

James H
-
Posts
3,247 -
Joined
-
Last visited
Content Type
Profiles
Forums
Events
Gallery
Posts posted by James H
-
-

Evening ladies,
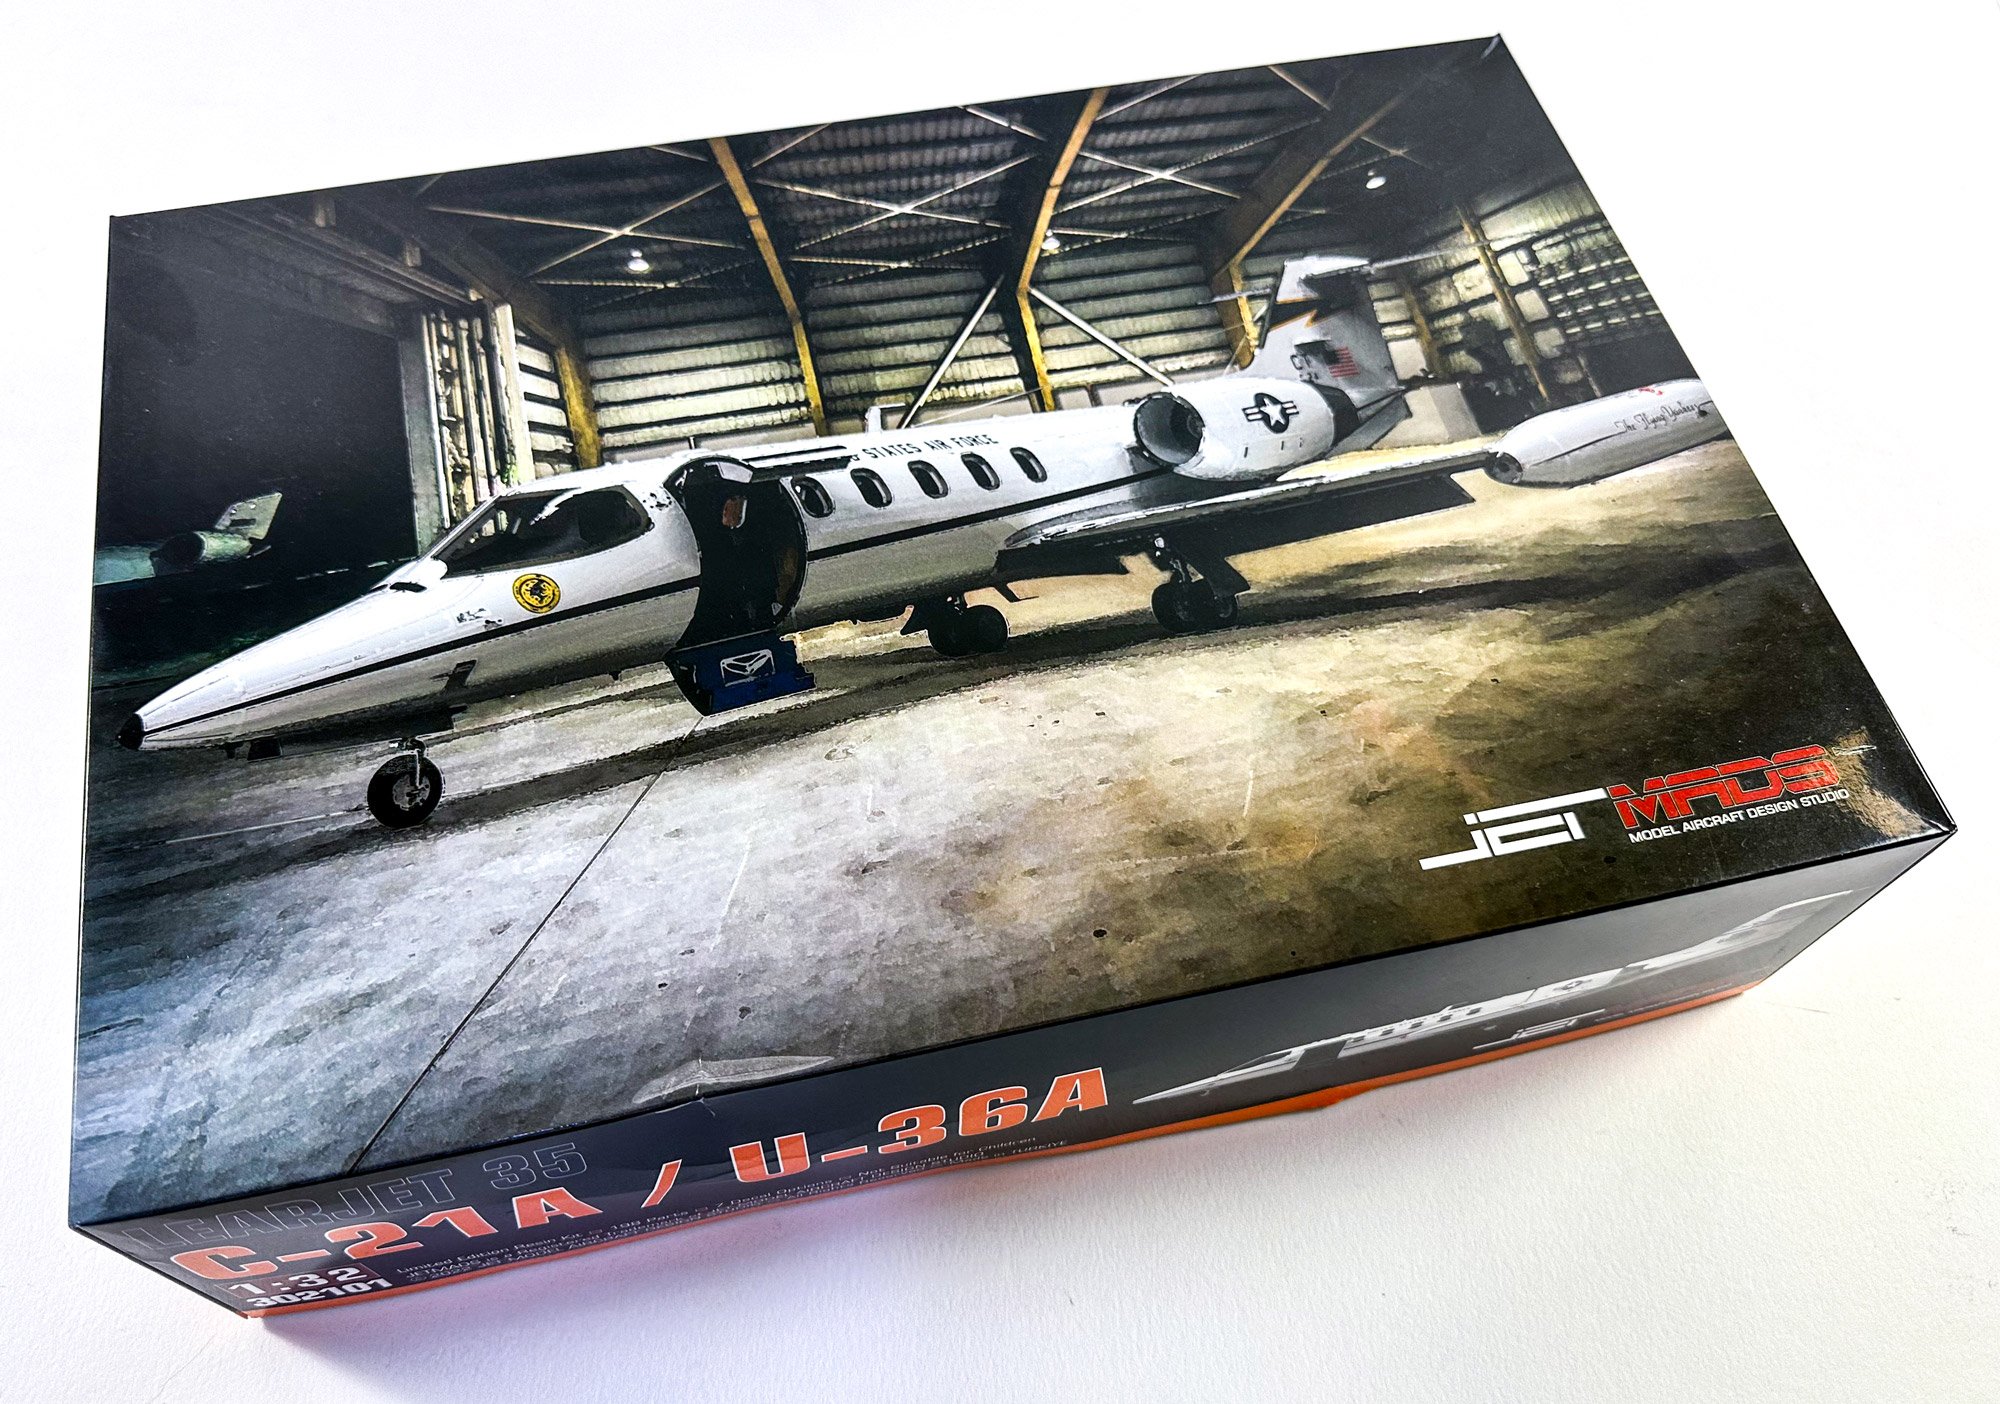
I've not written a review for a very long time, and this isn't really one either as Ernie has said plenty on his review of this same kit, and I largely agree with his assessment. In fact, I'm probably happier about the engravings on the resin parts that he is. 😂
Here is a link to tie in Ernie's review into this article:
I'm still in the midst of rigging my HMS Indefatigable, so these pics are done with my iPhone and the 3D print leaves a sort of blue caste with the camera sensor. I think in future, I'll revert to DSLR.
The kit itself is thoughtfully made and packed. It just took a clumsy postal system to cause one of the parts trays and guards to break, scattering parts into the carton. I've done my best to fix this for the photos, and leave the loose parts in front of the tray. When that lid is lifted, all parts and trays are sat in a strong foam frame.

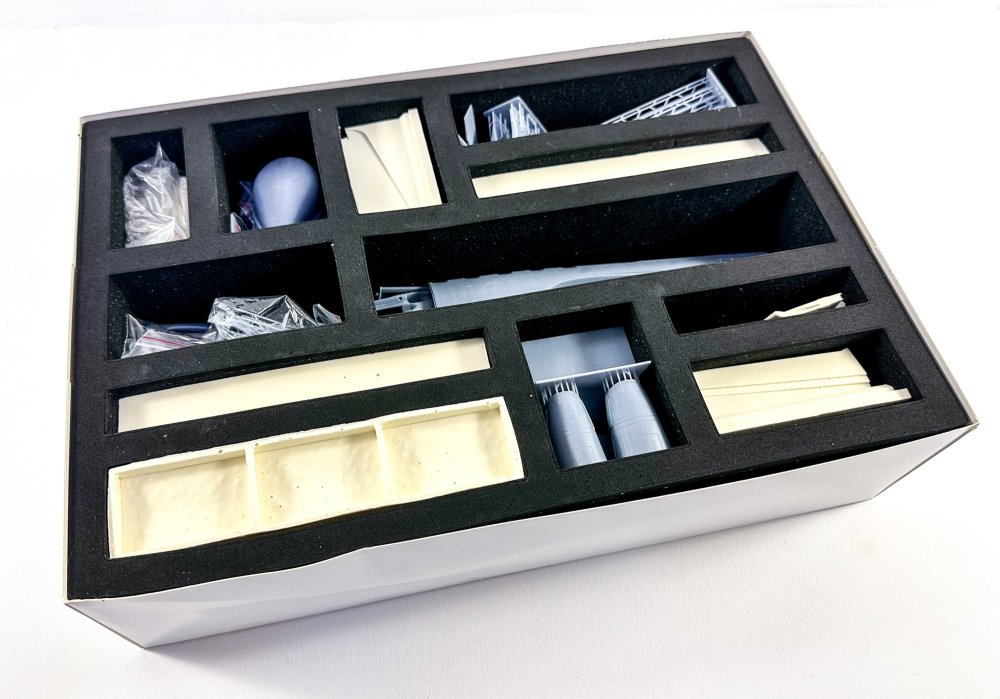
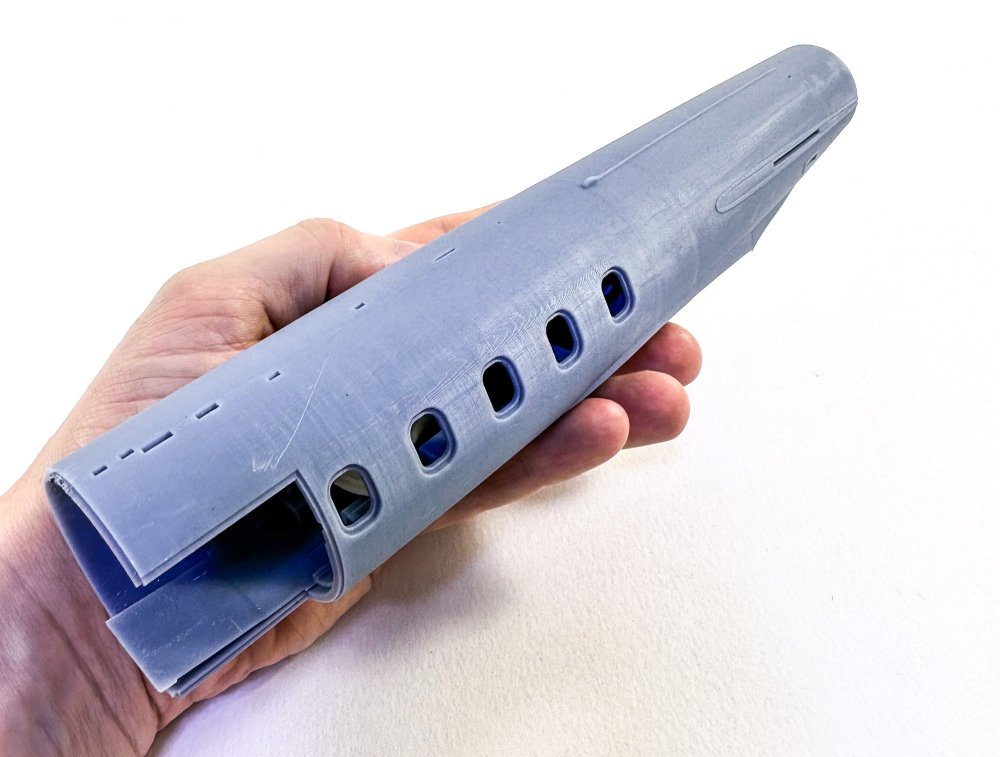
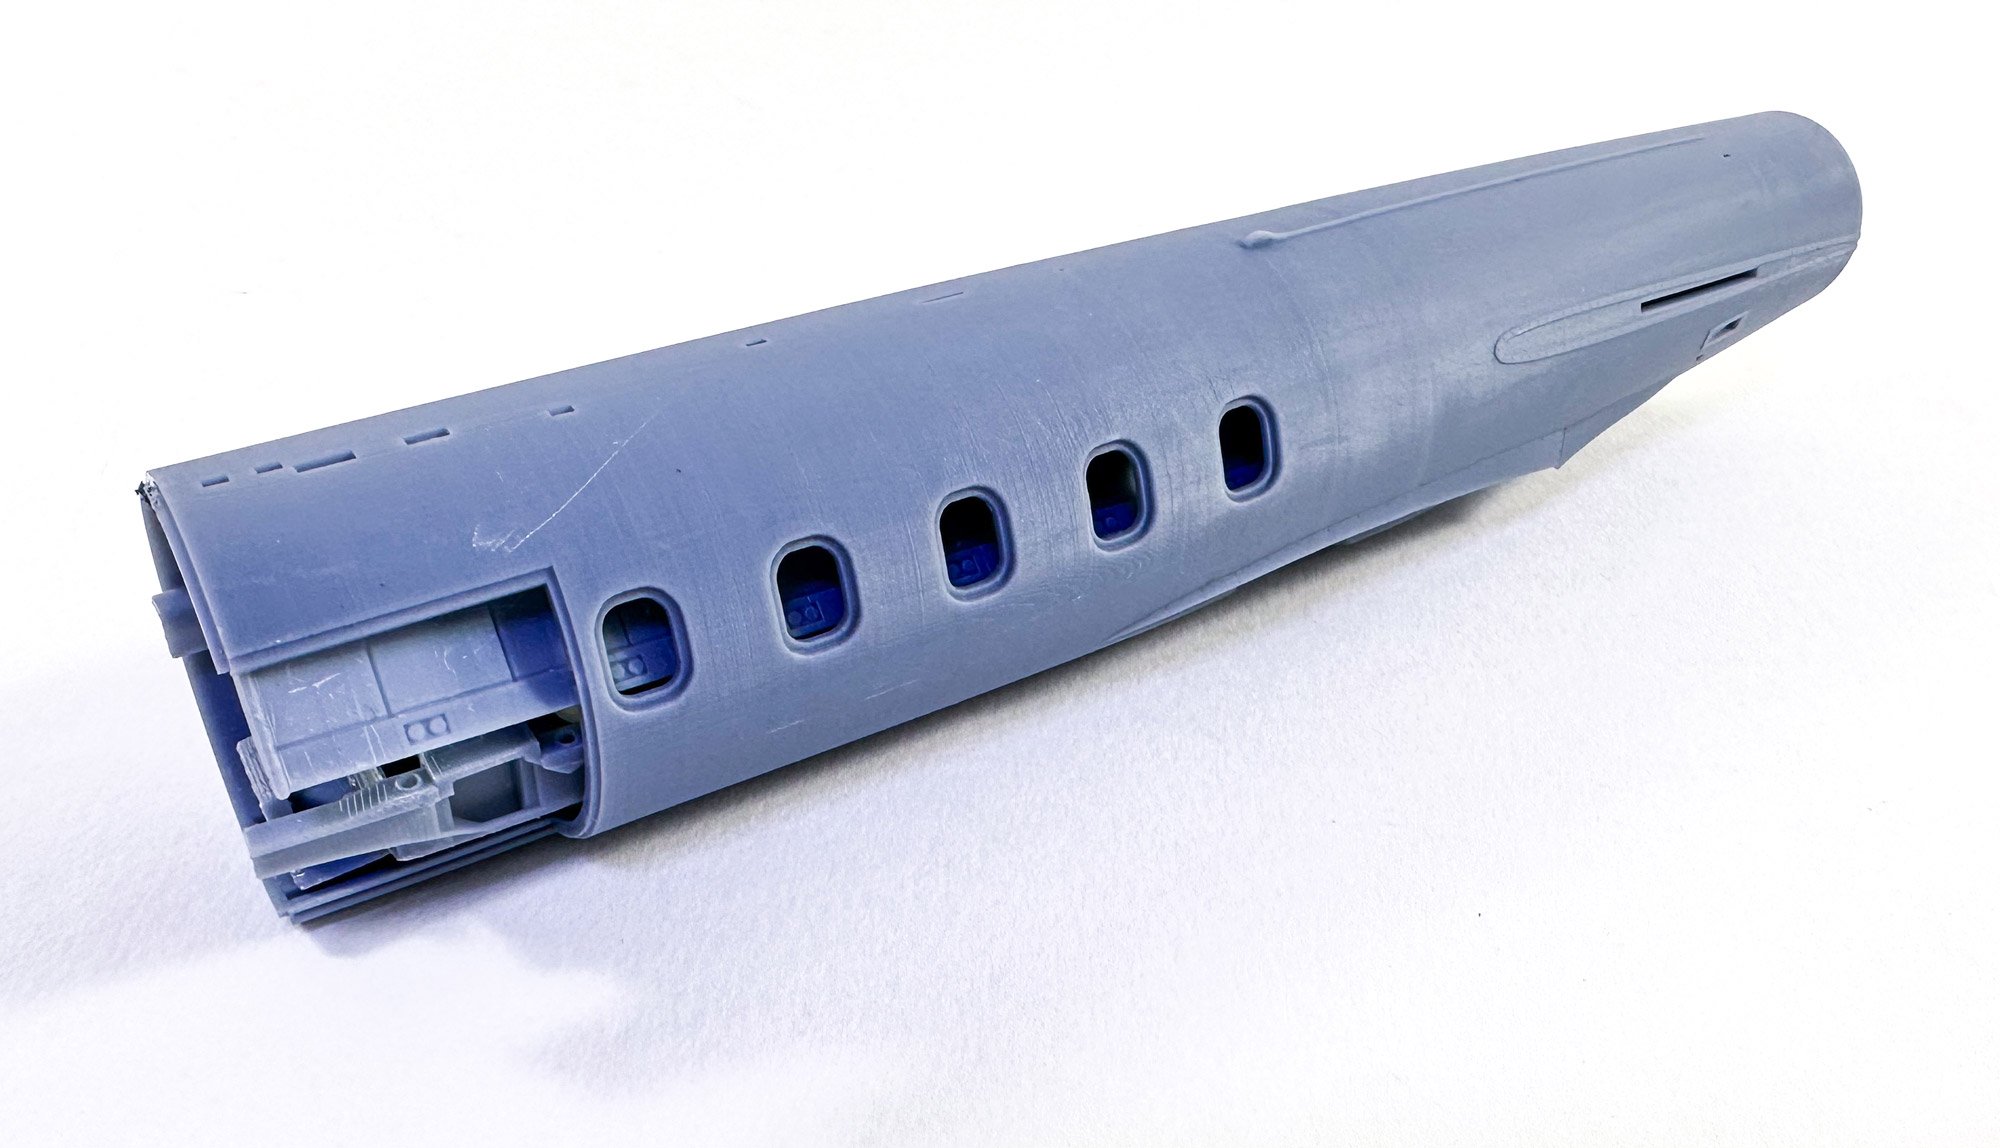
The fuse for this kit is built from three main sections, with the forward two in 3D print. The whole kit is a 3D-print/resin combo. I feel the kit was perhaps printed in 4K and something like this should've been in 8K to almost eliminate the print lines. It'll take some working to ready this for gloss paint, but it can be done. Here you see the fuse mid section, packed with other parts, as was shipped. You can see some surface 'scratches', but these are more just marks and will easily be removed when the fuse surface is prepped for paint.

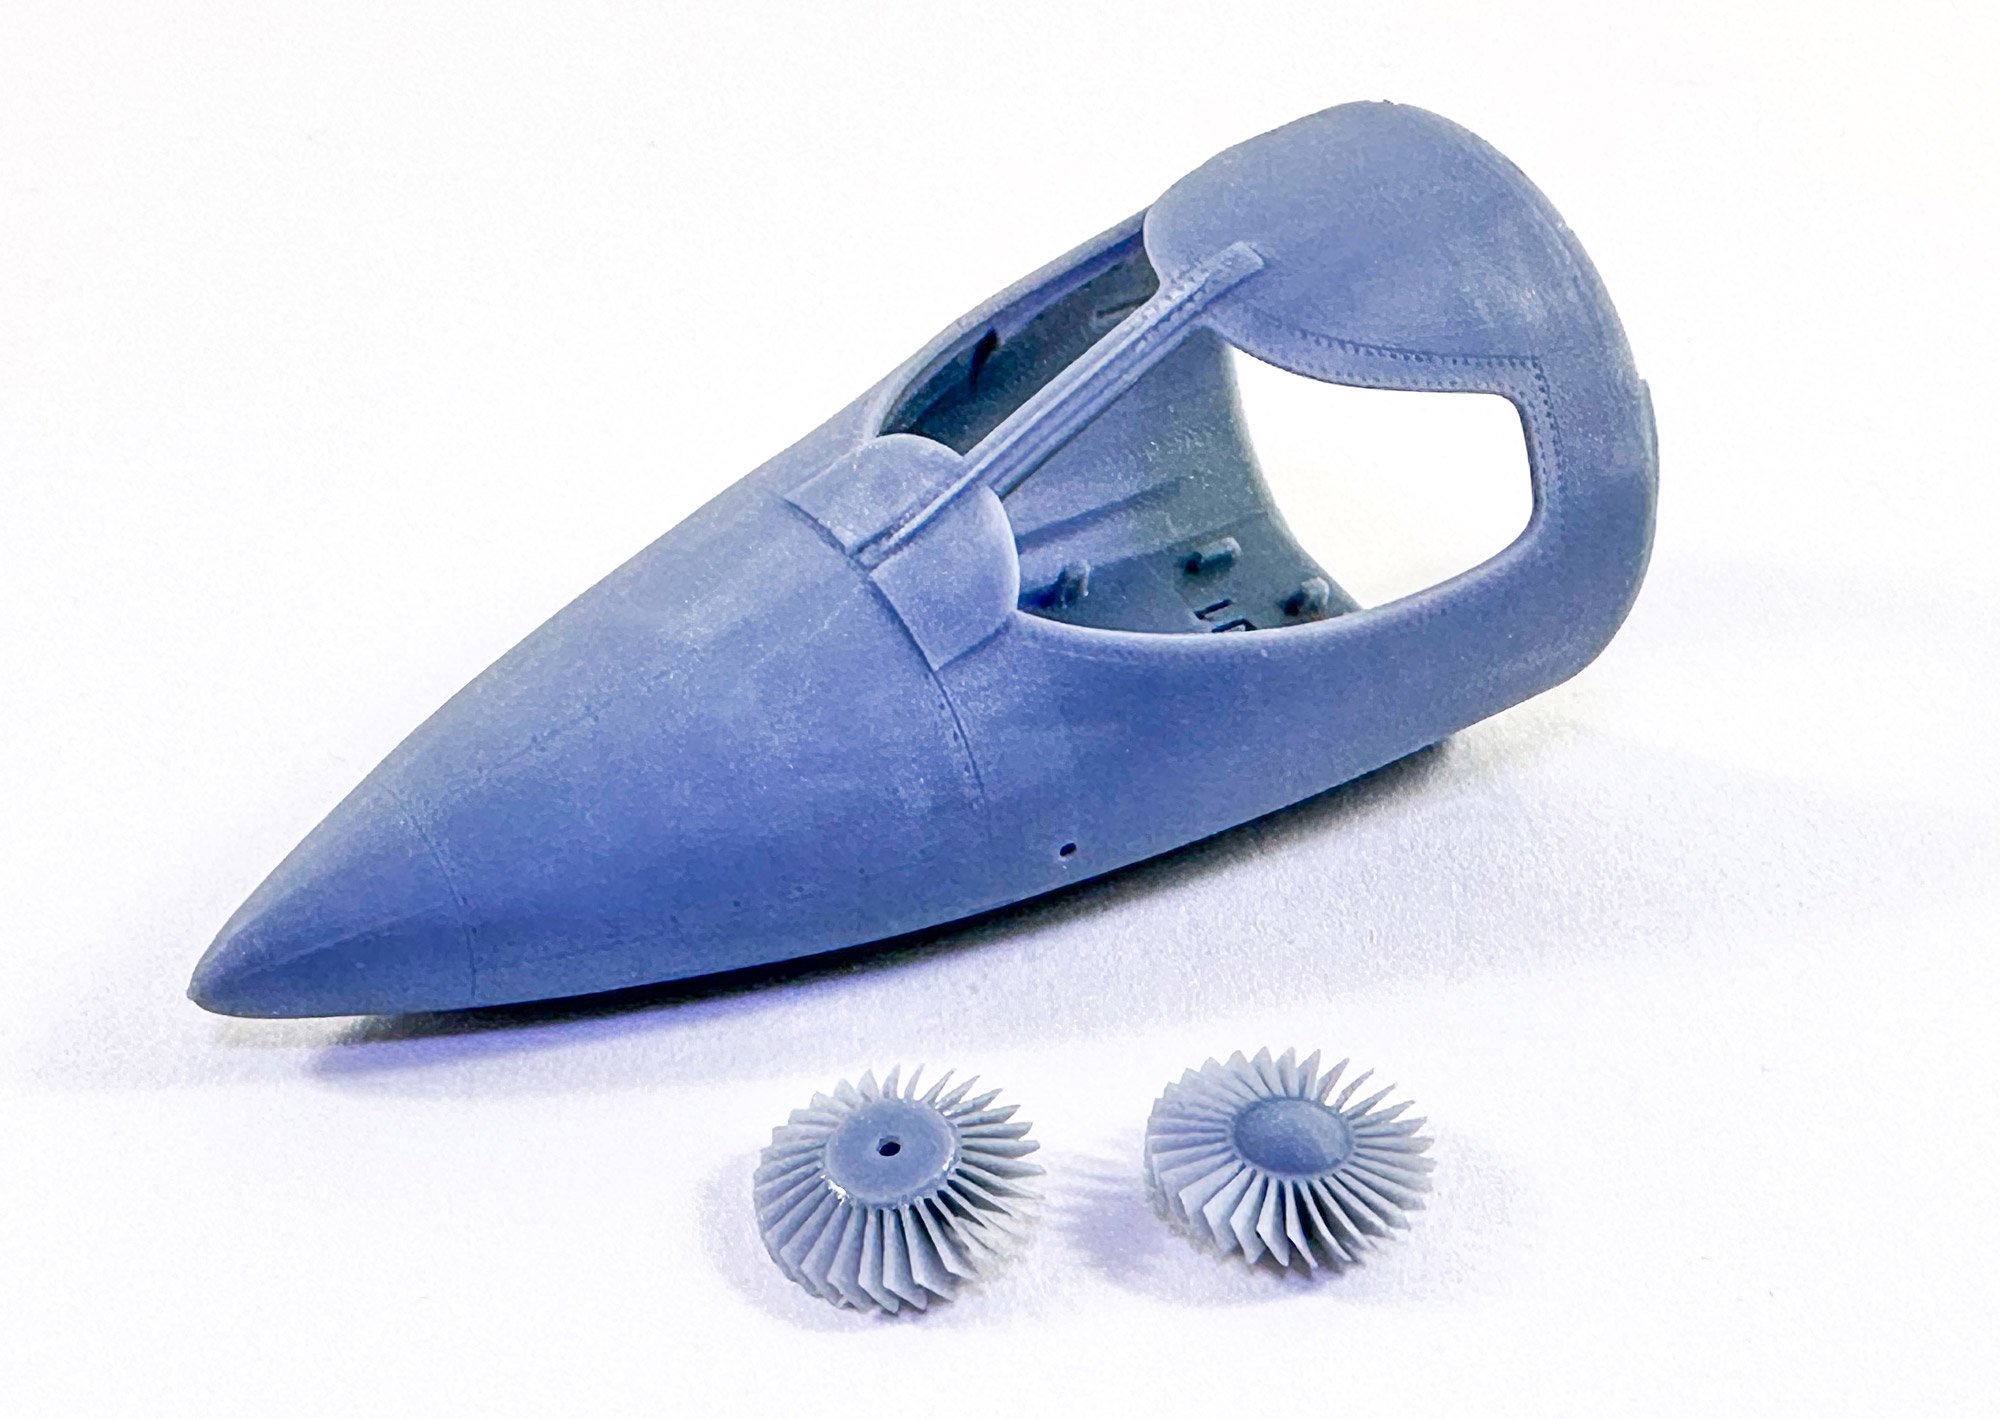
Just as an aside here, look at those impeller blades. They are just fabulous. This shows what 3D can do.

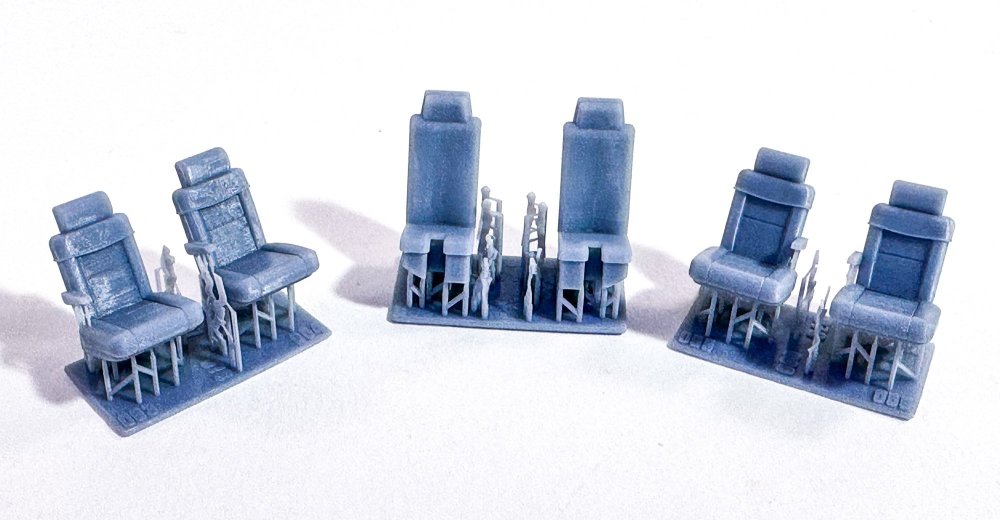
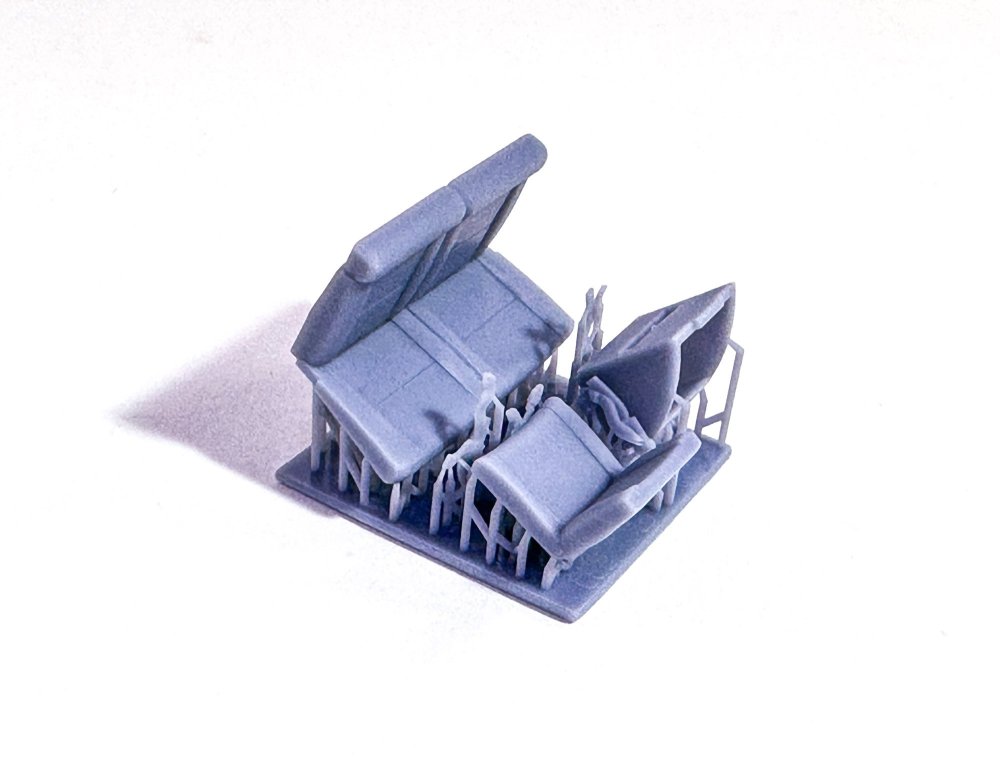
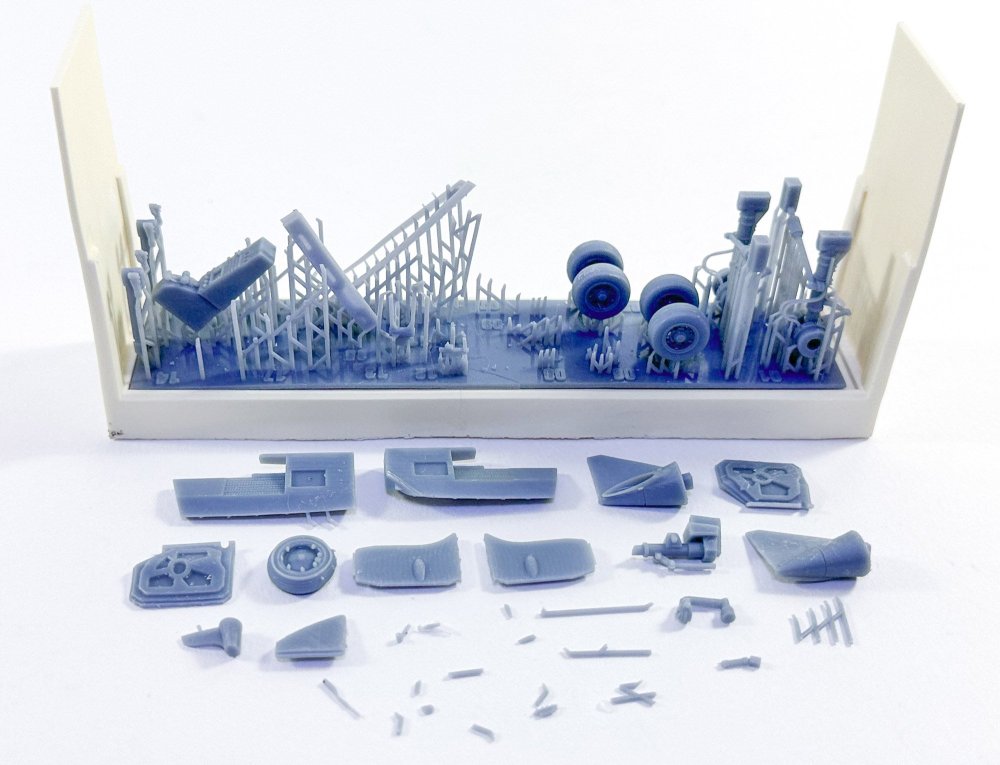
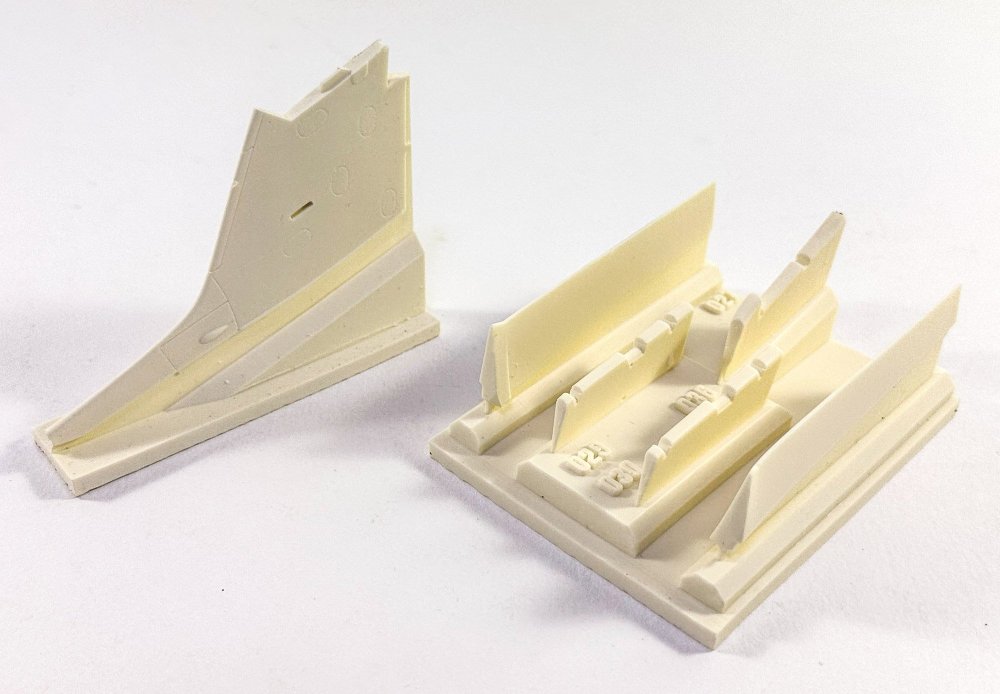
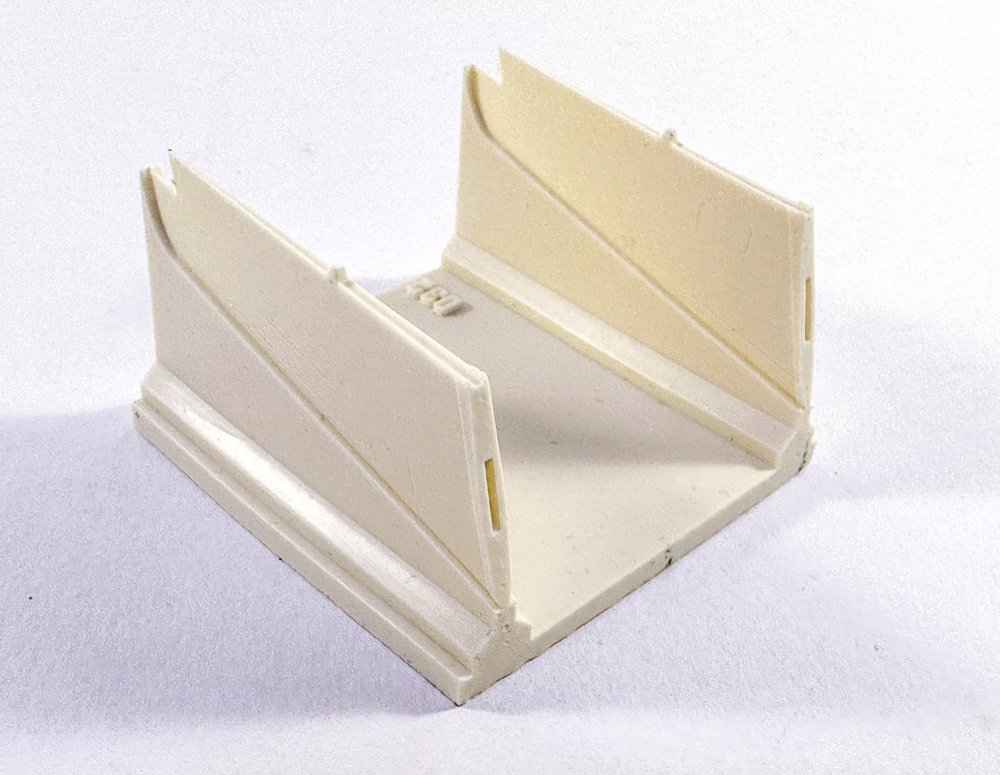
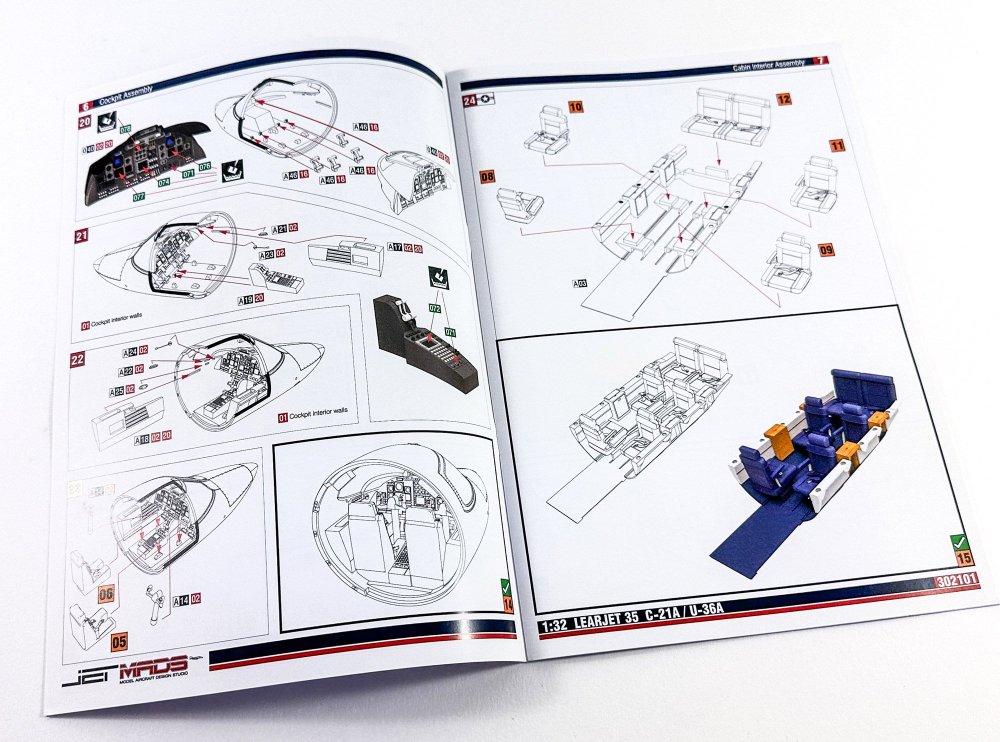
Here you see the parts that were stuffed into the fuse. These comprise the main fuselage internal cabin areas, and the rear fuse, cast in resin (for reasons not known). The seats are printed with separate seatbelts too.
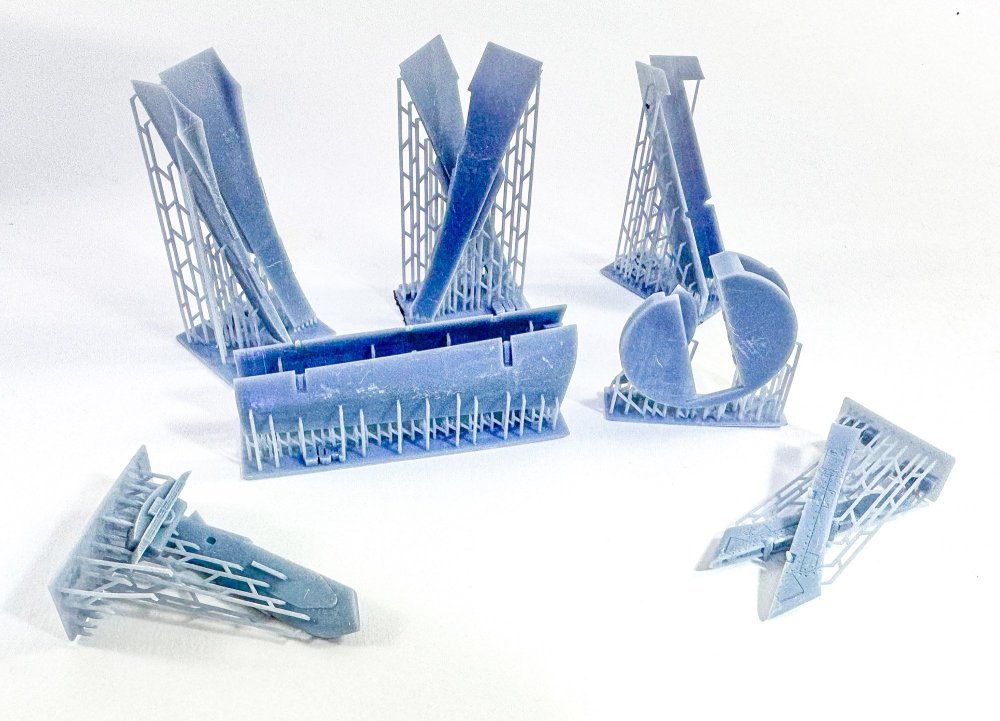
More 3D printing is included for the various flying surfaces. Despite my photos, the surfaces are very nice, subject to a smoothing, and the surface mars are just where the parts have rubbed against each other.
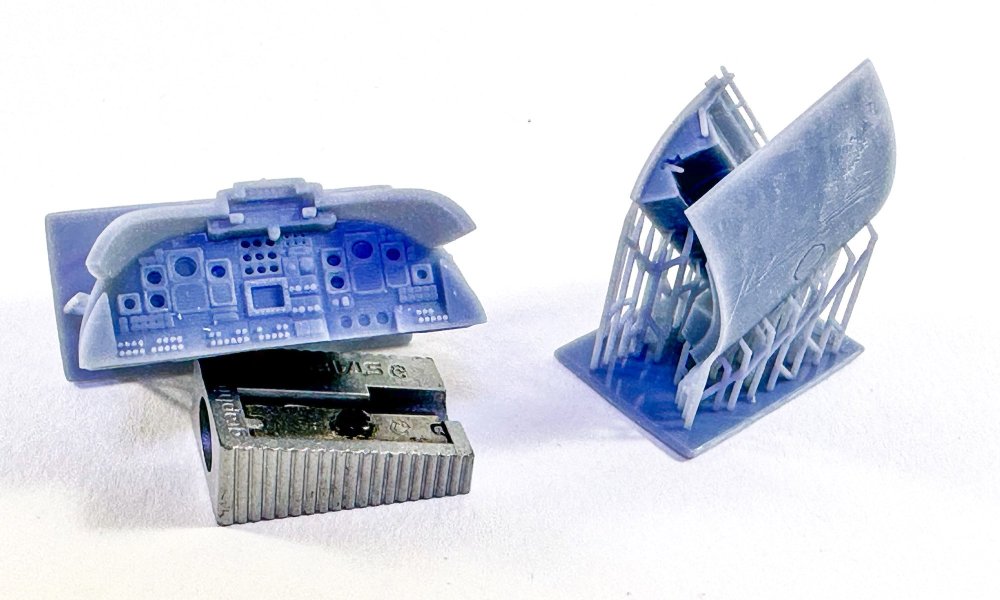
The instrument panel and coaming are integral, and decals are provided for the instruments. This is also very nice and will look great in paint. (remember, this stuff will need priming before paint, and I rarely ever say that!)
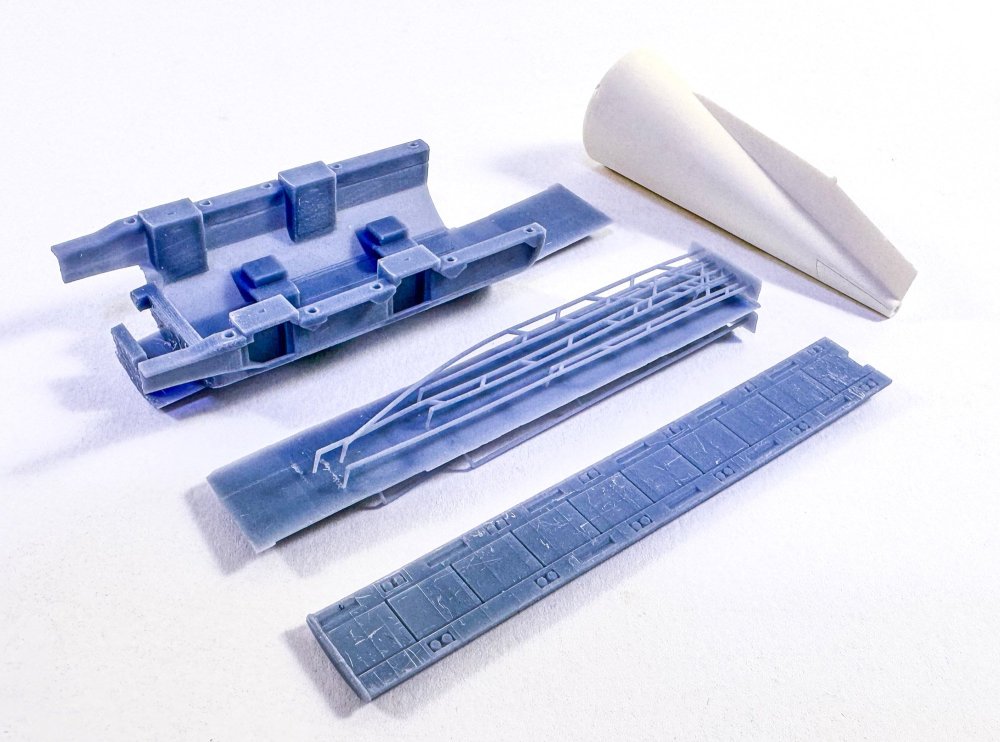
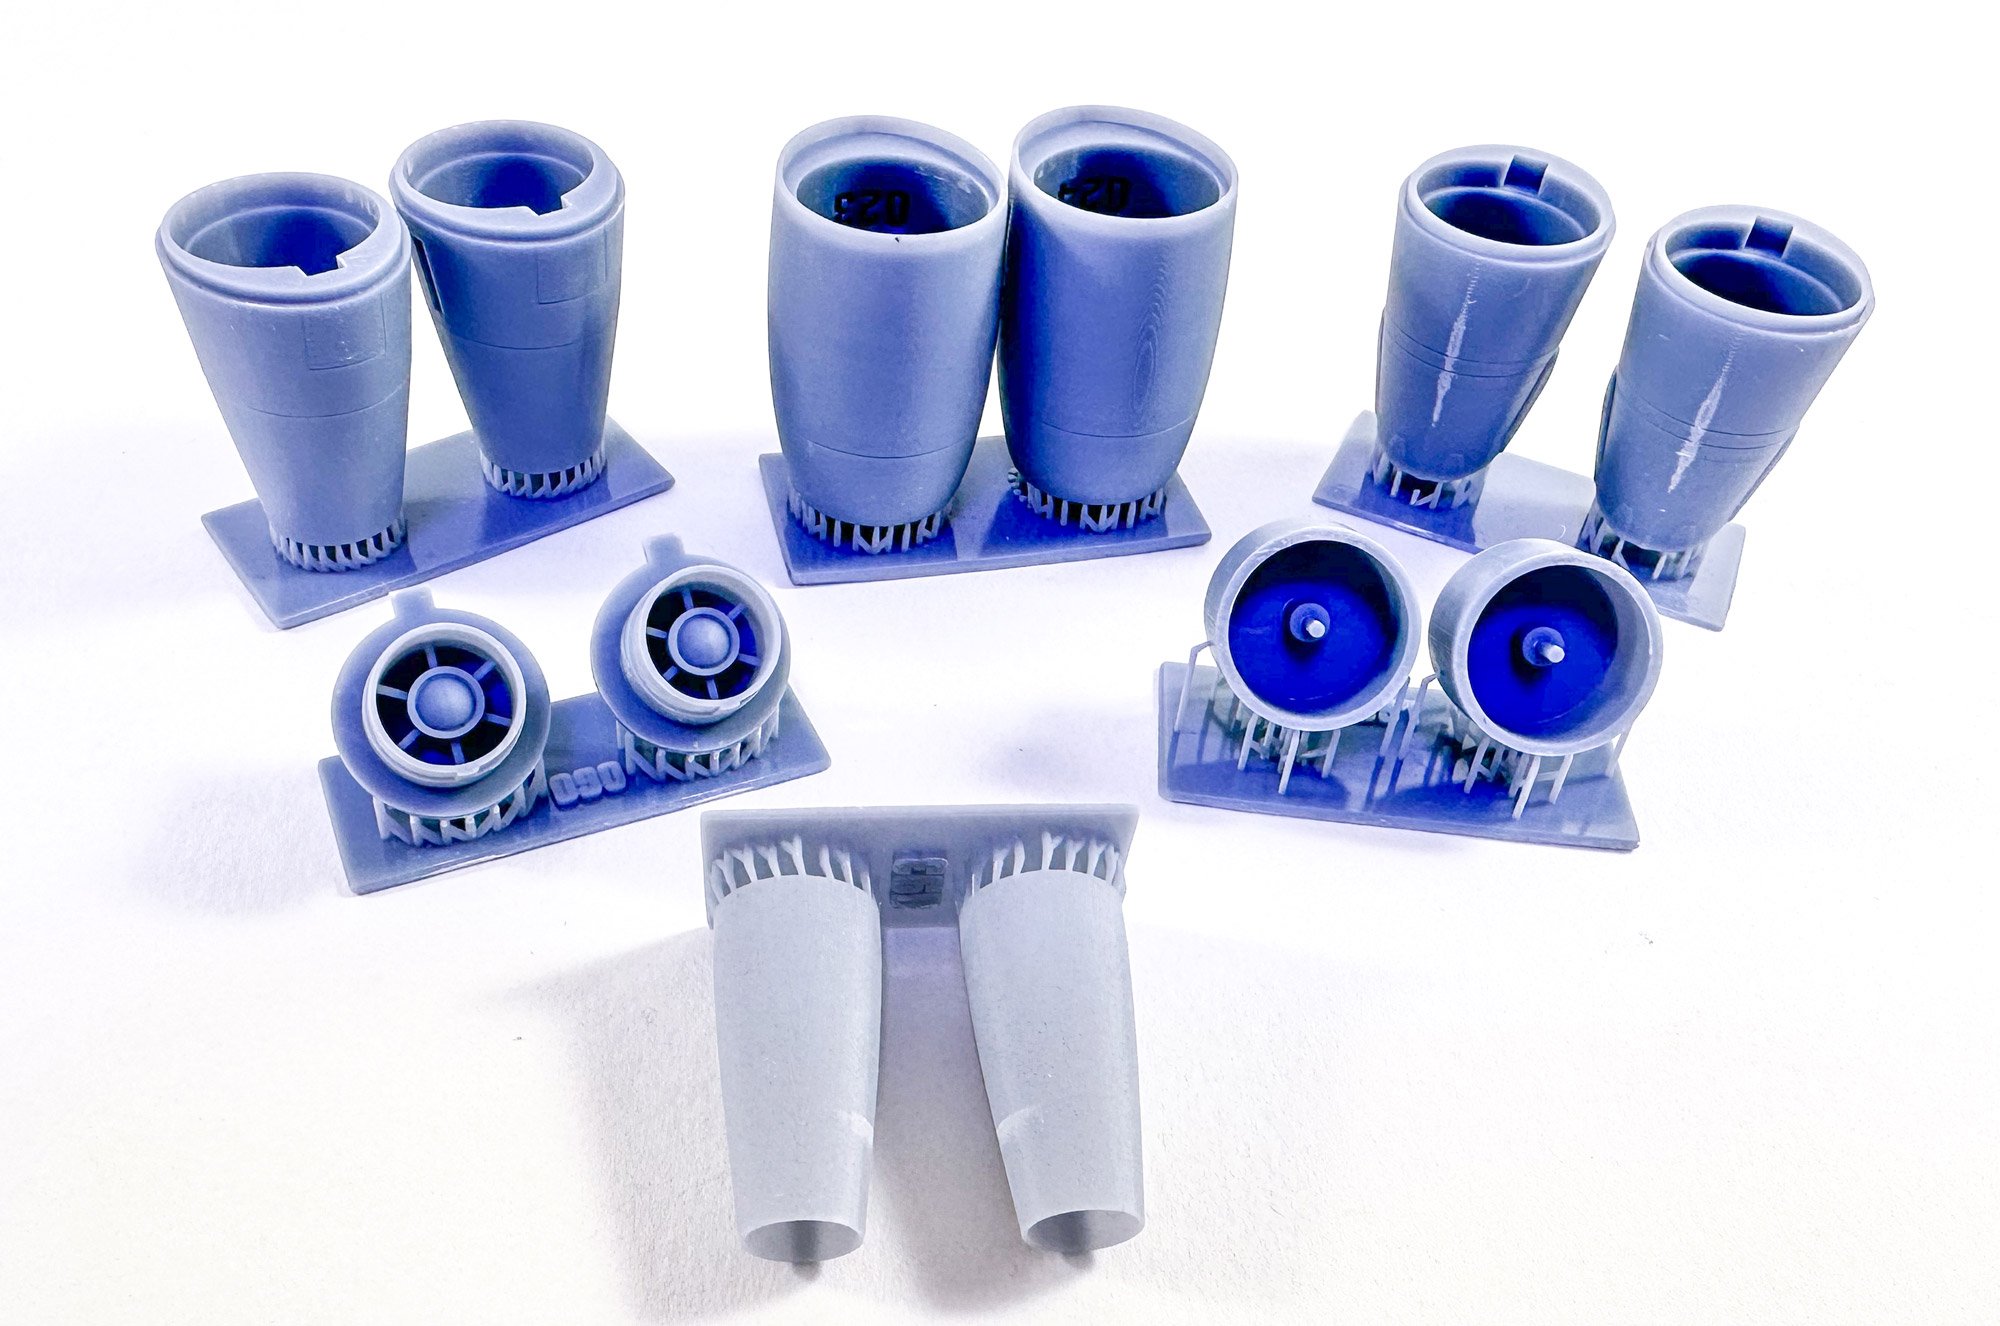
Here we have the varisou parts for the engine nacelles. The parts in the foreground are quite thin and beautifully made. Not sure if some craftily placed lead will be needed up front for this, but I'm aware of the possible fragility of the 3D printed struts.
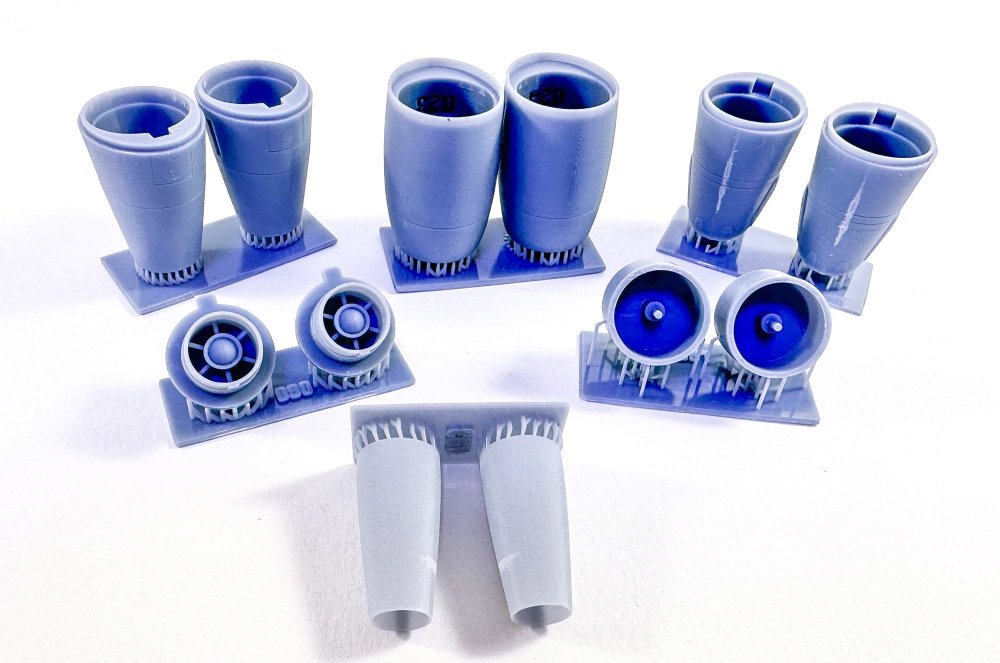
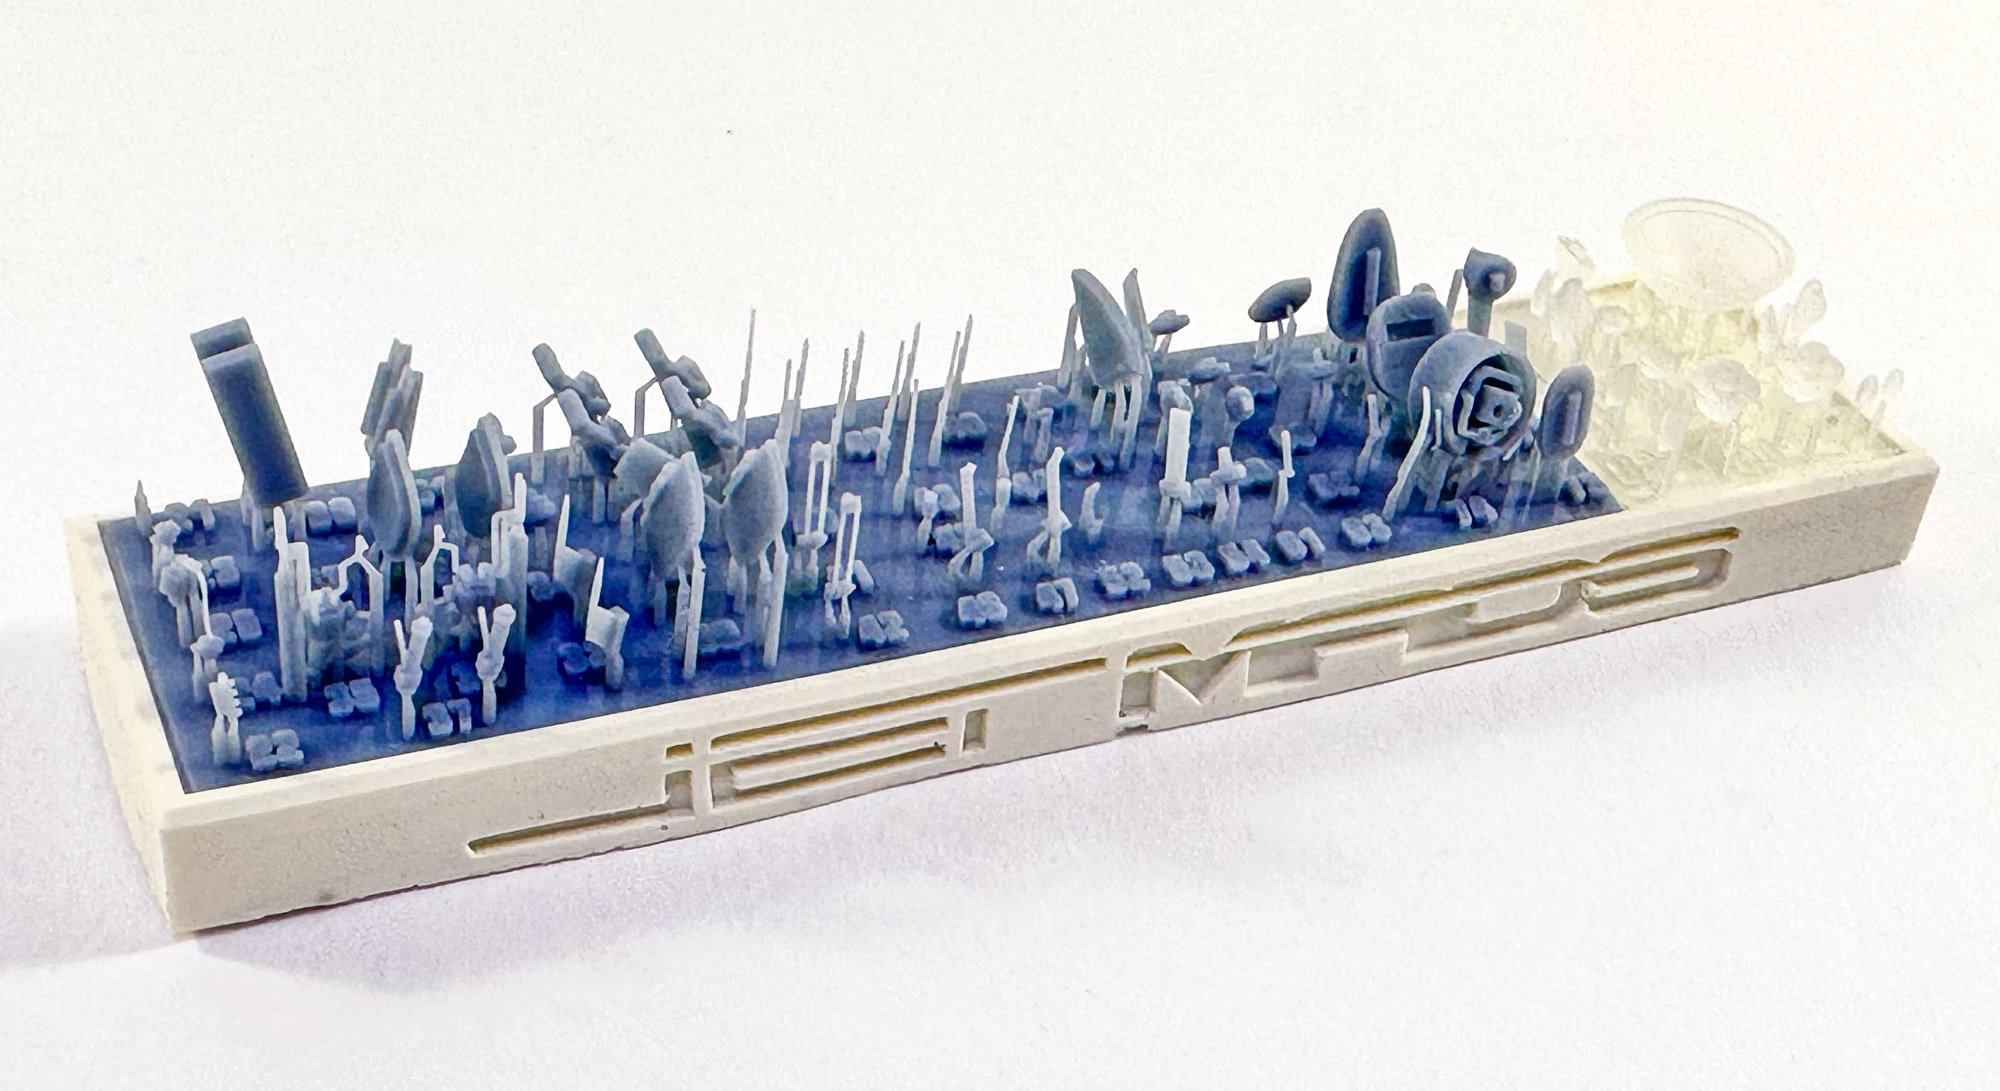
So where are the fiddly parts? Those are produced across two trays of parts, seen here. There are also some frosted clear parts which may need a polish before use. As with nigh on all parts, the numbers are included, and in this case, they are printed adjacent to each part. That's a nice touch.

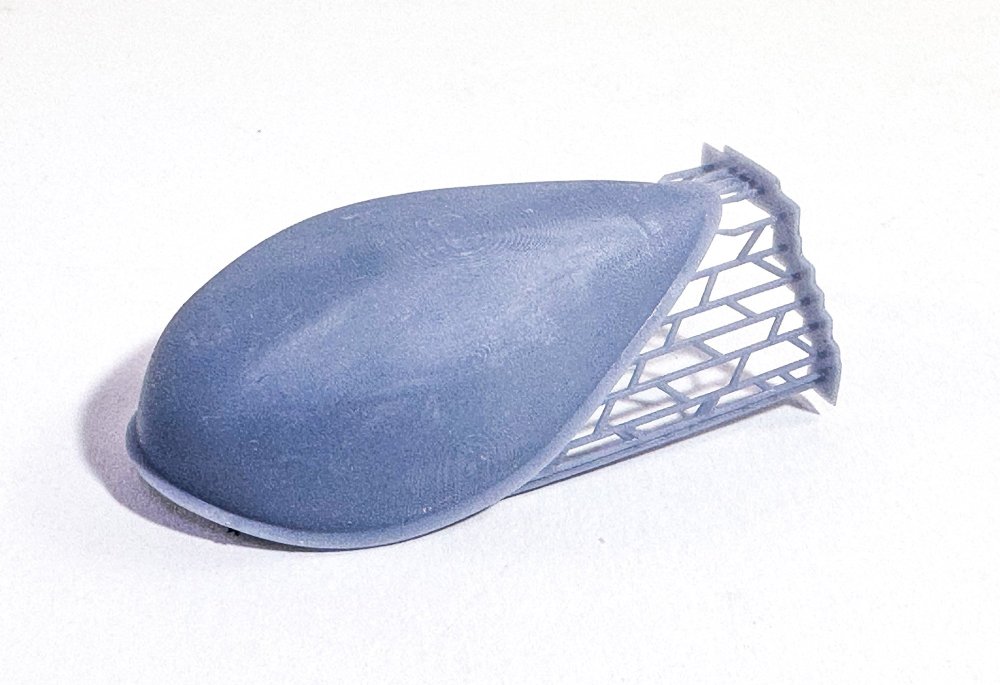
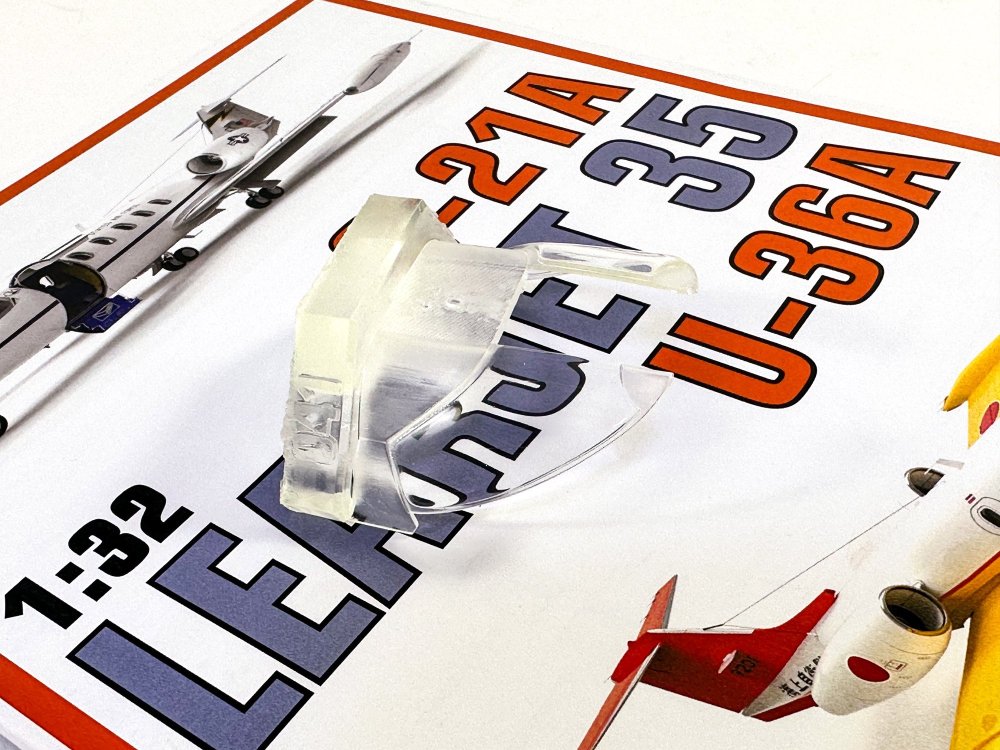
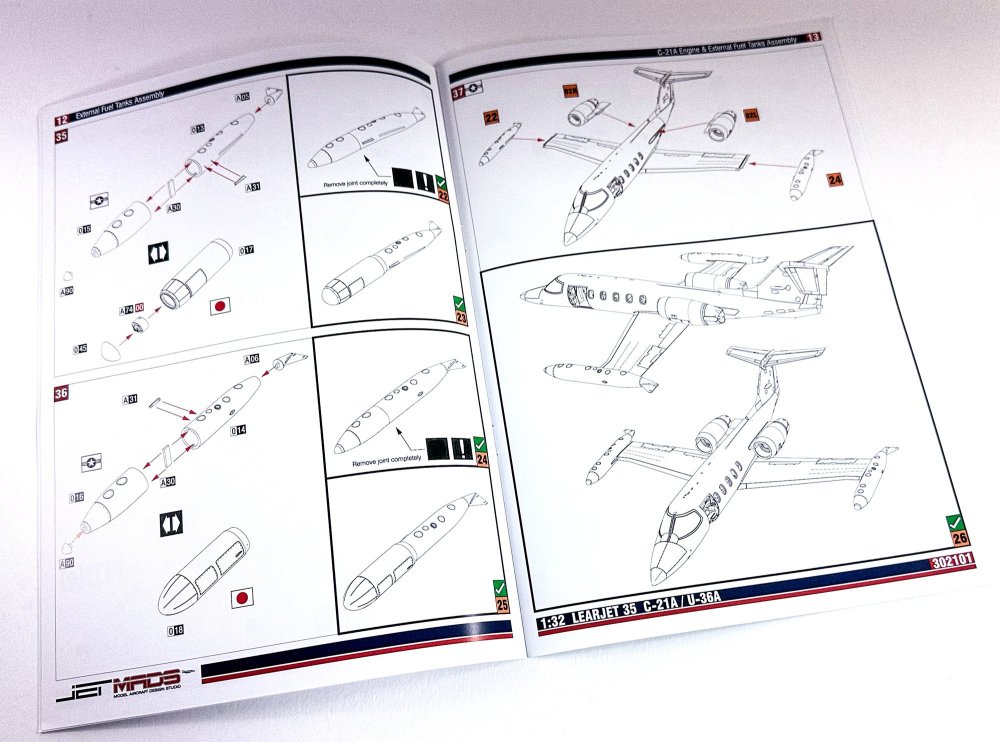
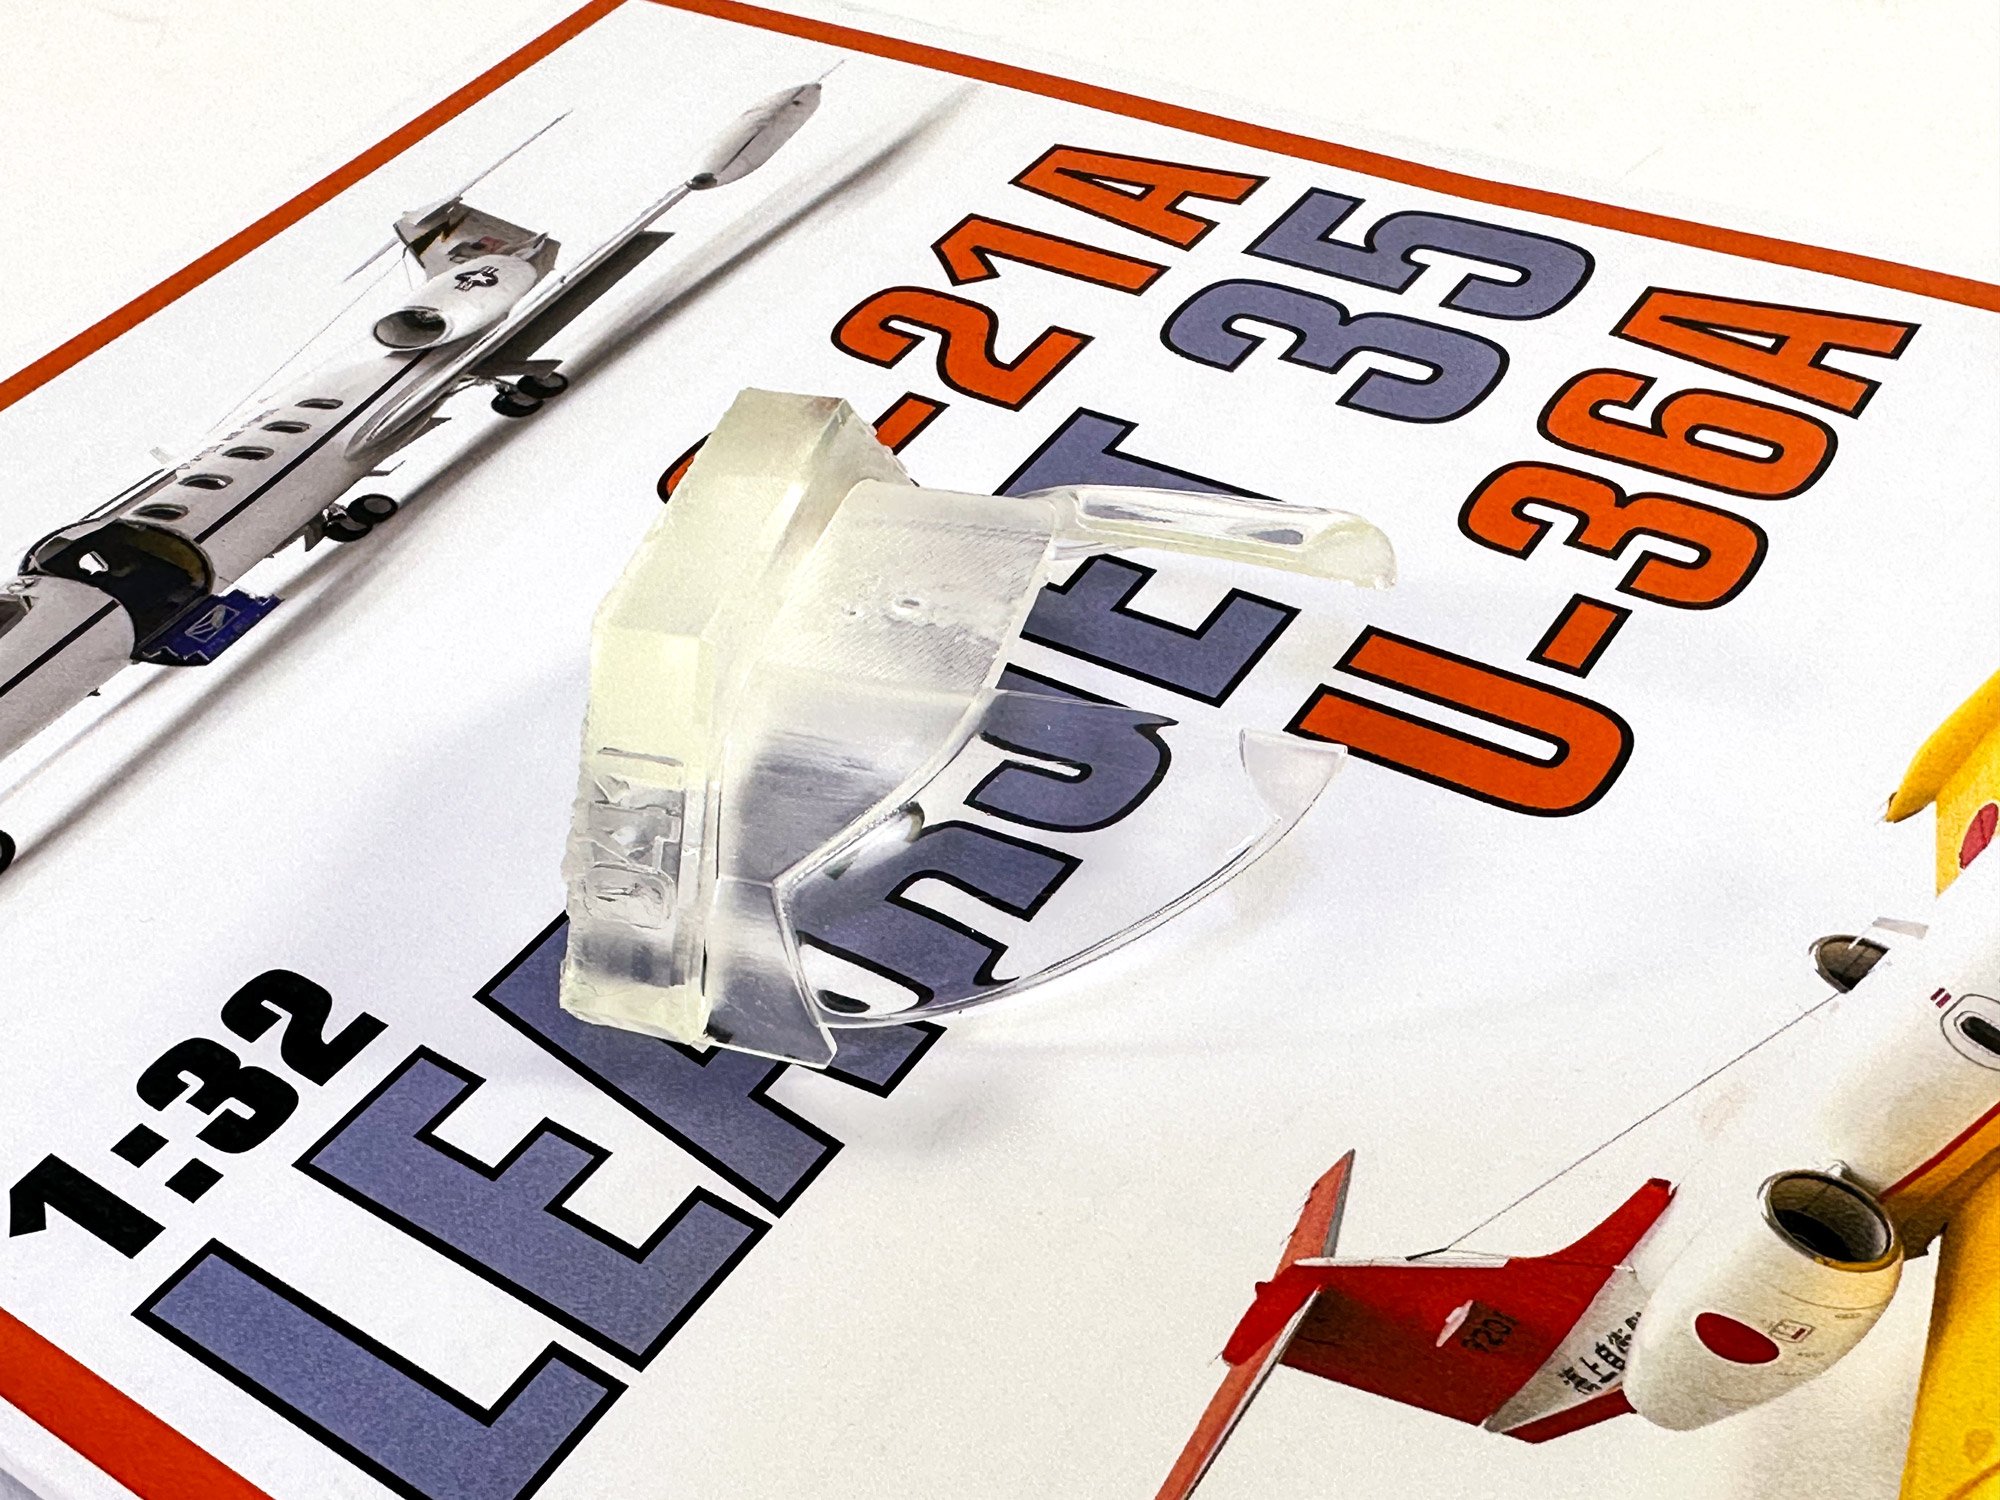
Lastly for the 3D parts, is this radome blister. This is for use with the Japanese scheme, of which I will definitely be building.
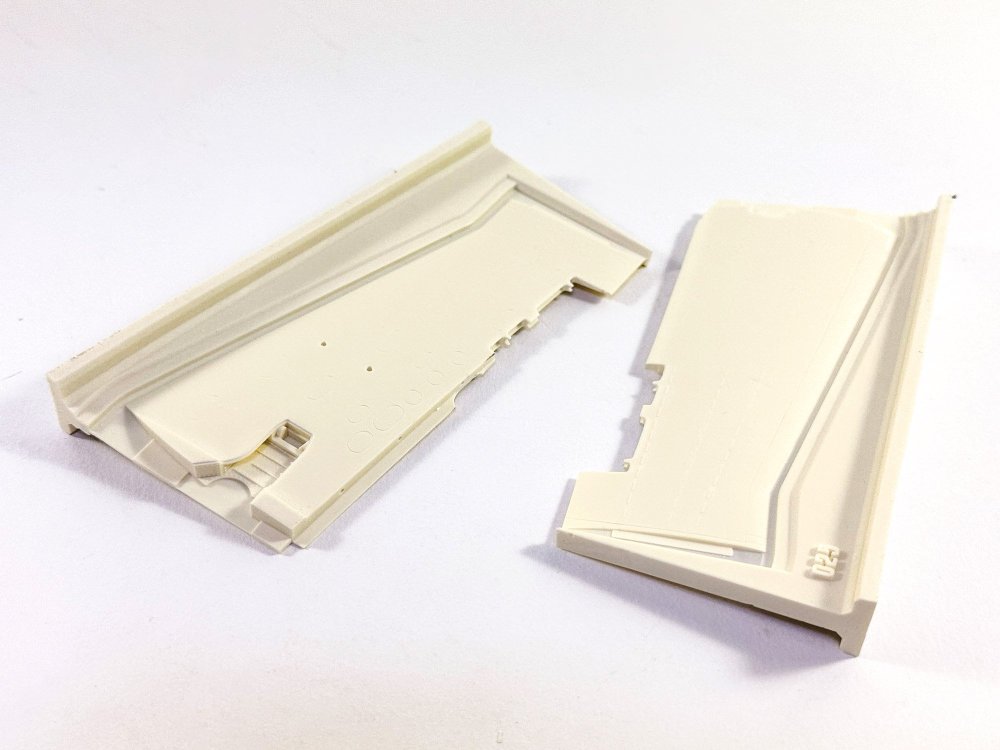
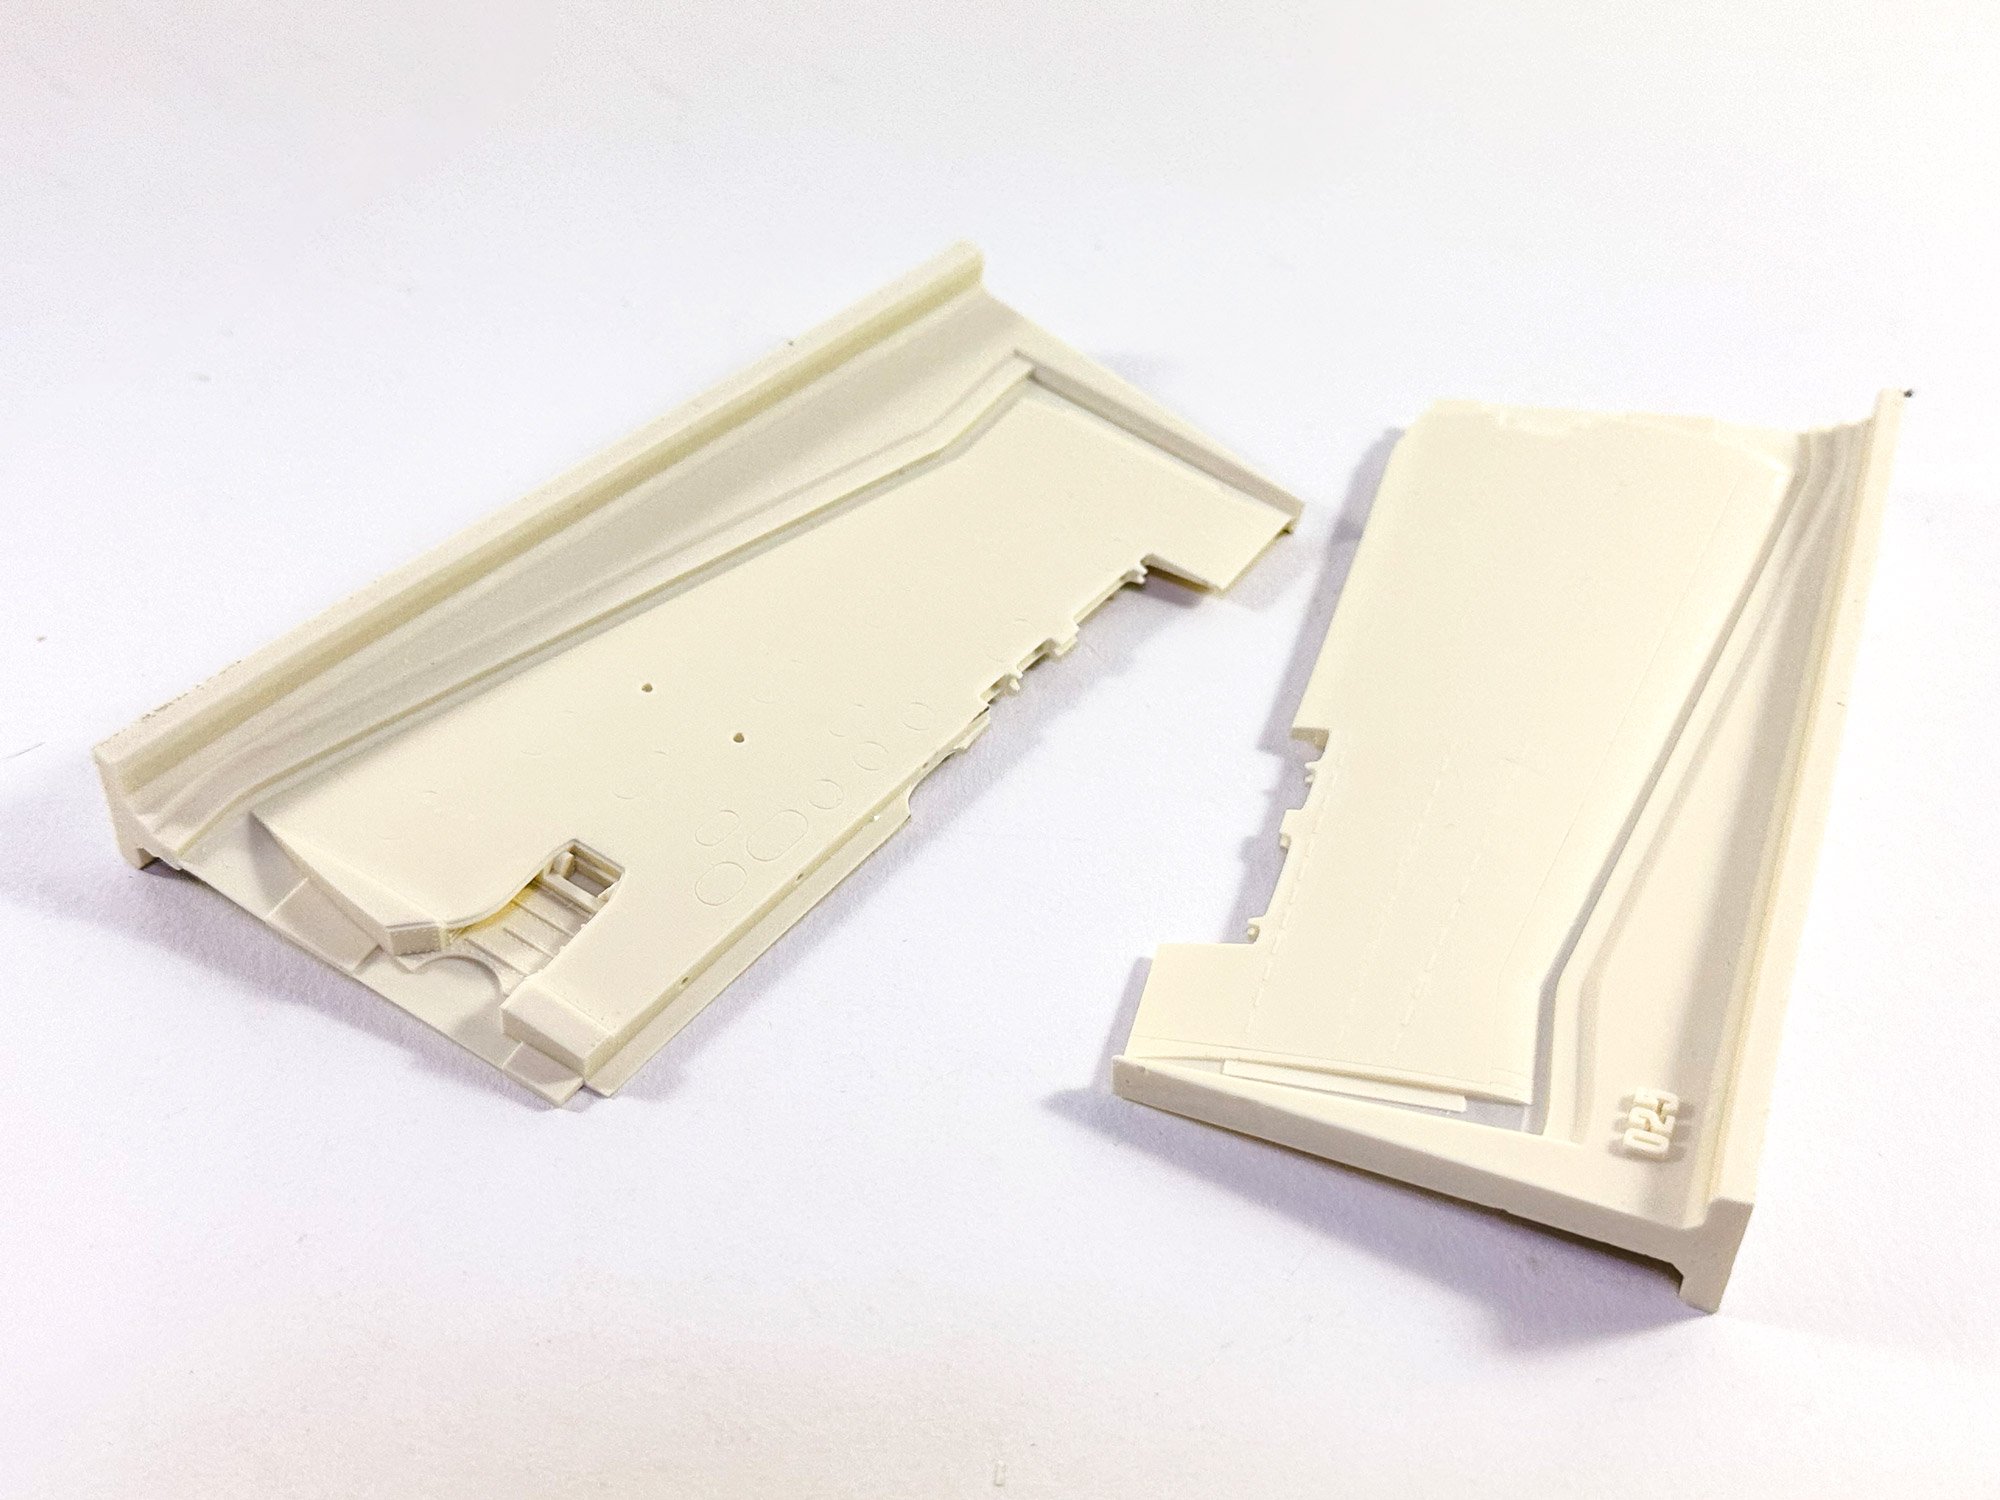
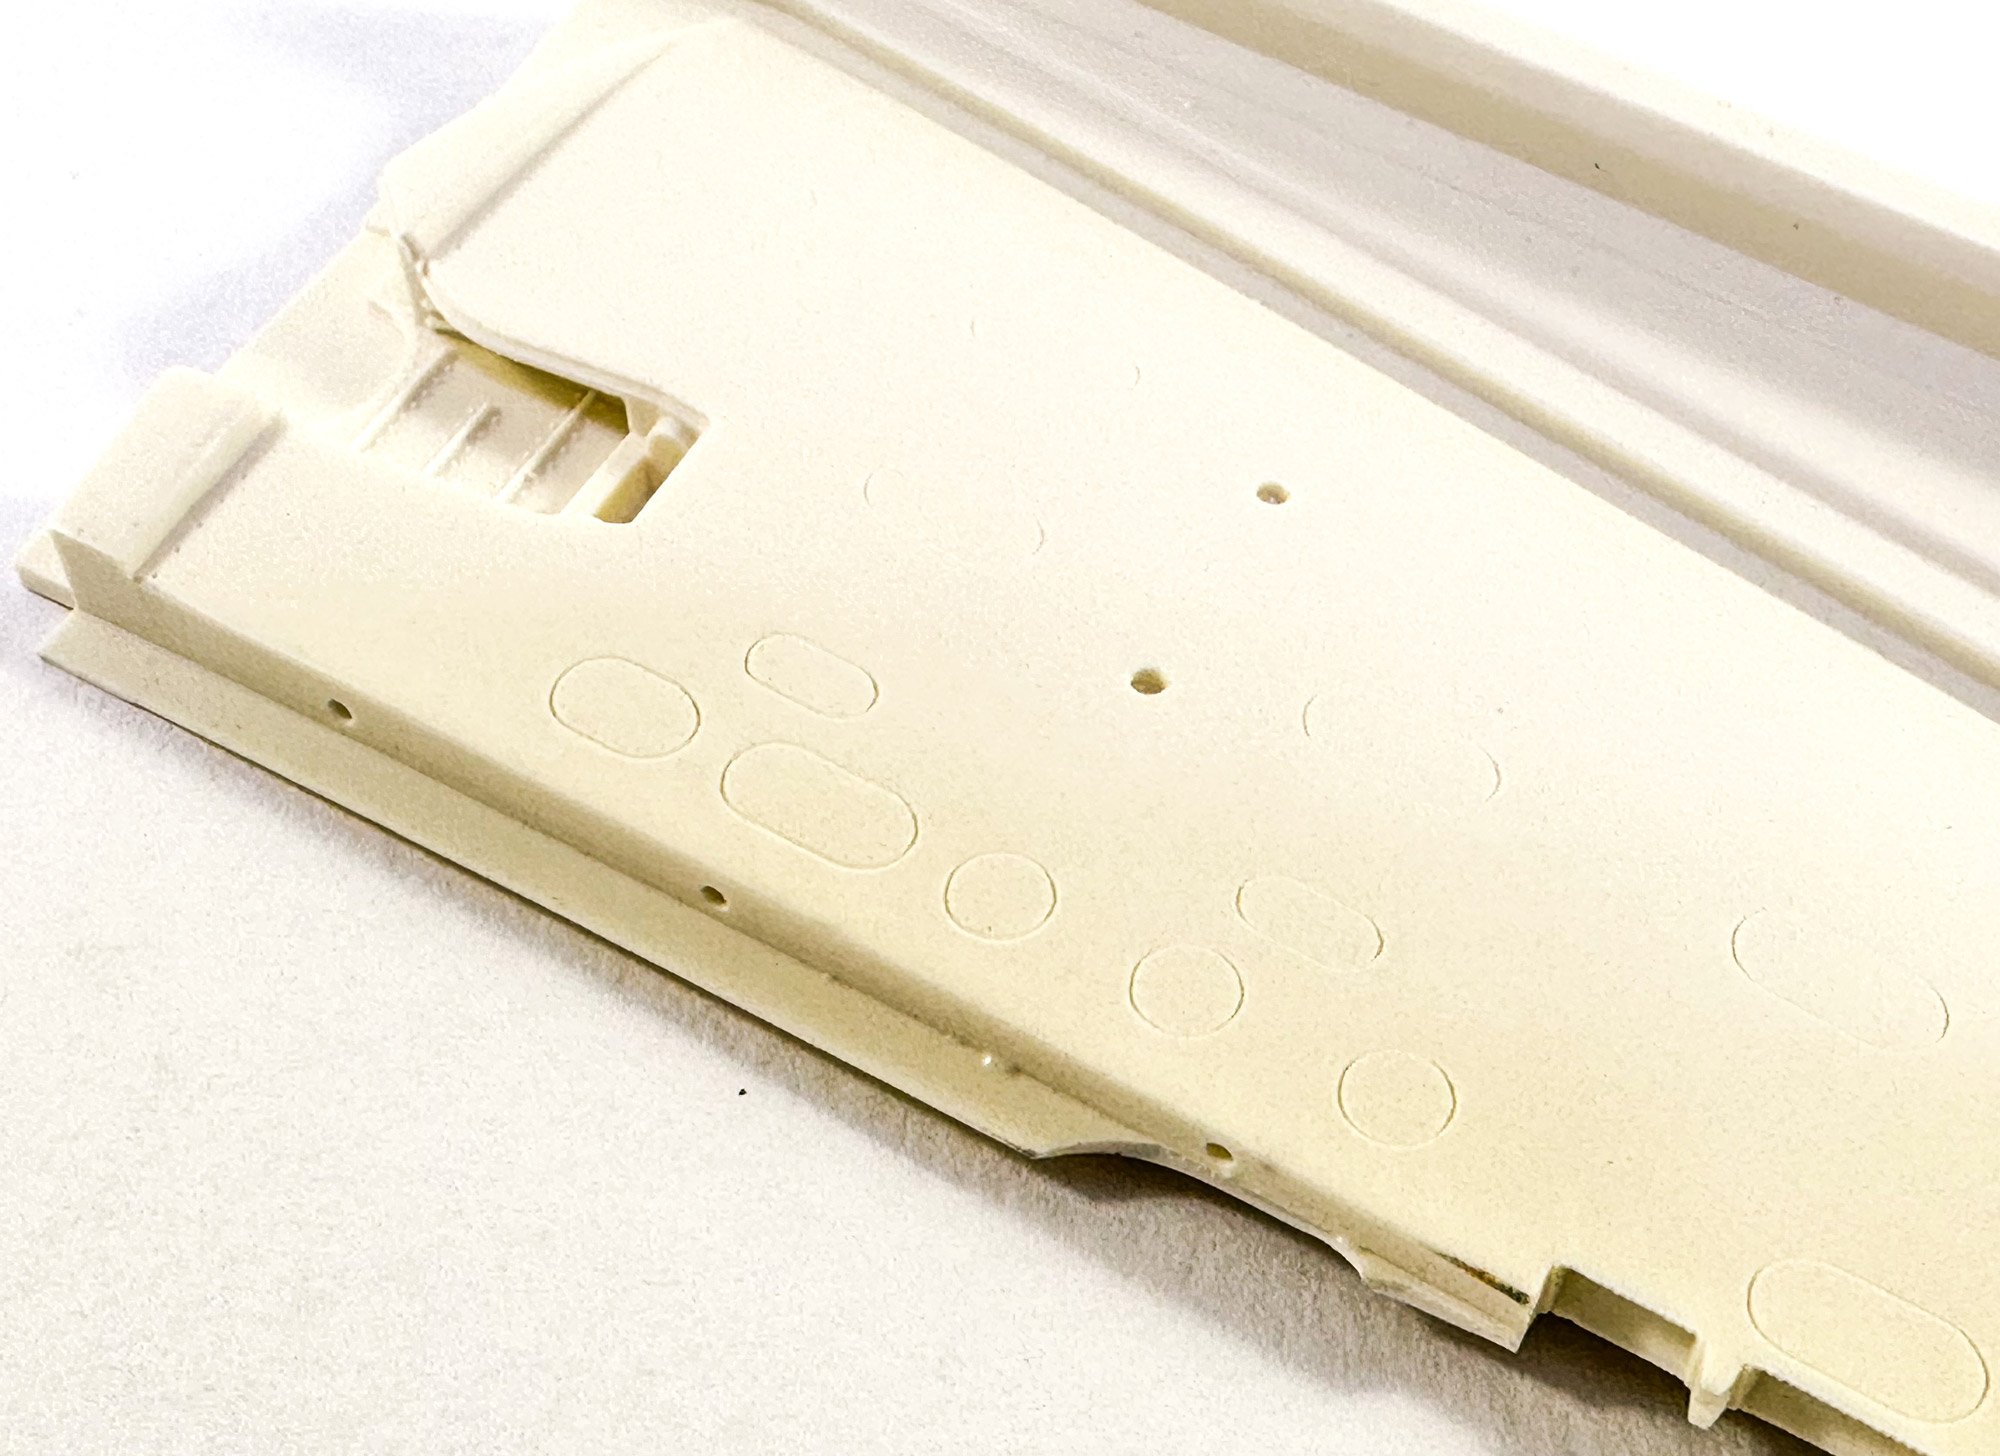
I did say resin was included, and this is used for the main flying surfaces (wings, tailplane, fin etc. This is cast in a cream coloured, soapy looking resin which does hold the detail nicely. There isn't too much surface detail needed on a lear, but the various access ports are nicely cast.

I didn't bother to de-bag these as I doubt I could get them all to fit back, but these are the various tip tanks for the wings.

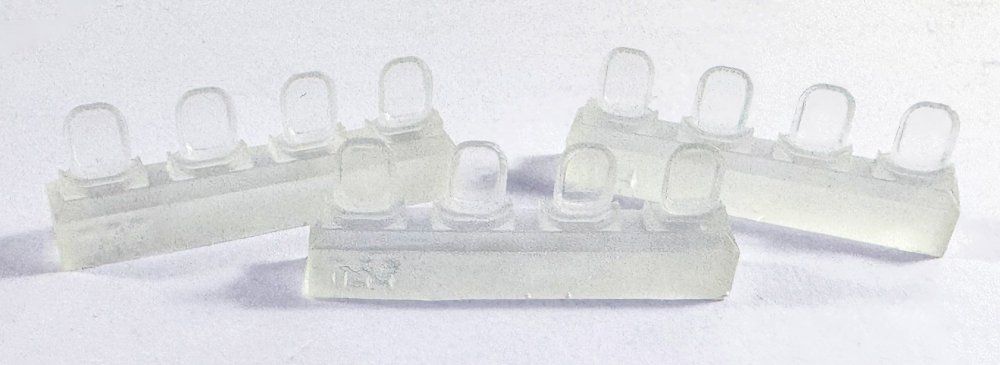
Clear resin is included for the main cockpit and fuselage windows. These are crystal clear and can be used straight from the blocks. I wish JetMads had included some masks for these parts, especially the fuse windows, so that the modeller can make them all identical.
Instructions and decals
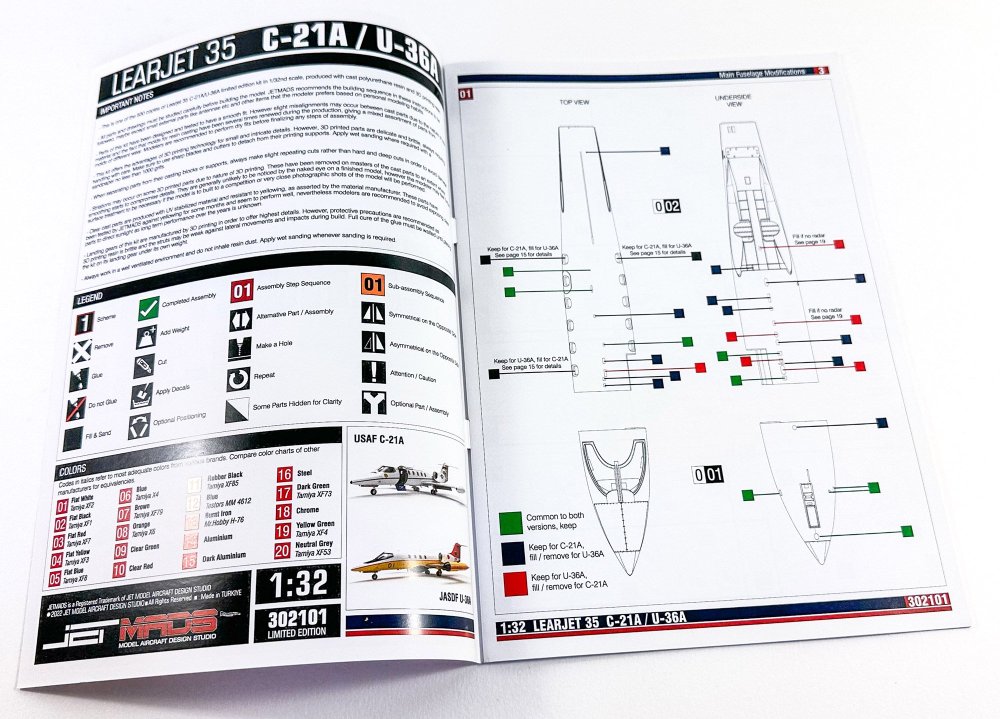
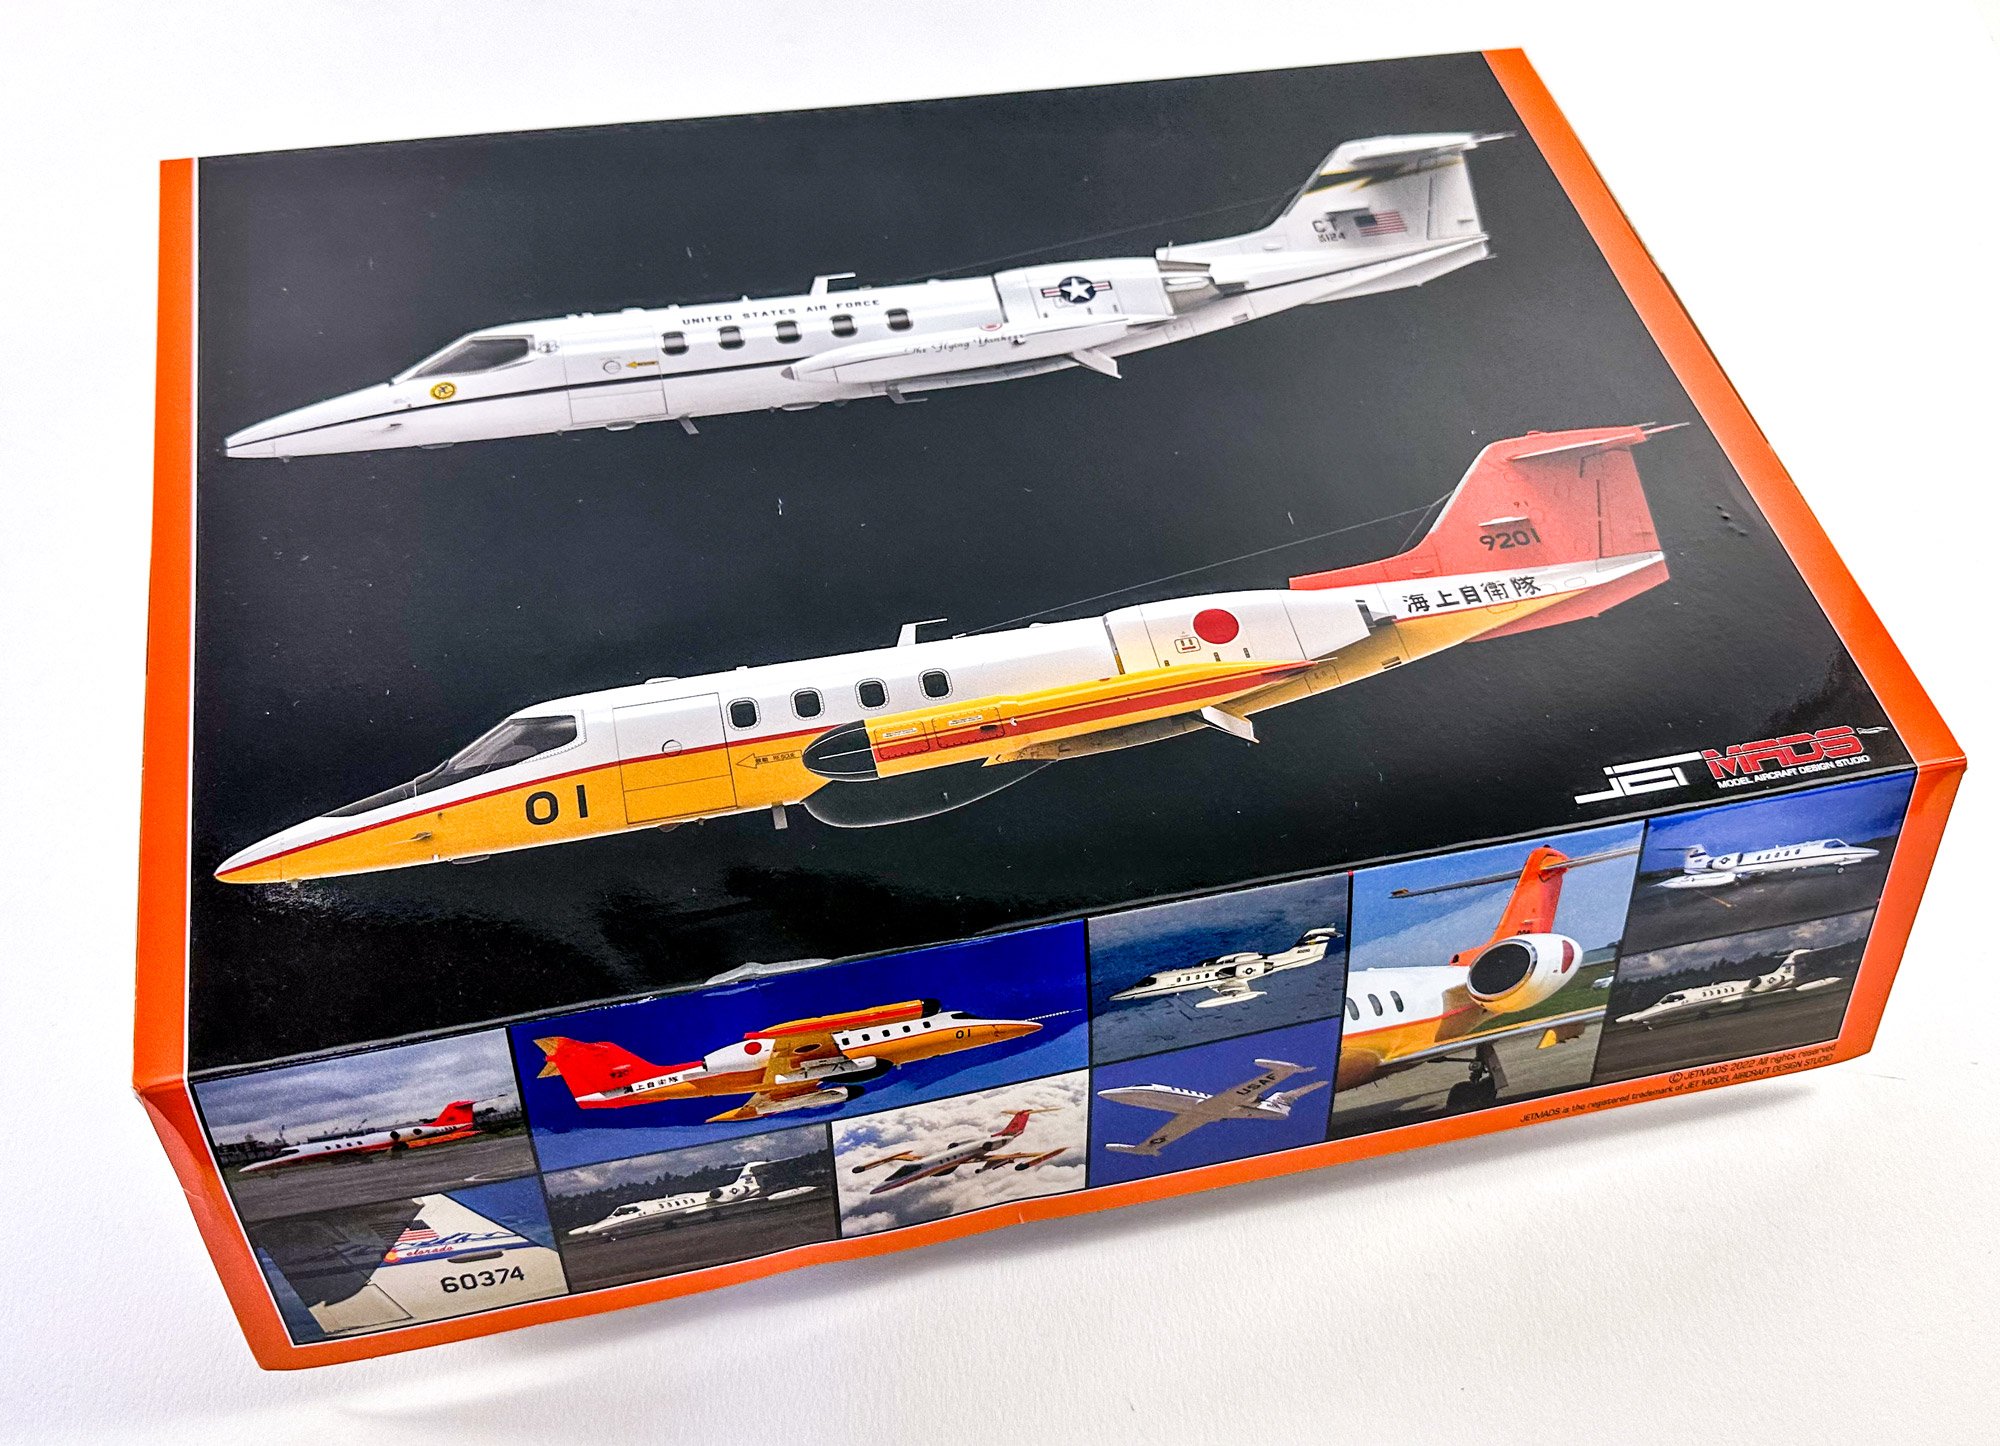
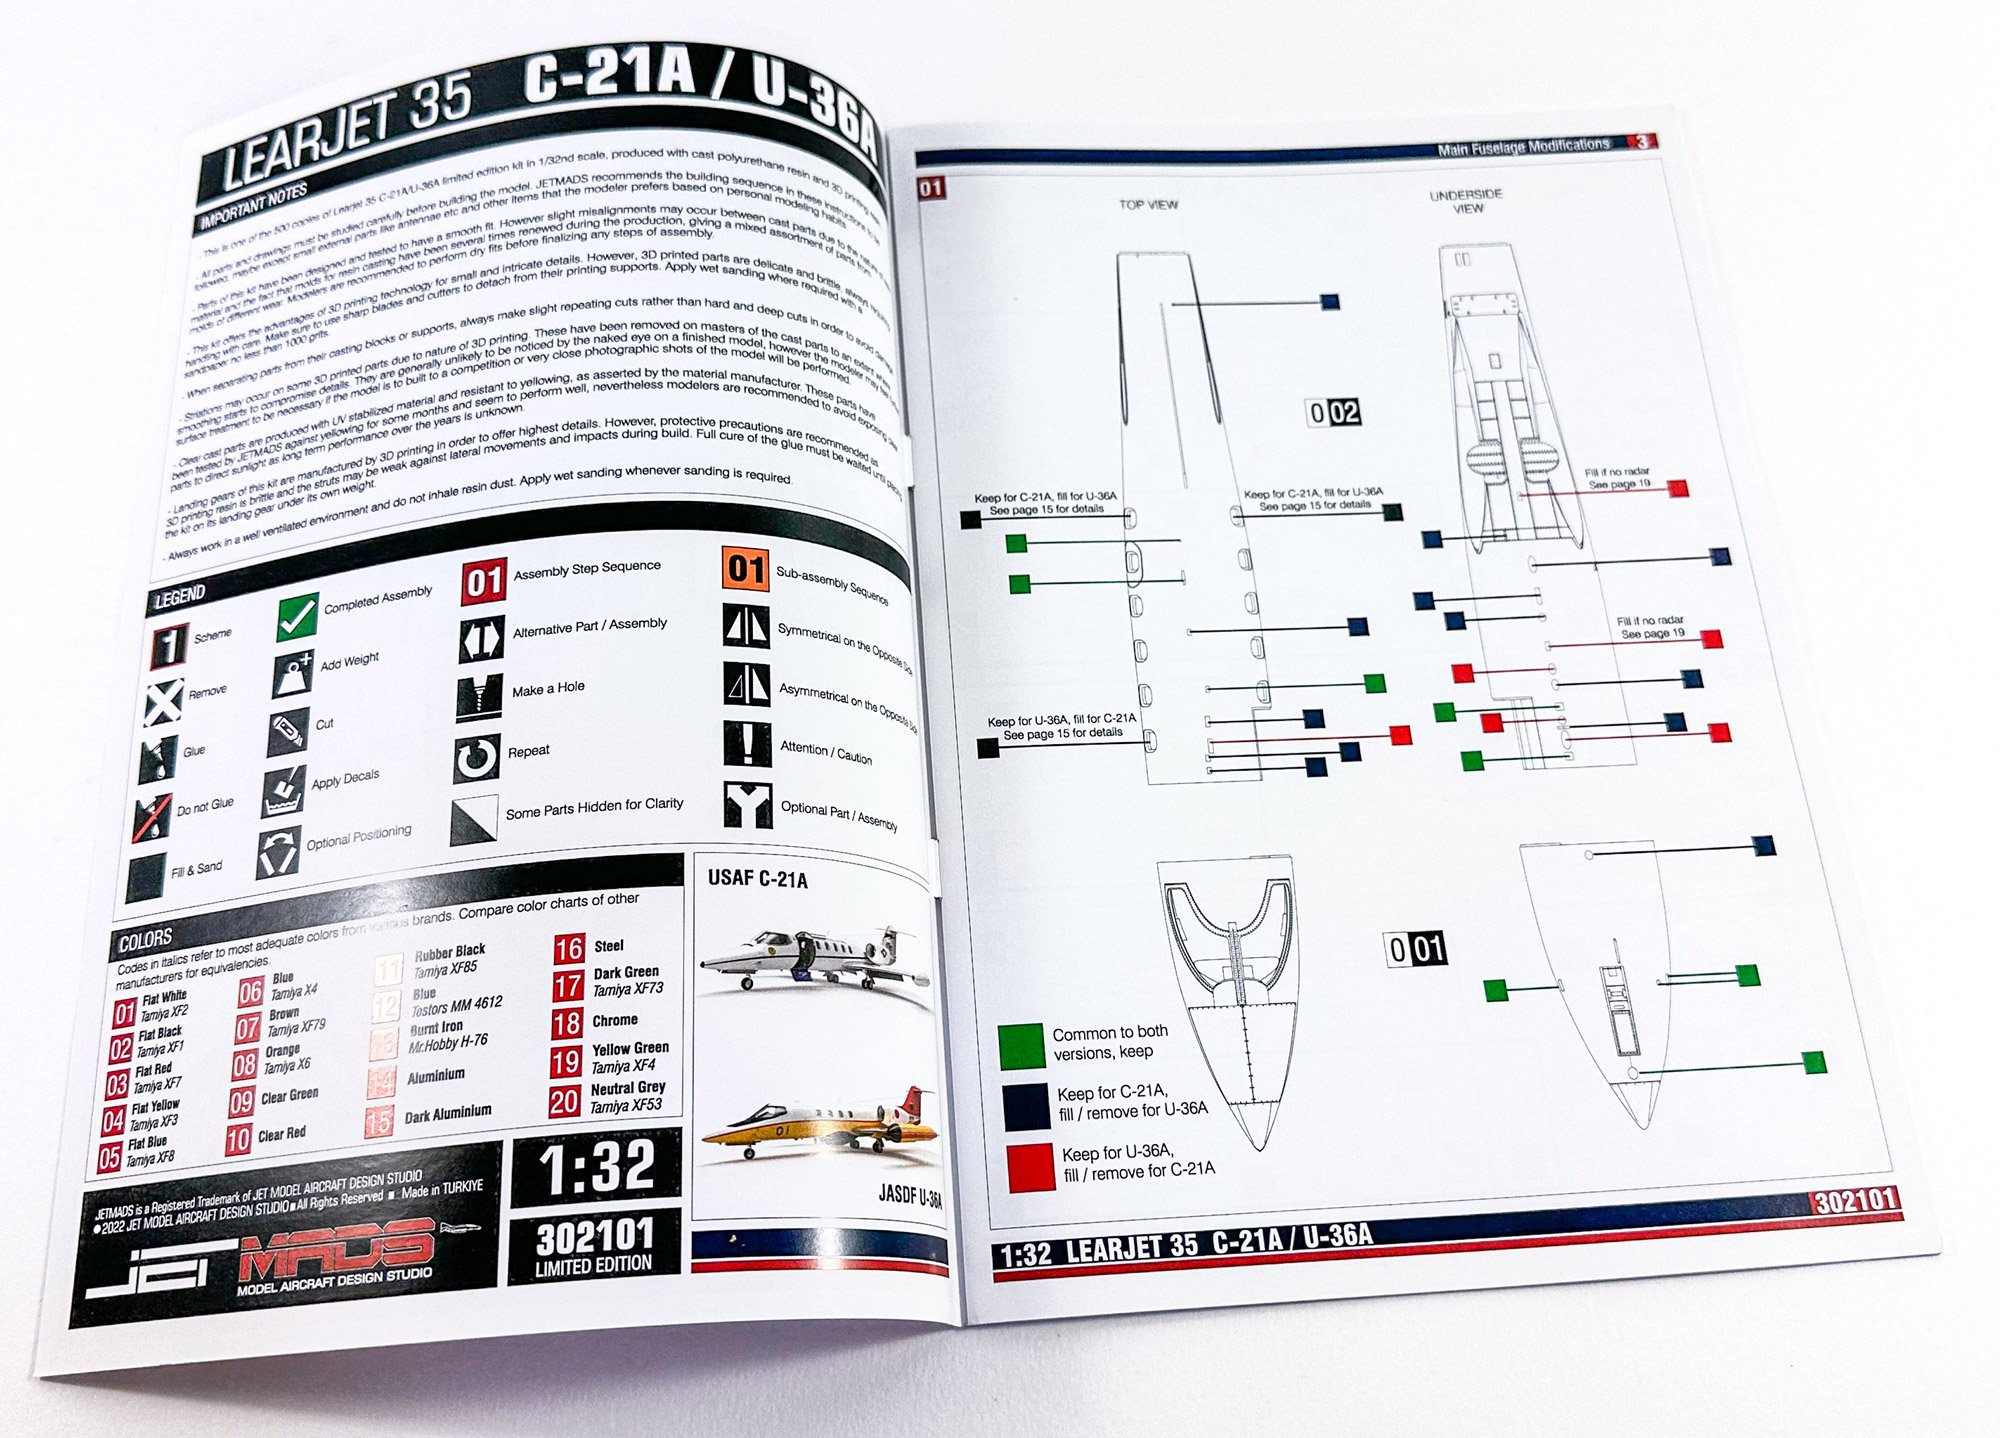
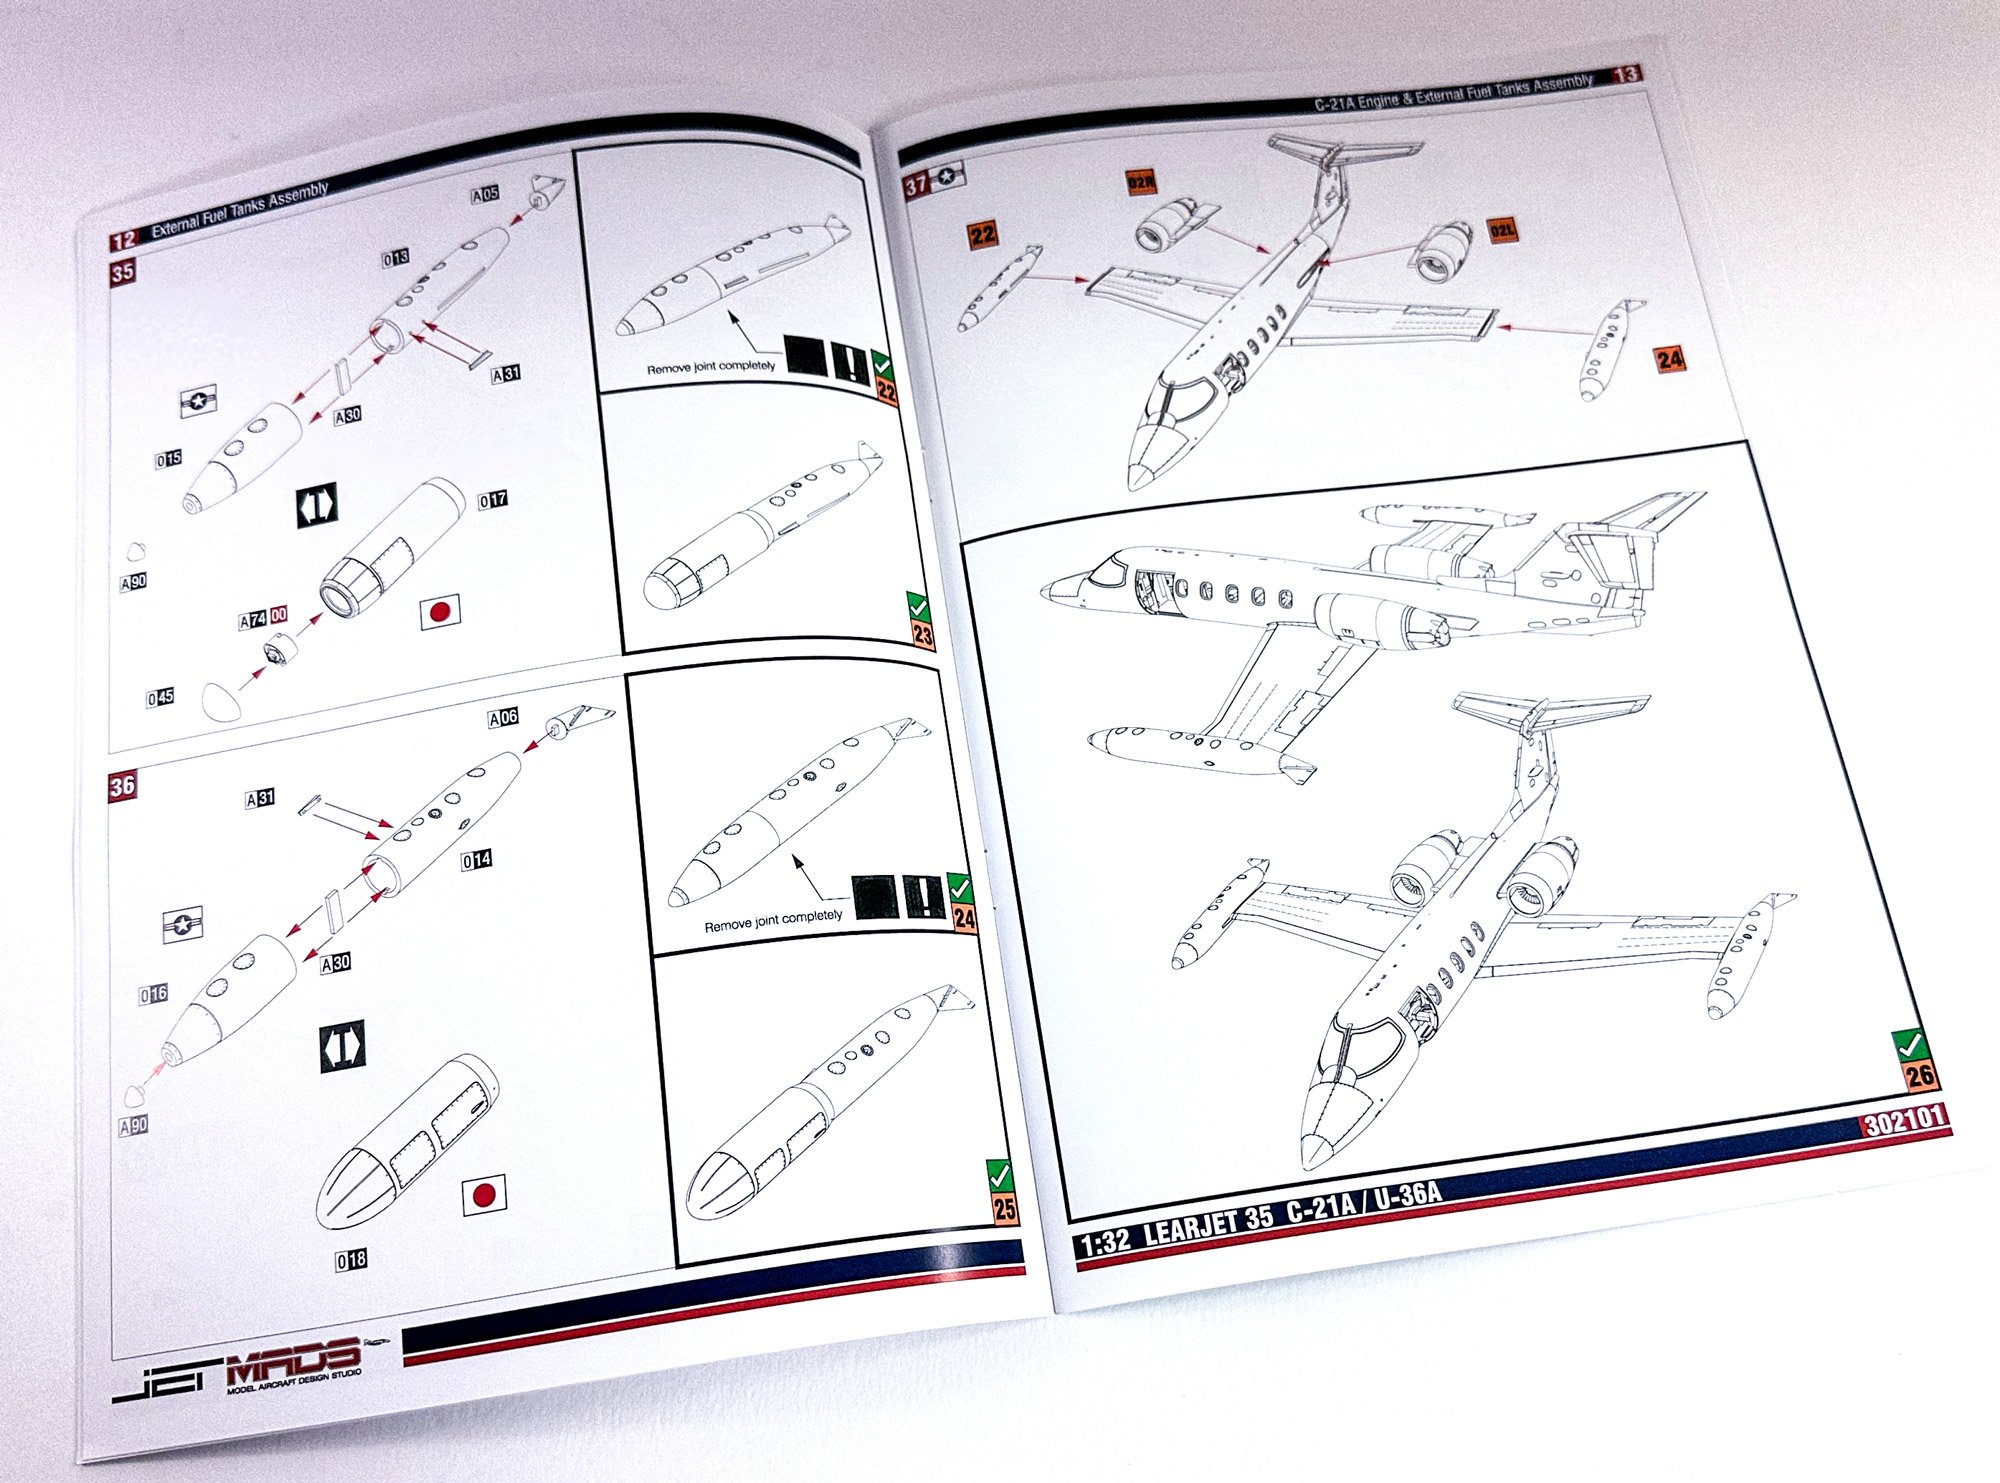
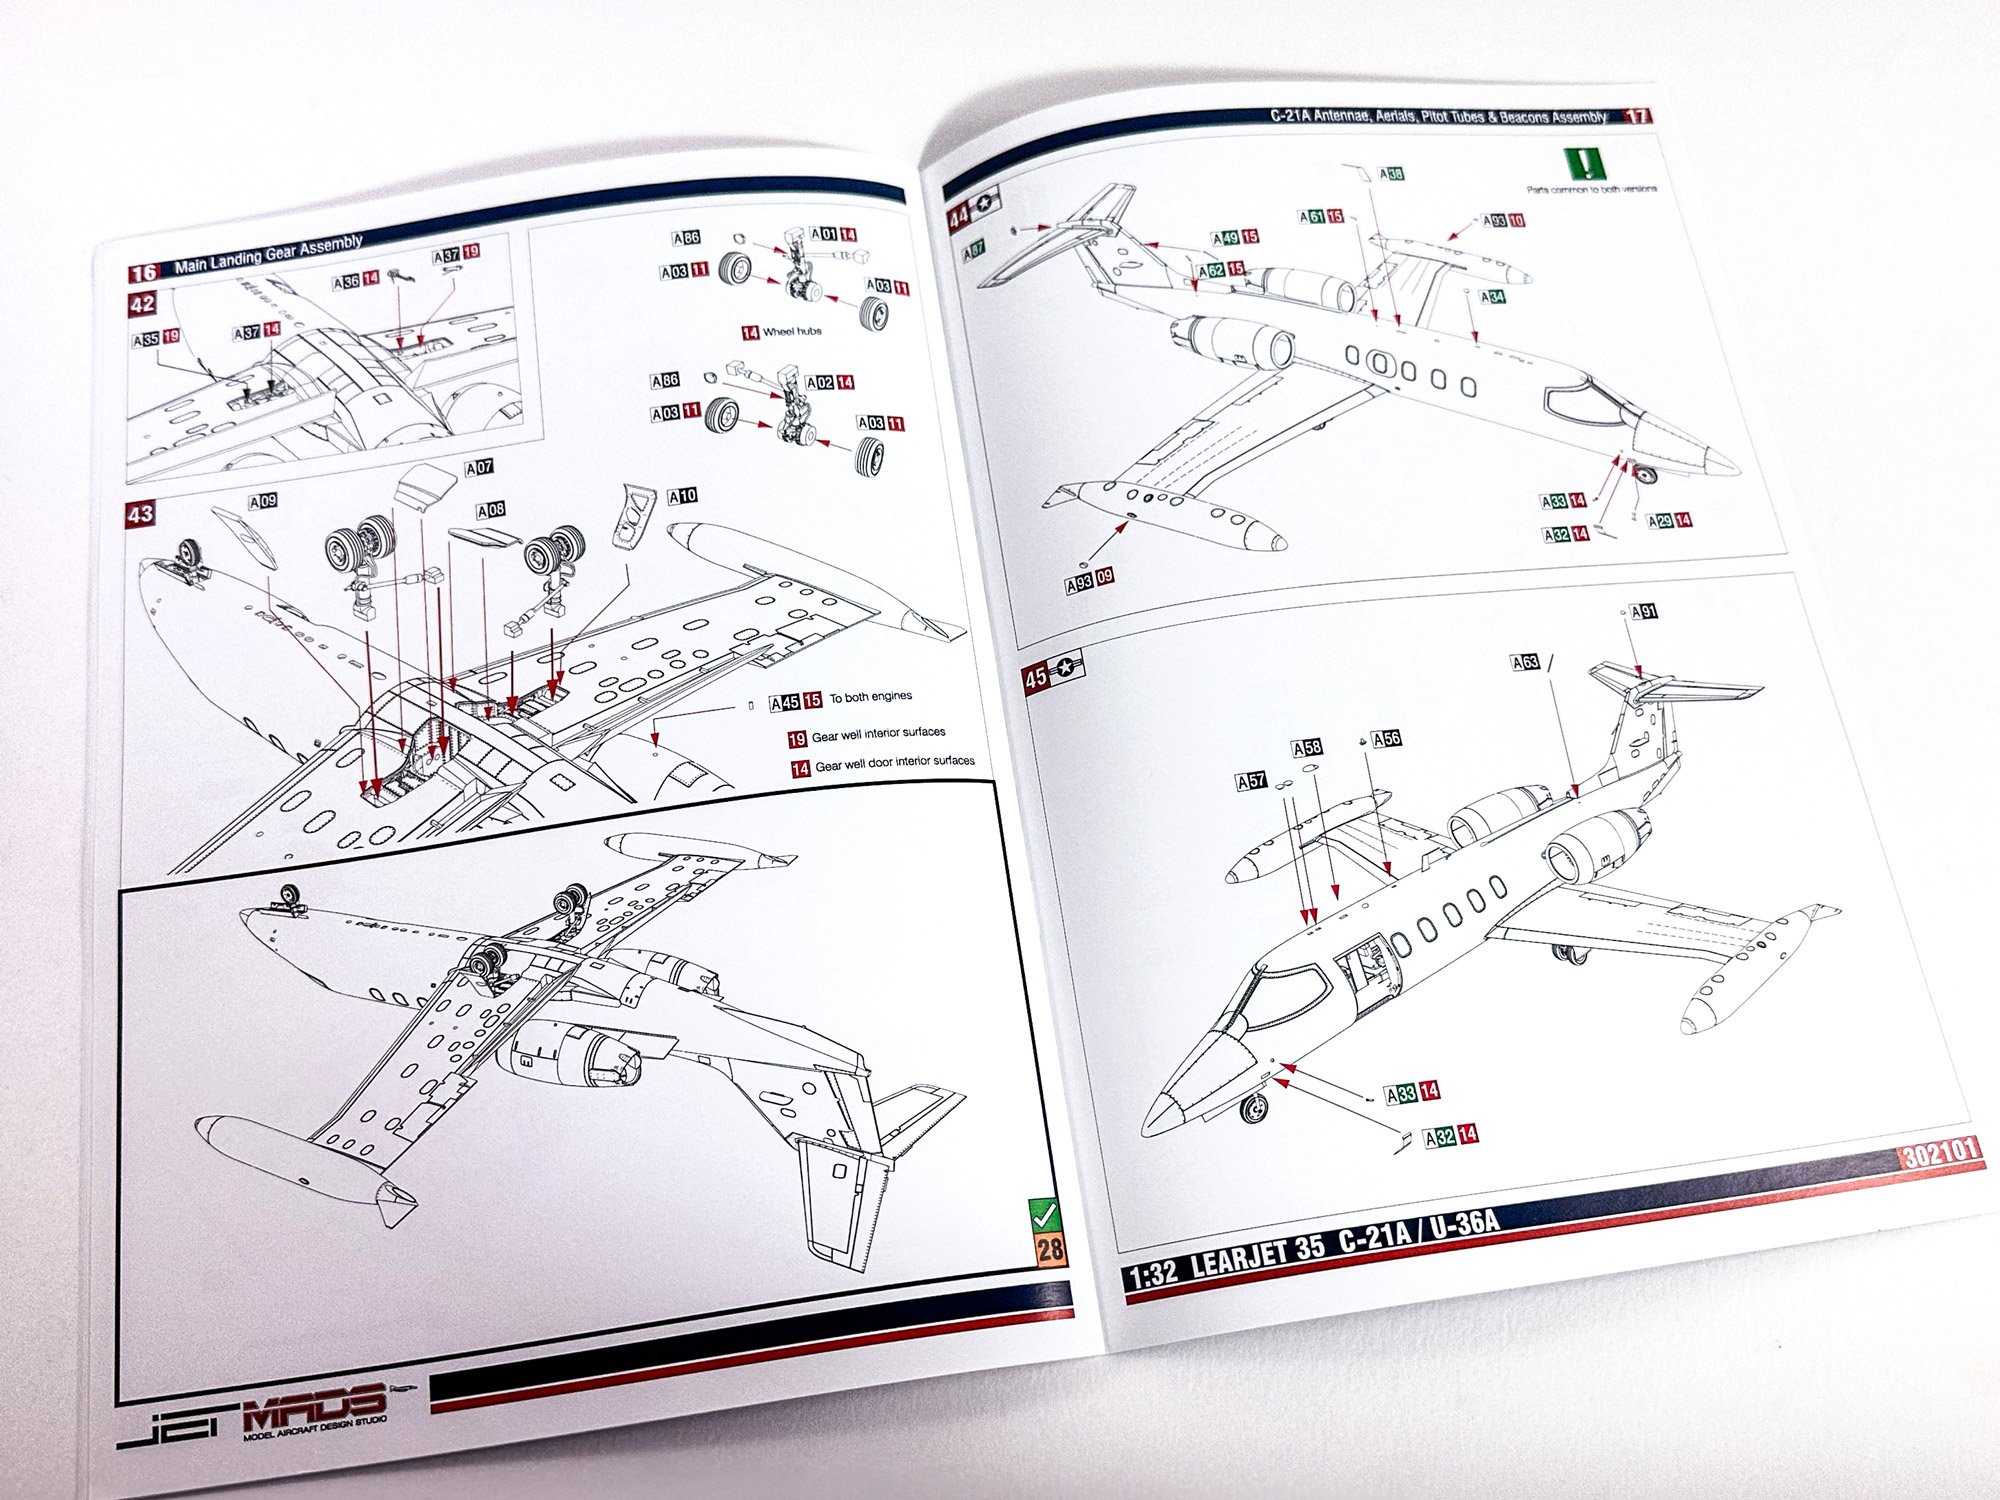
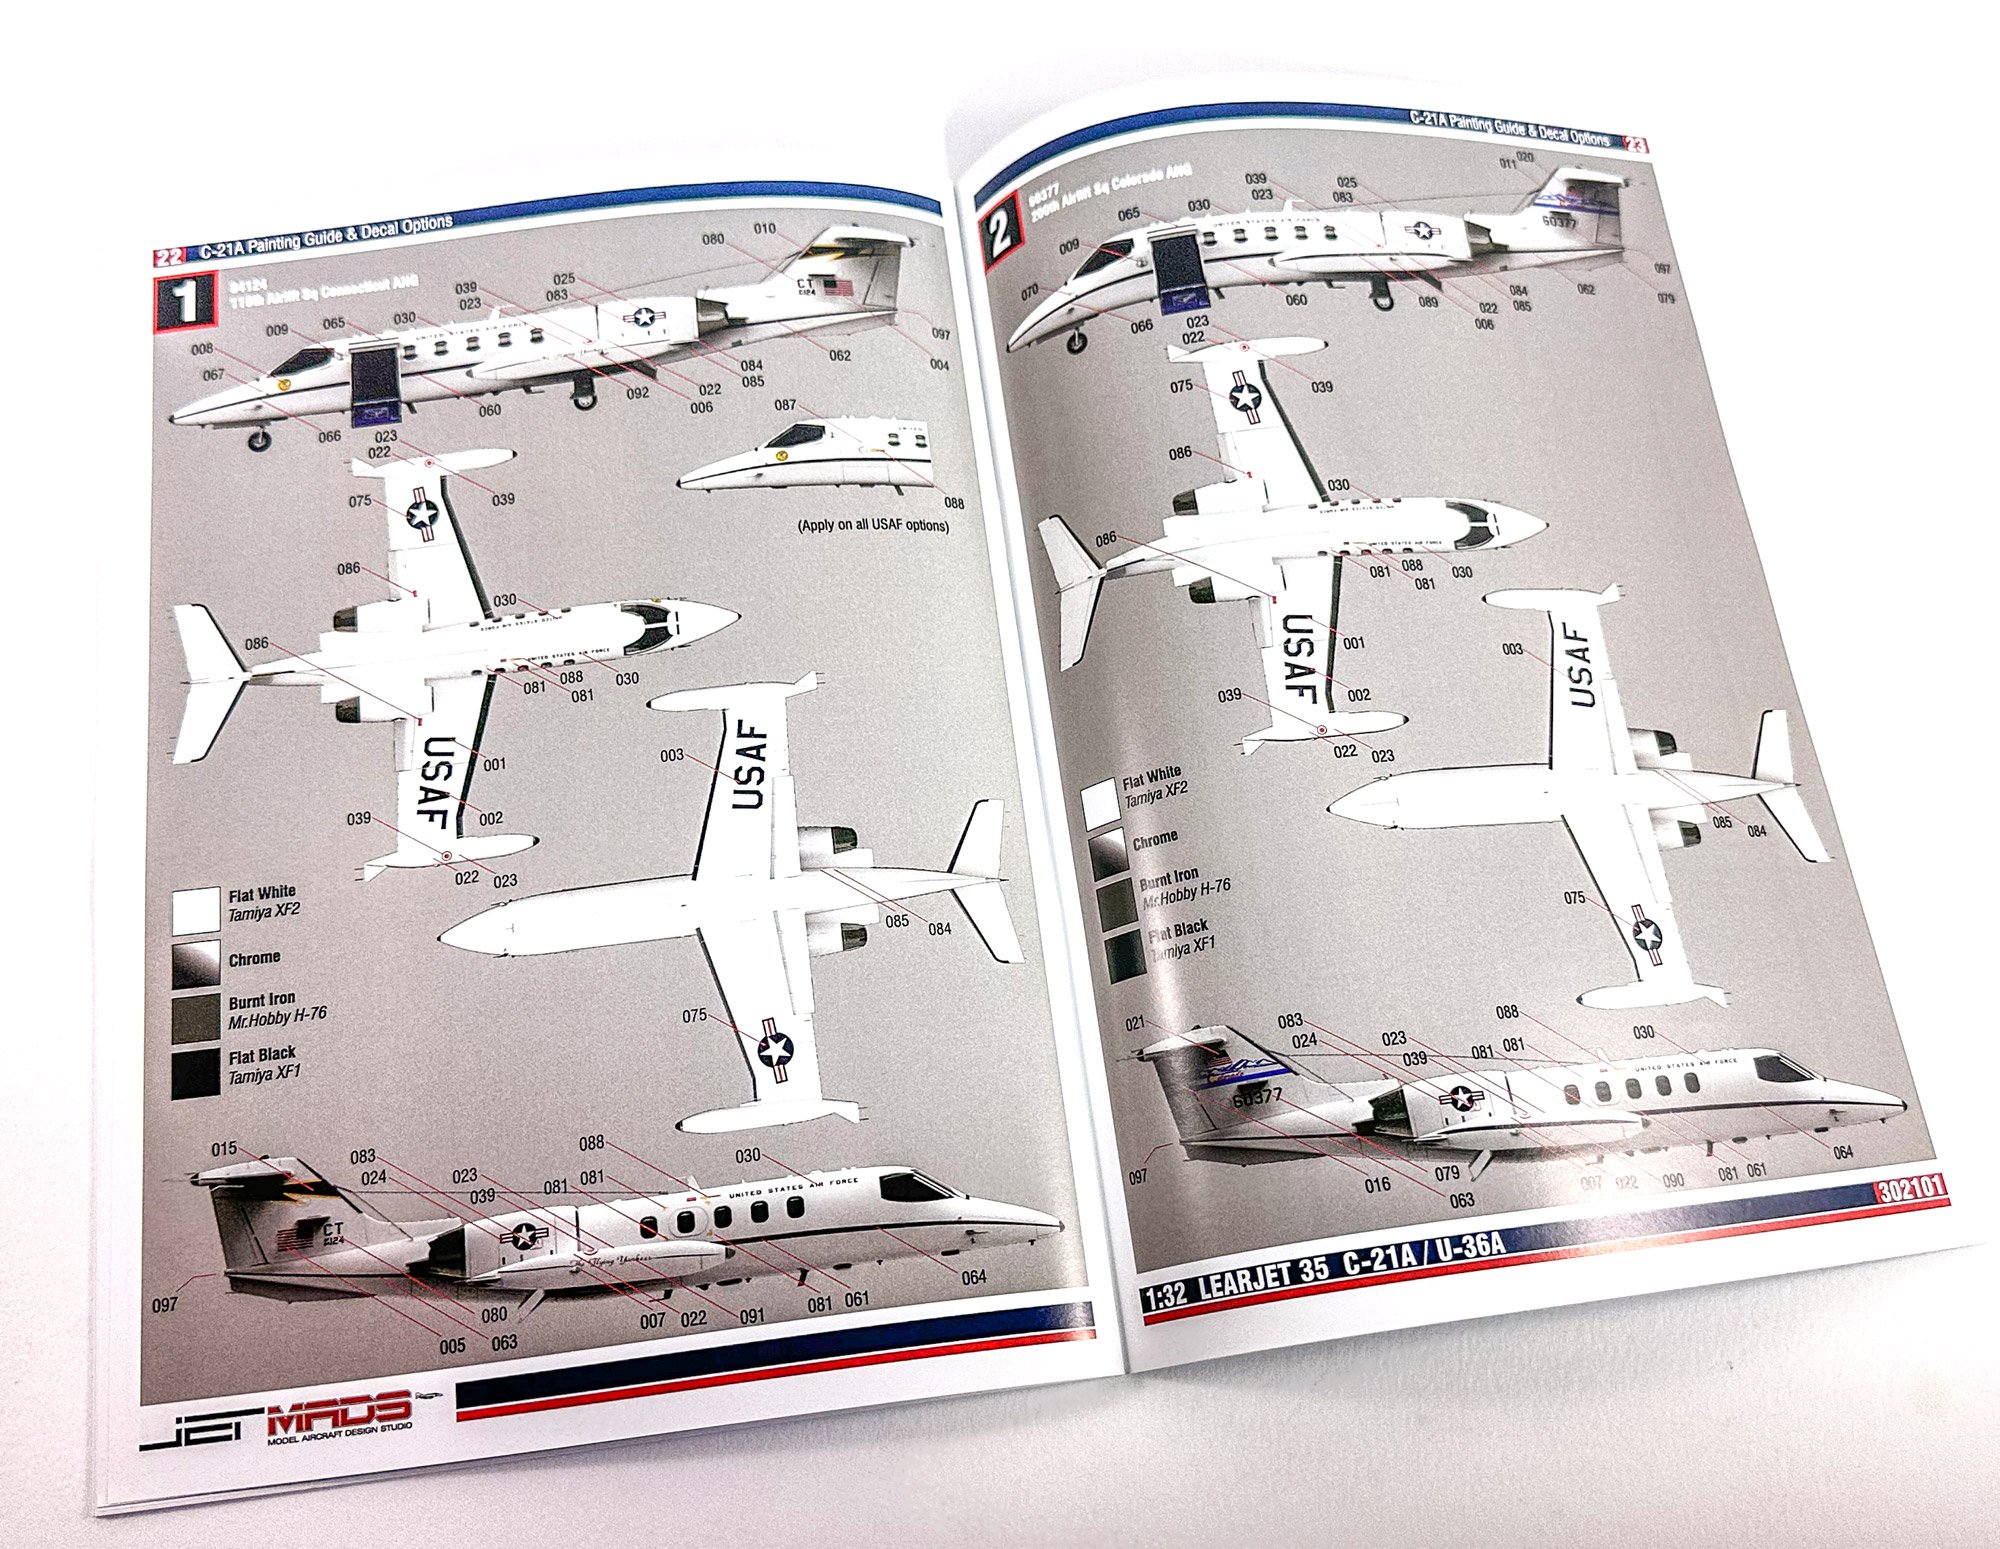
The manual for this is A4 in size and comprises a series of very detailed and well illustrated drawings which comprise colour annotation throughout. There are five US 'schemes' and one Japanese, although I appear to have not done a photo


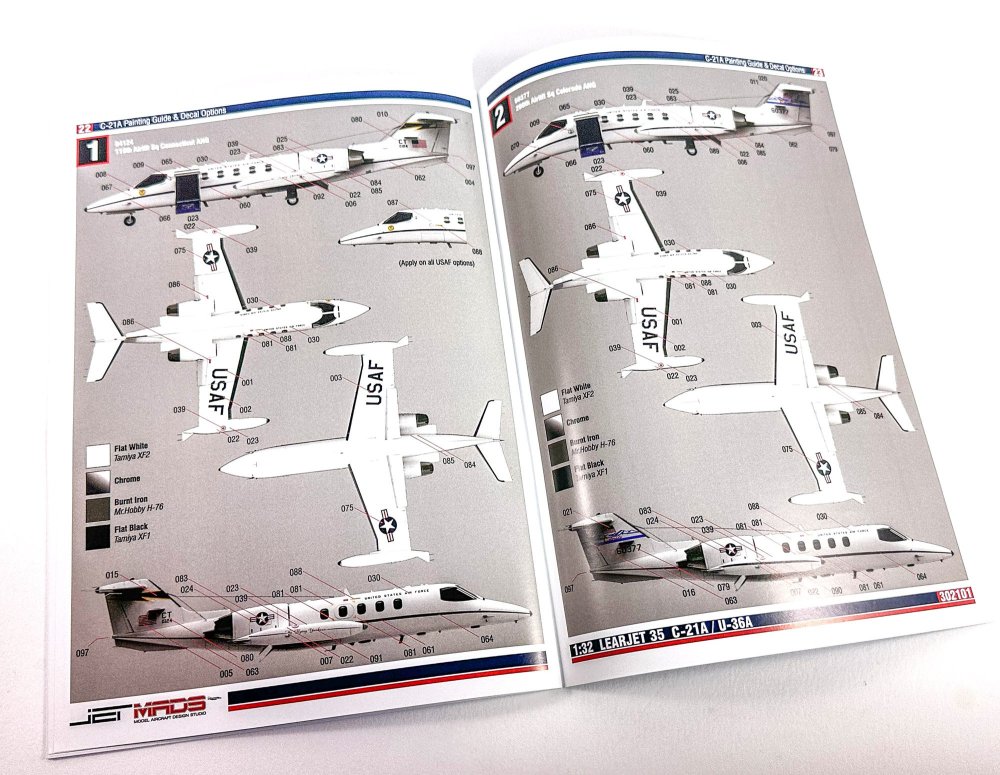
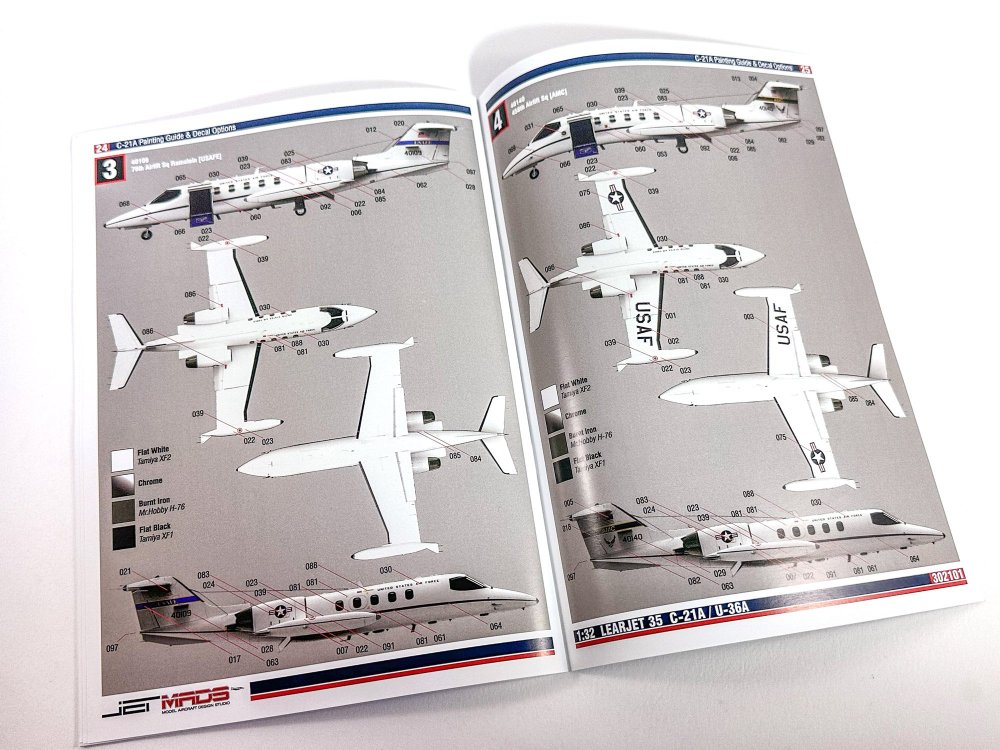
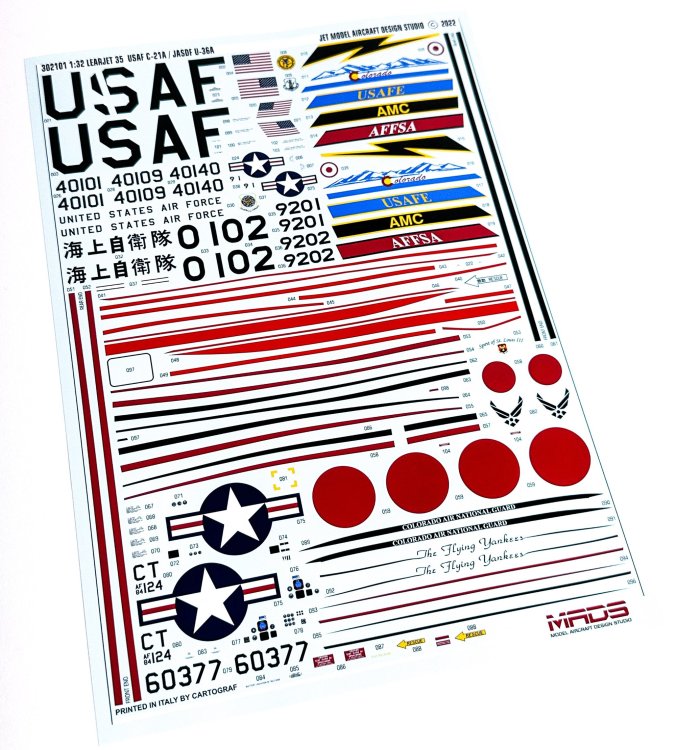
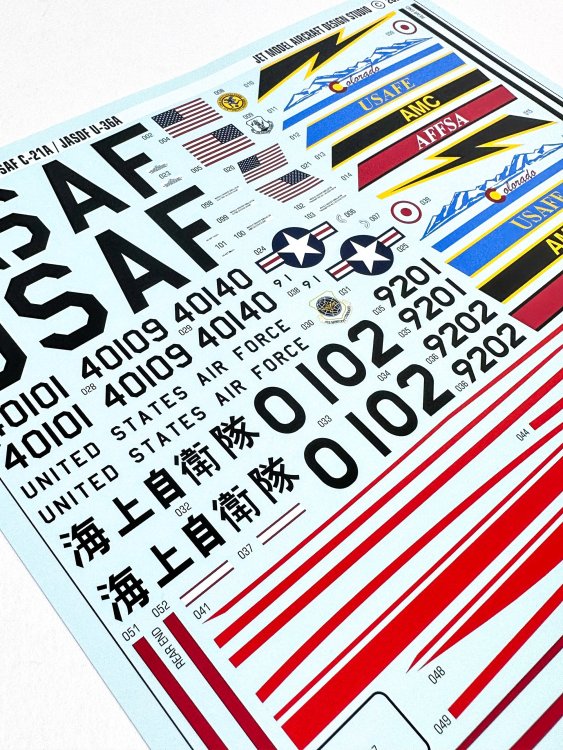
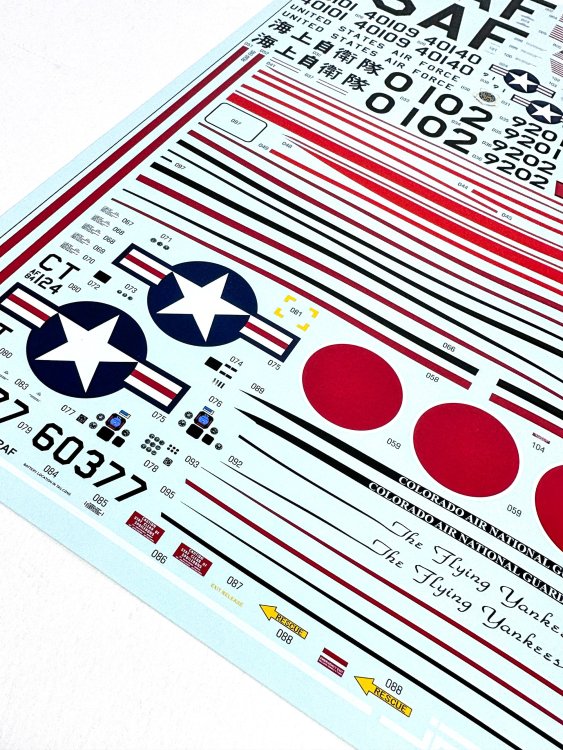
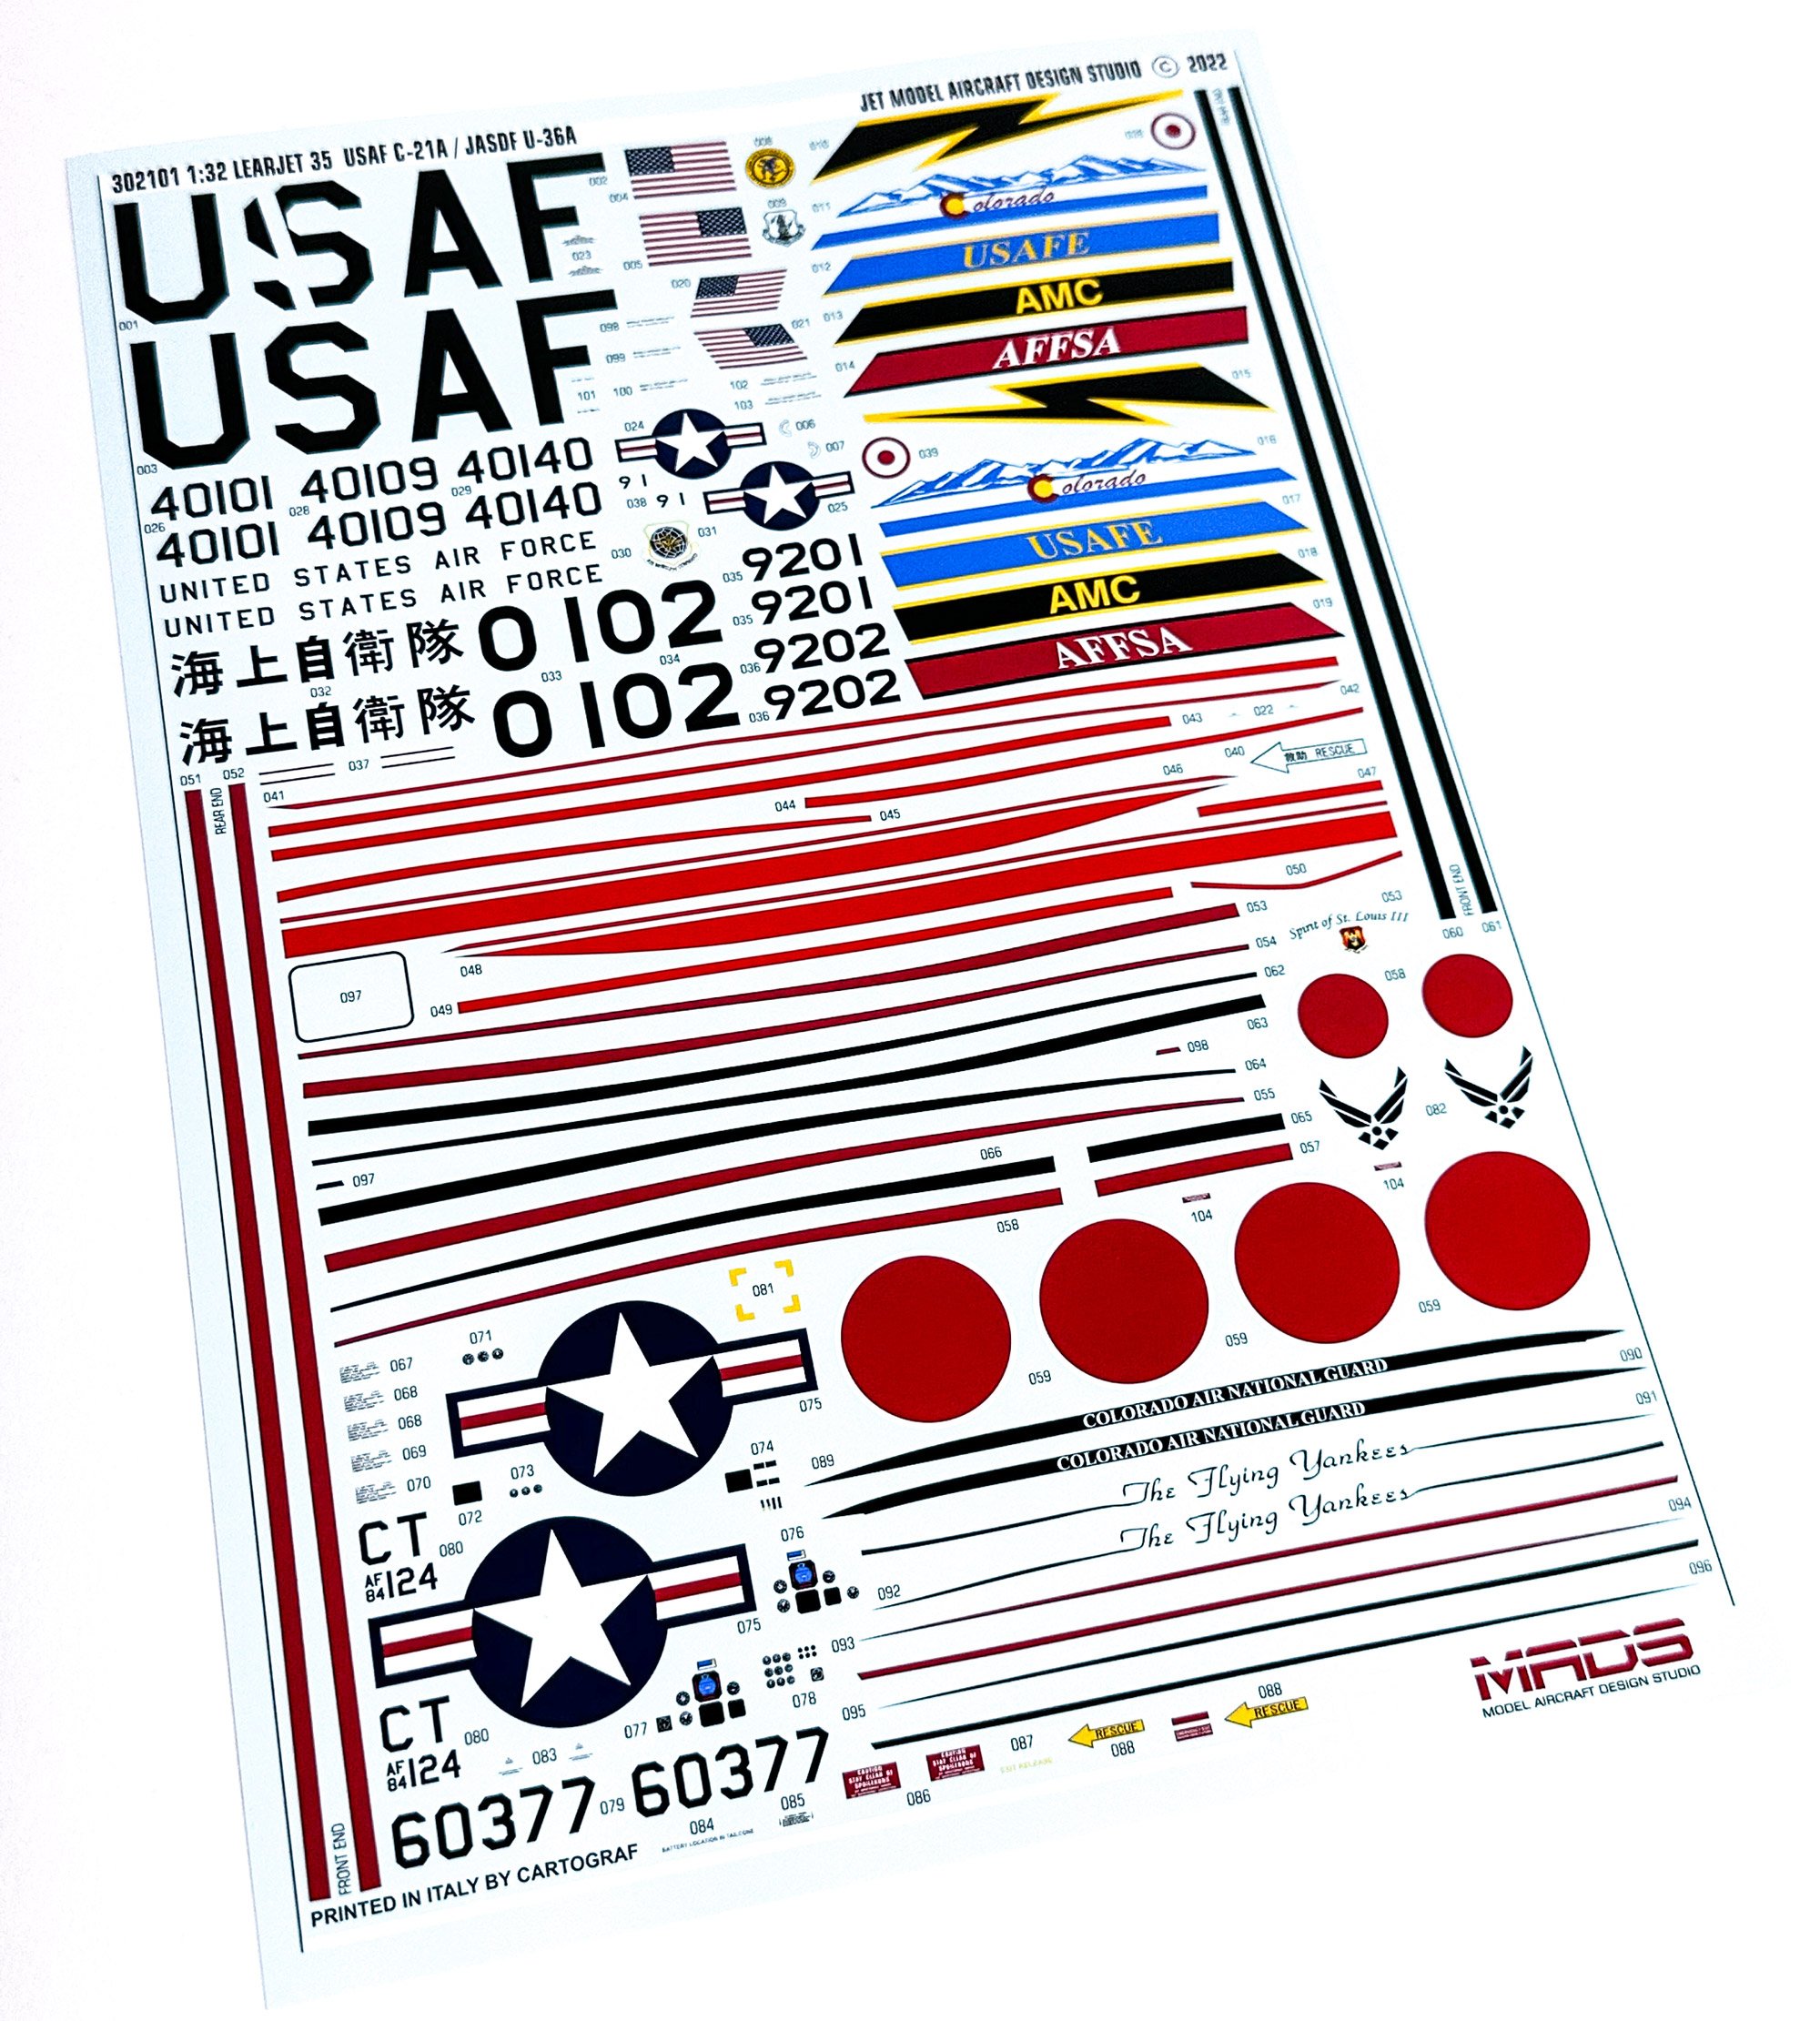
Decal are Cartograf and there's nothing to fault here in terms of print quality and registration etc. The various scheme option decals are clearly seen. Stencils are also included.
It's unfair to write a conclusion here as I have already said, I agree with Ernie's assessment. There is a lot of work to make this kit into the Lear you expect, mostly due to needing to remove all vestiges of the 3D print lines, but hey, this is supposed to be a hobby! My only real criticism is that they should've included those canopy masks too, and perhaps something sturdier for the beautifully detailed undercarriage struts.
A I write, this kit I out of stock, so don't really know if this is moot, but it will give an indicator of what to expect from a JetMads kit.
My sincere thanks to Ernie for this opportunity in looking at this kit and also to getting it built up later this year!
-
 2
2
-
 1
1
-
-
I've done as was instructed to get the Gallery online but there's a couple of issues flagged on install.
I've ticketed Invision, so hopefully this will happen sooner rather than later.
-
3
-
3
-
-
Have you tried deleting your browser cache and cookies?
If you've some corruption stored there, that could affect it. Try another browser to test.
I run a site with 42k members which operates the same software and there are no reported issues.
-
1
-
1
-
-
18 hours ago, belugawhaleman said:
Nope. Tried it, doesn't work......a parroted comment? Don't know.
I've been doing the same way for at least a couple of years....then, suddenly,
the way I've been doing it doesn't work.....Anyway, I found another way.
I know the "change" occurred after the site was down. Thanks anyway.
Regards;
Paul.
The reason the site was down was due to a power supply outage to the datacenter where we are hosted.
There were no actual software changes made to the site.
-
I do like that ZM 190.
I just figured that my wife would kill me if I bought another kit.
-
5
-
 1
1
-
-
1 hour ago, biggtim said:
Let me know via PM if you do. Another person asked for that one, so I've already been working on getting the parts all hunted down and put together. Should be ready soon.
Cheers.
When I locate a kit, I defo want that set.
-
4
-
-
I'd love an F-86 set.
Problem is I need the damn 1:32 Kinetic kit too. Not easy to find.
-
4
-
-
Ok, there's been no change to our system here that would cause such an error.
If you paste something into the sig area, the editor will probably carry over any original formatting.
A tip to get around that is to paste text into your browser address bar and then copy it again and paste to your sig. That removes all formatting. You can then amend as you like.
-
1
-
-
Yes. Absolutely.
Not moulded in that shitty, soft and soapy plastic any more. The sprues don't even look like typical Airfix ones and the detail is outstanding. I believe they are now moulded in the UK and not that crappy place they were using in India.
-
3
-
-
Ok folk,
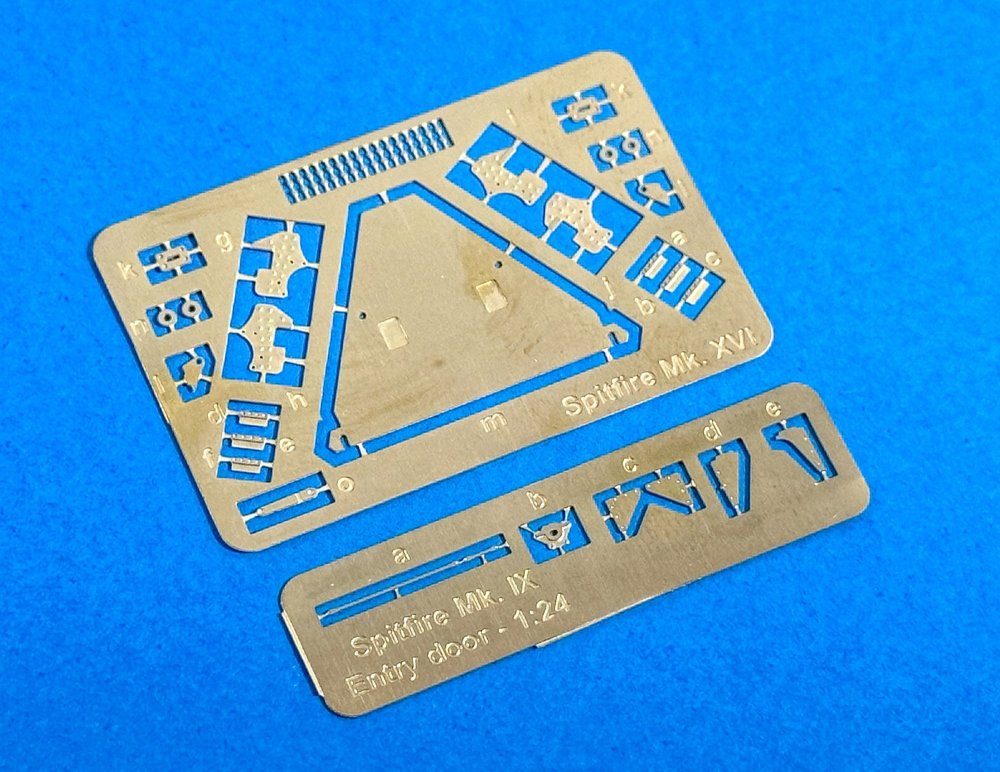
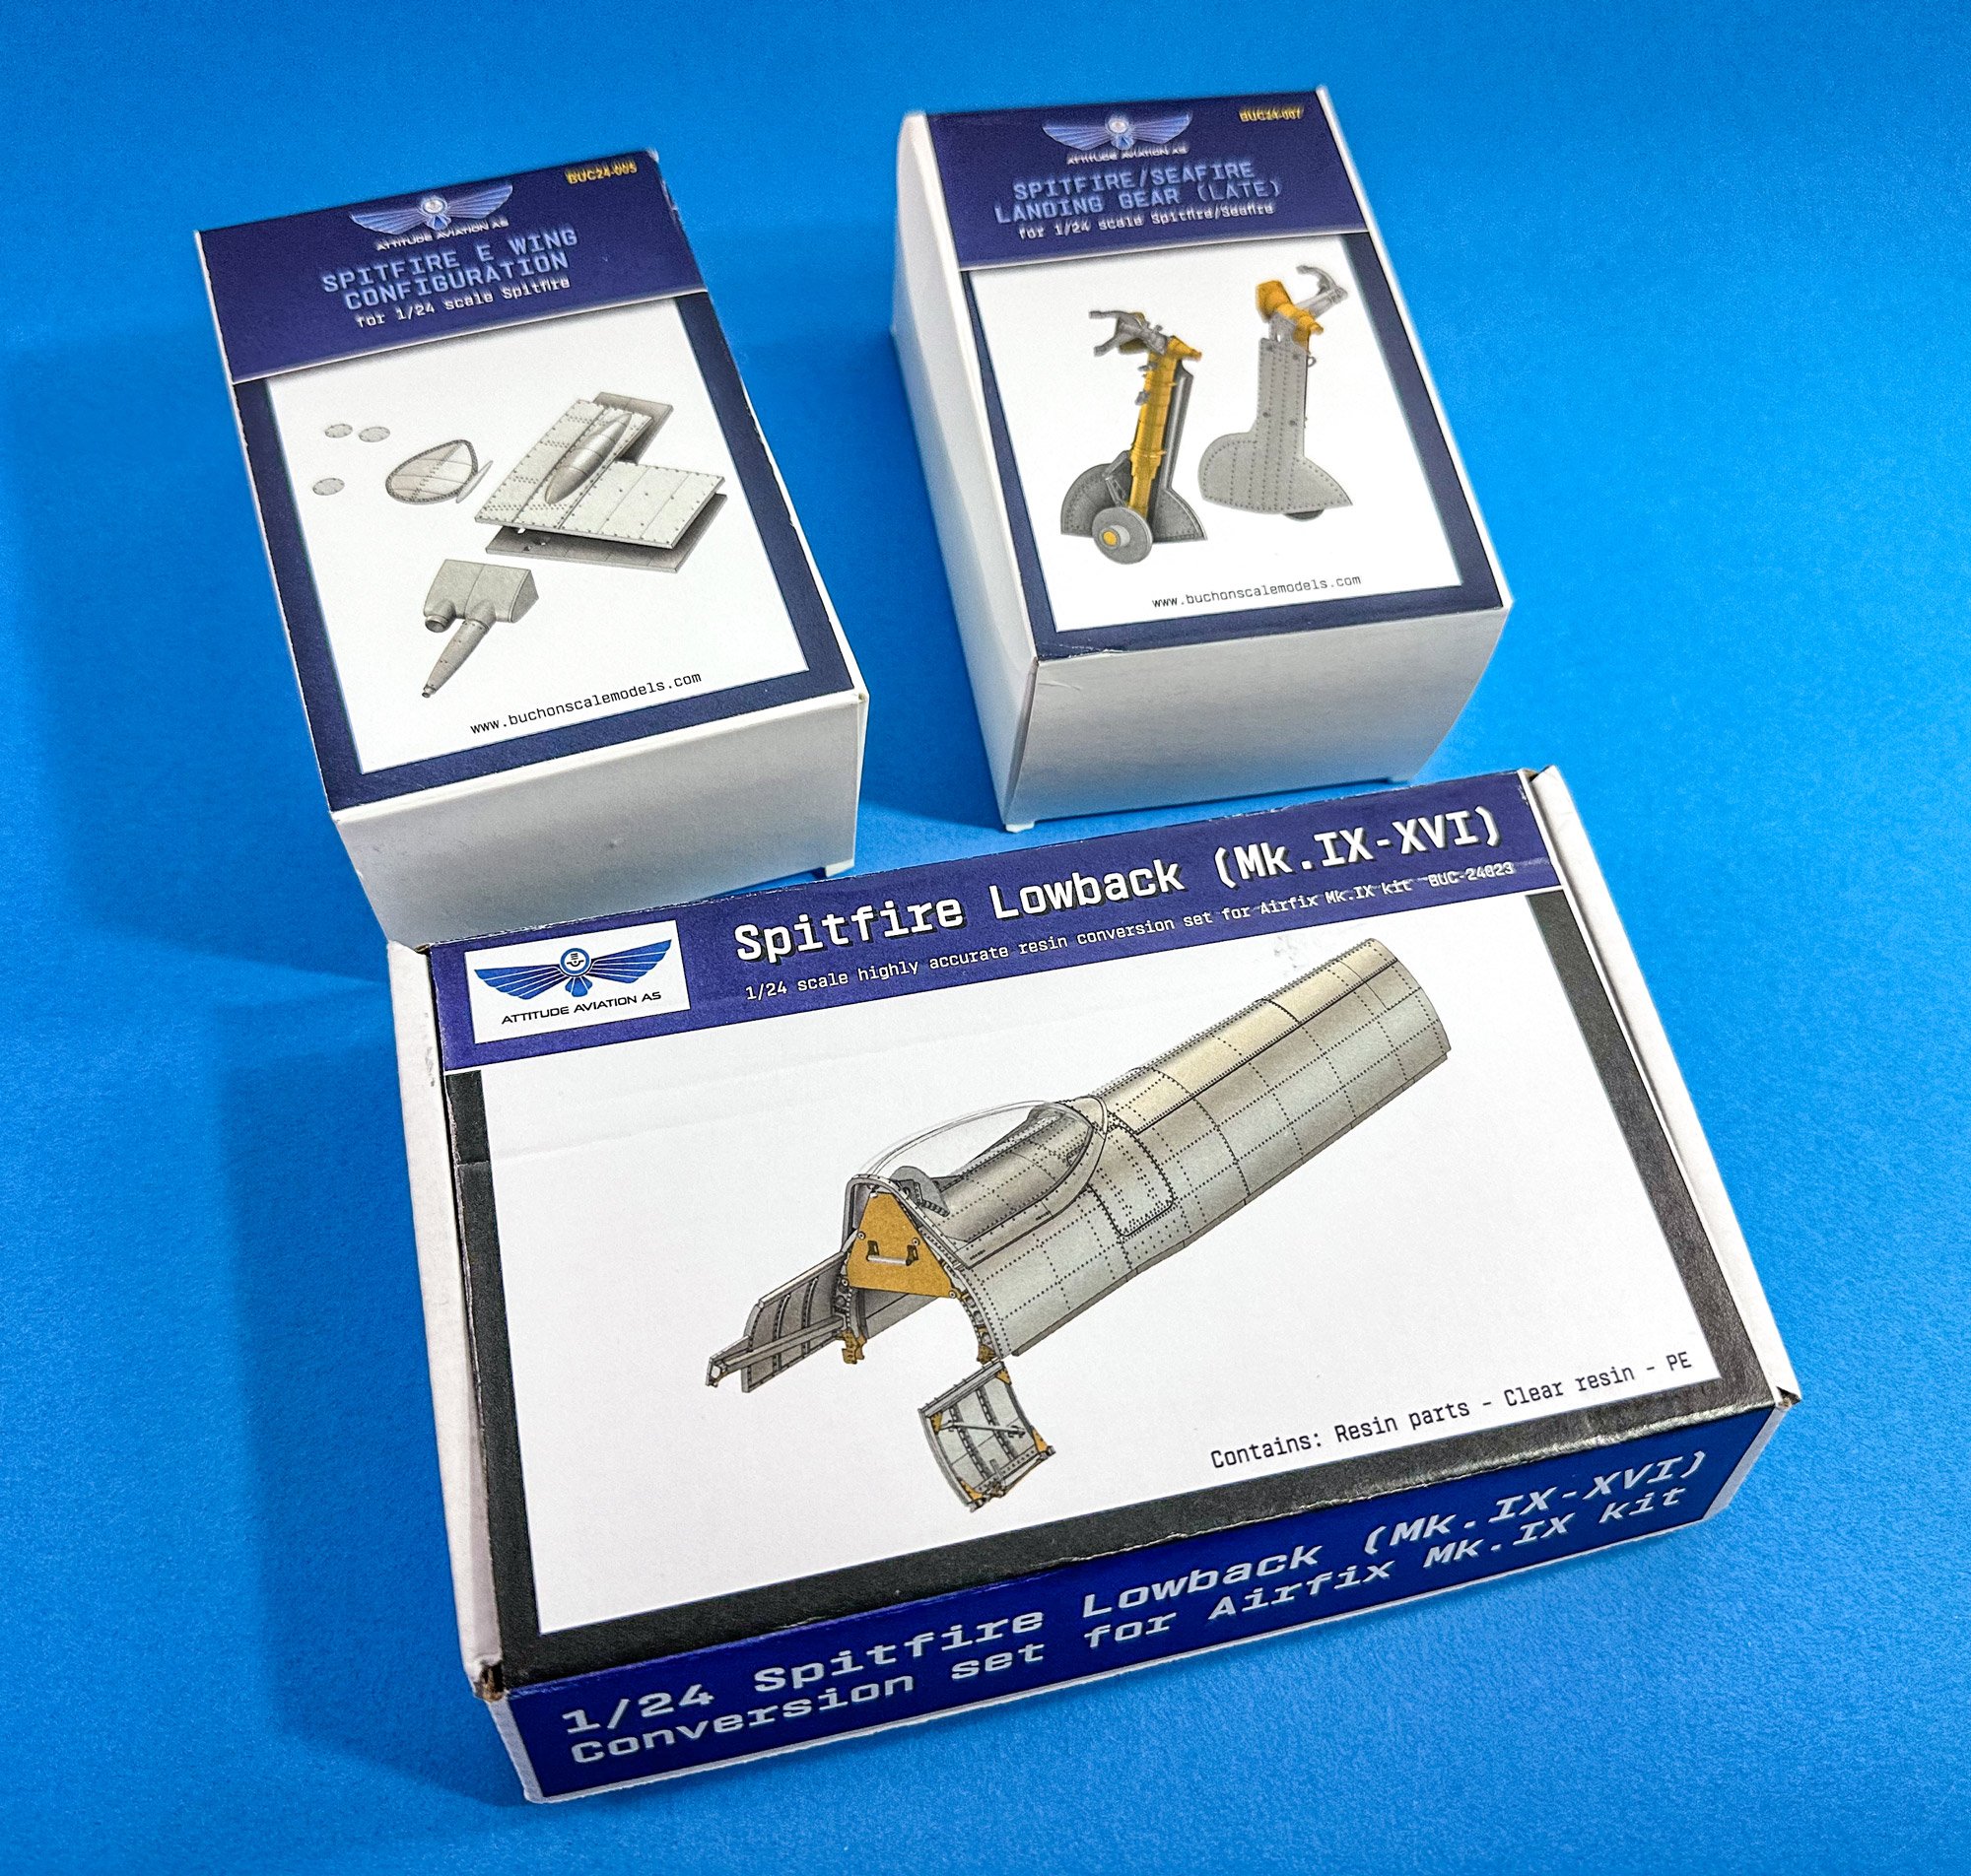
This isn't so much a review, but more a 'first look'. I managed to get some time last night to do a few photos of the items that Espen sent me for the forthcoming 1:24 Spit Mk.XVI. All of these are cast in grey resin, with the exception being the crystal clear teardrop canopy of the low-back Spit. The low-back conversion also two small frets of PE. My apologies for doing these on an iPhone as I desperately need to upgrade my camera in the next months.
These sets cater to not just the Sweet Sixteen, but those who want to upgrade the base kit, such as the nicely produced brass undercarriage parts. When you load up a model with resin, those are definitely something that you ideally want to have to protect your finished work.
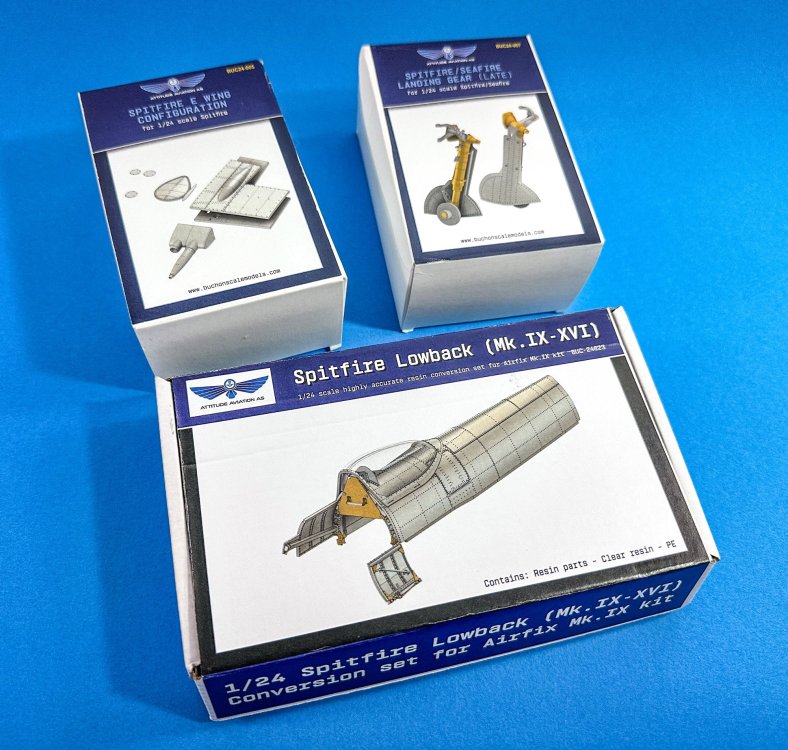

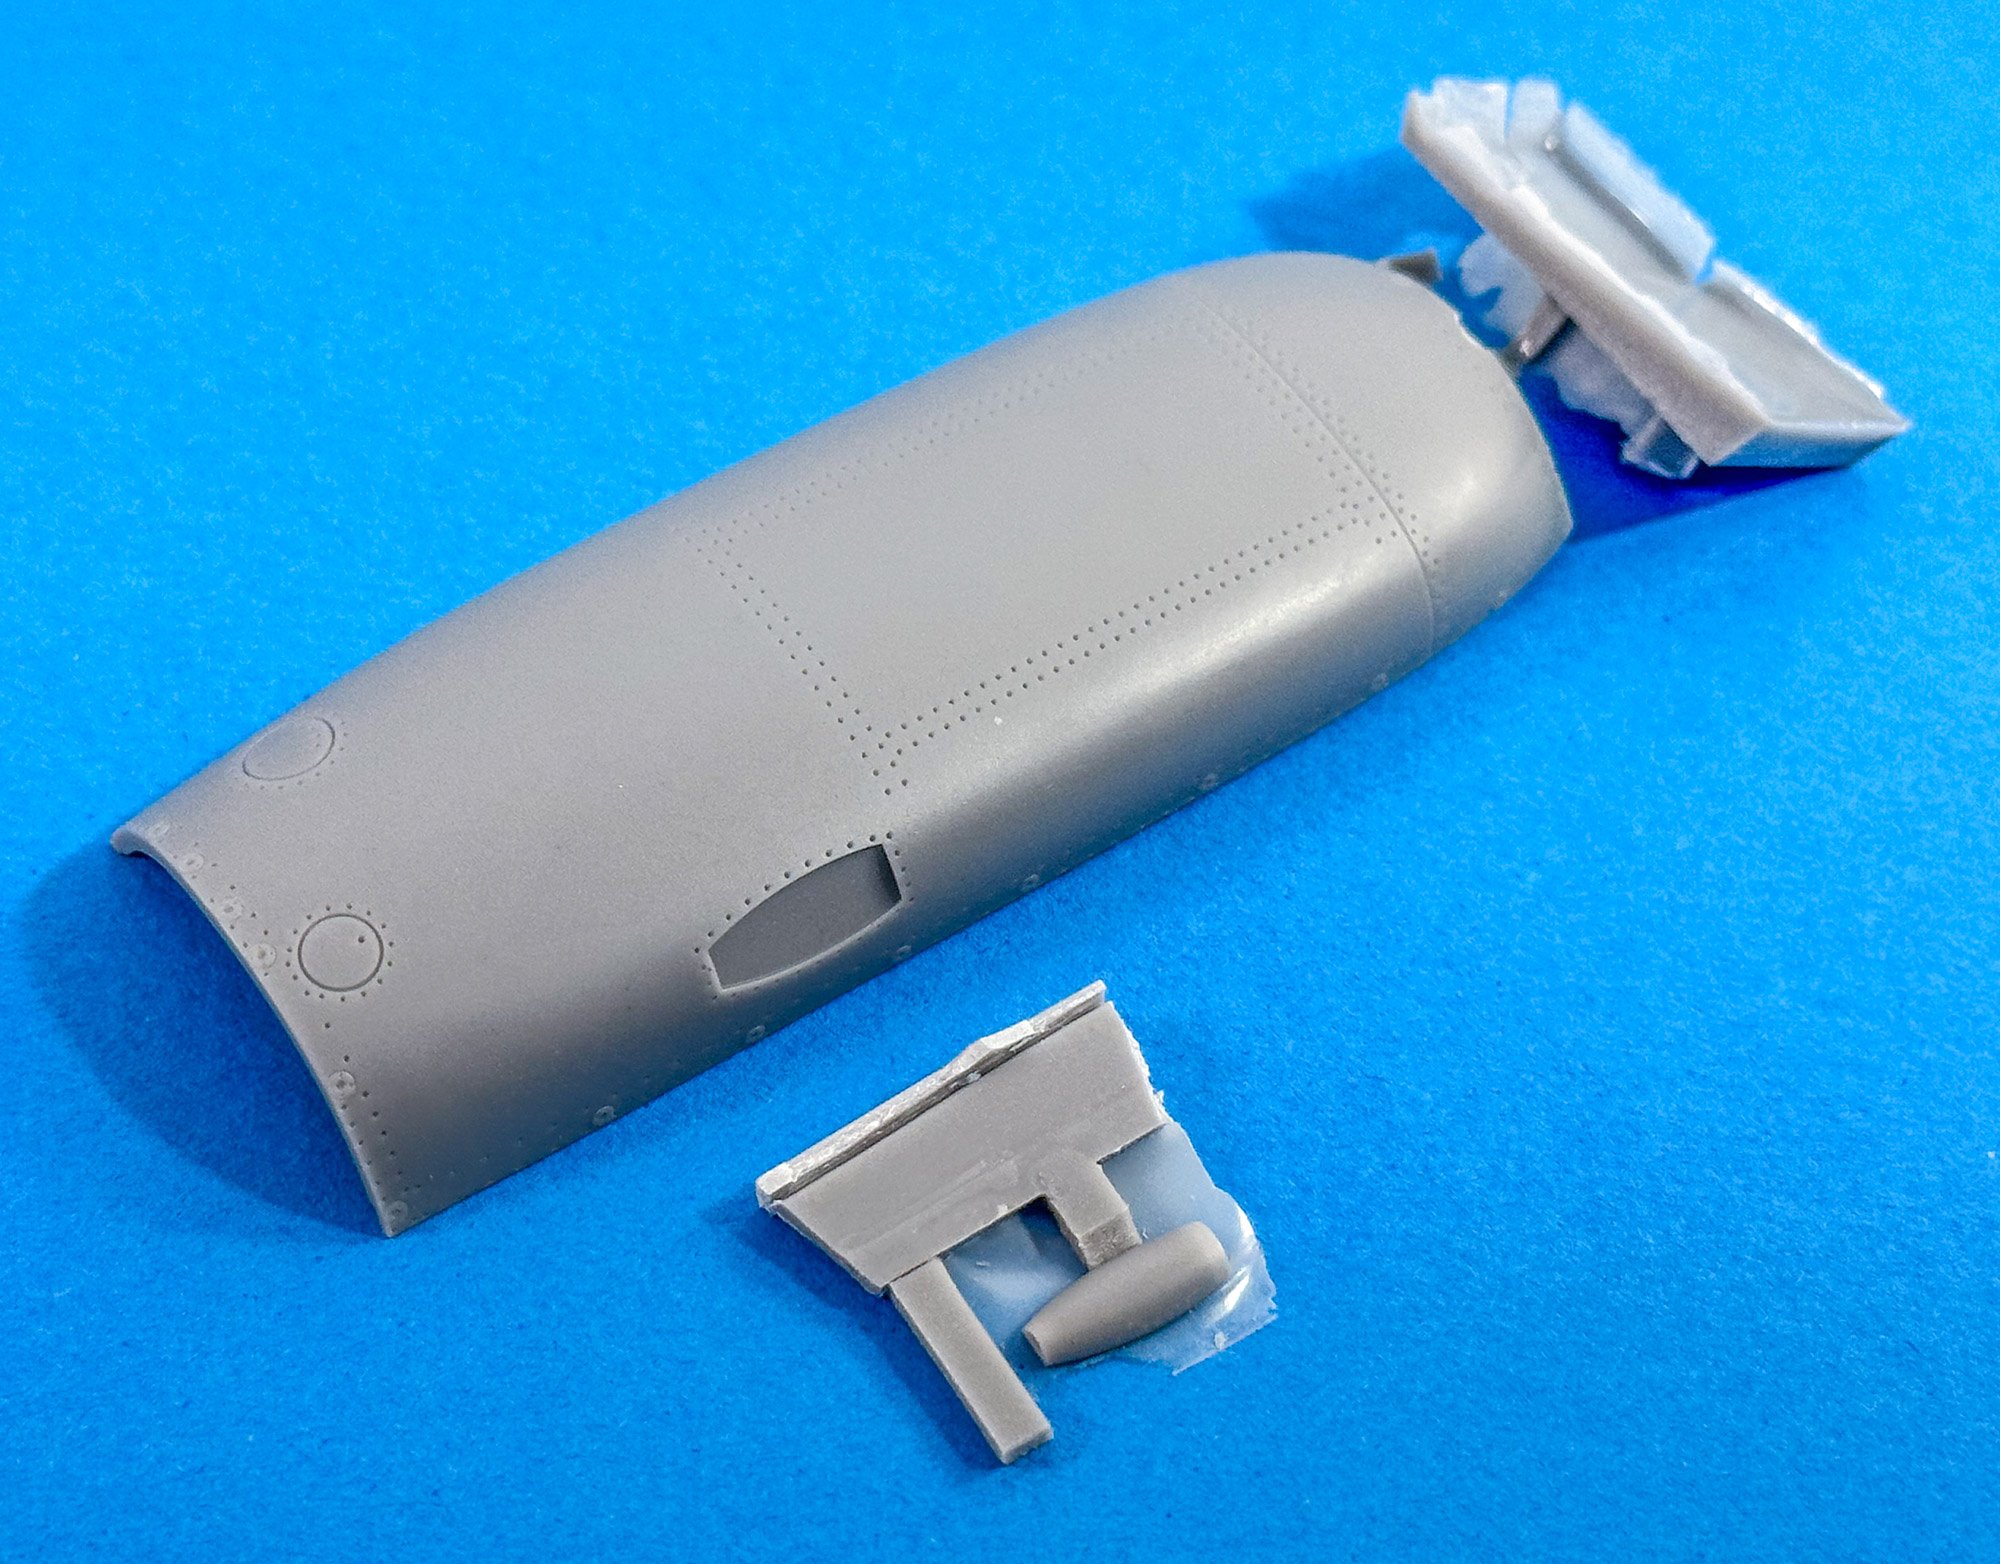
Cowl top
Now, not having looked clearly at the Airfix kit yet, I'm not too sure how this differs from the kit part. I have to assume it's in shape, somehow. A small casting block at the front is all that needs to be removed. Mine was snapped off in transit, and I've a tiny break to fix, but a couple of mins work will sort that out.
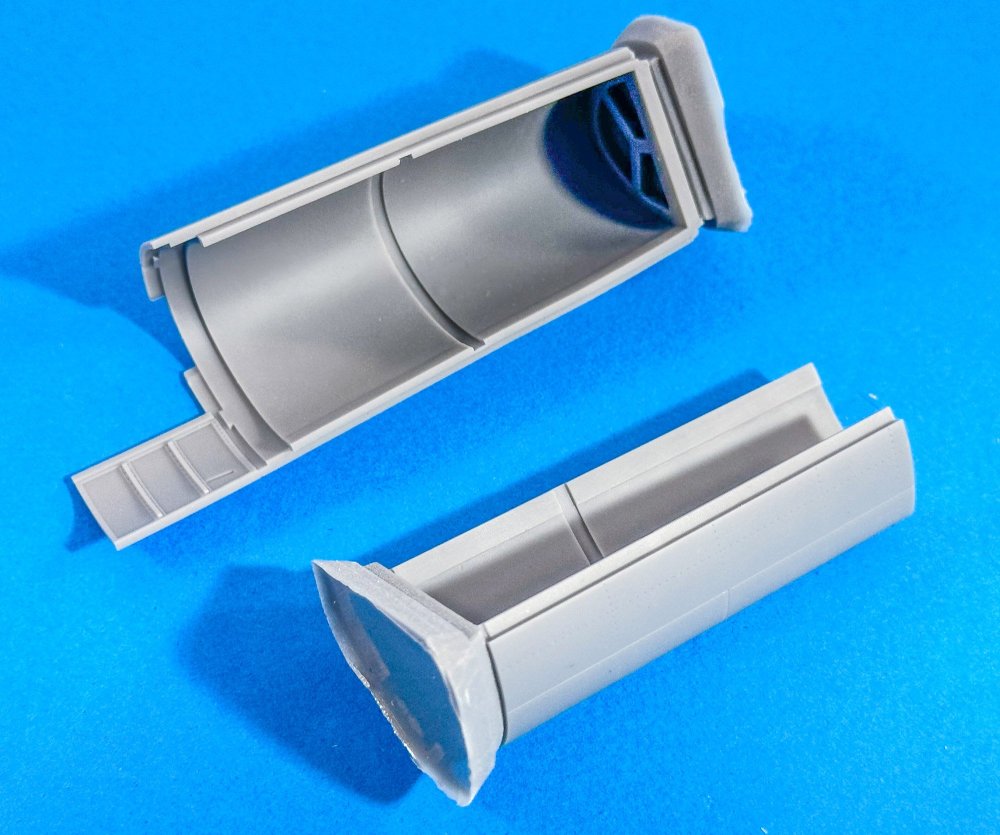
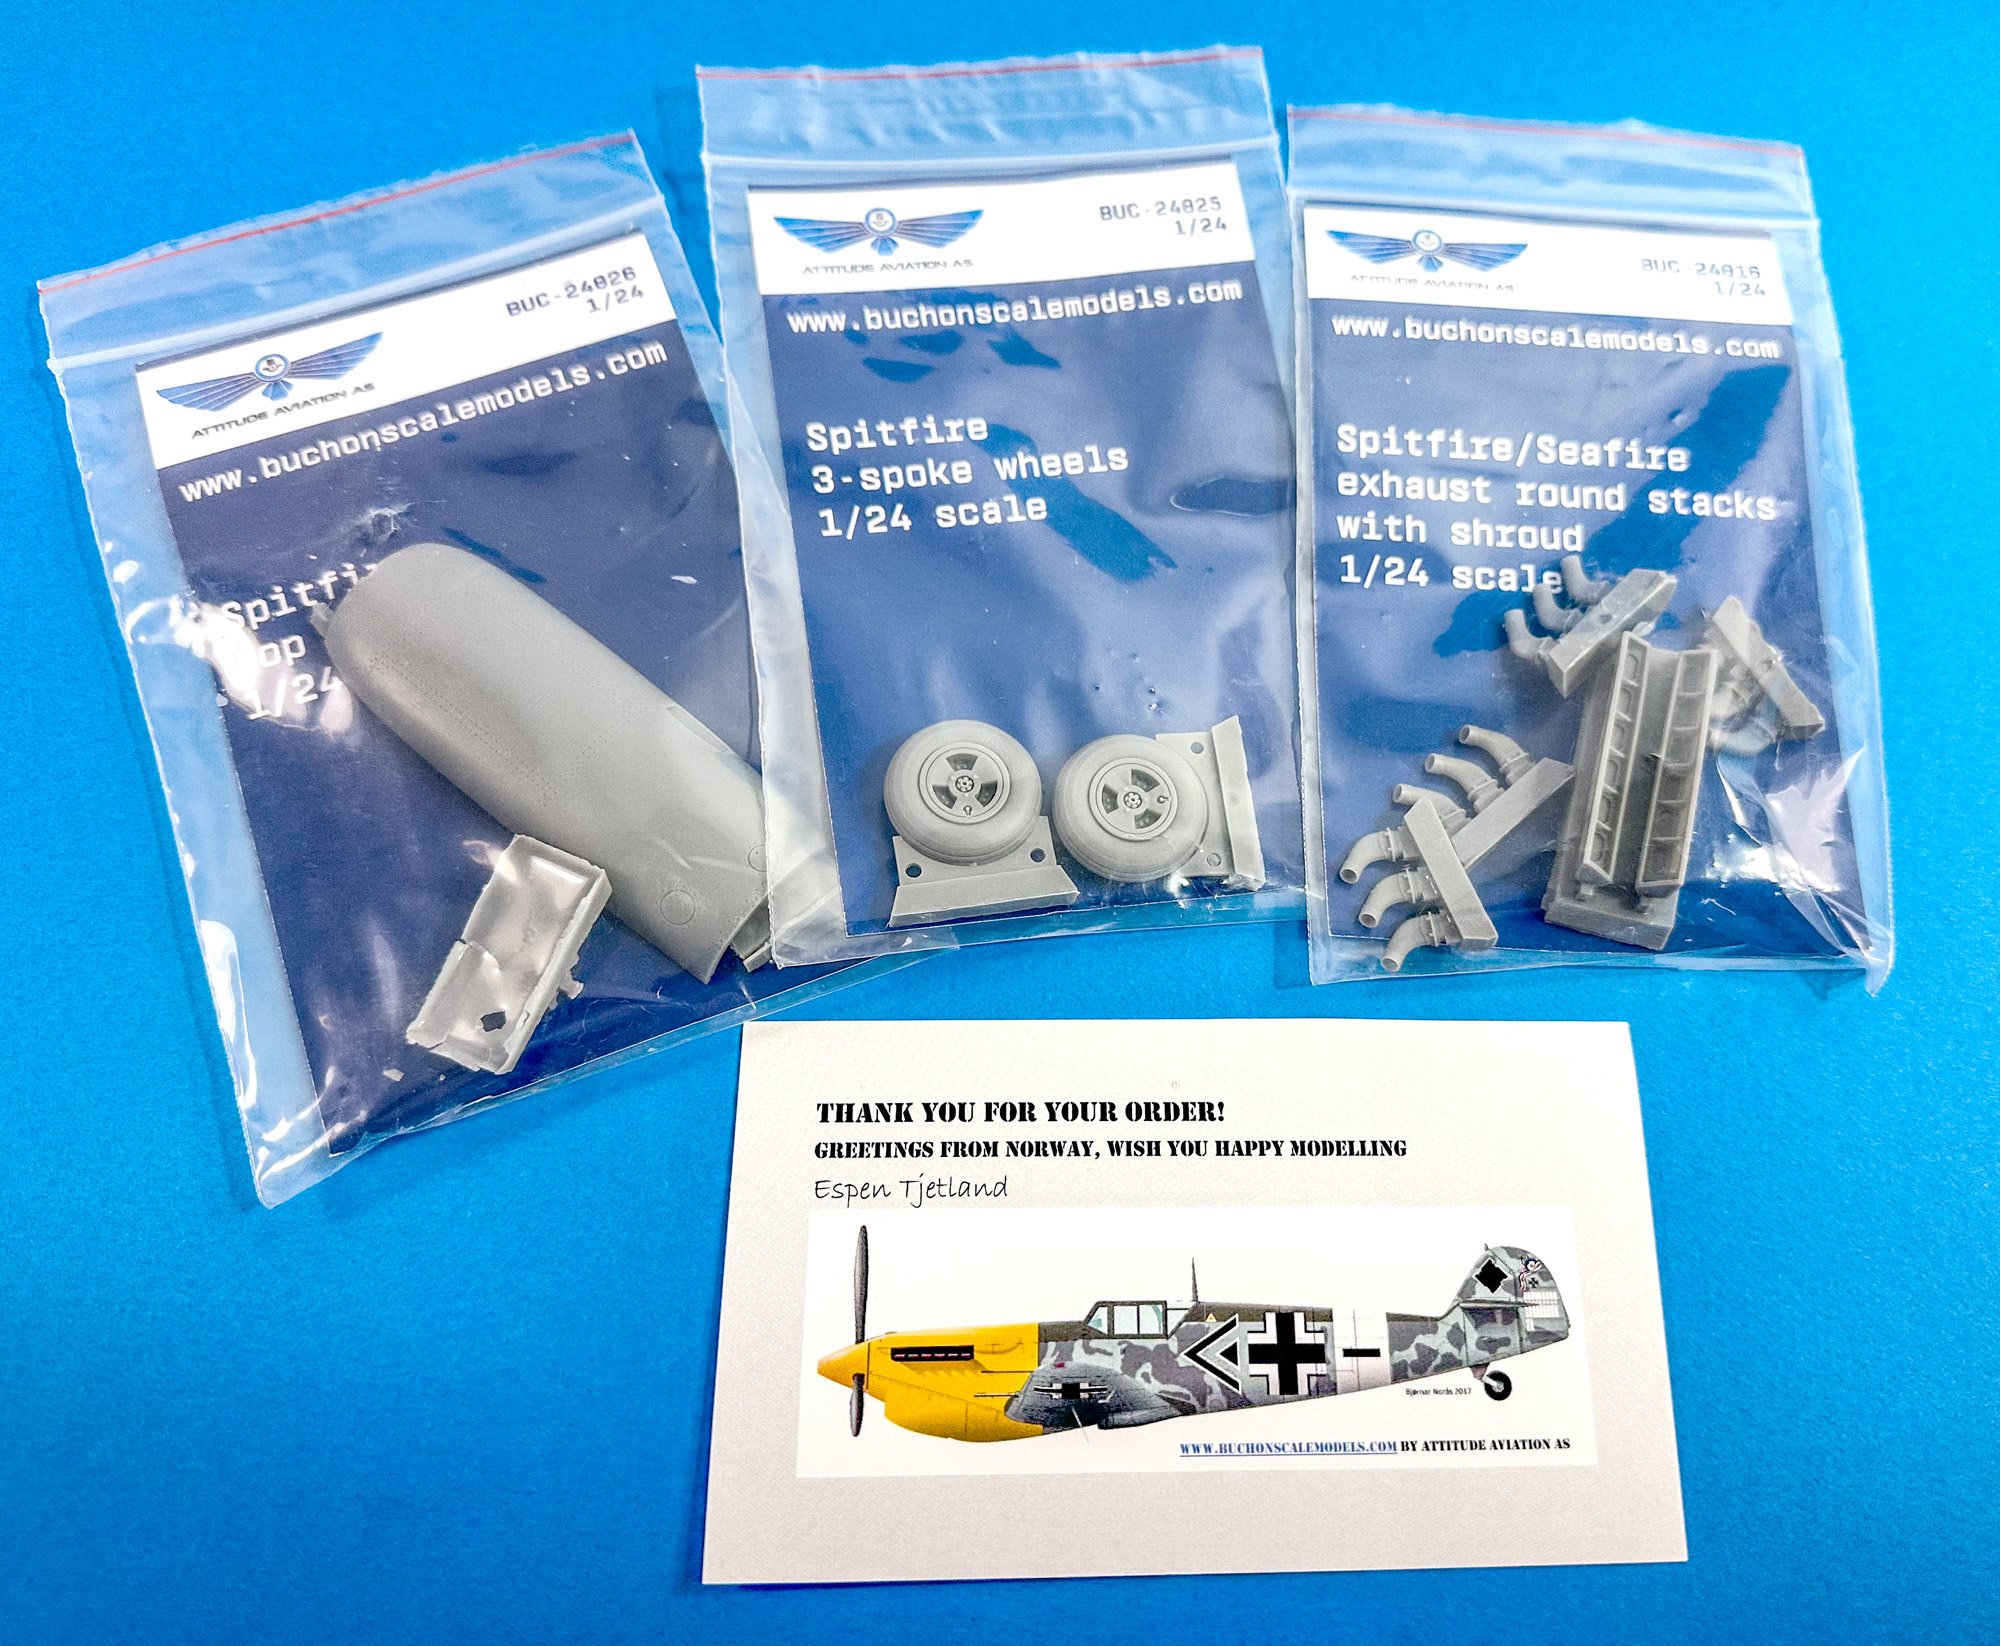
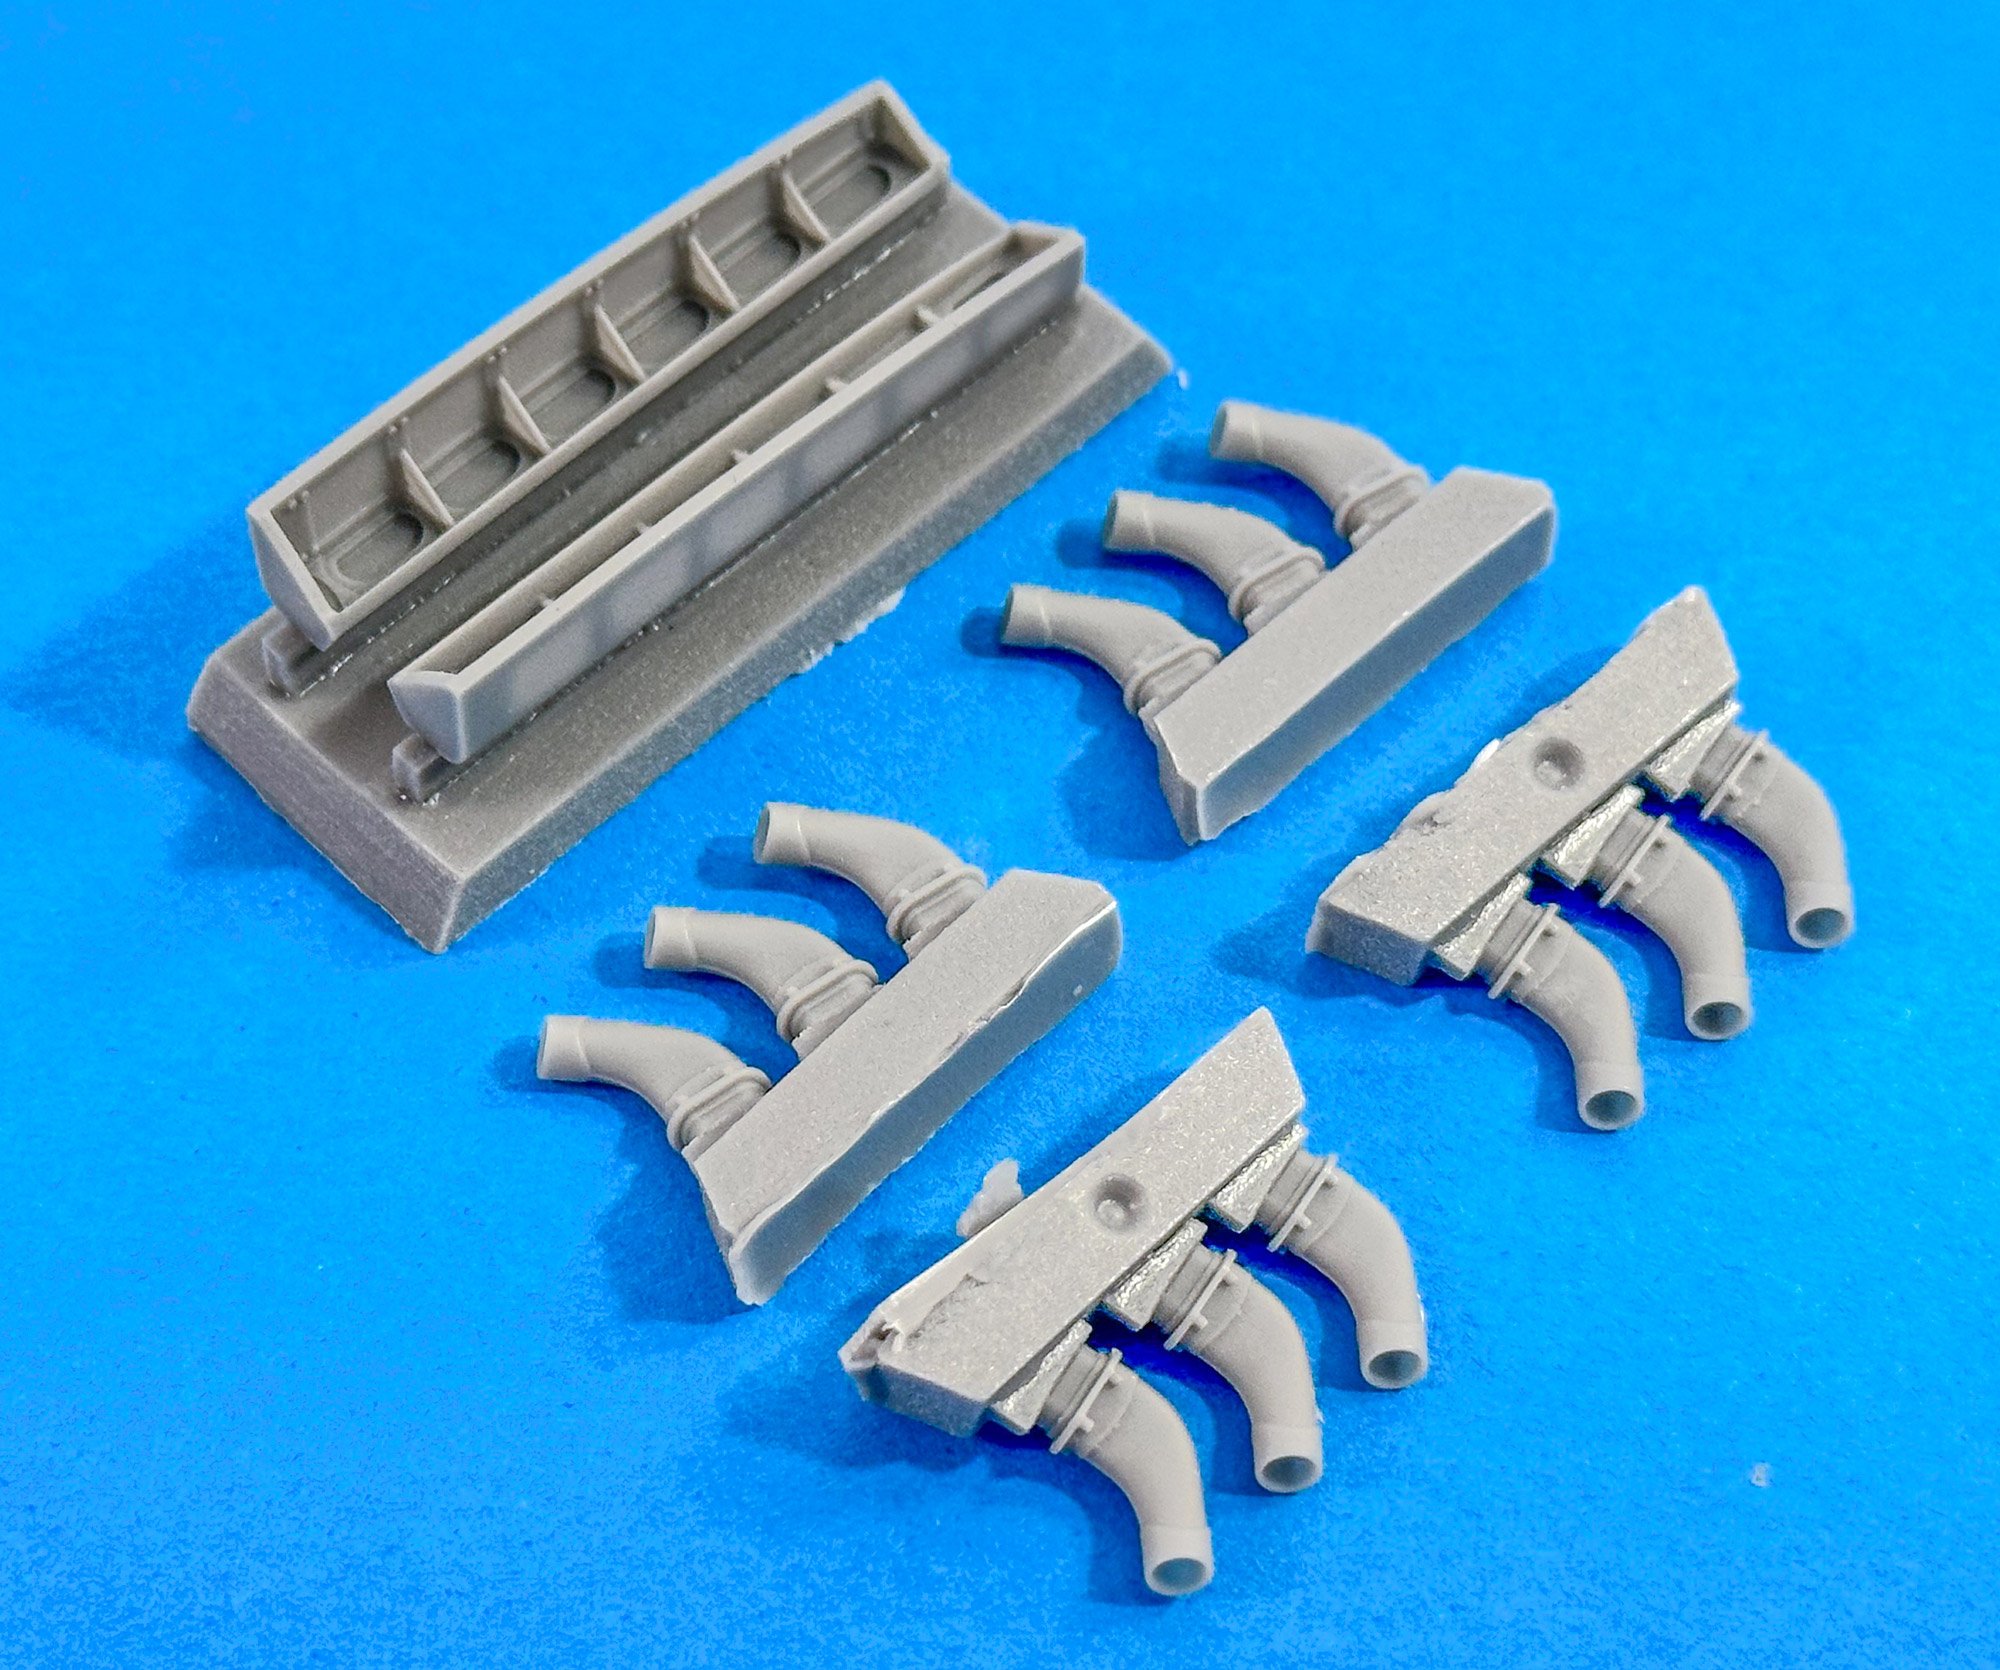
Spitfire/Seafire Rounded Exhausts
The Mk.XVI will absolutely need to be fitted with this set. I'm sort of thinking that this can be used with the engine, but the parts will need to be grafted into the thin side frames that sit outside the engine sides. If not, I'm sure I can be selective on at least showing one side of the engine exposed. The stub casting blocks have indents to ID them for the correct side of the engine.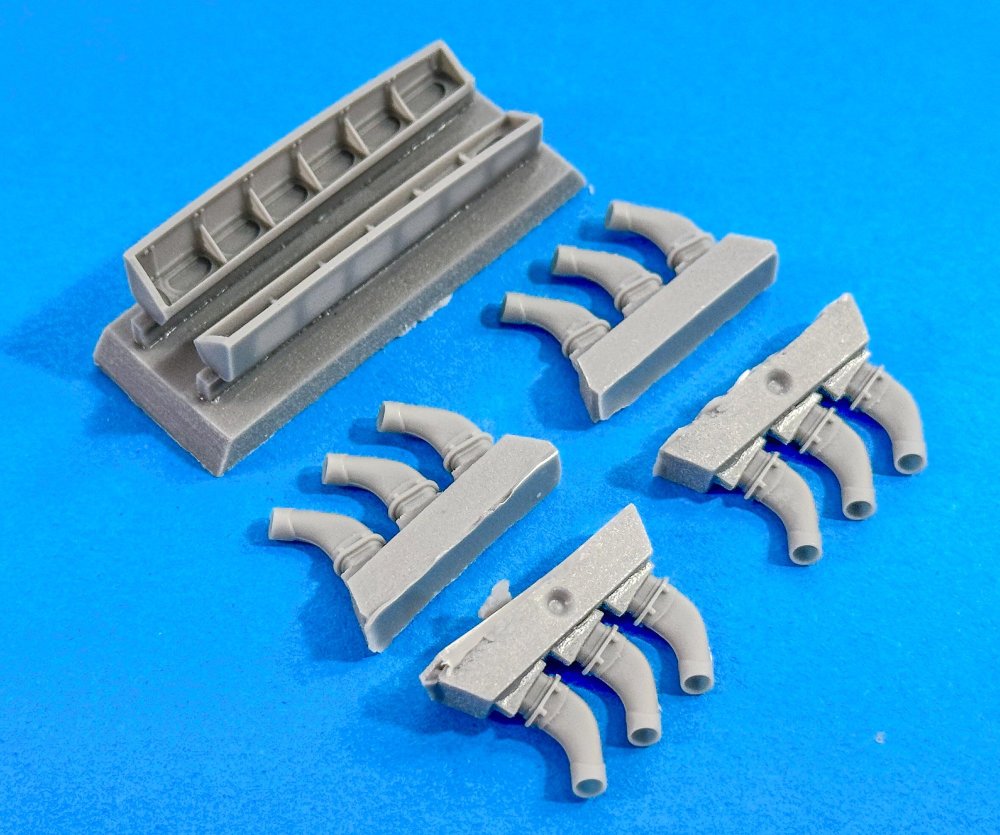
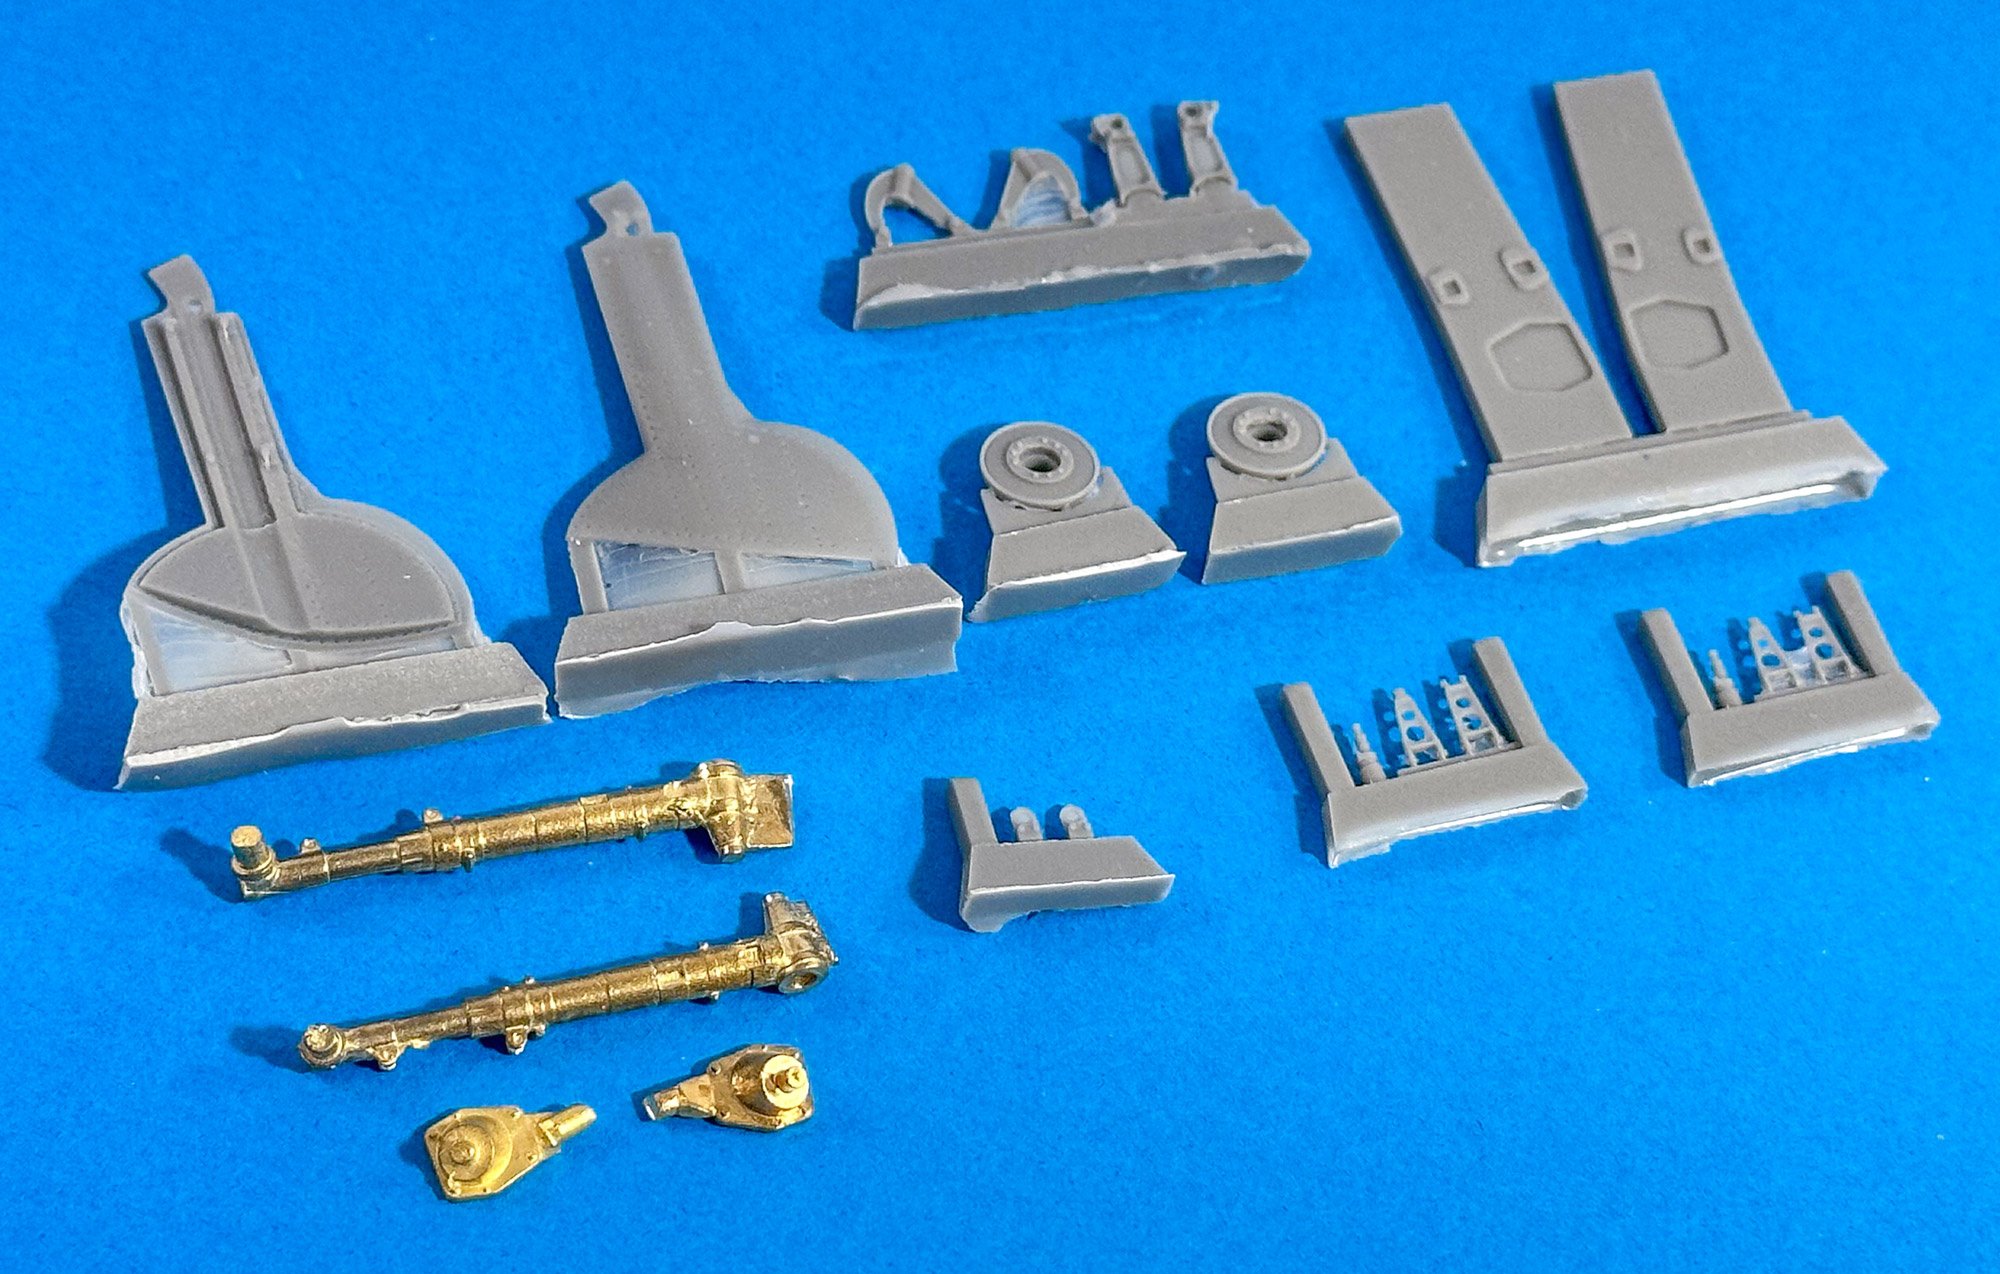
Three Spoke Wheels
A simple, direct replacement for the kit part. The casting seam runs along one of the smooth tread lines and will be very easy to clean up.
E-Wing Configuration
I'm told this will be a very useful set to fit to the Mk.XVI. This set was designed for the old Airfix kit, but not all parts are to be used on the XVI. Those that are, I am sure can be made to work.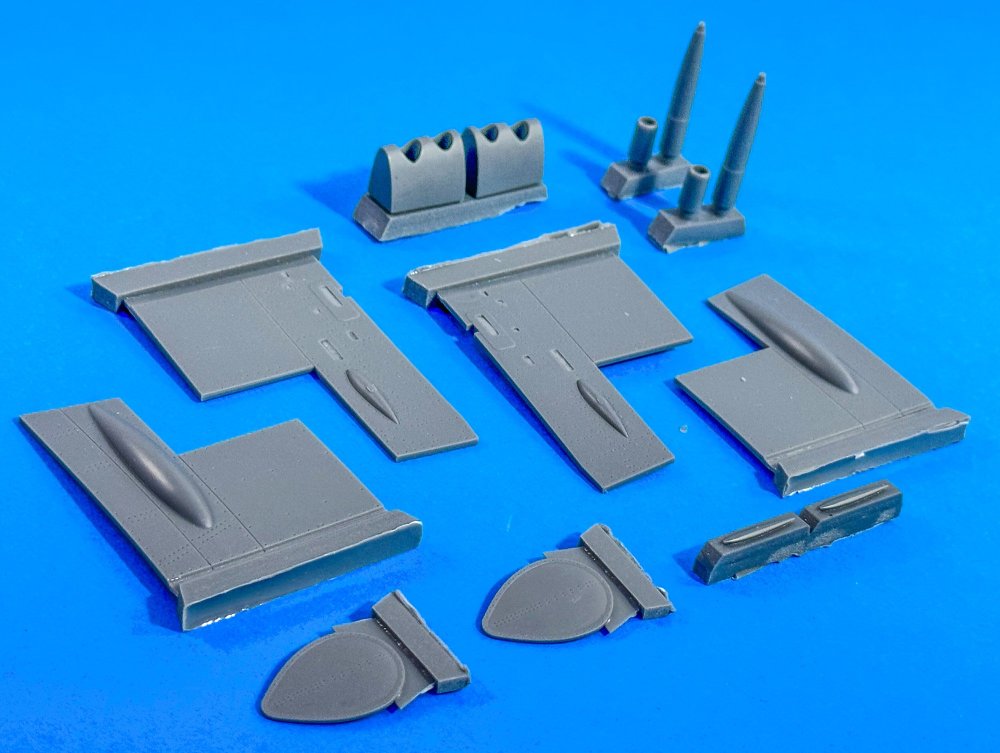
Spitfire/Seafire Landing Gear (Late)
This is a straightforward set to fit to the new Airfix kit, with the brass legs just requiring very minimal cleanup. The overall detail is really very nice., including those gear doors with their thin edges.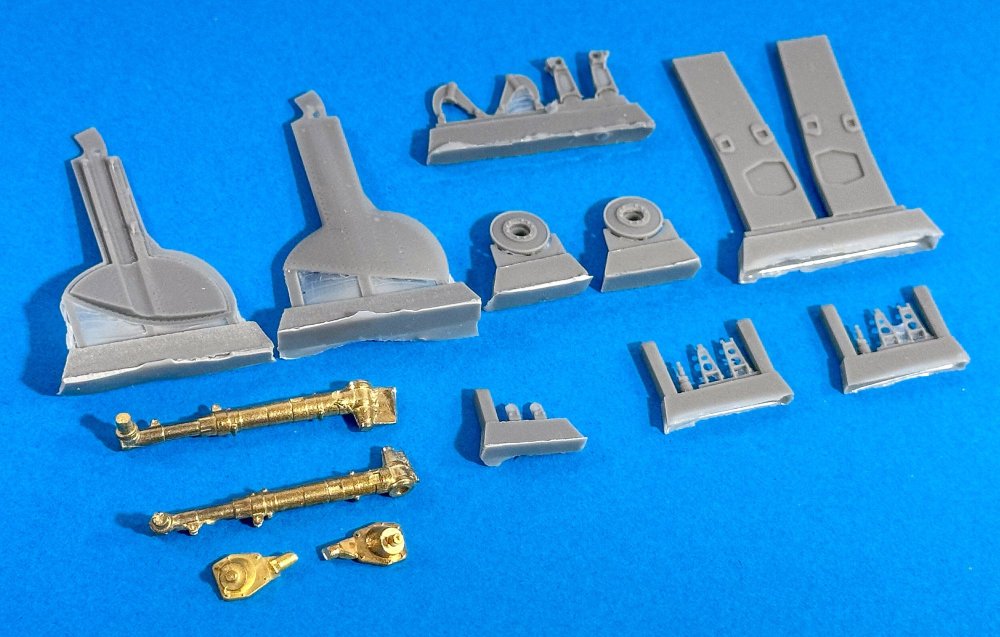
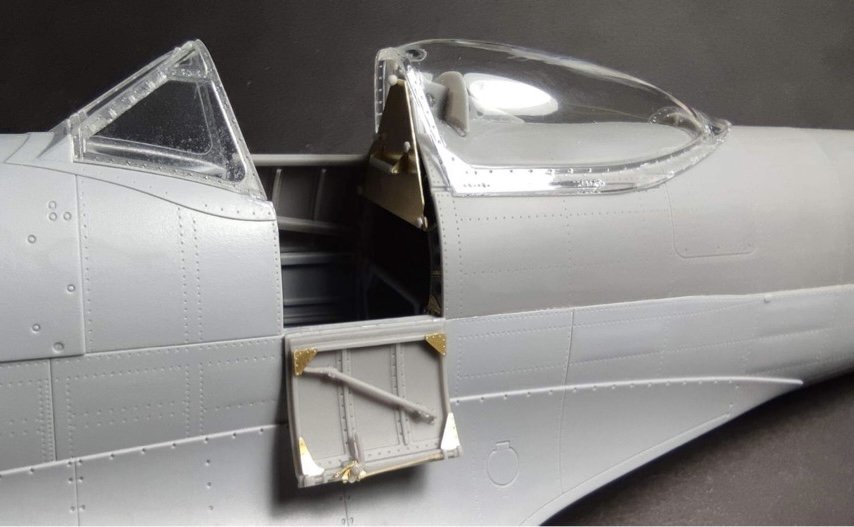
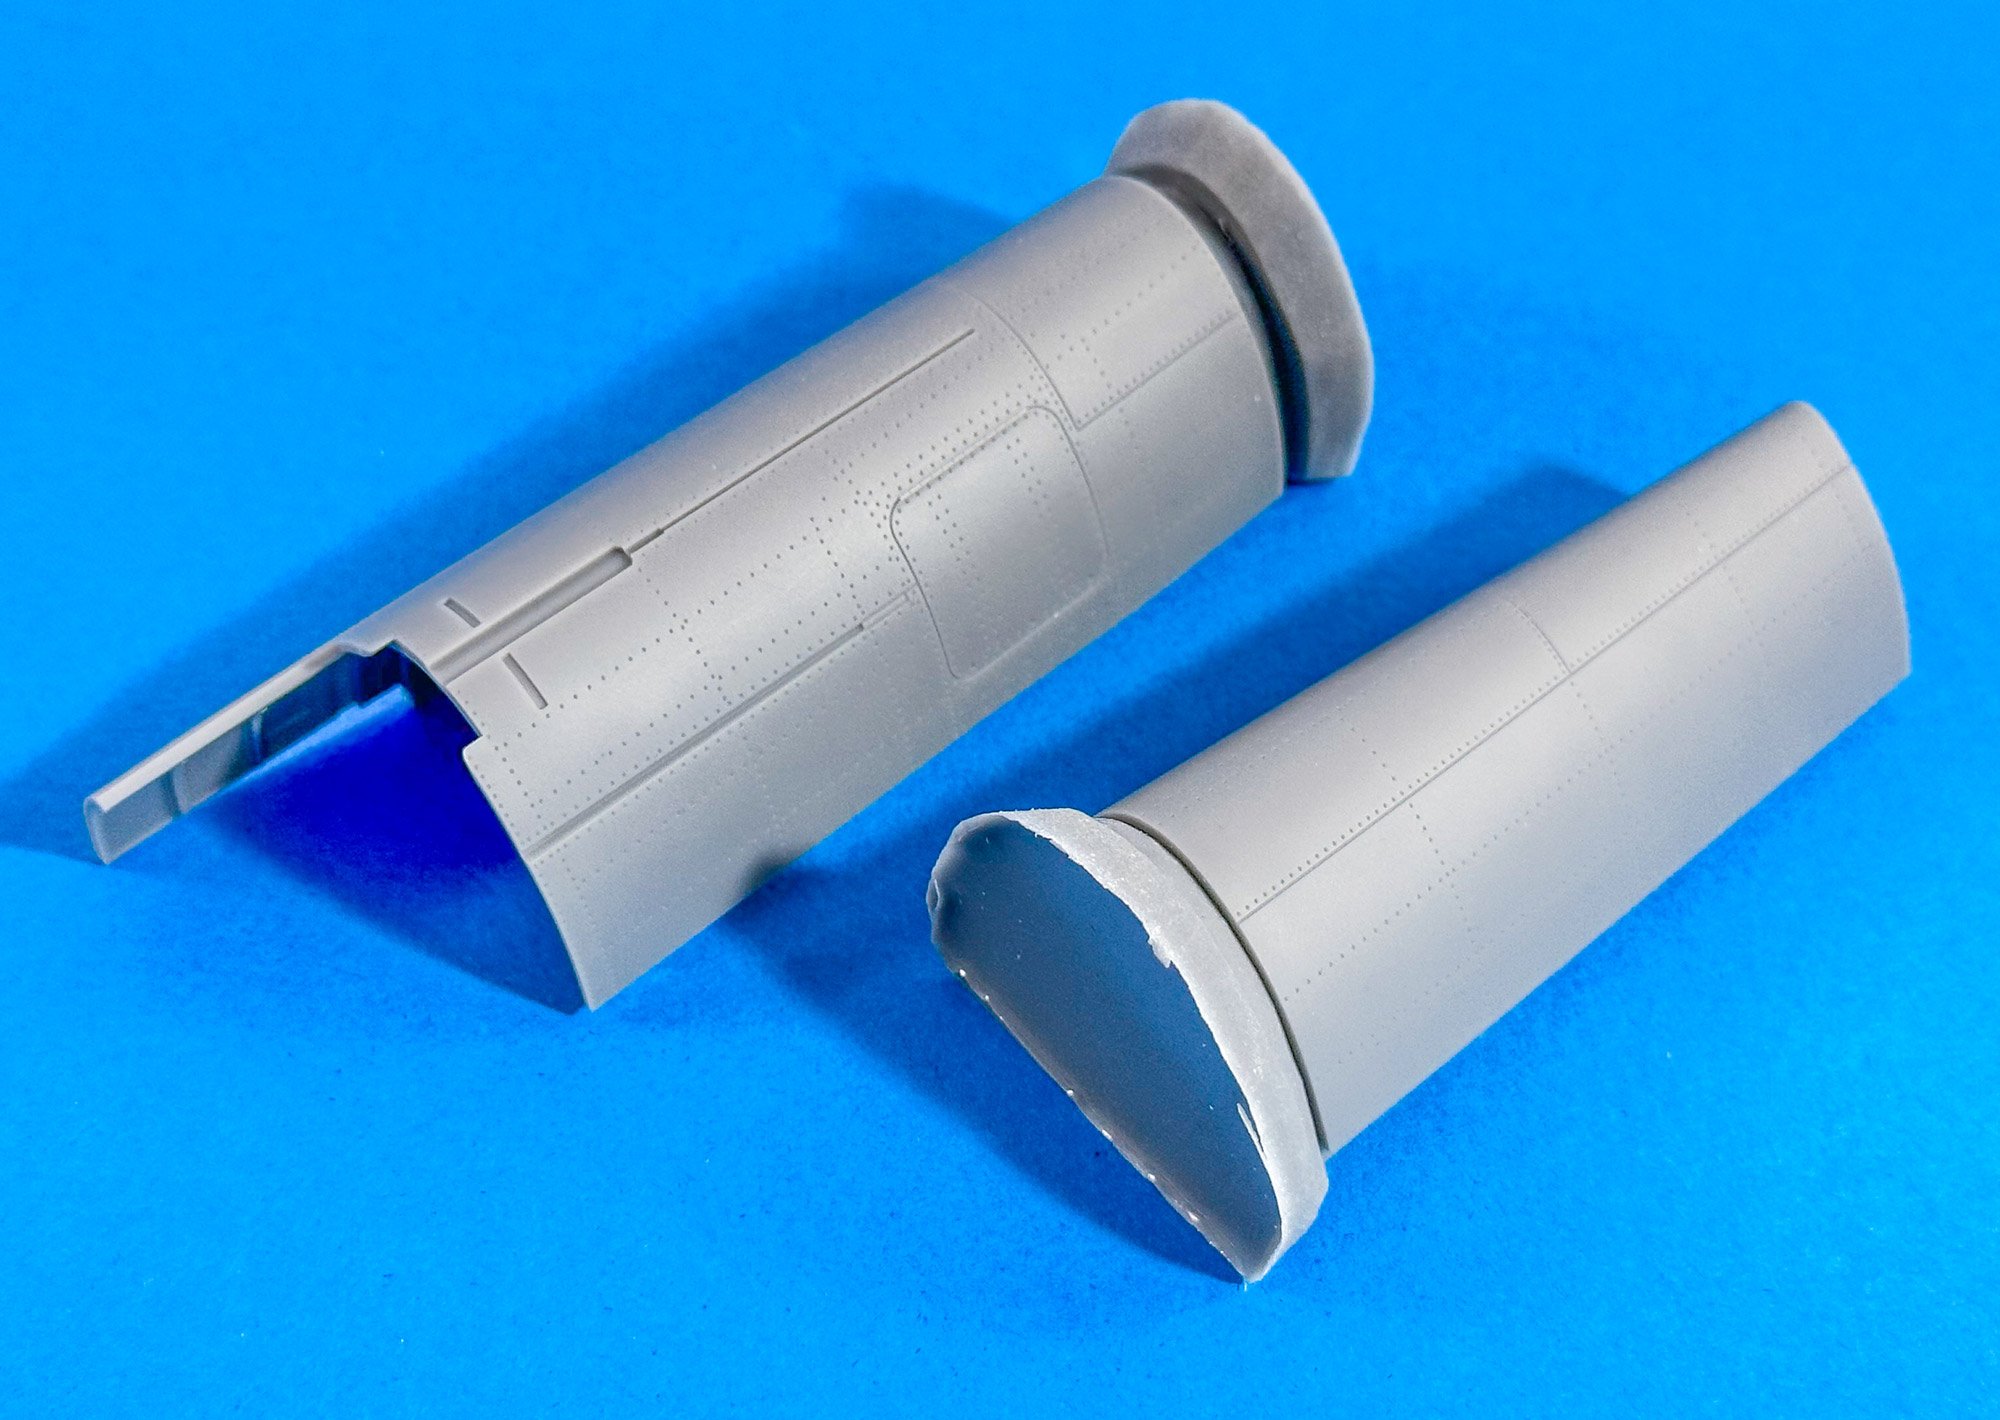
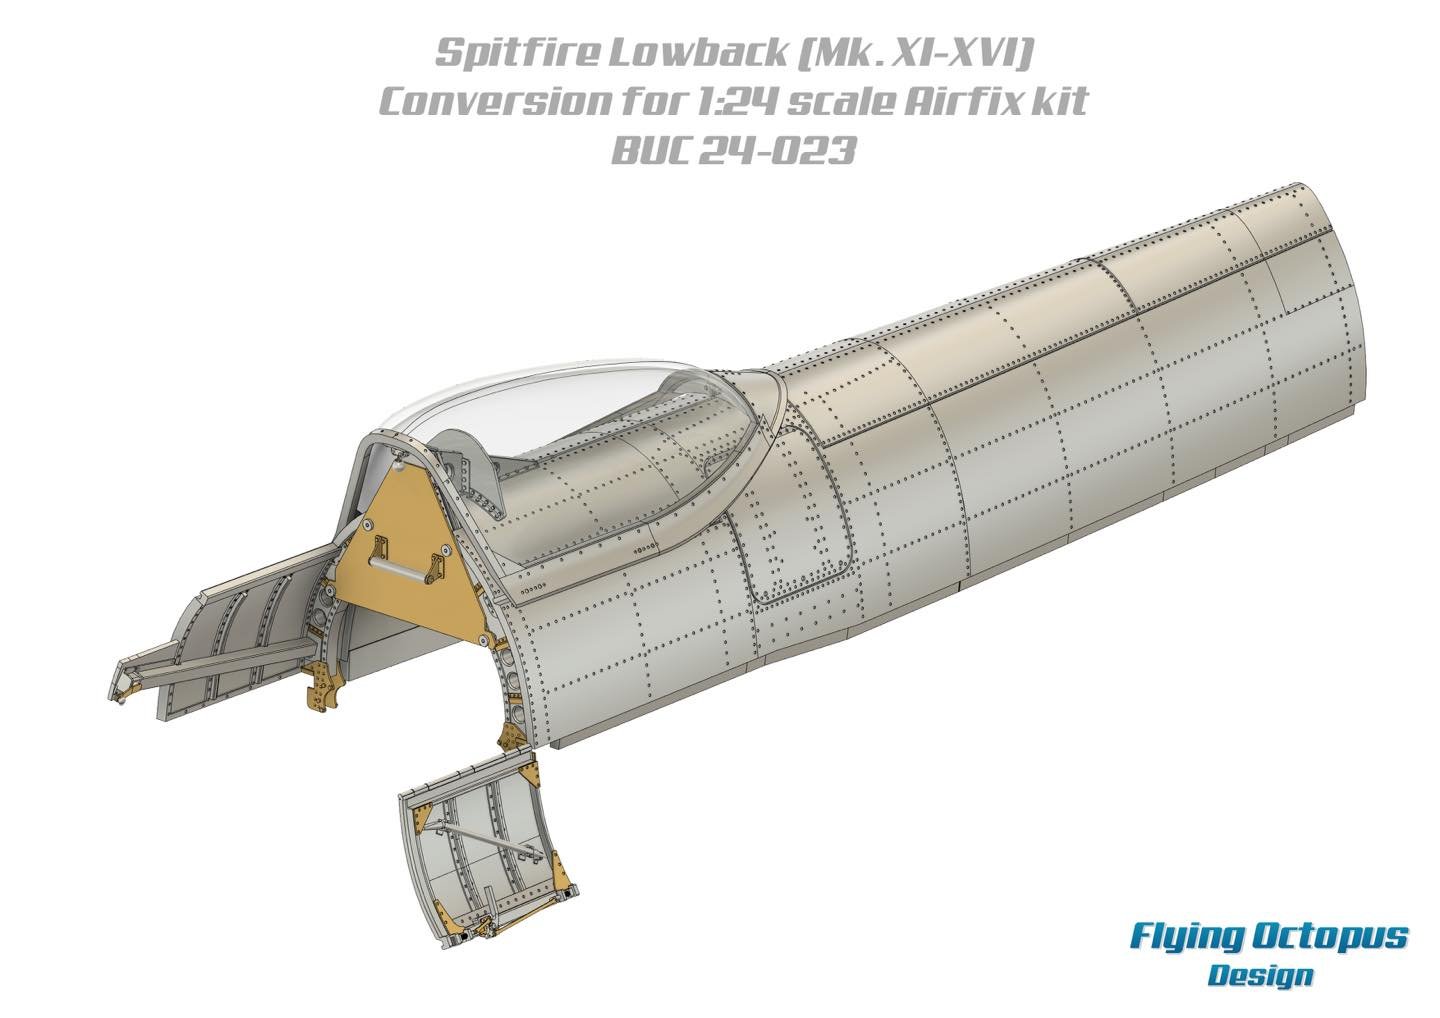
Spitfire Mk.XVI 'Low-back' conversion'
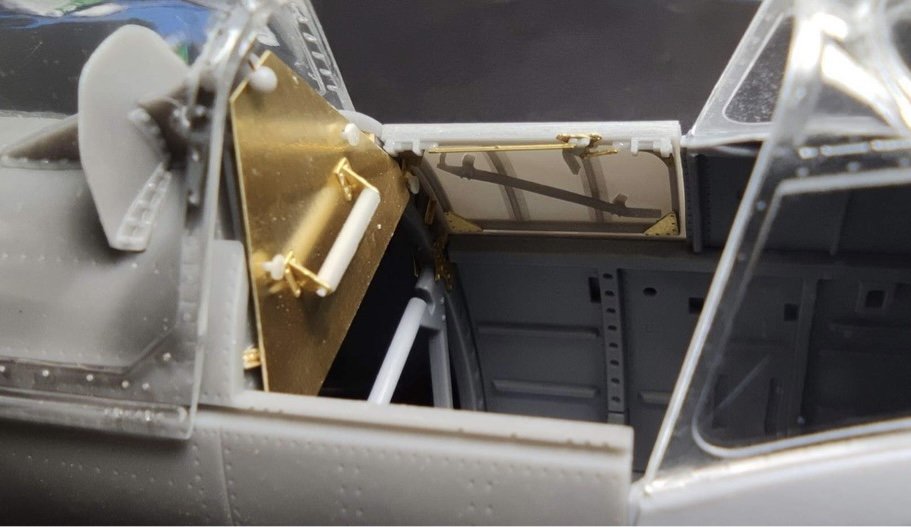
If any set is going to give you palpitations when it comes to converting your new kit, it's this one. The fuselage will require some careful cutting down, aft of the cockpit, along specific panel lines. The new spine comes in two parts, with each having a cast former to glue within. I've not removed any blocks at this point to see seamless these parts sit together, but I'm not at all worried when I see the one that Espen has been showing. Plus, having built his Buchon conversion, I know he's a stickler for getting things right.
Here are the rest of the resin parts for the conversion. There is also some supplemental resin for adding fishplates to the fuselage former to the rear of the pilot, as well as the armour plate.
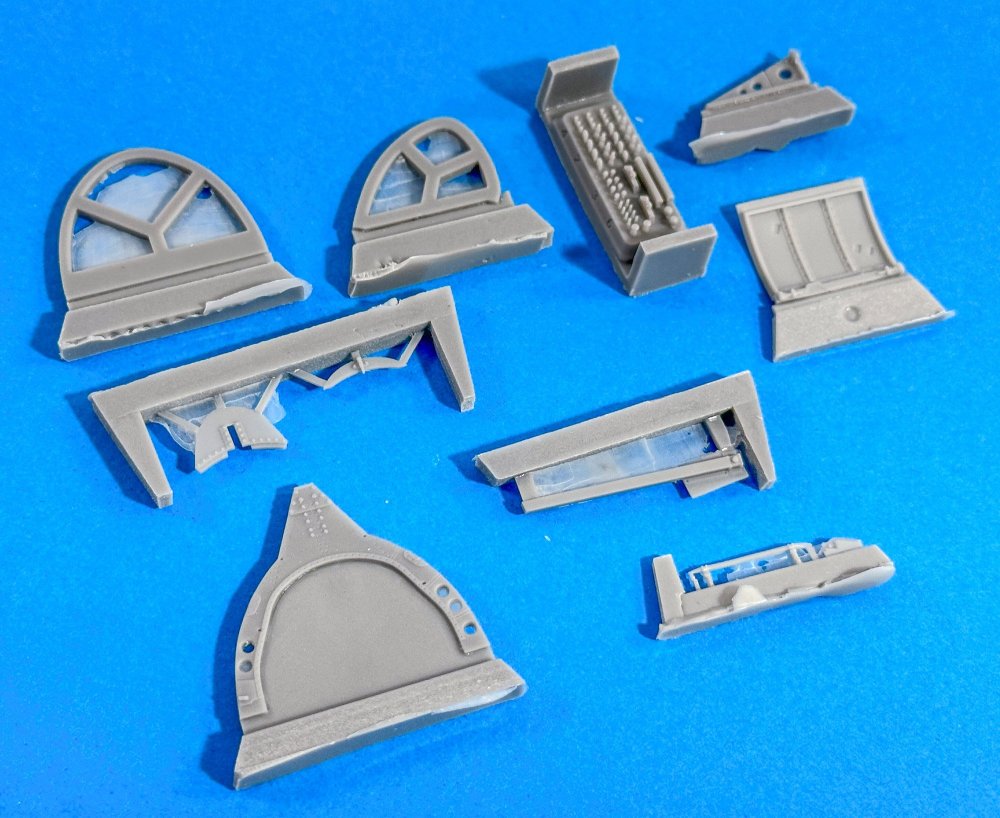
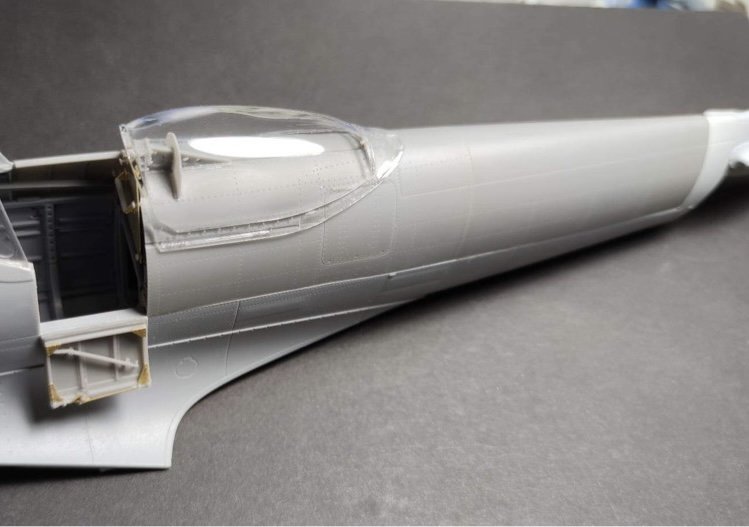
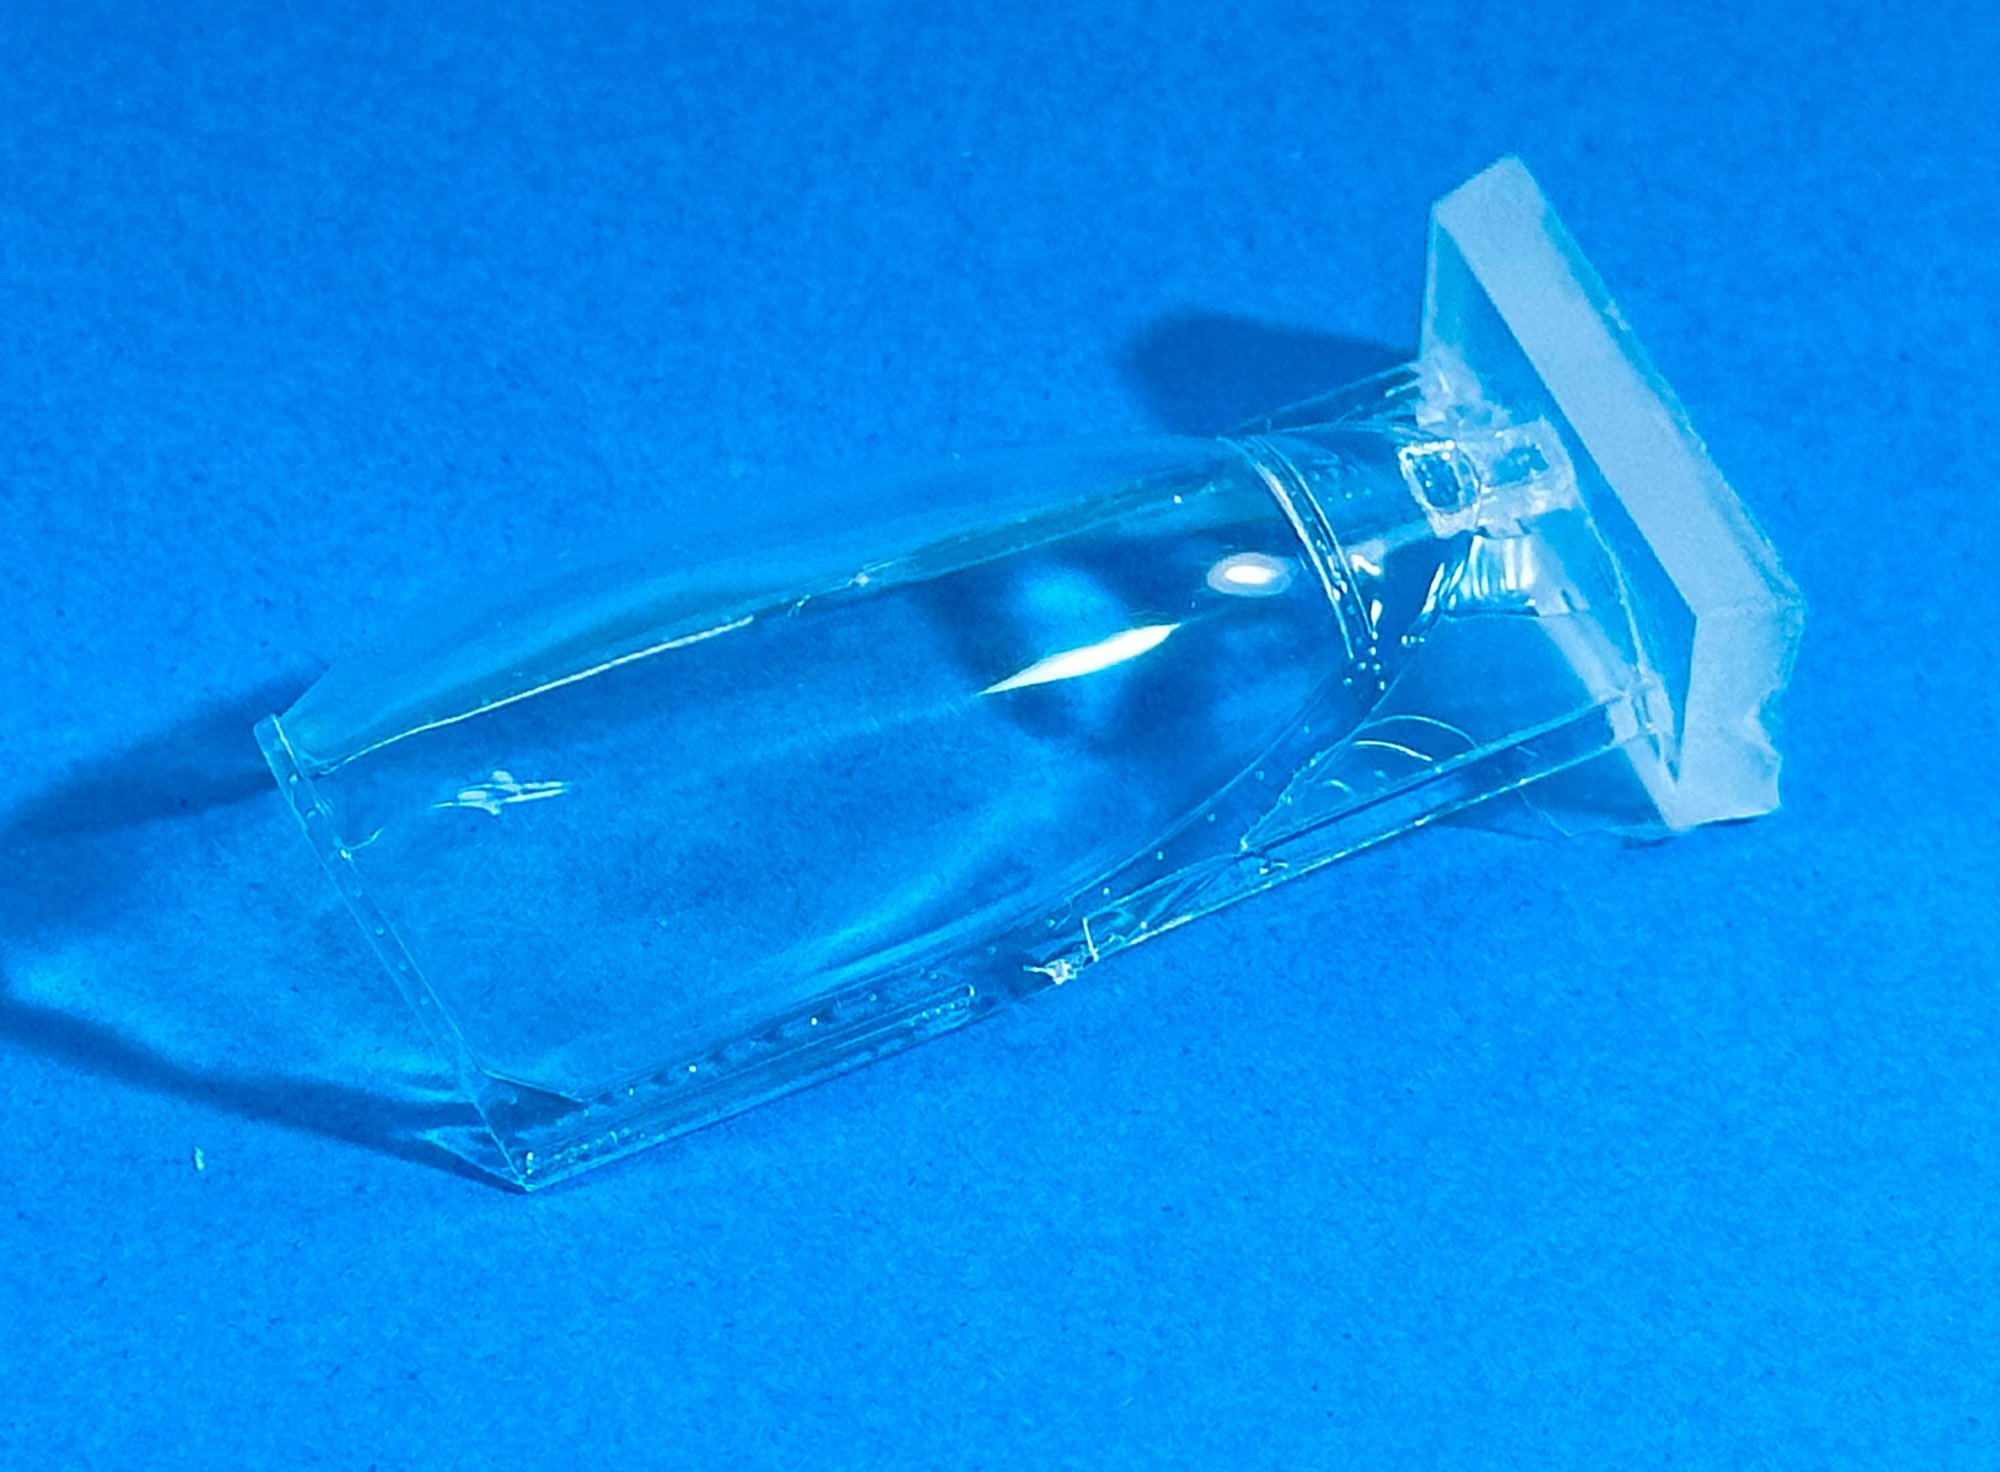
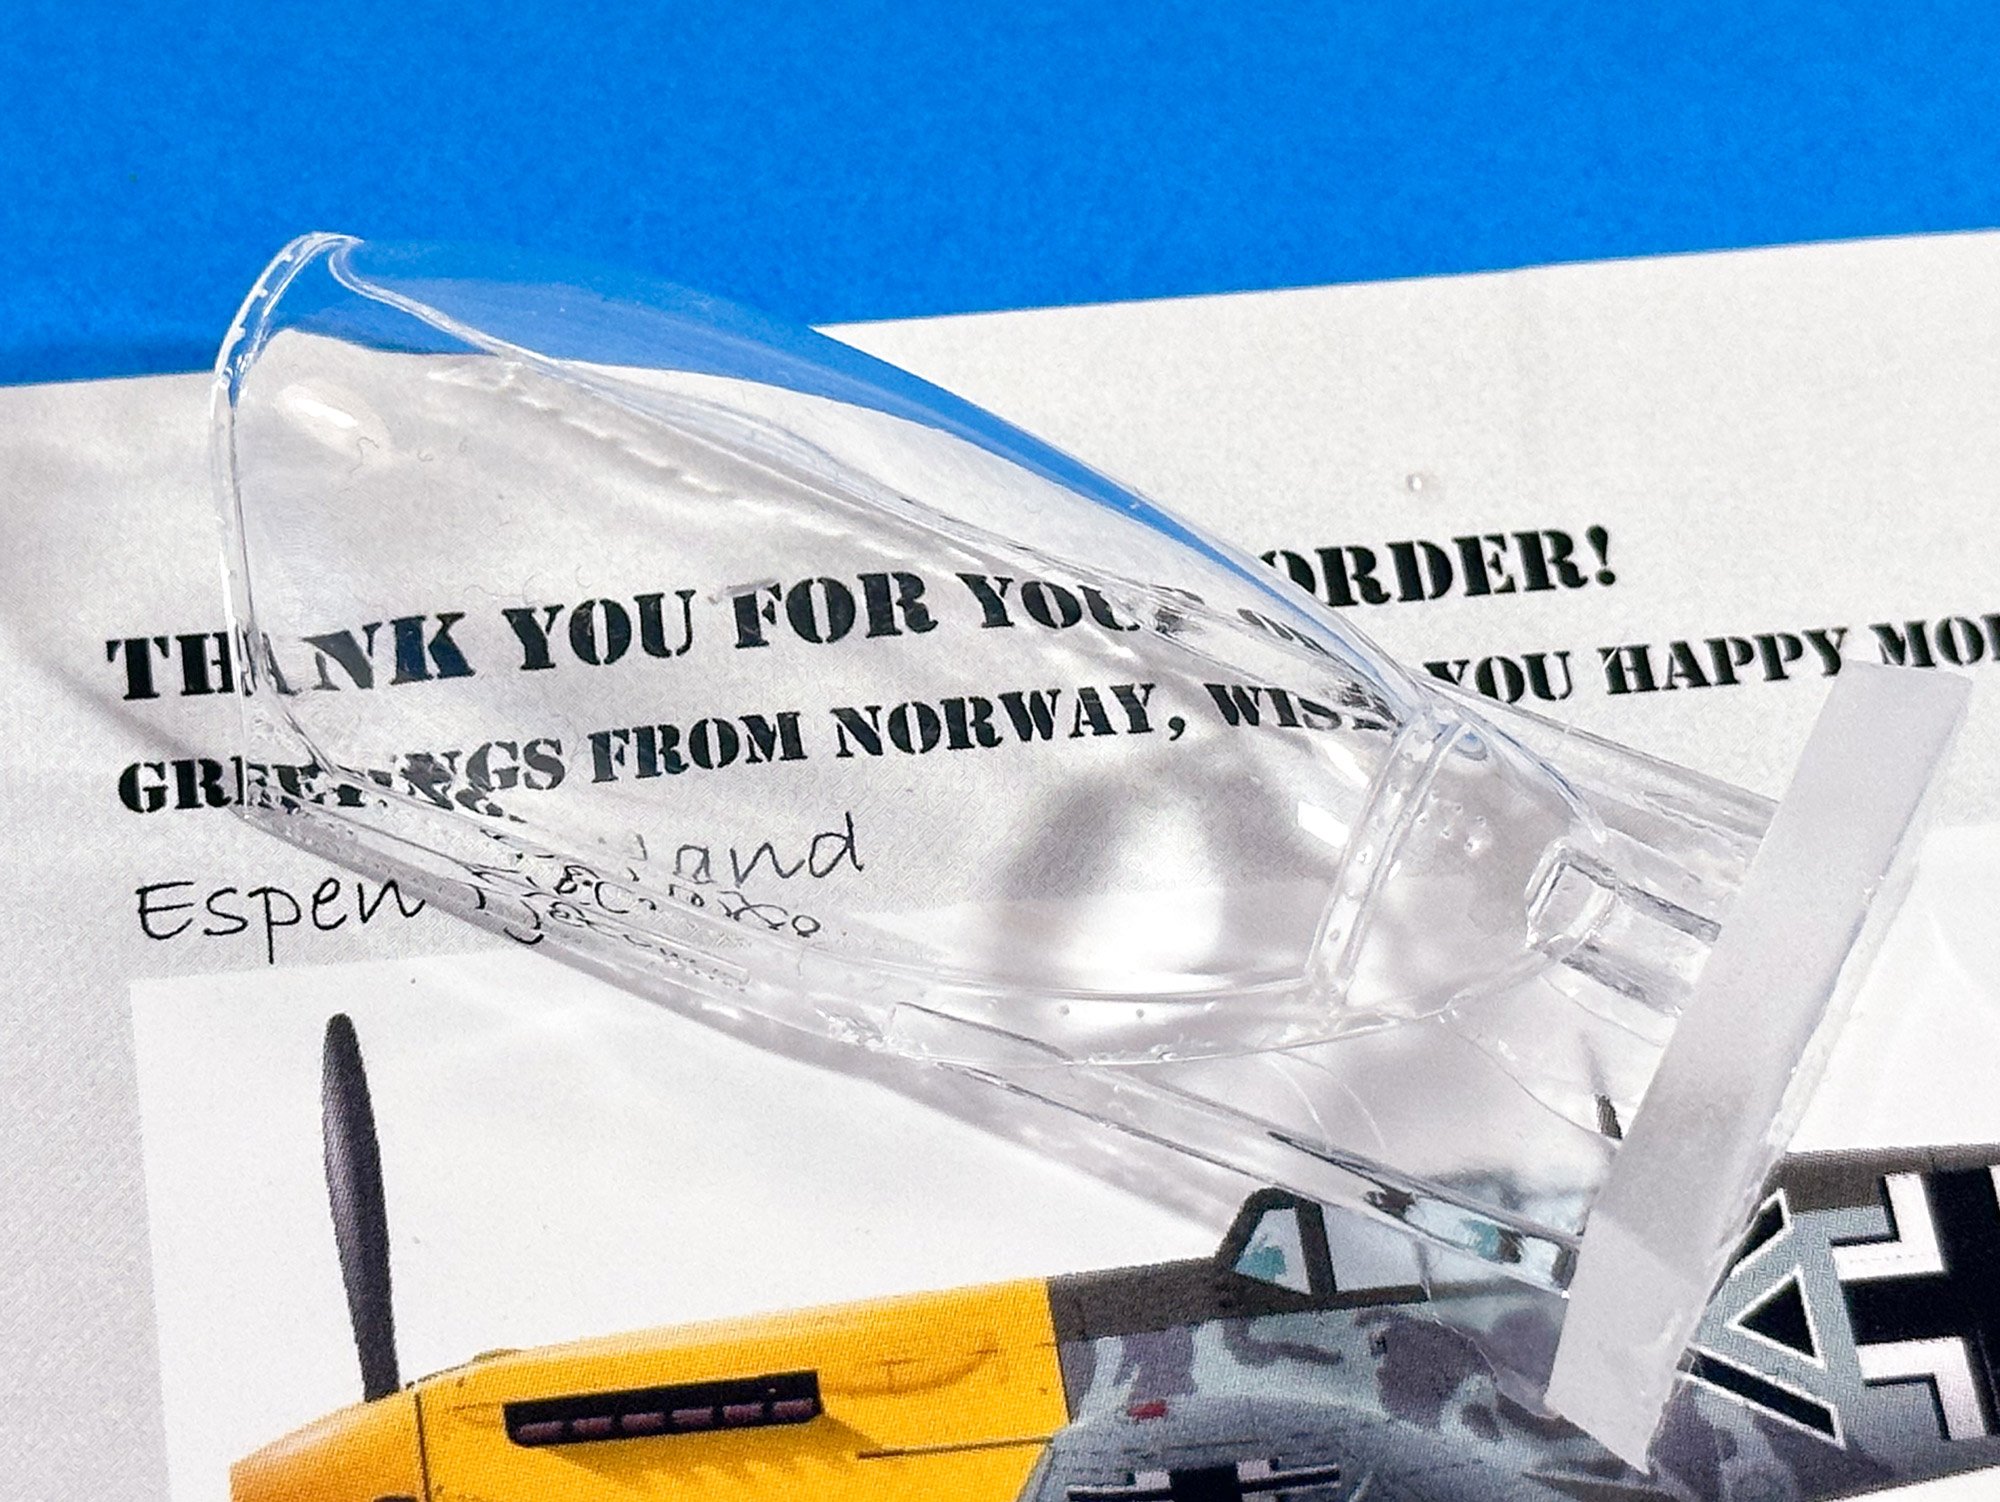
A real crux for making this is a successful conversion is getting the new teardrop canopy right. And here it is. Beautifully cast and totally crystal clear. The only distortion comes from the curves as you look at the part sat on some text.


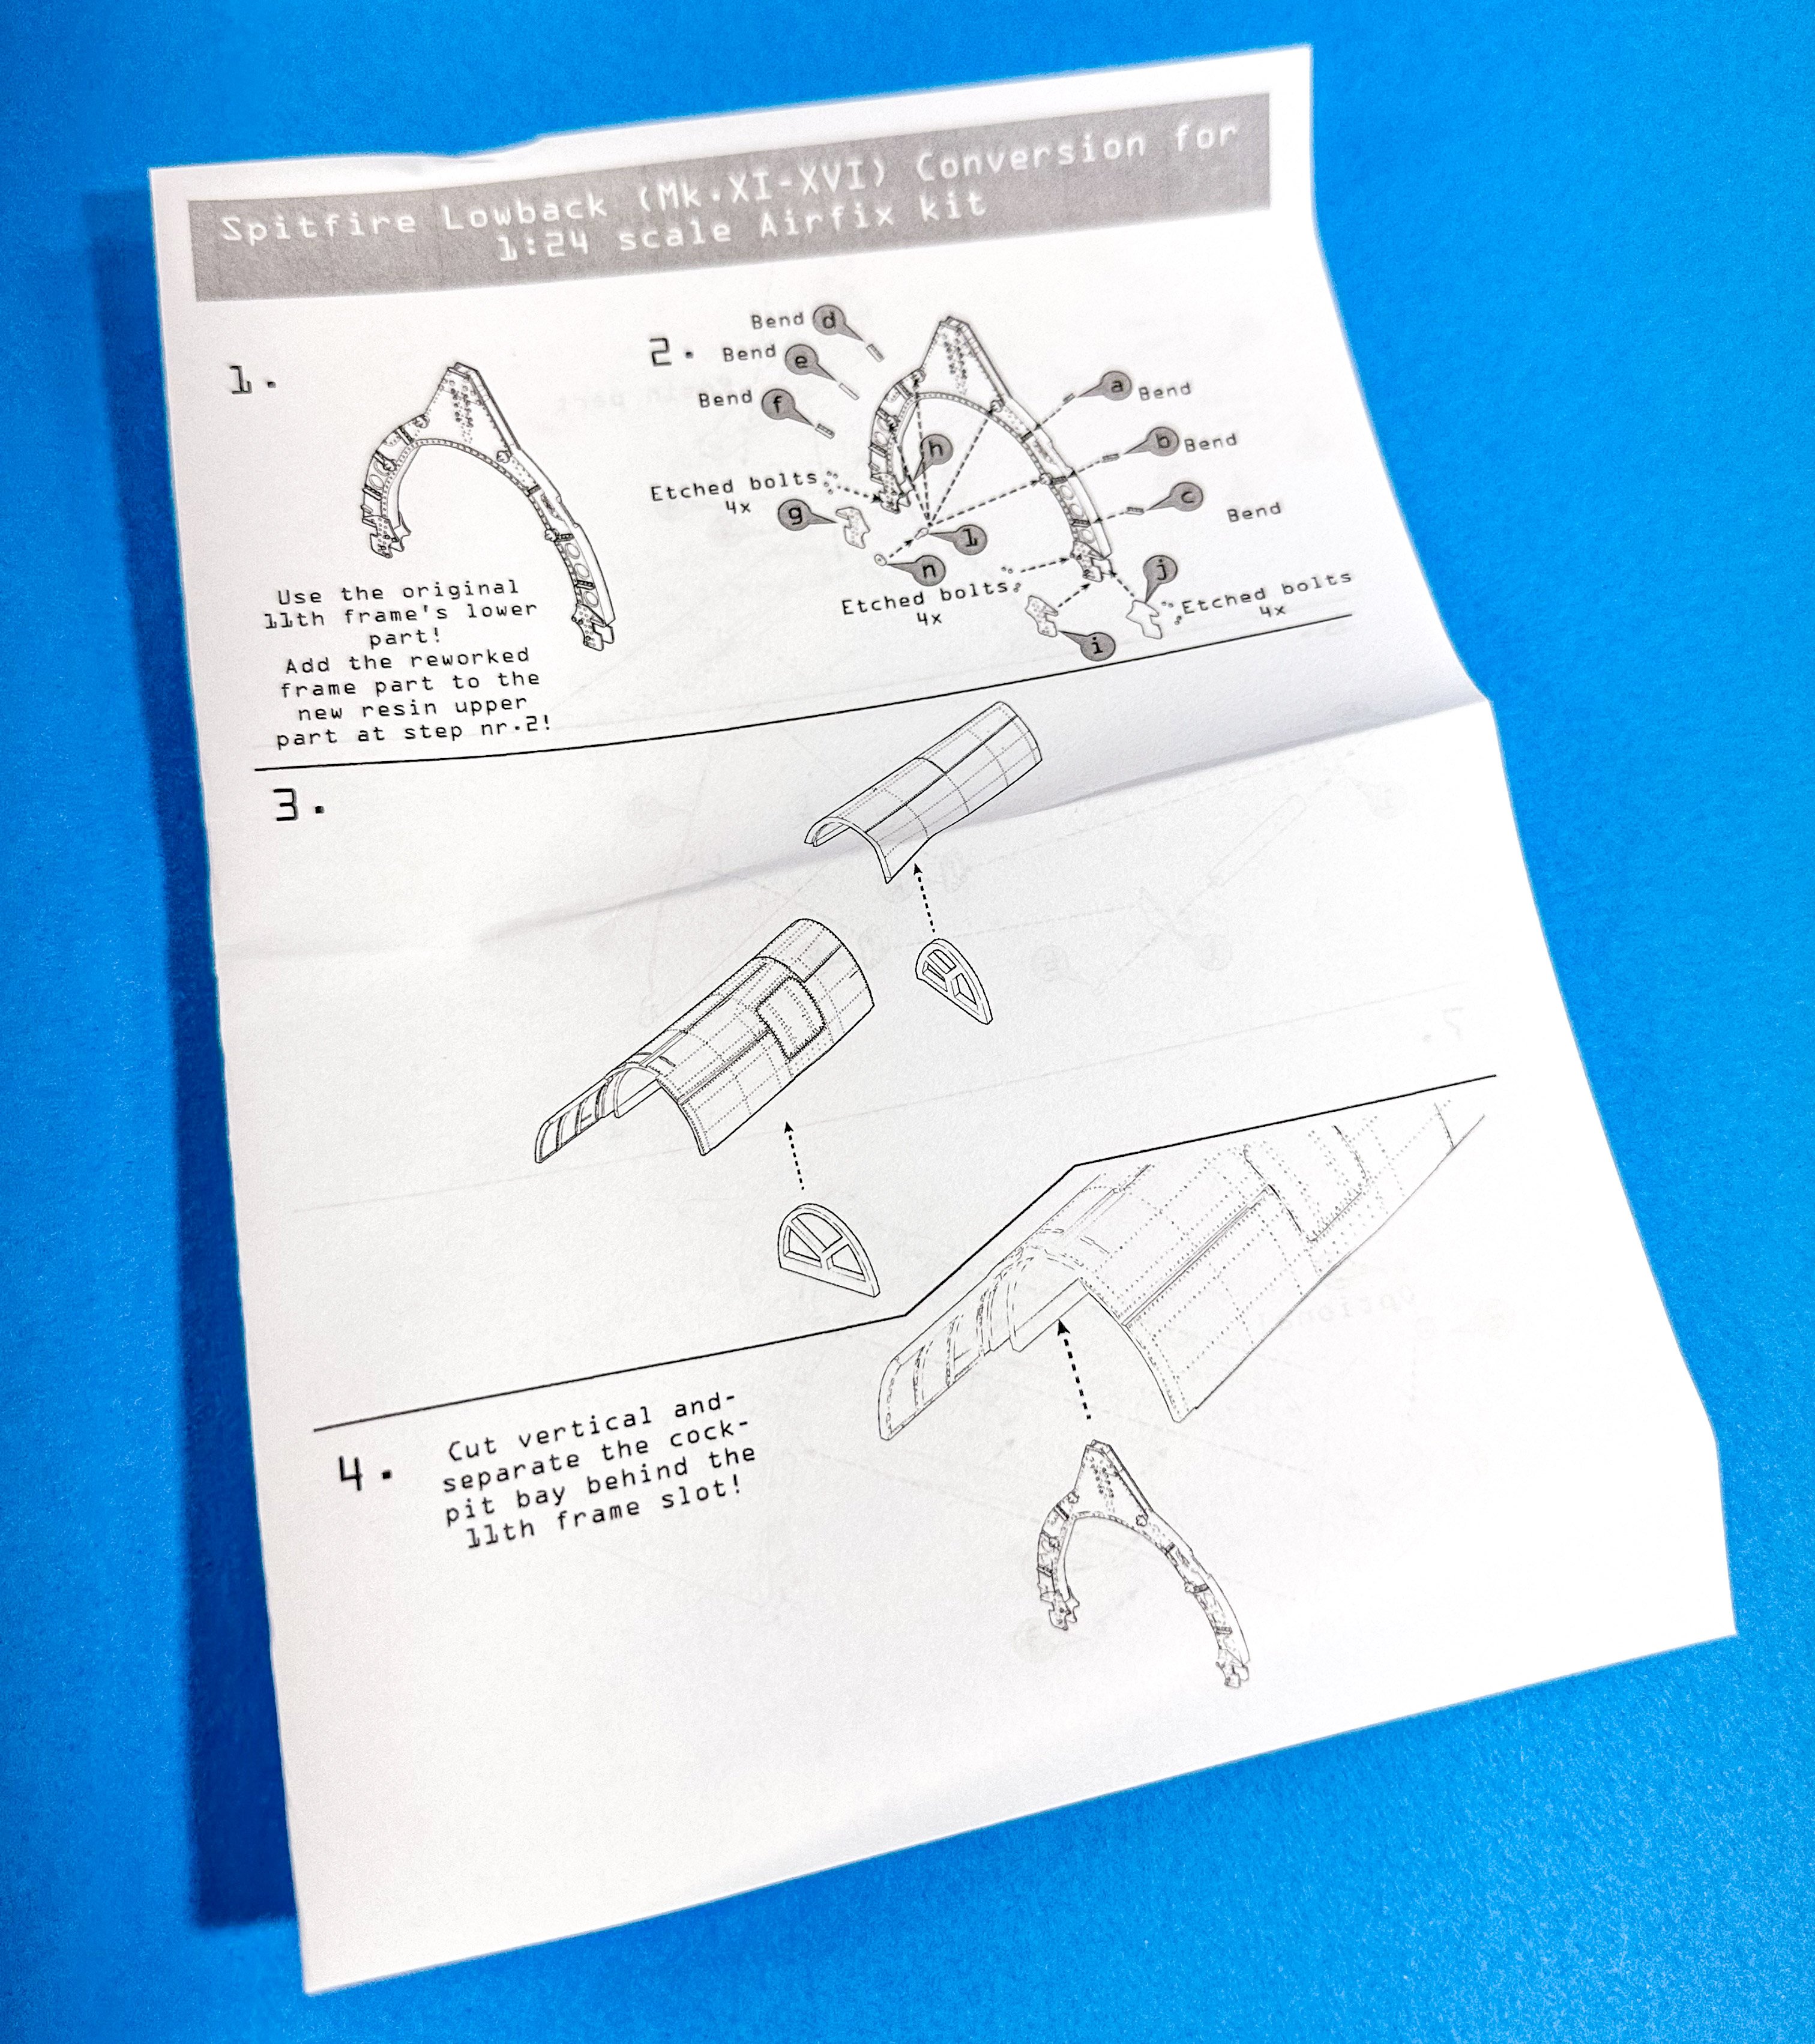
As you can see, the instructions are very detailed about the hacking and slashing you will need to perform on the base kit.


Until I get to this project in July, that's all until then. These sets really are very nice, and my thanks goes to Espen Tjetland in sending these out for the forthcoming Mk.XVI build. I seriously CANNOT wait!

-
2
-
1
-
-
Calm down folks. Let it drop. Pointless gong round in circles and beating each other up.
As you were!
-
1
-
4
-
-
11 hours ago, PanzerWomble said:
people you think are throbbers ?
PMSL!!
Not hear that term for ages! I can tell you're UK 🤣
-
1
-
-
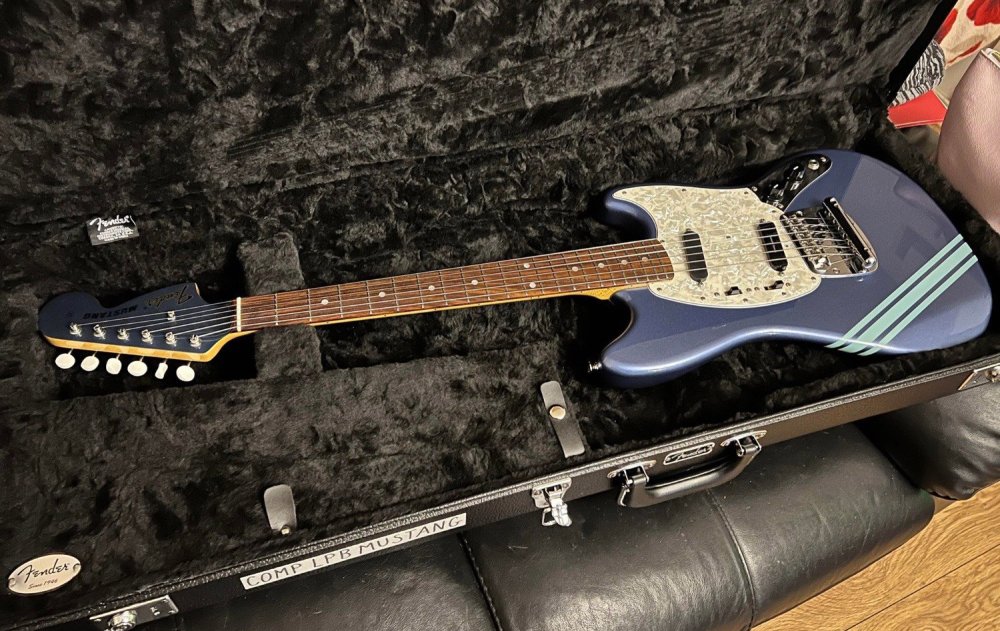
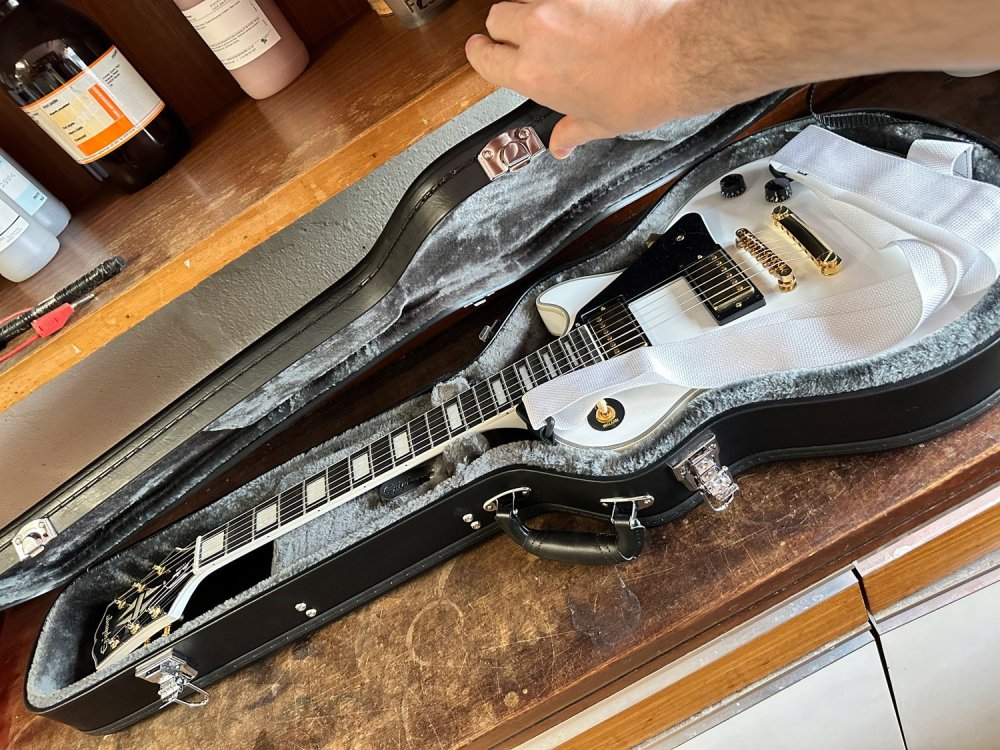
This up next?
-
This is my 'other hobby'.
A shit guitarist and proud of that!
-
7
-
1
-
-
4 hours ago, Clunkmeister said:
Phil, you got the screens, and the money we all paid him went to his Solicitor. When he gets out he might have changed his name to Francine.
But Ol’ Jay will be singing soprano like a bird.
Hopefully banged up with a guy called Leeroy and walking bow-legged afterwards!
The noncing sexual deviant.
-
2
-
-
Sweet Jesus
-
1
-
-
Good riddance to bad rubbish.
I always knew what a gold plated arsehole this guy was, but this adds a whole new element.
at least the turd is off the streets now, unable to abuse children or operate his dubious business.
-
3
-
-
I loved building the Fly Hurricane, but a proper, non-limited run kit is very much appreciated.
-
3
-
-
I just got this. More on it when I can reveal:

-
9
-
1
-
-
I can't believe a topic about an arrow has now reached into 2 pages 😆
-
2
-
-
I can make this red though. Check now.
-
2
-
3
-
-
I only have certain controls over this as it's a plugin that's written by a third party.
I can't modify this to work in specific ways depending on how wide the screen is open. This is also the only tool I can download for this purpose too. We had to run without this for ages as the last one hadn't been updated.
-
2
-
-
12 hours ago, belugawhaleman said:
I was looking for a black, or at least, a more visible arrow. Well I guess, that's O.K.
More visible? 😆

-
2
-
-
I've been on a Fleetwood Mac kick recently.
-
3
-


1/32 Messerschmitt P.1101. 3D designed & printed
in LSM 1/35 and Larger Work In Progress
Posted
Jeebus!