
James H
-
Posts
3,247 -
Joined
-
Last visited
Content Type
Profiles
Forums
Events
Gallery
Everything posted by James H
-

Takom 1/35 V2 Rocket
James H replied to JeroenPeters's topic in LSM 1/35 and Larger Work In Progress
That's looking great. Figure looks better looking slightly upwards. Is he about the light the fuse? -
1/16 Takom Imperial Japanese Army Type 94 Tankette
James H replied to Dave J's topic in LSM 1/35 and Larger Work In Progress
That's come a long way in a short time! Are you putting the figure in for size comparison? -
hk models Lancaster B Mk.I, R5868, PO-S (S-Sugar)
James H replied to James H's topic in LSM 1/35 and Larger Work In Progress
They'll be added later, once the masking is removed. It was just easier masking without them fitted. BTW, love your Norden bombsight. I'll be using it for a future mag project. -
Short Sunderland MkII
James H replied to ThomasProbert's topic in LSM 1/35 and Larger Work In Progress
Loving this one. Superb work so far. I'm big into interiors so can't wait to see what you do there. -
hk models Lancaster B Mk.I, R5868, PO-S (S-Sugar)
James H replied to James H's topic in LSM 1/35 and Larger Work In Progress
Hey guys, remember this is my build log -
hk models Lancaster B Mk.I, R5868, PO-S (S-Sugar)
James H replied to James H's topic in LSM 1/35 and Larger Work In Progress
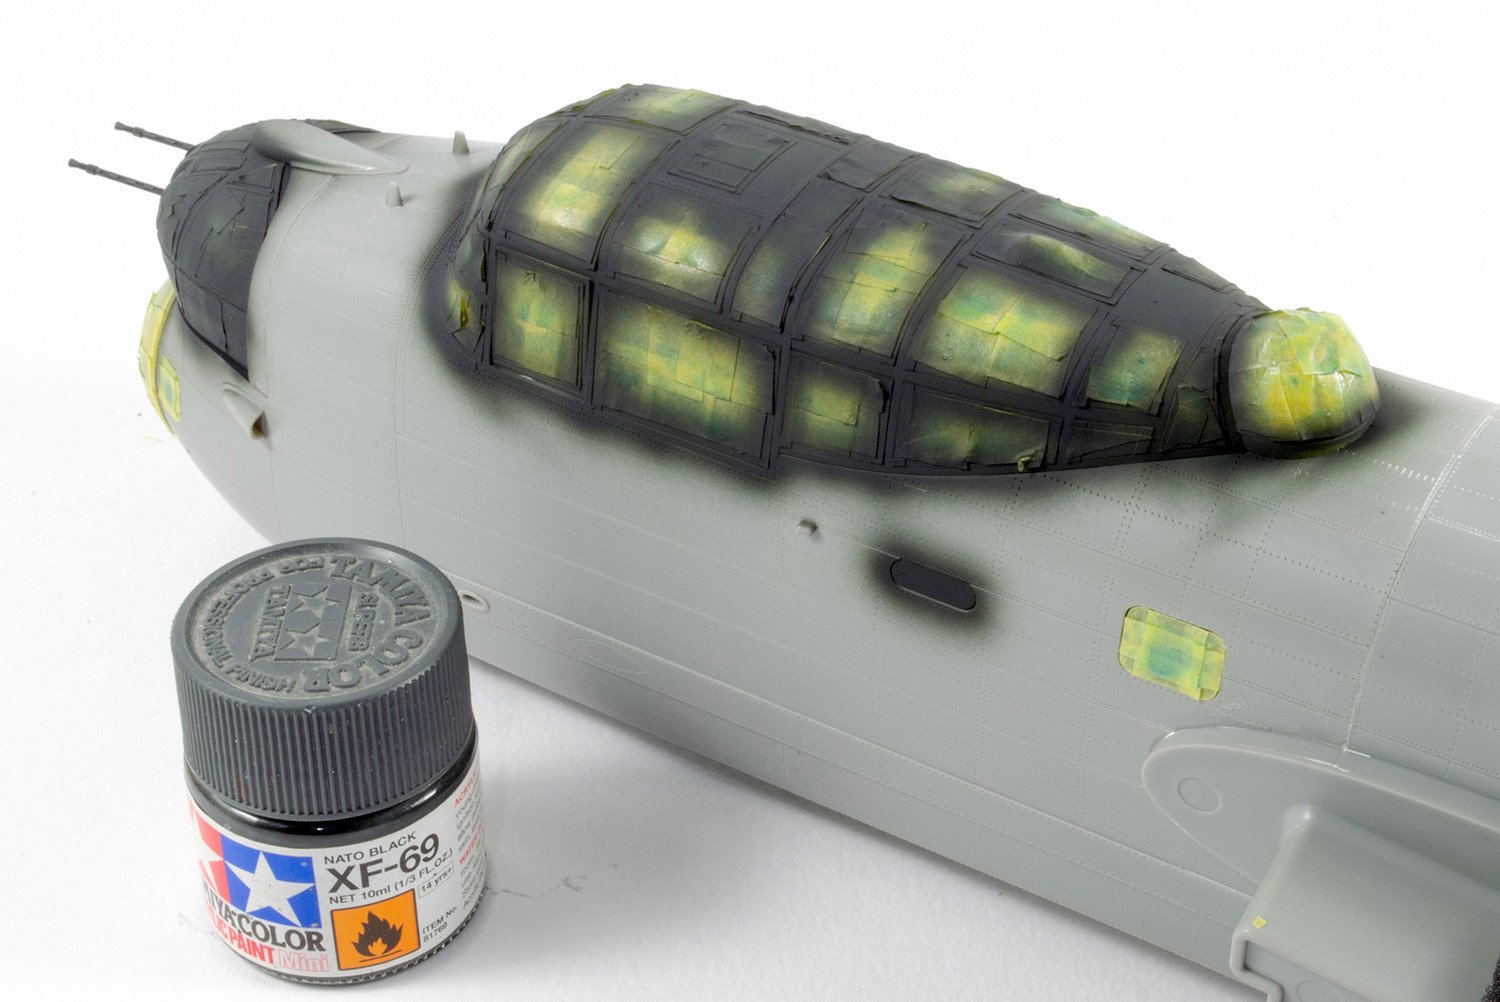
Ok, just one photo. Airbrushed in a 50:50 mix of Flat Black and Red Brown, then post-shaded in Flat Black. NATO Black then used to blend.
-
hk models Lancaster B Mk.I, R5868, PO-S (S-Sugar)
James H replied to James H's topic in LSM 1/35 and Larger Work In Progress
At the moment, I'm building up a 1:48 Tempest for MAI, then it'll be back to this. Expect an update in the next week or two. -
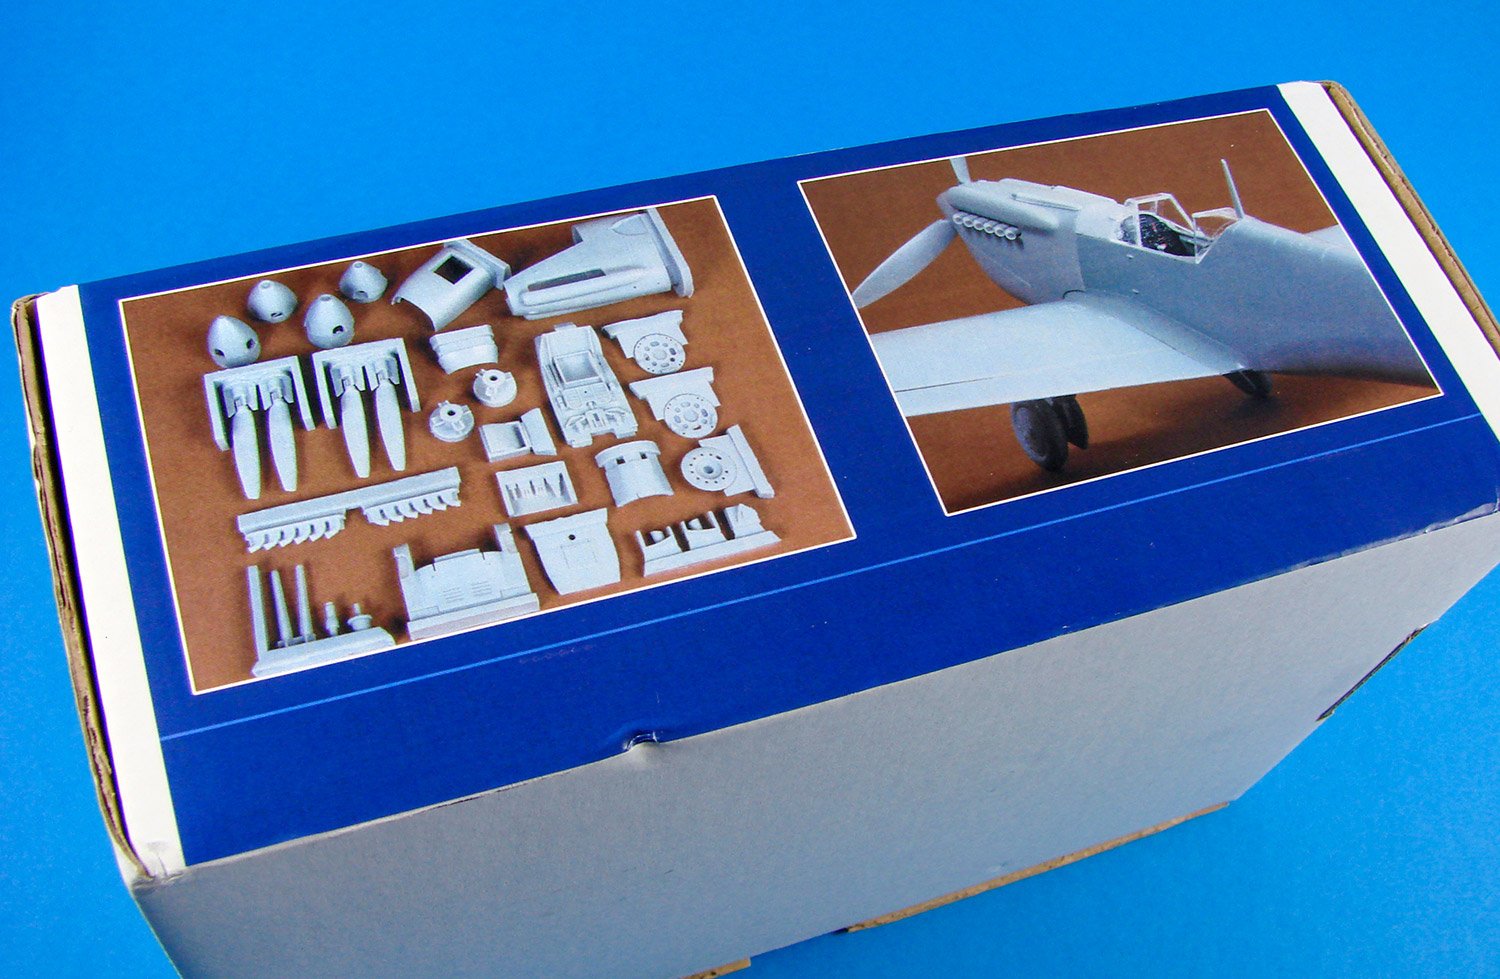
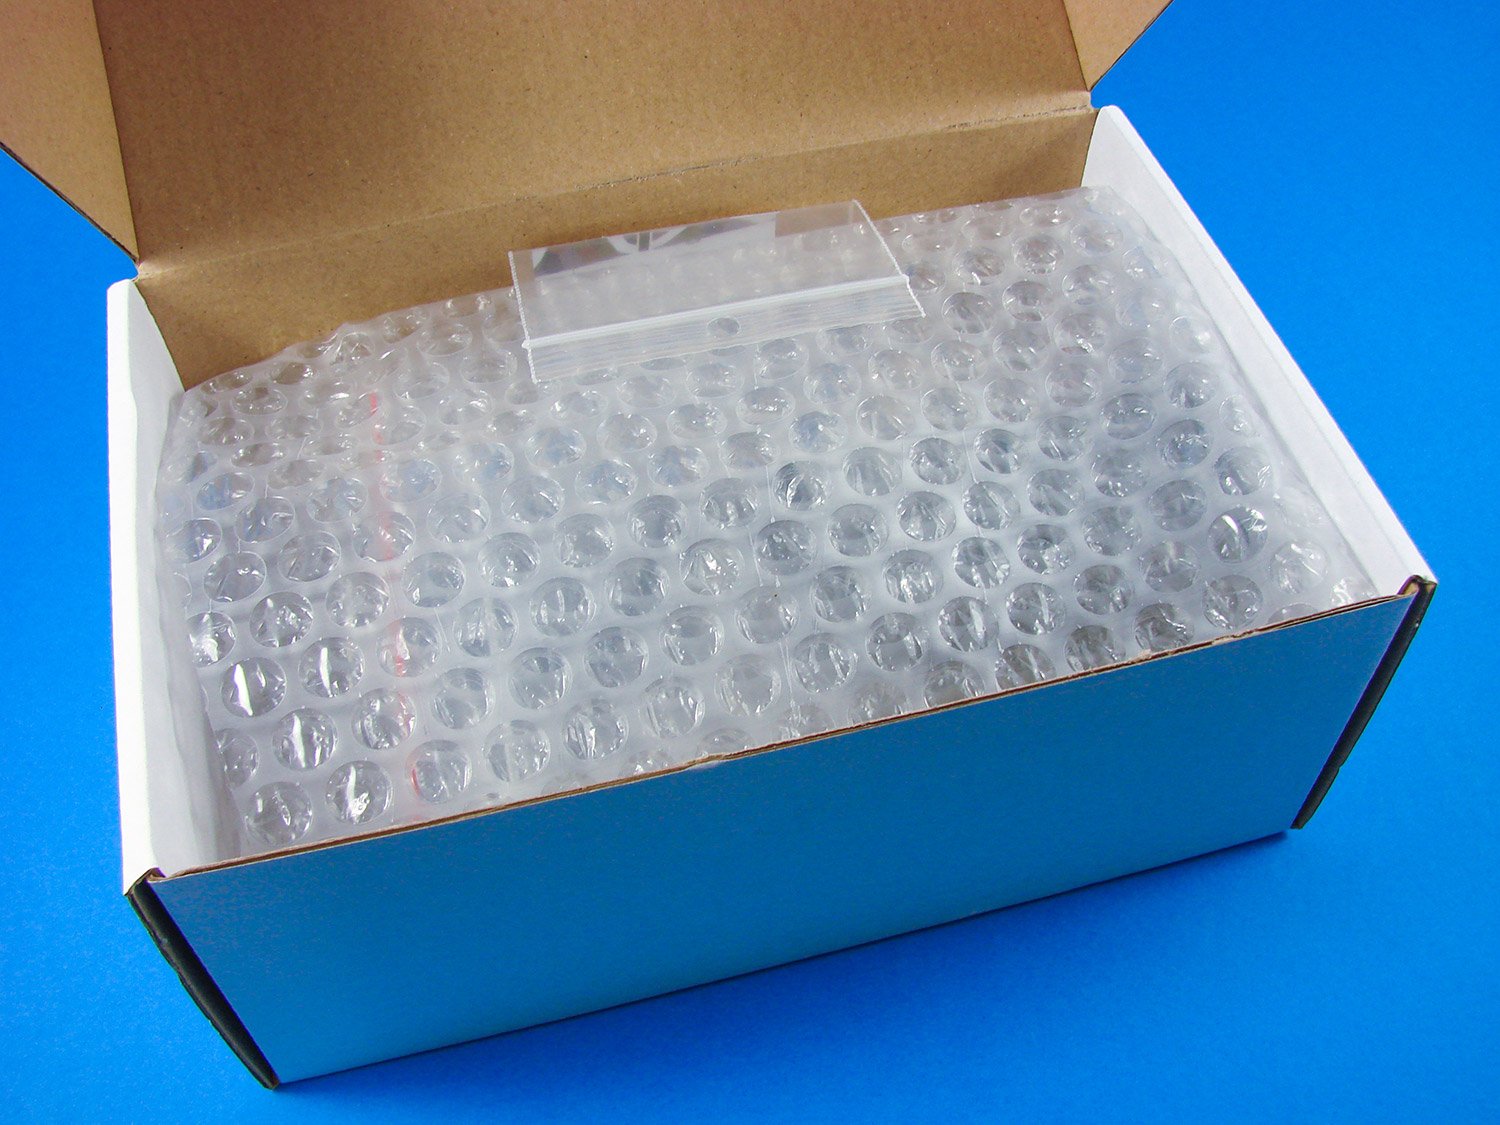
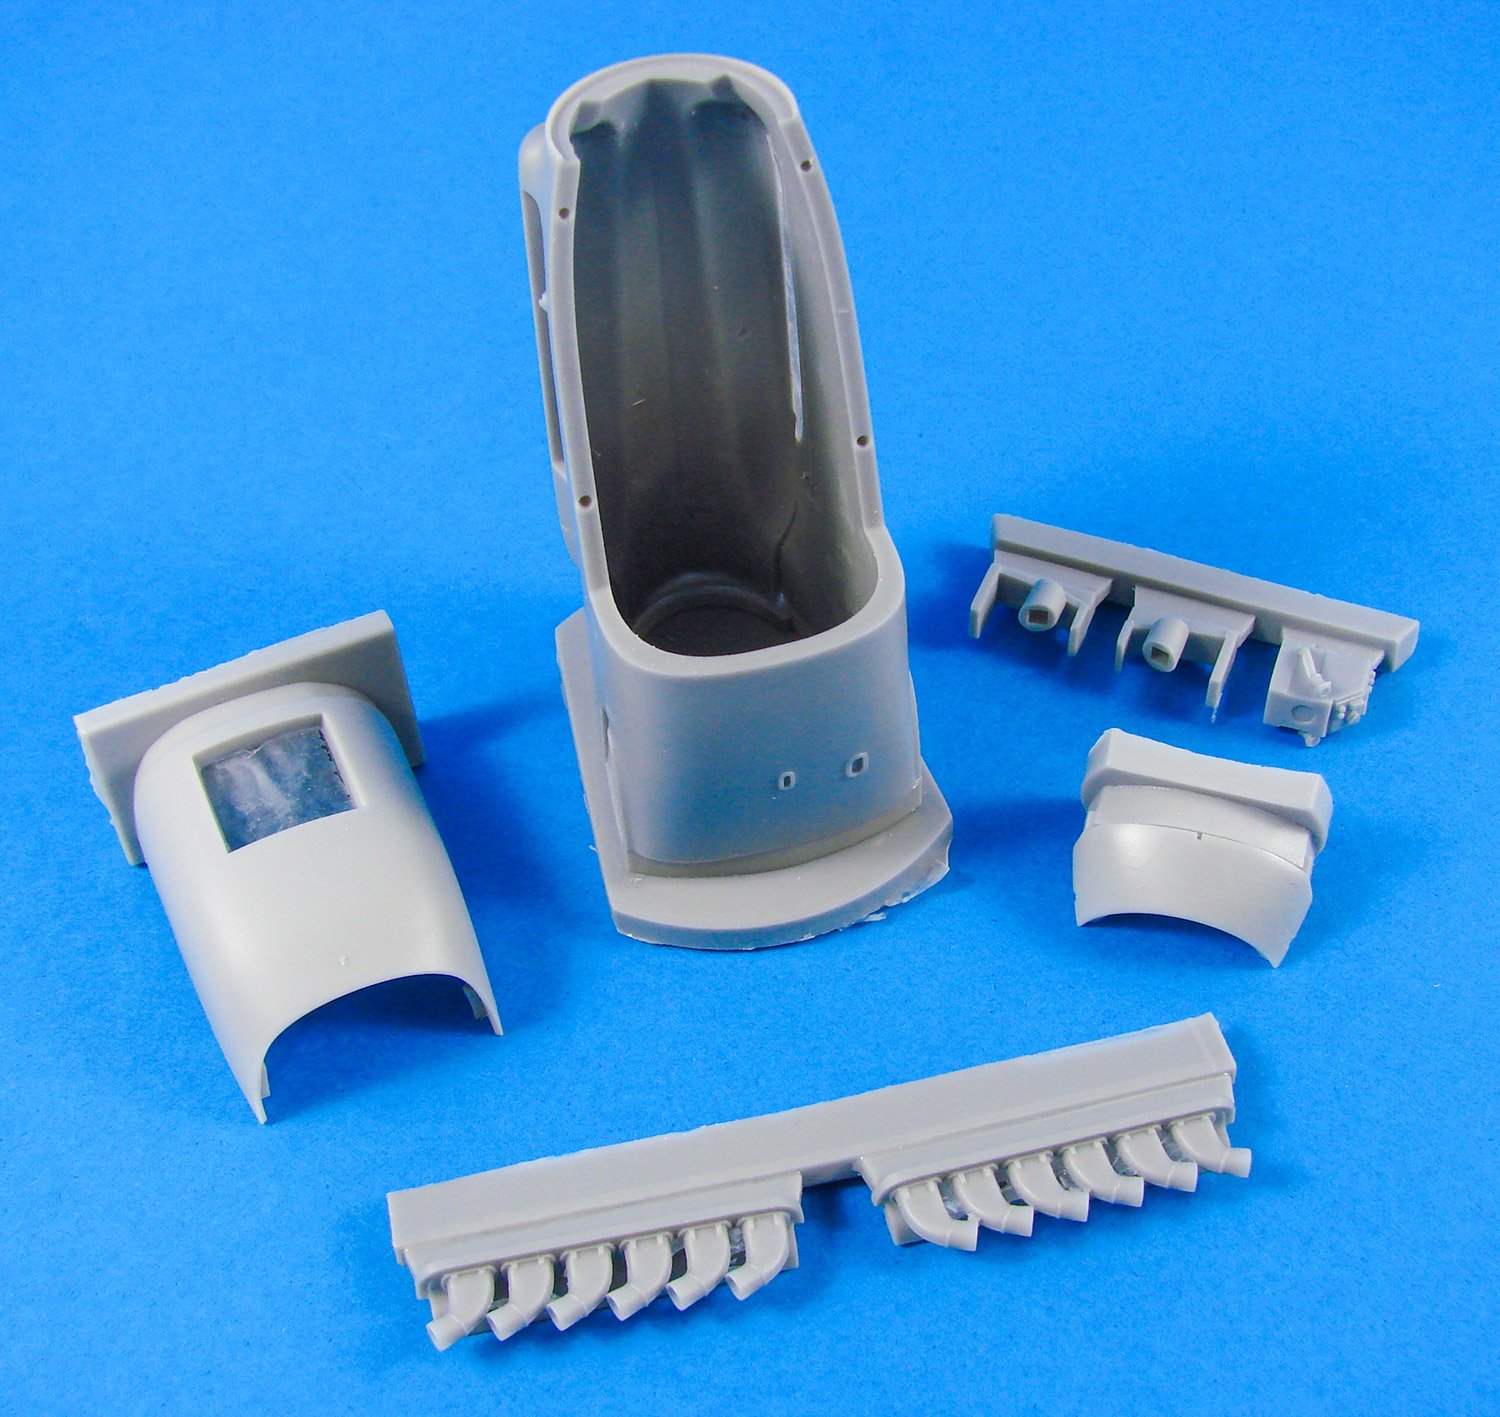
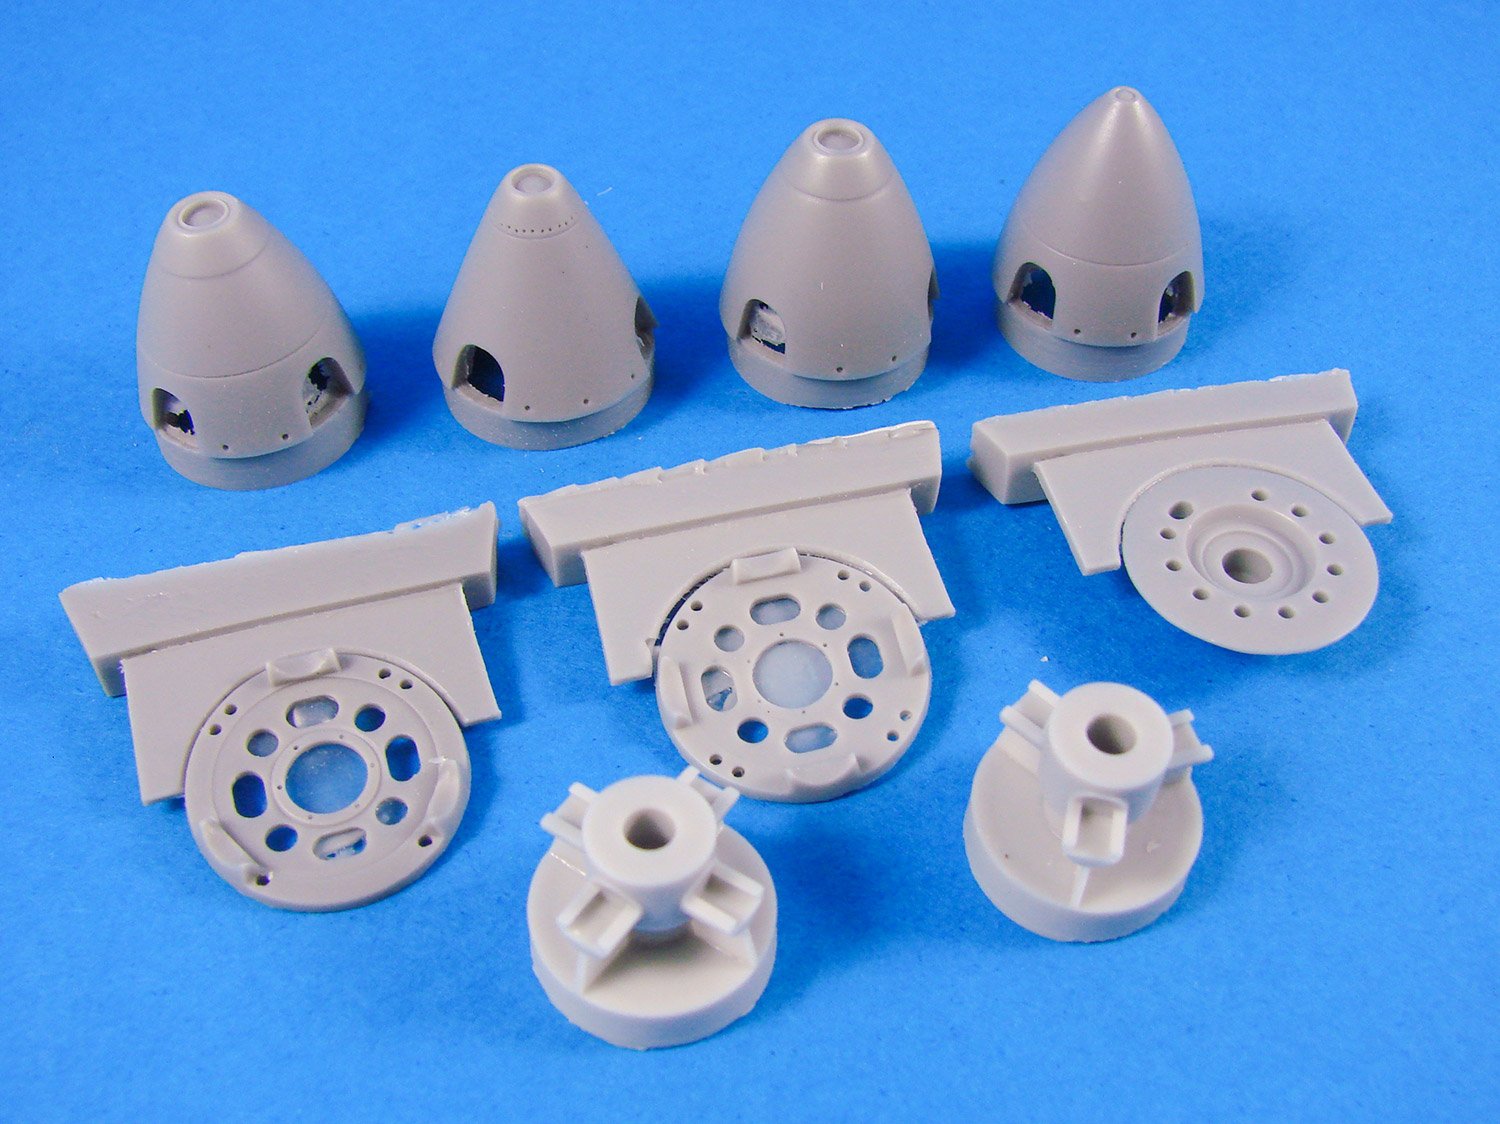
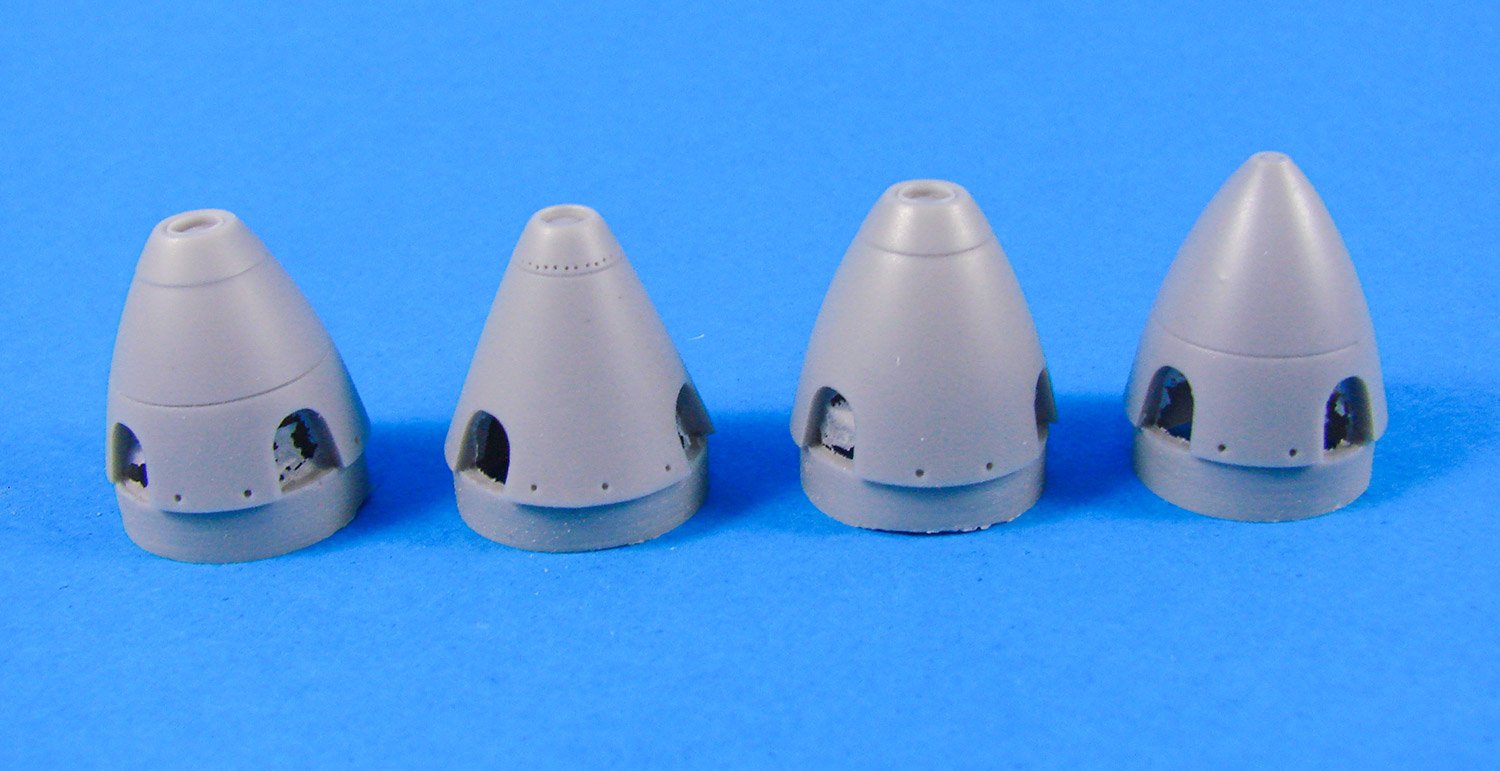
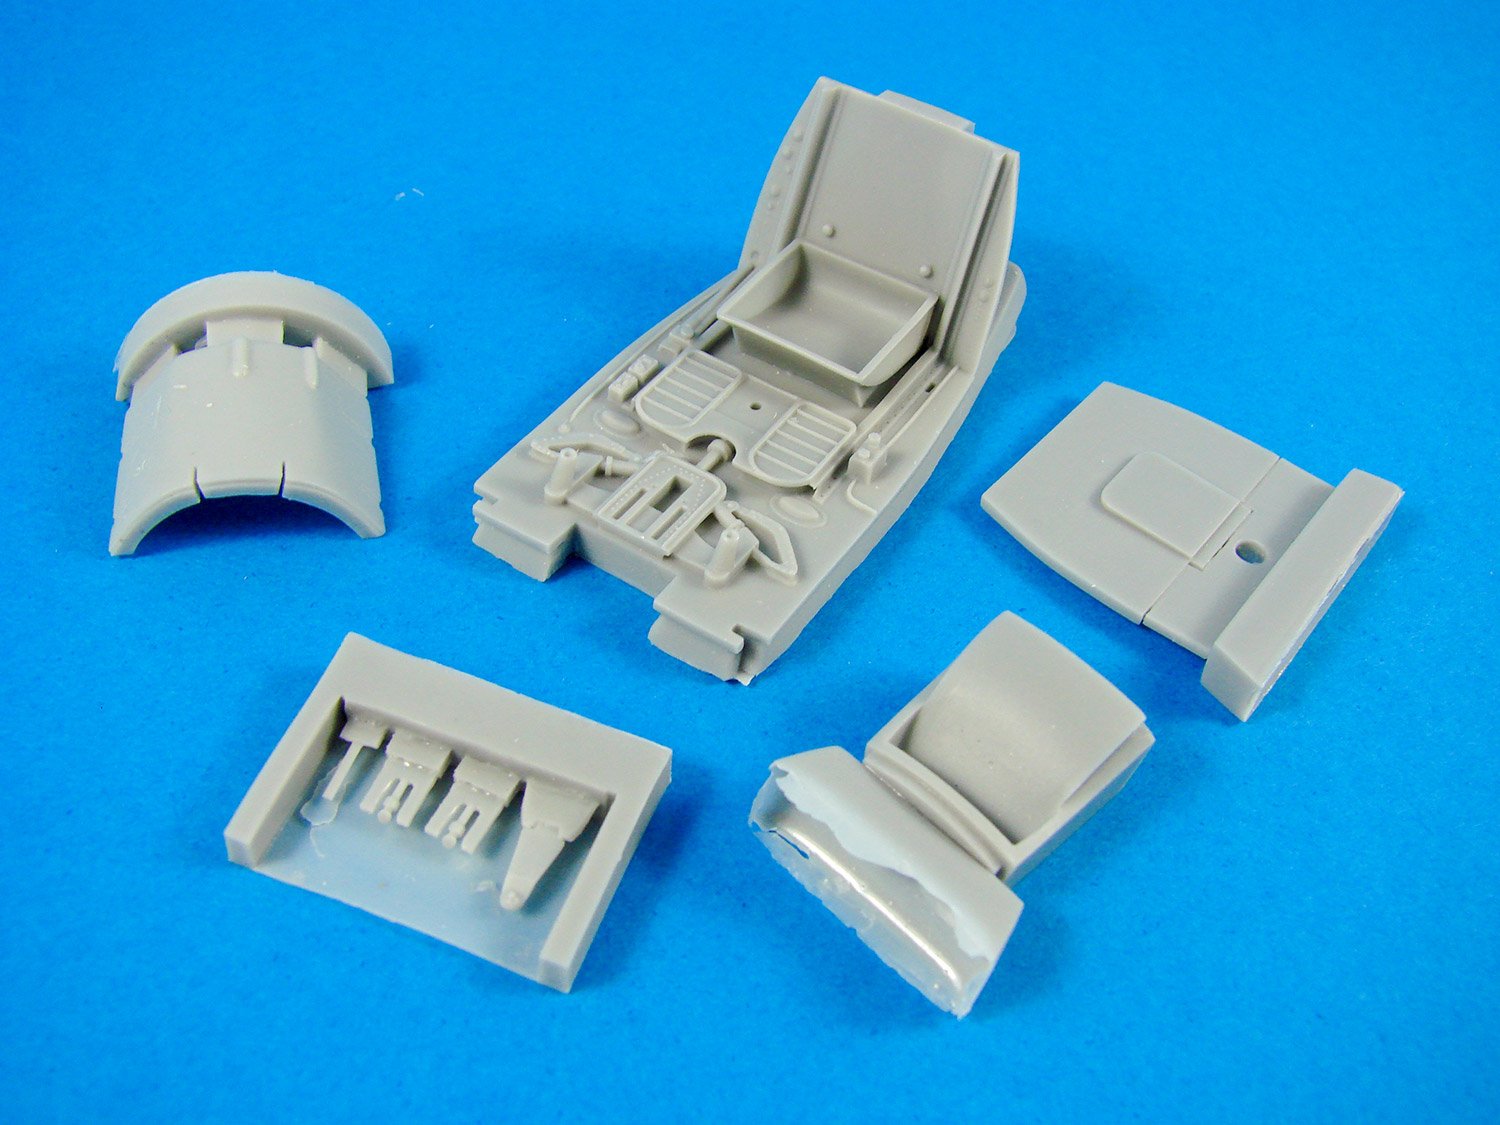
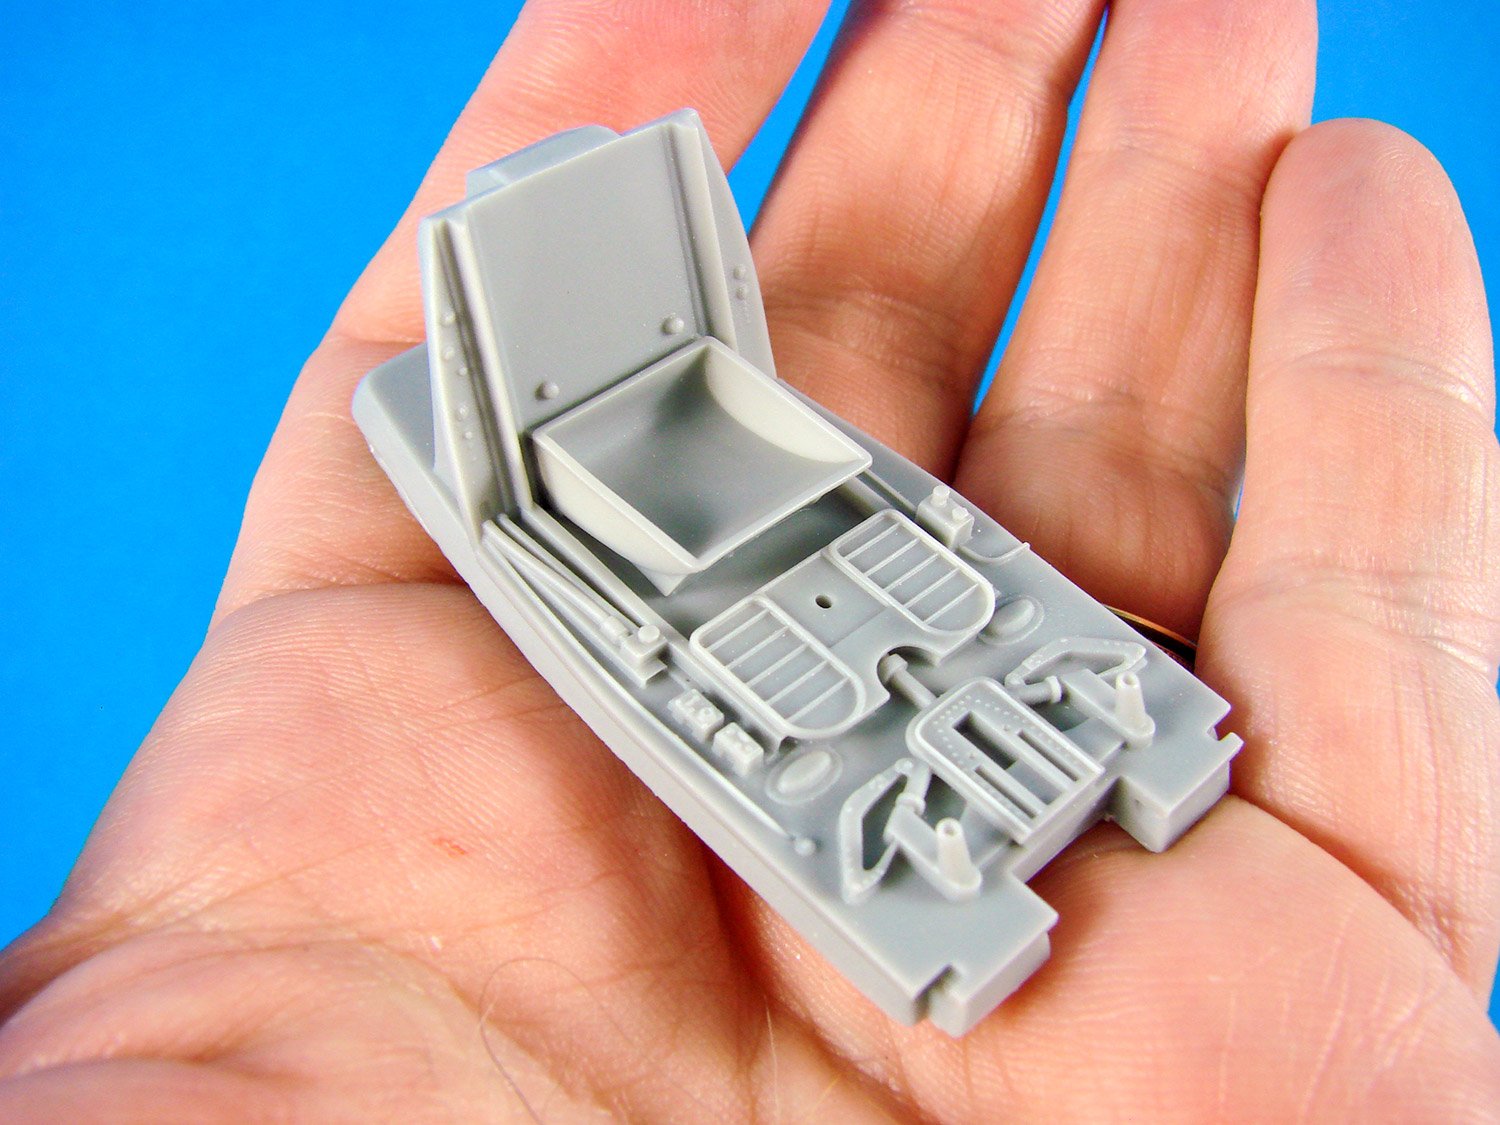
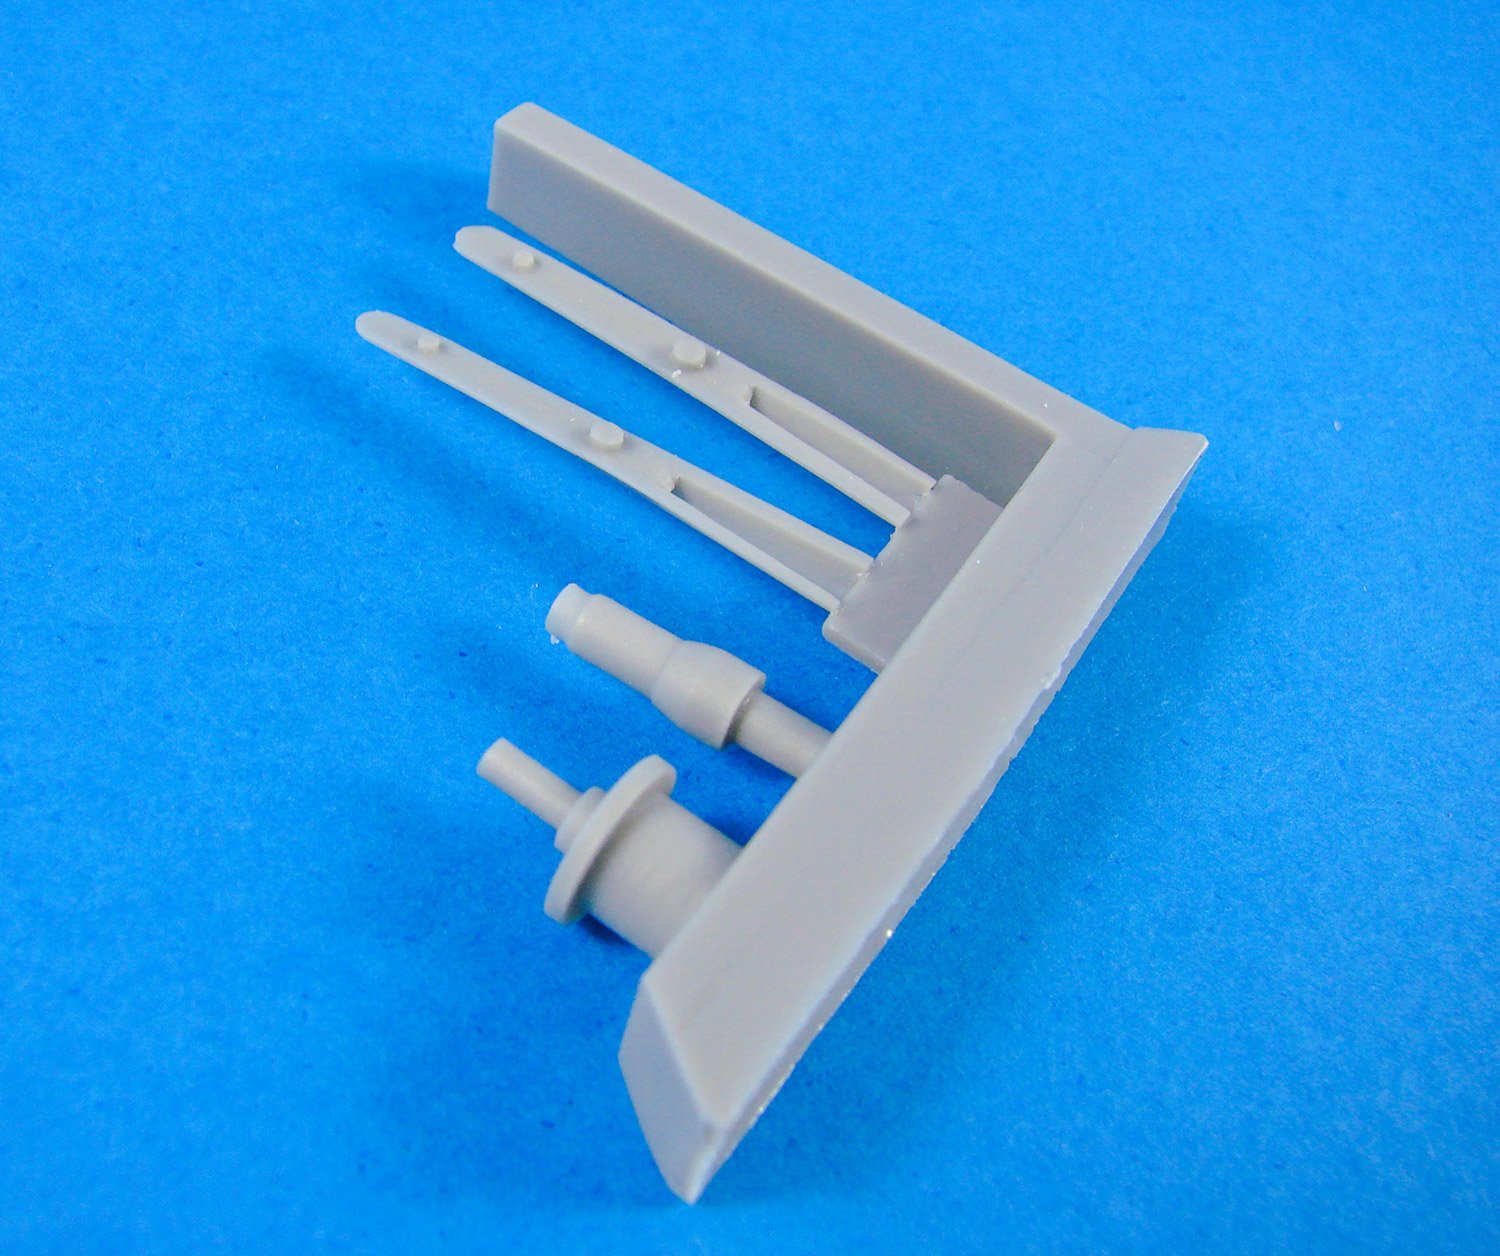
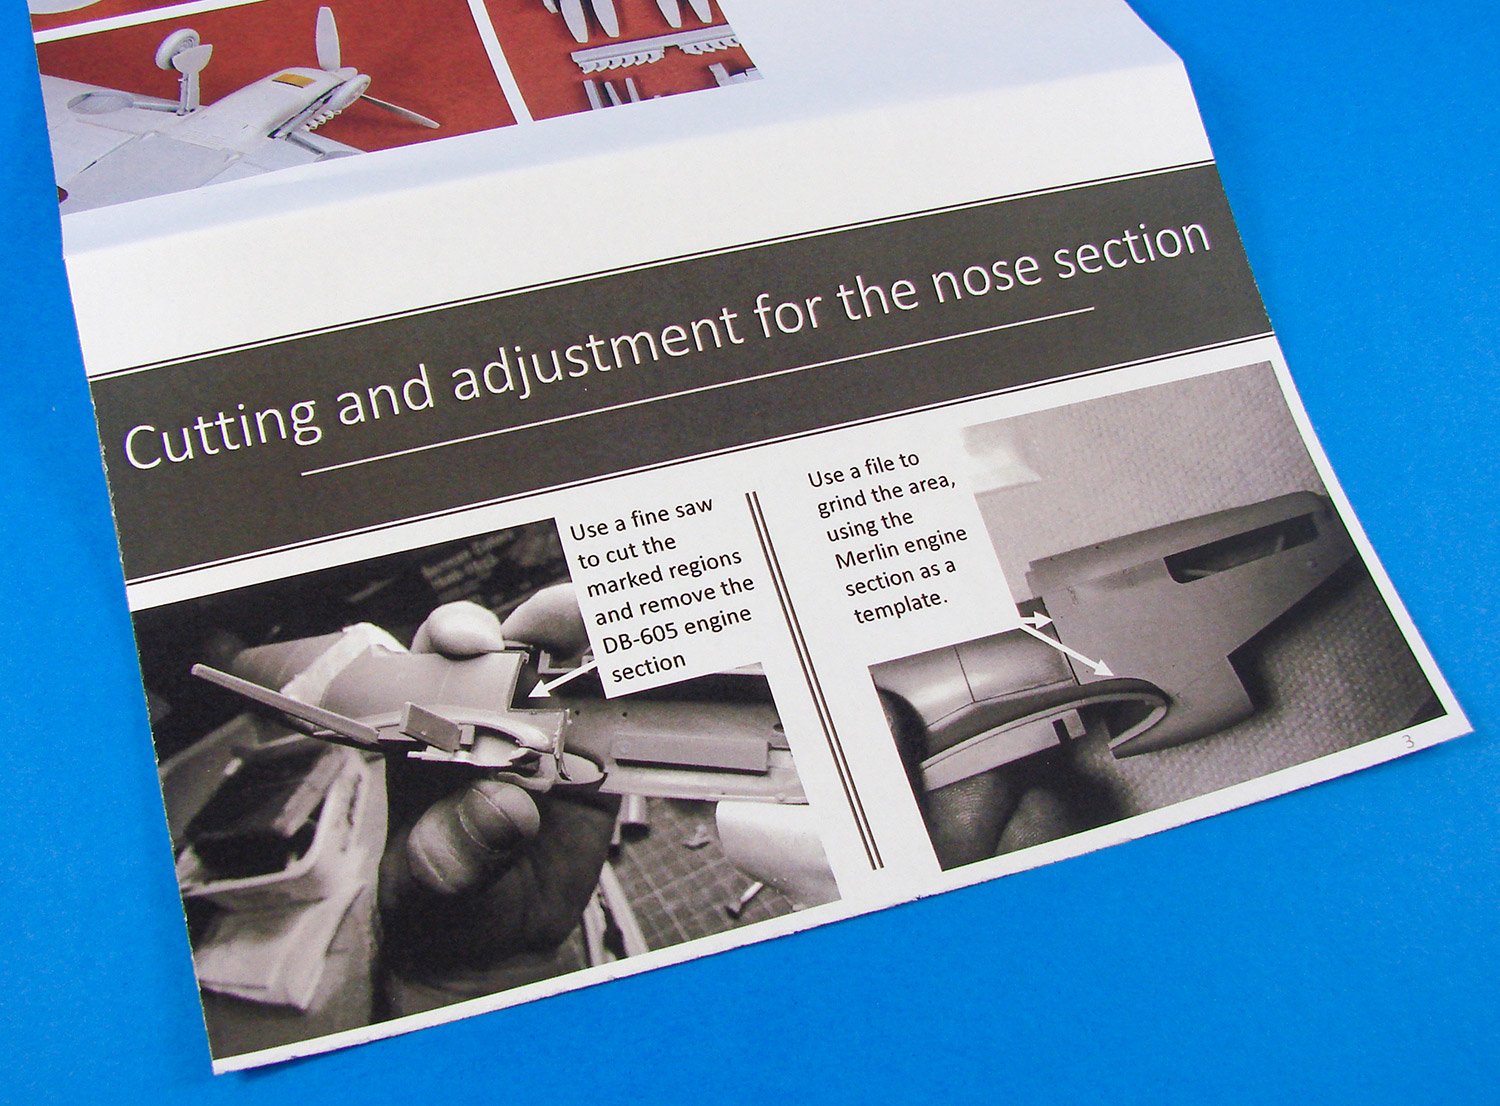
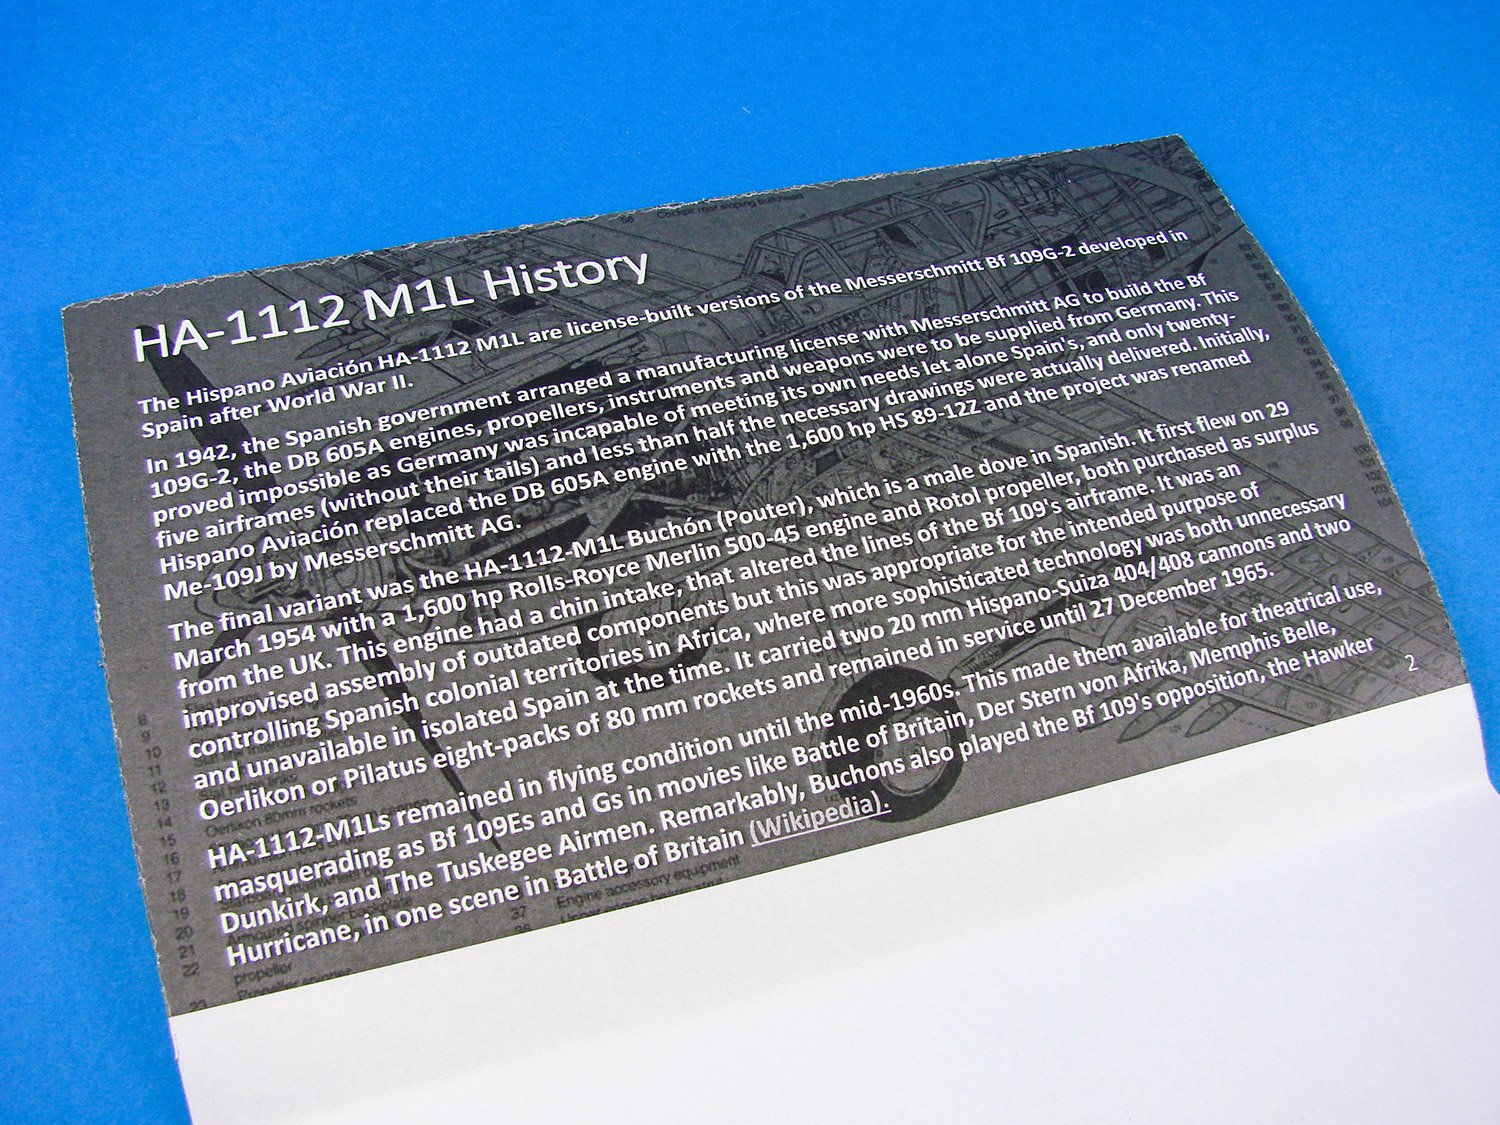
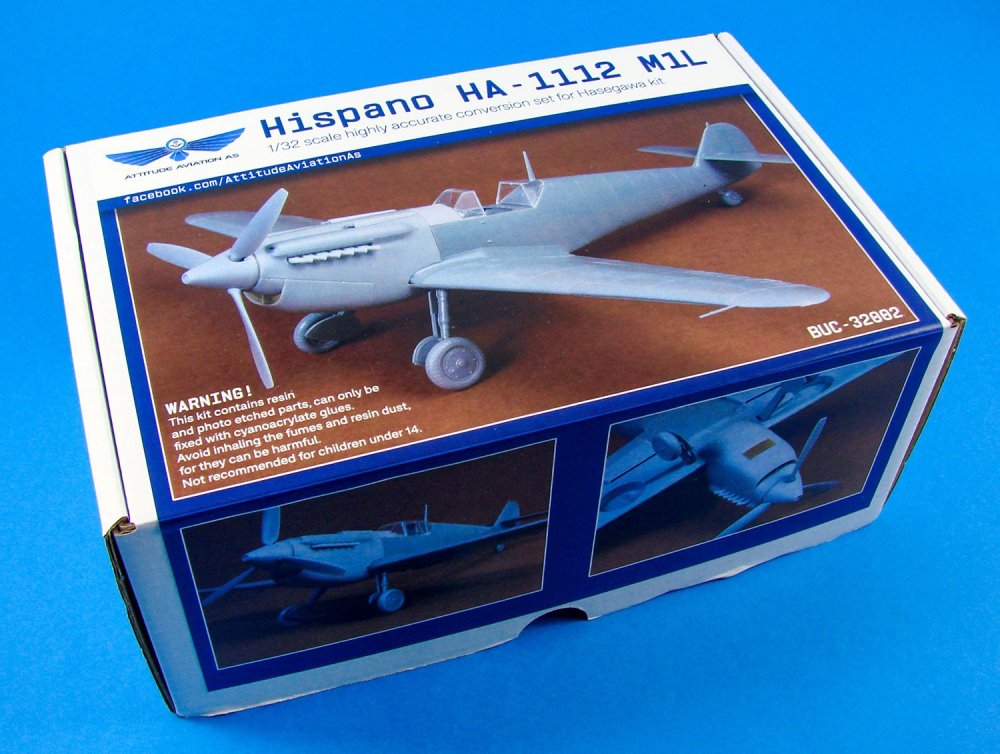
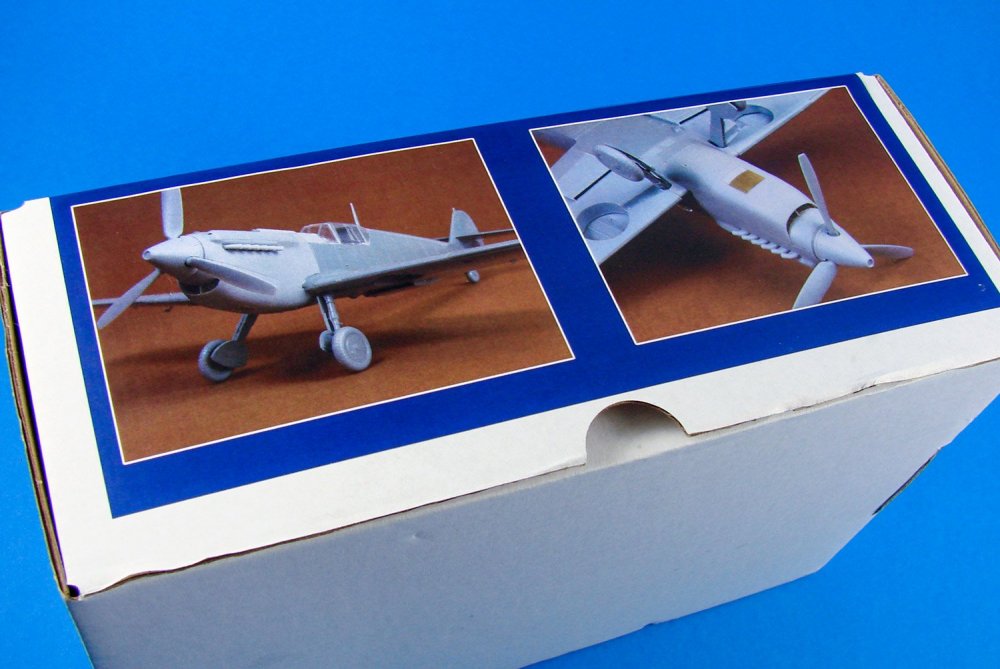
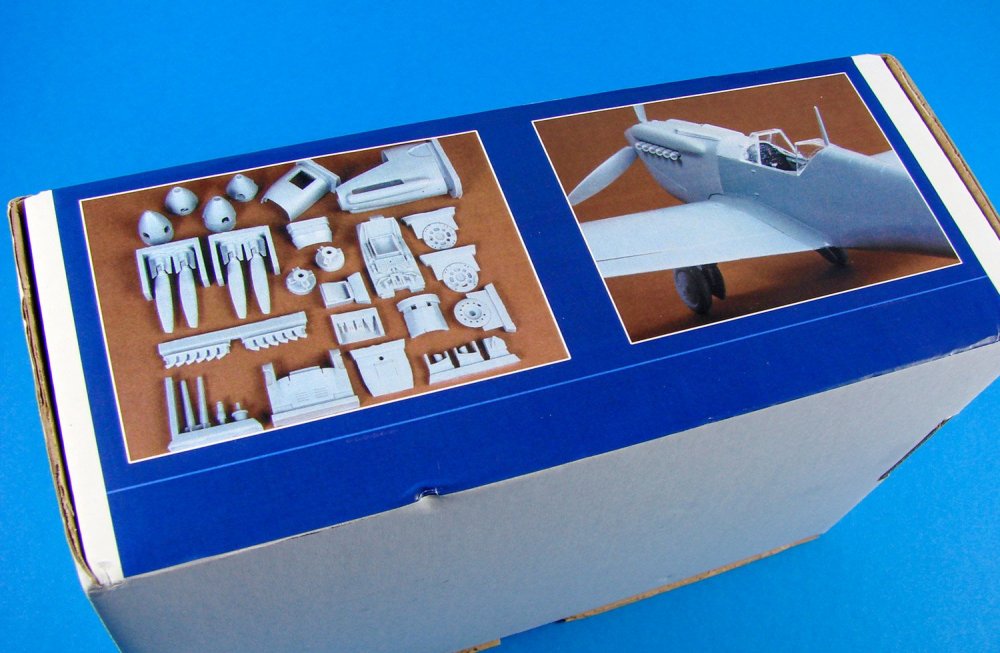
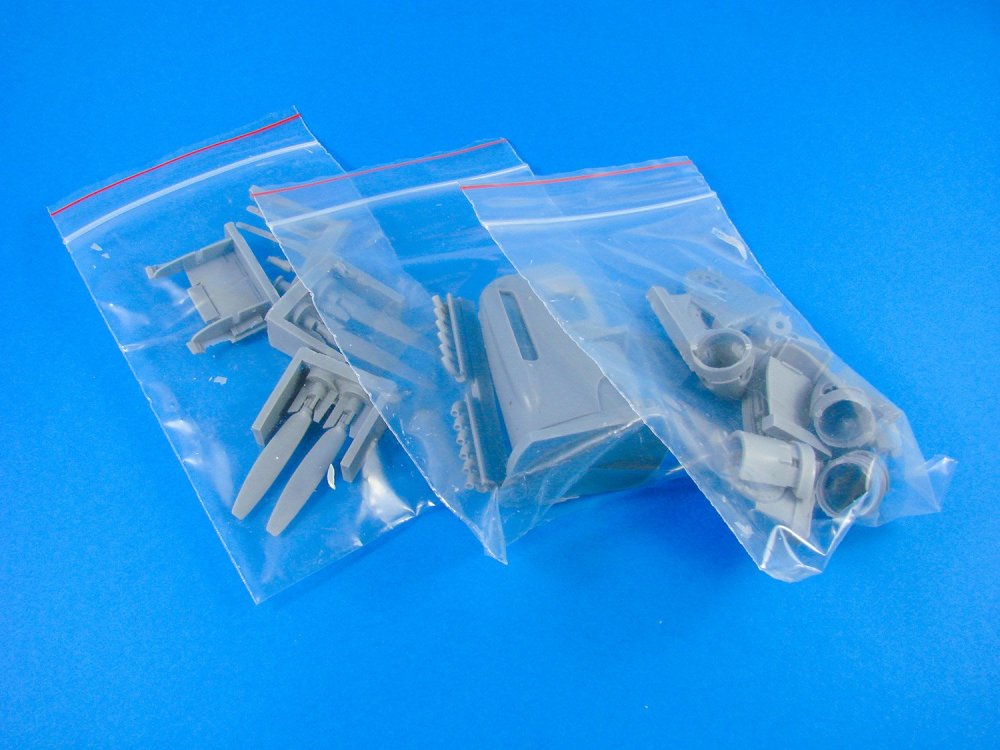
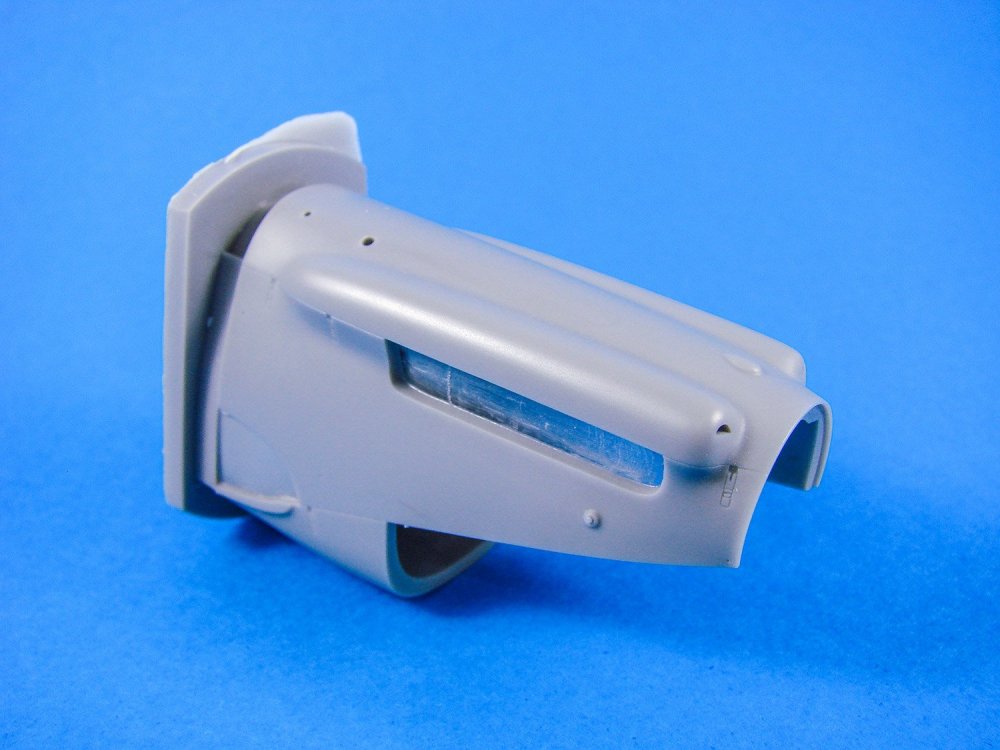
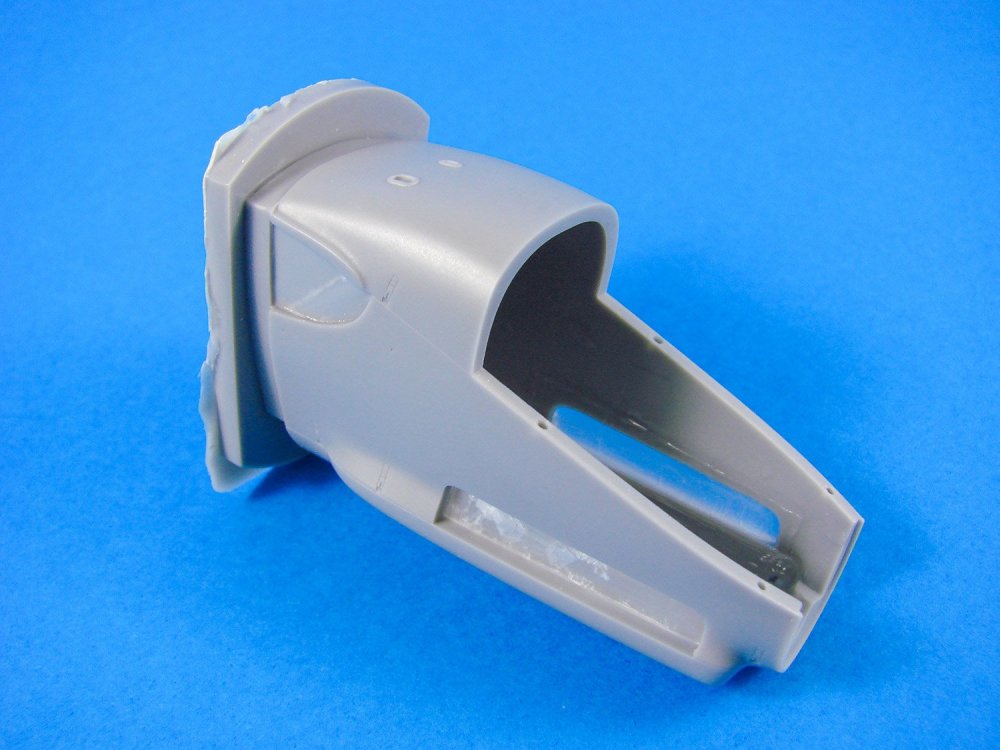
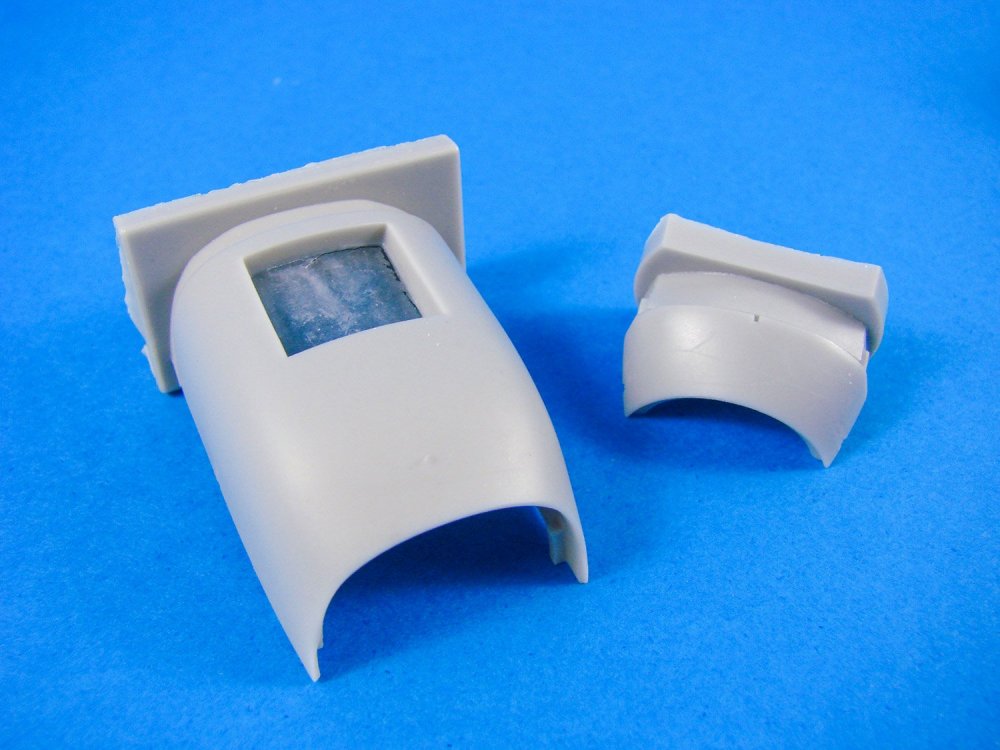
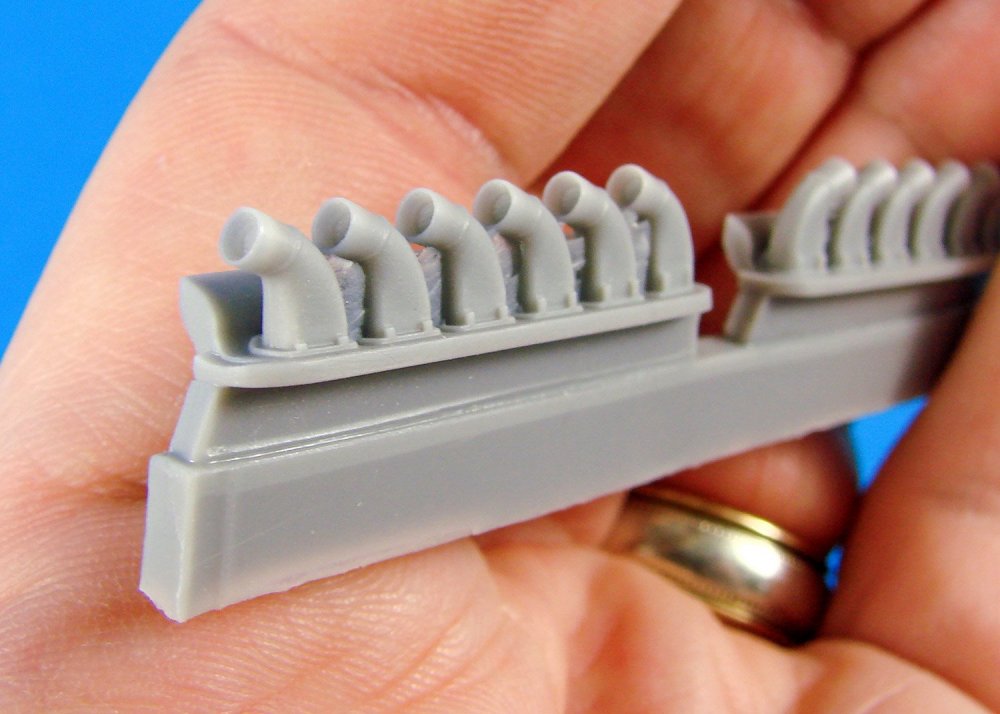
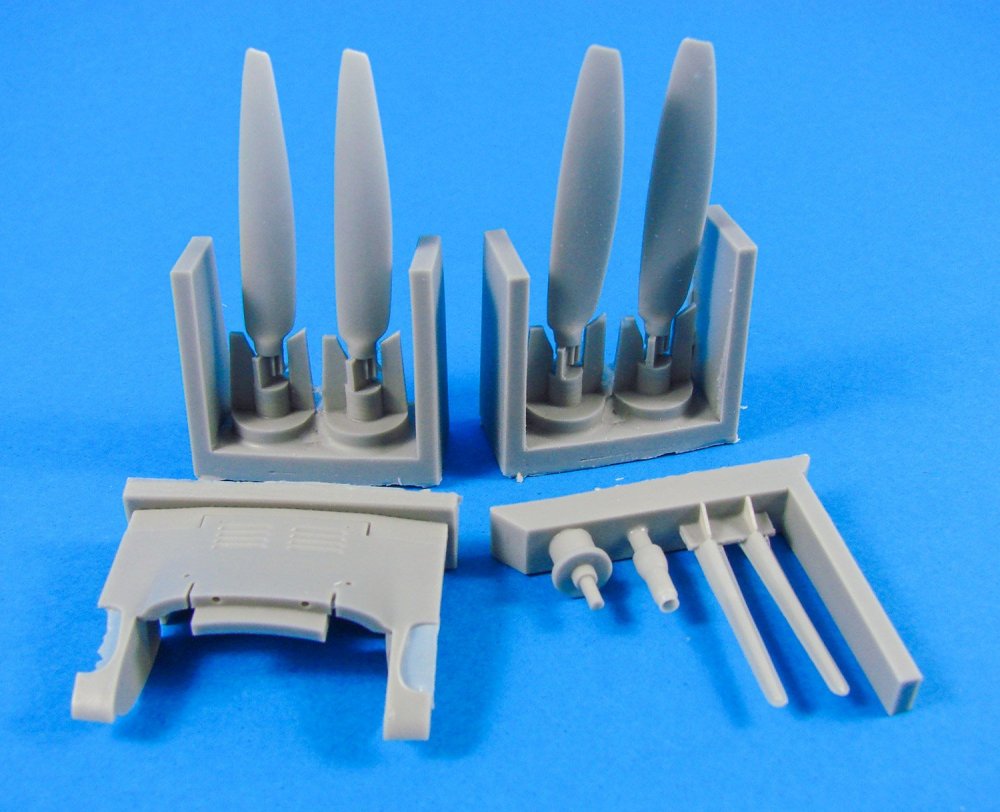
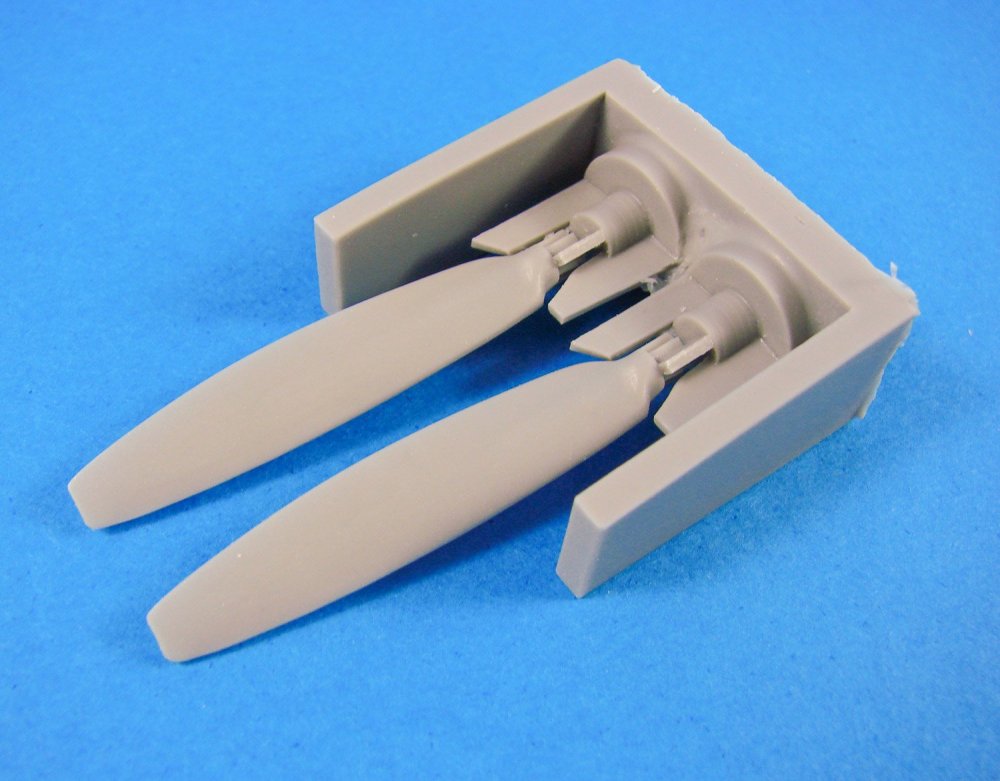
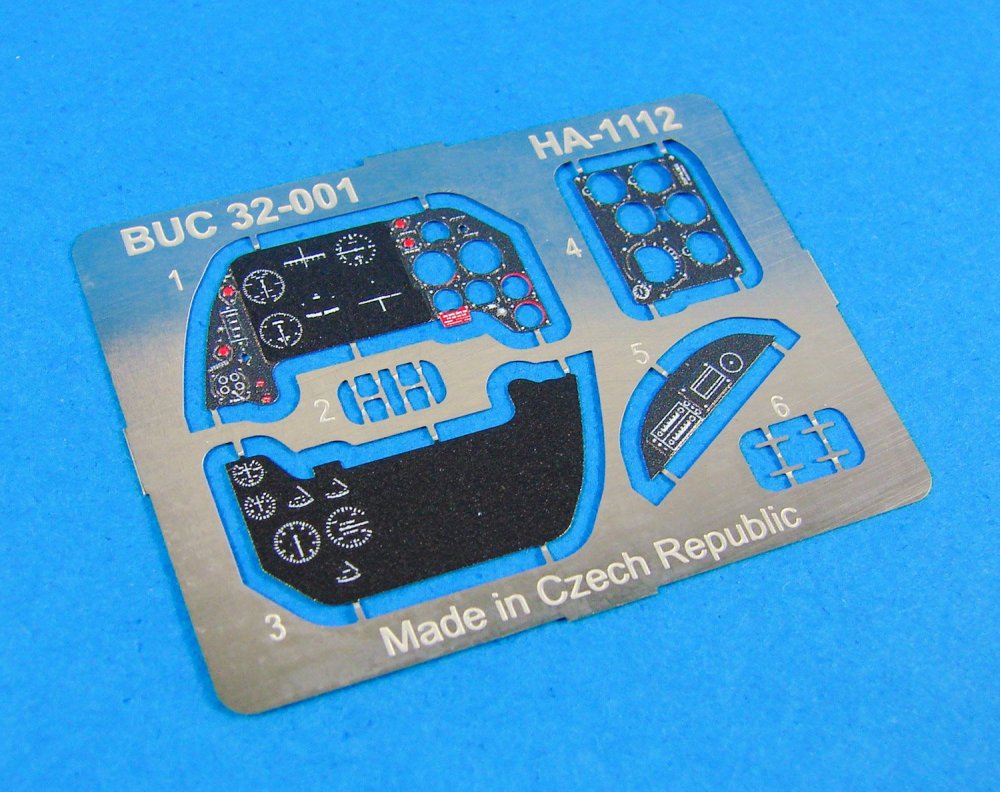
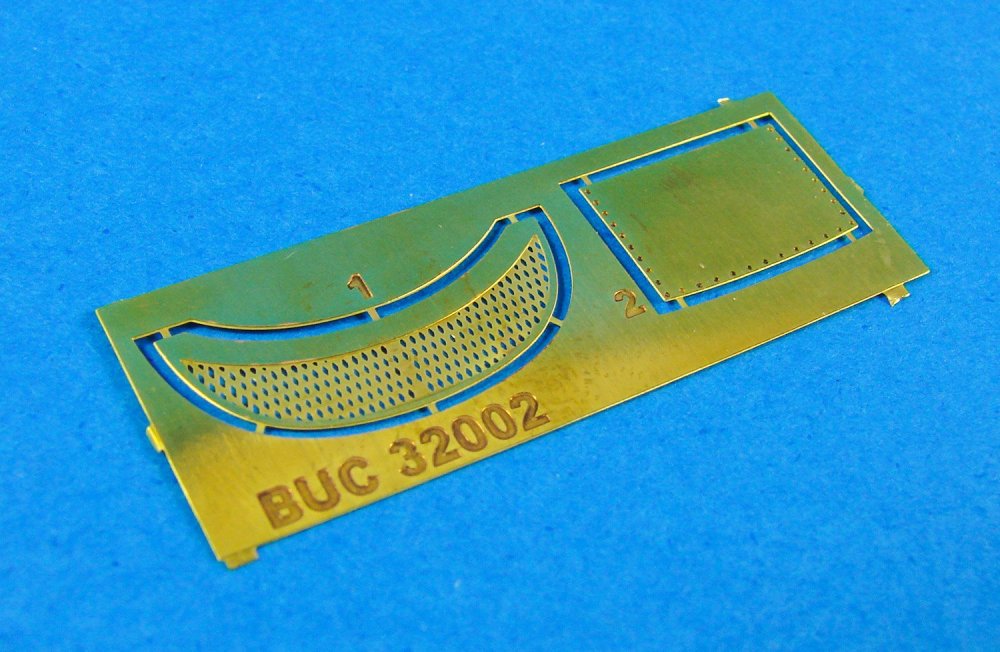
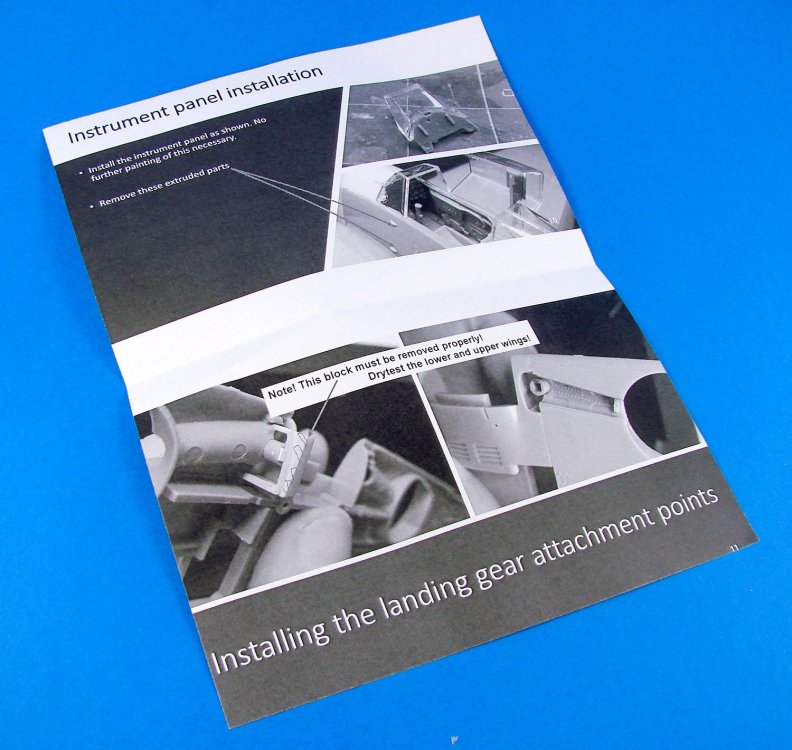
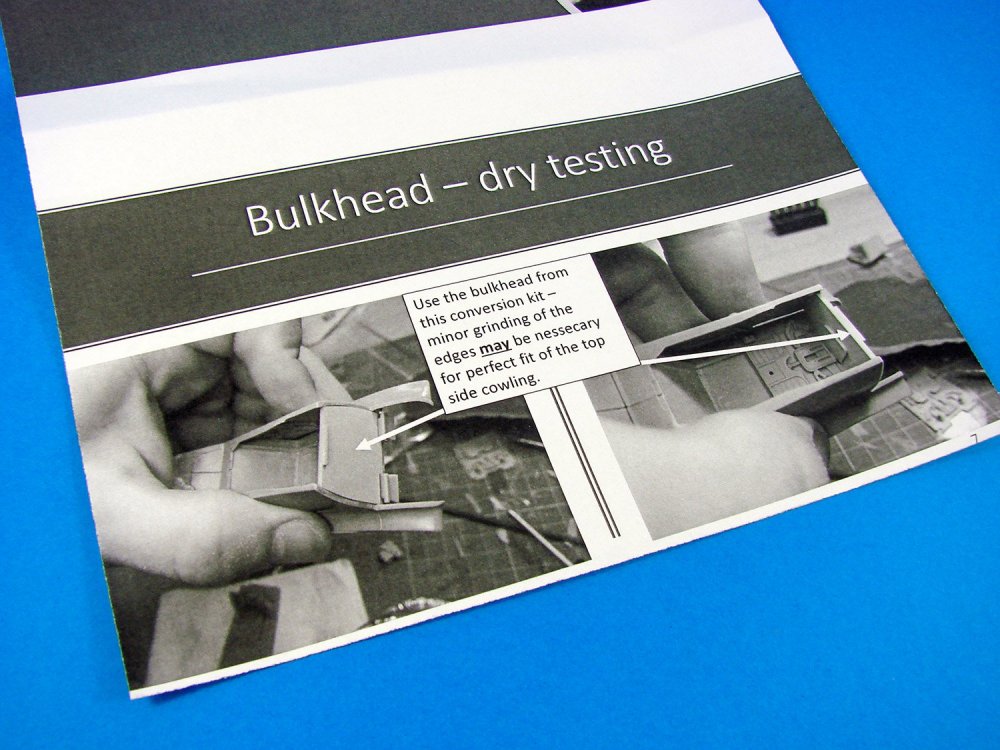
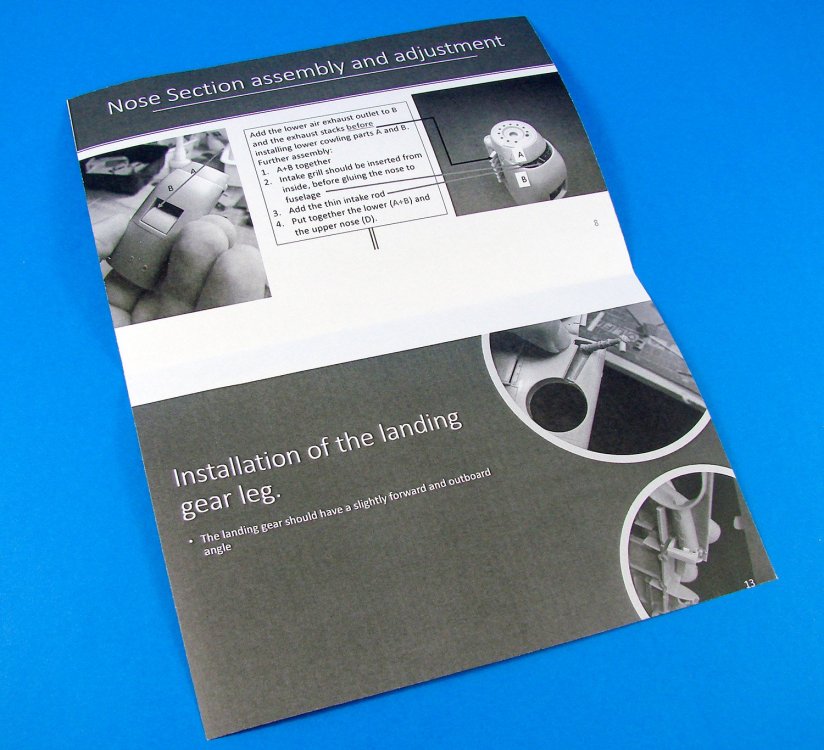
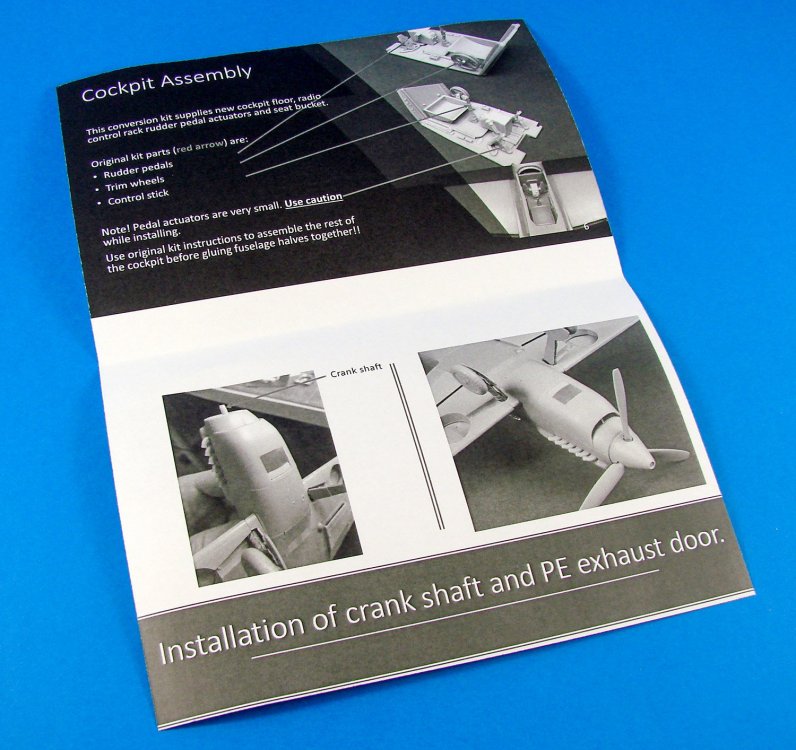
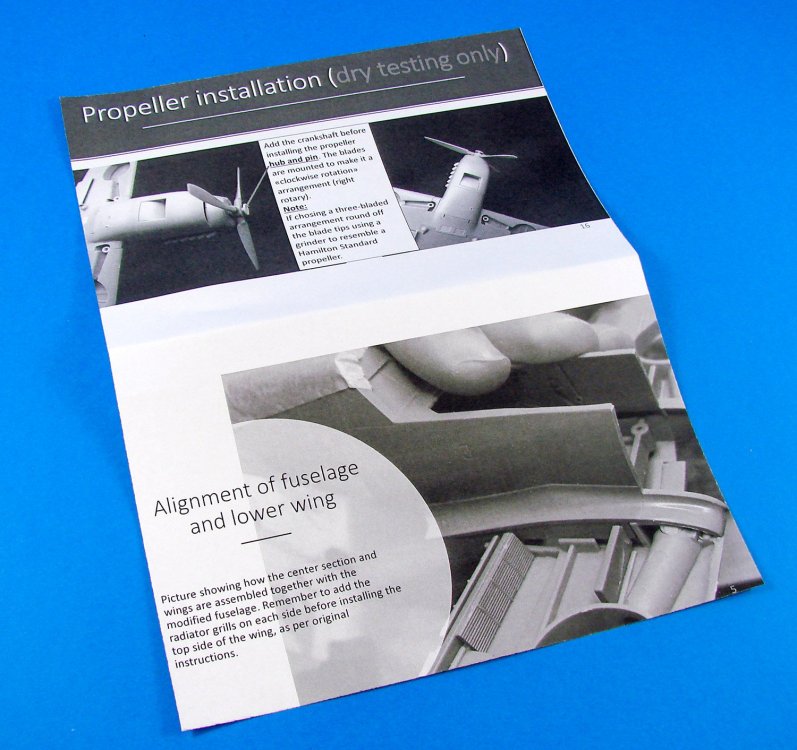
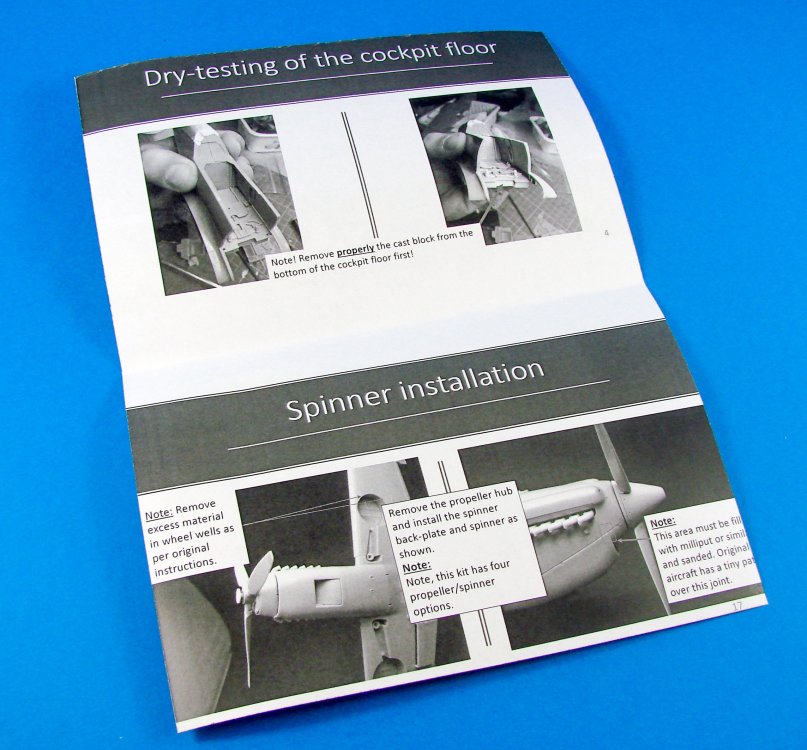
1:32 Hispano HA-1112-M1L Conversion (for Hasegawa/Revell Bf 109G-2/4/6) Attitude Aviation As Catalogue # BUC-32002 Available from Aviation Megastore for €59,95 The Hispano Aviación HA-1109 and HA-1112 are license-built versions of the Messerschmitt Bf 109G-2 developed in Spain during and after World War II. In 1942, the Spanish government arranged a manufacturing licence with Messerschmitt AG to build the Bf 109G-2, the DB 605A engines, propellers, instruments and weapons were to be supplied from Germany. This proved impossible as Germany was incapable of meeting its own needs let alone Spain's, and only twenty-five airframes (without their tails) and less than half the necessary drawings were actually delivered. In May 1951, a developed version, the HA-1112-K1L, improved the Spanish Hispano-Suiza, HS 17-12Z engine installation, carried either one or two 12.7mm Breda machineguns and Pilatus eight-packs of 80mm rockets and its three-bladed de Havilland Hydromatic propeller earned it the nickname Tripala ("three blades"). The final variant was the HA-1112-M1L Buchón (Pouter), which is a male dove in Spanish. It first flew on 29 March 1954 with a 1,600 hp Rolls-Royce Merlin 500-45[4] engine and Rotol propeller, both purchased as surplus from the UK. This engine had a chin intake, that altered the lines of the Bf 109's airframe. It carried two 20 mm Hispano-Suiza 404/408 cannon and two Oerlikon or Pilatus eight-packs of 80 mm rockets and remained in service until 27 December 1965. Due to their longevity, Buchóns have appeared in several war films masquerading as Bf 109Es and Gs. in movies such as Battle of Britain (alongside CASA 2.111 bombers, a Spanish-built version of the Heinkel He 111), Der Stern von Afrika, Memphis Belle, Dunkirk, and The Tuskegee Airmen. Remarkably, Buchóns also played the Bf 109's opposition, the Hawker Hurricane, in one scene in Battle of Britain. Extract from Wikipedia The conversion set Why a conversion? Well, firstly, why not! Secondly, there is no injection moulded Buchón in large scale, and despite the moans from some that it isn’t significant and that they wanted to see something else, the Buchón is a subject that many of us have wanted to model, and especially in the colours of the BoB film veterans. This isn’t the first time we’ve seen a conversion for this intriguing machine. Indeed, Grey Matter Figures did release one some years ago (2012/13), and I tried to convert a model with it, unsuccessfully, due to all manner of quality issues including bad shrinkage. I also have to say that the breakdown and actual parts vary, to my eye, quite a lot from that other resin set. Most definitely in final appearance of the Buchón. This set is provided in a resilient and deep corrugated cardboard box that has a product label that extends to both the front and rear, showing the finished model and a layout of the resin parts. Pulling out the tab opens the box to reveal, firstly, the numerous instruction sheets that we’ll look at a little later. Removing this, several layers of bubble-wrap can be seen, protecting the three clear and re-sealable bags of light grey resin parts. A small wallet is also included with two PE frets. You will note that there are no decals in this release. They will shortly be available from the Attitude Aviation As, as a separate product. You will be able to purchase either the German or Spanish decals. It also has to be noted at this point that the parts in this release are only really capable of building one of the German film veterans and not one of the Spanish machines. The reason for this is that the cannon fairings, wing fences and underwing rockets are not included in this set. However, it also has to be said that the tail struts of the German film veterans also aren’t included in this release, but I had heard they were scrapped from the film aircraft due to them falling off in flight. Ok, onto the resin etc. Bag 1 The first bag I’m drawn to contains the real centrepiece of this set, namely that new Merlin-engine cowl/nose. Unlike the single-piece nose in the GMF conversion set, this one is moulded in three parts, with the main cowl itself being hollow. This most definitely will help keep down the nose weight of the finished model. A nice touch here is also how the lower two chin parts have locating pins which fit the corresponding holes on the main cowl. All that needs to be removed from the parts are the well-placed casting blocks and some ultra-thin resin webs from the nose radiator opening and the exhaust openings. Detail is pretty commensurate with the original Hasegawa kit, with fine panel lines and also some exquisite latch detail. Note also the holes in the upper cowl. These are designed to accommodate the fake gun trough covers that were fitted to many of the BoB film veterans. If your machine wasn’t fitted with them, you’ll need to fill them in. Also nicely cast are the two rows of exhaust stubs with their neat hollow ends, weld seams and fastening bolts. There is an upper cowl fairing which is integral to these so it will be nice and easy to ensure correct location. A single casting block contains the cockpit radio set and the new undercarriage mounting blocks. Bag 2 You’re really spoiled here as there are not one, not two or even three….but FOUR different iterations of the spinner. Two of these are for the four-blade prop option, and the others for the three-blade. There is one spinner which is more or less a full shape, and the others have been cropped to represent the Emil of the BoB film, and these also vary somewhat in shape. These parts are to be married to one of two spinner backplate options, dependant on the numbers of blades used. An internal prop hub is included for each option too. There is a plate which forms the forward cowl ring, behind the spinner. Backplates and cowl ring are fully detailed too. Only a little clean-up will be required to prepare parts for fitting, and the casting blocks are connected via a then web. There were differences to the cockpit of the Buchón and as a result, there is a more or less complete cockpit tub included in this release, and it really does look gorgeous! You will need to supplement this with parts from the original kit, such as the rudder pedals etc. but you may want to use a little PE for some of these parts, where applicable, from a different aftermarket release. Also in this packet are a bulkhead for the fuselage, which sits behind the new nose, the lower cowl radiator outlet channel and the upper fuselage cowl which site in front of the windscreen. A small casting block contains parts for the cockpit. Bag 3 Our last bag of resin parts contains the four prop blades (with squared ends), a cowl to fuselage belly fairing, two fake gun trough covers for the movie aircraft, a prop shaft and dummy spinner gun. If you wish to model the three-blade prop machine, you will need to round the ends of these and create a profile akin to the Hamilton Standard prop. It shouldn’t take more than 30 minutes to do the prerequisite work. The prop shapes are excellent with nice thin trailing edges and tips. Photo Etch There are TWO PE frets in this release. One of them, presumably made by Eduard, contains the multipart, colour-printed instrument panel which is of course specific to the Buchón. Print quality is typically Eduard with solid colour and nice instrument definition. The second fret contains the chin intake grille and also the radiator outlet flap, produced in bare brass. Production quality is also excellent. Instructions There are several loose sheets, printed on both sides, which form the instructions. Each sheet contains specific aspects of conversion, with photographs and accompanying text. Some of the photos are a little difficult to decipher unless you look at the parts and study things carefully. They also don’t address the shortening of the wingtips and the installation of the dummy wing cannon that are needed for film veteran aircraft. Conclusion You most definitely will need to either sort out decals for the German machine, and if you want to build a Spanish machine, then there extra parts to purchase, as well as the resin. Attitude Aviation As has made a compromise in terms of initial kit cost so that you only pay for what you will actually use. The design of the parts, rendered in CAD by artist Ronnie Olsthoorn, and 3D-printed and cast by SBS of Hungary, are flawless. You can actually see that the designers have thought about things in an intelligent way and pulled off what appears to be a fantastic conversion of the famous sibling of Messerschmitt’s famed G-series Bf 109. The only thing I need to add is that you will need to do a little reference hunting to ensure your finished Buchón will have the correct spinner and prop combo for the selected scheme, and that you will need to look at shortening the wingtips slightly and adding the fake wing guns that were used in the film. My set wasn’t provided with any colour scheme profiles, but these are available on their Facebook page. A seriously nice set! My sincere thanks to Attitude Aviation As, for the review sample seen in this article. For more info, check out the company’s Facebook page, here. Visit Ronnie Olsthoorn's Aviation Art page here. Prepare to be amazed!


- 2 replies
-
- 2
-

-

-
- messerschmitt
- buchon
- (and 1 more)
-
I Like Button: I'm out for the day
James H replied to Peterpools's topic in Problems? Suggestions? Tell us!
Fixed! All Reaction restrictions removed. -
Lancaster Dambuster conversion now available.
James H replied to James H's topic in Modelling Discussion
The Mark Postlethwaite book is excellent and has rendered internal and external graphics by Piotr Forkasiewicz -
Spoofs. Doing the rounds. I get two or three every week. Changing your email passwords and anything else significant is always a good idea, not just as a precaution, but also if you've never changed them in a while. Also don't use the same pass for any two things. LSM security is the best we can get it.
-
1/16 Takom Imperial Japanese Army Type 94 Tankette
James H replied to Dave J's topic in LSM 1/35 and Larger Work In Progress
That's looking mighty fine. I thought this would build quickly. -
Takom 1/35 V2 Rocket
James H replied to JeroenPeters's topic in LSM 1/35 and Larger Work In Progress
We don't see one of these every day -
Just love your work. So good to see you share these projects at LSM too
-
1/16 Takom Imperial Japanese Army Type 94 Tankette
James H replied to Dave J's topic in LSM 1/35 and Larger Work In Progress
Started yet? -
Hope you like the book. I have my complimentary copy here and it's very good. I did proofing for that before I even knew it was related to the new range.
-
In all fairness, I think that's a colour that there is some controversy over. One school of thought actually puts it within the blue area.
-
I got a number from AK for projects, and so far they spray beautifully. One question though. If these are 'scale colour' as claimed by AK, meaning that they are lighter than the actual colour due to the so-called scale effect, then how does that then contrast when you add decals, which invariably aren't scale effect? Would that not add some strange contrast? I find the RAF Dark Earth to be noticeably lighter than I would expect.
-
1/35 Harley Davidson WLA
James H replied to JeroenPeters's topic in LSM 1/35 and Larger Work In Progress
Love it! -
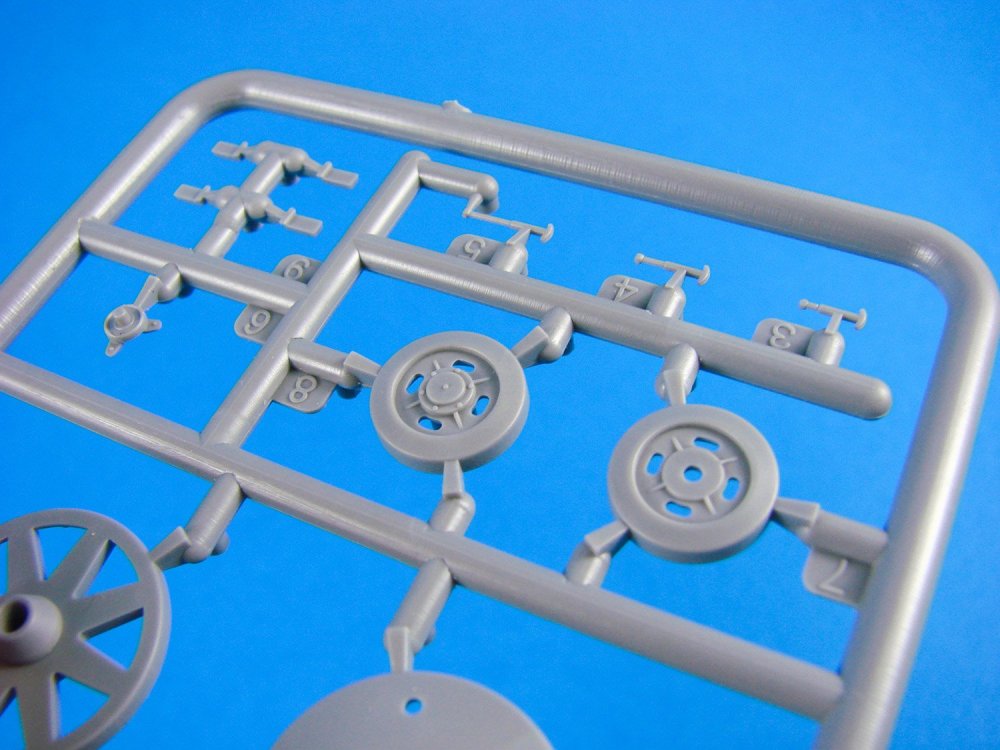
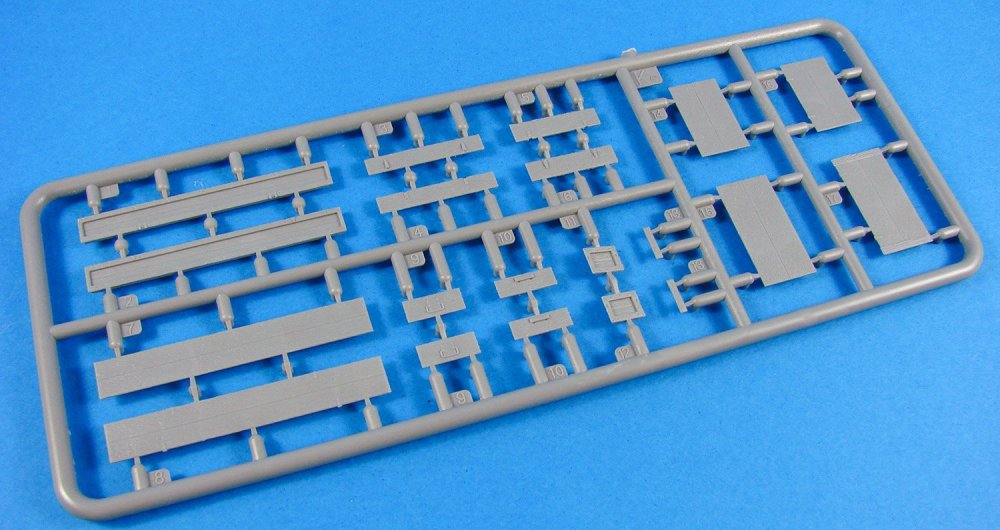
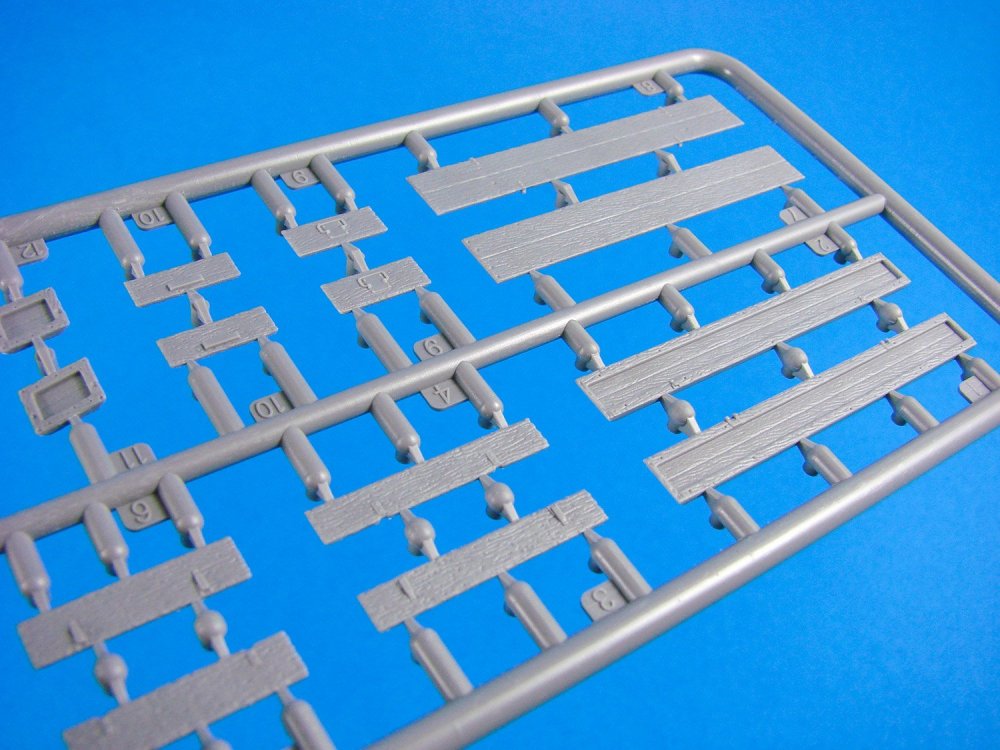
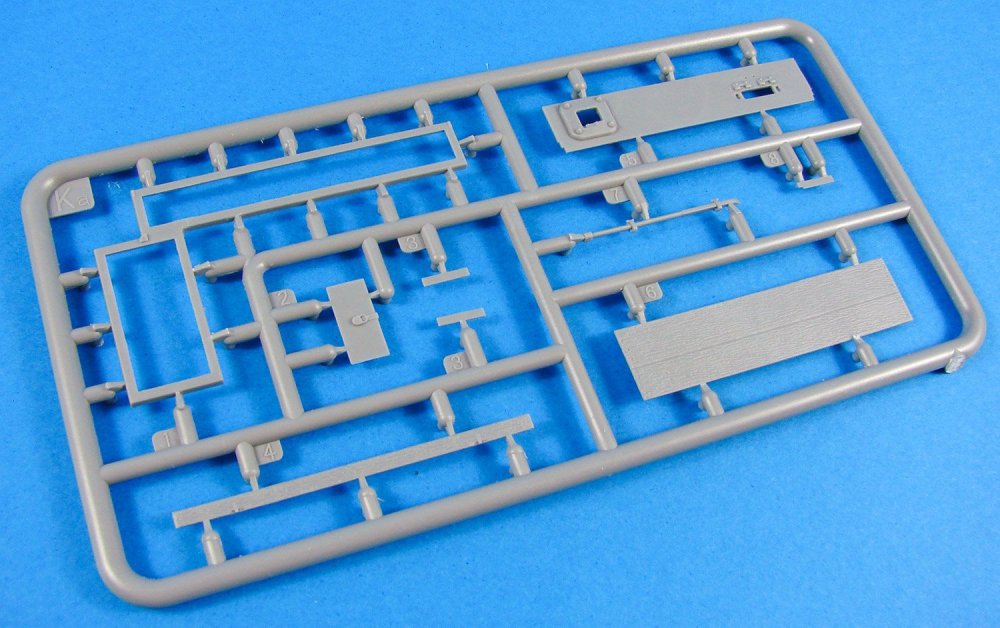
1:32 Fifie – The Scottish Motor Fishing Vessel Amati Catalogue # 1300/09 Available from Amati for €220.00 The Fifie is a design of sailing boat developed on the east coast of Scotland. It was a traditional fishing boat used by Scottish fishermen from the 1850s until well into the 20th century. These boats were mainly used to fish for herring using drift nets, and along with other designs of boat were known as herring drifters. While the boats varied in design, they can be categorised by their vertical stem and stern, their long straight keel and wide beam. These attributes made the Fifies very stable in the water and allowed them to carry a very large set of sails. The long keel, however, made them difficult to manoeuvre in small harbours. Sailing Fifies had two masts with the standard rig consisting of a main dipping lug sail and a mizzen standing lug sail. The masts were positioned far forward and aft on the boat to give the maximum clear working space amidships. A large Fifie could reach just over 20 metres in length. Because of their large sail area, they were very fast sailing boats. Fifies built after 1860 were all decked and from the 1870s onwards the bigger boats were built with carvel planking, i.e. the planks were laid edge to edge instead of the overlapping clinker style of previous boats. The introduction of steam powered capstans in the 1890s, to help raising the lugs sails, allowed the size of these vessels to increase from 30 foot to over 70 foot in length. From about 1905 onwards sailing Fifies were gradually fitted with engines and converted to motorised vessels. There are few surviving examples of this type of fishing boat still in existence. The Scottish Fisheries Museum based in Anstruther, Fife, has restored and still sails a classic example of this type of vessel named the Reaper. The Swan Trust in Lerwick, Shetland have restored and maintain another Fifie, The Swan, as a sail training vessel. She now takes over 1000 trainees each year and has taken trainees to participate in the Cutty Sark Tall Ships Races to ports in France, Denmark, the Netherlands, Ireland as well as around the UK. Extract from Wikipedia The kit Fifie is packed into a large, heavy box that certainly hints that there’s a good quantity of material included to build this historic fishing vessel in all its glorious 1:32 scale. I do admit to particularly liking this scale, having built plastic models for many years and indeed for magazine publication. It’s definitely something I can relate to when eyeing up the various dimensions and features. Amati’s presentation is flawless and certainly stands out, with its large, glossy lid that captures an attractive view of the Fifie. It has to be noted here that the hull is usually fully painted, with green being common above the waterline, but this model was finished to show off the beauty of the walnut timber supplied in the kit. And why not! For those that don’t know, this kit, under the Victory Models label, was designed by Chris Watton. Many of you should be familiar with that name and his design pedigree. At 1:32, this kit is no shrinking violet in terms of size. Fifie is 700mm long, 470mm wide and with a height of 230mm (sans masts). Lifting the lid does indeed show a box crammed with materials. Inside, we have several bundles of timber, plus a packet of timber dowel/strip/metal rod/tube, a thick packet containing numerous laser-cut sheets, another packet with plans and photo etch, and underneath the main timber, we have sail cloth and fittings packs. Thick foam is included to stop the main materials from banging around in the box. Strip wood Fifie has a double-planked hull, with the first layer being constructed from 1.5mm x 7mm lime strips. These, like many of the other bundles, are 600mm long, and very cleanly cut with no fuzzy edges Sixty-five of these are supplied. The same quality goes for the second planking layer, which is supplied as 90 strips of 1mm x 6mm walnut which is some of the best I’ve seen in a kit. There is little colour variation in these, and they look pleasantly uniform. I’ve always found Amati’s timber quality to be exceptional and this is no different. As well as elastic to hold the bundles some labels are also included to help identity the material. Other strip wood is included (beech and walnut) for such things as deck planking, caulking (yes, caulk plank!), lining the various deck hatches, sheathing the deckhouse structures, rubbing strakes etc. These bundles are both taped and bound with elastic, with the deck planking having an identifying label also. Cutting is clean and precise. Dowel and tube/rod Various lengths of dowel is included for masting, false keel strengthening pins etc. and thicker strip wood for the timberheads. All is supplied in a nice uniform walnut colour….no nasty walnut dyes/stains in this kit! These latter lengths are also packaged into a thick clear sleeve, unlike the others. Note also various lengths of brass and copper wire, as timberheads well as some copper tube for the propeller shaft, which can of course be an integral part of building Fifie as an RC model, should you wish. Some mounting parts are included for RC conversion, but you will need to purchase other items to complete the model for radio. MDF sheet items Again, Amati has made extensive use of 4mm MDF for the hull false keel and bulkheads, and all are laser-cut, as are all individual wooden items in this kit. Cutting looks very precise with very little in the way of scorching, apart from very localised discolouration. I know many don’t like MDF as a material for our models, but MDF sands easily and is also warp-free, lending itself to a nice, true hull. You won’t see any of this when you start to lay planks. There are FOUR sheets of this material, and you’ll notice that there aren’t any parts numbers engraved on here. You will need to refer to the first two sheets of plans which contain the parts references. A single sheet of 2mm MDF contains parts such as the four-piece deck, cleats, and the bulkheads and keel for Fifie’s single launch vessel. There is also a single 6mm sheet of MDF (sheet 2698-B) which contains the four parts needed for the cradle. I’ve seen numerous sites which now sell this model claim that no stand is included with this model. Well, this sort of proves that statement incorrect. This is the same cradle shown on the box lid images. Of course, you’ll need a suitable MDF primer for this, and some nice coats of gloss lacquer to get the best from this. Ply sheet parts SIX sheets of thin ply are included for just about every other timber construction elements of Fifie, including the deckhouse, deck superstructures, keel sheathing, and bulwark capping strip. Again, all parts are laser-cut and will require minimal effort to remove any edge char. Fittings Two boxes of fittings are included in the very bottom of the Fifie kit box. Some of the weight bearing down has caused a small crack in the two vac-form fittings boxes, as you can see, but all parts within are absolutely fine. The first box contains the cast metal propeller, deck buckets, ship’s wheel, rigging blocks, life preserver rings and a whole load of beautifully smooth wooden balls for making the many buoys which sit on Fifie’s deck. These are perfectly circular, yet the ones on the box image are slightly shaped. Instructions show these as the balls, and you could perhaps opt to use a little putty to add some shape to these. The second fitting box contains seven spools of rigging cord in both black and natural colours, nails, various cast fittings such as bollards, plus rudder pintles, anchors etc. Copper eyelets, chain and ferrules etc. make up the set. Sail cloth Should you wish to add sails, then enough material is supplied for you, in bleached white cloth. Photo-etch Very few kits come without photo-etch parts these days, and this is no exception, with TWO sheets of 0.7mm brass with a very high number of included parts. A quick scan around the sheets will easily identify parts for the mast bases, steam winch, engine skylight, capstan, deck hand pump, wheel assembly, herring shovel, tabernacle, mast rings, etc. Acetate and card I have to say I’m not entirely sure what the card/cartridge paper is for except for maybe general use, but the thin acetate is obviously for the cabin windows. Instructions and plans Without a doubt, Amati produce some of the very best instruction manuals to come with any model kit. For reference, check out my Orient Express Sleeping Car review and that of Revenge. Fifie is no different with a luxurious and fully-pictorial, 64-page publication. Whilst this isn’t perfect-bound as with the previous reviews, it is in full colour and produced to a standard that’s still far higher than many contemporary manufacturers, with each stage being shown under construction so you get a perfect idea about what is required at that point in construction. Text is also in English, or at least in the sample I have been sent. The rear of the manual contains a complete components list. Backing up this publication is a set of seven plan sheets. The first two of these are for identifying the various timber and PE parts. The others show general profile and detail imagery, as well as masting and rig drawings. Remember that the hull itself is built entirely from the photographic sequences so everything you see on these drawings is for external details. Conclusion I have to say that you get a lot of kit for your money with Fifie, and when I first asked Amati what they envisaged the RRP to be, I was quite surprised at this. Everything about Fifie is quality, from the packaging and presentation, to the beautiful, photographic manual, fittings, sheet and strip timber, all the way to the superbly drawn plans. I’m very surprised that the gestation period has taken so long for them to bring this excellent kit to market. It’s also a Chris Watton thoroughbred. If you’ve seen his previous designs, then you’ll be familiar with the format of Fifie, which was quite the different vessel for Chris to tackle, when everyone seemed to think he would only design fighting vessels, armed to the teeth with cannon. I must admit that Fifie did take me quite by surprise too. The very shape of this iconic and historic vessel is so homely and welcoming and for me, invokes images of those times when fishing communities were happy and thriving. Whether you’re a fan of Chris’s work or not, Fifie is most certainly a kit that you should consider dropping into your virtual shopping cart next time you visit your favourite online model ship/boat retailer, and of course, if RC is your thing, then this kit will also suit your genre! VERY highly recommended! My sincere thanks to Amatifor sending out the sample kit you see reviewed here. To purchase directly click the link at the top of the article to take you to Amati’s online shop or check out your country’s local distributor. Plans are also available from Amati, for €21.00
-
hk models Lancaster B Mk.I, R5868, PO-S (S-Sugar)
James H replied to James H's topic in LSM 1/35 and Larger Work In Progress
It'll be closed up apart from the bomb doors. There's no mechanism to pose the crew entry door in an open position, and I have no time to try and fathom it out. The engines will be closed up too as I figured the aircraft wouldn't have cowls off whilst laden with a full bomb load. -
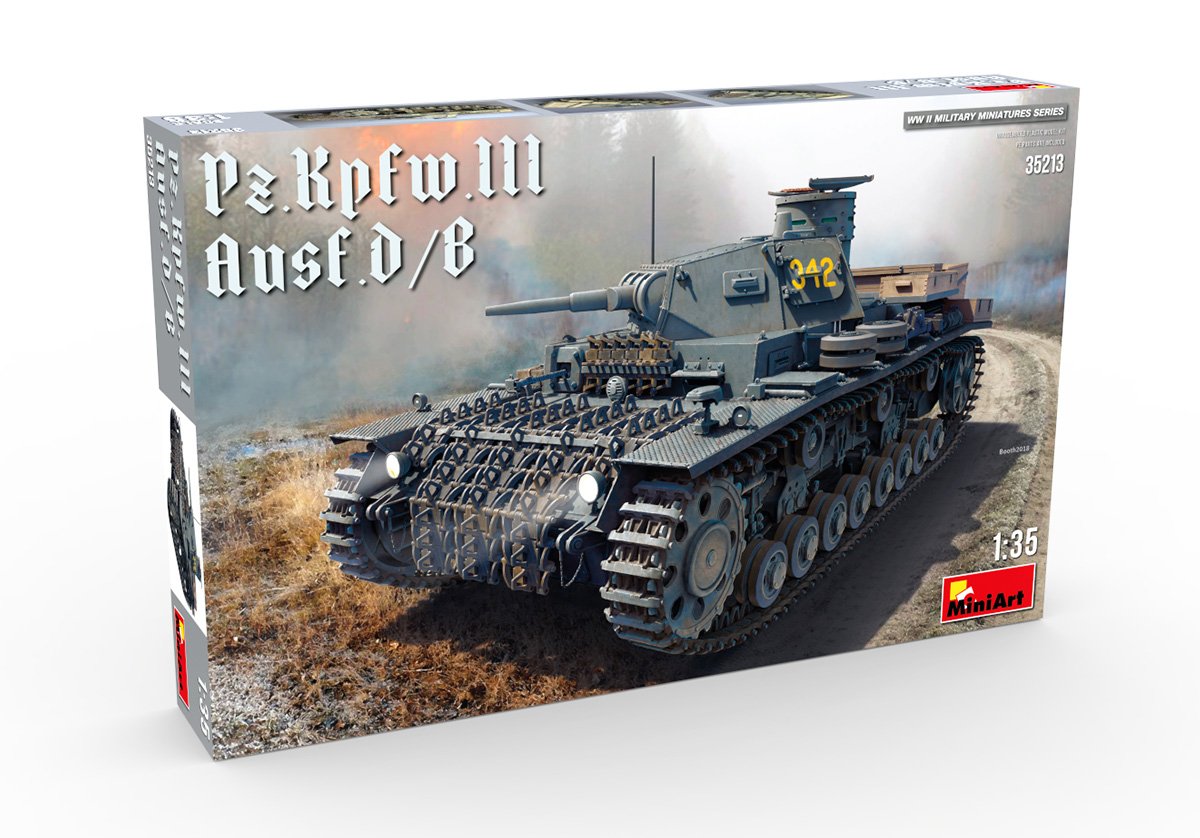
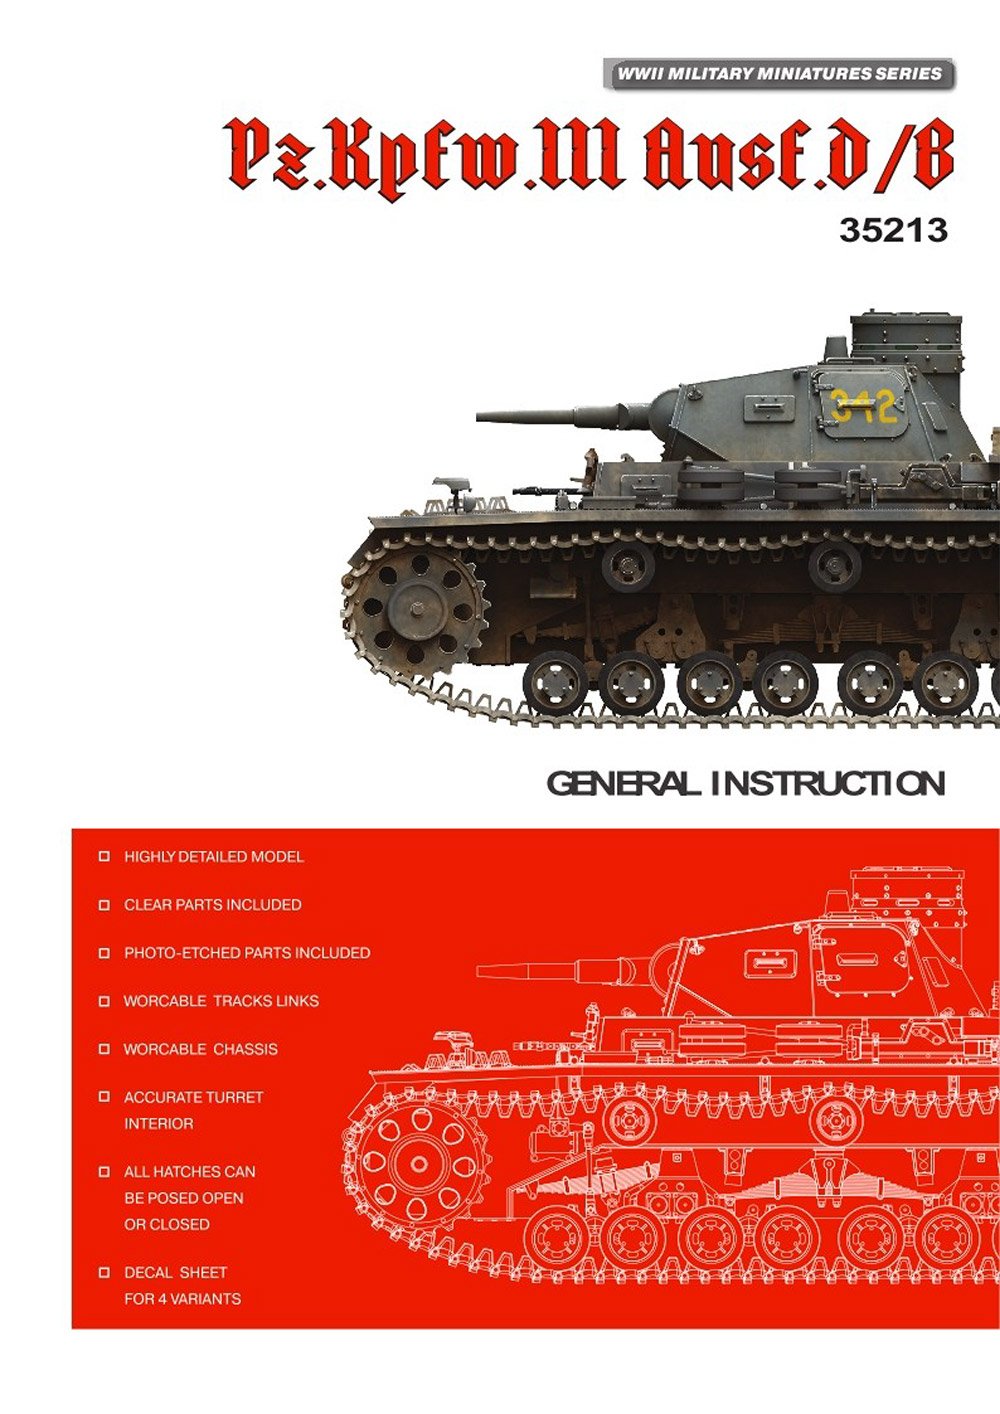
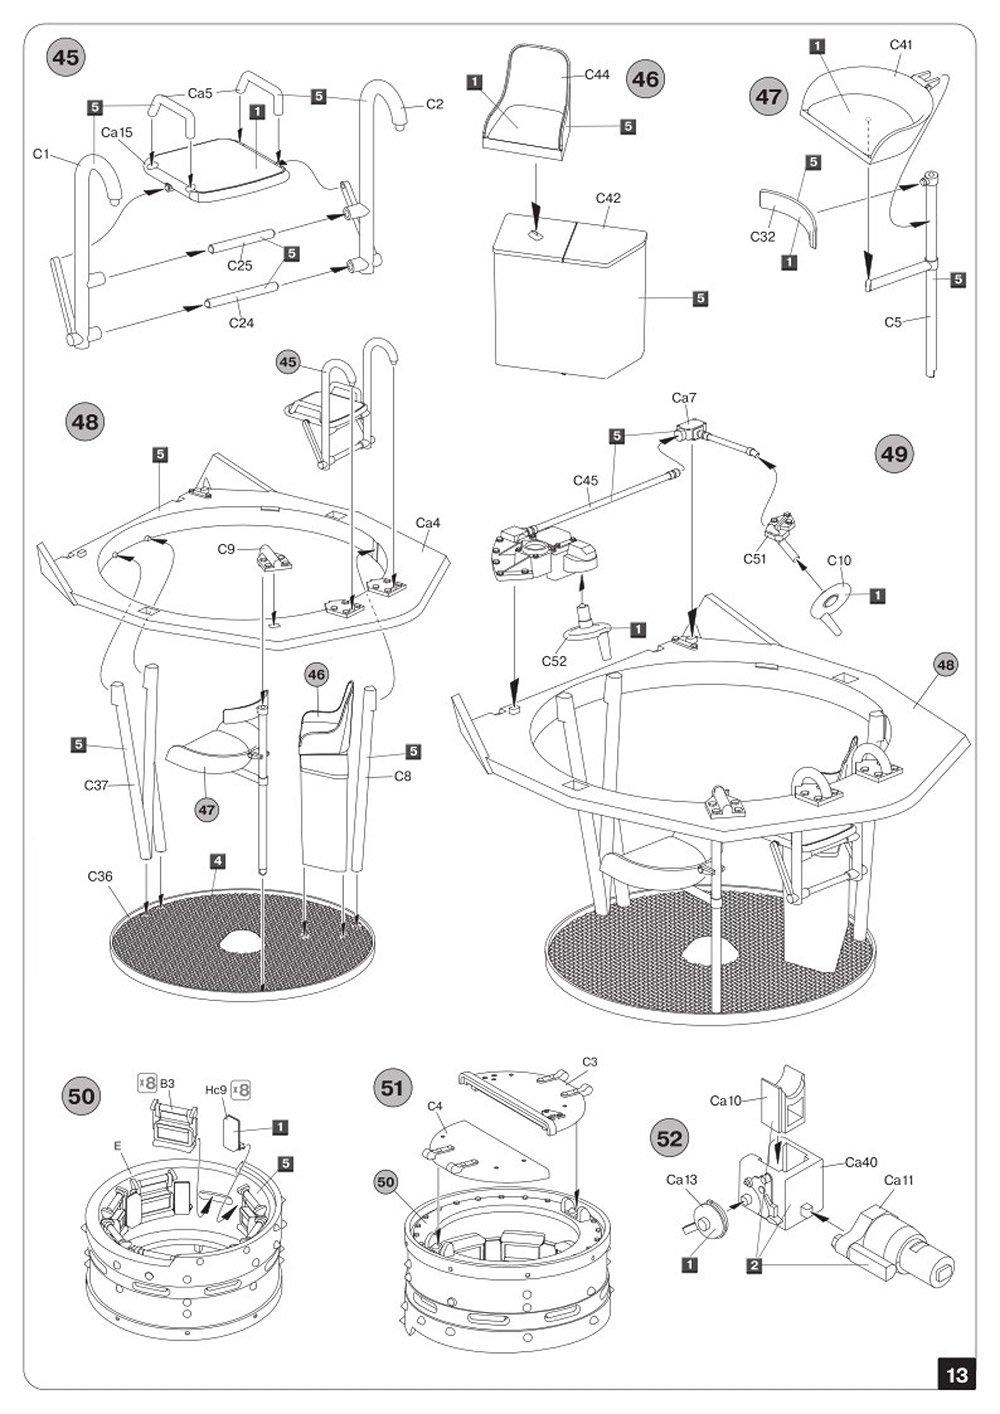
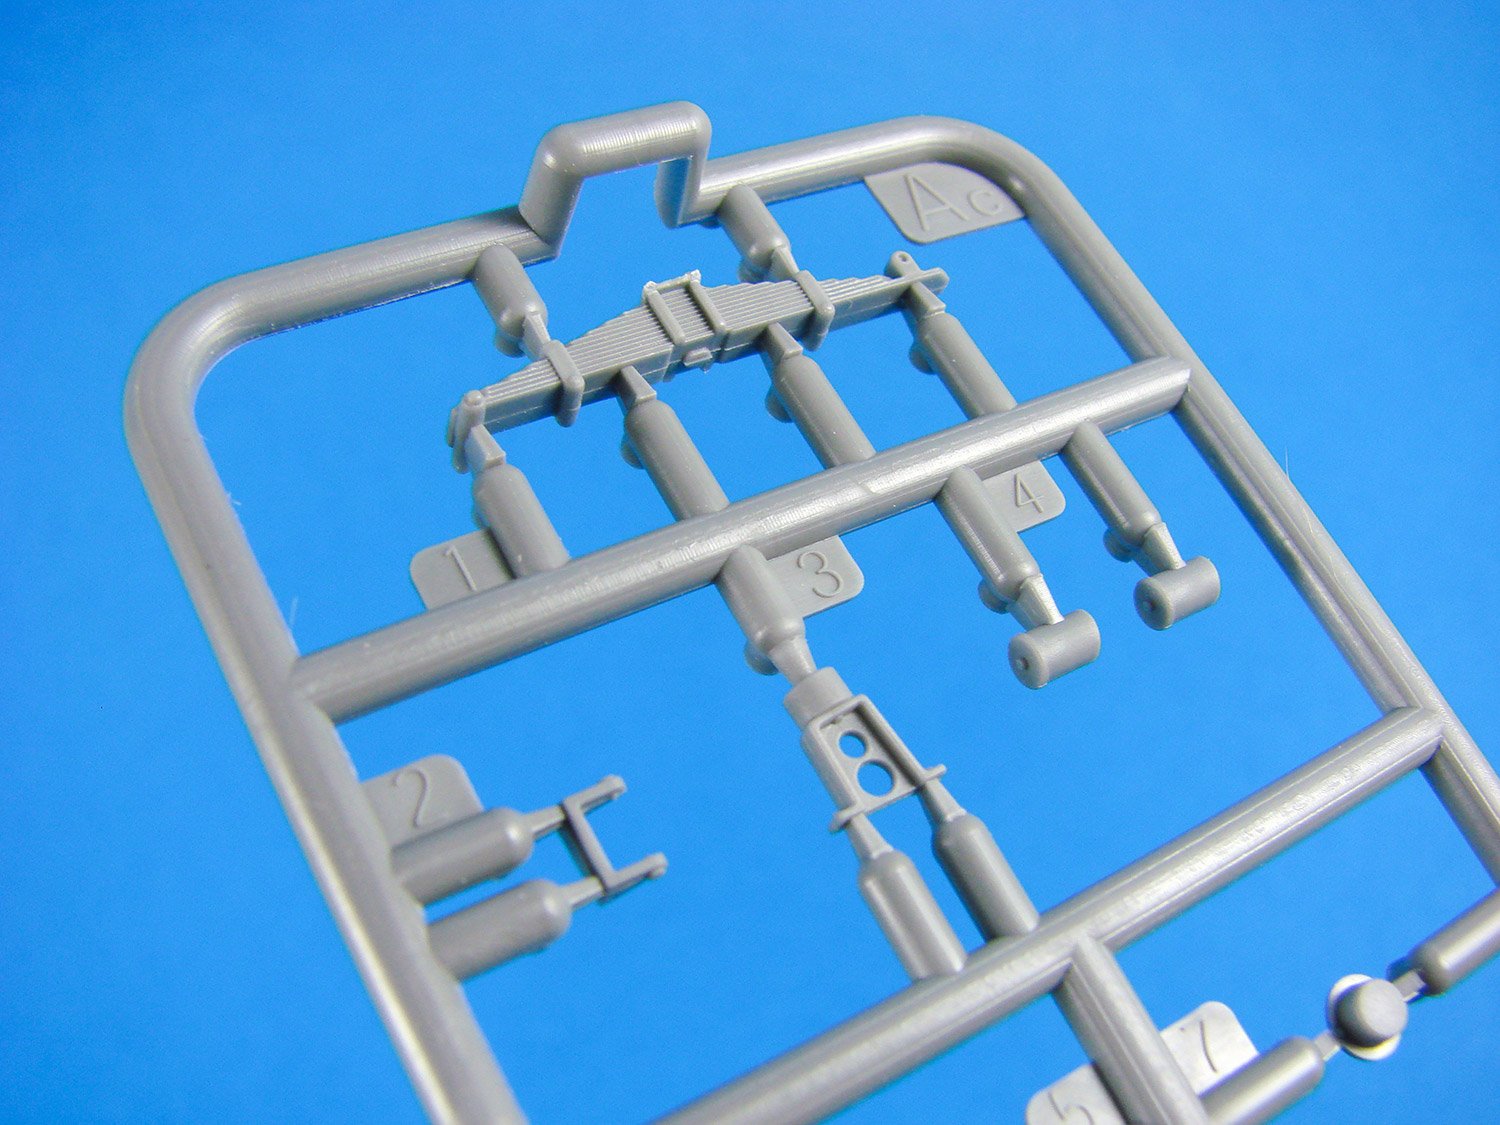
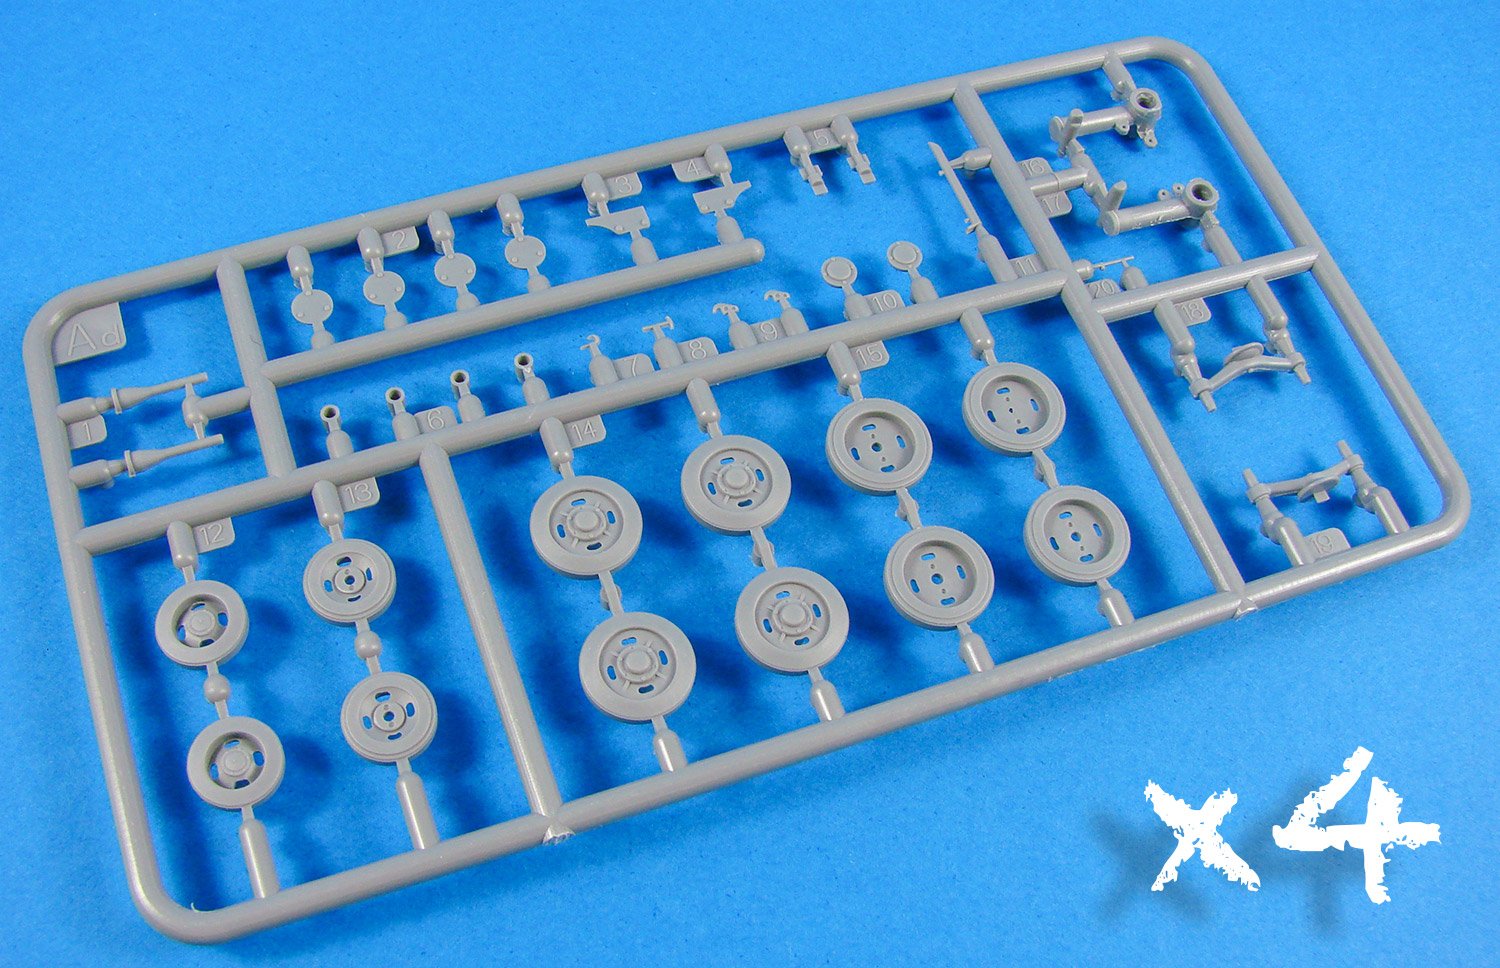
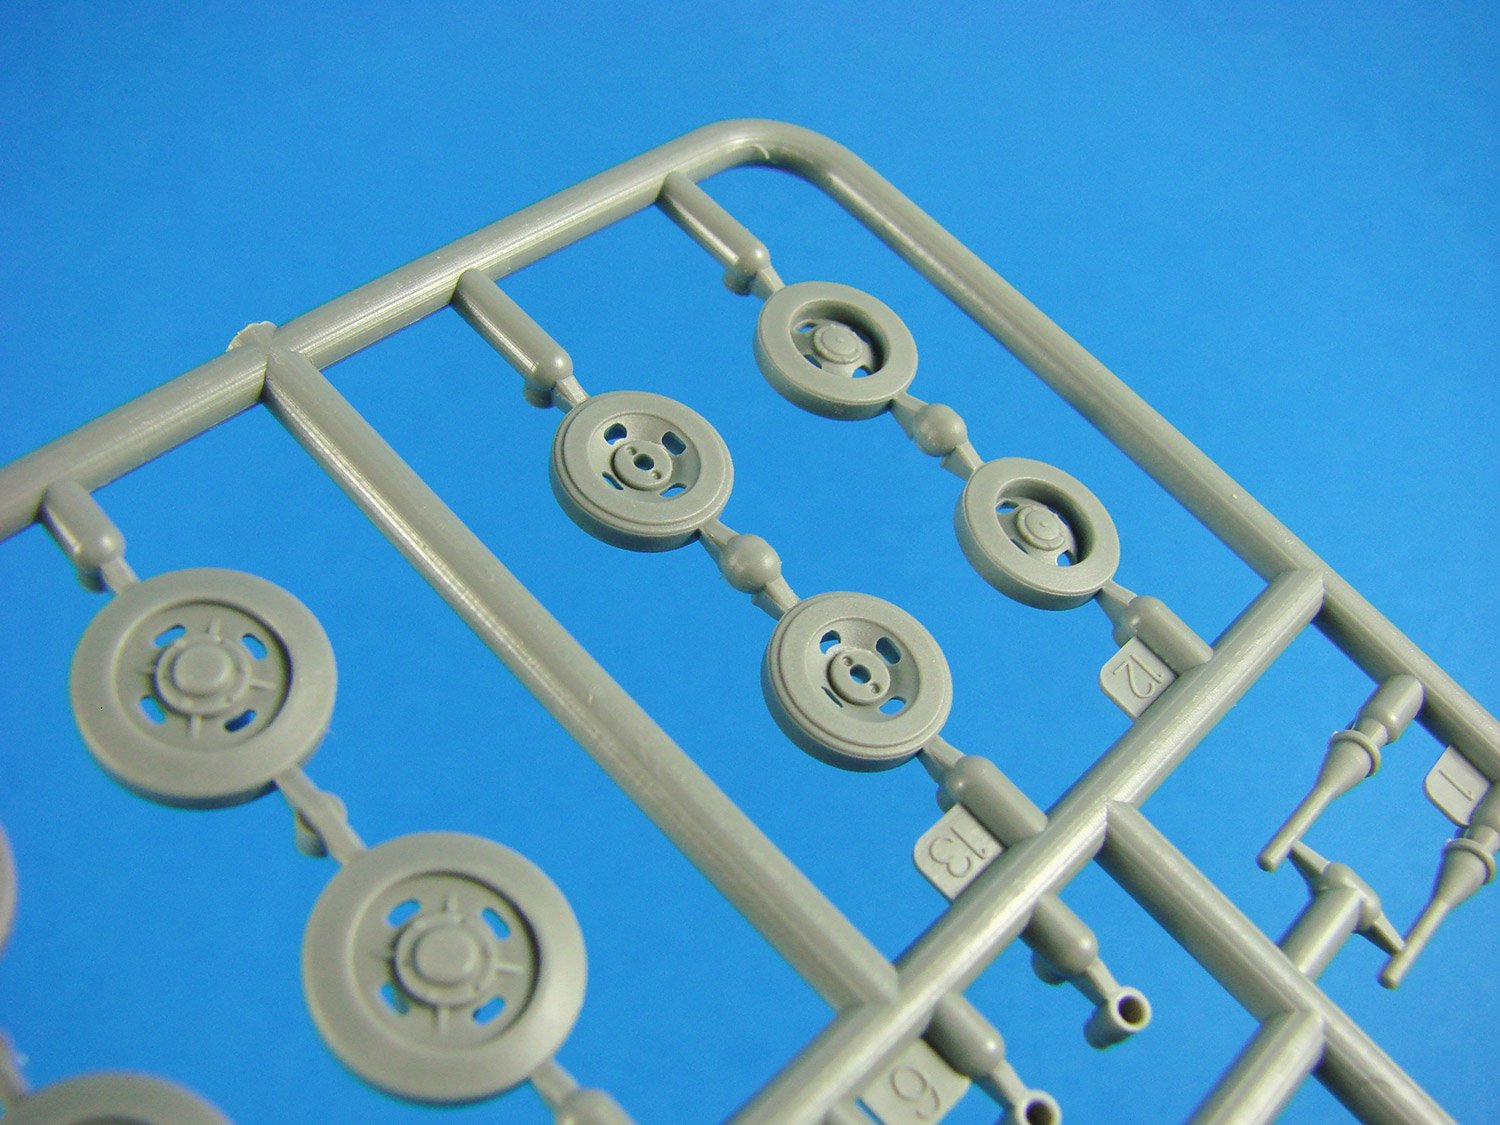
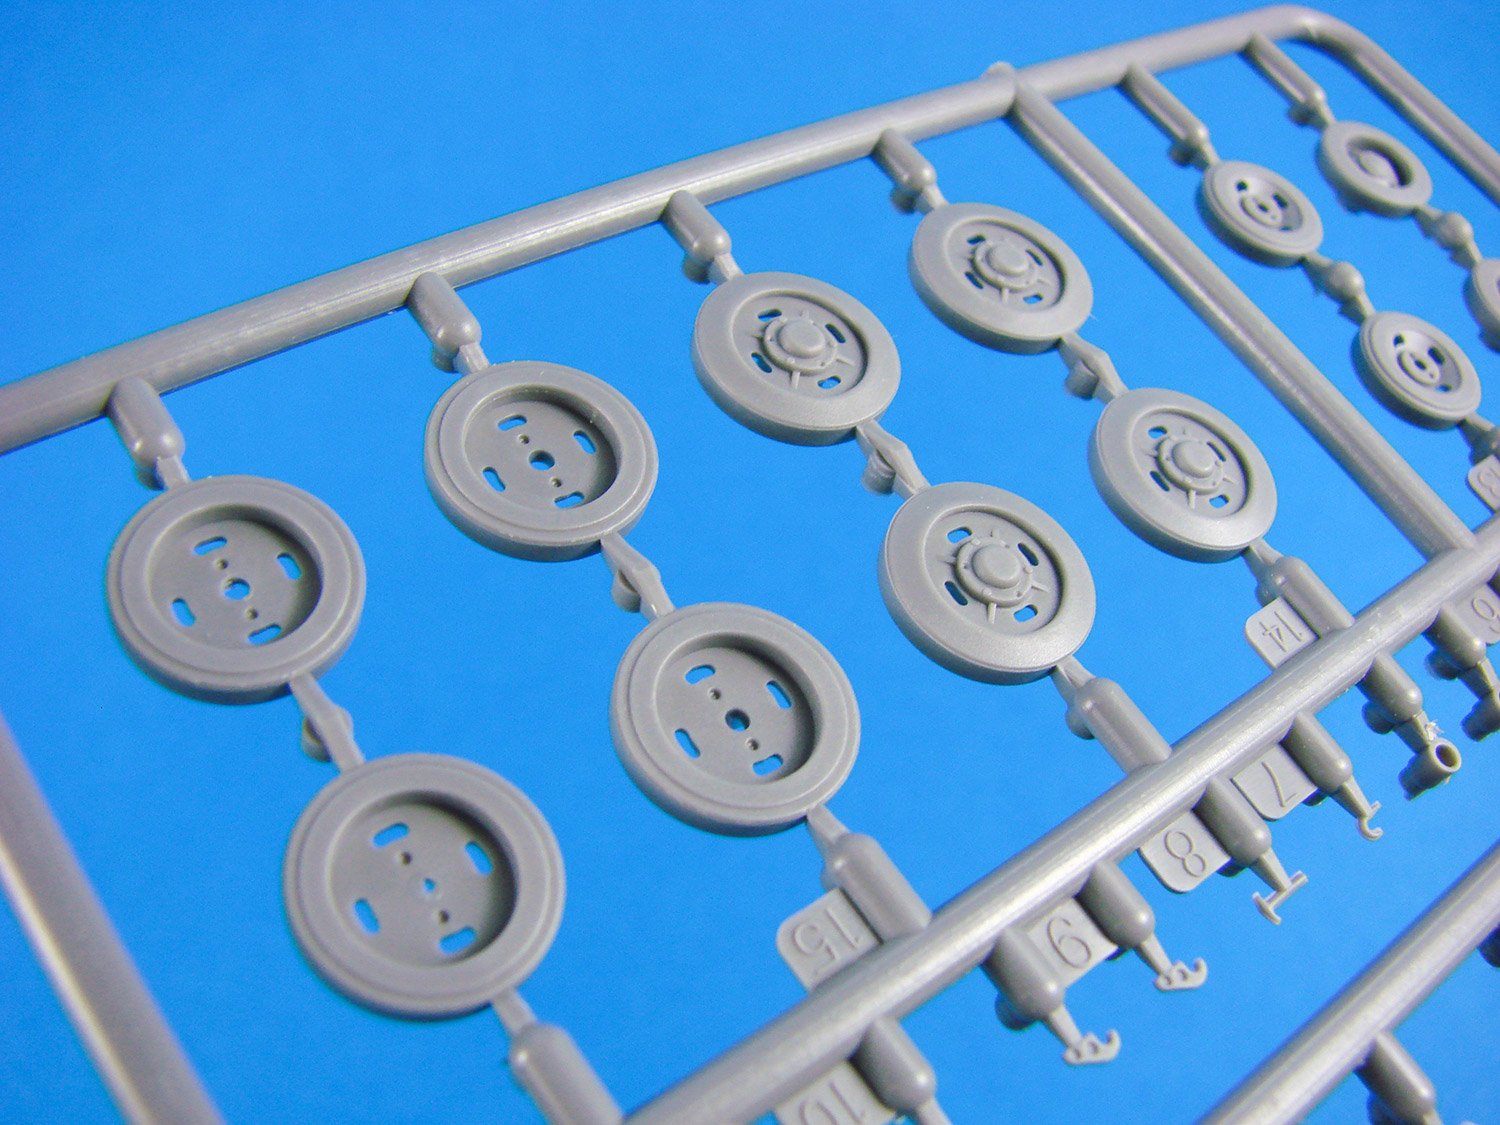
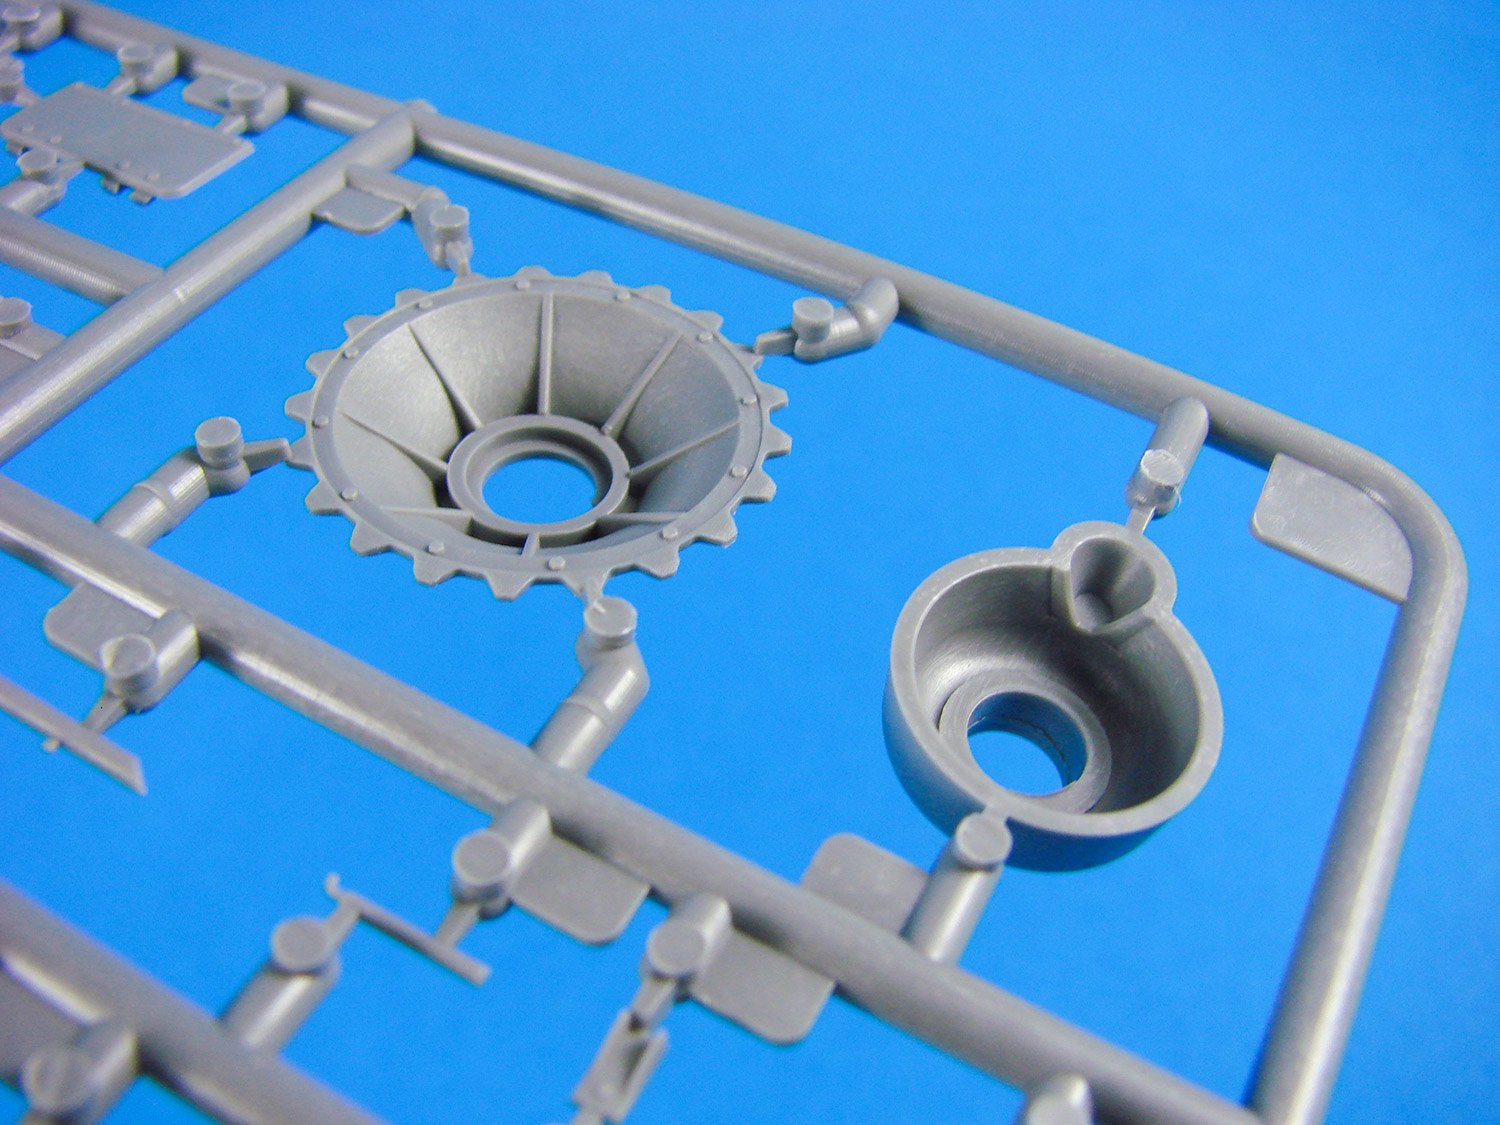
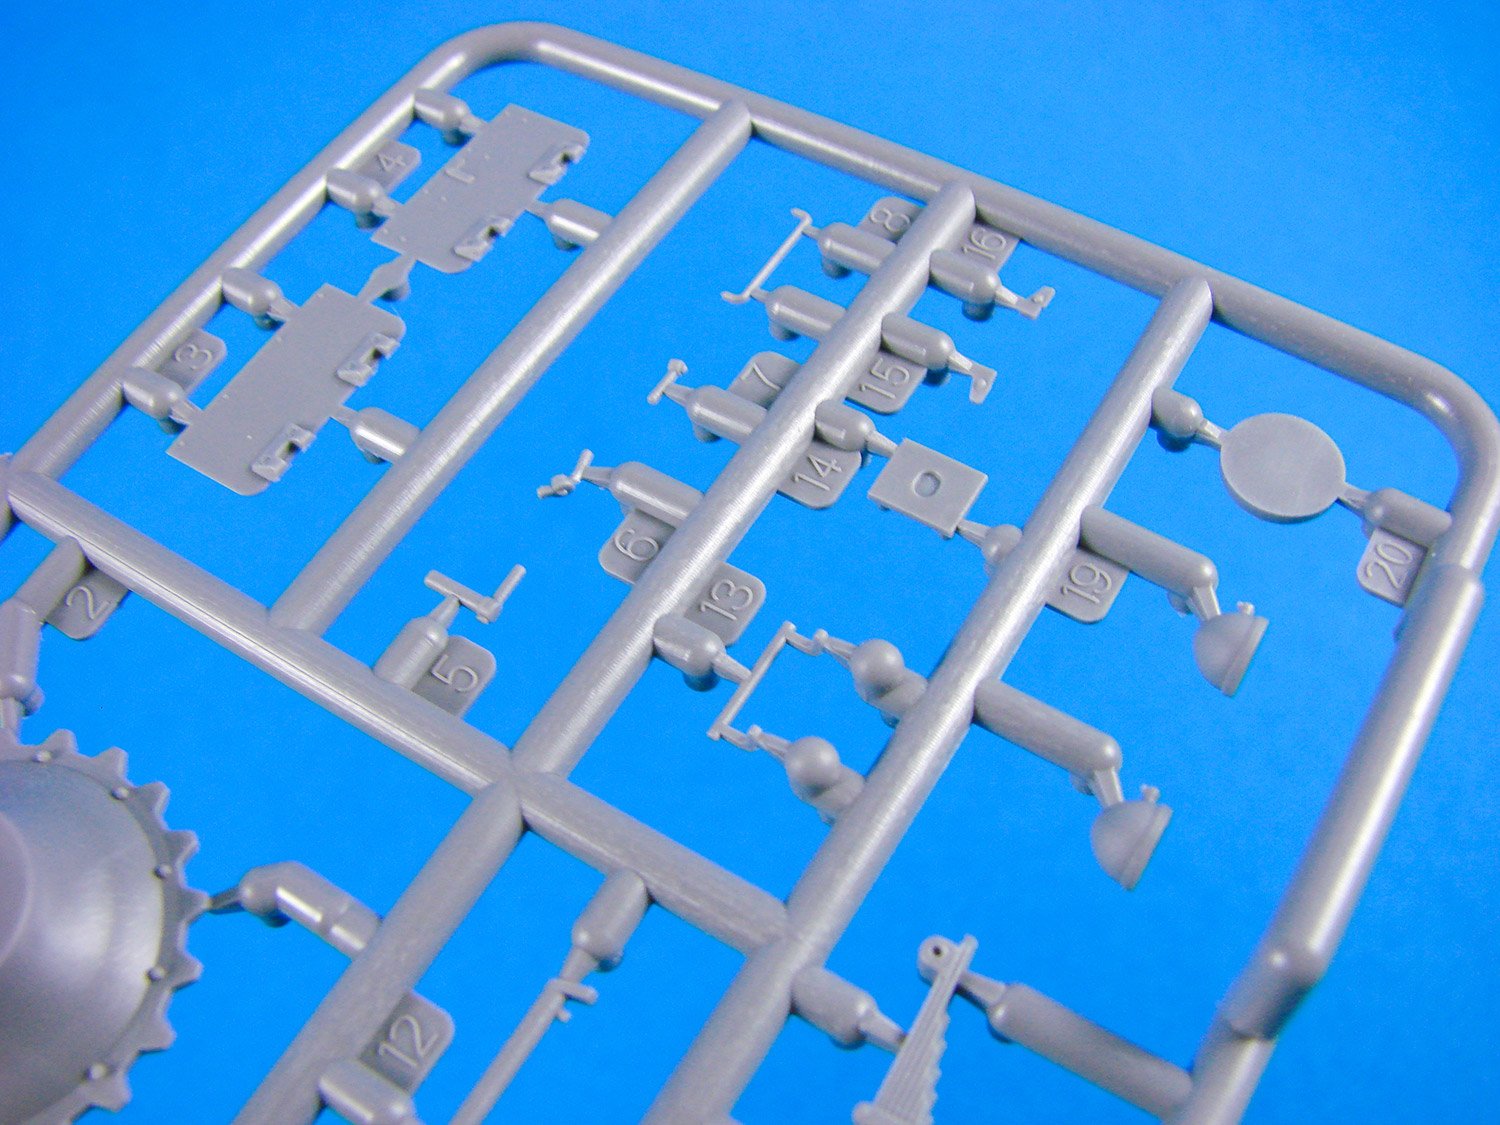
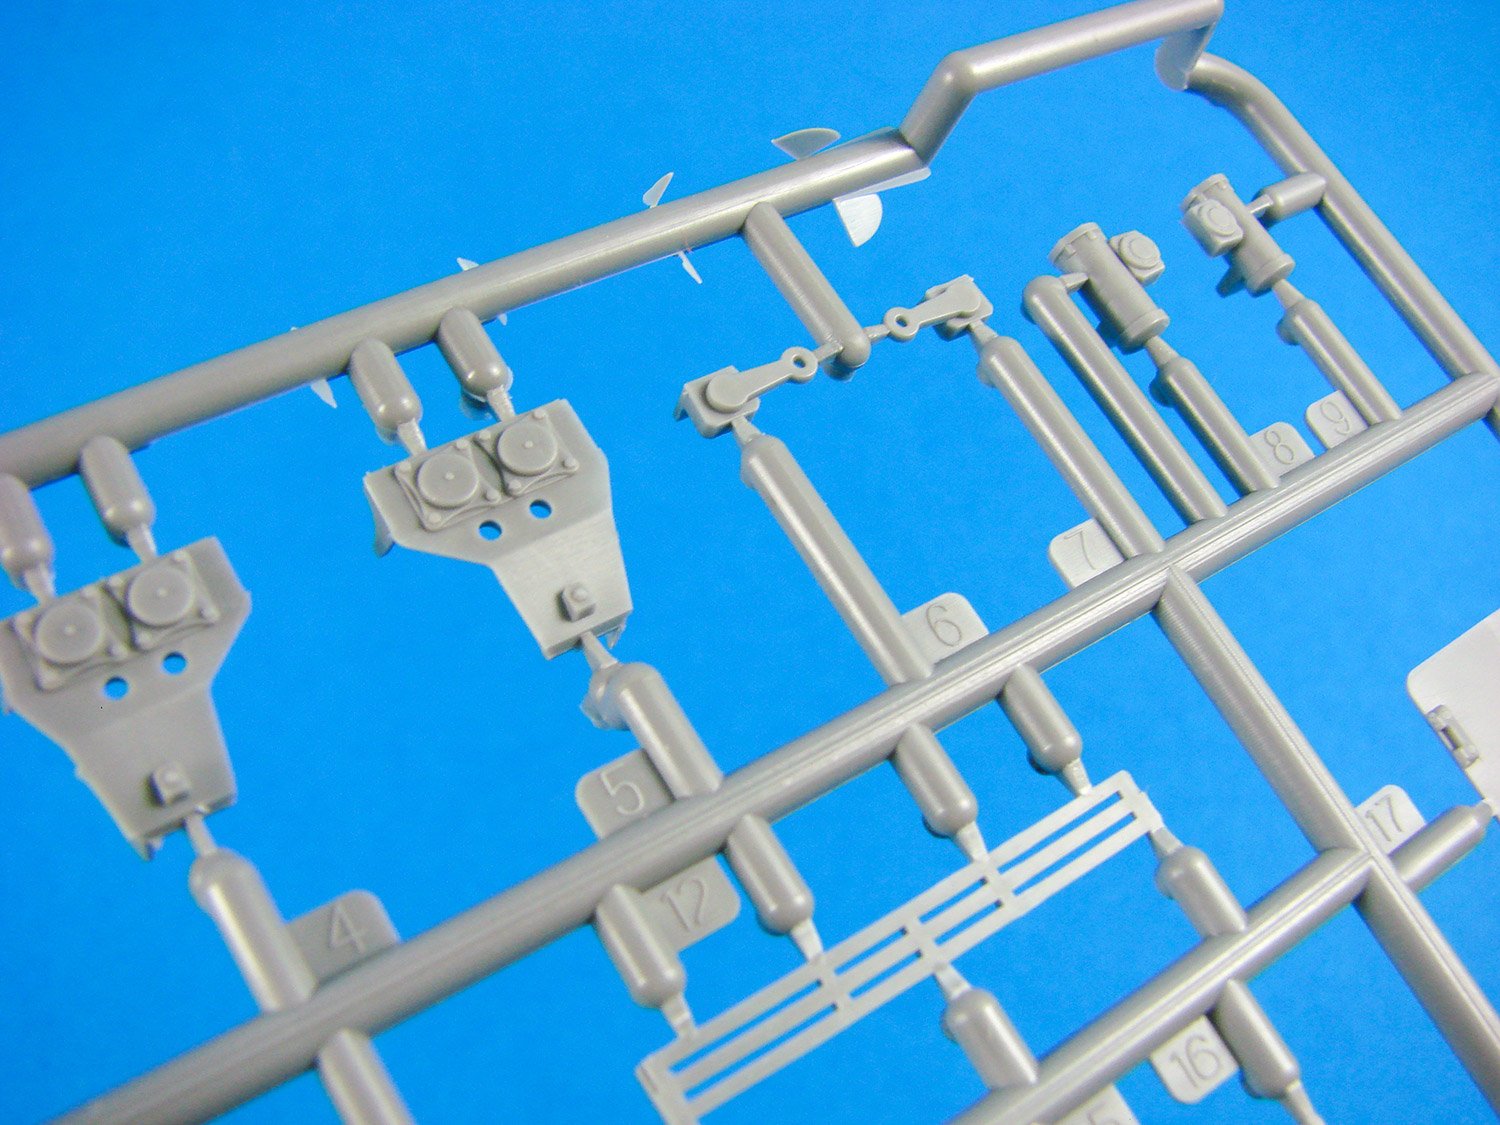
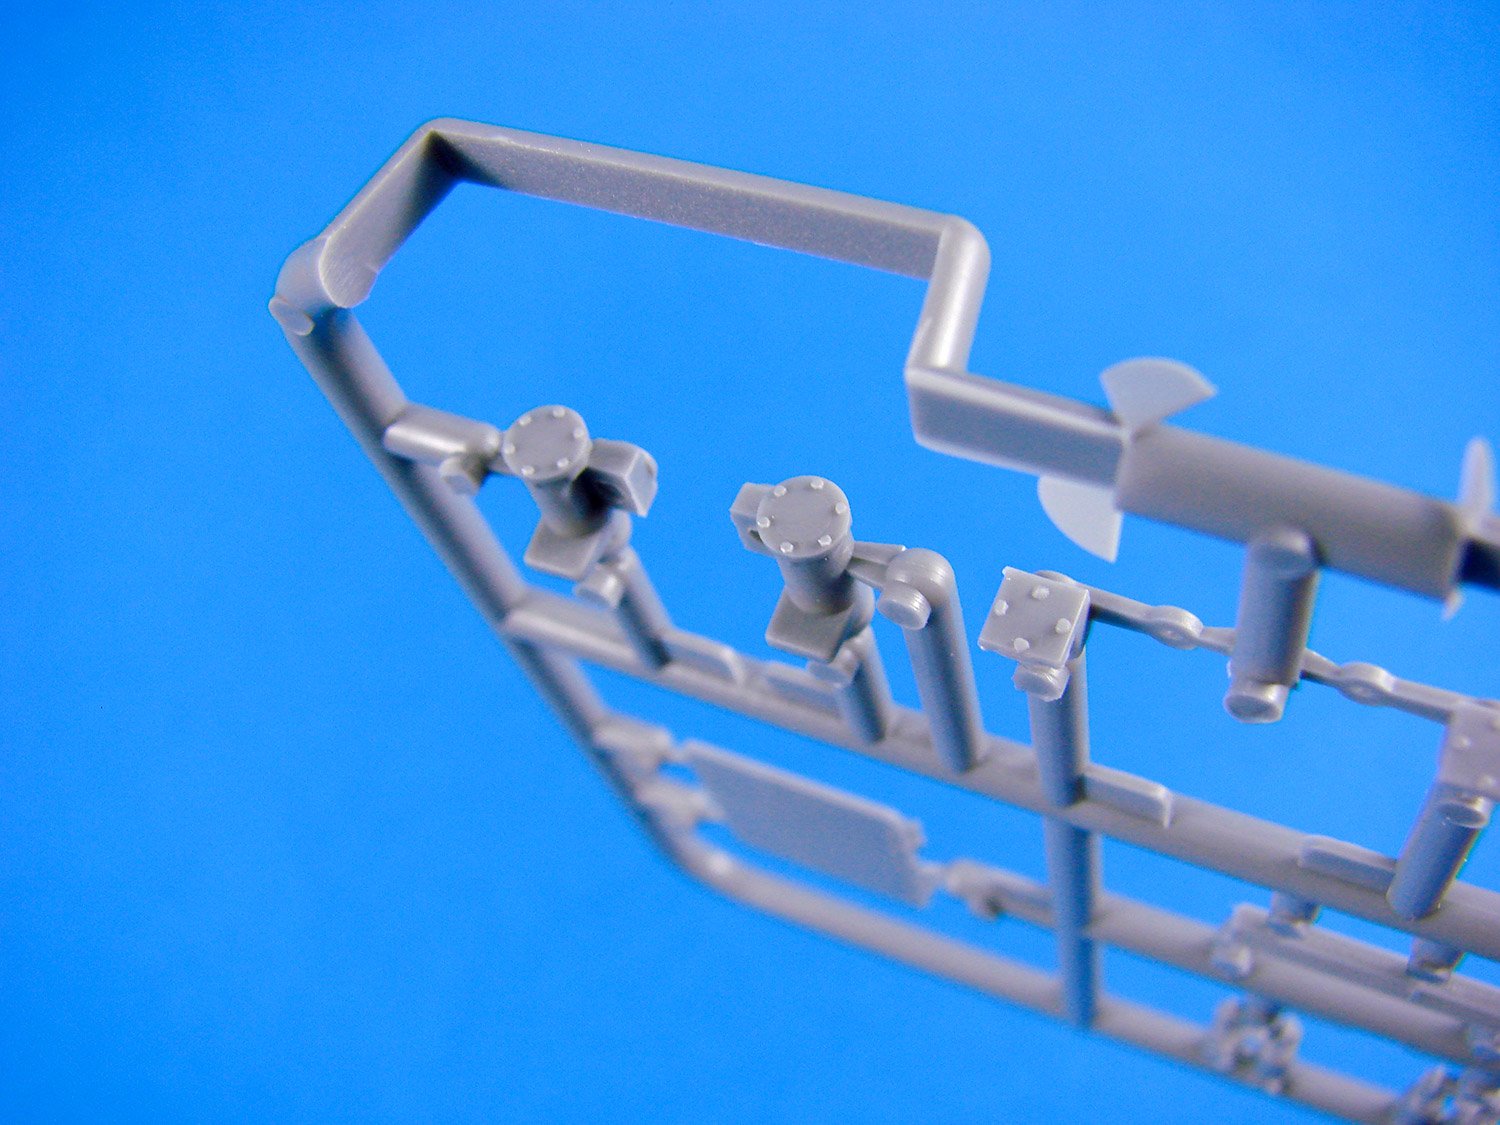
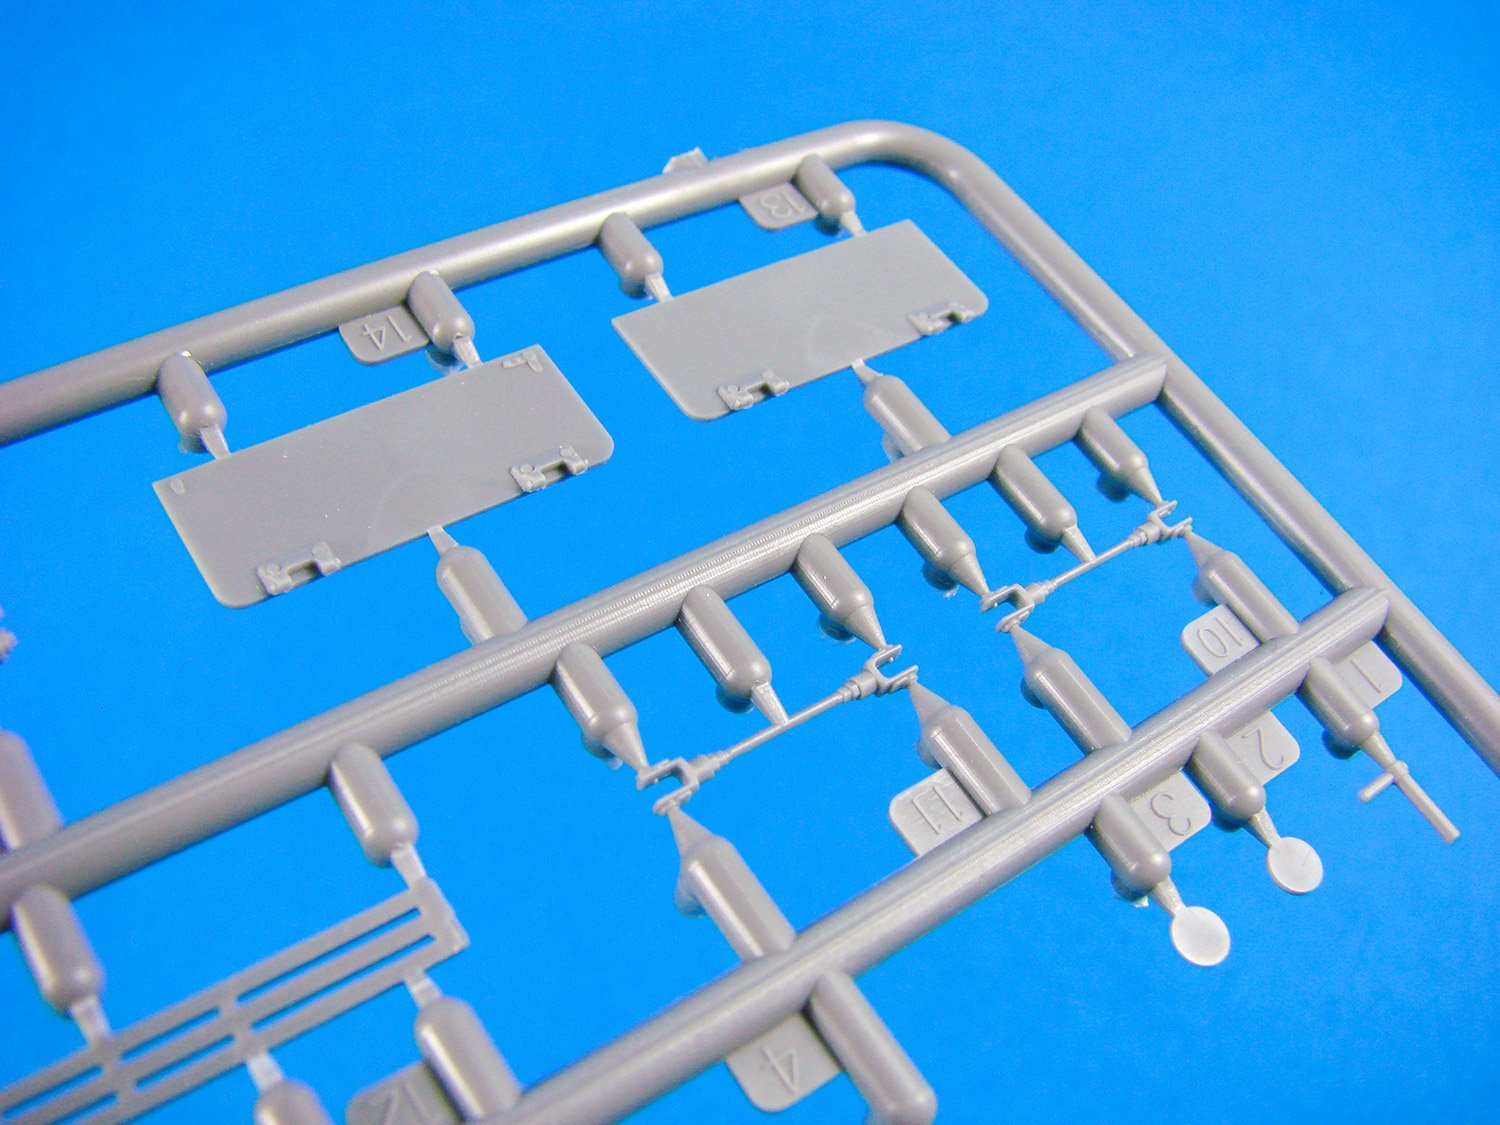
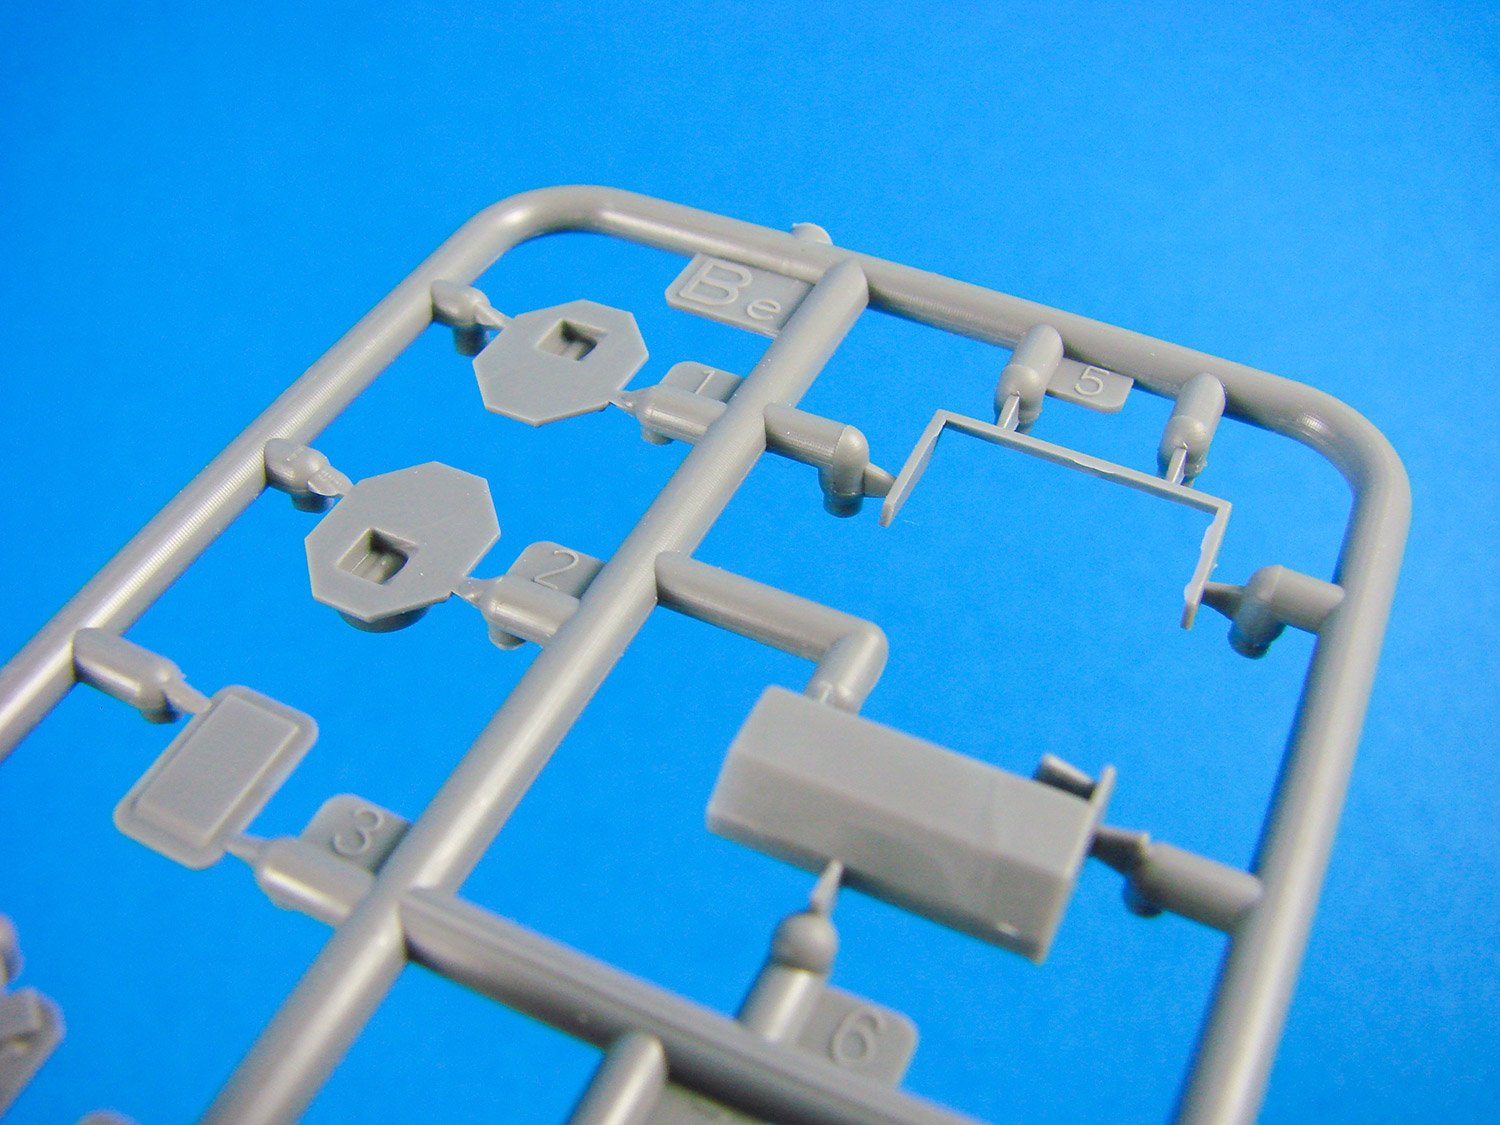
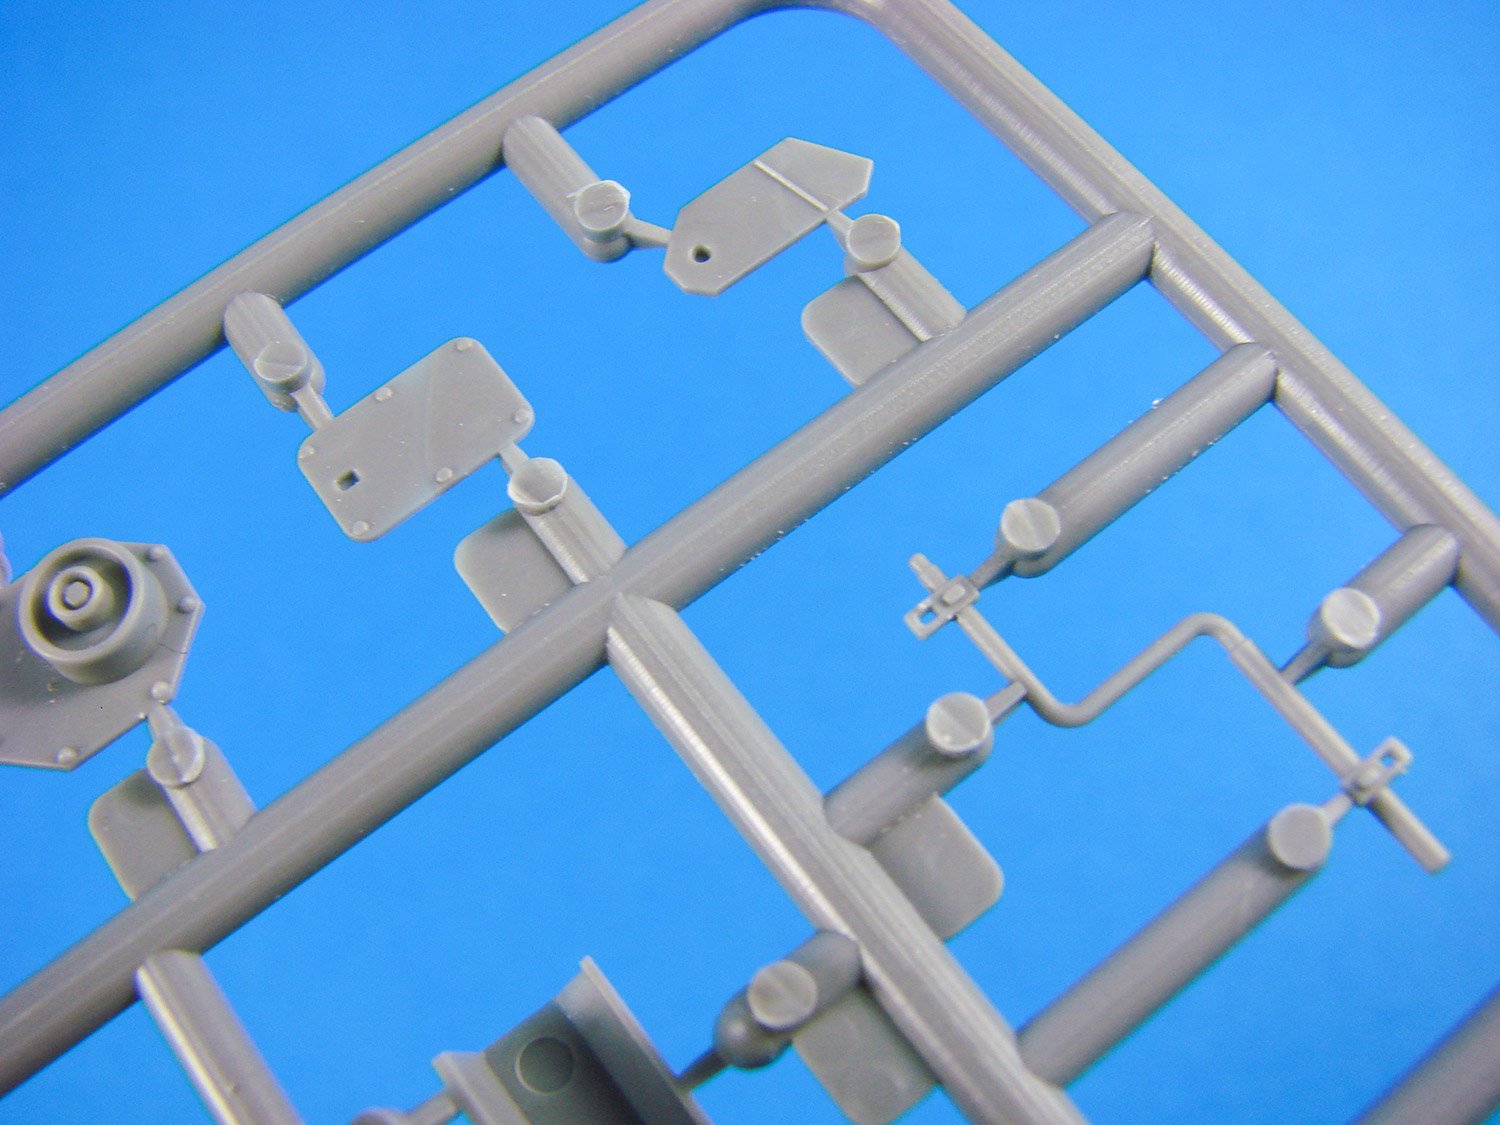
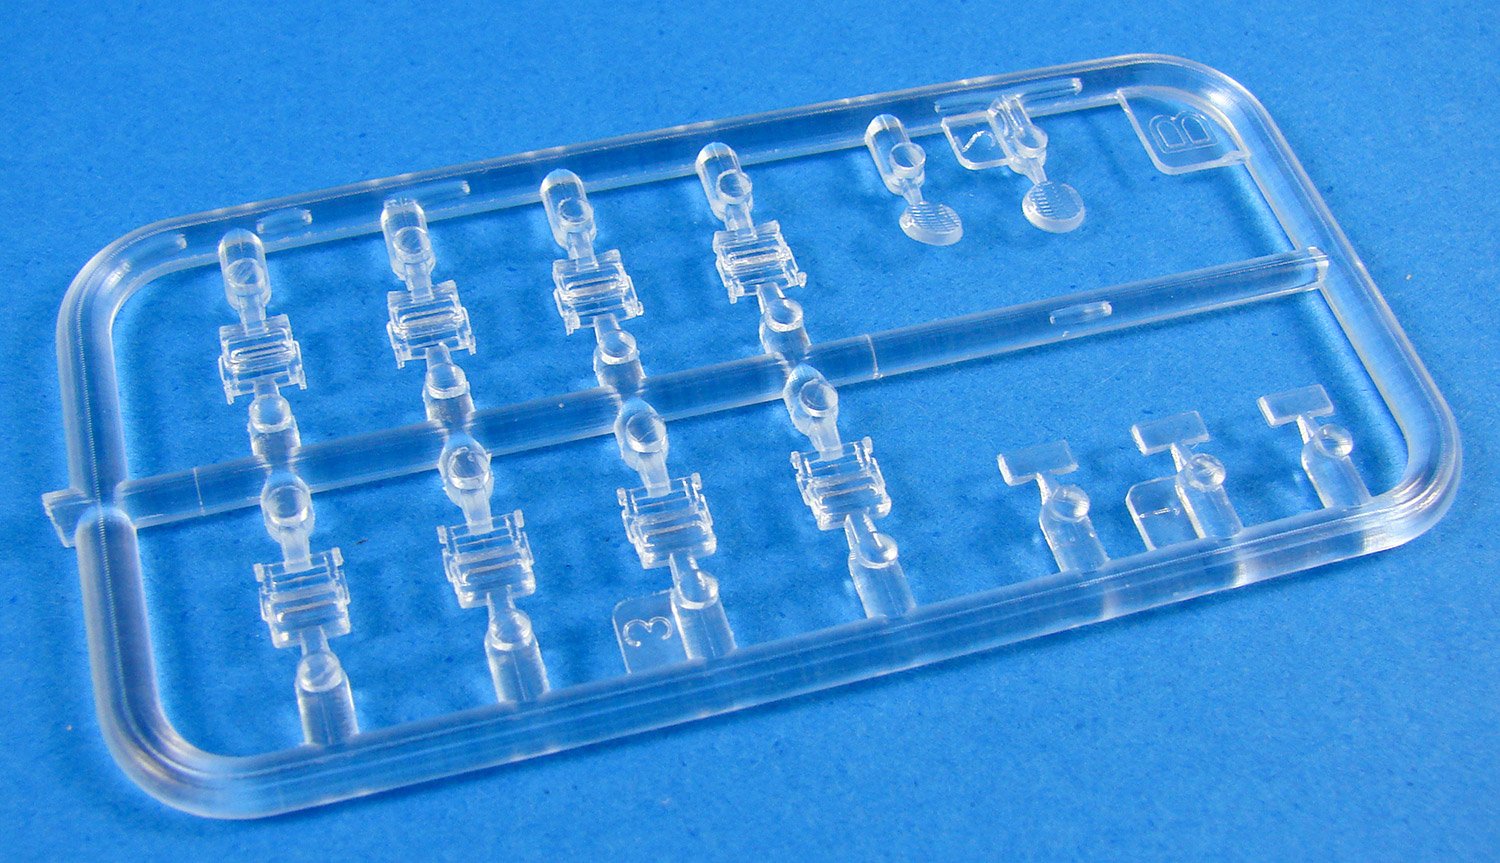
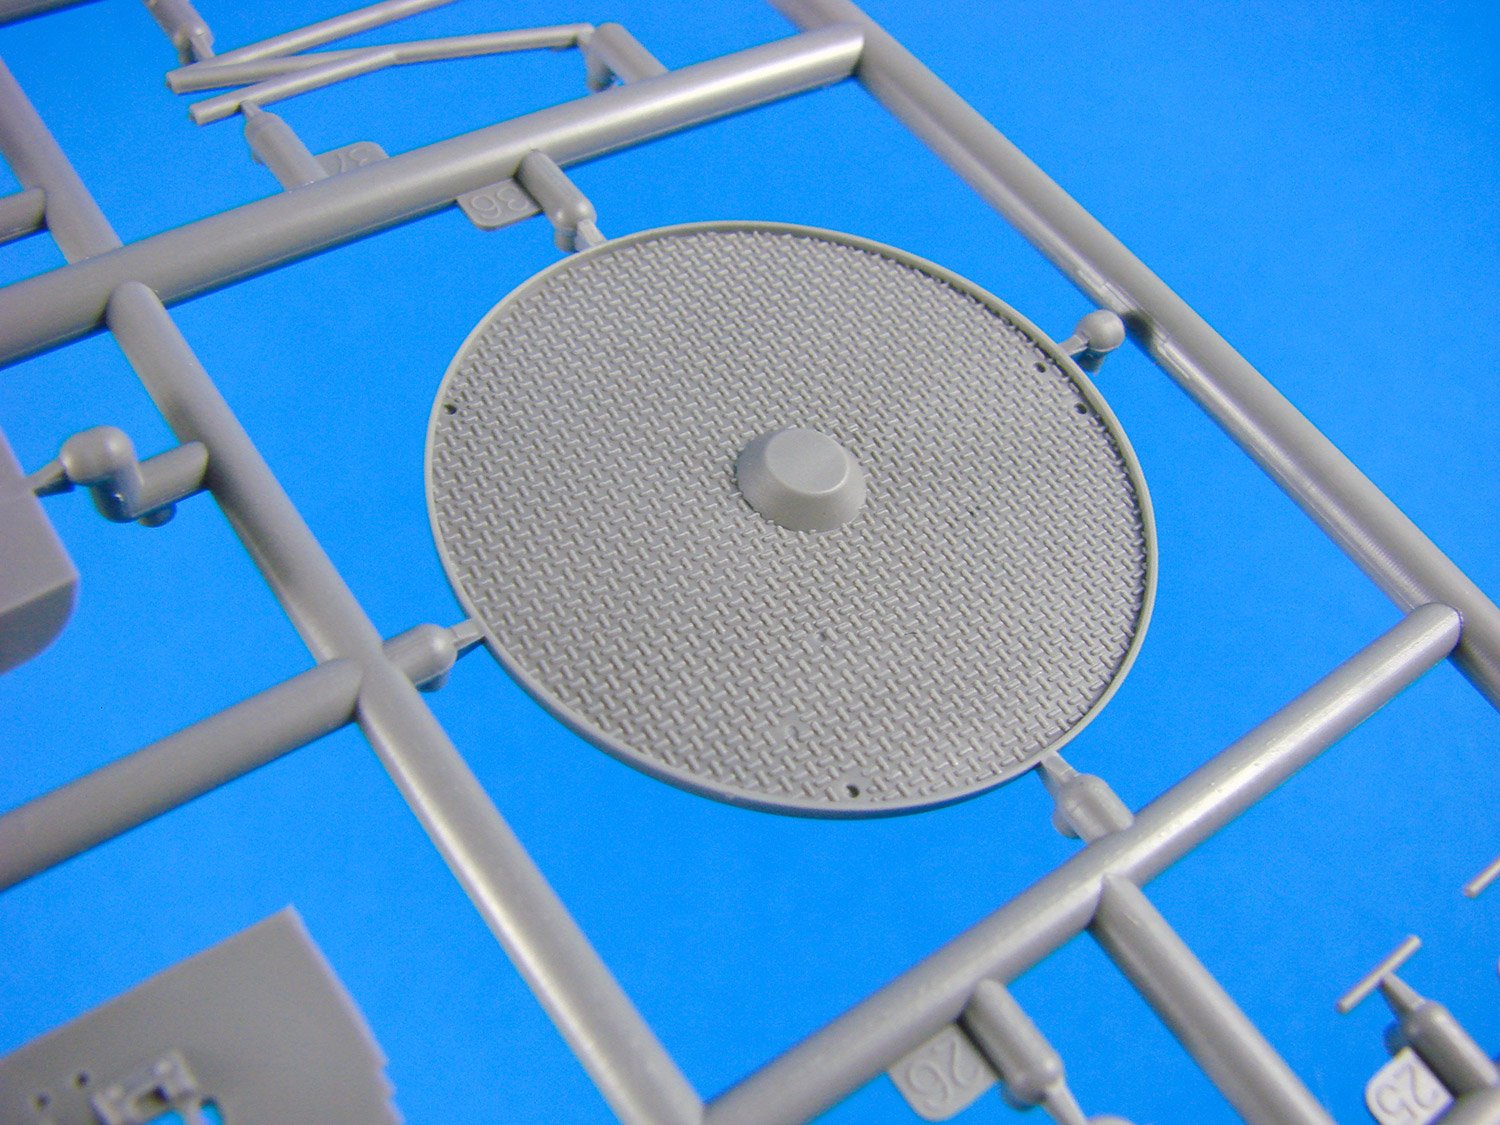
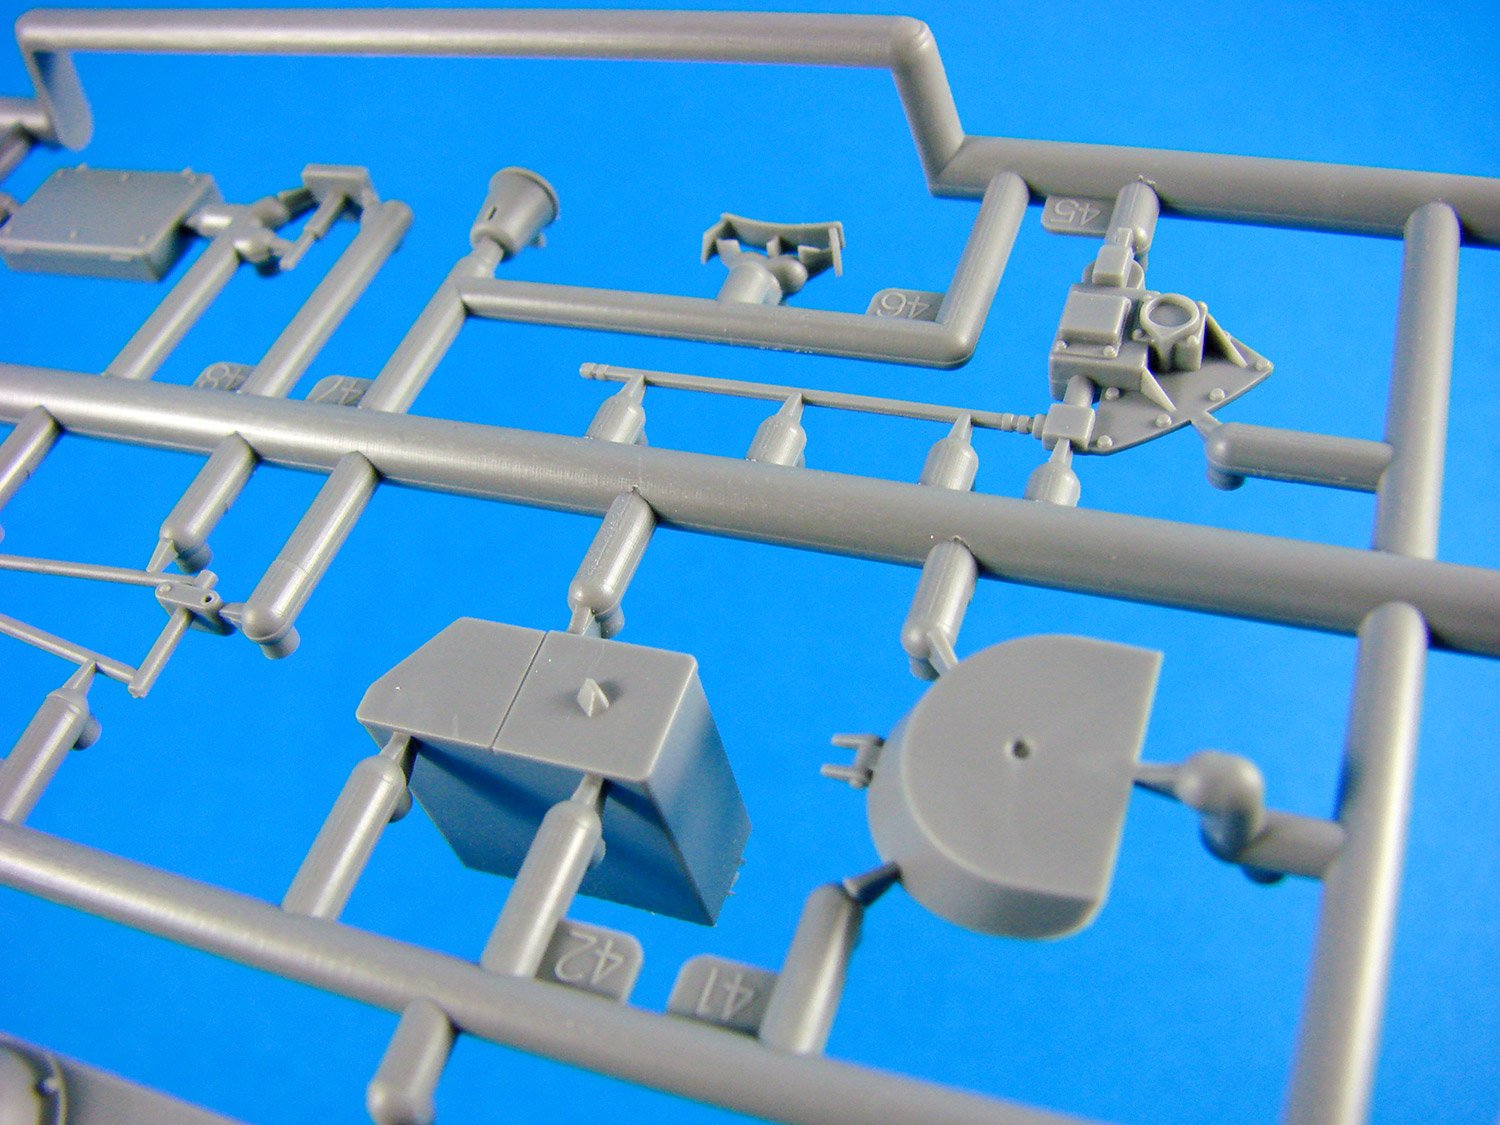
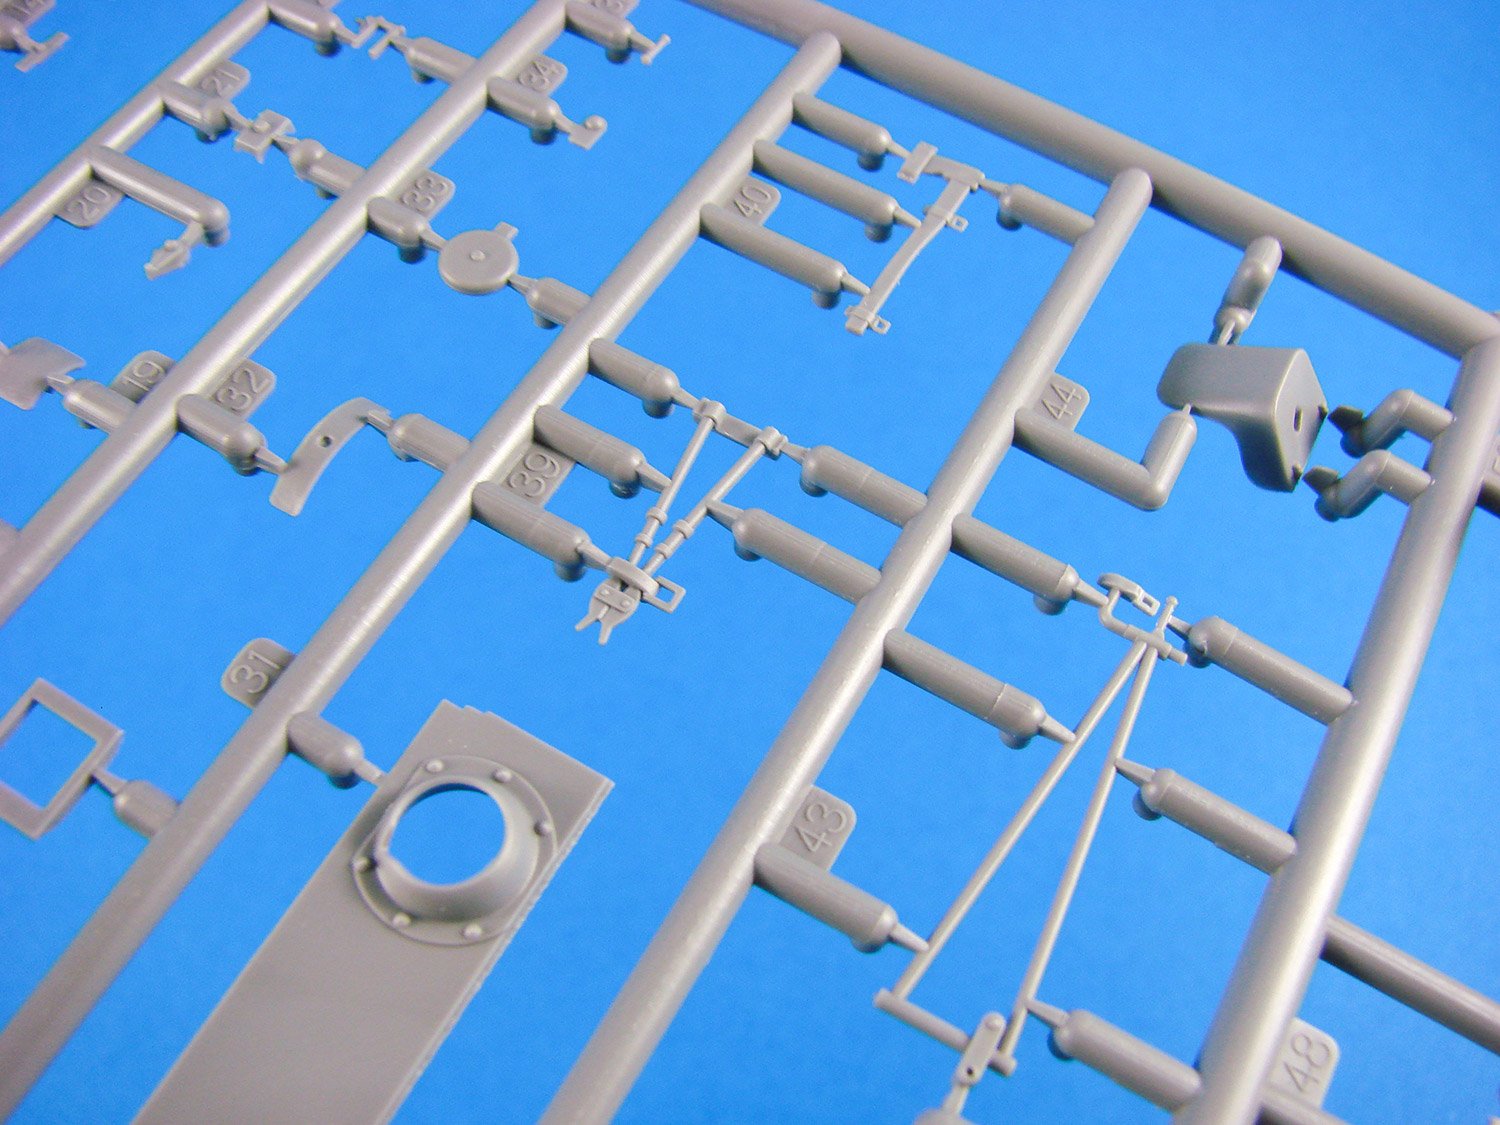
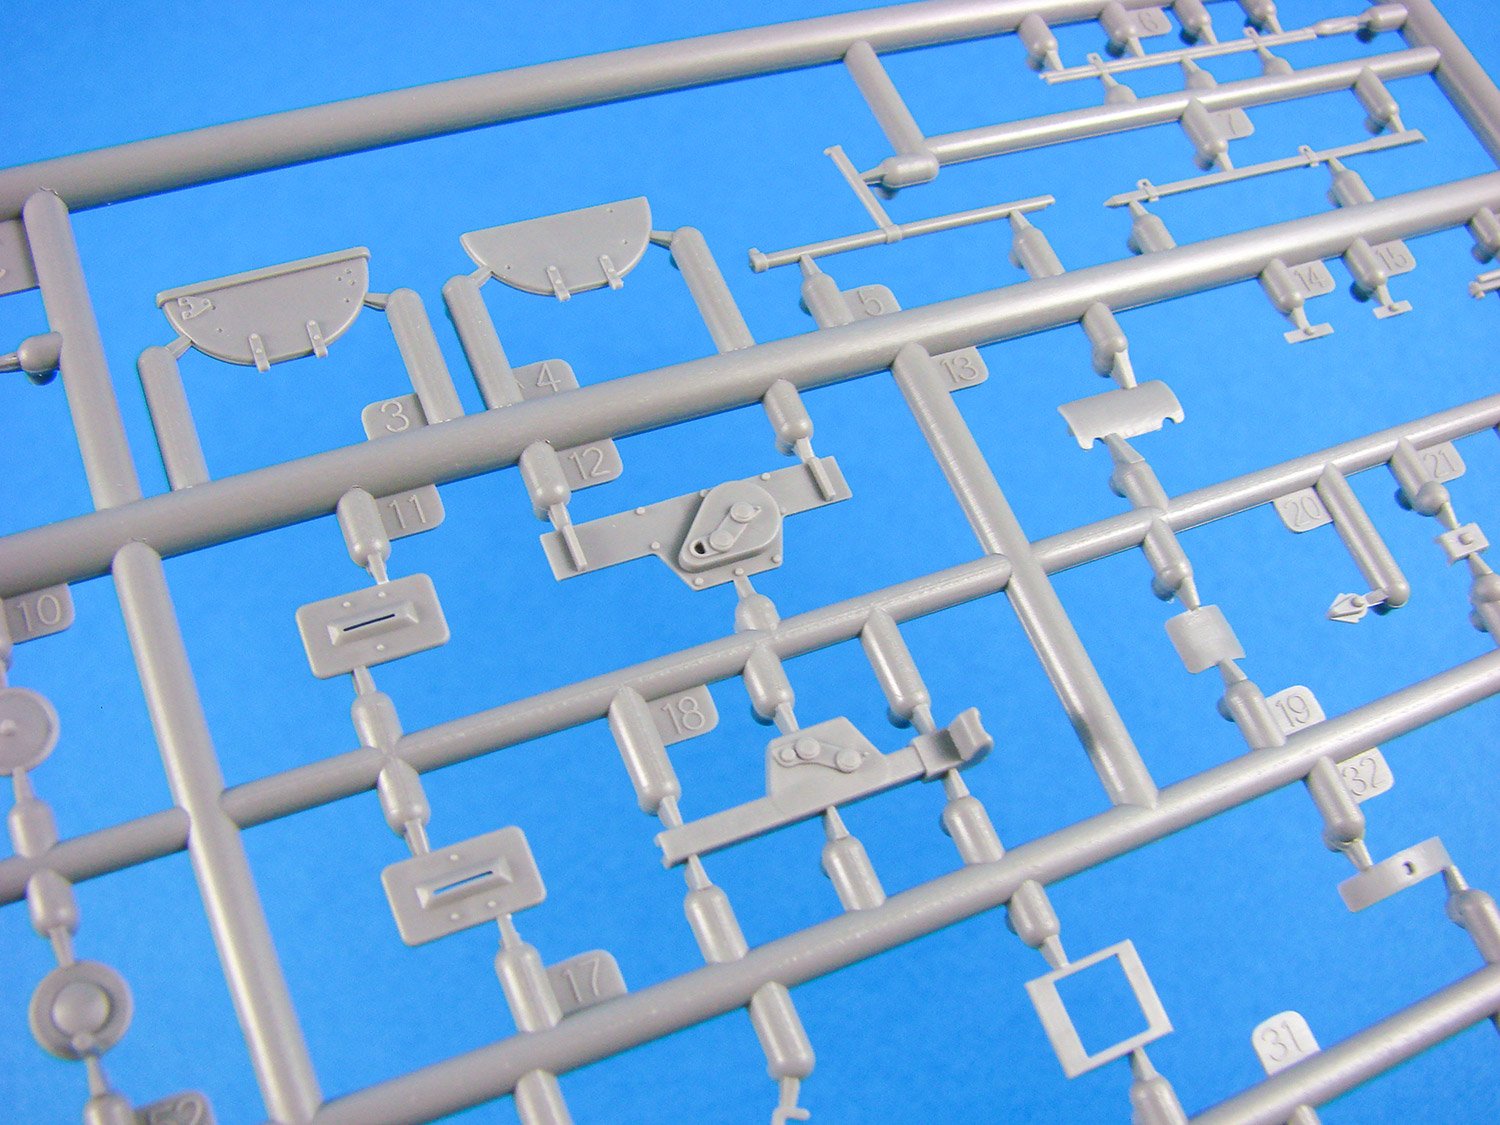
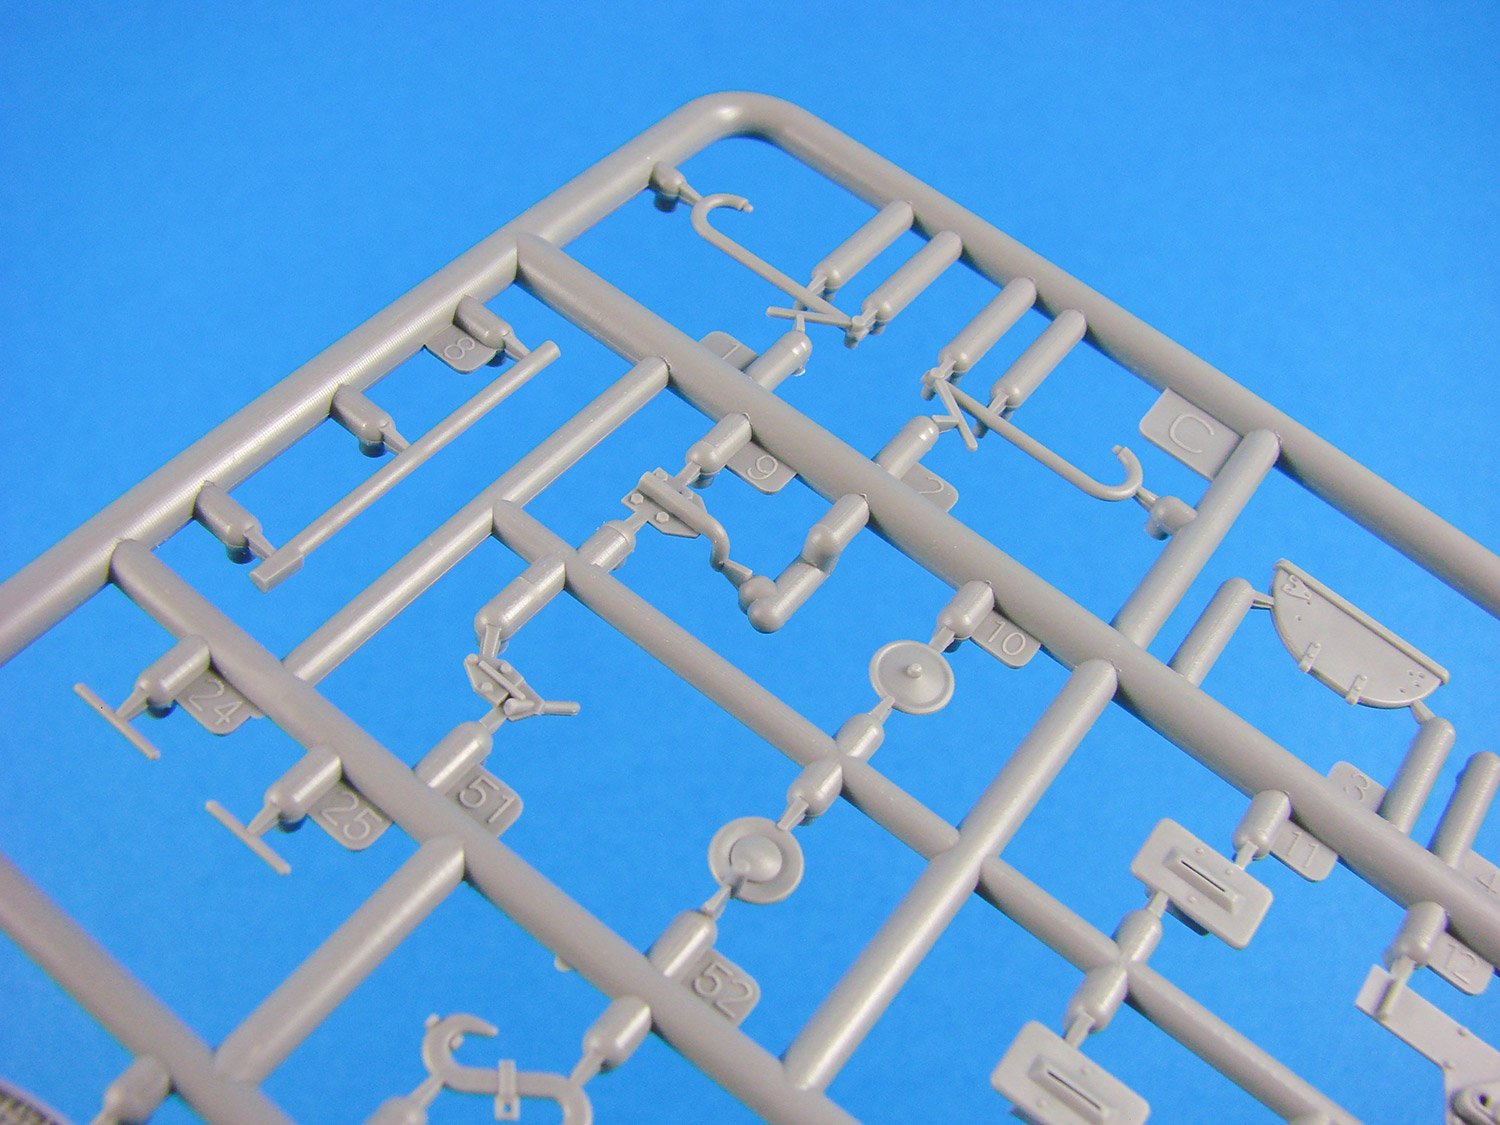
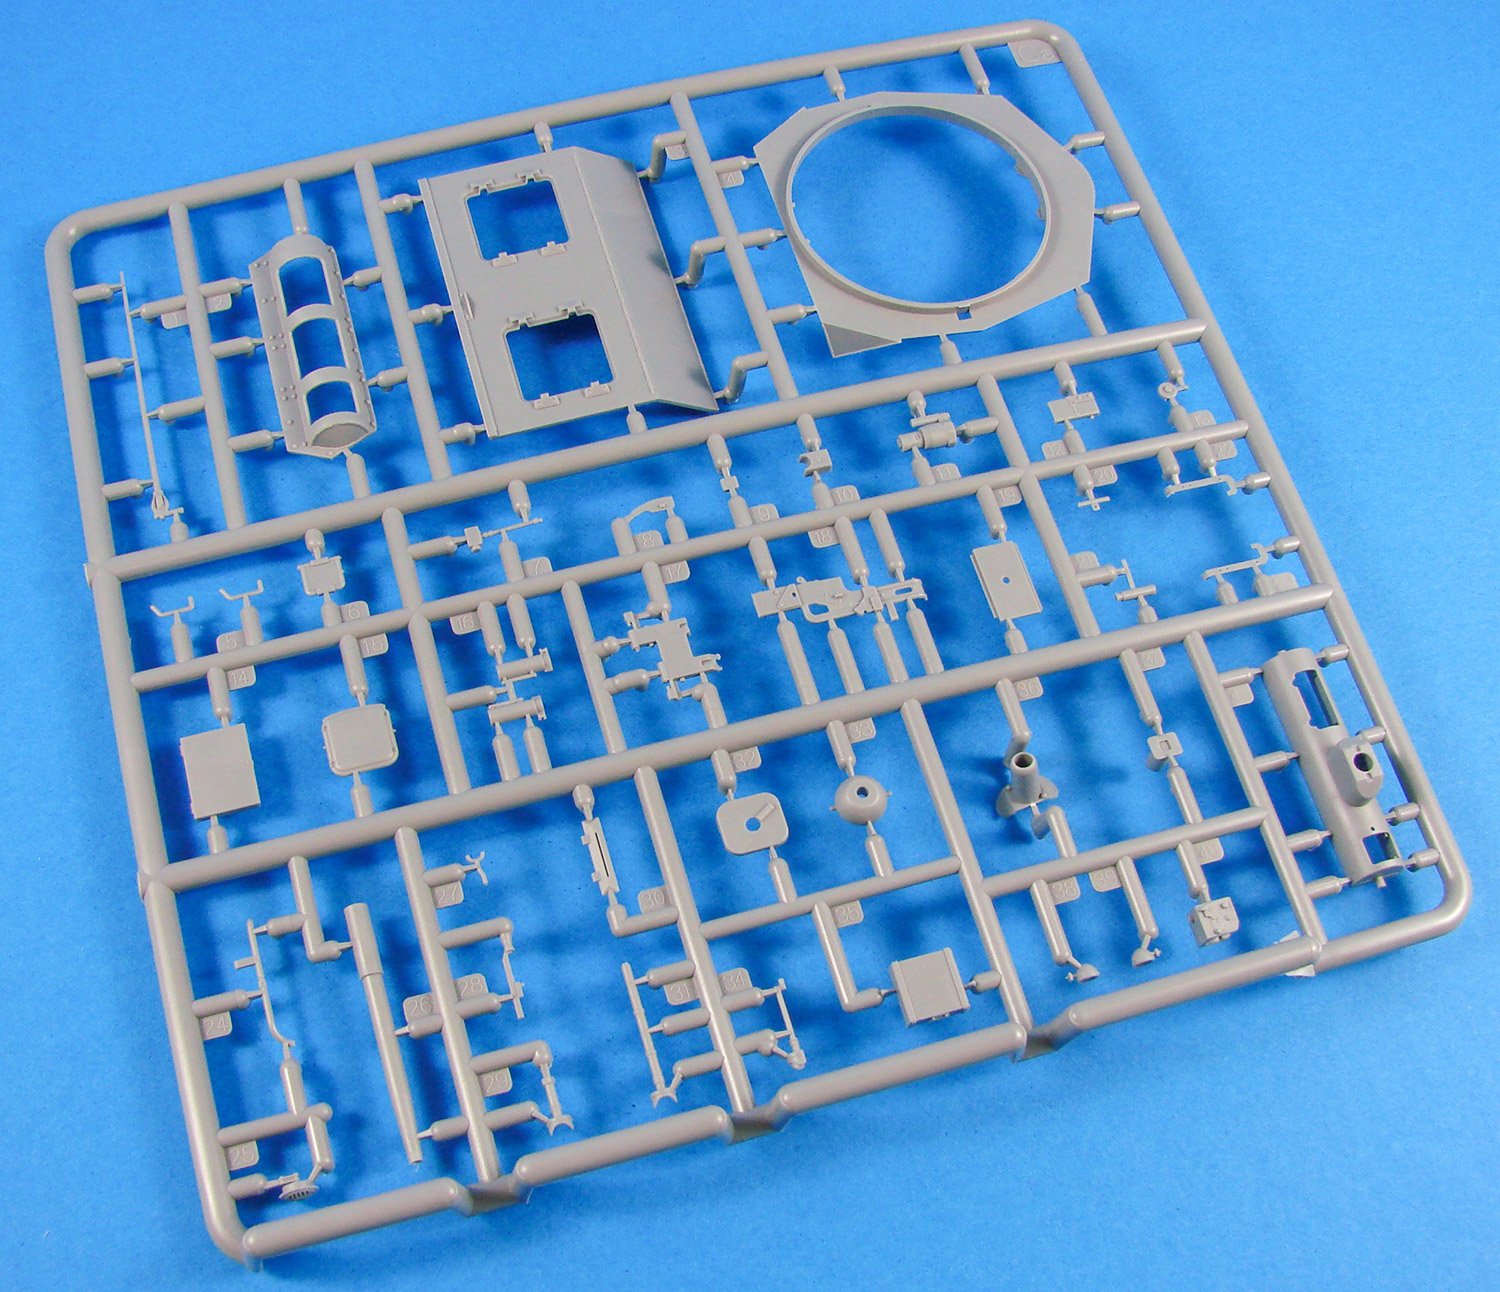
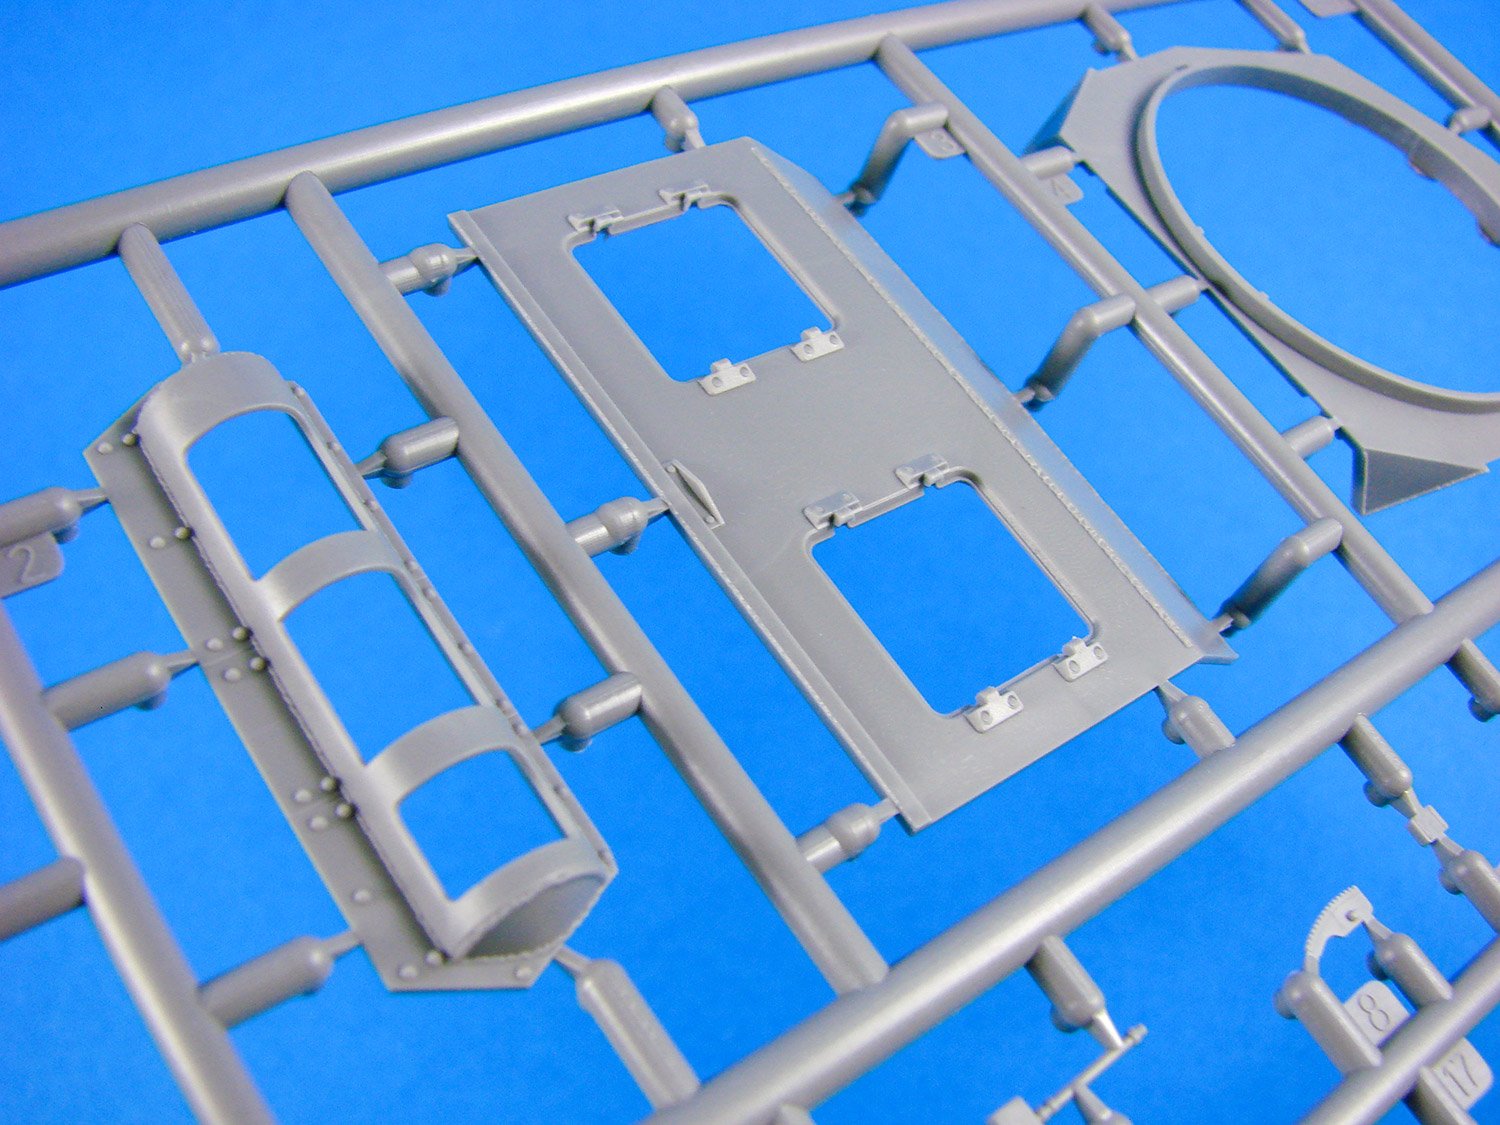
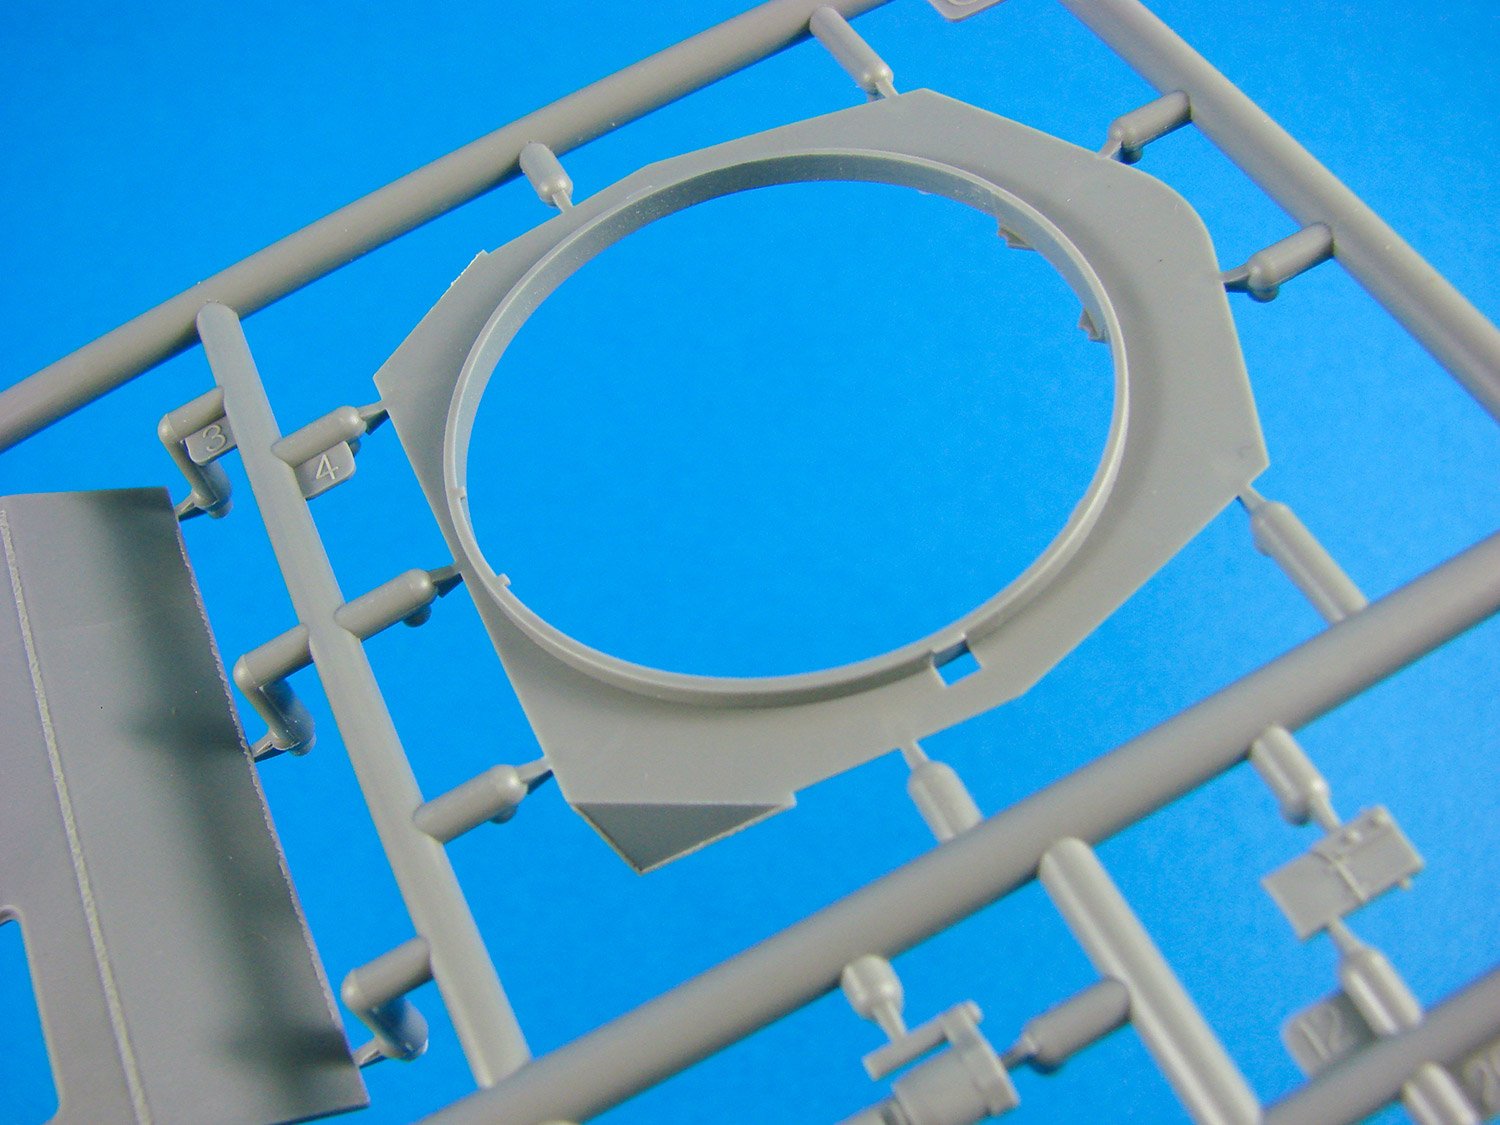
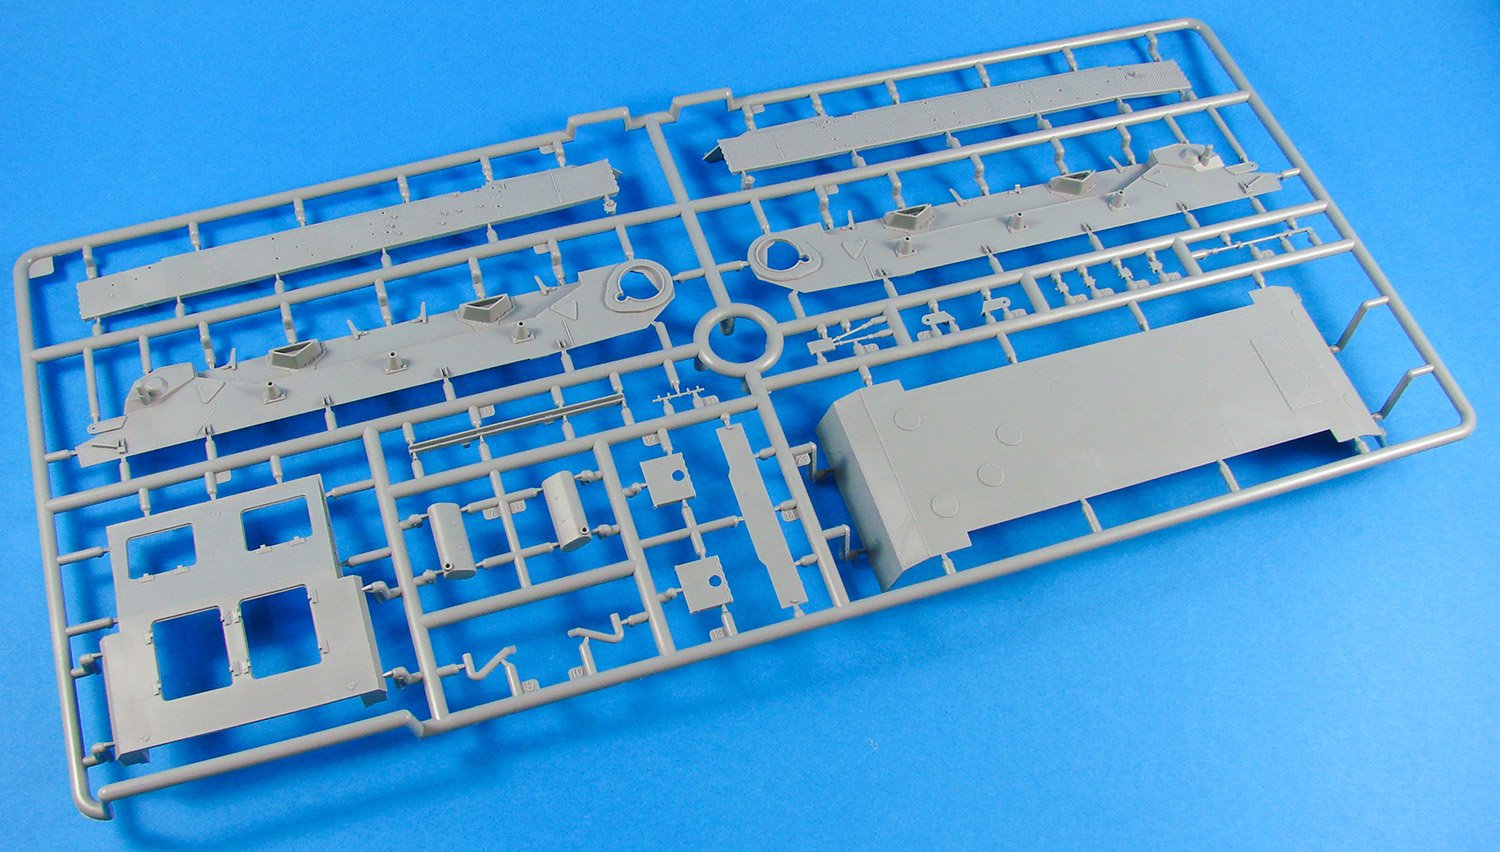
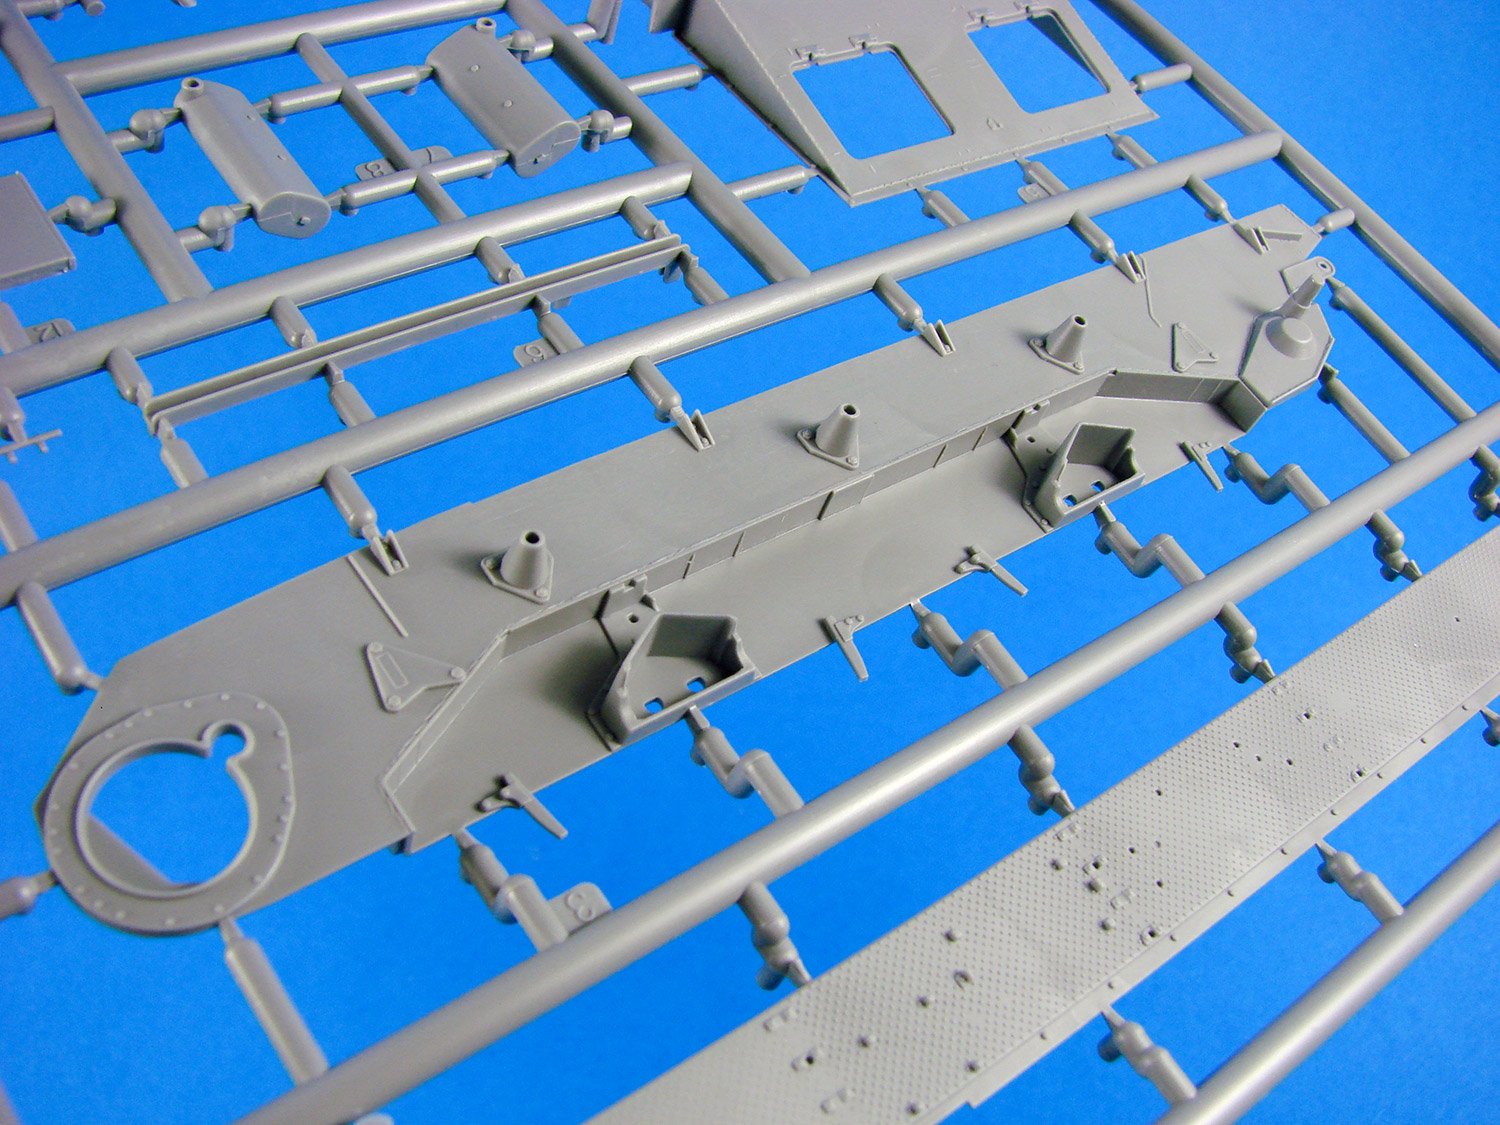
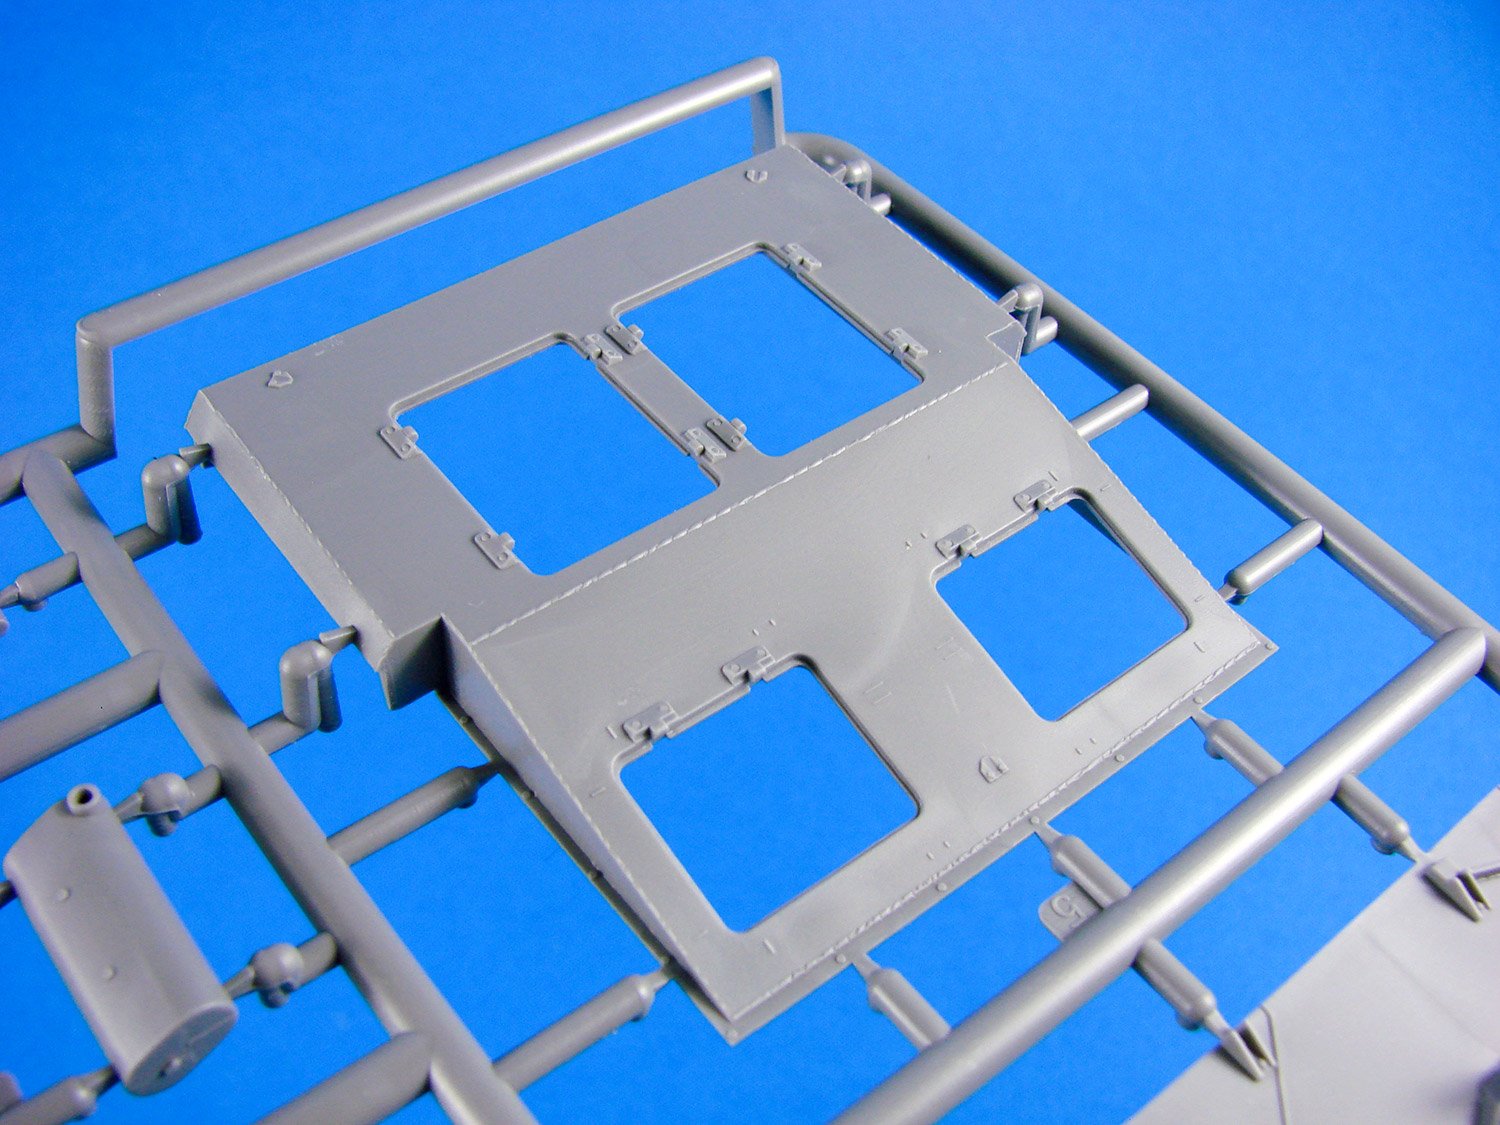
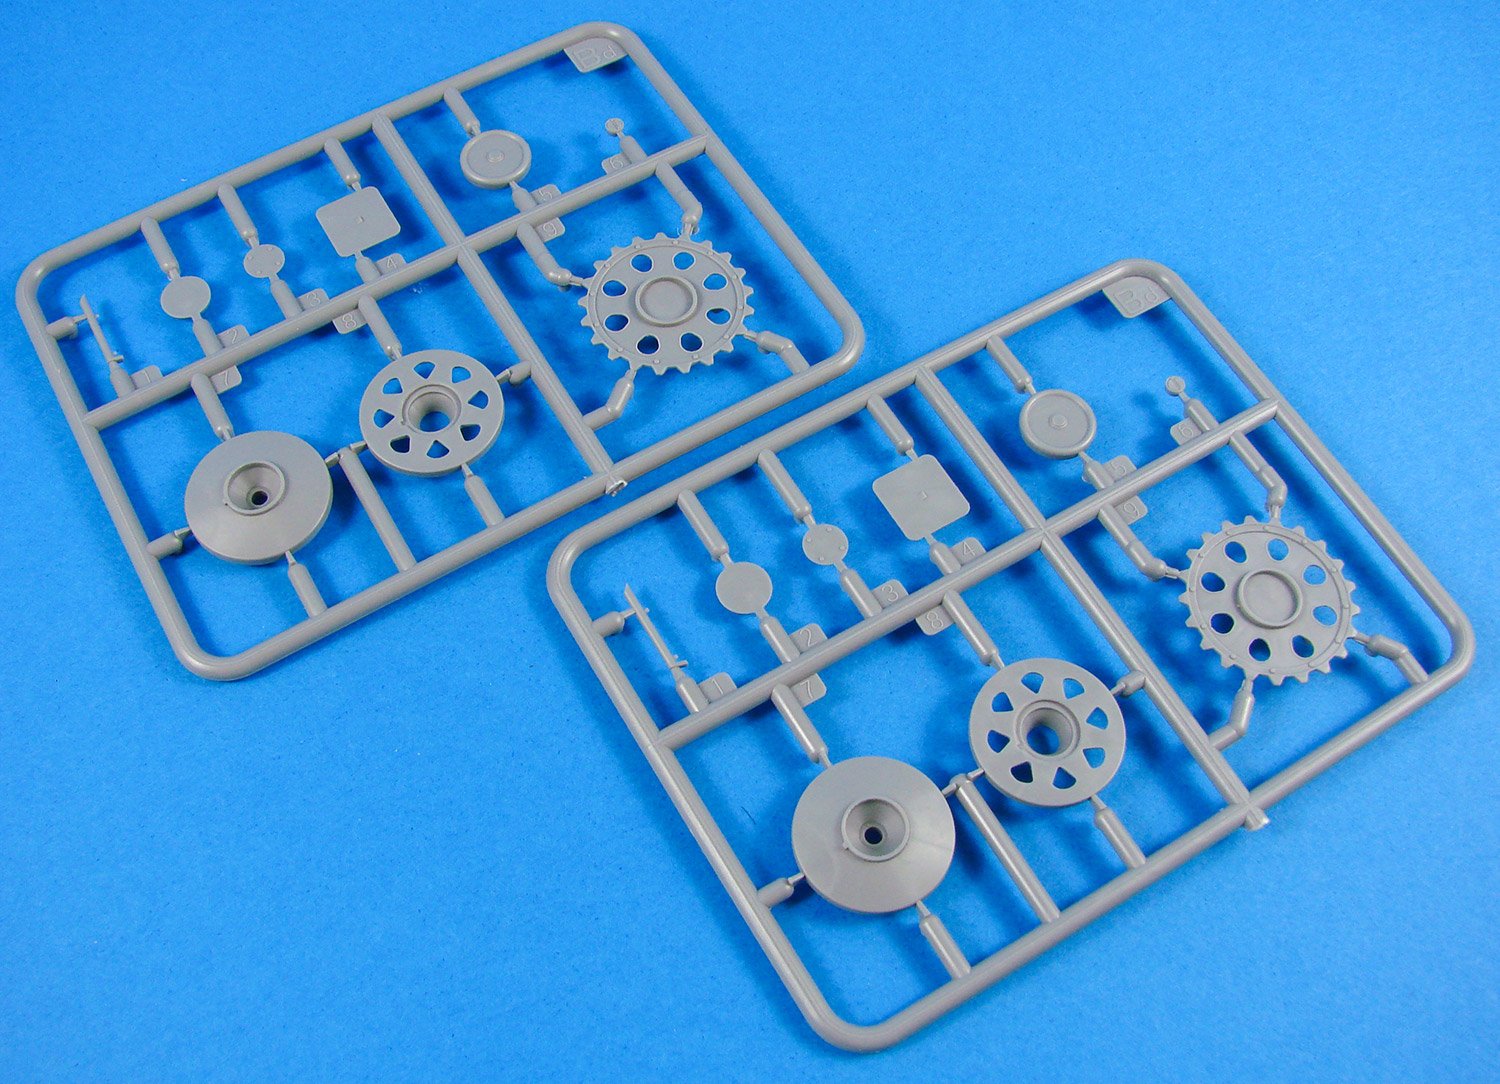
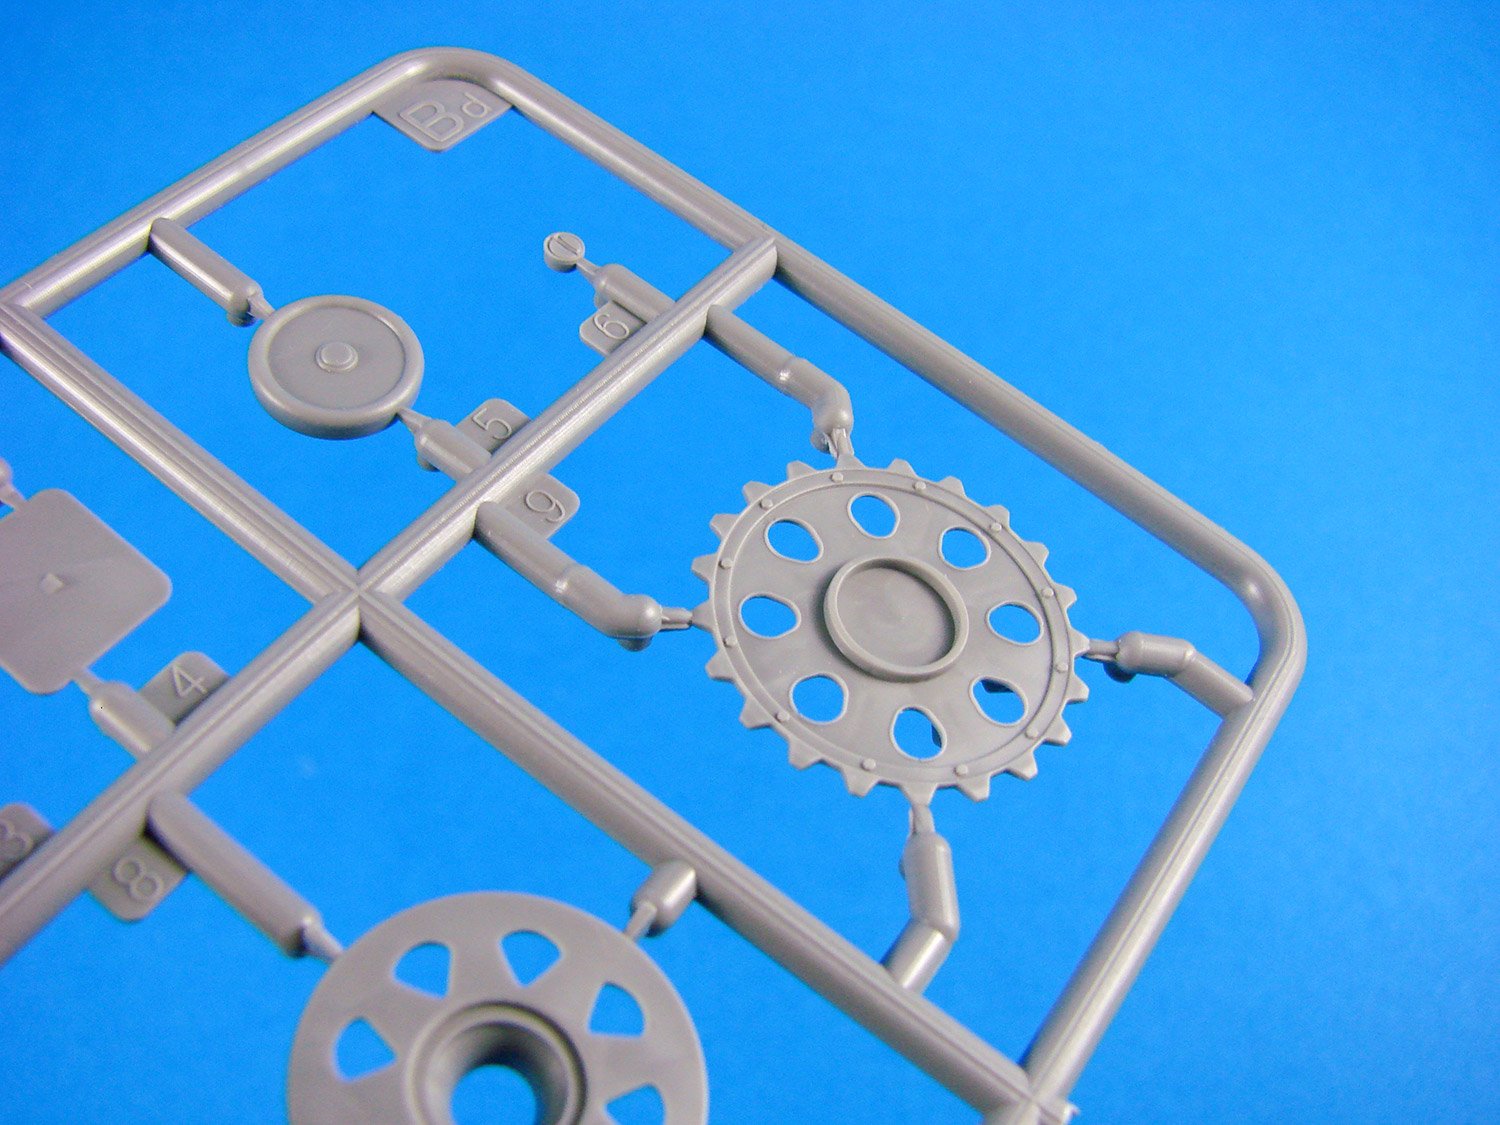
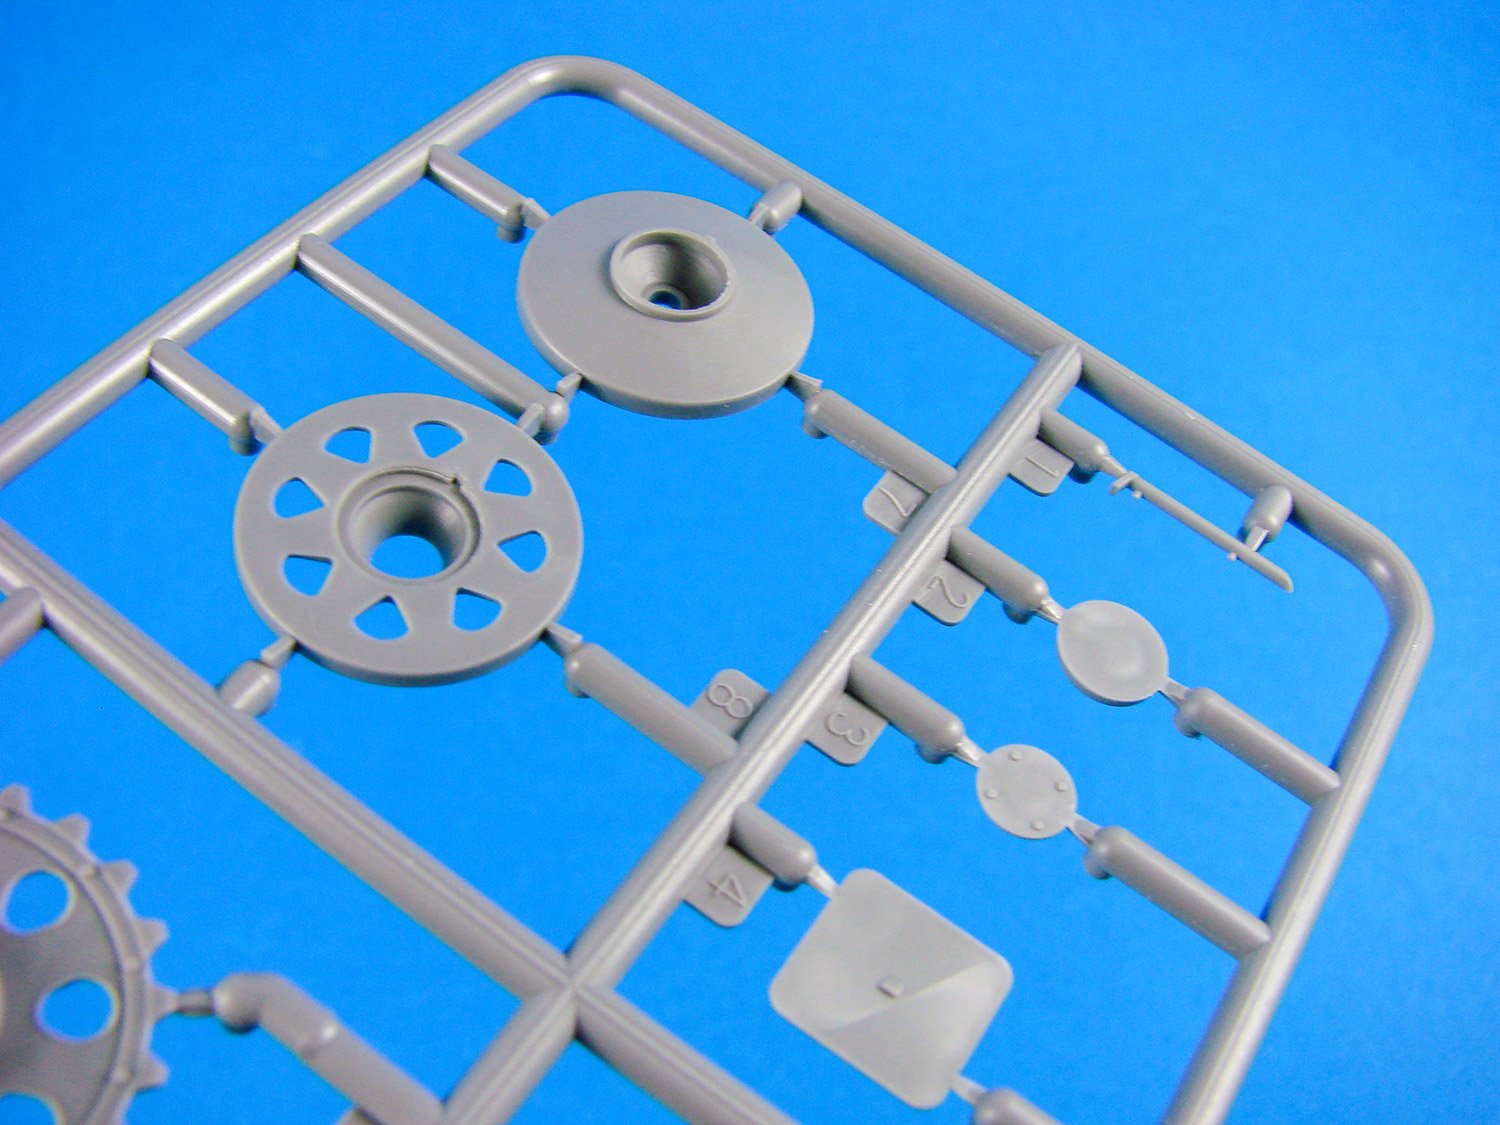
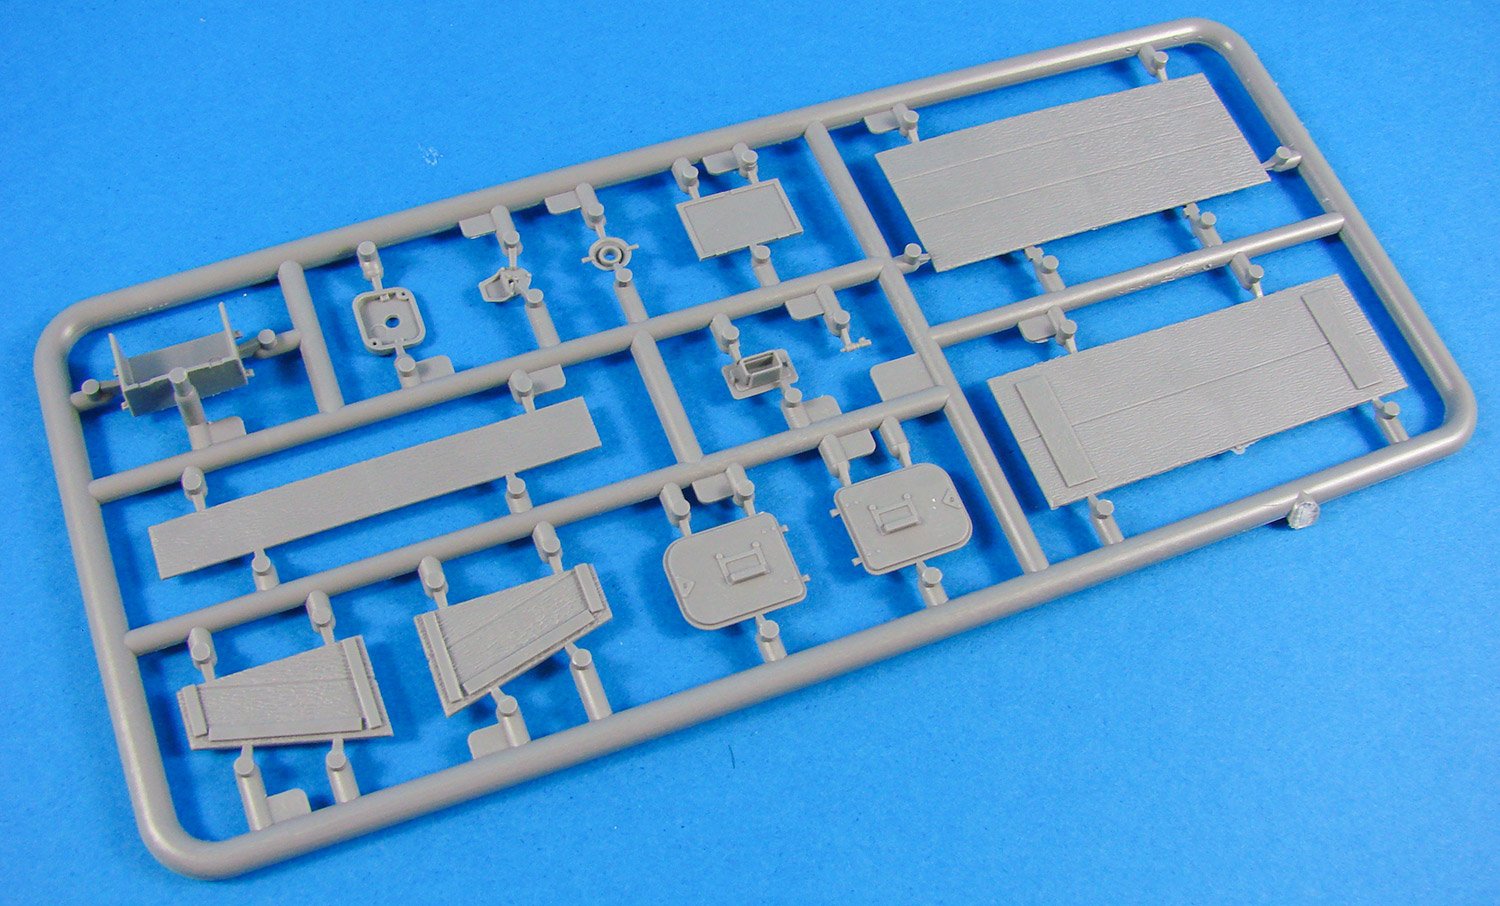
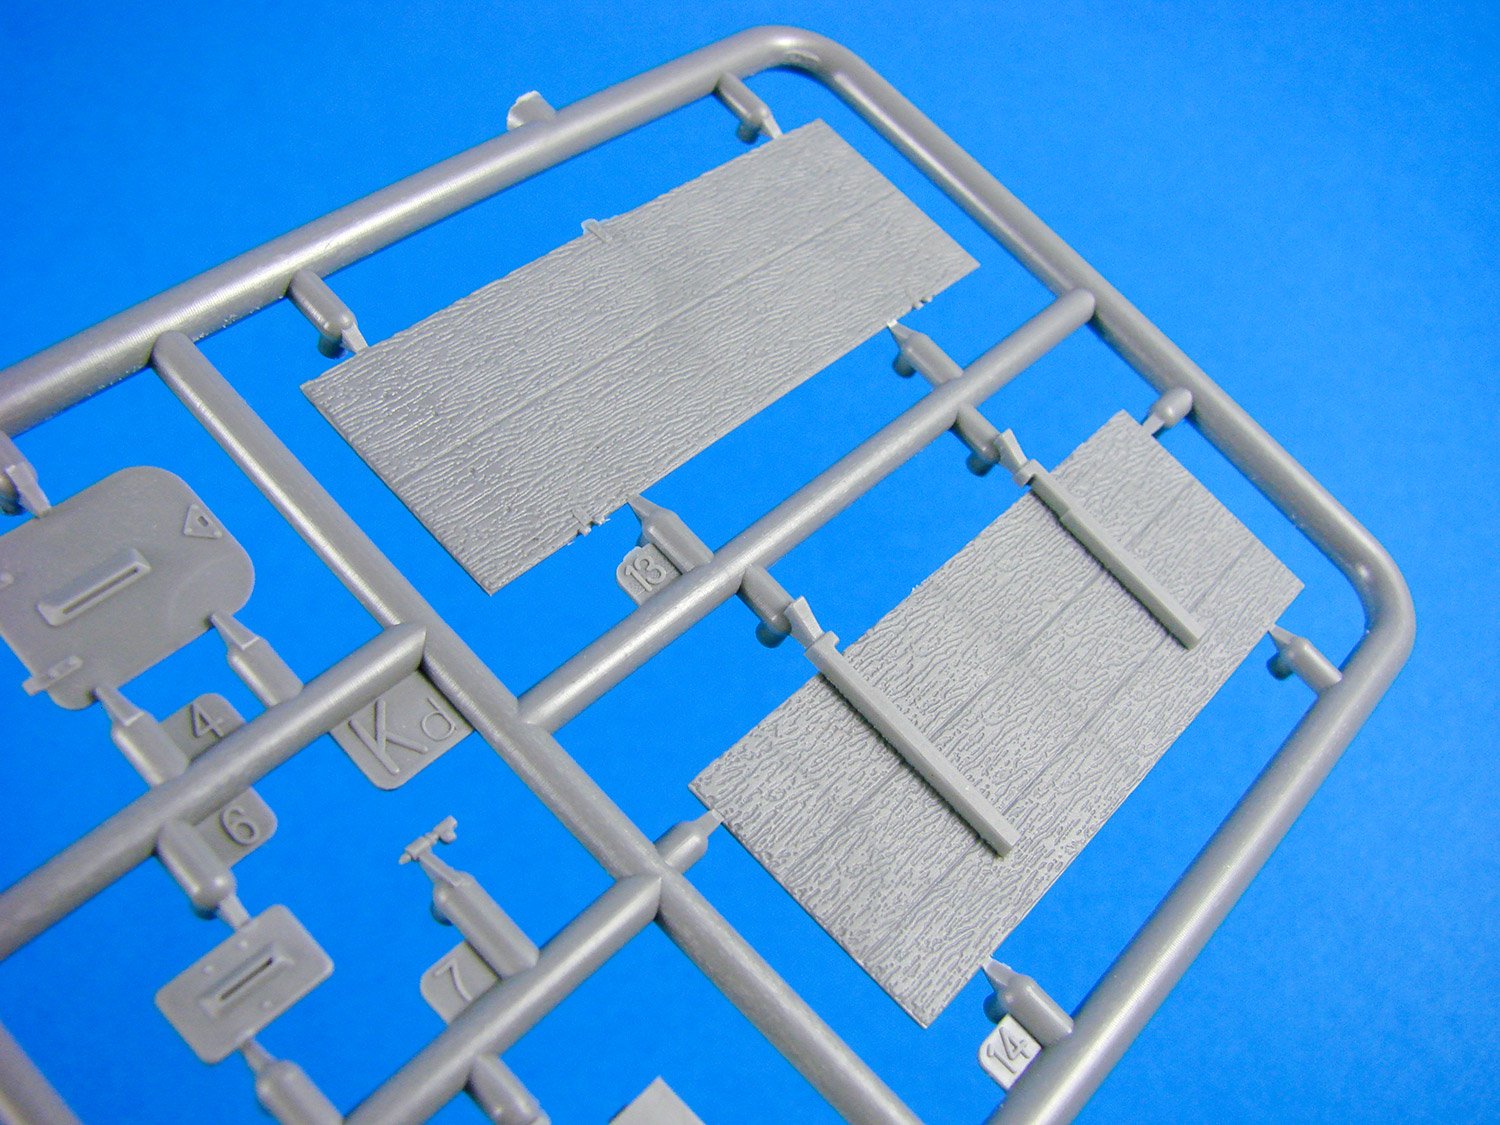
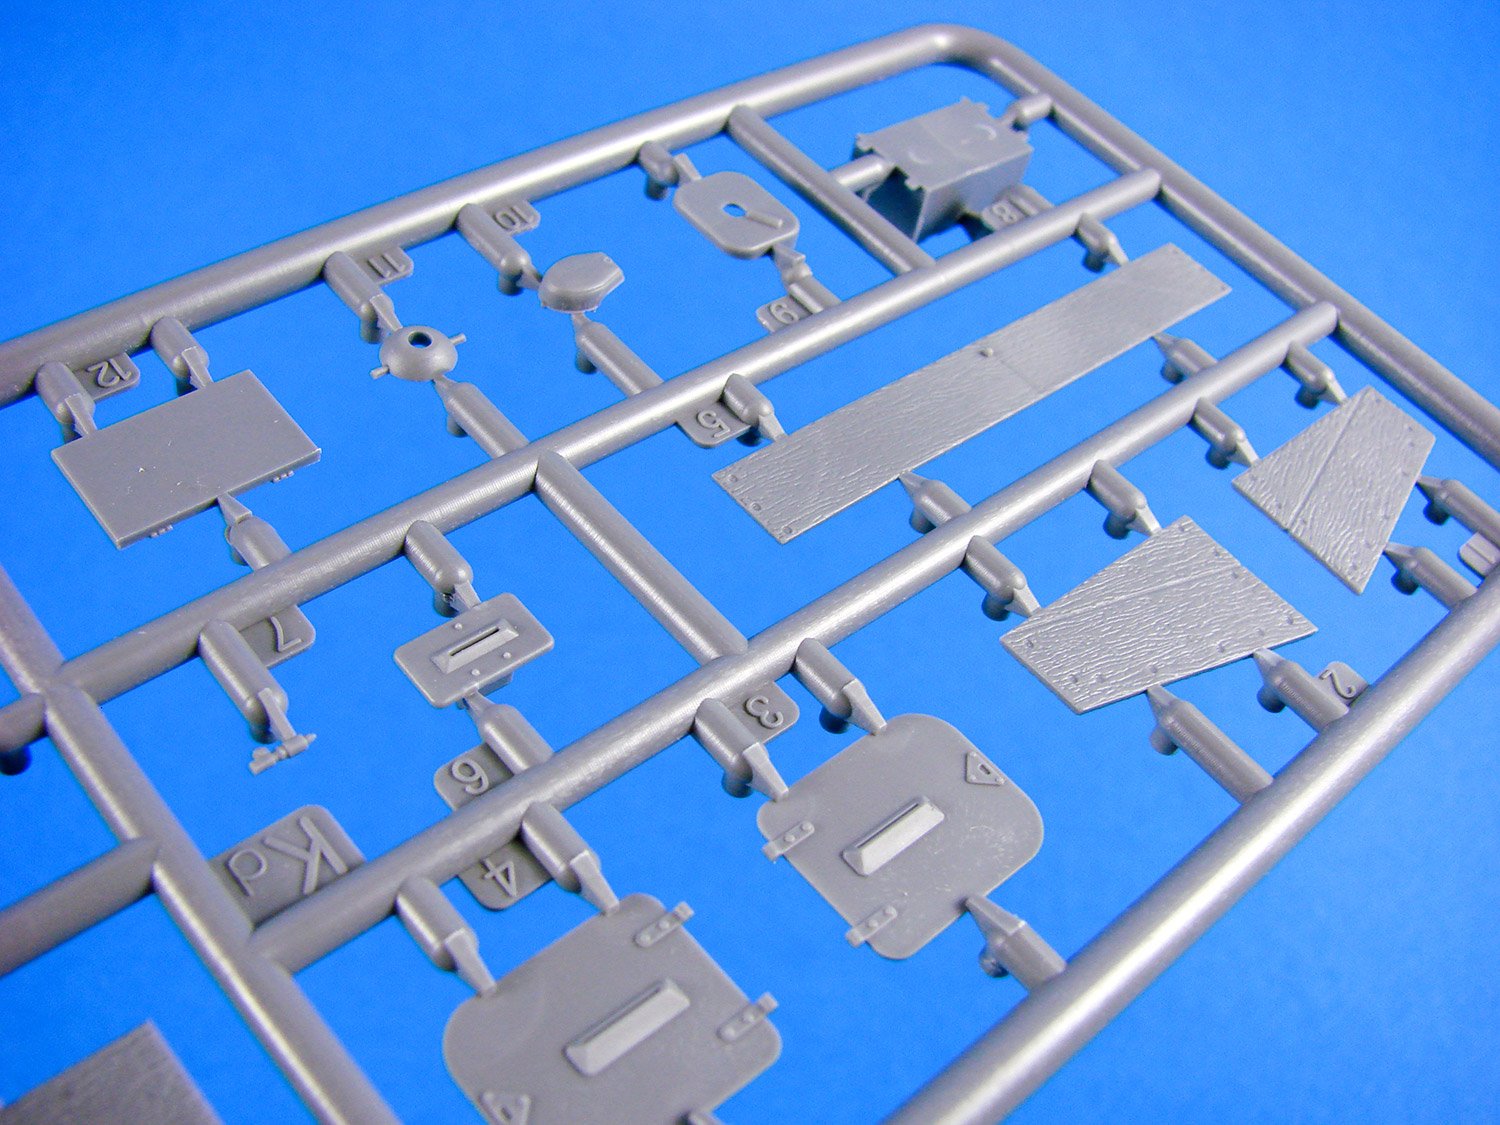
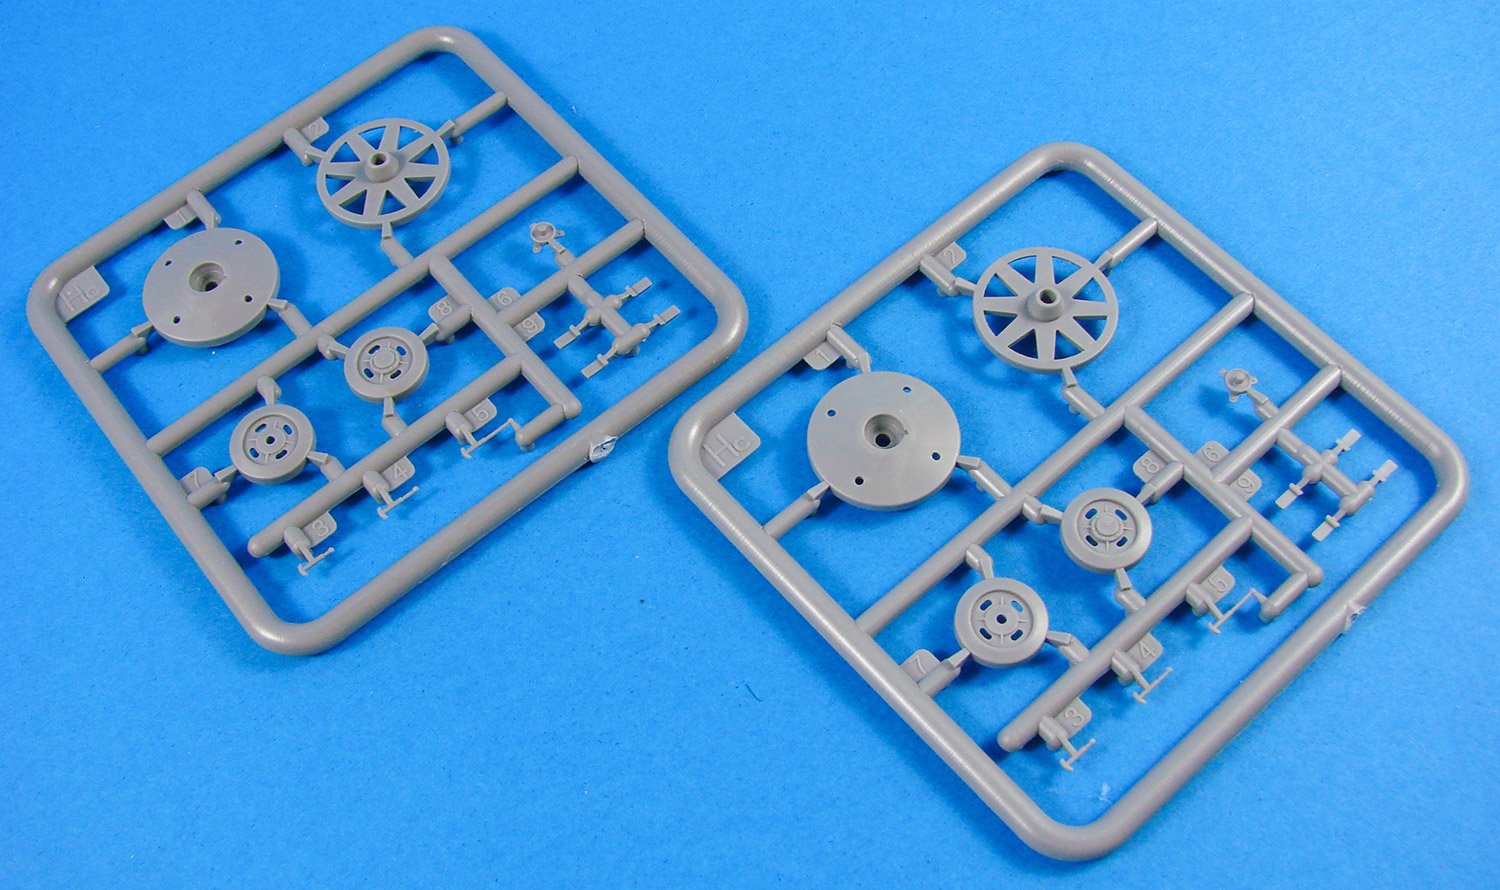
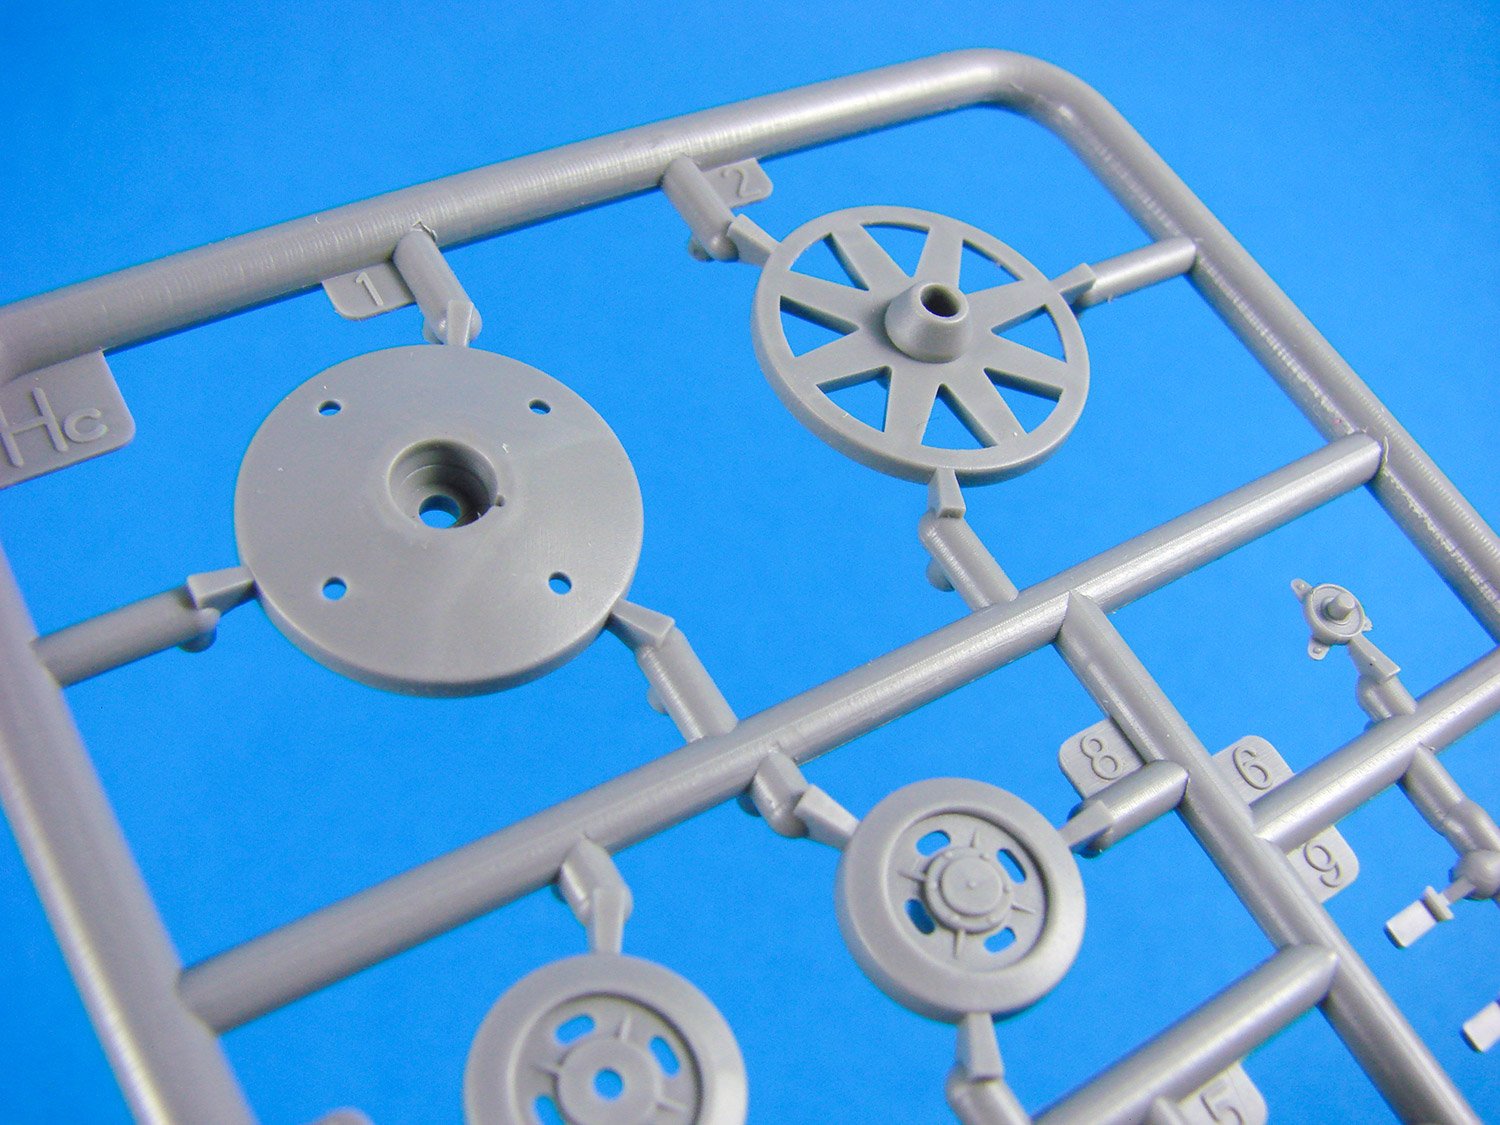
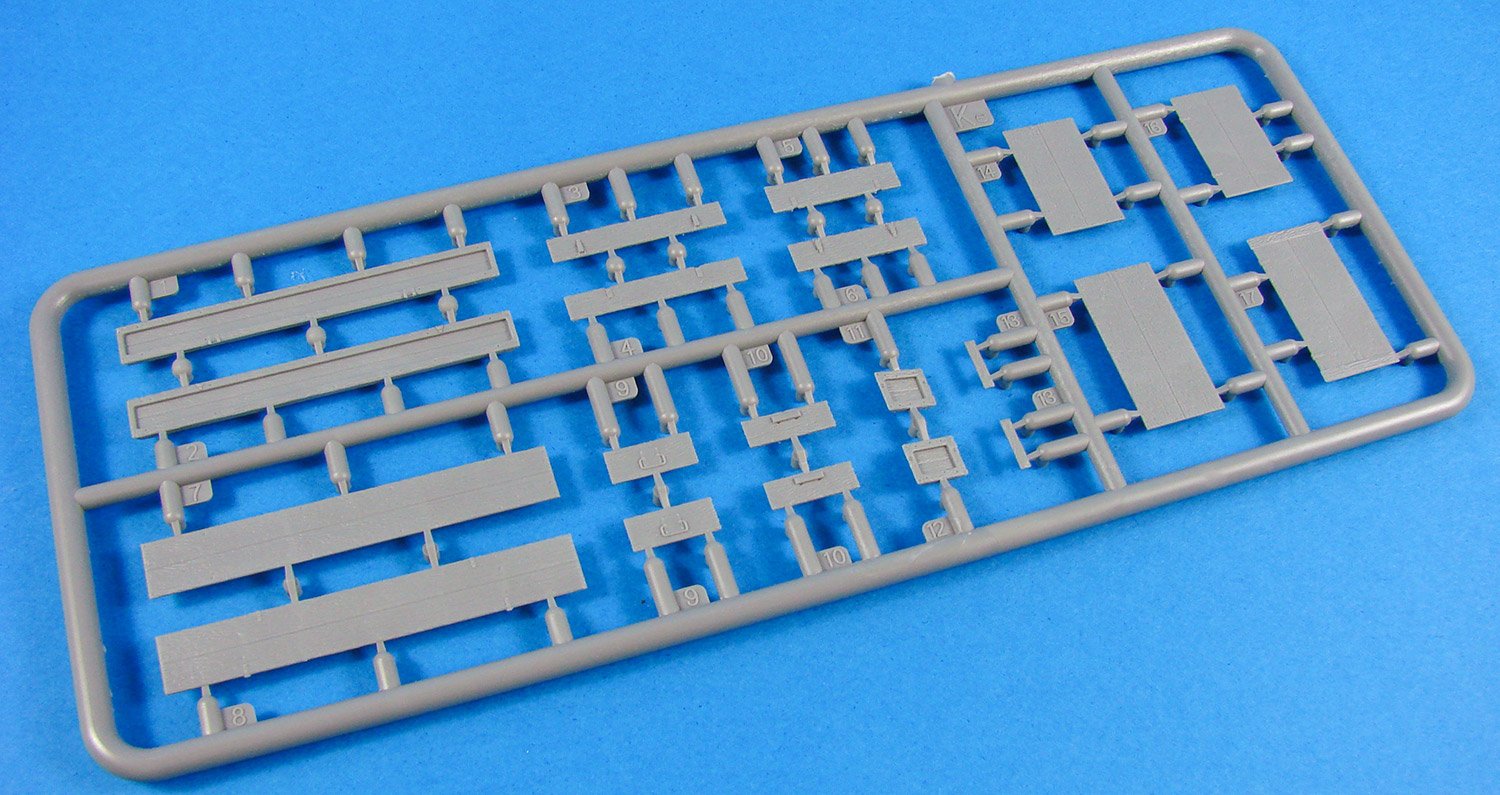
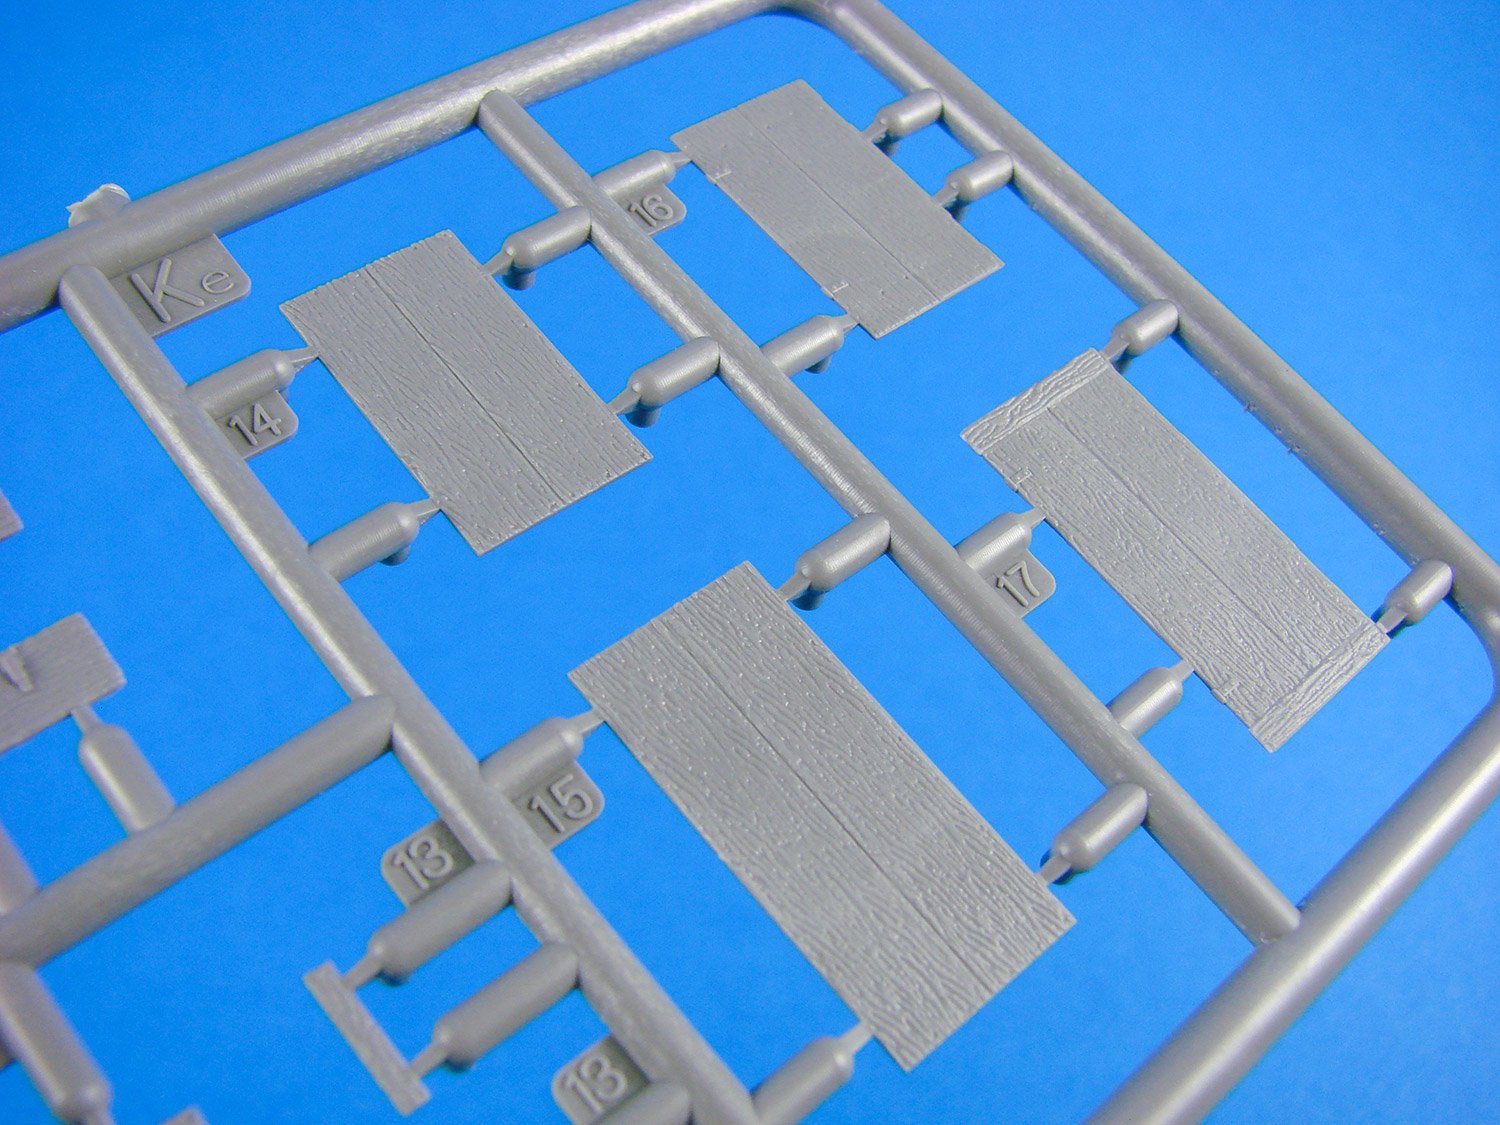
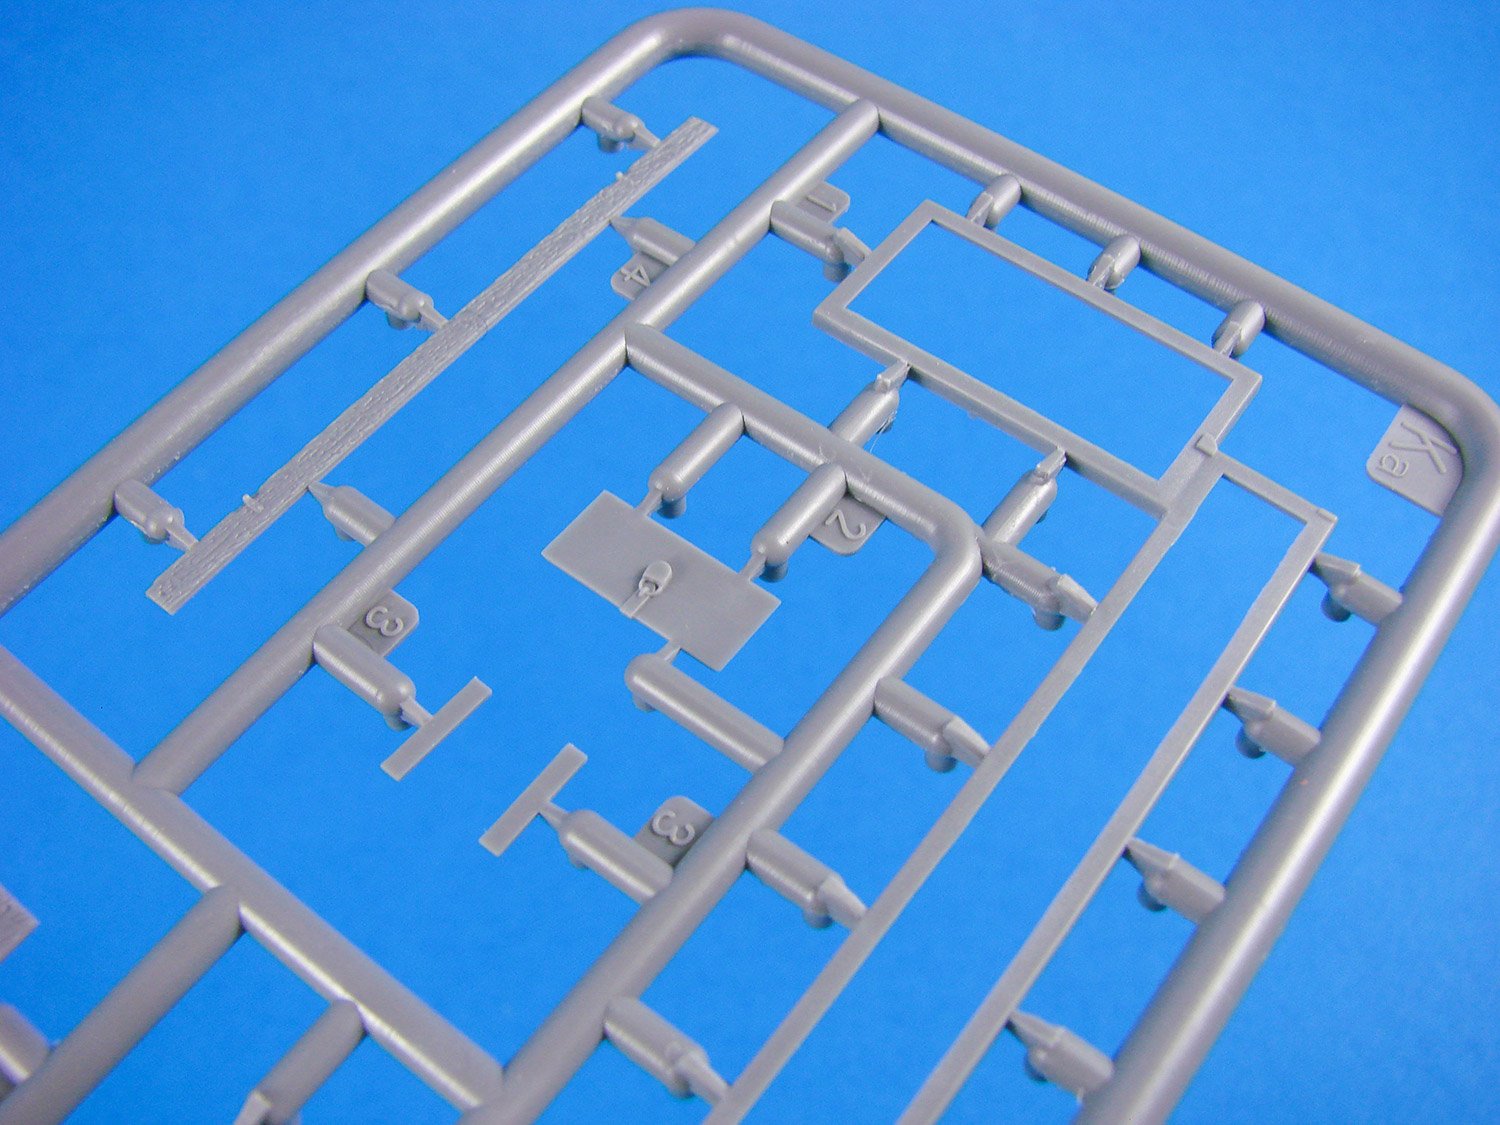
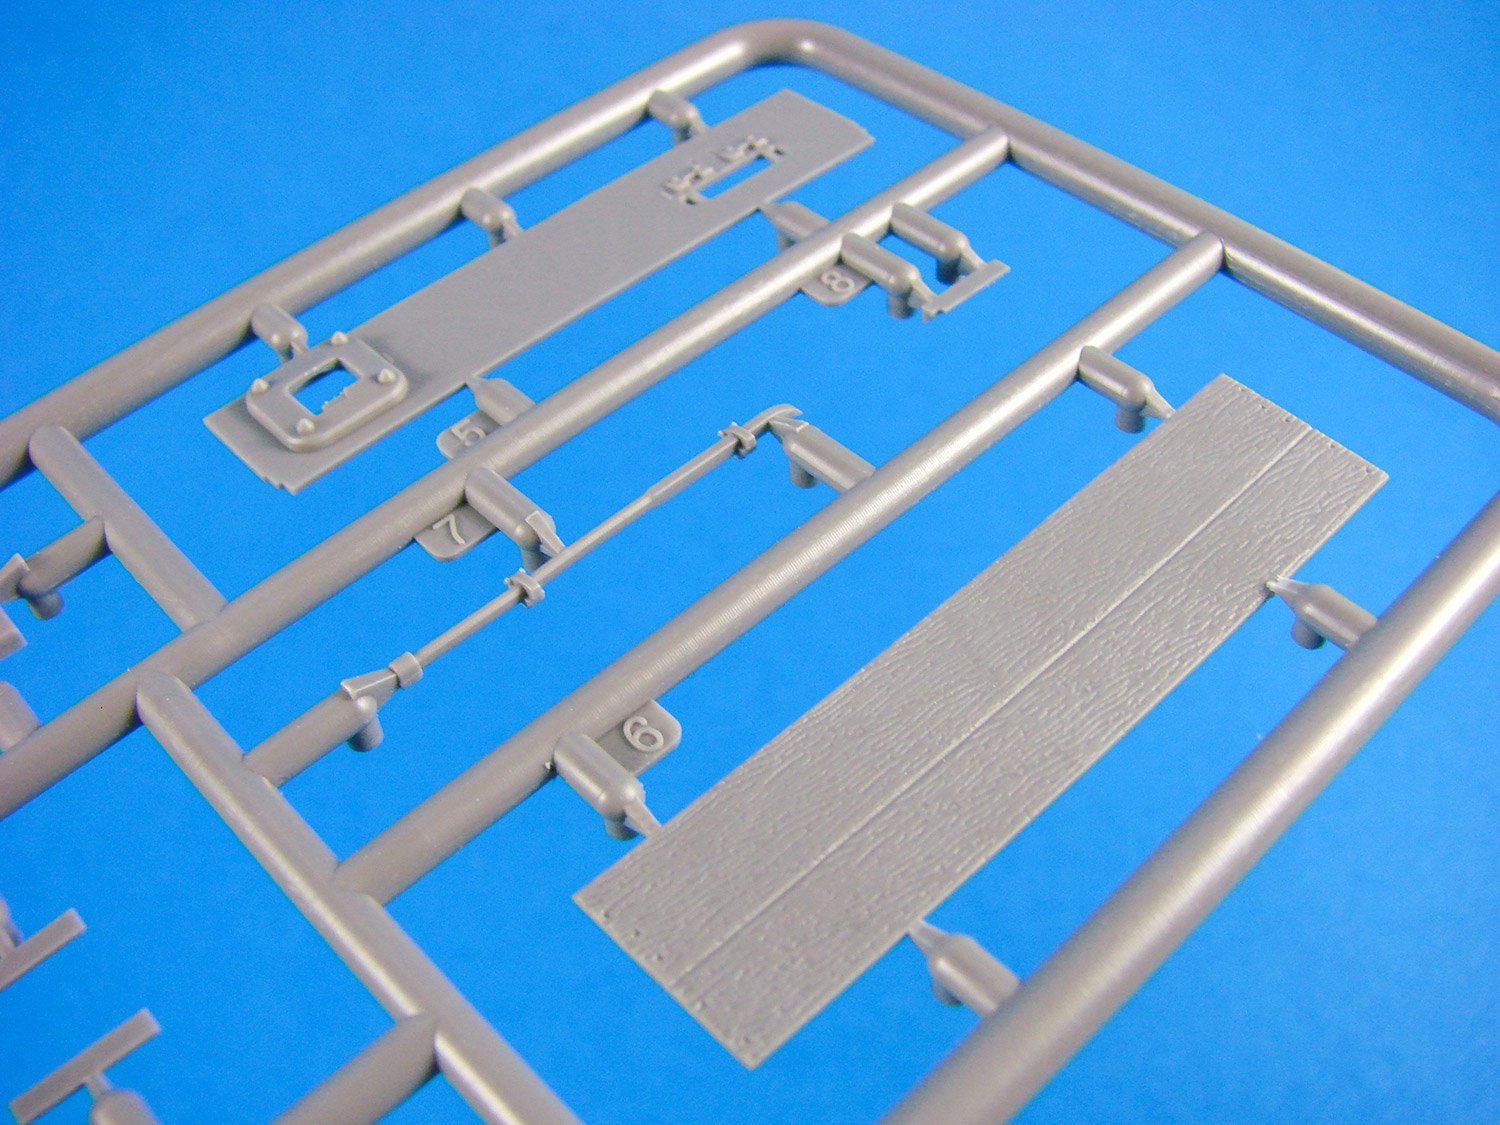
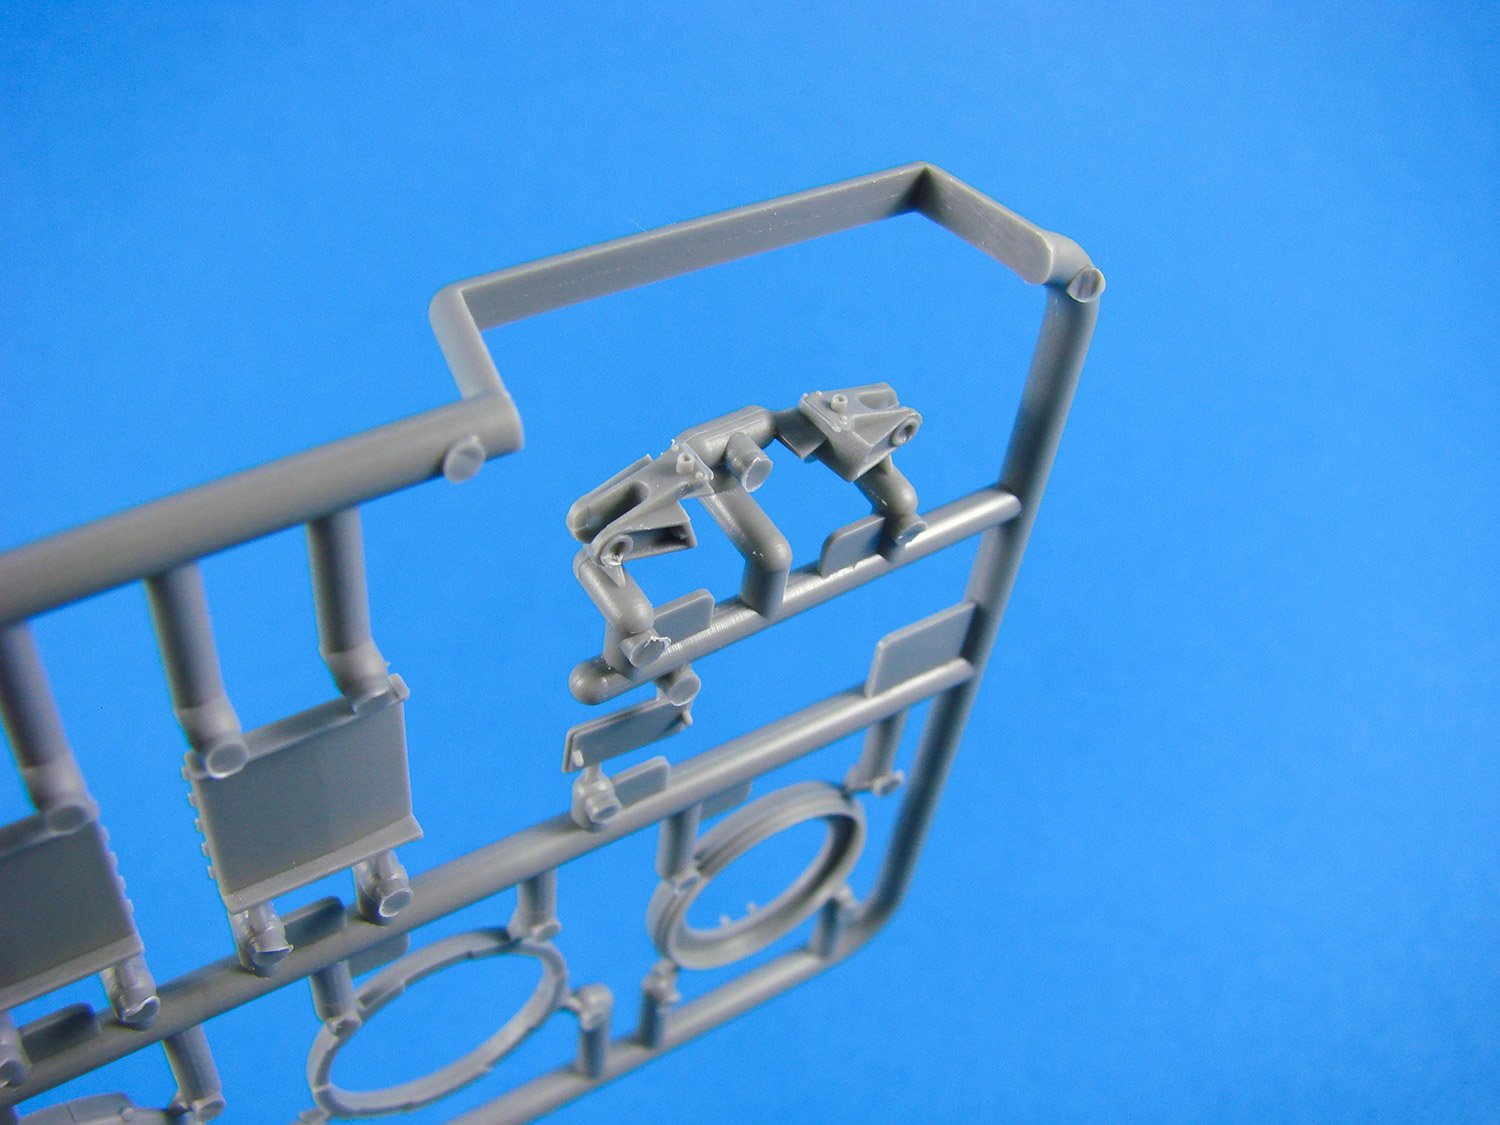
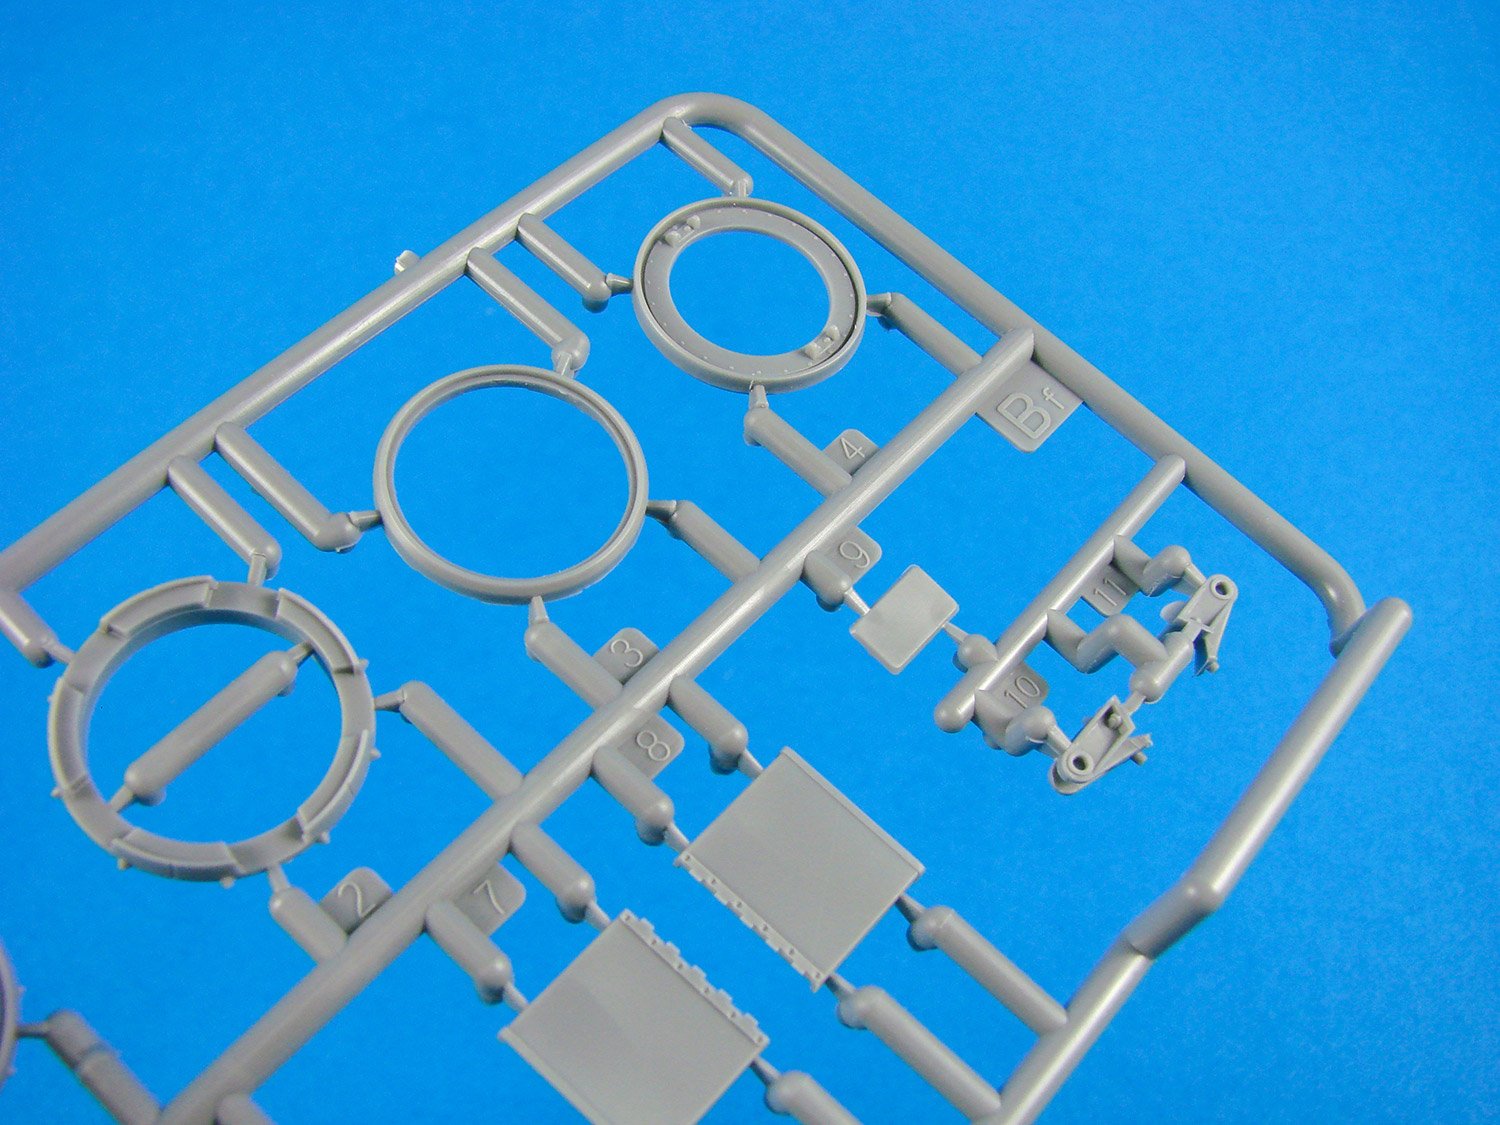
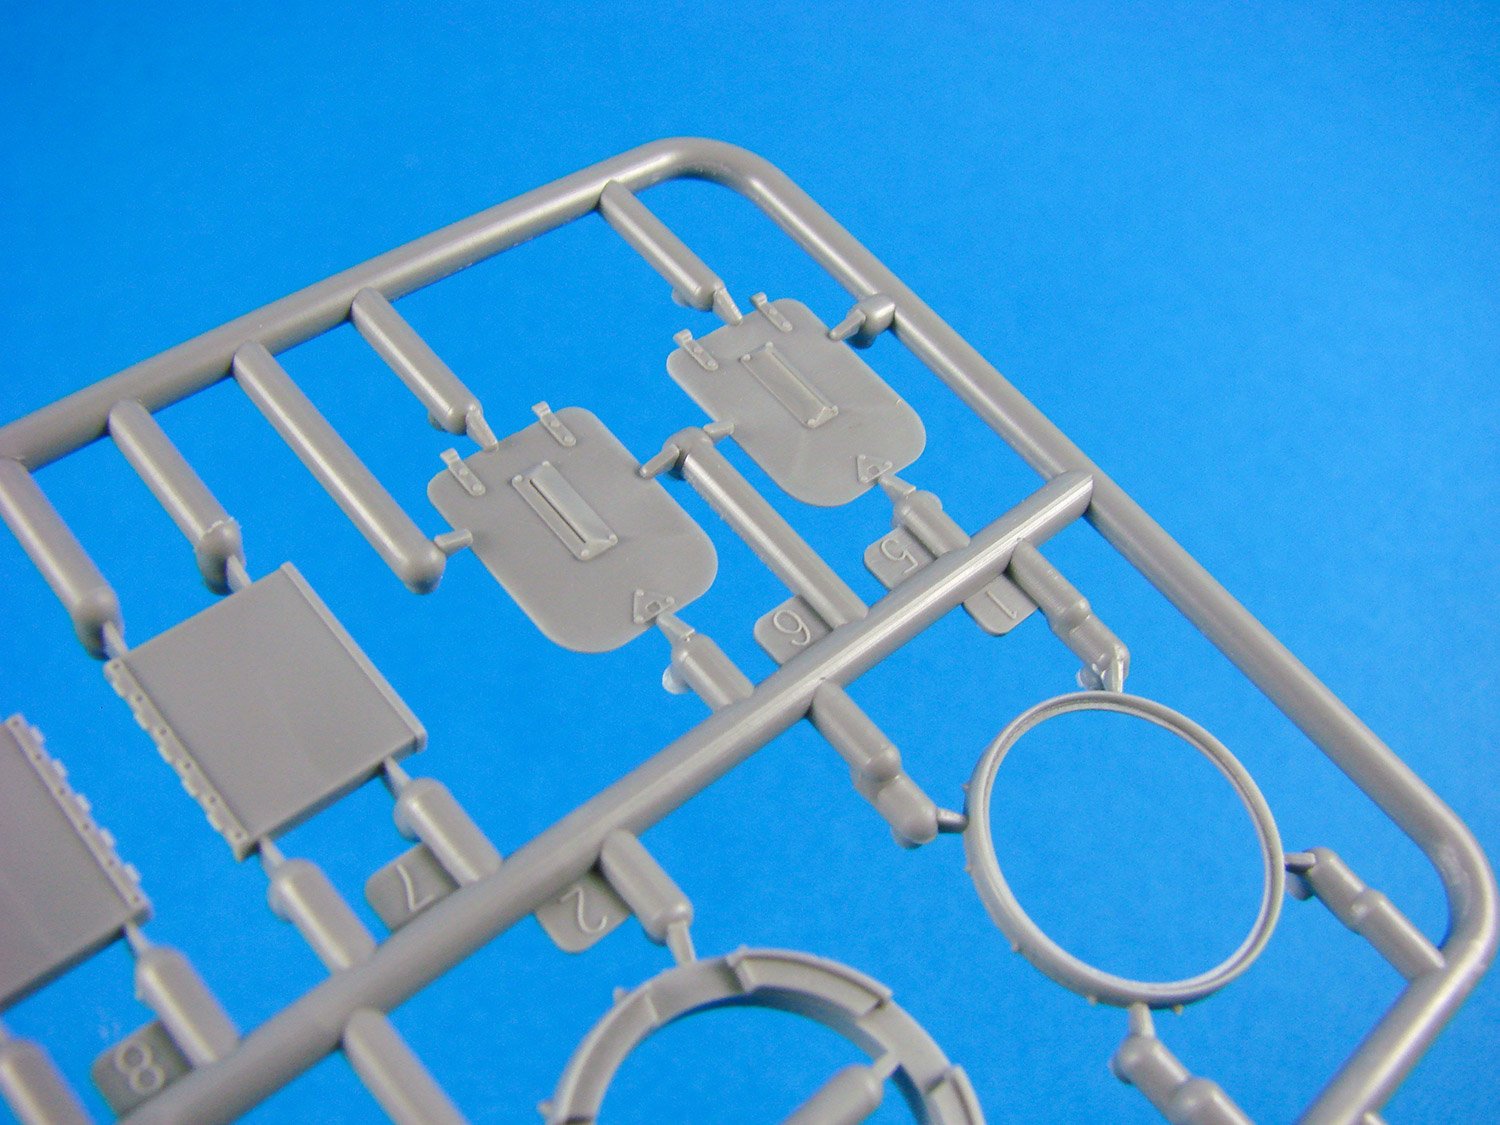
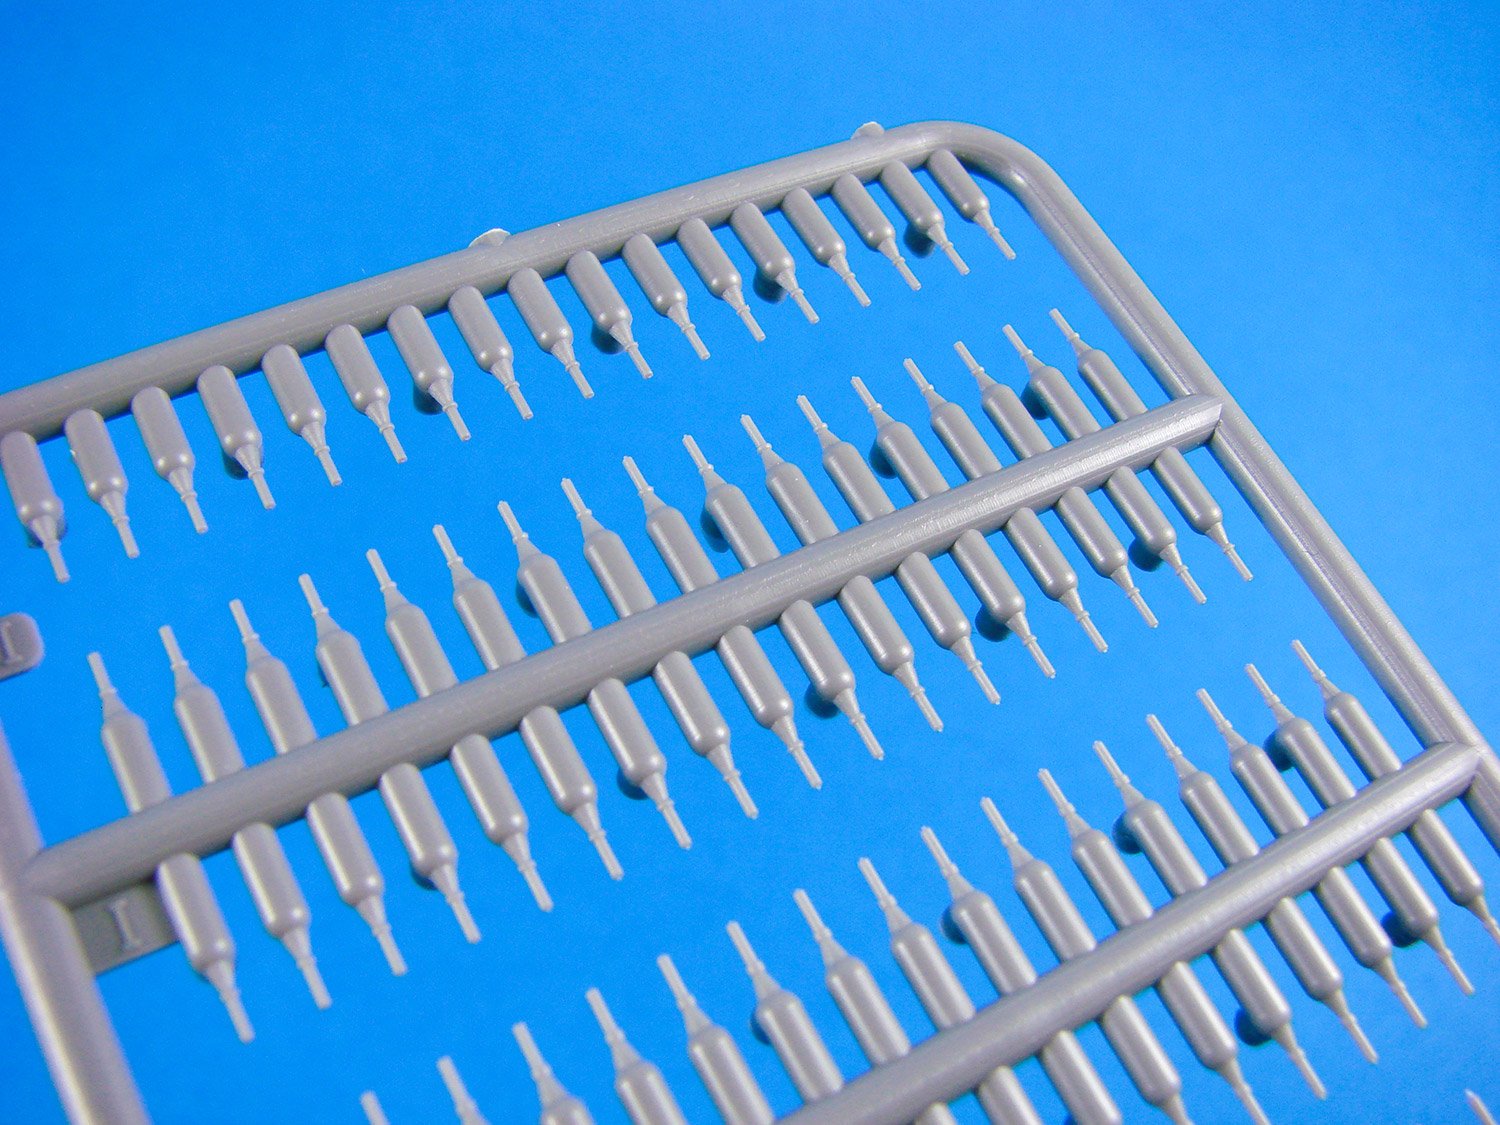
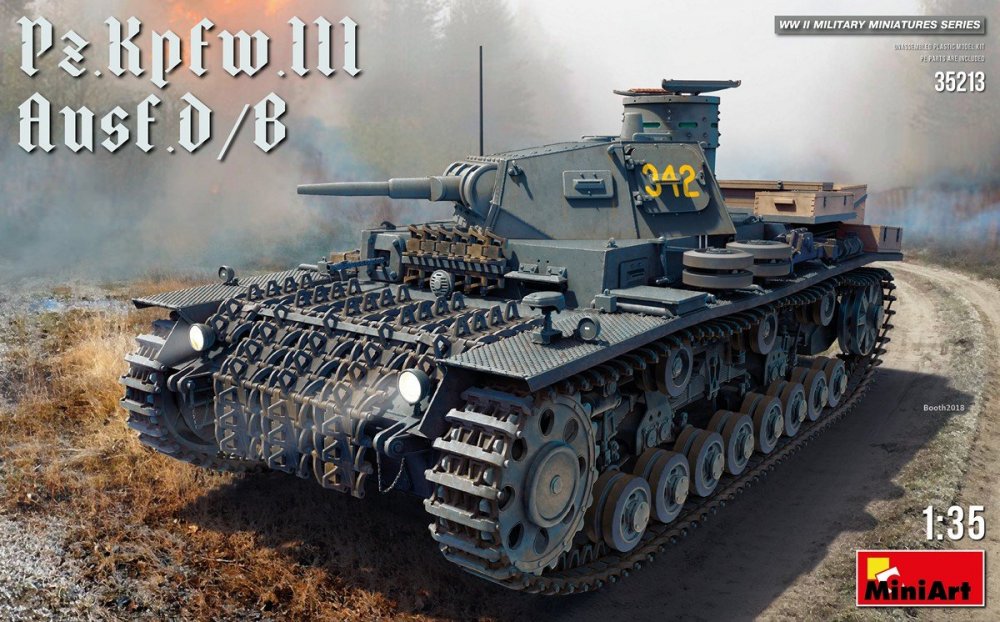
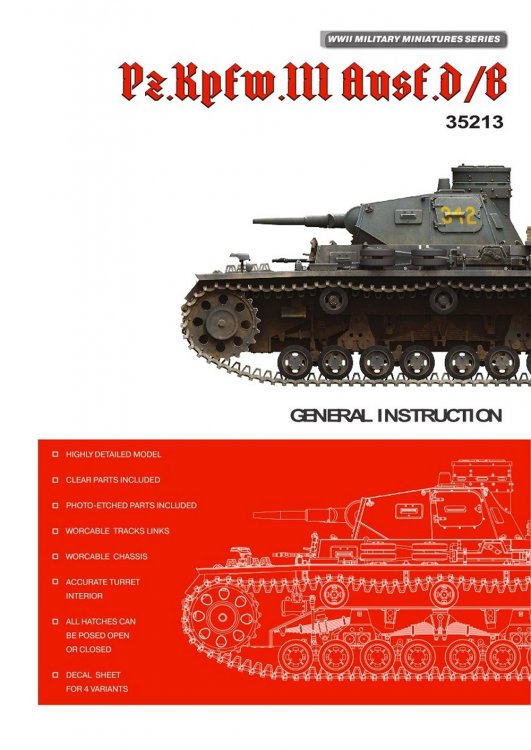
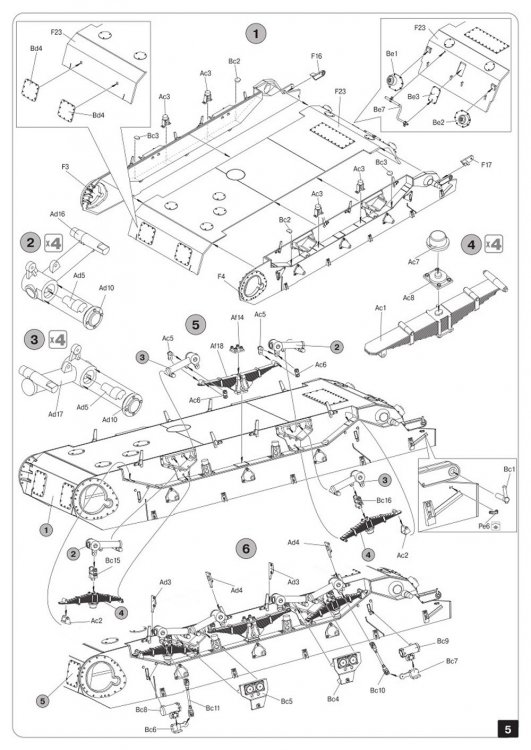
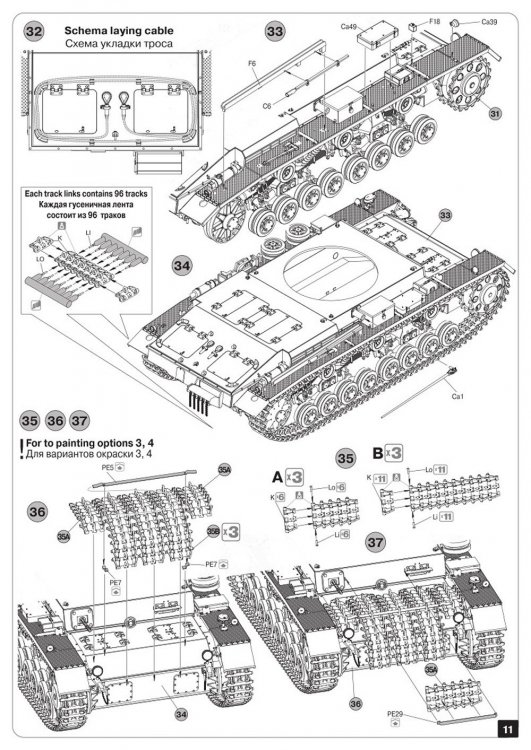
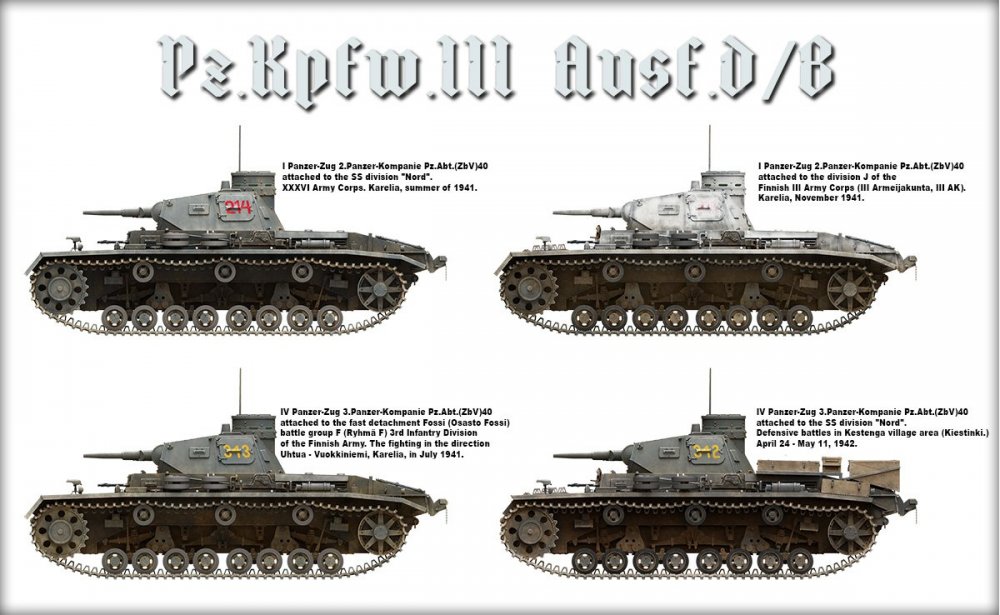
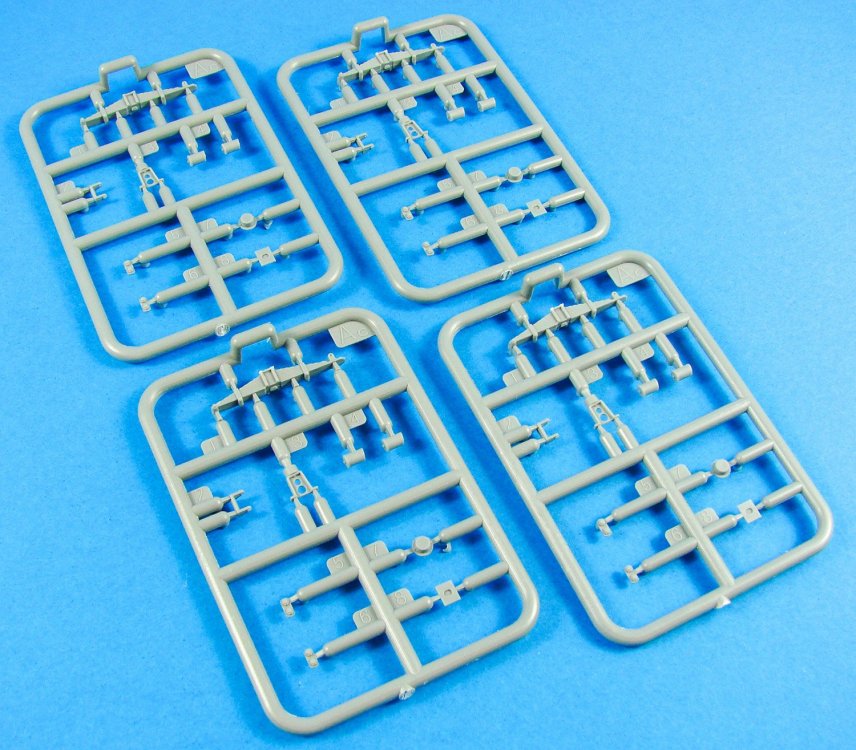
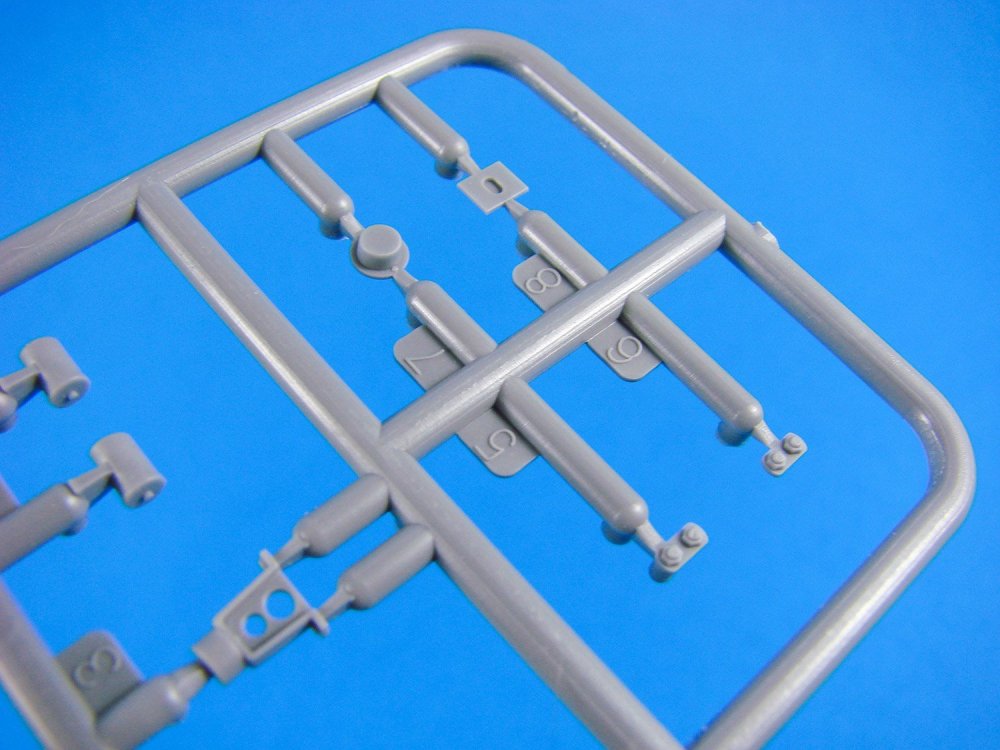
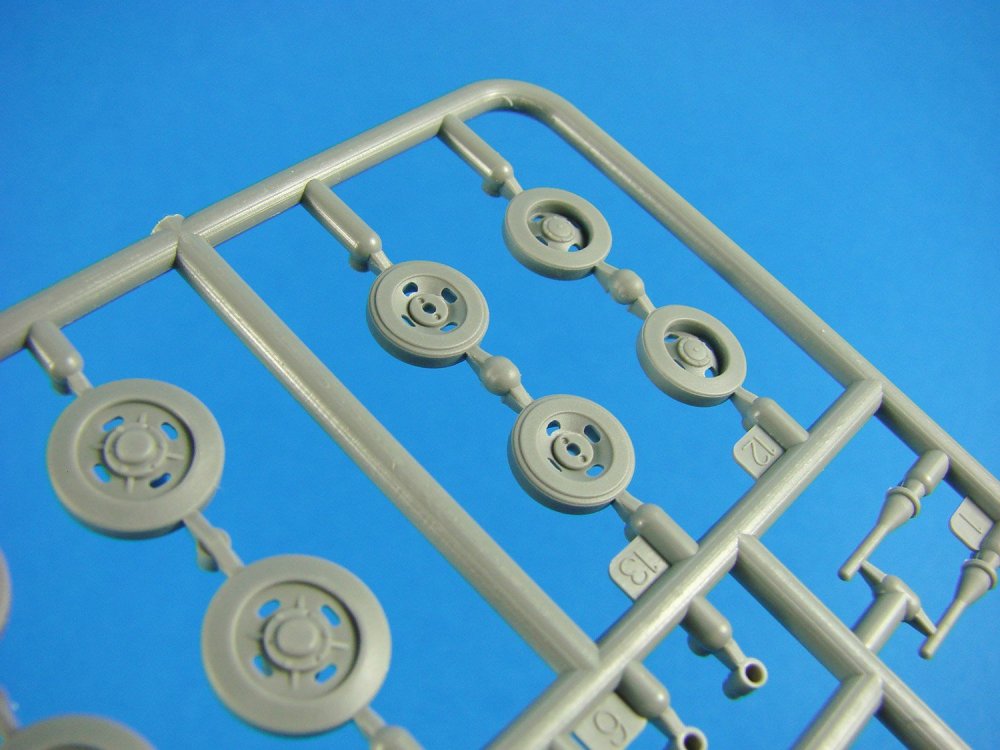
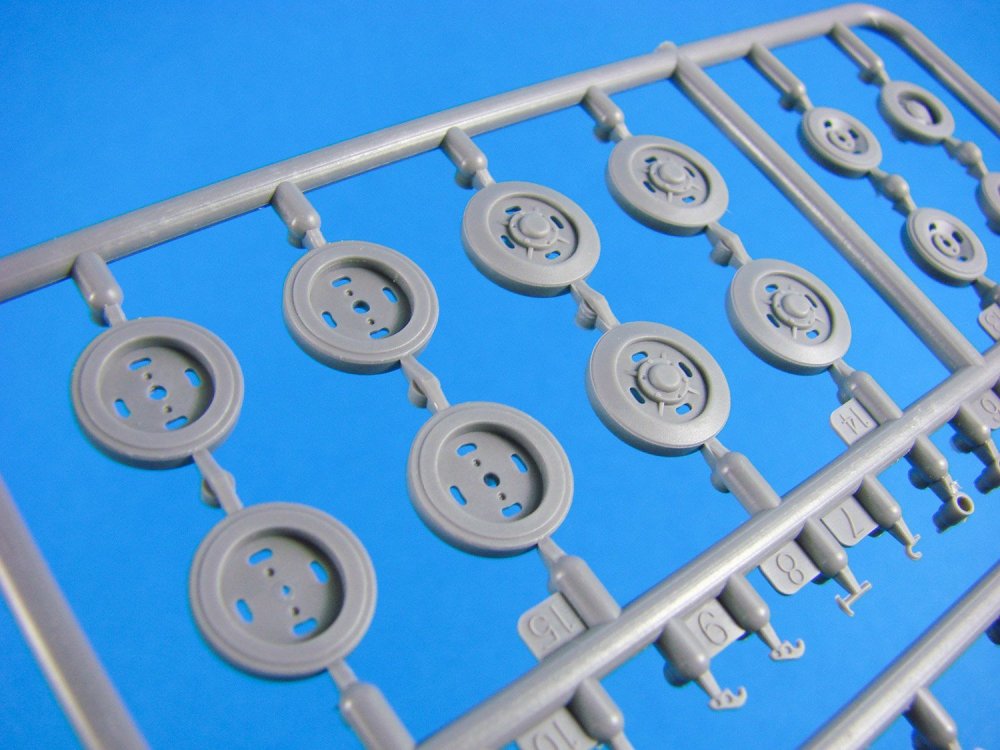
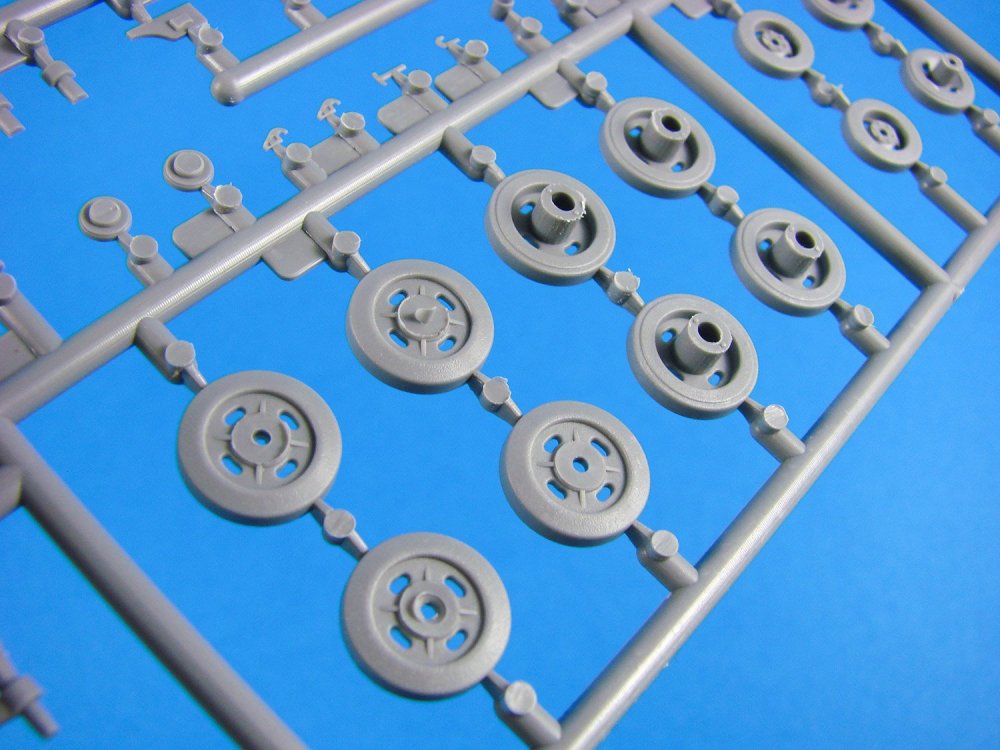
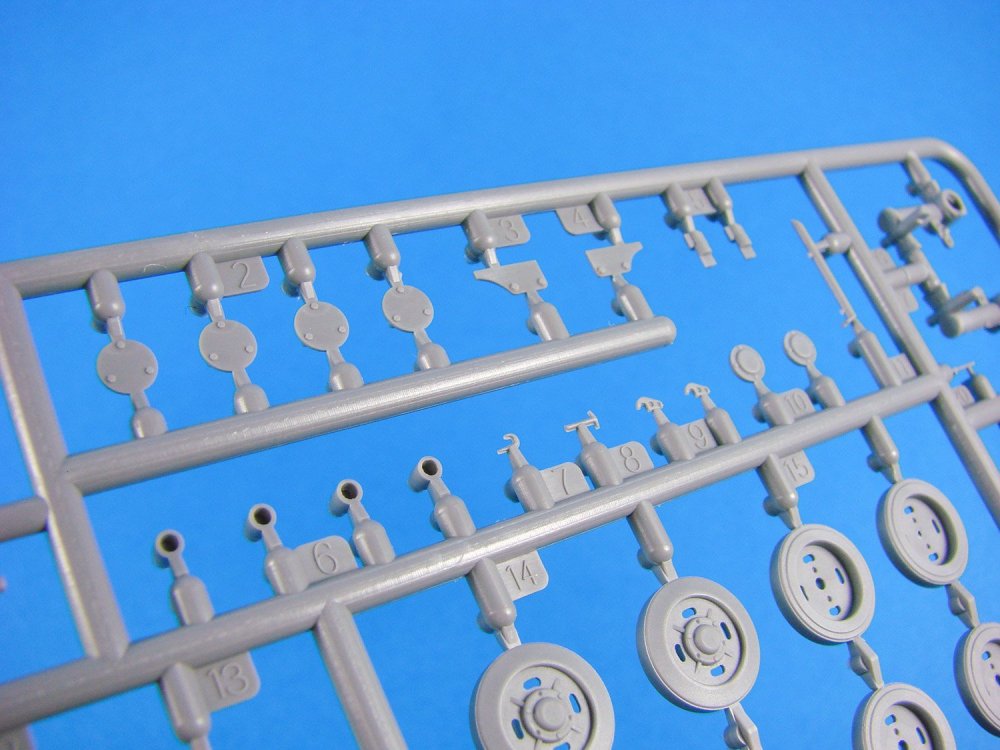
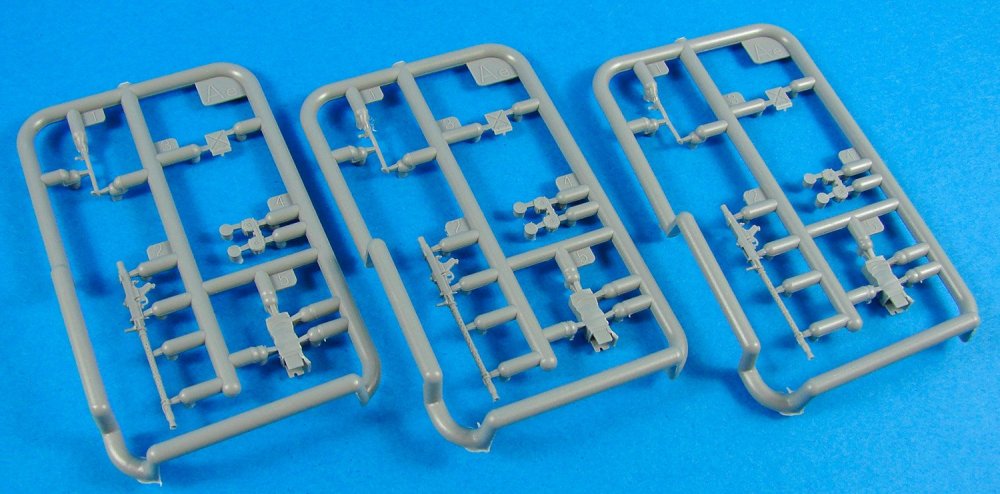
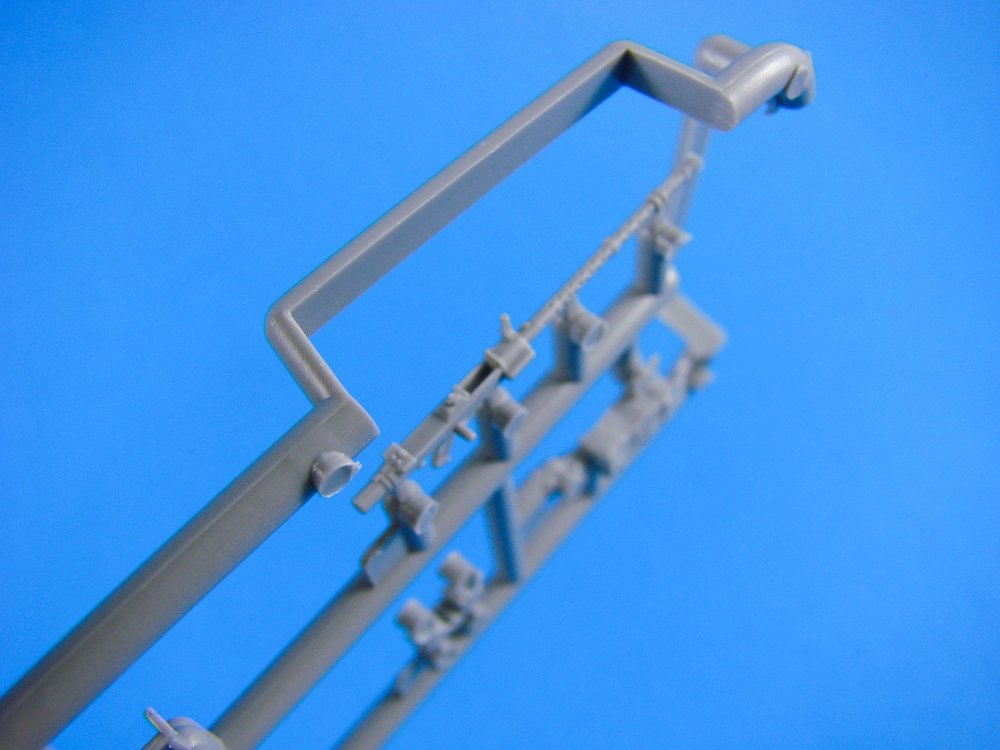
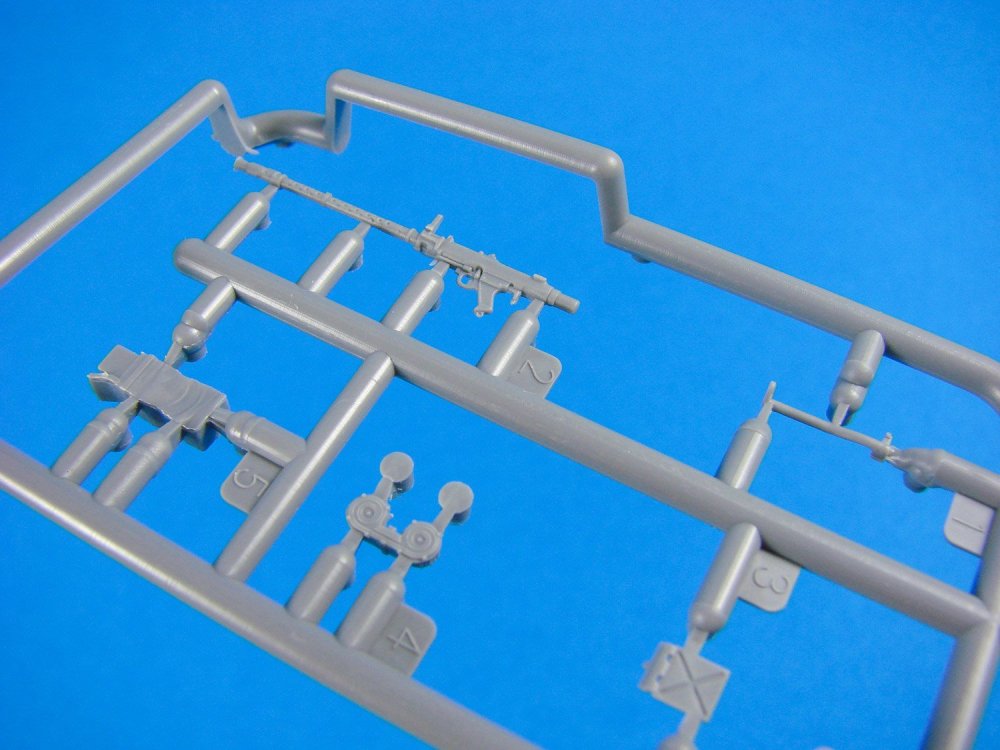
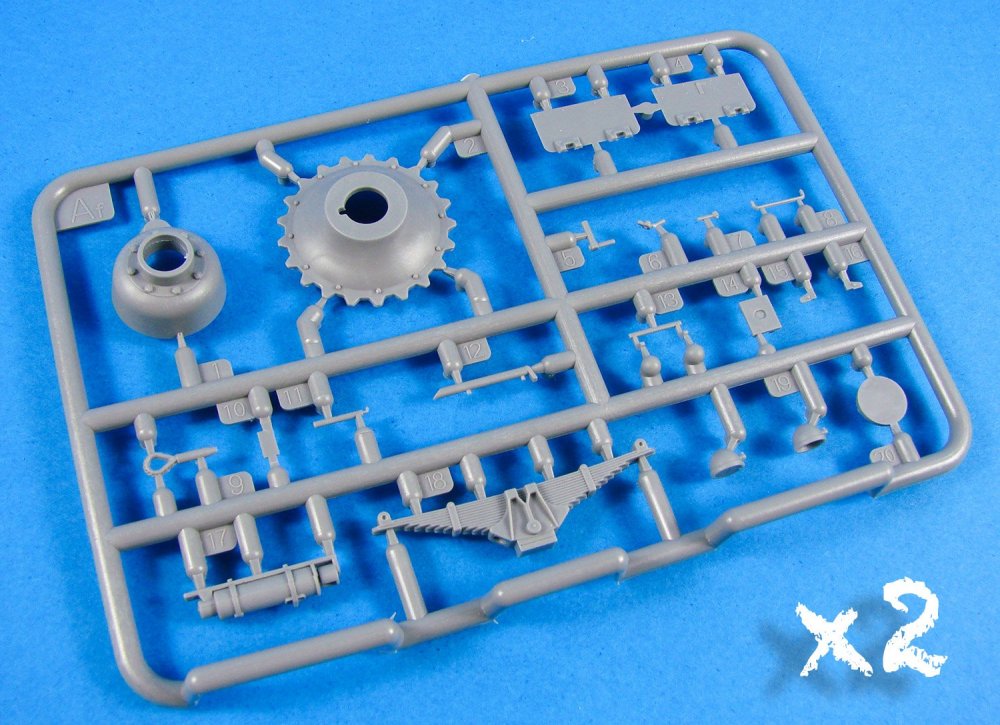
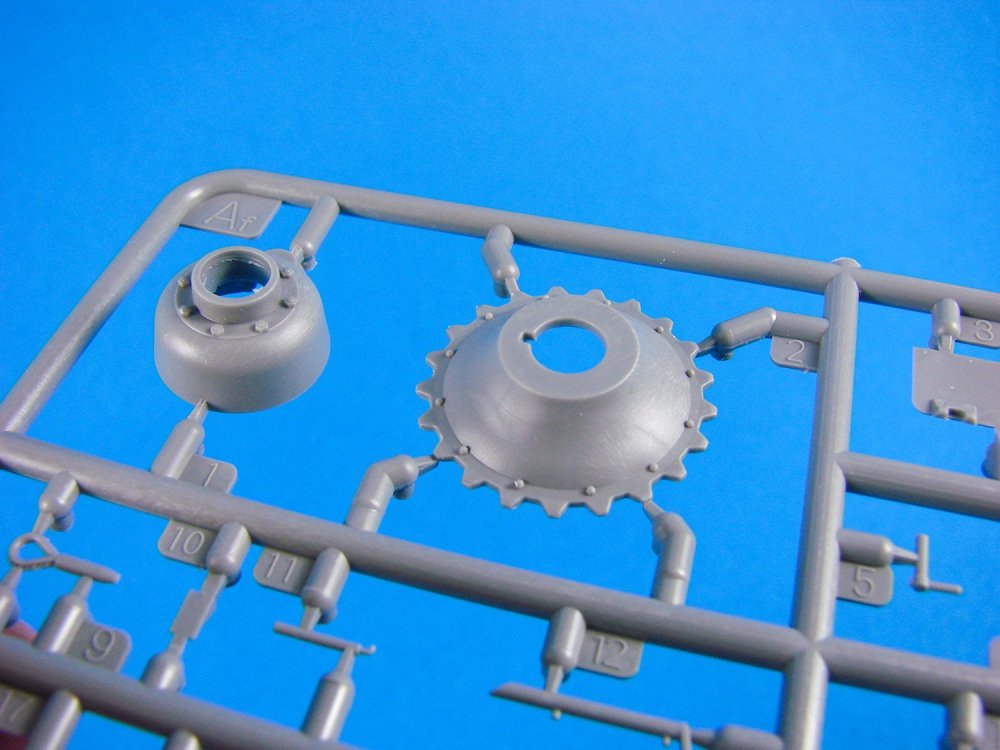
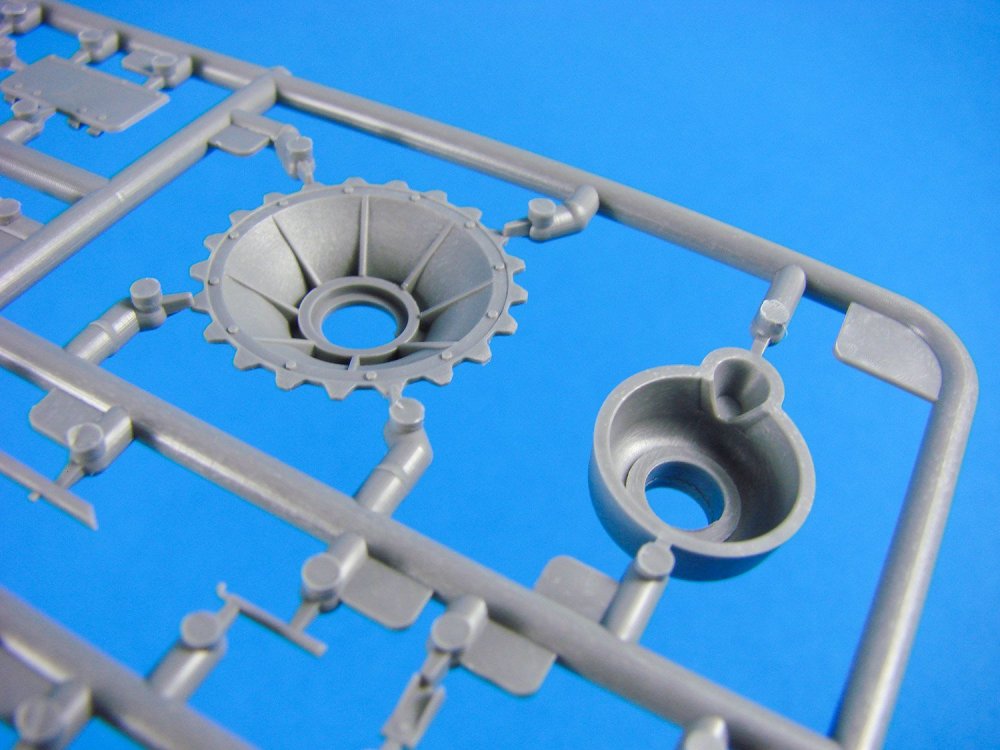
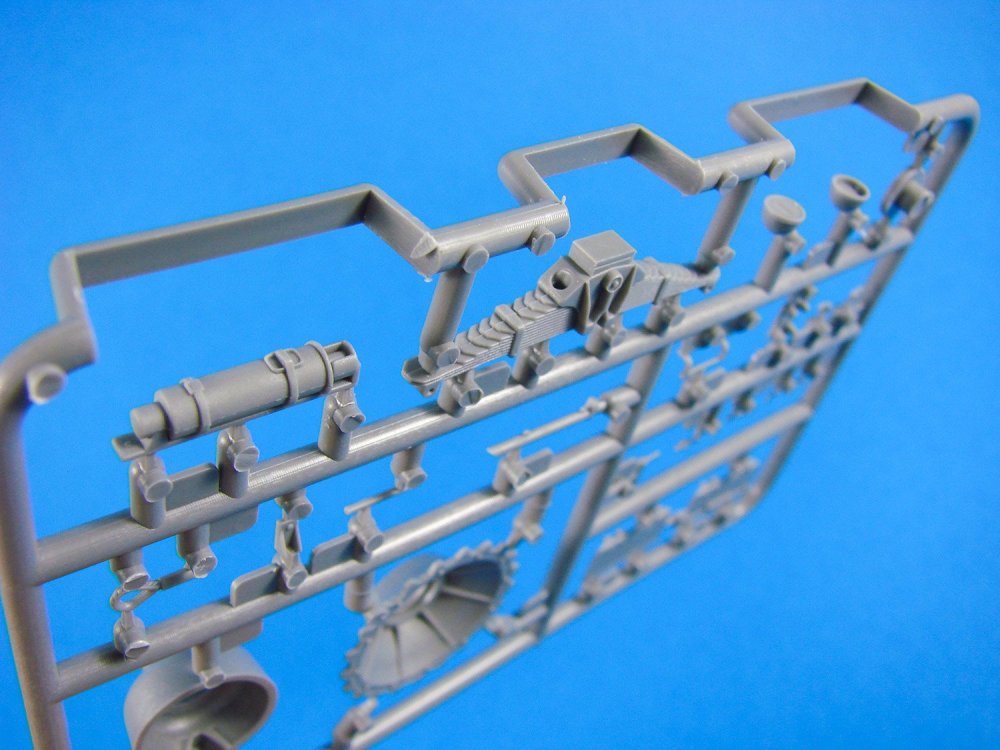
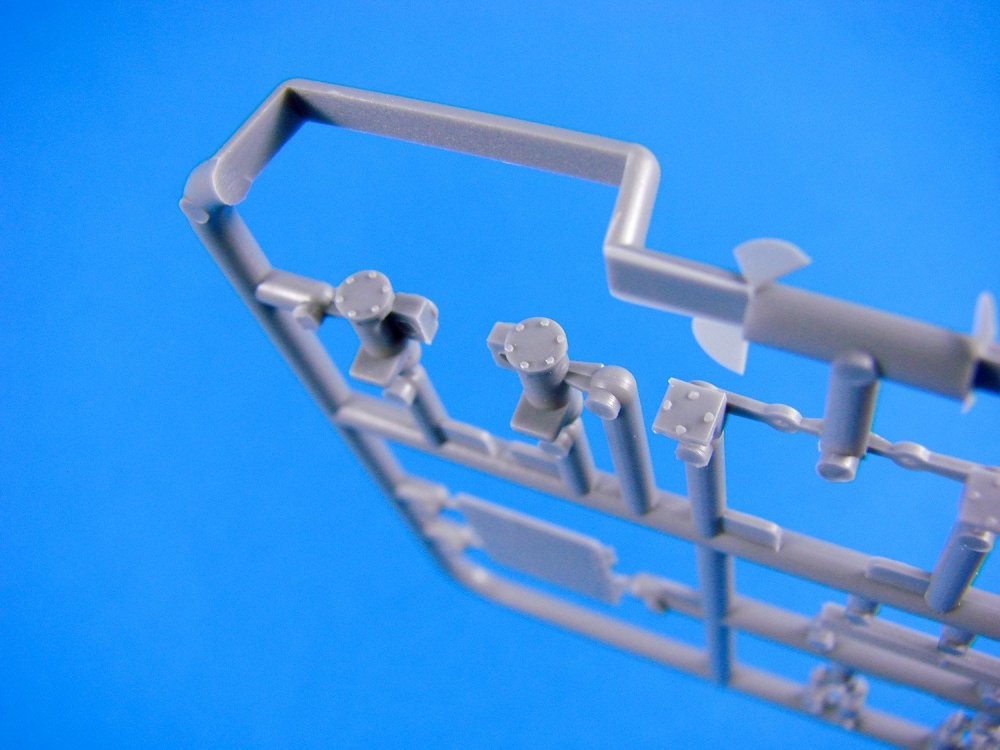
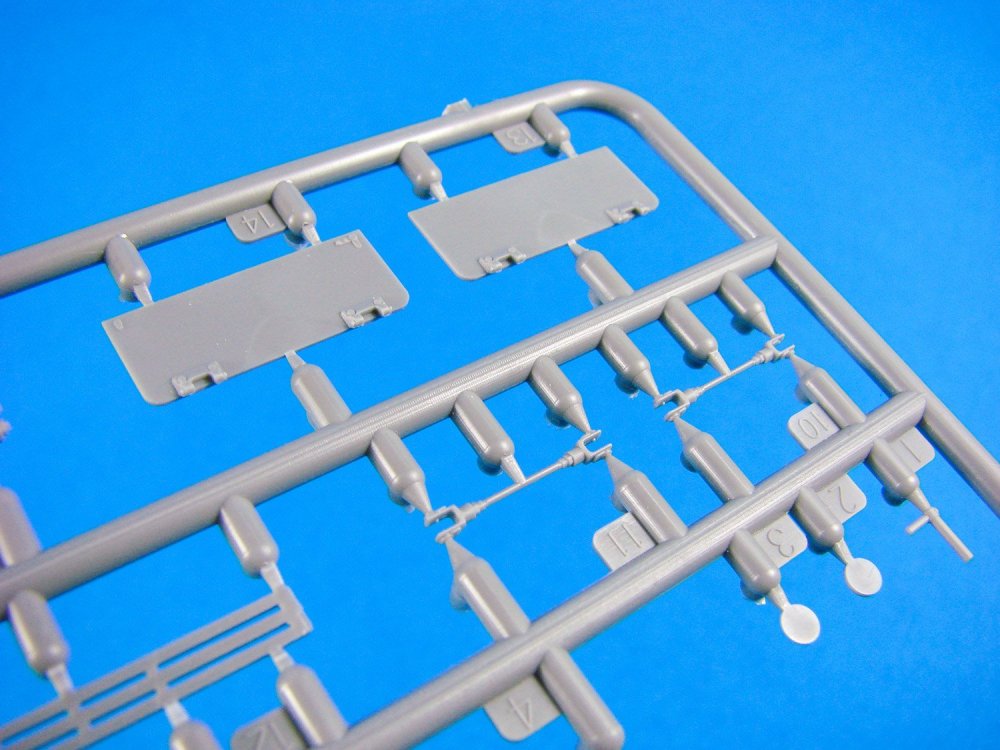
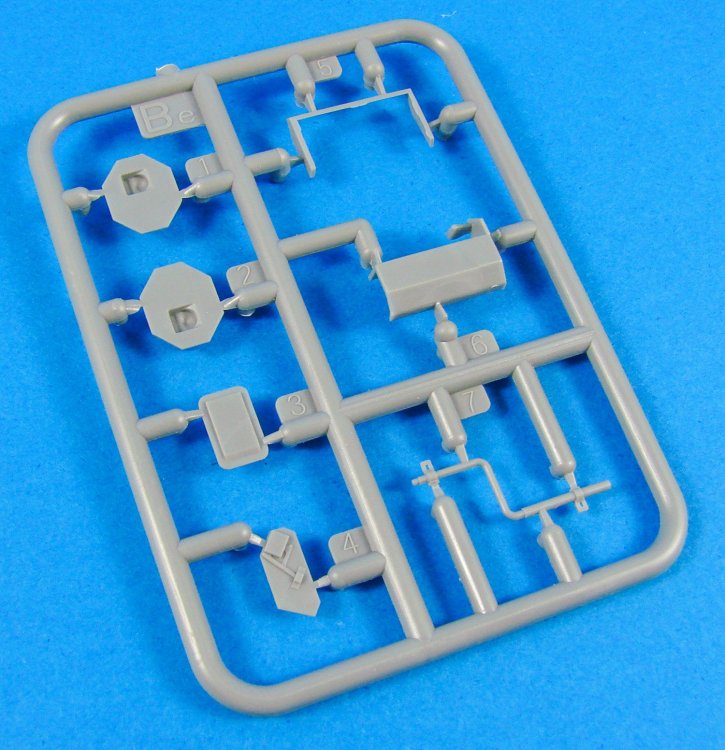
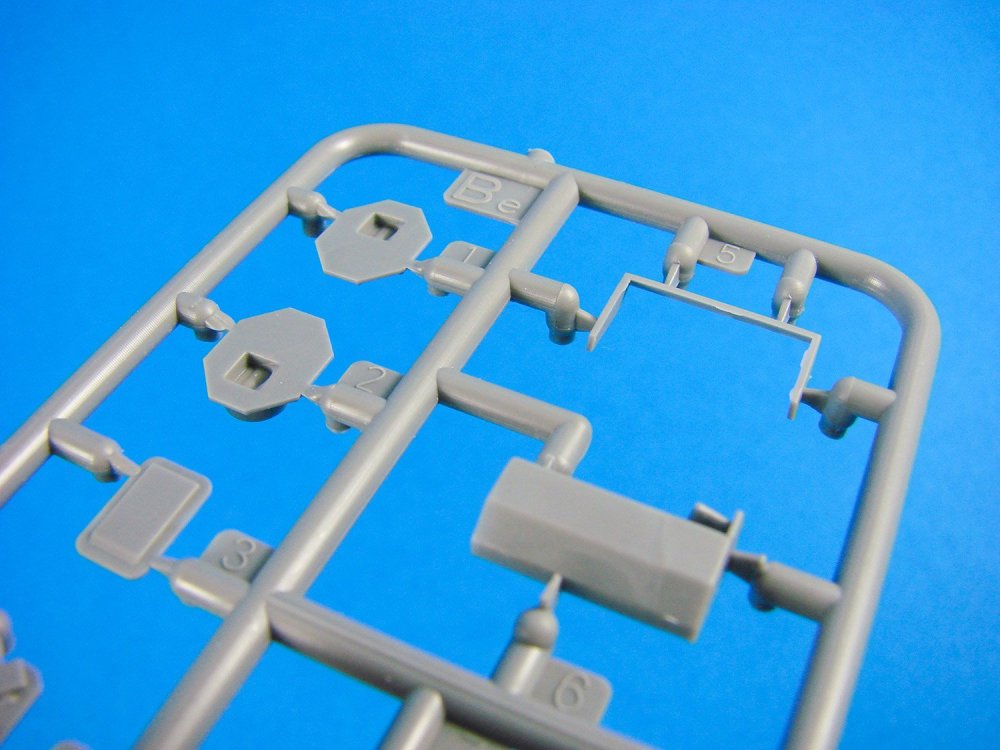
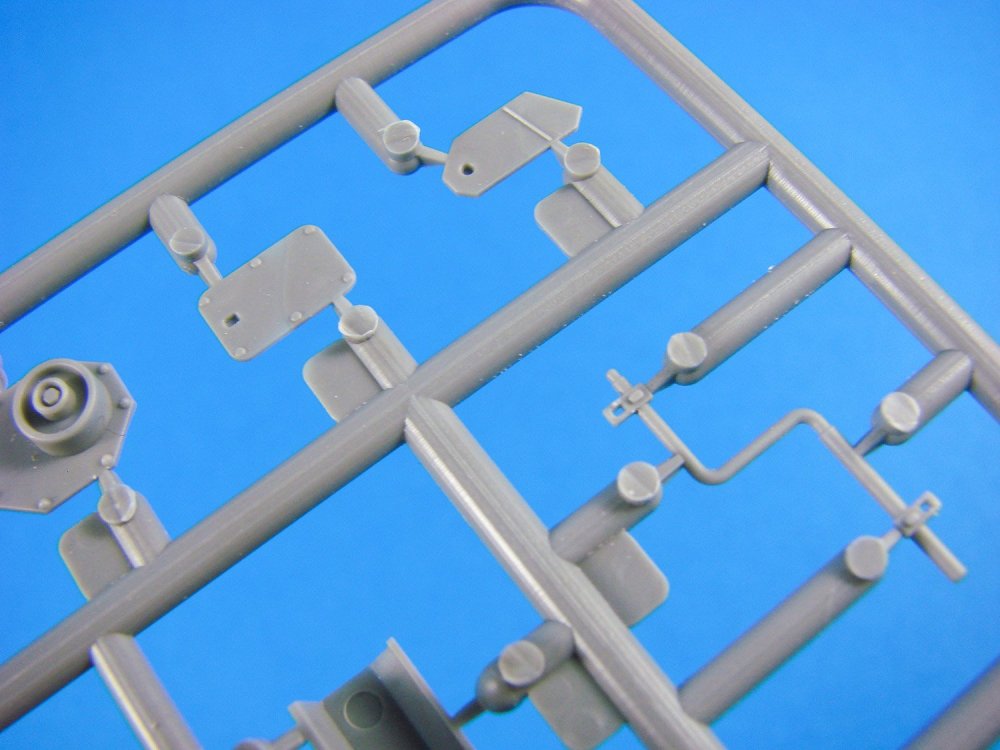
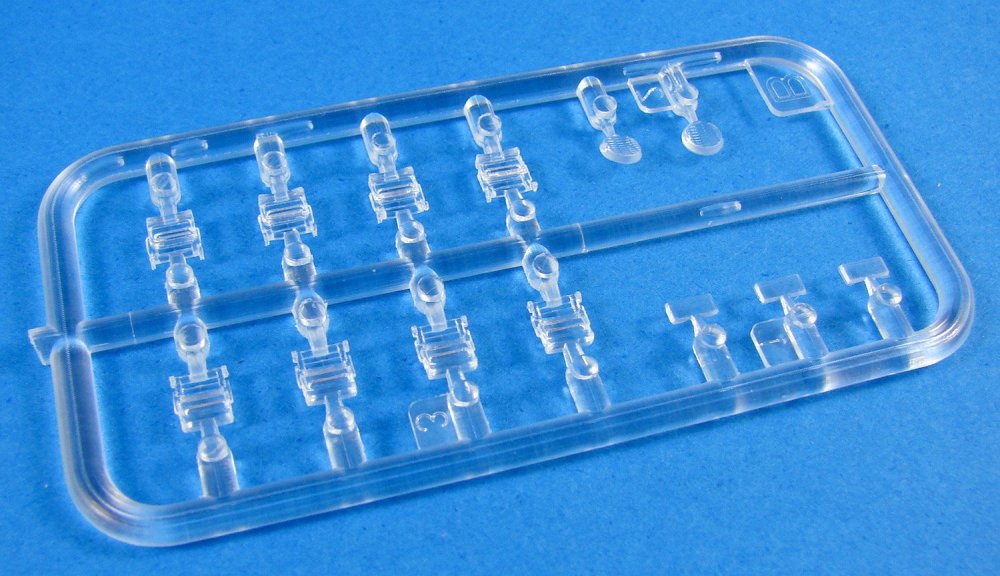
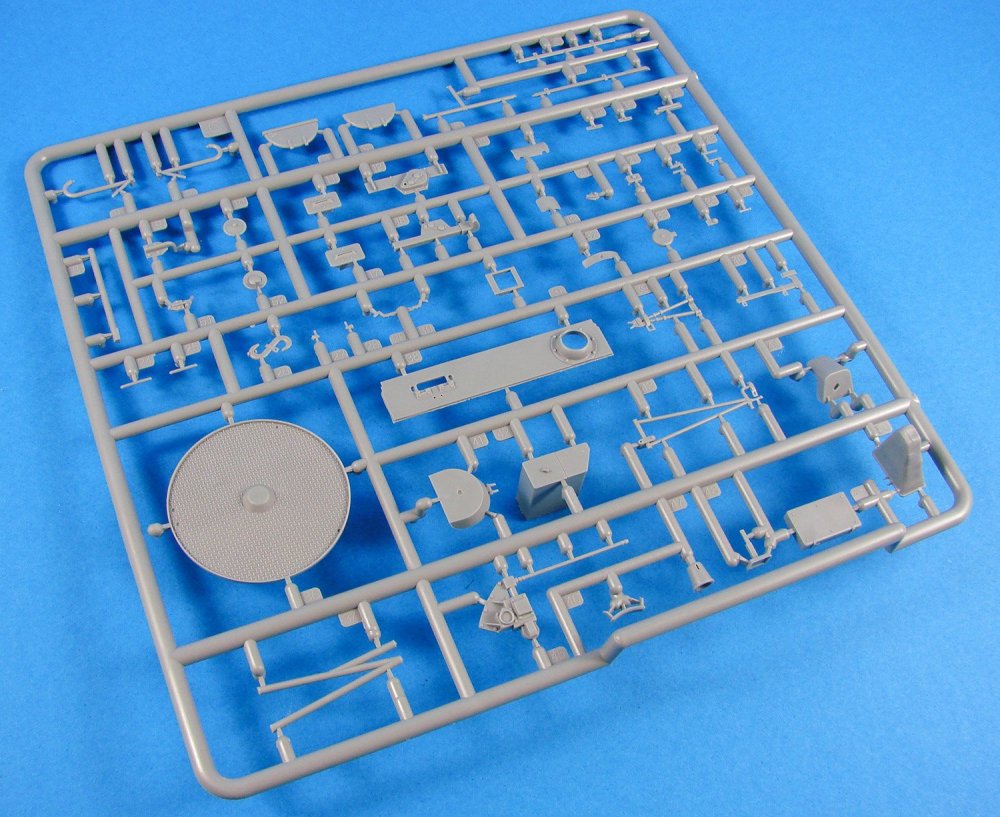
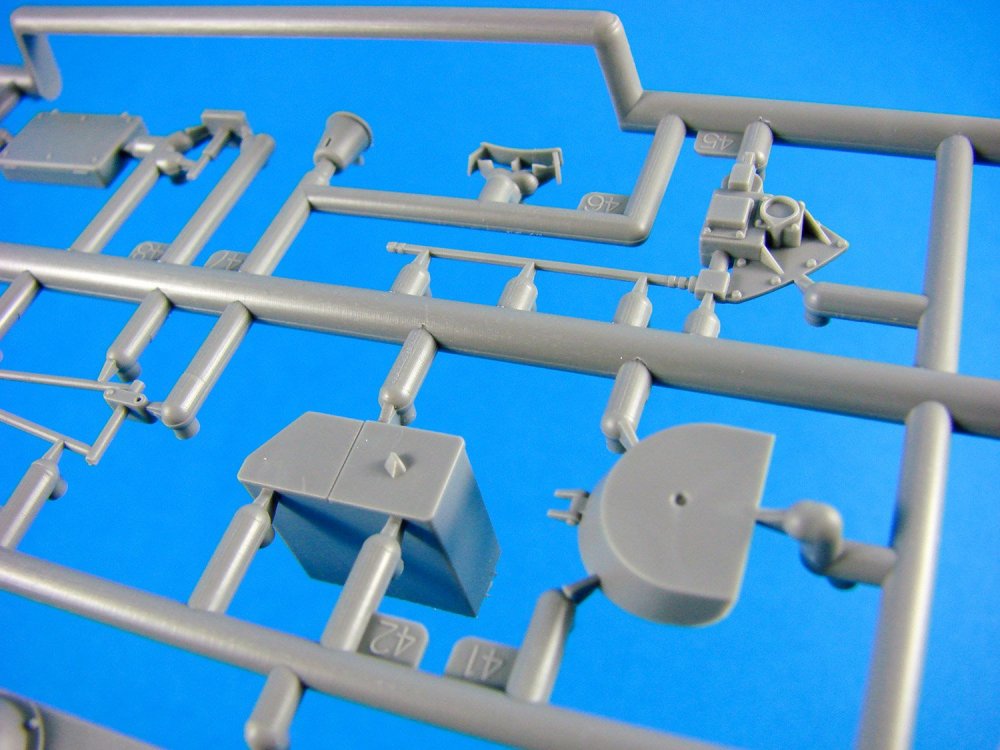
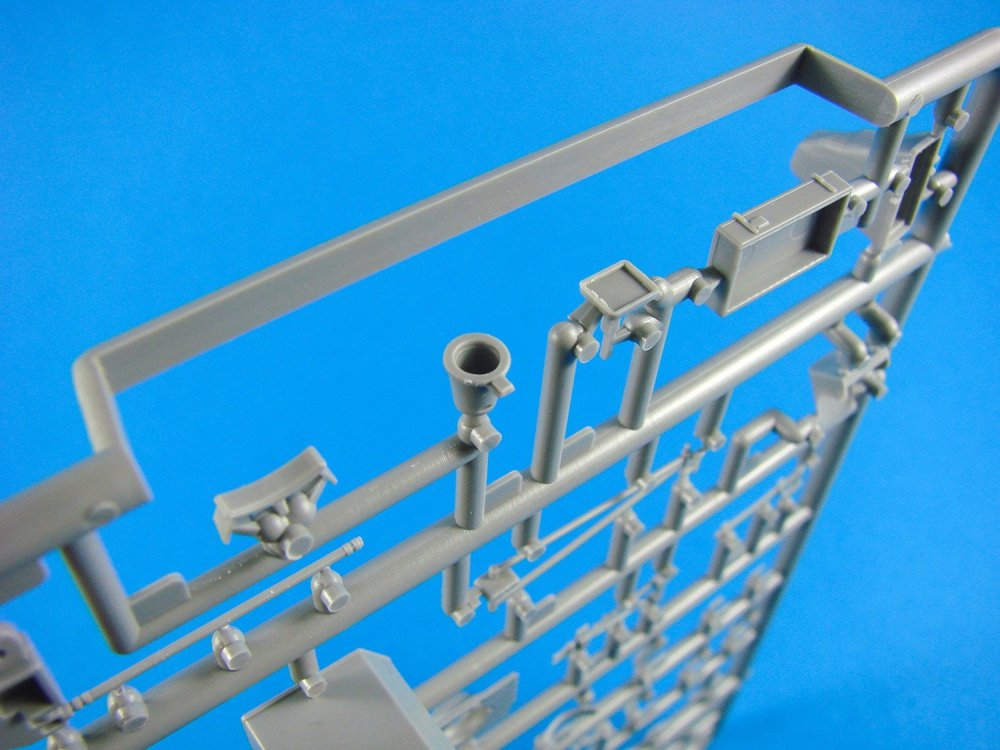
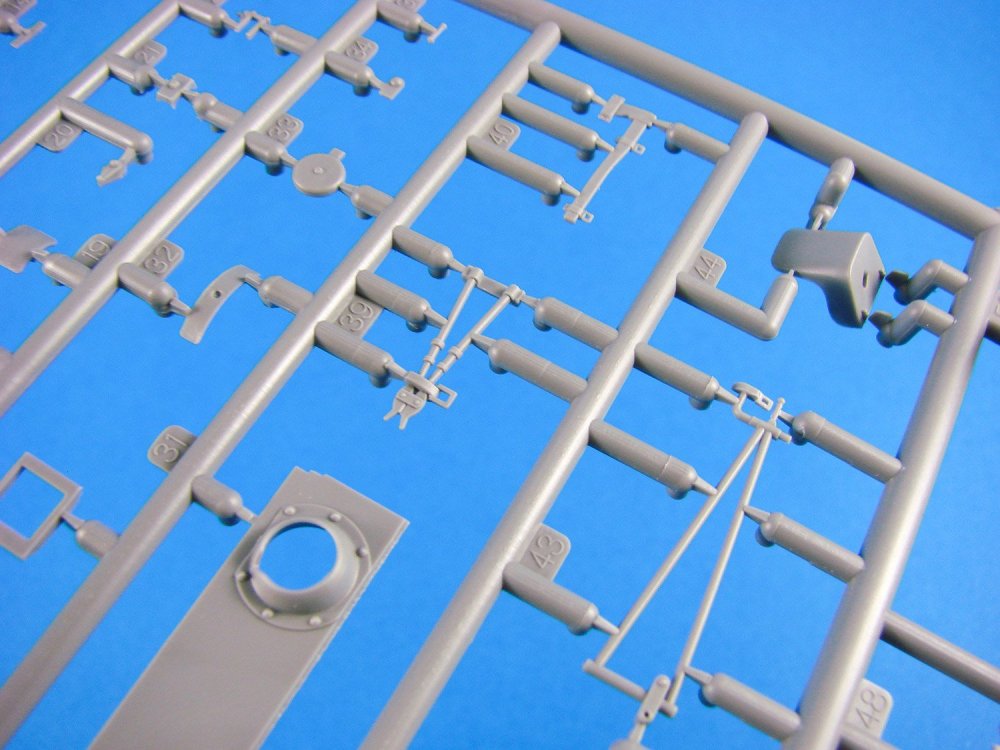
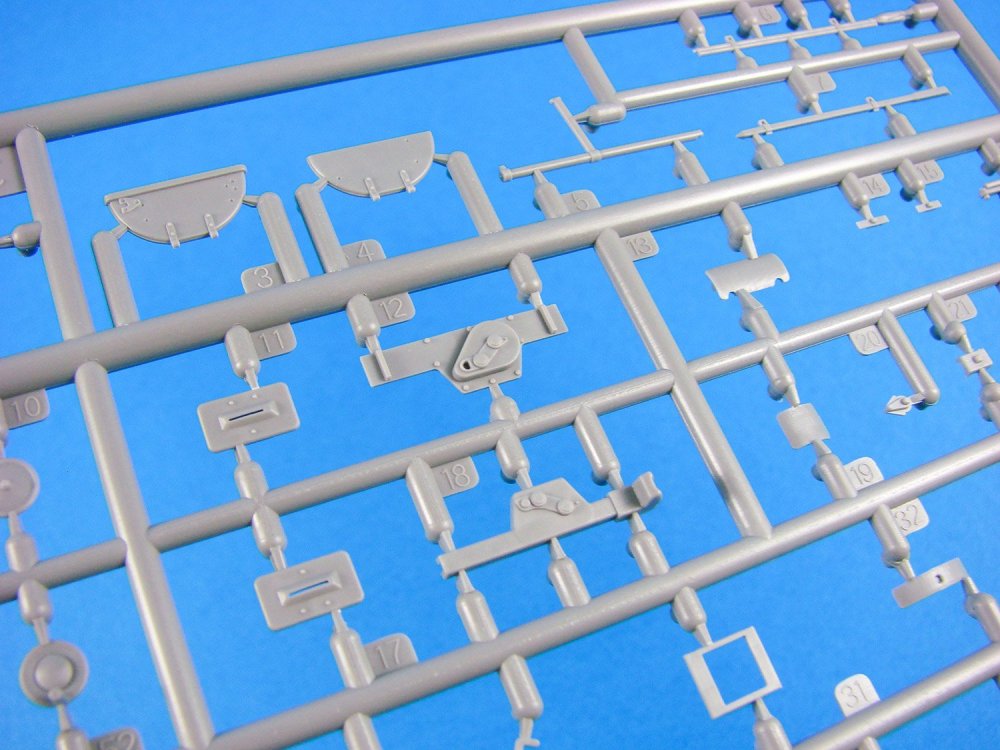
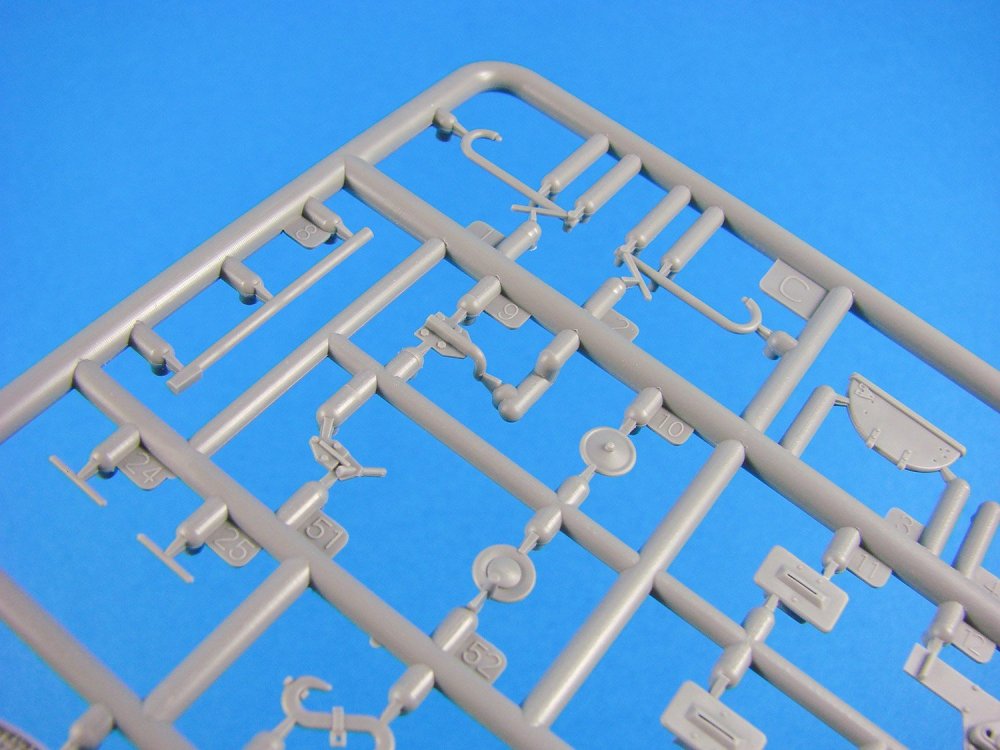
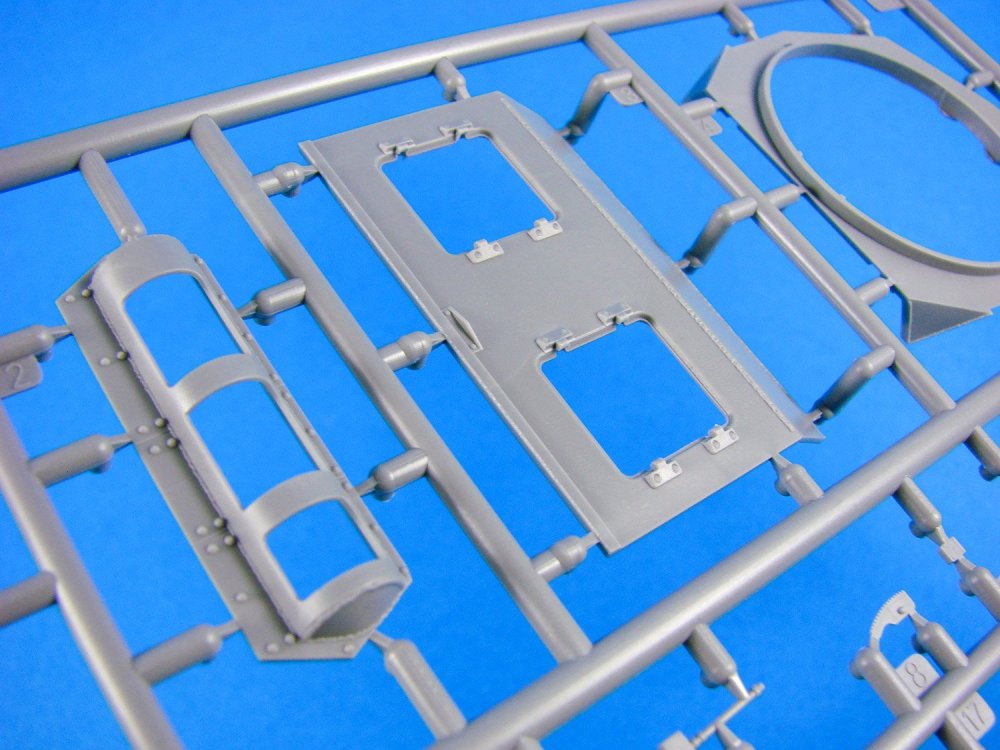
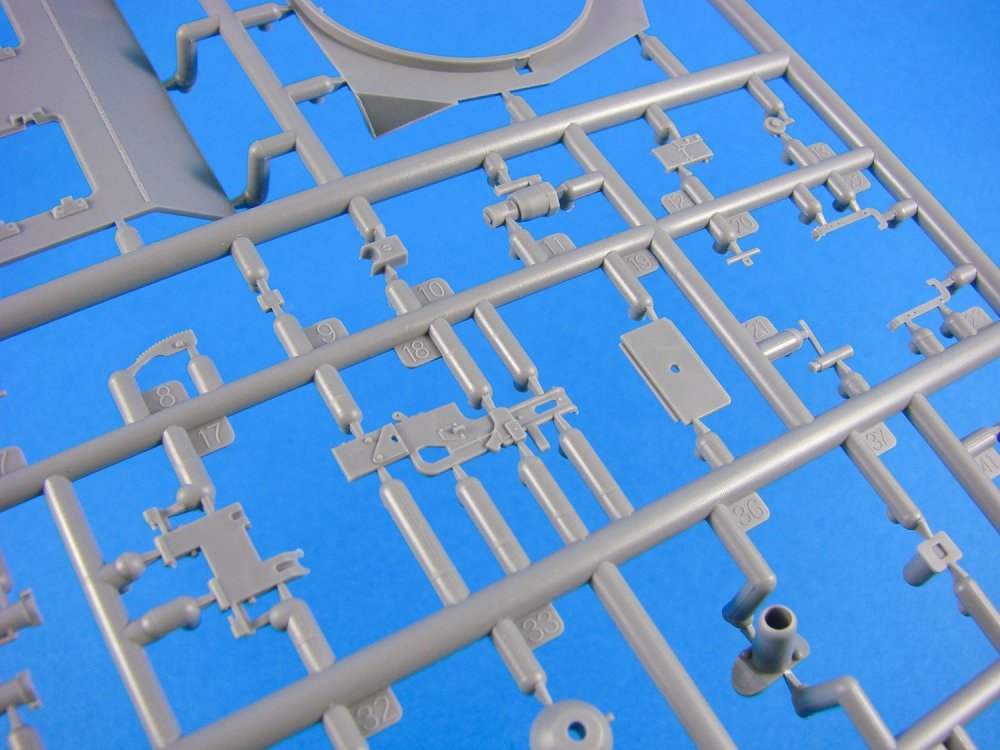
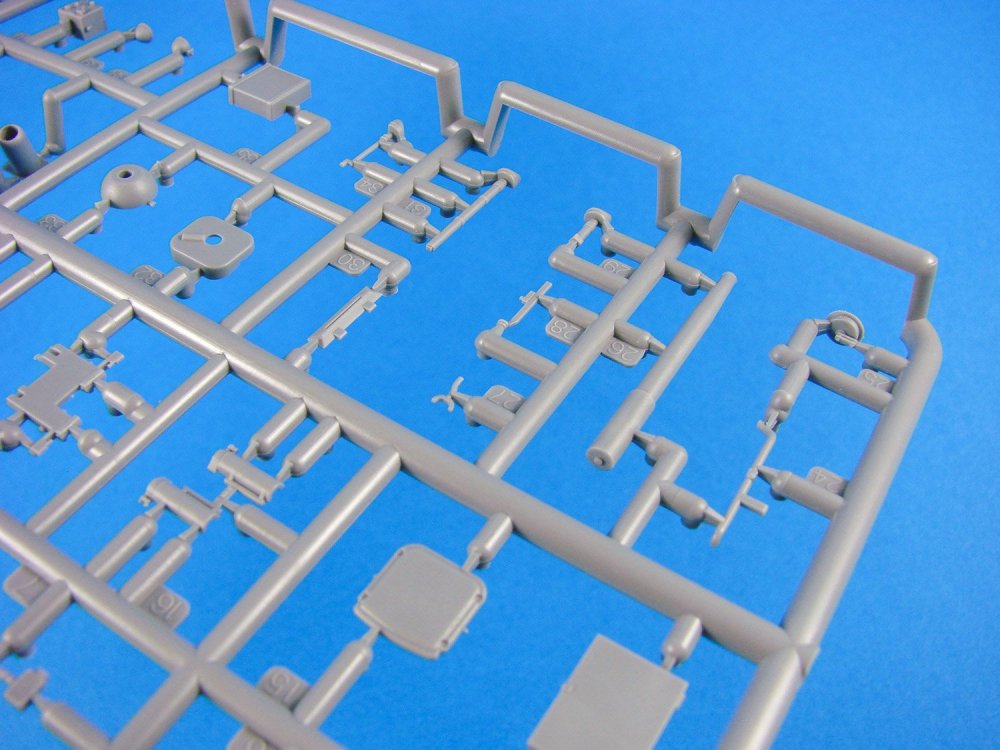
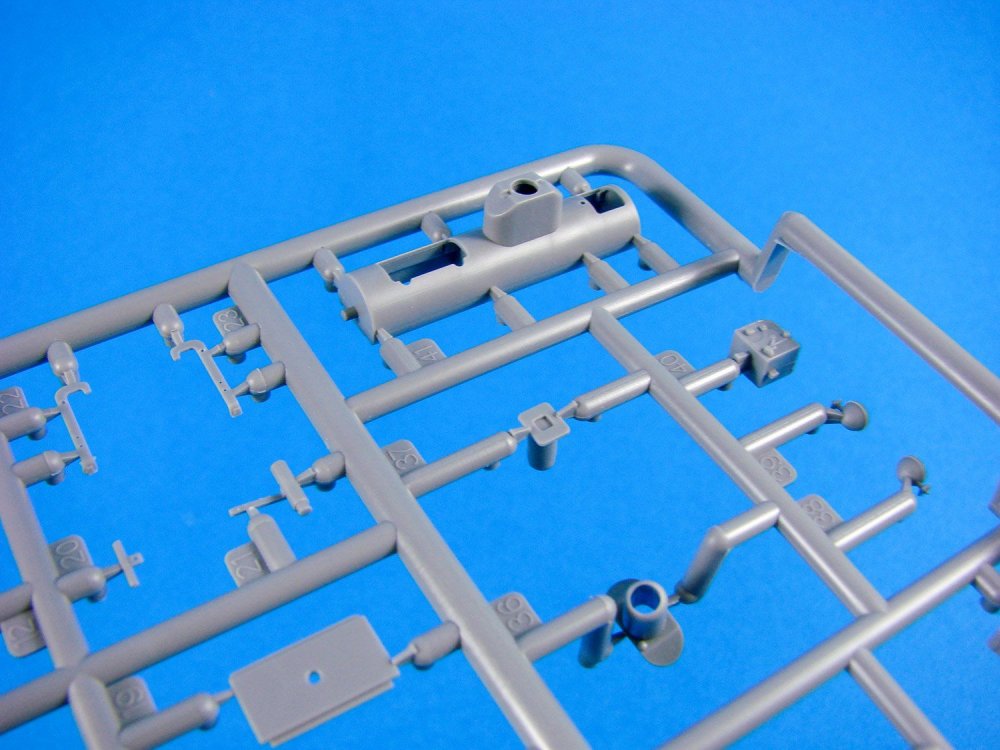
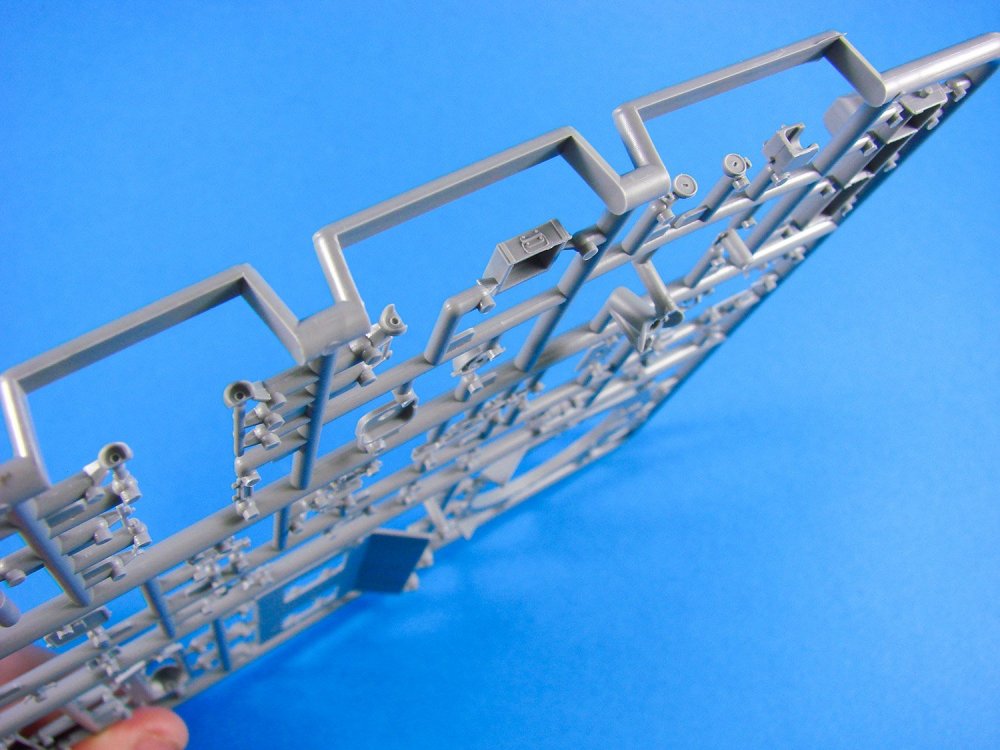
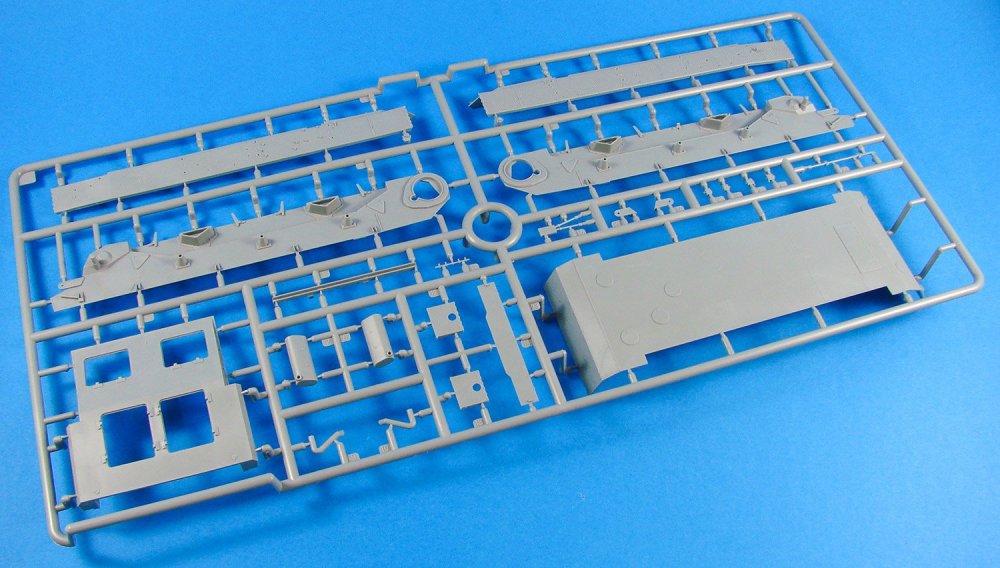
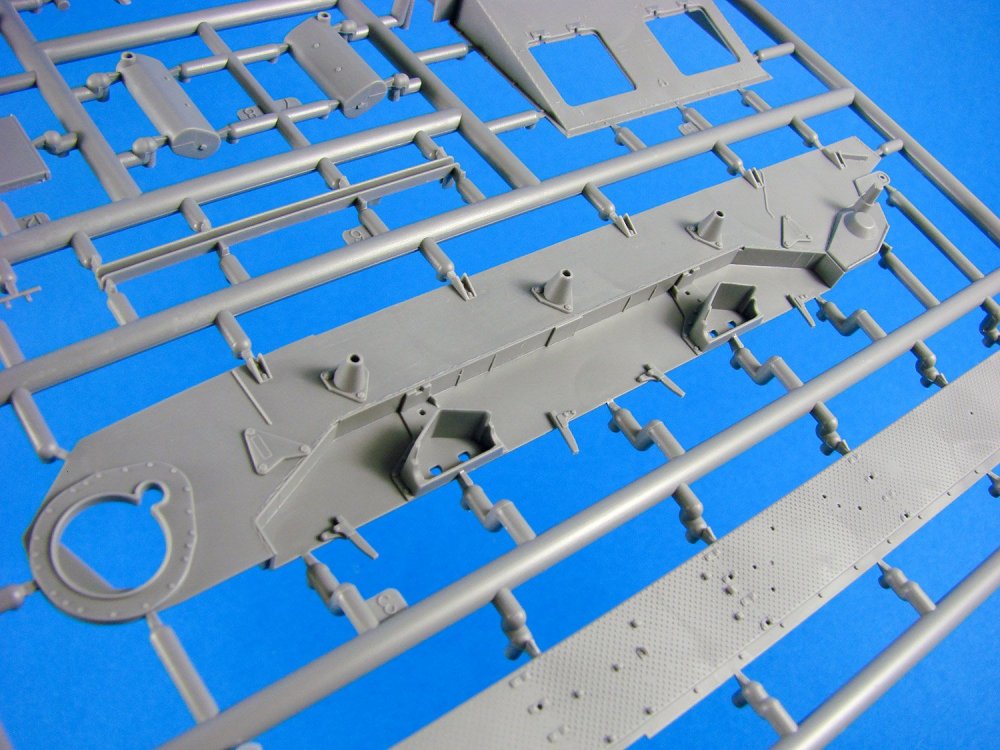
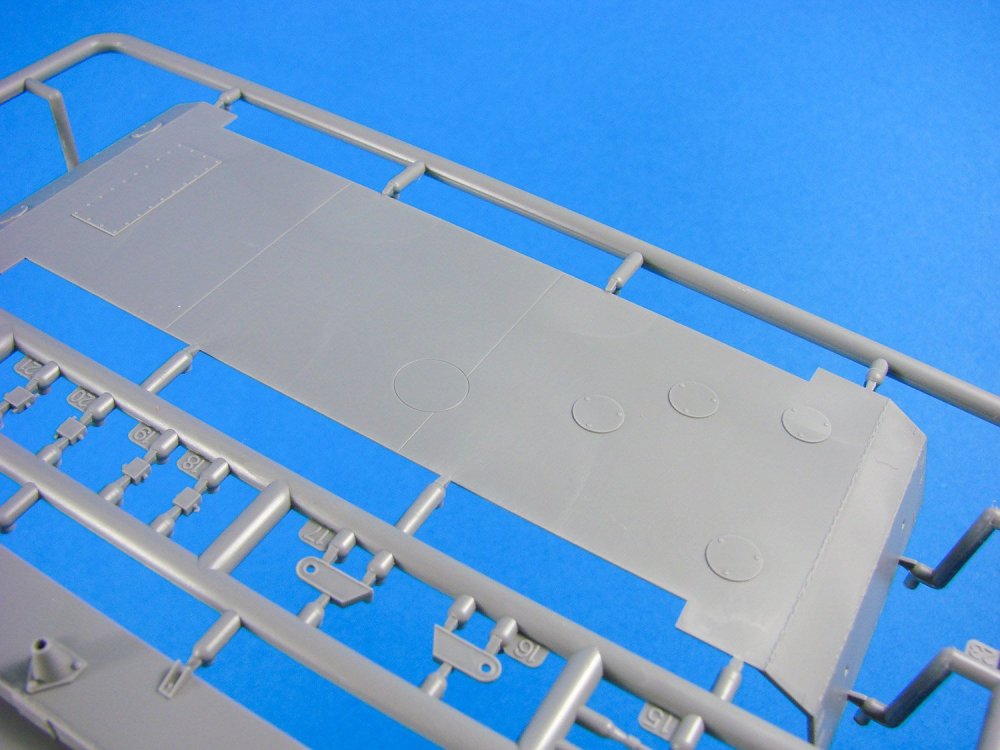
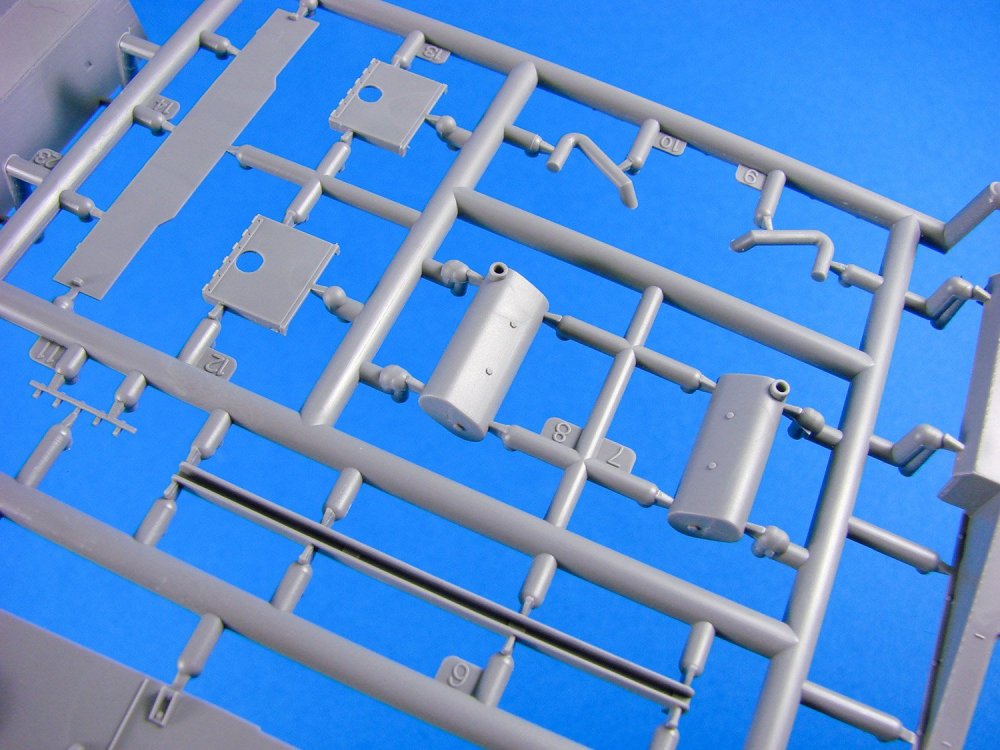
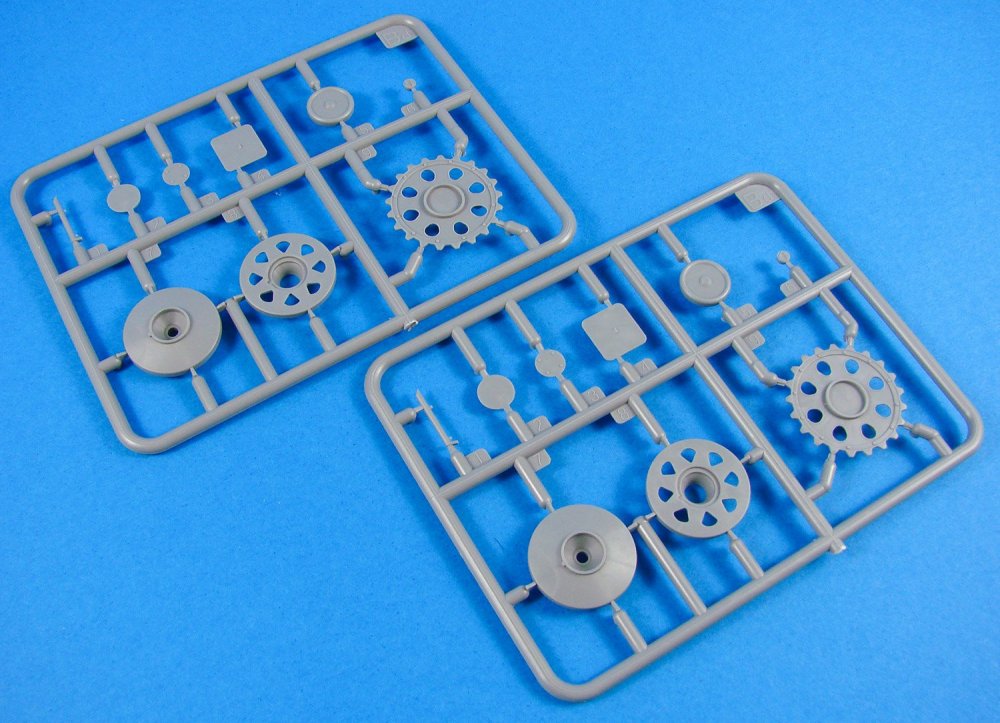
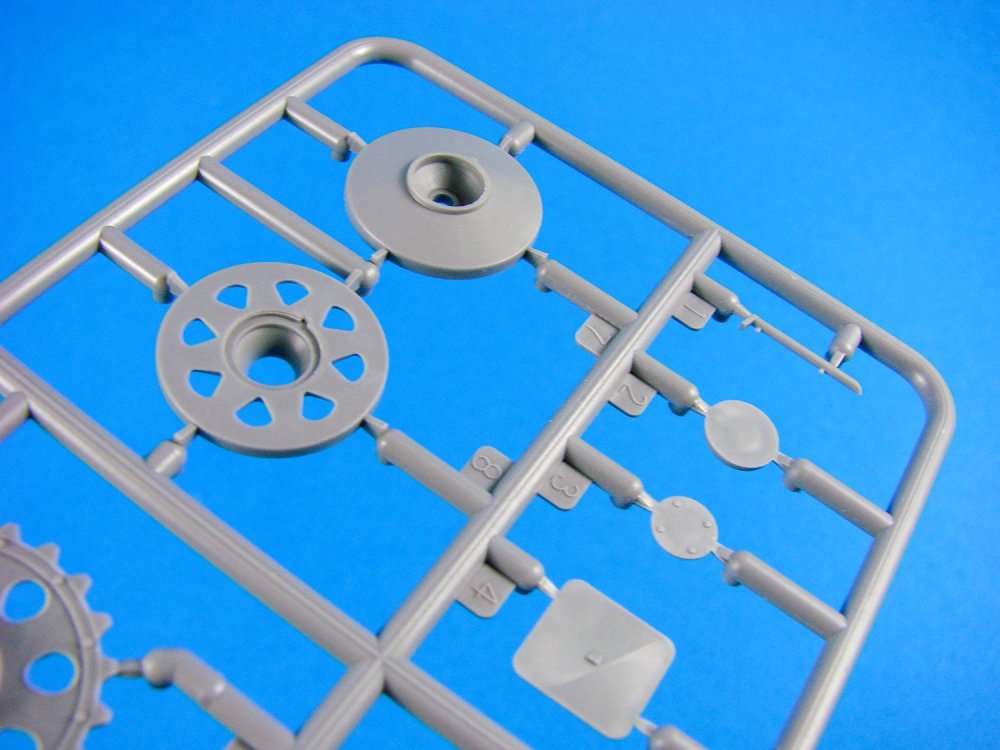
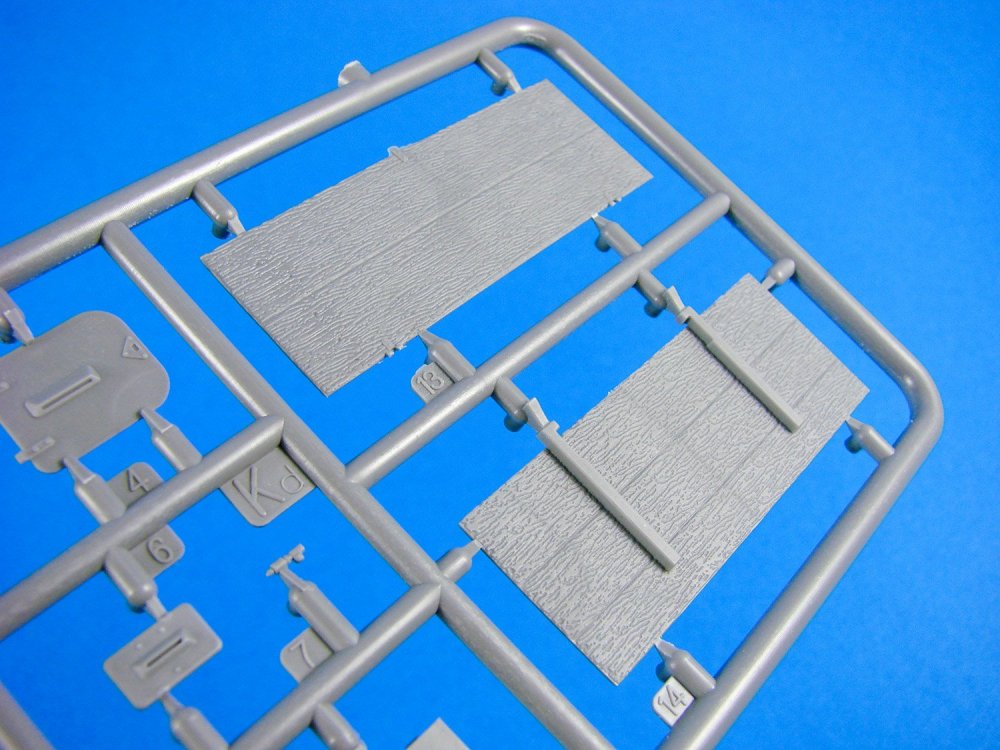
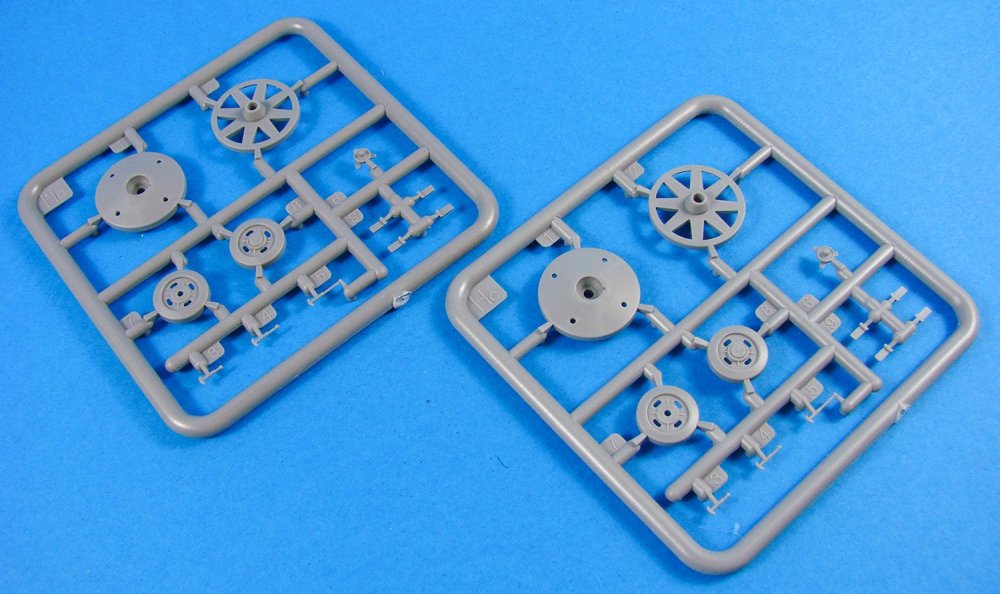
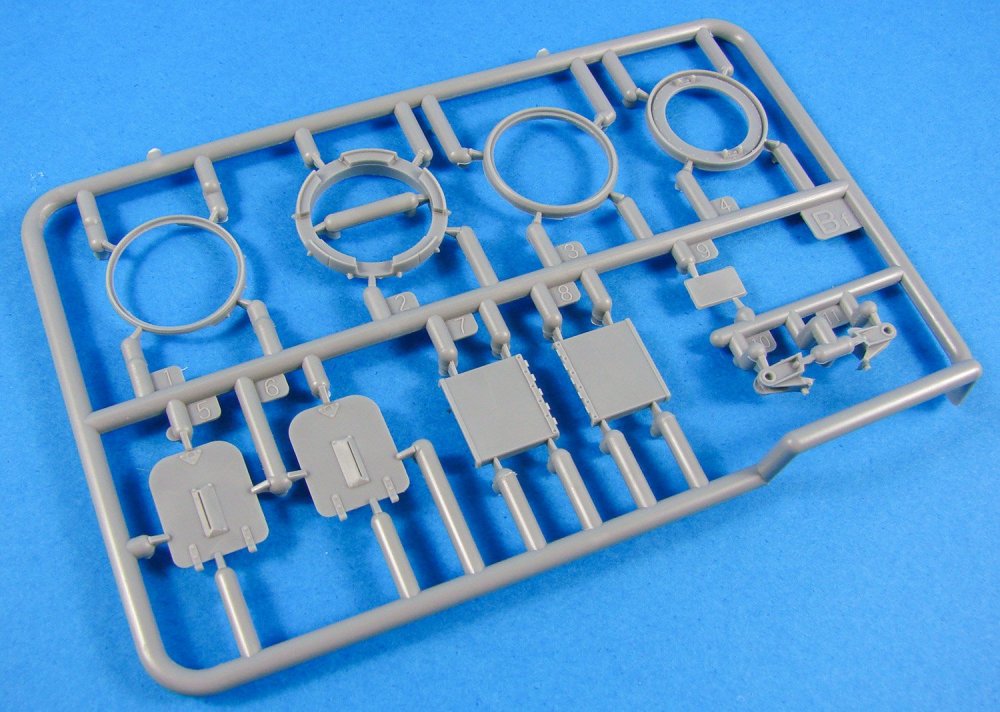
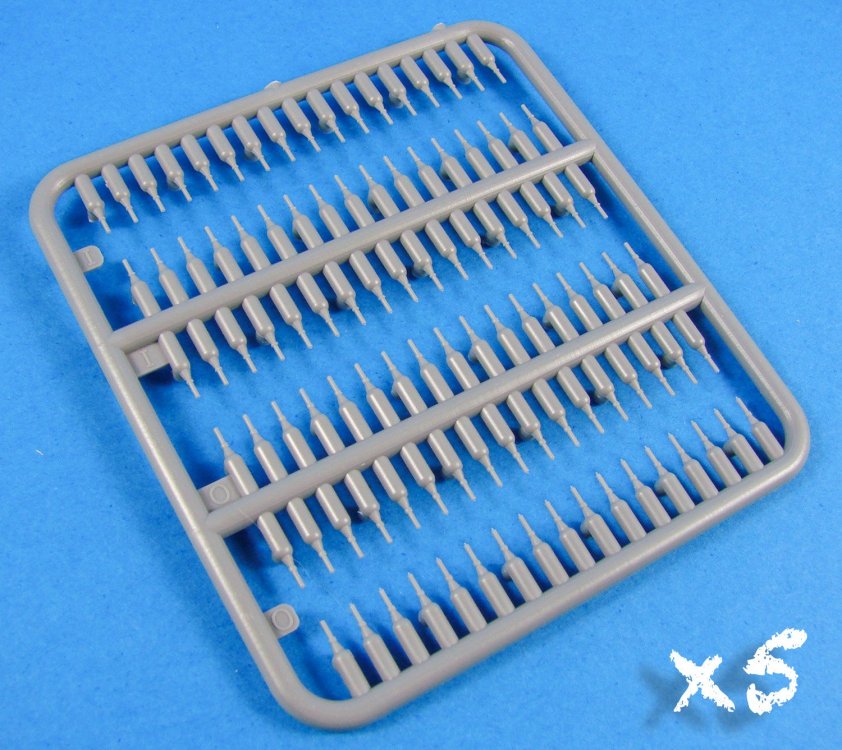
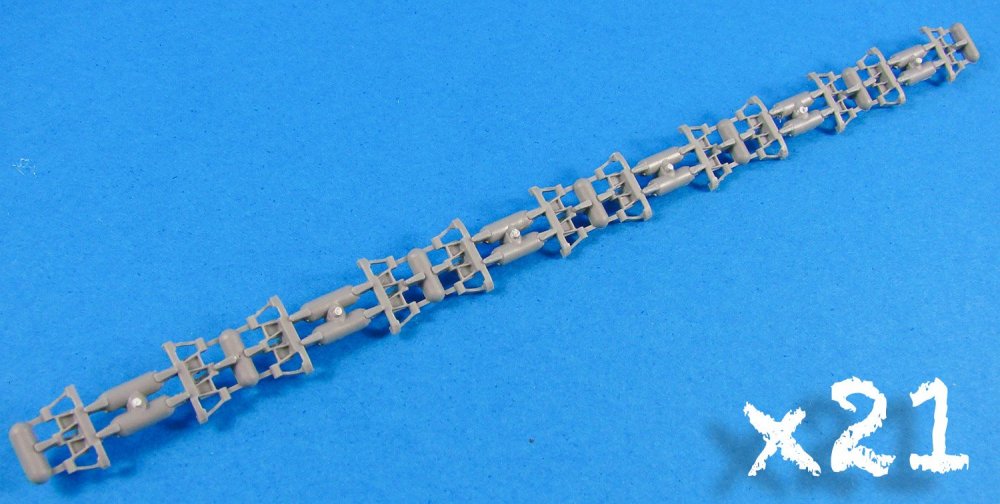
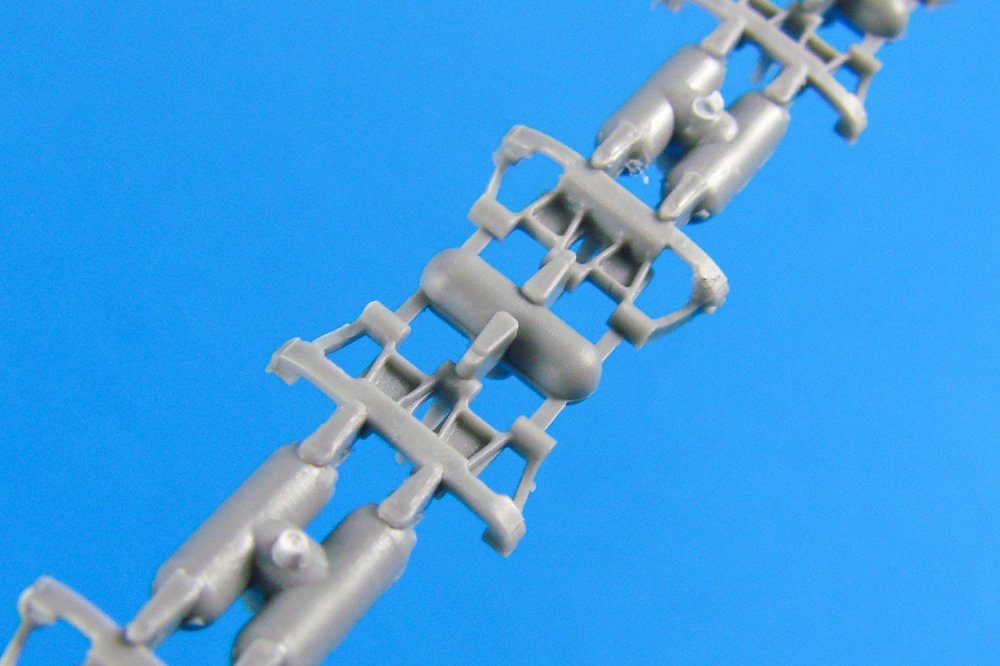
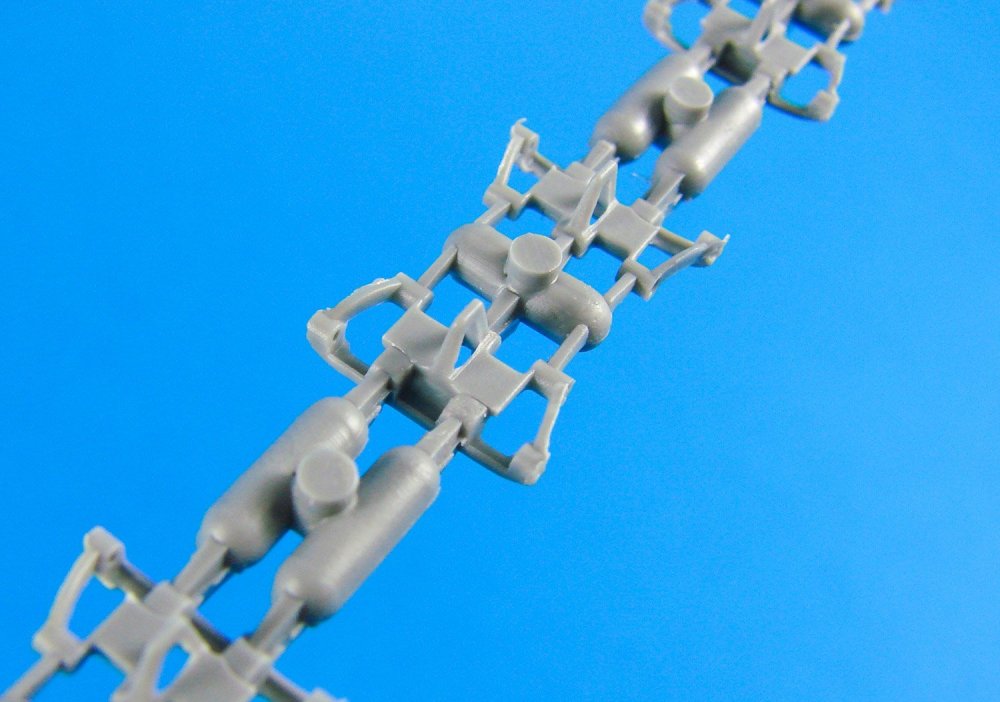
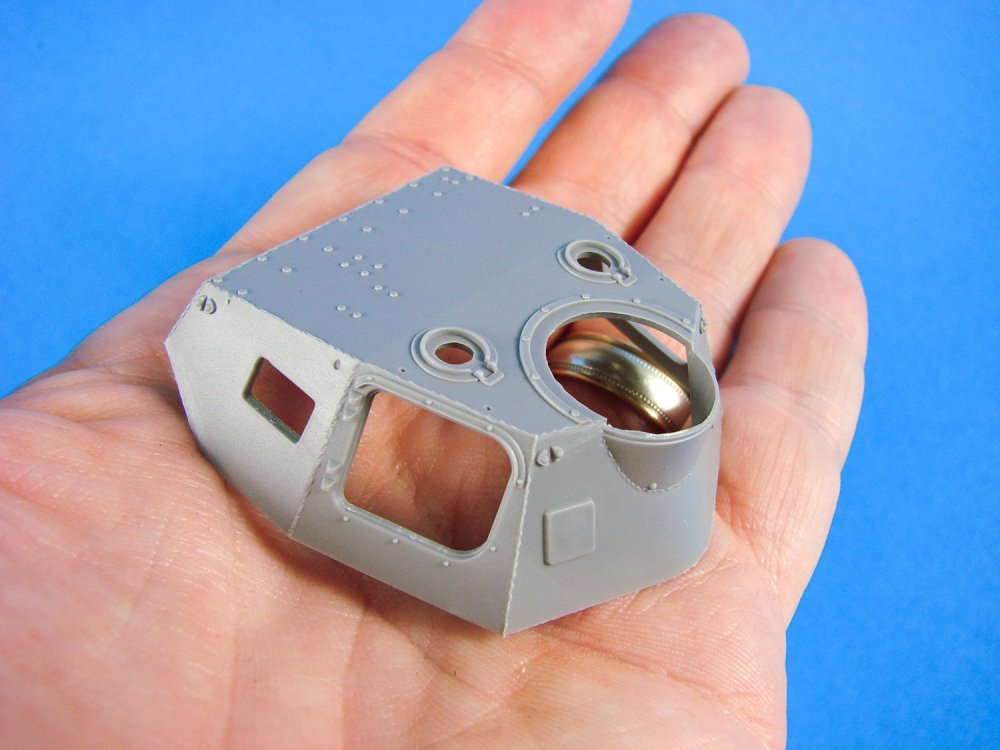
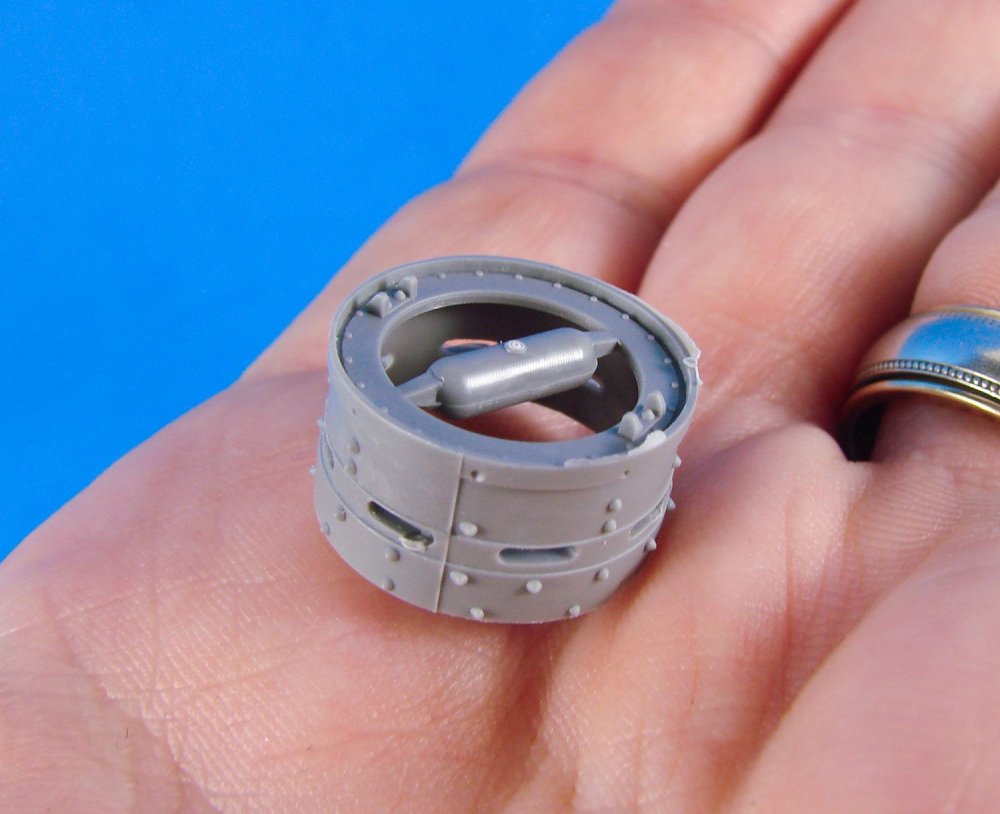
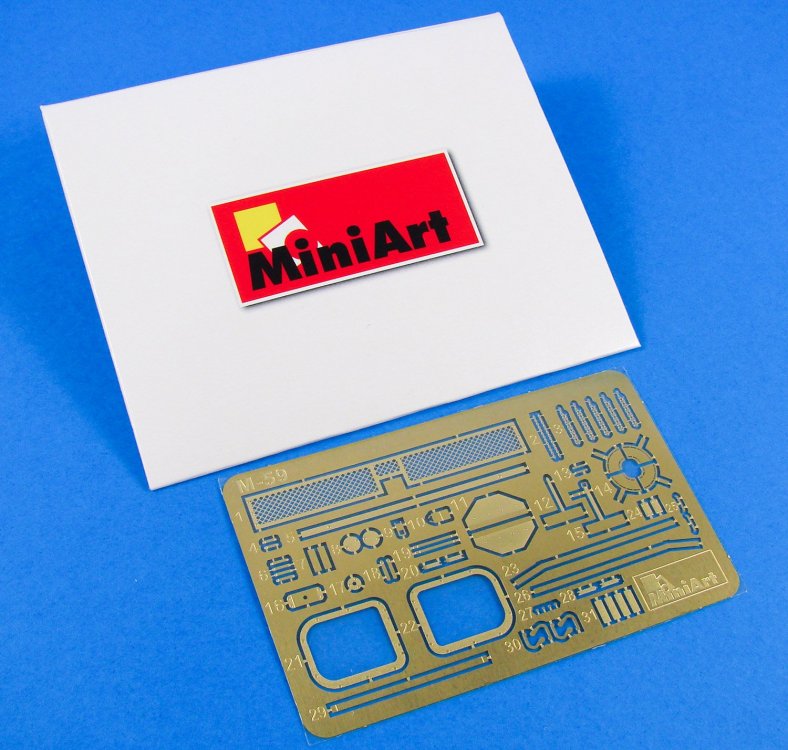
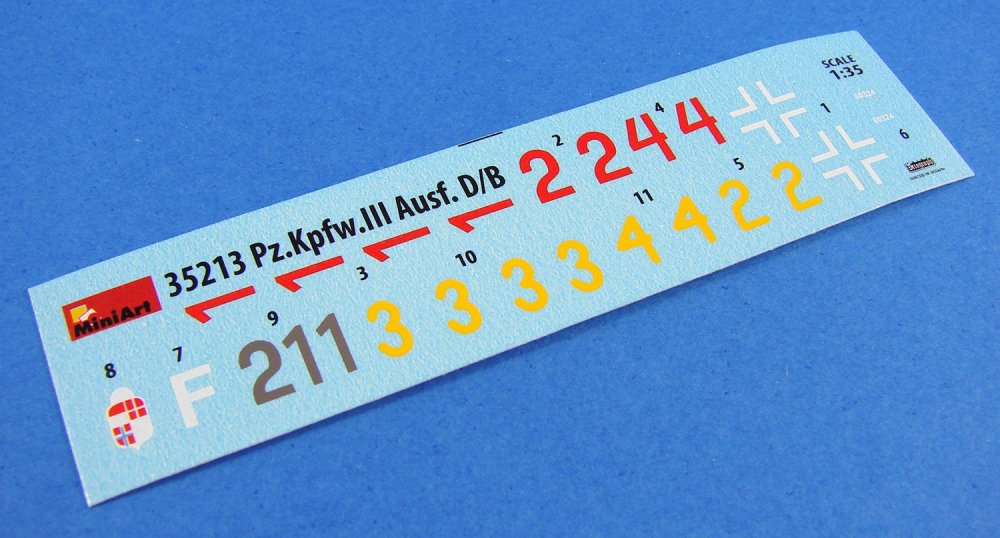
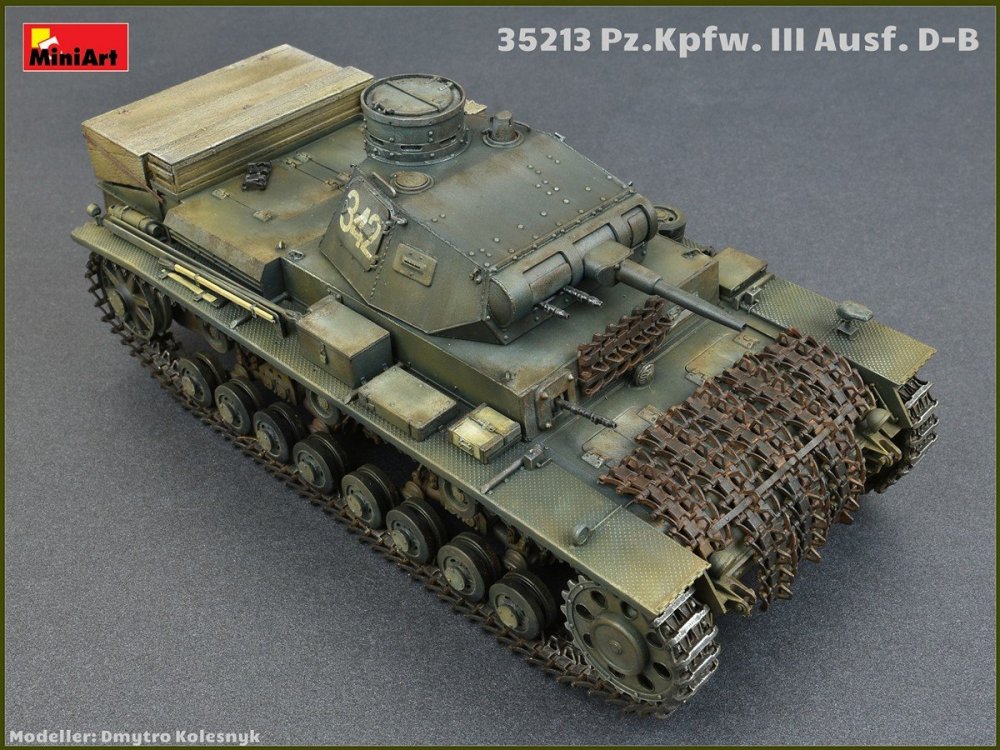
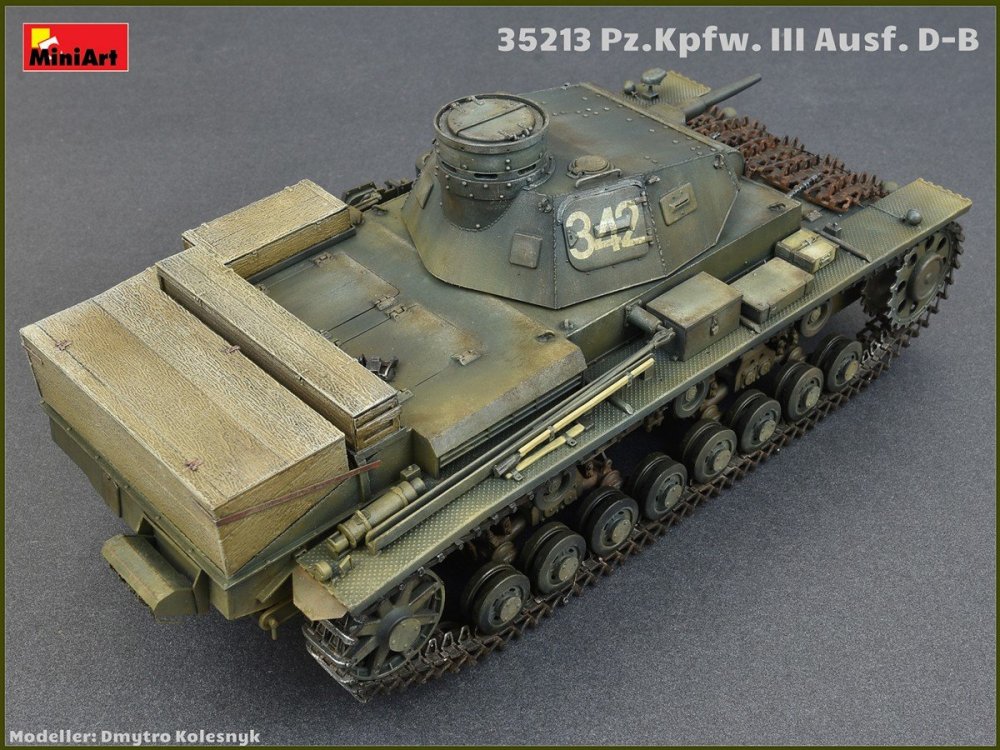
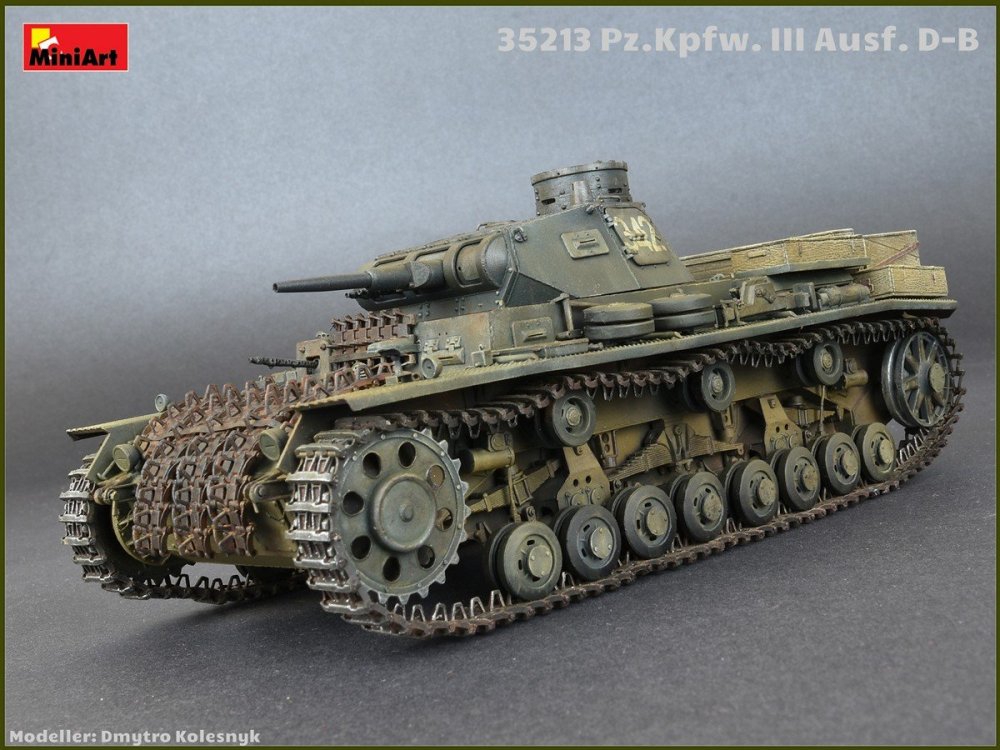
1:35 Pz.Kpfw.III Ausf. D/B MiniArt Catalogue # 35213 The Panzerkampfwagen III, commonly known as the Panzer III, was a medium tank developed in the 1930s by Germany and was used extensively in World War II. The official German ordnance designation was Sd.Kfz. 141. It was intended to fight other armoured fighting vehicles and serve alongside and support similar Panzer IV which was originally designed for infantry support. However, as the Germans faced the formidable T-34, more powerful anti-tank guns were needed, and since the Panzer IV had more development potential with a larger turret ring, it was redesigned to mount the long-barrelled 7.5 cm KwK 40 gun. The Panzer III effectively swapped roles with the Panzer IV, as from 1942 the last version of Panzer III mounted the 7.5 cm KwK 37 L/24 that was better suited for infantry support. Production of the Panzer III ceased in 1943. Nevertheless, the Panzer III's capable chassis provided hulls for the Sturmgeschütz III assault gun until the end of the war. The Panzer III was used in the German campaigns in Poland, in France, in the Soviet Union, and in North Africa. Many were still in combat service against Western Allied forces in 1944-1945: at Anzio in Italy, in Normandy, and in Operation Market Garden in the Netherlands. A sizeable number of Panzer IIIs also remained as armoured reserves in German-occupied Norway and some saw action, alongside Panzer IVs, in the Lapland War against Finland in the fall of 1944. By the end of the war in 1945, the Panzer III saw almost no frontline use anymore and many of them had been returned to the few remaining armaments/tank factories for conversion into StuG III assault guns, which were in high demand due to the defensive warfare-style adopted by the German Army by then. A few other variants of the Panzer III were also experimented and produced by German industries towards the last phases of the war, but few were able to be mass-produced or even see action against the encroaching enemy forces of the US, UK and Soviet troops. Extract courtesy of Wikipedia The kit This is now the sixth incarnation of MiniArt’s original Ausf.B kit since its original introduction in 2014, and if you’ve not delved into one of these then I think you could be in for a surprise. This new release, the second this year, concentrates on the ability to model this vehicle as either the Ausf.D or Ausf.B variants. Packaged into a deceptively small box with a typically attractive MiniArt artwork on the lid, this release really does pack a punch when it comes to sprue and parts count. Lifting the well-fitting lid, all of the plastic within is bagged into a single cellophane sleeve, with numerous sprues within separately packed too, but not all. A single PE fret and decal sheet, plus the 18-page manual, complete this ensemble. The decal sheet is packed into the same sleeve as the clear sprue. The PE fret is packaged into a card sleeve, and further protected itself with a thin film covering both sides of the item. In total, there are FIFTY-SIX sprues of medium-grey styrene and a single clear sprue. Now, before you get too excited at that figures, please remember that I include multiples of the same sprue, where applicable, and also individual parts that aren’t on a sprue, such as the turret and cupola. Sprue C and Cc are also moulded as one item, but for simplification, I have separated these for the photos and shown them individually. The kit itself does seem to comprise of between 1000 and 1100 parts, so this is no quick project, and some stuff will be pretty fiddly, such as the track assembly, plus all the spare links that adorn the front of the vehicle. The tracks are also workable. Other kit details from the MiniArt site say that the chassis is also workable, and the kit has an accurate turret interior with hatches that can be posed in either open or closed position. Instead of the bathtub lower hull we see on some armour, this section is built from three separate parts, including the lower hull sides. It does become pretty evident why when you see the level of detail moulded onto the latter. Even the best slide-moulding would have struggled with an all-in-one part! However, slide-moulding is a big feature of this kit, with many of the sprues having elements of this included, whether it’s to create simple things like open-ended barrels, but also for things you wouldn’t expect, such as the leaf suspension units and fire extinguisher. MiniArt have made some excellent use of this technology for parts that you simply wouldn’t have associated with this particular moulding. Whilst the Pz.Kpfw.III Ausf. D/B doesn’t have a full interior, which seems to be vogue at the moment, it does have a nicely detailed turret interior with many of the structures that you’d expect to see within, such as crew seat positions, traverse motor, azimuth, detailed main gun and twin MG34 installation. Some PE is also supplied to supplement the turret interior. All hatches are also poseable, but of course this would only really work with the turret due to the lack of detail within the main hull…unless of course you wished to use the opening to pose a figure. Now to those tracks. Having seen some great solutions recently to assembling these things on contemporary kits, with this one, you’re on your own. There isn’t any track assembly jig that I can see, so you’ll have to do these one by one, and also the track pins will have to be fitted with the bare minimum of cement so that it doesn’t run down the locating hole and glue the links solidly together. If you take your time, you should have no problems, and you’ll have also learned some patience skills too. There must be around 500+ parts for the tracks alone (96 links per side, plus two pins per link, coupled with the main links that adorn the front hull). Moulding quality is exceptional, with no flaws, visible seams or other things to niggle and gnaw away at you. Sprue Ac (x4) Sprue Ad (x4) Sprue Ae (x3) Sprue Af (x2) Sprue B Sprue Bc (x2) Sprue Be Sprue C Sprue Ca Sprue F Sprue Bd (x2) Sprue Kd Sprue Hc (x2) Sprue K (x21) Sprue Ke Sprue Ka Sprue Bf Sprue L (x5) Sprues E, Fx, G Photo Etch Decals A single decal sheet, printed with nice, thin inks and solid colour. Carrier film is minimal, and everything is in perfect register. The schemes included are shown here: Instructions MiniArt’s instructions are a joy to read and follow and should present no problems during construction. A complete parts map is included, but if any parts aren’t to be used, they aren’t shaded out as they really should be. Some painting reference is included during the construction phase, such as for the turret internals, and all colours are supplied for Vallejo, Mr. Color, Life Color, Tamiya, AK Real Color, Humbrol, Revell and Mission Models codes. Some superb colour illustrations are provided for the FOUR schemes in this kit, with clear decal placement notation. Conclusion For what really isn’t too much money for a kit these days, MiniArt provide the modeller with a very comprehensive and nicely featured release, with some superb engineering and excellent detail. They sure are on the way to providing an excellent family of modern-tooled Pz.Kpfw.III kits and if you’re in the market for something to see out those last cold, dark evenings this winter, you could do far worse than to entertain yourself with this lovely kit! My sincere thanks to MiniArt for the review sample seen here.


-
hk models Lancaster B Mk.I, R5868, PO-S (S-Sugar)
James H replied to James H's topic in LSM 1/35 and Larger Work In Progress
Here's a couple more for you!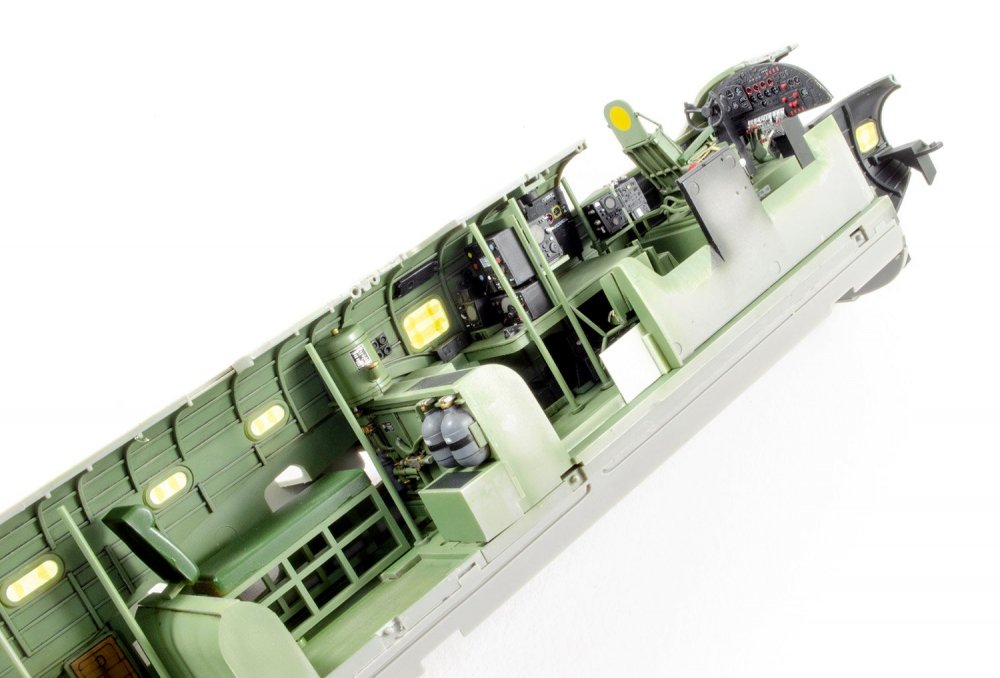

- 184 replies
-
- 11
-
-
Short Sunderland MkII
James H replied to ThomasProbert's topic in LSM 1/35 and Larger Work In Progress
Holy crap!! A Sunderland! Great to see you building this here, Tom -
hk models Lancaster B Mk.I, R5868, PO-S (S-Sugar)
James H replied to James H's topic in LSM 1/35 and Larger Work In Progress
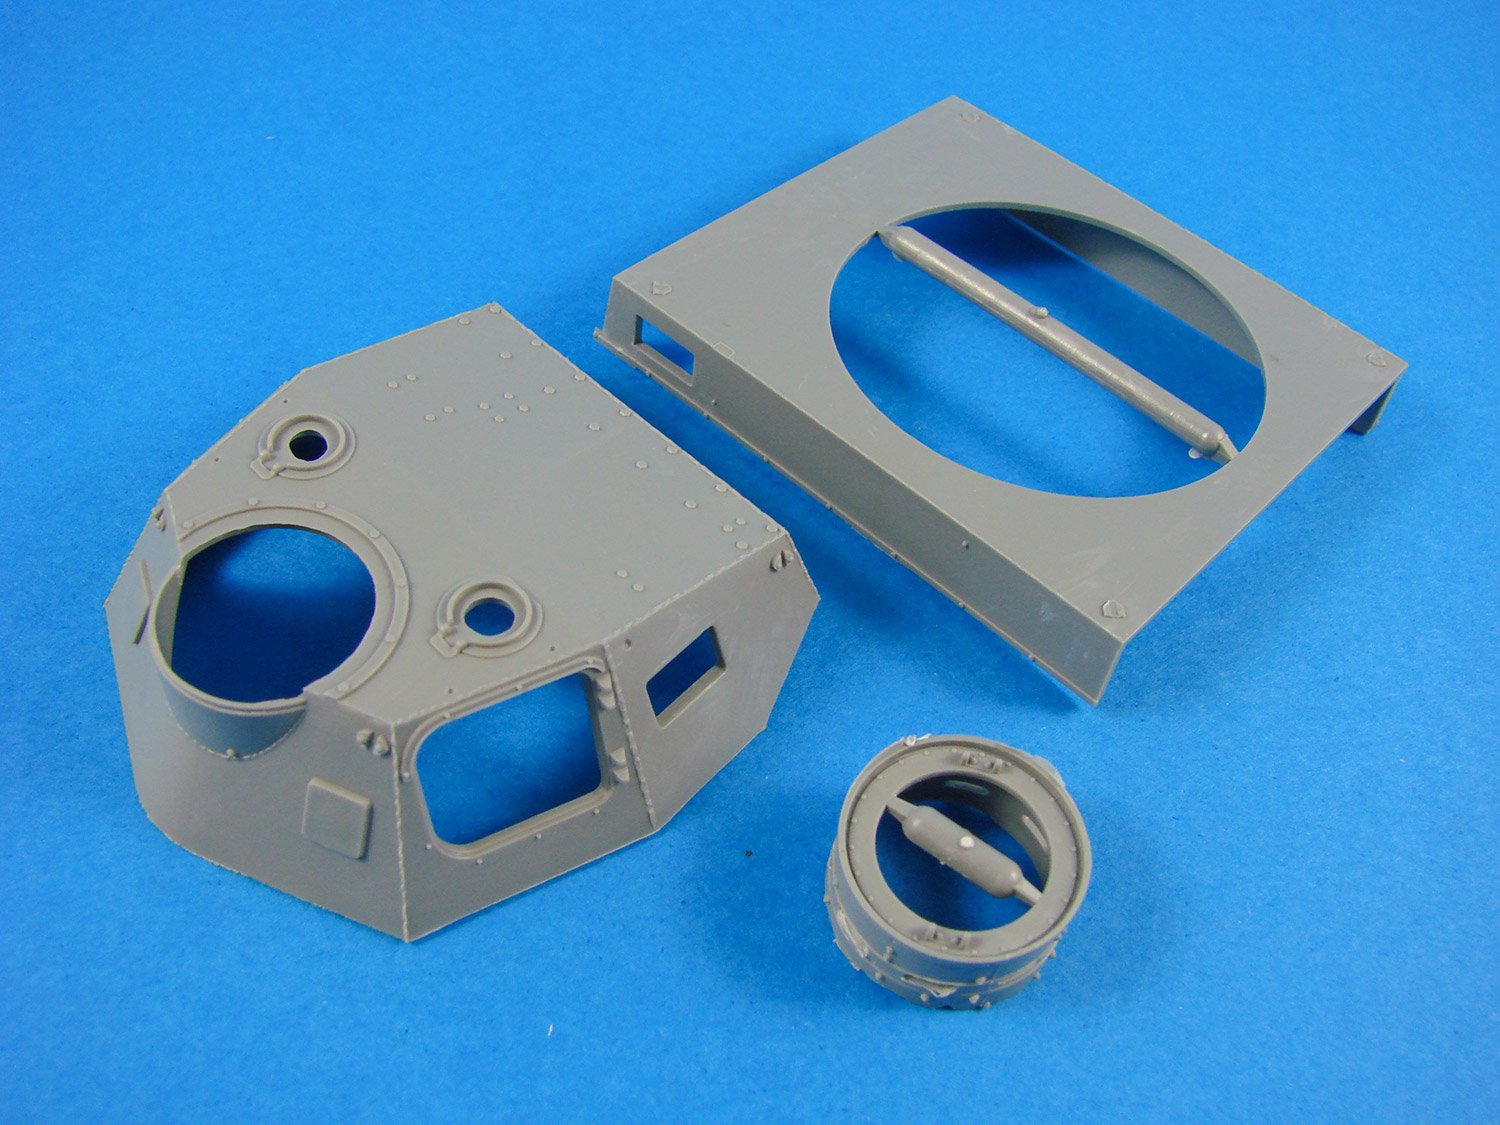
From memory, the compass is attached to a plastic part, I just cut that off and sanded it flat. The decal for this comes with the Airscale set.