aderowlands
-
Posts
97 -
Joined
-
Last visited
Content Type
Profiles
Forums
Events
Gallery
Everything posted by aderowlands
-
hk models Lancaster B Mk.I, R5868, PO-S (S-Sugar)
aderowlands replied to James H's topic in LSM 1/35 and Larger Work In Progress
I shall have to live vicariously through this and the following threads when others kits start getting put together as I have had to cancel my pre order and sell some of my stash due to a central heating boiler melt down. Keep up the good work. -
The Stuka can be done nicely, know I know where it’s likely to trip me up. I’ll be ordering another one after the Christmas expenditure and February trip to America.
-
Yes, some nice resin gear bays or even some etch would be nice. And the damn pulley chains in the cockpit would be even better!
-
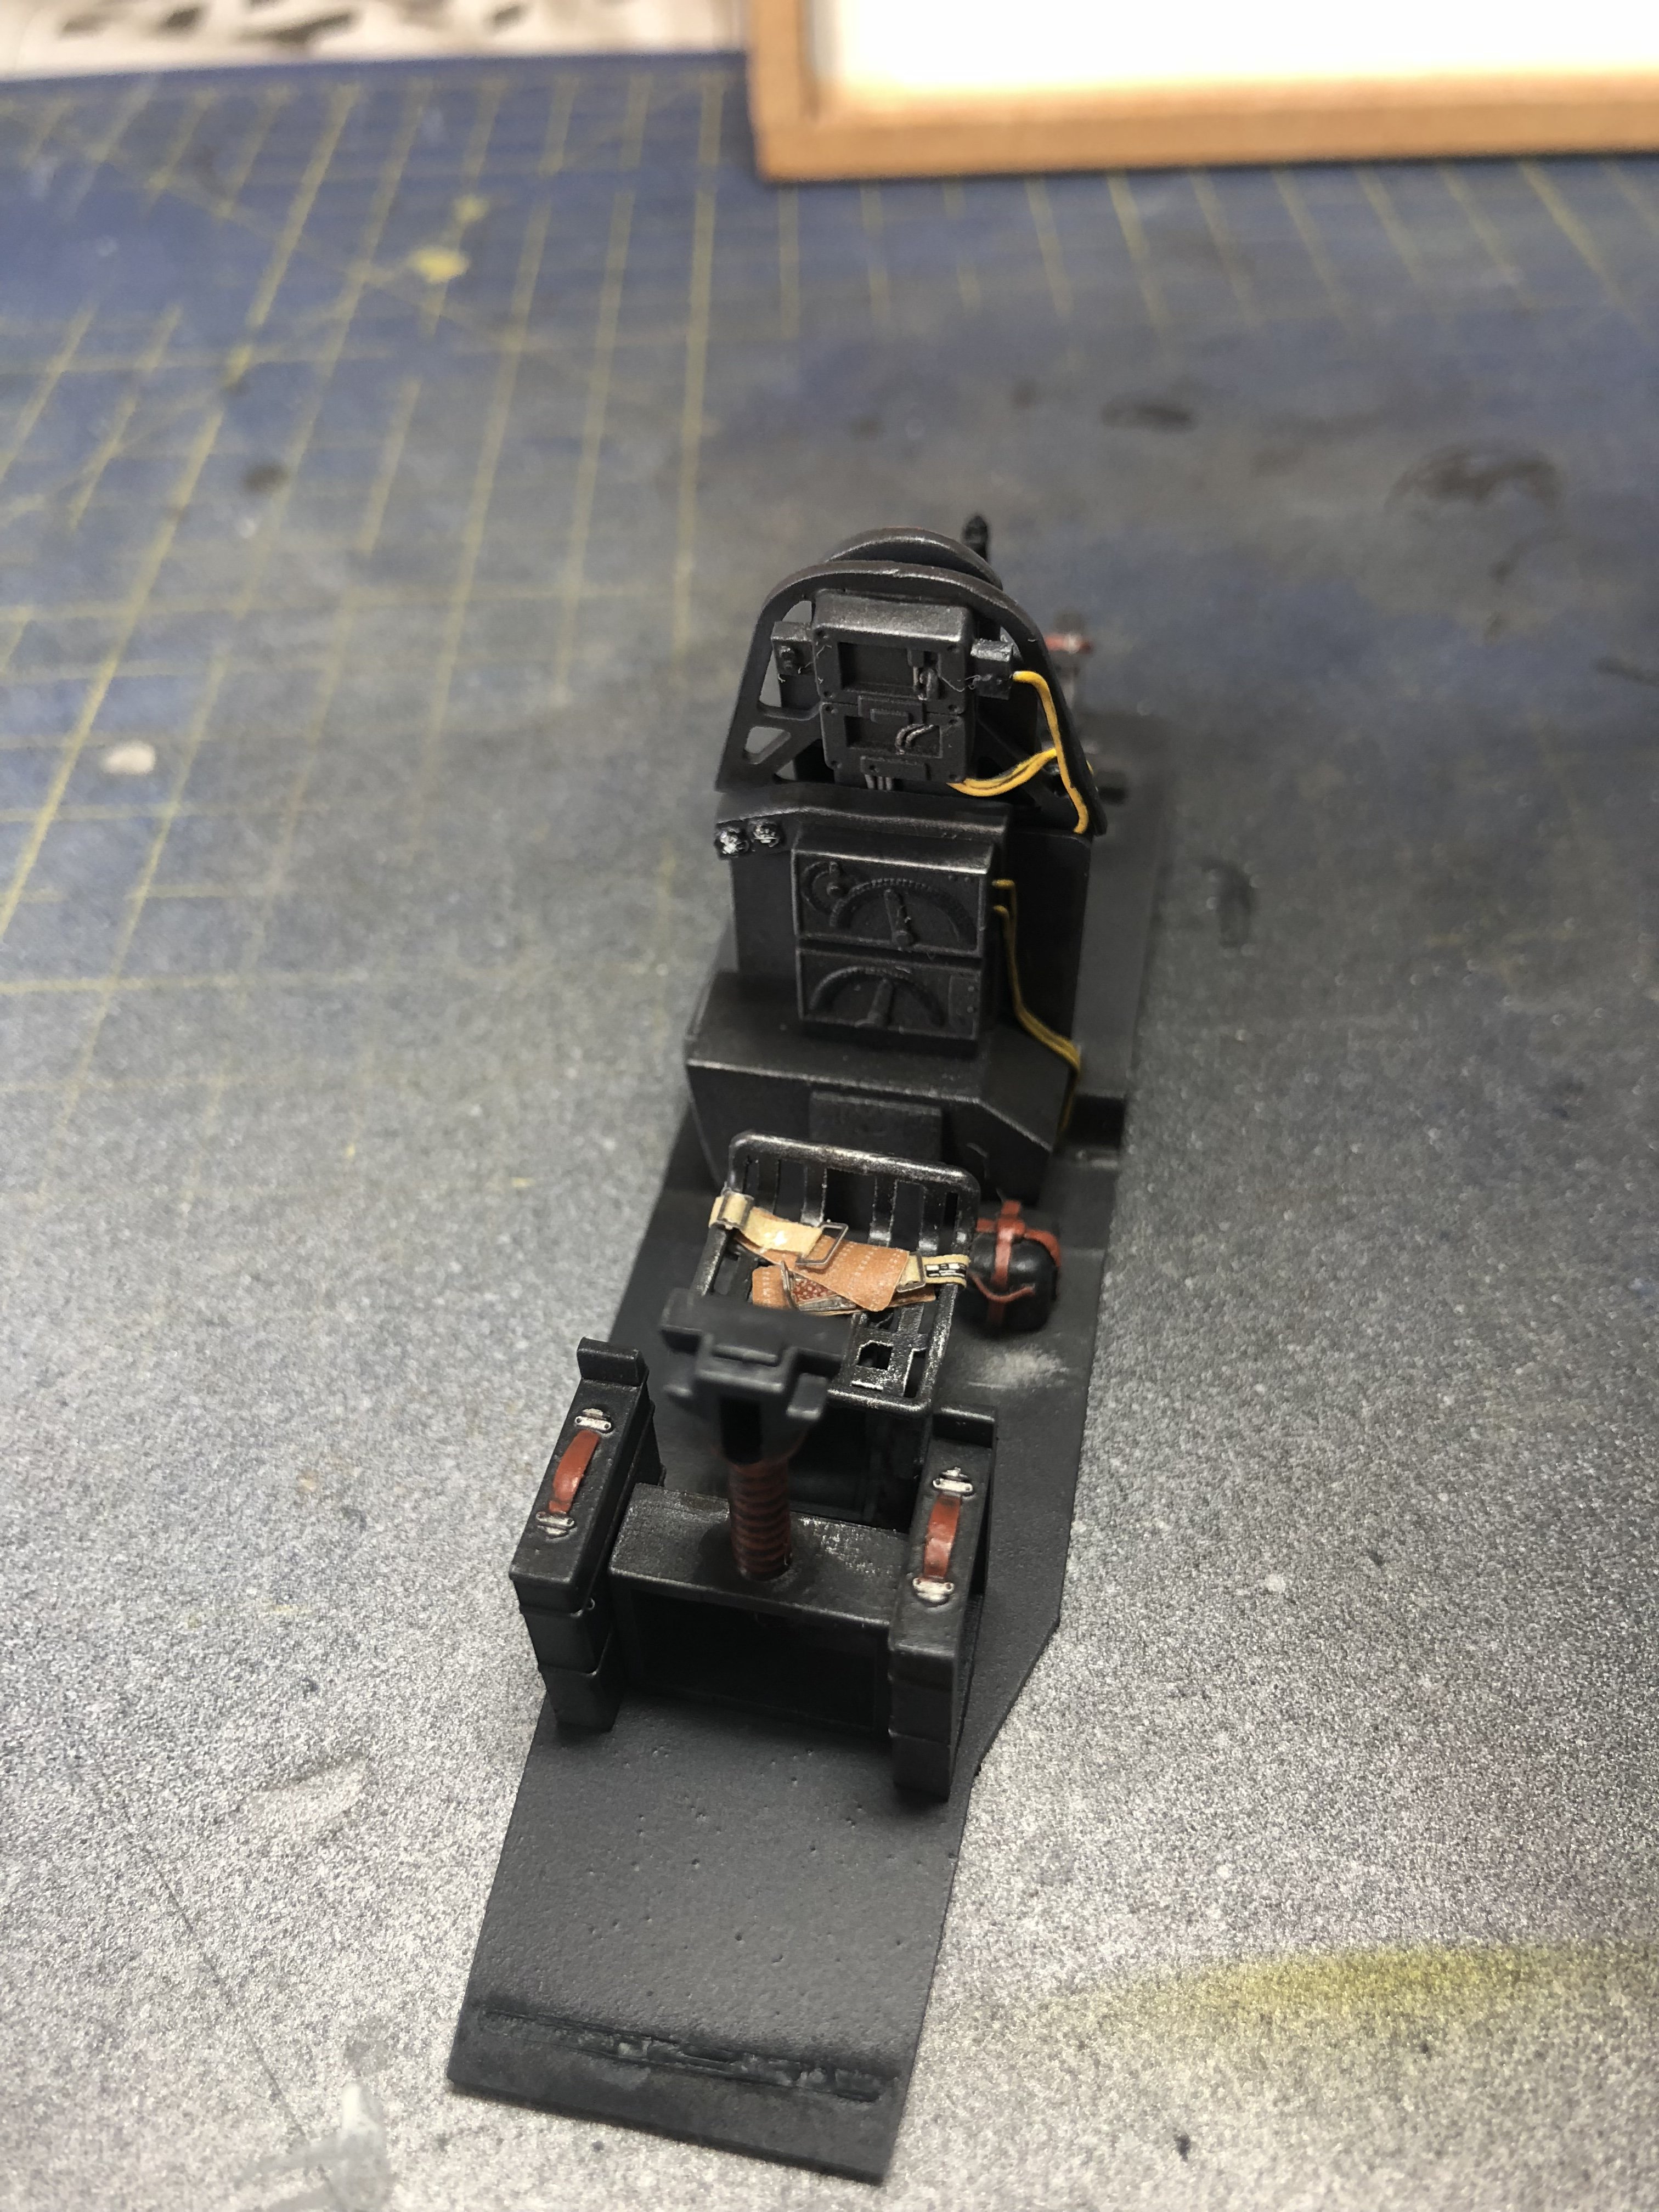
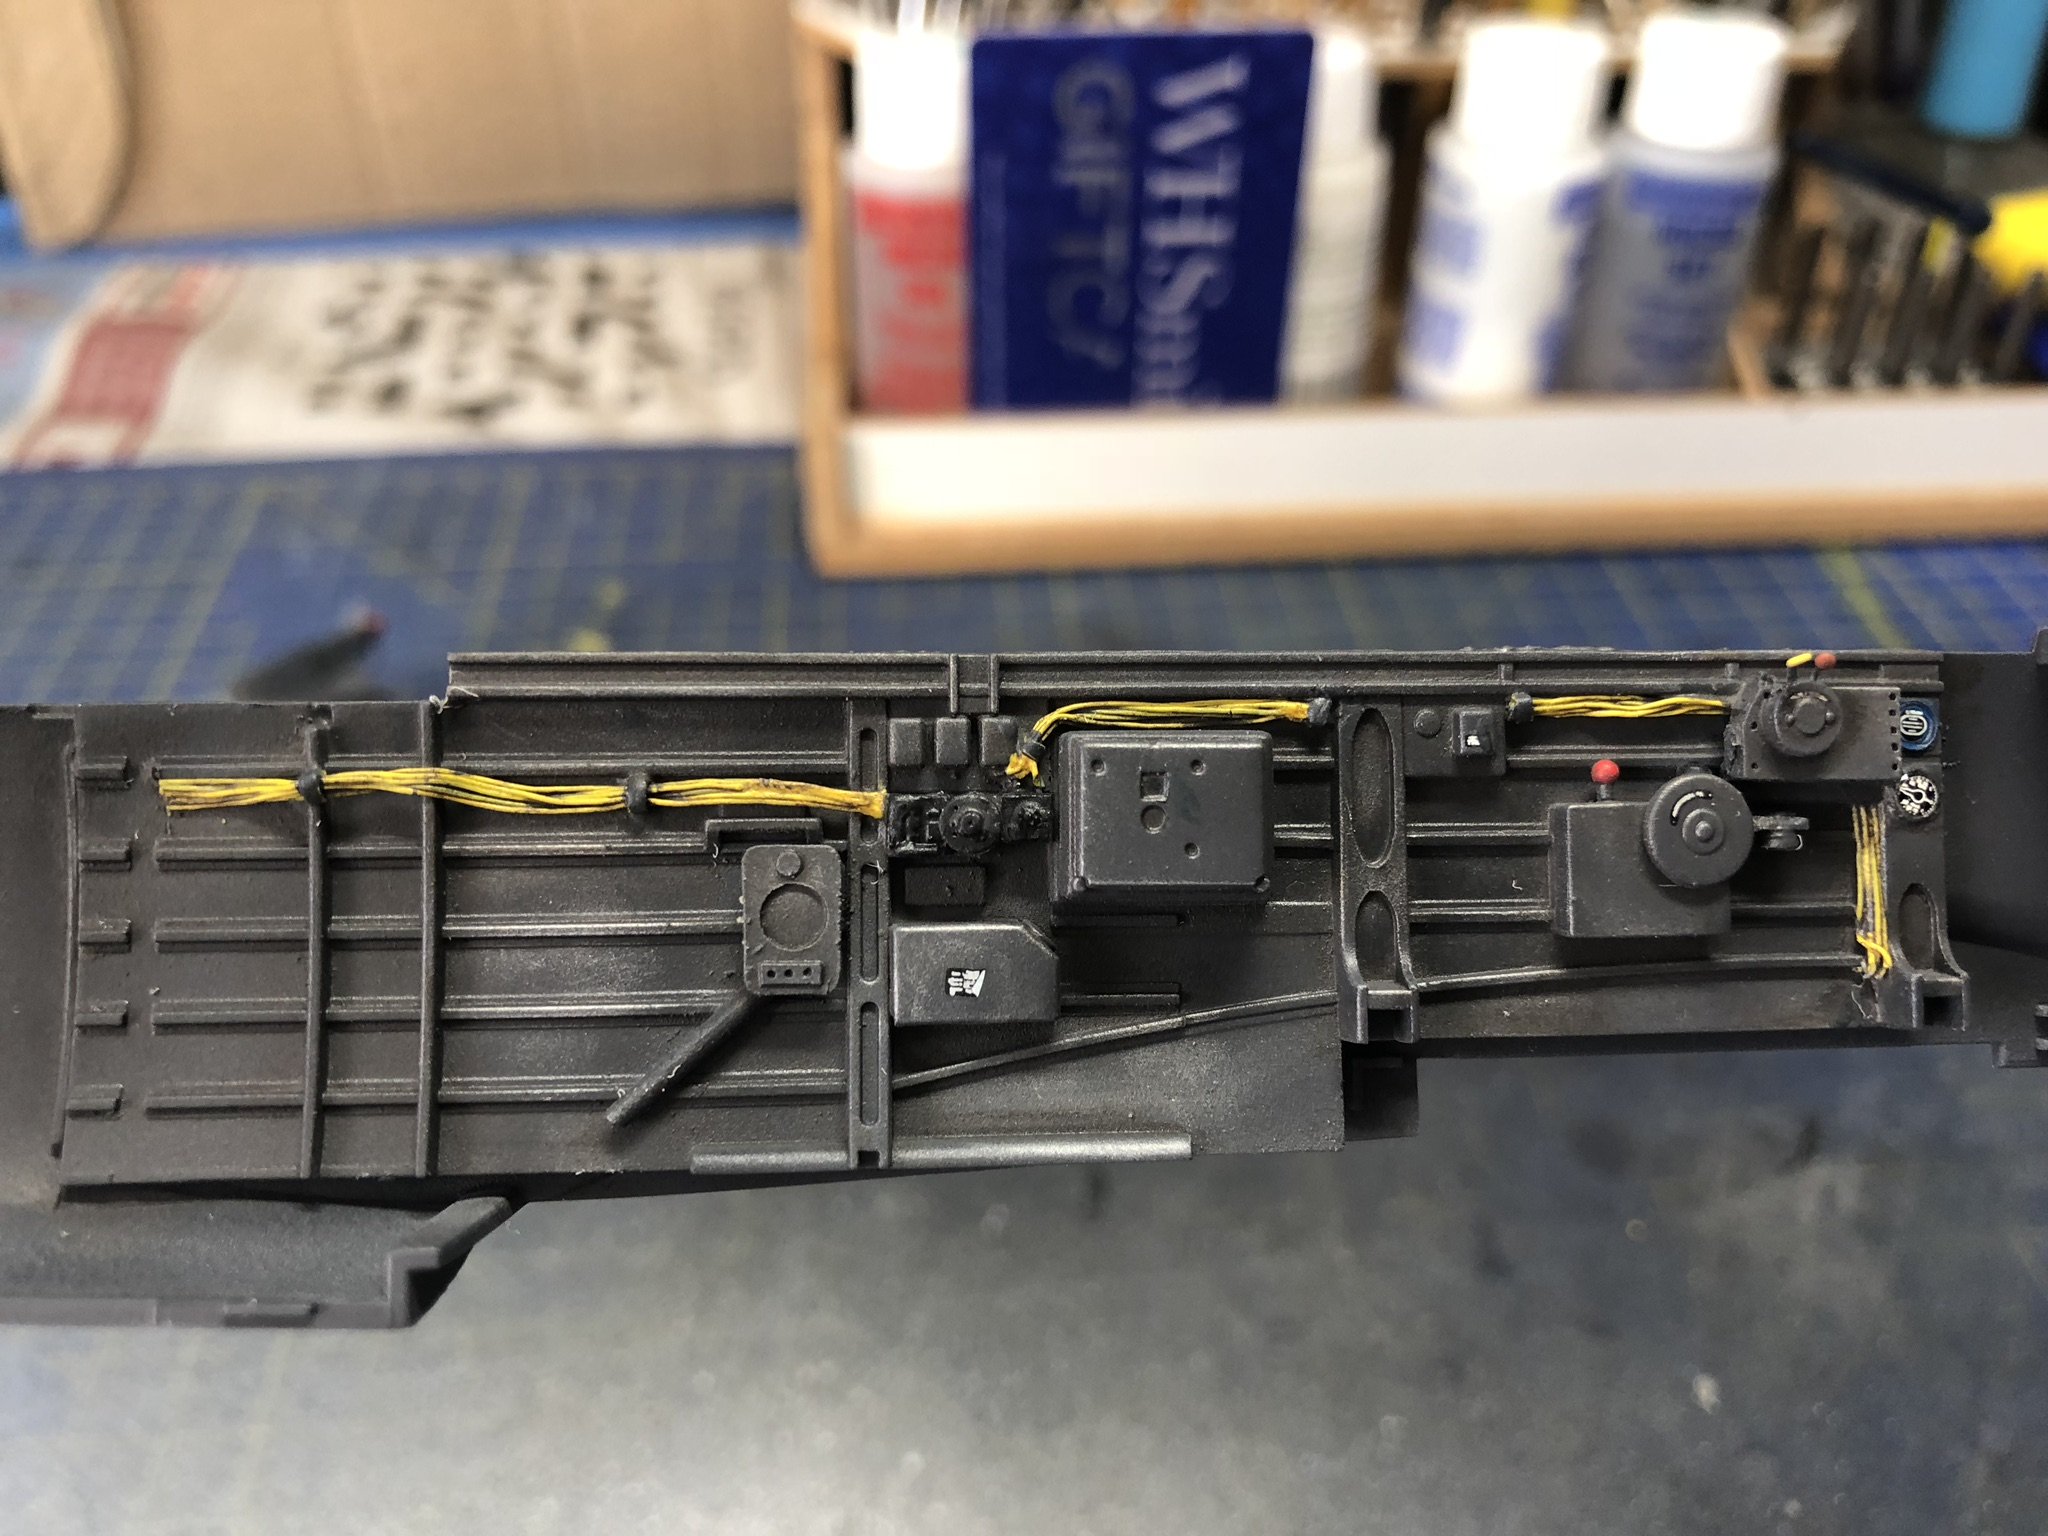
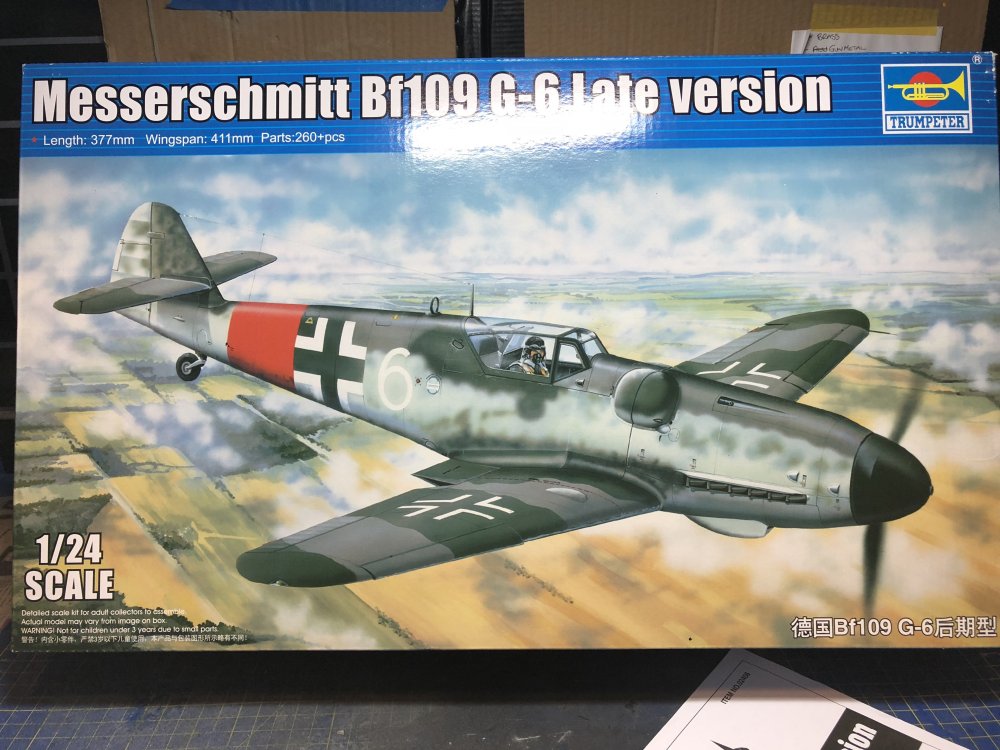
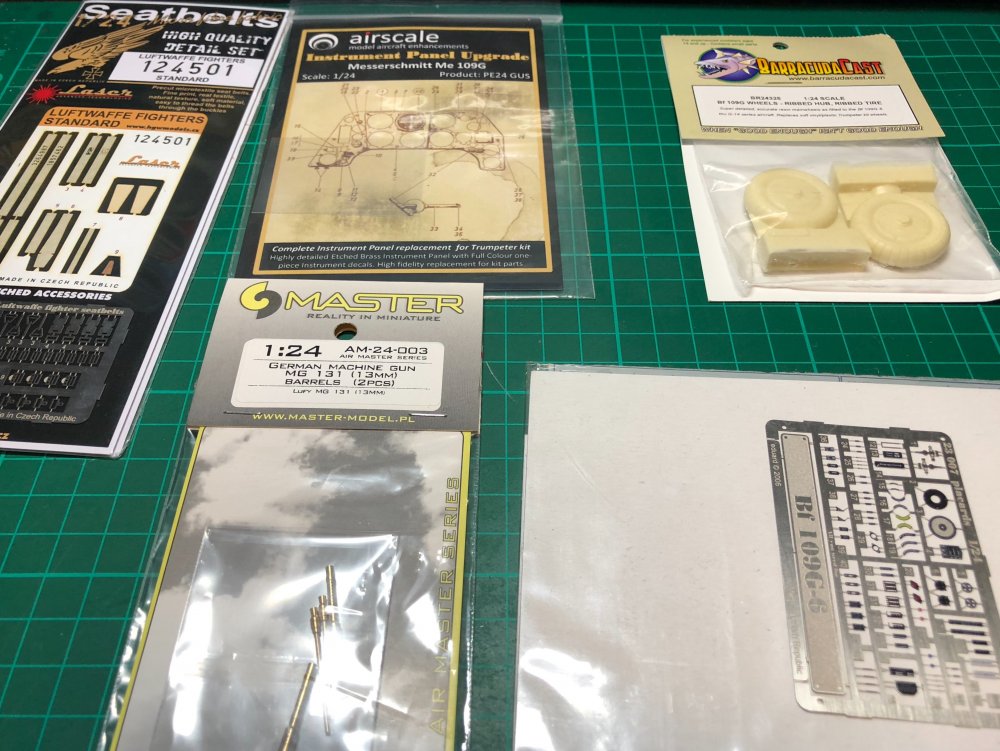
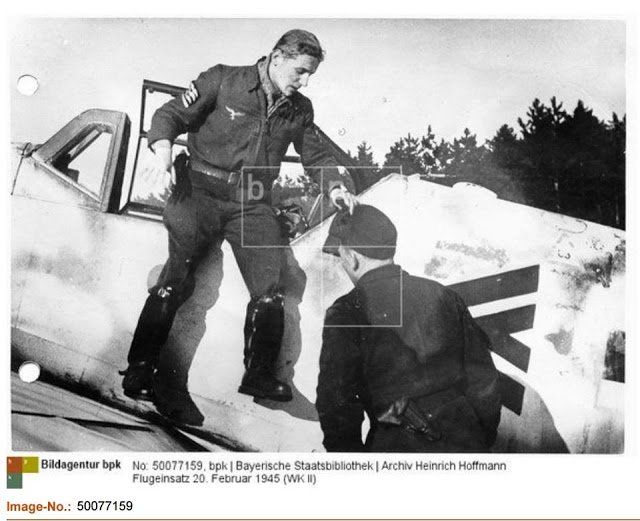
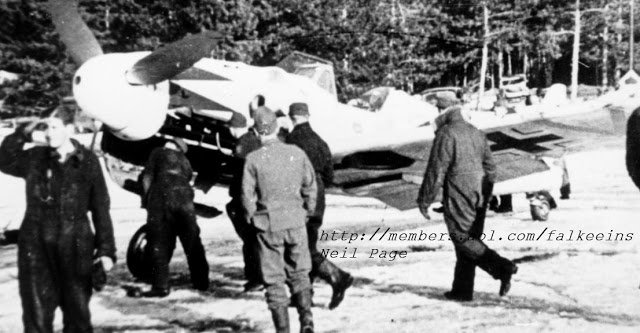
Next up for butchery after the Stuka debacle is this kit. Trumpeters’ attempt at a 109G-6. I am no expert on any airframe and it looks like a 109 to my eye, though no doubt there are inaccuracies along the way somewhere. What kit is perfect anyway? I think the kits major disappointment is the gear wells. There’s just no detail on the inner wheel wells at all, no canvas liner or lightening holes. I don’t know if I’m going to attempt a fix in there as that could be a road to ruin for me when I’d just like to get something through to completion. I have done a quick look over whilst up bagging the sprues and there are a lot of ejector pin marks to take care of, I mean a looooot, the cockpit floor looks like a piece of Swiss cheese, the cockpit walls not so bad but in need of care. That is where my initial days of work will be, which is fine as I’m still waiting on a few bits and pieces for the build to arrive, amongst them some 1/24 rudder pedals. I plan to do Hartman’s G-6 in Winter coat more or less as per the scheme in the box. The decals are printed by Cartograf and researched by Aeroscale so quite a good base to start from. The box scheme isn’t quite right from the 2 photos I have come across online. What I am not sure of is the White sprayed in a random blotchy pattern with the usual wear and tear or we this completely over sprayed in white and a grey random tiger stripe type pattern painted over that. I’m probably going to go with standard camo with blotchy white. The to do list for this includes scratchbuilding the battery box behind the head armour as one photo appears to show it there annoyingly the box art shows one in place but there’s no kit piece. The radio aerial mast needs to be deleted and it’s hole in the canopy filled, a nice easy fix, plus Trumpeter give 2 sets of the clear sprues so I get a second chance should I make a mistake. I’ll be making use of my Silhouette cutter by scanning the decals to create masks for the major markings, the kit decals don’t provide the correct Black outlined low visibility Balkenkreuze for the upper wings, it do have white ones for the other scheme in the box so an easy fix again hopefully. The Galland head armour also needs some work, Trumpeter moulded the glass armour part as a solid grey piece so that needs rectification one way or the other. The kit. The bits. HGW belts, Airscale instrument panel, Barracuda wheels, Master MG’s And Eduard placard sets, these I will try but if they look to thick I will replace with Airscale equivalents. In the post are some Radu Briznan rudder pedals and some wires and whatnot to deltail the cockpit. These are the 2 images I have found, thanks to the Falkeins page, if they need removing, feel free to remove them from the post. This will be a long term project for me, so be patient.
-
Oh I’ve seen some of those 50’s cars in person. Turning circle of an oil tanker.
-
Looks like the one you get with the Hobbyboss 1/32 F-84 and is as far as I’m aware the only representation of such a weapon in 1/32 without scratch building it. I saved 2 for an Atlantic based Avenger sub hunter project that never got going because I sold the kit, but am wanting to buy another one.
-
I would love to see you try fit that in an average sized British car park space.
-
Trumpeter 1/32 Ju 87G
aderowlands replied to aderowlands's topic in LSM 1/35 and Larger Work In Progress
This one has been delegated to future paint mule duties. I can’t speak for overall shape accuracy as I know some of the earlier Trumpeter Stukas suffered in the nose area but the G and D being vastly different to the B and R in that area I can’t say. The cockpit has enough detail to suffice, fit was for the most part good. The wing to fuselage join was very tight, but a small gap opened up once glue was applied but nothing some Mr Surfacer didn’t take care of, one of the spats fit like a glove, the other took some work to fit, same for the the horizontal stabilator supports, one nice, the other a bit of a turd. Having built the kit I know where I can improve on a second run through, I’d do the nose slightly different to how I did it on this build. I’d see if the 2 nose halves can be fitted together first to get a better join and then try fitting it over the engine to the firewall in the same way I did in this build. I can’t see how it works if you follow the instructions. The part that gave me the most hassle was the clear top to the RDF apparatus in the fuselage, it just didn’t fit and had to be sanded to blend in but with the rear guns already in place in my build it was a real bear so in the second run through that would be done sooner. I’d give it a 7 or 8 out of 10 for buildability but it does have its frustrations as listed above. Just think things through before committing to the glue and it will be fine. The major flaw is the underwing cannon, Trumpeter got it wrong in that they modelled them as handed, guns feeding and ejecting from opposite sides on each wing where in reality they fed from the same side on each gun and spat out the empty cases from the other side. I think it would be a real pain to fix them so I got around it by ordering the G kit and a D kit, which for some r ason gomes with the gun sprues so I have 4 sprues for 2 correct guns. Though now Trumpeter offer a spare parts service so you can try that route. As for other Trumpeter kits, I can only speak for the ones I’ve built, the Mig 3 was simple enough though the windscreen is wrong, with frames moulded where in reality there was none. The P-47N had a lot of inner detail that would never be seen and the windscreen is wrong looking in that too, intact it seems to be canopies and screens where Trumpeter falls flat on a few kits. Their 1/24 Hurricanes are nice builds. I have a 1/24 109G-6 to build and an P-47D Razorback. I don’t do jets so can’t speak for any of their offerings there. -
Trumpeter 1/32 Ju 87G
aderowlands replied to aderowlands's topic in LSM 1/35 and Larger Work In Progress
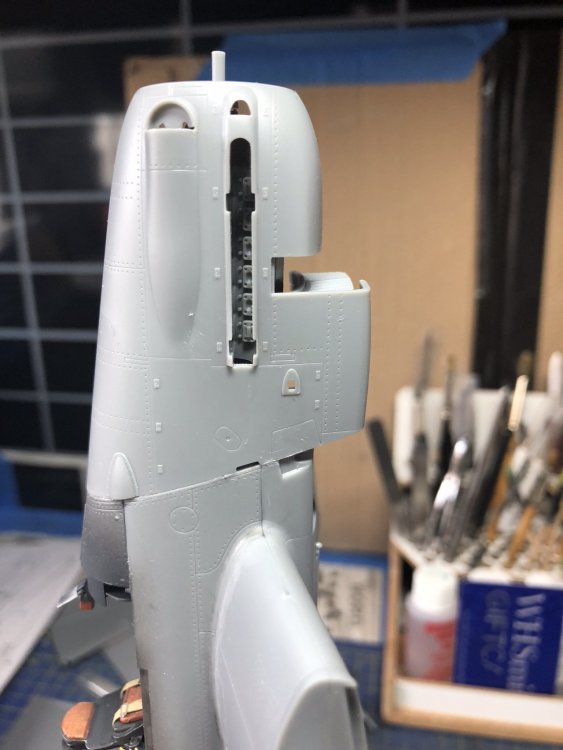
This one is going down as a learning experience. I applied another primer coat today and I’m just not happy. Added to the other things I’m not happy with and know I can fix on a future build thus one I’ve decided isn’t worth further time or effort. I know parts will look like crap when the masking is removed, especially the RDF window. However this is the furthest I have got with a project for a long time so that’s a plus. I will pick up a new kit as I can get them relatively cheap from the Far East. As for the bomb aiming window, I asked Mark Proulx about it during this build as I knew the G retained an ability to carry a 1000lb bomb on the centreline but wasn’t sure if aiming was taken over by the gun sight. His answer was it was a question he had been trying to answer himself for years so it was a case of add it and leave it clear or add it and paint it over, nobody could prove otherwise either way I went. However he could say he had never seen a photo with the cradle or bomb fitted so I left that off, but the swing arms on the fuselage sides remained. Only a few hundred G’s were produced so references and photos aren’t that numerous. The Hendon example can’t really be used as it’s been tampered with over the years as a lot of museum pieces are. -
Trumpeter 1/32 Ju 87G
aderowlands replied to aderowlands's topic in LSM 1/35 and Larger Work In Progress
An update of sorts. Since last posting on this I finished my week on night shifts, each day during that week I worked only on sanding out scratches from seam elimination and restoring lost detail, I did one sanding grade each day basically, all went to plan, the last bits were added yesterday, radio mast, rear machine guns, then canopy, the glass cover for the RDF gizmo in the rear fuselage, now let me say, I had planned on adding this after painting. I am so glad I didn’t stick to that plan as this part was a nightmare to fit, an absolute nightmare, it can only go on one of two ways as it’s contoured to follow the curve of the fuselage, and being a circle, the front can be the back as easily as the back can be the front but damn, this thing did not want to go on, complicated by having had to add the rear facing guns as adding them after painting was a no go, knowing this now I’d add the glass part for the RDF before closing up the rear canopy on any Ju87 I may or may not make in the future. Eventually got the glass part to sort of sit in its recess, proud of the uselage in places, the best it was going to get, of course glue has ruined some of the paint work on the inner part of the RDF, so we’ll amd truly not thrilled at that but nothing I can do now about that. This abomination was allowed to dry whilst I was out at work. Got home last night and wondered what to do now, about sanding this thing flush. Out came the Felxifile tapes, the holder wasn’t going to work for this application so it was done by hand. Worked through the Flexifile grades to get a reasonable flush finish, then Micromesh, then finally Tamiya polishing compounds, it is by no means perfect but we shall see. Then today a priming disaster, Alclad black primer and scratch filler, used with the intention to cover the many micro scratches still present. Normally I spray a home made thinned down mix of Gunze black primer but I haven’t usually had to attack a model with so much sanding. Well anyway, it’s far from my first time using the stuff but it’s dried dusty in several places and looks like crap as a result. I had time to sand and polish it back with some sanding sticks and give it a rinse under a cold tap where it has been left to dry out thouroughly. I am away from home for a few days now, it was my intention to get the primer down and we’ll and truly dry for when I got back but that isn’t going to happen now. It will have to wait until I return. Very much not happy with this model at the moment as was ready to launch it at the wall due to these last minute issues. It had so far been an ok build, not stellar by anyone’s standards, some issues were of my own creation, some were down to Trumpeter. But mental notes have been made should I tackle this kit again. I do like the subject and I got the kit quite inexpensivley so may get file this one away as a learning tool and get another kit. It’s a Bitch to sand one painted as there’s so many dangly bits, I have snapped the radio mast already but that can be remedied. I’ll throw some primer at it when I get back home and we’ll see where we go from there. -
Trumpeter 1/32 Ju 87G
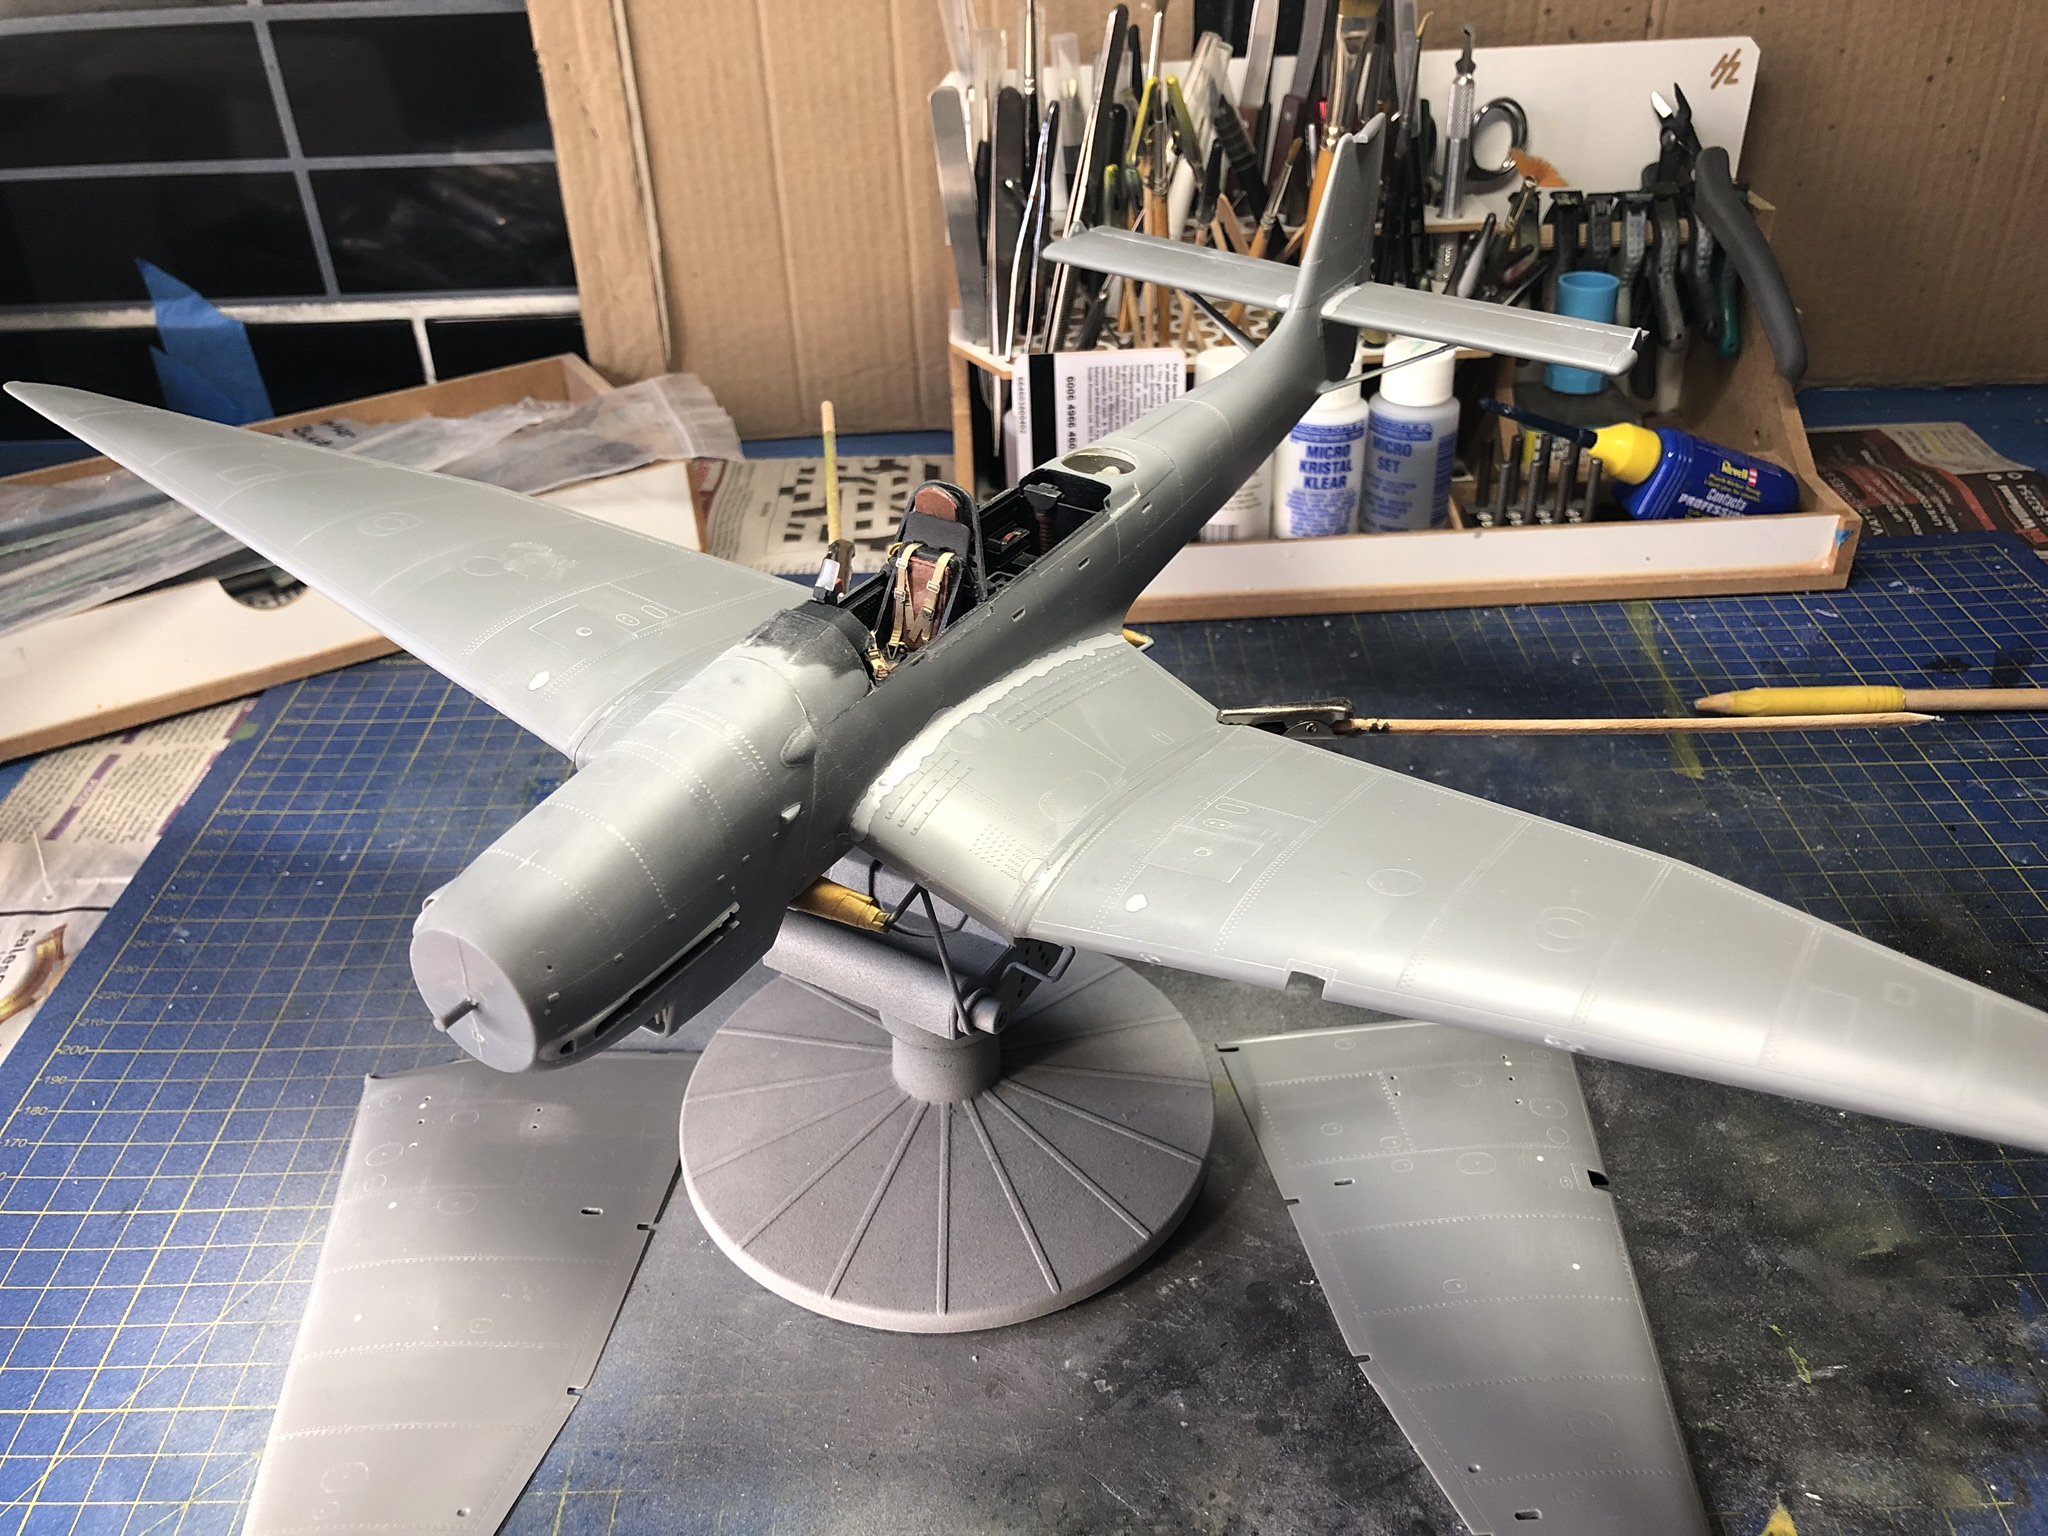
aderowlands replied to aderowlands's topic in LSM 1/35 and Larger Work In Progress
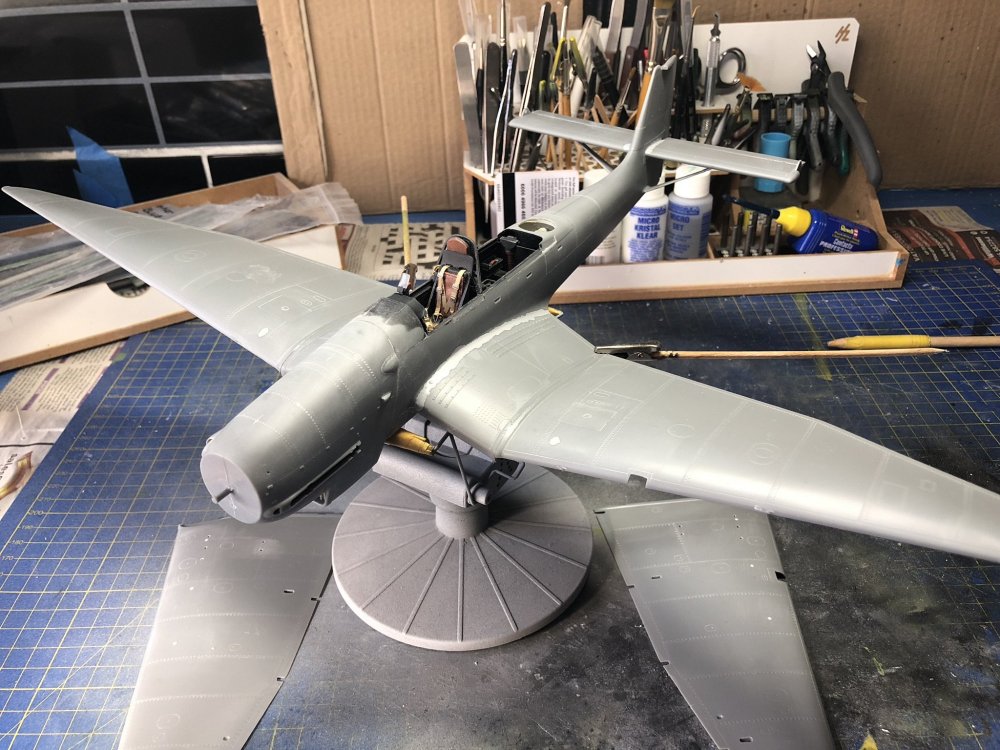
A little more work done today, an attempt at restoring some lost detail from fairing various bits and pieces in to the fuselage. Its a job I hate, probably the job I hate most in this hobby. I will never be able to restore what was lost that’s for sure. Radu Briznan’s rivet wheel used in an attempt to put back lost rivets on the cowling. Came out ok, not brilliant but it will work under a couple of coats of paint. The Vogel has its wings, well half of them anyway. It’s a very big bird too. I first tried the fit with both wing halves taped together, for me this was a no go as the join to the inner wings wasn’t stellar and I do not want to be sanding in that area as it would be a bear. So I did it this way, the provided wing spar would ensure the correct dihedral could be attained whilst getting a nicer fit to the inner wings. It works better than the other way. I remember this being a problem area on the Hasegawa kit too. I also added the props under the horizontal stabs after checking to see if I could get away with doing it after painting, but this being a Trumpeter kit one fit like a dream, the other was a dog, I know not why, but it just didn’t want to sit in its recess and touch the horizontal stab in the corresponding slot, so out with the glue to melt some styrene and manipulate it into position. Progress will likely slow a little over the next week as I work my week on night shifts. Learnt long ago to leave kits alone when sleep deprived. The bottom wing halves need to be joined to the tops, some fairing in around the radiator face and a little tidy up of the fuselage with some super fine grit micro mesh and it will be ready for paint. Still to be done are the wheel spats and those whacking great guns.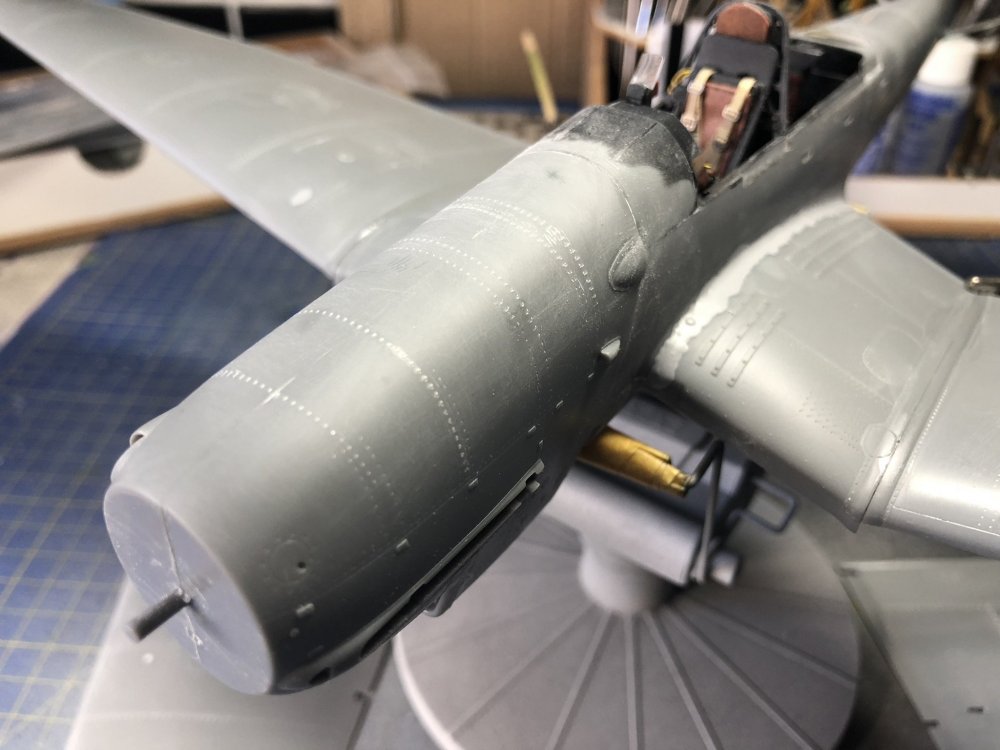
-
Trumpeter 1/32 Ju 87G
aderowlands replied to aderowlands's topic in LSM 1/35 and Larger Work In Progress
Well a little more detective work and I think I've come to the understanding that the G-1 was built from converted D series Stukas so did retain some of those features, the dive brake fixings and the wing top fairings. G-2's were as far as I can tell new builds with the extended wing tips like the D-5 series. As best as I can tell from zooming in on a photo of the Stuka Rudel surrendered by crash landing theres no dive brake parts and a different photo of it in the air it looks like no cockpit side slab armour and no wing top fairings/bulges so it would seem I'm good with what the kit provides. I've also come across some interesting photos of a G that may or may not be Rudel's Stuka in a winter whitewash which is appealing. -
Trumpeter 1/32 Ju 87G
aderowlands replied to aderowlands's topic in LSM 1/35 and Larger Work In Progress
Also looking at the fuselage compared to photos of the real deal I cant help but get the feeling that the height of the fuselage side in the pilots area is a little short in height from the wing root to cockpit sill. Nothing to be done about that one though. -
Trumpeter 1/32 Ju 87G
aderowlands replied to aderowlands's topic in LSM 1/35 and Larger Work In Progress
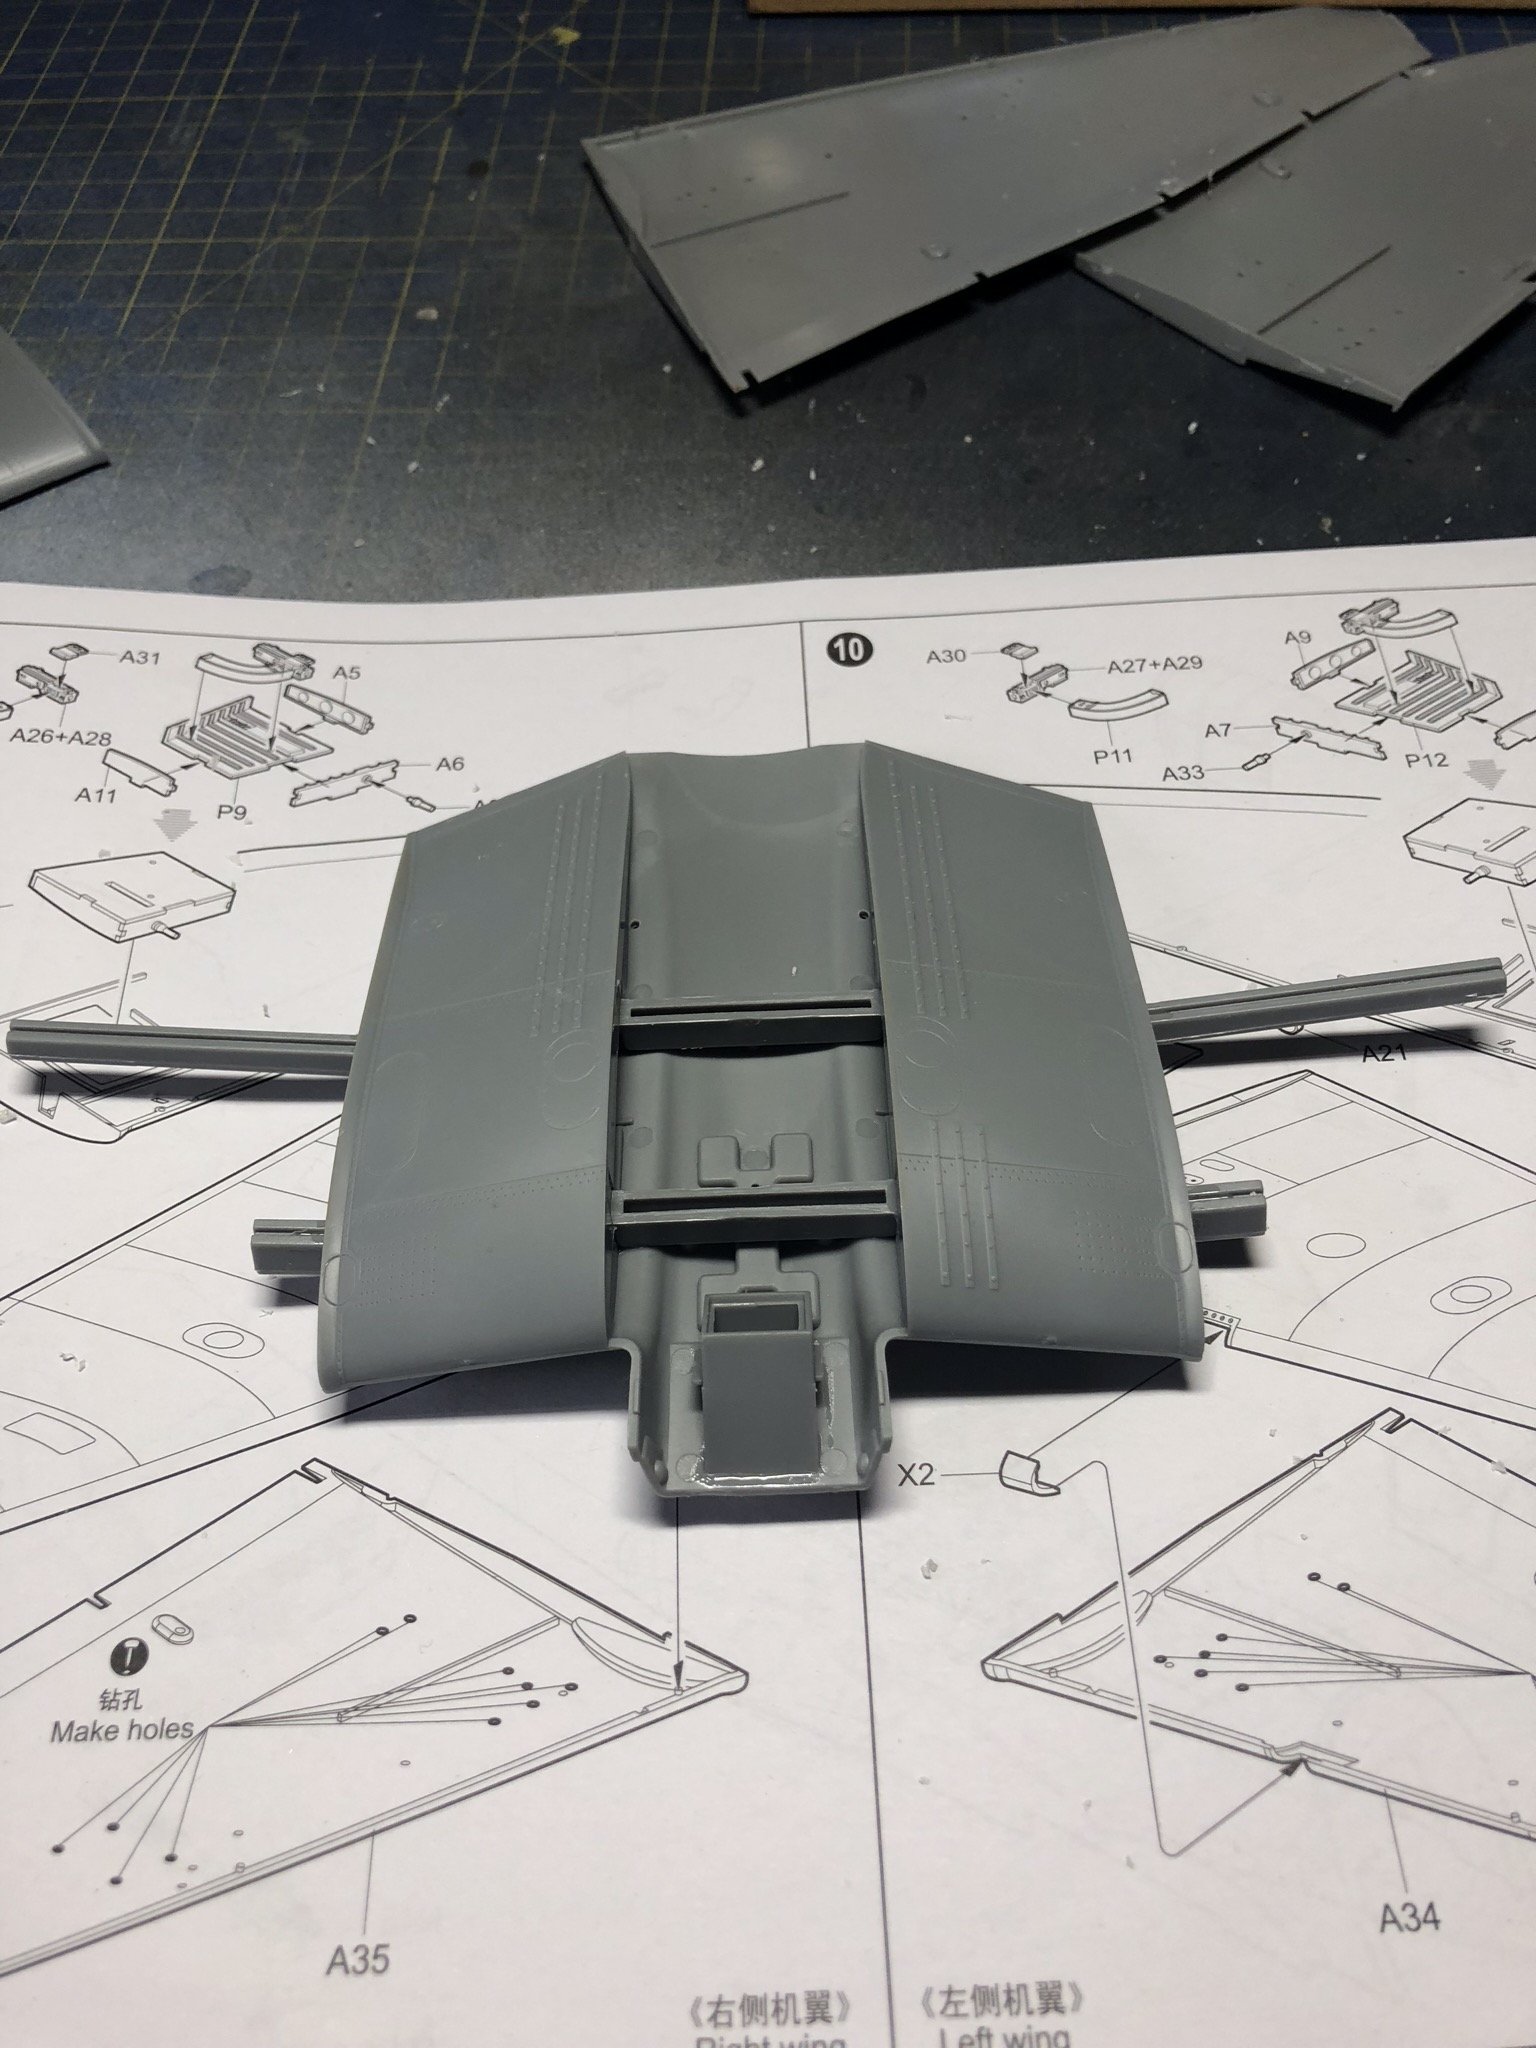
Today was a day of seam cleaning and some general tidying up, so no photos as there isnt much to see. A couple of things though, the G series, although it didnt have dive brakes fitted due to the great big tank busting guns fitted under the wings, the posts that the brakes attached to were present, Trumpeter has actually left holes in the undersides of the wings for these but dont provide the parts in this kit. Having checked the instructions for the D series kit on the jp.1999 website they are on sprue that come with the D and earlier kits but not the G, so rather than try and replicate the parts from some sketchy photos I filled the holes in the wings. Another thing lacking is there should be some bumps on the wing upper surface where the machine guns of the earlier series were positioned. Nothing in this kit to provide those bumps, but Trumpeter do provide a cut out in the wings for said parts. Again, filled those in and decided to ignore the issue. Trumpeter do provide the slab armour for the cockpit sides but dont mention them in the instructions. I'm undecided on fitting these or not. I just cant tell from the few photos of Rudels Stuka if they were fitted or not. The more I look at the kit the more I get the feeling that the fuselage from the wing root to the cockpit sill is a little on the shallow side. -
OK, is this a mistake or is someone just being a wiseguy.
aderowlands replied to Clunkmeister's topic in General Discussion
They are my go to for airbrushing now. The only problem is getting a match for fixing goofs and over spray, I did buy some of the aqua colours that come in the dropper bottles to try for that purpose, if you put some from the bottle out into a dish for a while and let dry for about 5 minutes without touching it it becomes thick enough to brush on. I’ve only tried it with the RLM 66 versions and whilst the brush painted 66 dried a little darker than the airbrushed 66 its a difference I can live with. Gradually phasing out my old go to of Gunze paints, which will take a while as I have quite the stockpile of some colours. -
Trumpeter 1/32 Ju 87G
aderowlands replied to aderowlands's topic in LSM 1/35 and Larger Work In Progress
A hell of a lot easier than trying to go the old fashioned way with Tamiya tape and a new 11 blade! For a canopy with less glass to be masked I’d go the old way but this thing has a hell of a lot of panels to mask. -
Trumpeter 1/32 Ju 87G
aderowlands replied to aderowlands's topic in LSM 1/35 and Larger Work In Progress
There is a Revell boxing of the Hasegawa D series out there somewhere, not sure when it was released, don’t know if Revell released one of their own at some point. -
Trumpeter 1/32 Ju 87G
aderowlands replied to aderowlands's topic in LSM 1/35 and Larger Work In Progress
Today I had one of those vibes that was telling me to leave the kit itself alone. So taking heed of that feeling that if I touched today I’d balls something up but not wanting to waste a day off work before progress will slow to a crawl next week when I start night shifts again I formulated a plan. I had purchased a Montex mask set for the canopies with this in mind. I find the material they use to not really like sticking to curved surfaces and they start to peel after a day or so and me, well I can have those masks on for weeks as progress ebbs and flows. So to the Bat Cave and my flatbed scanner and Silhouette Portrait plotter. Montex set was weeded out and scanned into the Mac, imported in to Silhouette and after triple checking I had my measurements right (of course before all this I tried one of the Montex pieces on each of the canopy sections to check they fit). The masks were then cut on to a piece of Tamiya masking paper as shown below. Only one piece failed to fit but was an easy fix with some thin strips of Tamiya tape. I can’t recall if the photos shown before had the horizontal stabs and rudder added to the fuselage. Well they’re on now, I failed to notice some ejection port marks on the counterbalance for the horizontal stabs, they’re on the inside faces and will be dealt with when I’m tidying up the various seam lines and one or seven glue thumb prints here and there. The stabs fit nicely. I need to check the fit of the prop that goes under them to the fuselage as I had planned to leave it off to ease painting, if they’re a snug fit I’ll stick to that plan, if not, I’ll have to glue them in place before paint. Before masking the canopies I put them all in place to see how much of the cockpit would be seen if I left them all closed up on the final model and I’m happy that being a veritable greenhouse, most of my cockpit work will show, so closed they shall be. The pilots sliding canopy isn’t really designed to be open methinks and I don’t want to force it and snap it down the middle.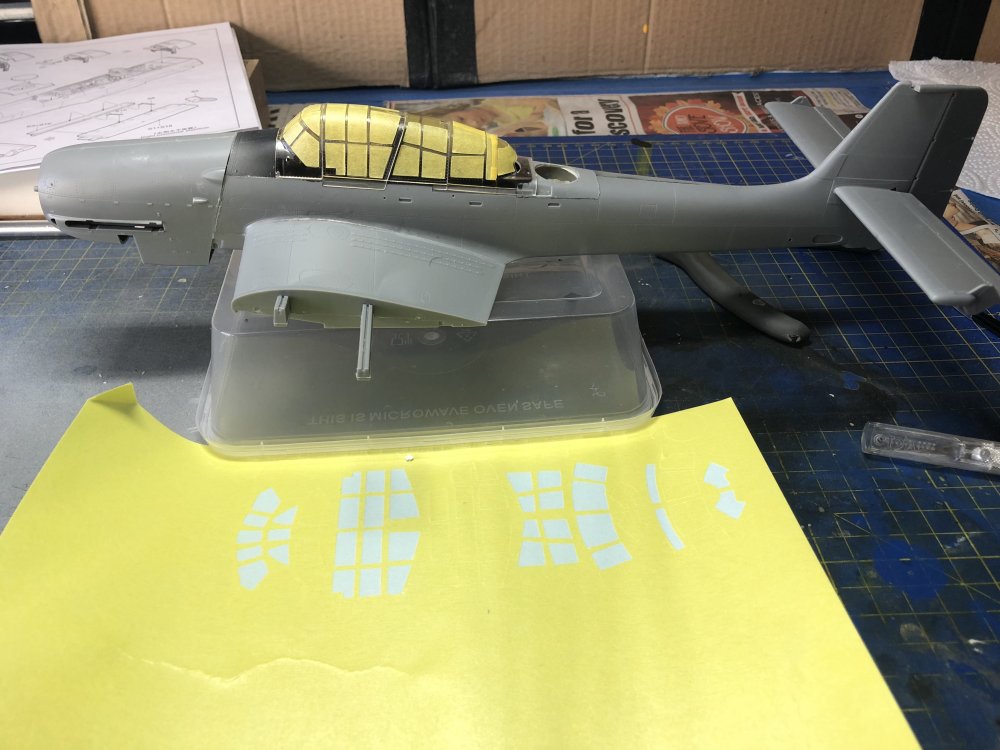
-
Trumpeter 1/32 Ju 87G
aderowlands replied to aderowlands's topic in LSM 1/35 and Larger Work In Progress
On inspection this morning I have noticed I have some seam work in my future, some on the fuselage halves where I’ve glued them, which is normal for me but the engine cover solution wasn’t quite perfect, not bad, but will require some work and the part of this Hobby I hate the most, adding lost rivet and line details, I can never for the life of me put back what was lost. -
Trumpeter 1/32 Ju 87G
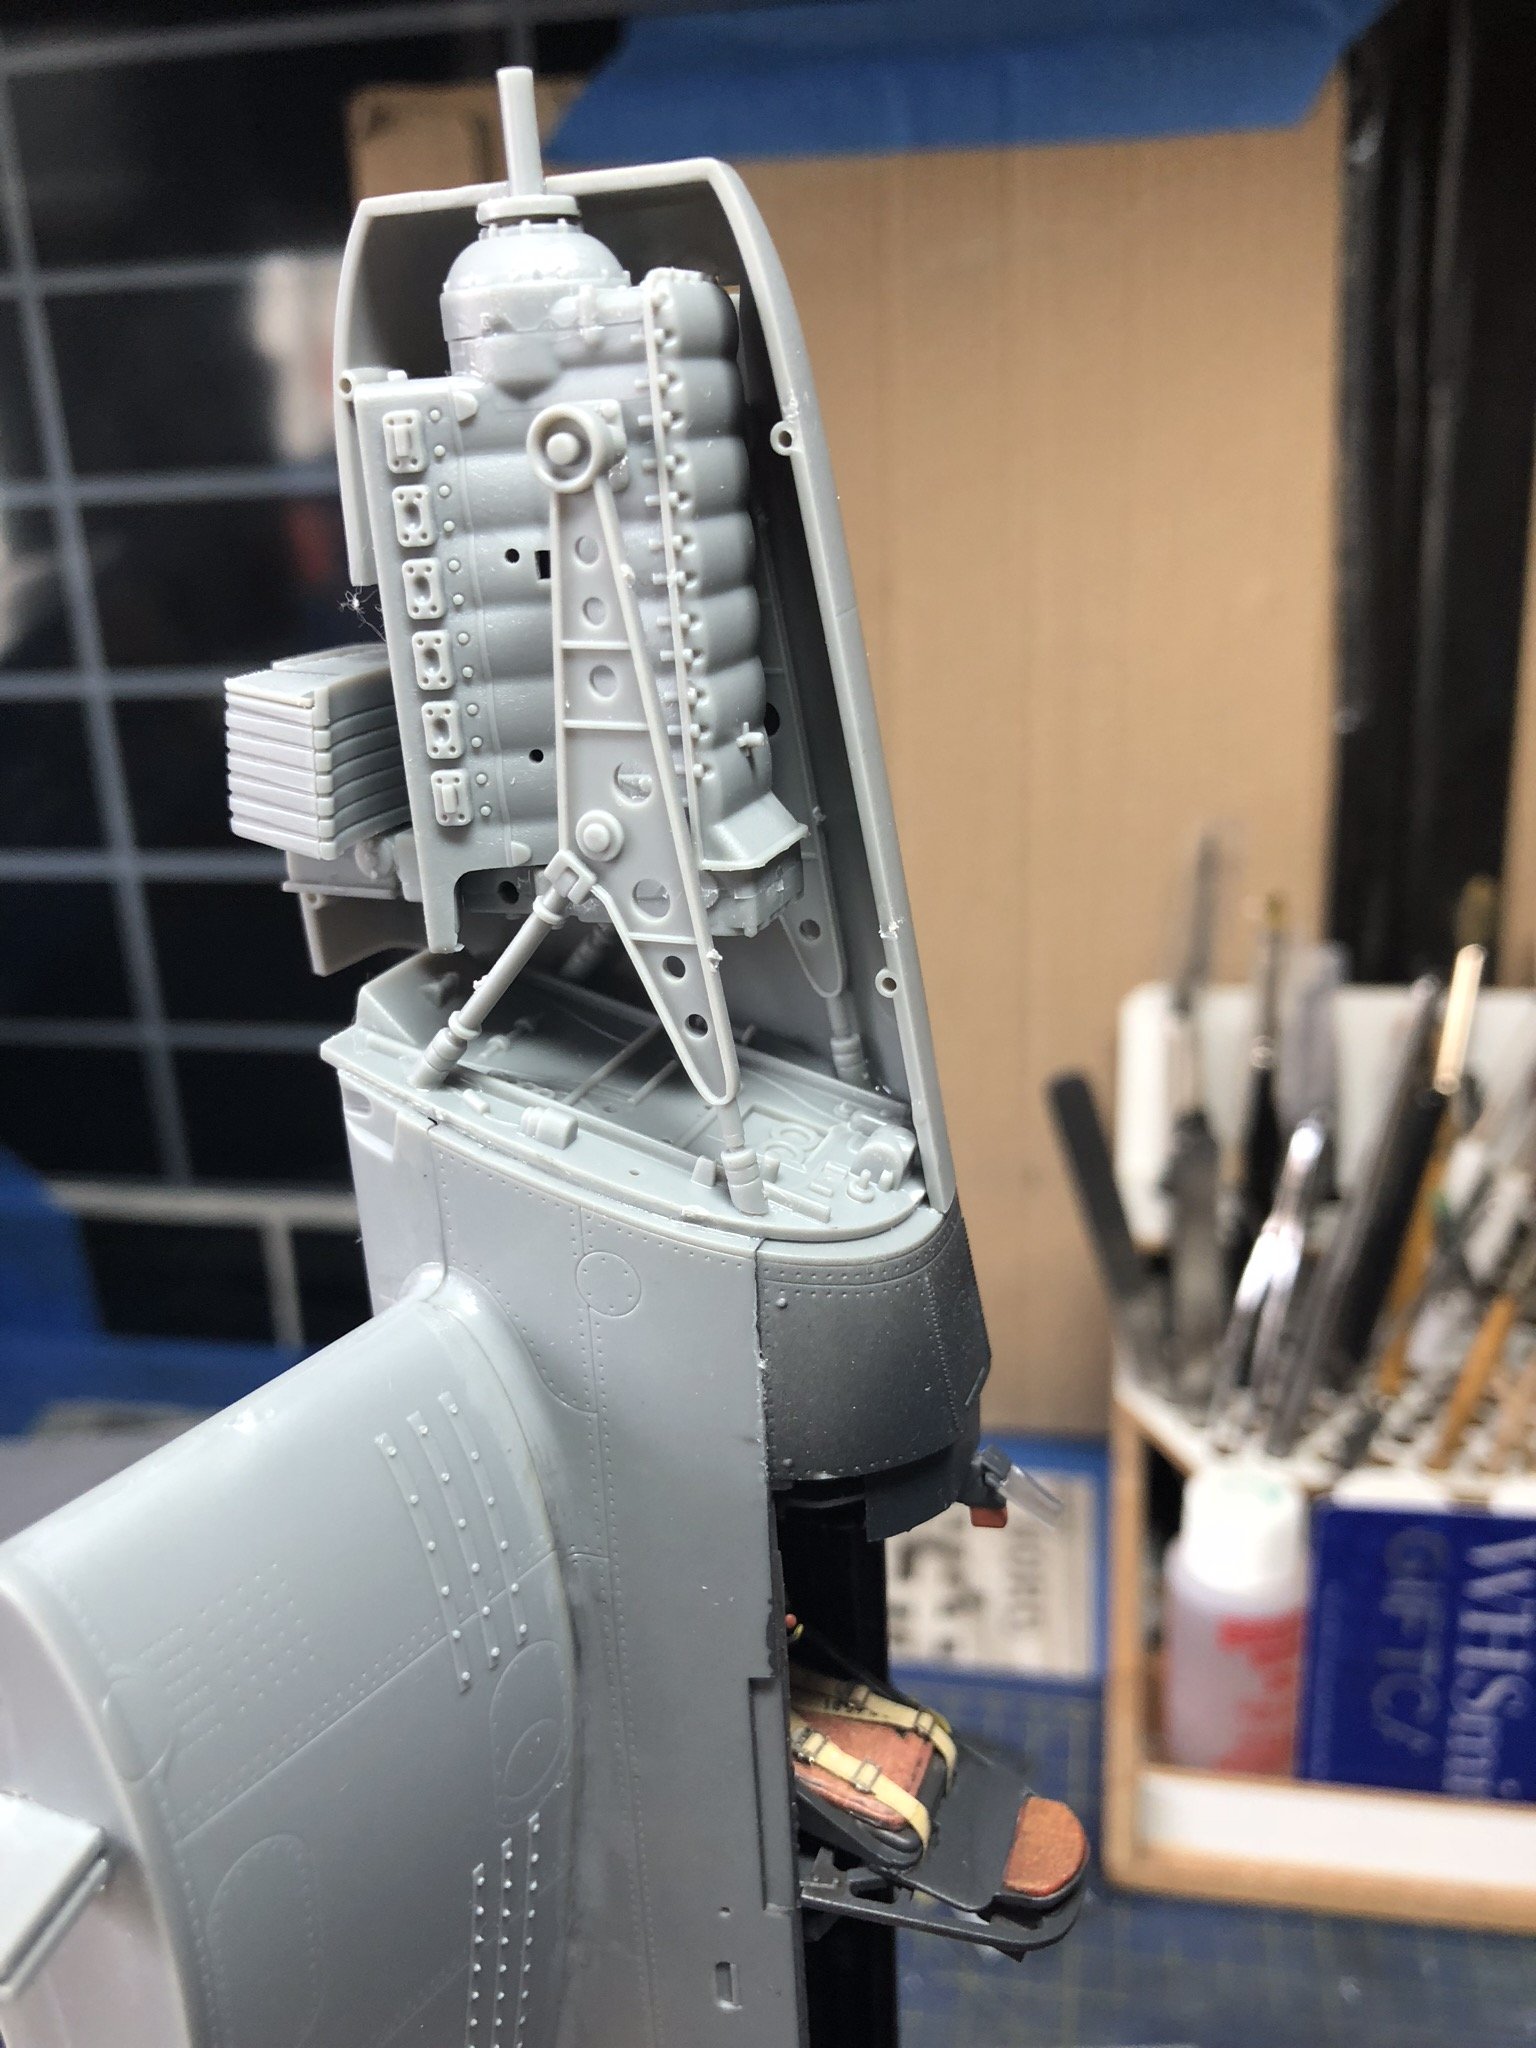
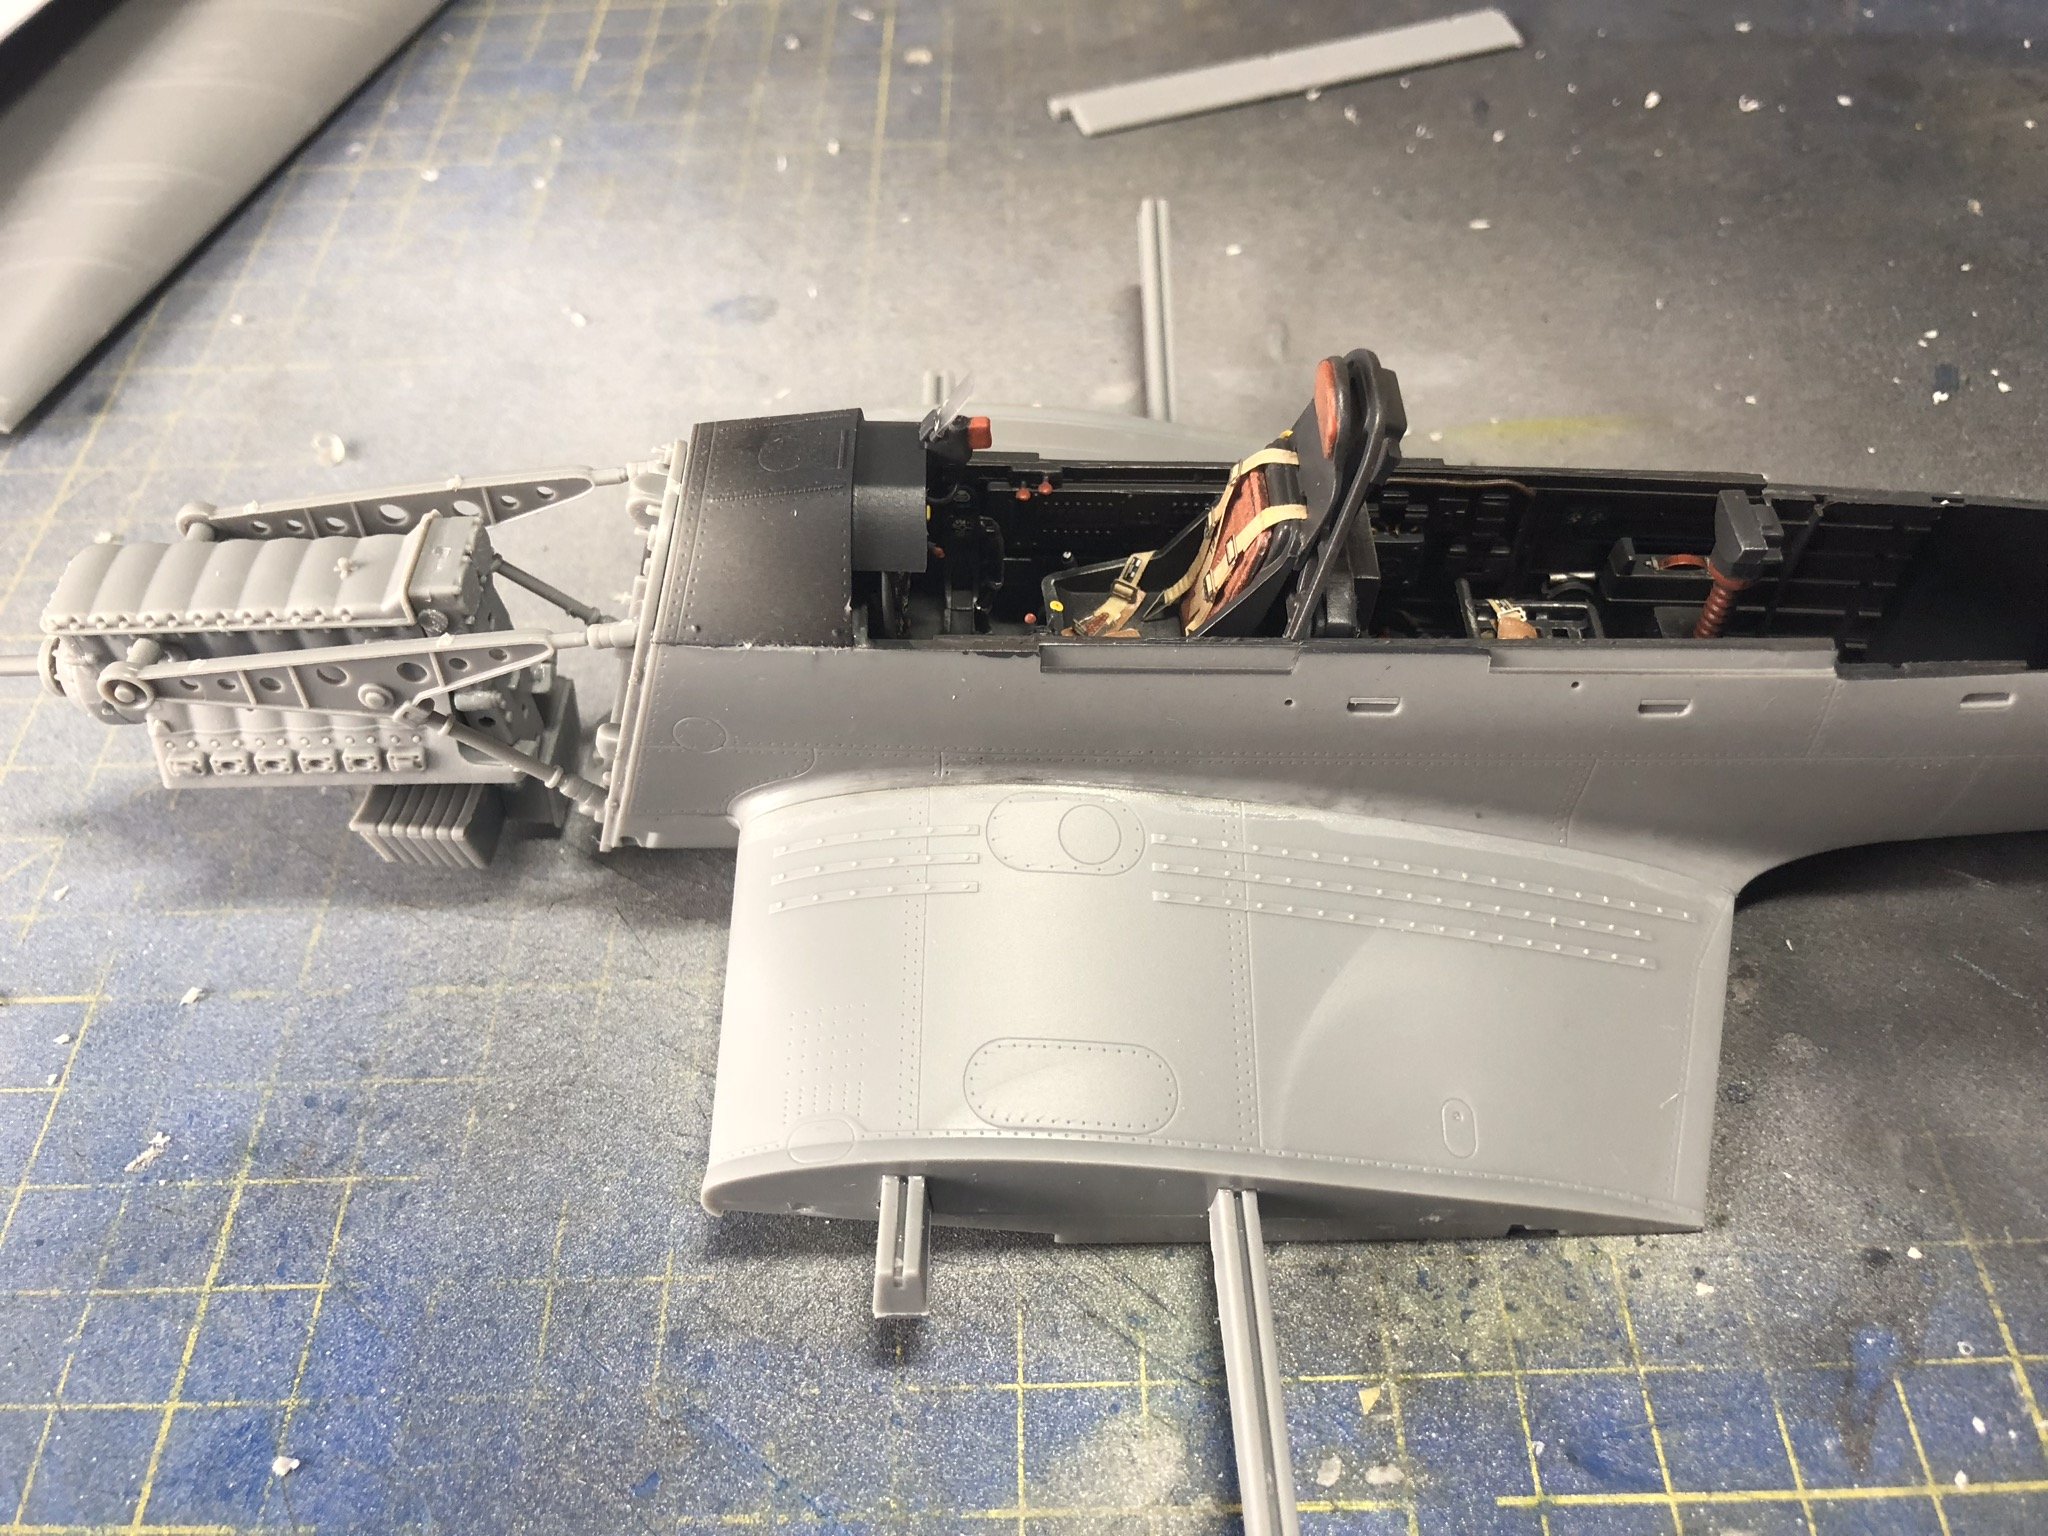
aderowlands replied to aderowlands's topic in LSM 1/35 and Larger Work In Progress
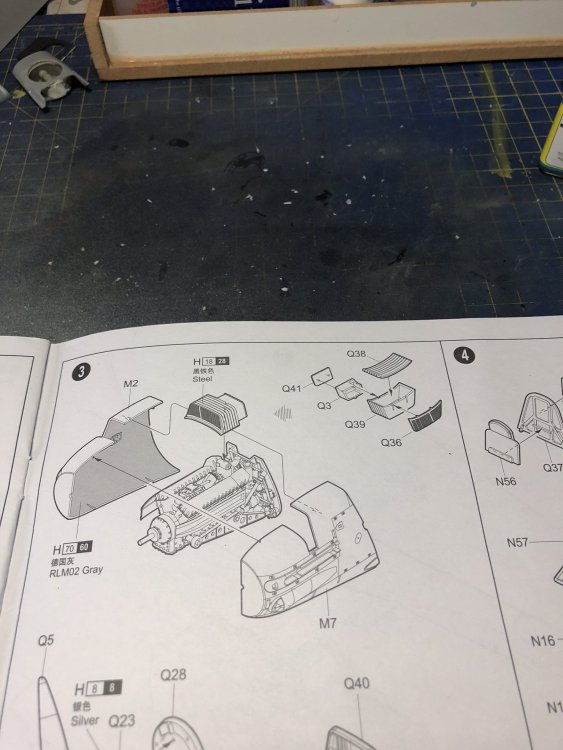
A little more work done today between other jobs. Fuselages halves were joined togetherness last night. Inner wings put together. joined to fuselage. It was a very tight fit and a bit of a job to get done, I thought maybe the cockpit floor had maybe prevented a good join of the fuselage halves but no, all is good there, so it’s just the way the kit is designed. The engine was only put together to hang the prop and exhausts off of. There’s no way to display it anyway. Speaking of the engine, this is how Trumpeter would have you do it. Do to that way and there’s no real way to mount the engine in the fuselage parts, I thought the firewall would do it but no, the only parts that touch the fuselage parts are the radiator bit and the prop boss, not enough there to get a firm glue joint. So I went about it a different way. ..... Glue the firewall to the fuselage. It has mounting points so it’s a a good snug fit. Then once dry, take one half of the engine cover and glue that to the fuselage, there’s a nice gap around the firewall for this. Ill let that set up over night then add the second half. Despite having seen the real deal at Hendon a few times I forget just how big an airframe the Stuka was, this one will be taking up virtually a whole shelf in the cabinet to itself when done I think. Like most kits it comes together quite quickly once the cockpit is done and fuselages joined up.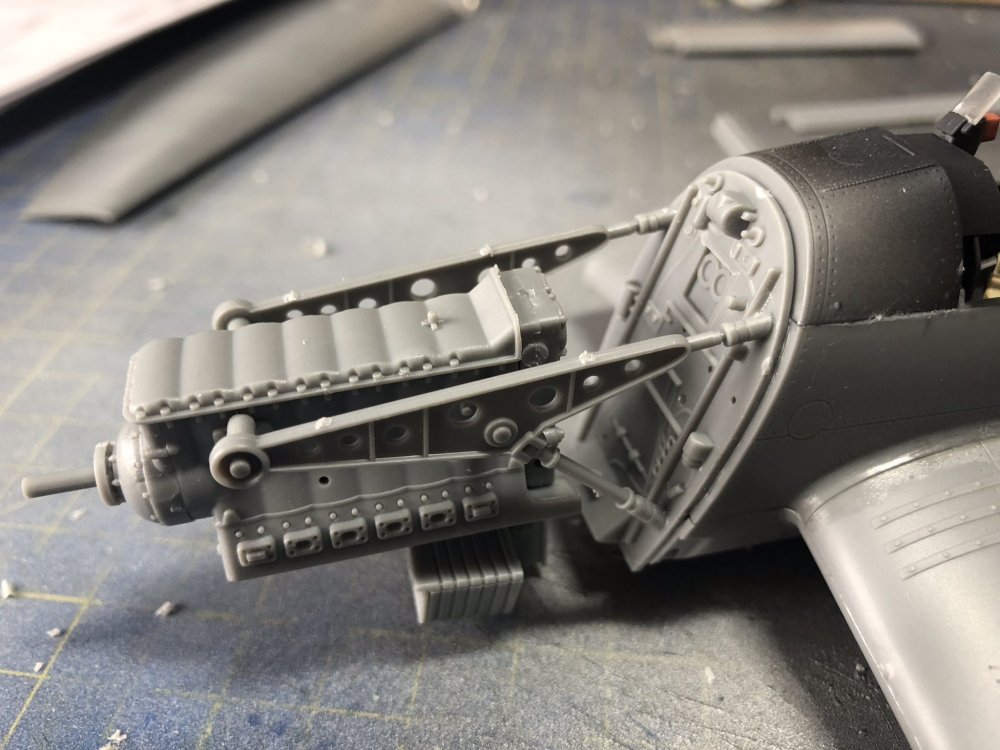


-
Trumpeter 1/32 Ju 87G
aderowlands replied to aderowlands's topic in LSM 1/35 and Larger Work In Progress
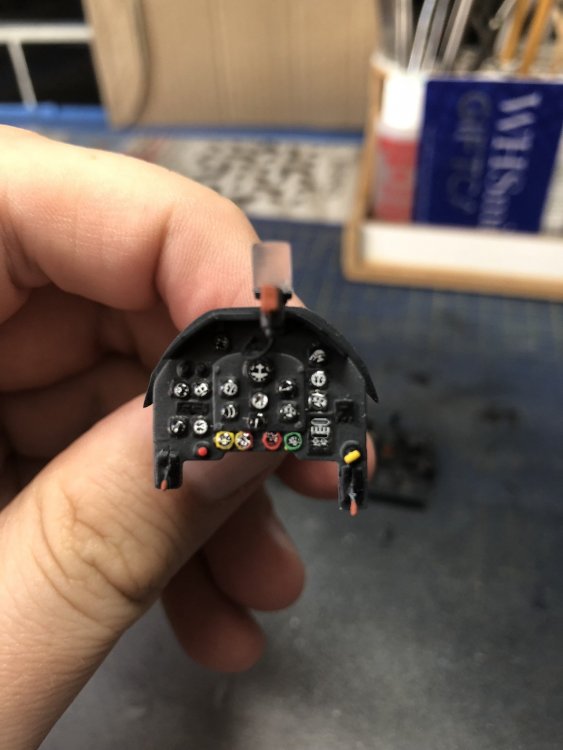
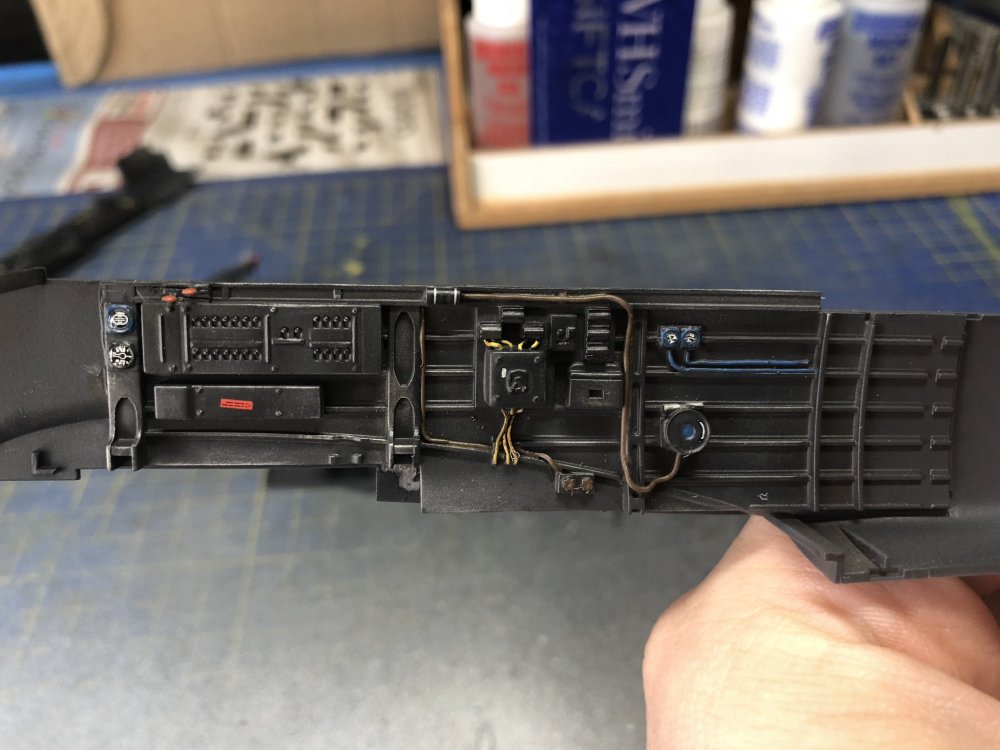
As threatened earlier. I have managed to squeeze some time in to flat coat the cockpit parts and add some UV glue to the instrument dials to simulate the glass faces. Still happy with the instrument panel but it is what it is, this is not ever meant to be a competition piece, it’s a get something done from start to finish without running out of mojo. Photos taken with my phone so not brilliant but they show where I am and what I’m up to. The cockpit walls are mainly the kit parts, lead wire used to simulate pipes and wiring, Aires throttle quadrant was used as was some other bits and pieces. Yep, the red decal on the fuse box has gone as key but will be buried deep in the cockpit so I can live with it. the cockpit floor has a kit part missing at the rear. The Aires set comes with a much nicer representation of the direction finder that sits in the fuselage behind the gunner, however using the Aires part mated to the kit piece takes a bit of work, being Aires fit isn’t the best, I faired it in with Milliput and it looks as good as it’s going to get. However to make it fit the rear wall of the cockpit has to be removed, but fits fine if only Trumpeter parts are used. I don’t think that bit can be seen once the fuselage is joined up anyway. Next step is joining the fuselage halves.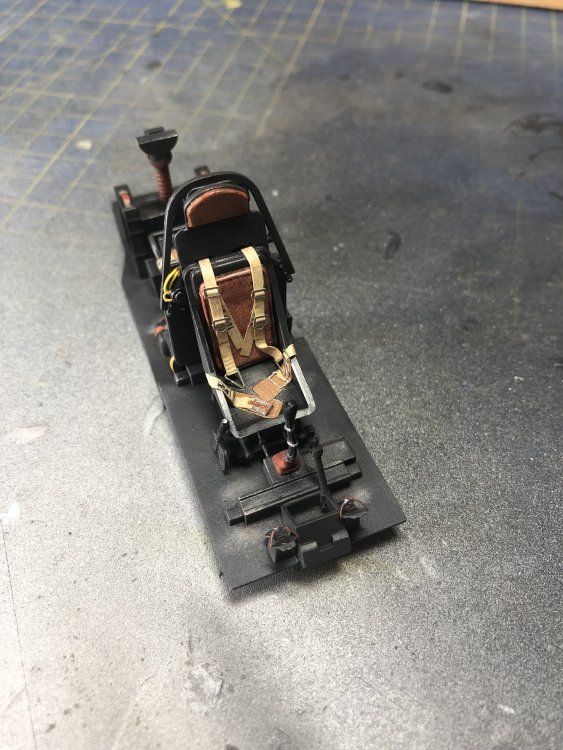


-
Thanks, the model photos are backed up on my imgur, regular images are automatically sent to iCloud from all my devices.
-
Won’t be making it this year as per every year it falls on a day I’m working so have to book it as a holiday day but this year my allotment has been needed elsewhere. My bank account is happy though.
-
Ok so I have managed to upload some photos from my iPad directly to an in progress post I have going, will those photos disappear from the thread should I delete them from my iPhotos on the iPad or are they now here regardless?
-
Trumpeter 1/32 Ju 87G
aderowlands replied to aderowlands's topic in LSM 1/35 and Larger Work In Progress
So that’s where I was up to until this week, I had been working a week of night shifts and I learnt a long time ago to not even look at a kit when working nights, disaster usually ensues, and other stuff cropped up after that. I have since painted all the parts shown above, painted the details, added the HGW belts which were all kinds of nightmarish trying to decipher what was what as the pictogram instruction called for parts that just aren’t there, so fathomed an approximation of them and have thrown then on. Later today I should be flat coating the parts so maybe more photos tomorrow but I have aquarium issues to resolve too so we shall see. But I feel better now having contributed something here. Oh and just to be different to everyone else that ever modelled a Ju 87G this one will be In Rudels scheme....