


rverissimo
-
Posts
80 -
Joined
-
Last visited
Content Type
Profiles
Forums
Events
Gallery
Posts posted by rverissimo
-
-
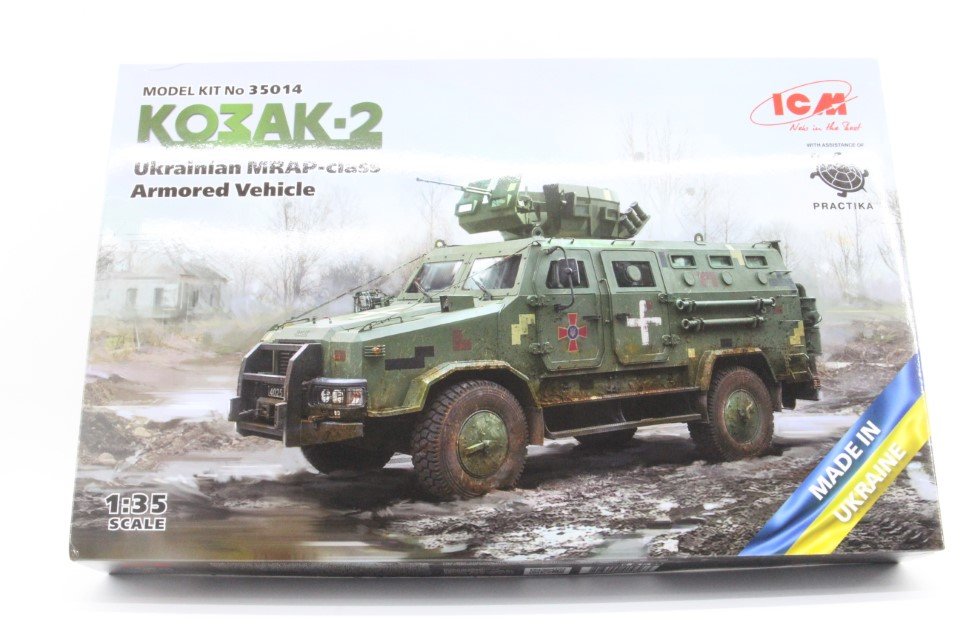
1:35
Kozak 2
“Ukranian MRAP -Class Armored Vehicle”
ICM
Catalogue Nº 35014
Introduction
The Kozak-2 is a 4x4 multi-purpose, wheeled, armoured combat vehicle designed and manufactured by Ukrainian defence company NPO Practika to meet the mission needs of the Armed Forces of Ukraine, the National Guard, and the Border Guard Service.
Practika developed two versions of the Kozak based on the EuroCargo 4×4 truck chassis developed by Iveco, a manufacturer of light, medium and heavy commercial vehicles based in Italy.
The base version of Kozak was unveiled in August 2009.
A Kozak-2 prototype vehicle underwent tests in November 2014 and a further modified version was demonstrated in March 2015
It includes a V-shaped armoured hull to protect the crew against anti-personnel mines or other explosives. It also uses suspended seats, and a collapsible sandwich structure in the floor to deflect and absorb mine blasts.
Designed for high mobility operations, both urban and rural, Kozak-2 can carry a crew of 10, a driver and a commander with 8 deployable dismounts. The vehicle fitted with a turret, capable of mounting up to a 12.7mm machine gun.
The vehicle is intended to offer enhanced security for the Ukrainian troops. It can be configured for patrol / reconnaissance, mobile command post, ambulance, cargo / repair / maintenance, and special operations.
Currently deployed in the Ukrainian conflict and exported to Indonesia and Bangladesh.
Source:
https://defence-blog.com/ukrainian-army-receives-40-kozak-2-light-armored-vehicles/
https://www.army-technology.com/projects/kozak-2-multi-purpose-armoured-vehicle/?cf-view
https://en.wikipedia.org/wiki/Kozak_(armored_personnel_carrier)
Let’s look at the kit then:
The box is sturdy, as the art design is just a cover top for a top opening box.
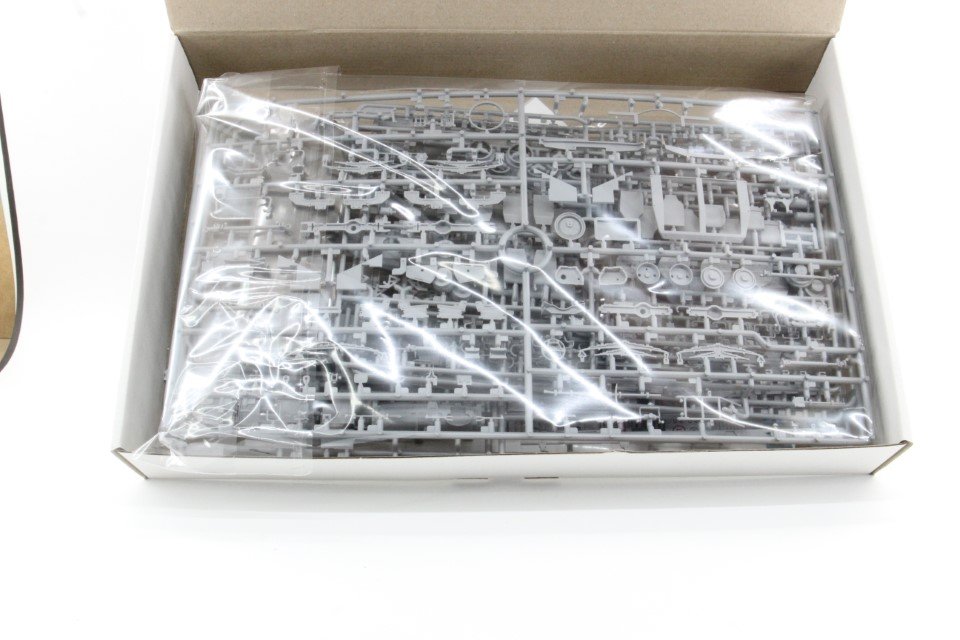
Inside the box:
7 grey injected plastic sprues
2 clear plastic (Windows) sprues
5 rubber tires
1 photo etch fret.
3 decal sheets
The sprues in detail
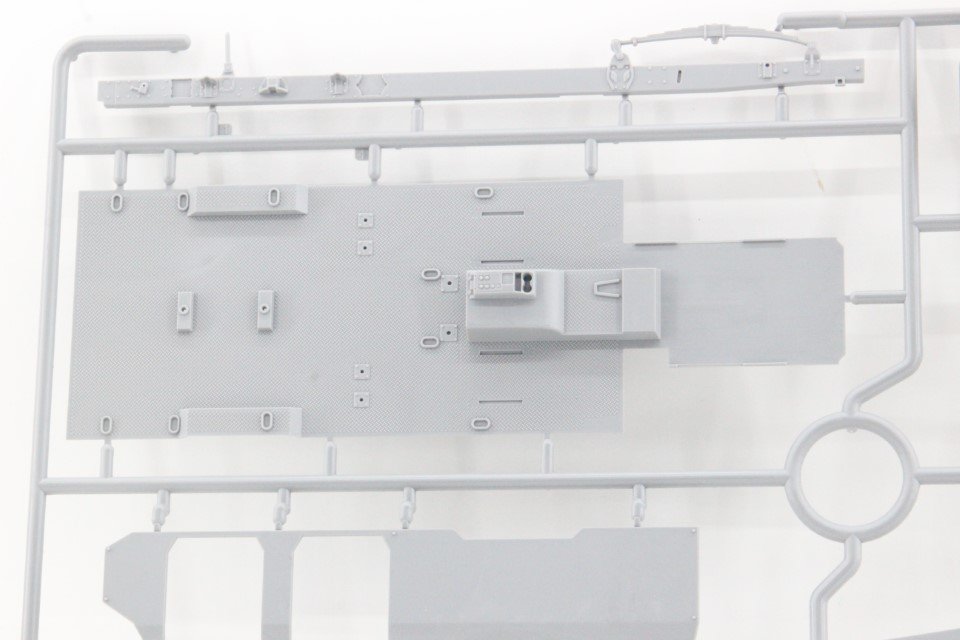
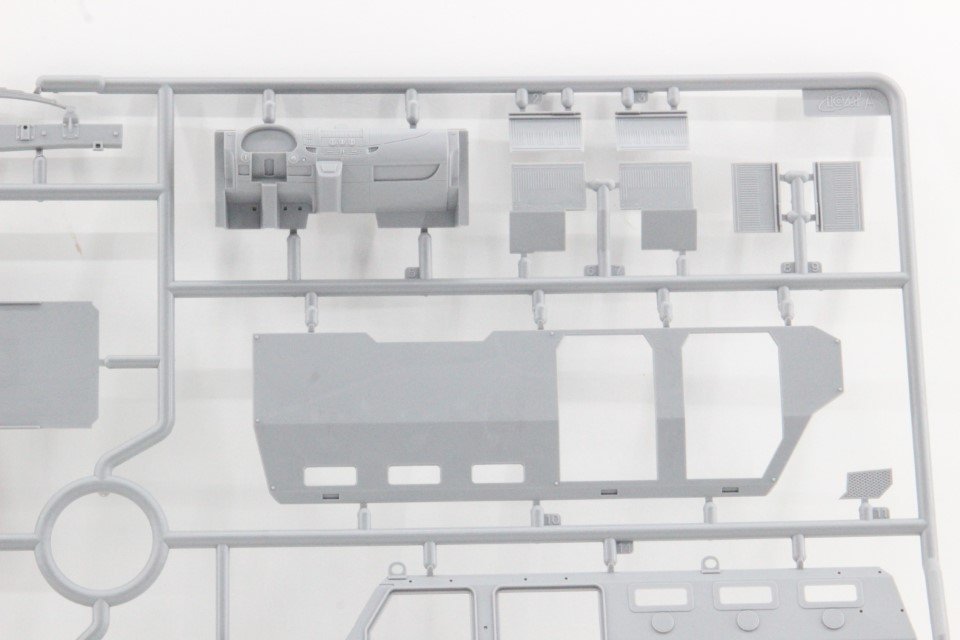
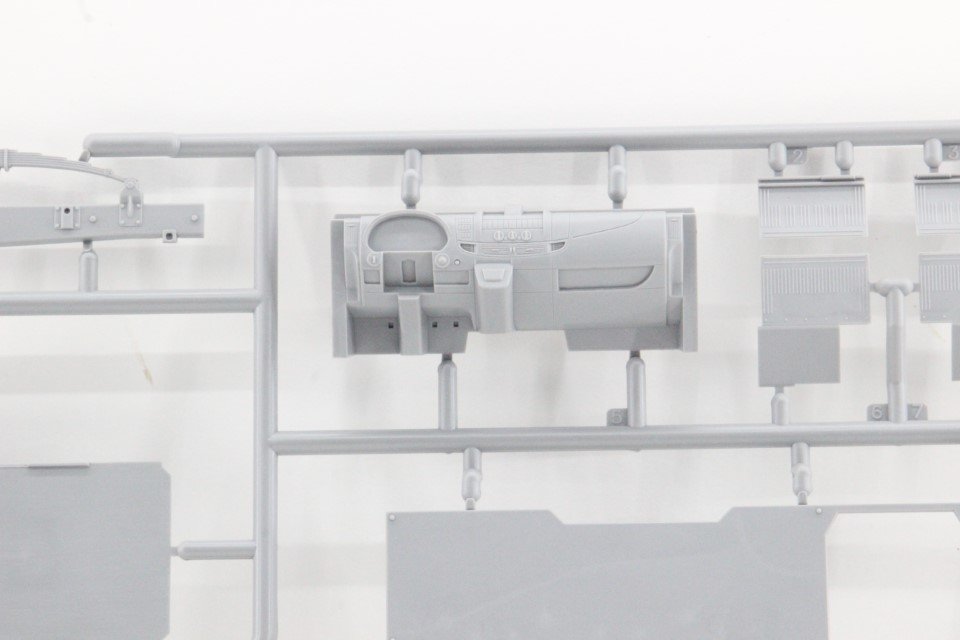
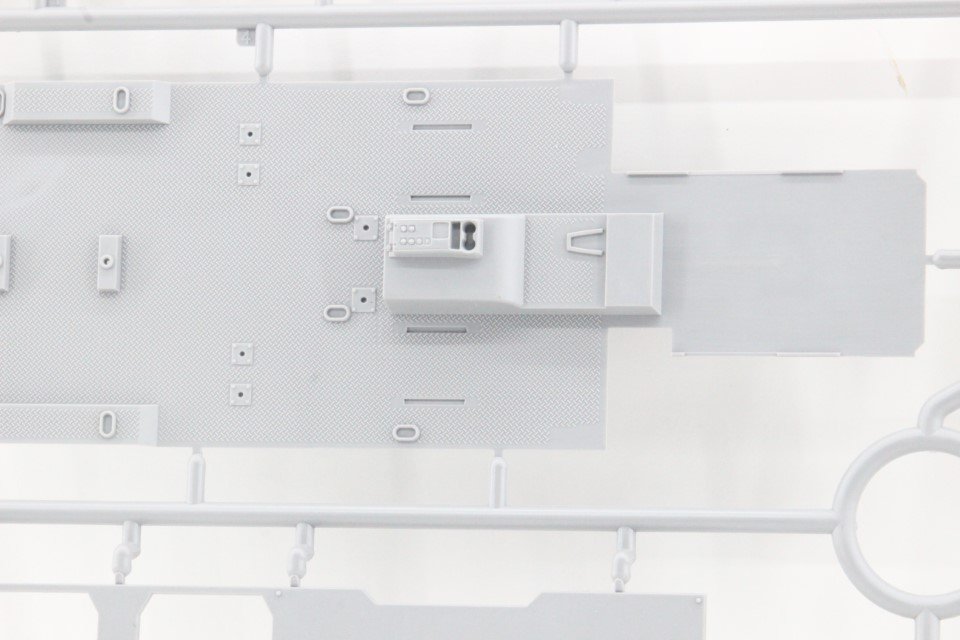
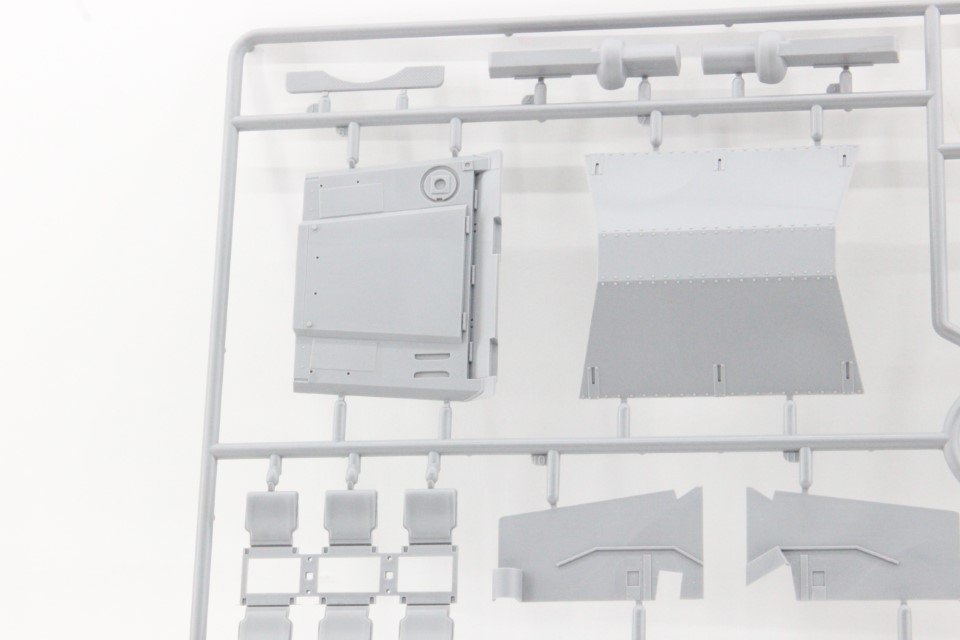
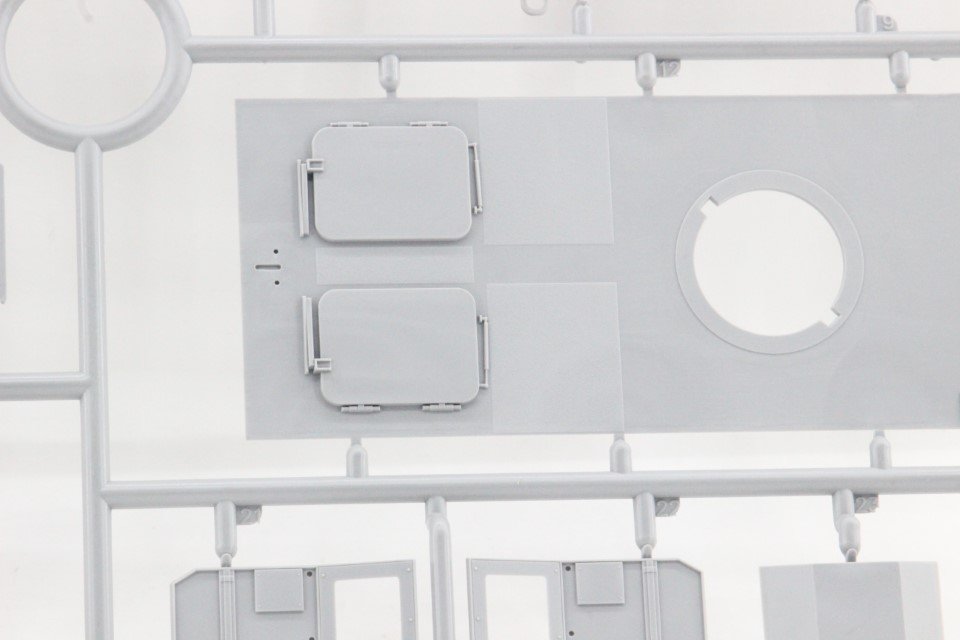
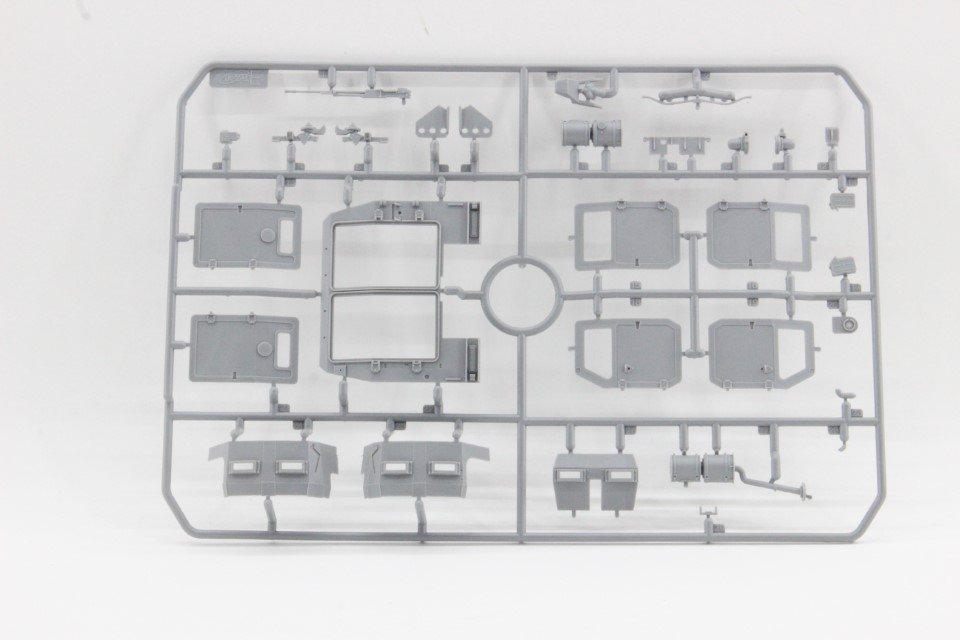
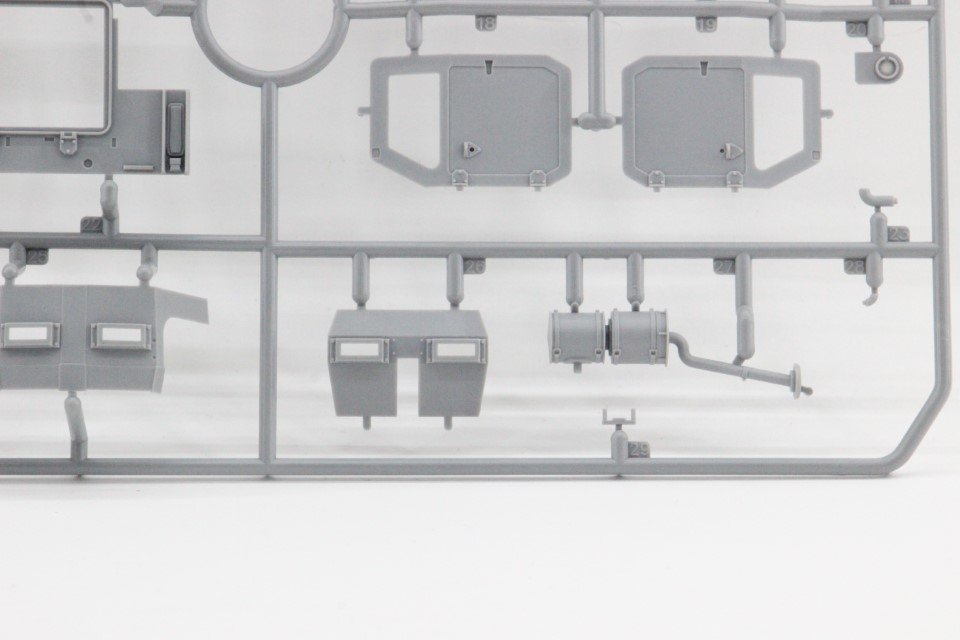
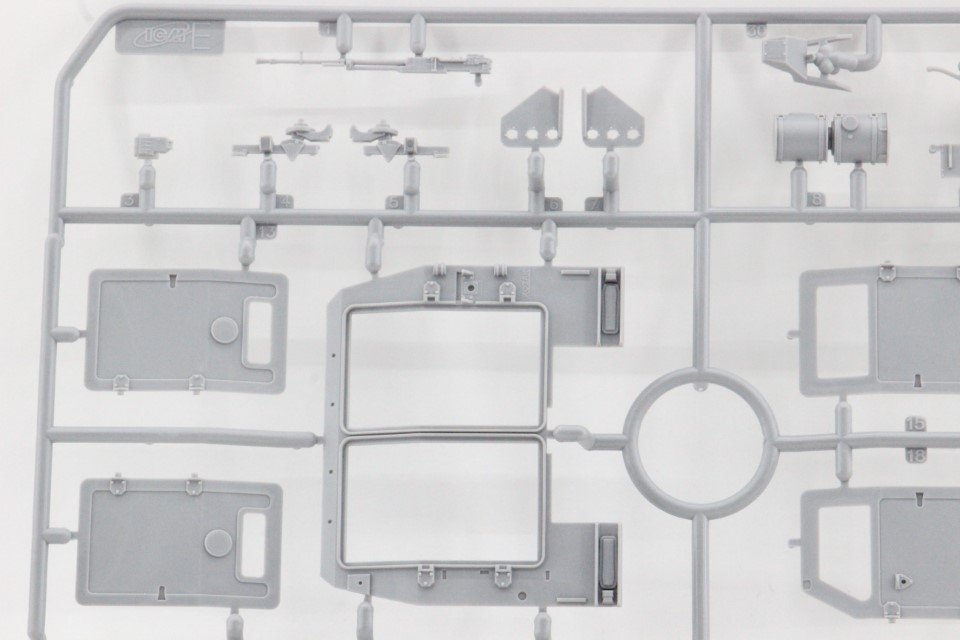
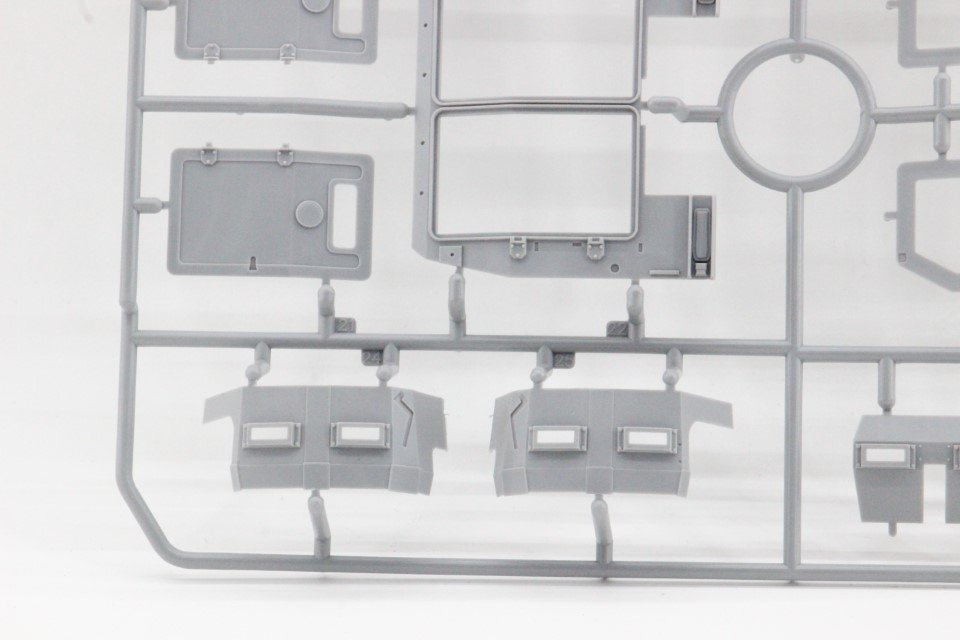
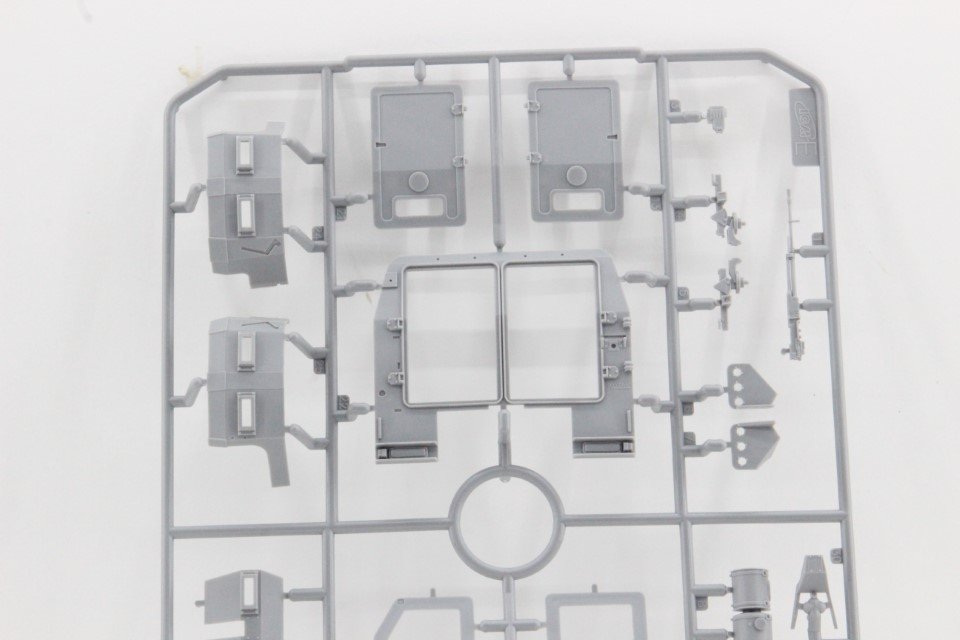
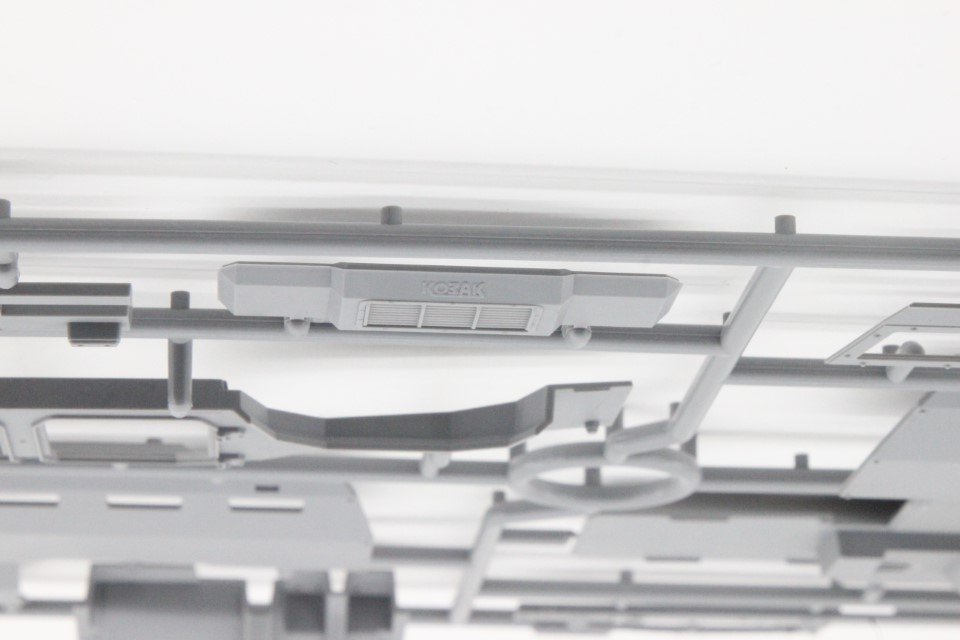
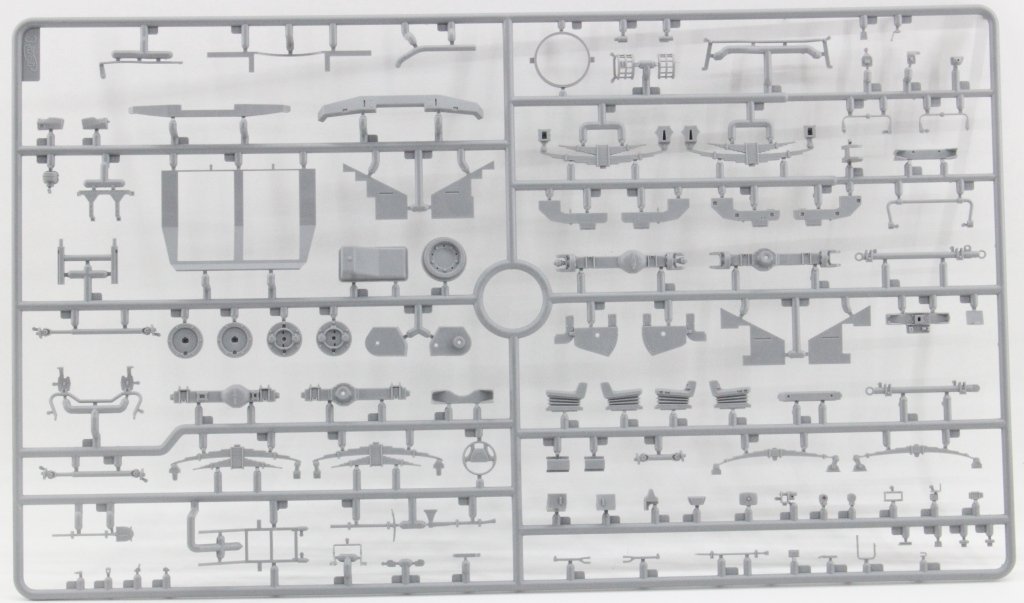
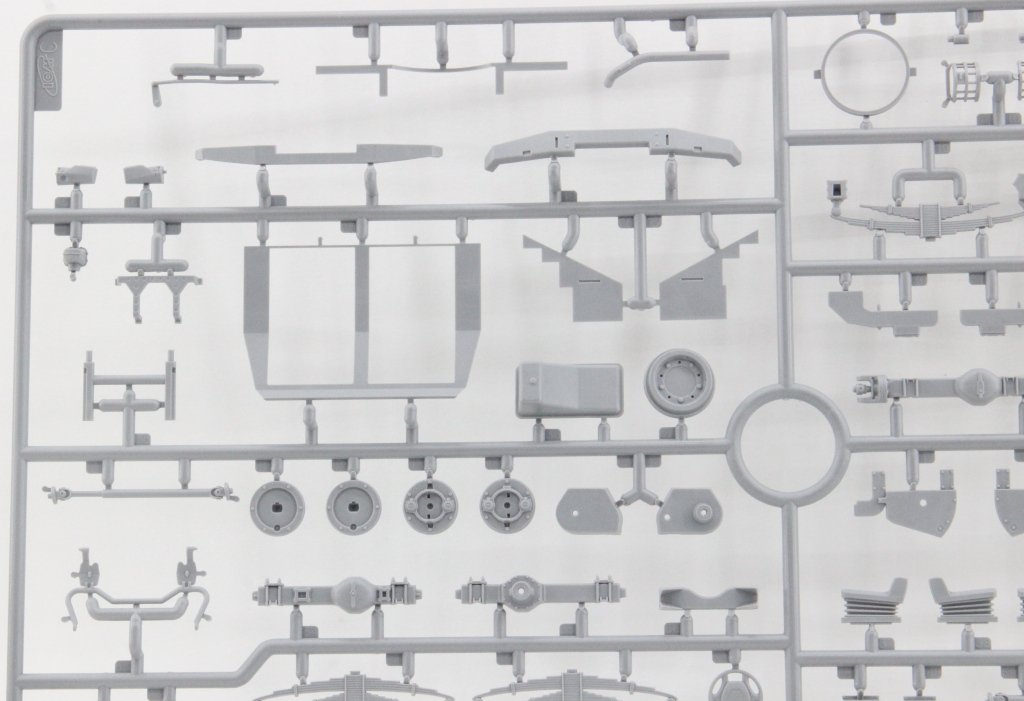
Sprue A - In this Sprue, the most striking feature is the vehicle's body floor. It is composed of non-slip flooring (which exhibits appropriate and visible detailing). The central console is also integrated into the same piece. The instrument panel and front console are also part of this grid and display an acceptable level of detail. The left external side panel is noteworthy for its appropriately scaled detail, as well as the interior walls of these same panels. It's an original way to detail the vehicle's interior without compromising complexity in the mould with an injection on both faces of the piece. The front grid presents an eye-catching detail, despite being moulded in a single piece and without holes between the strips allowing air passage for cooling. The vehicle model logo is also visible and clear.
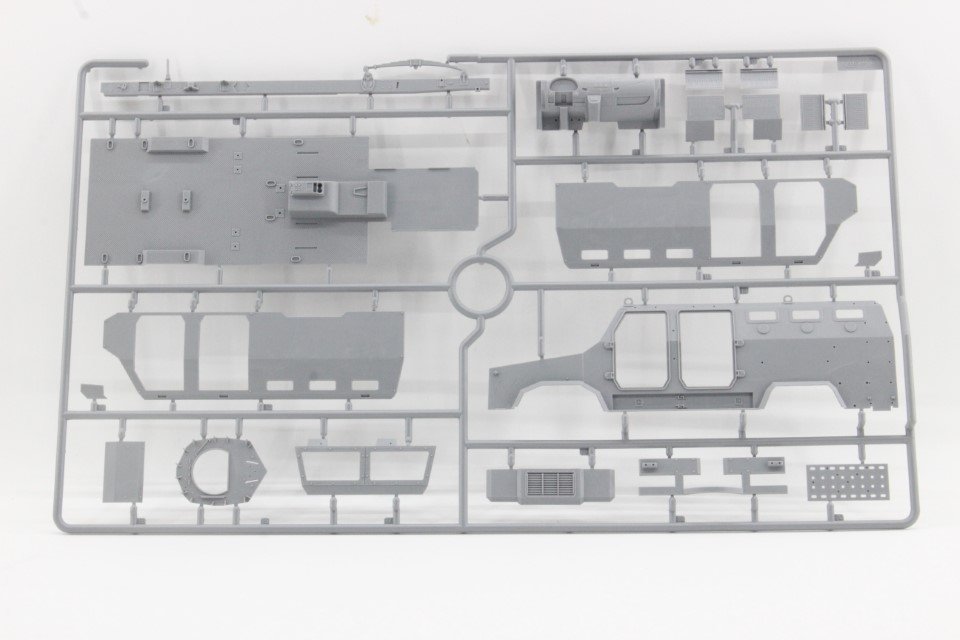
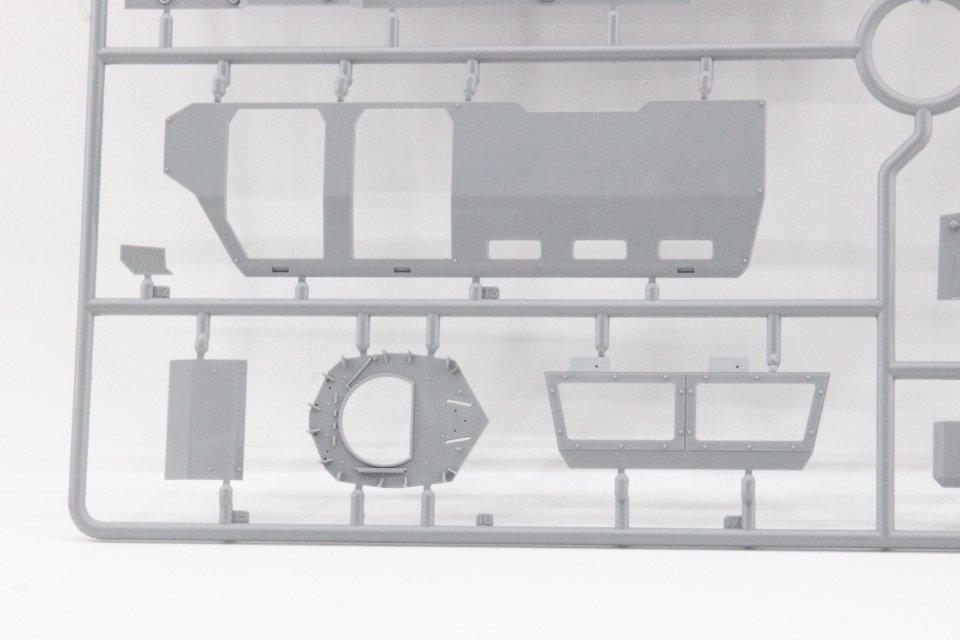
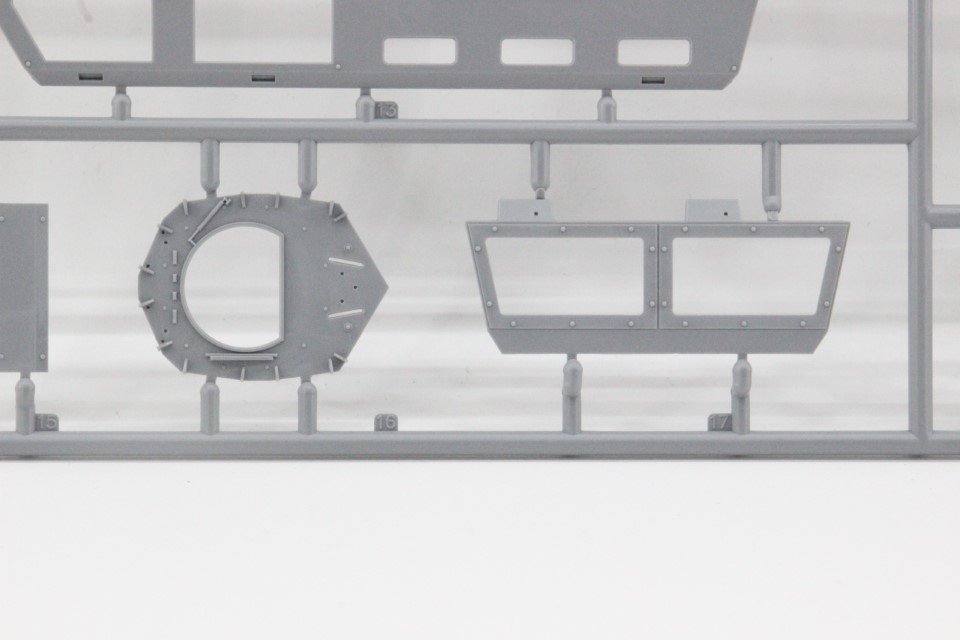
Sprue B – In this sprue, the highlighted elements undoubtedly include the right outer side panel, the V-shaped shielding plate for the lower part of the body/chassis, aimed at helping to dissipate the energy from landmine explosions or improvised explosive devices (IEDs). This V-shaped structure is known as the 'V-shaped chassis' or 'chassis in V.'
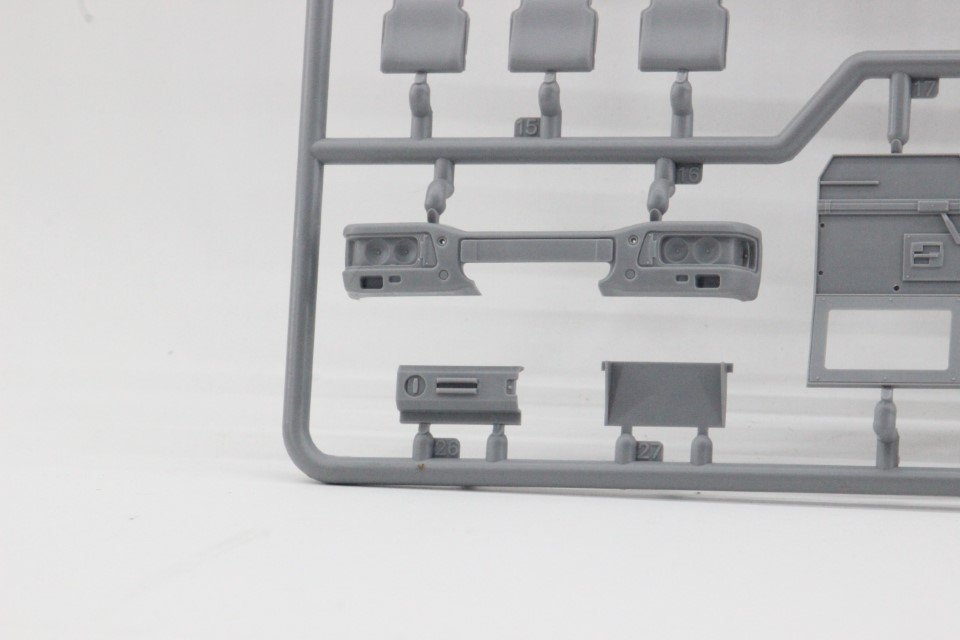
The front bumper with the attachments for the headlights is presented as a single piece, as well as the inner halves of the existing vehicle doors and access hatches.
Body components and transmission are present, although the latter is quite simplified. As it is a hidden piece, little detail will be visible in the final model.
Note also the roof (where two of the hatches are moulded in the closed position), as well as the bonnet, with appropriate details.
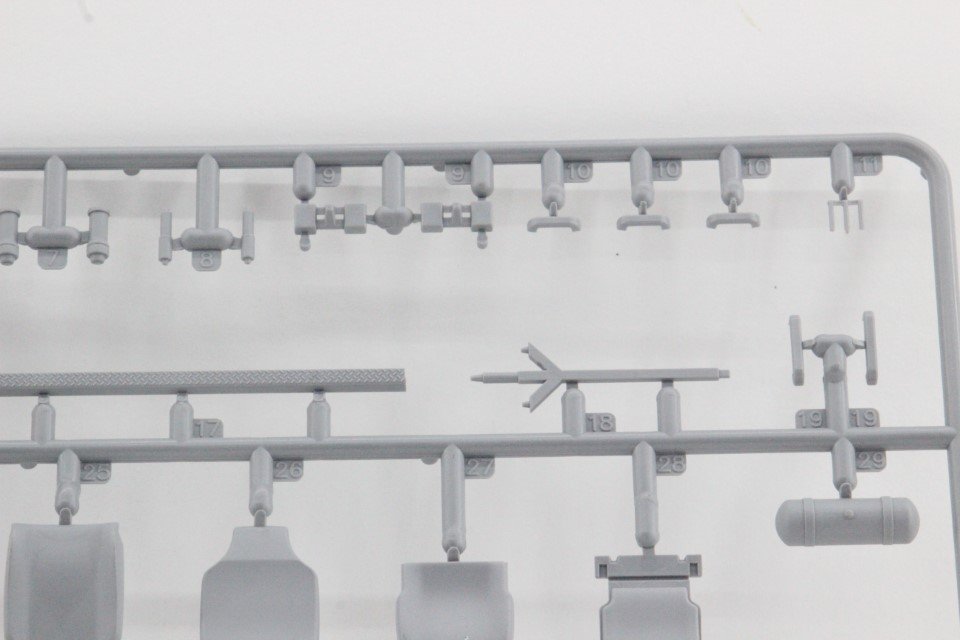
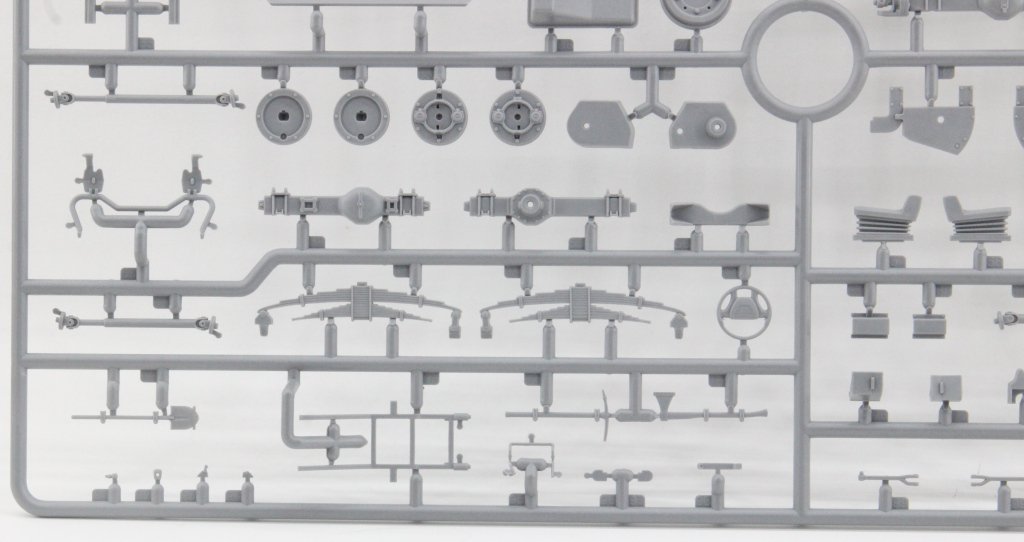
Sprue C - In this grid, the parts that make up the transmission and respective shafts, suspension (in this case, suspension springs are represented by two halves), some visible components of the engine (given that the kit does not include an engine), tools, as well as the structure where they fit in, are present. The tools are molded as a single piece and include their respective fastenings.


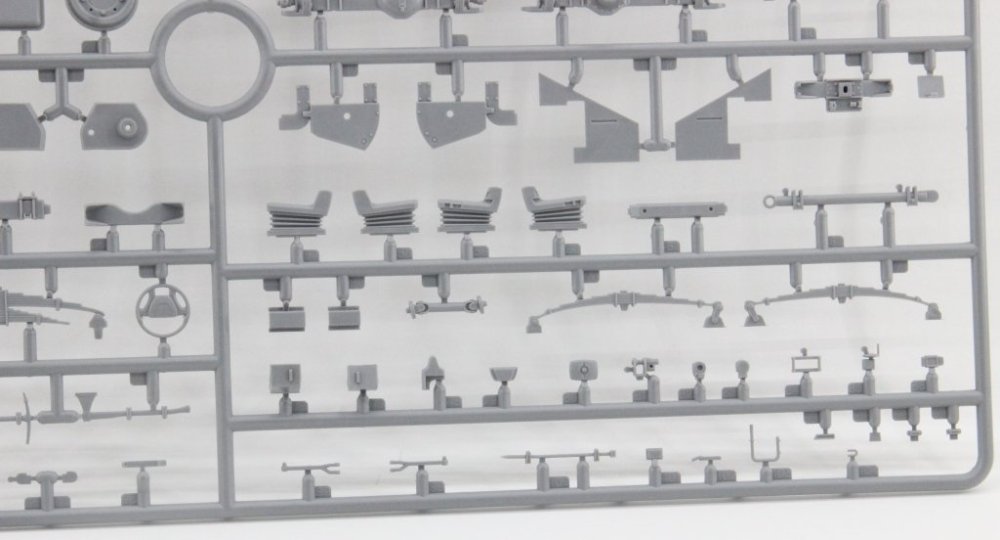
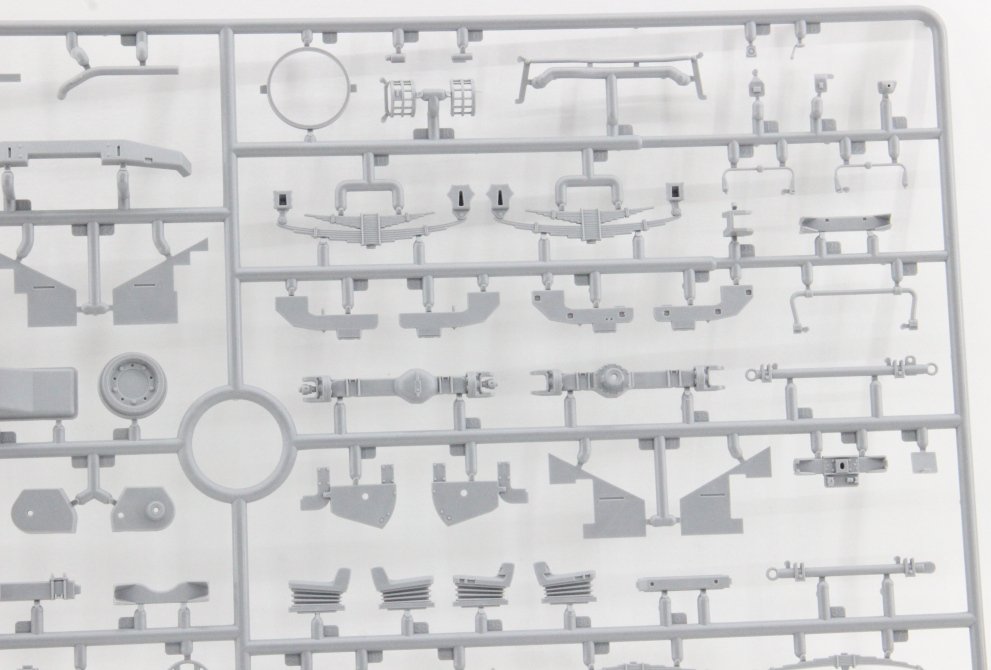
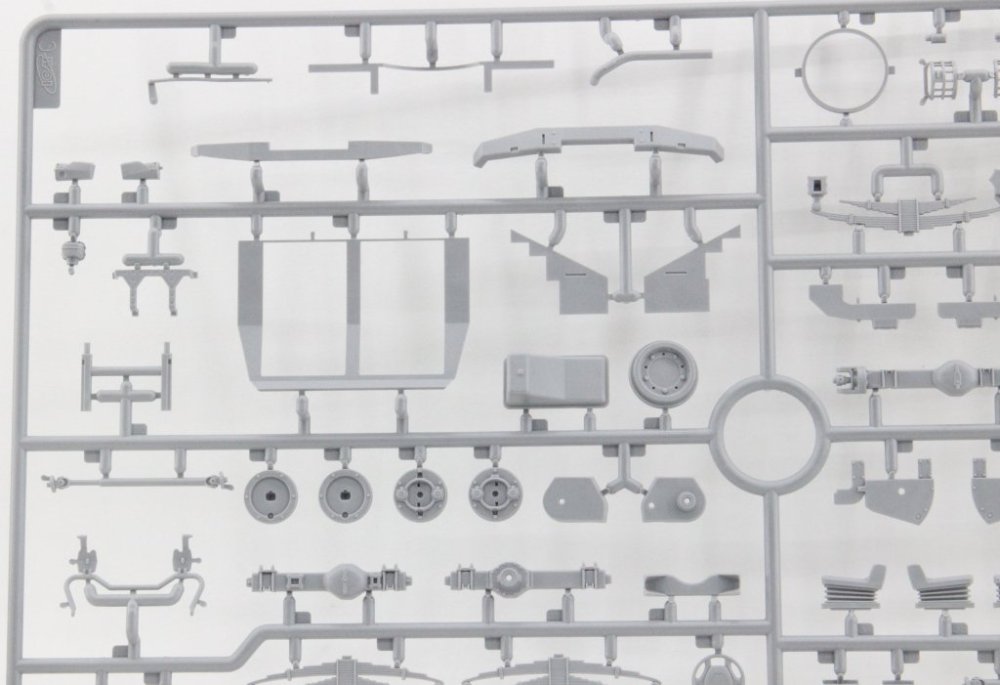
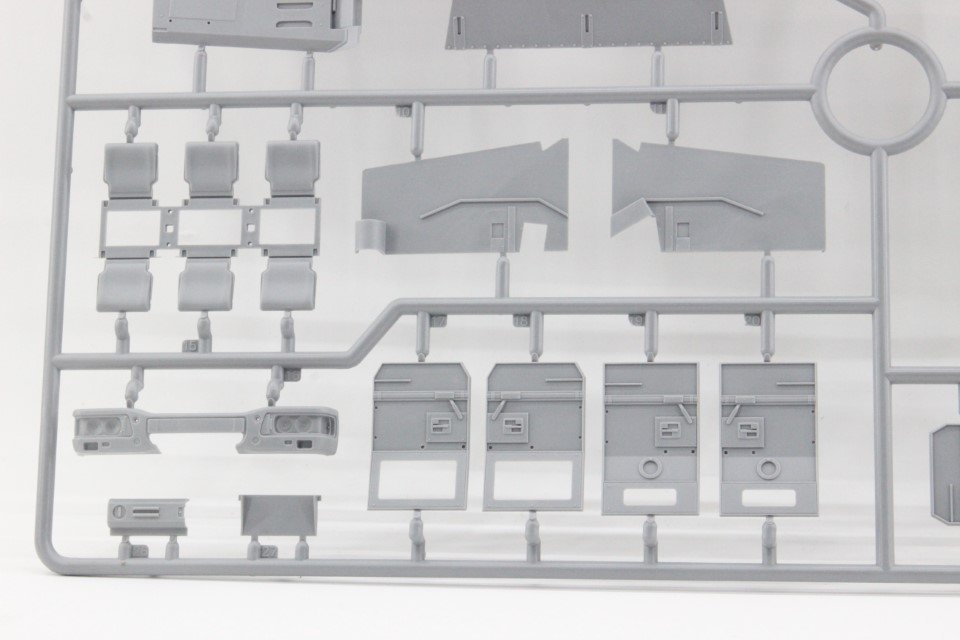
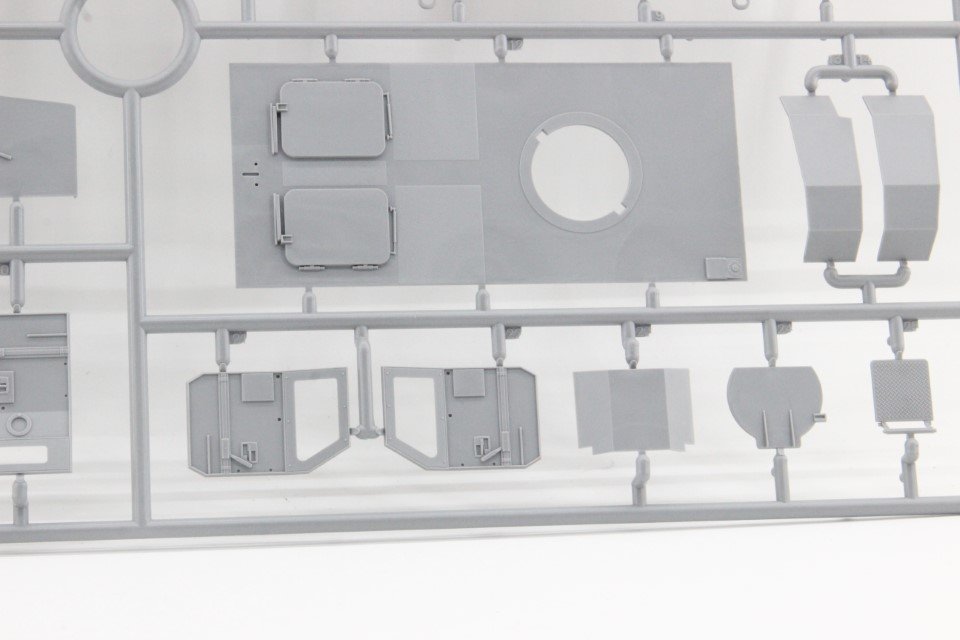
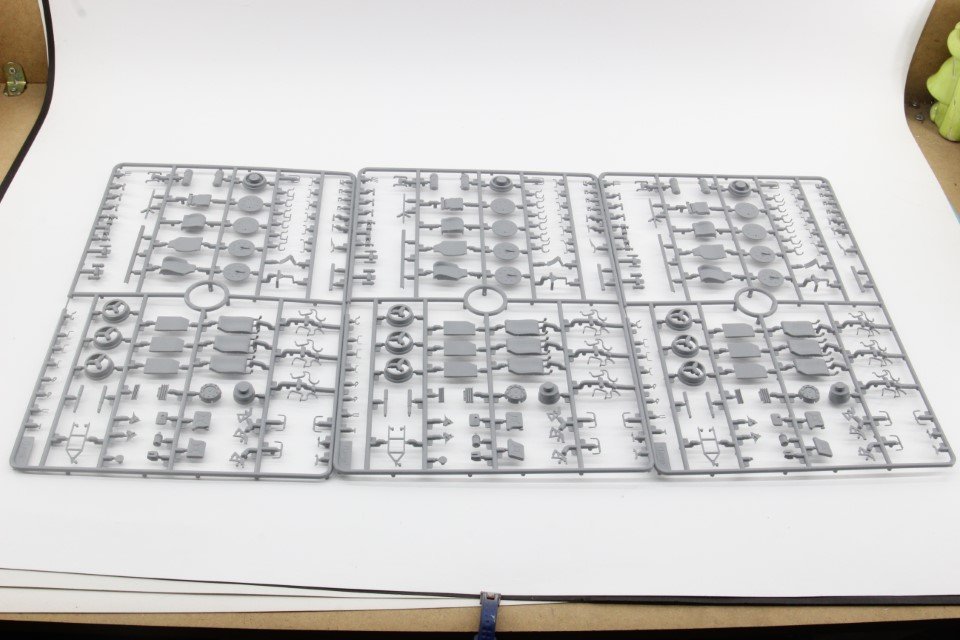
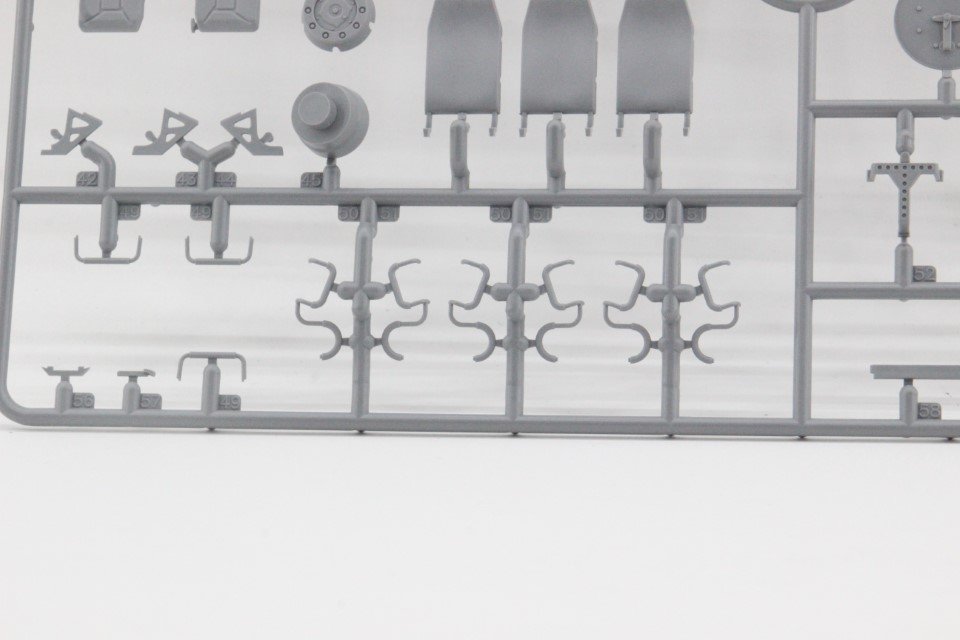
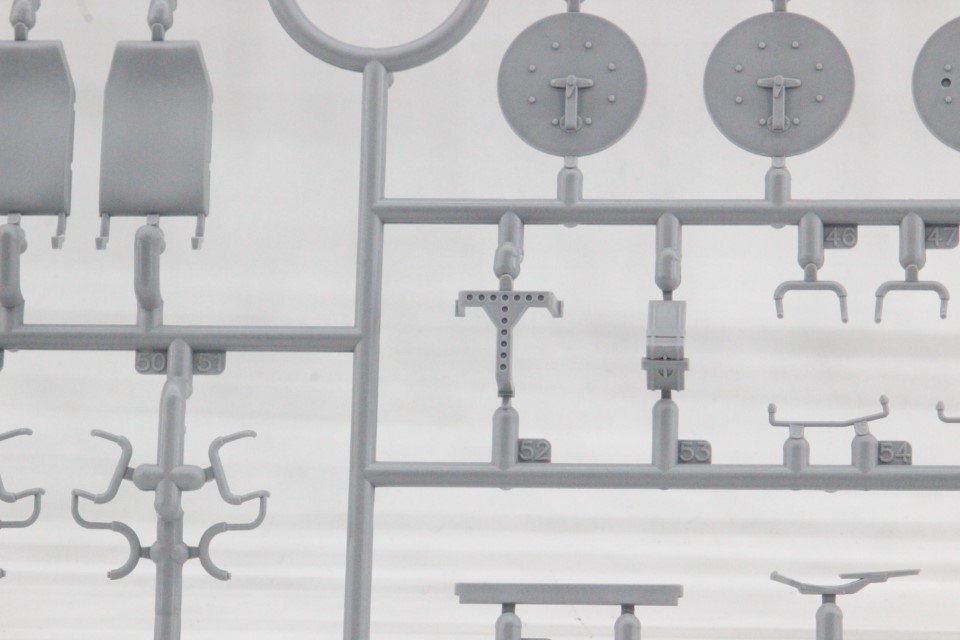
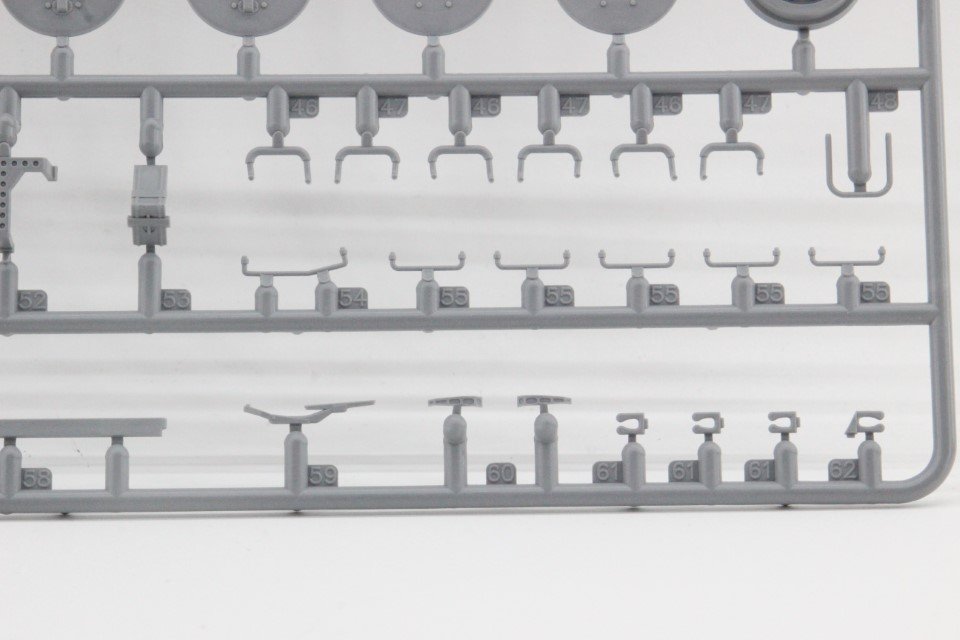
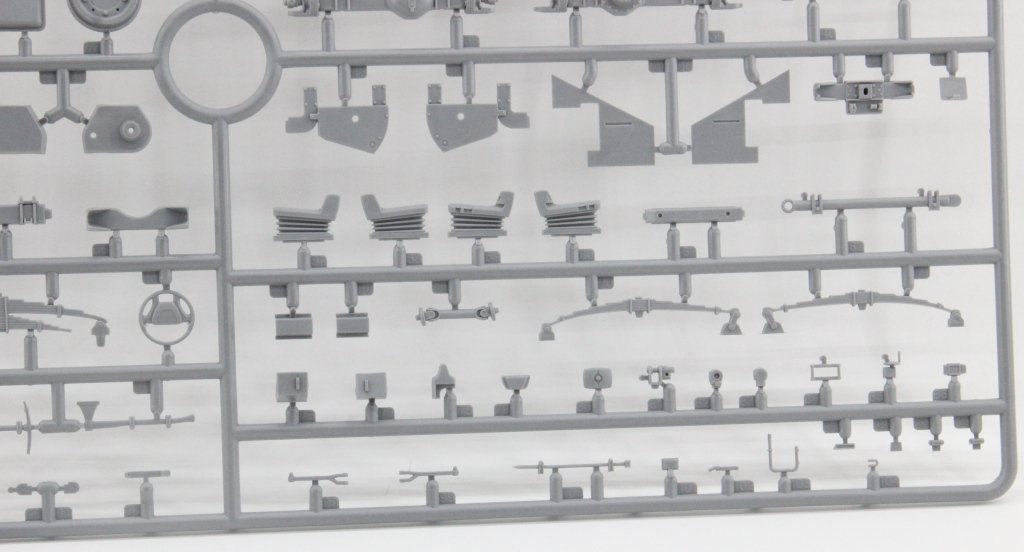
Sprue D - Three identical grids are provided, as they supply all the necessary parts several times during the model assembly. The rims for the wheels, as well as the wheel hubs. Various parts of the passenger seats. It is noteworthy that each seat consists of a set of parts that include, for example, the coverings for the back of the driver and passenger seats, various handles for the rear seats.
Also, note the detail in the various handles to be used on the exterior and interior of the model. Attention and care should be given when removing these parts from the grid, due to their delicate nature.
Some modelers may prefer to replace these handles with metal or copper equivalents
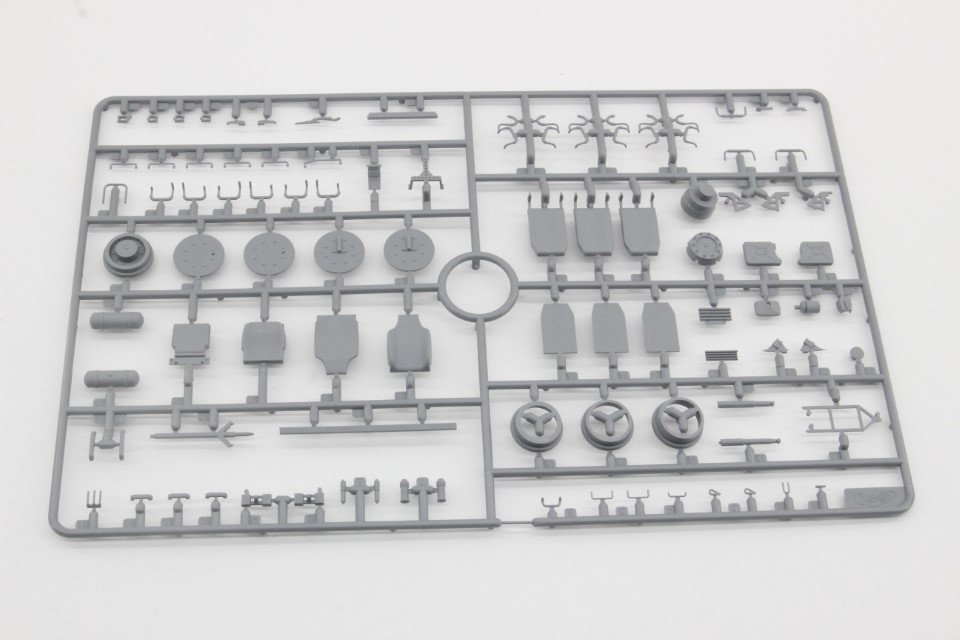
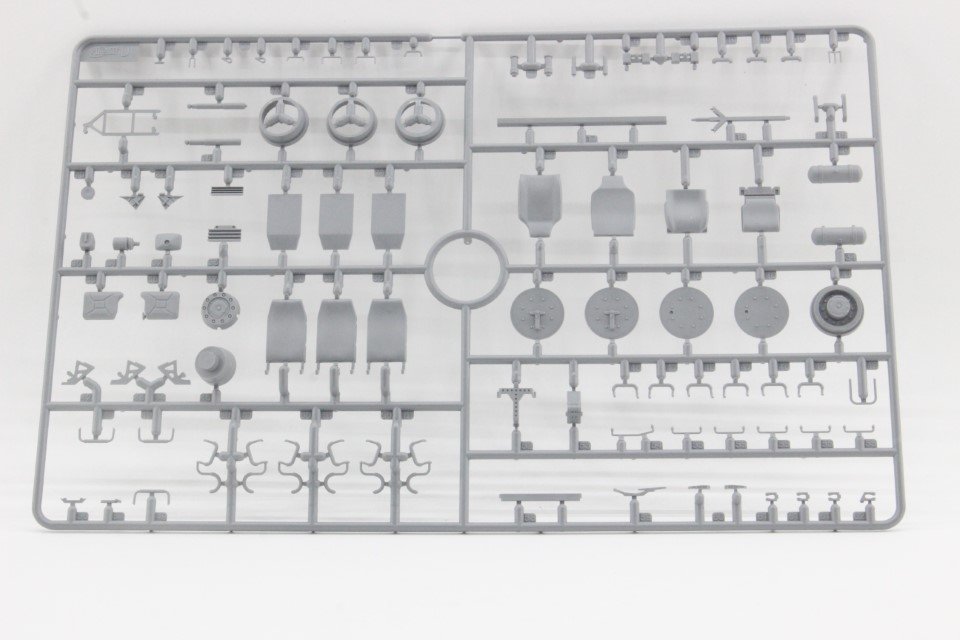
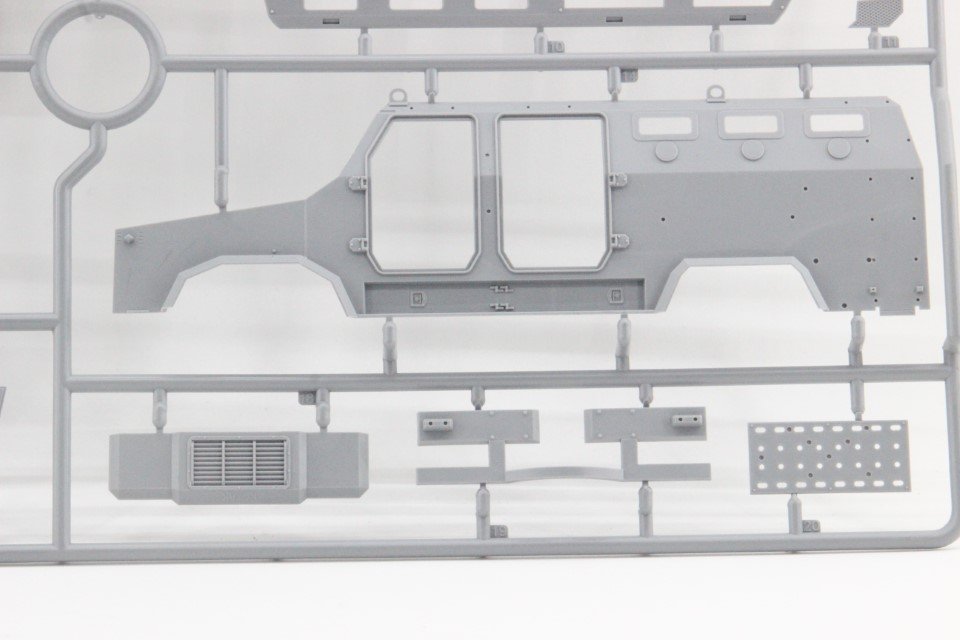
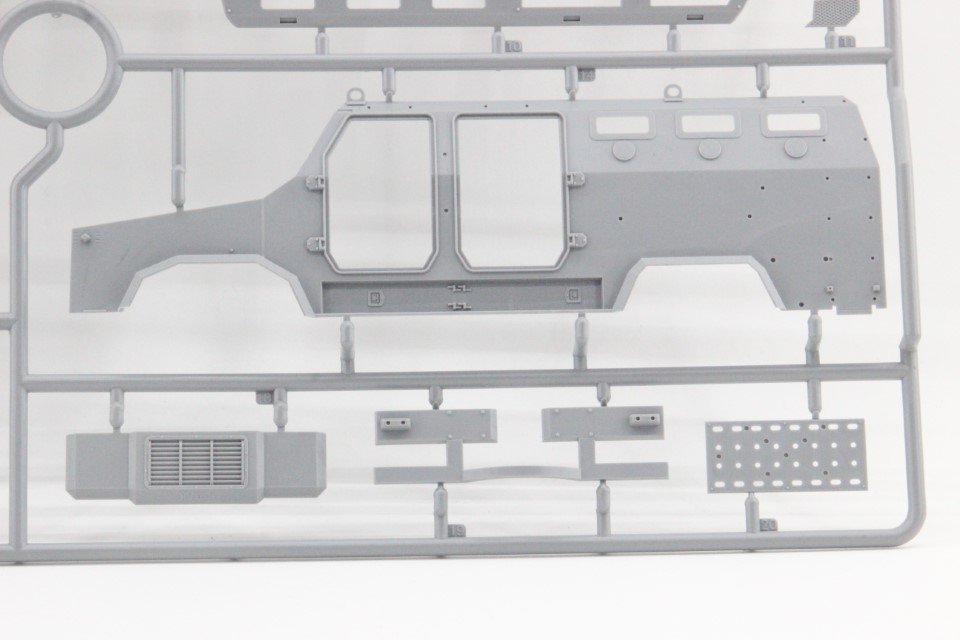
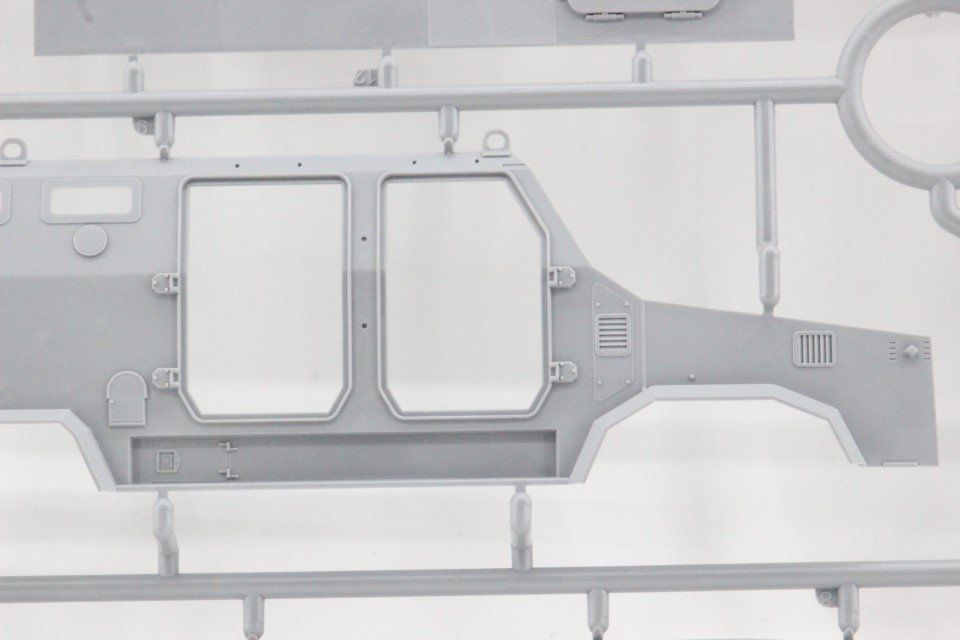
Sprue E - This sprue consists of the parts that make up the outer halves of the side doors. It also includes the rear panel of the model, highlighting the hinges of the rear doors as well as the base for the rear lighting assembly.
Furthermore, there are armour plates that compose the small tower on the roof, where the machine gun, its support, and the ammunition box are situated. The latter are represented in two halves, so proper gluing and alignment should be carefully handled.
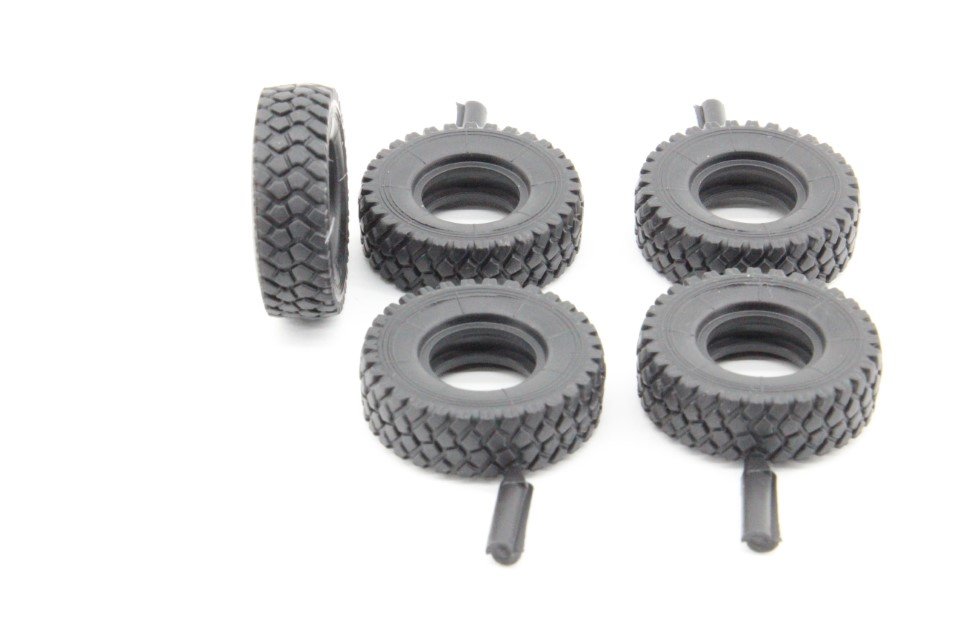
Sprue F - The tires (5 in total) are represented in vinyl and as a single piece. Despite the material used, which personally I'm not a fan of, the detail is adequate, with a good representation of the treads on the surface and the reinforcing veins on the sides of the tires.
Sprue G - Two grids of transparent parts are provided, well-defined and clear. The pieces that make up the door windows and the windshield have a fitting groove that facilitates assembly in their respective areas.
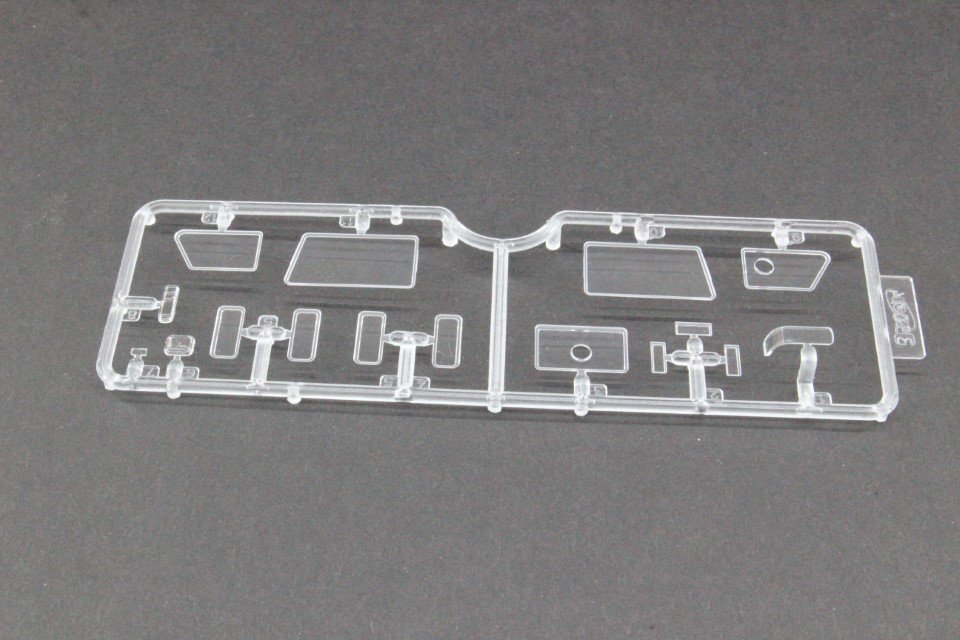
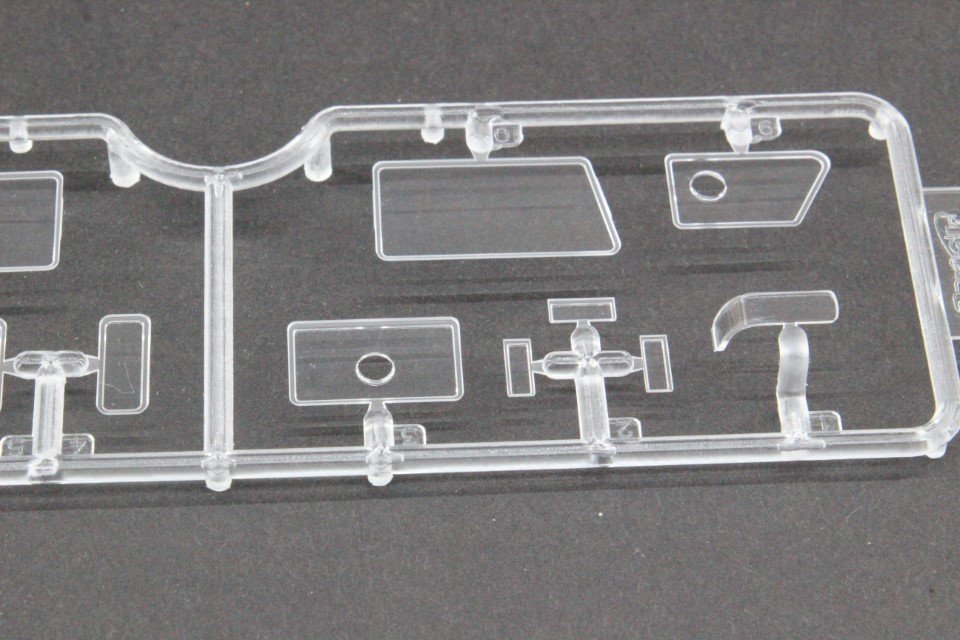
Note: the dark background stands out the colour parts details.
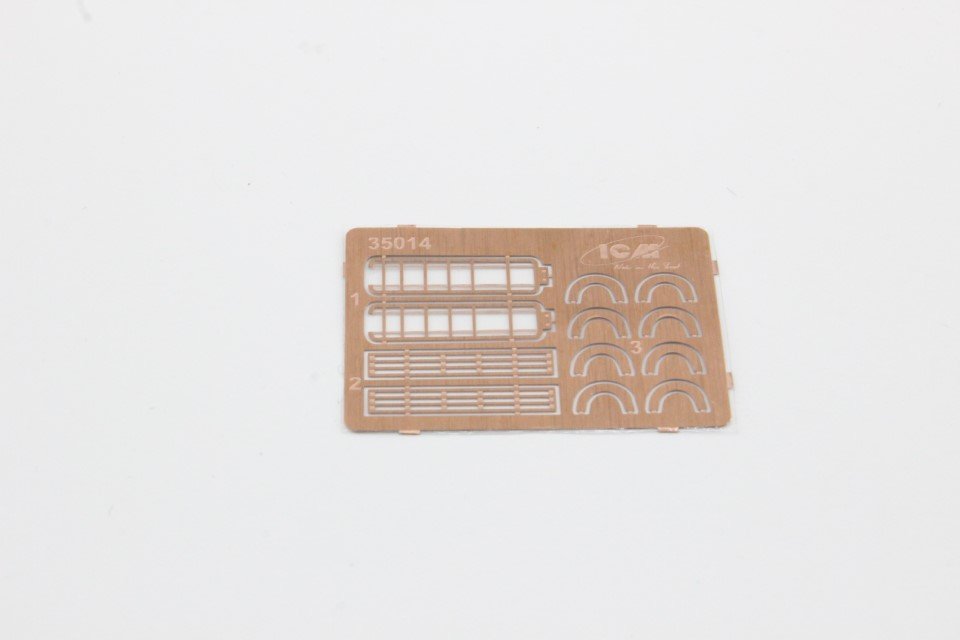
Sprue P: A small sheet of photo-etched engravings accompanies the model and is designed to advantageously replace the detail and scale of the protections for the front side indicators and the protections of the front and rear light clusters.
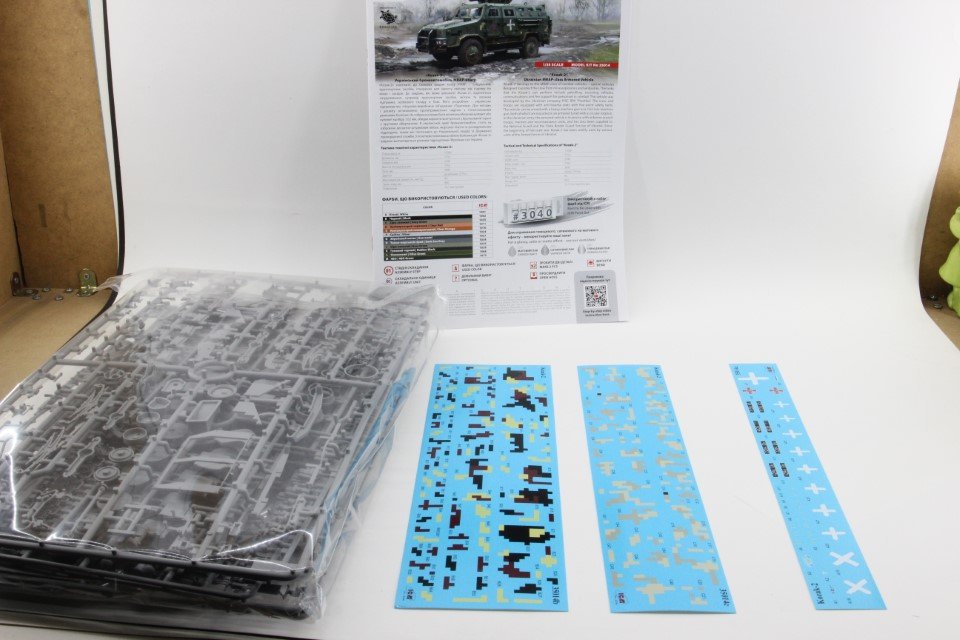
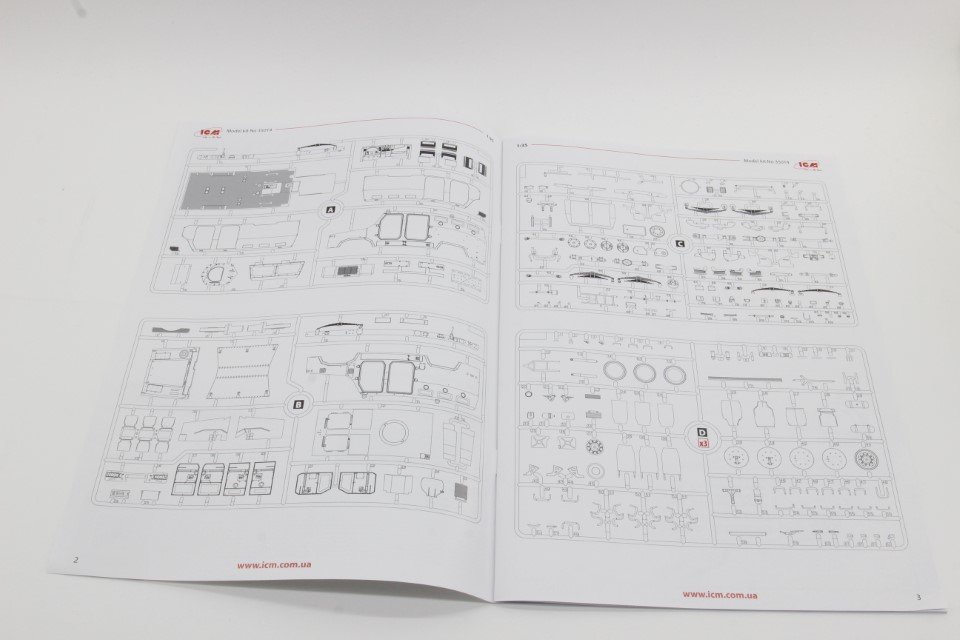
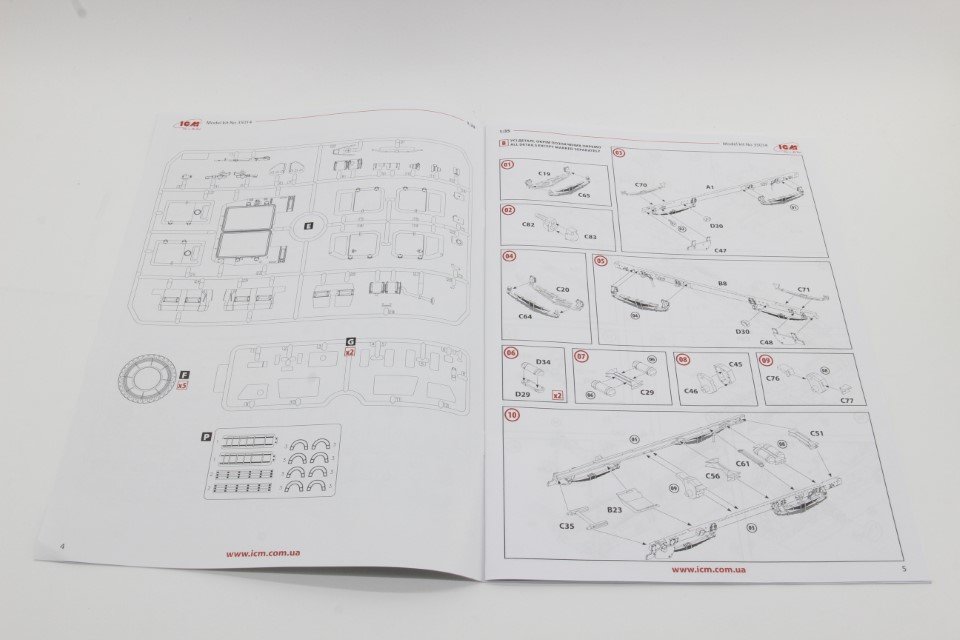
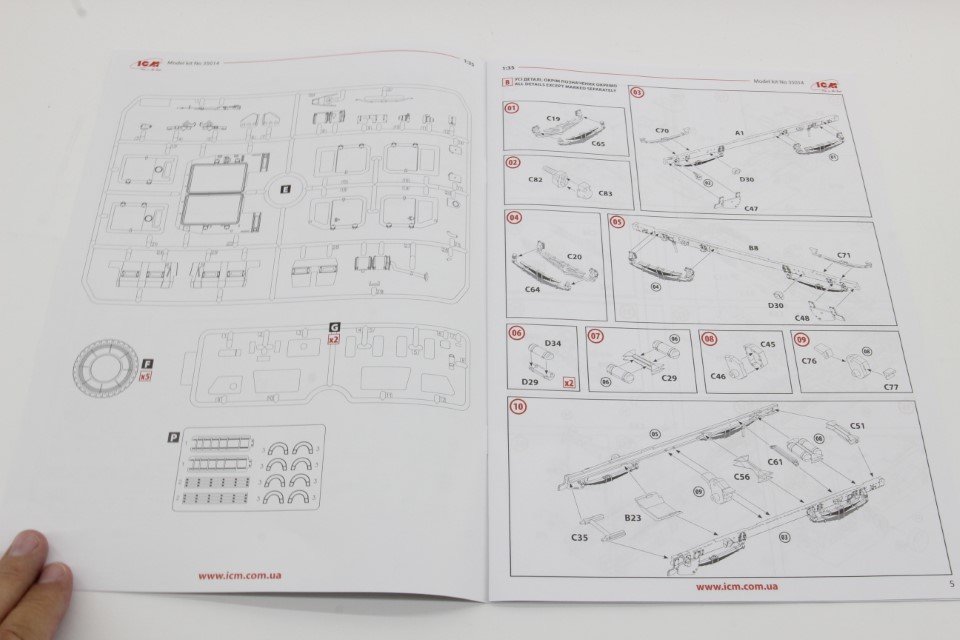
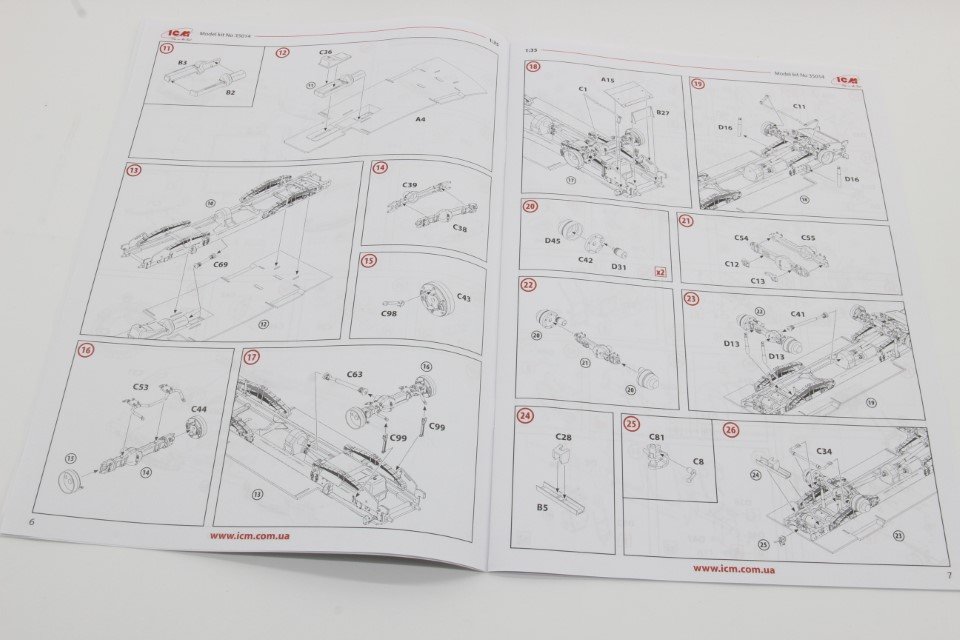
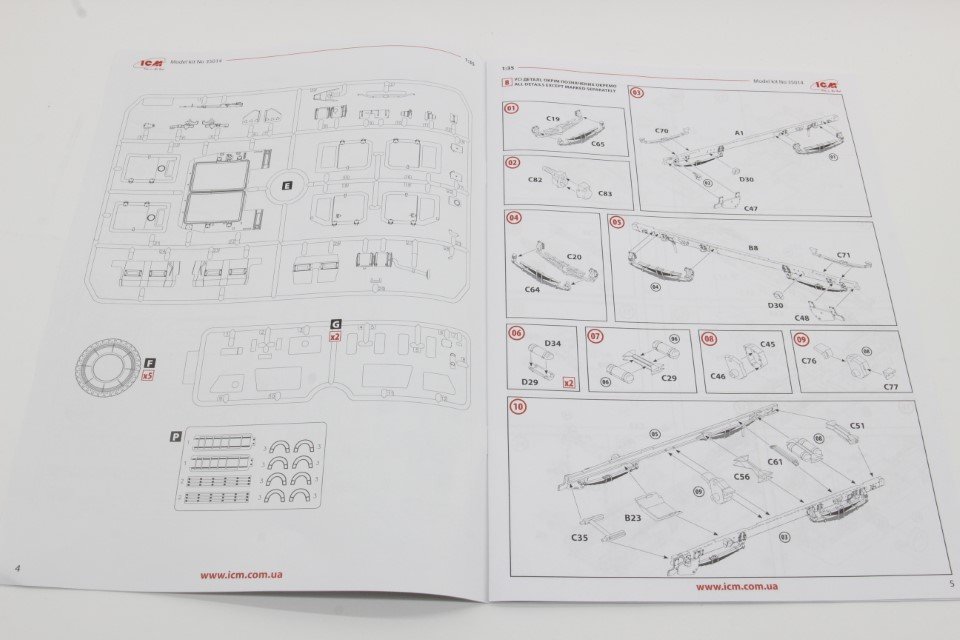
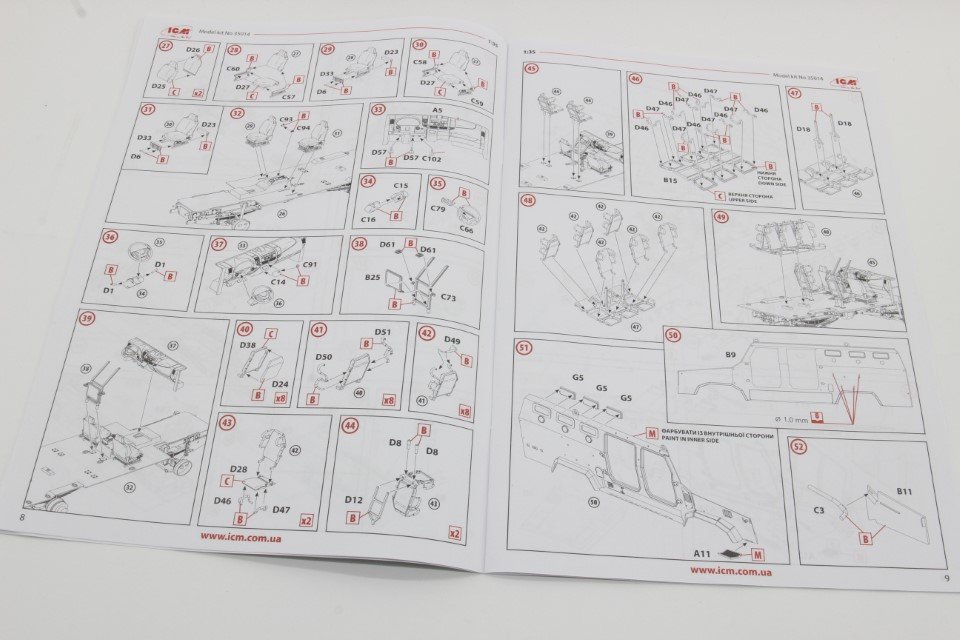
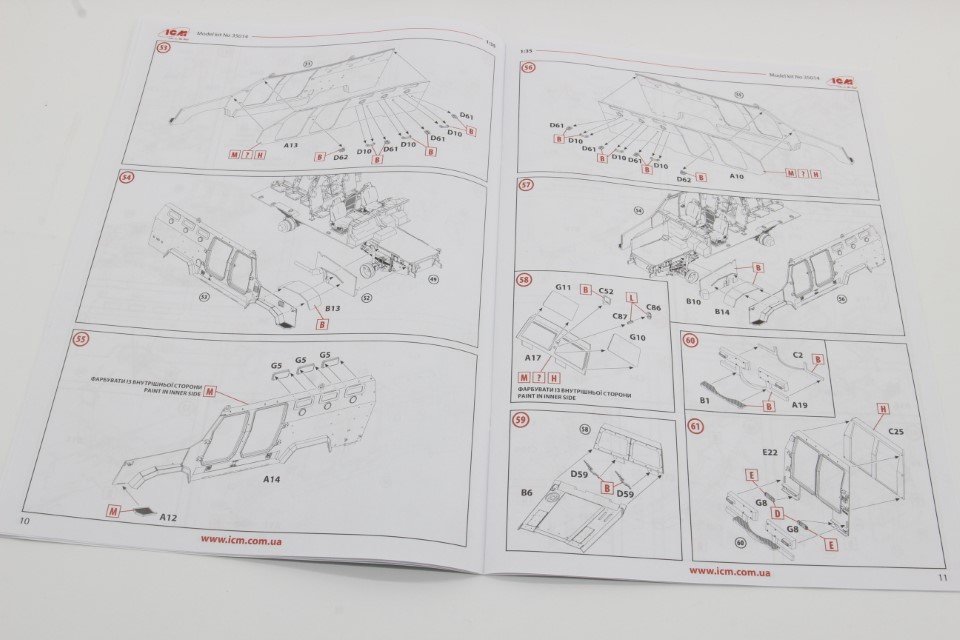
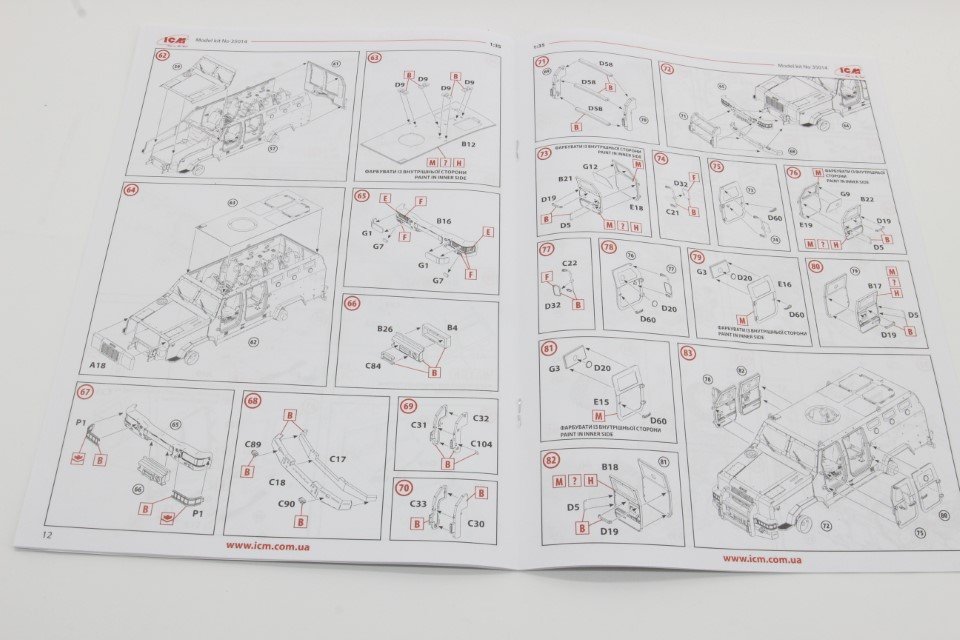
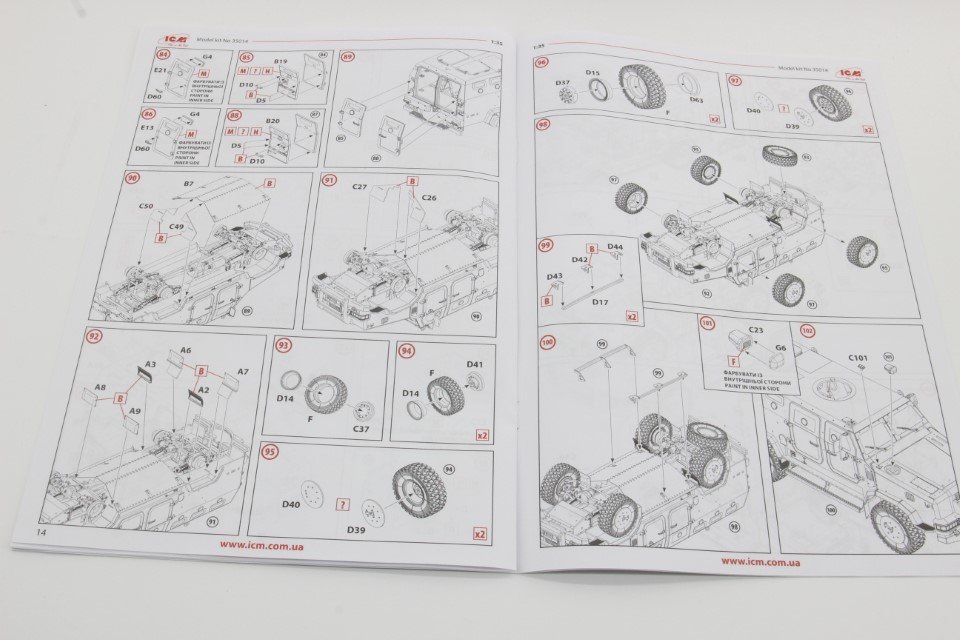
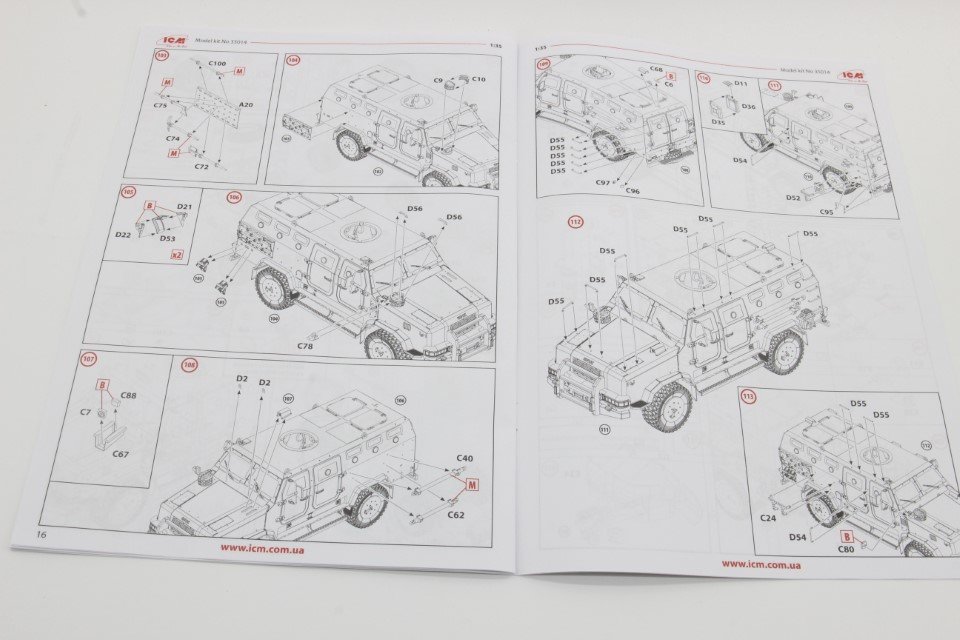
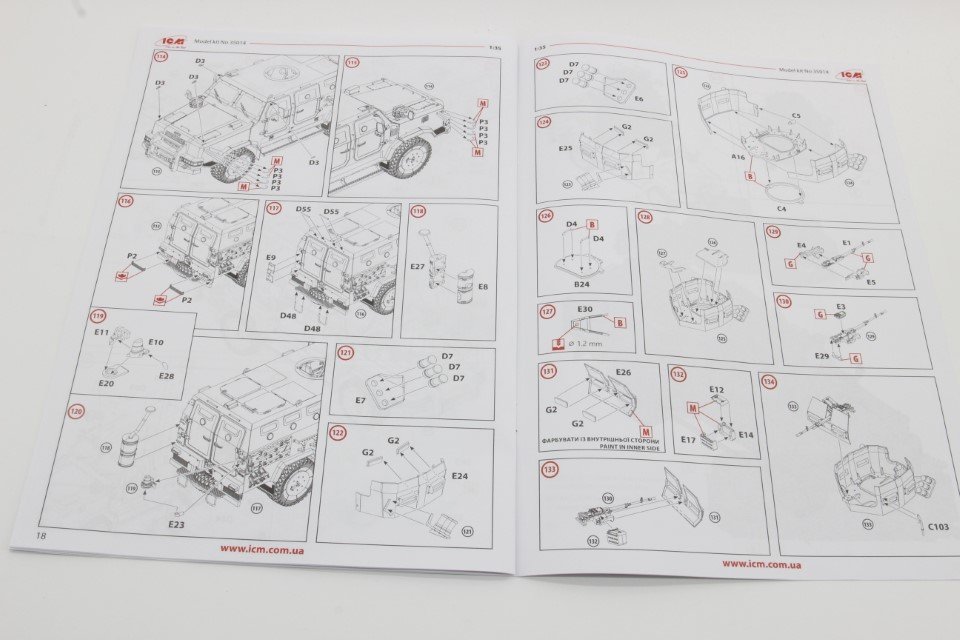
Instructions
The instruction book accompanying it, totaling 24 pages, includes a historical overview of the model, technical and tactical data, and a colour chart that, in this case, only provides references for ICM's range of colours. This is understandable as they're launching their own range; however, finding equivalents for other brands in the market isn't difficult.
The scheme and location of each piece are presented in grid diagrams on the following pages of the instruction book, which is divided into a total of 136 steps/phases of construction. It might seem like a lot, but it's not. Many steps involve the assembly of two pieces, so effectively expanding to this number of stages, in my opinion, makes the process more manageable. It allows for a more relaxed approach and simplifies the assembly process, as we don't have to ponder over the best construction sequence.
Each step is marked with the Grid Letter and the corresponding piece number, a familiar structure for many model brands.
This model indeed presents numerous small yet important details. Therefore, to focus on these small realism notes, this extensive instruction sheet becomes crucial. The drawings are clear and understandable. Whenever necessary, the respective colour letter is referenced to paint the correspondent piece.
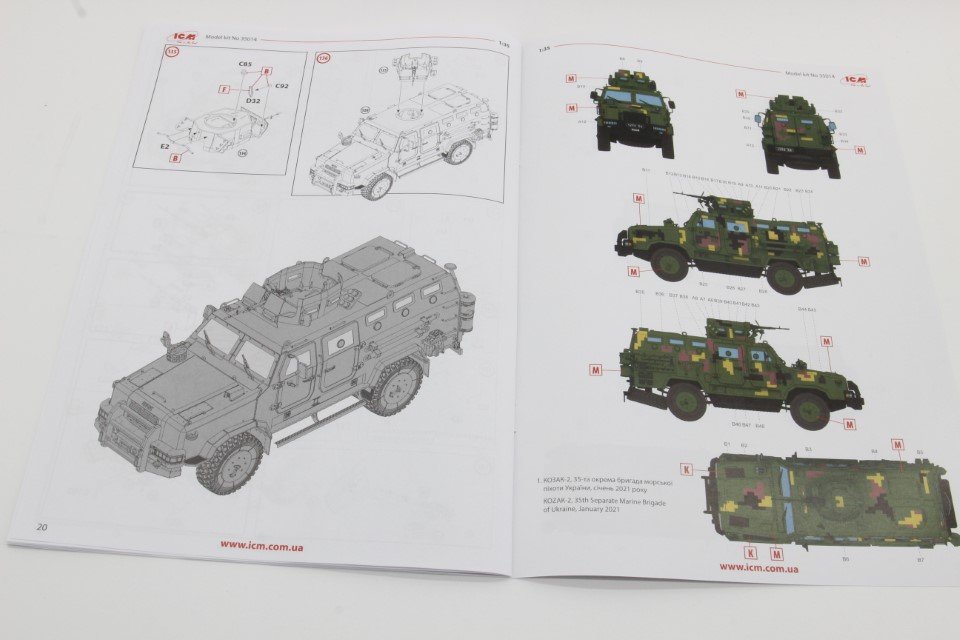
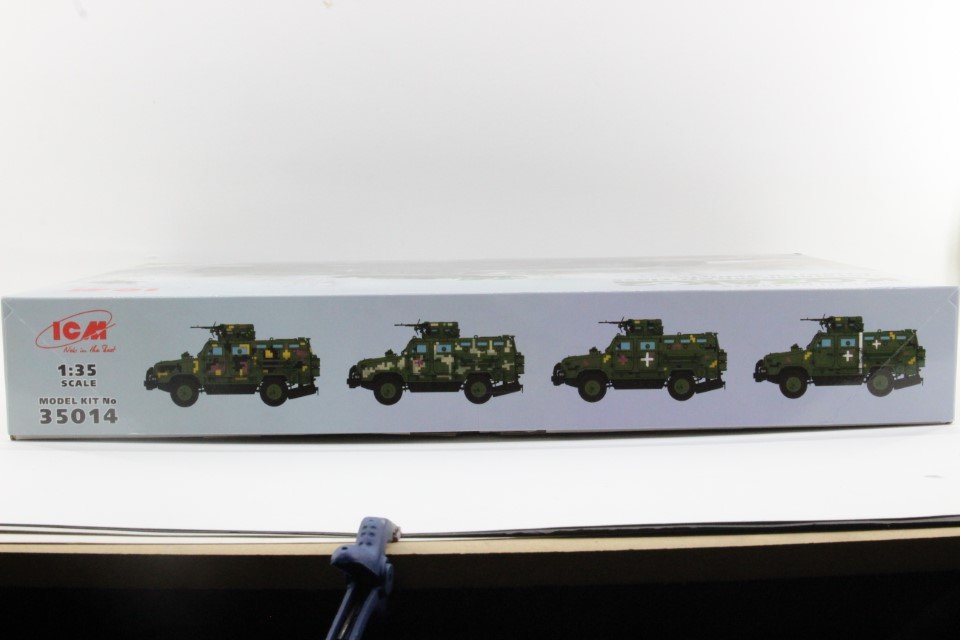
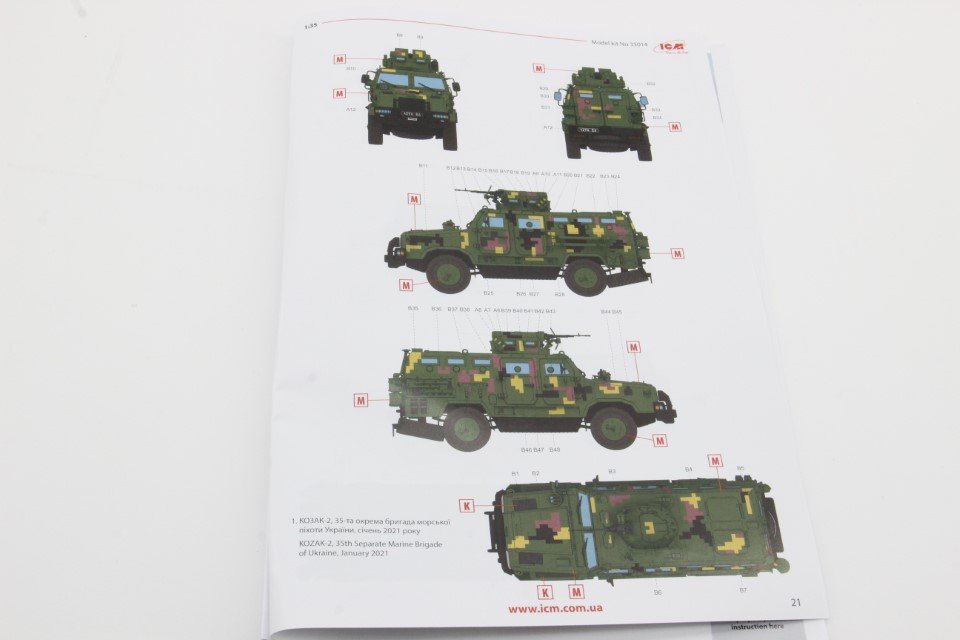
Markings
There are four options on the decal sheet, all with a base coat of green, and various digital camouflages applied over the top. From the box you can build one of the following:
1 - KOZAK-2, 35th Separate Marine Brigade of Ukraine, January 2021
2 - KOZAK-2, 36th Separate Marine Brigade of Ukraine, August 2021
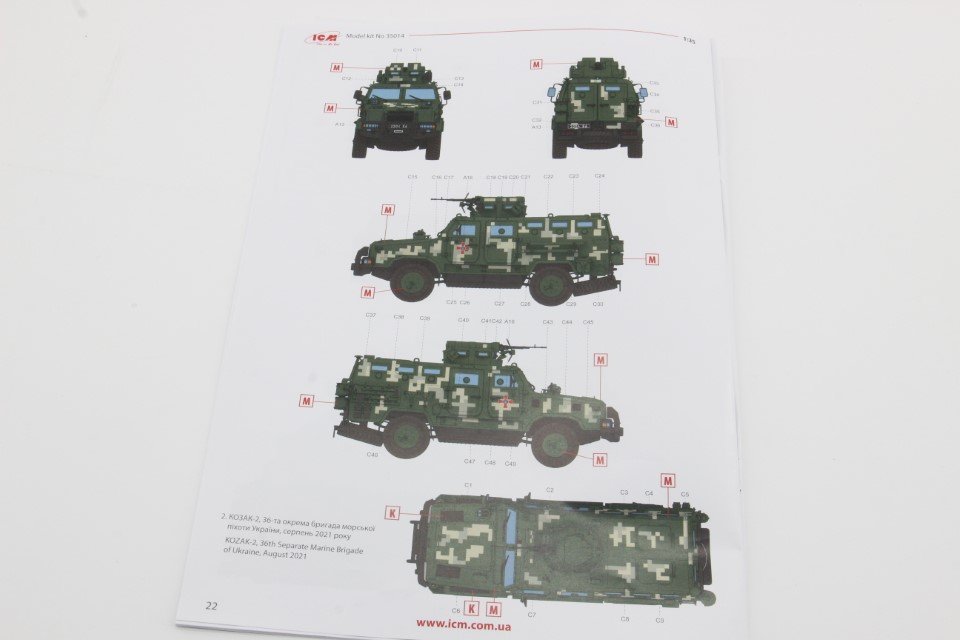
3 - KOZAK-2, reconnaissance unit of the Armed Forces of Ukraine, November 2022
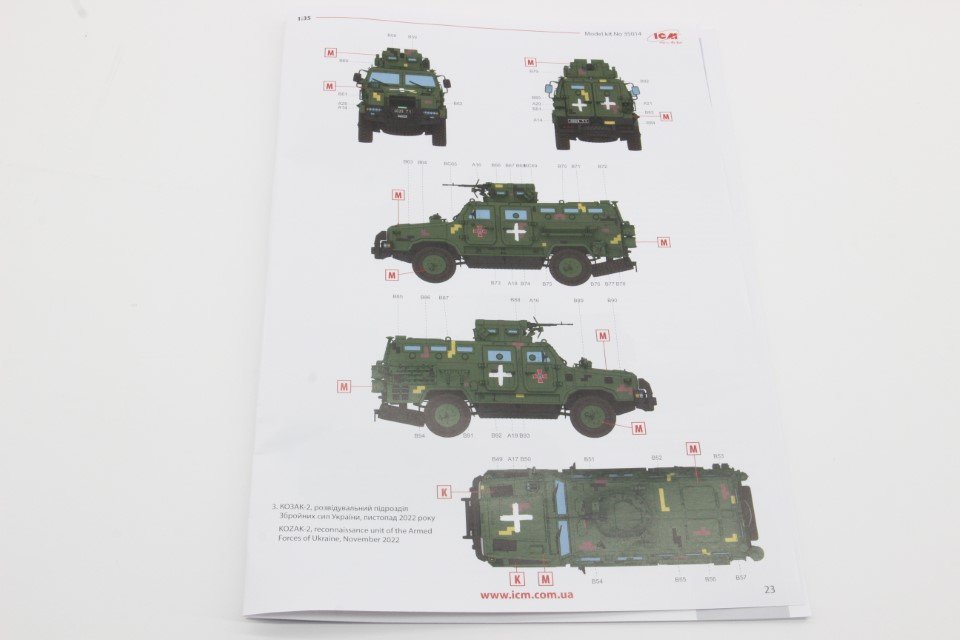
4 - KOZAK-2, an unknown unit of the Armed Forces of Ukraine, autumn 2022
.JPG.7f43d5e5fd097598a066599f45e4ede9.JPG)
Again, all diagrams refer to the correspondent colour letter listed on the first page.
So this brings this review to the last item of the box:
Decals
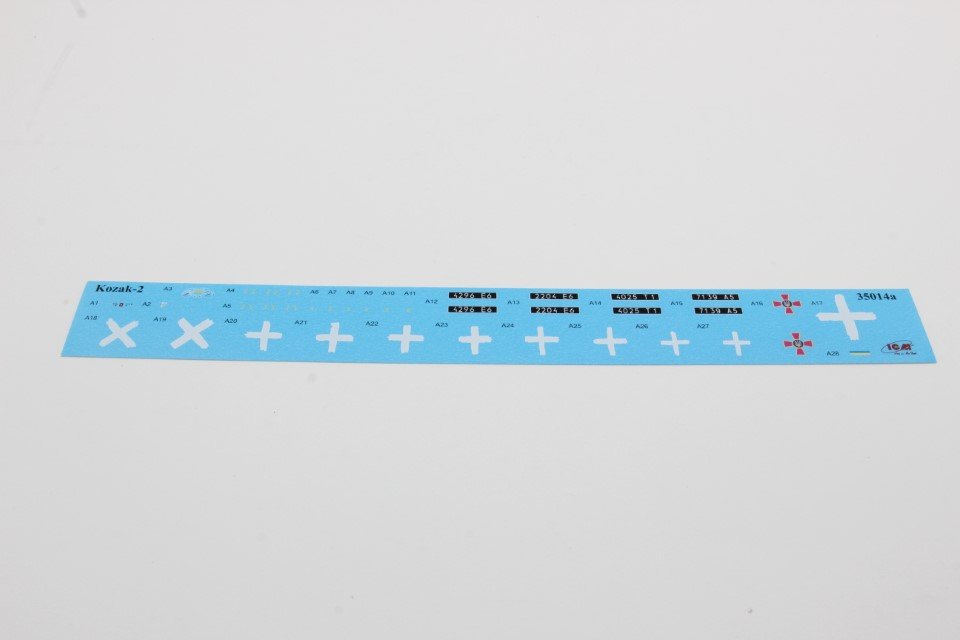
This set provides us with three decals sheets.

Decal sheet A – supply us with all common marks for all marking options, as license plates, service marking, national marking and dashboard instruments and interior knobs and switches. Regarding this last one decals, no information is provided, nevertheless, it’s intuitive where it should go.
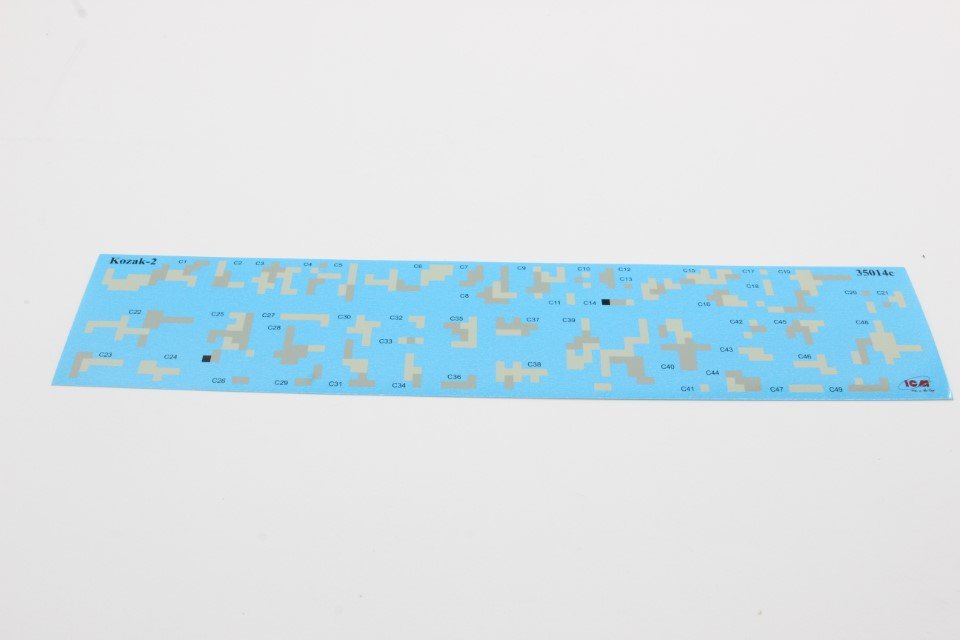
Decal Sheet B – The larger of the three sheets, provides a set of several digital geometric camouflage Decals to apply on top of the common green base colour, shared by all versions.
Some are one in red brow, others sand colour and some with a darker shade of green and they all are used for the camouflage for three decoration options.
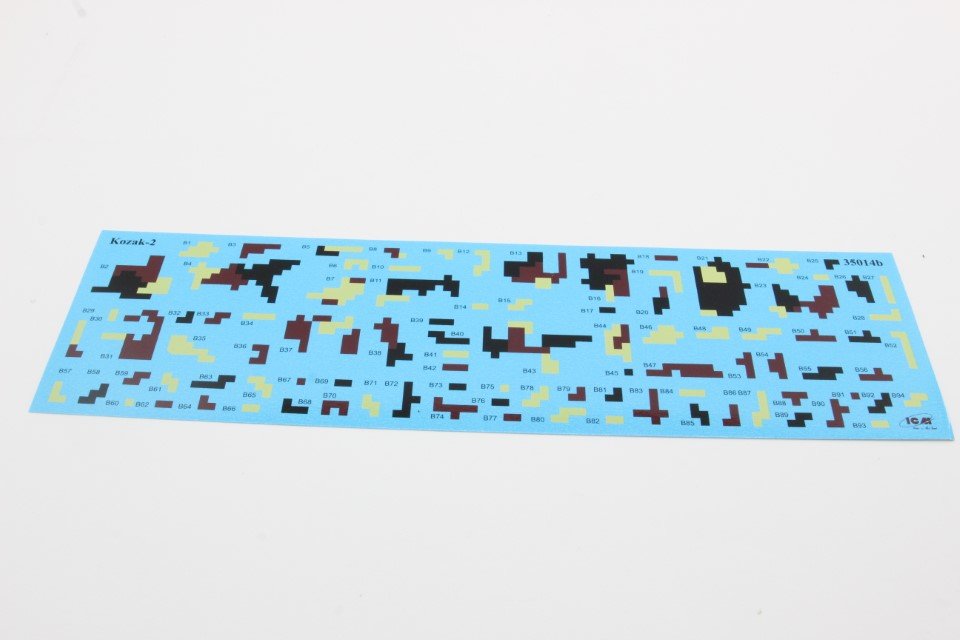
Decal Sheet C – this sheet is destined to the digital pattern, in sand colour shades, of the fourth option.
This is a method to facilitate a process that would otherwise complicate the completion and finishing of this model. The most discerning modeler will certainly paint all the digital spots of the camouflage.
Myself as a modeller I appreciate this solution. Will speed up the model decoration and conclusion. It is really a plus.
Conclusion
These lines are always difficult to express.
I enjoy and like this model. The injection parts are clean and detailed as an injection mould allow us.
The construction will not bring any issue, nevertheless some care is needed to handle and assemble all small and fragile parts, but in the end you will in your collection a very attractive and unique model of a modern vehicle.
It’s suited to novice and advance modellers due to its simplicity of assembly and permits super detailing, also showcase the detailed interior, thanks to the possibility of mounting the side and rear doors in the open position.
A must for all fans of modern military vehicle in the main scale (1:35)
The possibility to use decals as digital camouflage patches is a very good idea and will definitively motivate any modeller to overcame the model conclusion.
Highly Recommended !
My sincere thanks to ICM for the review sample

-
 2
2
-
 2
2
-
-
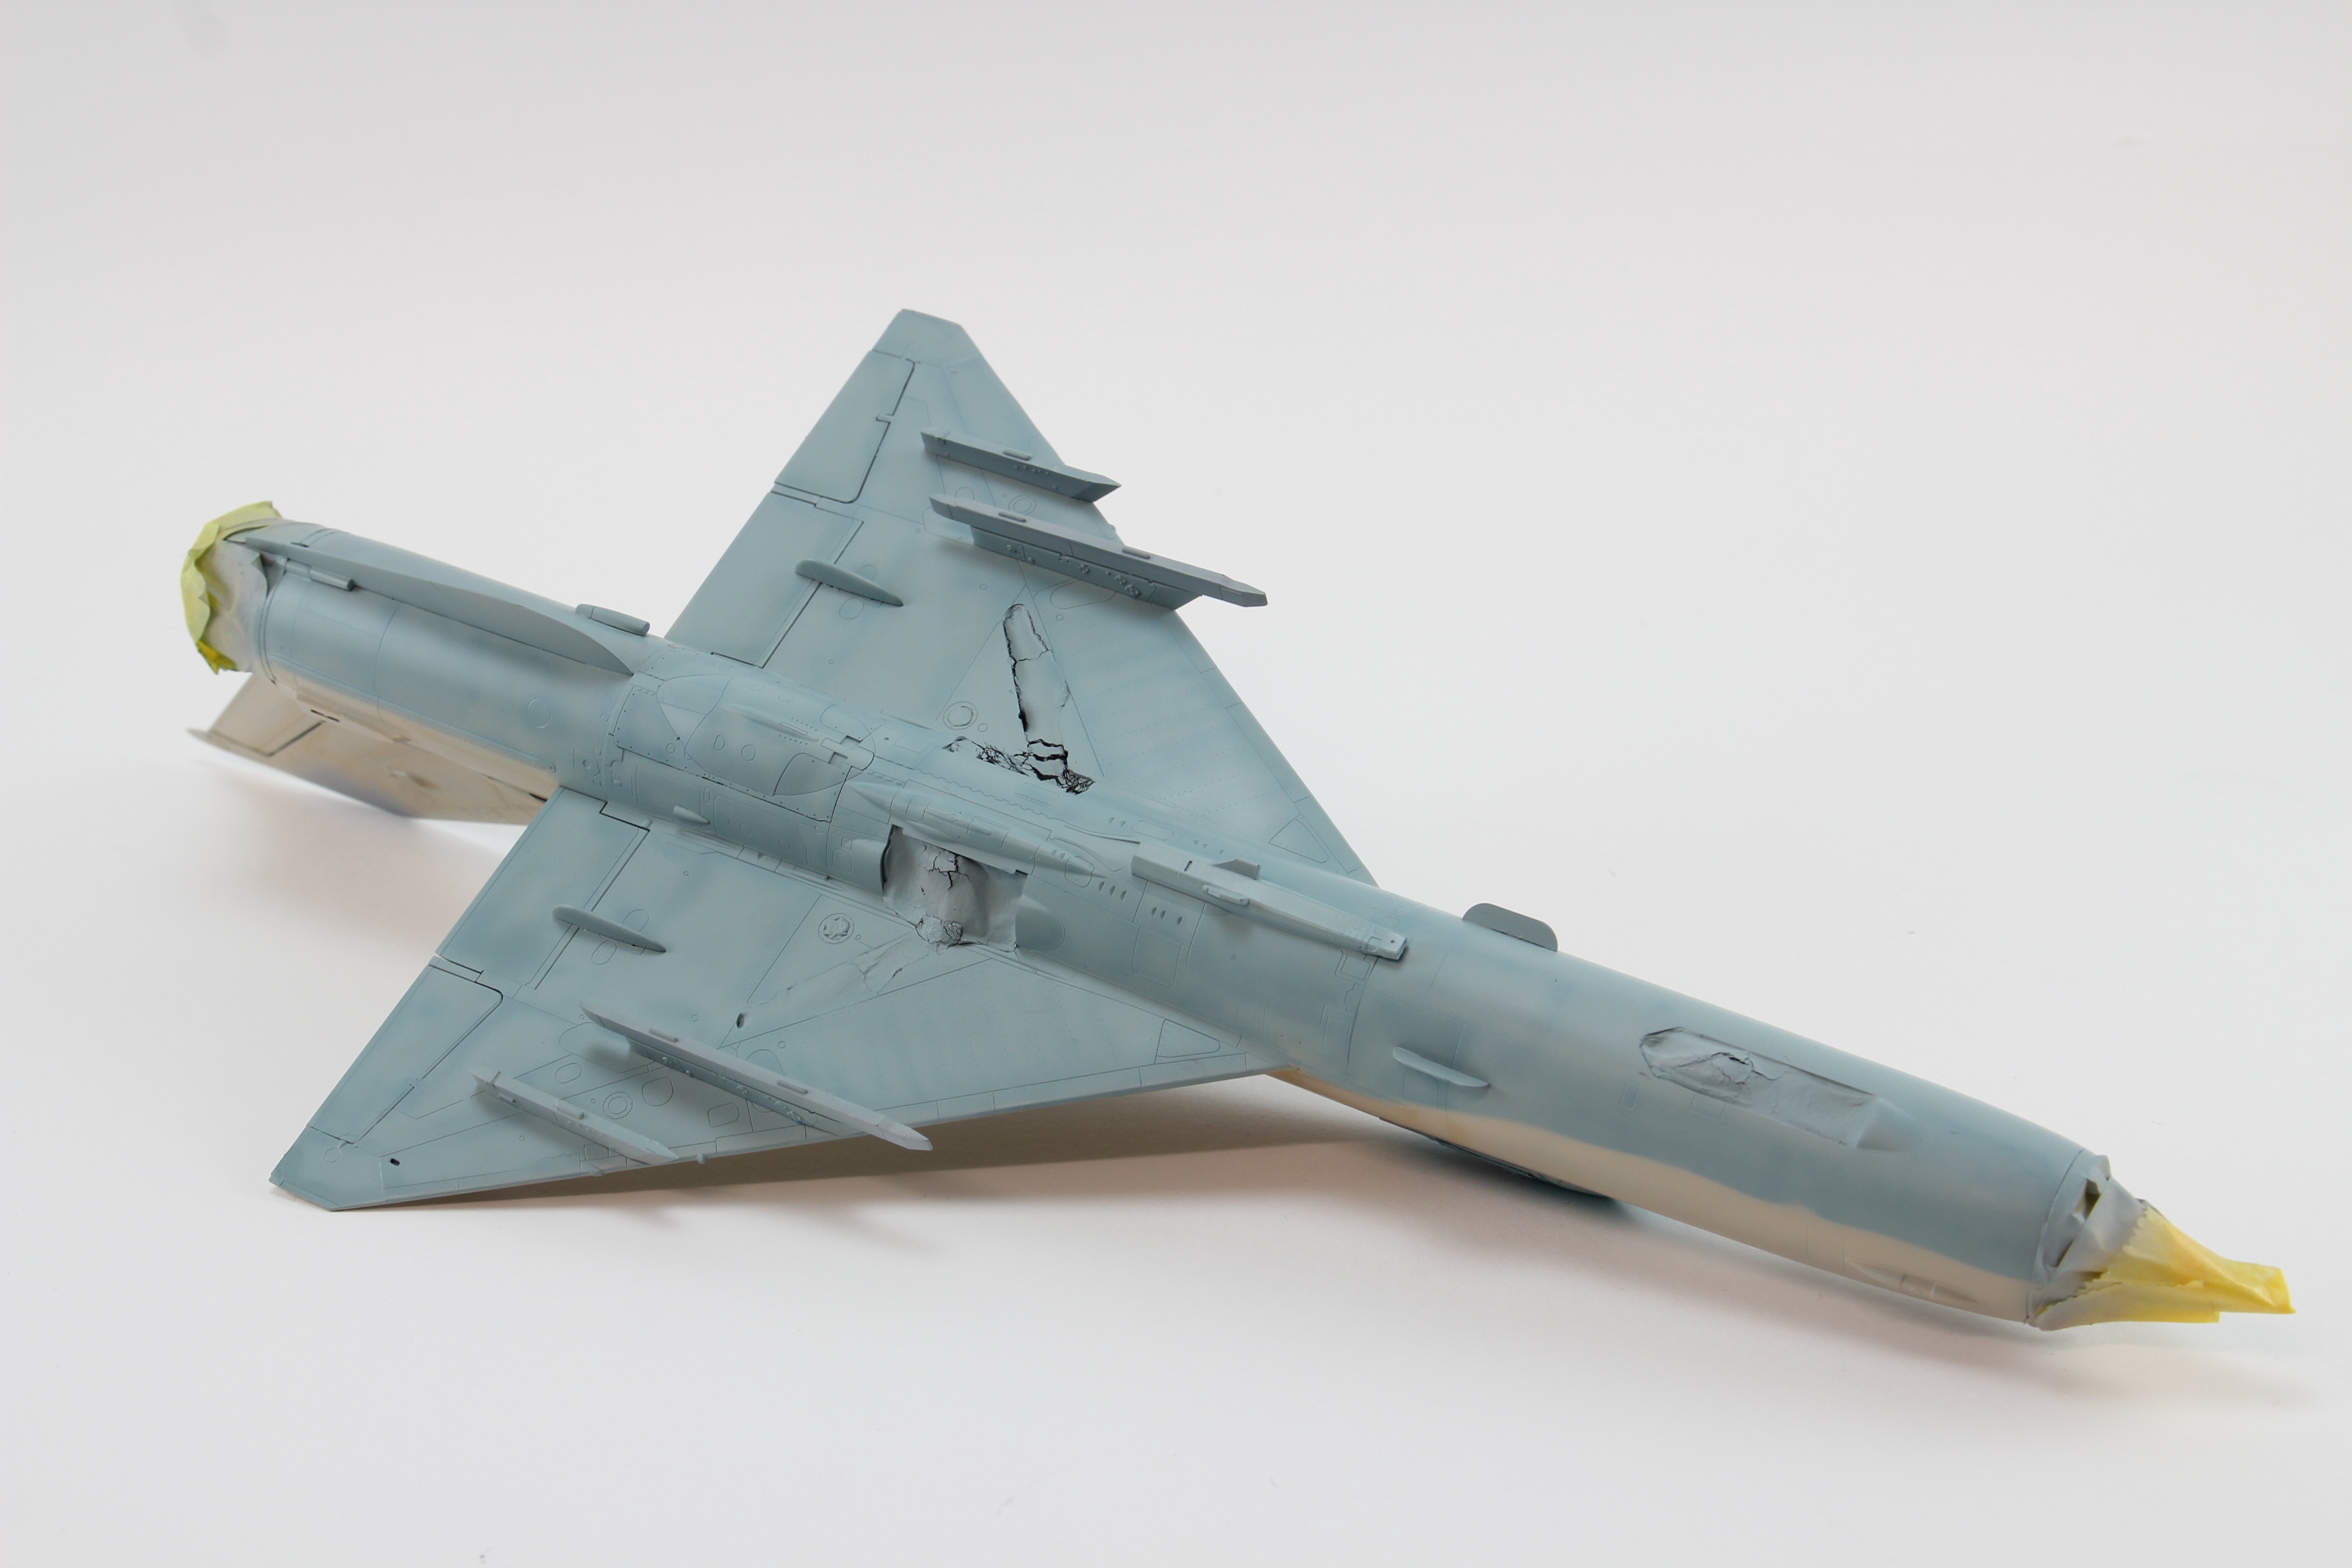
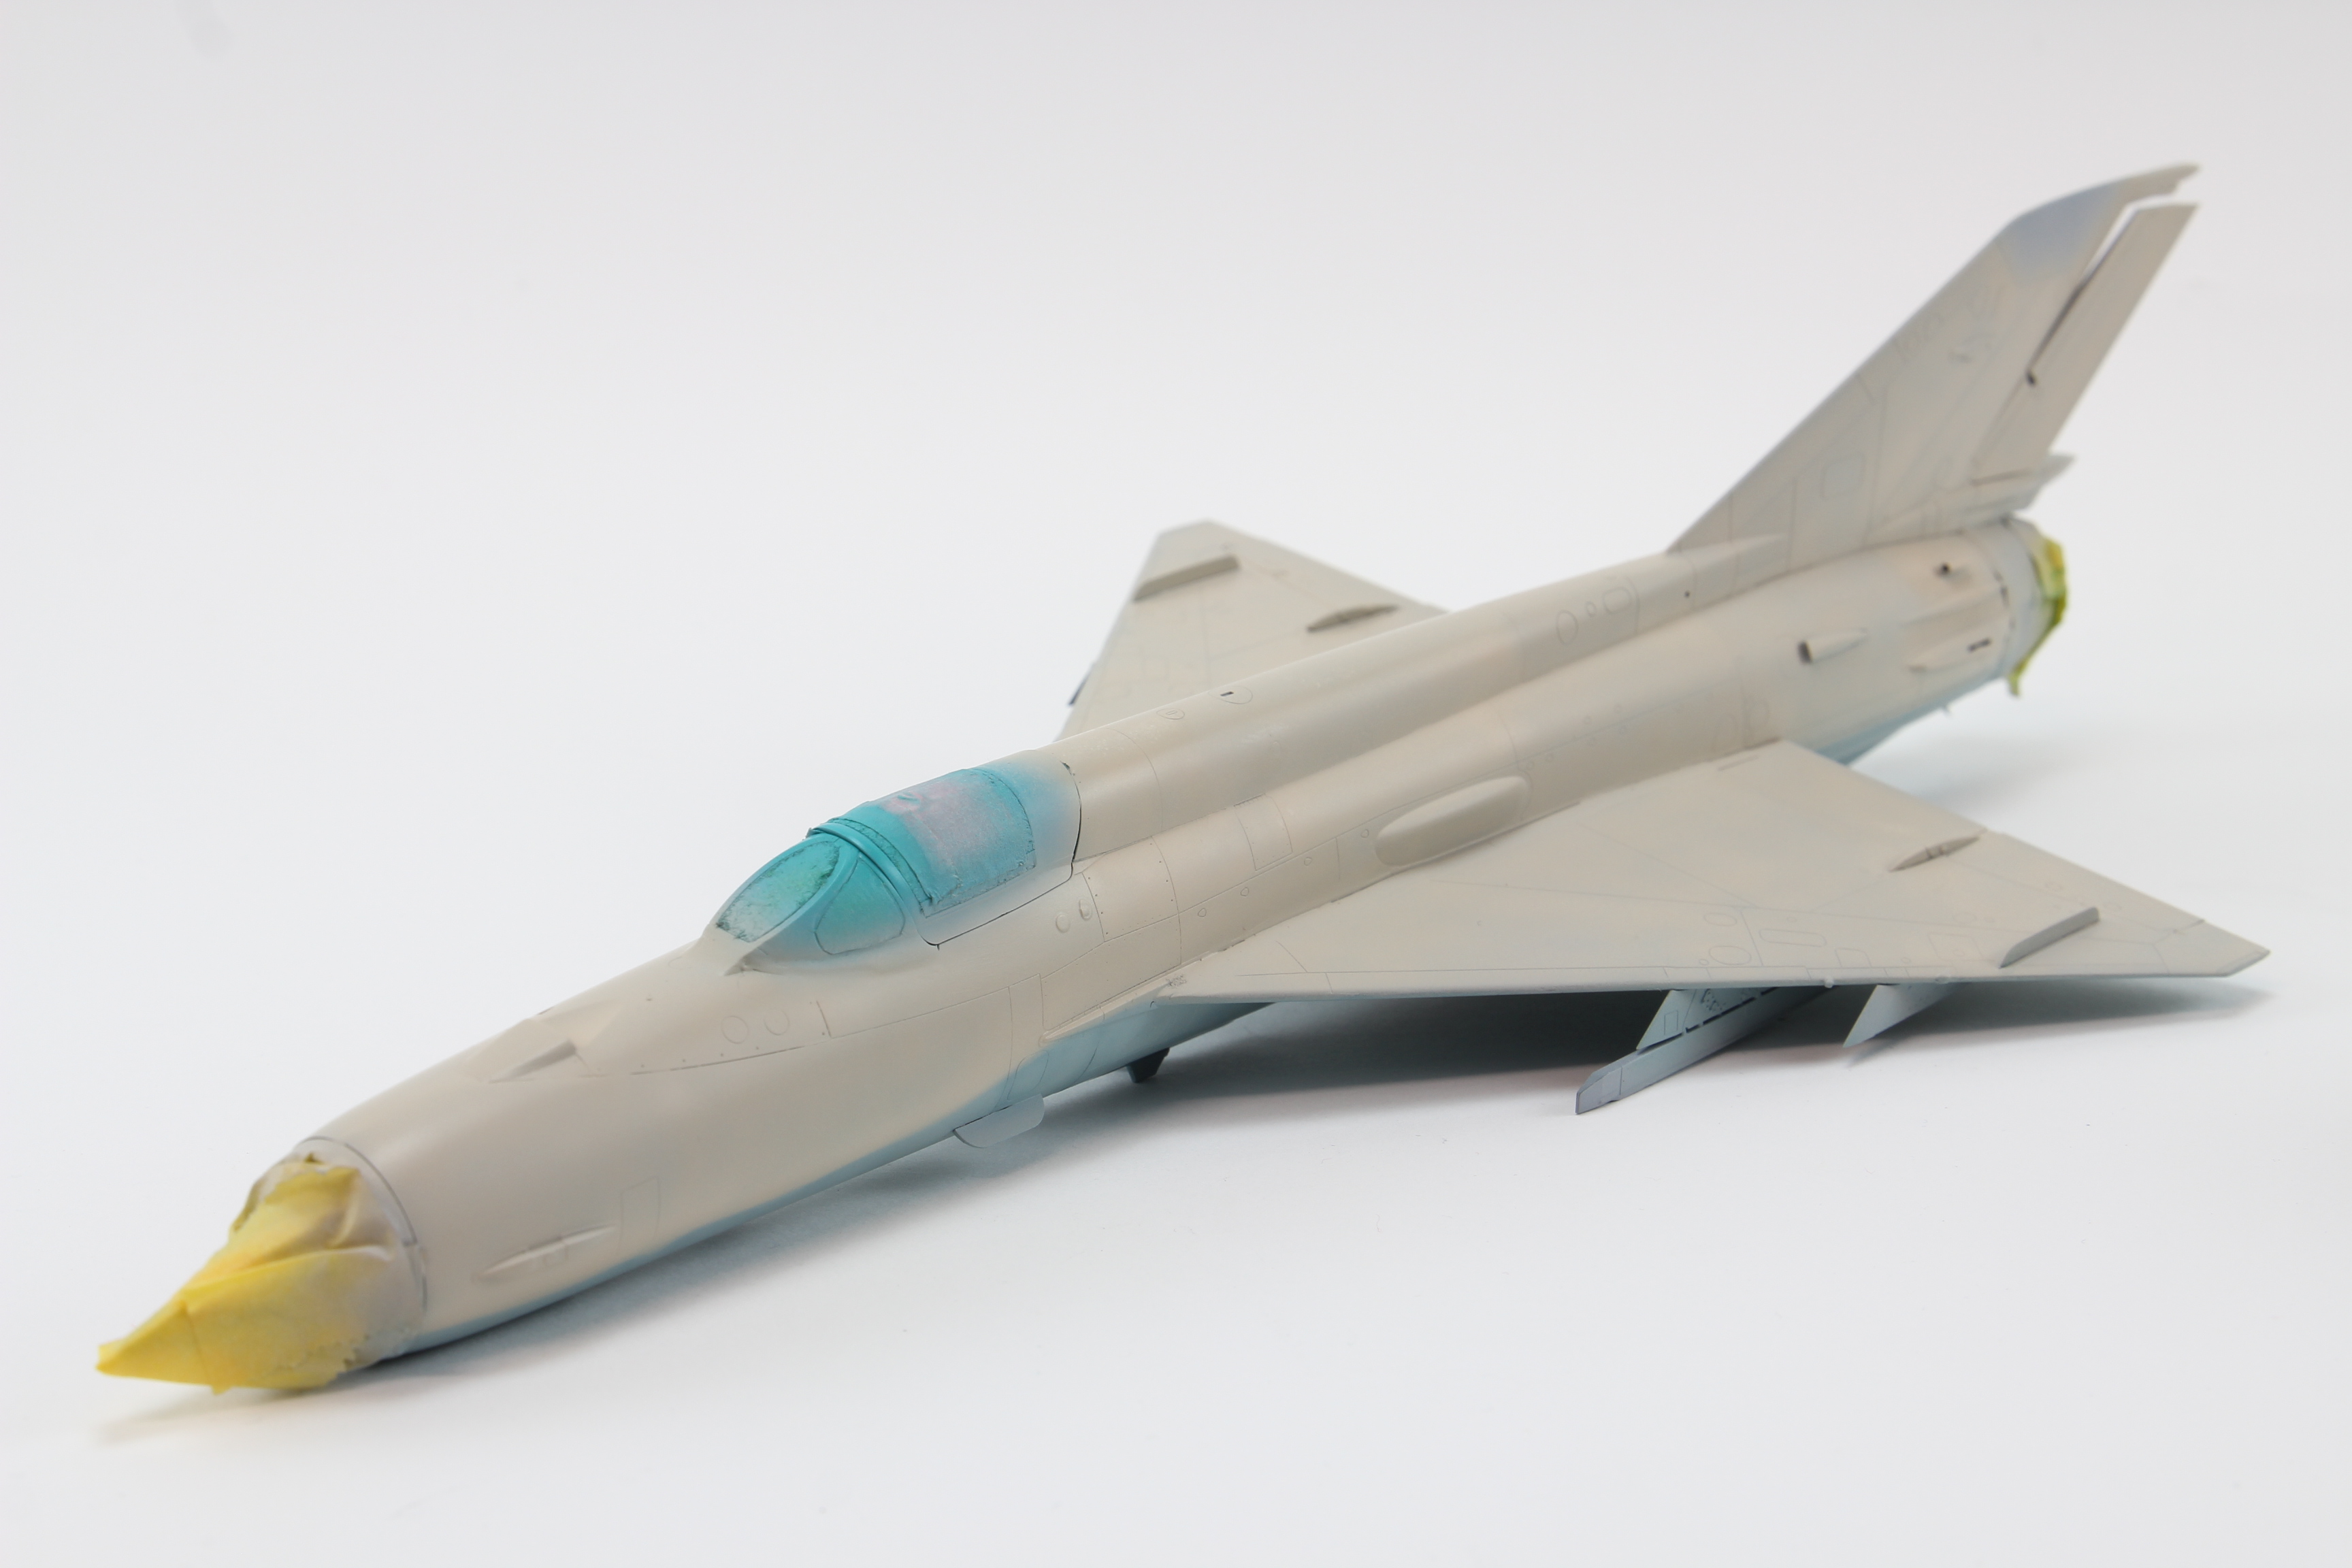
Hi Everyone,
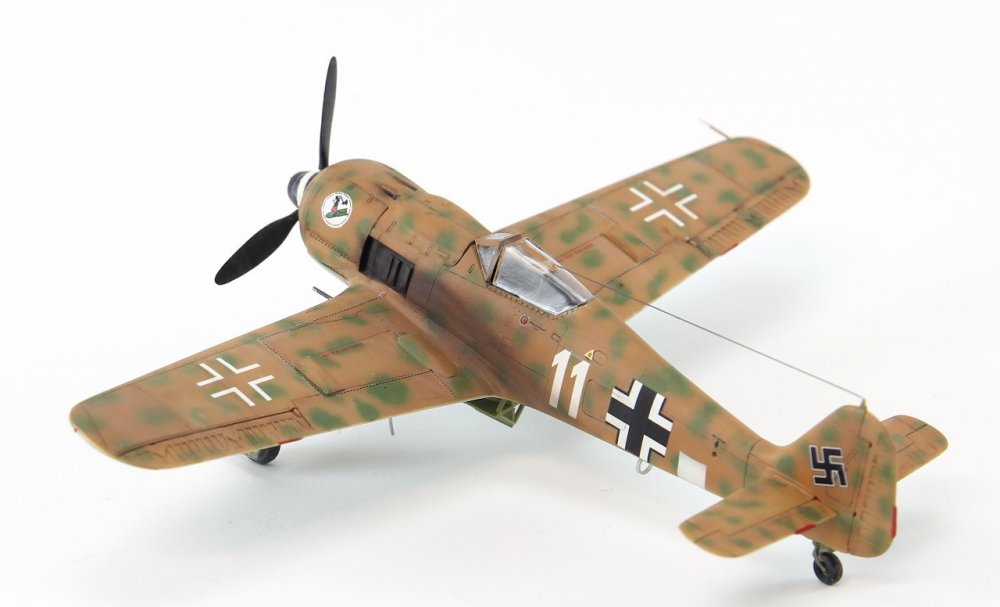
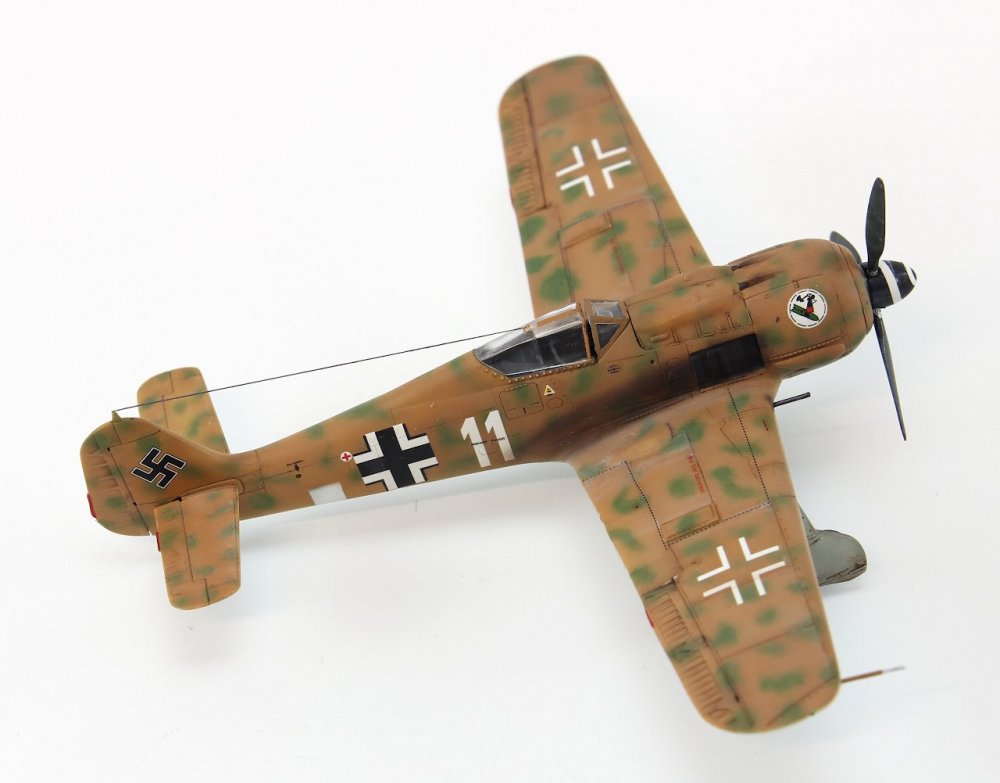
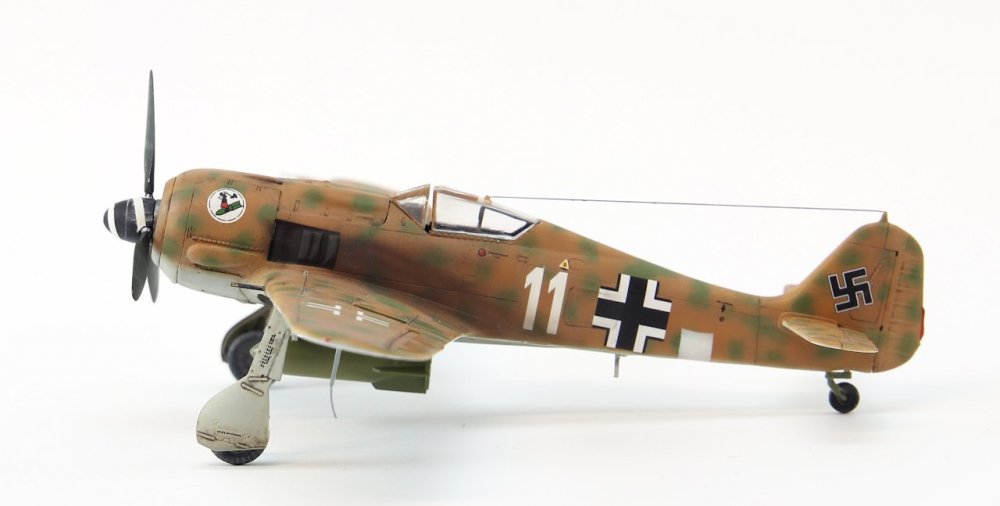
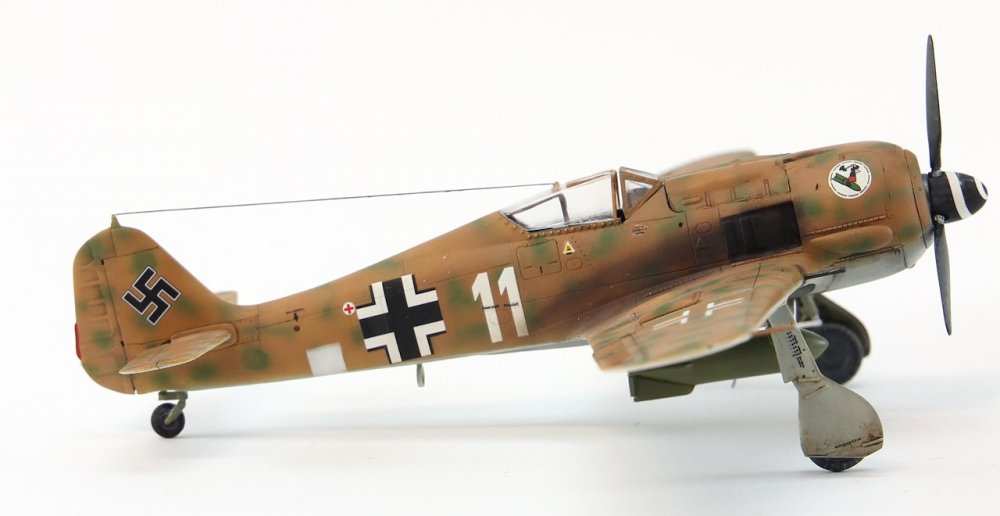
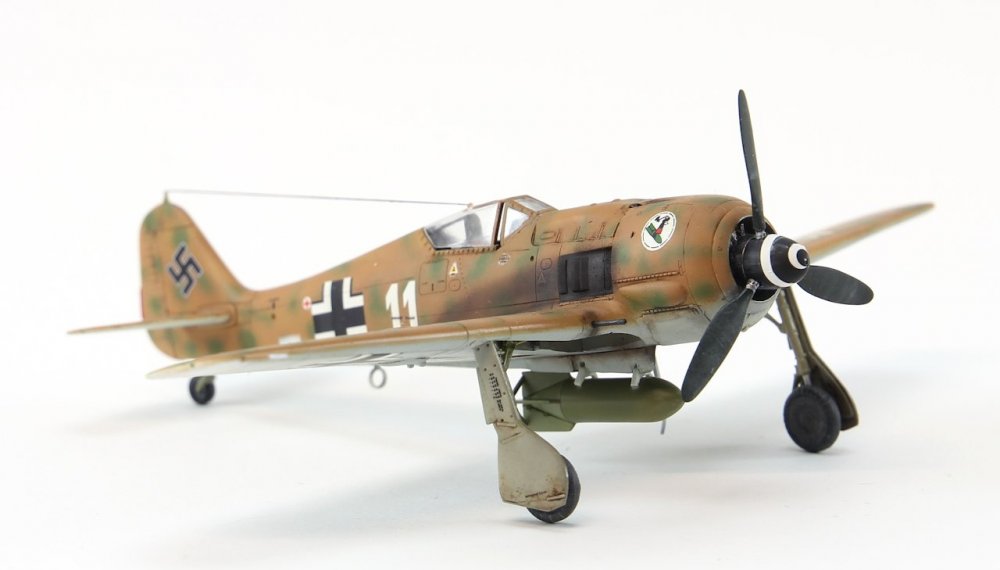
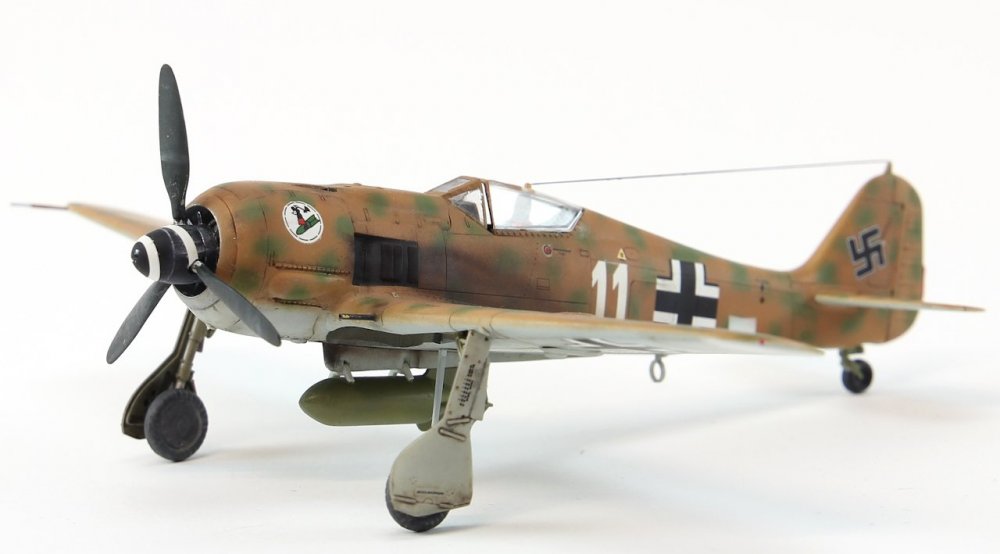
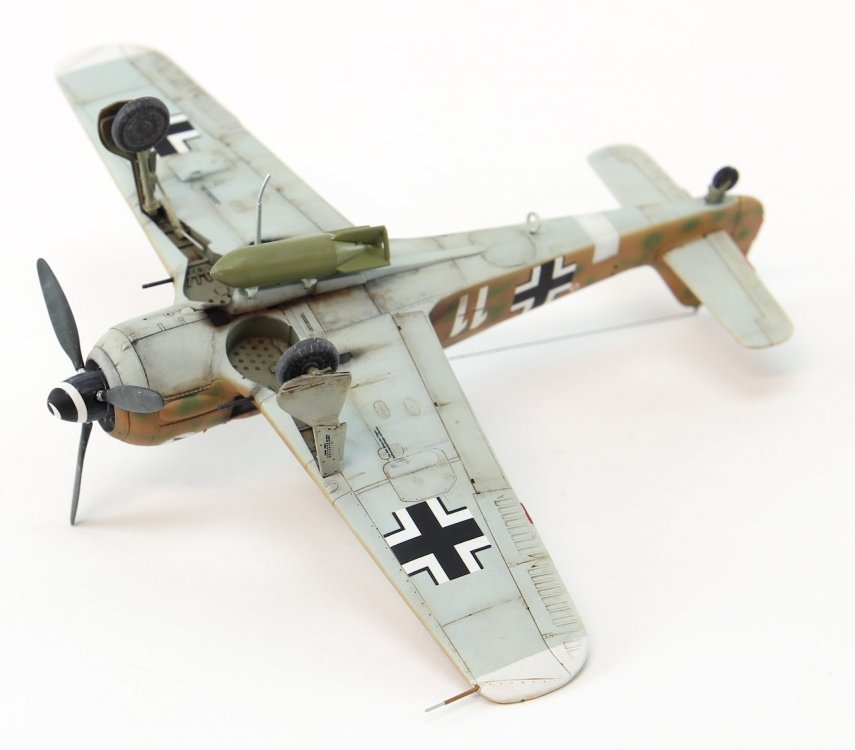
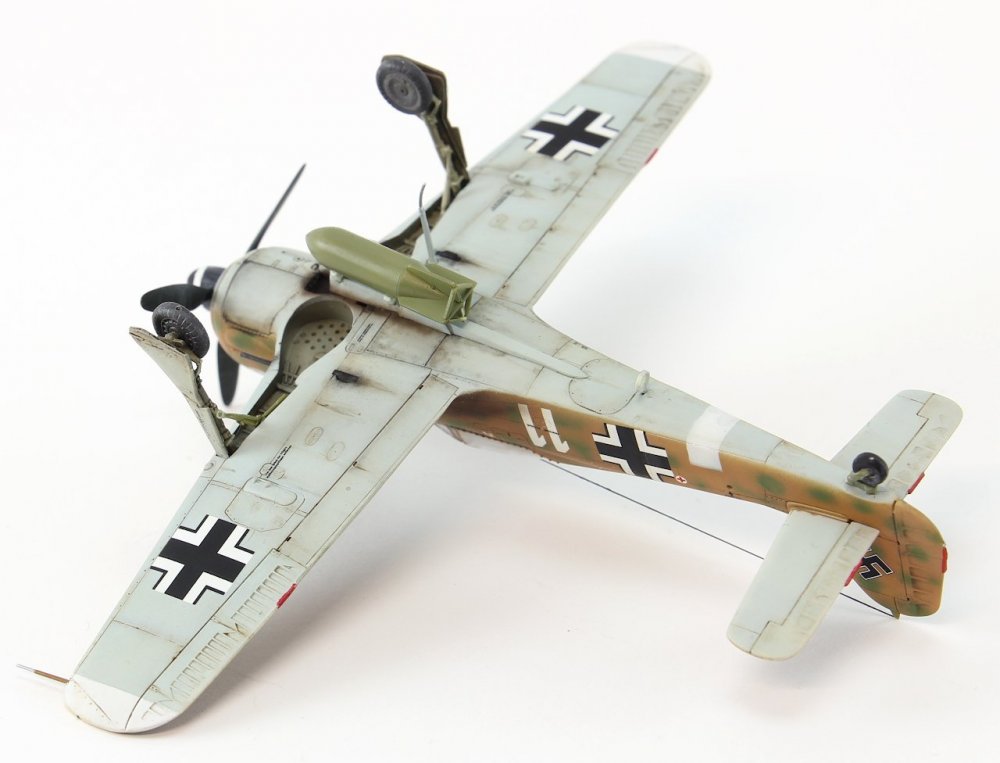
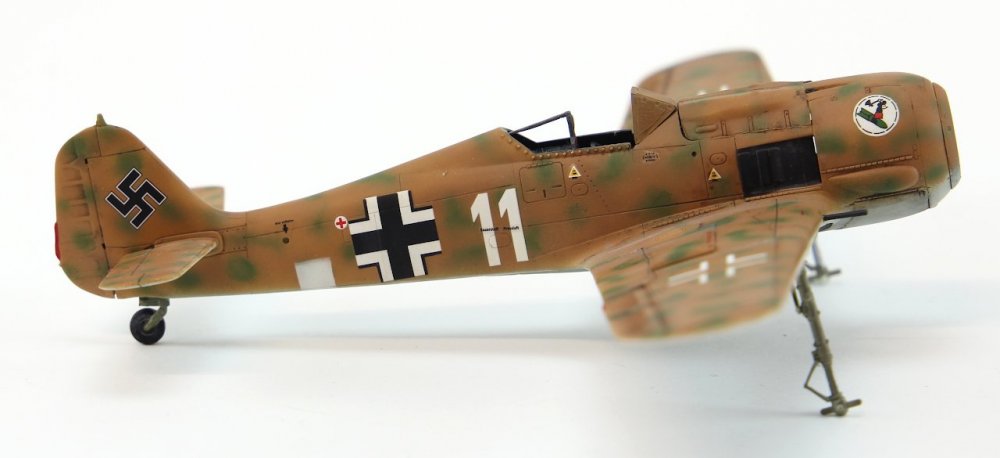
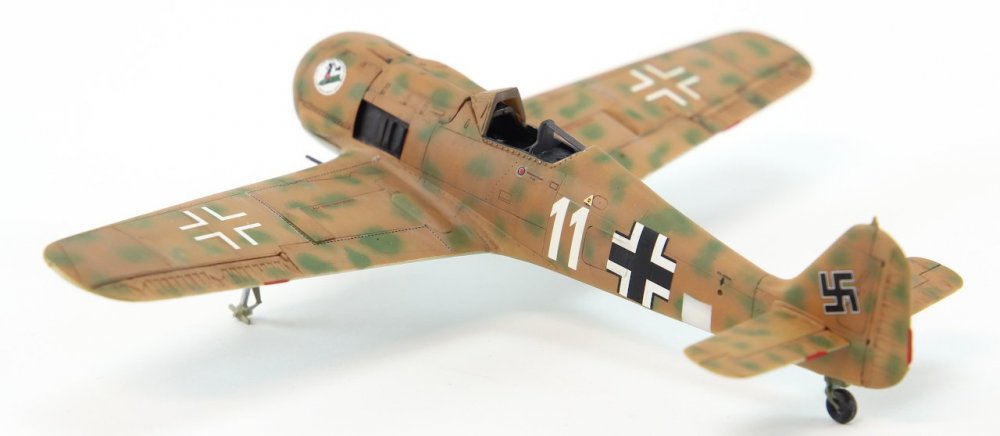
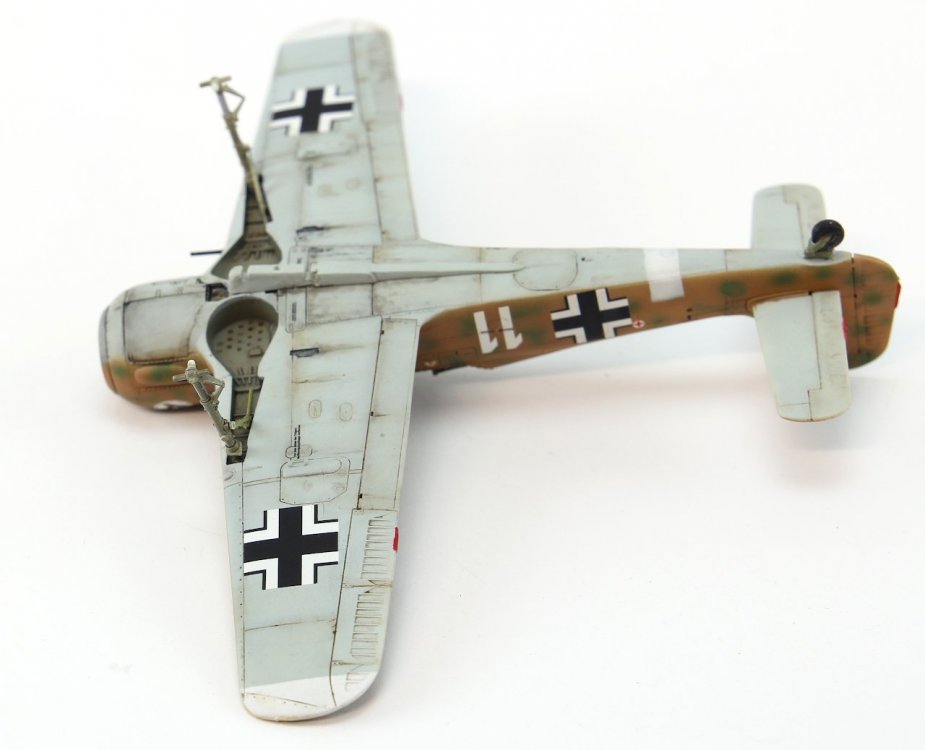
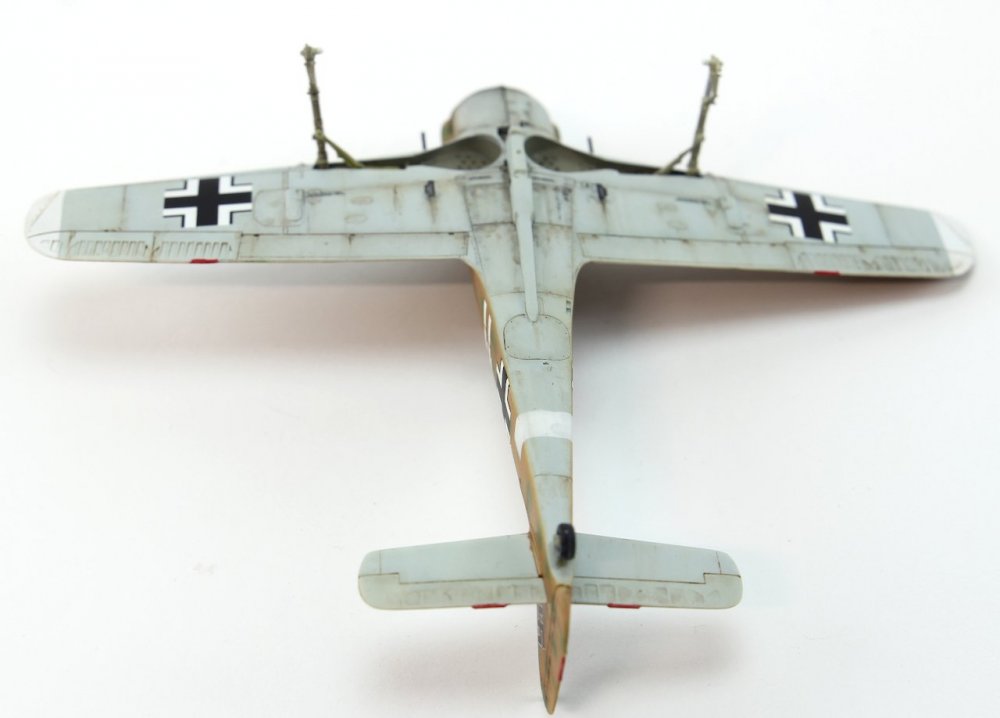
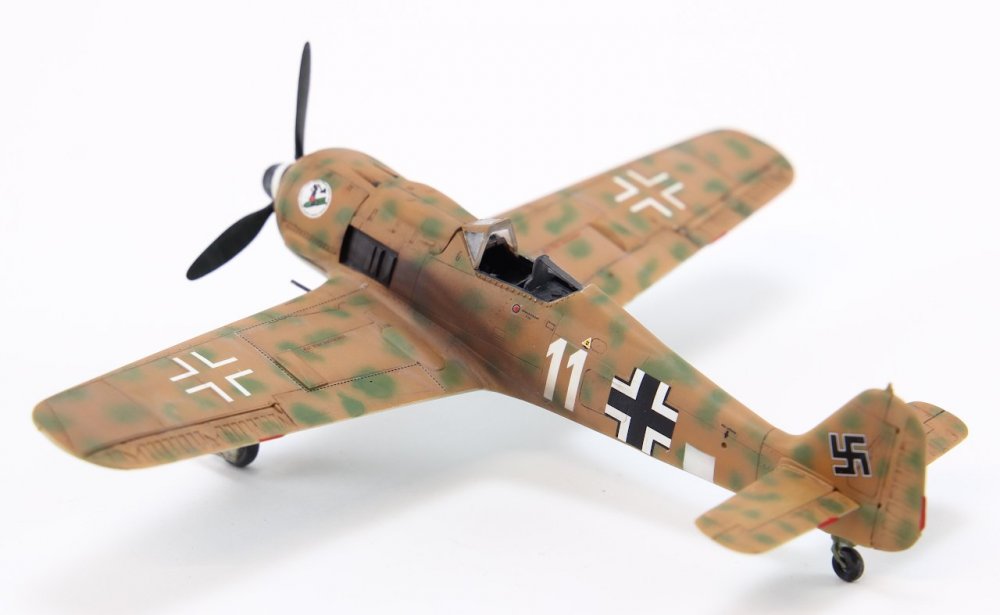
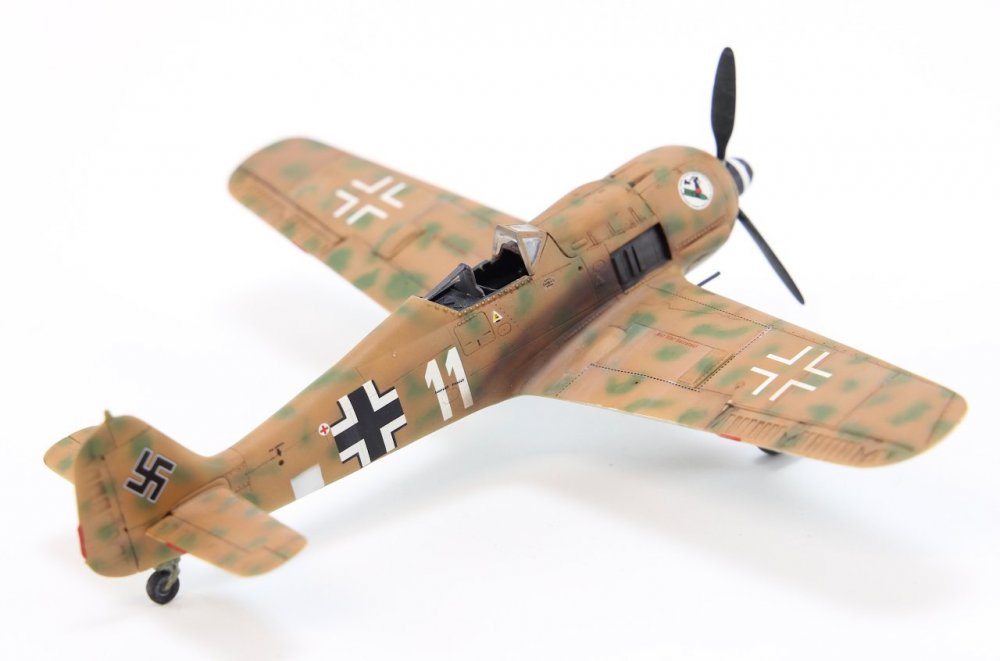
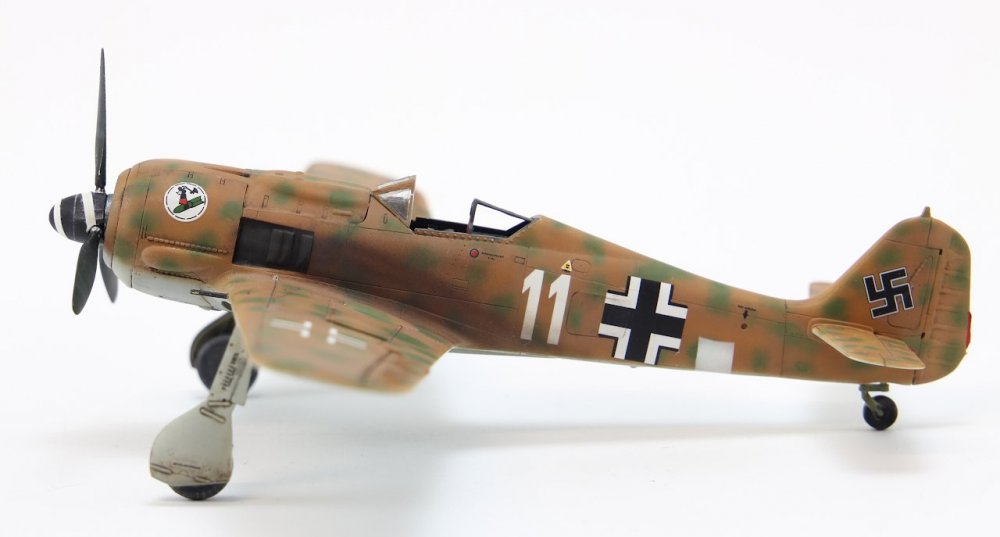
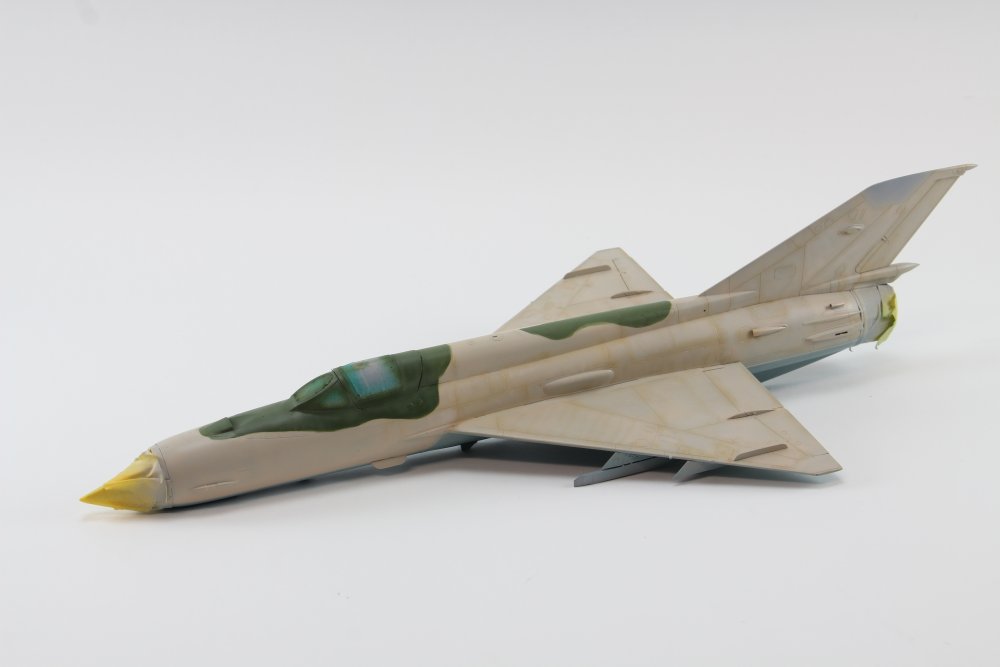
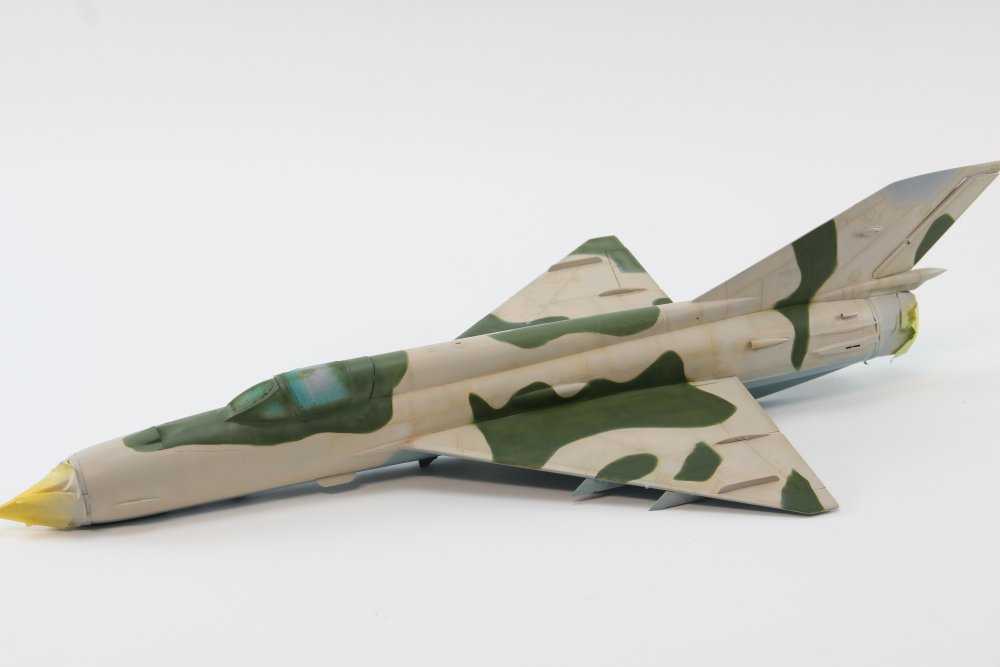
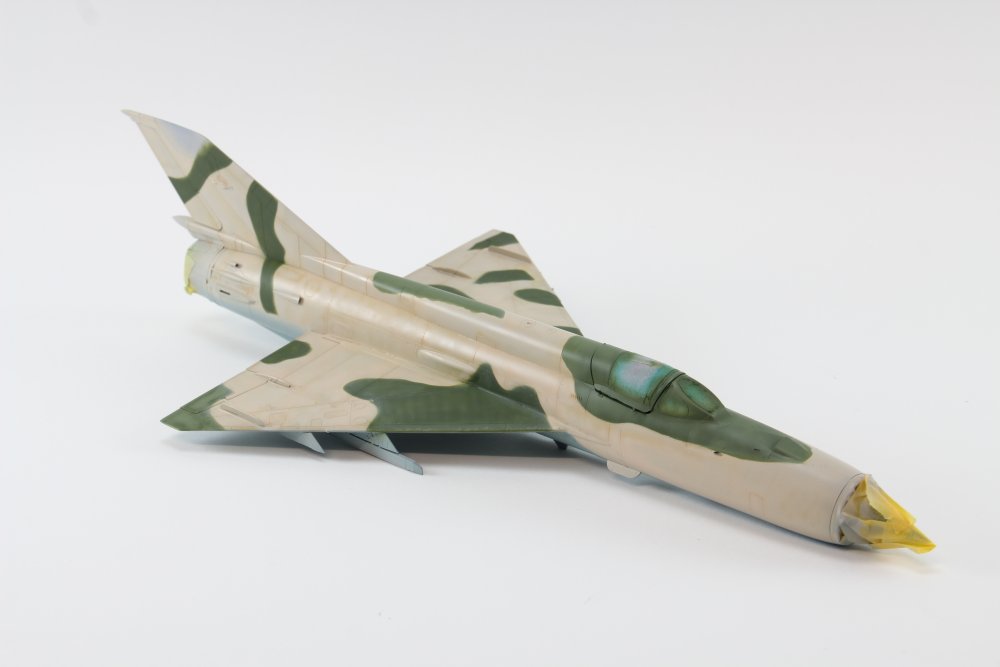
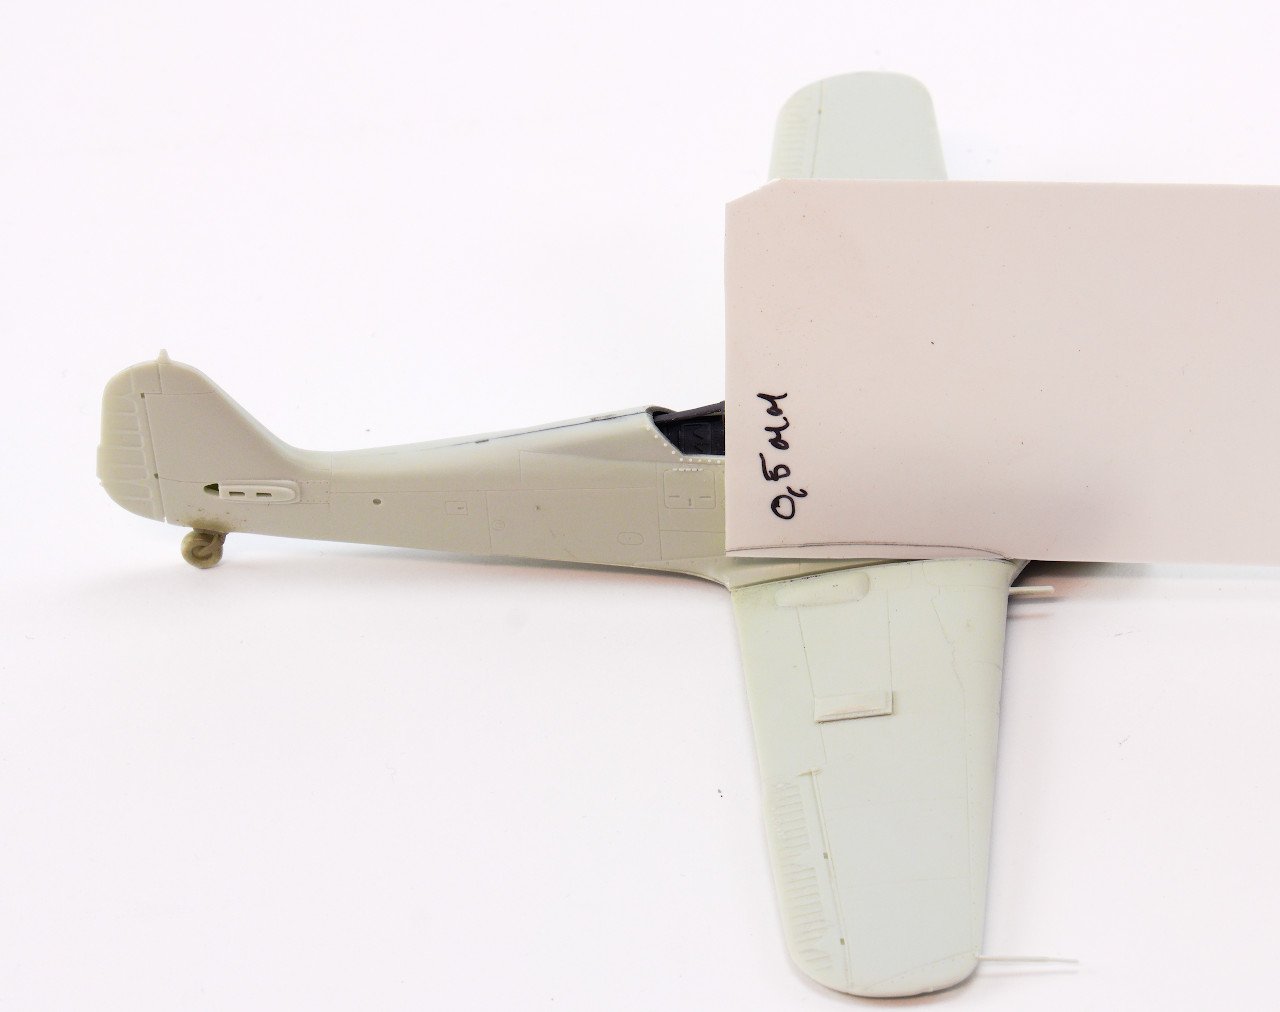
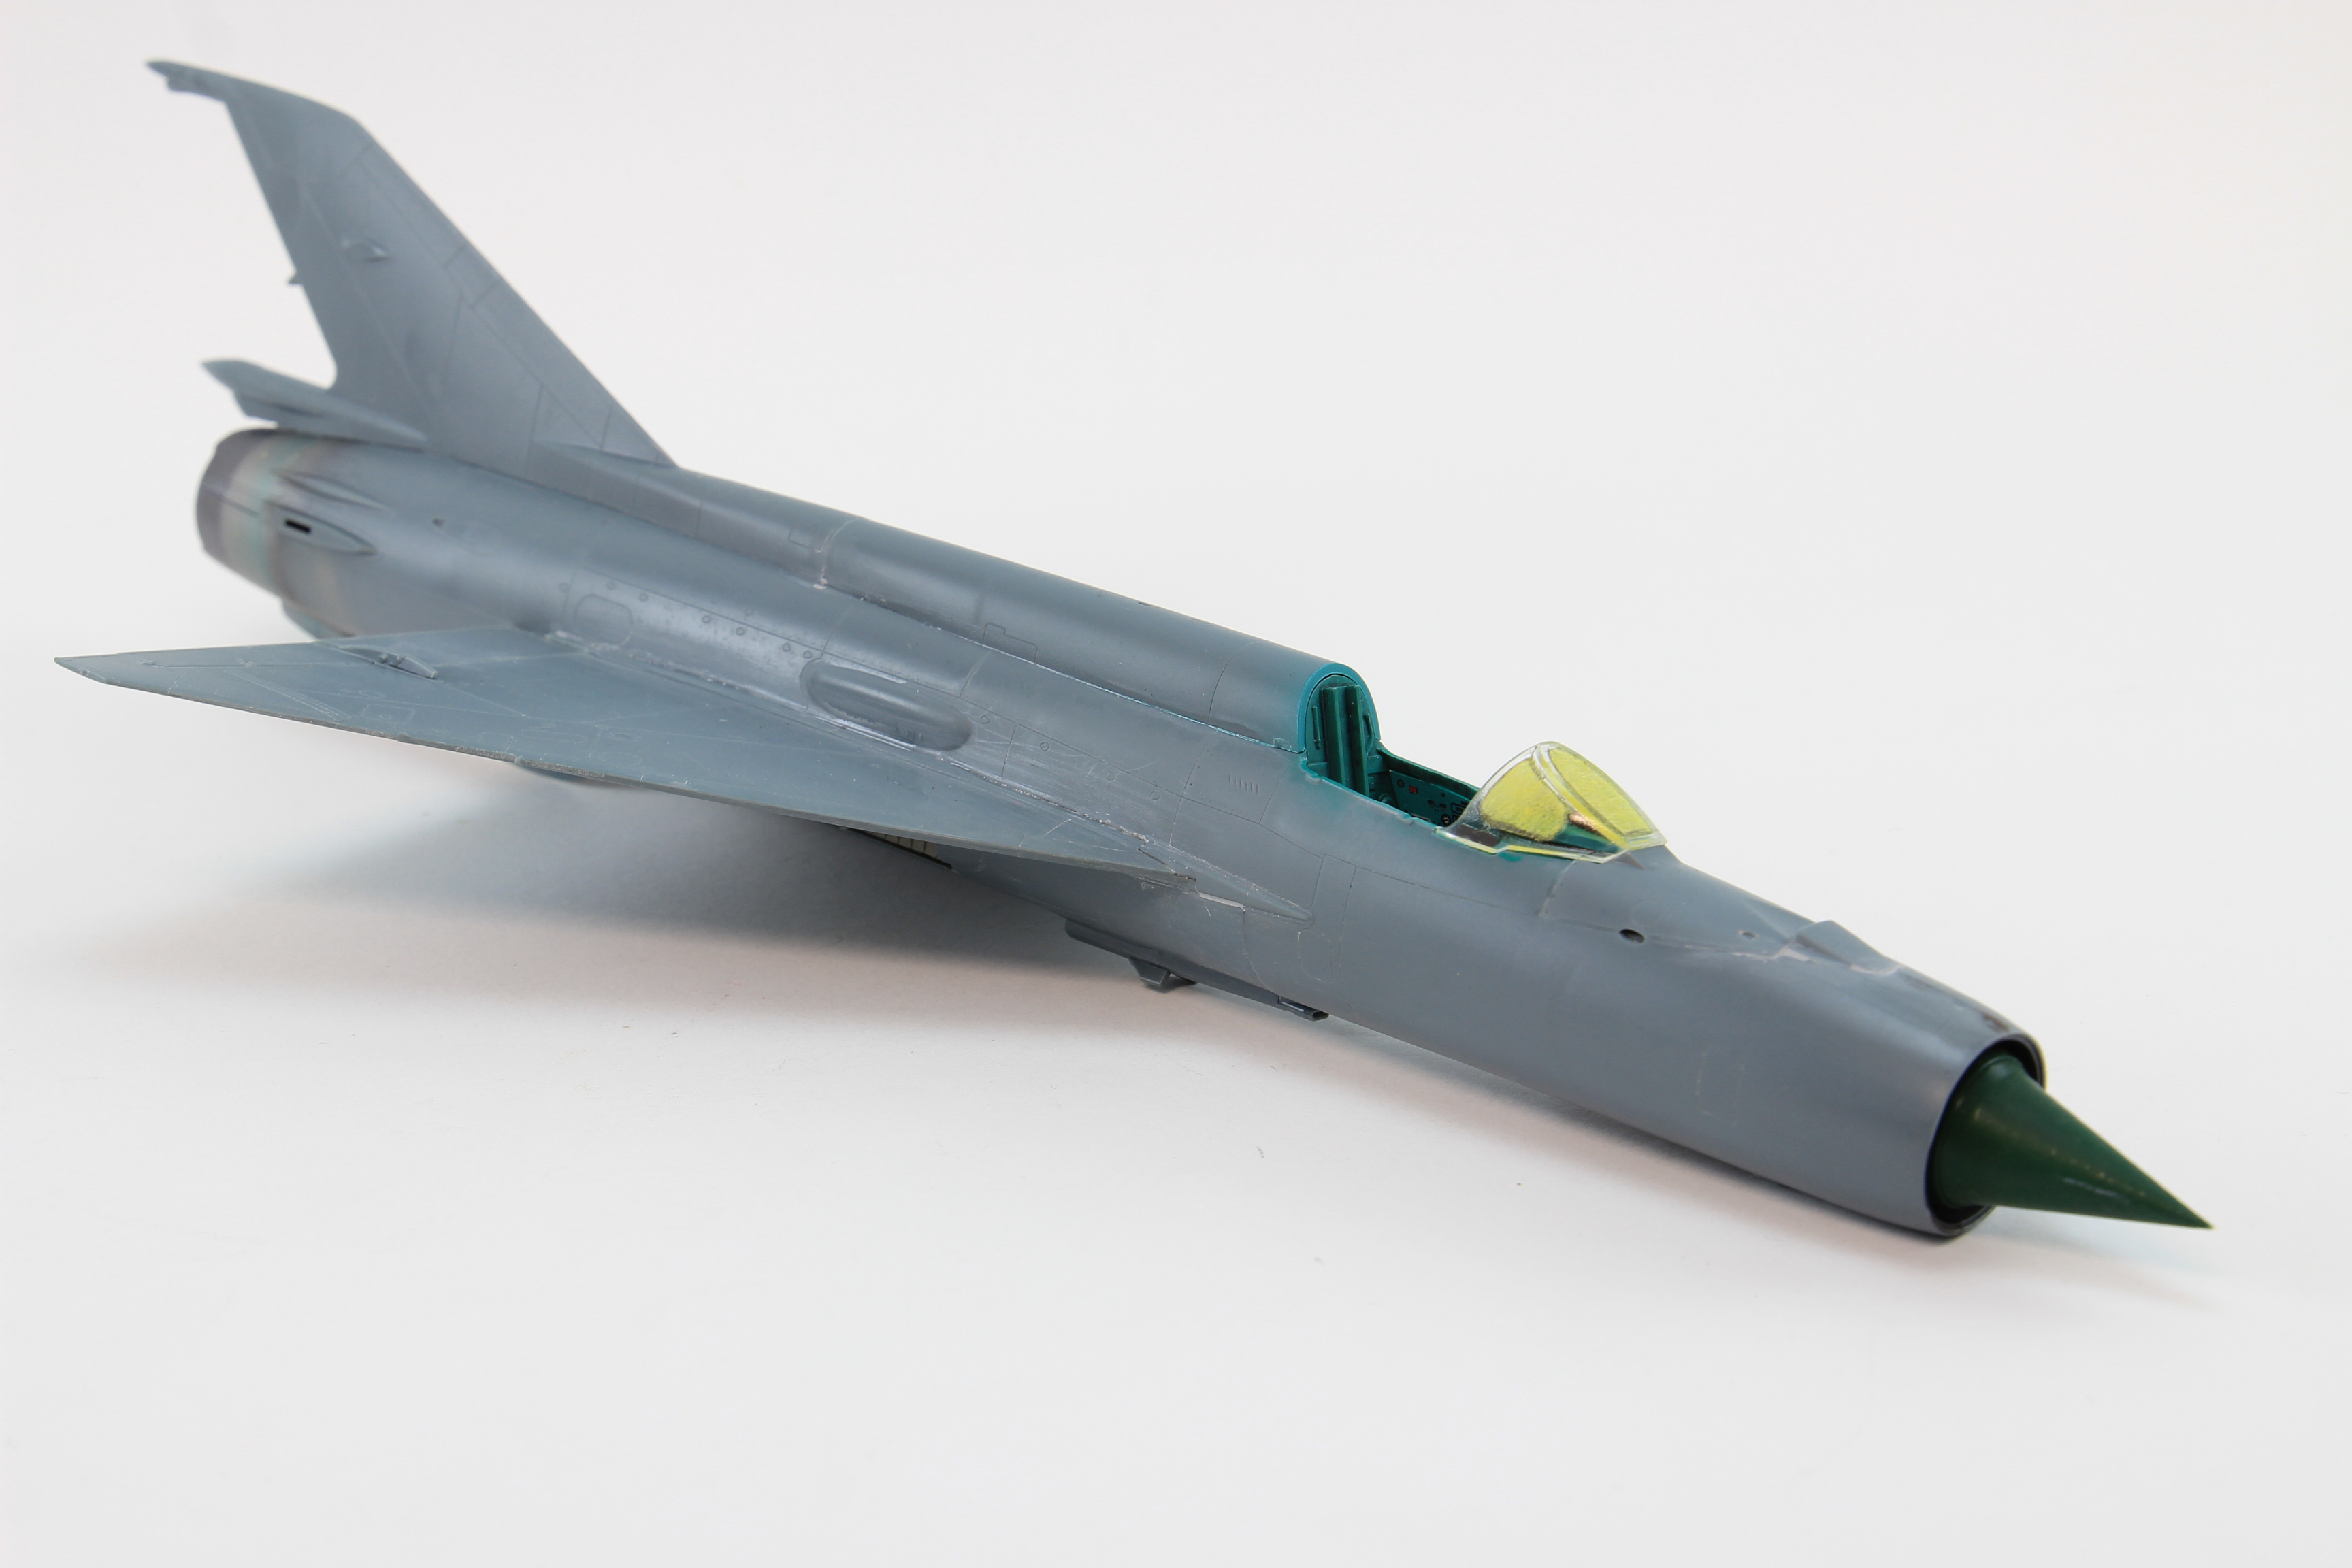
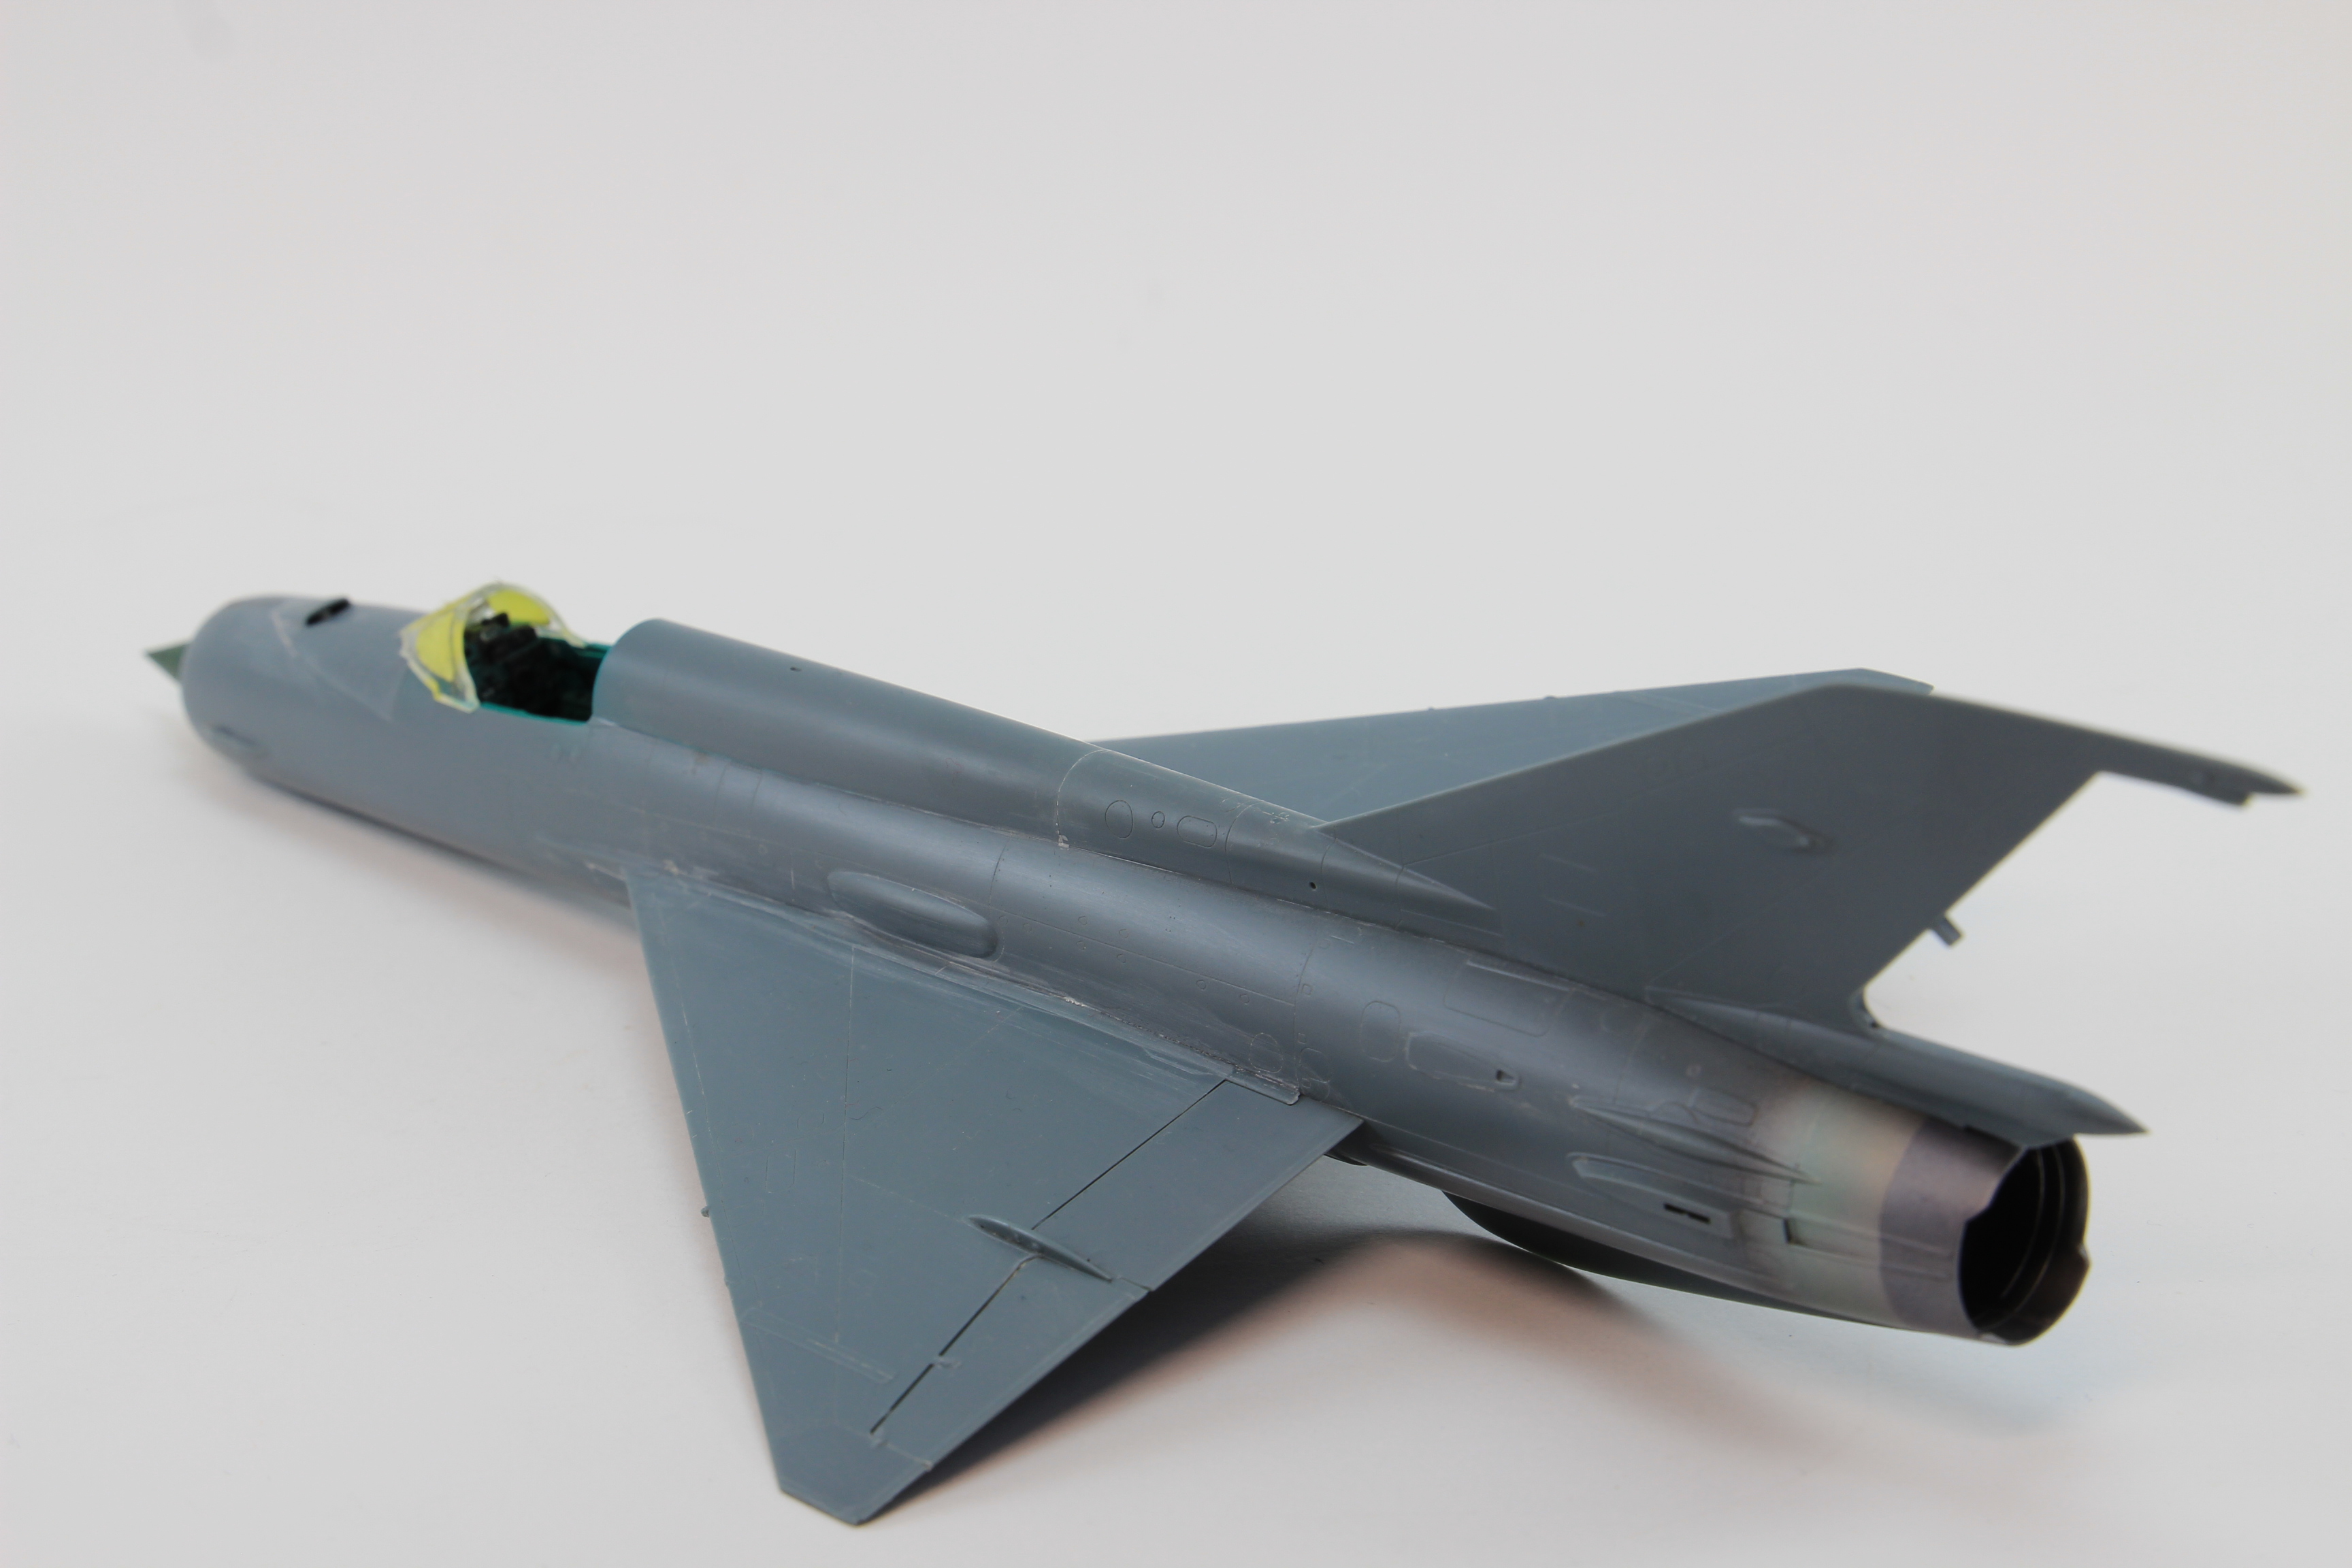
Just to share some pictures of my latest model Finished ( not quite finished as i'm still thinking on adding the external tanks)
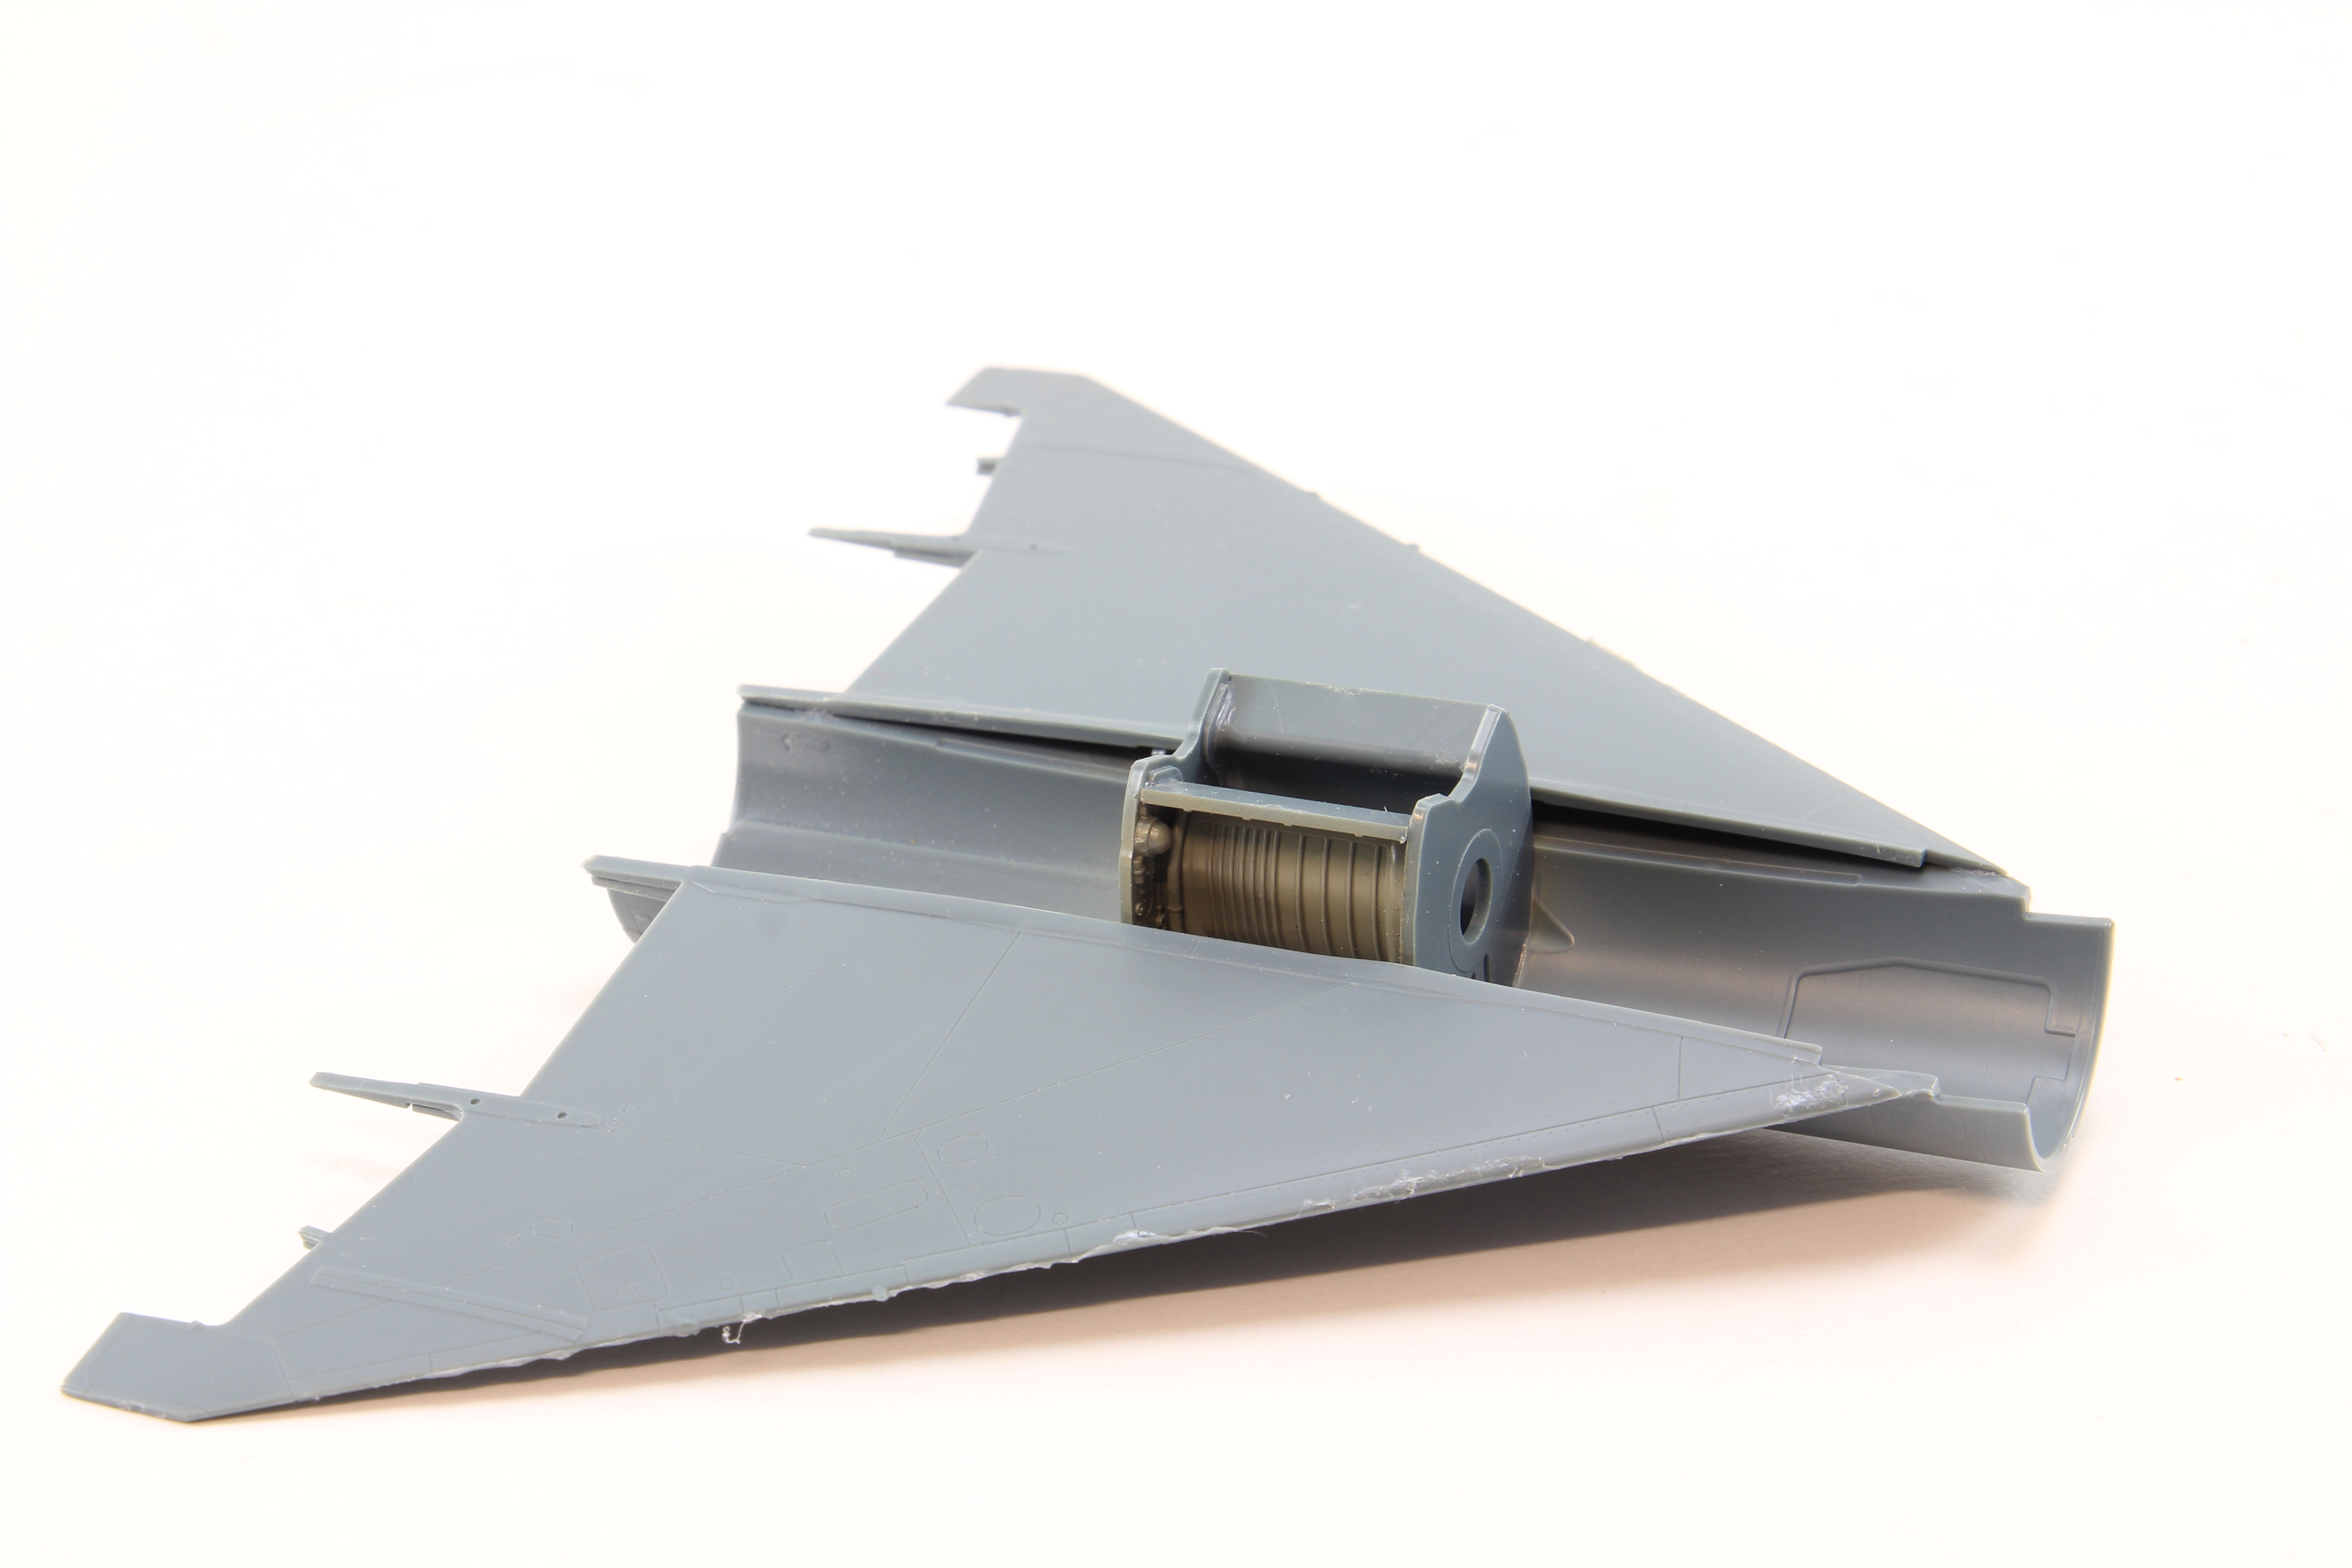
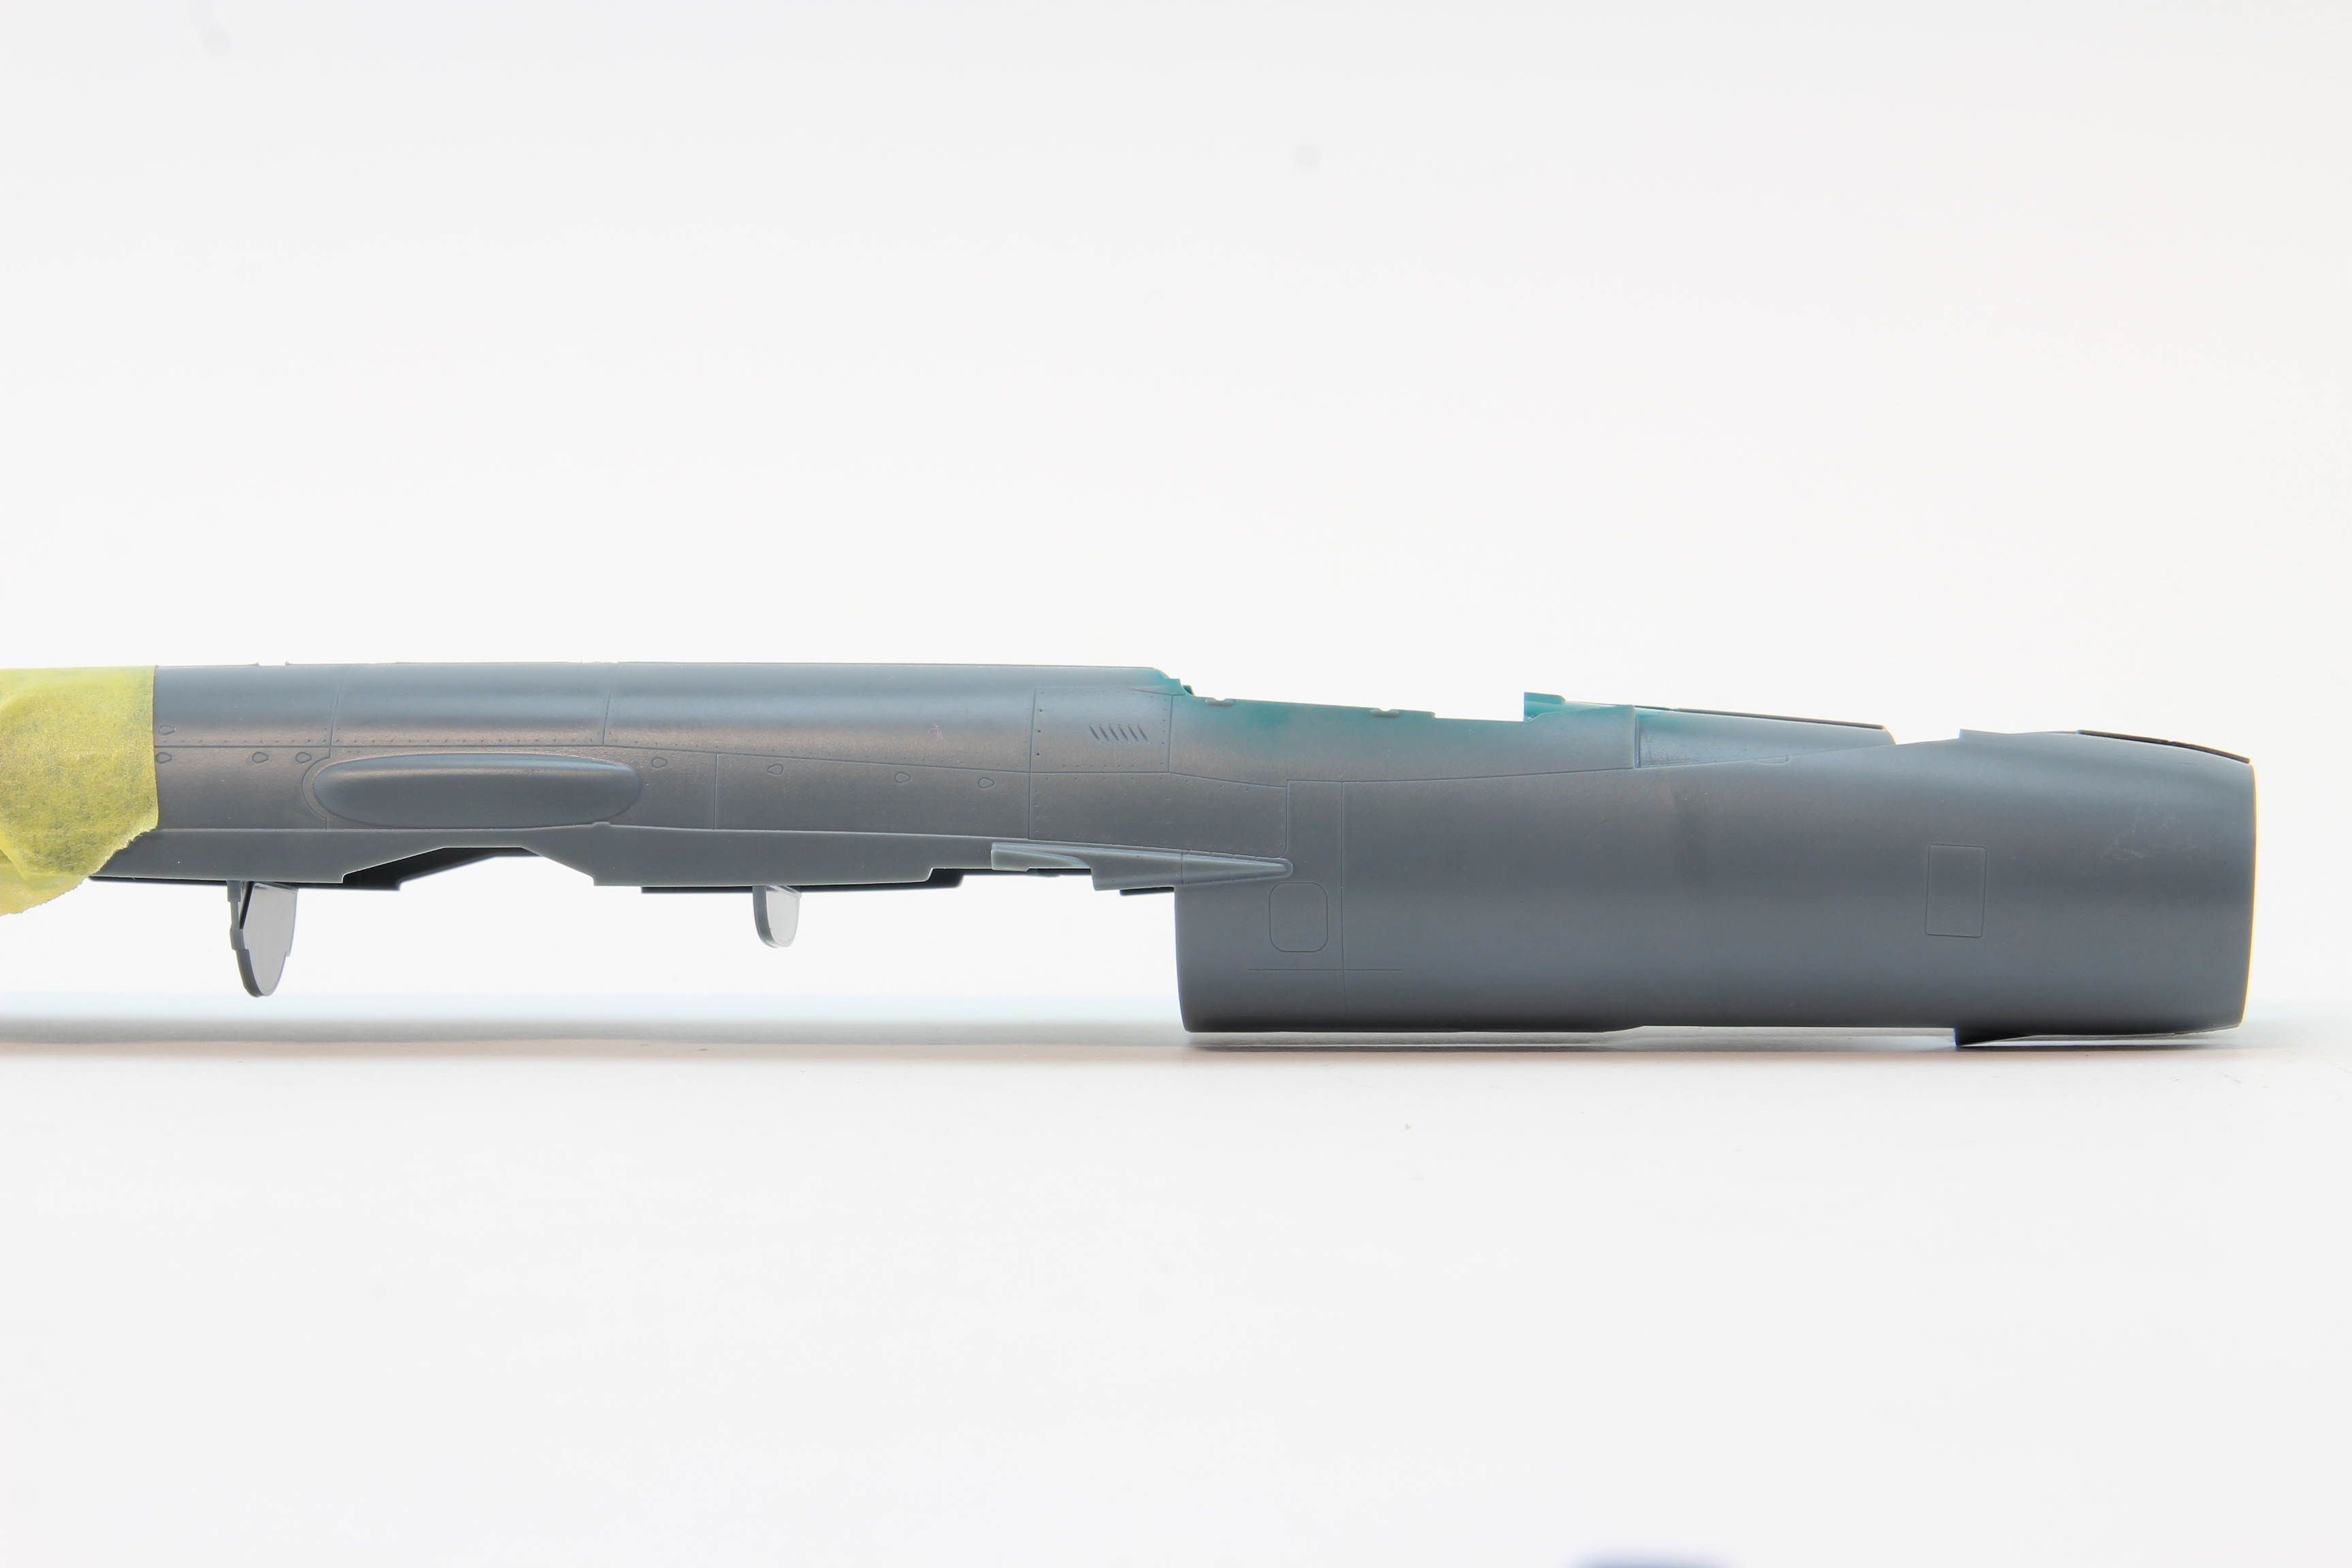
This is a model that is on my workbench about 20 (!!!) years, so i decided to give it a go...
Build oob with exception of ejection seat harness, RBF in copper wire and brass from a wine bottle.
Tail marks ( Blue and white) are painted, as i did not trust in the decals provided.
Paints used are Gunze ( grey) and Tamiya (White).
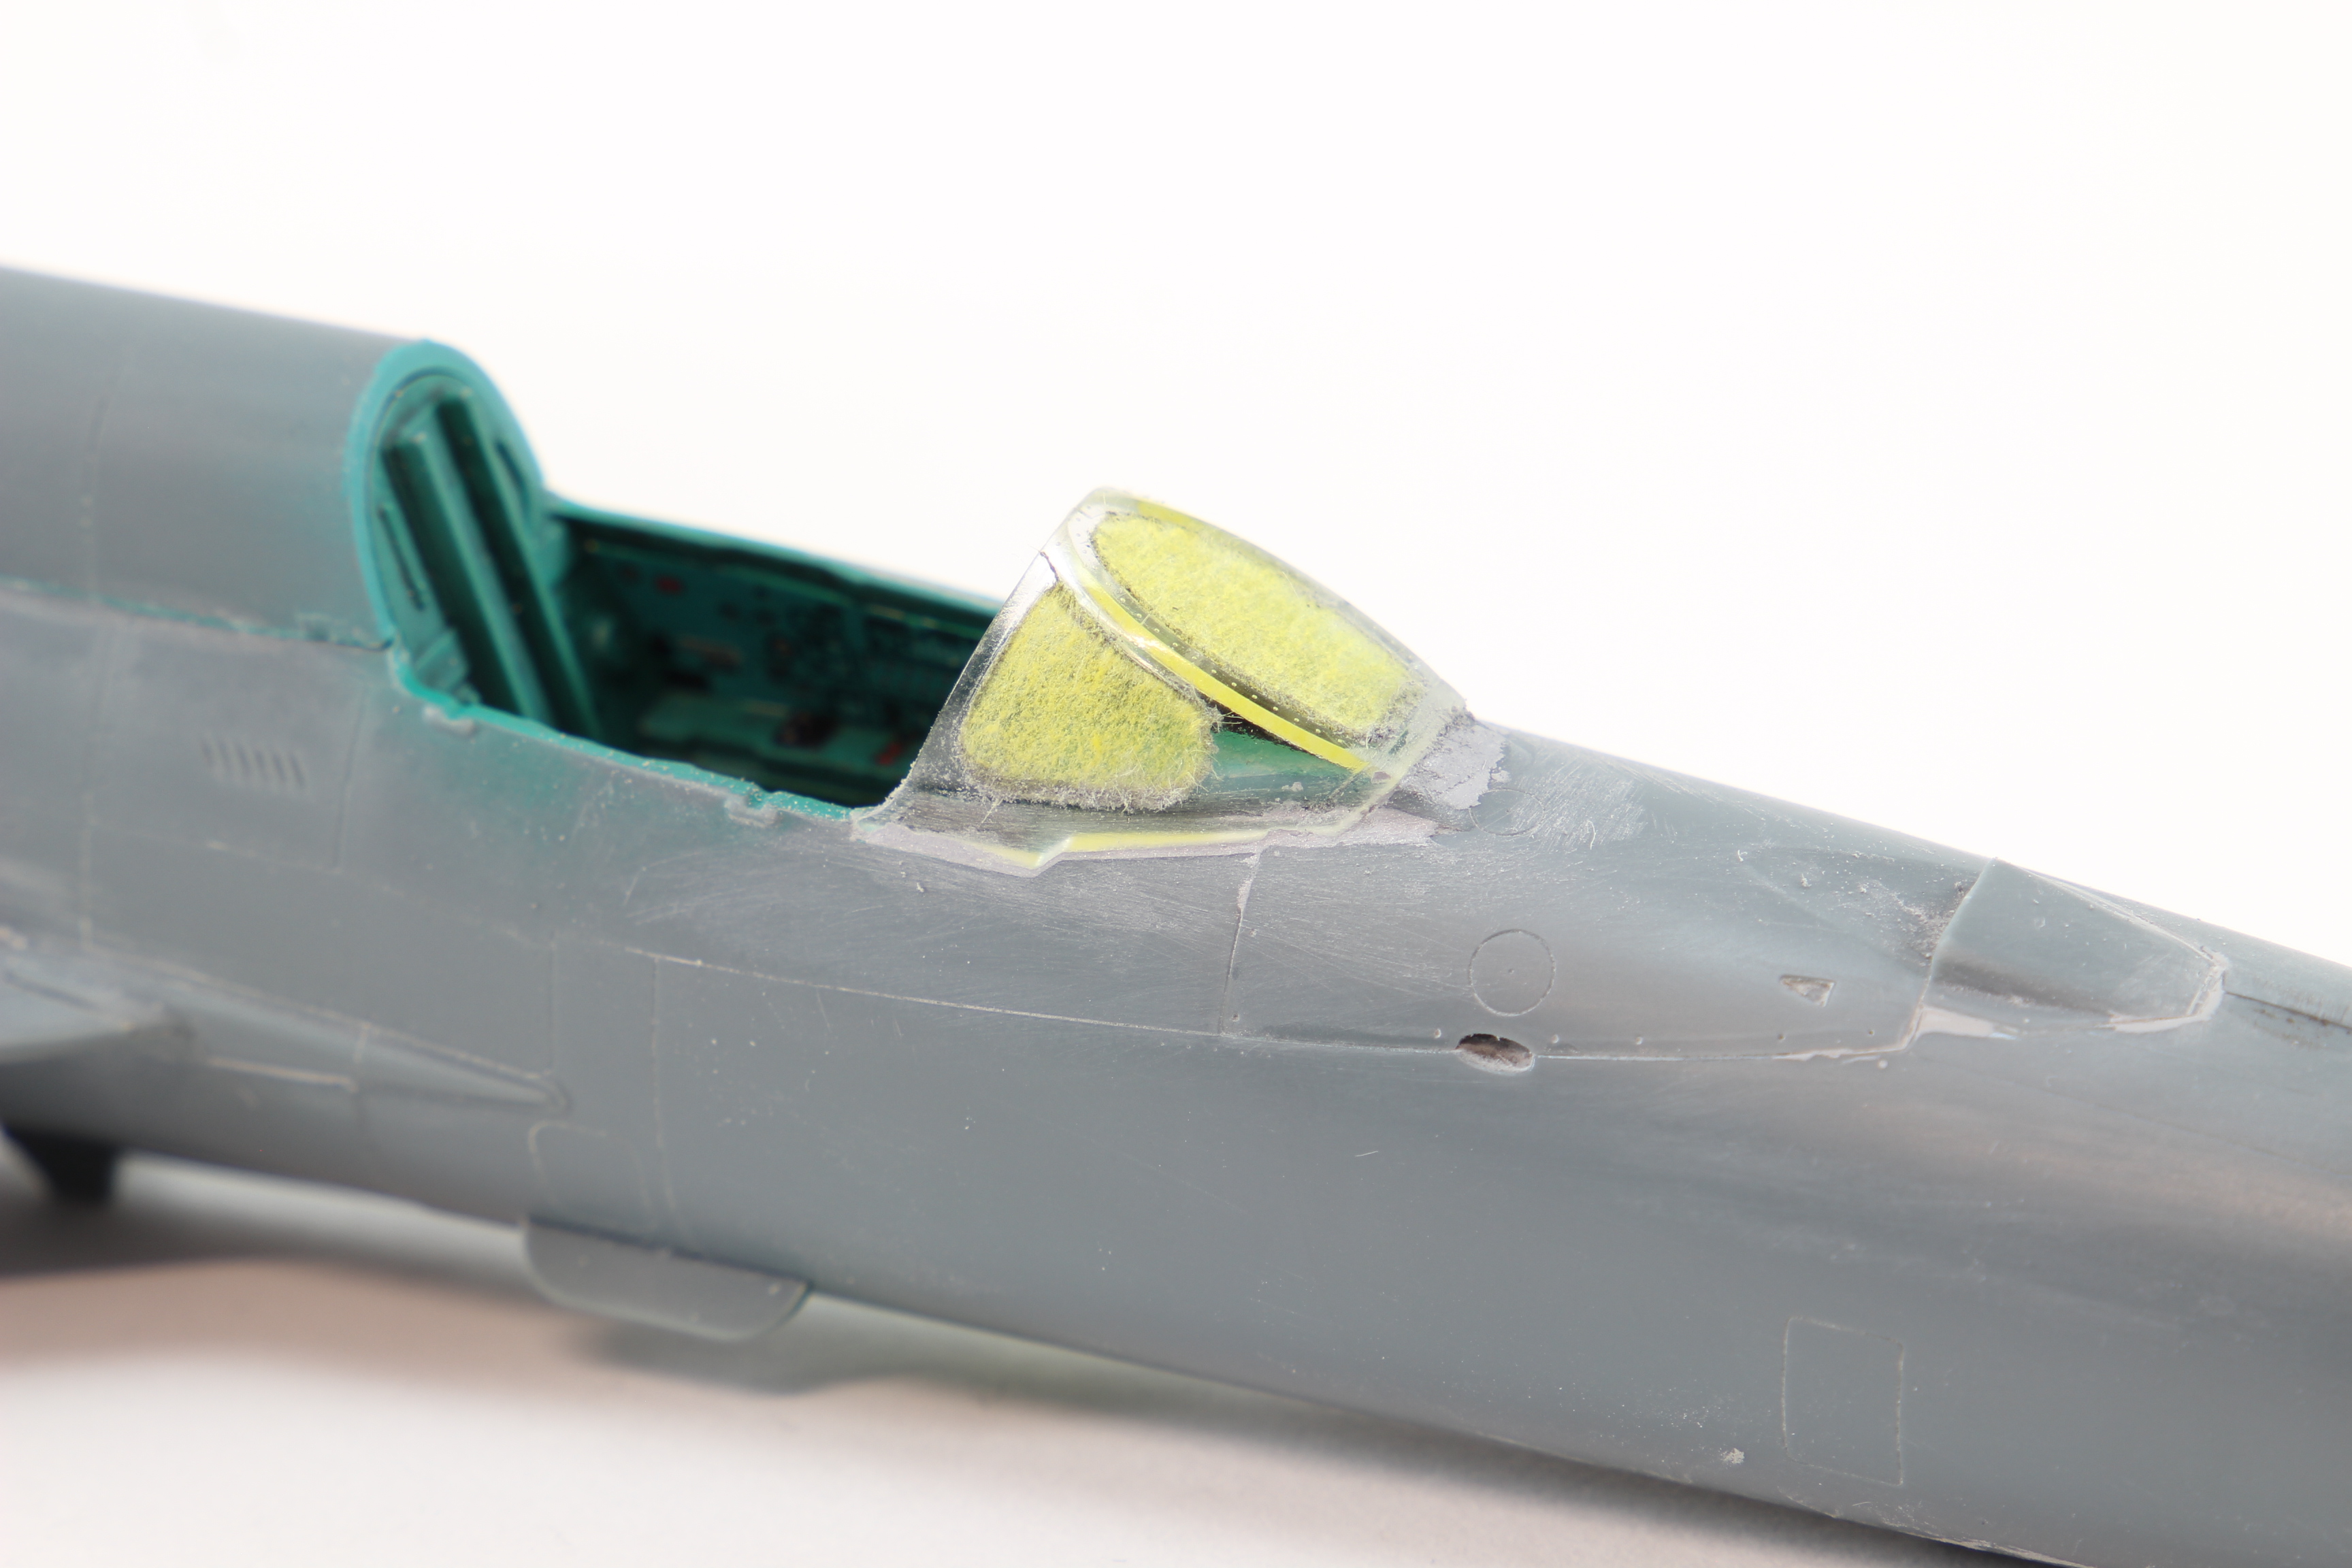
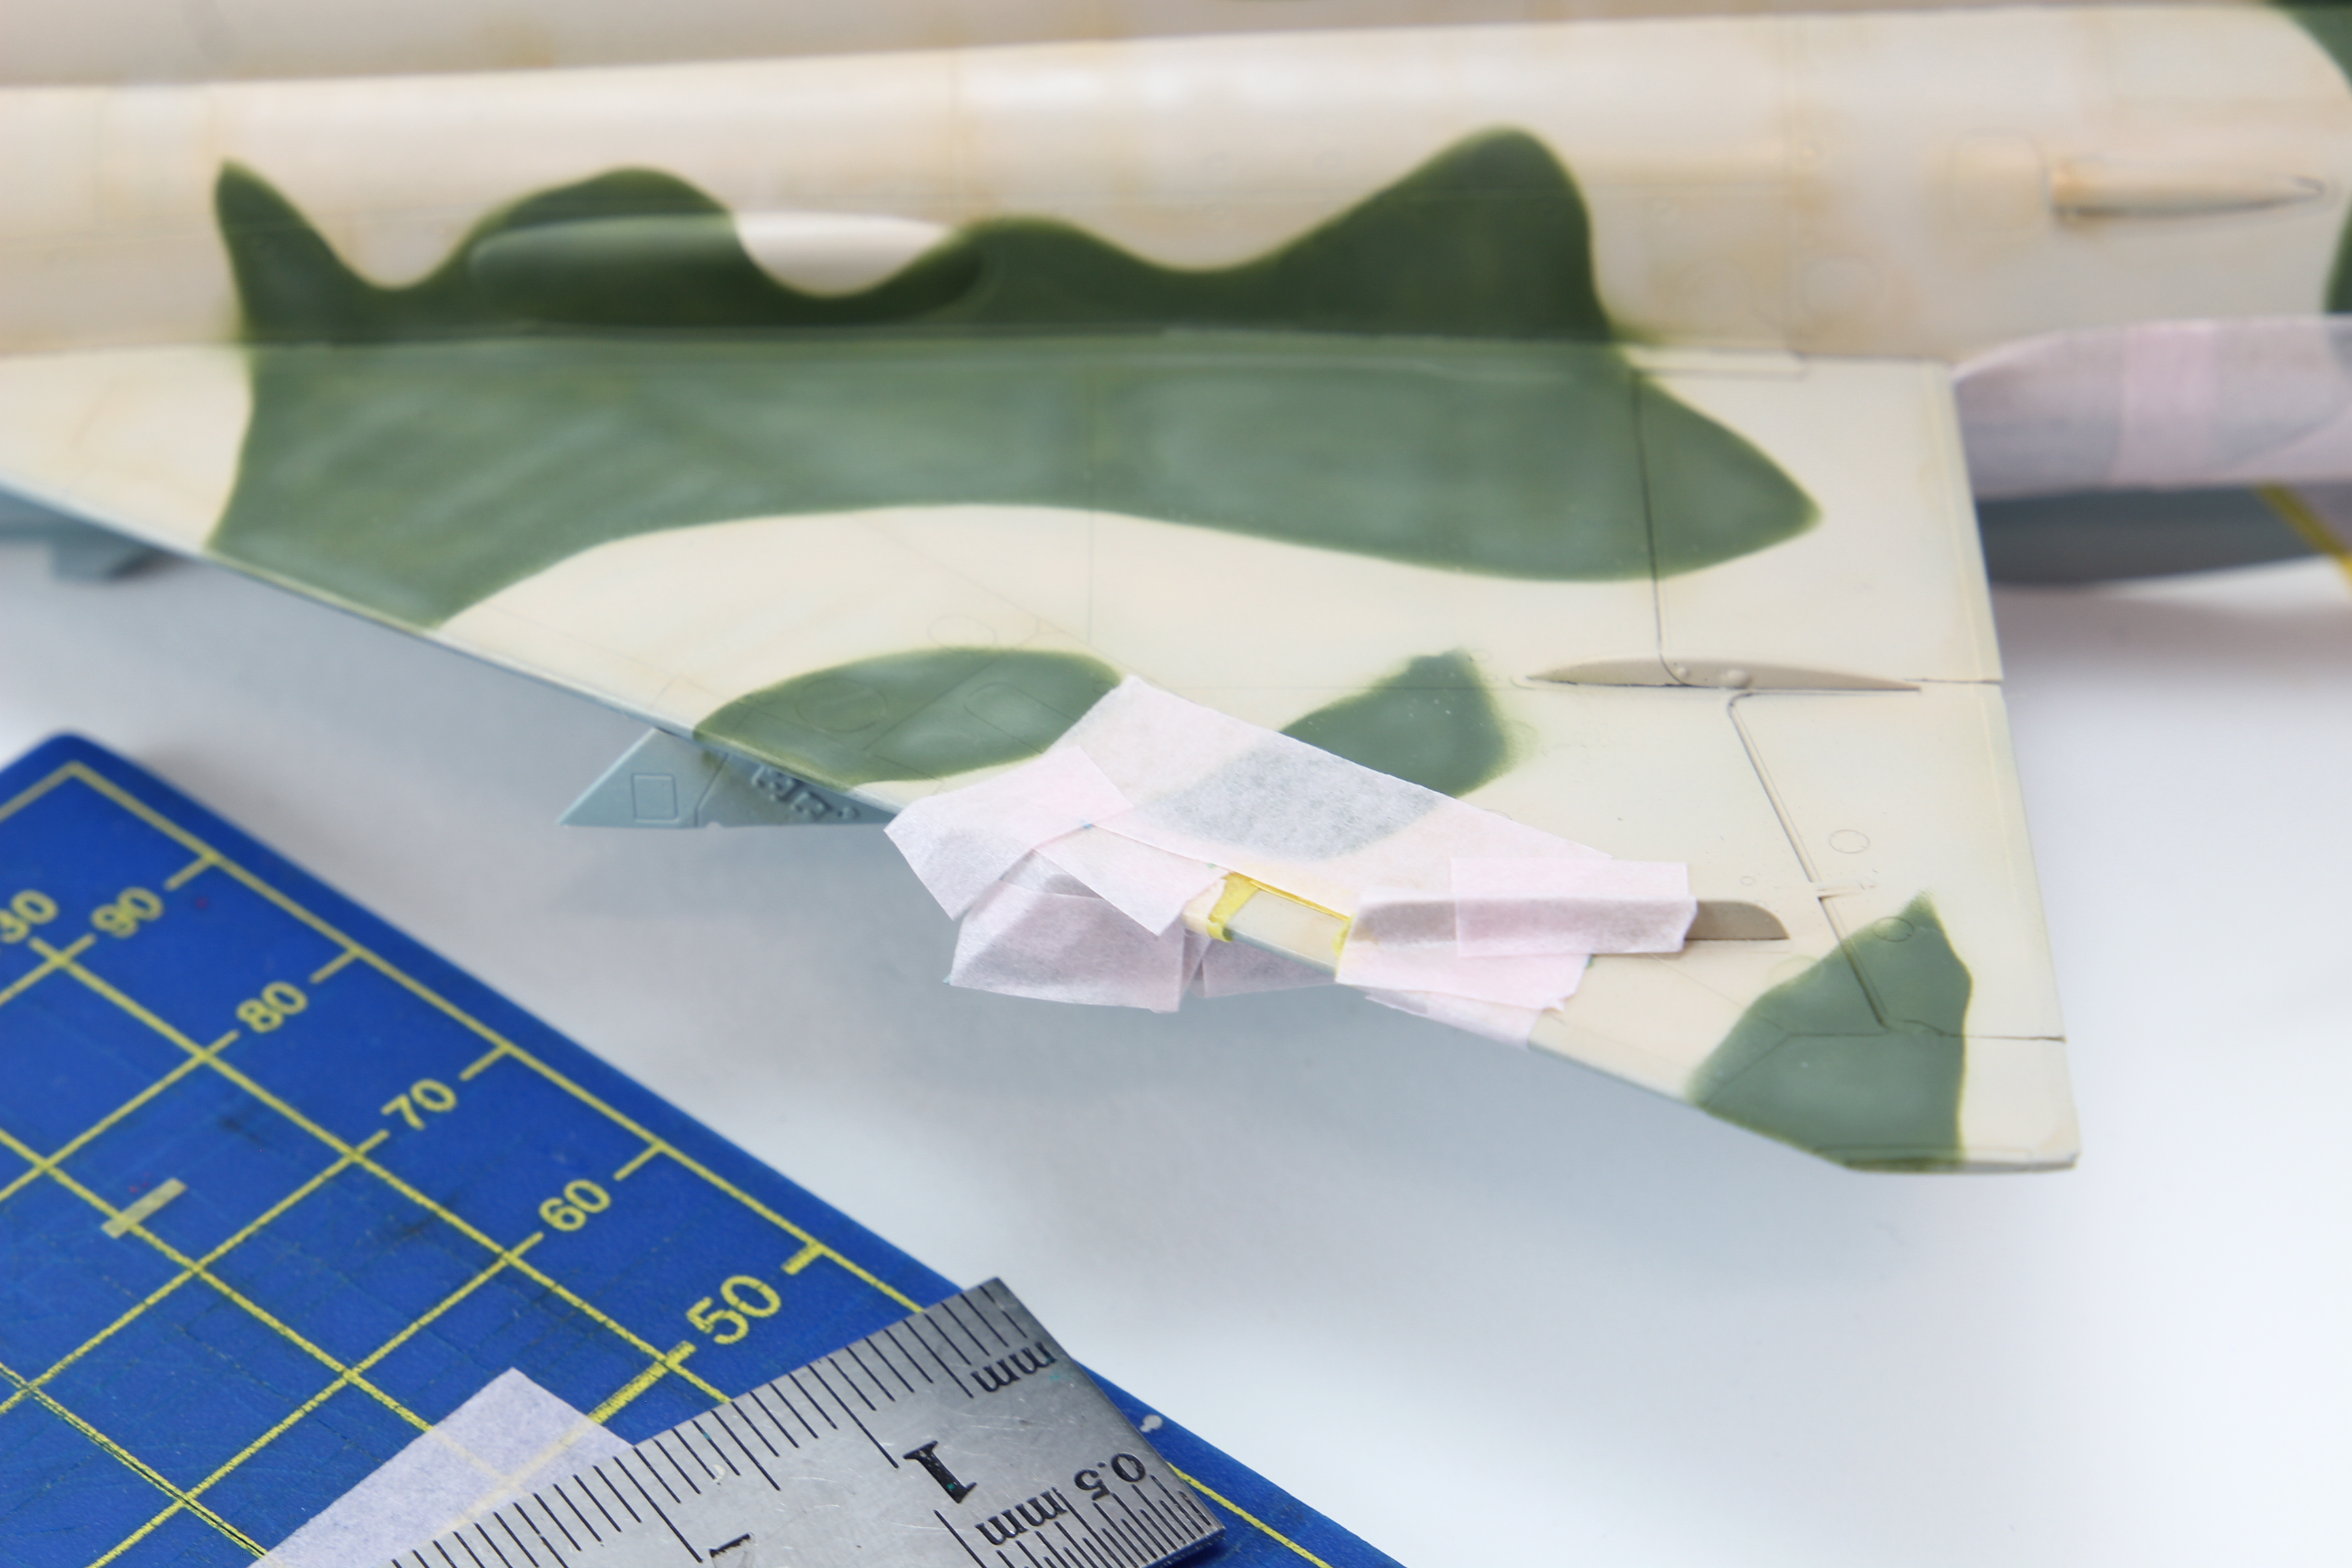
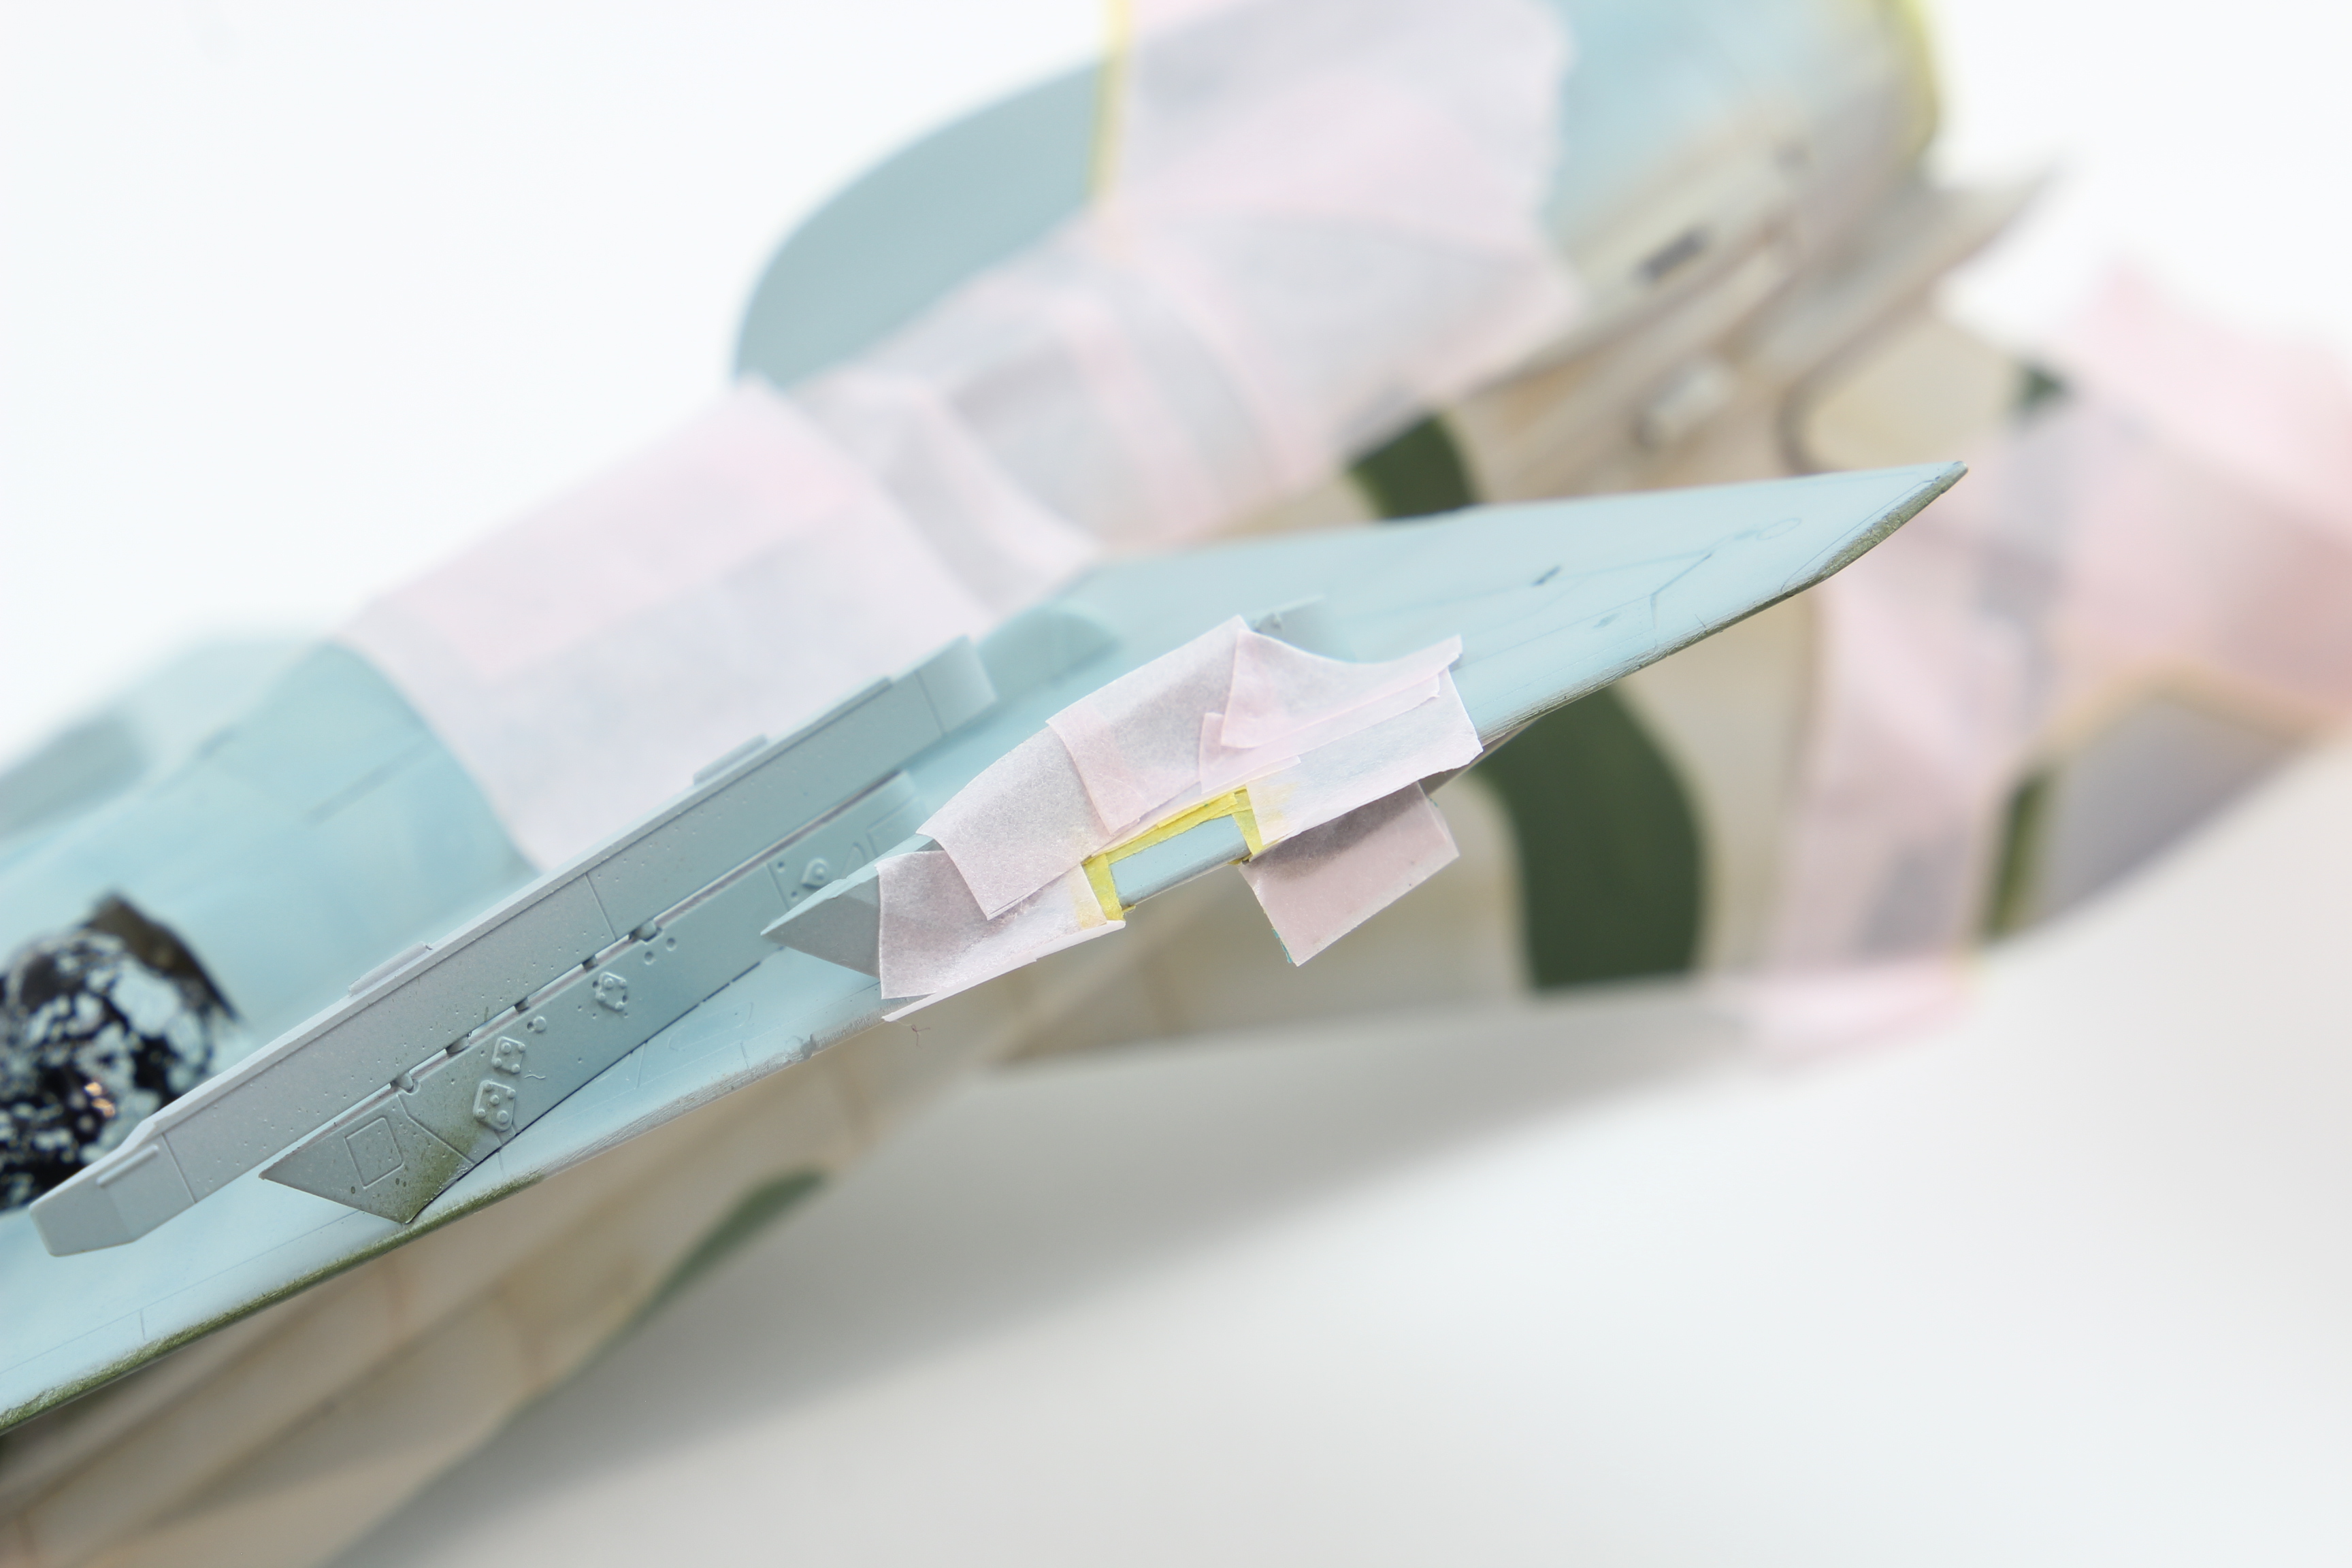
The models lacks some details ( for example - navigation lights on the wings) so i had to mask and paint them.
also the yellow strips on the windshield despite beeing oversize, they are decals leftovers.
And it's done!
.JPG.dcf100129b8864f72e93f85883a3e9be.JPG)
.JPG.92e23bed270675092b68b11150e63d25.JPG)
.JPG.5dcf75583666bf764e9b8d85d5b3ff76.JPG)
.JPG.f79362e0d6d4119486b6cb9bd4001e1f.JPG)
.JPG.0fcec26be1102e1e6f4bab878f63b841.JPG)
.JPG.ff690e5bead07fde37b38ca0513f6c4a.JPG)
.JPG.833050202e72b3ff1c2d3d15110f5630.JPG)
.JPG.4a87eed0b978d06885a3dce6df154720.JPG)
.JPG.33e3c7b1b9a420a34bda7743a696b28f.JPG)
.JPG.f4ef3cfa355b468181265720e235c39f.JPG)
.JPG.7c4af34bba3180412012db54bb72e670.JPG)
.JPG.ee448c2c11097932f8e92738e1ccbeed.JPG)
.JPG.01a52207f6900a0dbeadf06e4c629ff4.JPG)
-
5
-
1
-
-
Plusmodel 1:72 Wheels for A-26 variants
Introduction
This review presents 4 sets of resin wheels and rims to enhance A-26 Models in 1:72 Scale ( Italeri / Revell or Airfix).
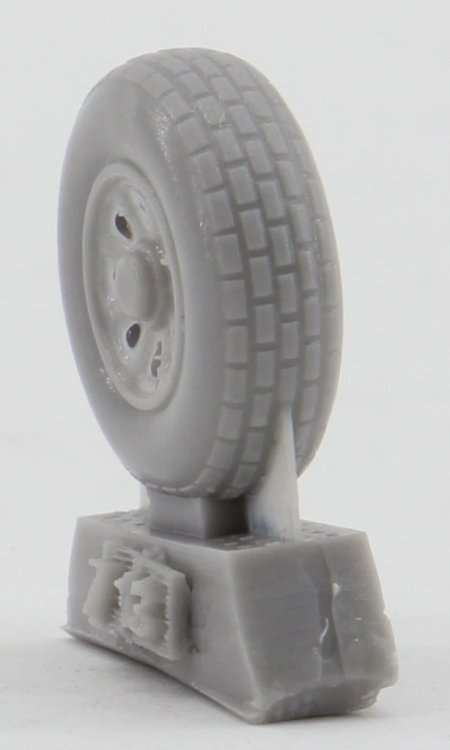
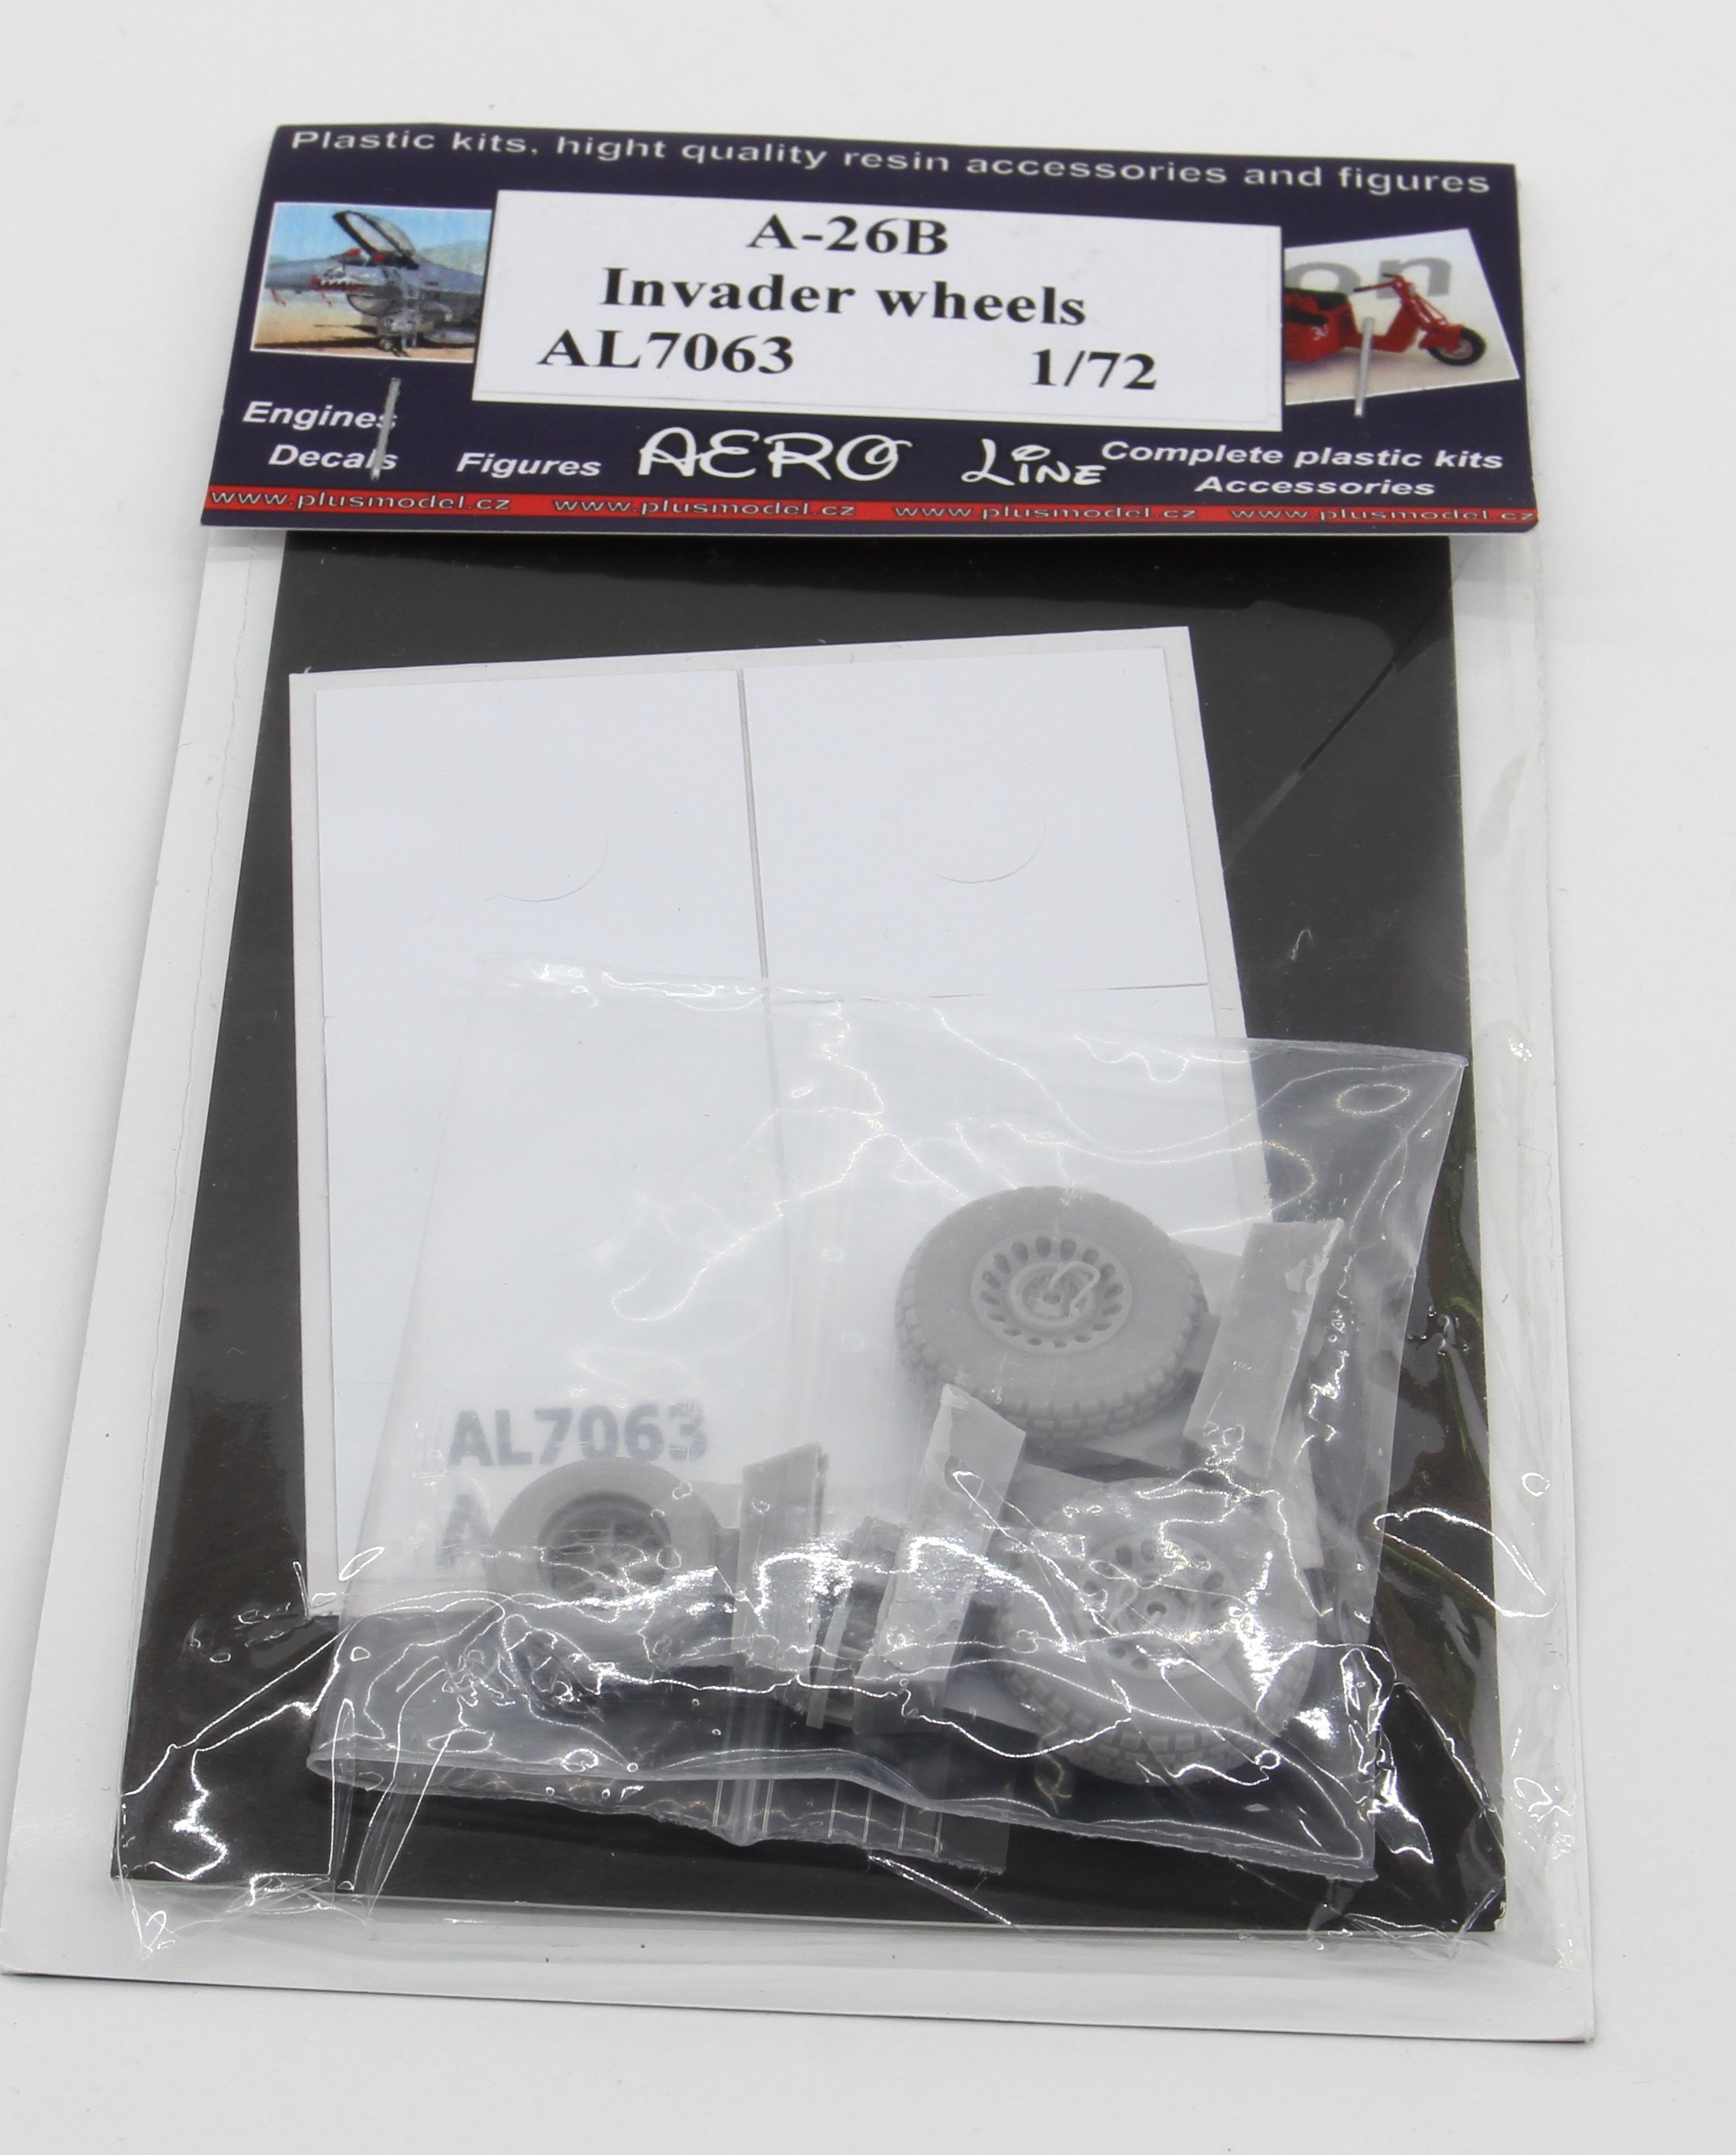
AL7063 A-26B Invader wheels
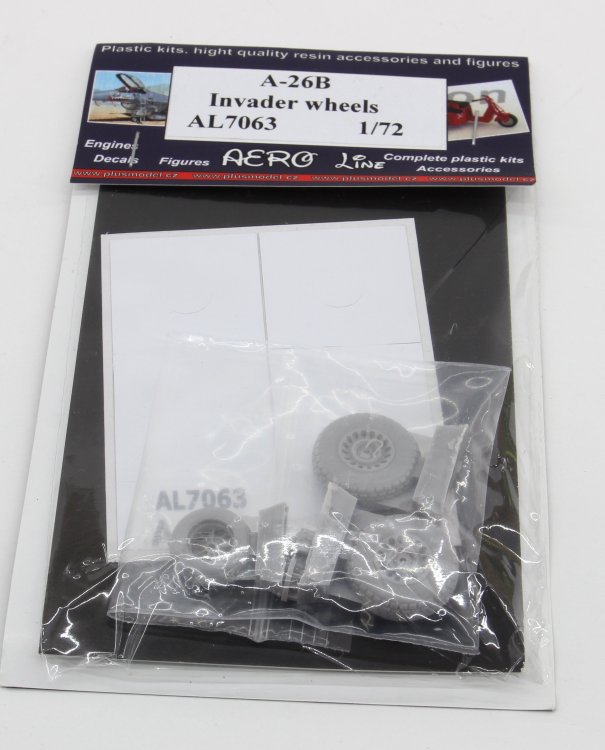
In the clear bag, the content is visible for inspection.
No reference picture is provided, but with the internet available, it is possible to consult some reference for painting. According to my references, the wheels hubs should be painted metallic colour.

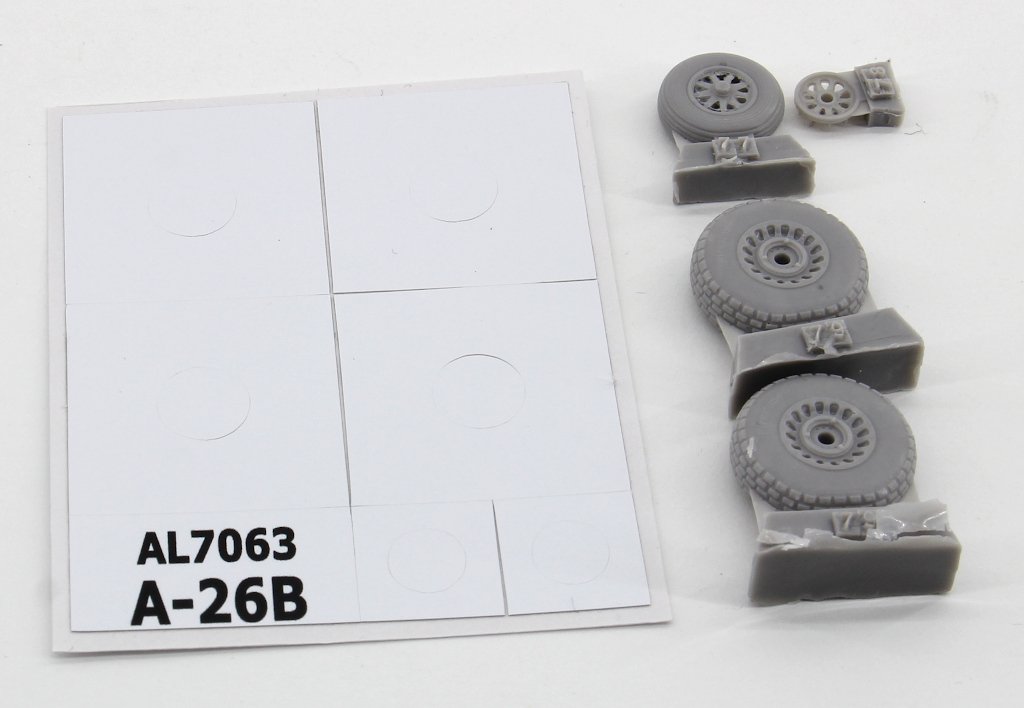
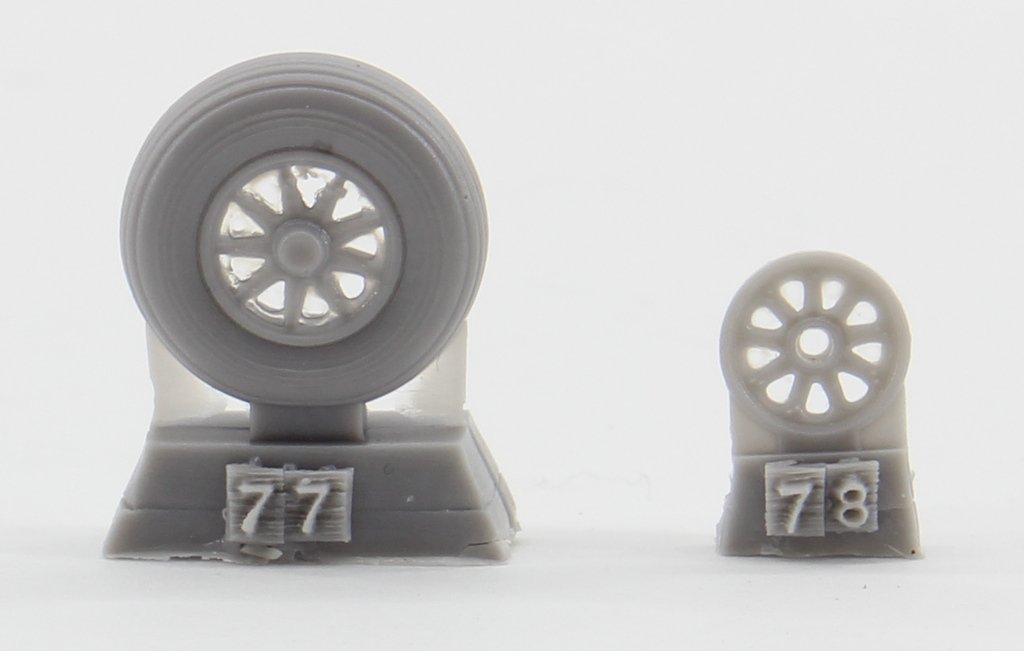
4 resin items are supplied (2 complete main wheels, 1 front wheels with separate rim)
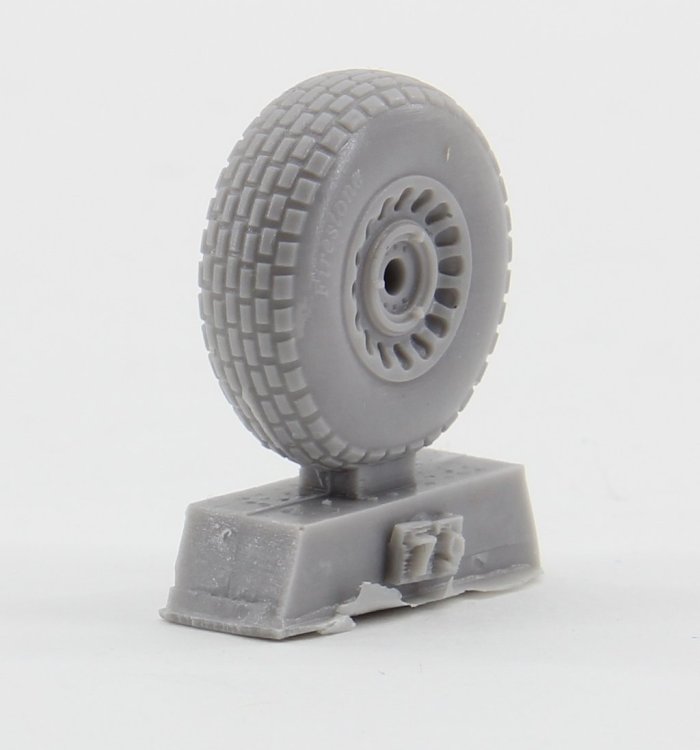

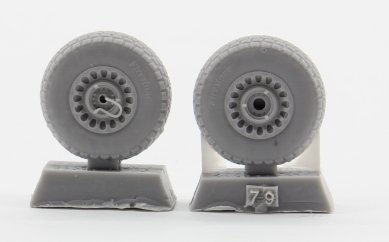
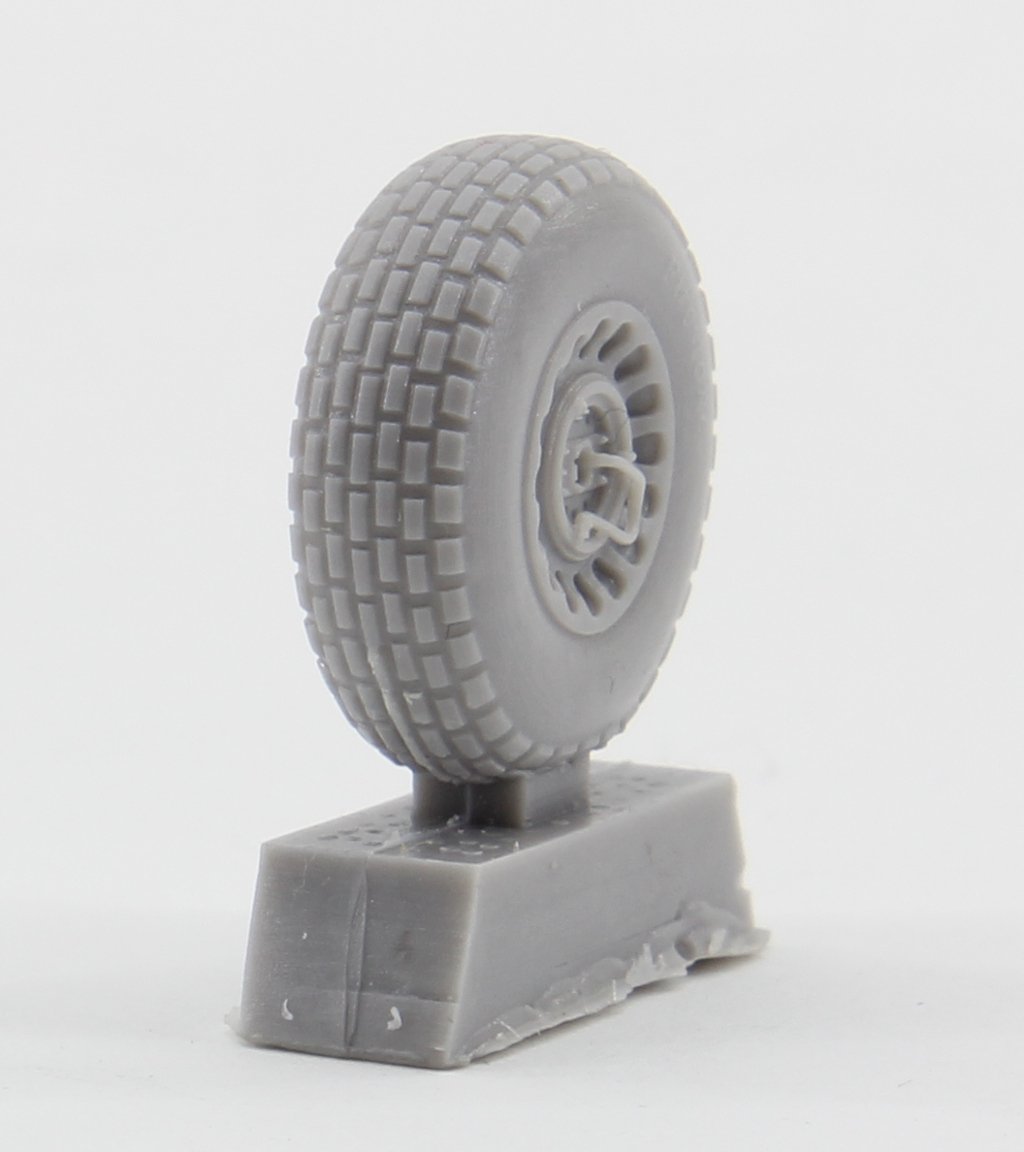
The main wheels present an exquisite detail that will show up upon painting. The tire pattern will benefit from a proper weathering.
The front wheel also boosts a nice and in scale detail. Some care will be needed to clean up the rim and remove the wheel from the moulding block.
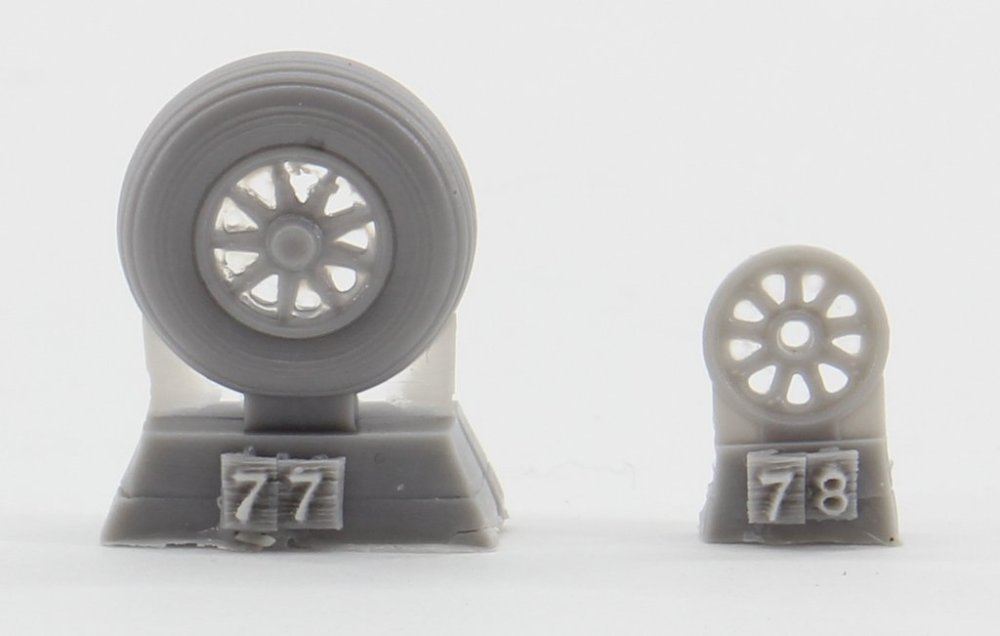
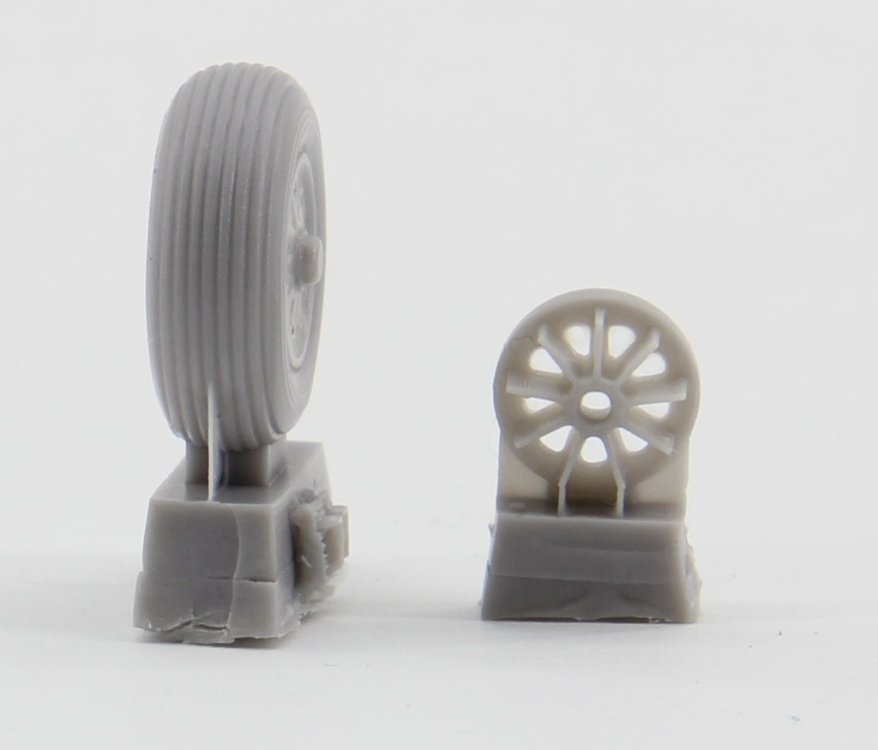
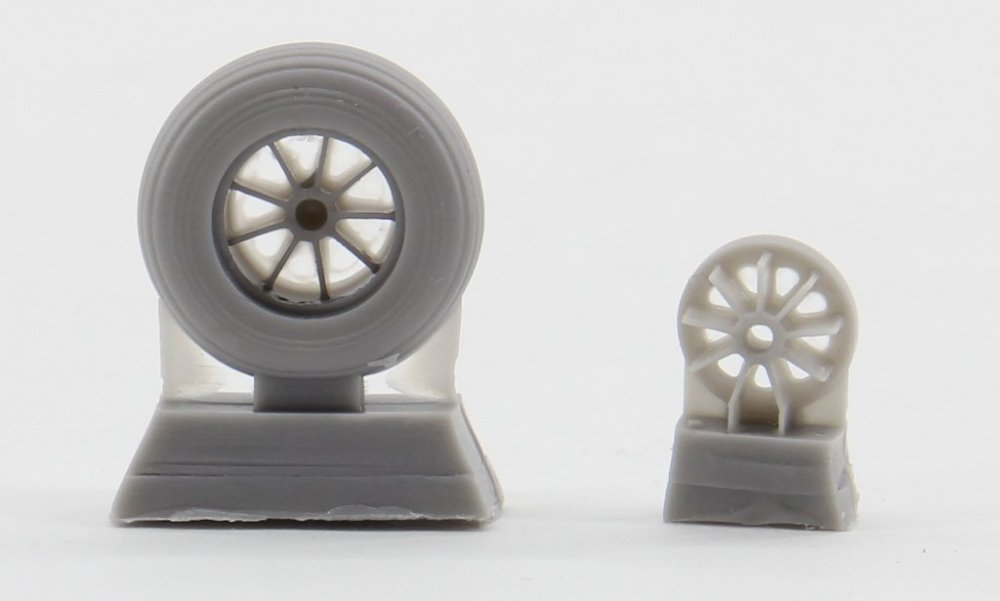
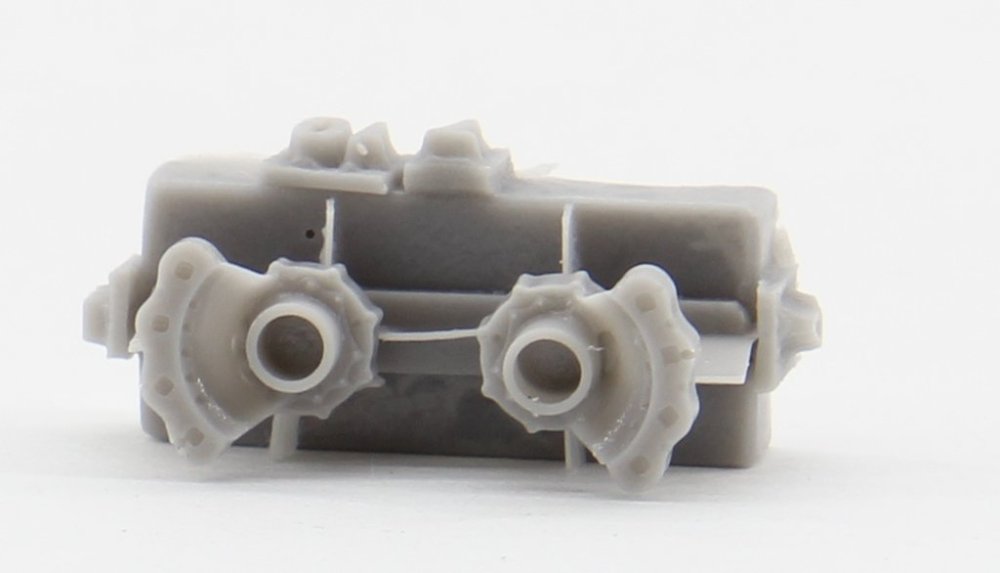
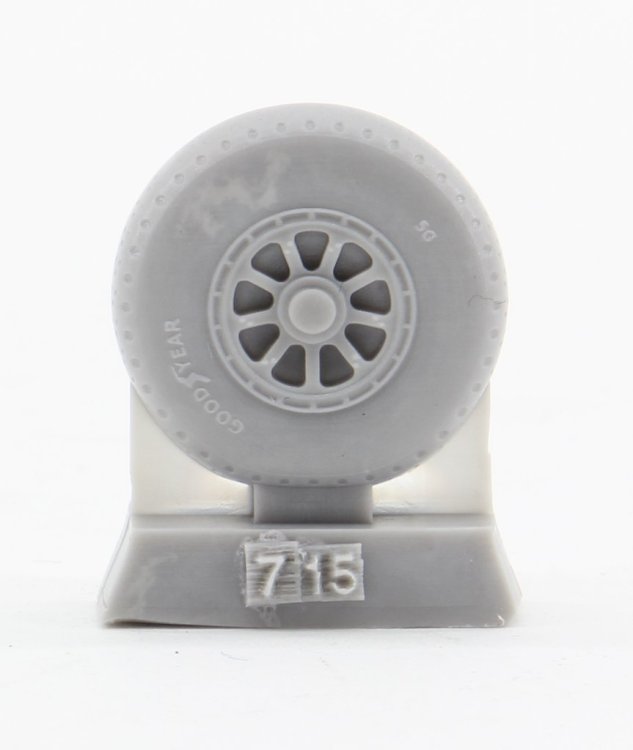
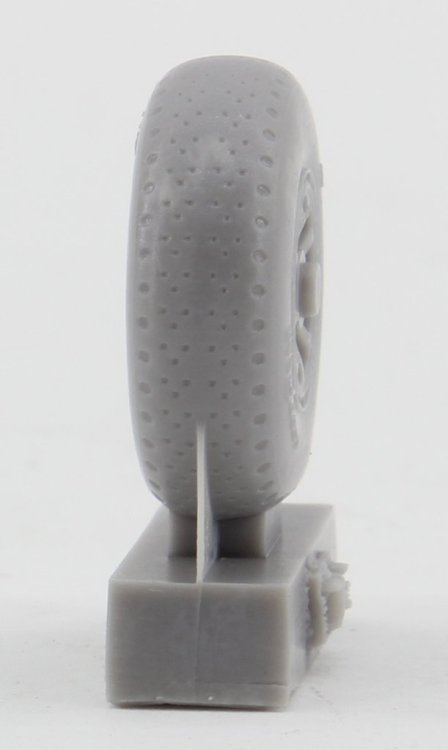
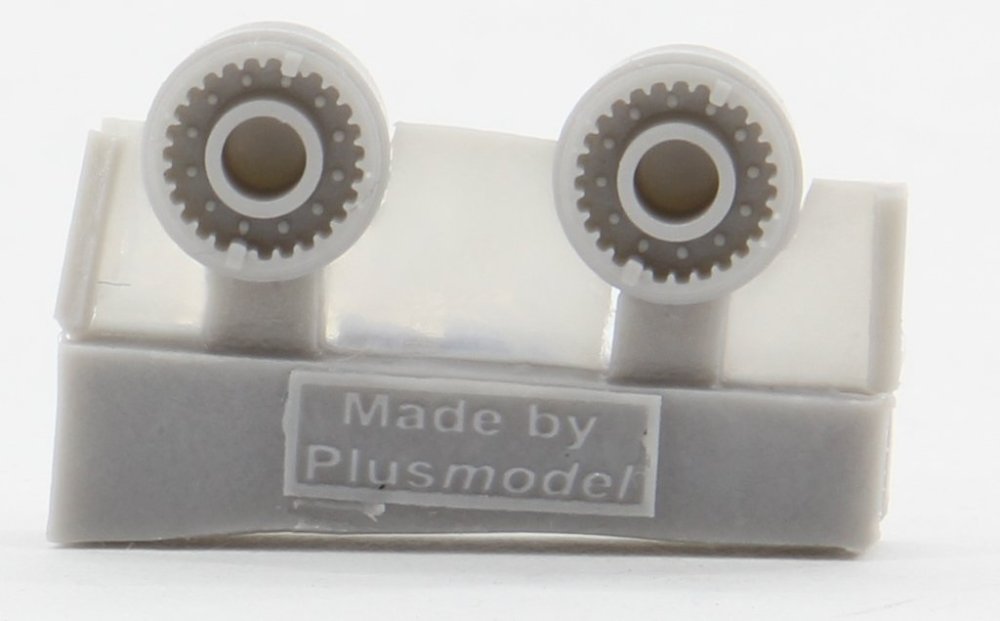
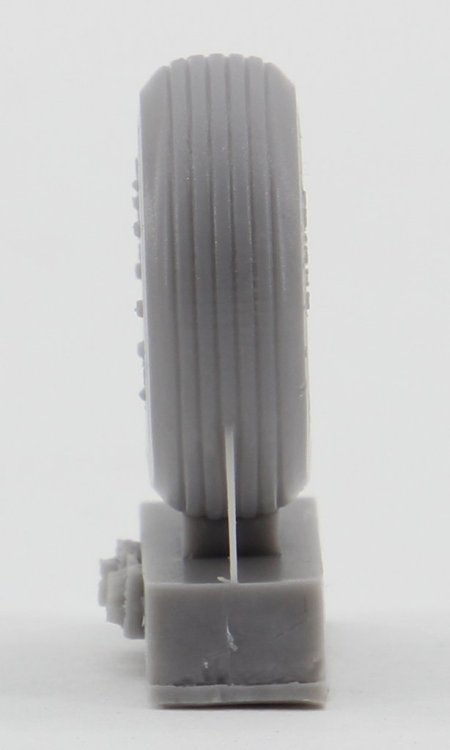
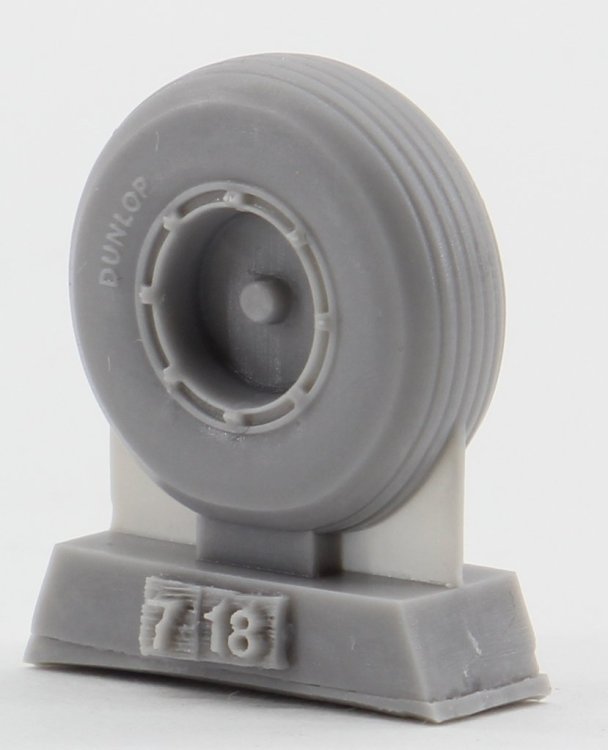
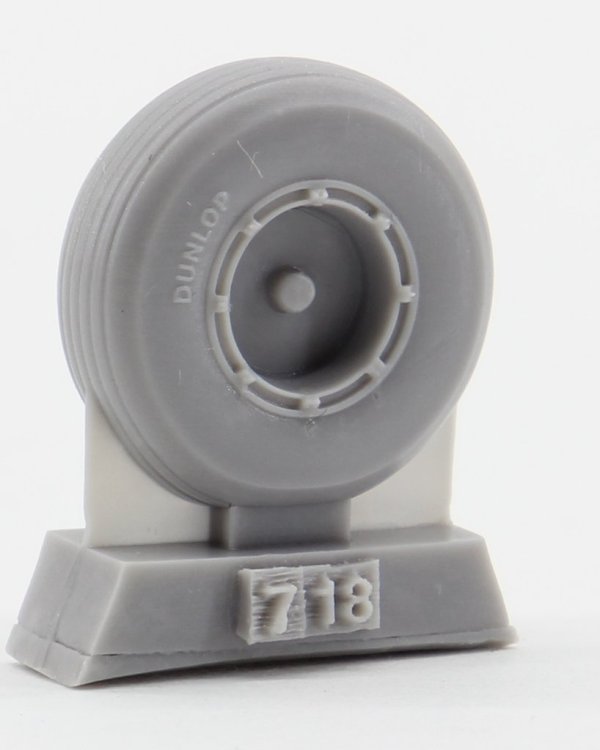
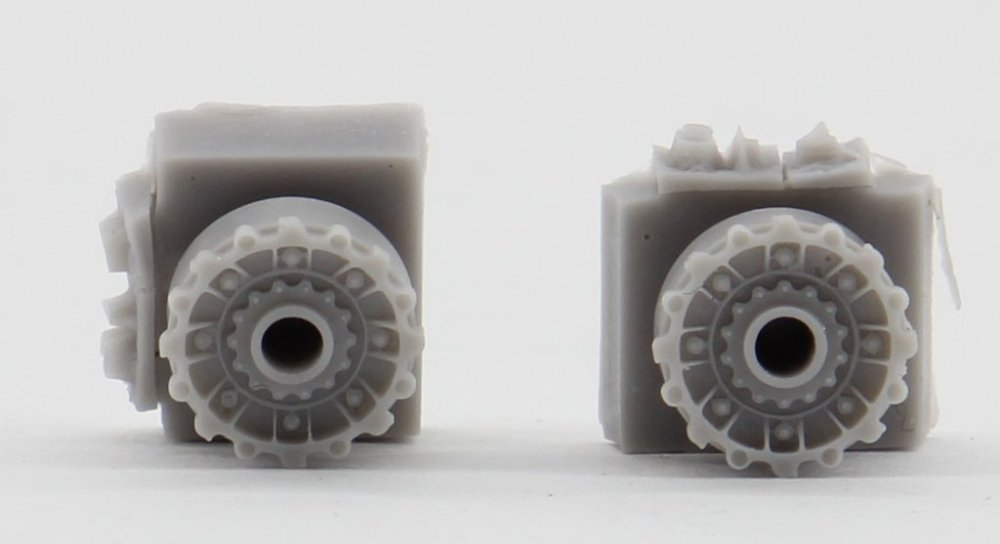
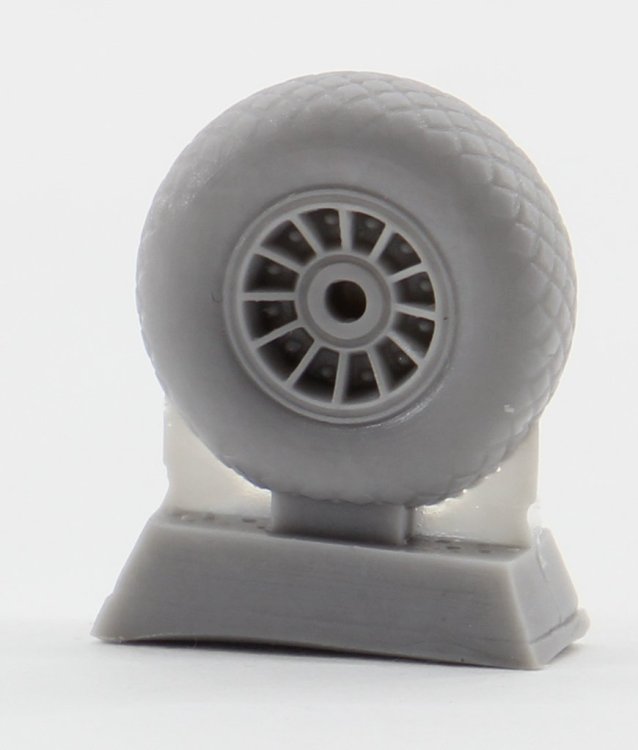
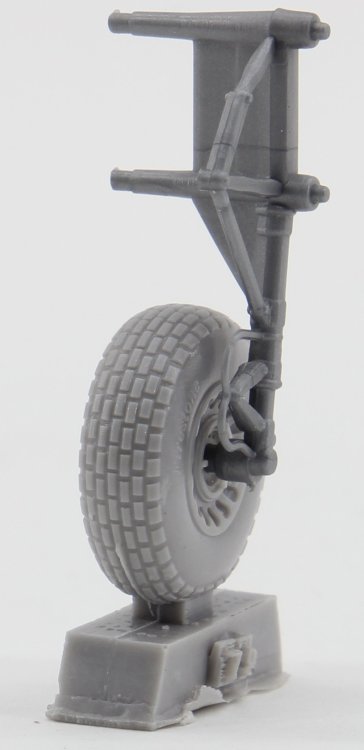
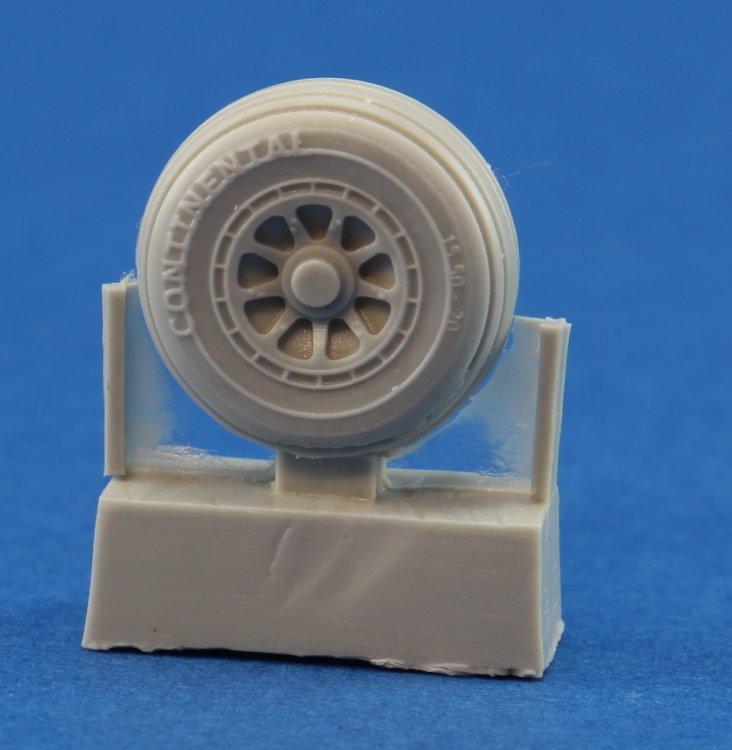
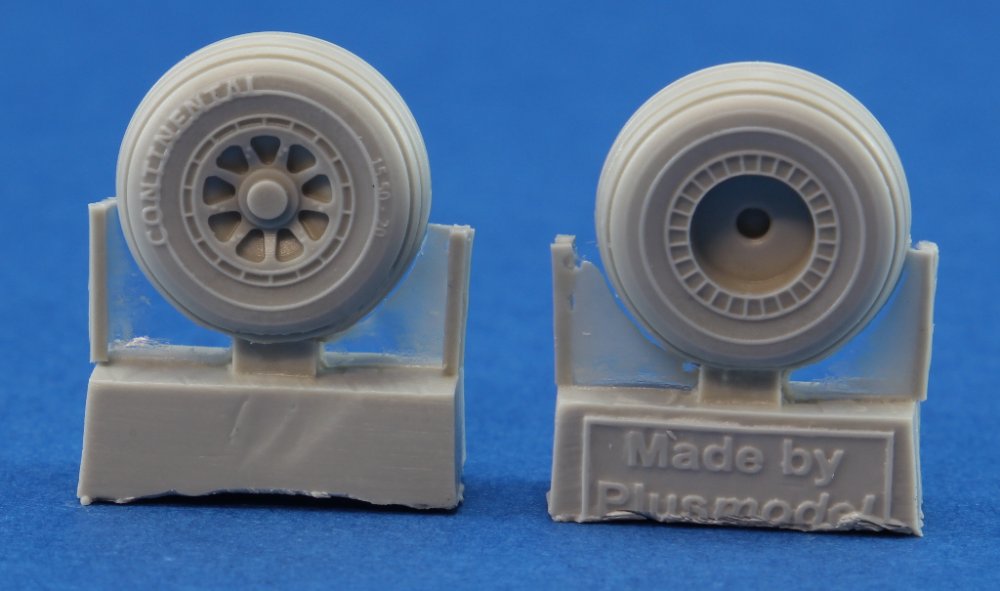
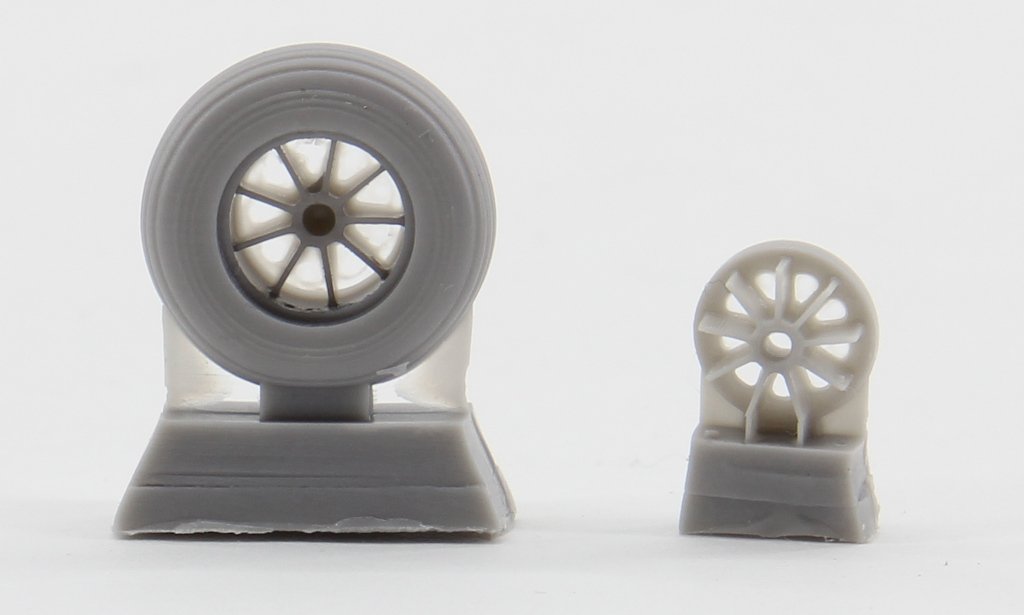
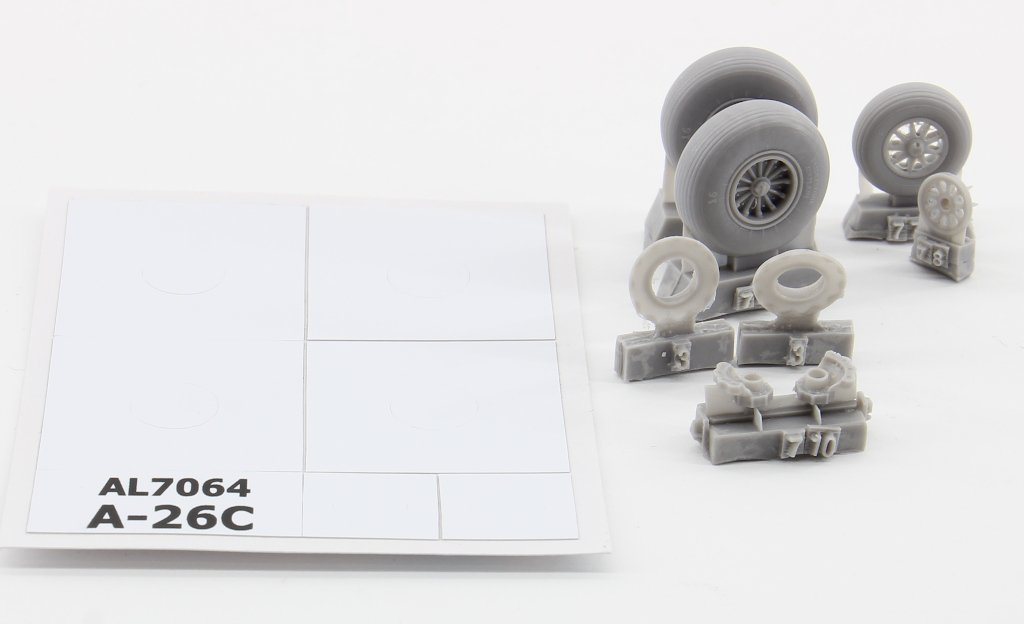
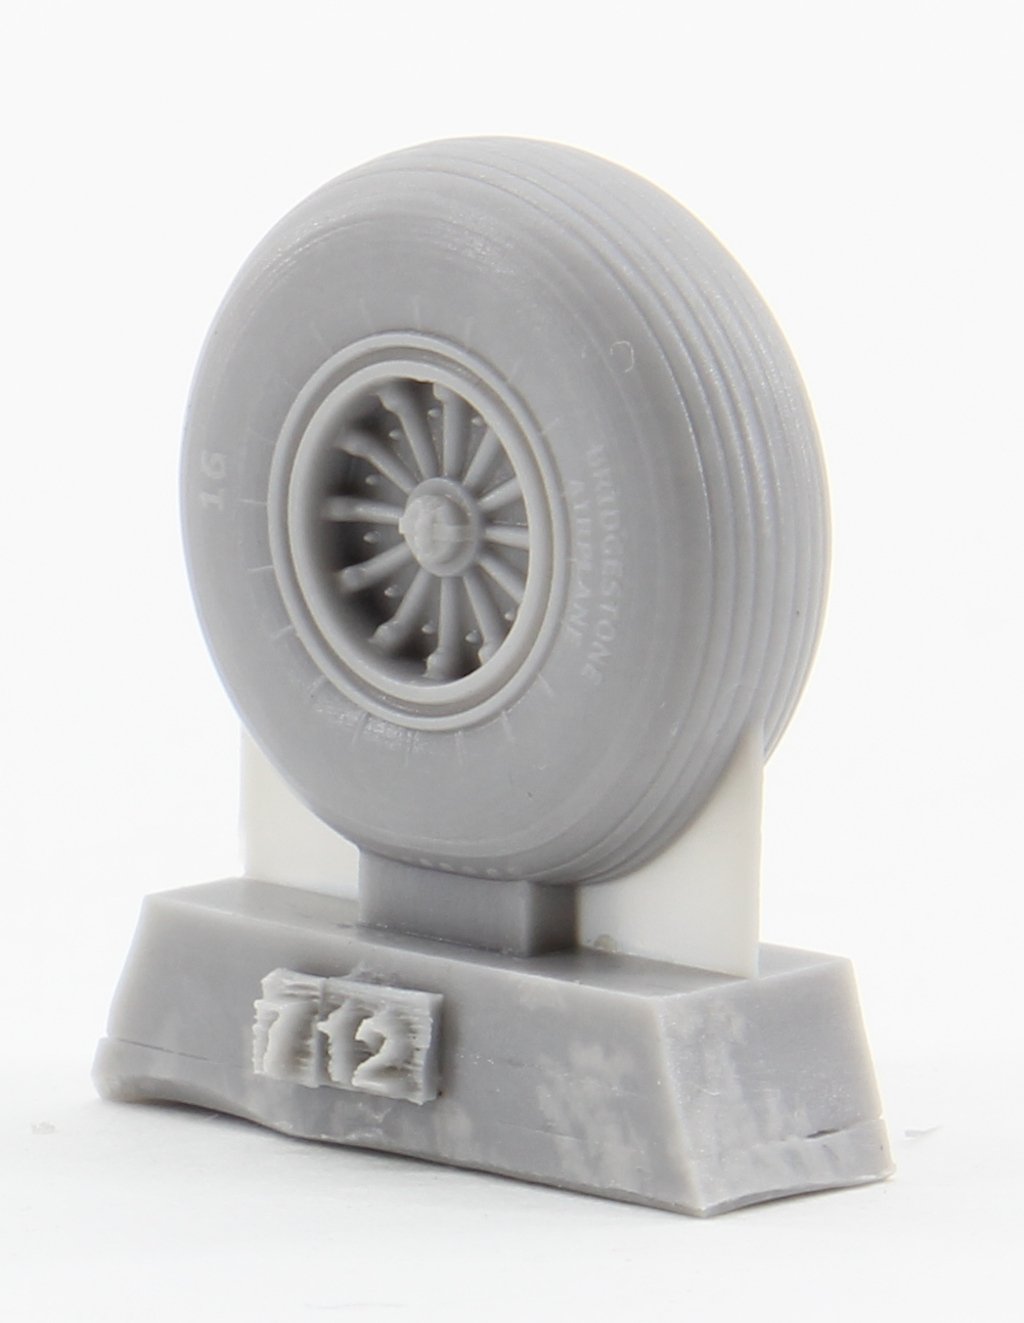
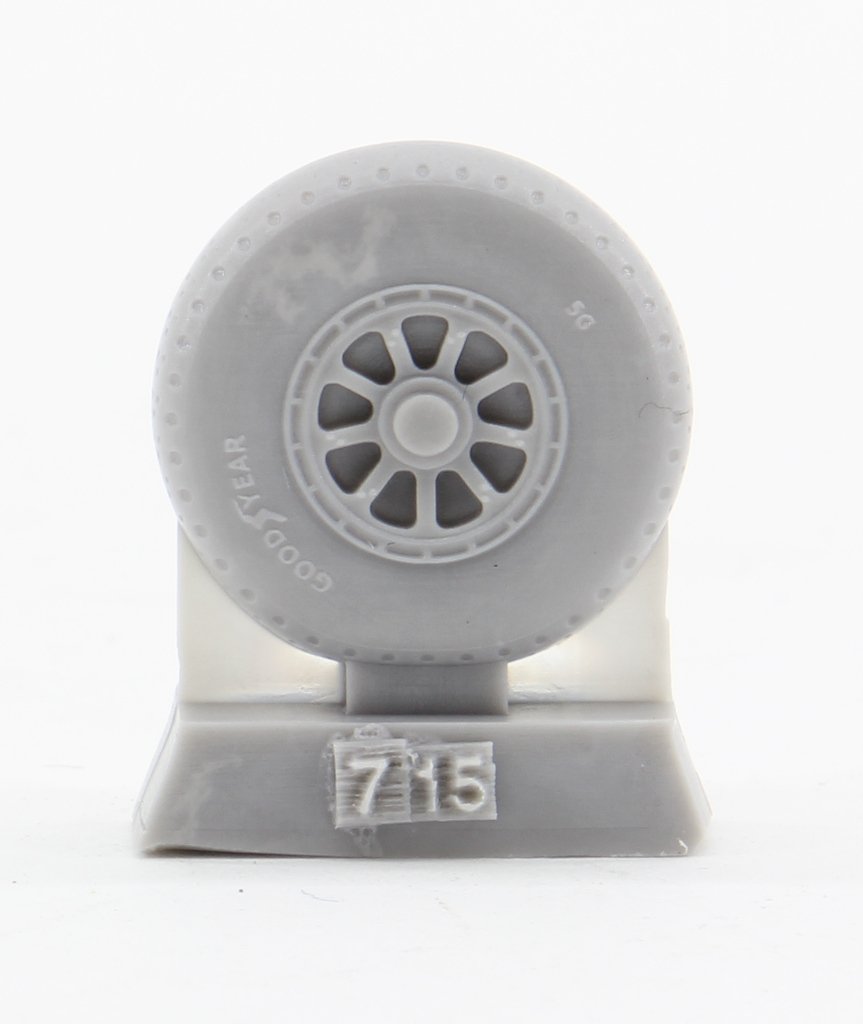
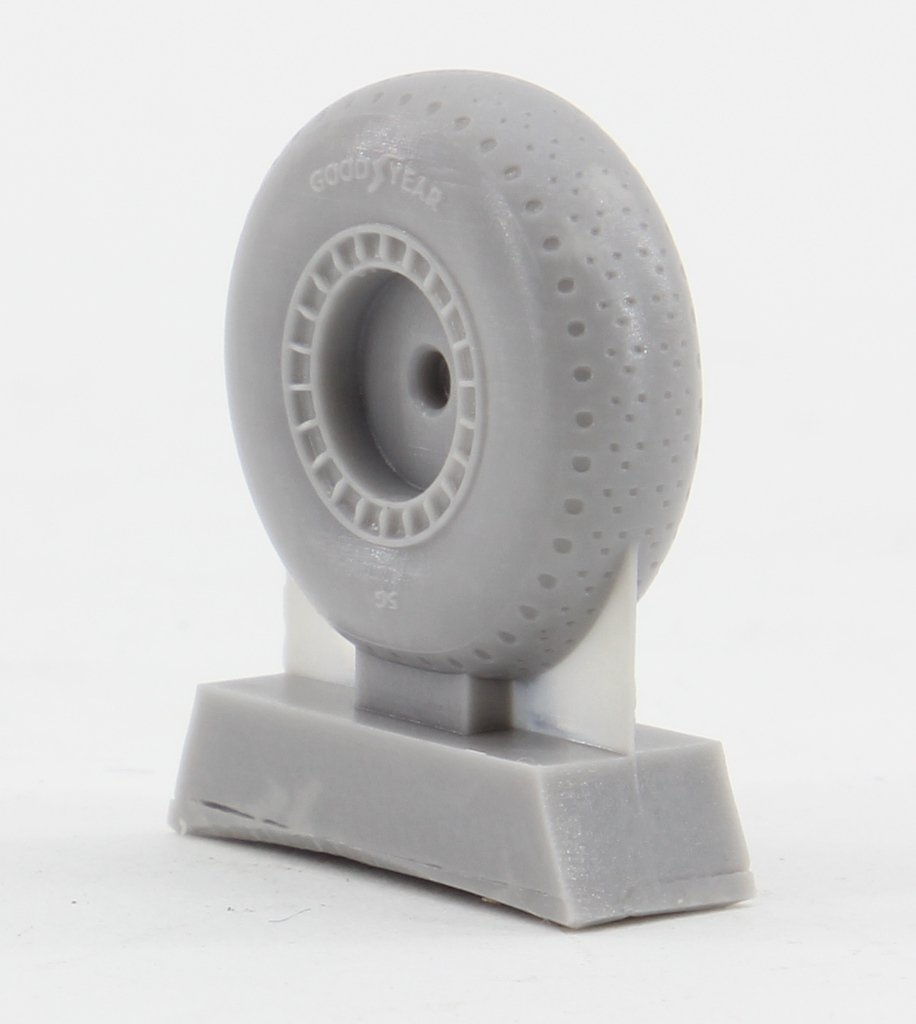
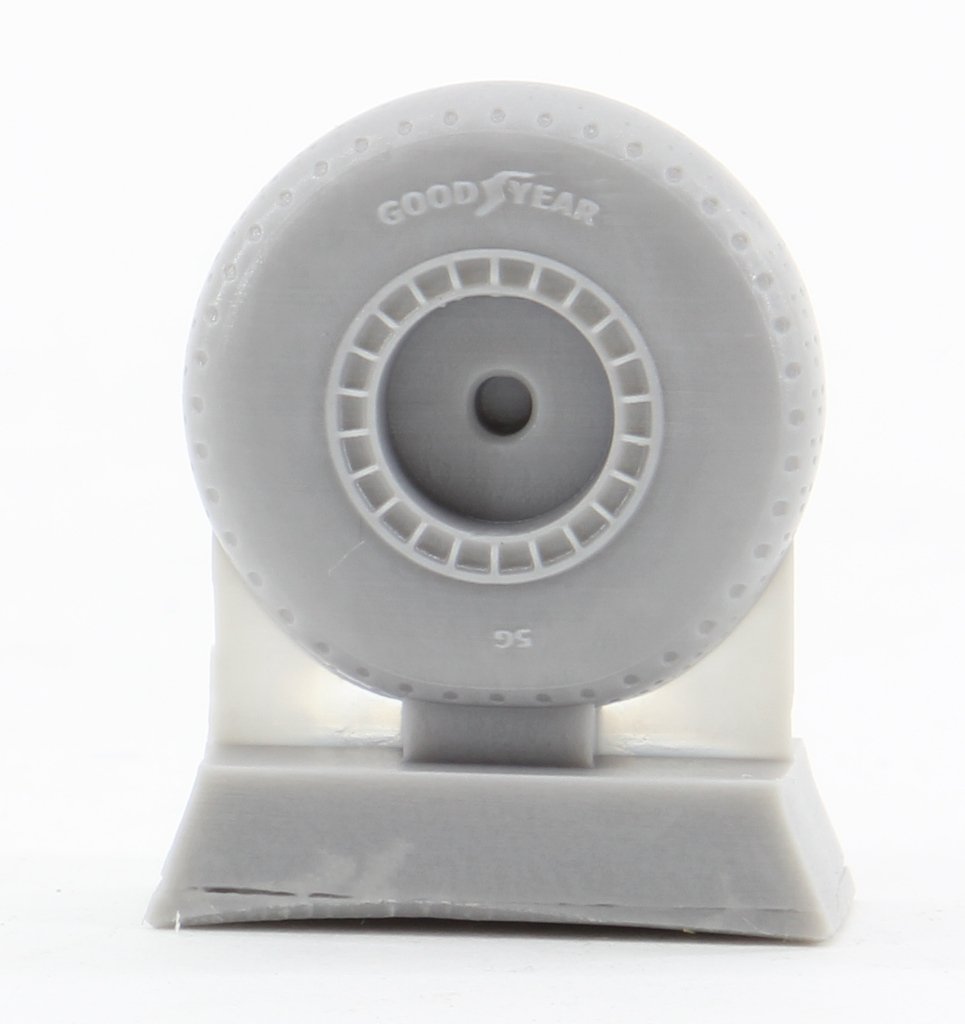
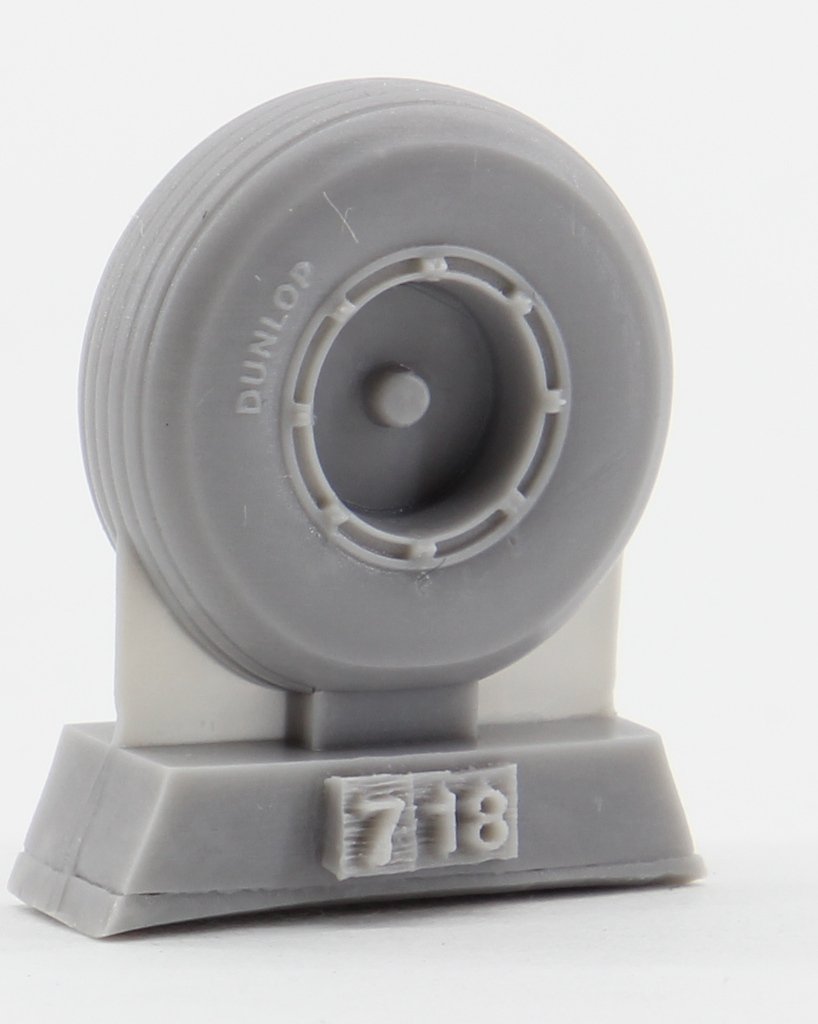
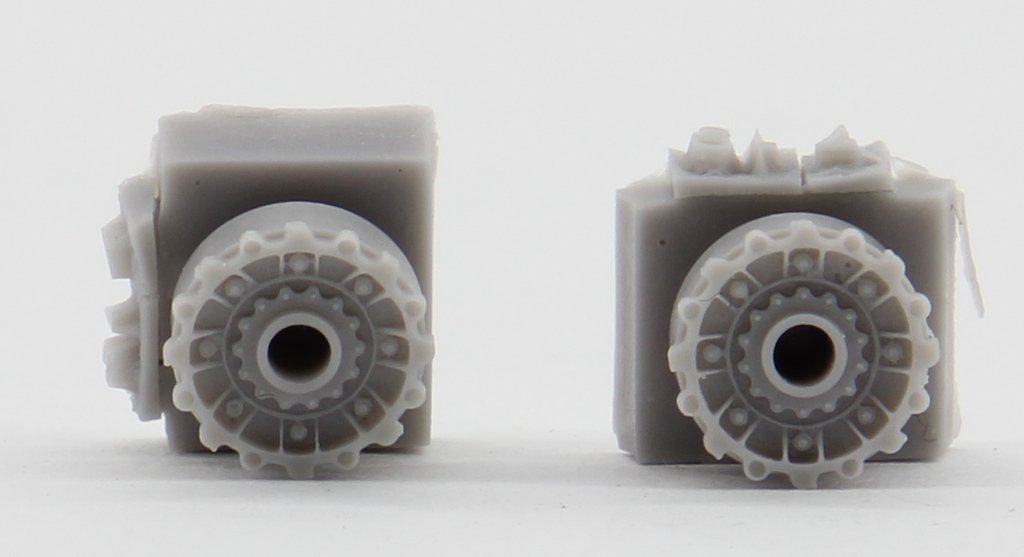
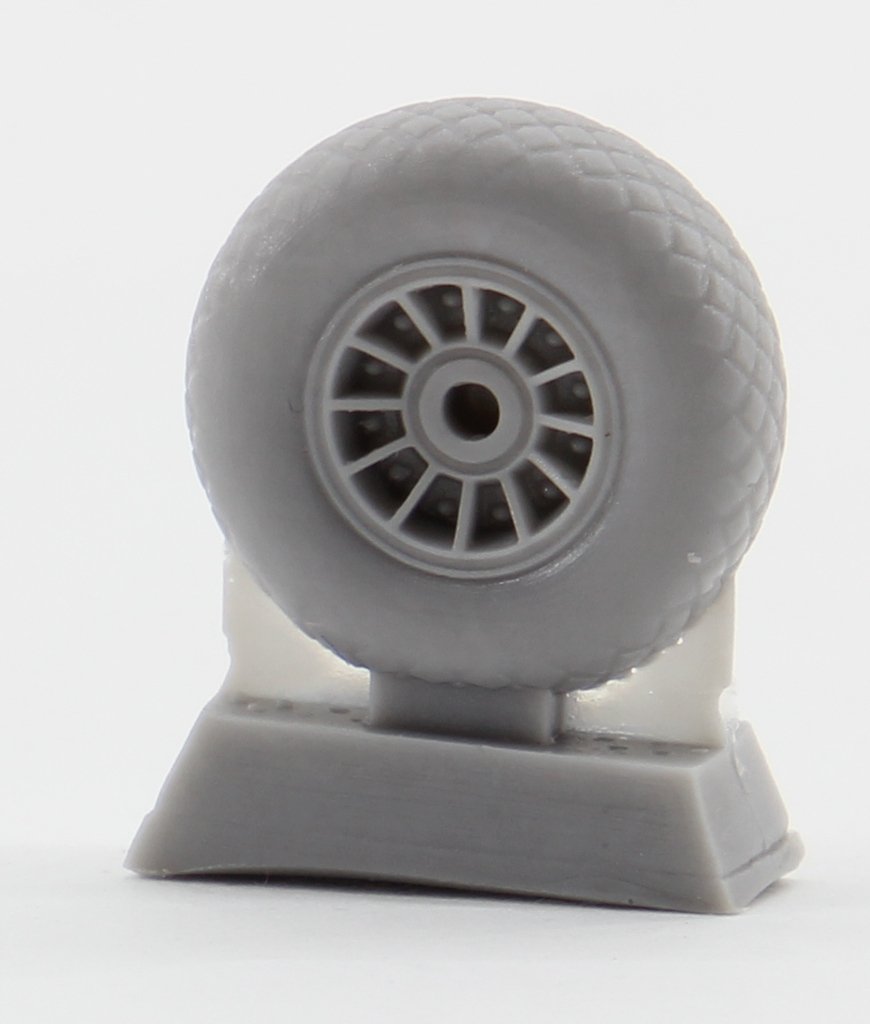
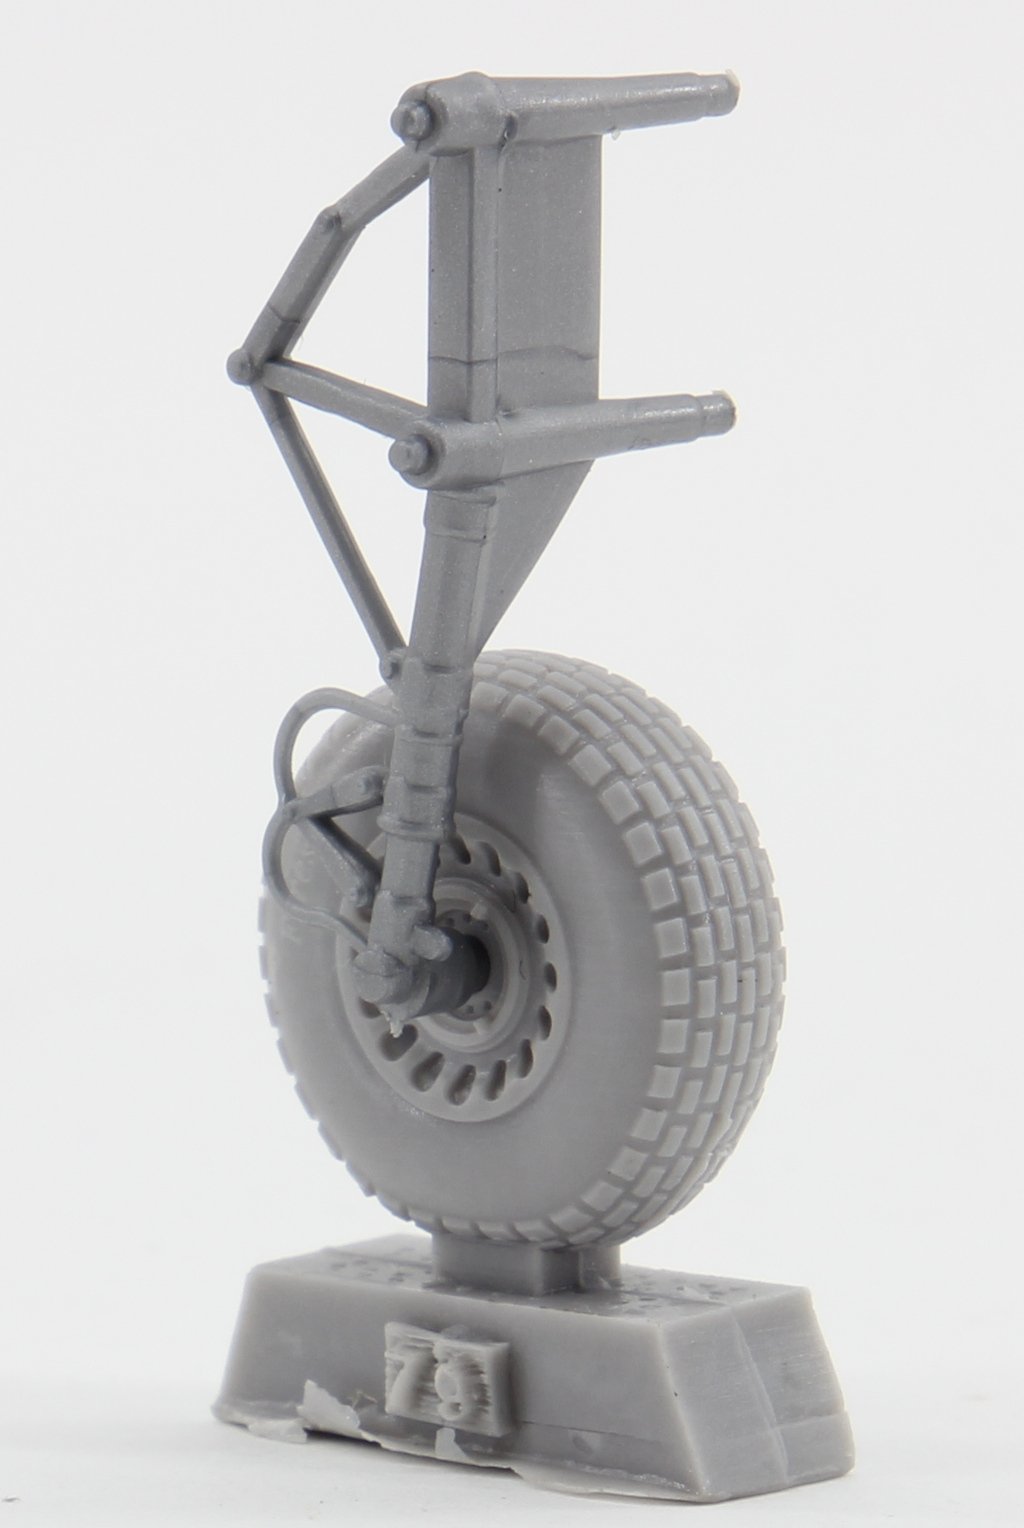
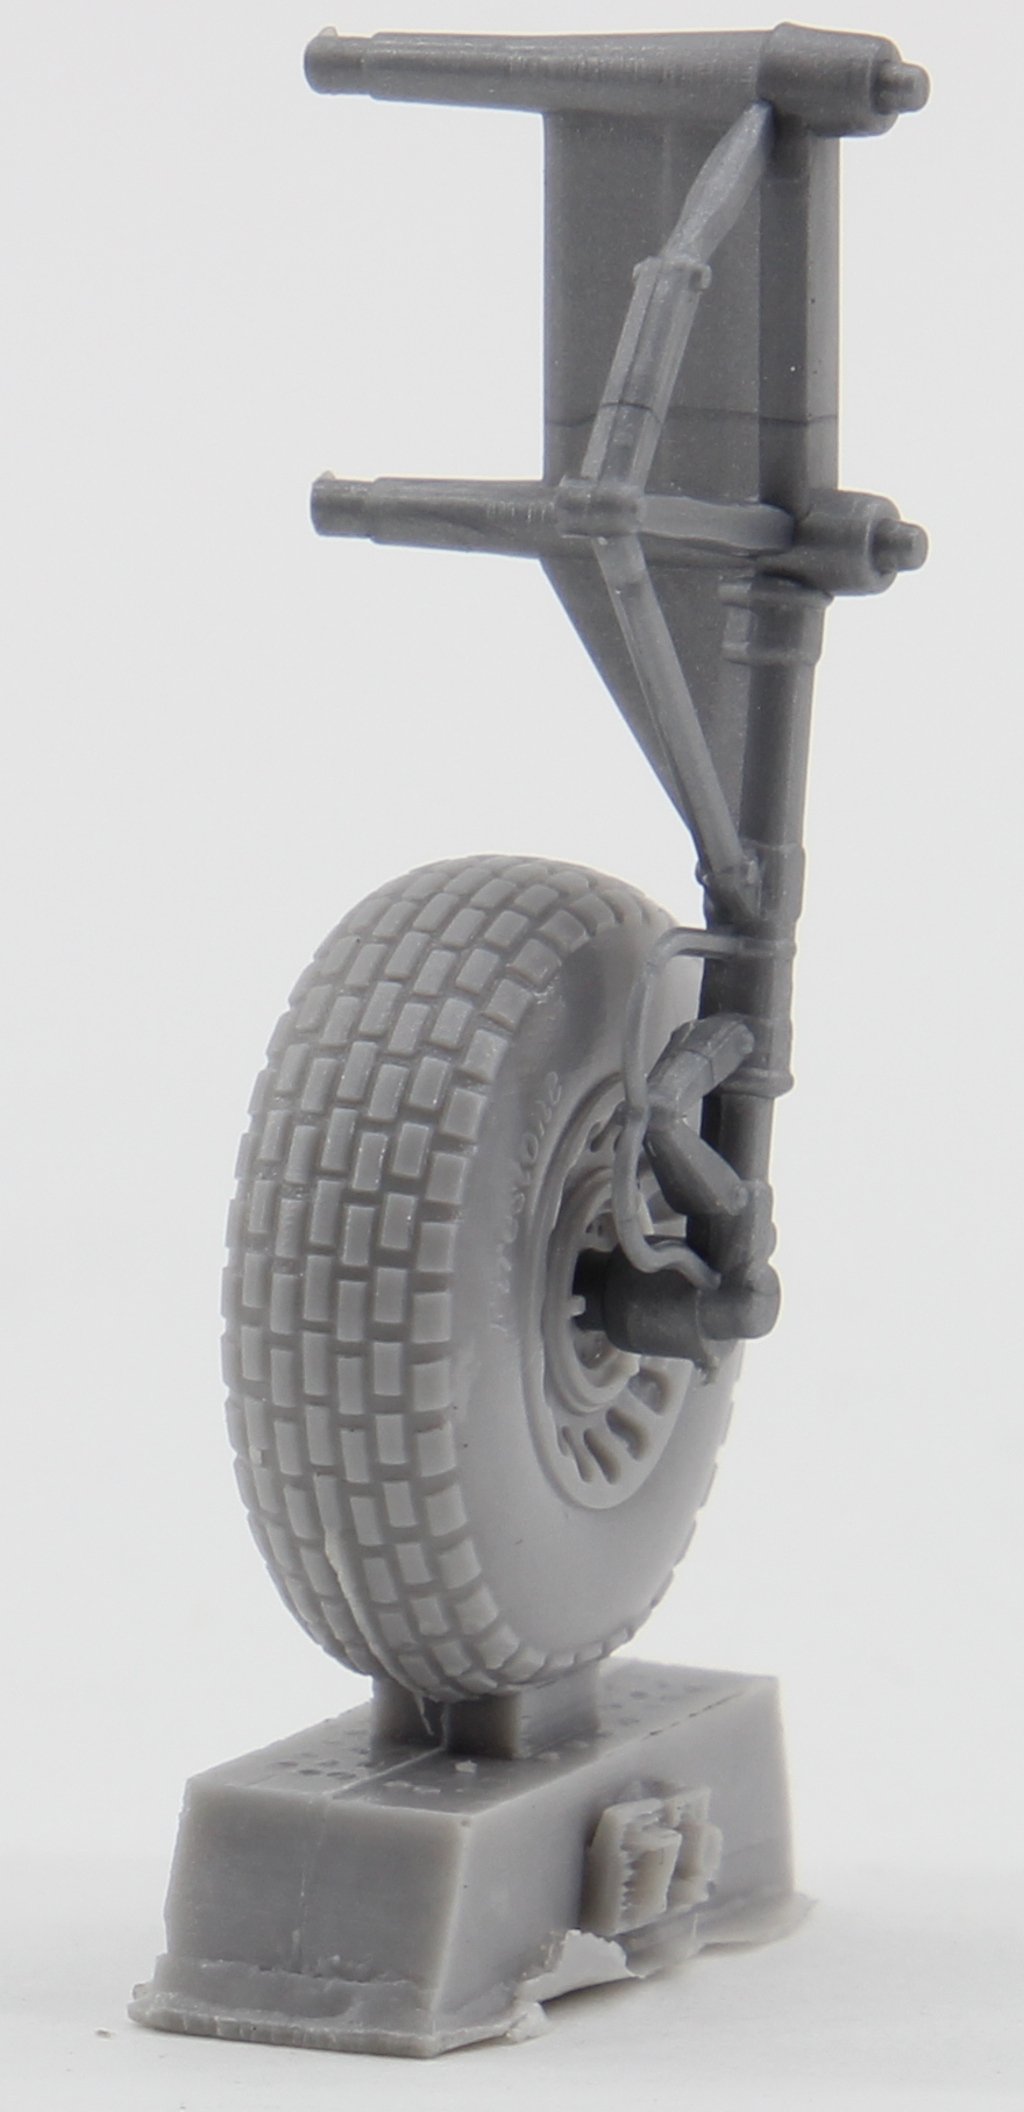
AL7064 A-26B Invader wheels grooved pattern

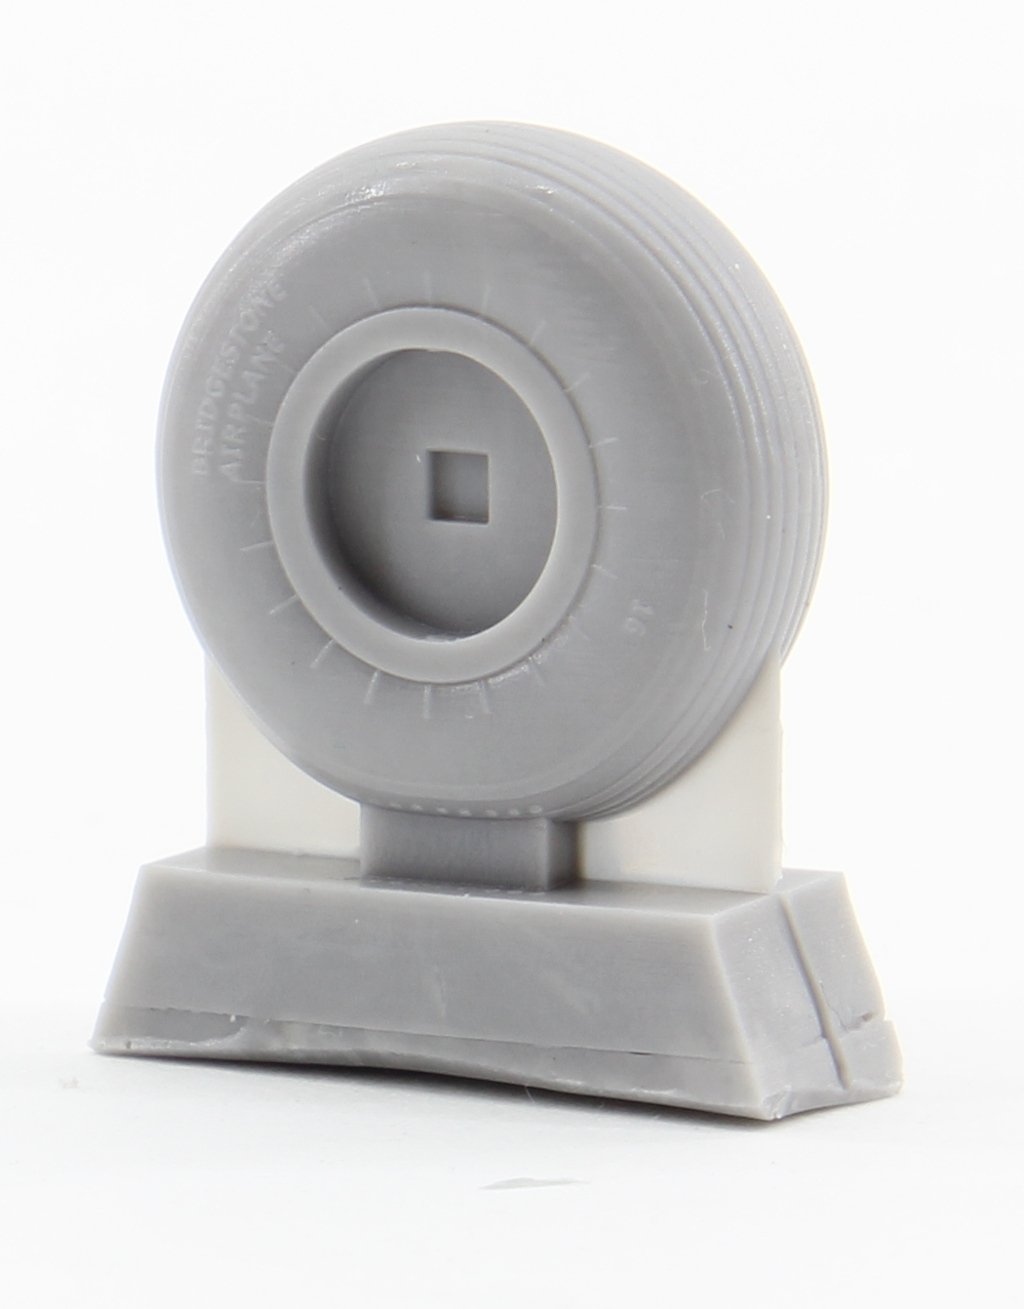
This set is the most complex of them all, as the main wheels are accompanied by extra details on the form of the brake drums and callipers.
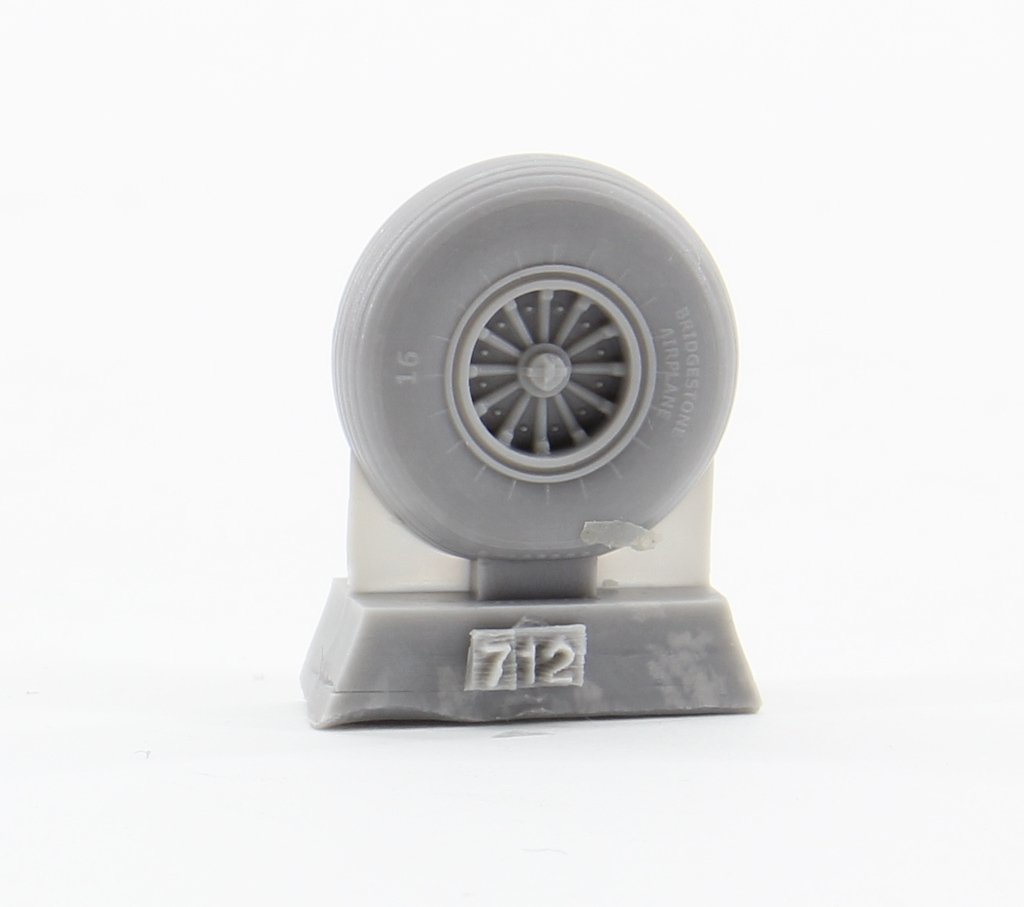
The main wheels present us a nice and soft detail on the rim and on the tire the manufacturer logo is presented. This will show with a proper paint job.
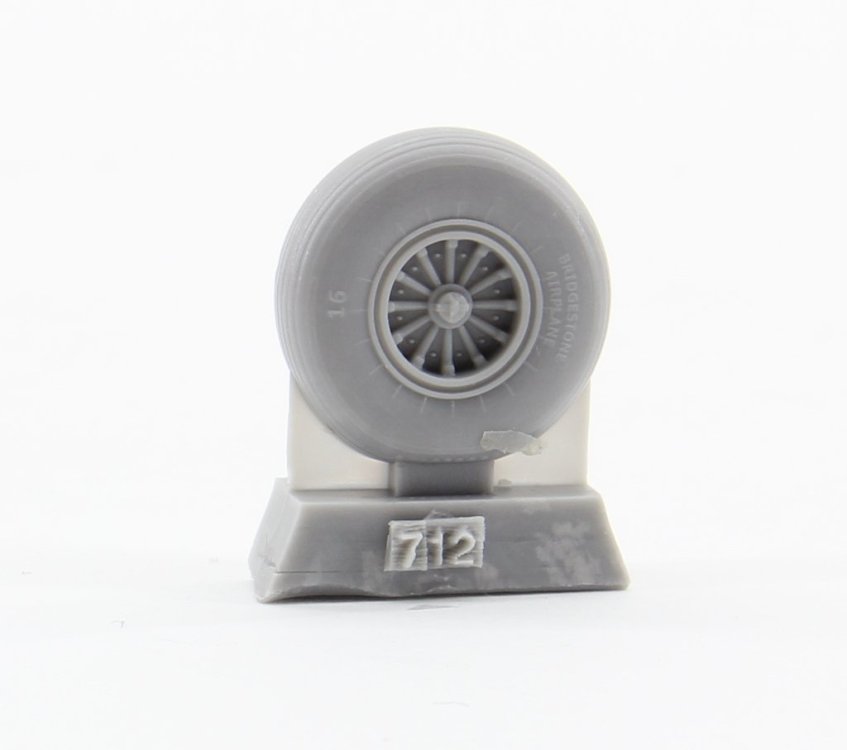
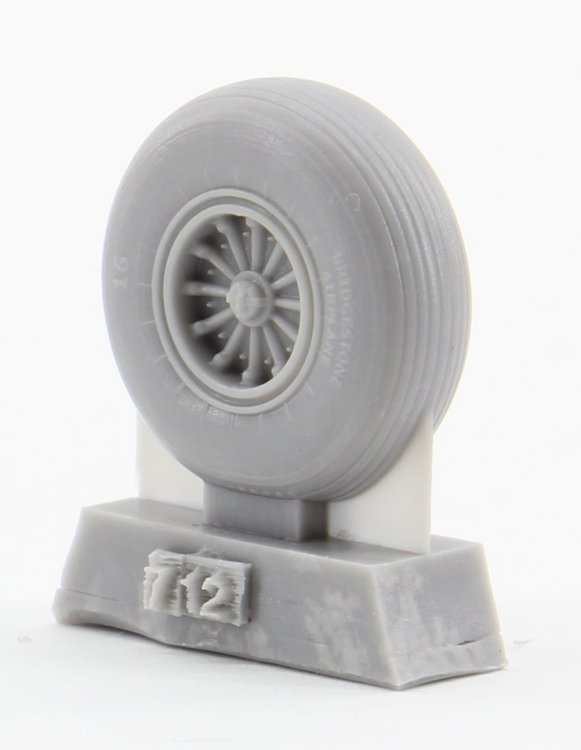
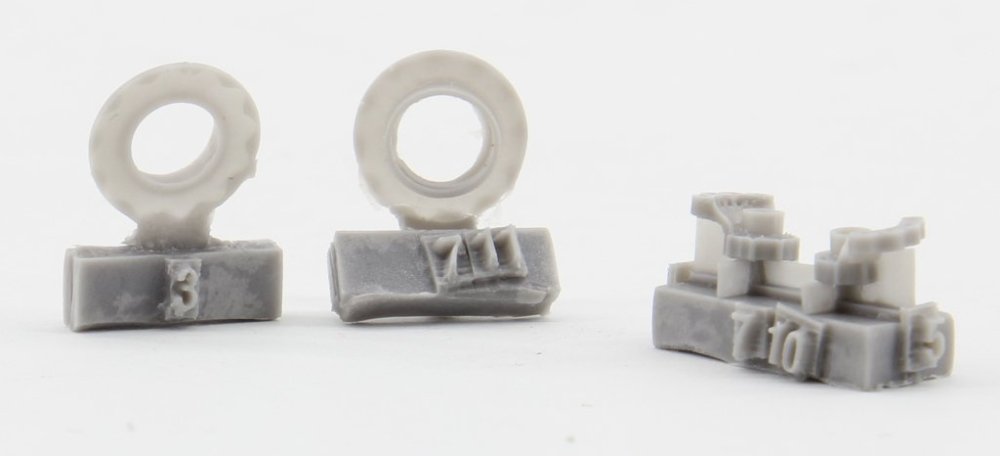
No instructions are provided so keep your references close.
The front wheel also has a nice detail, some cleaning to the rim is necessary but nothing complicated.
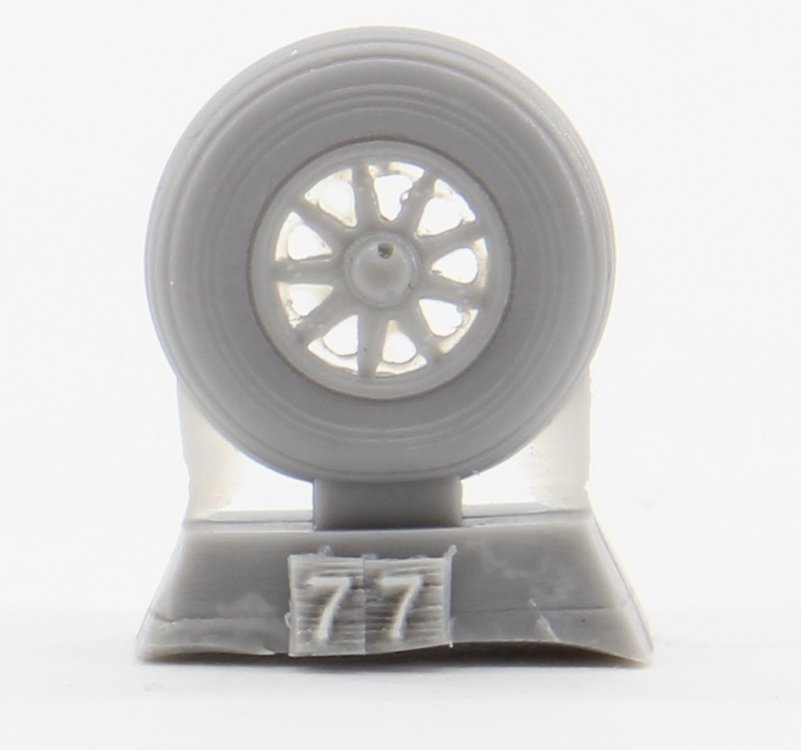
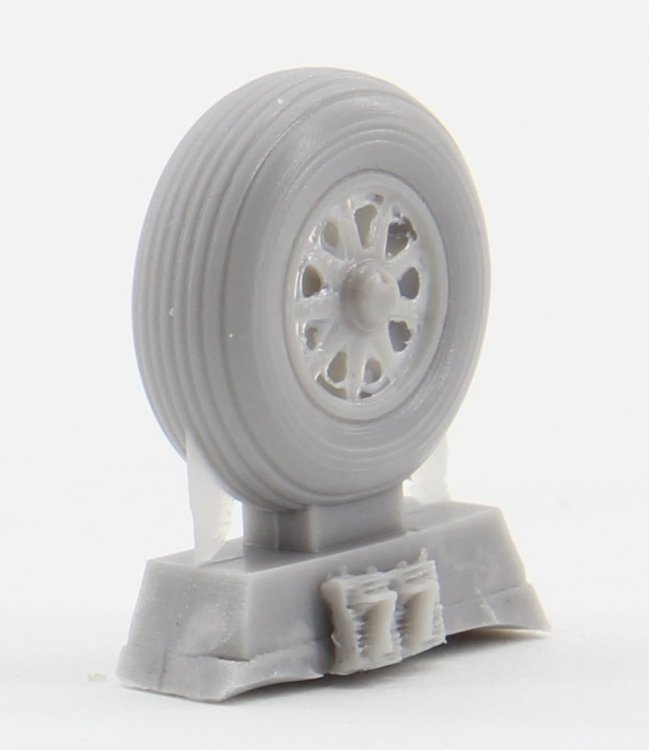

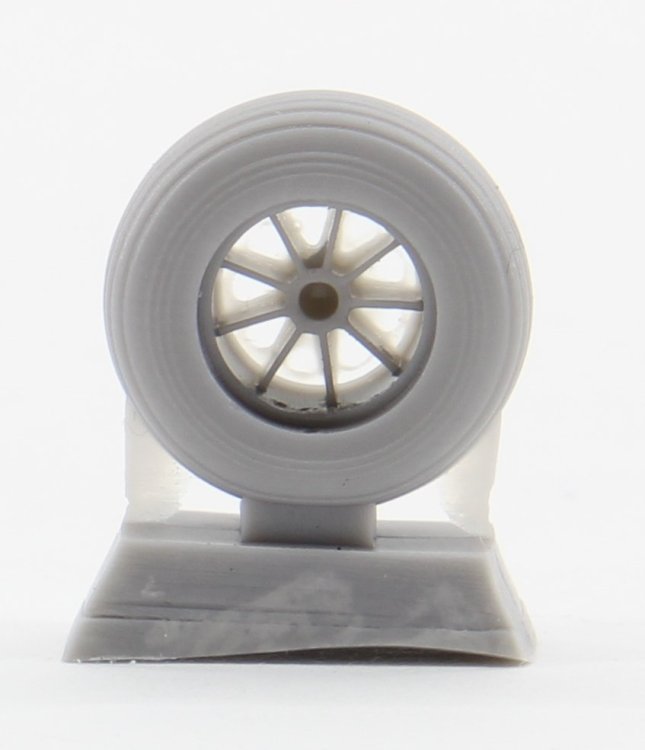
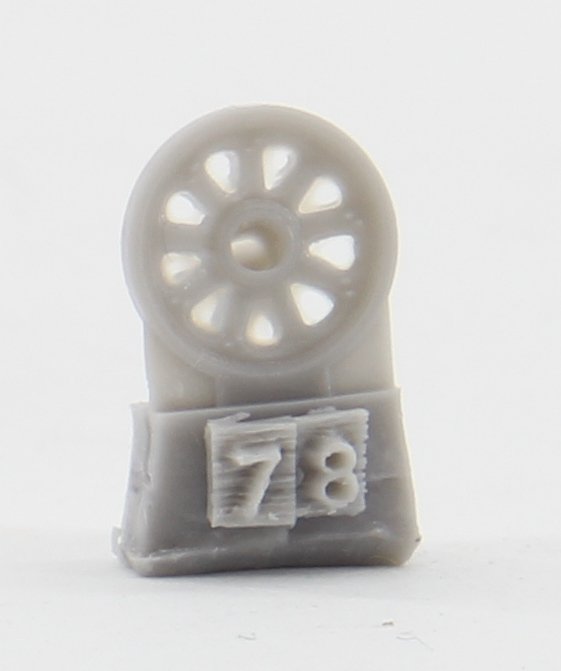
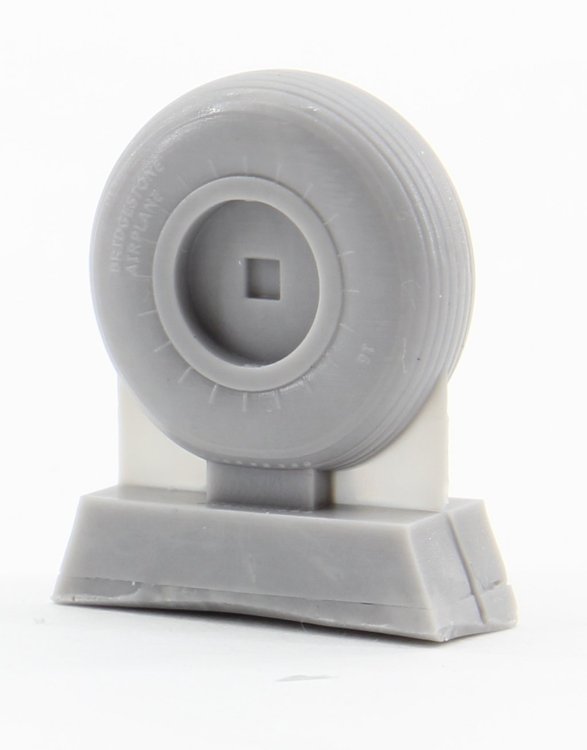
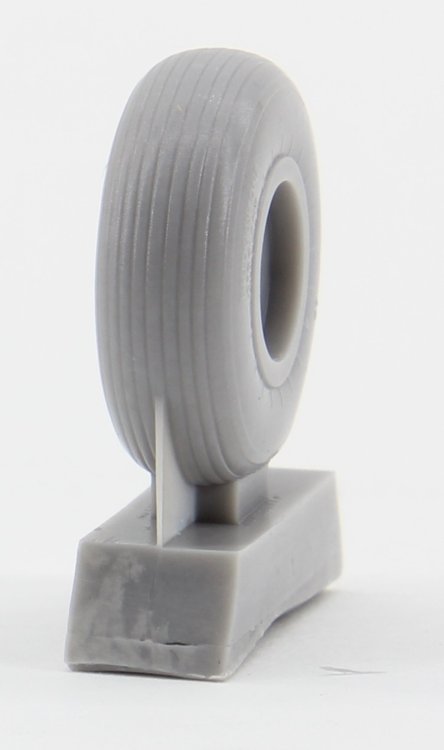
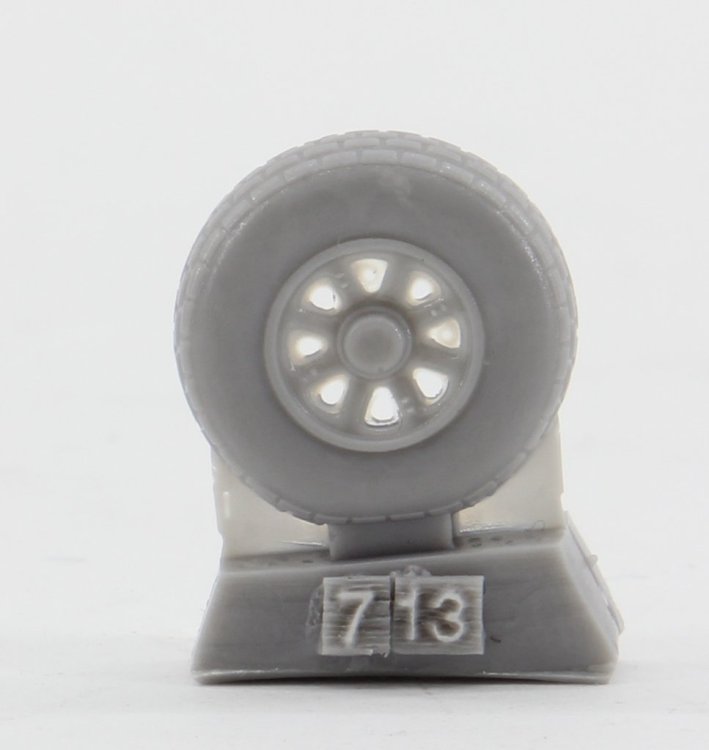
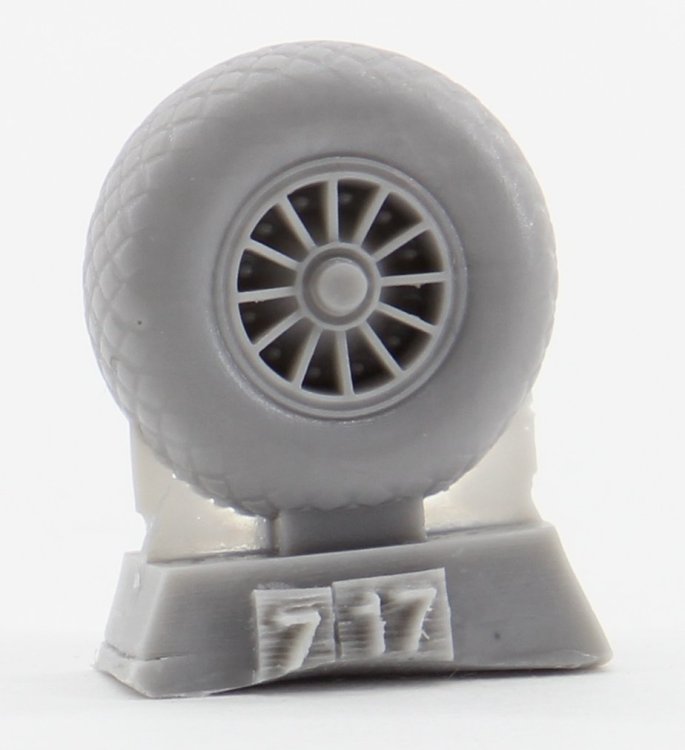
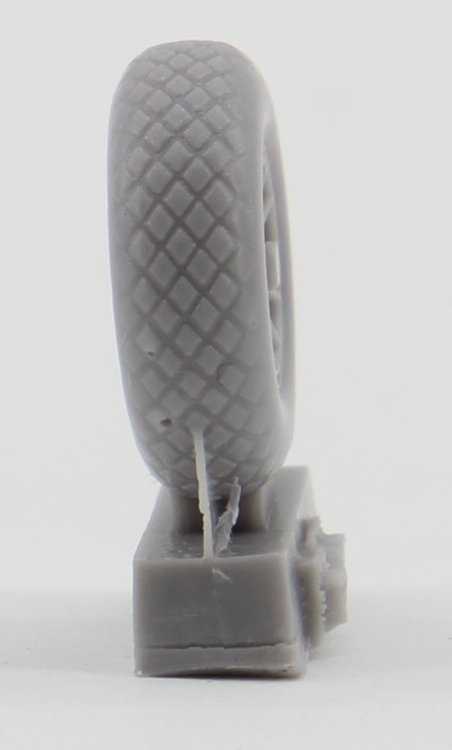
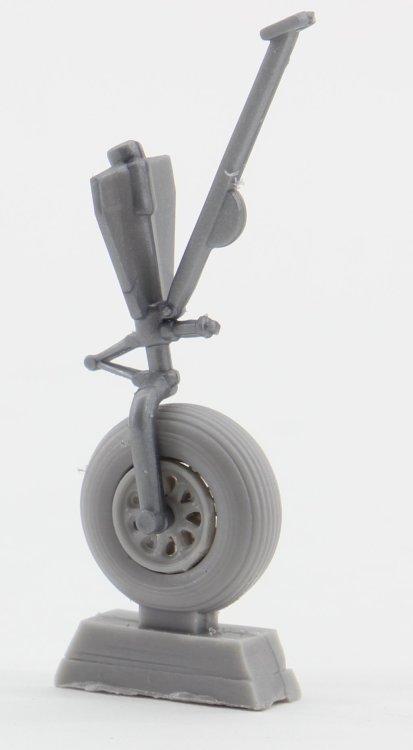
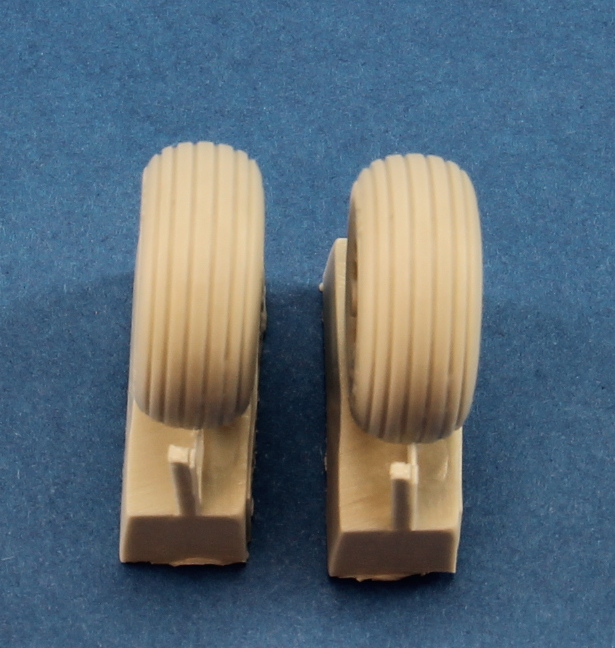
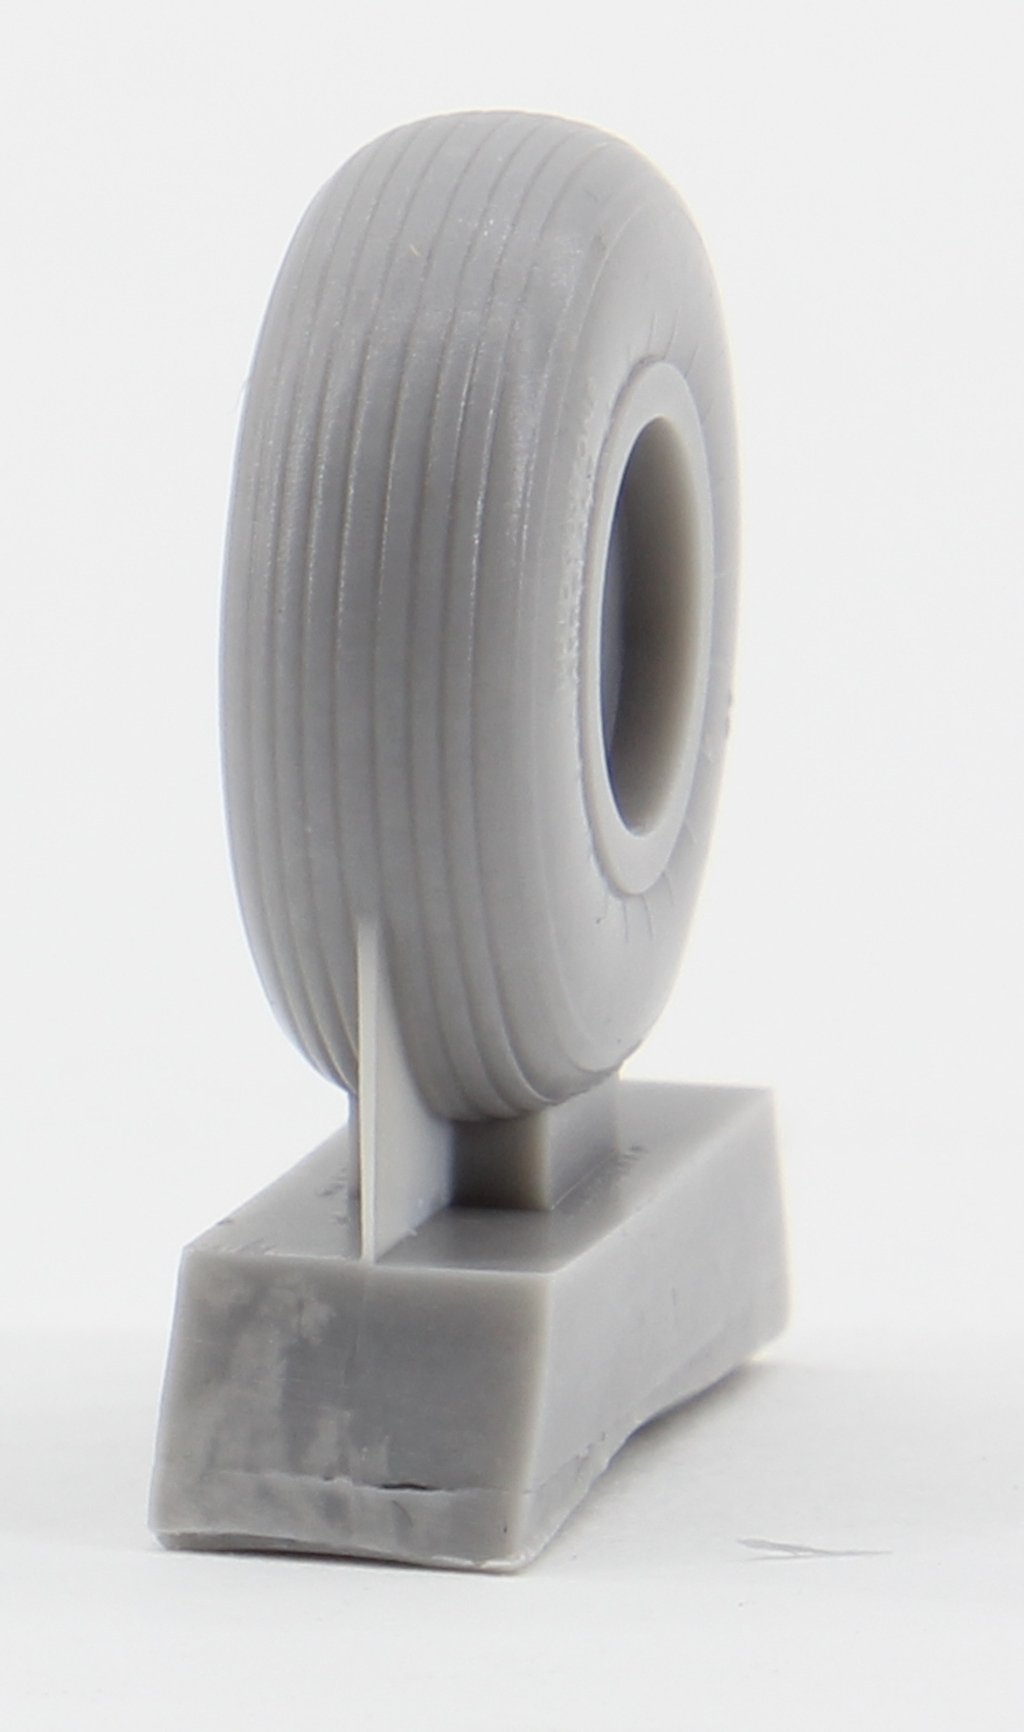
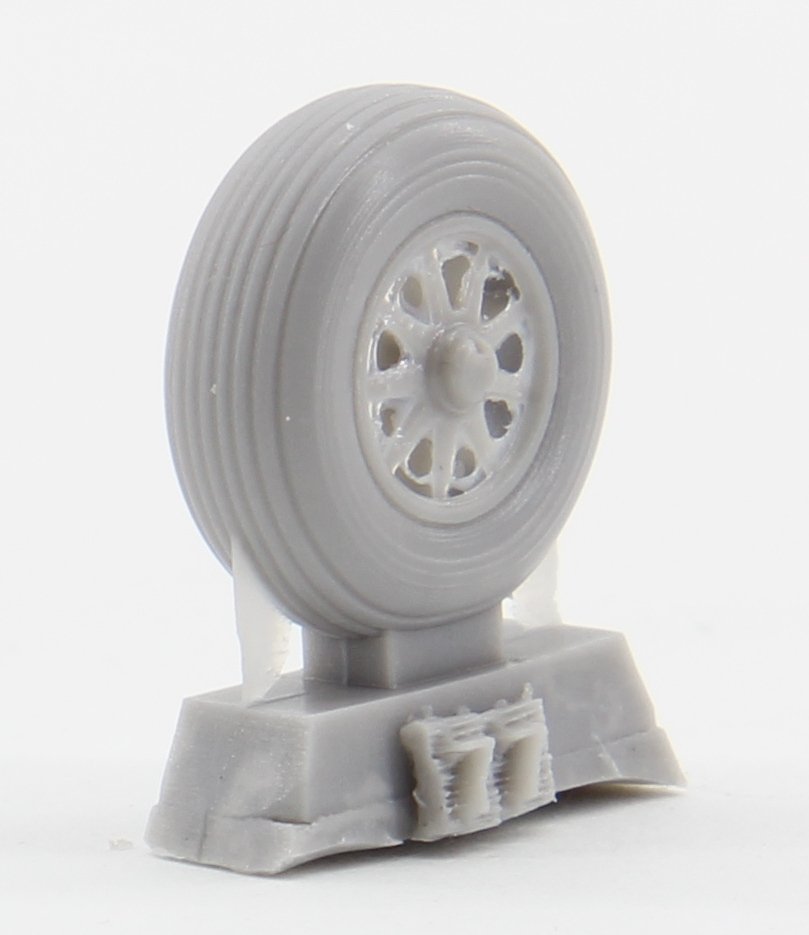
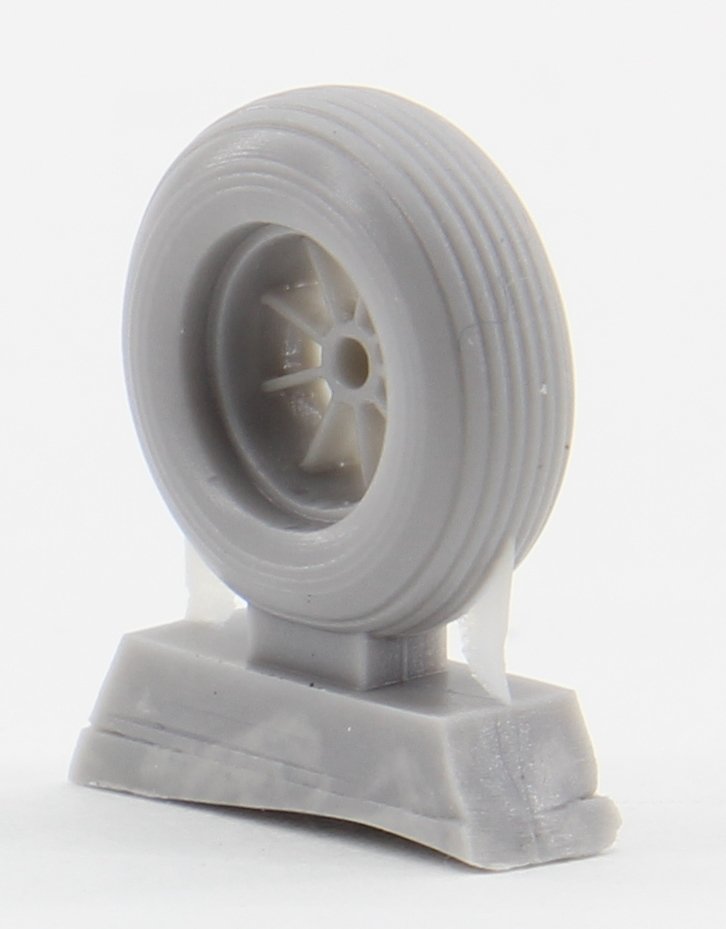
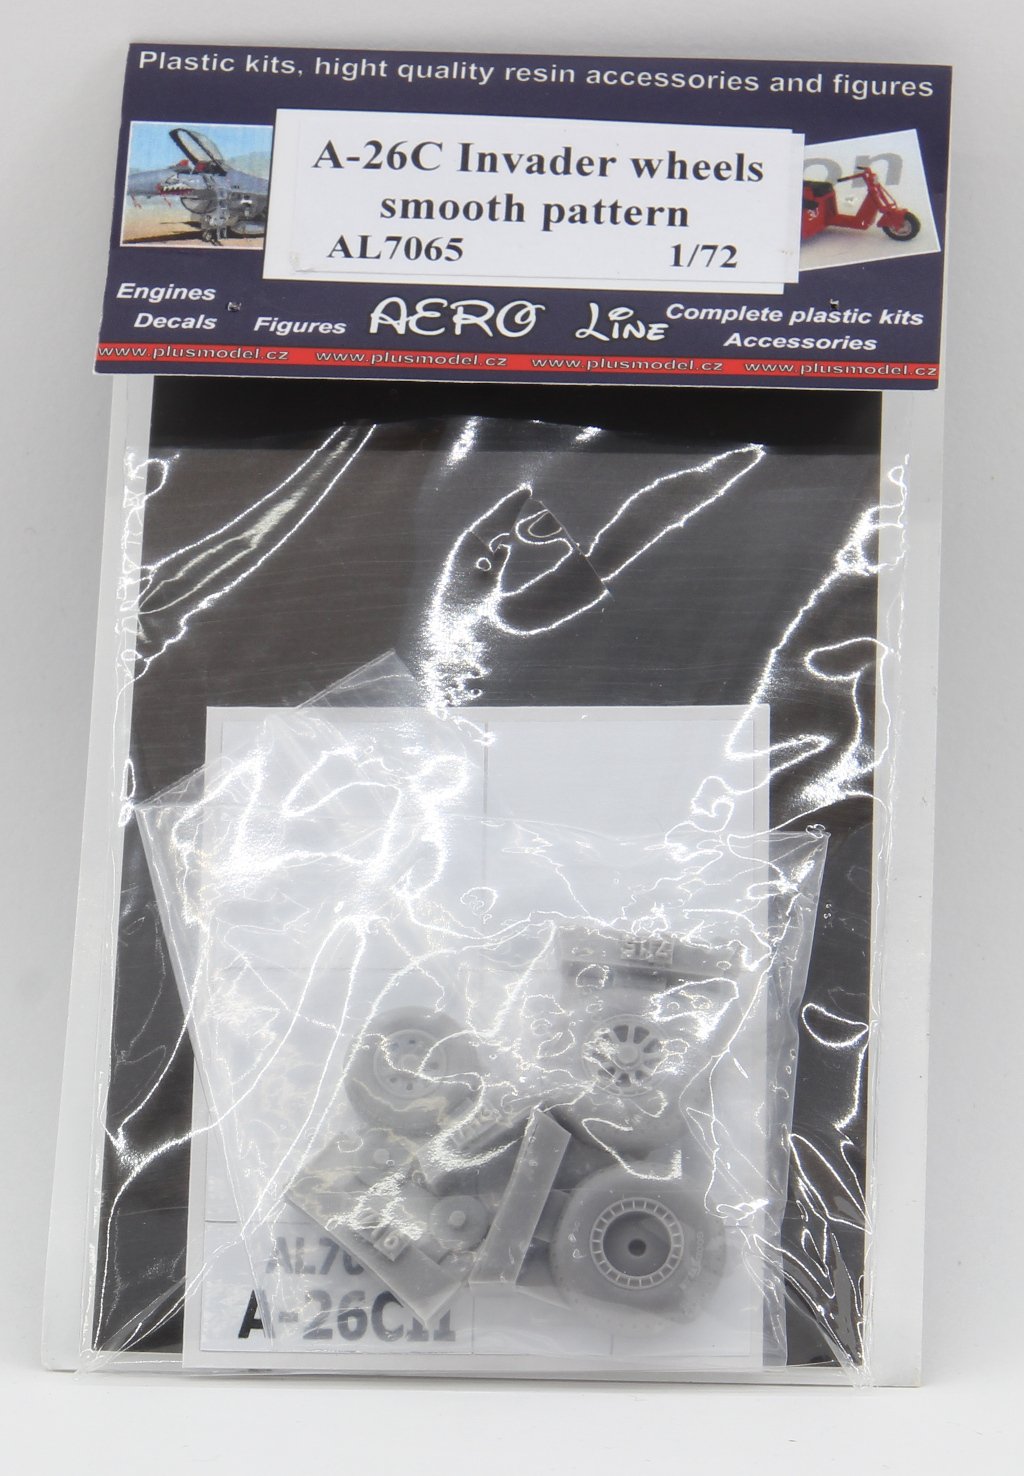
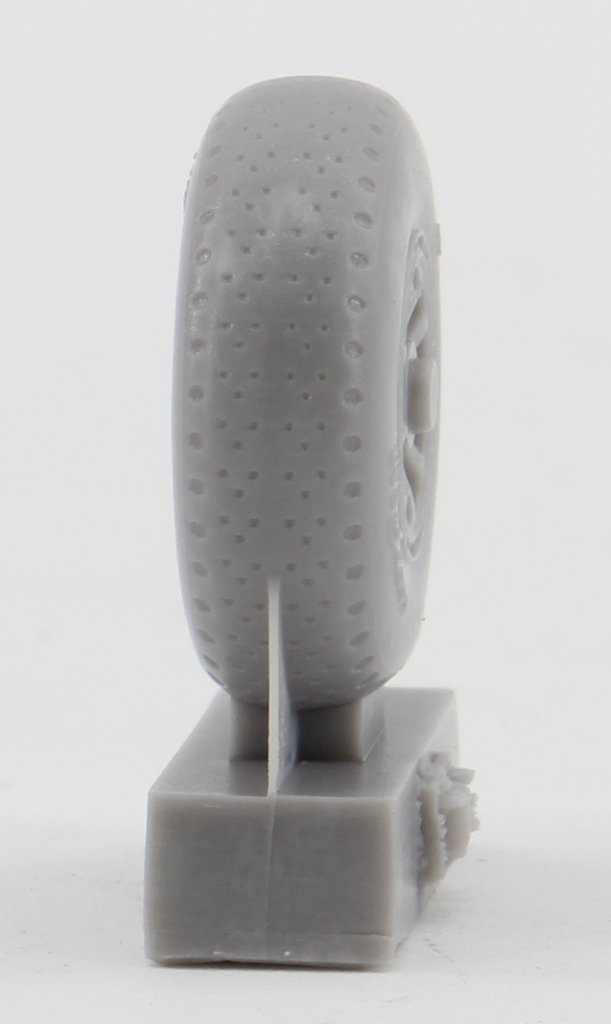
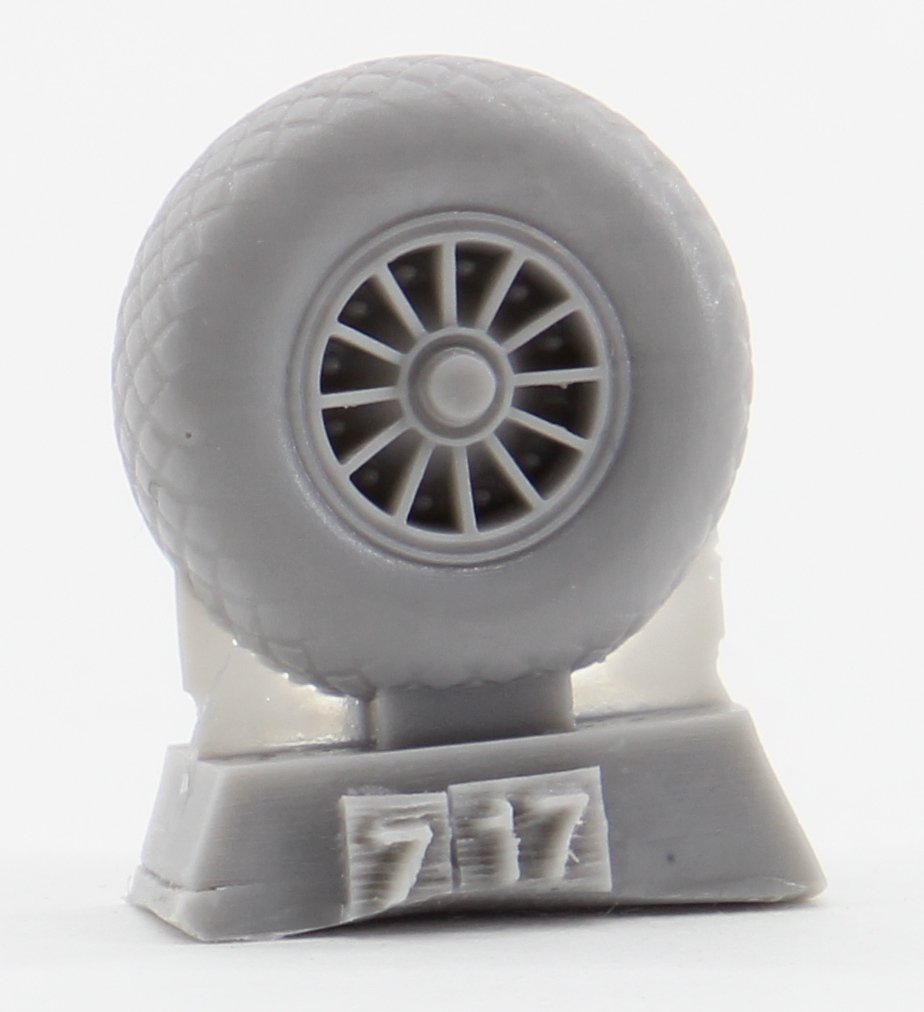
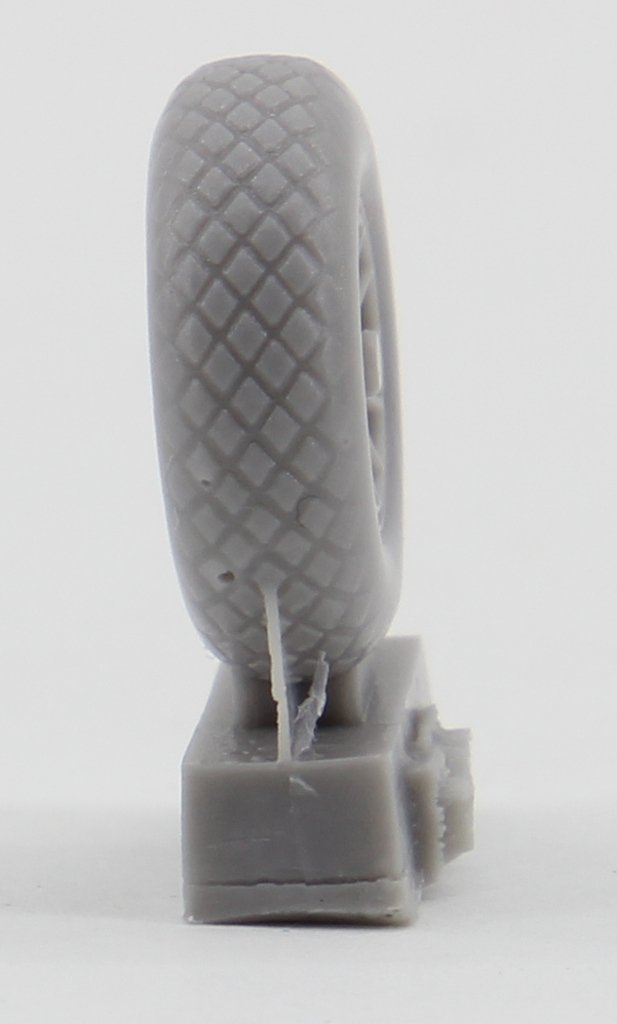
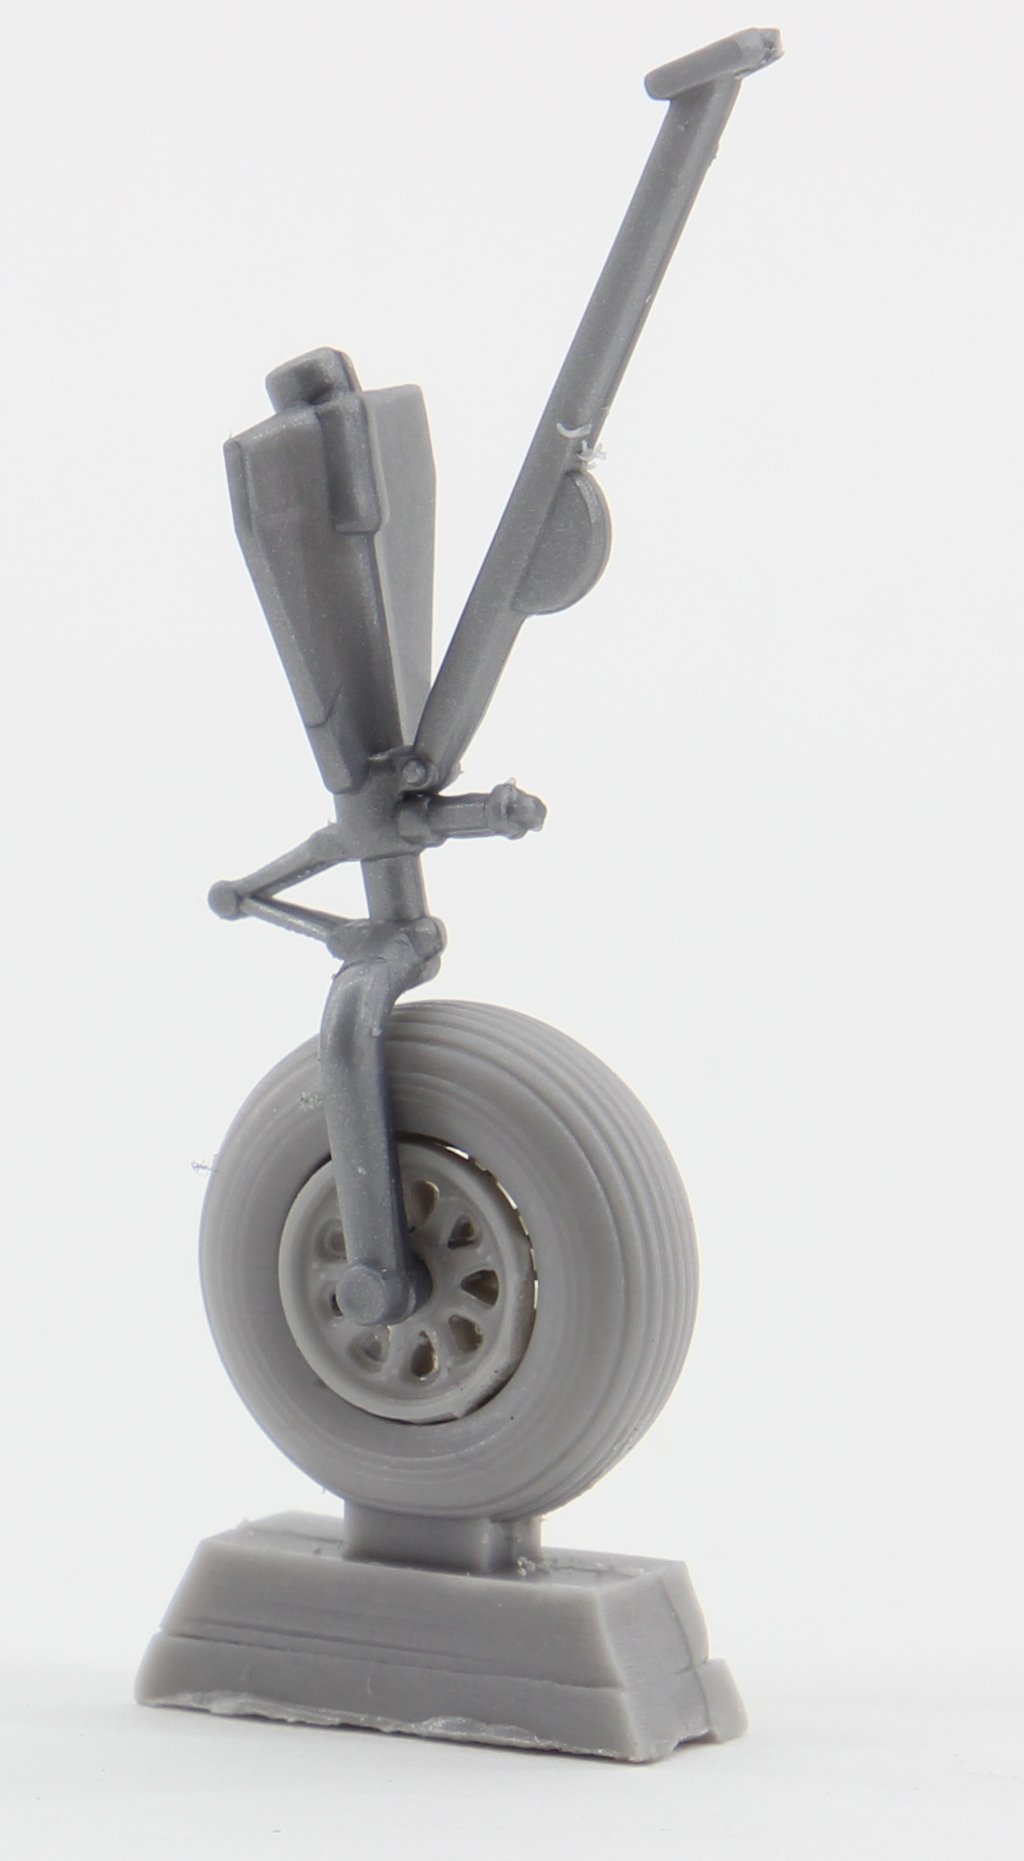
AL7065 A-26C Invader wheels smooth pattern
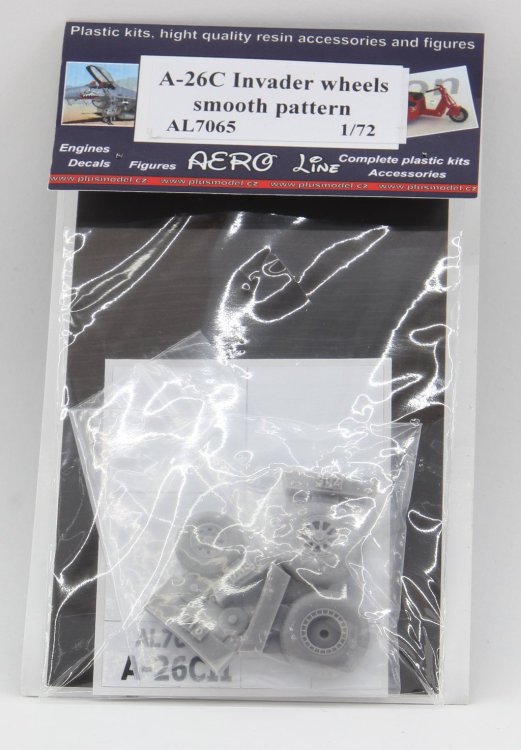
This set contains 6 resin parts, two rear wheels with the inner component of the rim separately and a front wheel with a separate half of the rim.
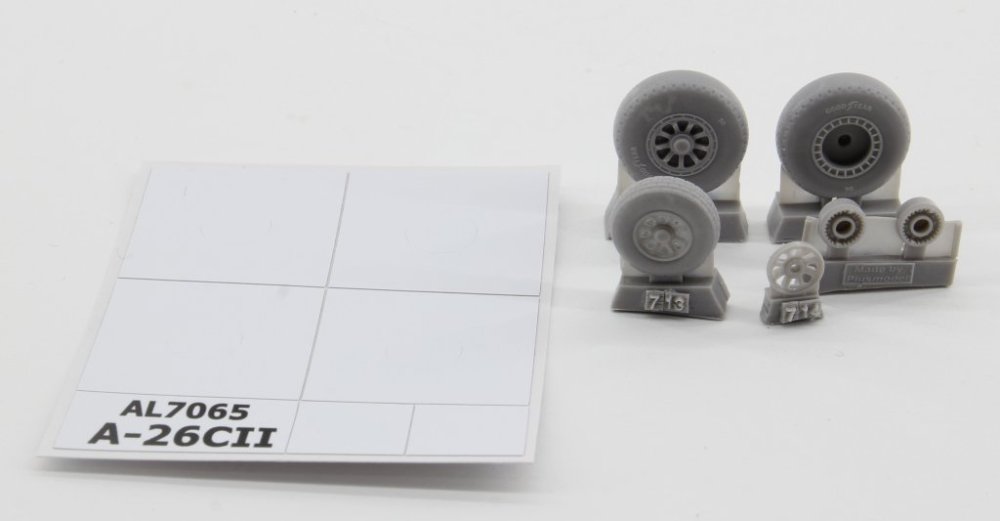
The main wheels are composed by the tyre and front rim and the rear rim as a separate part. Also, important to mention the detail of the producer's logo and the very particular pattern of the tire tread.
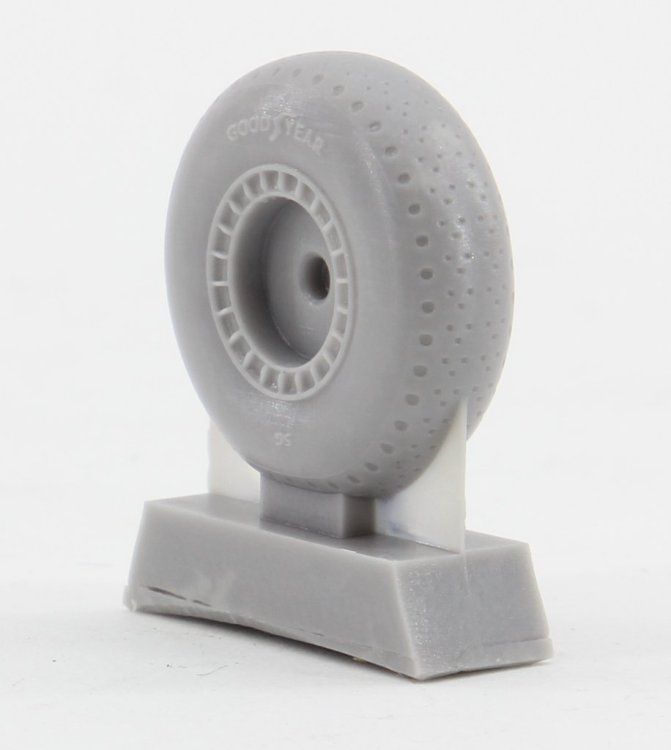
The front tire and rim offer the same characteristics already indicated.
Some care is needed to clean up the rim.
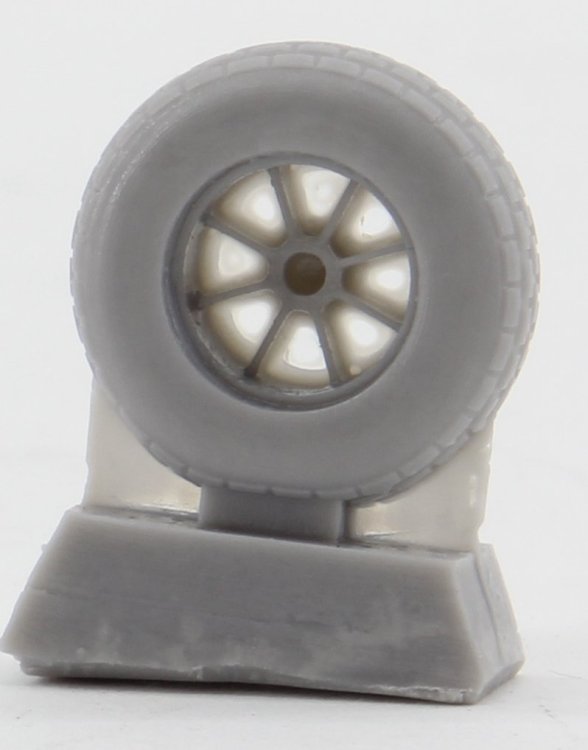
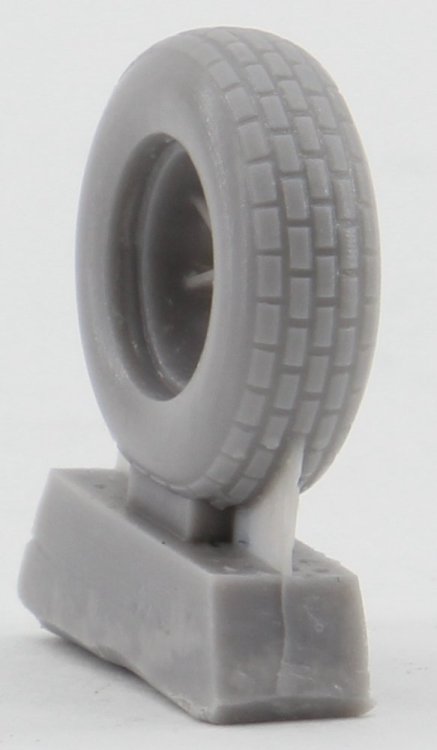
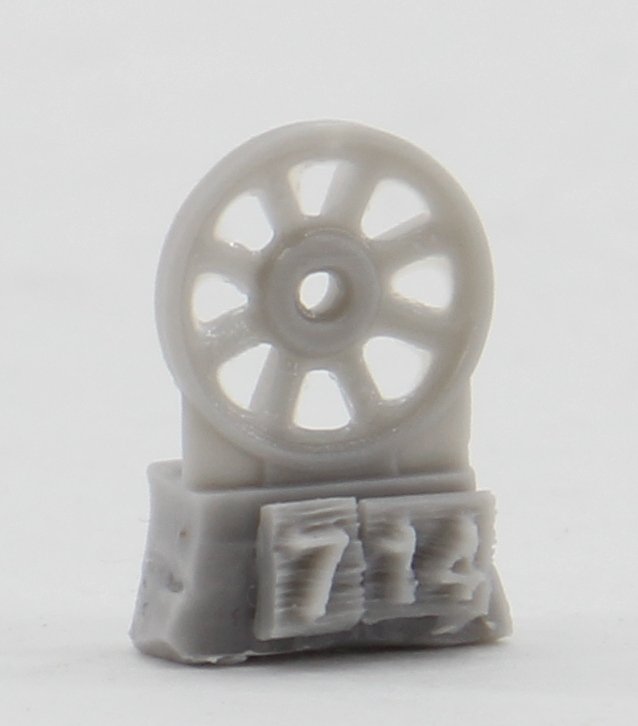
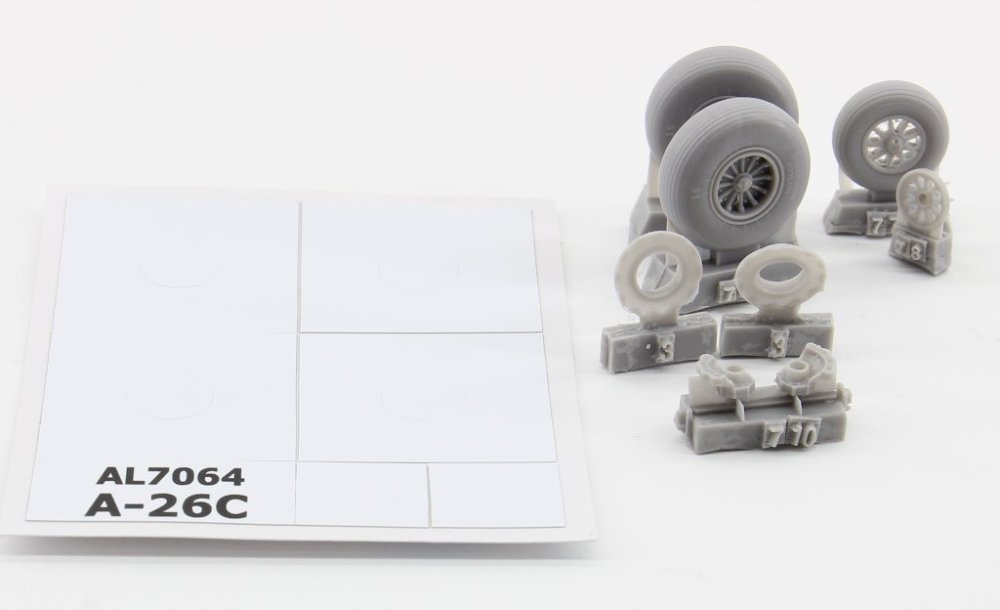
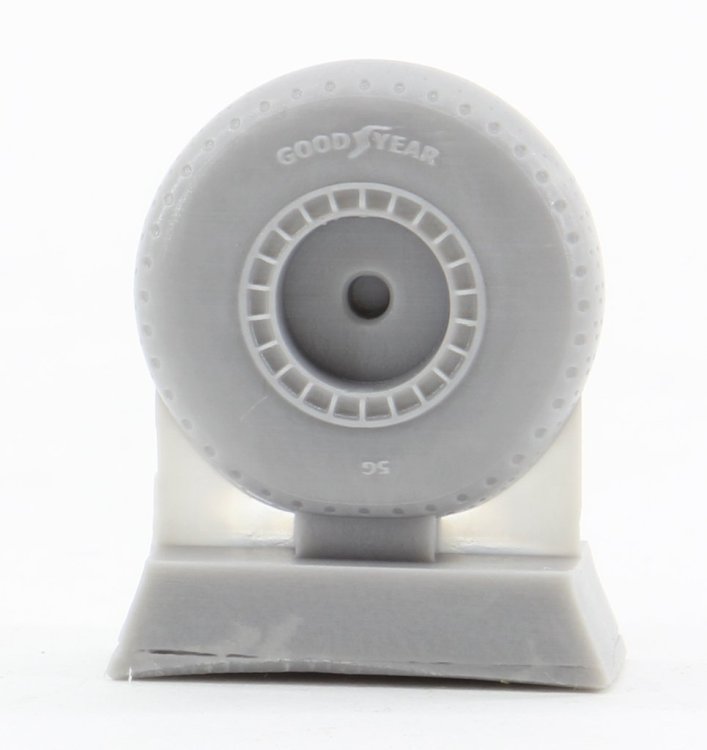
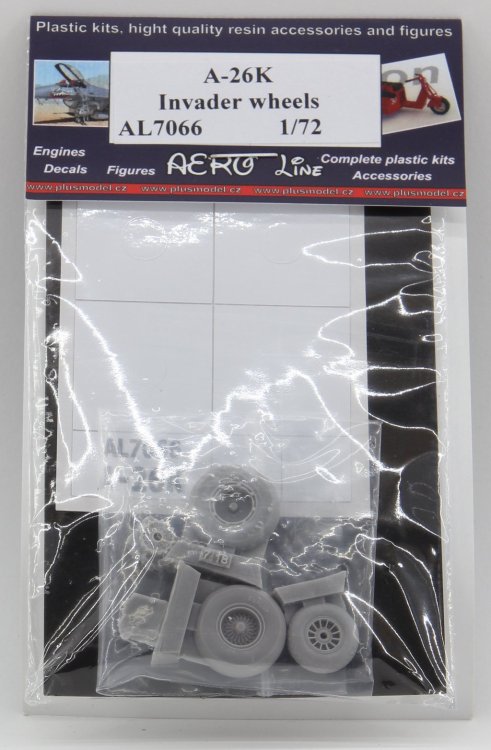
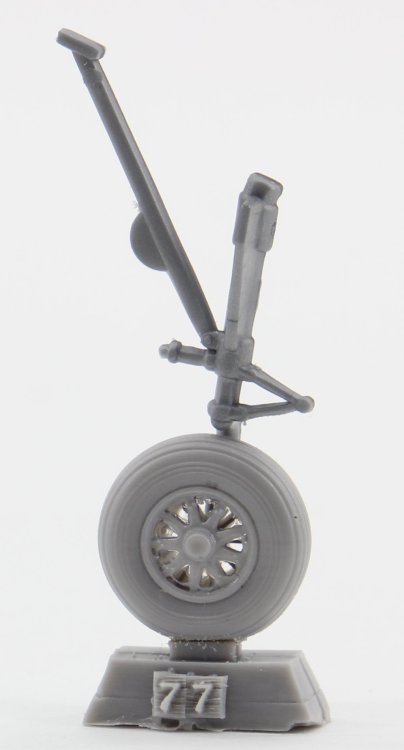
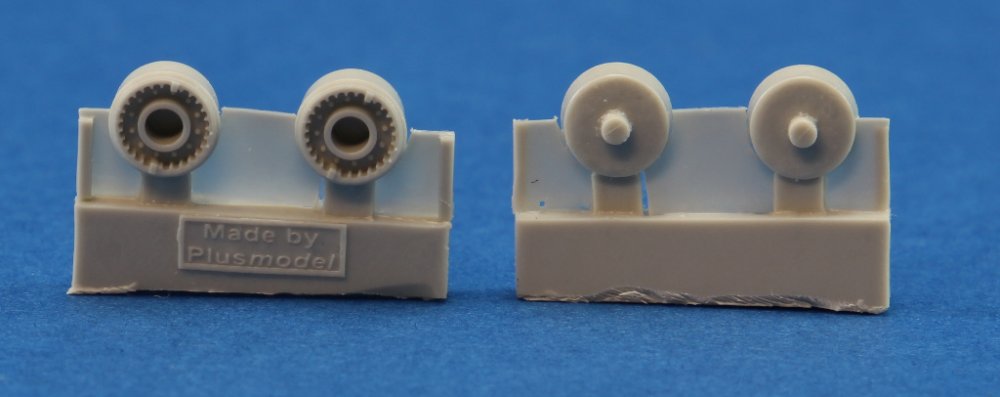
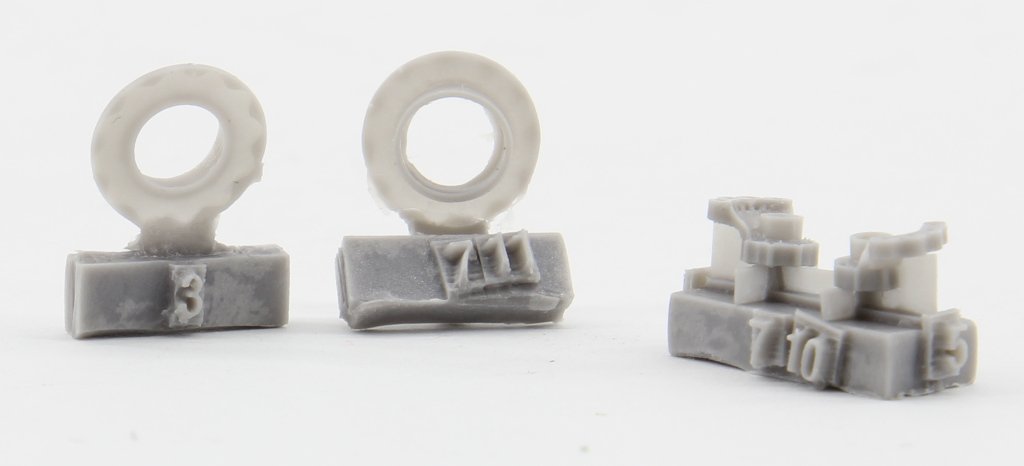
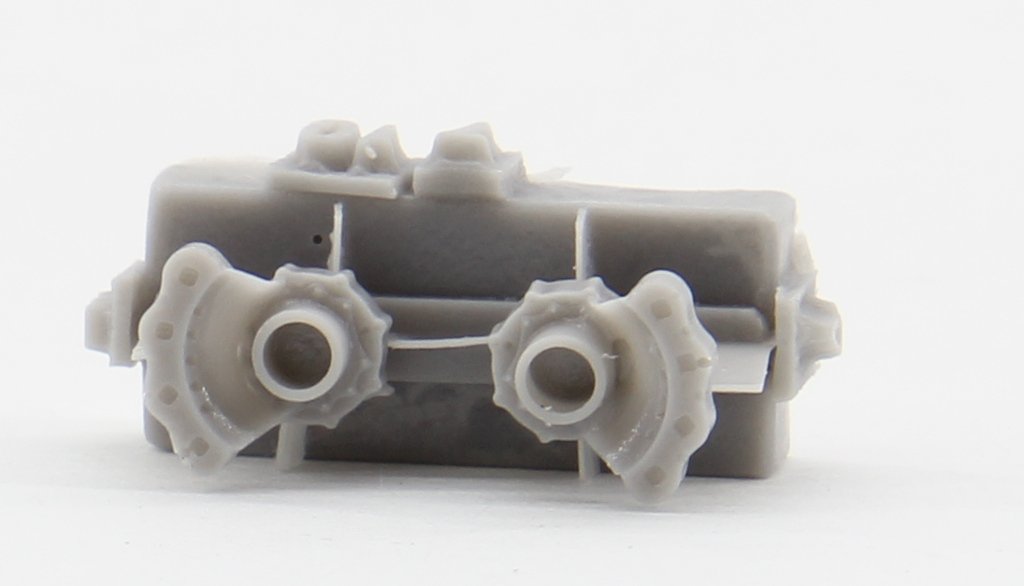
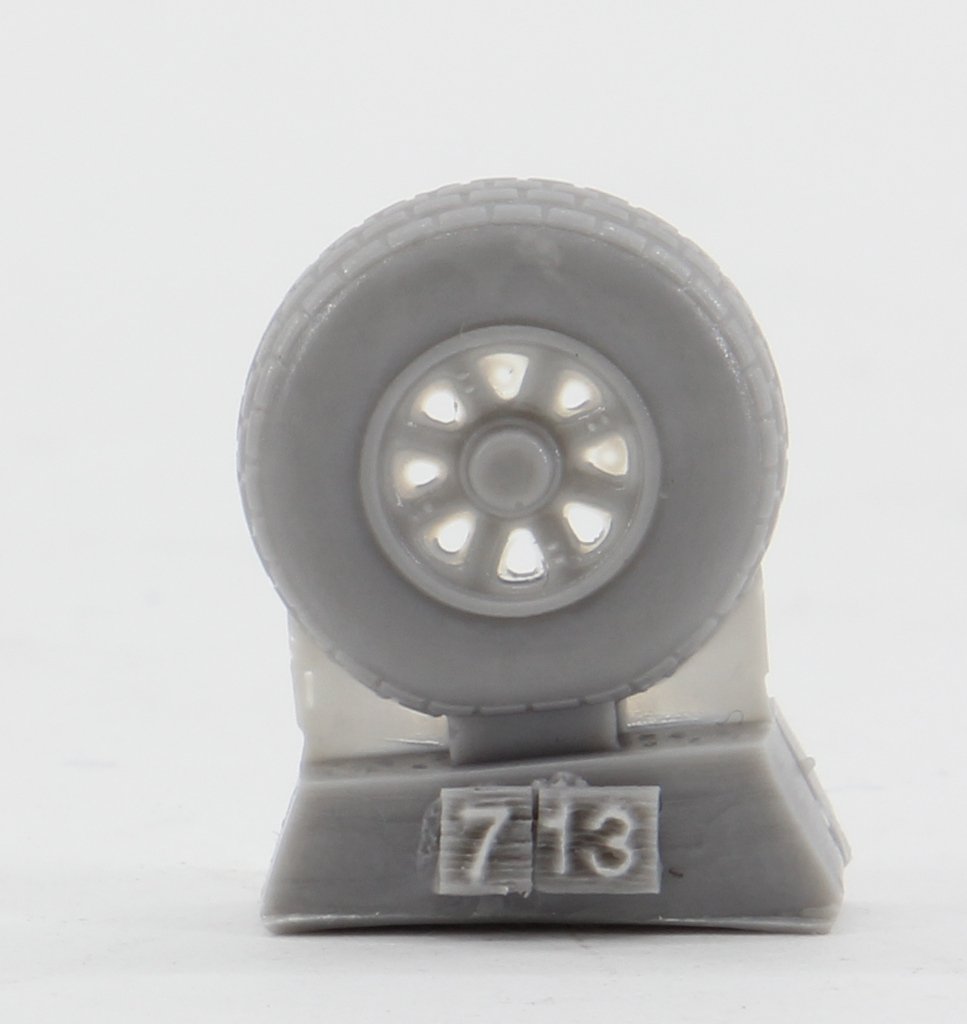
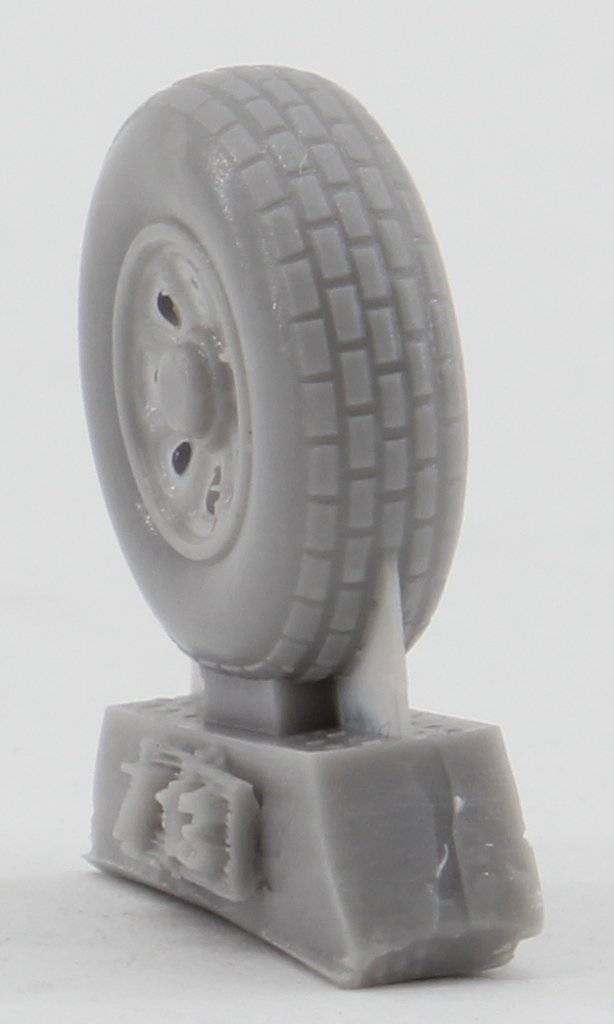
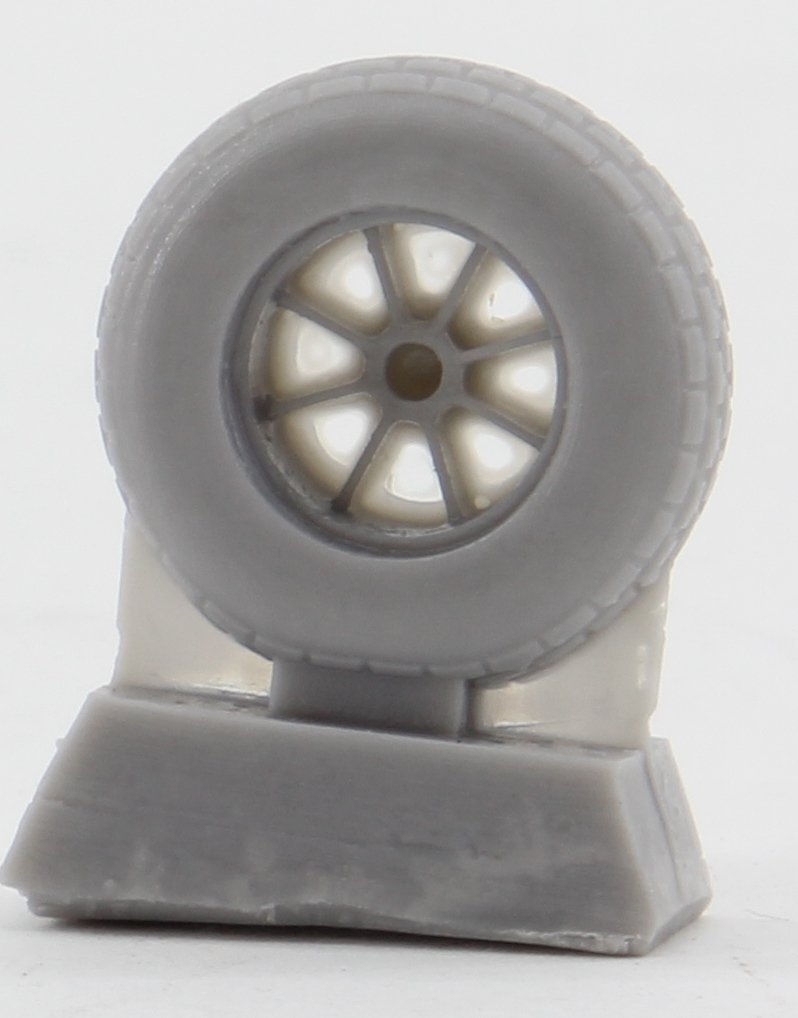
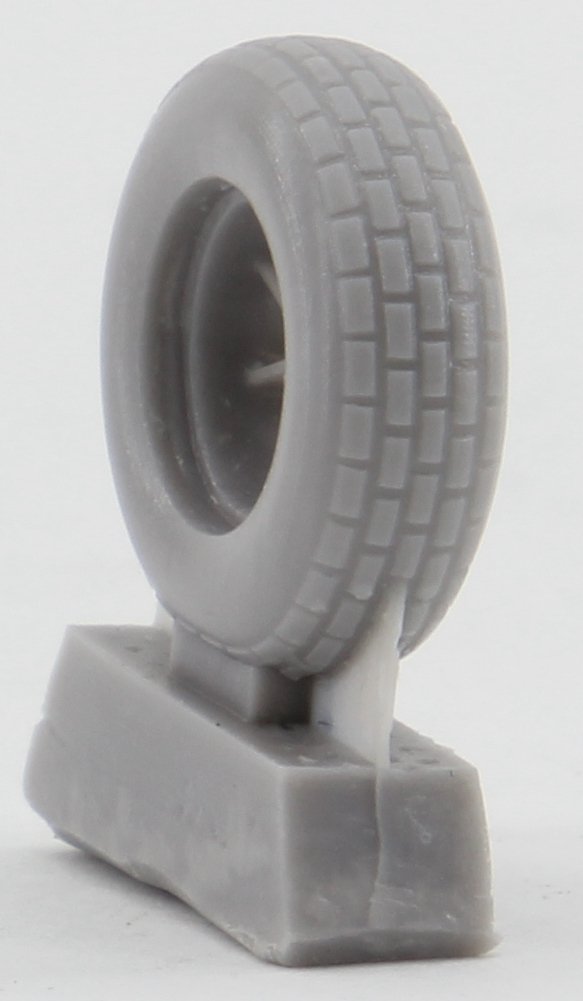
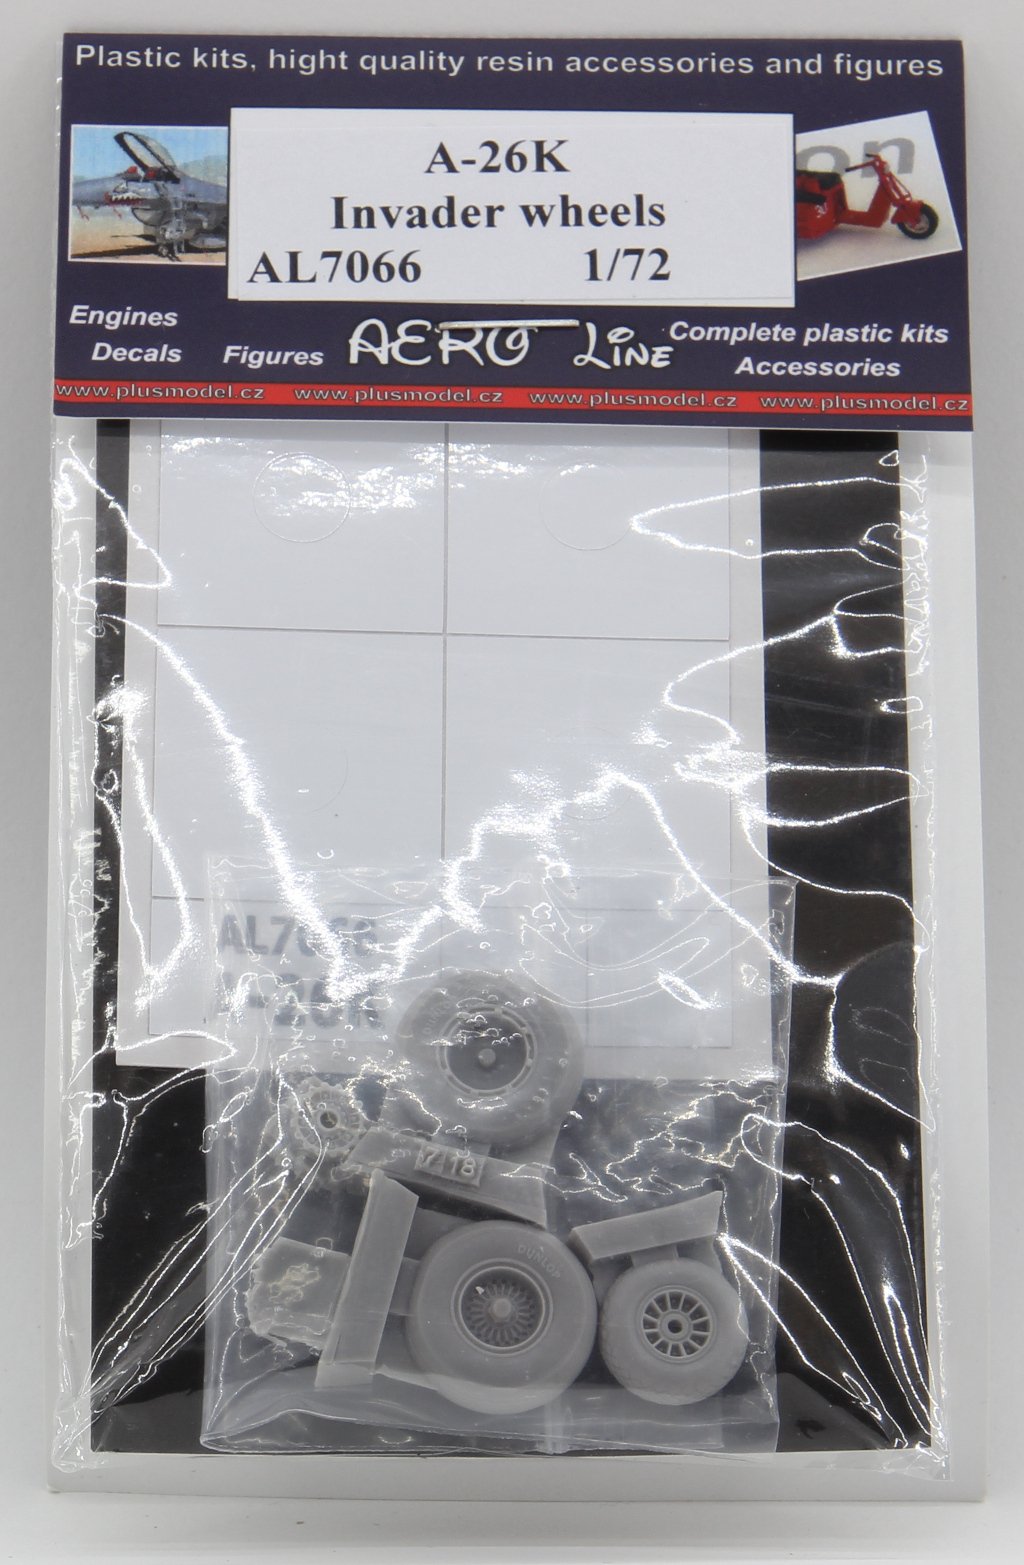
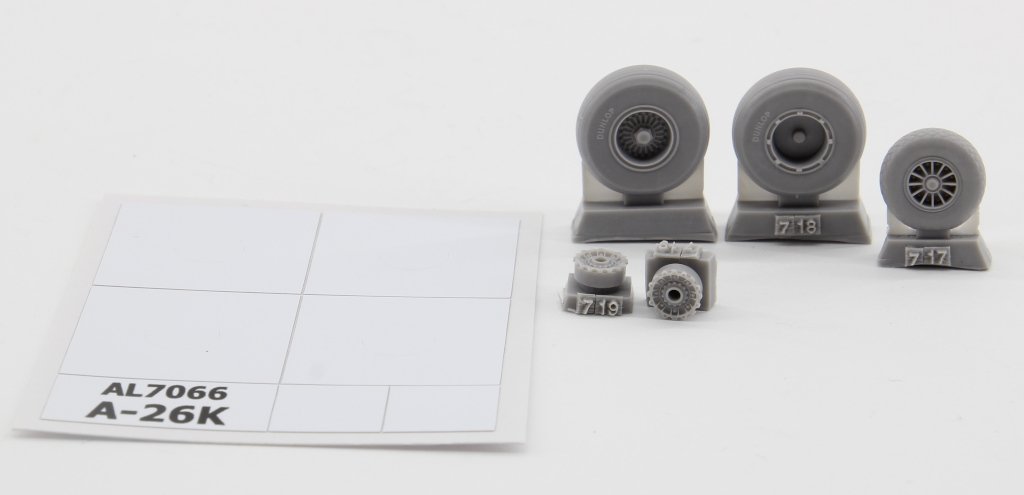
AL7066 A-26K Invader wheels
This set is applied to the final versions of the A-26, namely the improved and upgraded version, used in the Vietnam conflict.

This set is composed by 5 resin parts and paint masks.
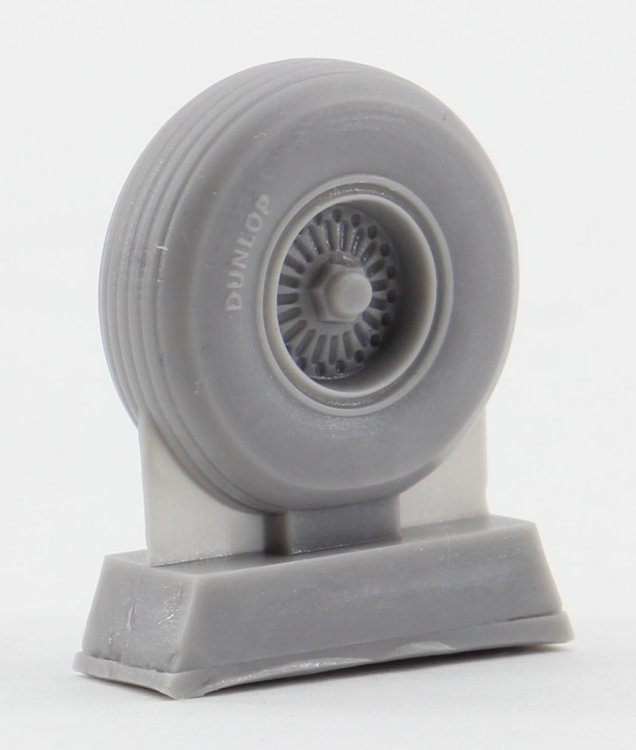
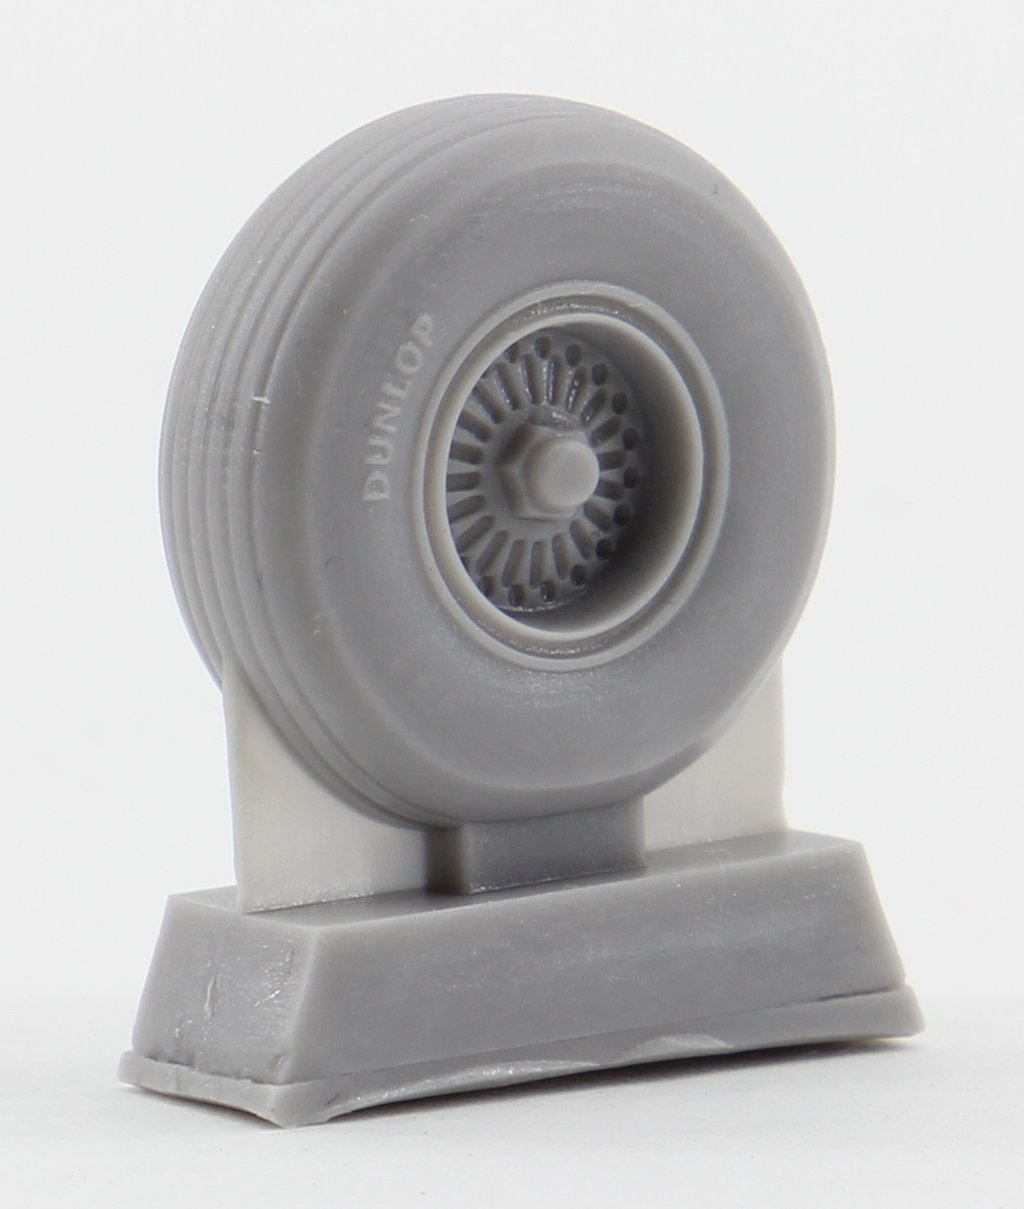
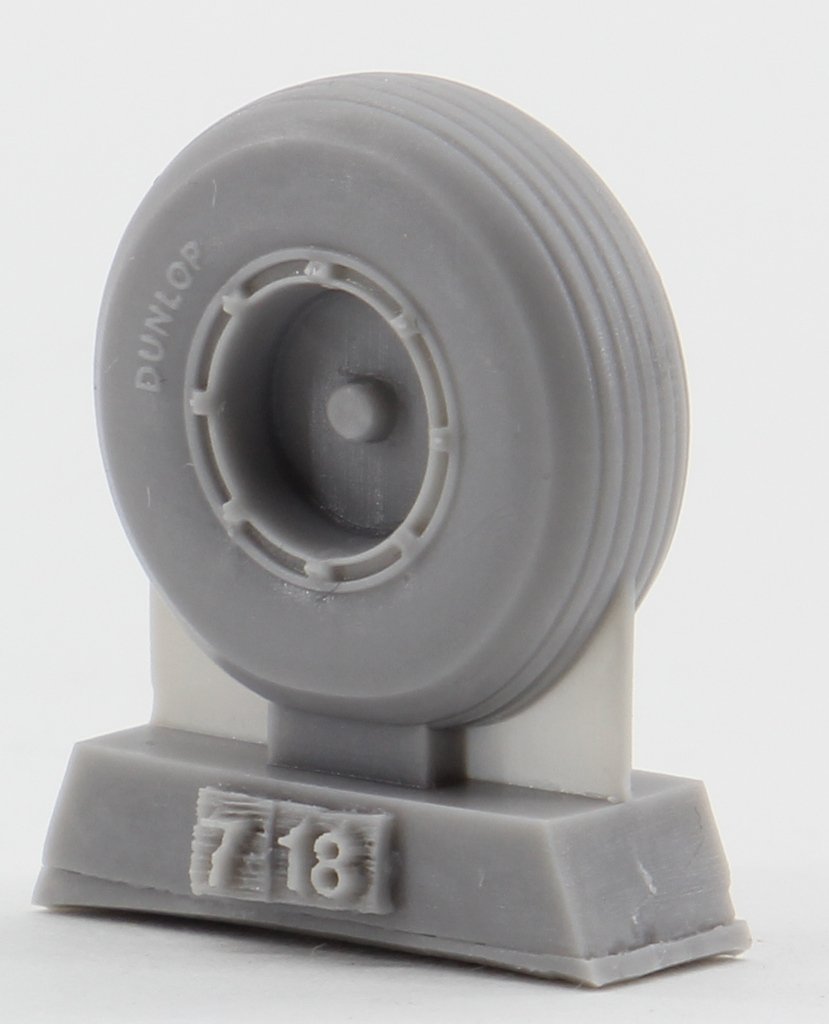
The rear wheels are composed by the tyre and front rim and the rear rim as a separate part.
The front wheel is one resin piece.
Common to all sets
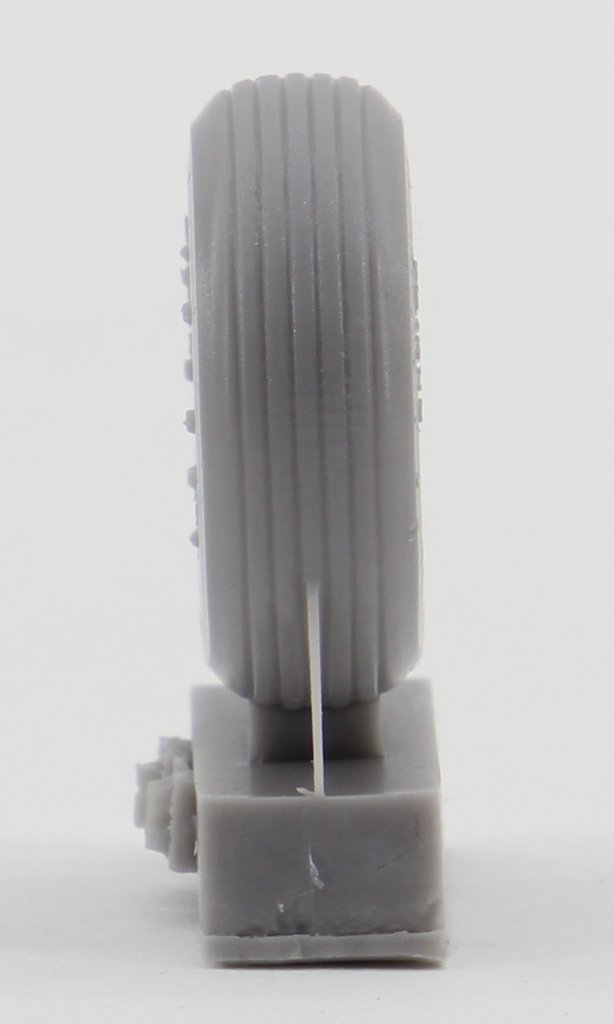
The removal of the casting blocks can be done with no effort, using a small saw, as the attachment to the casting mould is minimal and it’s located on the area of the tire in touch with the ground. The tires are mould with weight effect.
Painting masks
All sets include a small vinyl pre-cut paint mask.
Should you prefer to paint the wheel first and then the tyre, you have two sets available.
Also, if you prefer to paint the tyre first and then the centre rim, also two sets are at your disposition.
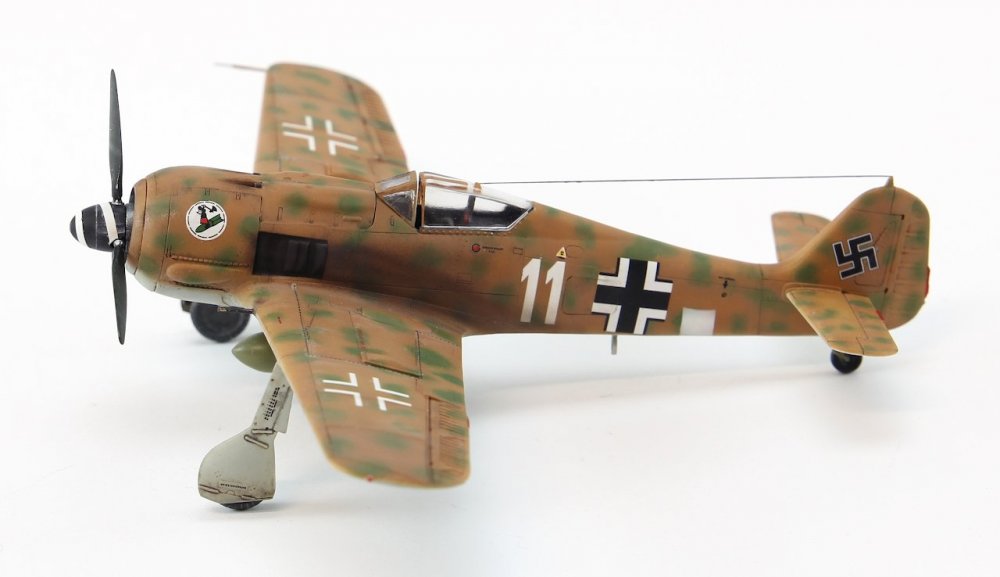
Test Fit
In order to check the parts fit, I grab my 1:72 A-26 Invader from Revell ( Italeri) and give a test.
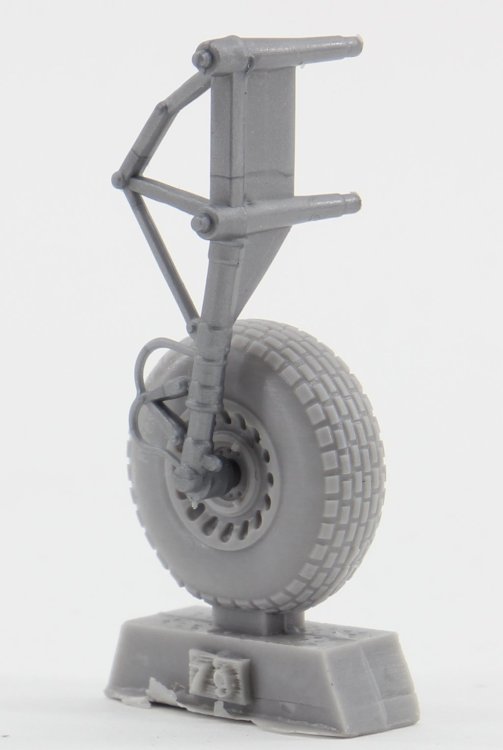
The result is showed in the pictures above, perfect fit.
Conclusion
This set is a improve on the kit’s parts, as they will be a very acessible and it will improve the basic model.
All wheels are an easy replace to the original ones.
This is a must set to enhance the look of the original model and as so, recommended.
Our thanks to Plusmodel for the review samples and all the support given. To purchase this directly, click on the following links:
#AL7063 #AL7064 #AL7065 #AL7066

-
1
-
1
-
-
On 9/16/2021 at 11:24 PM, Peterpools said:
Excellent progress on your FW190. From my end the decals and weathering look very good and I can't see any silvering.
Keep 'em comin
Peter
hi Peter ! thanks!
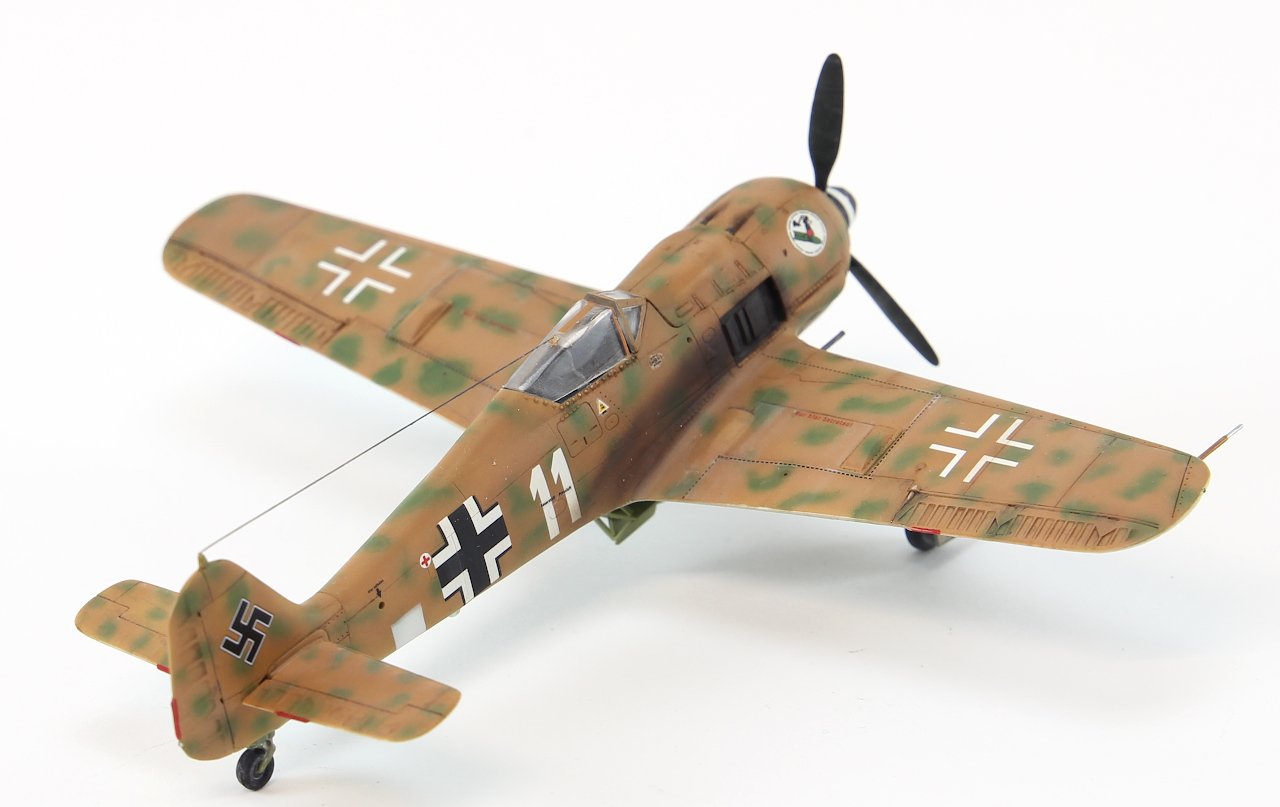
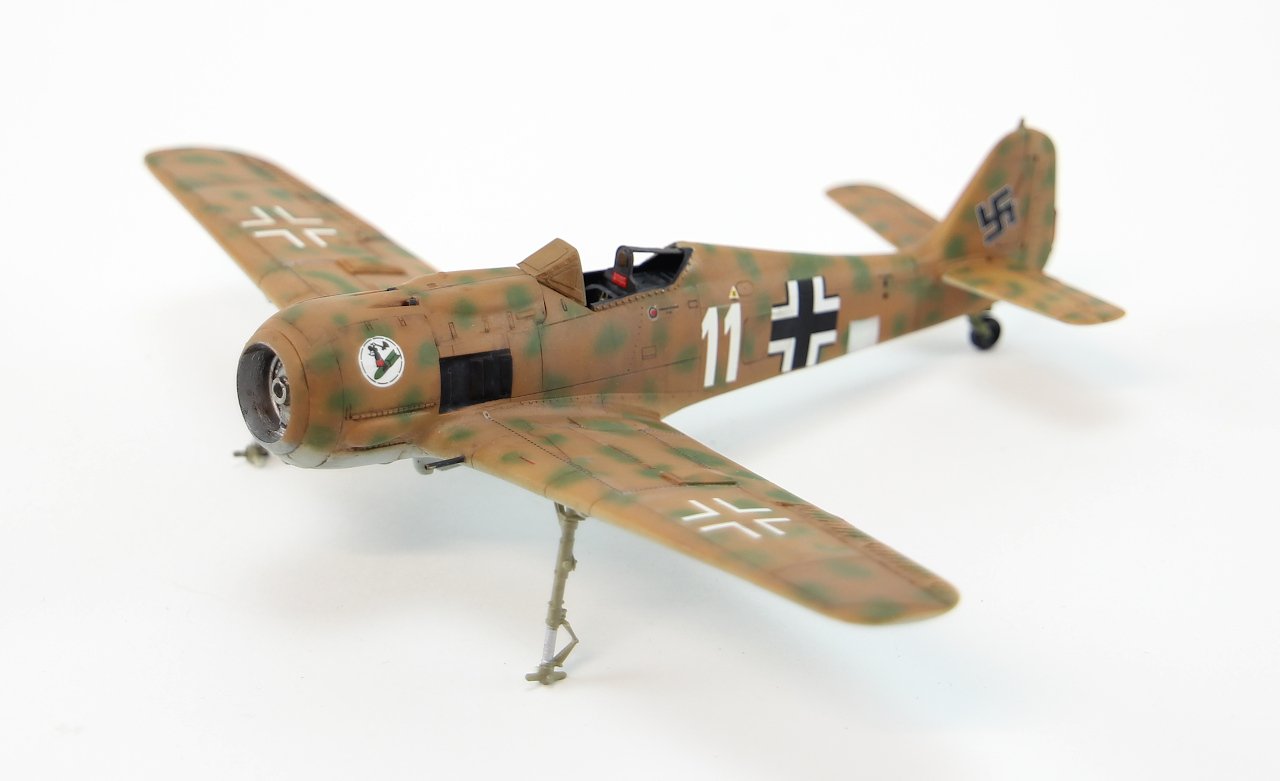
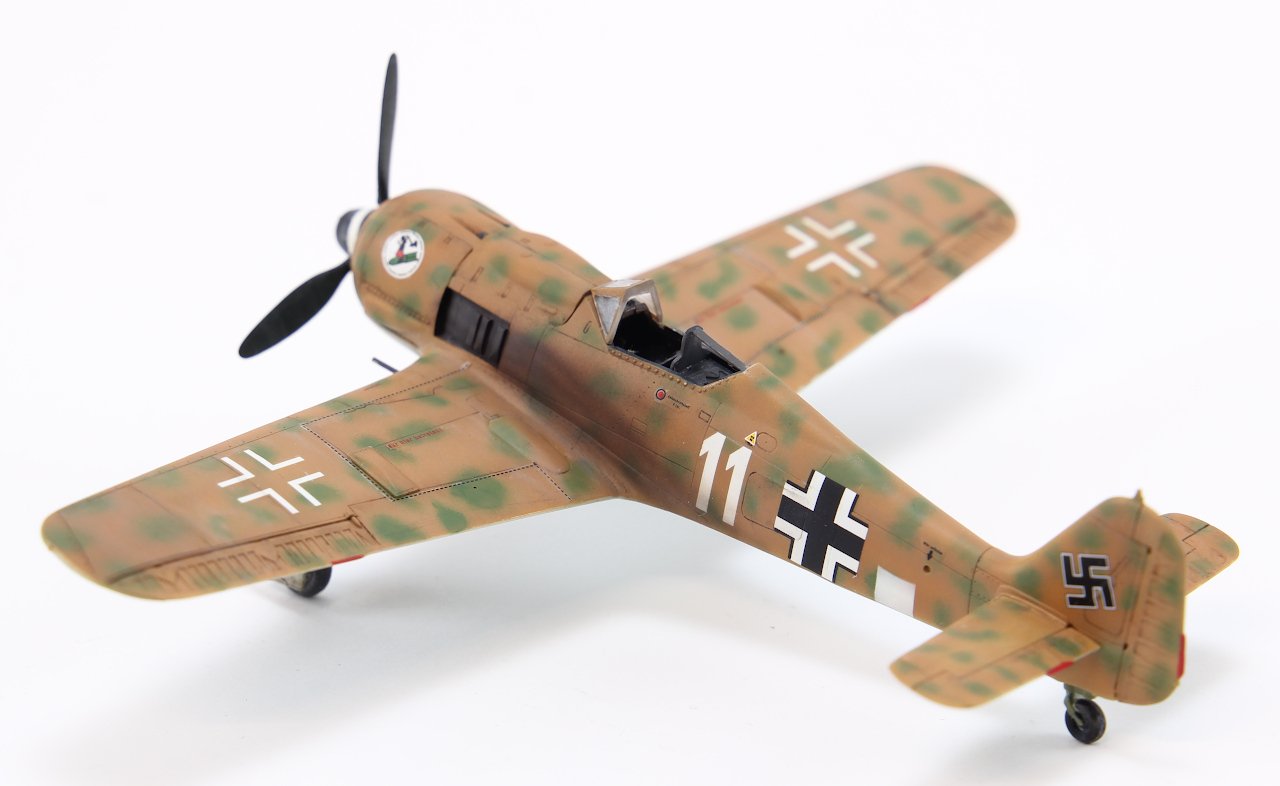
Well... my friends, this is the end...
")
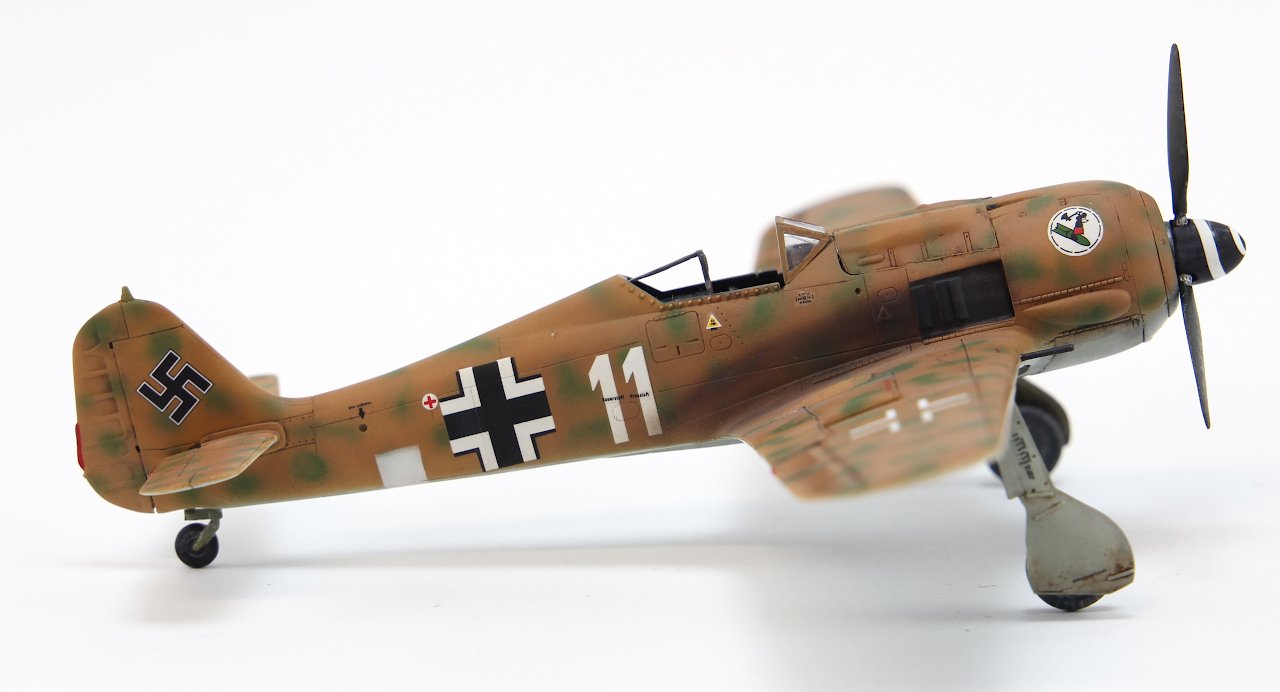
Acabado / finished!
It was a small challange and i still don't like the canopy and some of the decals but some times things are what they are, and i'm satisfied with the end result.
So let me share the final photos

Thanks for watching and comment!
Now to the next model !
All the best !
-
6
-
1
-
-
On 8/28/2021 at 11:13 PM, Peterpools said:
Ricardo
Very nice progress on your 190. Glad you were able to rescue the canopy which surely seemed to have better days. AB and cammo work looks spot on.
Keep 'em comin
Peter
Hi Peter! thanks for the words!
Here's a small update on the build.
It has some shortcomings. The Decals, despite a gloss surface simply keep with silvering... some walkways on the wings are the prove of that.
The decals were set and the matt finished applied.
Weathering was replicated with oils and the exaust stains were made by airbrush mixing Acrylic tamiya XF-10 flat Brown with XF-1 Matt Black.


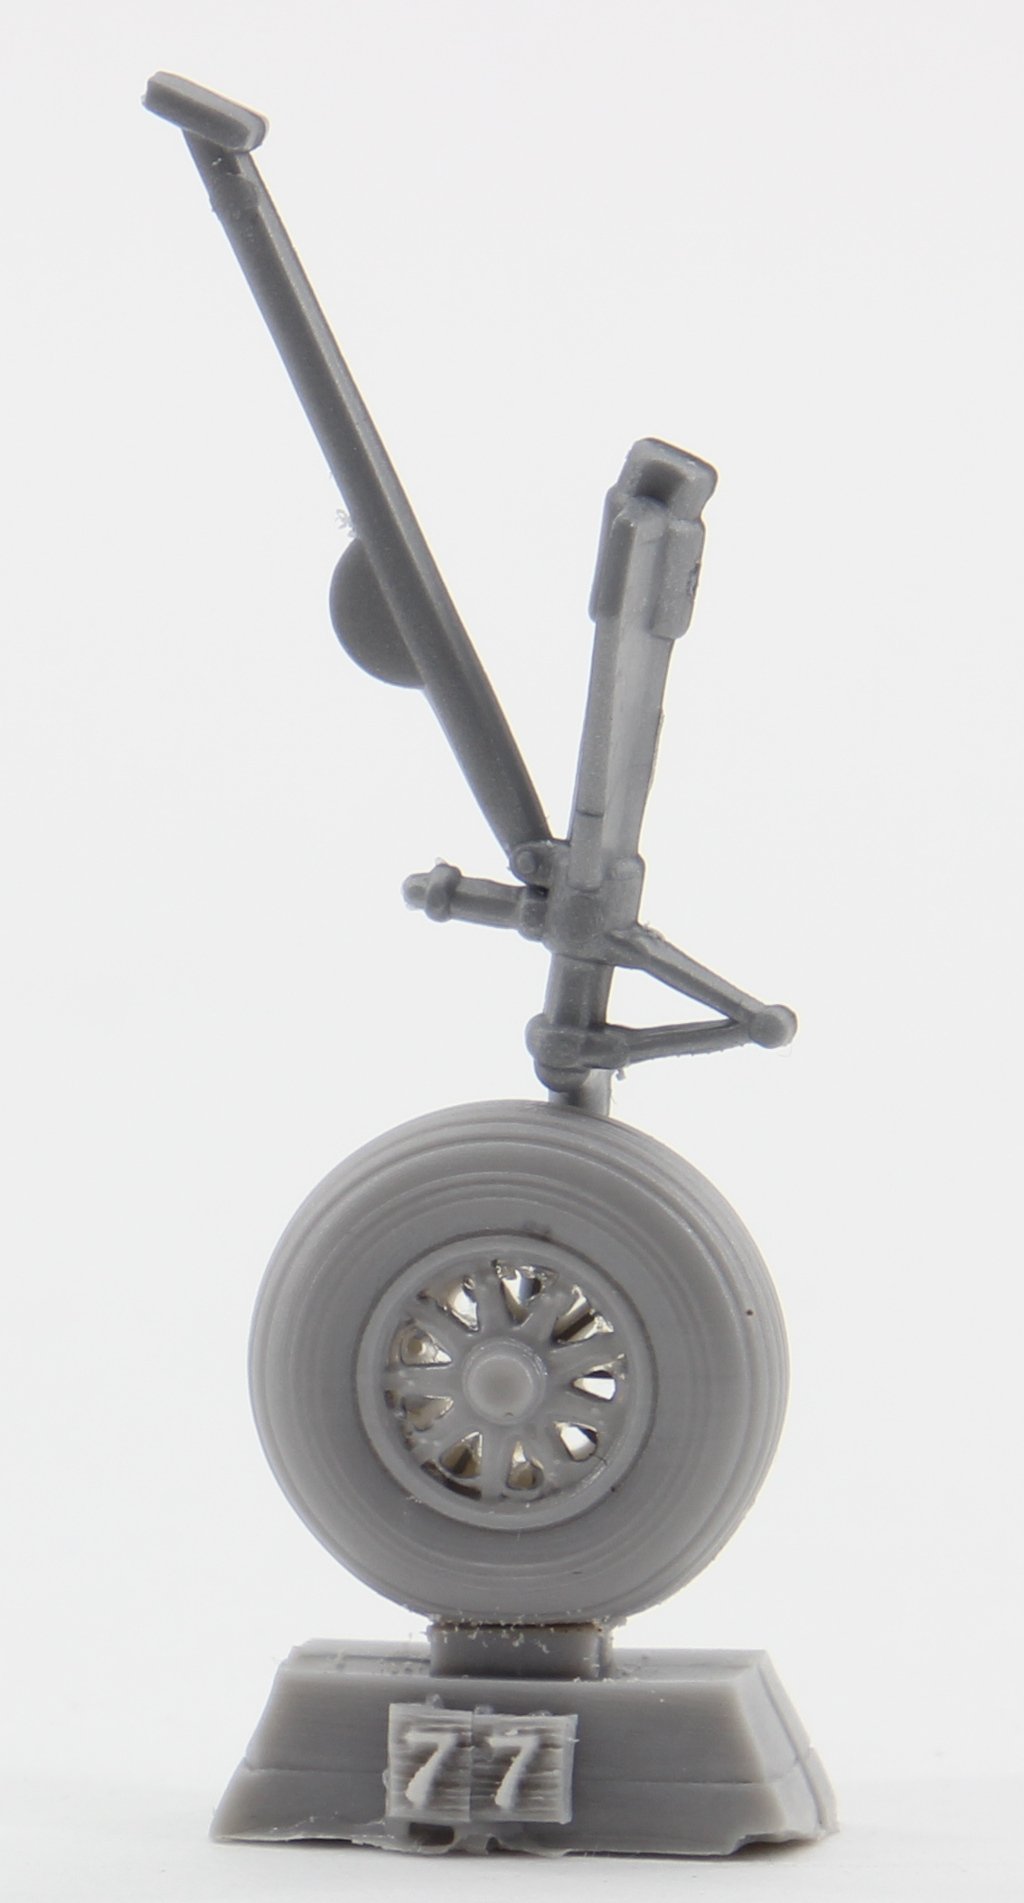
It's always a good view to observe a model on his own wheels. Propeller in place and exaust stains painted.

Almost done. Despite the fact that the canopy in undersized comparing to canopy rails, it's a mistake that I'll have to live with.
I tried a canopy from another Revell's FW-190 and the end result is the same. Nevertheless i do enjoy the end result.
-
3
-
1
-
-
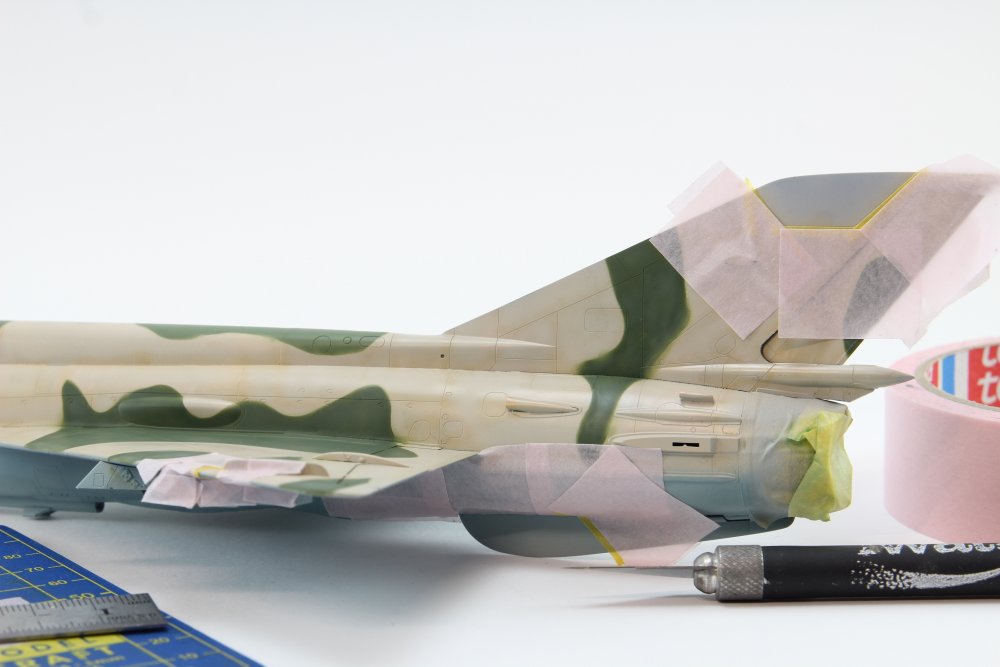
Hi Guys!
Sorry for the long delay on this build...
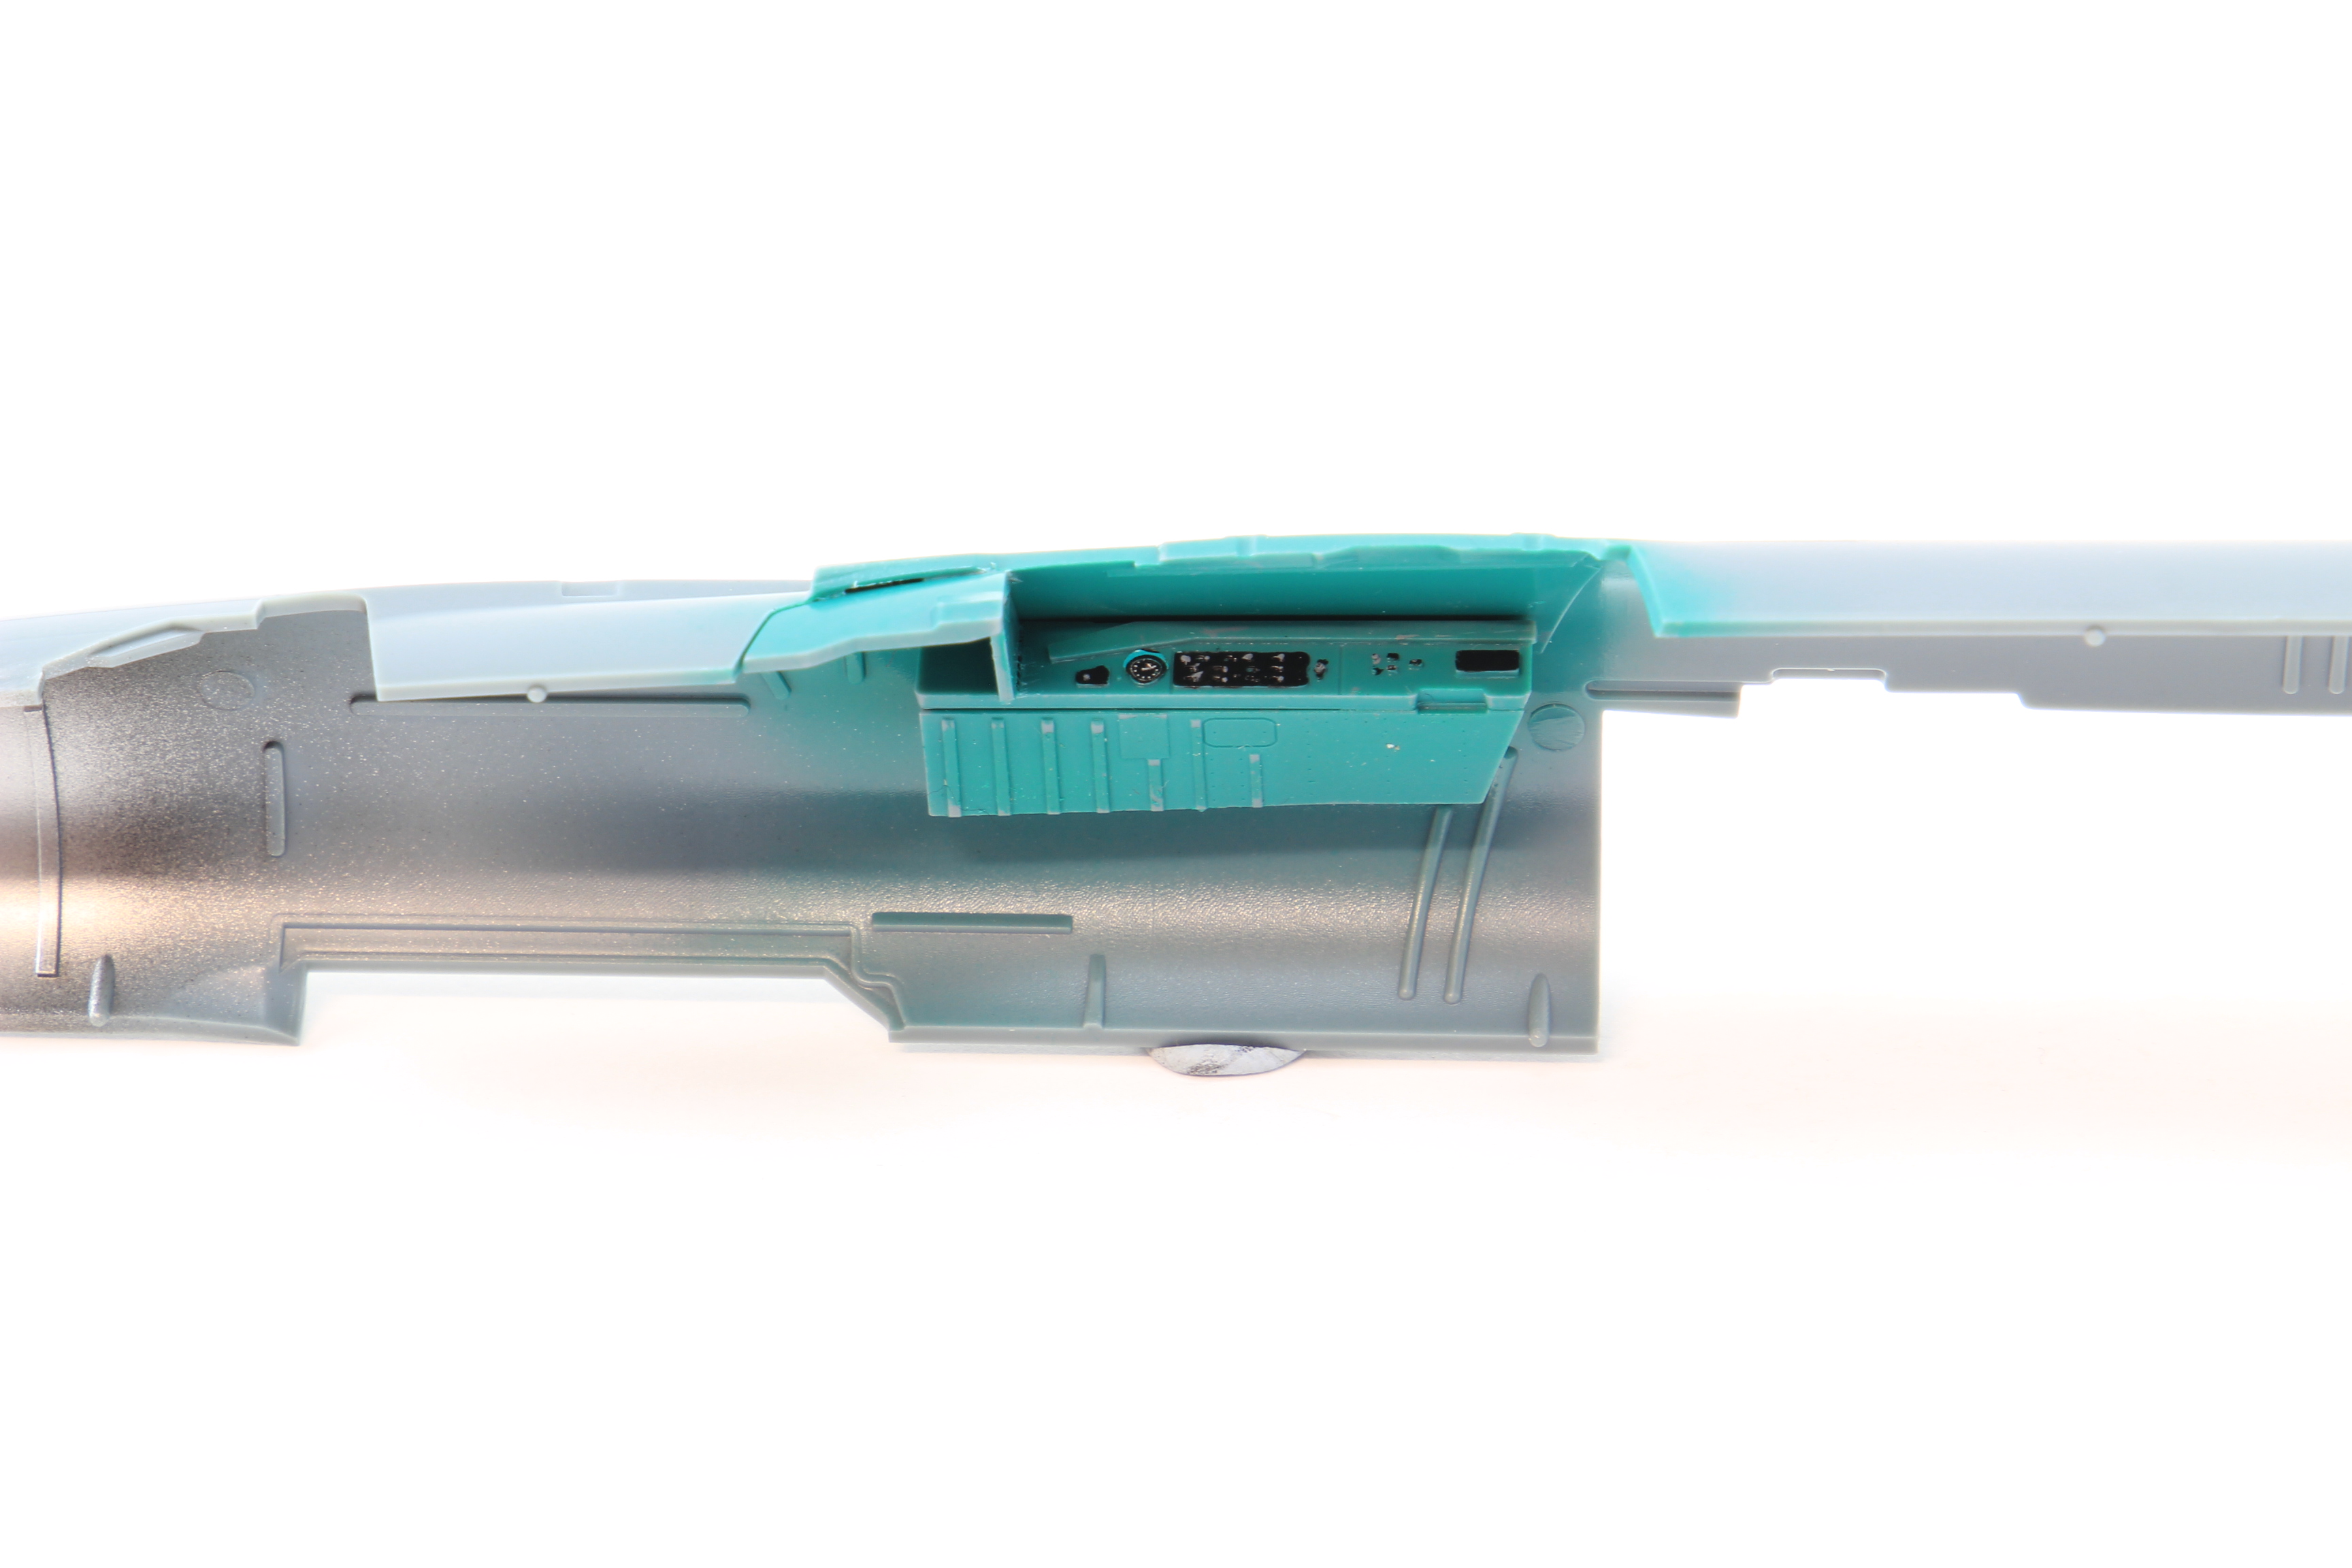
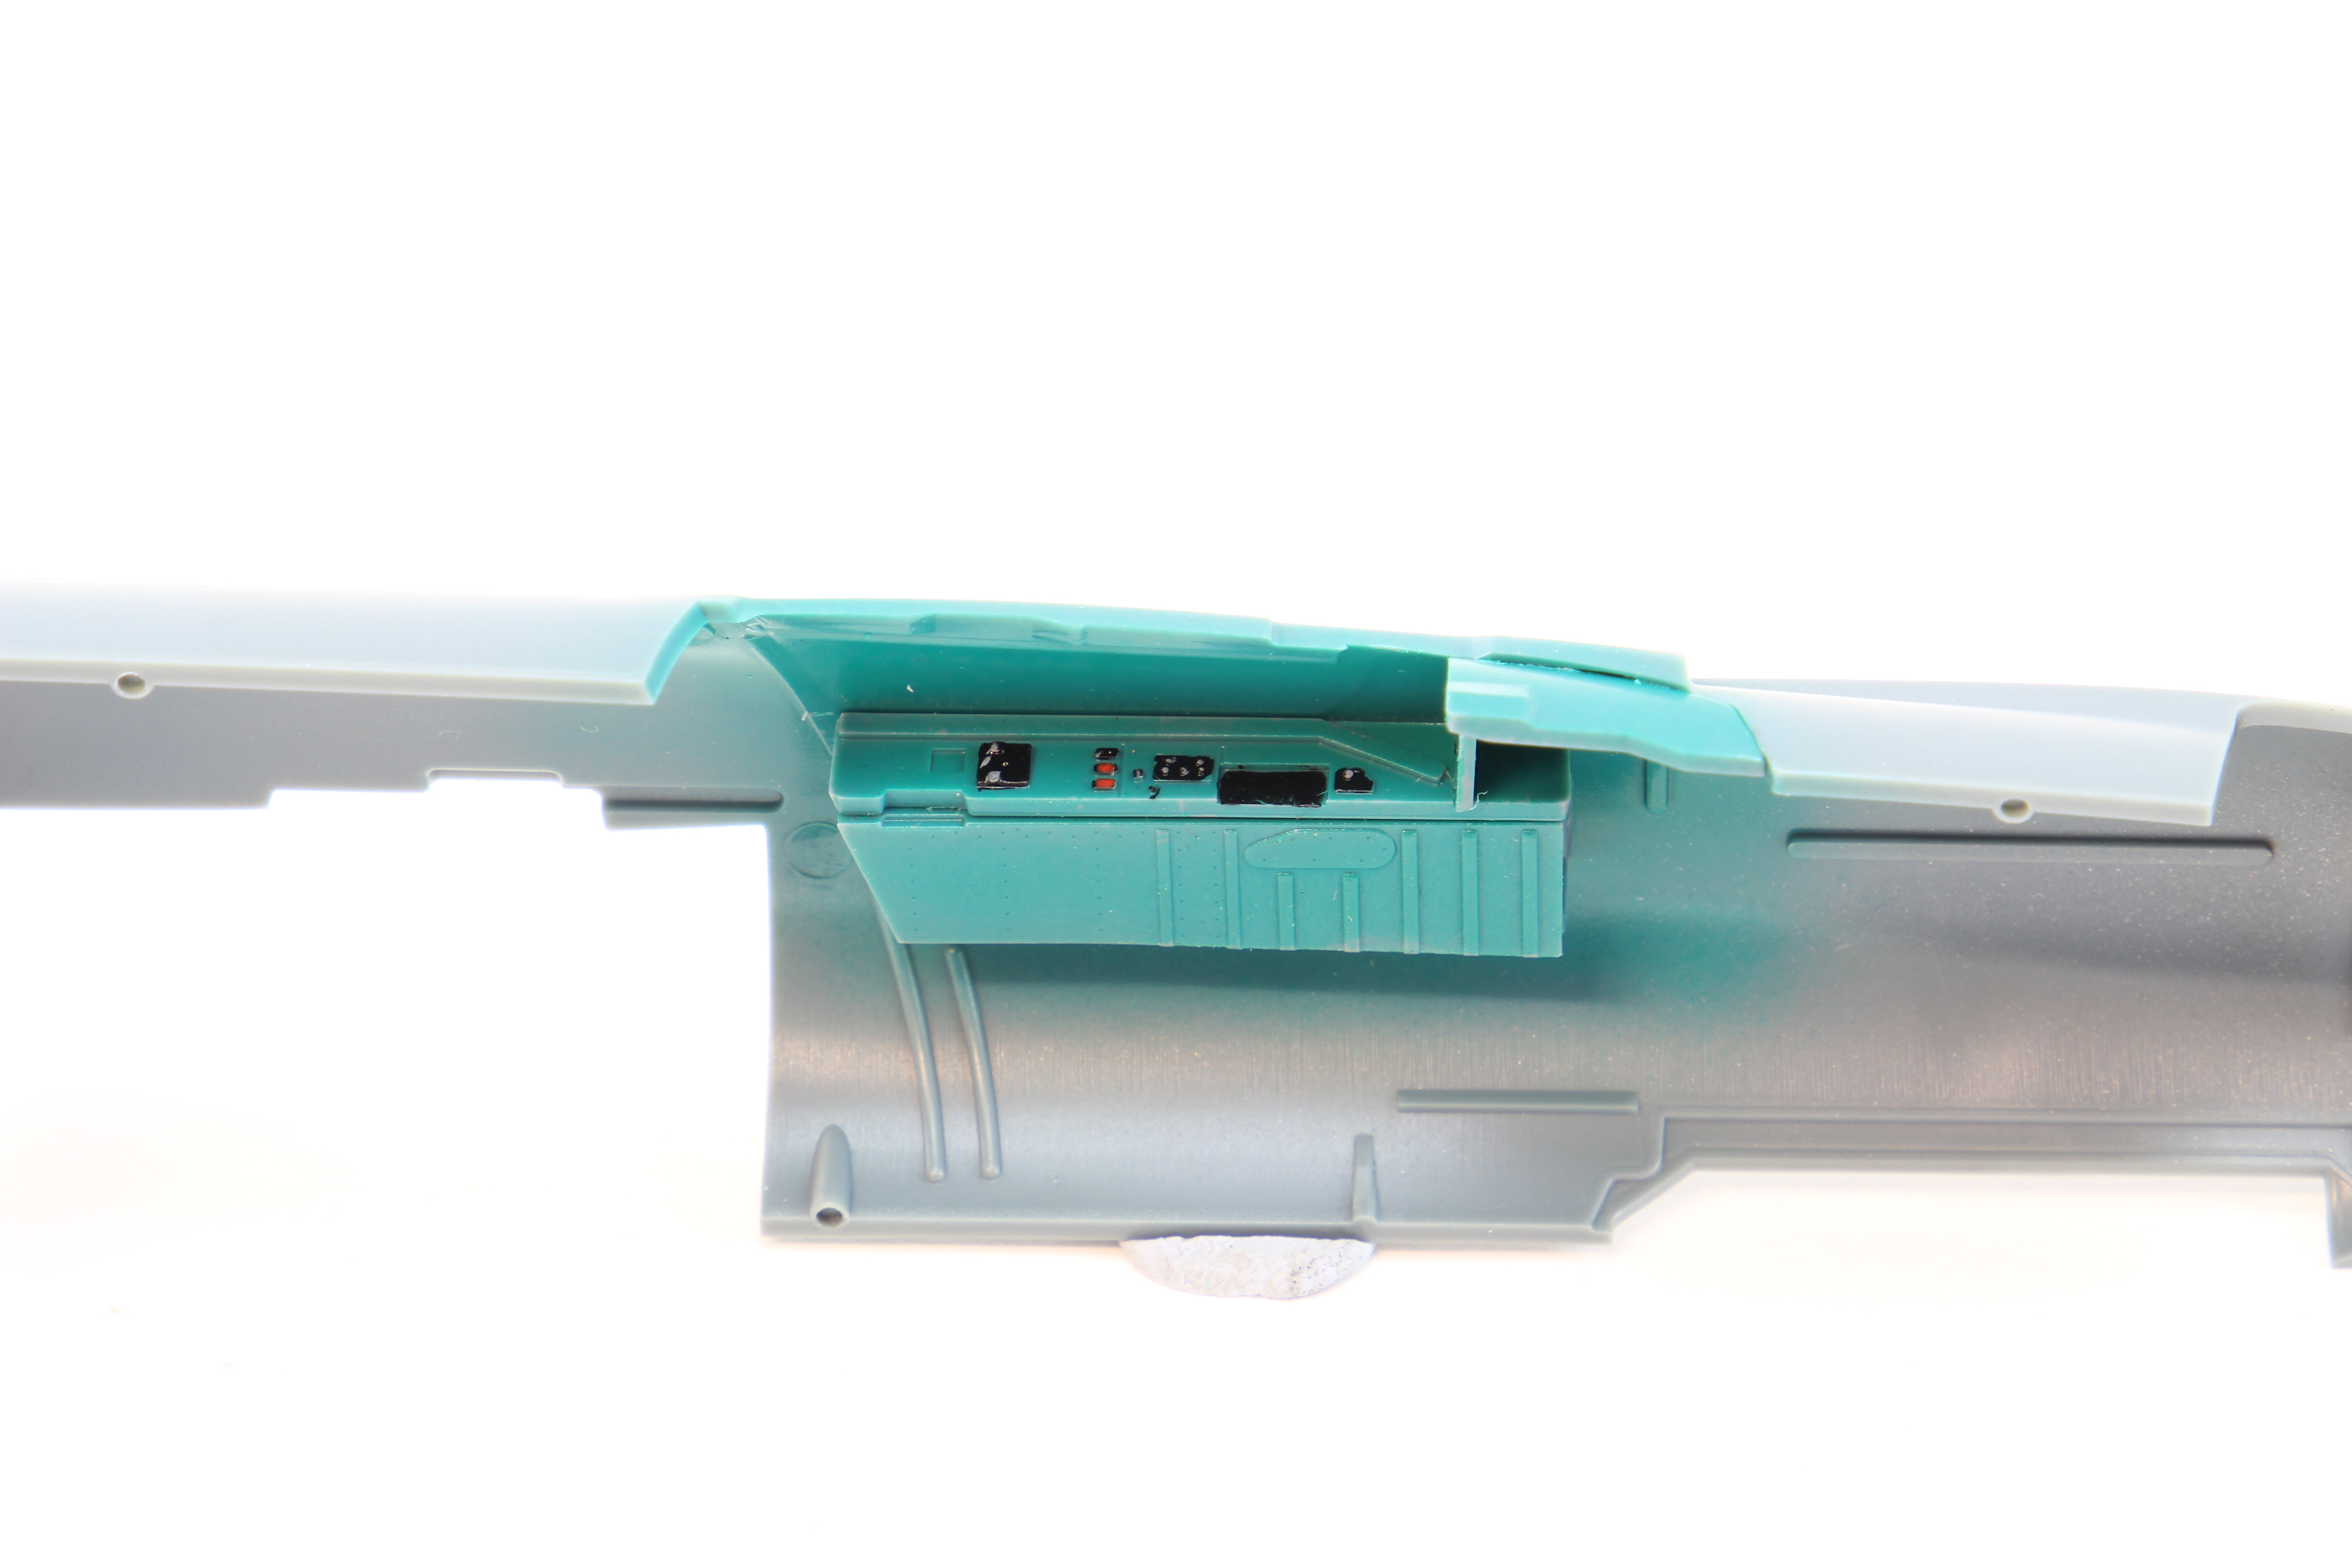
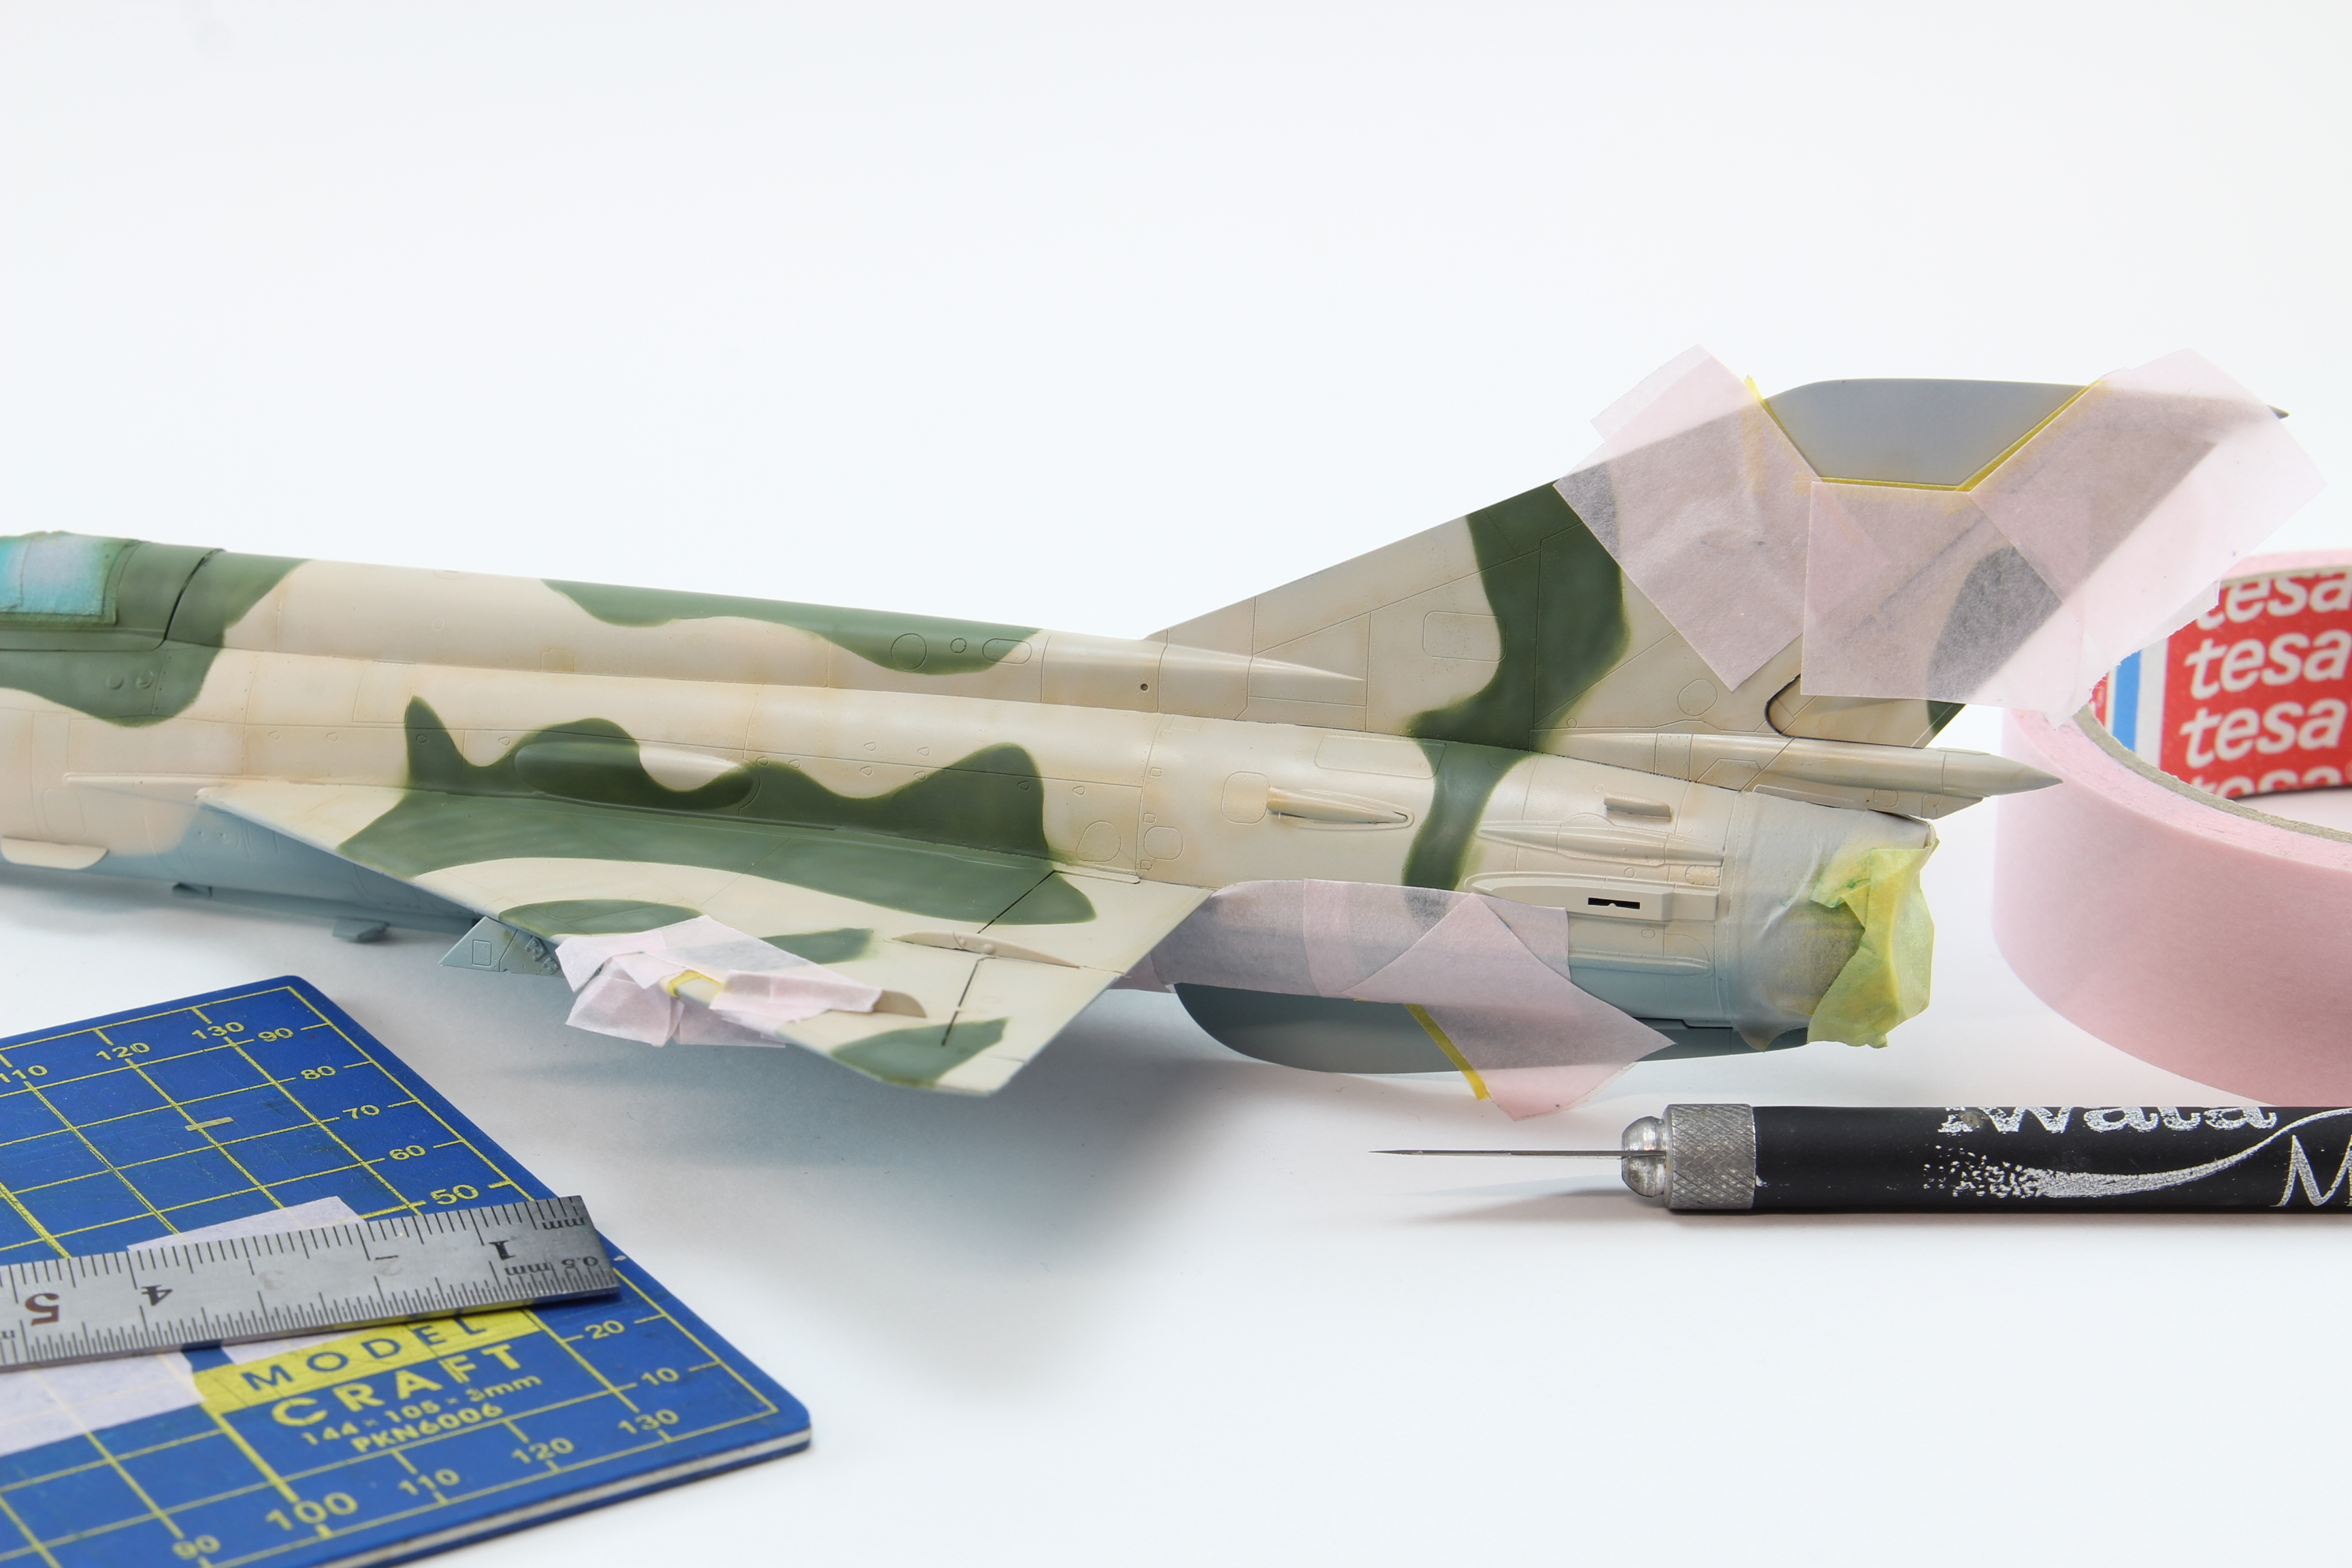
the Painting process advanced and some issues came along...

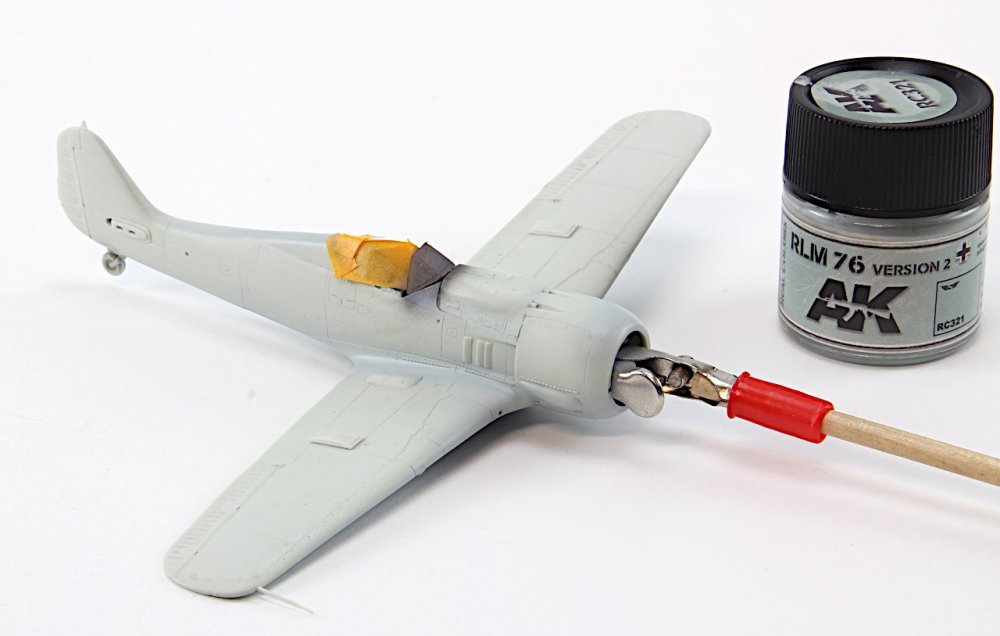
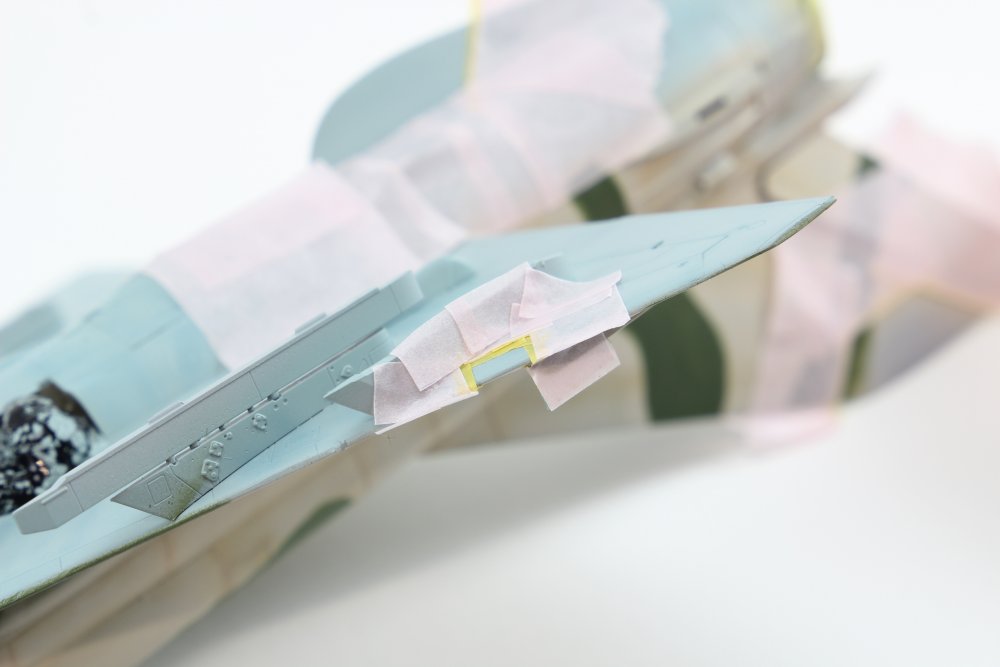
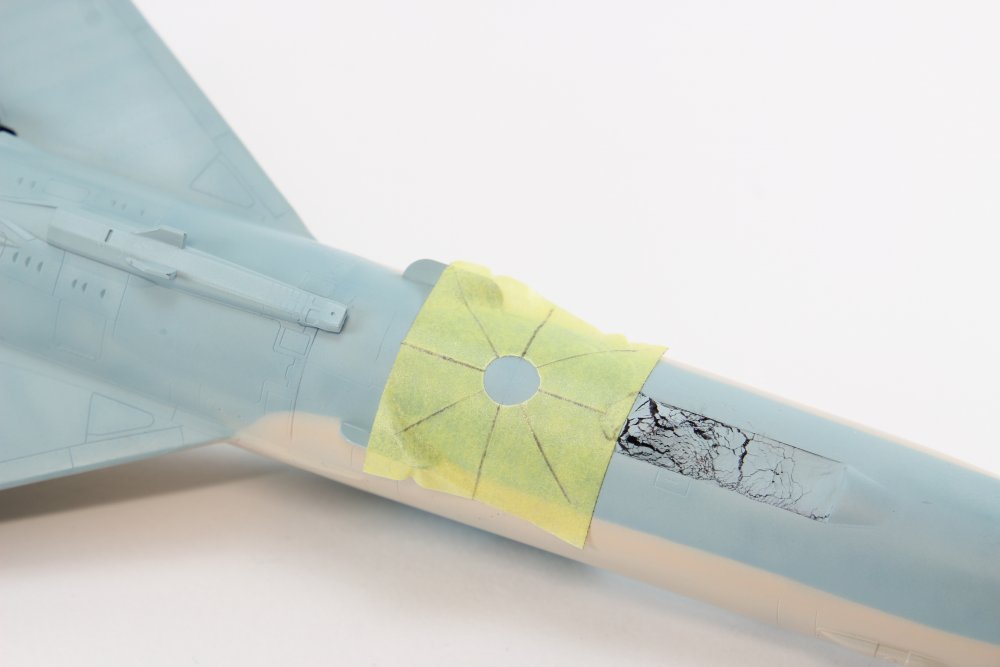
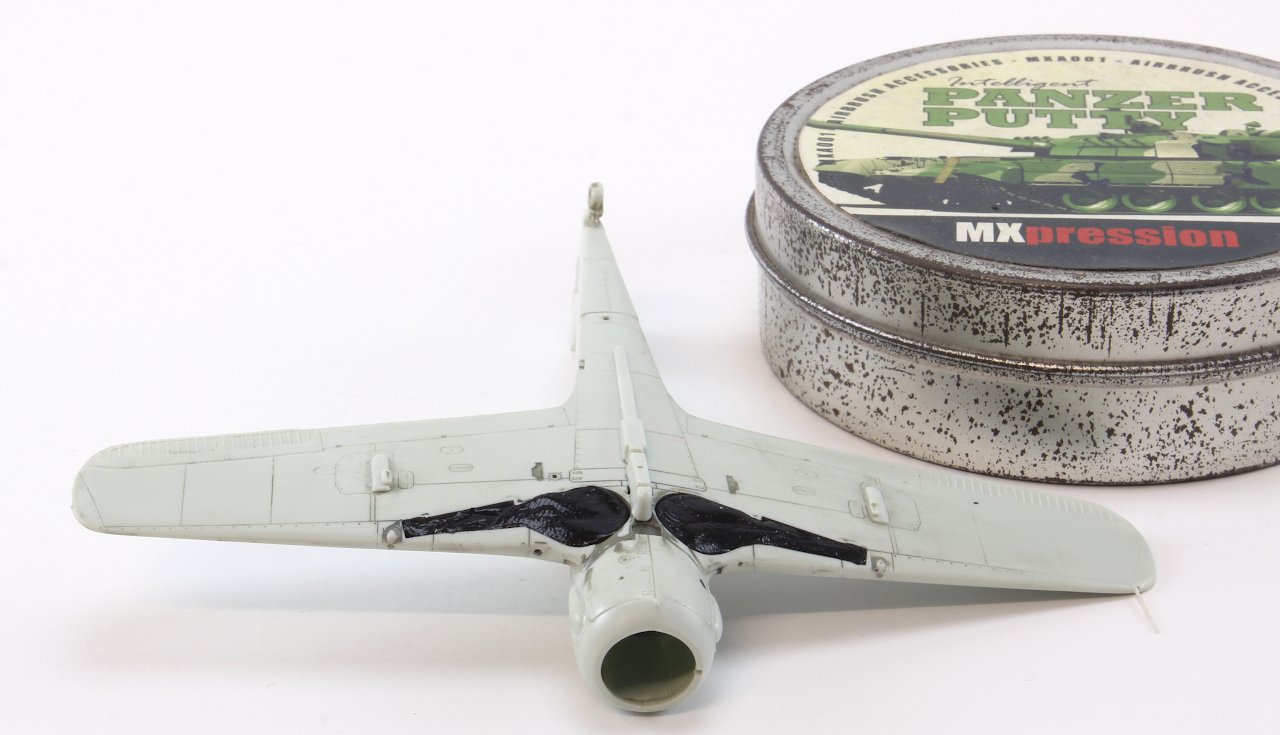
The main landing bay was masked with this "putty" in order to protect the paint.
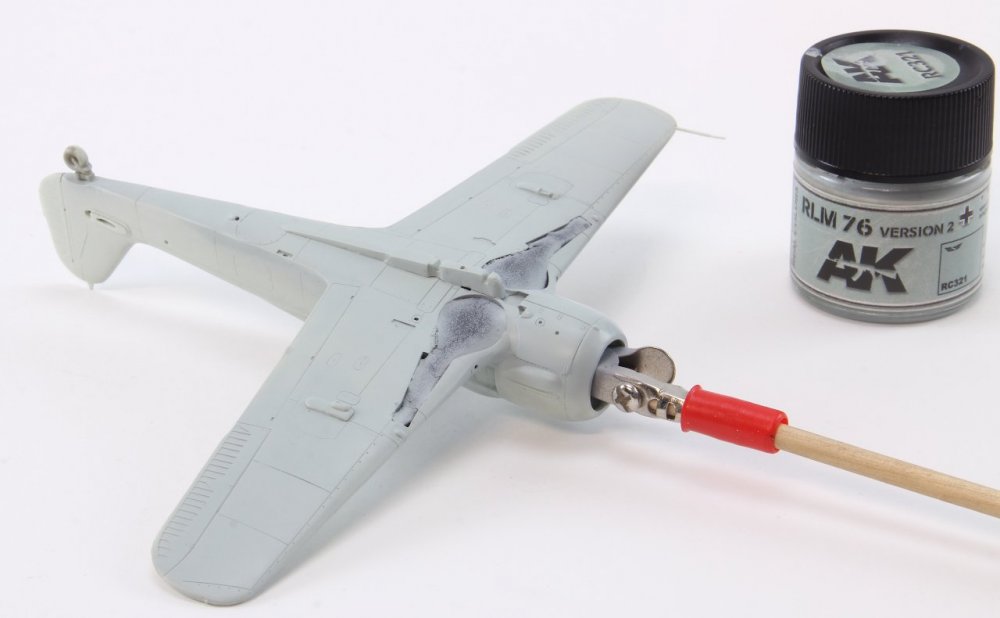
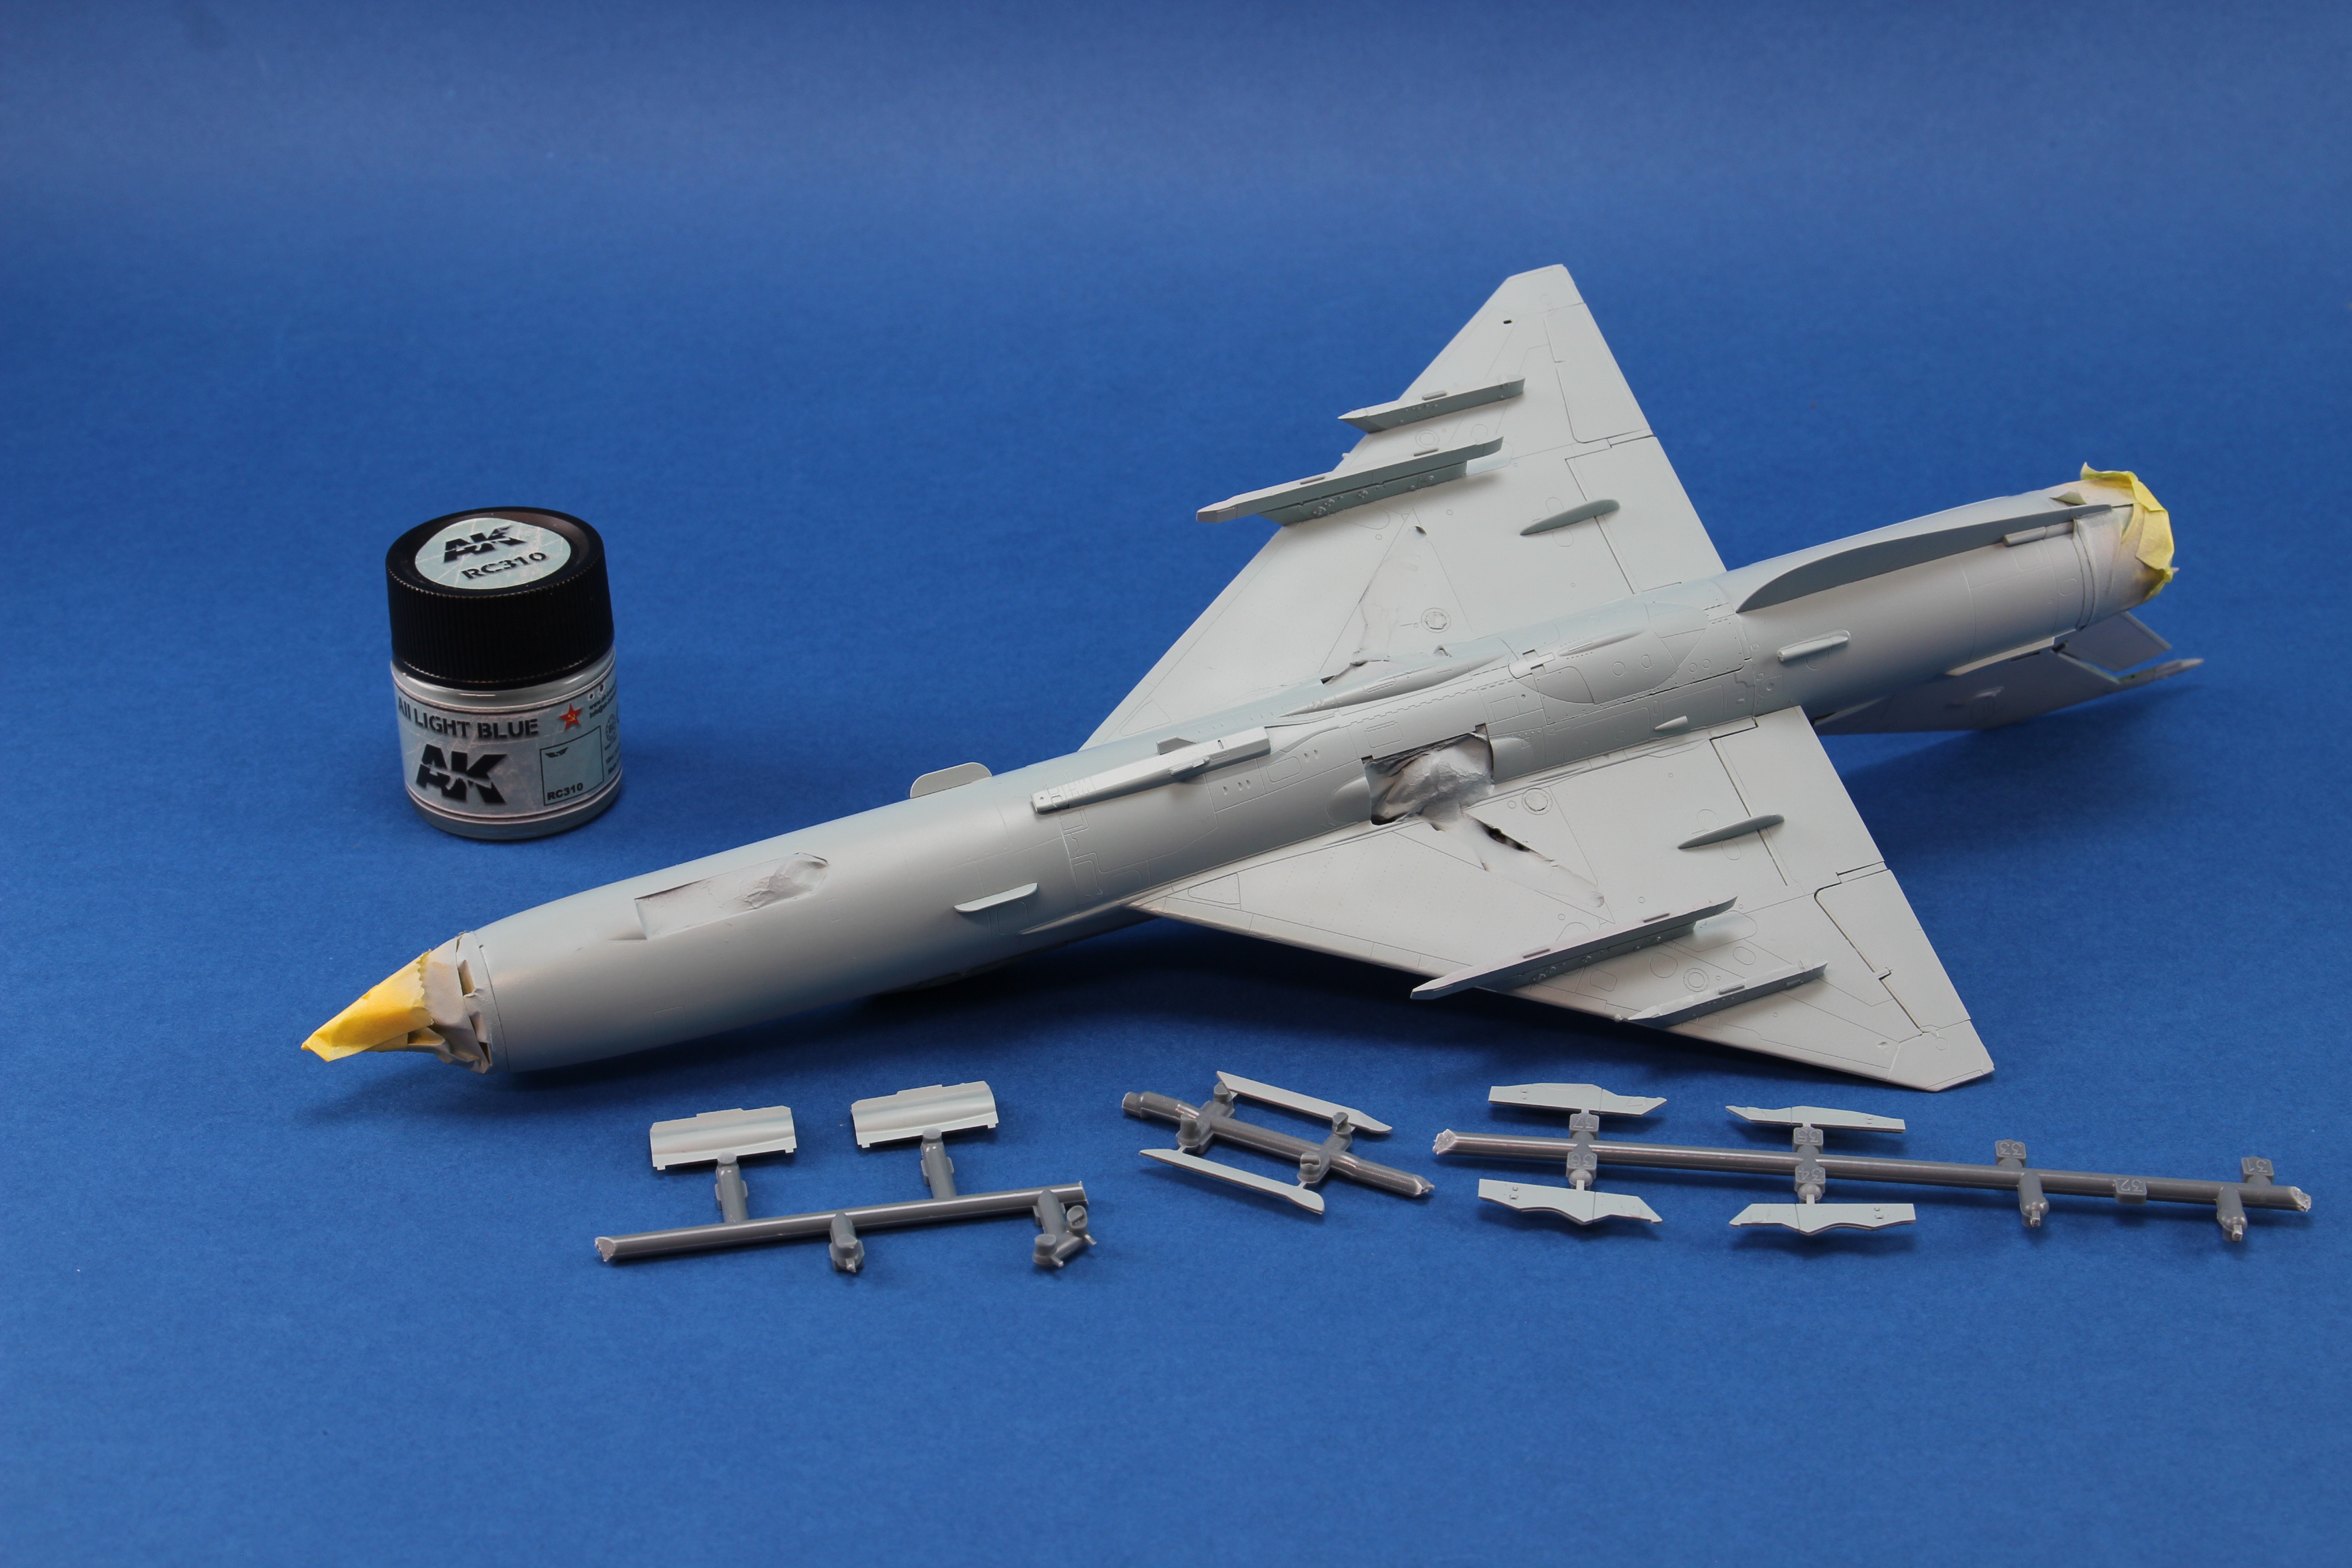
And almost imediately i applied the base colour, using AK RC range.
the excess colour helped keep the "putty" fixed until it's removal.
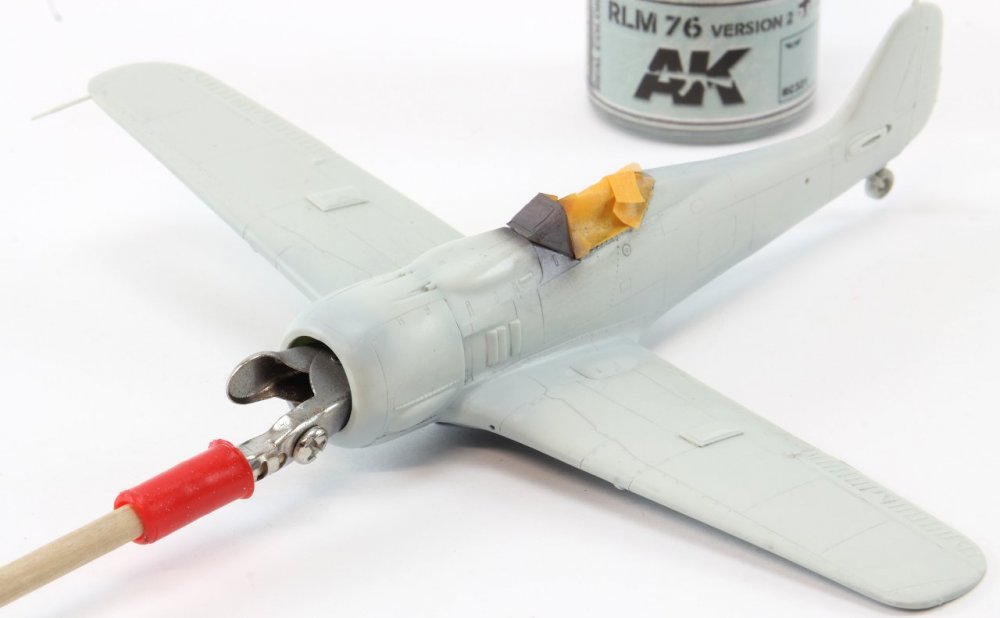
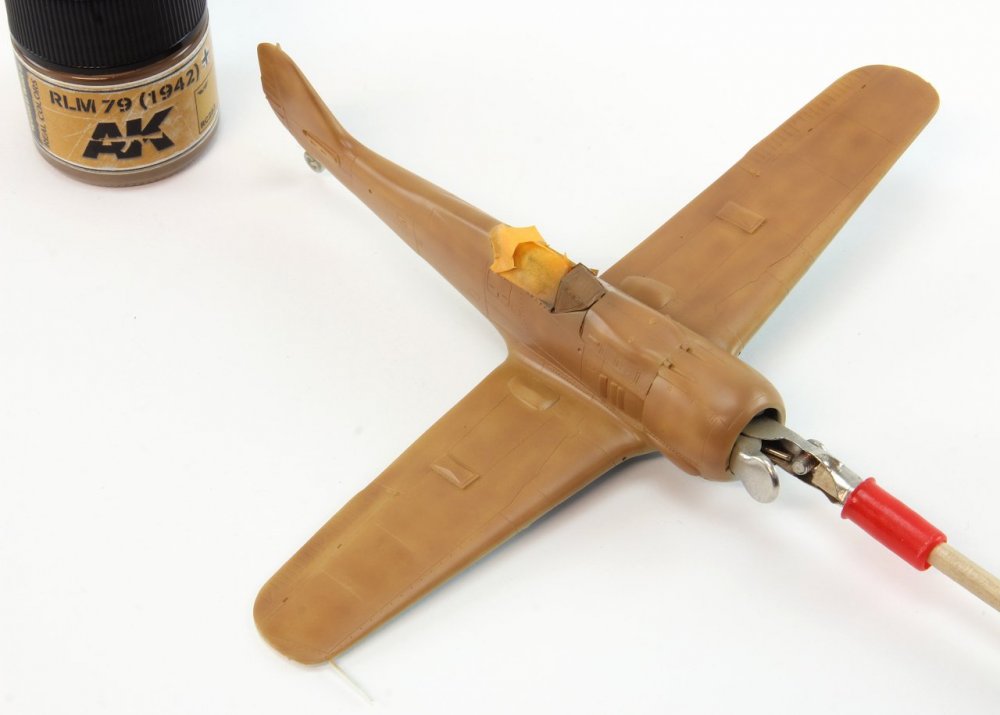
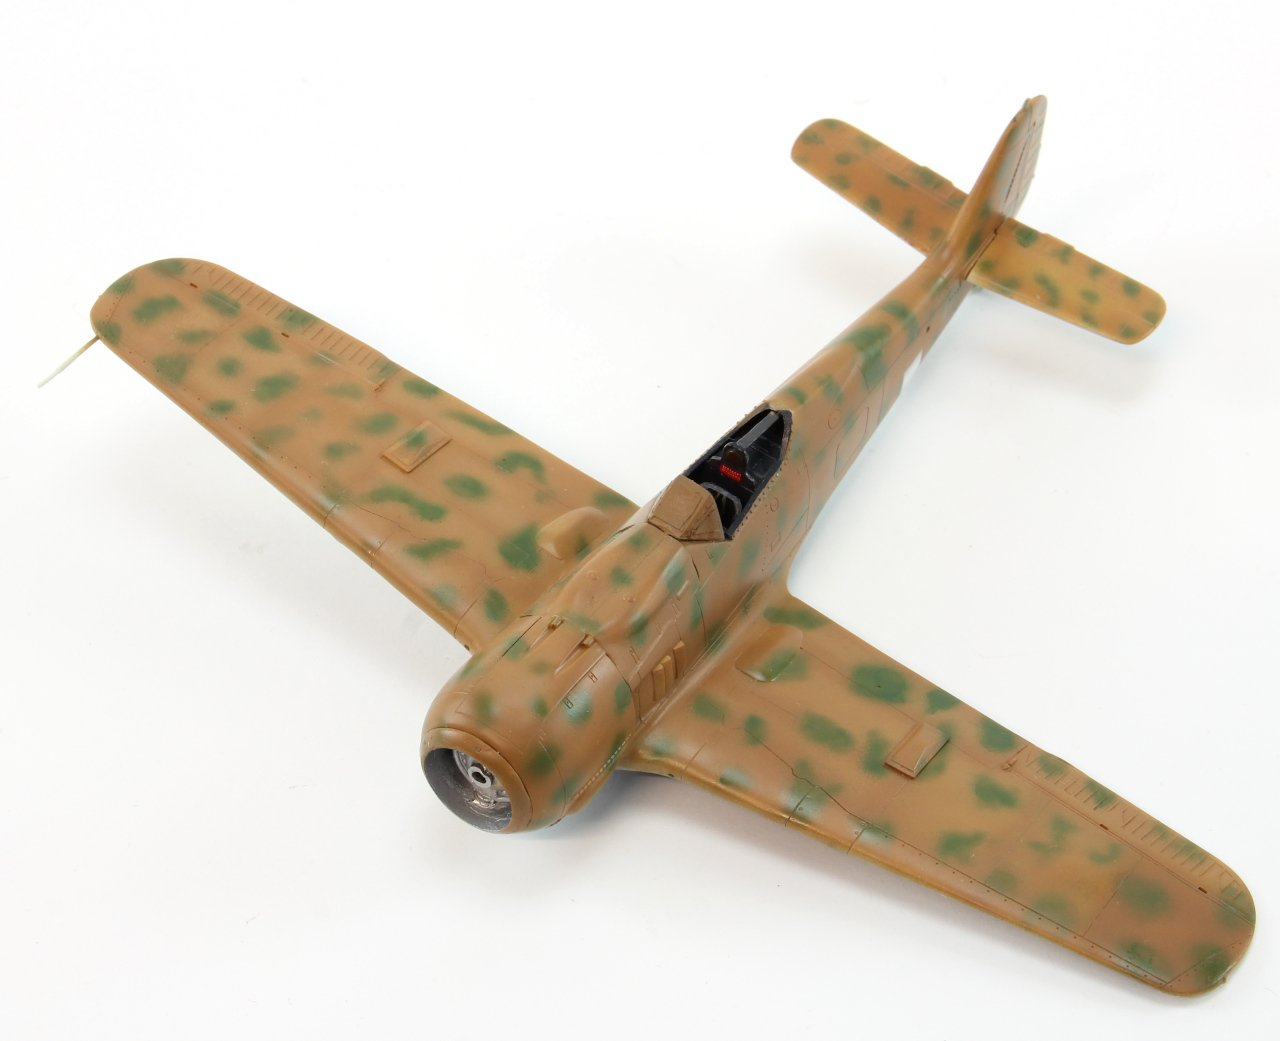
Followed by the upper surfaces main colour, also from AK's RC air Range.
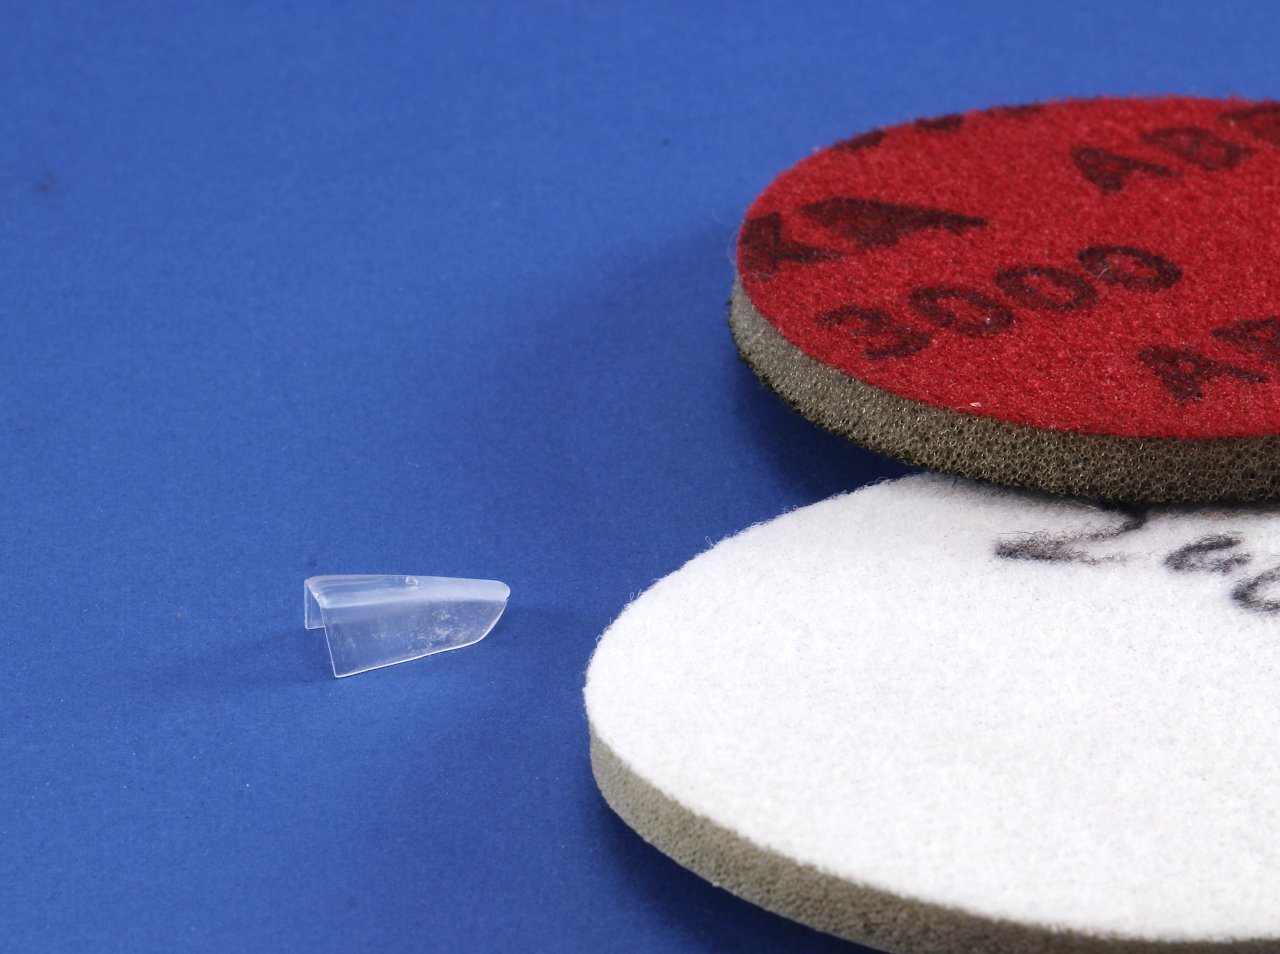
I applied the coat without any primer, just polished the surface with a 3000 Grid pad.

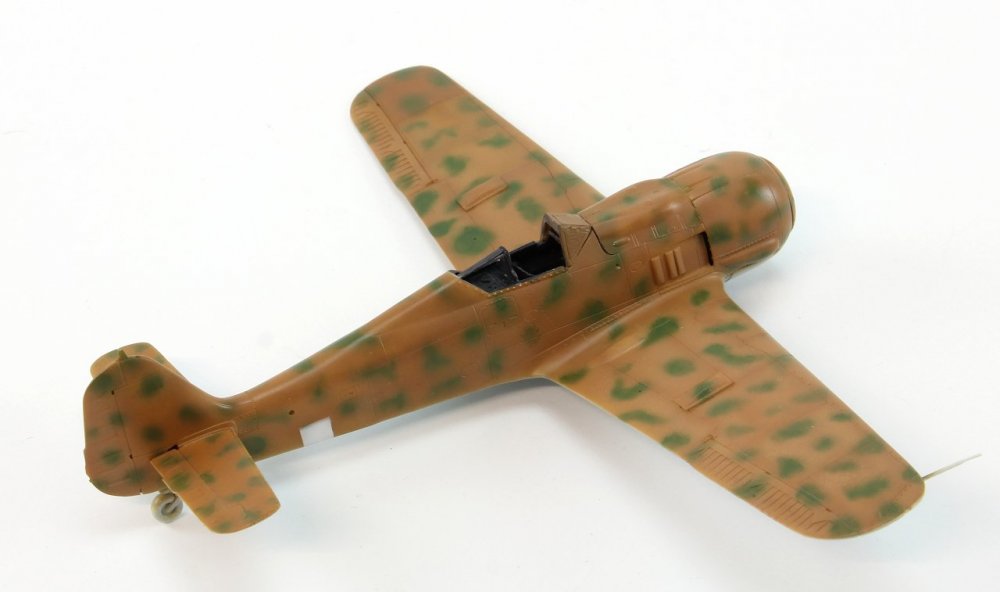
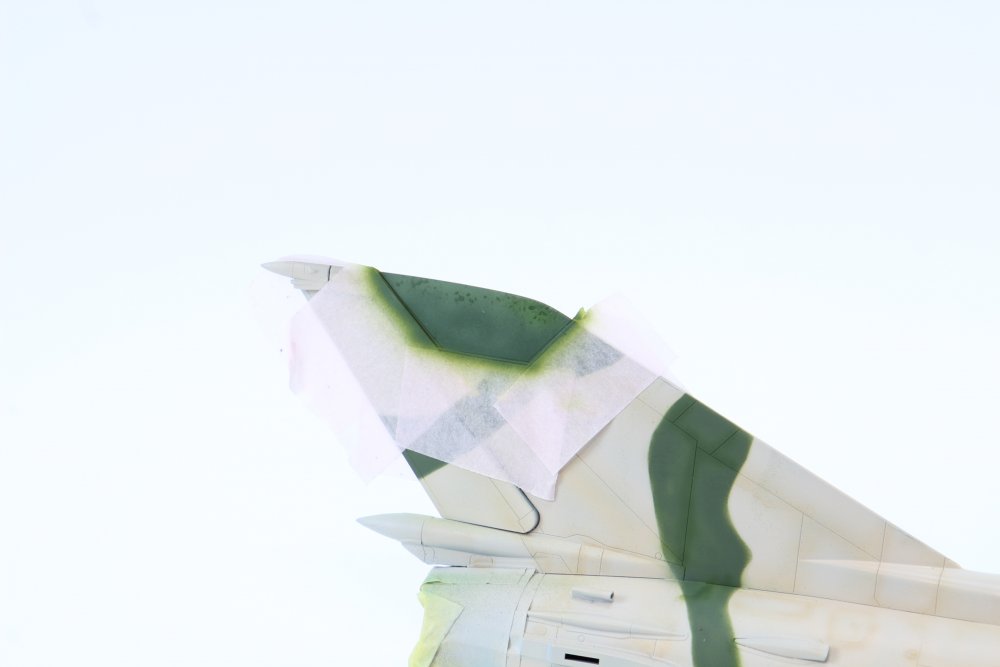
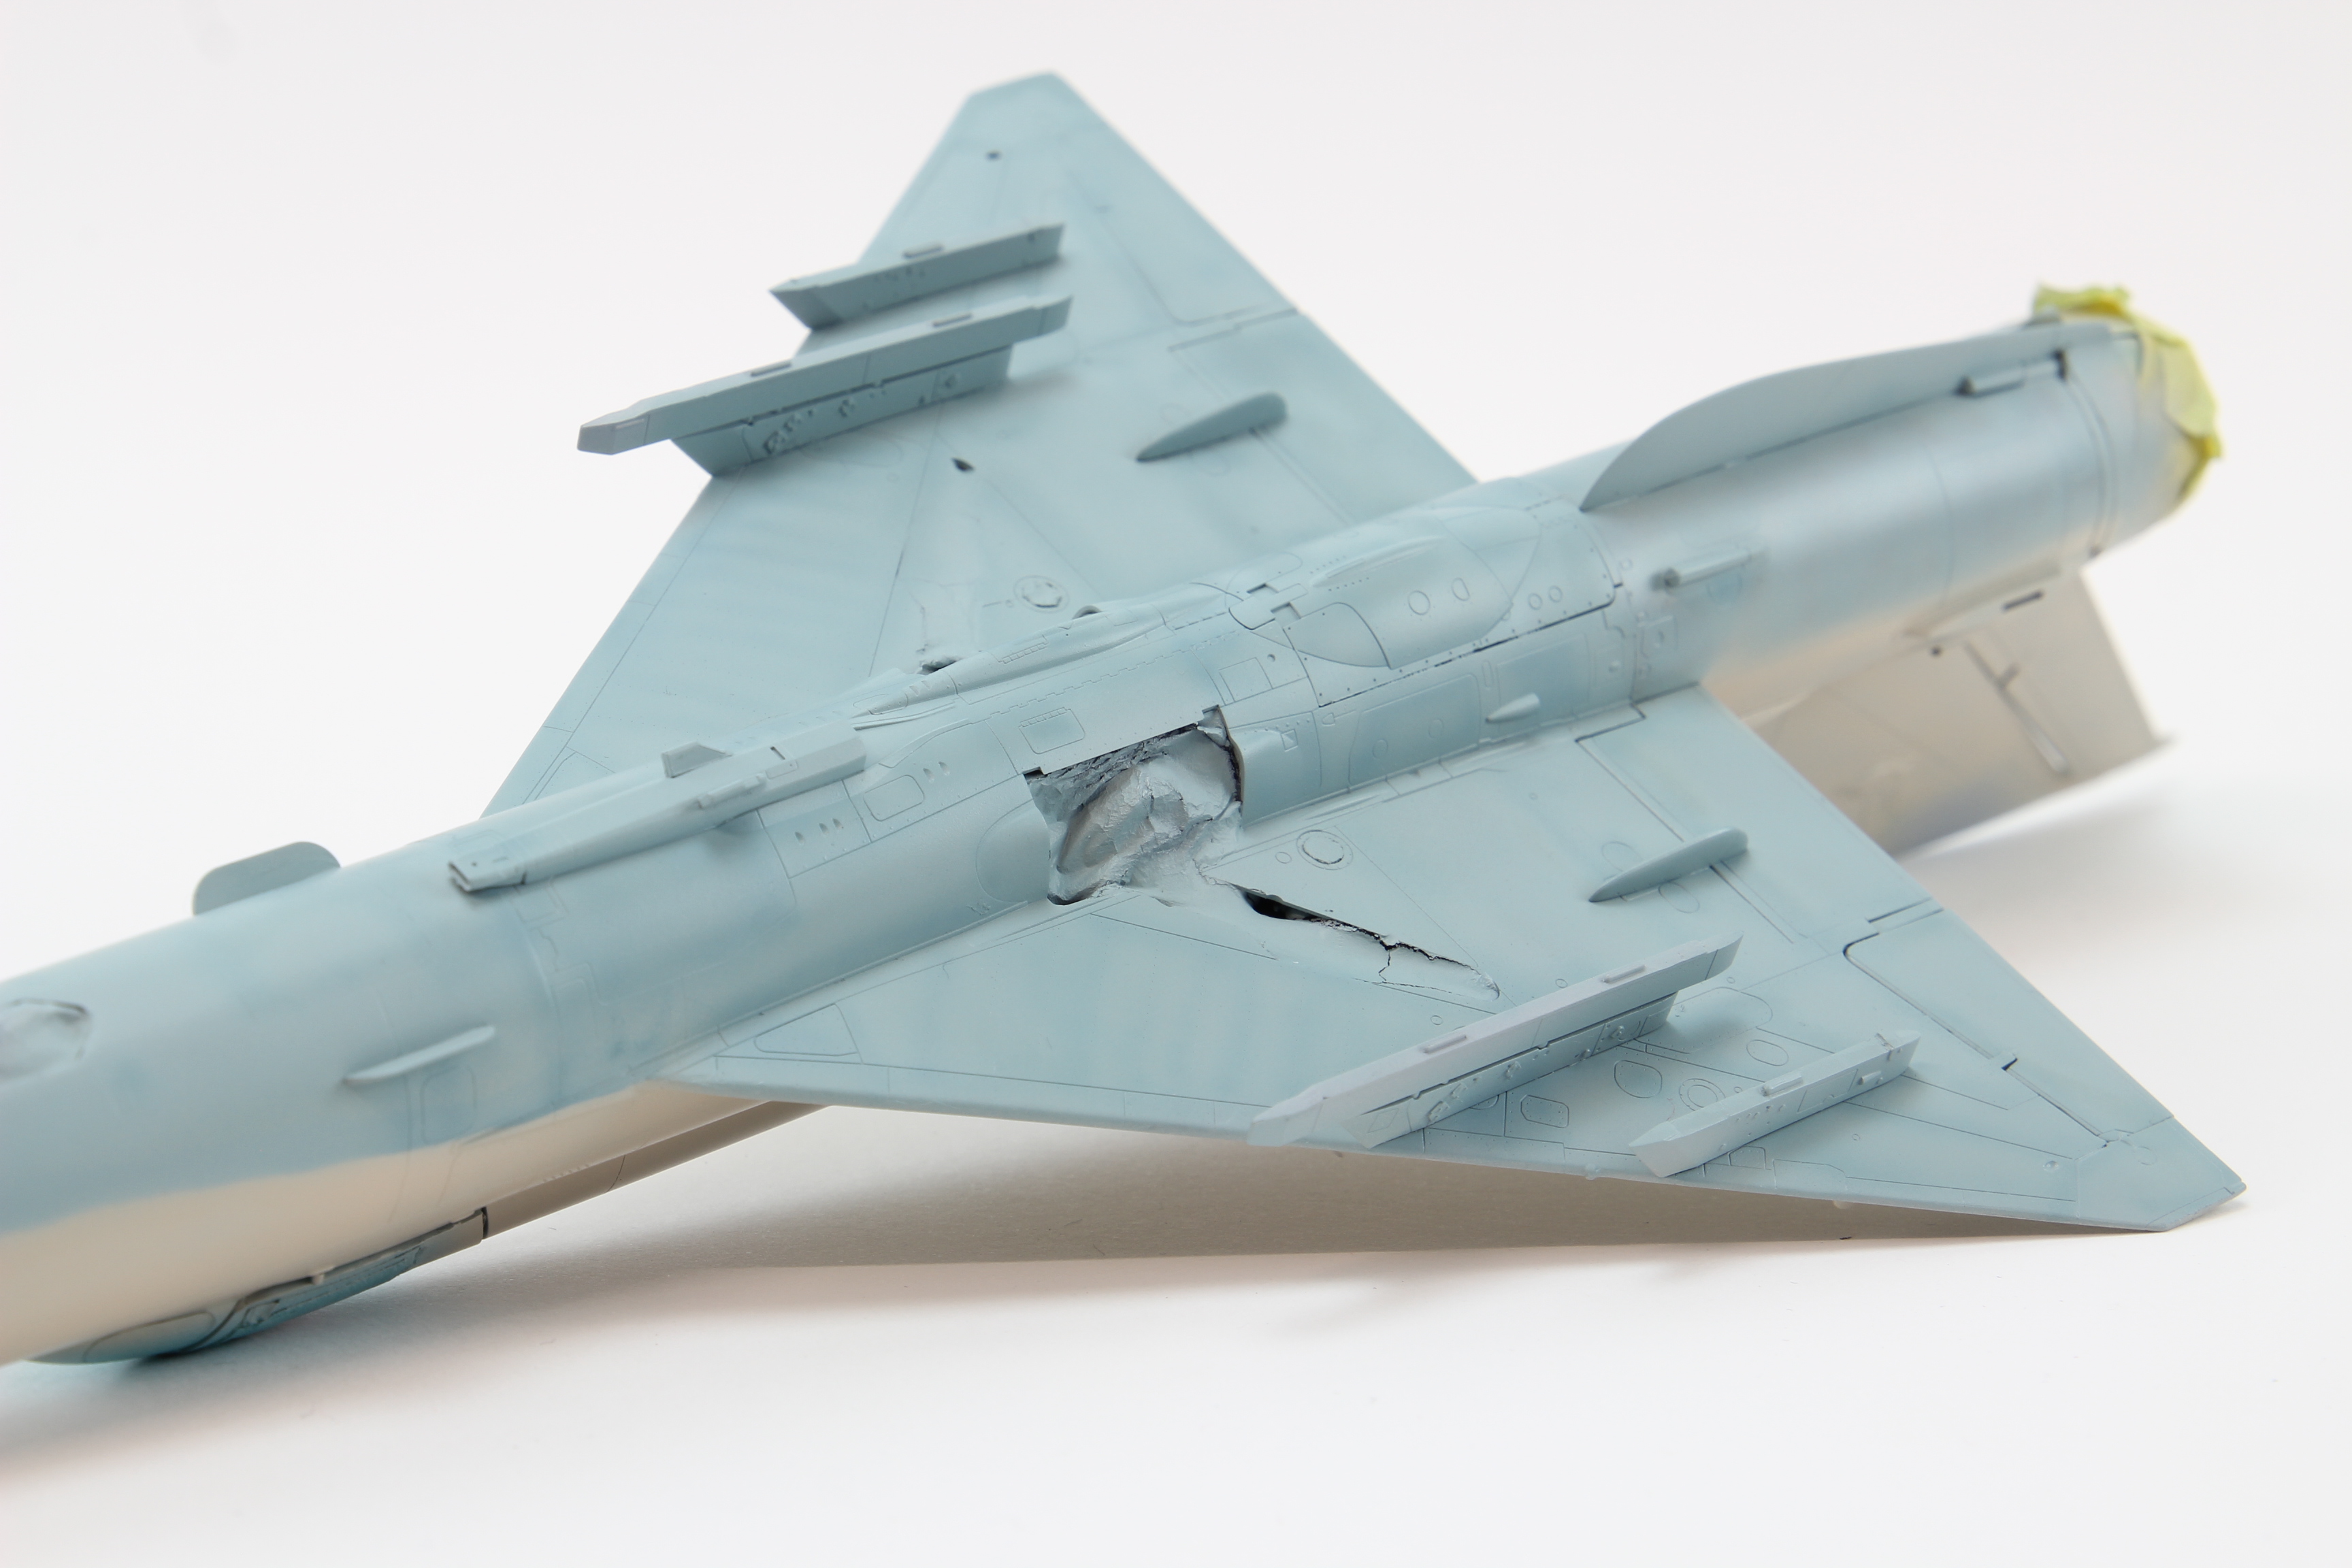
Followed by the green camouflage mottle, and this ie where all the trouble came. It's clear in the pictures that some spots simply are not "blend" and smooth.
Instead of performing the painting sesson only in one shot, i did it over three nights, and i was unable to replicate the same paint dilution, and even operate the airbrush in a proper way... some say that working very late in night may produce this results.
Also you'll notice that one of the left wing panel is slightly darker than the rest of the airframe. Well this is due to the fact that i put my finger moistered with thinner in that area, and i think that i do not need to explain more.
in the meanwhile the decals have been applied but i did not take any picture yet.
thanks for watching
best regards
Ricardo Veríssimo
-
3
-
1
-
-
On 7/3/2021 at 6:18 PM, Kaireckstadt said:
Great start and nice little bird!
The parts are so tiny!
Which livery will you make?Hi Kaireckstadt ! sorry has i din not answer your question.
The livery is the same as the boxart ! check the first picture!
Thanks for the feedback Guys!
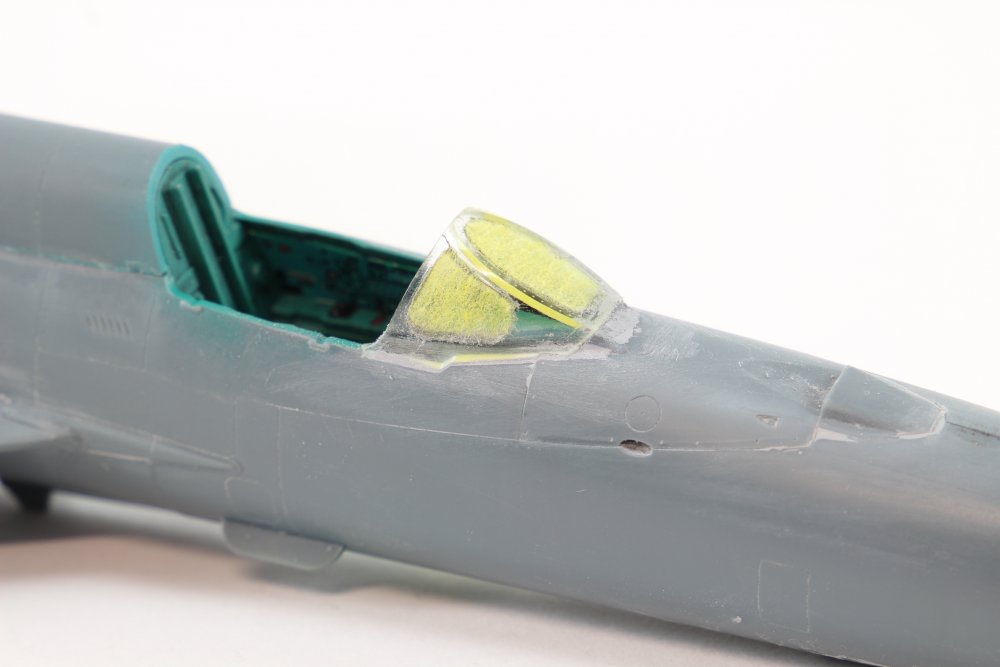
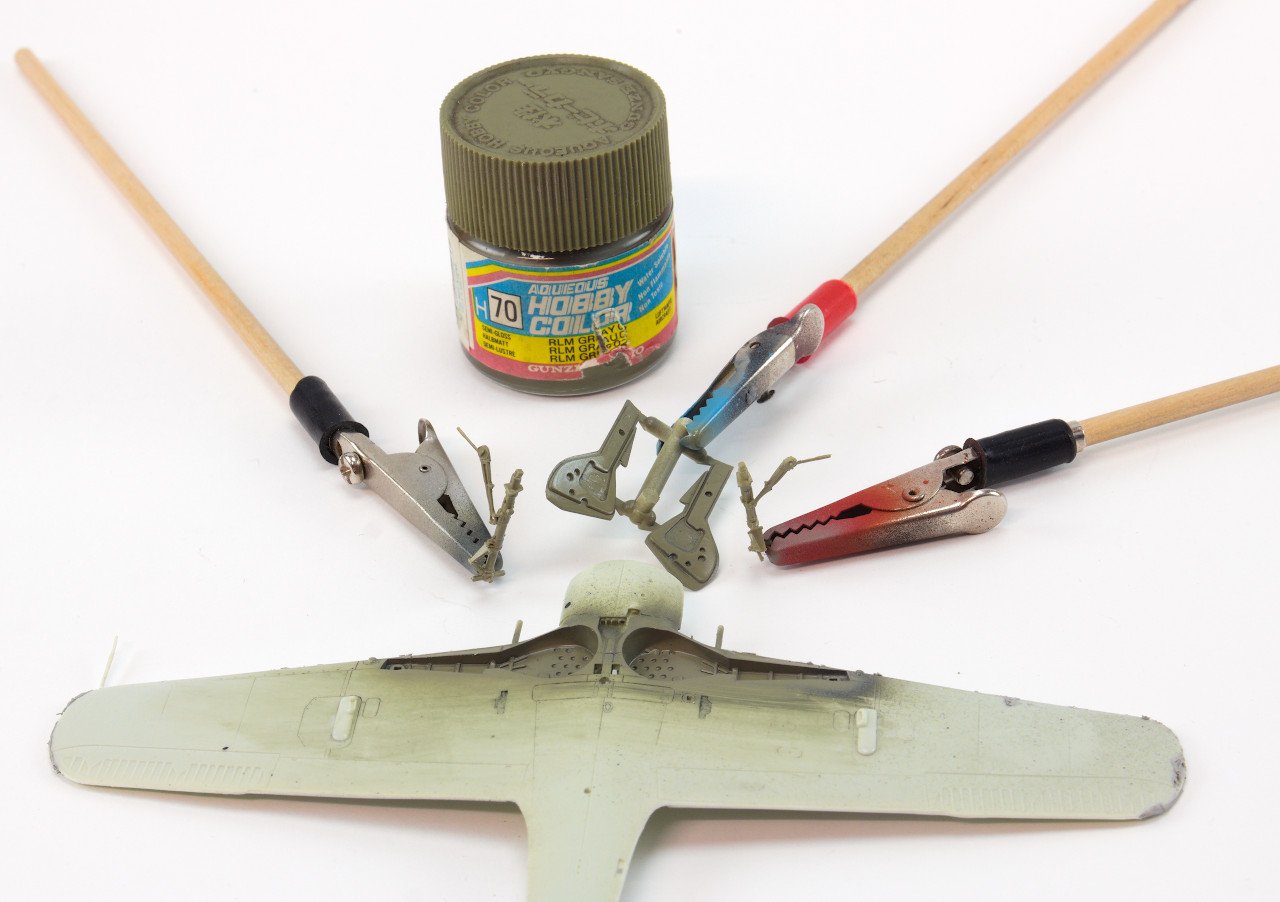
Here's a small update ! Last night my attention were on the cockpit area, mainly the gunsight detail.
The model's original part is a plastic part, so i remove it and replace it with a piece of clear acetate.
But first, some painting is required . RLM66 from Gunze range are perfect for the job.

A decal was set on the headrest armour plate.
All details were brush painted with vallejo acrylics.
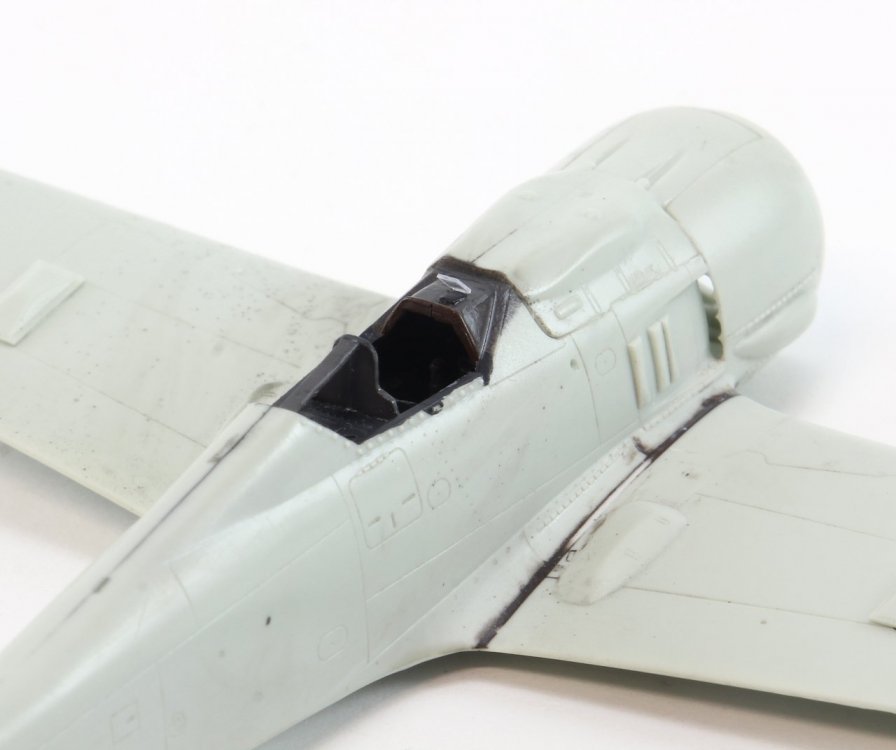
Note: the gunsight glass was glued in place using white glue. At the time i took the picture, was still drying.
thanks for watching!
have a nice Sunday !
-
7
-
-
On 7/3/2021 at 12:19 AM, GazzaS said:
Nice start. Love to see what some guys can do with 1/72... but I just dislike the scale.
Hi GazzaS It's a compact scale! thanks for your feedback!
On 7/3/2021 at 1:49 AM, harv said:Thanks for showing us ! .......harv

thanks Harv!
On 7/3/2021 at 11:41 AM, Peterpools said:Ricardo
Nice start on your Fw190. I do spend way to much Time painting and adding some details and agree that once the fuselage is buttoned up, so little can be seen - but it’s both fun and rewarding just the same.
Keep ‘em comin
Peter
Hi Peter ! i agree. right now, my modelling point of view is trying to keep it simple!
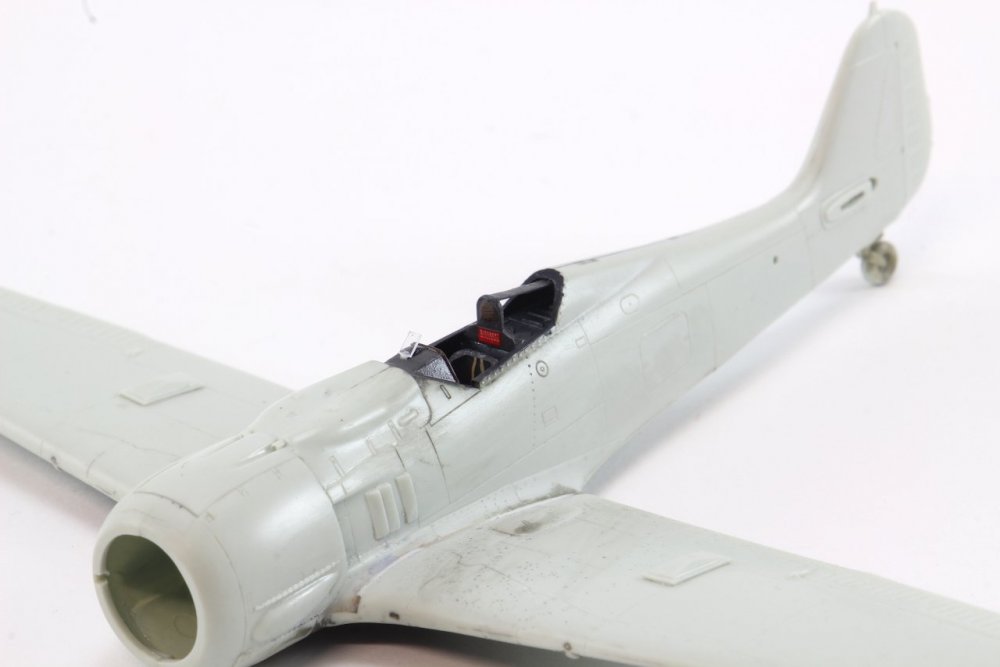
Well, upon one week away from the workbench, a small update.
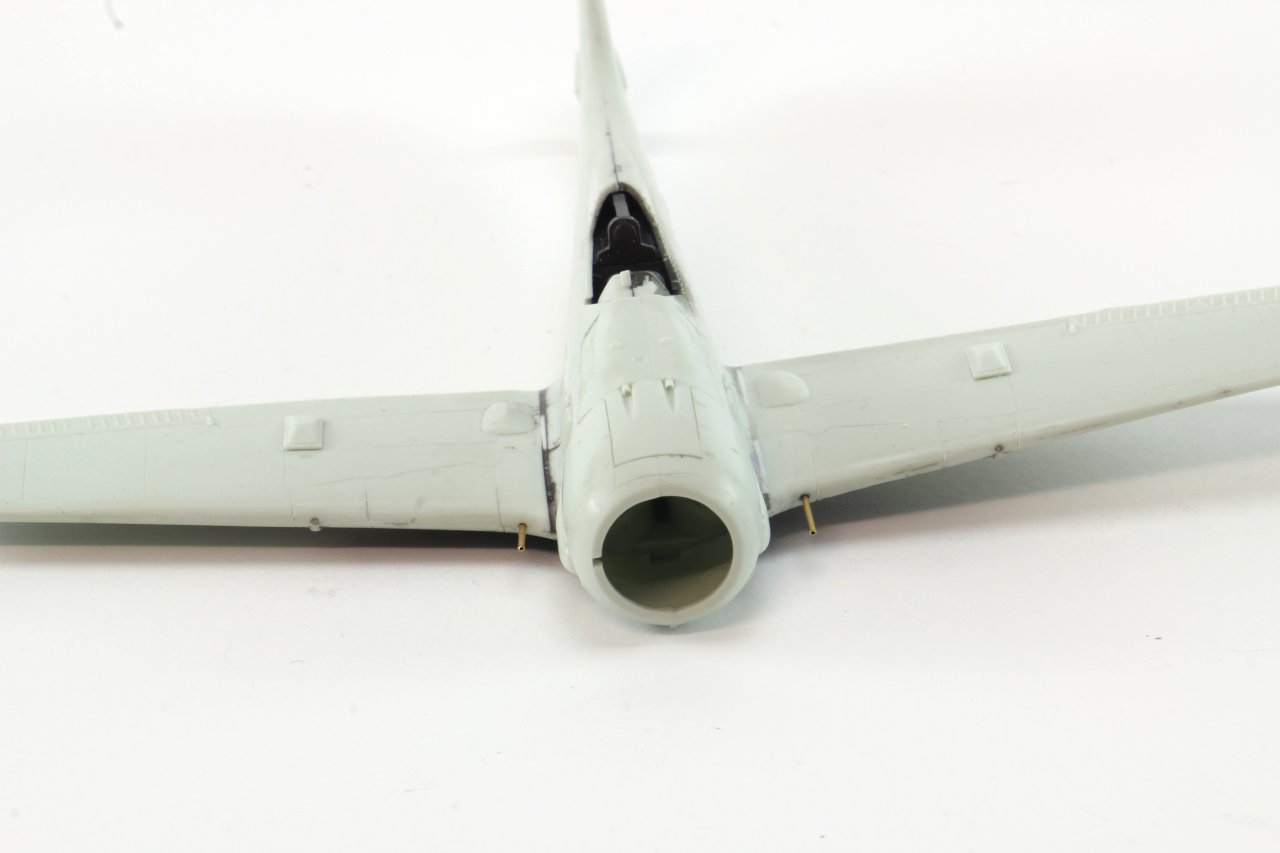
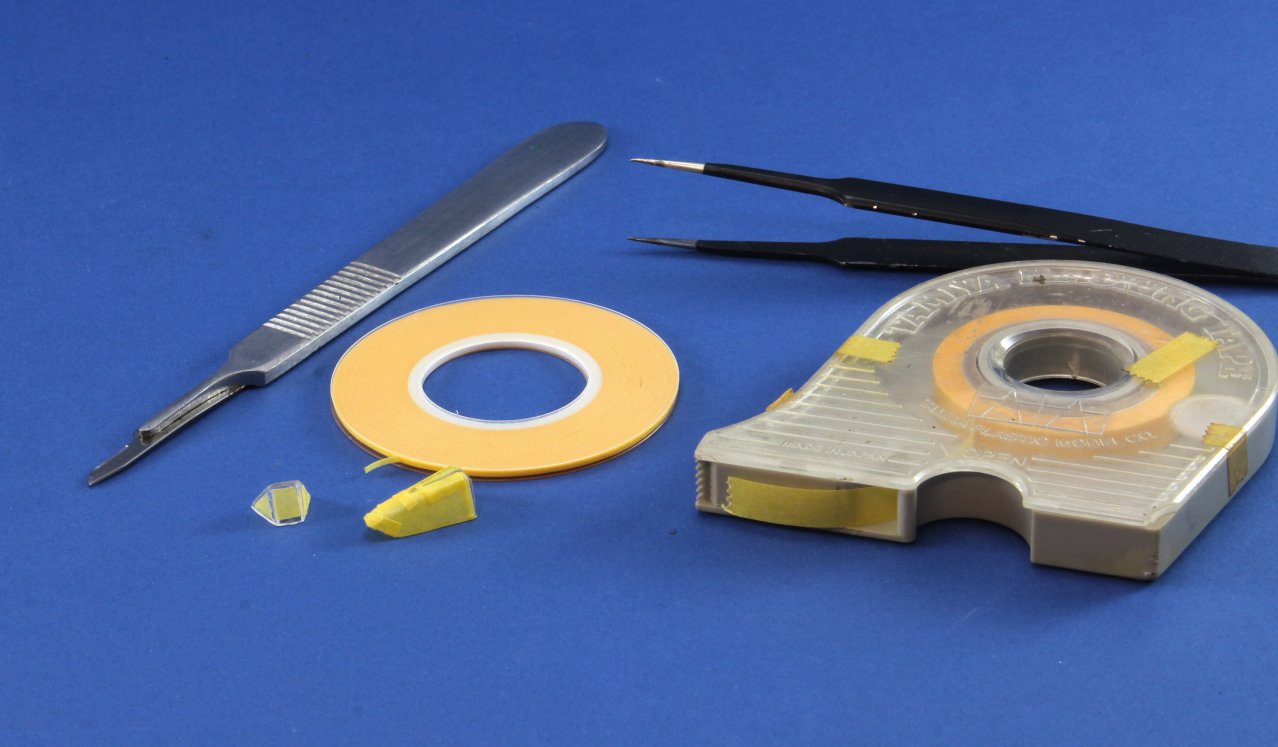
The wing root cannon barrels were replaced by metal tube, 0,6mm diameter from Lion Roar. This set is really good, is i can cut the tube with a x acto blade.
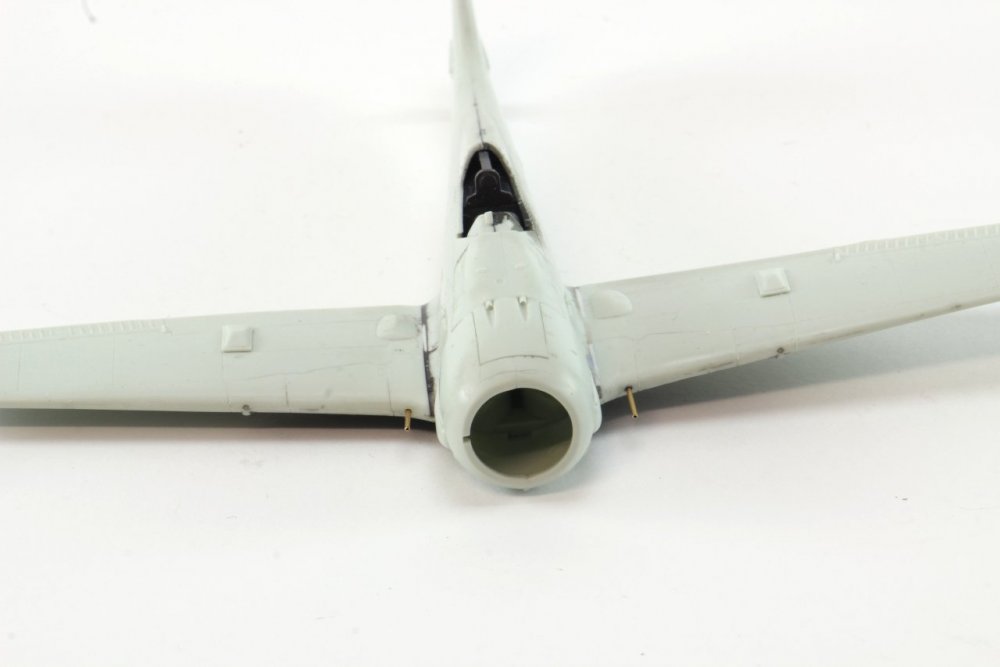
Note: the tubes are only attached and not glued / Aligned.
then my attention was set on the canopy, which is to say the least, miserable,
i started by buffing with a 2000 pad and when i'm happy with the result, started buffing with a 3000 till 6000 buffing pad.

the last step was masking the canopy and windshield, using Tamiya tape and a sharp blade. A 10 minute task.

And this was the update . Hope to advance a bit more today, and they i'll share the photos.
thanks for watching!
-
6
-
-
Hi all!
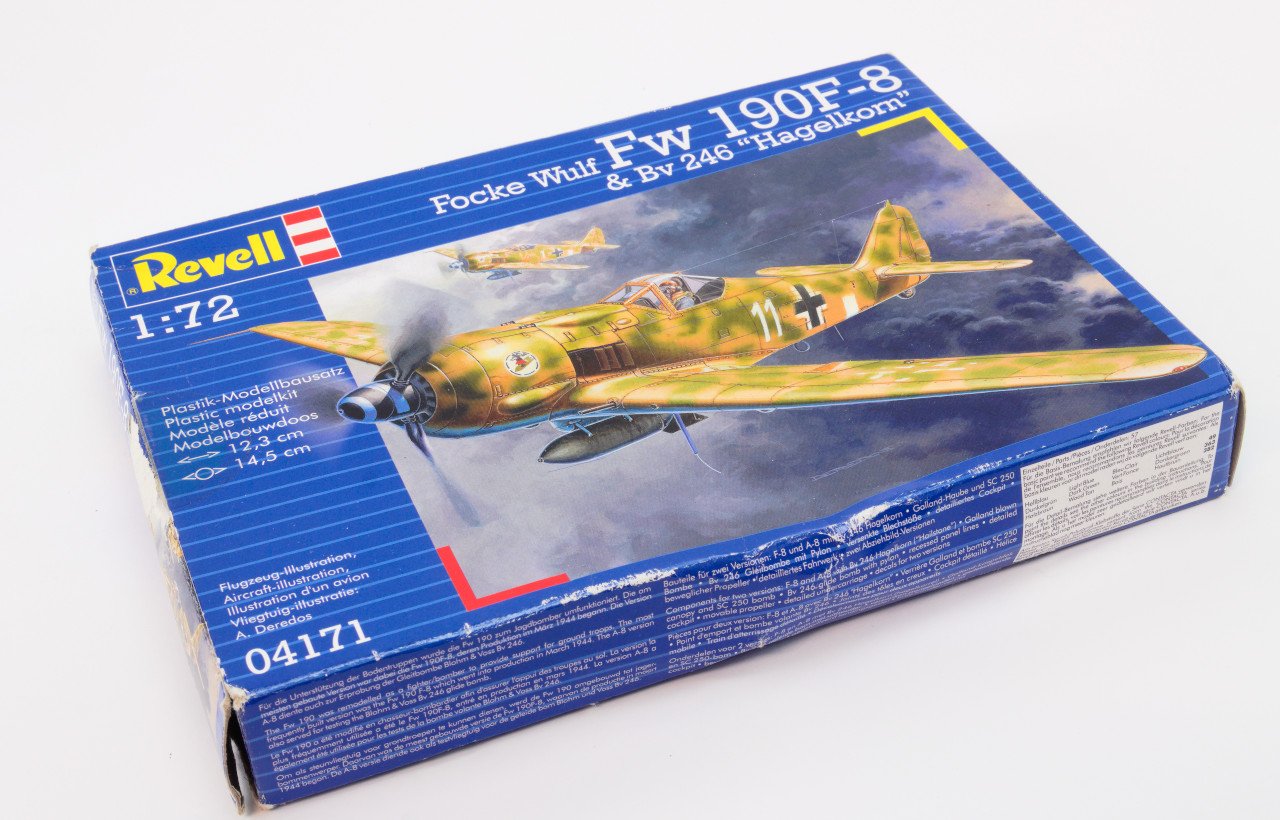
For some time now that i wished to start a topic "step by step" on this forum and i found the ideal candidate.

I bought this model recently at a local hobby shop and already "destroyed" one on my resume, due to lost parts.
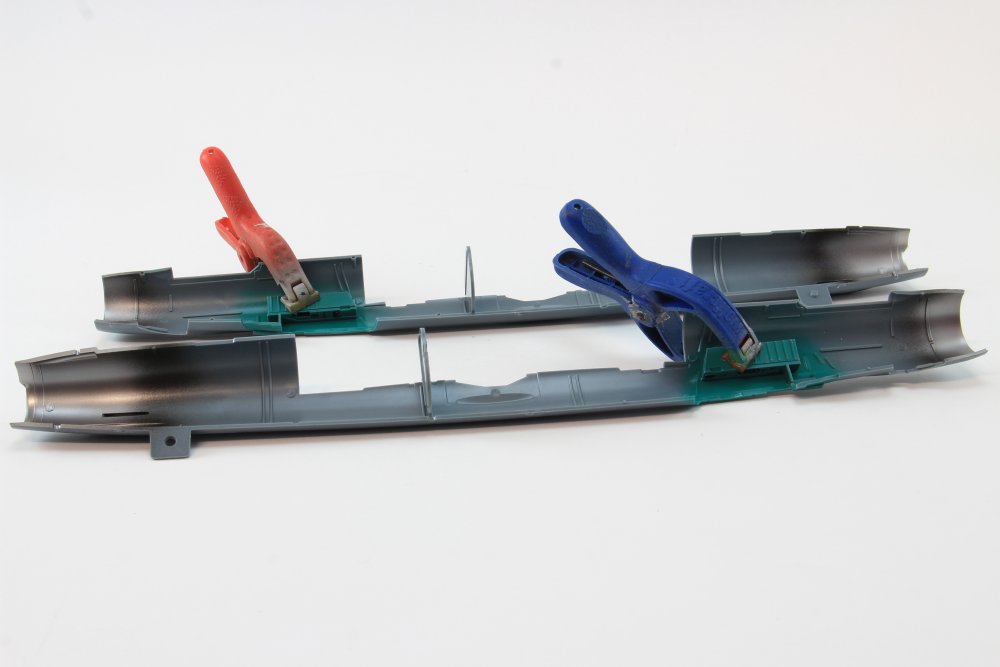
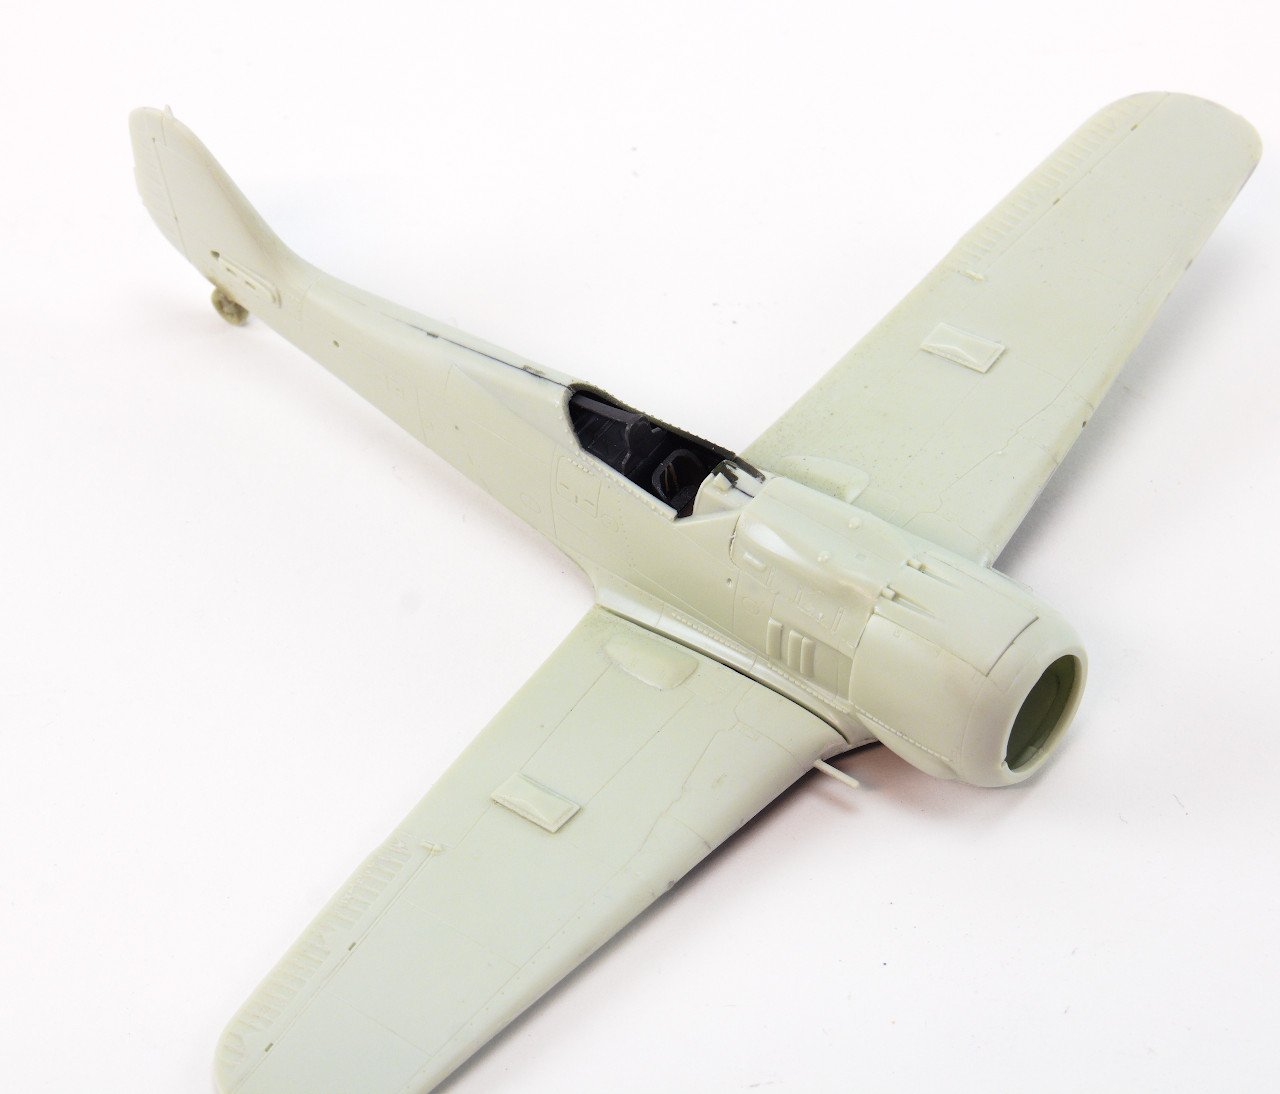
As usual in my airplanes, I started to cut and prepare parts from sprue, starting from the cockpit, that and by the pictures below, I did not take pictures.
The paint was made with a primer from Vallejo, followed by RLM66 from Model air, also from Vallejo range.
As much of the cockpit is hidden, detail painting was kept into a minimum.
Over a 4 hours period, I was able to complete the fuselage / wings glue, and main components prep for paint.
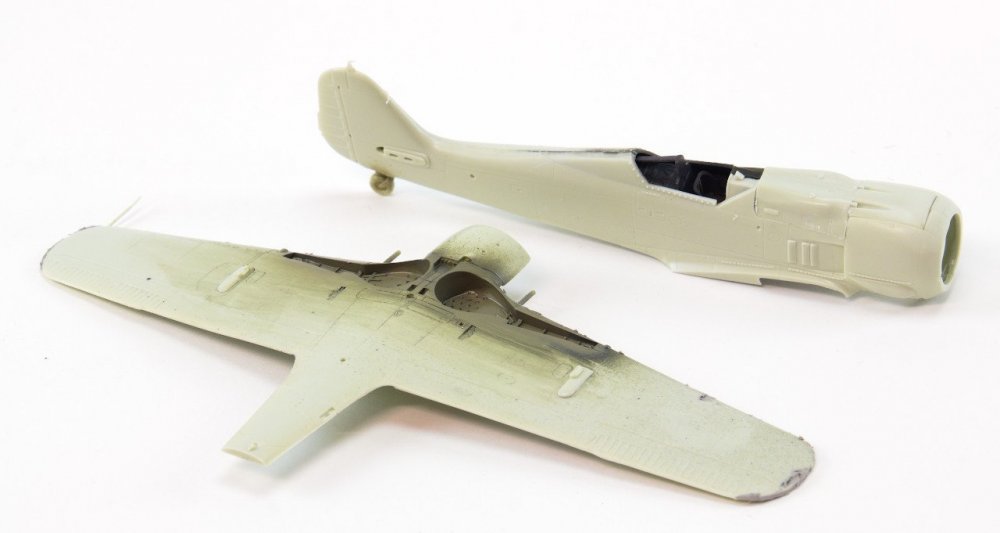
In the beginning there was putty and sandpaper…
The assembly, and this must be a fault as modeller, I need to resource to putty and sandpaper to eliminate the glue seams. In some models it is easy and in others, well, not.
I won’t complain a lot on this model, as I assume that it’s a natural part of this hobby.
As usual, my favourite tools of trade for this are sandpaper ( starting 600, 1200, 2000, 3000) and a mix of superglue ( the cheap one) and
talcum powder.
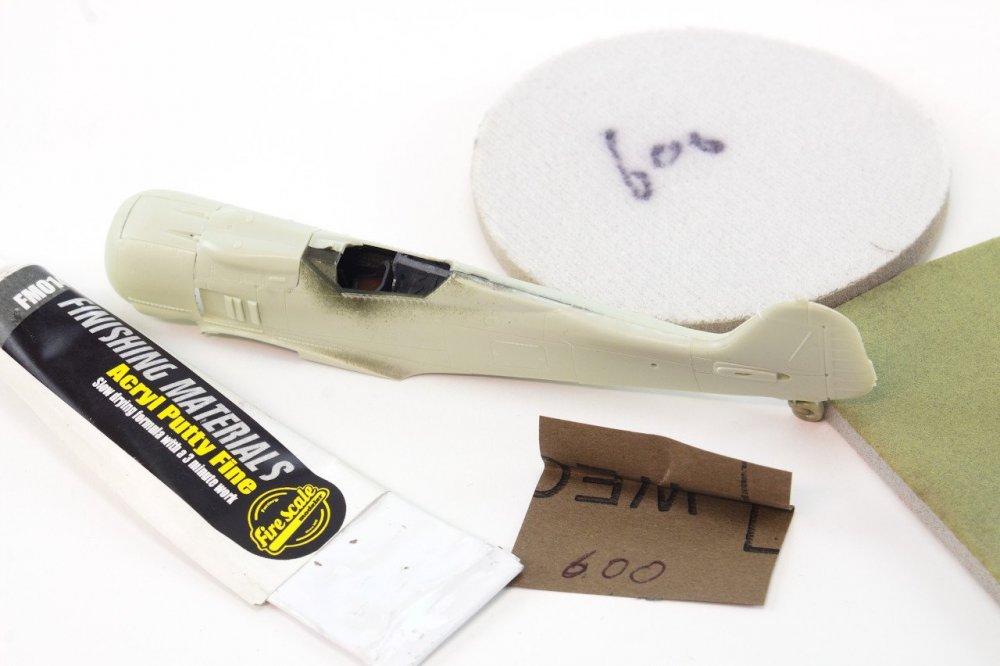
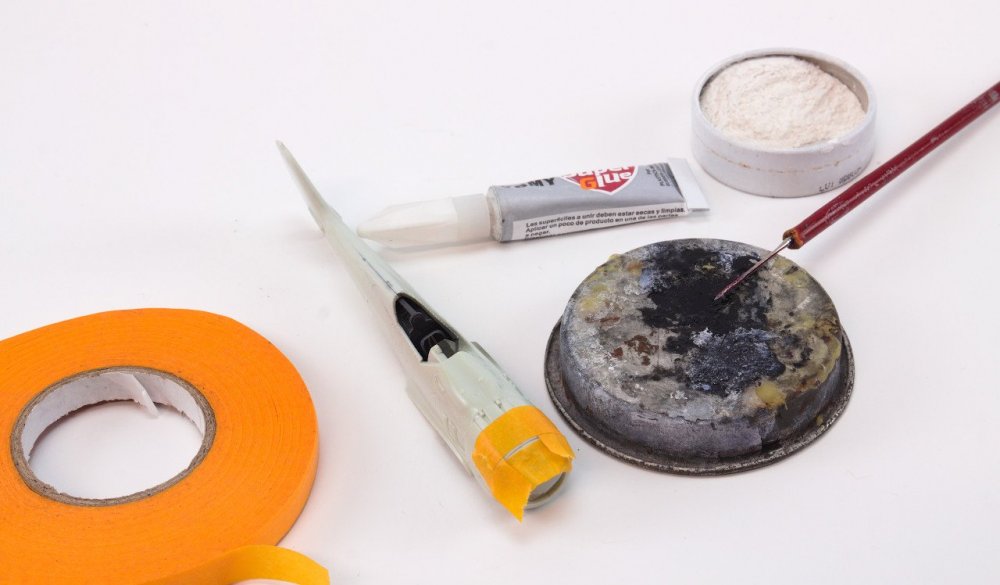
And also use putty made by firescale modeler (Portuguese brand with a nice offer in terms of paints and finishing materials), dries fast and it's perfect for finishing big seams.

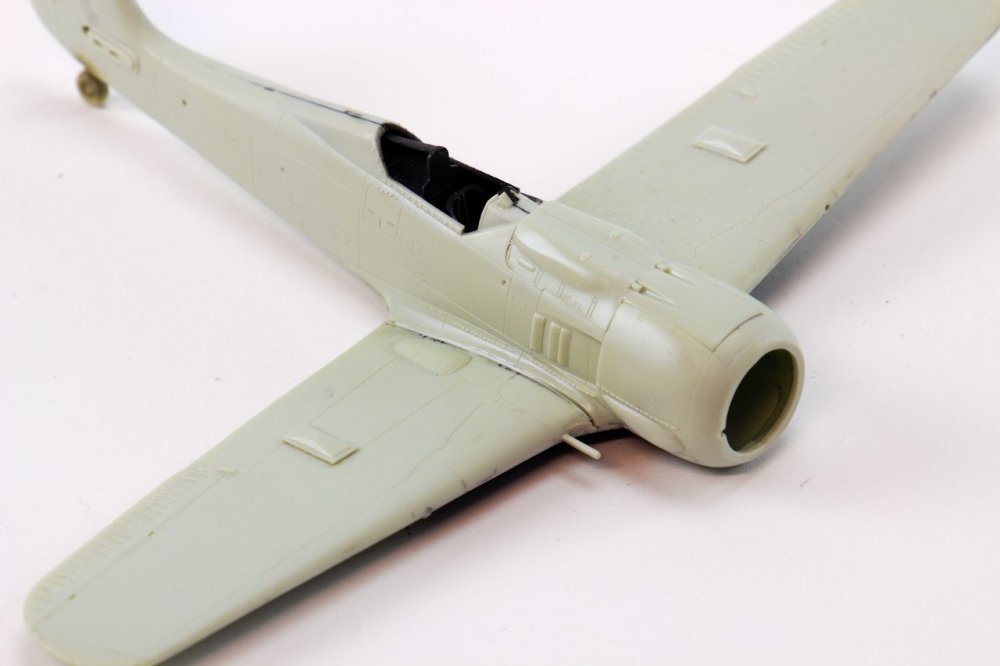
A considerable seam was identified in the wings roots (I could avoid that if paid more attention to dry fit) and pushing the wings up and glue it, does not fix the problem in hands.
As so, a piece of plasticard was inserted in the gap, and with a pencil, i marked to cut.

and the final result:

The result with the strip of plasticard inserted, glued and sanded.
Some atention will be required in order to garantee a smoth finish.
In the meanwhile
Small parts have been painted in the correct colour, RLM02, from Gunze

and this concludes part one of this step by step.
I'll try to be quick on the updates.
Thanks for watching!
-
5
-
1
-
-
hi Bradg!
great model! i built that exact model a few years ago!
regards!
-
2
-
-
12 hours ago, DocRob said:
Very nice and comprehensive step by step with your MIG. I like the chosen scheme and how you painted and weathered it. I have two Eduard Mig-21 waiting for me to build them and it's not the first time, I feel the urge to start.
Cheers Rob
Hi Rob!
In Mig-21 regards, there's a lot of camouflage to choose from !
Eduard's Mig-21 is a nice model, but some care must be taken at the assembly, mainly the joint between fuselage and wings.thanks!
19 hours ago, harv said:Nice ! And thank you how you did it!.....harv

Hi Harv! ! Thanks!
20 hours ago, Peterpools said:Very nice work on the Mig ..
Keep 'em comin
Peter
Hi Peter!
Thanks!
-
3
-
-
On 6/29/2021 at 11:10 PM, Martinnfb said:
Nice tutorial with an exciting end result. Yay!
Thanks!
I was really happy to finish it!
-
1
-
-
On 6/29/2021 at 11:08 PM, GazzaS said:
Excellent looking MiG!
Thanks!
-
3
-
-
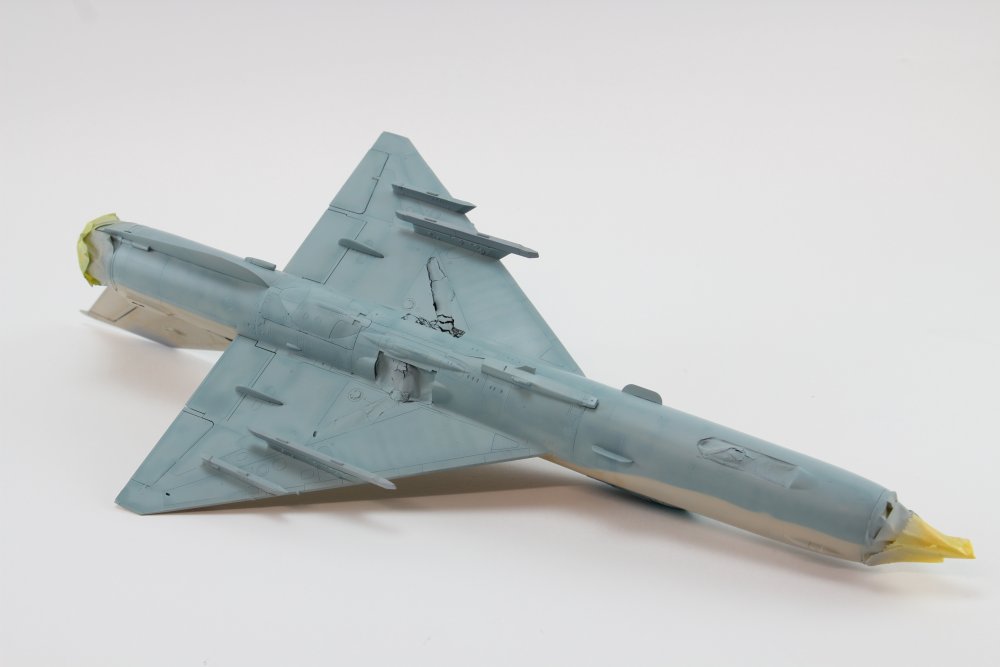
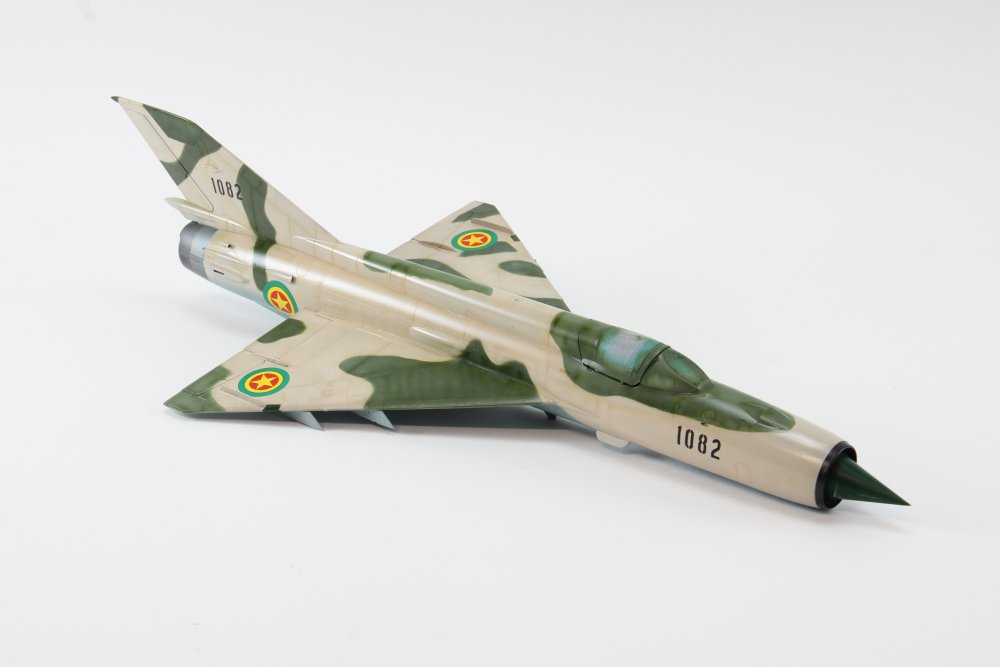
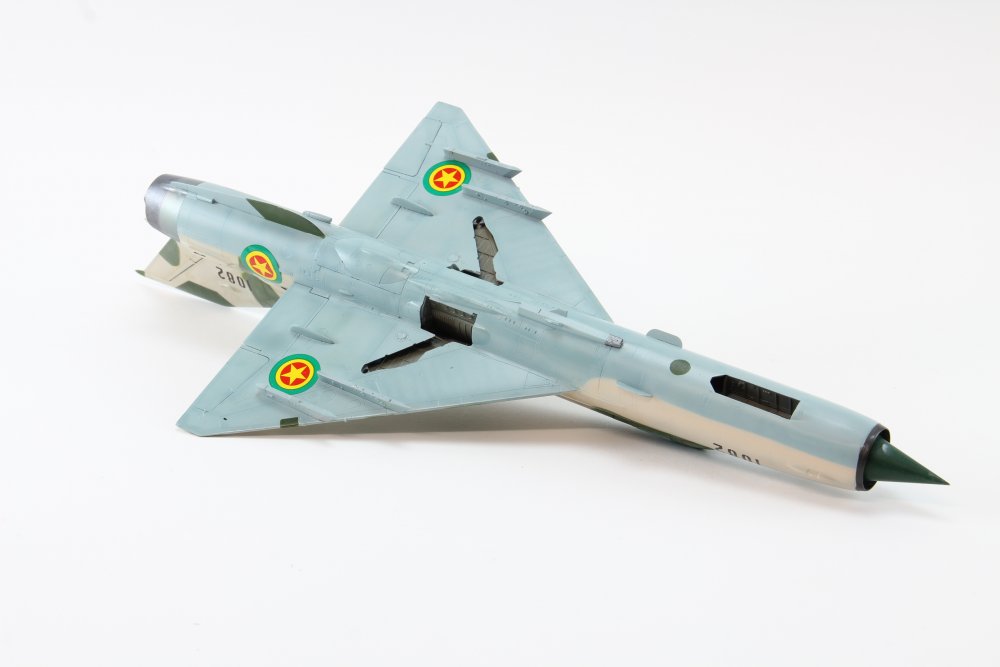
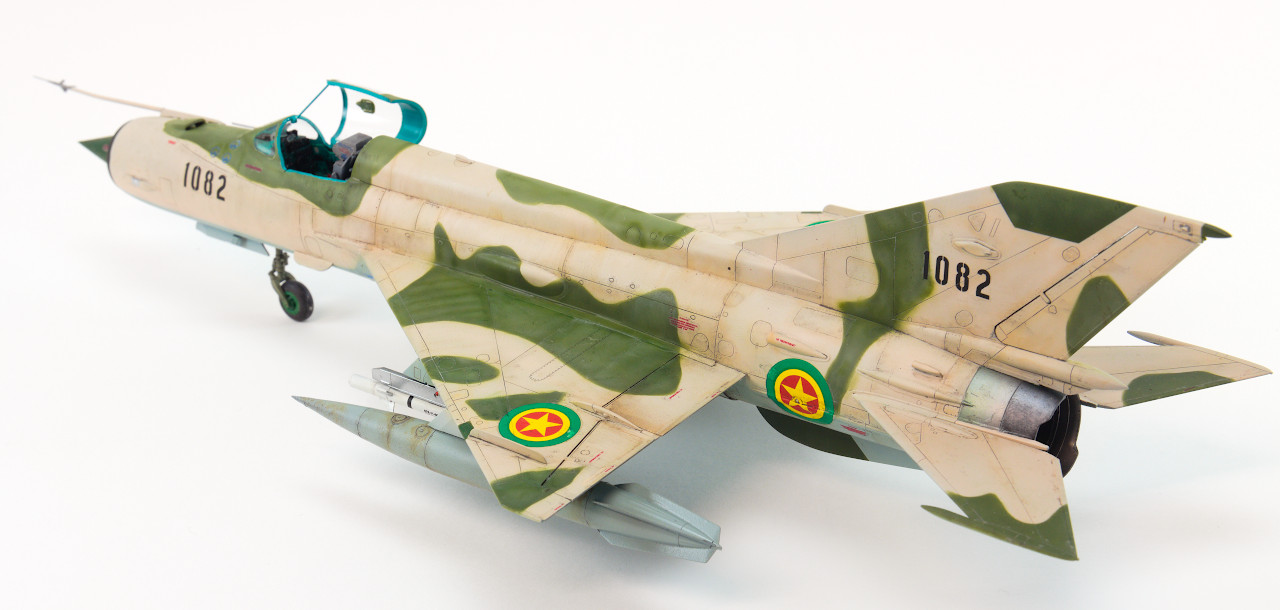
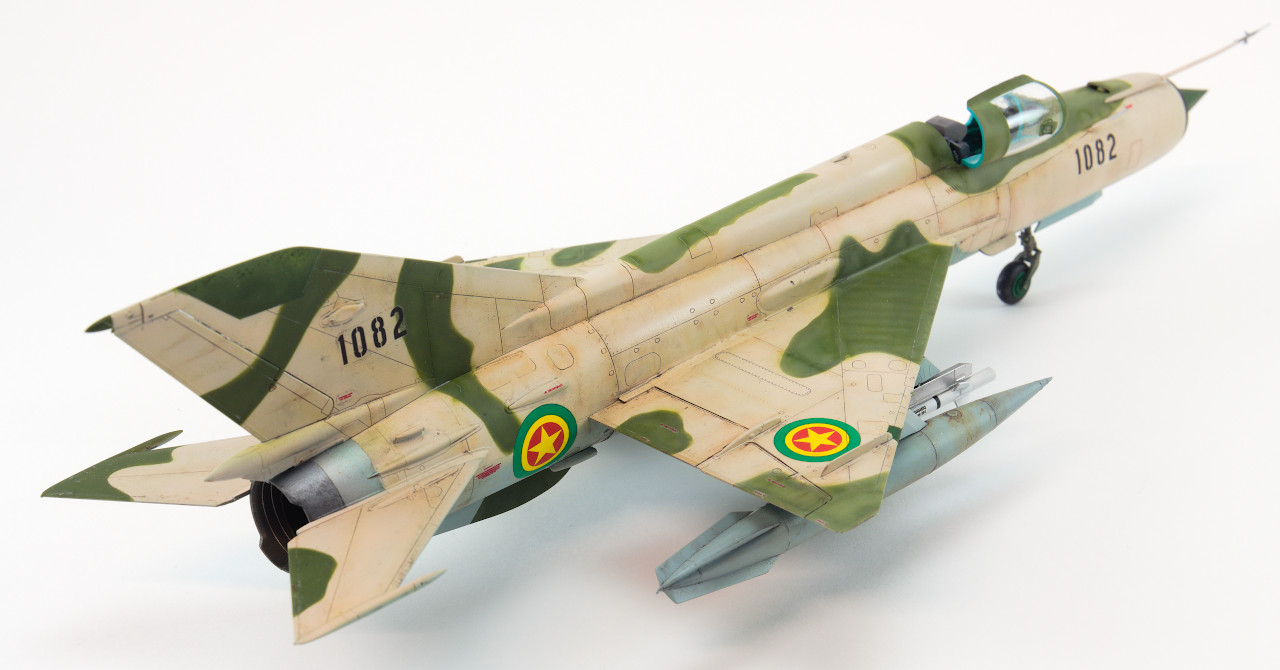
Hi all!
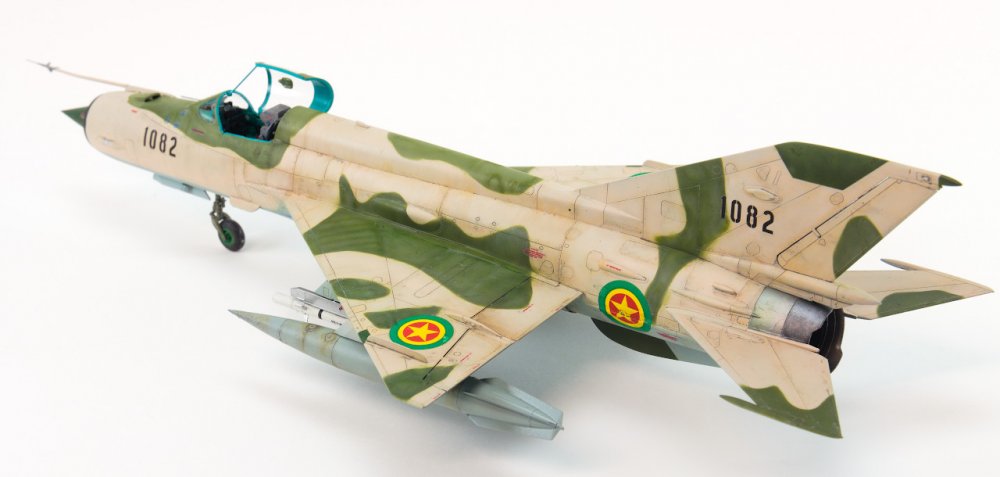
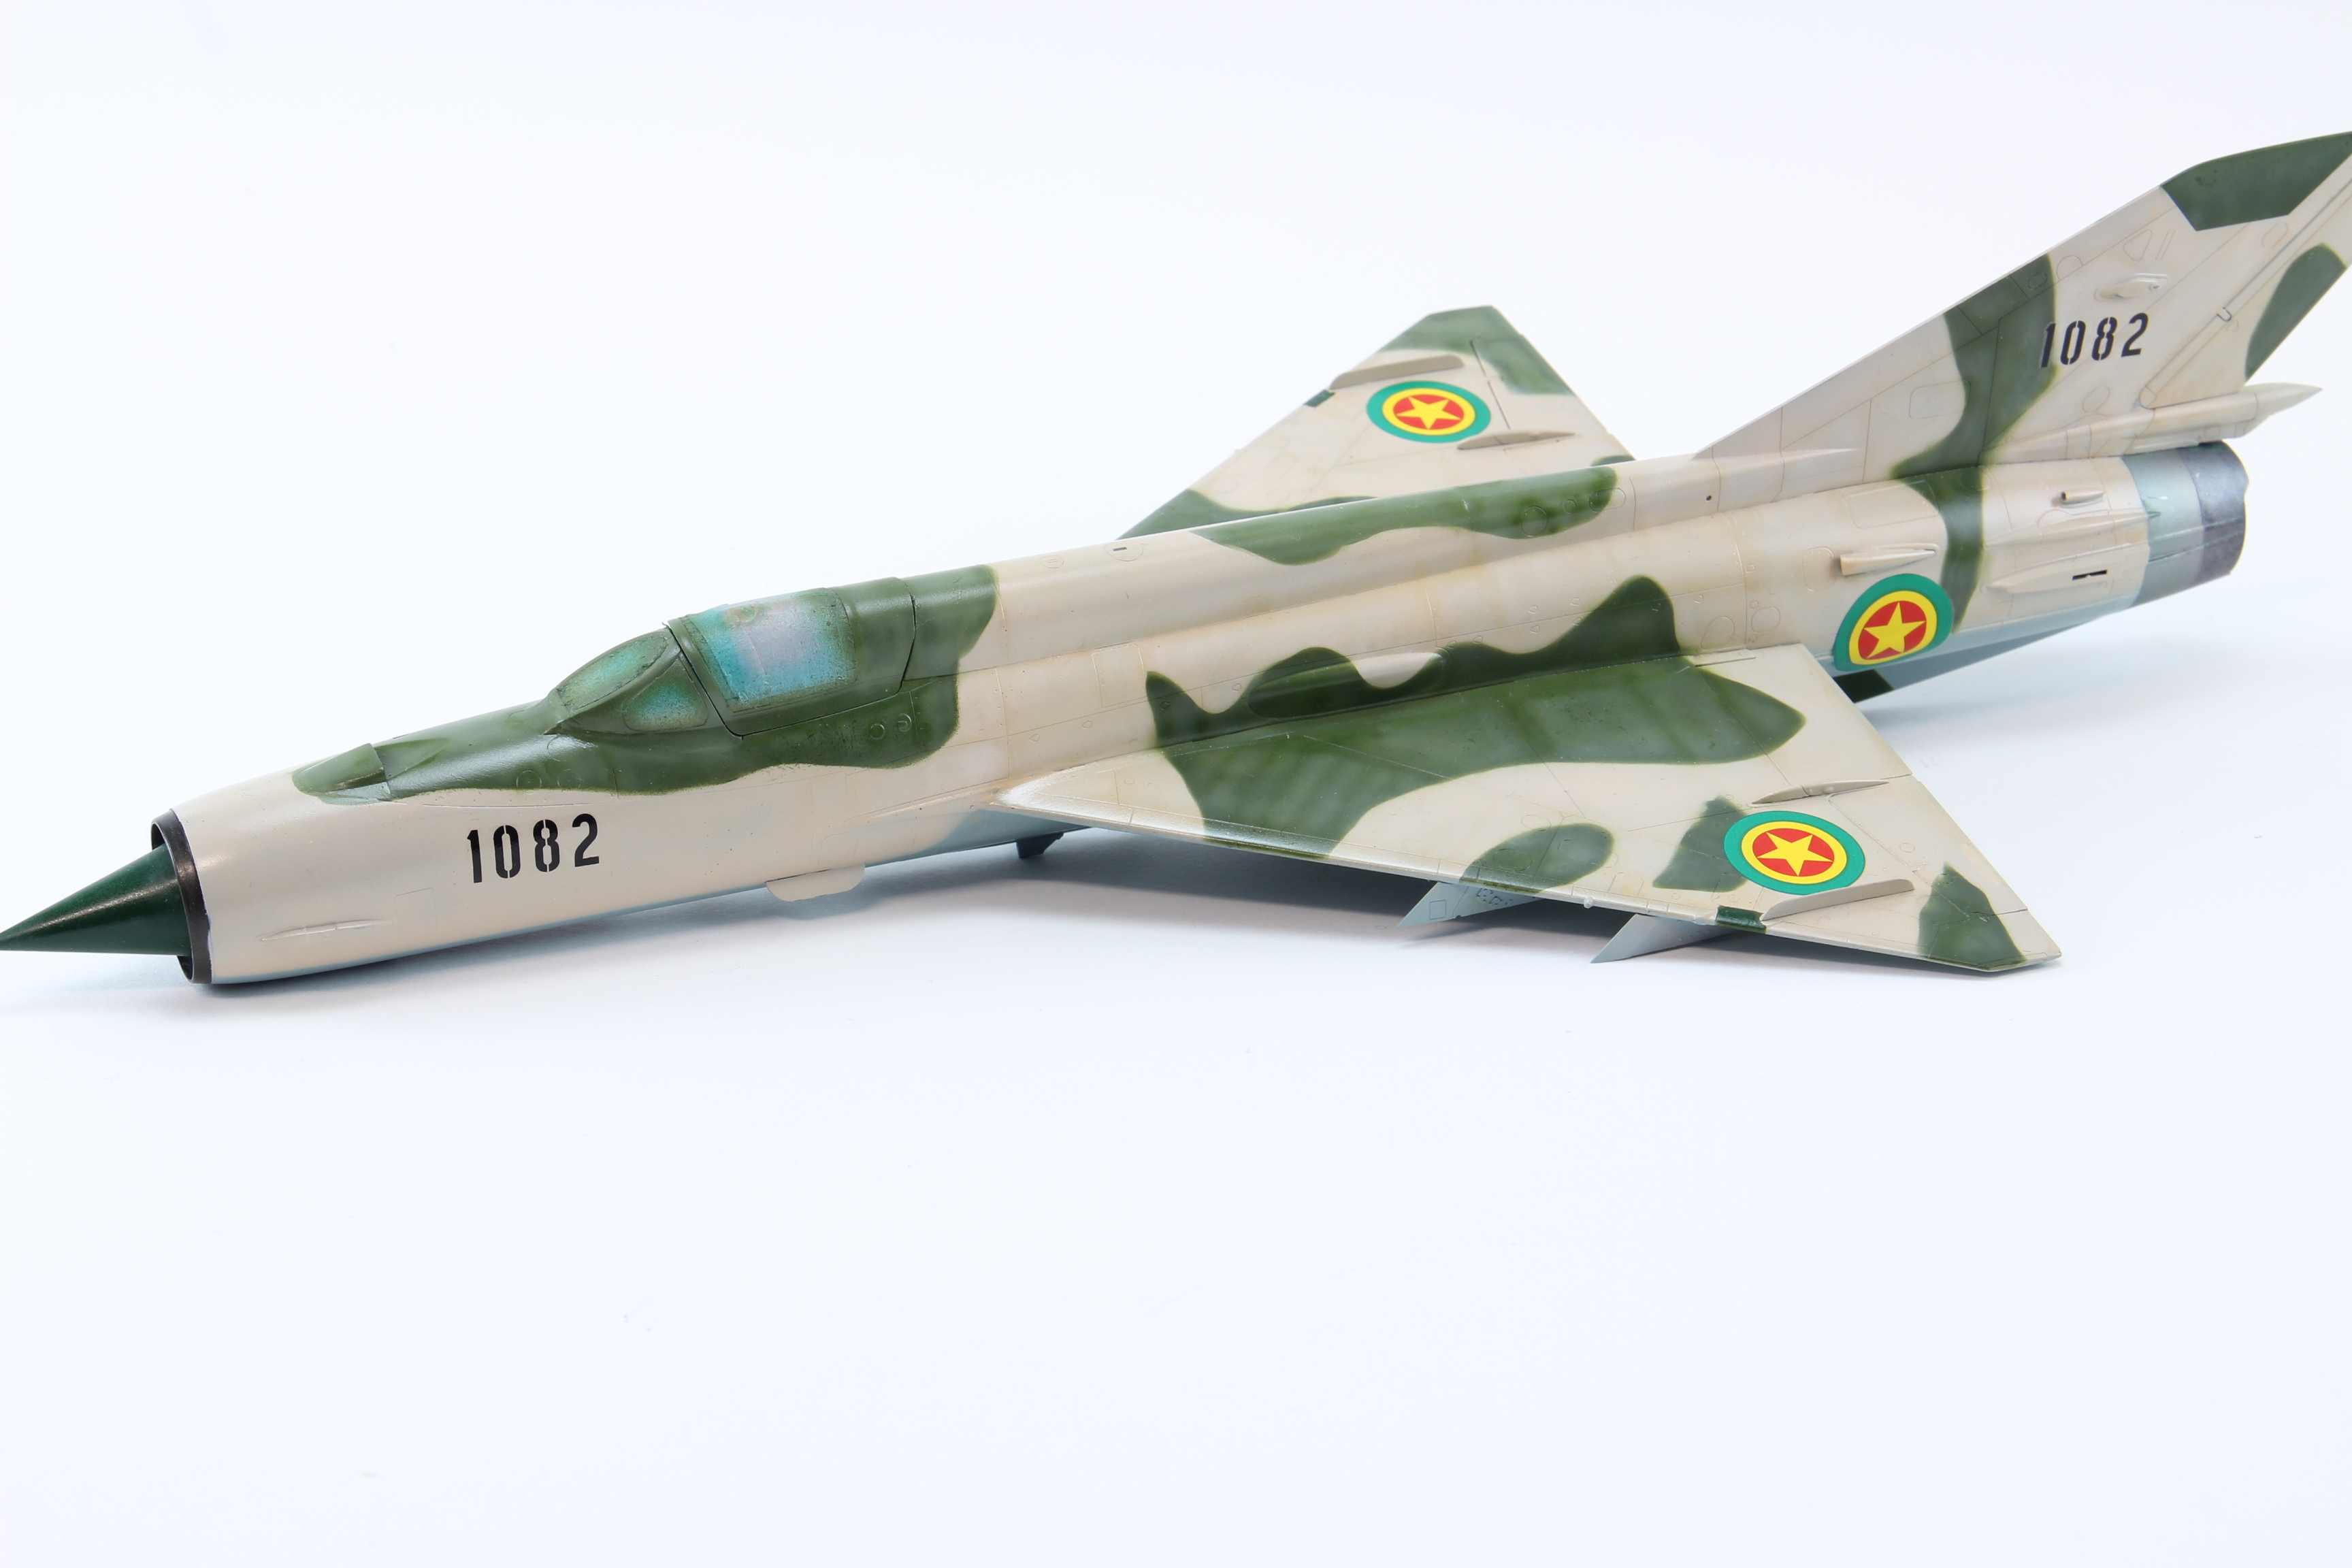
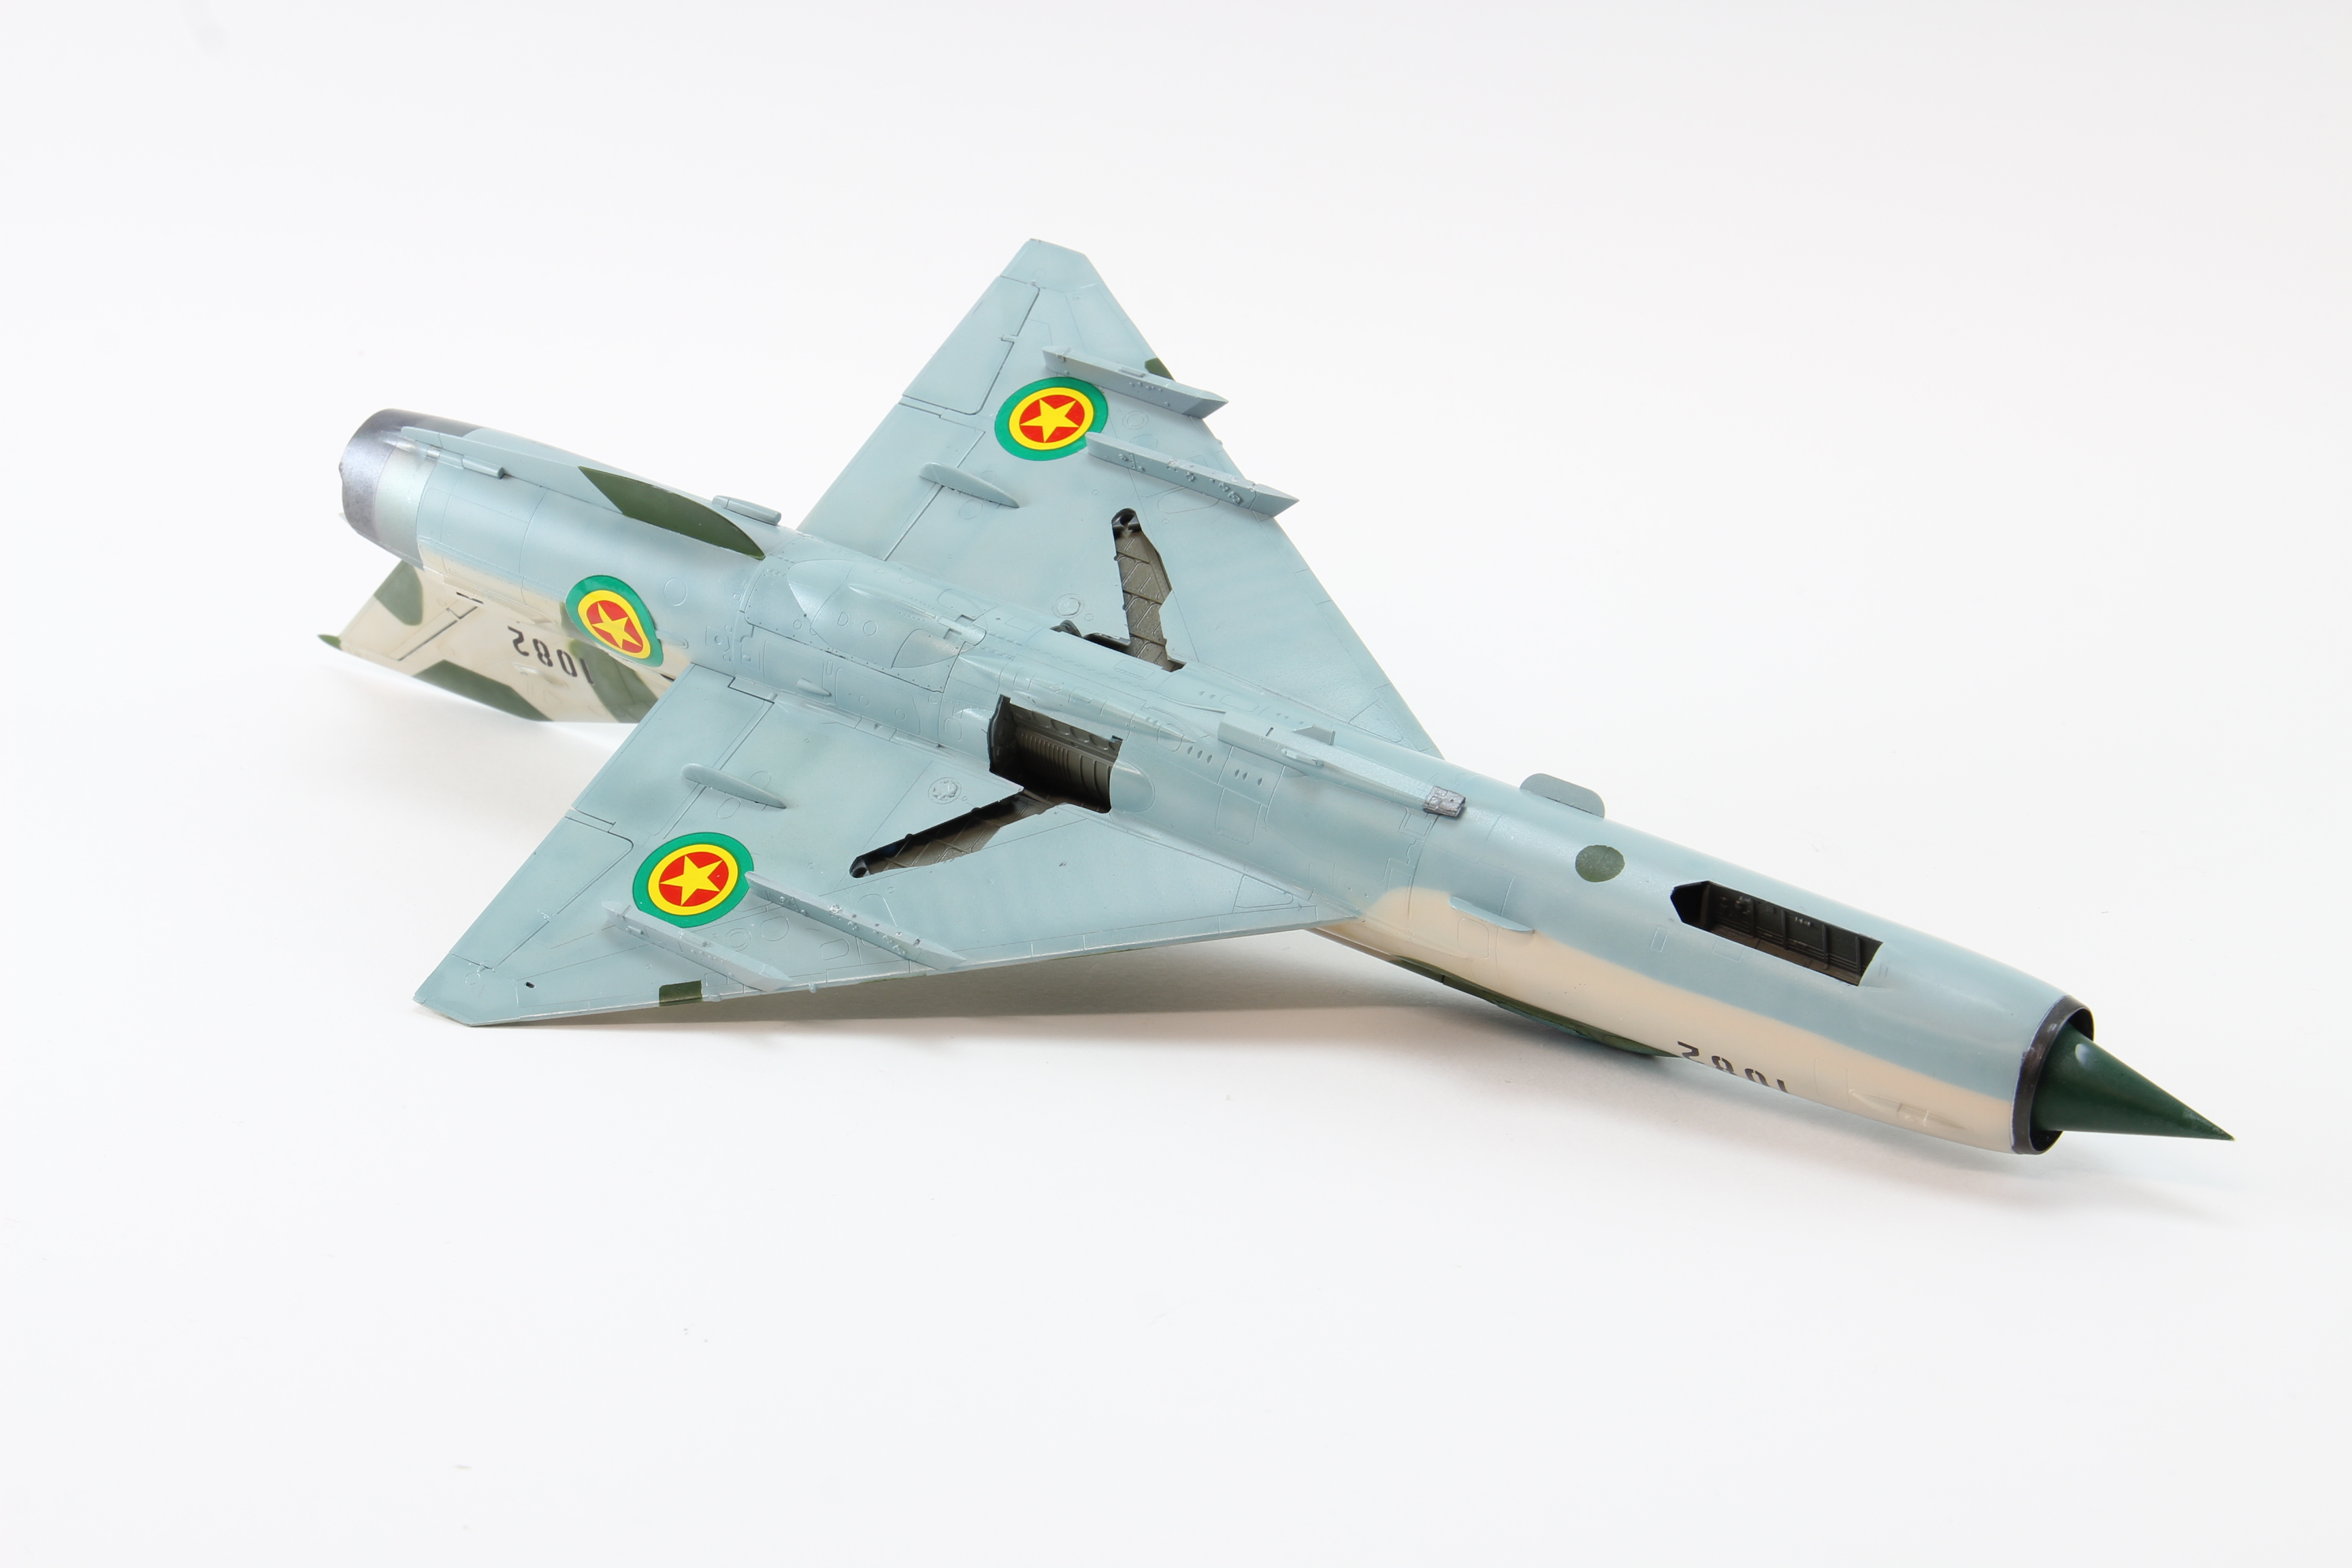
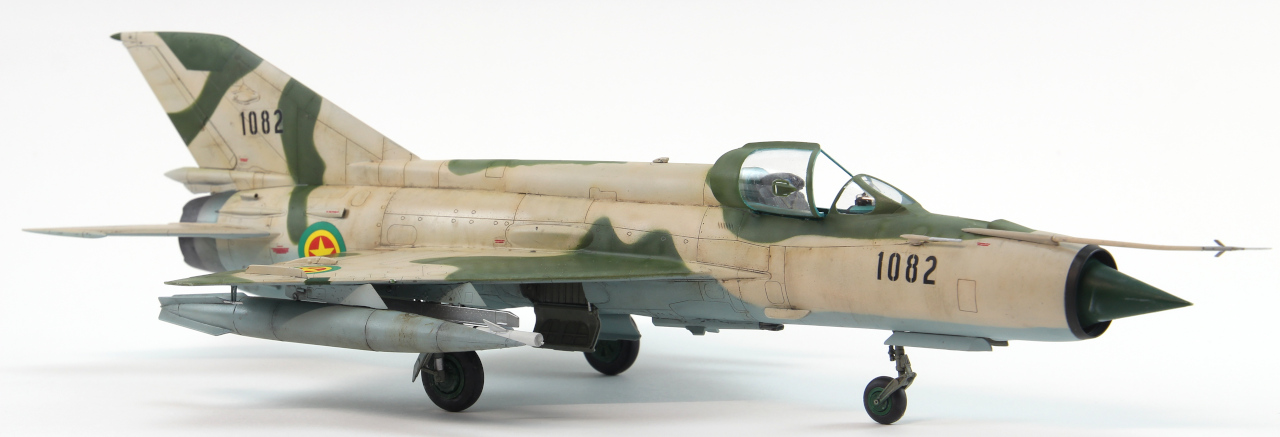
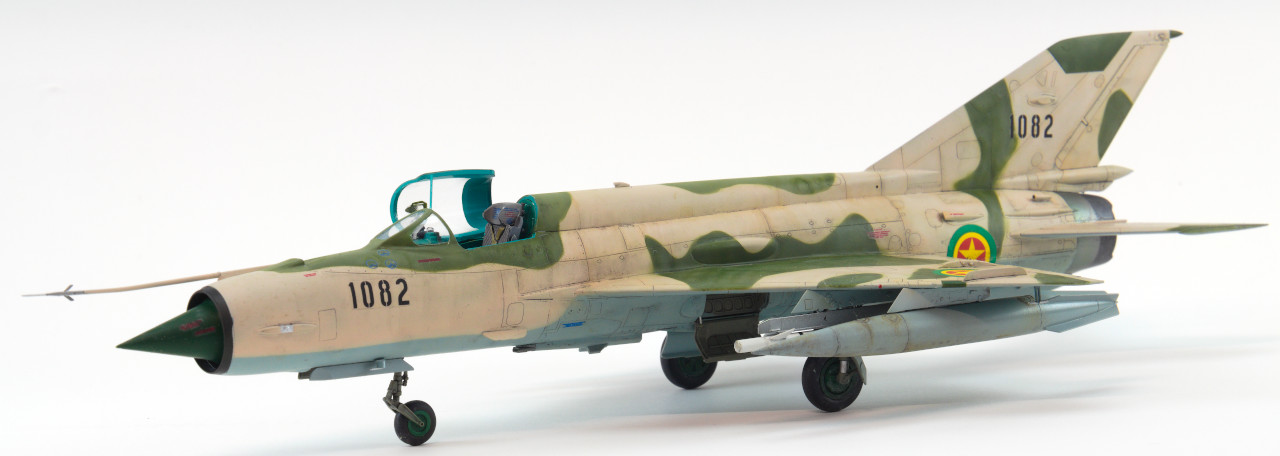
I would like to present my latest 1:48 build, as a part of a Mig-21 group build.
The Weekend edition is a "basic" set, containing all plastic sprues for a mig-21MF, with a simplified decoration option (one airplane with full stencil) and no photo etch and resin goodies.
One catch is that some parts needed to properly represent a MIG-21, Eduard supply them as photo etch, and the weekend edition does not include them.
Nevertheless i wanted to keep the build as simply and strait forward as possible.
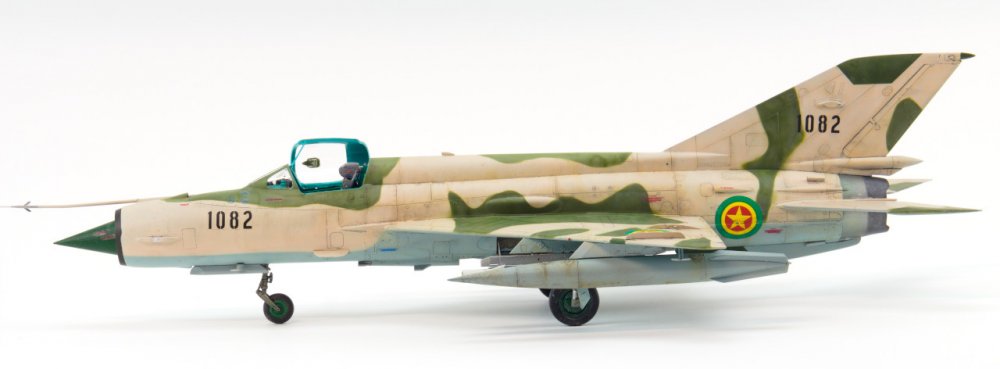
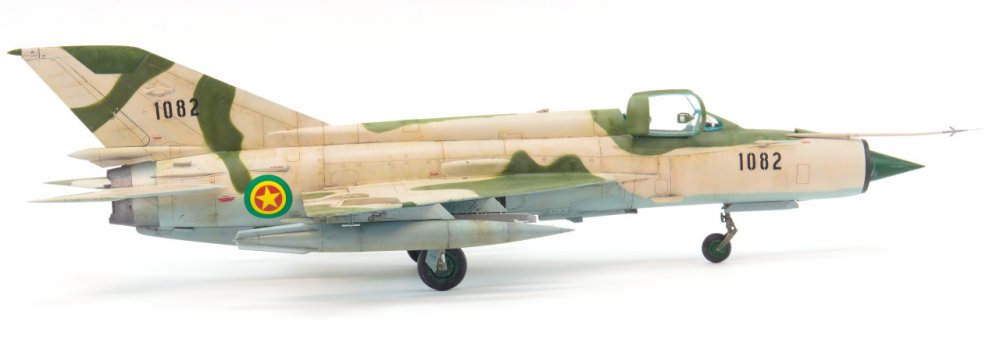
During the build, i opted to add a metal pitot tube from master, as the kit's part is very simple. Another adition were scratchbuild seatbelts, made of lead foil.
As the original decoration is too "Green", i choose to use a decal sheet bought a couple of years ago, from berna decals , african migs Part 1 and i choose a Mig-21 MF from ethiopian airforce.
the colour scheme allowed me to work on the weathering process, as it's my favourite part of it.
In the end, some issue with the decals (my fault due to laziness), but i'm happy with the result. Also, there's another two of them waiting in the stash.
For the painting process, AK's Real Color range and gunze, were used.
As so, let's go the photos.


The Dials were cut one by one from the decal sheet and glued on the instrument panel.
As putty i used superglue mixed with black pigment.

the front windscreen needed some attention and care, but i think that the poor fitting was caused by a cockpit miss align by me.


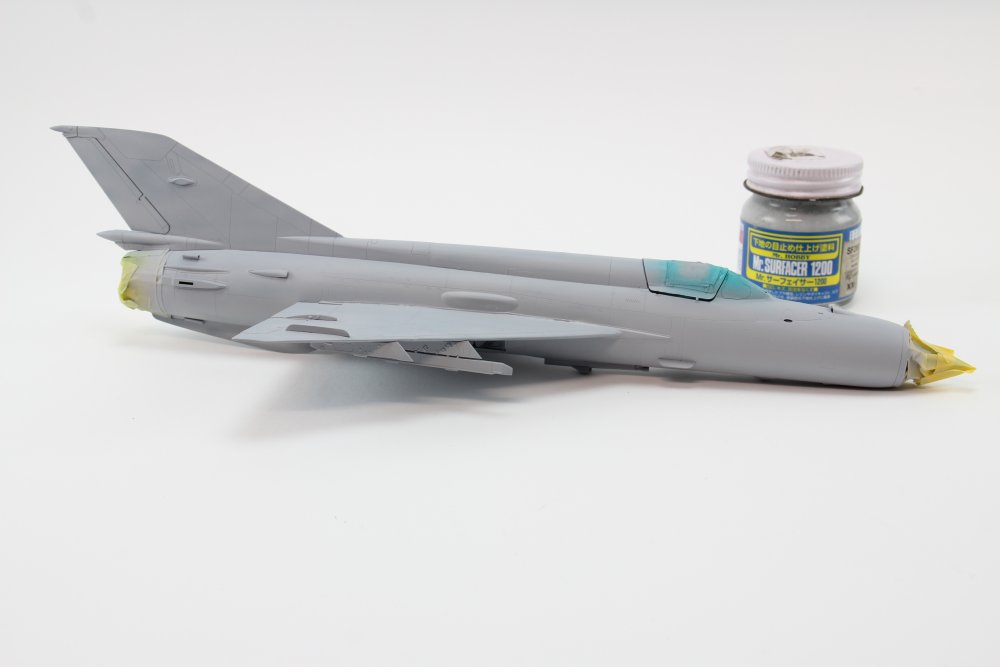
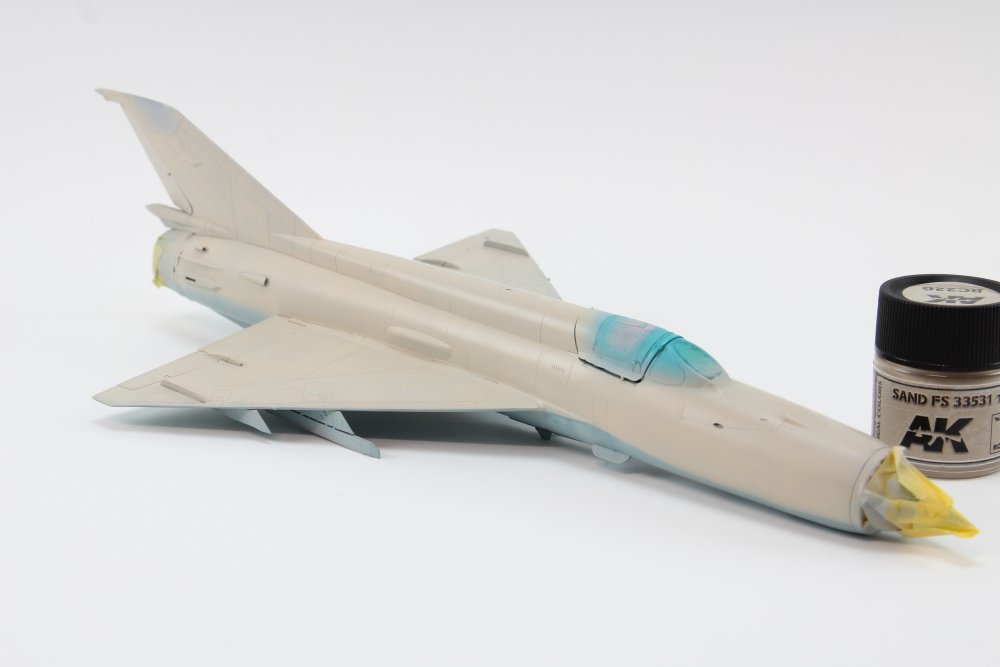
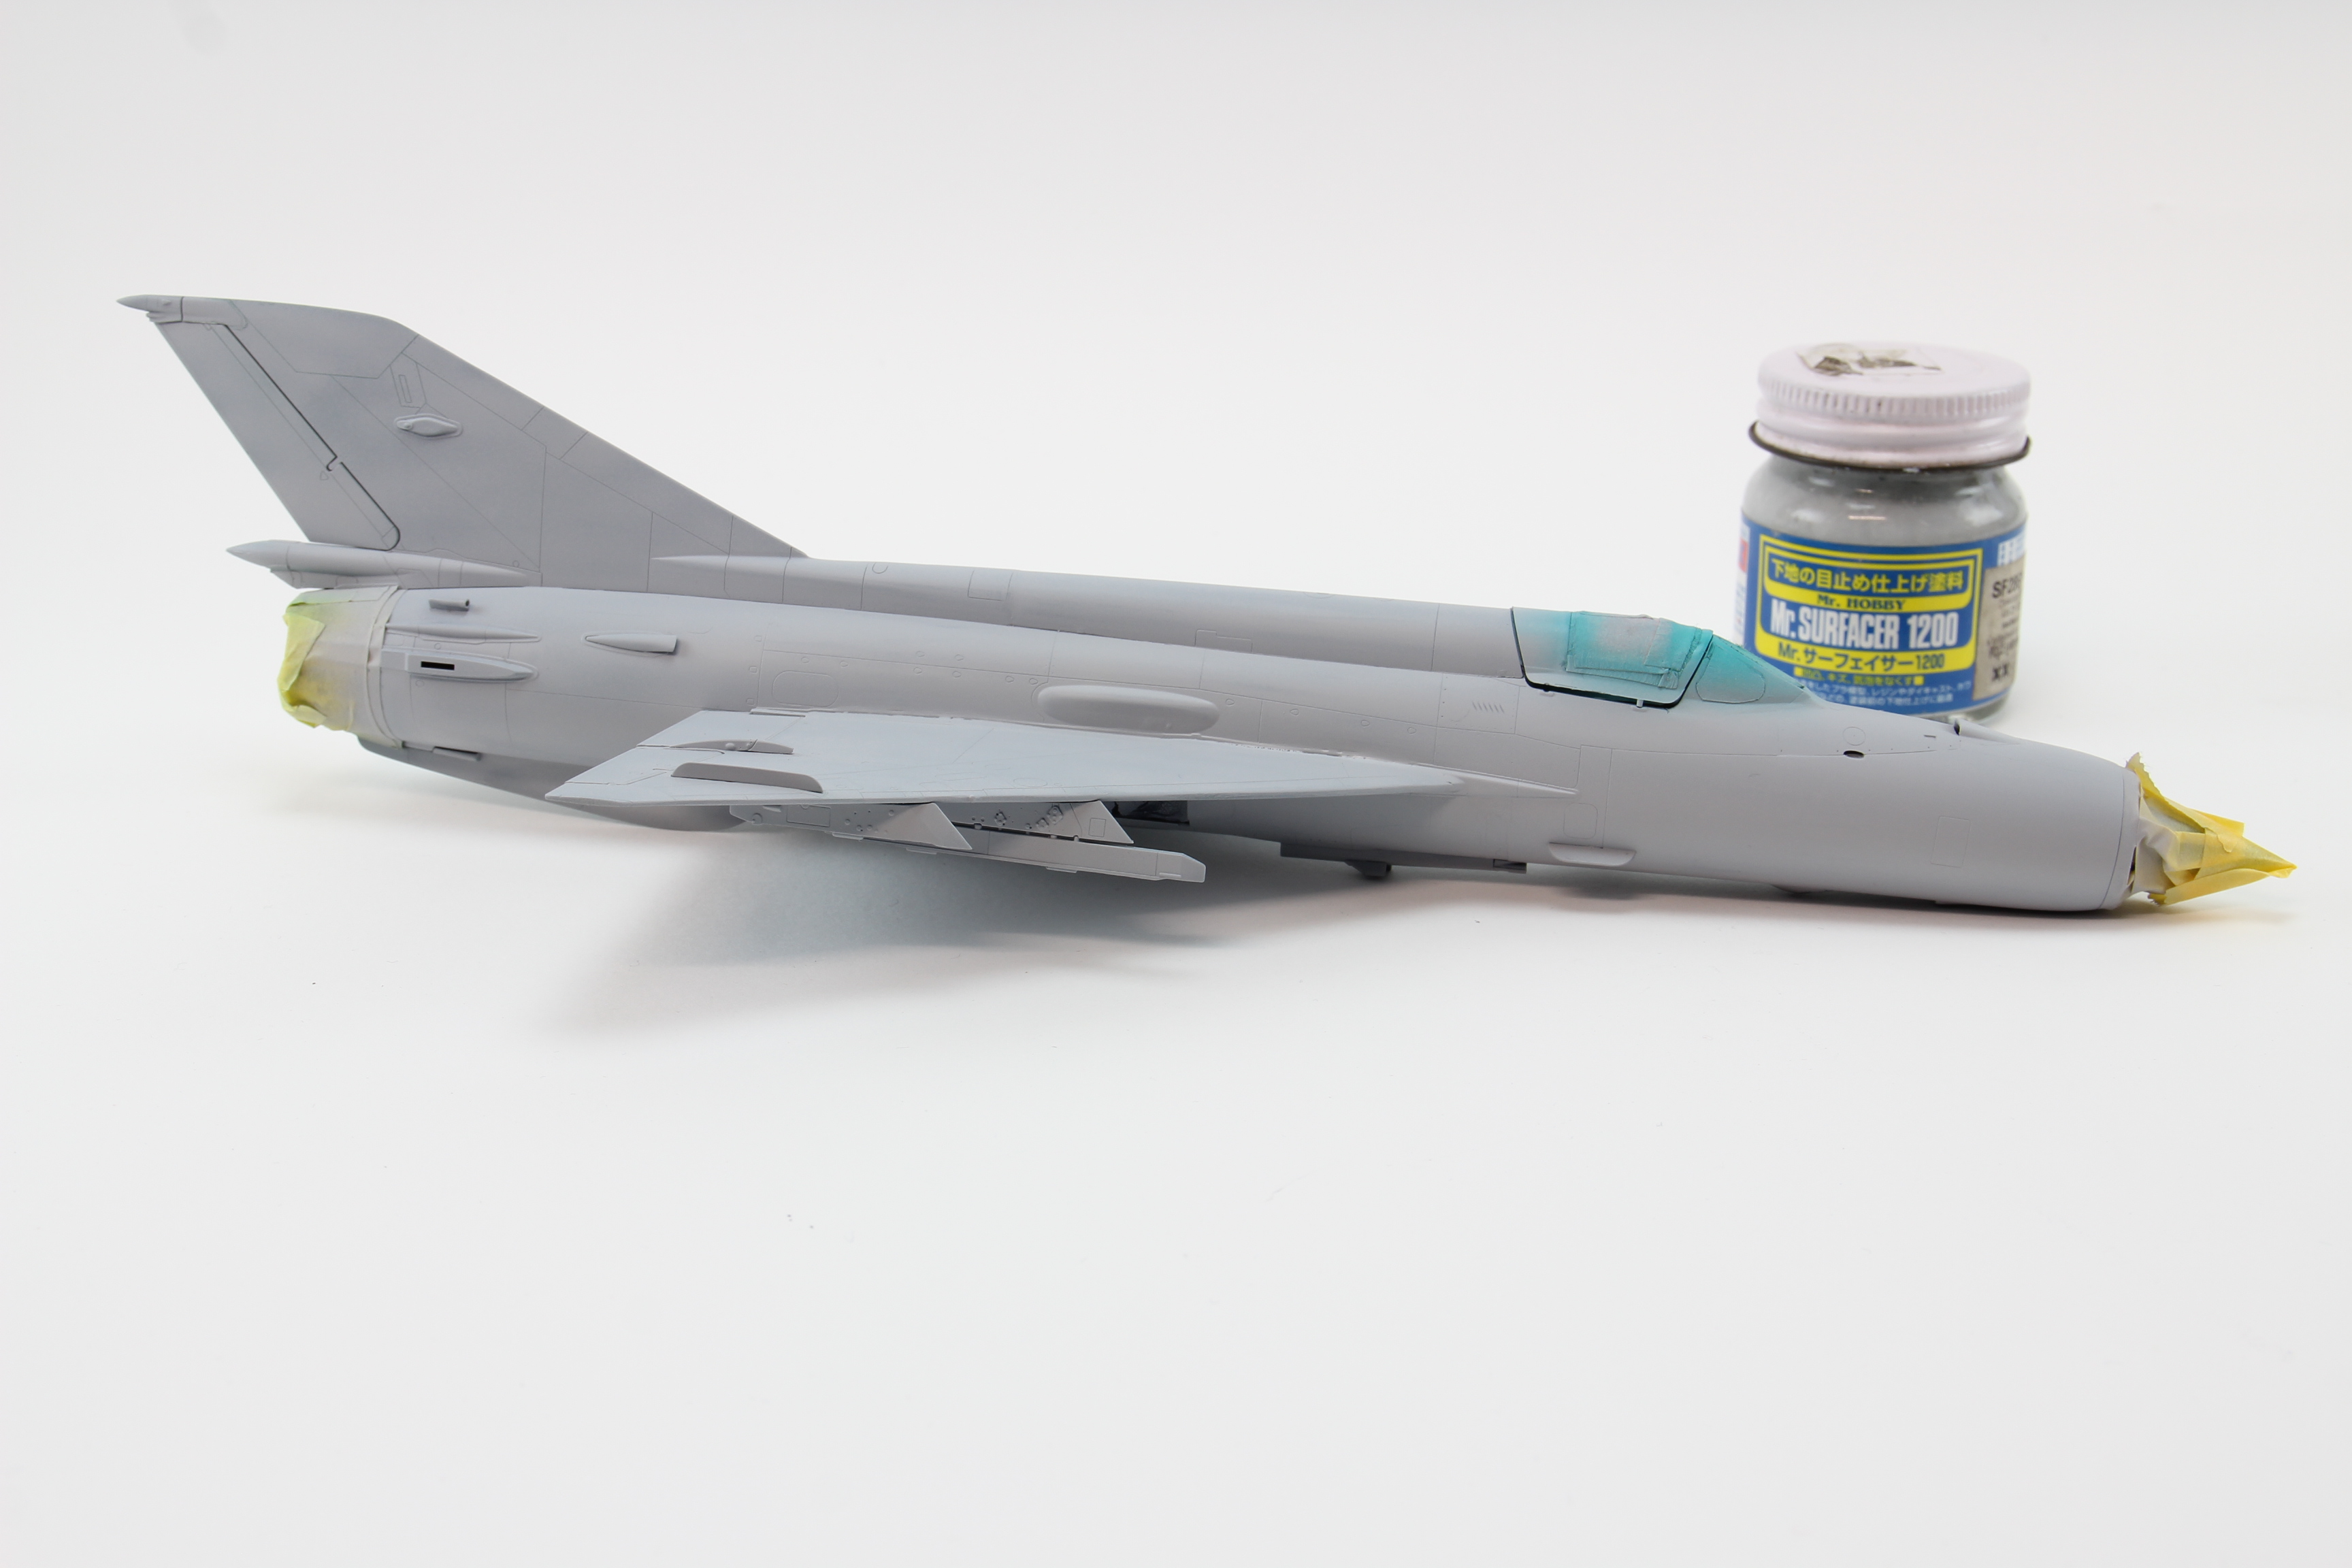
Priming using Mr Surface 1200 thinned with mrcolor levelling thinner. All surface was then polished with a 3000 sandpaper.
As my workbench is on a garage, lot's of dirt lying around, waiting for the right oportunity (when the paint is wet...)
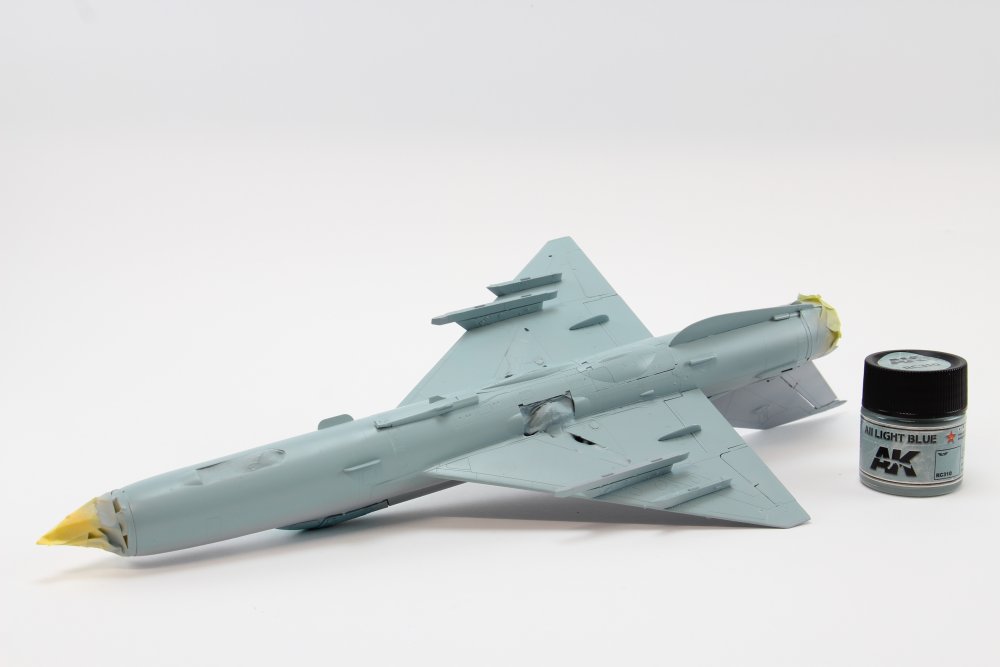

Lower color applied.
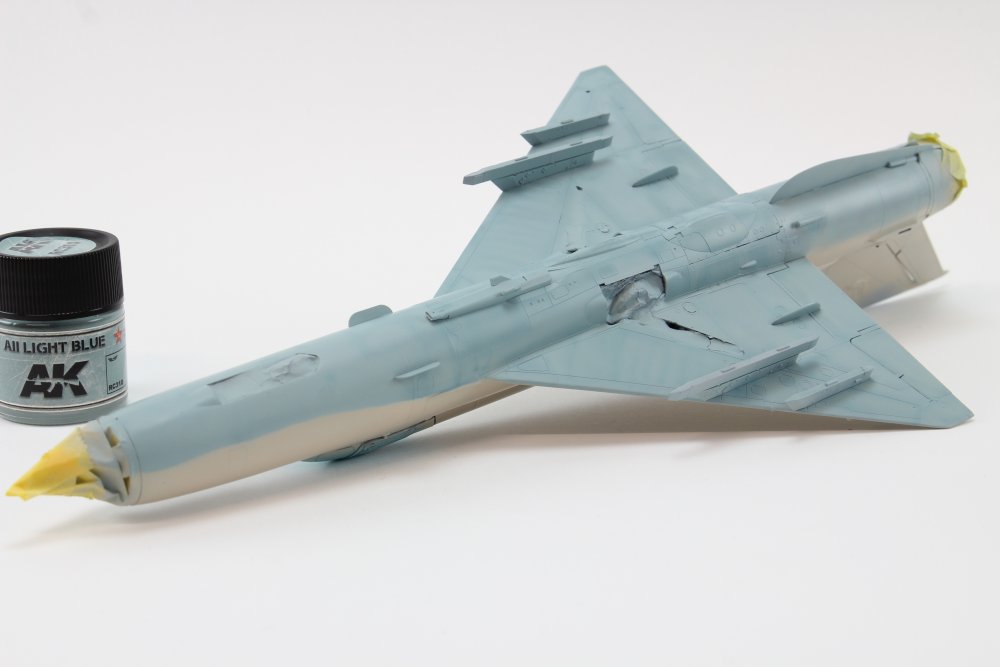

Upper camouflage, light color.
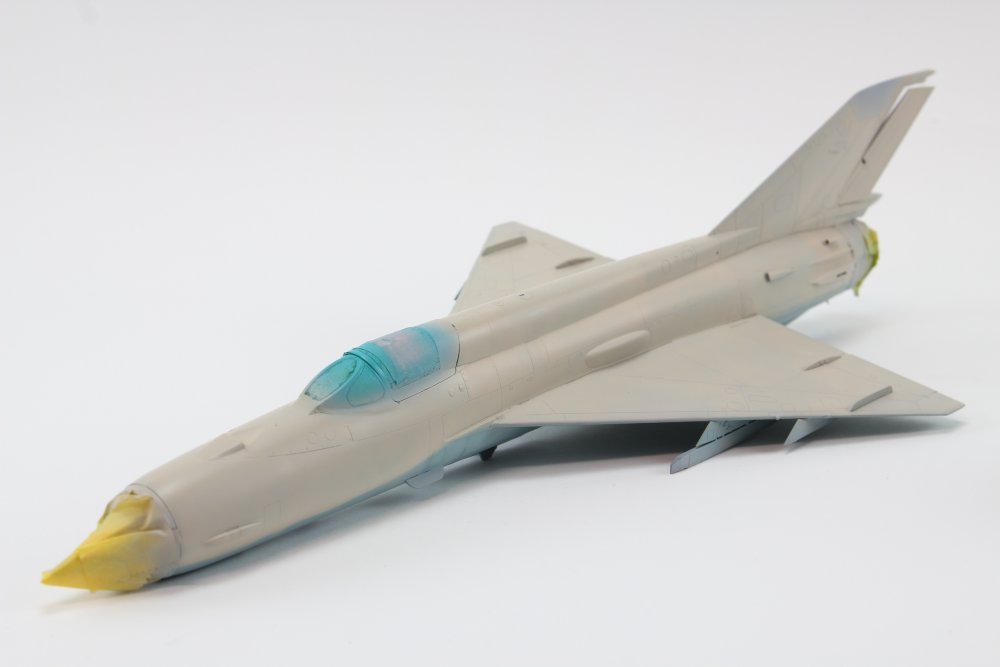
Details painting


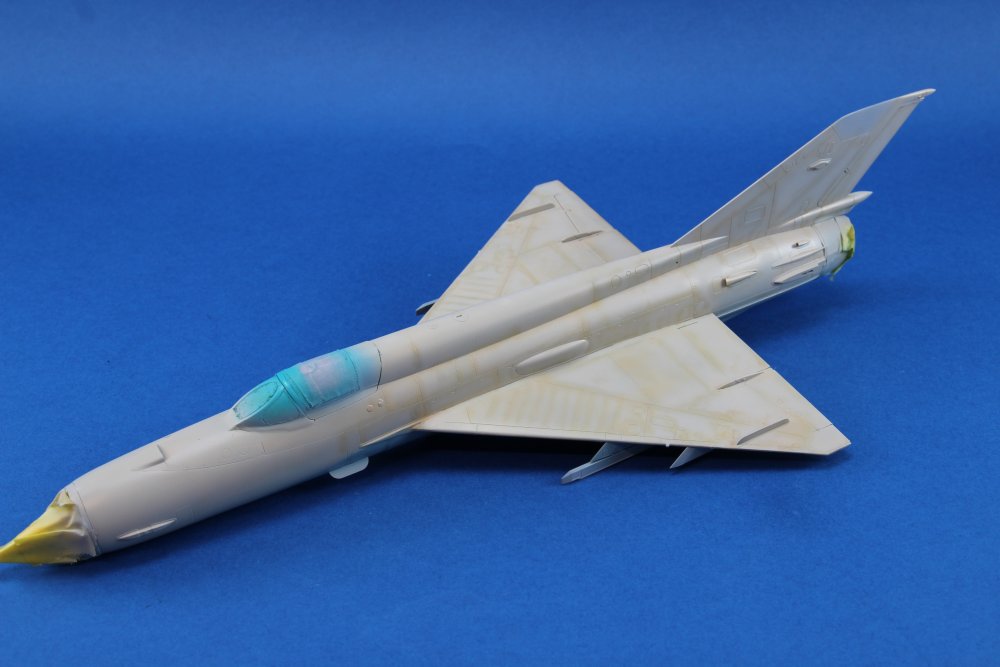
Decals aplication

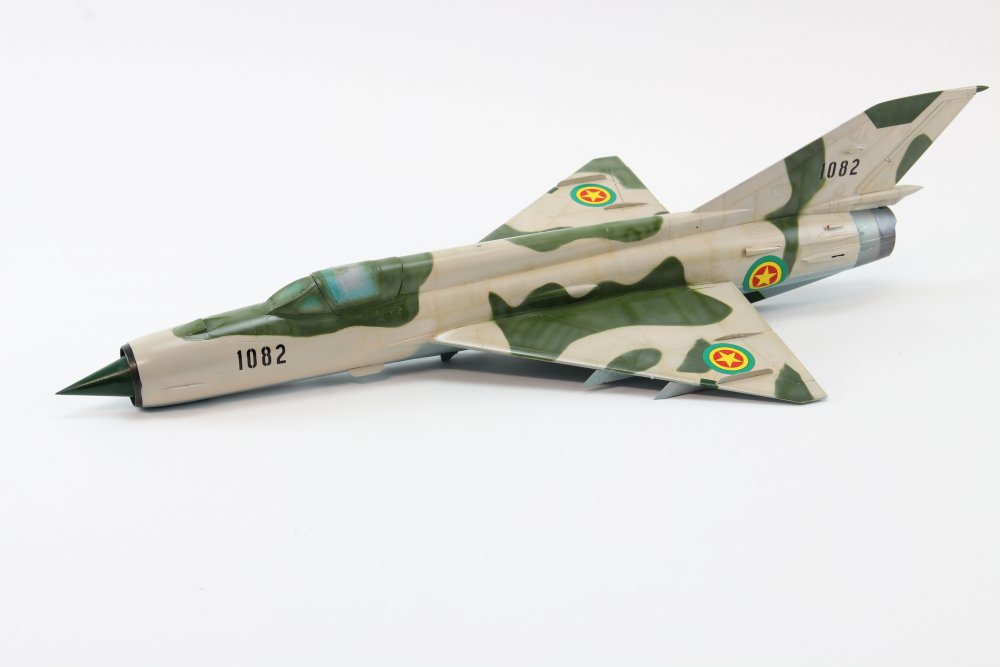
Final Pictures
I don't have pictures of the weathering process, because simply, i'm lazy and i require to move a lots of stuff around to properly set the photo box, that doubles as storage area. So i leave you with the final pictures.


Conclusion
i might notice some errors, they are there and for me, each time that i'll look at this model, i'll remember them ( i hope!) !
I could detailed the landing gear, sensors, etc, but i prefer to keep it simple. It was challenging and fun!
Thanks for watching !
best regards from Portugal!

-
8
-
1
-
-
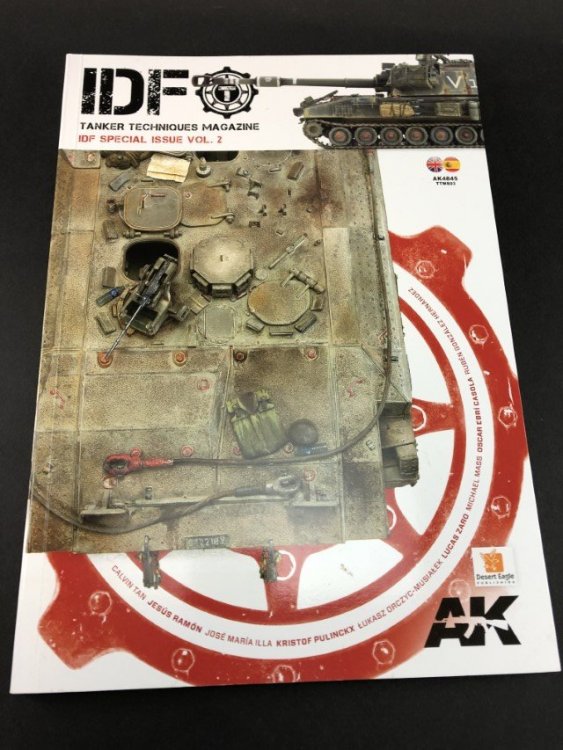
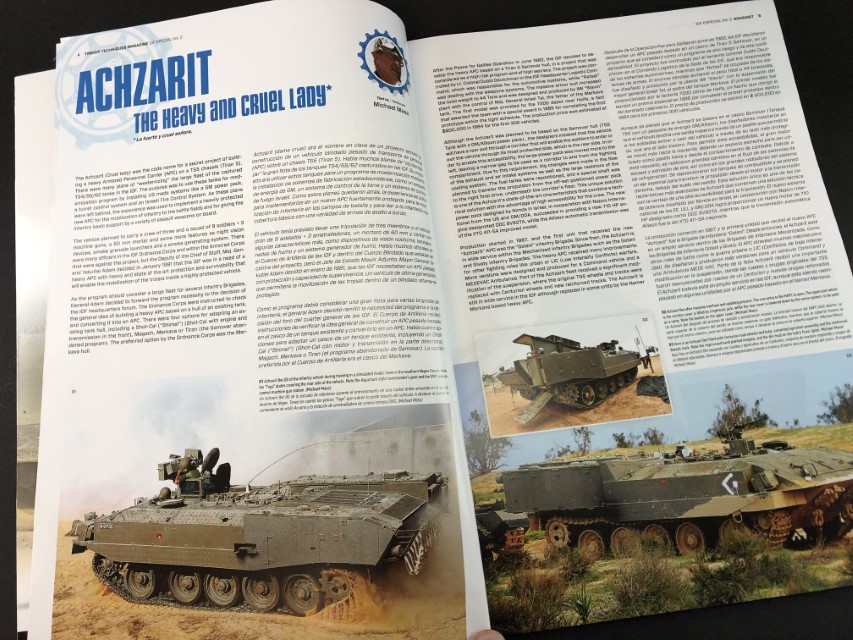
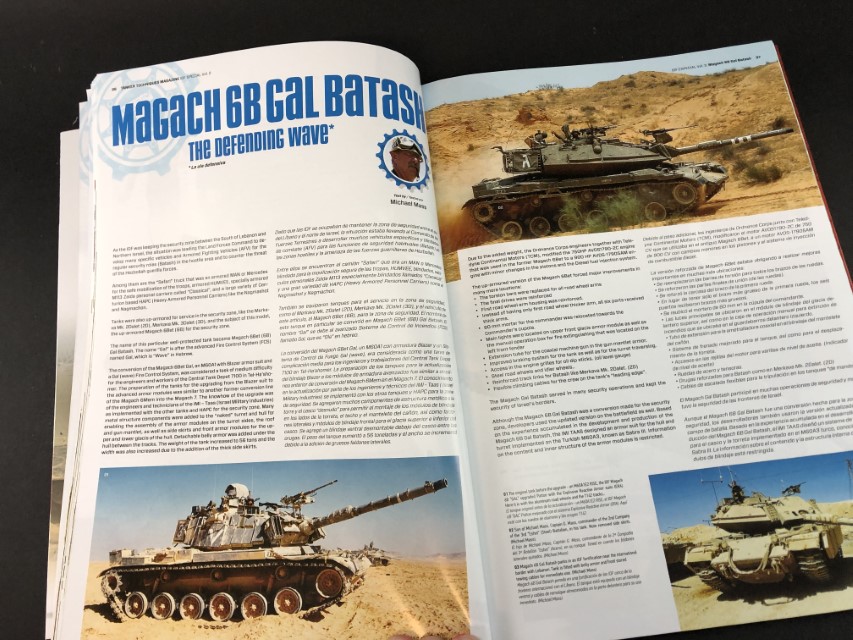
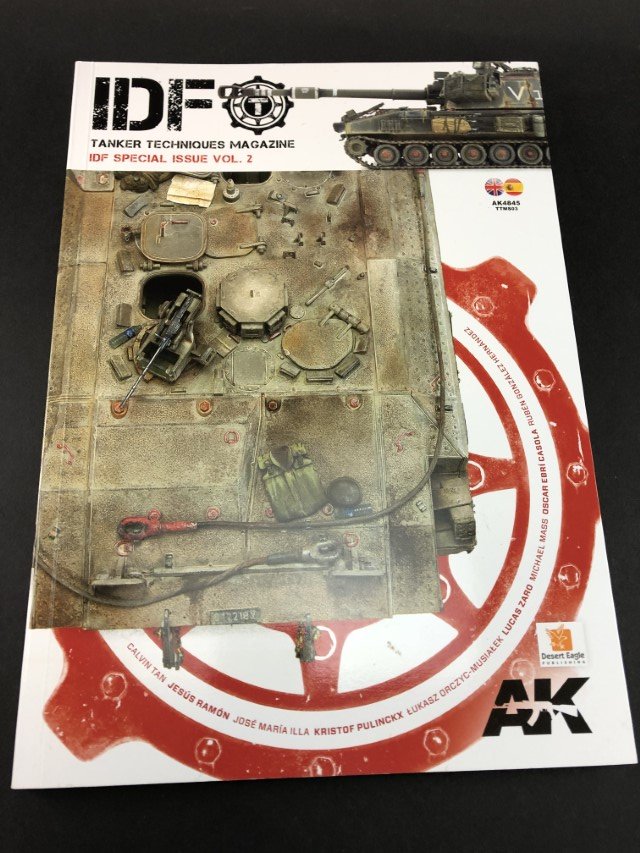
Tanker Techniques Magazine
IDF Special Issue vol.2
Author – Several
Publisher: Ak Interactive
Price: 18,95€
Introduction
AK has been established as a renowned brand for modelling products and high-quality publications.
The book is in a A4 format with 112 Pages, with soft cover with reinforced inner cover. The paper is satin finish, with a good touch and with excellent printing, giving a lot of quality to the colors and image.
All Photos are sharp and superb quality, allowing us to appreciate in detail each one of them.
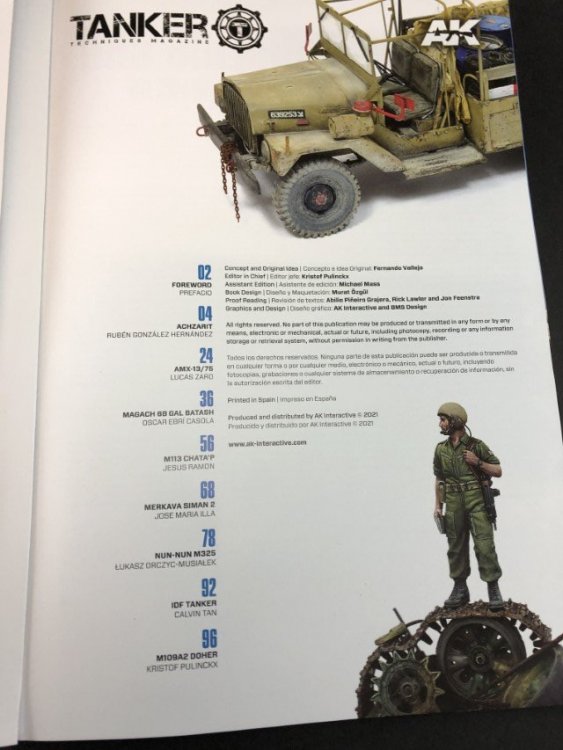
This publication is a special issue part 2 dedicated to IDF Armour vehicles and its crews, represented in 8 articles, 7 vehicles and a figure, made by 8 well know modellers.
All articles have introduction text, and all pictures are numbered and correspondent captions in English and Spanish.
A foreword is written by Michael Mass and Kristof Pulinckx and present us a modelling perspective of the subject in hands (IDF armour), and as a kind of bulleting news, informing about the amount of available IDF scale models currently in the market.
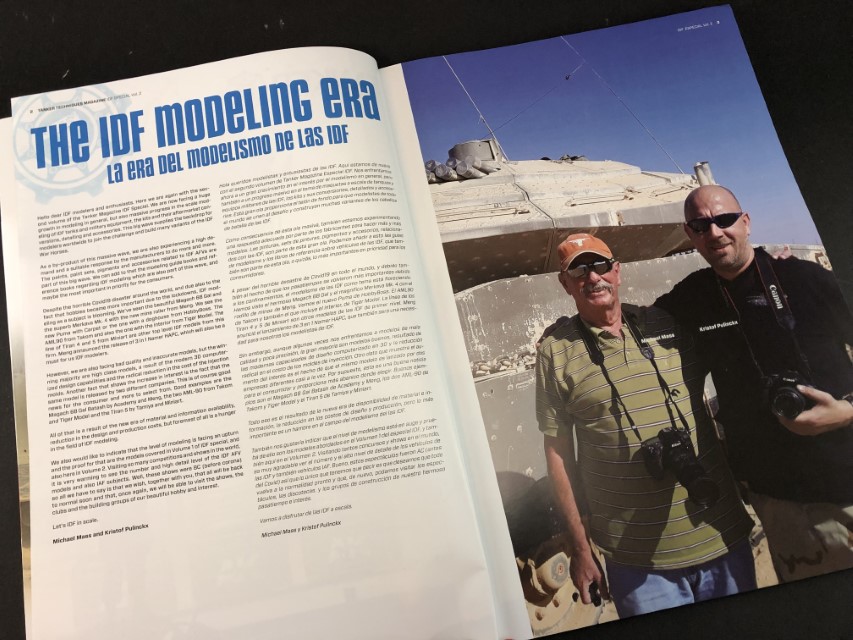
As a special note, every build has a preface of the type, made by Michael Mass from Desert Eagle Publications, describing the historical context of the vehicle, its origins, field deployment and evolution in IDF use. A real compact history lesson in two pages.
As for the content goes, and consulting the index, we have the followings:
1. ACHZARIT by Rubén González Hernández
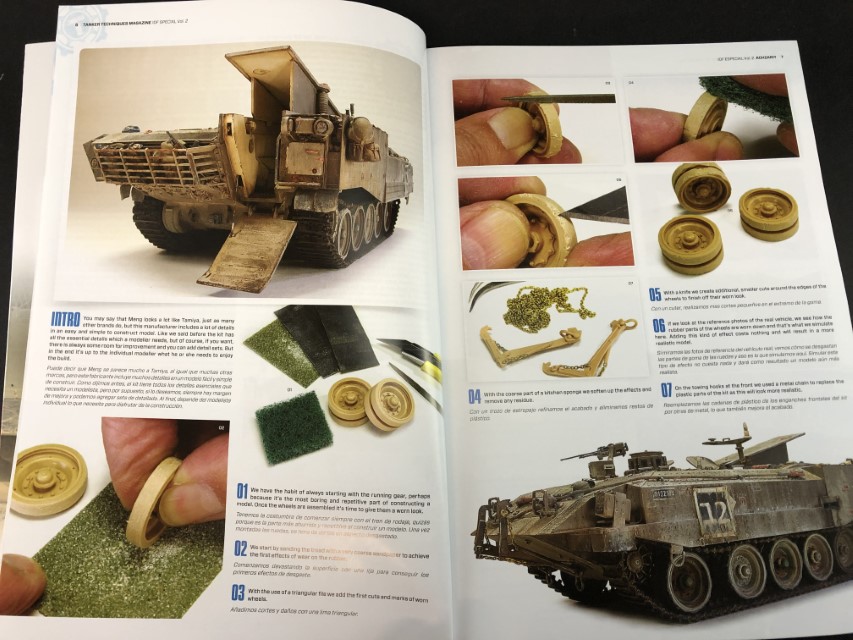
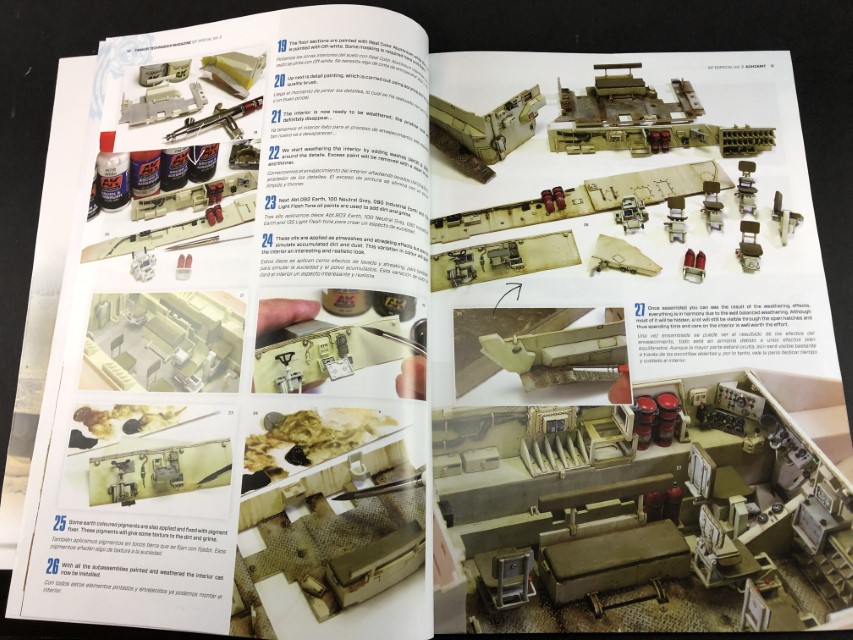
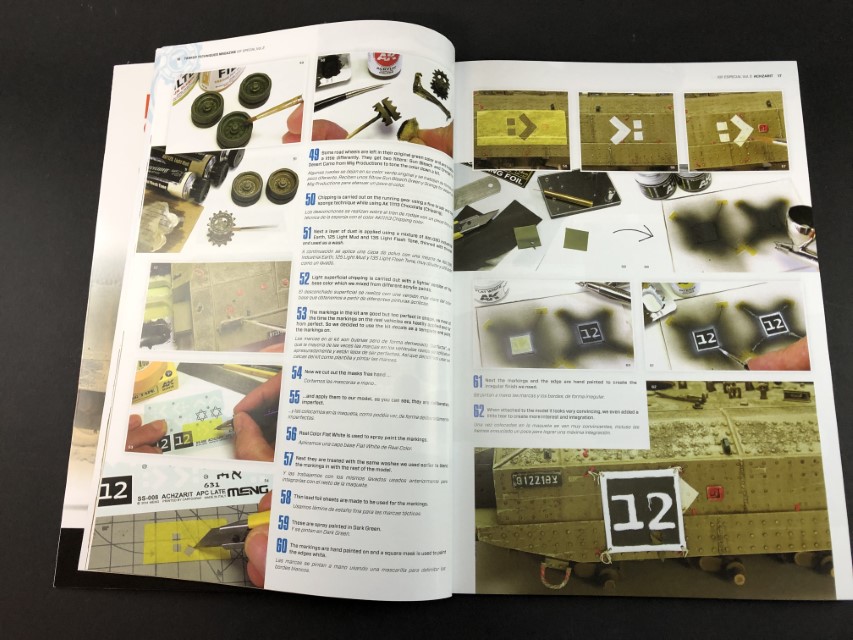
The first article is one of my favourite’s armour vehicle. Using 1:35 Meng as a base, this is a full step by step photo description, featuring assembly, detailing, interior painting, exterior painting, and weathering.
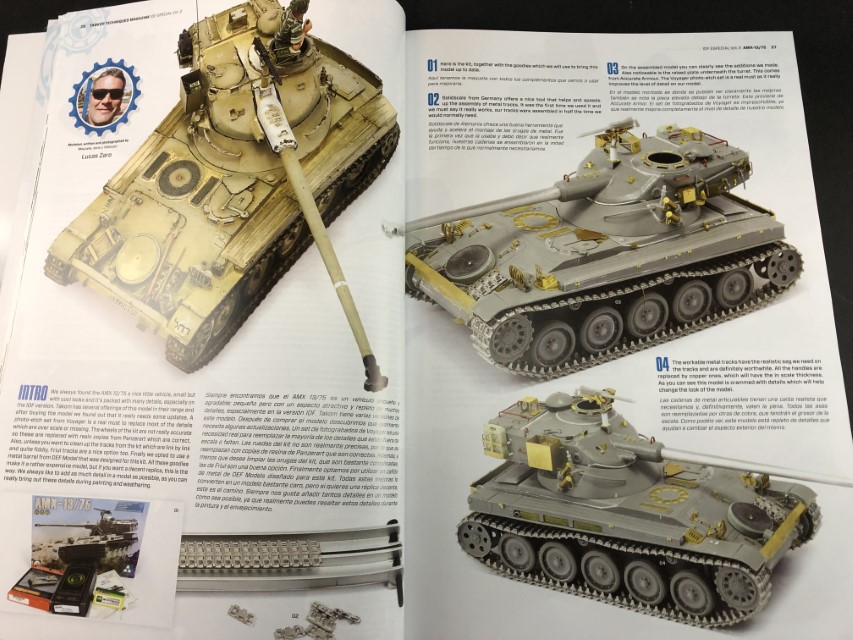
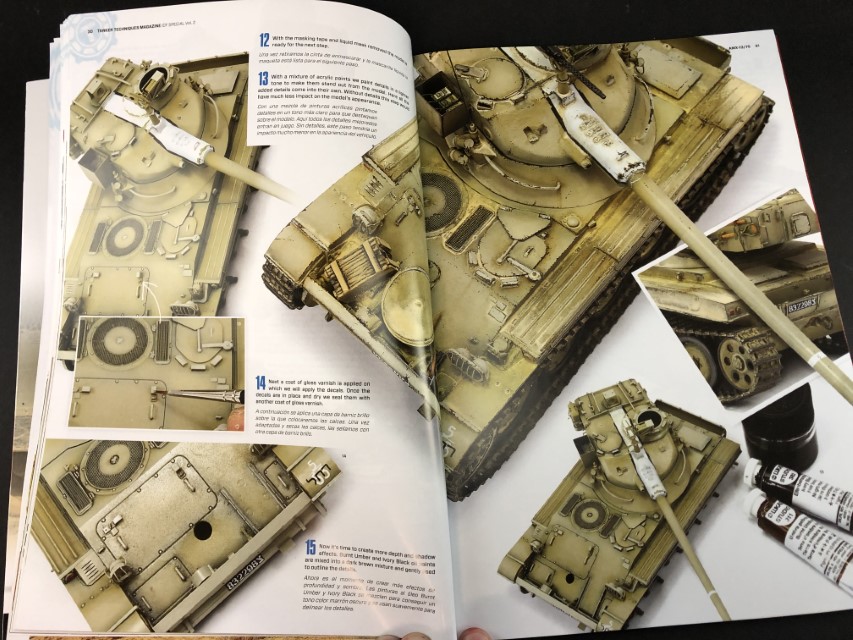
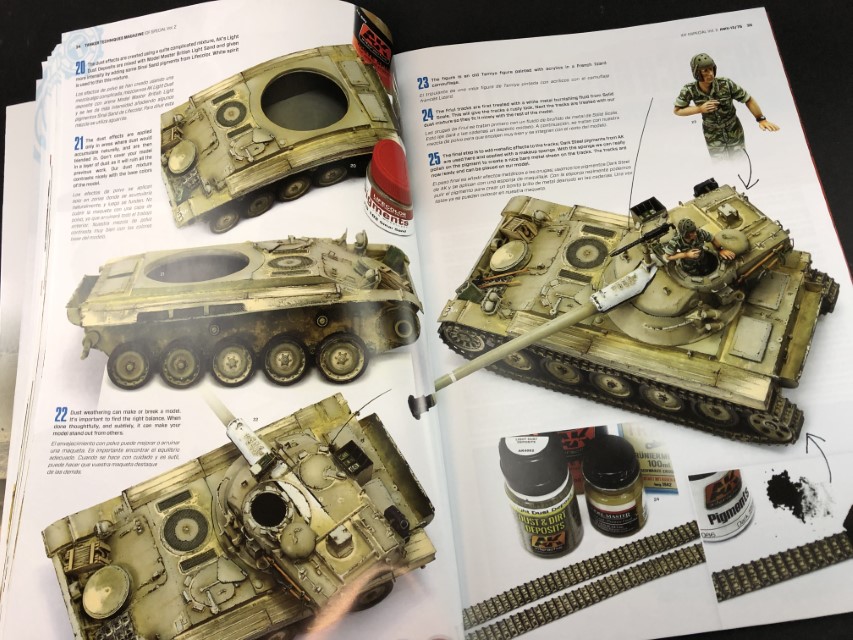
2. AMX-13/75 by Lucas Zaro
The next article focusses on the AMX-13/75 in 1:35 scale, from Takom with aftermarket goodies. A very clean and straightforward build, also with step-by-step photos of the entire process.
3. Magach 6B Gal Batash by Oscar Ebrí Casola
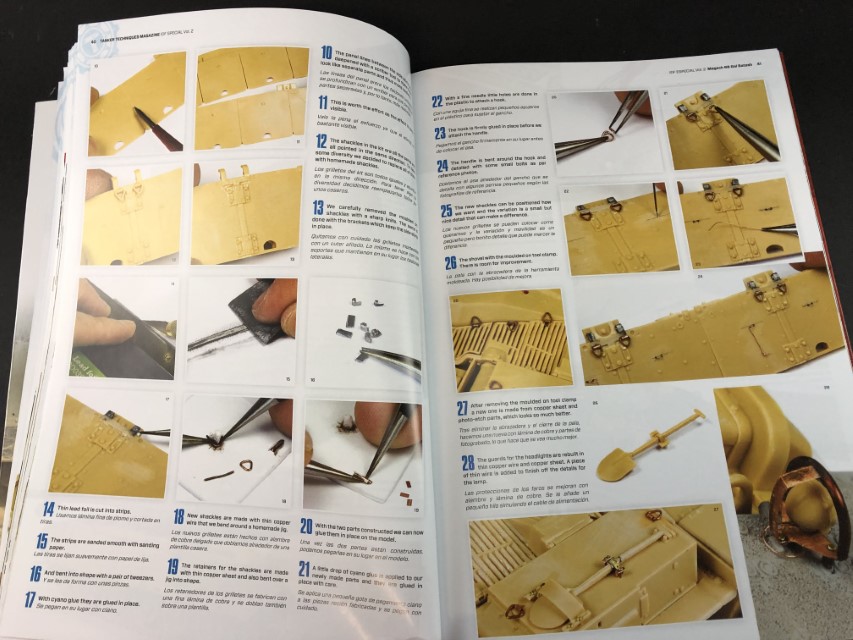
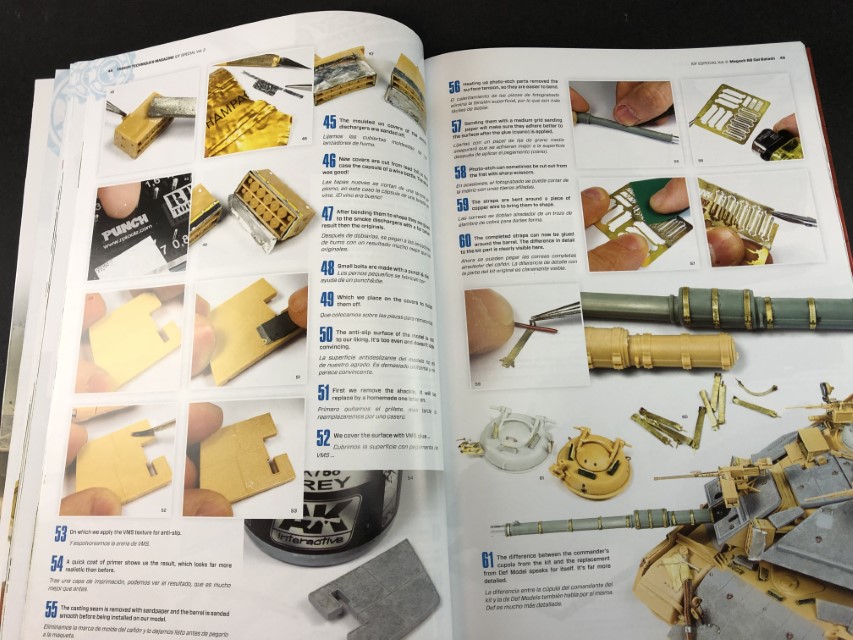
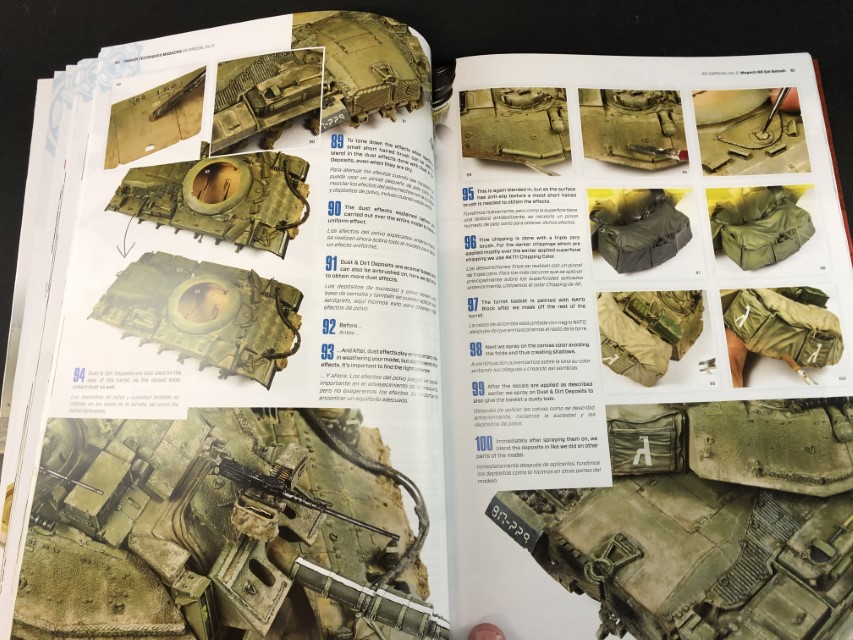
Using 1:35 Meng model as base, this article presents us with a model with some degree of scratch build and show us how we can improve a model with simple technics.
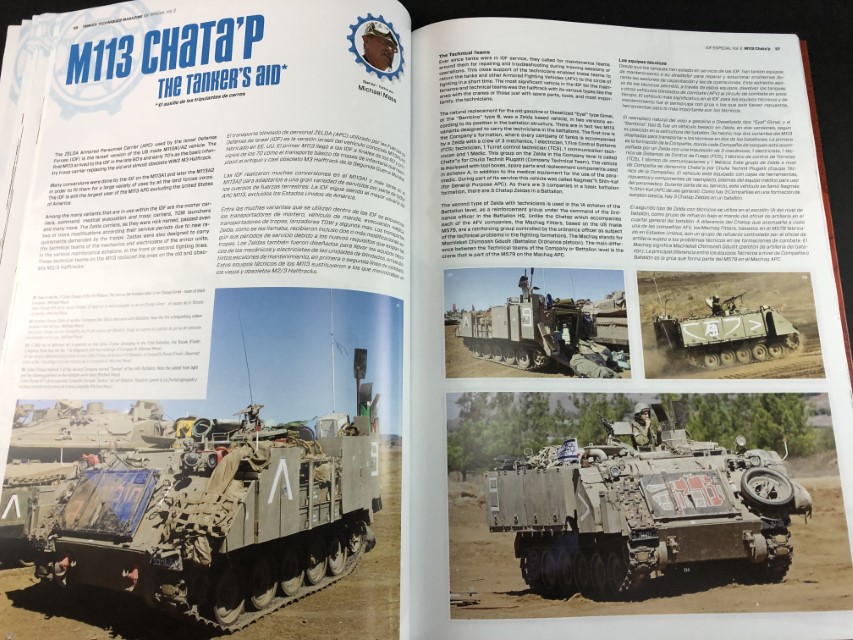
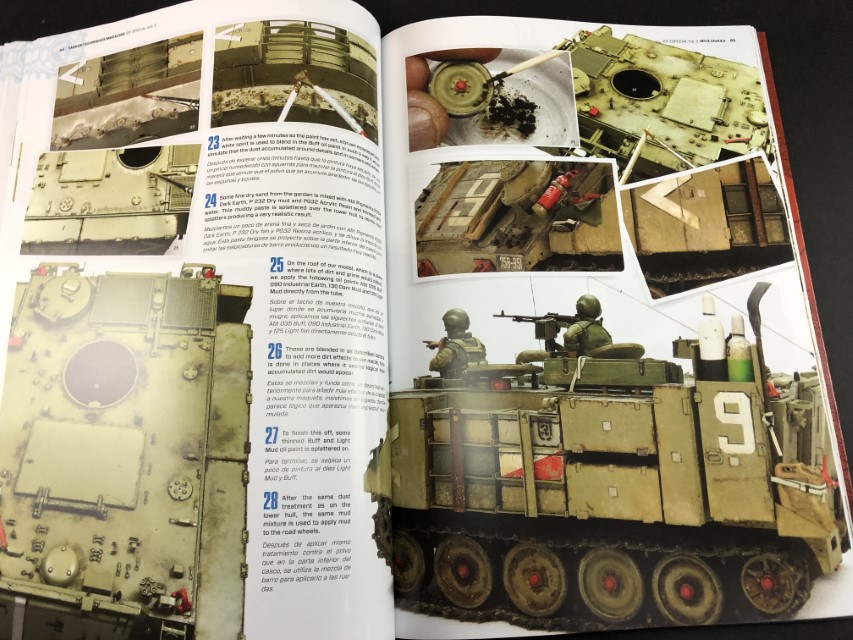
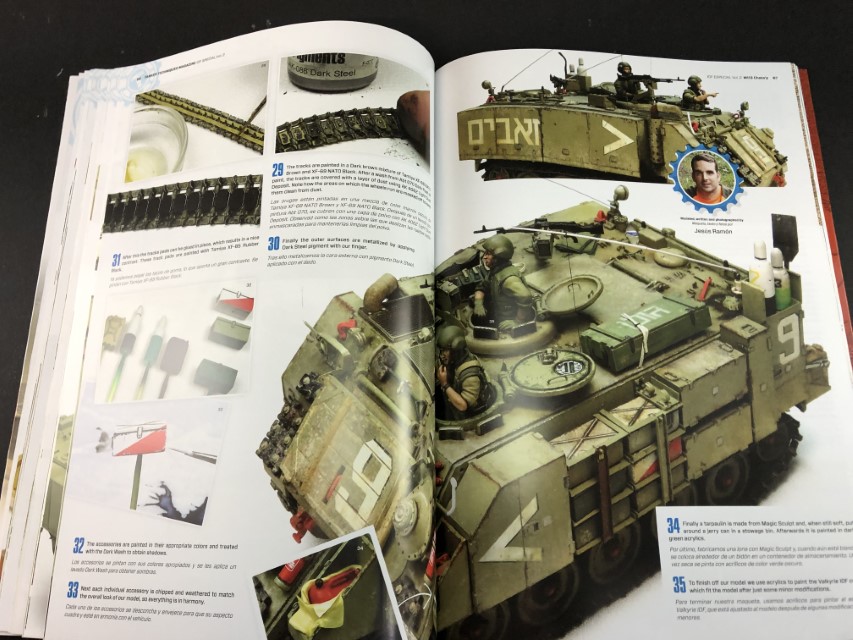
4. M113 Chata’p by Jesús Ramón
The fourth article focus on the highly modified and classic M-113.
Using Tamiya’s 1:35 as base and with the help of a conversion set, the author uses with care combination of items in resin, photo etch and scratch build, to obtain an original and aggressive look. Also, with comprehensive step by step photos of the entire process.

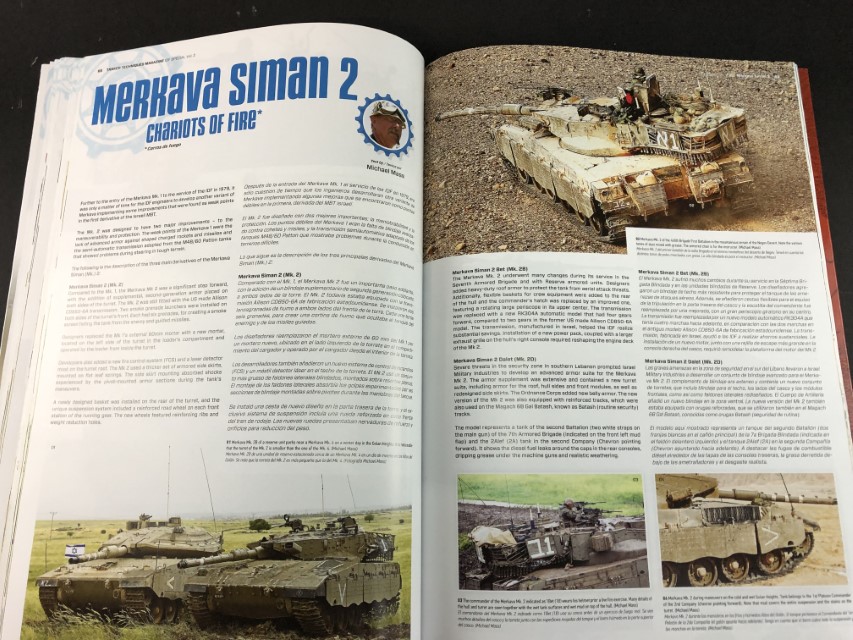
5. Merkava Siman 2 by José María Illa
The sixth build focus on the famous Merkava MBT. Using 1:35 Takom Merkava 2B. This article focuses on a complete build with emphasis at the painting and weathering parts.
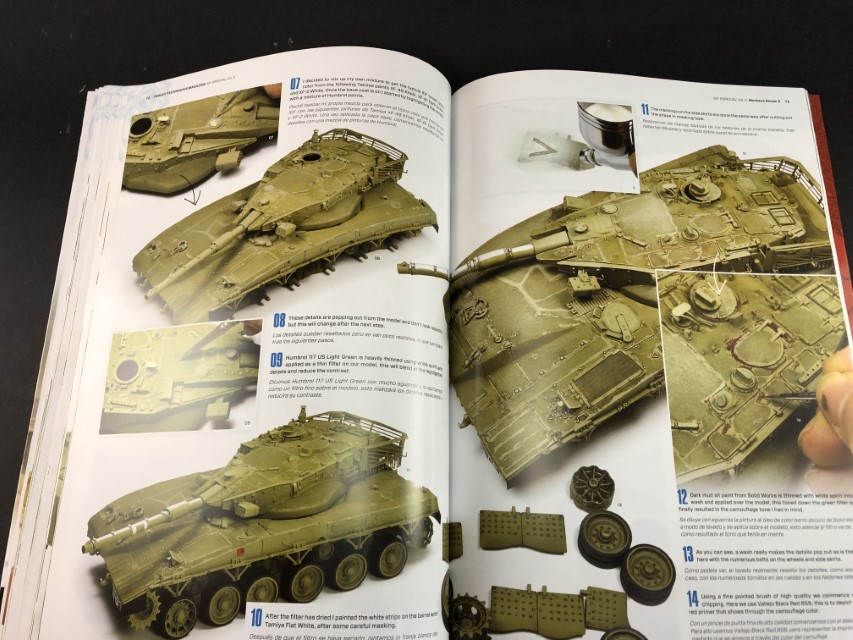

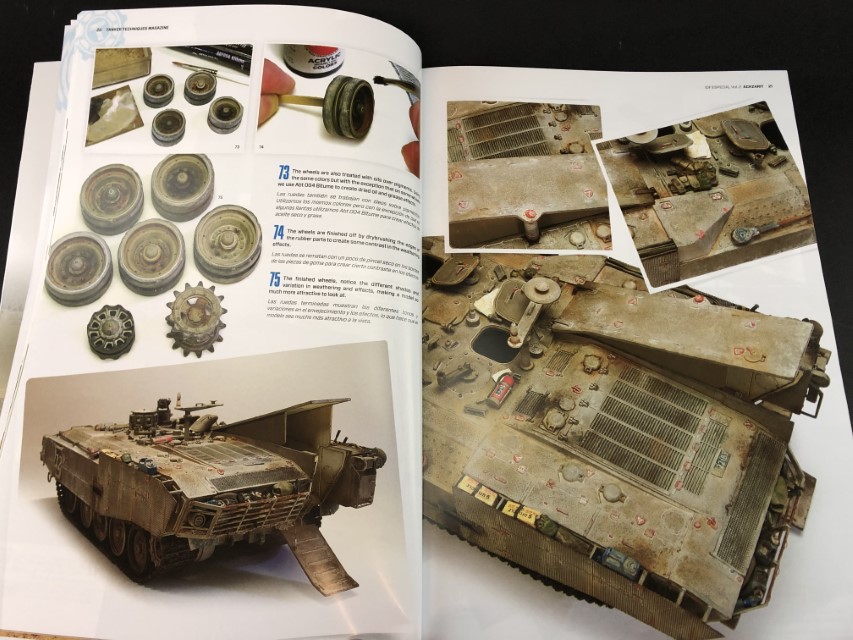
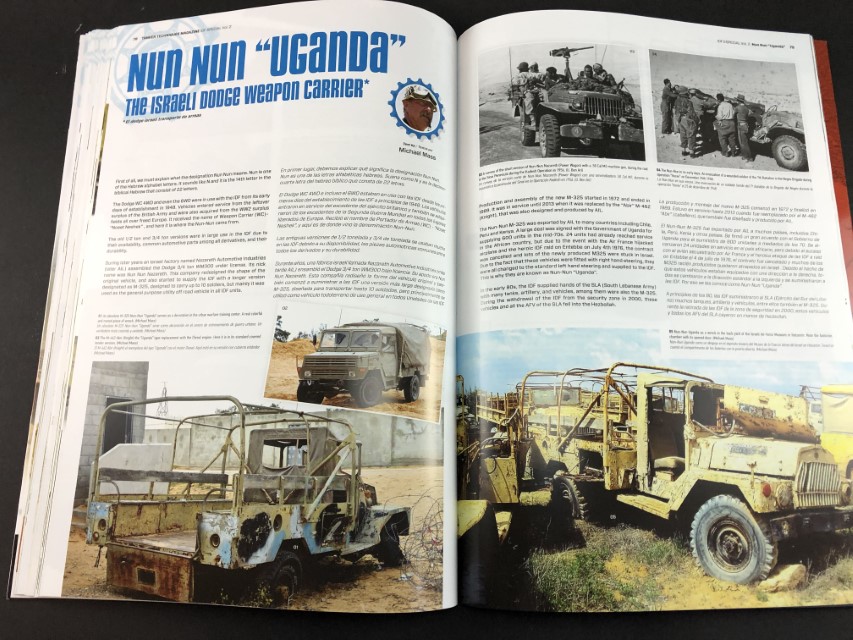
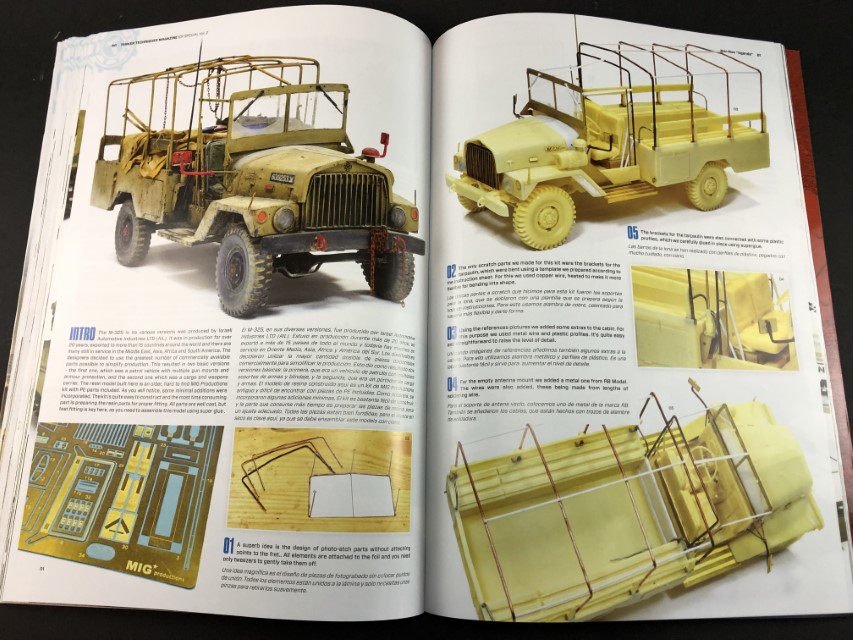
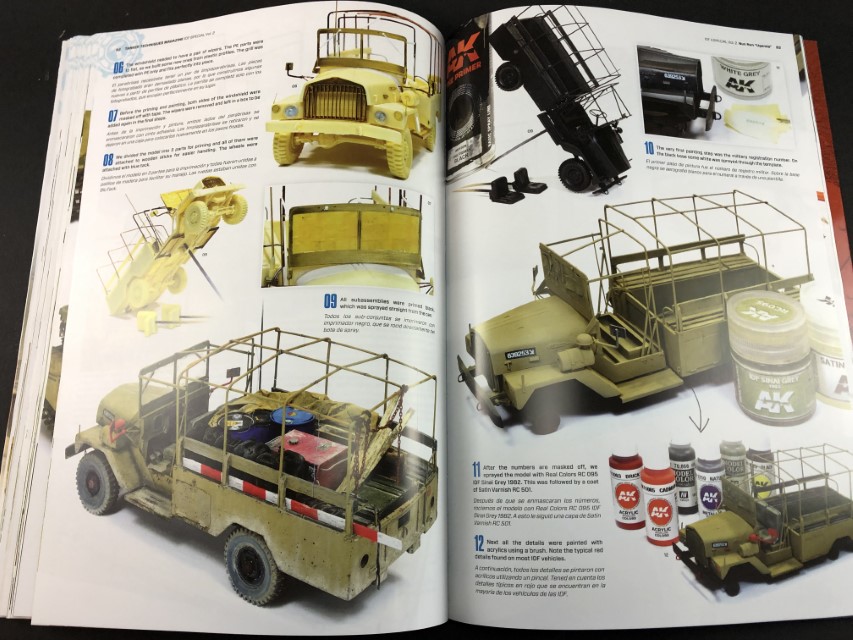
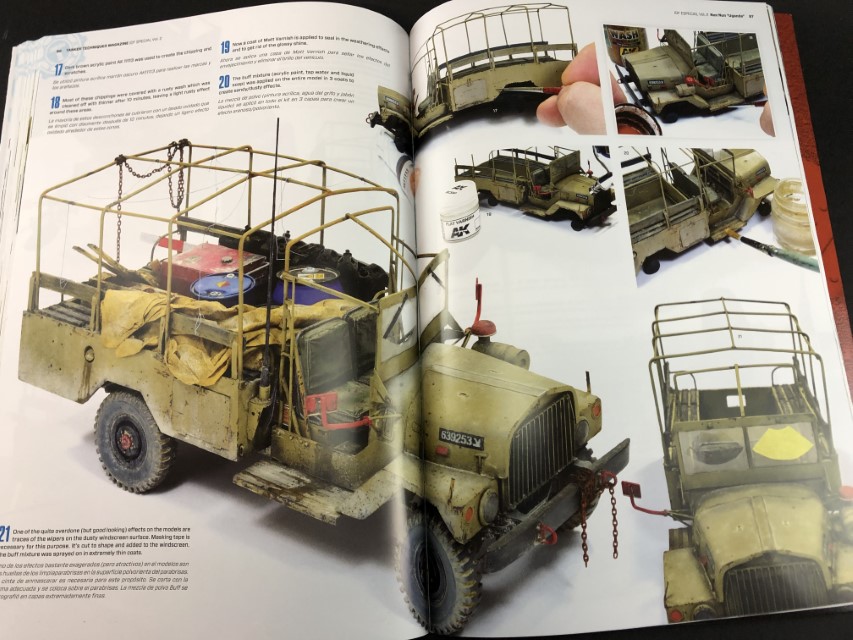
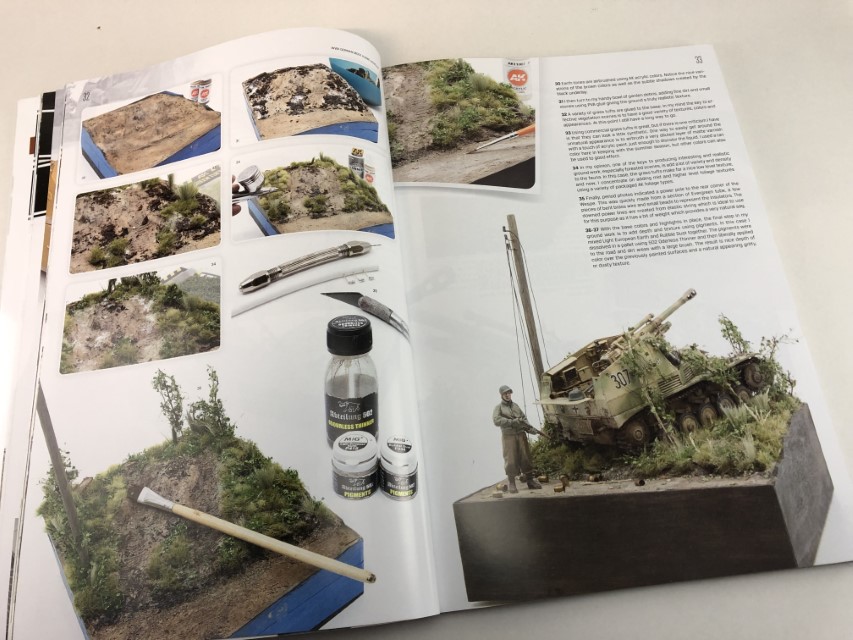
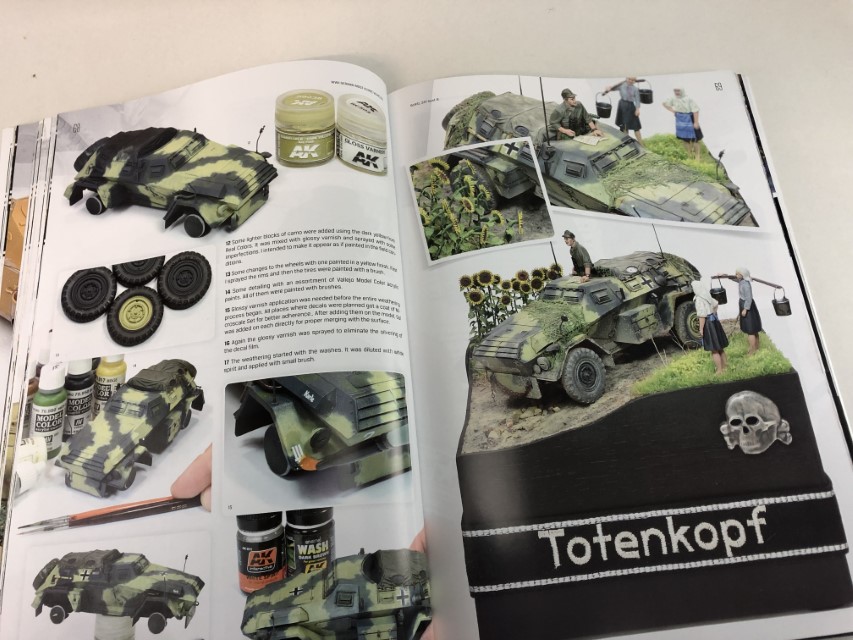
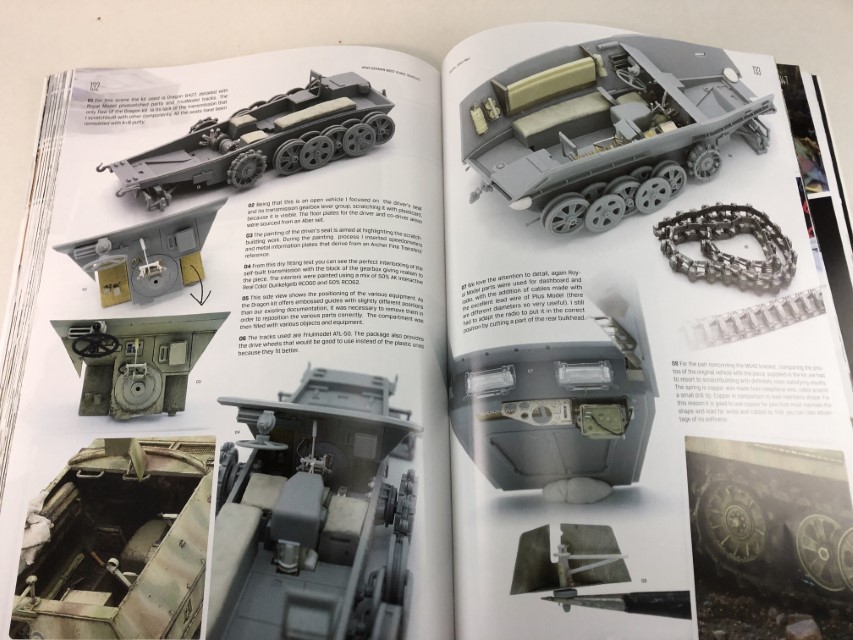
6. Nun-Nun M325 by Łukasz Orczyc-Musiałek
Using the classic Resin offering 1:35 Mig Production resin model, this sixth article present us the task of preparing, building, detailing, and painting a multi-media. The result is a very convincing scale vehicle.
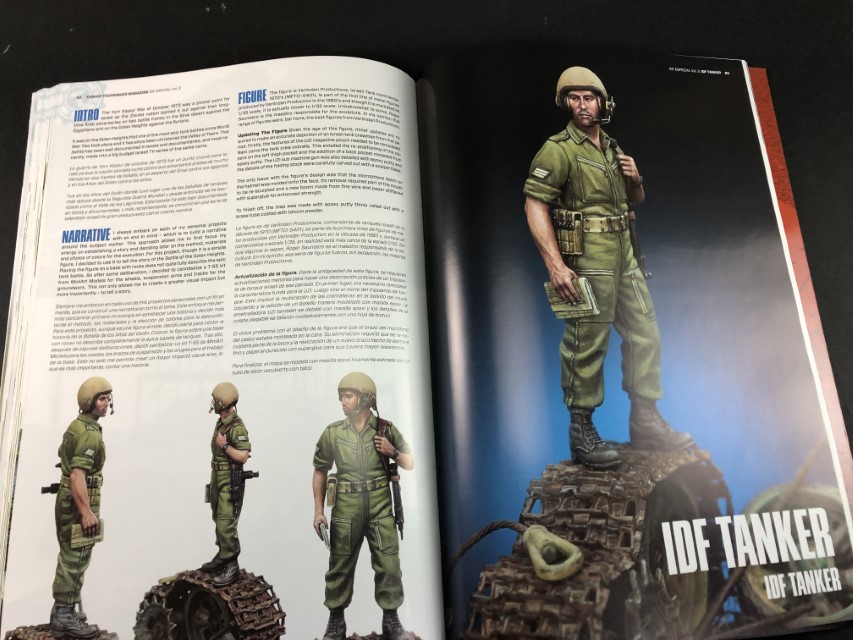
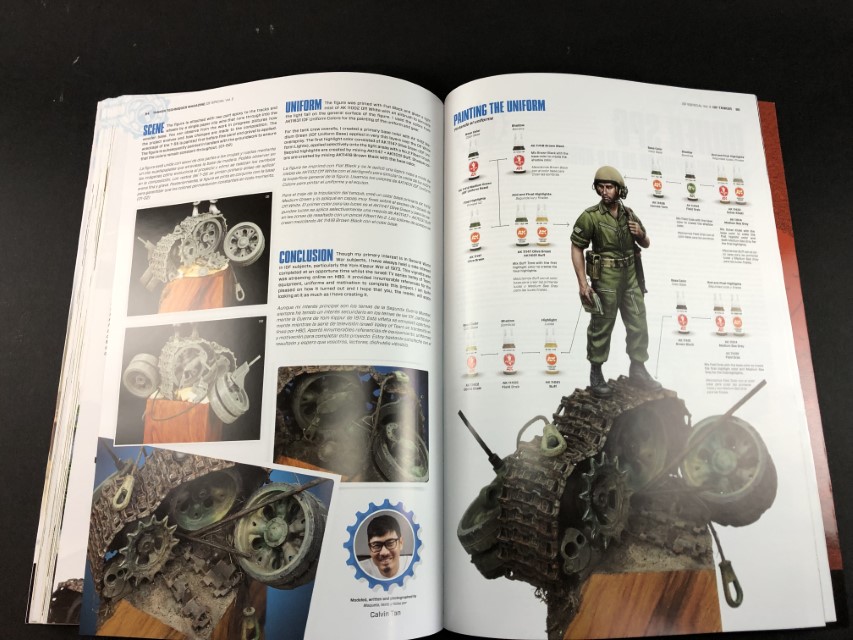
7. IDF TANKER by Calvin Tan
The seventh article is a figure in a base in 1:35, using a classic Verlinden reference. The set was updated with some scratch details and minor corrections. The author integrates the figure in a small base. A written description of all items (figure preparation, scene, and painting) is provided, as a chart with all colours used to paint the figure.
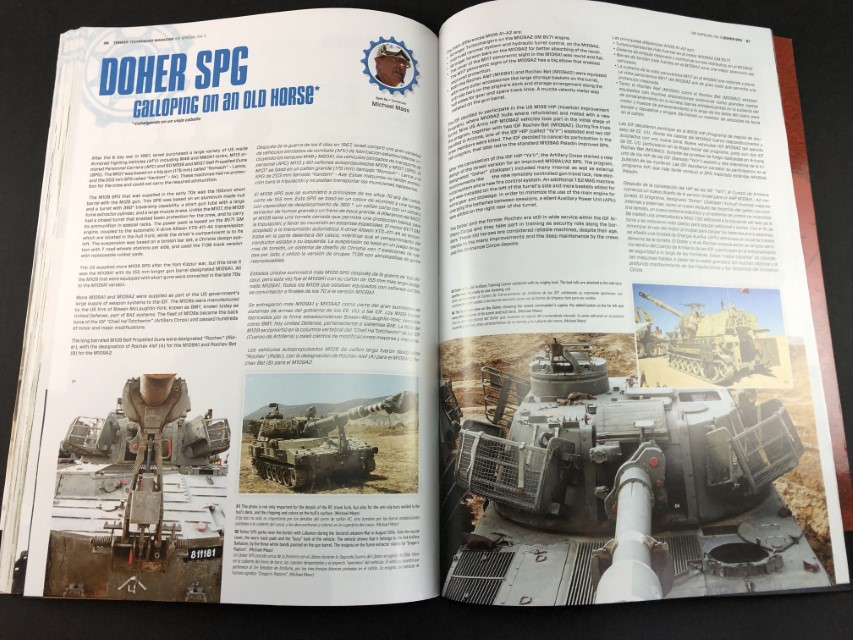
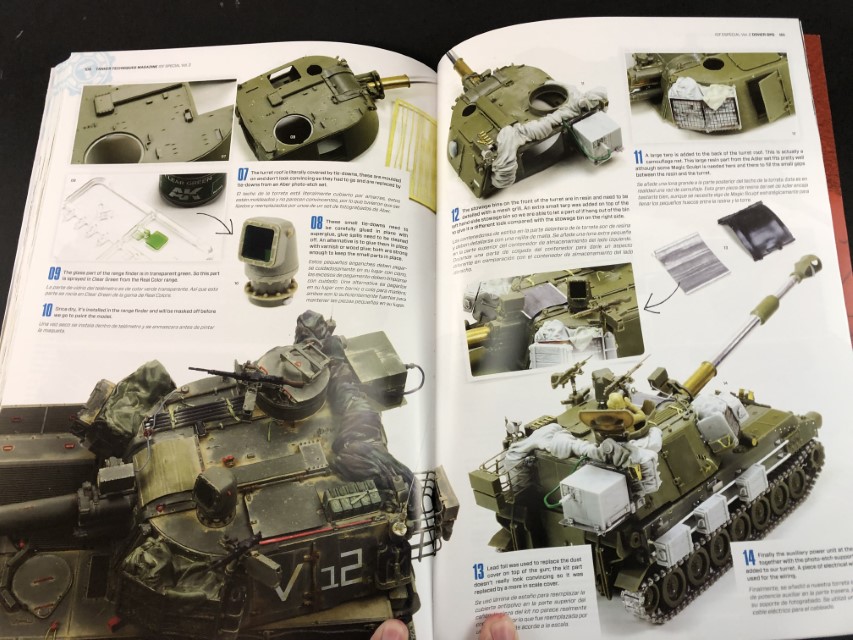
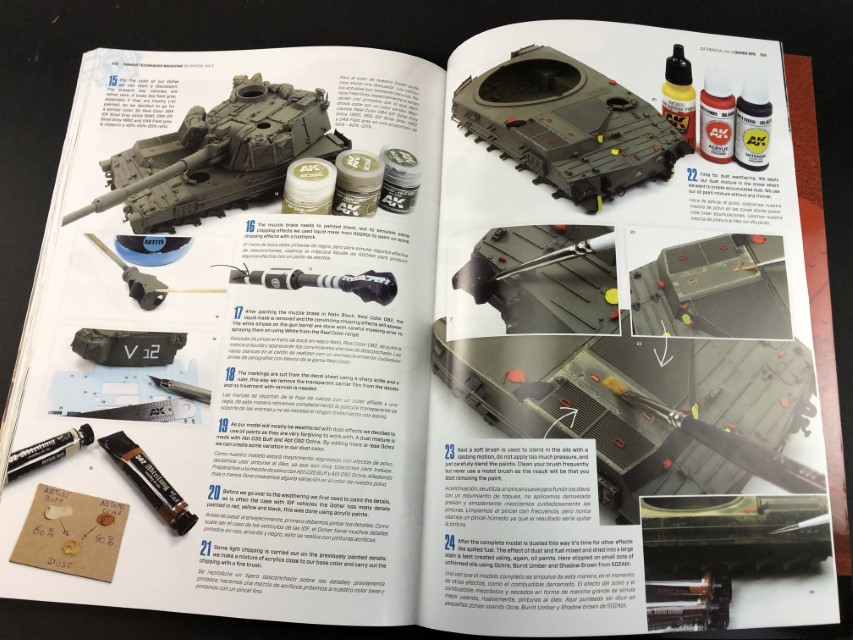
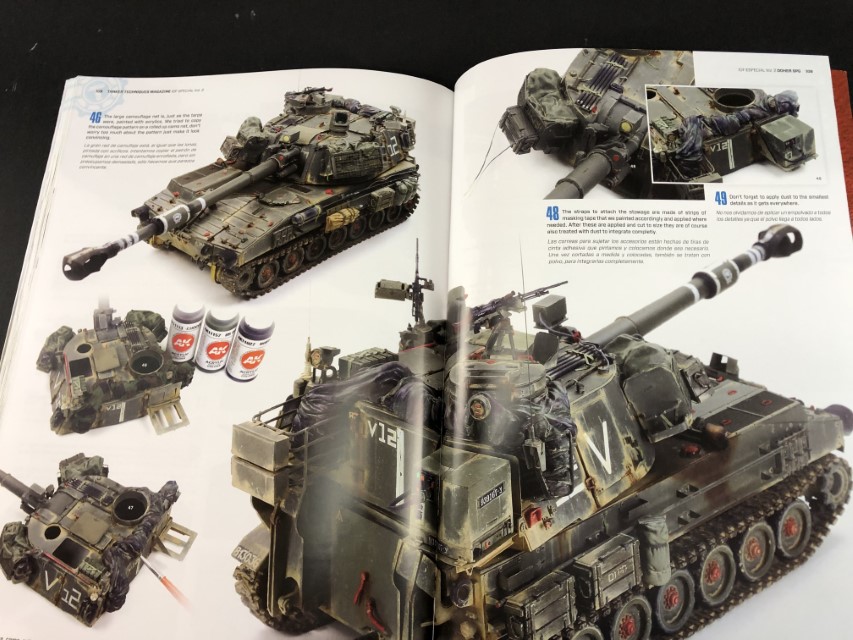
8. M109A2 DOHER by Kristof Pulinckx
The last build is a modern classic. Using the 1:35 AFV-CLUB Doher, Friul Model tracks a and a conversion set, the final result is a very convincing model of this well know SPG. The narrative drives us through the construction parts, showing the use of P.E. parts as replacement for the Kits parts, scratch build details and tracks worn and used treatment. The painting process is quite simple and effective, and the weathering process is based almost with oils in order to give a dusty look.
Conclusion
This is a long review, but the book deserves it and I really hope that the pictures will help to understand why. The historical introduction in the beginning of each article is a pleasant and original way to present the model.
It’s my view that every author offers us with their unique way and personal approach to several technics, starting by the model preparation, painting and weathering and in the end, as far as a average modeller like me, I was captivated with some weathering technics presented.
This book is a must, as it covers several aspects of the theme, aggregates several technics, and present it in a very attractive reading and visual guide.
Highly recommend!

My thanks to Fernando Vallejo and Ak-interactive for the review sample.

Ricardo Veríssimo
-
1
-
2
-
-
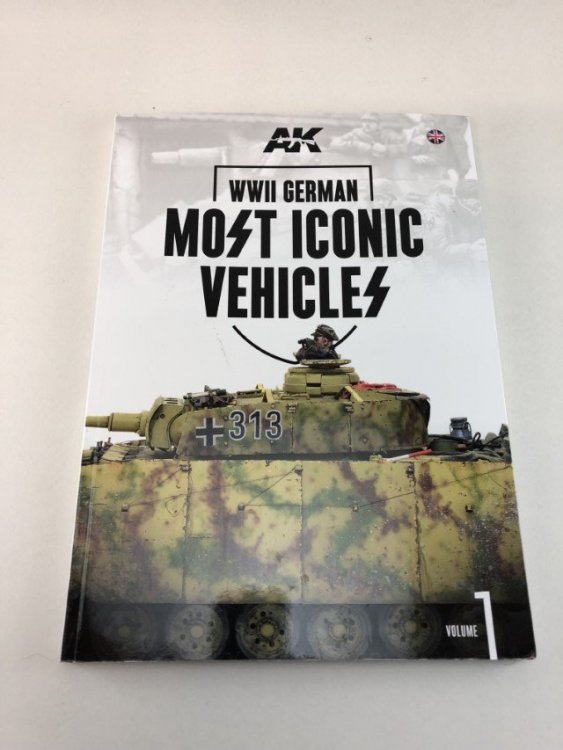
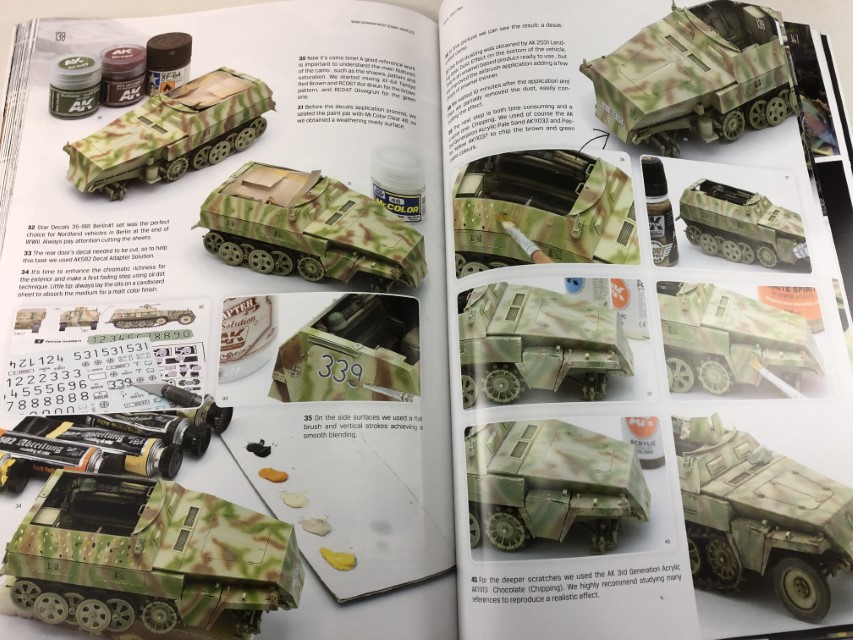
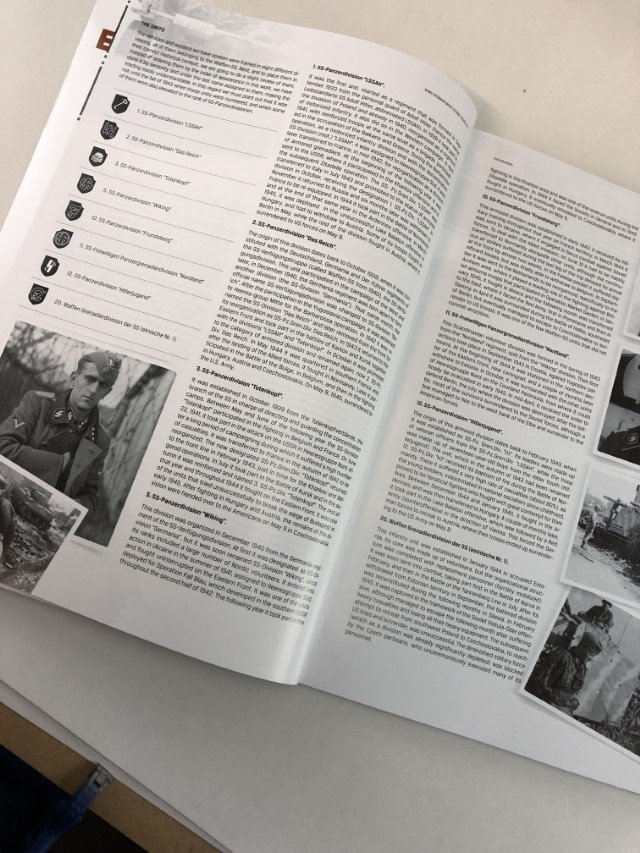
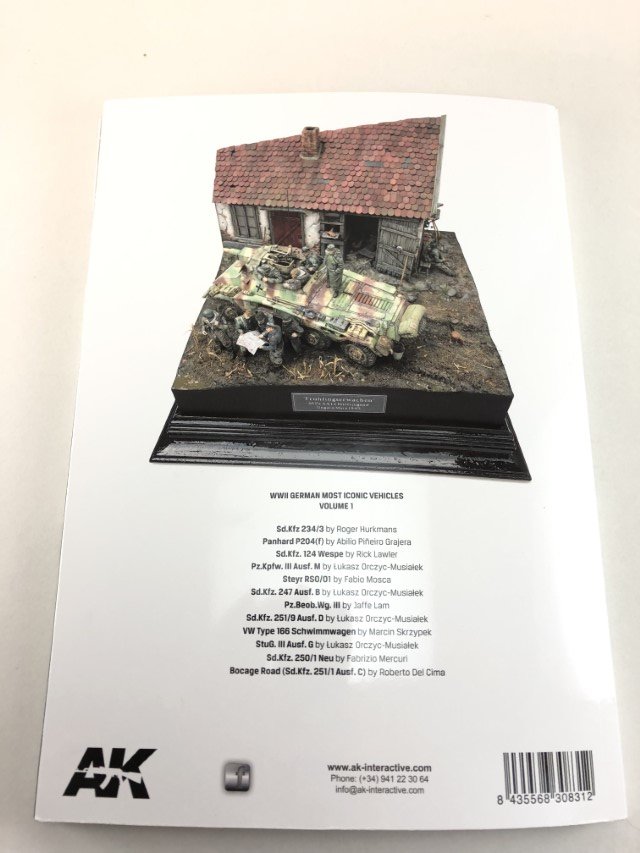
WW2 German Most Iconic Vehicles Vol. I
Author – Several
Publisher: Ak Interactive
Price: 24,95€
Available in English or Spanish
Introduction
AK has been established as a renown brand for modelling products and high-quality publications.
The book is in a A4 format with 159 Pages, with soft cover with reinforced inner cover. The paper is satin finish, with a good touch and with excellent printing, giving a lot of quality to the colors and image.
This publication is part 1 of 2 dedicated to models used by units of Waffen-SS, covering 12 1:35 builds from 8 modellers, ranging from medium tanks, to halftracks, self-propelled, antitank armoured and transport vehicles.
A historical introduction, model presentation Historical units’ description is made by Carlos de Diego Vaquerizo.

As for the content goes, and consulting the index, we have the followings:
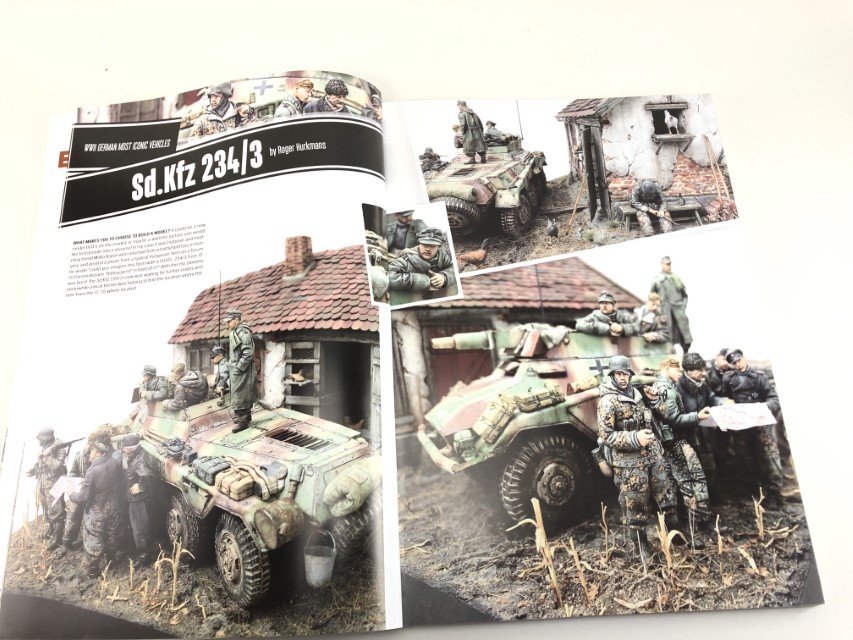
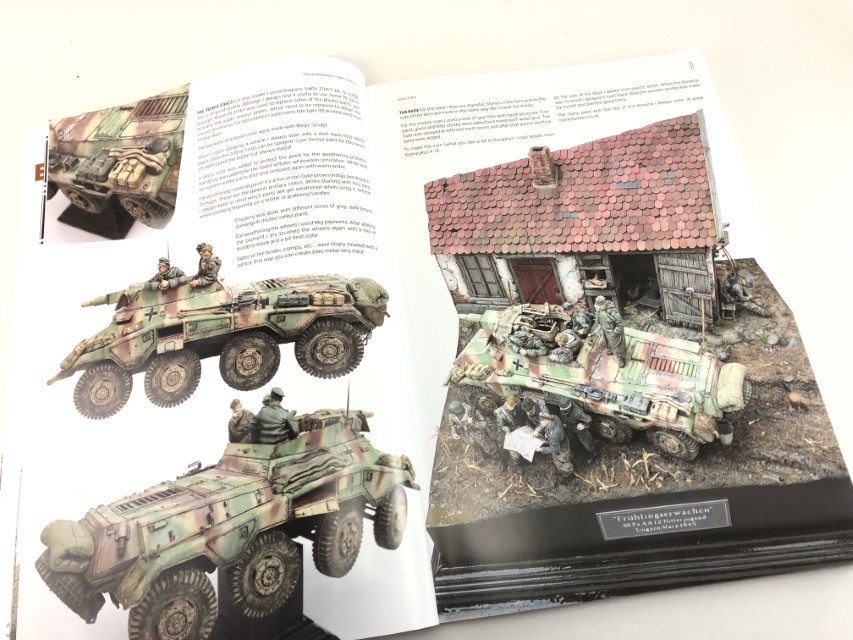
1. Sd.Kfz 234/3 by Roger Hurkmans
The first article presented is a compact one, with succinct description regarding the figure’s conversion and painting, the building, vehicle and base.
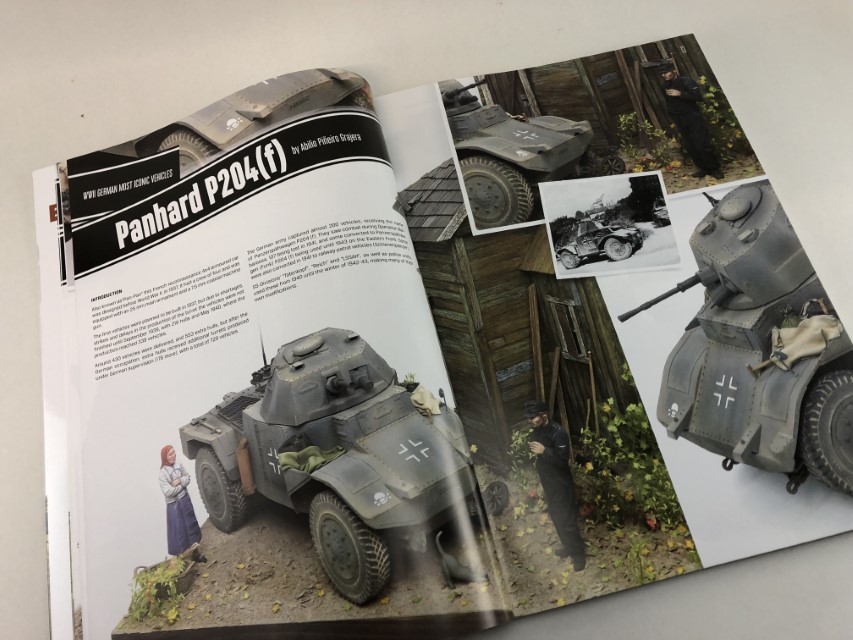
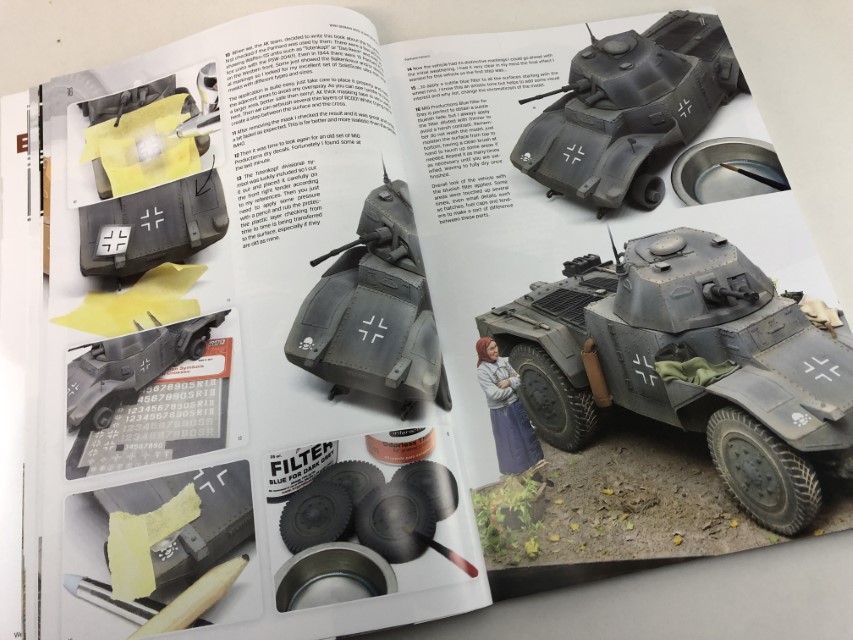
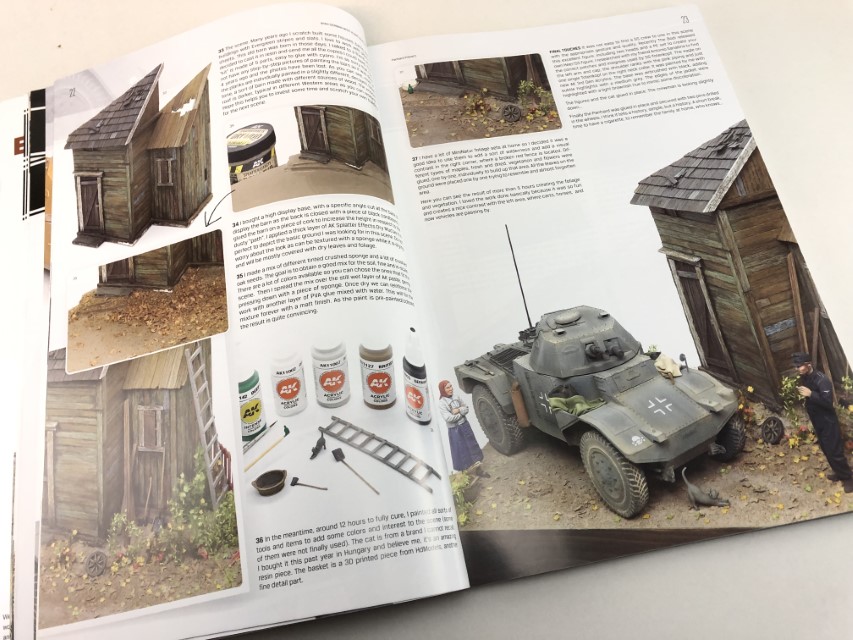
2. Panhard P204(f) by Abilio Piñeiro Grajera
This article depicts a French Panhard in German use. The focus is on the vehicle paint and weathering process, concluding with a overall description on the building and base elements.
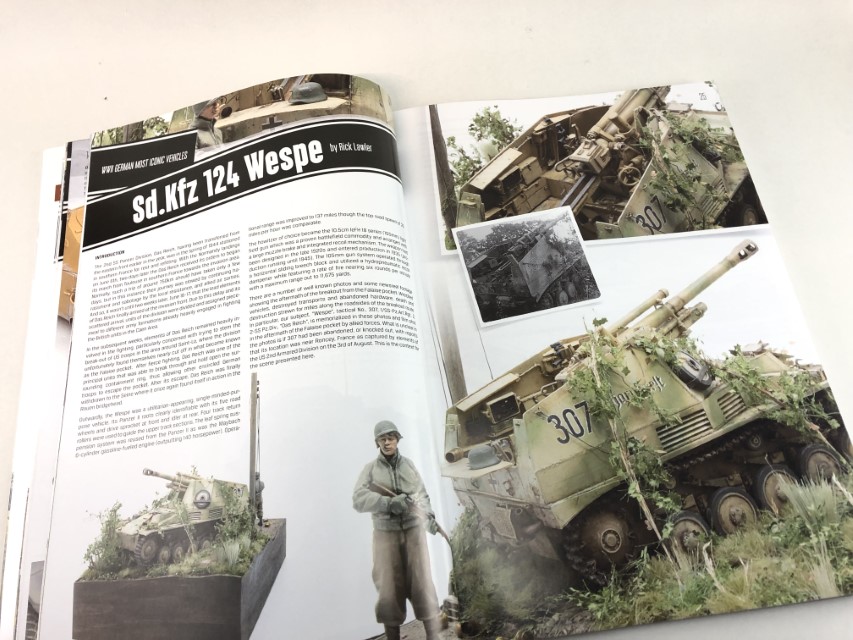
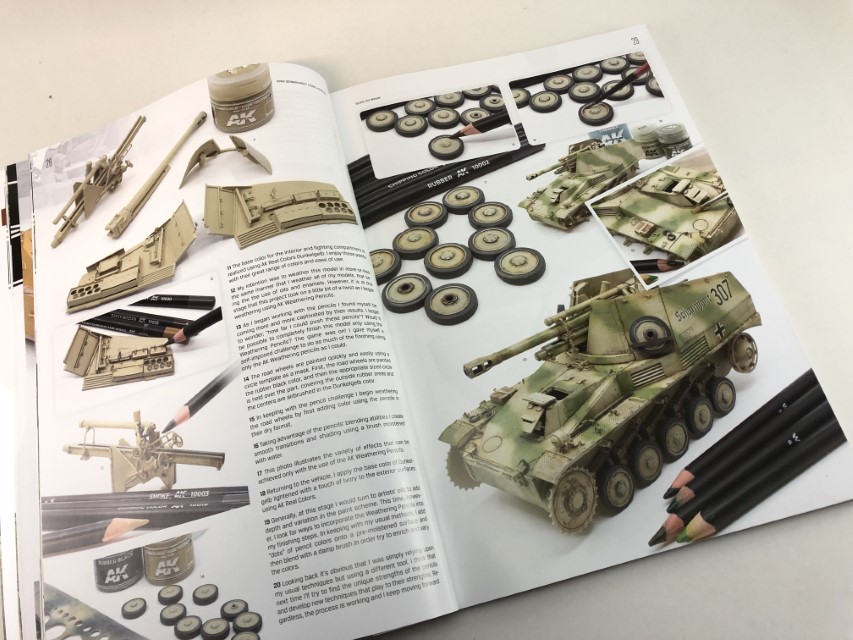
3. Sd.Kfz. 124 Wespe by Rick Lawler
Using the well know Tamiya 1:35 rendition of this SPG, the article describes in a graphic step by step, the assembly, painting and weathering of the vehicle and correspondent base.
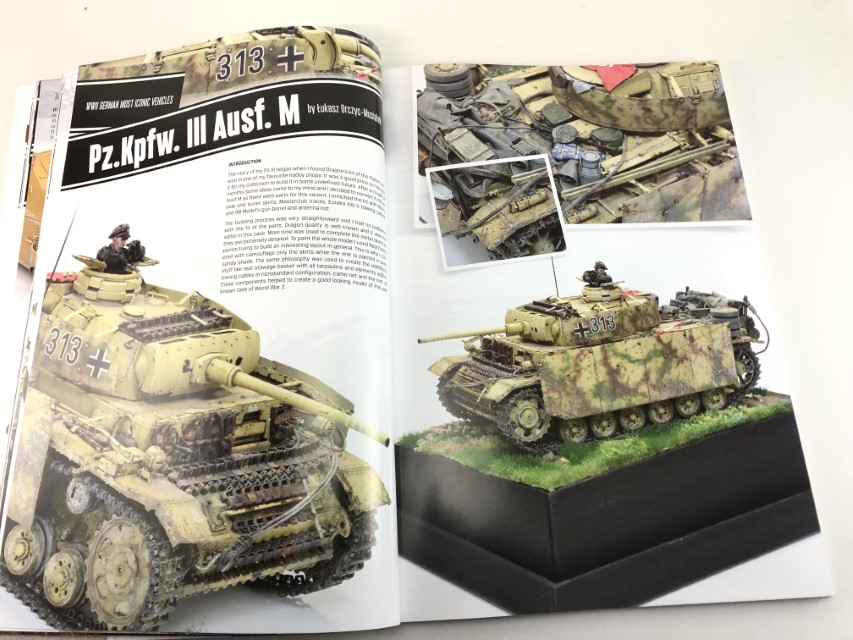
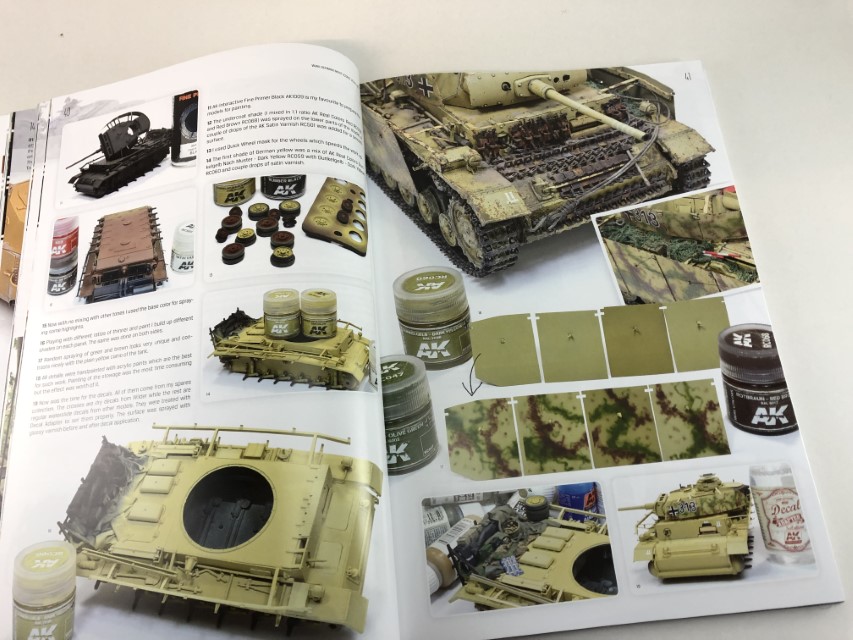
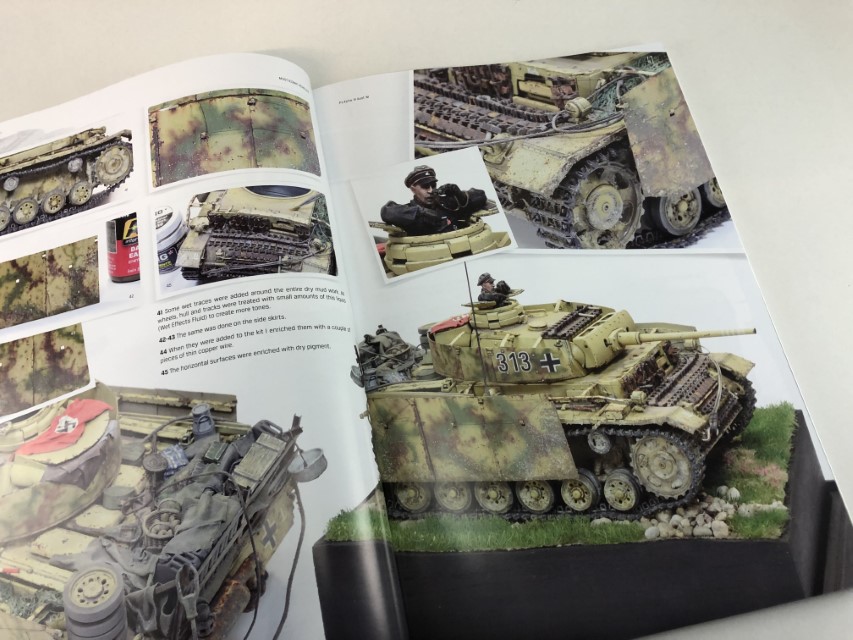
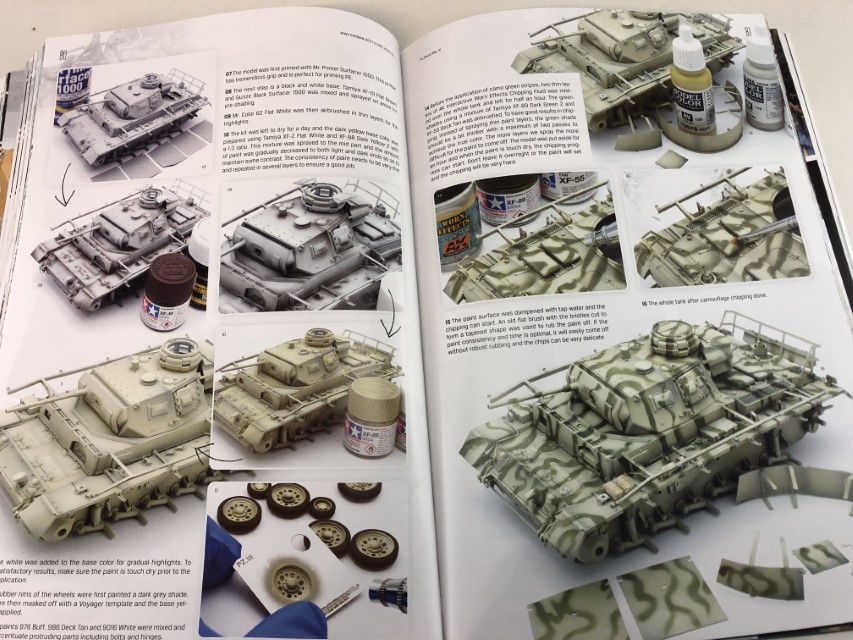
4. Pz.Kpfw. III Ausf. M by Łukasz Orczyc-Musiałek
This build focus on the build, detail, paint and weathering Dragon’s 1:35, using several aftermarket sets. The result is a very realistic and balanced model, using several weathering technics and materials.
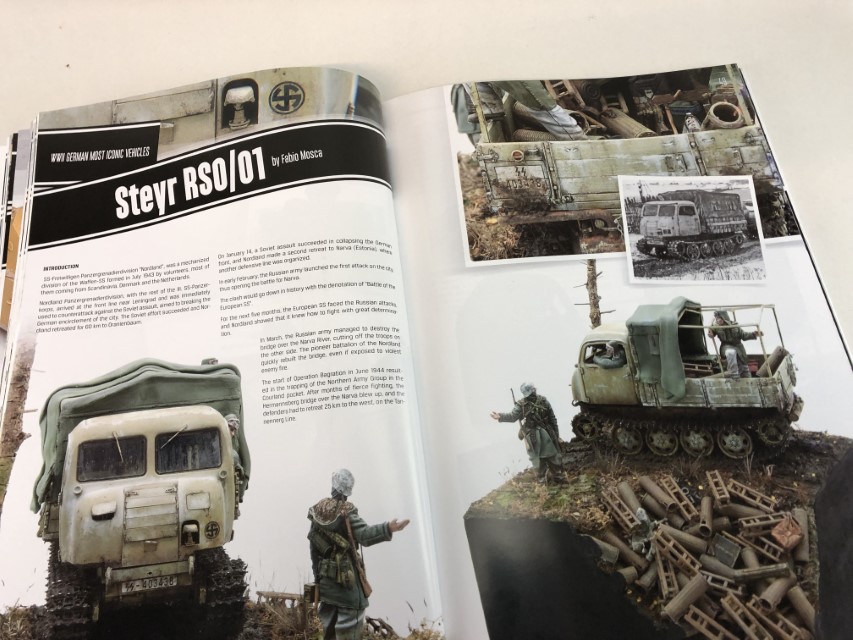
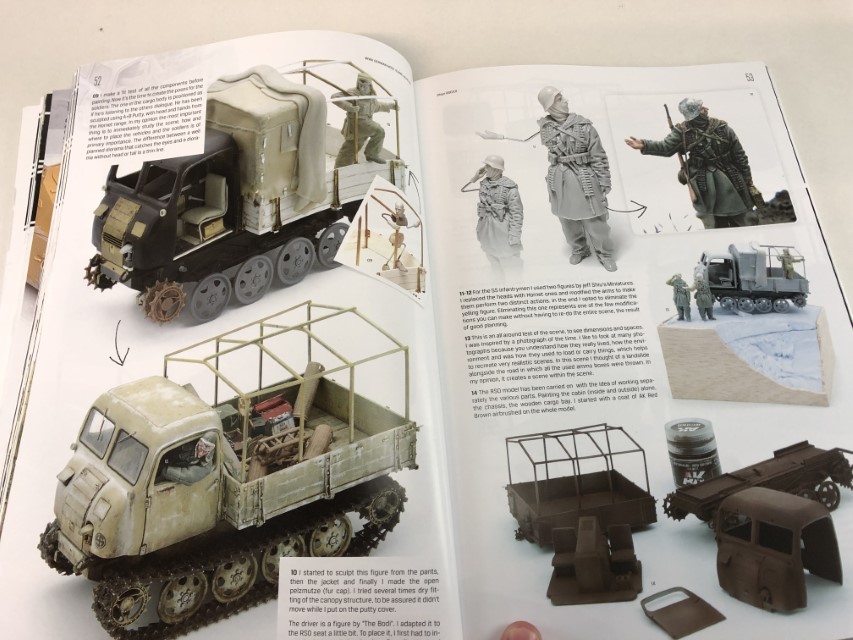
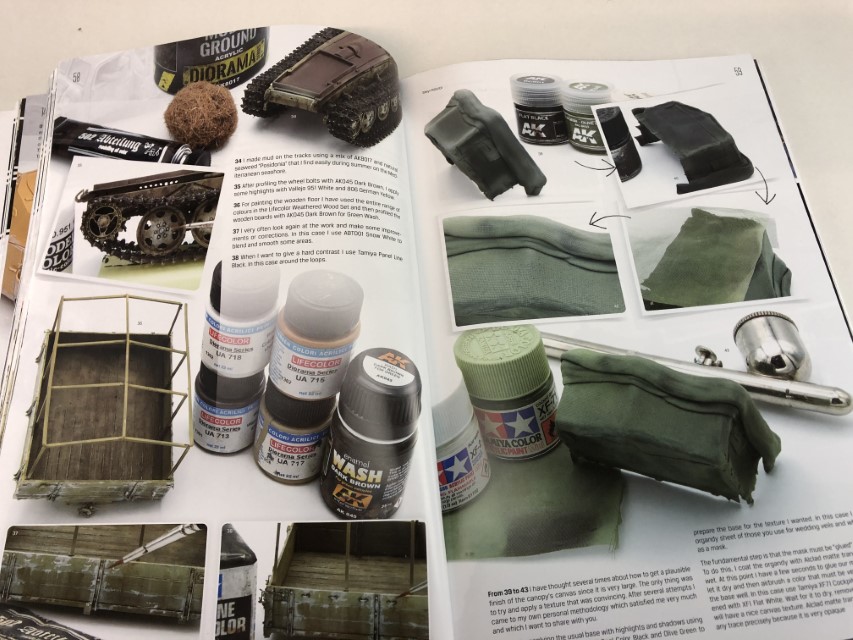
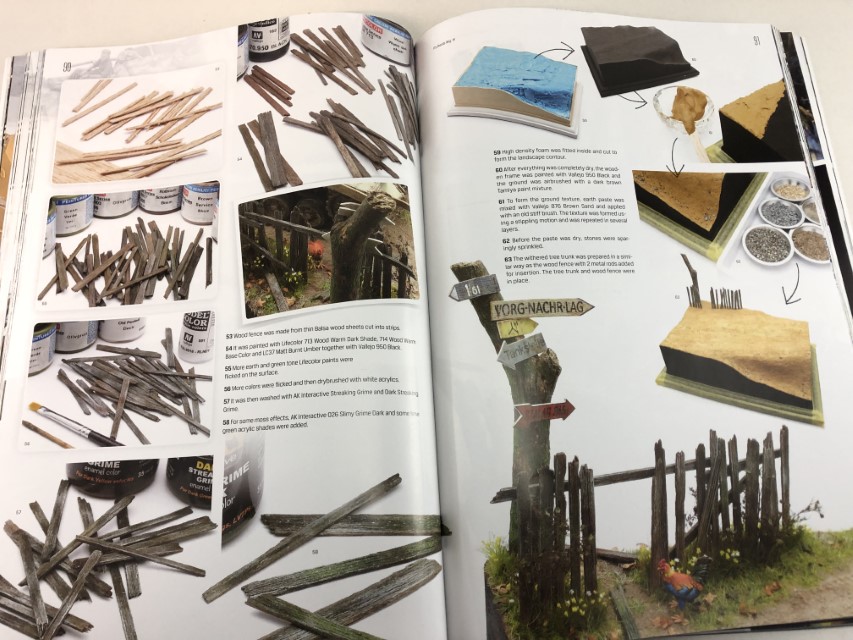
5. Steyr RSO/01 by Fabio MoscaUsing the old Italeri 1:35 as basis for this diorama, the author, present us with a deep and detailed article, covering several upgrades on the model, using scratch build or aftermarket parts as resource. The build is a classic example of multimedia, as several type and sources are used. The painting process is well explained in the step by step, as well as the ground build and paint sequence.

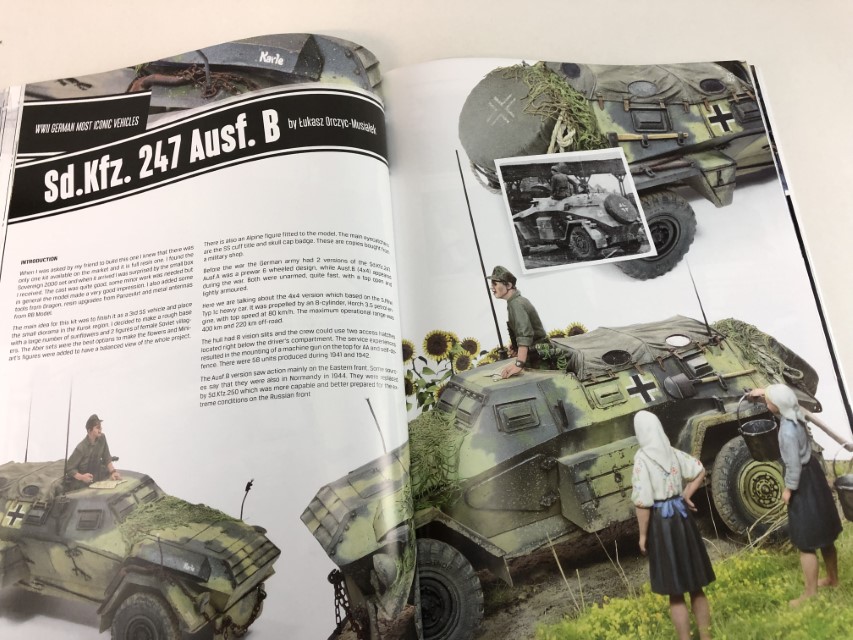
6. Sd.Kfz. 247 Ausf. B by Łukasz Orczyc-MusiałekThis article presents us a 1:35 resin model from Sovereign 2000 upgraded with scrathbuild items and aftermarket bits and retrieve from other models.
The result is a very original diorama of a very unusual vehicle.

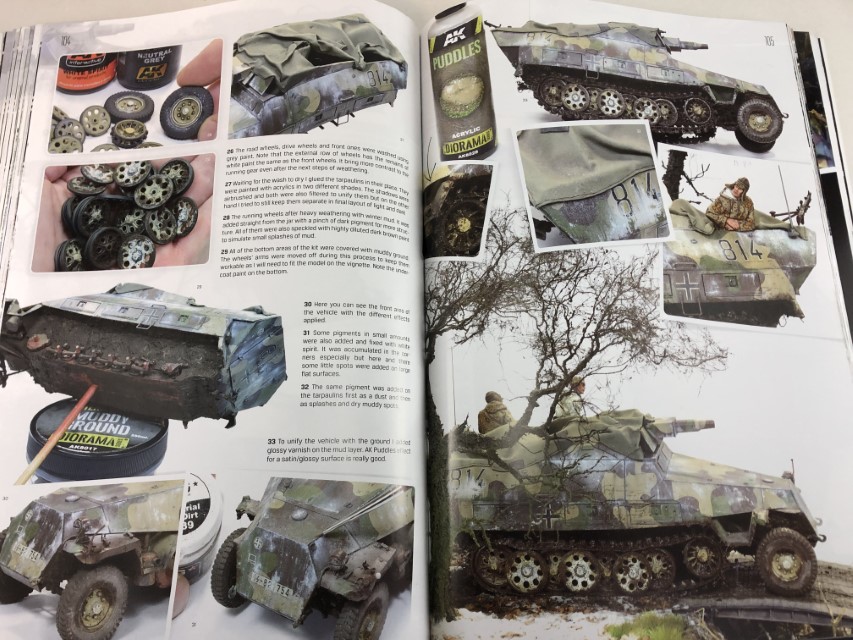
7. Pz.Beob.Wg. III by Jaffe Lam
This article describes a complete step by step of the model and base, includes in depth pictures and description for the painting, weathering, again using several techniques and products, and on this chapter, the use of pigments and associated material to proper address the road wheels and tracks.


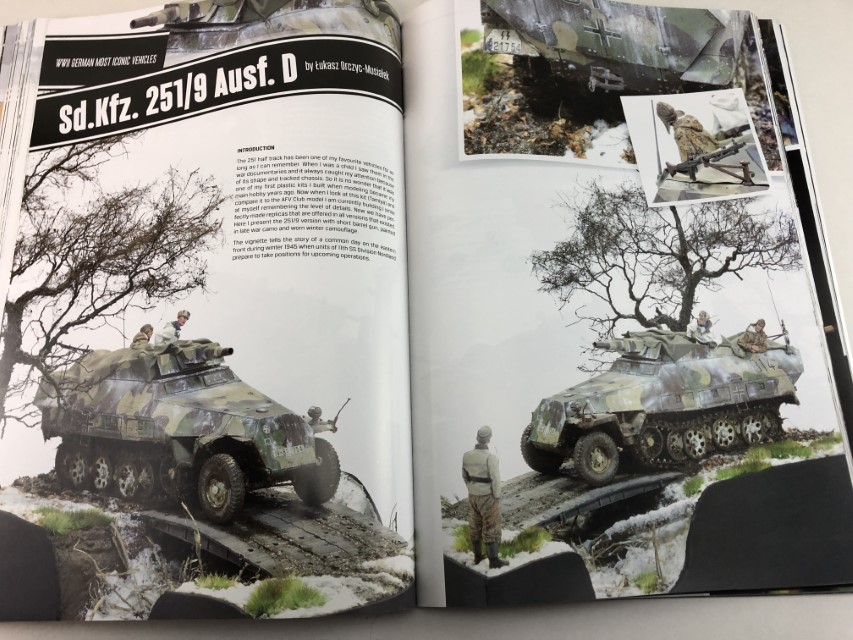
8. Sd.Kfz. 251/9 Ausf. D by Łukasz Orczyc-Musiałek
This article presents a vignette using as a base the Tamiya Model, being the centre piece, the focus is the model assembly, painting and weathering.

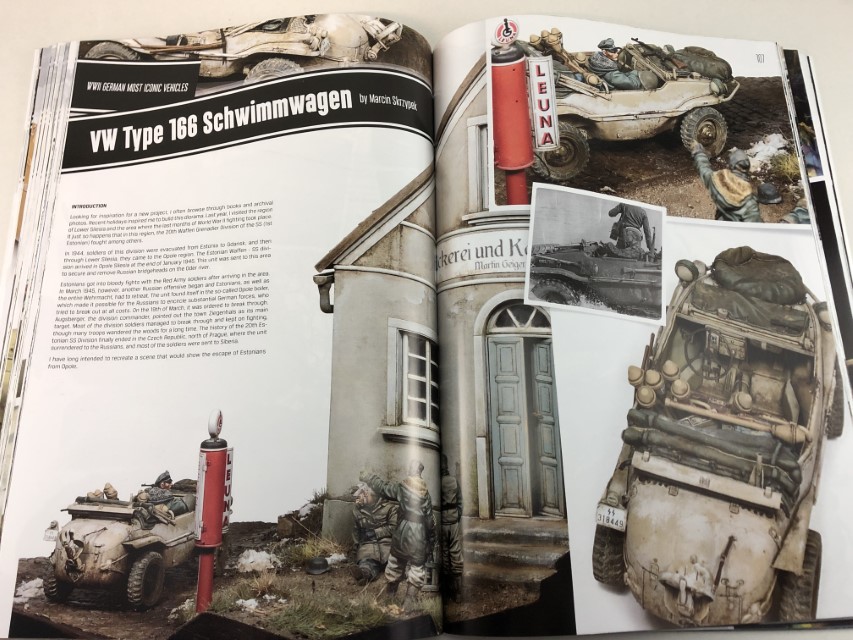
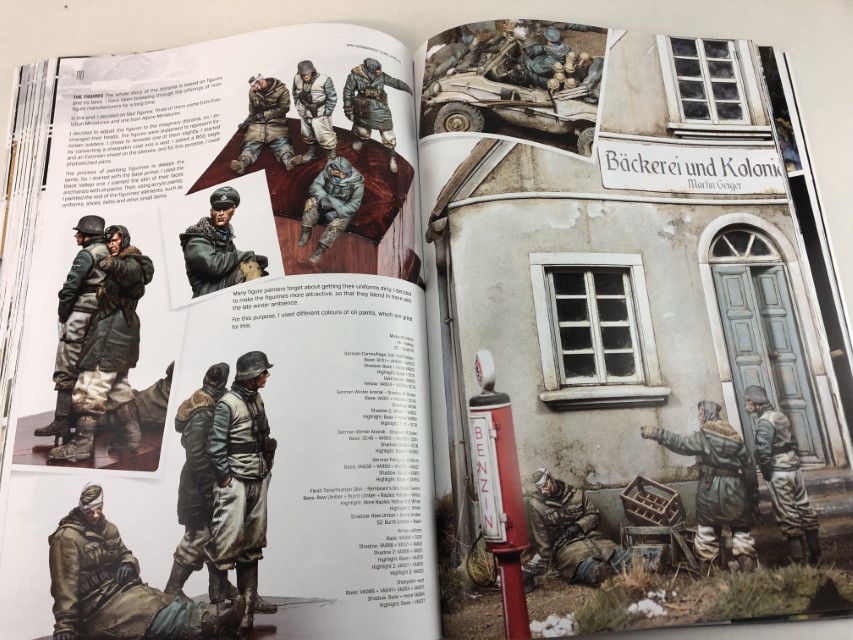
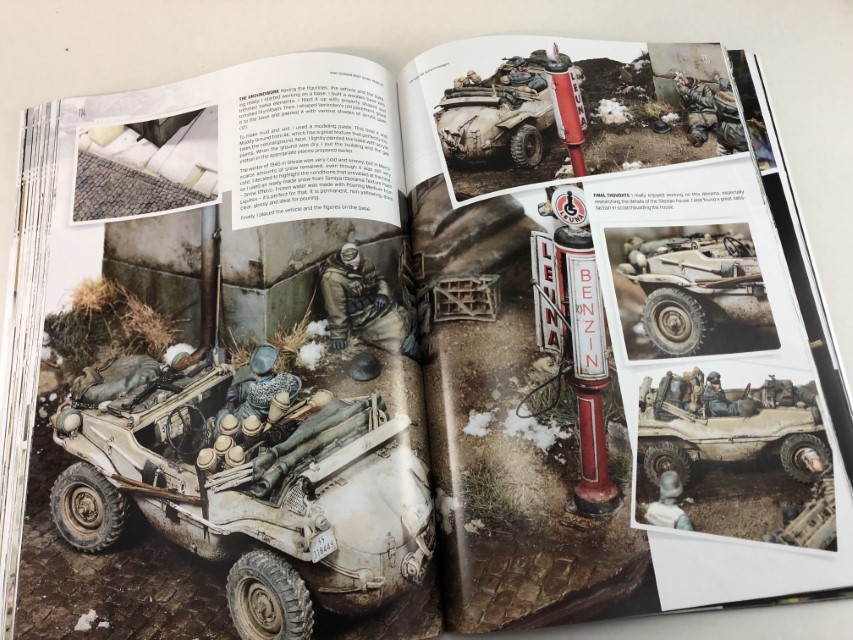
9. VW Type 166 Schwimmwagen by Marcin SkrzypekThis is for me, one of my favourite builds. Again, using the classic Tamiya’s model, the author descrives in a graphic step by step the assembly and painting of the vehicle. The figures also are included, with complete instructions of the paints used in the process. The house is a scratchbuild one, and despite no detailed photos are provided, some notes are presented as some close-up pictures of some details of it.
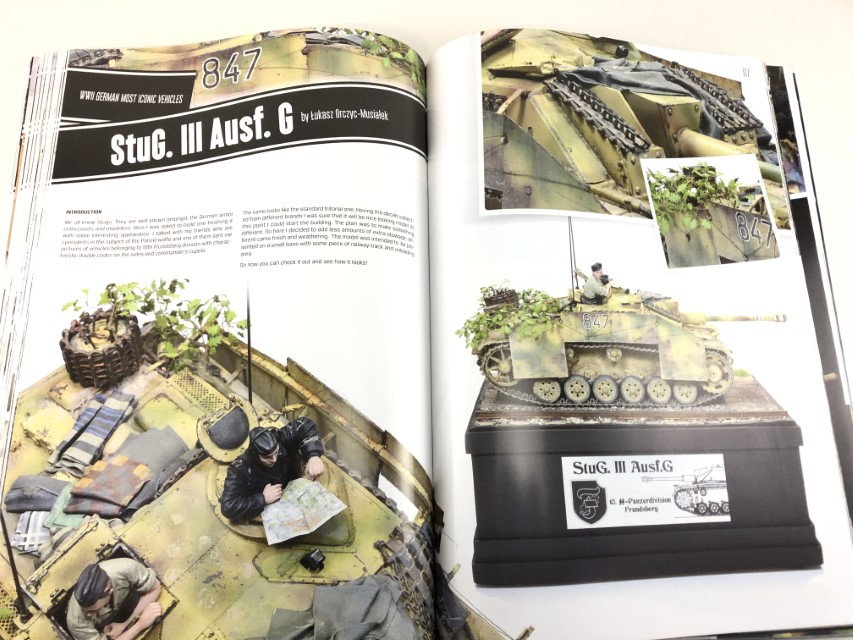
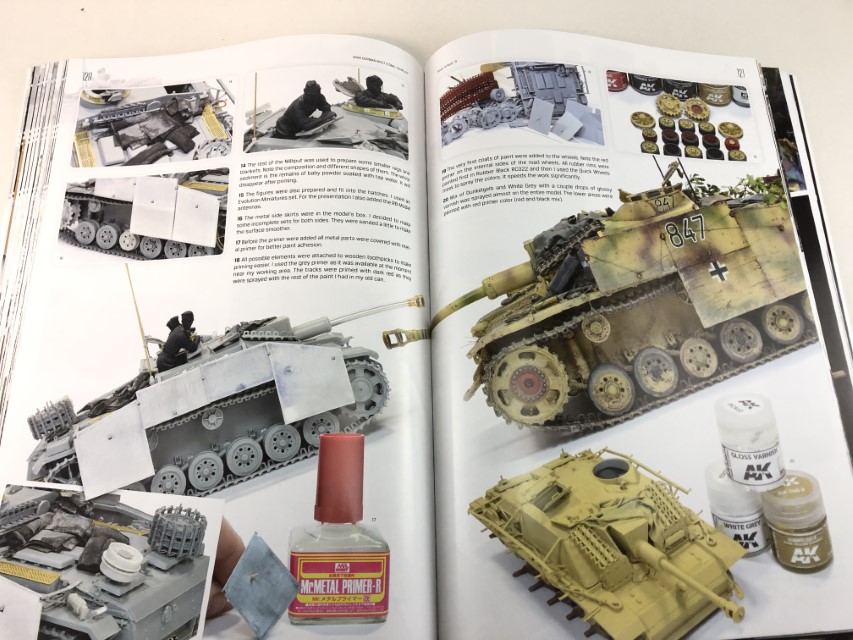
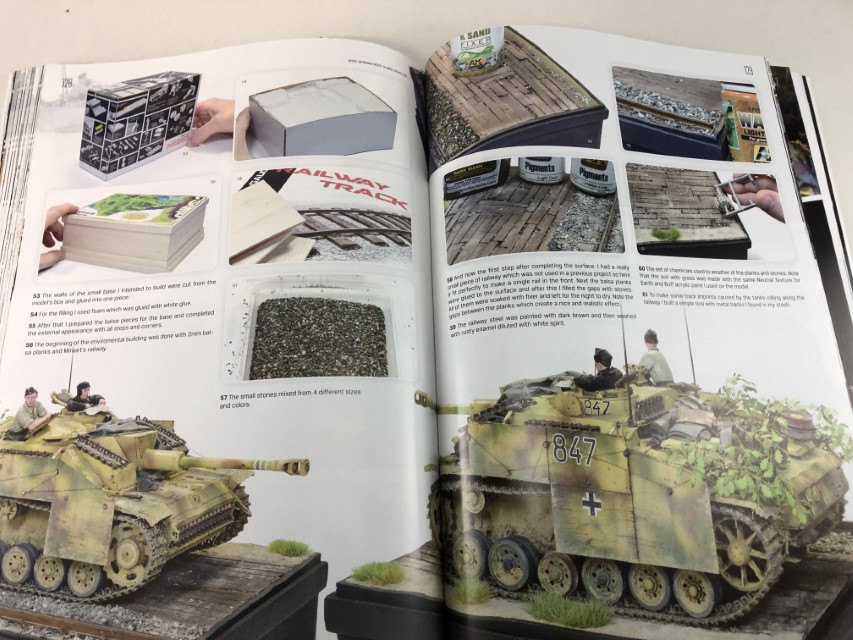
10.StuG. III Ausf. G by Łukasz Orczyc-Musiałek
The 10th article presents us a very original Stug III Ausf. G, using 1:35 Dragon’s model. The author presents us with a in depth, step by step, of the painting and weathering process of this model, concluding with the base and terrain construction, detailing, painting and finishing.

11.Sd.Kfz. 250/1 Neu by Fabrizio Mercuri
This build is quite simple and compact but presents a lot of detail and care on it. the first part of it focuses on the vehicle assembly, starting on the interior, resorting to scratch build items and aftermarket sets. The exterior is also presented with detailed photos and captions of the process.
The small base construction is also presented with a compact but very complete step by step.

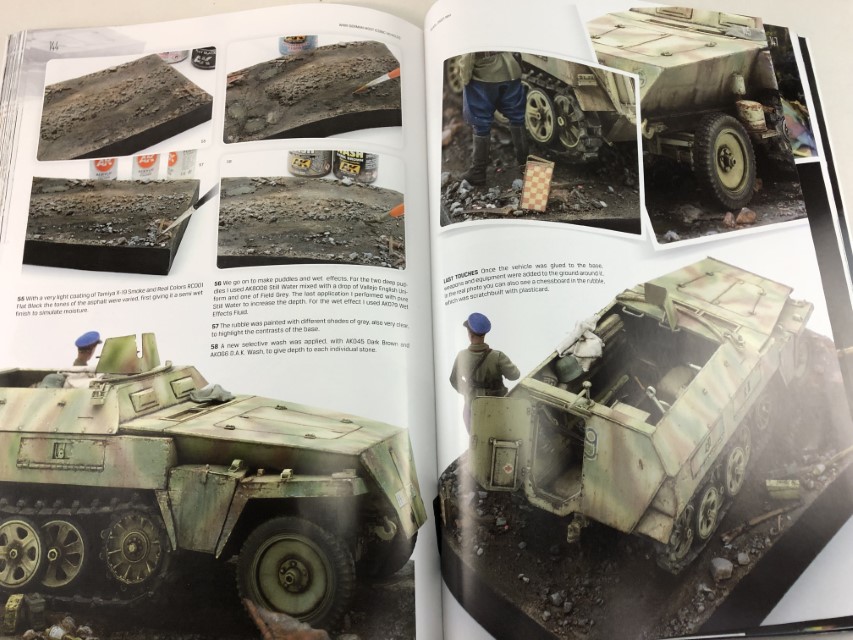
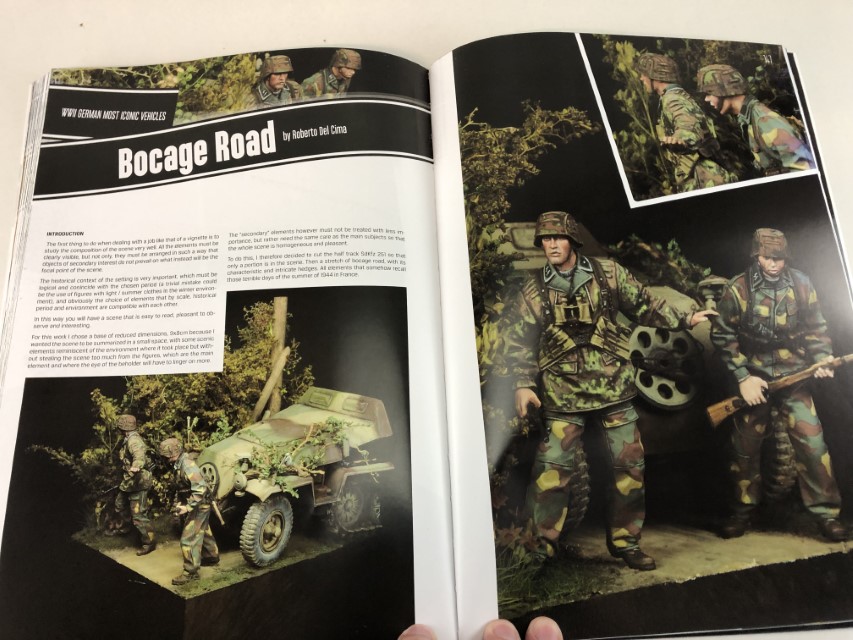
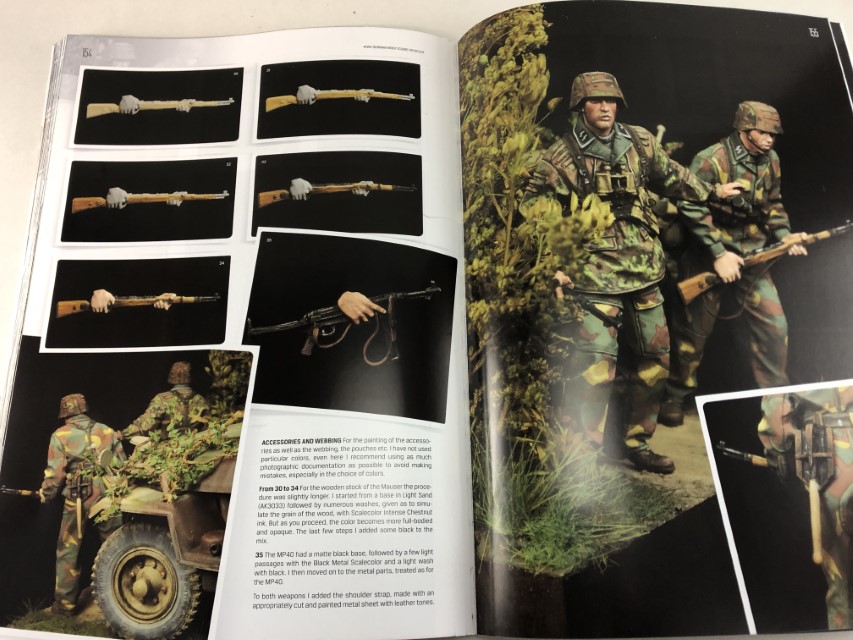
12.Bocage Road (Sd.Kfz. 251/1 Ausf. C) by Roberto Del Cima
The last article presented is a small vignette where the primary elements are two figures, complemented by the front part of a sd.kfz 251.
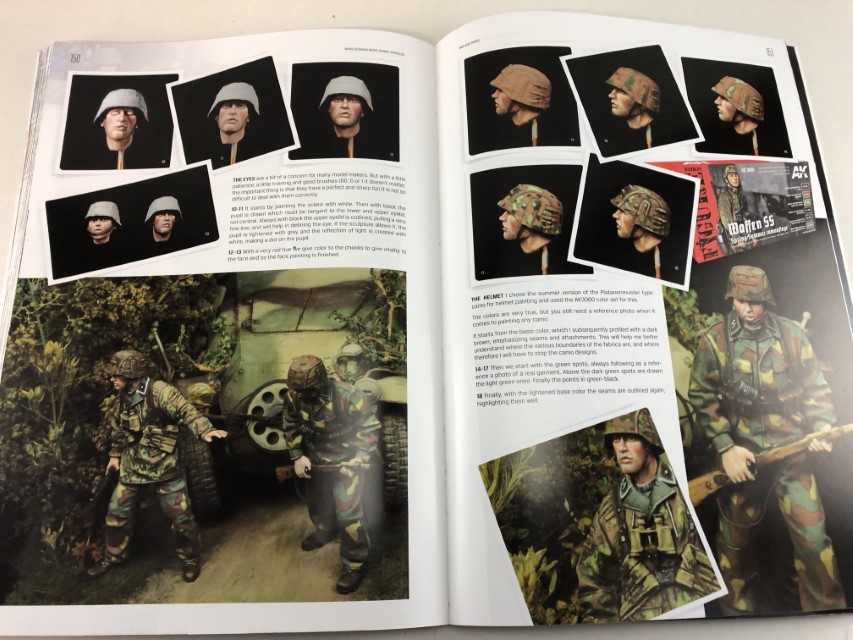
As so, the focus of the build are the figures, and a very comprehensive step by step of pictures and captions, are provided, describing with detail all steps of it. also provided are the colour sets used for painting.
The complex camouflage presented on the uniforms catch my attention, as these are very colourful and complex to paint. Nevertheless, the description is clear, and the author “disassemble”, making it quite simple to understand. I do think that in the end, the modeller’s hand and sight make all the difference!
The secondary element, the Sd.kfz 251 is also described as a step-by-step photo guide, with captions, not as depth as the figures, but also clear. The last element to be presented is the base, with also deserving a step-by-step process.
ConclusionThis is a long review, but the book deserves it and I really hope that the pictures will help to understand why. Nowadays we are blessed with a boost of information from several sources but sometimes, we are at our workbench and there is nothing better that read a book, consult it, inspiring us to build, create and evolve. This book is a must, as it covers several aspects of the theme, aggregates several technics and present it in a very attractive reading and visual guide.
Highly recommend!
My thanks to Fernando Vallejo and Ak-interactive for the review sample.

-
2
-
1
-
-
Plusmodel Aero Line Series 1:72 C-47 racks for drop container
Introduction
This small review presents us with a very original enhancement to any 1:72 scale C-47.
A set with six parapacks attachable to the C-47 under fuselage.
When I received this set for review, I was not aware of this accessory existed for C-47, and after a bit of investigation, this is what I found:
Each airplane could mount up to six of this container in each flight, which contained useful supplies for military or partisan ground forces, under their wings.
The packs were wired to a control panel located by the aircraft's cargo door.
The jumpmaster used this control panel to select which parapack to drop.
He could drop them in any sequence or drop them all at once with a salvo switch.
Releasing a Para pack from the bottom of the plane also deployed the pack's parachute.
A picture of this can be consulted in this link .
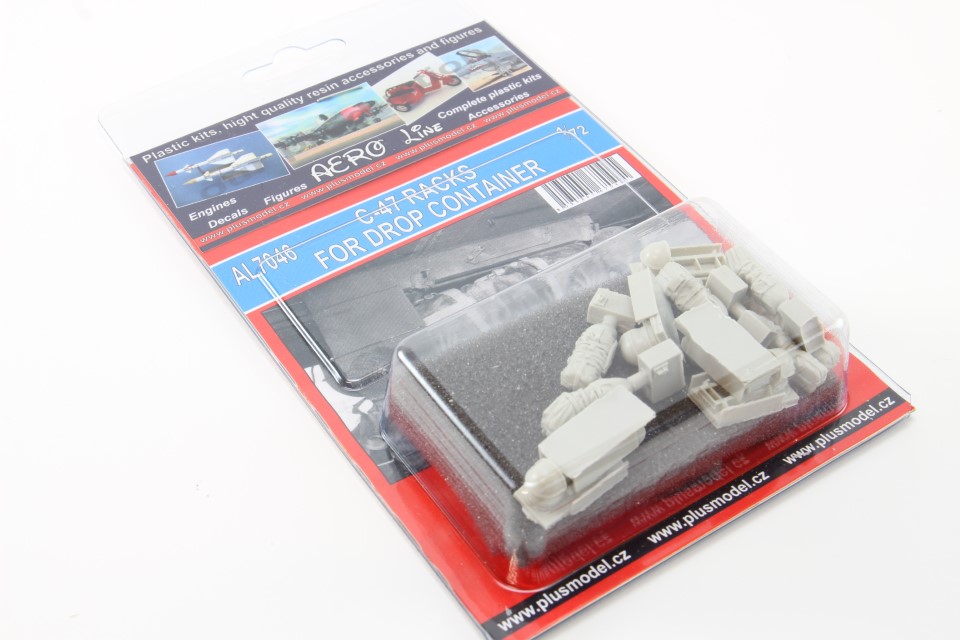
What’s on the
boxbagIn the clear bag, the content is visible for inspection, 12 light grey resin, 6 containers and 6 parapacks.

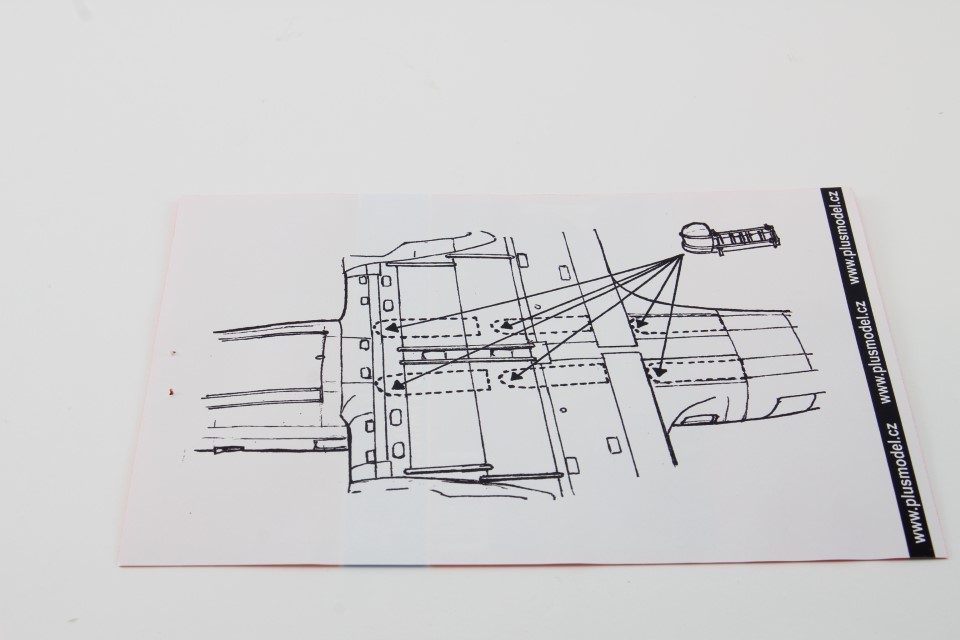
On the back of the presentation paper, there is a diagram explaining the location of each parapack at the belly of the C-47.
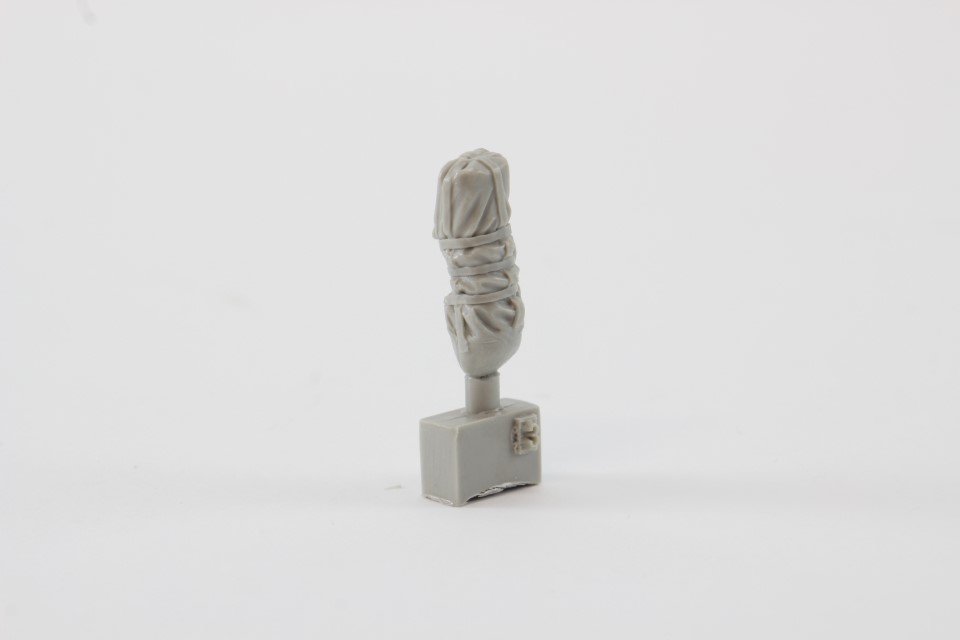
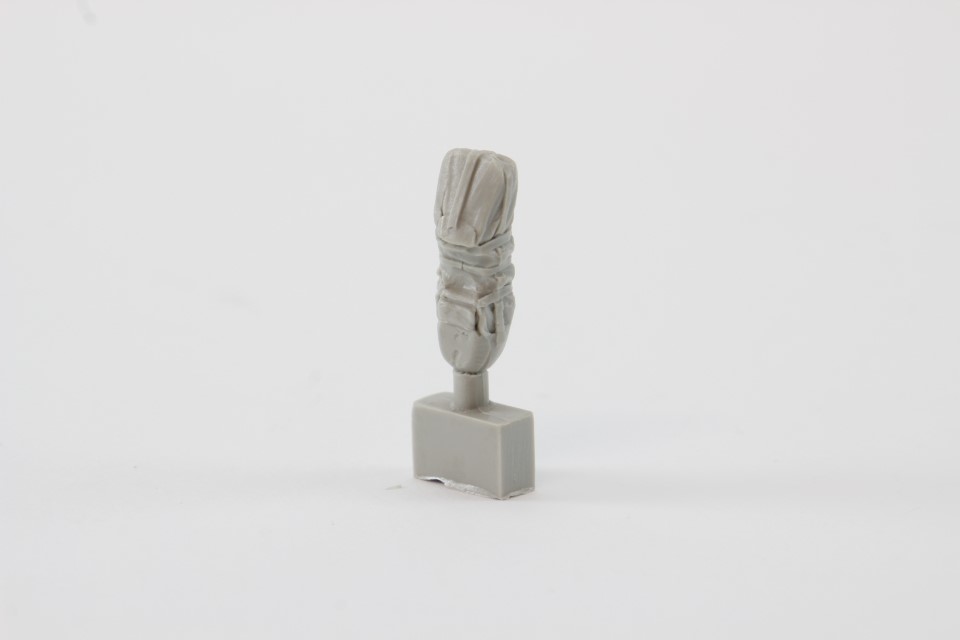
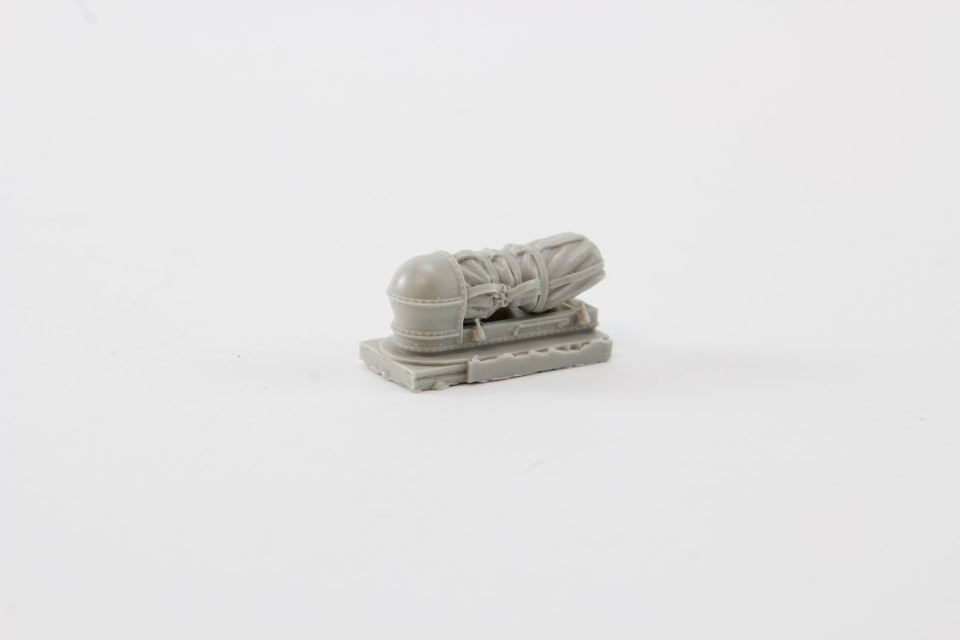
Each set is composed by a container and a parapack.
The container presents a nice and exquisite detail, starting from the internal framing and in the exterior, with the presence of rivets and the attach points for the parapack.
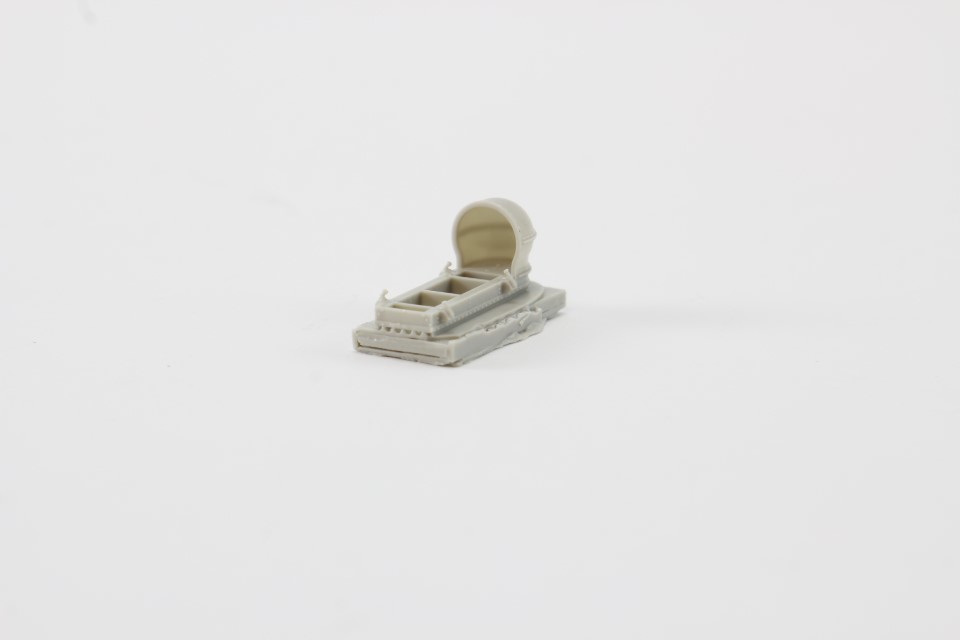
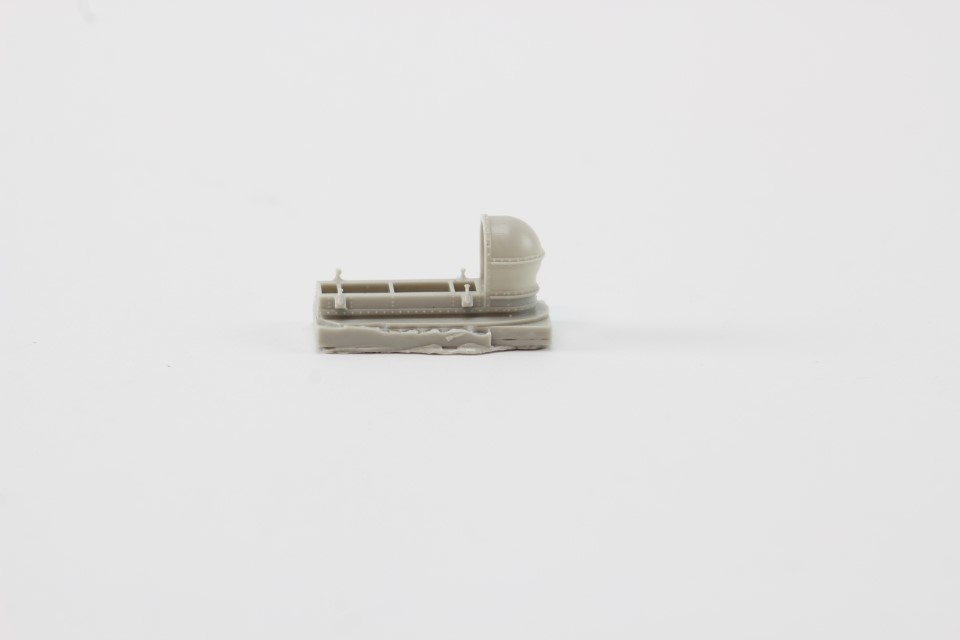
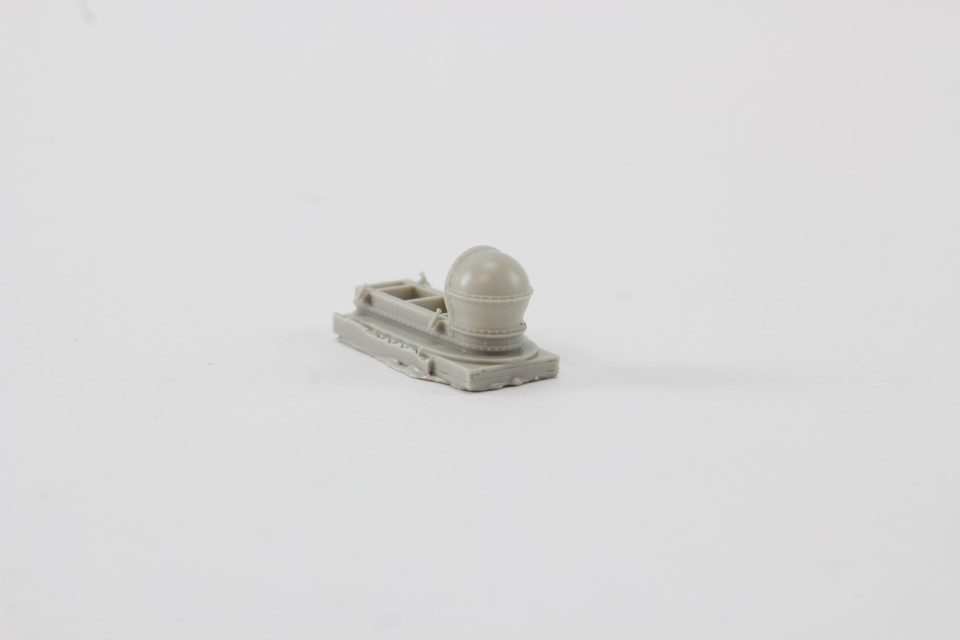
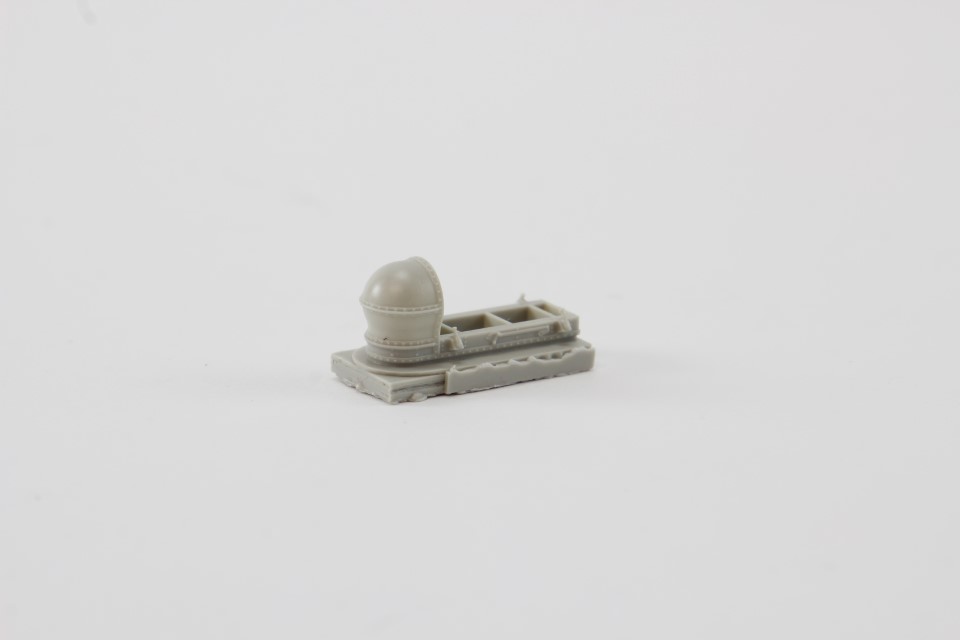
As the parapack concerns, the detail is adequate, with natural folds for the exterior of the pack and detail for the straps is correct for the scale.
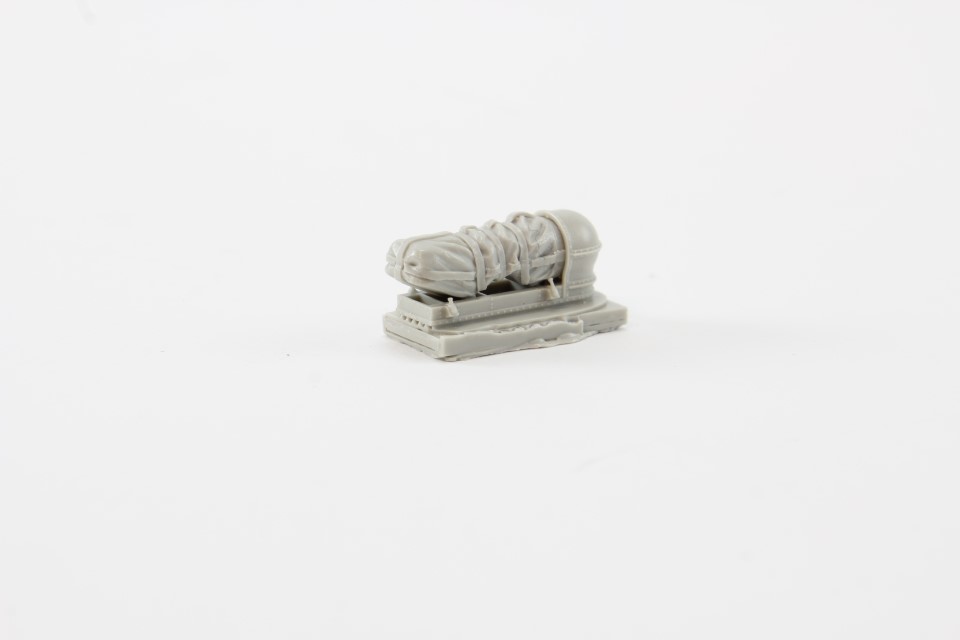
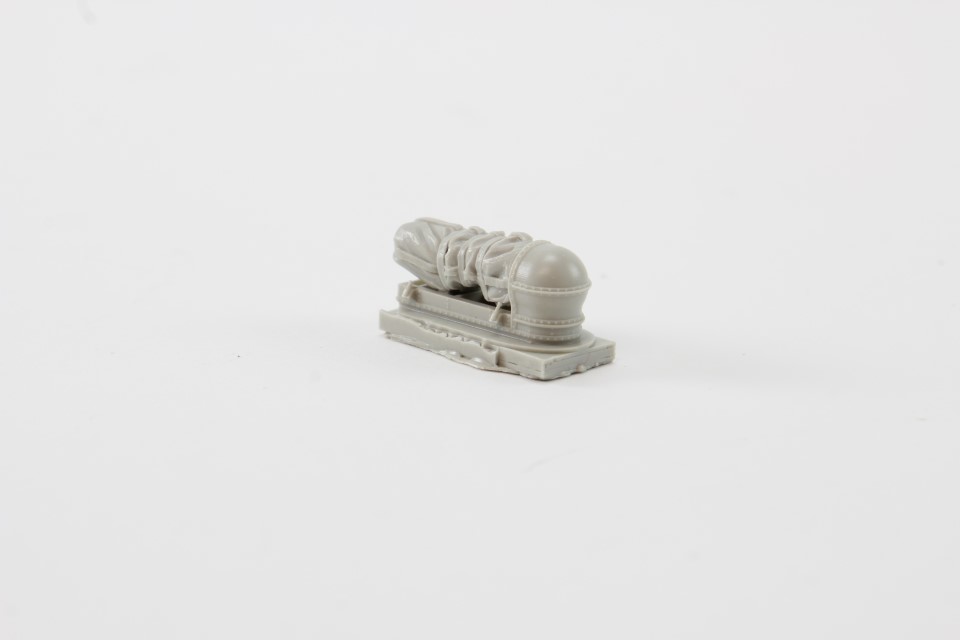
The assembled set
Conclusion
This set will update and replicate a unique feature for any 1:72 scale C-47.
If you want to display your Dakota in a rather original feature, than this set is a must.
Our thanks to Plusmodel for the review samples and all the support given. To purchase this directly, click THIS link

-
1
-
-
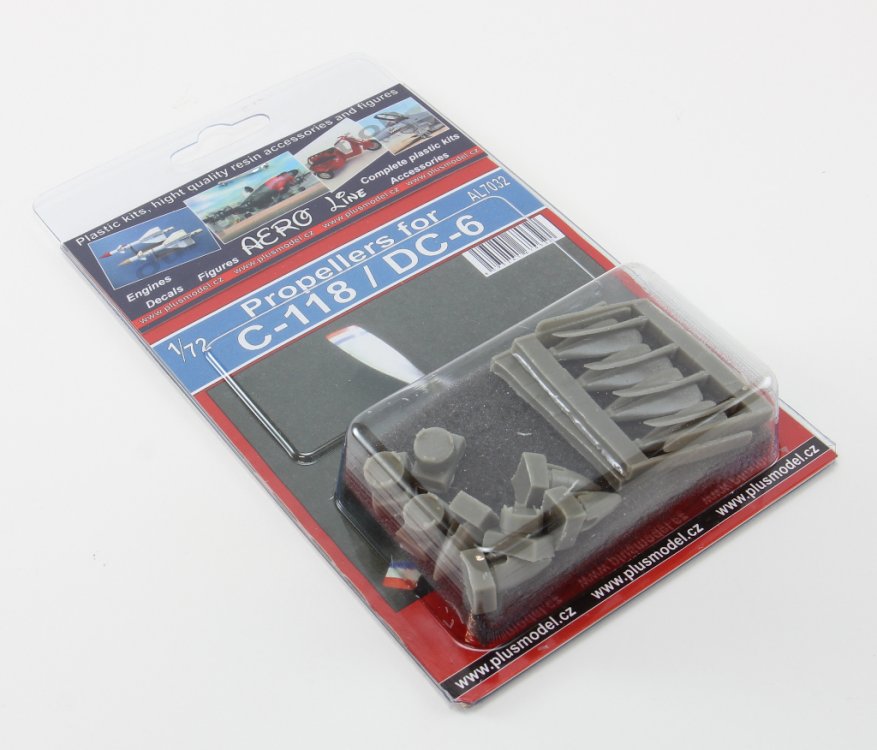
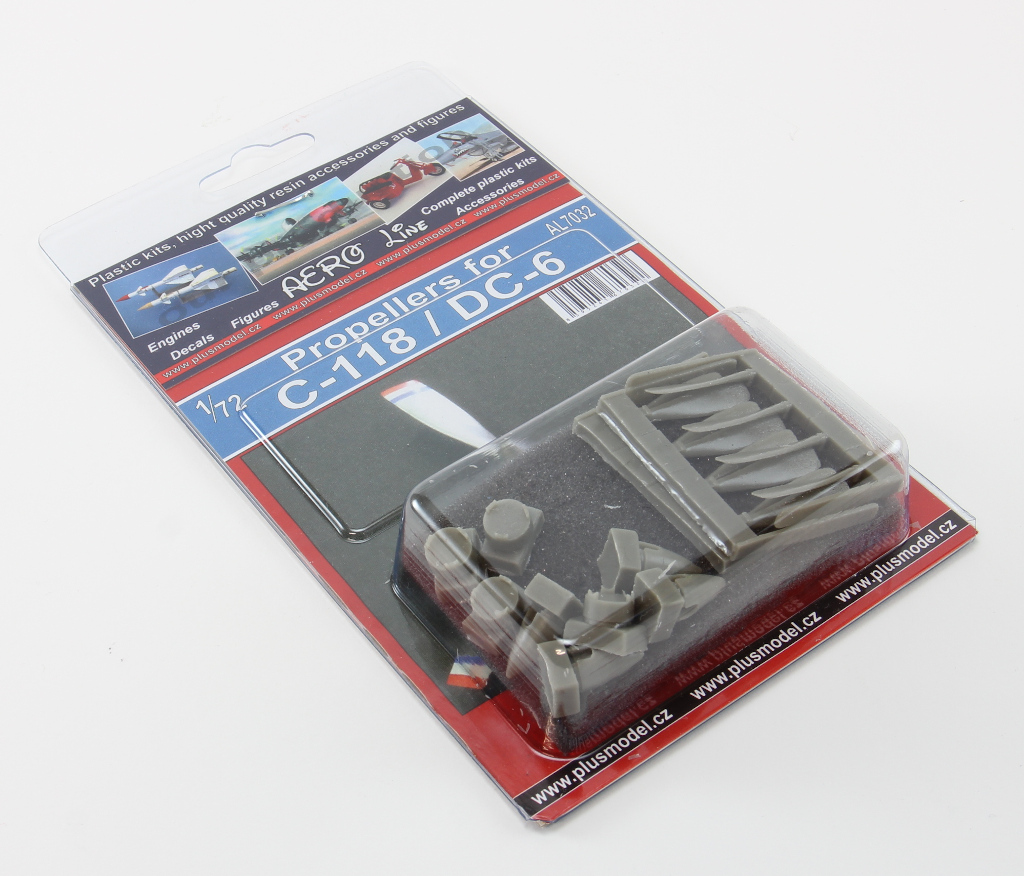
Plusmodel 1:72 Propeller for C-118 / DC-6
Introduction
This recent release from Plusmodel was designed to replace / improve the propellers for 1:72 scale C-118 / DC-6B. The only model available is Heller’s.
Being the only game in town for this elegant airplane, this set is a must improvement comparing the model’s original offering.
What’s on the box
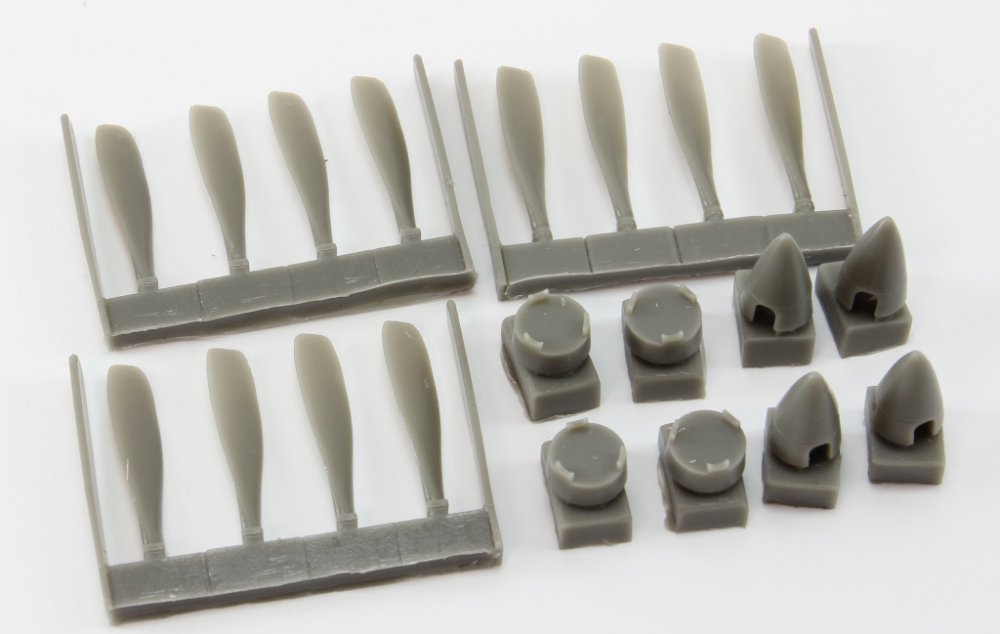
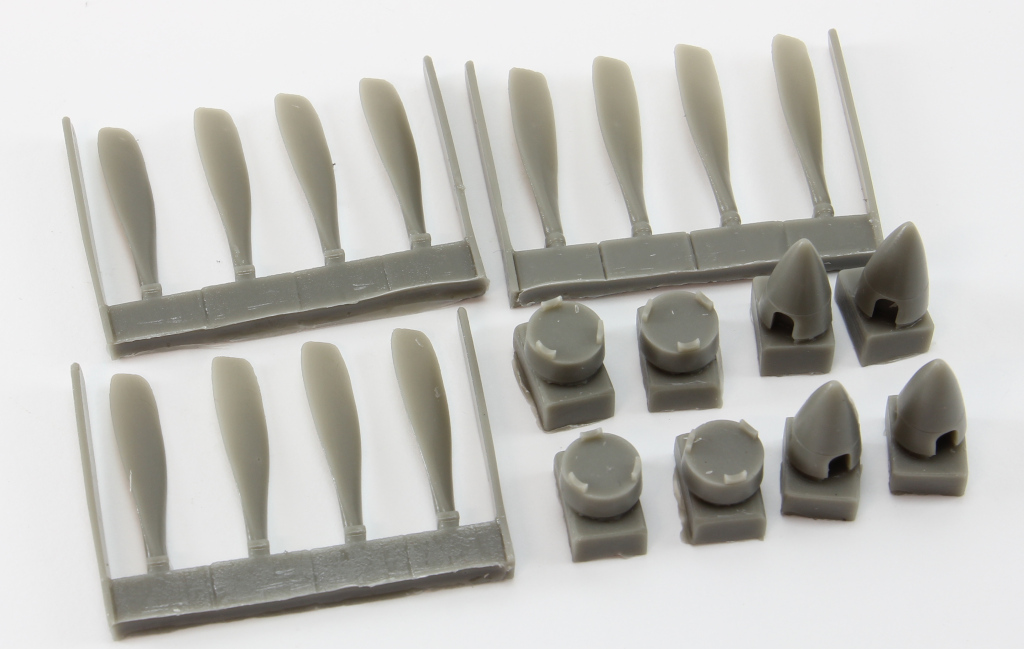
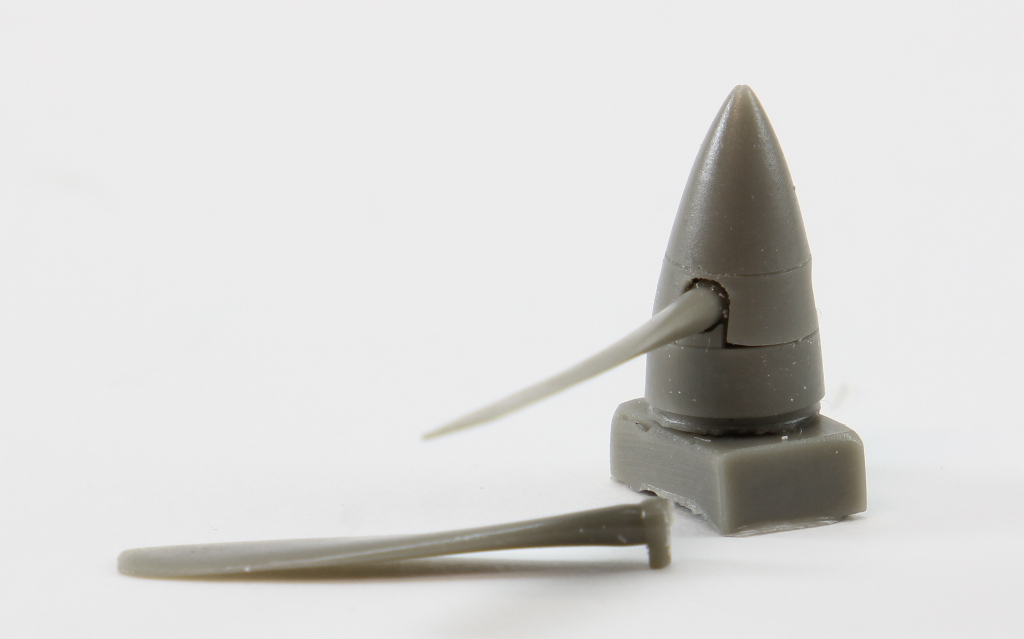
Inside the clear blister there is 20 resin objects composing:
3 sets with four propellers
4 propeller hubs
4 Spinners
This set, allows to represent the Hamilton Standard 43E60 usually equipped in DC-6A and B early versions.Nevertheless, please remember that this airplane still flies nowadays and check your reference about the propeller used.
No propeller stencils are provided.
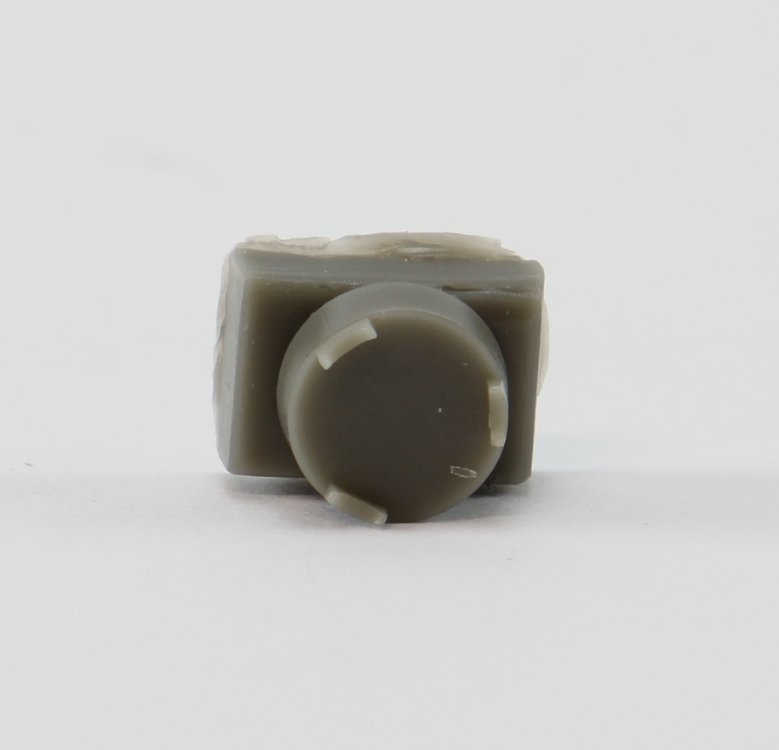
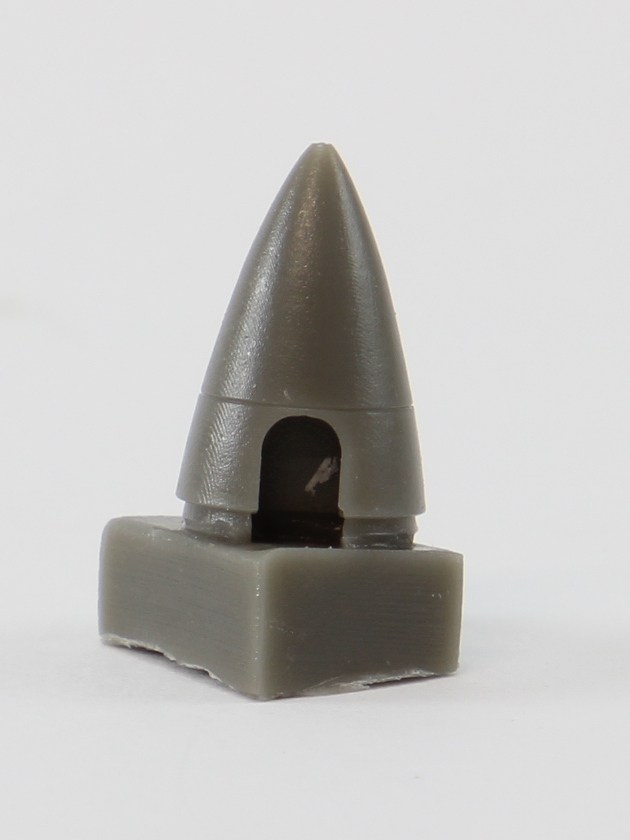
Propeller hubs
The propeller hubs are nicely detailed.
Even though no jig is provided to properly align the propellers to the centre hub, plusmodel came up with a clever system:
The back end of the propeller has a rectangular end, that allow it to proper fit into the propeller Hub. All that it needs is to glue it with a small amount of super glue, and the fit is perfect.
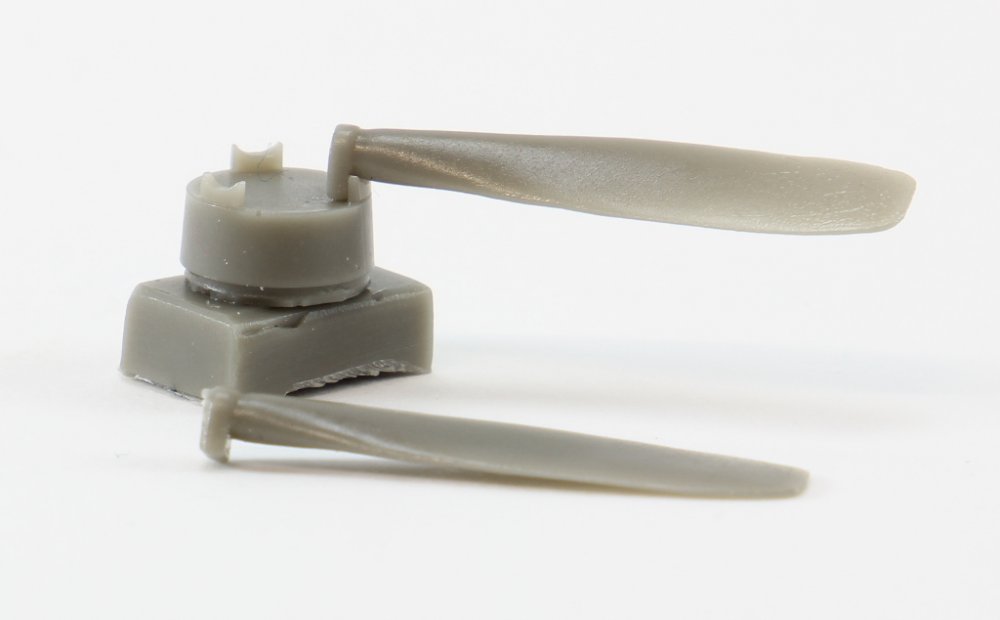

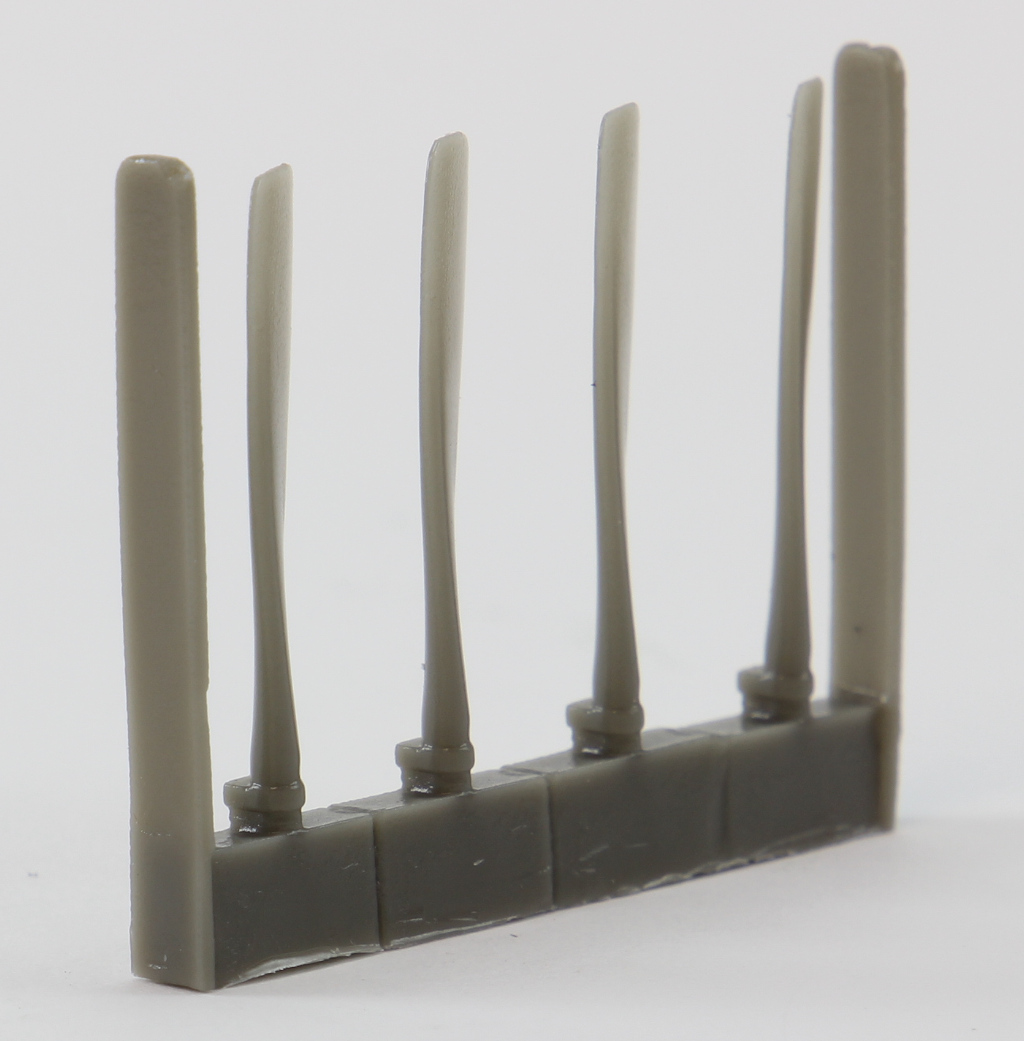
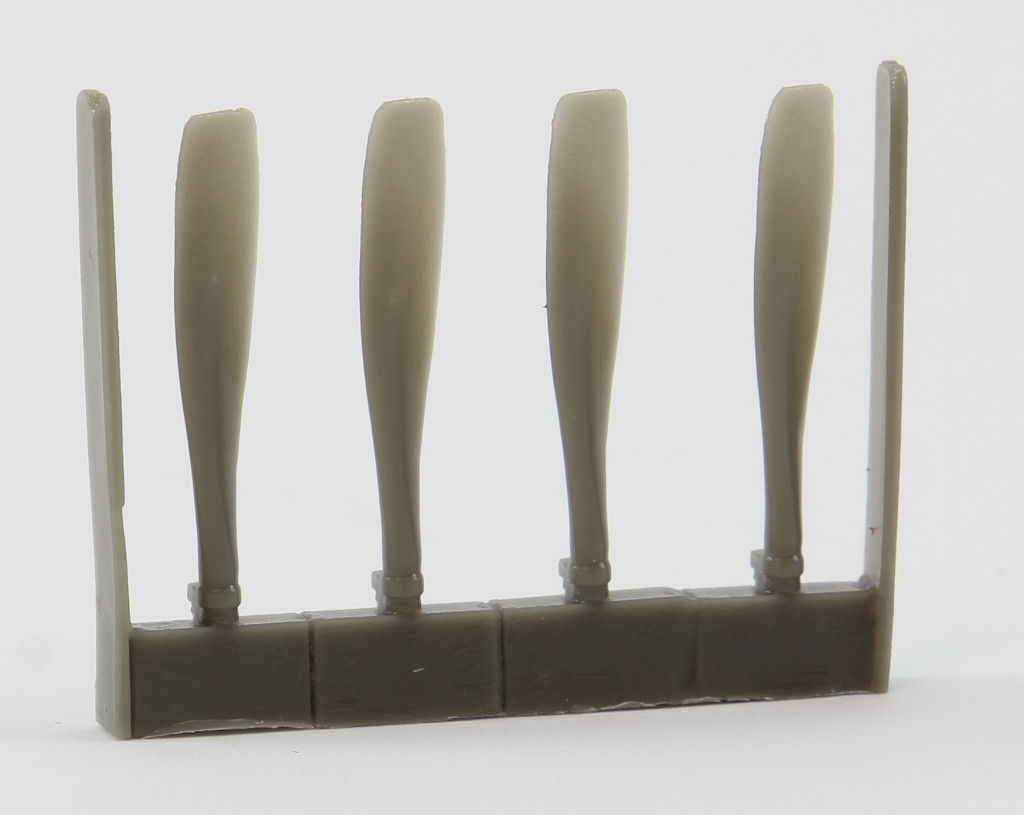
Propeller
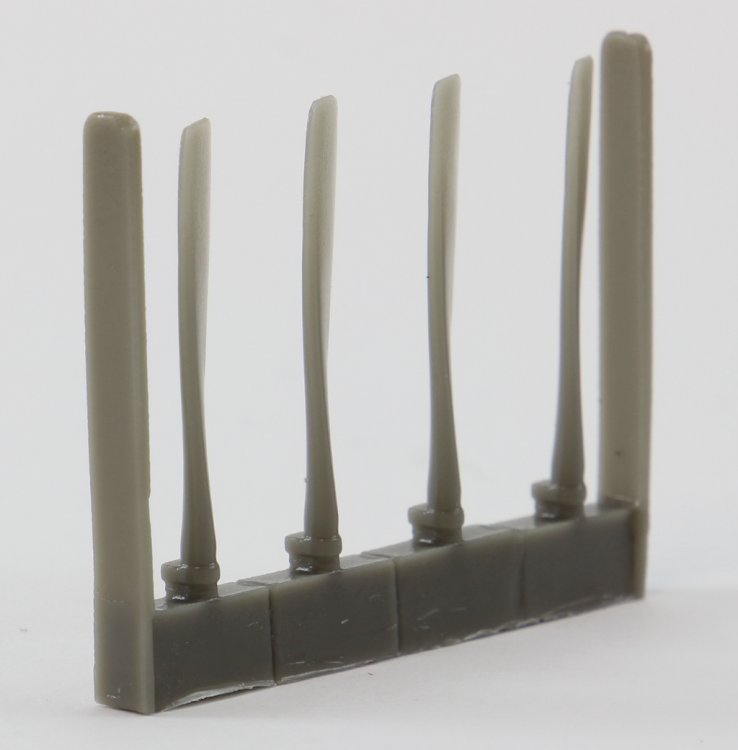

The propellers are nice detailed and the removal from the casting mould is trouble free, just take your time, a fine saw and a mask (to protect from resin powder) should do the job. As mentioned early, the propeller base has a rectangle shape for proper fit on the propeller hub.
Spinner

The spinners have a small mould base, that can easily remove with a fine saw.
The fit is perfect and guarantee a proper shape and pristine finish.
ConclusionThis set is a strait forward replacement and improve over the model’s parts.
Highly recommended
Our thanks to Plusmodel for the review samples and all the support given.
To purchase this directly, click THIS
Ricardo Veríssimo

-
2
-
-
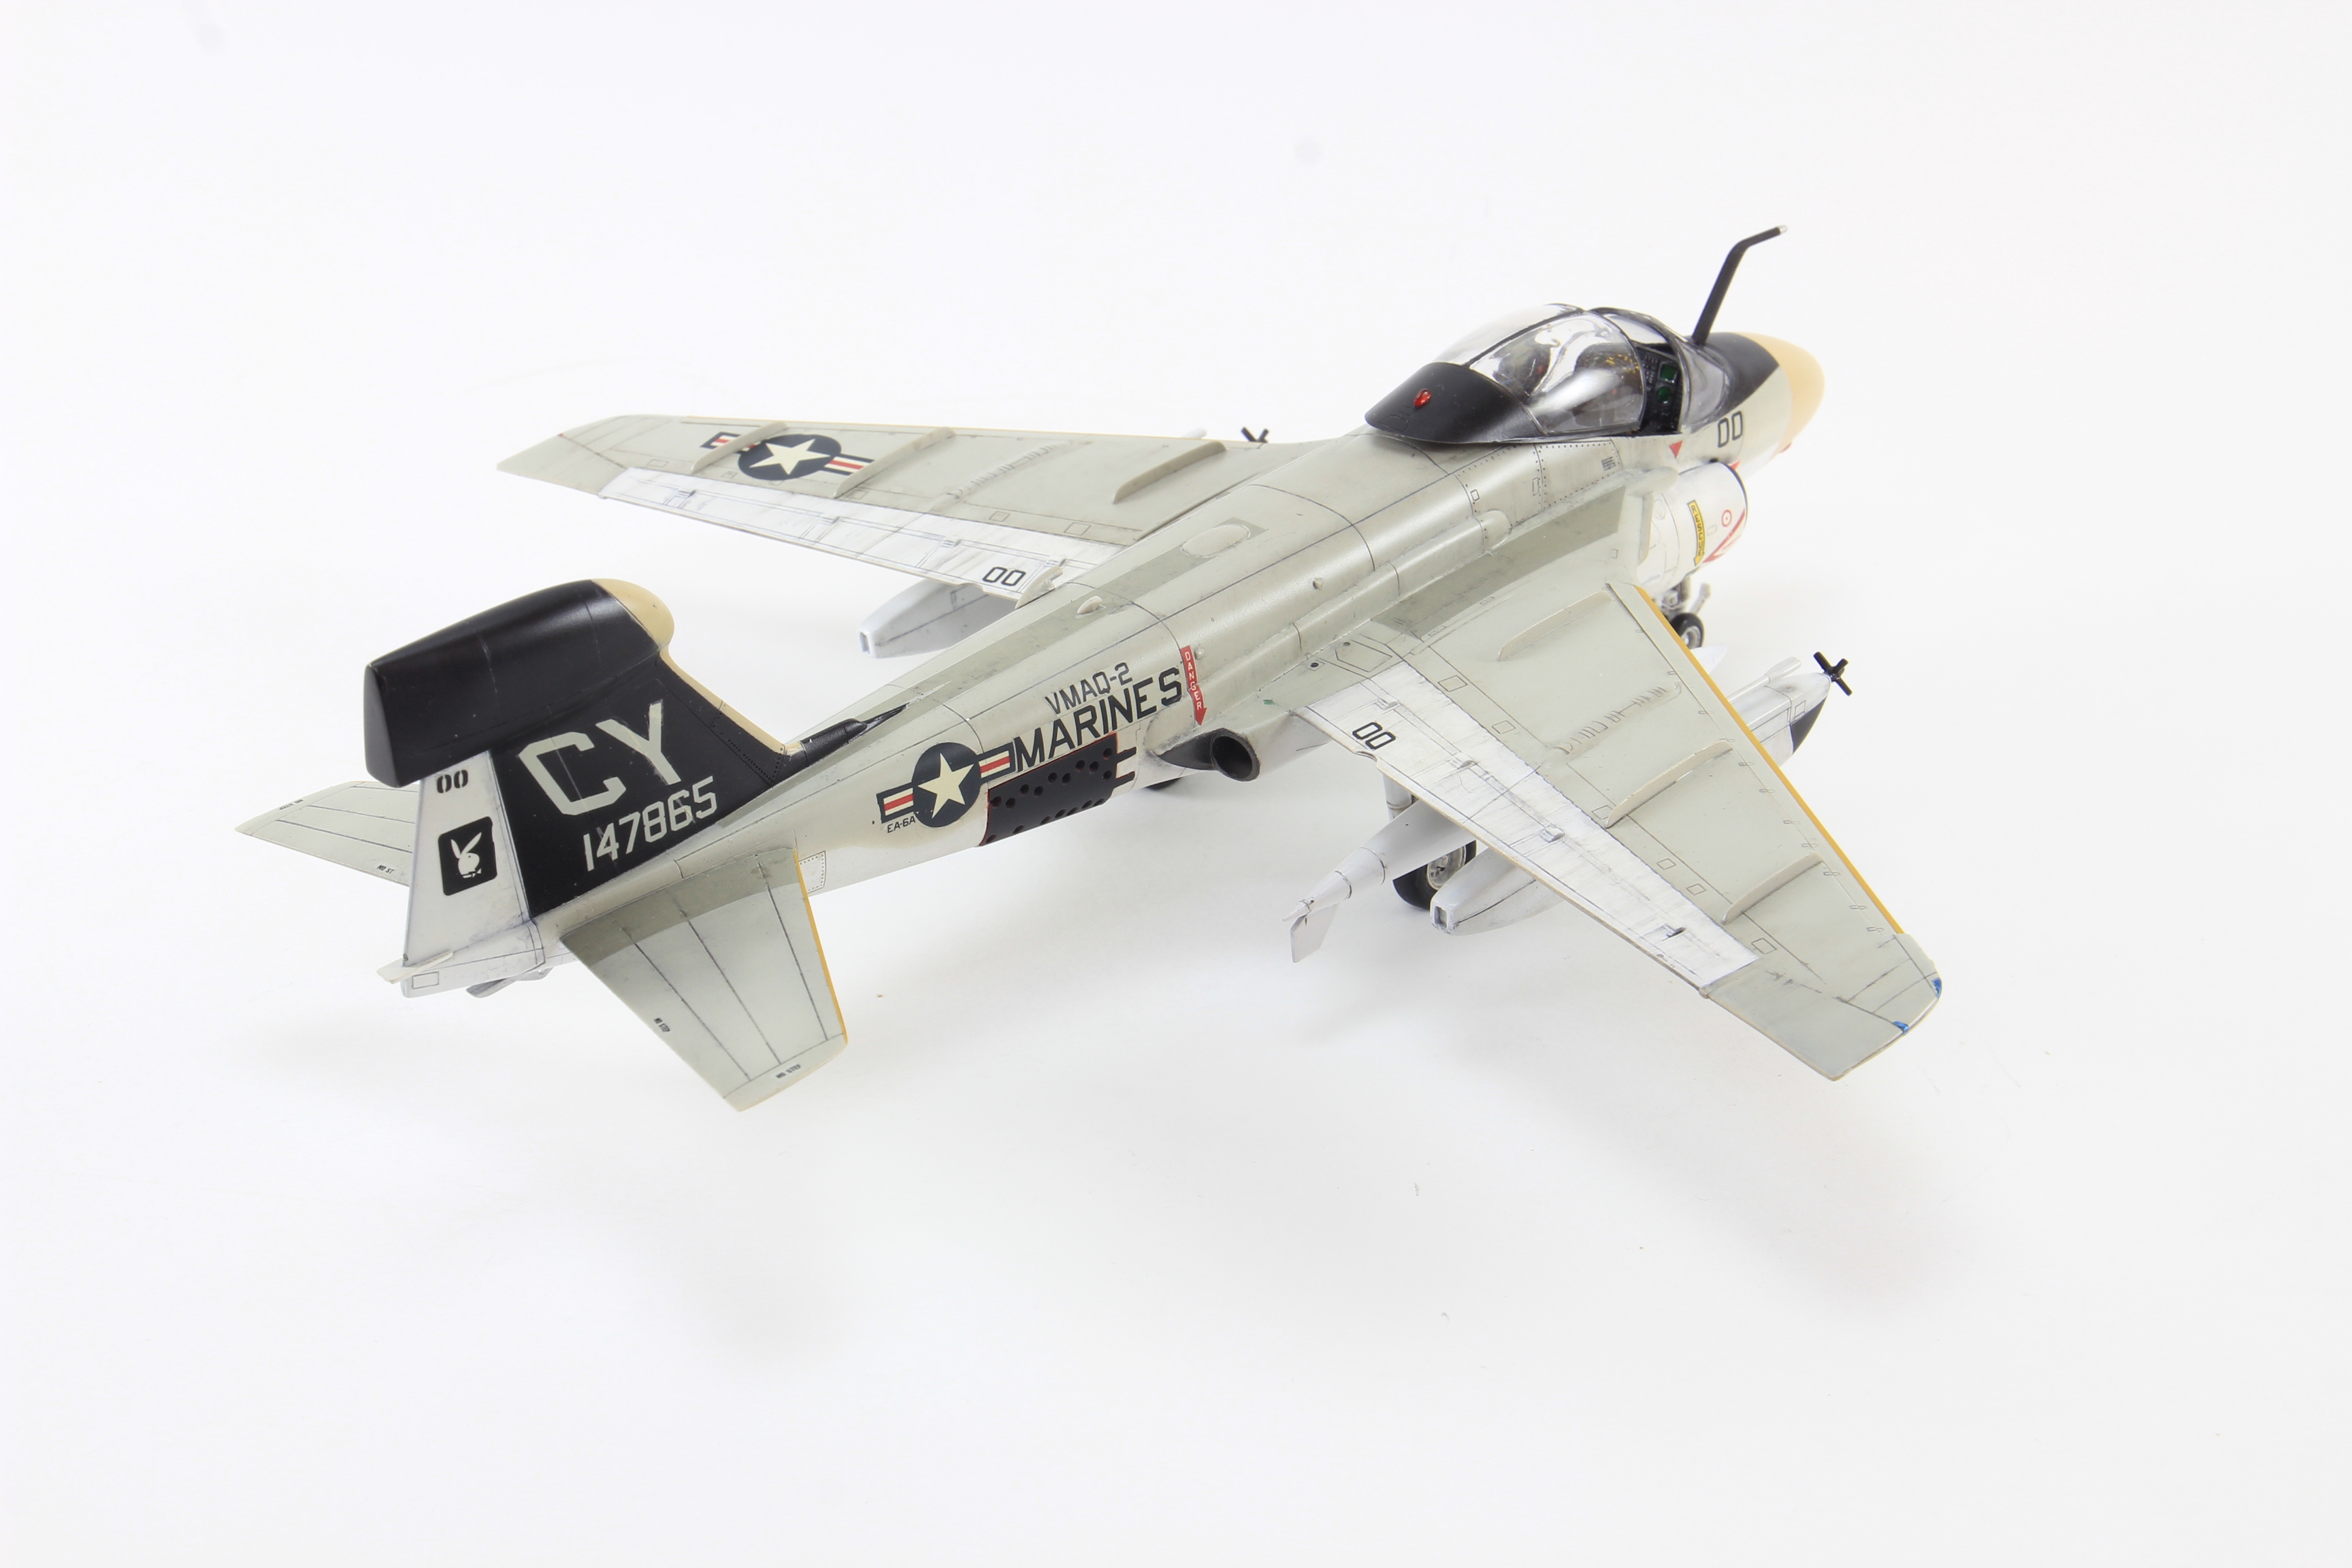
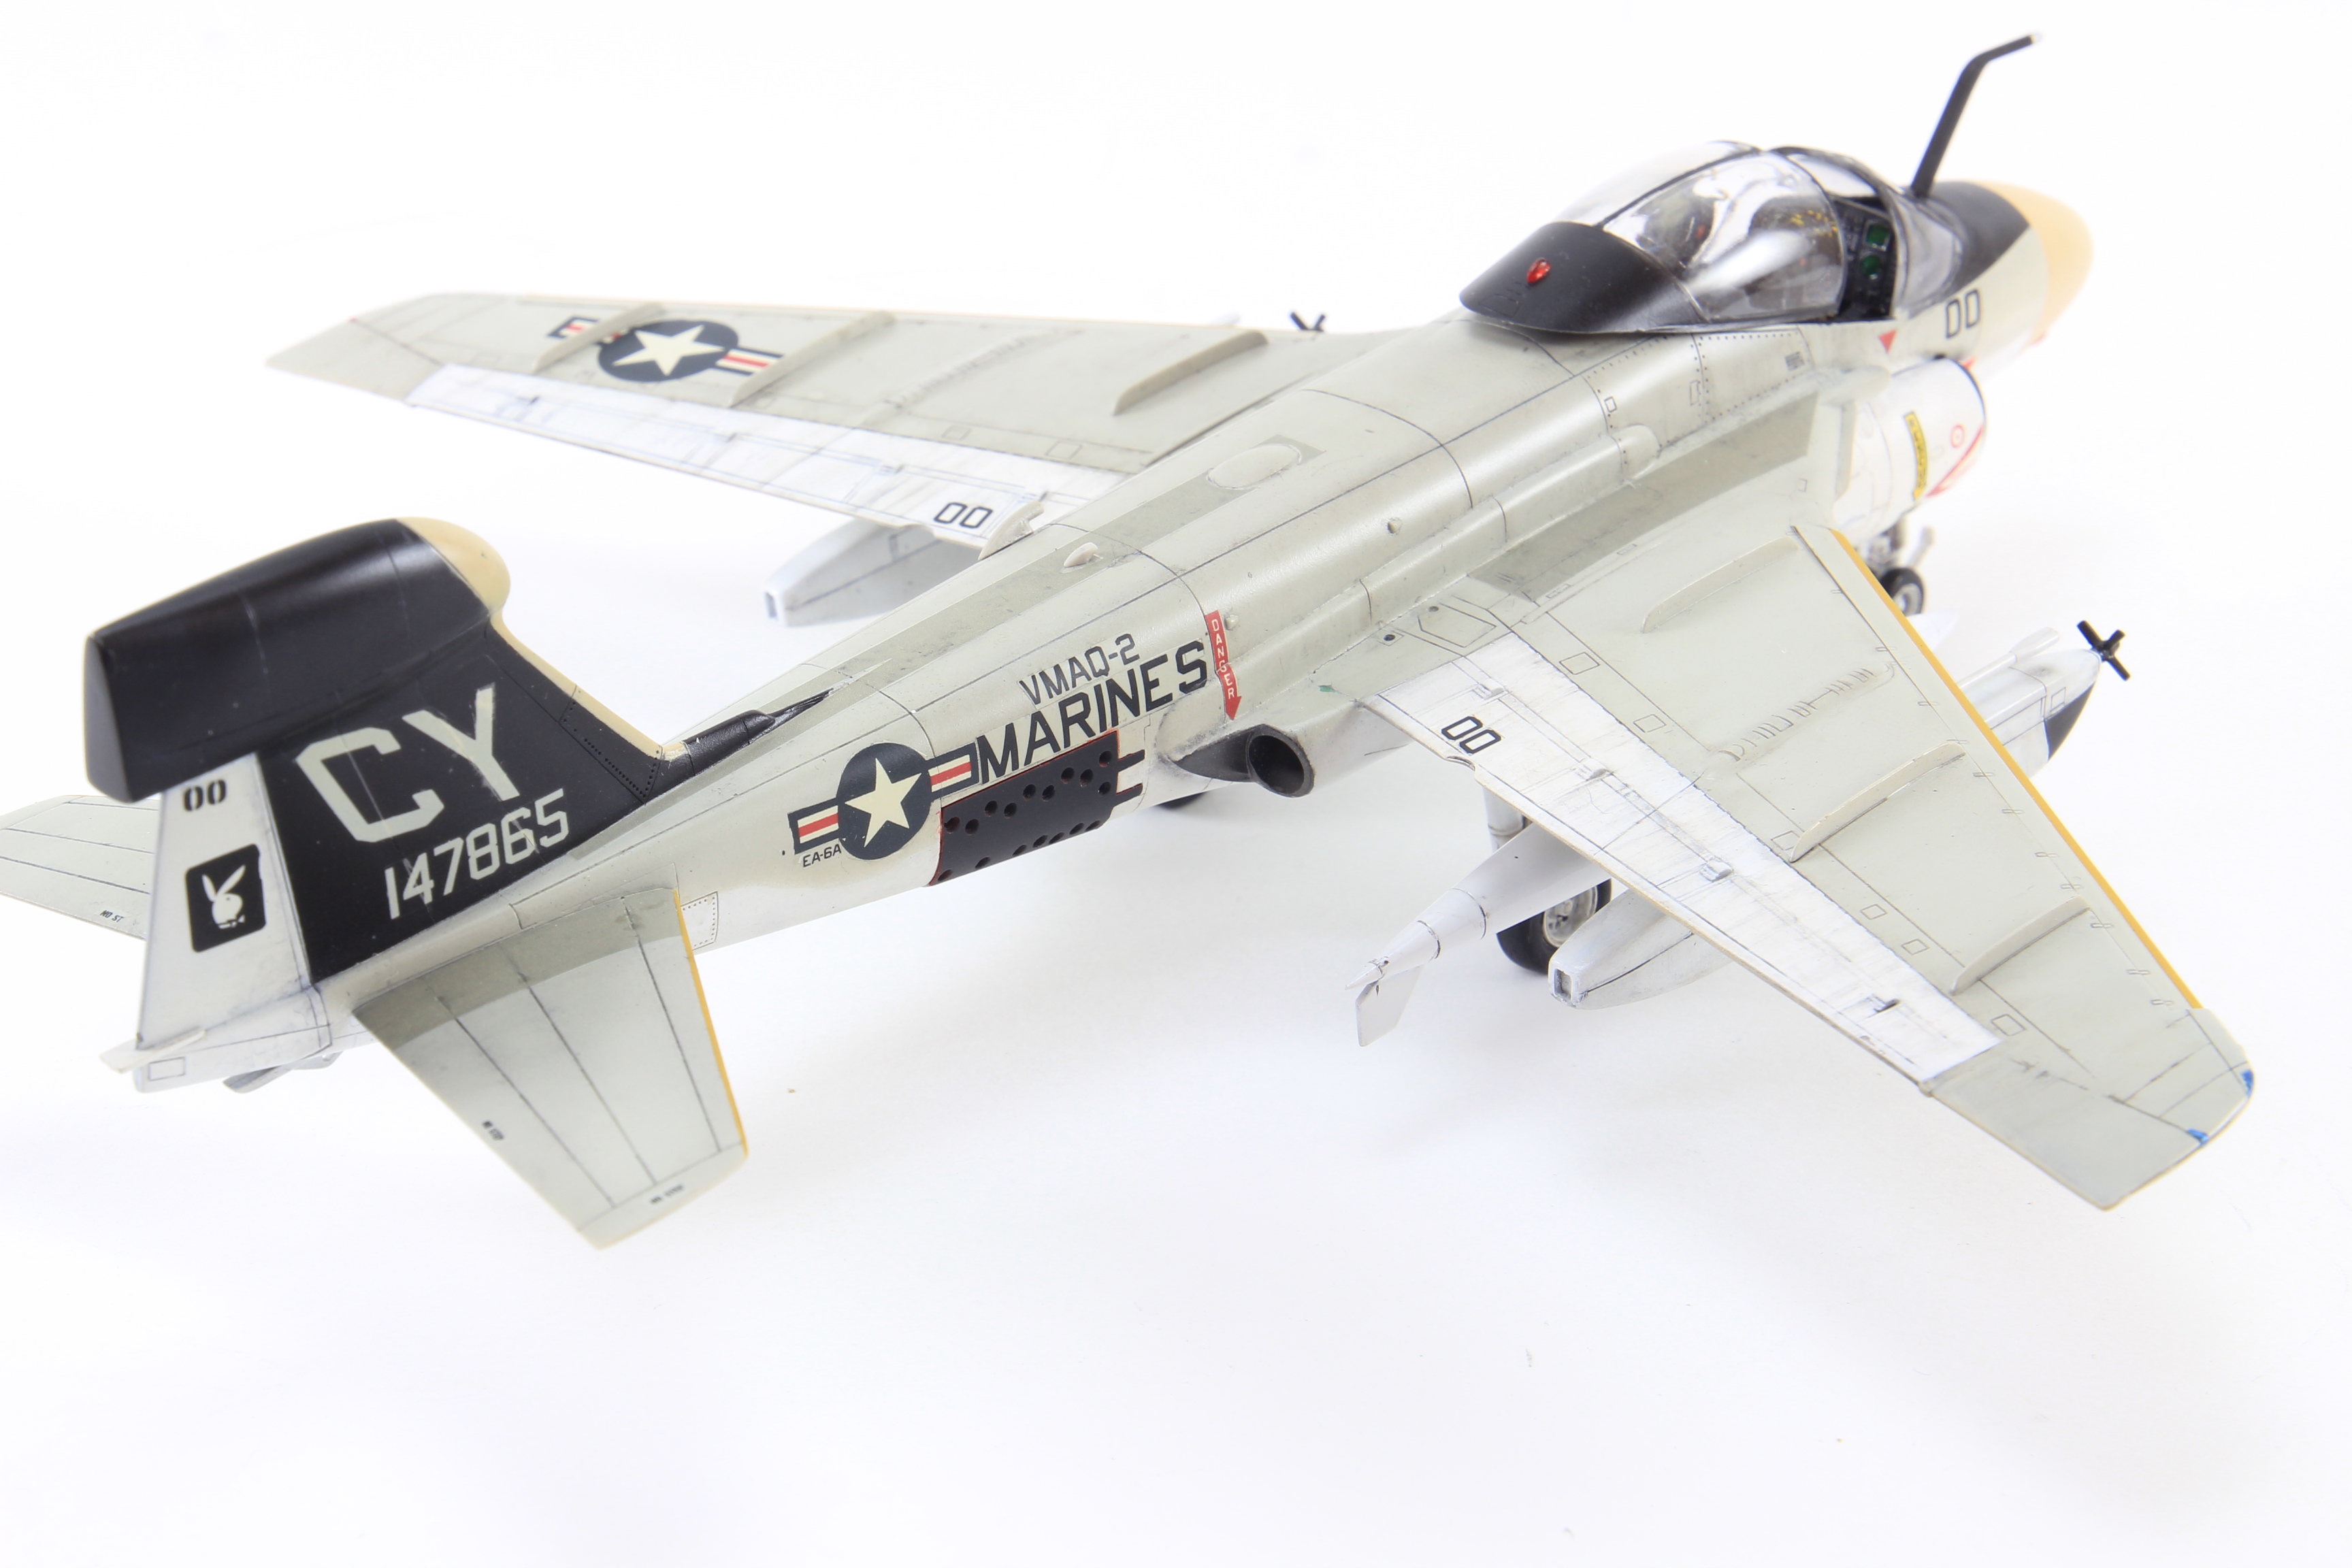
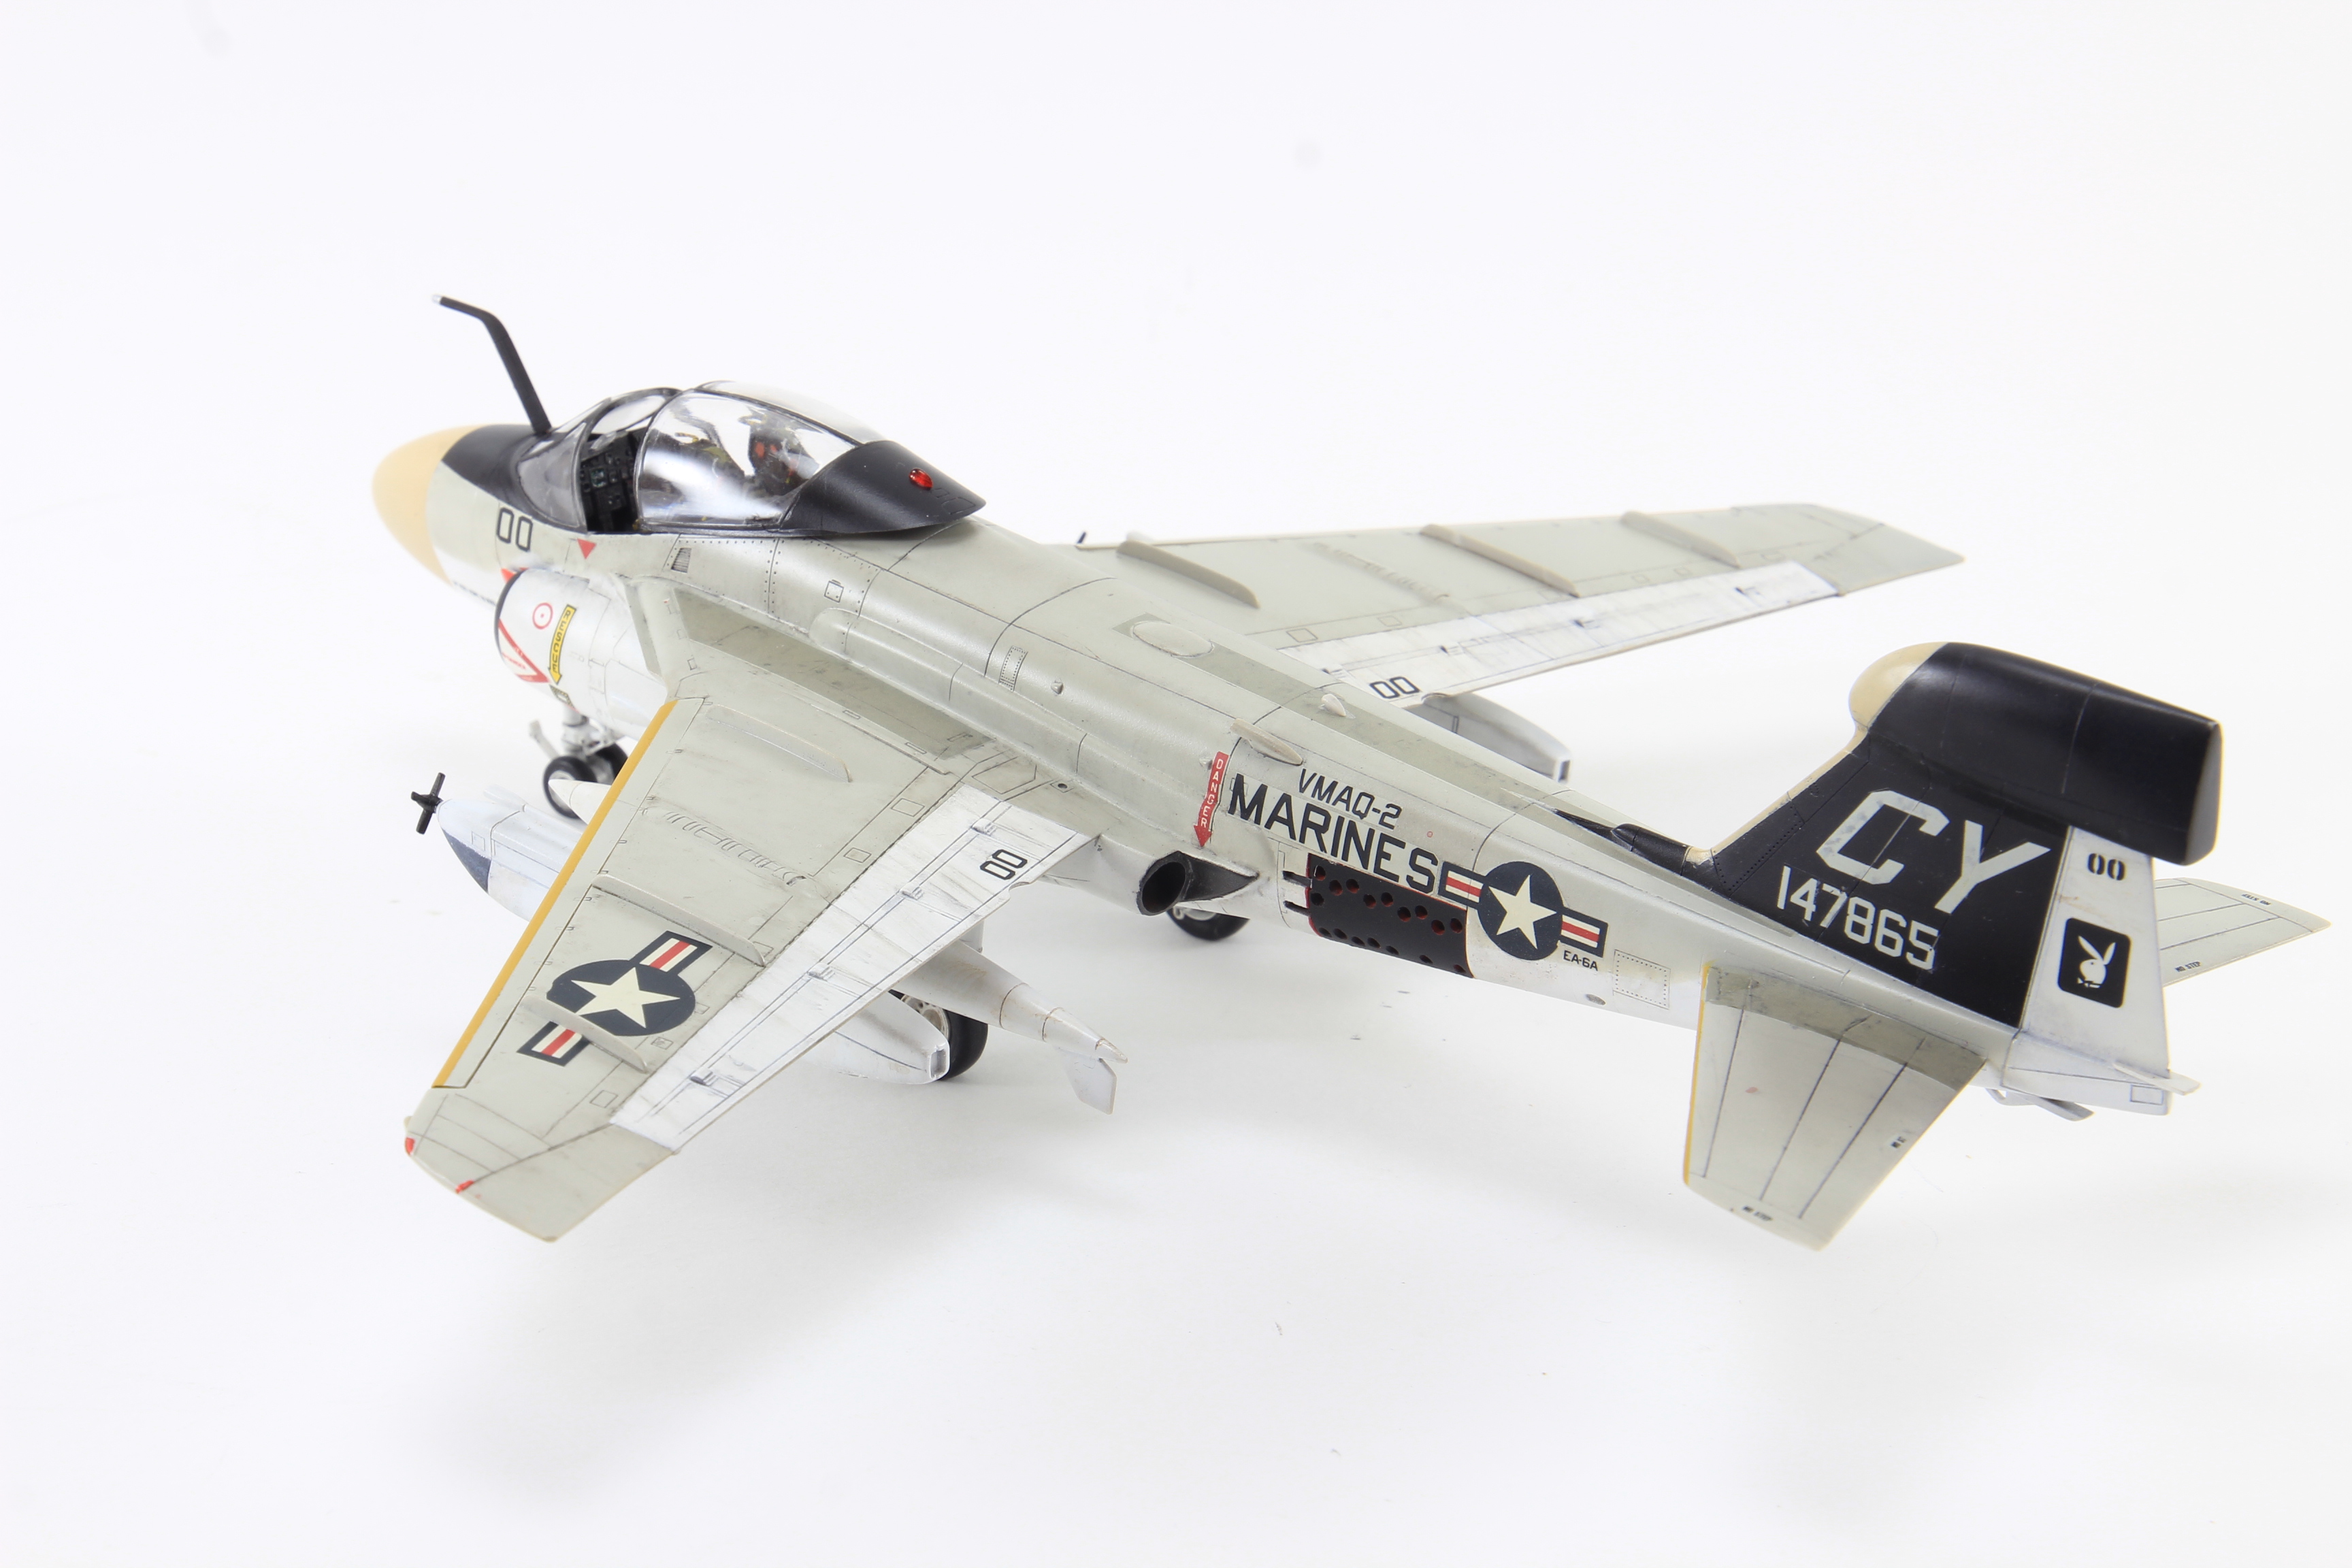
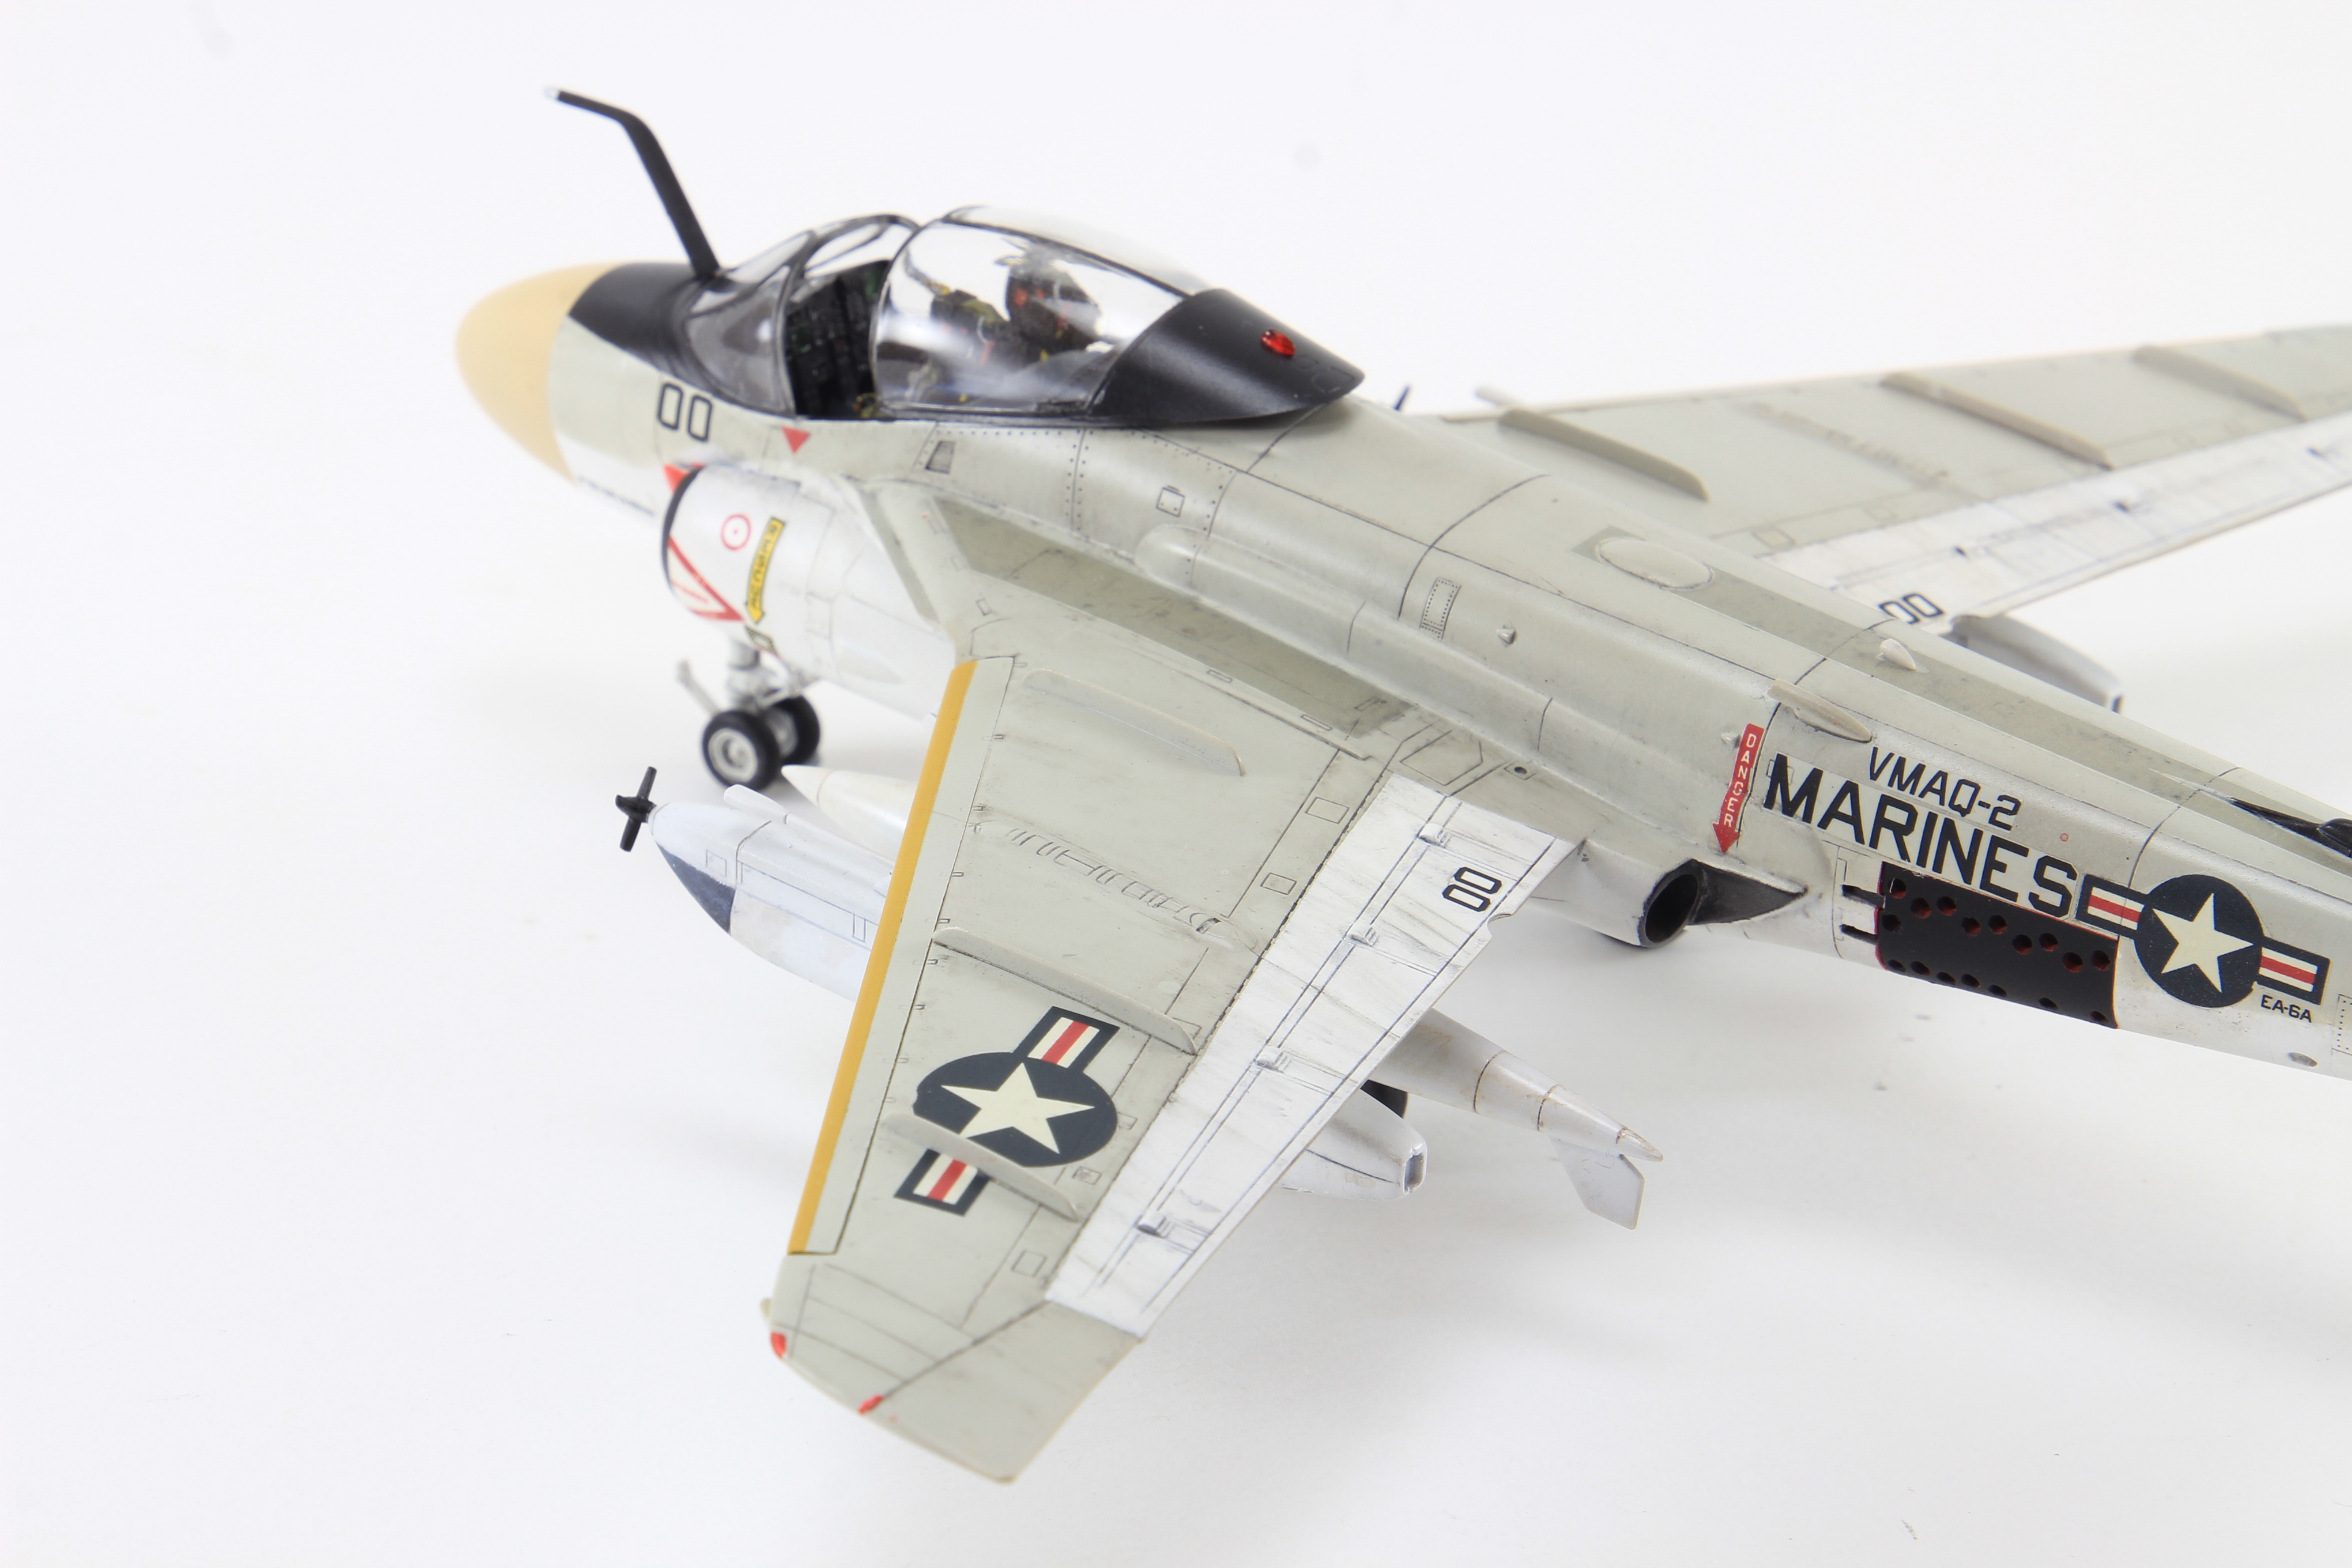
Hello,
I would like to show a completed model , finished last year.
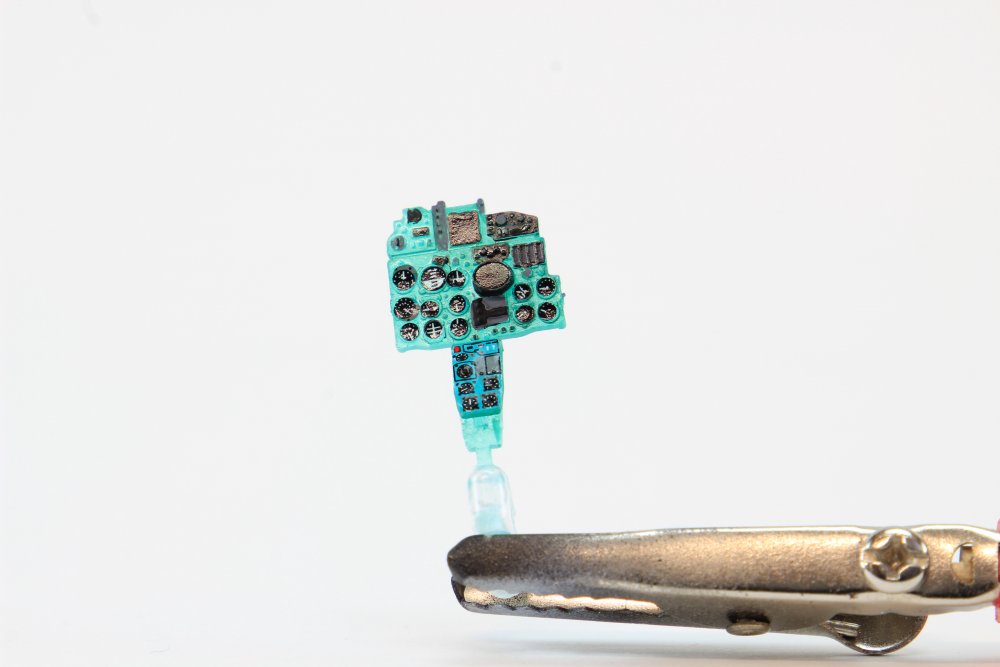
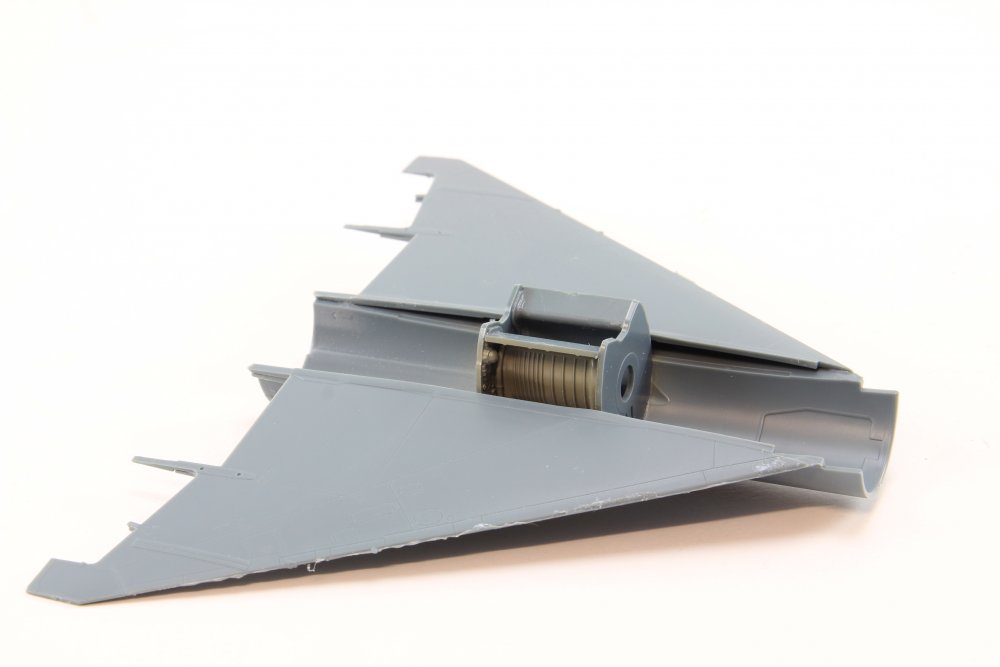
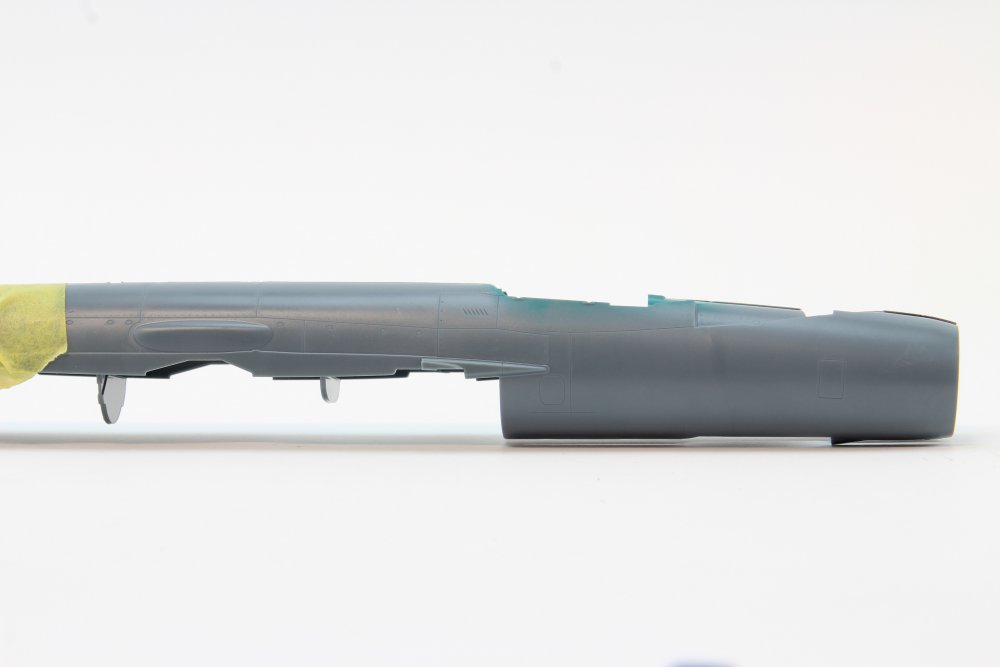
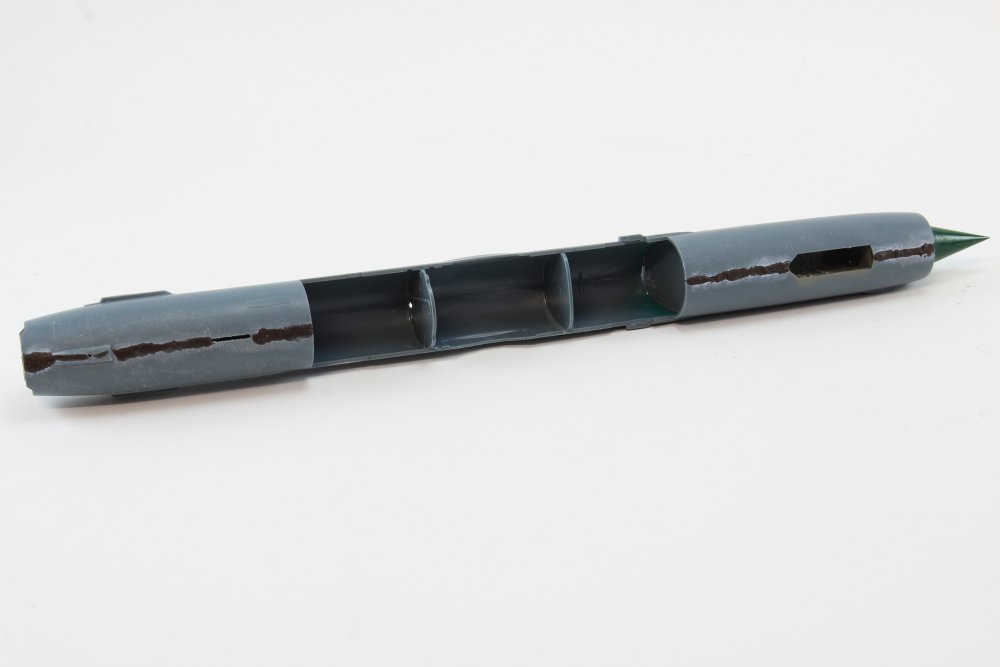
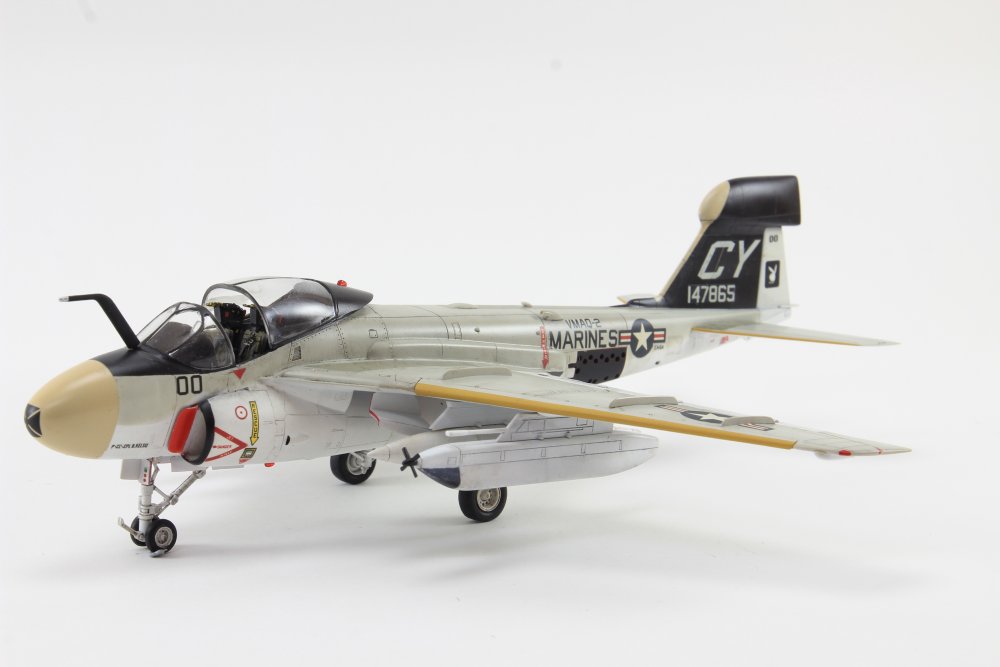
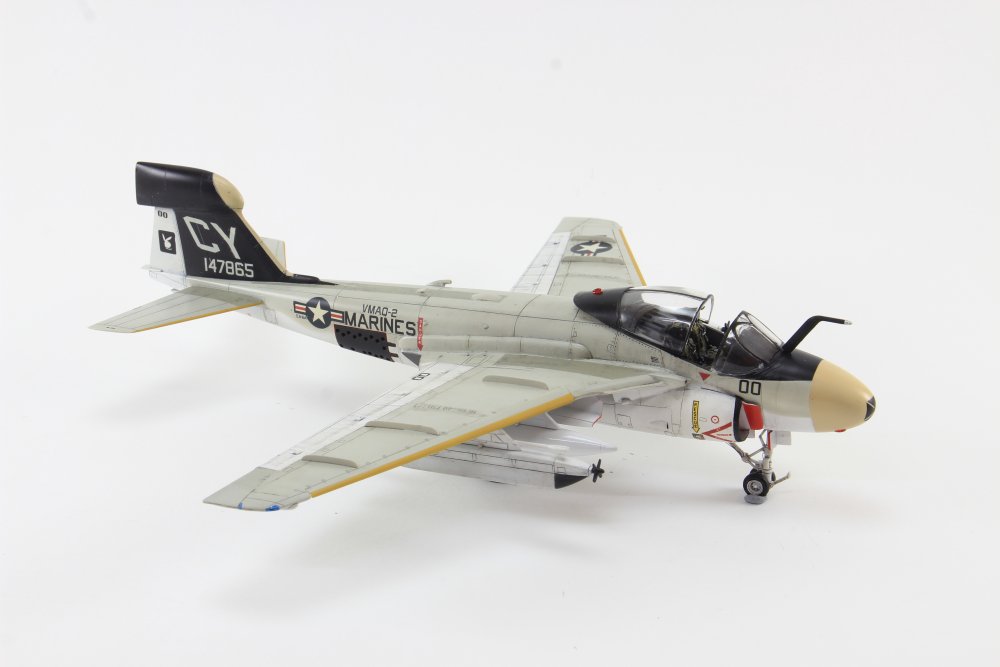
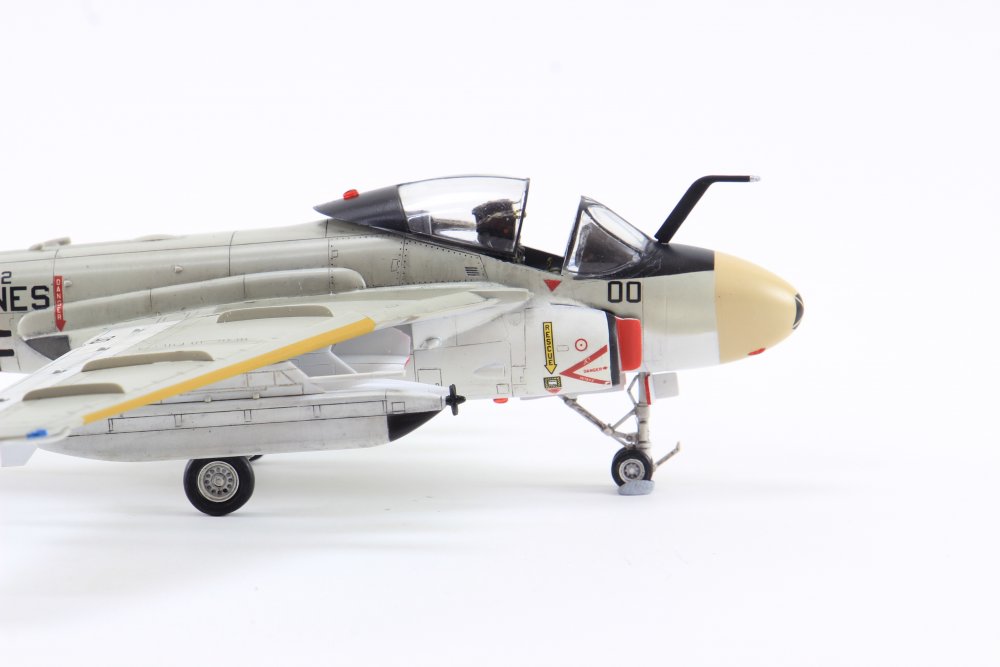
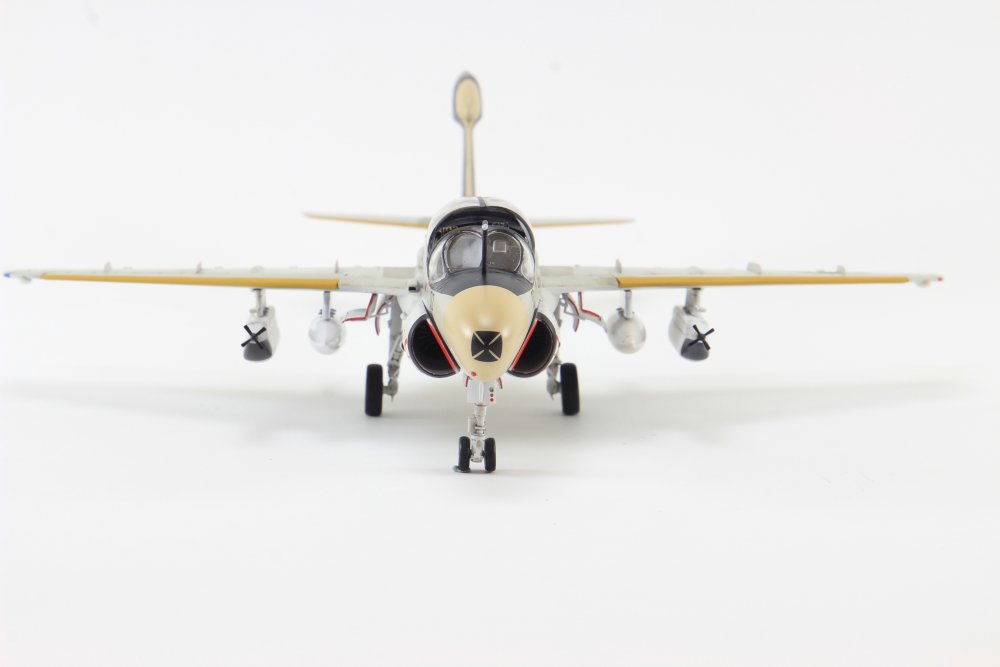
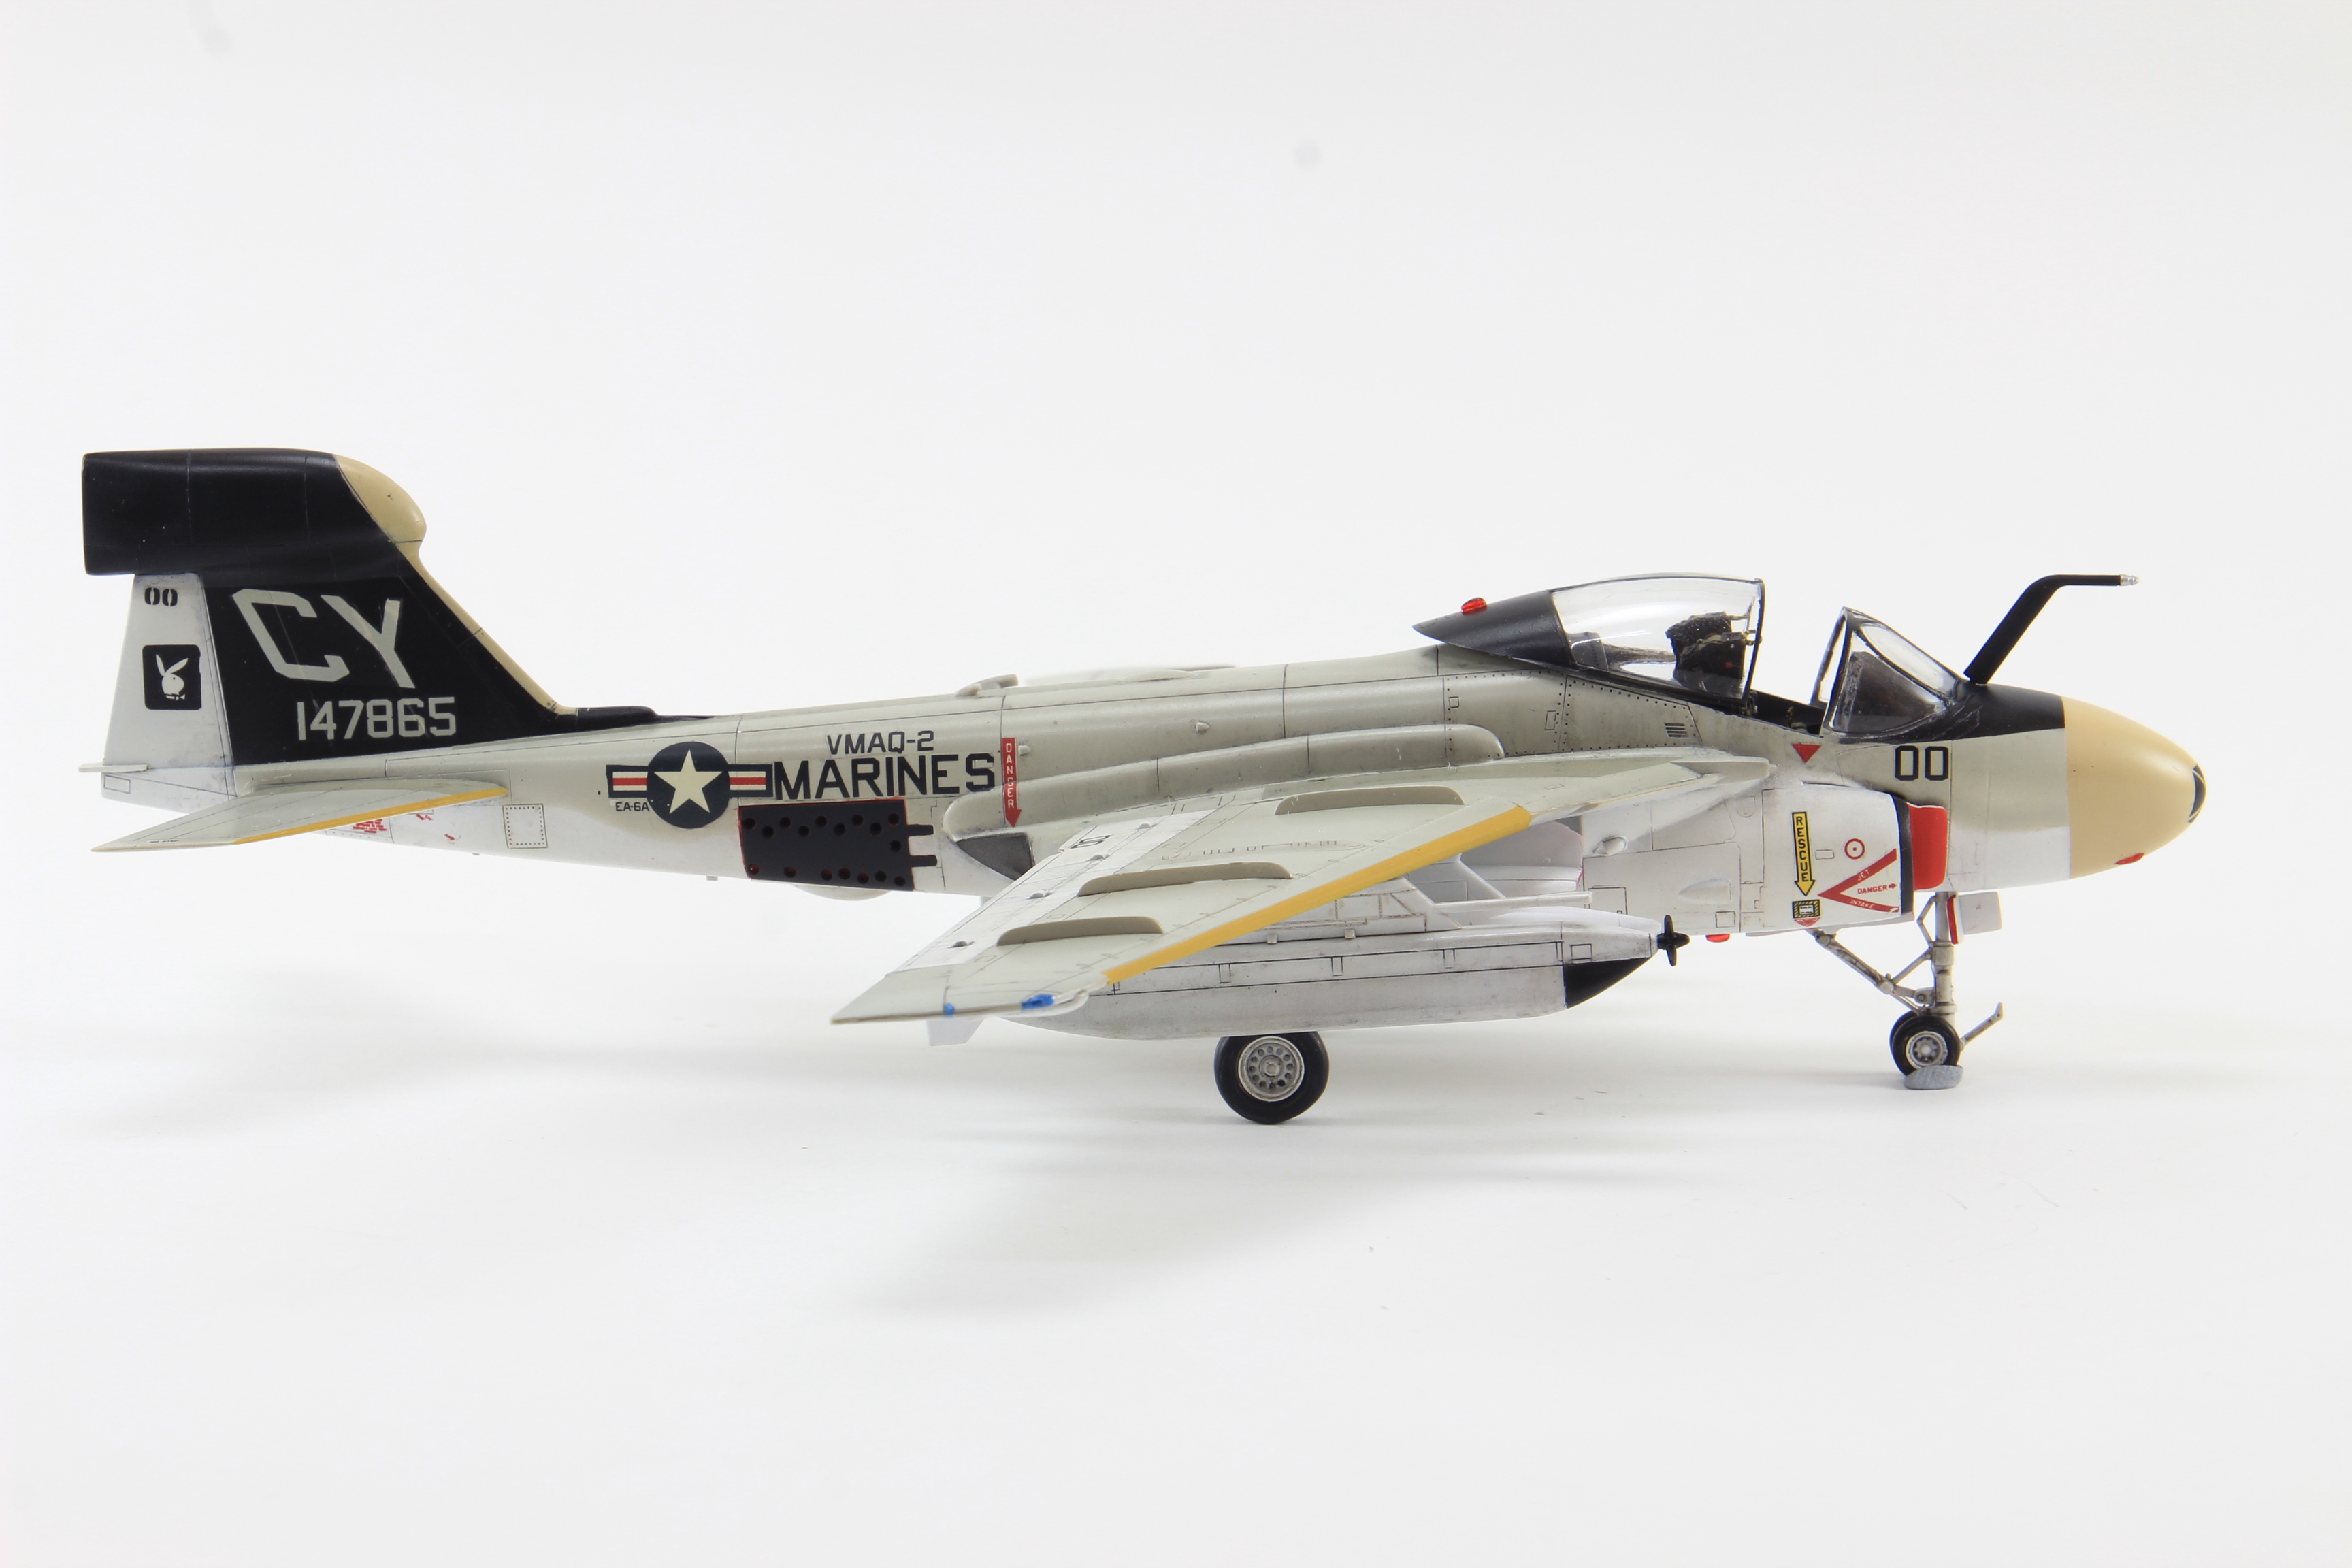
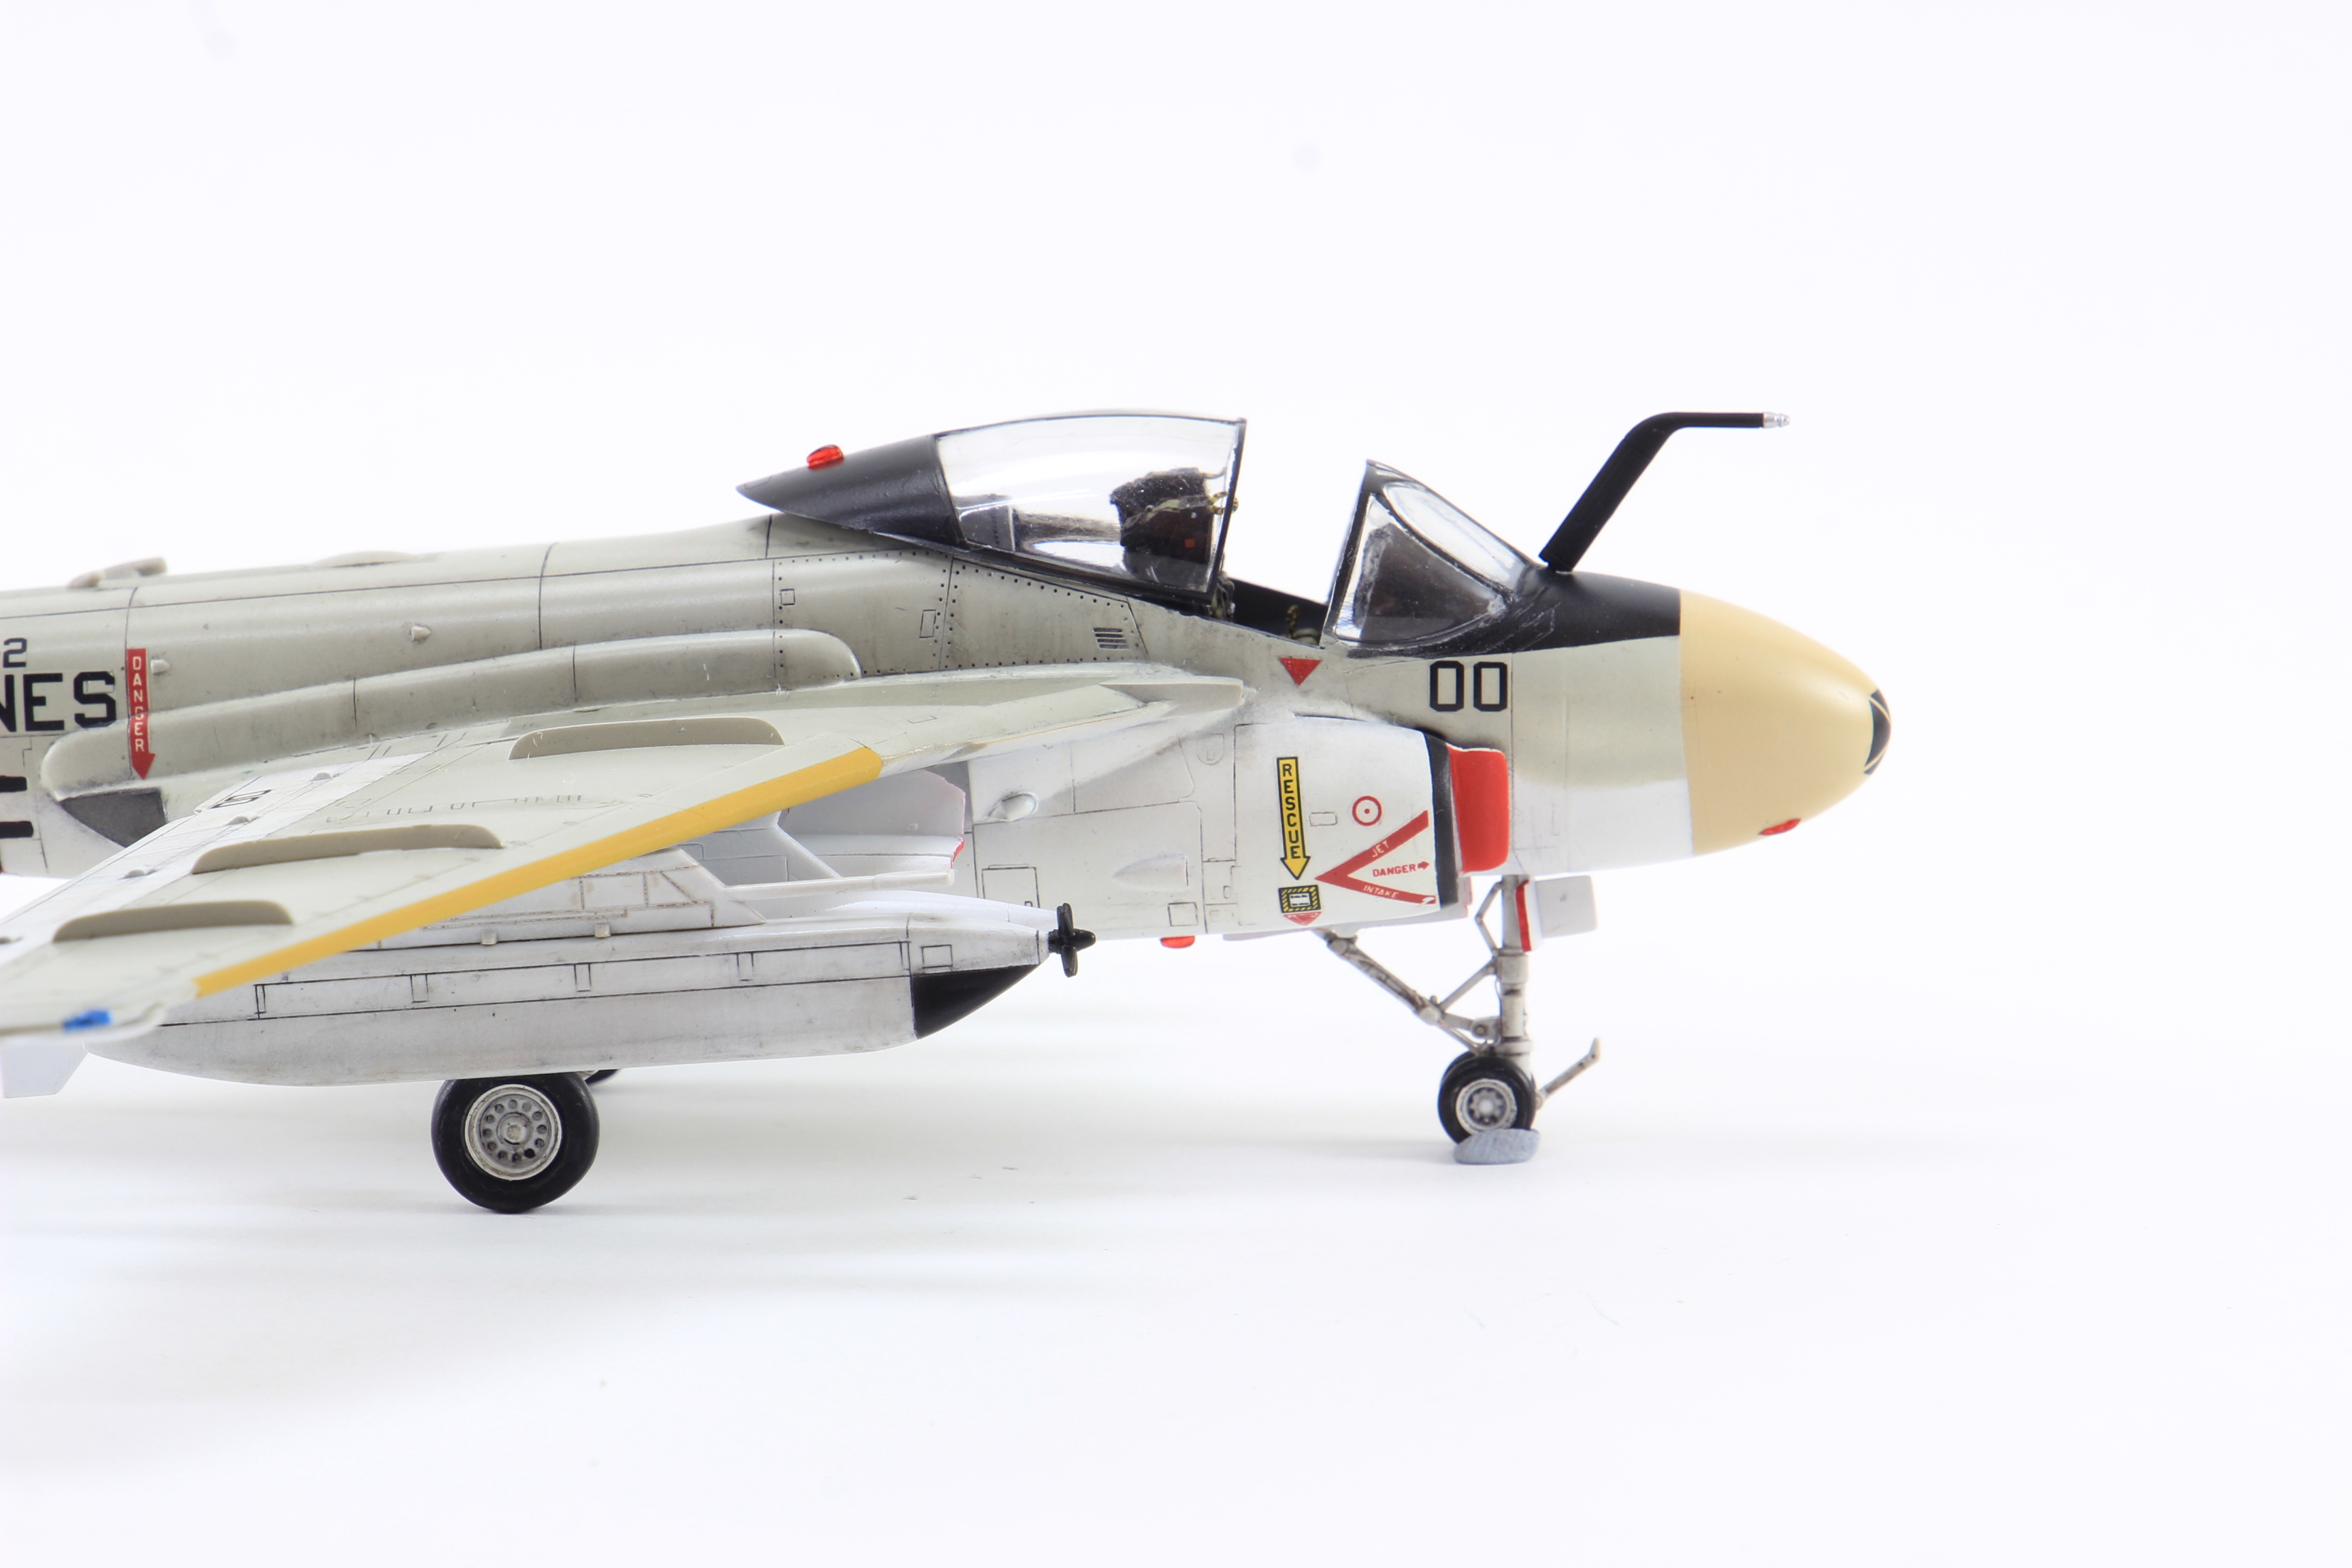
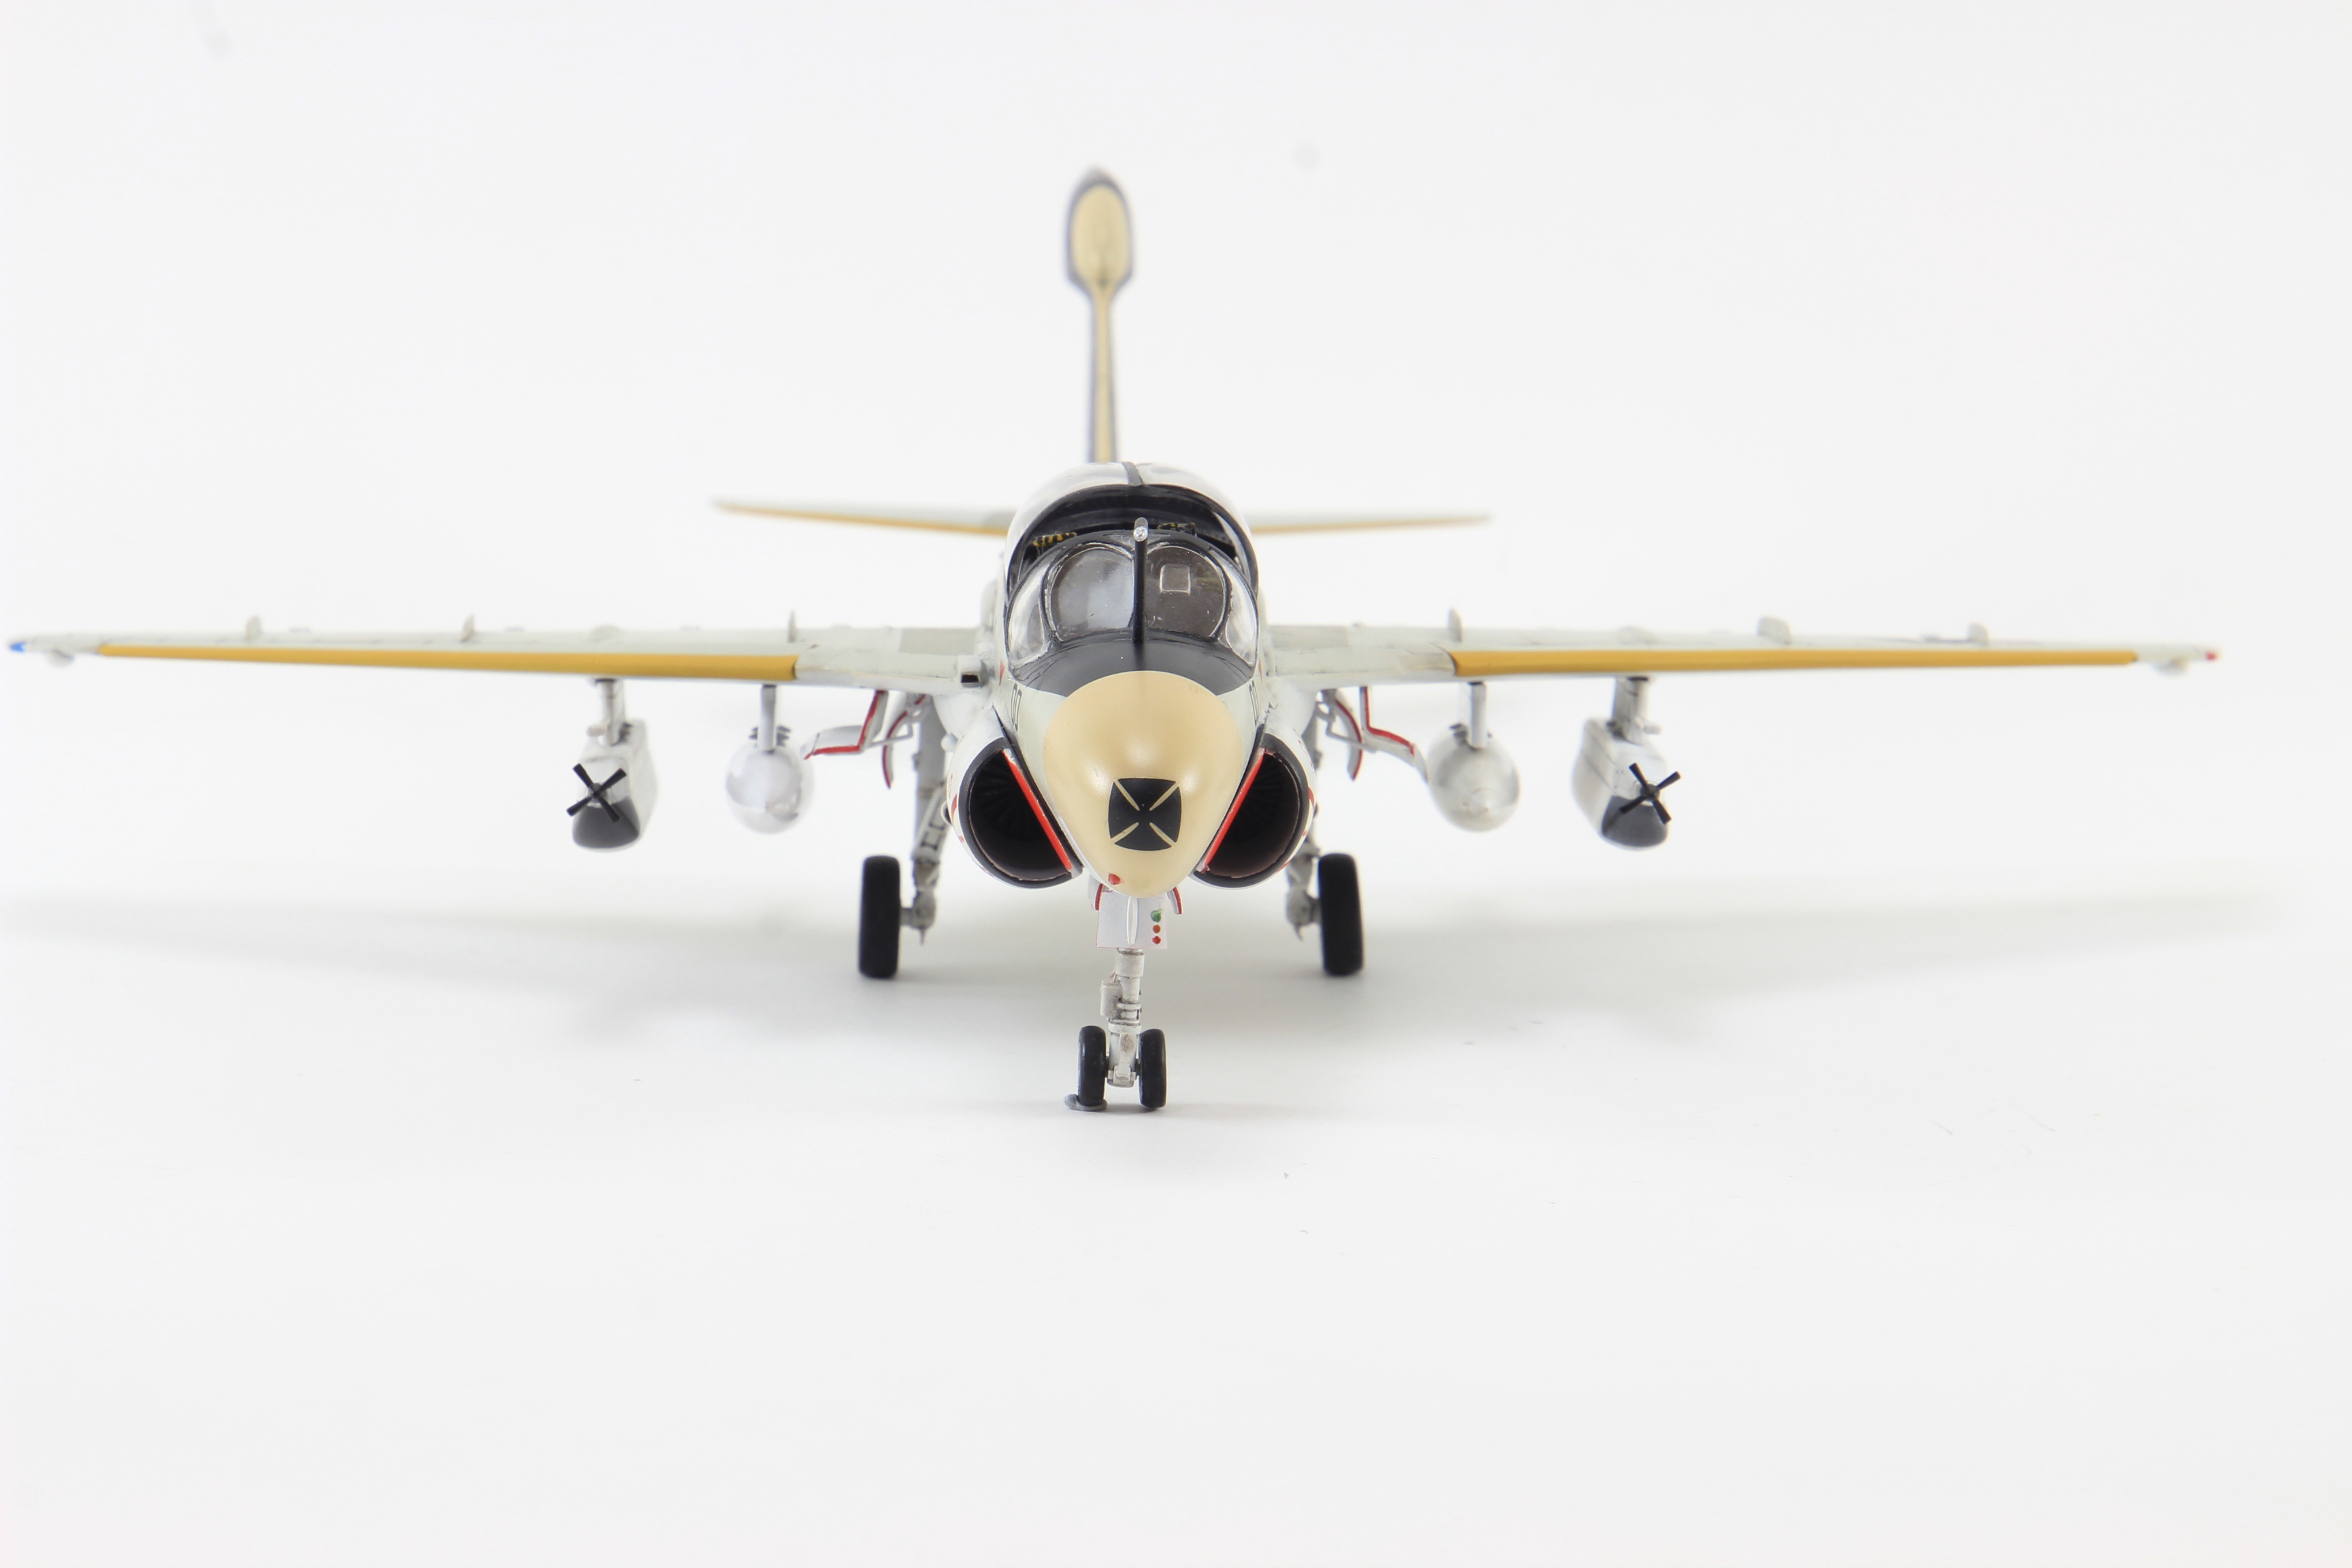
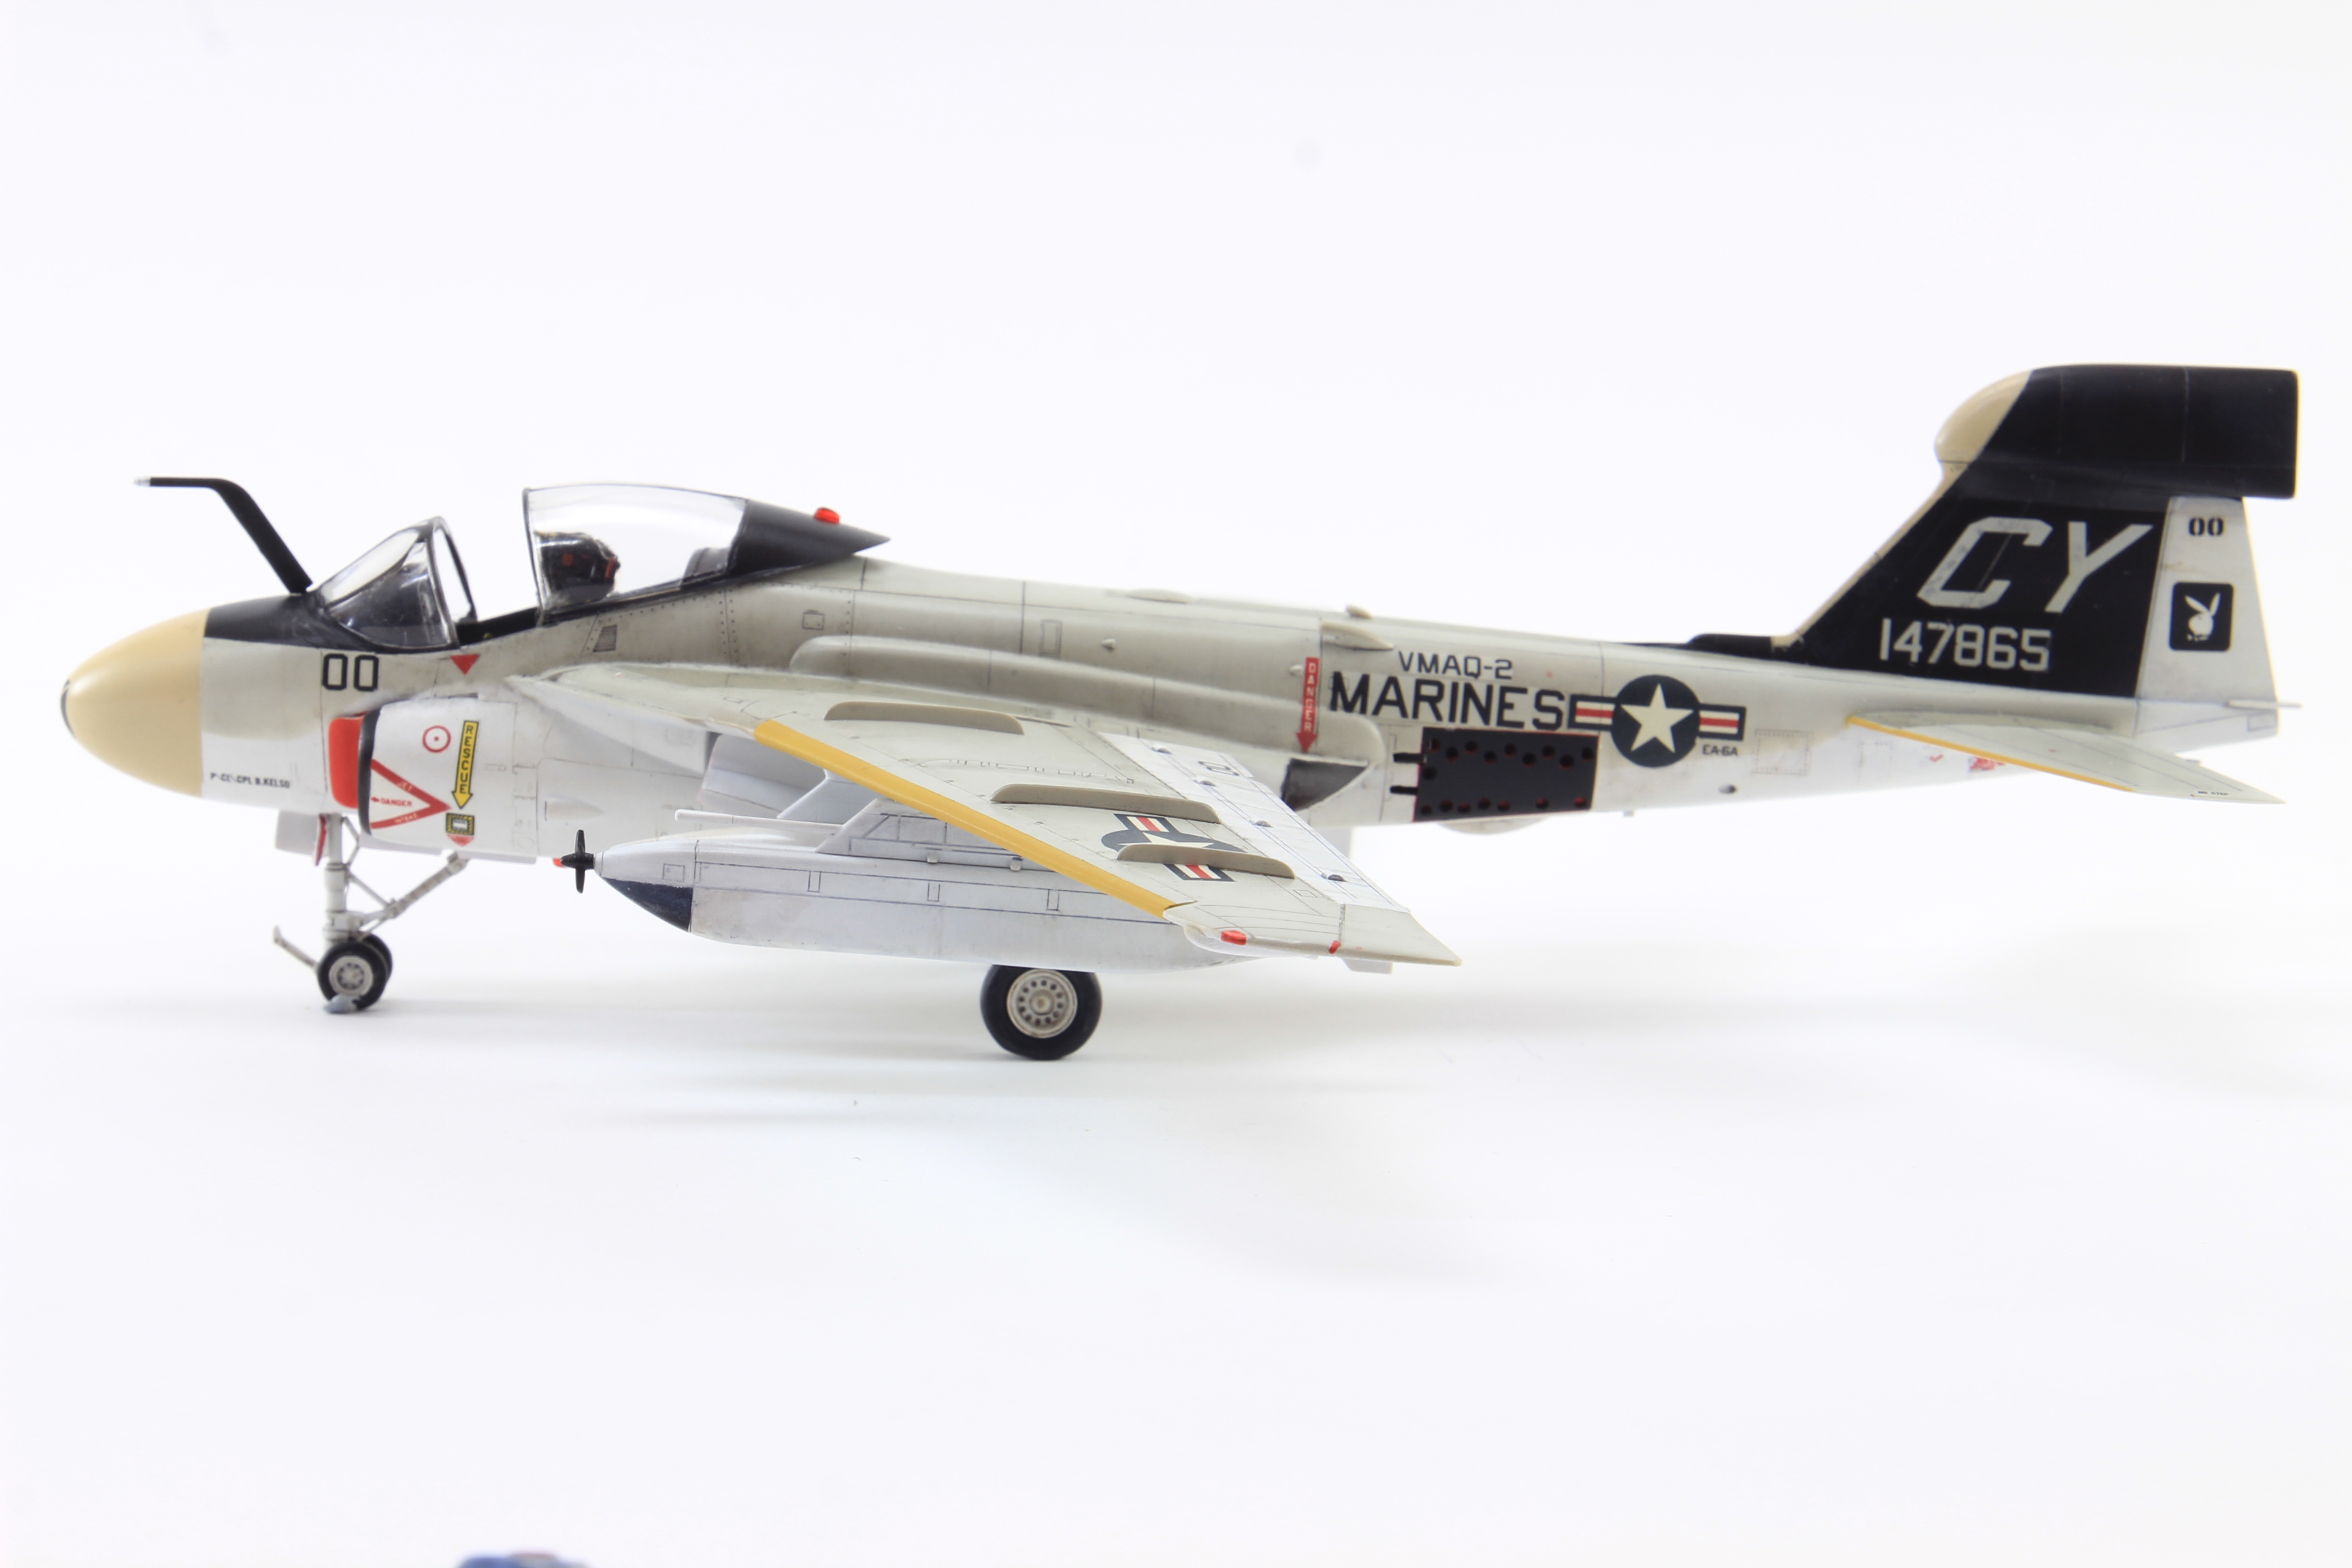
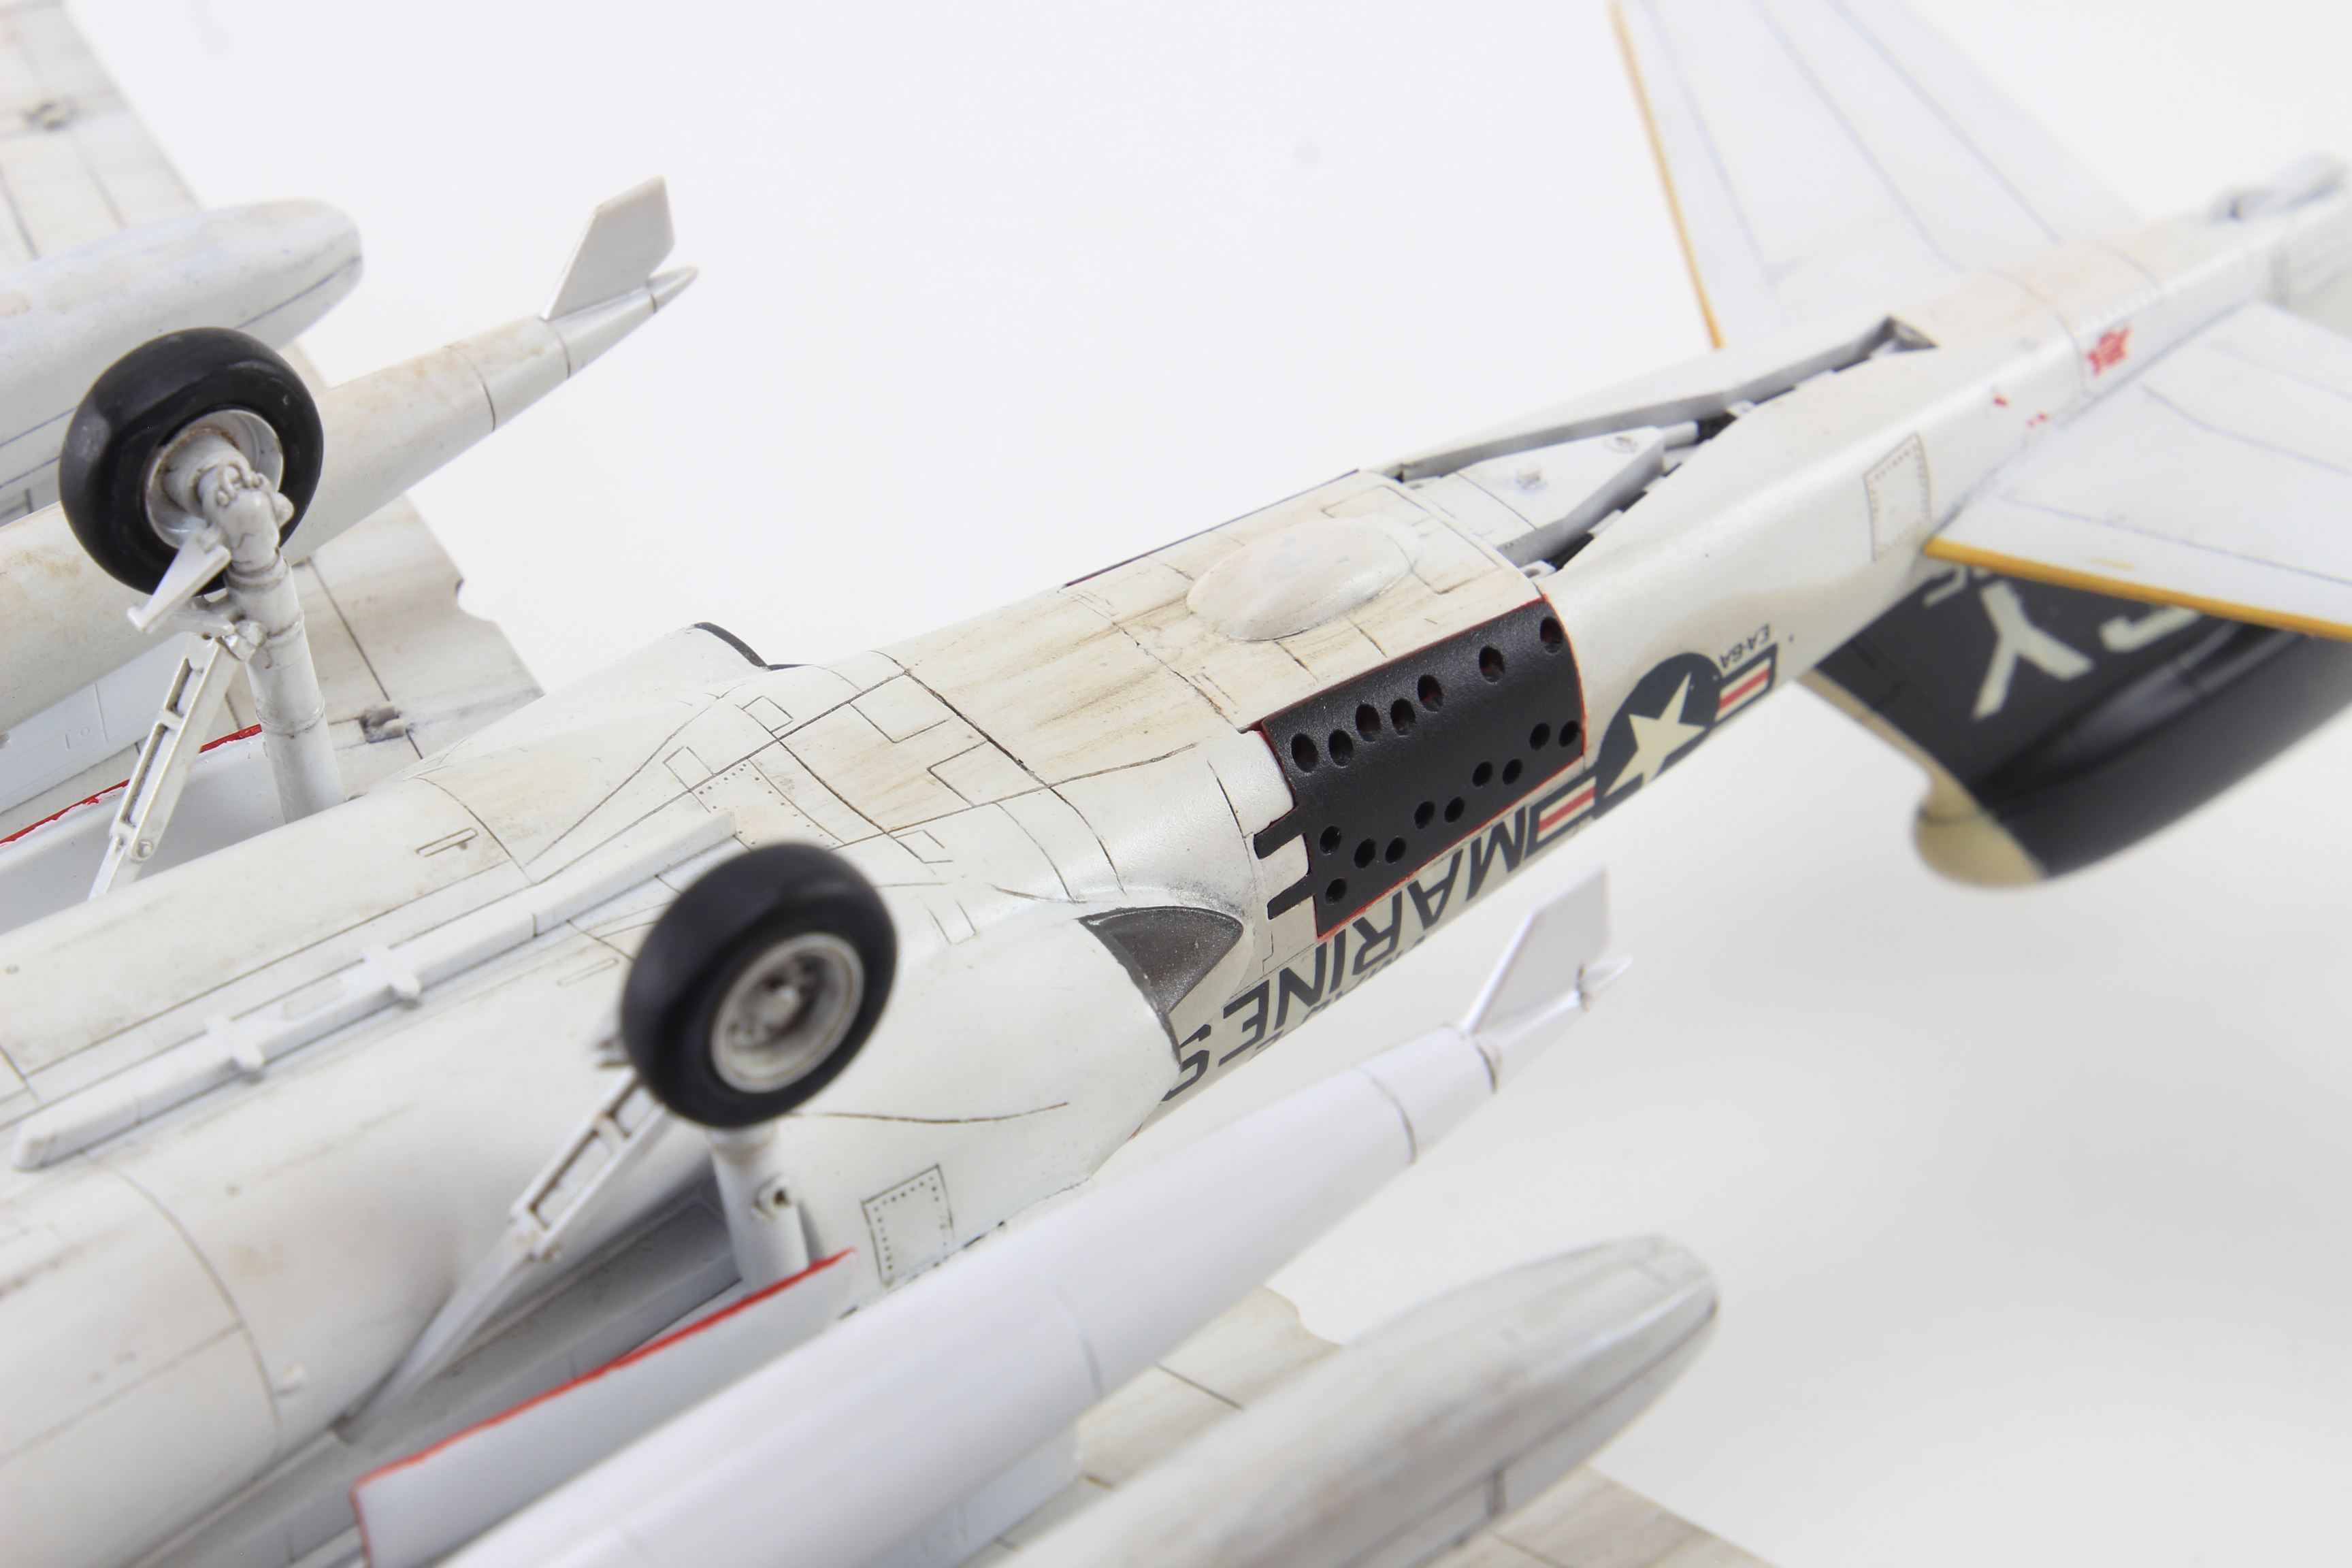
It's a Fujimi's 1:72 EA-6A Intruder. This model was one of my "shelf Queen" , has had sit on my workbench for about a decade.
It turn out a decent model with a fine engraved detail and ok cockpit detail. The ejection seats were replaced by a resin aftermarket.
For painting i used AK RC colours and Gunze.
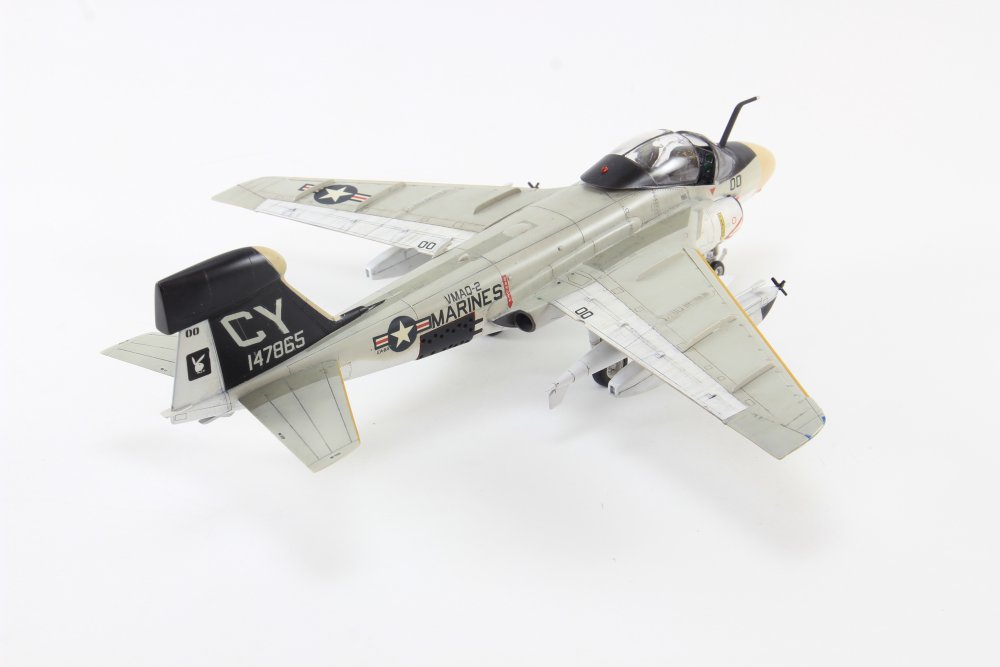

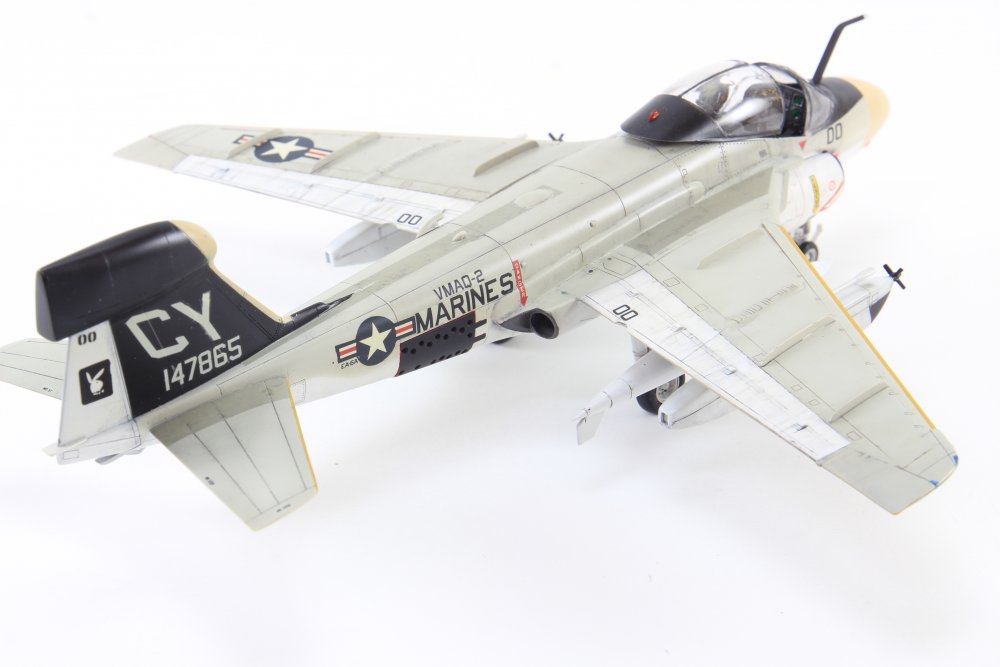
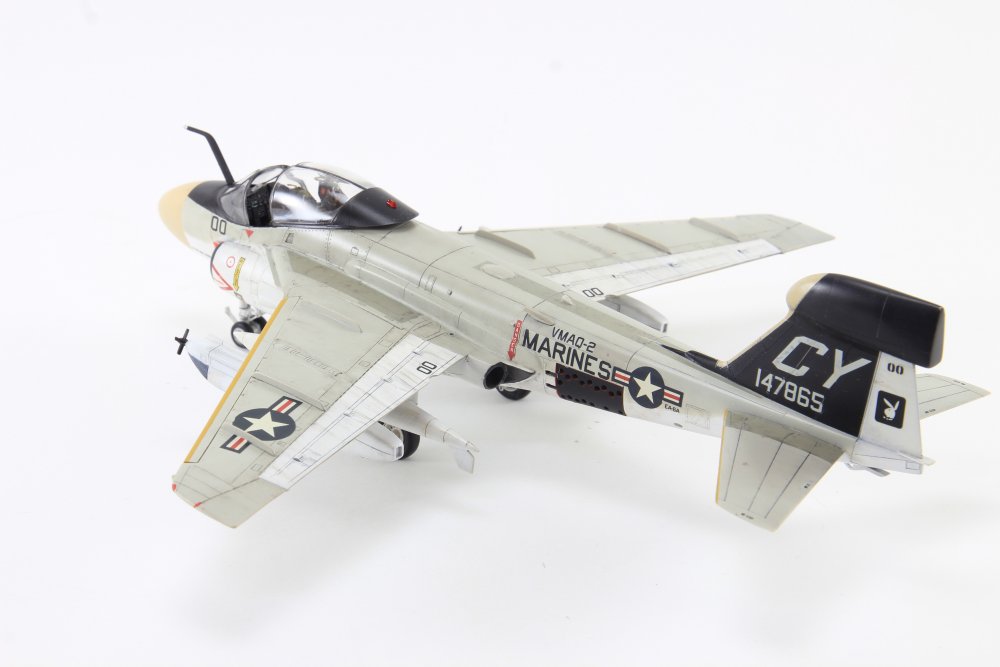
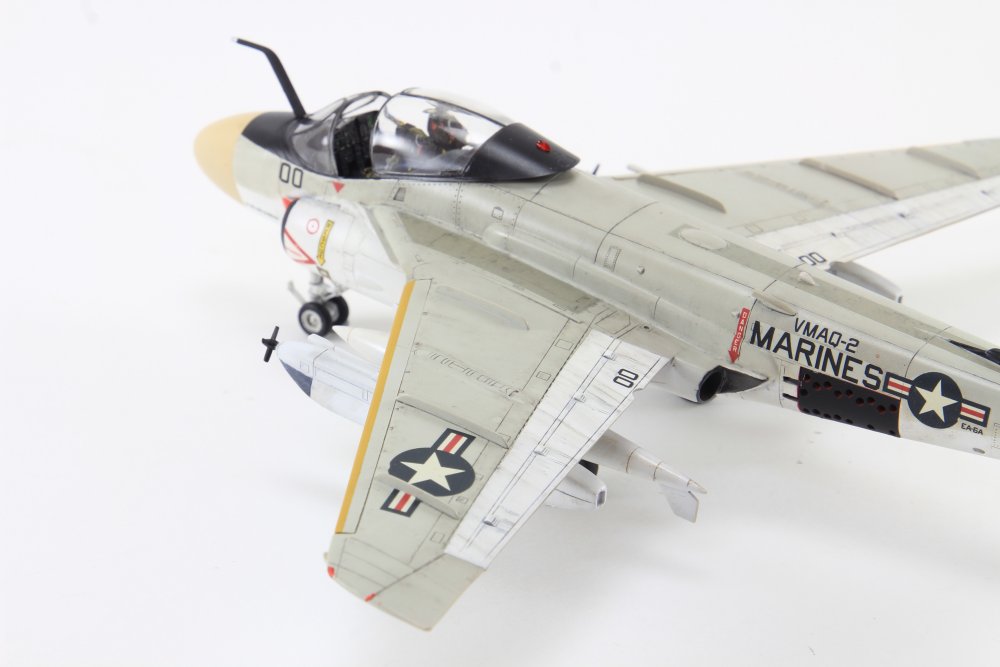
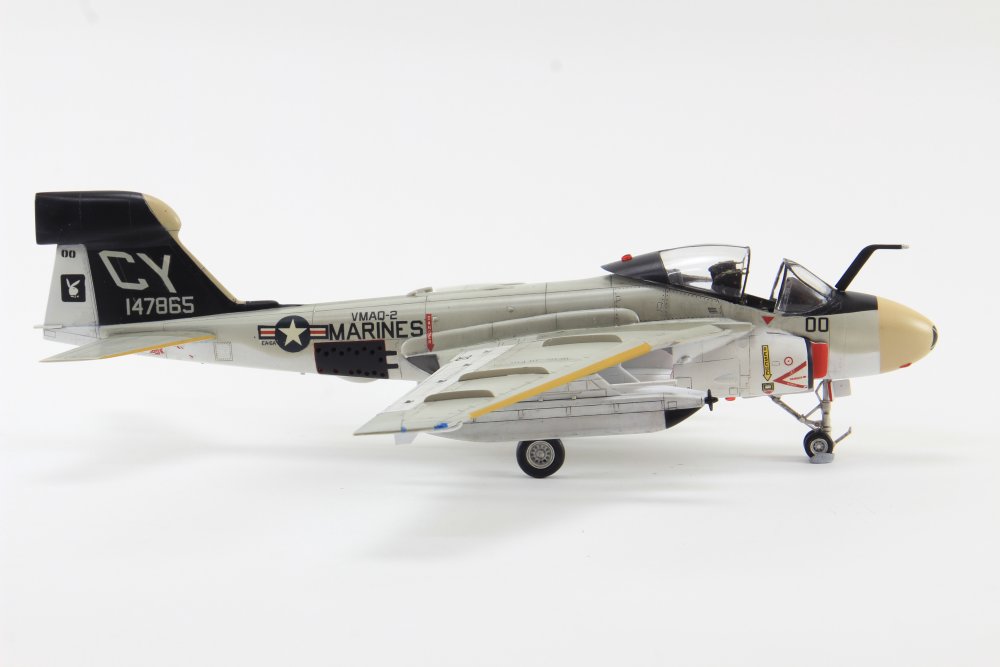
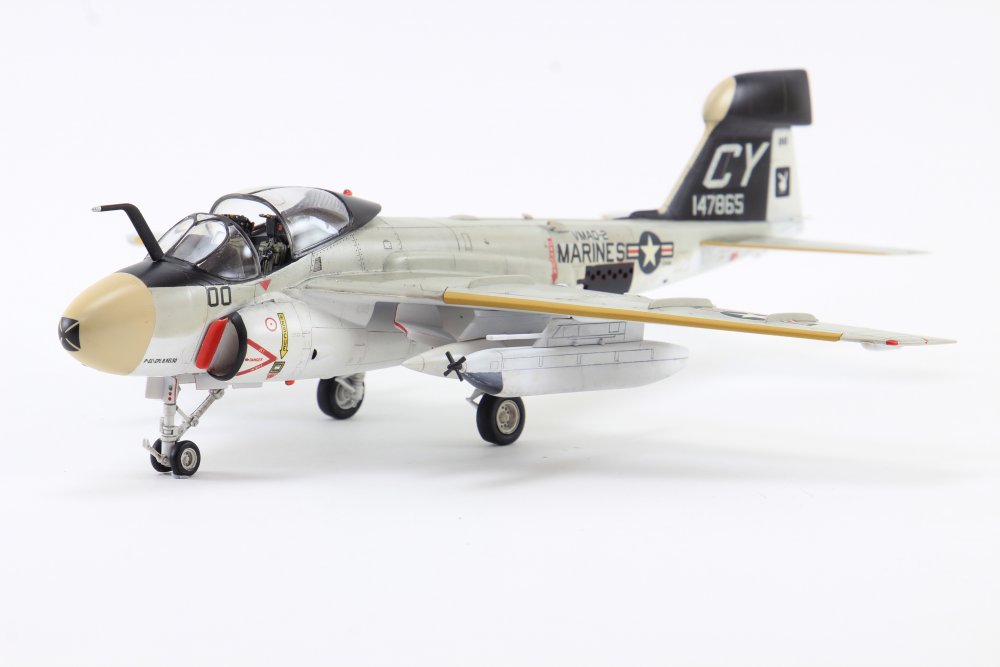
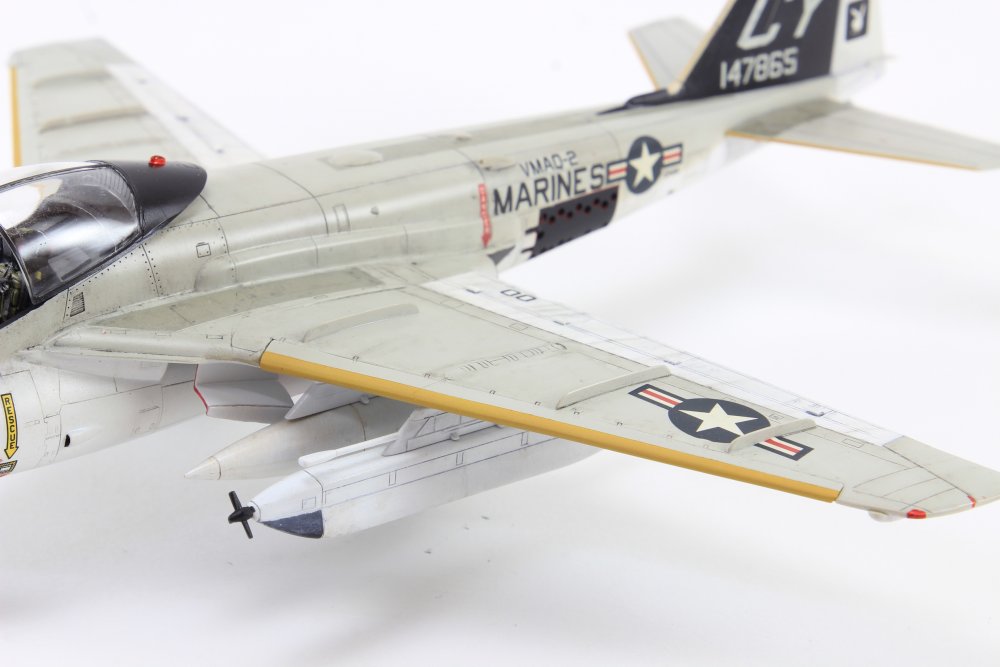
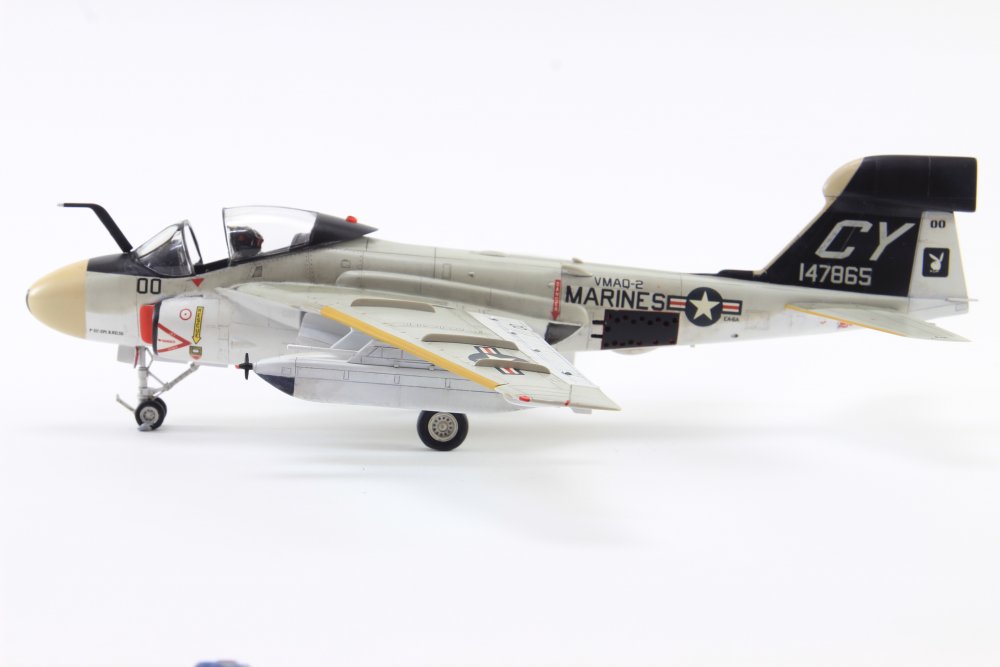
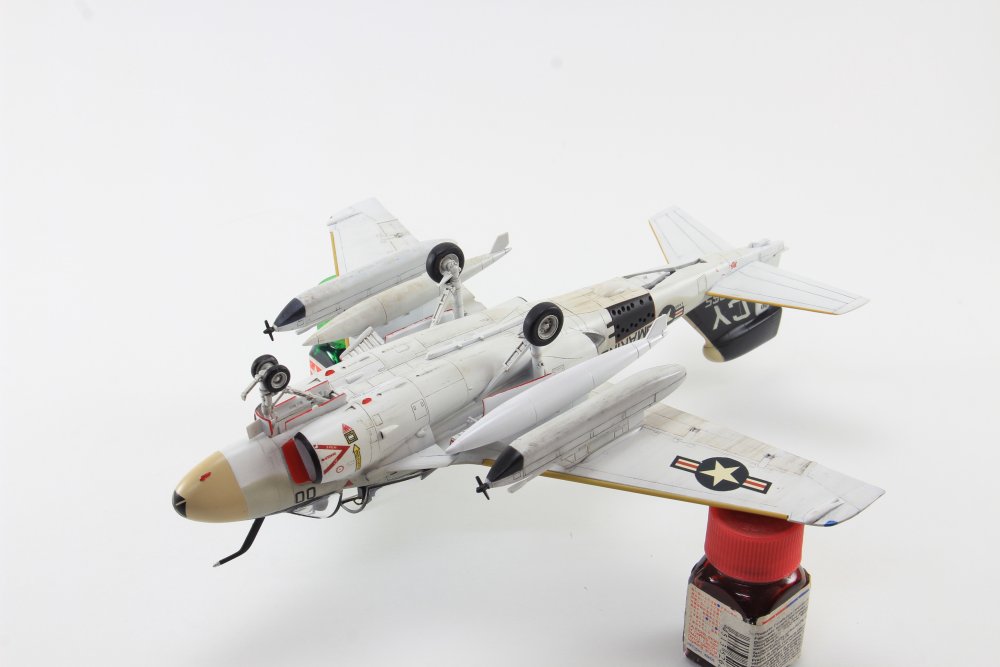
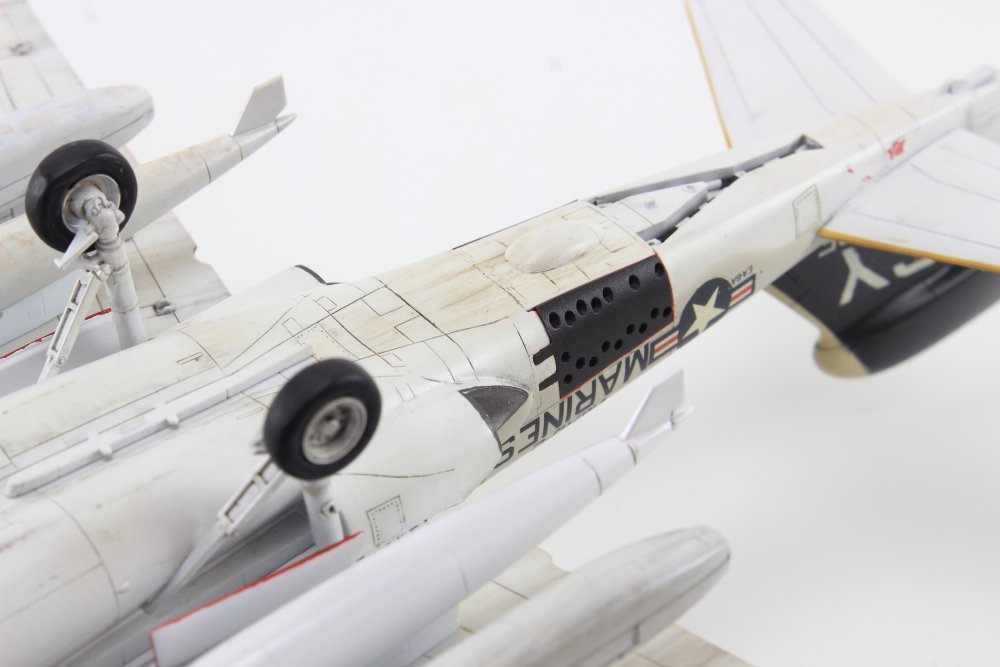
Thanks for watching!
best regards from Portugal
Ricardo Veríssimo
-
5
-
1
-
-
Hi Harv! thanks for watching and input!
Regards
Ricardo Veríssimo
-
3
-
-
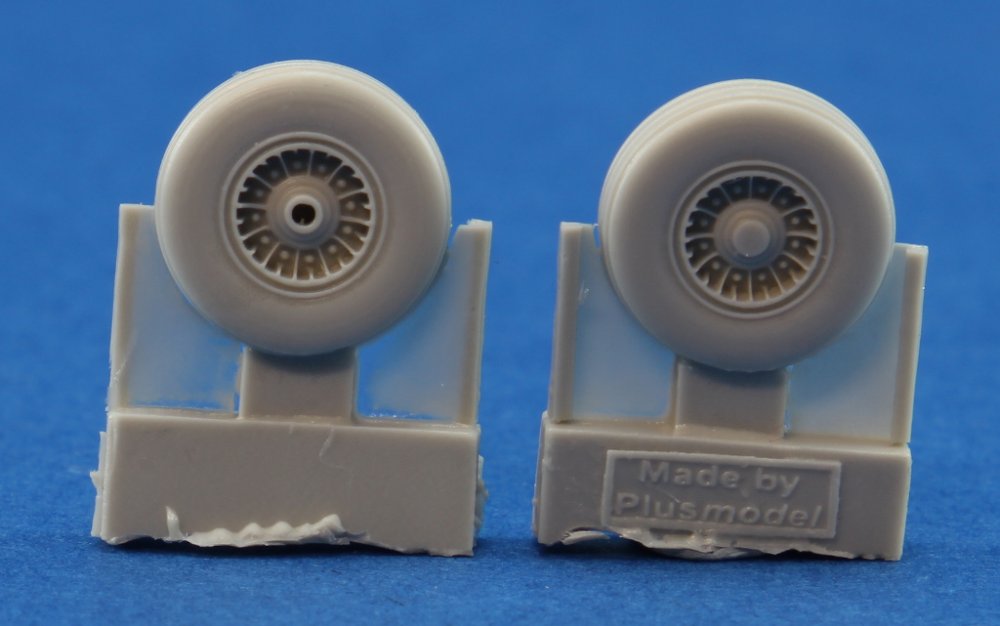
Plusmodel Aero Line Series 1:72 C-119 Boxcar Wheels - Early
Introduction
This small review presents us with an easy enhancement to 1:72 scale C-119
Also, this set has a new layout, presented in a clear bag.
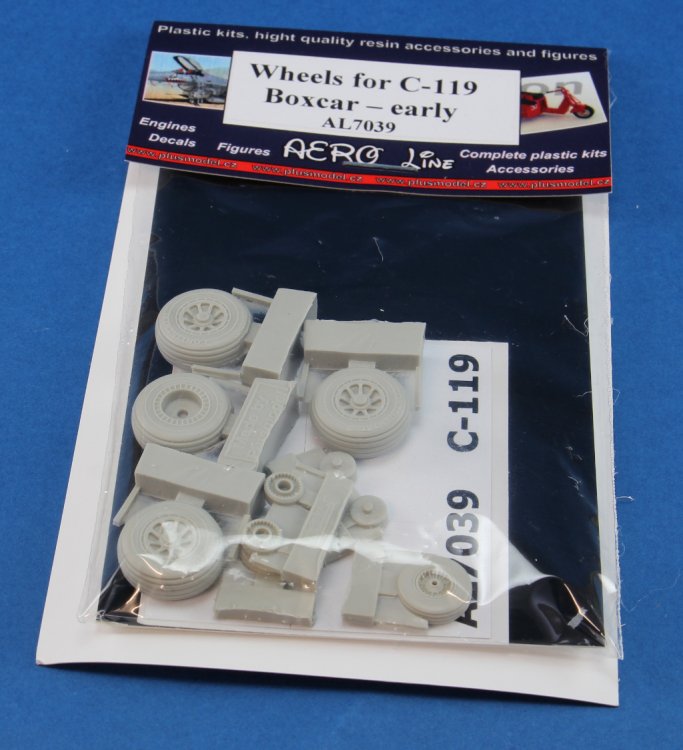
What’s on the
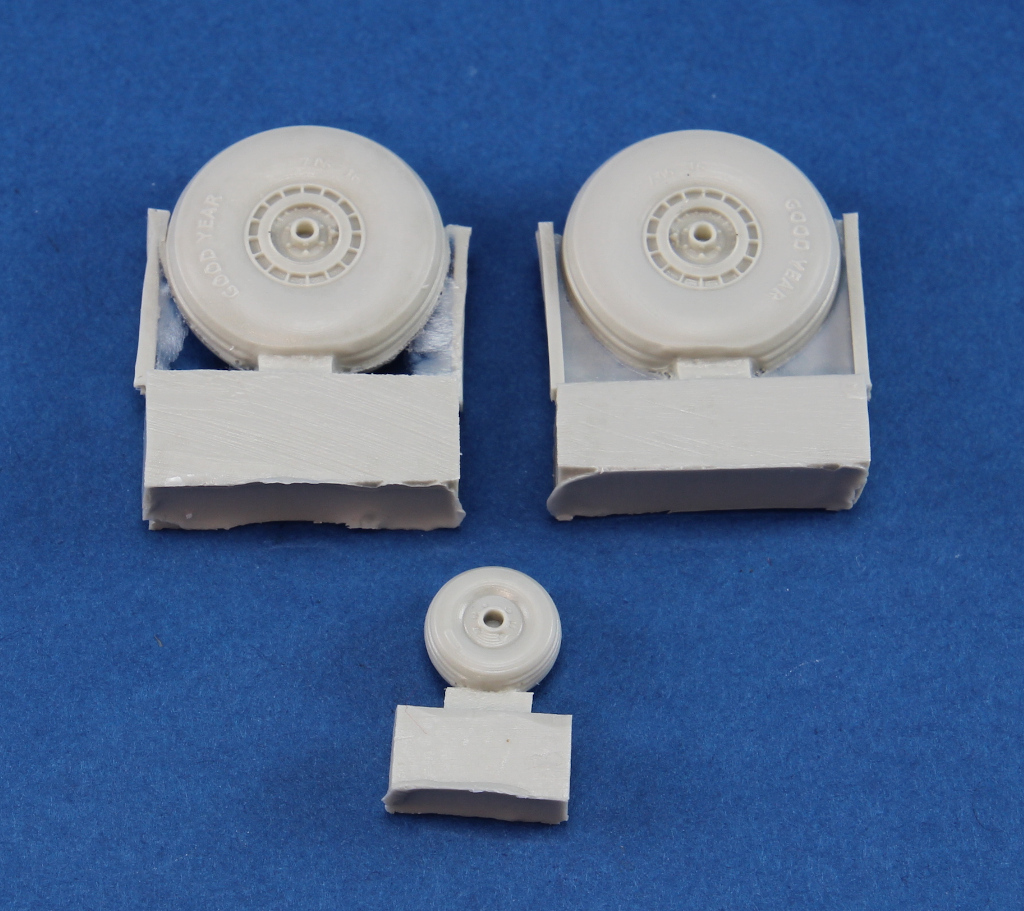
boxbagIn the clear bag, the content is visible for inspection, 10 light grey resin parts and a small vinyl type white paint mask.
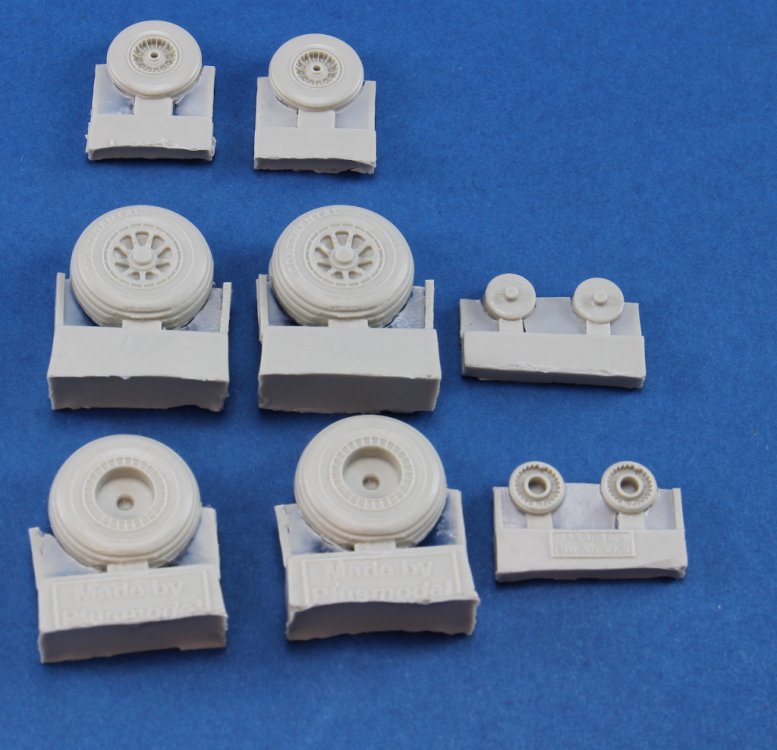
Set detail is very crisp and it will upgrade the detail, comparing with the Kit’s plastic wheels.
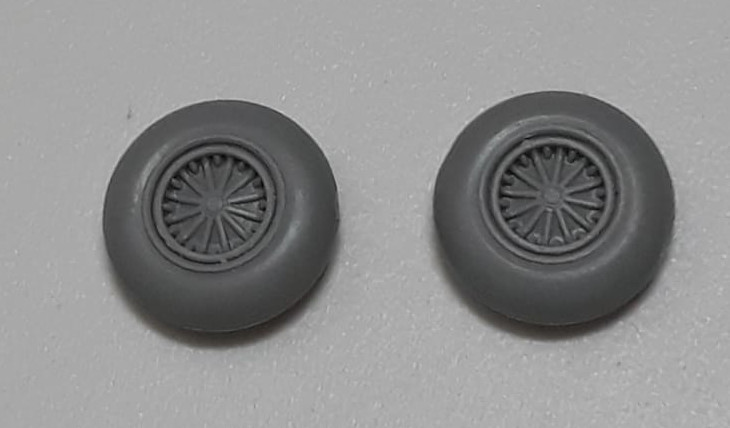
Italeri C-119 Main wheels
Italeri C-110 front wheels
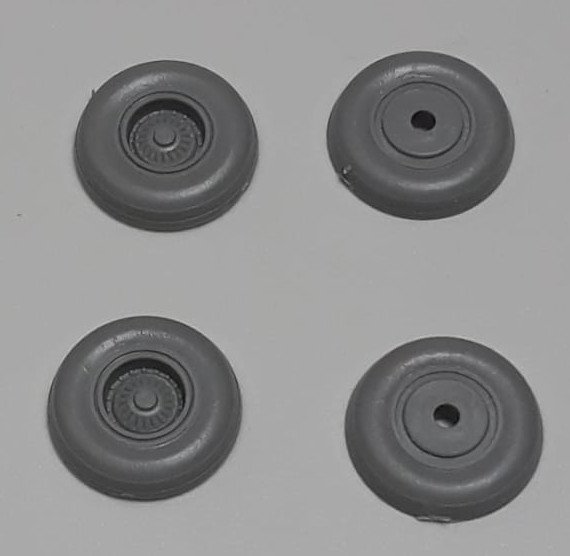
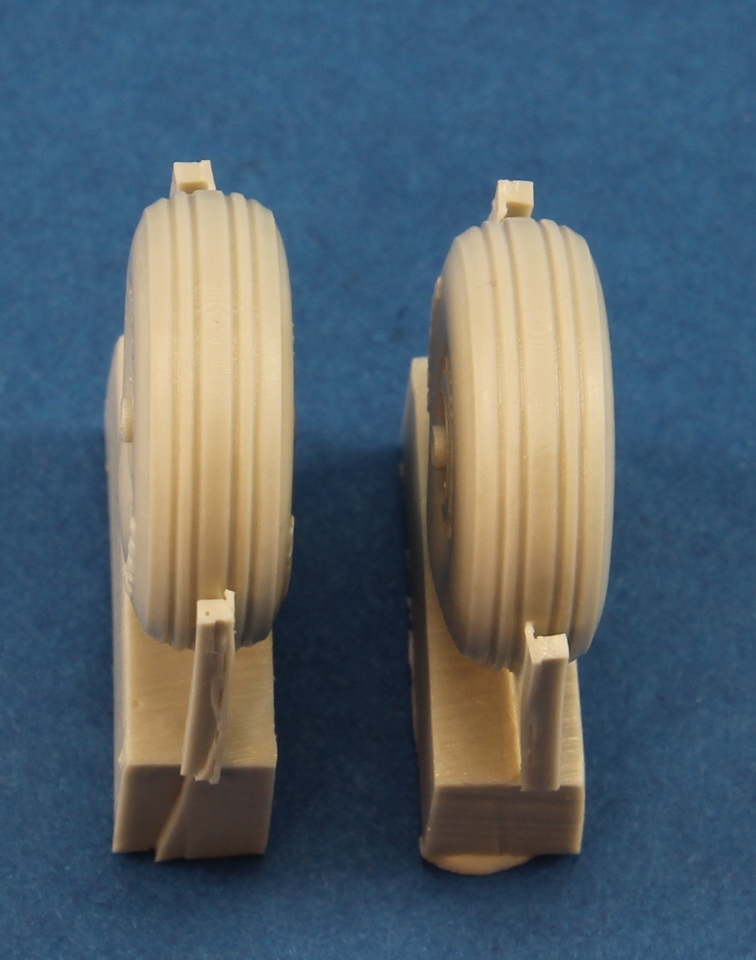
The main wheels are composed by a complete unit containing the tyre and front hub. The detail is delicate, and it will show under a layer of colour. Also worth of note is the tyre groove pattern and the tyre maker logo, perfectly detailed on the tyre.
The rear rub is moulded as separate part.
The front wheels, despite the small size, presents a magnific detail, especially the groove pattern on the tyre.

The last part is a small vinyl pre-cut paint mask.
Should you prefer to paint the wheel first and then the tyre, you have two sets available.
Also, if you prefer to paint the tyre first and then the centre rim, also two sets are at your disposition.
Conclusion
This set will provide an accessible and efficient way to detail and enhance the wheels of Italeri’s 1-72 C-119 early version.
Our thanks to Plusmodel for the review samples and all the support given.
To purchase this directly, click THIS link

-
1
-
-
Hi Rob !
thanks!
Ricardo Veríssimo
-
4
-
-
Hello everyone,
i would like to present my last build.
Hobbyboss 1:48 TA-152 C-0. A simple and quite enjoyable model.
Paints used from AK RC range, thinned with their own thinner.
.JPG.abb5de0de52e2082a8225cc2ef84d783.JPG)
.JPG.ceded2f9ad5d7228f4221e5fca51de57.JPG)
.JPG.5a4df1d97686714cc0c55059ef849723.JPG)
.JPG.ab3b6e55263fbbd9cbe5c0881dfe6532.JPG)
.JPG.951fda21ae8b3ea63725ea115fc1e3cf.JPG)
.JPG.d4ed541ef42612340d71078726cb5182.JPG)
.JPG.f590ec96cdc9bd224db8d228ae4f589b.JPG)
.JPG.d253200d7dd11aba446a68331da4ee38.JPG)
.JPG.21dd0710d80fb6939687bd510bfd56e2.JPG)
.JPG.66e3d3e3109b37717a4cede516e3e910.JPG)
.JPG.85bb455b401a5ea4ef9315ea23b1e6bf.JPG)
.JPG.80a57e3c568bb361910b0862c354e8fd.JPG)
.JPG.6c05b7b7c2c935b2ad10898a04ddd475.JPG)
thanks for taking a look!
best regards from Portugal
Ricardo Veríssimo
-
7
-
1
-
-
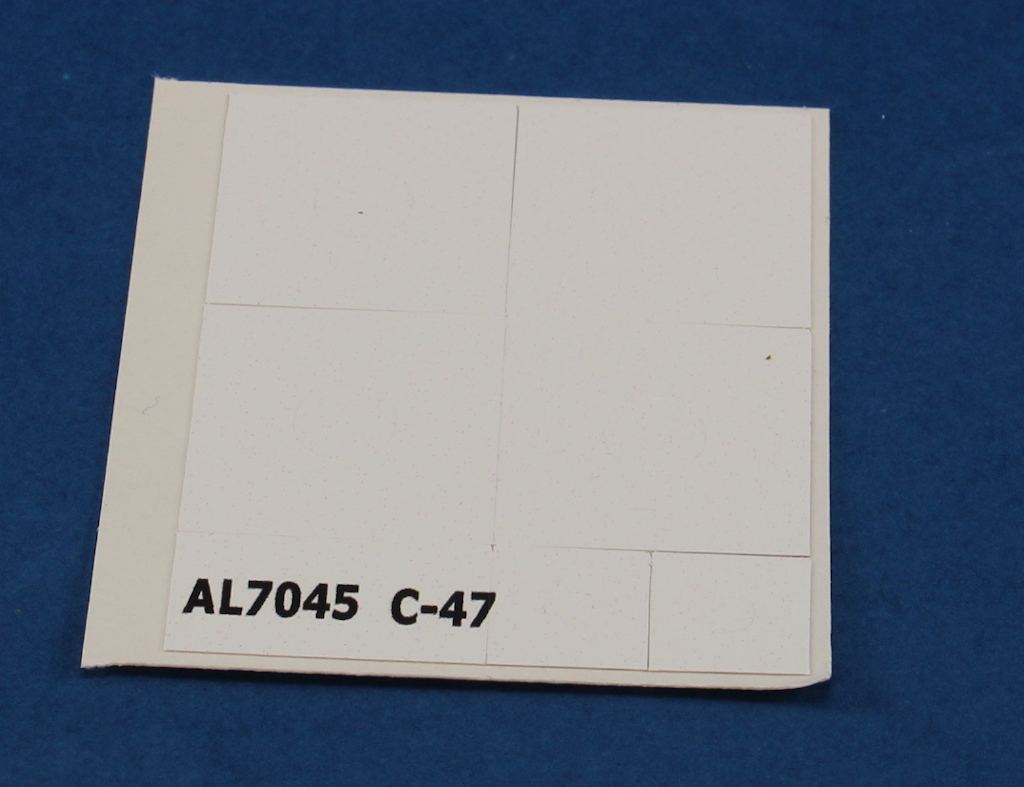
Plusmodel Aero Line Series 1:72 C-47 Skytrain wheels without cover
Introduction
This small review presents us with an easy enhancement to 1:72 scale C-47.Also, this set has a new layout, presented in a clear bag.
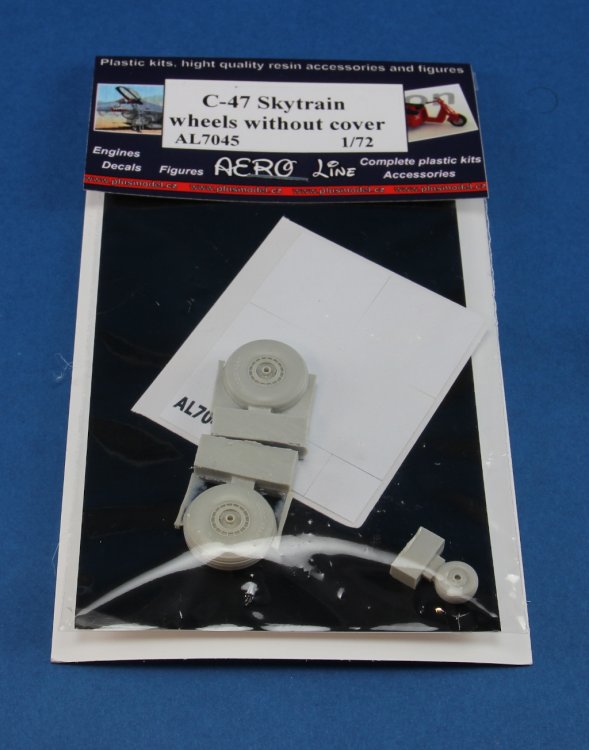
What’s on theboxbagIn the clear bag, the content is visible for inspection, 3 light grey resin parts and a small vinyl type white paint mask
Set detail is very crisp and it will show in the finished model, as the C-47 has a unique landing gear, allowing the wheels to contrast.
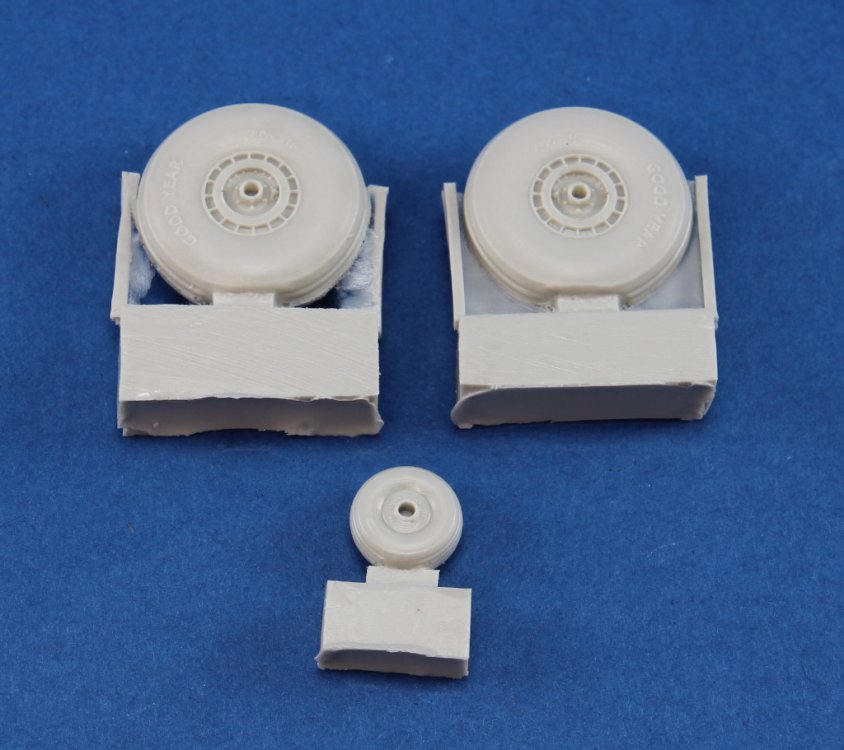
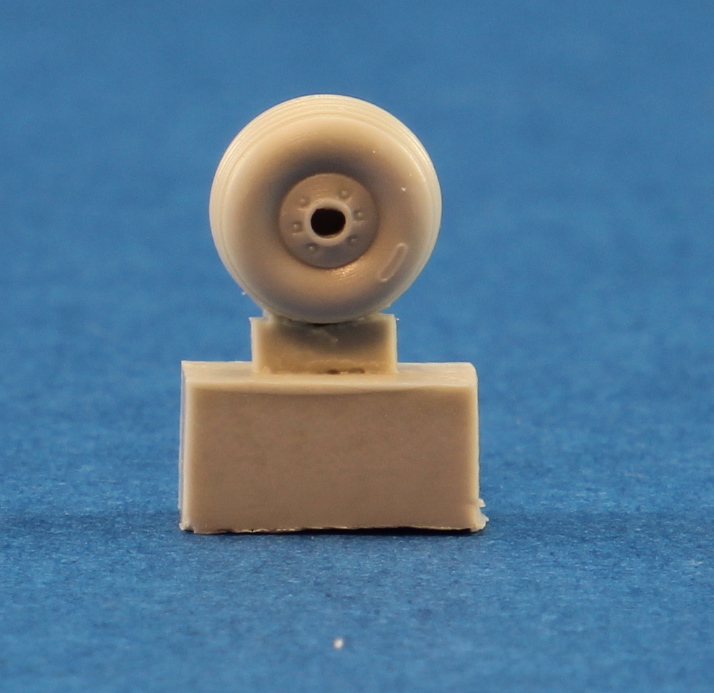
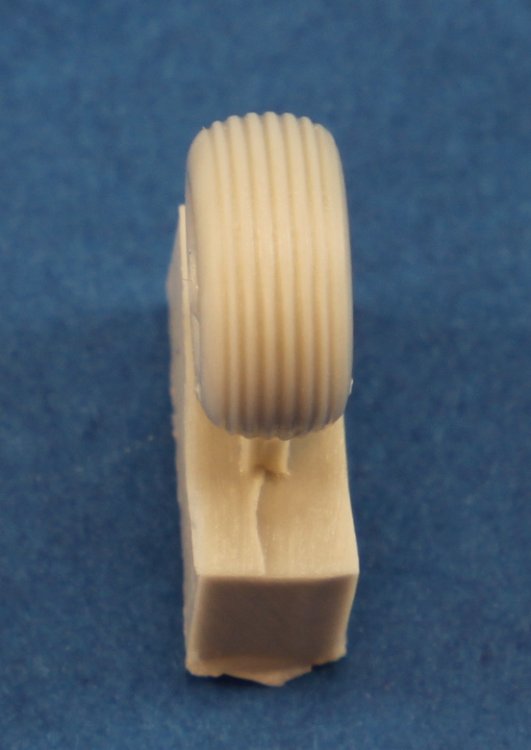
The main wheels are composed by a complete unit containing the tyre and hub. The detail is delicate, and it will show under a layer of colour. Also worth of note is the tyre groove pattern and the tyre maker logo, perfectly detailed on the tyre.

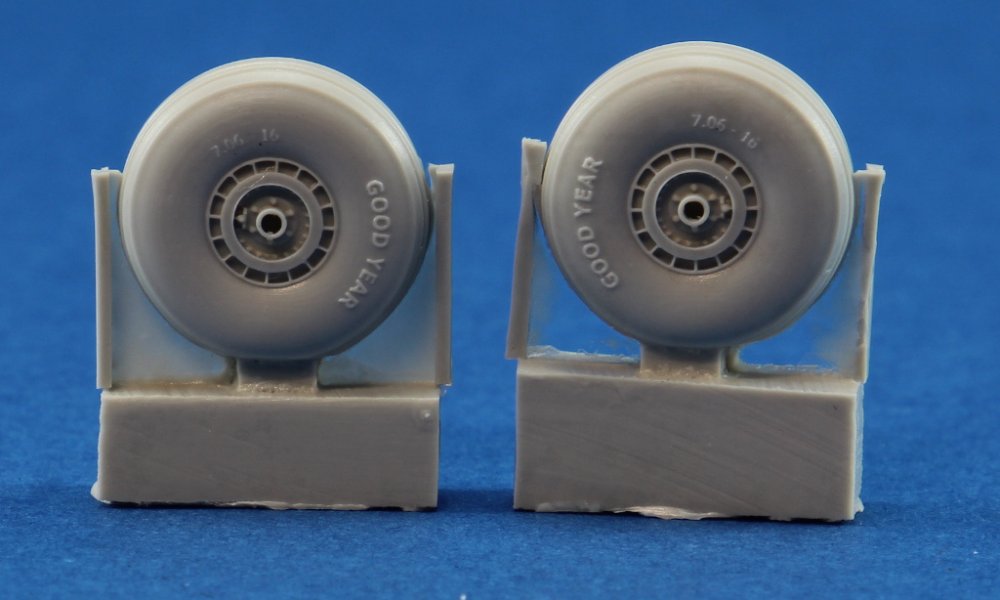
The rear wheel, despite the small size, presents a magnific detail, especially the groove pattern on the tyre.
The last part is a small vinyl pre-cut paint mask.
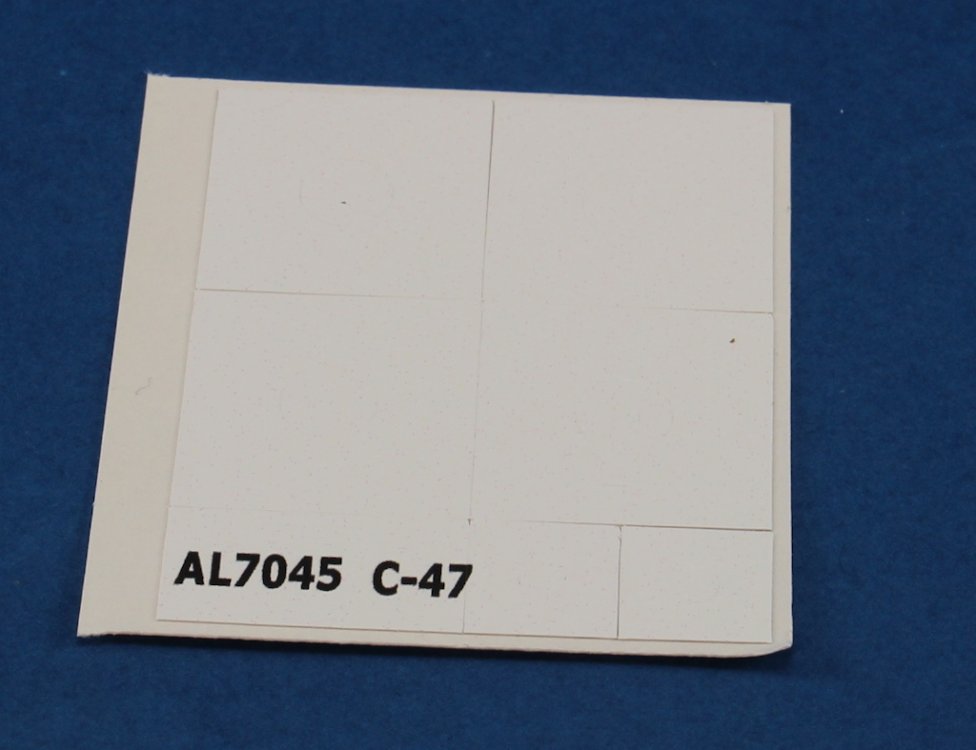
Should you prefer to paint the wheel first and then the tyre, you have two sets available.
Also, if you prefer to paint the tyre first and then the centre rim, also two sets are at your disposition.
ConclusionThis set will provide an accessible and efficient way to detail and enhance the wheels of any 1-72 C-47.
Our thanks to Plusmodel for the review samples and all the support given.
To purchase this directly, click THIS link


AK Interactive 1:35 Technical Raiders
in LSM-Related Reviews (military figures etc)
Posted
AK INTERACTIVE
1:35 AK35017 “Technical Riders”
Available from AK-Interactive for 12,95€
This set of figures from AK-Interactive is released to perfectly adapt to Ak’s own series of FJ-43 pick-ups, mainly set 35002 (FJ43 PICKUP WITH DSHK).
The set consists of 4 figures perfectly suited to the pickup truck environment, namely the driver and the "Vehicle Commander."
The box suggests a used vehicle along with the location of its occupants. The clothing style and gear used suggest the location as a combat team somewhere in the Middle East or Africa.
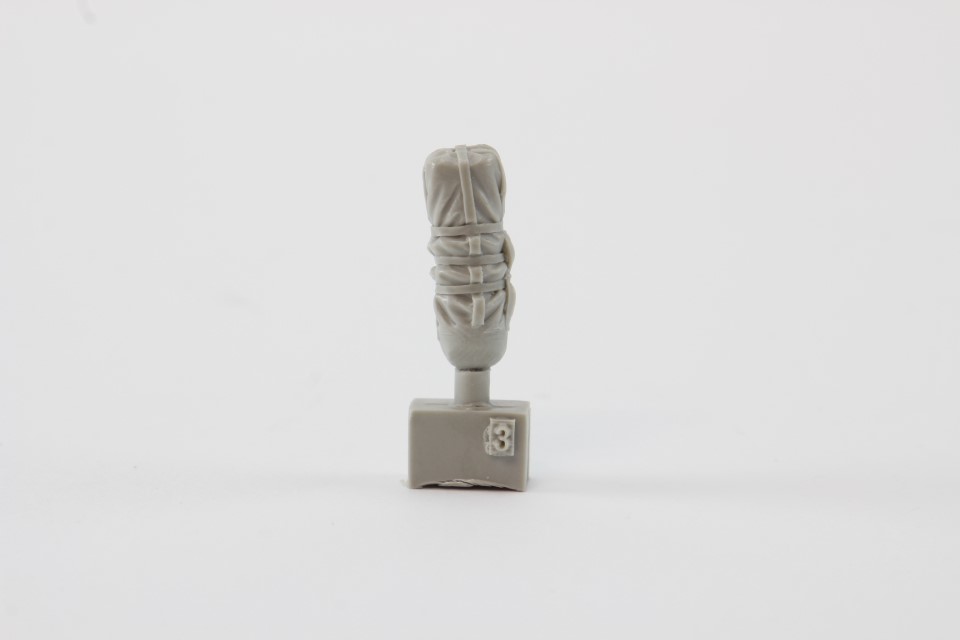
Along with the figures, a set of accessories is provided in the form of sleeping bags, a tent roll, a large transport bag, backpacks, binoculars, an ammunition box, and a portable cassette radio (!).
On the back cover, there is a simple yet effective presentation of the figures available for reference, a suggested paint colour scheme (using the range of AK Interactive acrylics sets or individual references), as well as a simple assembly guide for the figures and their respective accessories, mainly backpacks and ammunition vests for assault rifles. The vehicle commander is holding binoculars in his hand.
The two figures occupying the cargo box and holding the heavy machine gun have a natural pose as if they were celebrating a victory or conquest.
What’s in the box
In the box, there are 3 sprues, two of them containing the figures, and the third (smaller) one holding assault weapons and some accessories.
Sprue A - This sprue provides the parts for assembling two of the figures: the driver and the heavy machine gun operator. The detail and anatomical shape of the models are suitable for the injection technology used. There are mold marks on the pieces due to the manufacturing process, but these can be easily removed with a blade and sandpaper. The clothing creases are adequate and detailed enough to stand out with proper painting. The faces also have suitable detail, although care must be taken when removing the (slight) mold marks, as these are in quite visible areas. The torsos of both figures are well done, with proper locations for attaching various accessories (ammunition pouches). The vehicle driver wears a scarf covering his face and sunglasses for style. The heavy machine gun operator has a celebratory pose, with one arm raised and clenched fingers while the other hand holds the machine gun. The upper limbs are represented with rolled-up sleeves, and the fingers are well defined. The details on the backpacks (accessories) are adequate, with designated areas for attaching exterior pockets (molded as a separate piece).
Sprue B - On this sprue, the remaining crew members are provided, to be placed in the vehicle's cargo area. The poses are natural, as previously mentioned. The vehicle commander, with a beard, has a head perfectly sized and also comes with a molded military beret. In his left hand, binoculars can be added.
The second figure stands in a celebratory position, holding an assault rifle in the right hand and making a victory sign (V) with the raised hand.
Sprue C - This smaller sprue includes: 4 assault weapons, detailed to scale and technology. Note the screw detail, barrel, and trigger guard protection. Additionally, the sprue provides binoculars in a single piece, a two-part ammunition box, and a very original accessory - a portable radio-cassette player (quite 80s)!
Conclusion: The set is straightforward in construction and design, suitable for the aforementioned vehicle but adaptable for other vehicles as well. Beginner modelers can use this set without major constraints or difficulties. Advanced modelers can enhance the figures, complementing the basics. The mold marks mentioned are due to the limitations of the injection technology, but they are easily manageable during removal, which shouldn't discourage any modeler. Moreover, the affordable price of this set allows for complementing these types of vehicles without a substantial increase in the final project cost.
Our Thanks to Ak-Interactive for the review sample!
Ricardo Veríssimo