


Fran
-
Posts
2,126 -
Joined
-
Last visited
Content Type
Profiles
Forums
Events
Gallery
Posts posted by Fran
-
-
Chris, check here:
-
 3
3
-
-
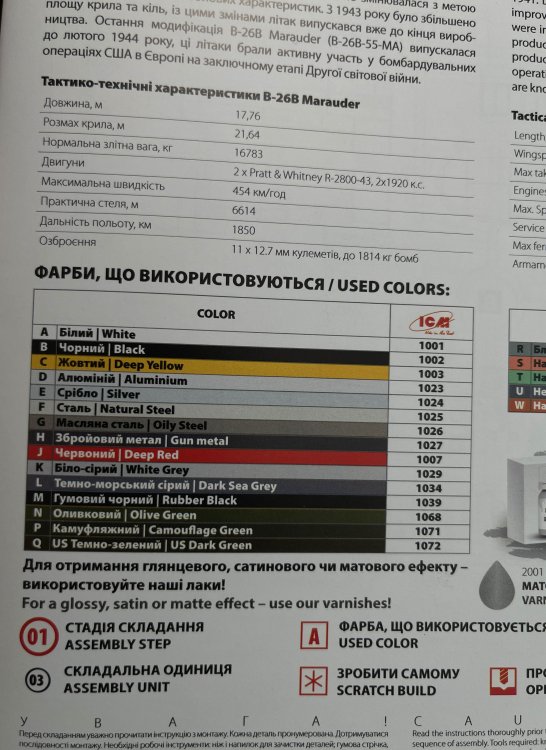
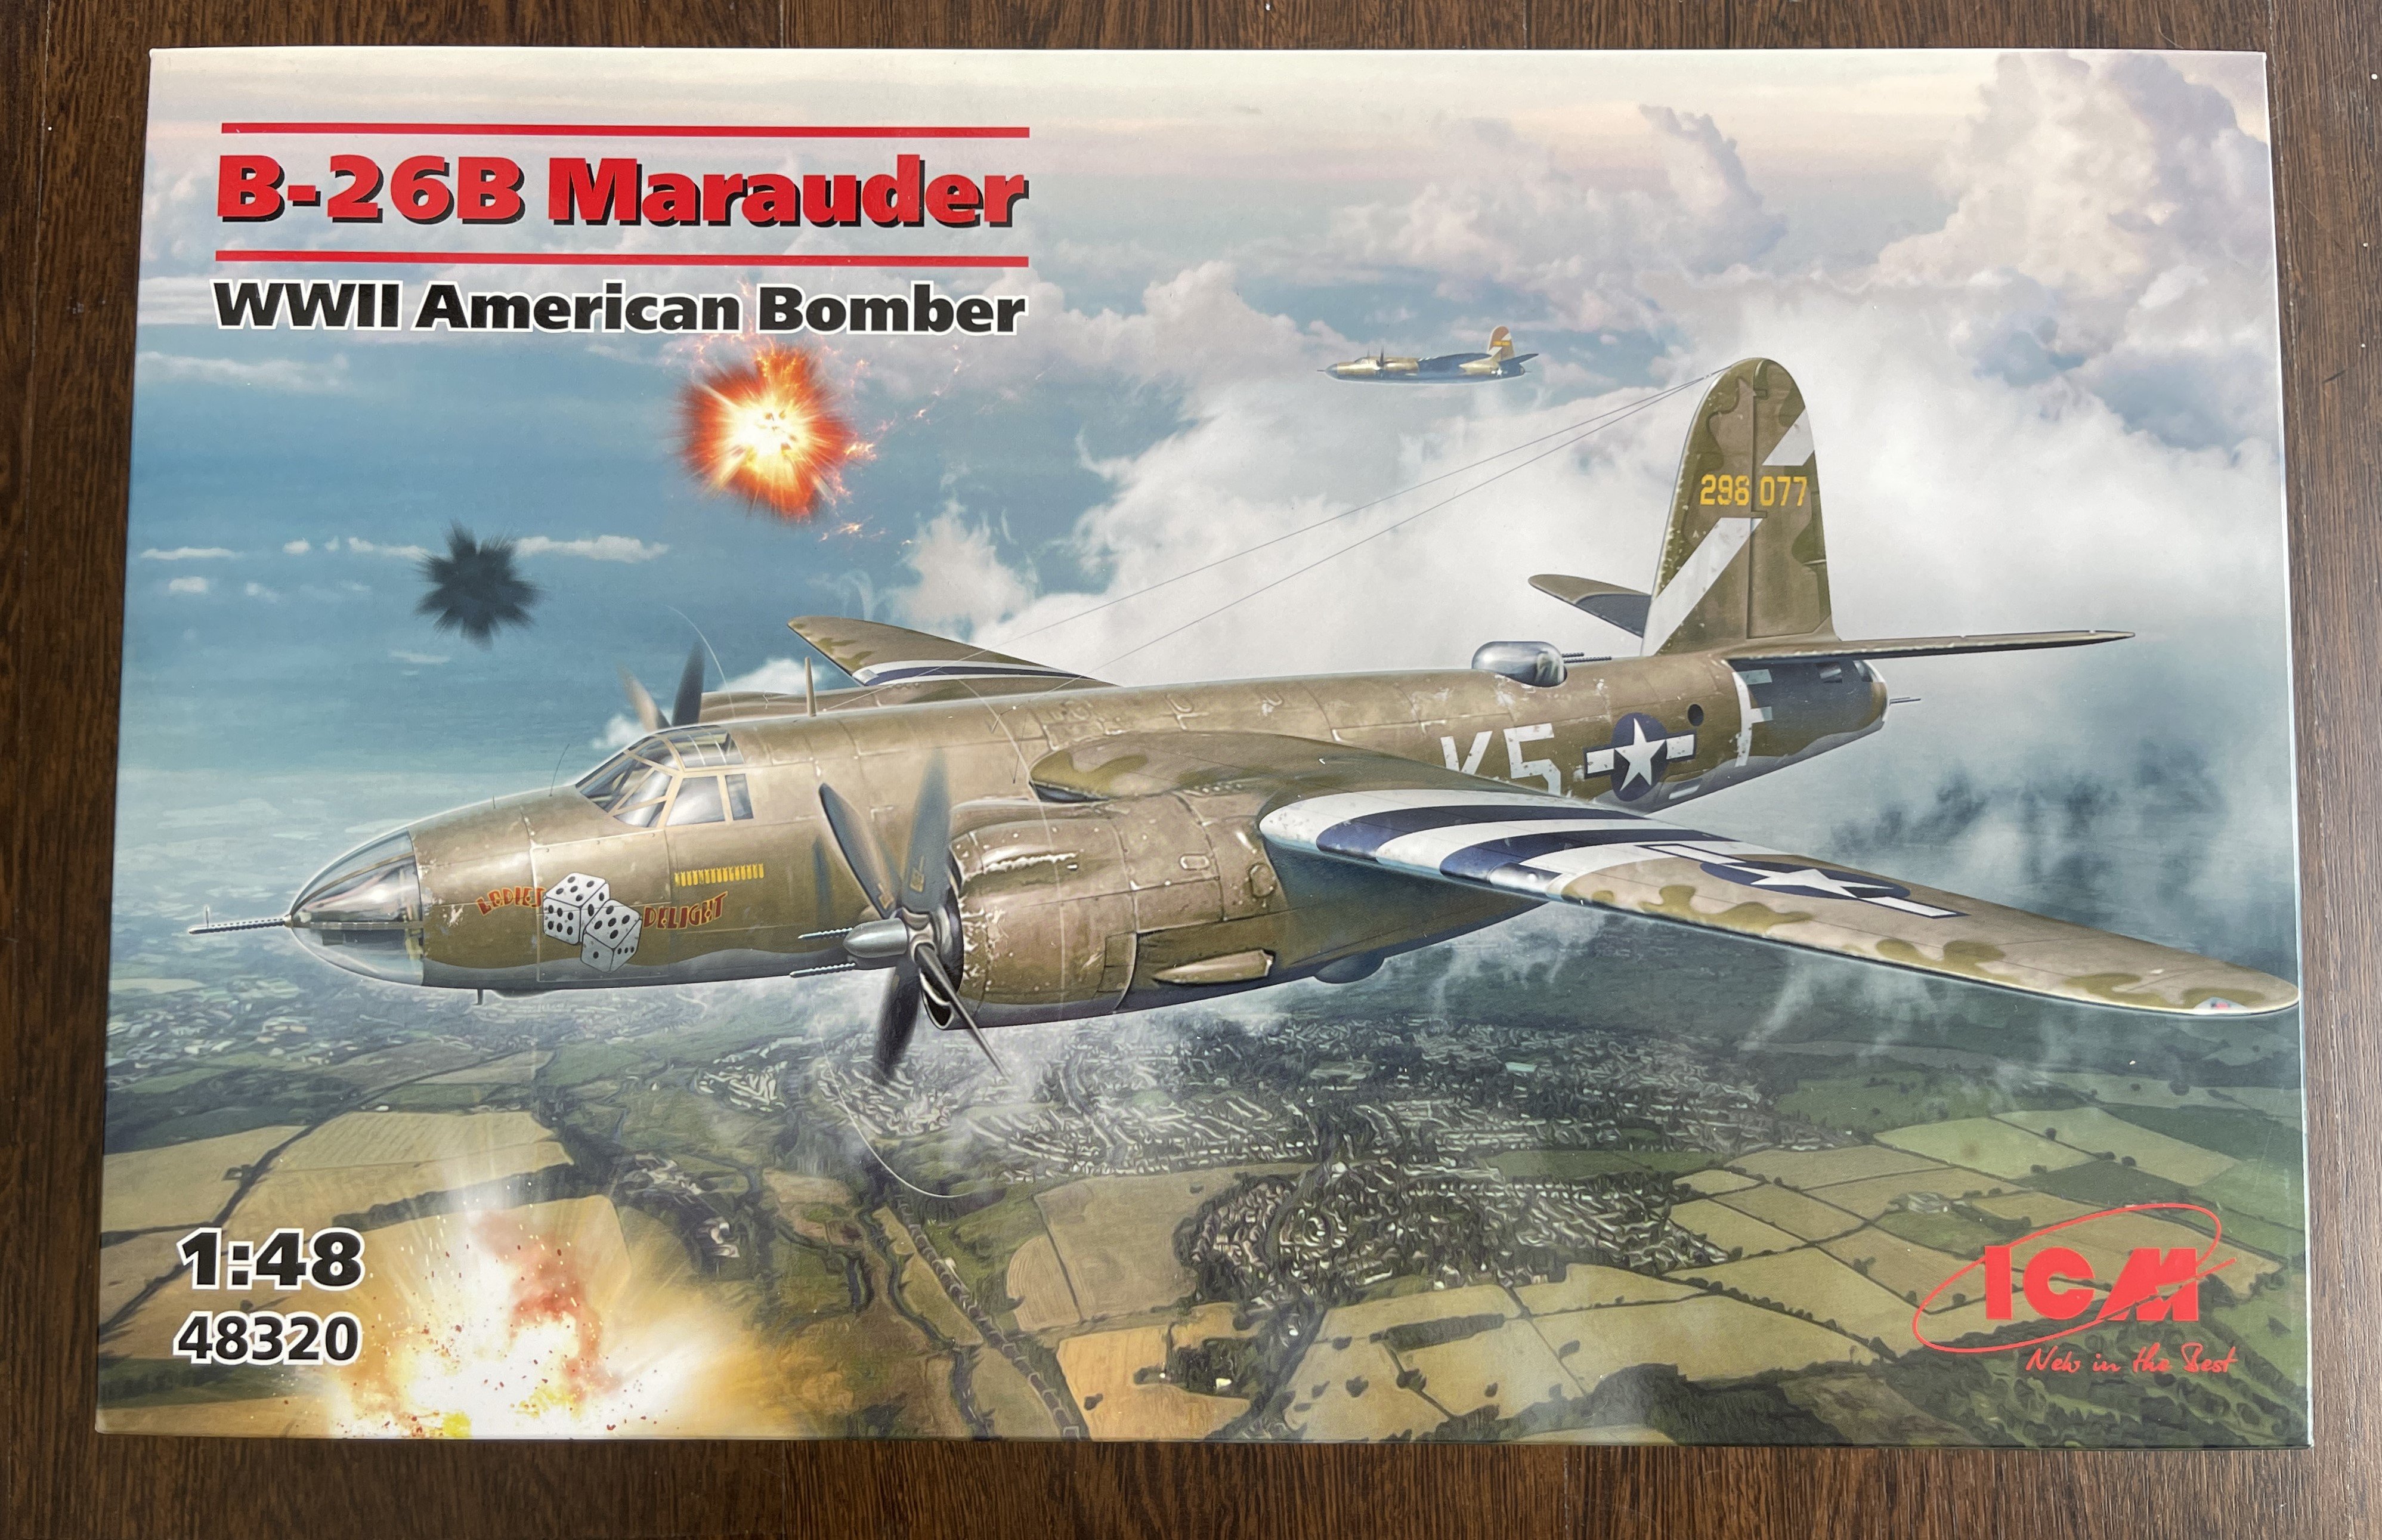
1:48
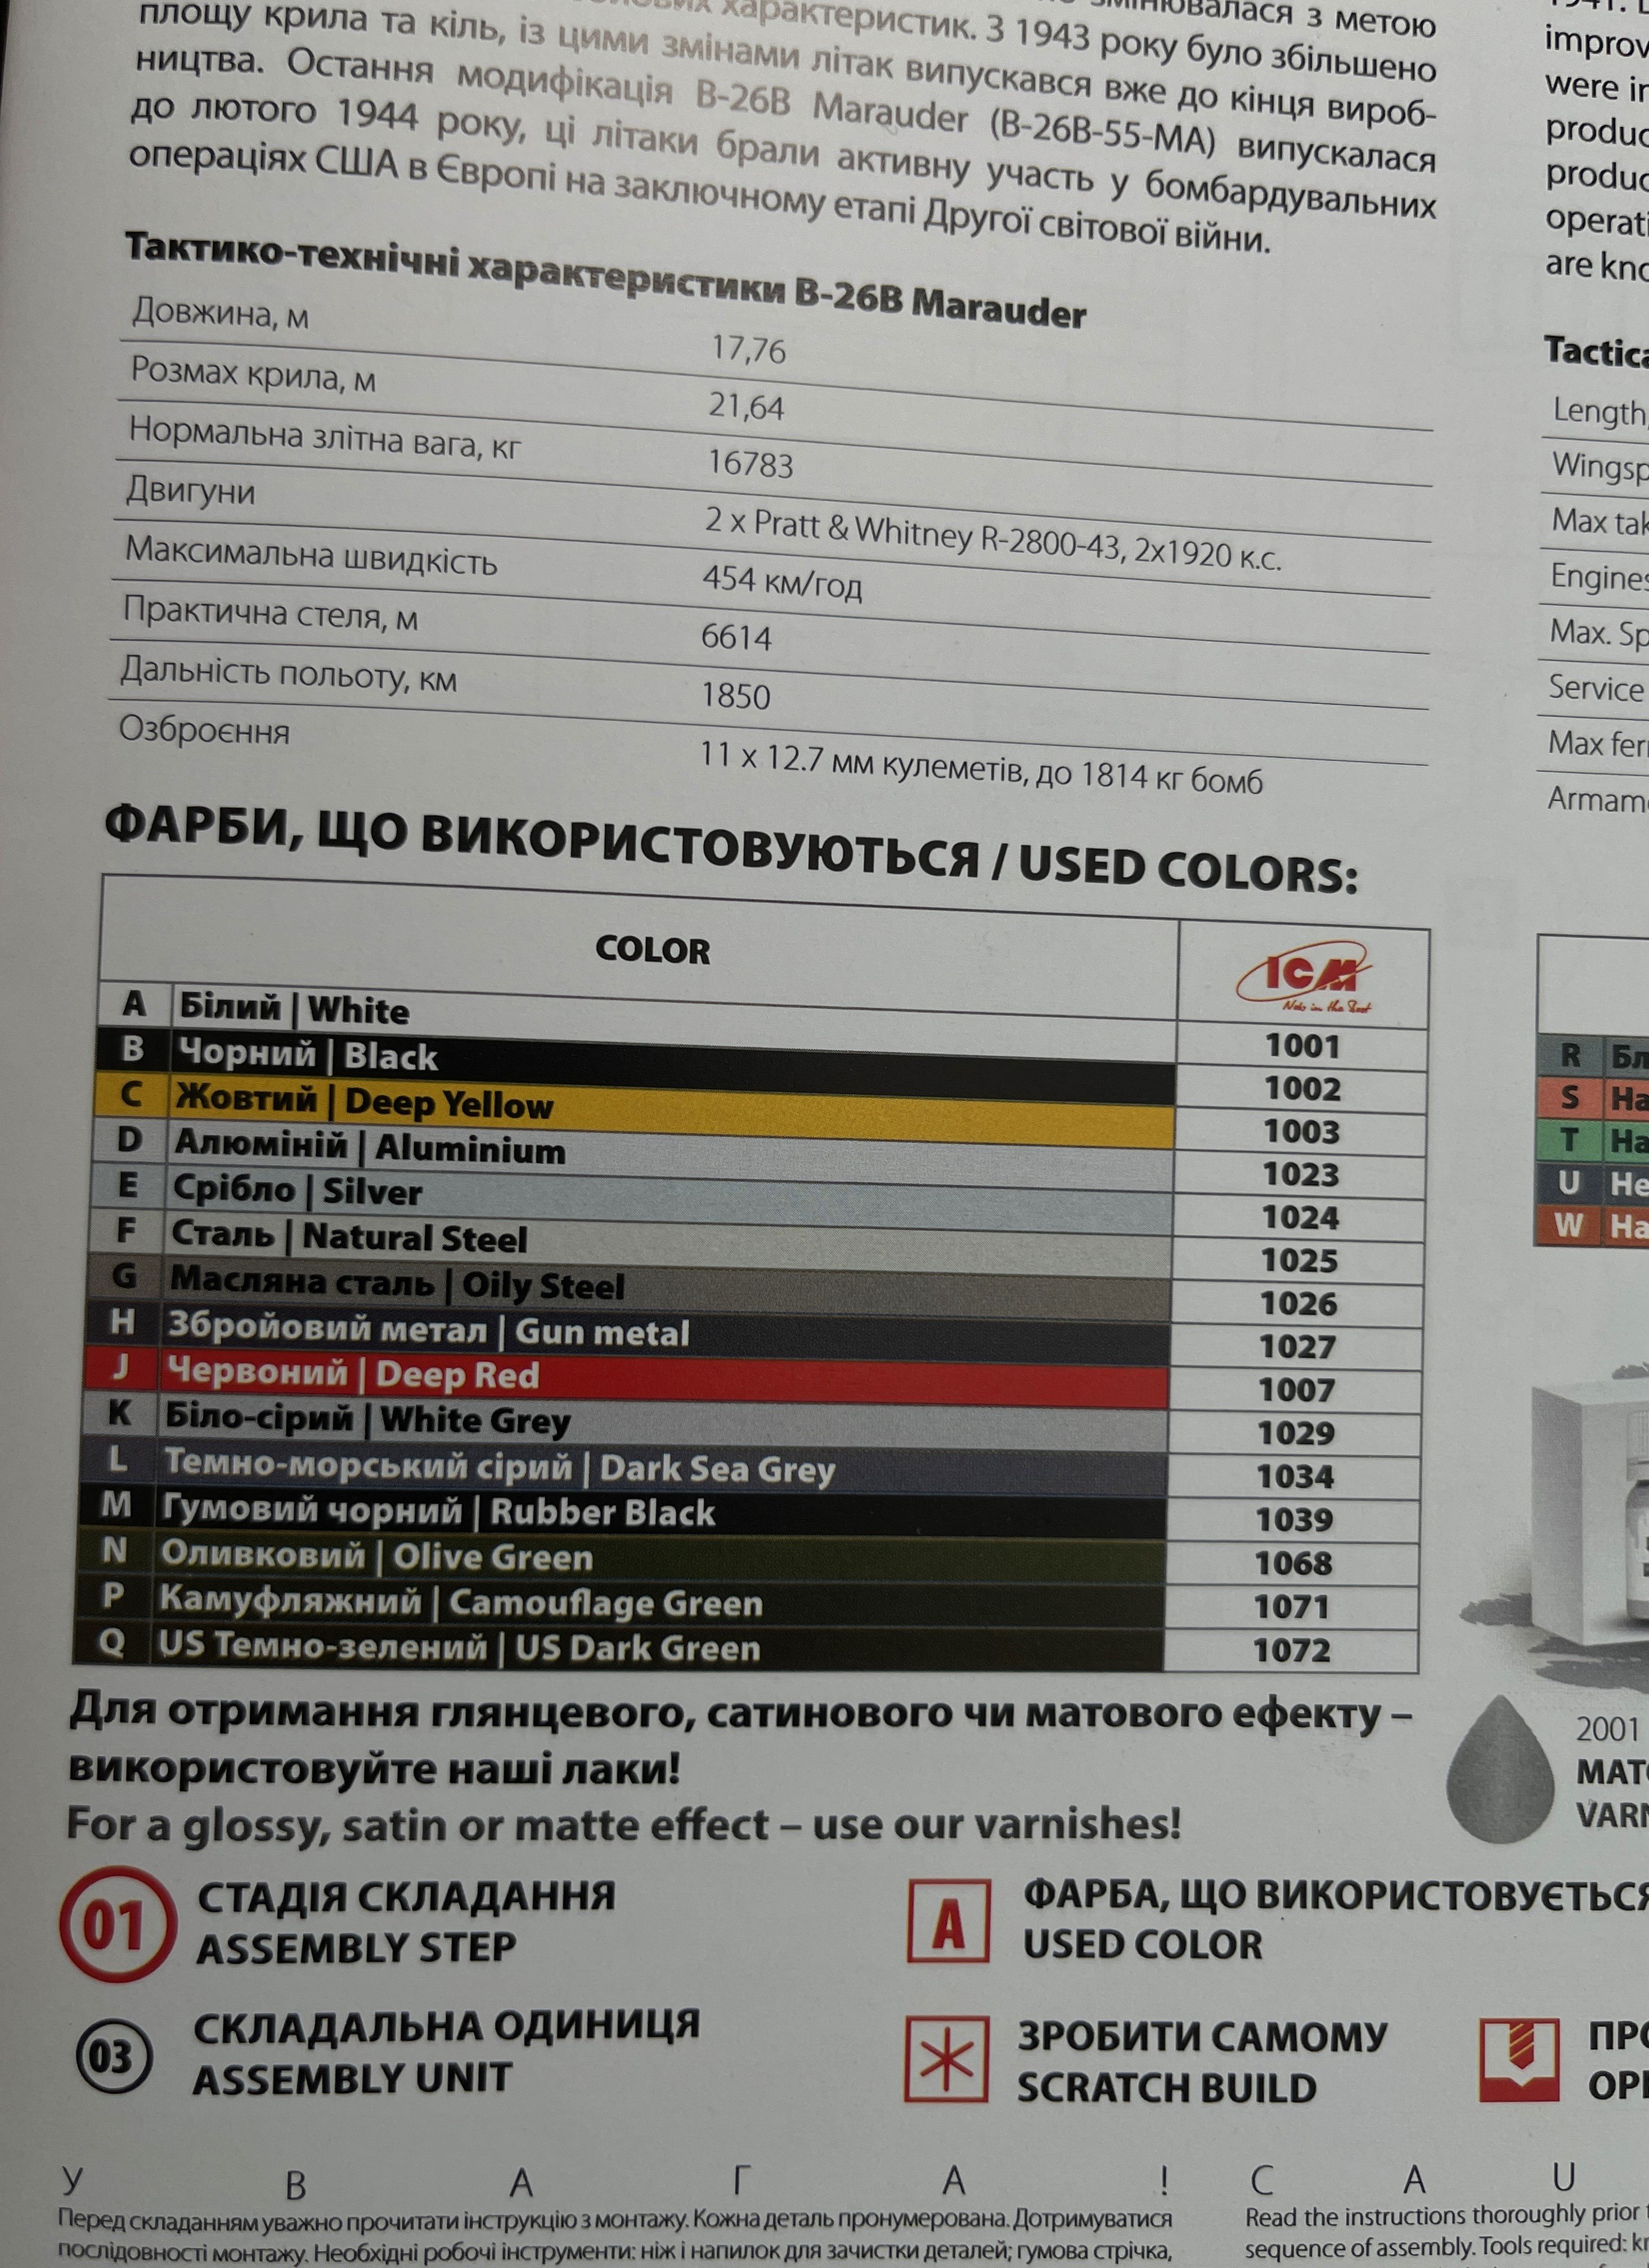
B-26B
Marauder
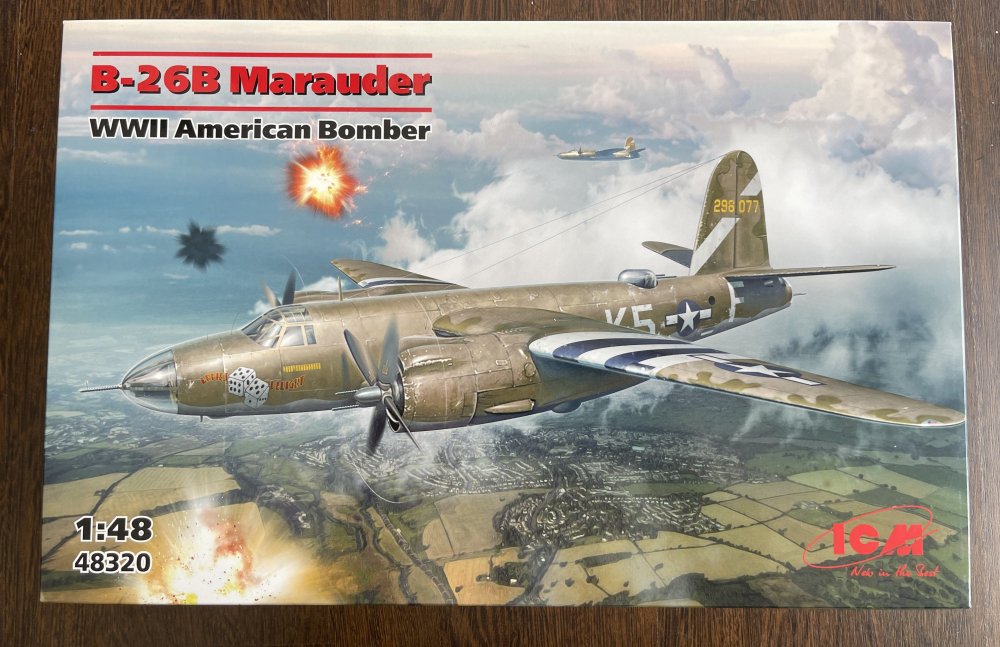
ICM
Catalogue number 48320
Price: around 75€
“The Glenn L. Martin Company's Model 179 answered a January 1939 Army Air Corps specification for a high-speed bomber. The Army ordered the streamline twin-engine, all-metal monoplane, designated the B-26 Marauder, in September and the first production example flew in November 1940. The design incorporated several new innovations. The high wing loading of the design and the resultant increased landing and take-off speeds caused many accidents in training. Intimidating epithets such as the "Widow Maker" and "One-a-Day-in-Tampa-Bay" added to the B-26's initial reputation as it underwent Congressional scrutiny.
As those problems were being resolved, Marauders immediately went into combat after American entry into World War II. On June 4, 1942, Army Air Forces (AAF) Marauders defending Midway Island attacked Japanese aircraft carriers with torpedoes, but failed to score hits. The AAF sent Marauders to North Africa after the Allied invasion in November 1942 for service with the Twelfth Air Force. Eighth Air Force B-26s flew the first bombing mission against German forces in Europe on May 14, 1943. In preparation for the invasion of France, the Eighth's Marauders were transferred to the Ninth Air Force, the primary American tactical air force in Europe, in October 1943.
Like the M1 Garand combat rifle, the Sherman tank, and the LST, the Marauder was an important weapon in the war against the Axis powers. B-26 crews flew over 100,000 sorties and dropped approximately 150,000 tons of bombs, primarily against Nazi Germany. The AAF lost fewer Marauders than any Allied bomber it flew—less than one-half of one percent. Besides the United States, the air forces of Great Britain and France operated Marauders in combat. Few Marauders survive today out of the 5,266 produced by Martin.
*History from National Air and Space Museum.
Just a brief history for a very well know aircraft.
So, let`s crack the box to check one of the most wanted and eagerly waited model of the year.
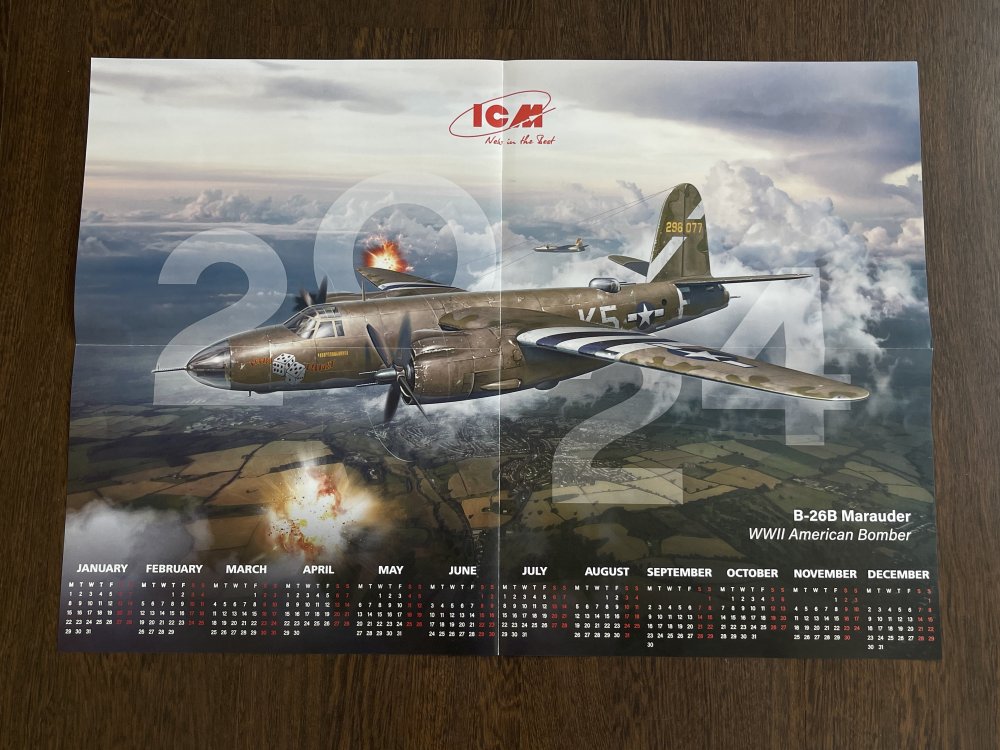
The usual ICM flip top cardboard with a separate card lid showing the artwork.
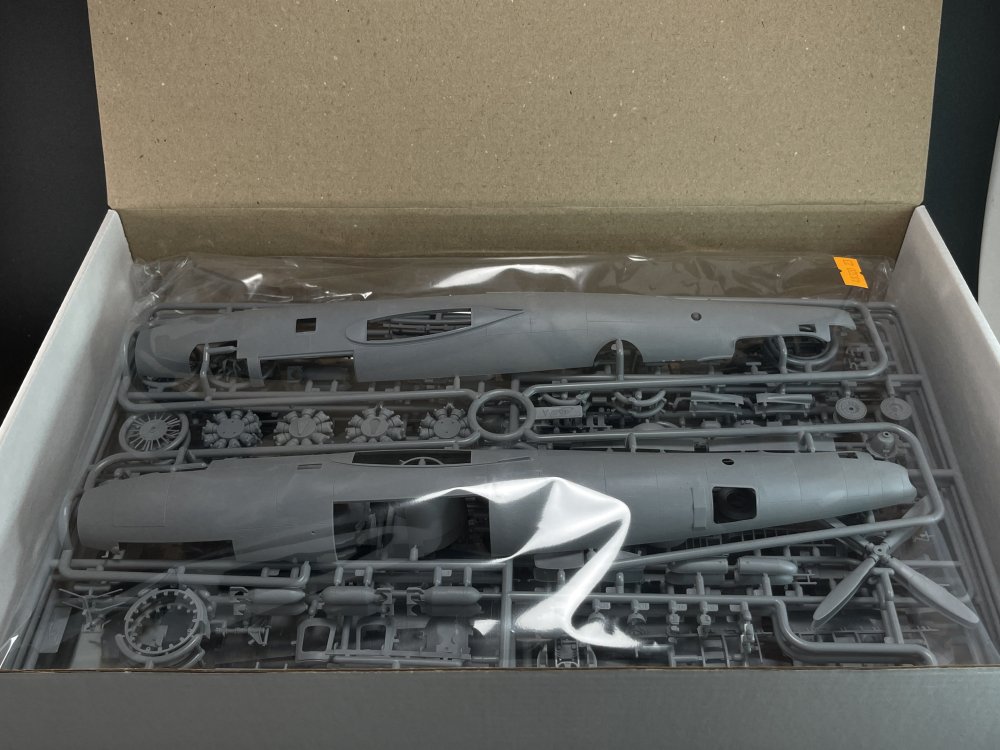
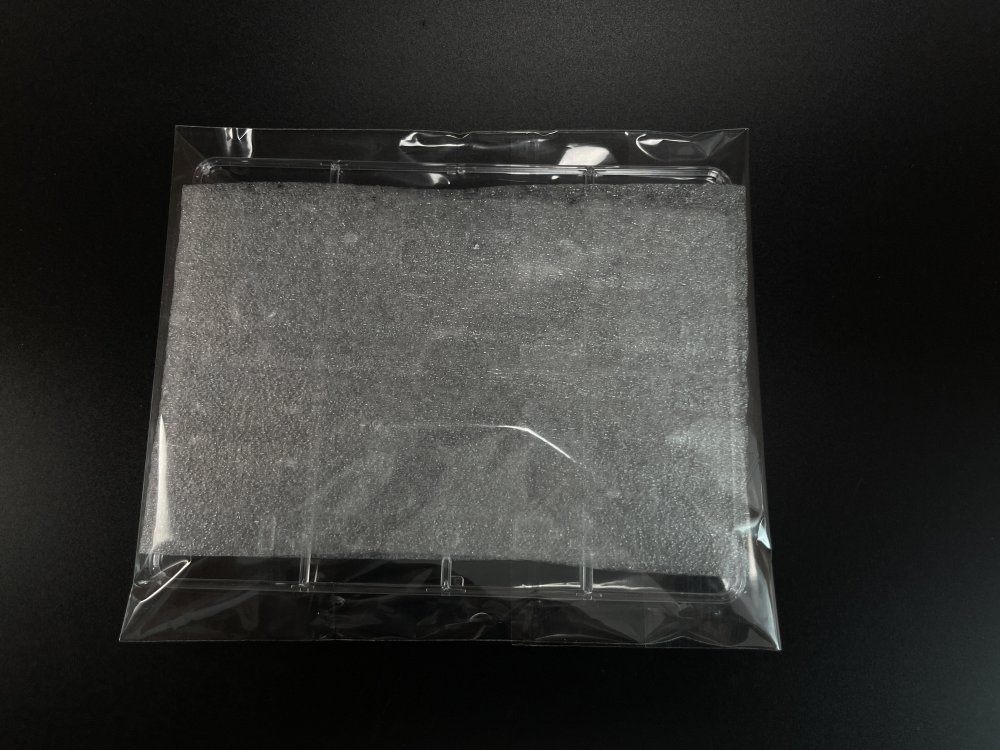
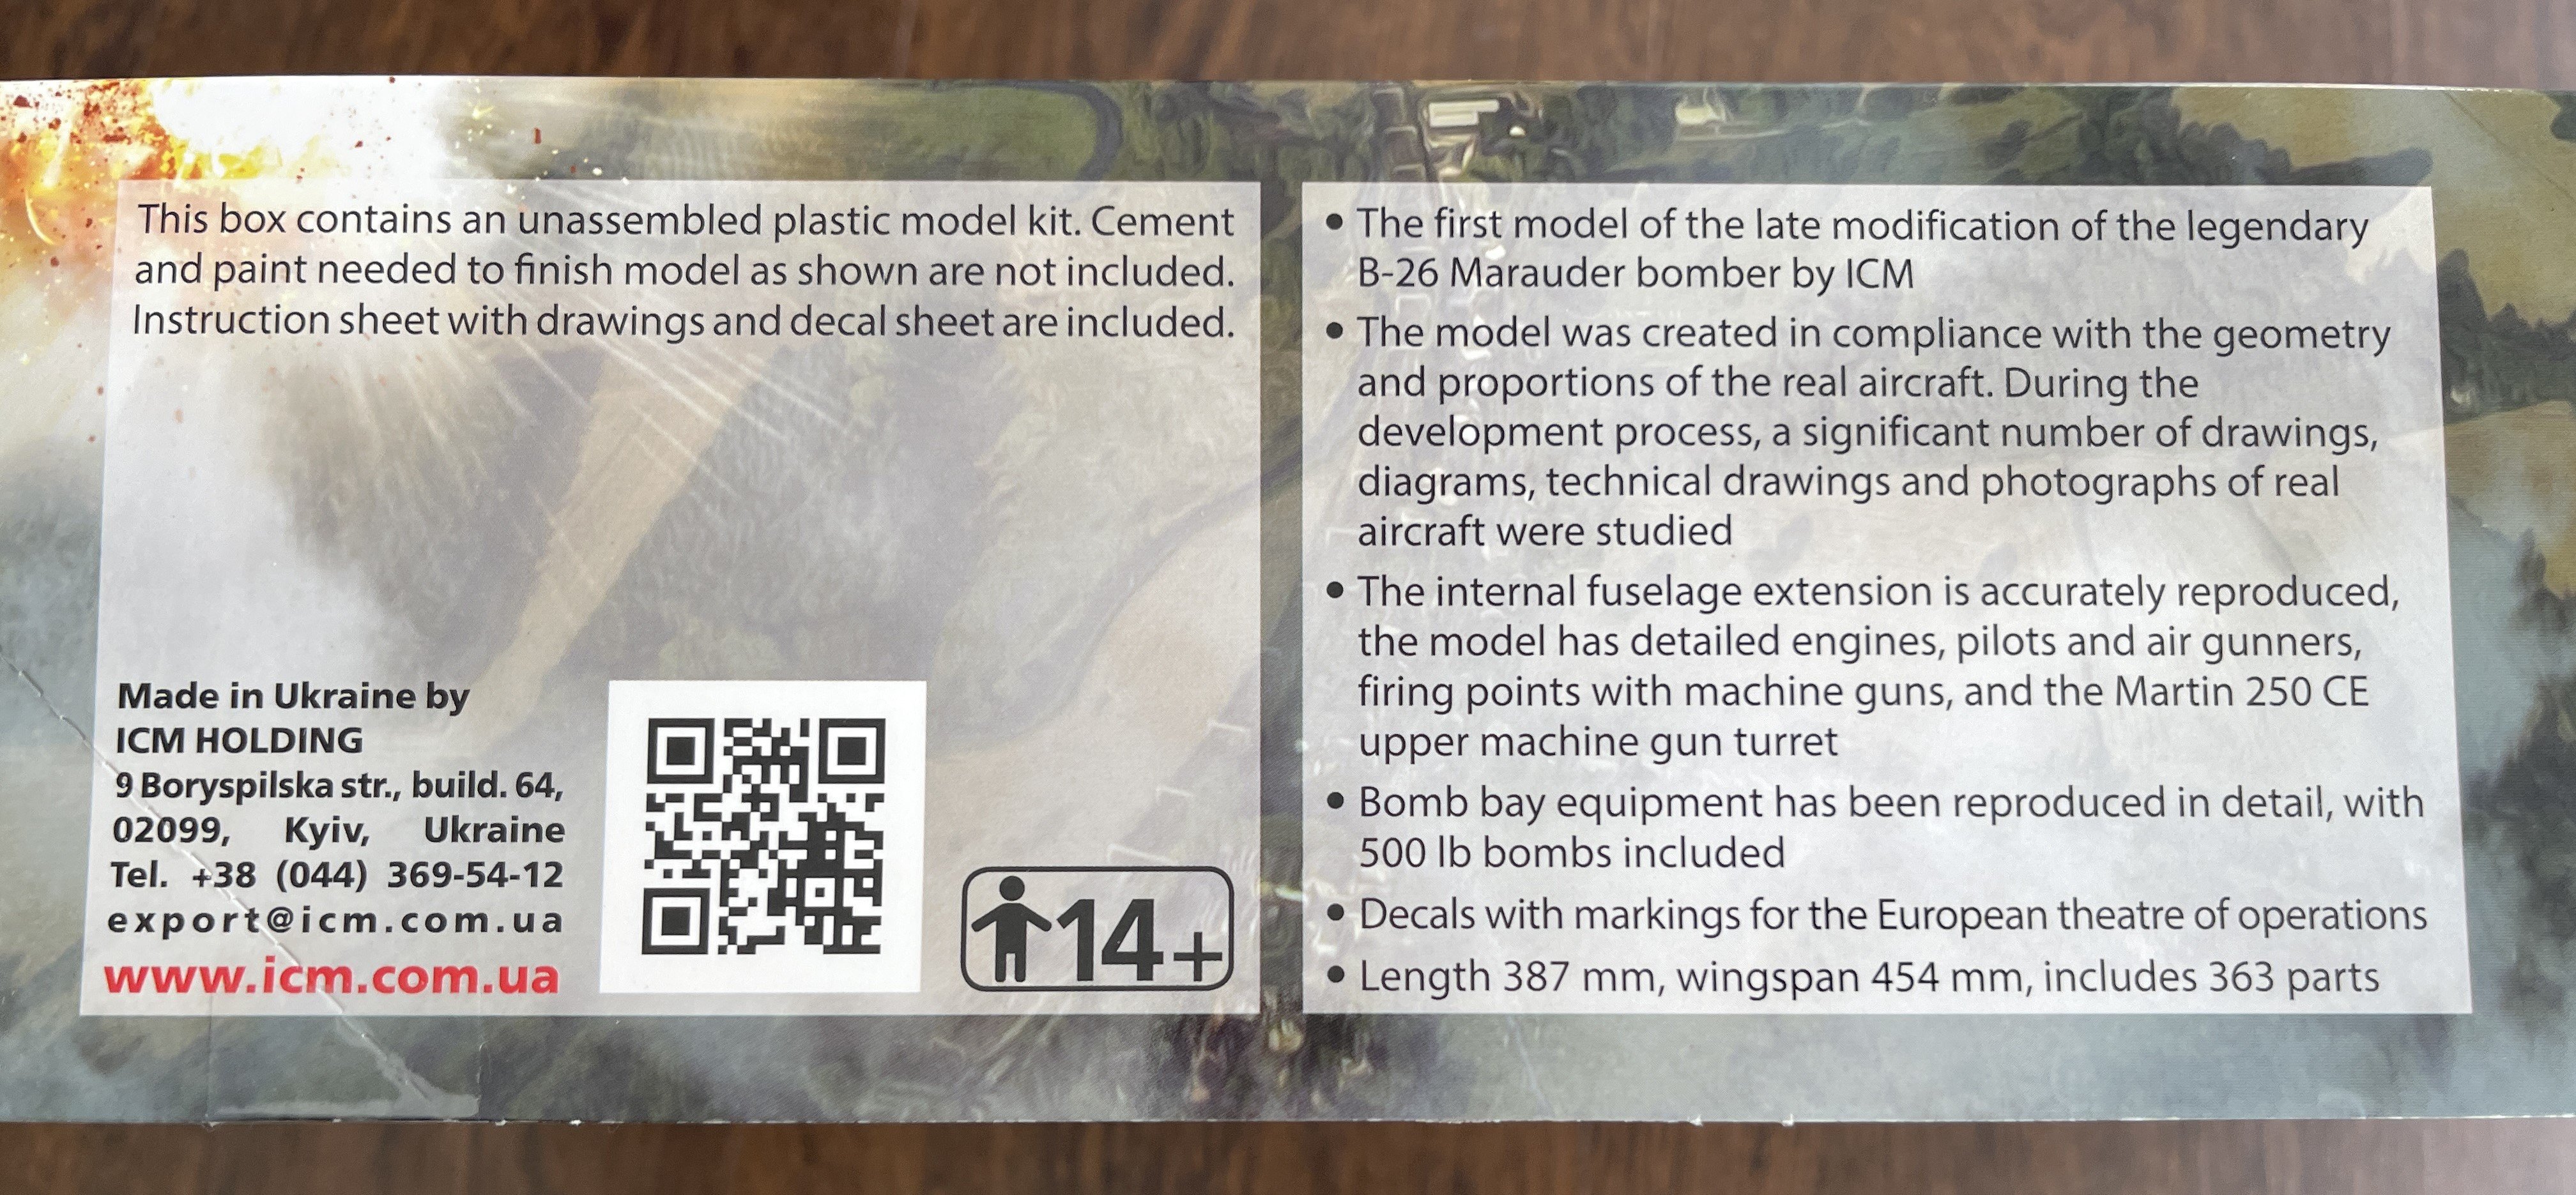
Inside you have sprues separated in two plastic bags and the clear parts in another bag and full protected.
Speaking of artwork, I really love these ICM artworks. No idea who is the author but kudos to his work.
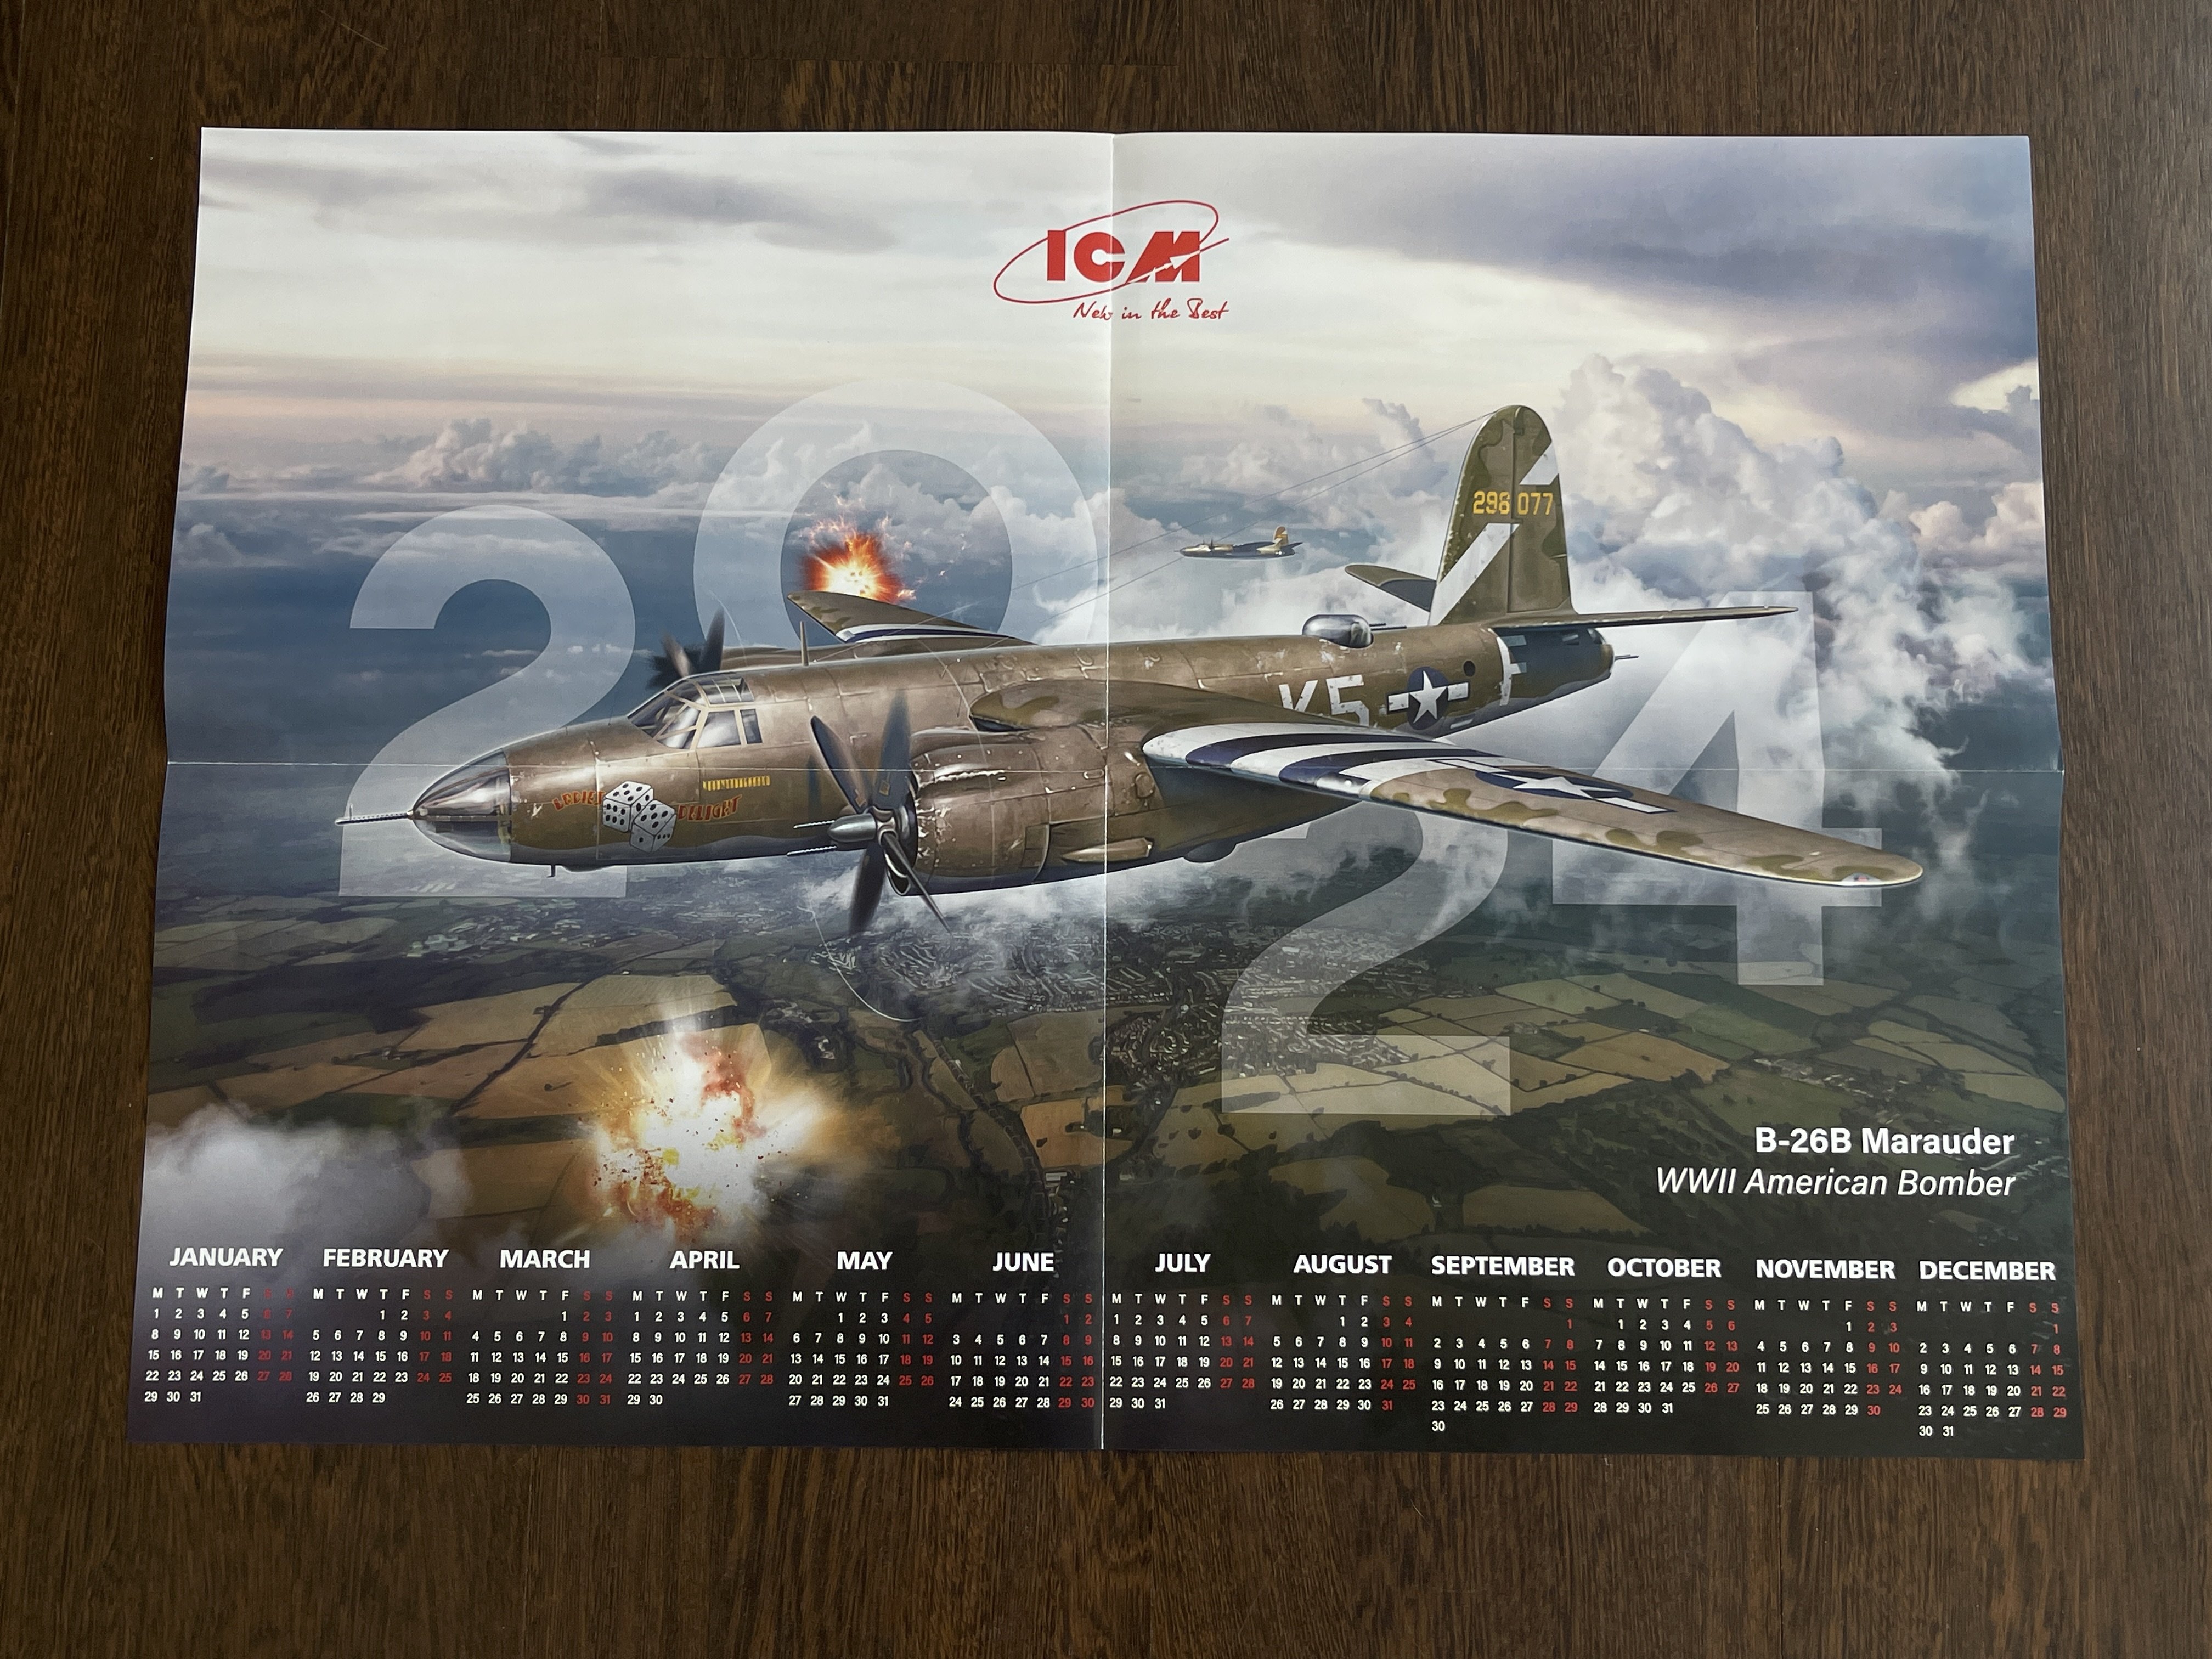
Inside you will also find a calendar.
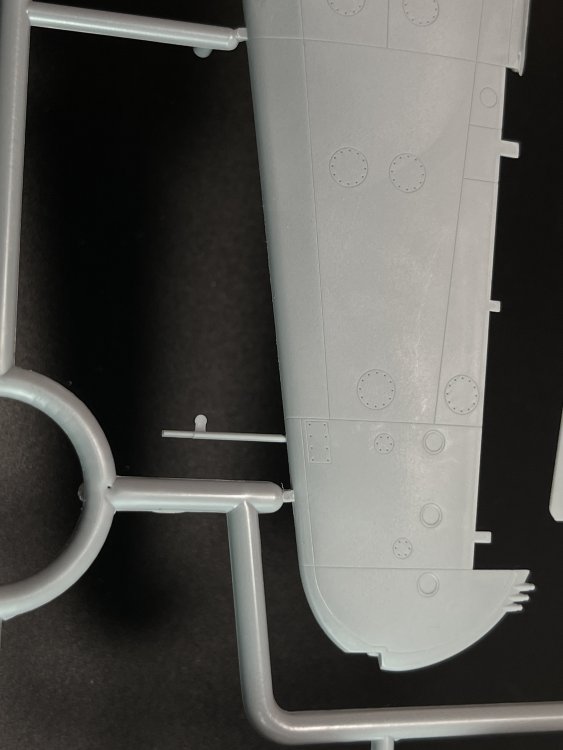
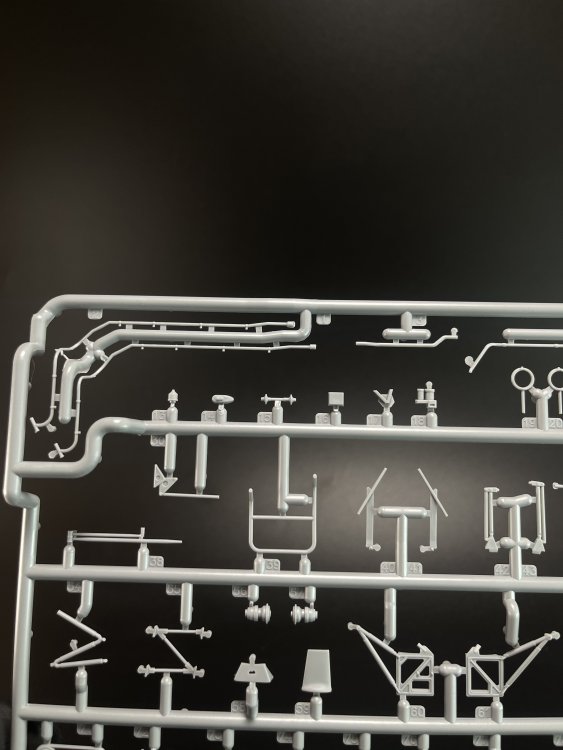
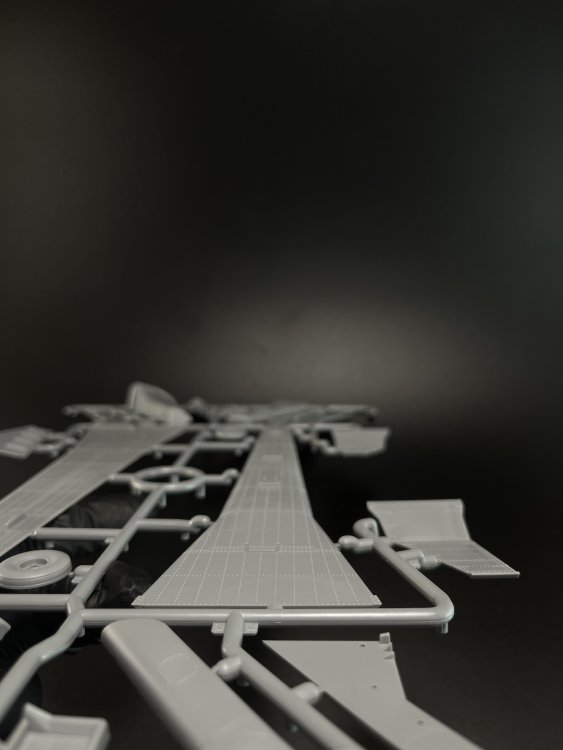
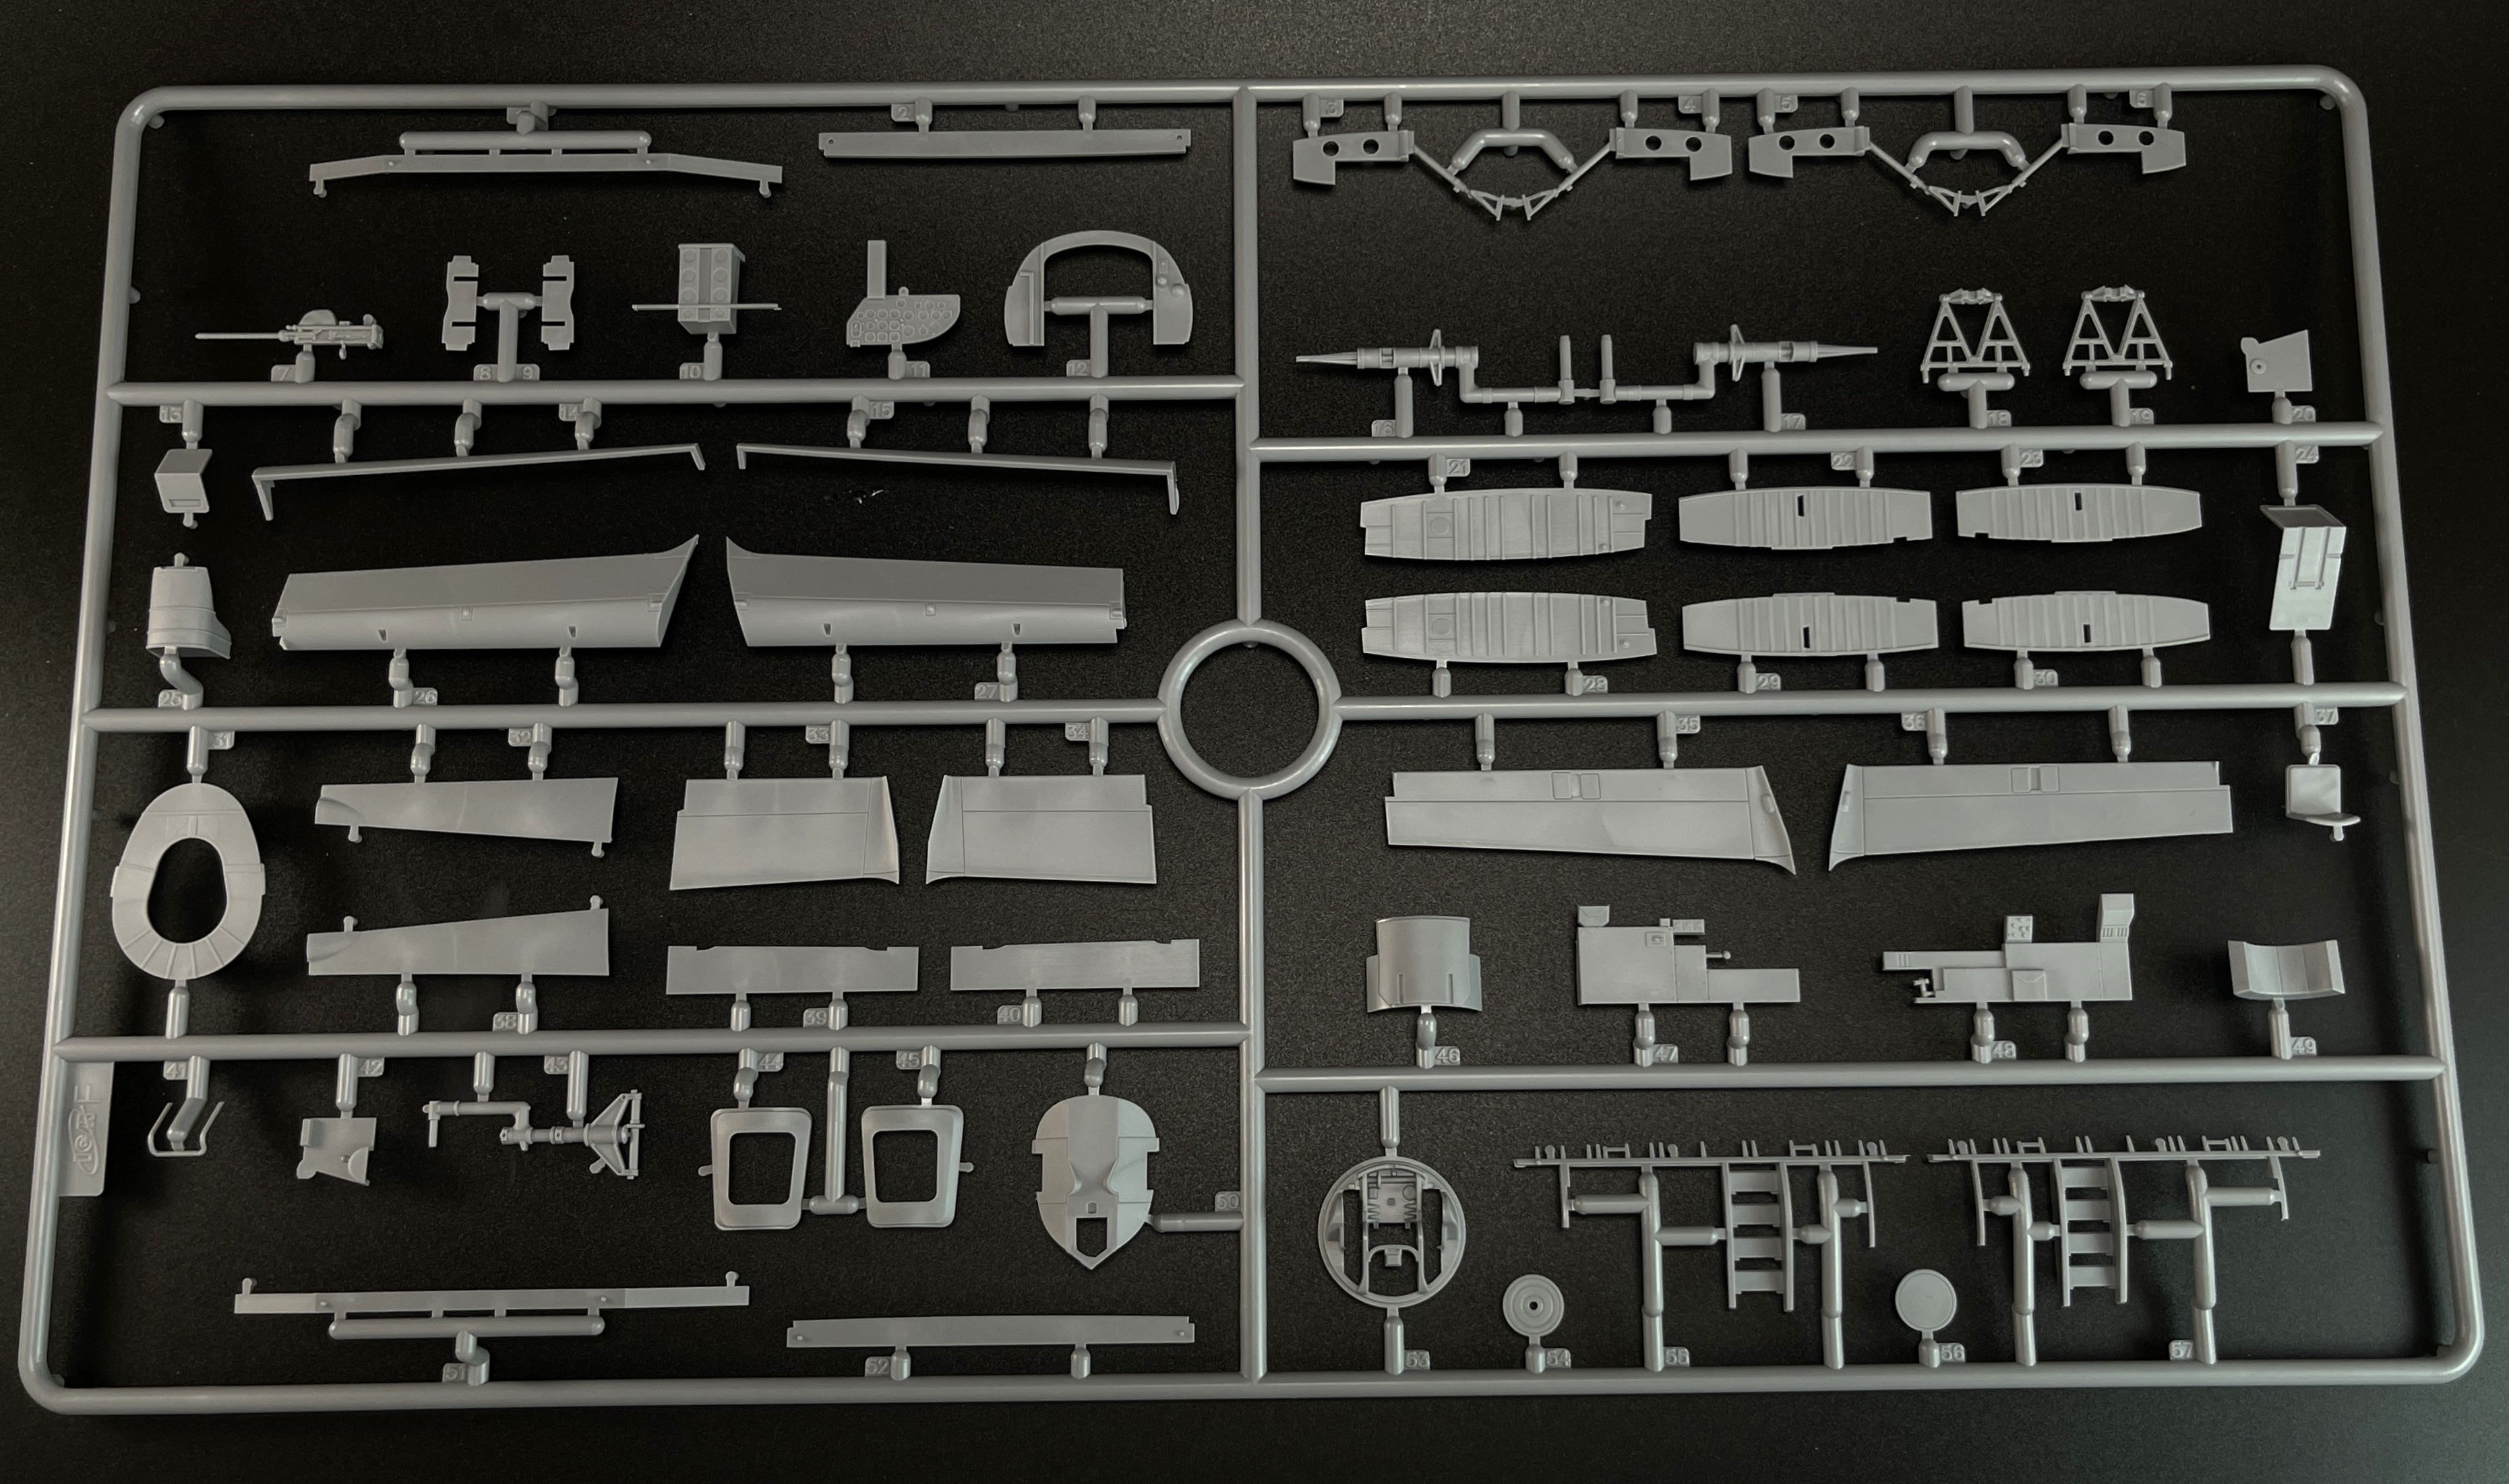
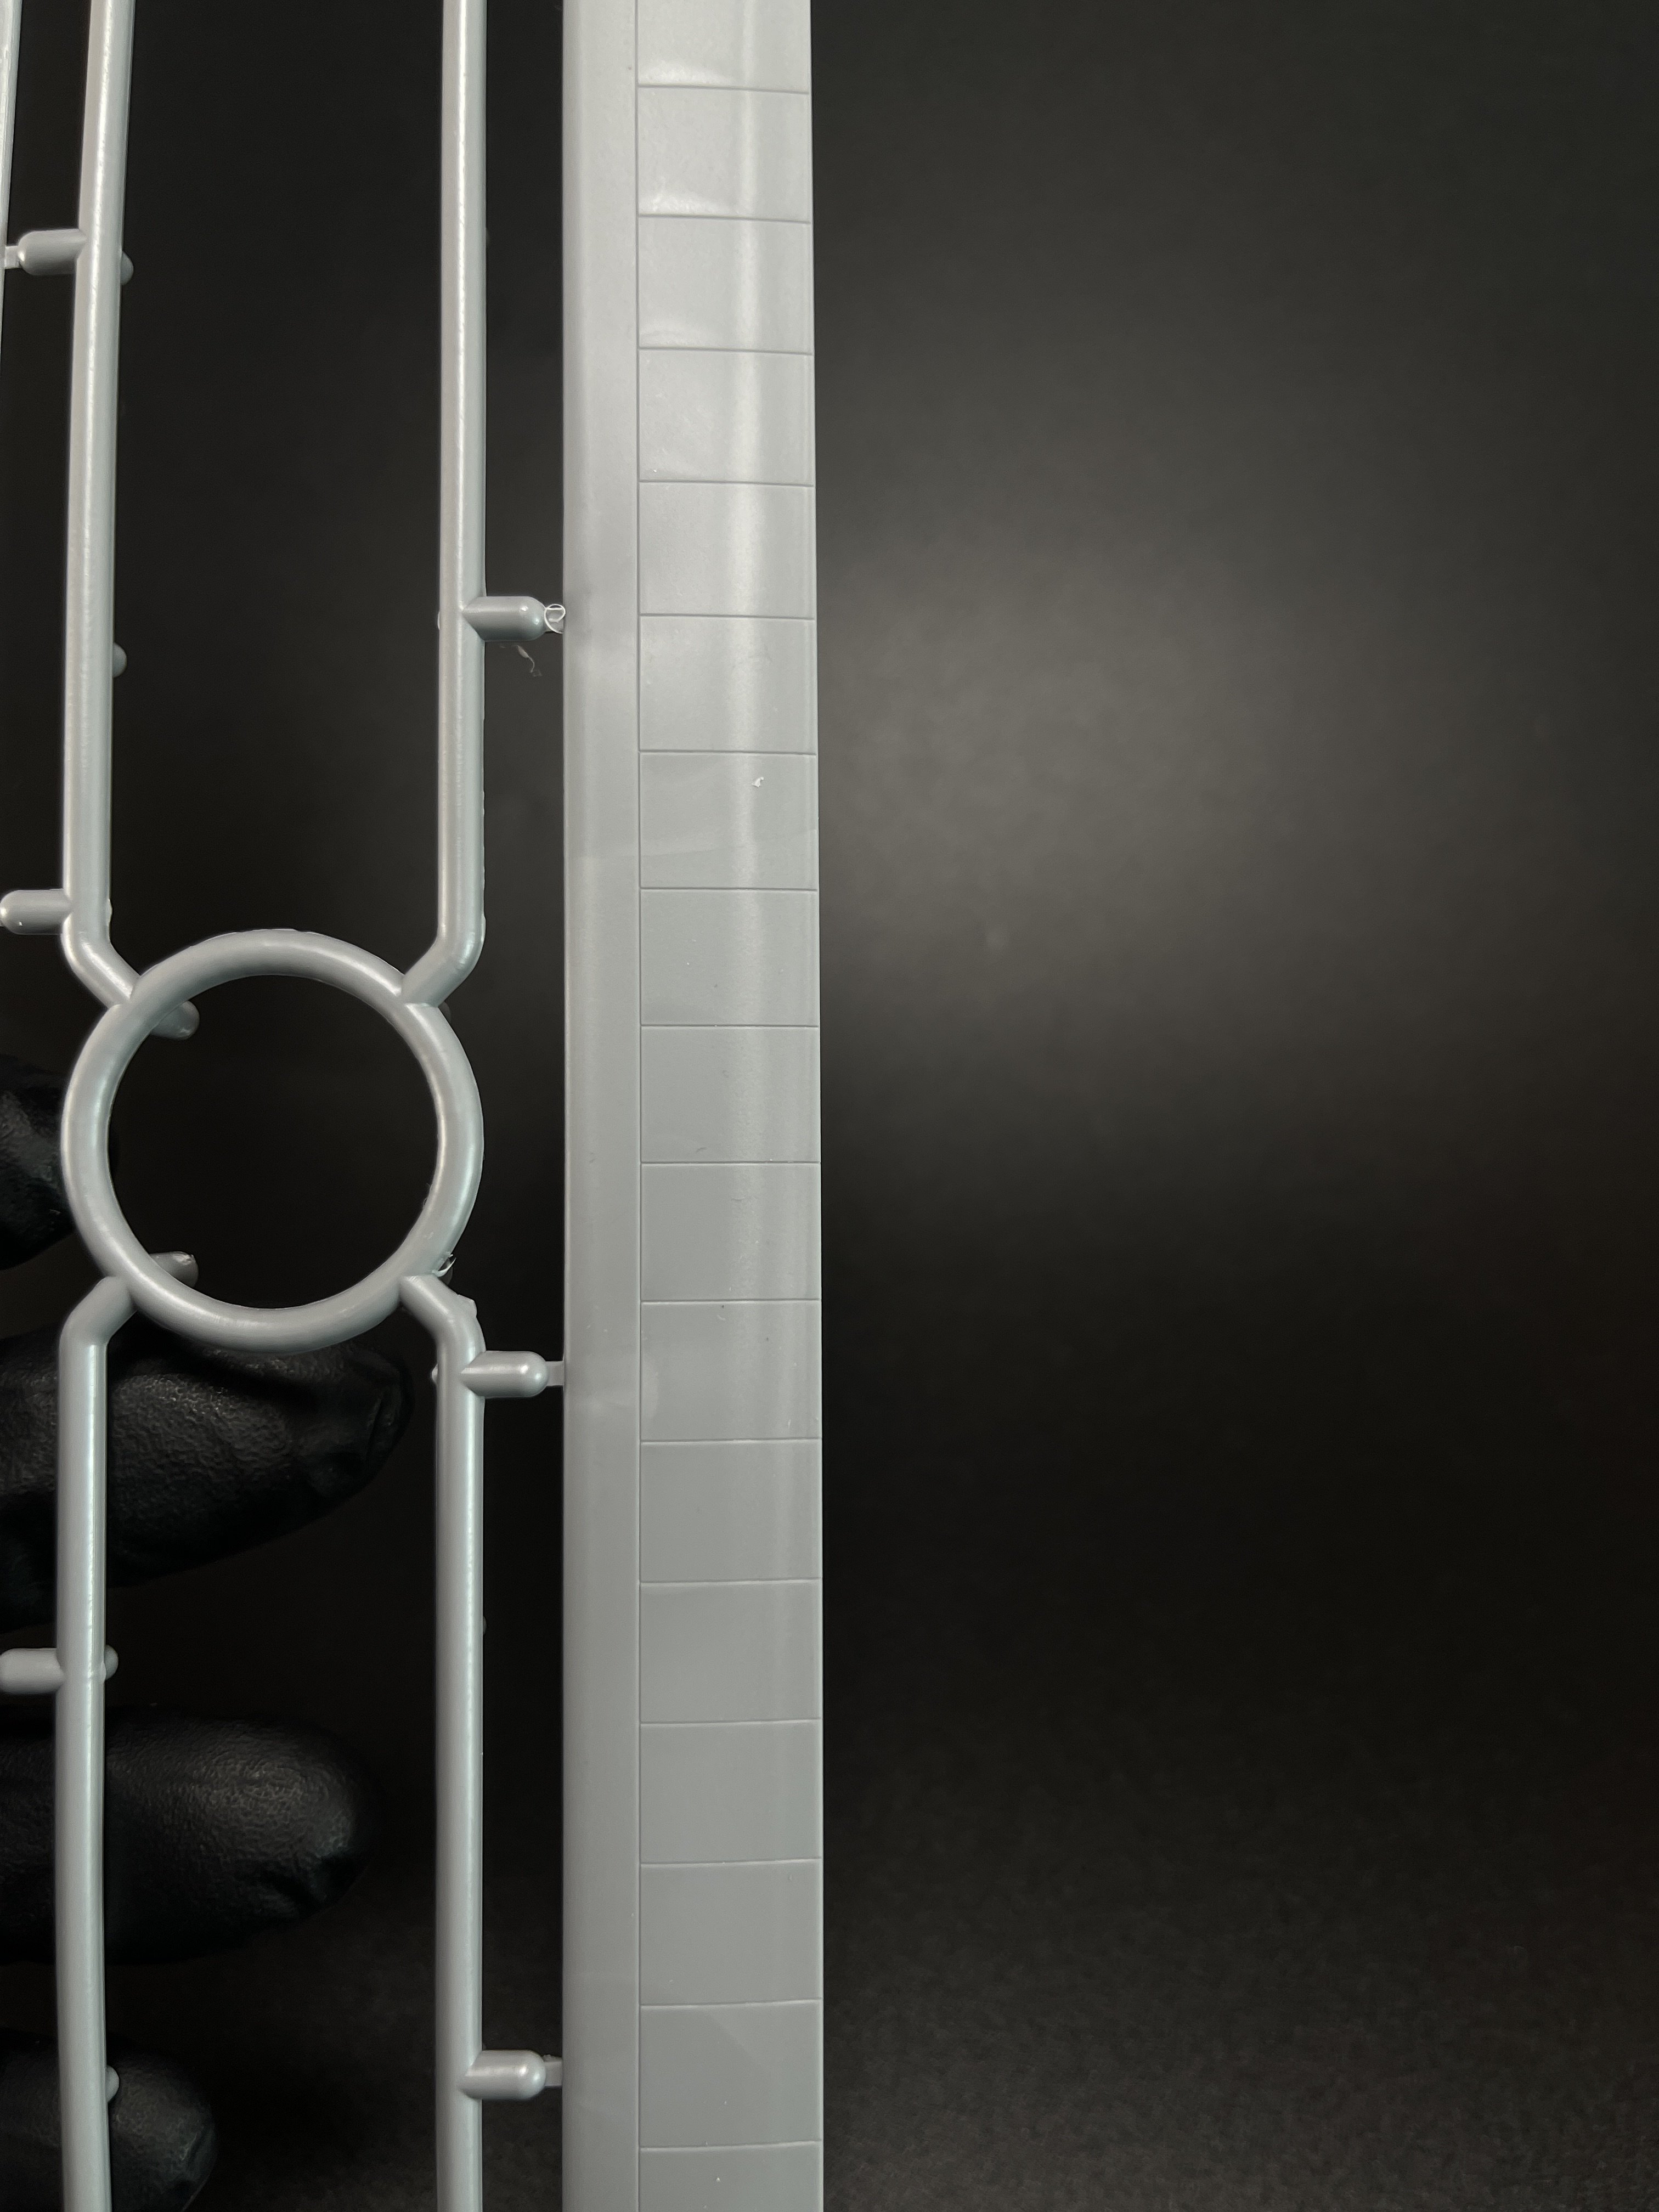
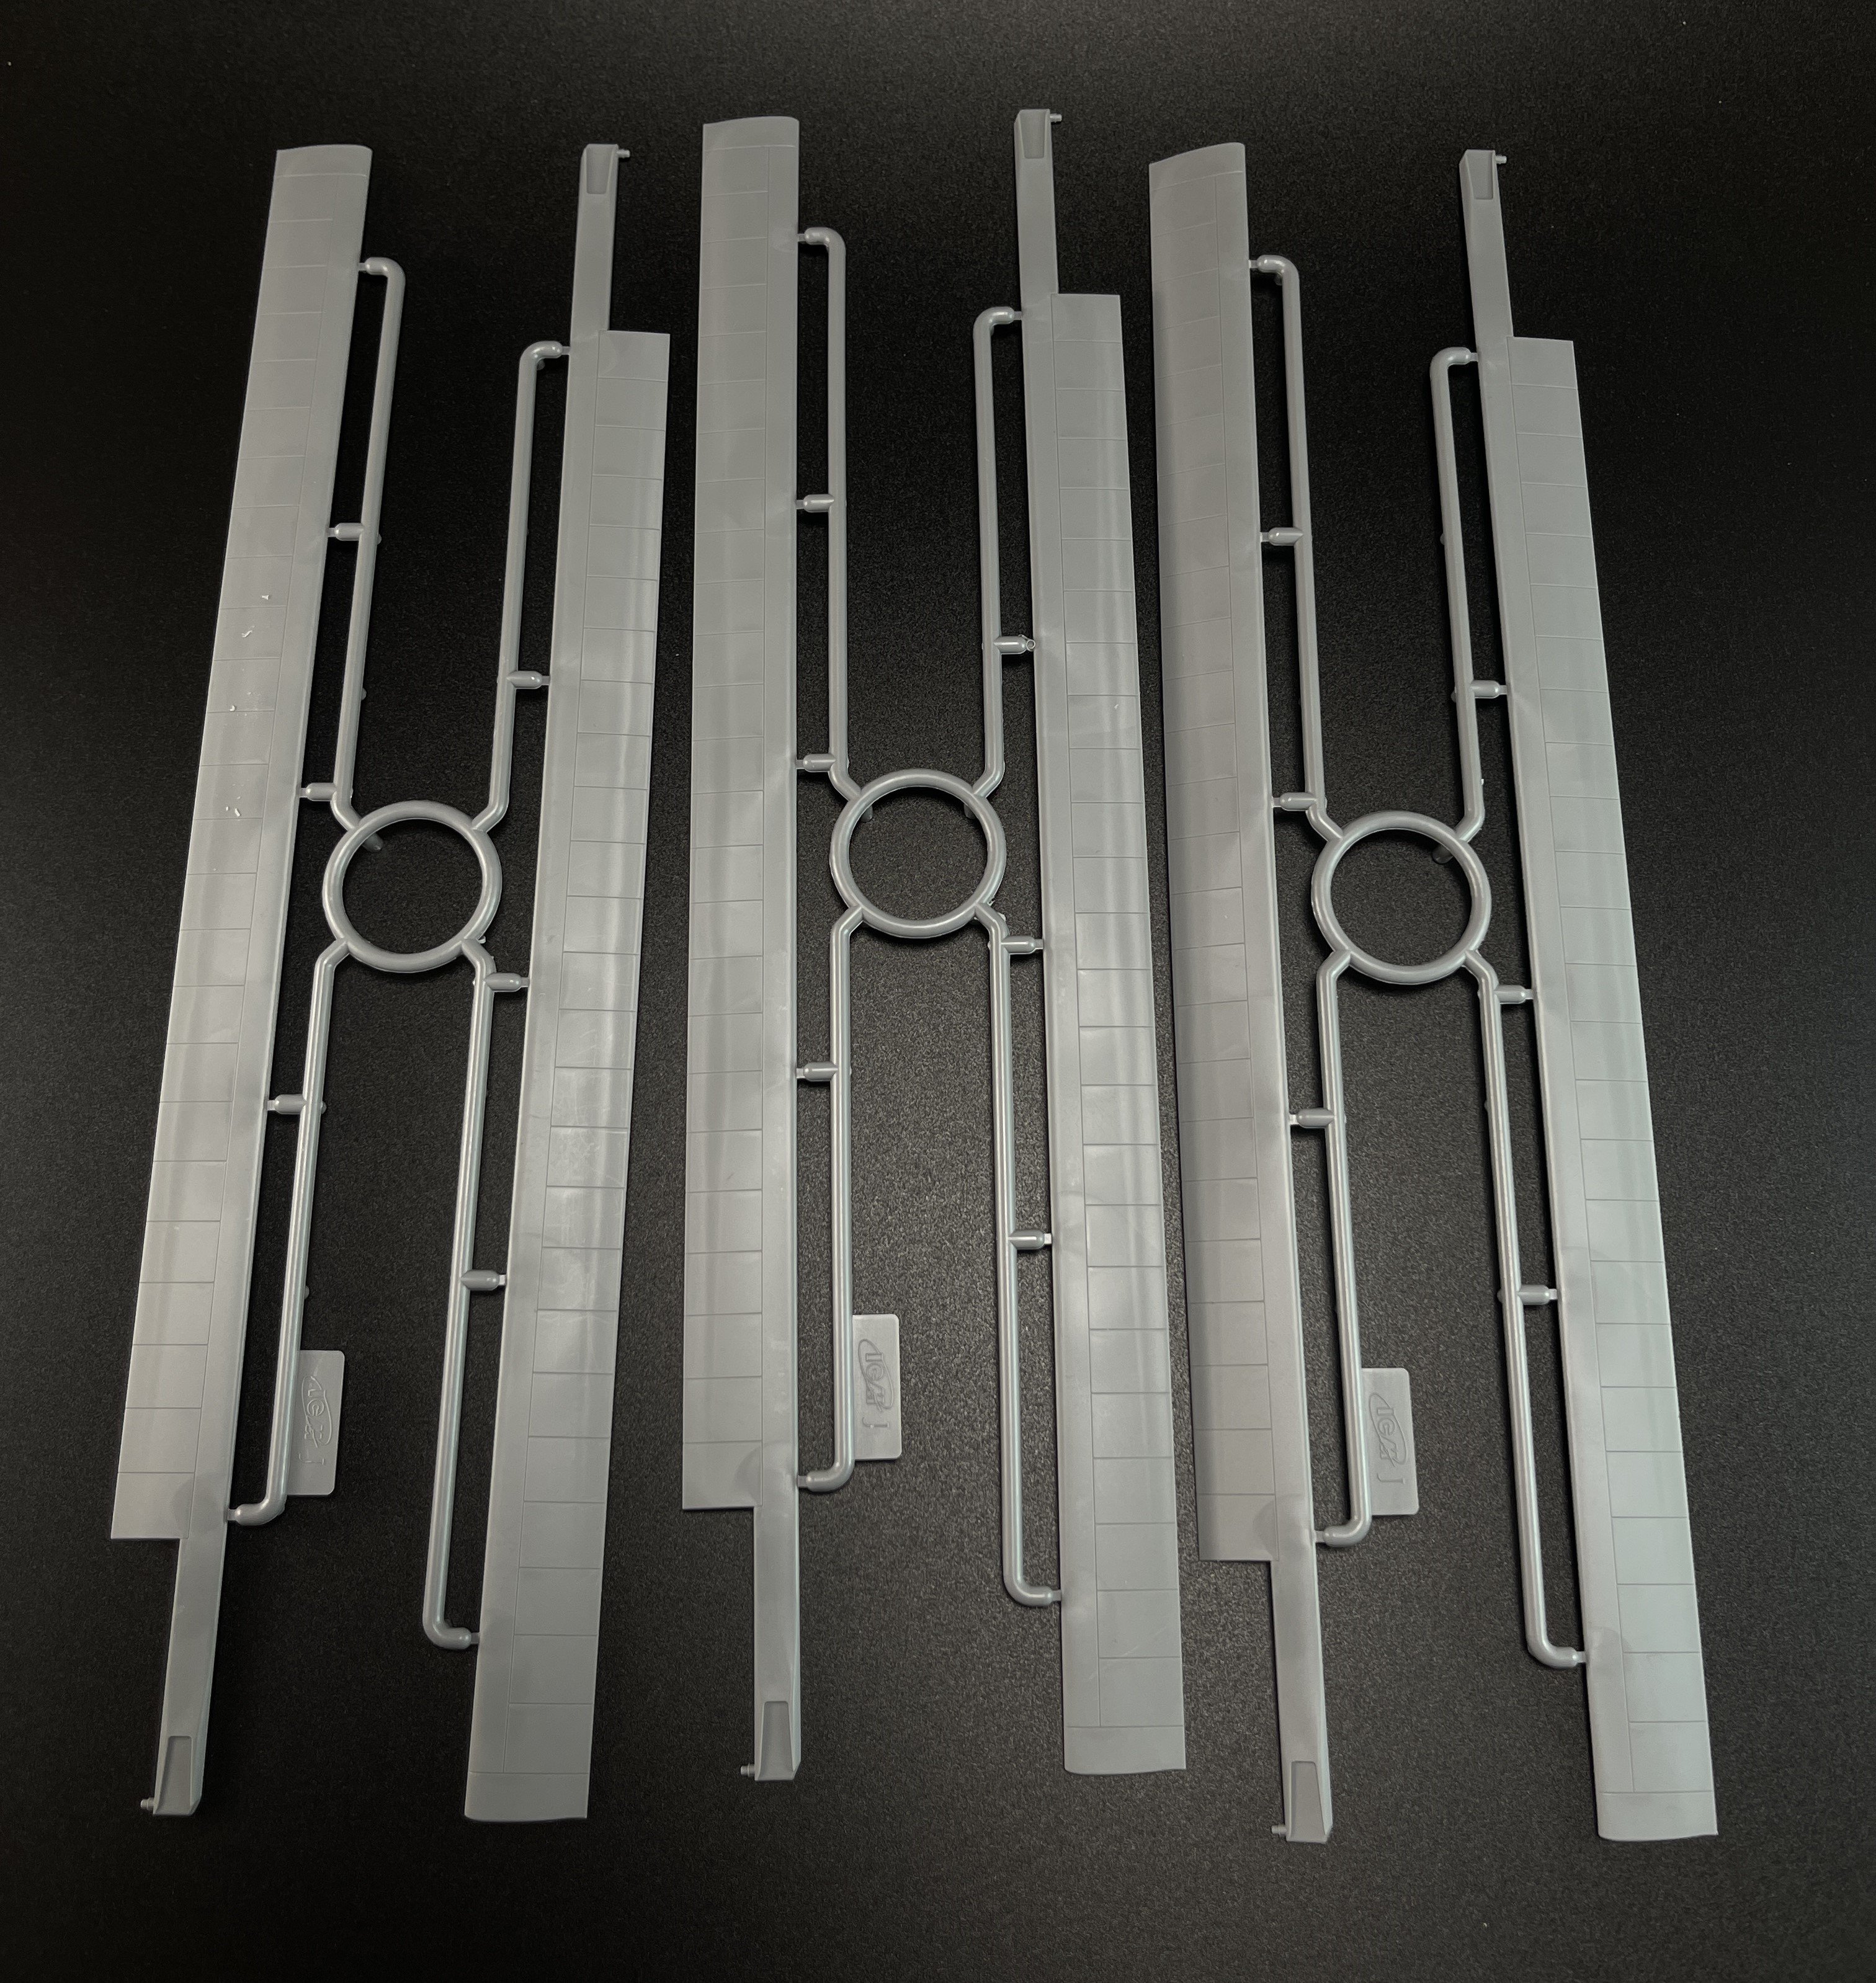
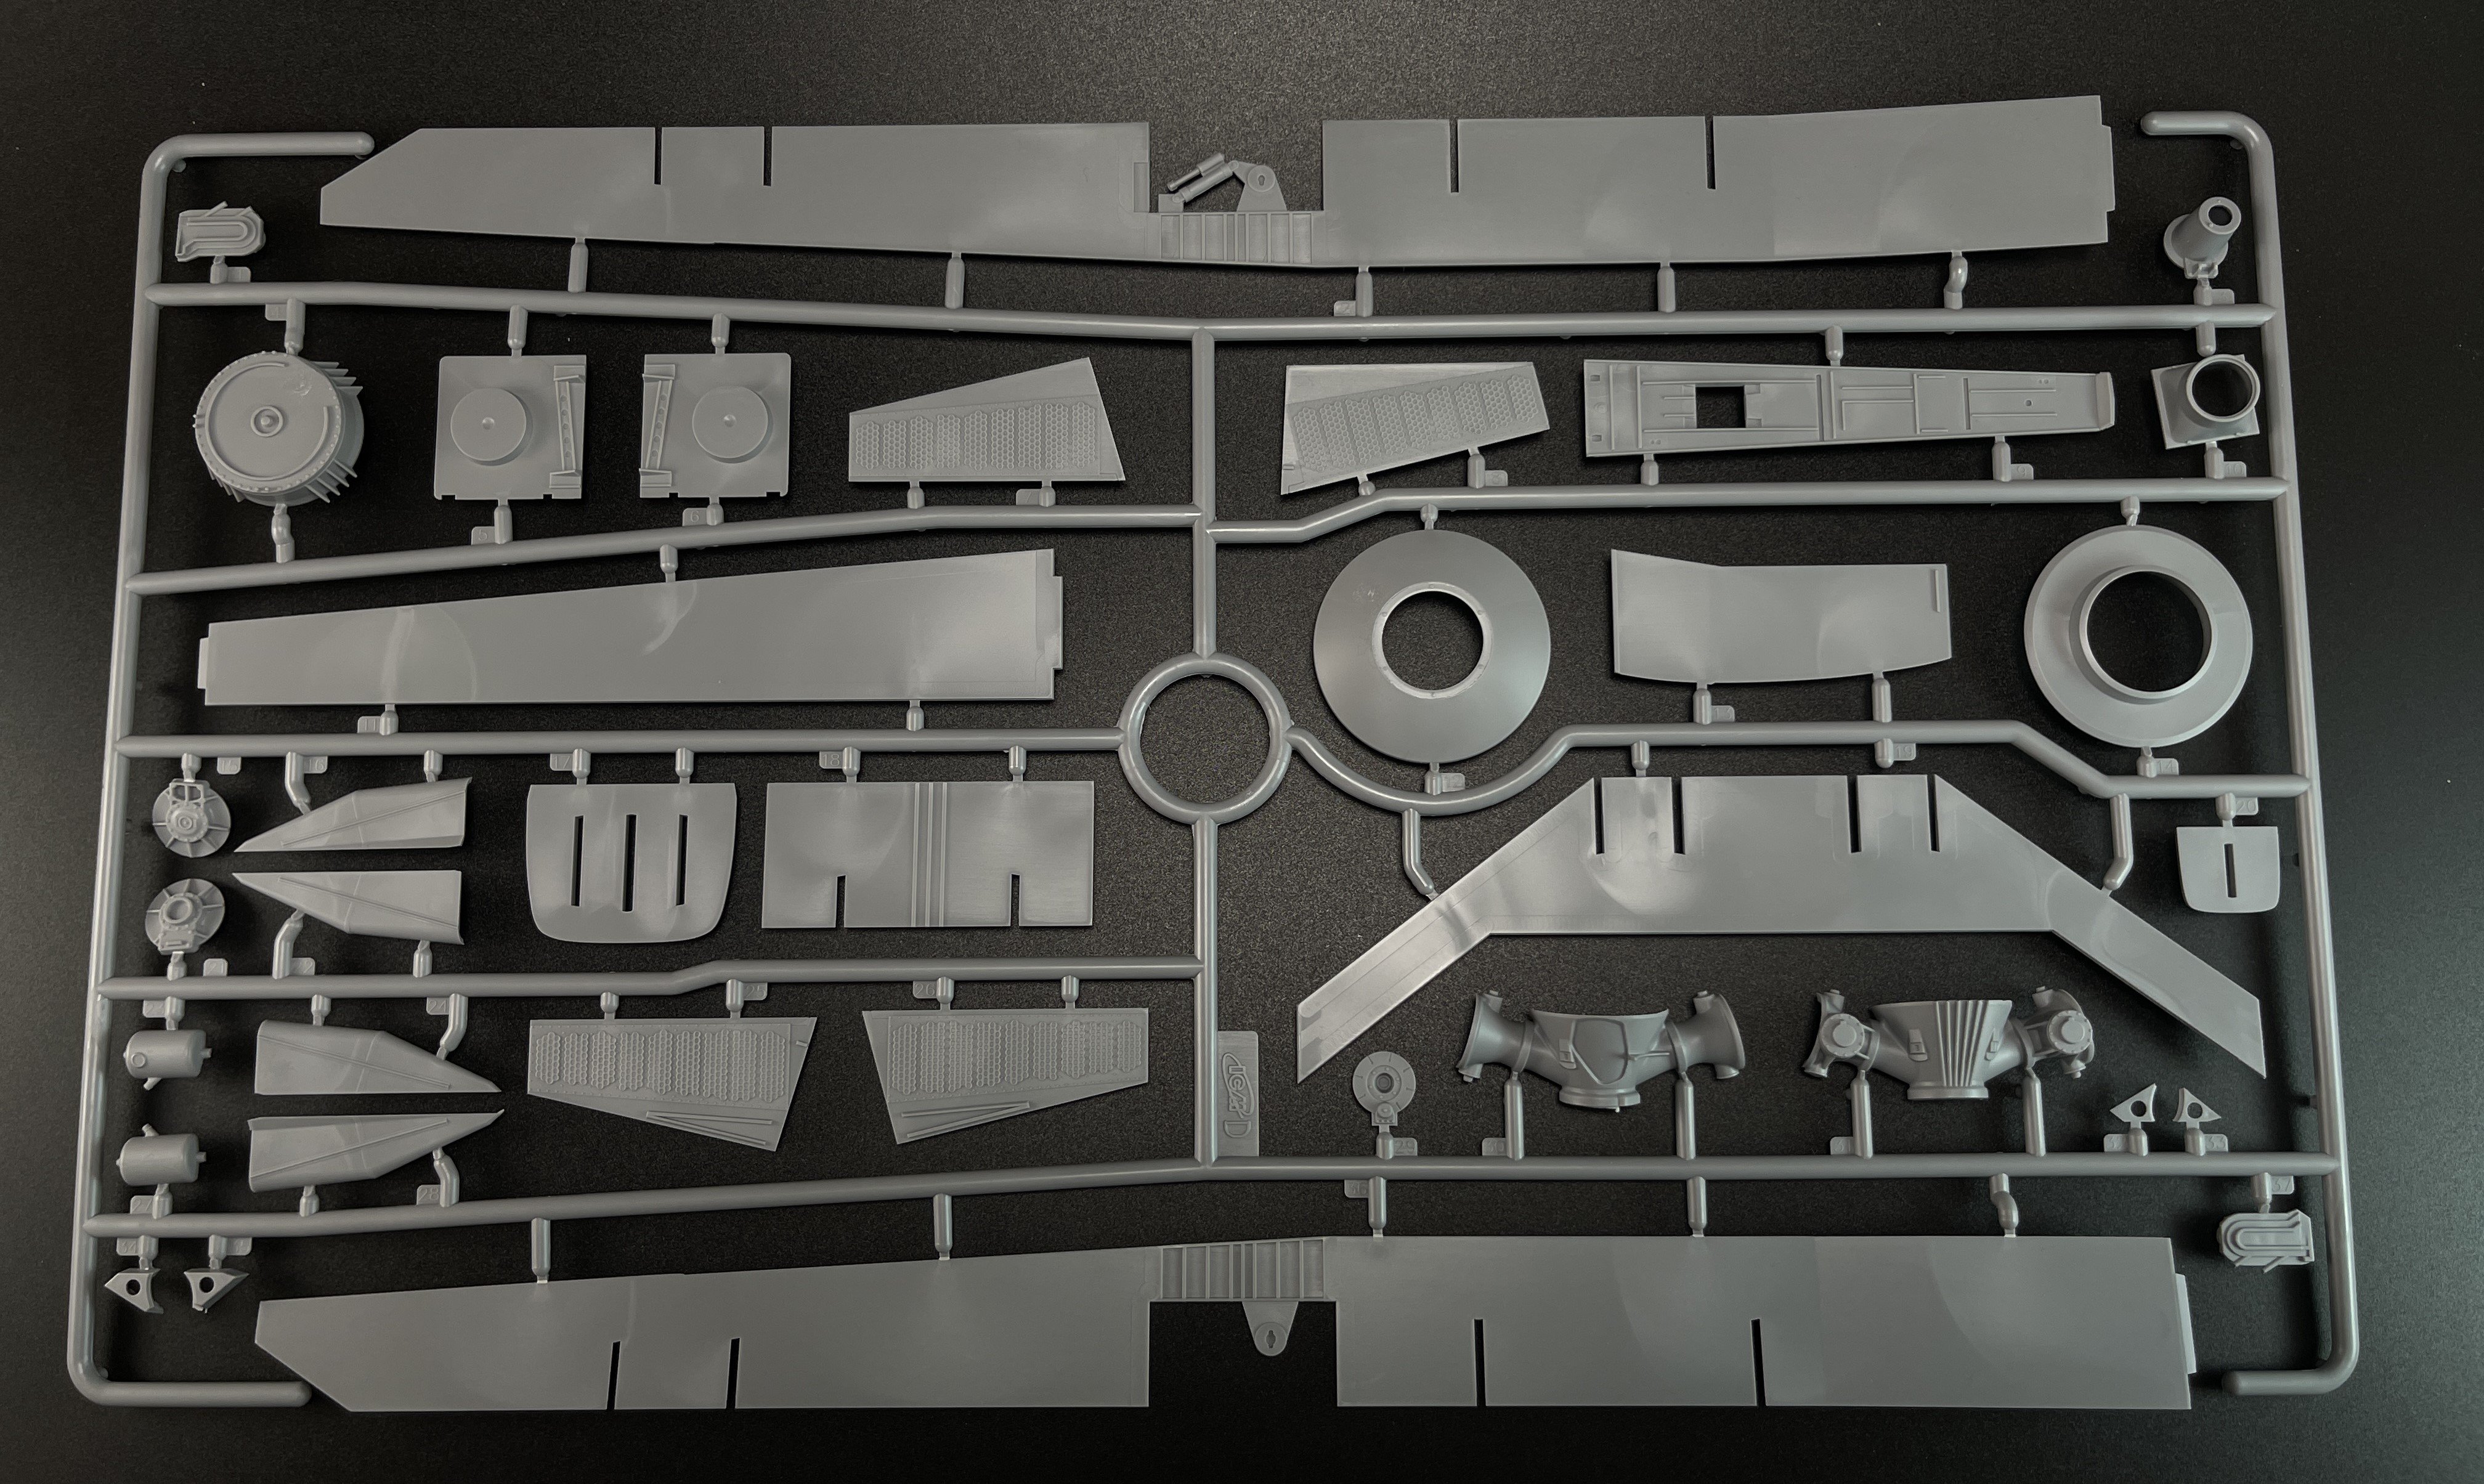
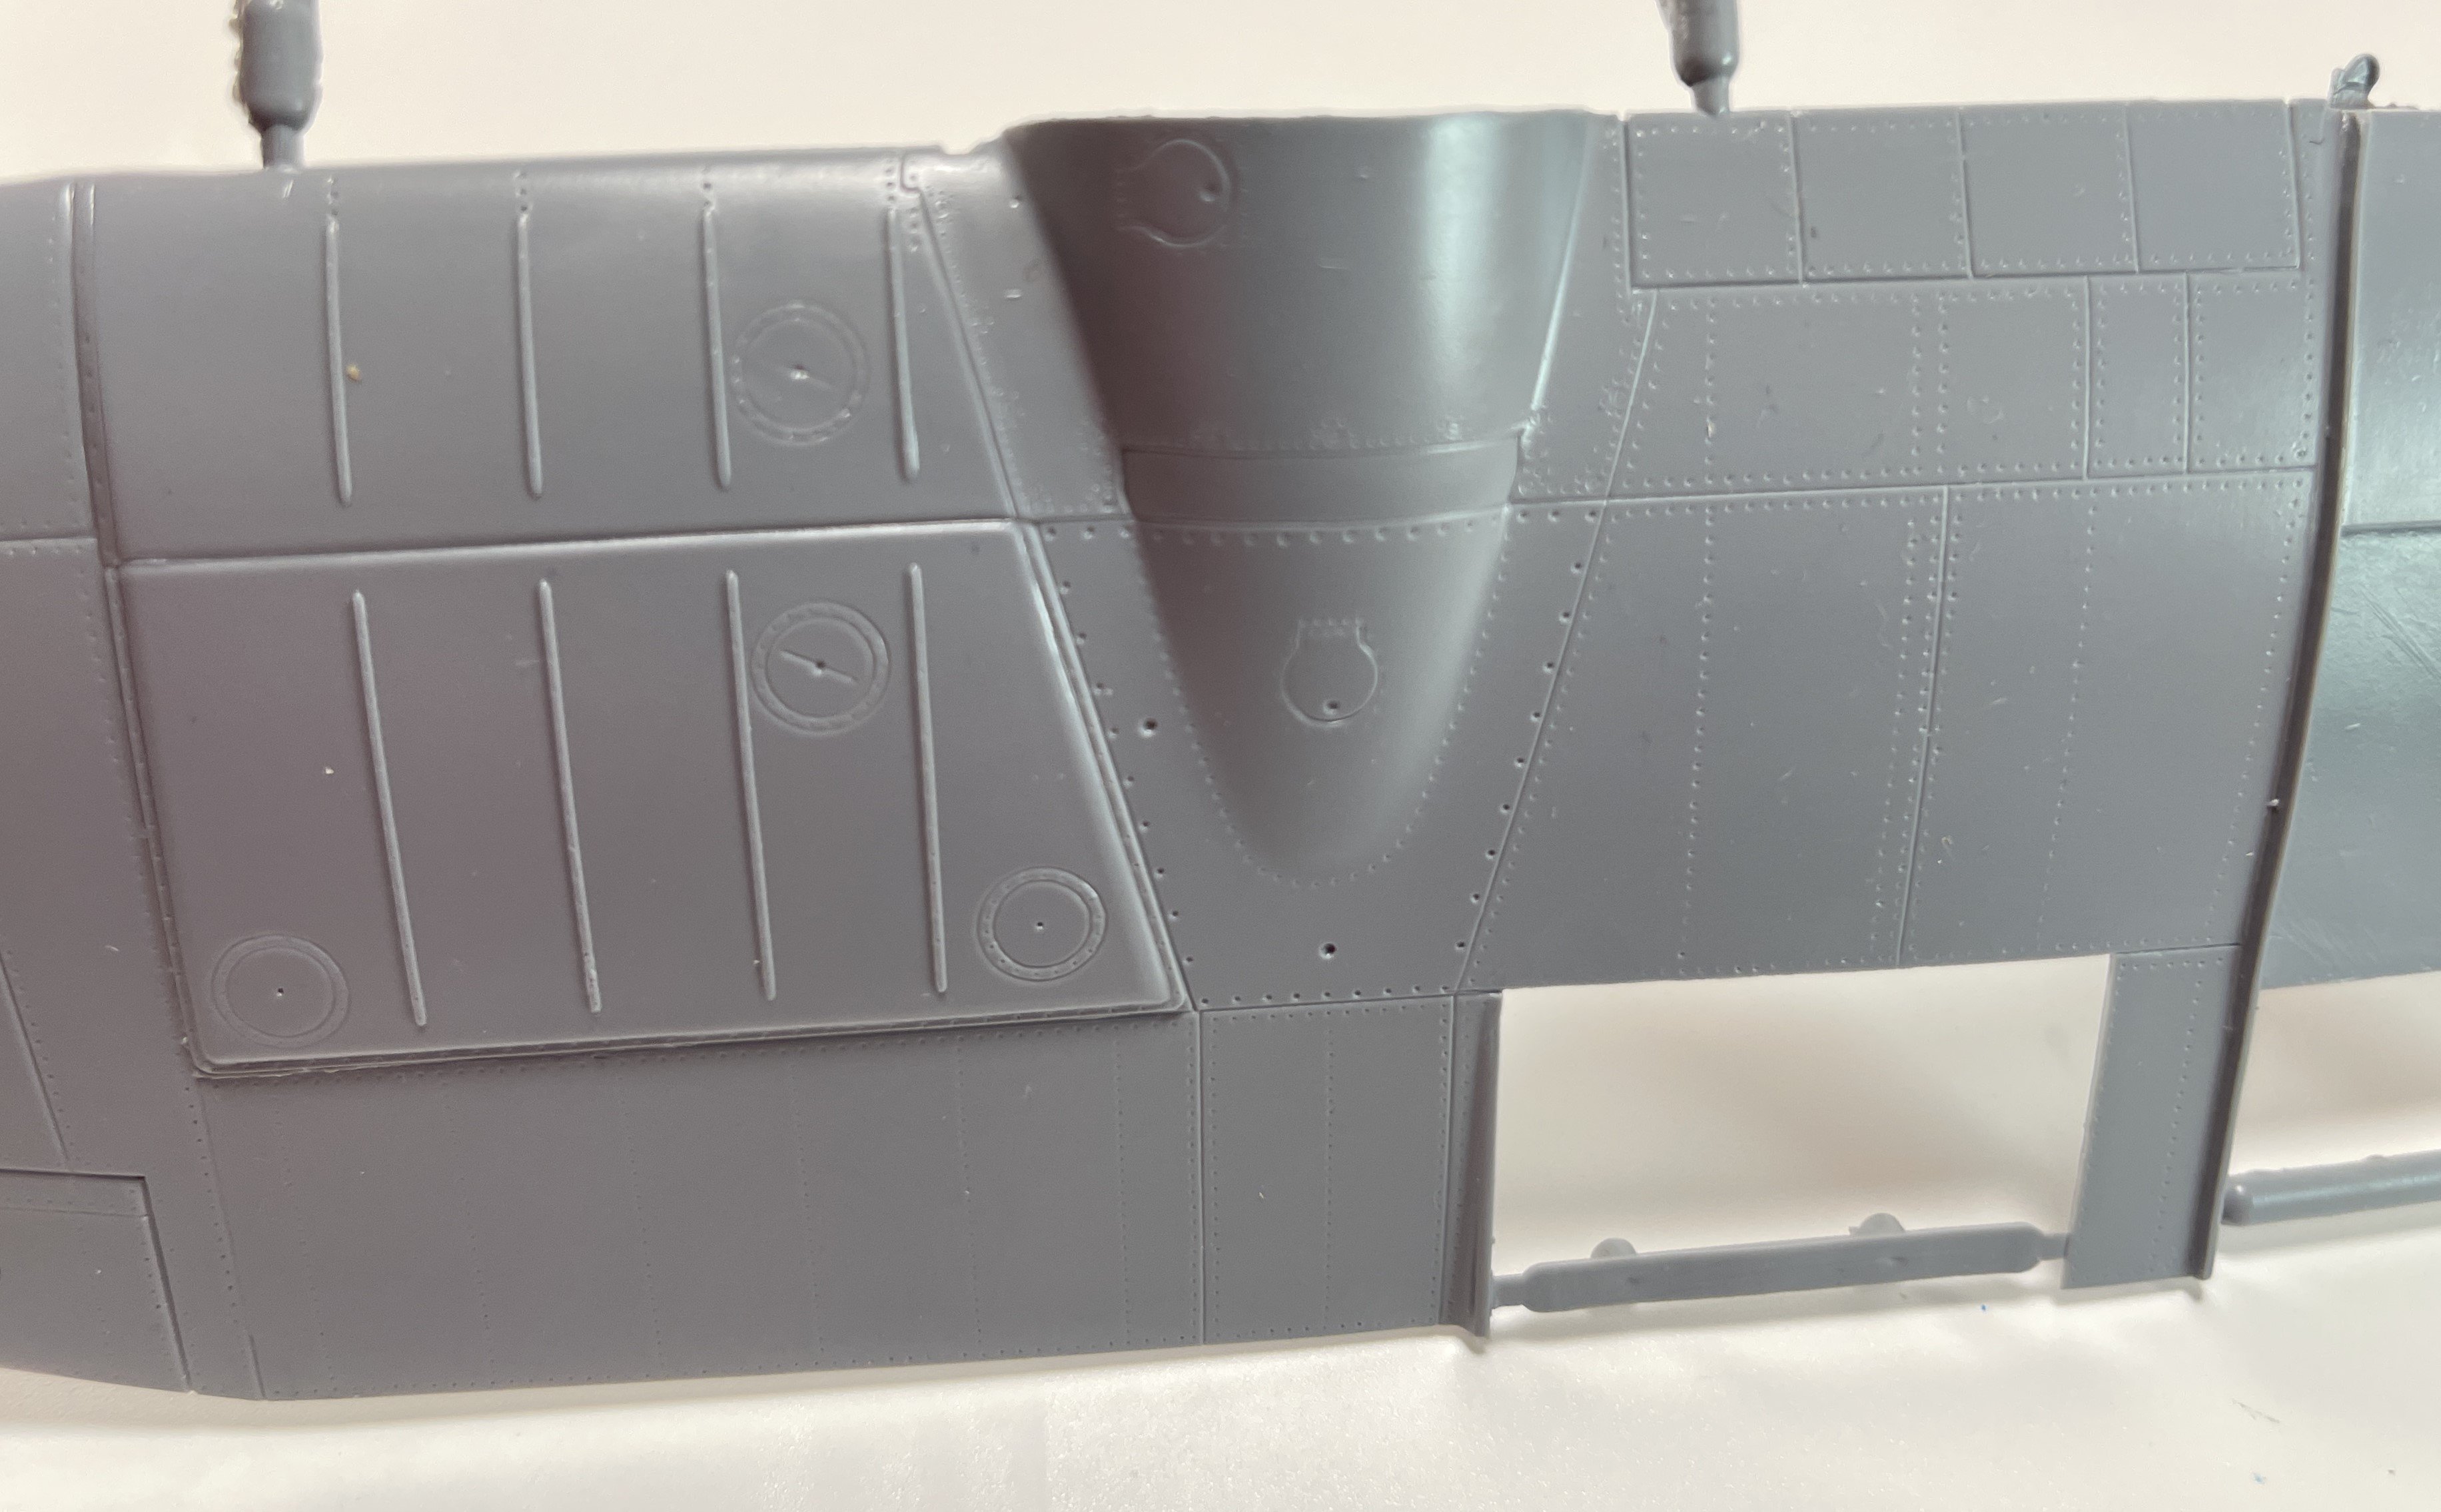
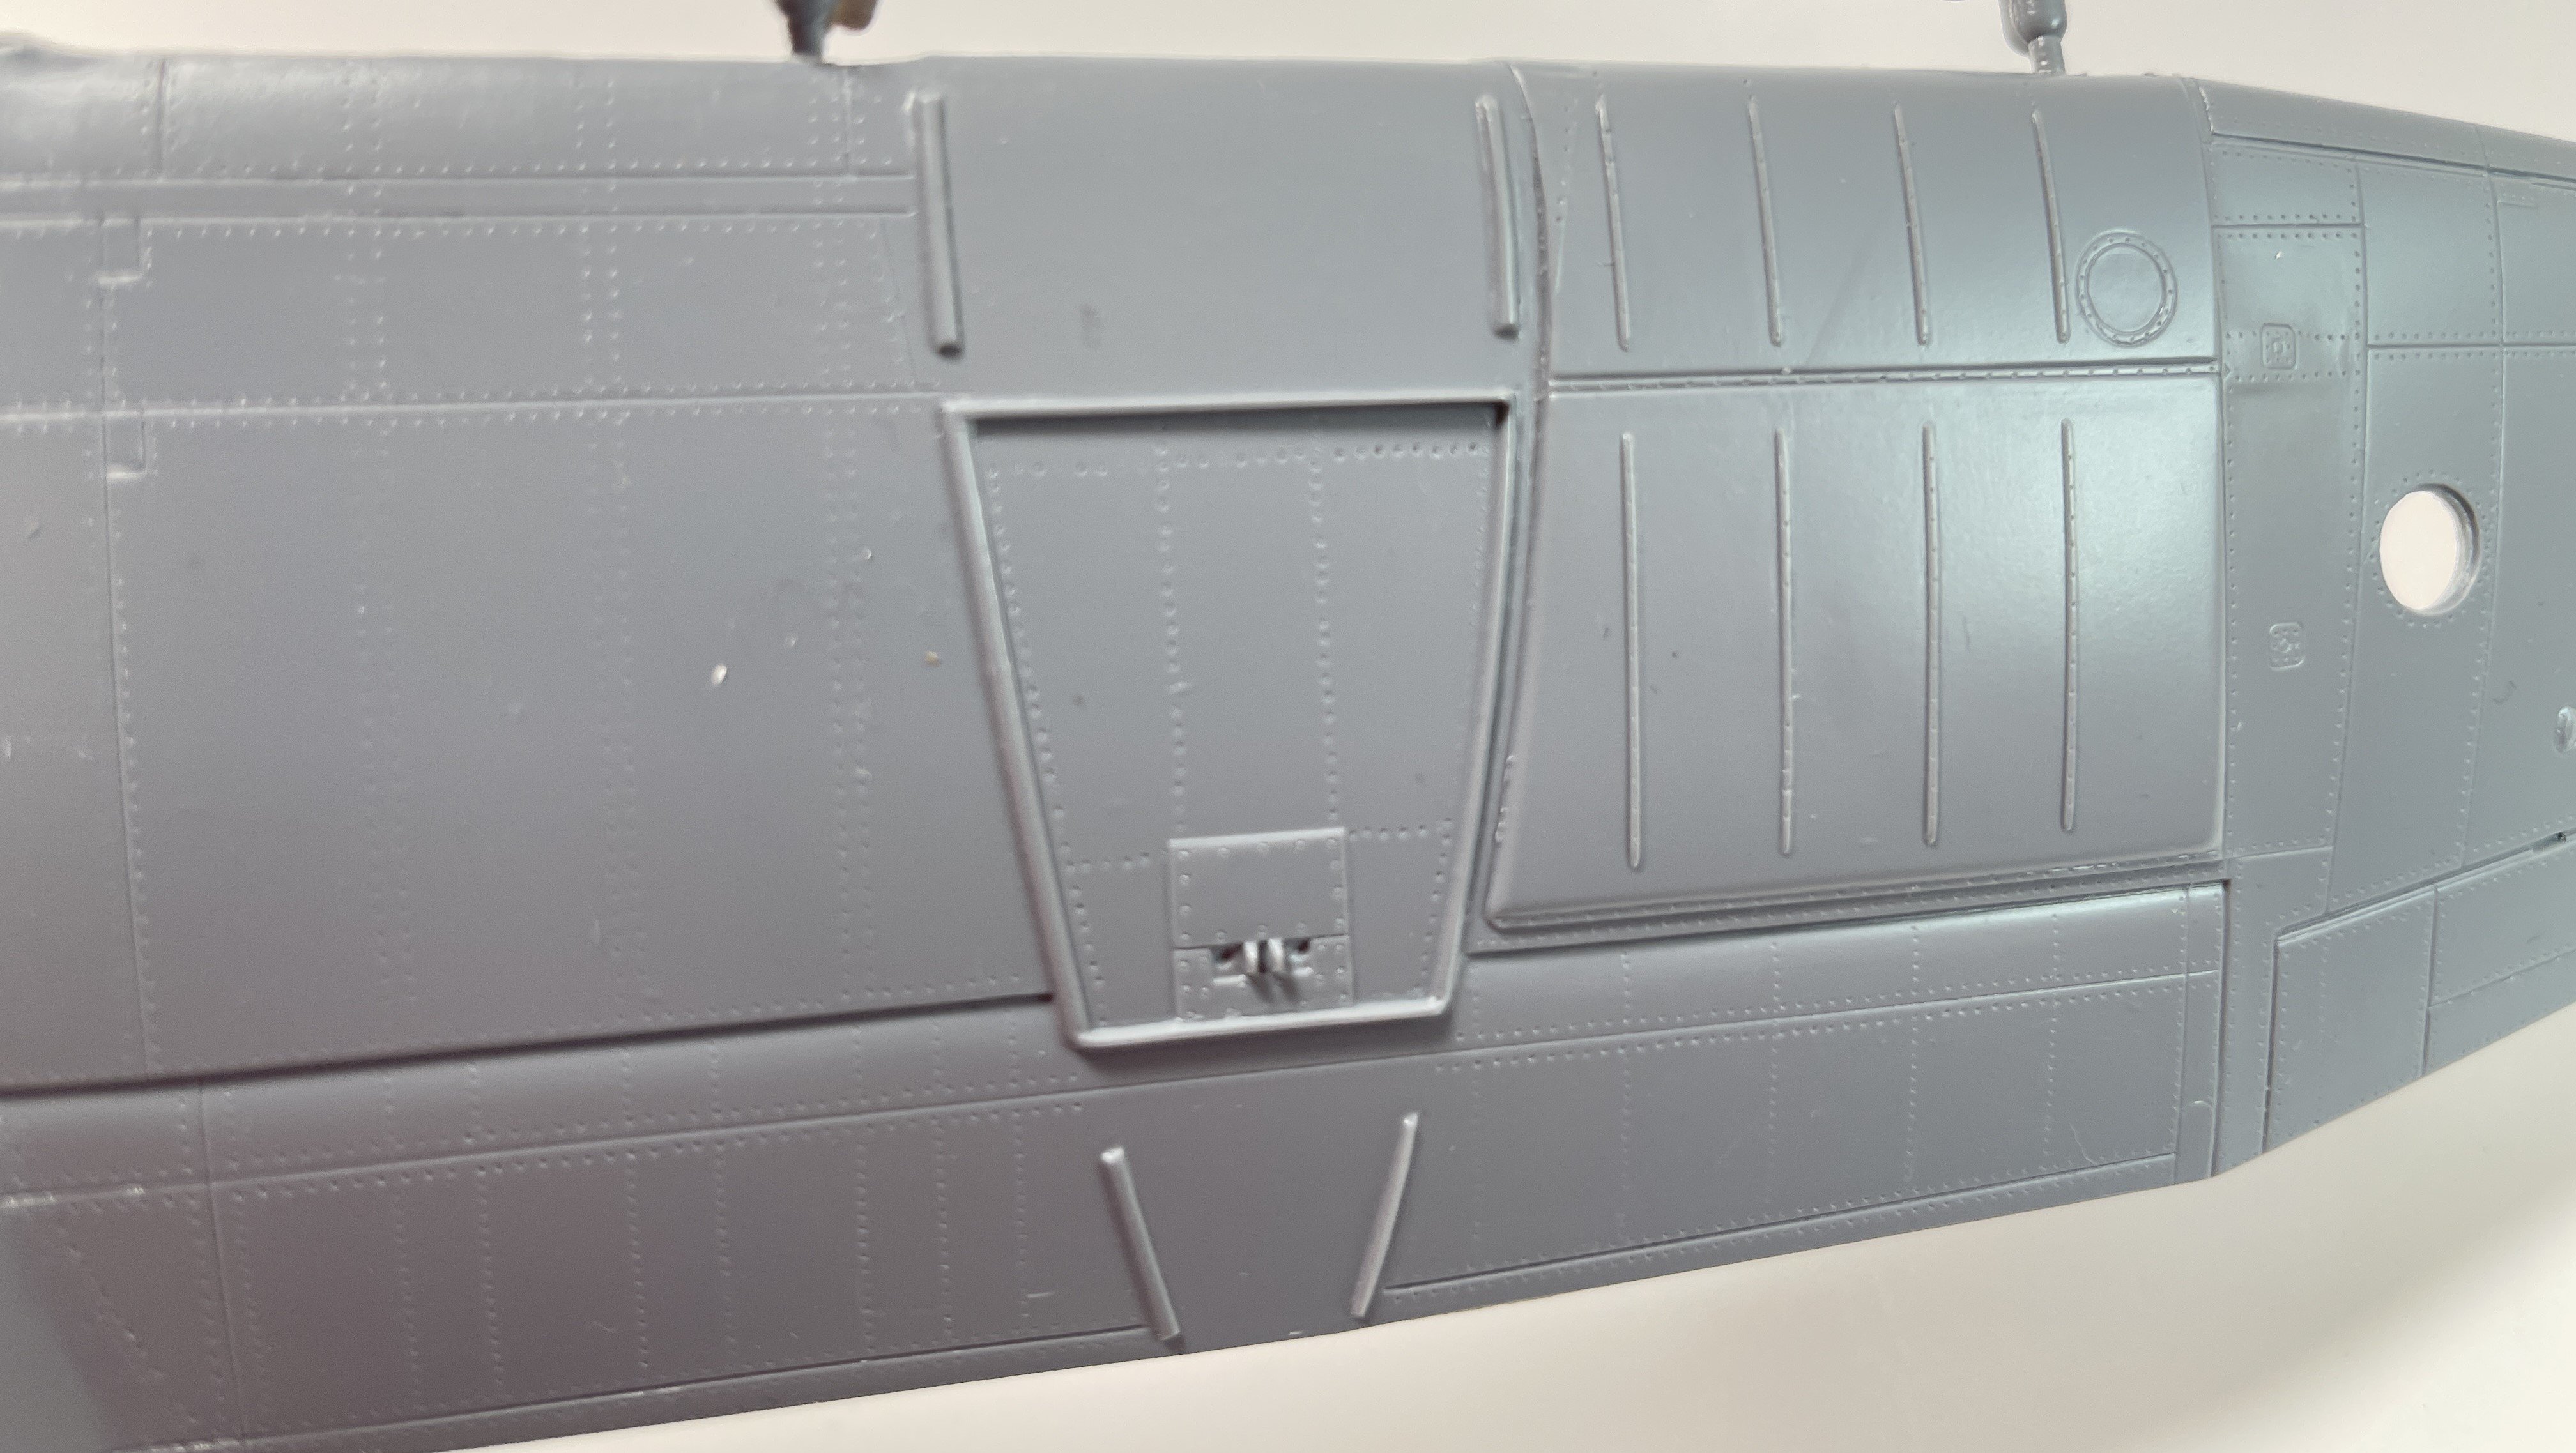
Passing on, a fist general view, is a typical ICM quality plastic, with no distortion, no flash, with very good surface detail.
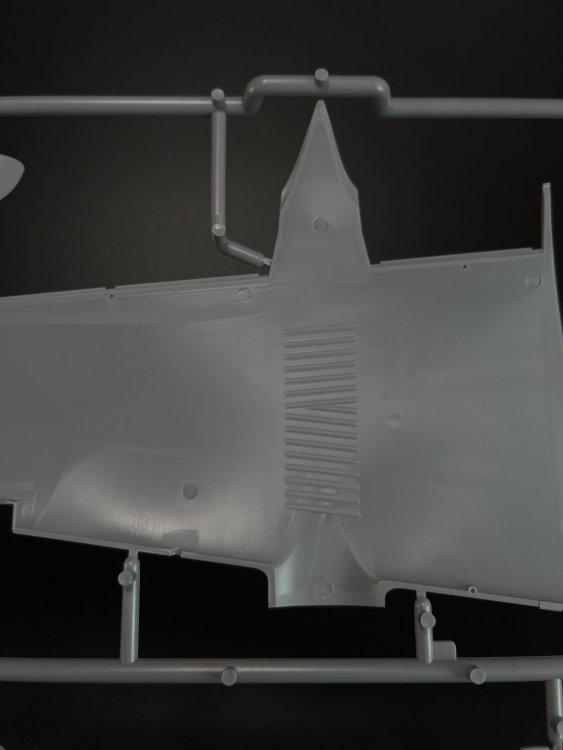
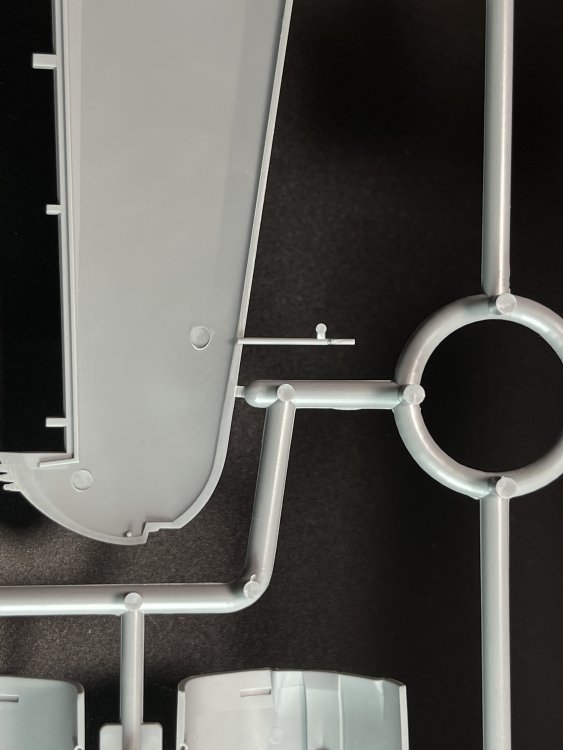
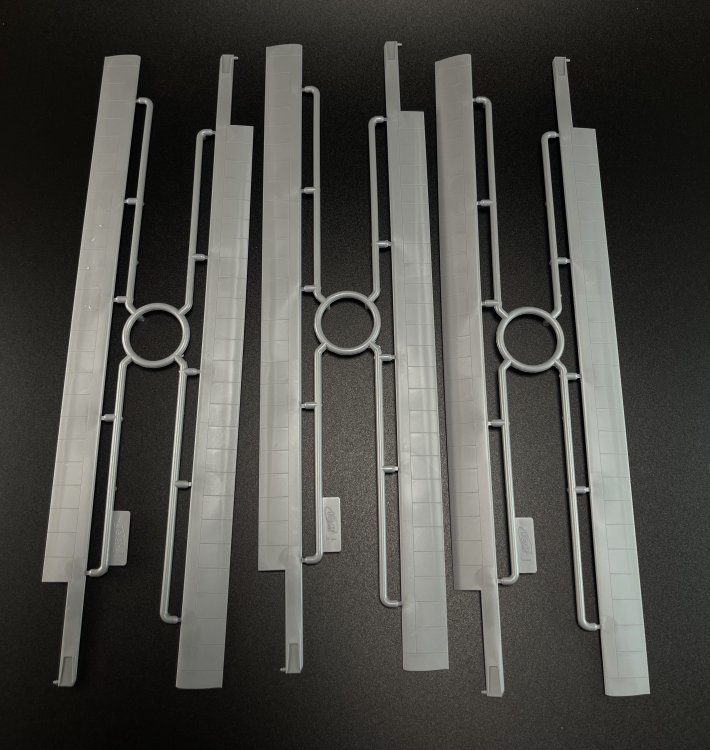
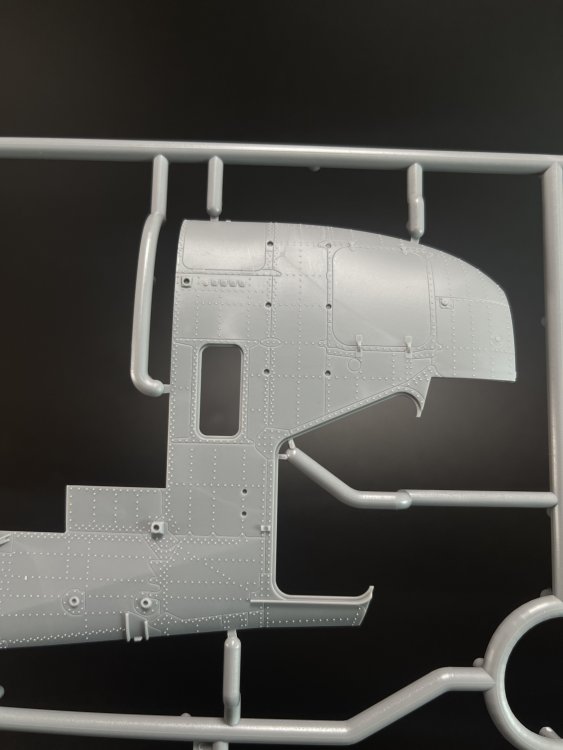
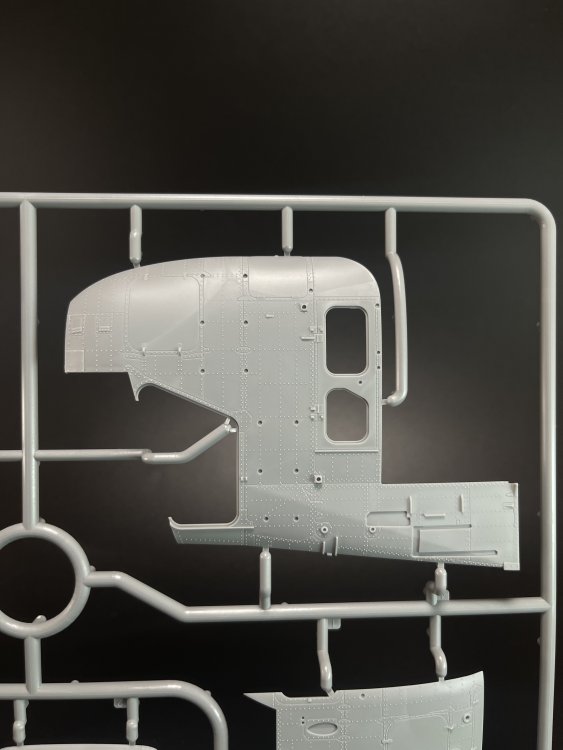
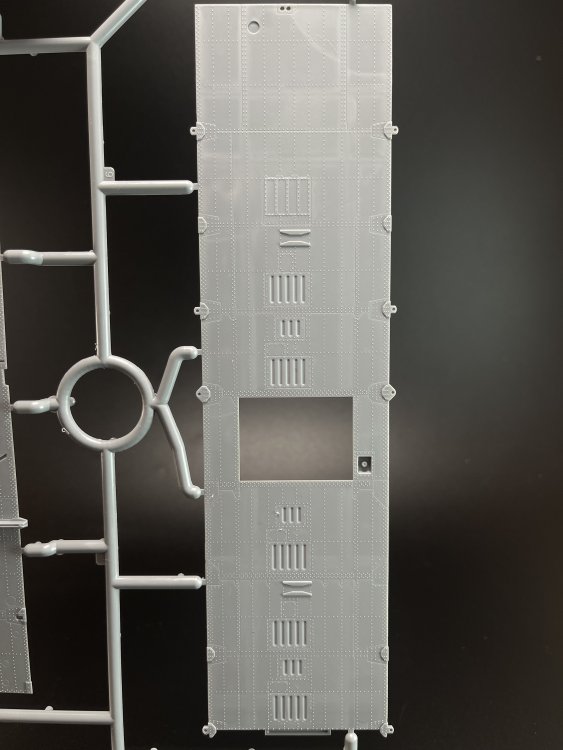
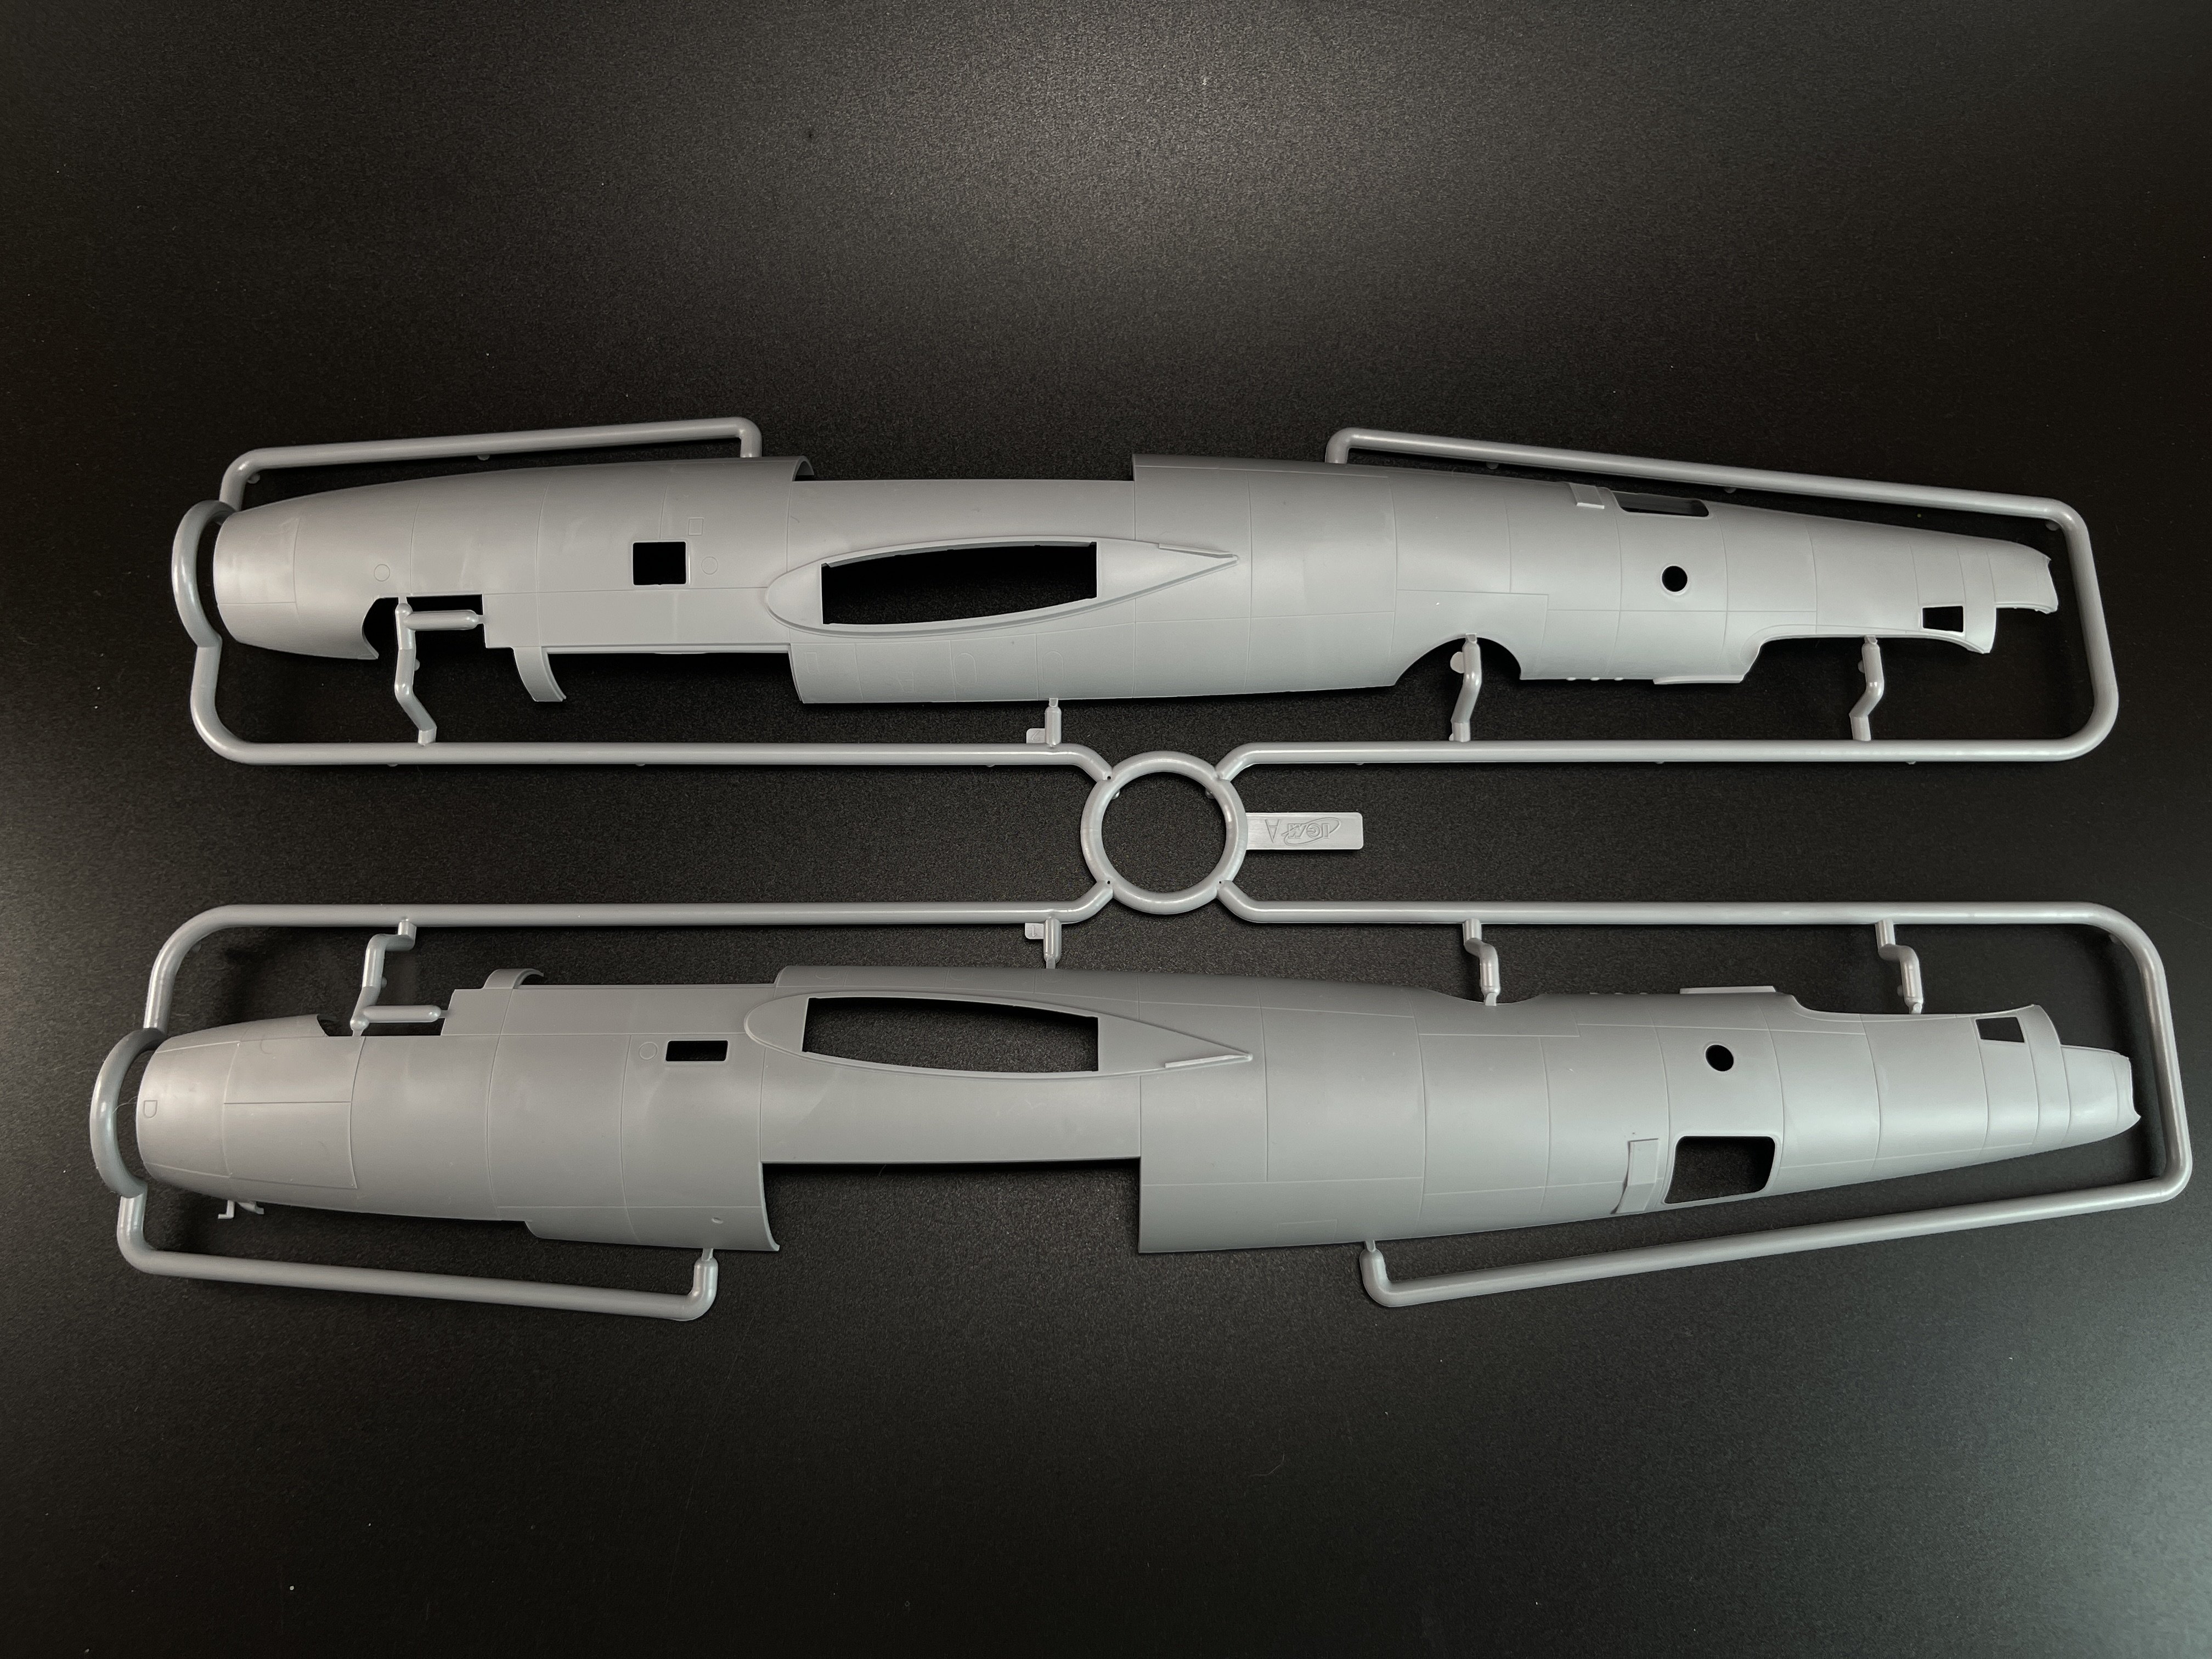
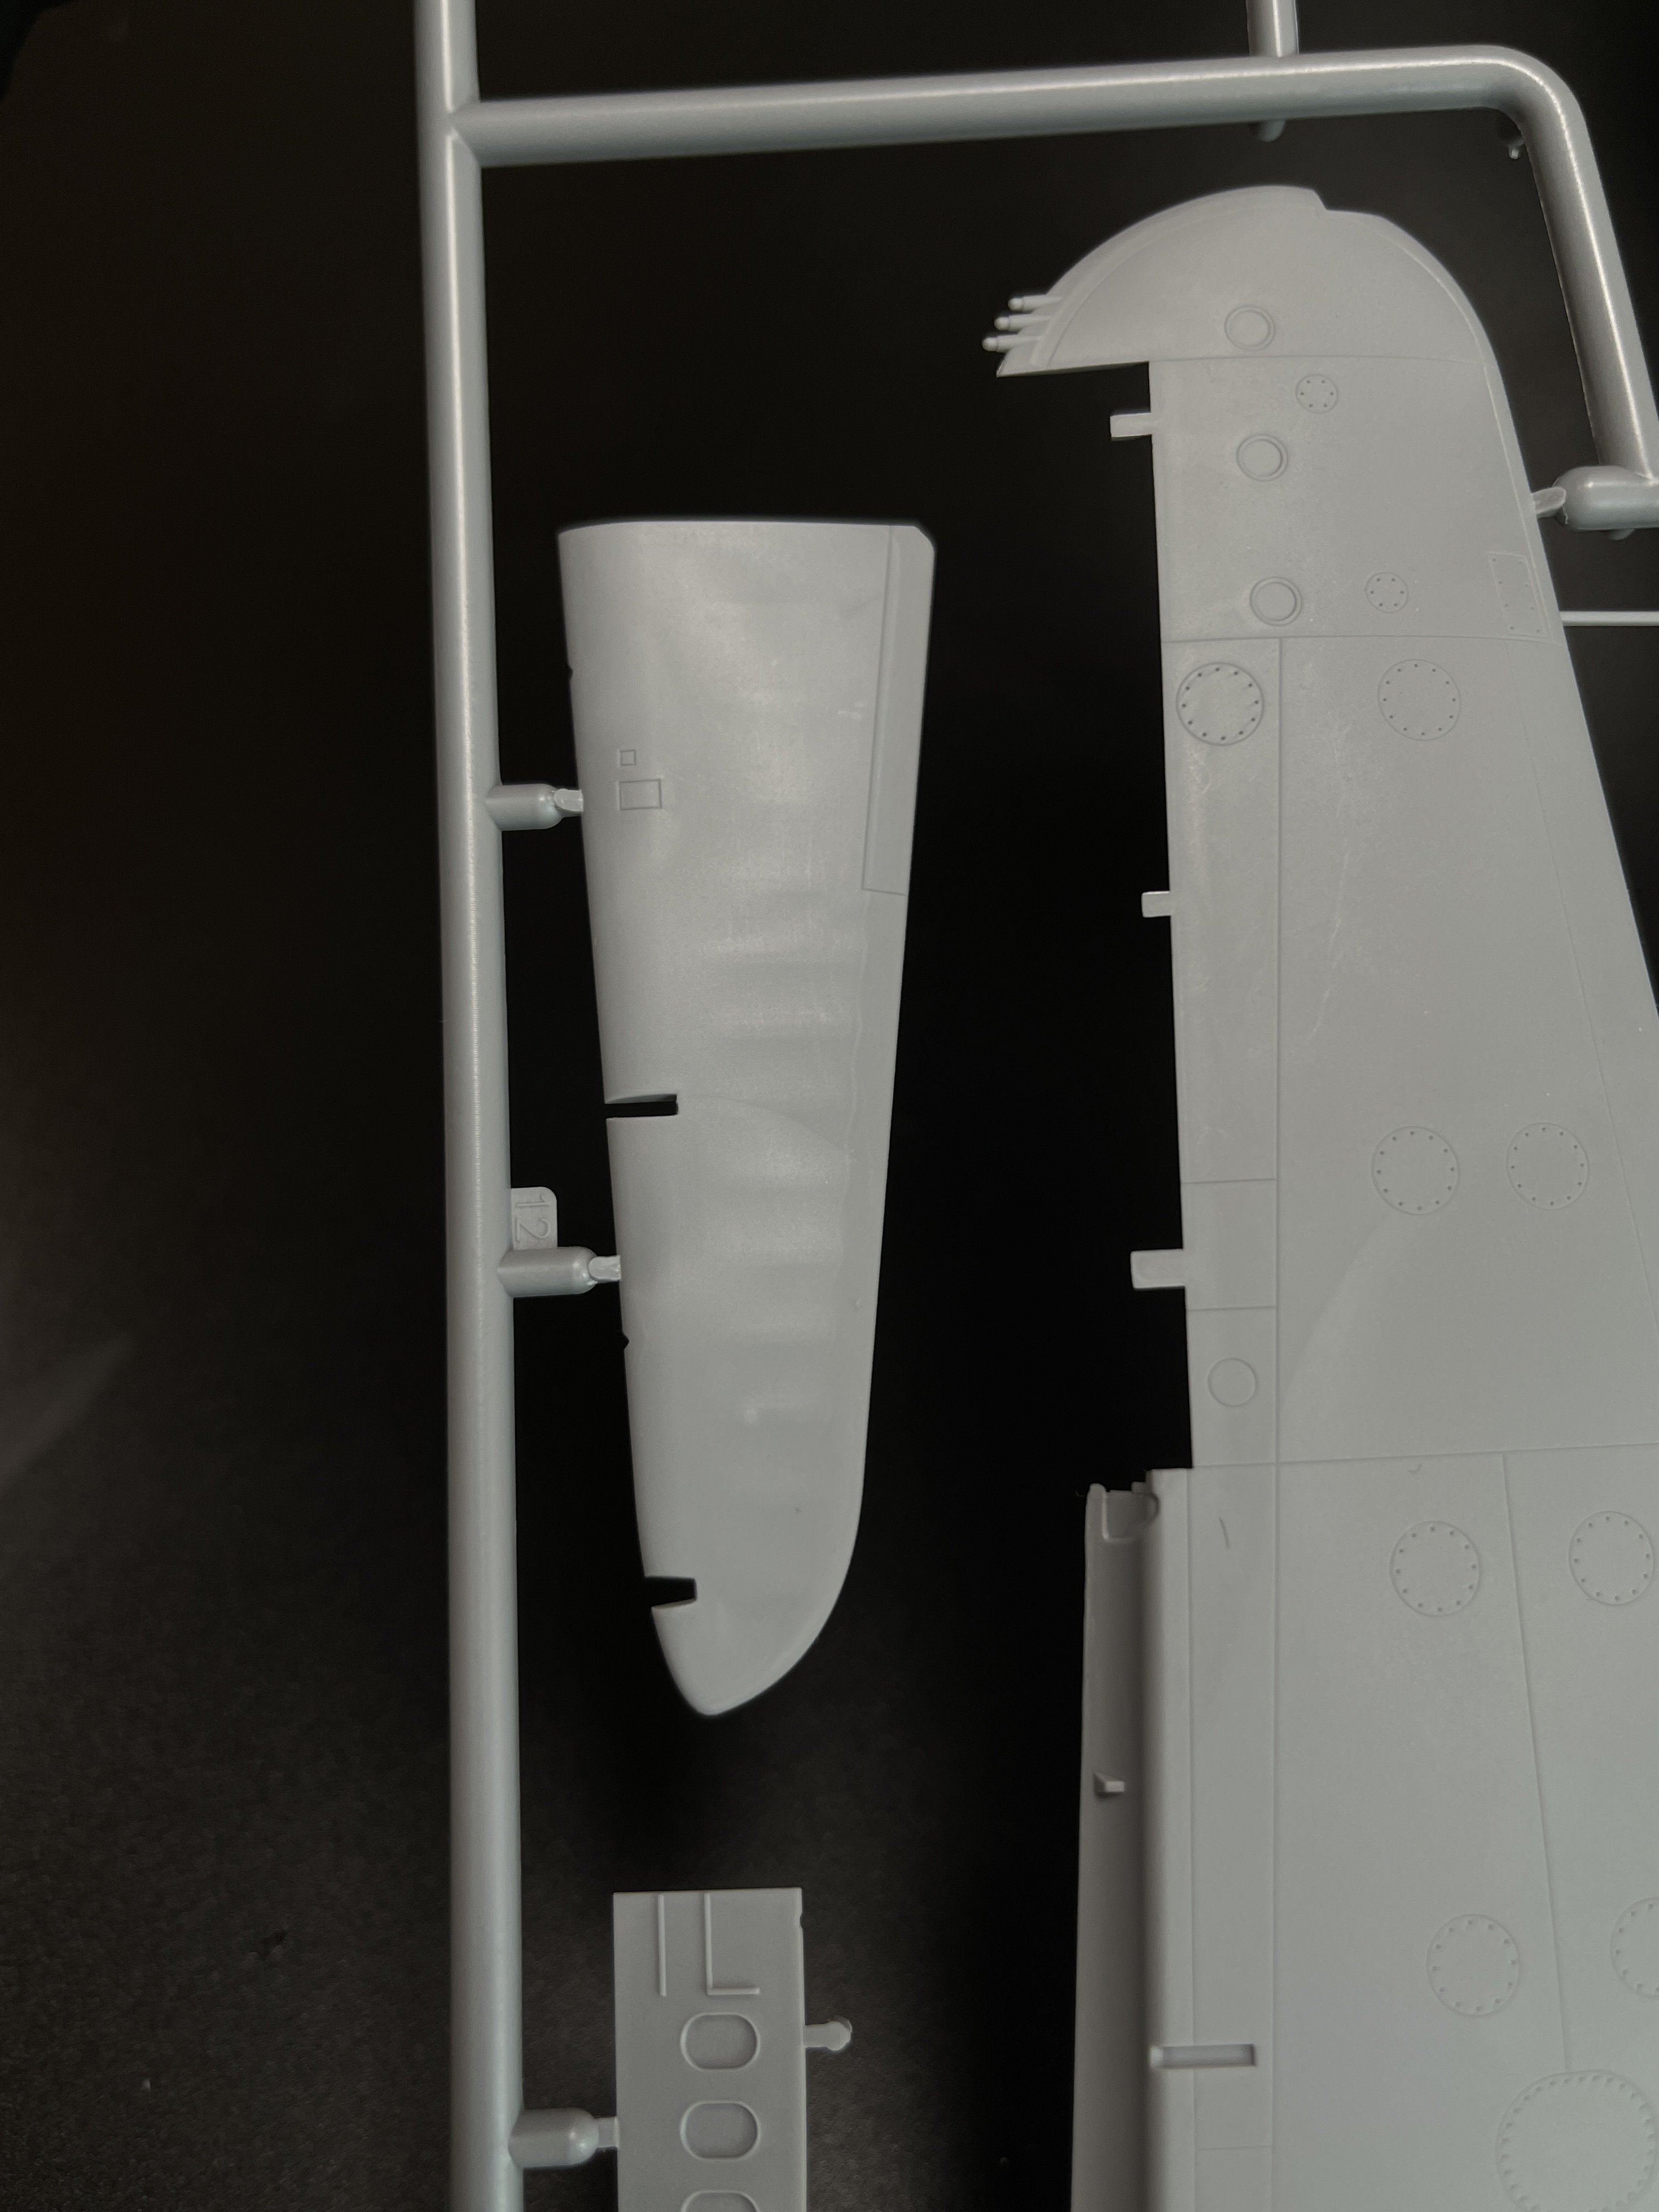
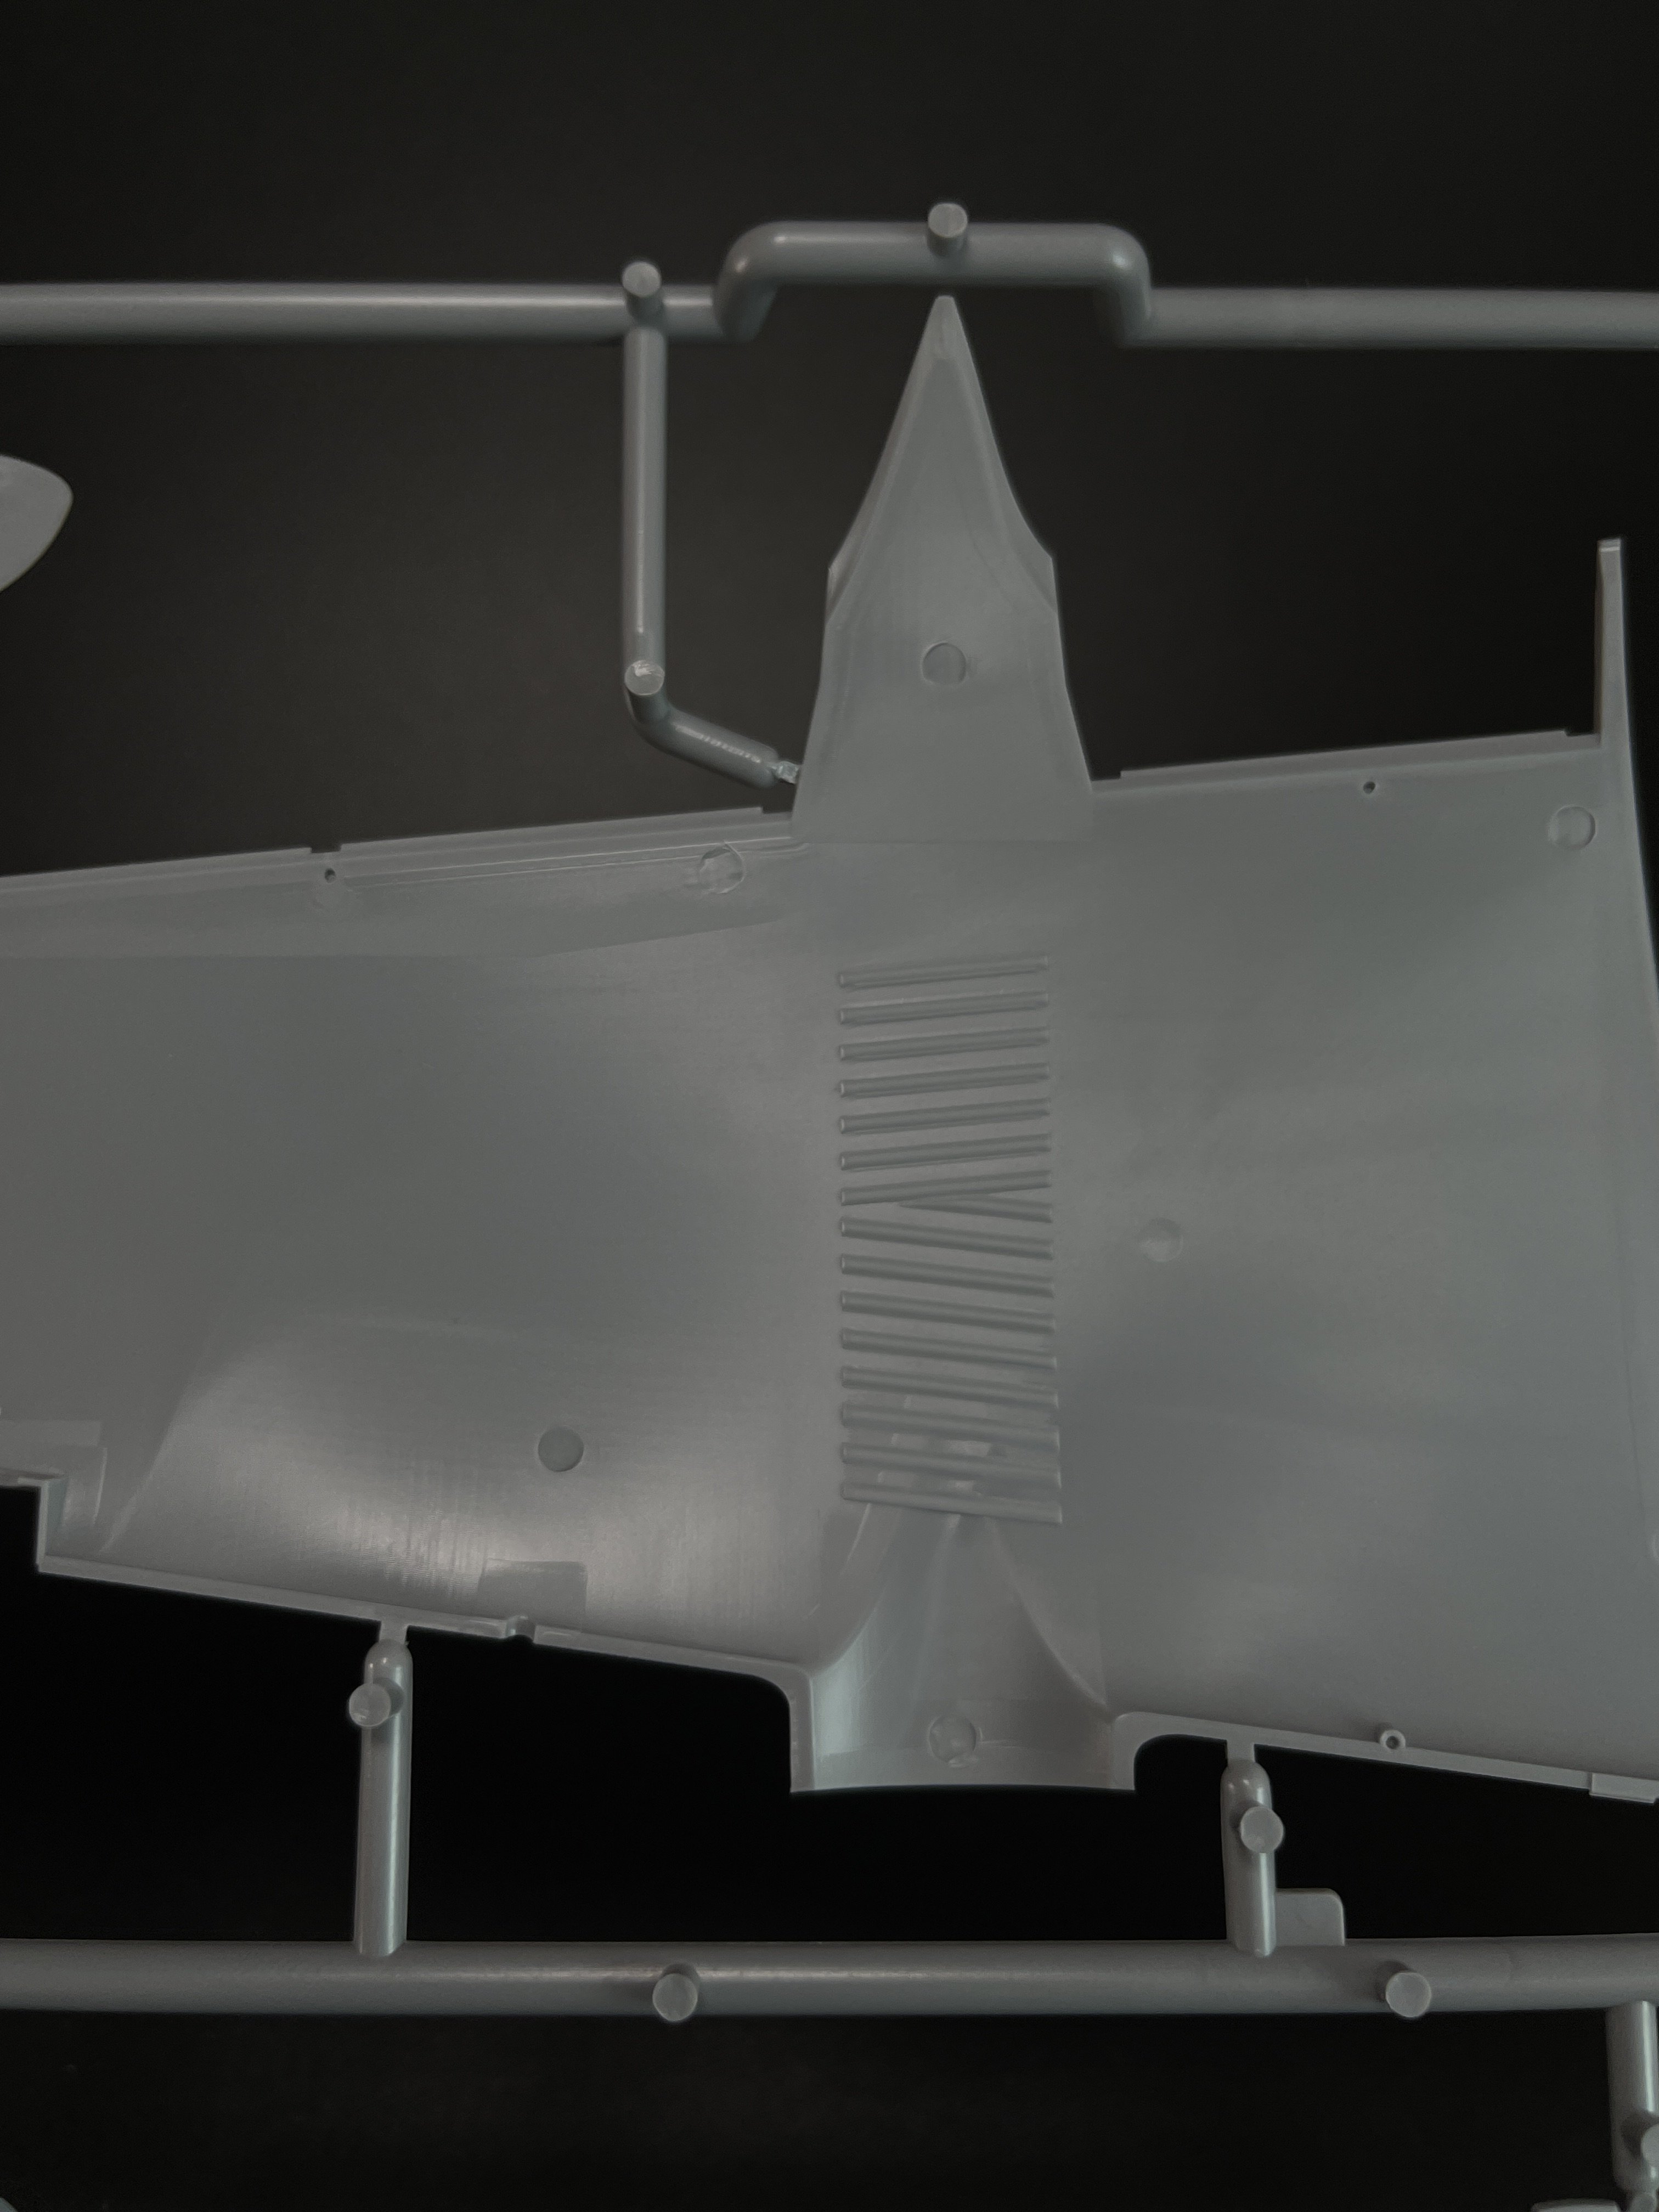
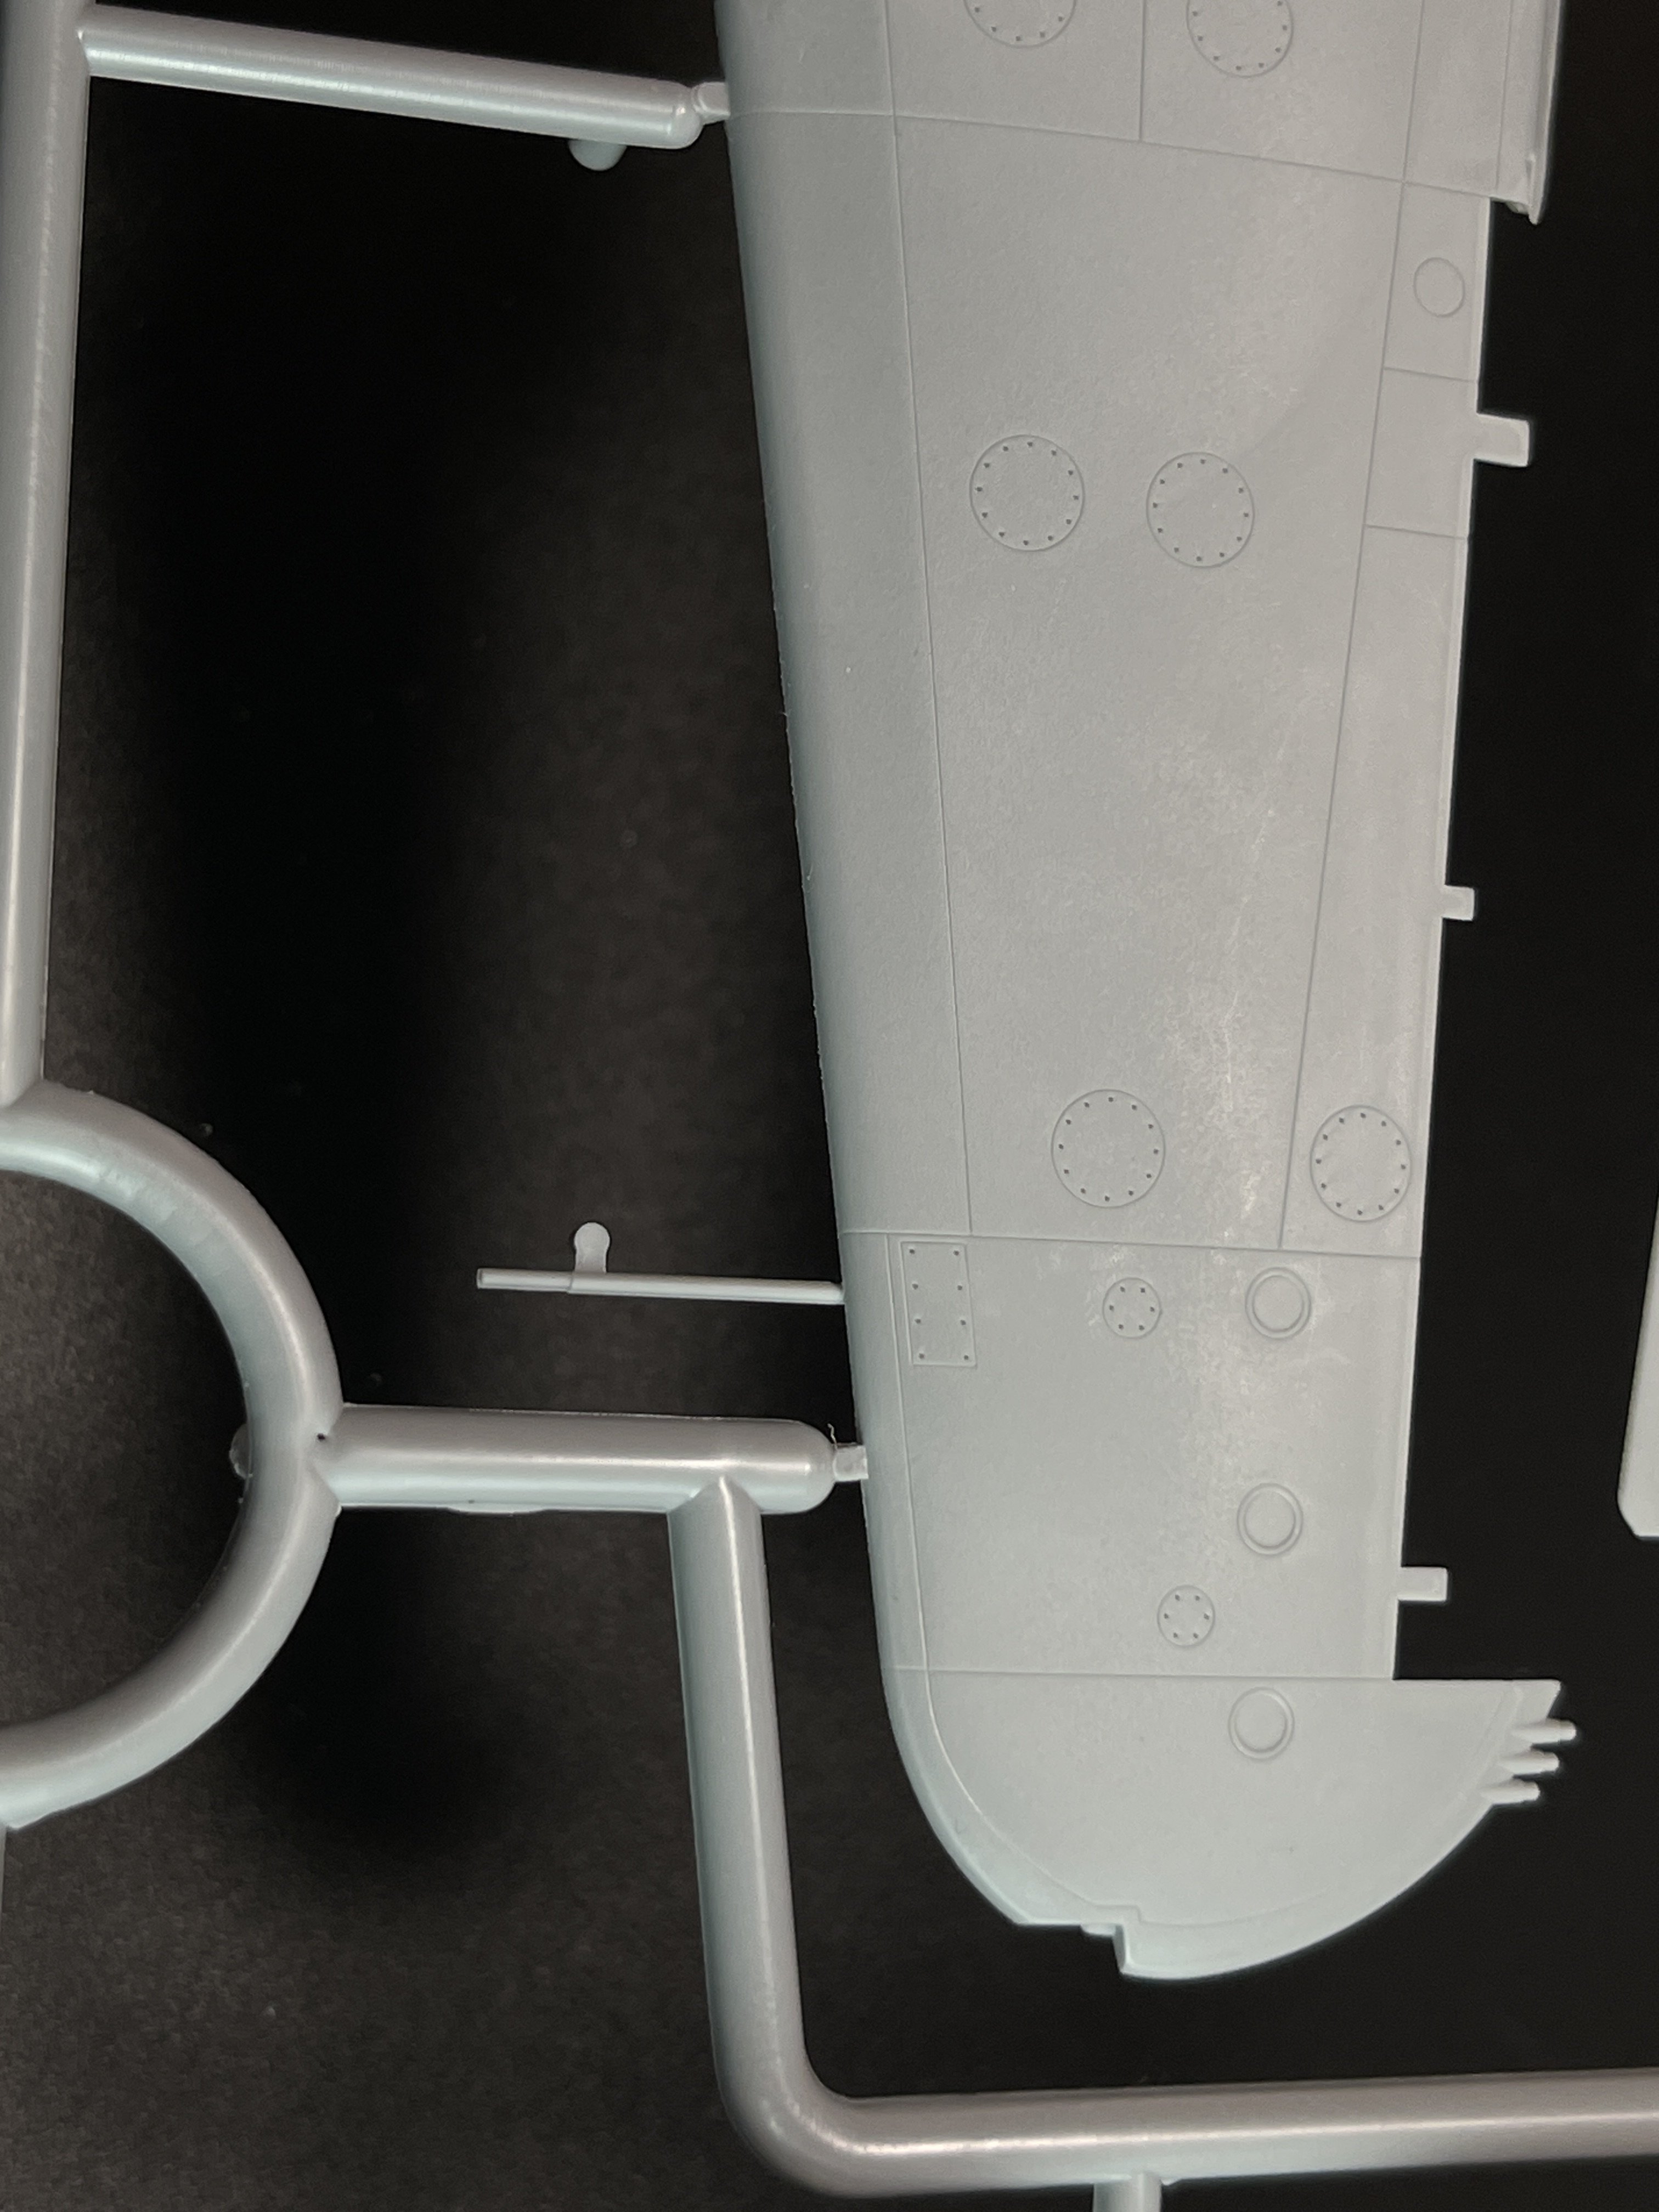
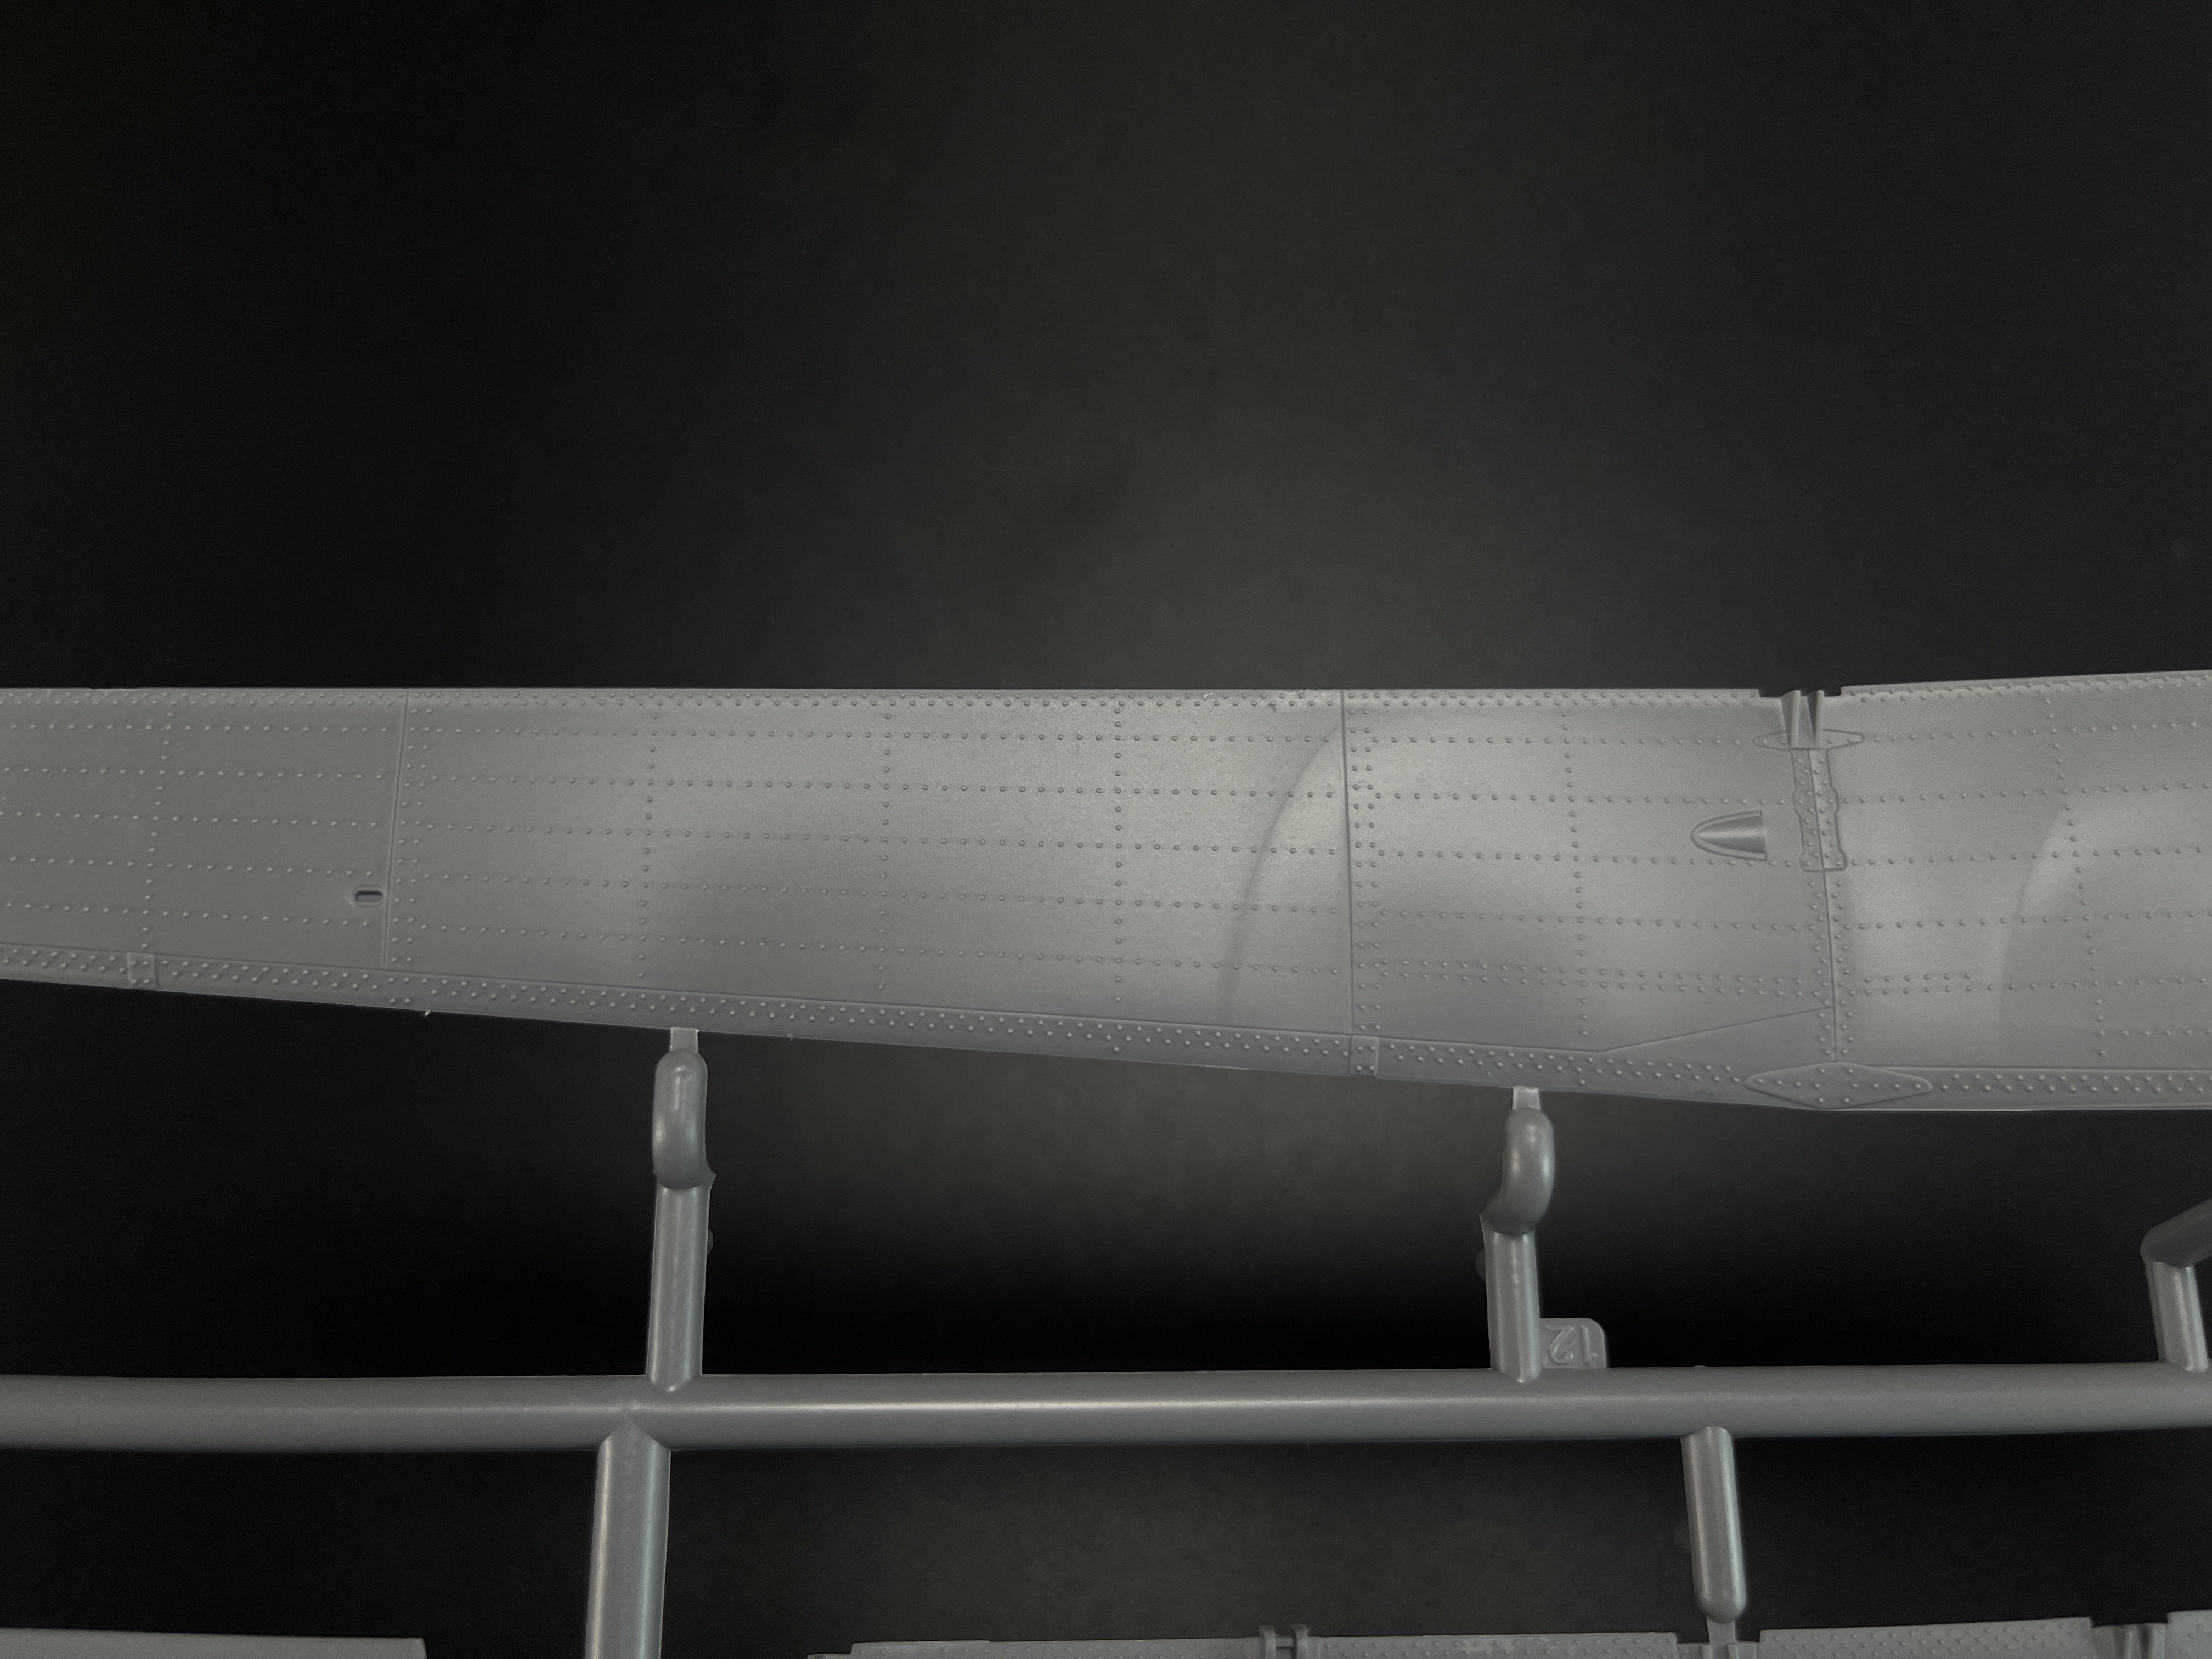
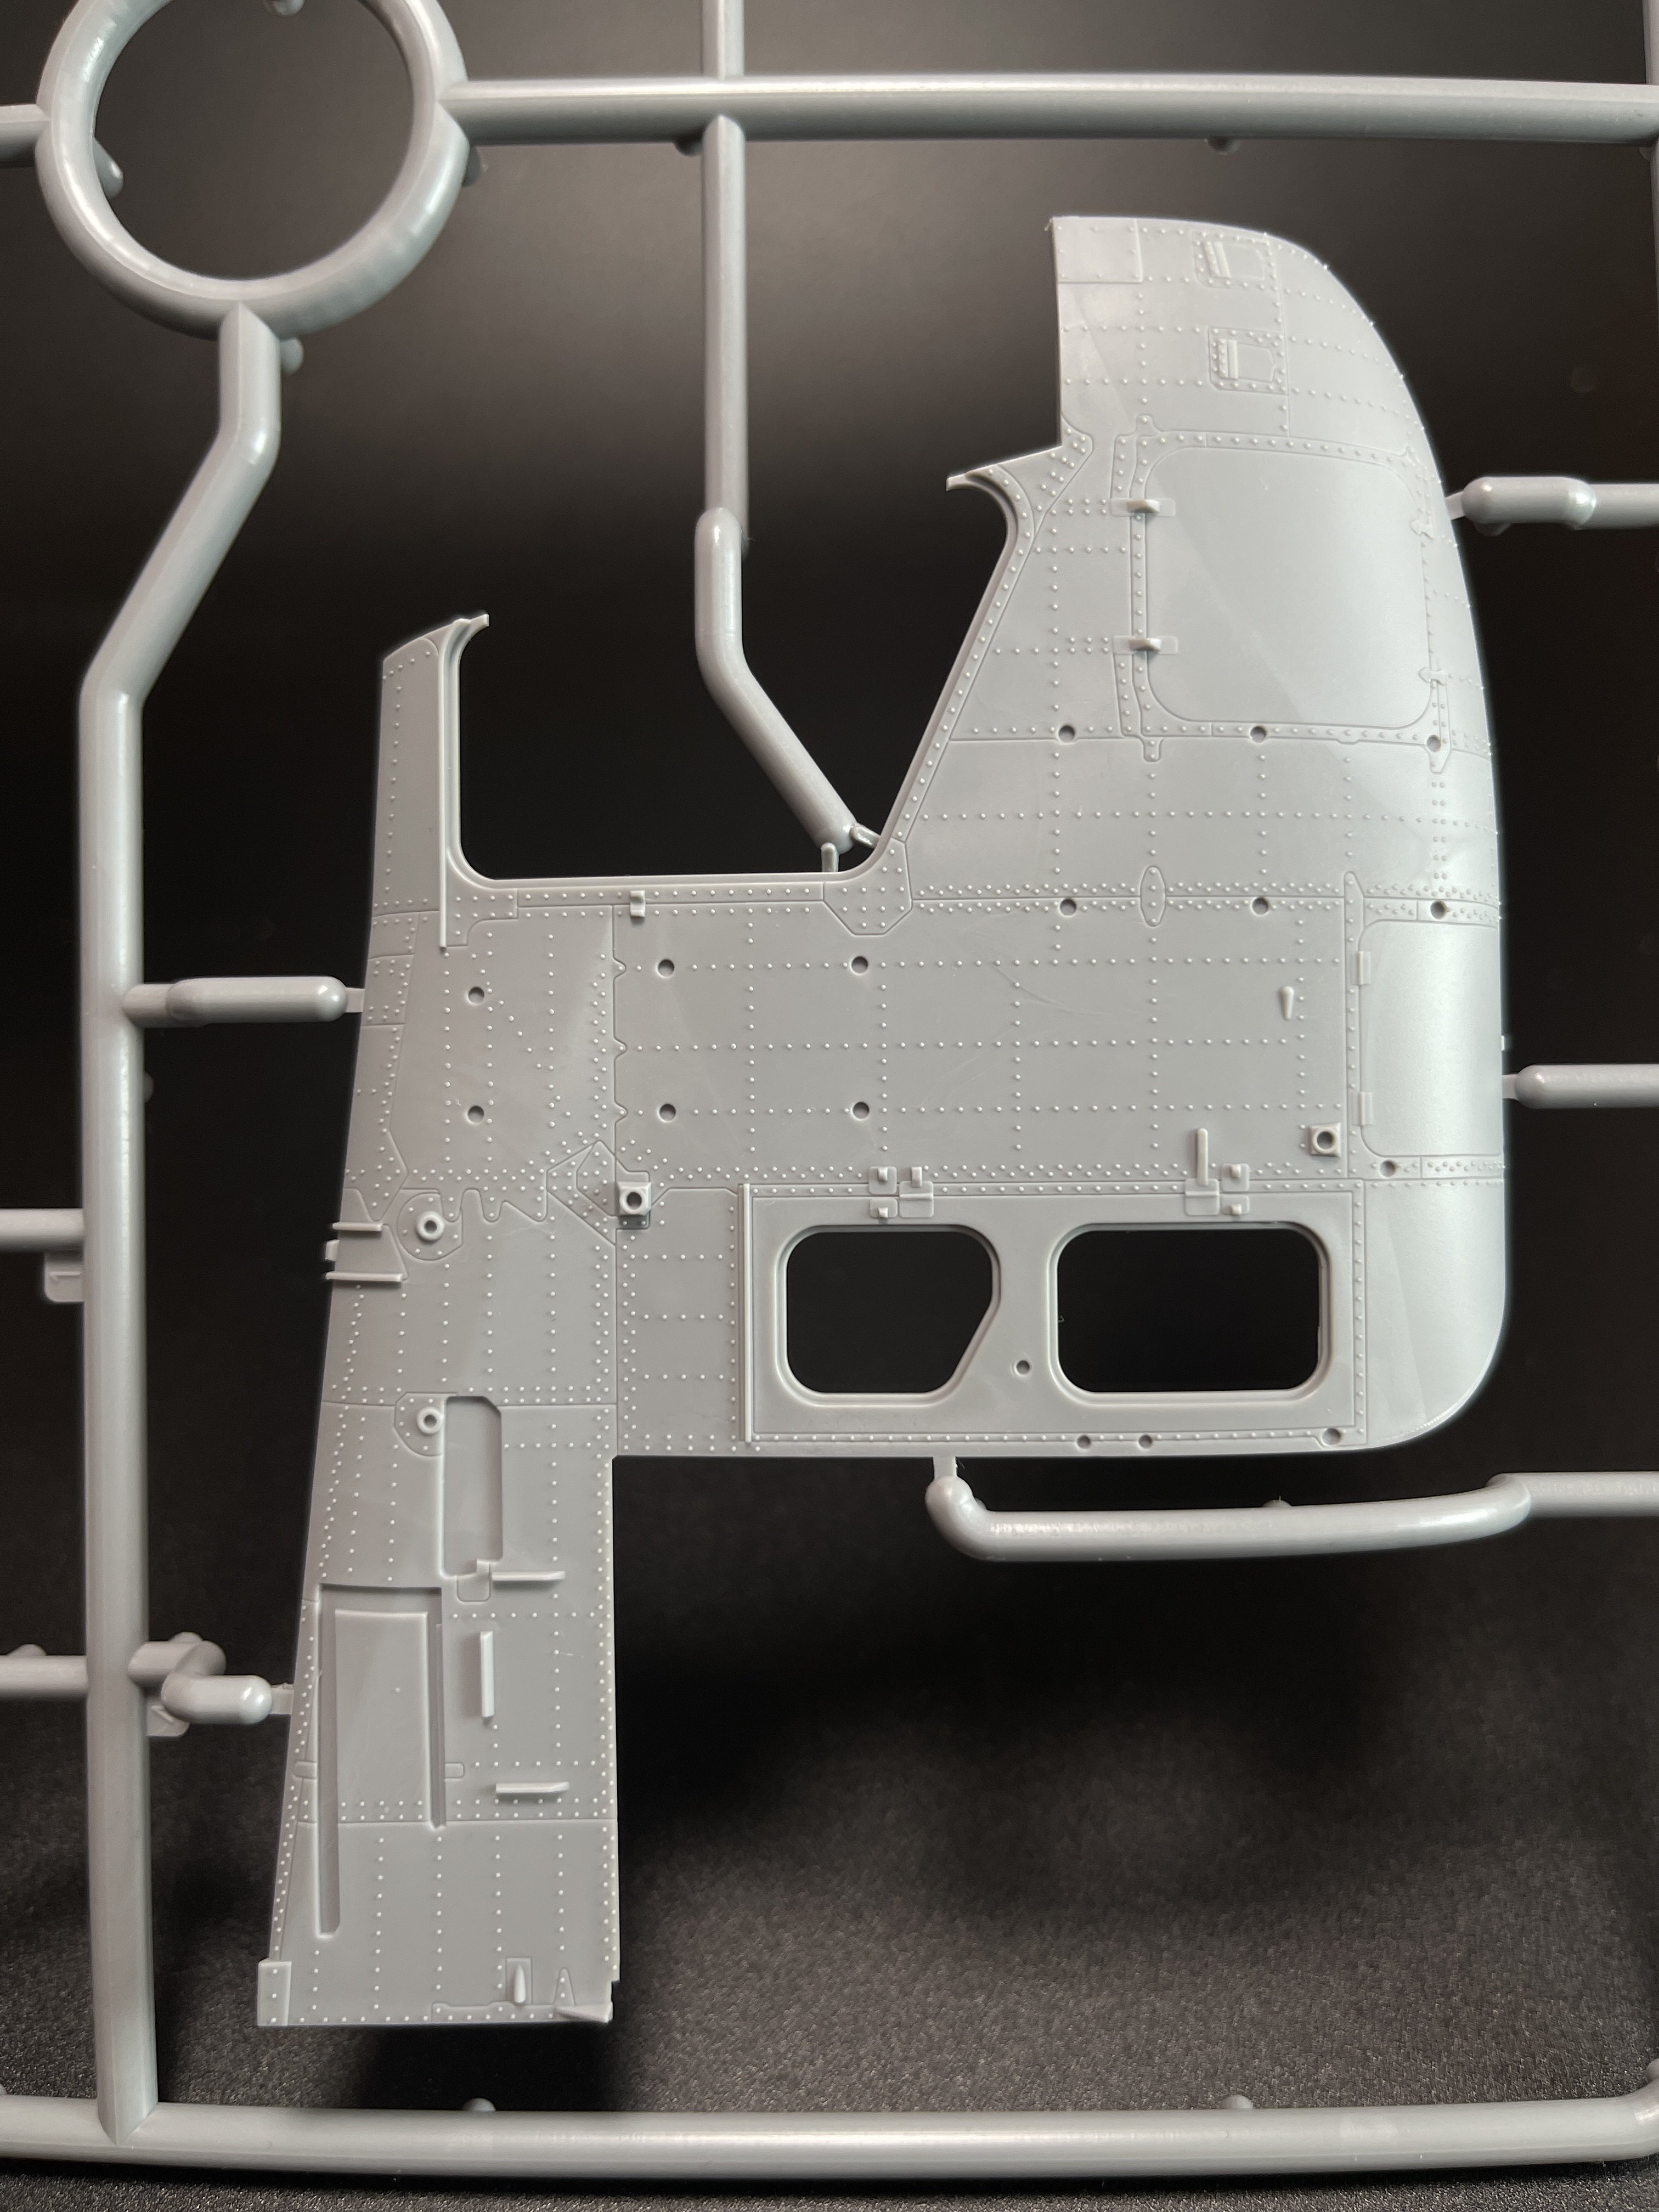
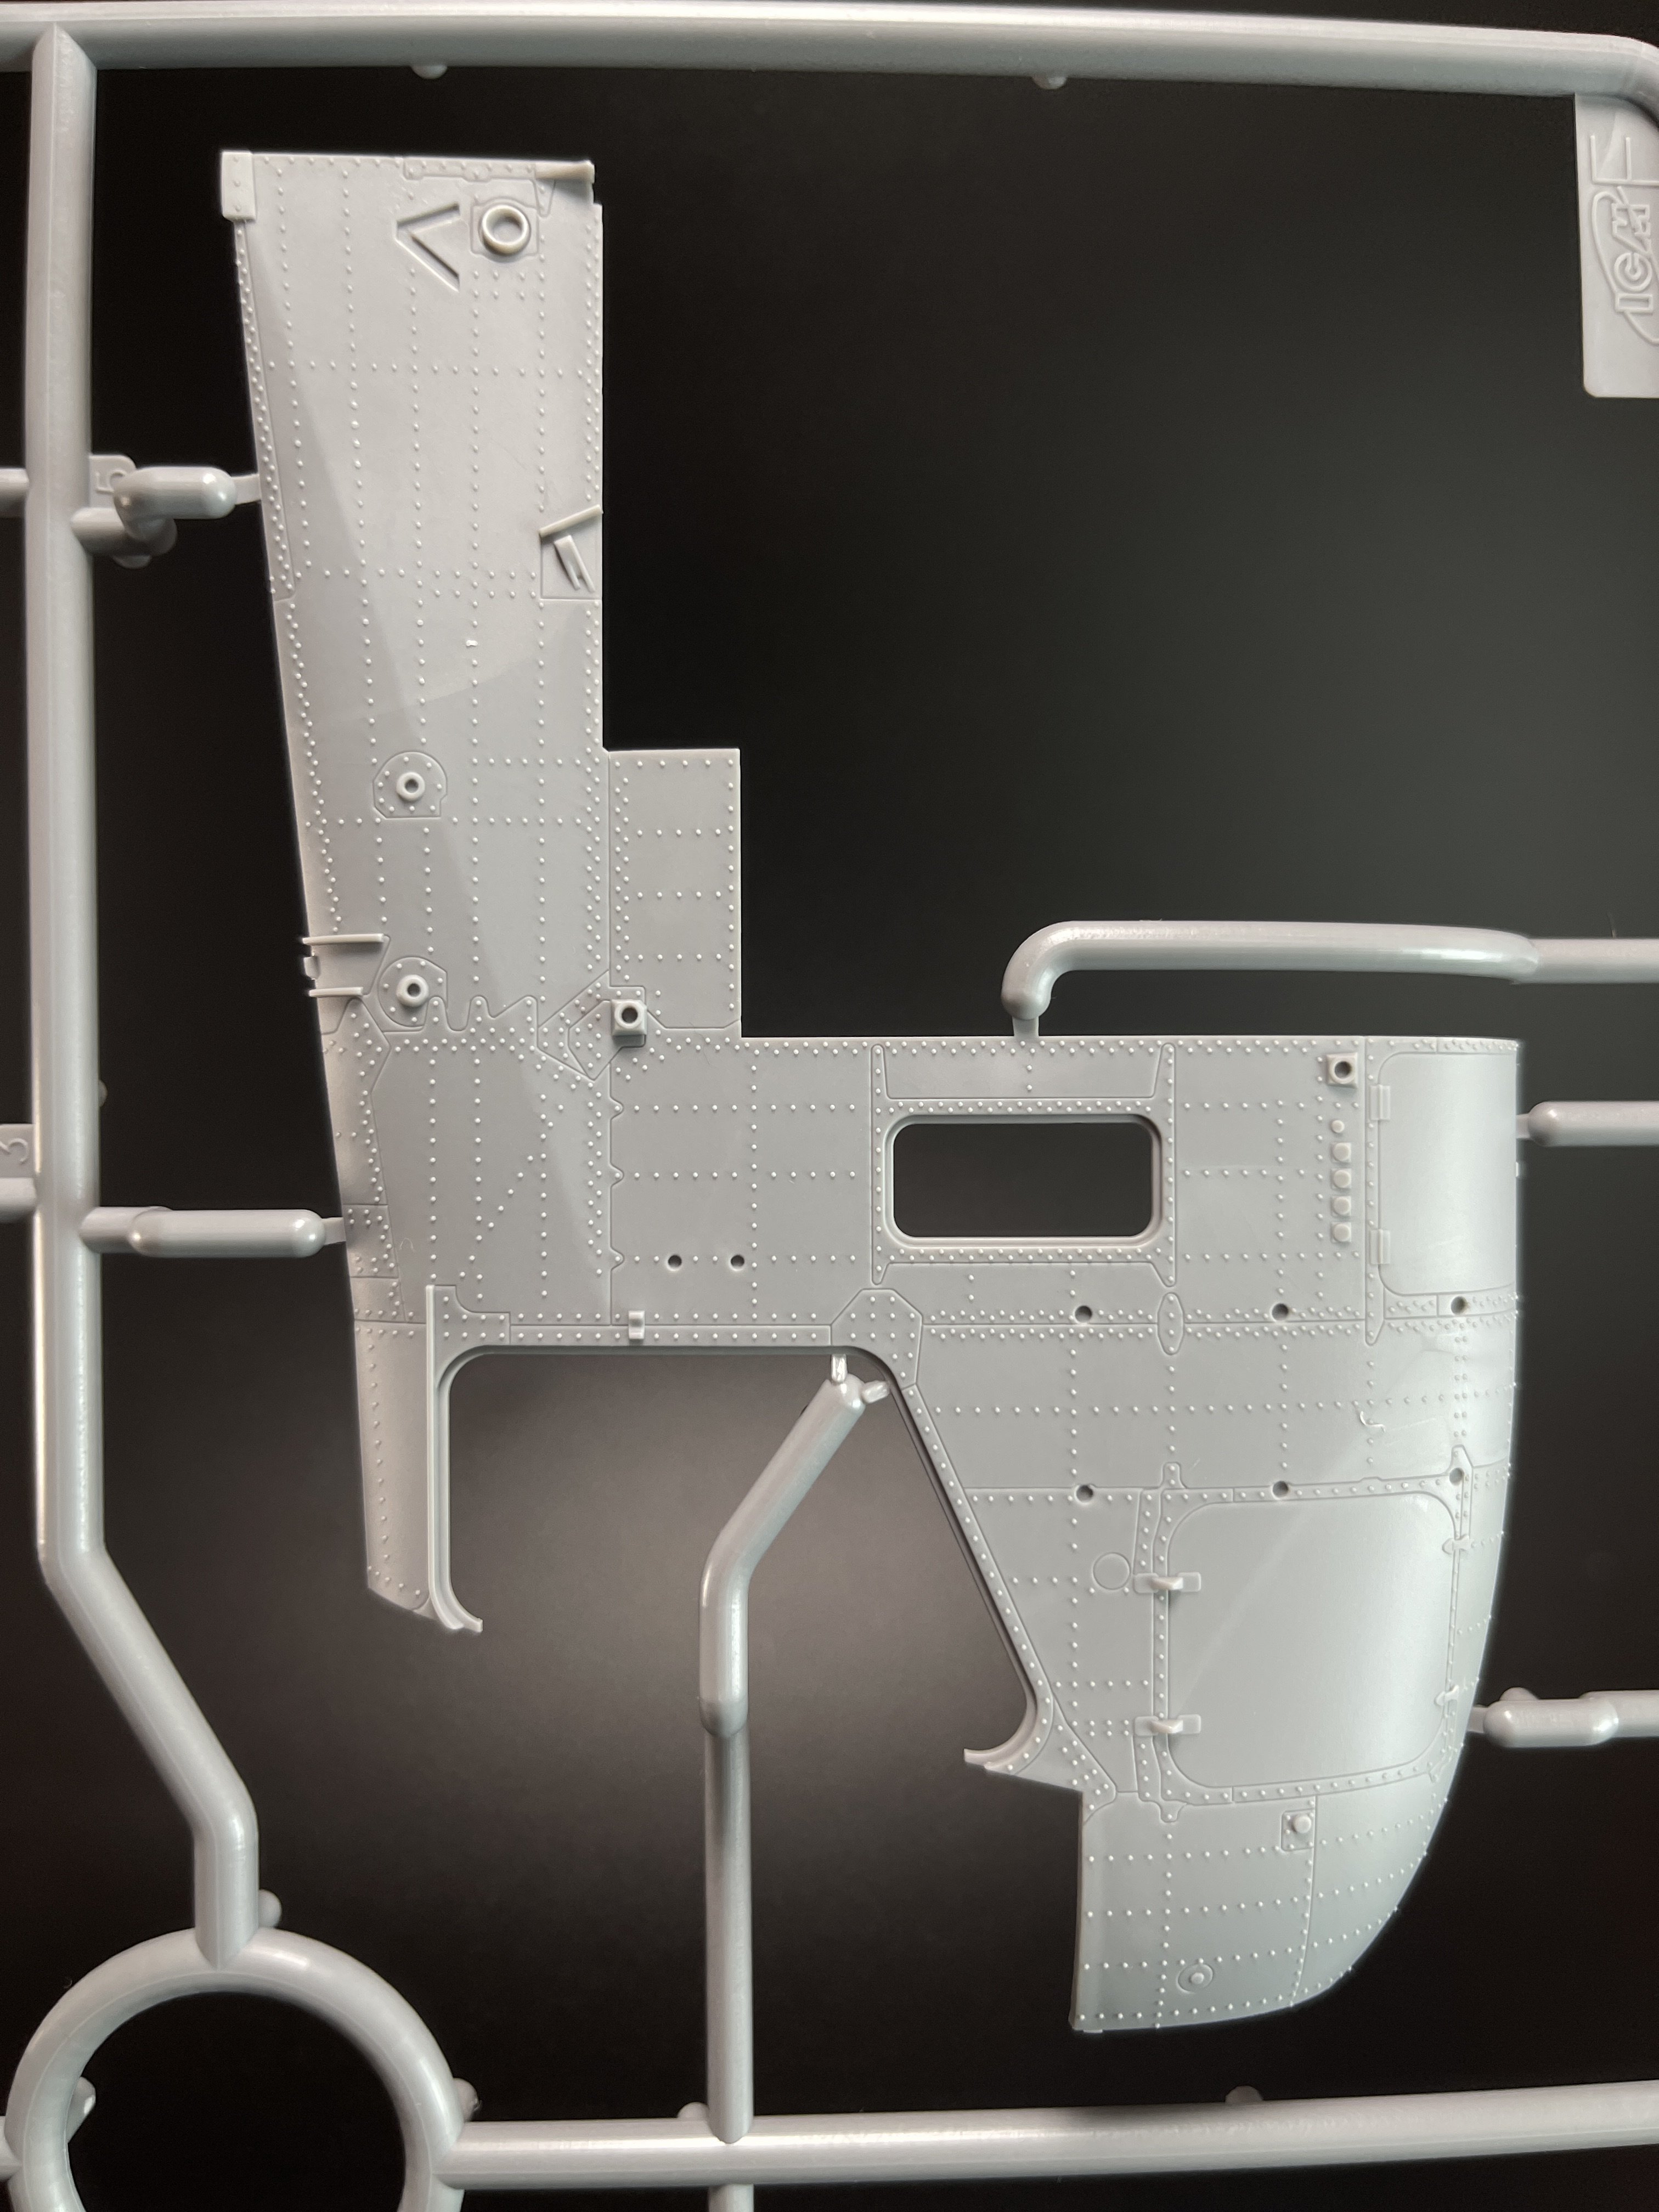
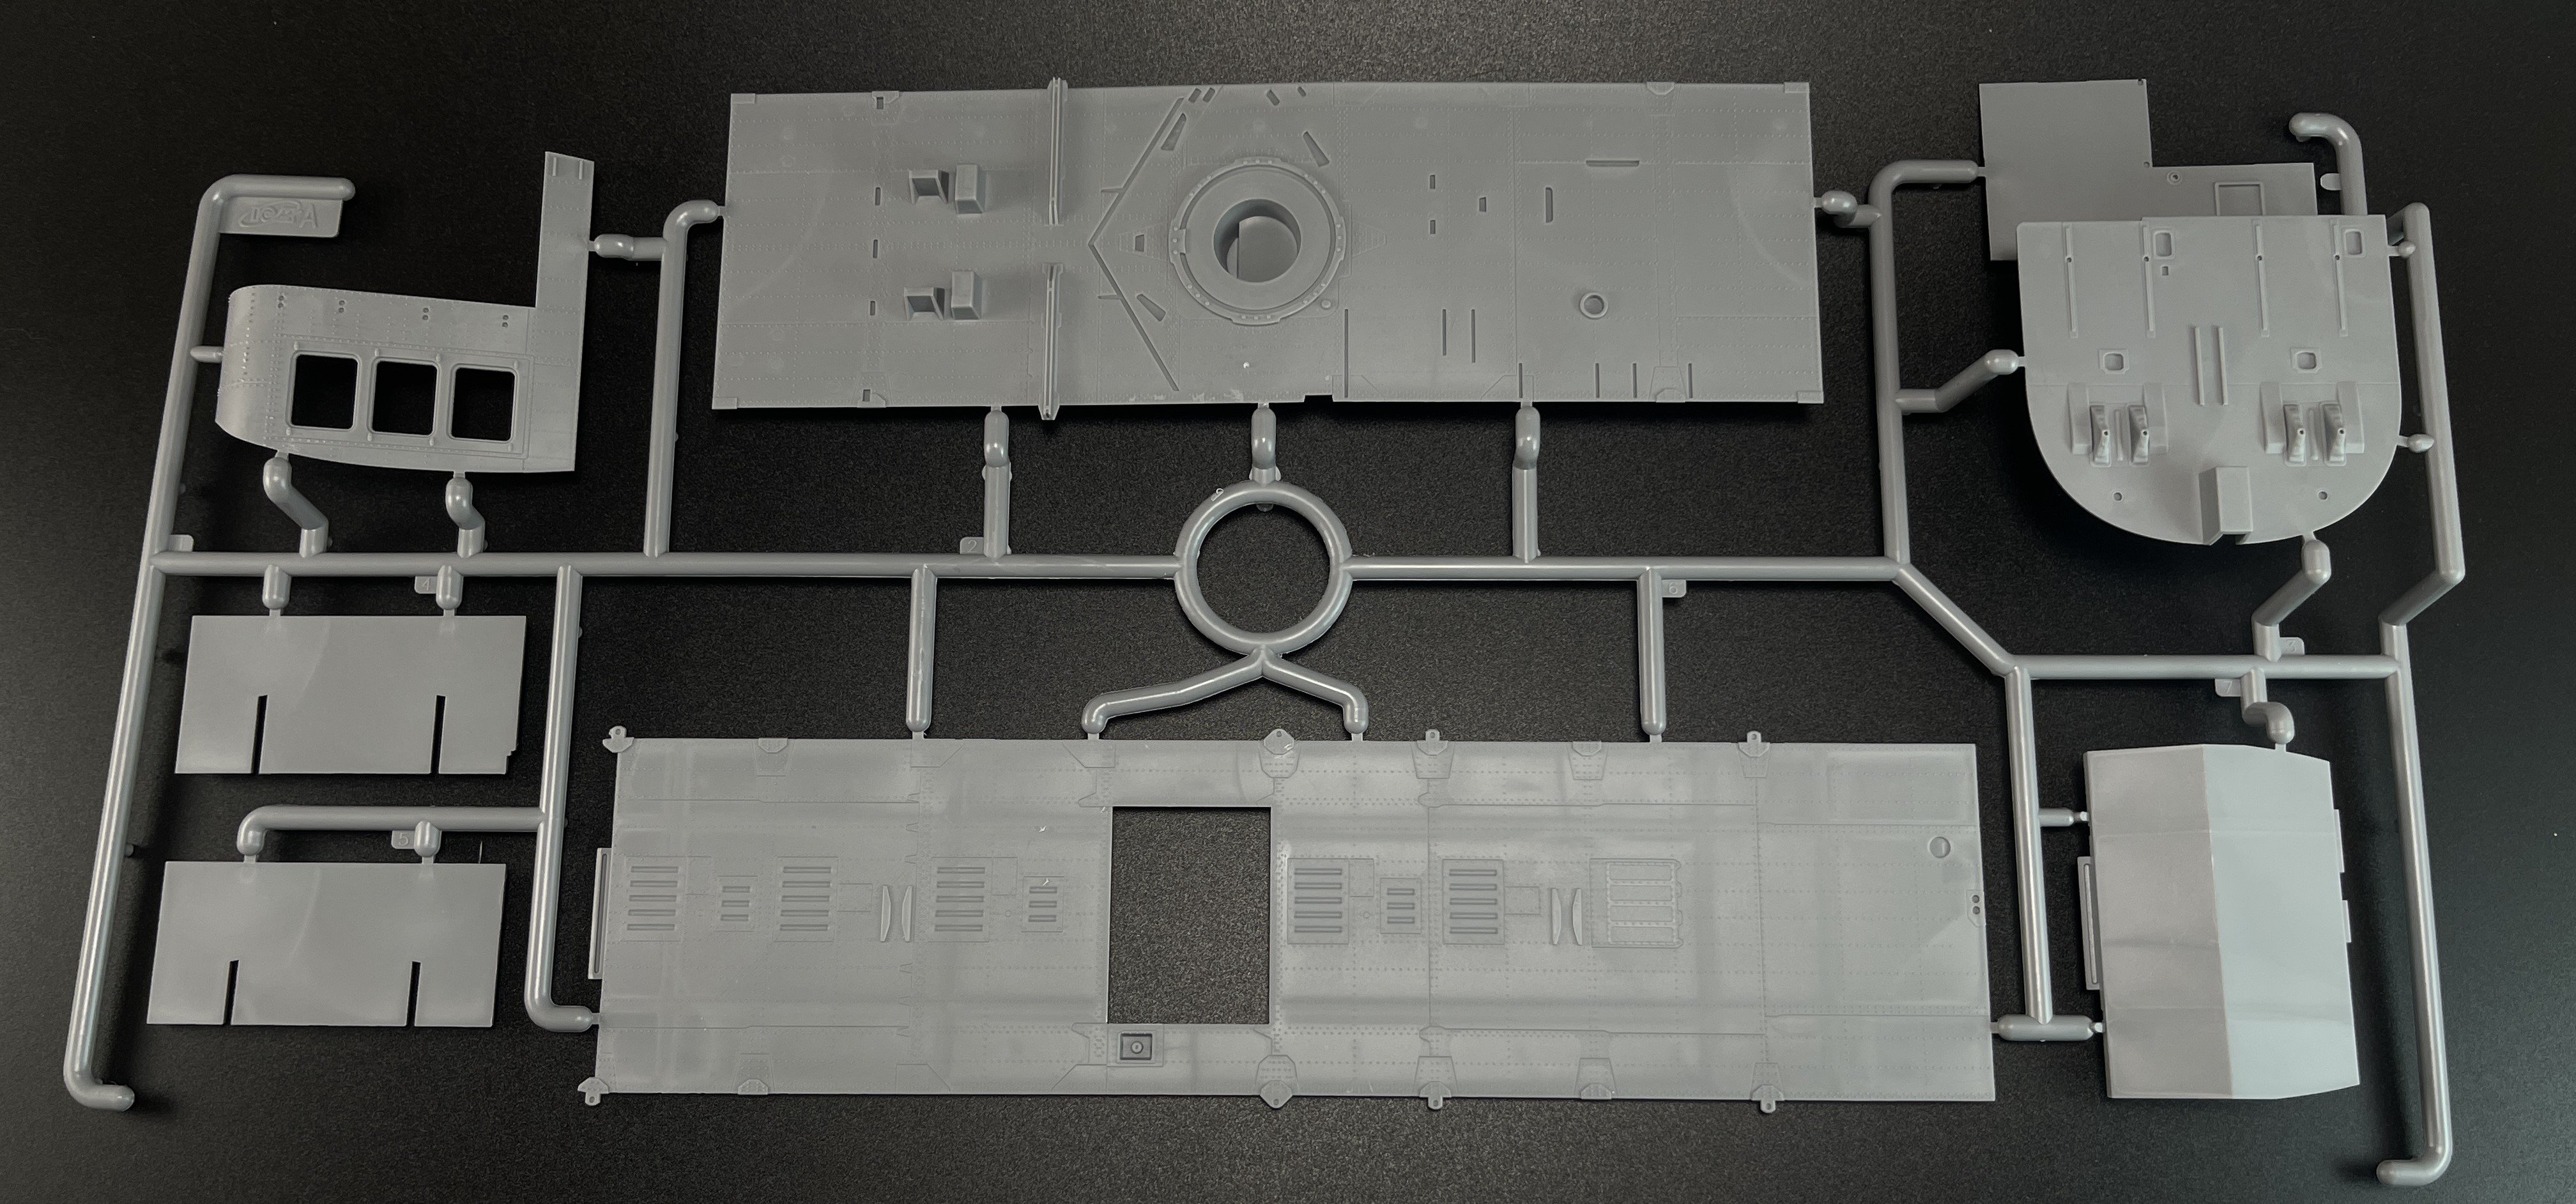
On sprue A, the fuselage halves.
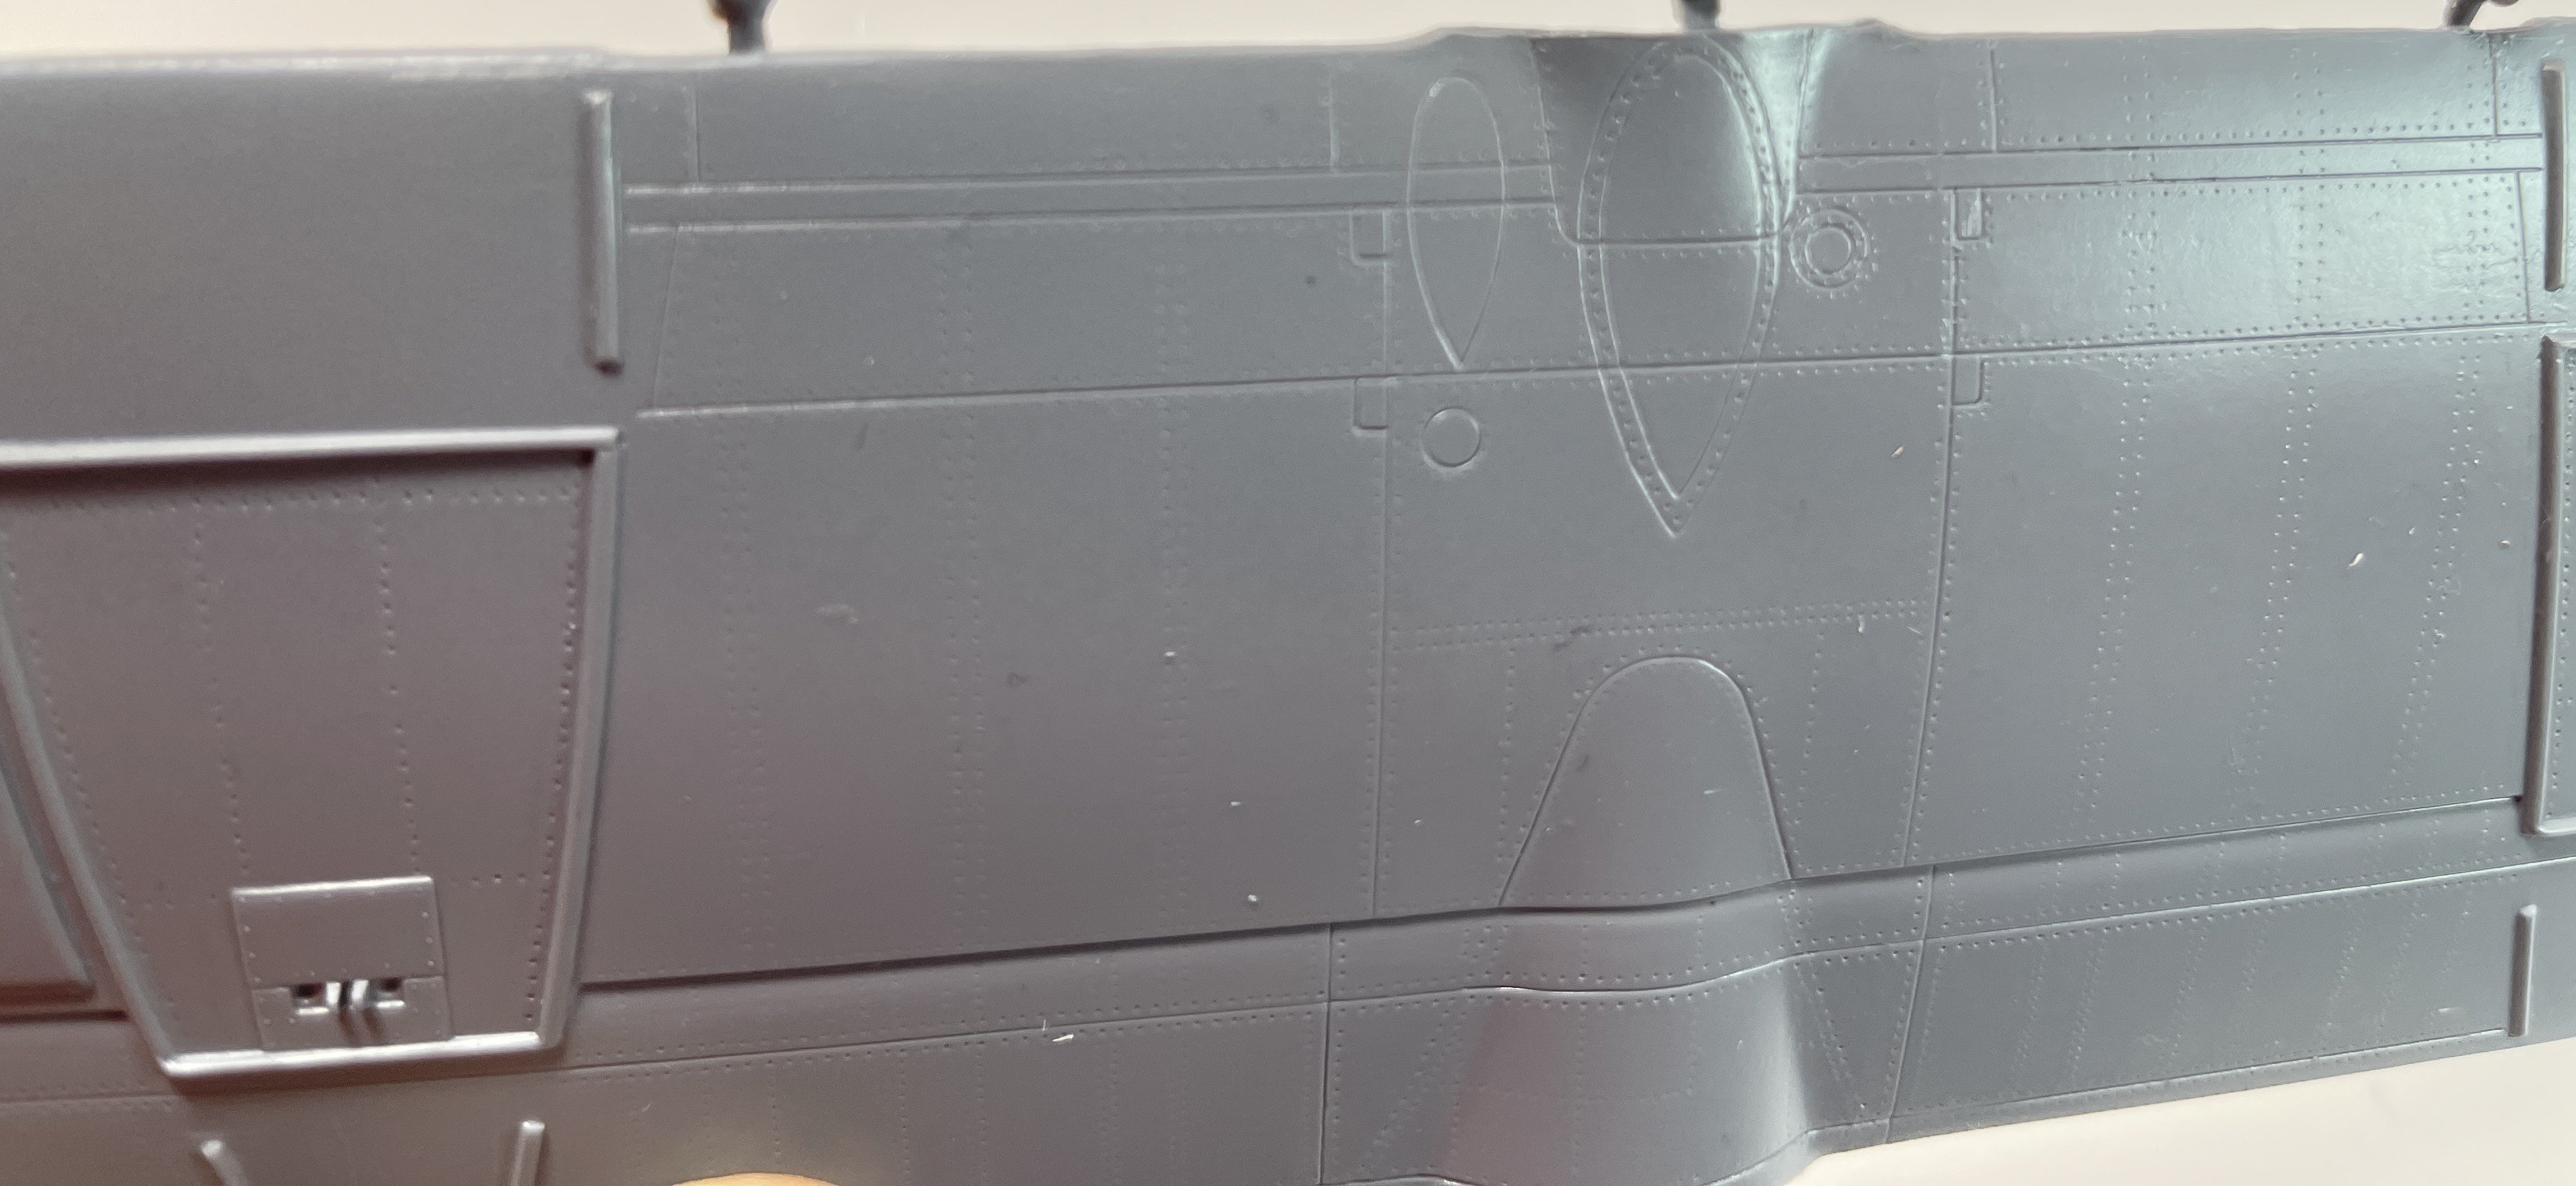
In the external view, the surface detail is there but you don’t see most of the rivets made. An intermediate modeler will do that with no problem.


The fuselage has a fantastic fit as usual in the ICM models in a few years now.
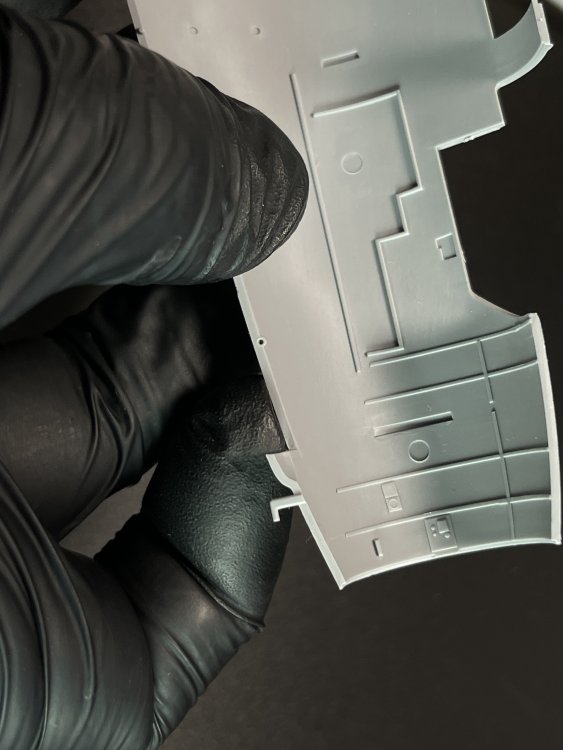
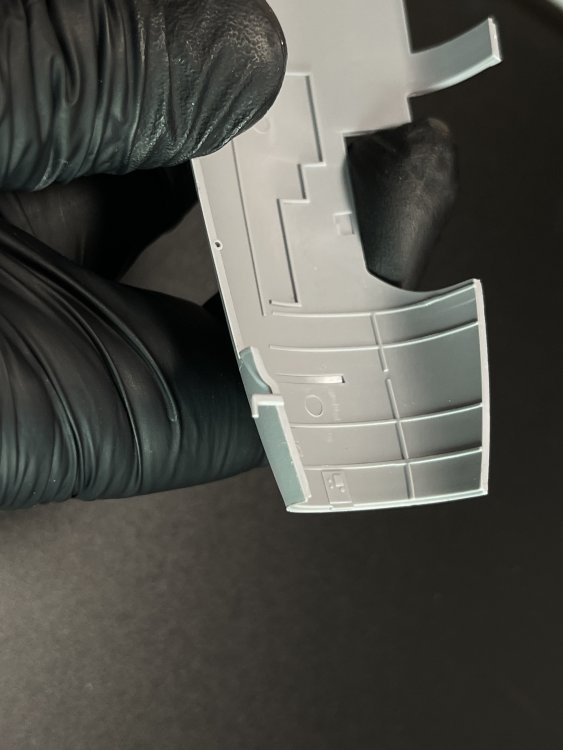
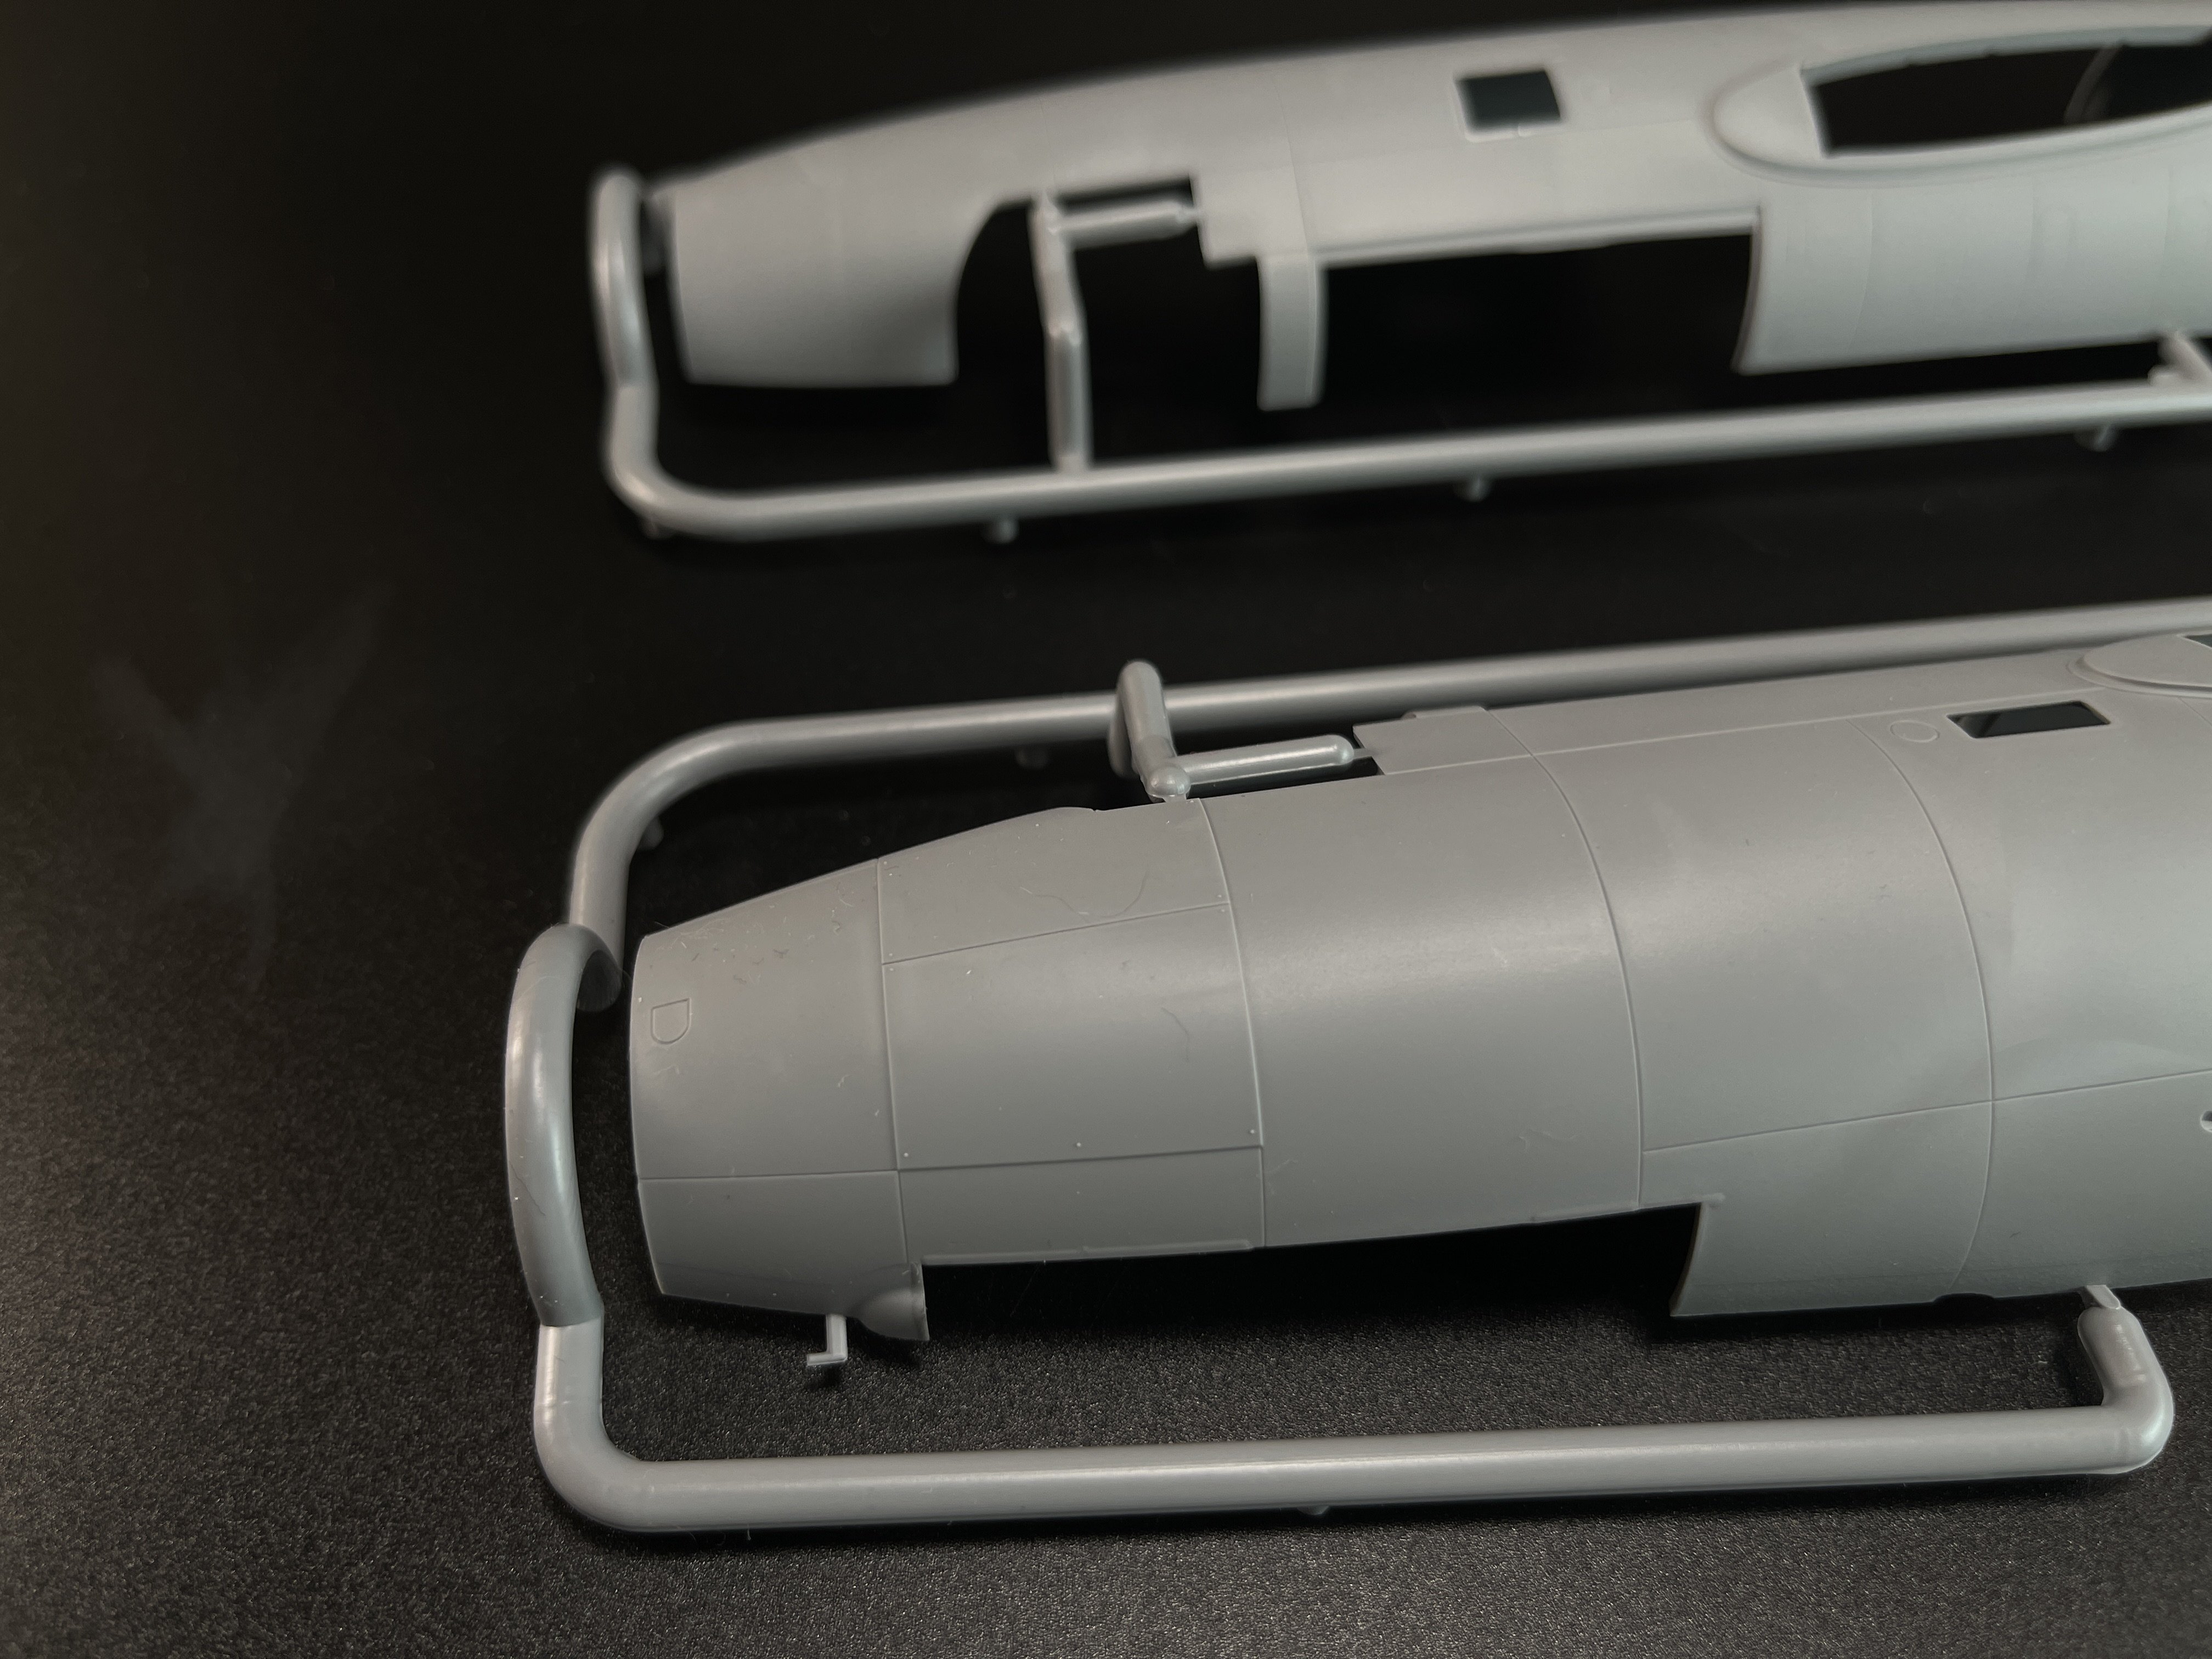
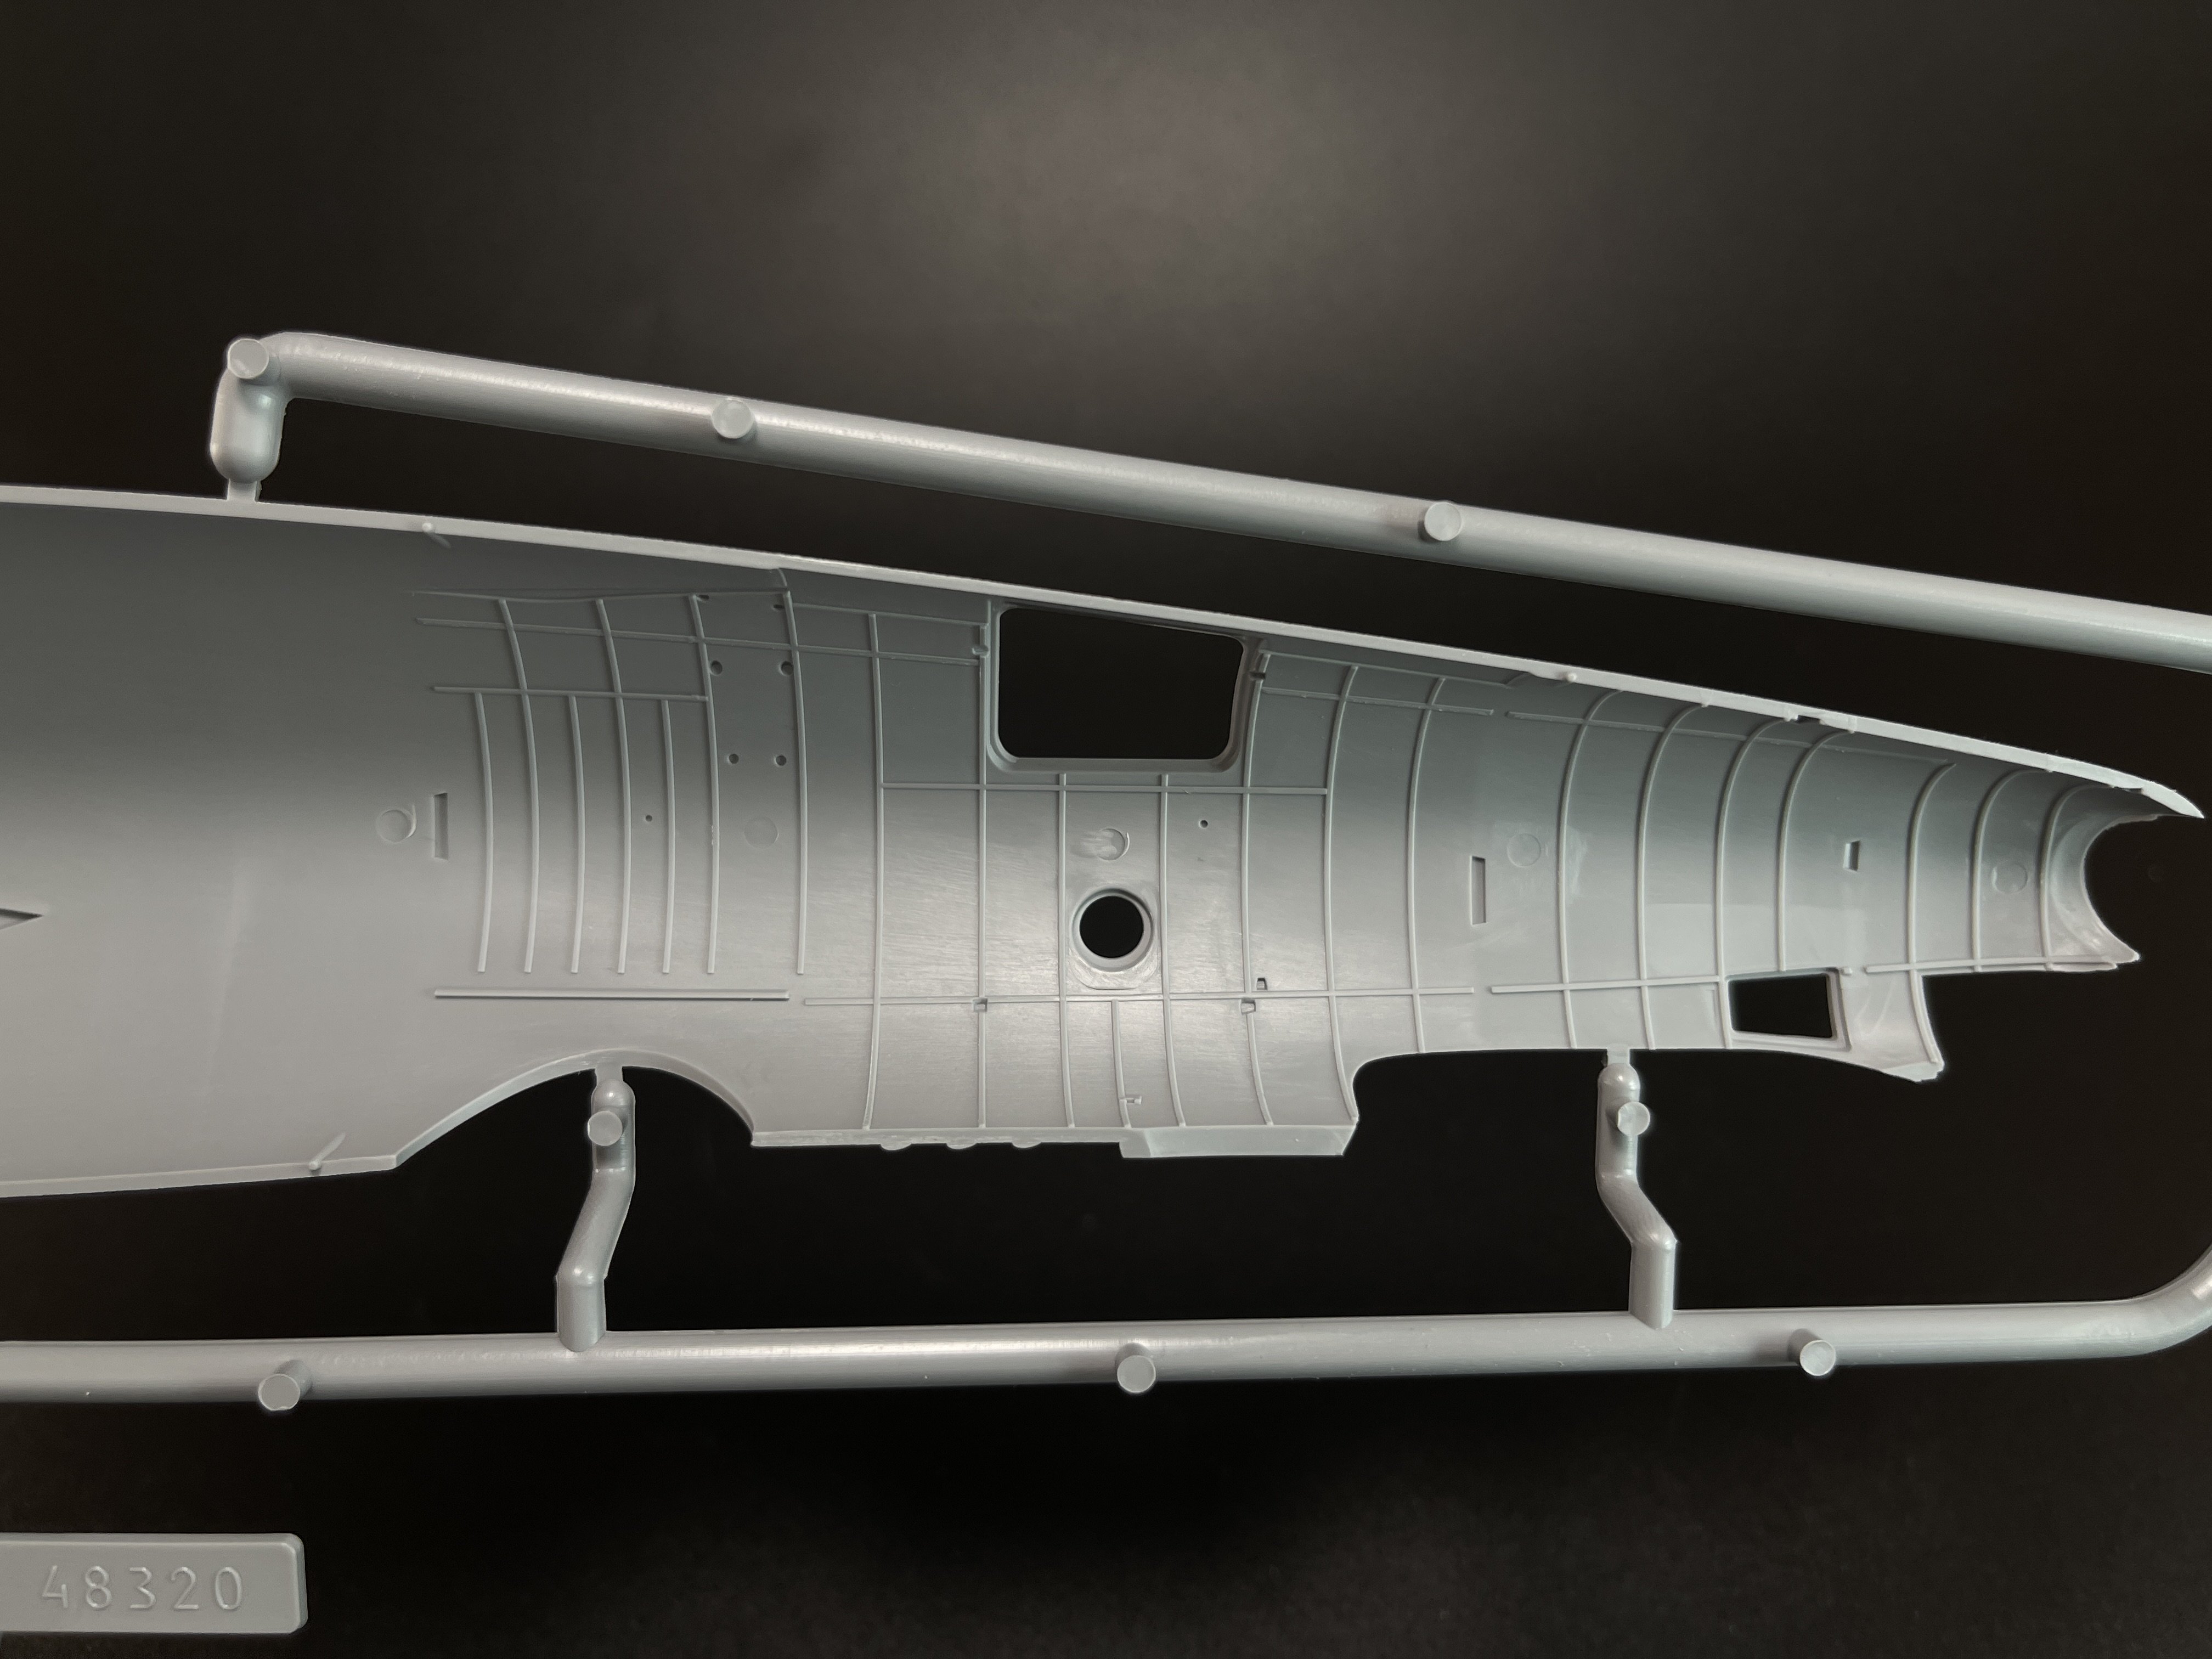
Checking the interior, there is the internal frame in the visible parts and location pins to put the fuselage together and to put the other internal details into the place.
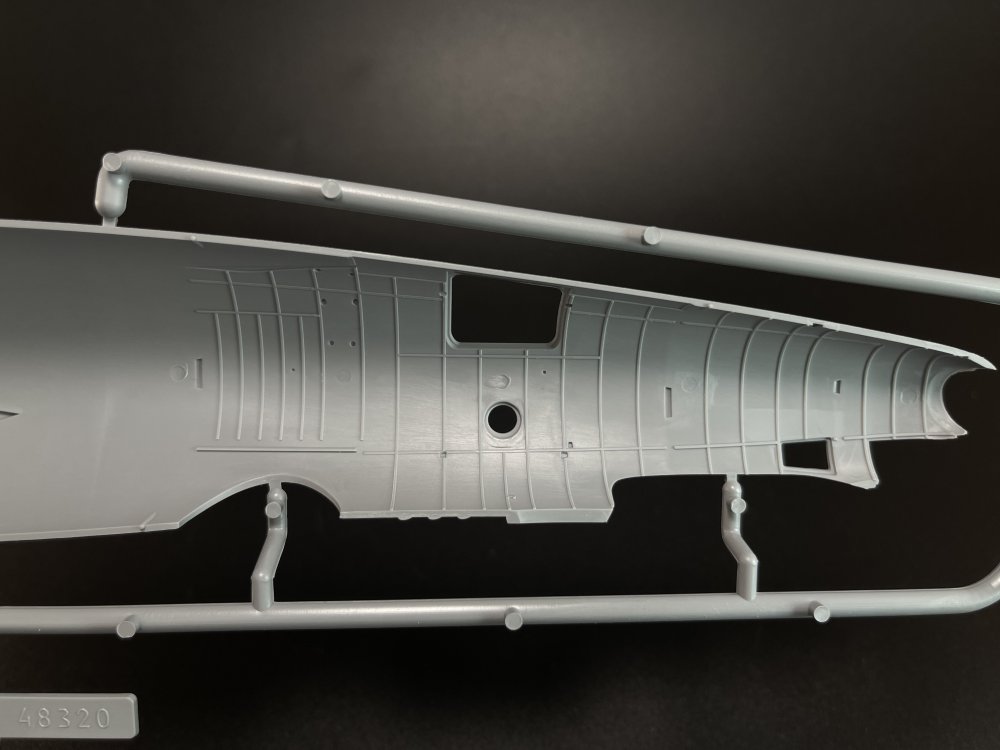
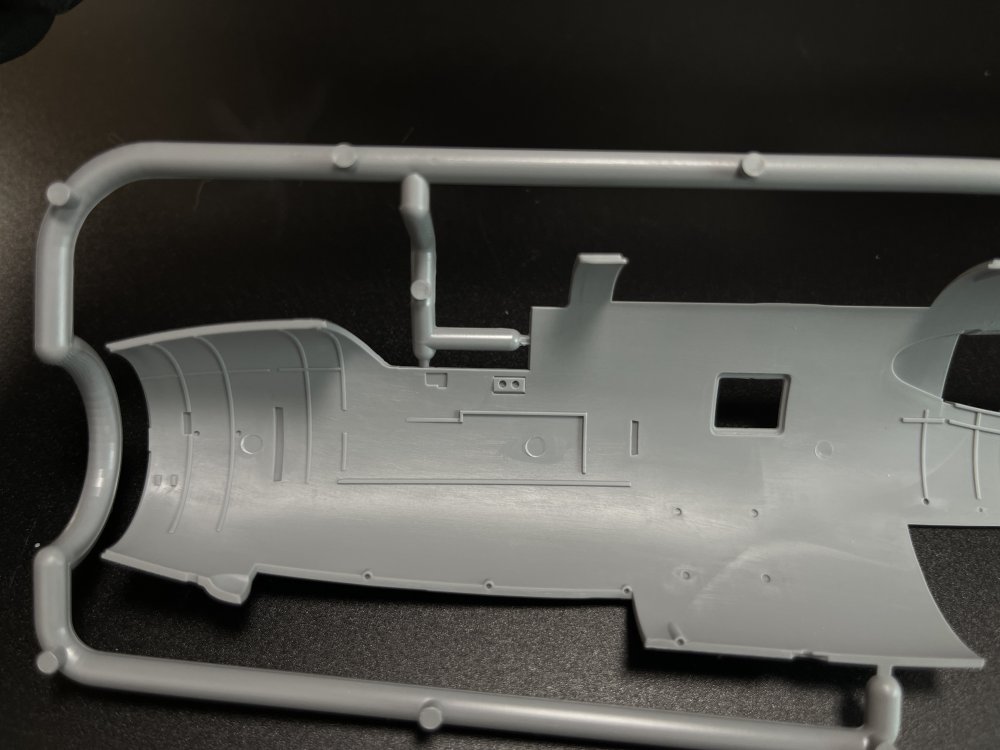
Injection marks… a few and one of them, just near a window will give a few extra work to remove it…
Checking the construction evolution this location pin probably will not be total expose but I don’t think that you can pass not delete it.
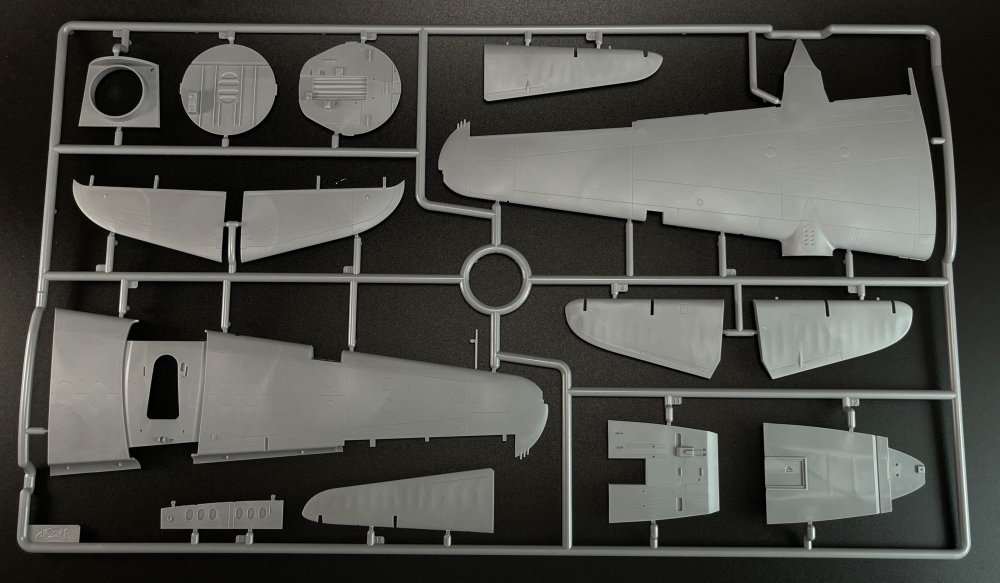
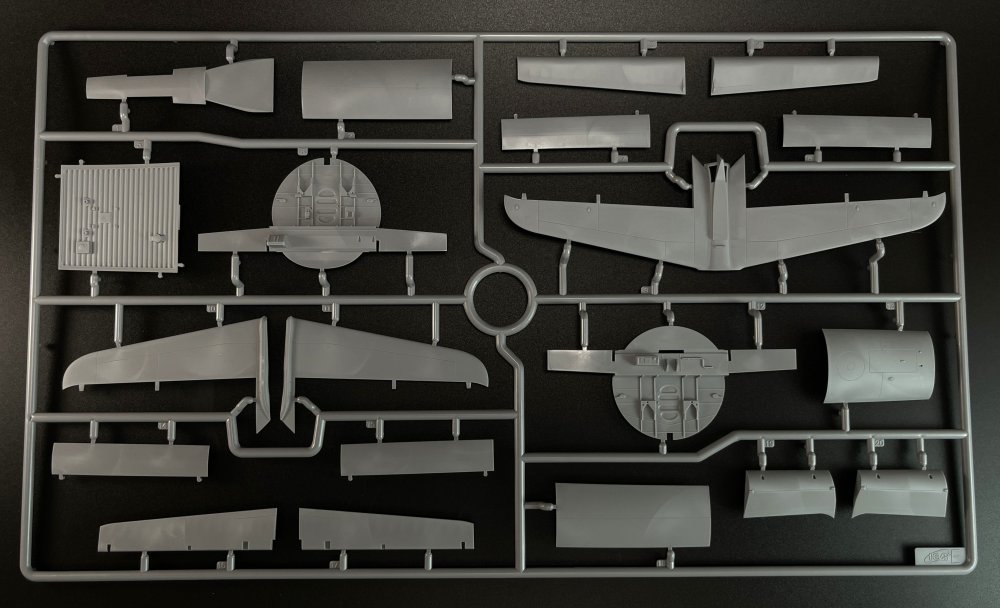
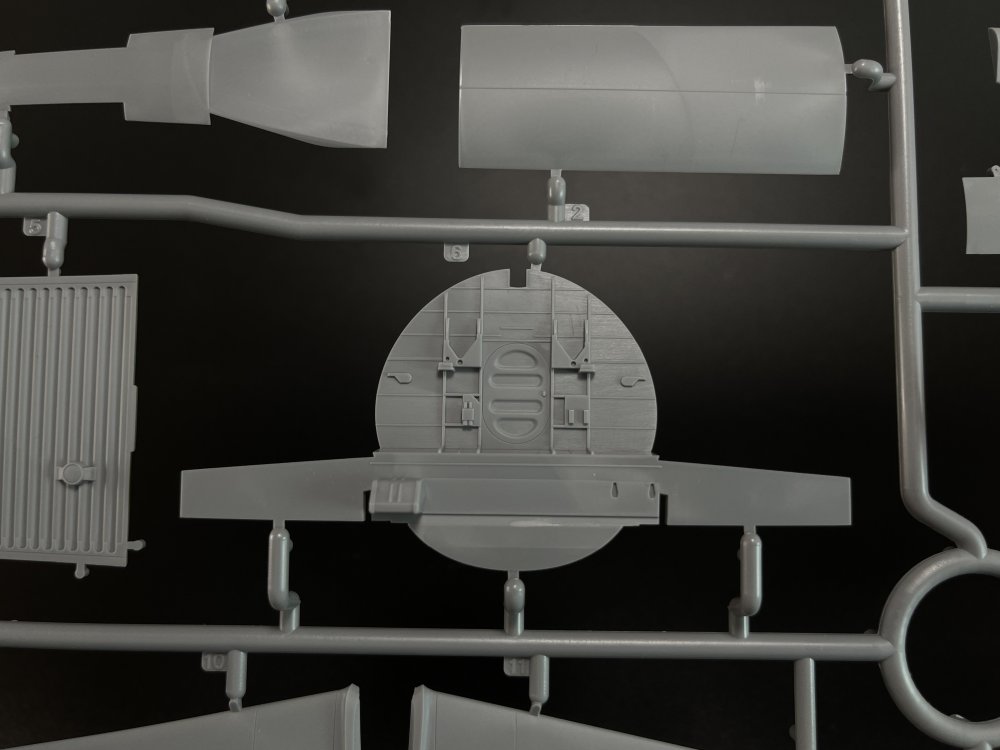
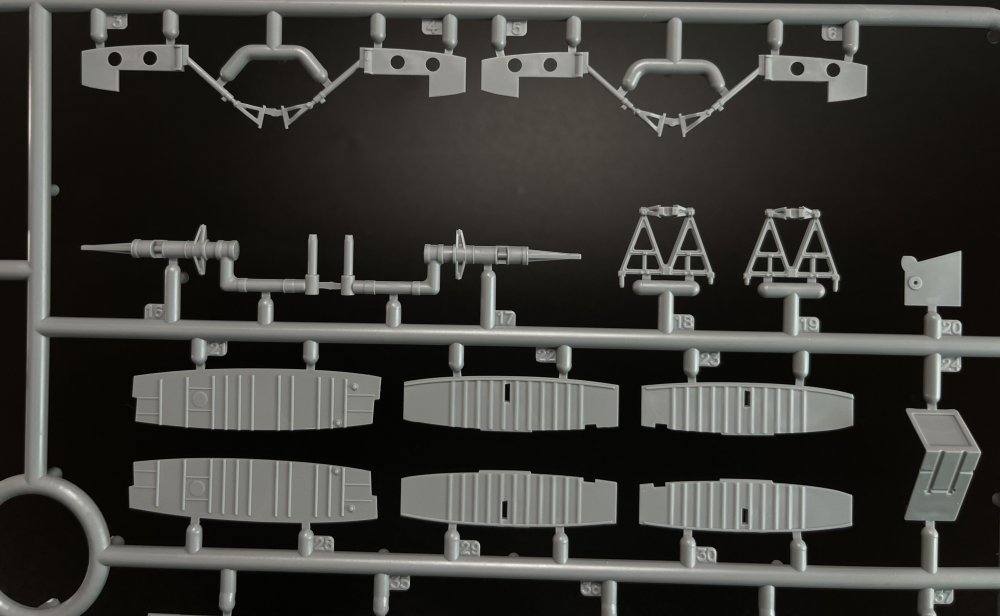
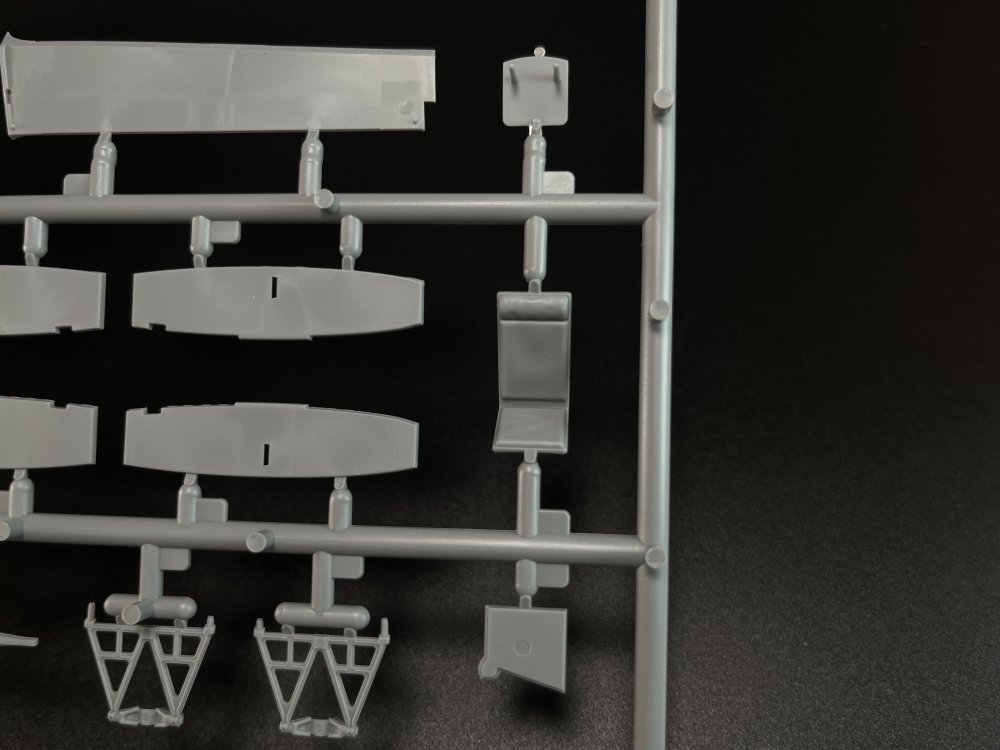
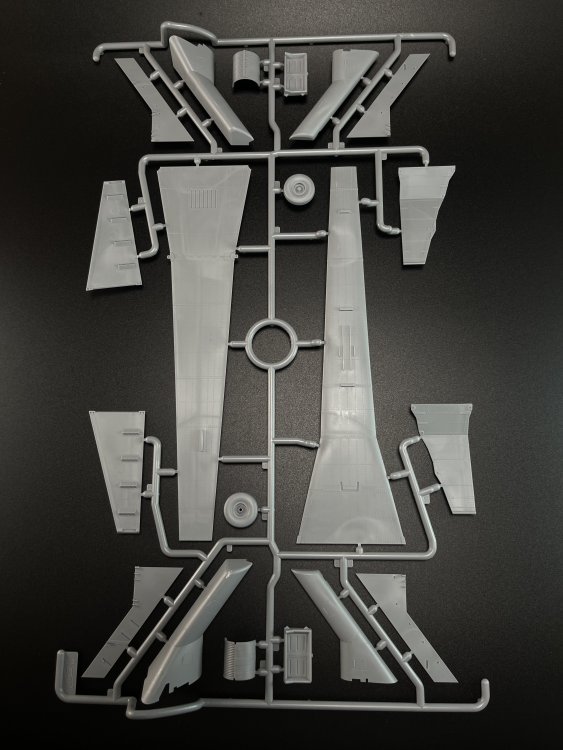
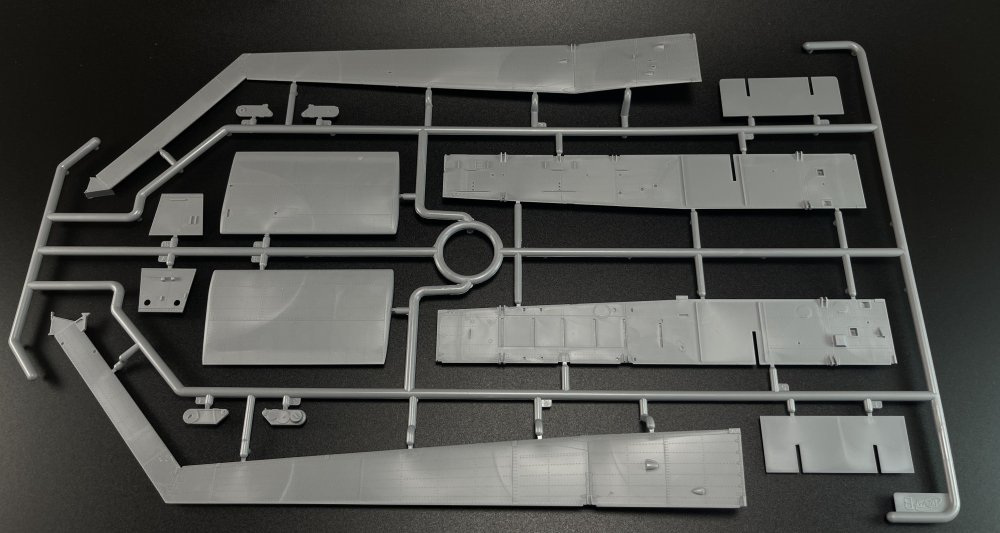
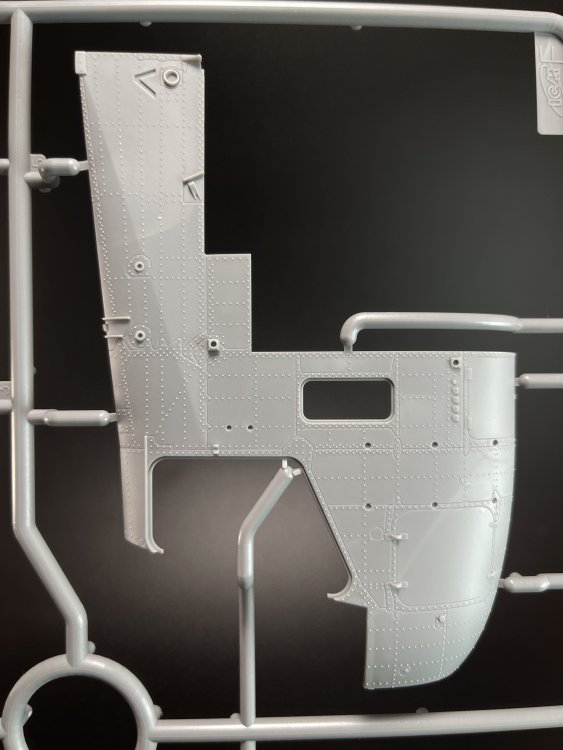
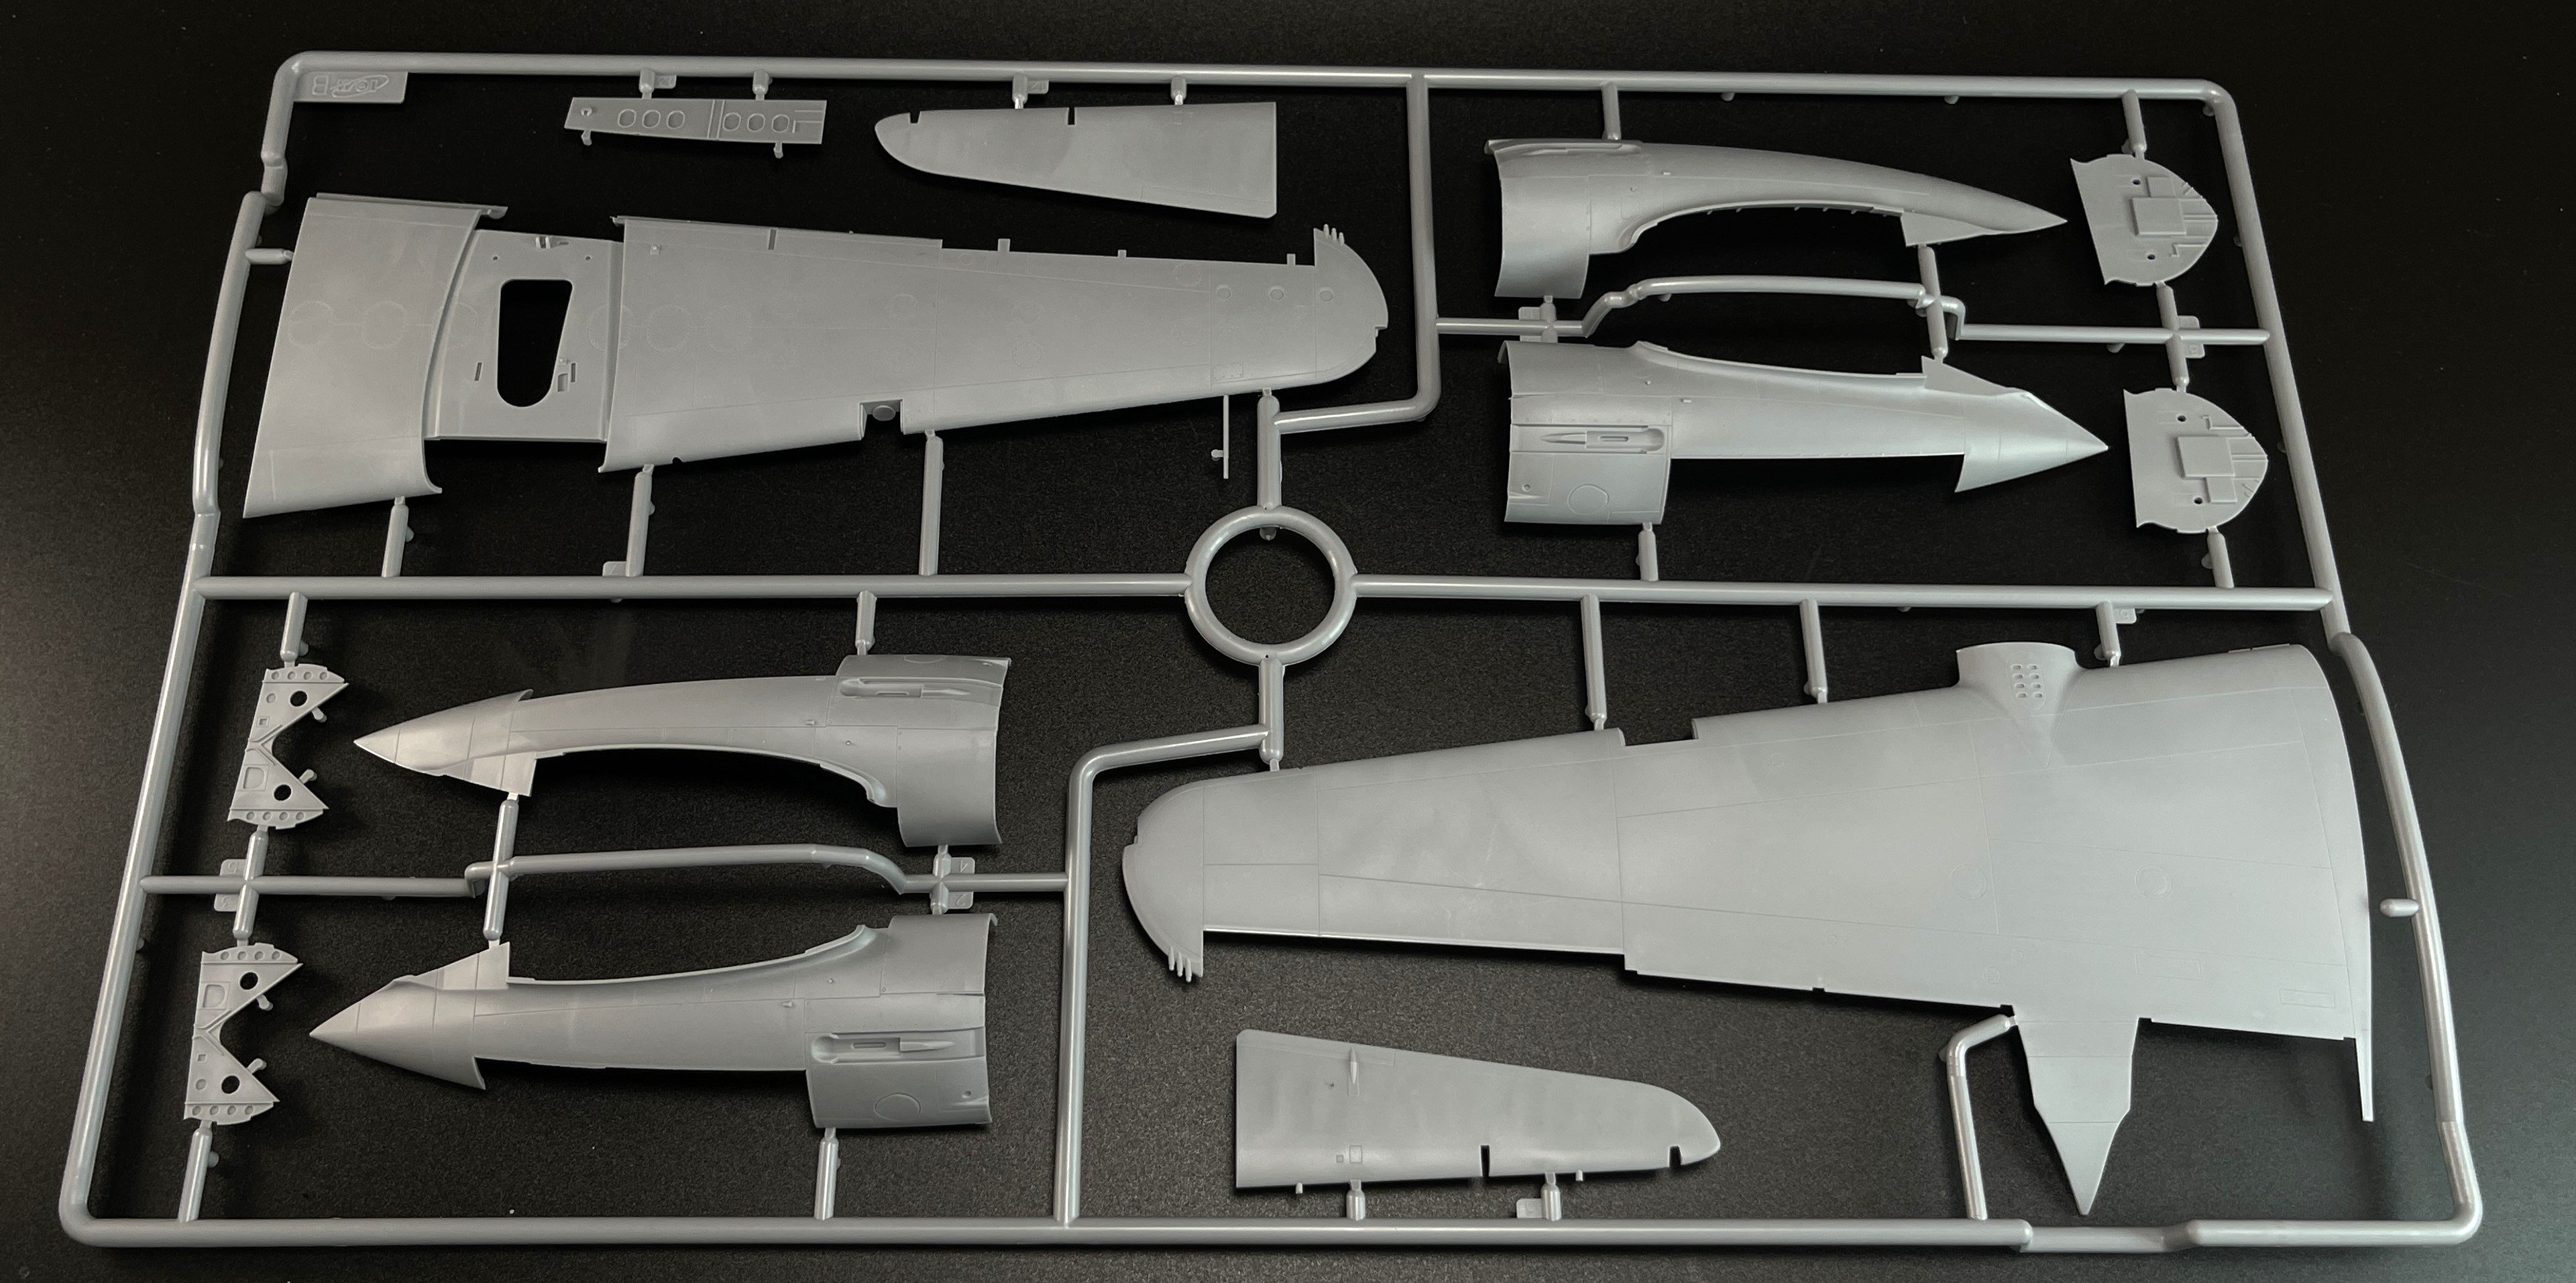
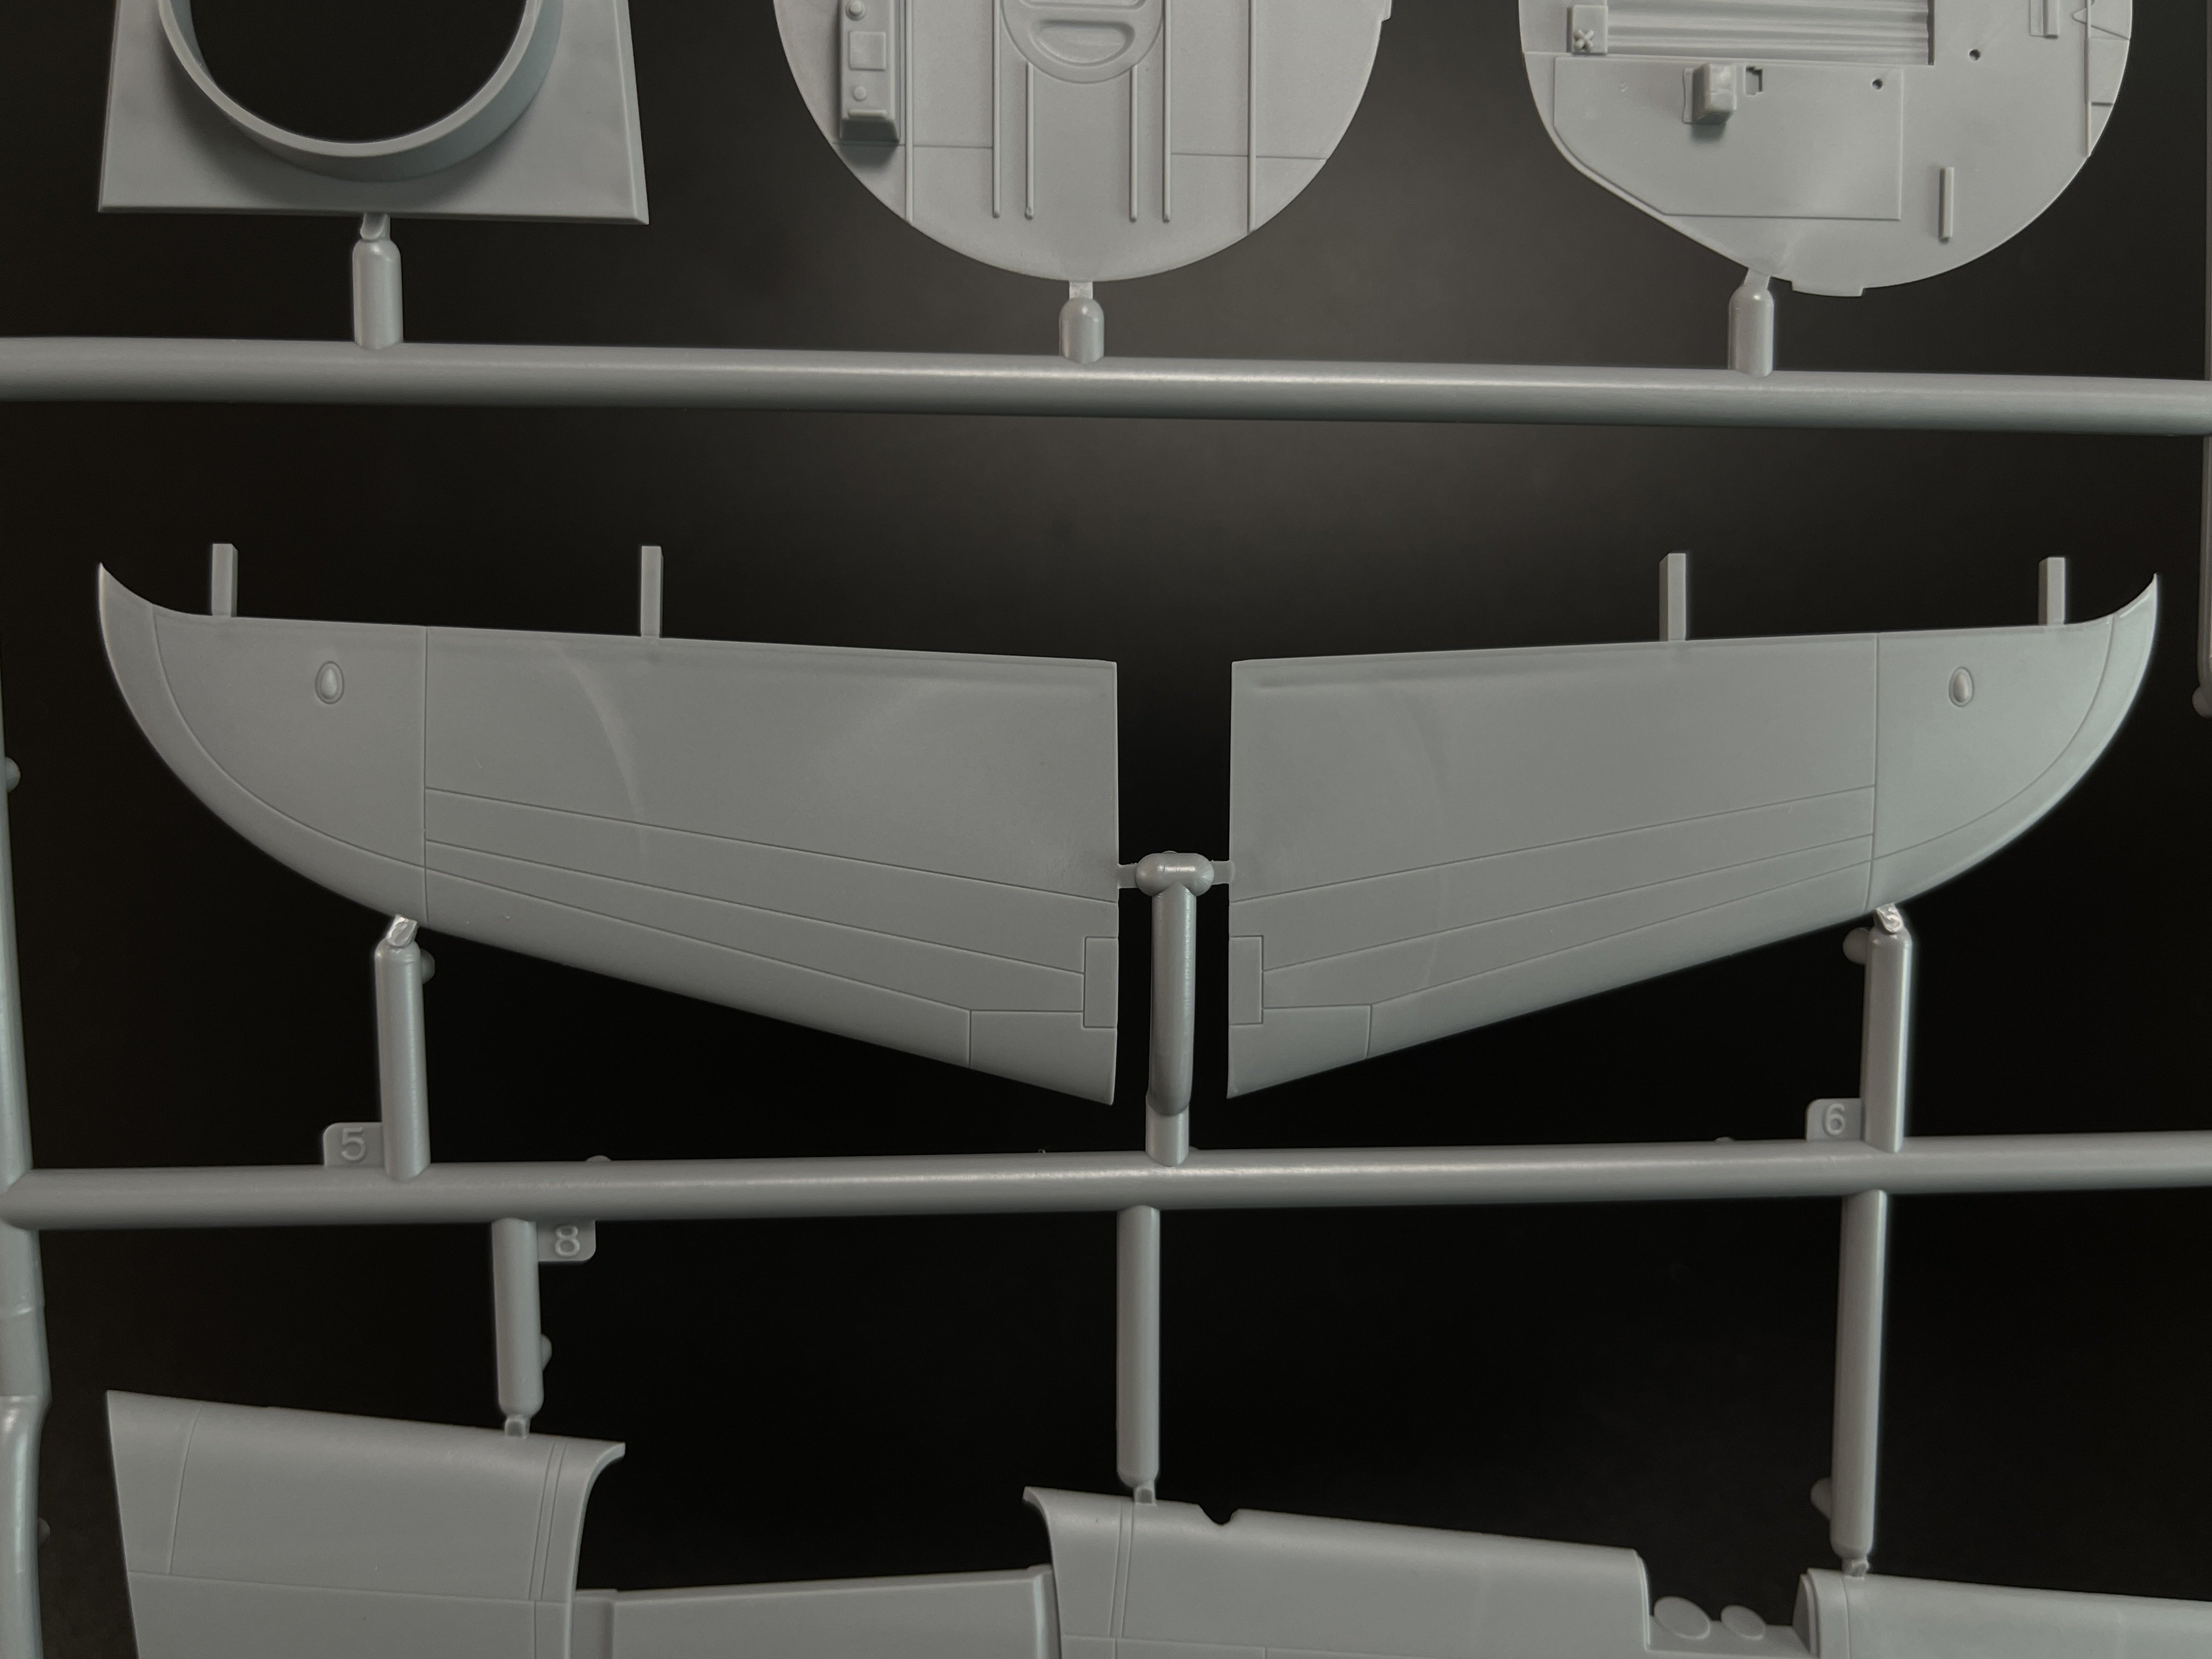
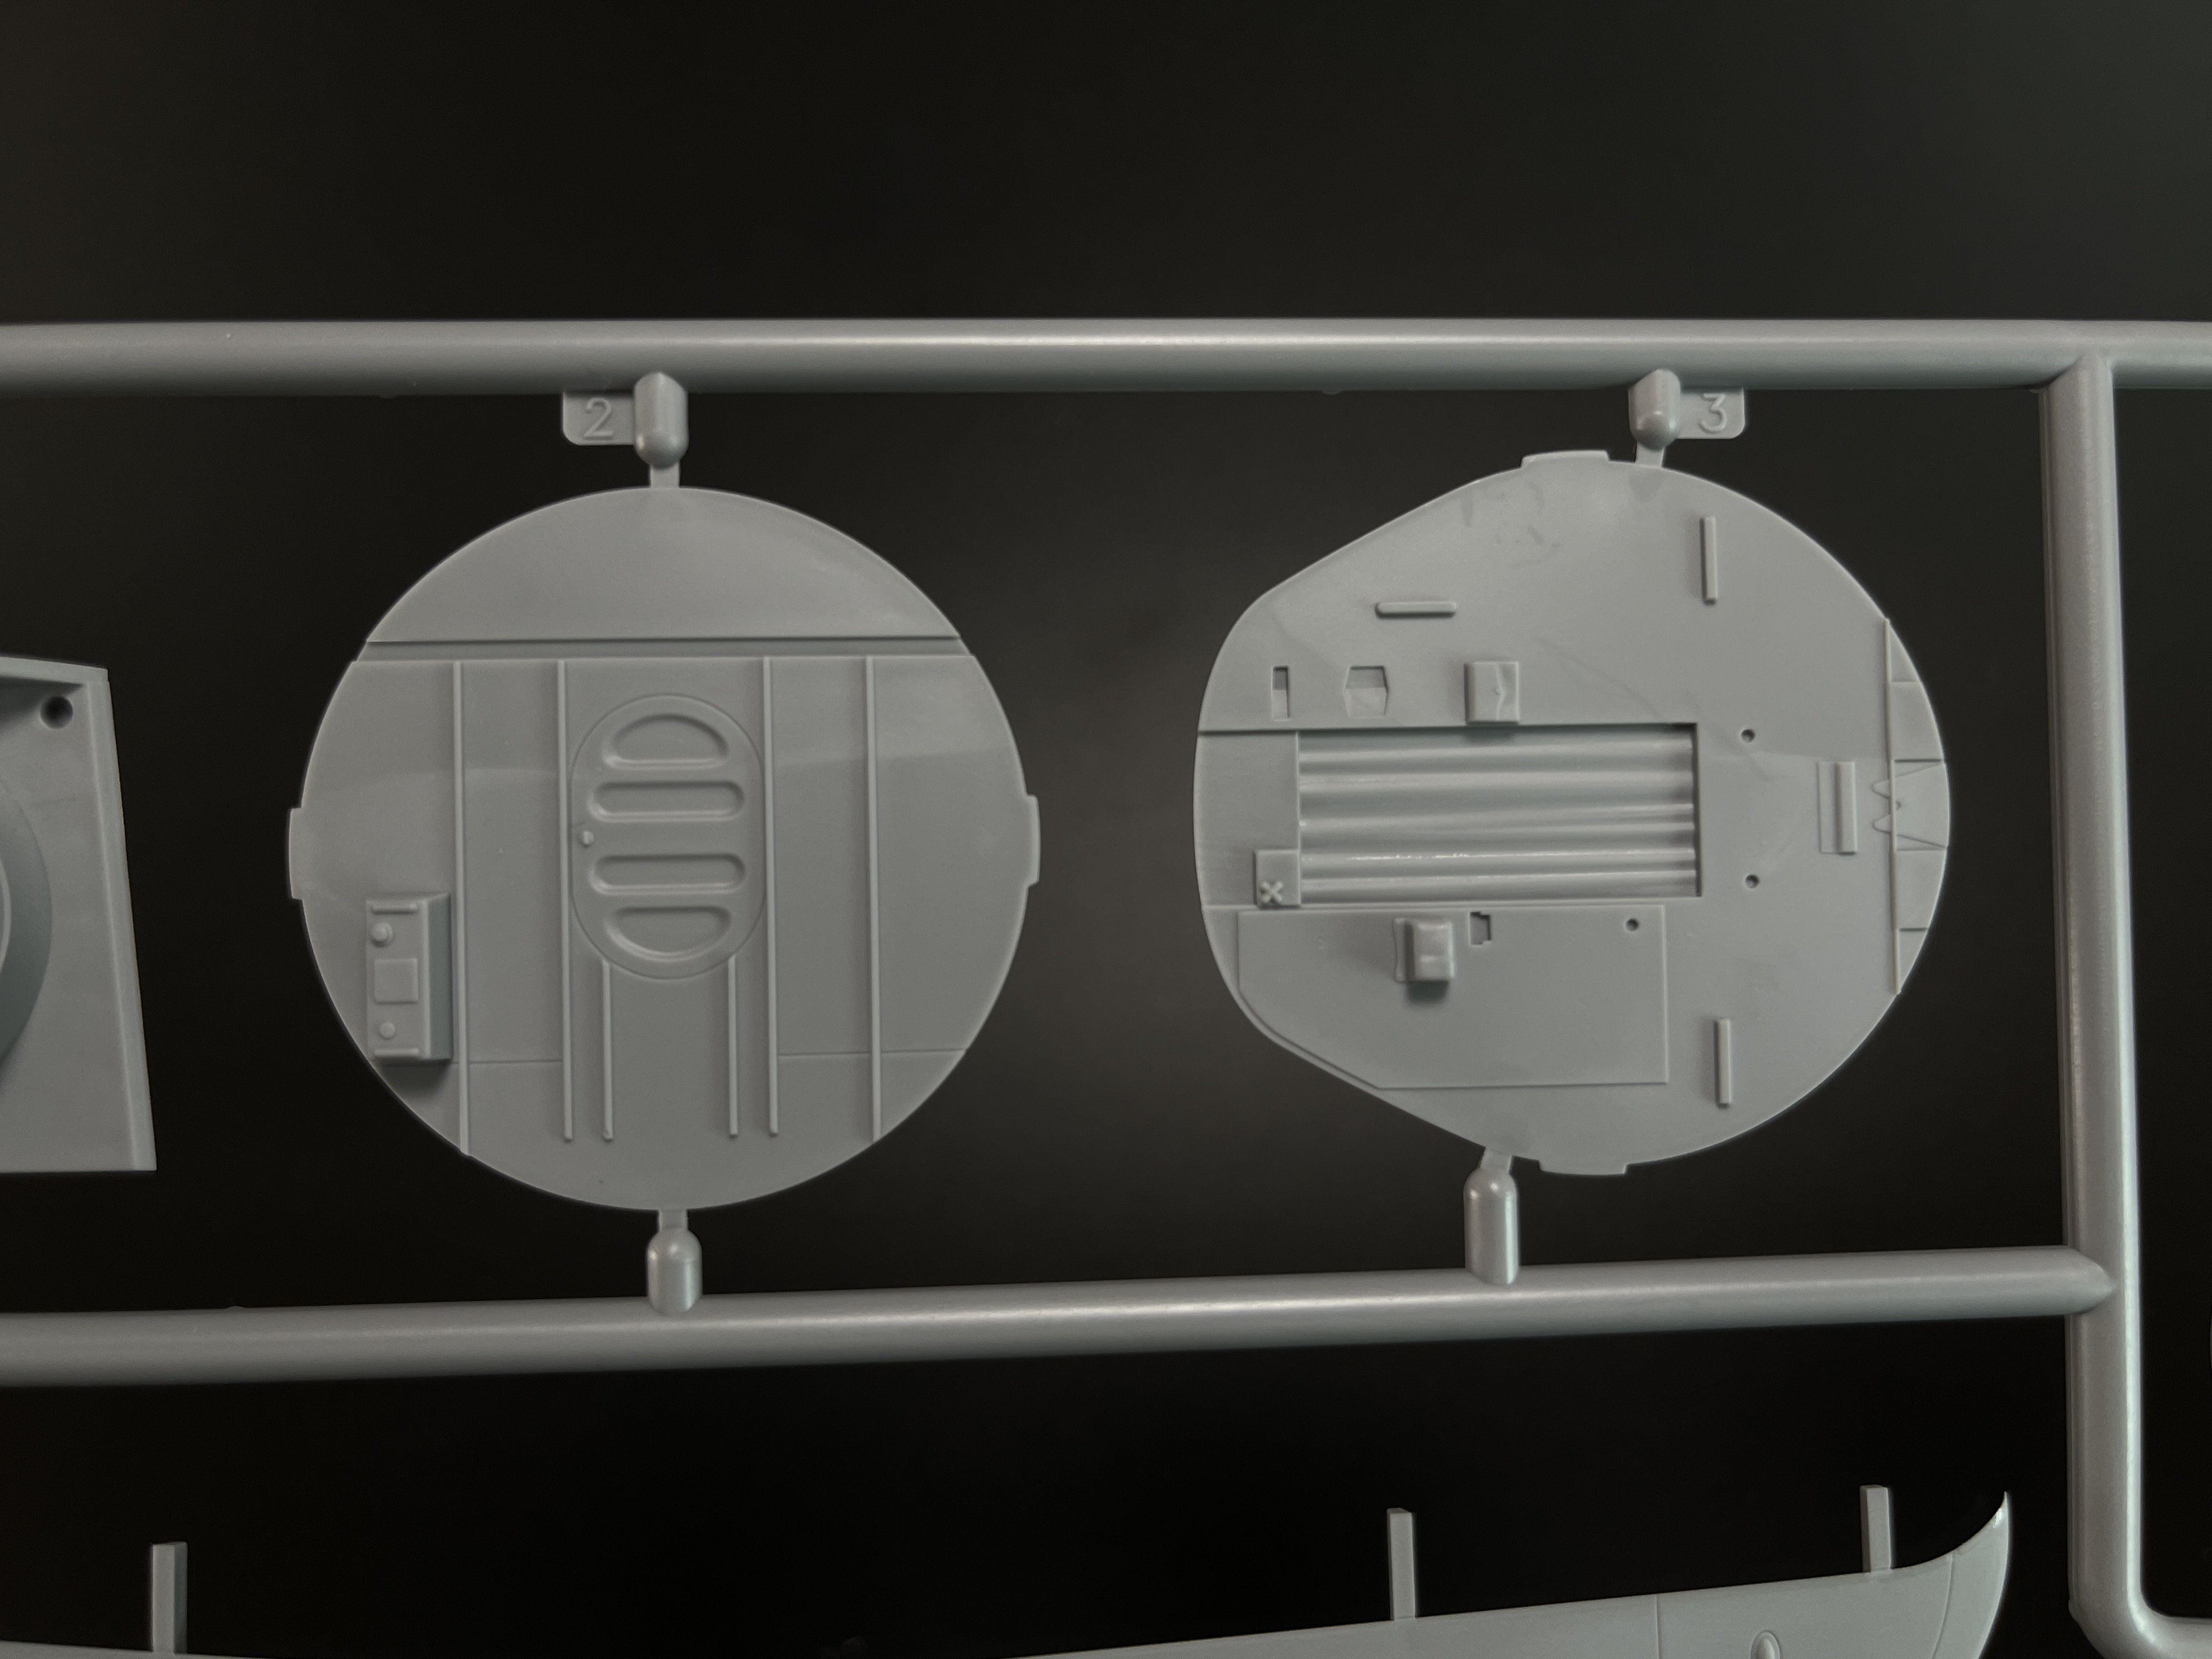
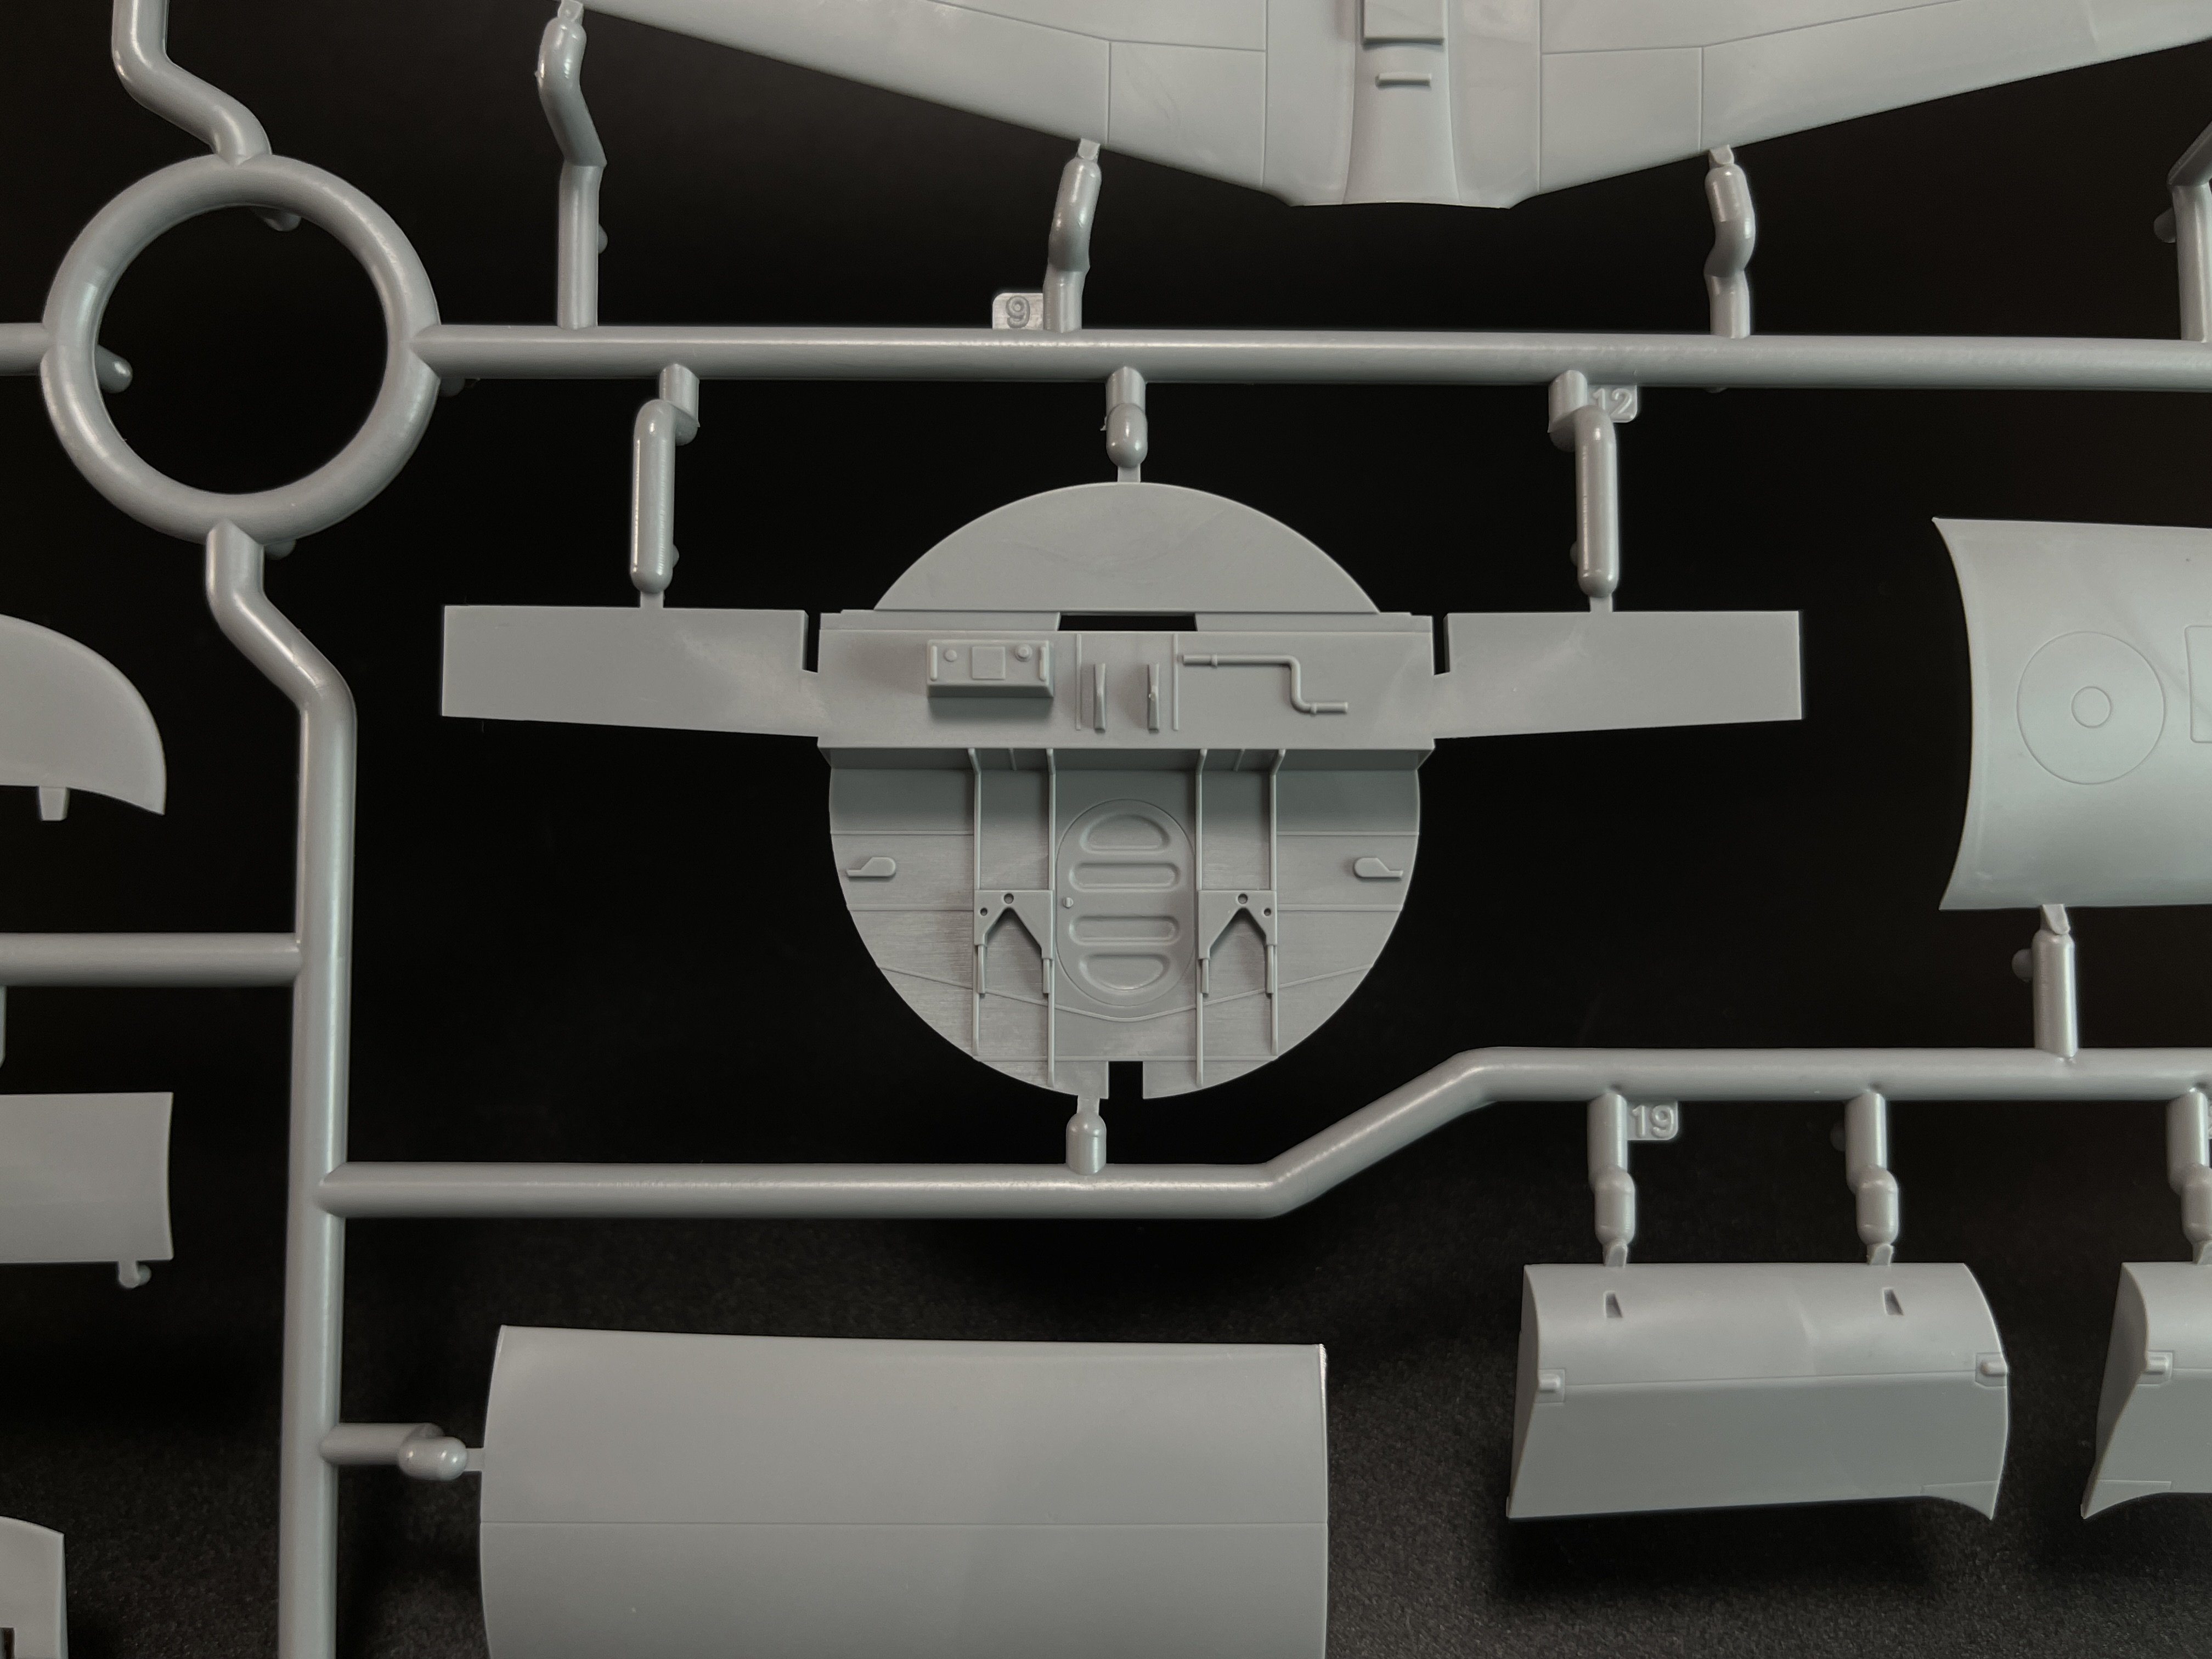
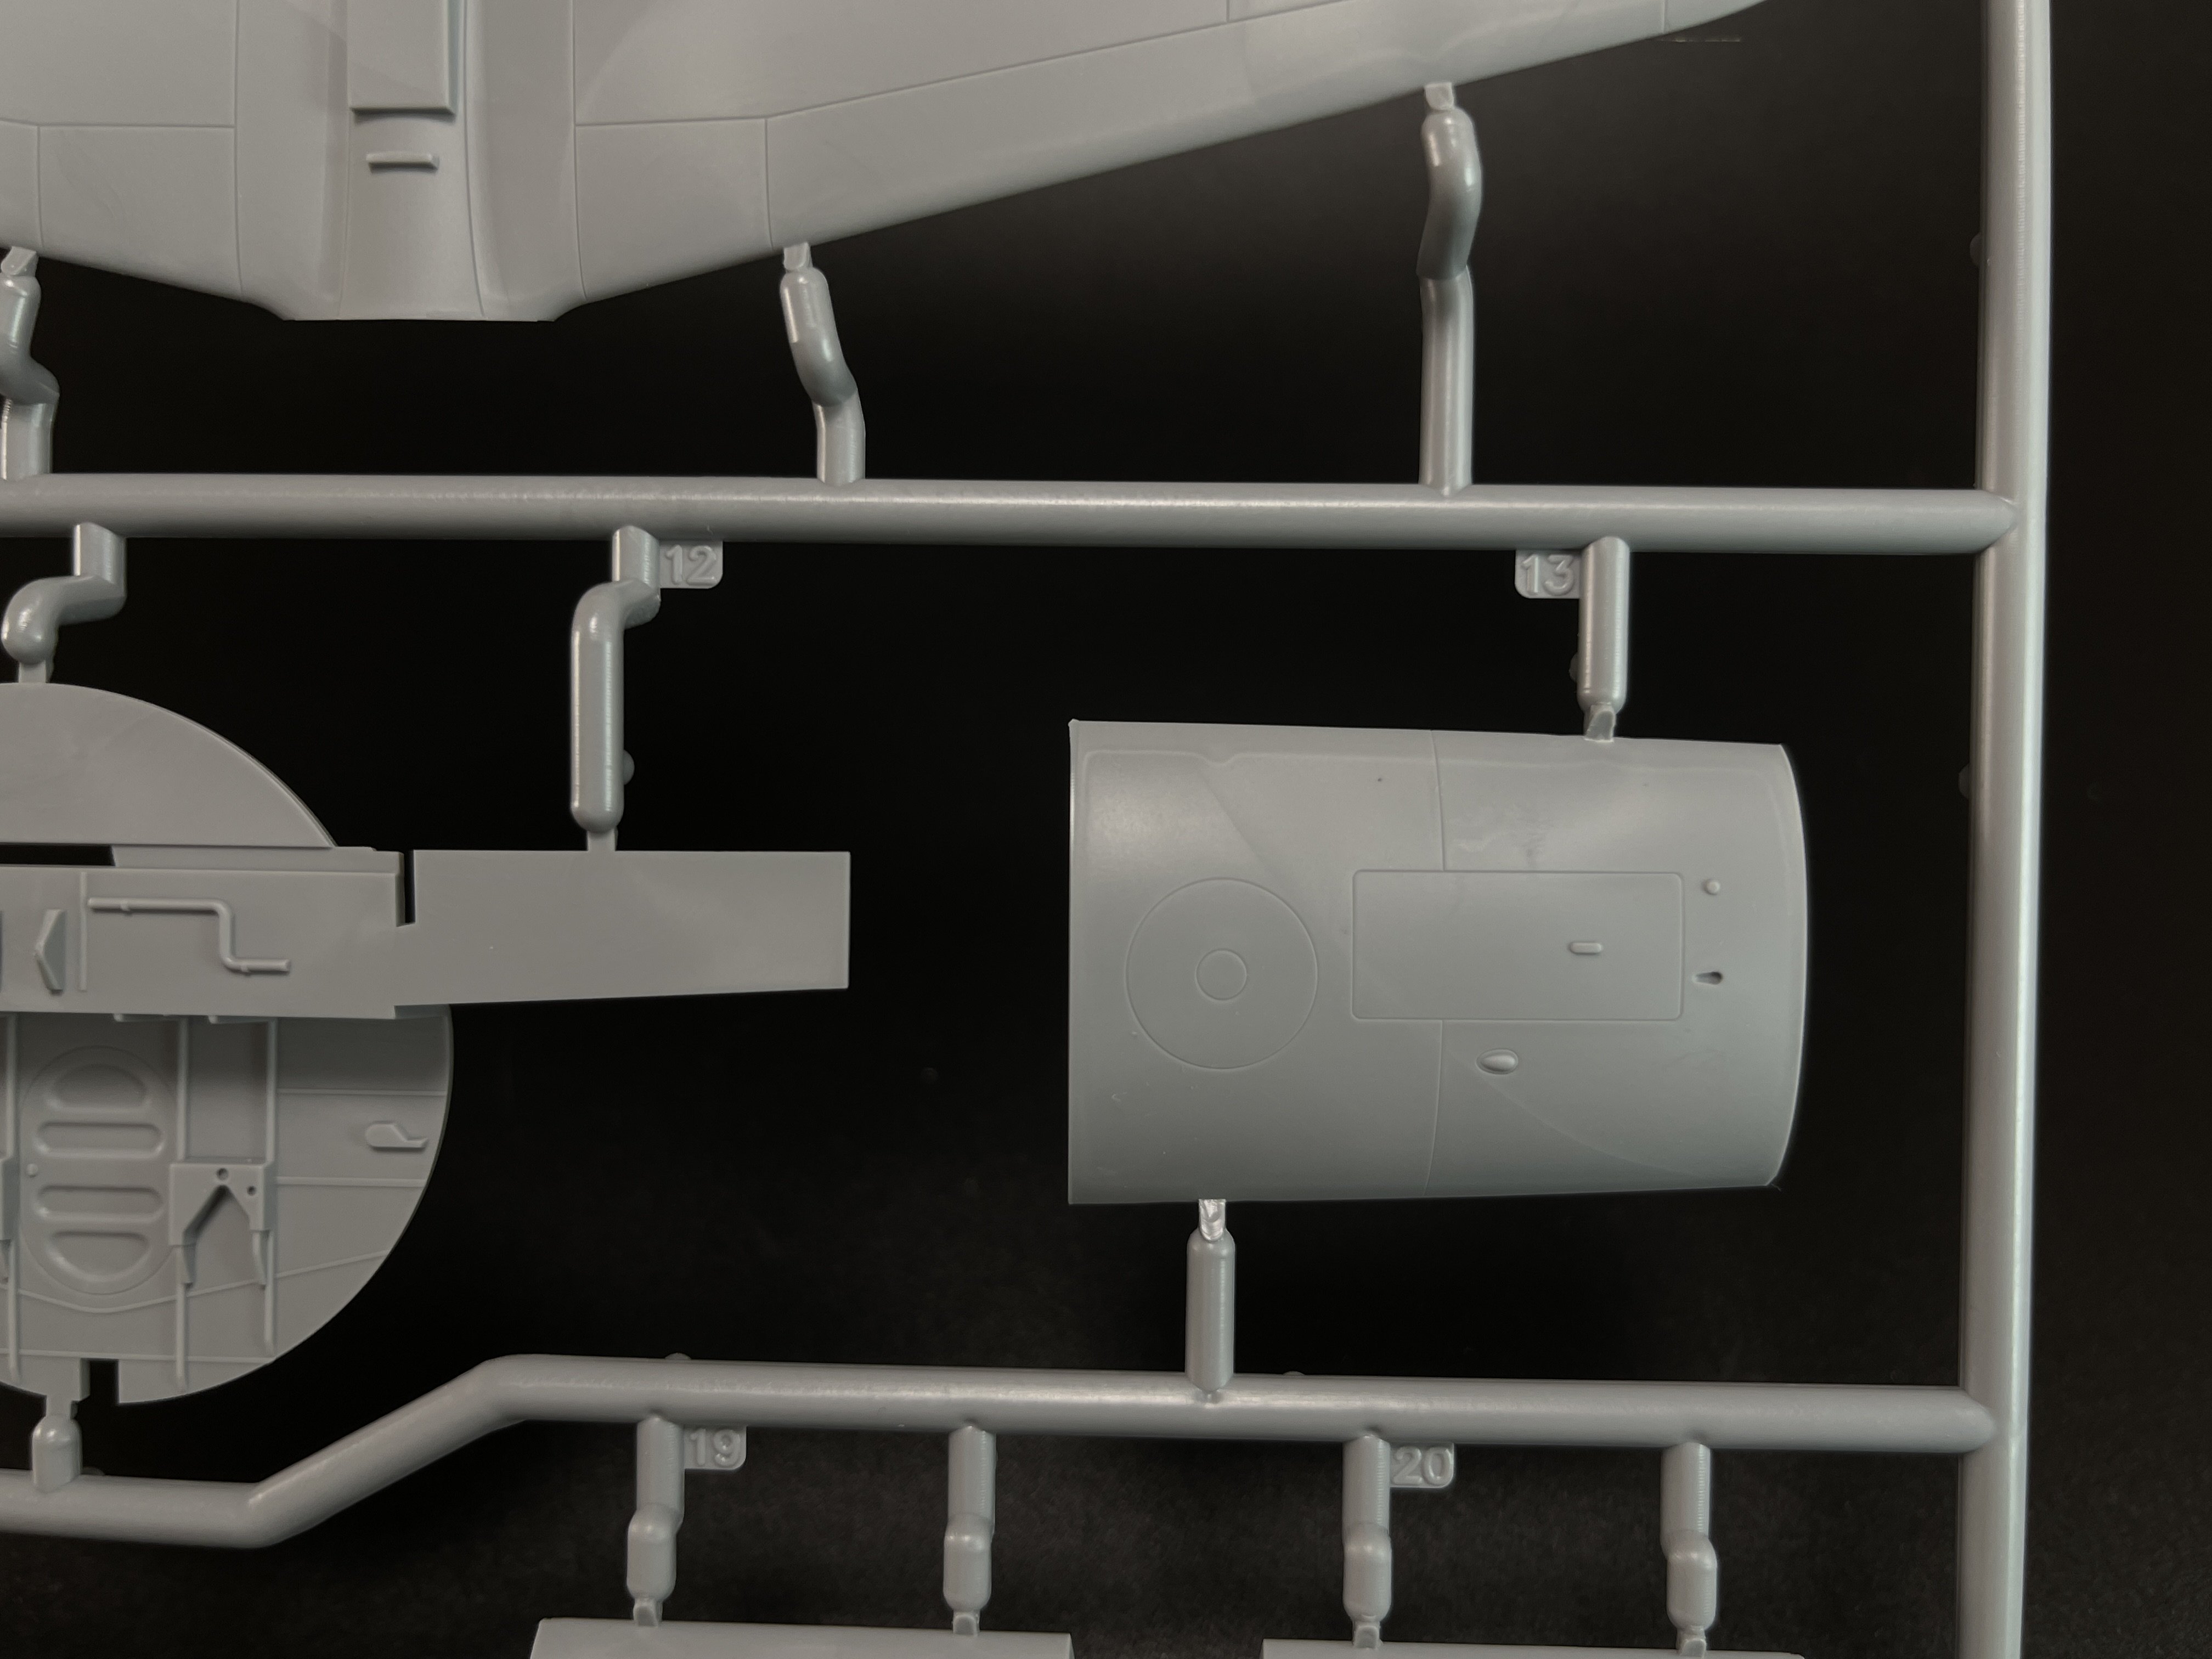
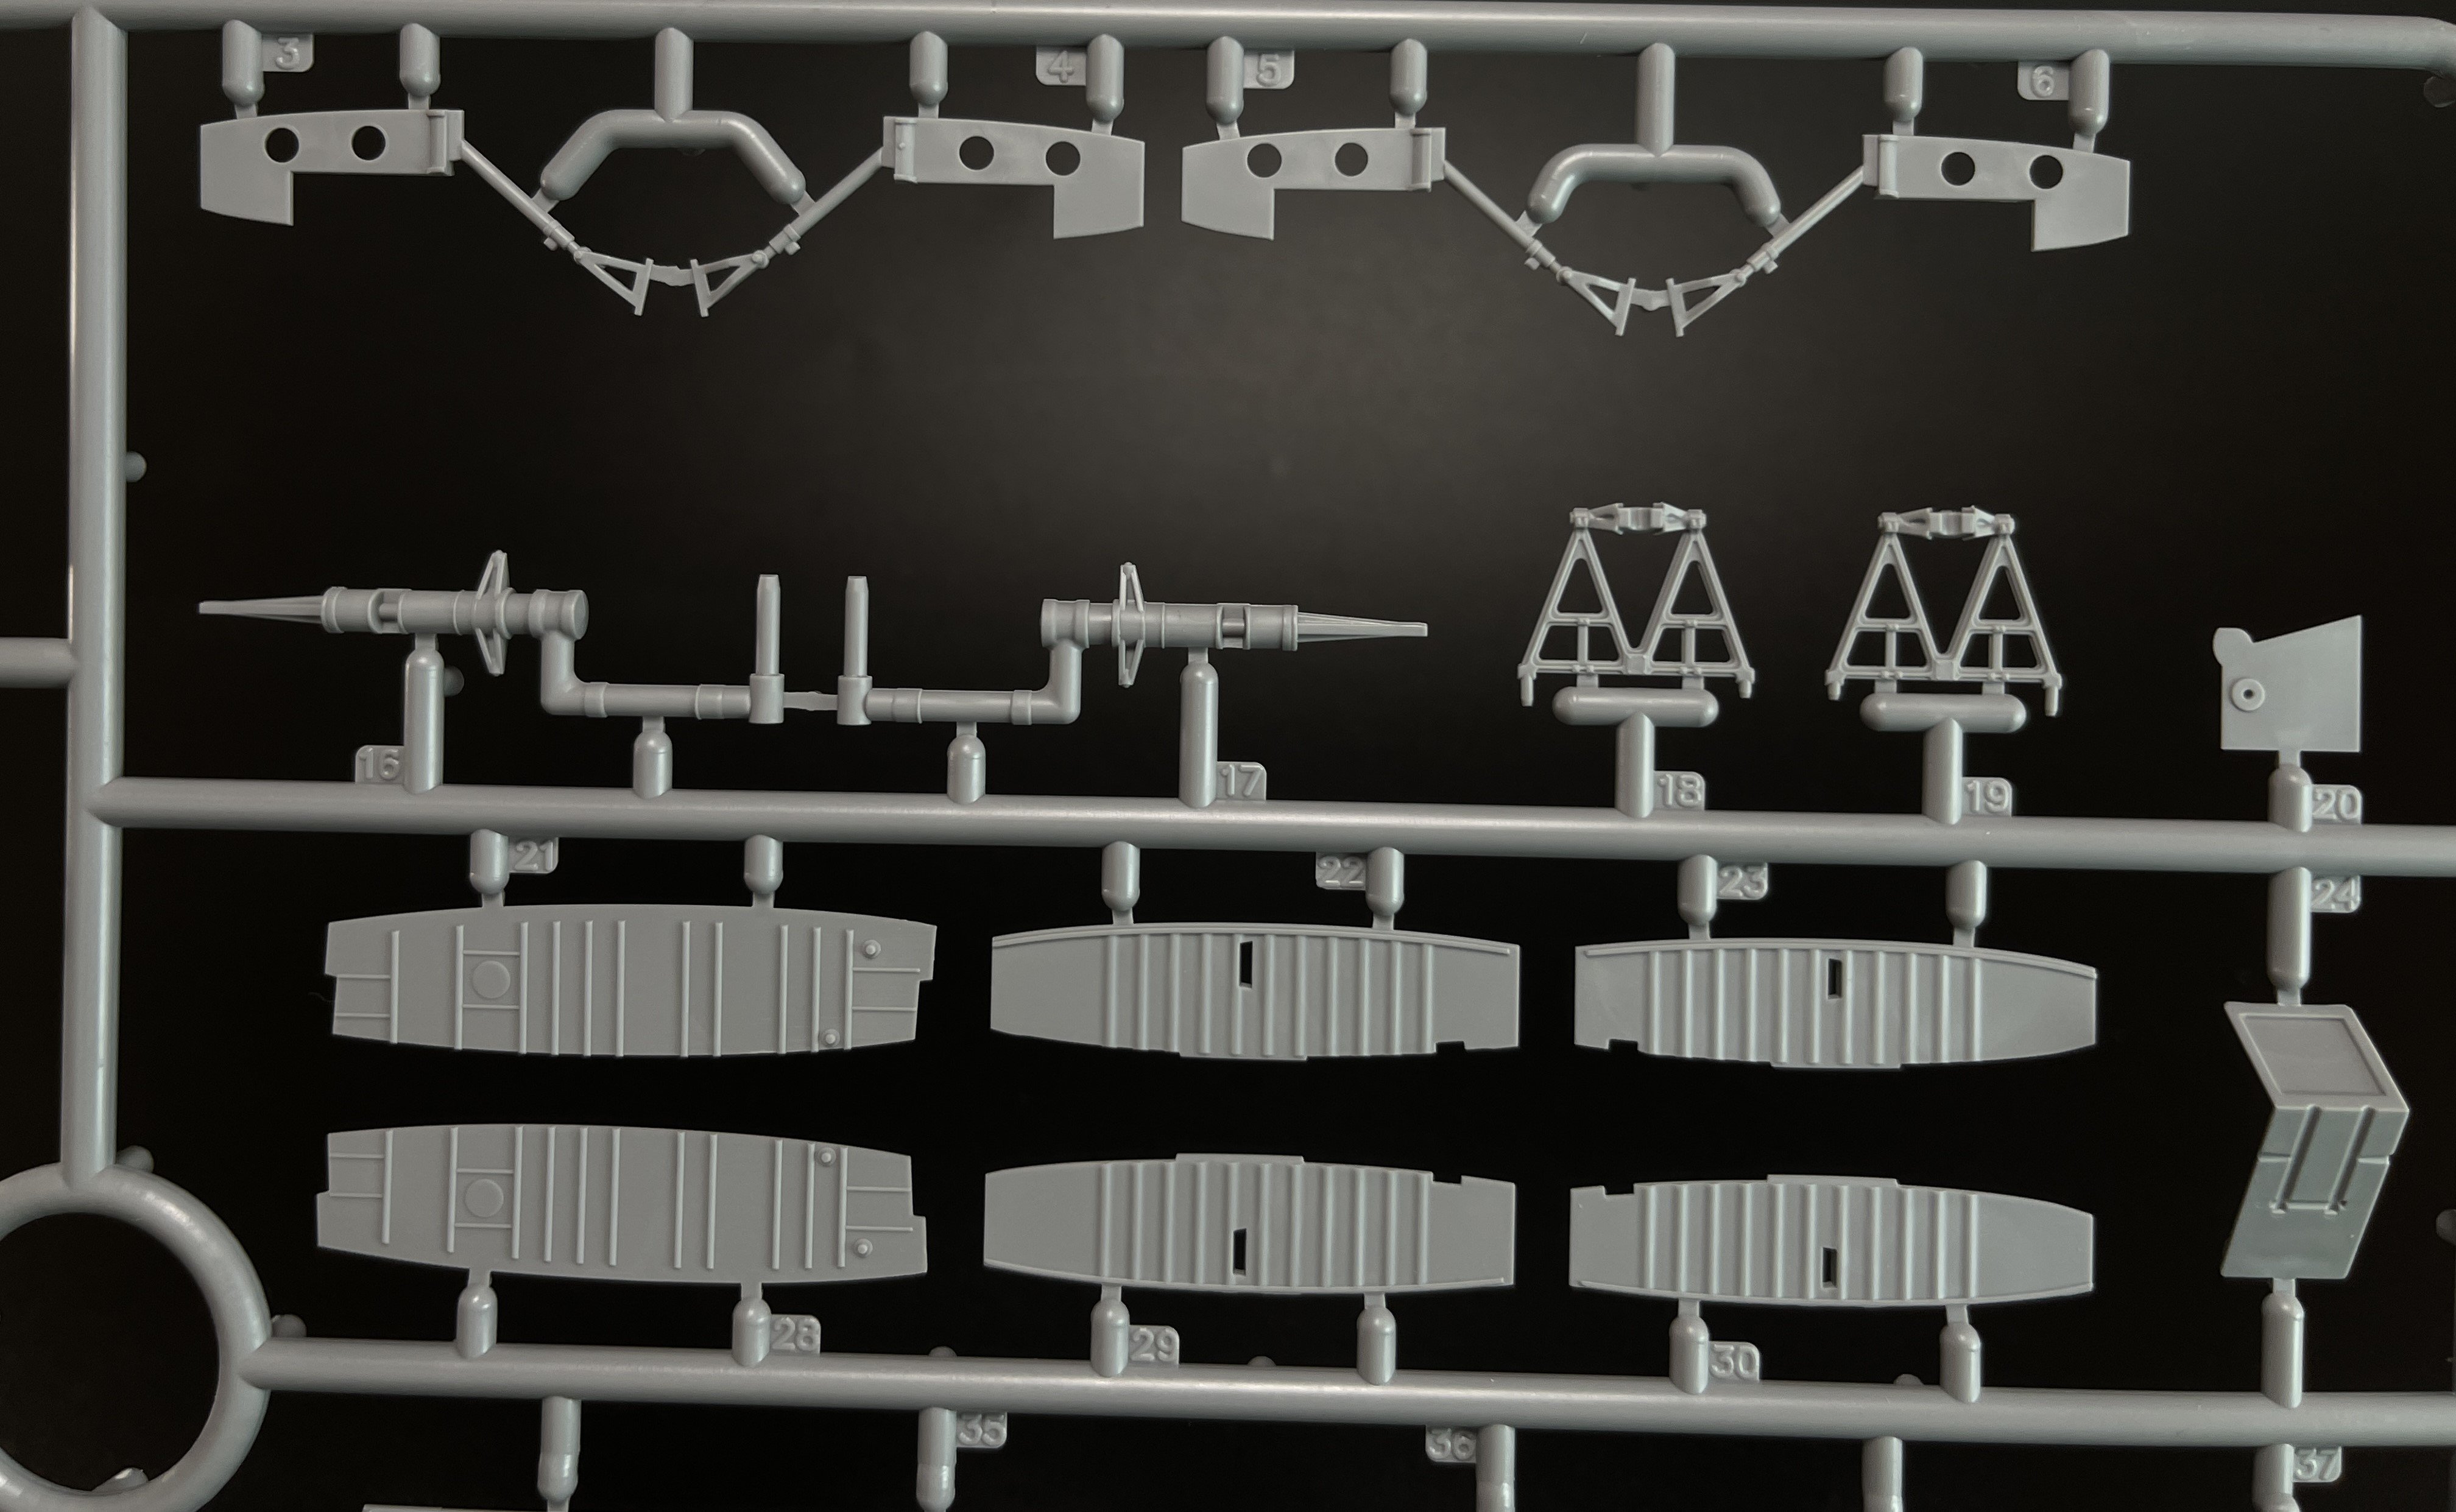
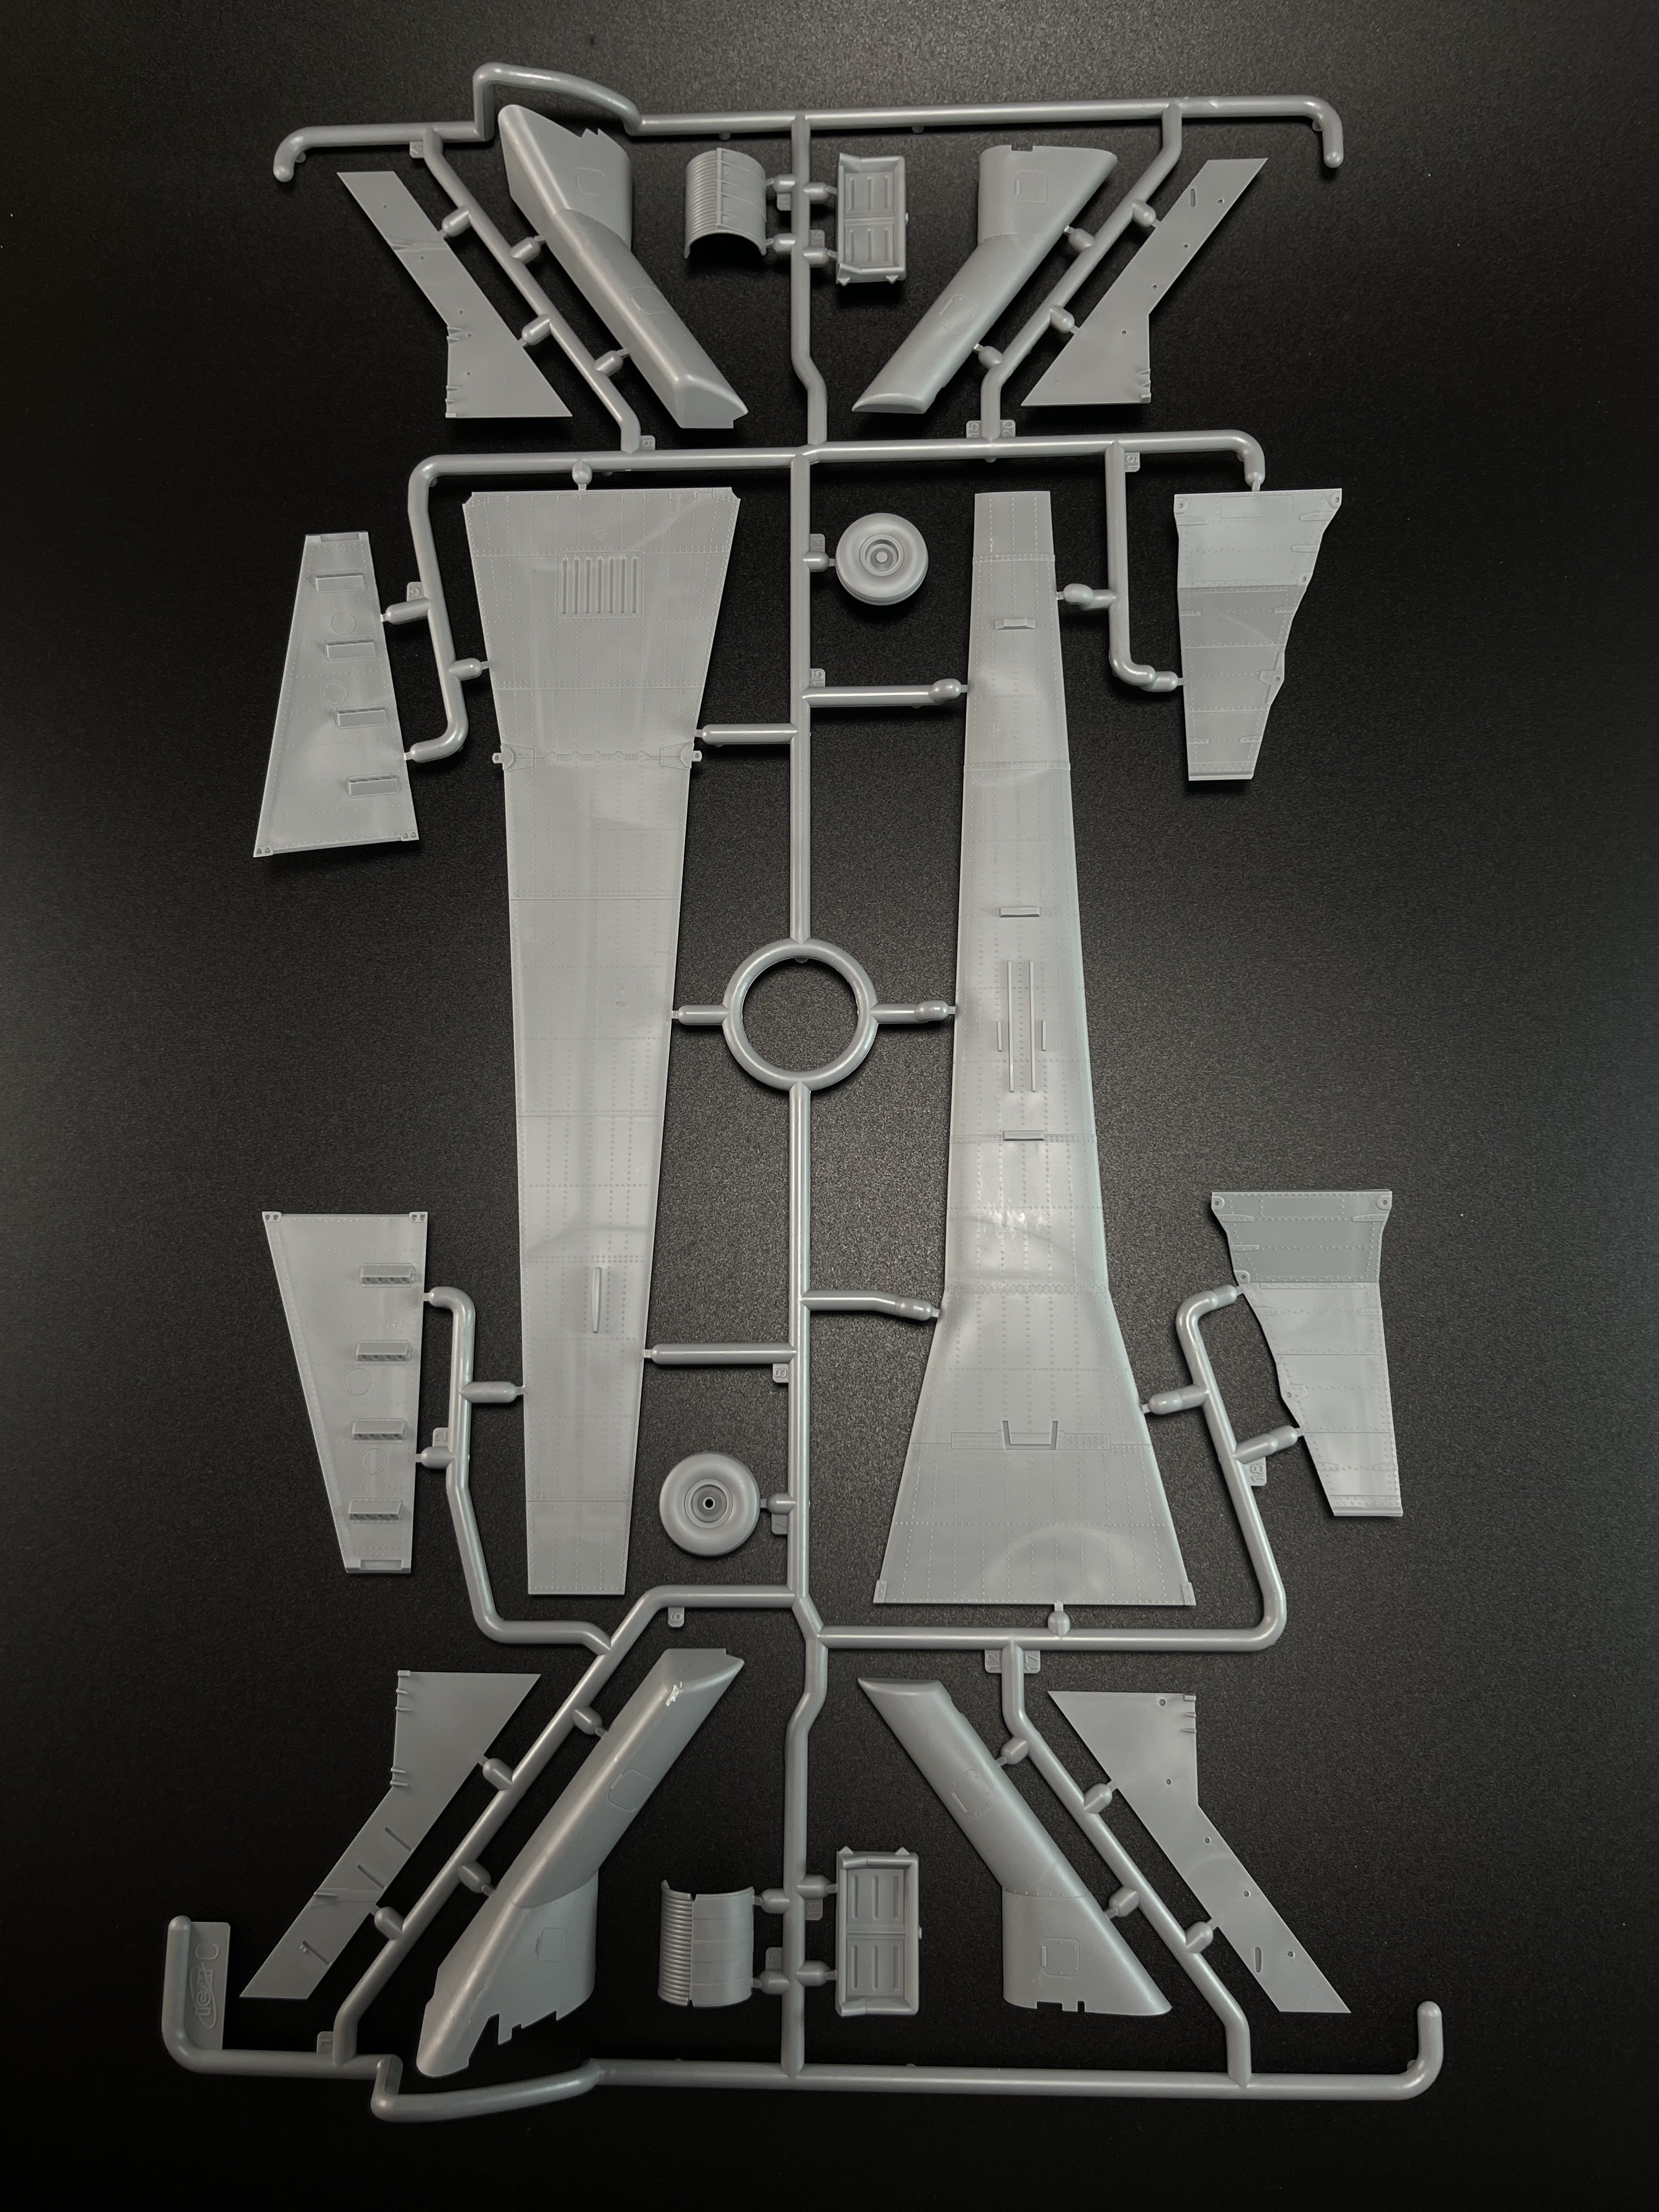
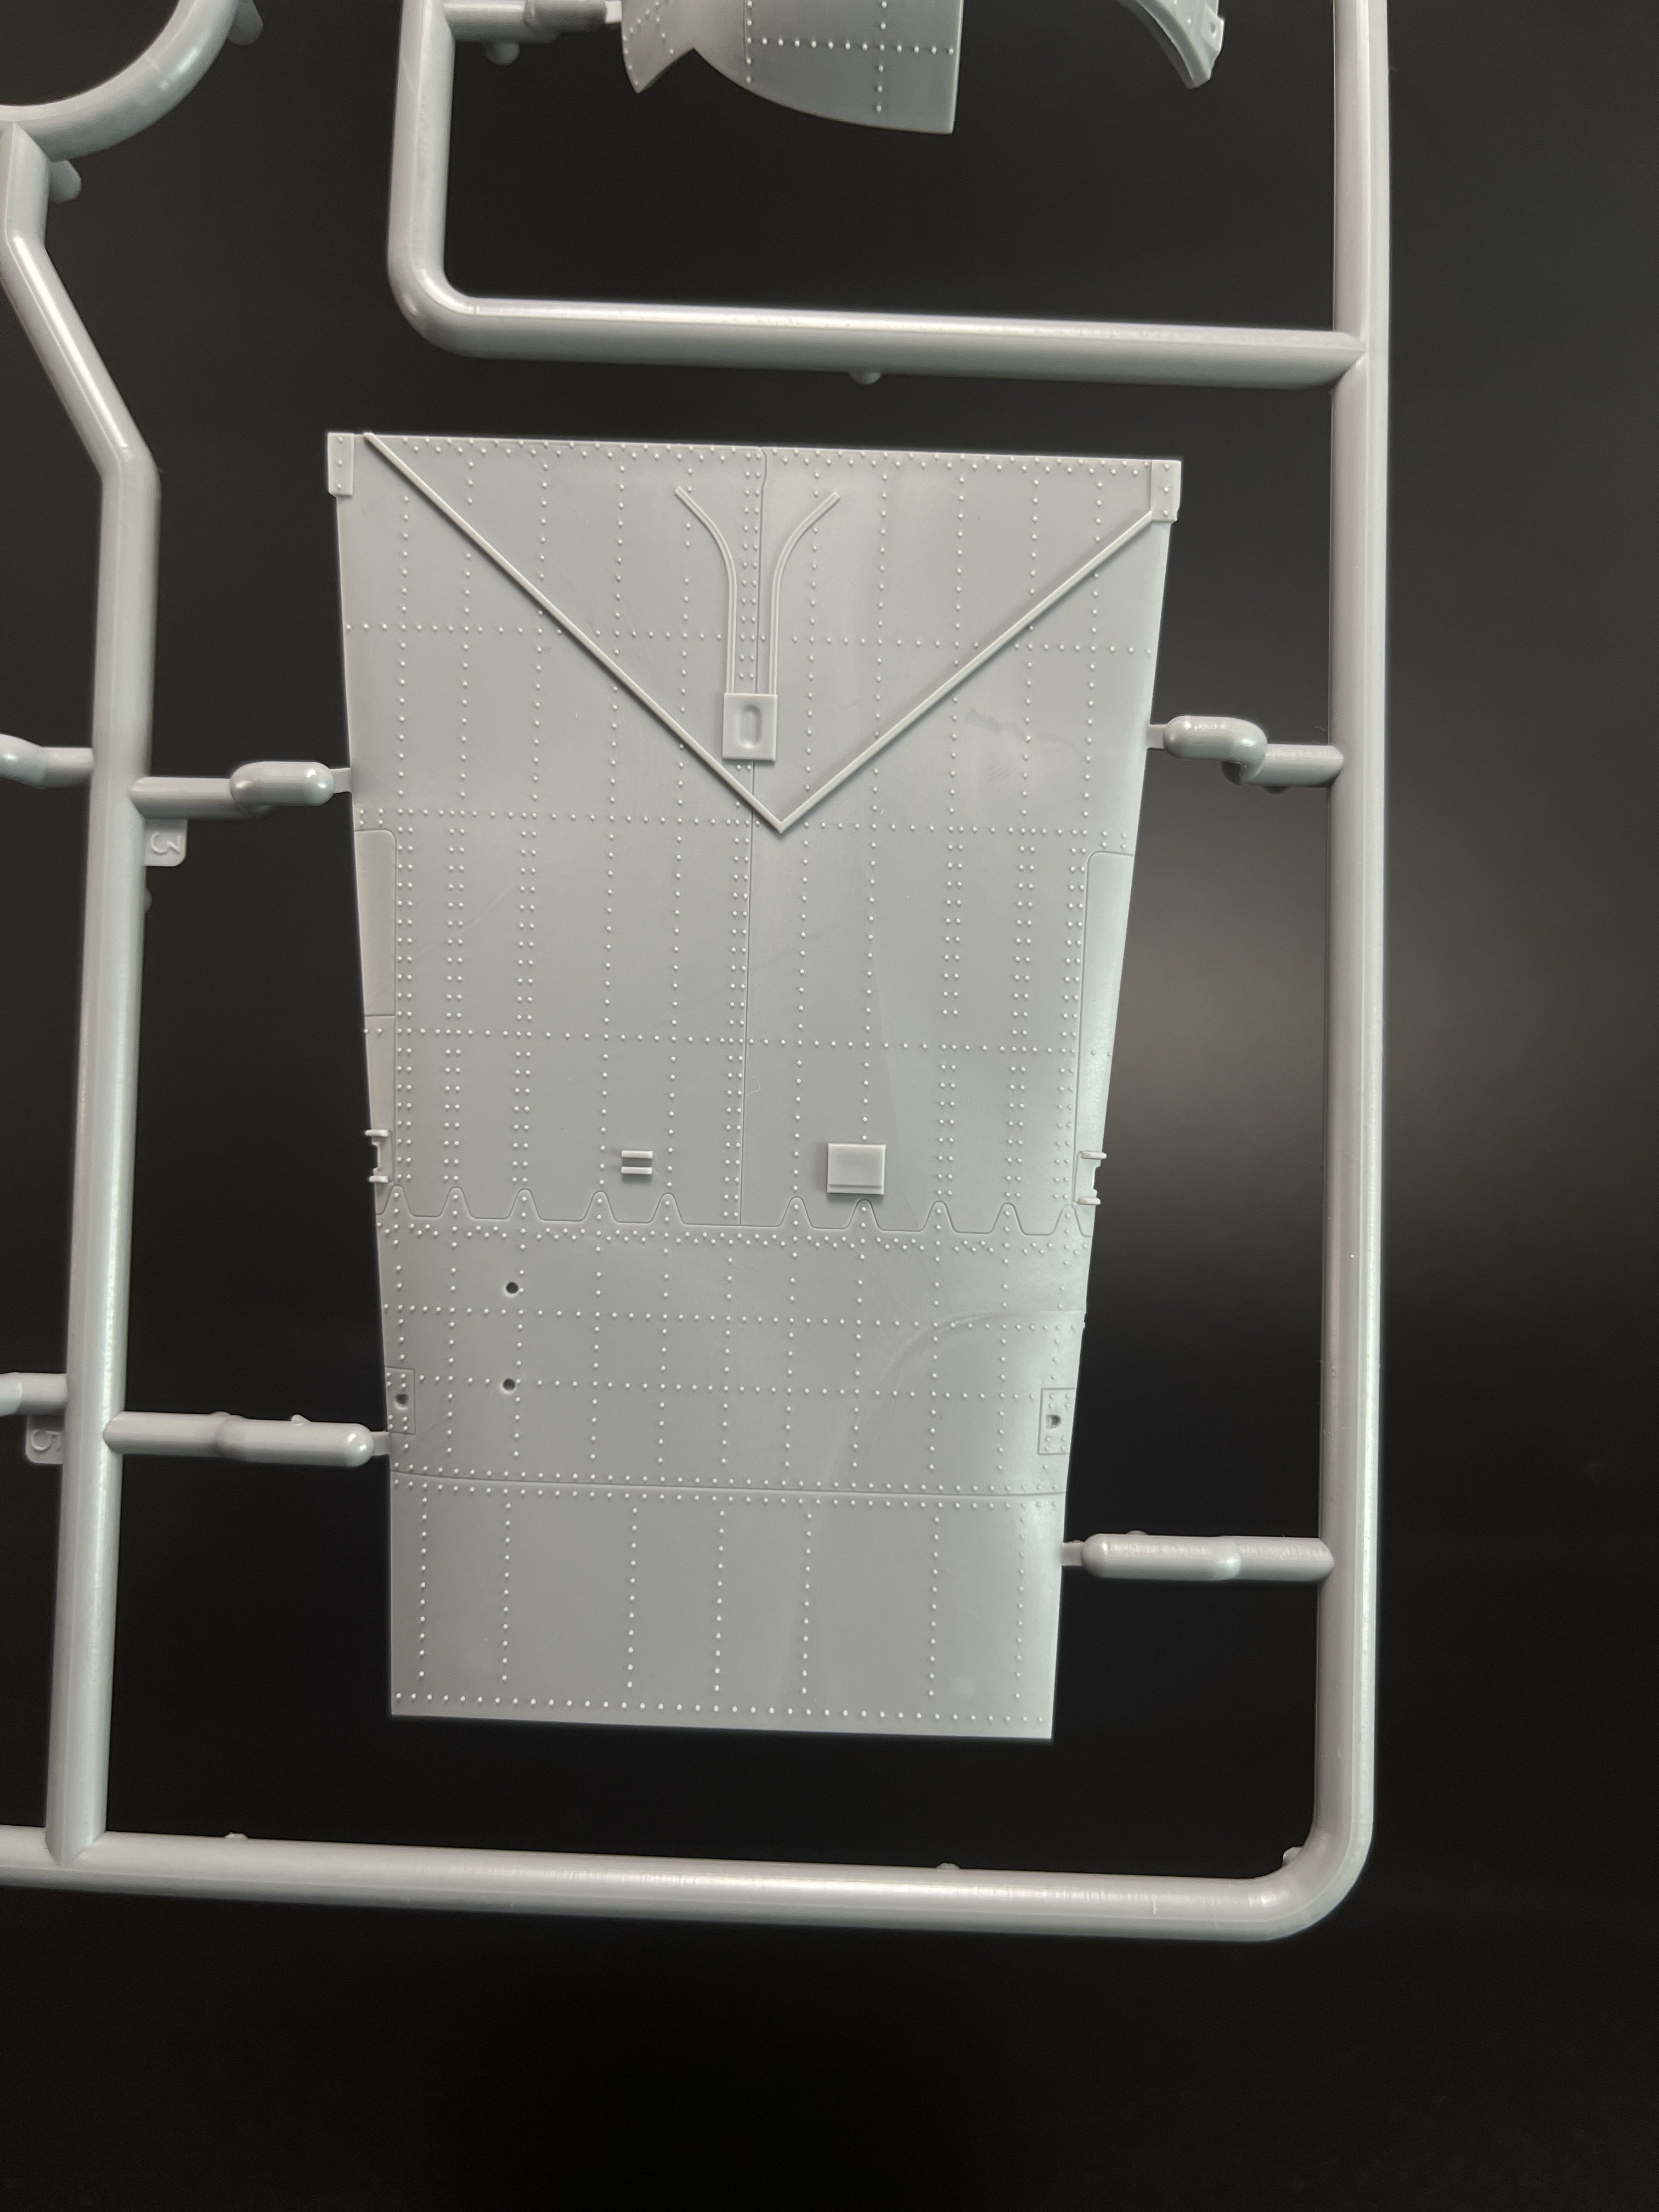
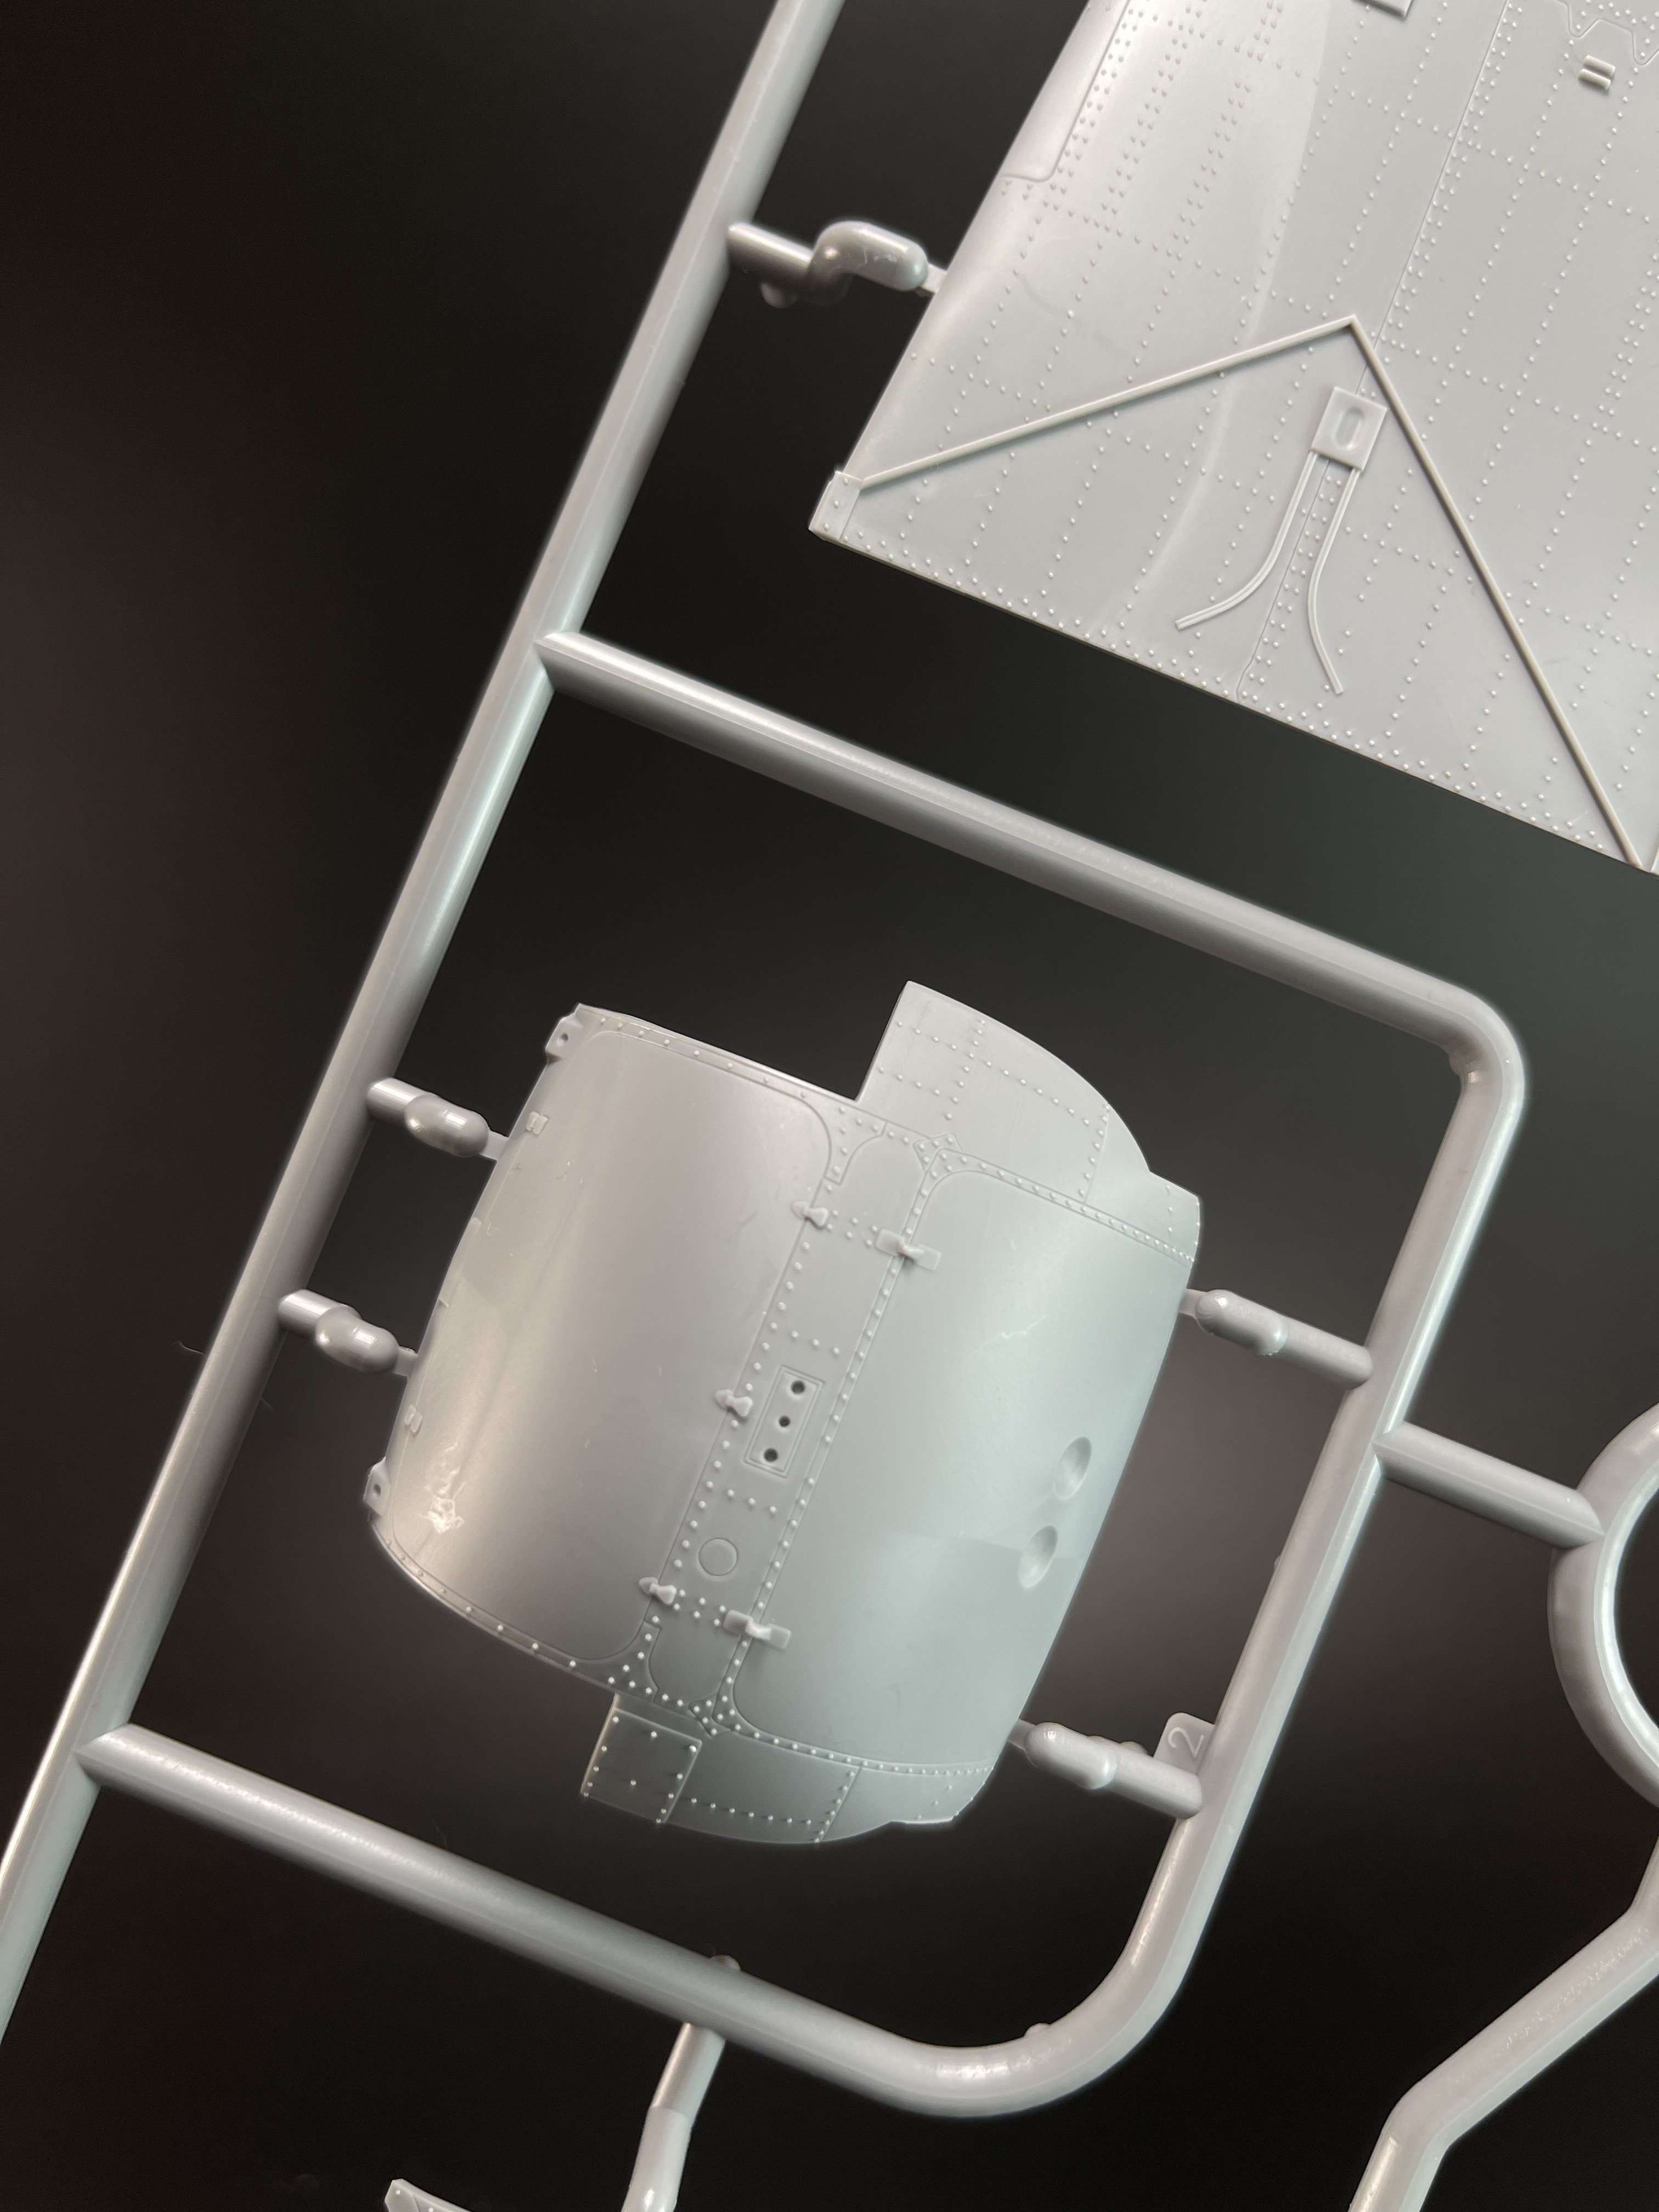
Sprue B
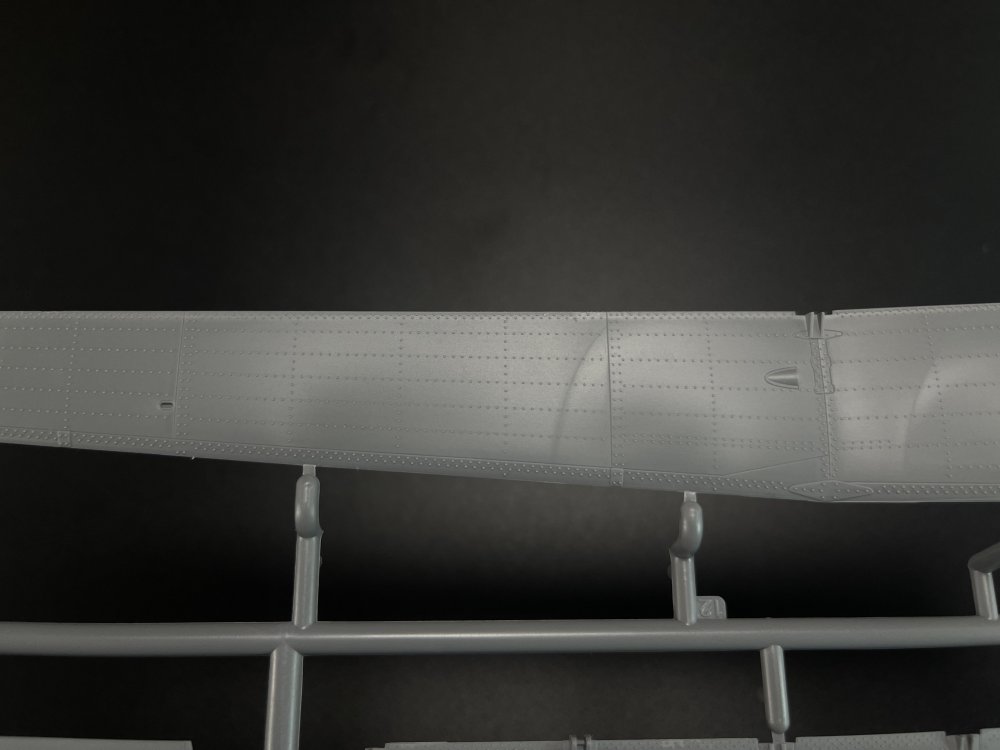
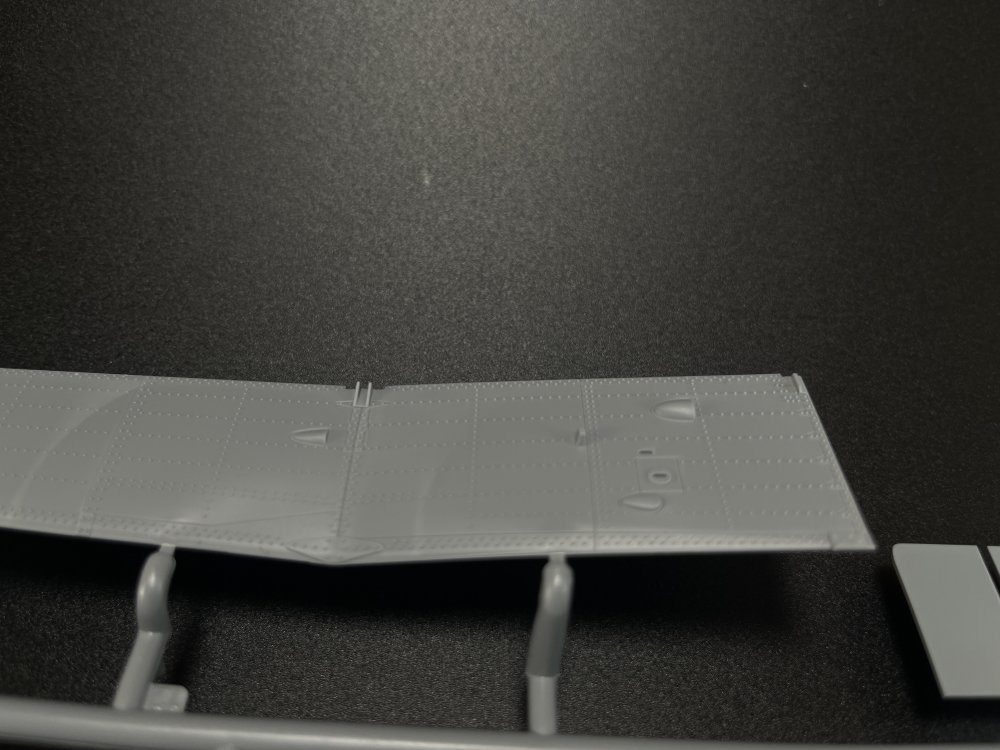
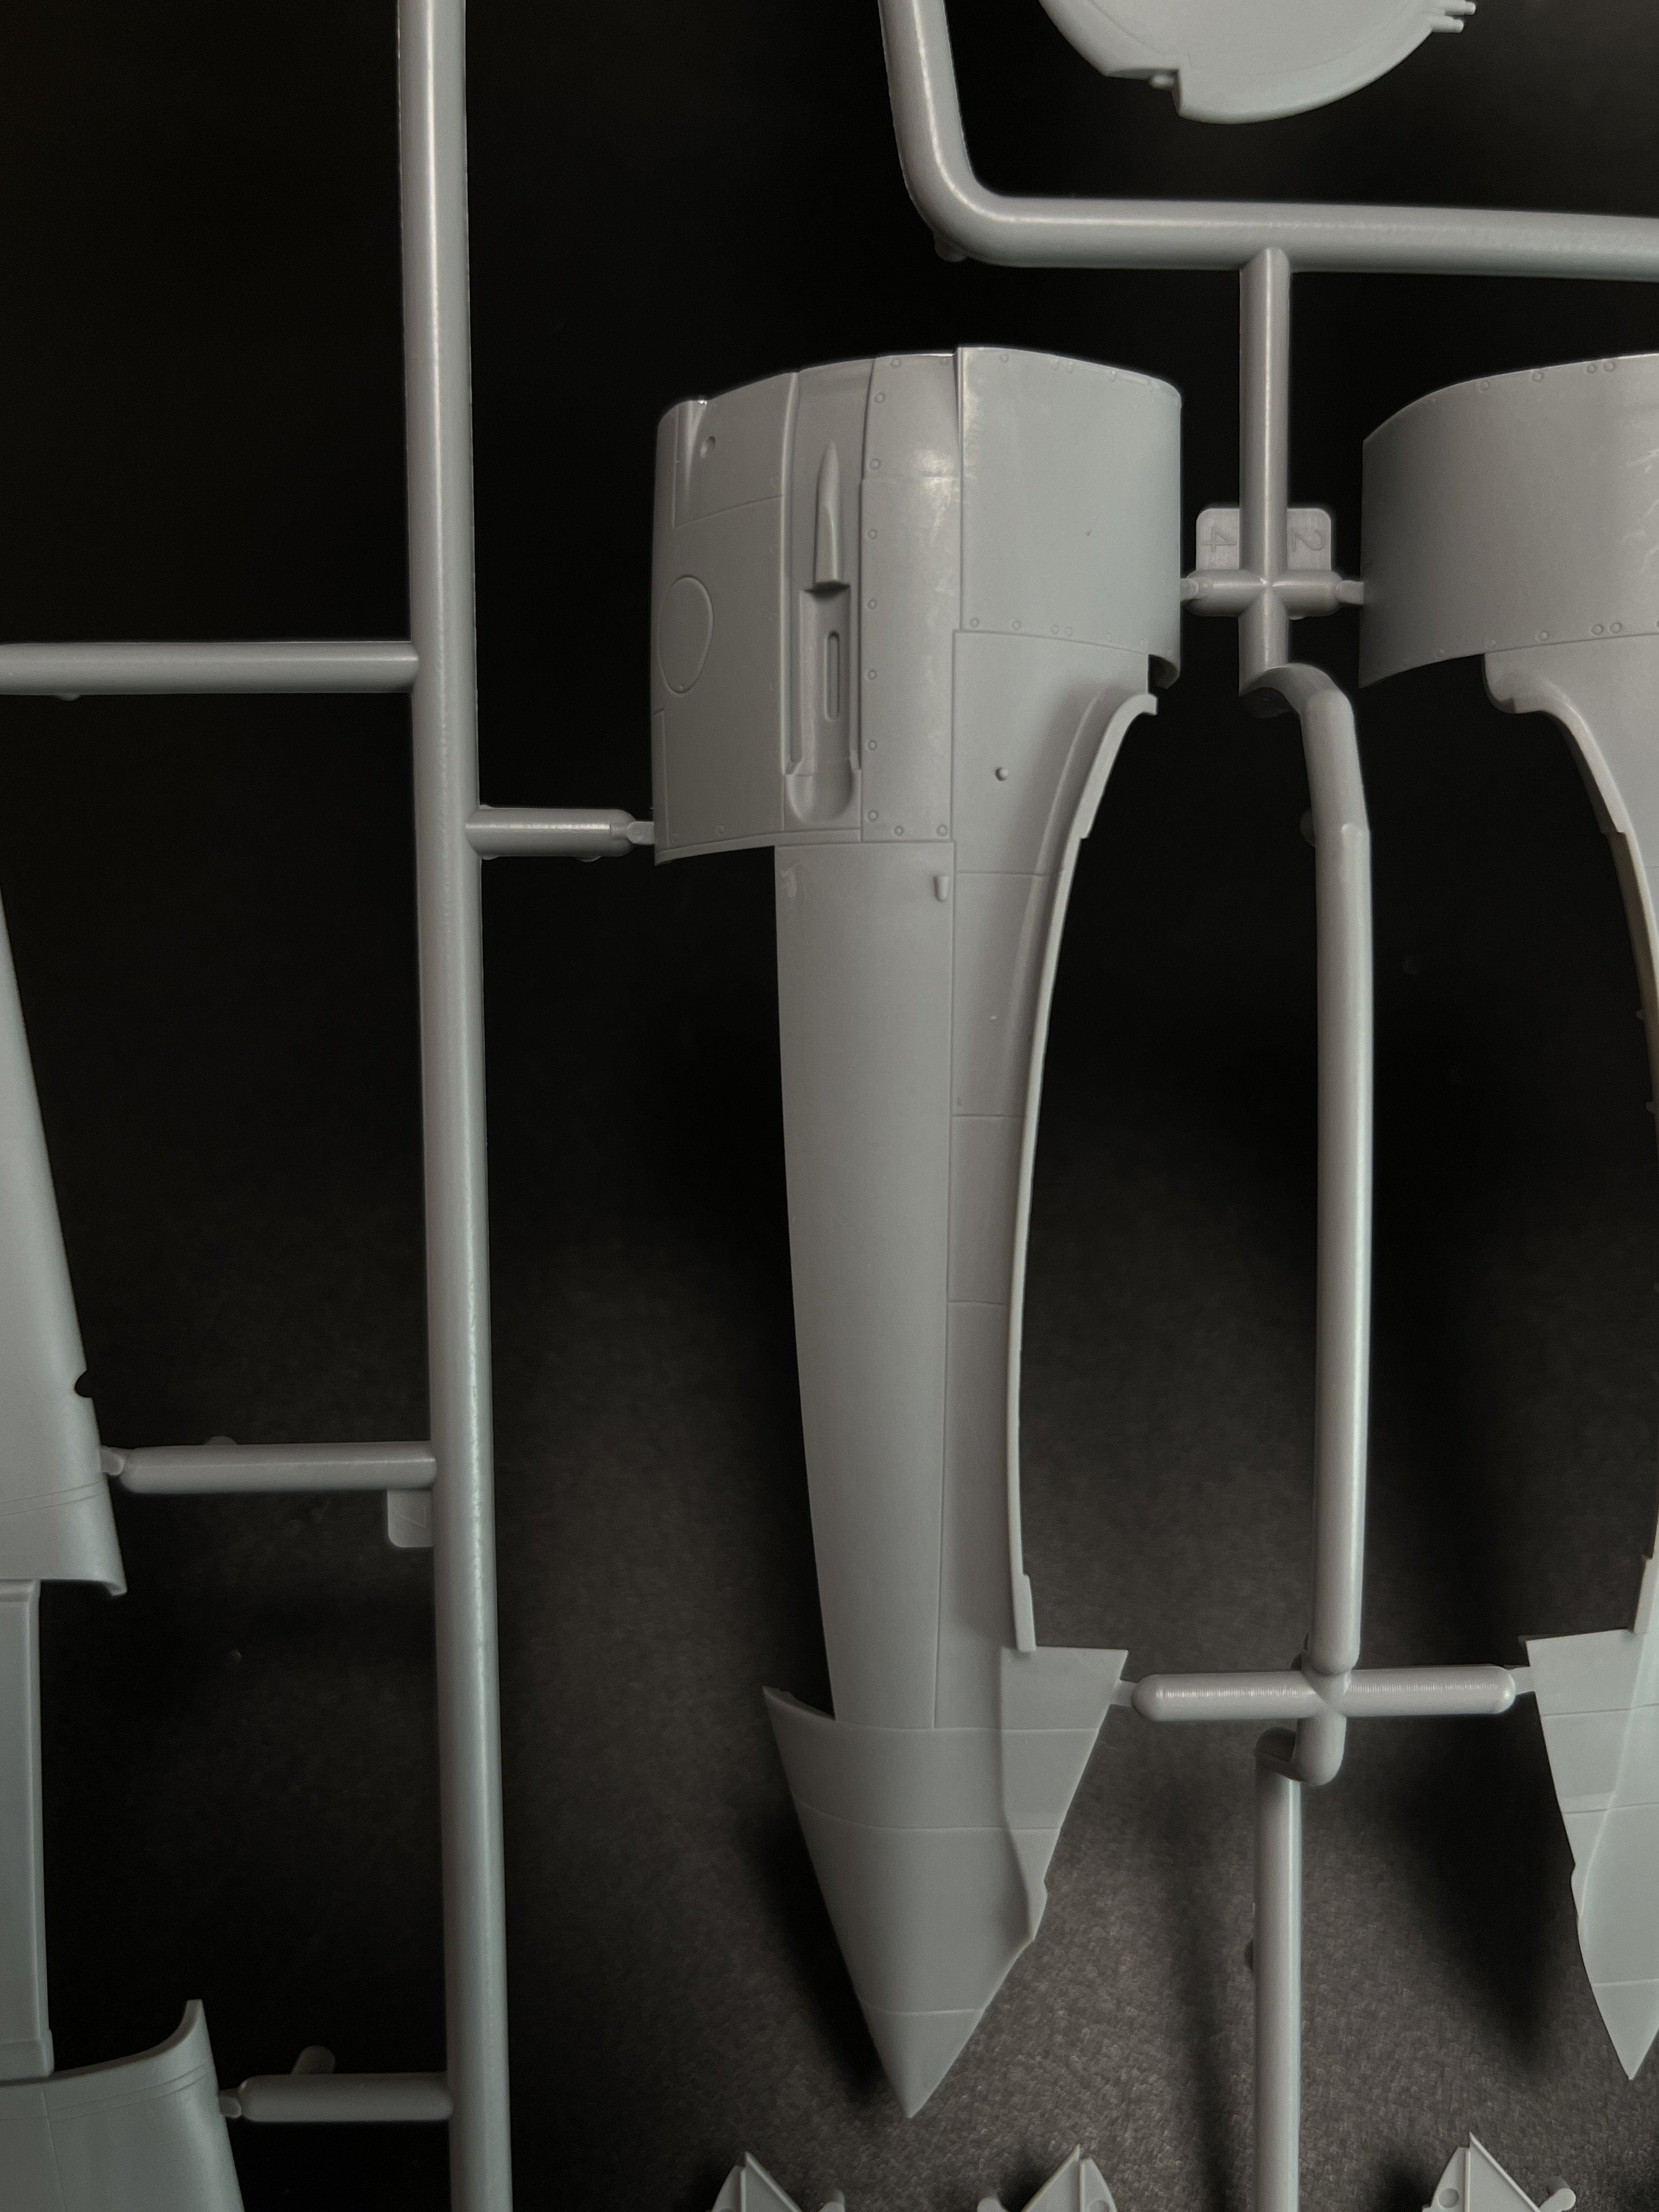
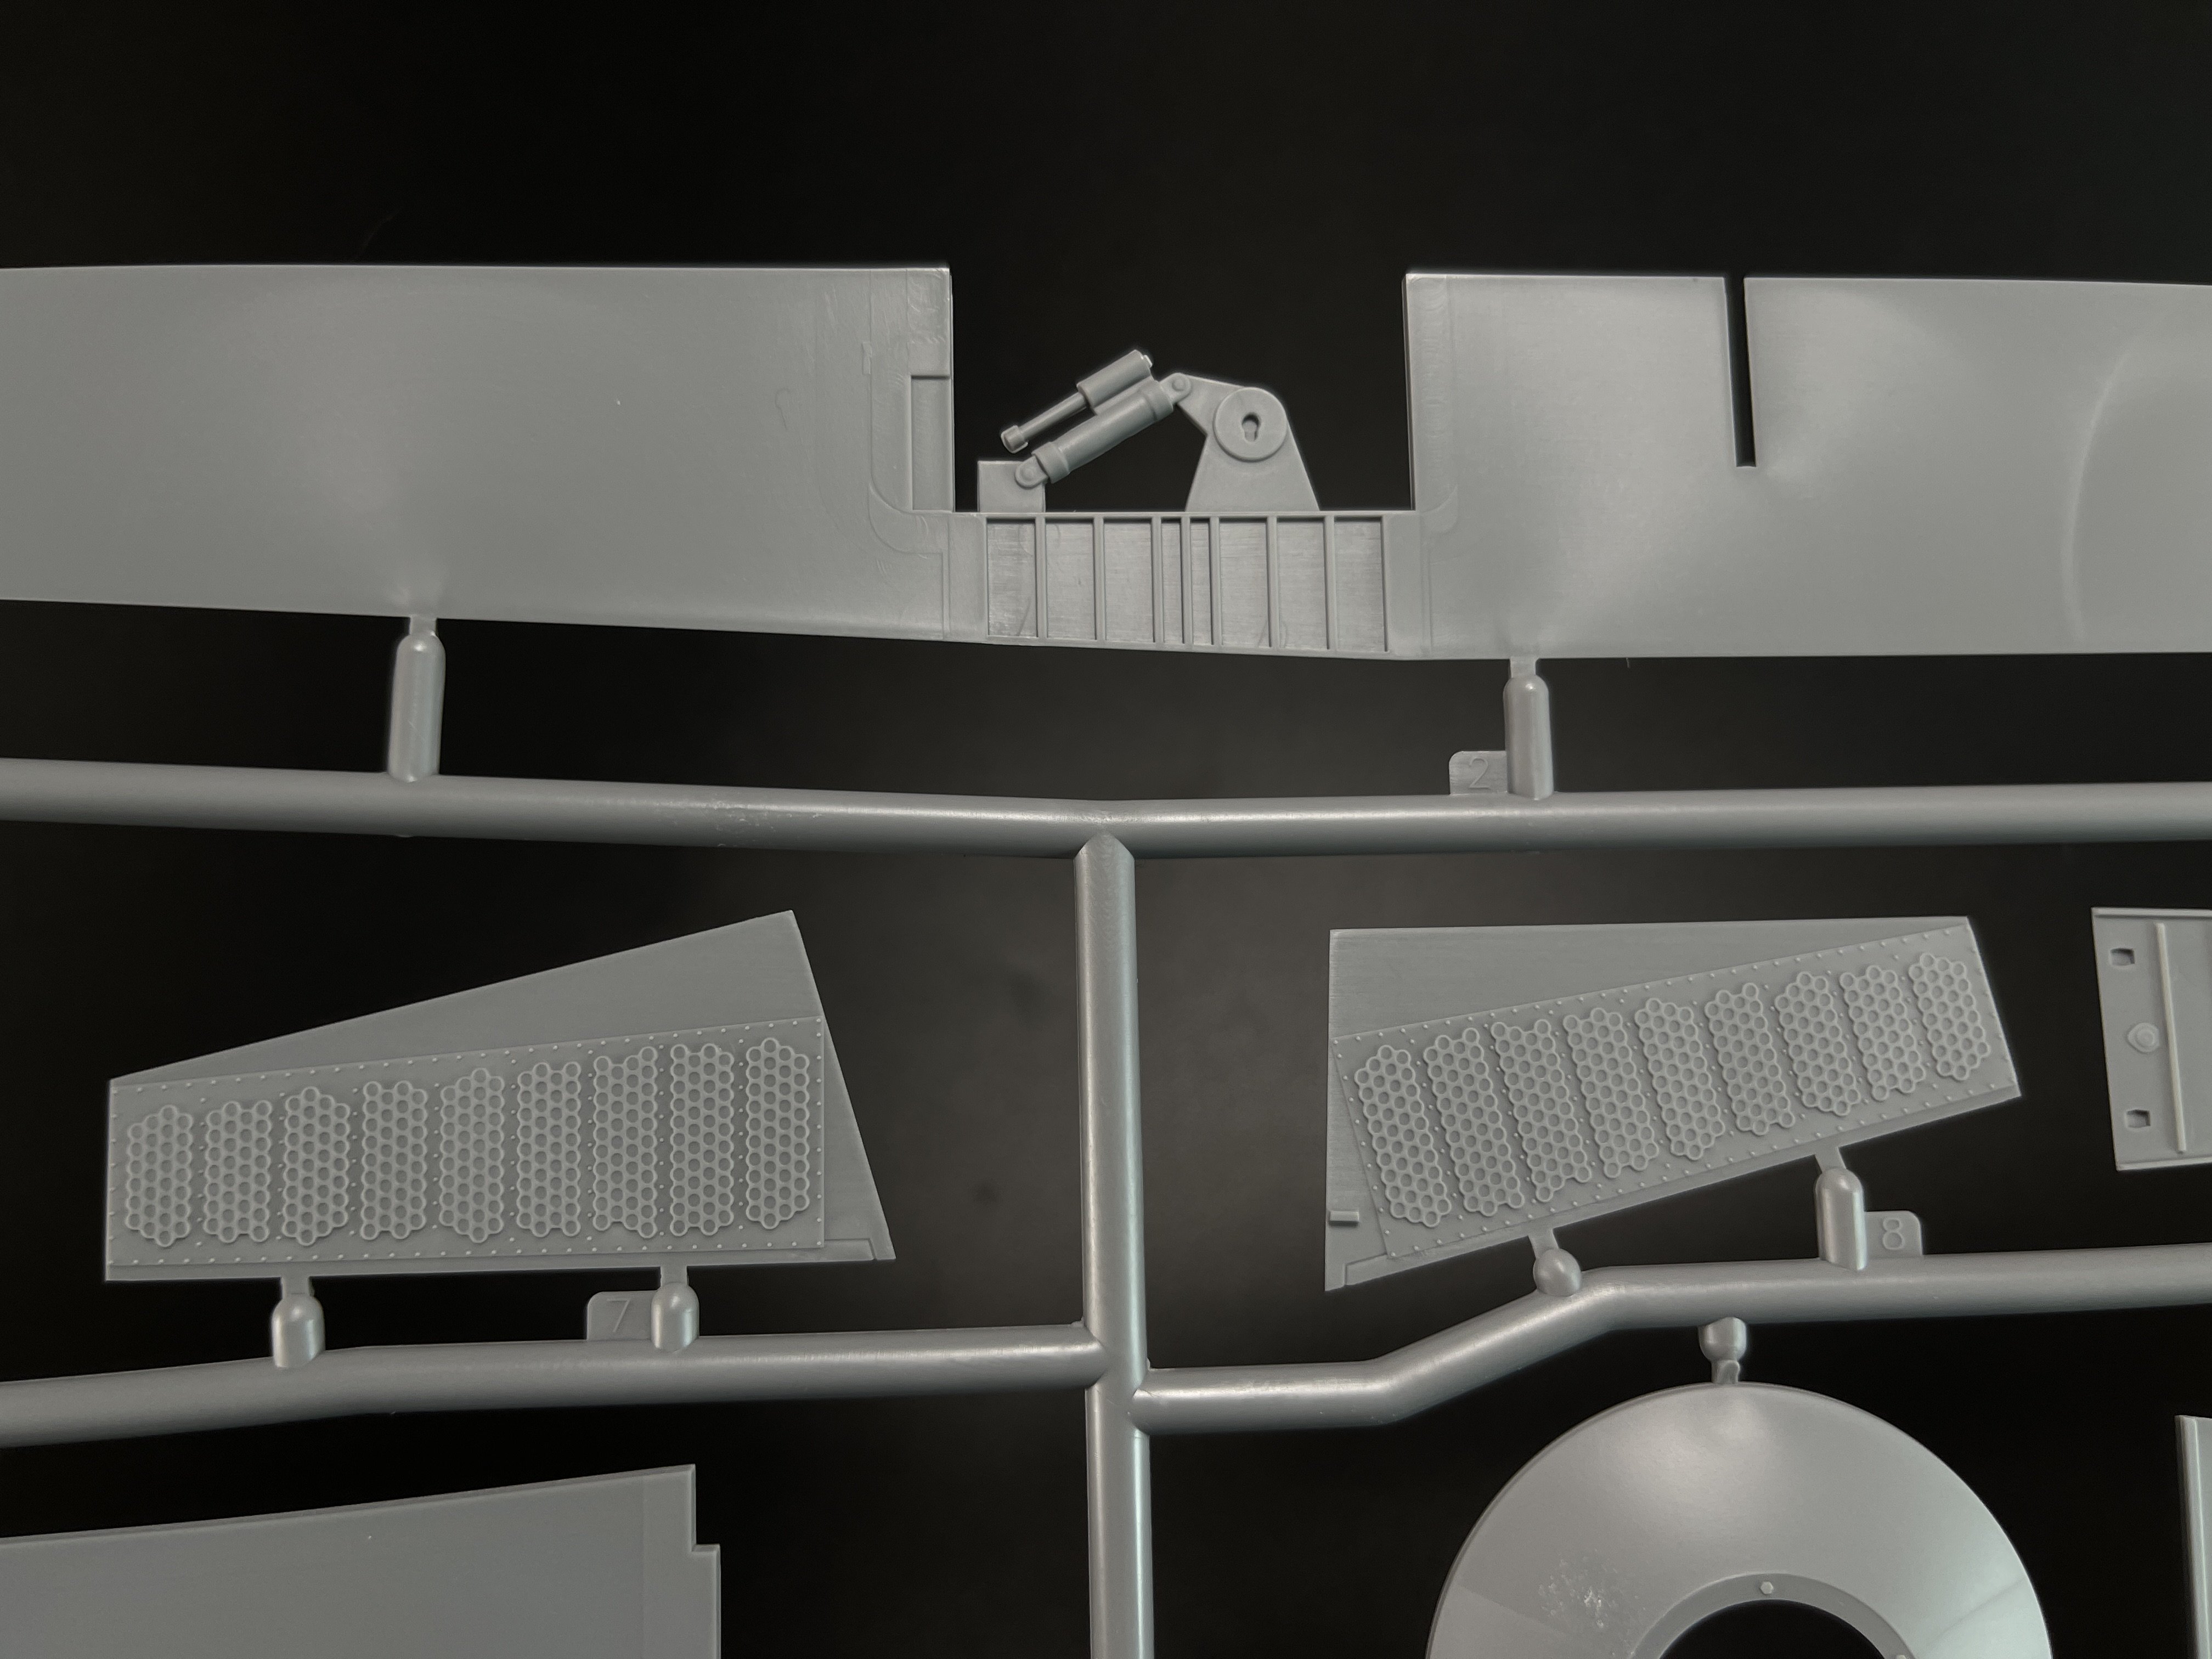
On this sprue, one wing, engine gondola with the undercarriage.


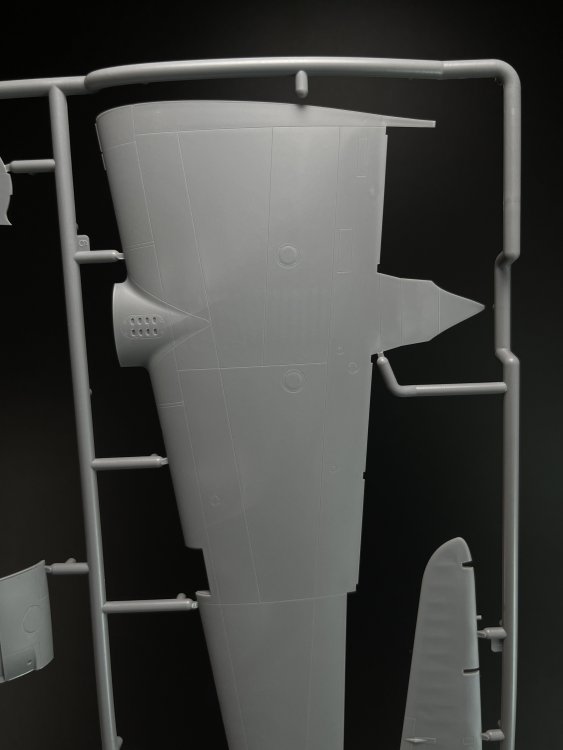
The inside detail on the undercarriage is good. There´s some improvements that can be made for the AM companies.
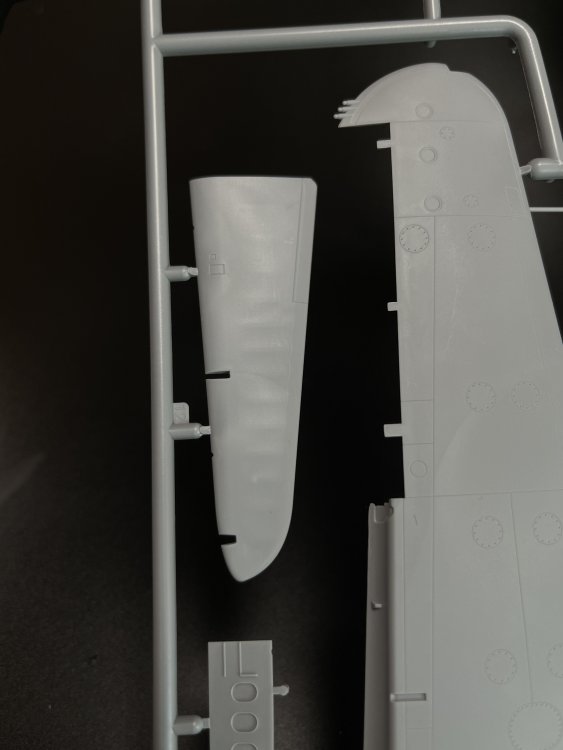
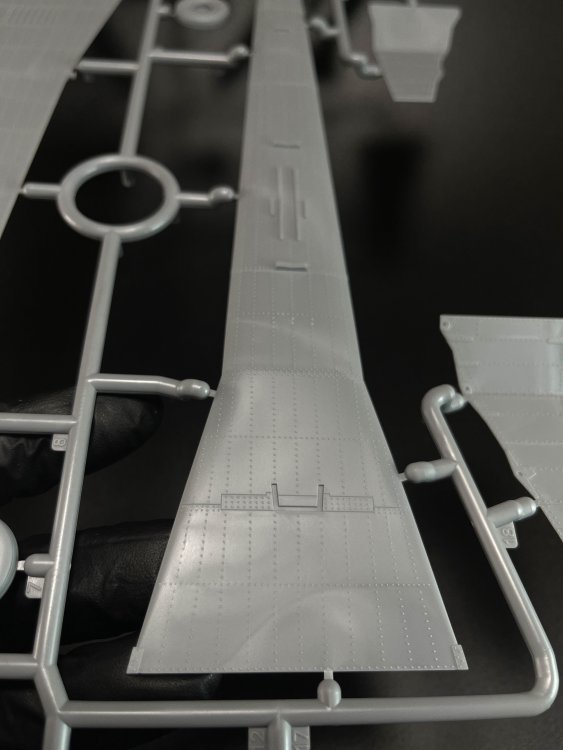
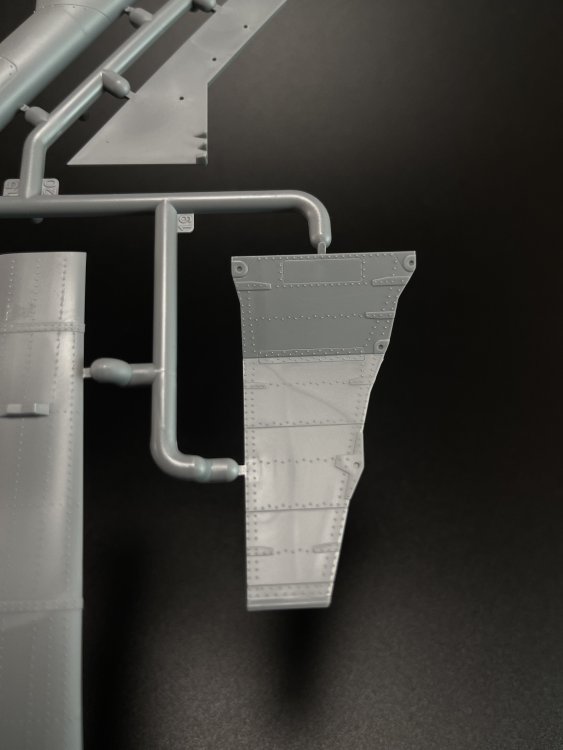
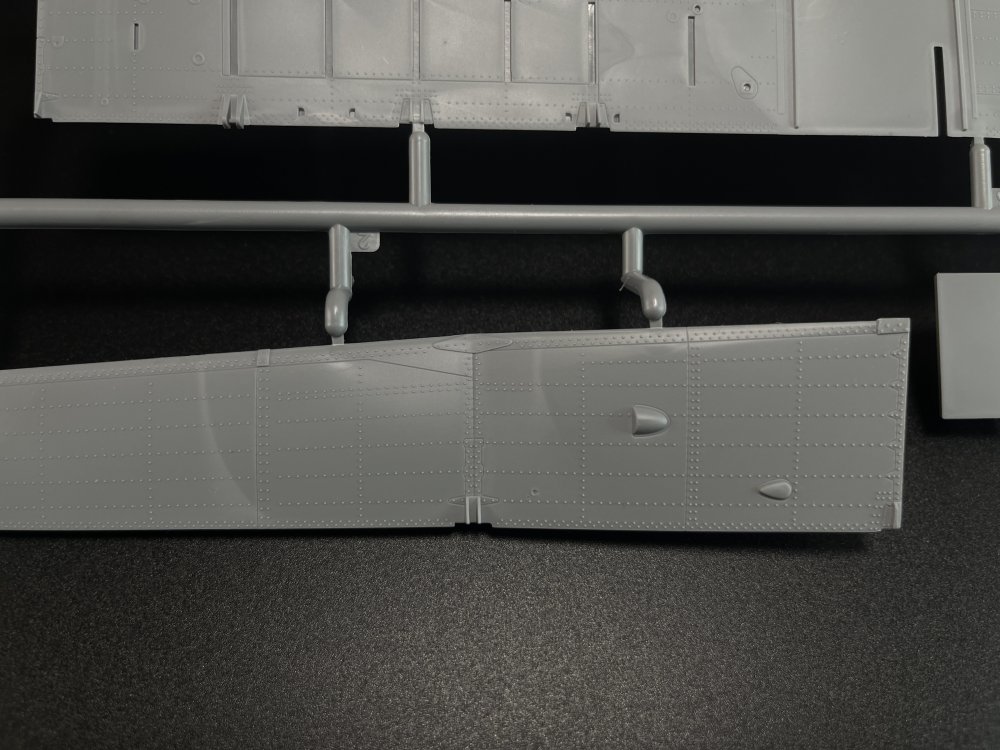
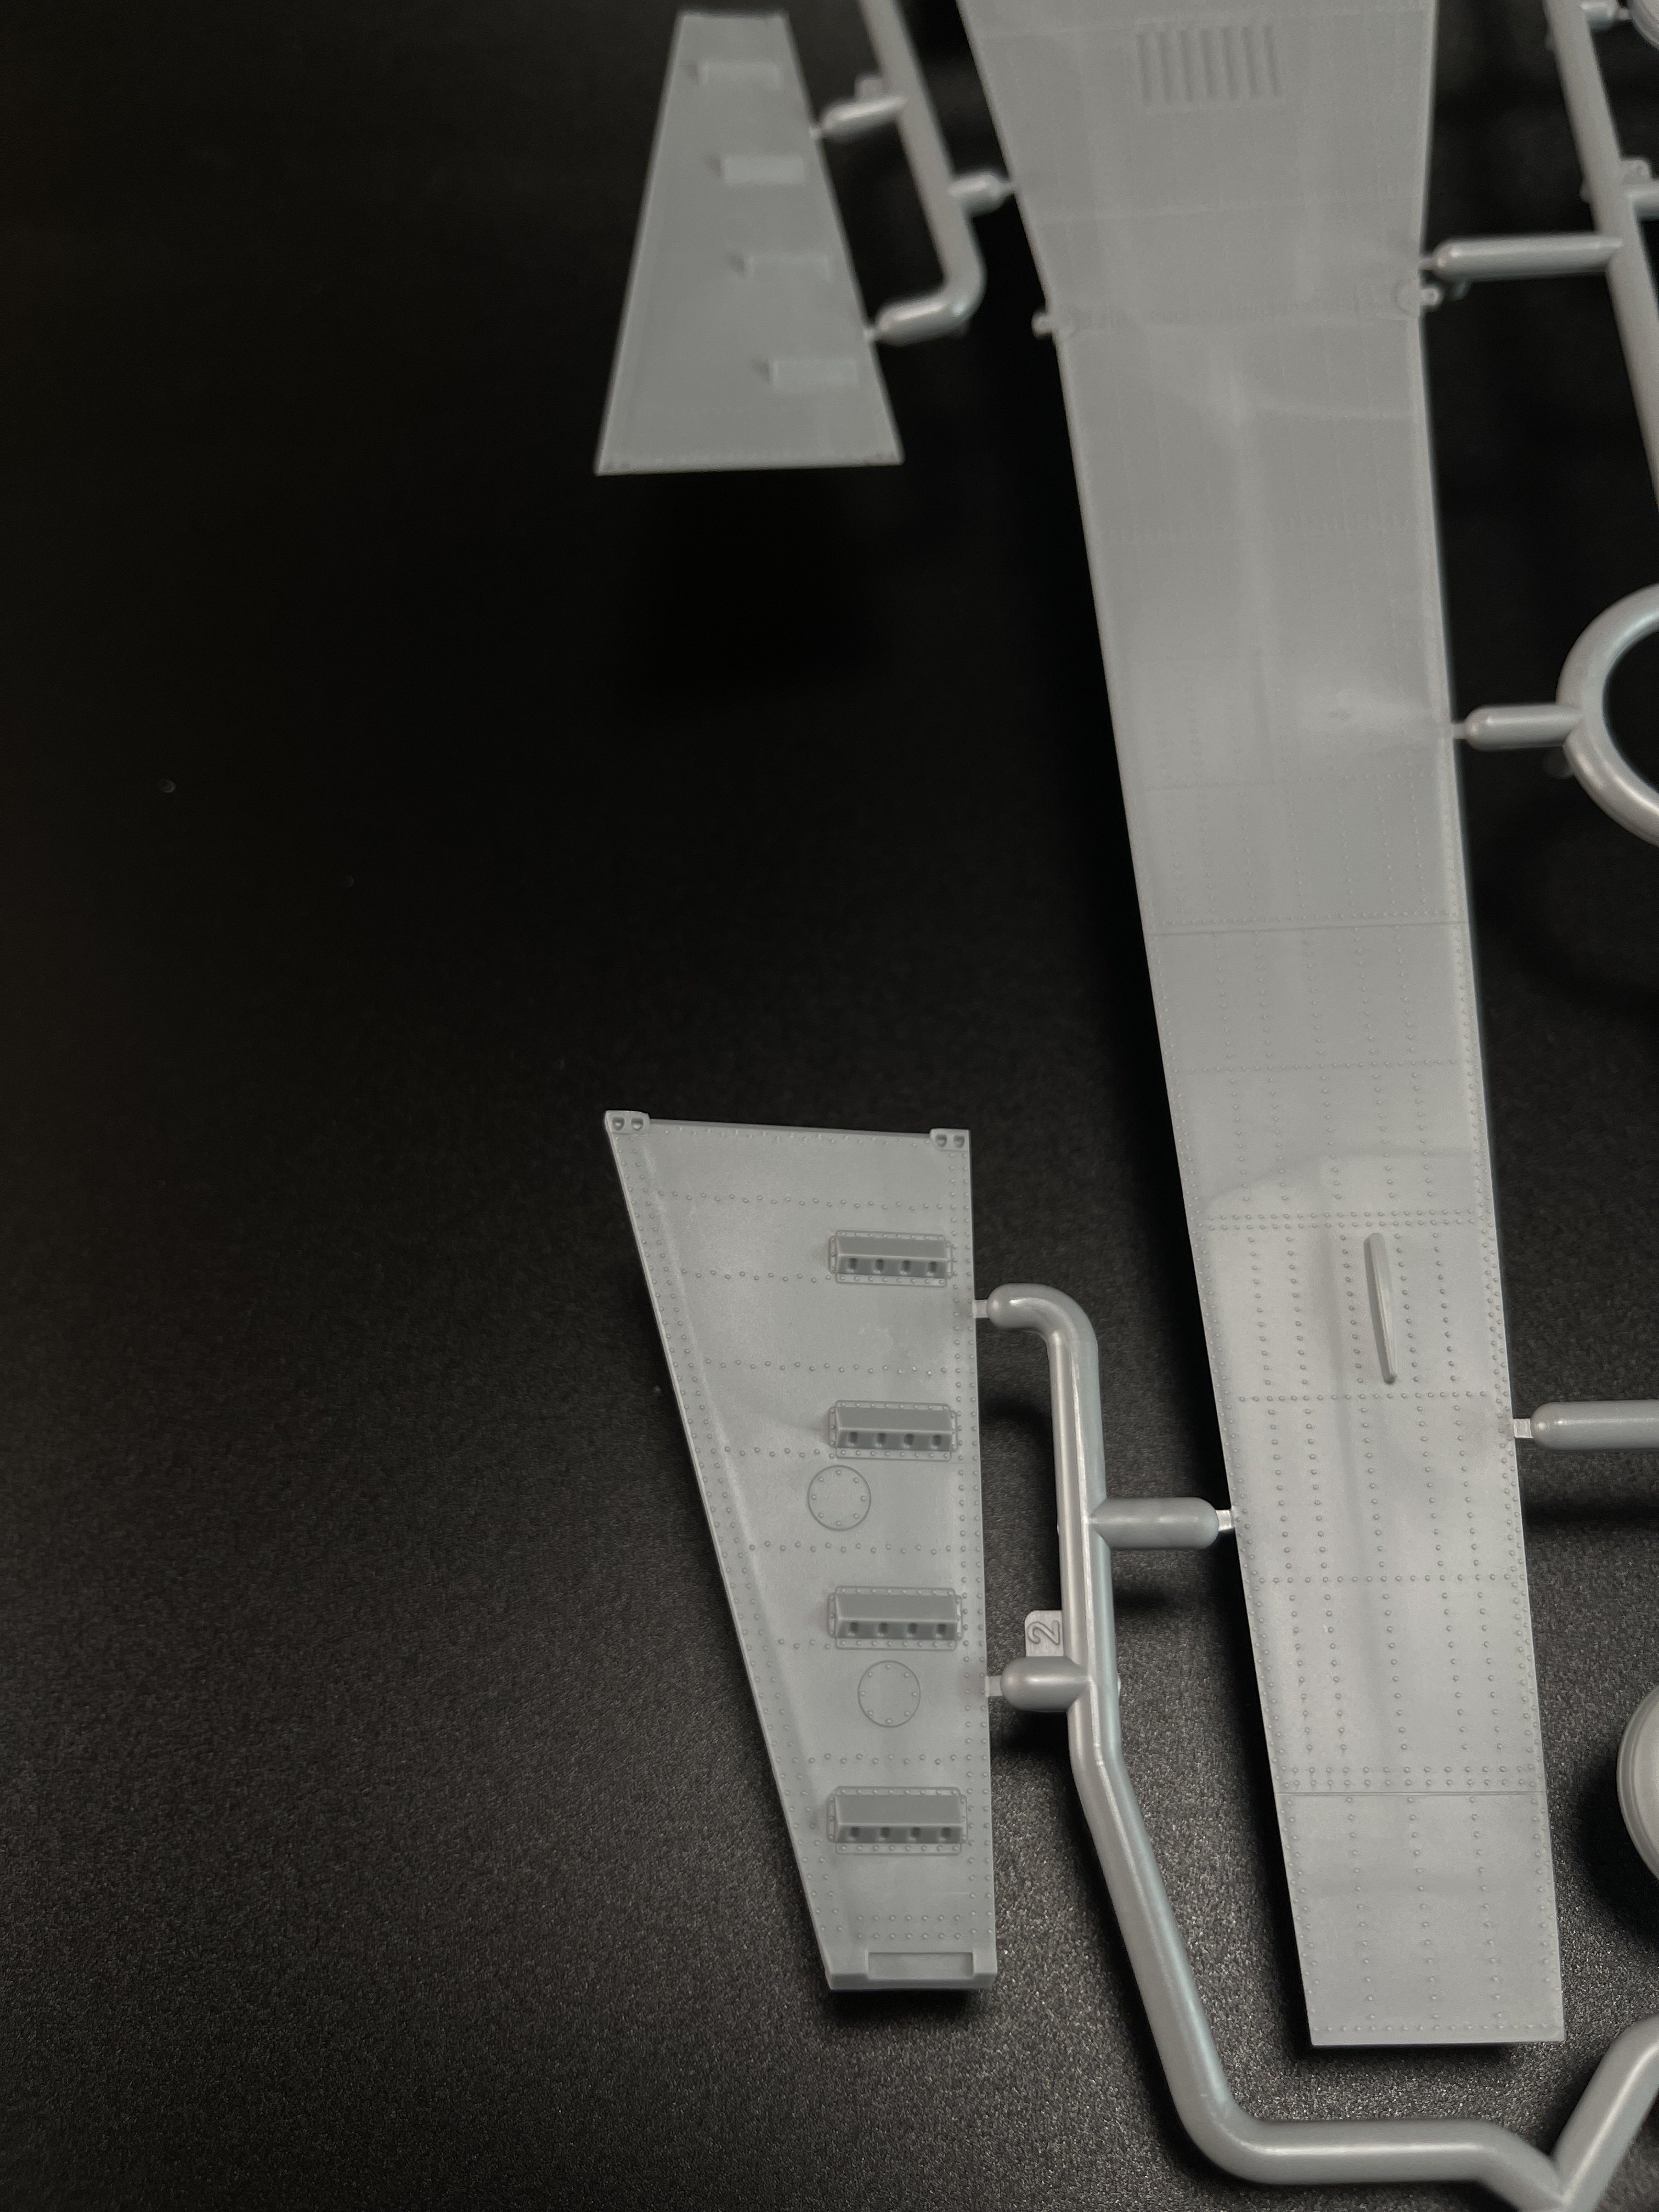
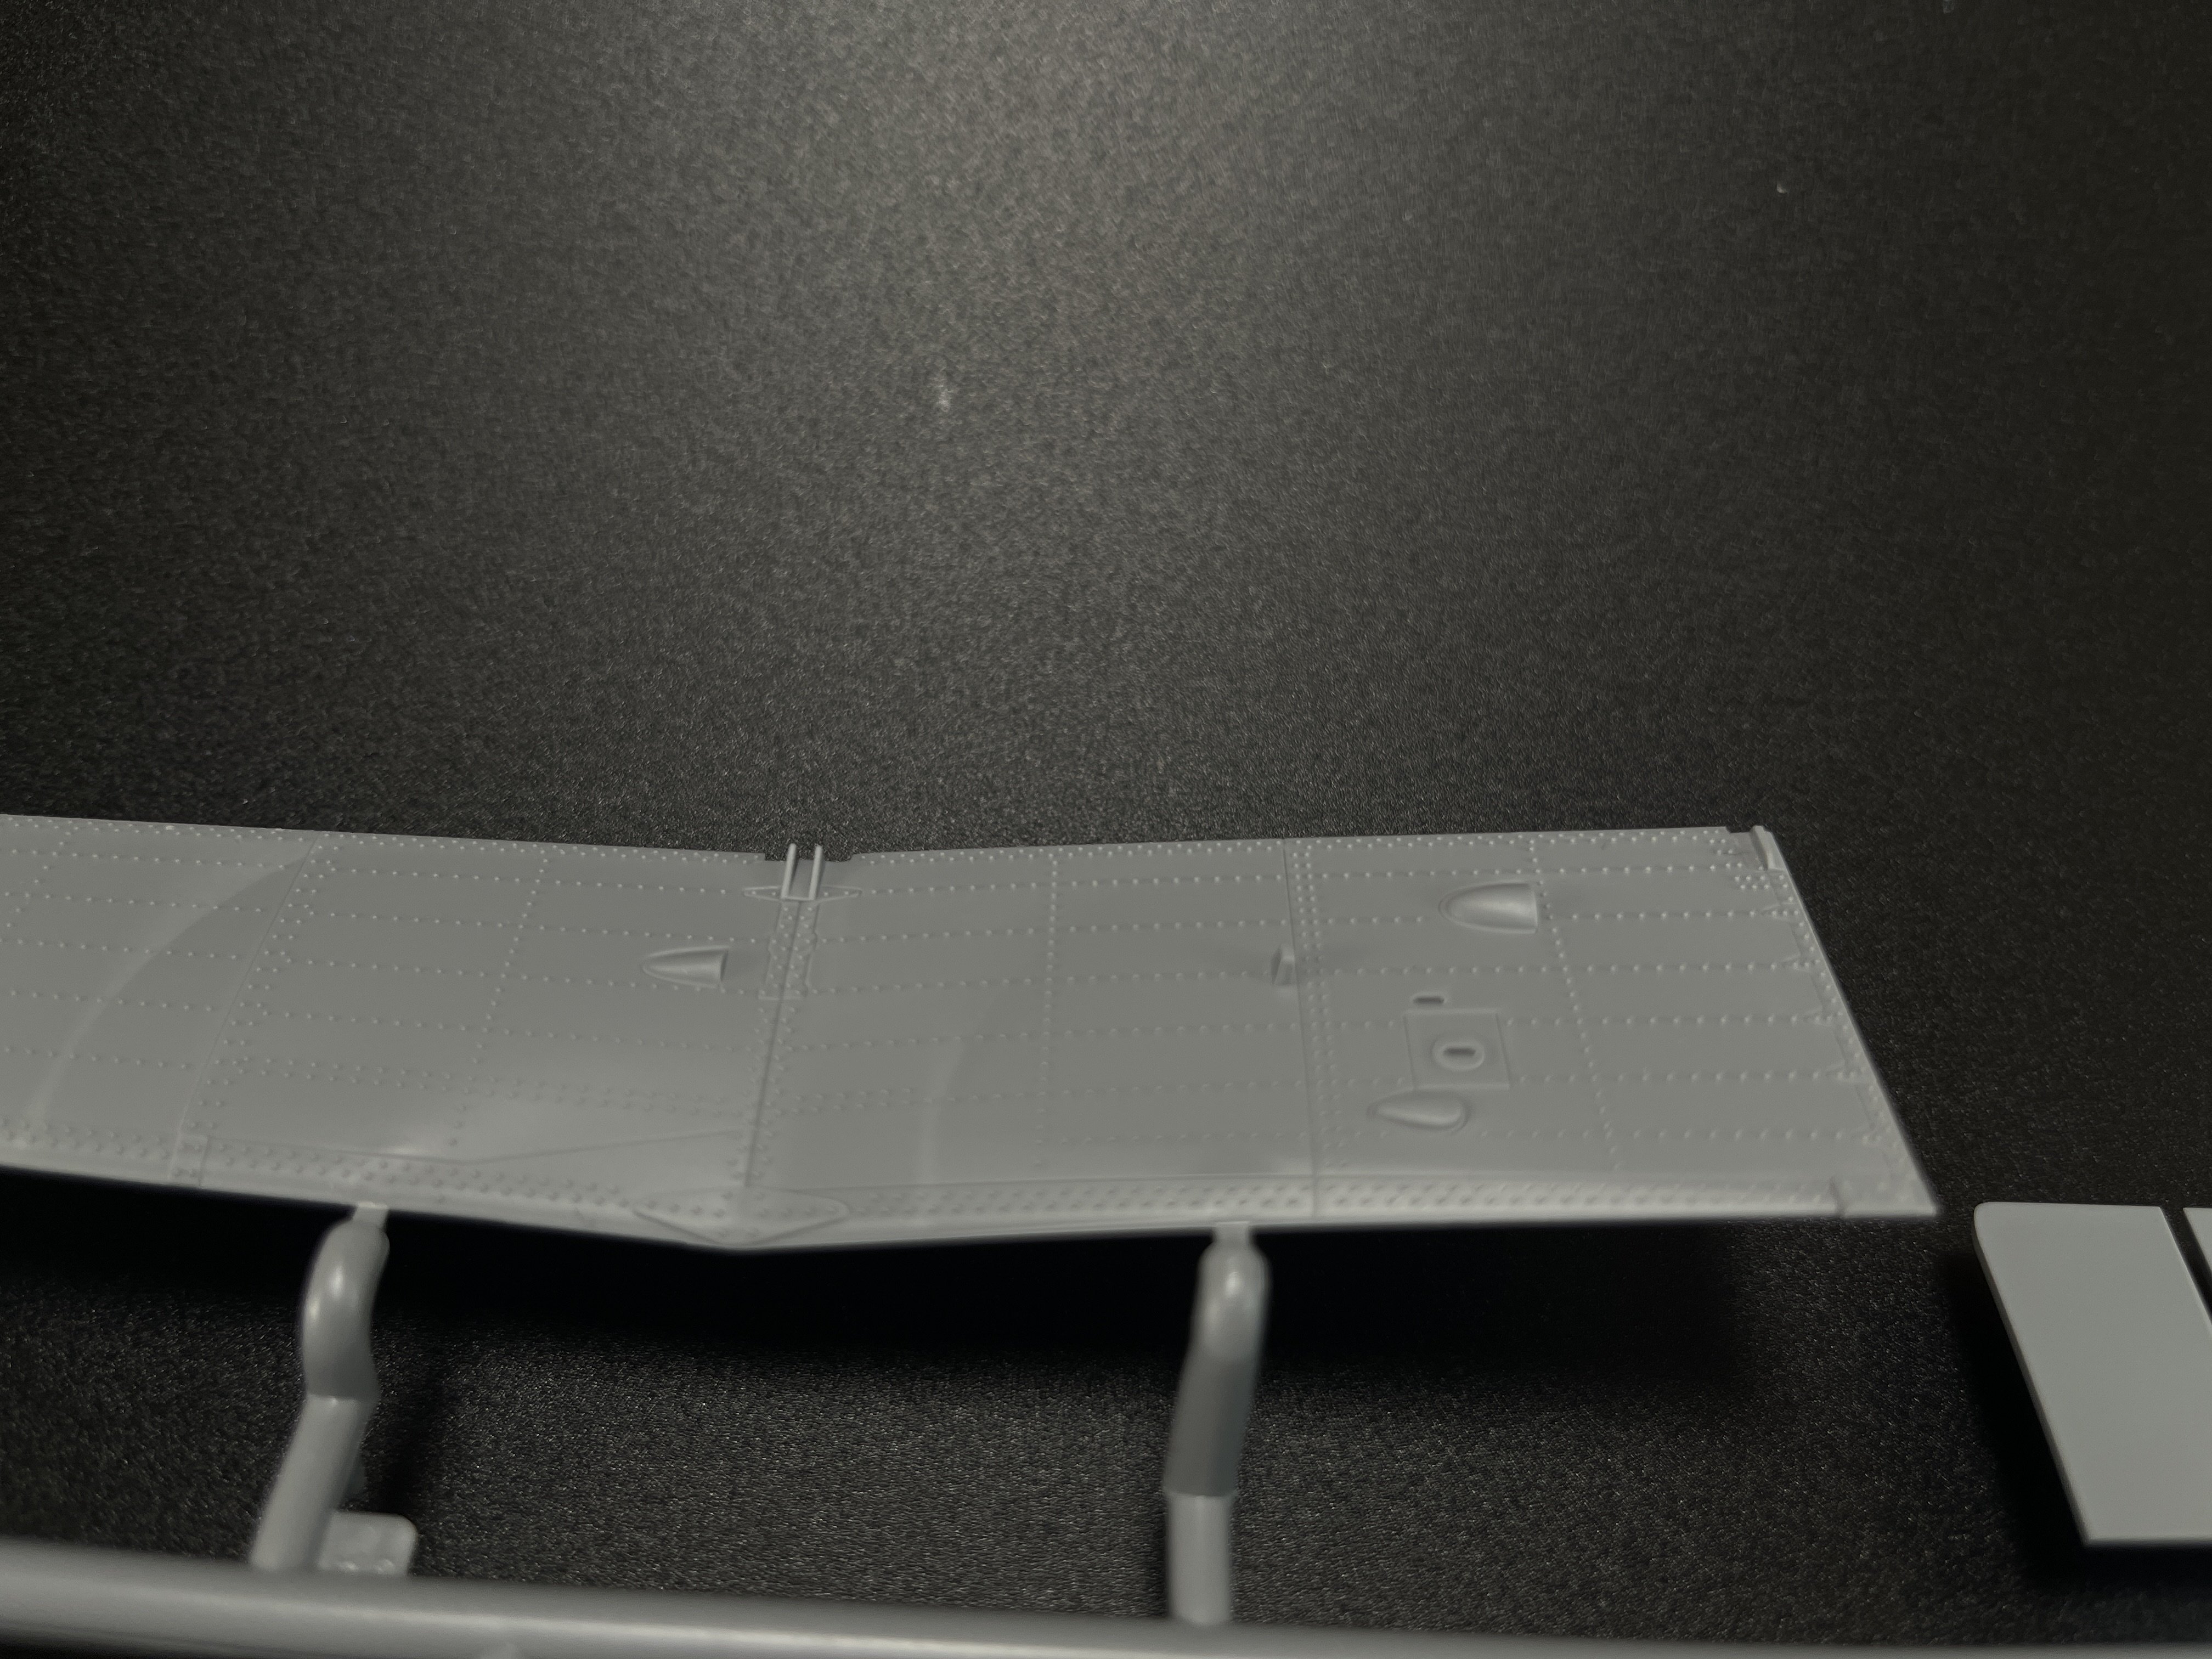
The wings also have a very good and sharp surface detail.
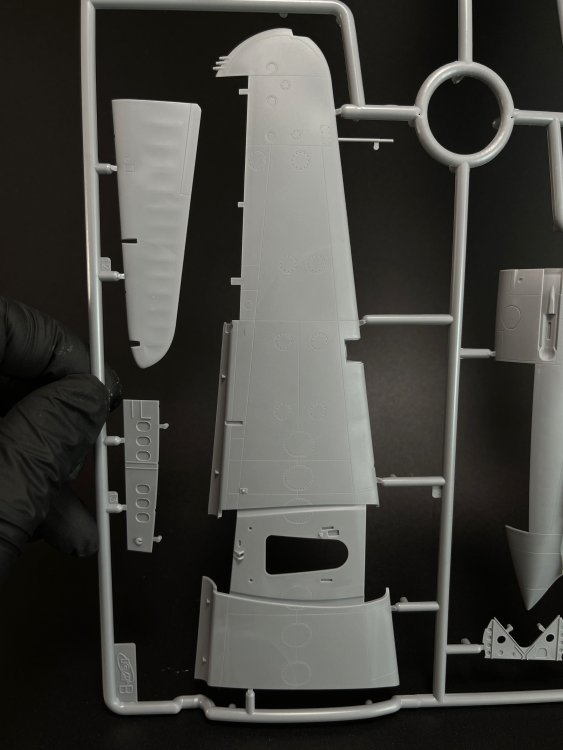
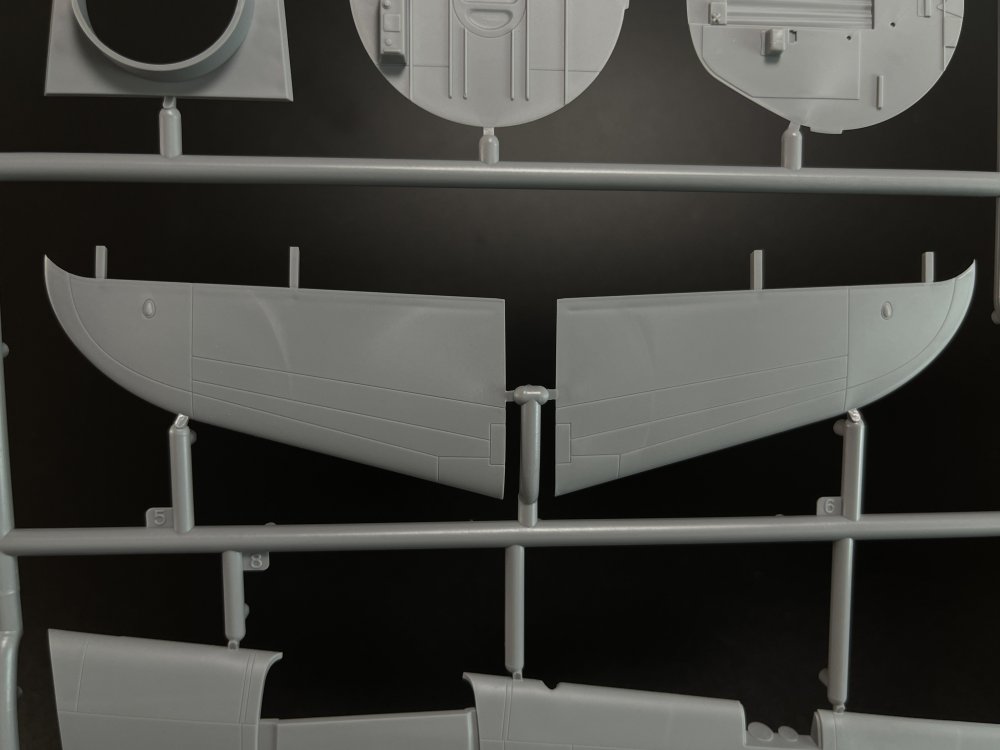
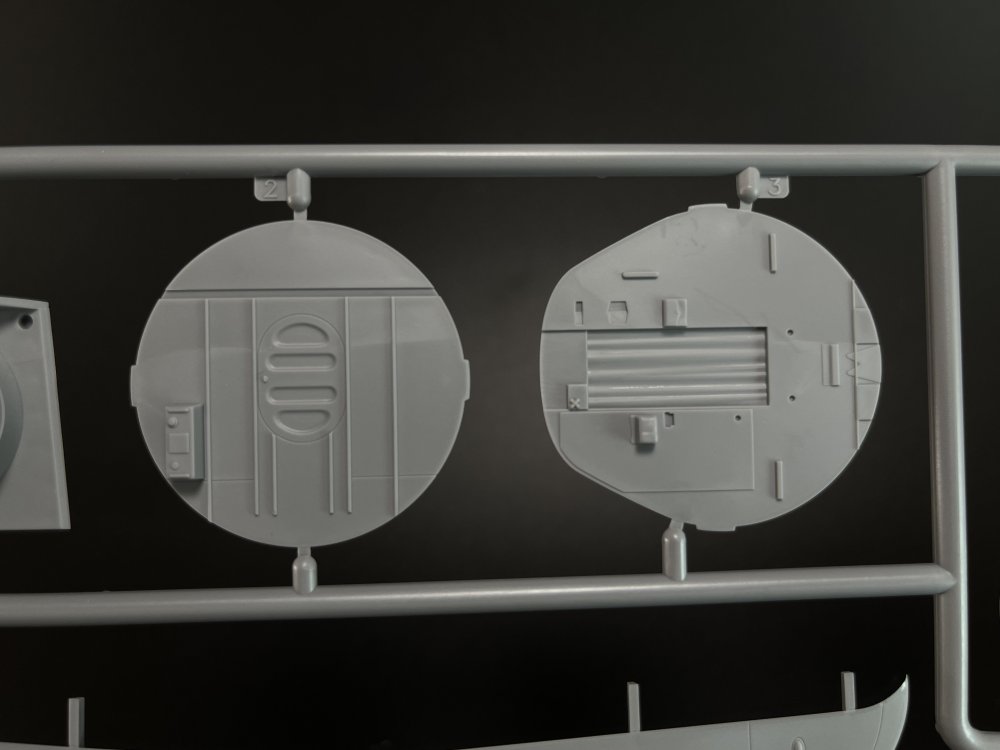
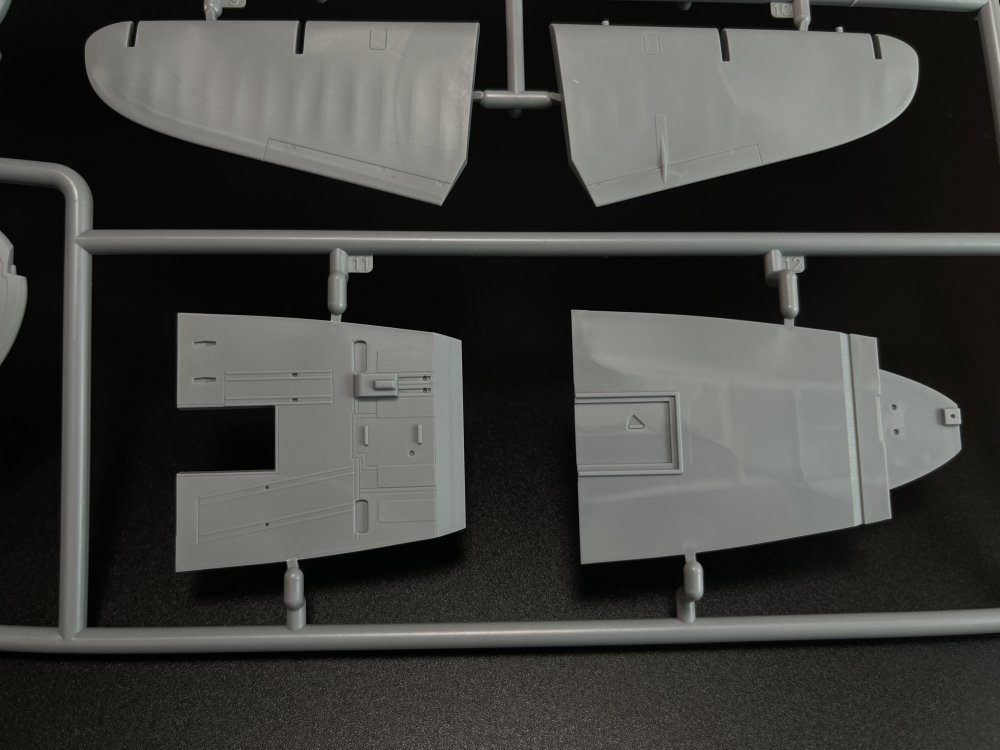
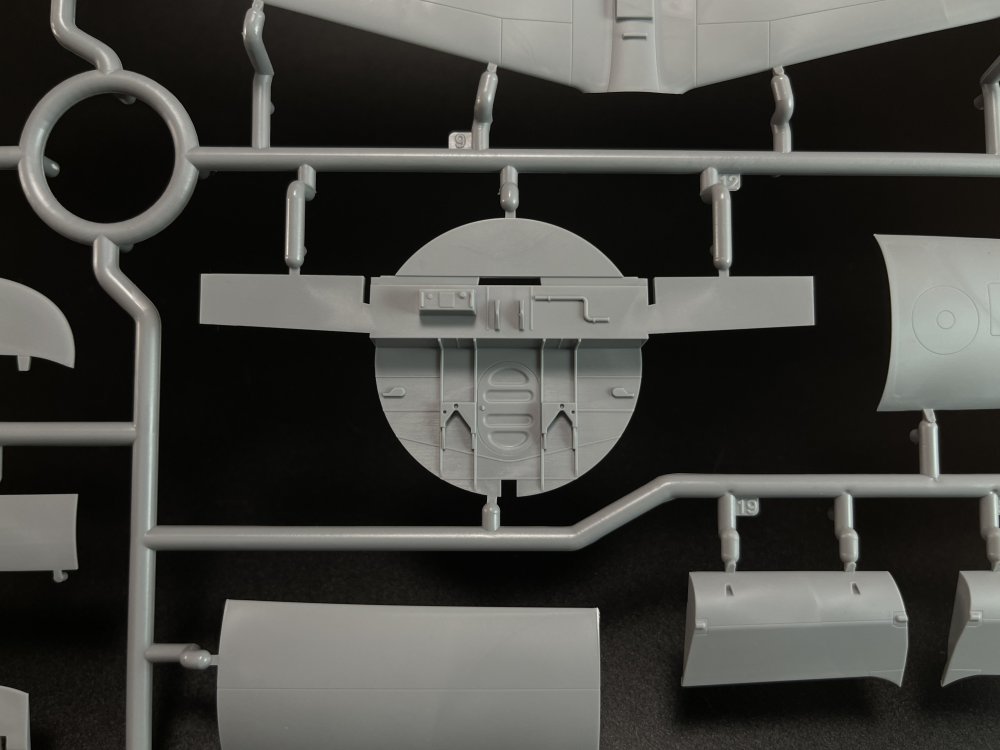
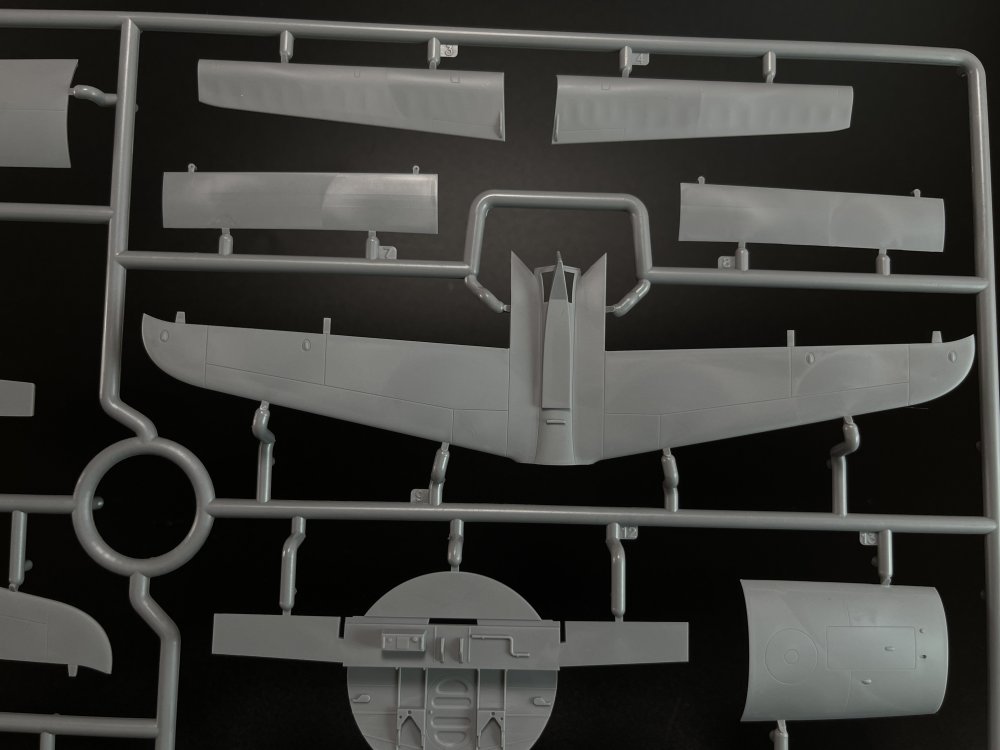
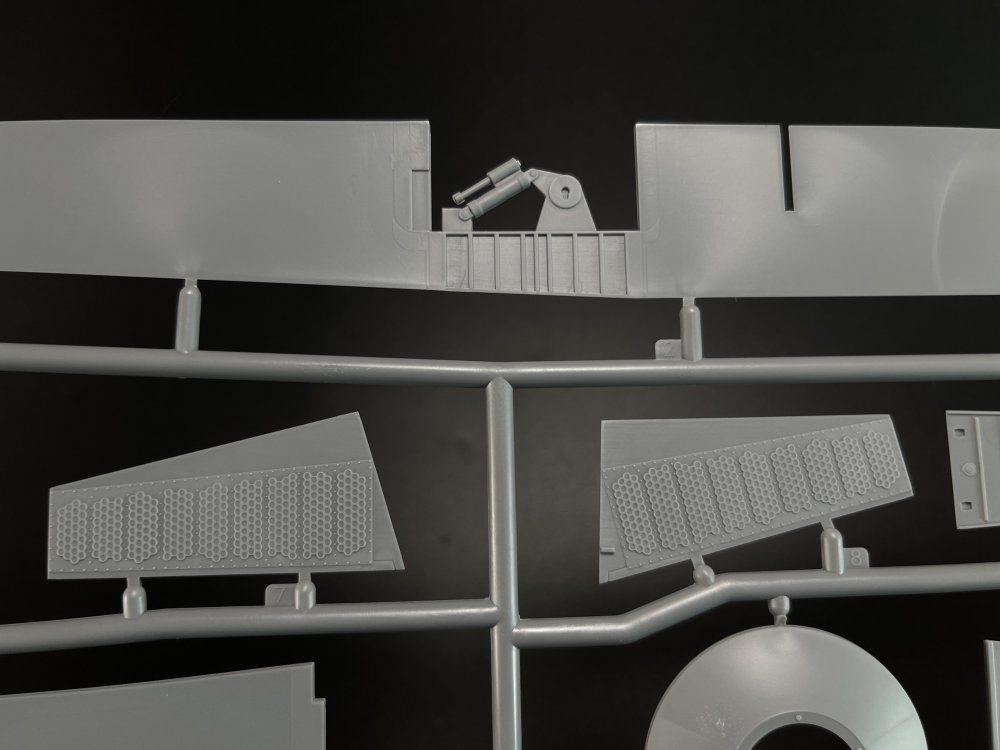
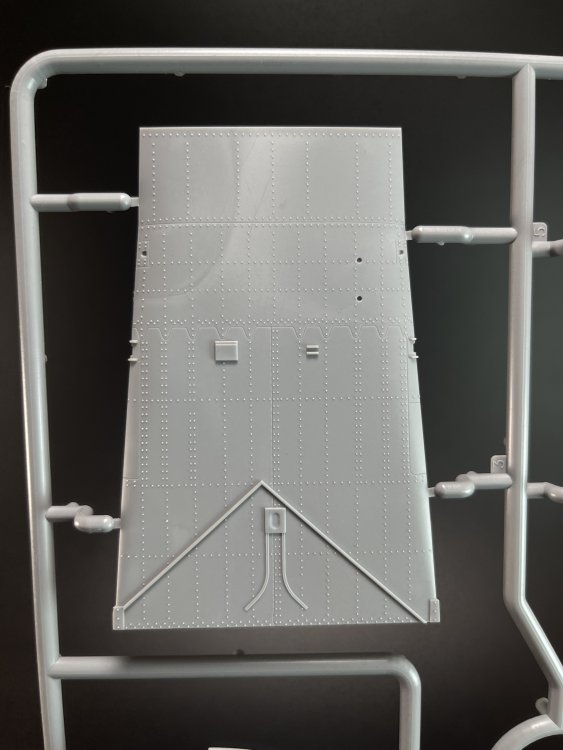
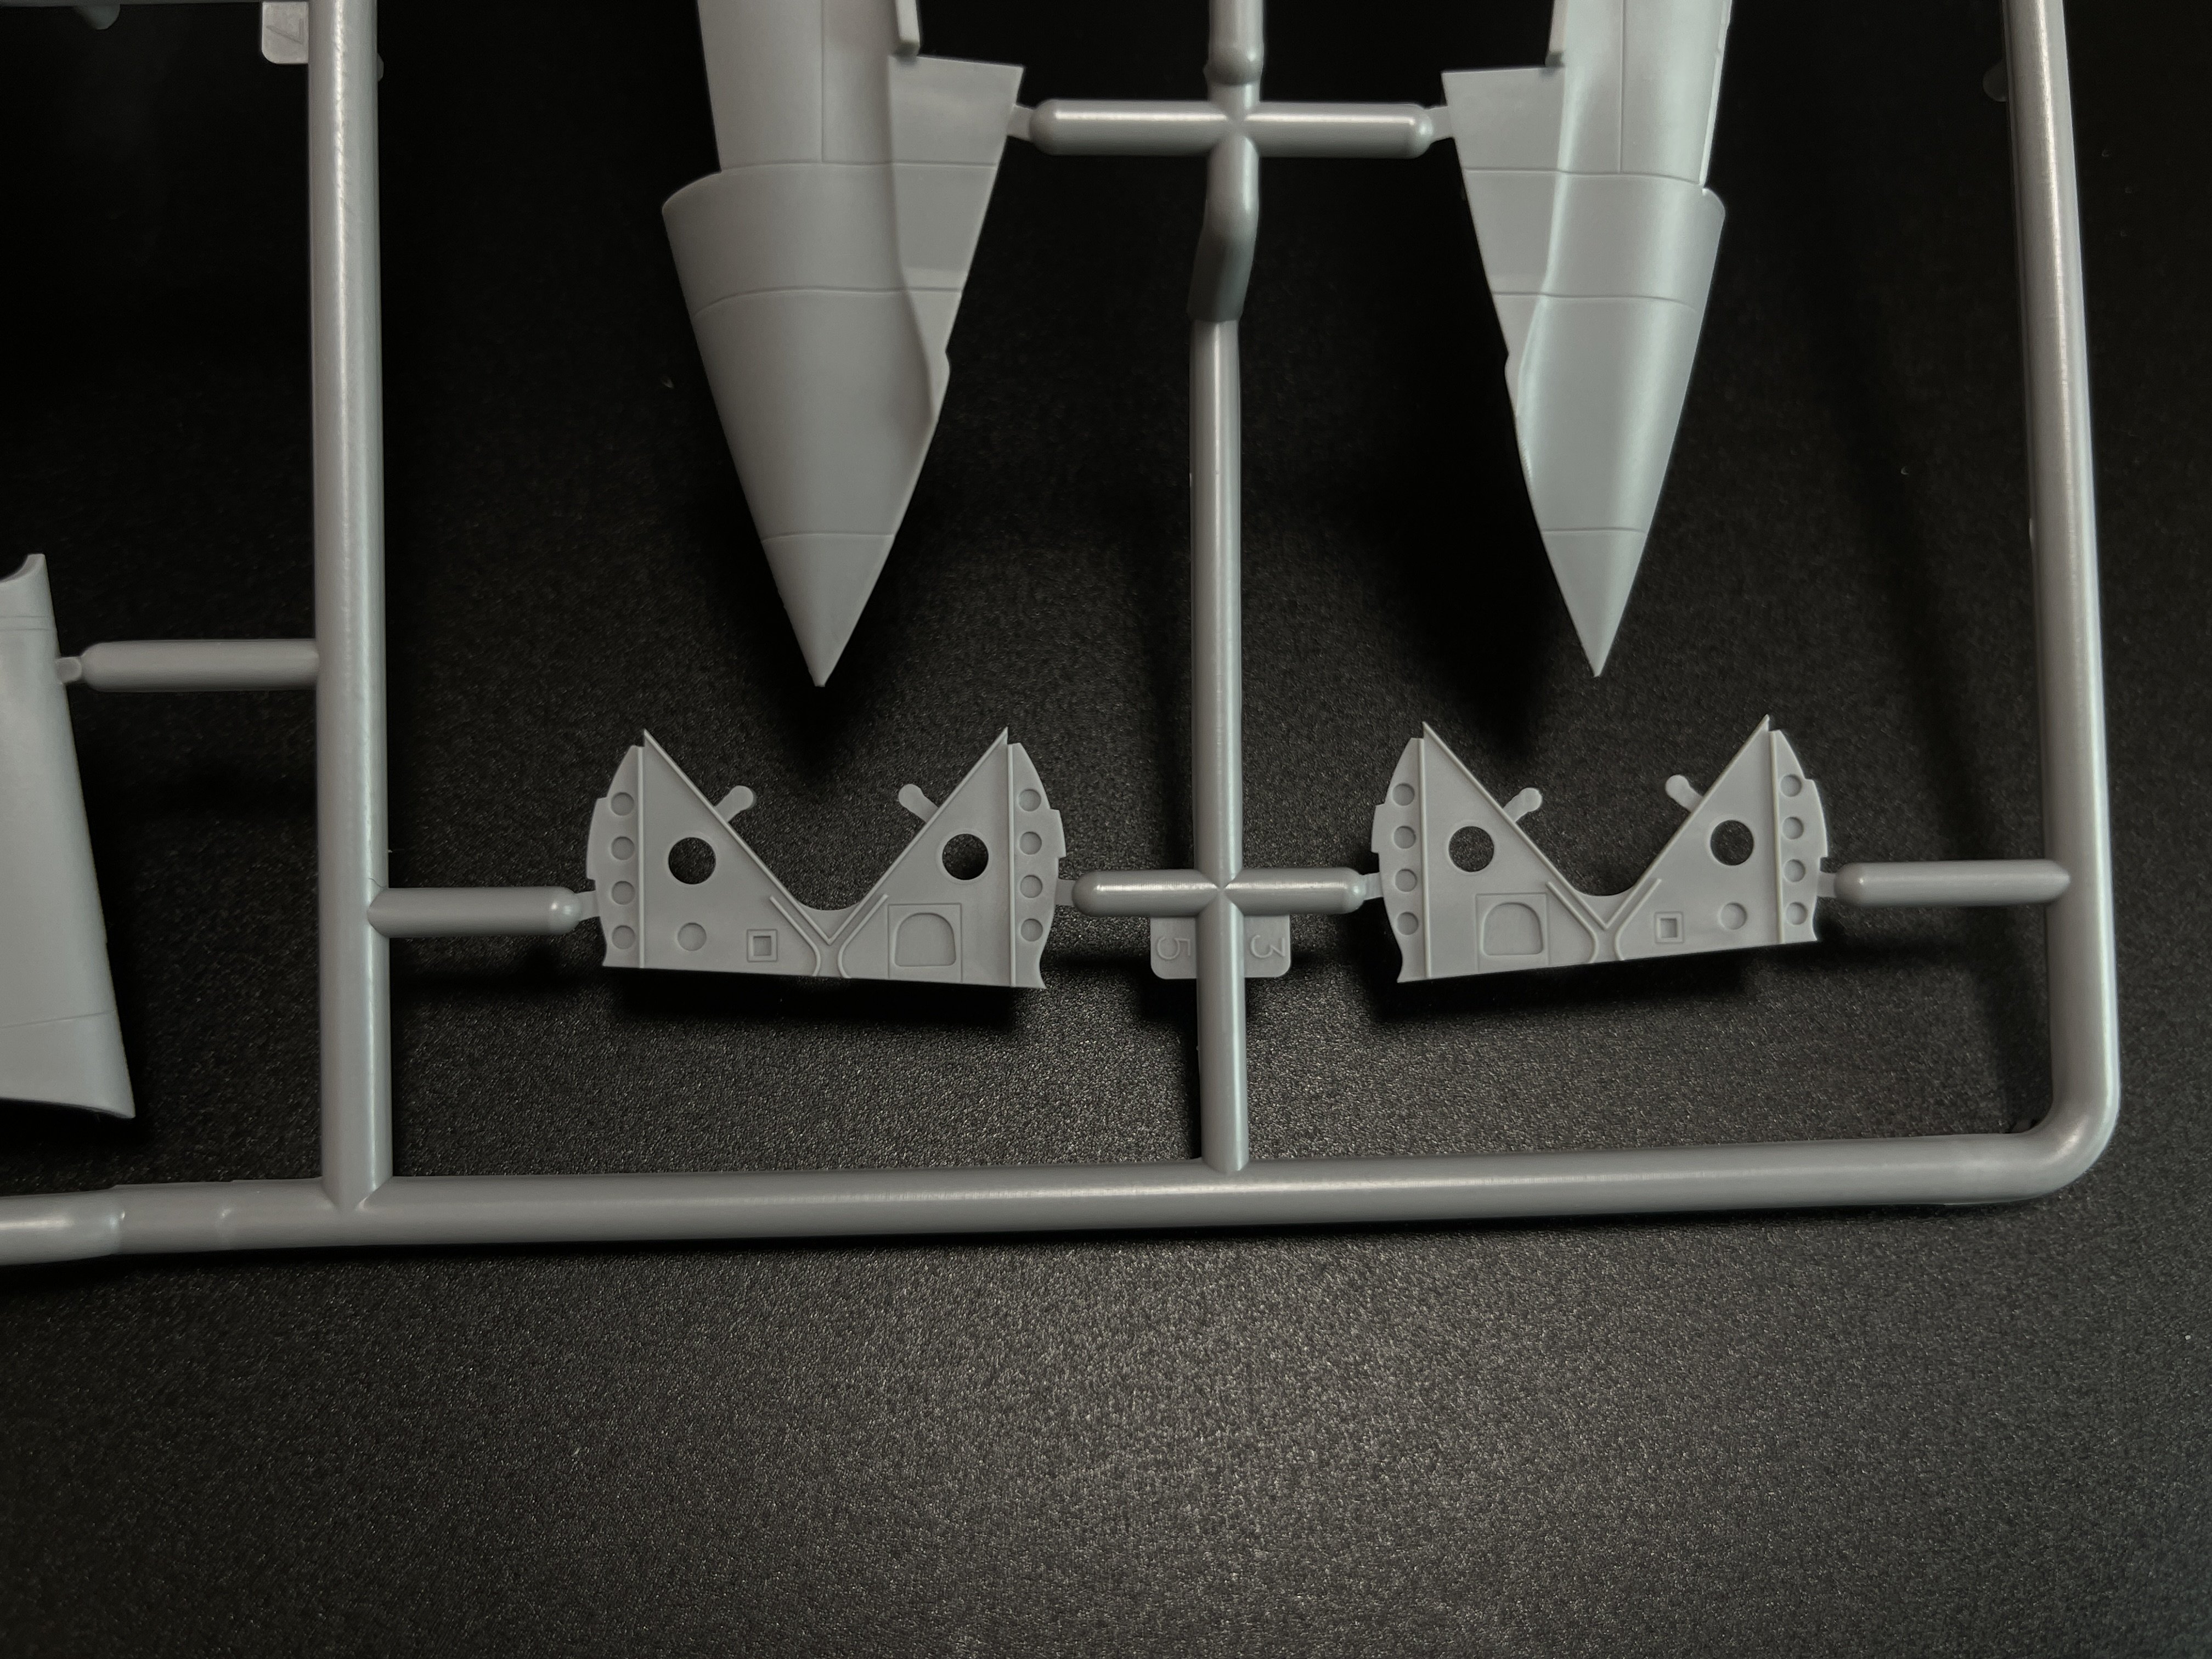
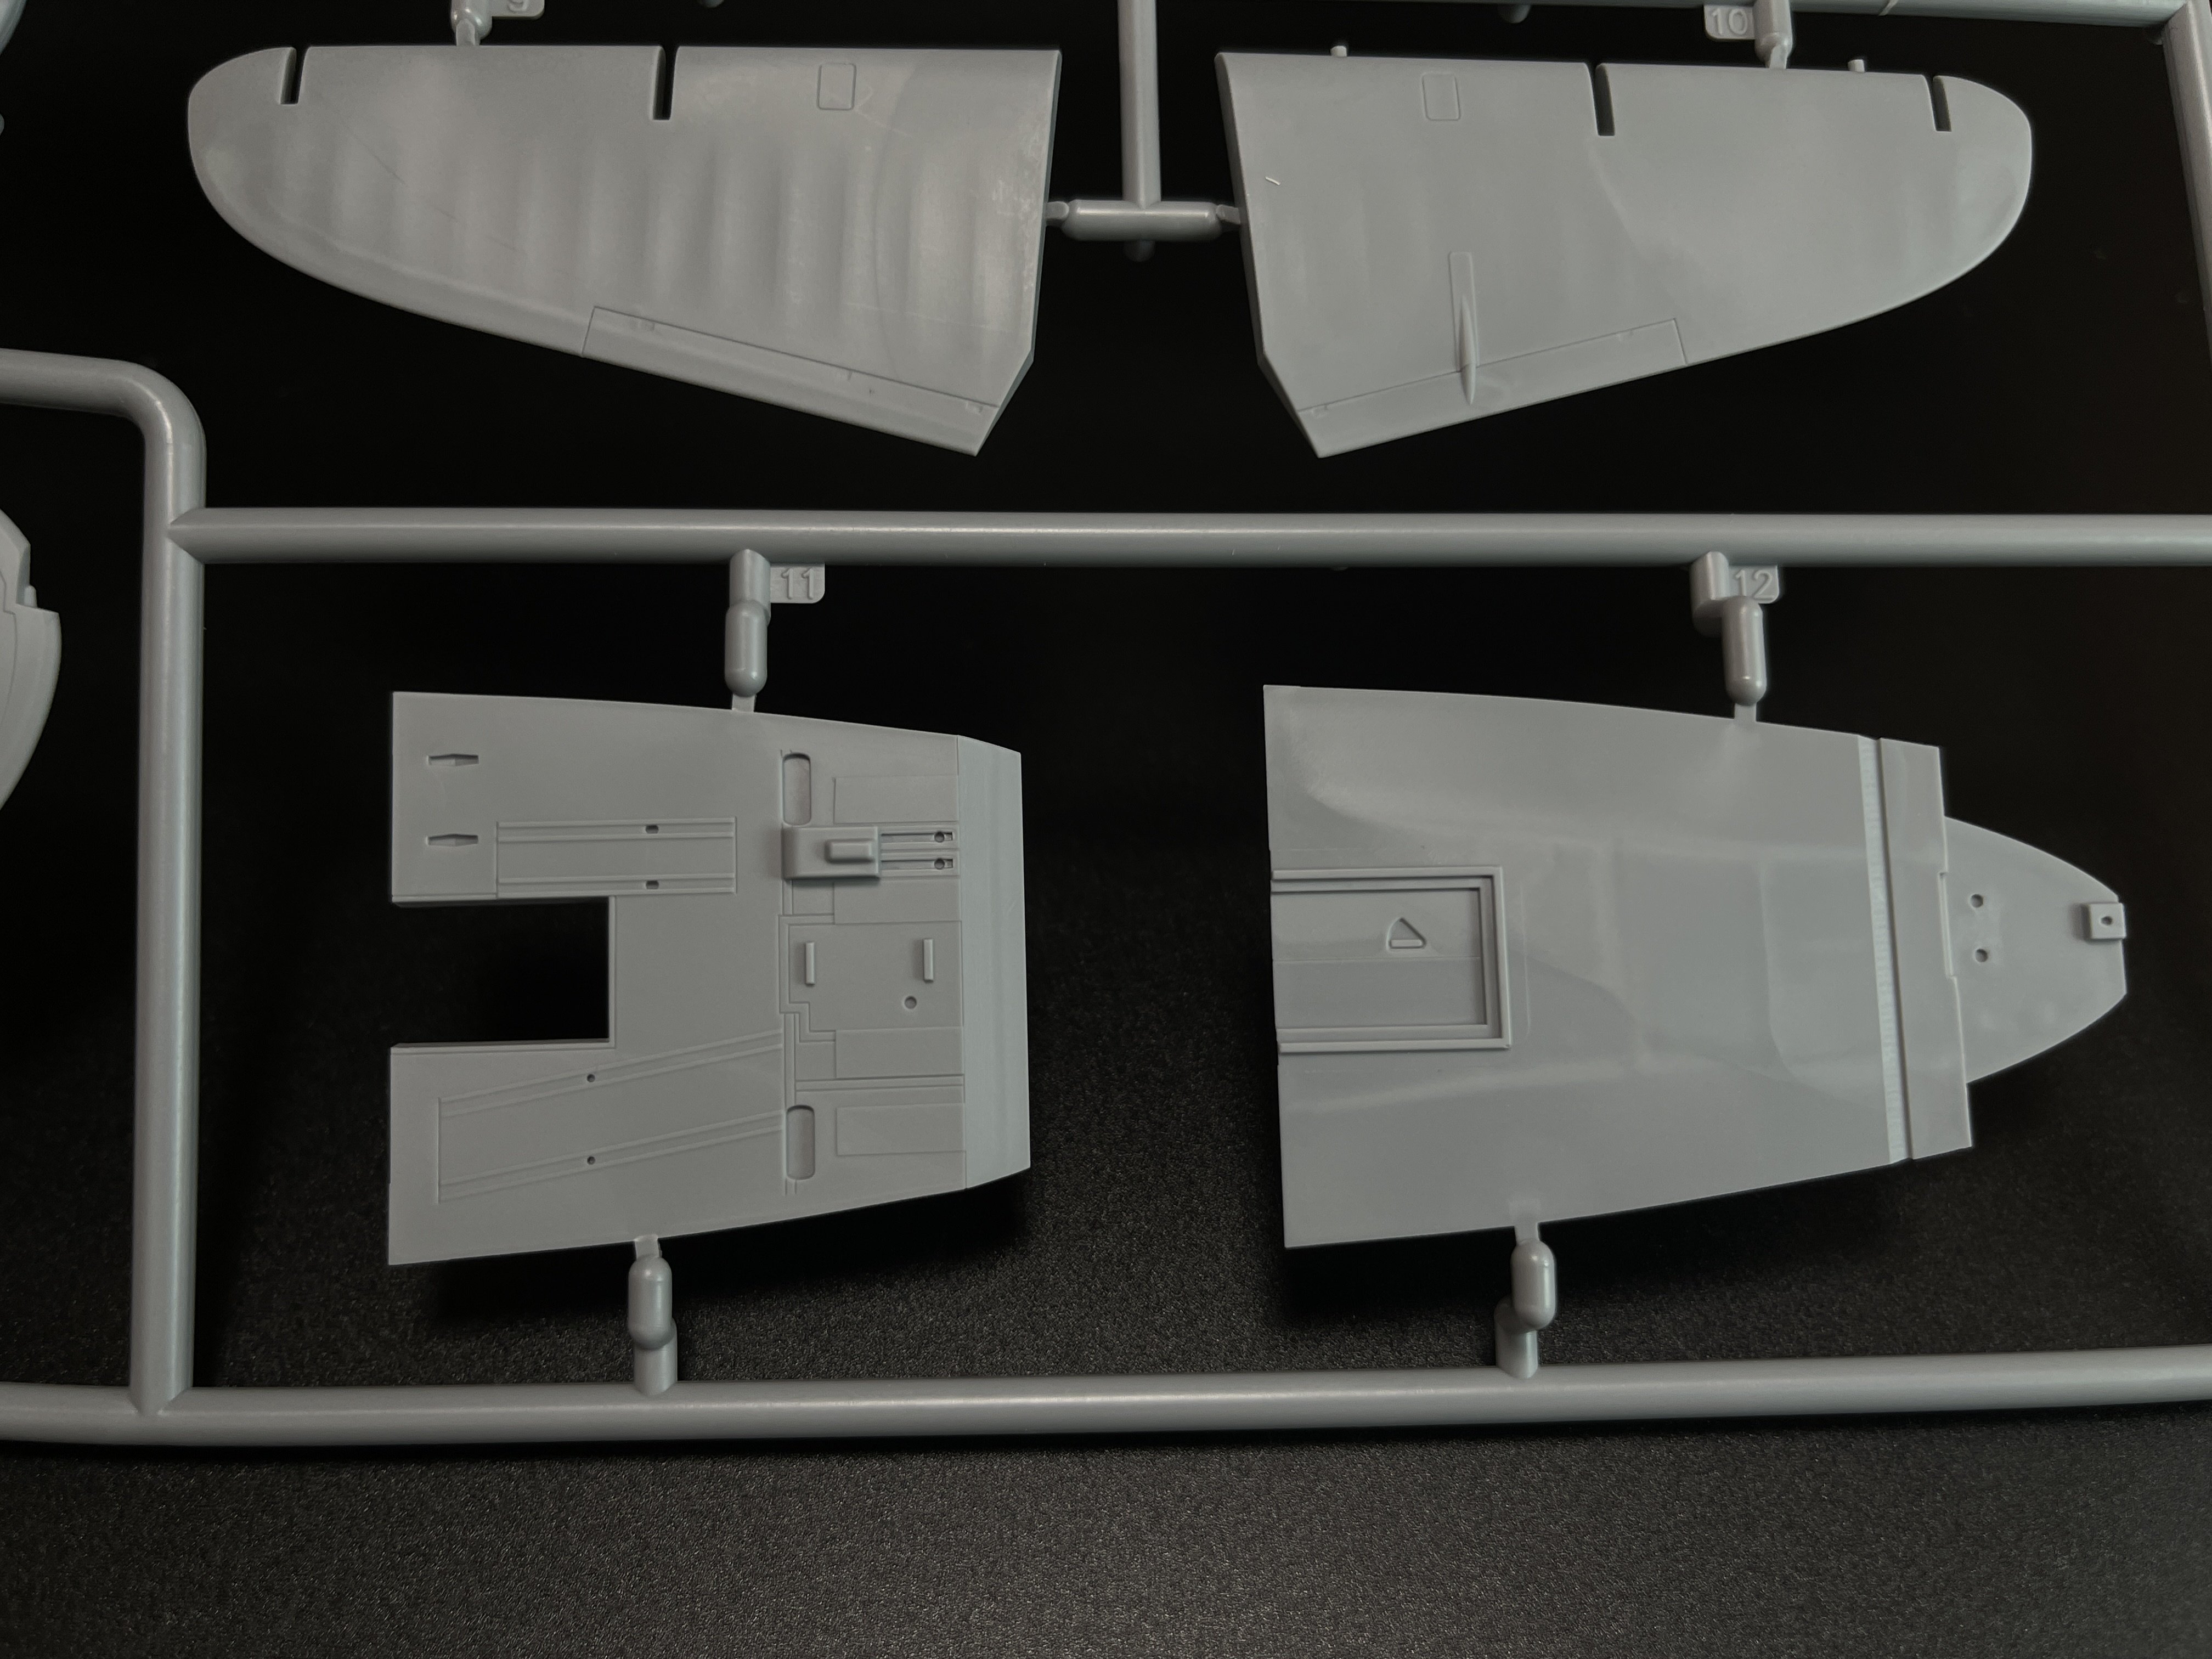
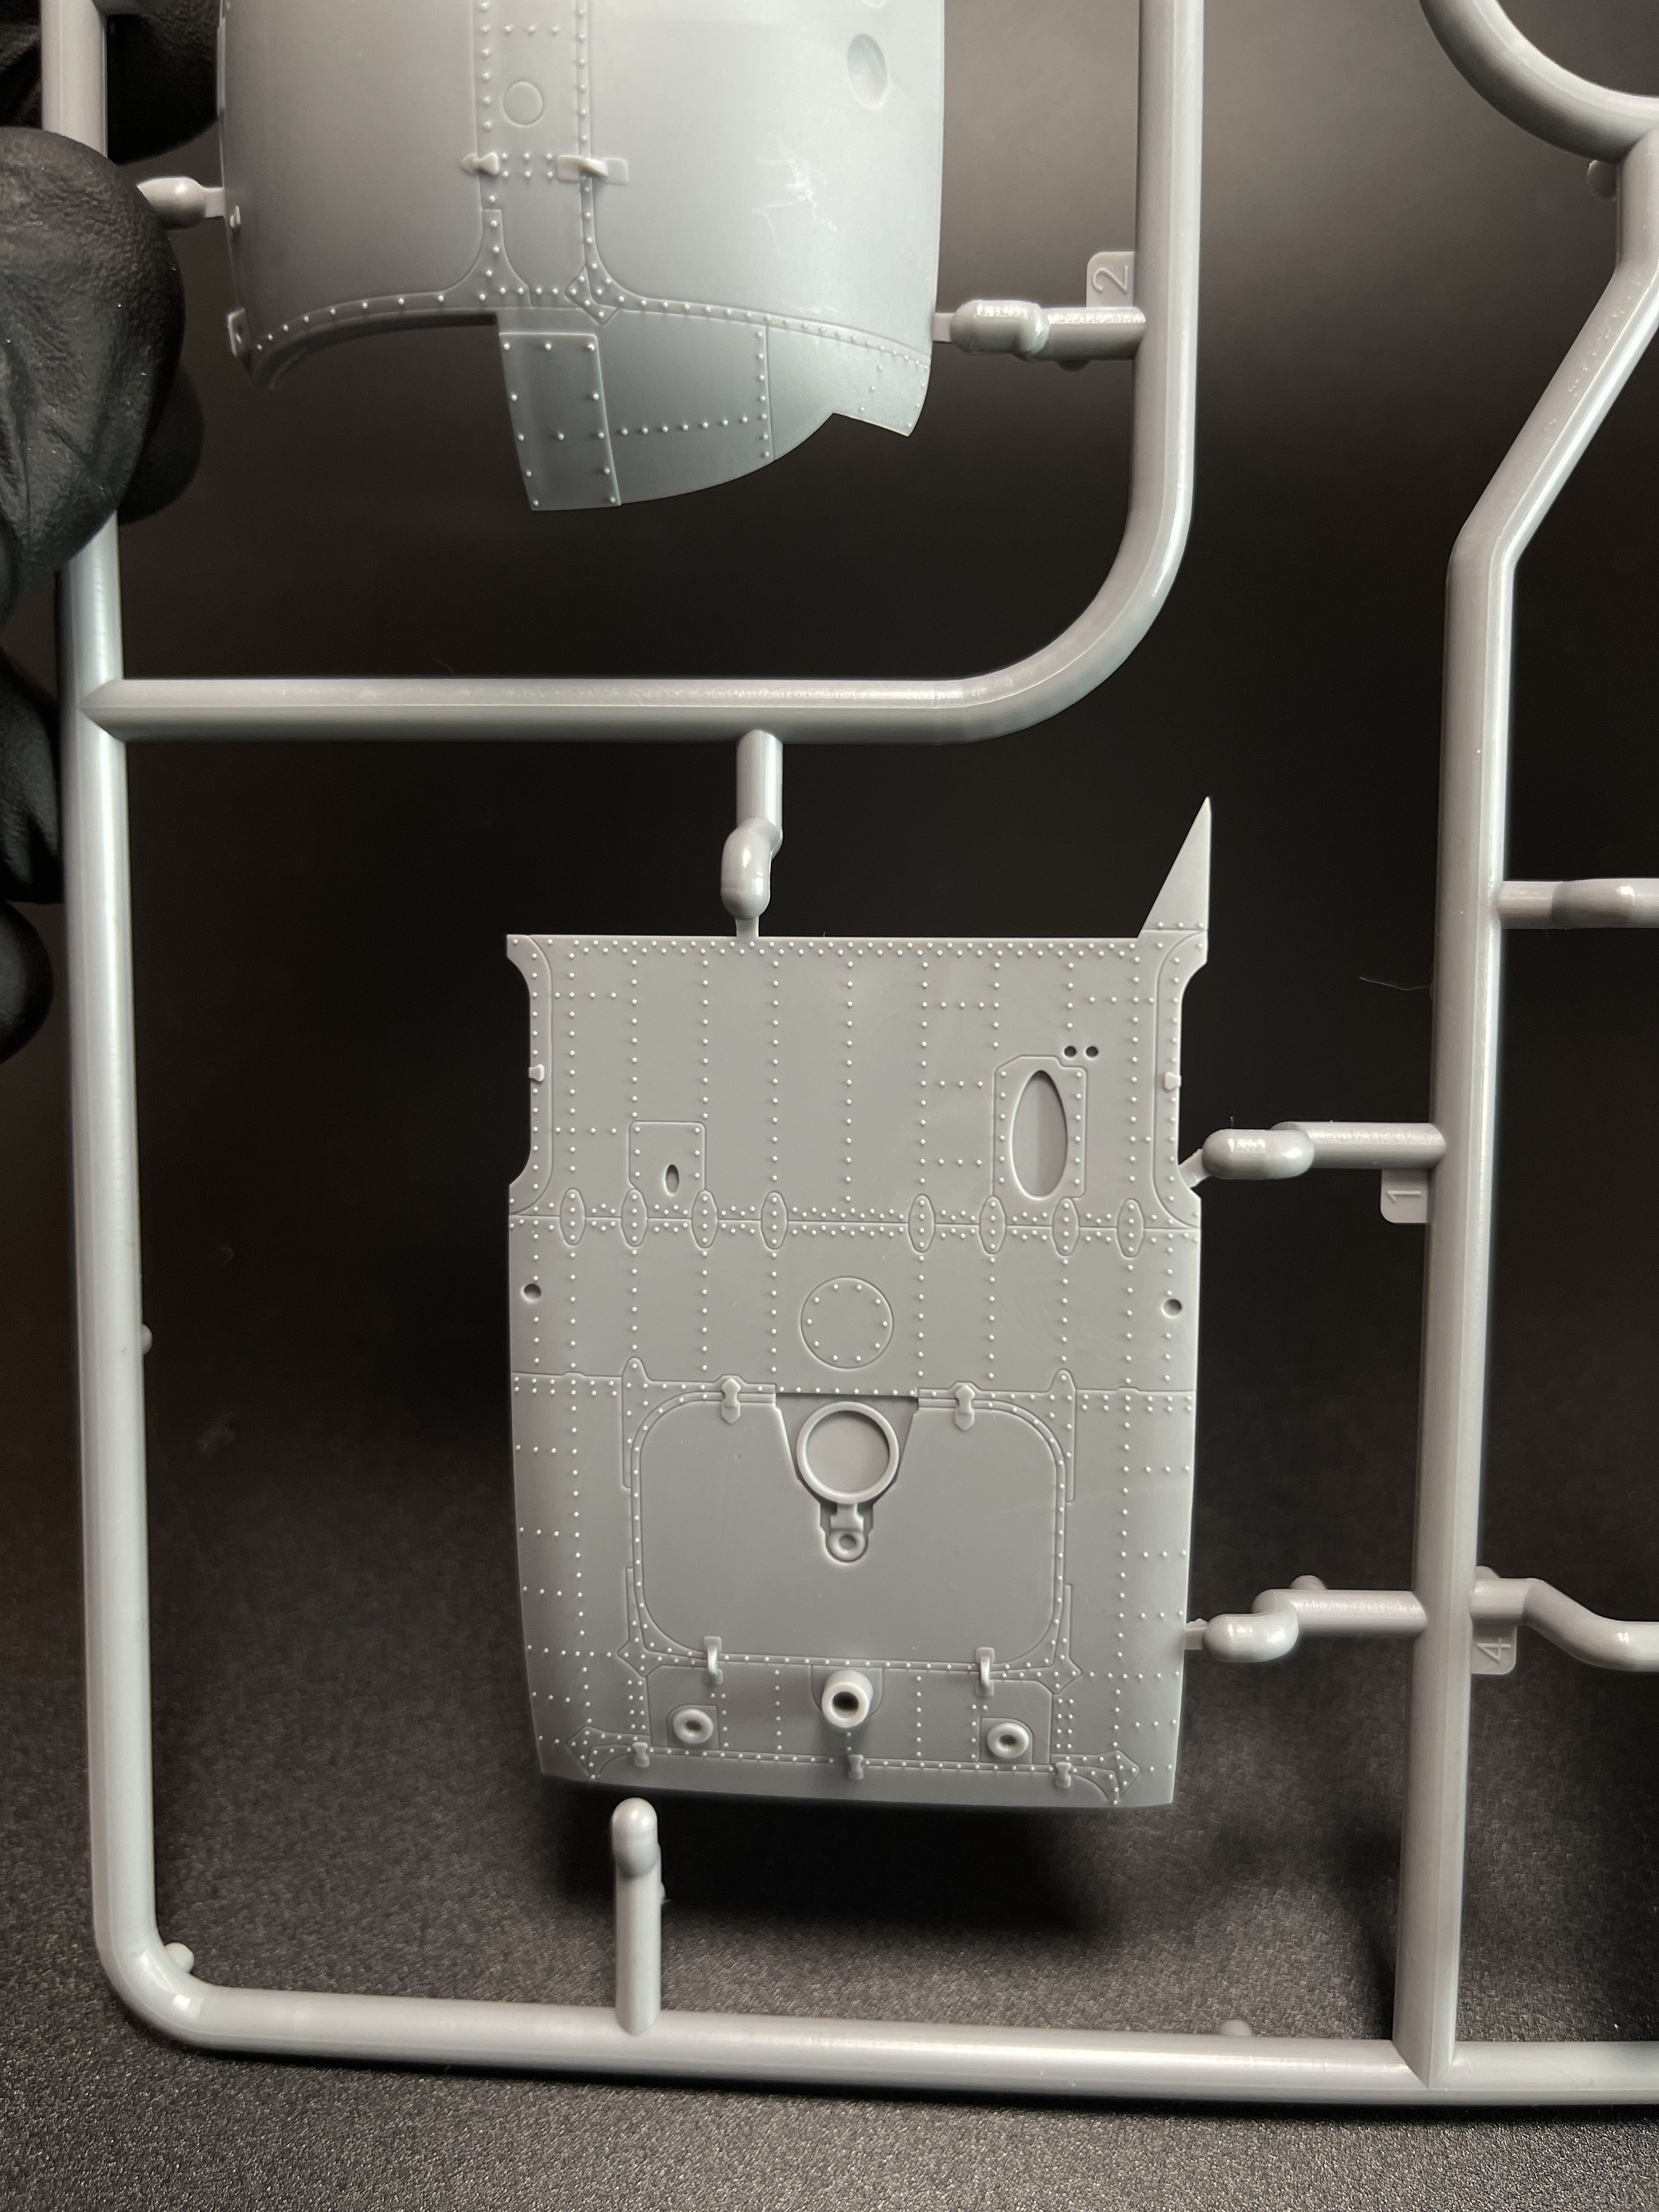
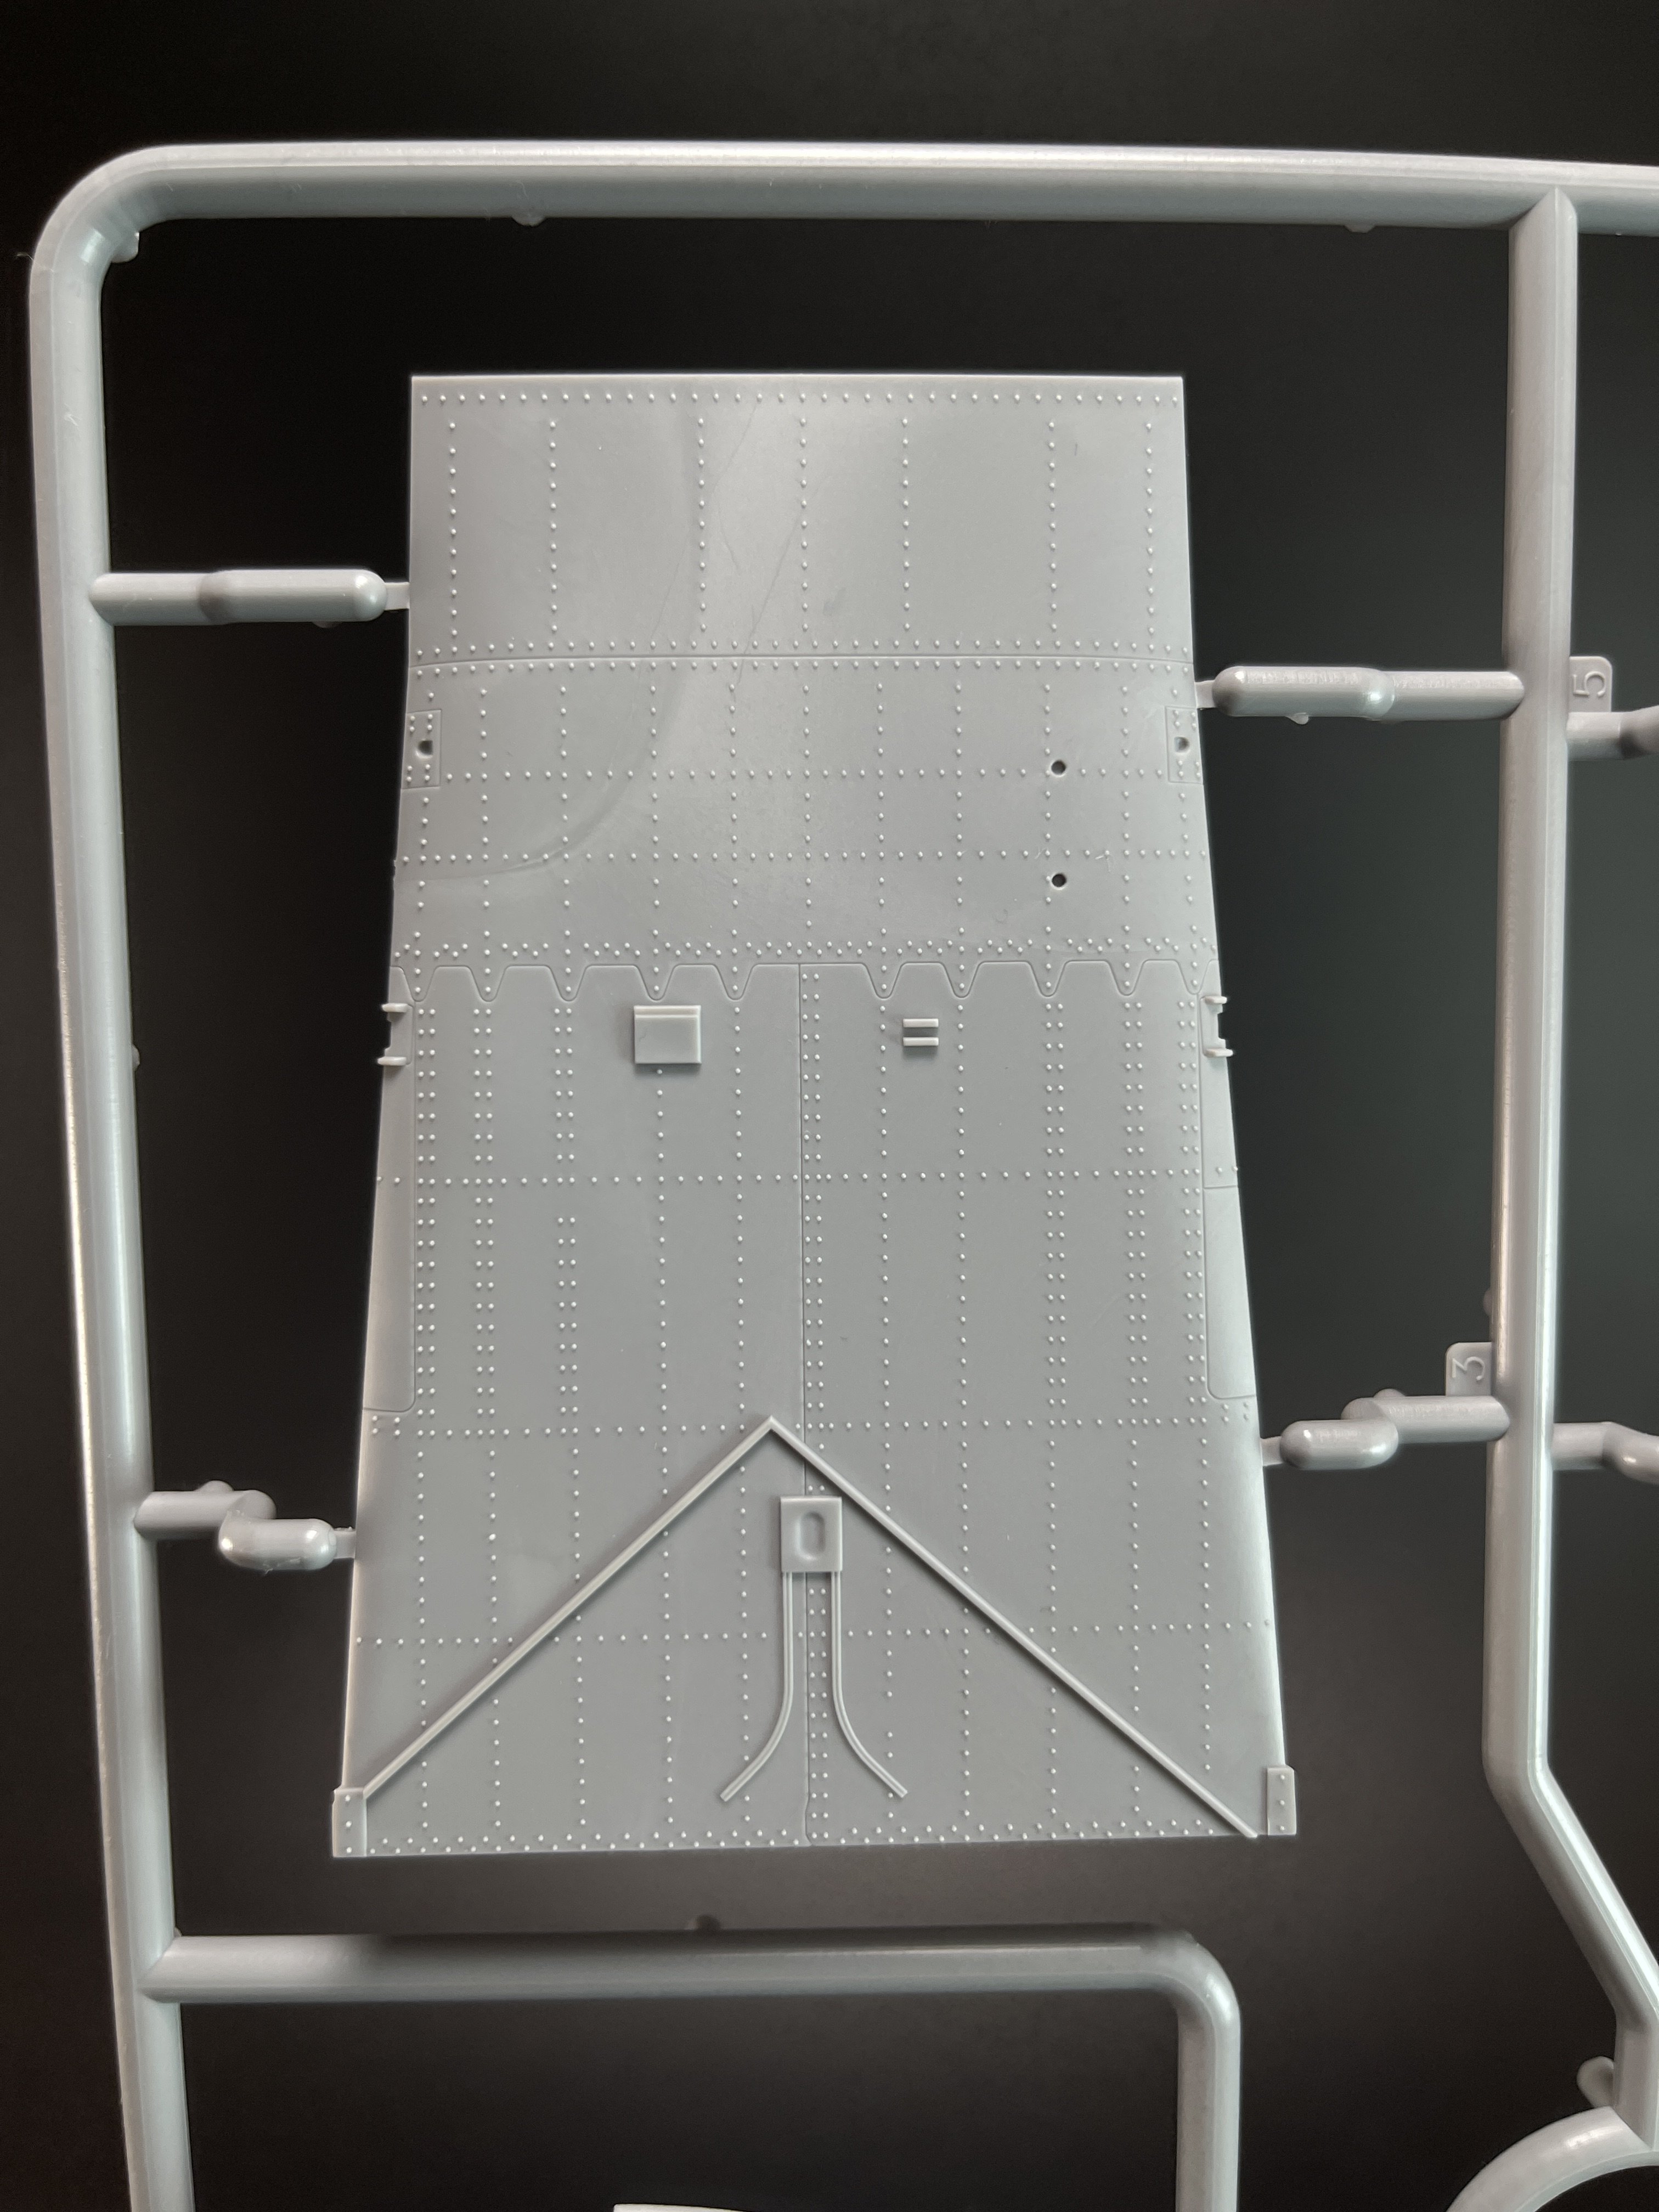
Sprue C
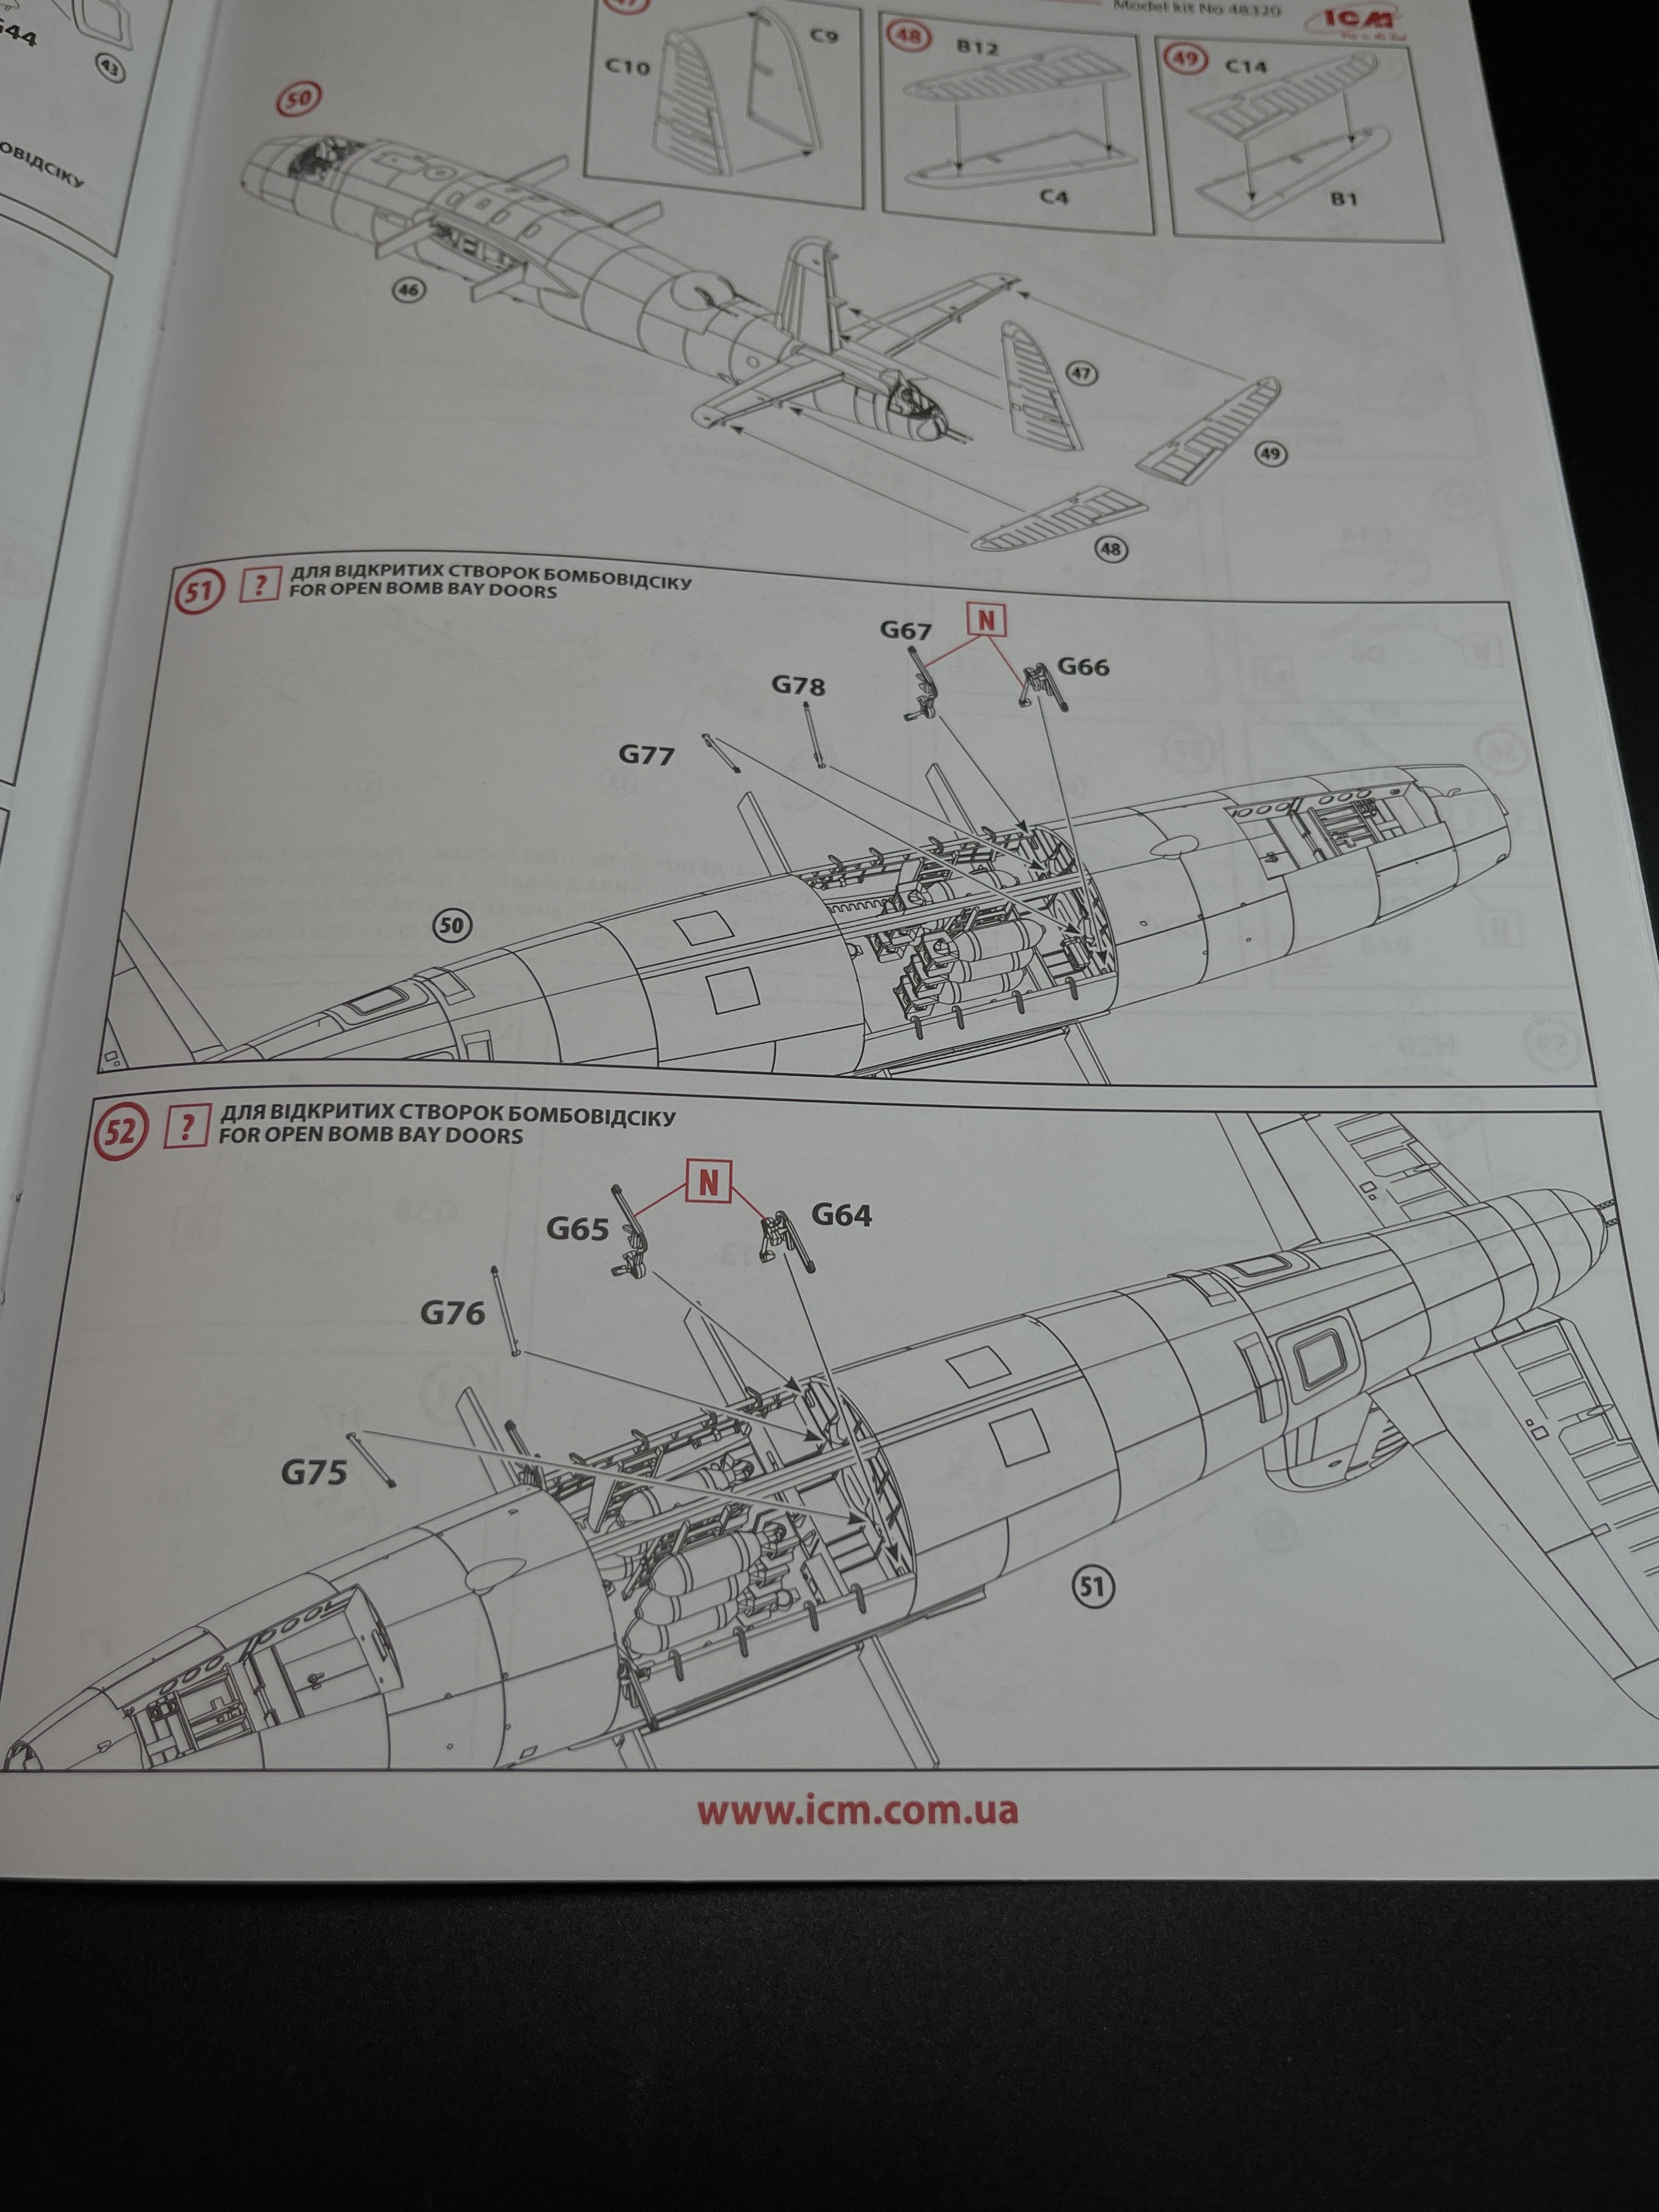
Here the other wing, tailwings, cockpit floor and front floor. Also intermediate “walls” with some very engrave detail (those doors are asking to be open….)
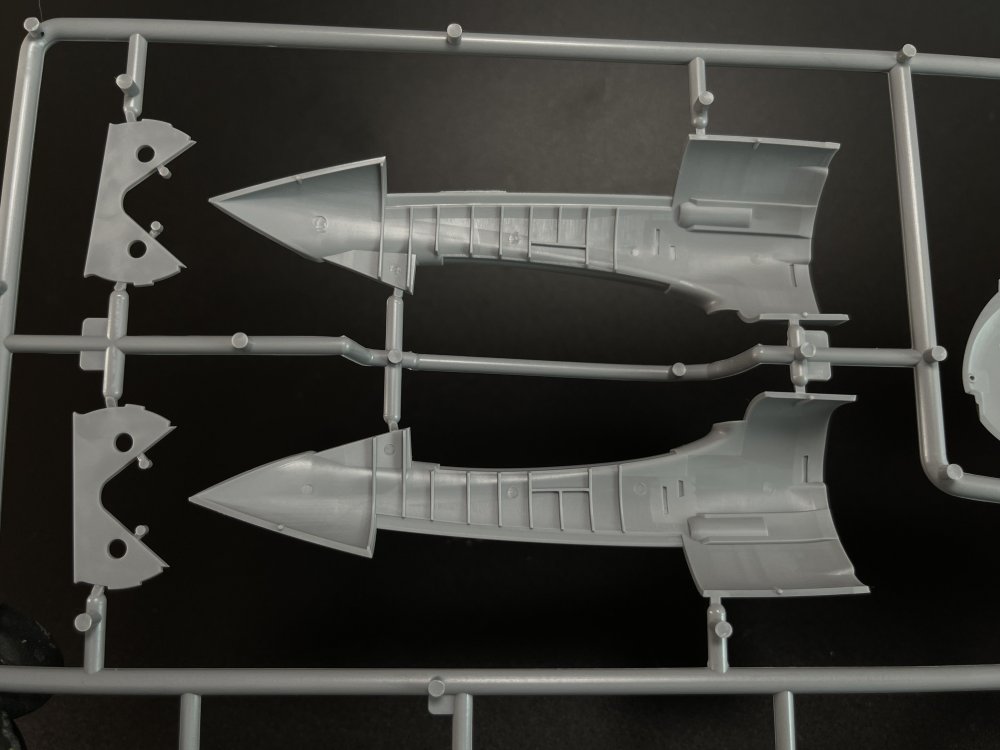
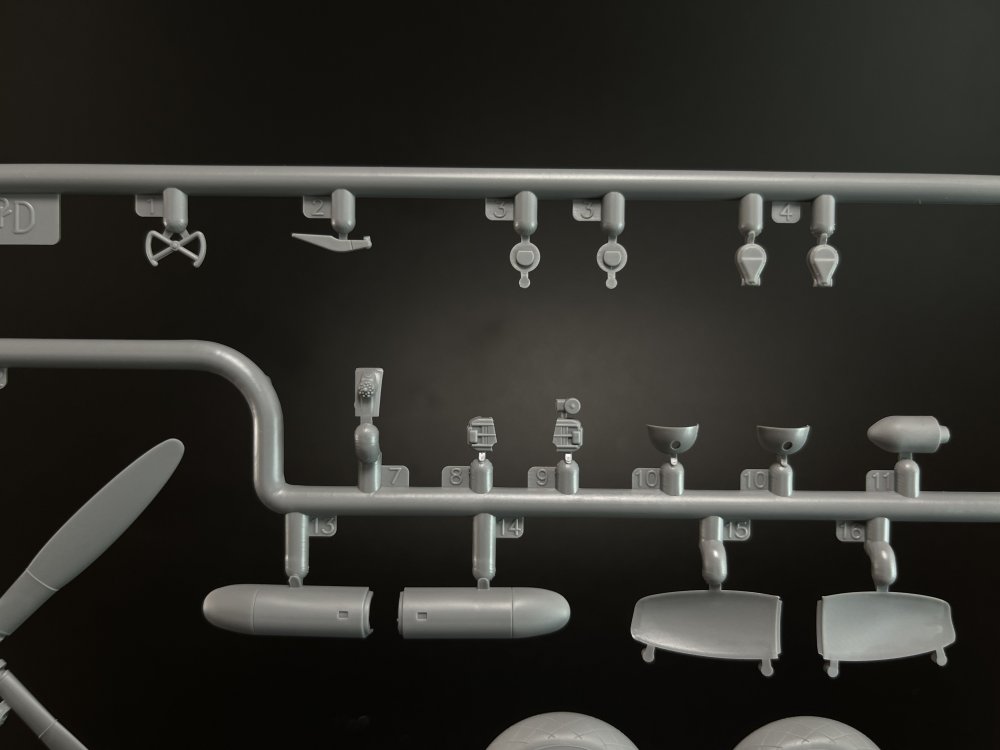
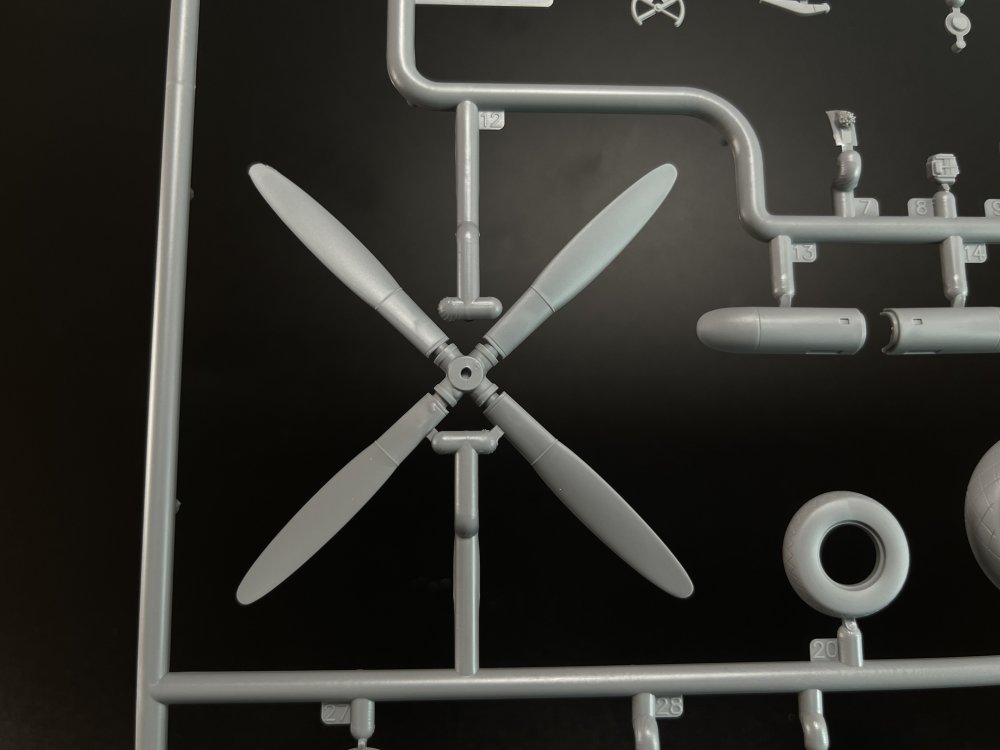
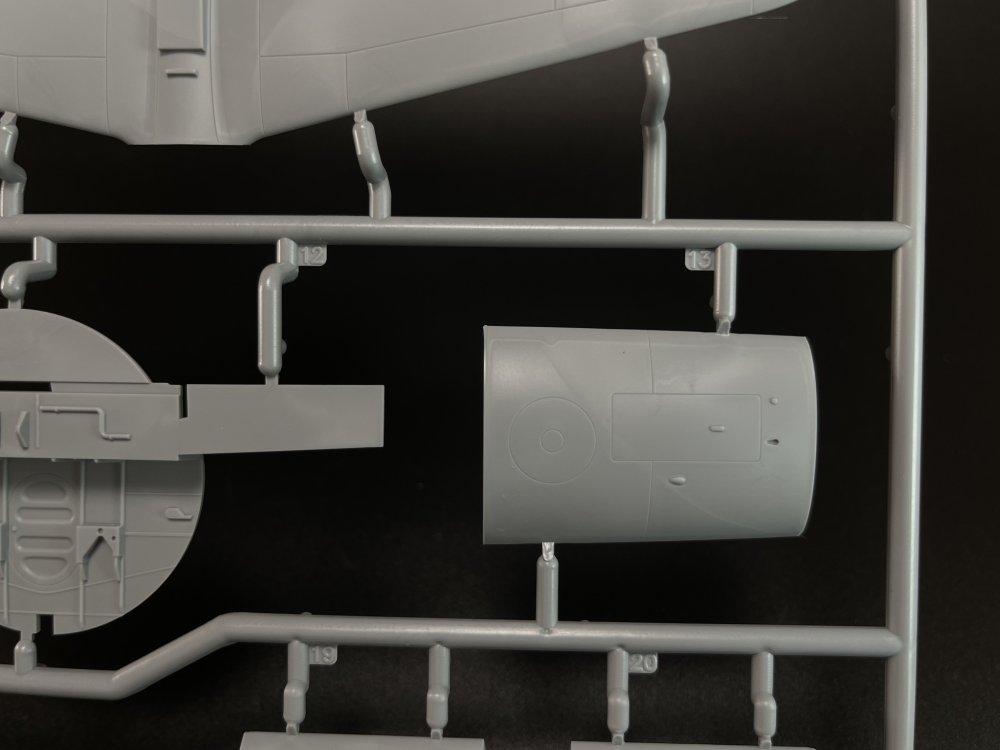
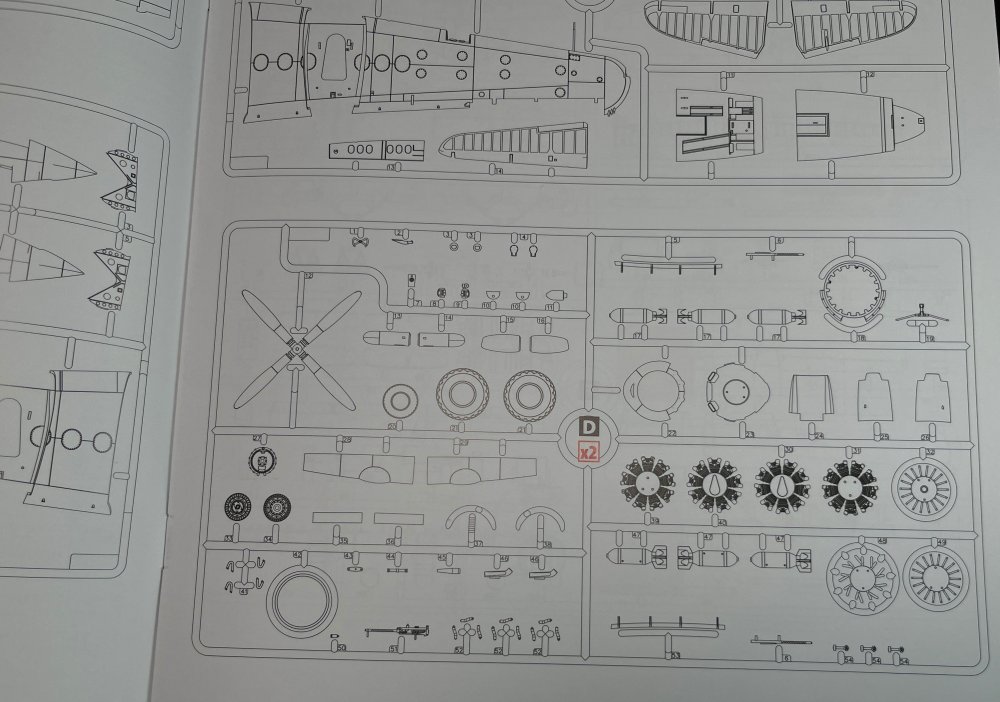
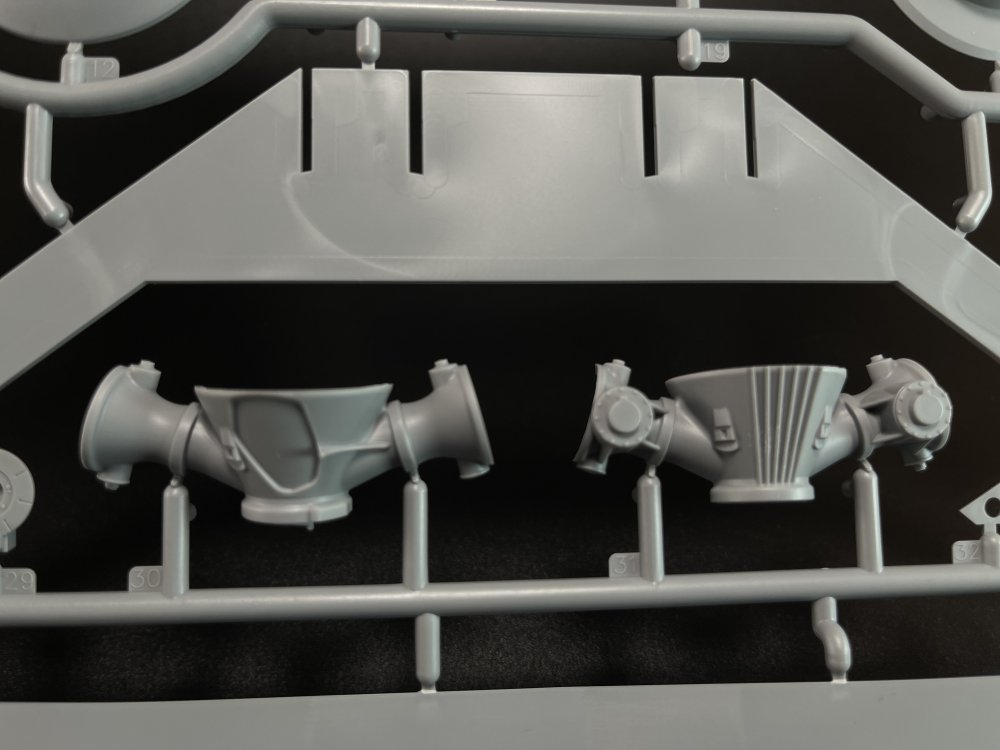
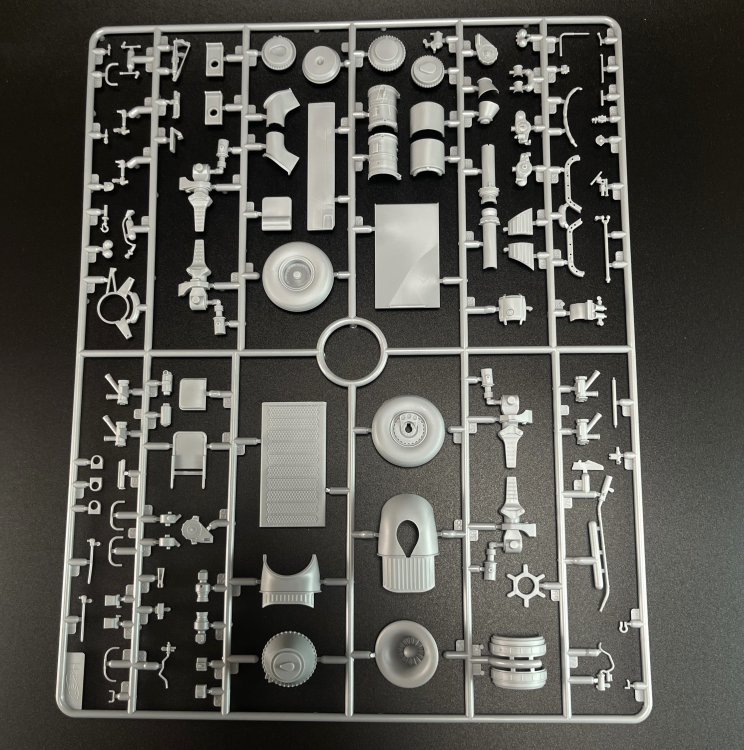
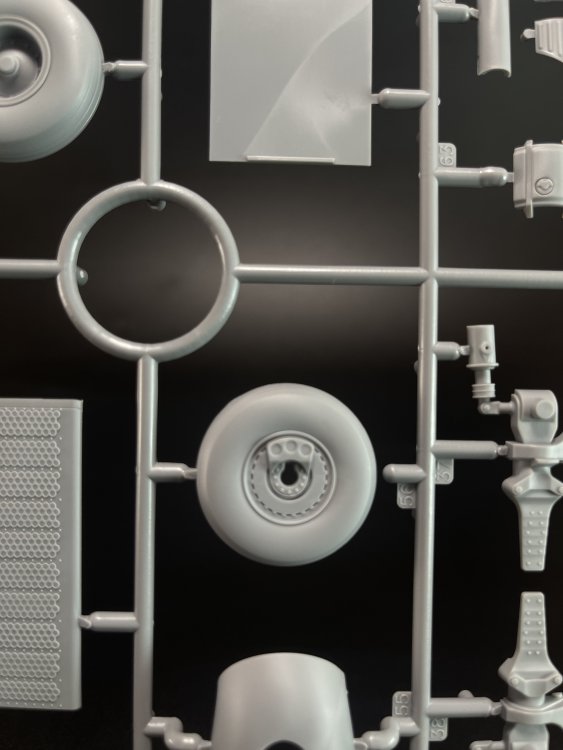
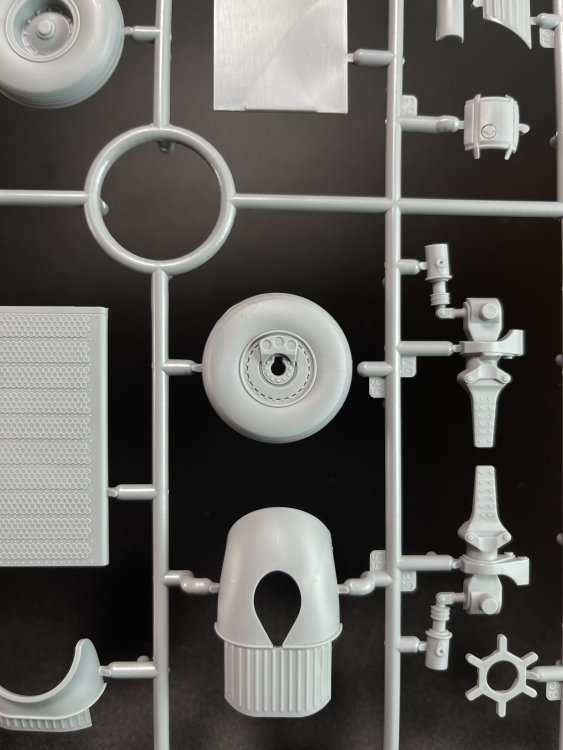
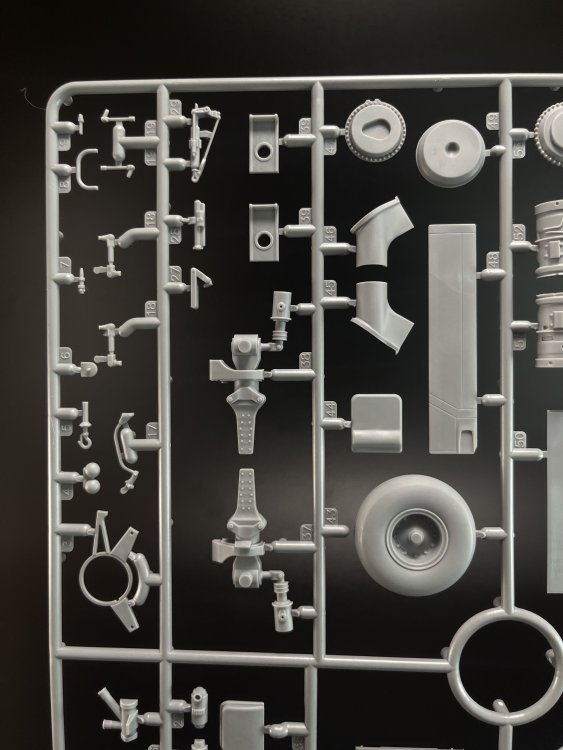
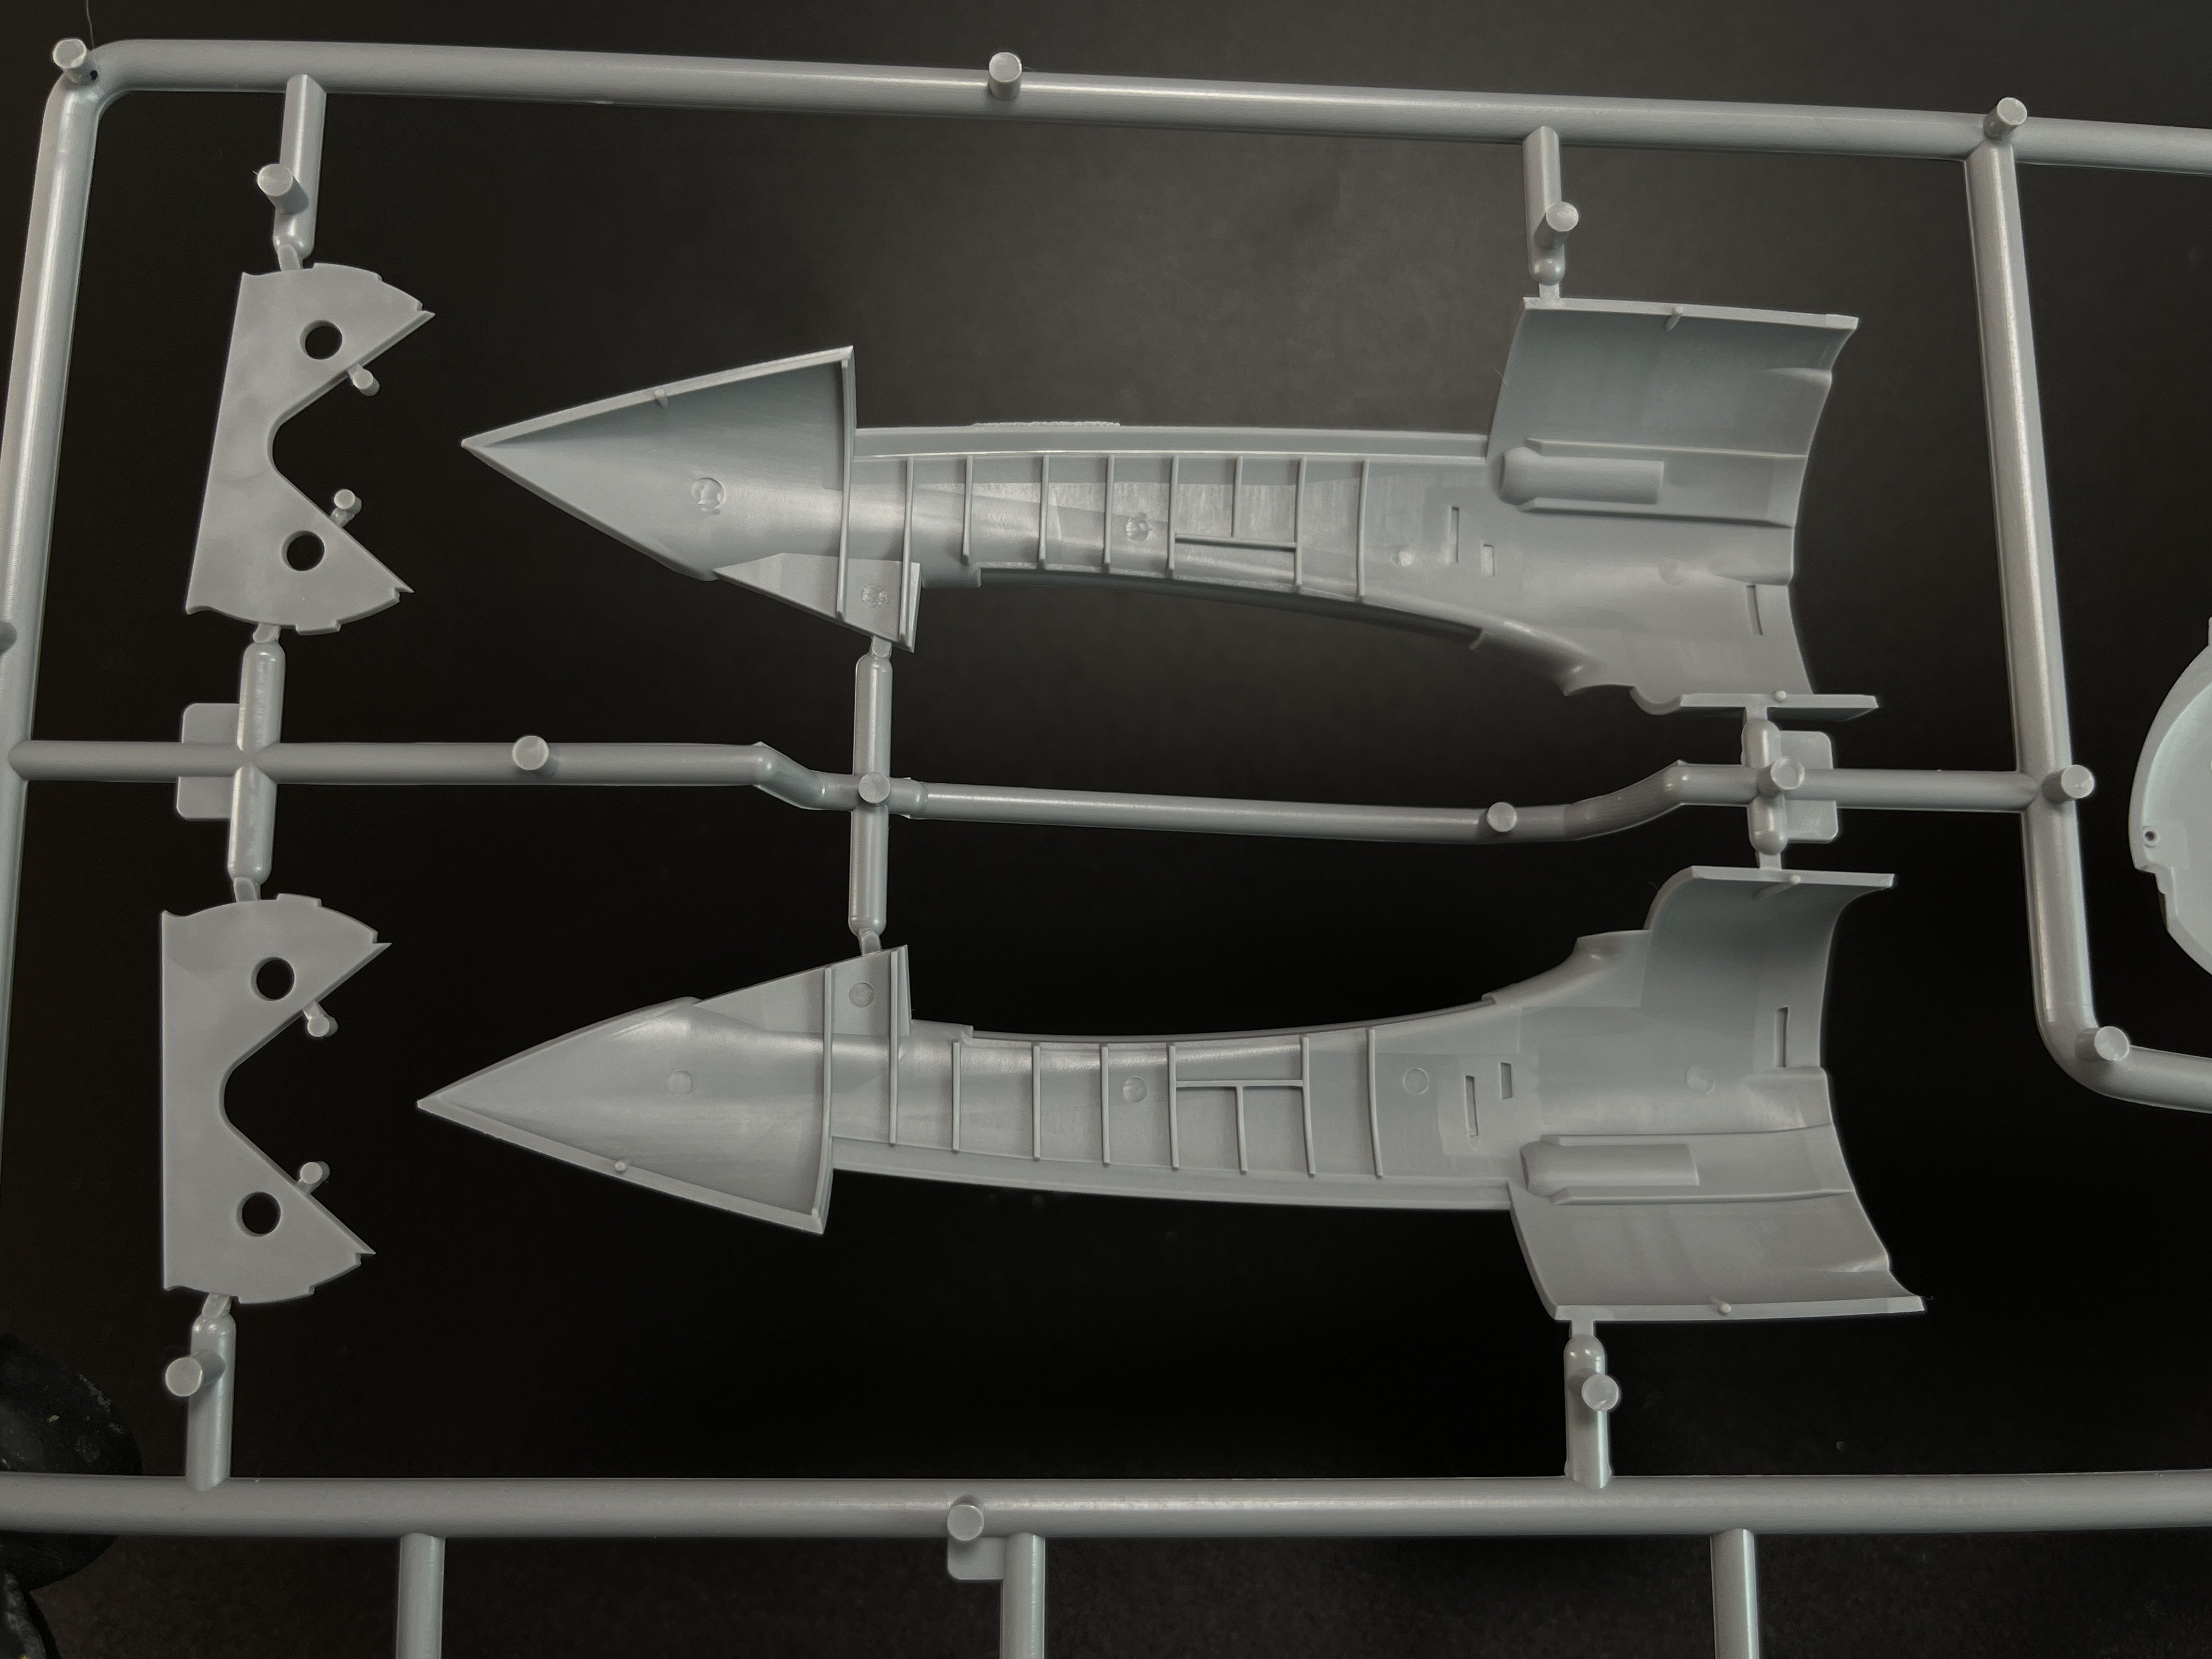
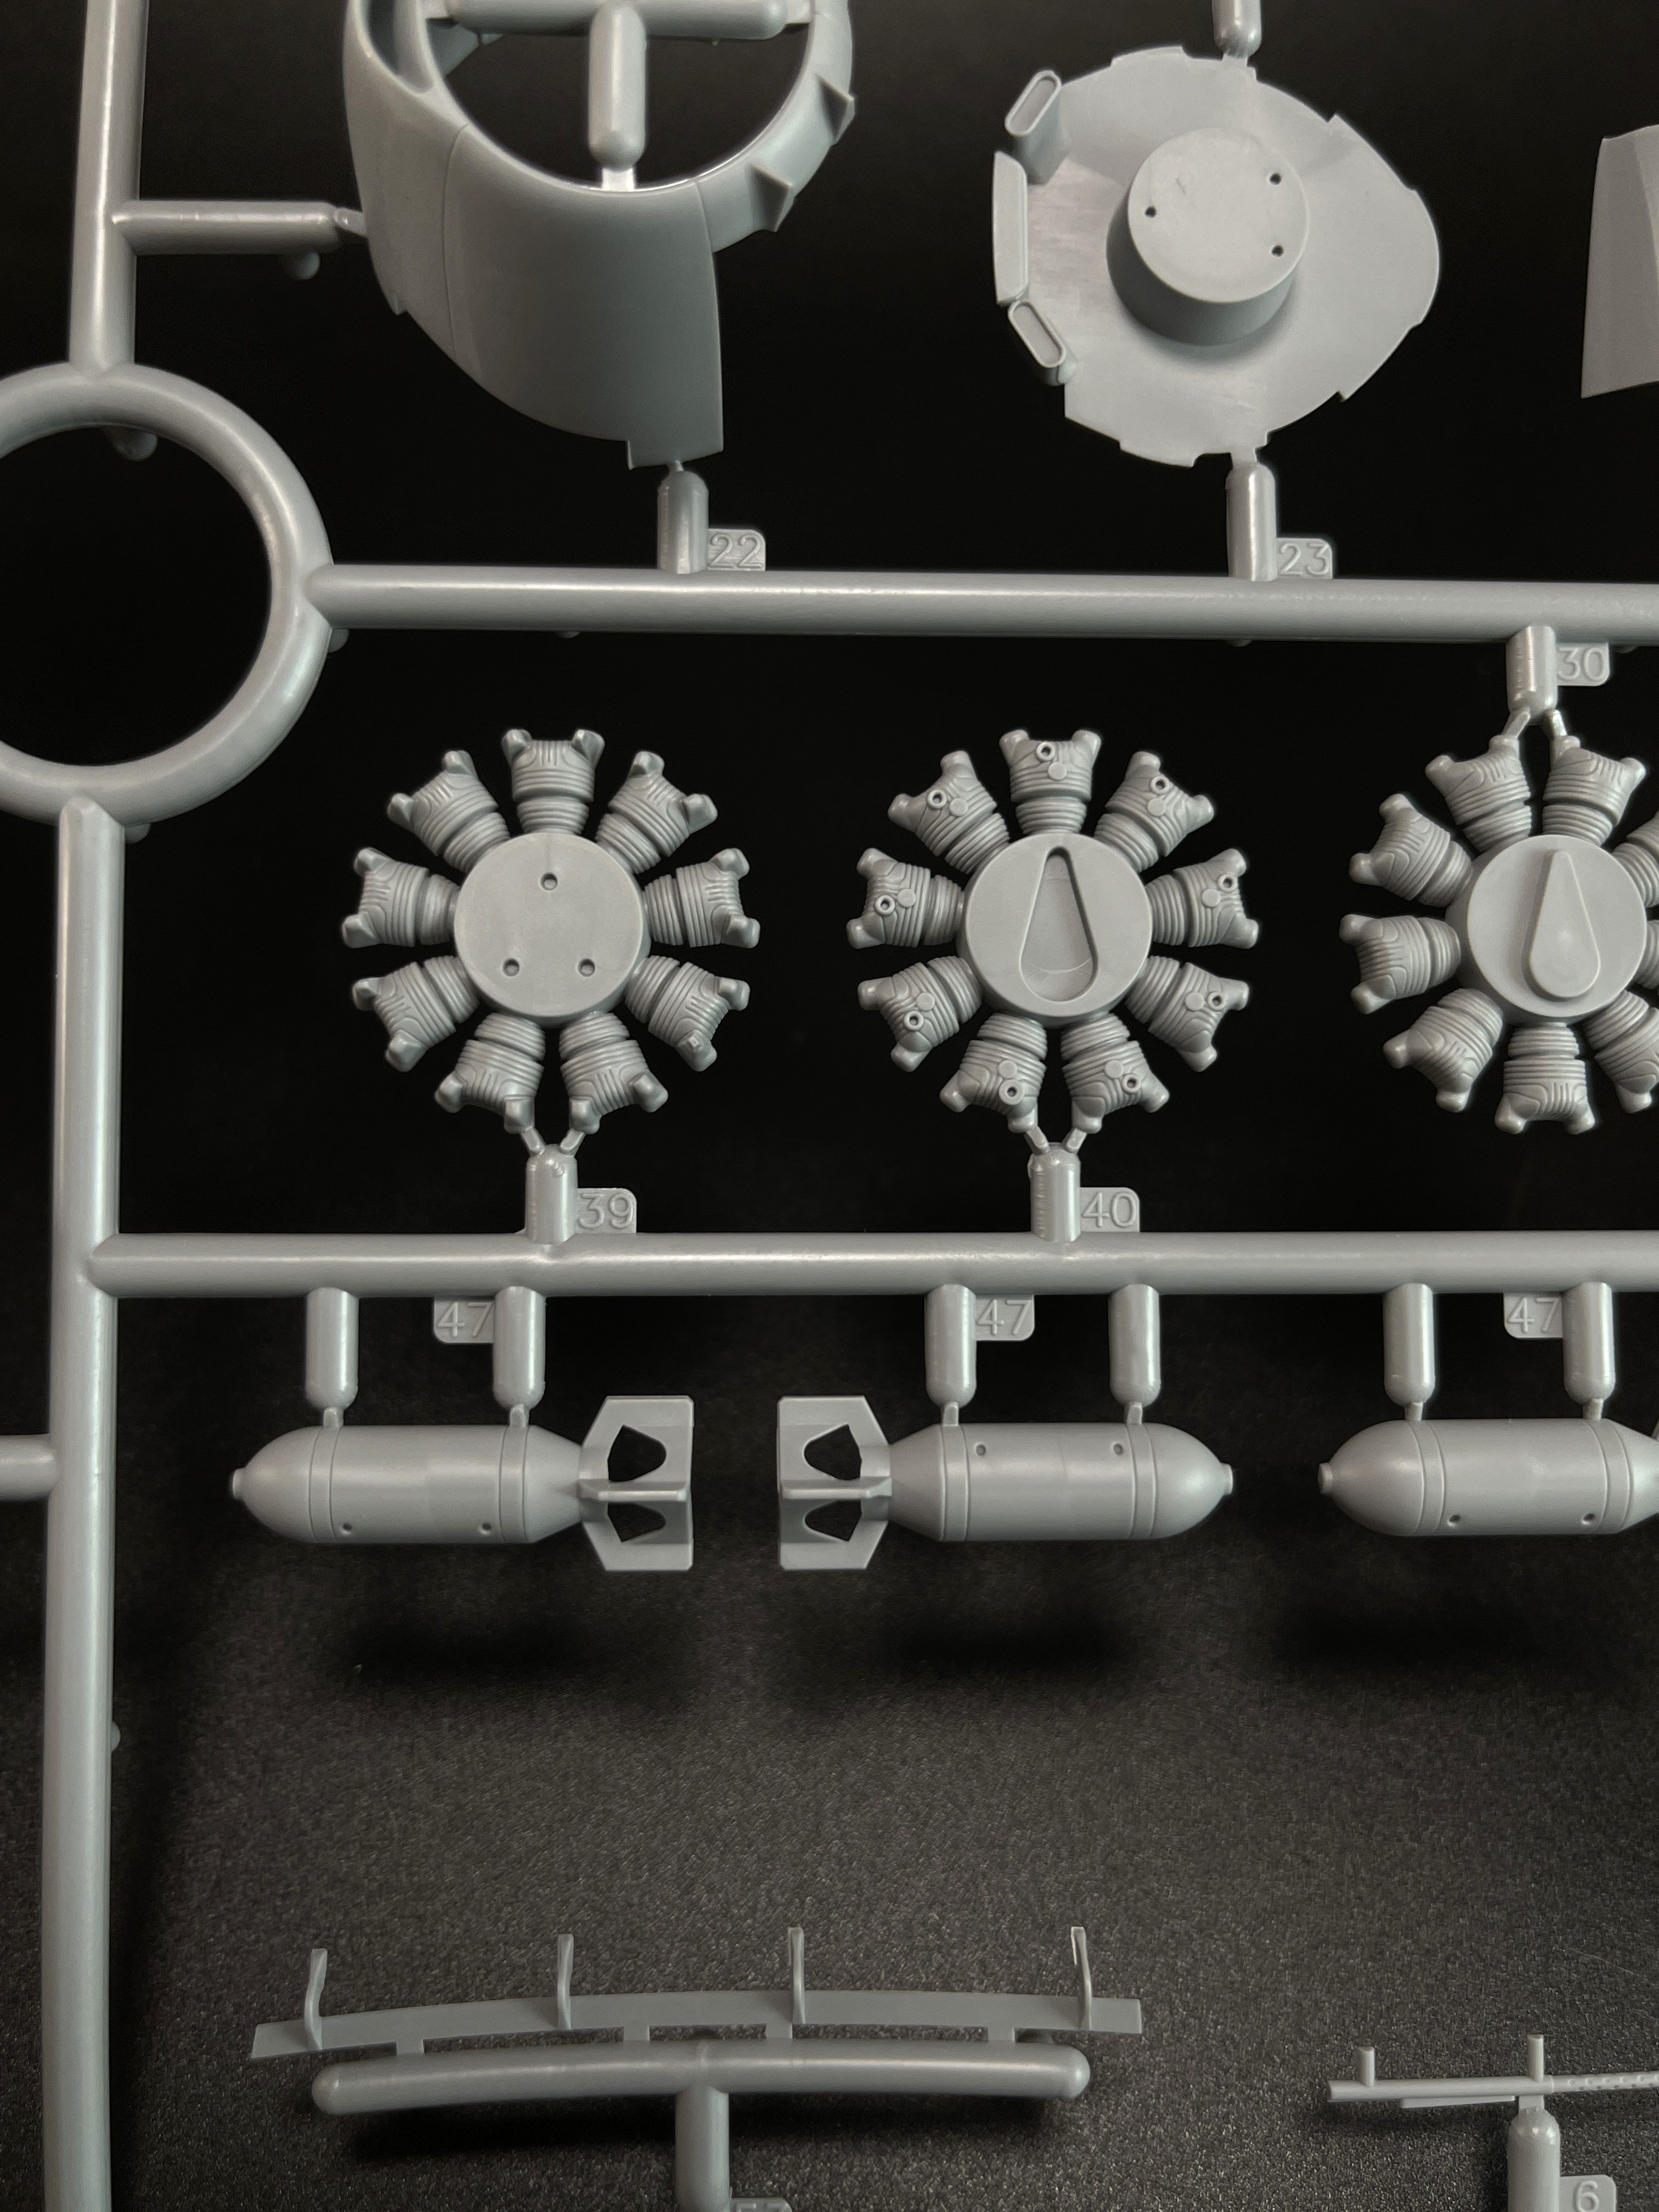
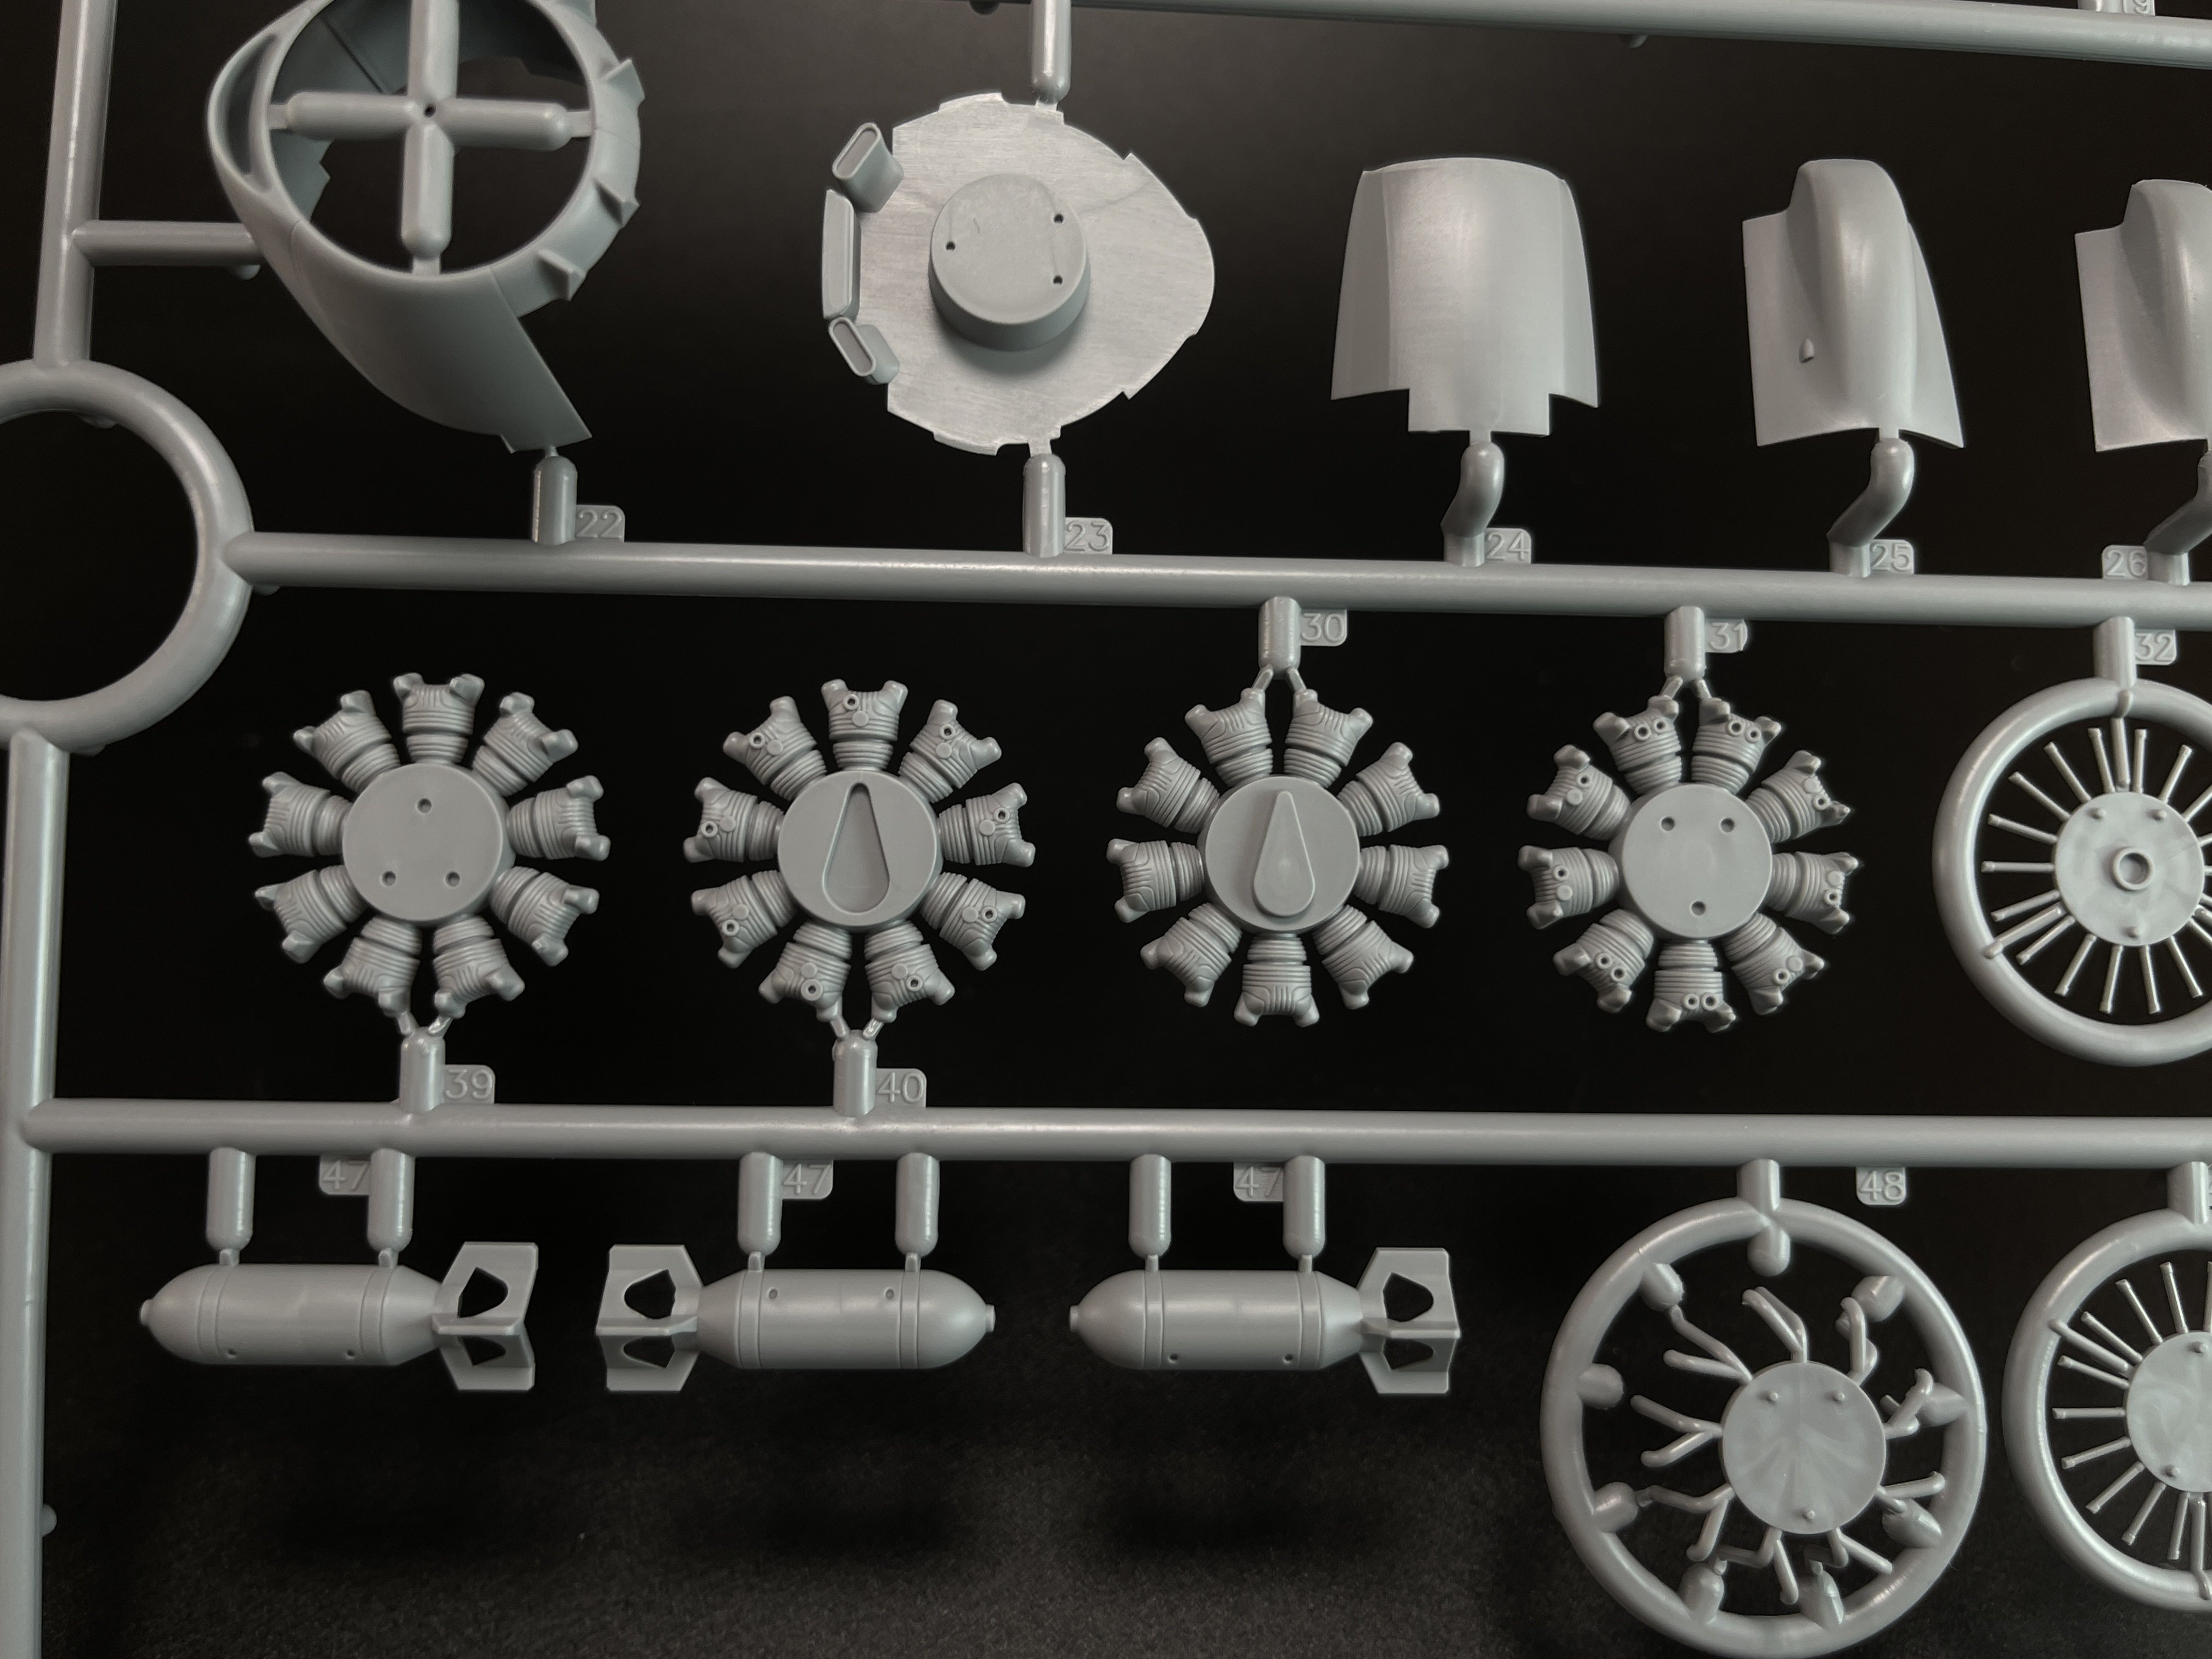
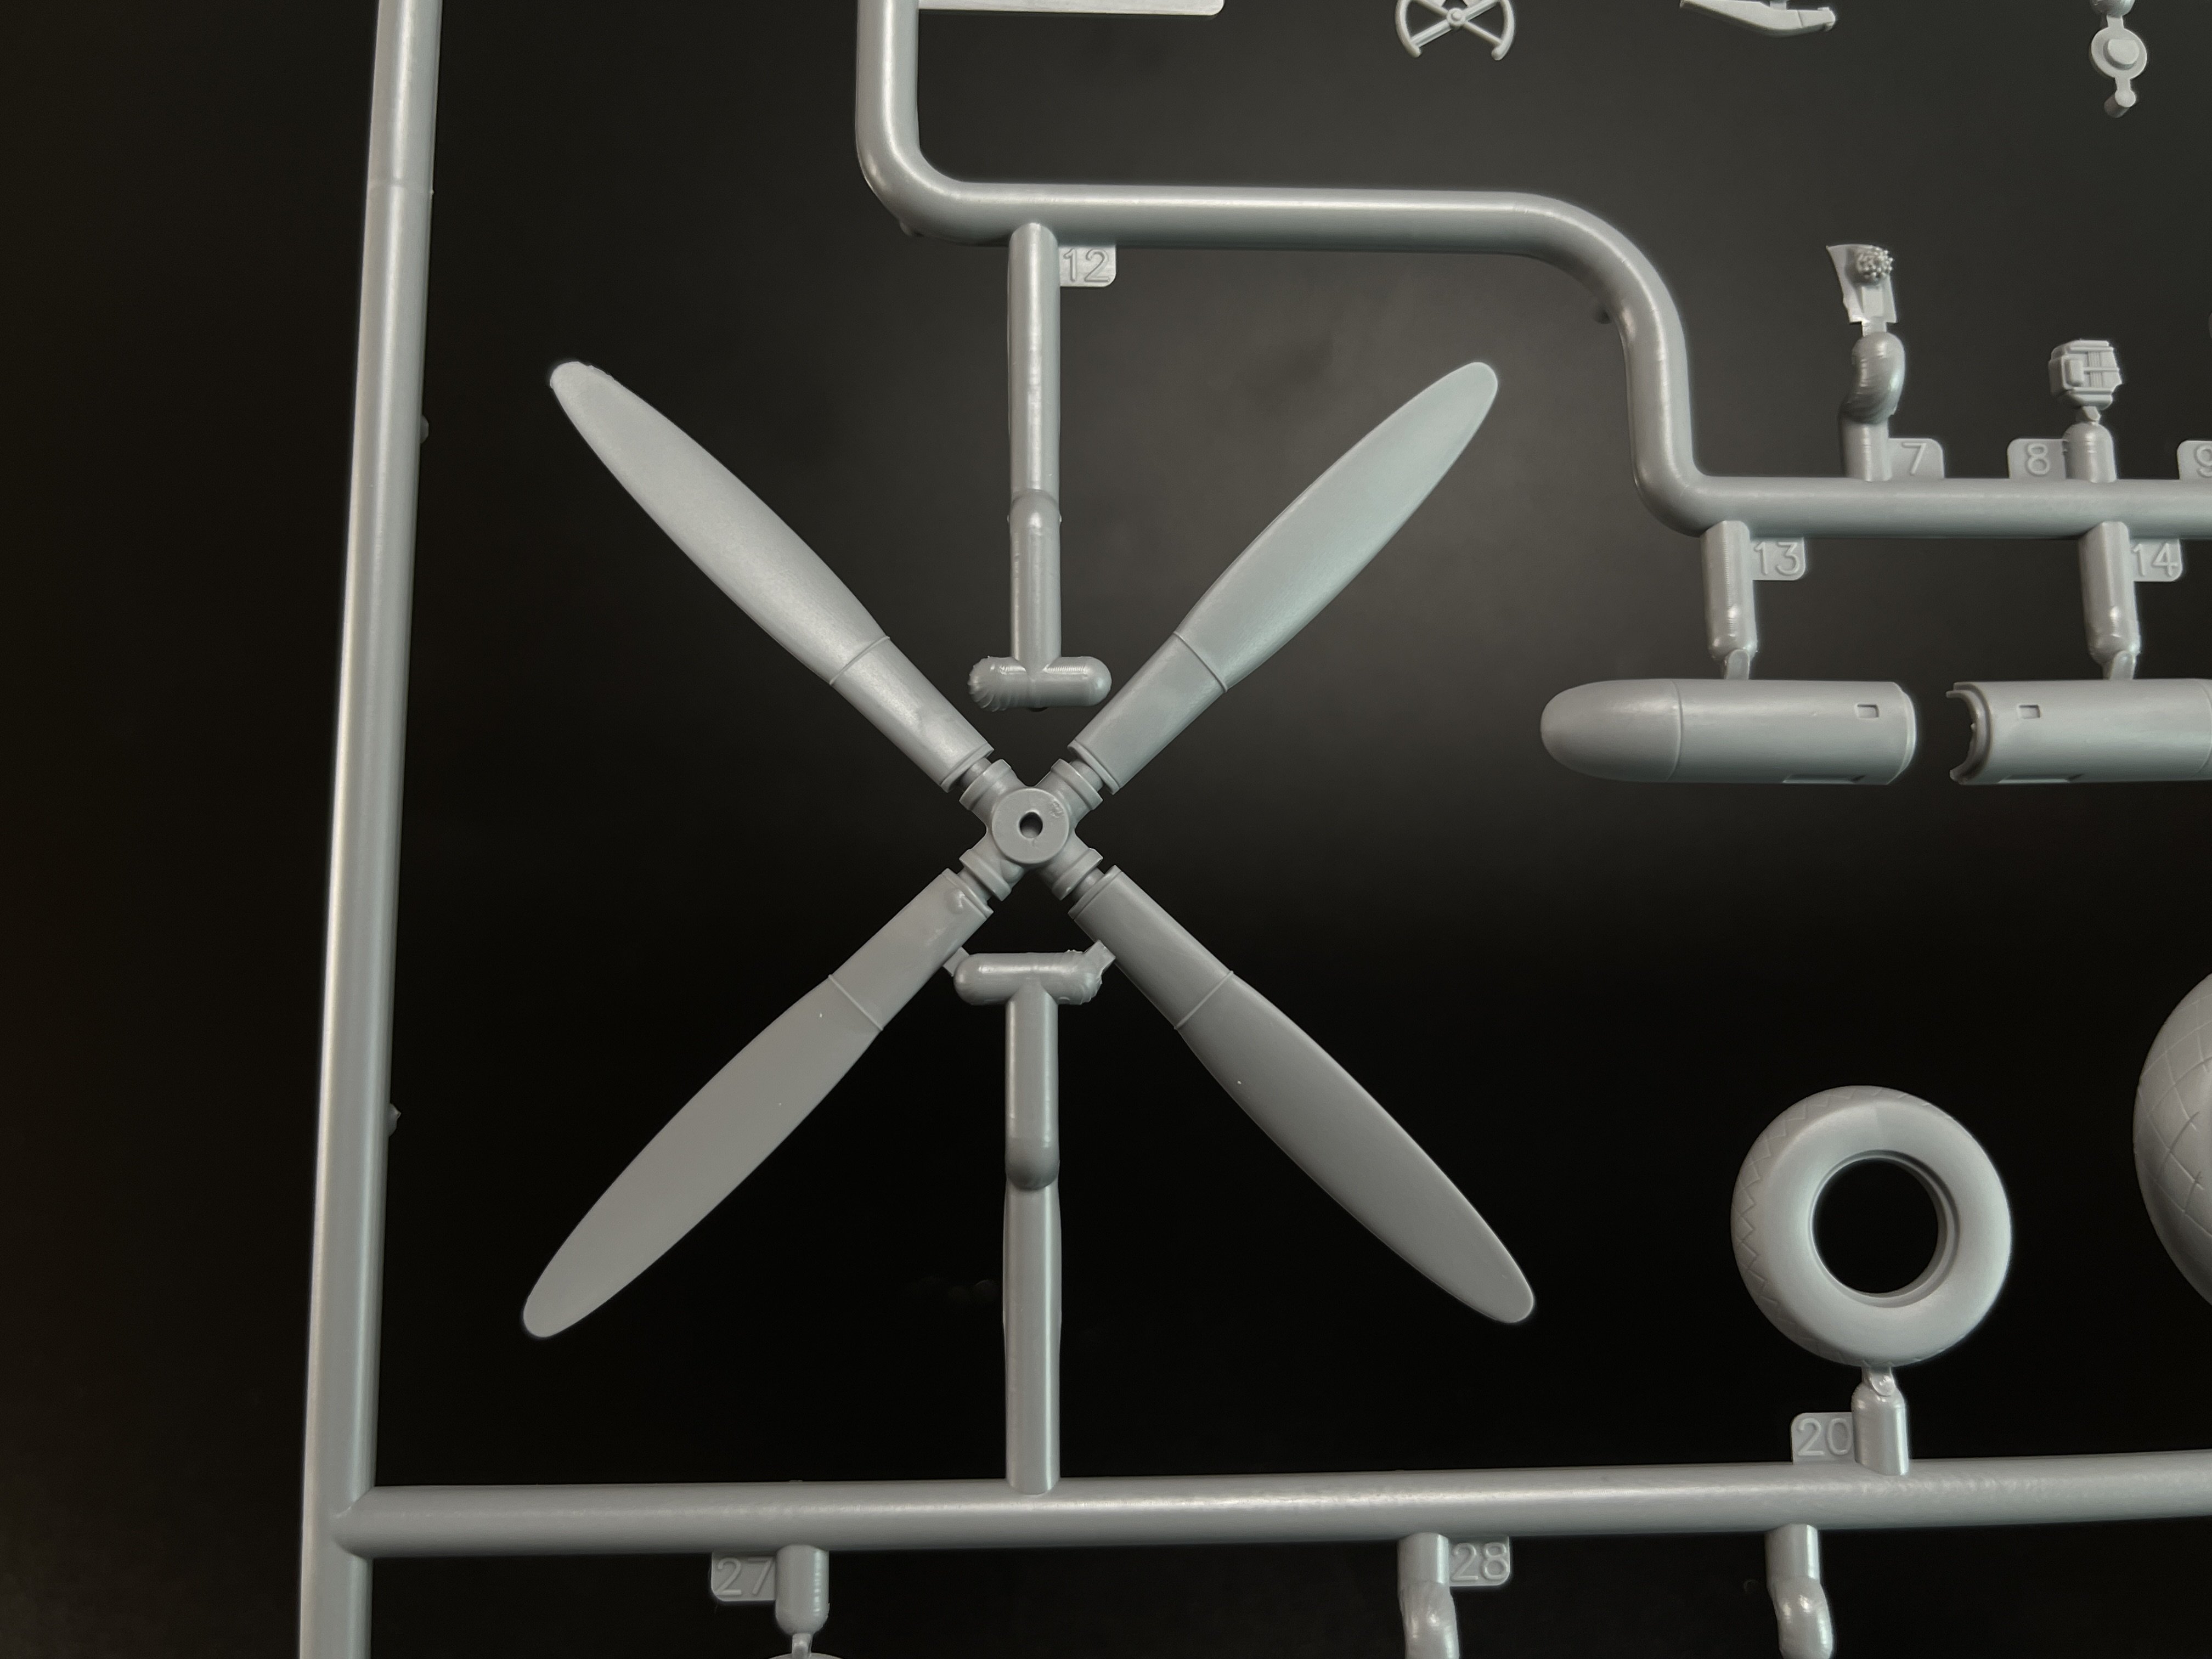
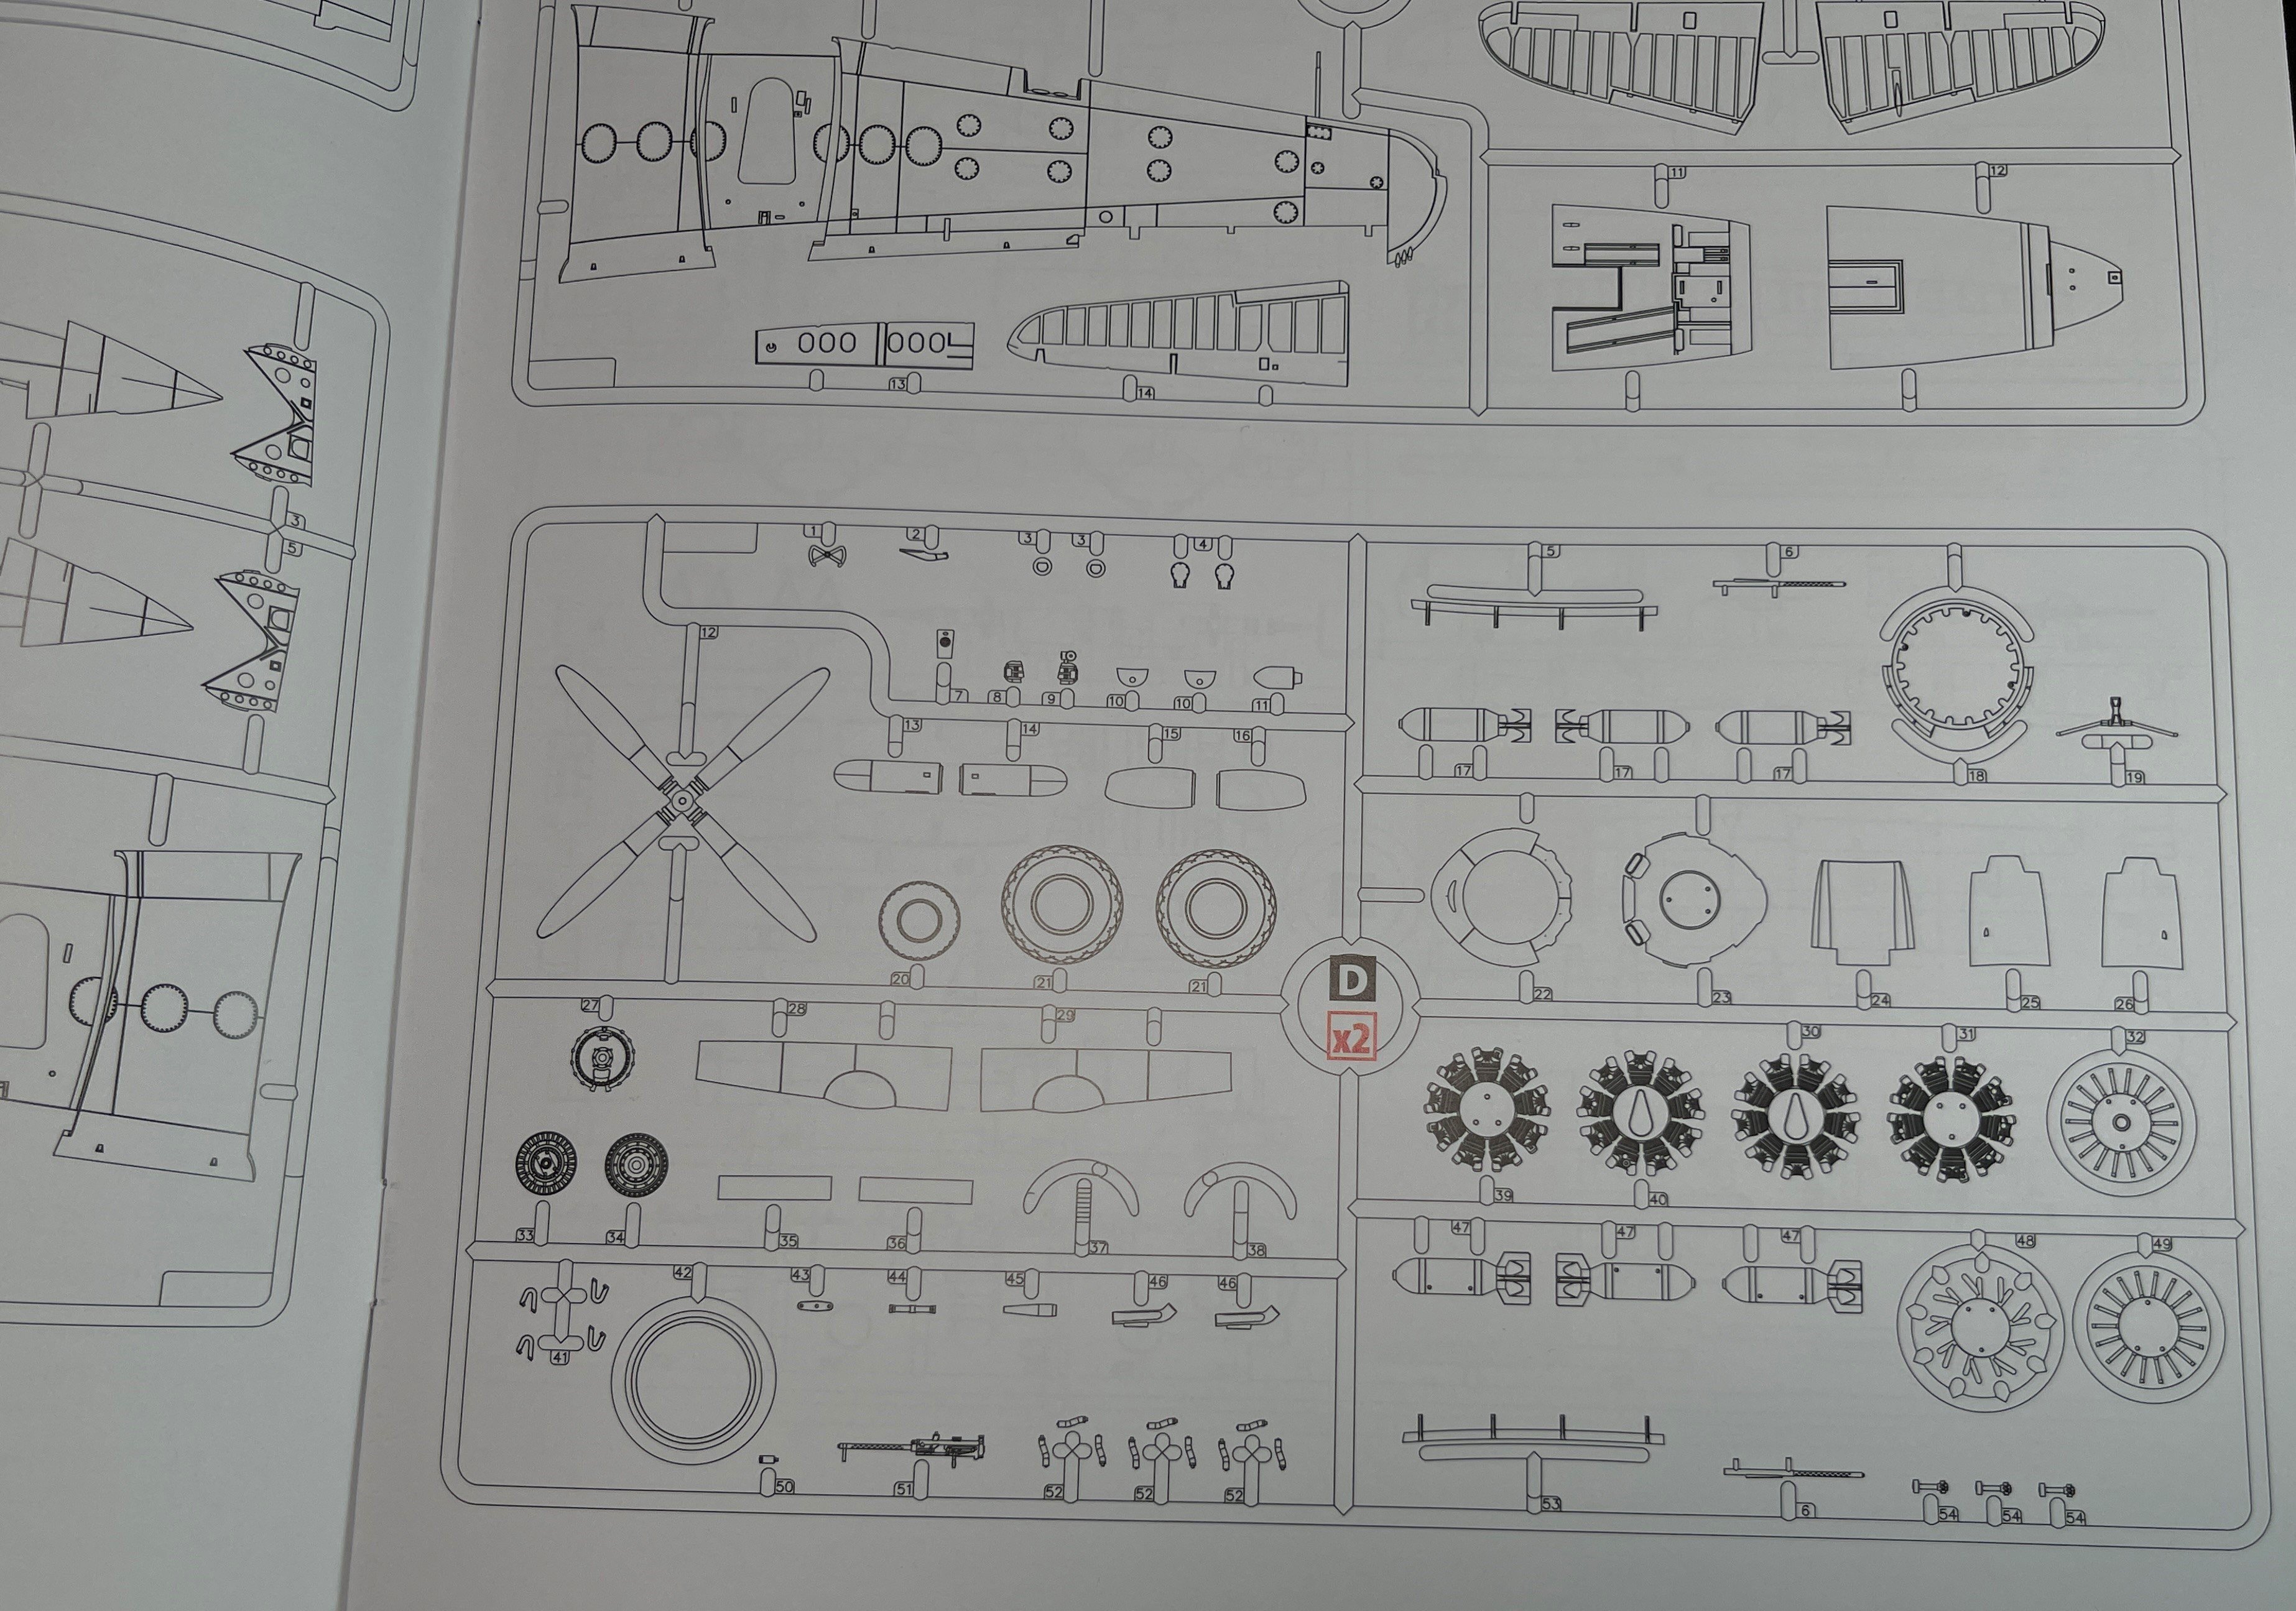
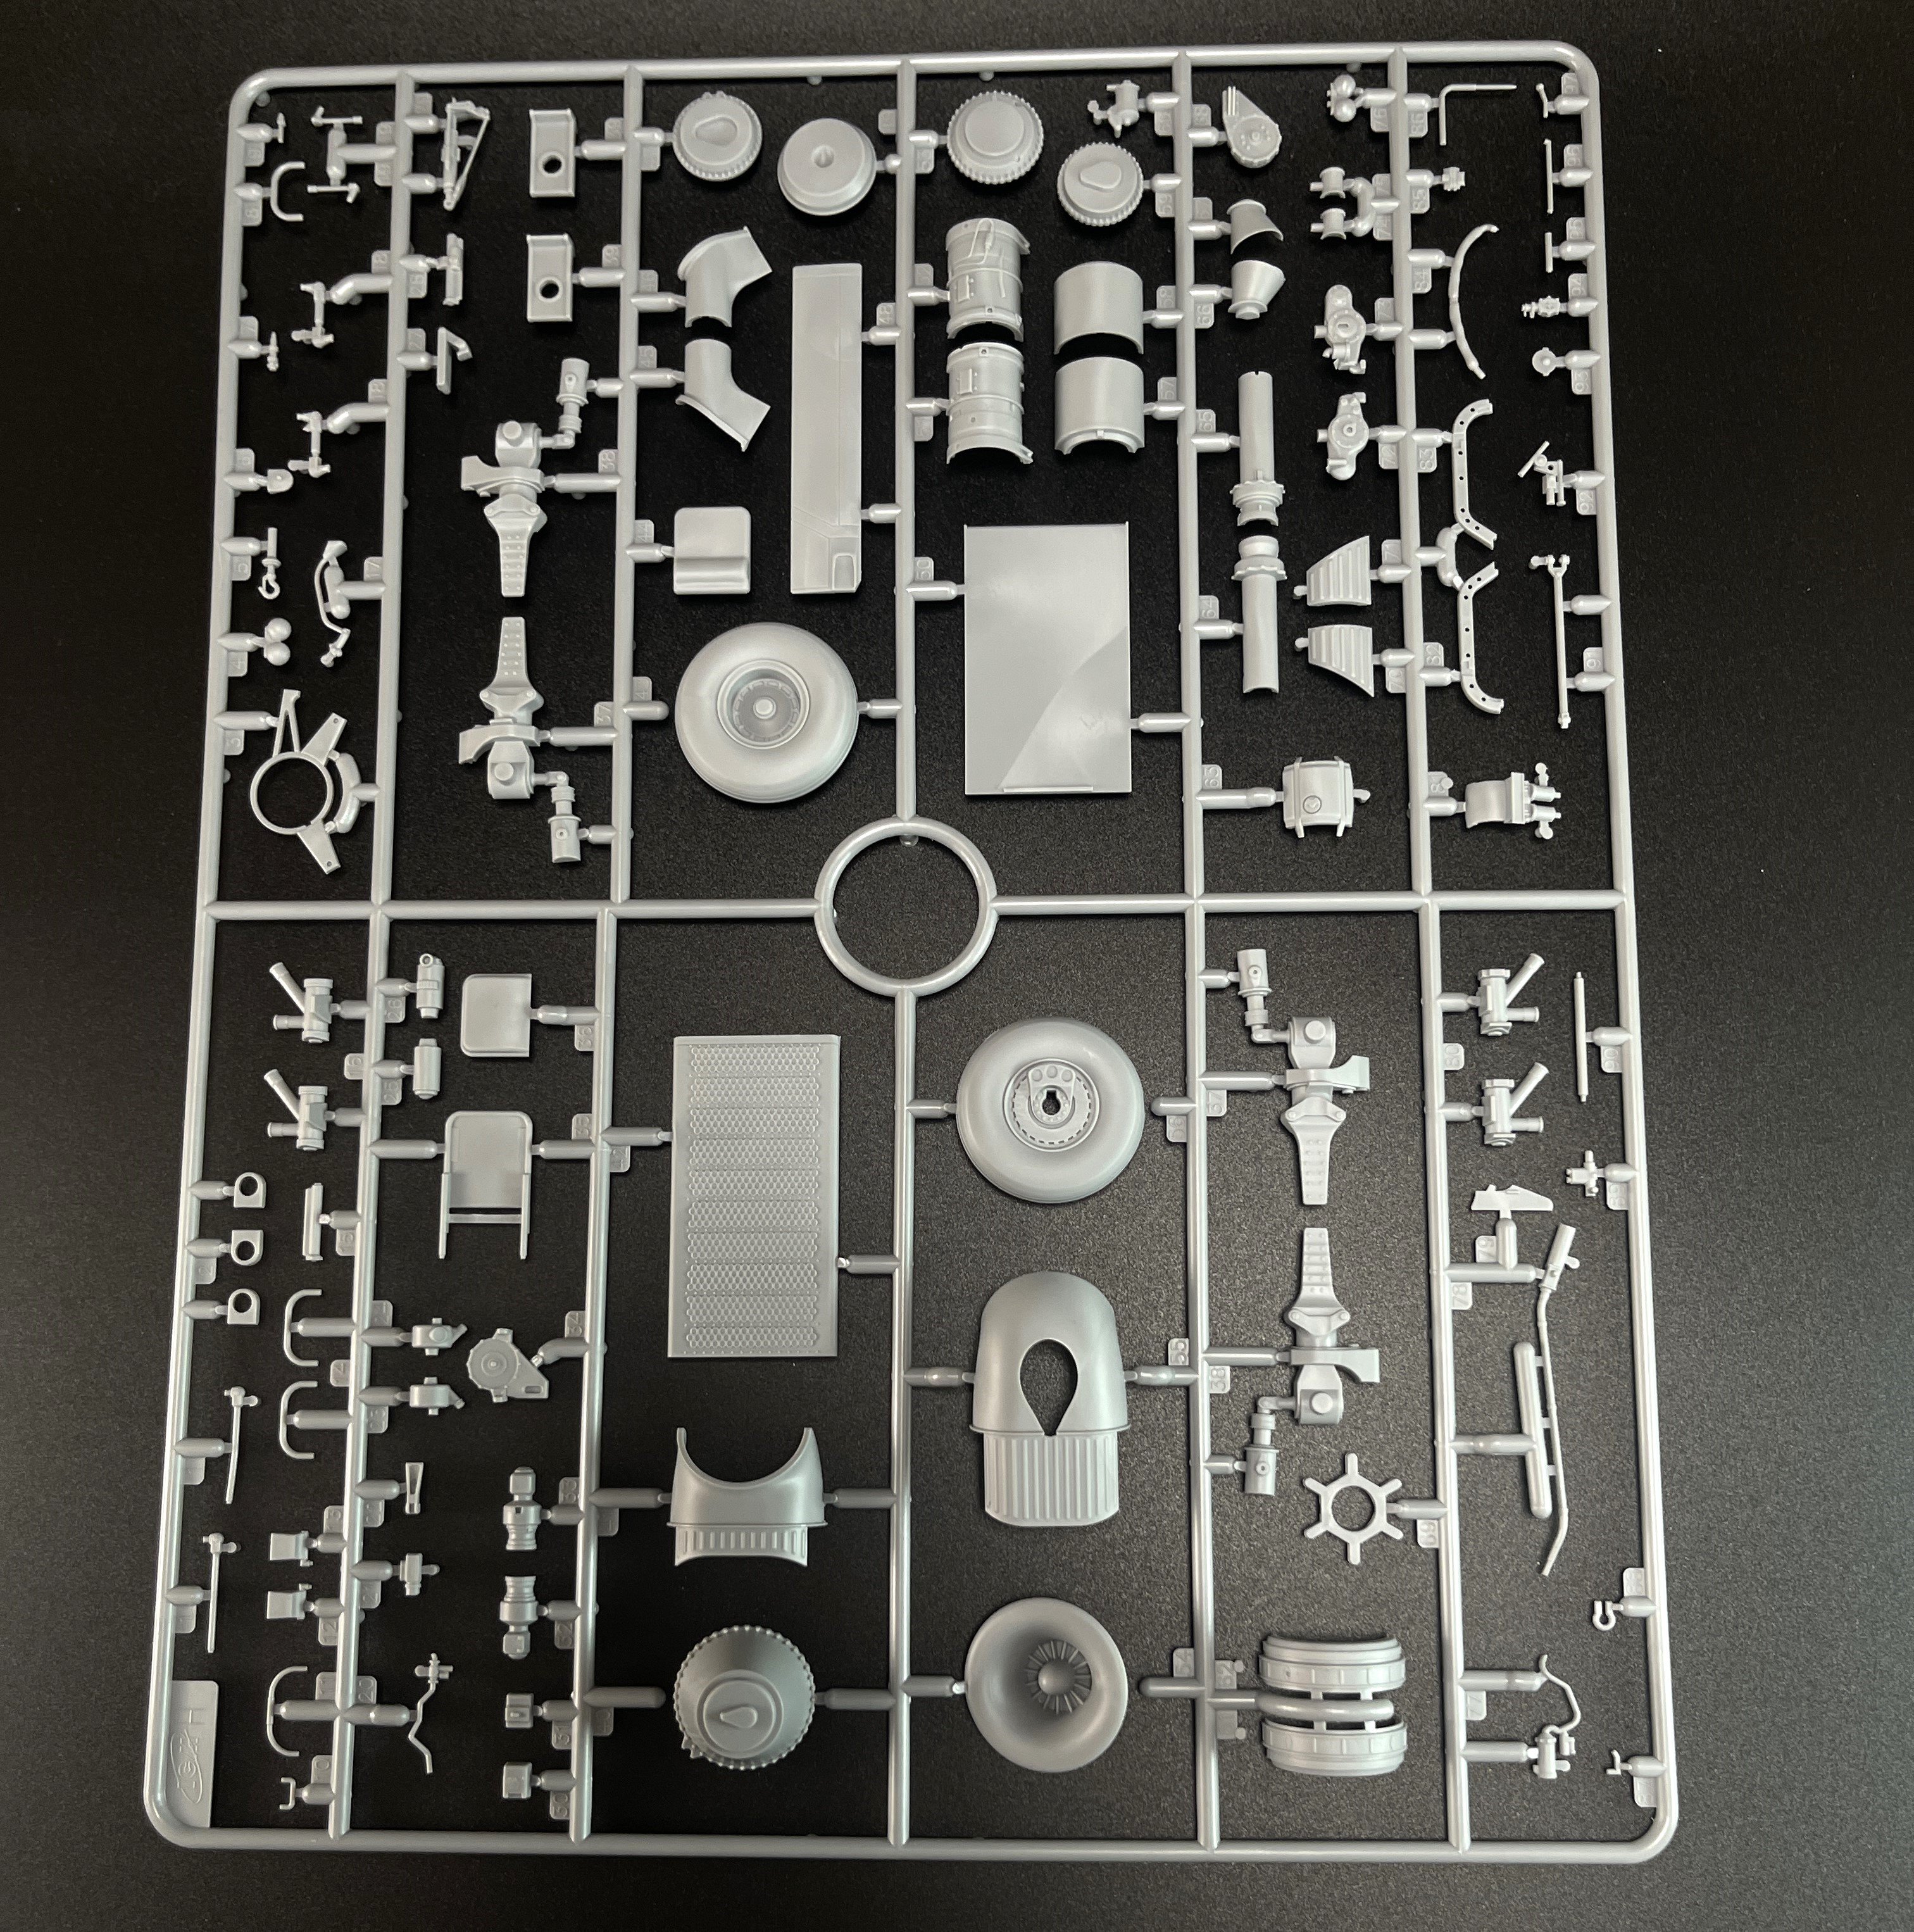
Sprue D
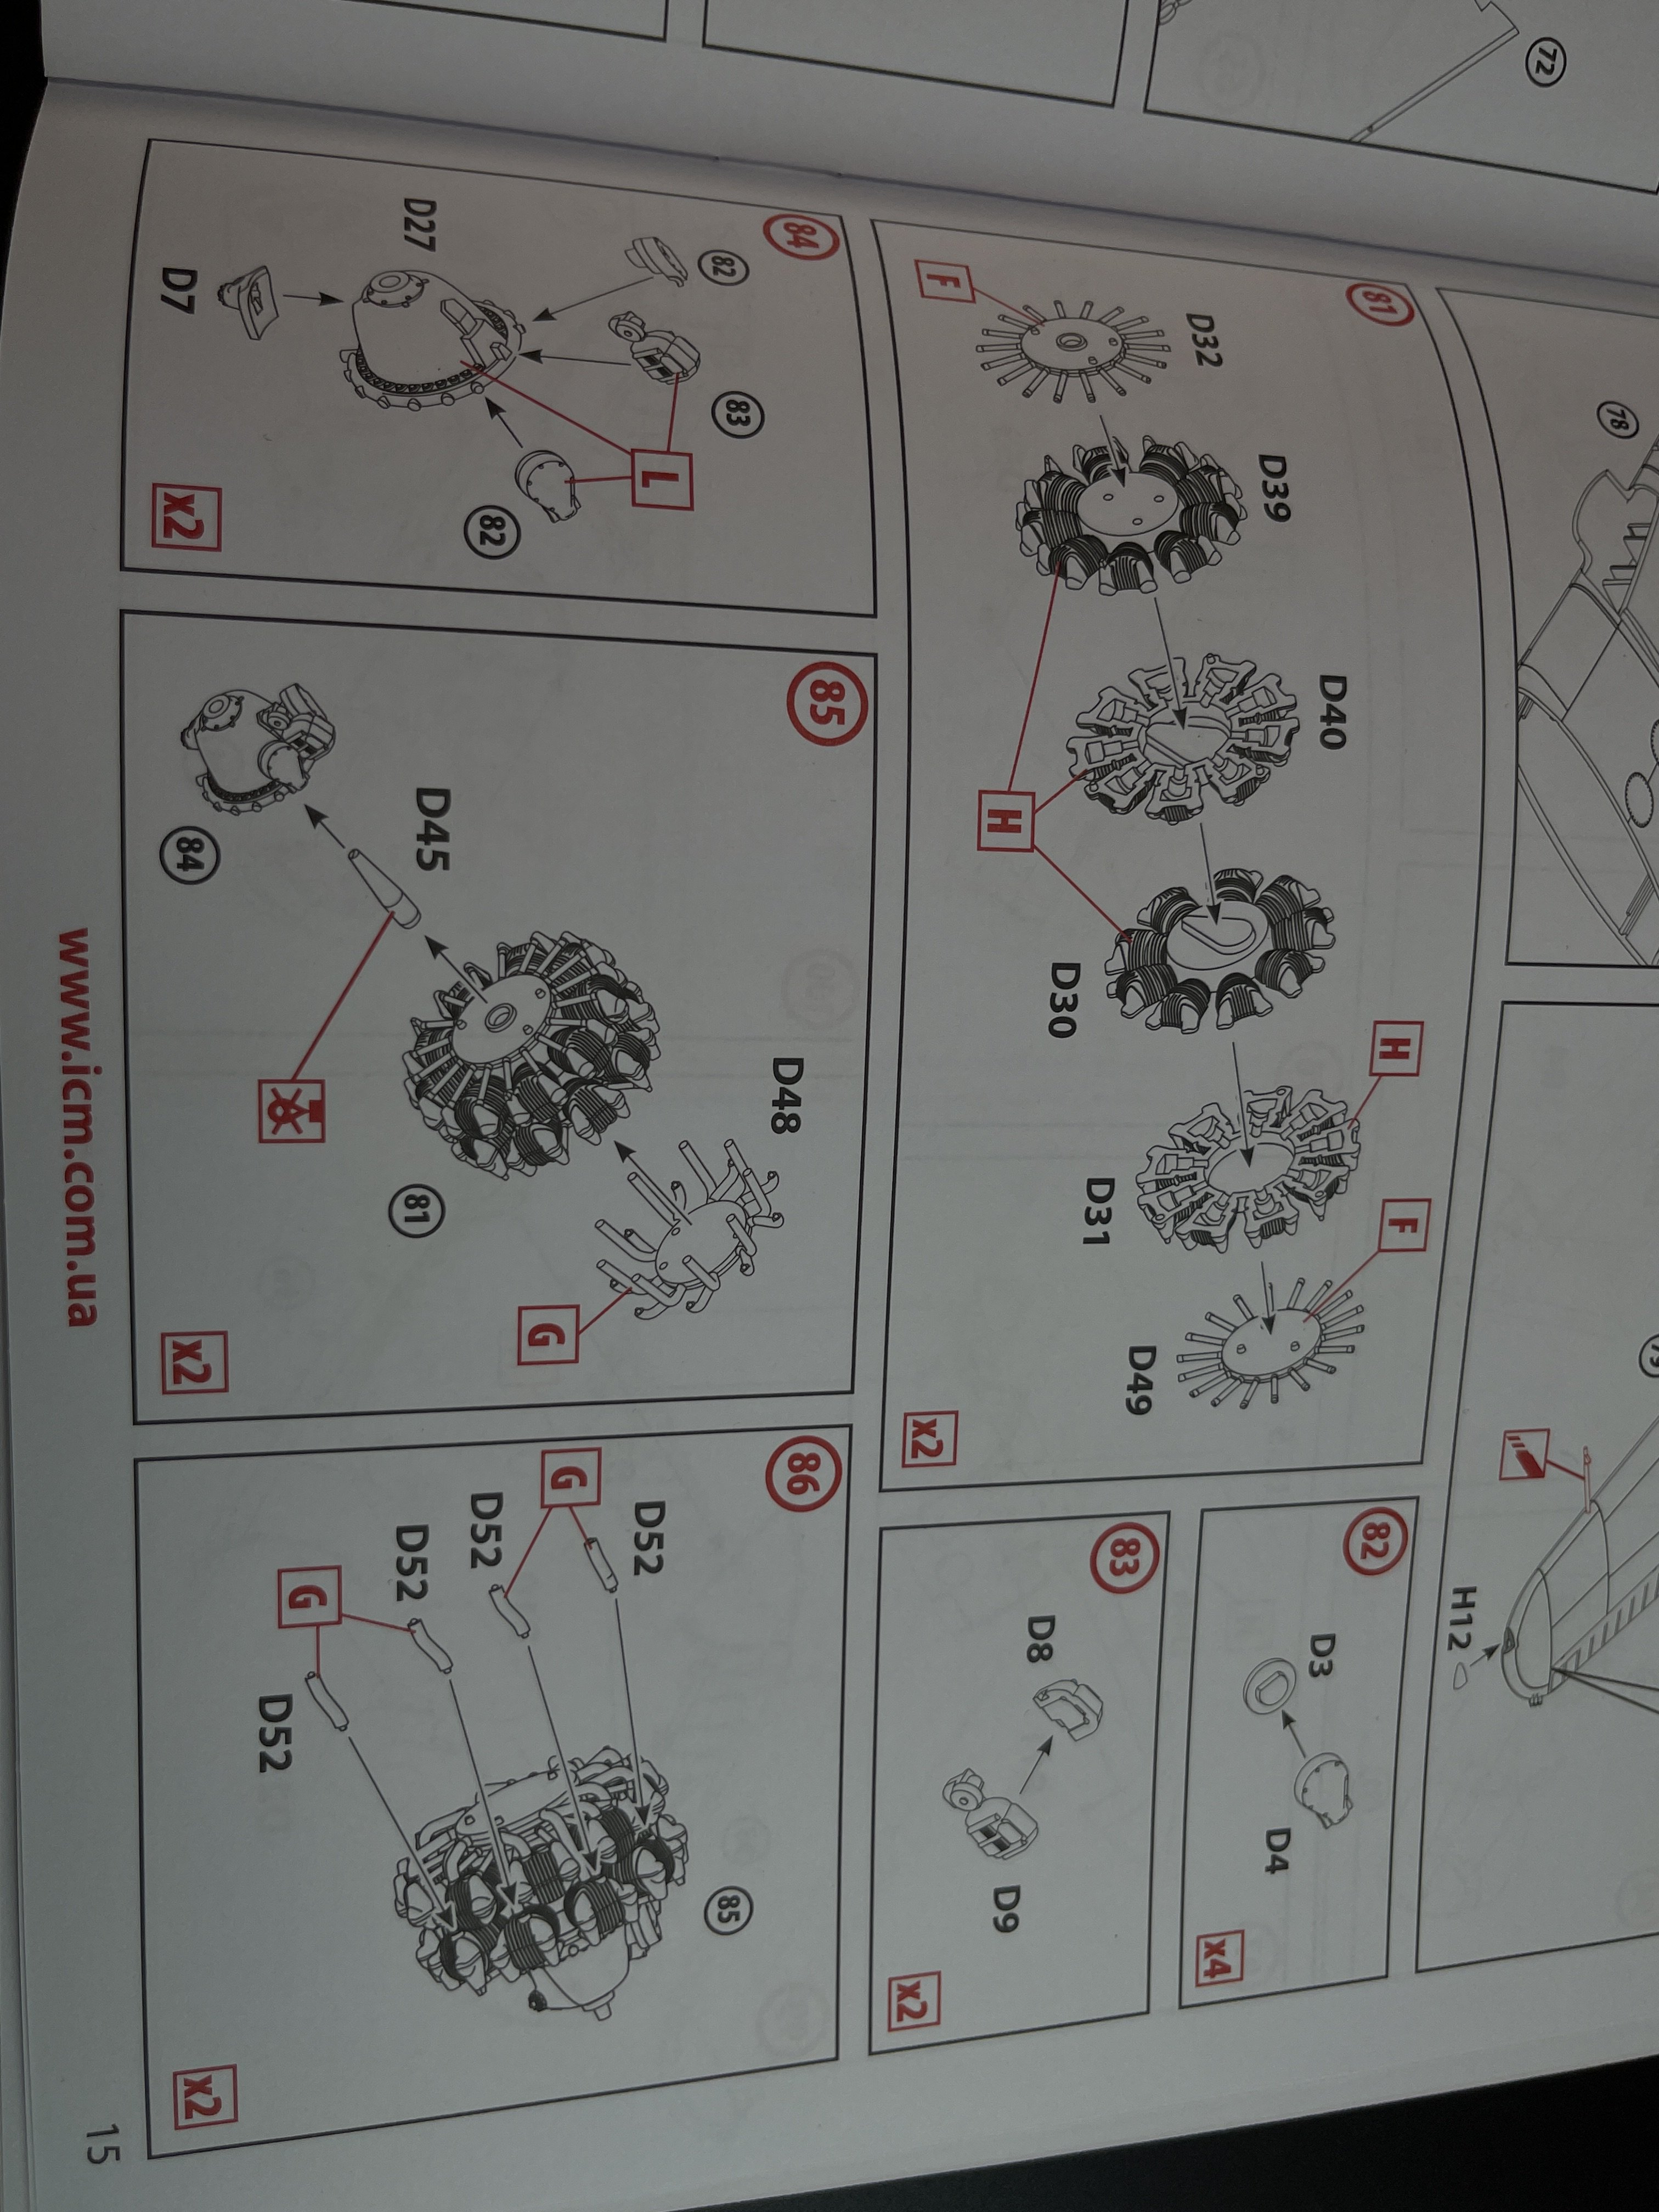
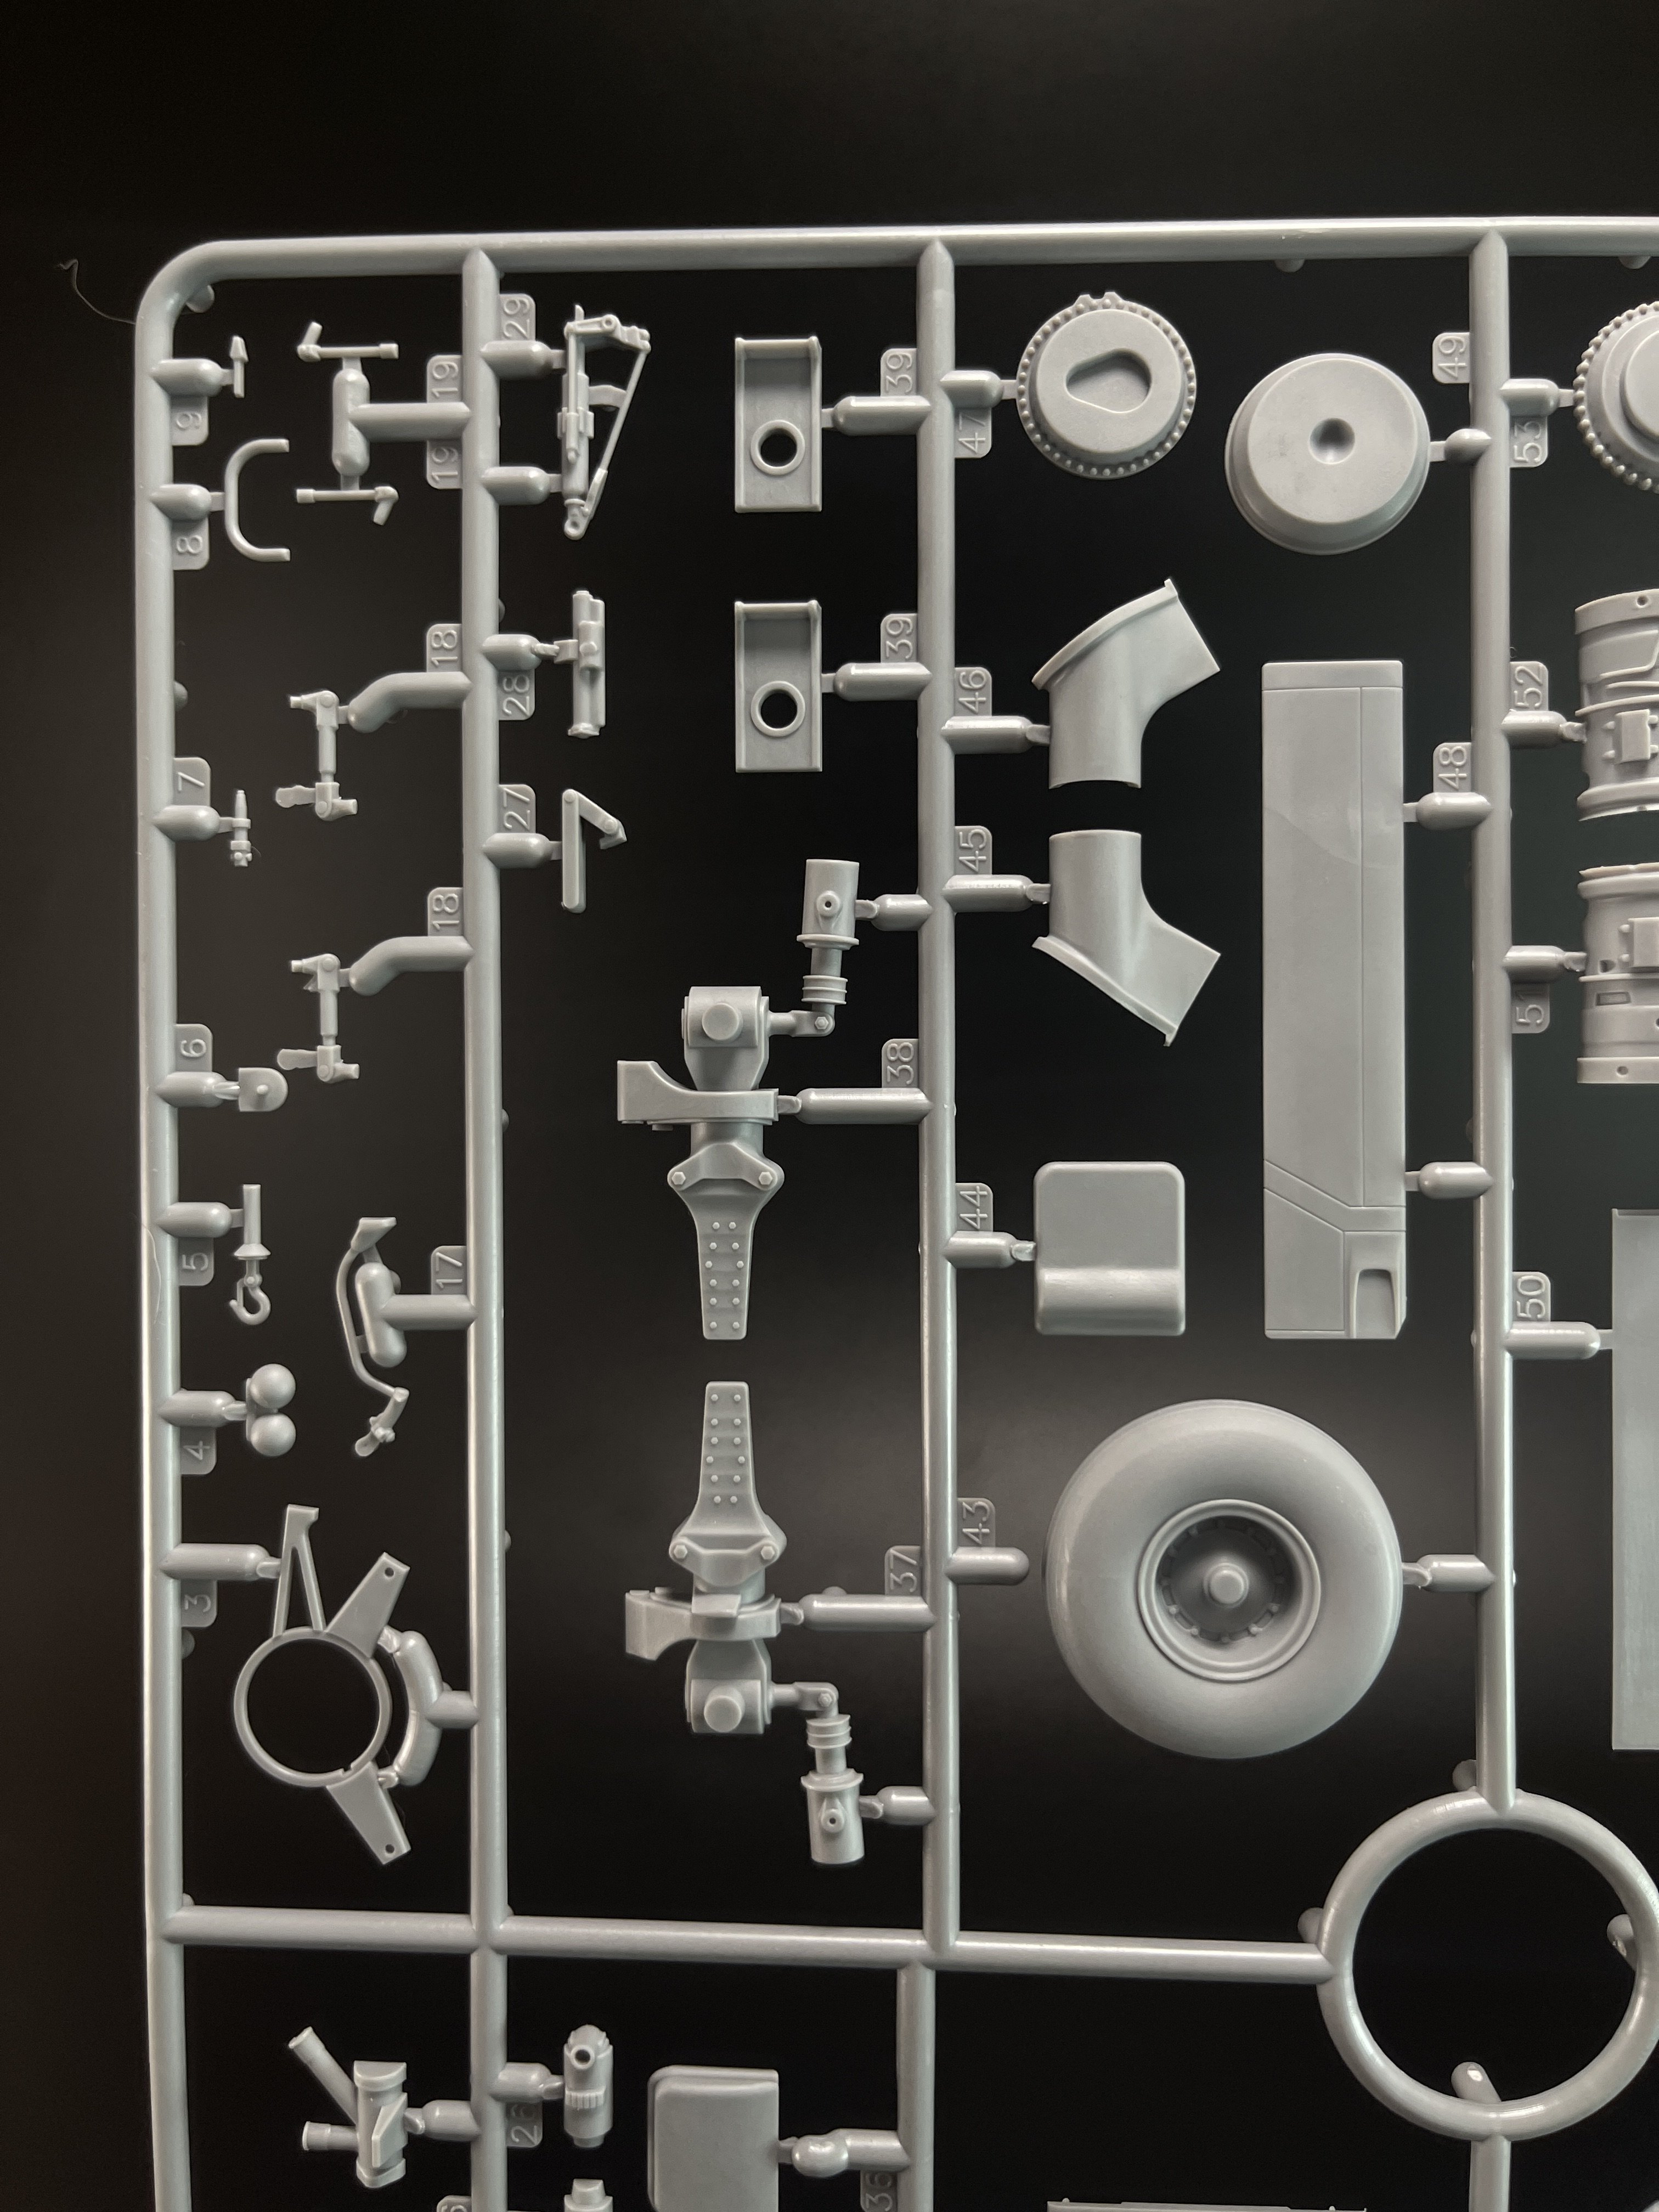
Two sprues in fact, with all the parts for the engine, propellers and engine nacelles.
The engines detail looks quite good. No doubts a very good effort have being made in giving a nice looking detail engines on this one. Kudos engine. To make it almost perfect in this scale you just need to add some wires.
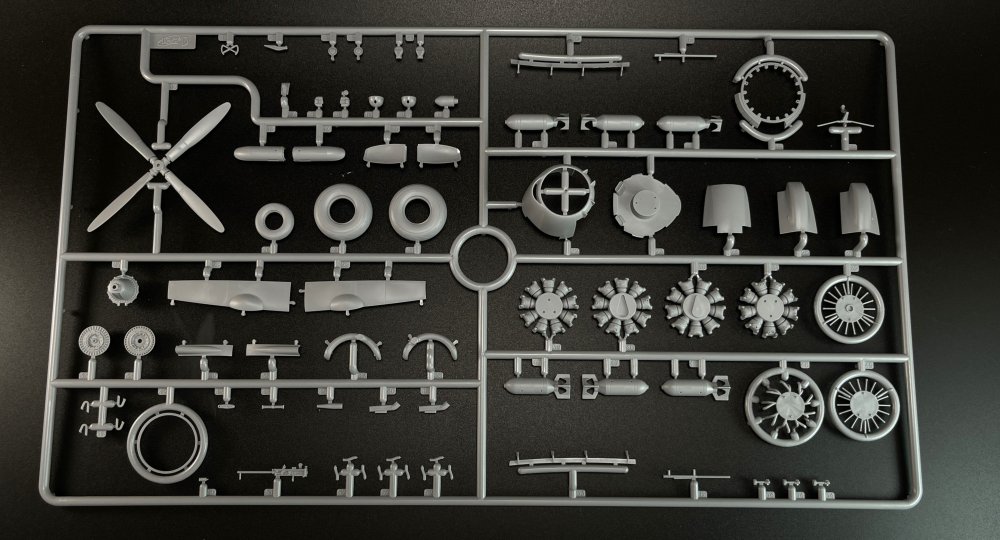
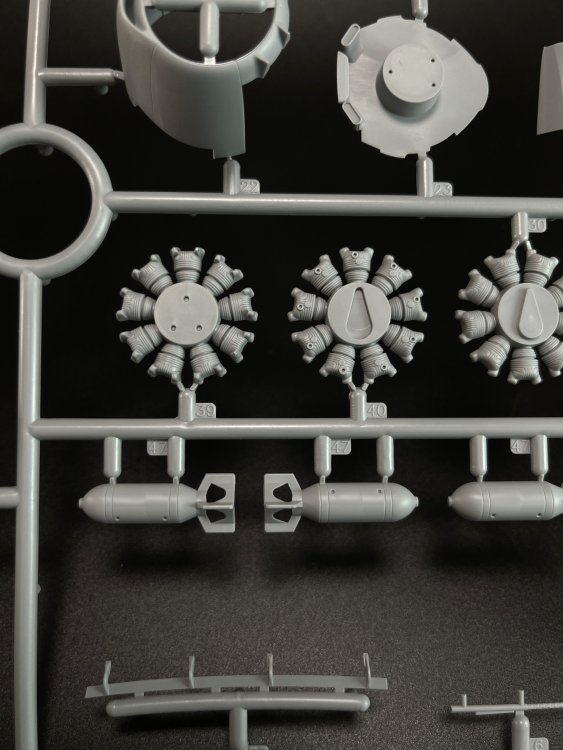
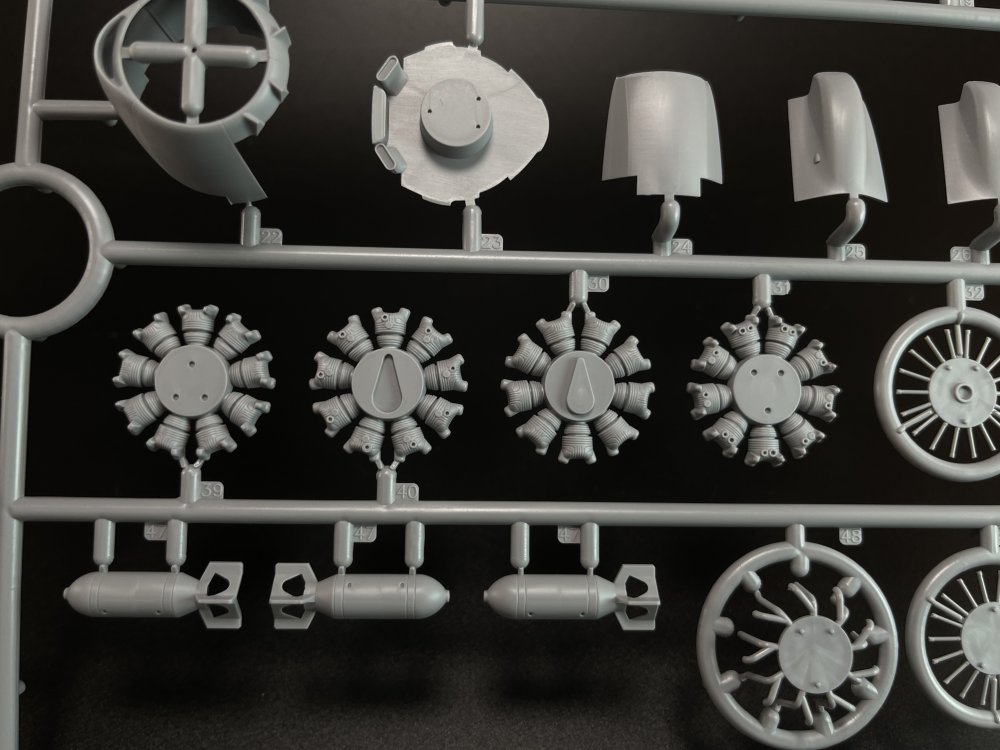
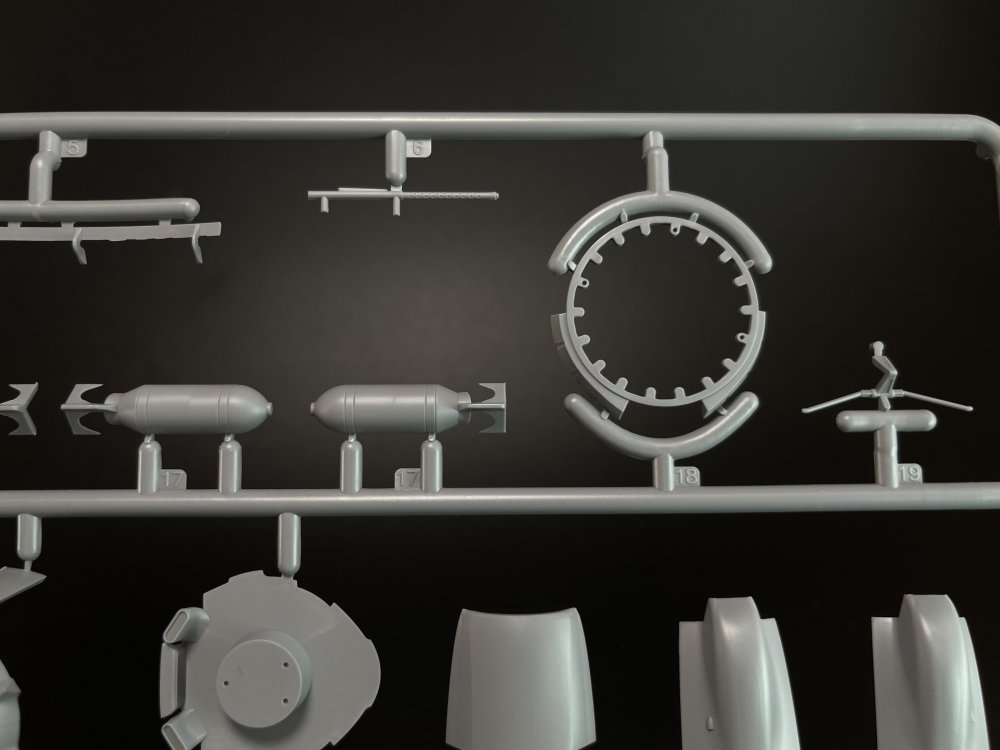
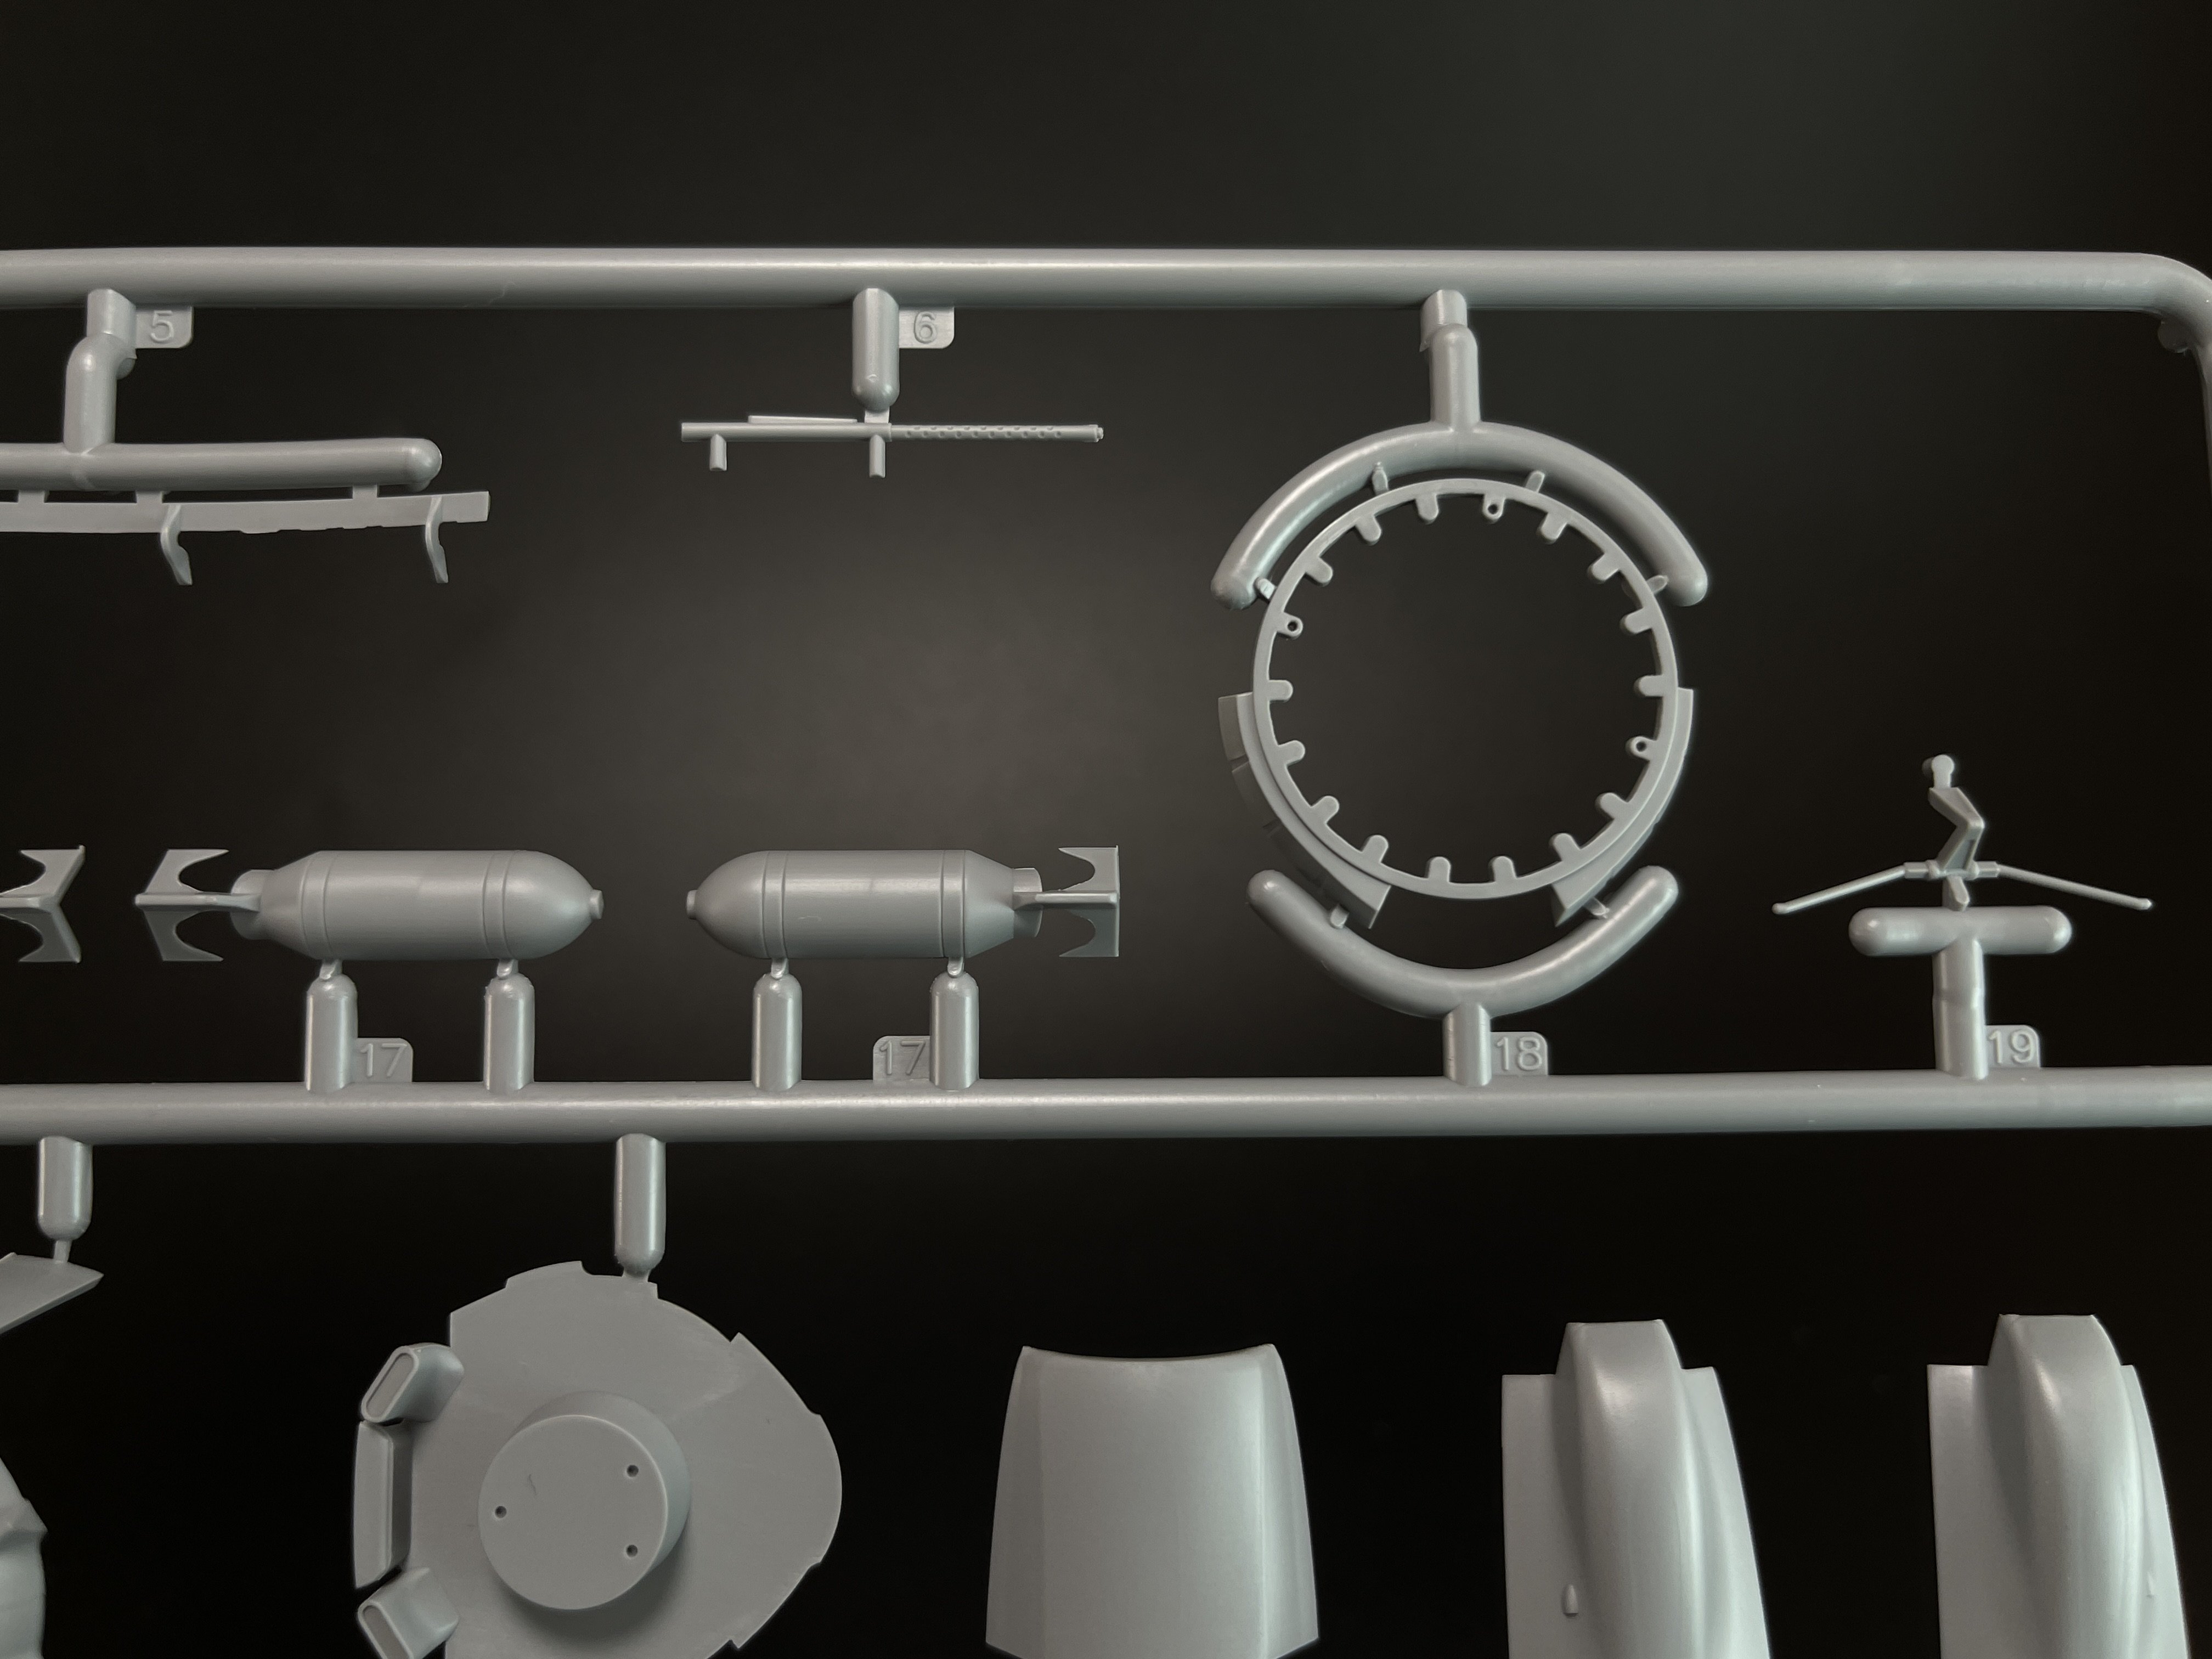
A few small details are given in this sprue and all the ordinance for the bomb bay.
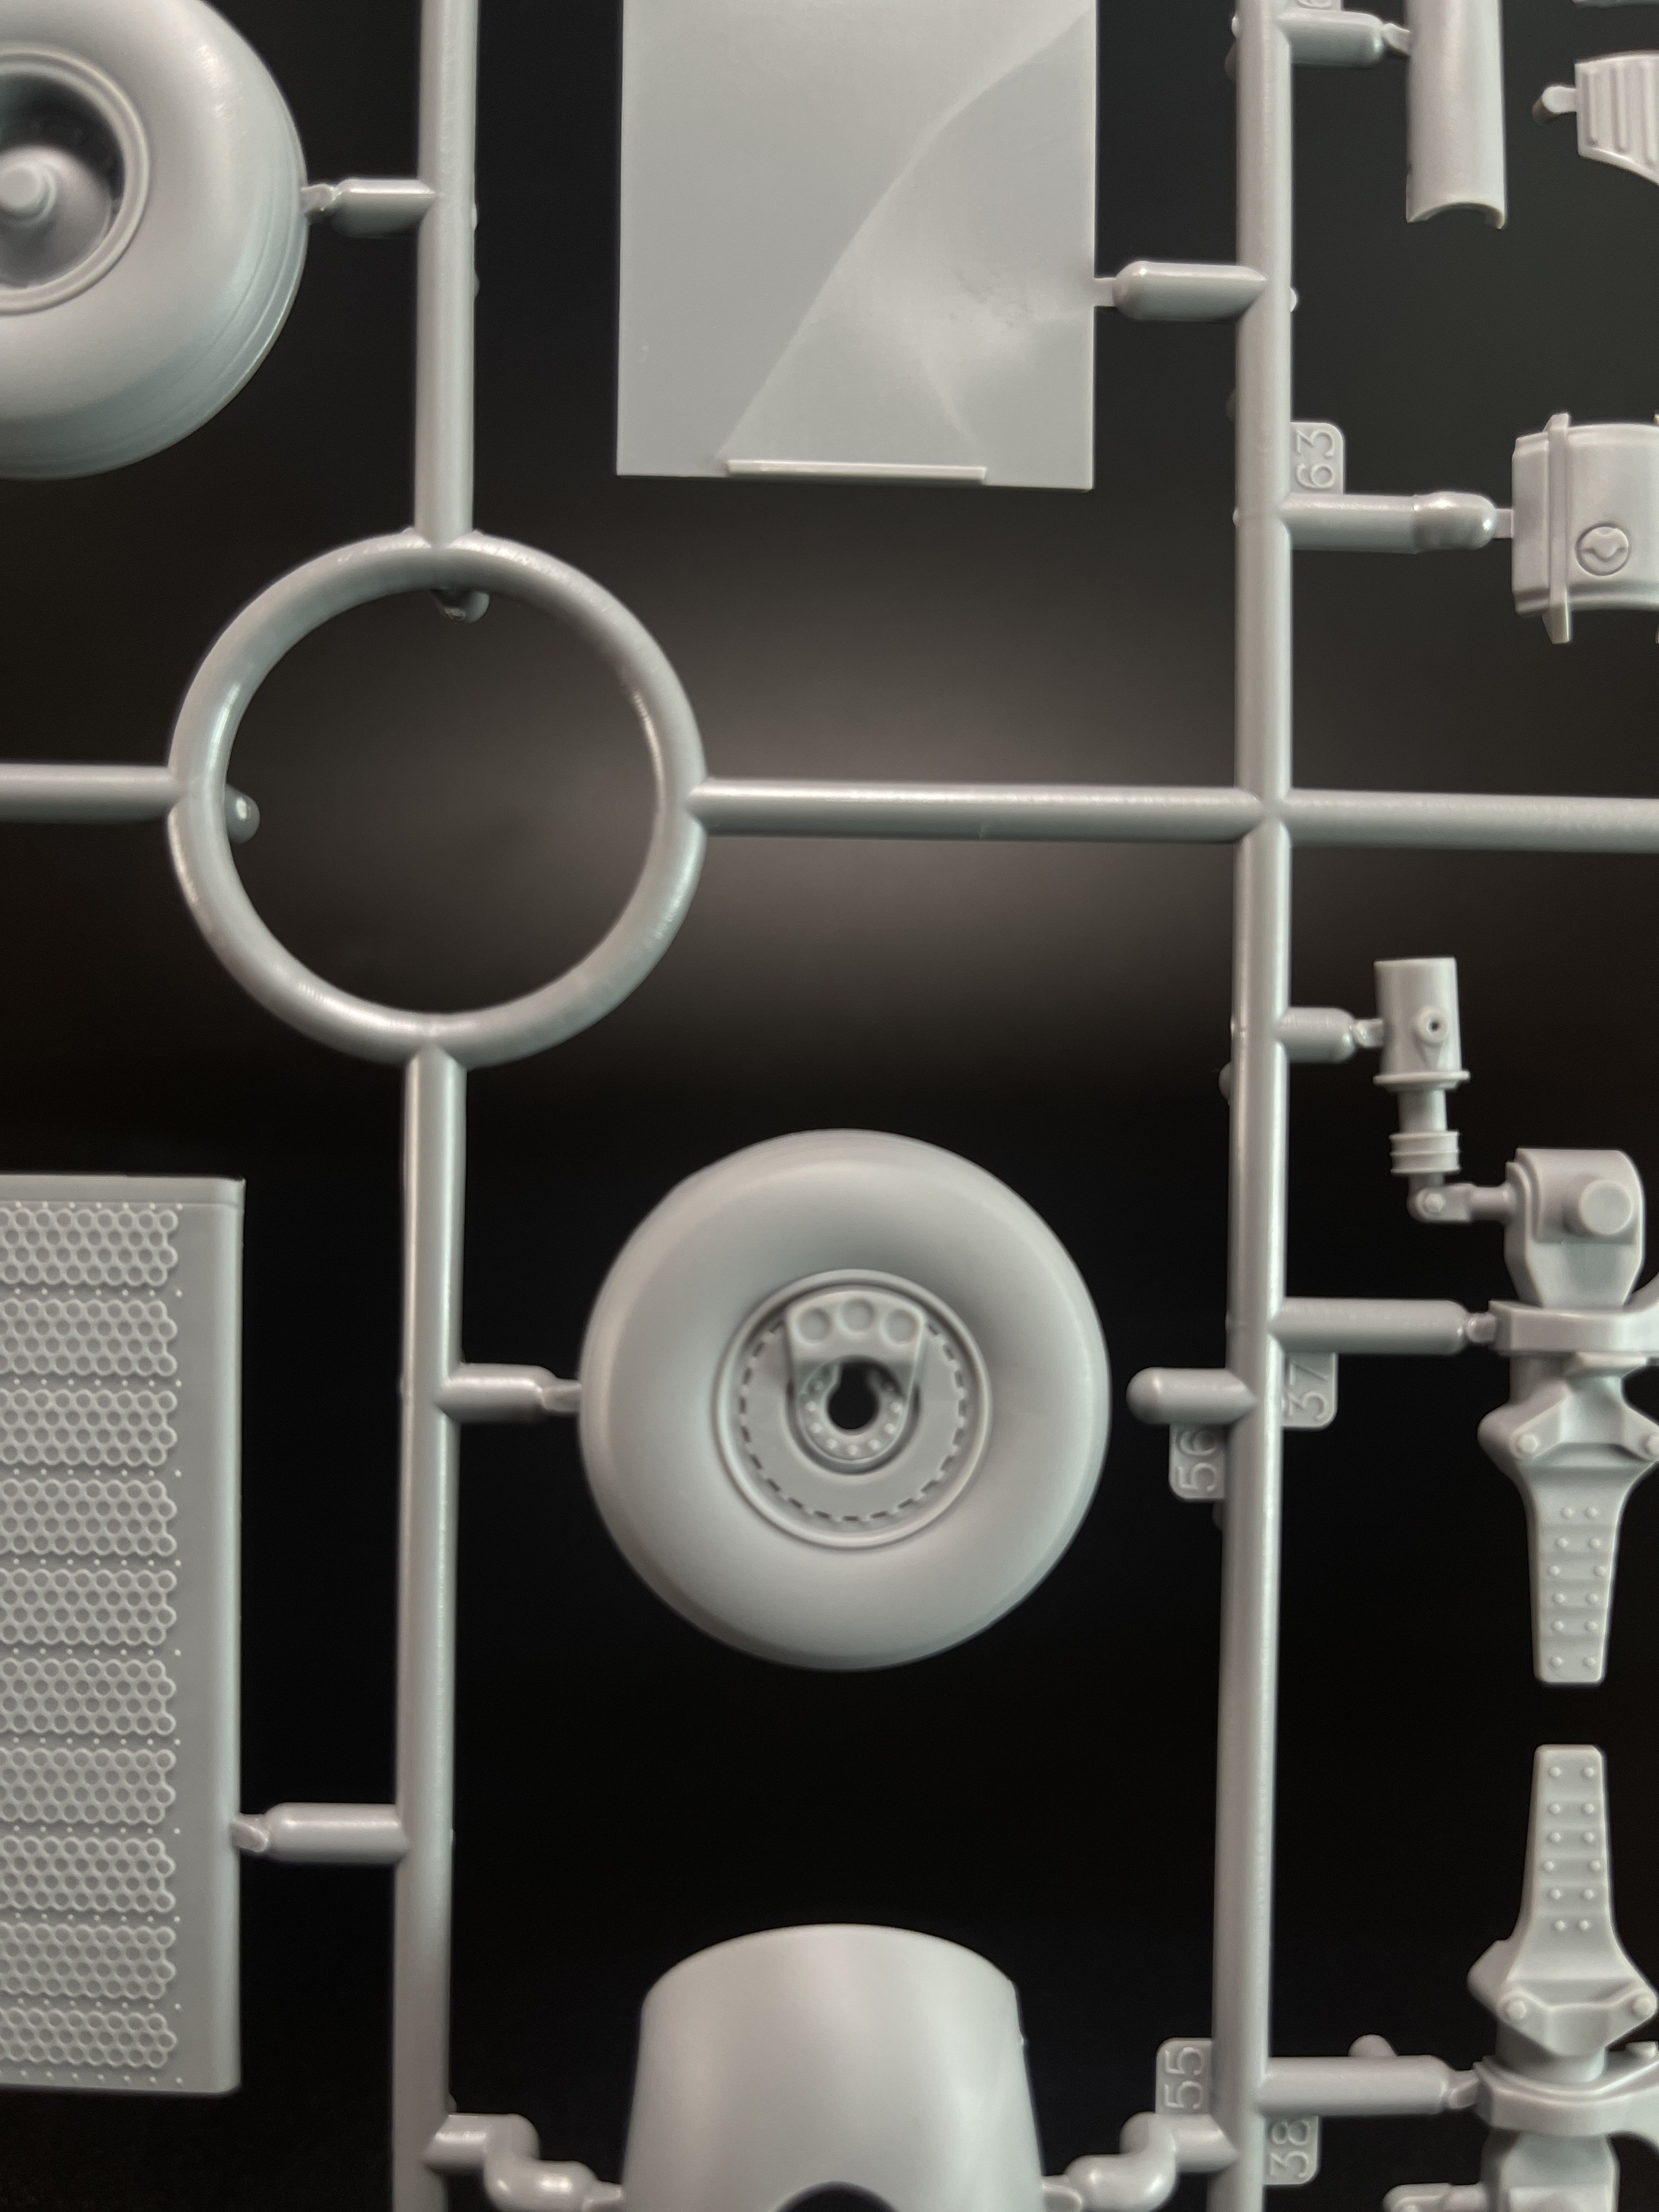
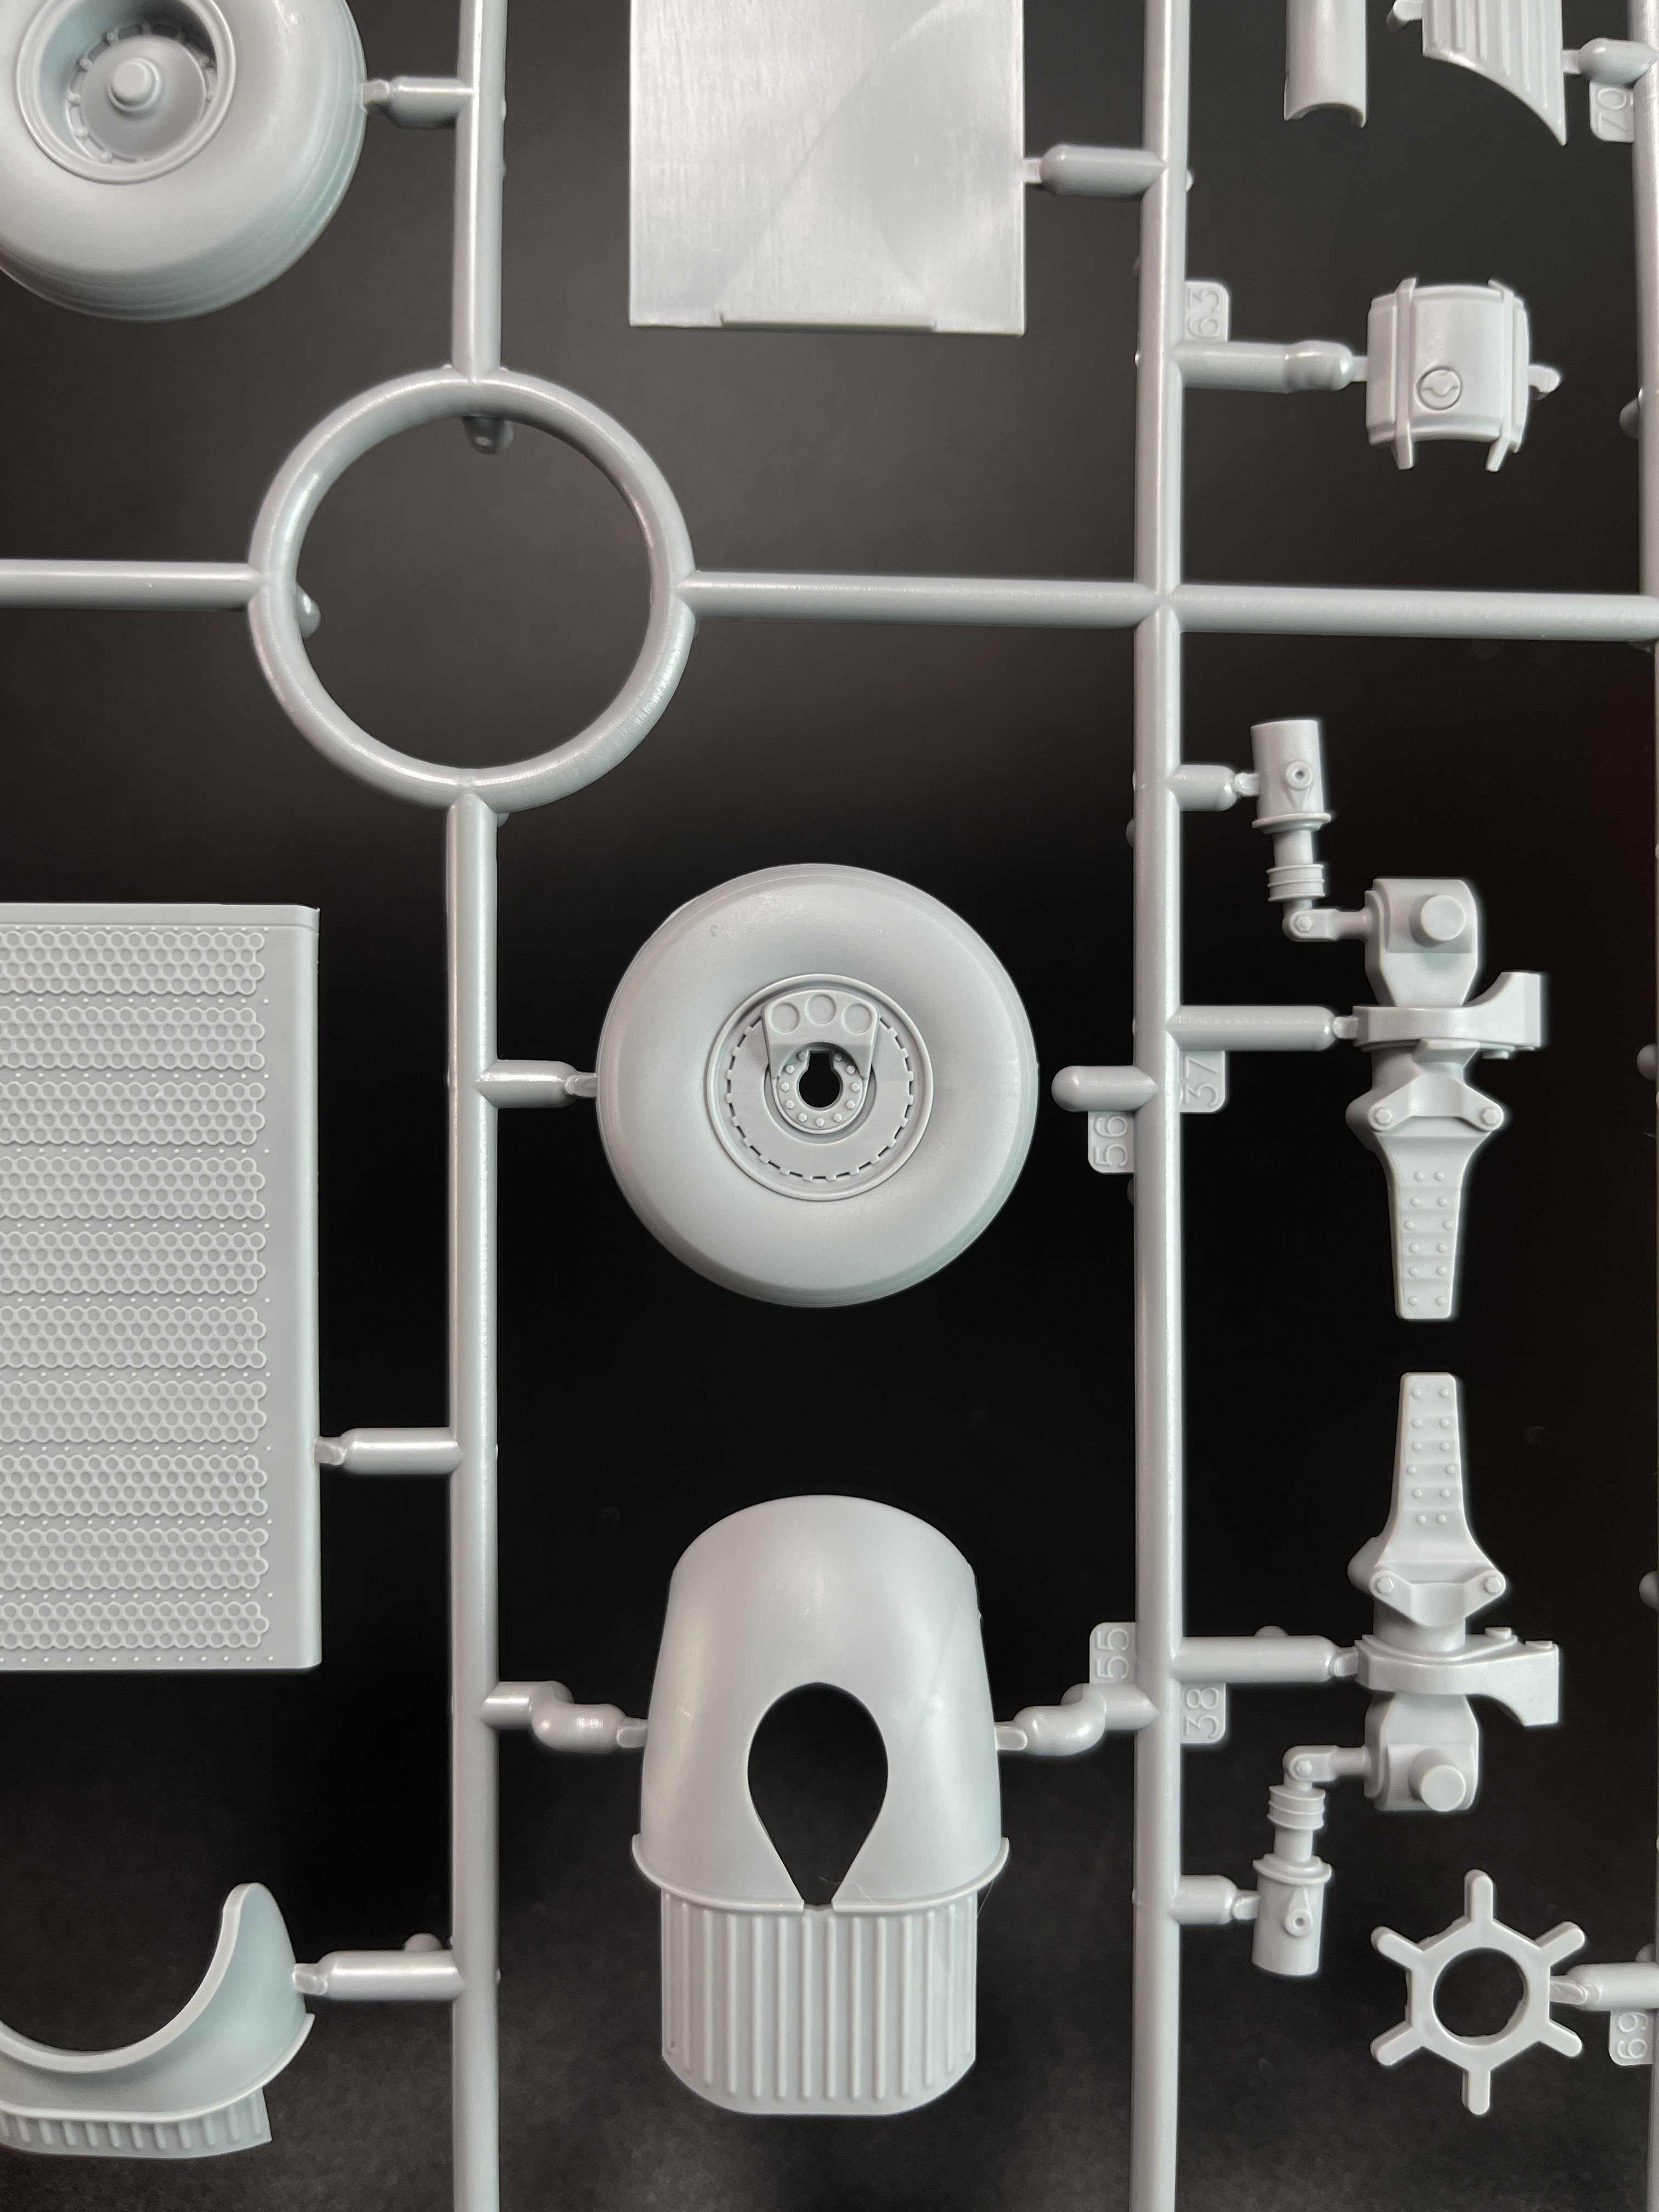
Also the wheels, in two halves, but with quite good detail on the hub and also the tire. I’m quite happy with detail on the wheels.
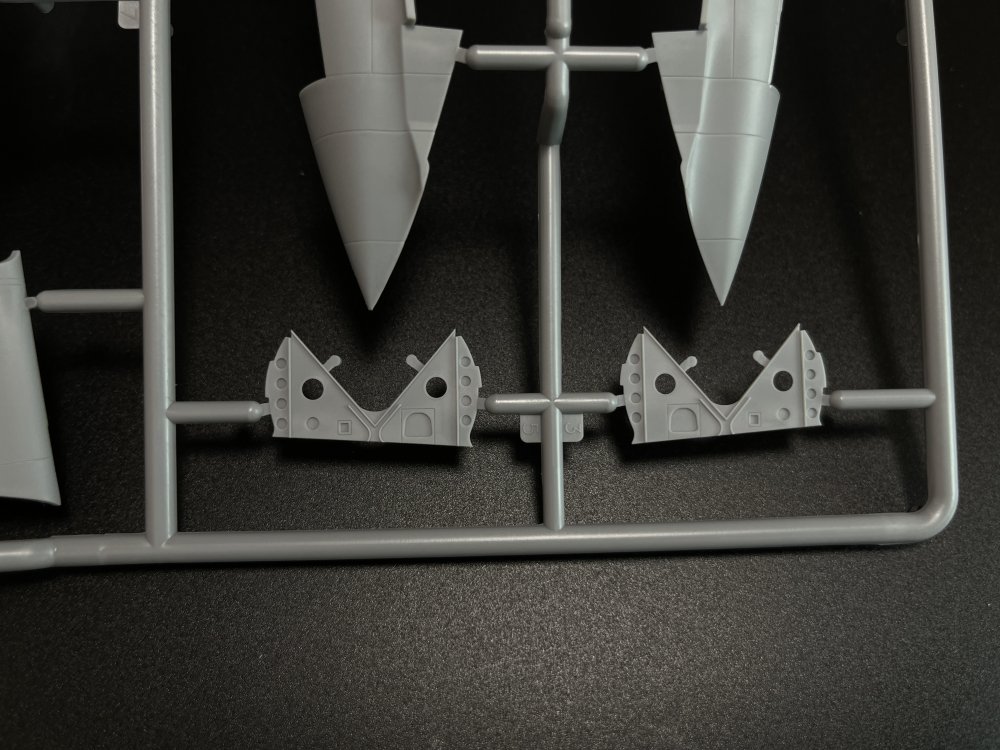
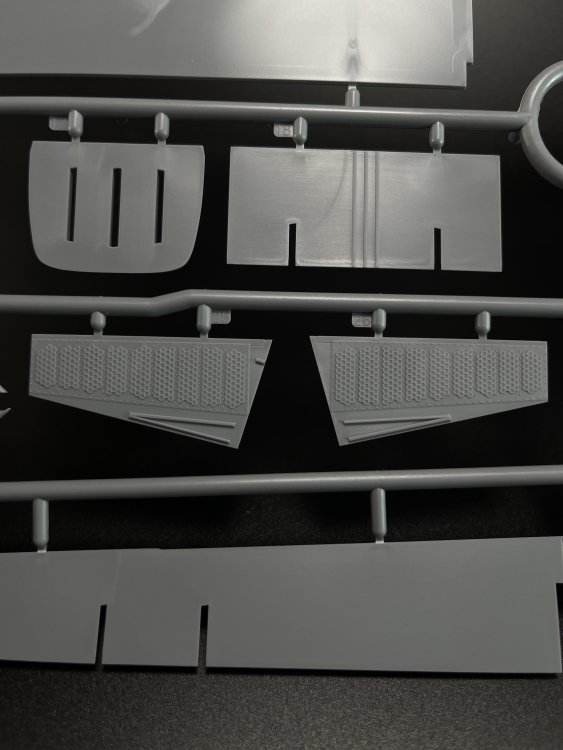
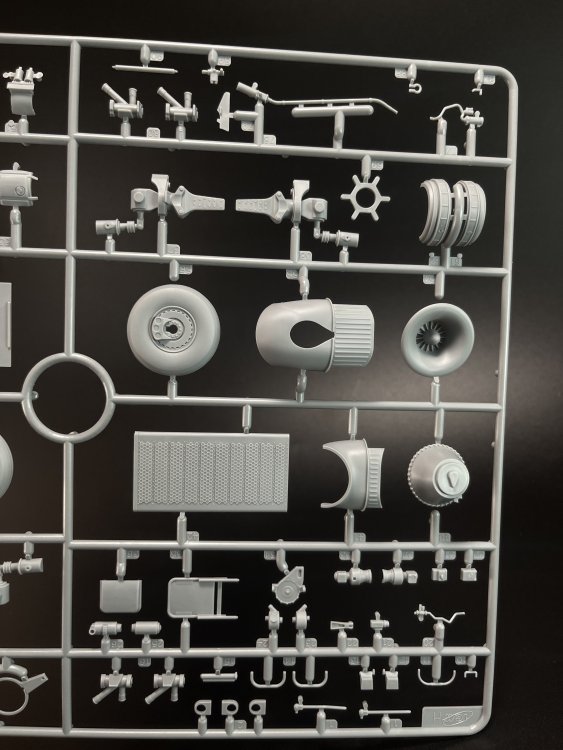
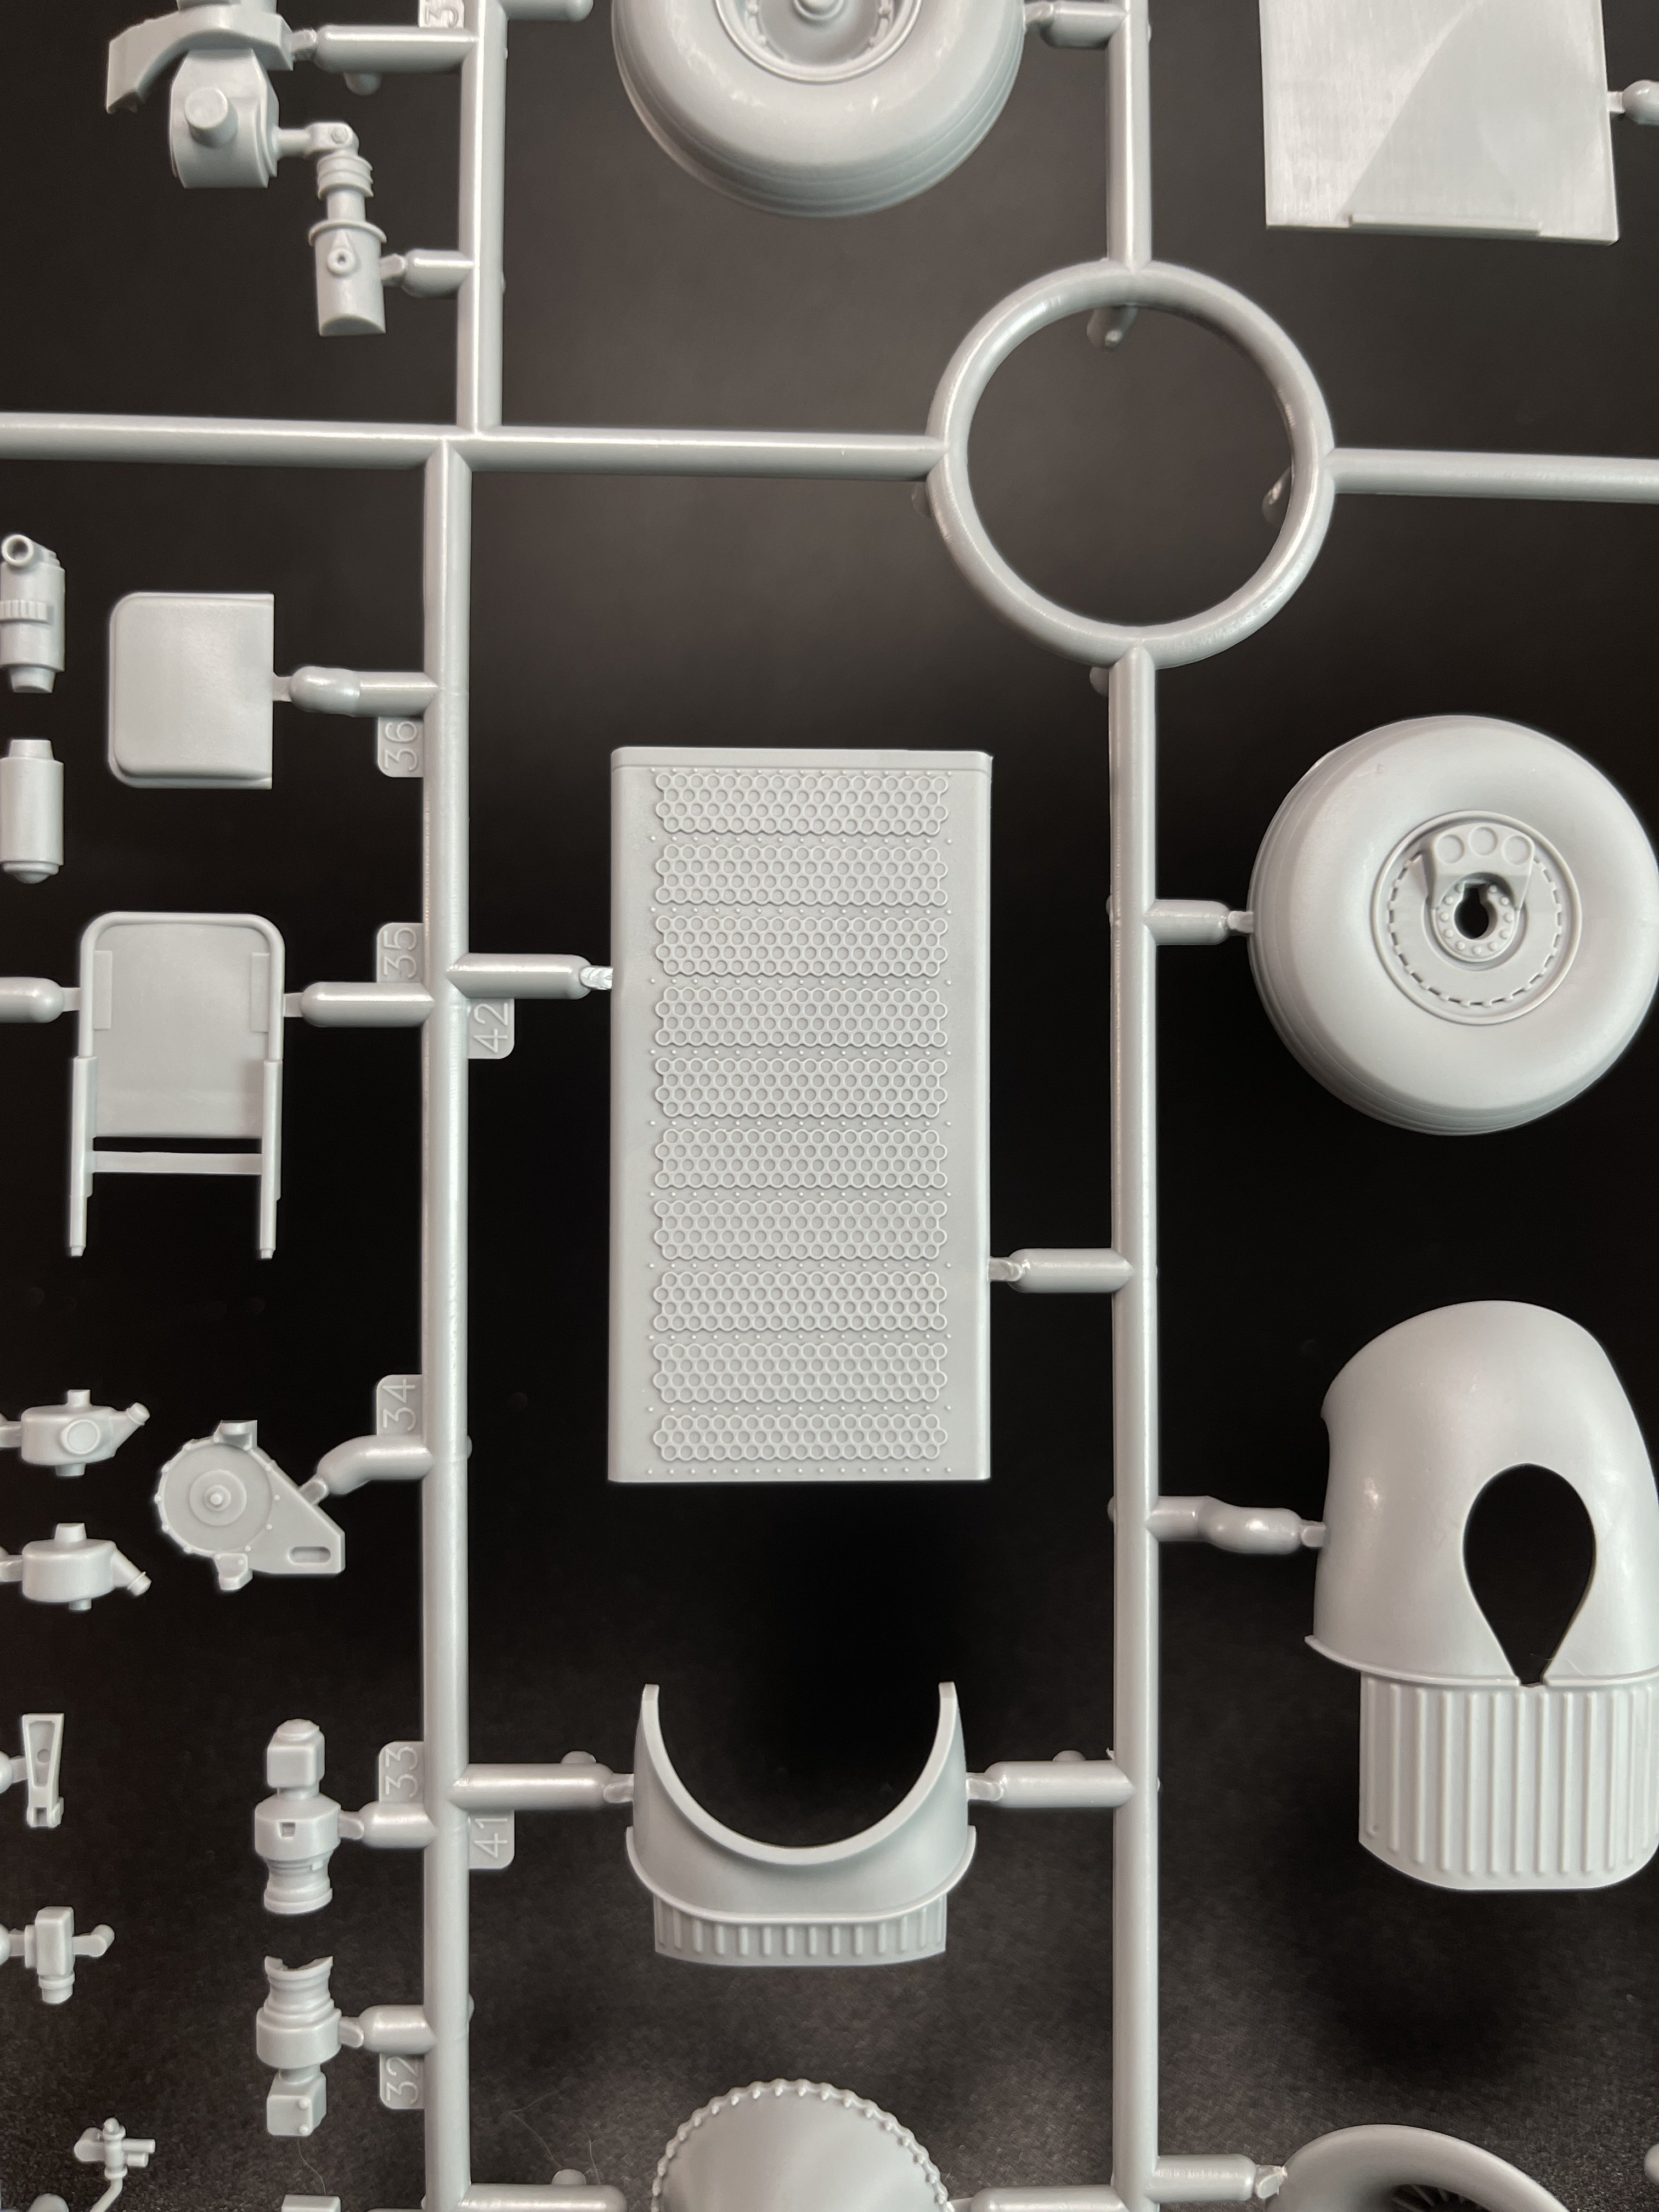
Sprue E
Besides the rest of the tail wings, several detail for the wing jig attach to the inside walls. These walls have quite sharp and good detail waiting for a good paintjob to bring up all the detail. The final result could be quite good directly from box.
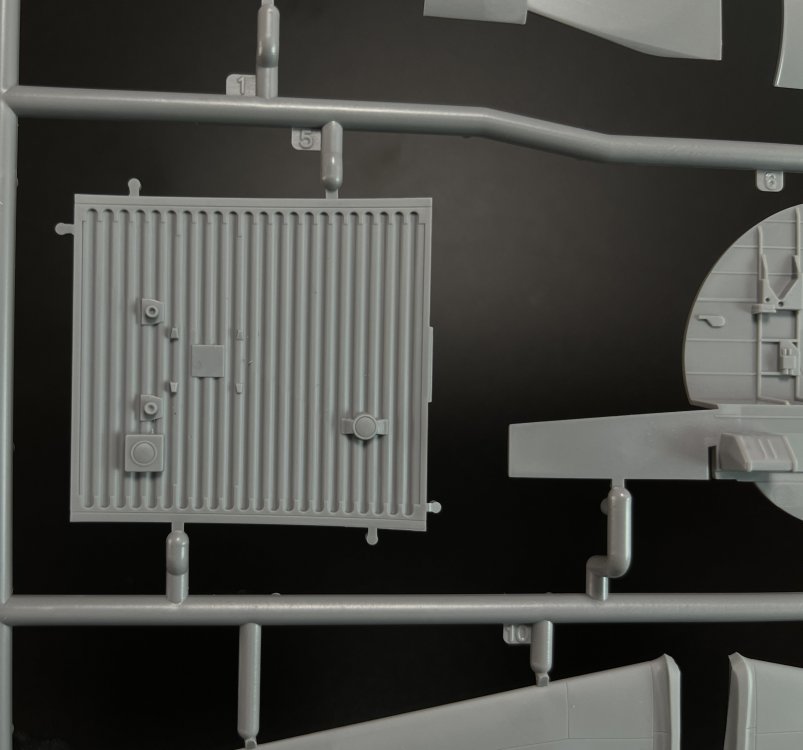
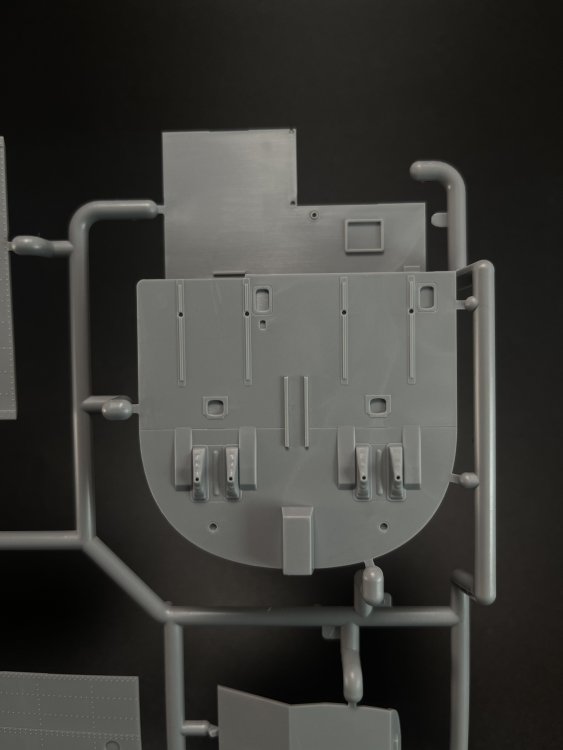
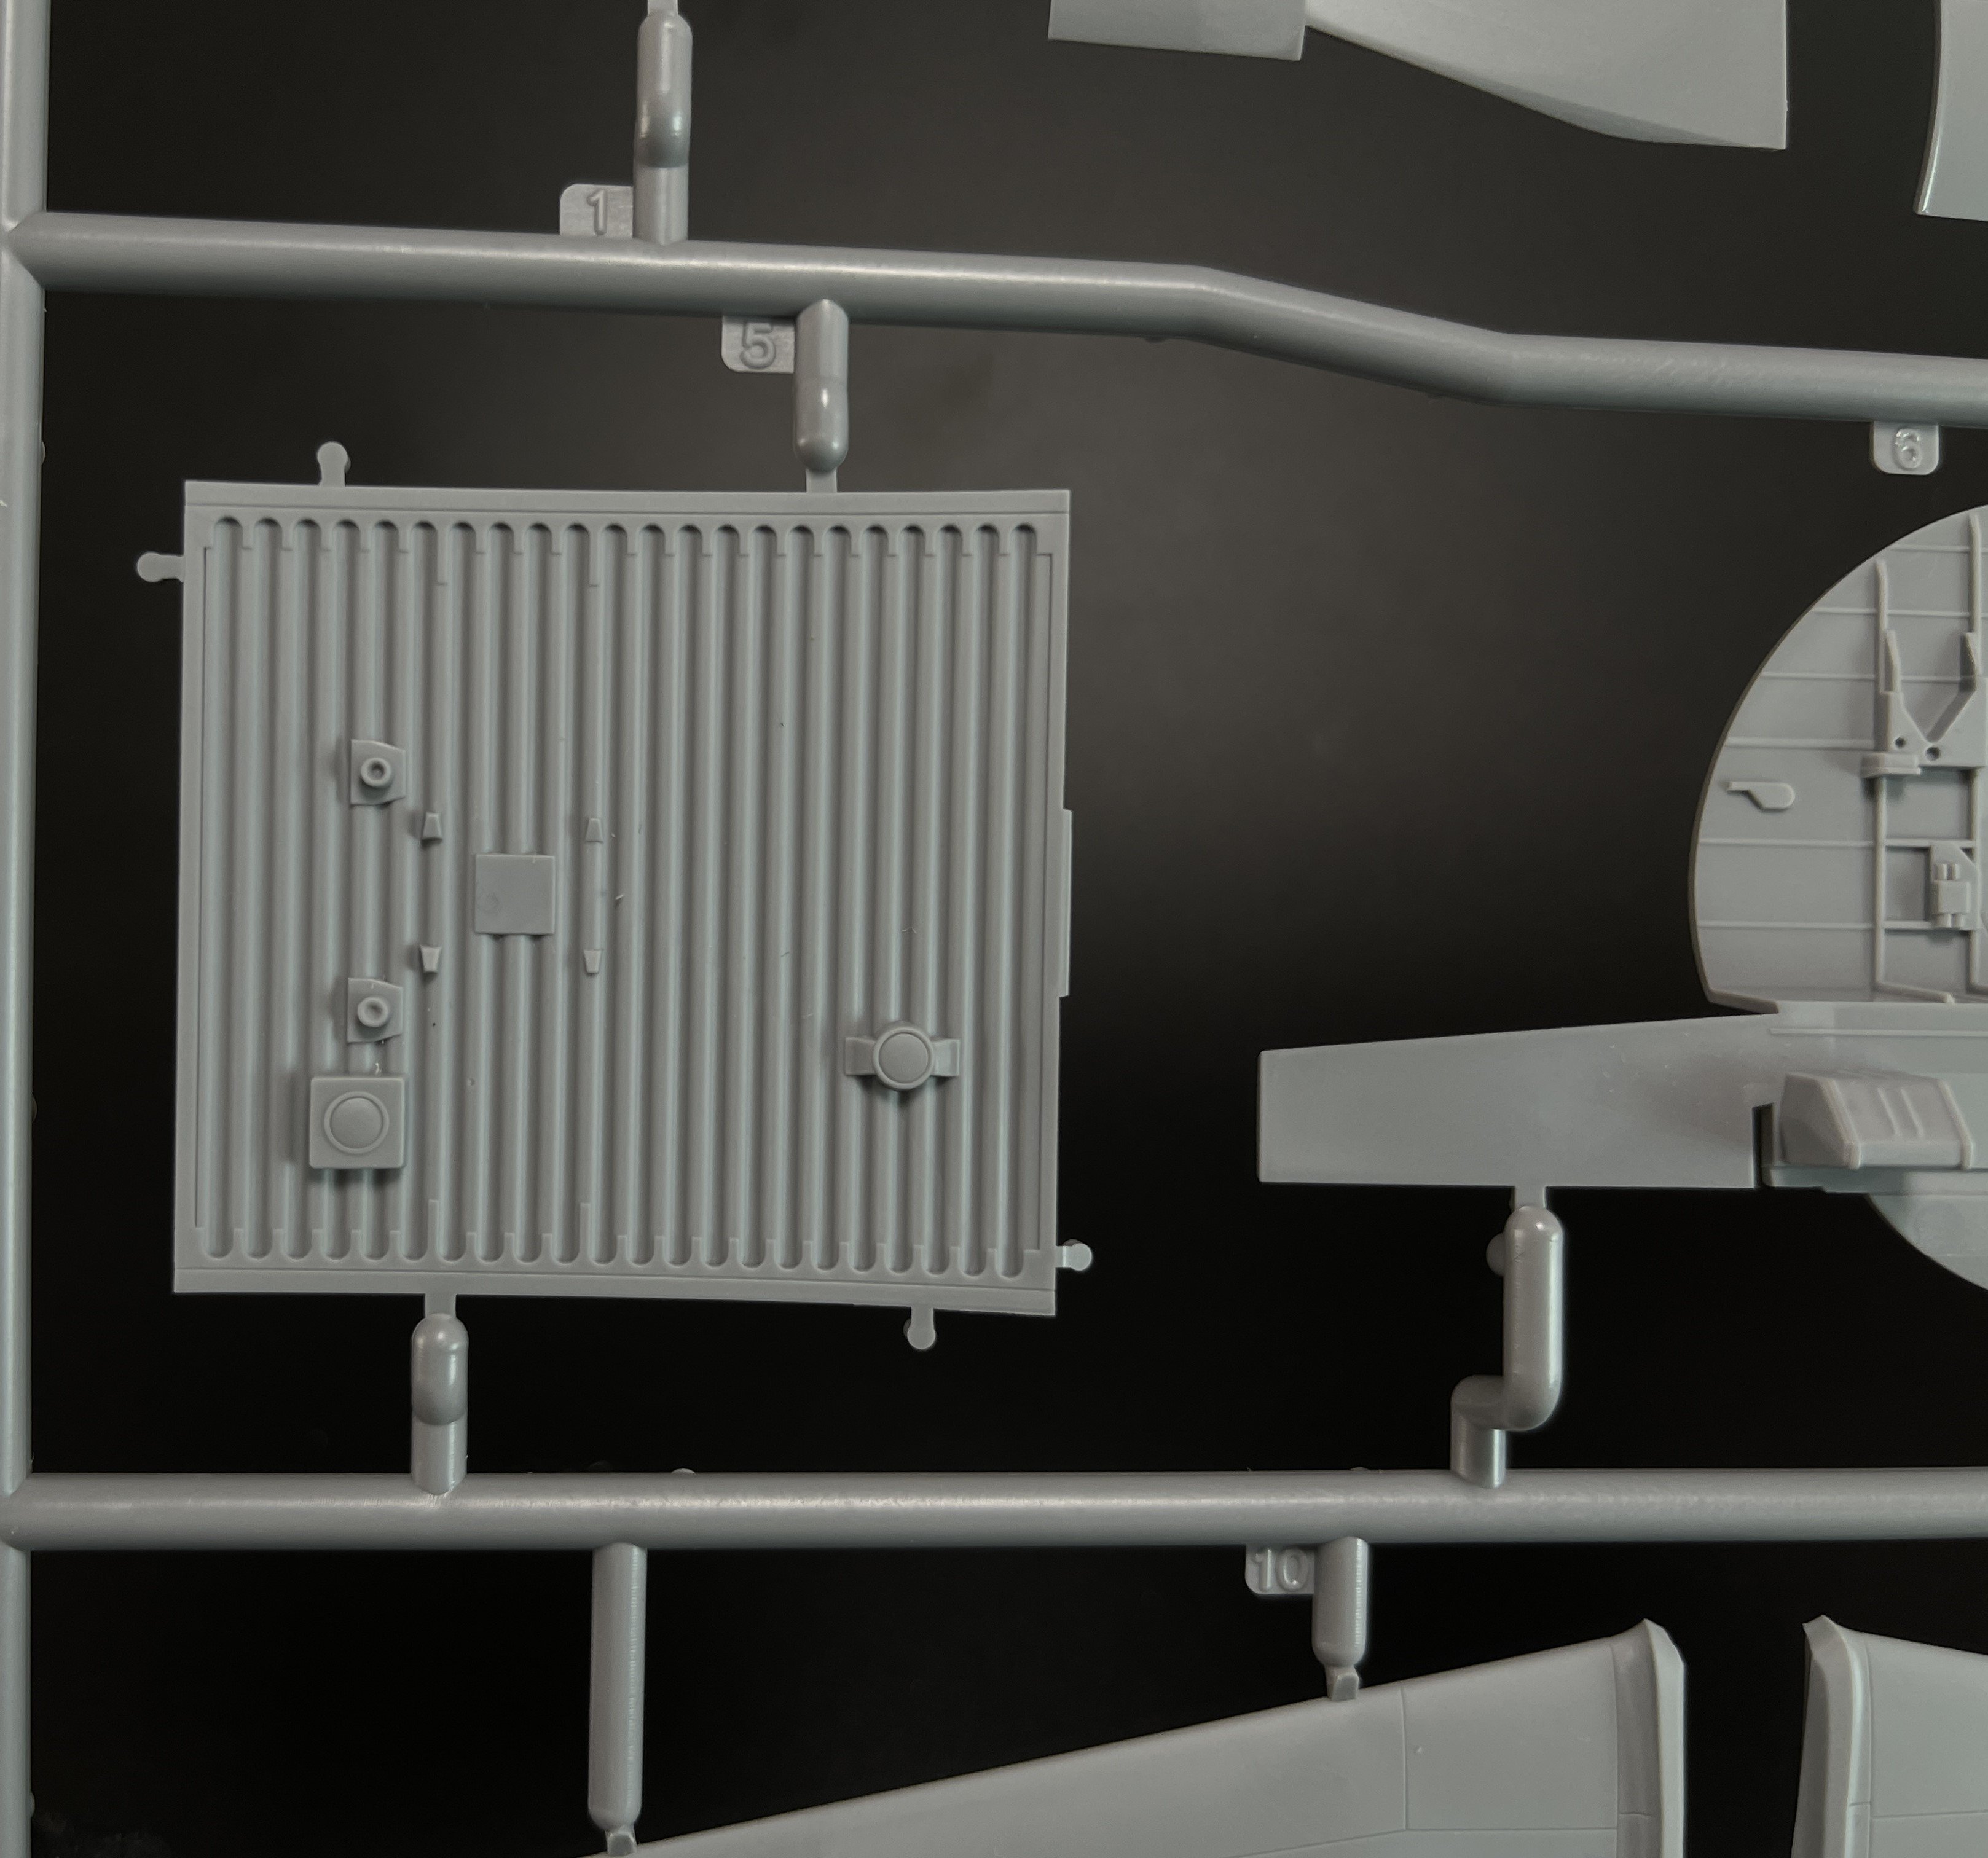
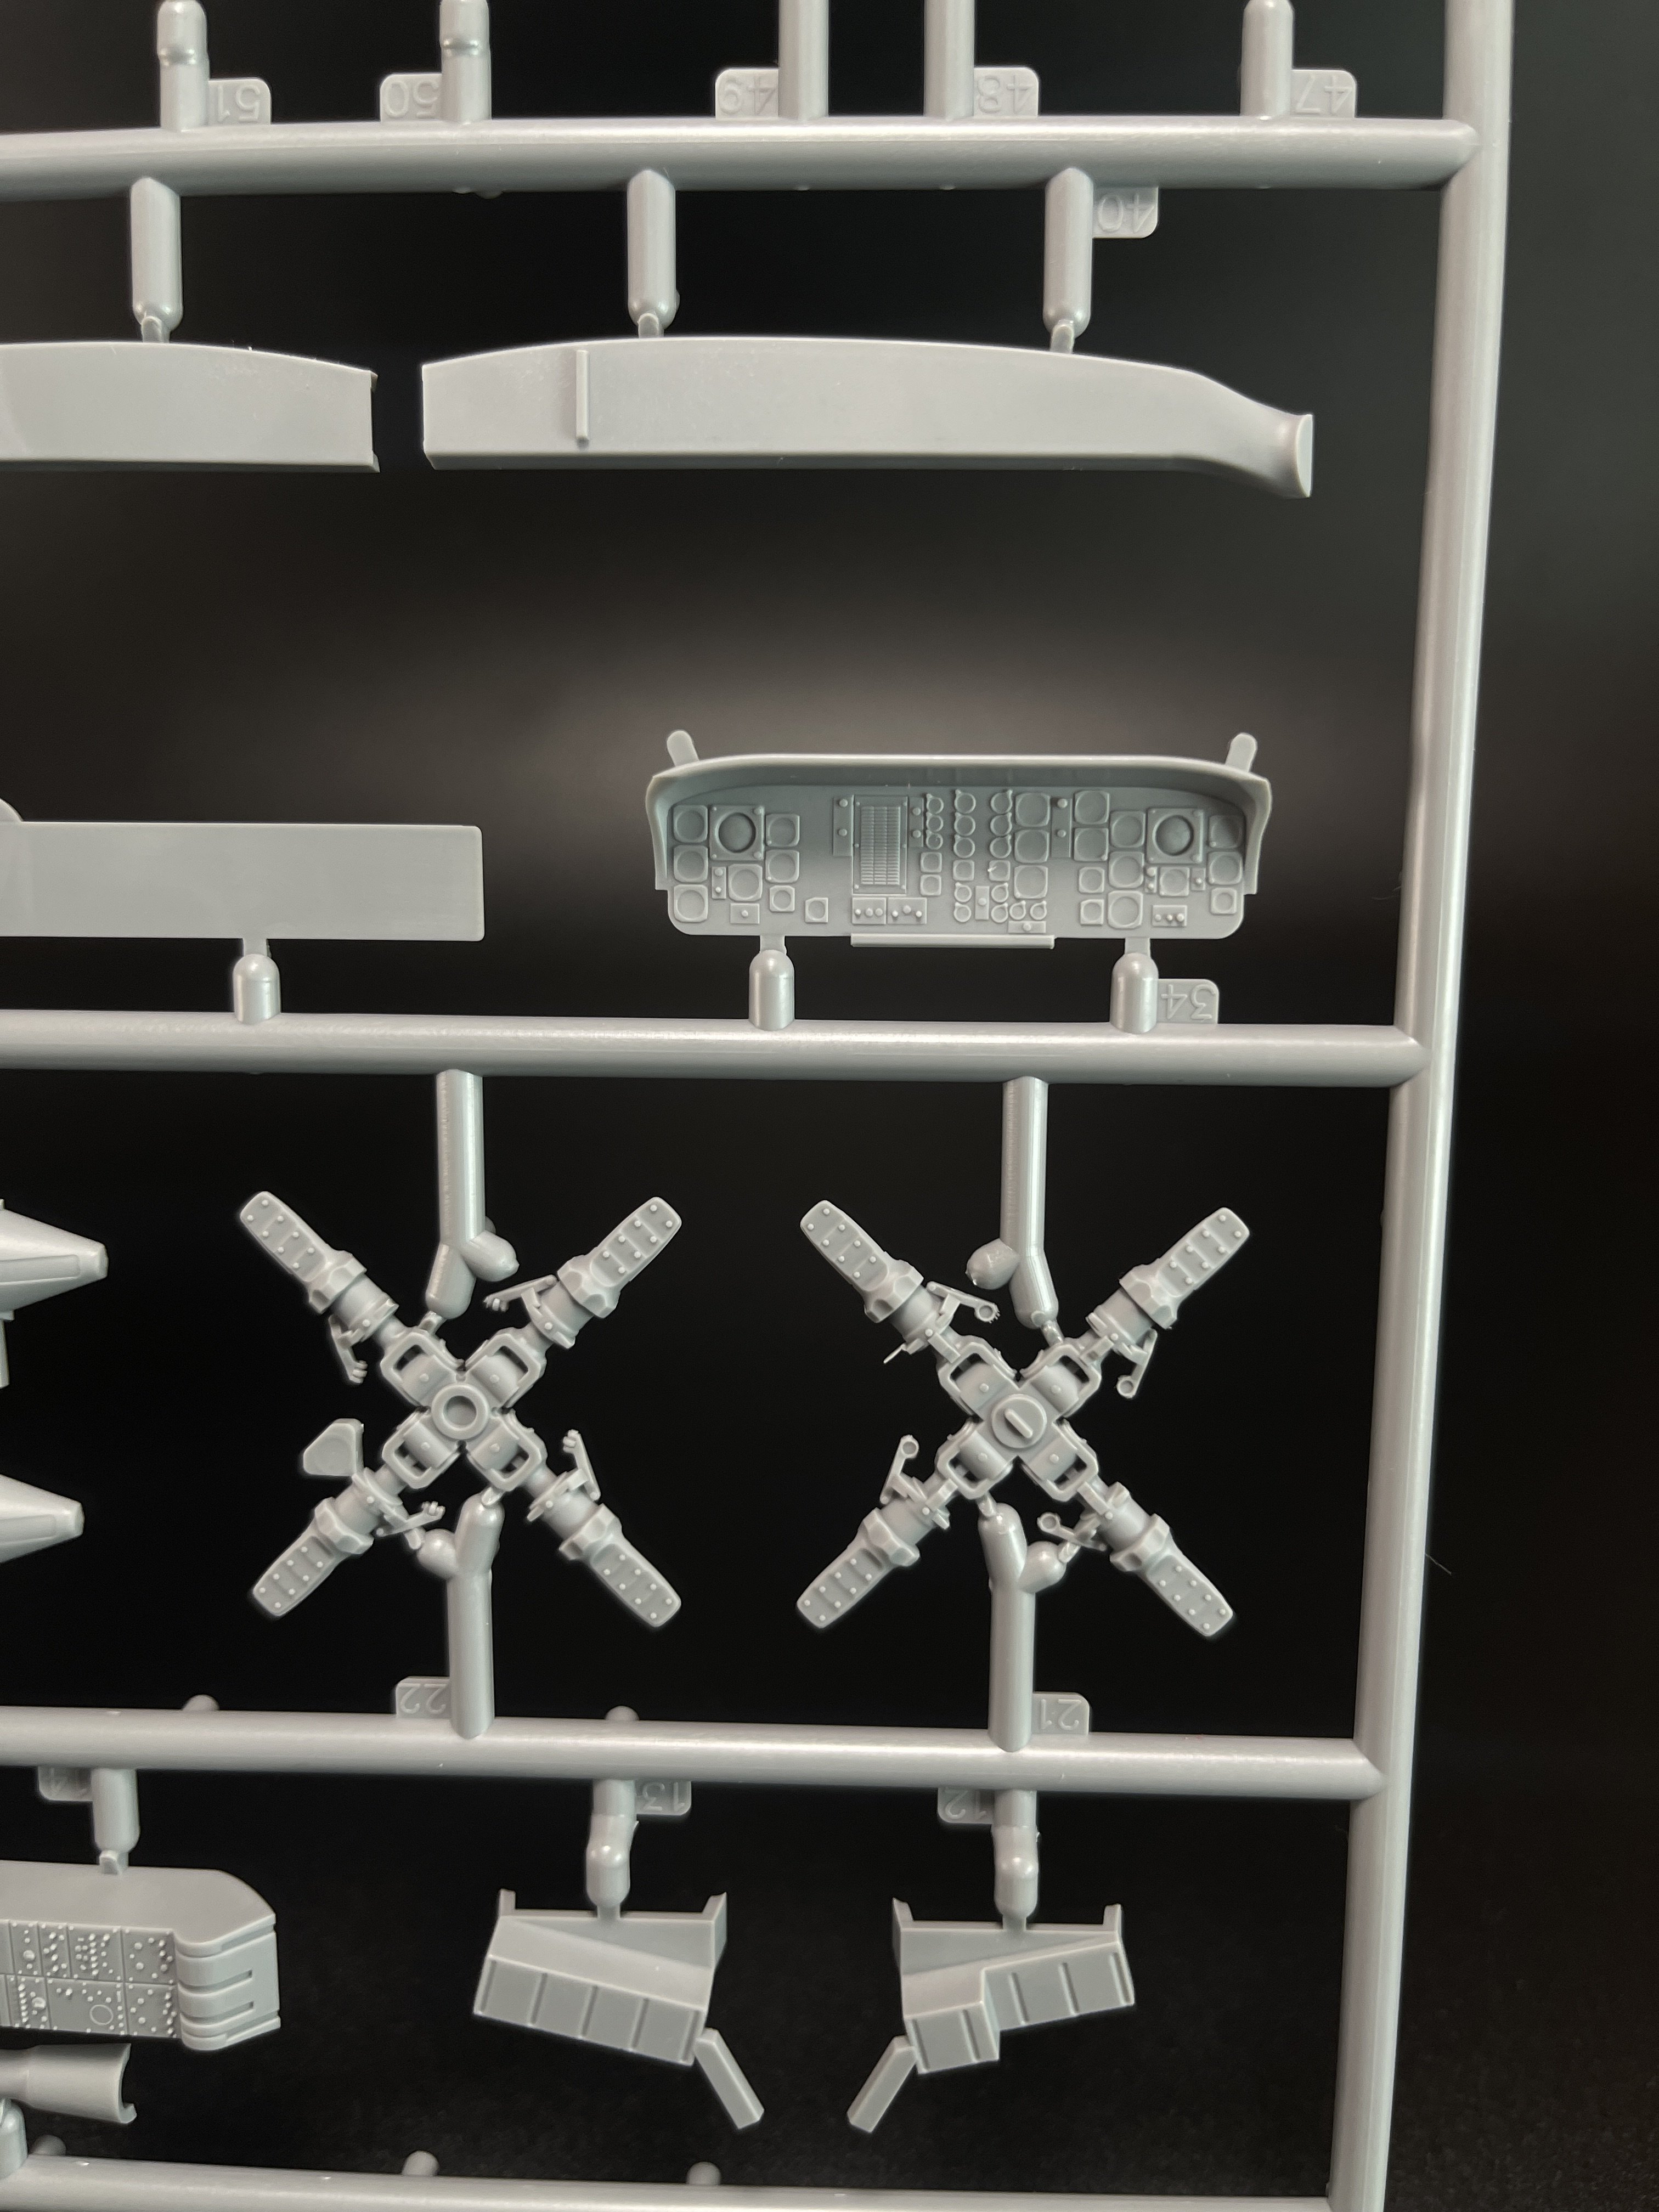
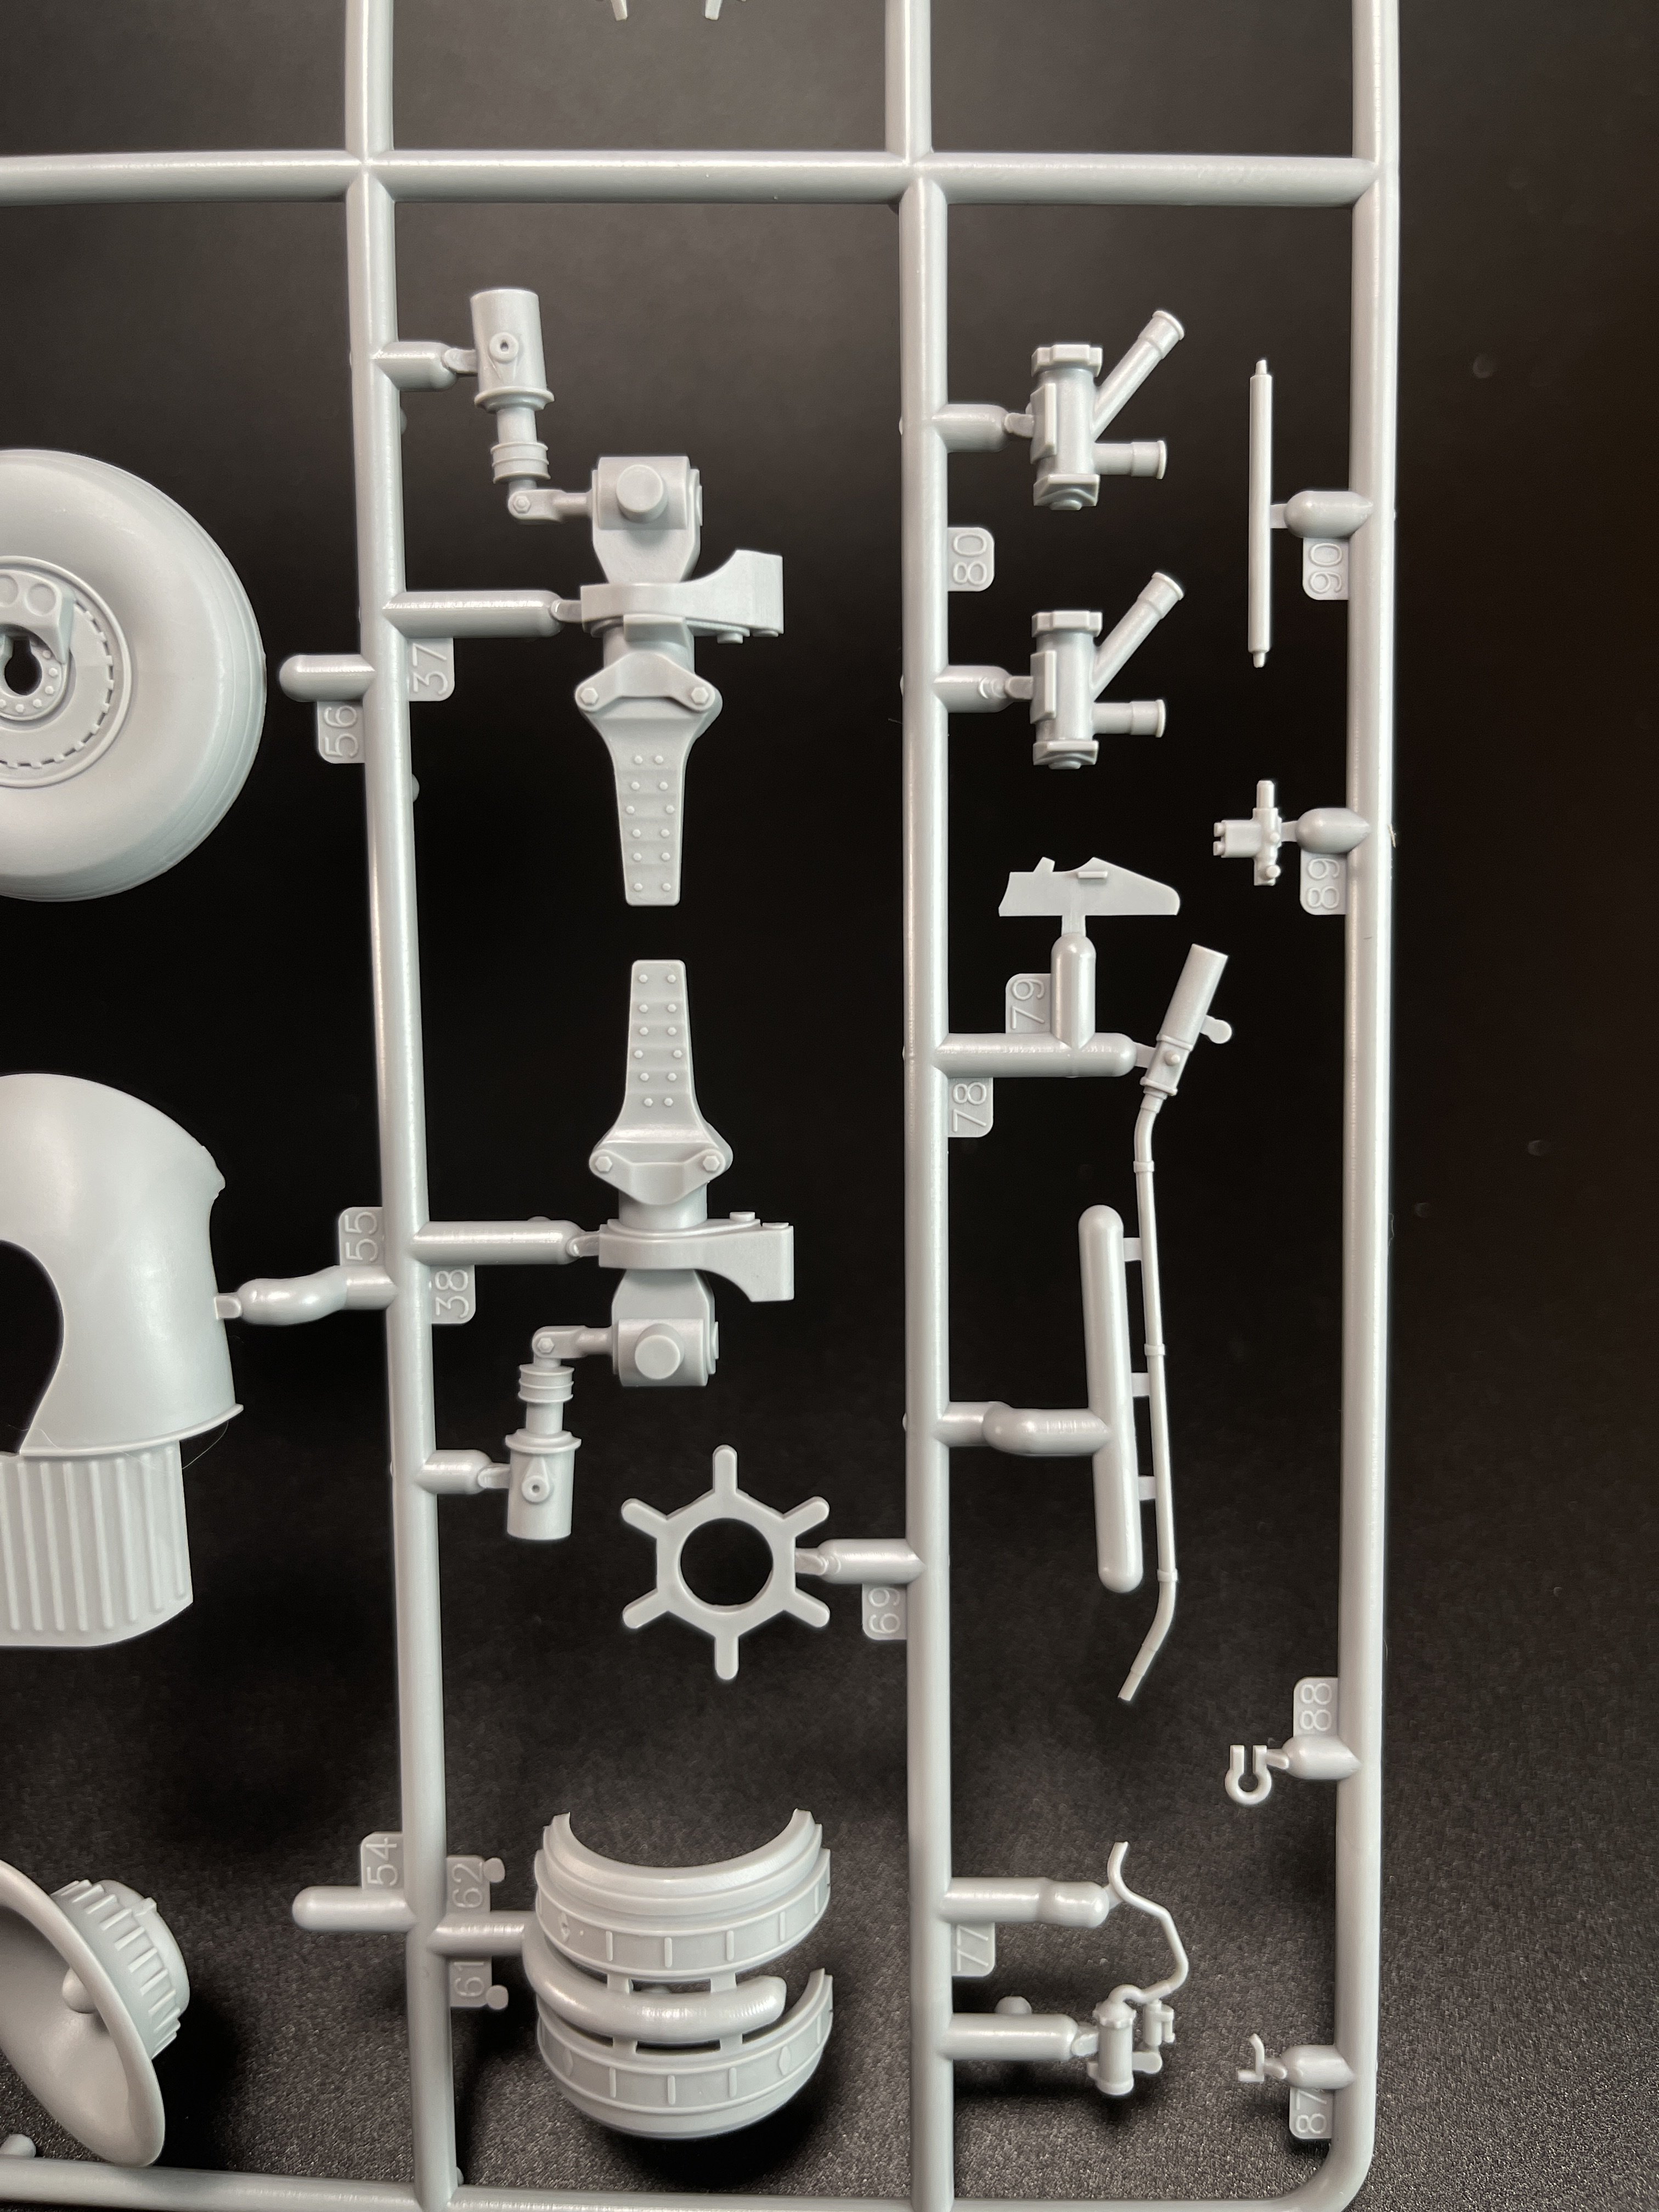
Sprue F
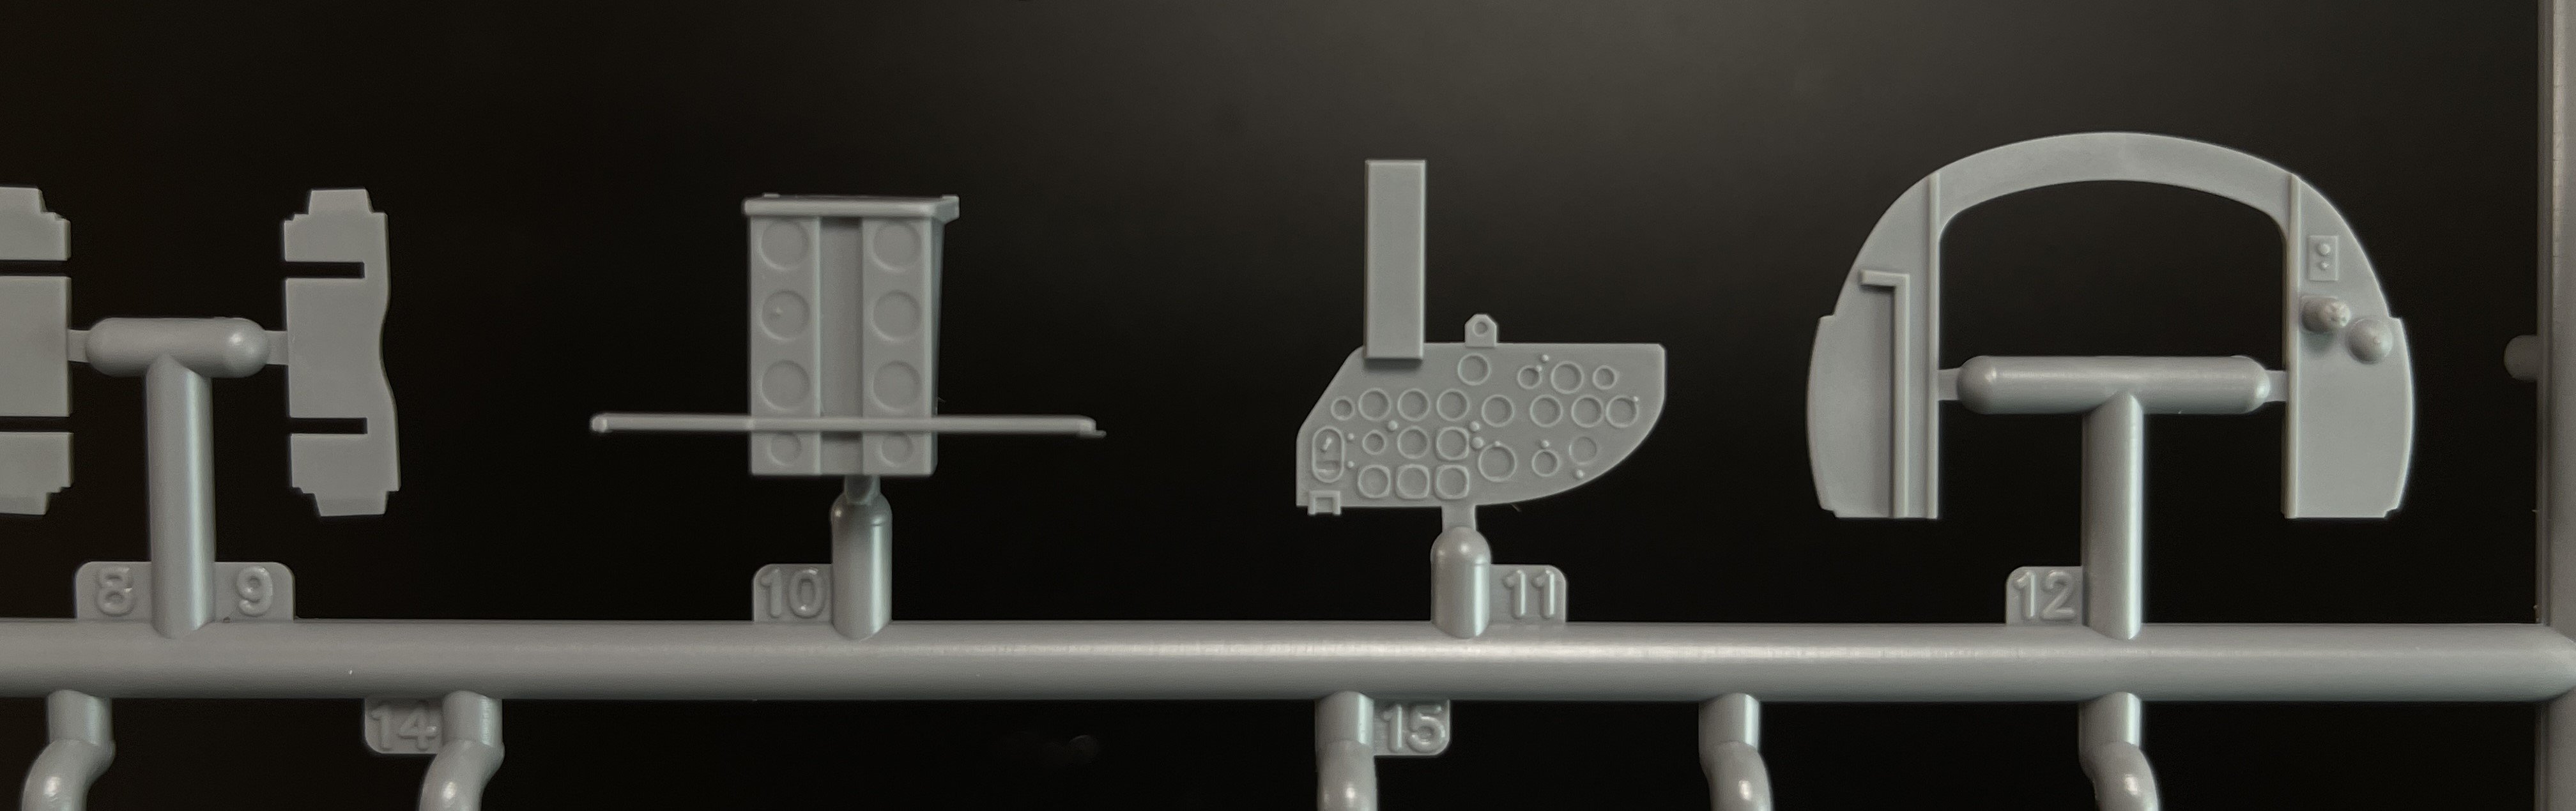
This sprue brings us the flaps, upper turret (and all its details) instrument panels, side cockpit consoles and undercarriage bay.


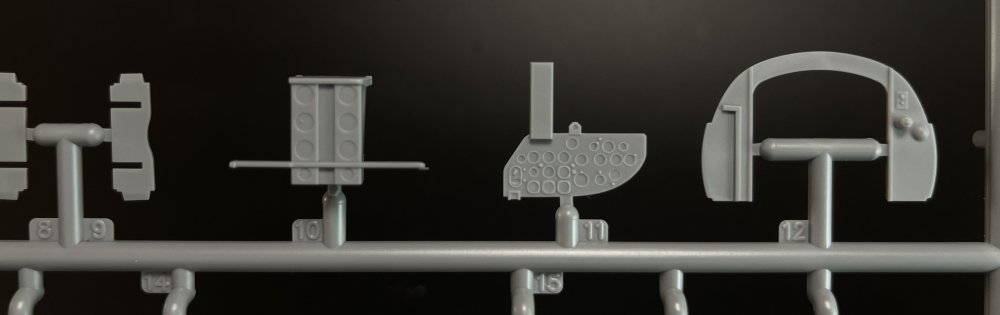

The instrument panels is quite good in raised detail and you have a decal set for the instruments bazels.
The undercarriage bay could have been a little more detail but for me, is good as it is. Personally I don’t used to give much attention to undercarriage detail as is a quite hidden detail.
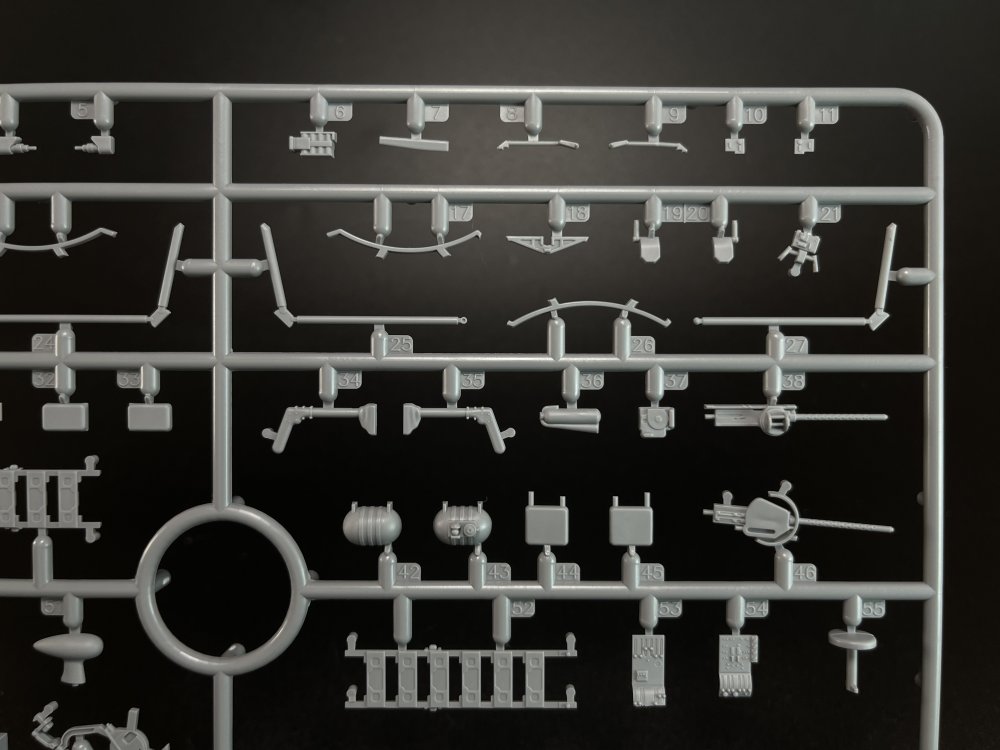
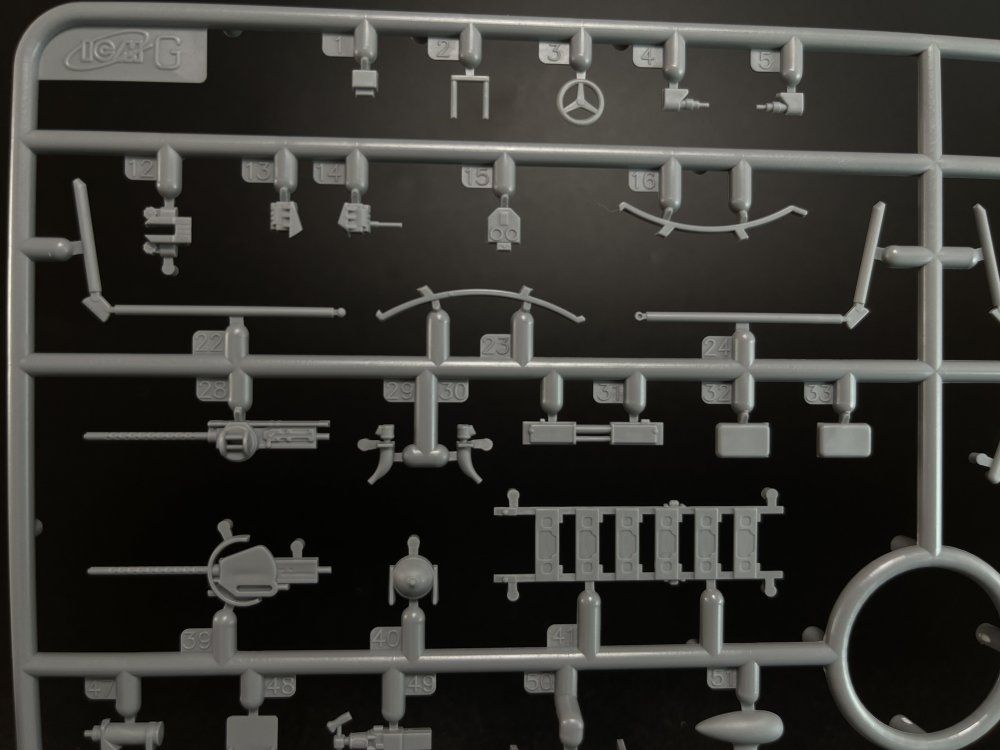
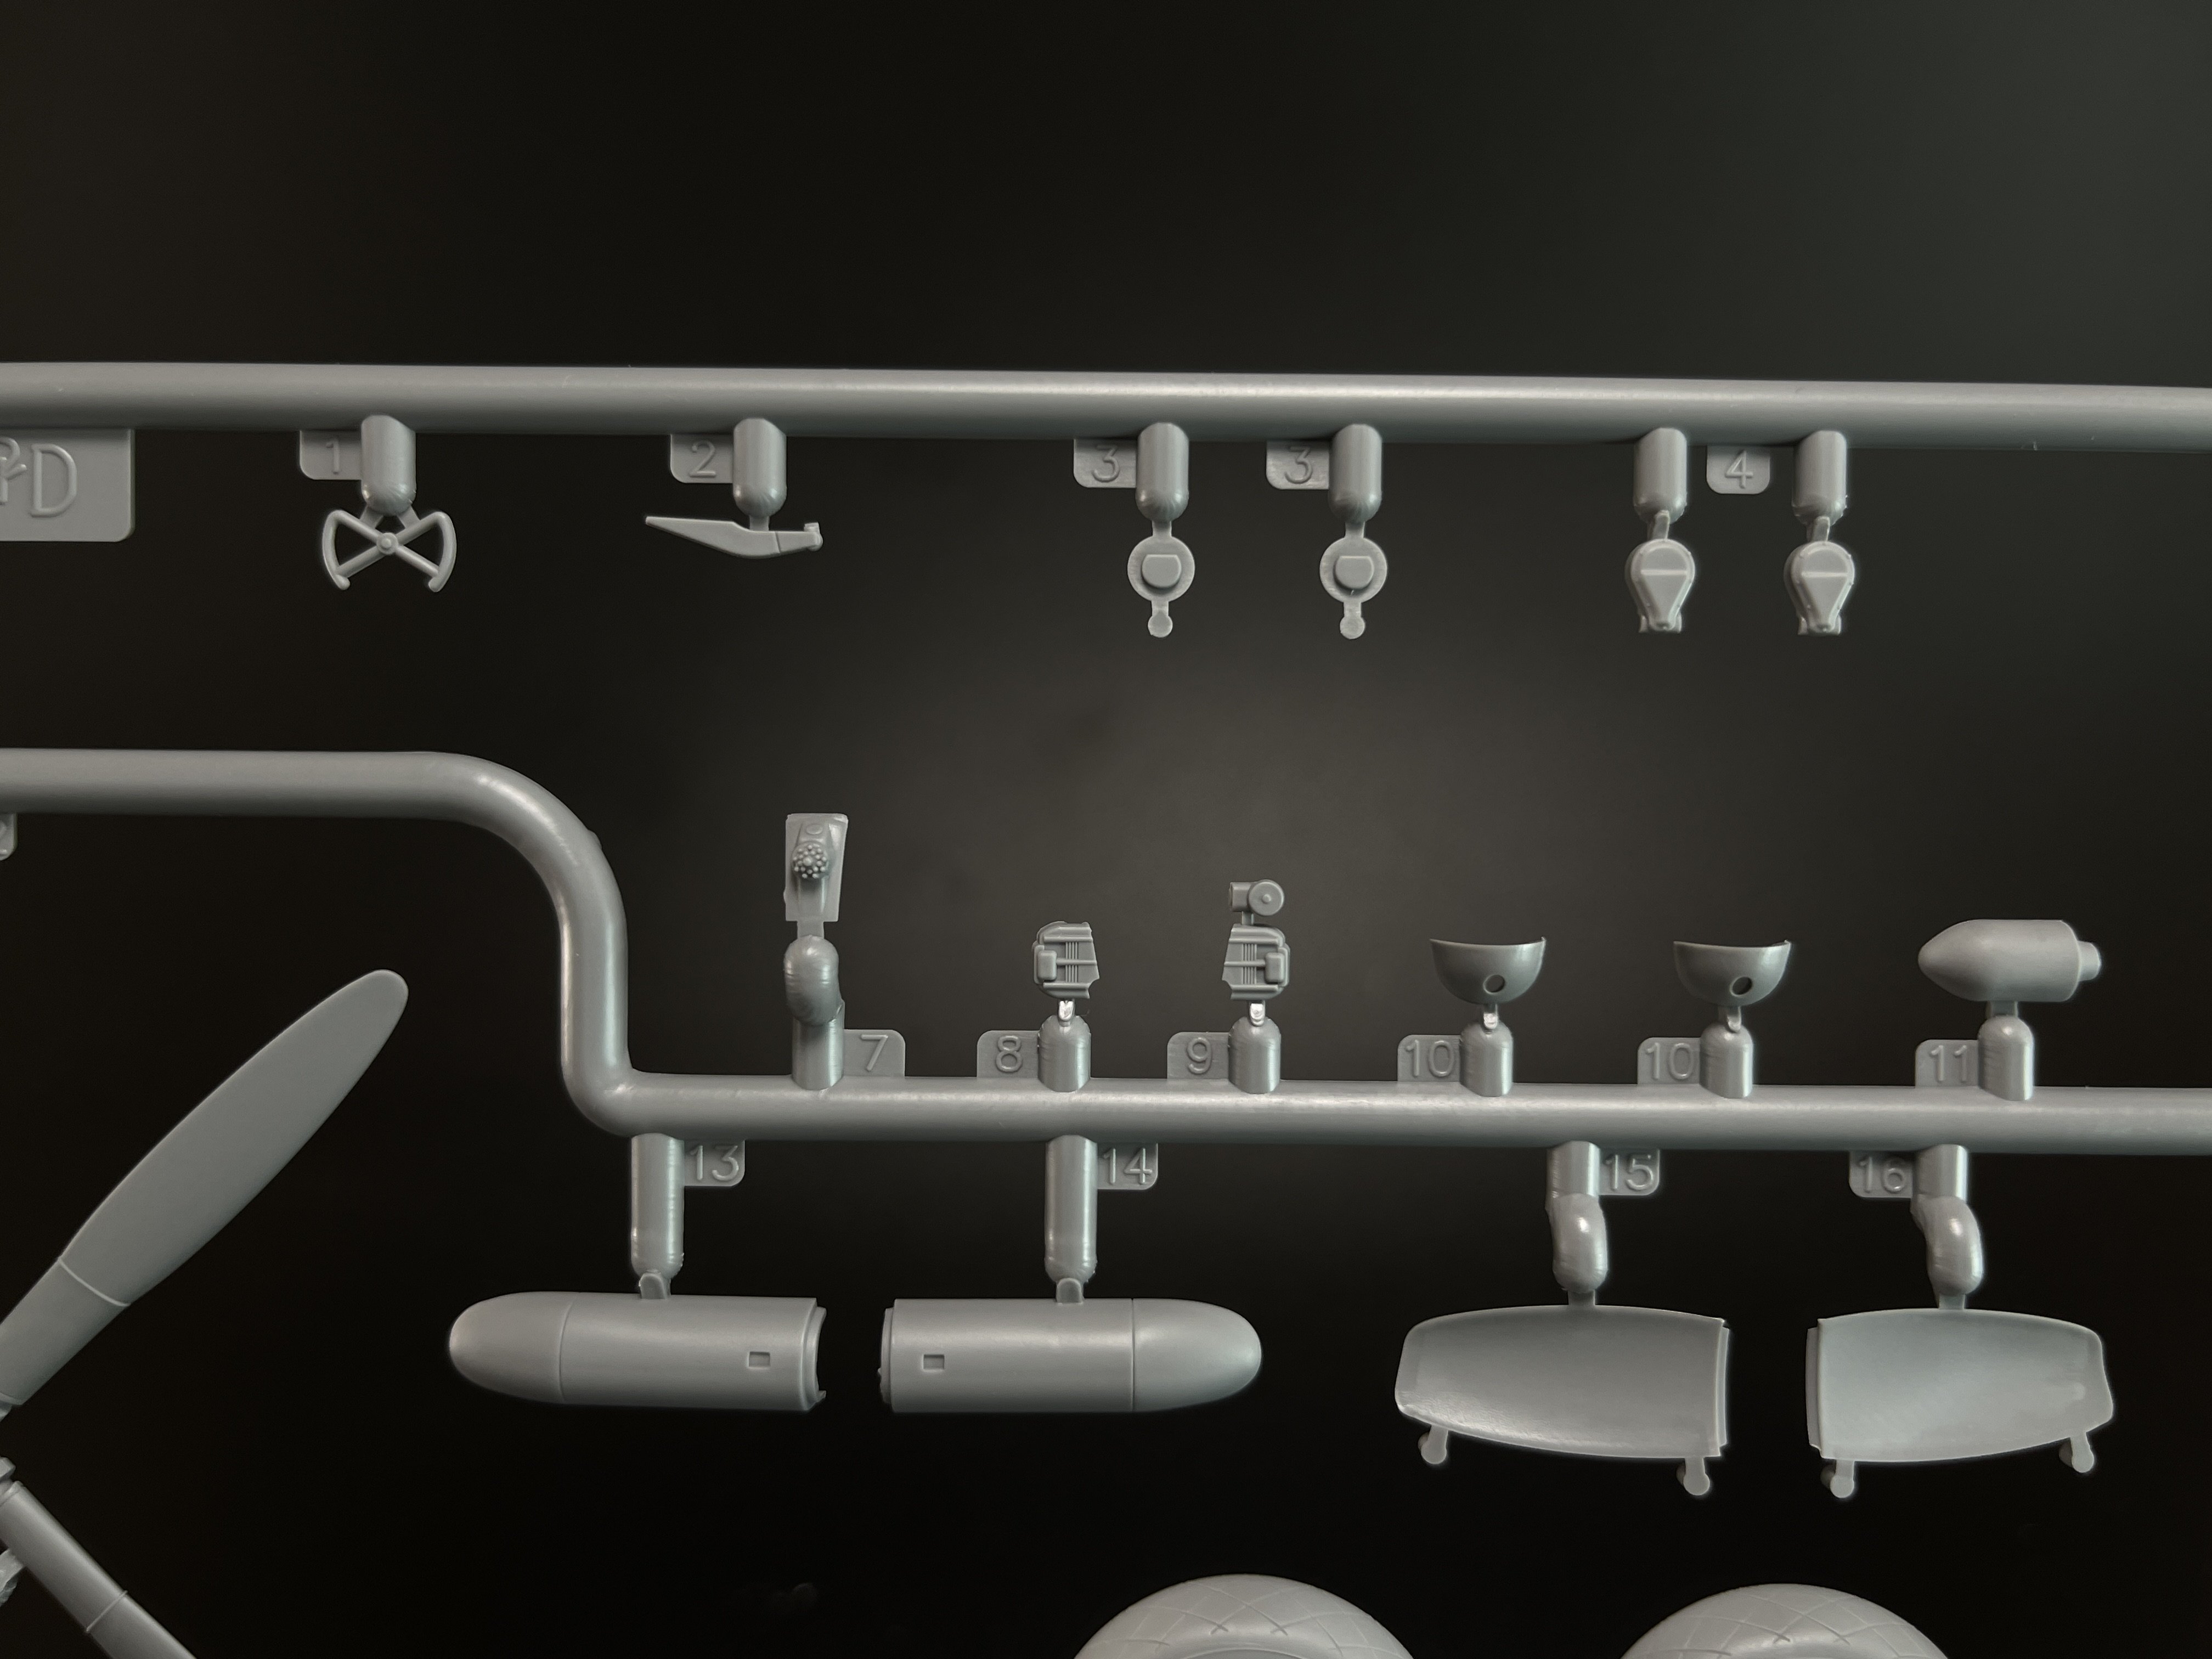
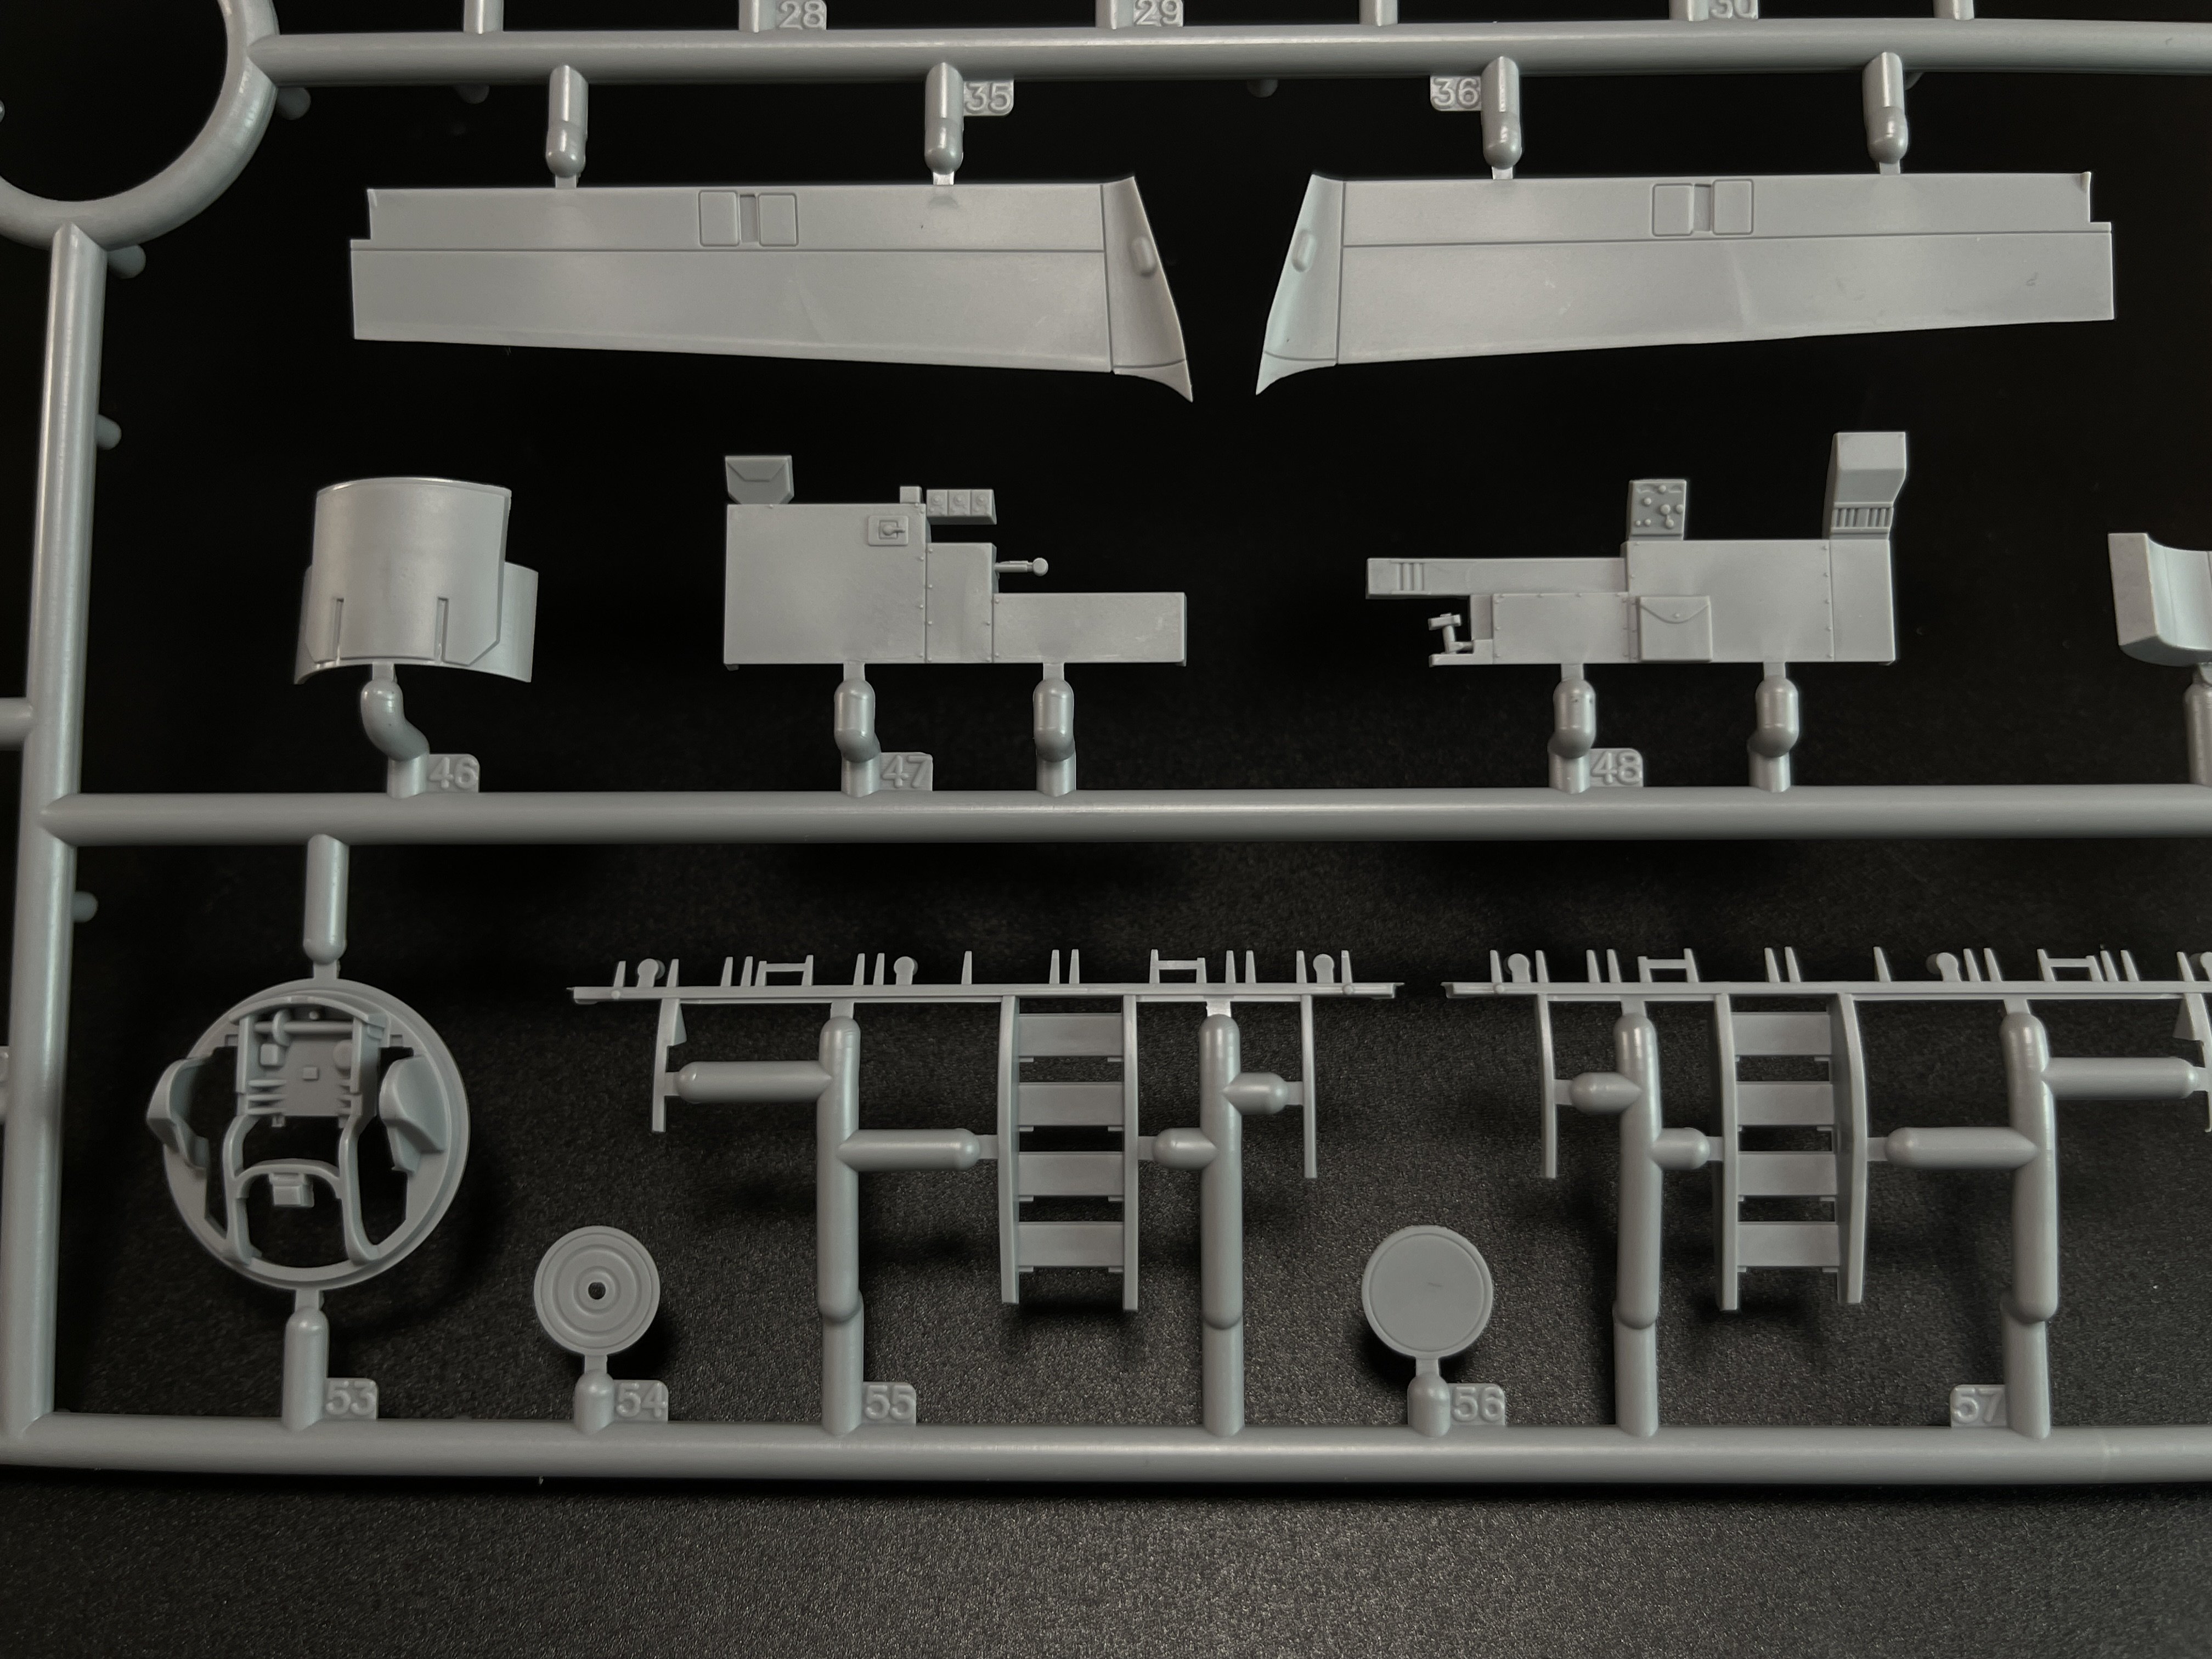
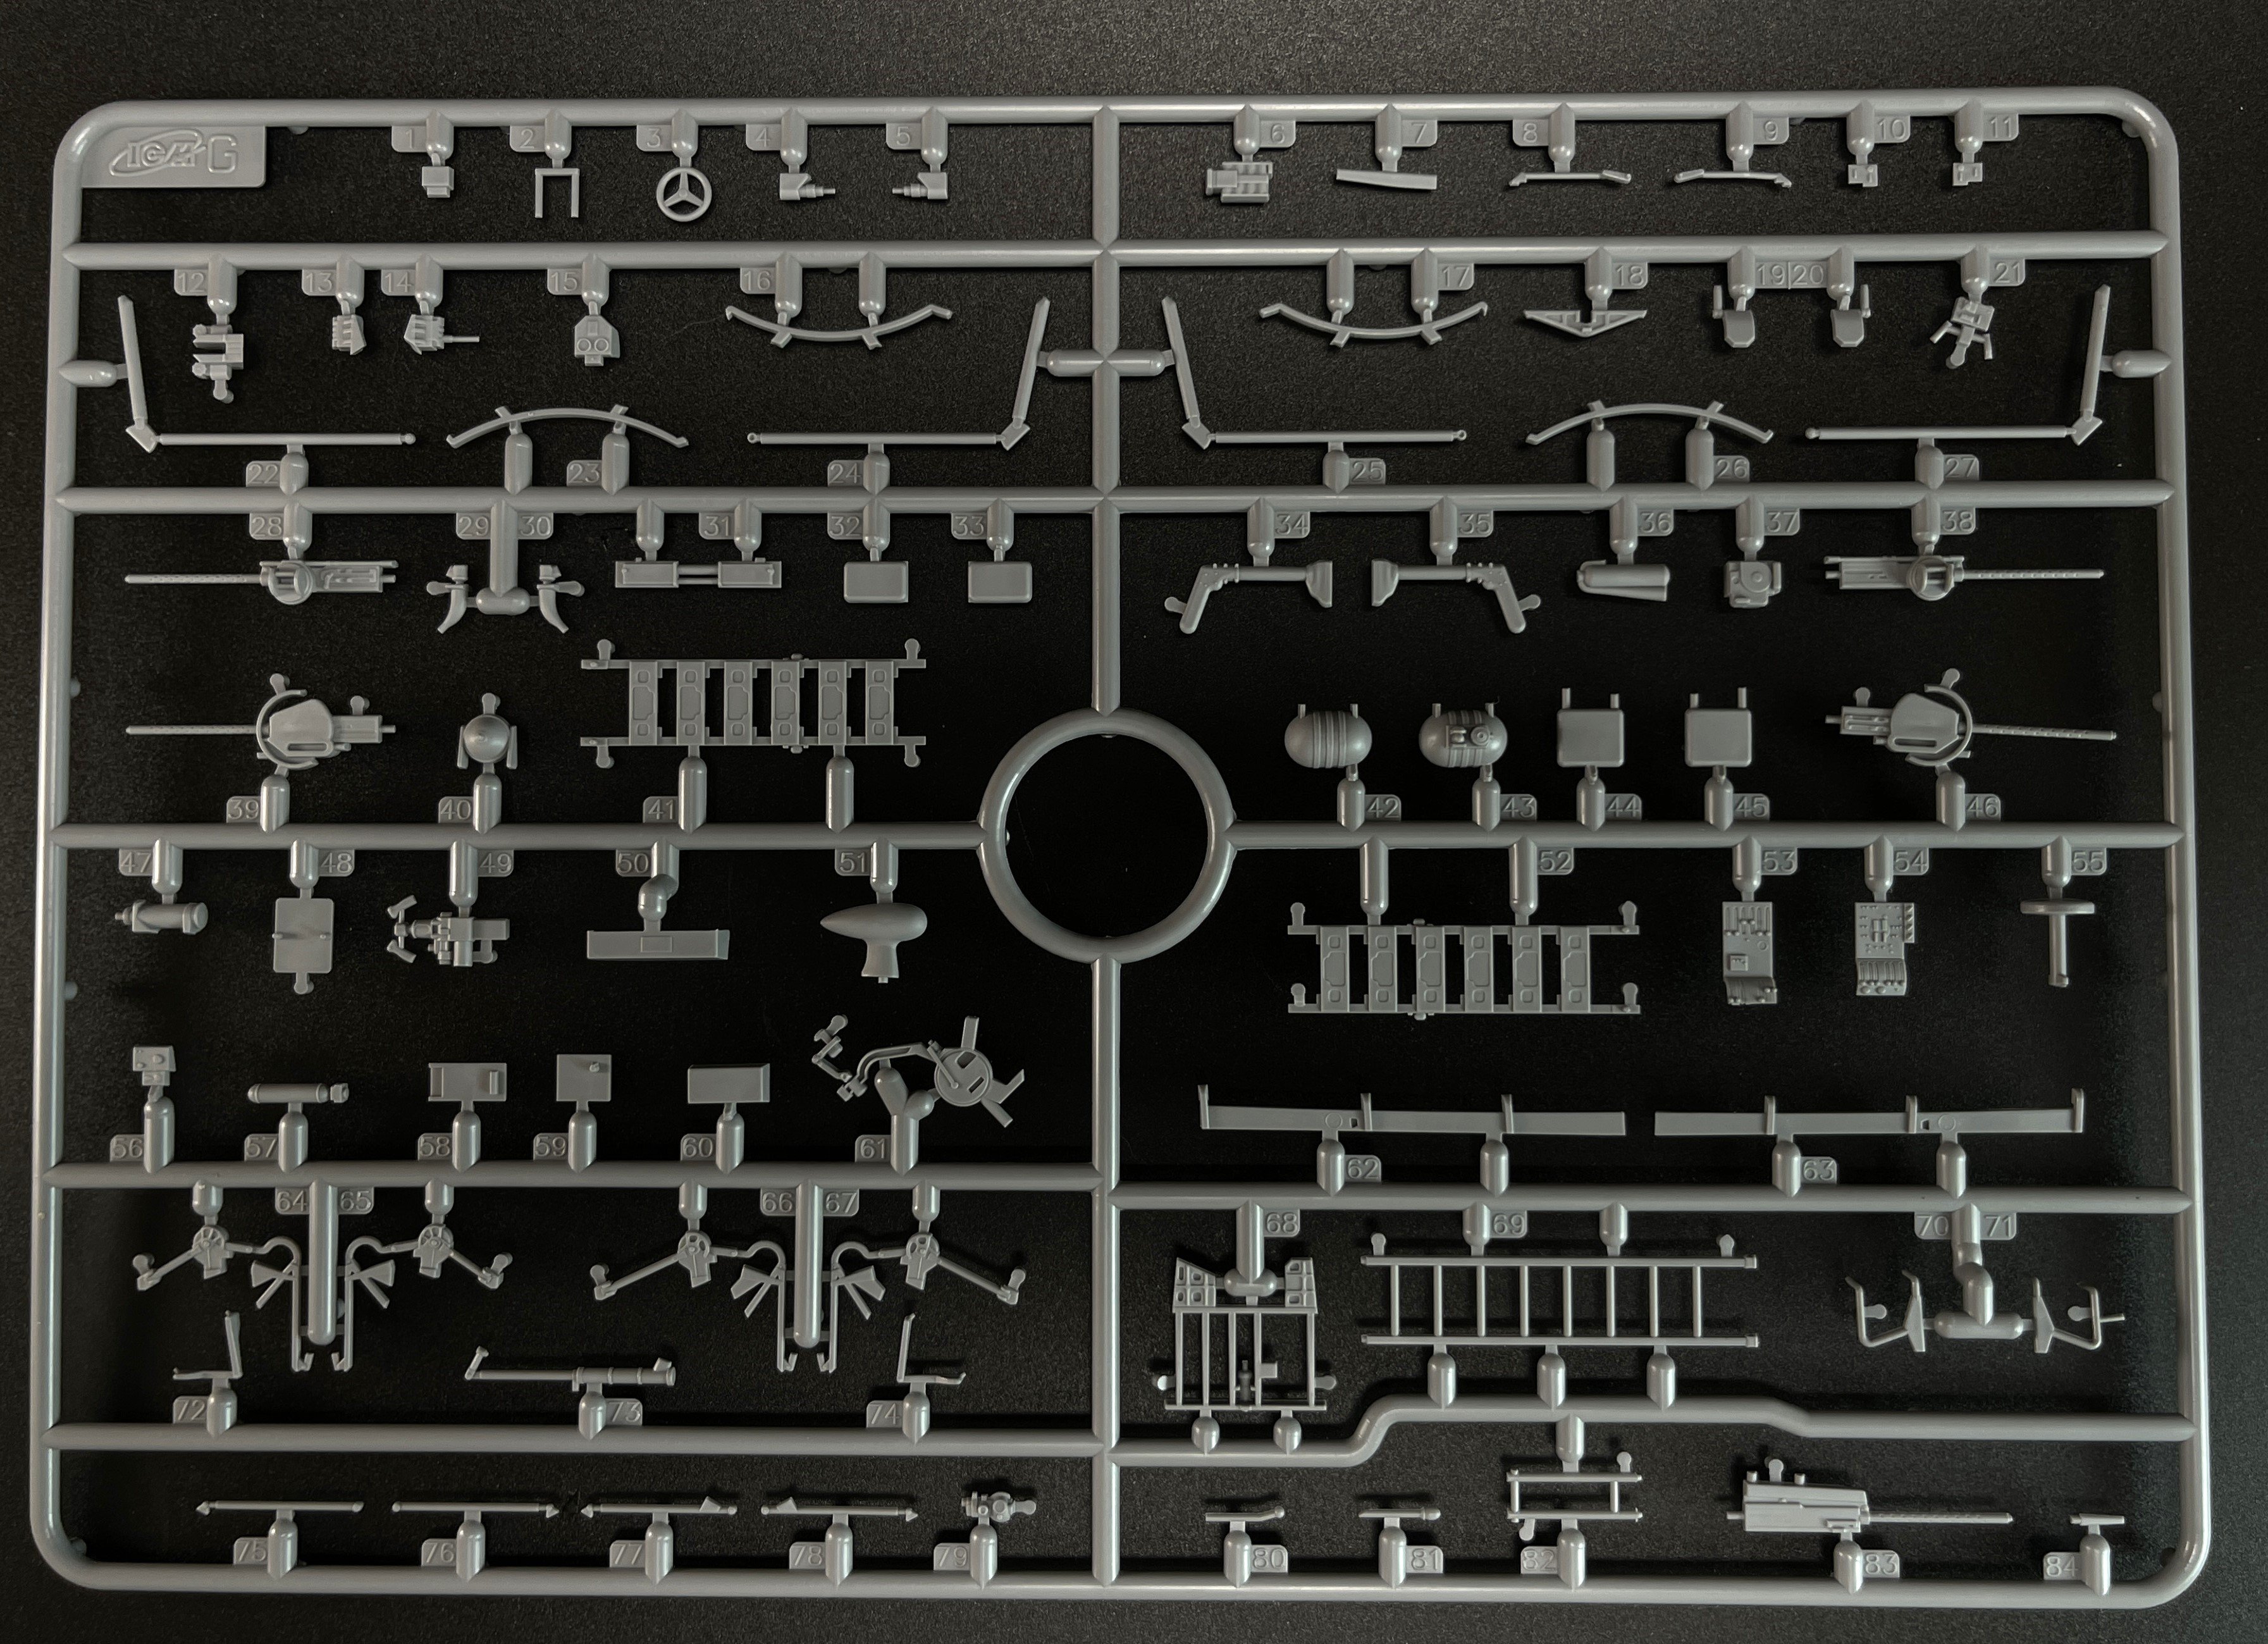
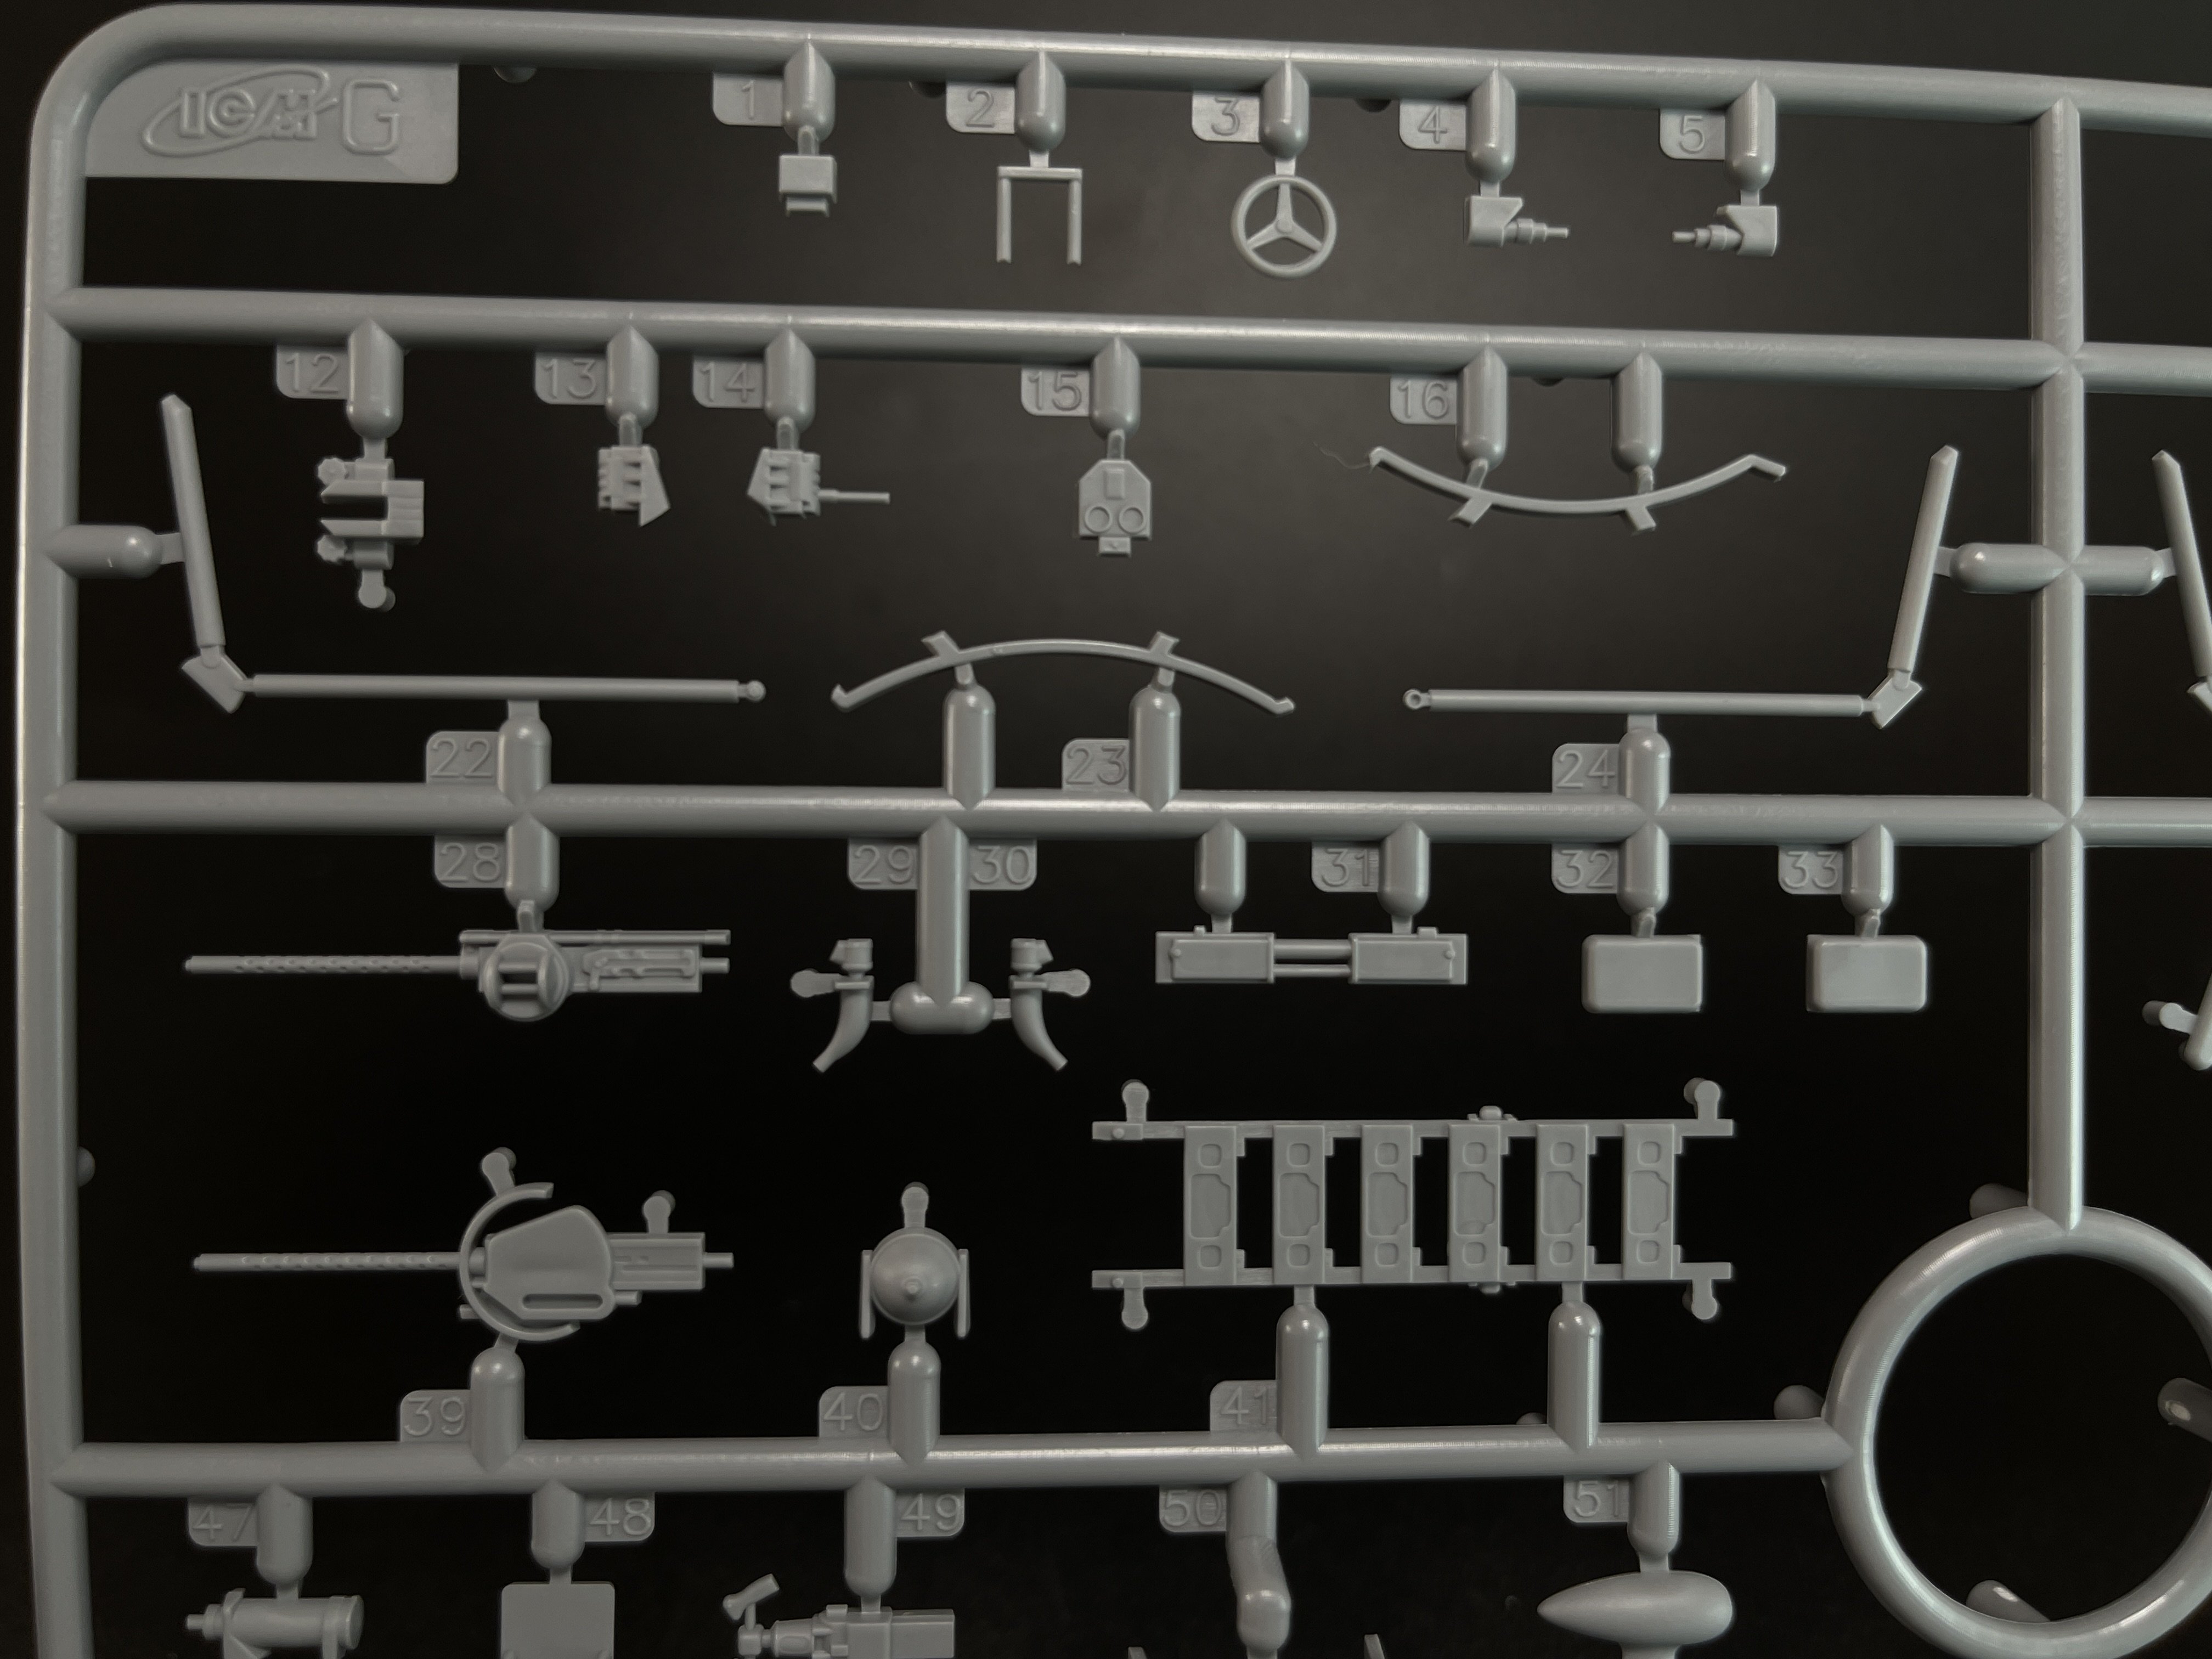
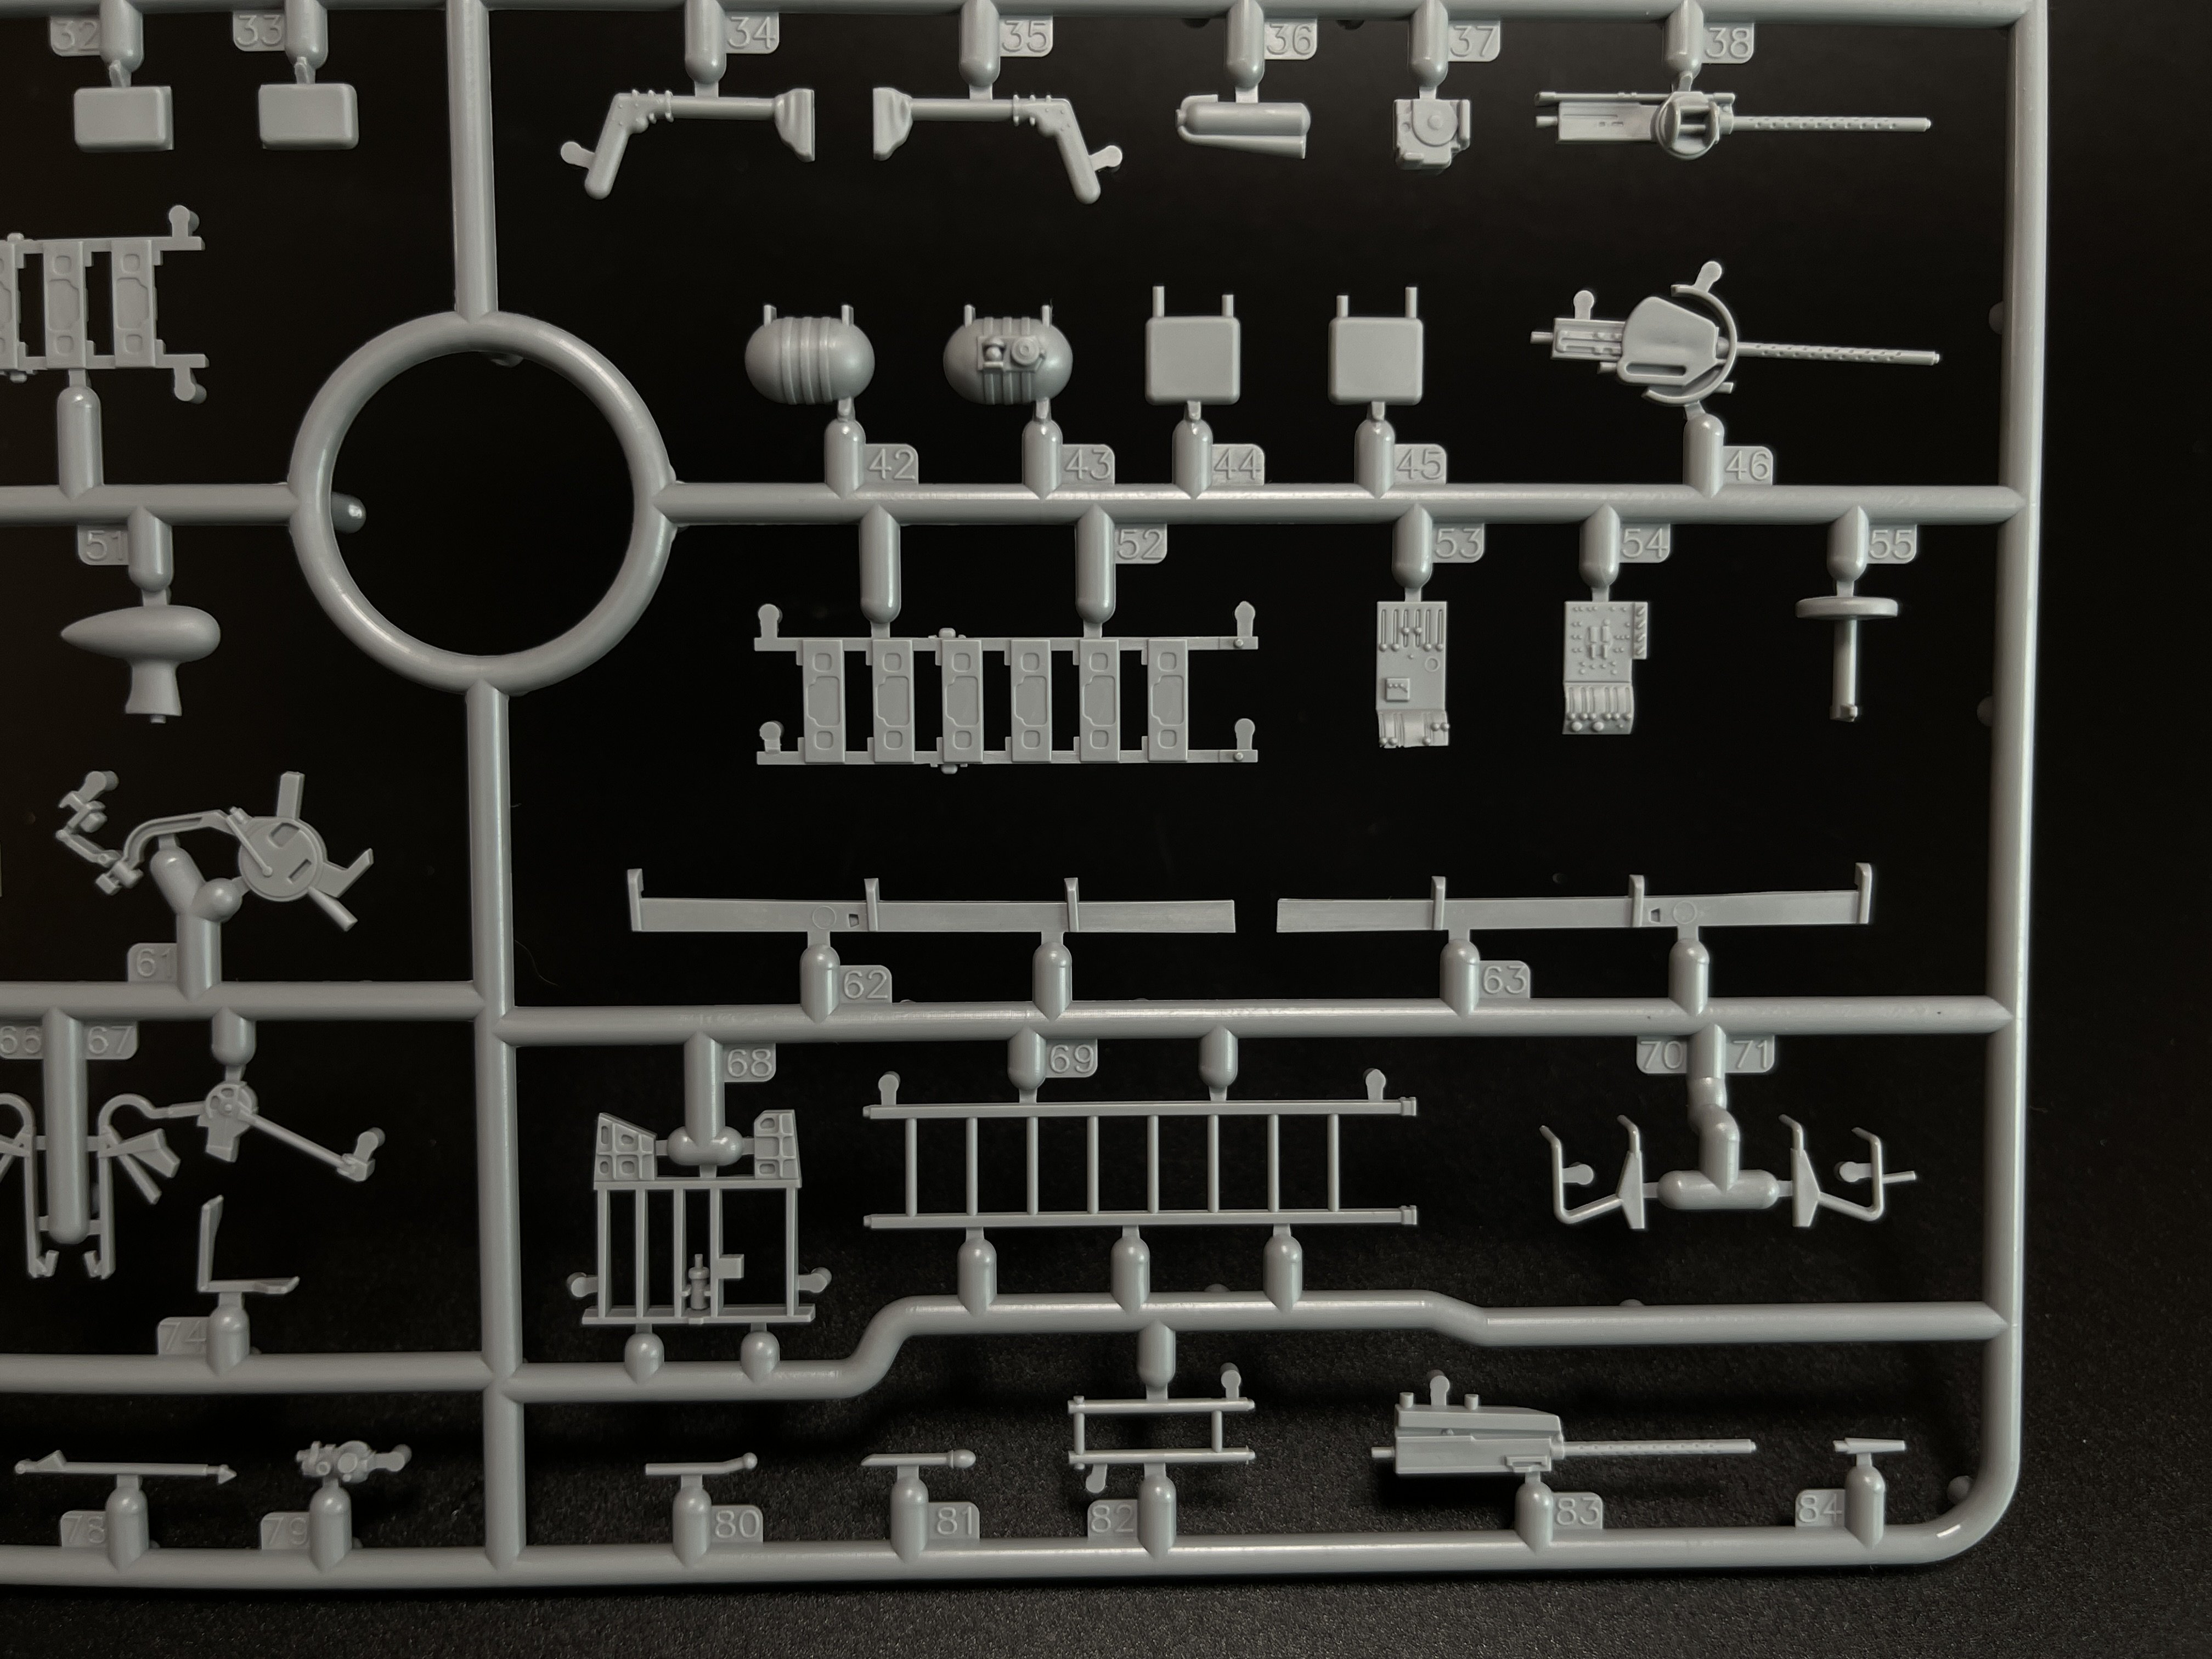
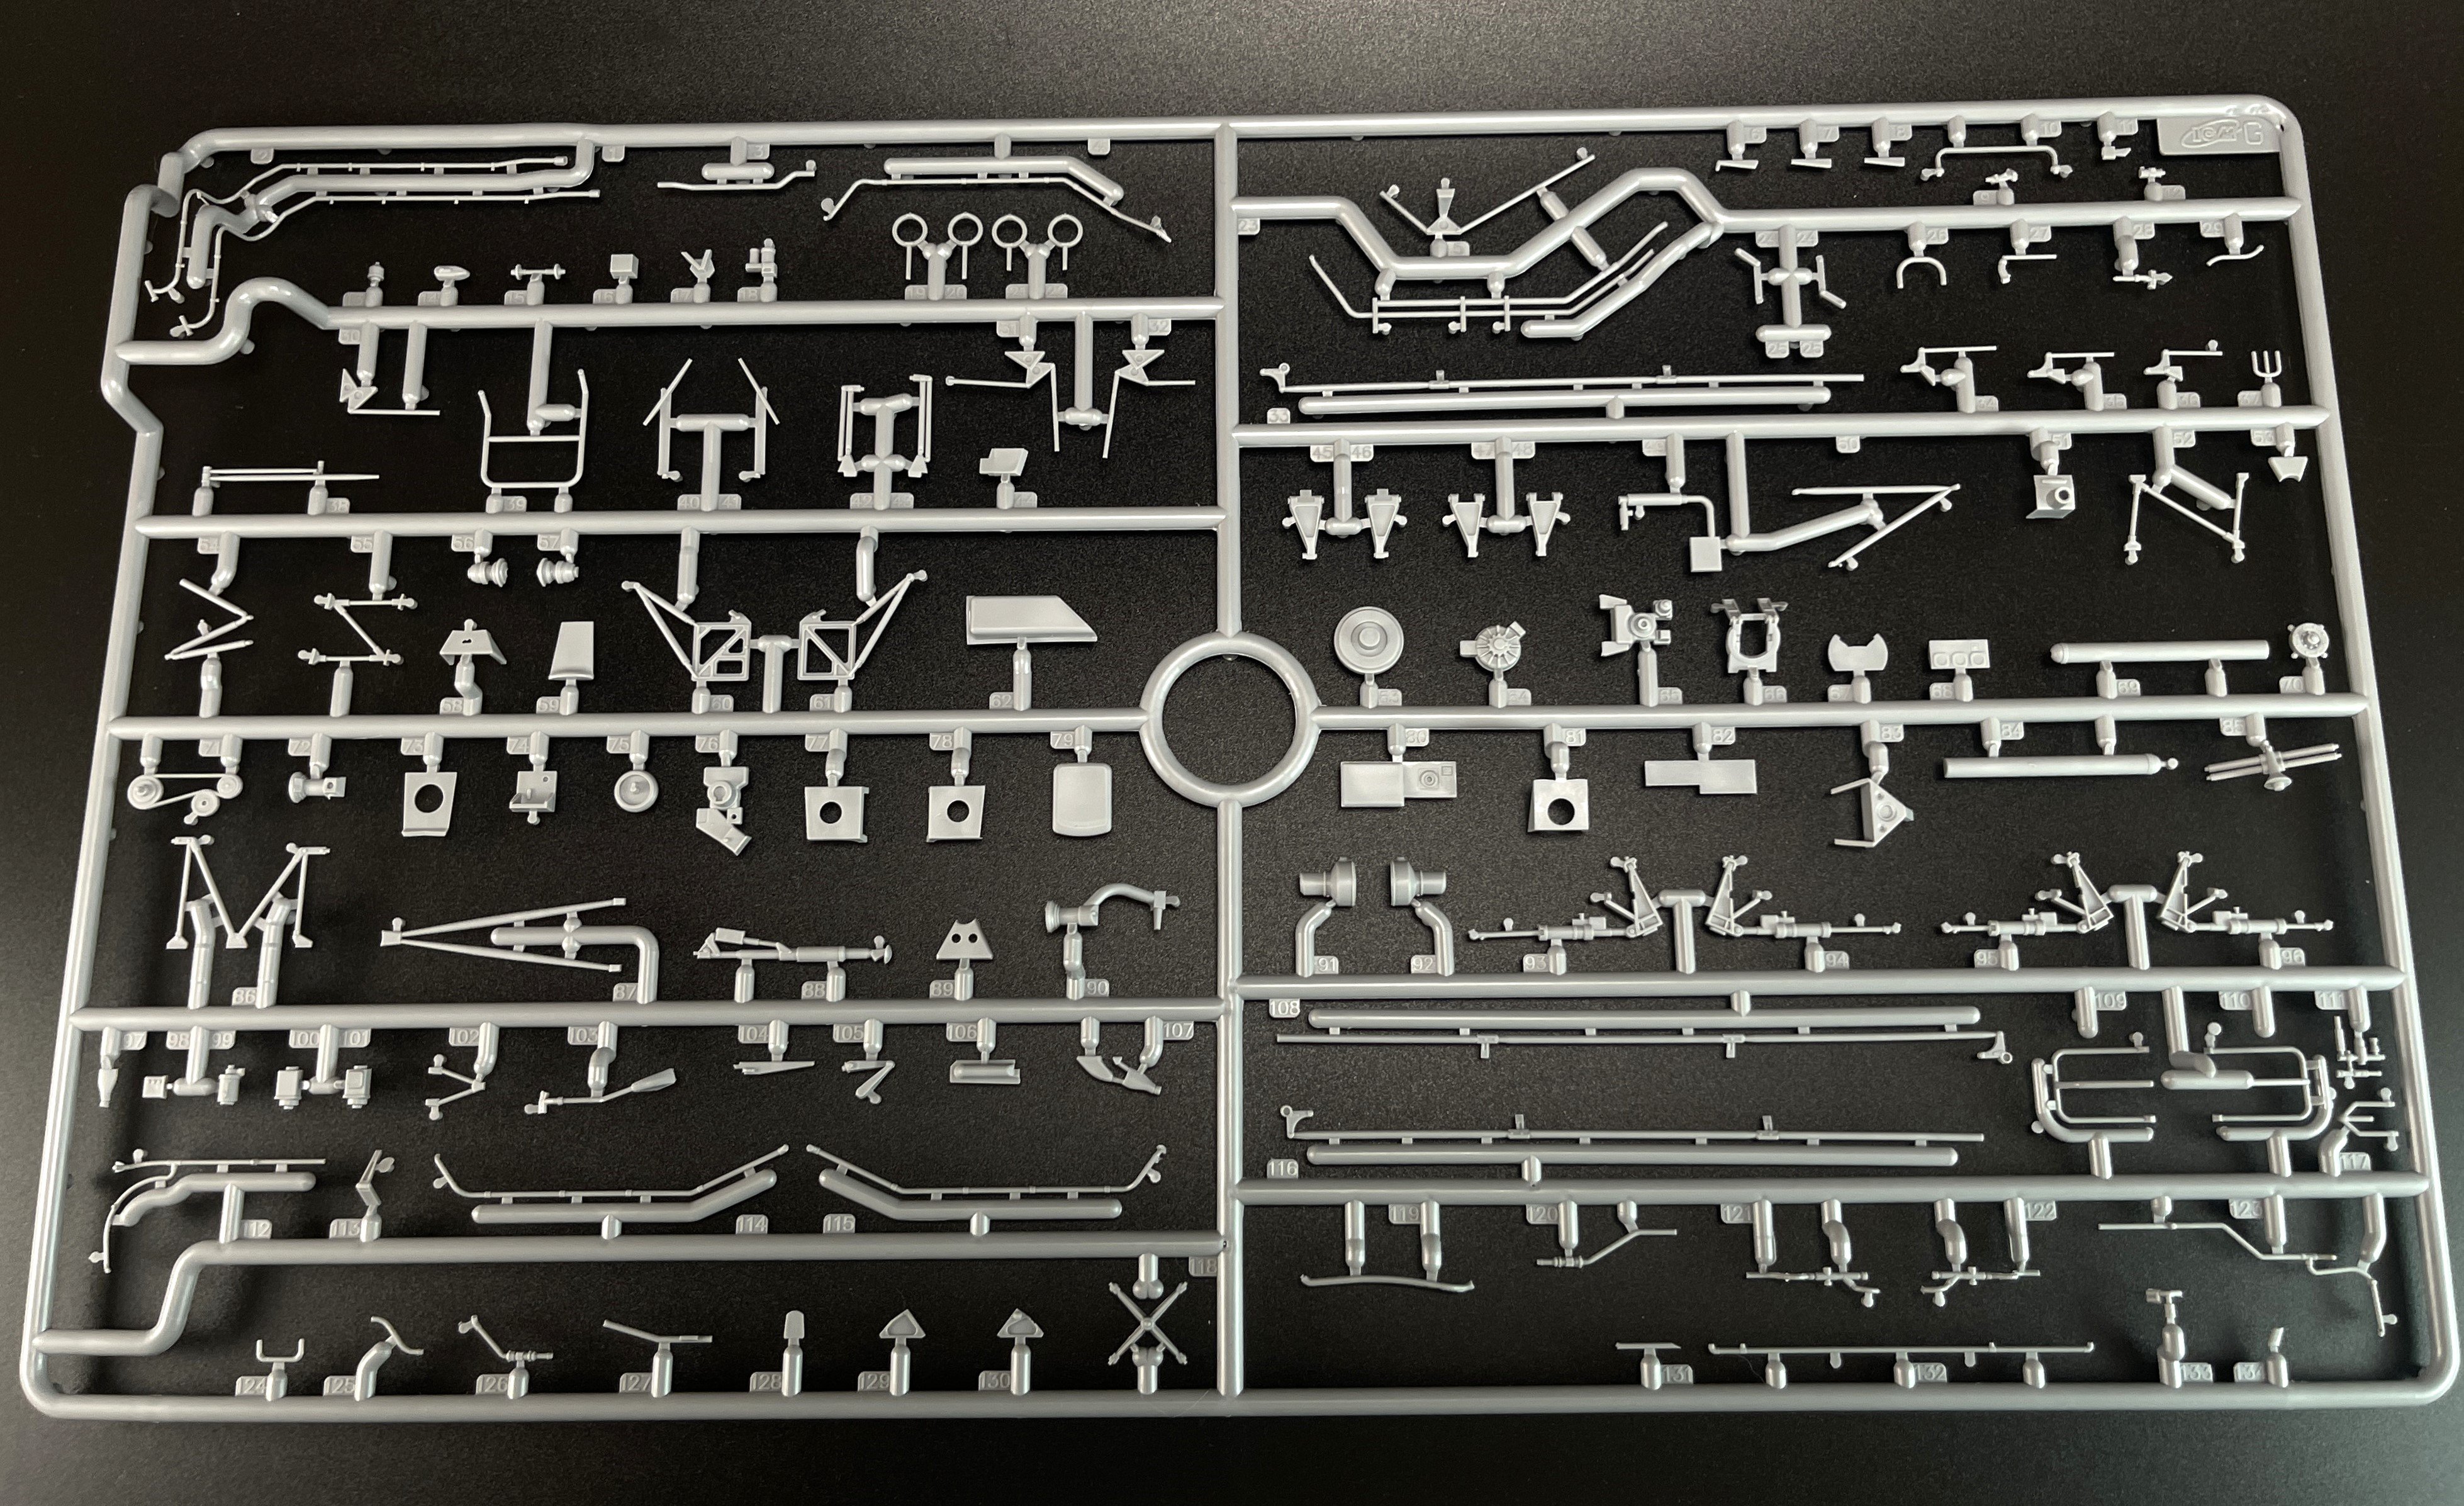
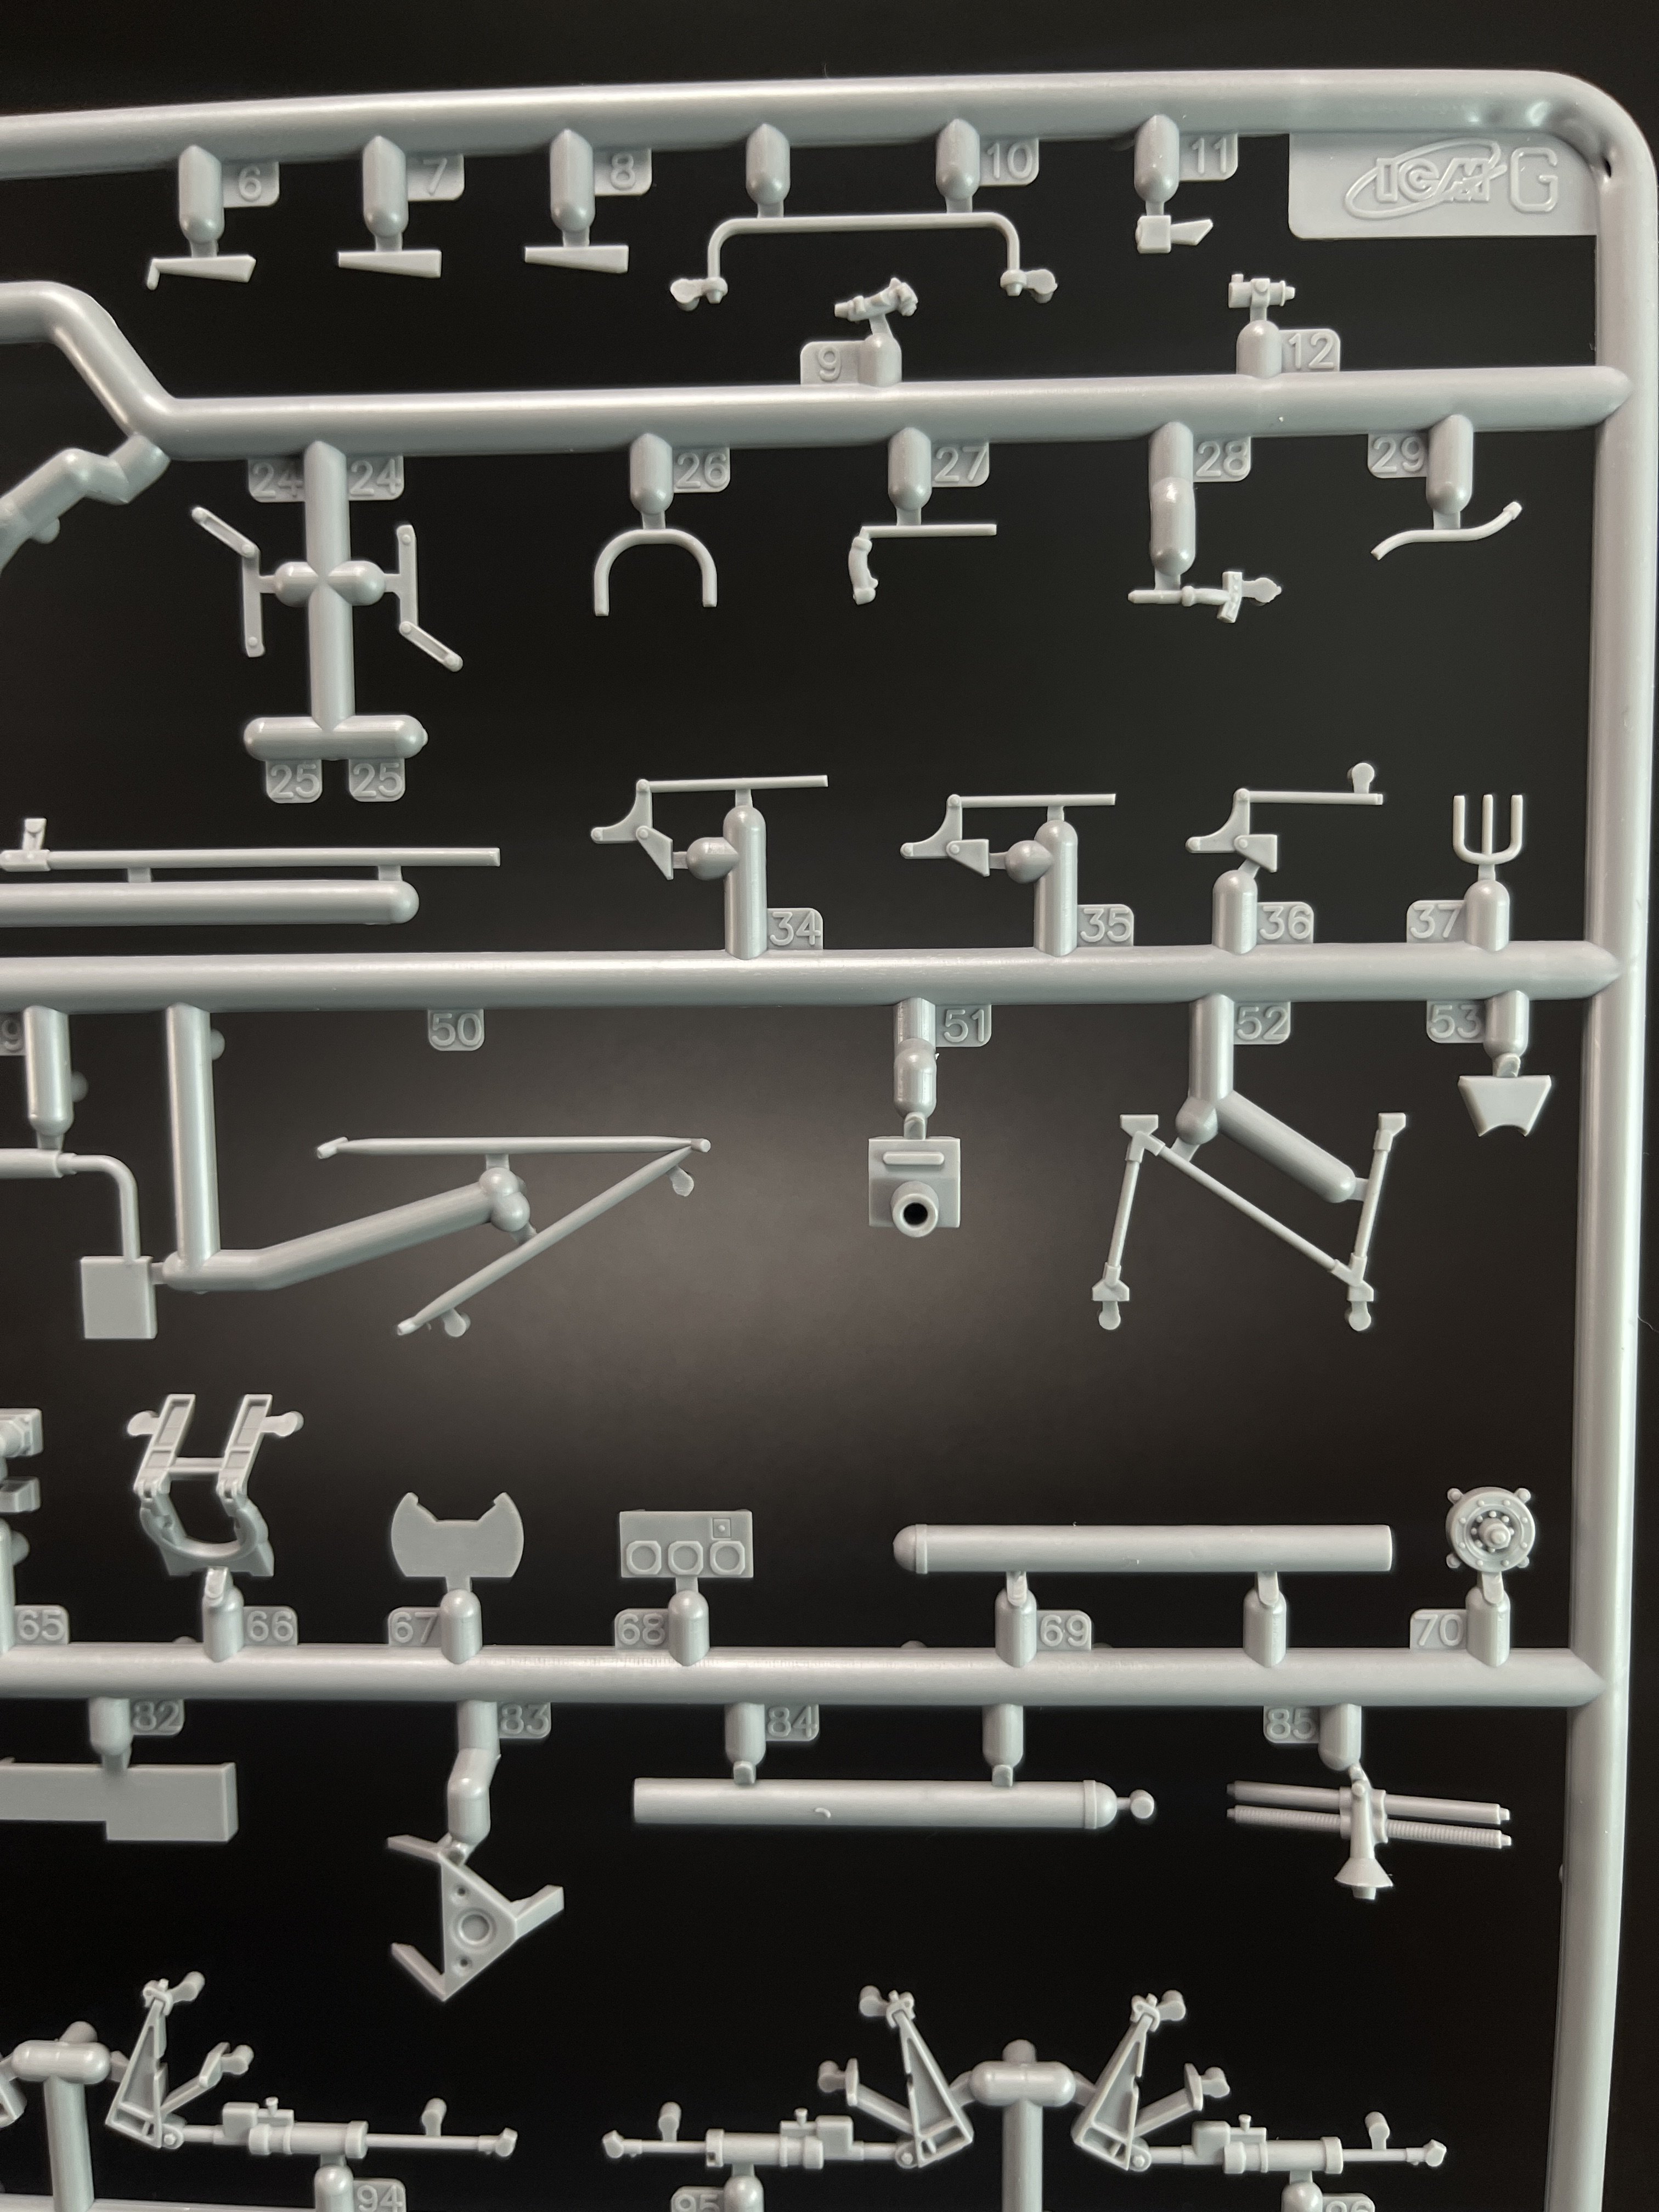
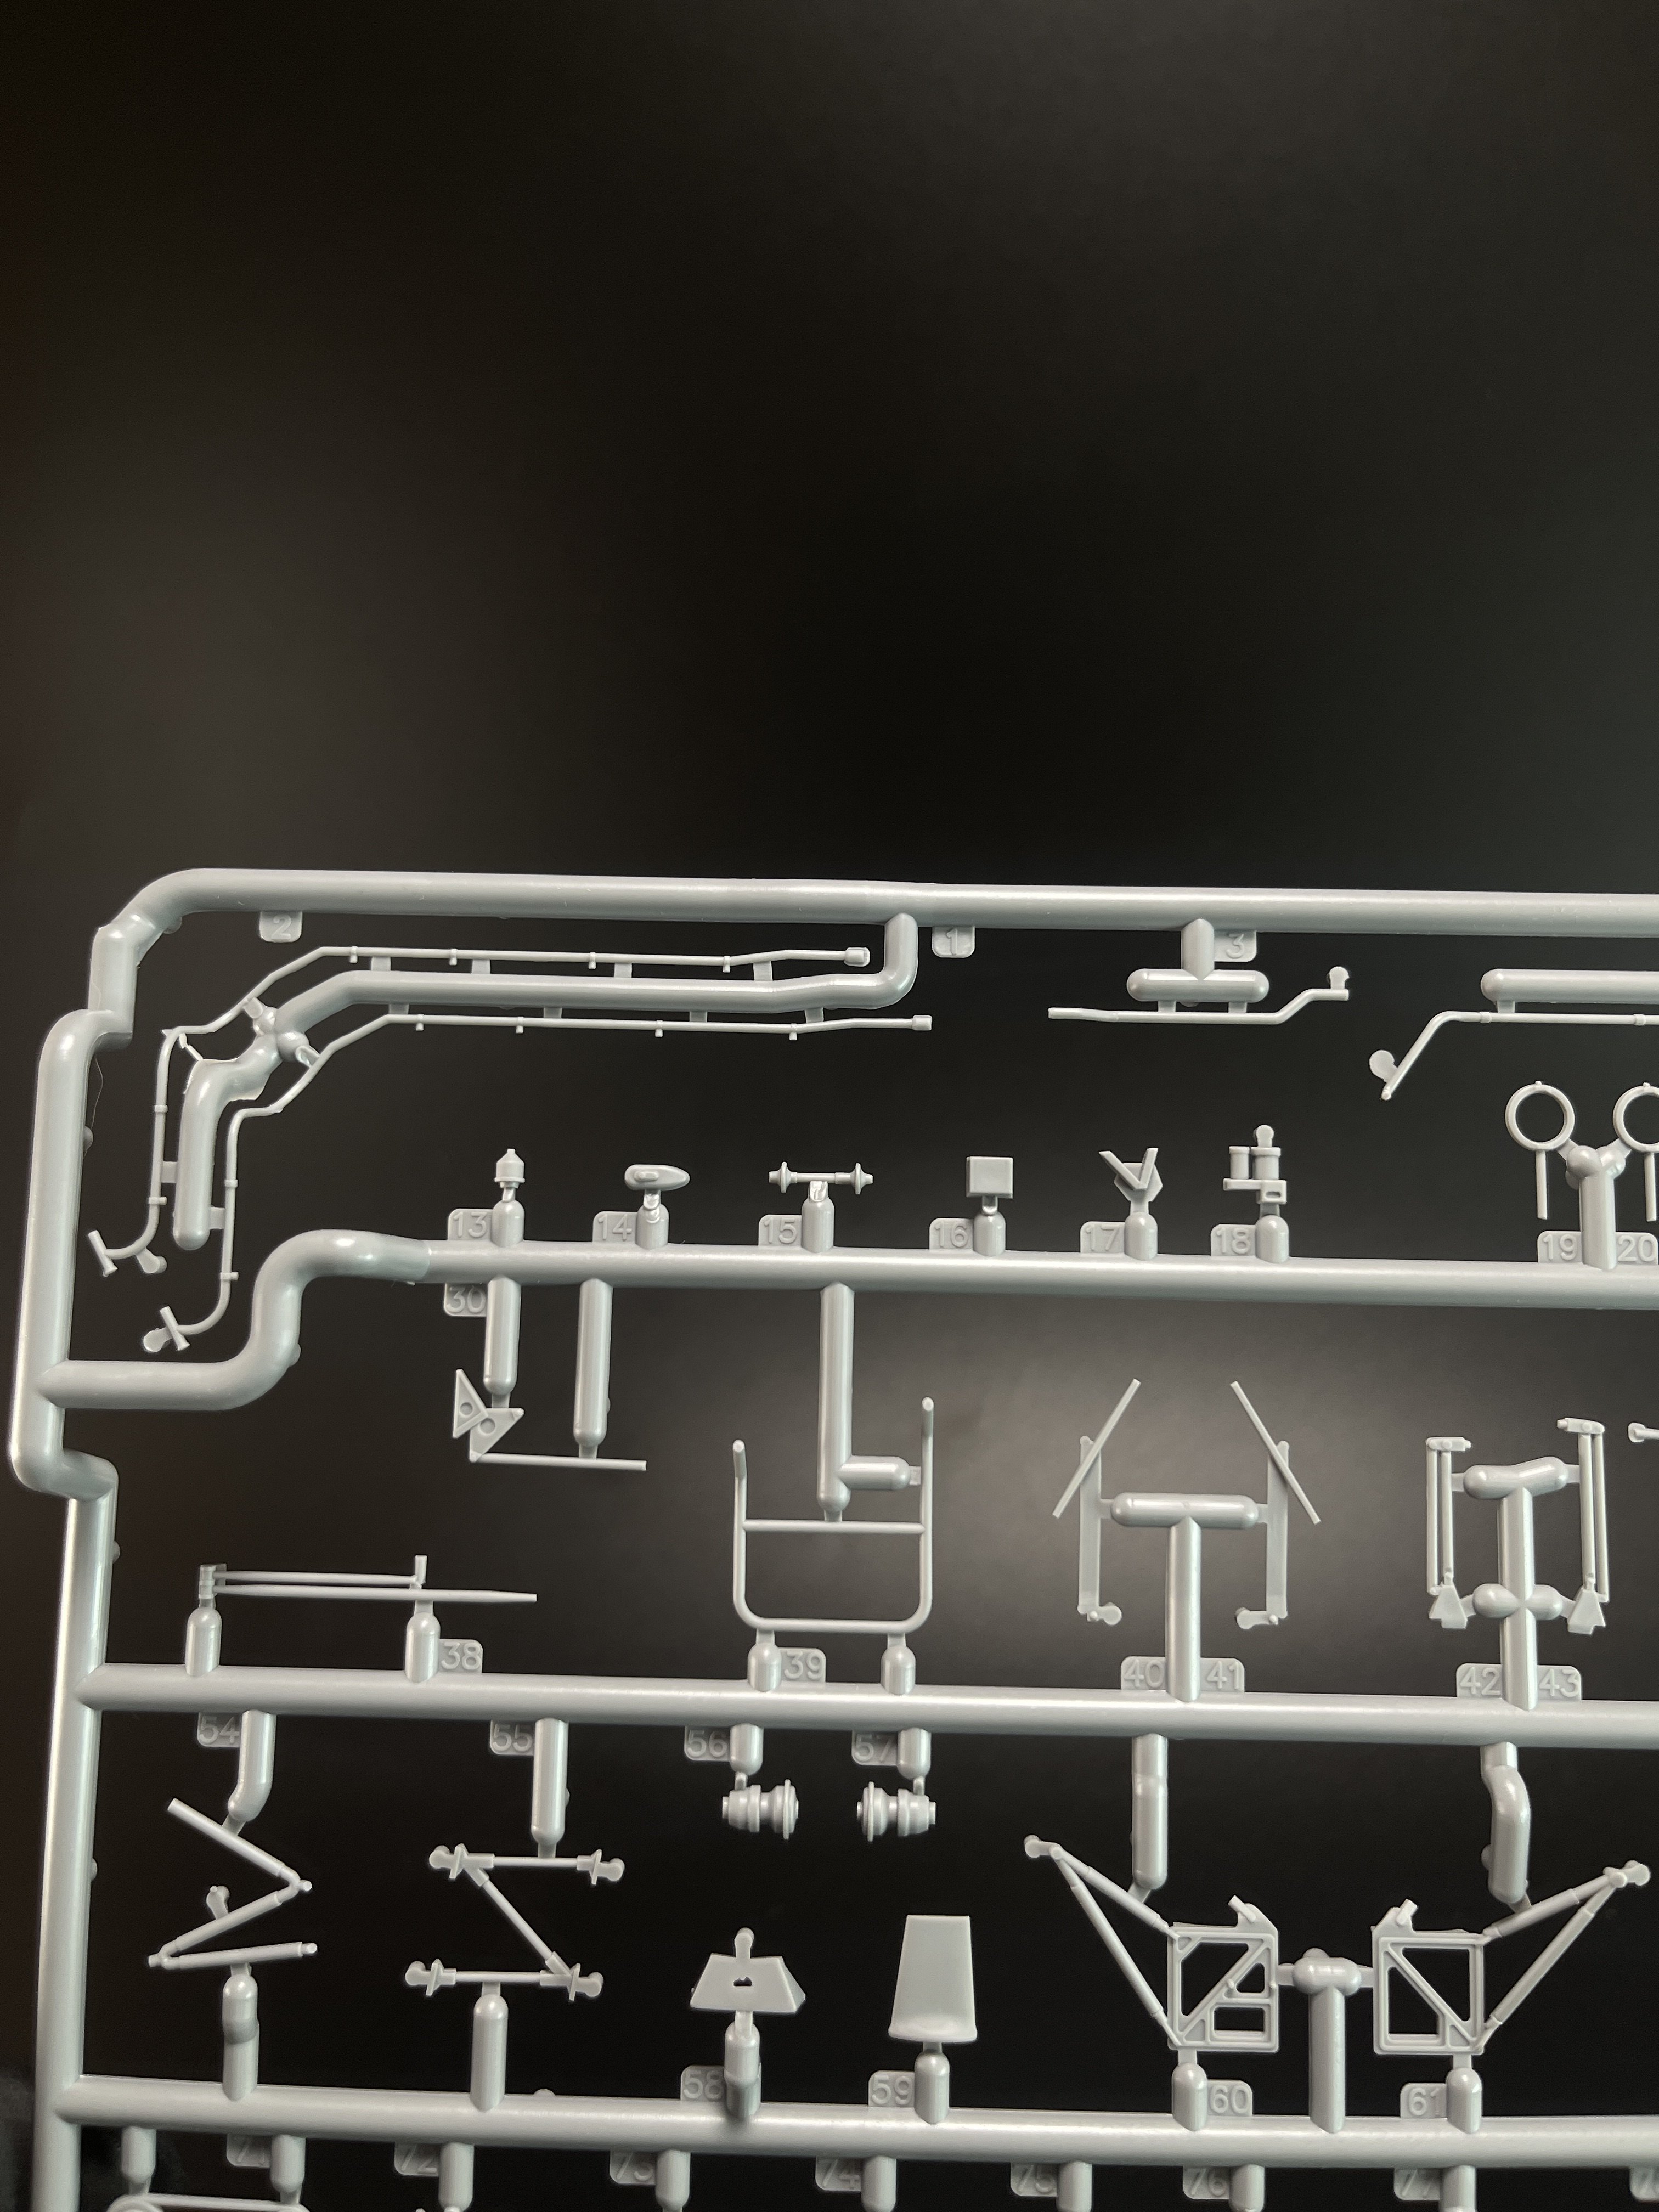
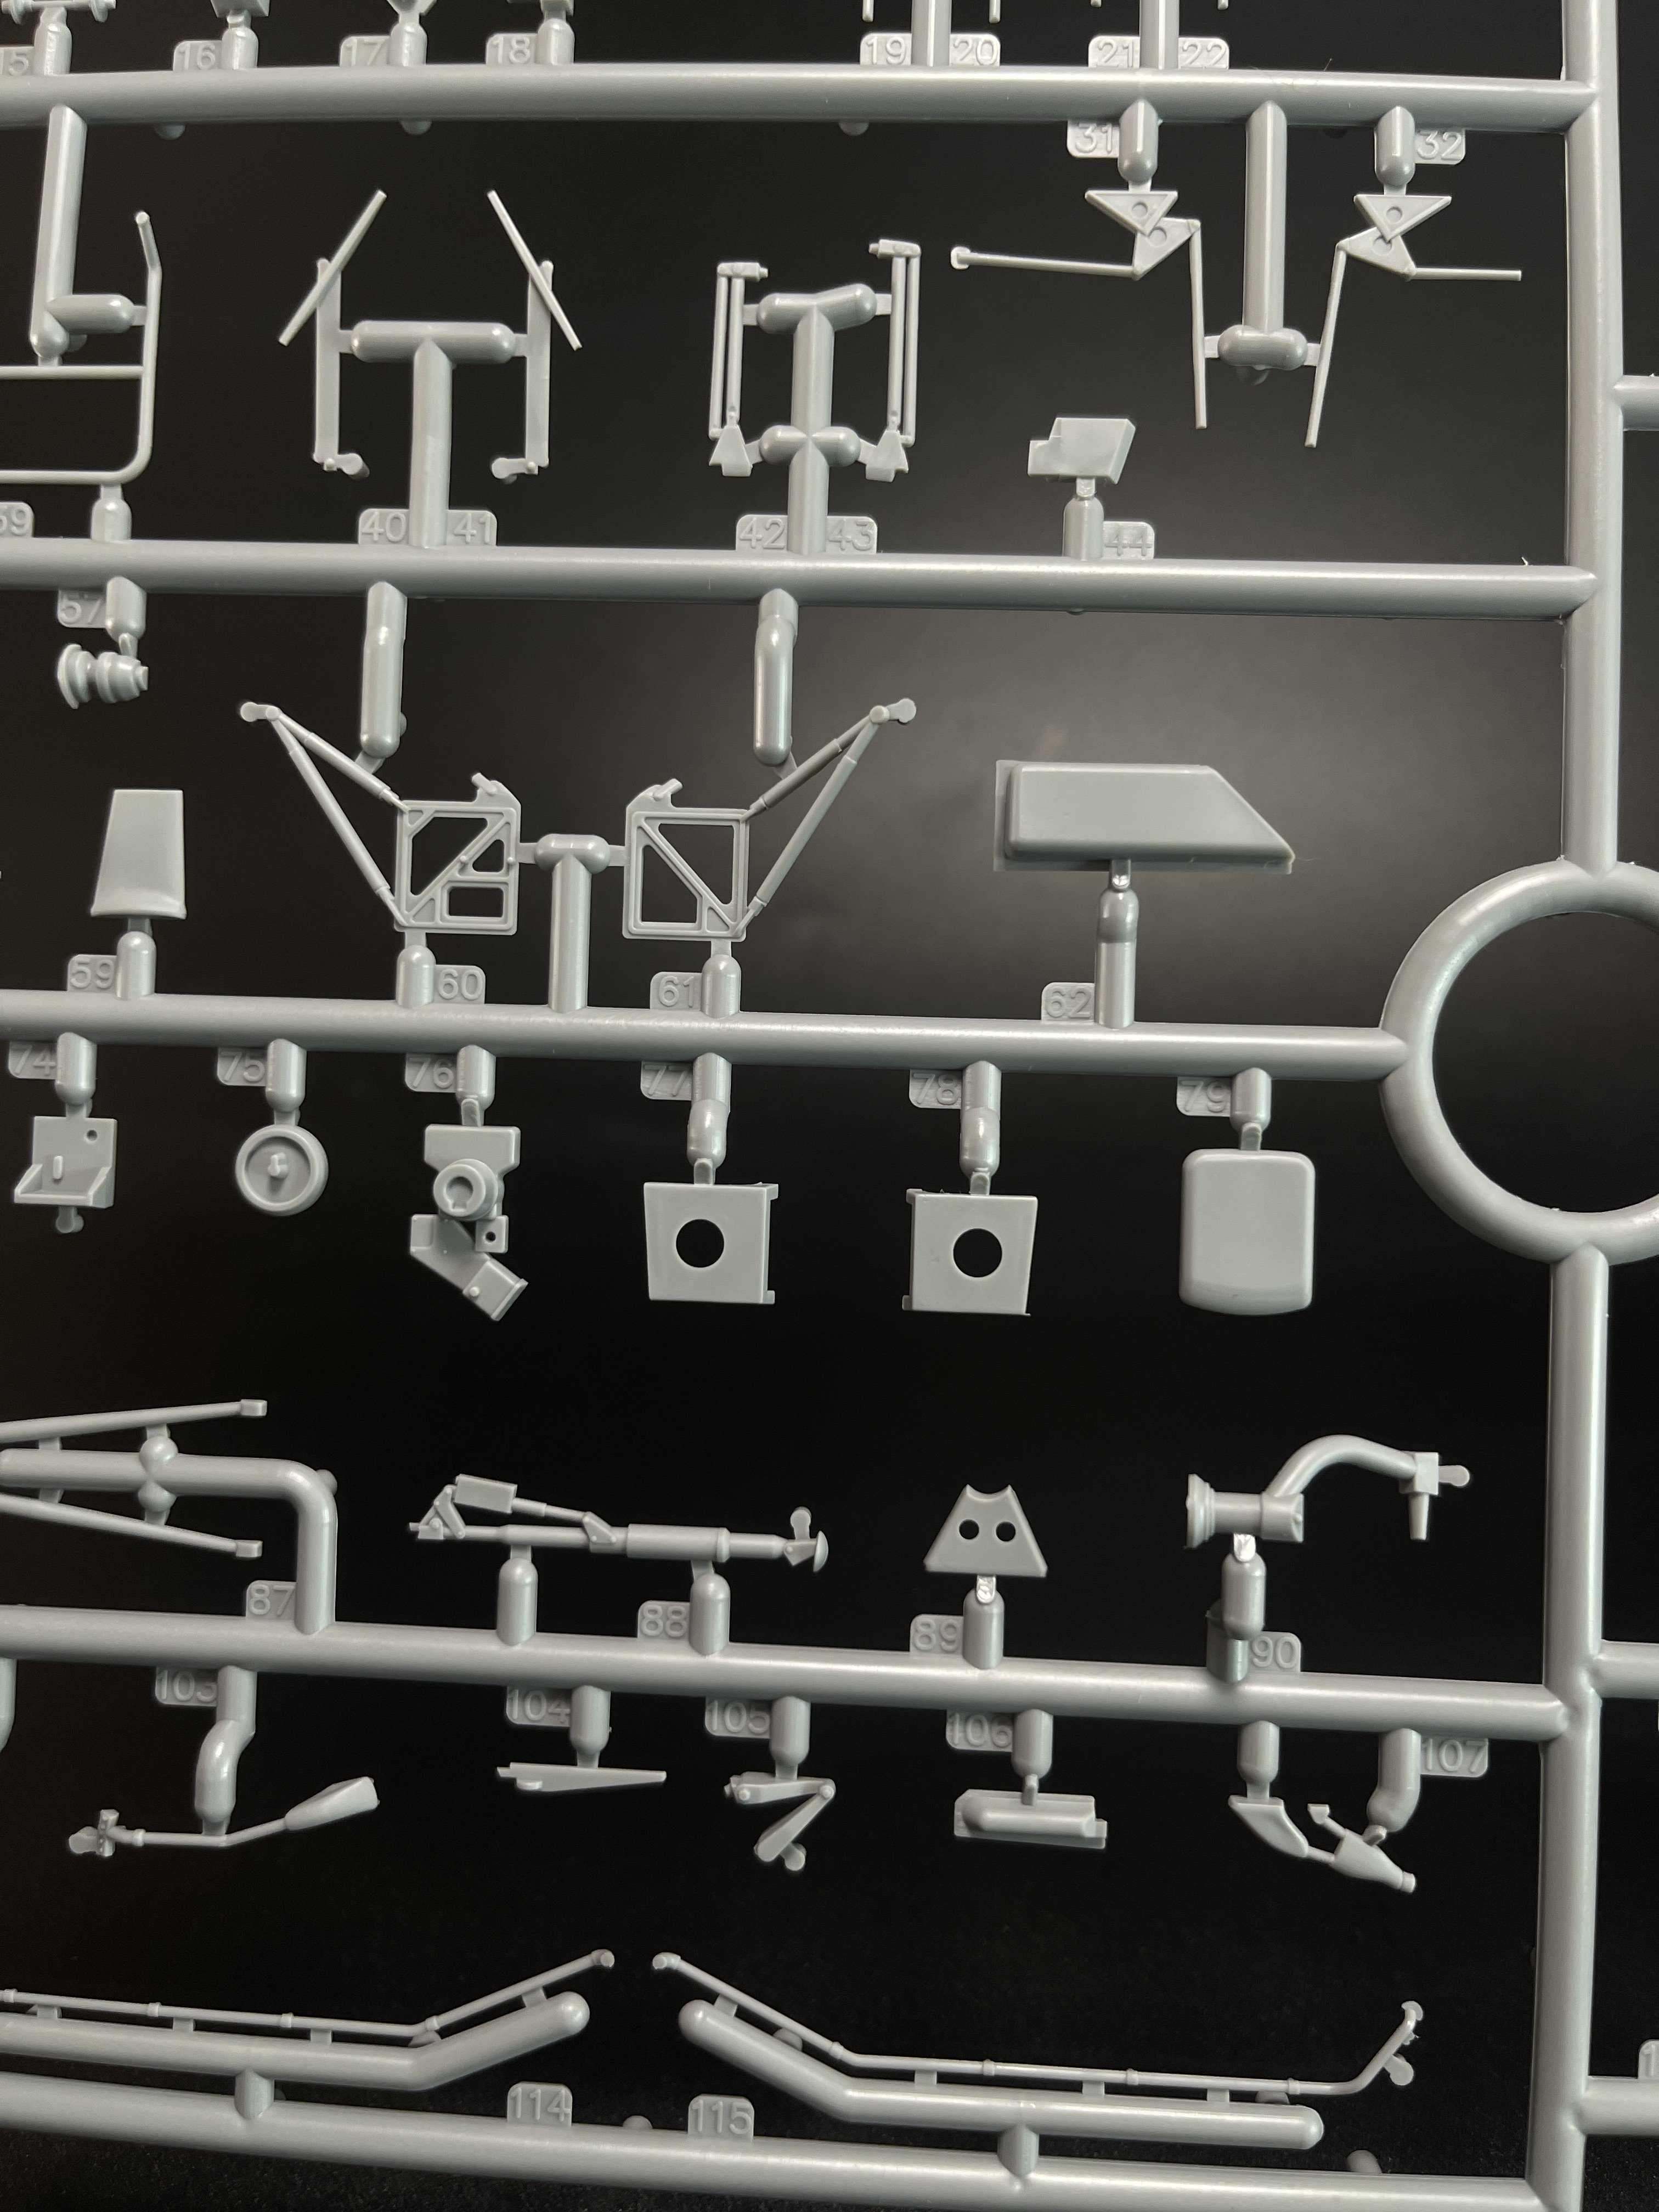
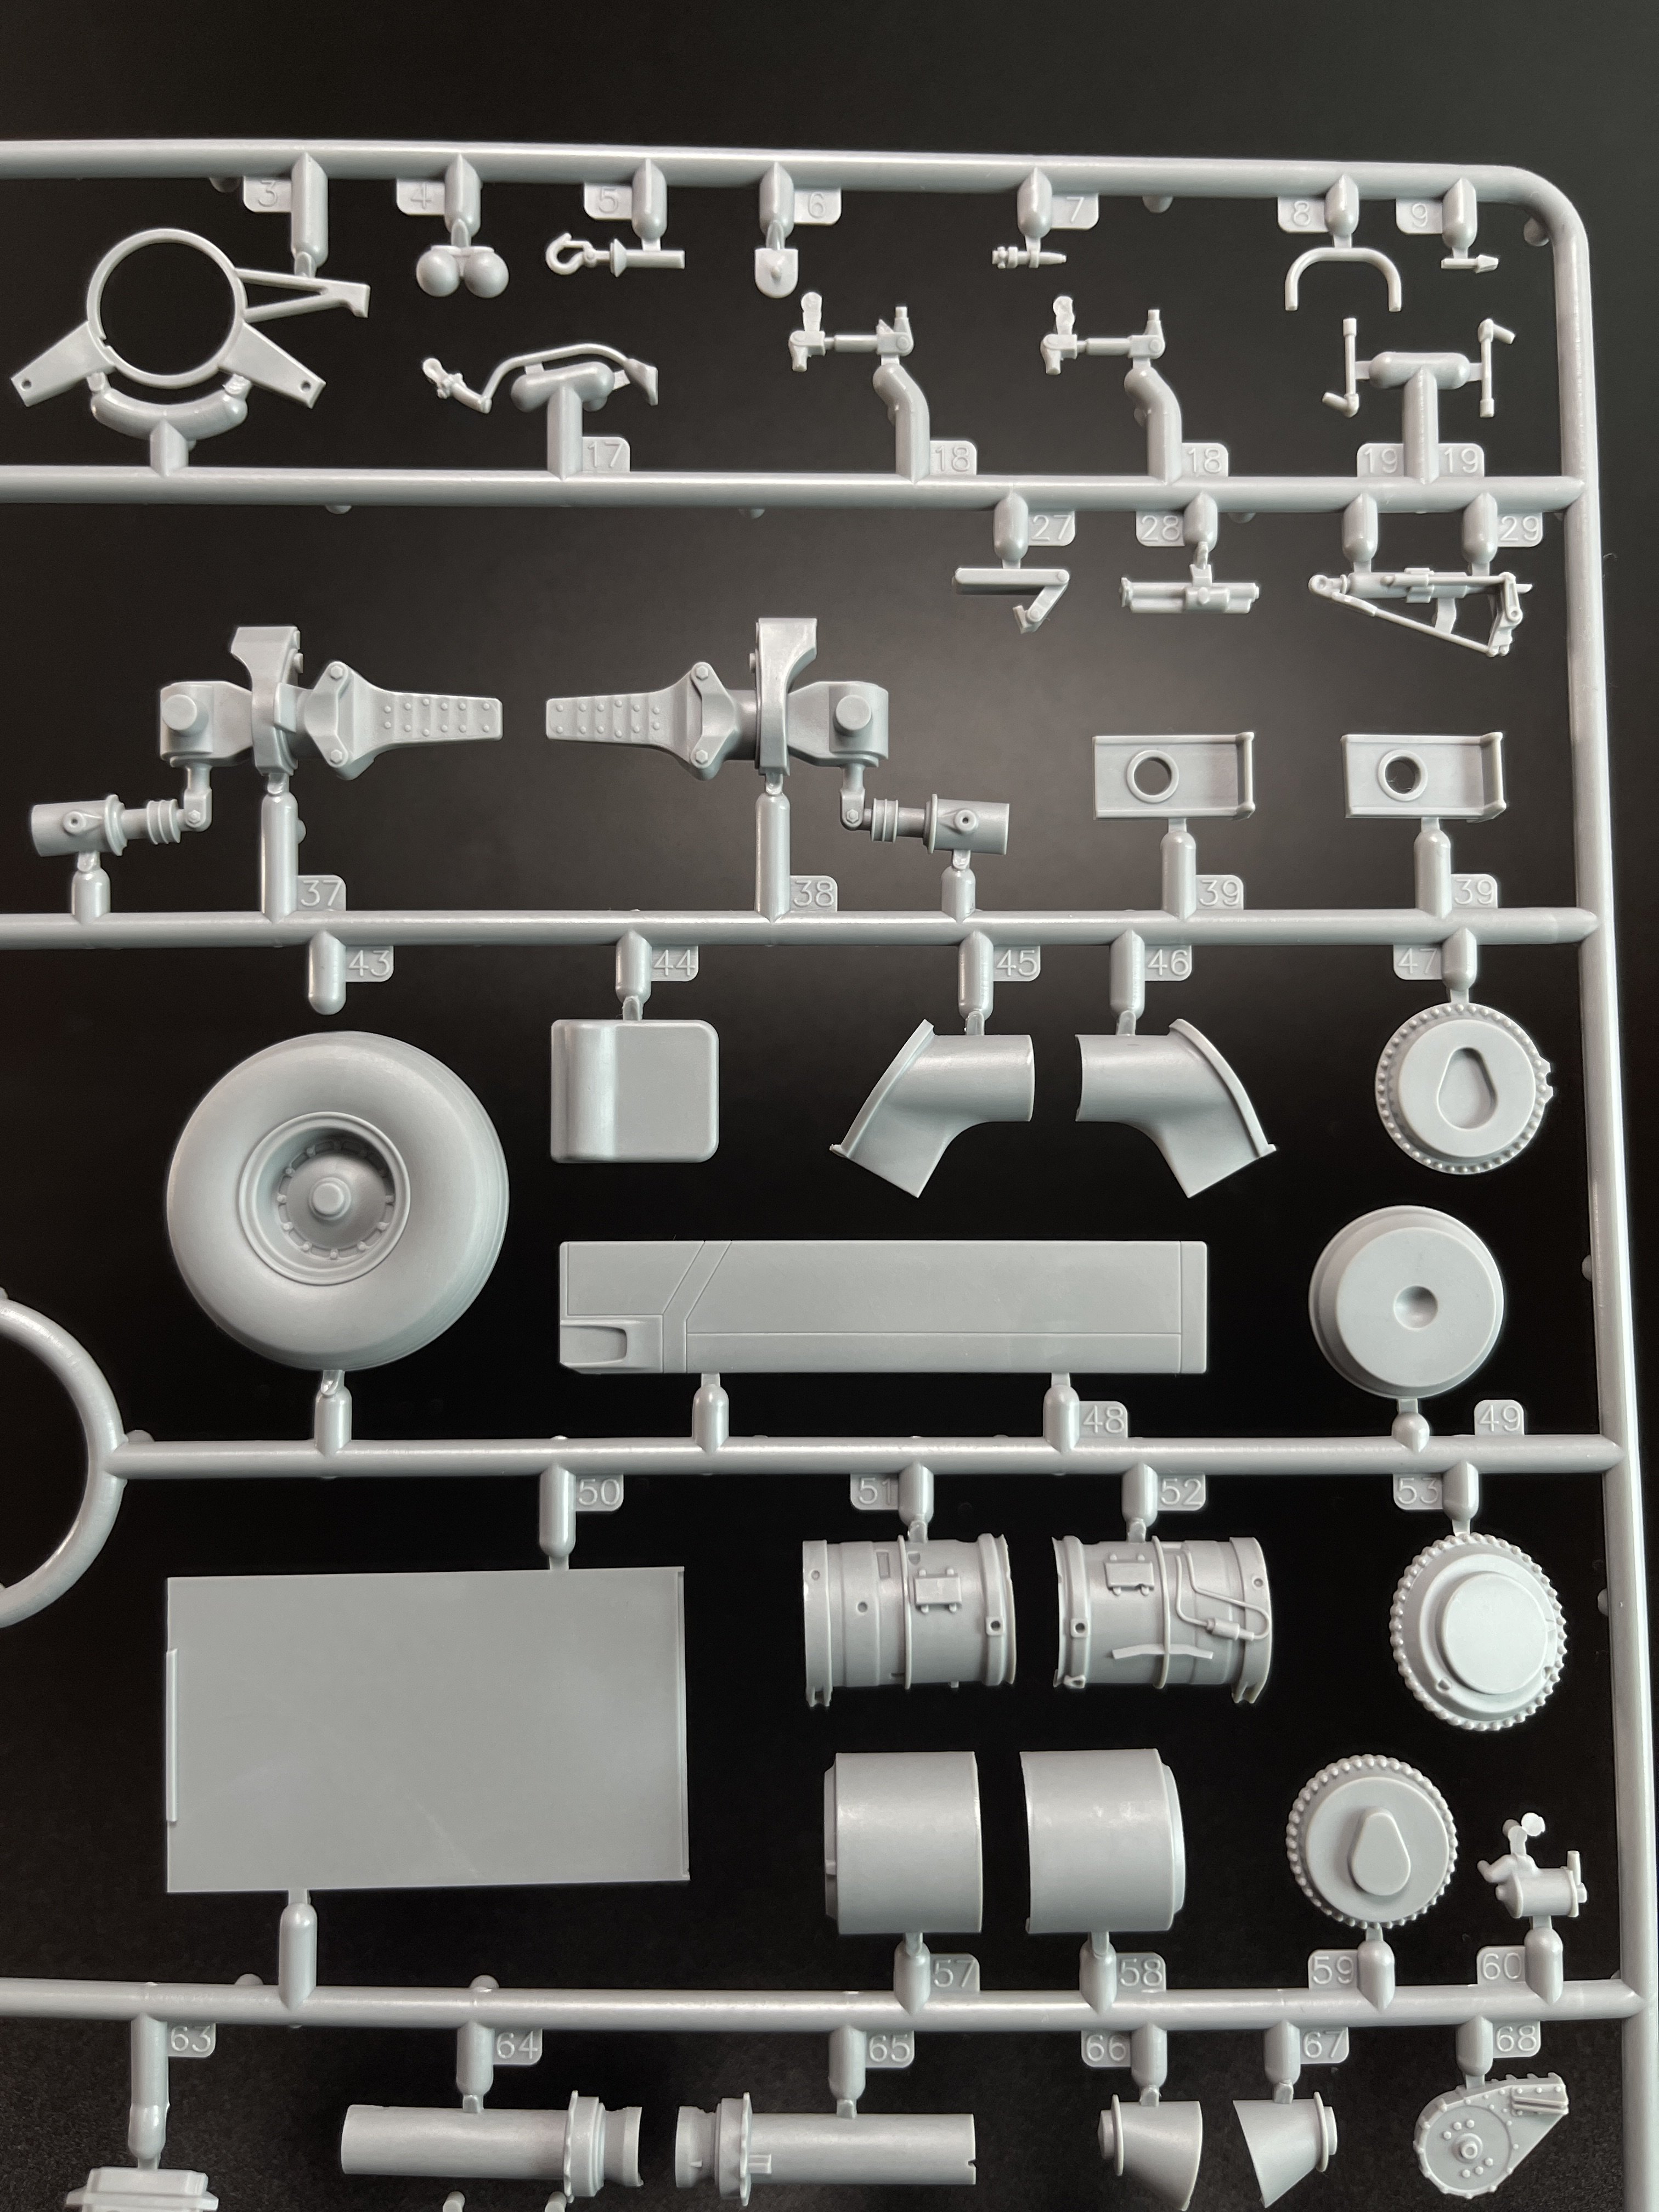
Sprue G
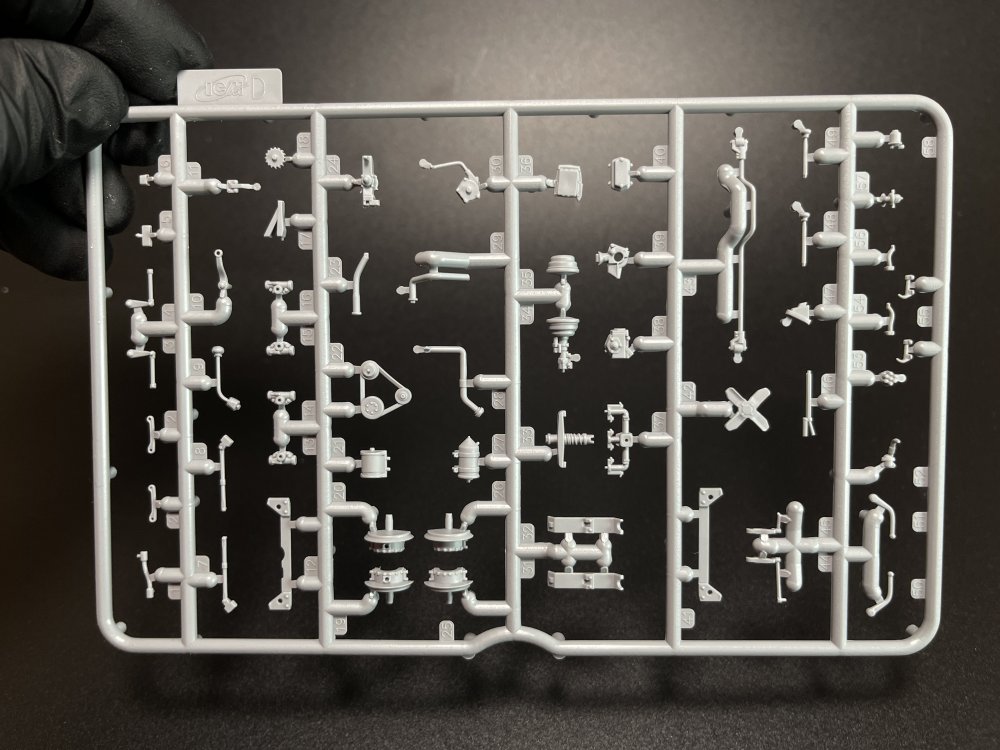
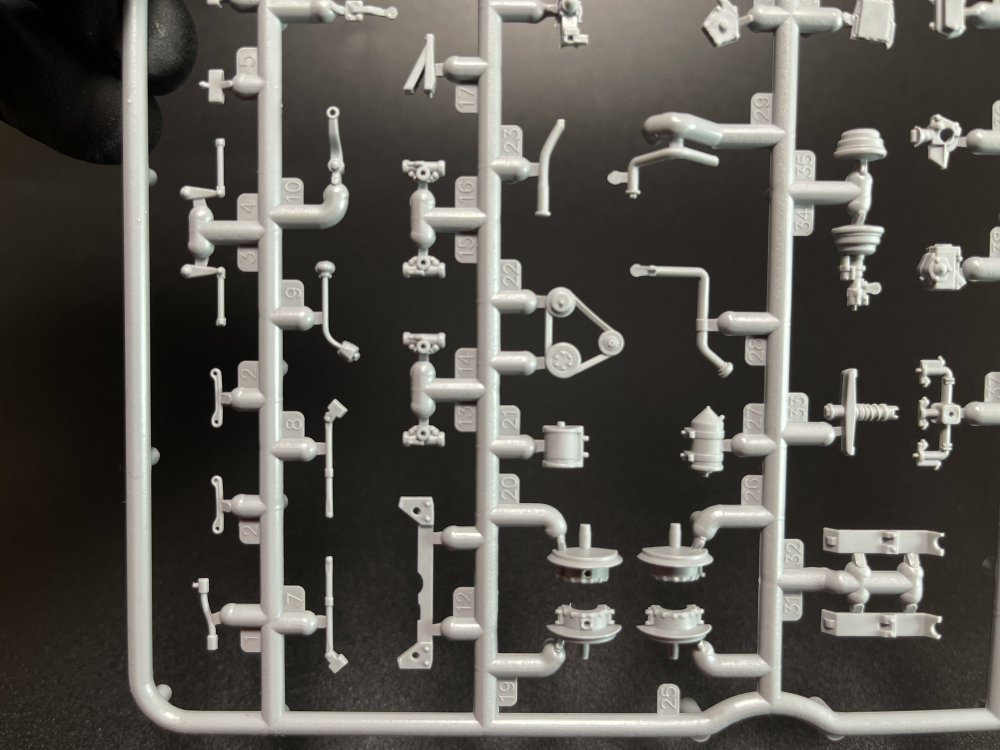
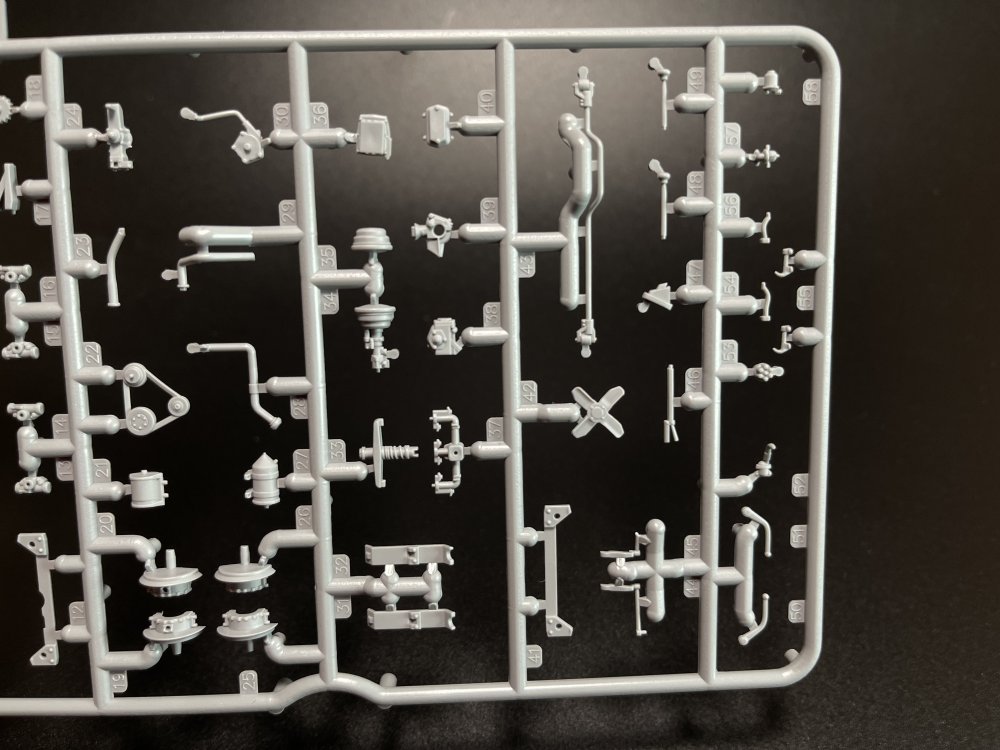
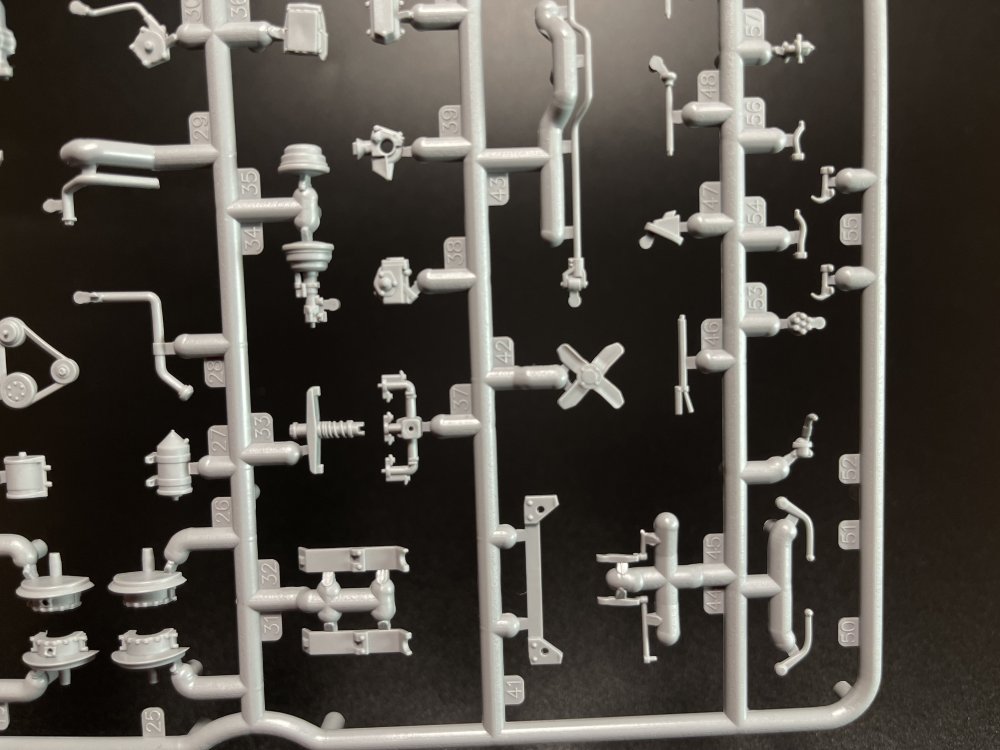
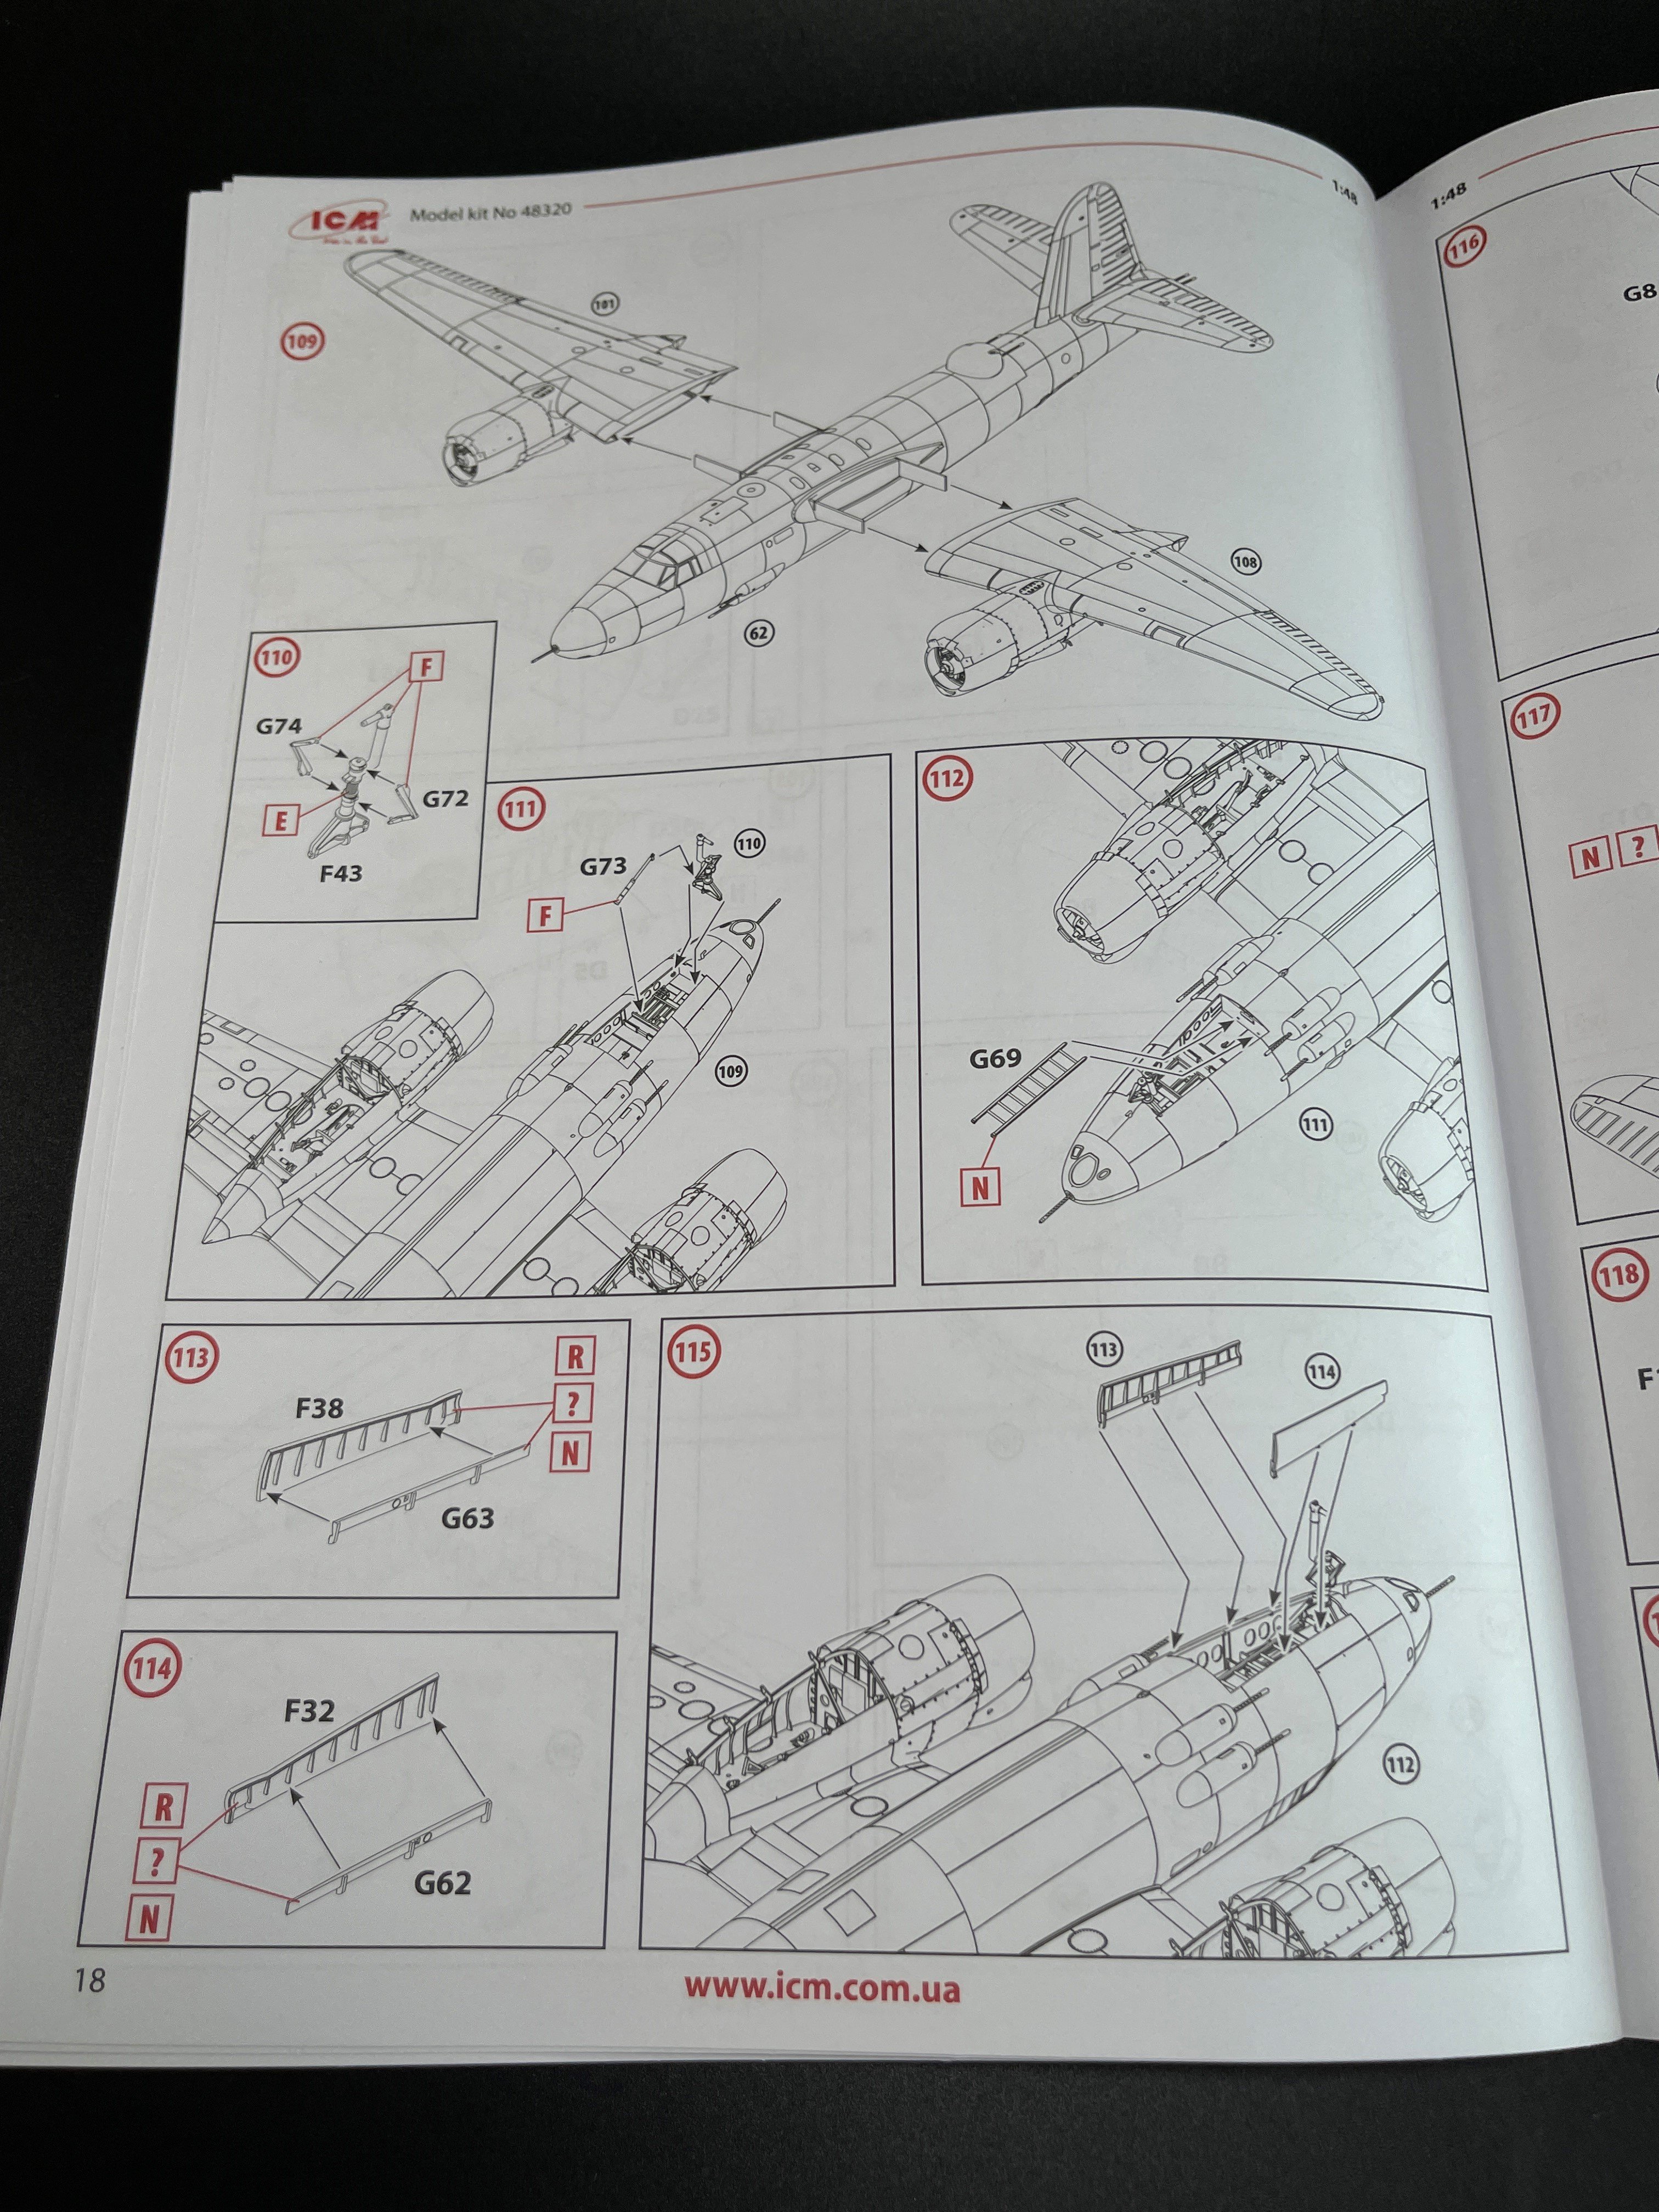
Almost all the small detail are in this sprue. Machines guns, bomb details, cockpit consoles, bars and ladder.
All with good detail and no flash!!!
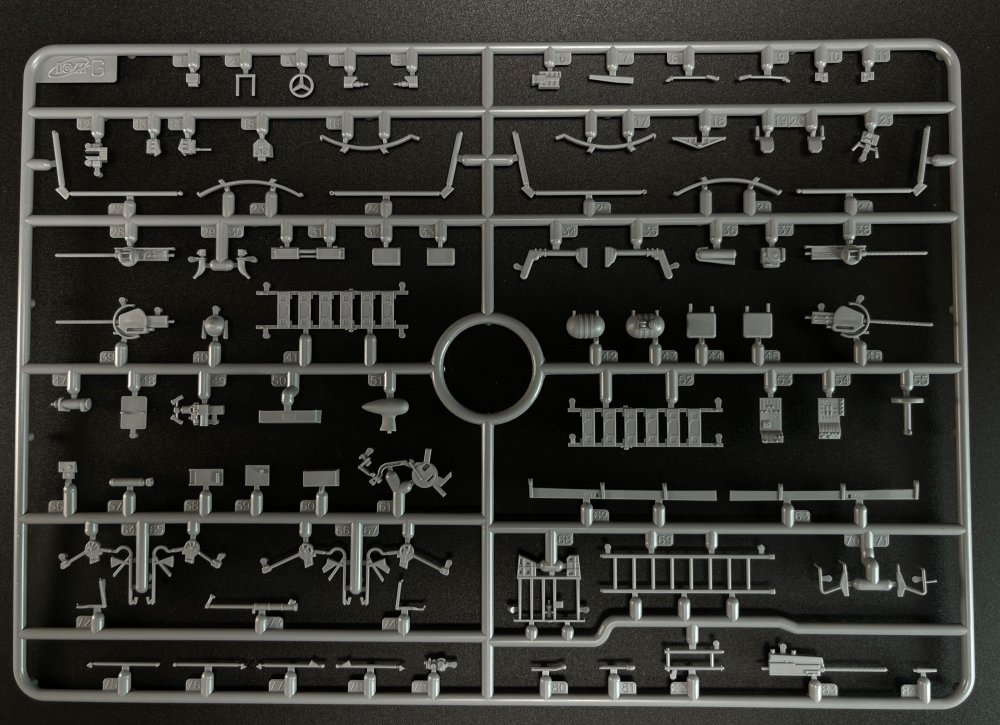
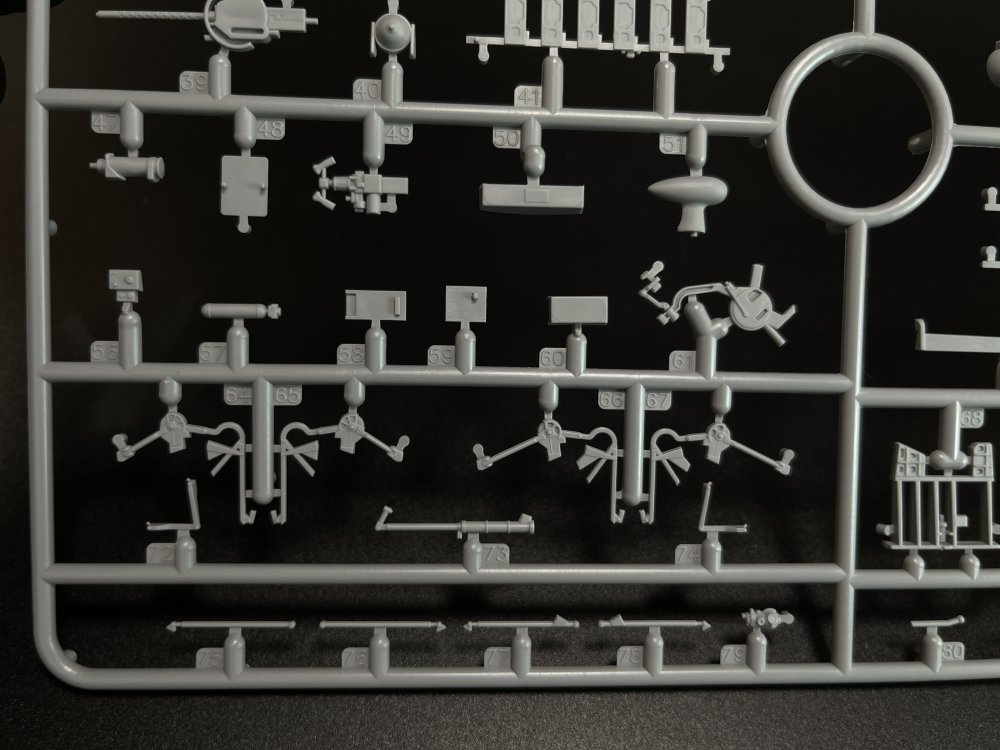
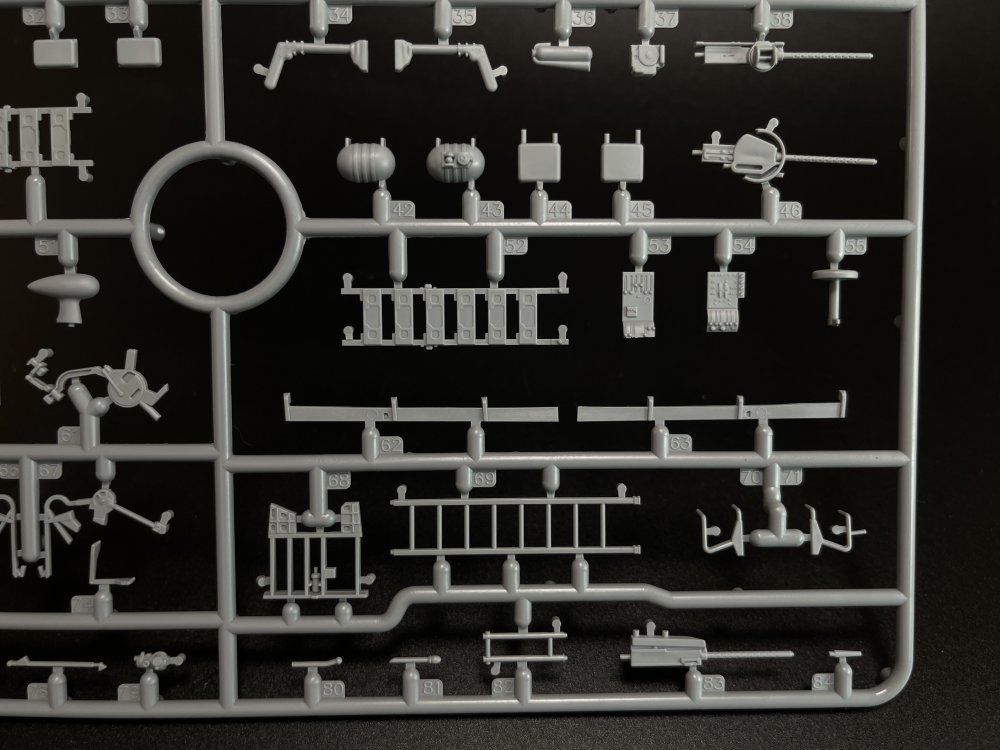
Here the location points have some relevance because some part are quite small and it could be not so easy to remove then form the sprue But the location points are well thought in places that are easy to remove, without damaging any details and easy to remove with a small sanding stick or another sanding tool.
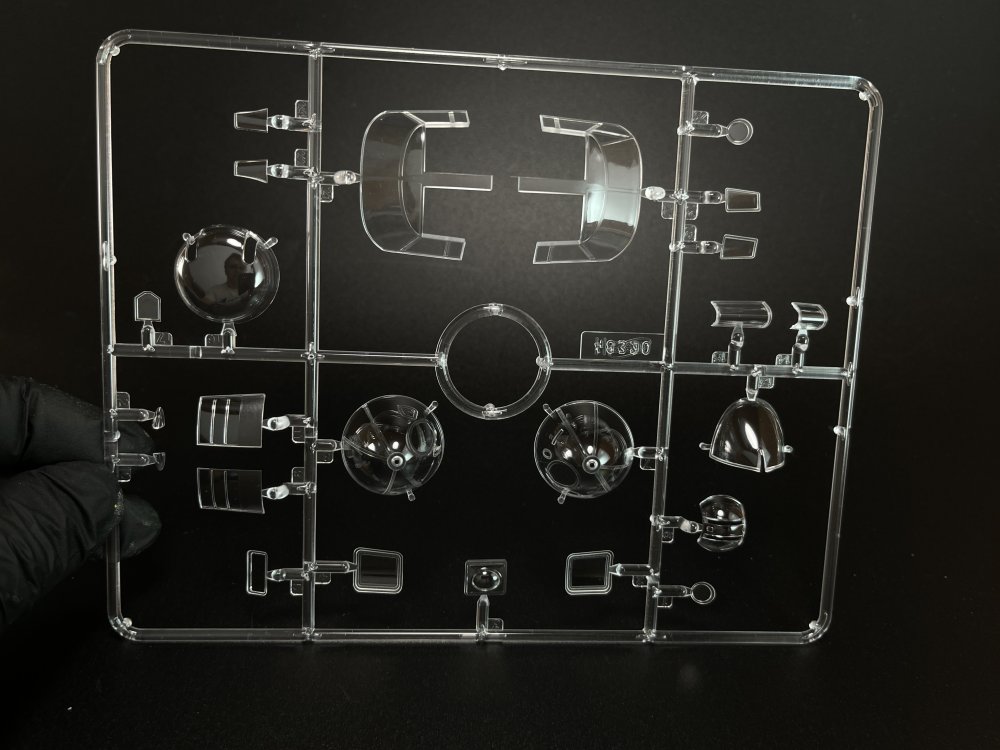
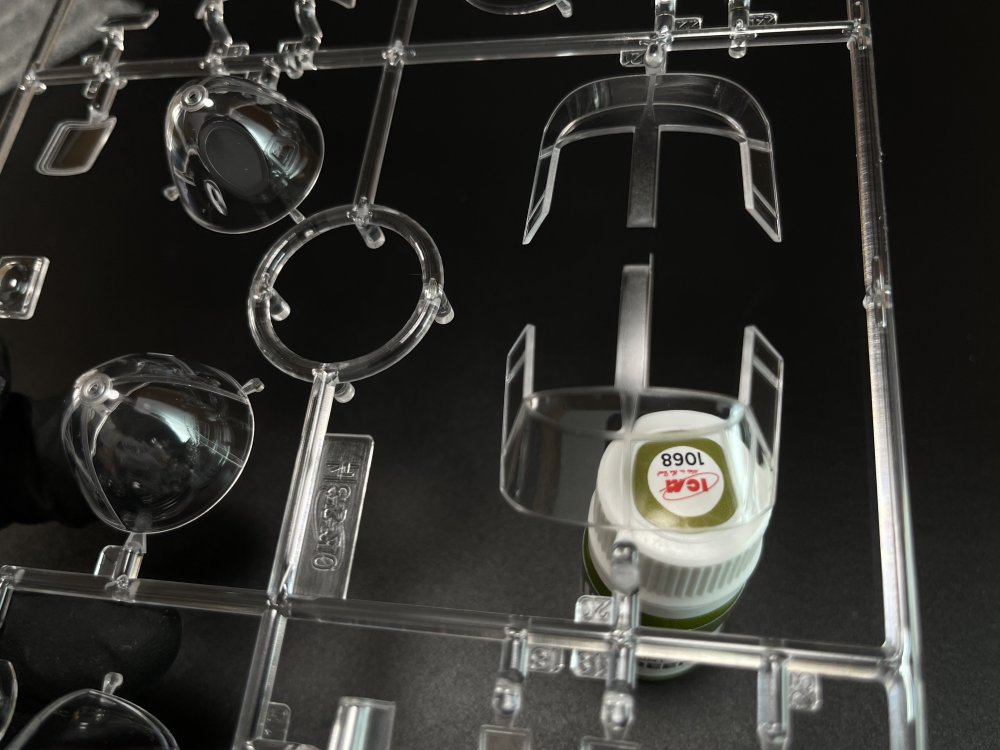
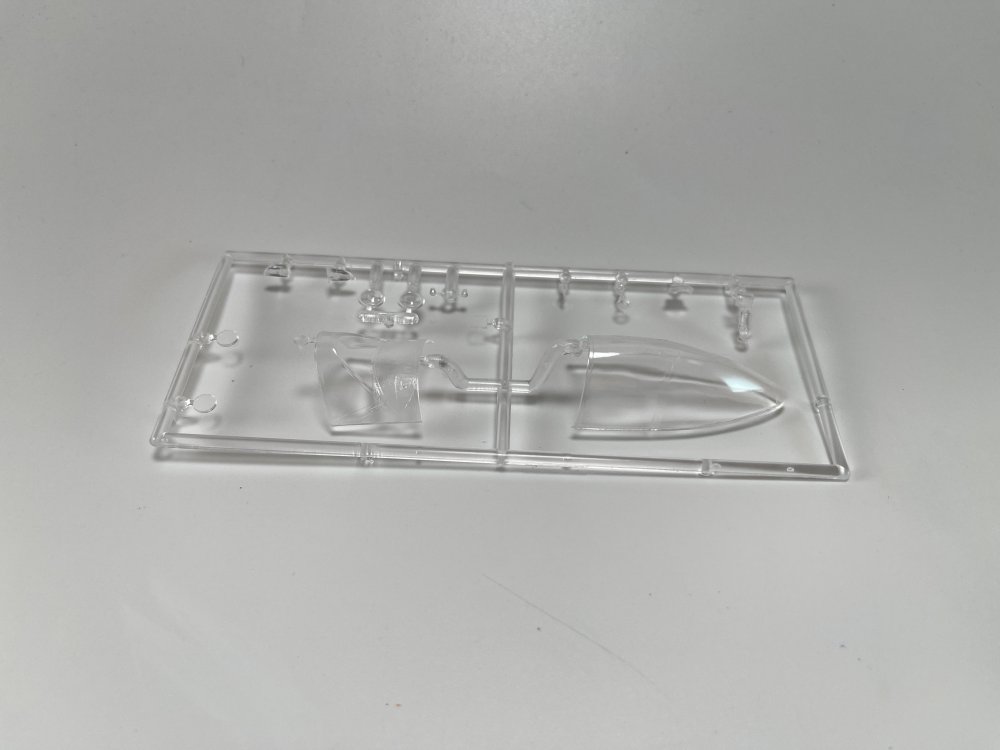
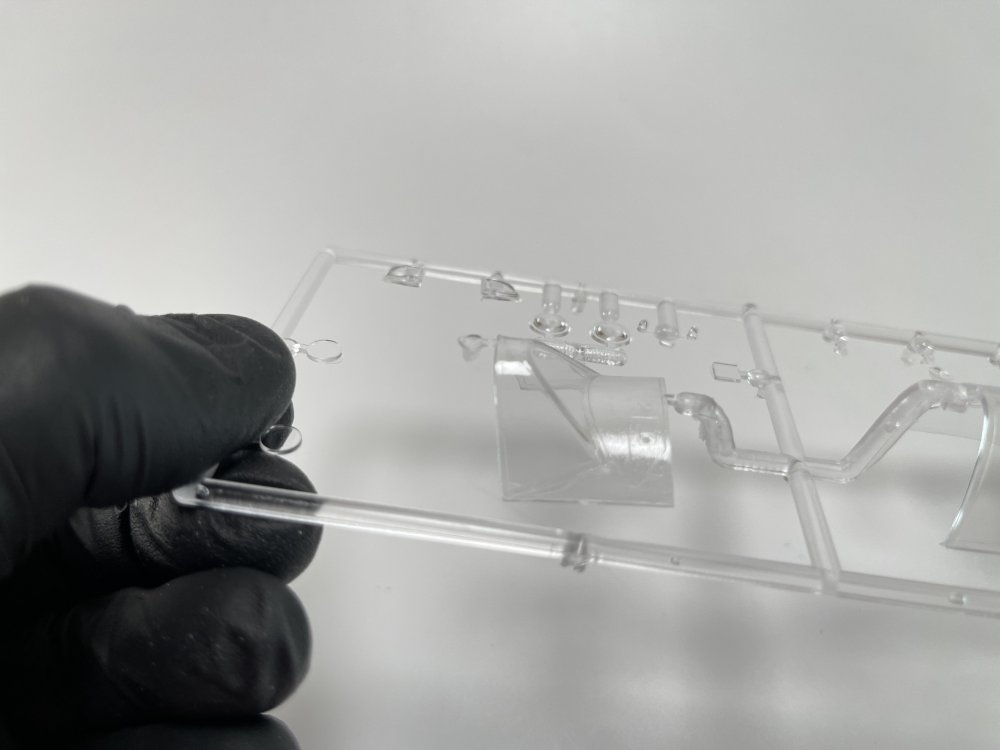
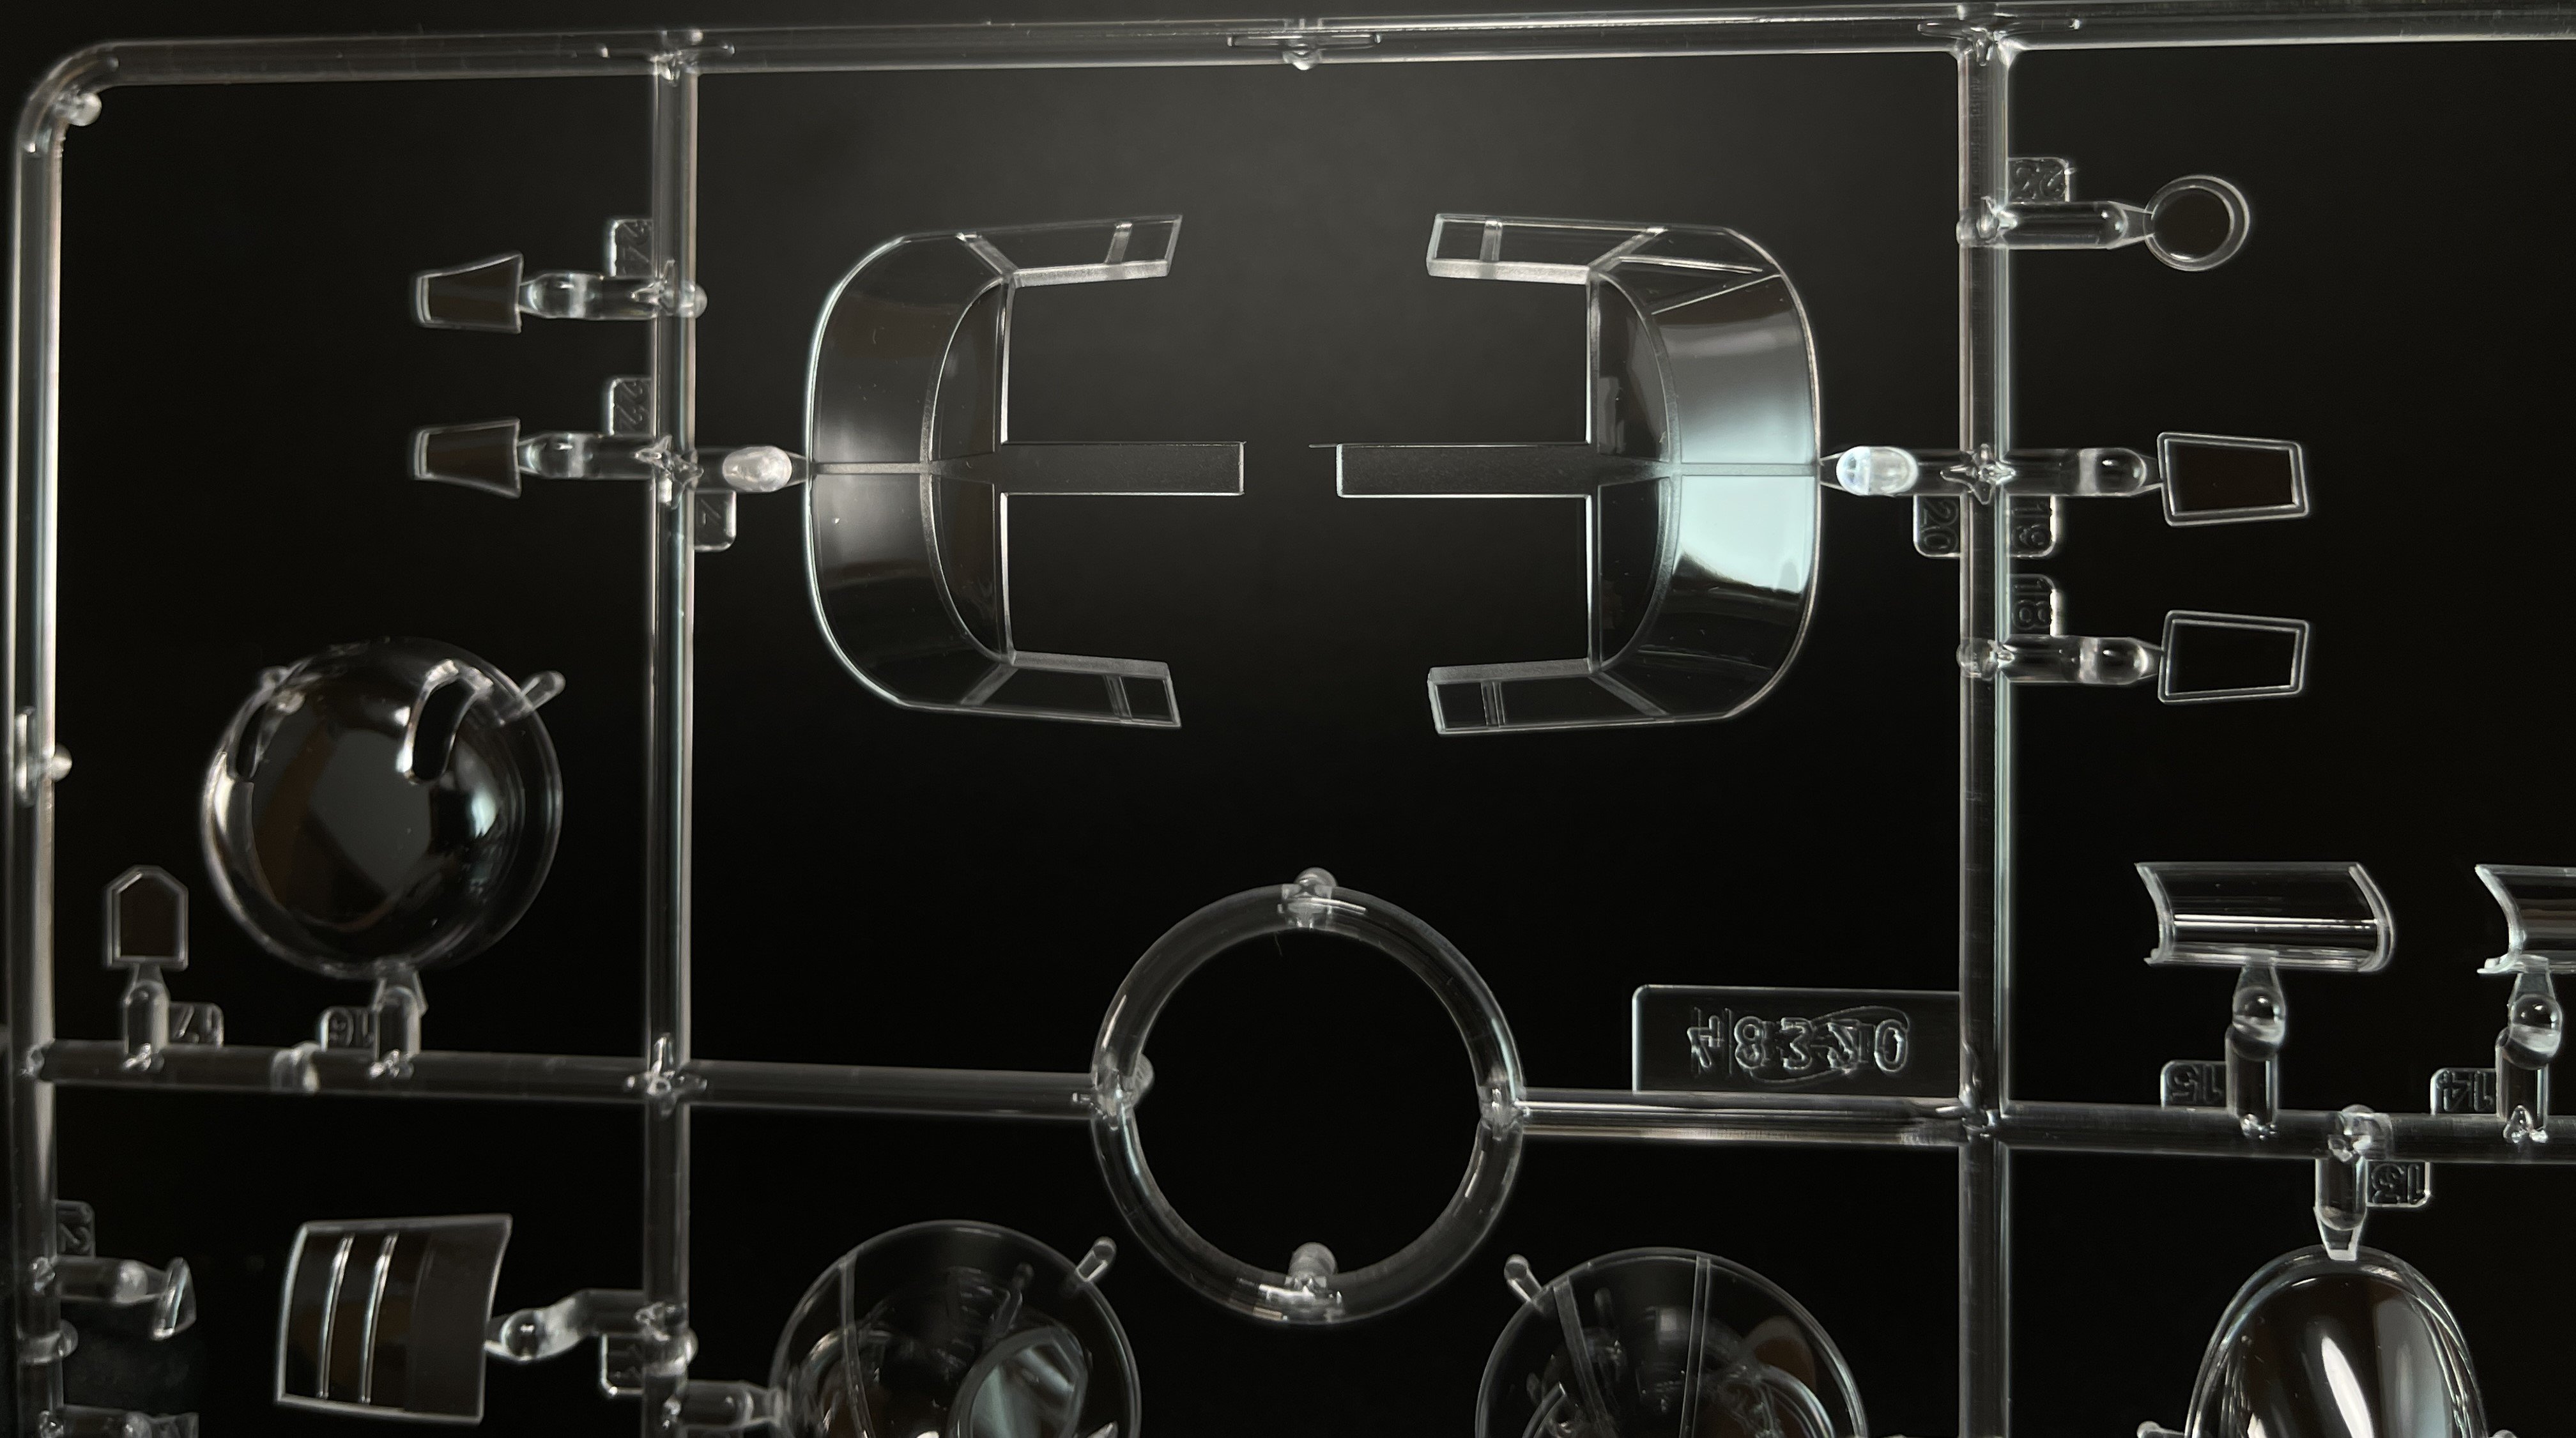
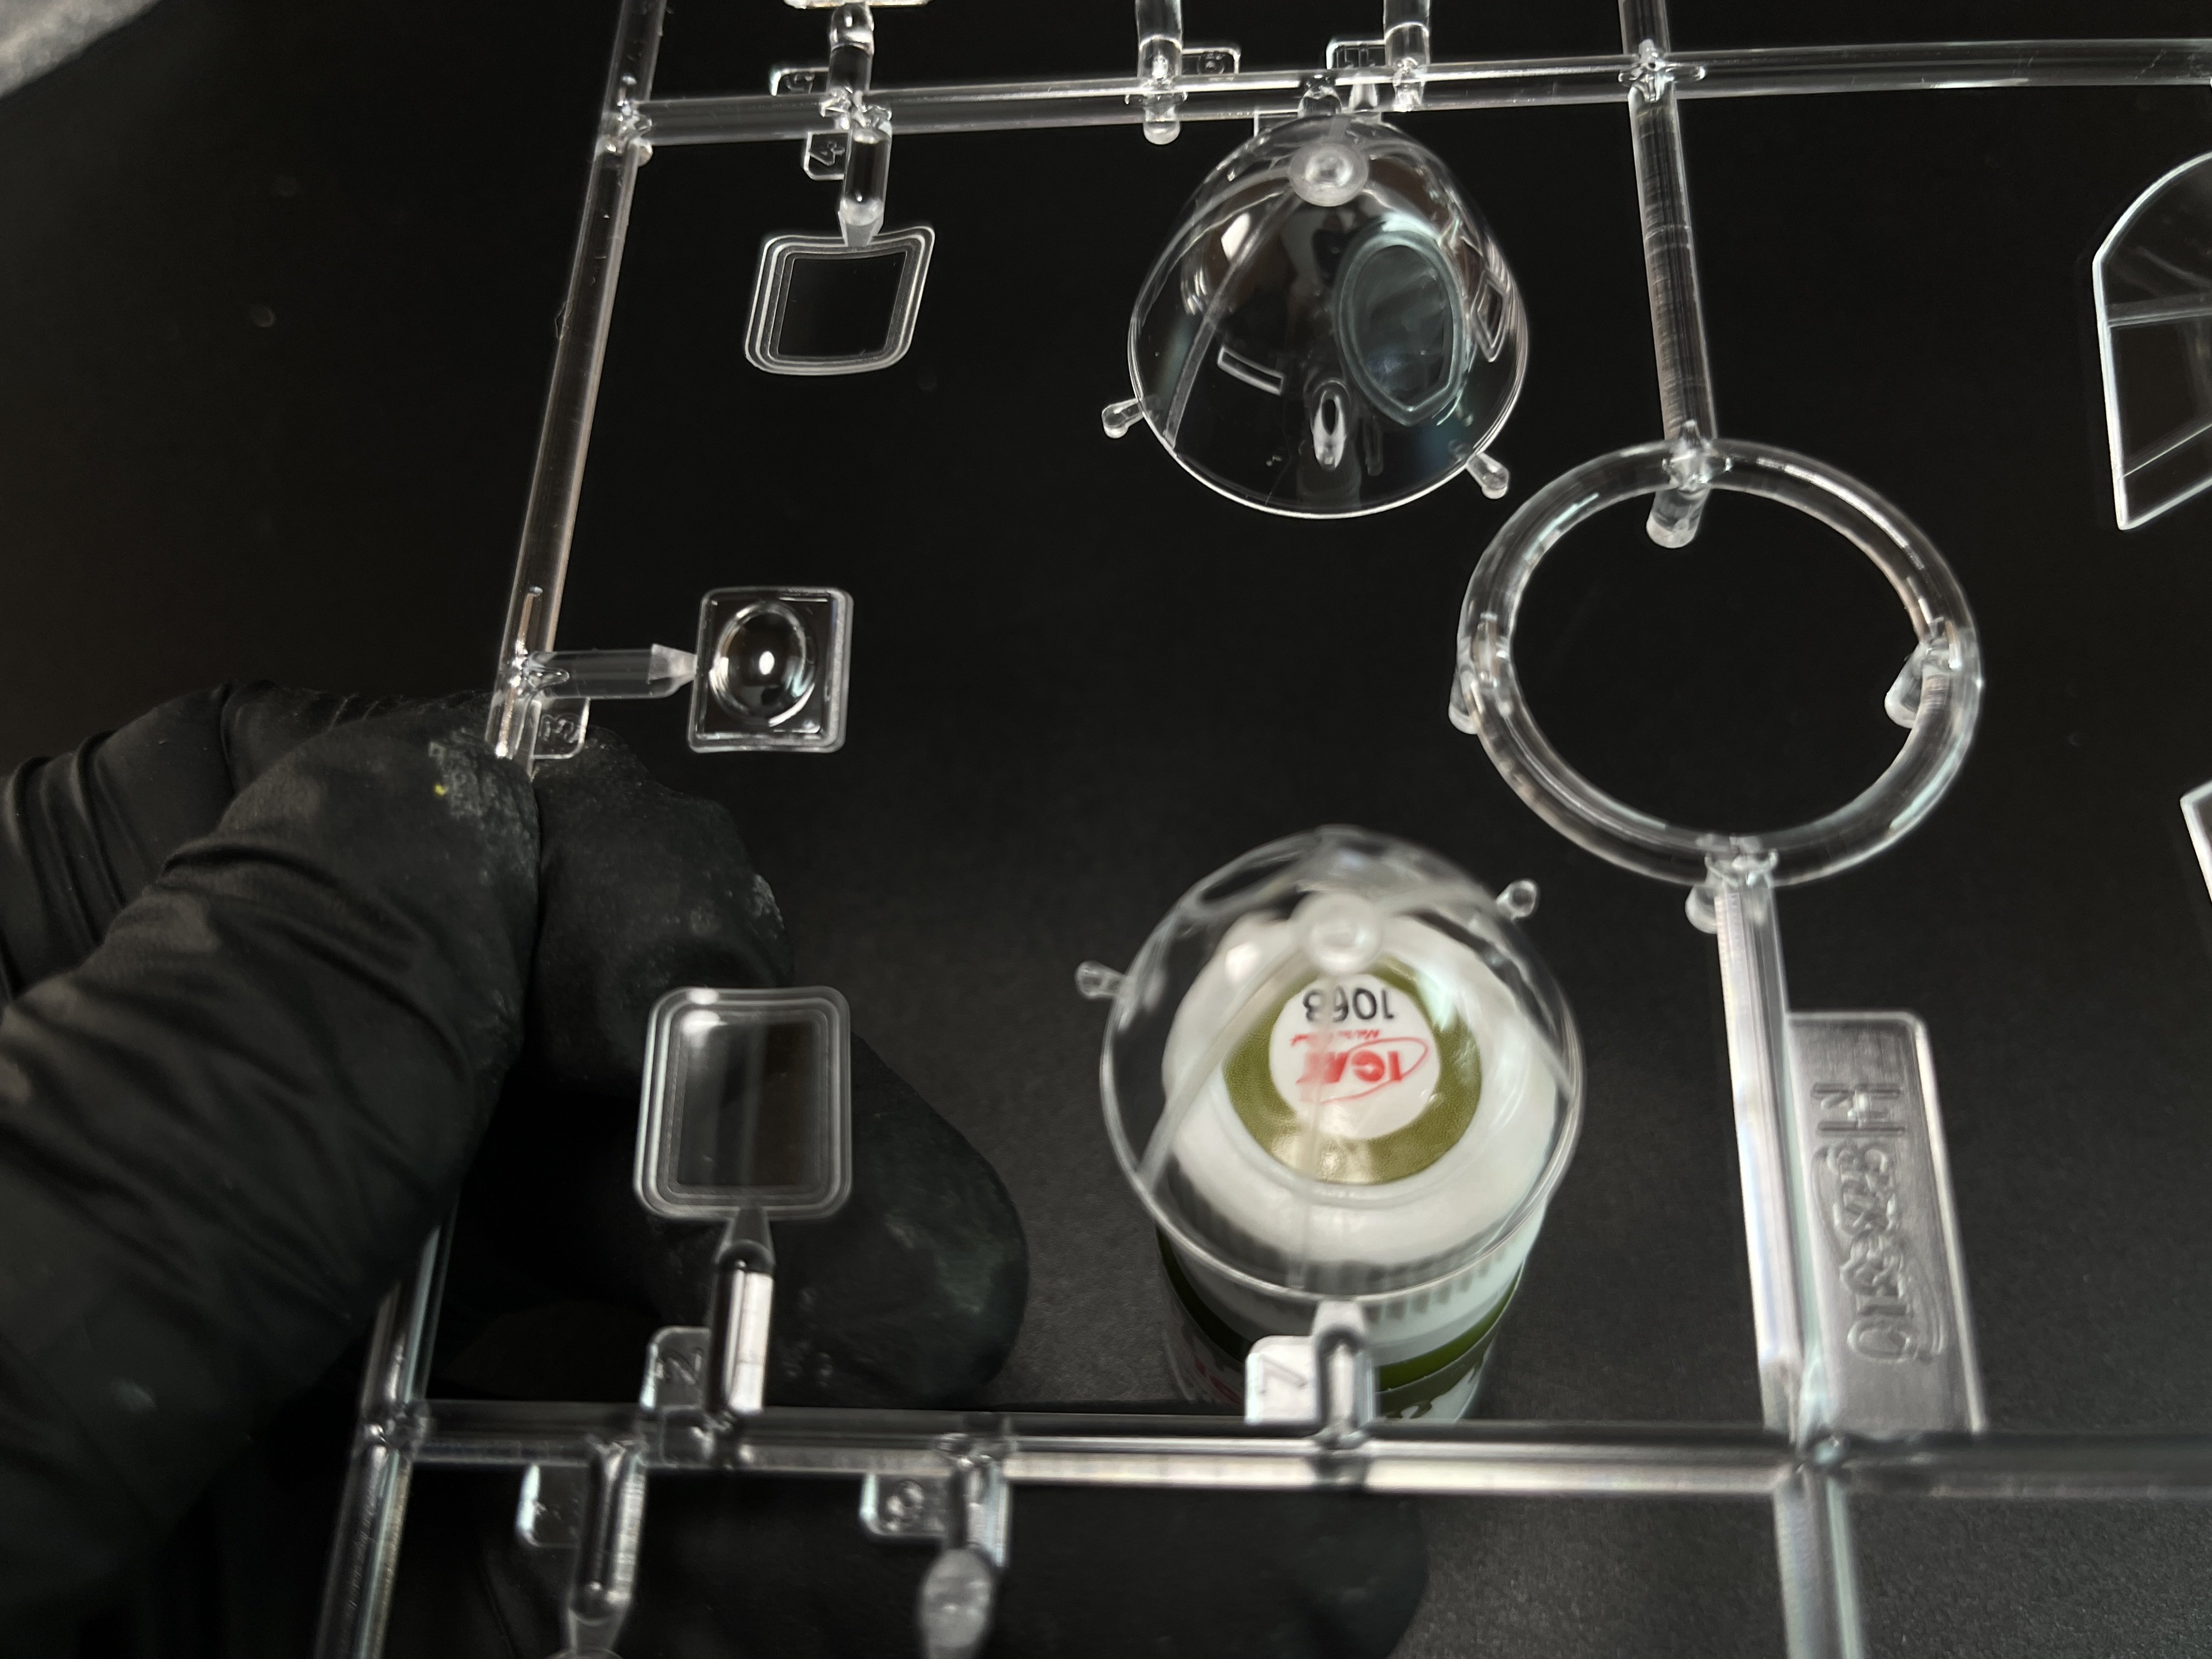
The Clear parts
As usual are pristine and very clear with no distortion at all.


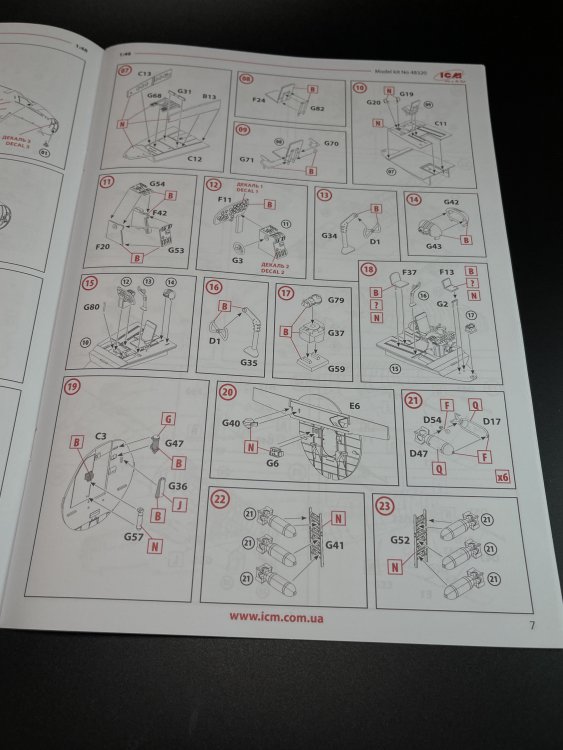
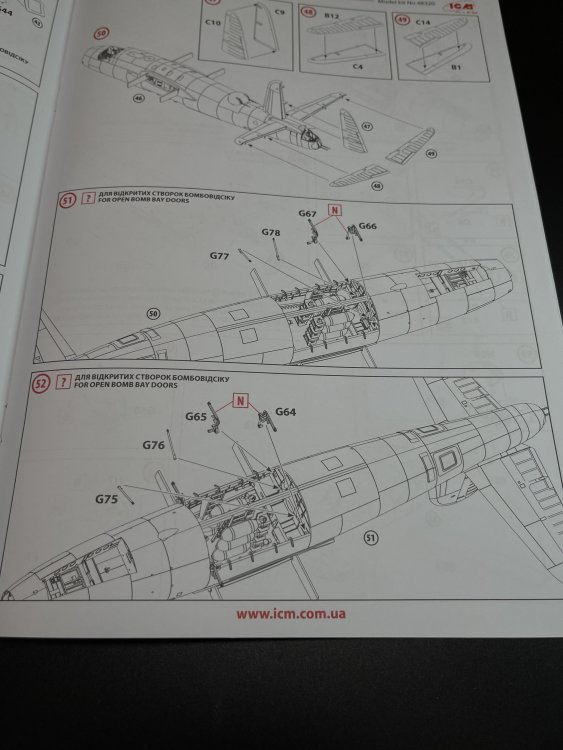
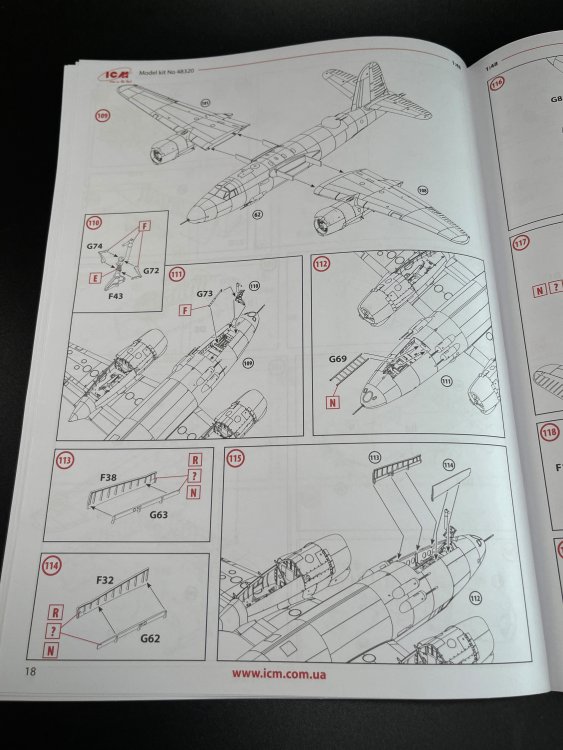
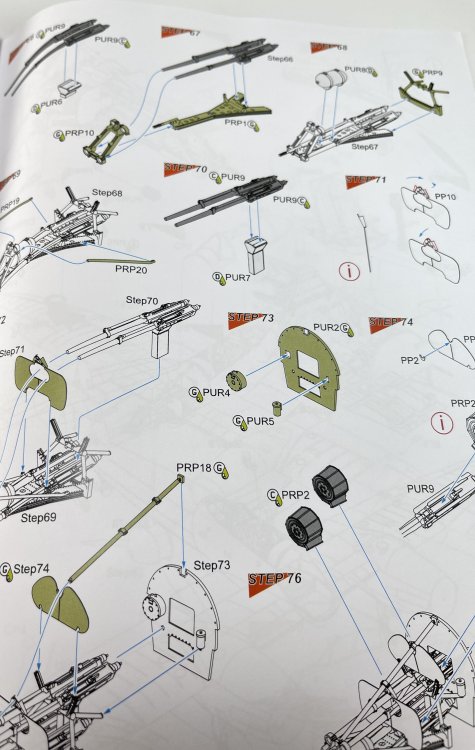
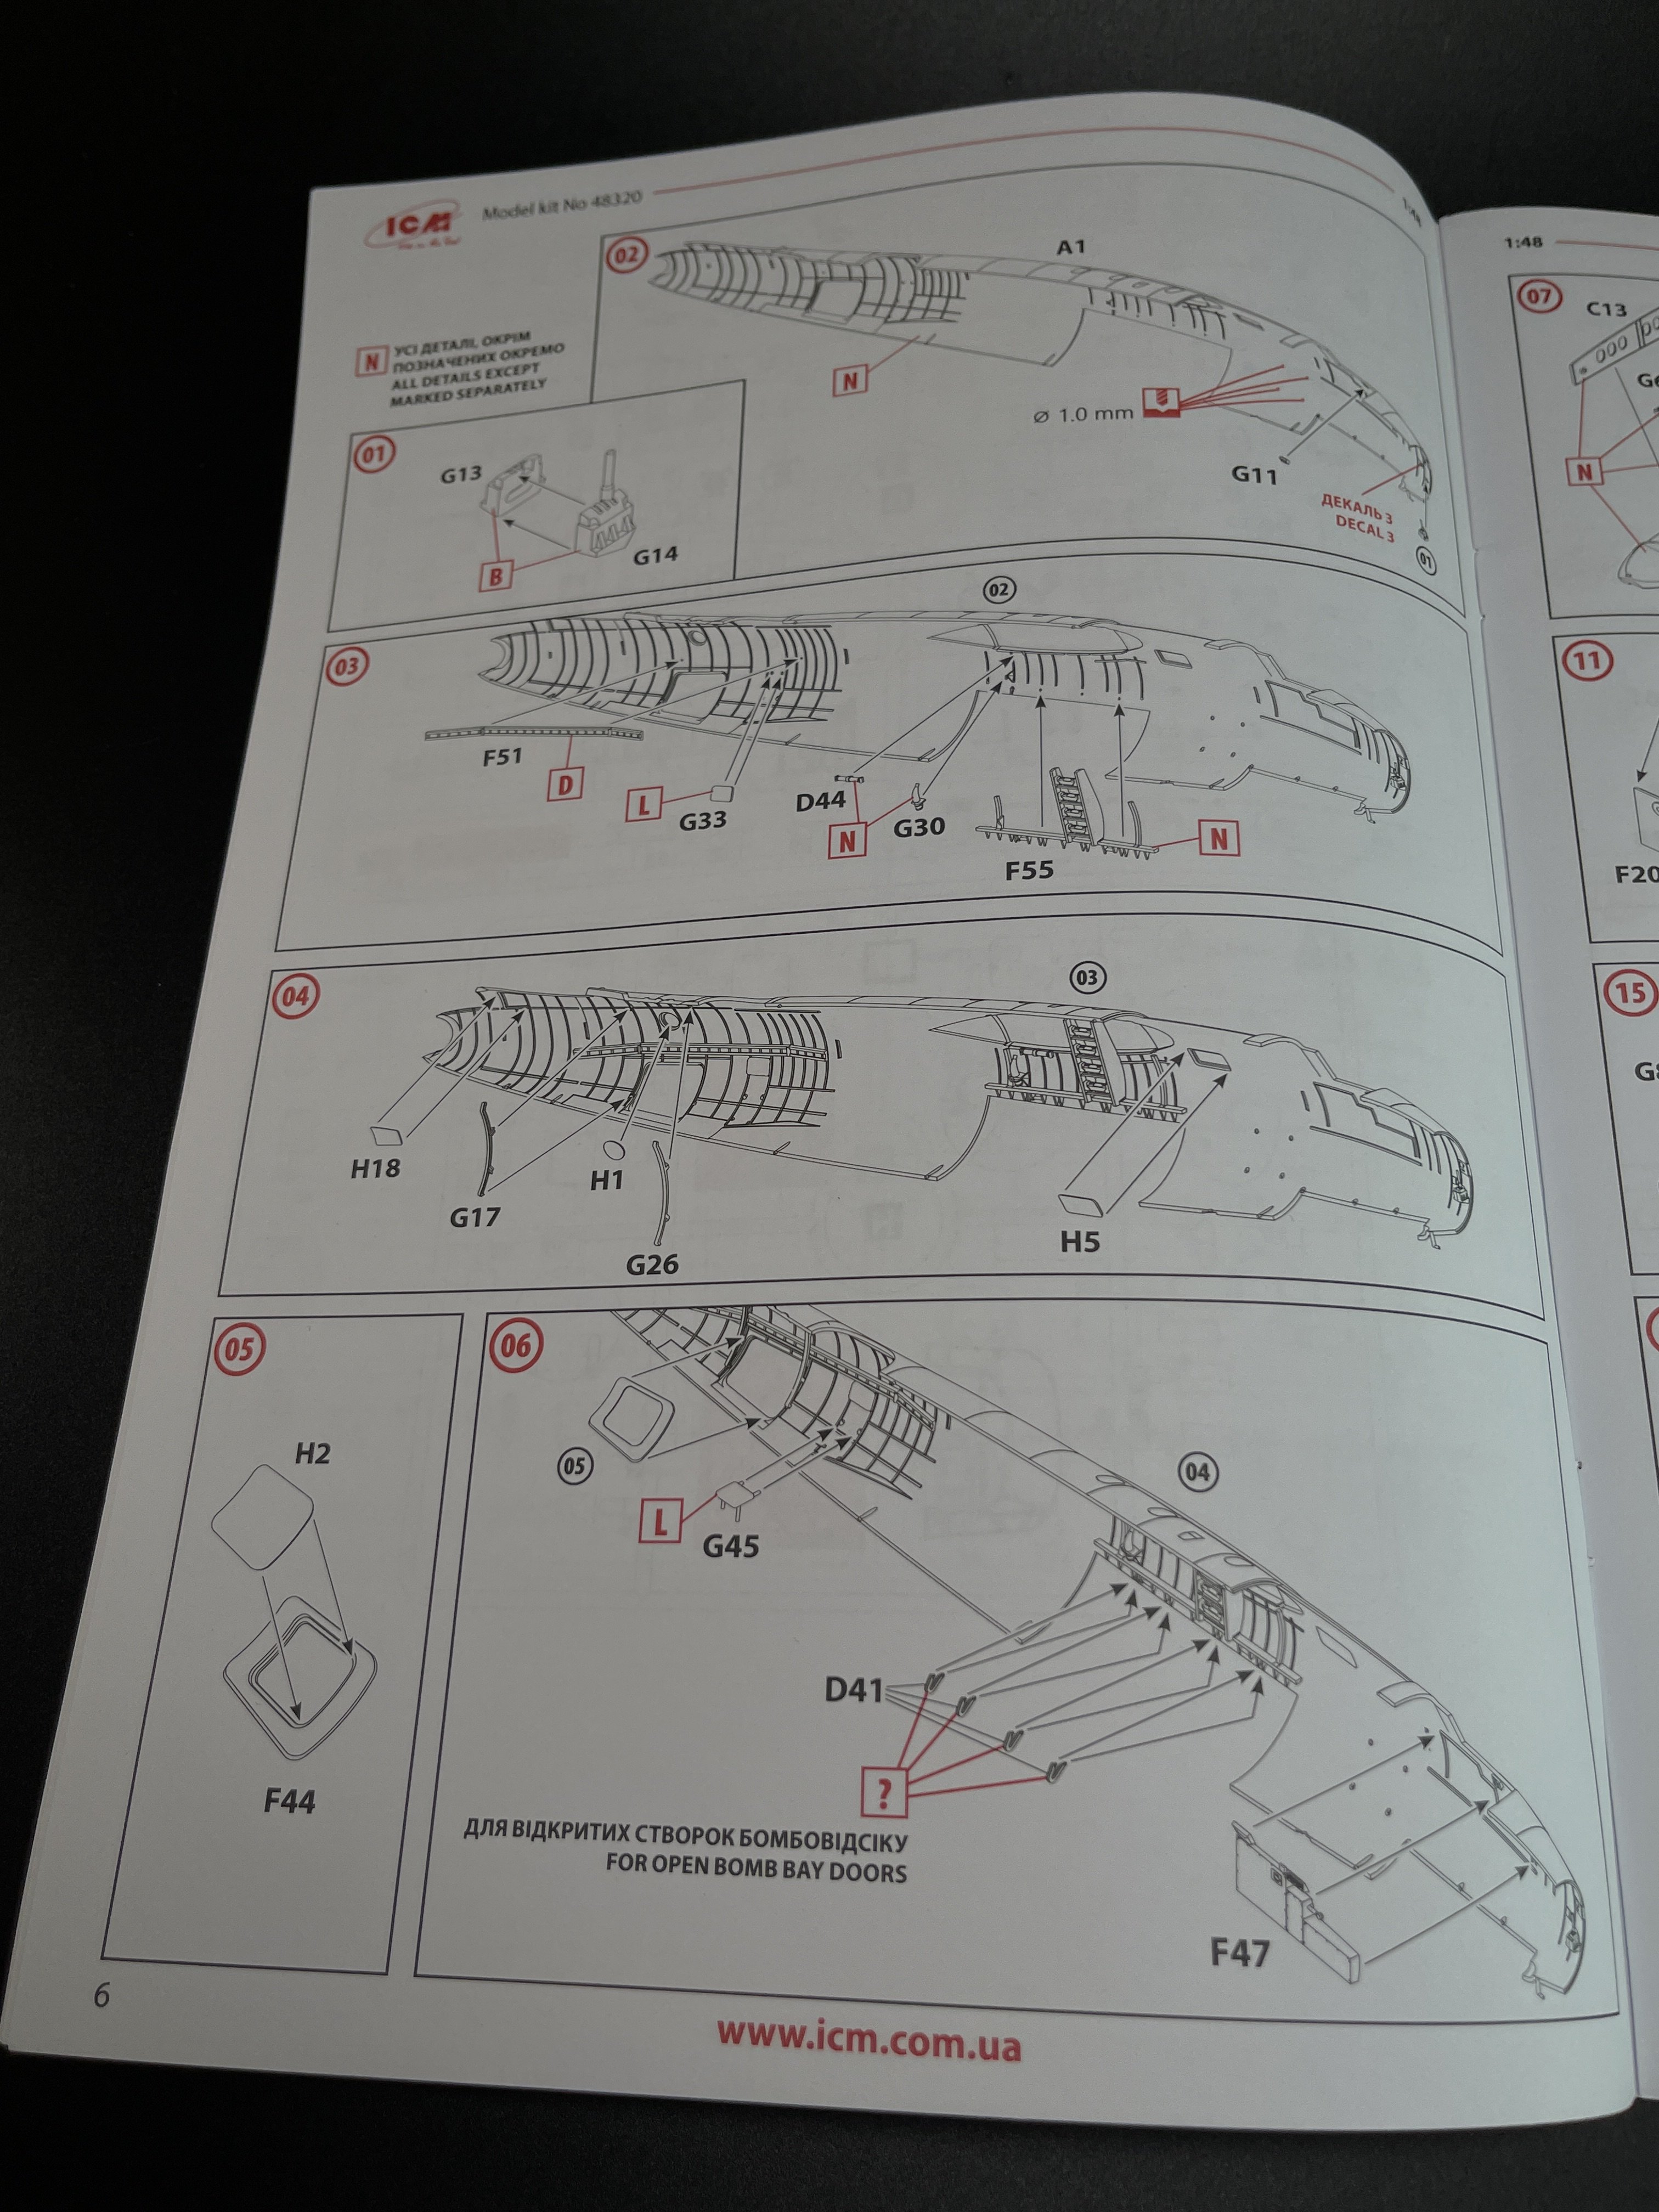
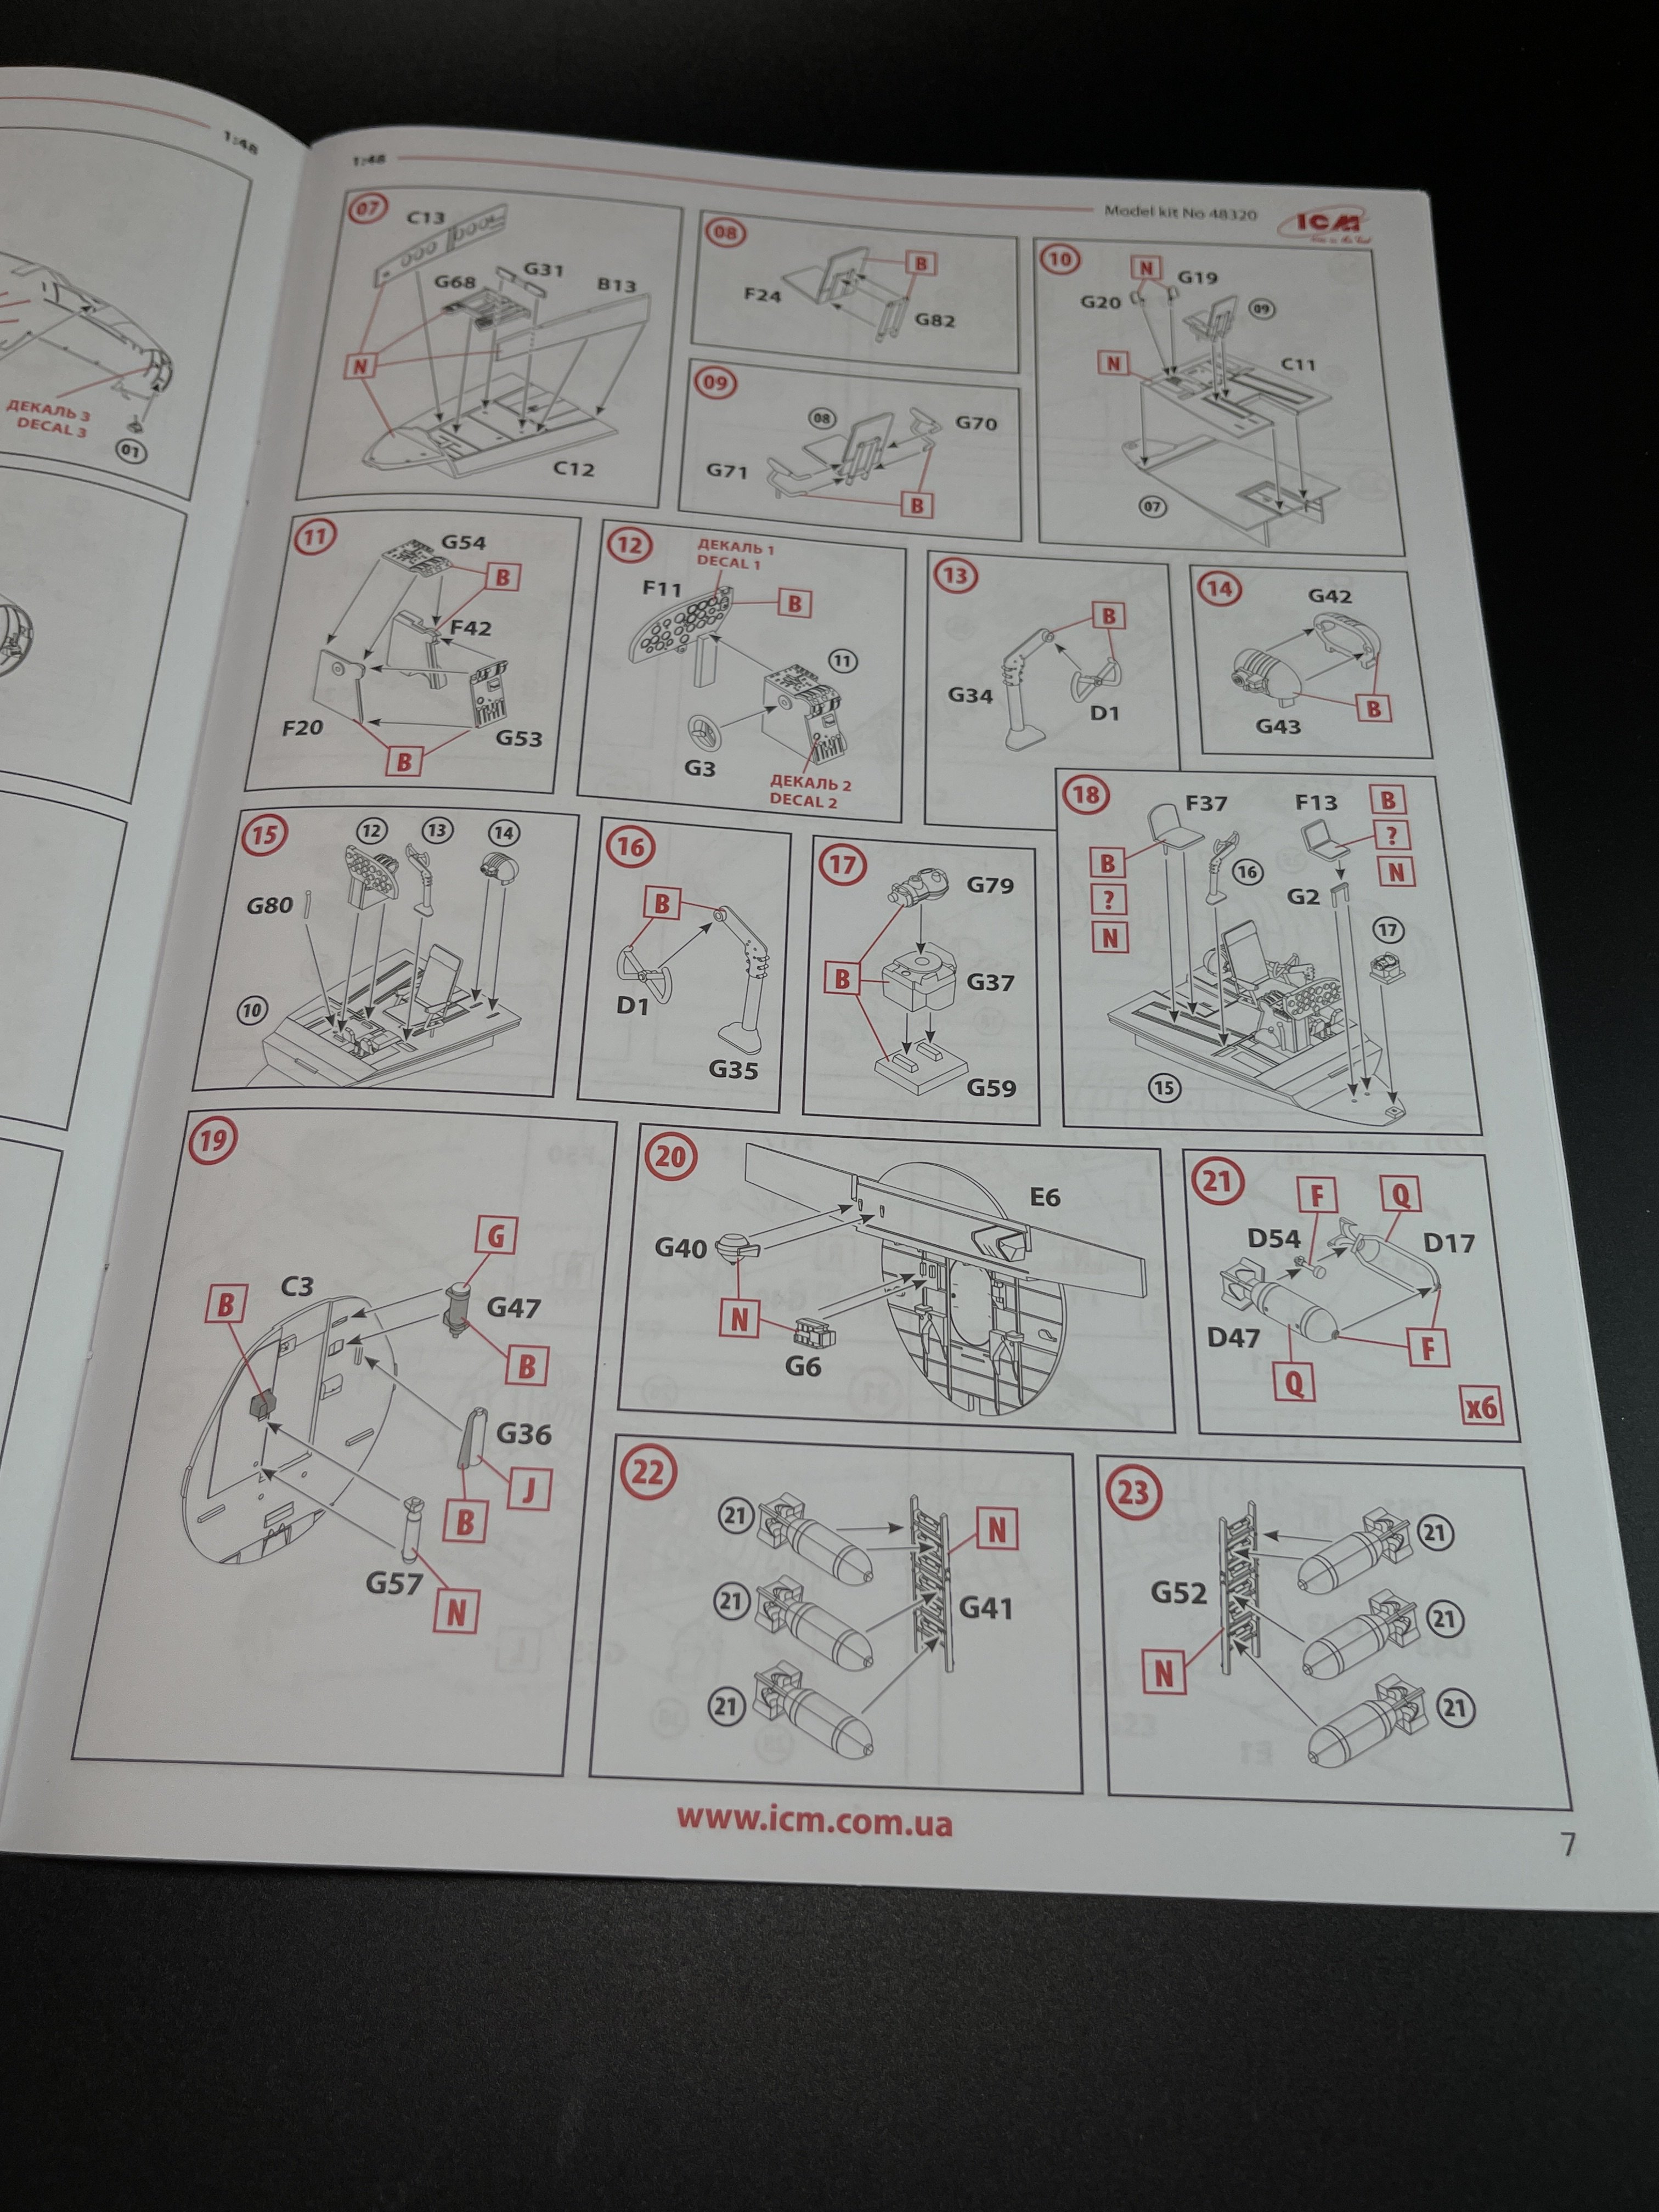
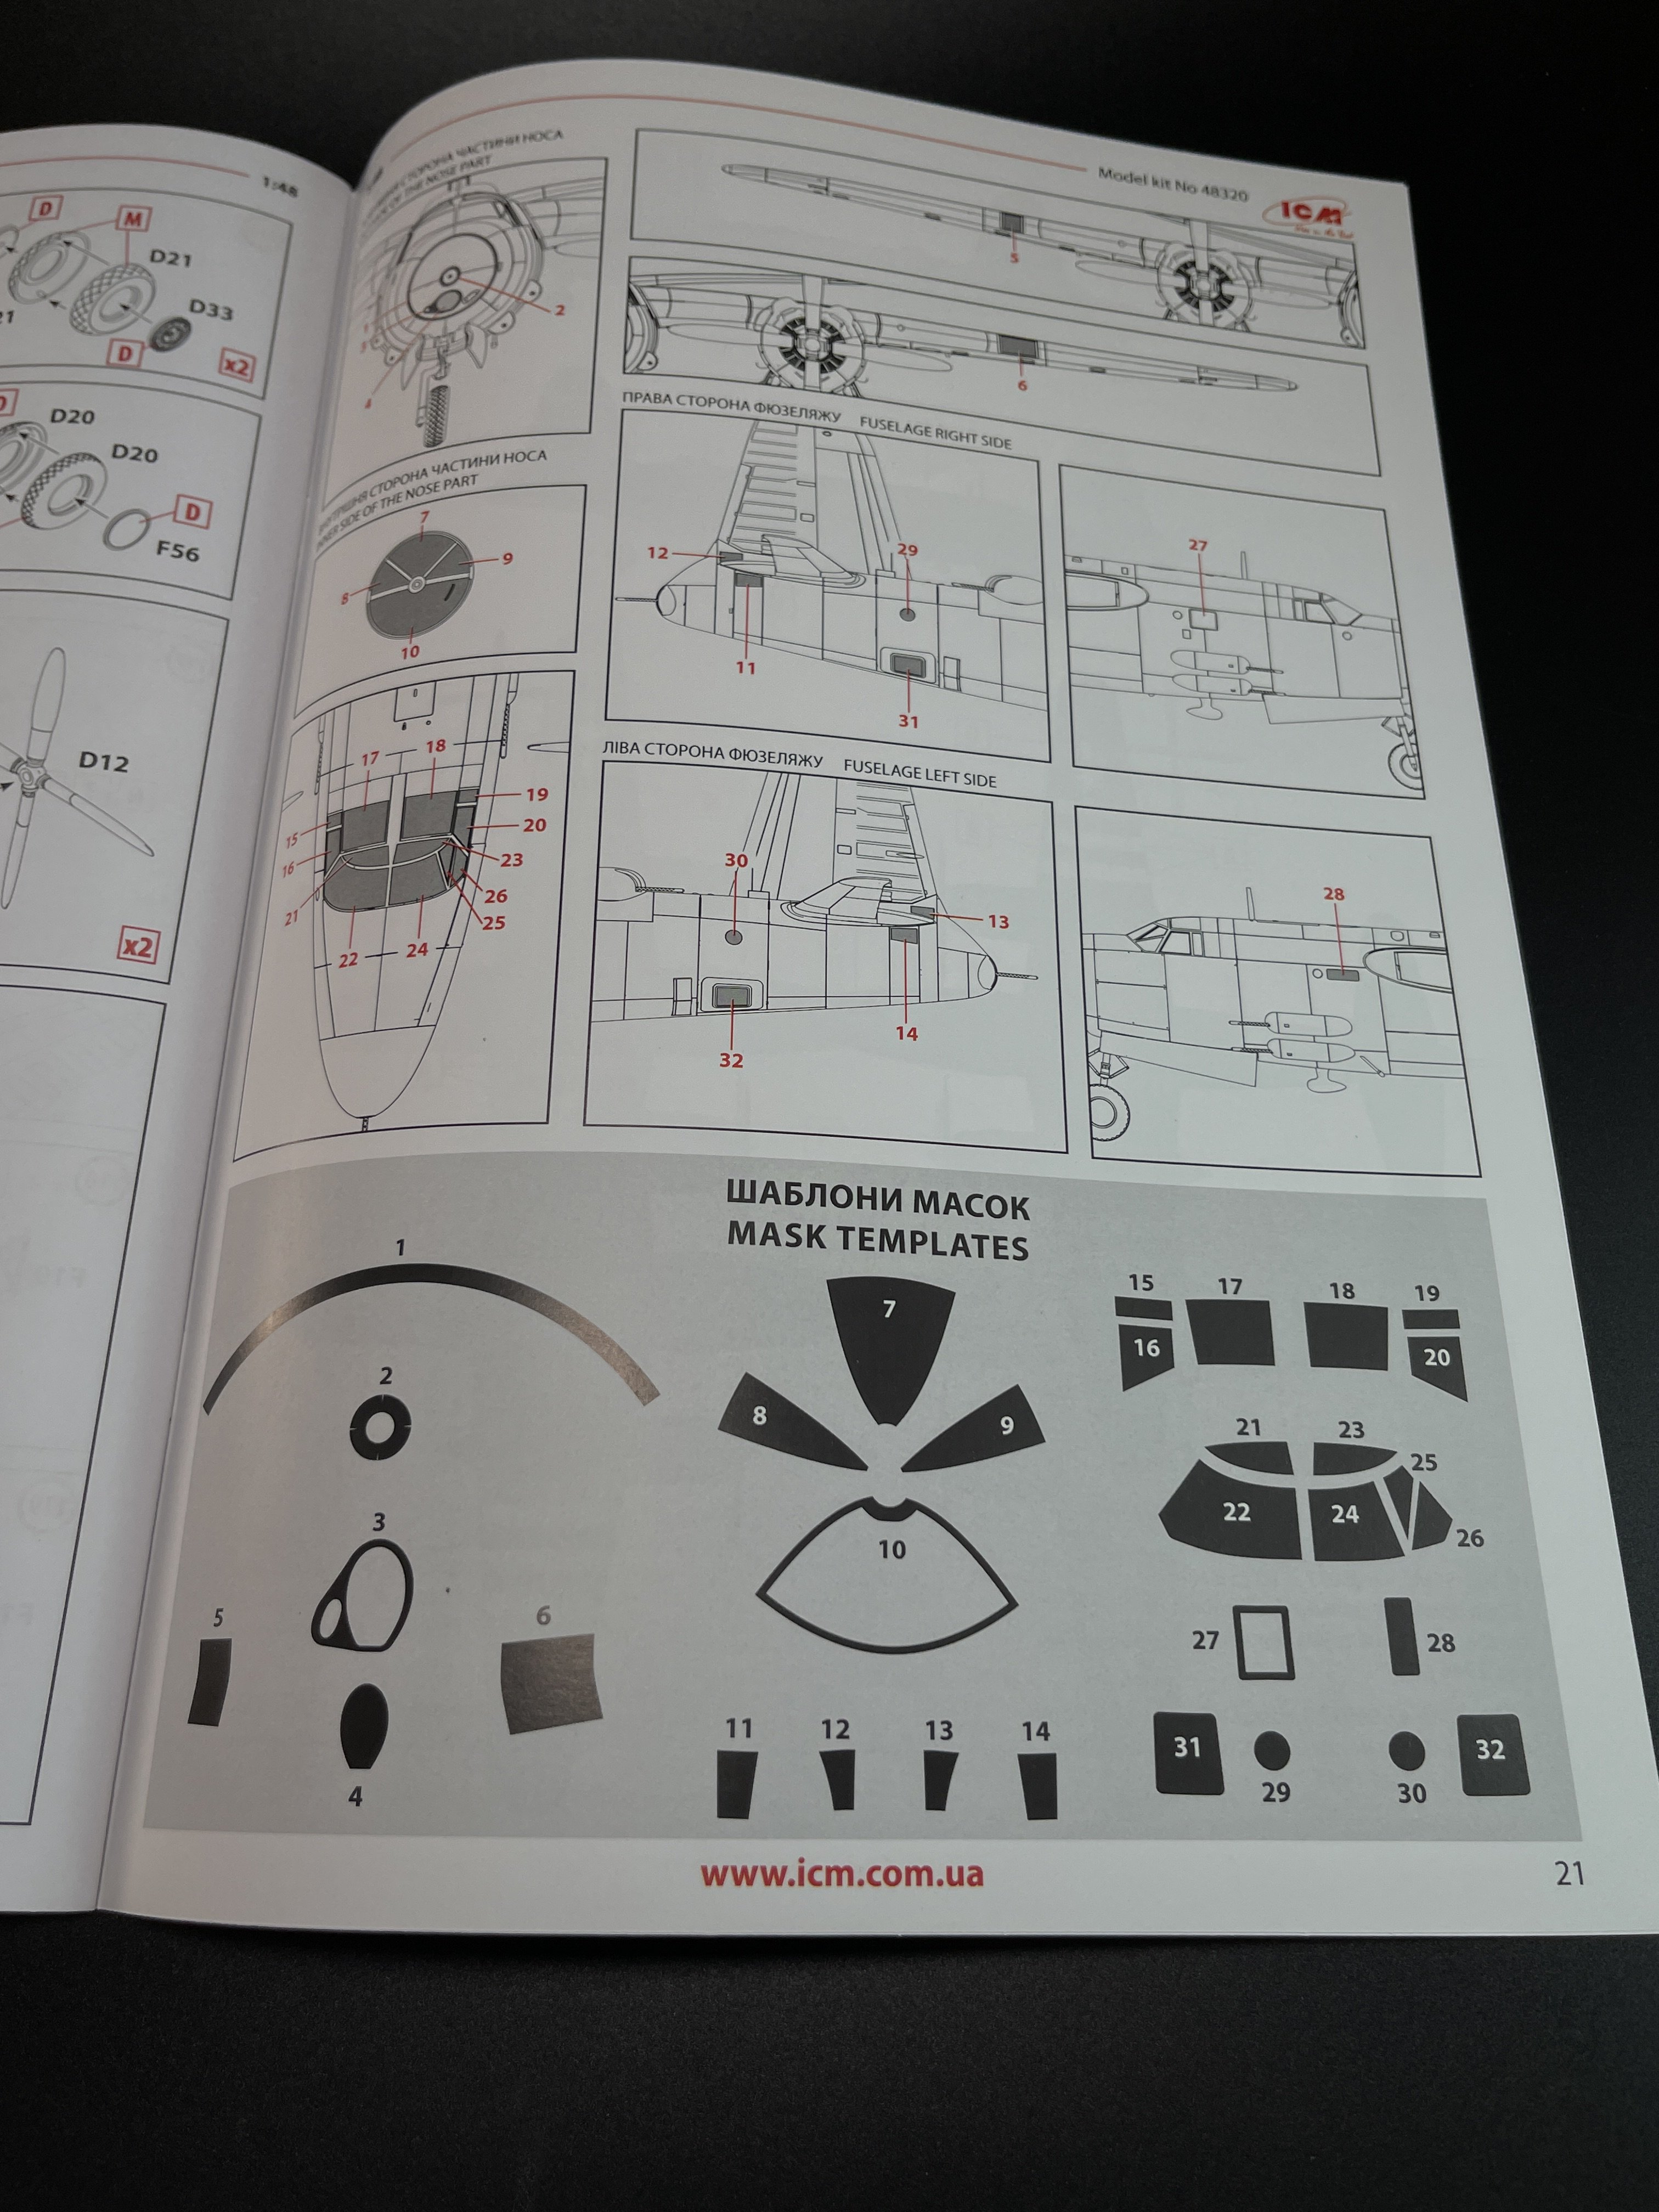
The instructions.
The usual standard from ICM with a booklet with the first and last page in satin paper and the rest in normal paper.


The color table chart only have ICM paint range and it start to make some sense (at least in Europe) as you start to have some online store that sell them as Art Scale Kit.
I already try ICM in brush application only (Airbrush will follow) and I must say: I has impressed with the brush paint flow and the cover pigmentation. I will make a proper review on those paints.
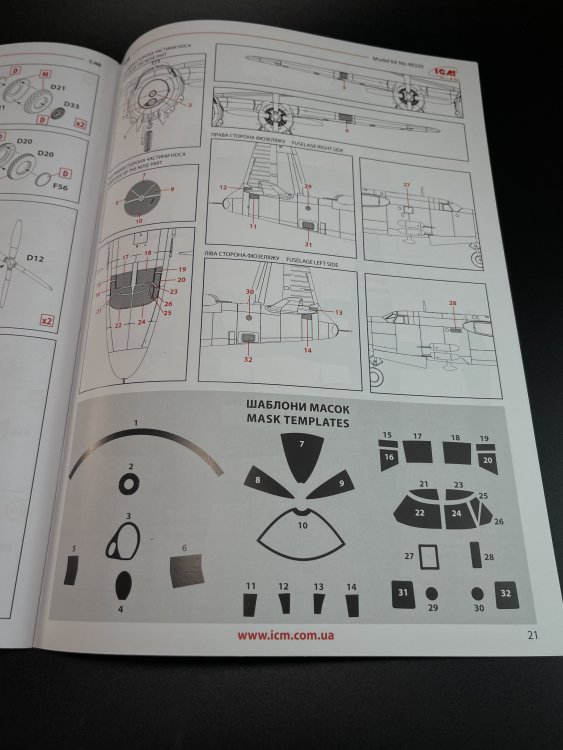
Anyway, the instruction manual is detailed and easy to follow. It includes step-by-step assembly diagrams, color callouts, and decal placement guides.
And this one has masking templates.
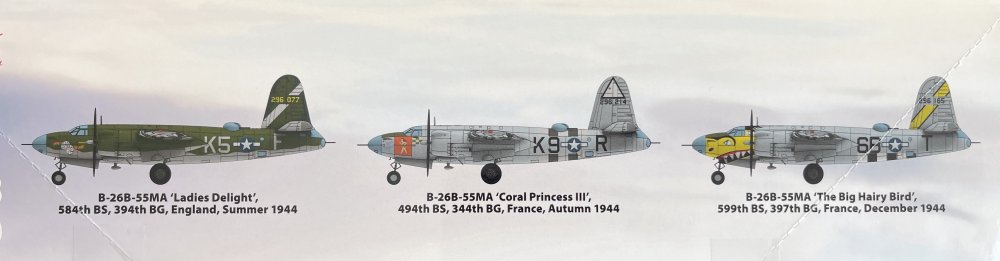
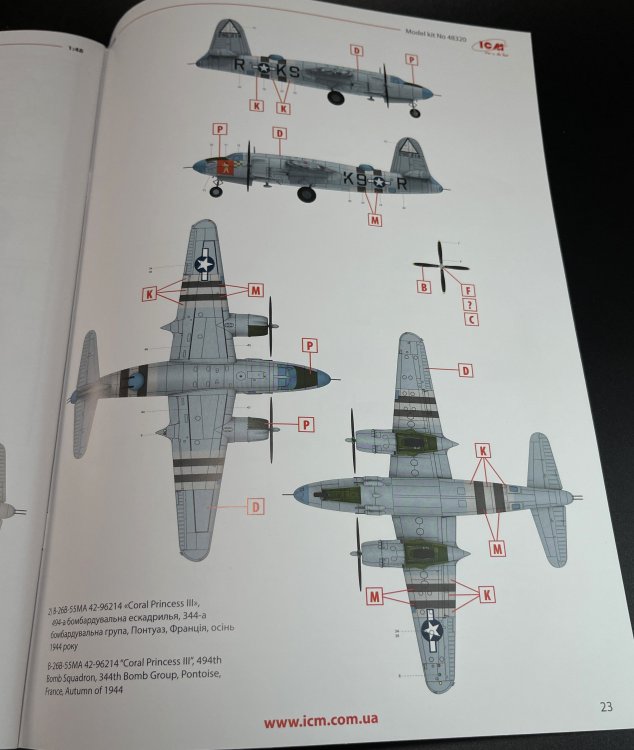
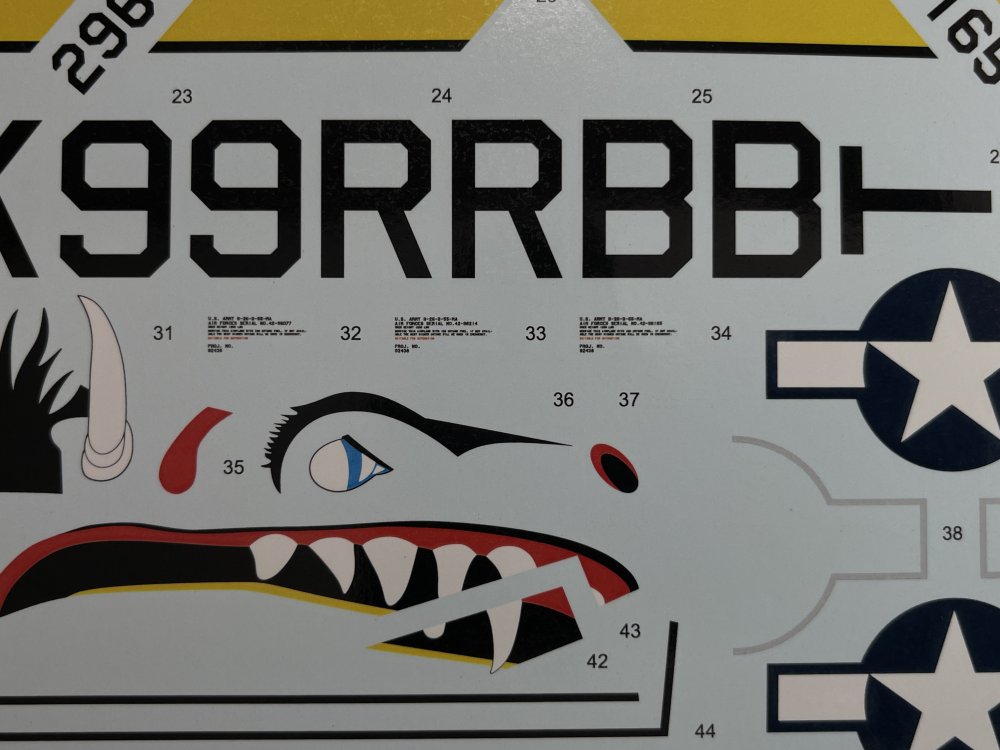
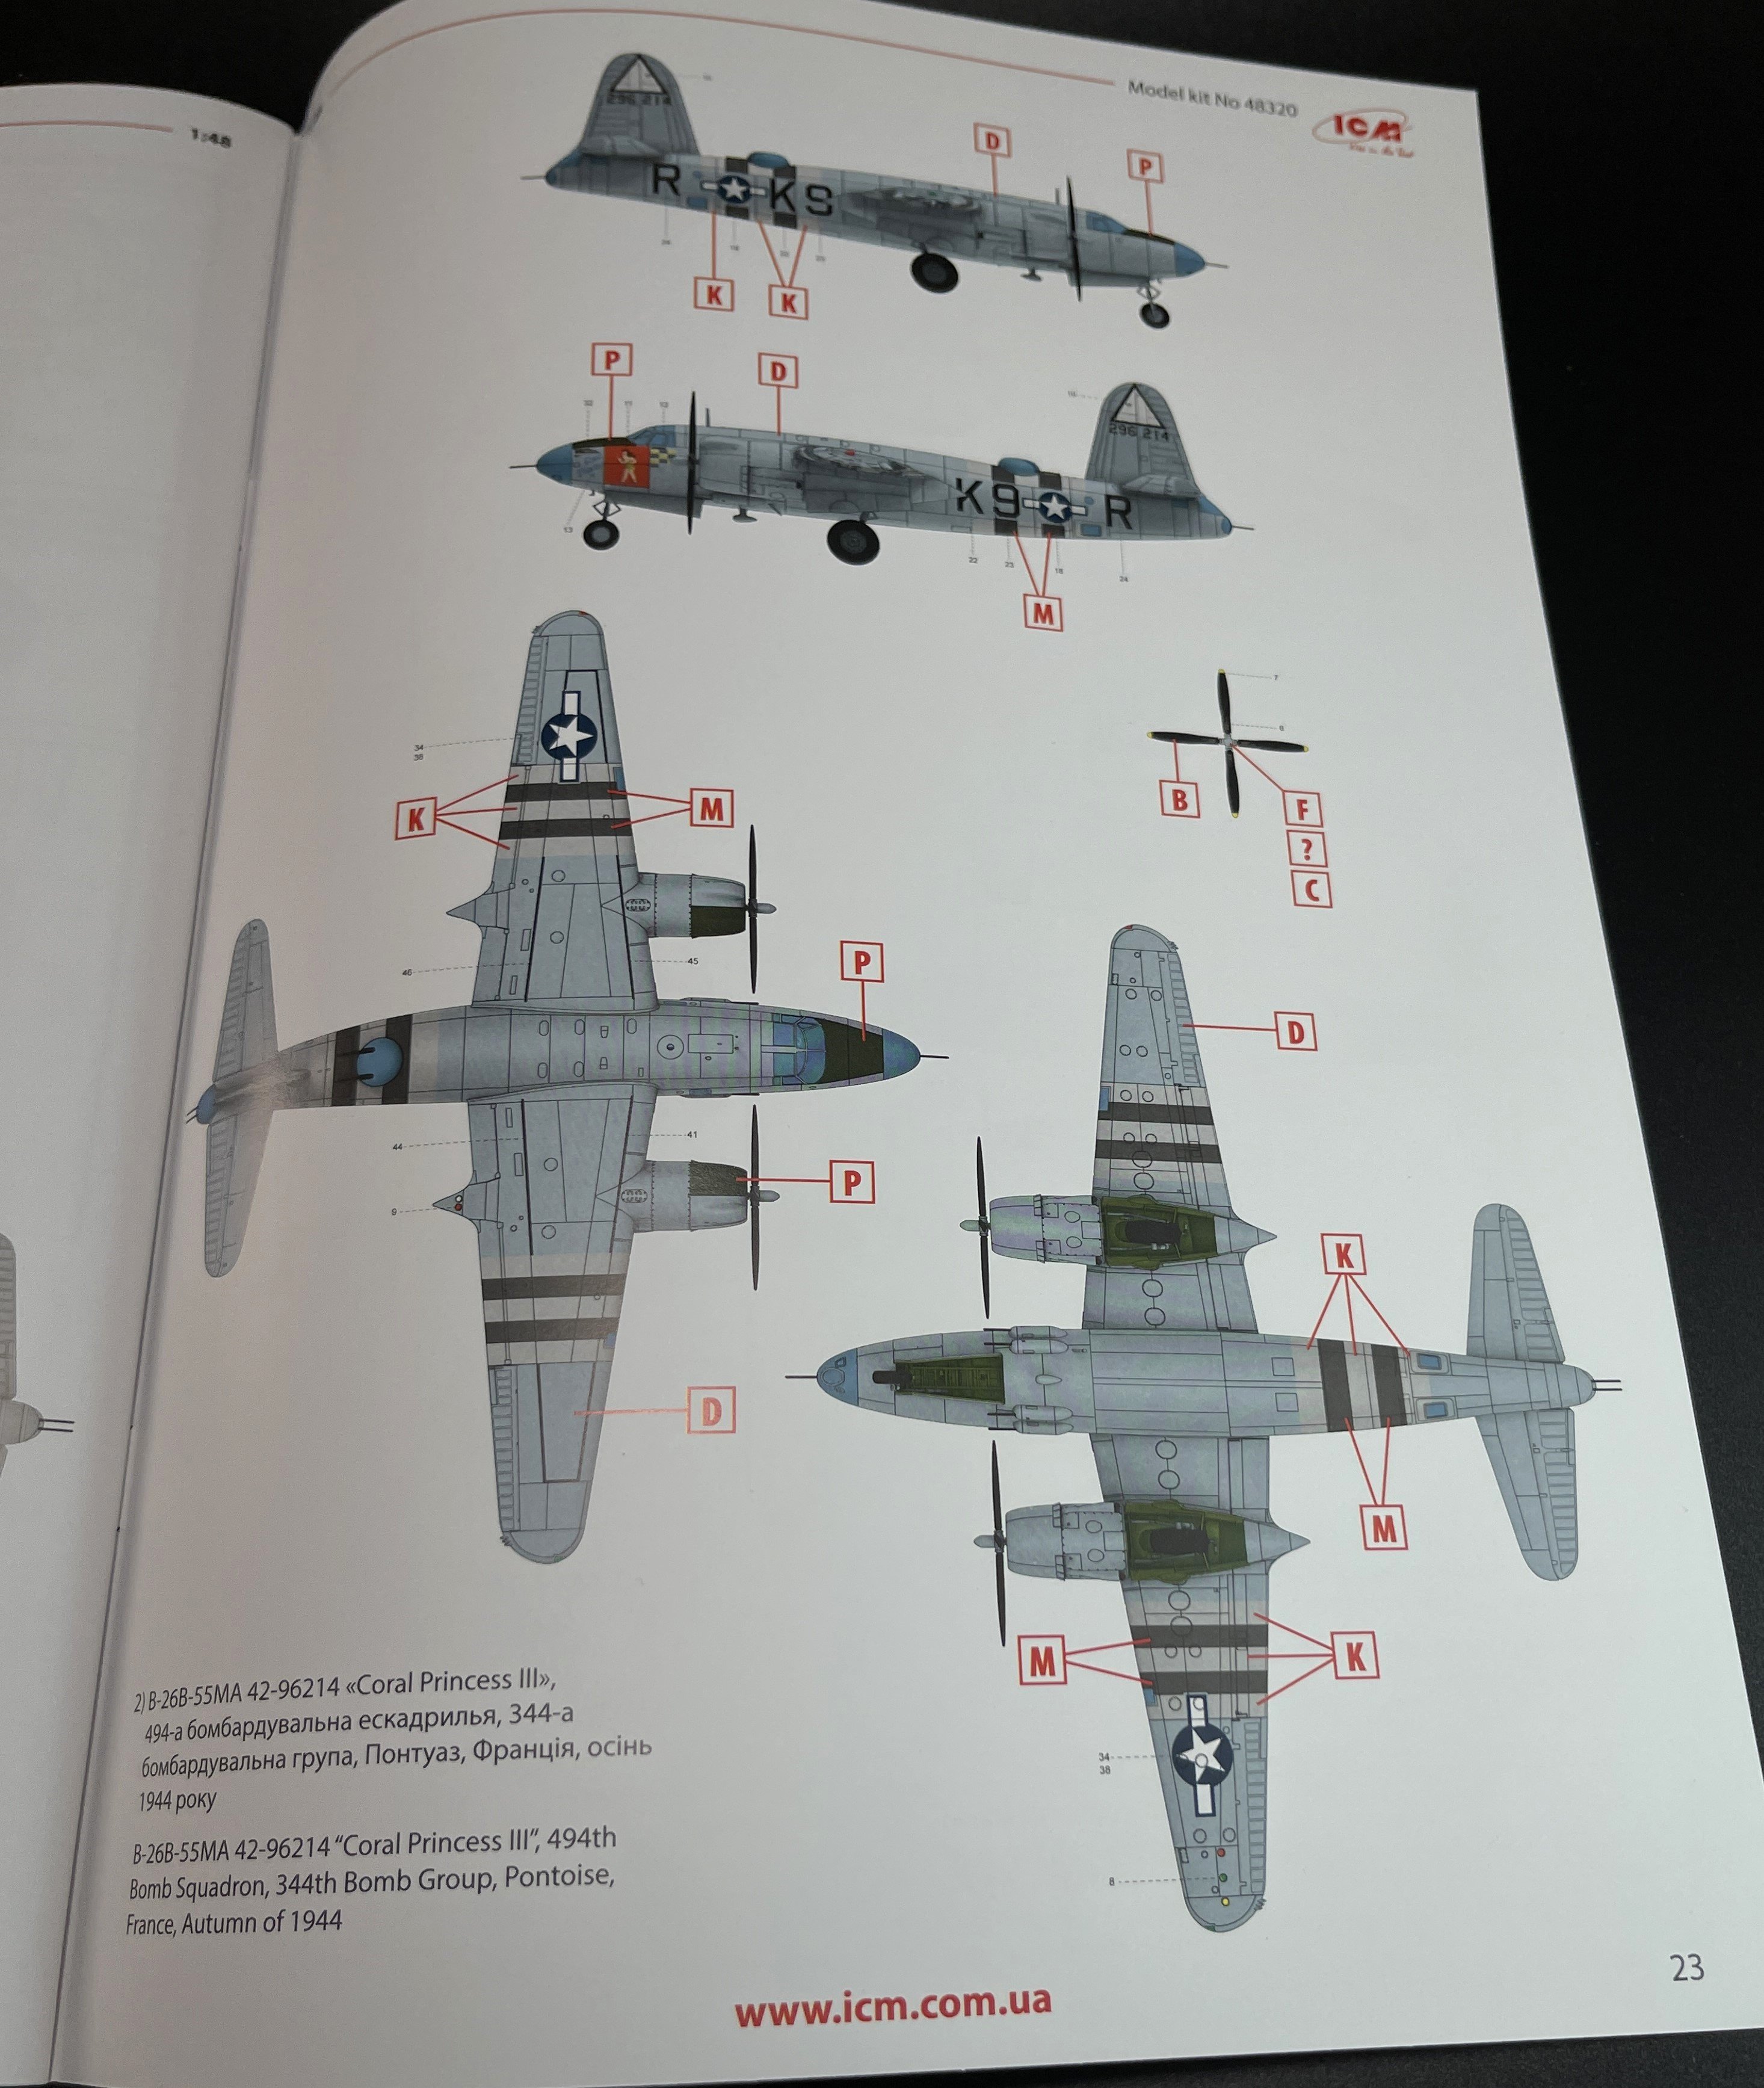
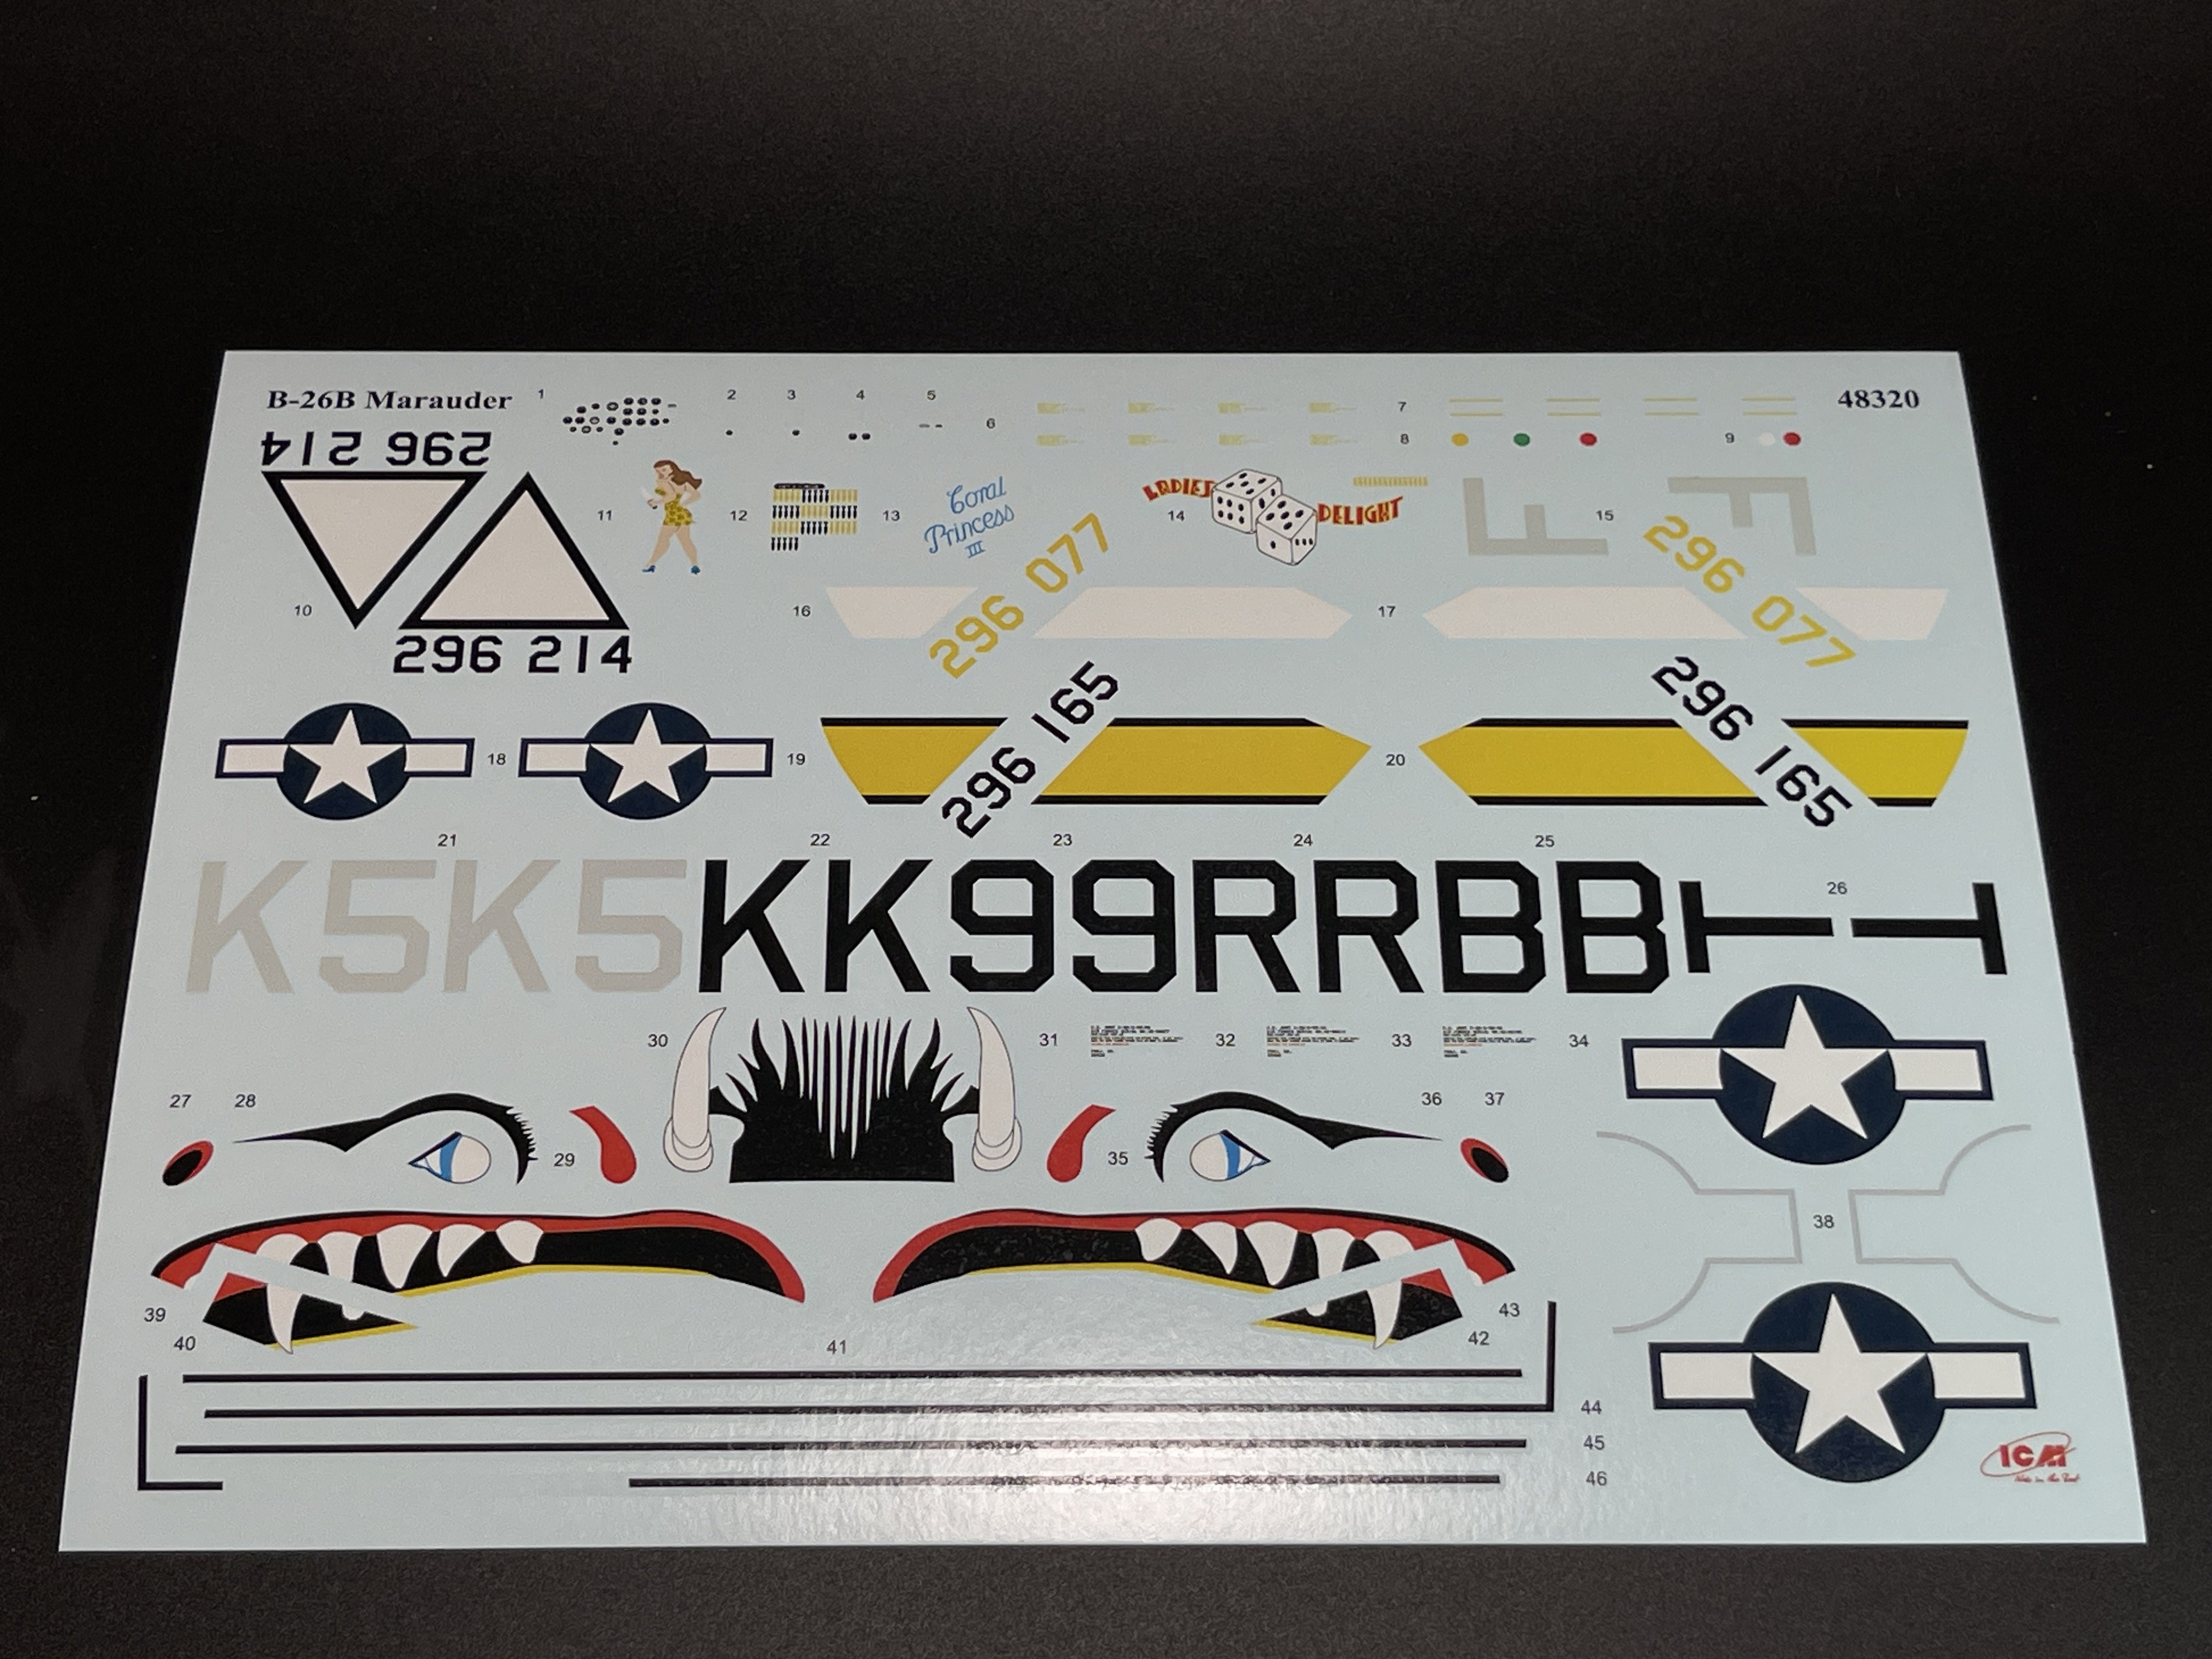
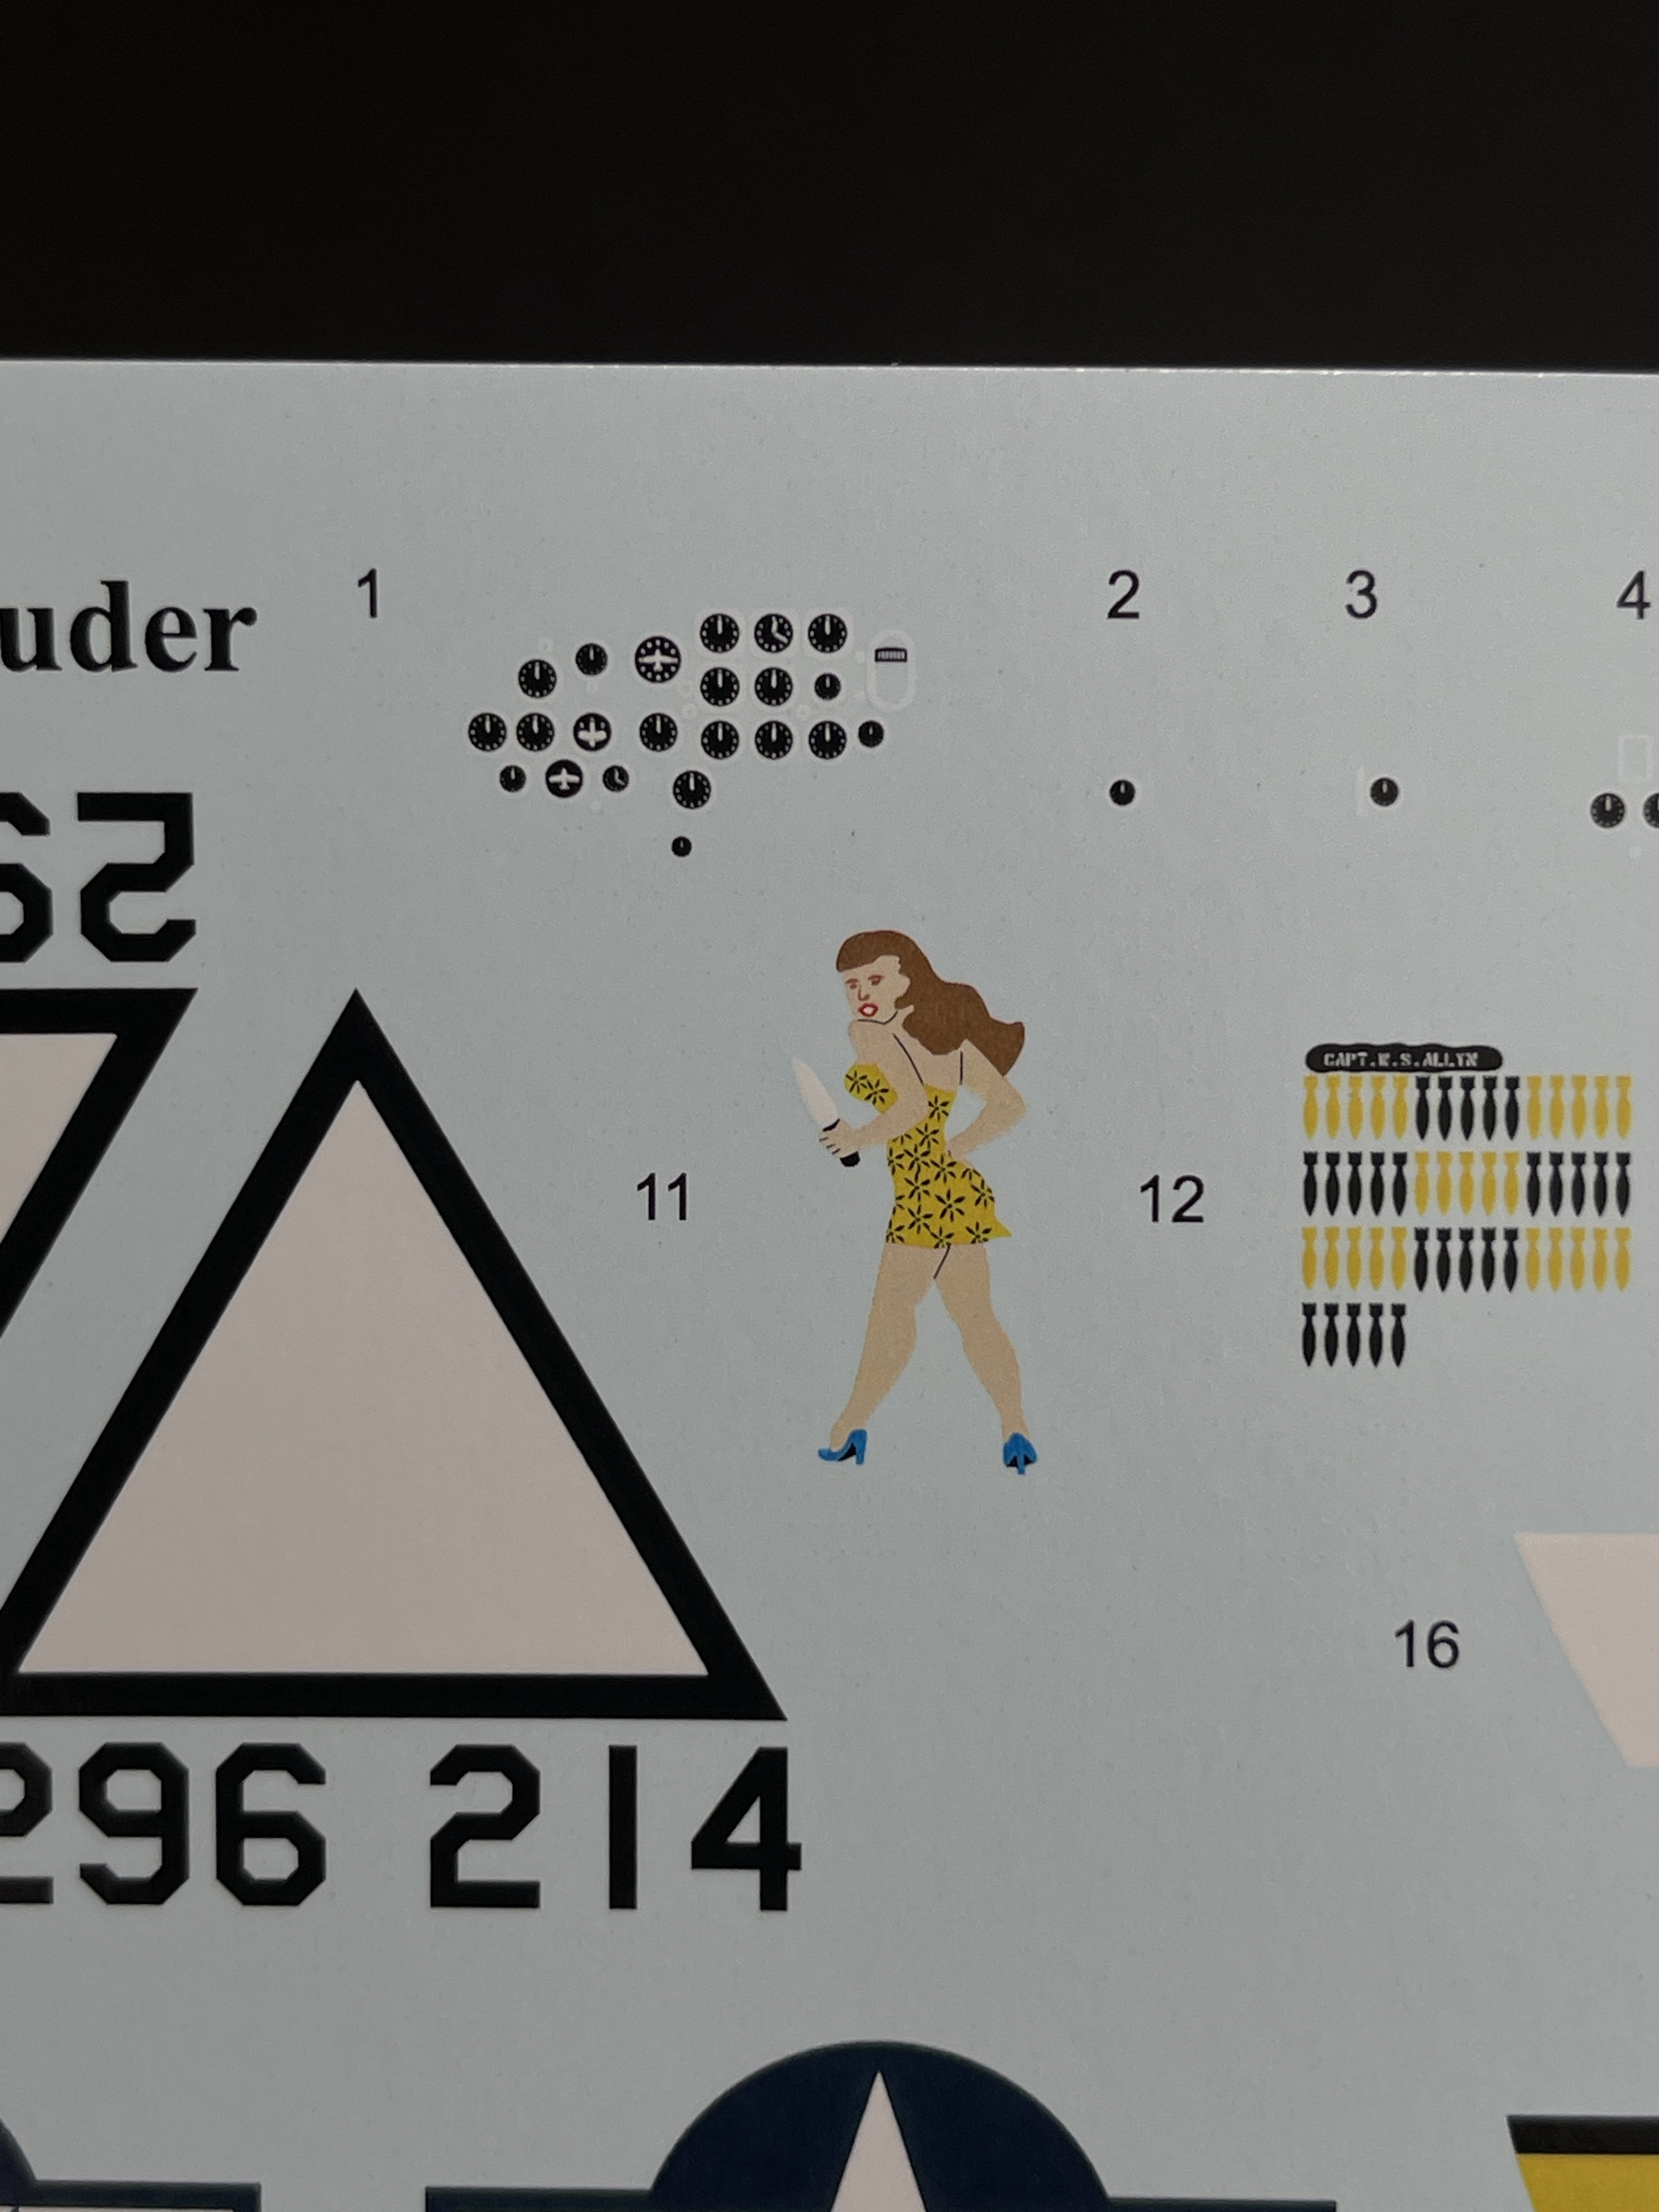
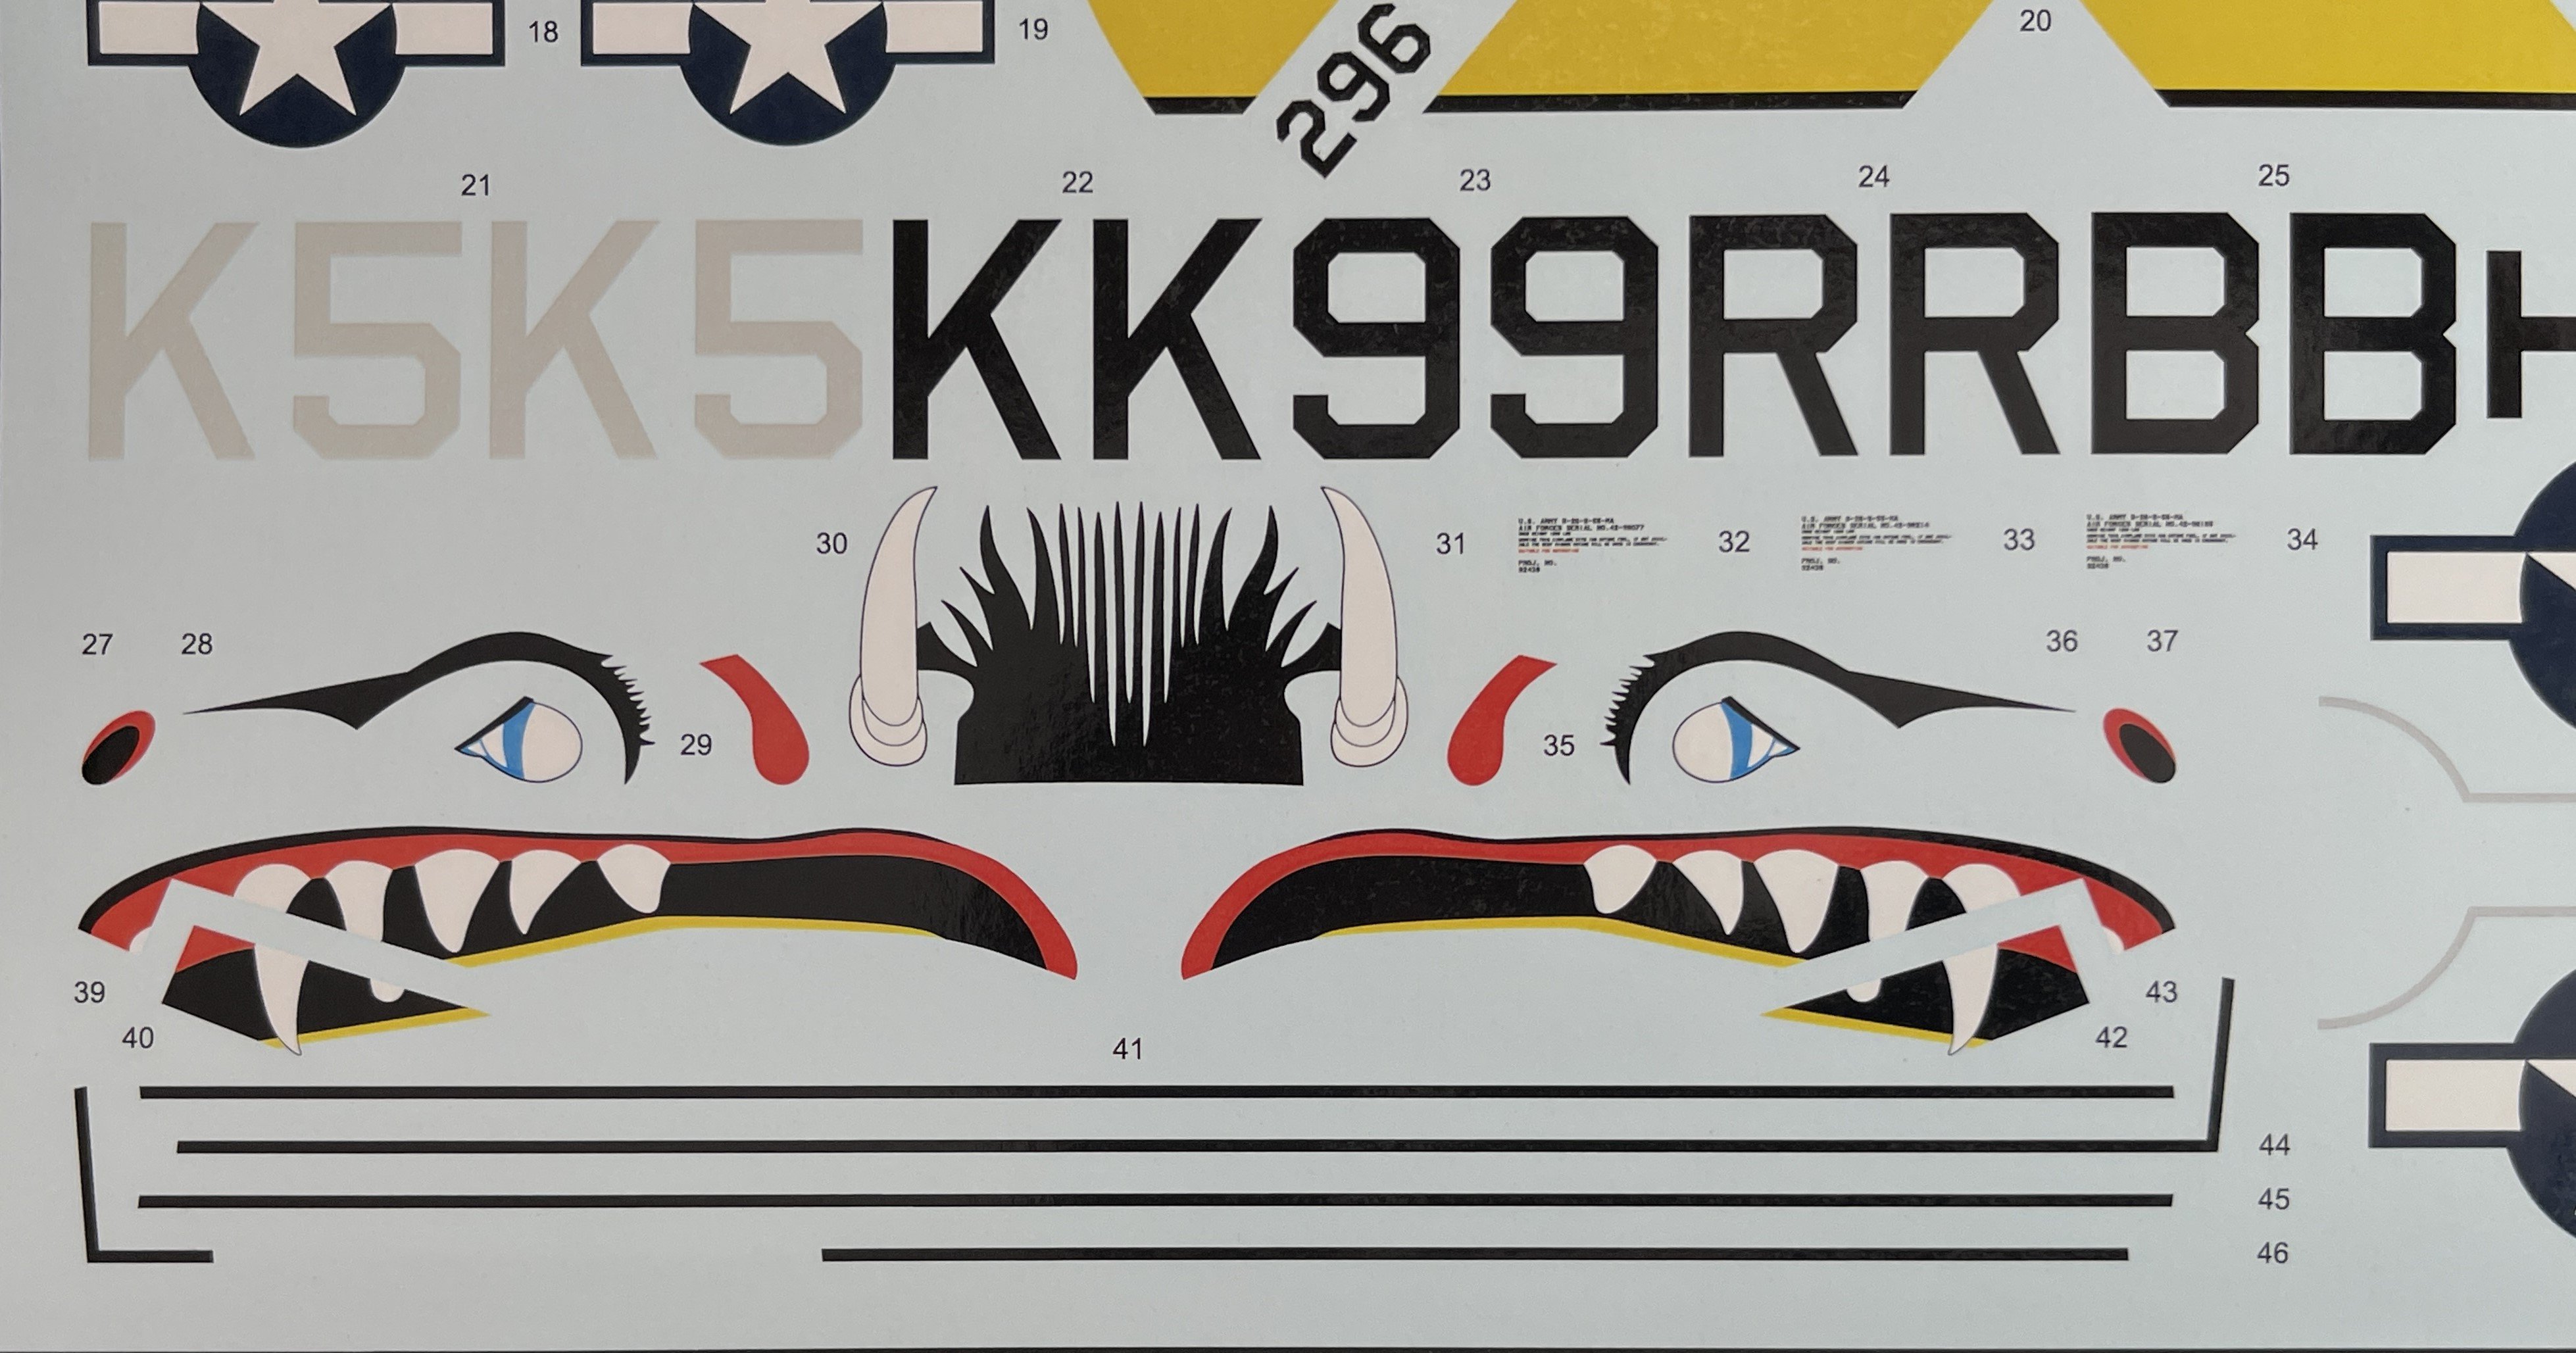
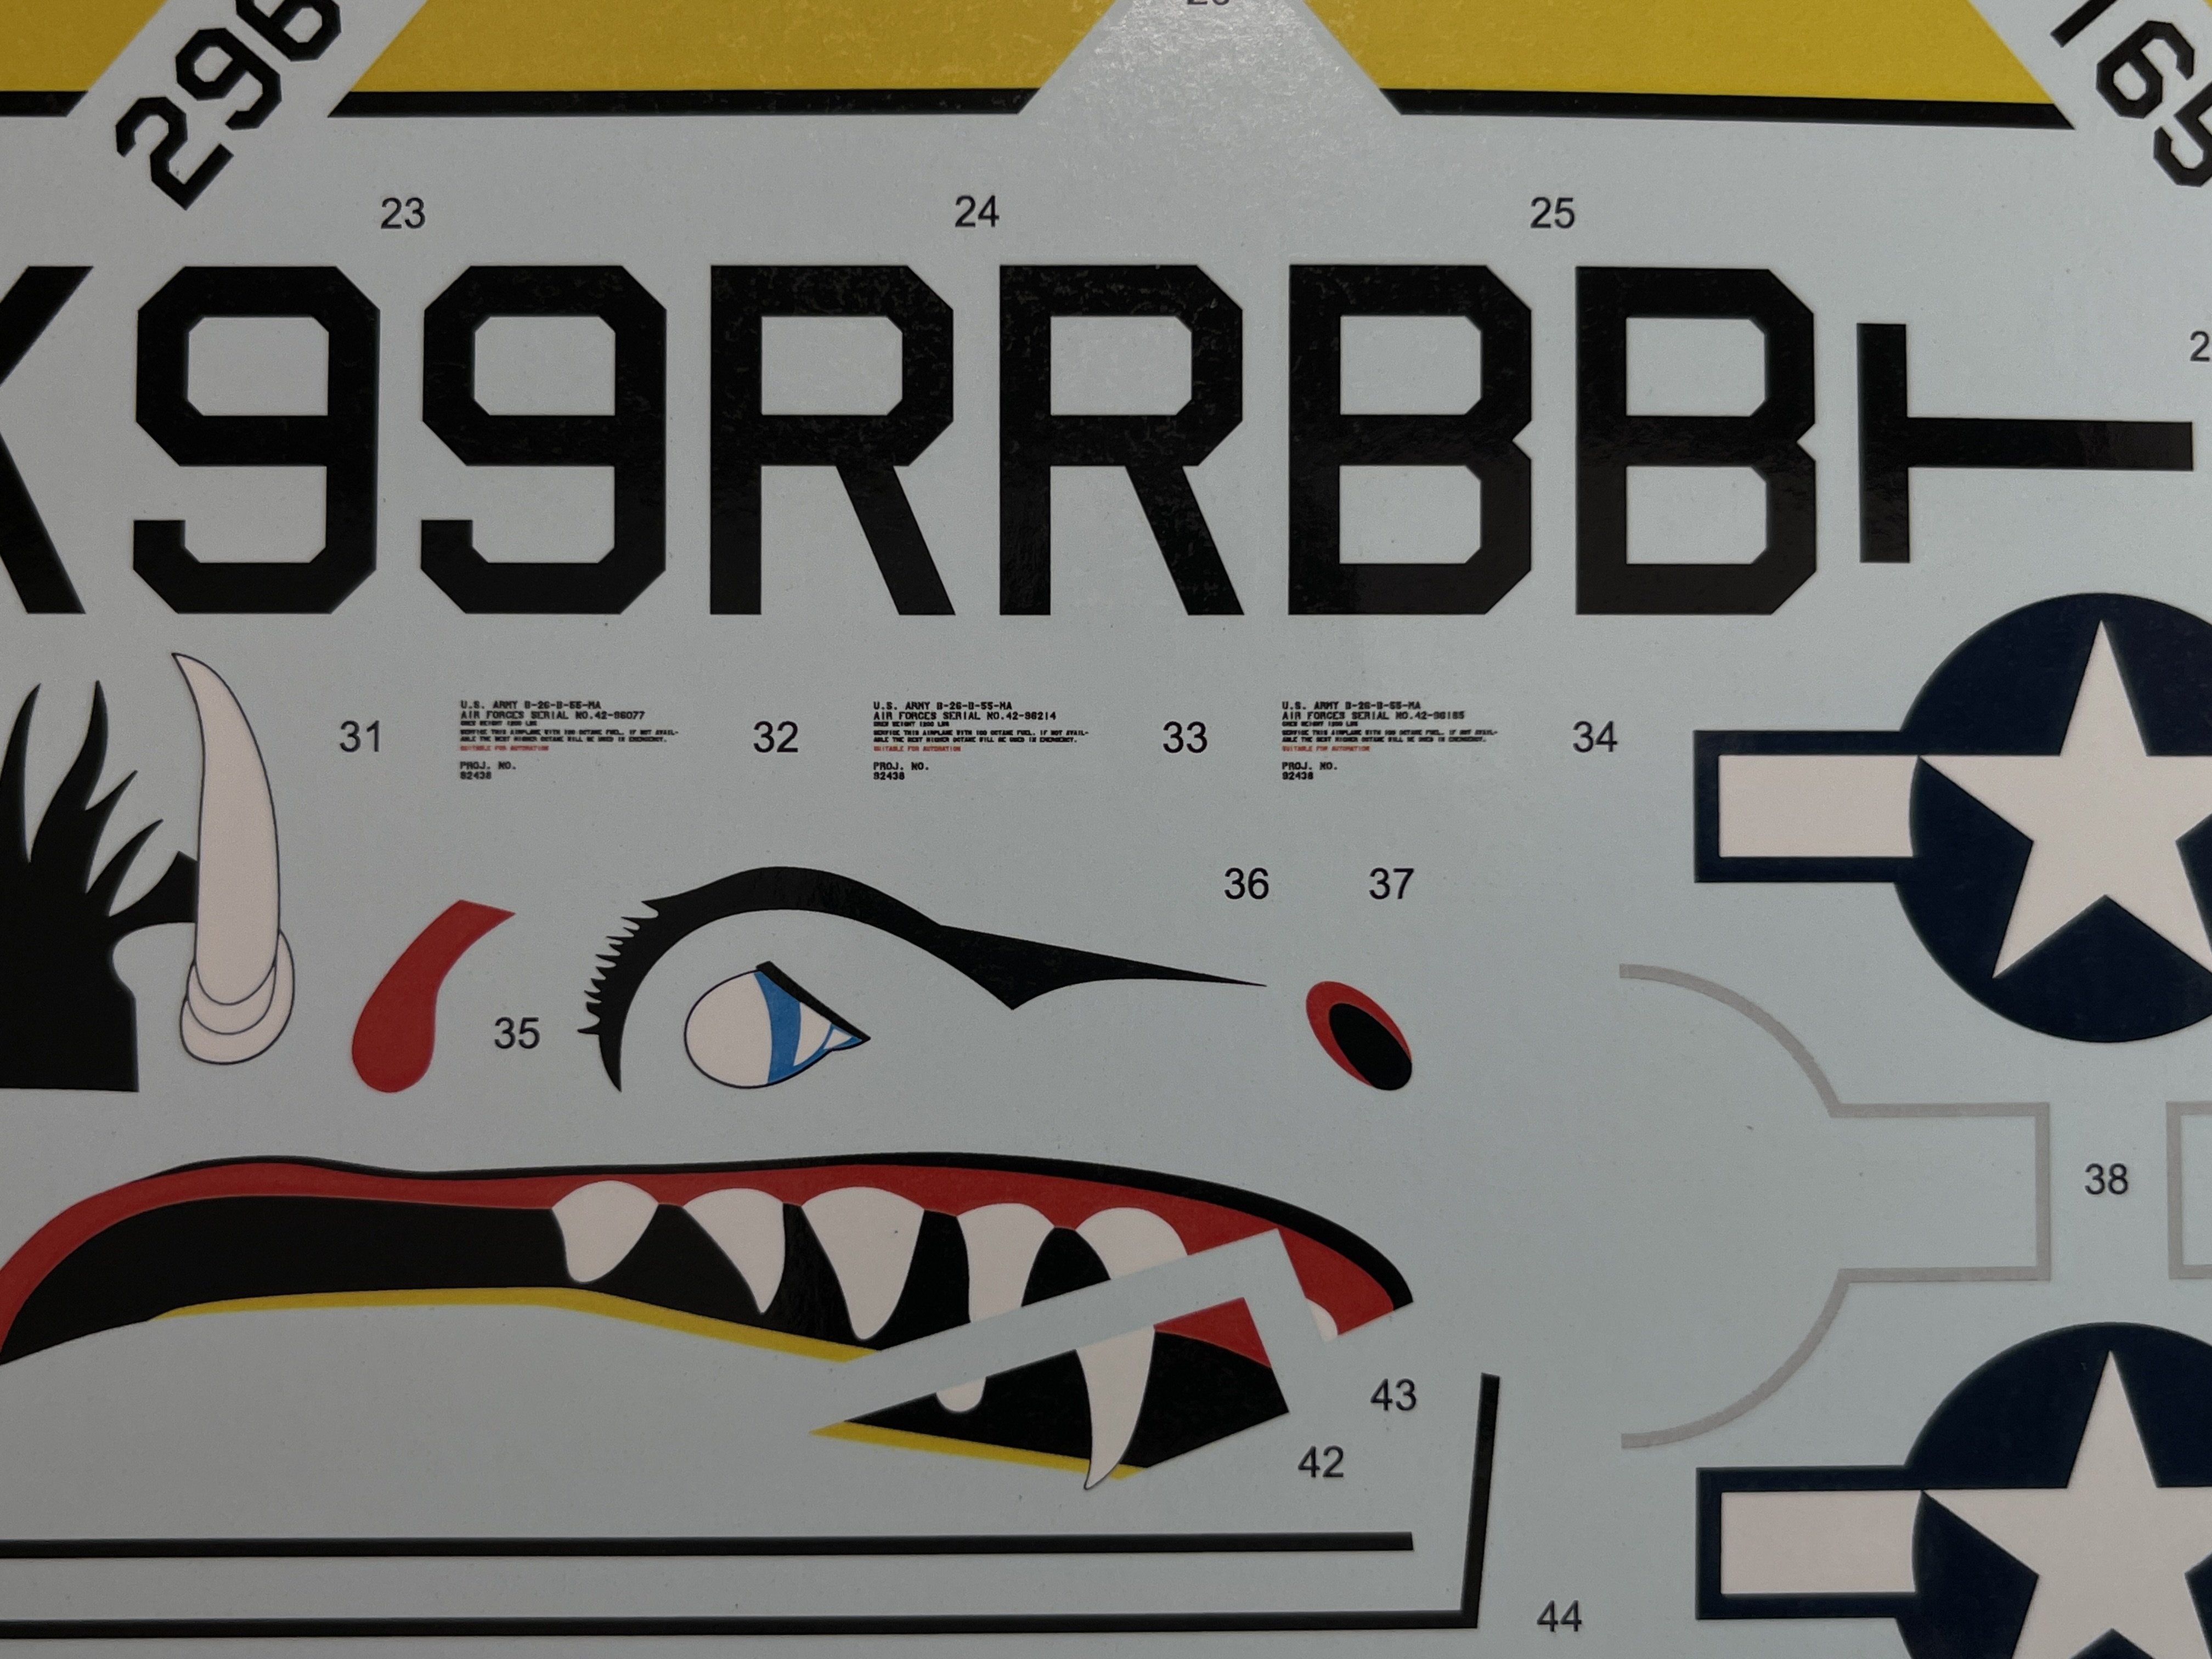
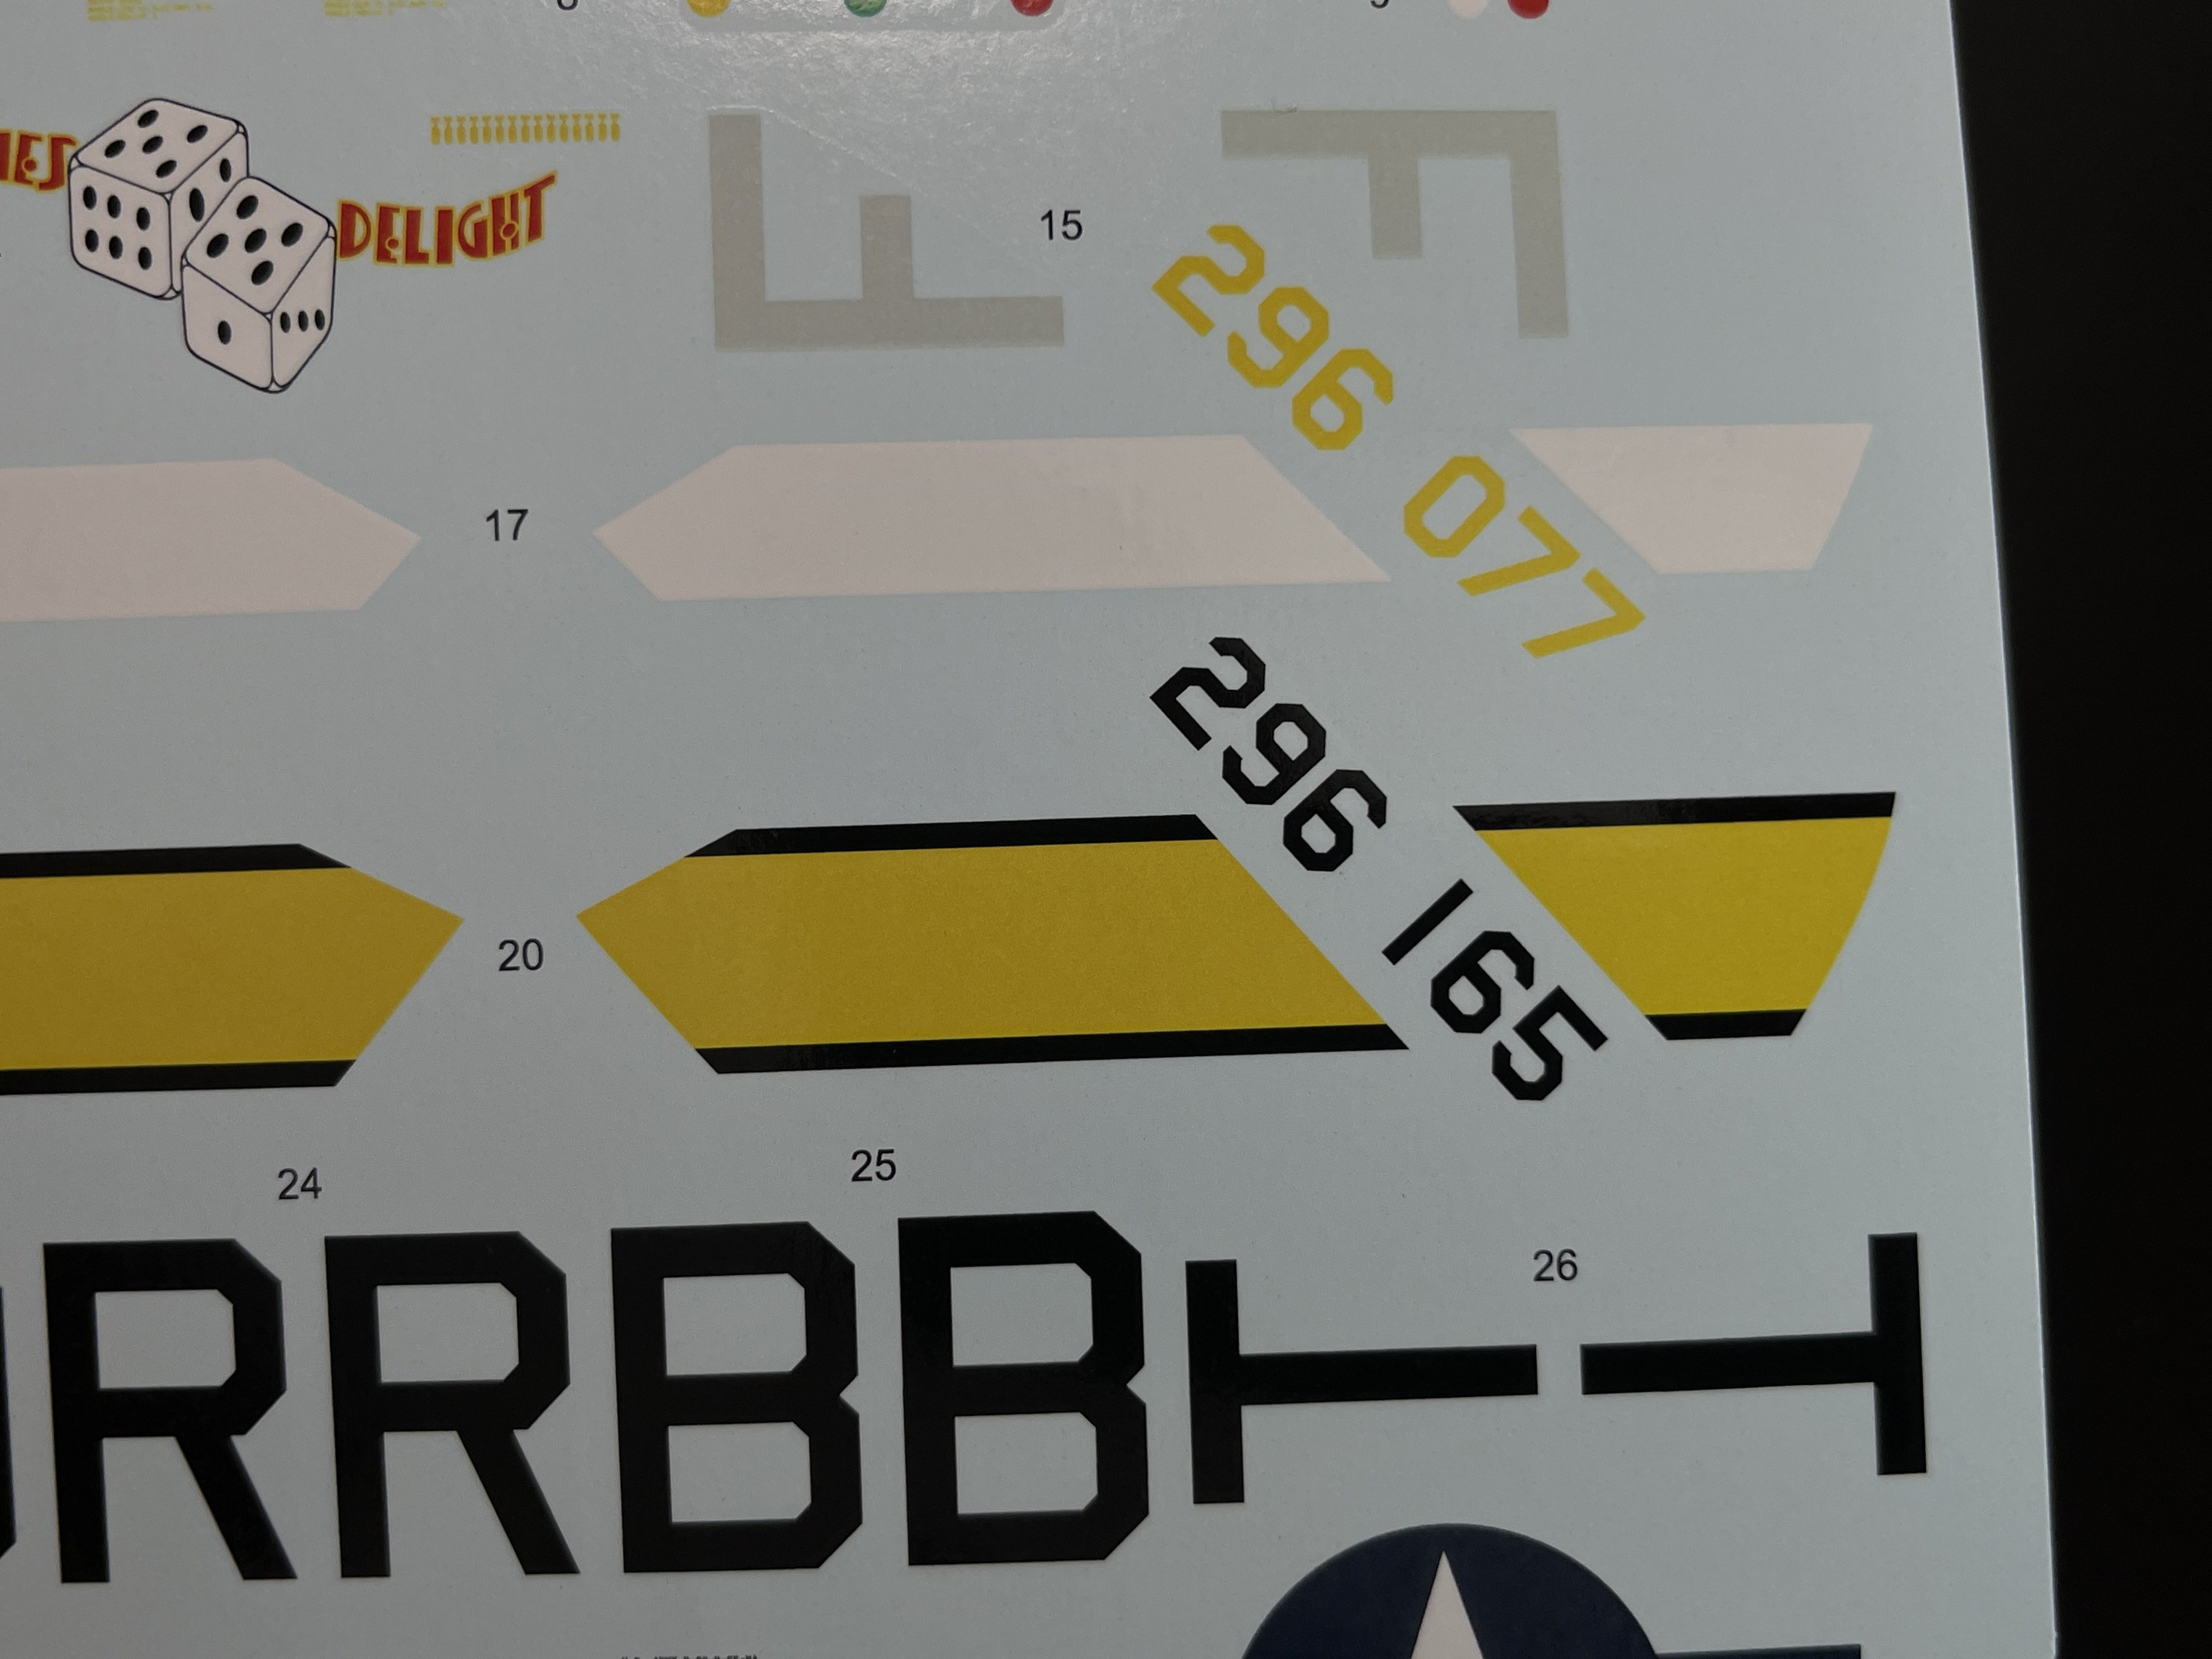
The decal sheet has a good color registration and supply 3 finishing options:
B-26B-55MA 42-96077 “Ladies Delight”, 584th Bomber Squadron, 394th Bomb Group, probably in Boreham, England, Summer 1944,

B-26B.55MA42-96214 “Coral Princess III”, 494th Bom Squadron, 344th Bomb Group, Pontoise France, Autumn of 1944;
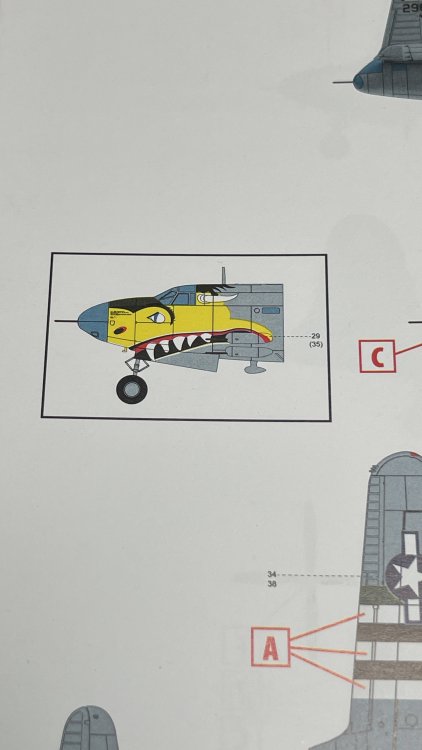
B-26B-55MA 42-96165 “The Big Hairy Bird”, 599th Bomb Squadron, 397th Bomb Group, Peronne, France, December 1944.

The decals are design by ICM and made for the third party but I have no idea who.
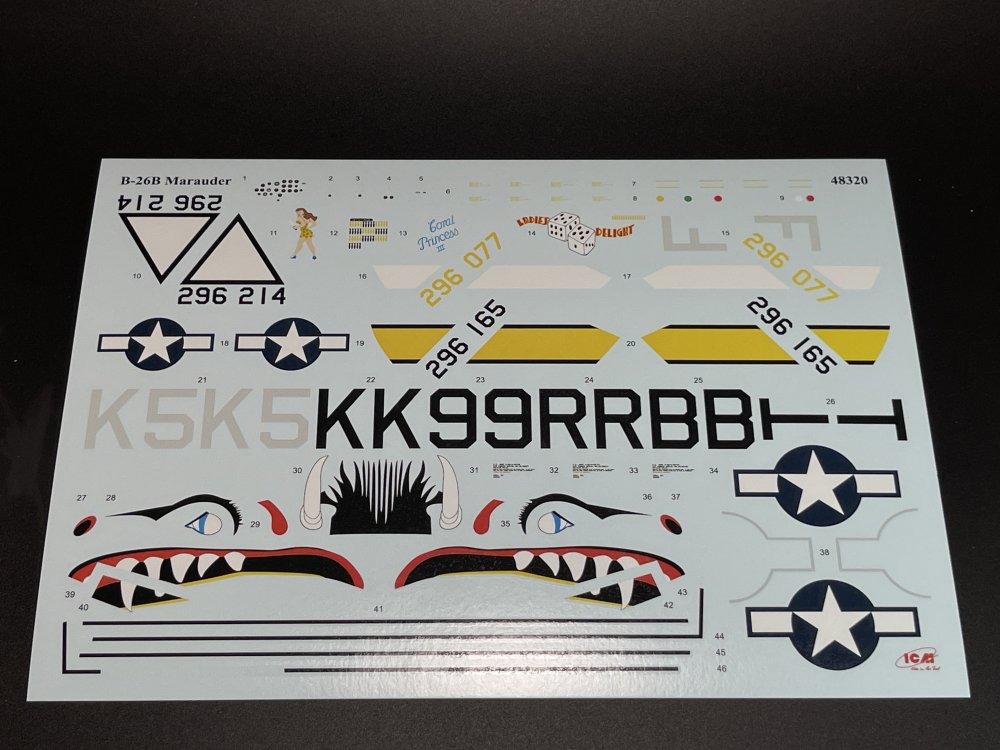

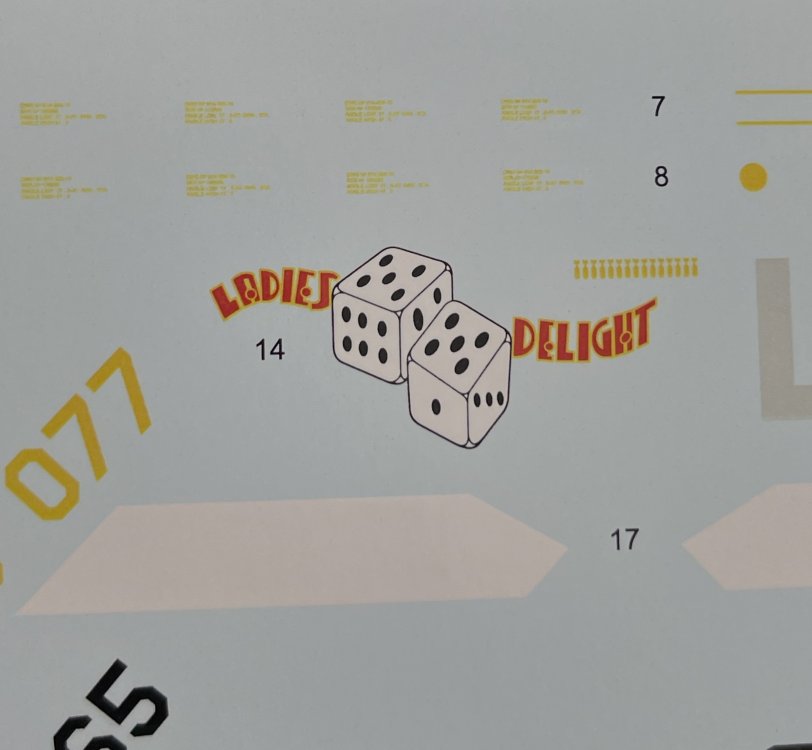


As for “The Big Hairy Bird” the yellow nose must be painted… so some extra masking work will be needed to get this scheme in to good term.
A negative aspect…
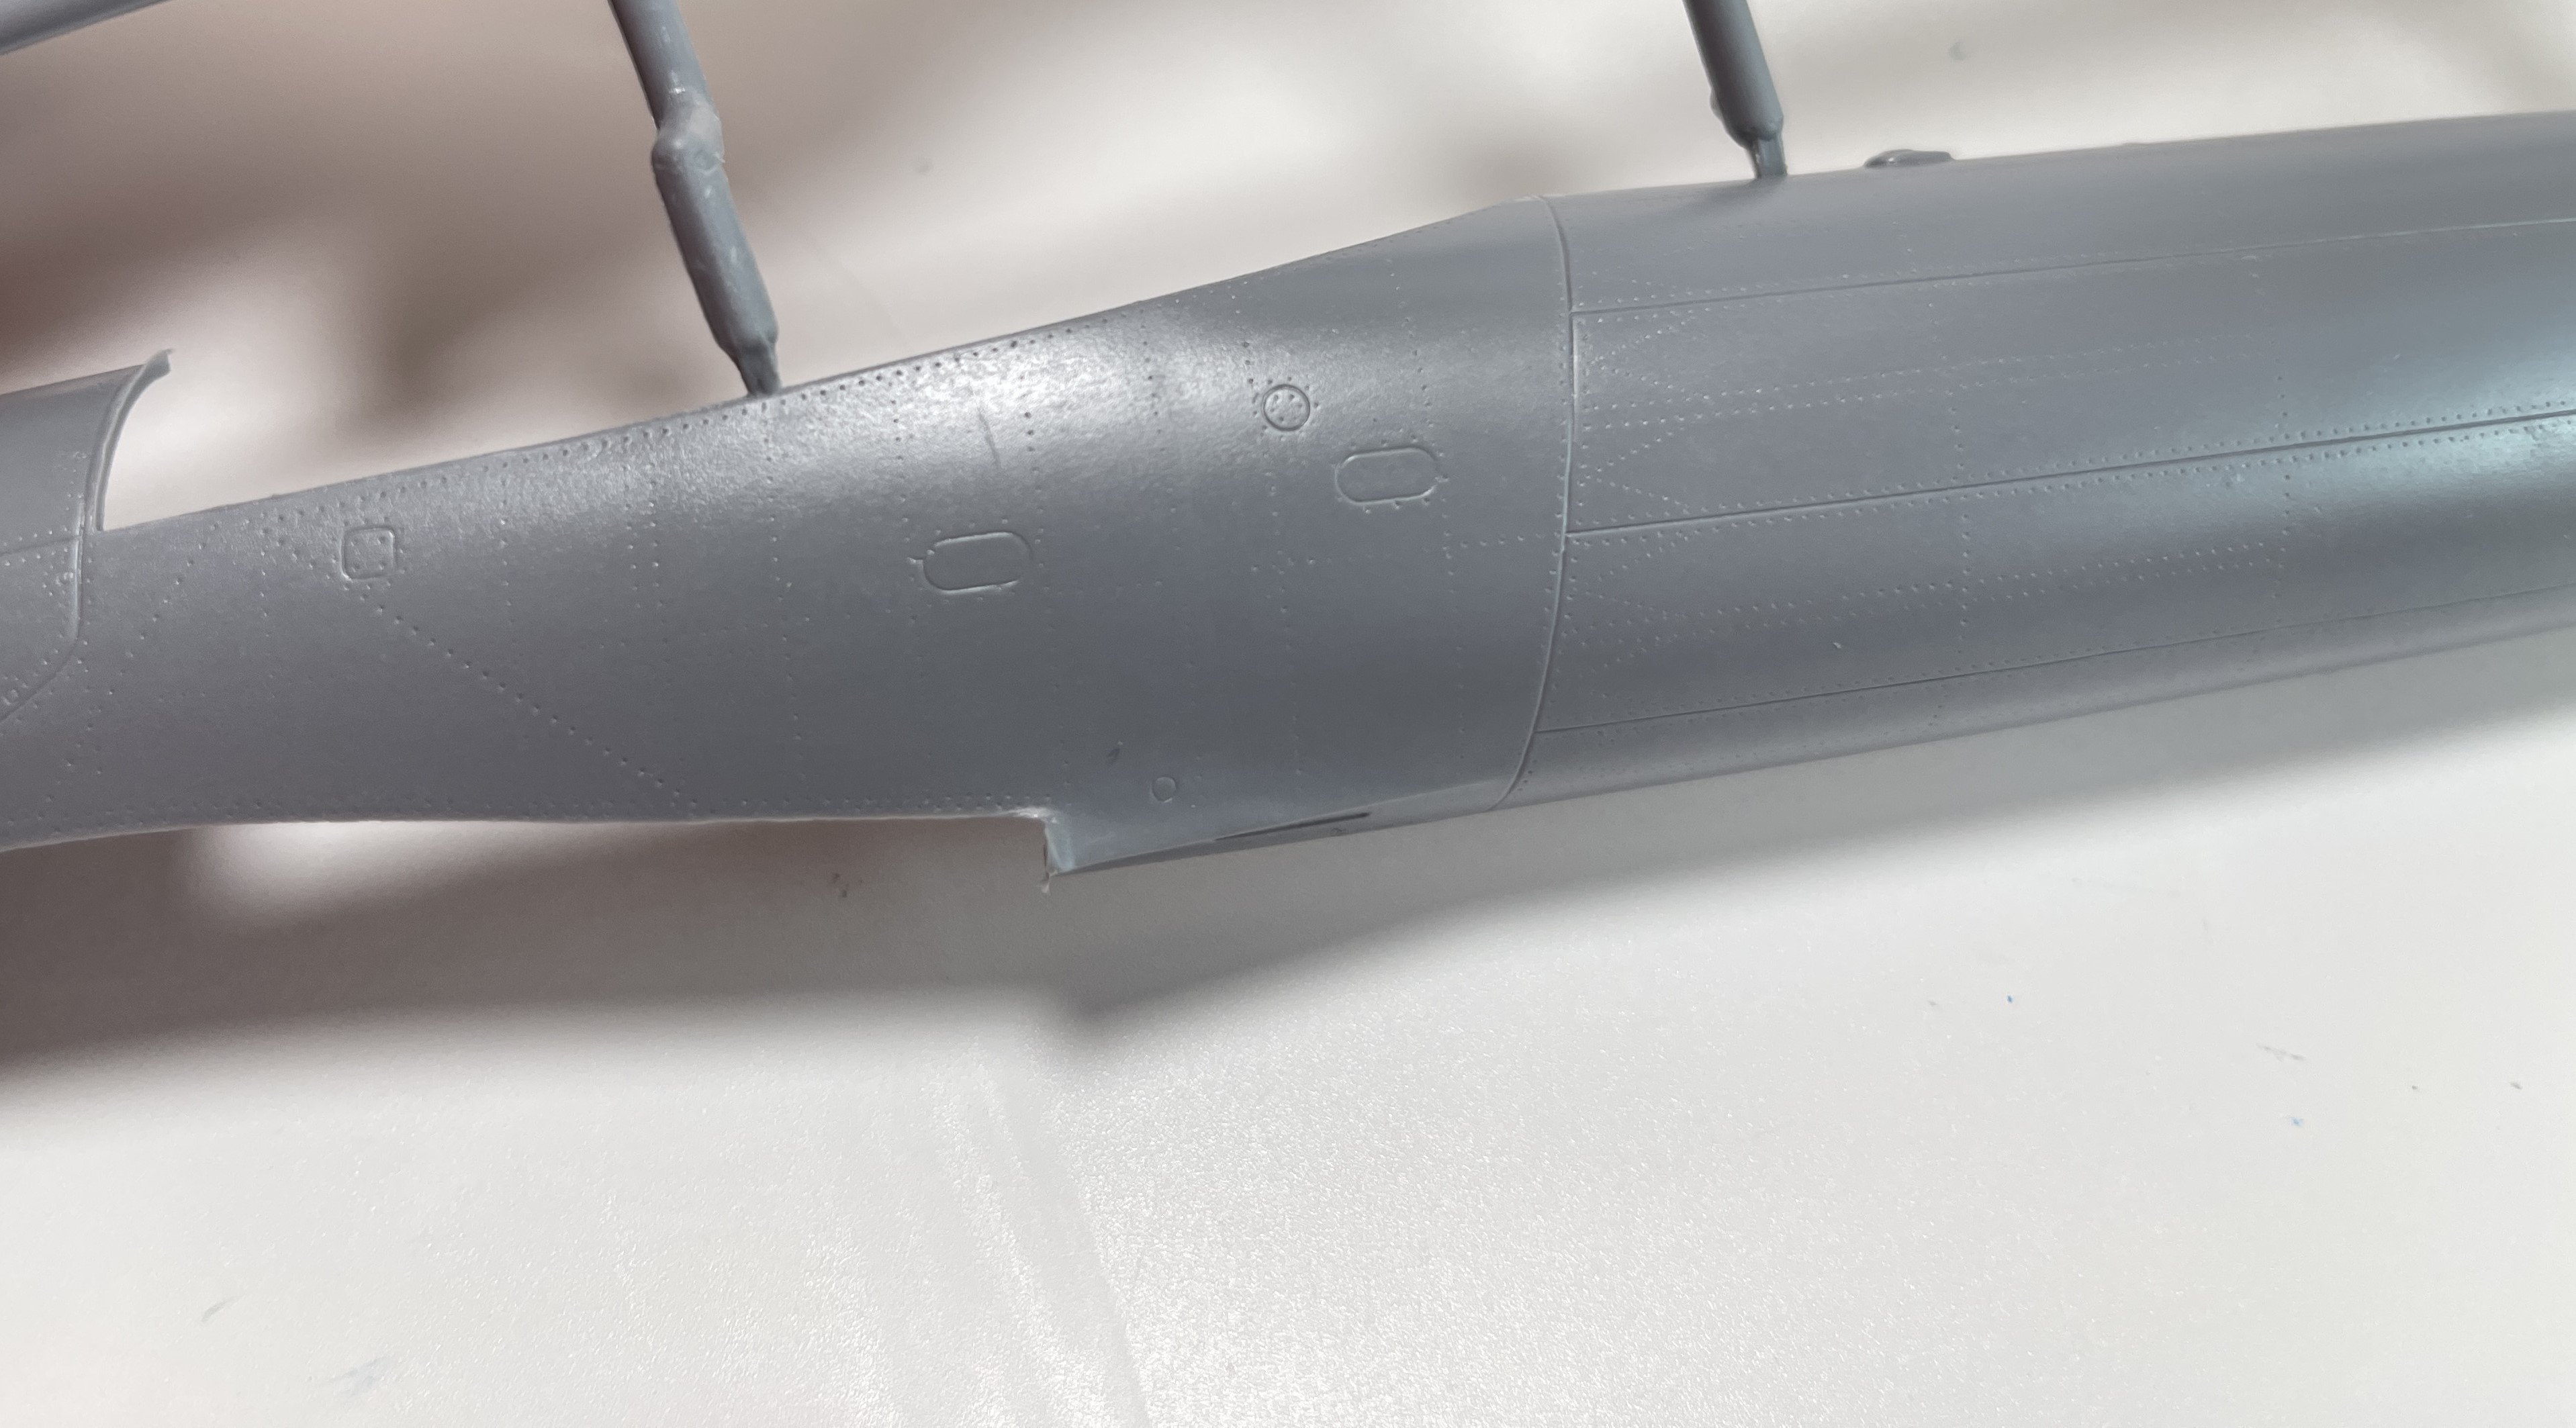
So if you watch carefully the sprues, you have notice something that is not the best solution (at all) from ICM…
ICM decided to mould in the pitot probes in the fuselage and in the wings….
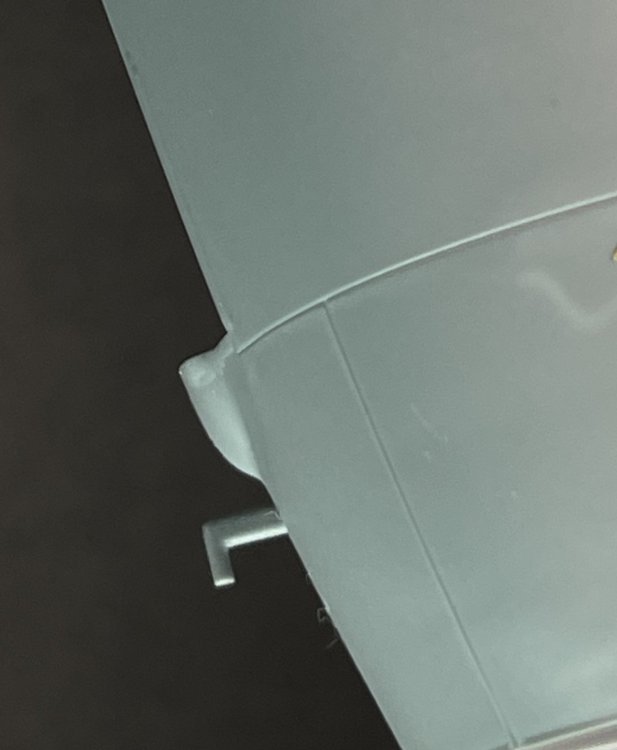
Why??? This is the best way to break during construction. I bet that at least 98% of those will be broken in the construction….
So the best way will be remove both, make the respective hole and store it an put it in only in the final steps of construction.
It`s a negative aspect on this beautiful kit.
Conclusion
A must eager (probably one of the most ones) model that we have been waiting as a 2023 release but only saw the daylight in March of 2024.
The wait as worth it, no doubt about it!!
The detail out of the box is very good and it will make a very good replica. For the expert and keen modeler some AM will make some extra detail to make this beauty into a total masterpiece.
The pitot decision moulded in the fuselage is a wrong decision (that I hope that ICM will not do it again) but will not remove the higly recommendion on the best B-26 in 1:48 scale!.
The construction is not totally straightforward as there are several sub-assembly that you need to take care and time (as undercarriage is a complex sub-assembly steps) to get it right on spot., so the novice could have some trouble in build this one. But all other modelers can make from this a truly fantastic model of the B-26 Marauder.
VERY Highly recommend this to intermediate/expert modeler
My thanks to ICM for making this fantastic model.

-
2
-
 4
4
-
-
What a beauty my friend!!! Great work!!!
-
1
-
1
-
-
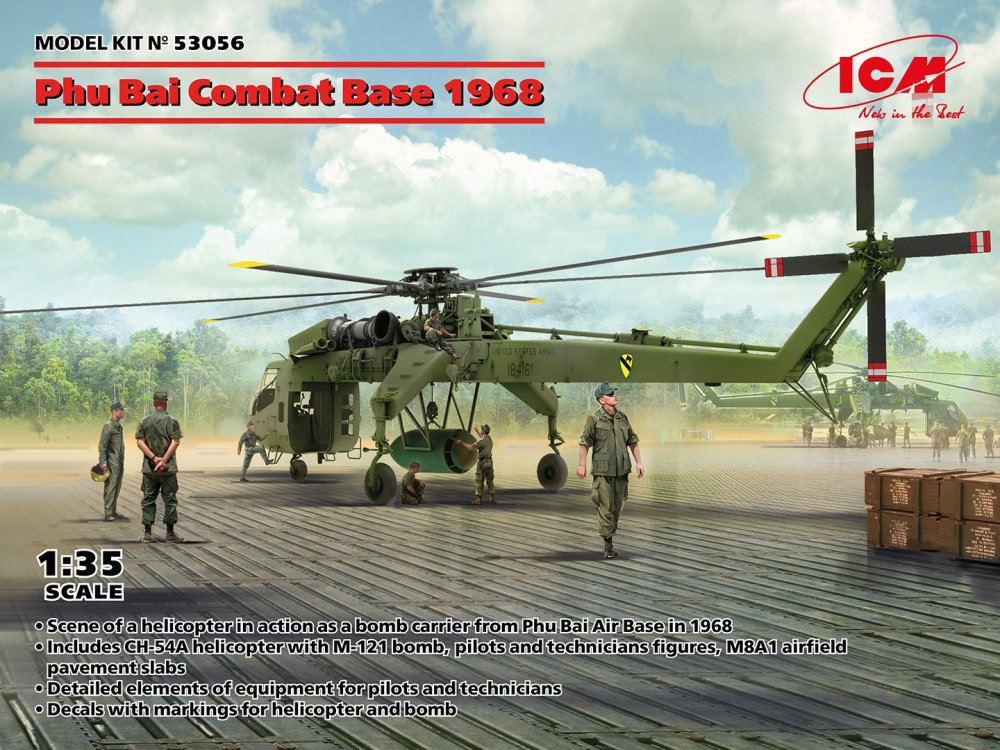
1:35
PHU BAI COMBAT BASE 1968
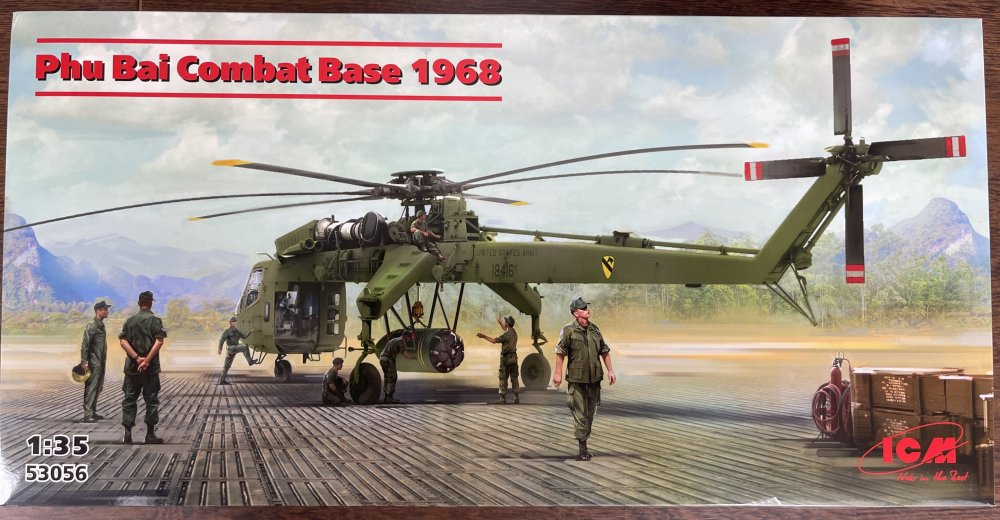
ICM
Catalogue number 53056
Price: around 145,89€
ICM is a proud Ukrainian Company and they proudly announce themselves as such on the box top of all releases since the war as began.
And proud they should as they are making an extraordinary work in the modelling world.
Phu Bai Combat Bae was a former U.S. Army and U.S. Marine Corps base south of Hue, in Central Vietnam. On 30/31 January 1968, the base was hit by Vietcong mortar and rocket fire as part of the TET Offensive. The base was used to support U.S. and ARVN forces fighting in the Battle of Hue. The first relief force was dispatched from Phu Bai to the MACV Compound in Hue City. On 15 February 1968, General Creighton Abrams established MACV forward at Phu Bai to assume direct control of US forces in northern I Corps, which were then engaged in the Battle of Hue, the Battle of Khe Sanh and the TET Counteroffensive. MACV Forward ceased operation on 10 March 1968. IN 1969, the 85th Evacuation Hospital moved from Qui Nhon and was established at the Norwest end of the airfield, adjacent to Highway 1. The Headquarters of the 101st was moved to Phu Bai.
For a little more detail history about this military base, check here: https://military-history.fandom.com/wiki/Phu_Bai_Combat_Base
There`s a lot of pictures online of actual real pictures of the CH-54 in Phu Bai:
https://www.flickr.com/photos/13476480@N07/21018823201/in/photostream/
Checking the pictures is easy to see where ICM seeks inspirations.
Before cracking the box, I leave you the review made by our Ernie Ling of the 1:35 ICM CH-54A:
https://forum.largescalemodeller.com/topic/19184-135-scale-ch-54-tarhe-by-icm/#comment-224683
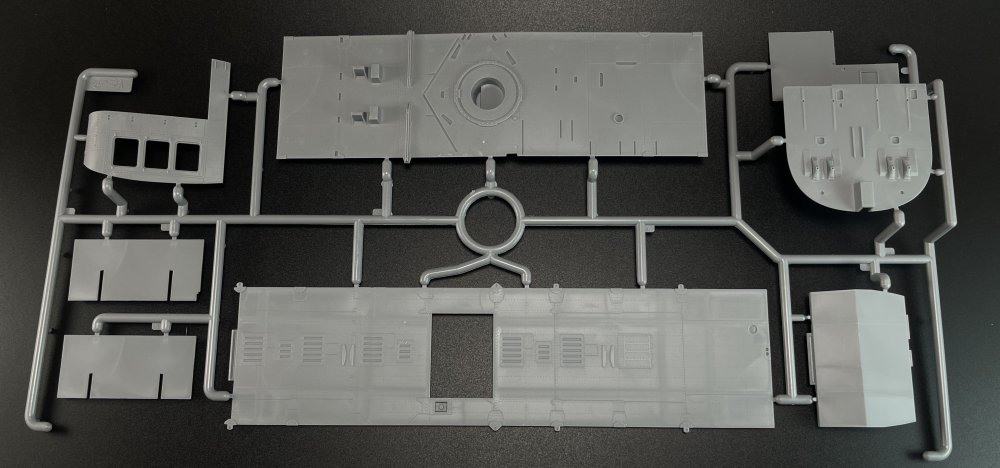
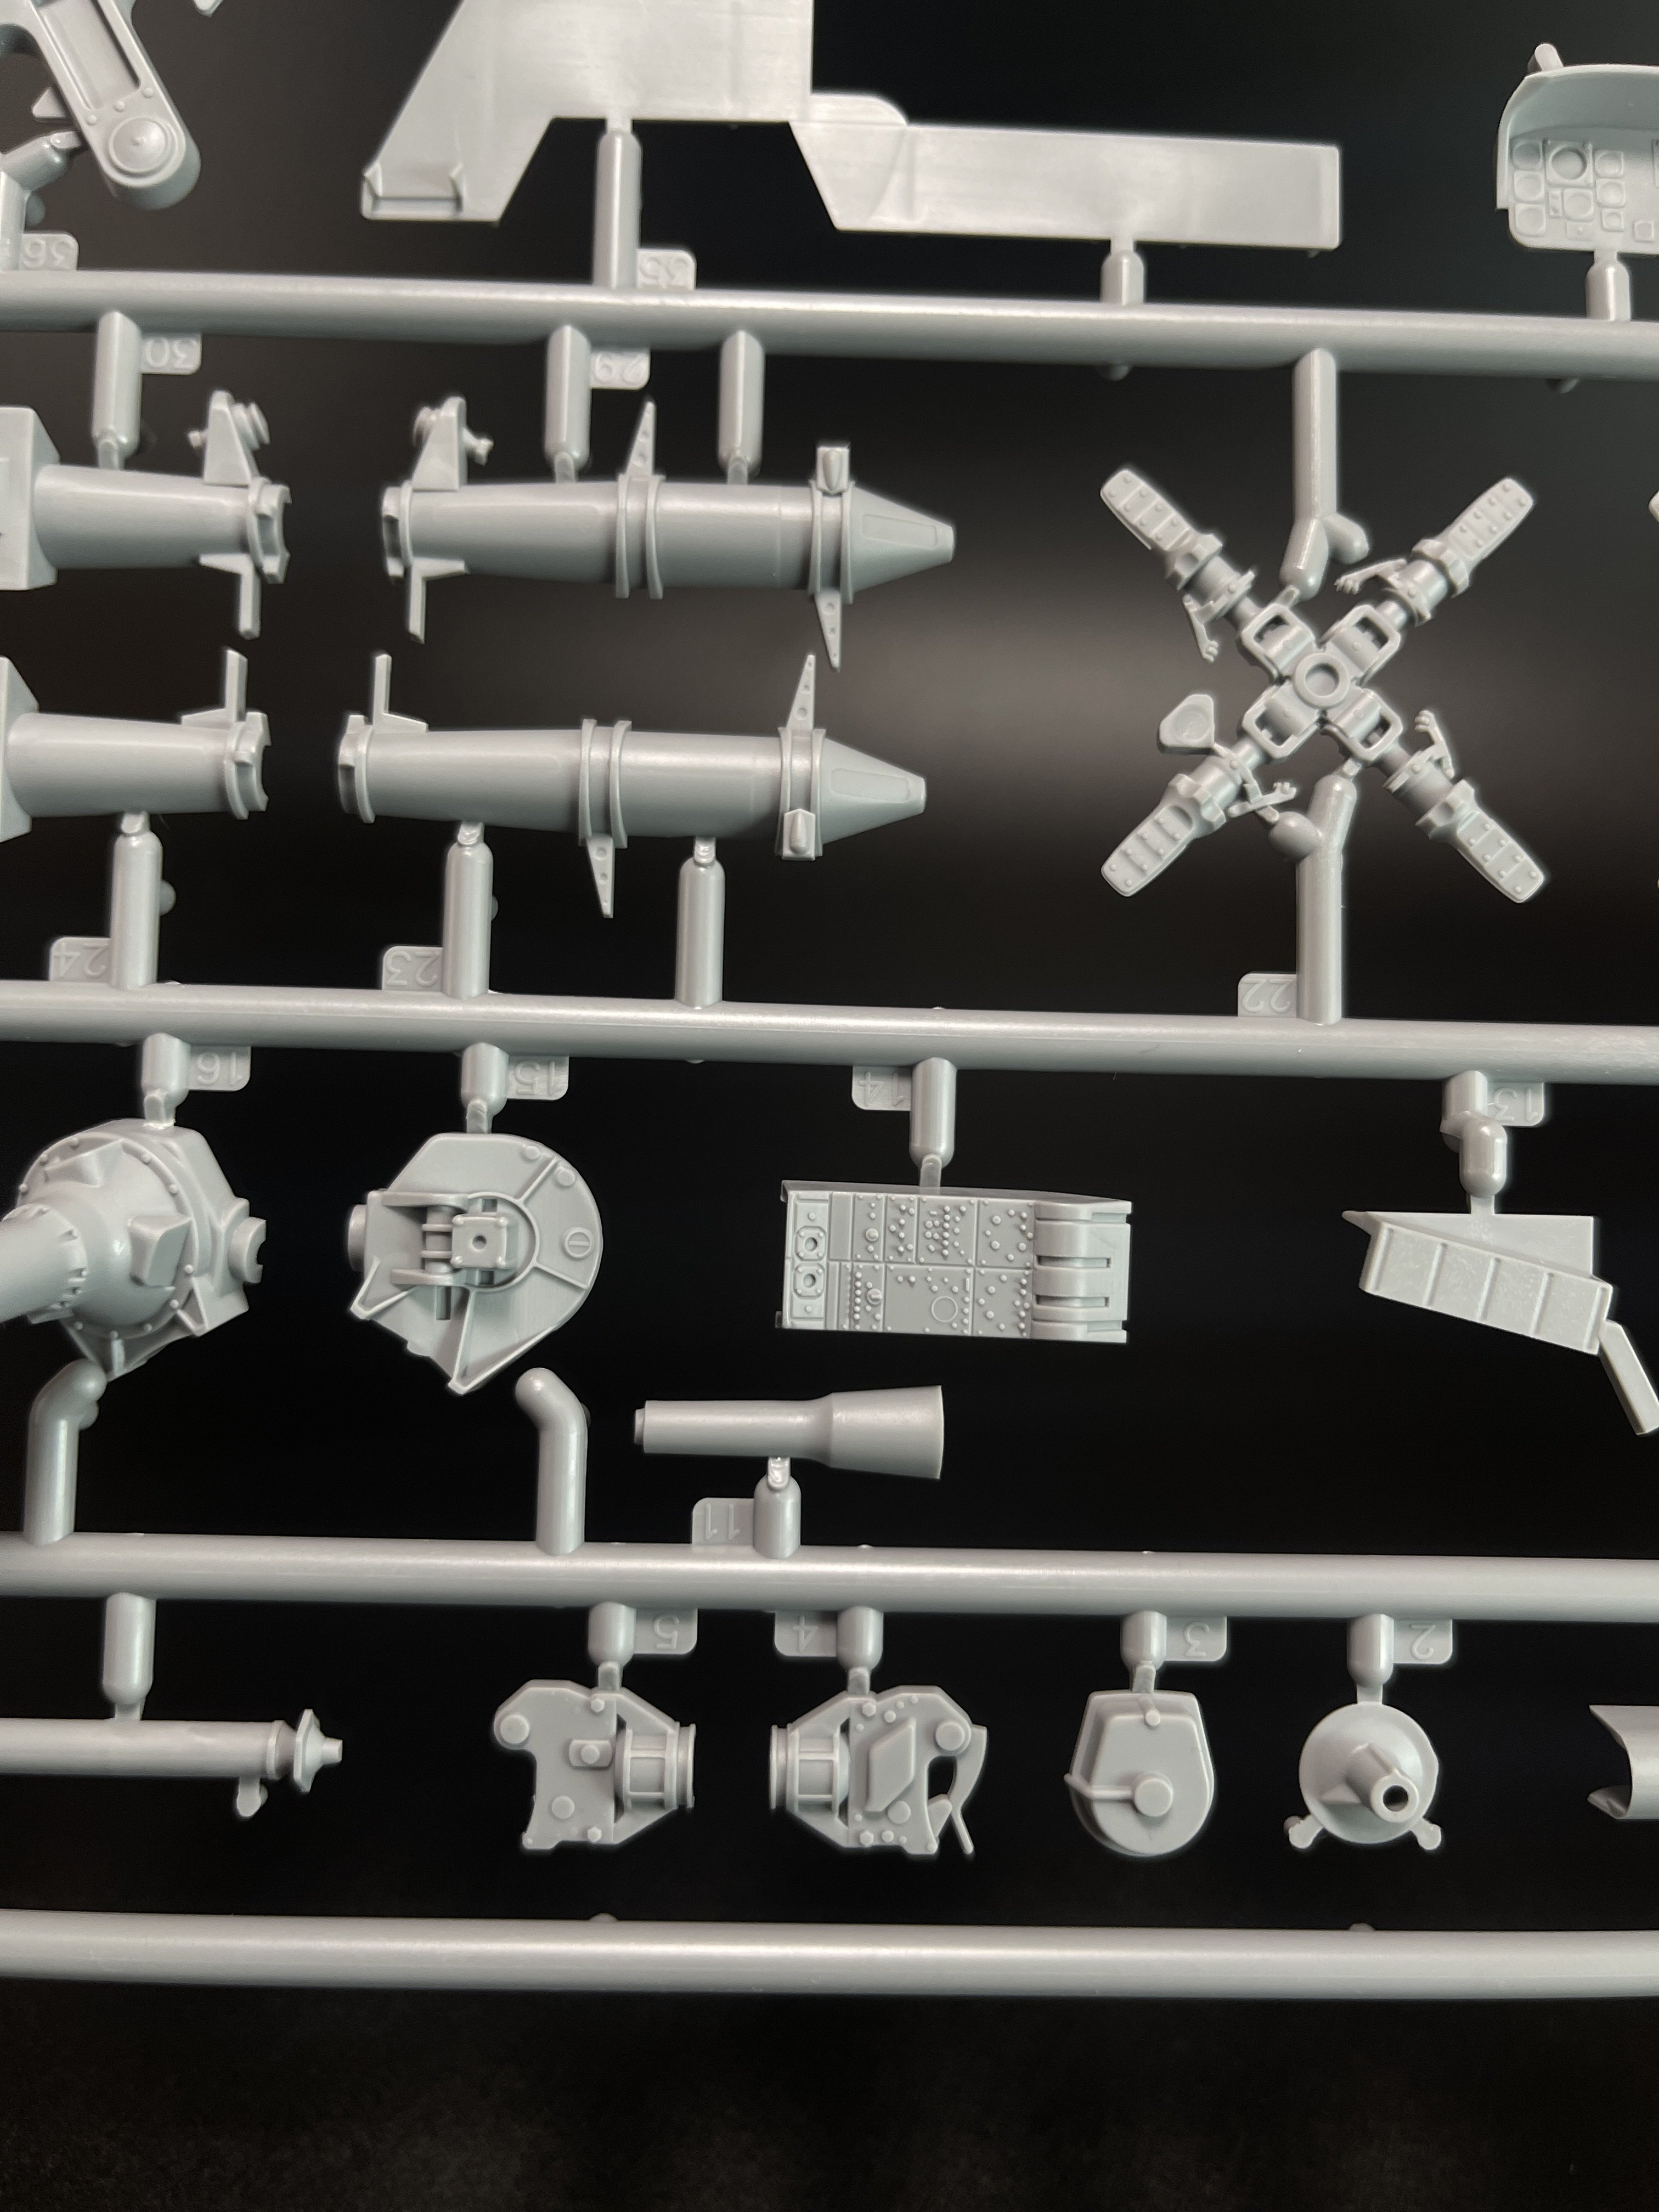
This model kit that we are reviewing today is a multiple model kit, the CH-54A with the M-121 bomb (model kit 53055), helicopters ground personnel (53102), US Helicopter Pilots (1960s-1970s) and M801 US Landing mat (53200).
So ICM just bring parts of each one to a single box, and add a new box art (a really good model box art, I must say, as usual on the ICM model boxes) and we have Phu Bai Combat Base 1968!!
So, inside, beside de parts of each model kit mention, you get also the instructions of each one.
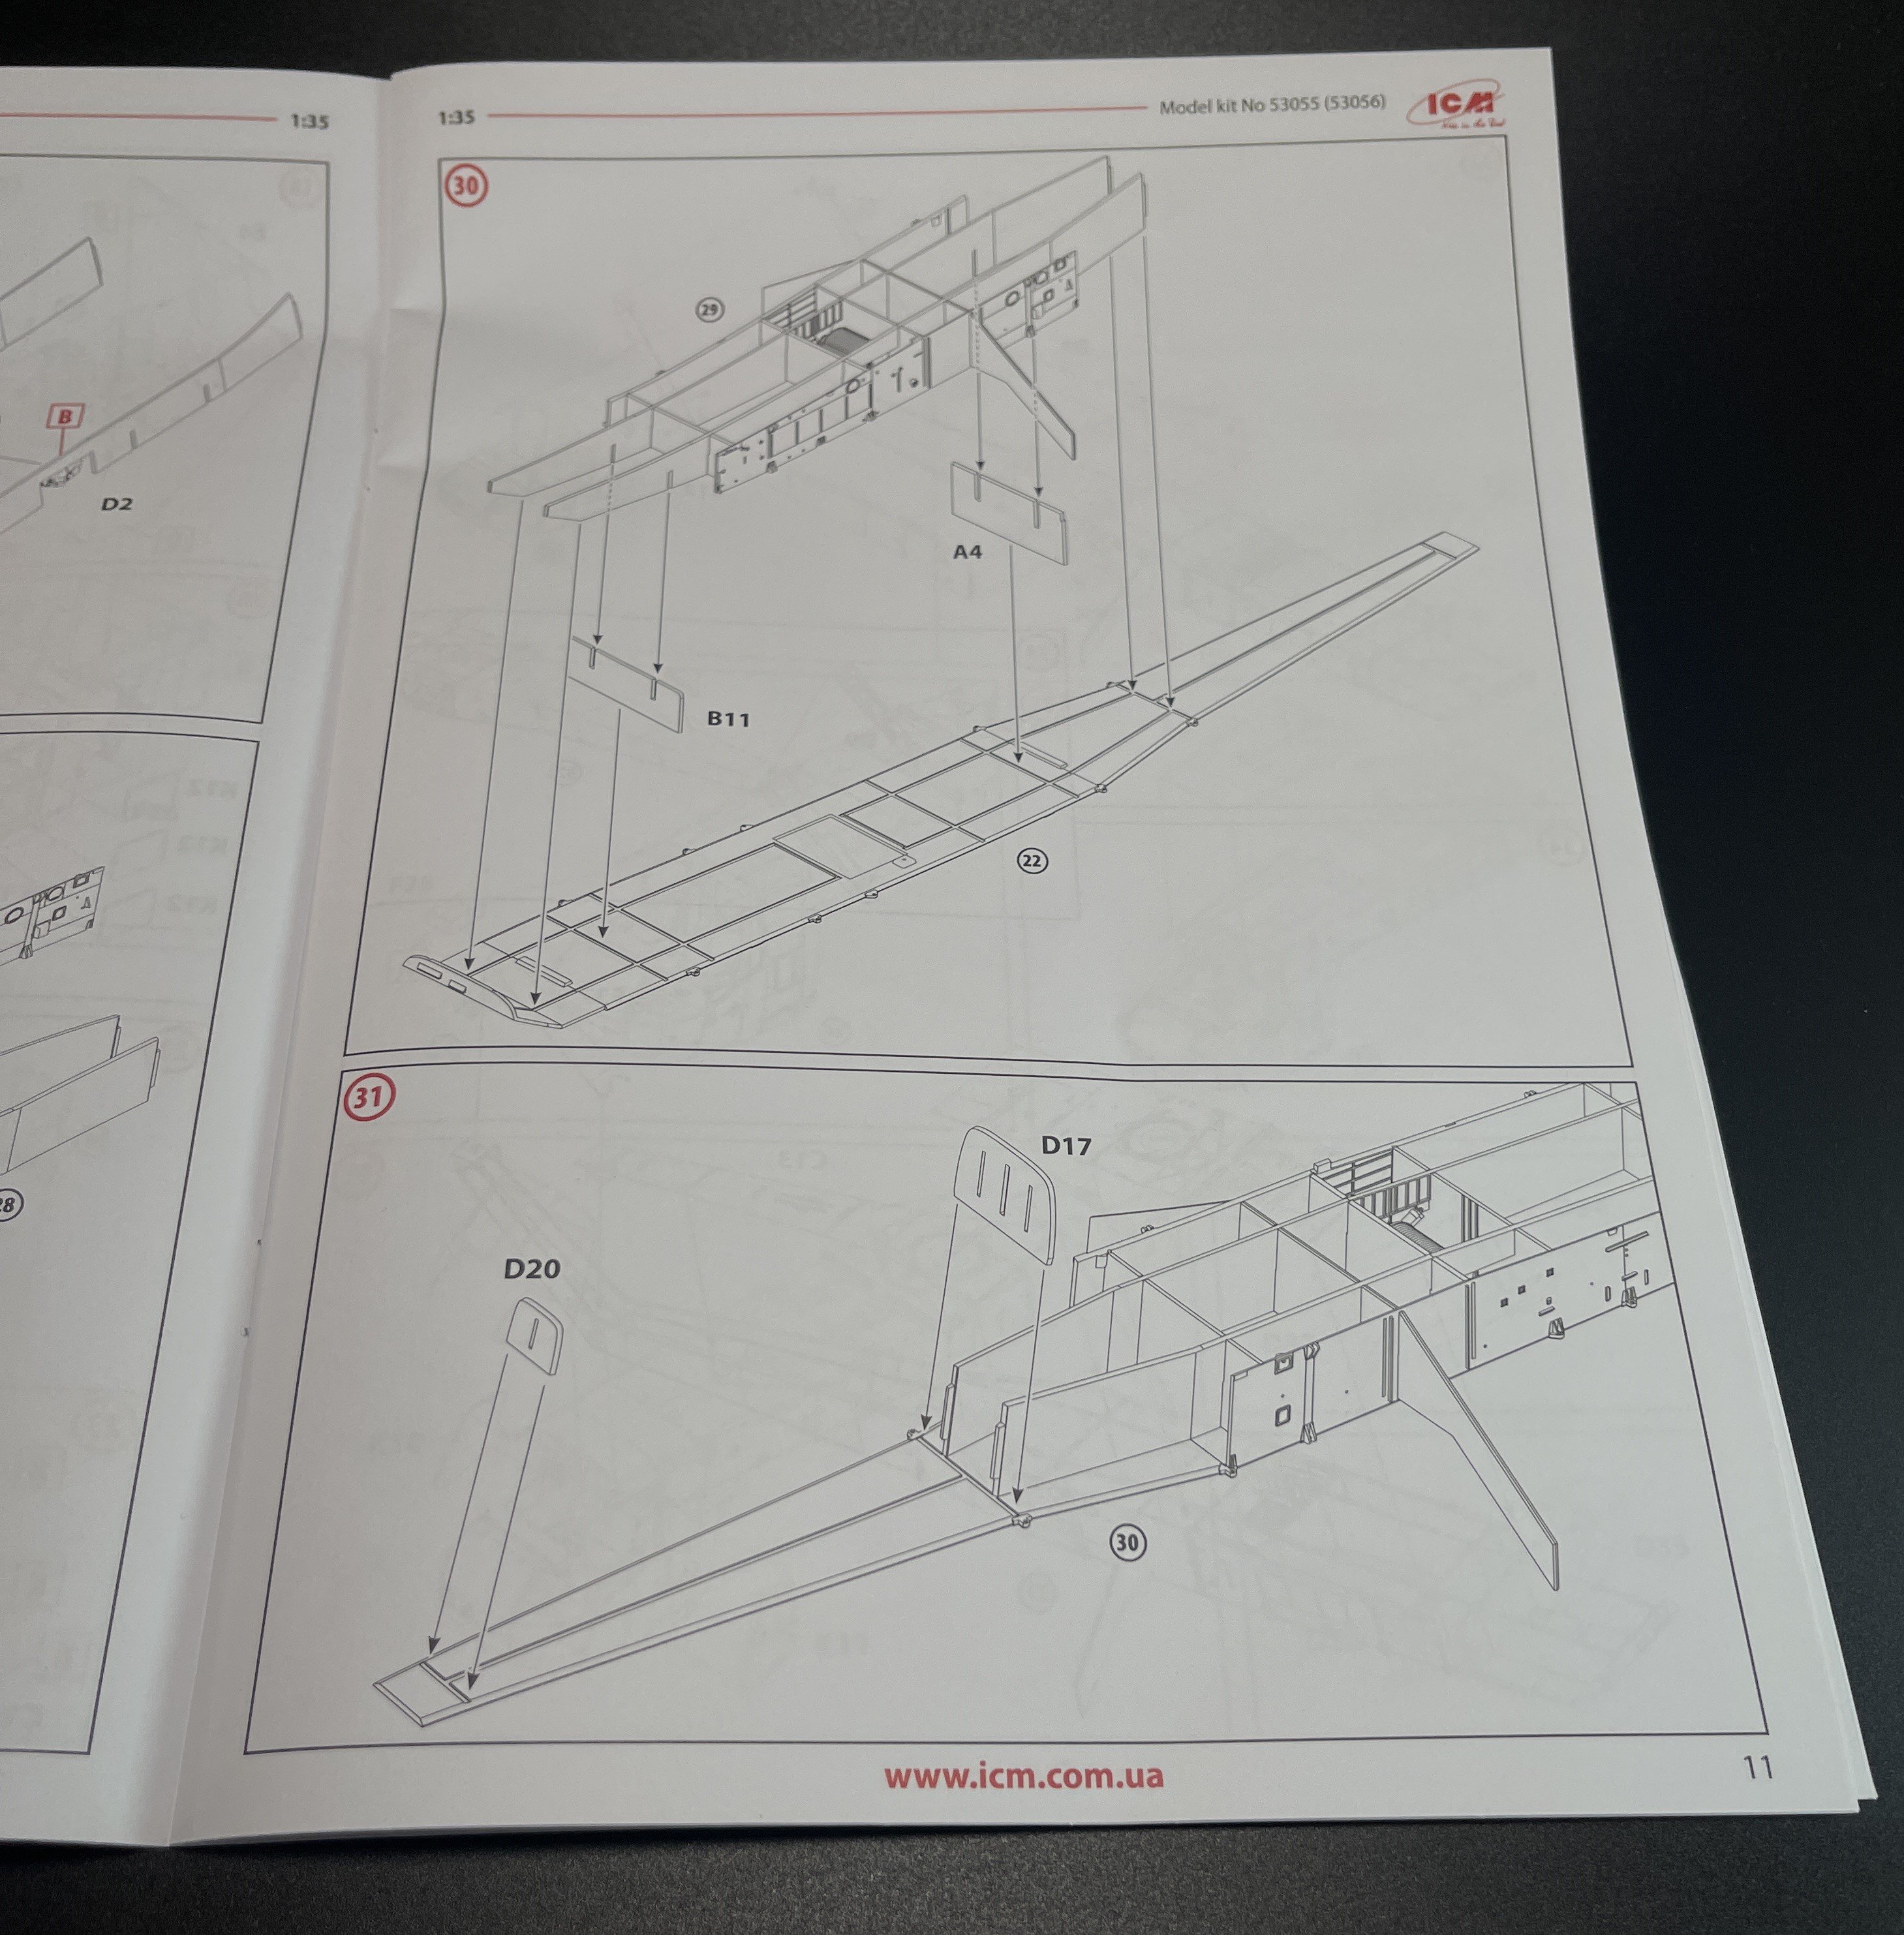
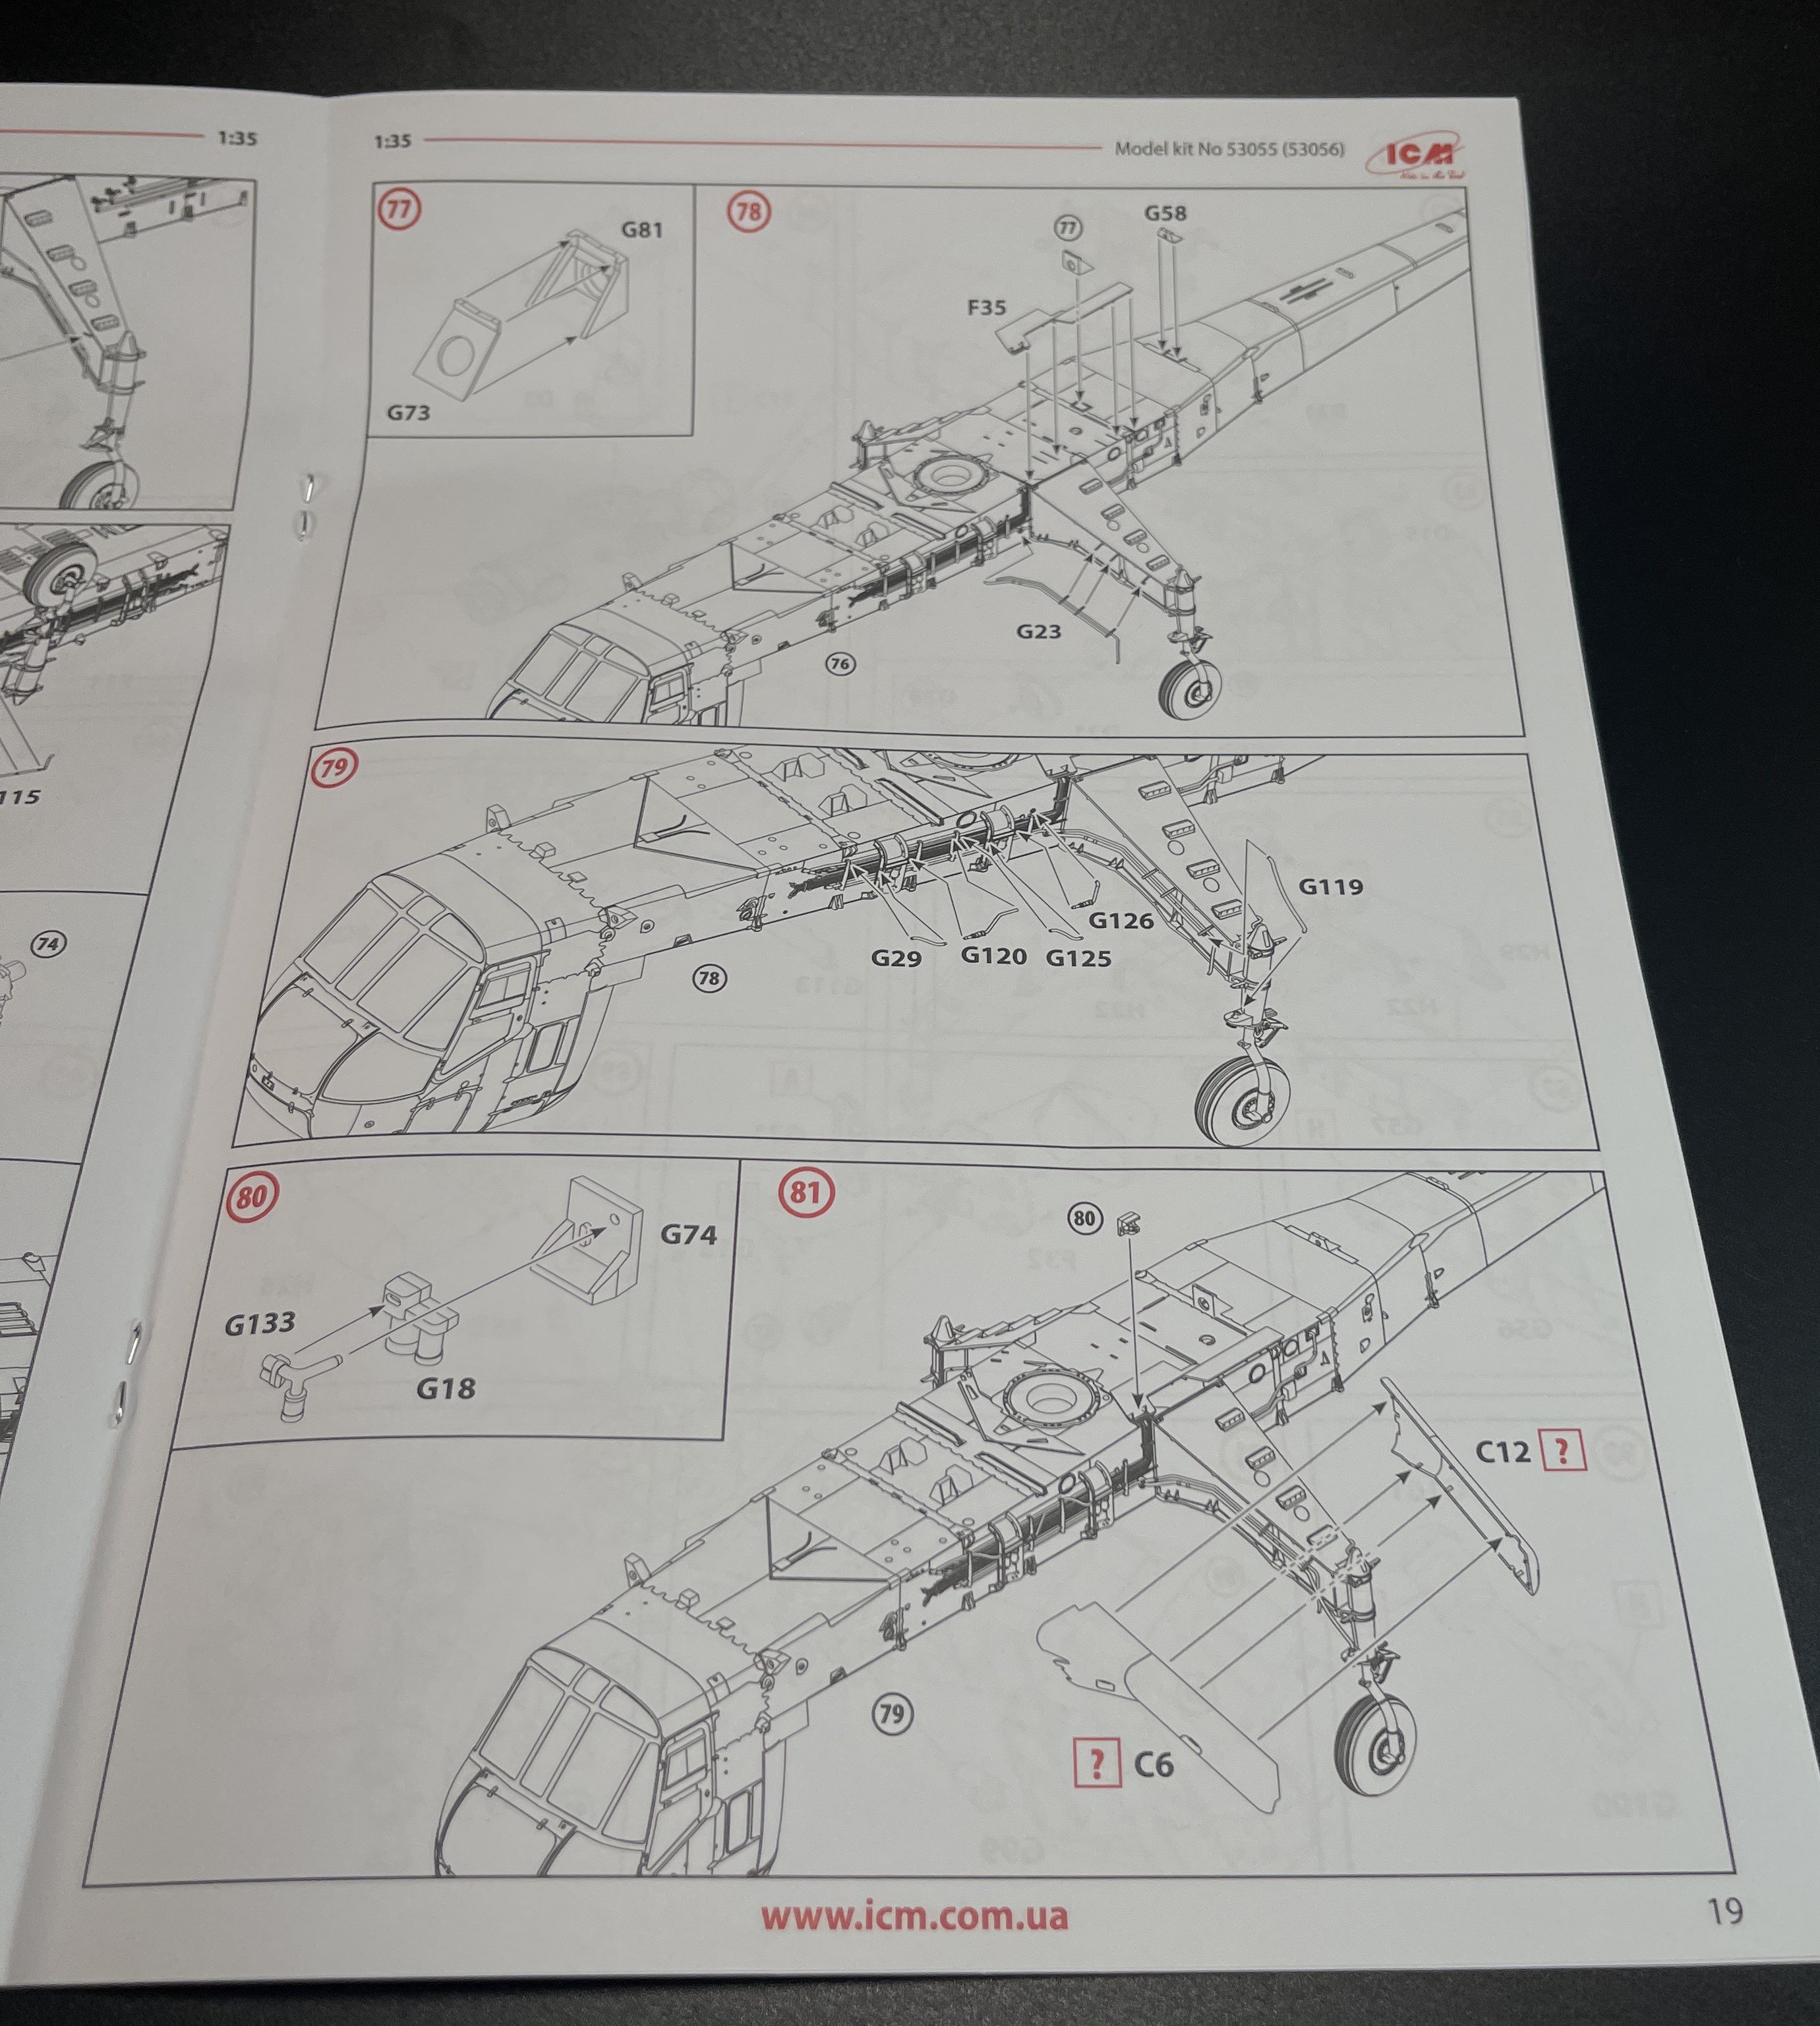
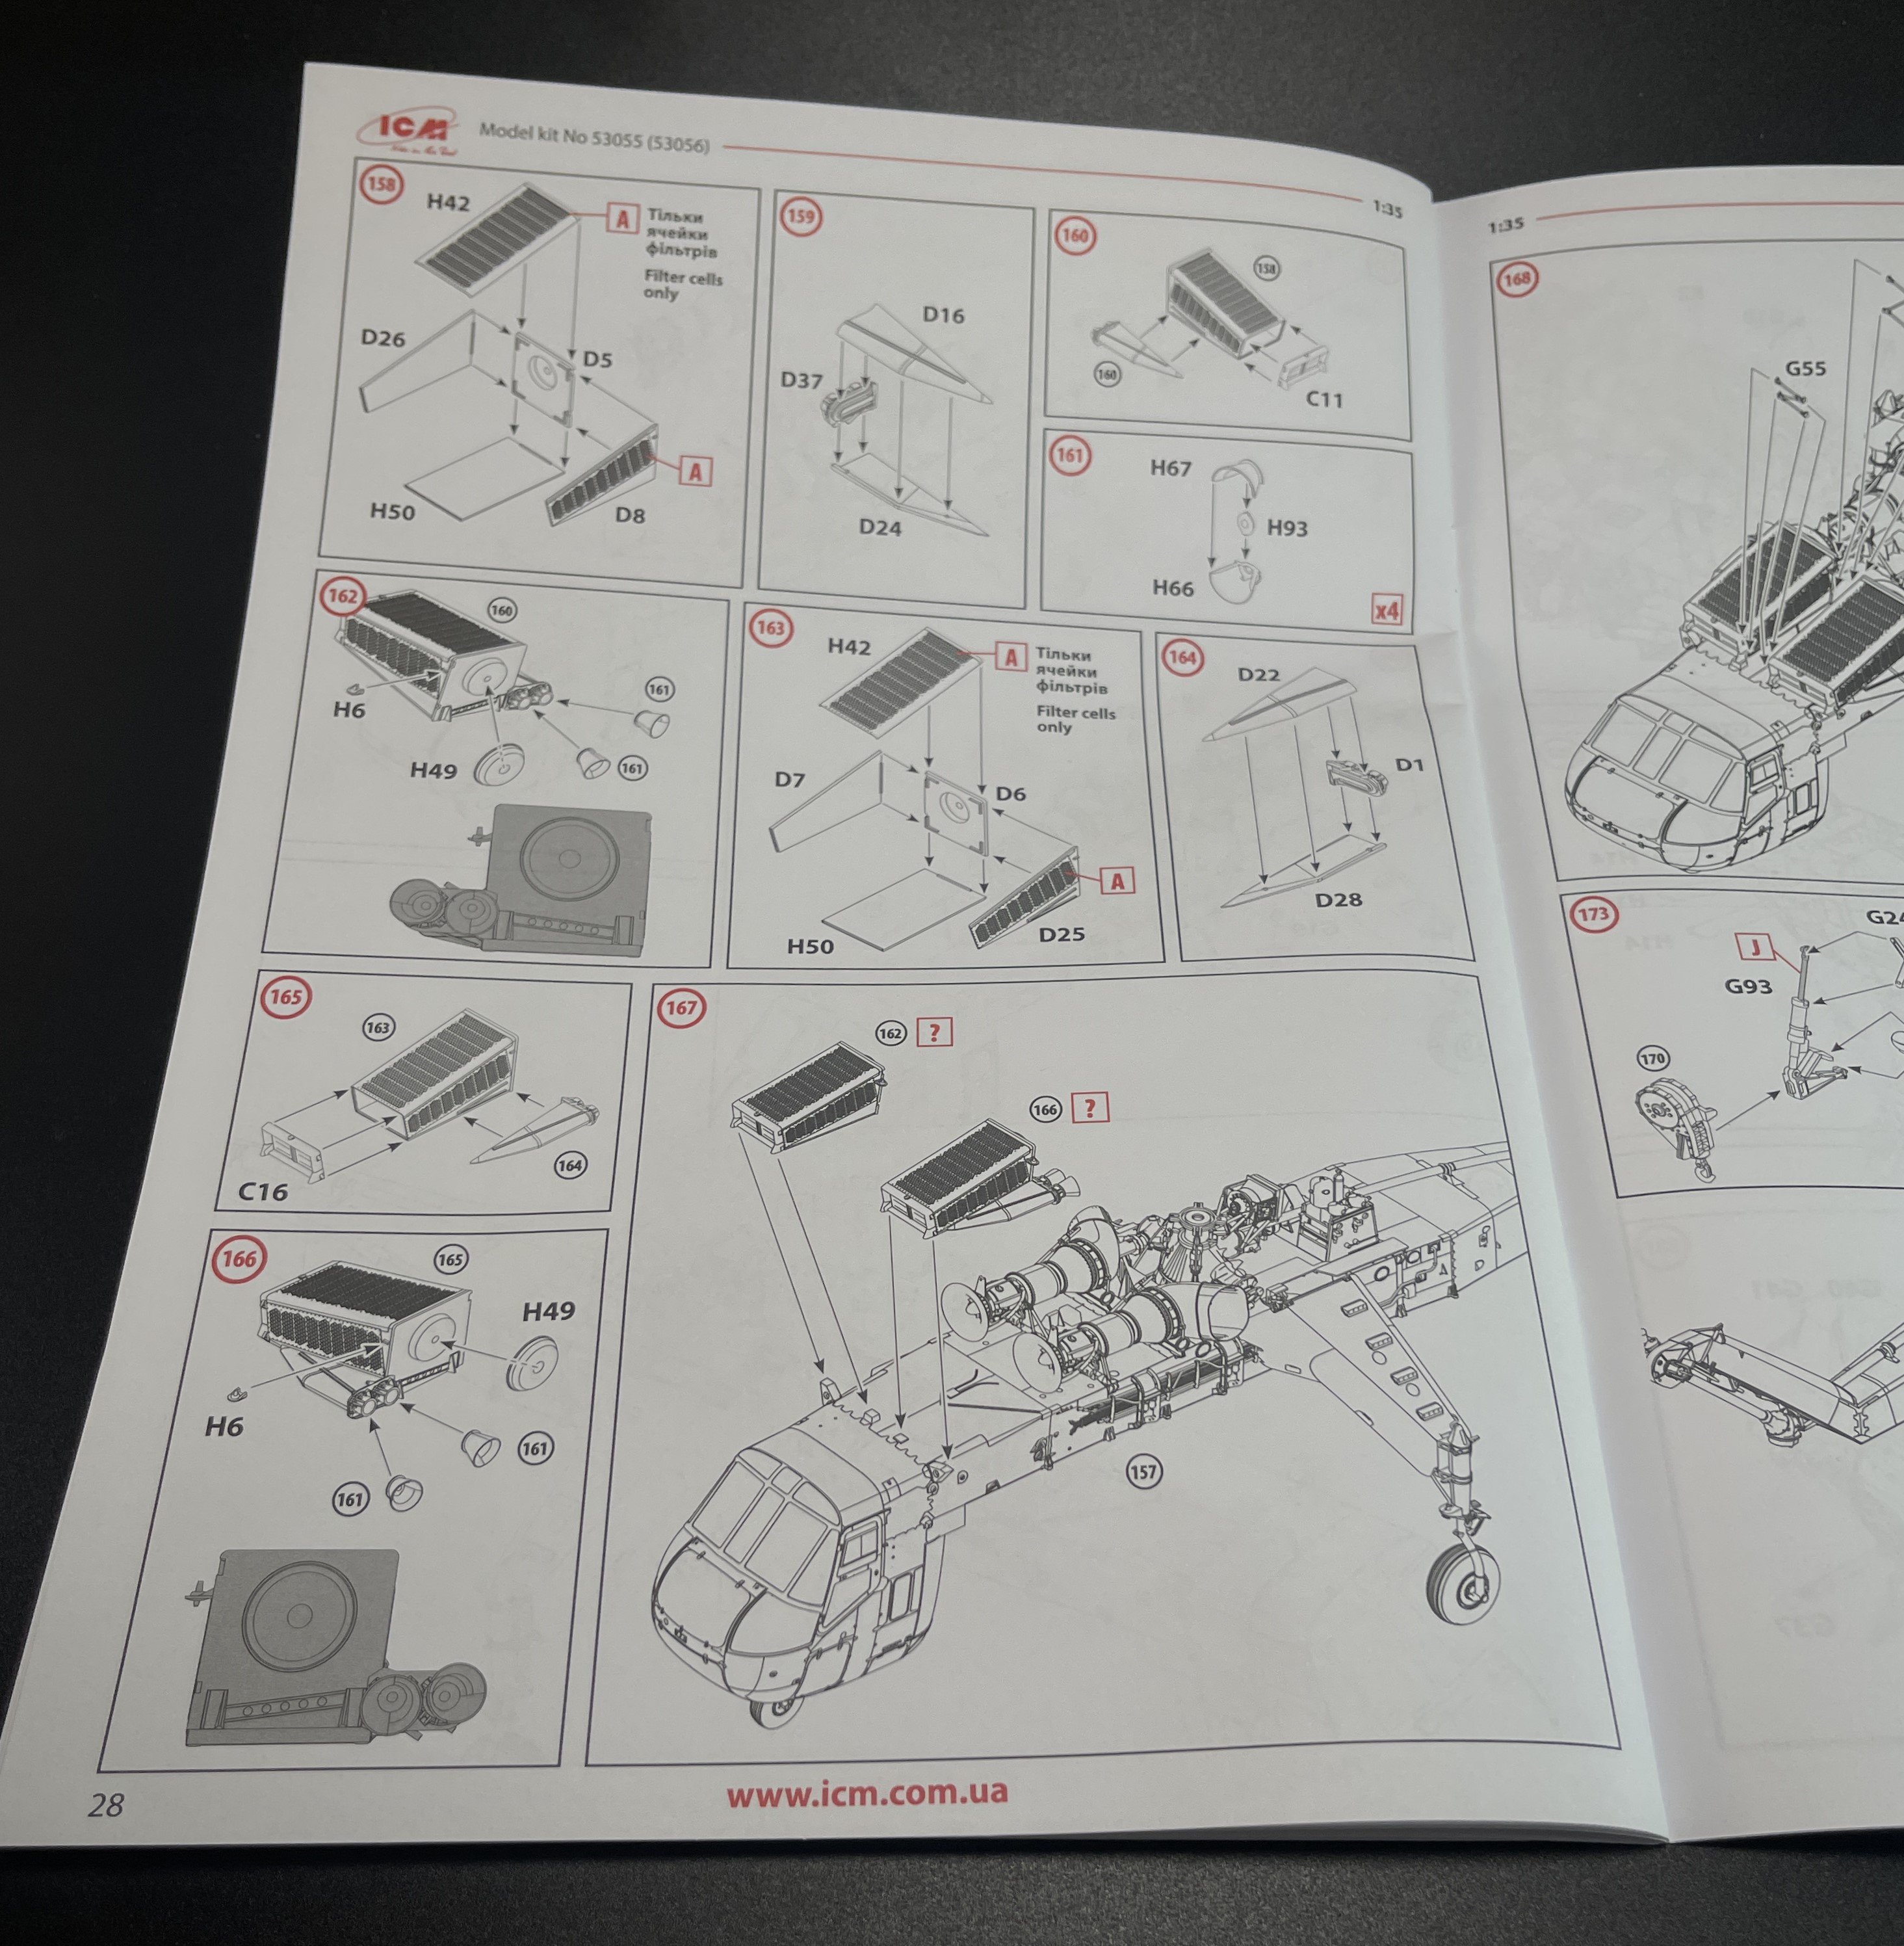
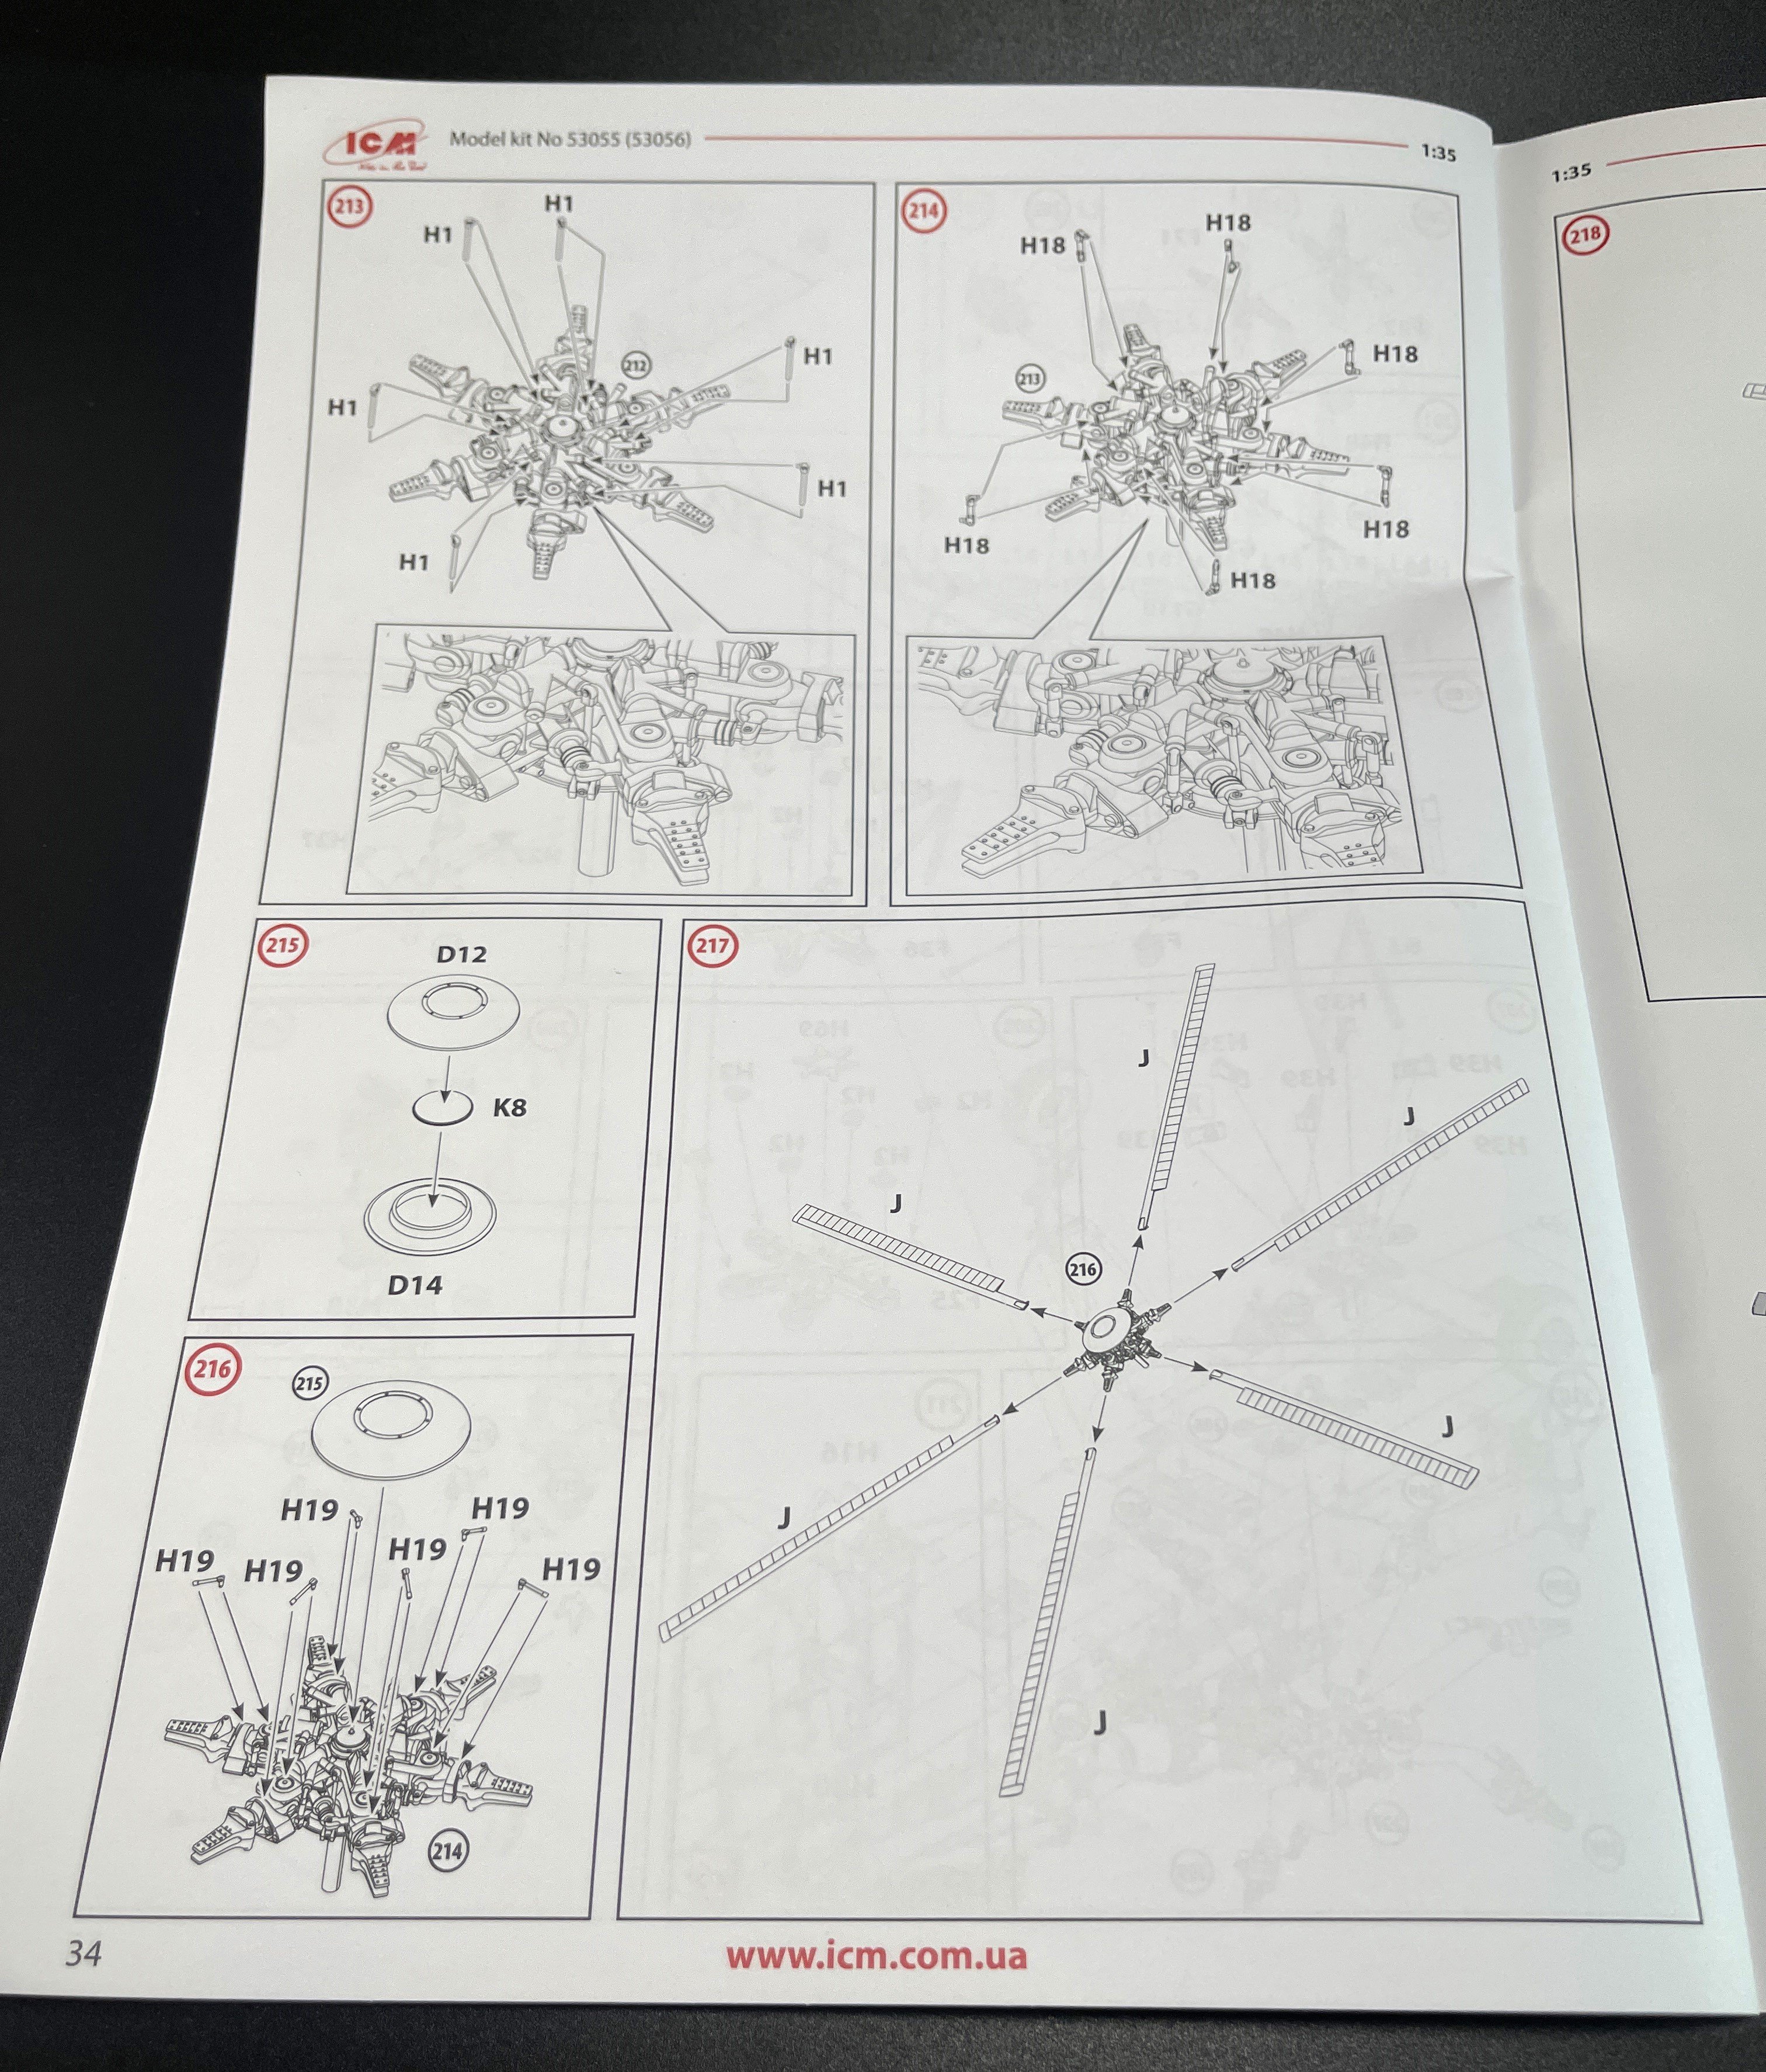
The instructions of the CH-54 is the one for the 53055 - Sikorsky CH-54 with M-121 bomb.
For me it`s the first time I see in flesh, the 1:35 ICM CH-54.
I must say: I am really impressed with all the work and research on this one and size!!
As Ernie says, military helicopter fans, several of whom call LSM home, cheered loudly at the announcement.
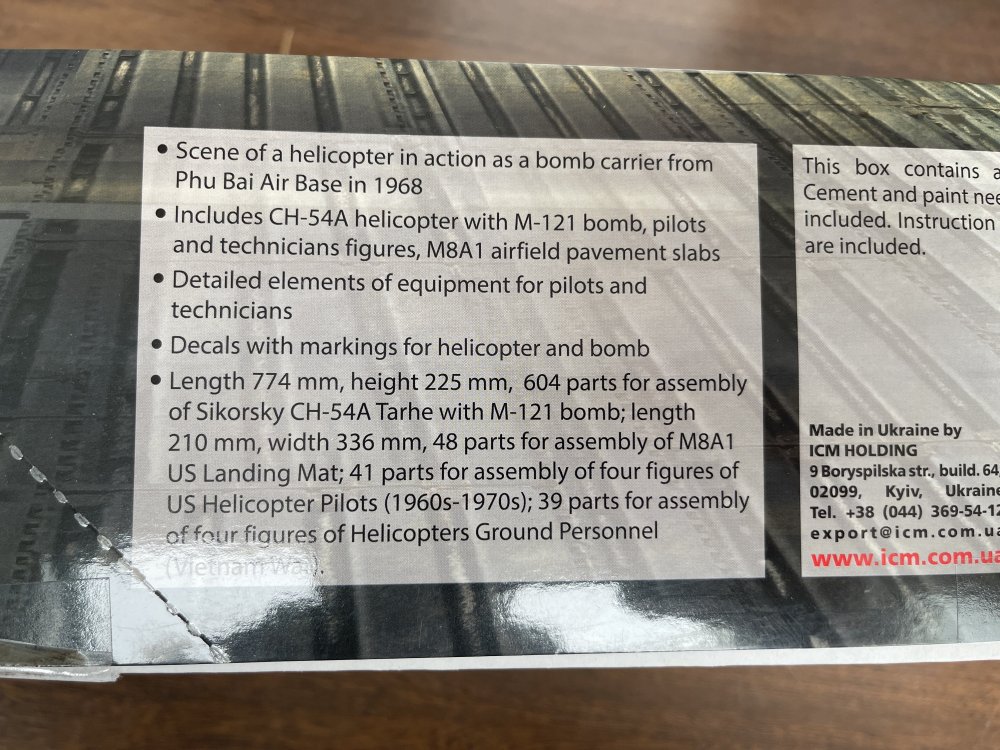
It’s a very big box, and lifting the color lip top off, you get two sturdy big cardboard box, both full of plastic.
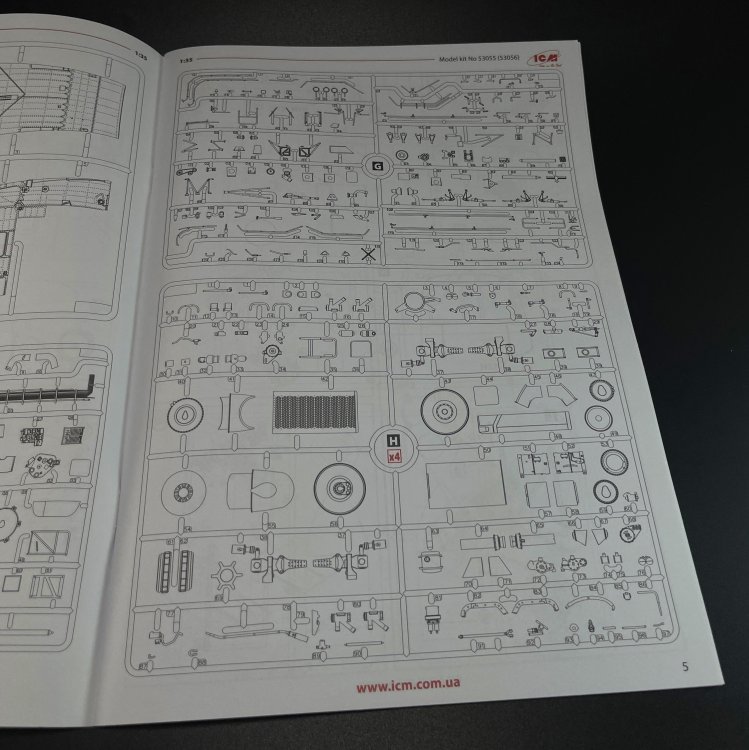
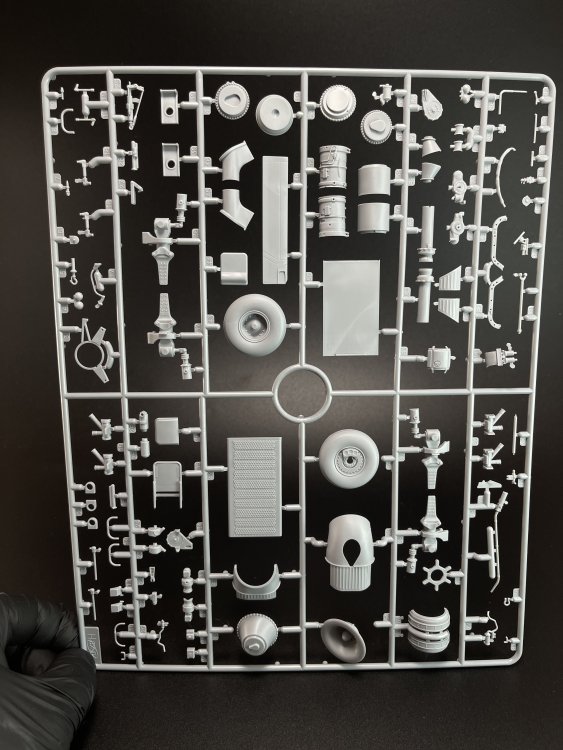
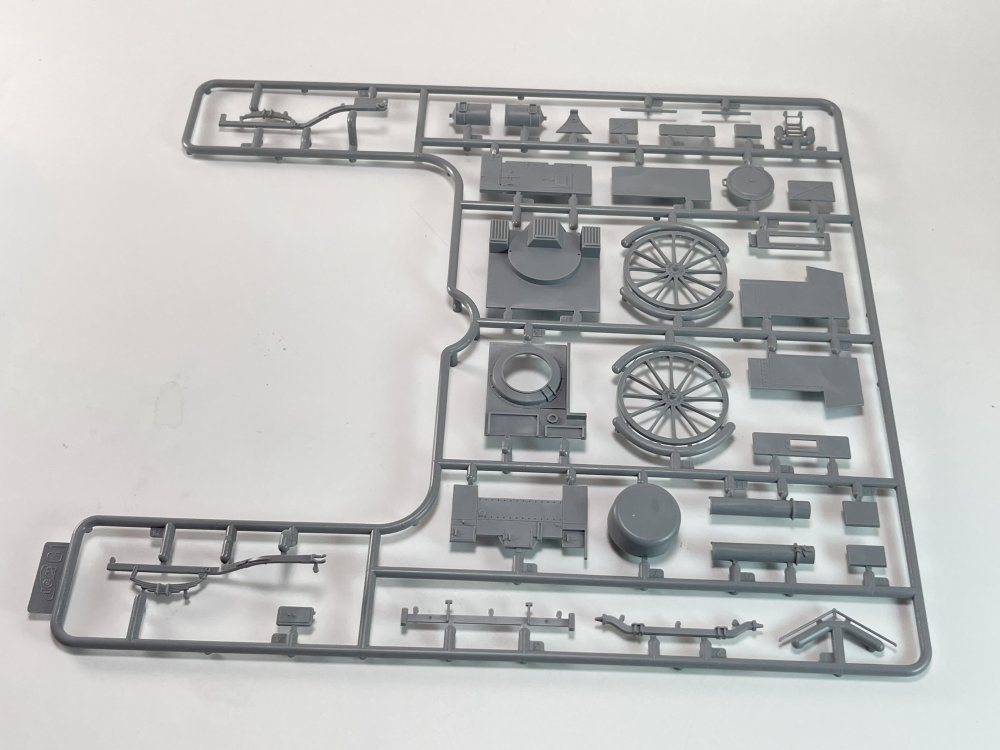
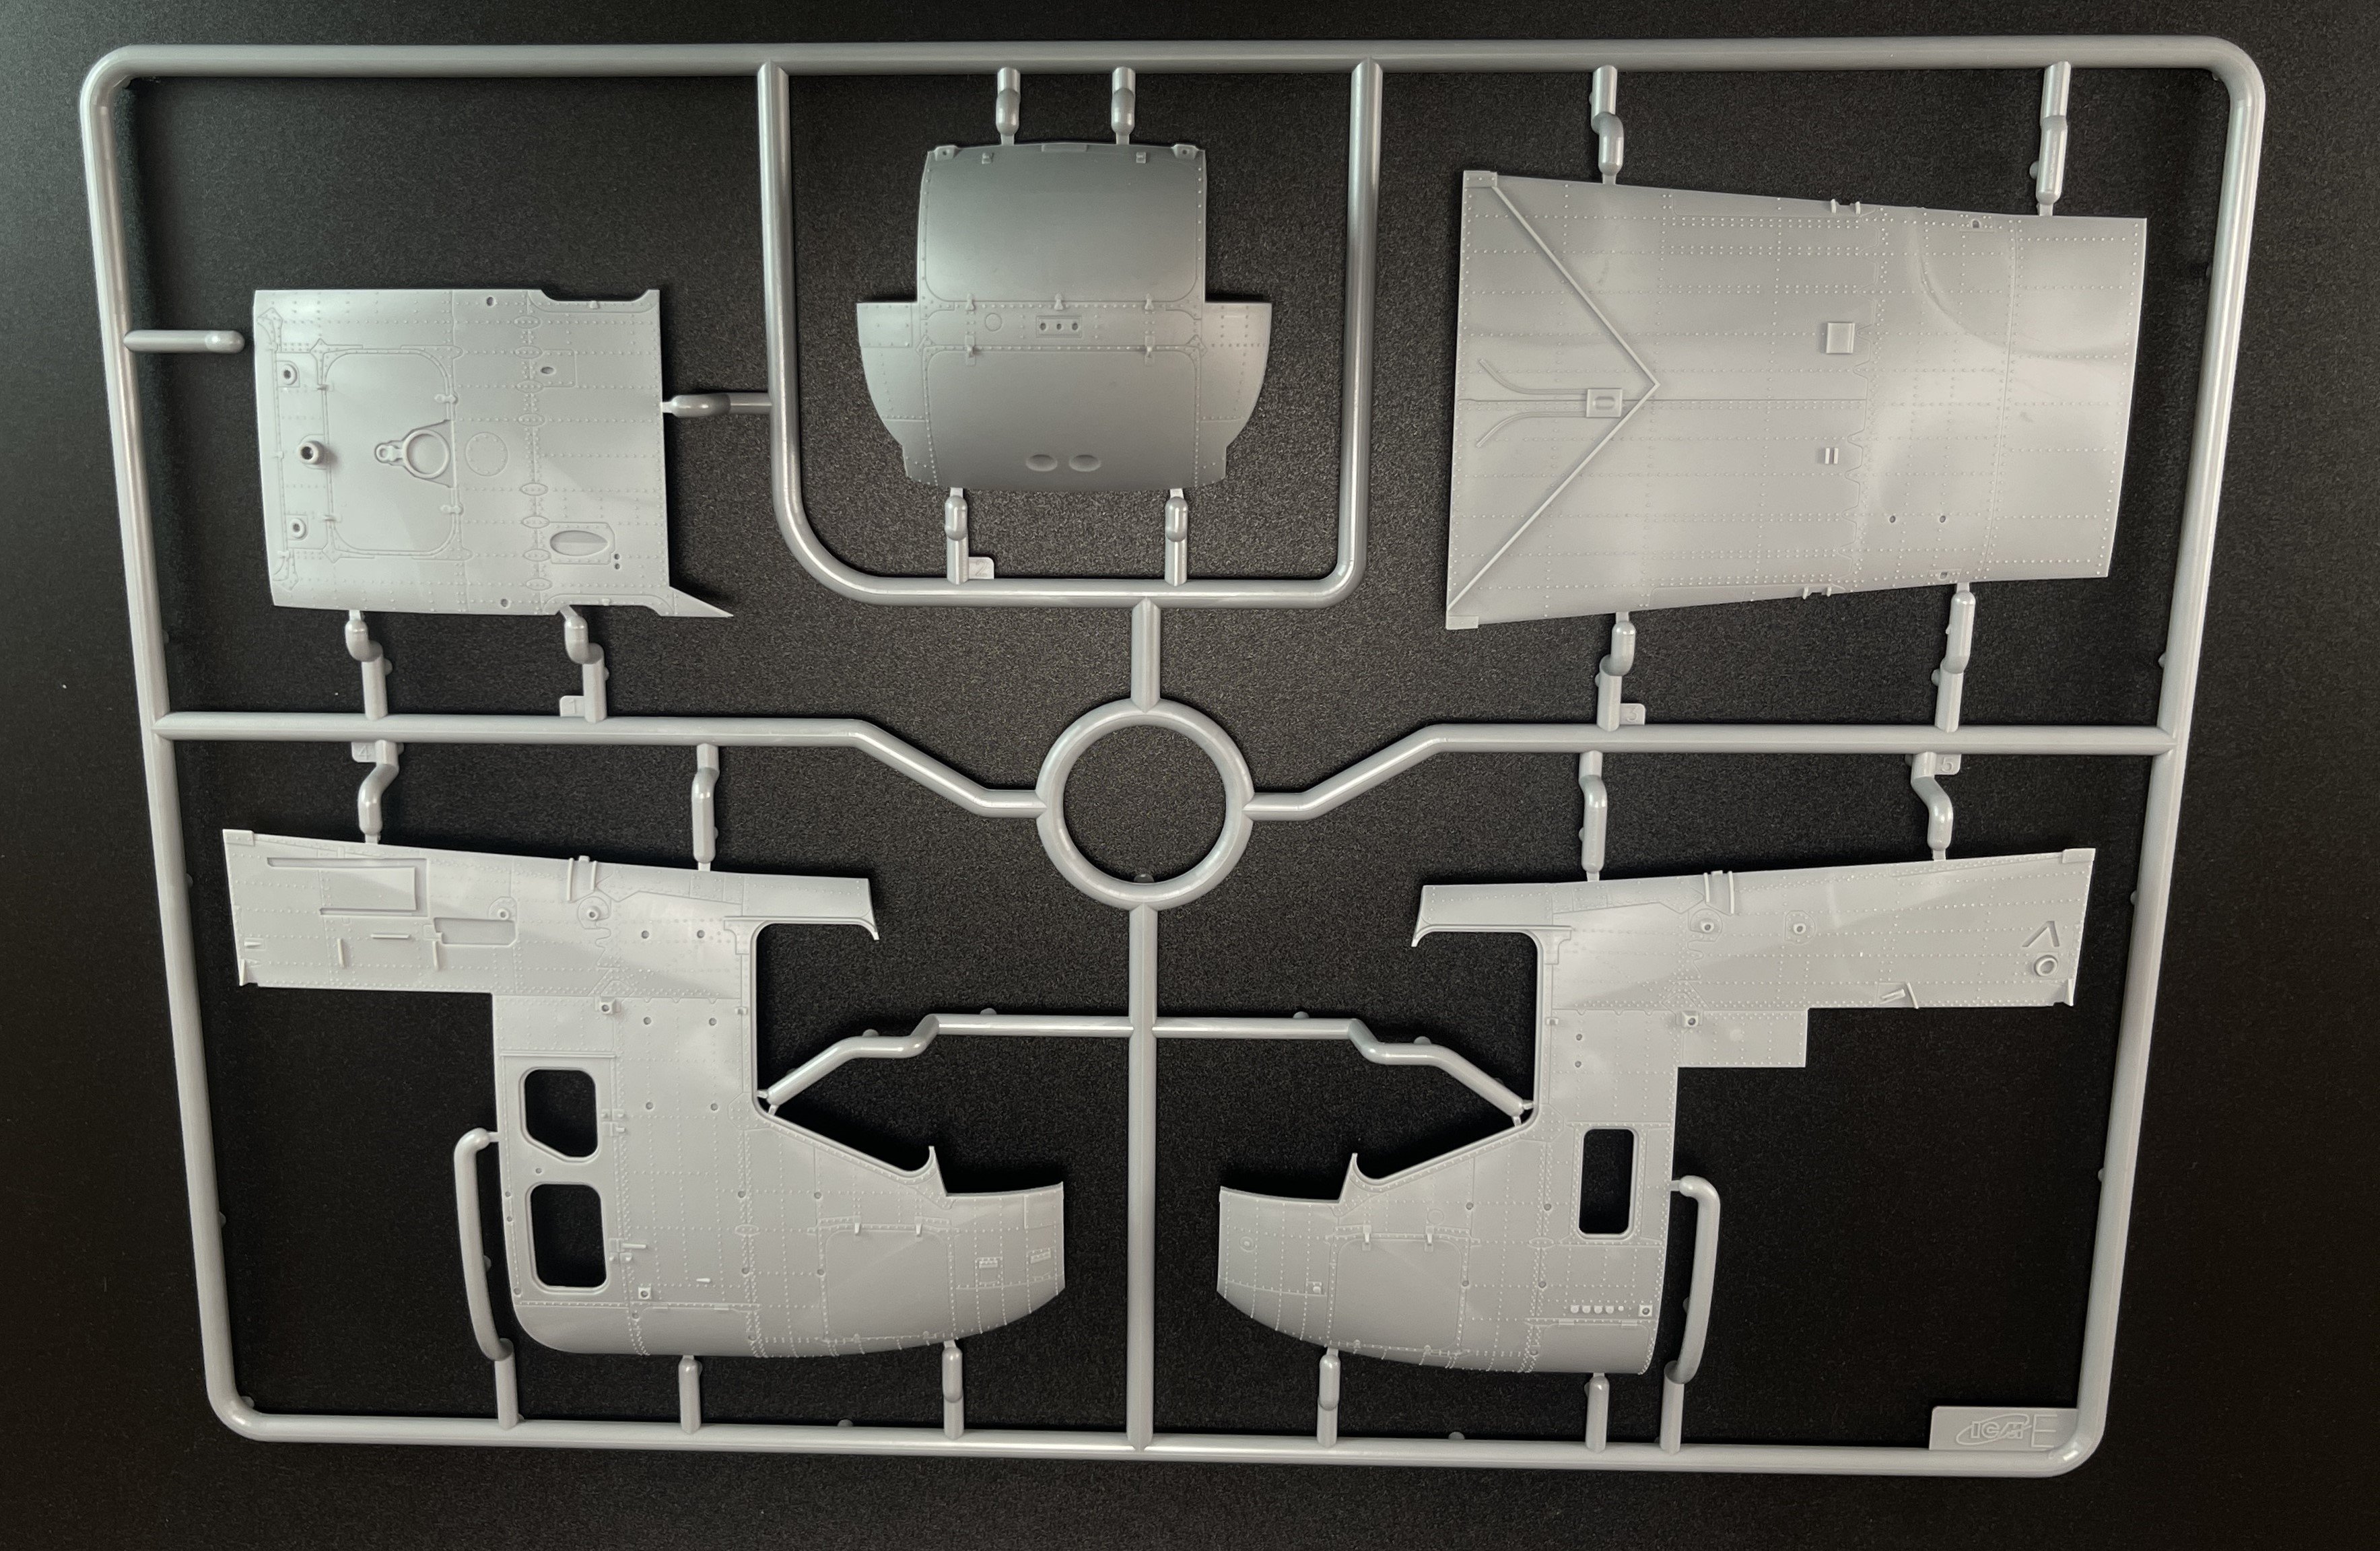
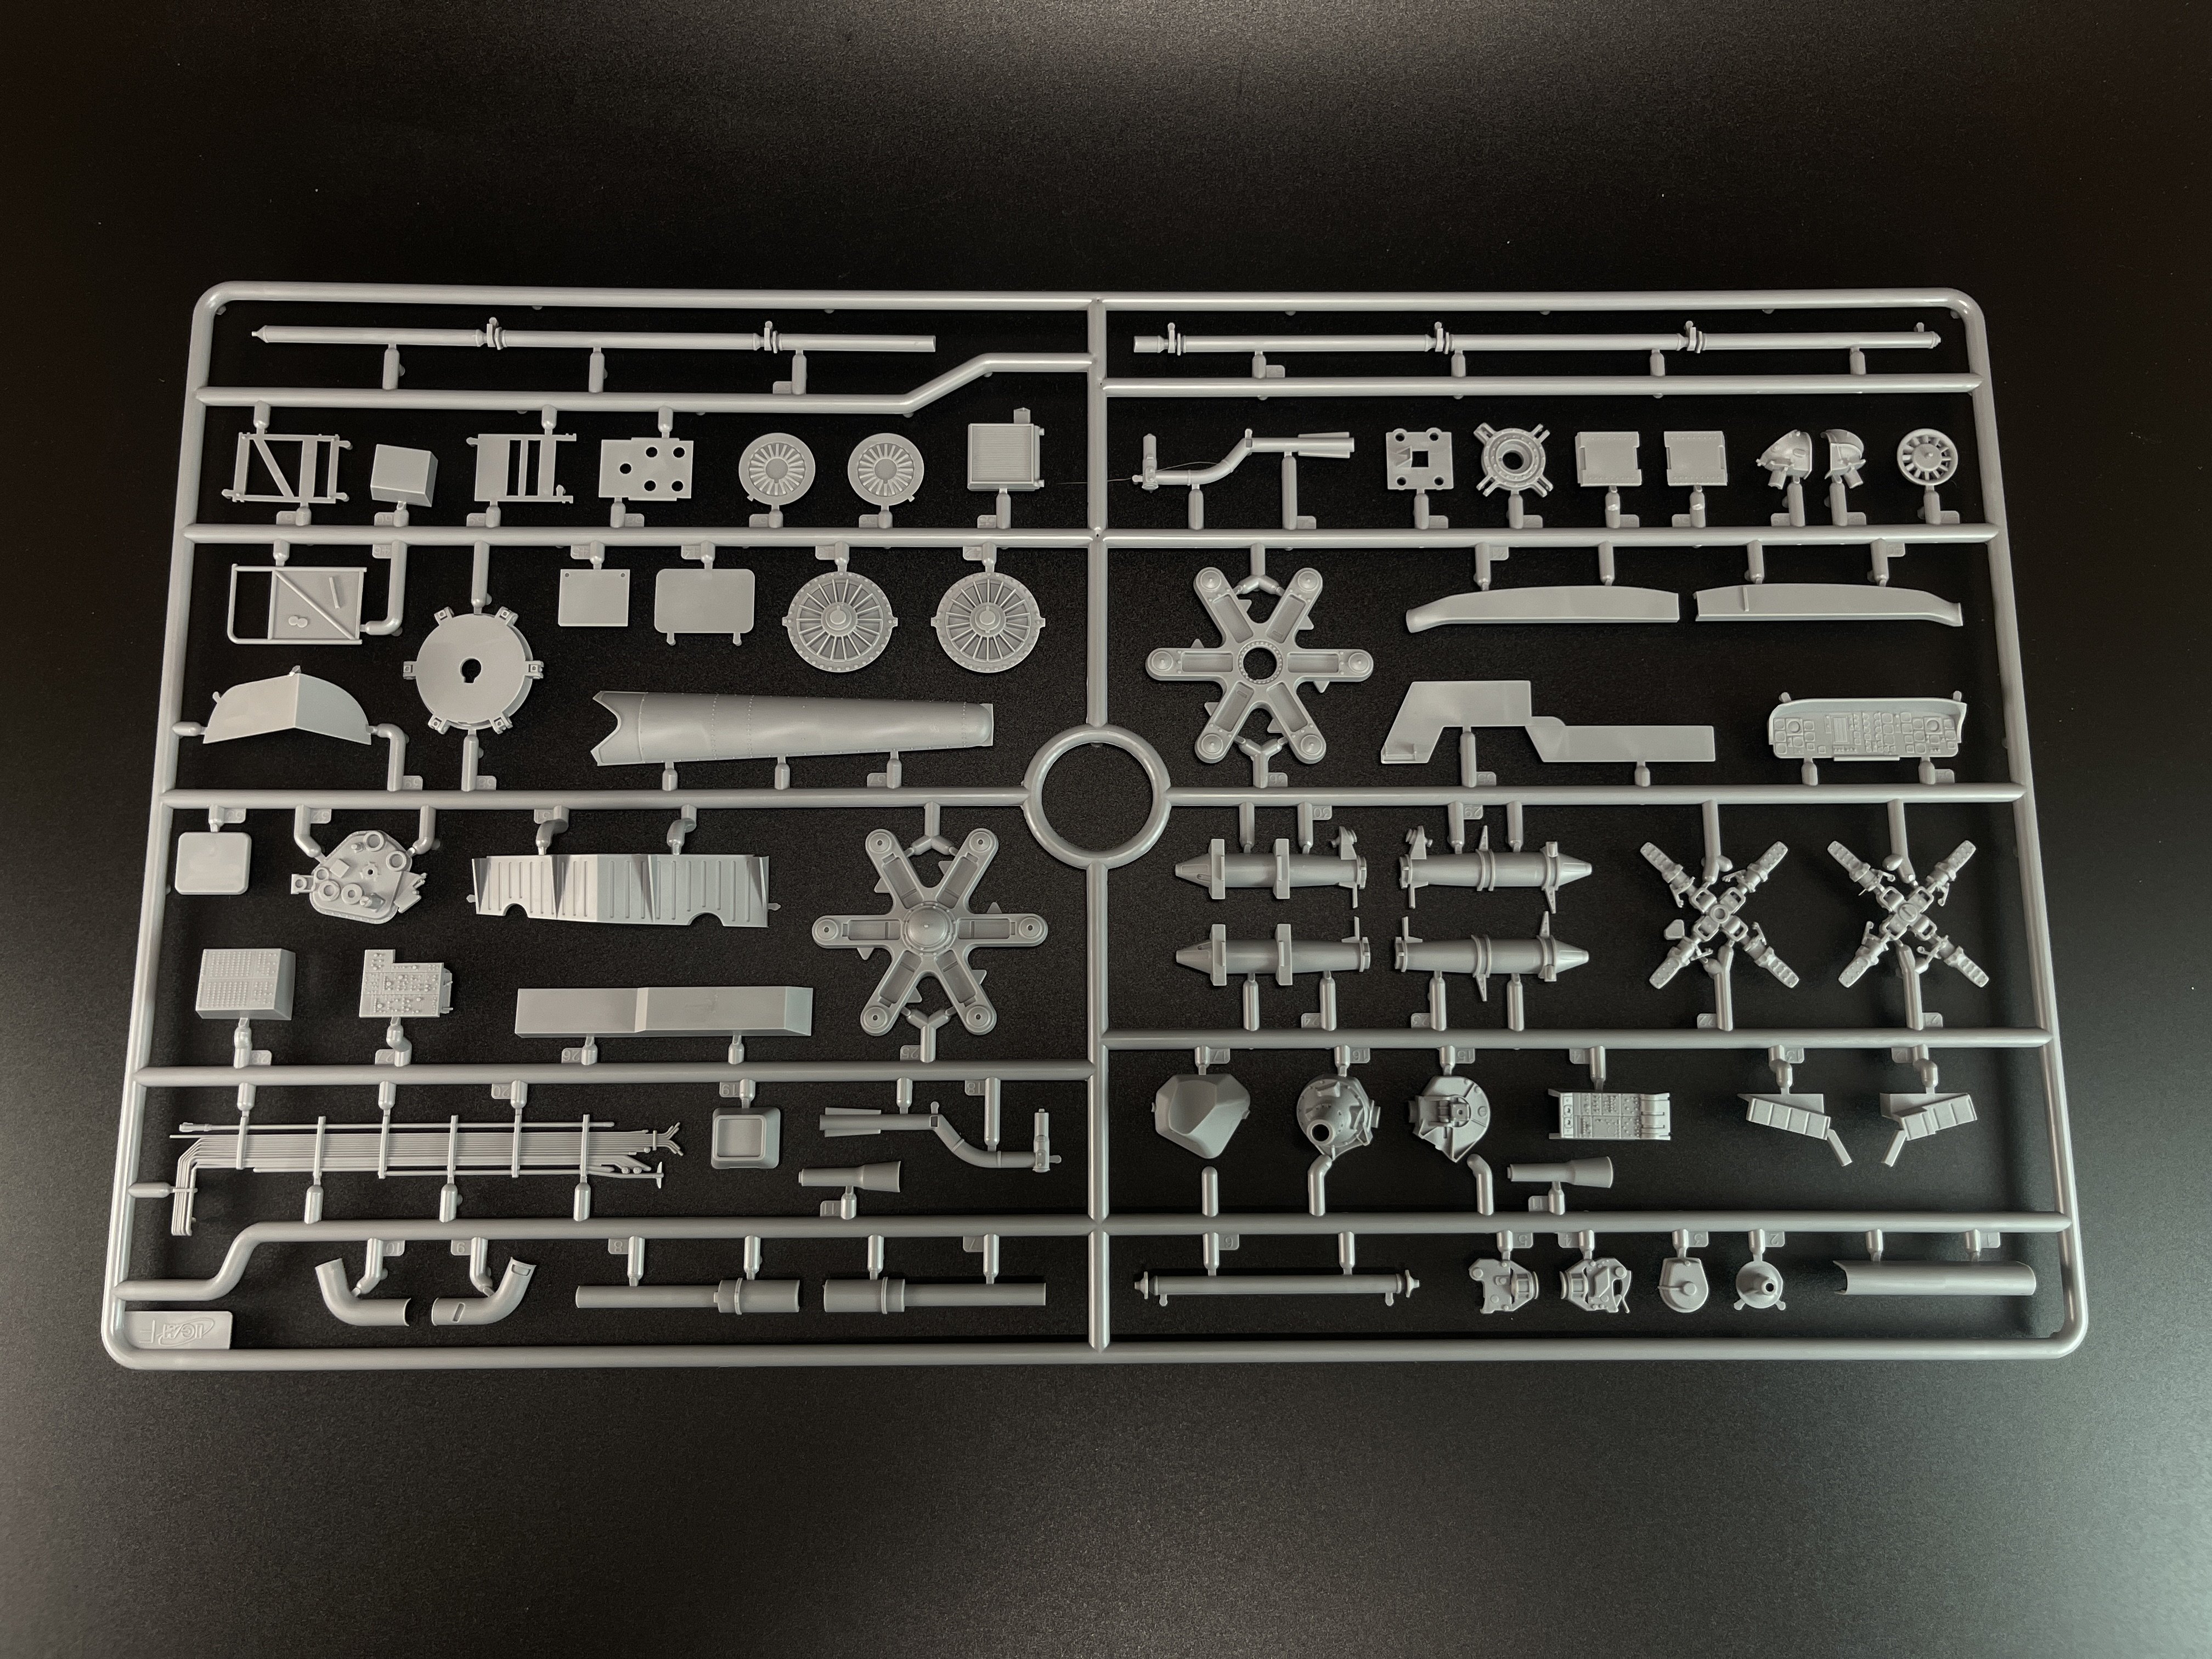
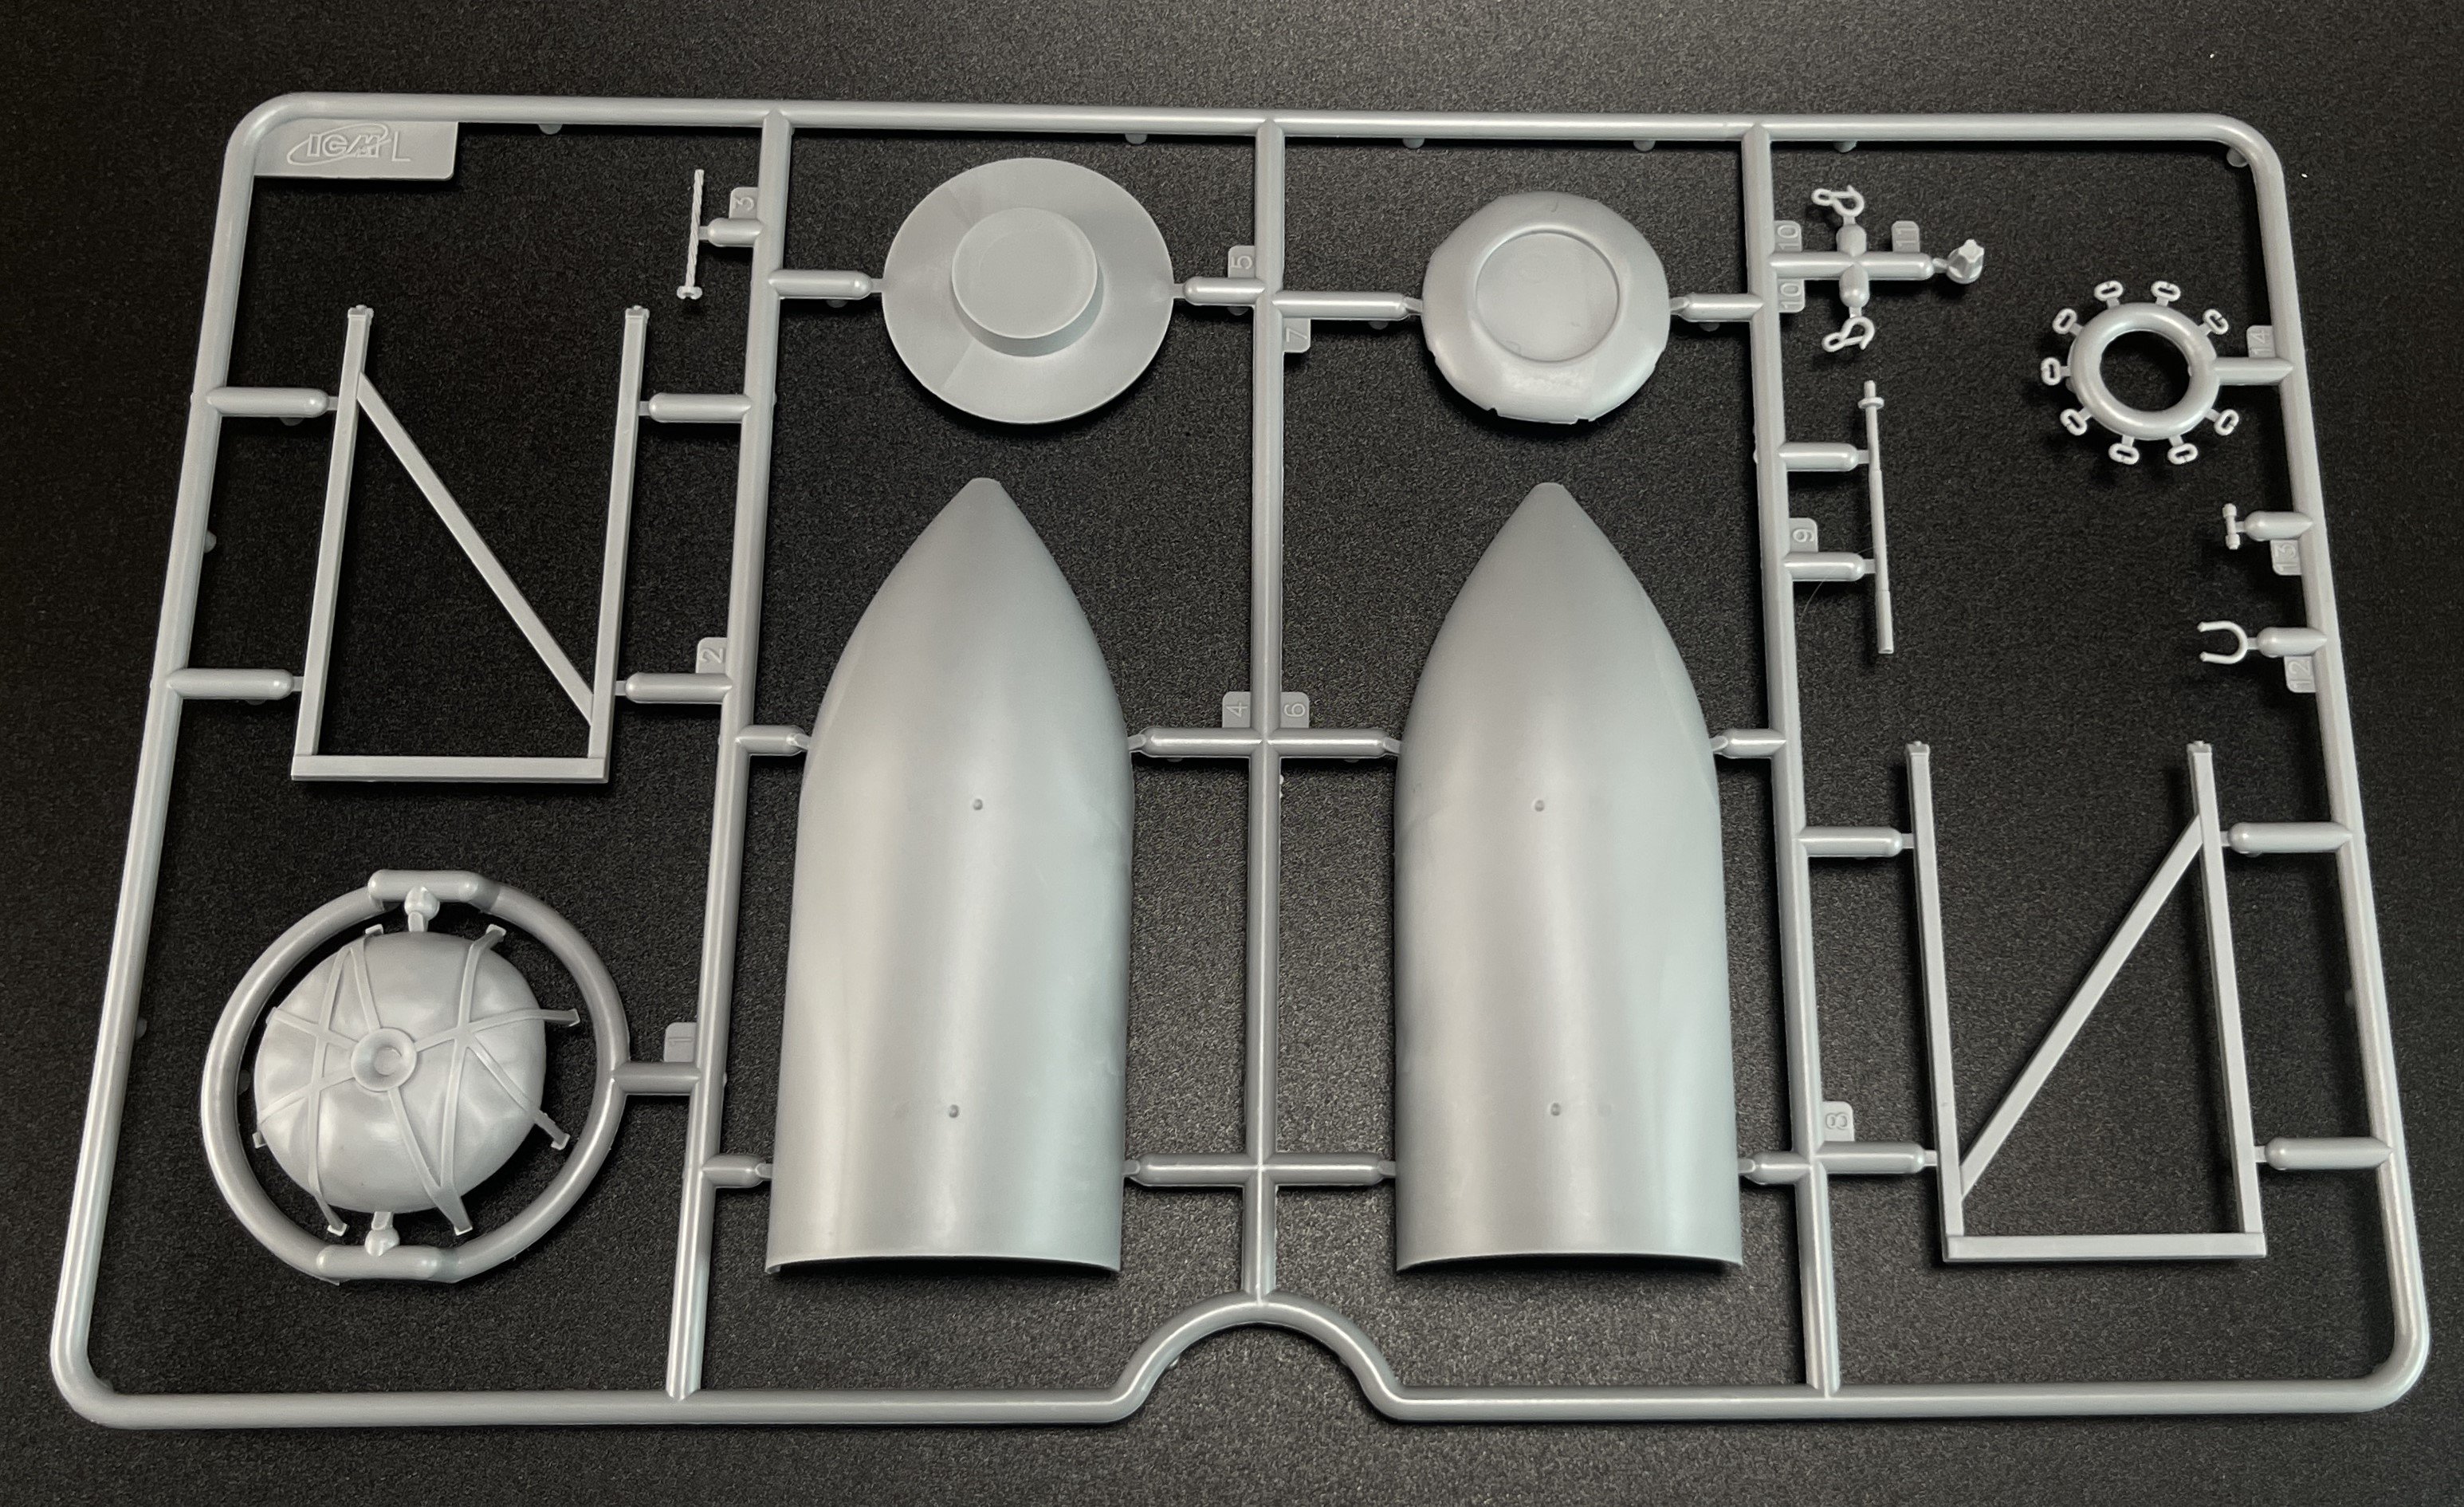
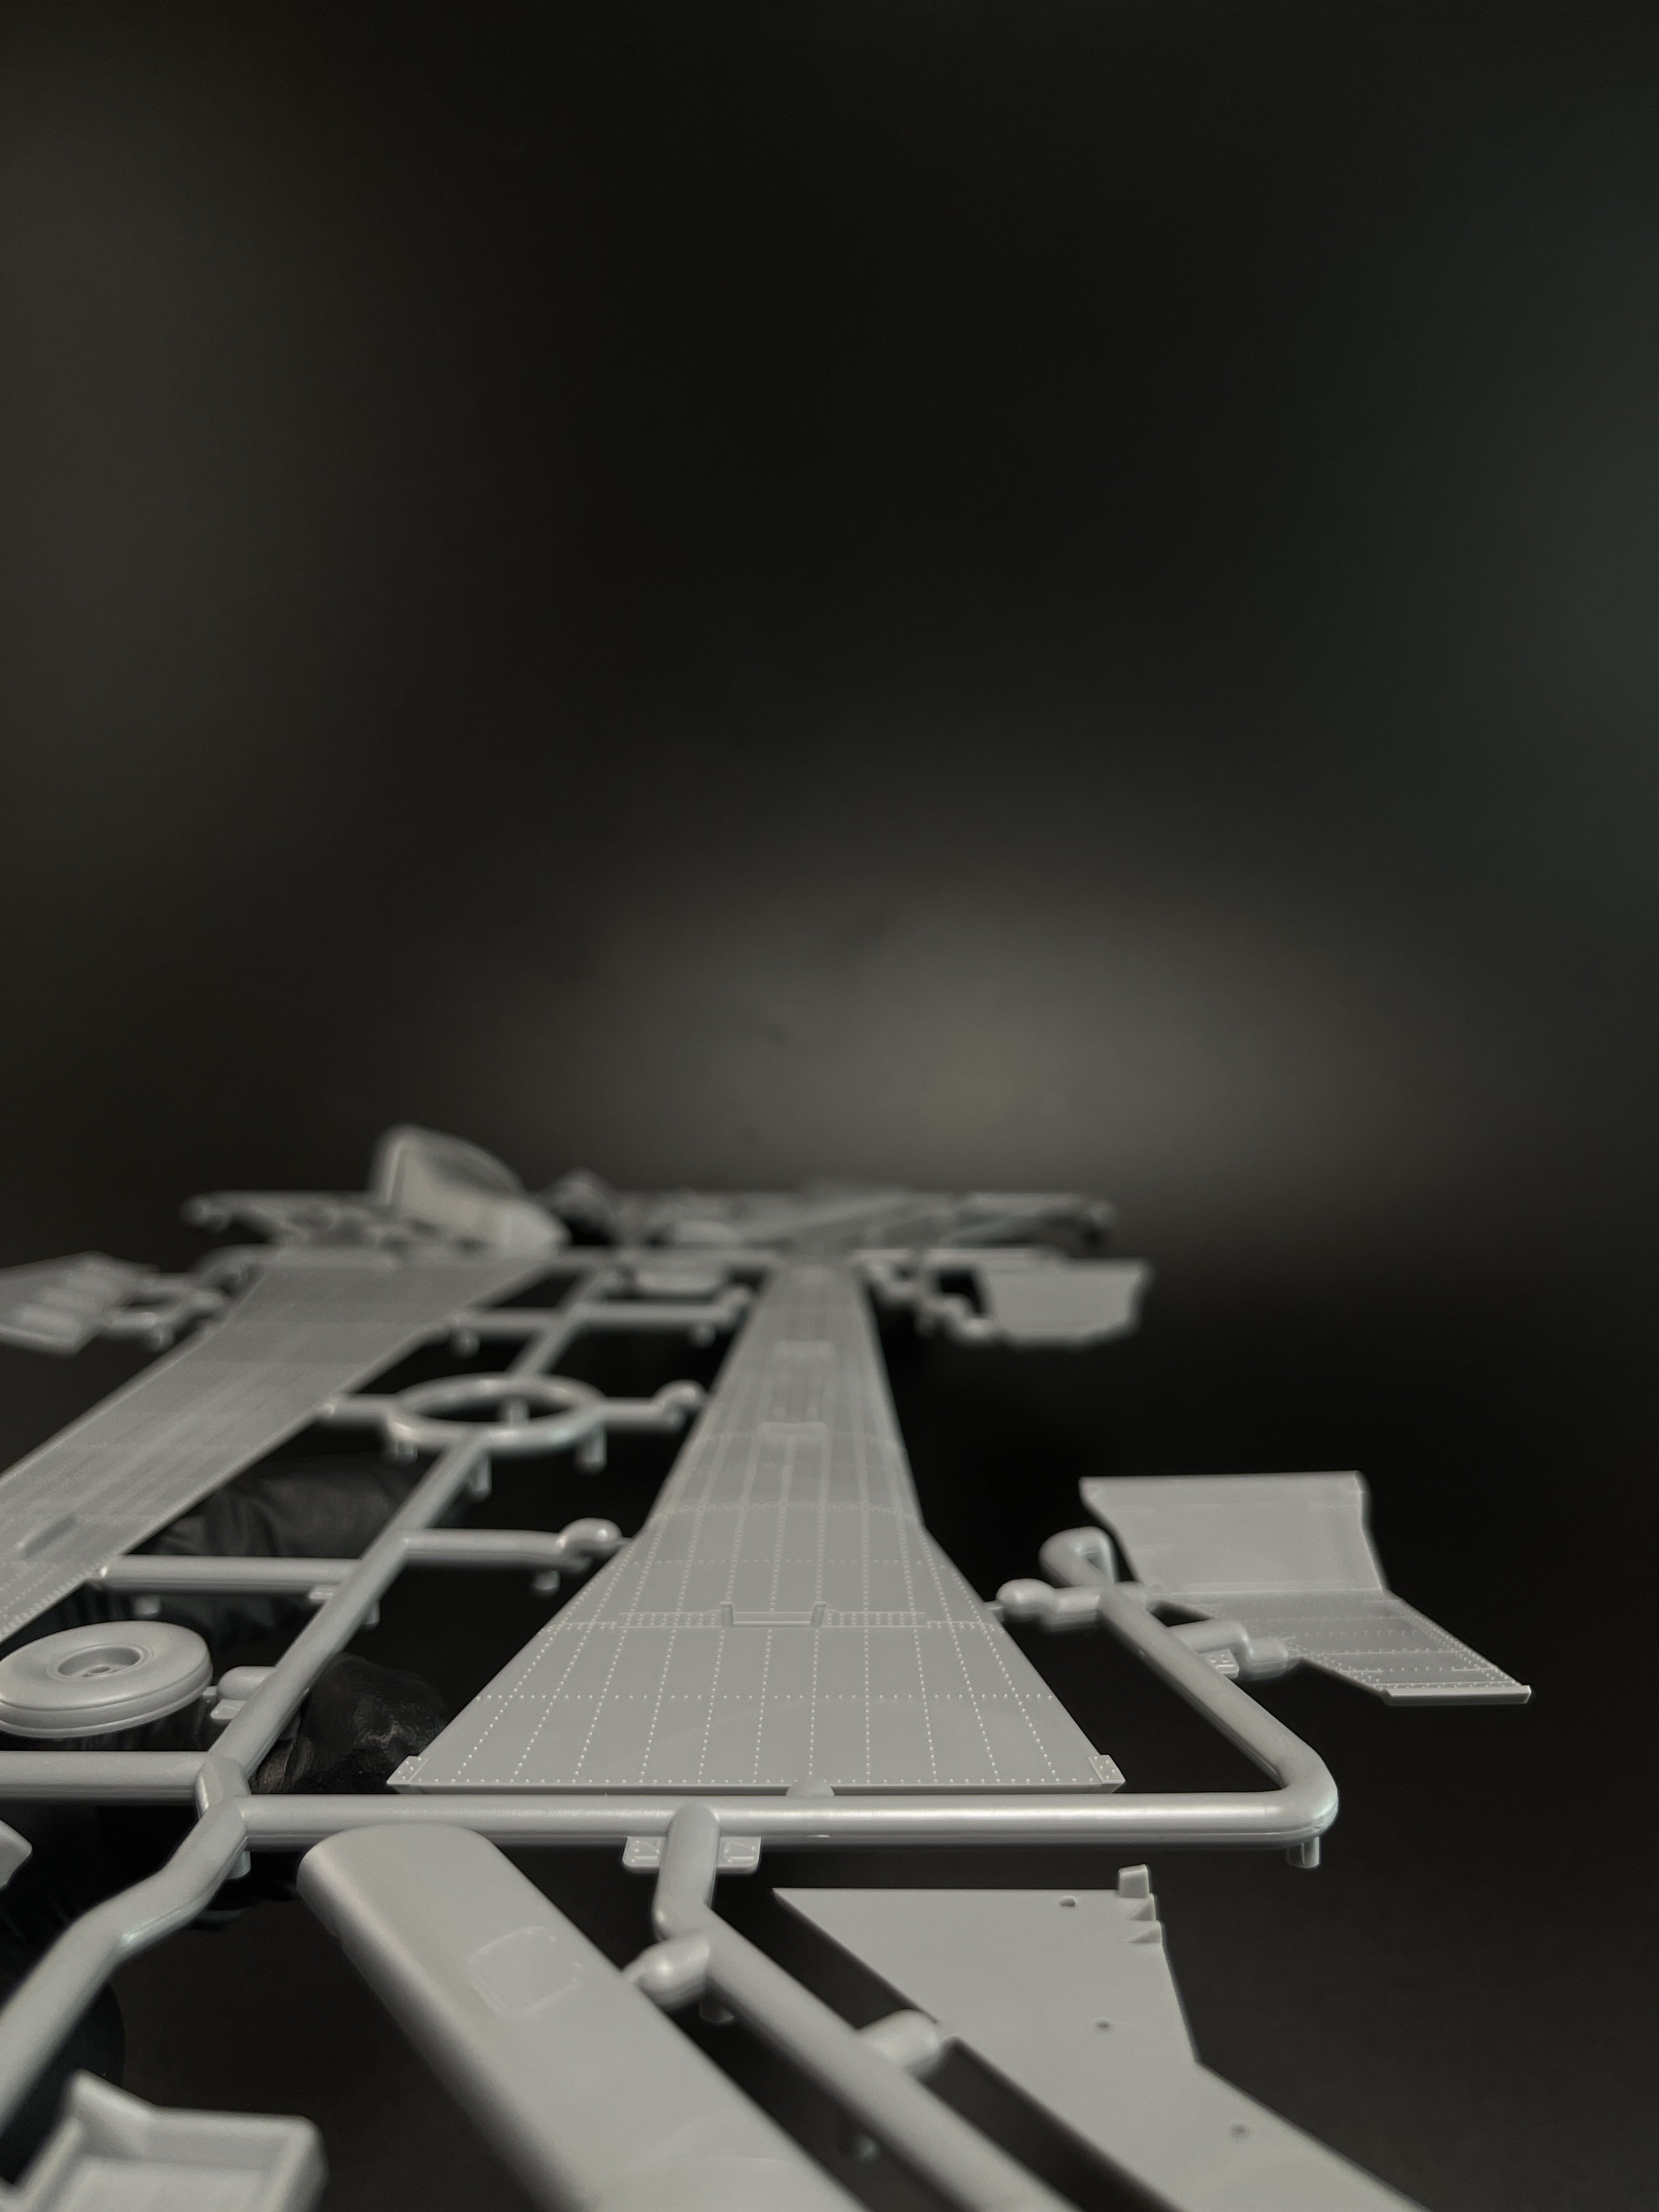
Let`s see the plastic.
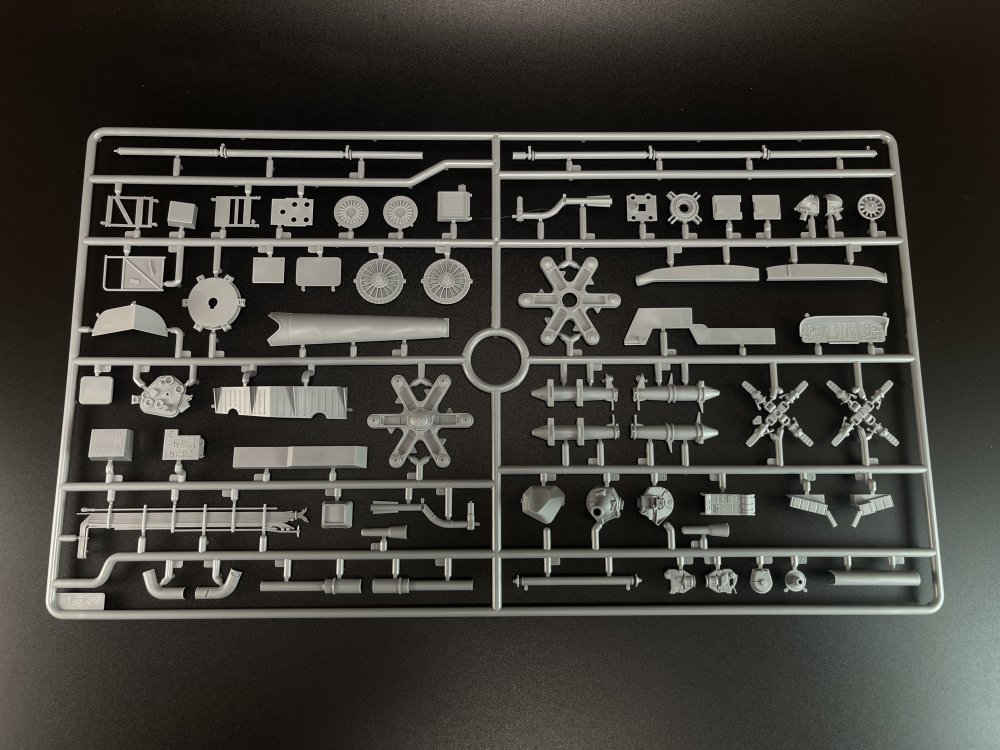
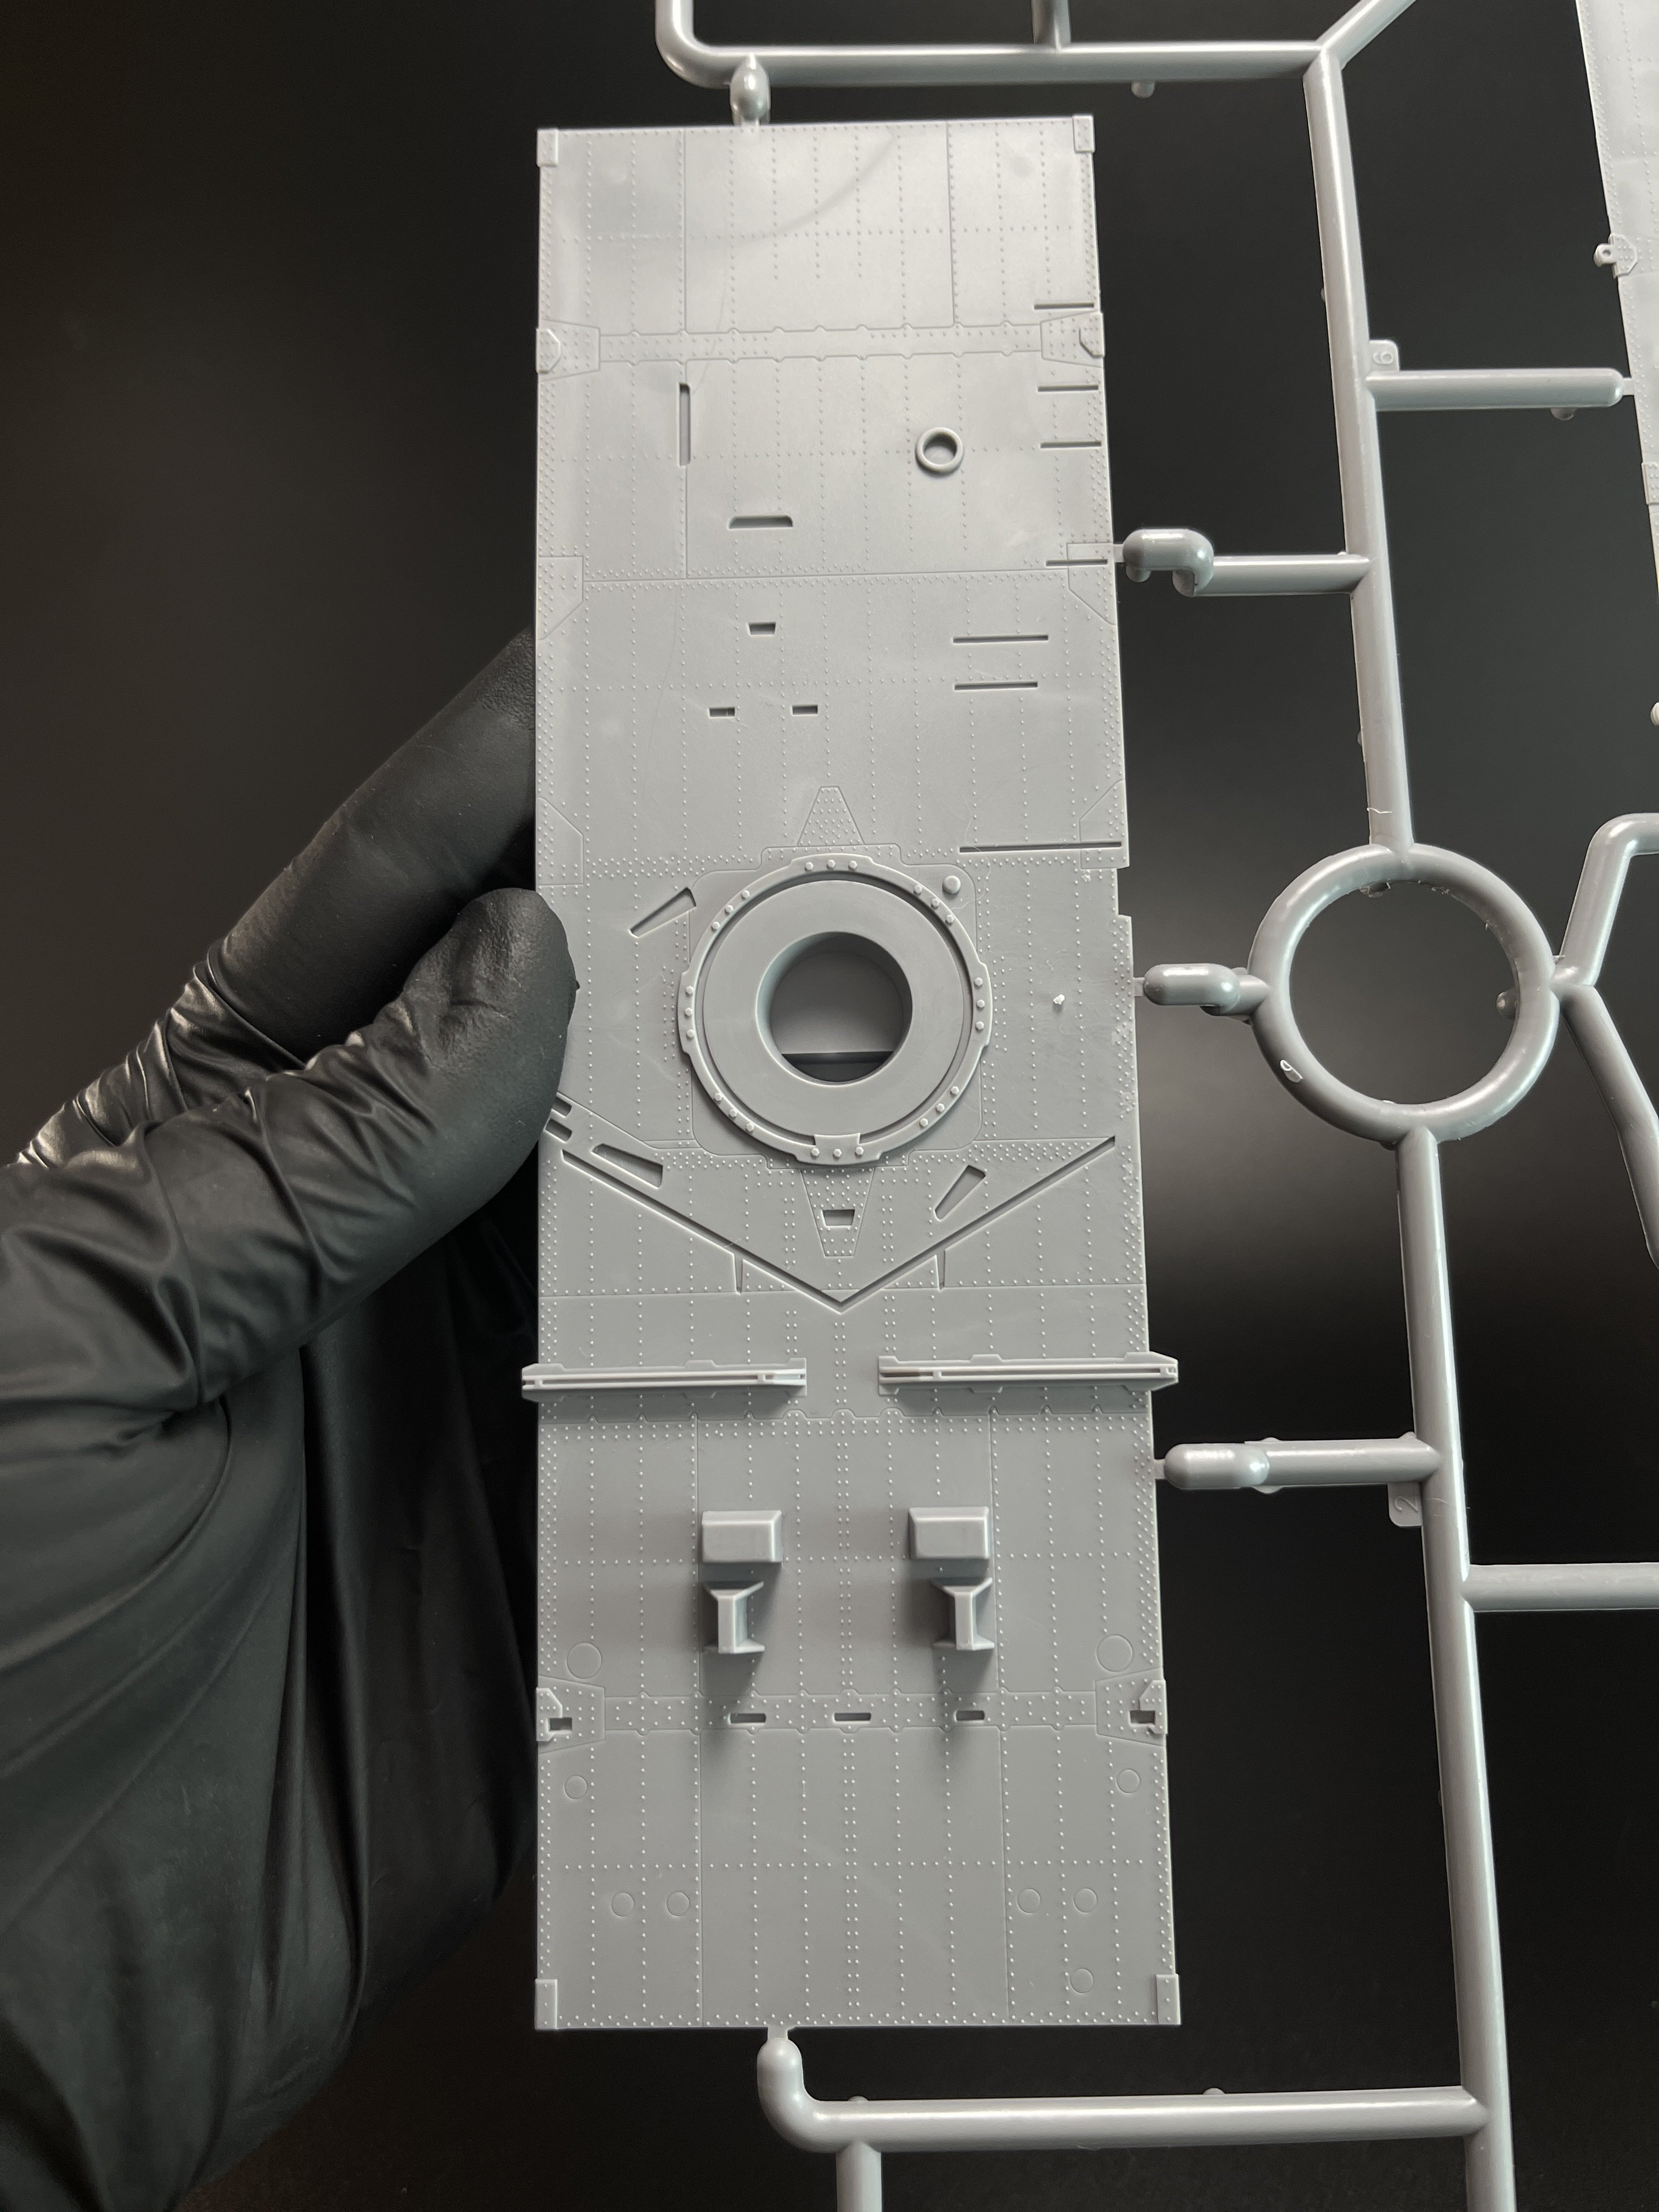
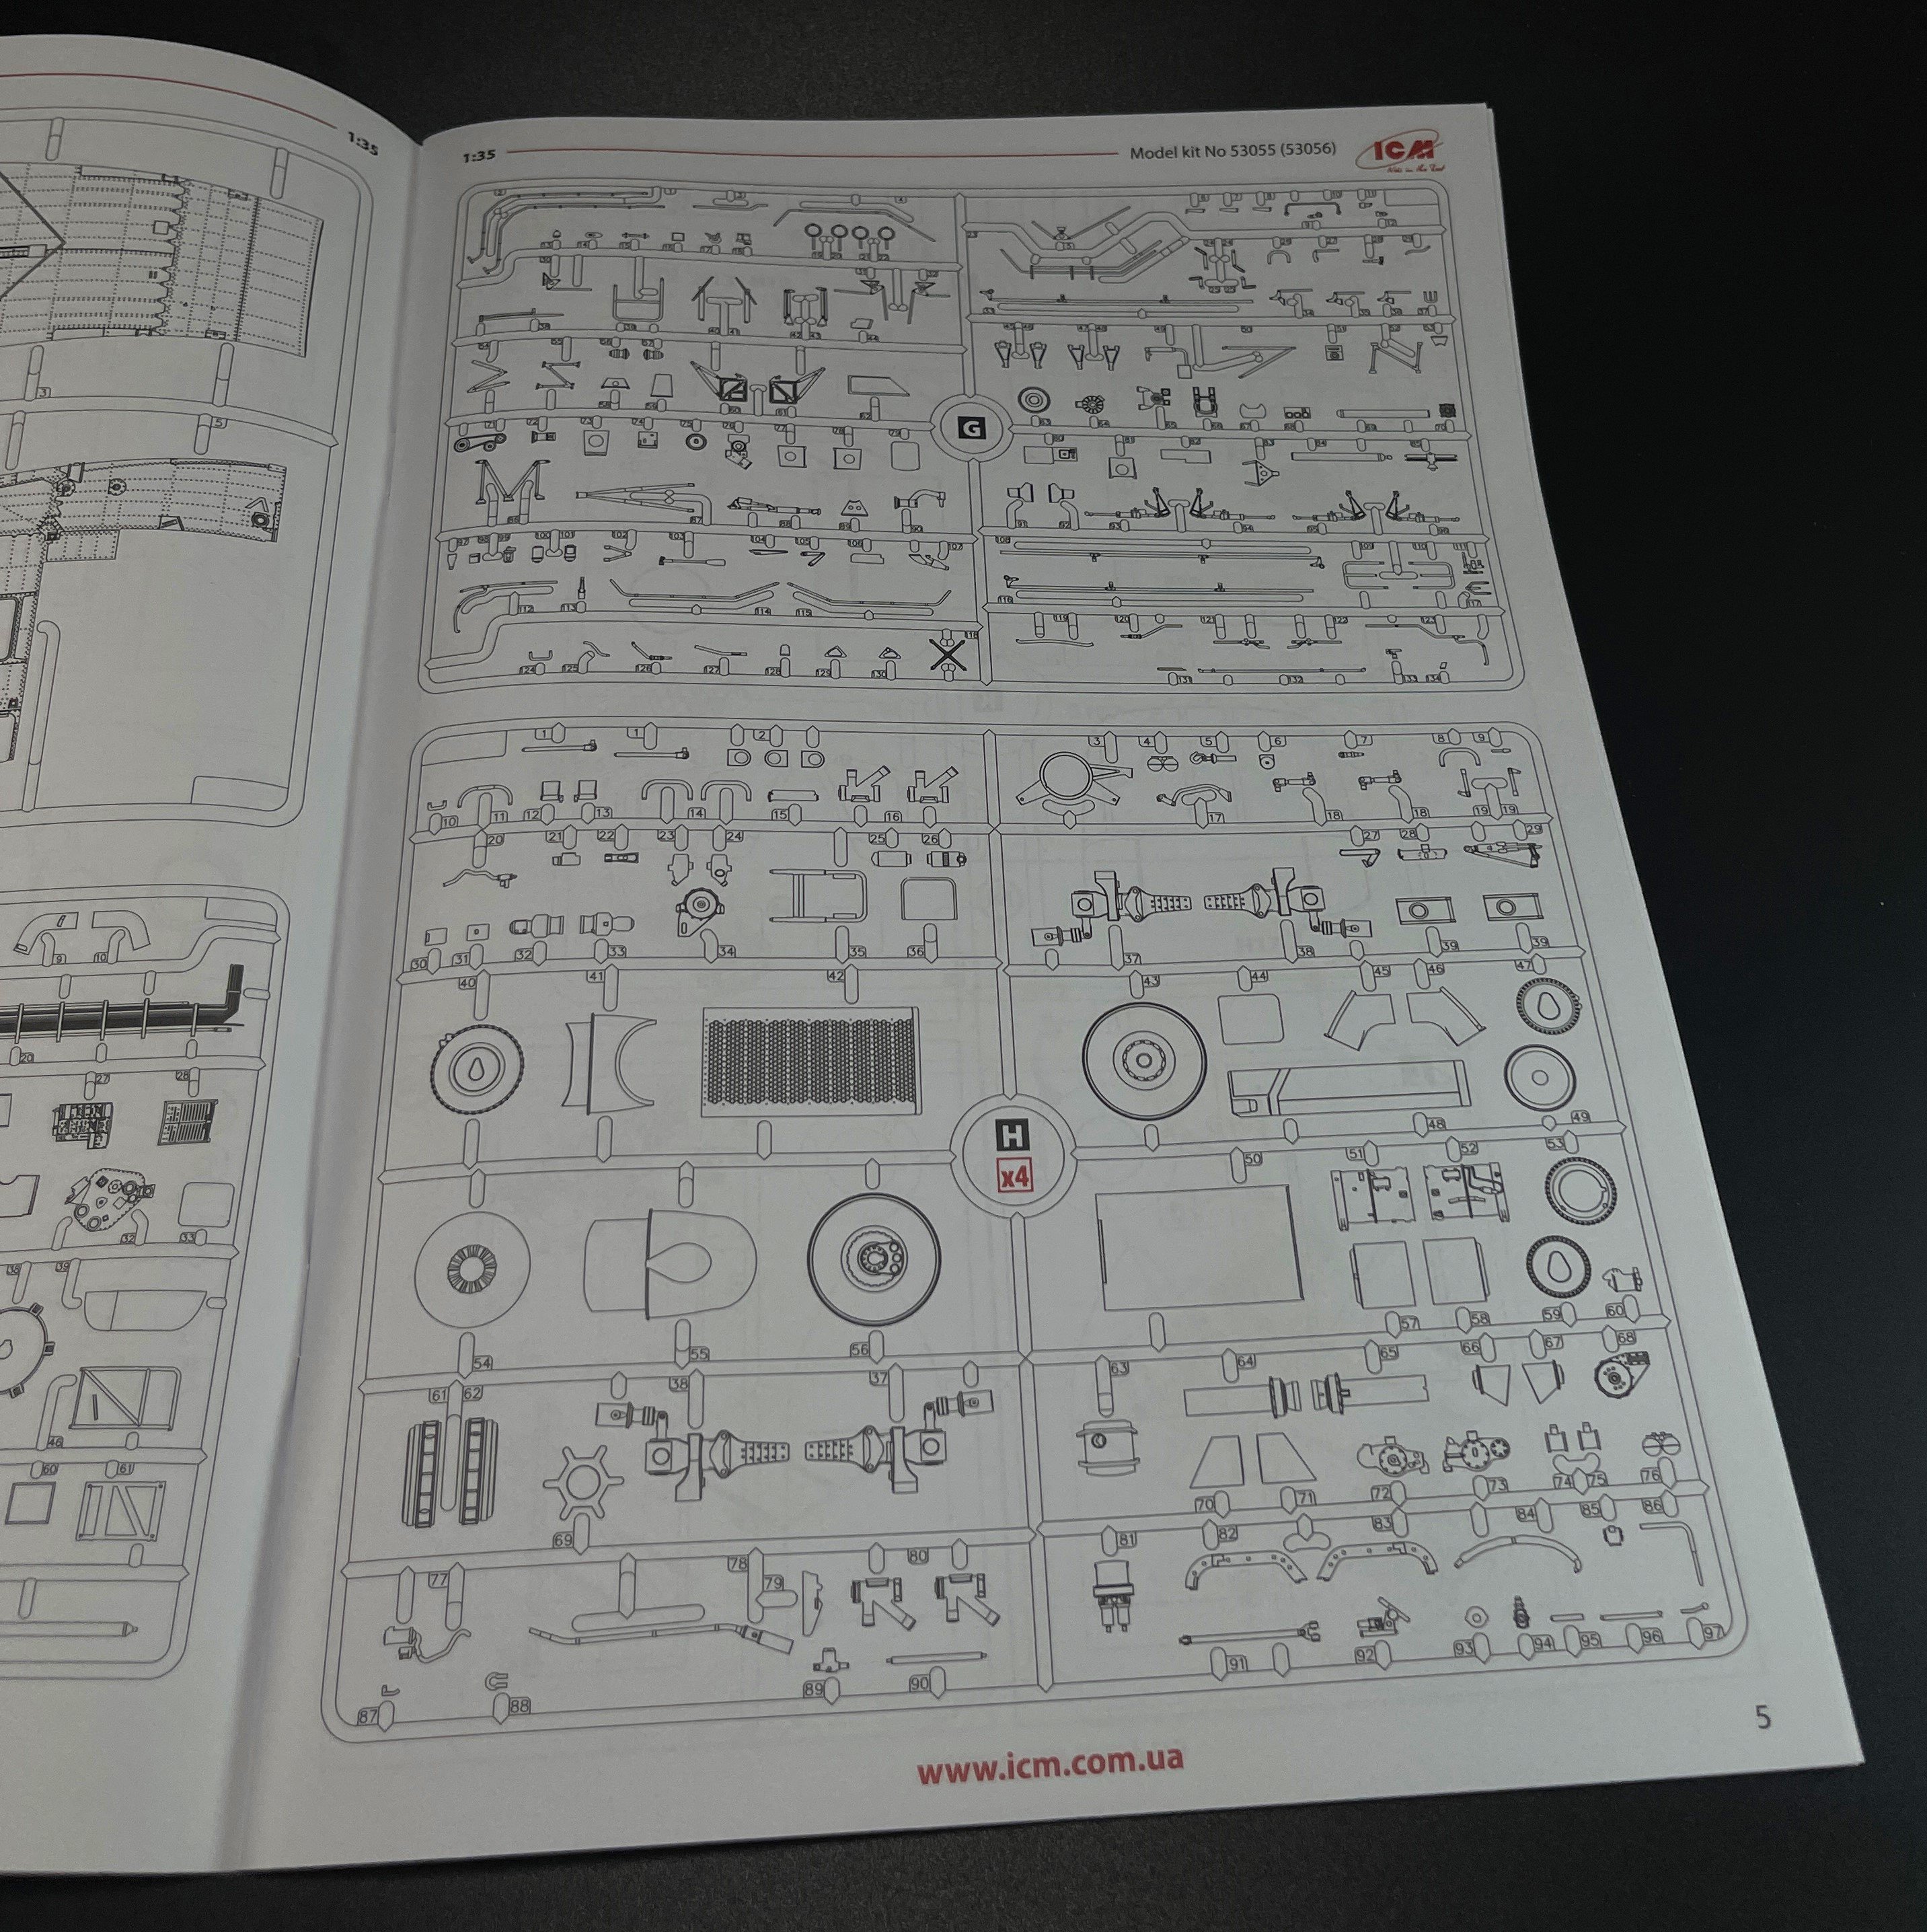
The plastic is typical from ICM, in gray color, with very good surface details.

In my model I have some moulding lines that are easy removed and perfectly normal in a standard model kit.
I don't have any flash. The moulding quality is quite good in all dimensions, large parts and very small parts.

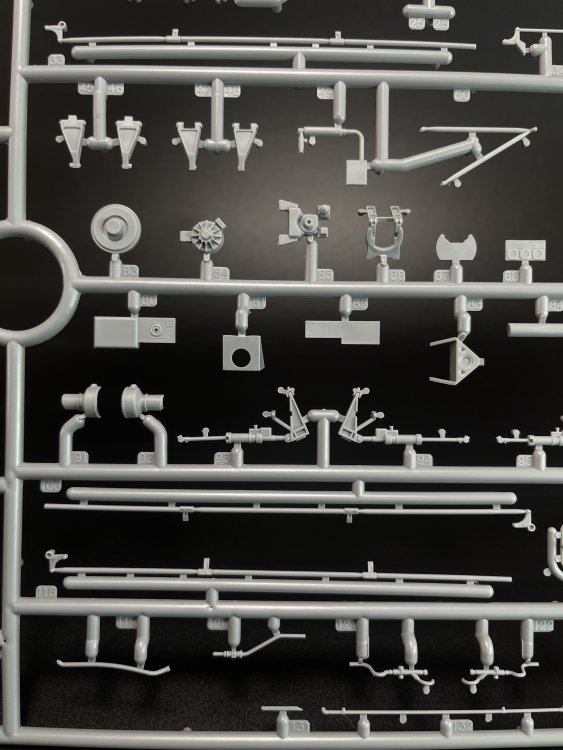
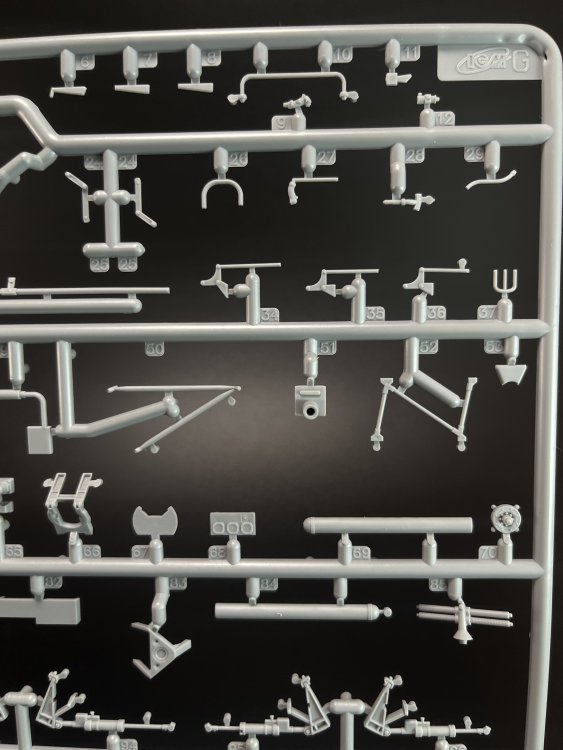


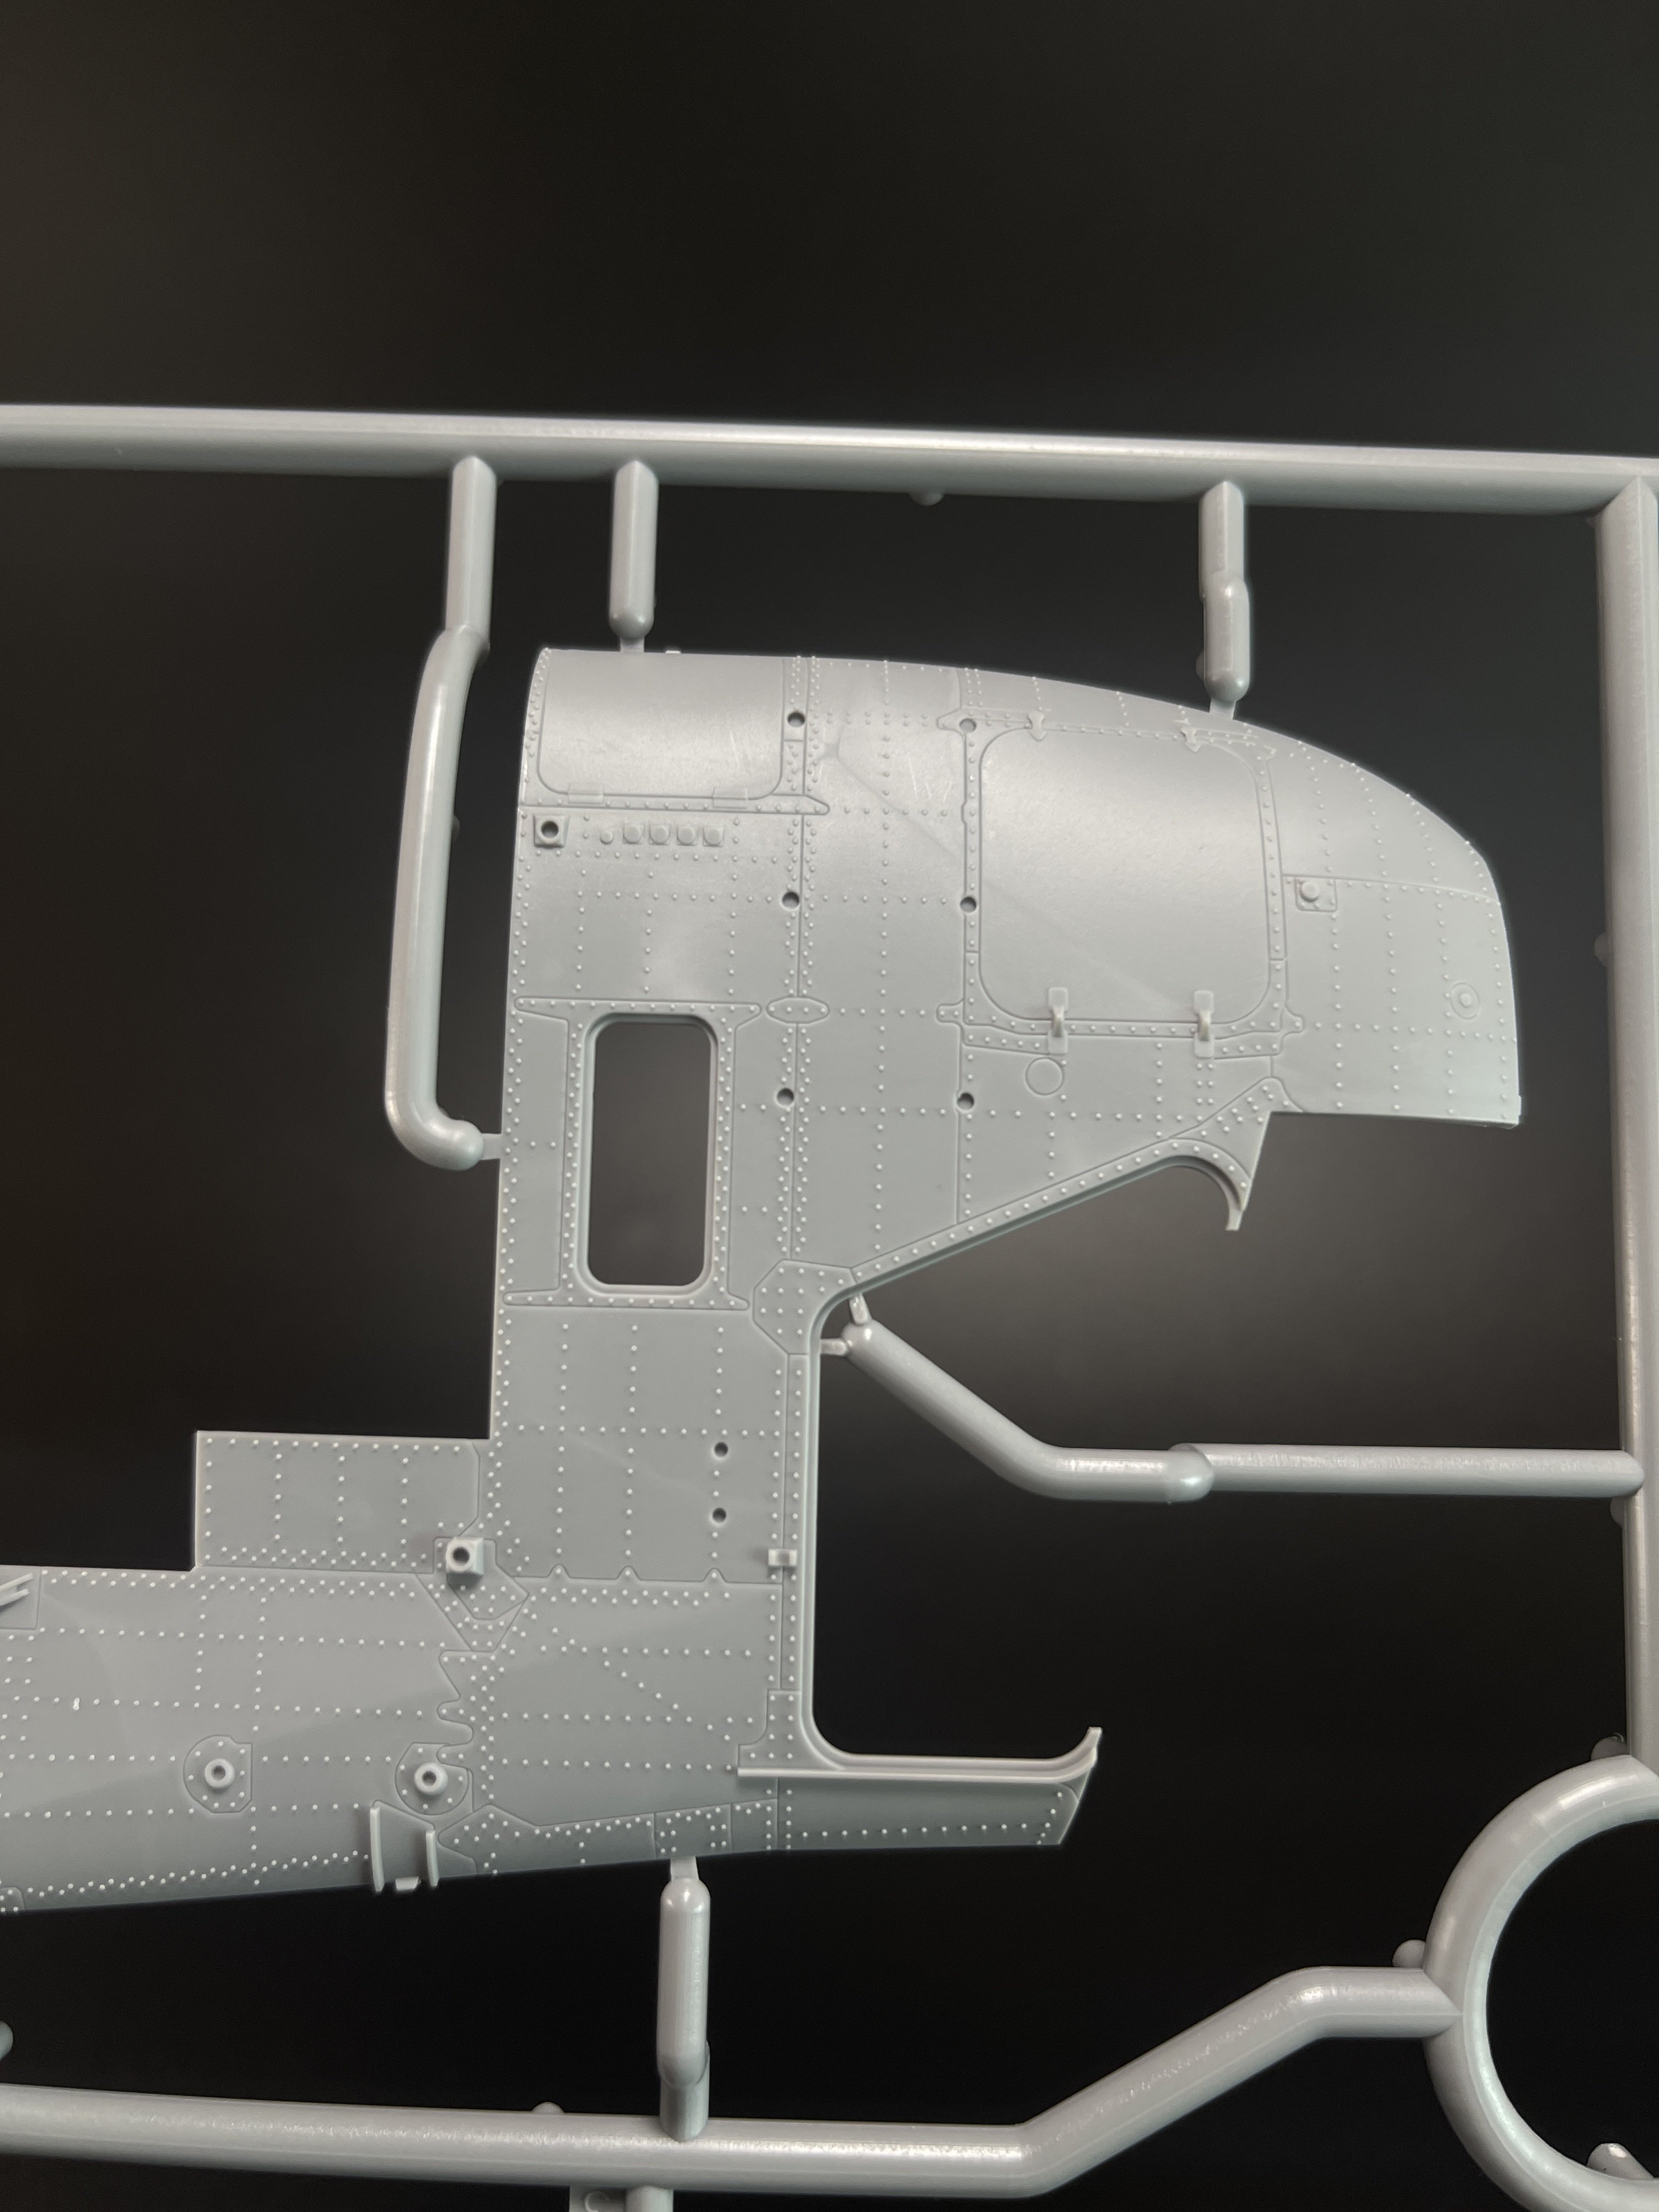
The surface detail is quite good, actually, is best one I have ever seen in a ICM model kit.


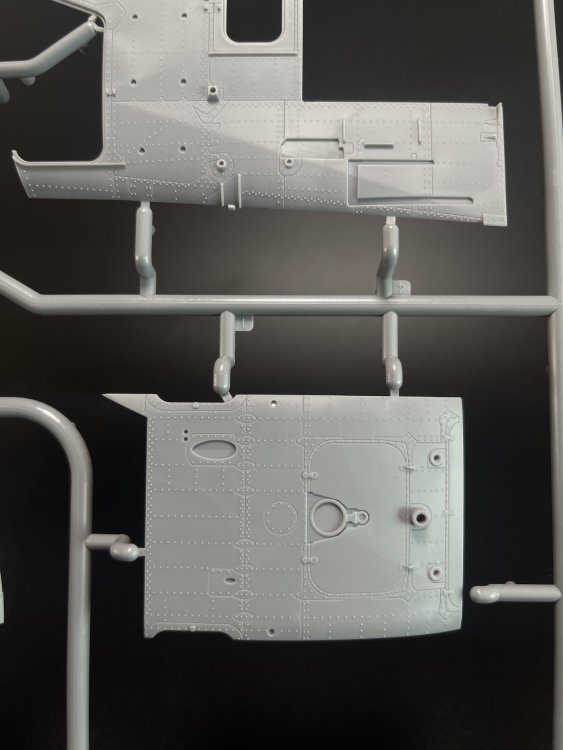
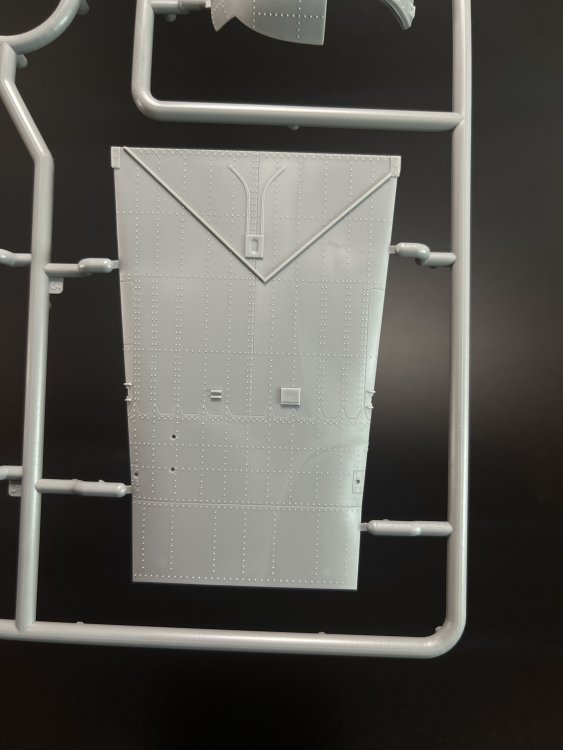


There`s some really good nice details and of course, positive rivets as it should have, being an helicopter. The surface is loaded with thousands of beautiful, tiny positive rivet heads so you don’t need any help from aftermarket goodies.
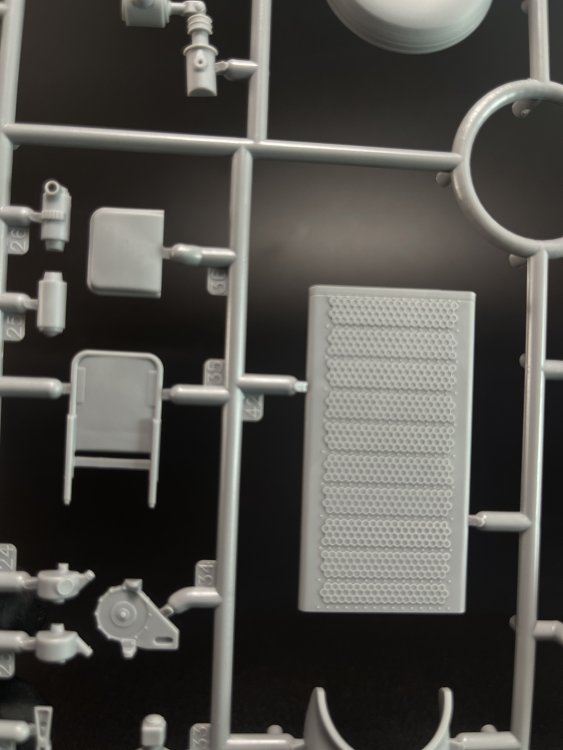
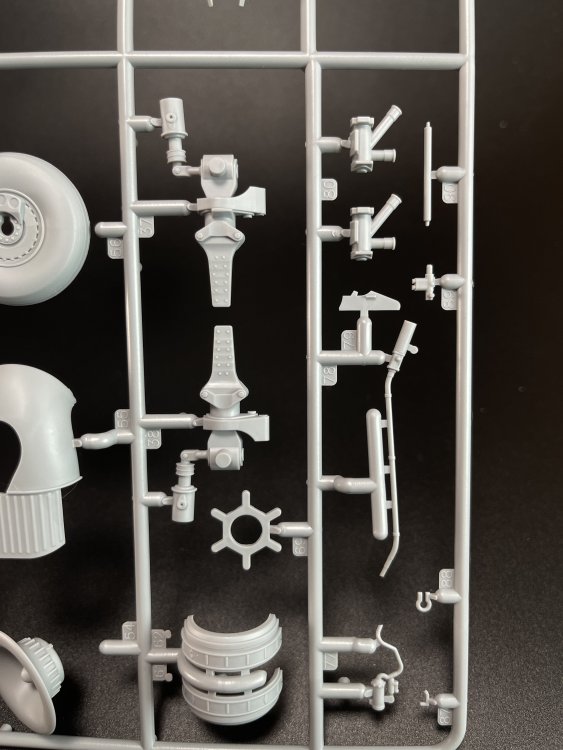
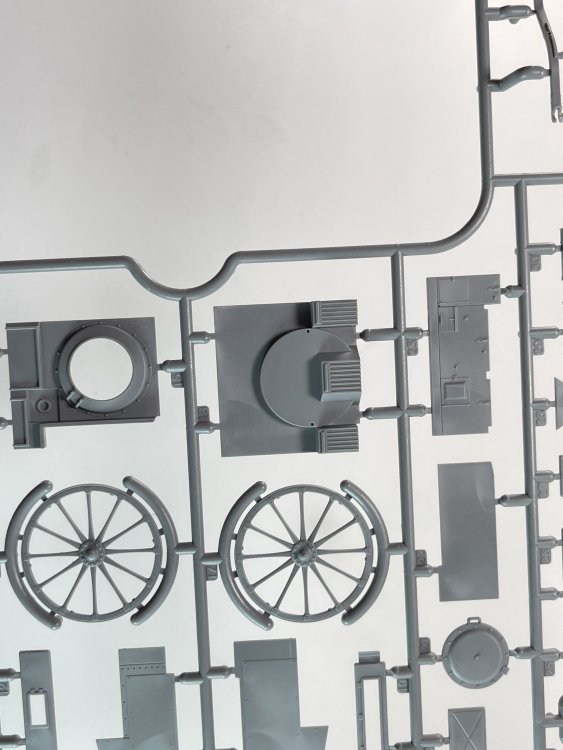
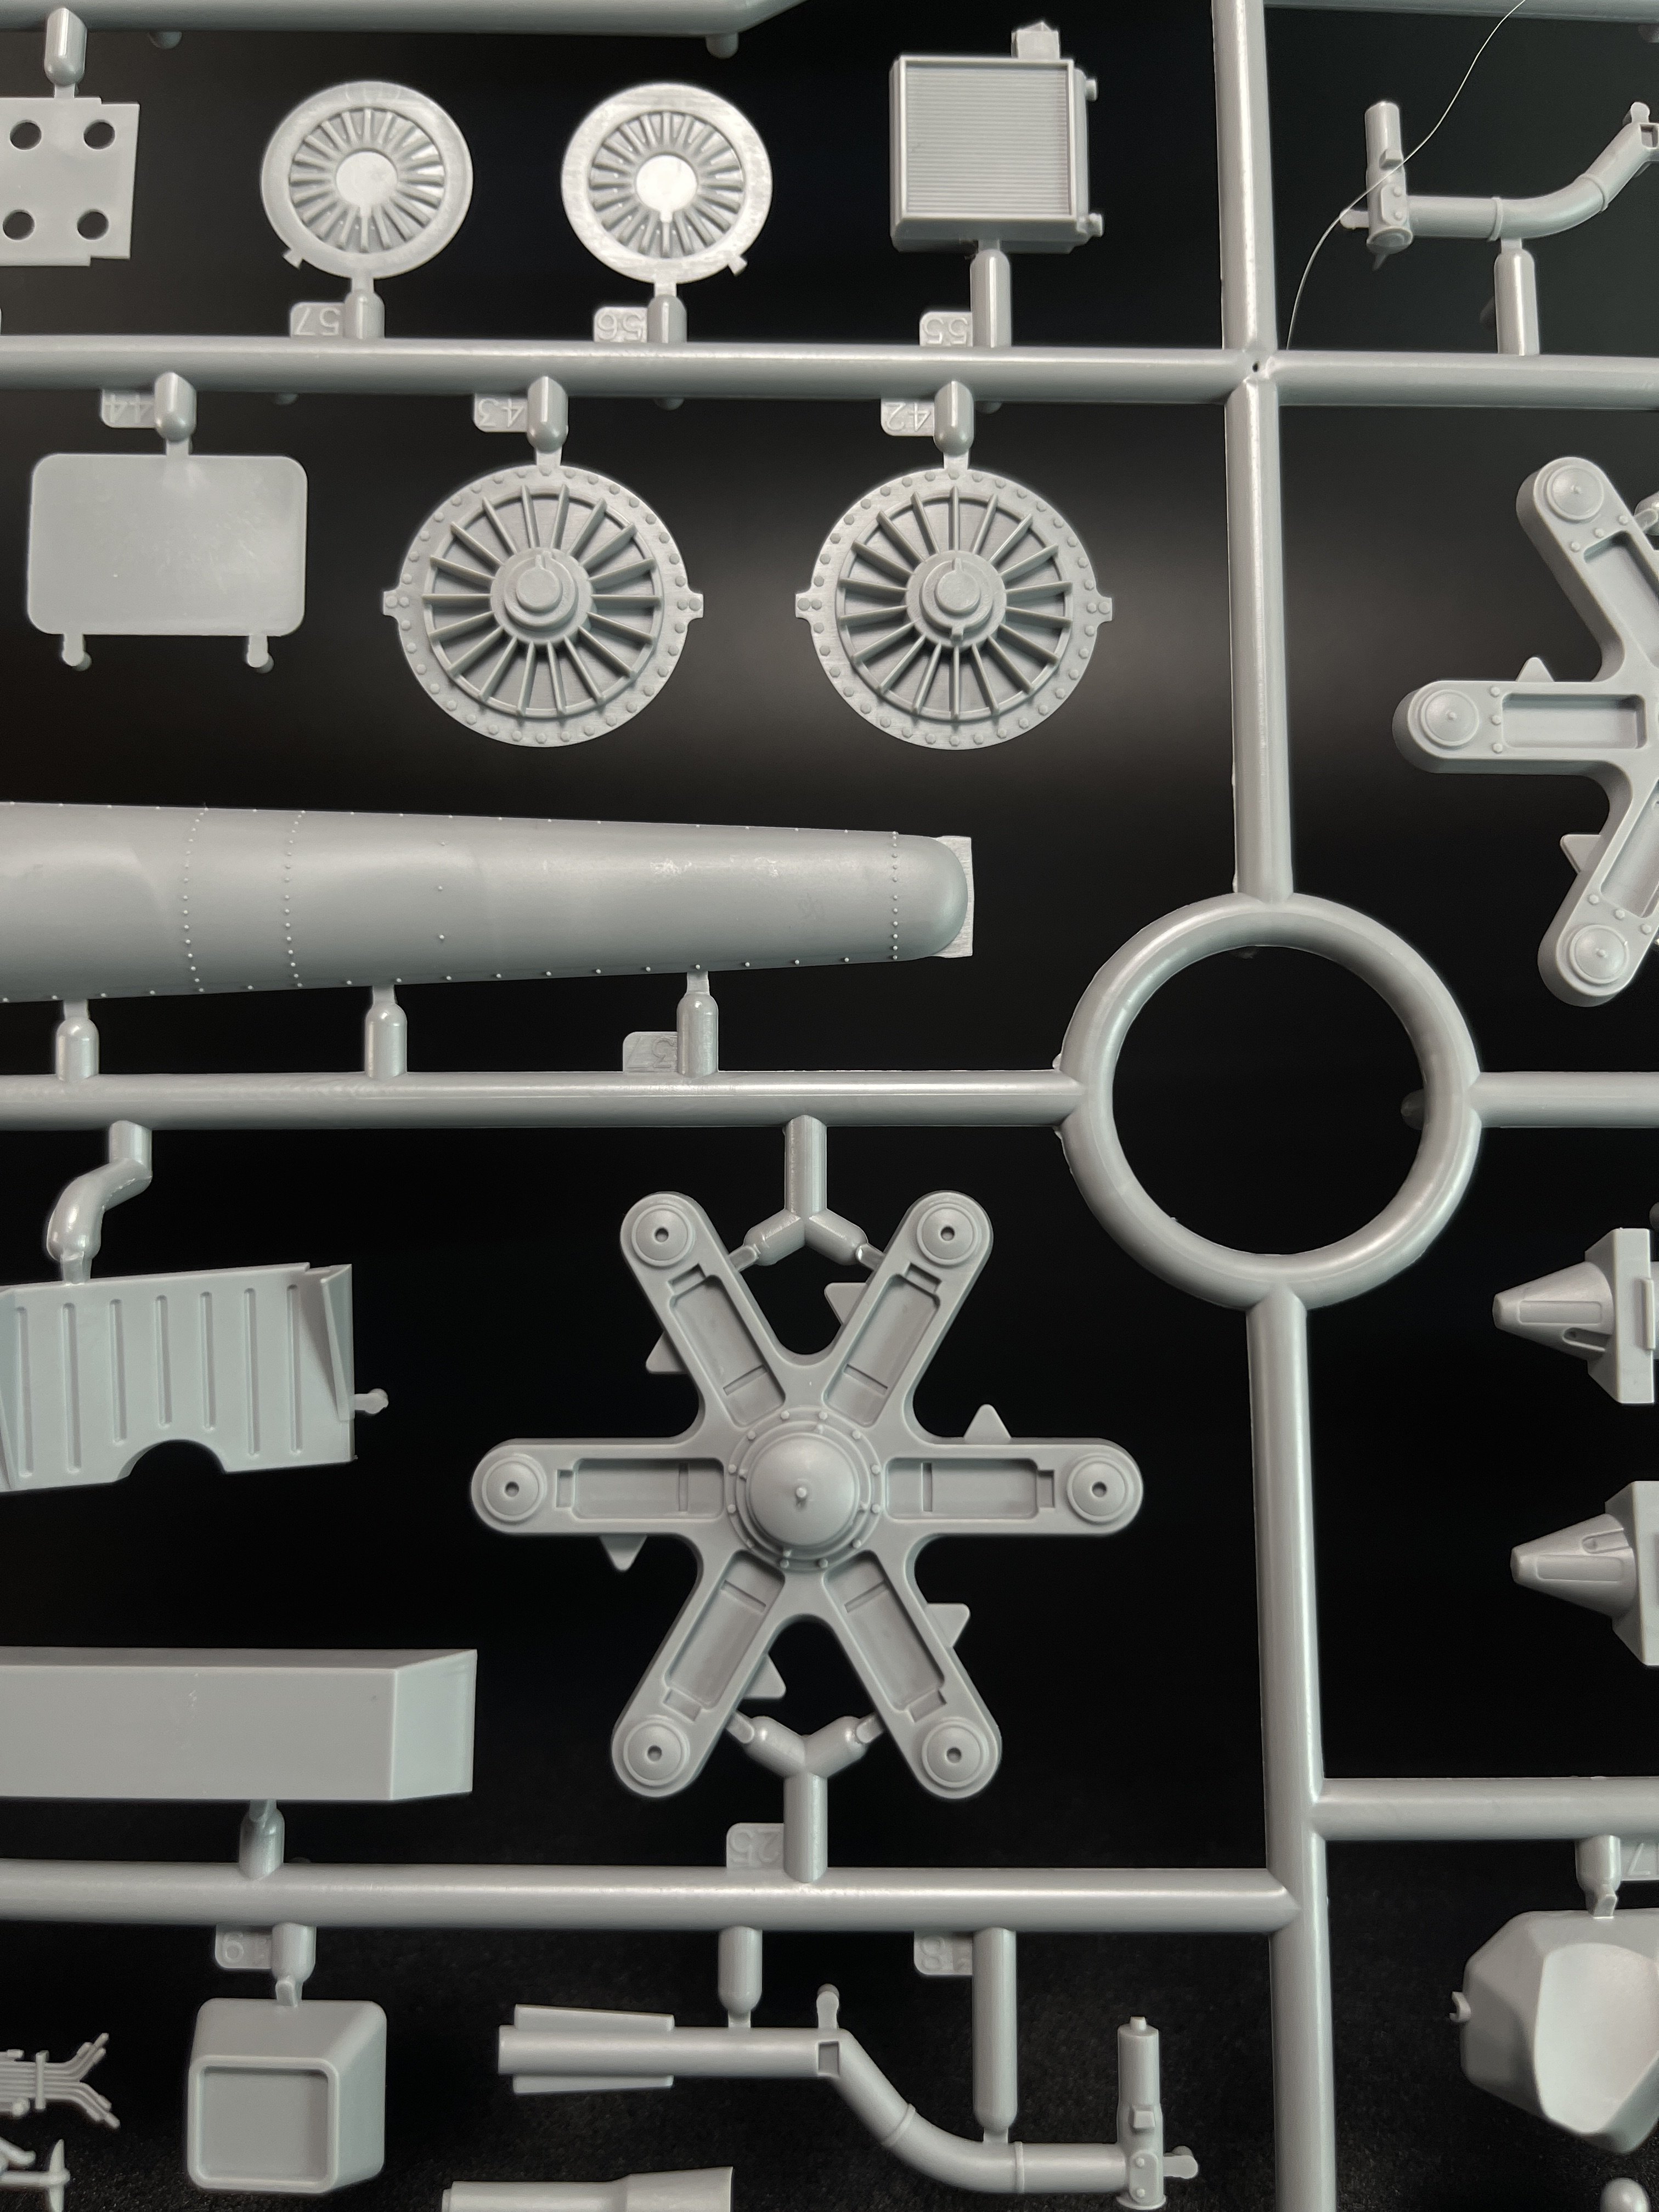
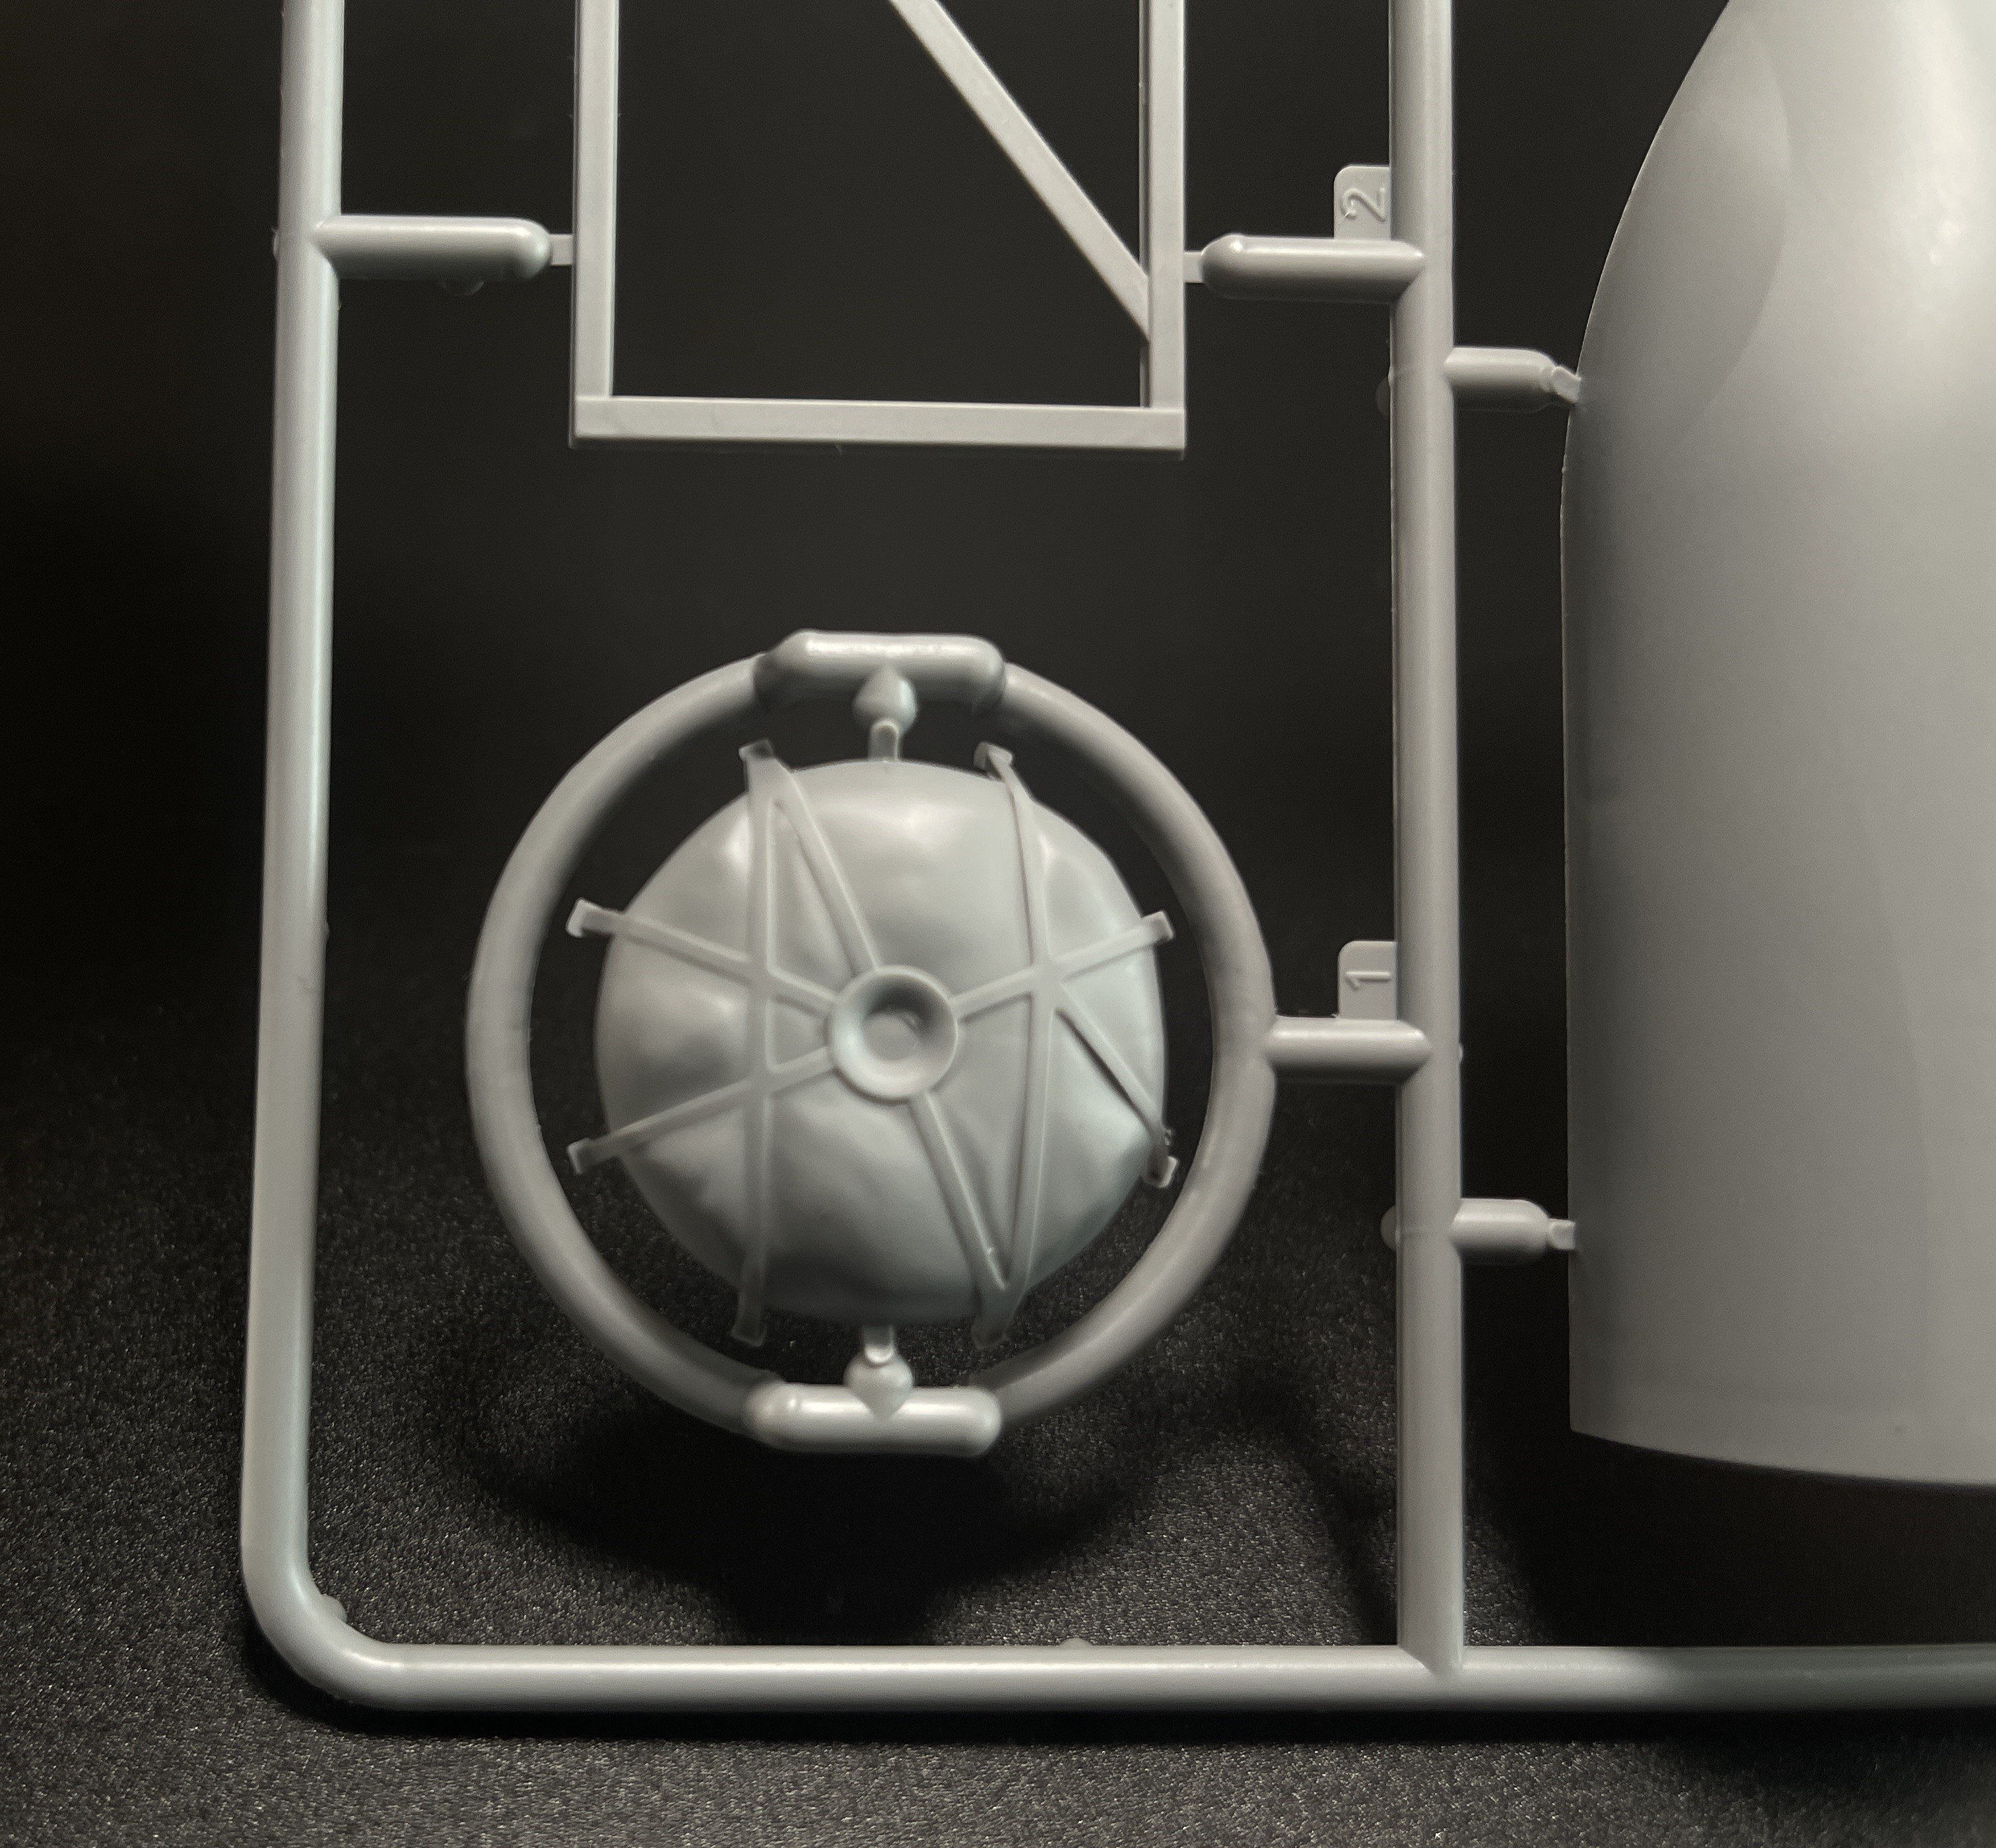
The wheels. I like to have good wheels and in this particularly heli, with wheels that are quite visible even more.
The wheels are moulded in two halves, with good detail on the hubs. In final, a good result can be achieved by using the wheels straight from the box. Me, Myself and I will probably for a resin aftermarket wheels set.
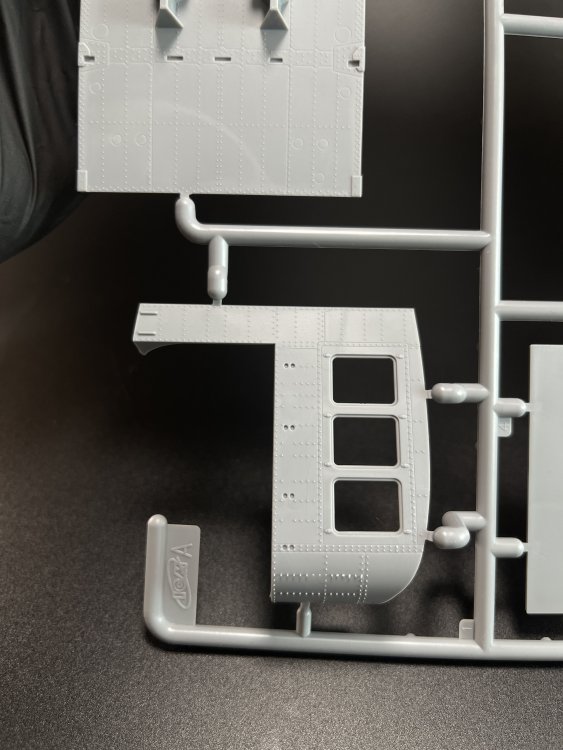
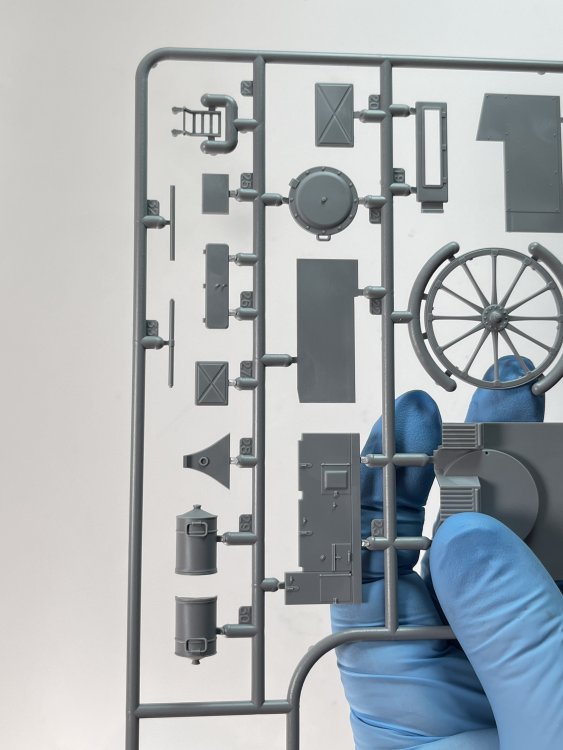
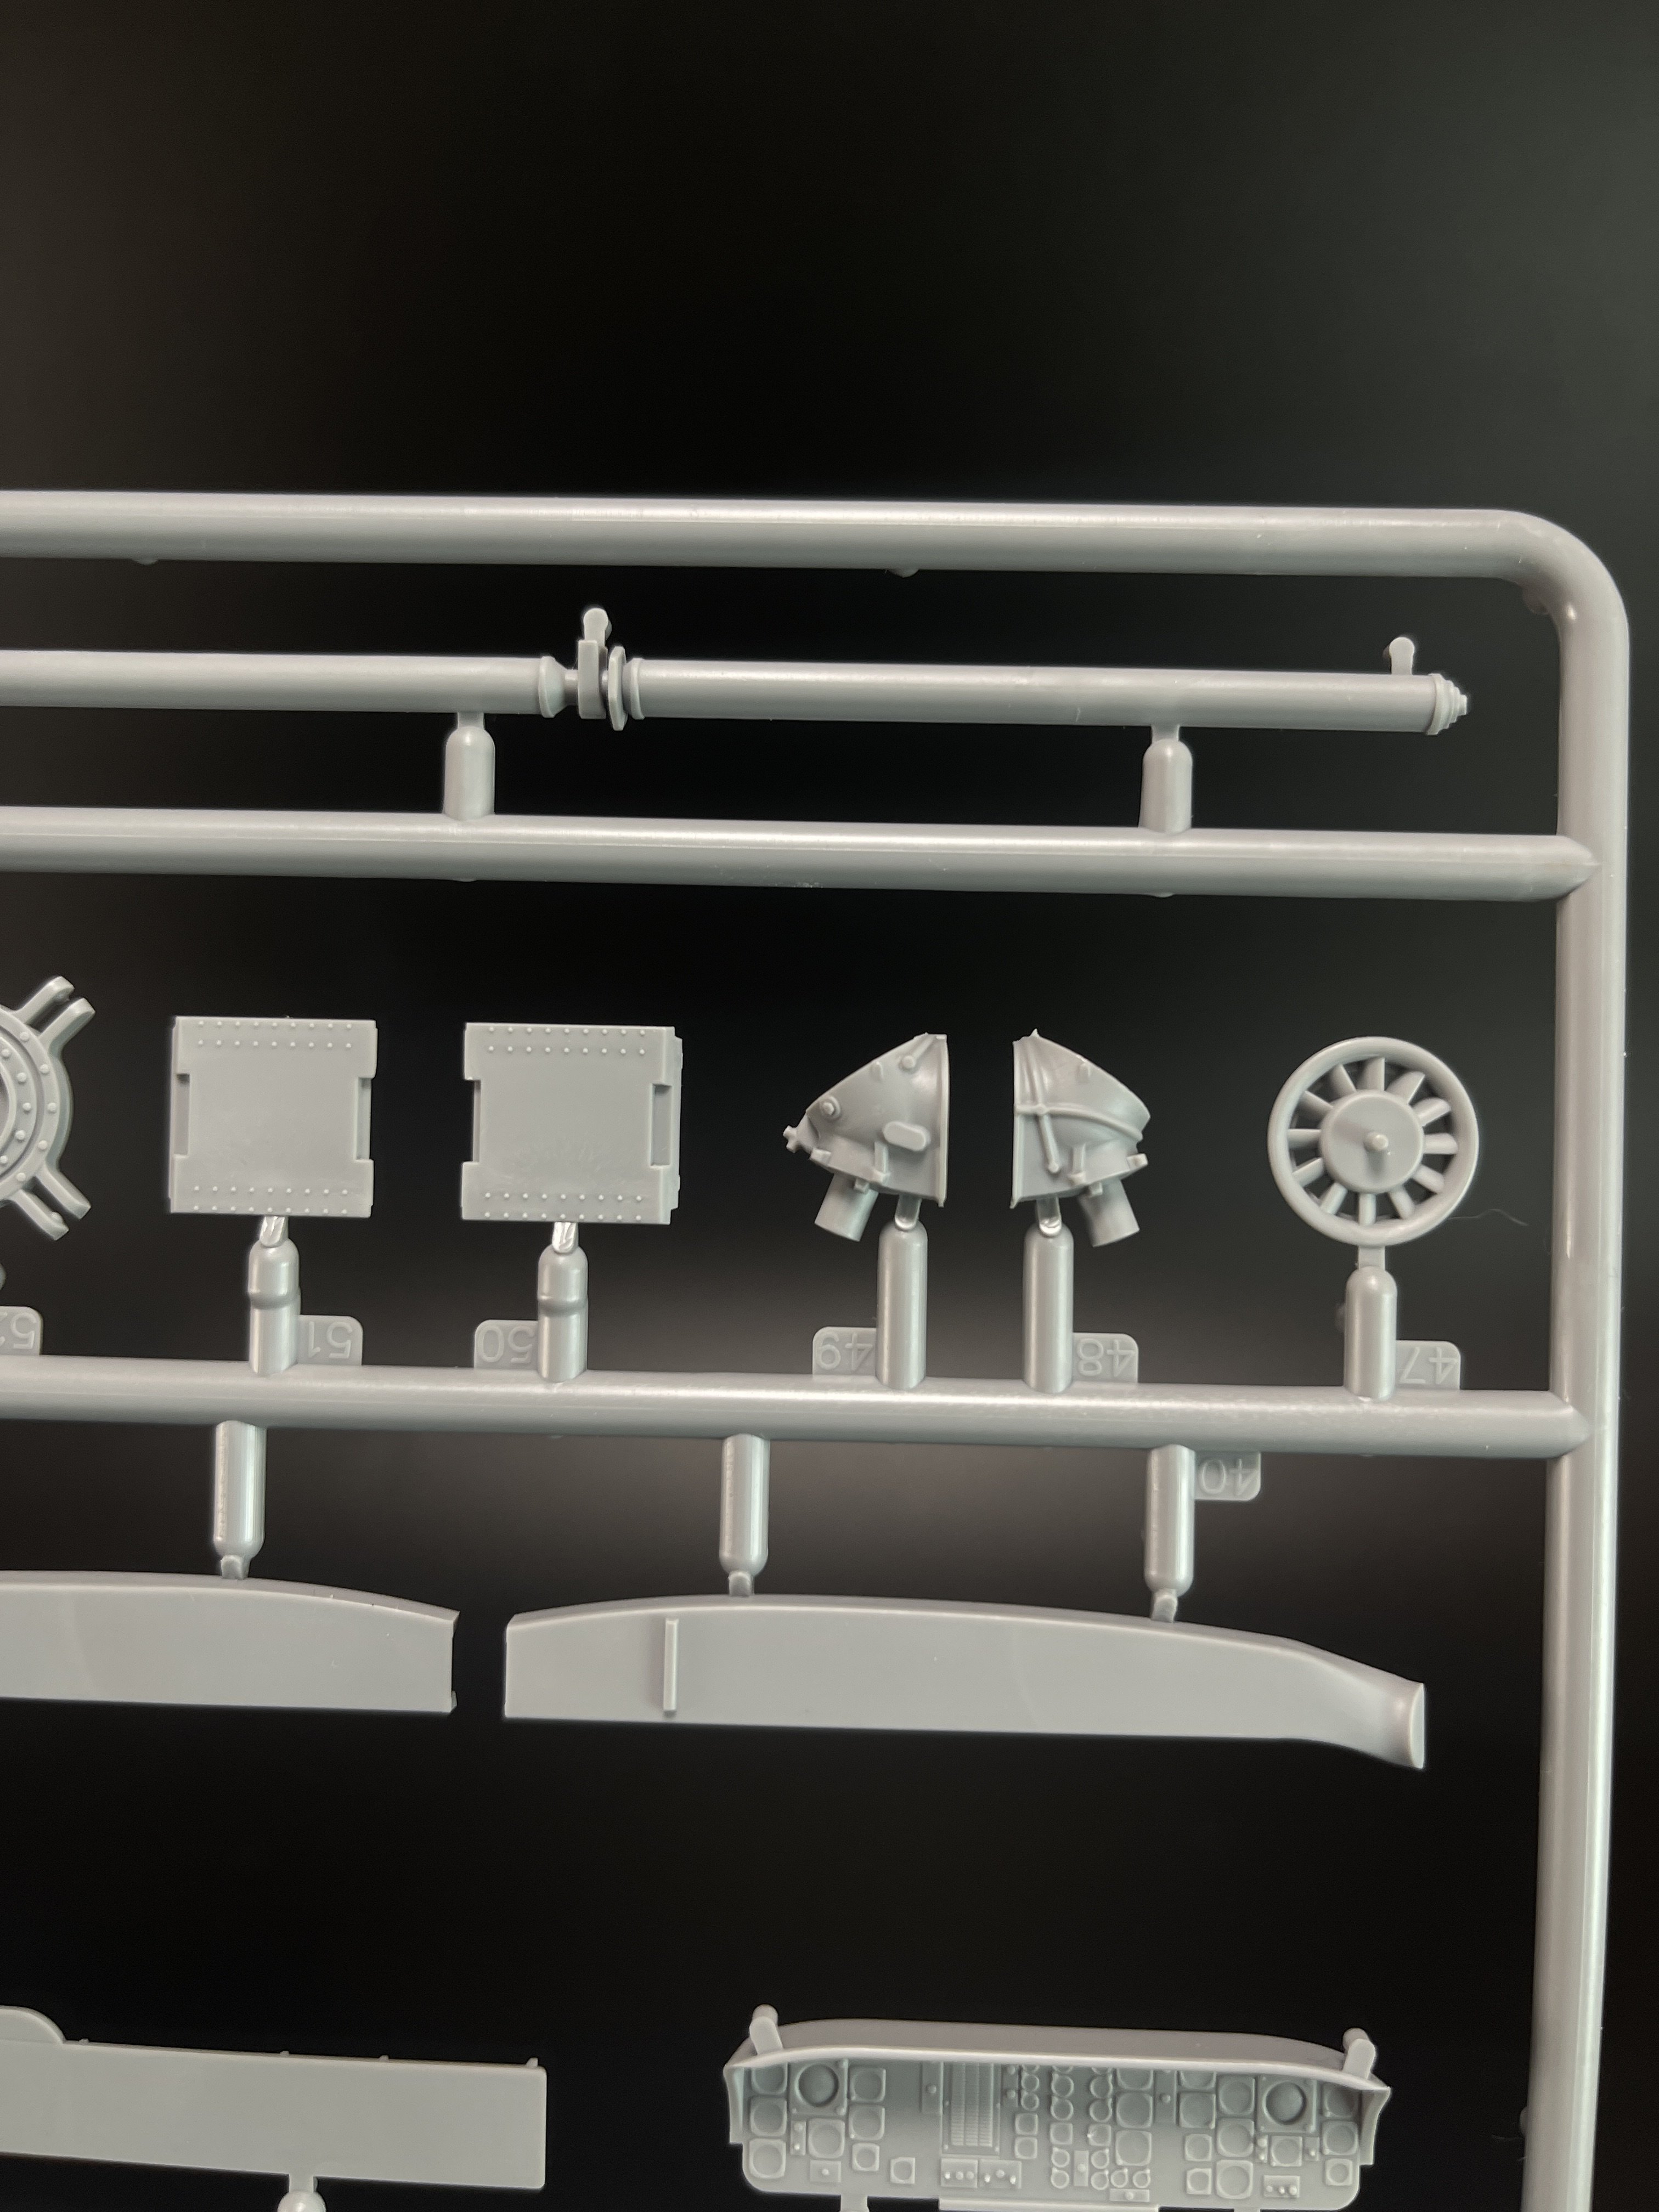
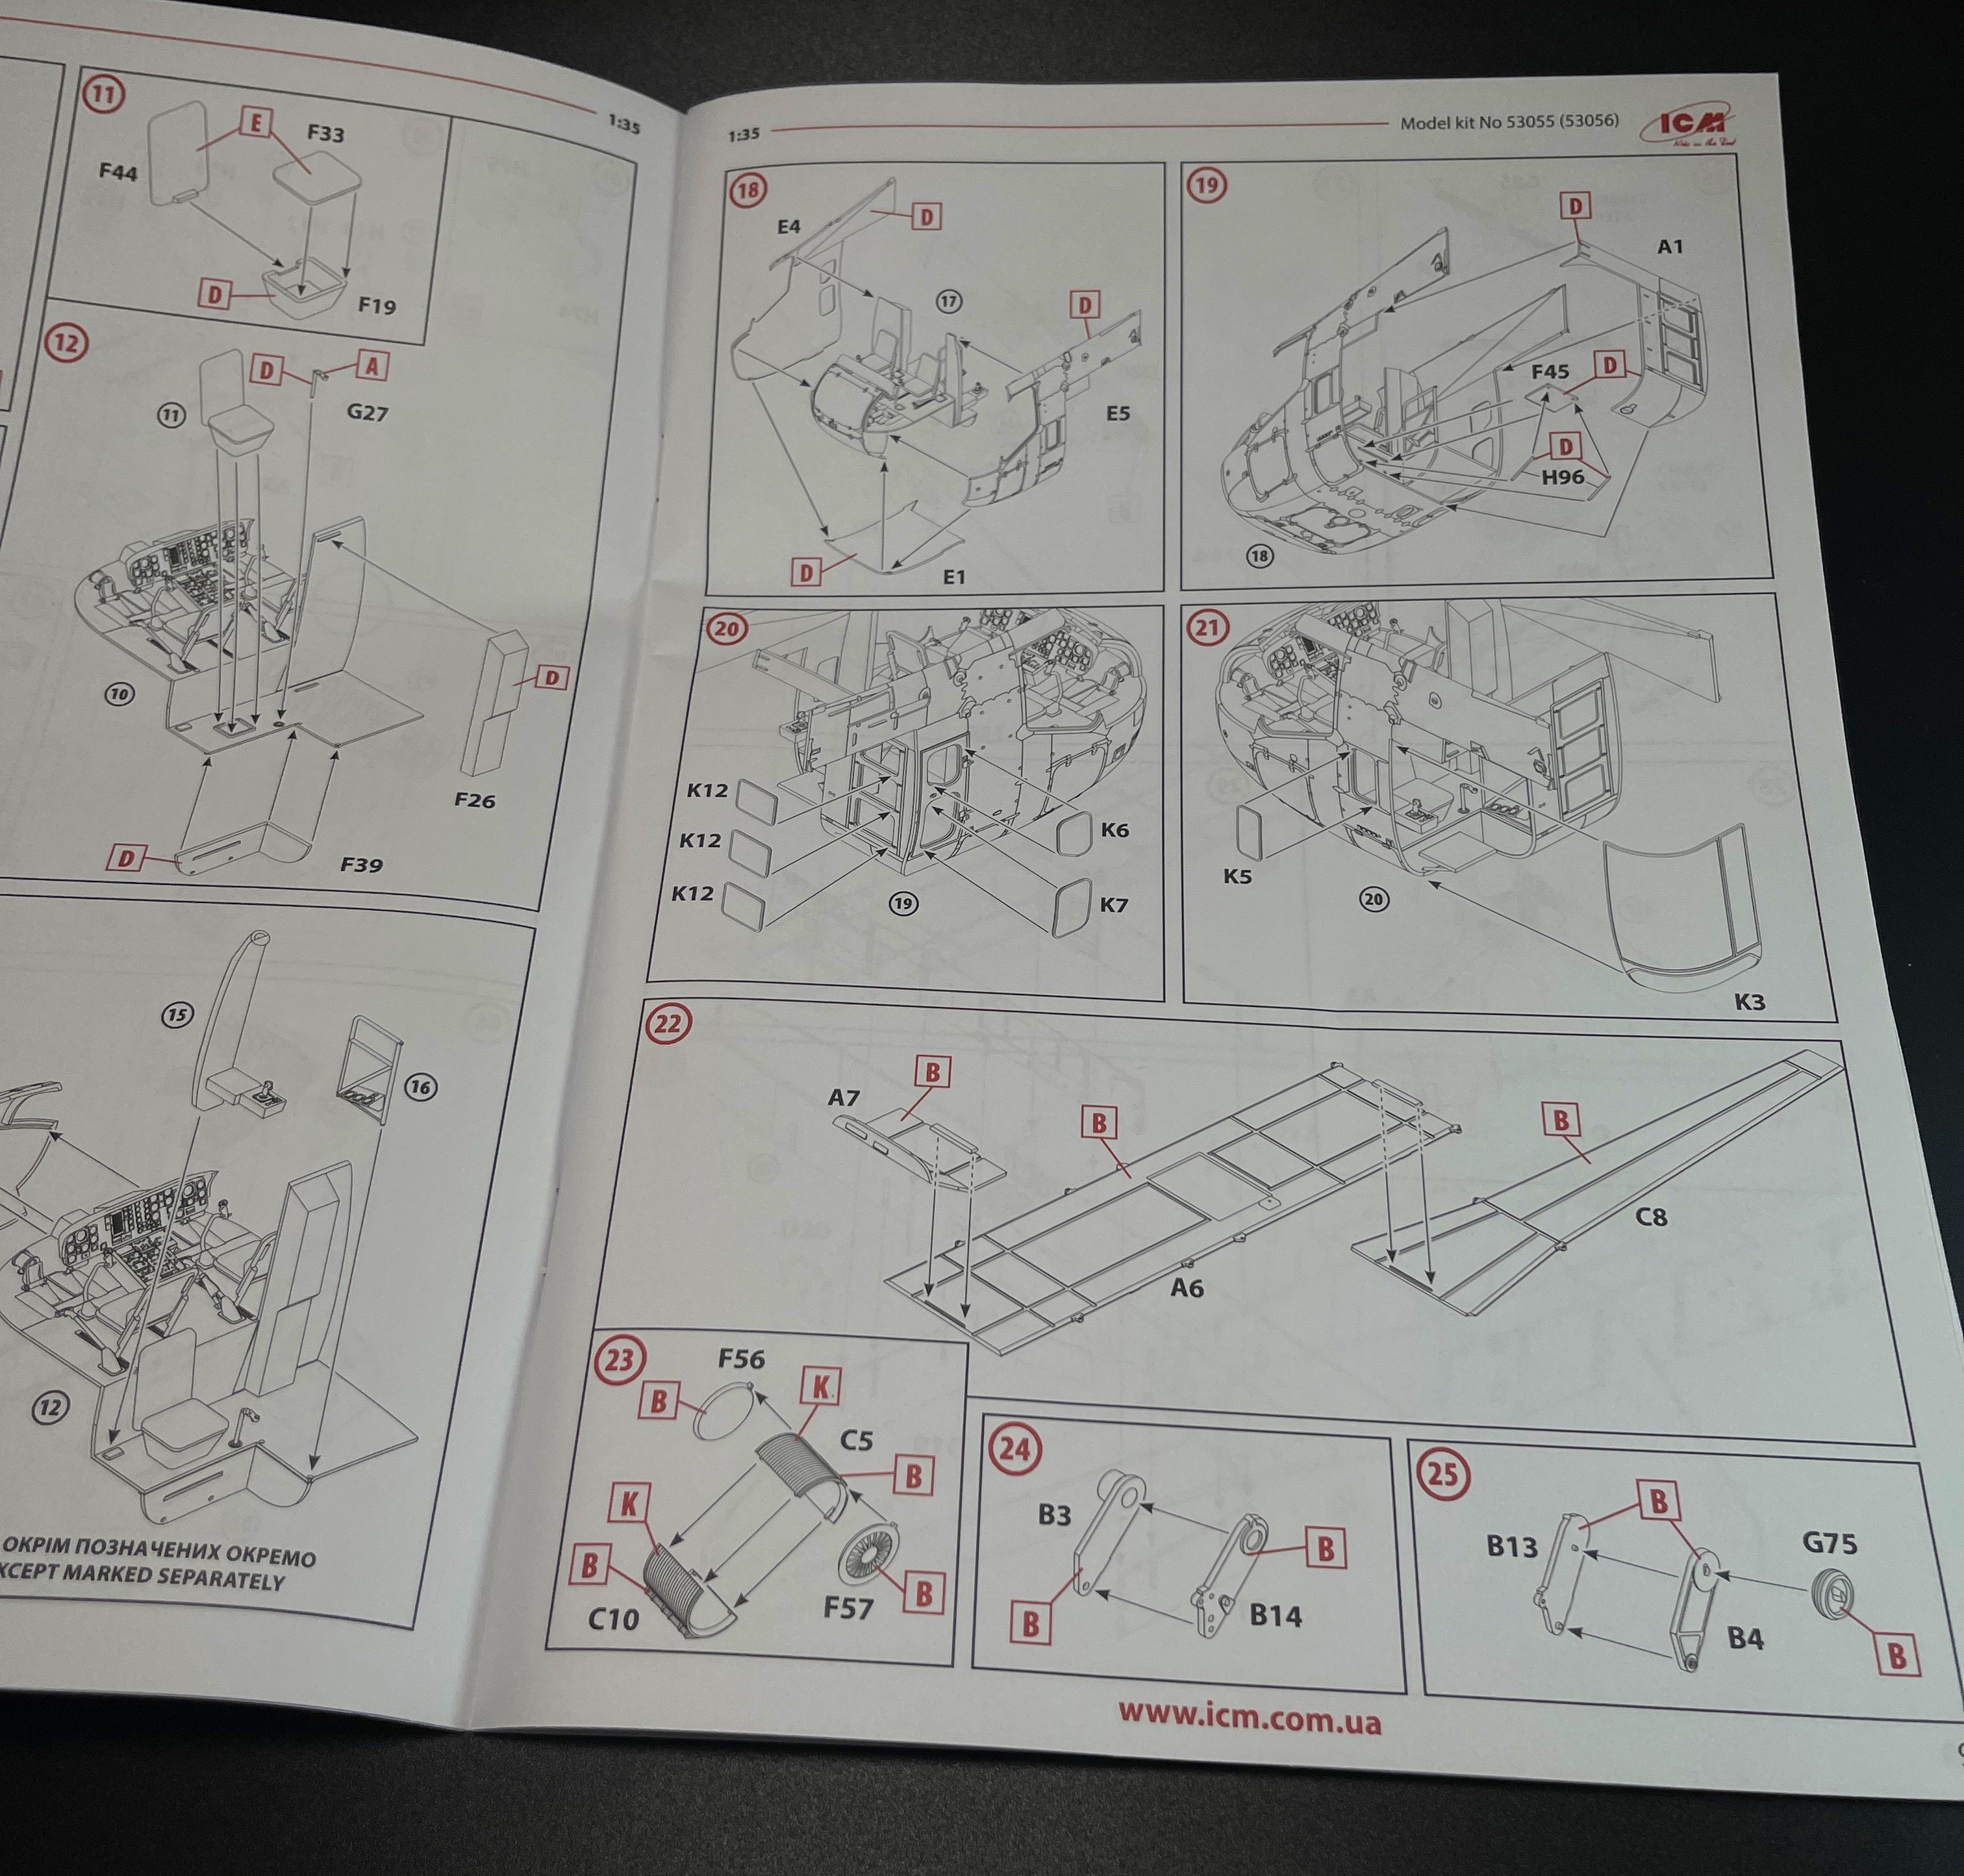
About the interior of the cockpit/cabin, it`s quite detail straight from the Box.
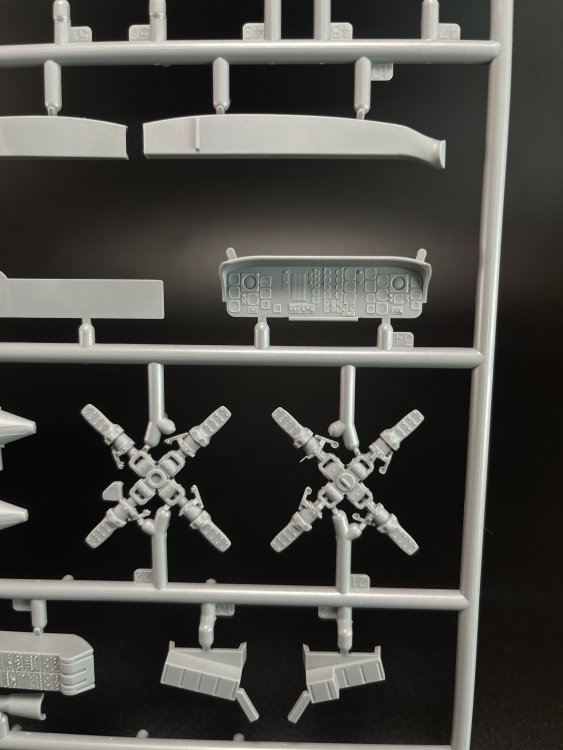

The moulding in the instruments and switch panels is good and the detail is there. Just need to be painted. The result will depend on the modeller. As for seatbelts, ICM don’t give them moulded on the seat (thanks!!!) but also don’t give any PE (as they don’t have outsourcing – it`s a all in product) so you will have to source out somewhere, either aftermarket either scratchbuild.
Again, ICM clearly wants to give to all modellers, a quite good direct products straight from the box, and they actually did it very well and leaving room for the aftermarket players and to modellers that want a little more detail.
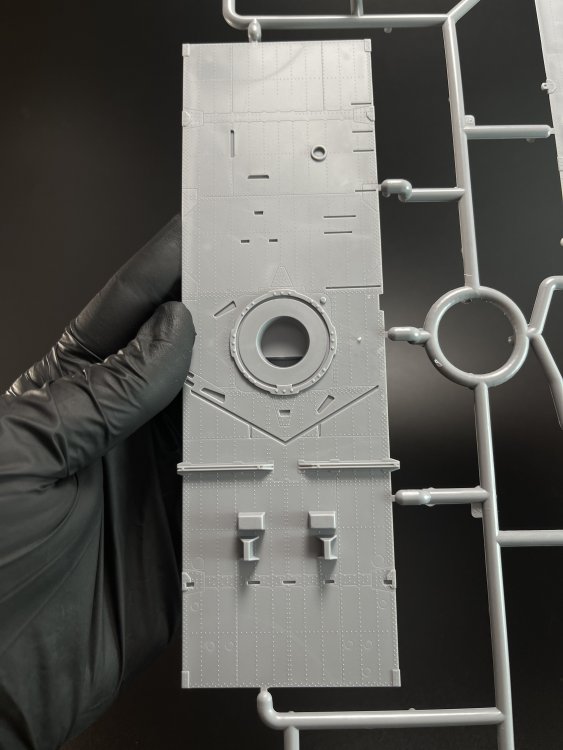
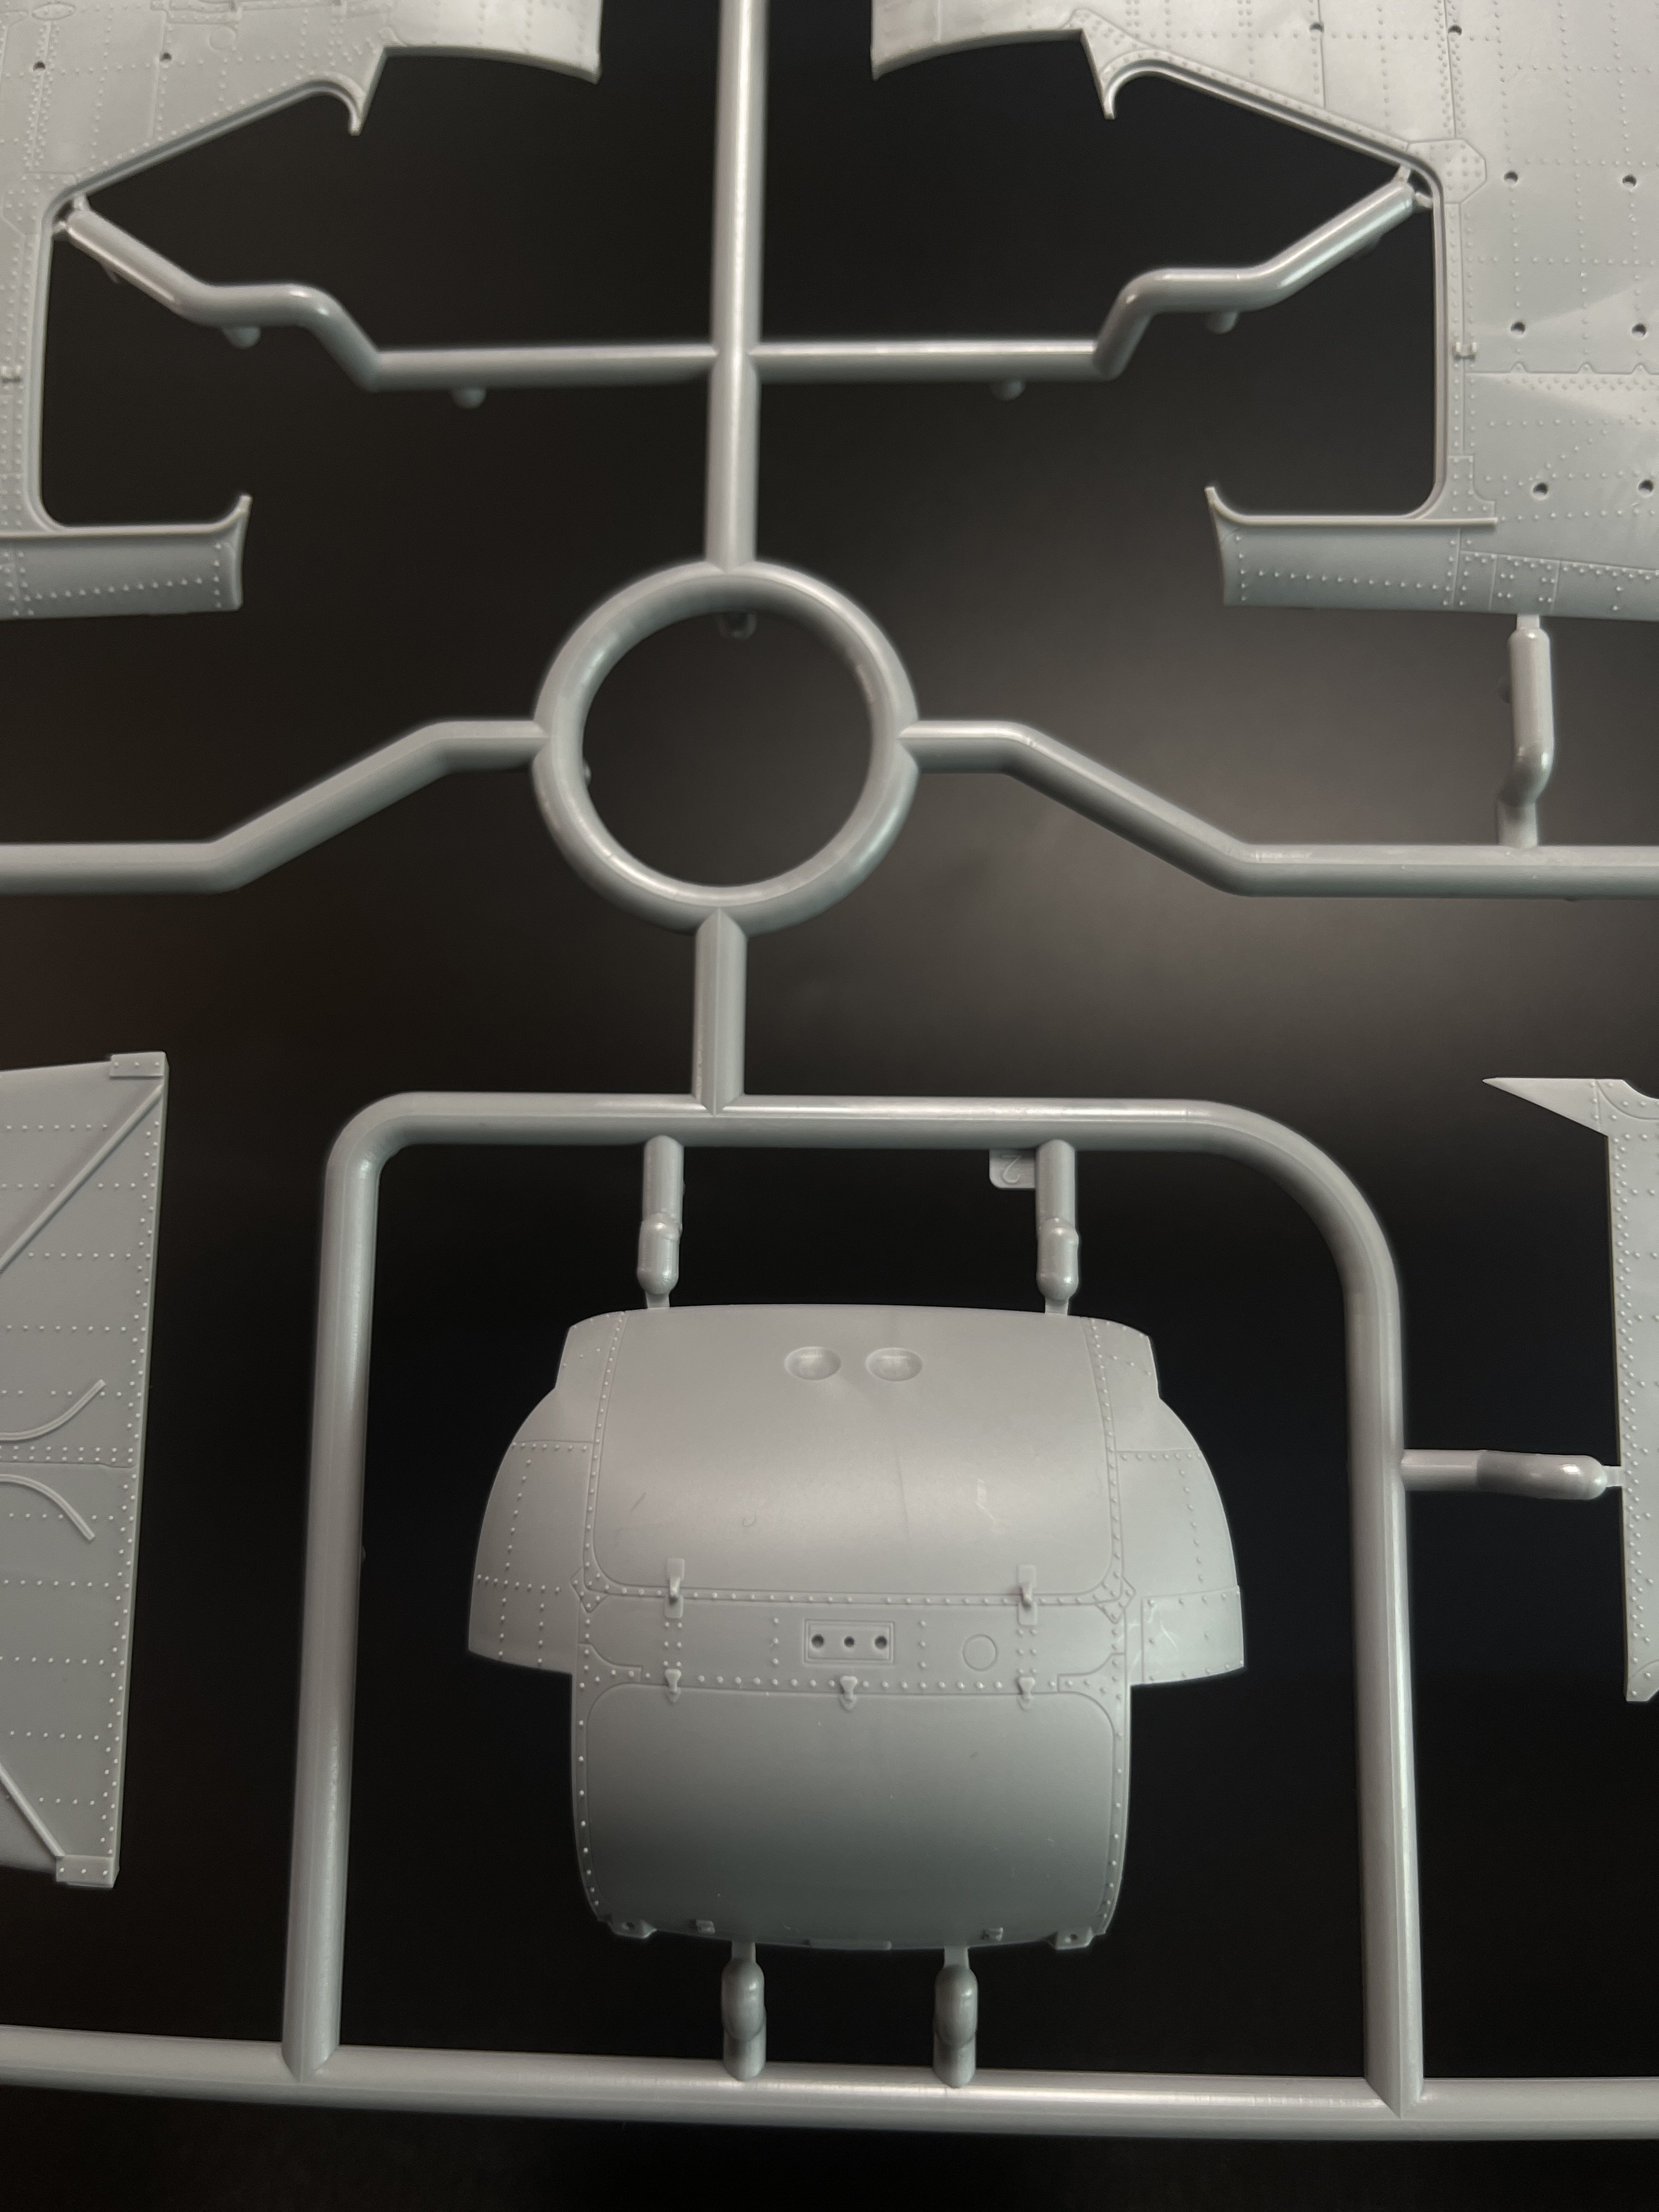
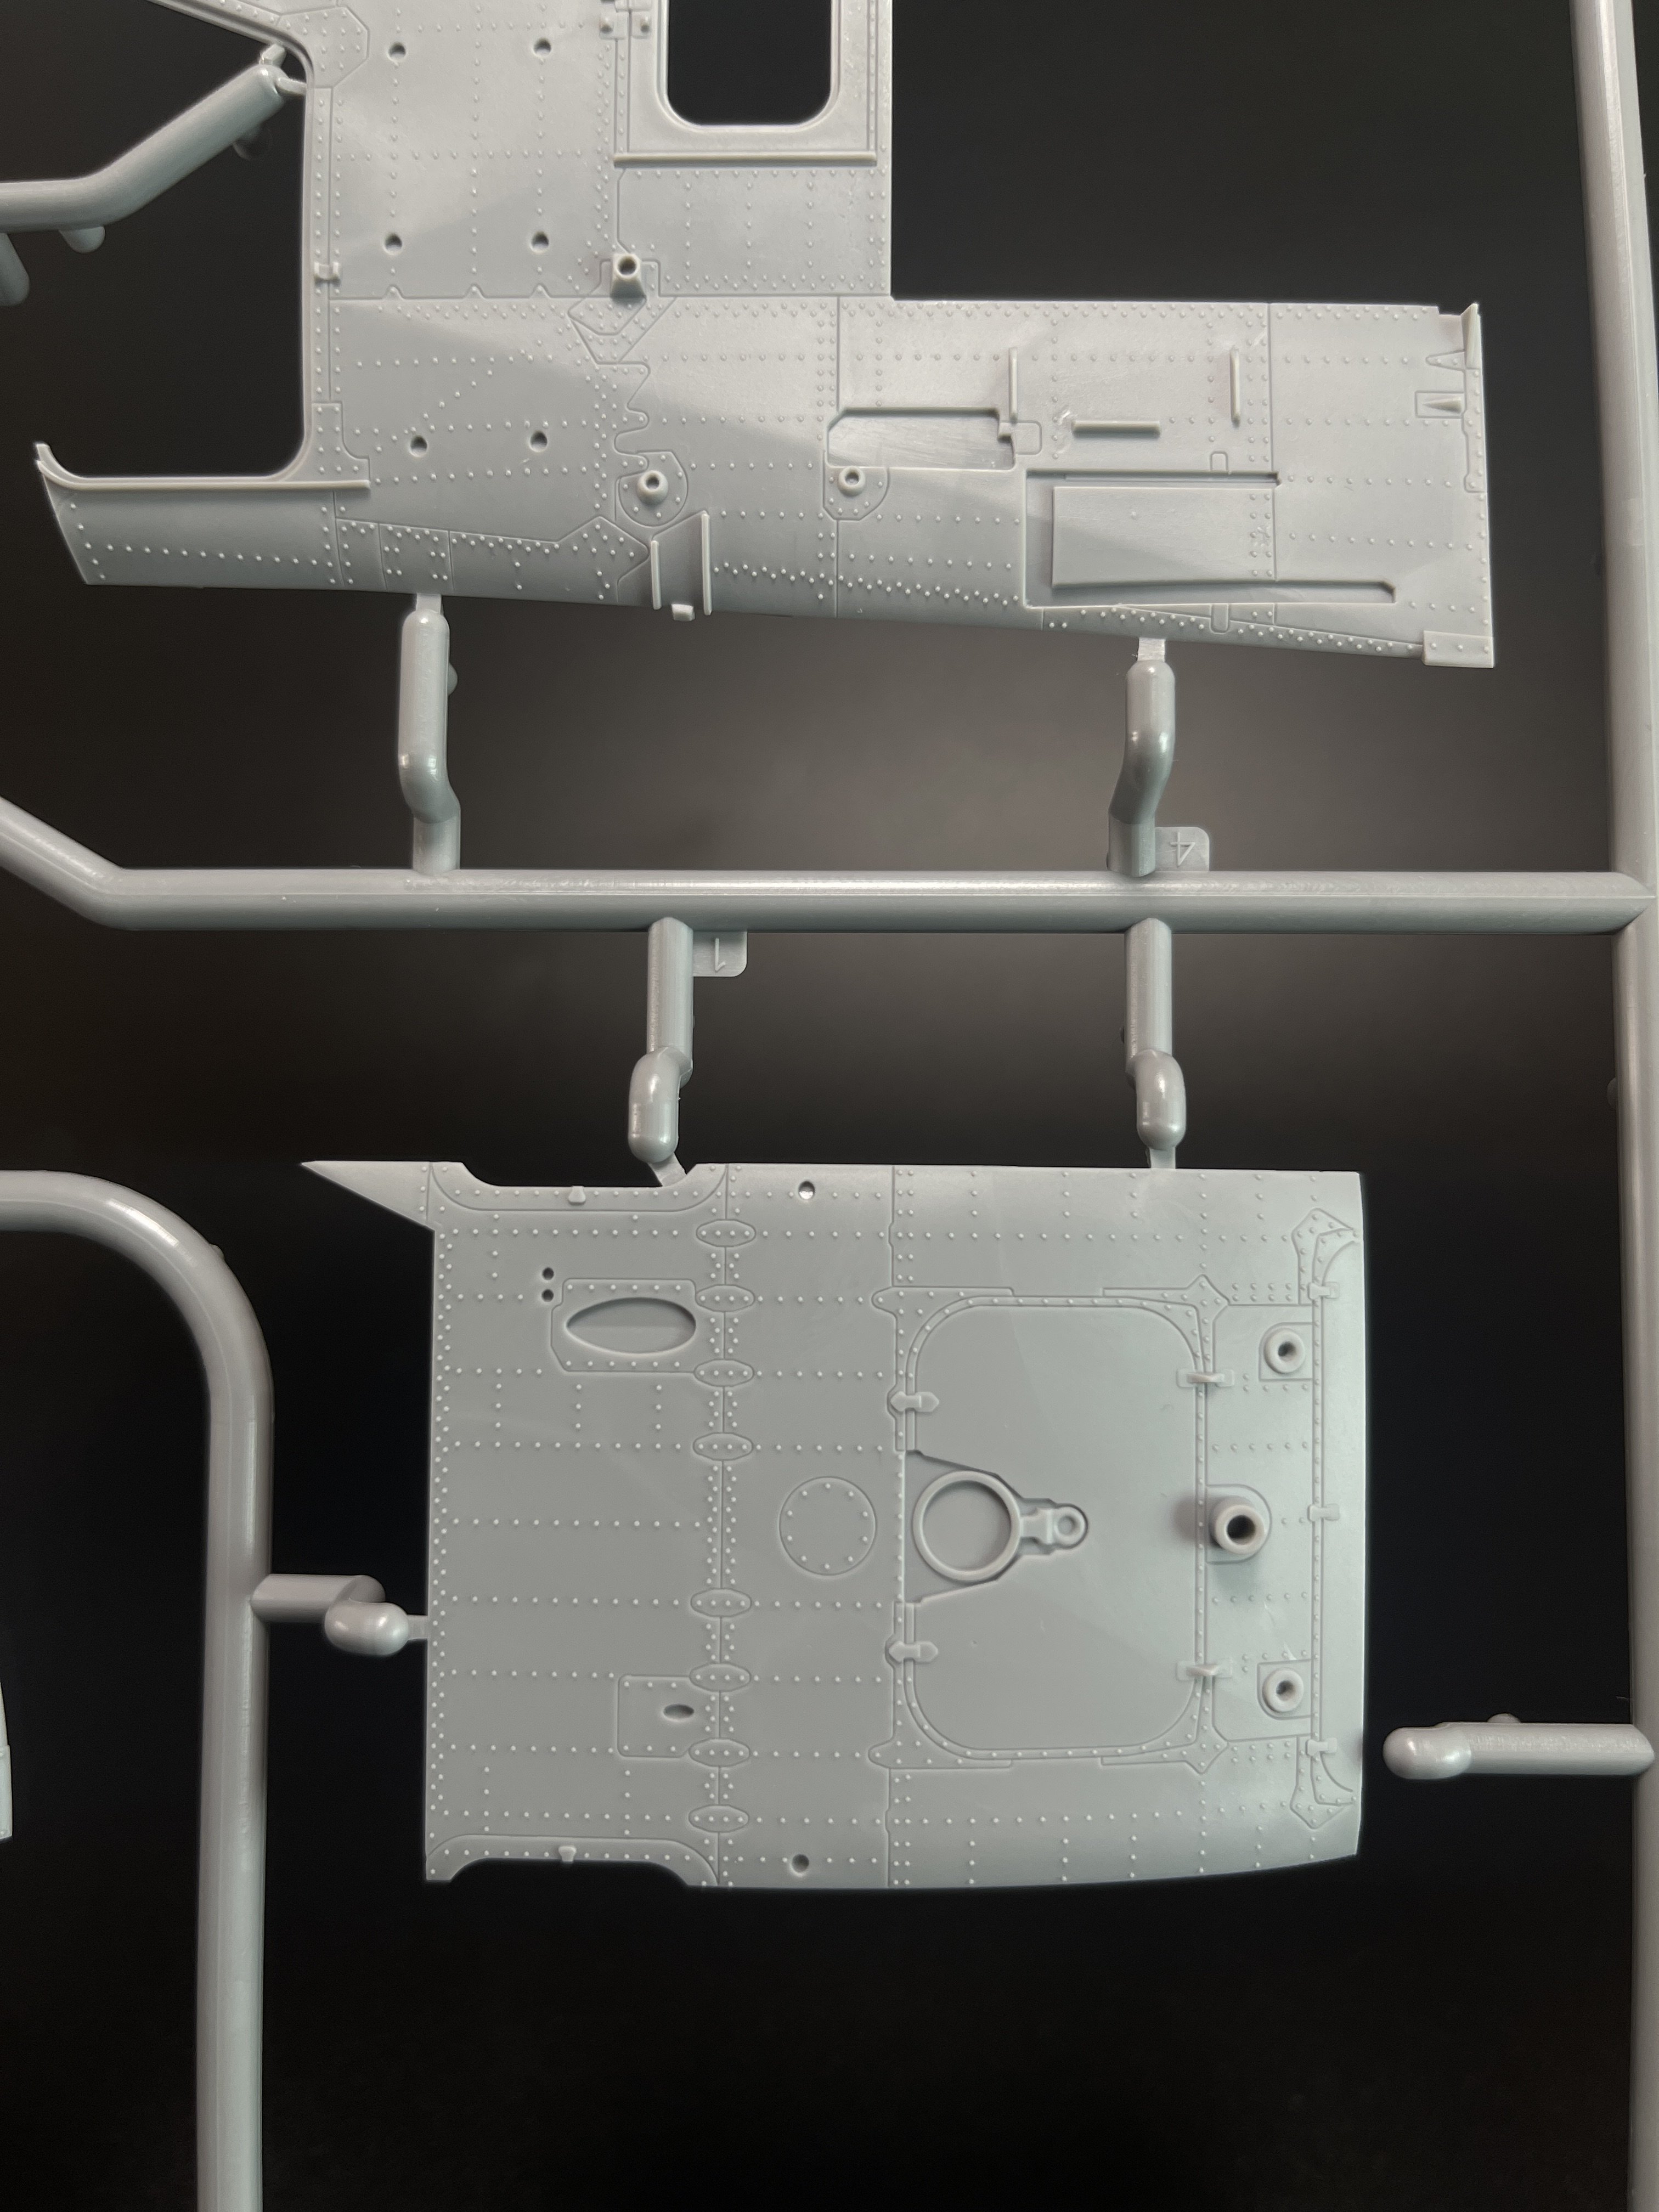
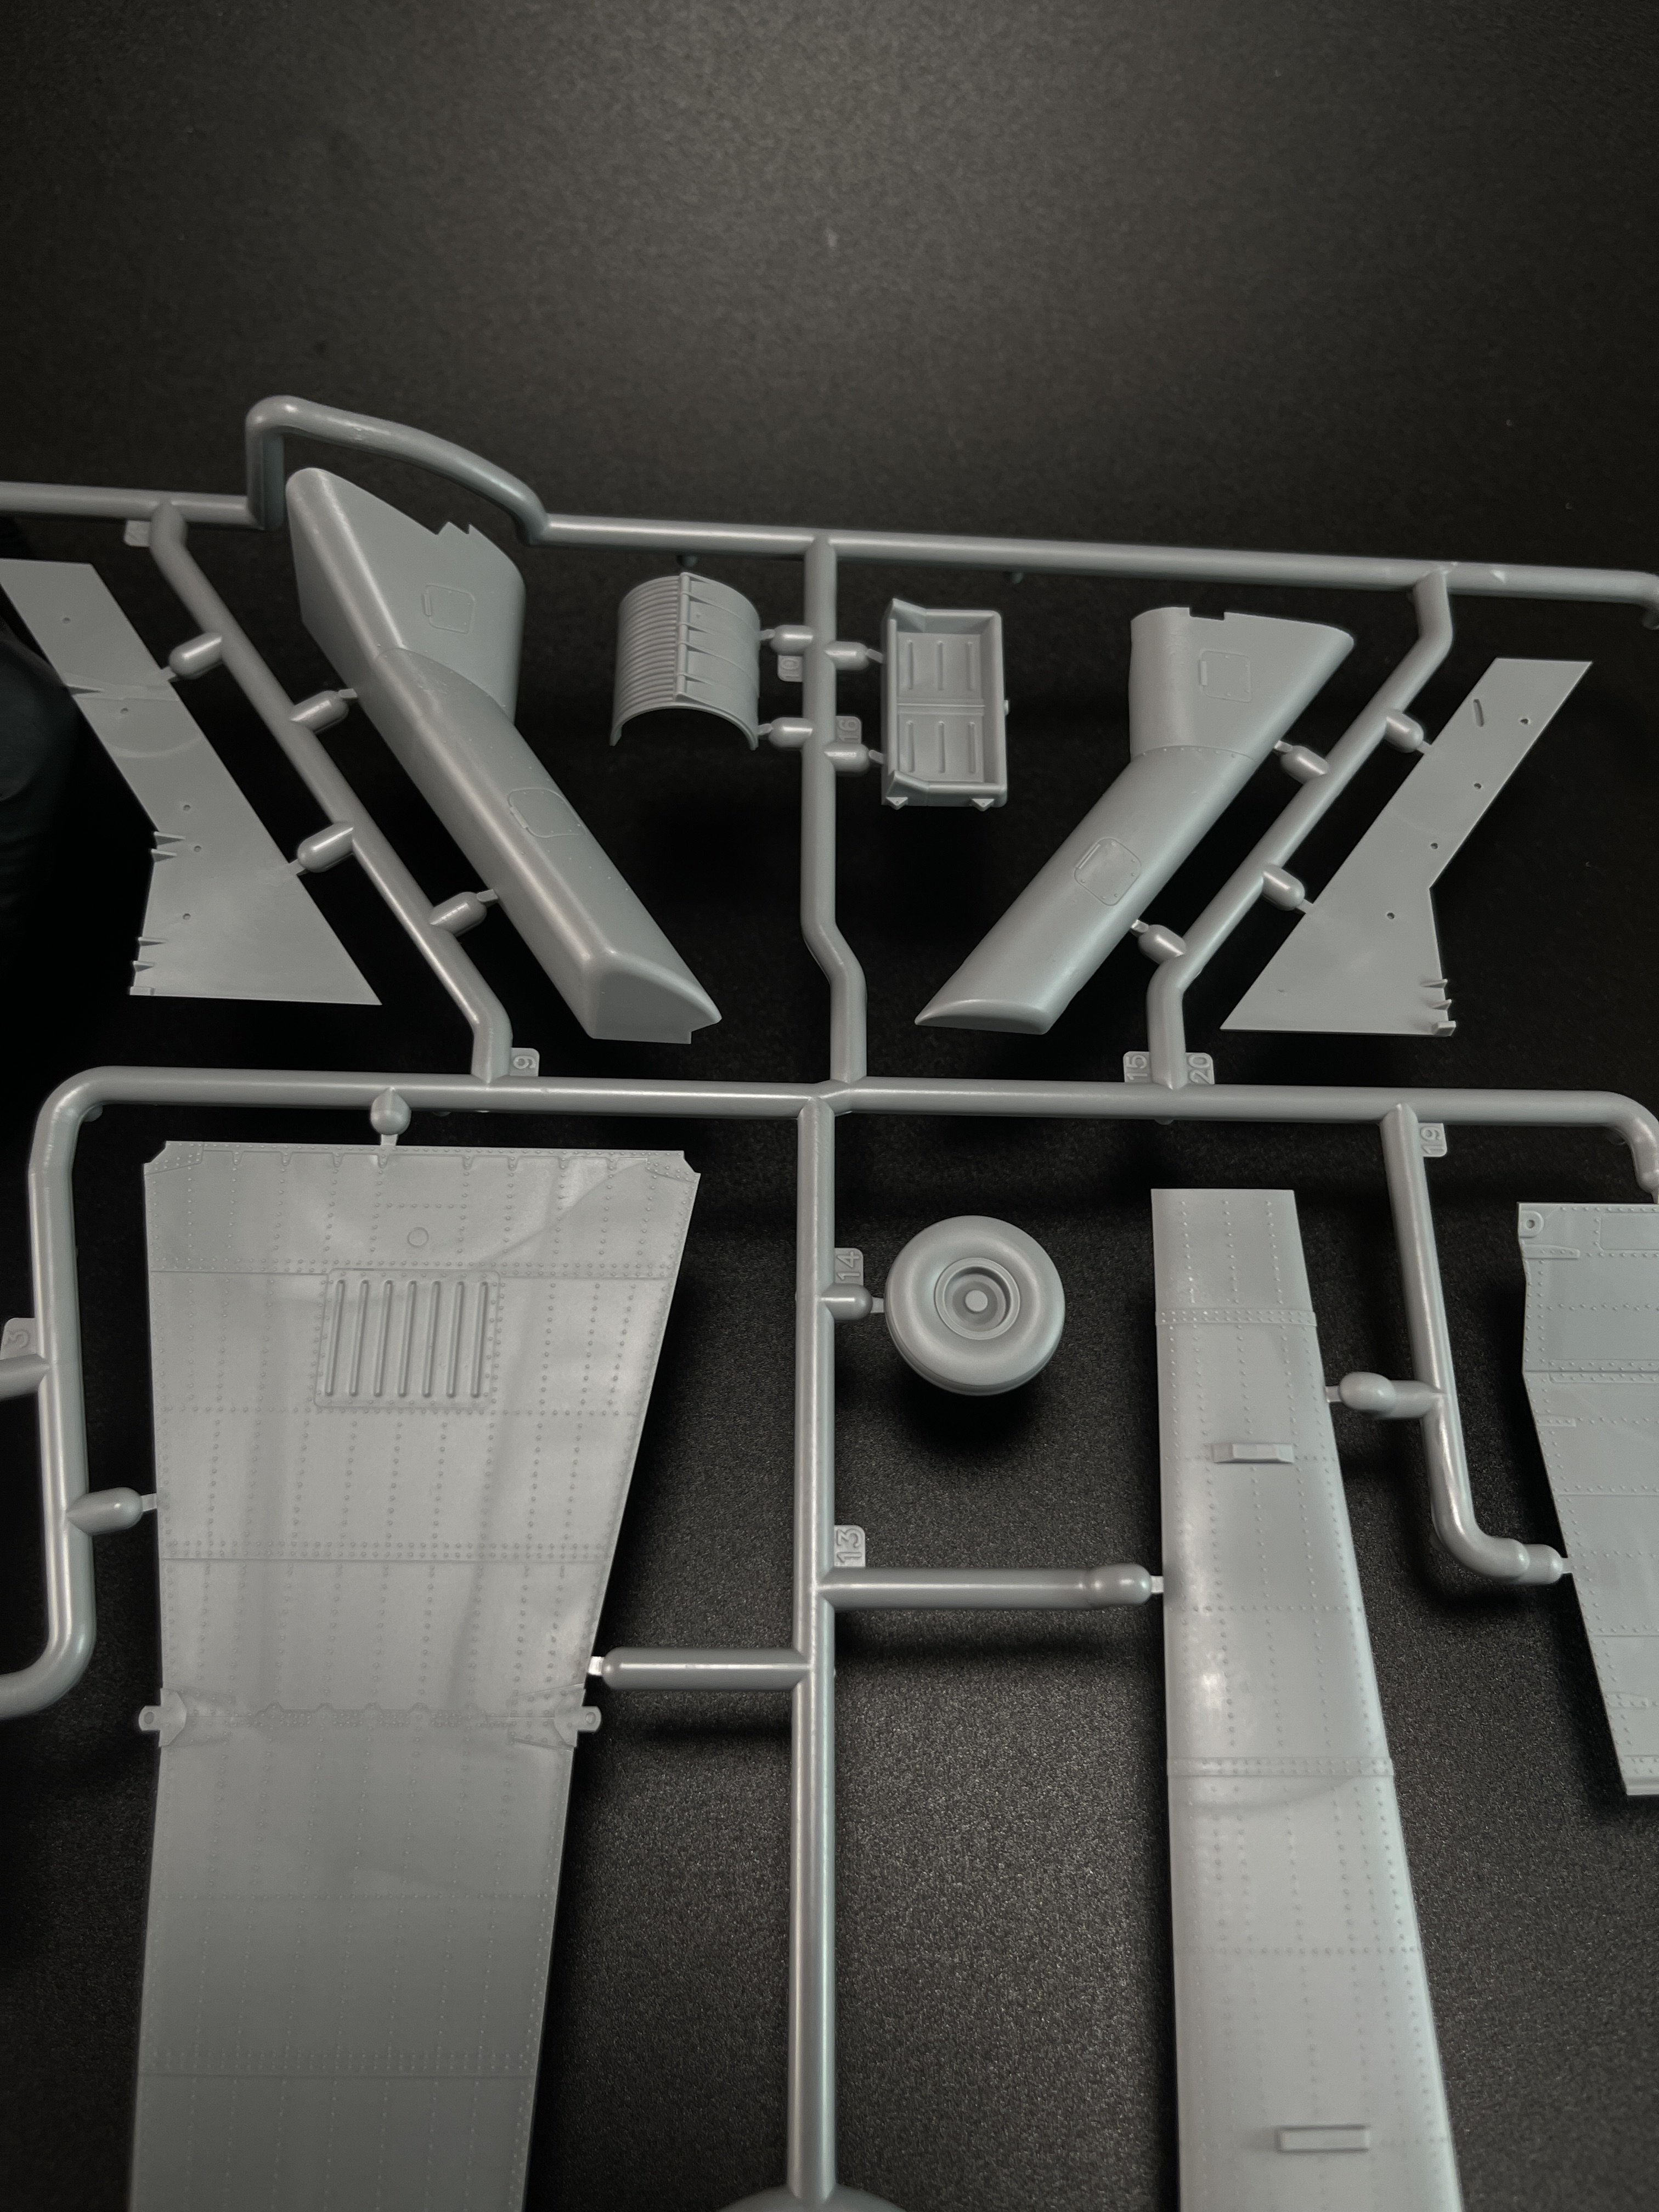
Surface panels line detail is very pleasing and the intakes, engines and transmission provide a lot of detail straight from the box.

The engine is not a full engine but only the part that you will be able to see.
However, the rotor-blade is in full great detail.
In both areas, aftermarket guys have a word in this, and seeing the Res-kit detail sets, they elevate the bar and you will get ultra-detail if use those sets.
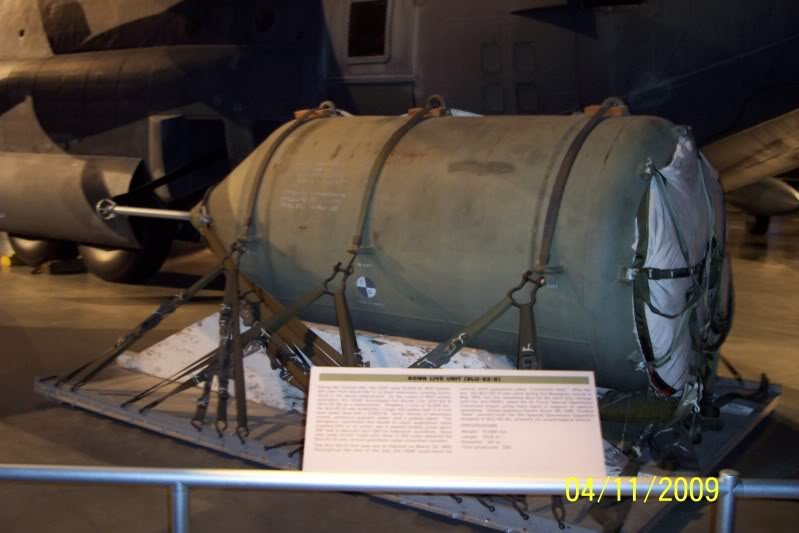
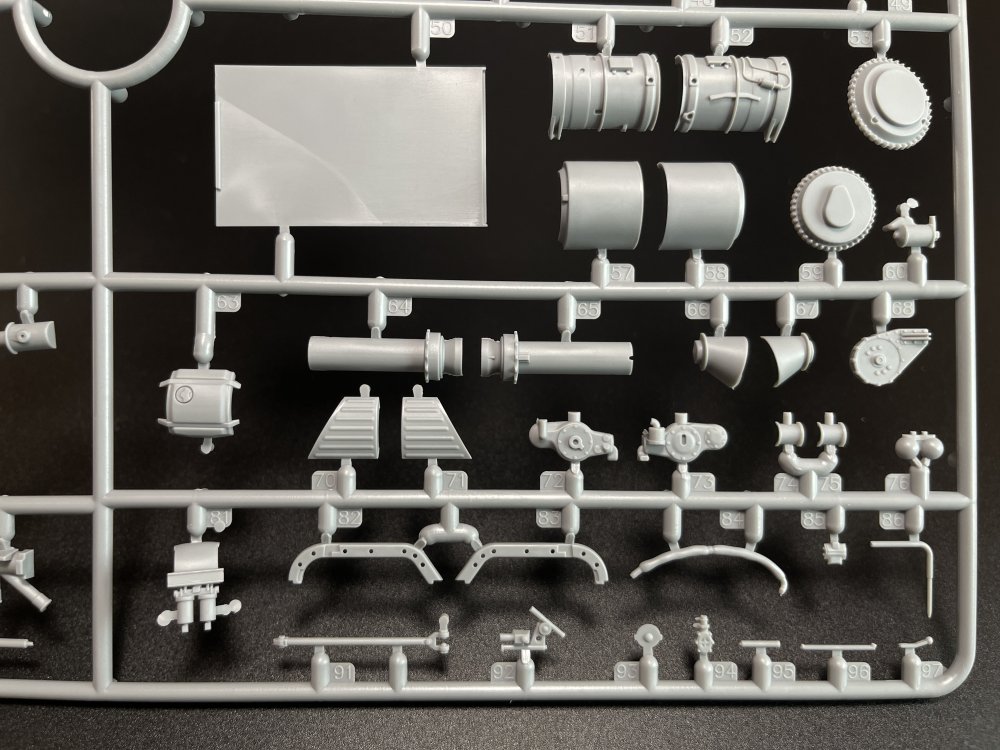
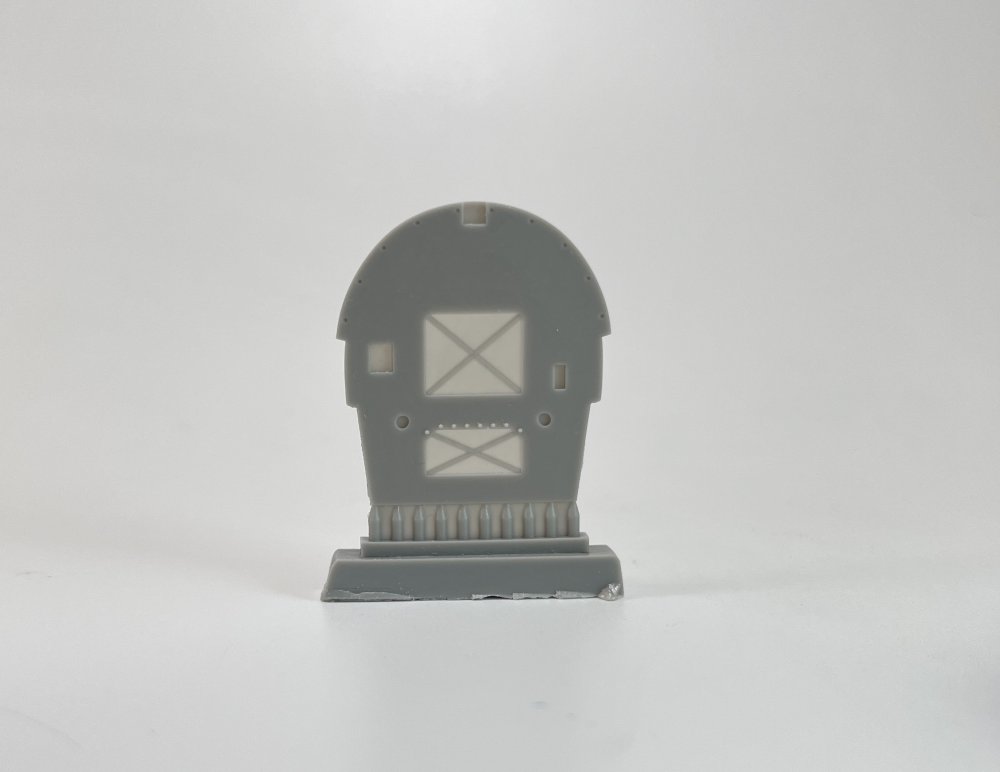
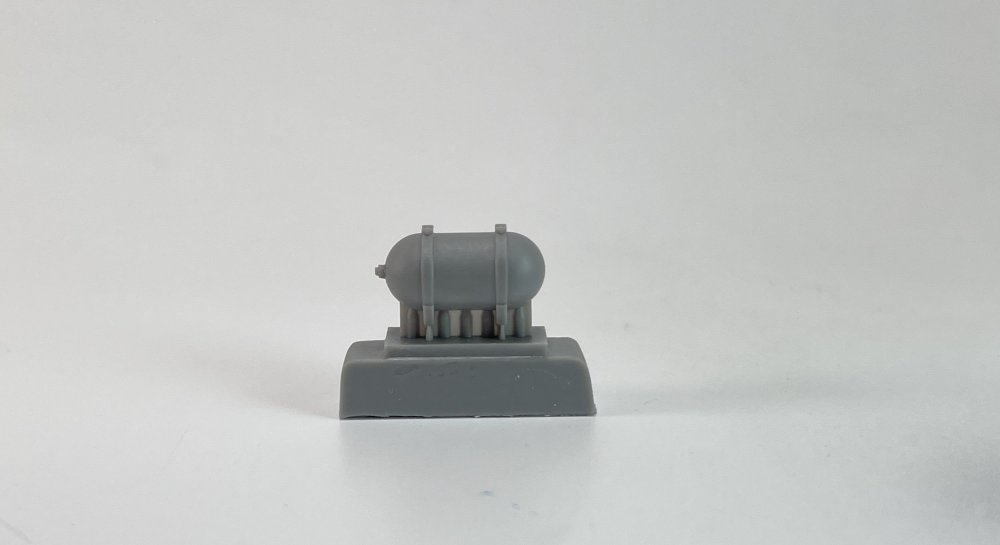
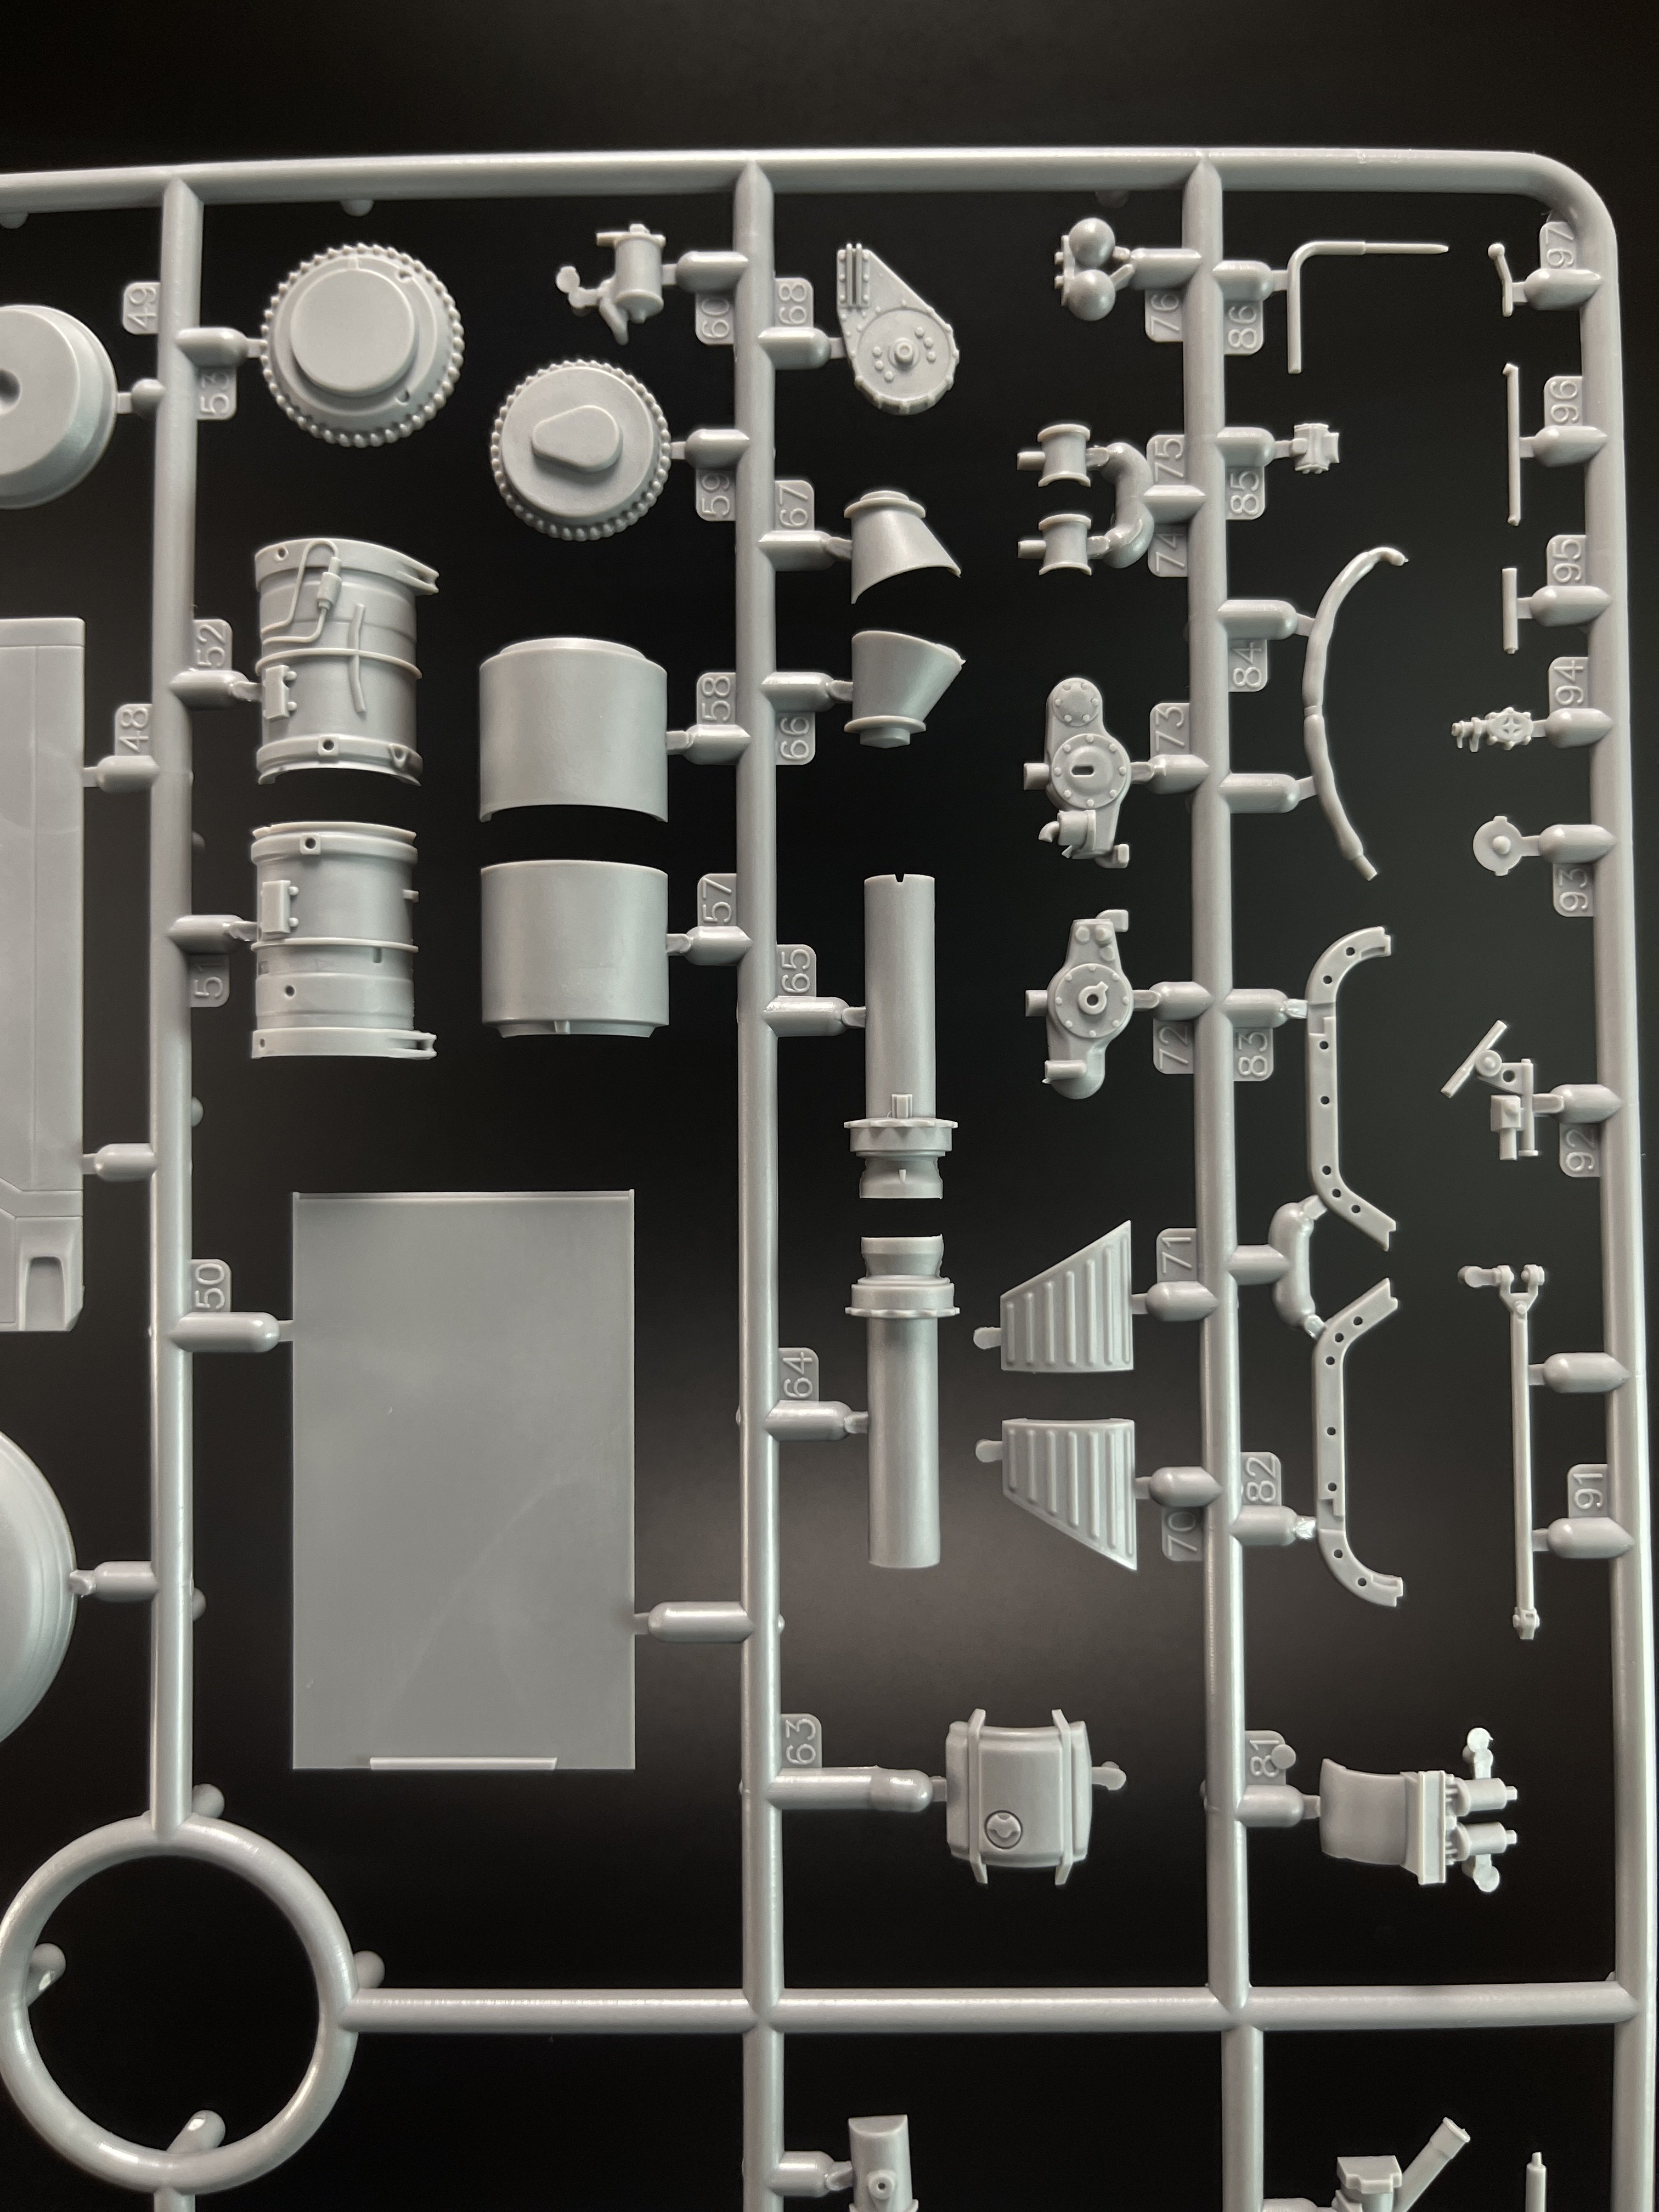
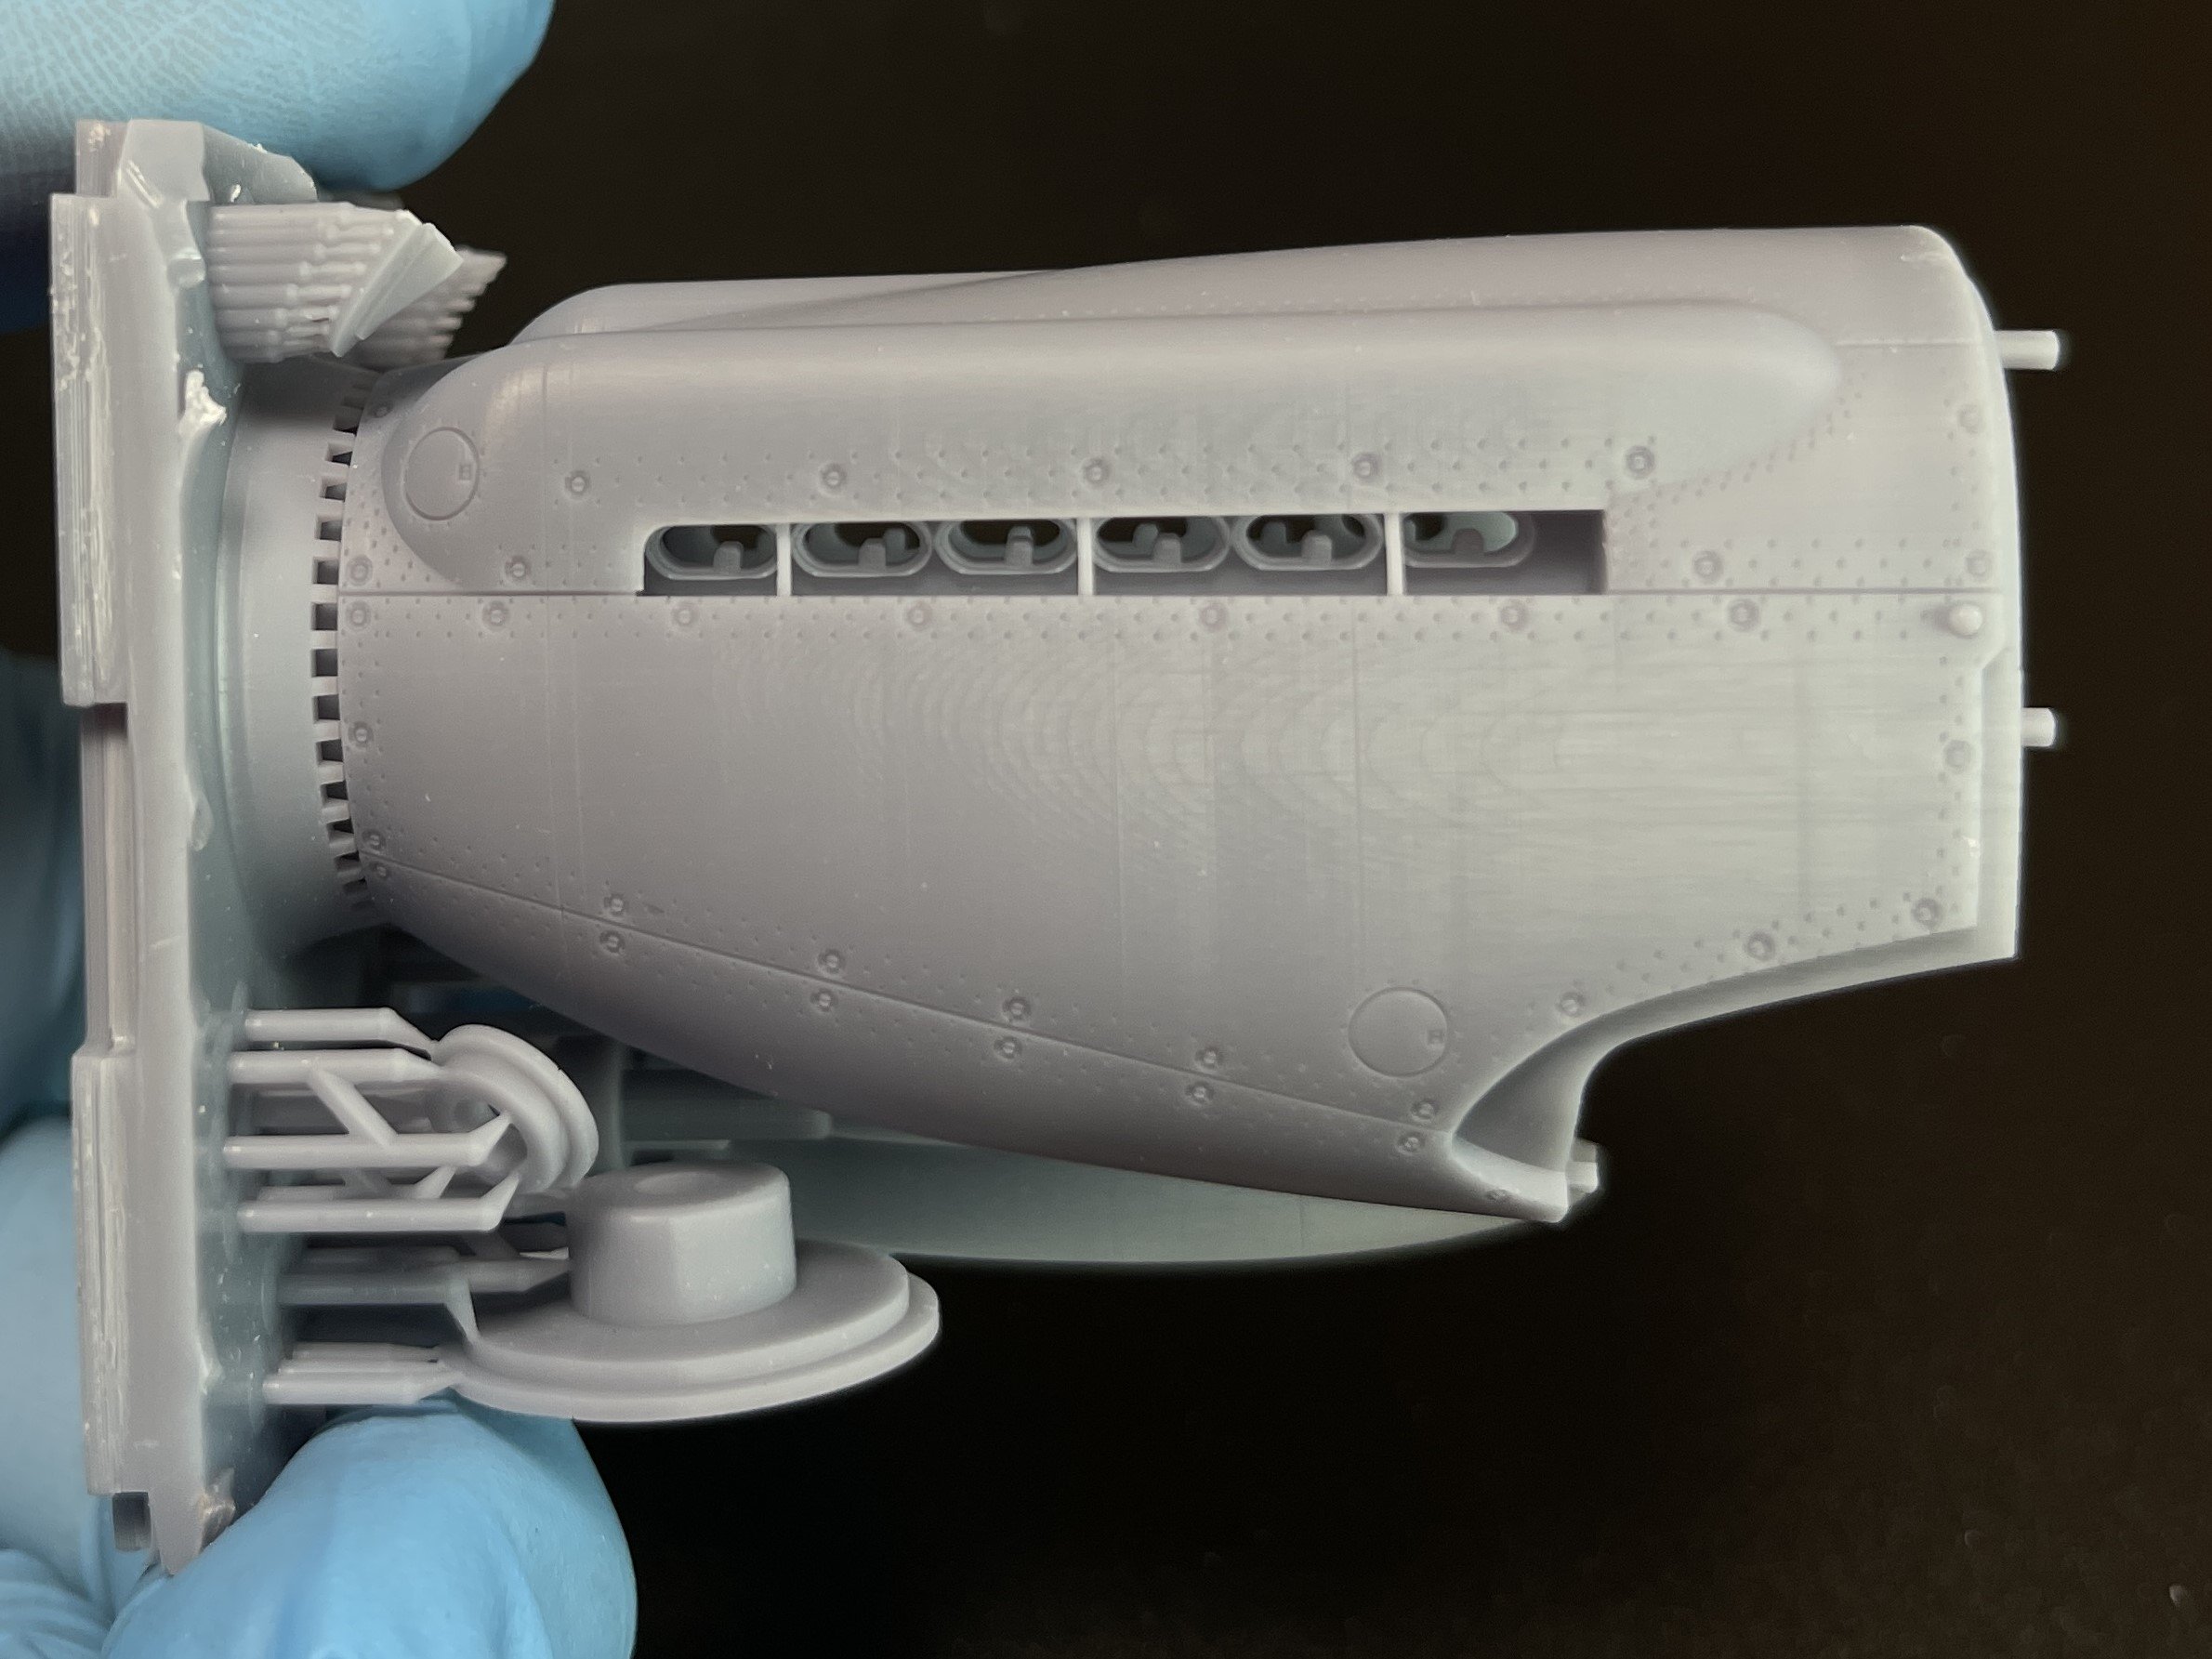
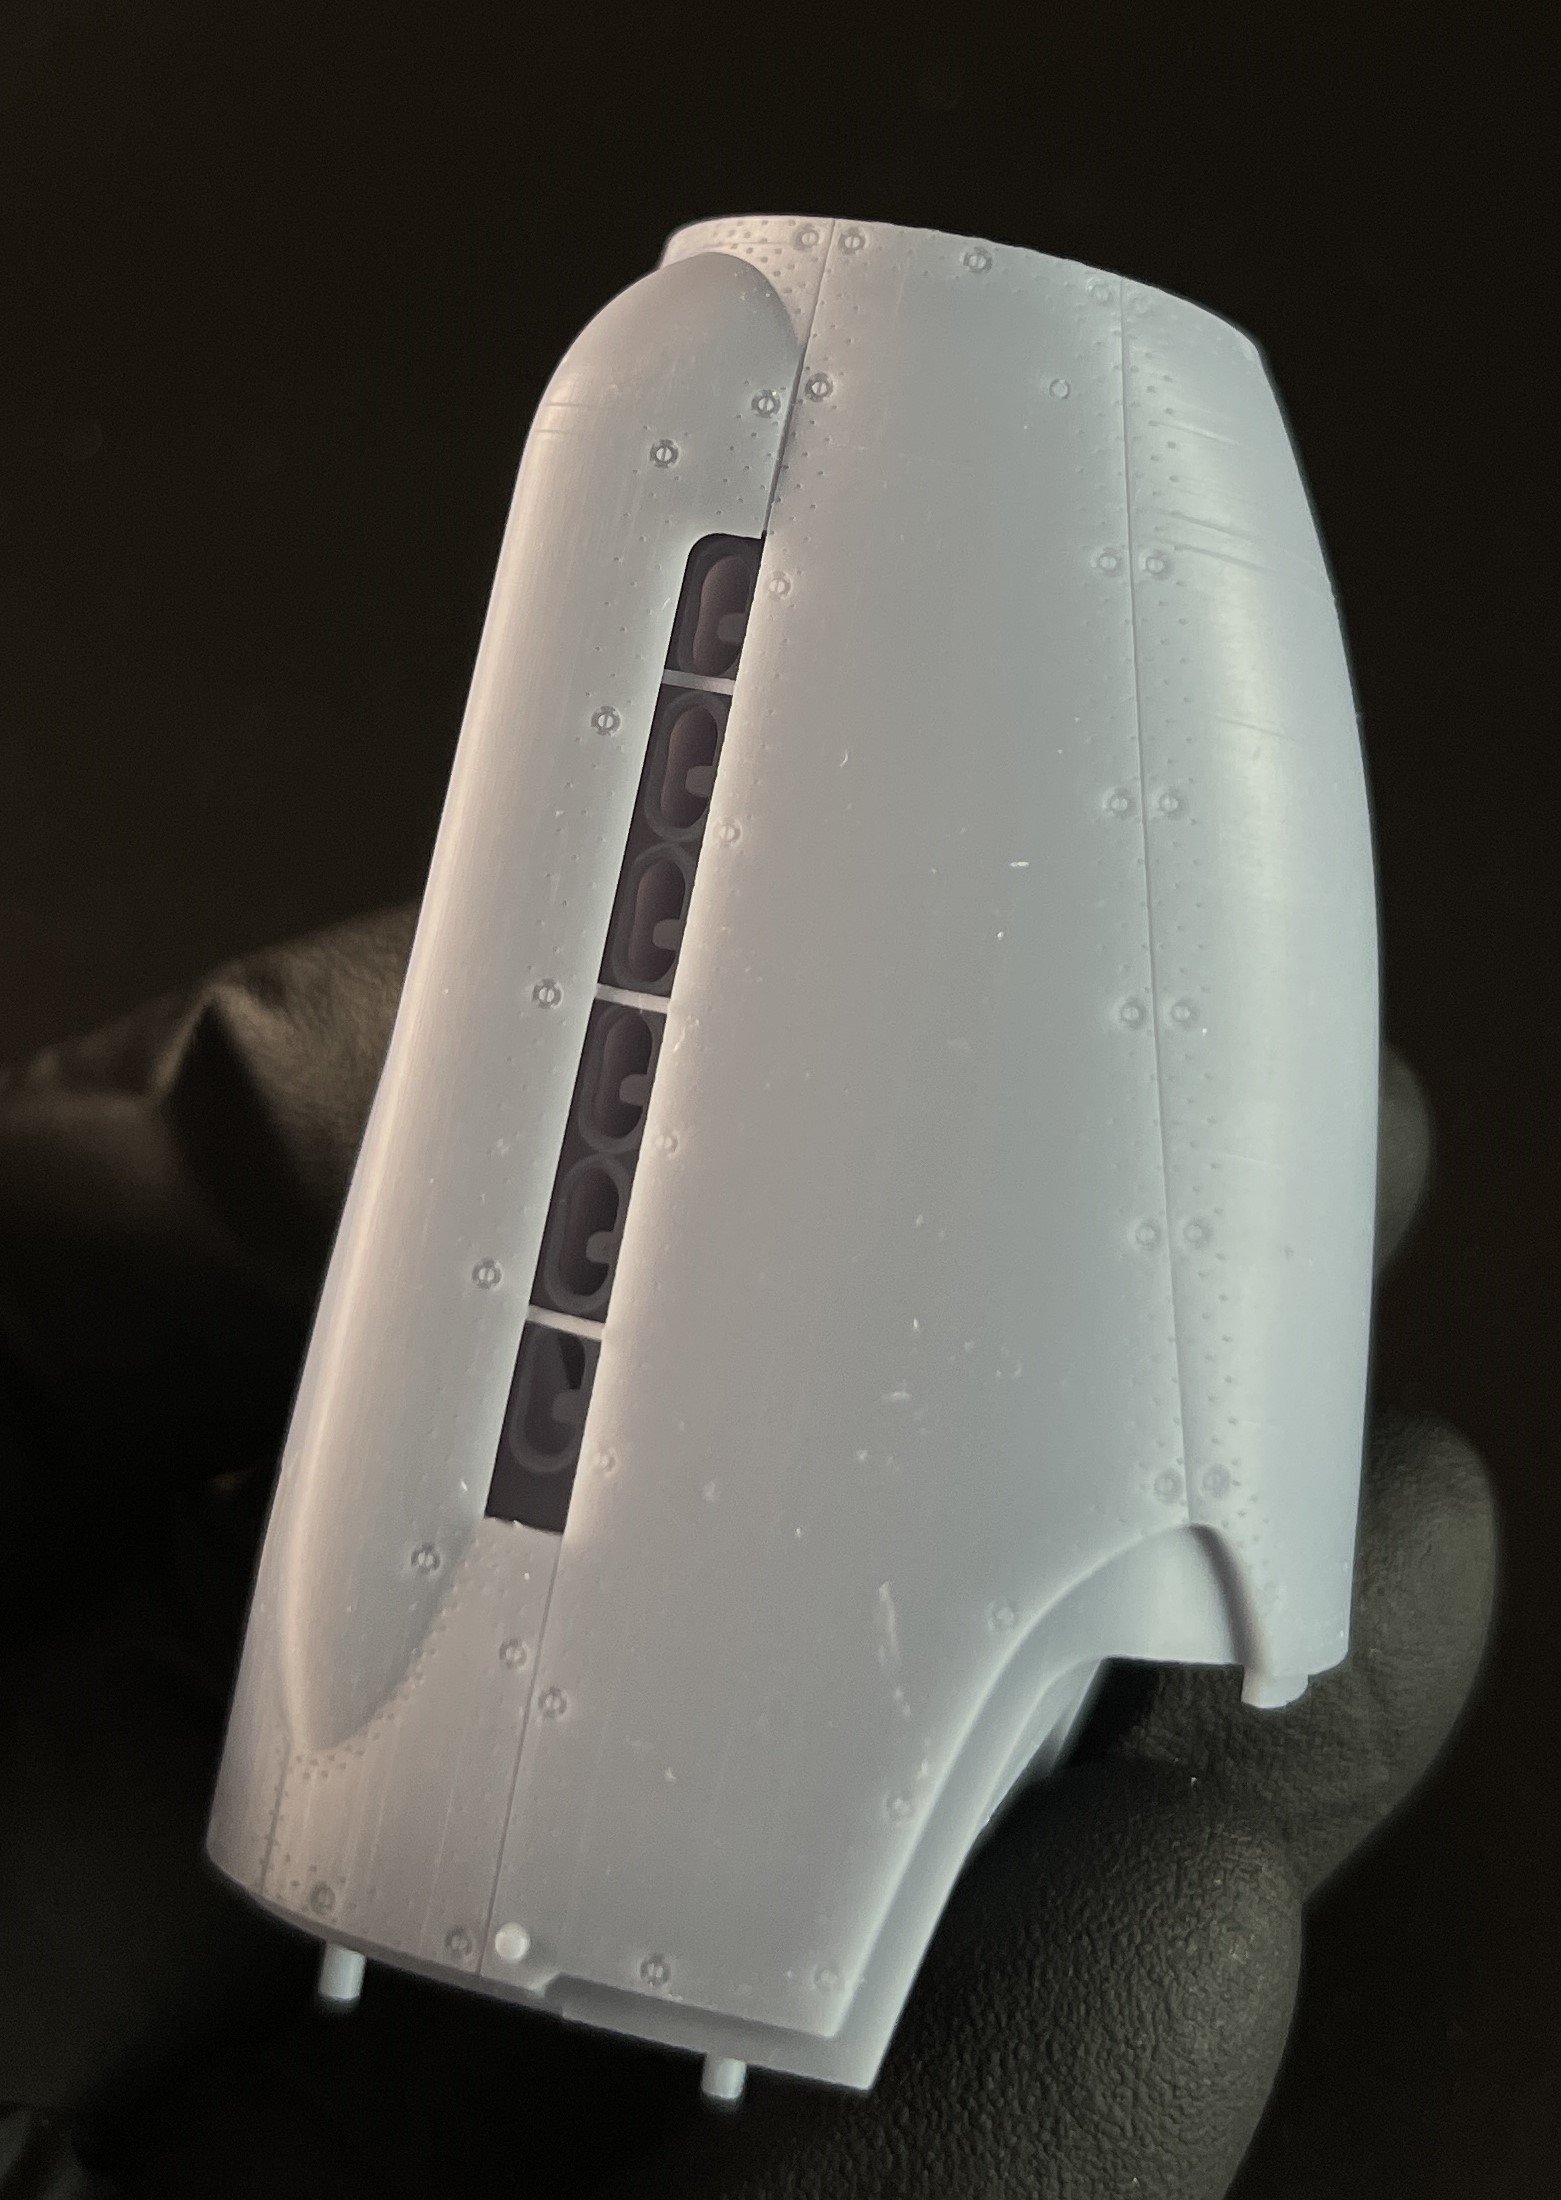
Now, the “new” thing: The M-121 bomb.
In December 1967, the U.S. Air Force began a testing program to use large bombs for explosively clearing jungle areas for landing of helicopters. After tests in the United States, the U.S. Army began dropping the bombs using CH-54 helicopters. Use of the helicopters was expensive, time consuming and inefficient due to the CH-54's limited range. In October 1968, a C-130 crew from the 29th Tactical Airlift Squadron of the 463rd Tactical Airlift Wing flew a series of test drops while under the guidance of MSQ-77 radar controllers; additional test drops were made in December. In March 1969, the 463rd commenced Project Commando Vault, and bomb drops became a regular occurrence. Besides clearing the jungle and preventing the ambush of helicopters that were approaching the landing zone (the M121's blast diameter was 60 meters), the explosion also stunned the NVA or Viet Cong personnel within 500 meters and revealed or destroyed booby traps in the landing area.
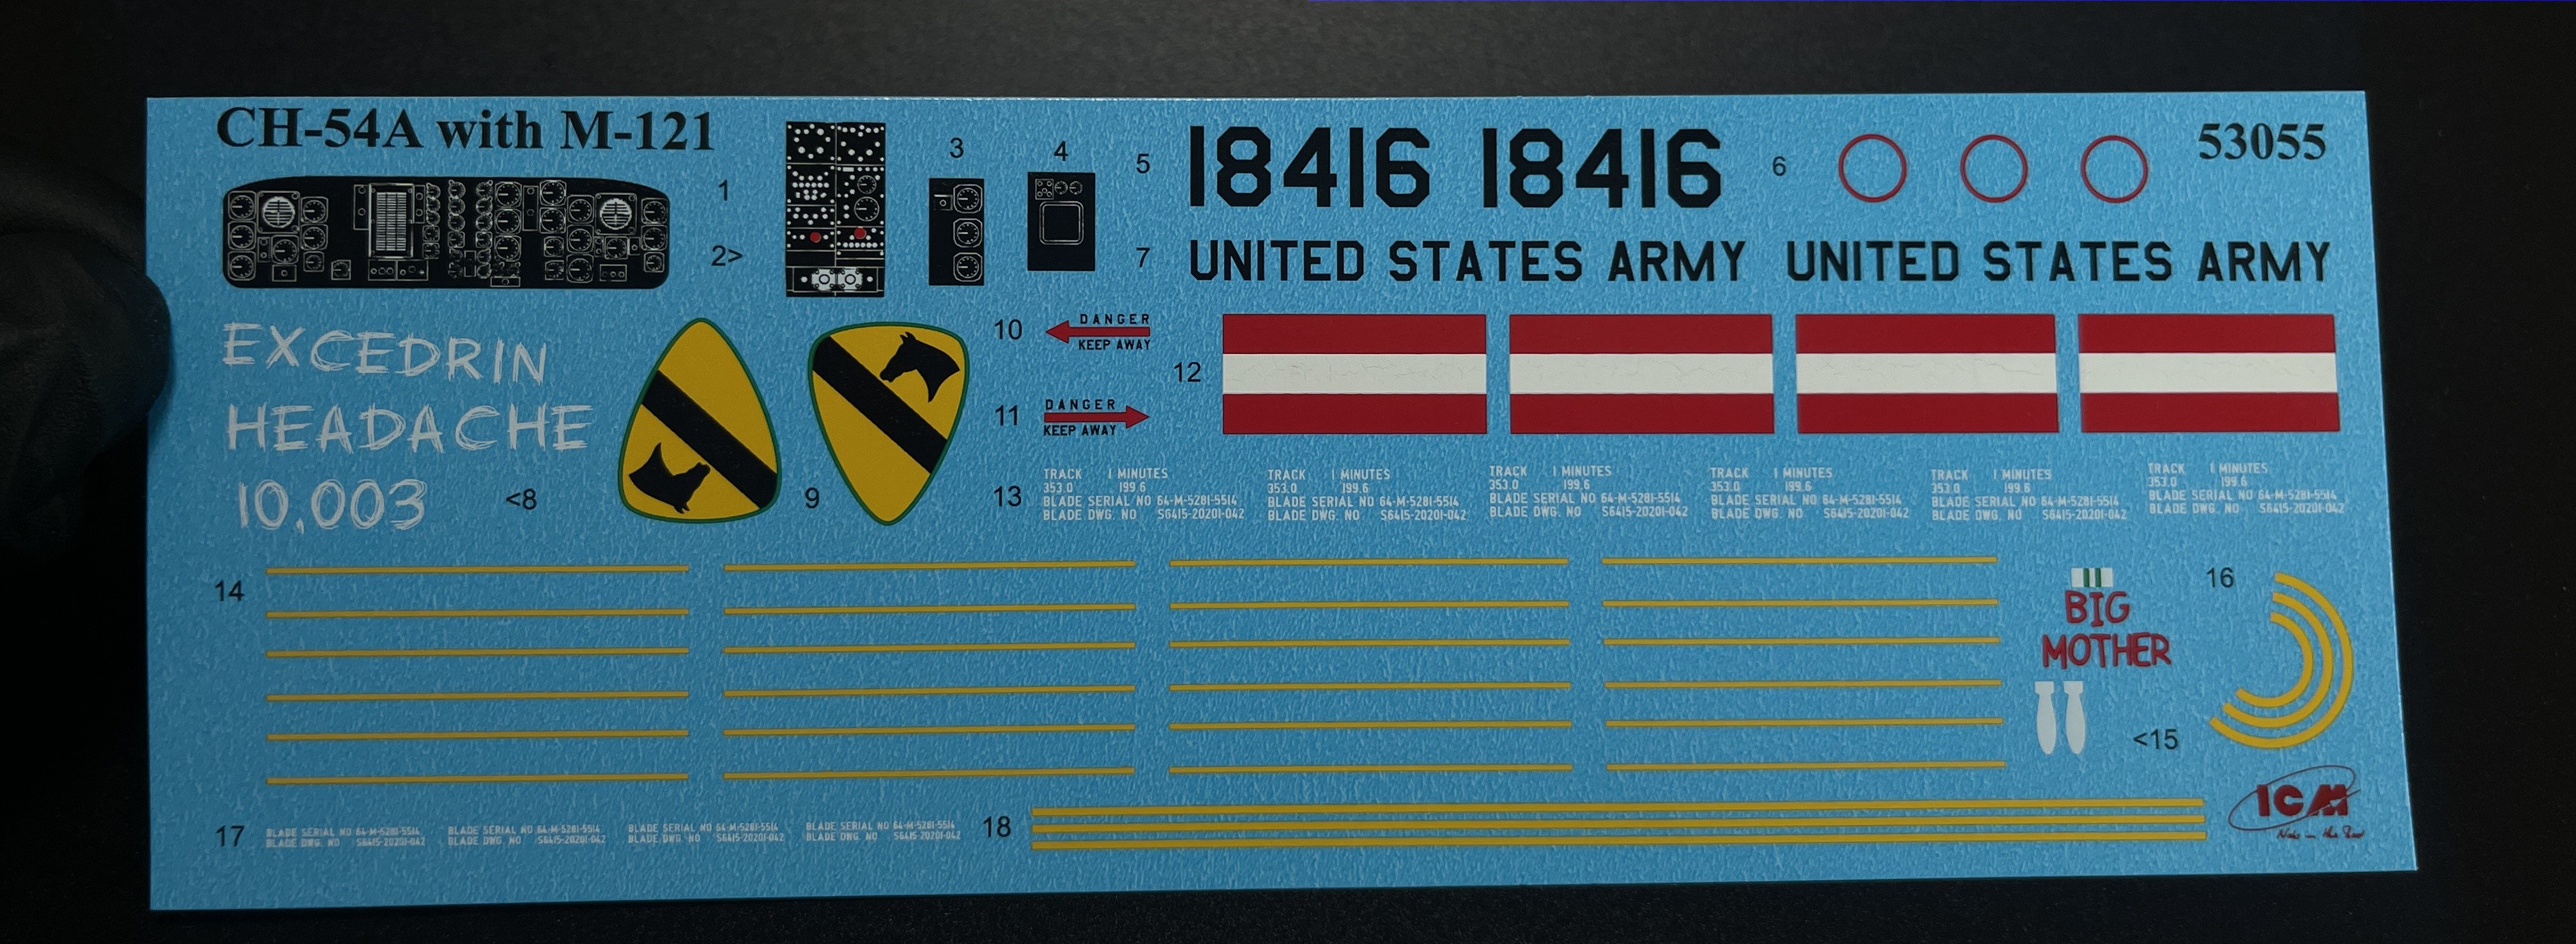
Due to the bomb's weight and powerful effects, ordnance handlers would chalk mark the bombs as "Excedrin Headache #10,00x" where x was the sequence number of the bomb; a reference to the well known (at the time) advertising campaign promoting the efficacy of the Excedrin brand of extra strength pain relievers.
Use of the M121 to clear a jungle zone was a technical success, but the weapon did not satisfy MACV's command requirement to clear a jungle area for five helicopters at the same time.[3] Despite this, the United States continued to use the M121 to clear helicopter landing zones in the jungle until stockpiles were depleted while a more powerful bomb was developed for jungle-clearing purposes. The new BLU-82, developed in 1969, entered service later in the Commando Vault program. Unlike the M121, which used TNT, the BLU-82 used a slurry mixture of ammonium nitrate and powdered aluminum. It had a slightly bigger blast diameter (80 meters).
(history from Wikipédia)

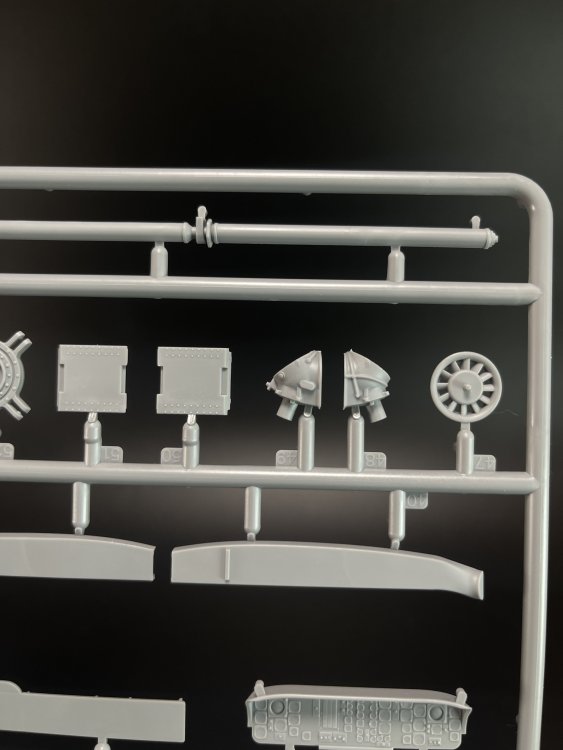
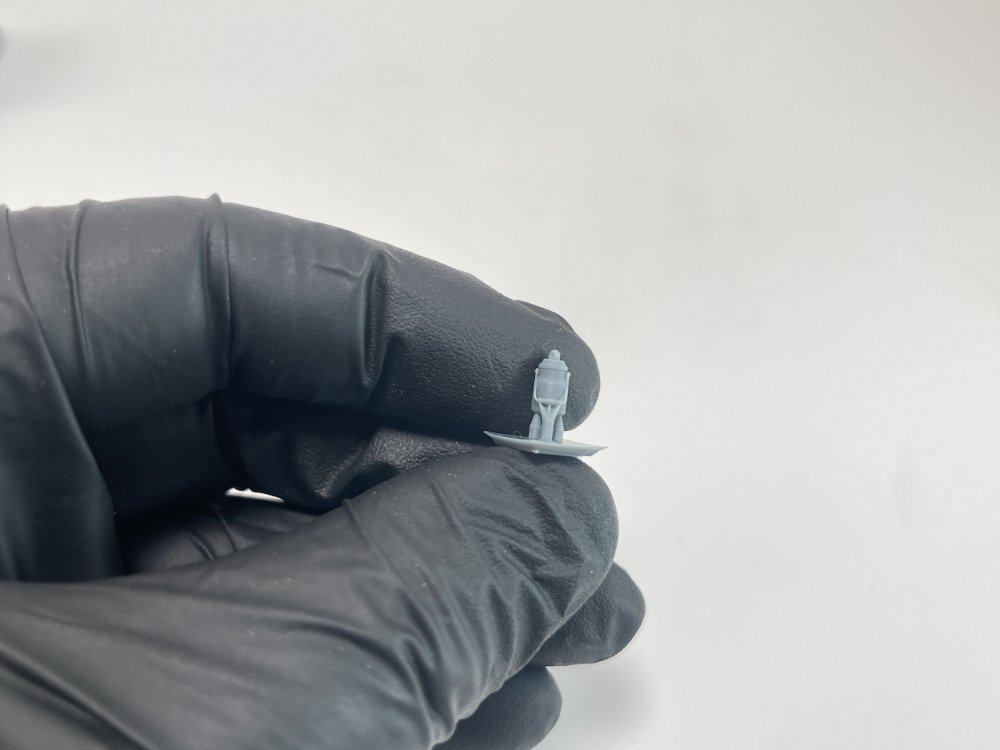
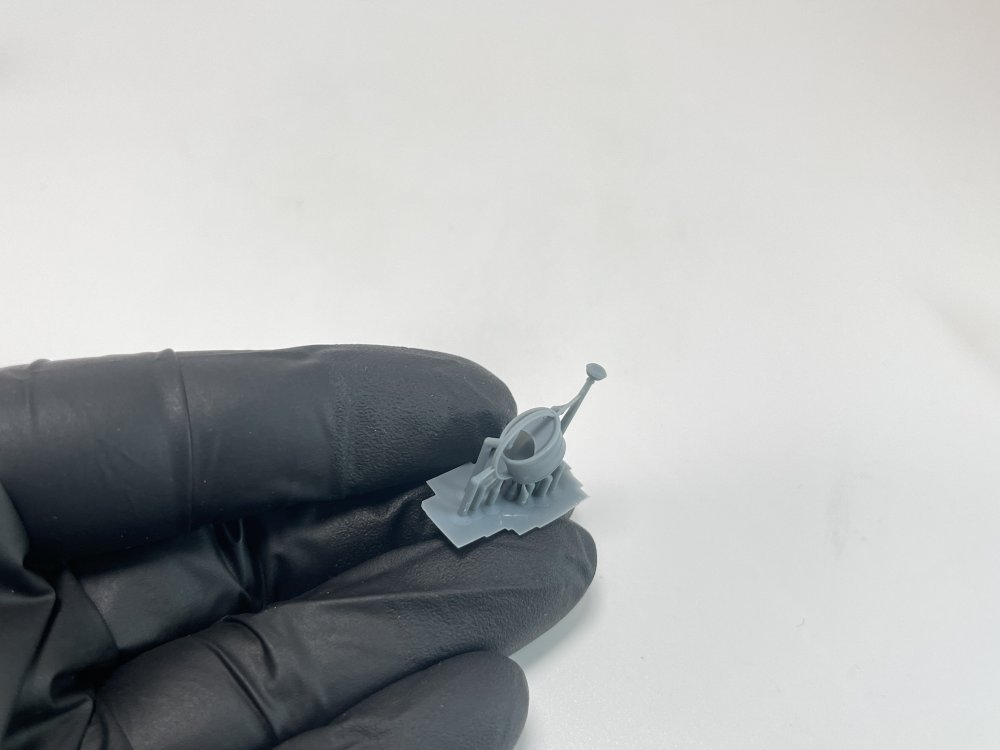
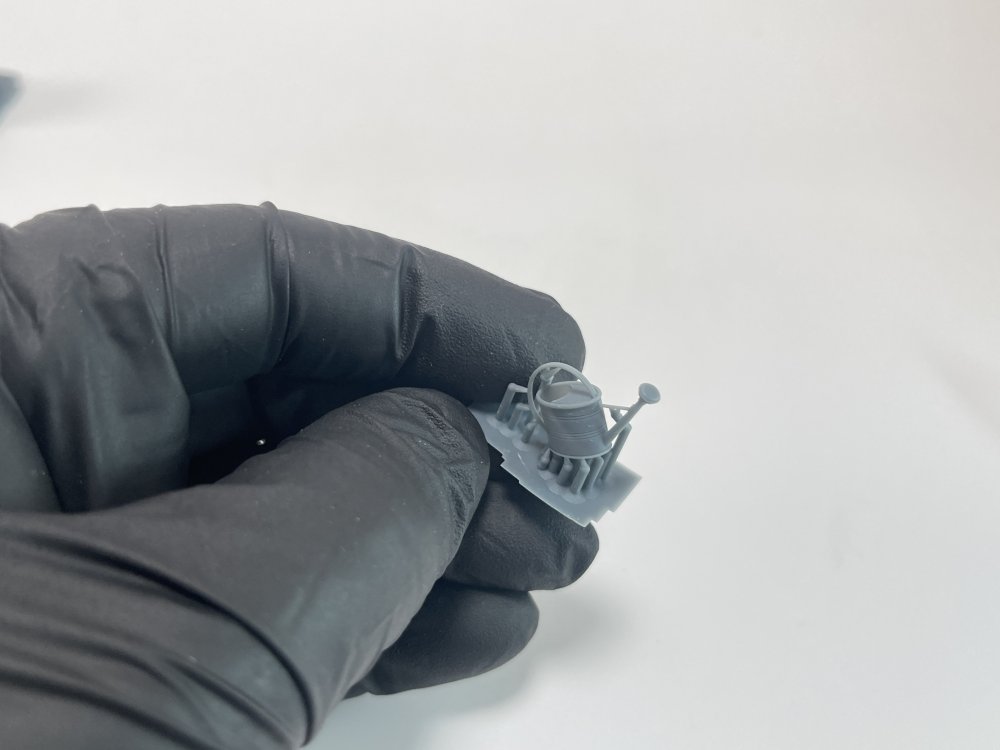
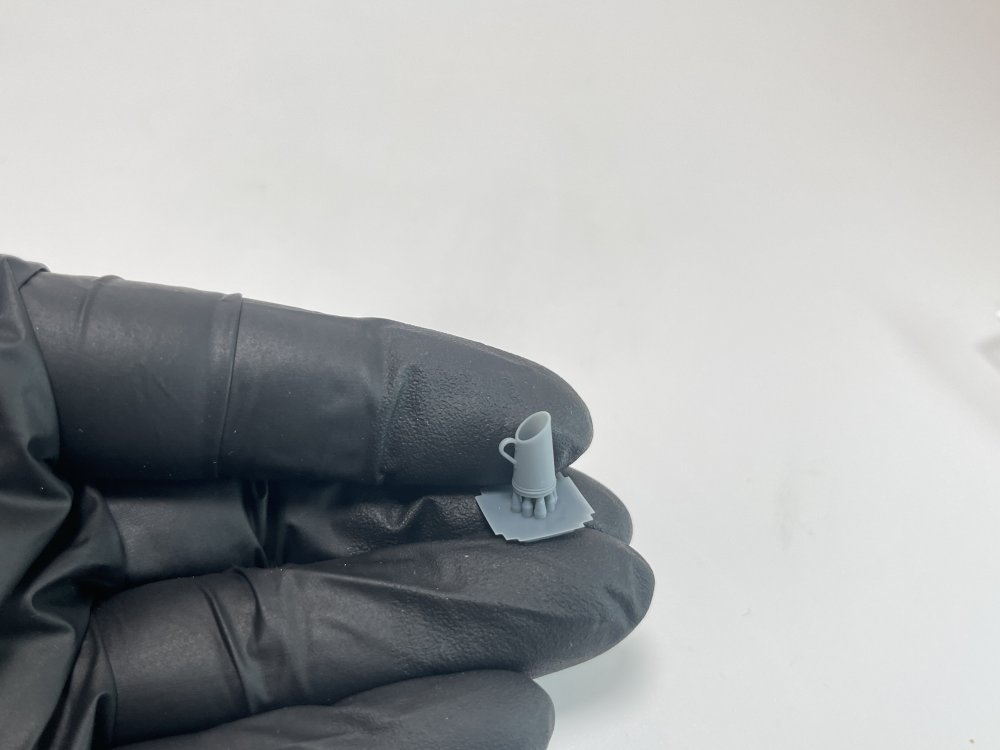
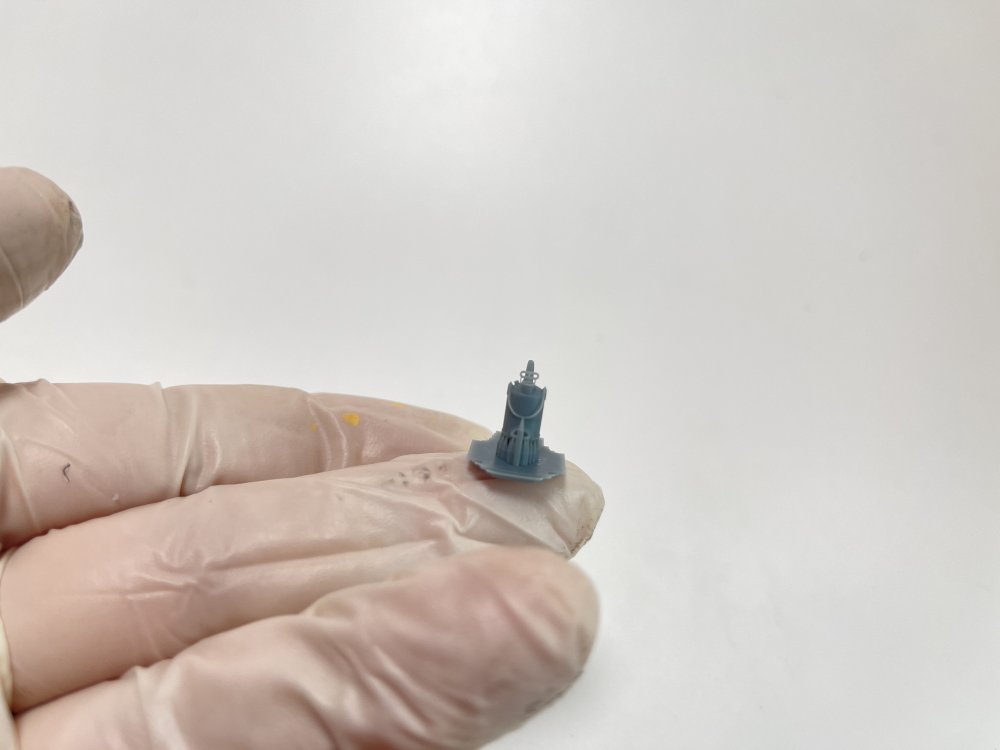
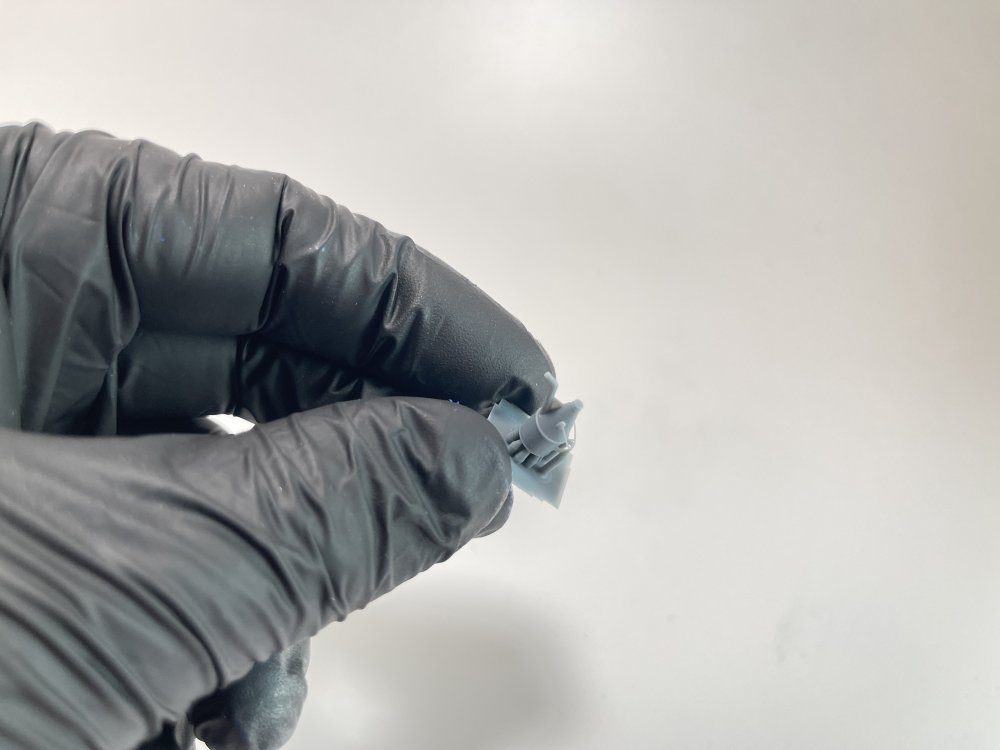
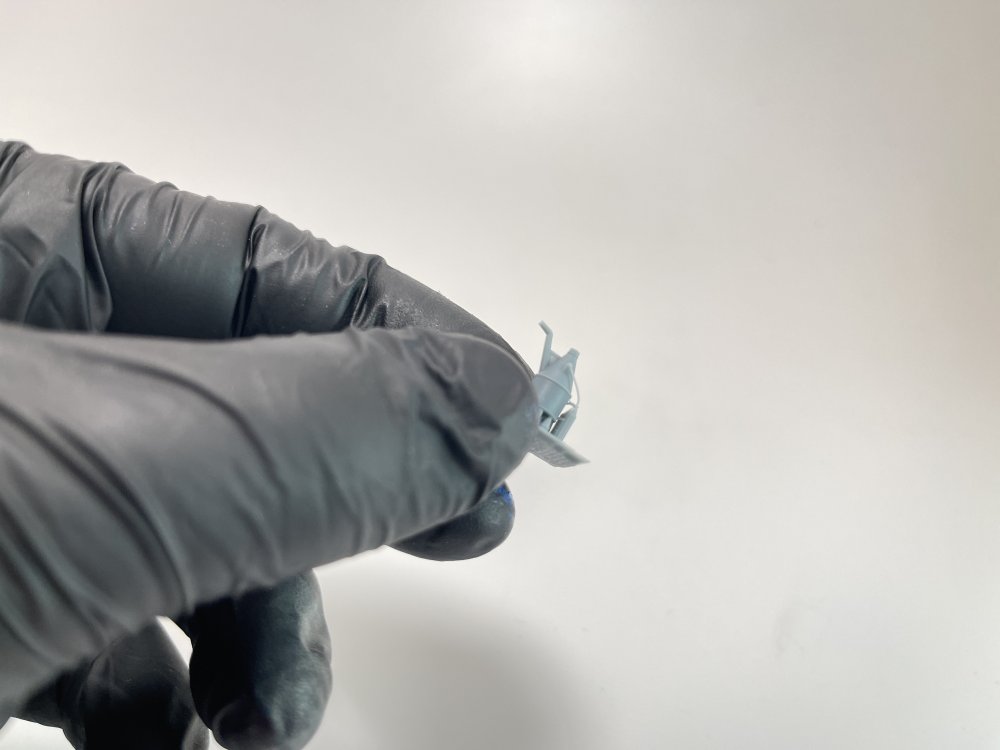
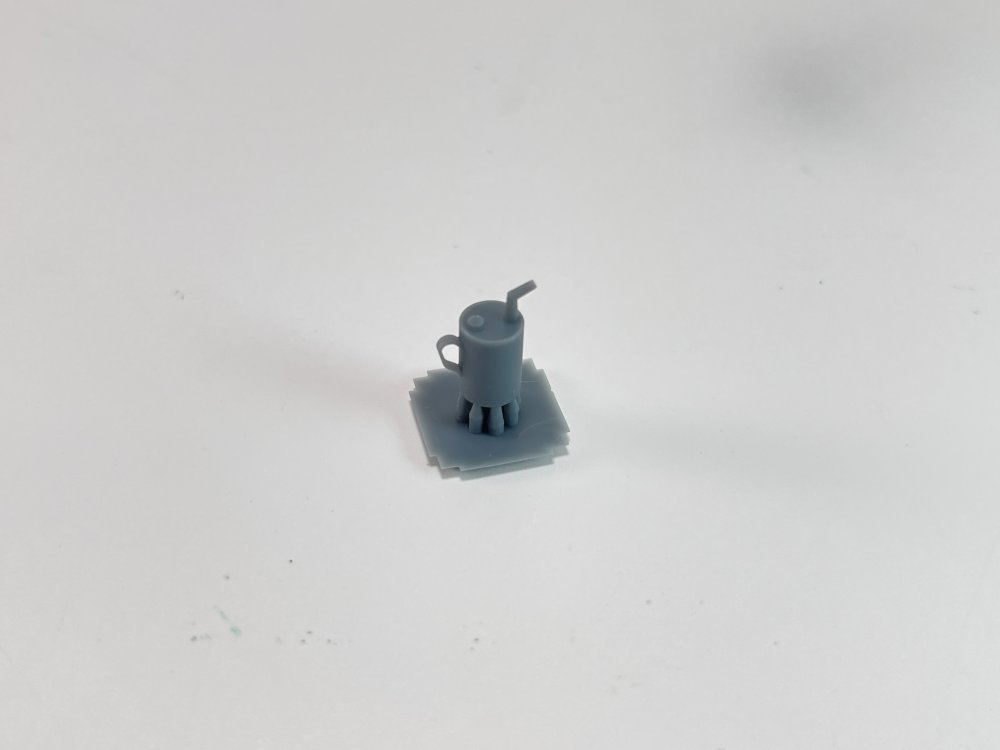
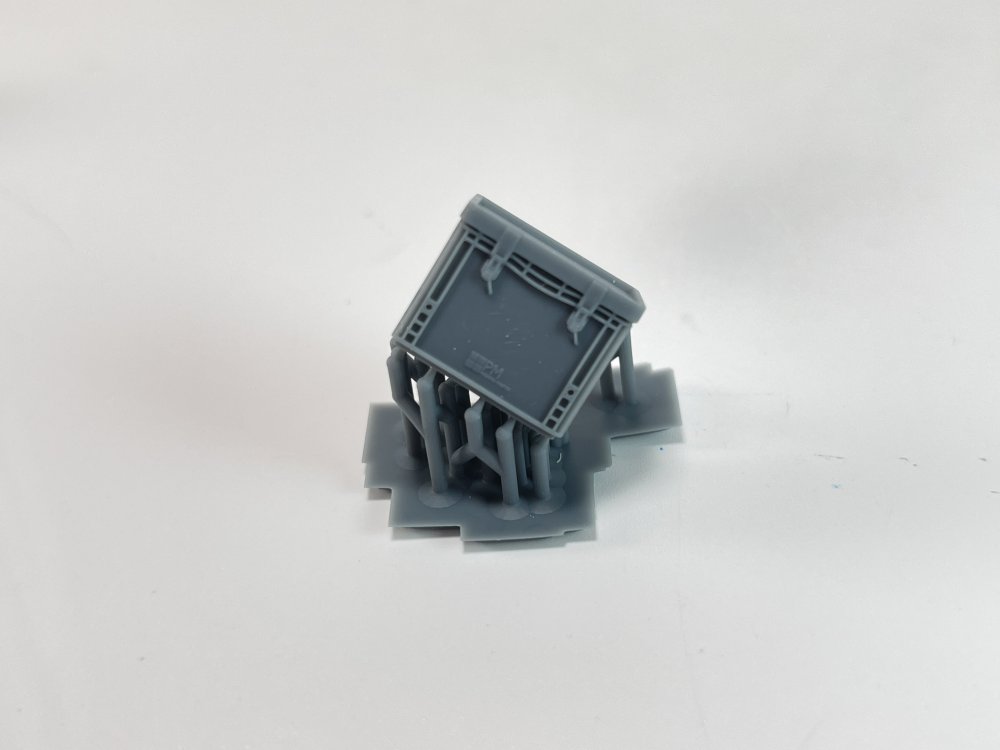
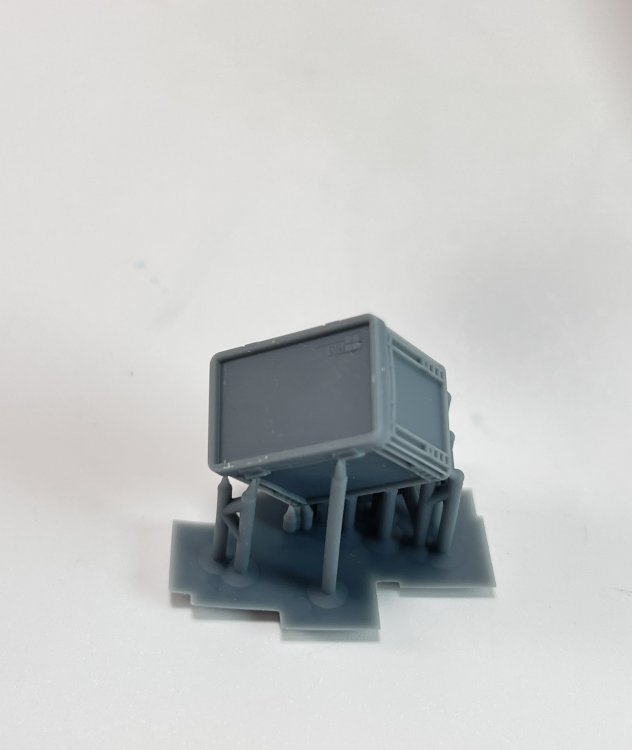
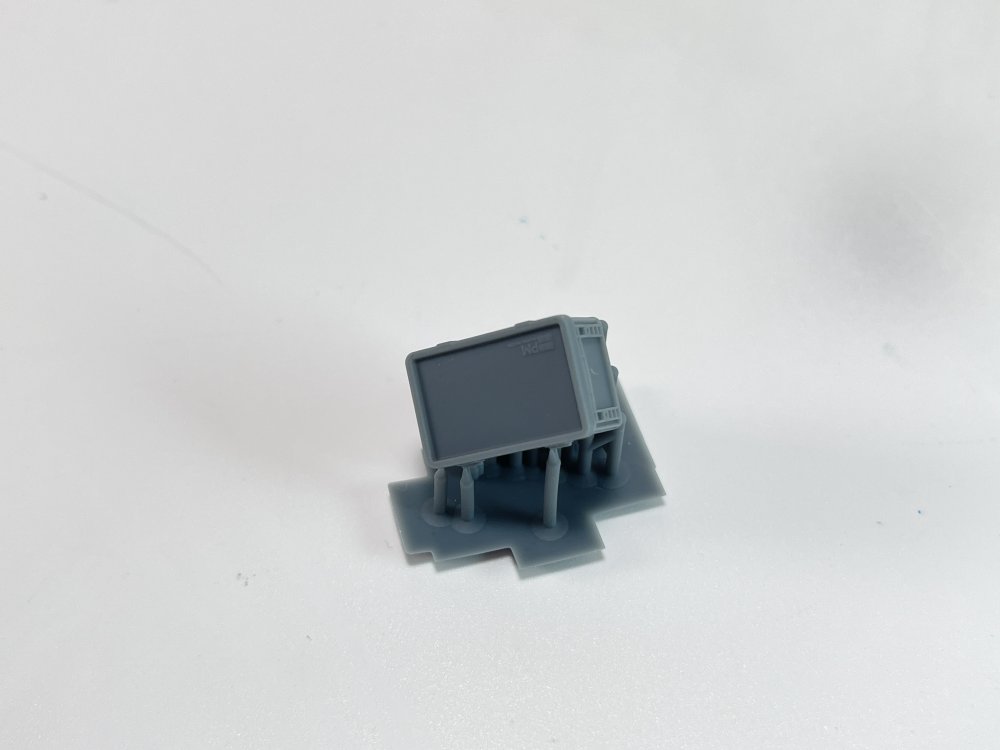
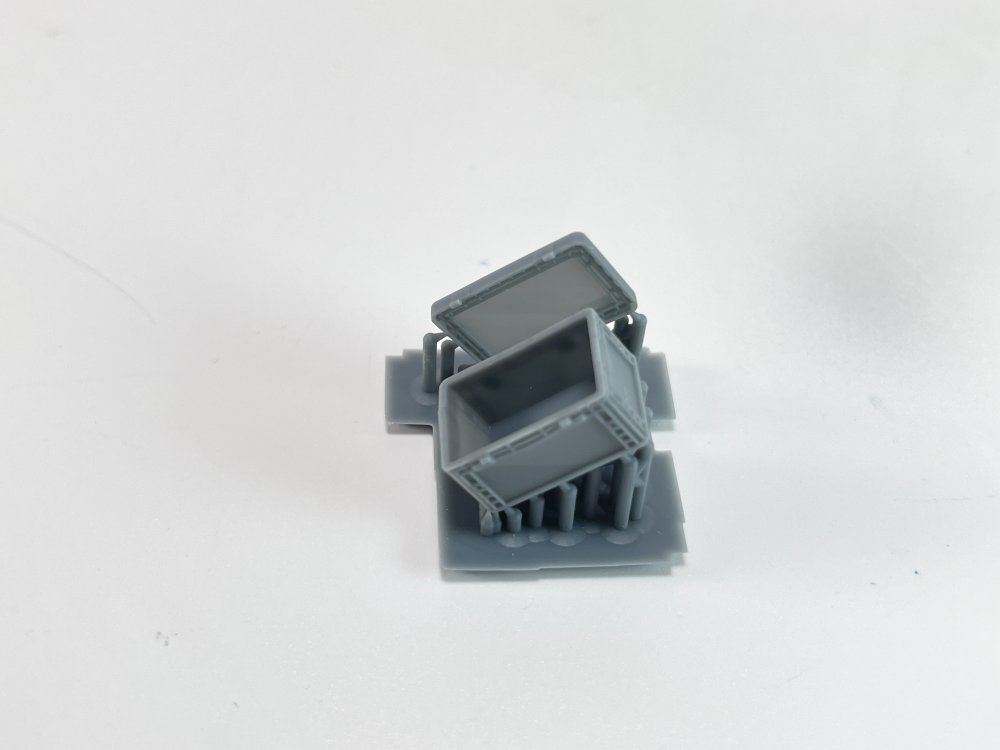
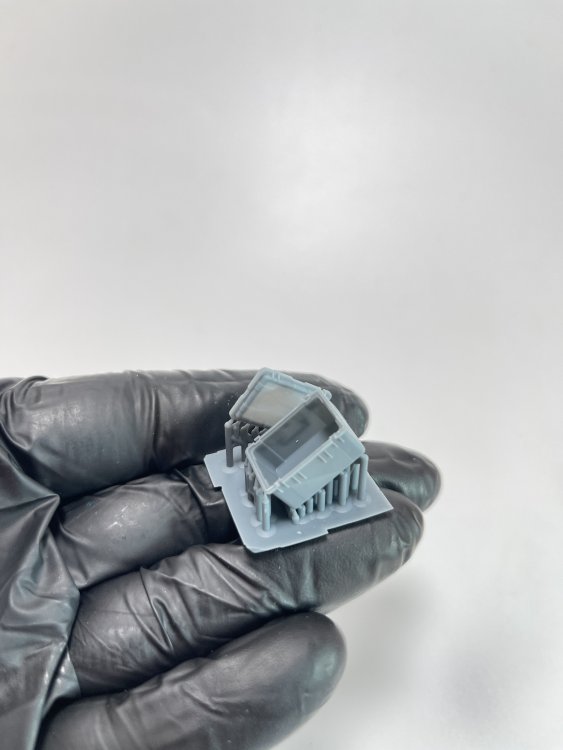
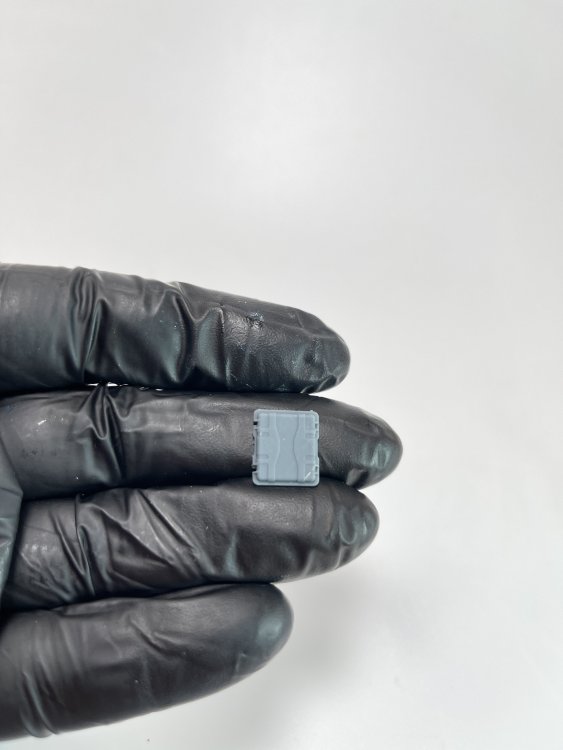
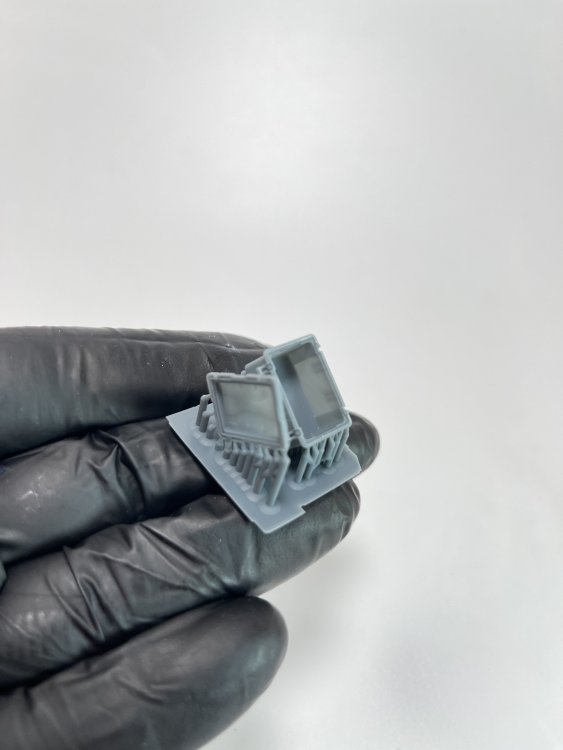
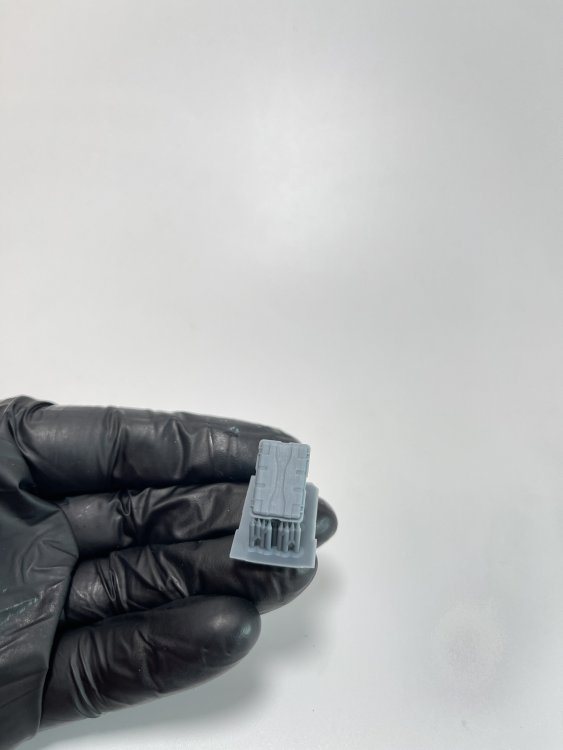
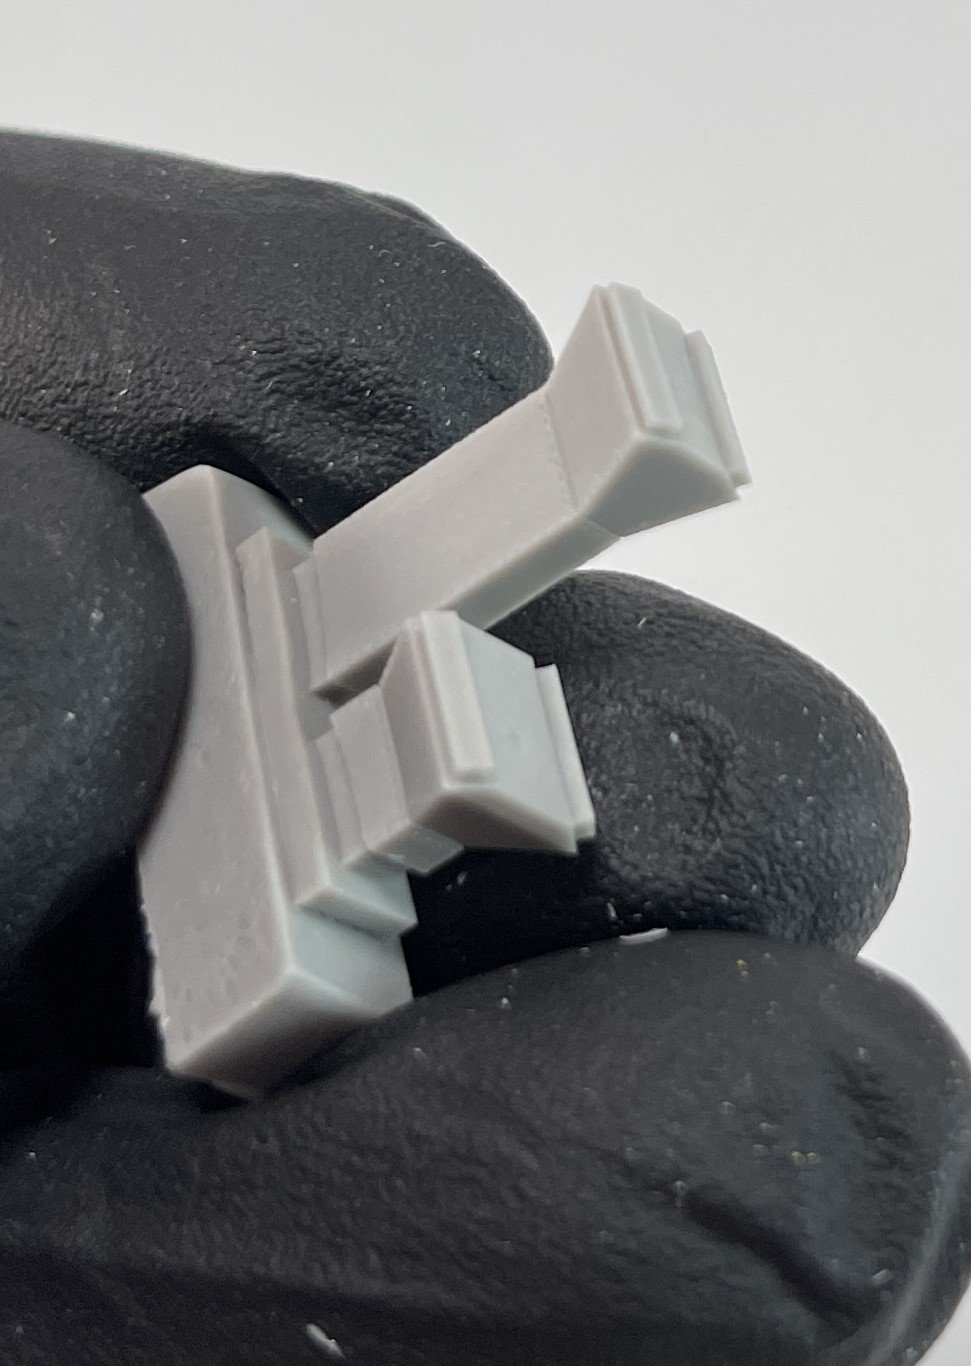
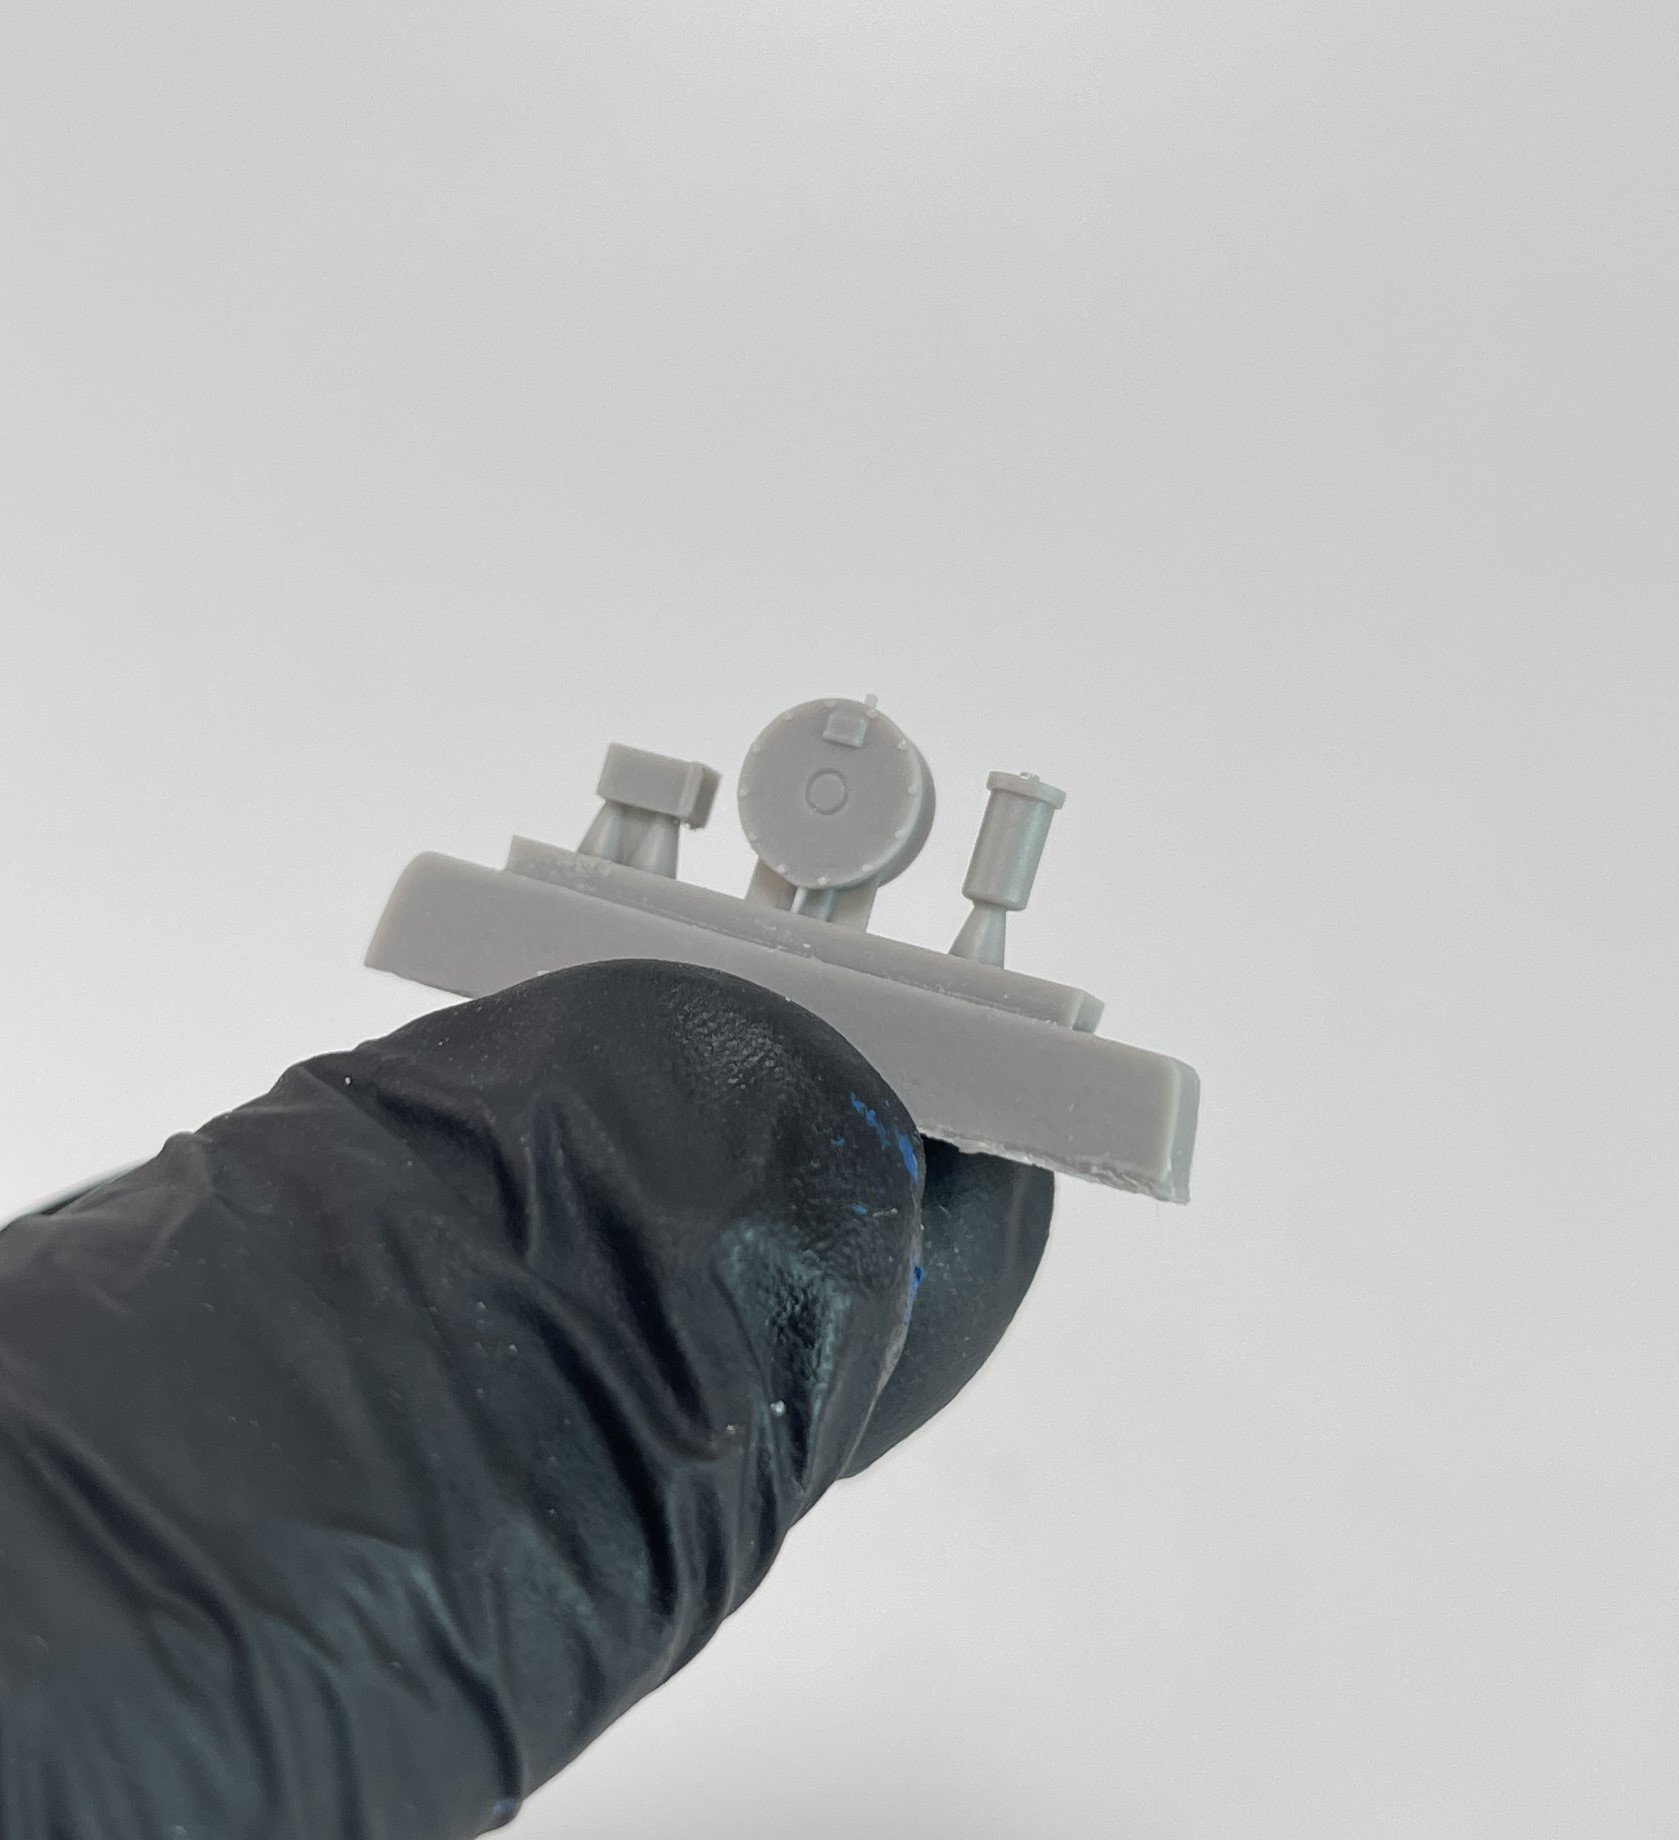
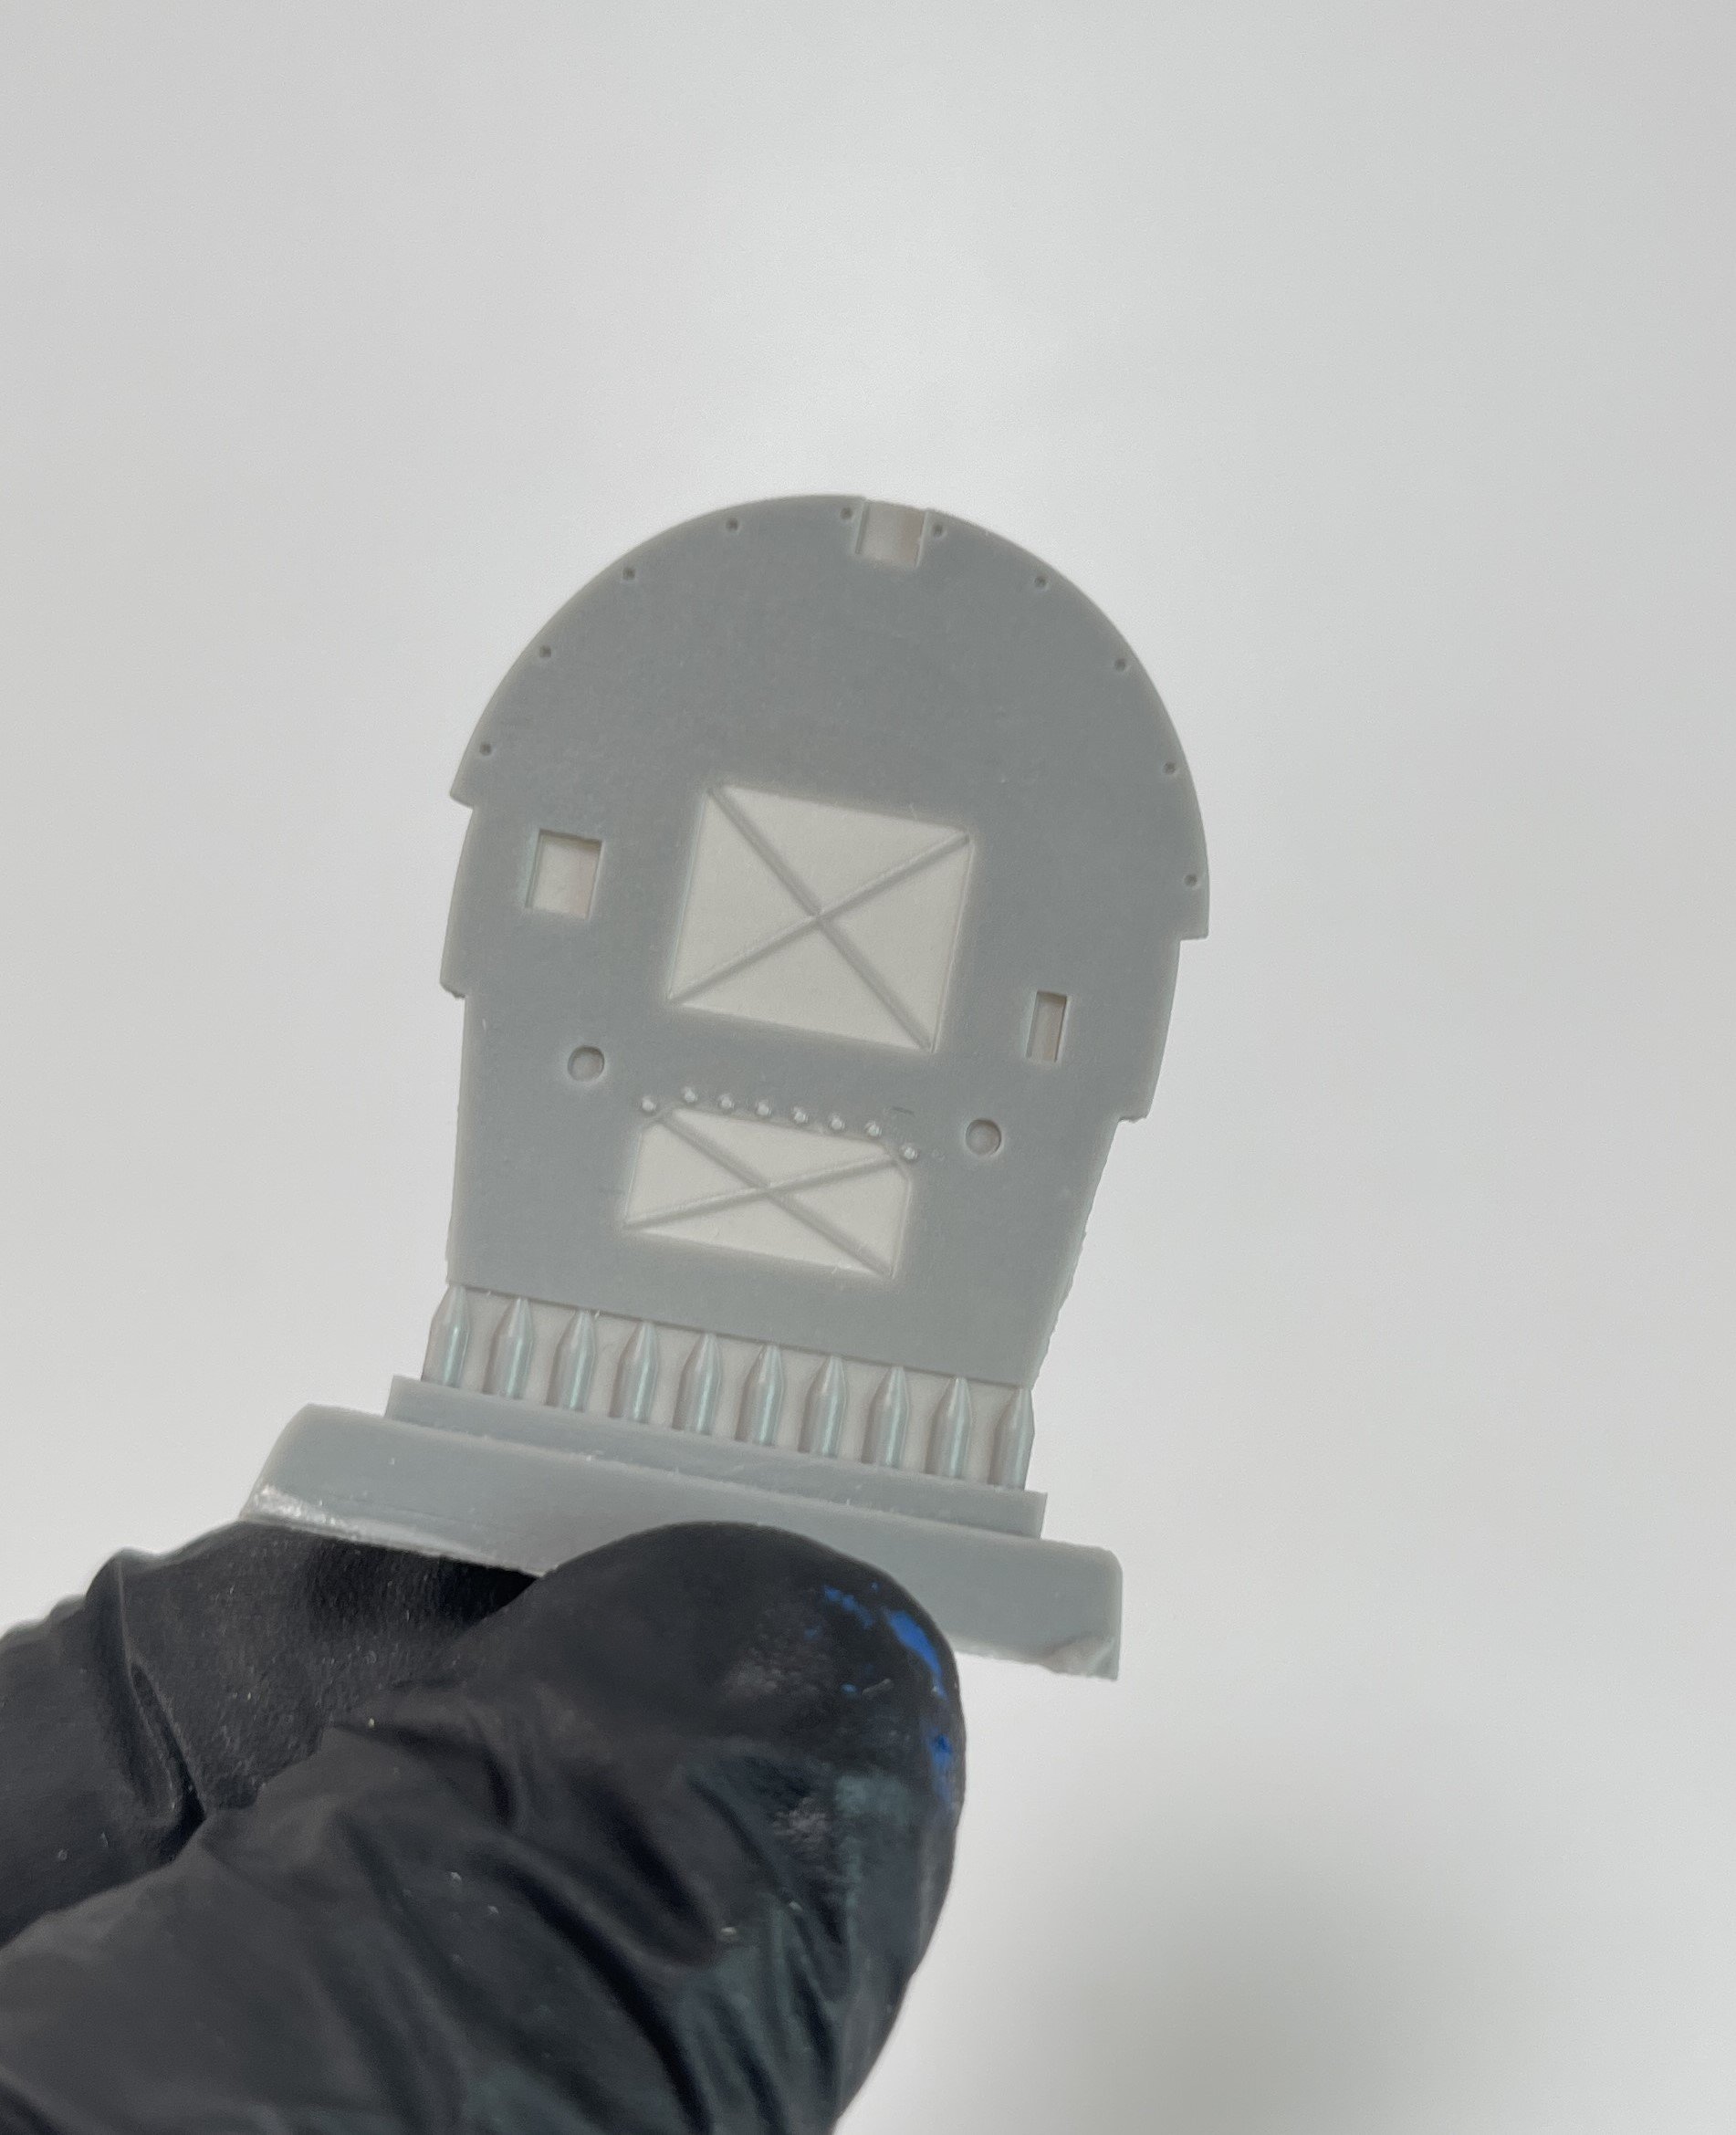
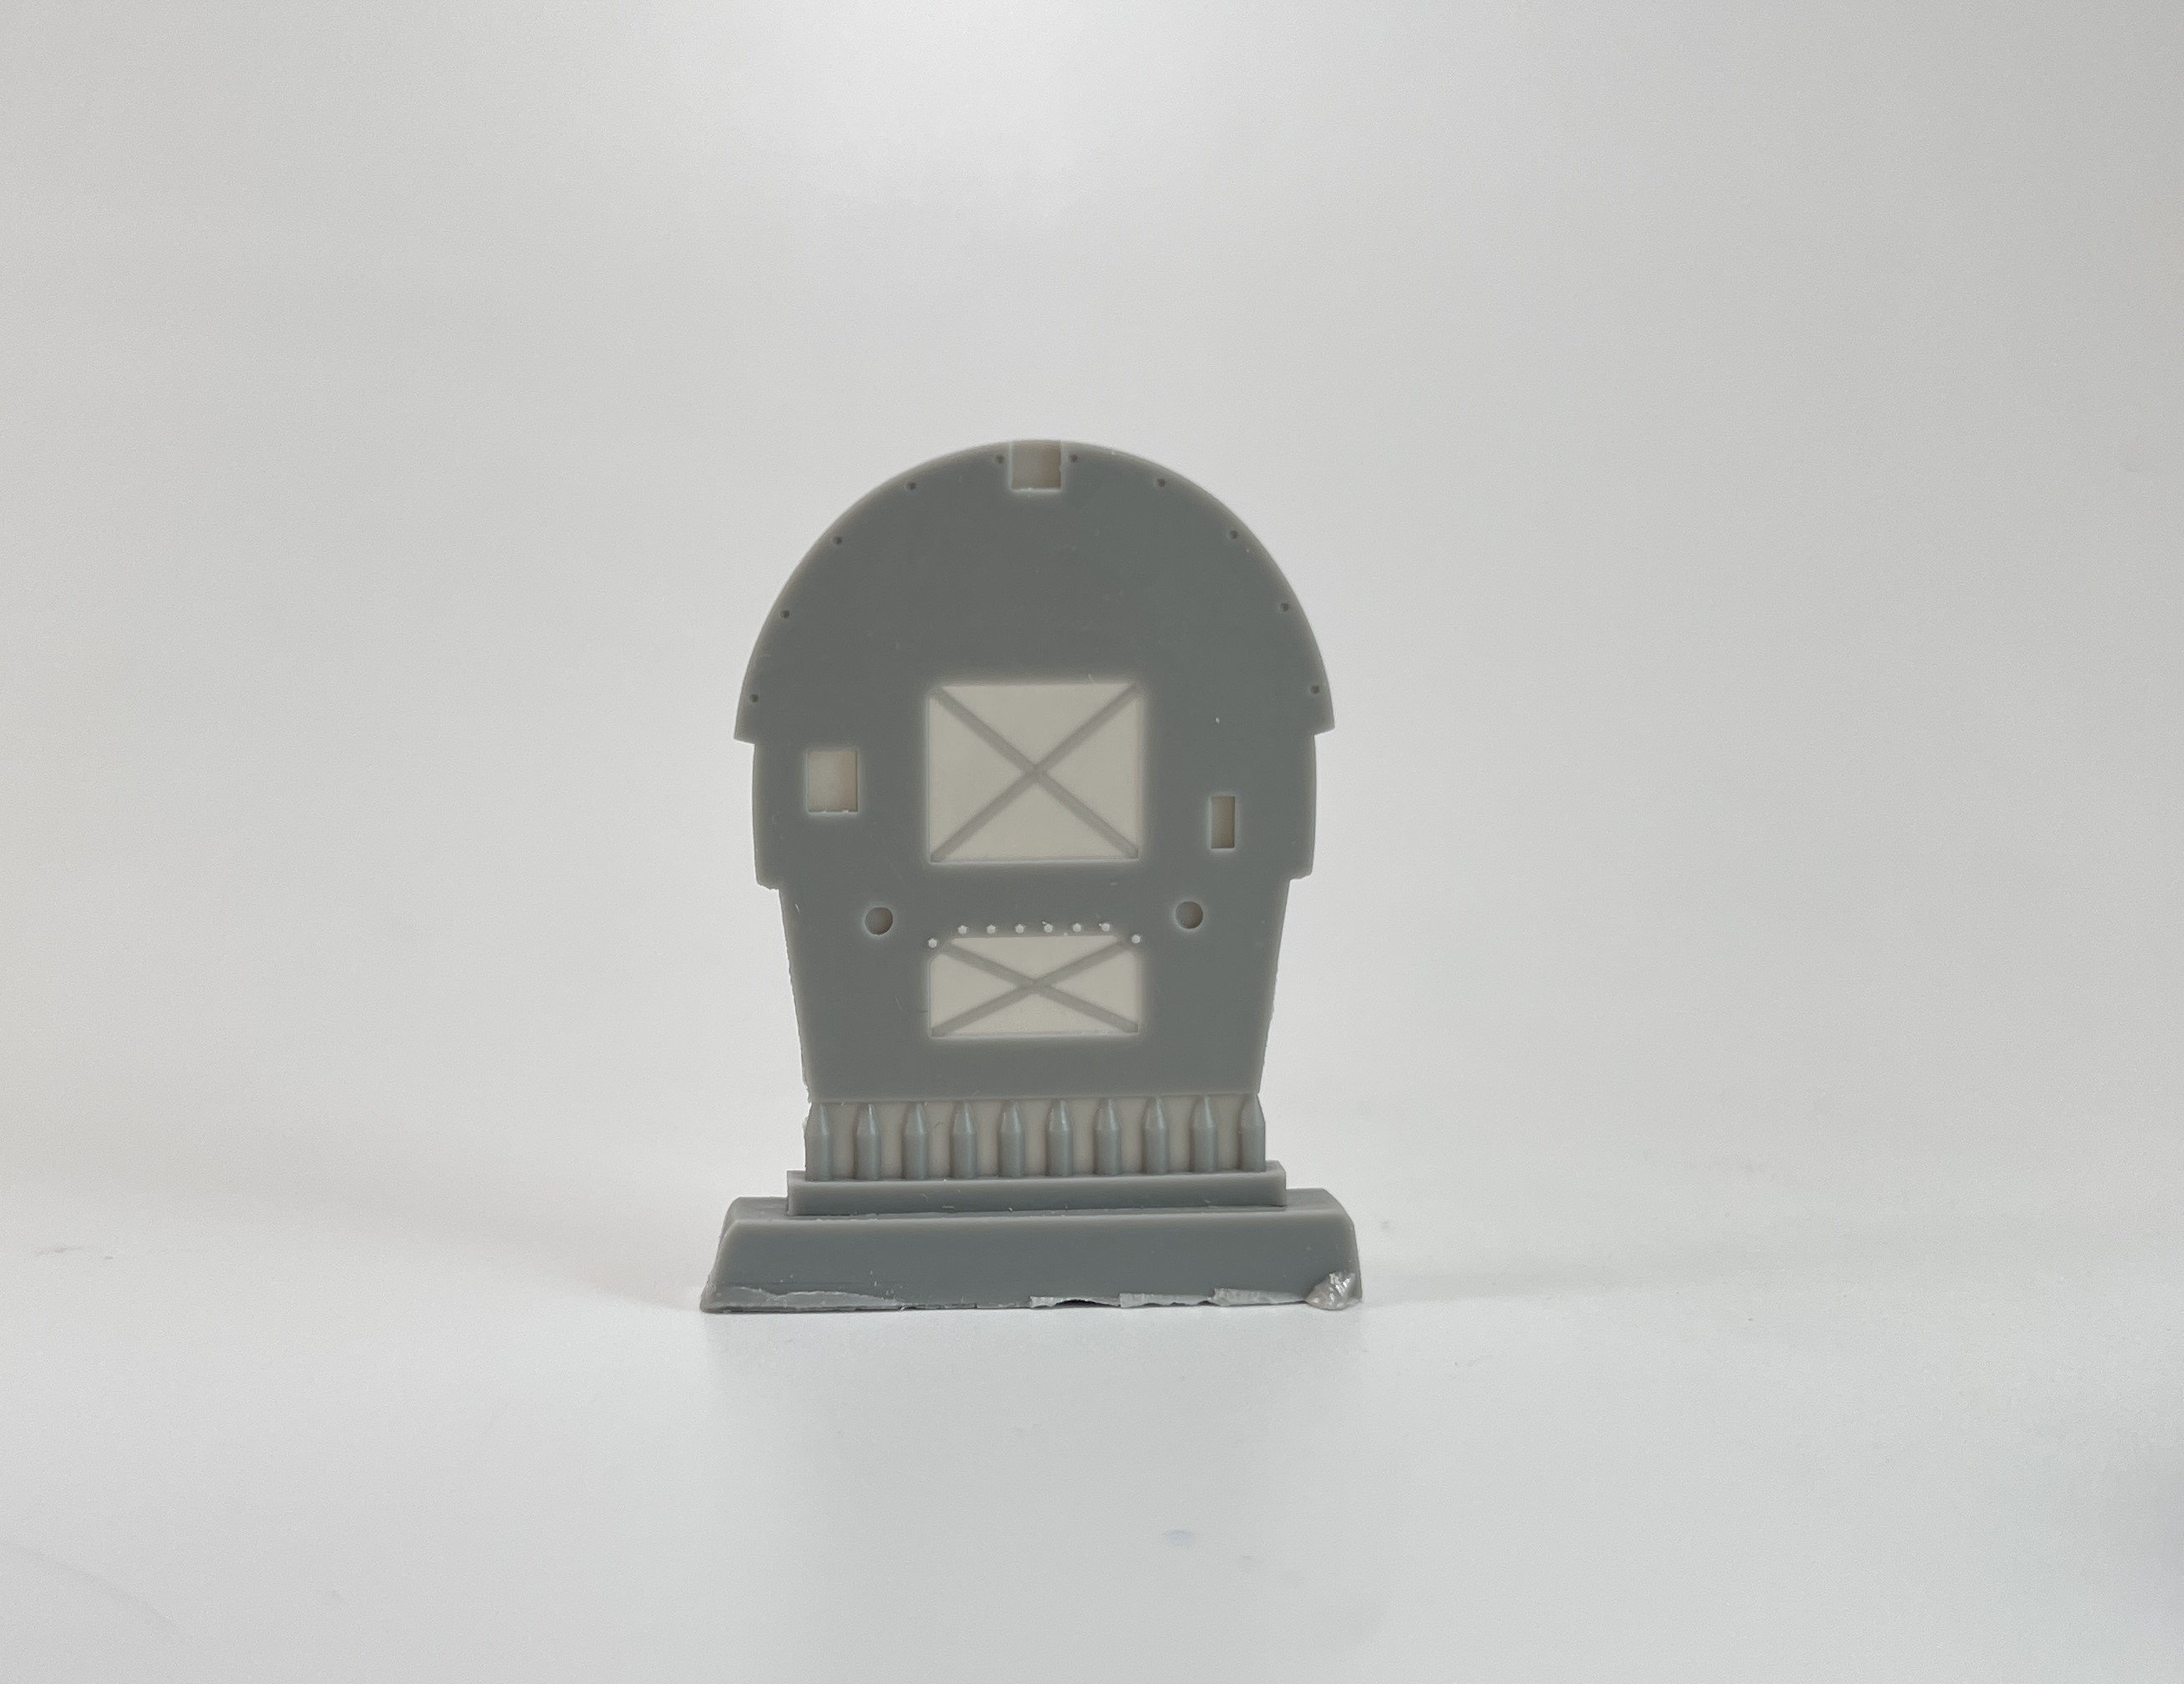
The M-121 has a small sprue with all the parts for it. A nice detail is the “tail” parachute. The detal are there waiting for a nice paintjob.
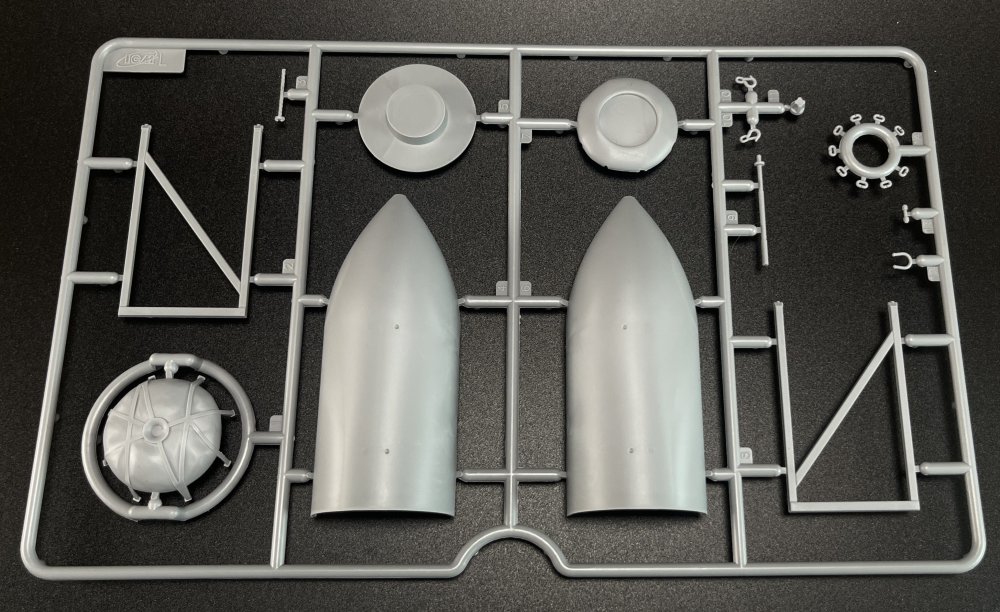
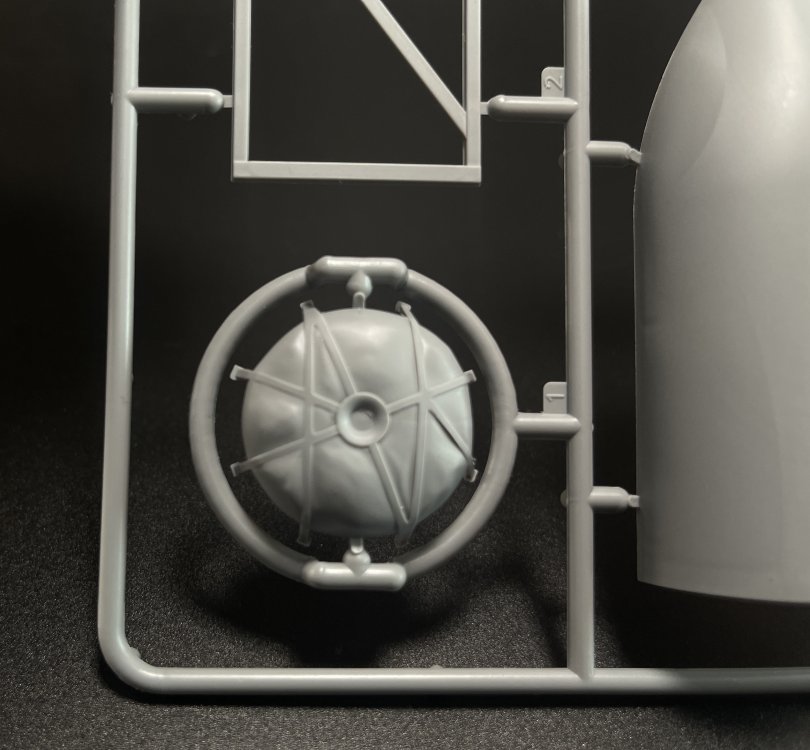
The details, checking pictures of the real thing is quite nice.
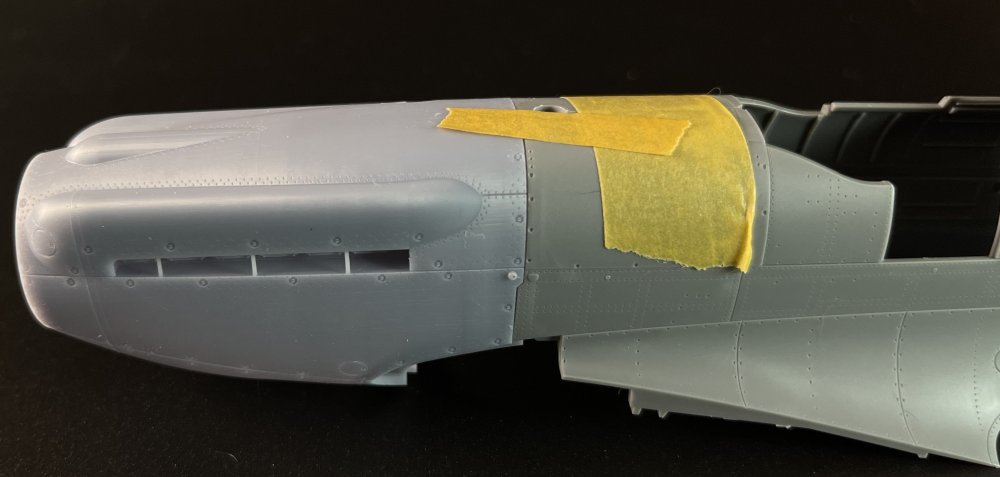
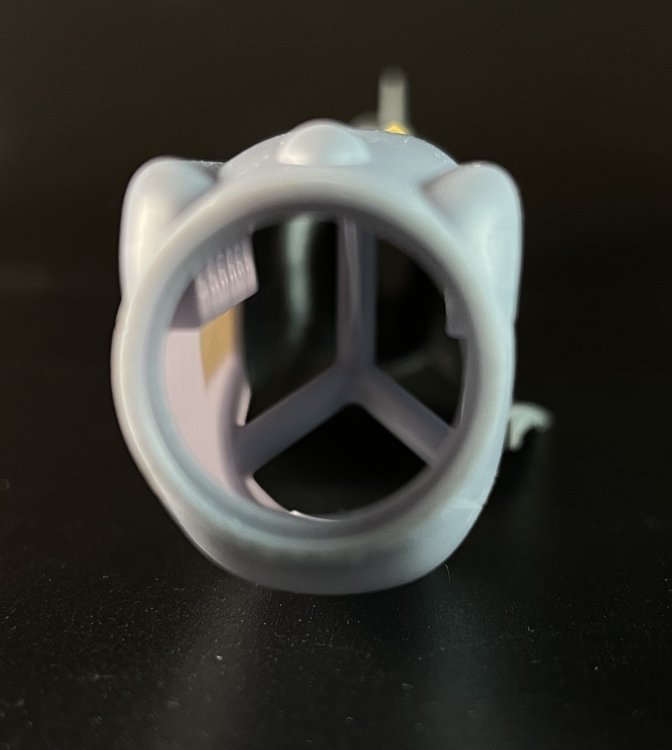
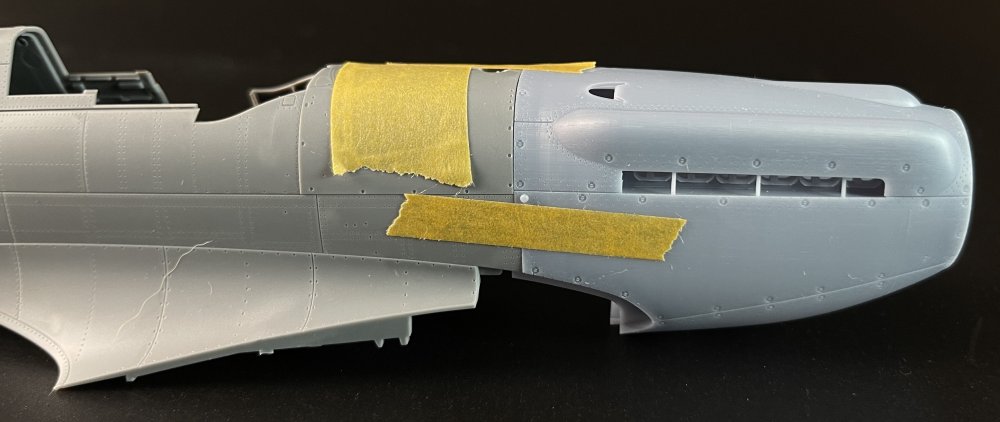
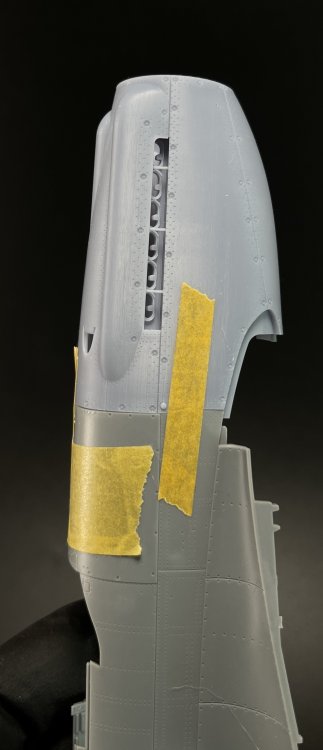
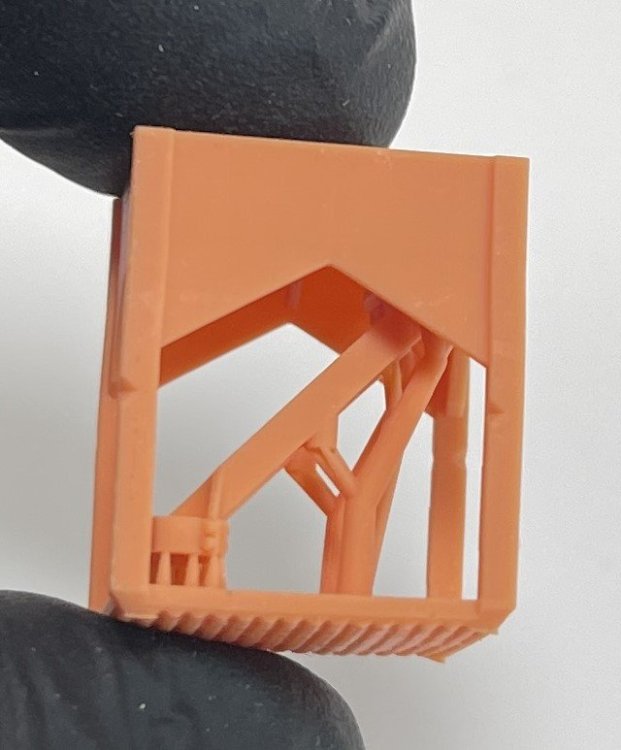
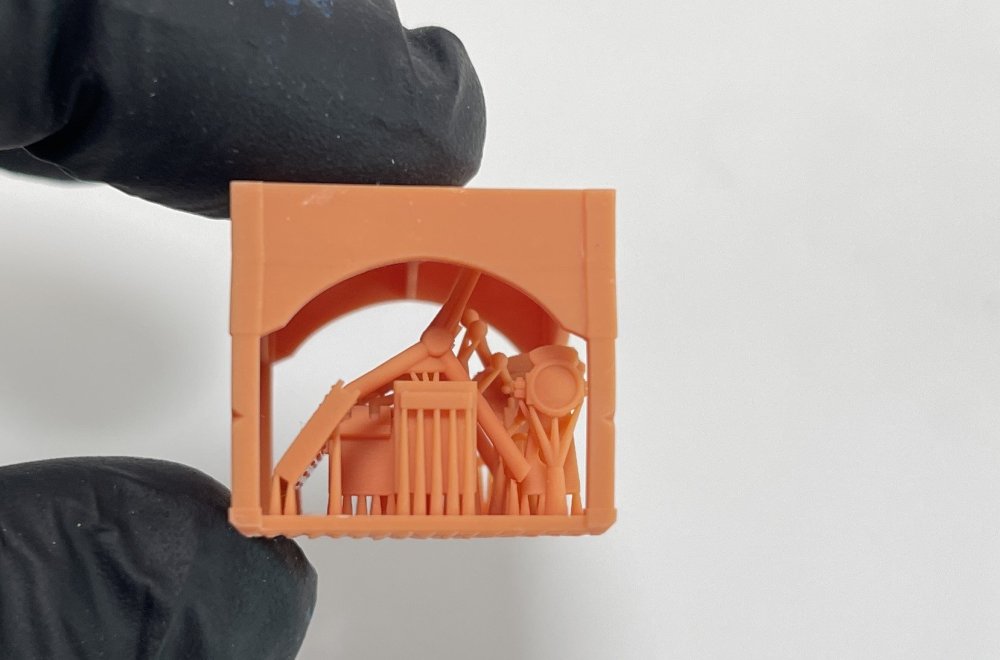
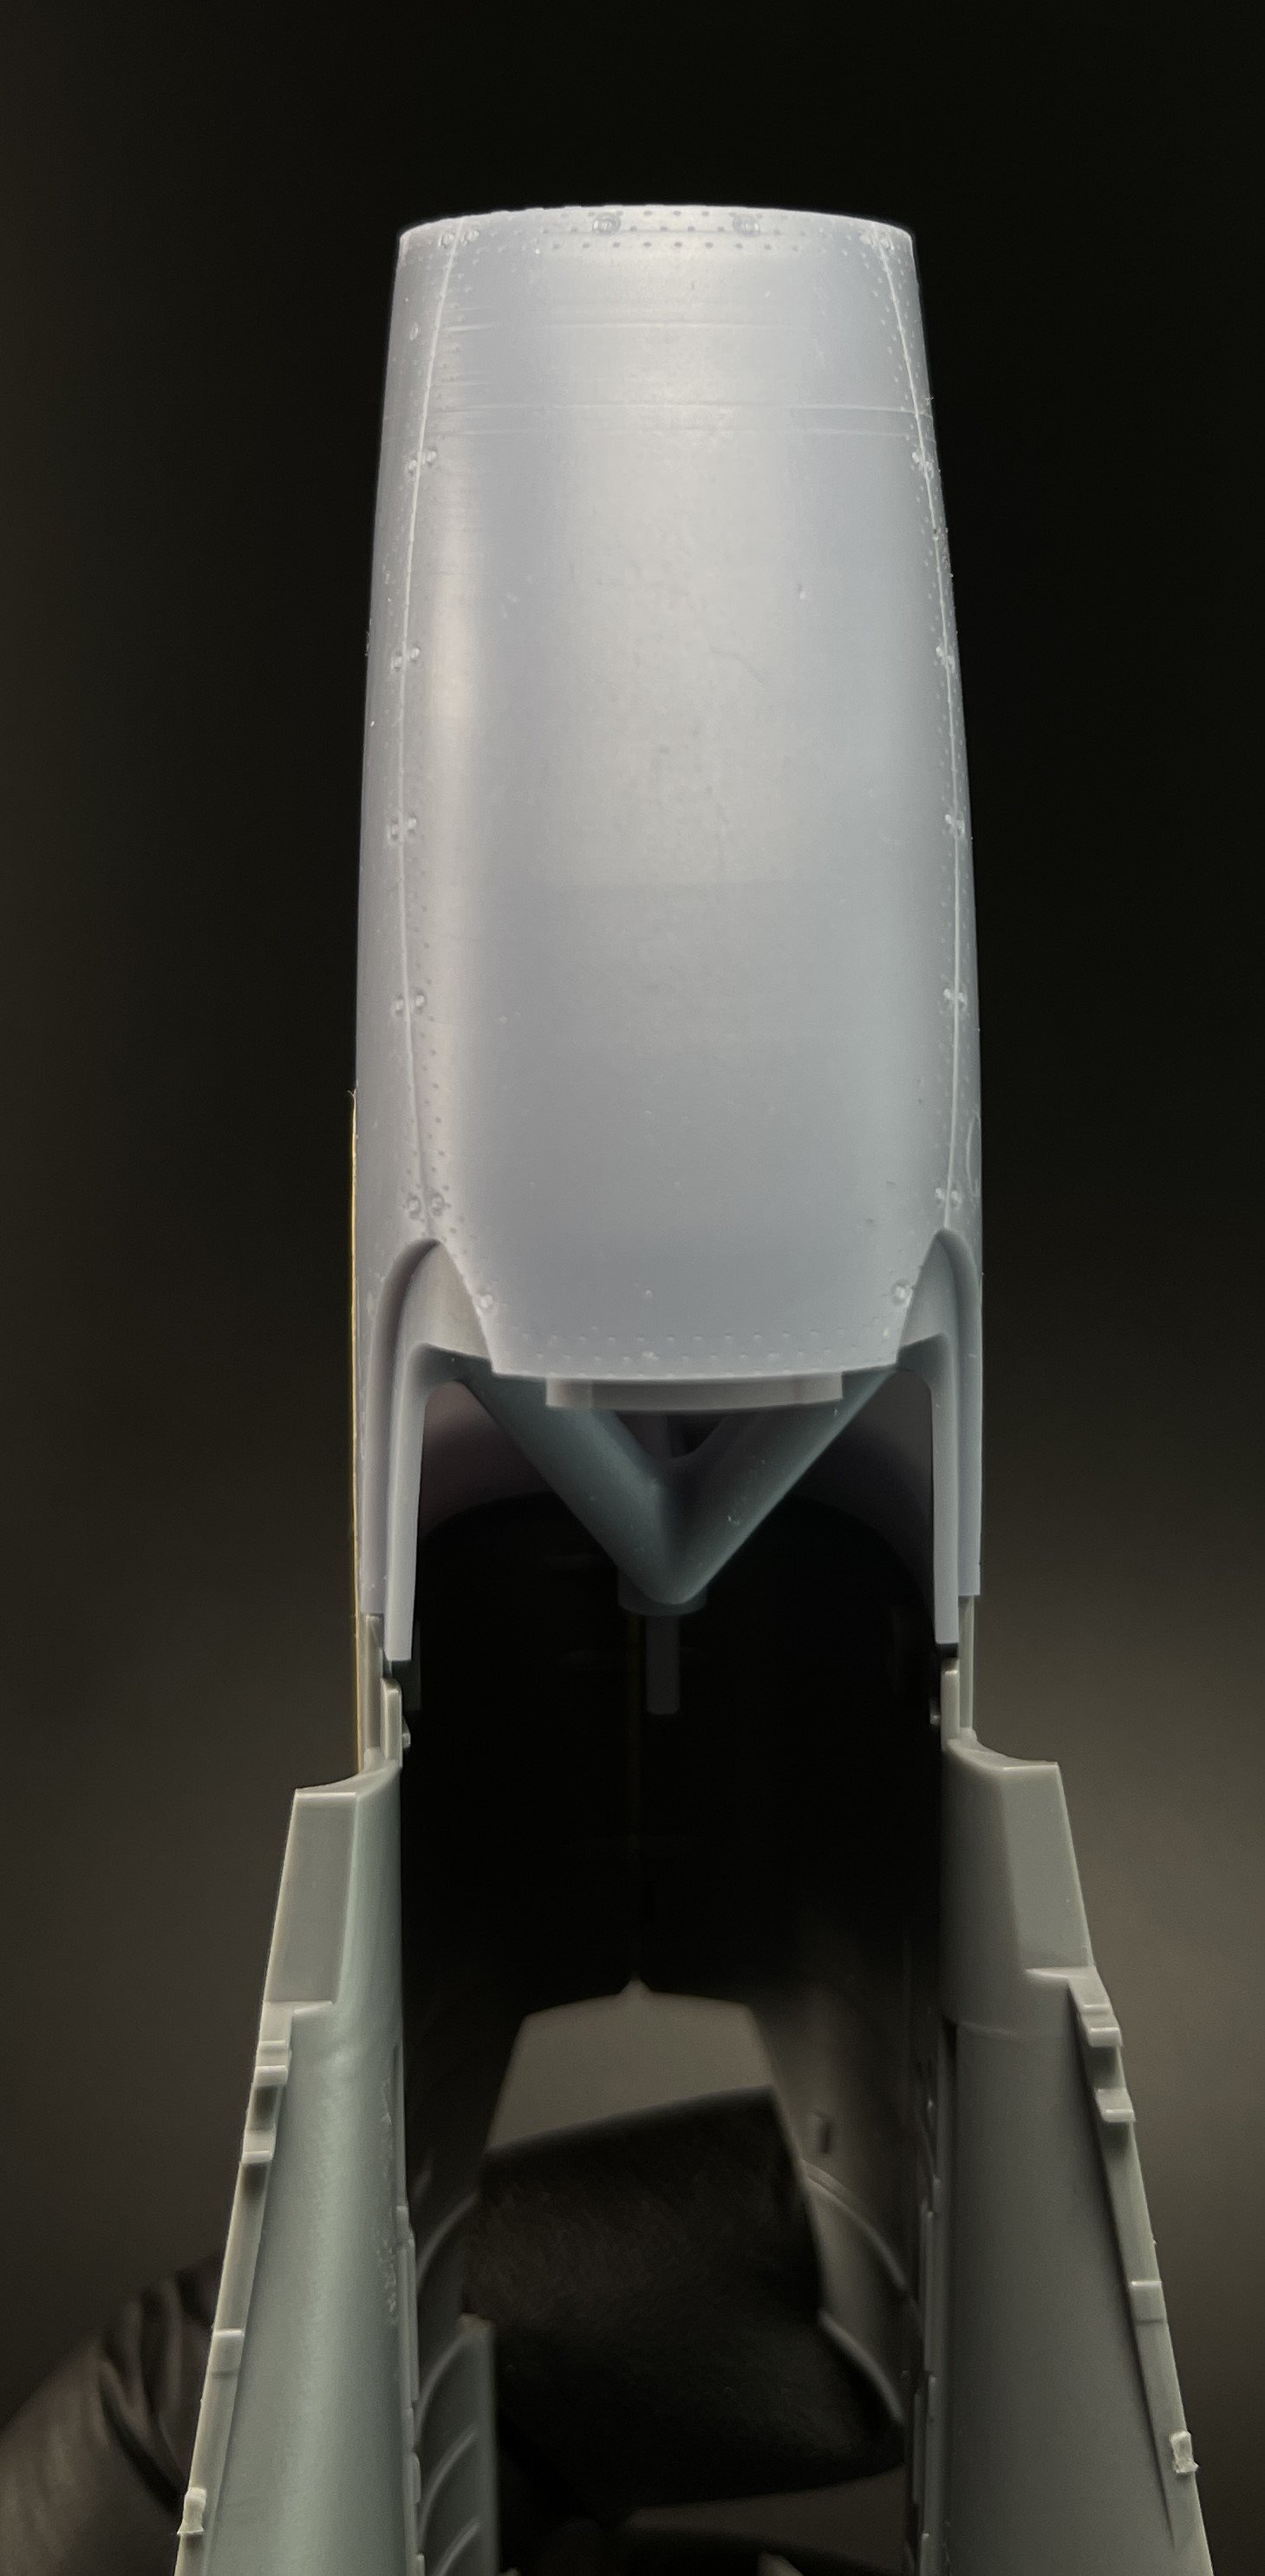
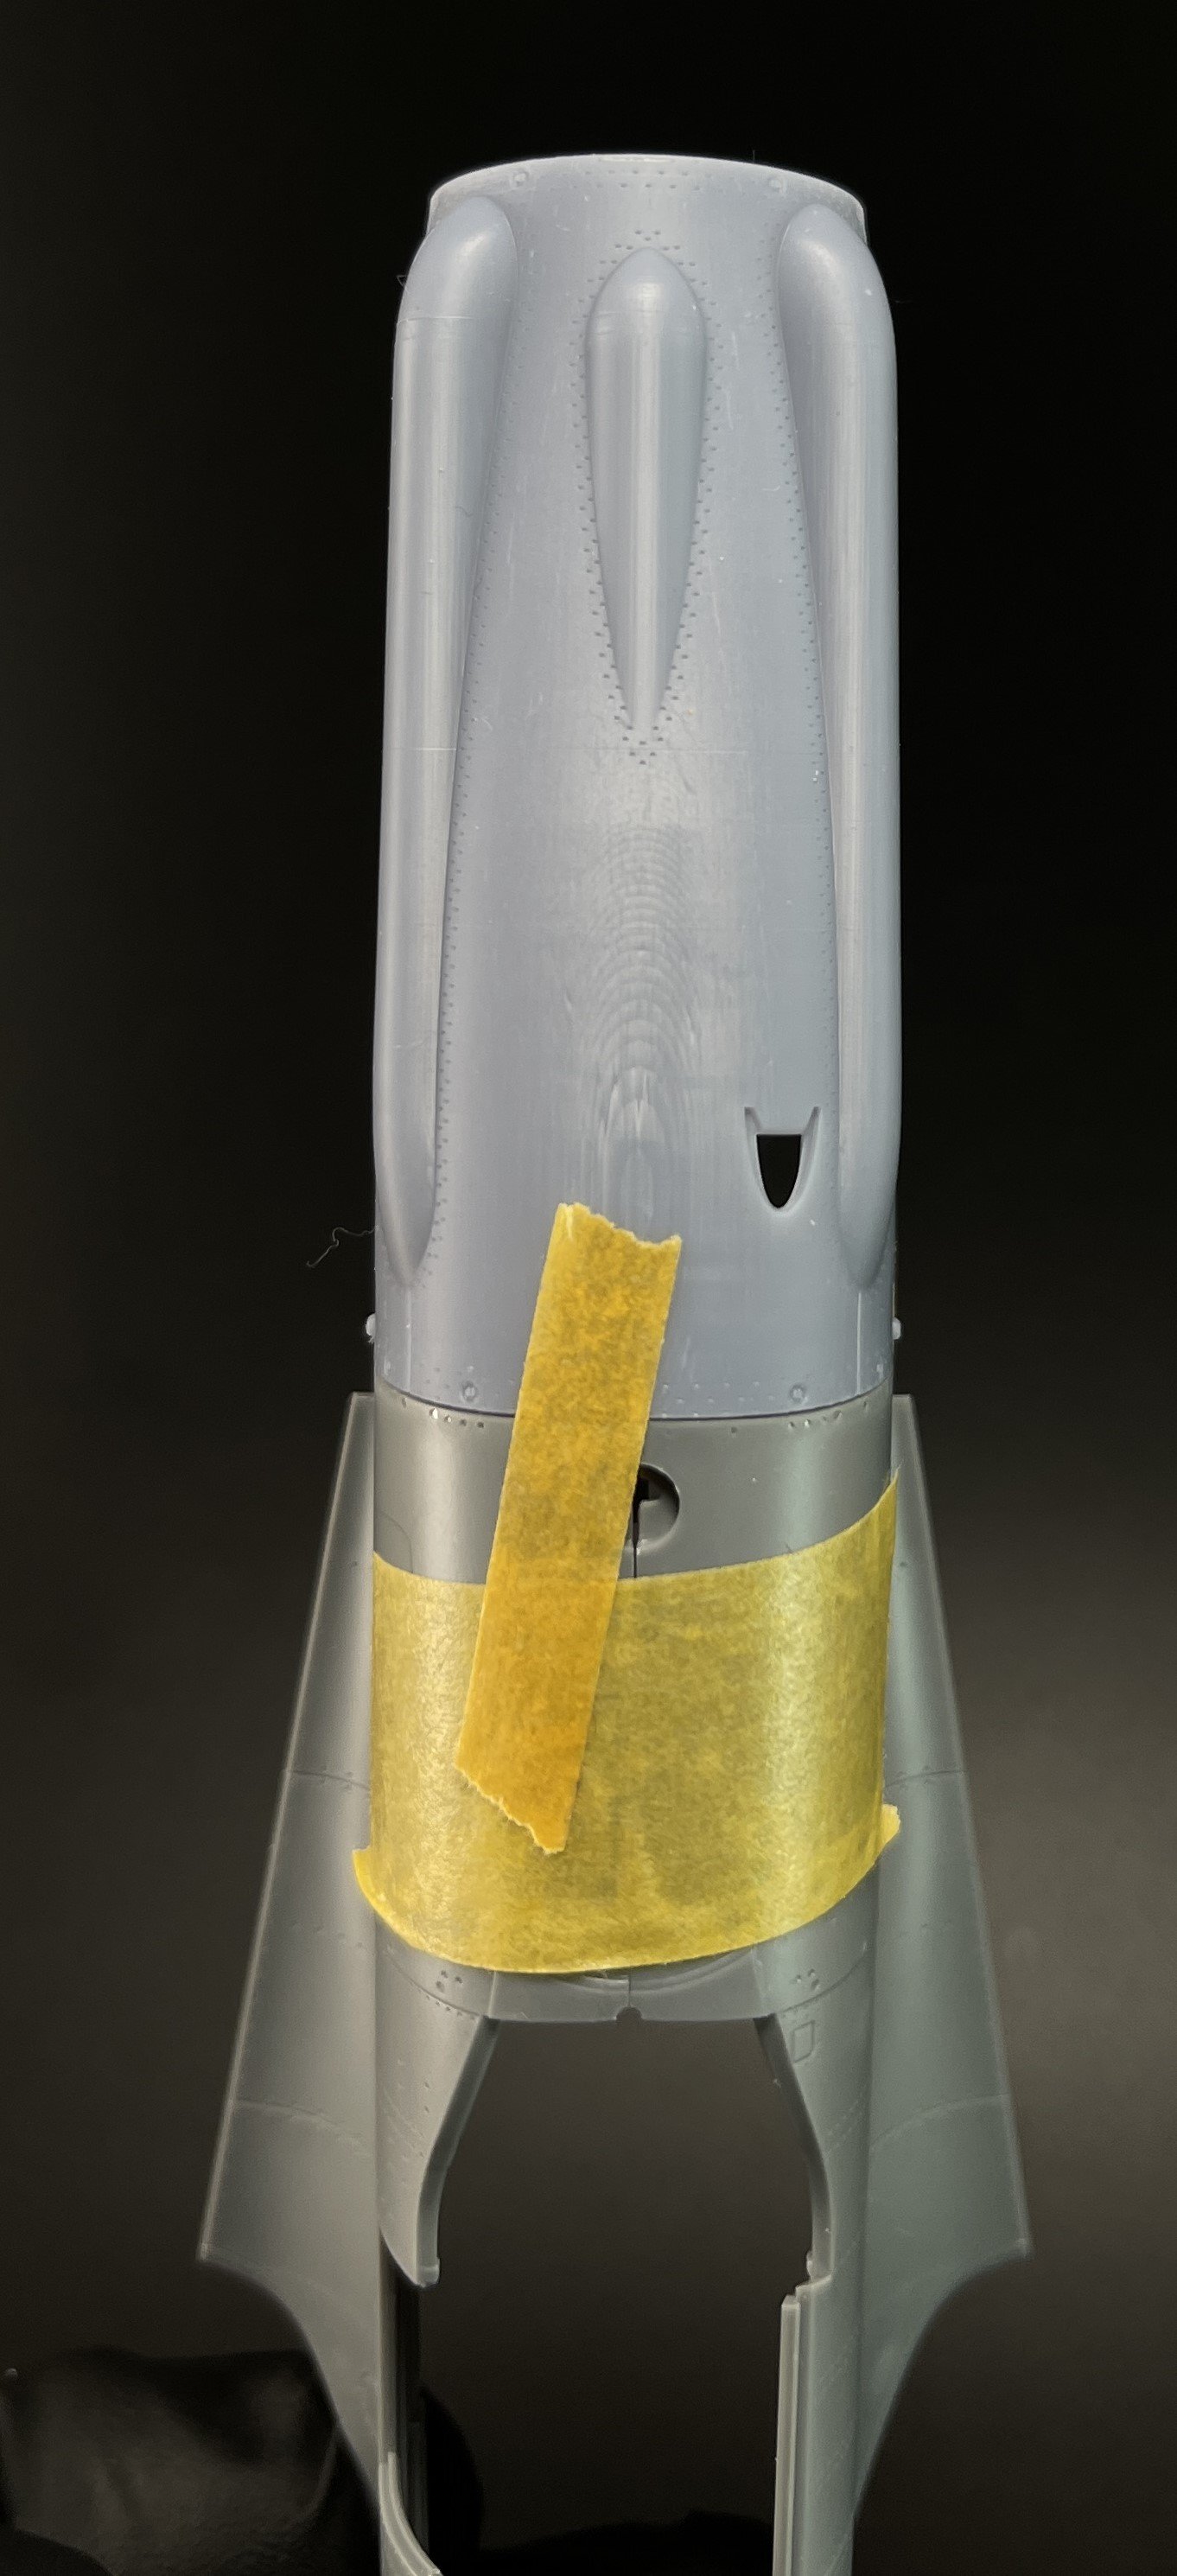
However, I have read something about the inaccuracies about the nose.
I just dryfit the bomb to chek it:
.thumb.jpg.b3d8450c9f63b000ed1b8a2b072808bb.jpg)
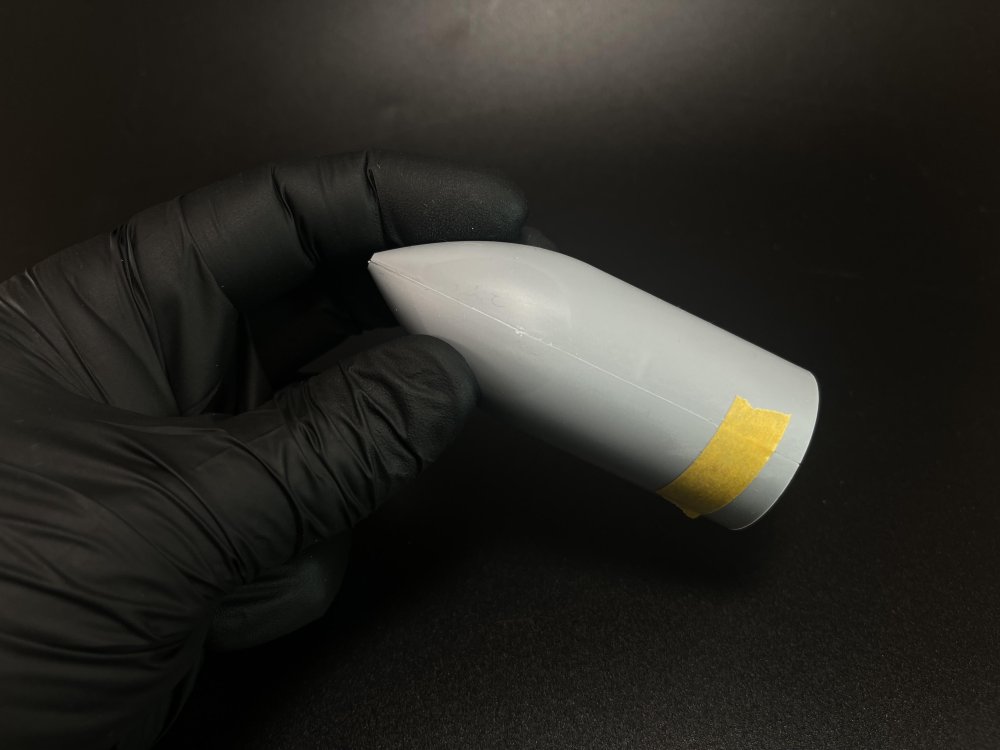
.thumb.jpg.0e8d9fdec19b0059937b695fa5a7630e.jpg)
Comparing with some online pictures, it looks like that the bomb shape of the nose, of the bomb pictures that I saw, is bit off, in fact.
Anyway, it`s nothing that take my sleep.
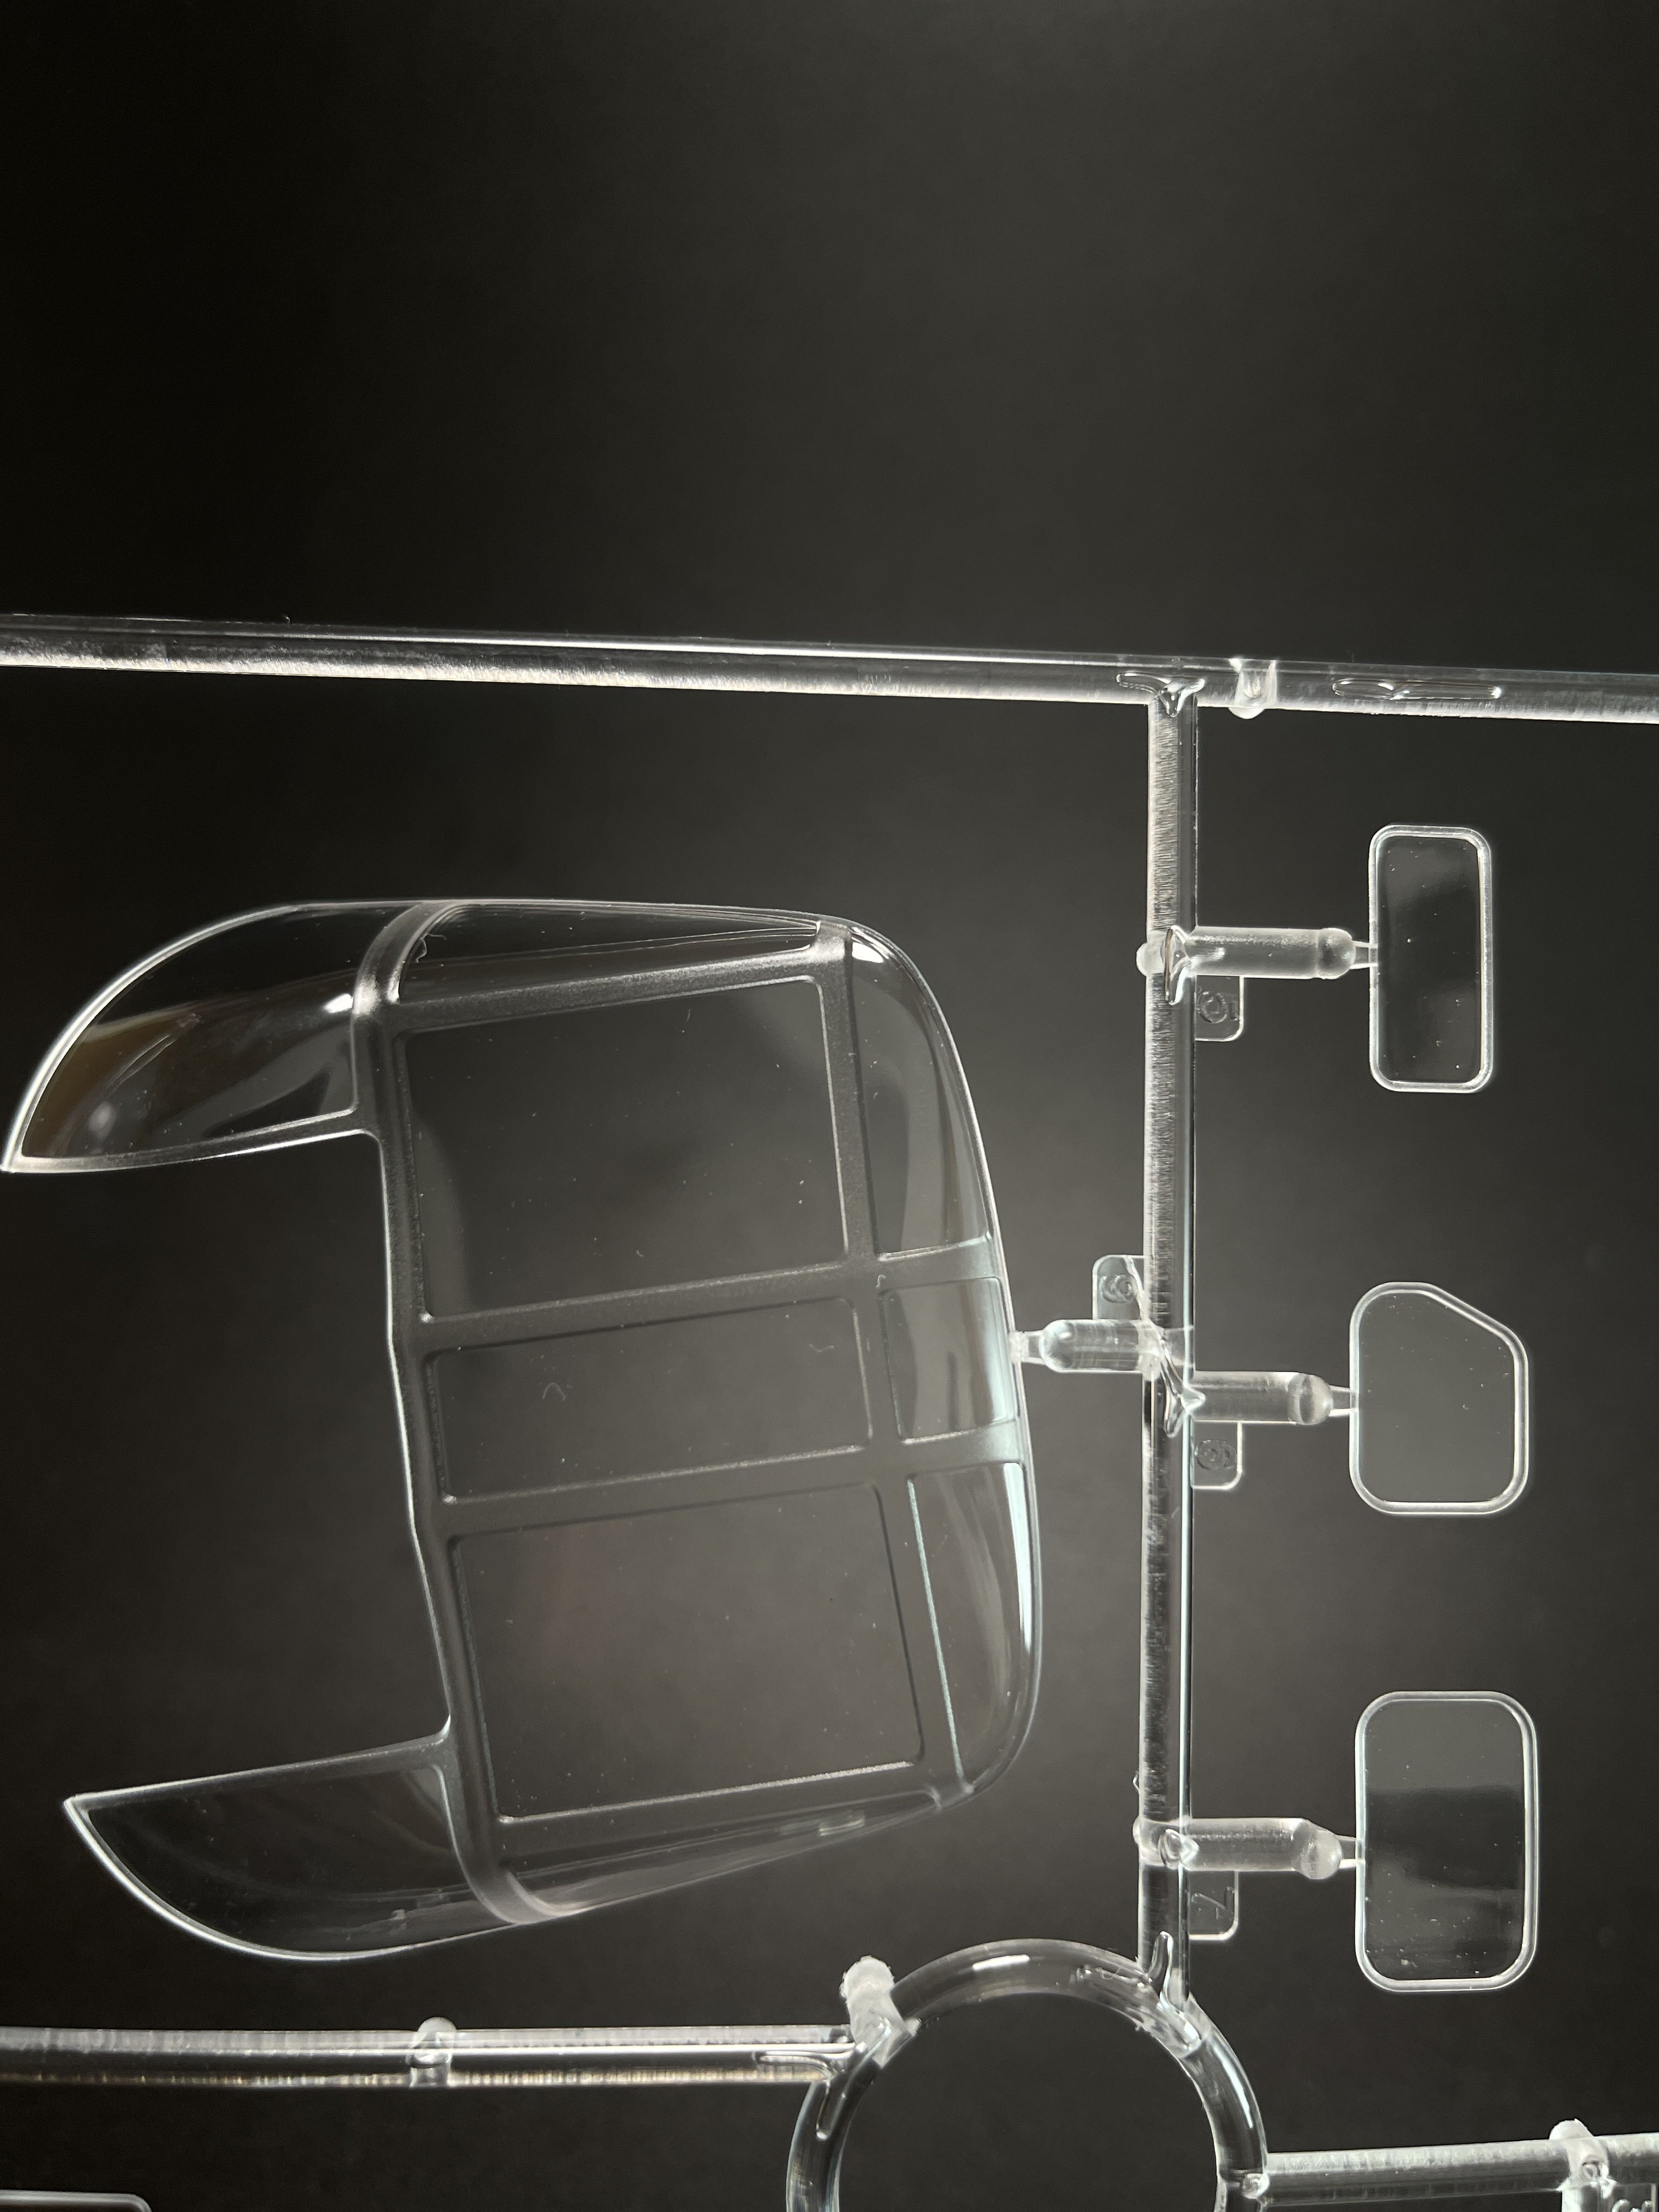
Moving to Clear Parts
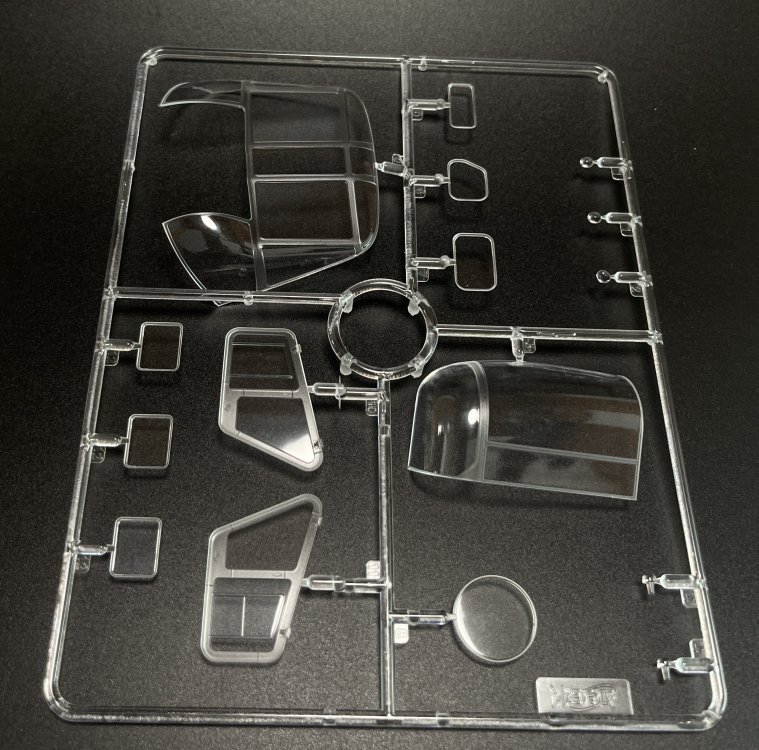

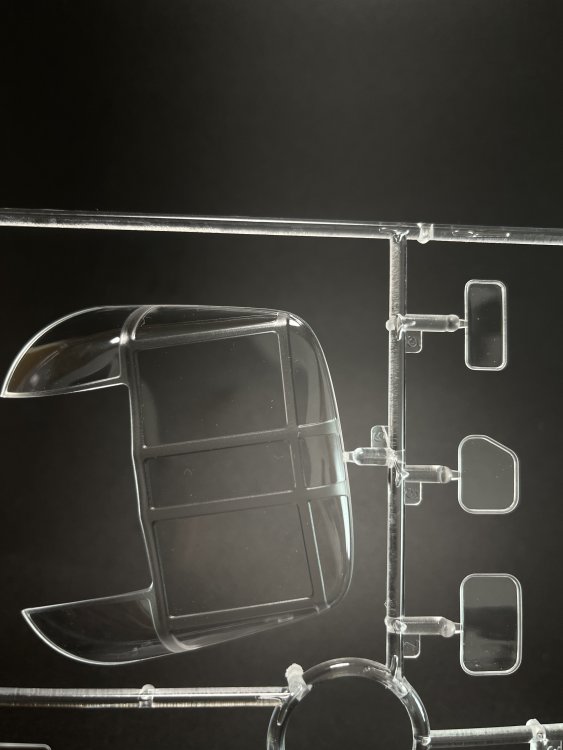
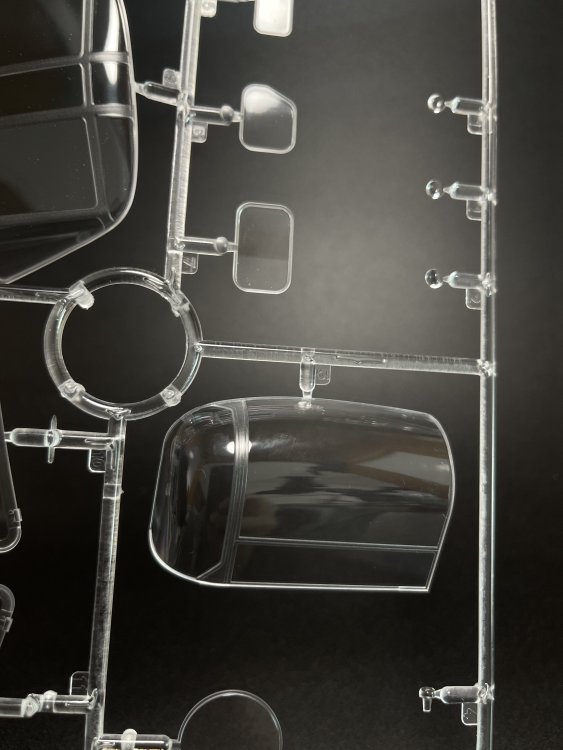
These are big, very well mould and really clear with no distortion at all.
The decal sheet has a very good color pigmentation and is “home-made” by ICM showing the gigantic effort of ICM to have an all-in house made product.
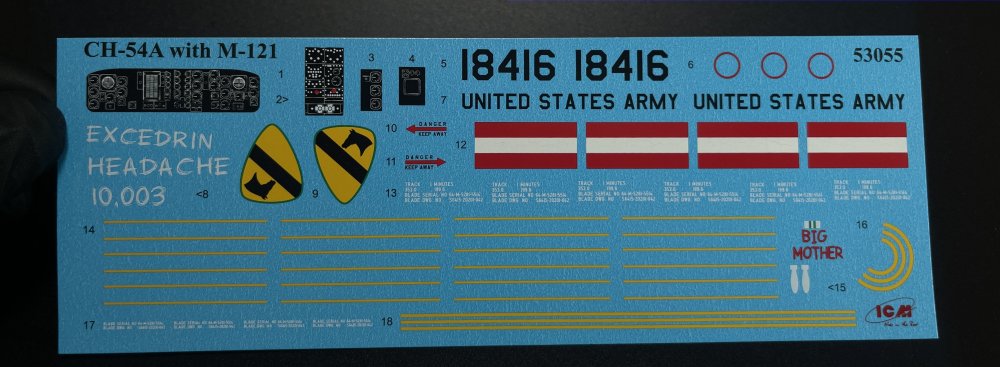
Just love the bomb inscription.
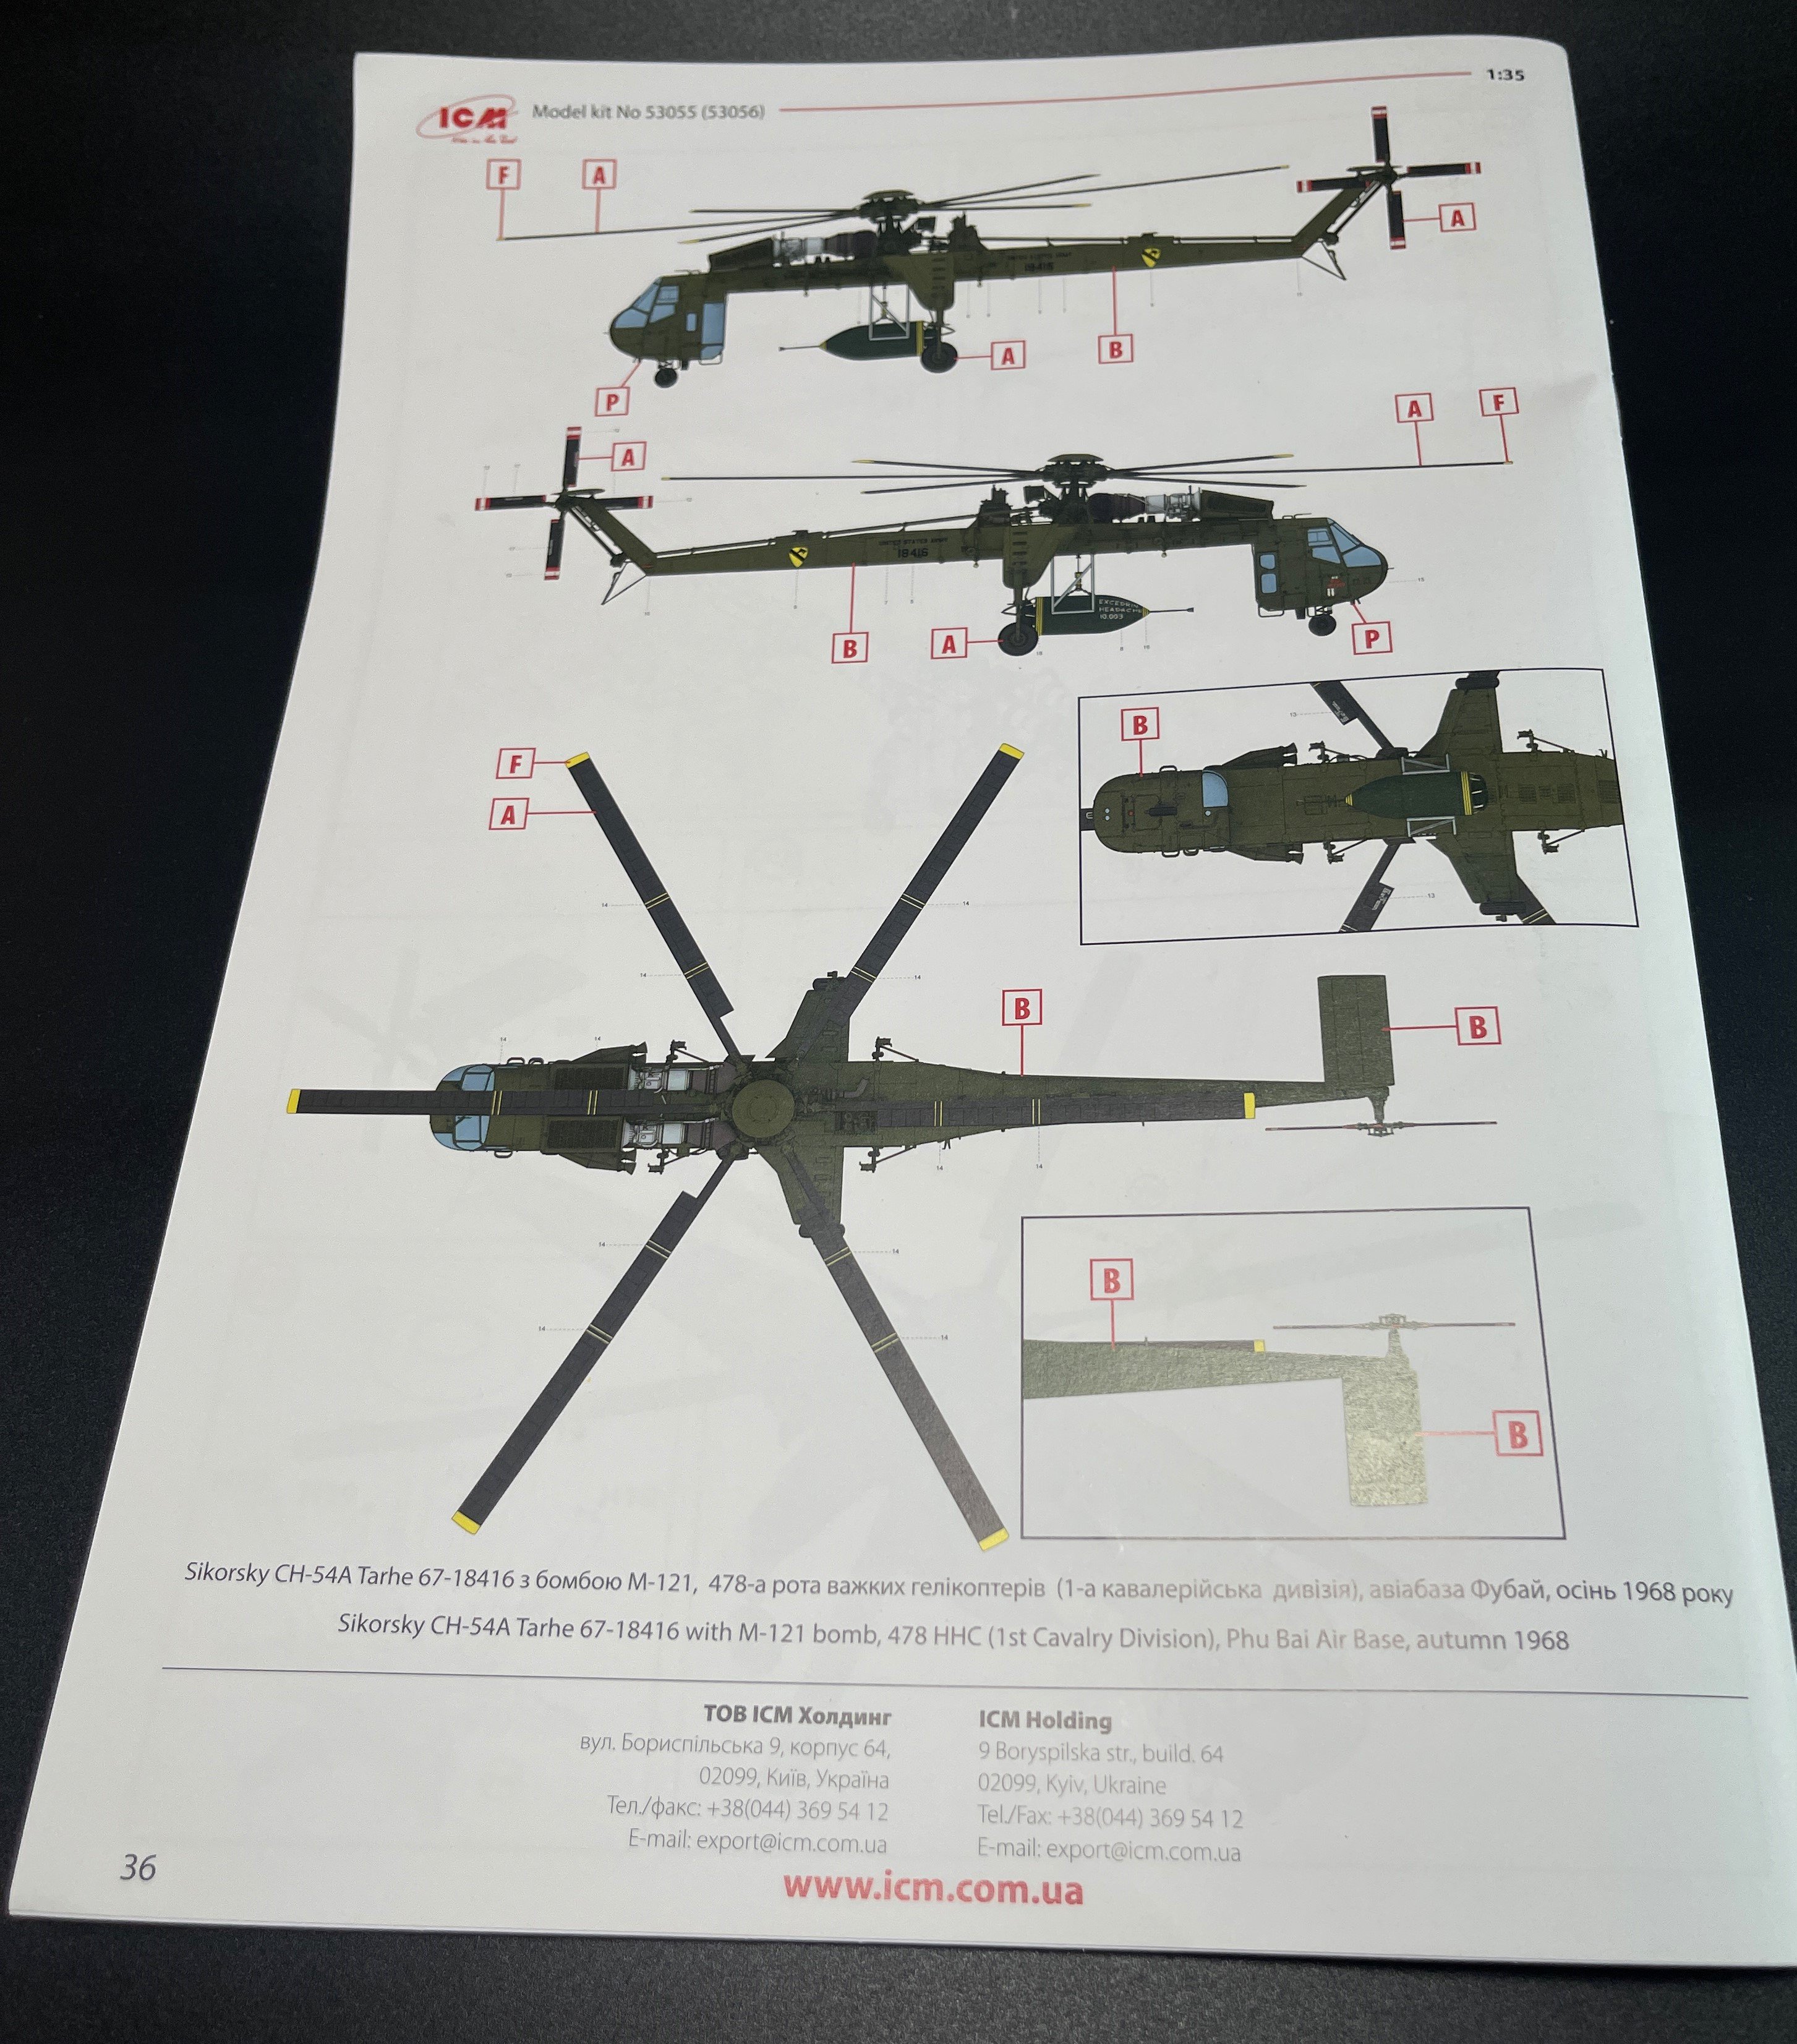
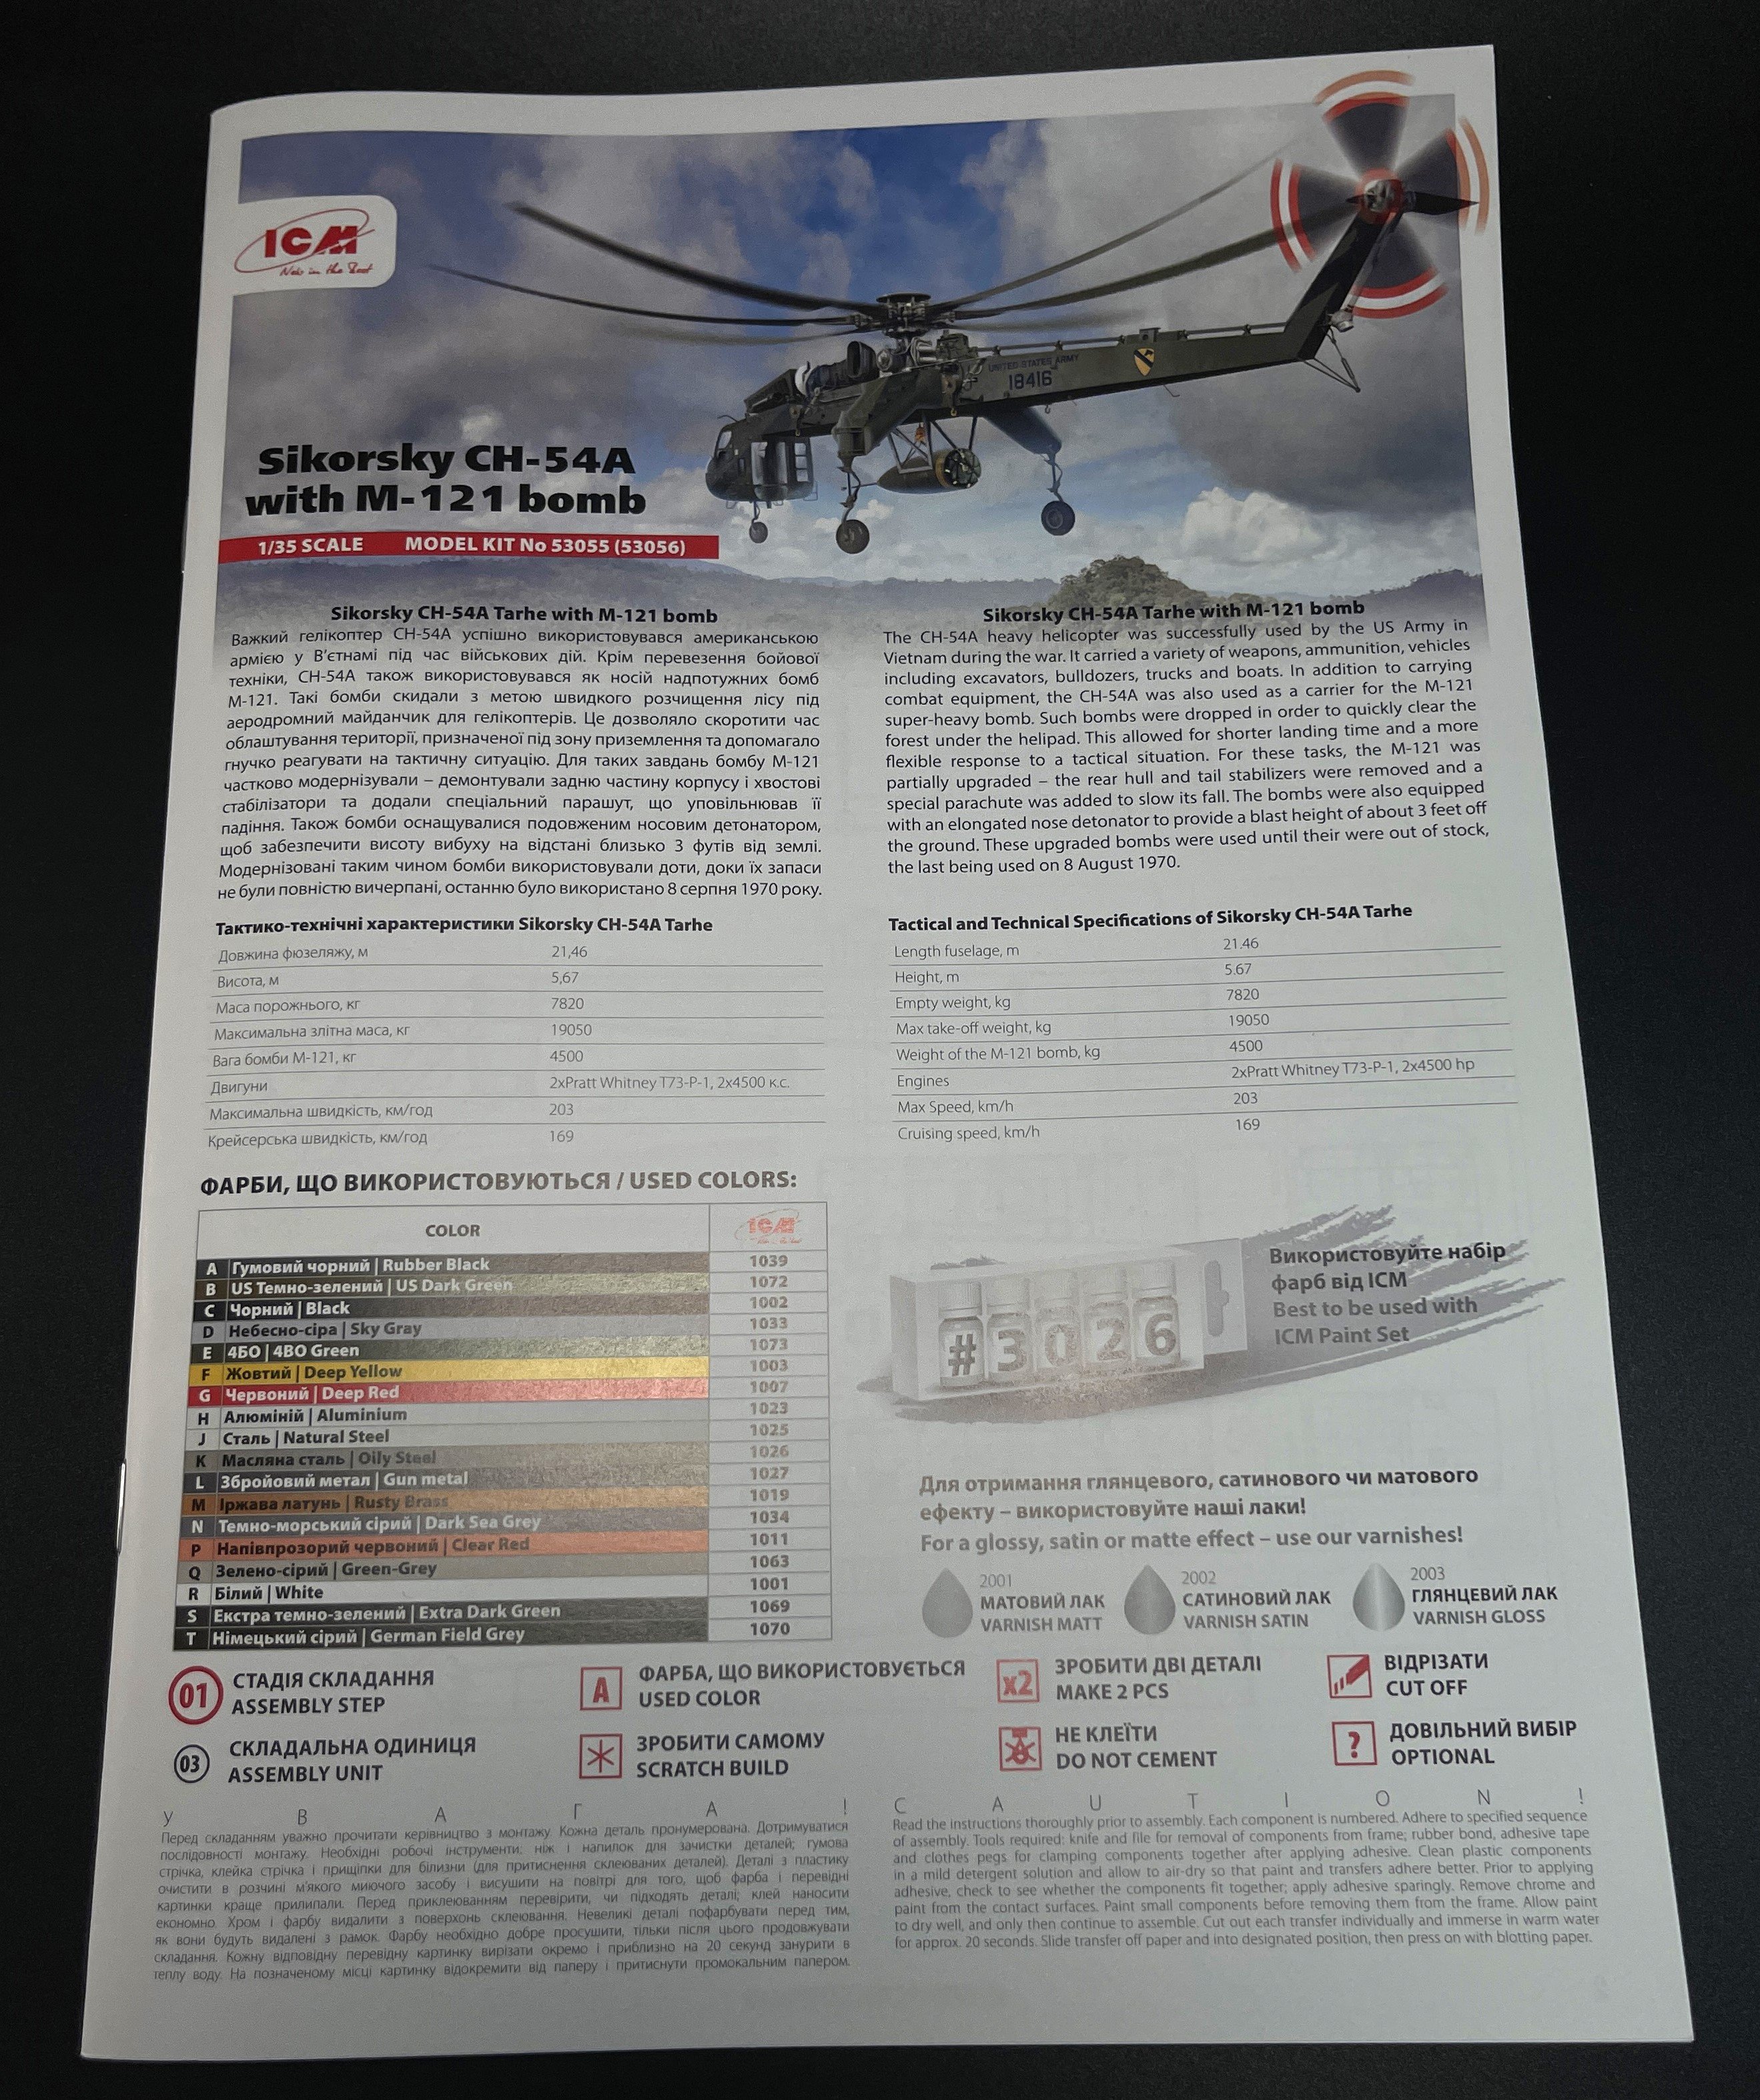
The scheme is Sikorsky CH-54A Tarhe 67-18416 with M-121 bomb, 478th HHC (1st Cavalry Division), Phu Bai Airbase, Autumn 1968.
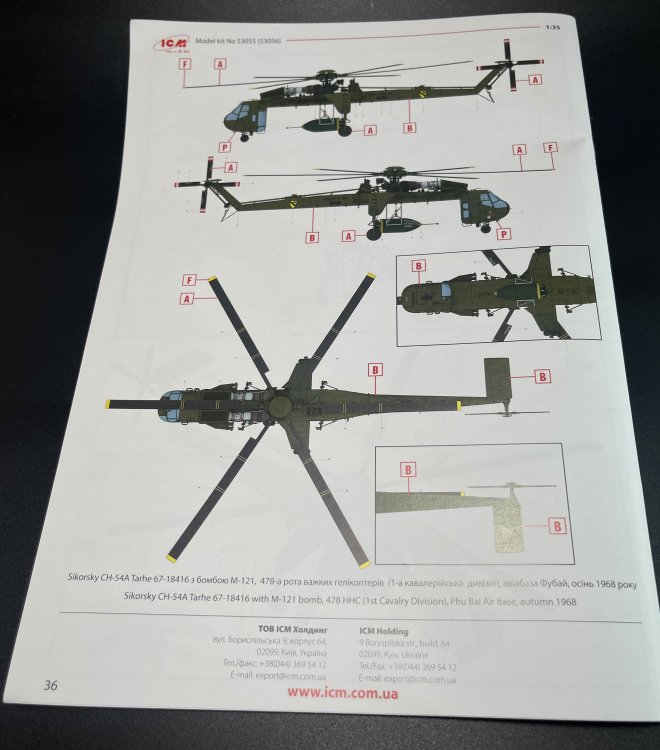
The instructions booklet
The instruction book is a A4 size with 36 pages with the first and last page in glossy paper.


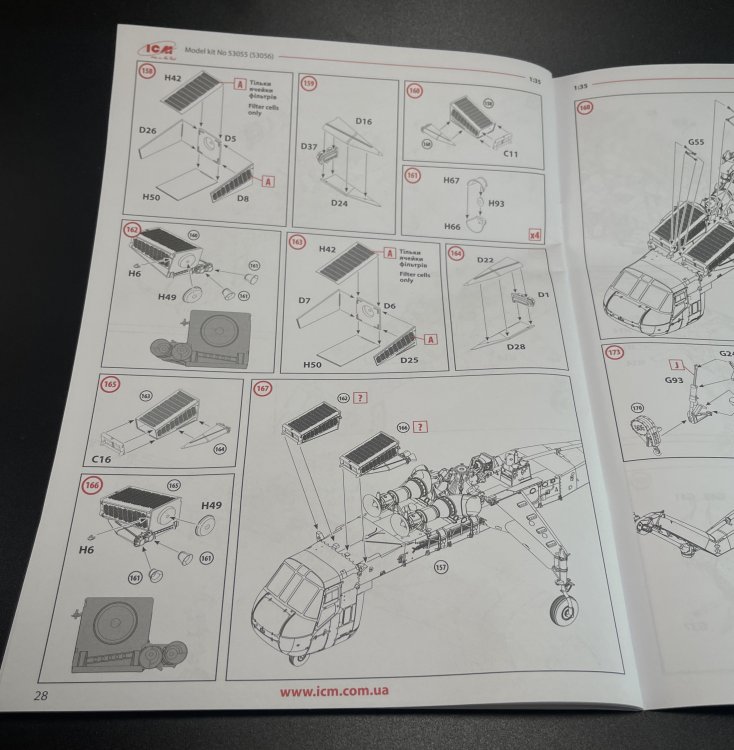
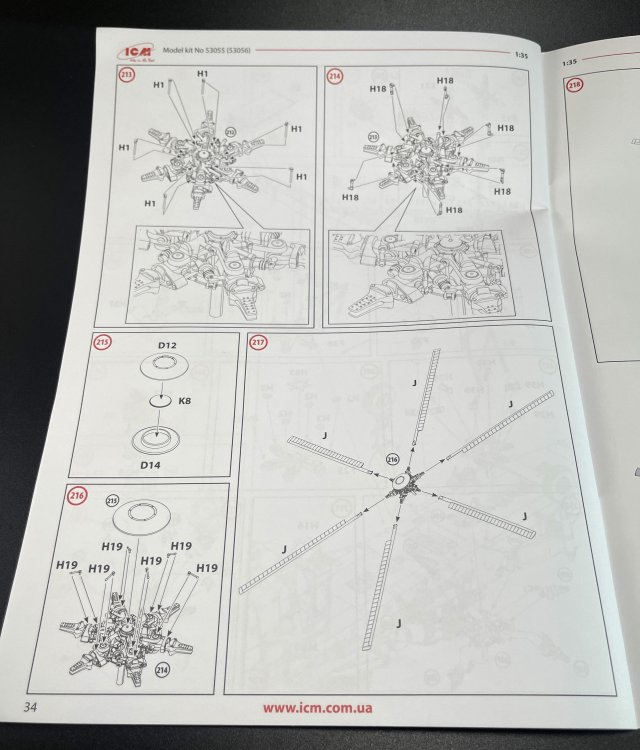
The instructions are easy to follow, with very good drawings with good parts identification and indication where to fit.
The colour indication. Not my first time telling this but one of ICM CEO said, in one podcast (Models from Ukraine) that ICM wants to be an “all in company” so all the ICM production is a vertical one, they made the CAD, the steel molds, the decals and now they are making also paints.
It`s, in fact an all new approach in the modelling world but ICM is getting there because I already saw, finally, in one of my usual model shop (Art Scale Kits) ICM paints on sale.
So the colour being only ICM references starts to be a non-issue to the novice modeler (attention, this particular modeler is not for the novice one) that simply can get some ICM paints quite easily in a foreseeing future.
On this model, there`s no masking tape template.
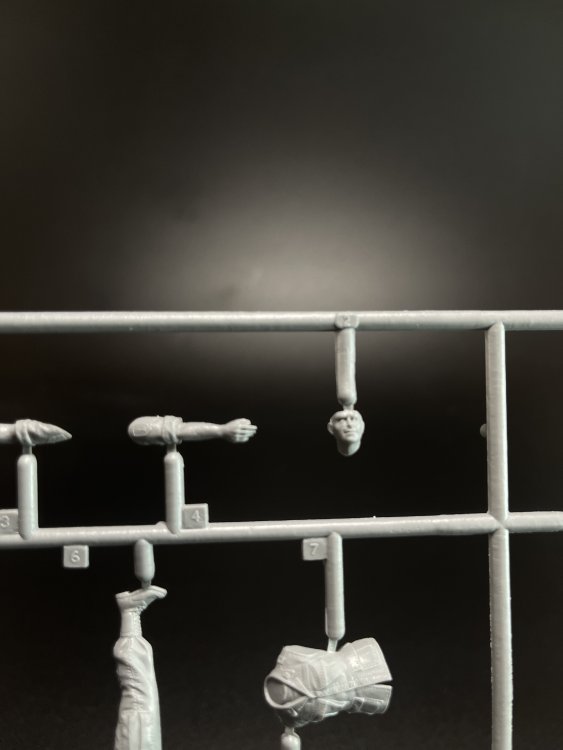
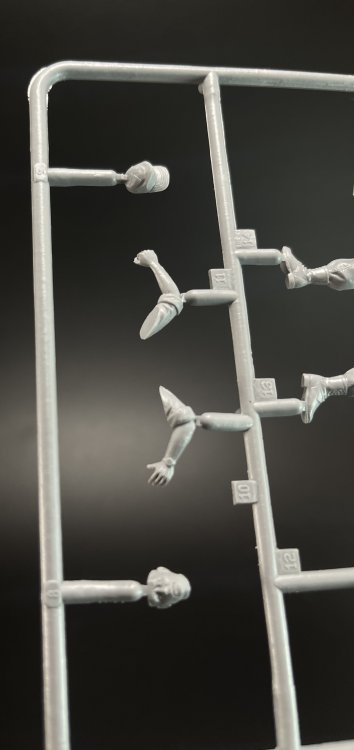
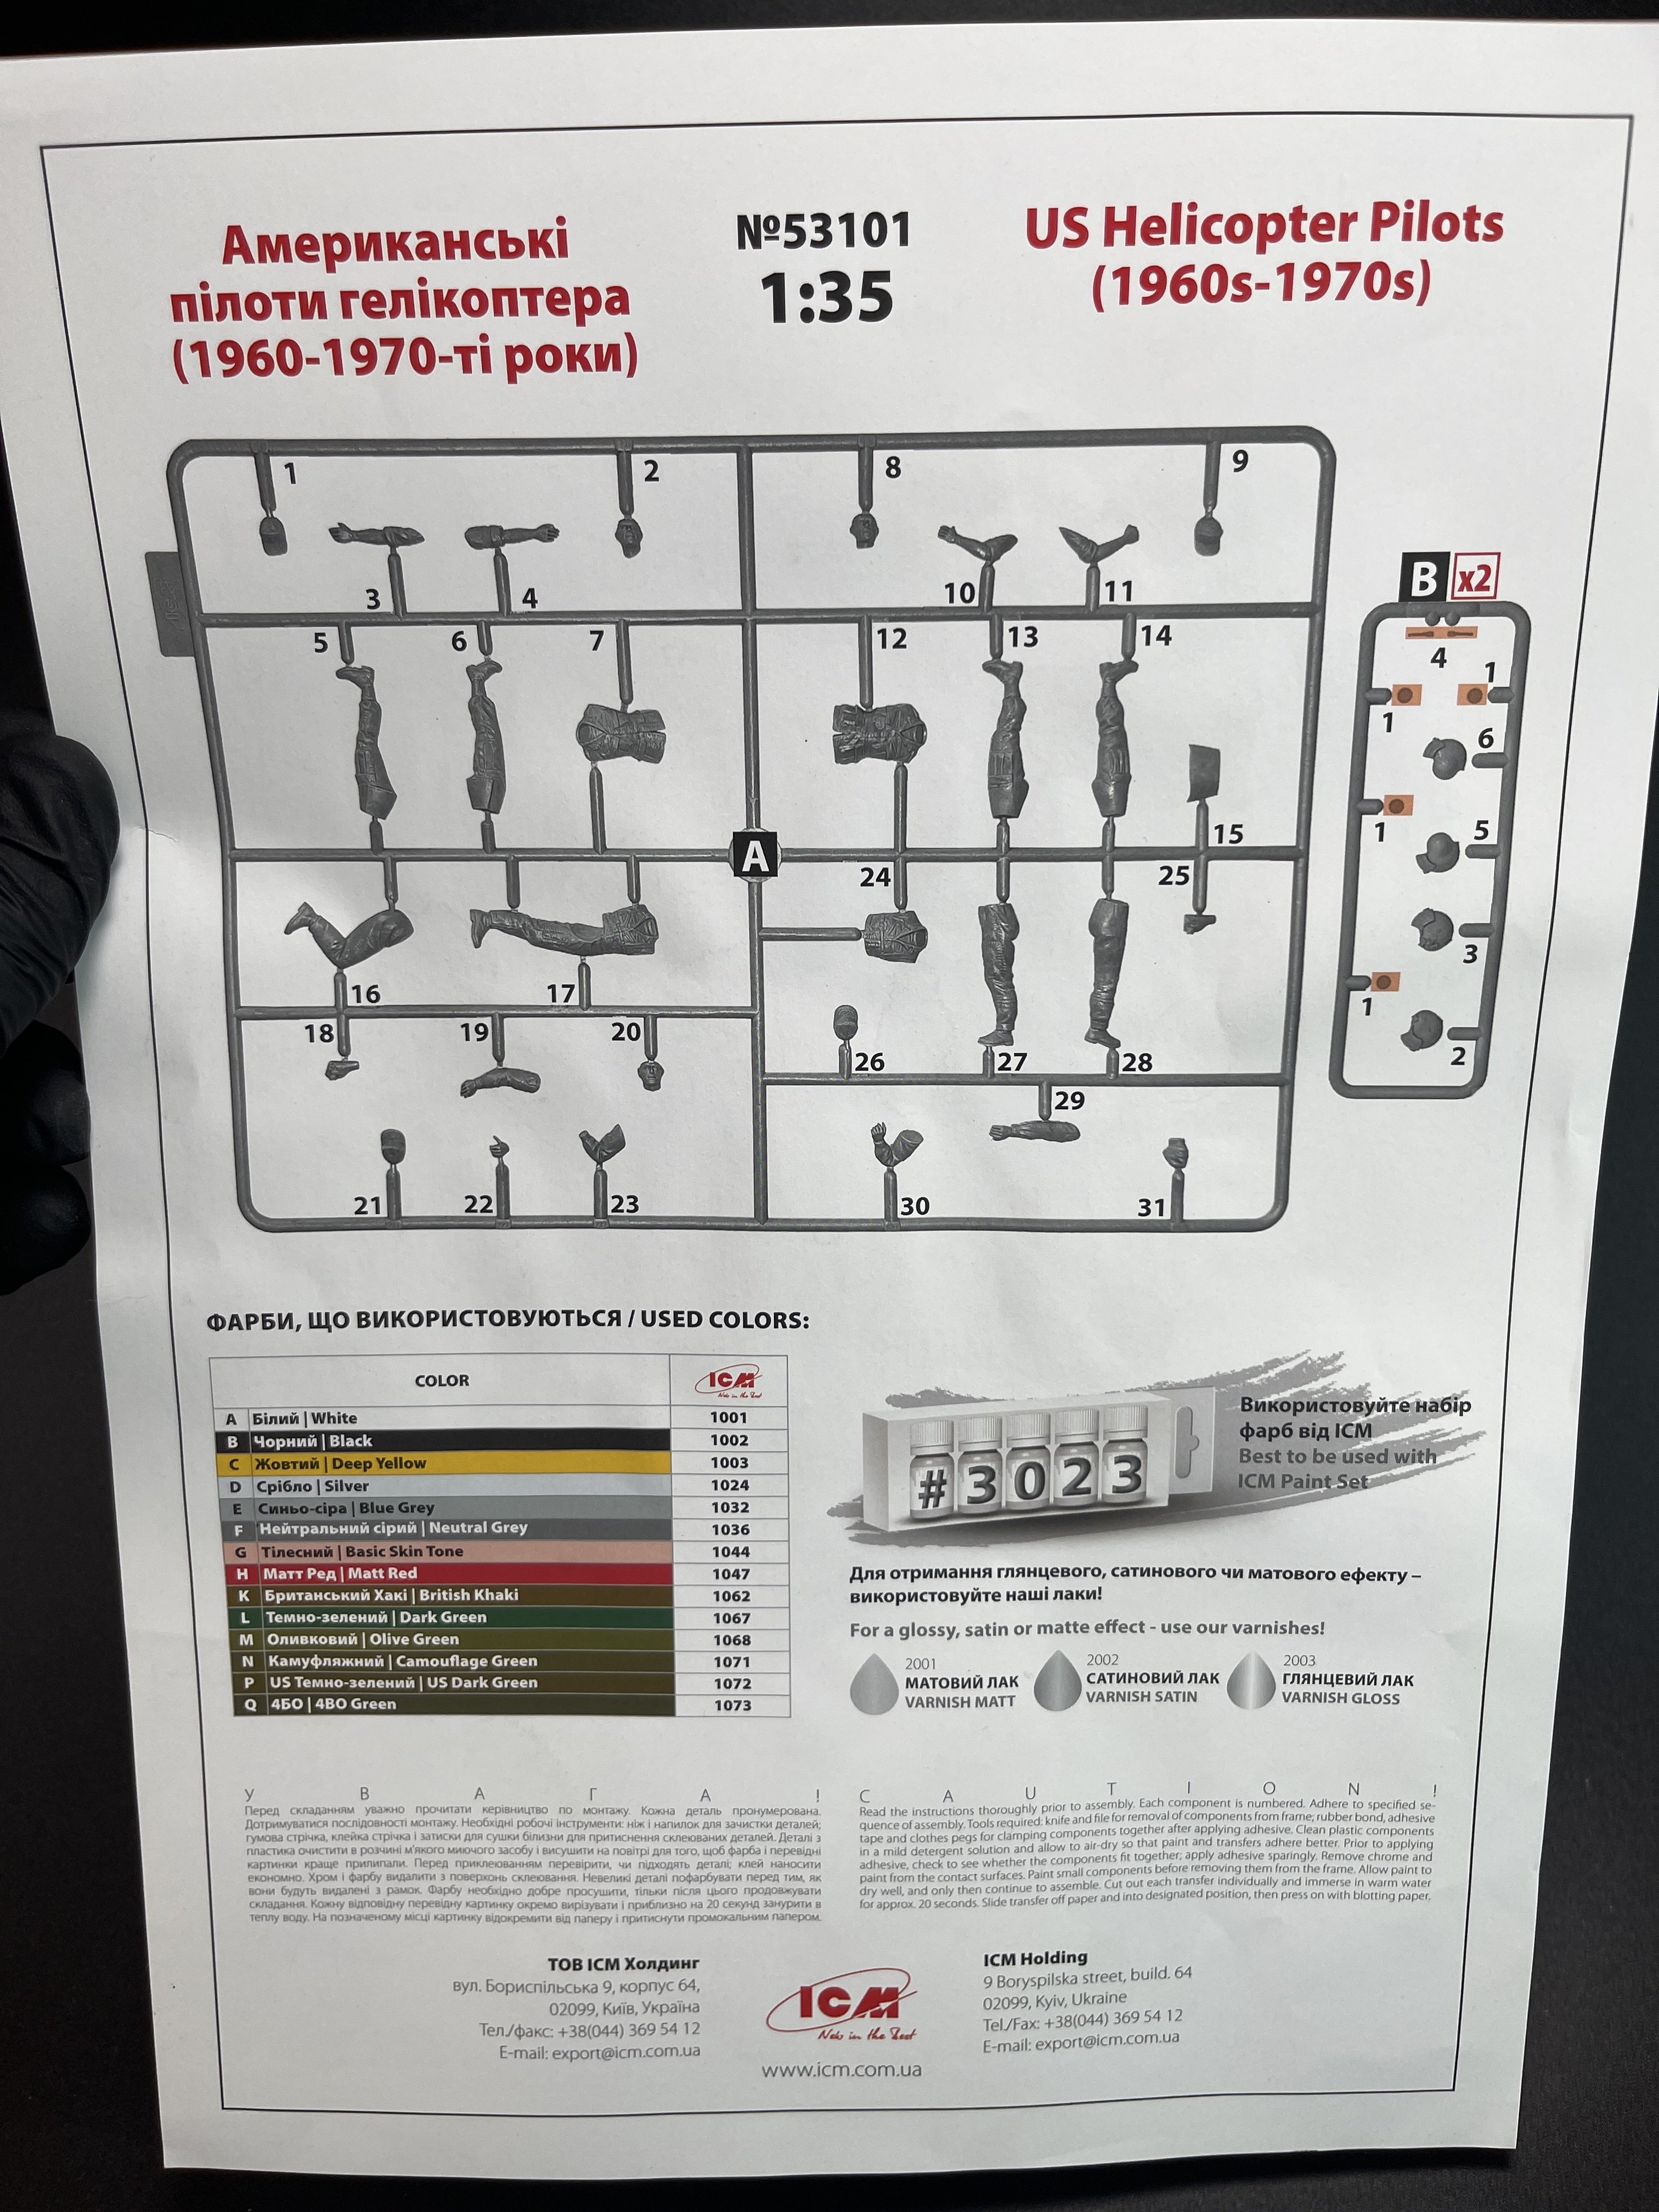
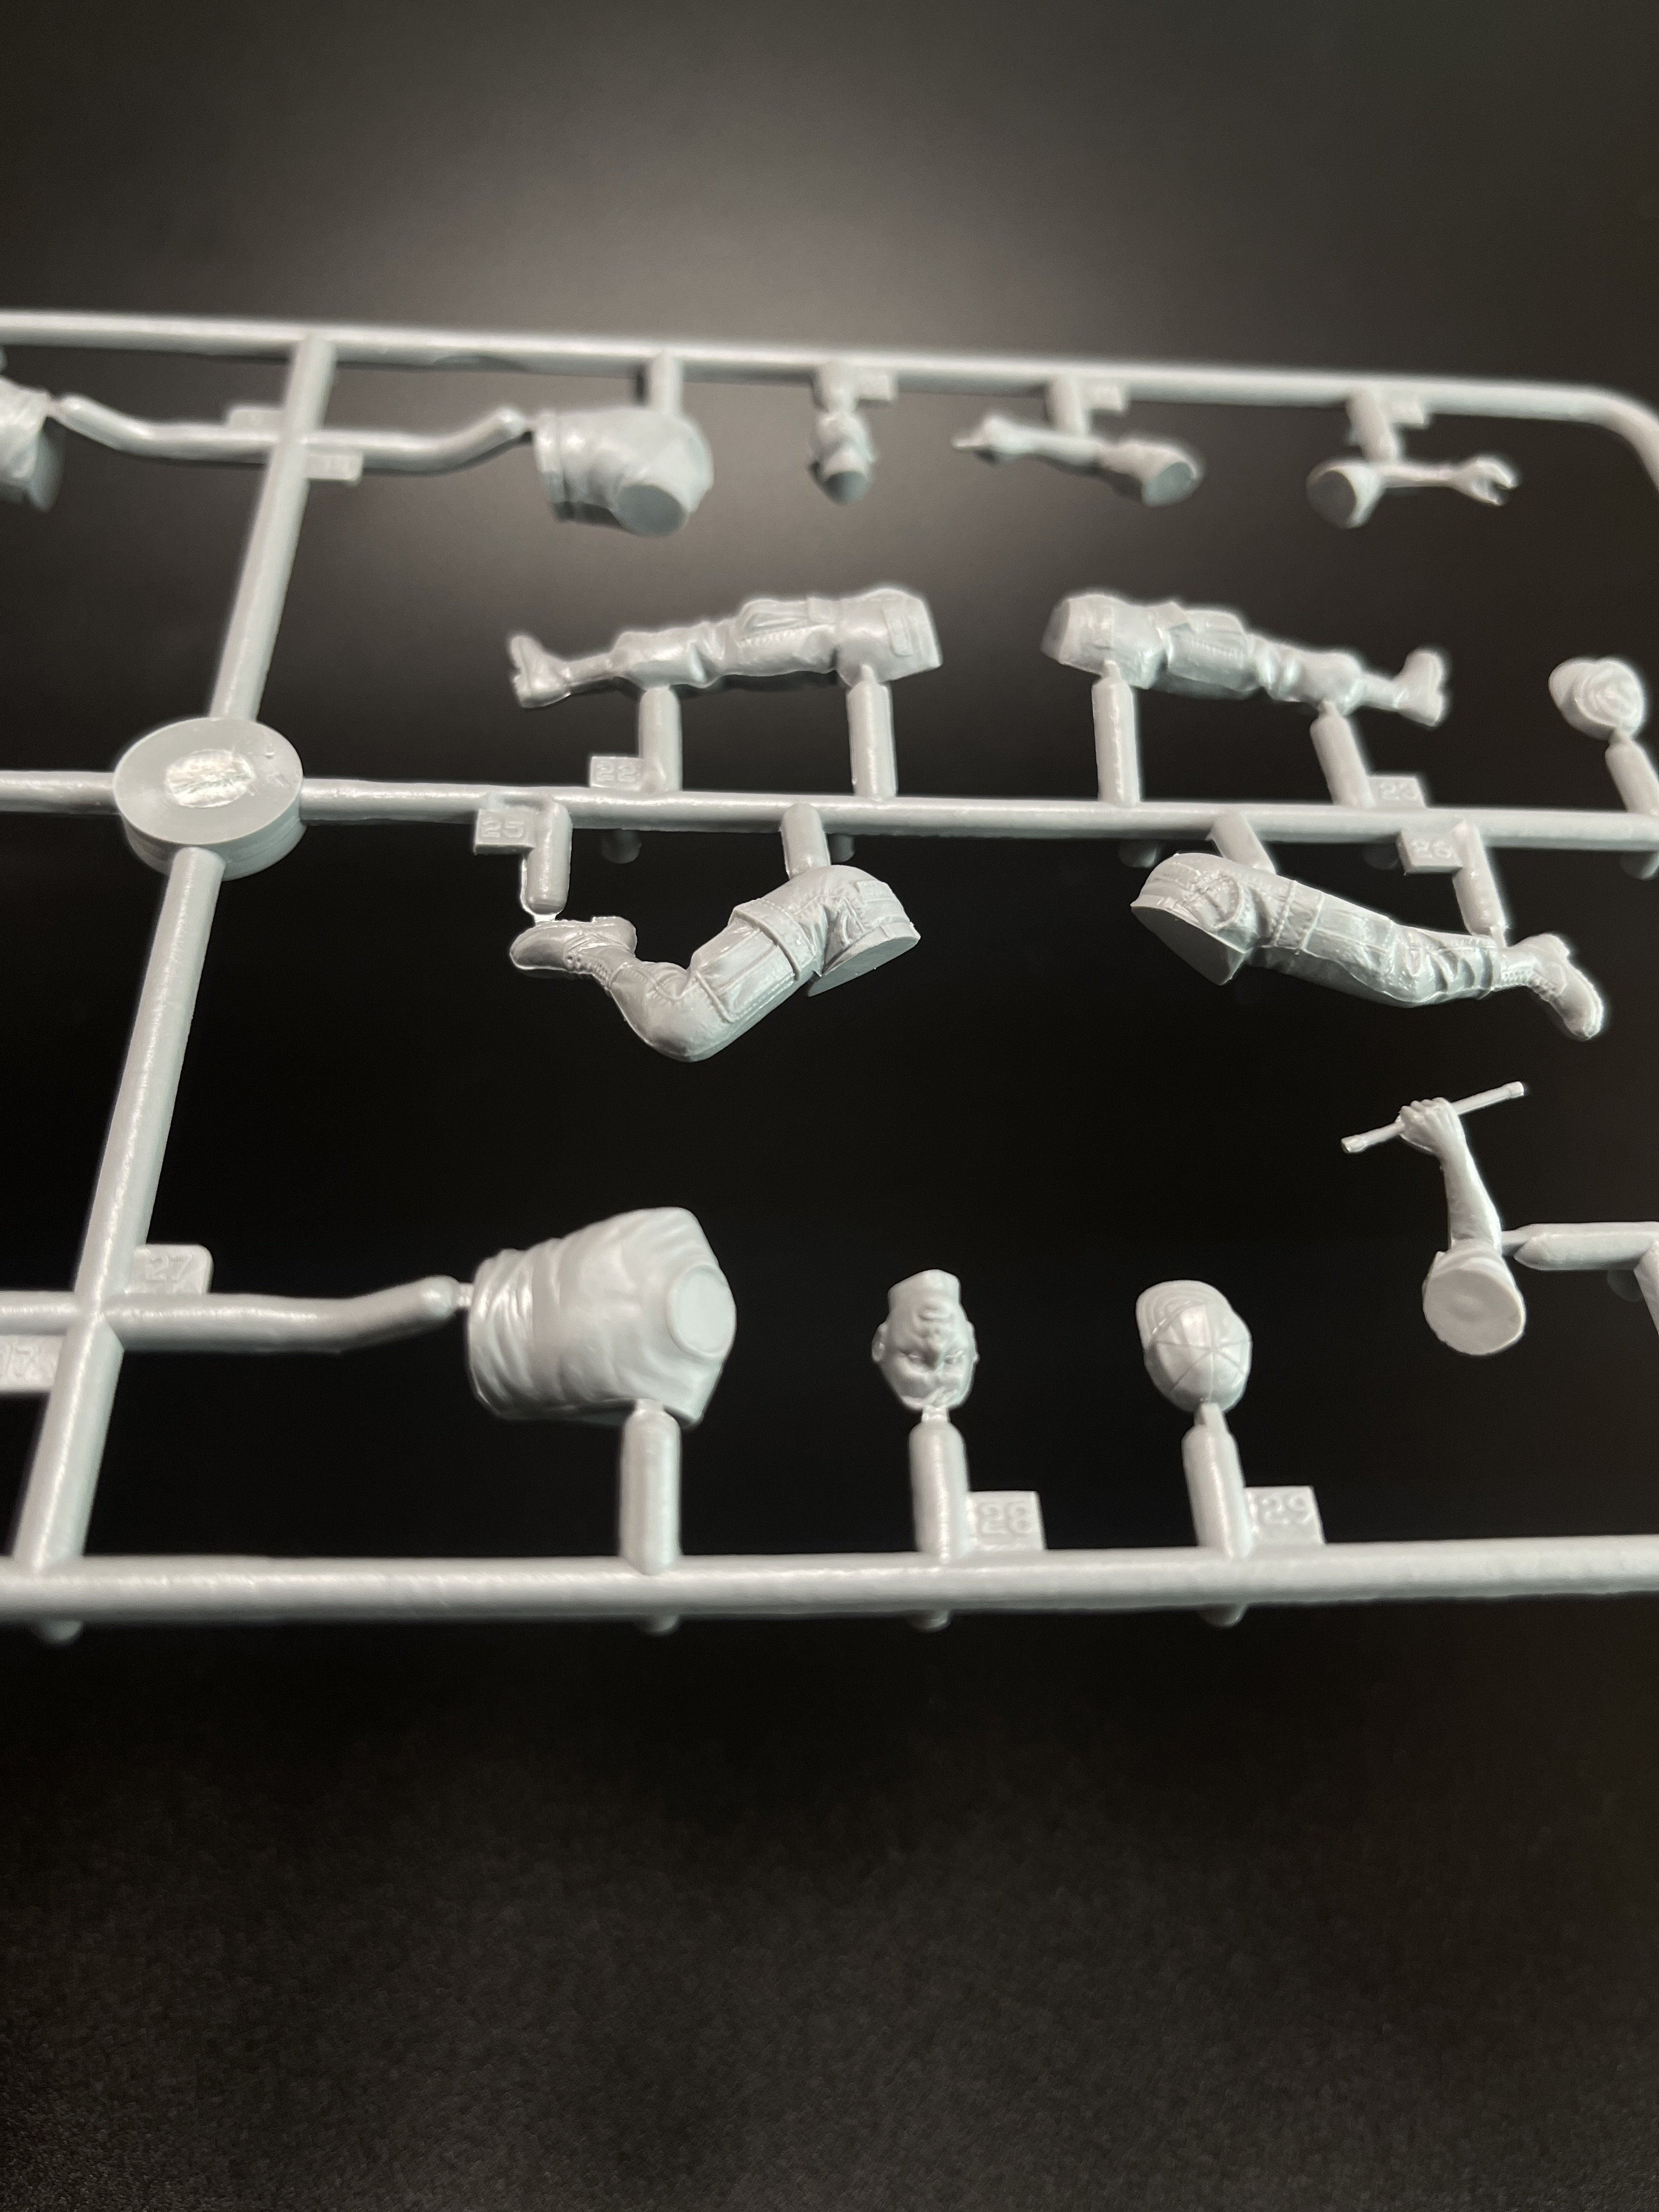
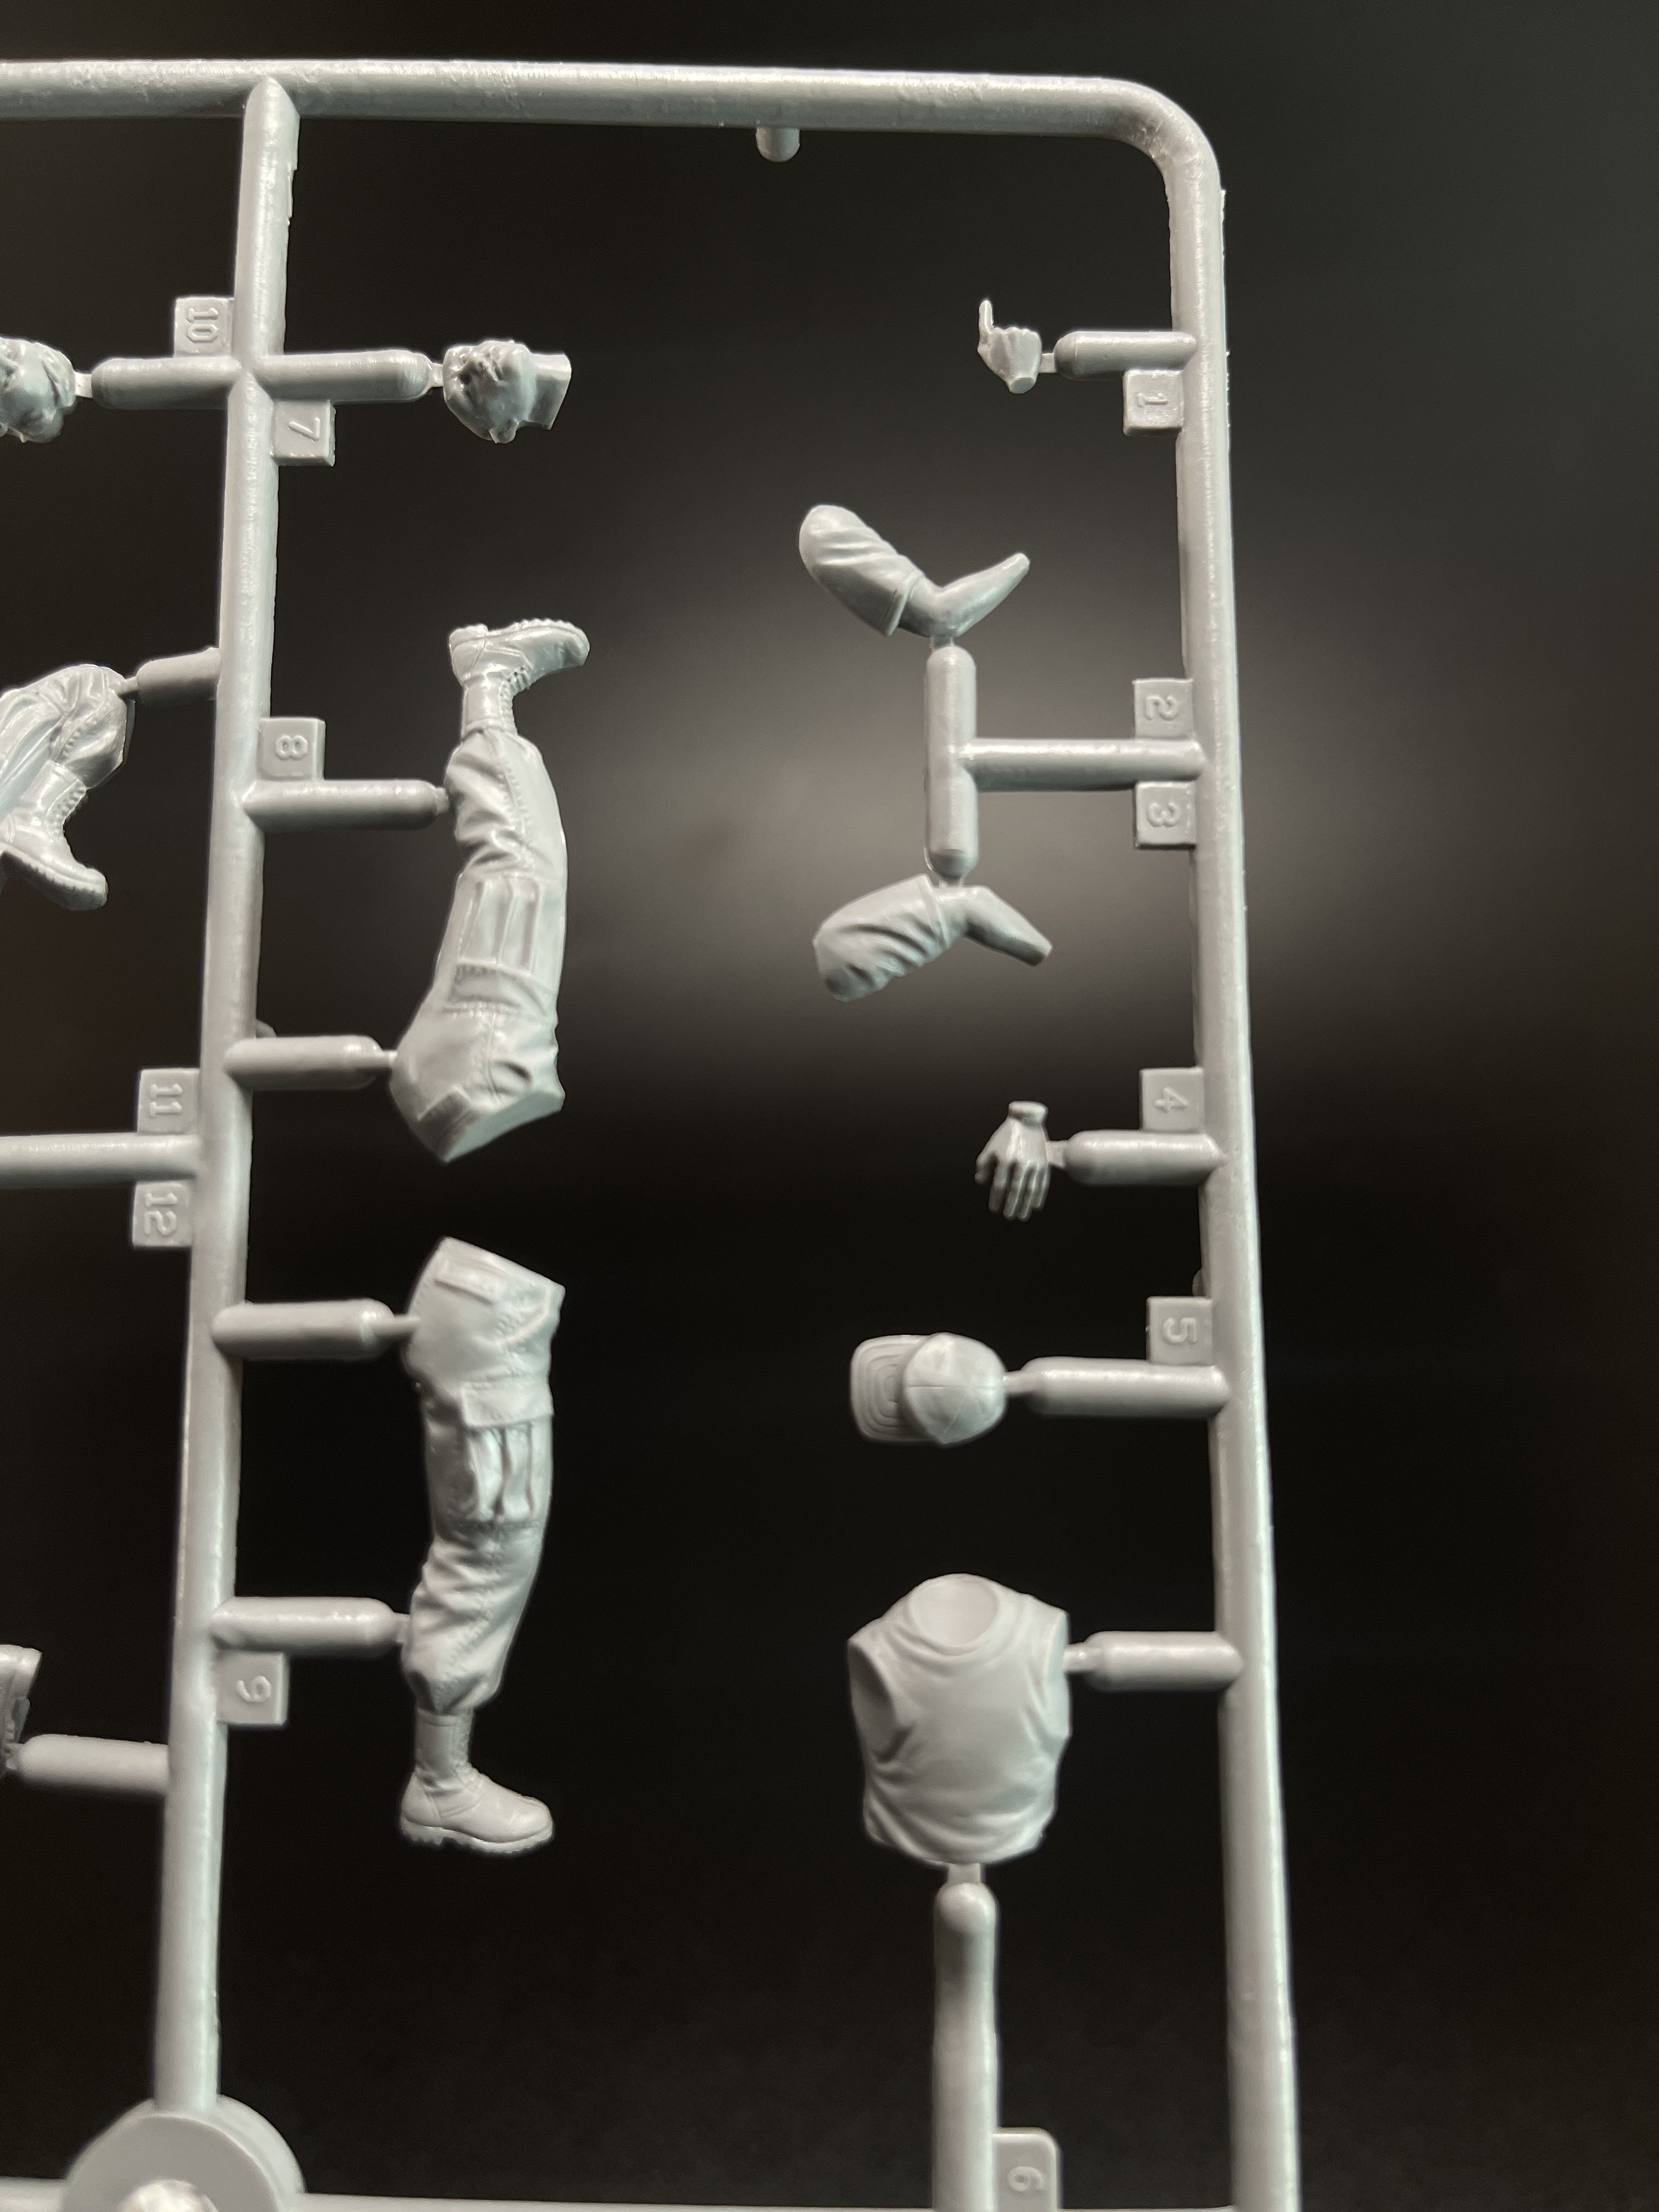
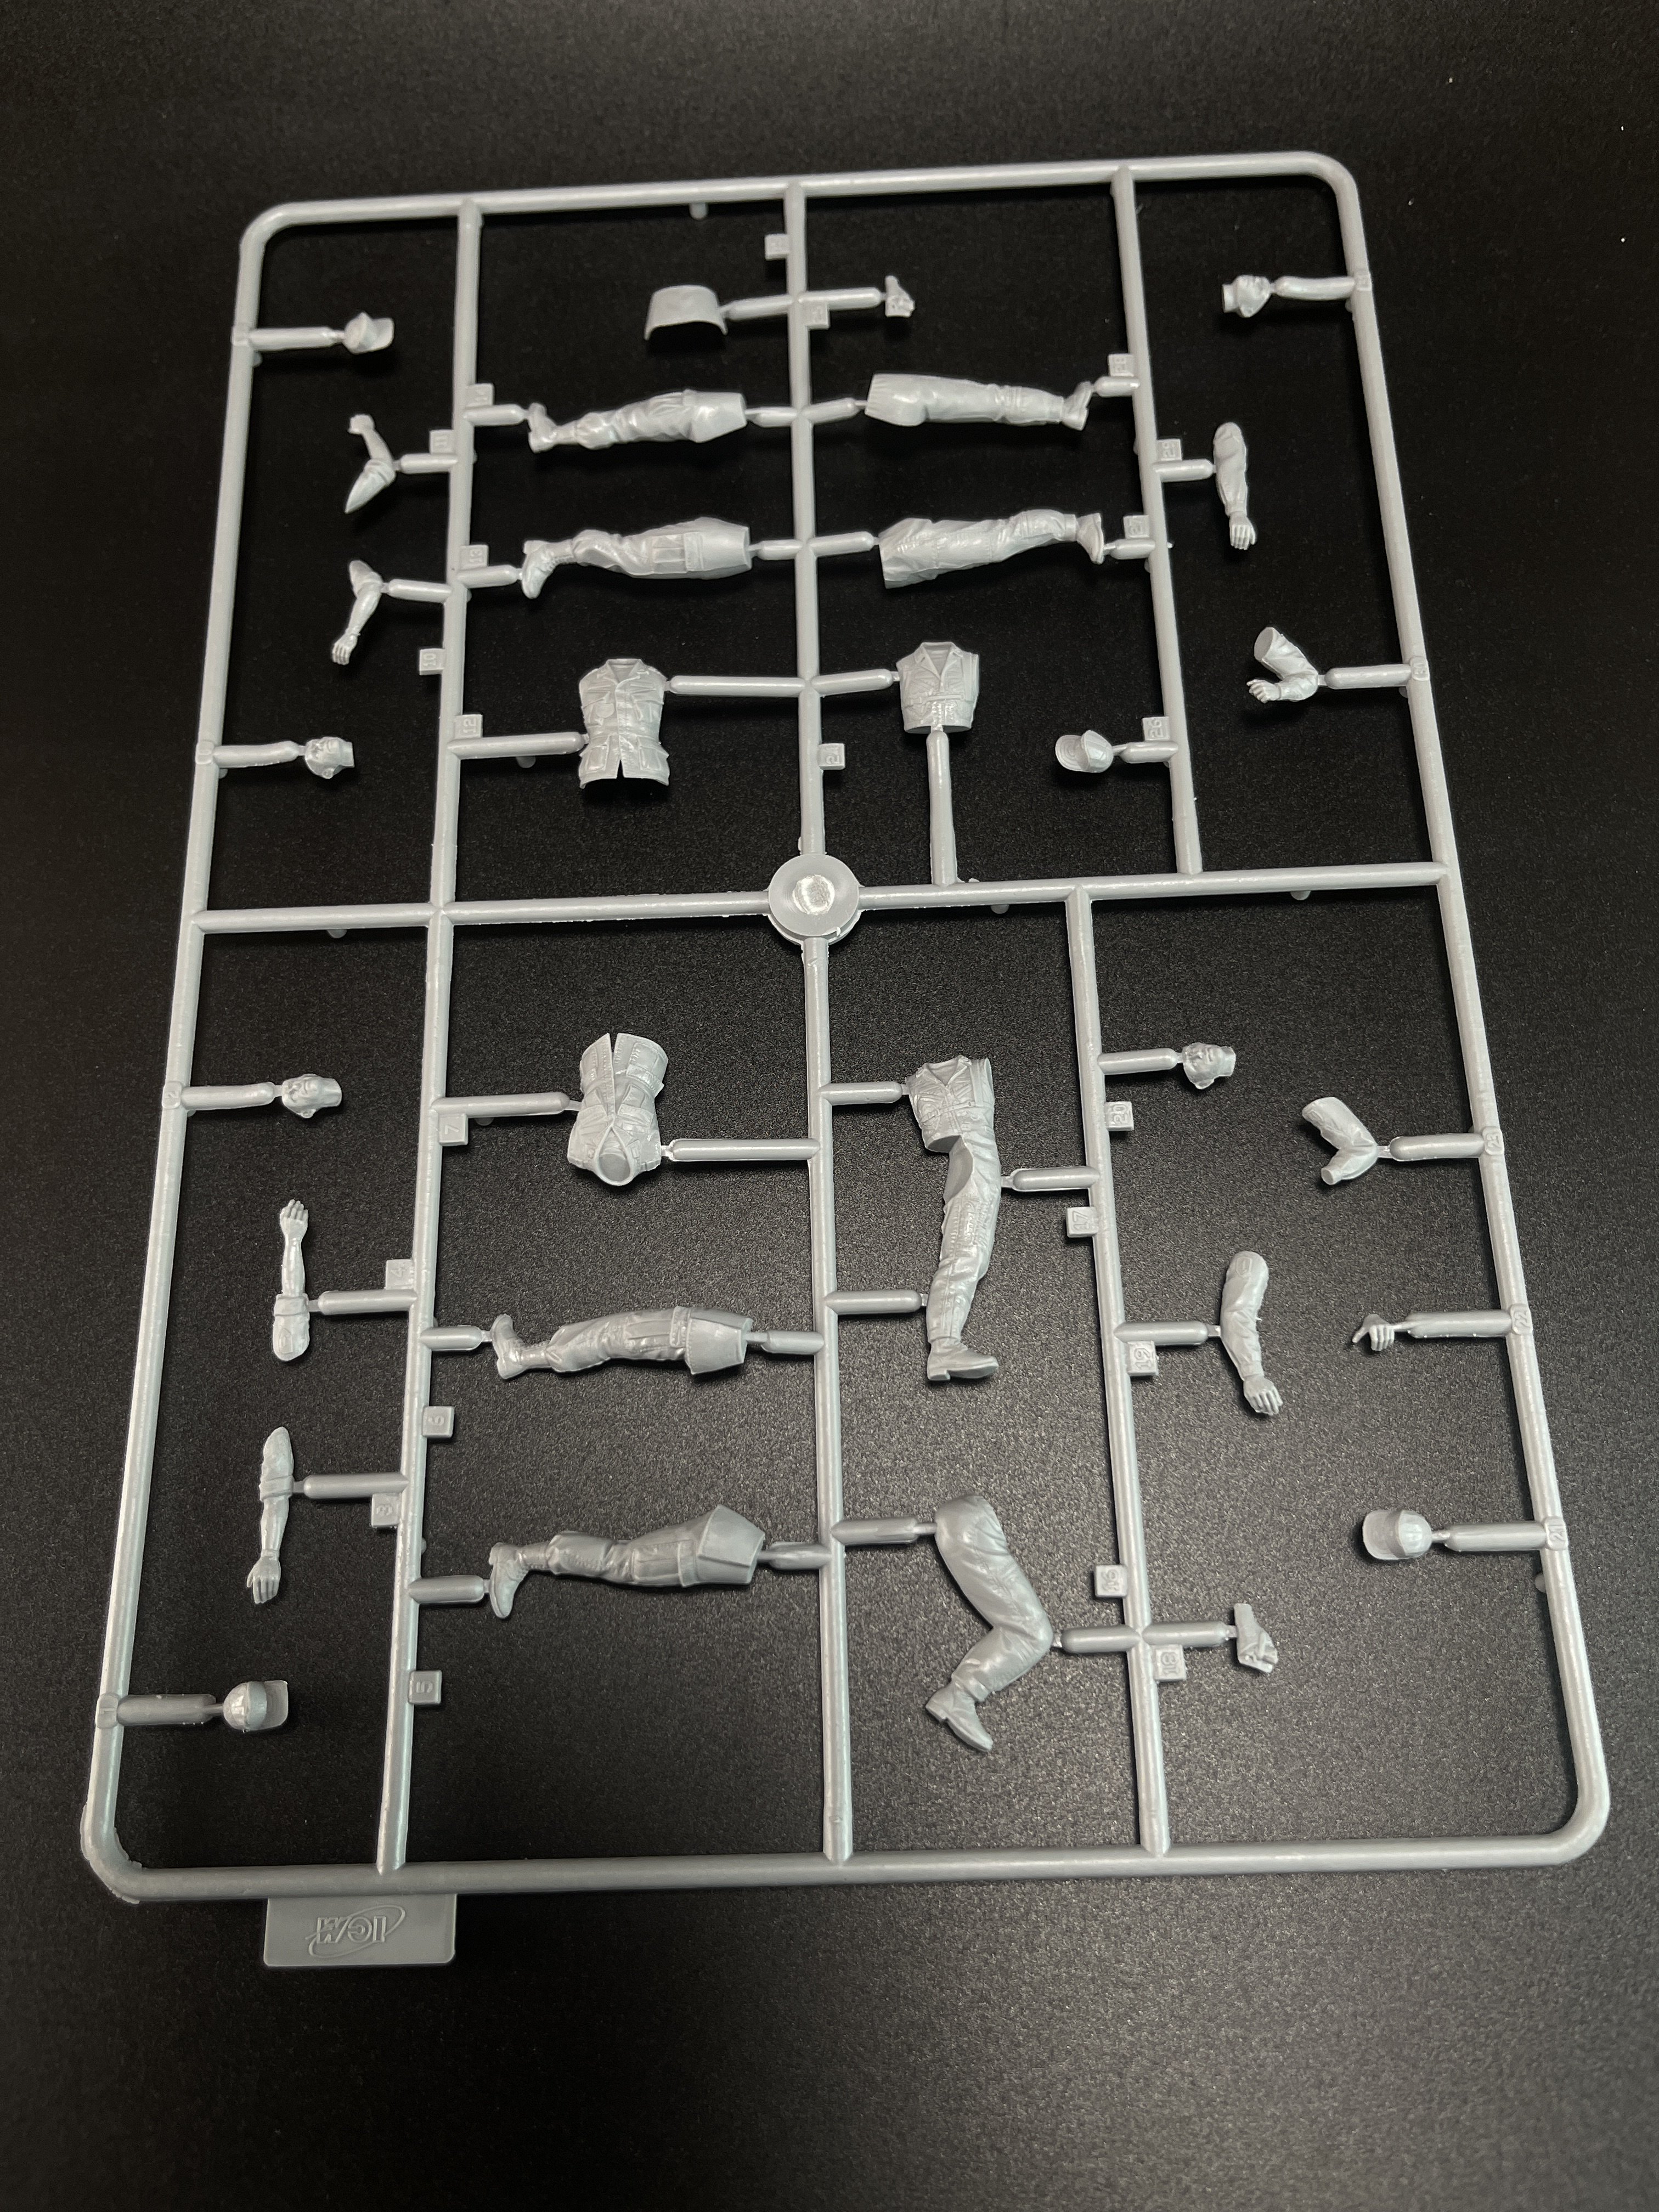
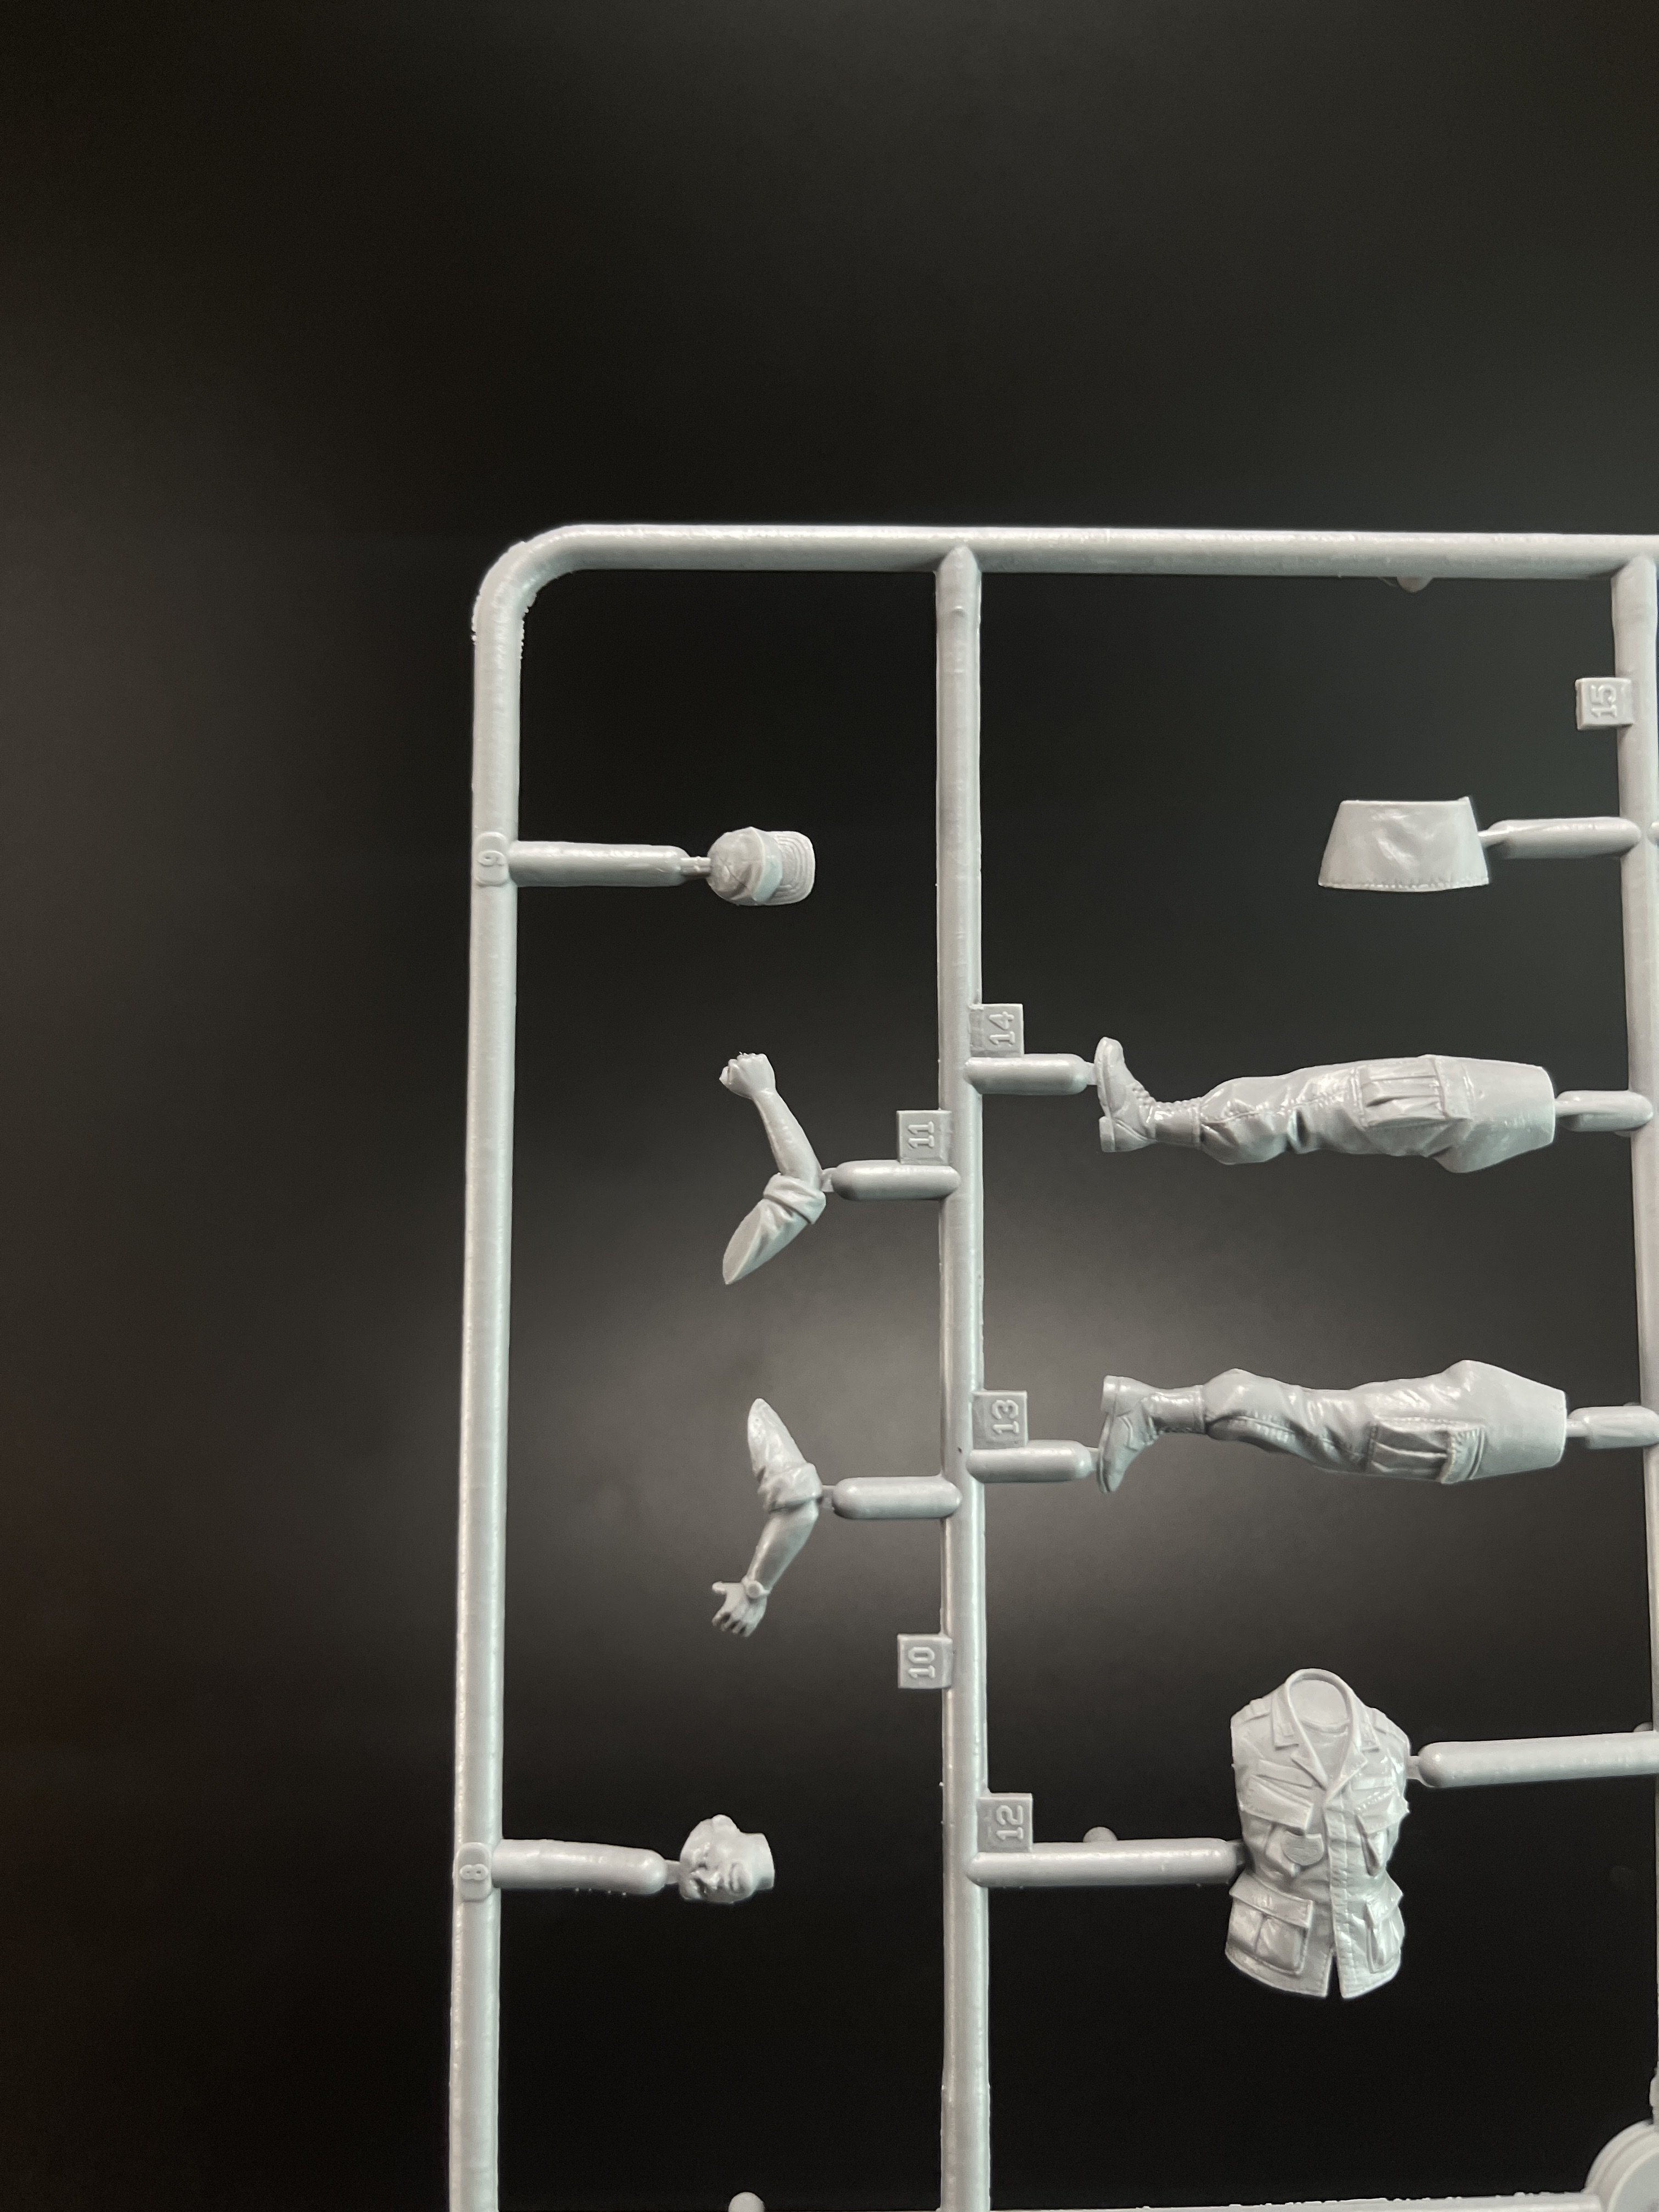
Let`s move to the figures.
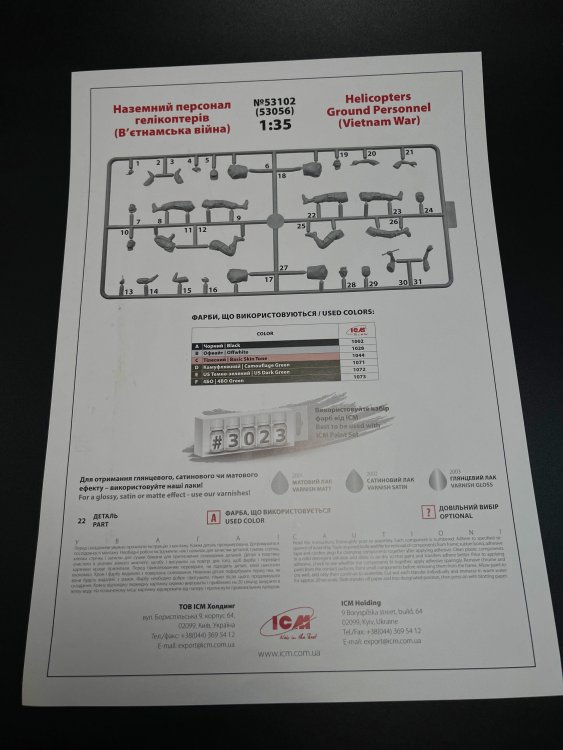
The figures… This is a combo kit with the CH-54 and two sets of figures:
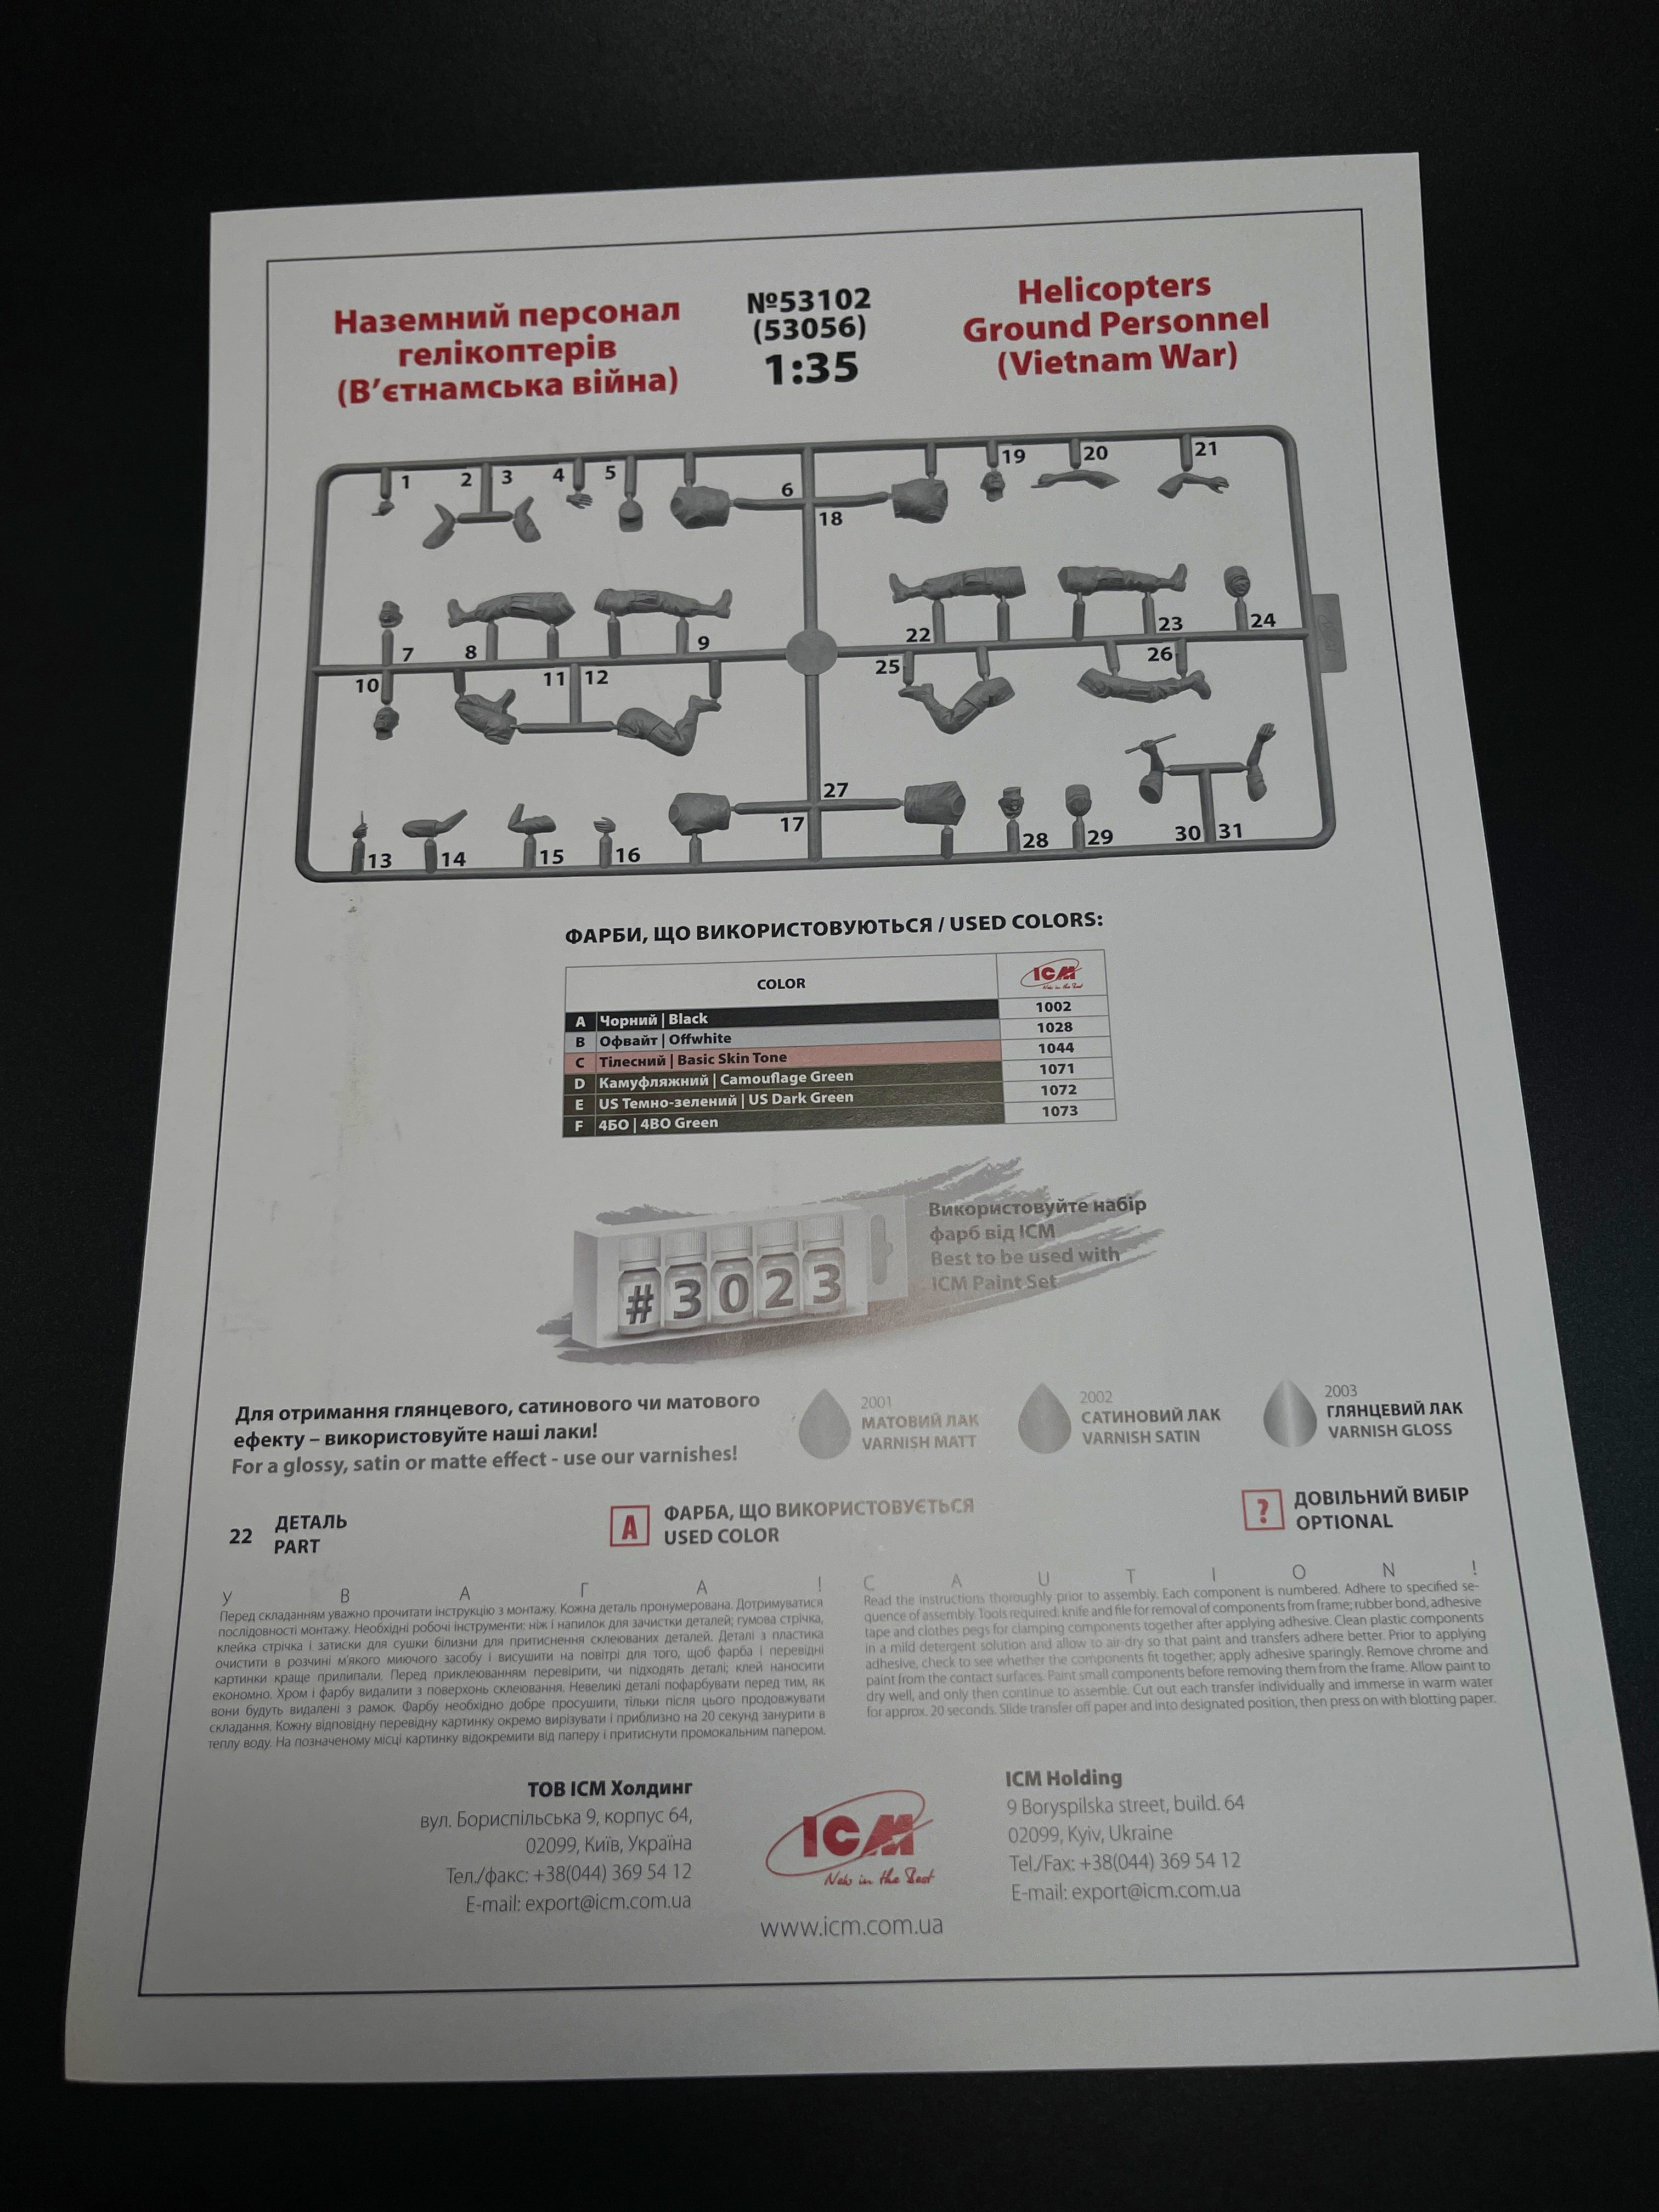
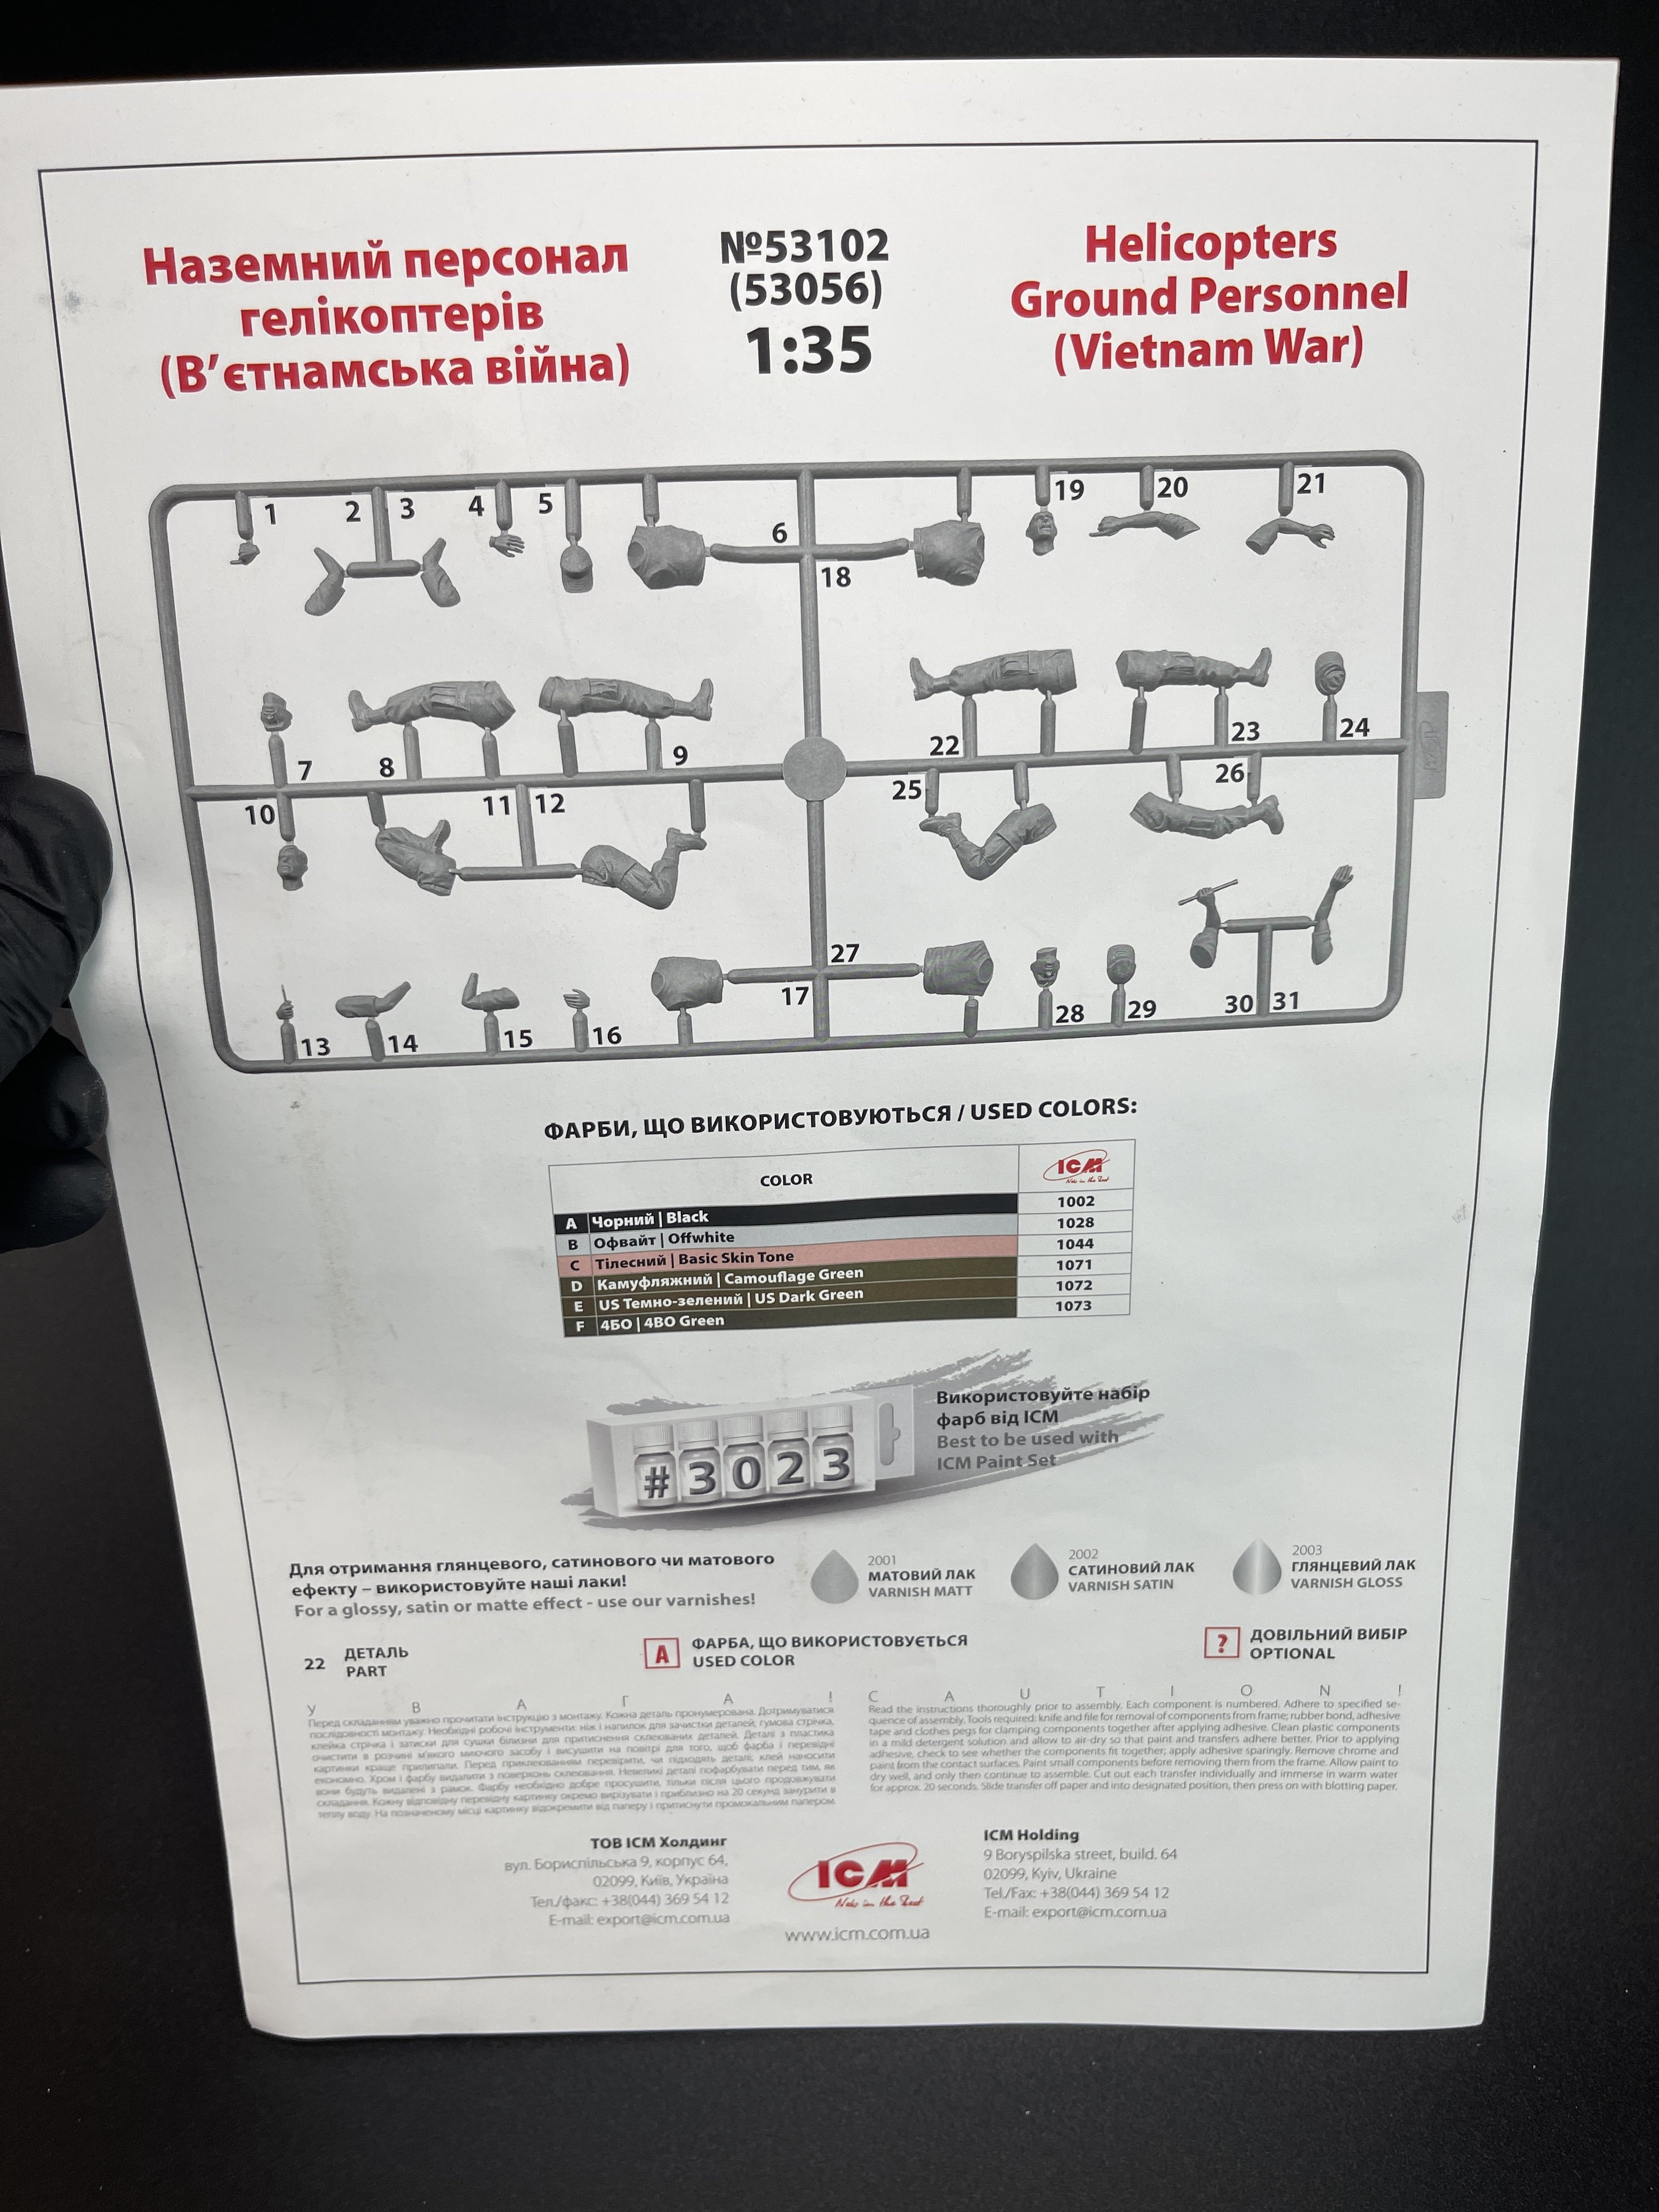
Helicopters Ground Personel (Vietnam war) (catalogue n.º 53102)
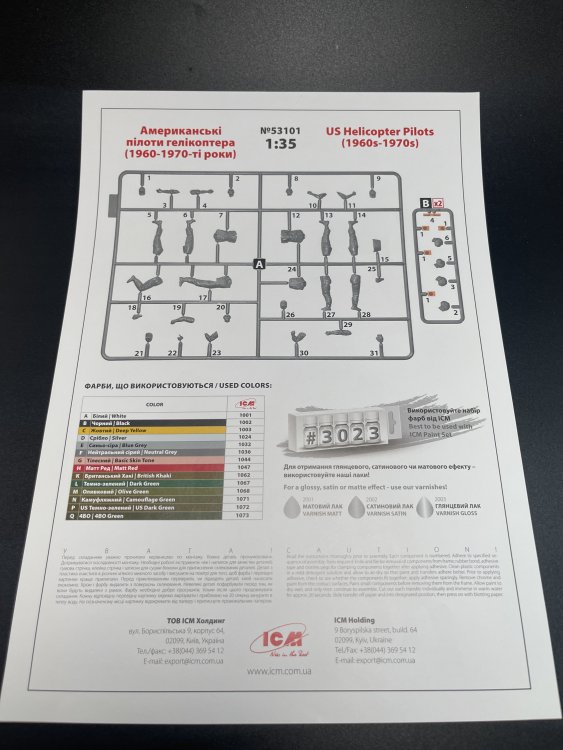
and
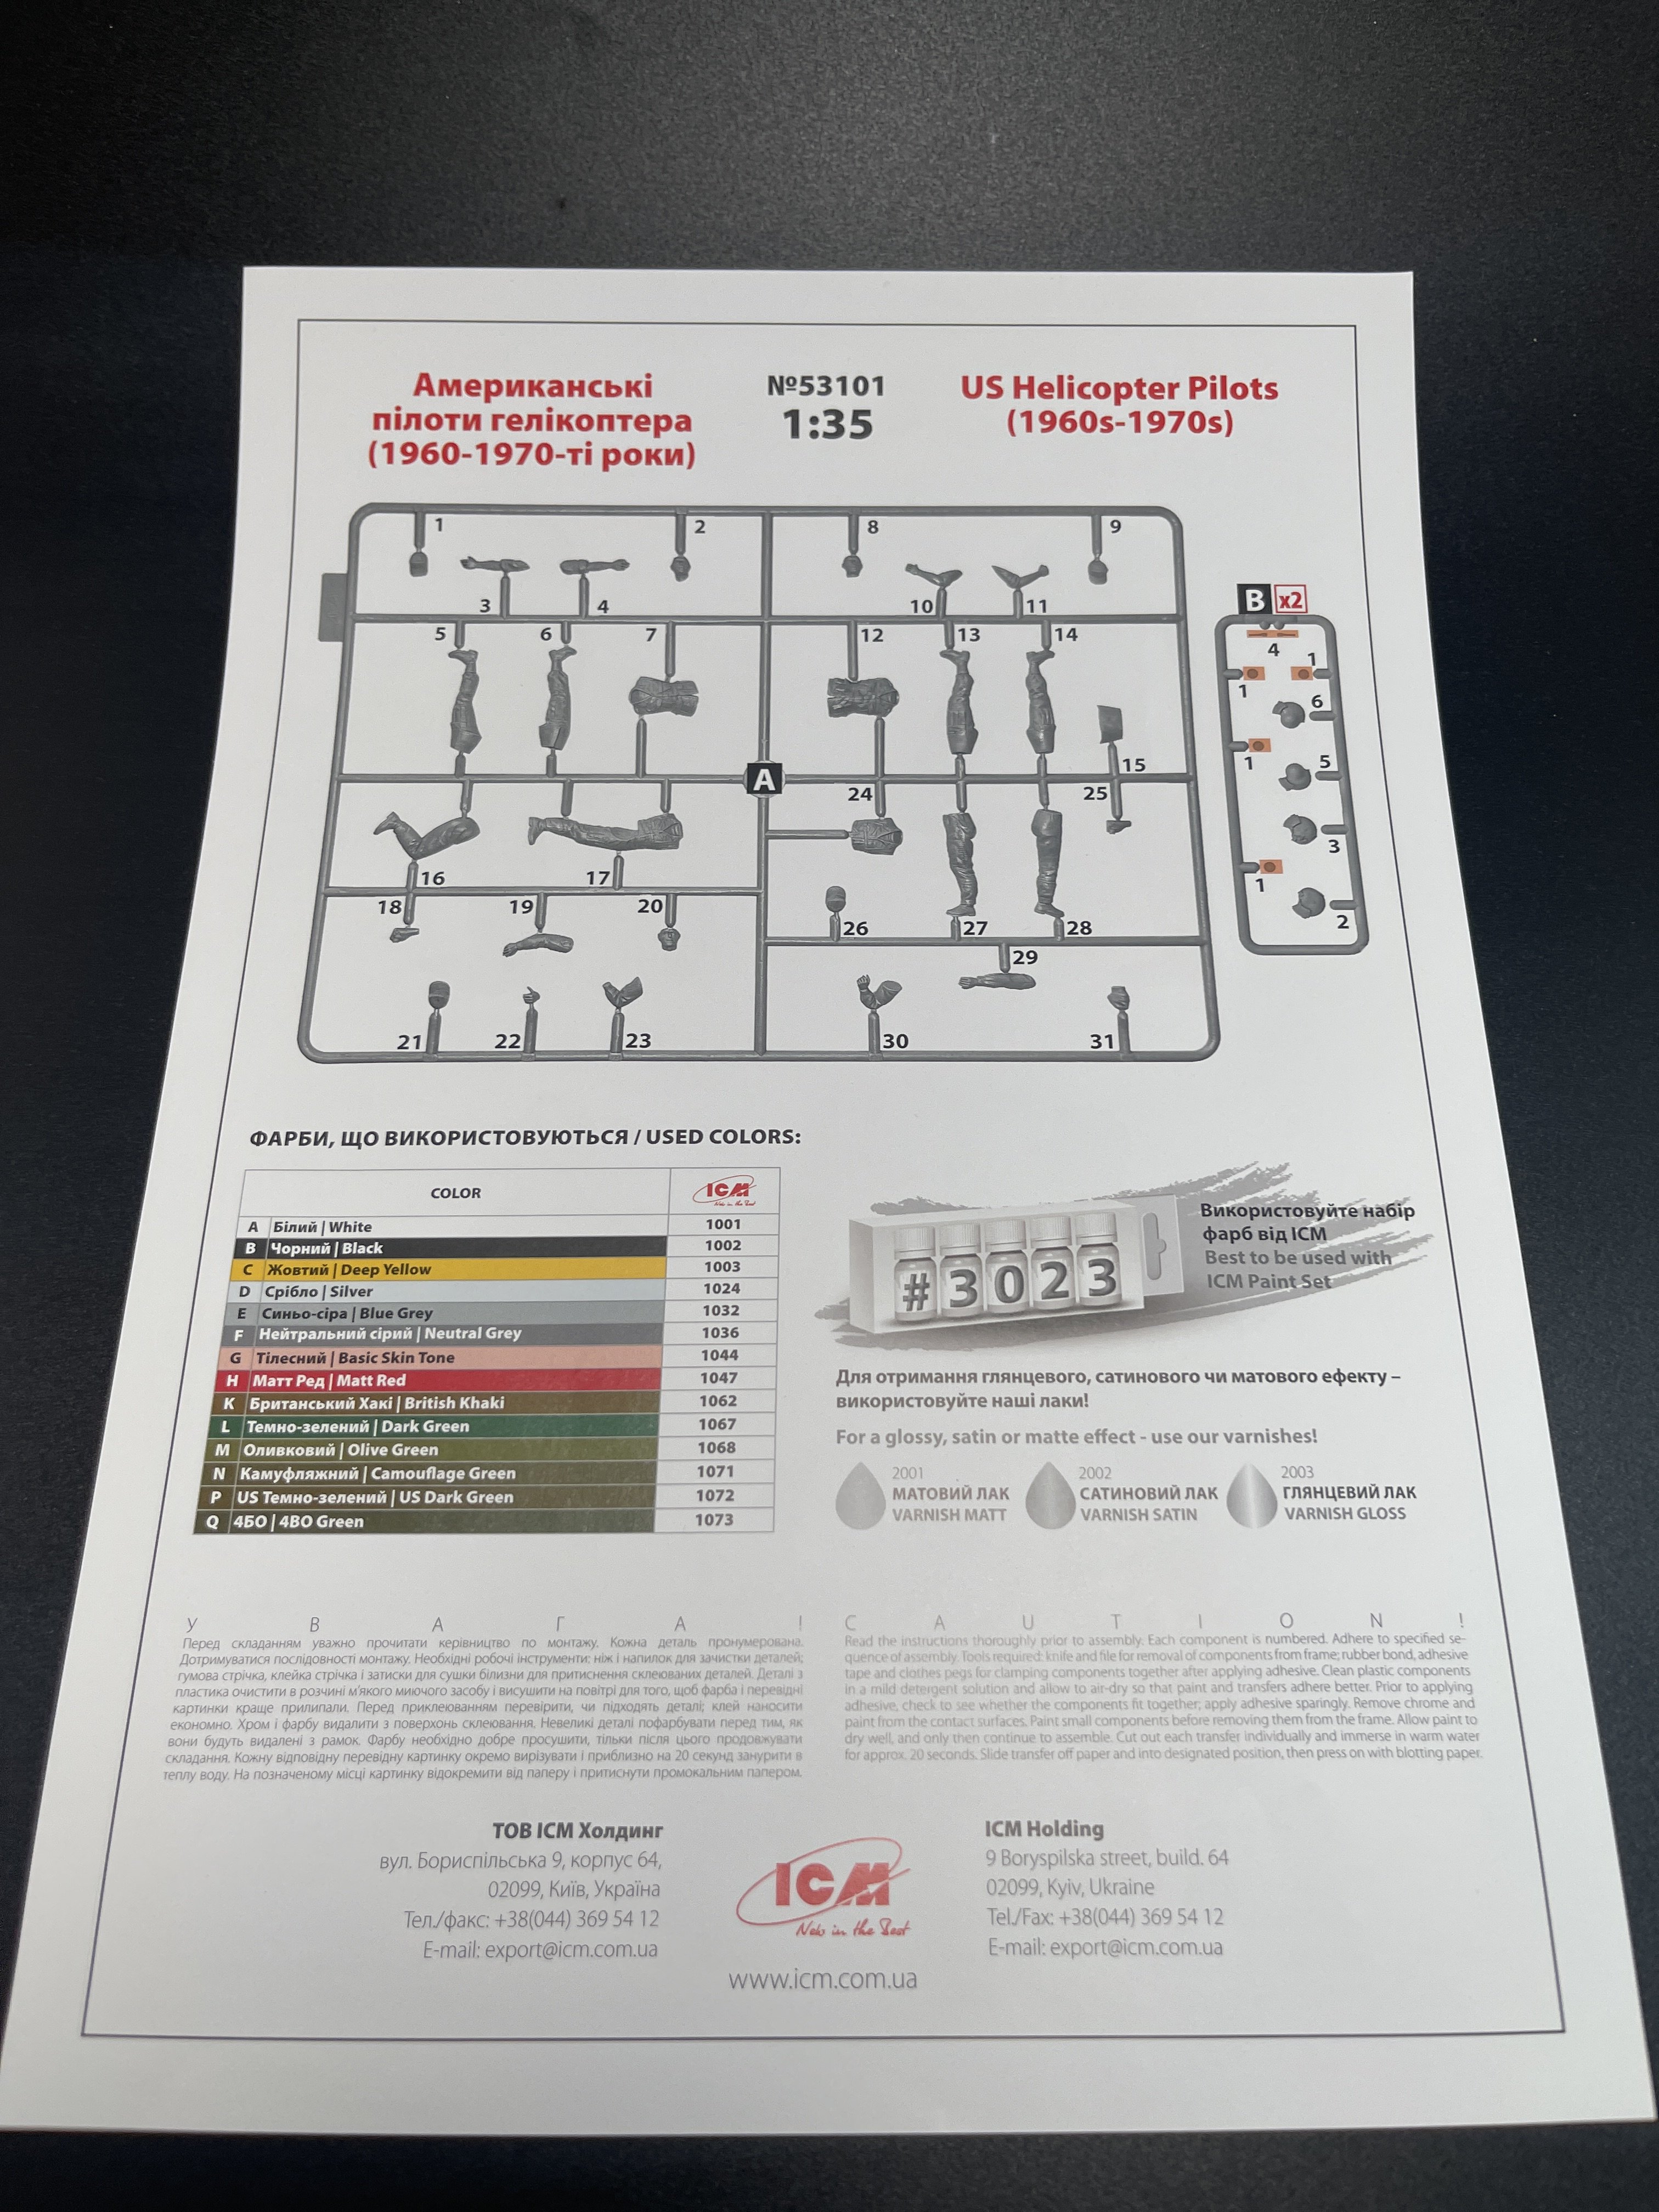
US Helicopter Pilots (1960s-1970s) (catalogue n.º 53101)
There`s no box whatsoever so you just get the sprues diagram and painting instructions. Not assembly instructions are given… but if you look carefully we see the parts numbers on the figures. So there´s is assembly instructions.
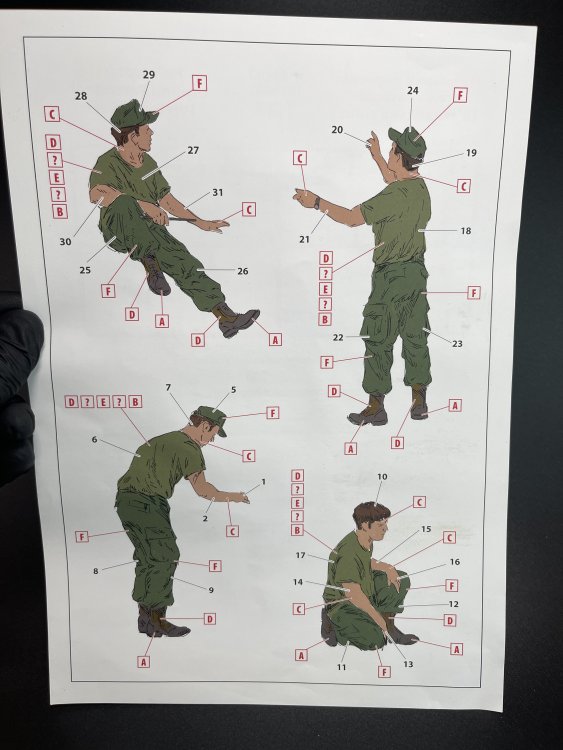
but it shouldn’t be hard to do…
Both sets have 4 figures in different postures.
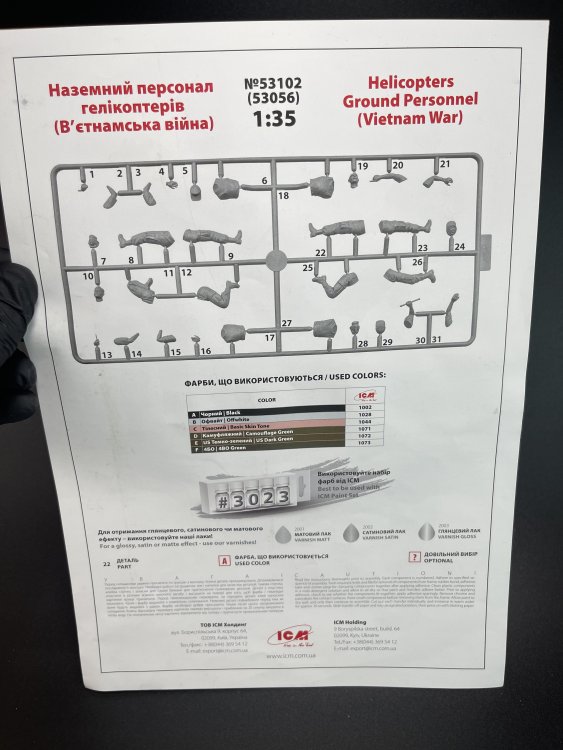
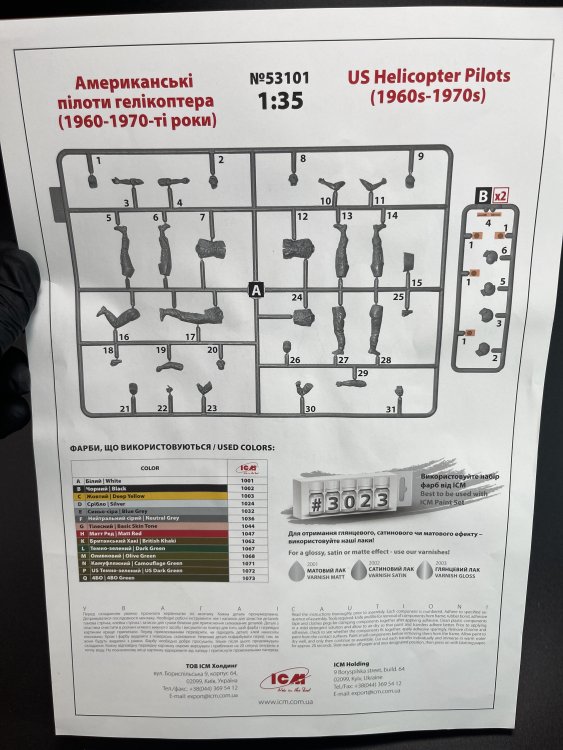
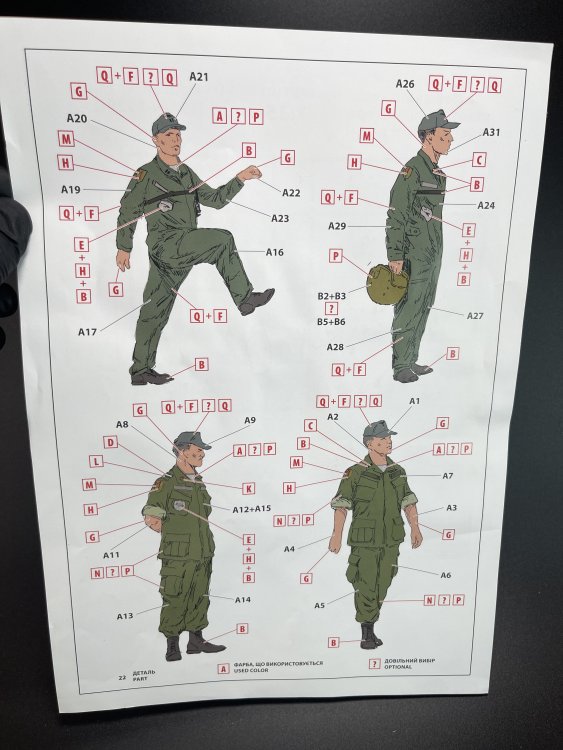
The figures in plastic from ICM are very good.
There`s the seam line mould that is need to be removed but with care and patience you get a good result. That seams line is from the moulding so is inevitable. But if it easy to be remove on legs, arms, is not that easy on the face and specially on hands. So take your time… or if you want to get the best of the best of these figures, just get hands and faces in resin (Hornet are the best ones for me).
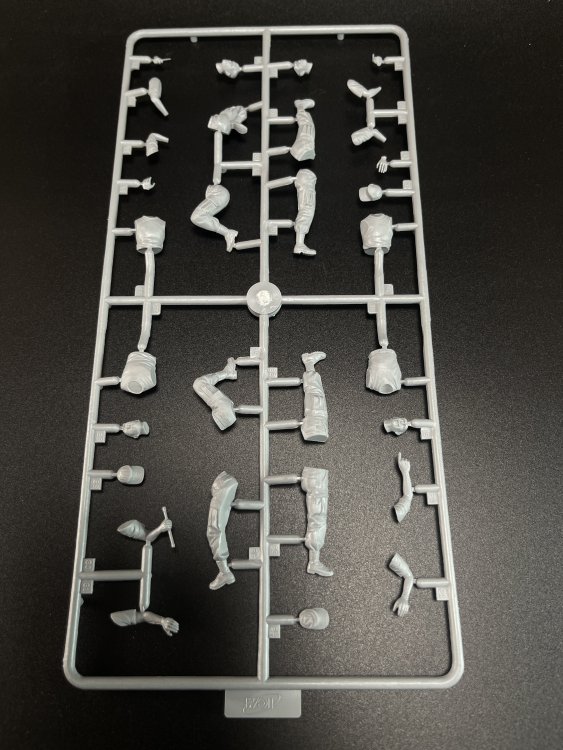
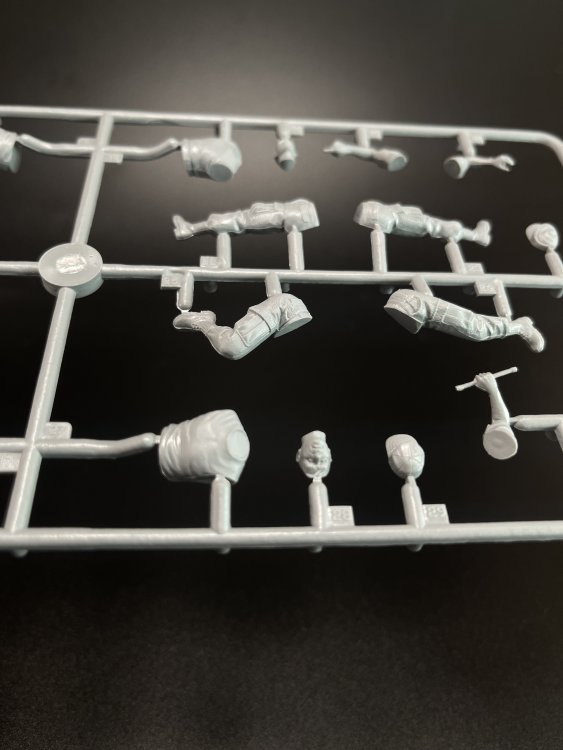
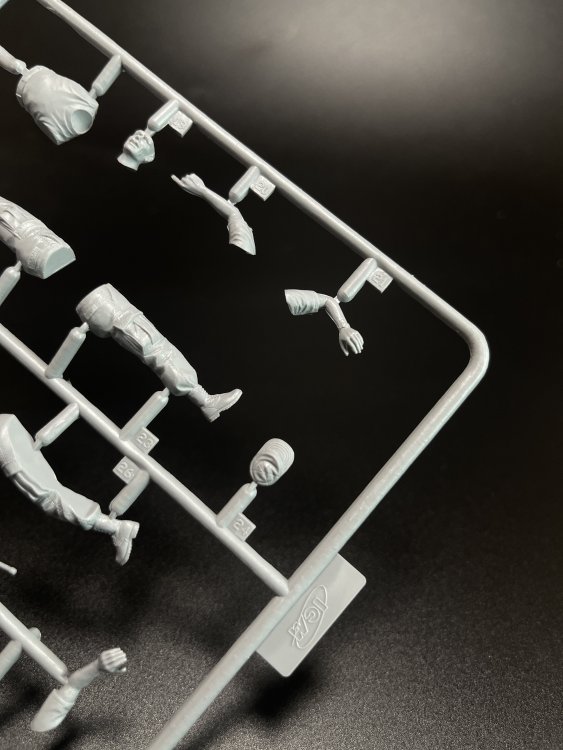

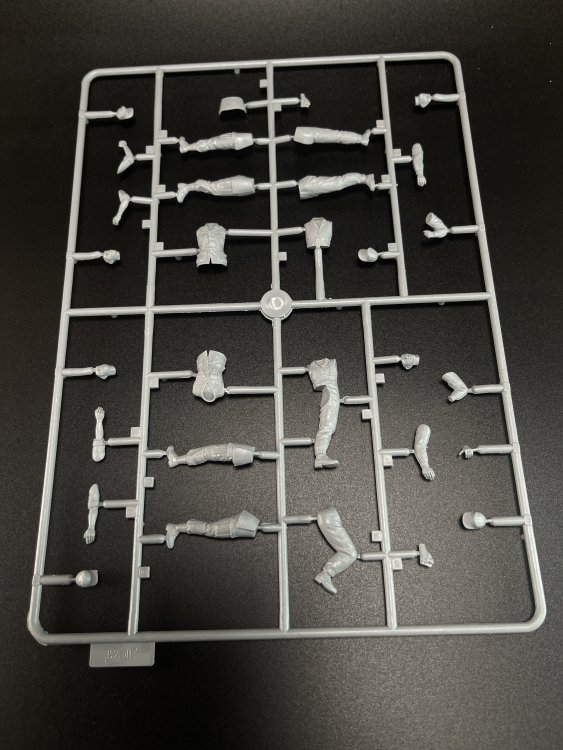
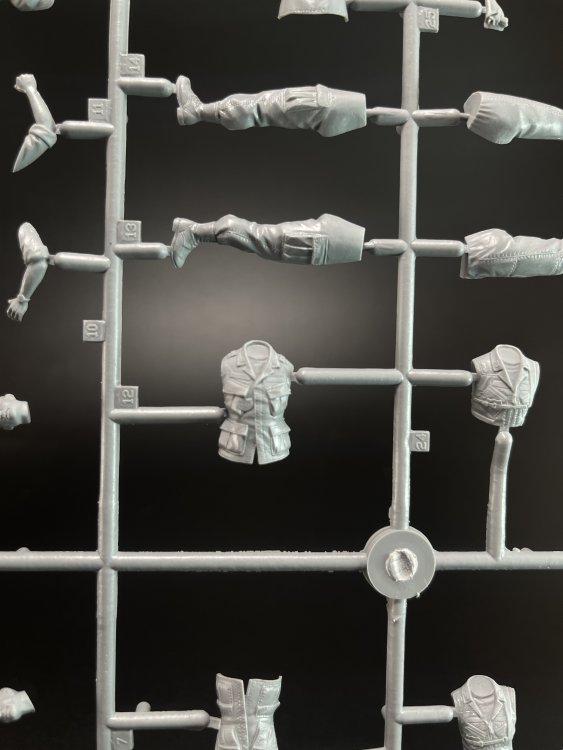
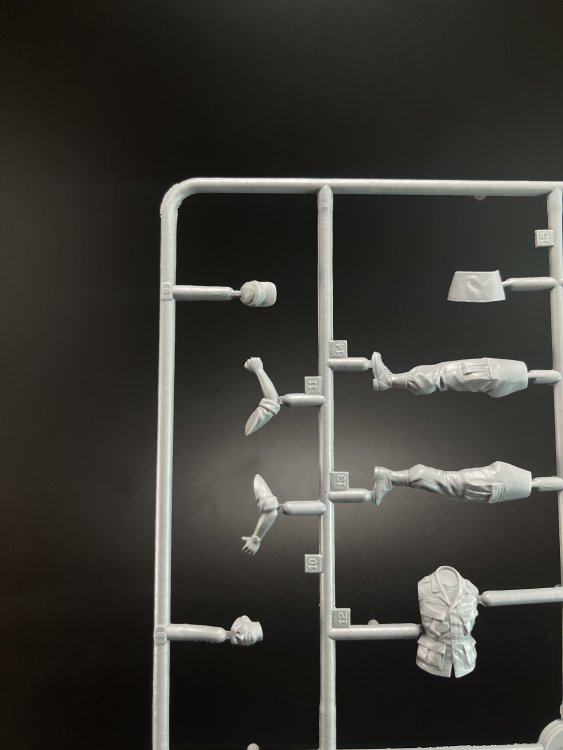
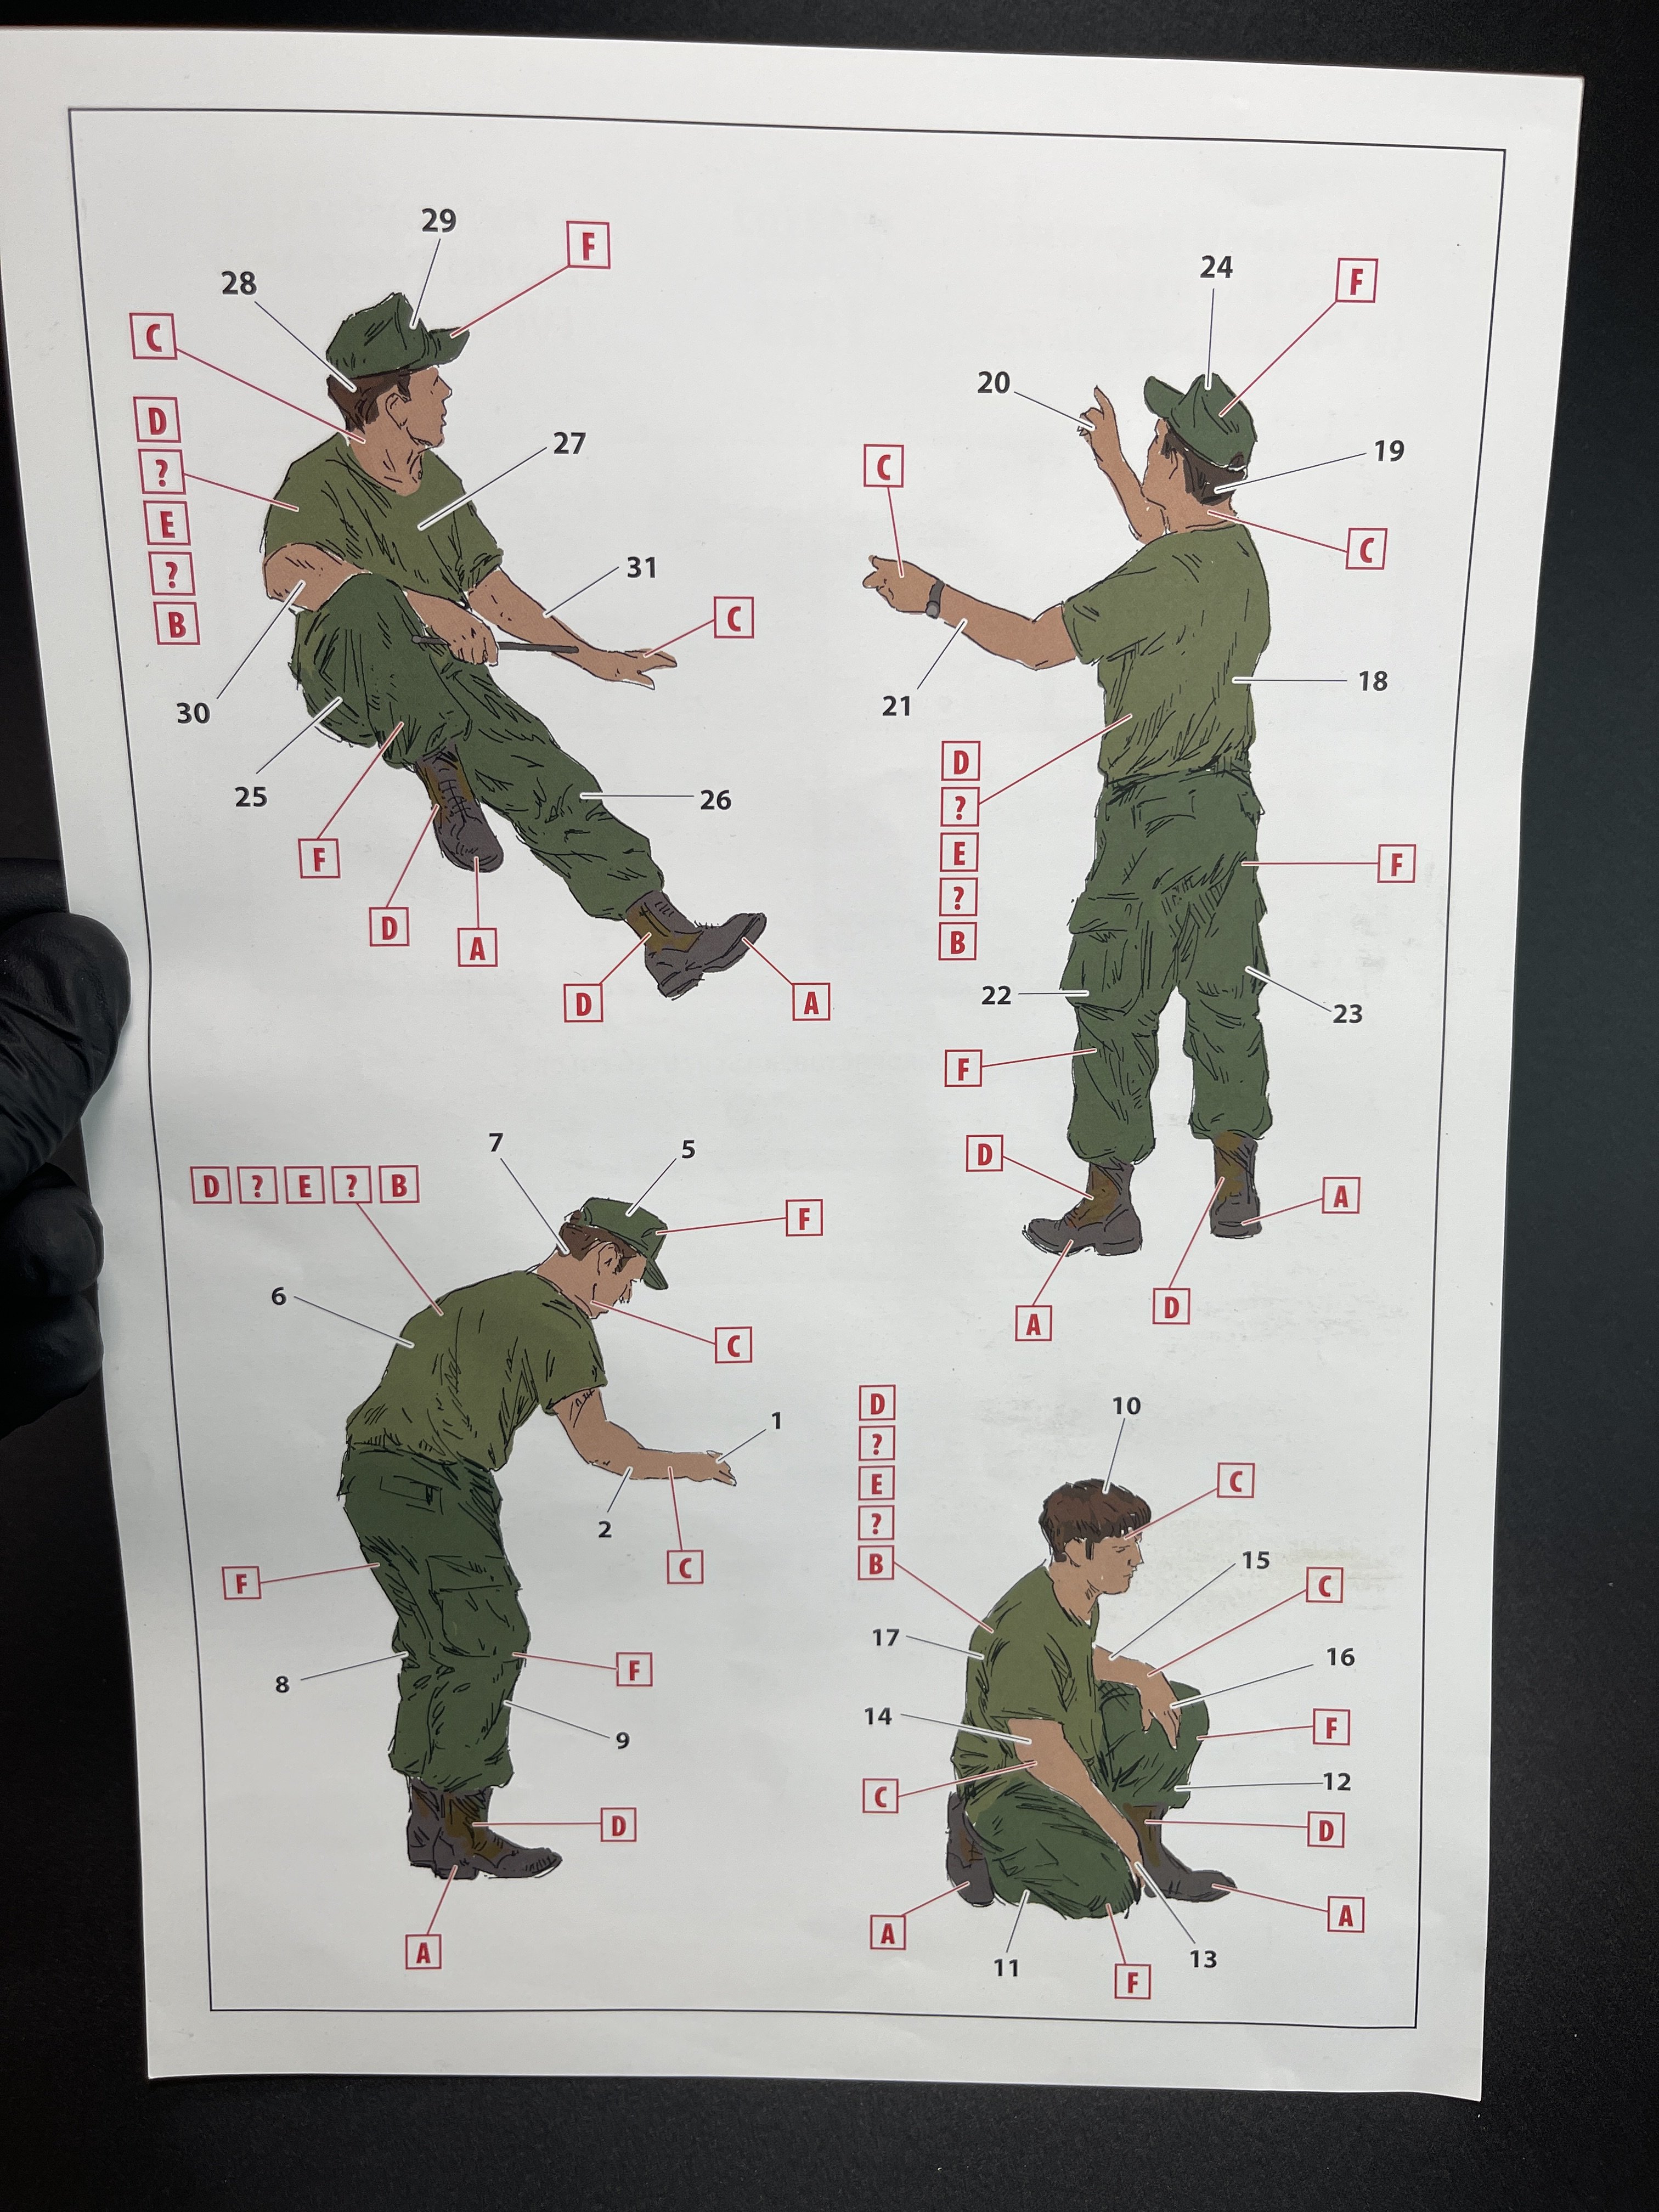
As for the detail, and starting with the clothes I think that are quite well reproduced, but not being a Vietnam clothes specialist, I `m quite happy with the detail. Not as sharp and clear detail as resin but still, very good for plastic.
The posture and body positions are quite convincing and very well reproduce making all the figures in a natural pose which is a quite hard task to do.
The hands of all figures are very well made for injection and as I already said, with care and patience to remove the seam line you will get a good result
Also, these figures are independent of each other, so you can chose to use all or only one or two, of both sets.
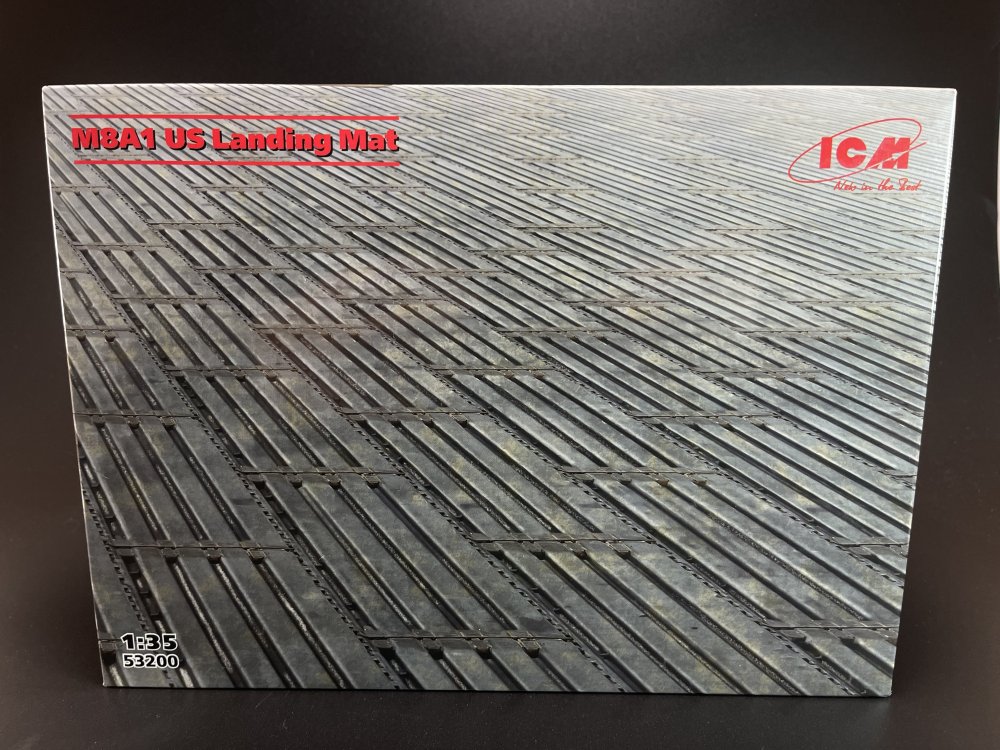
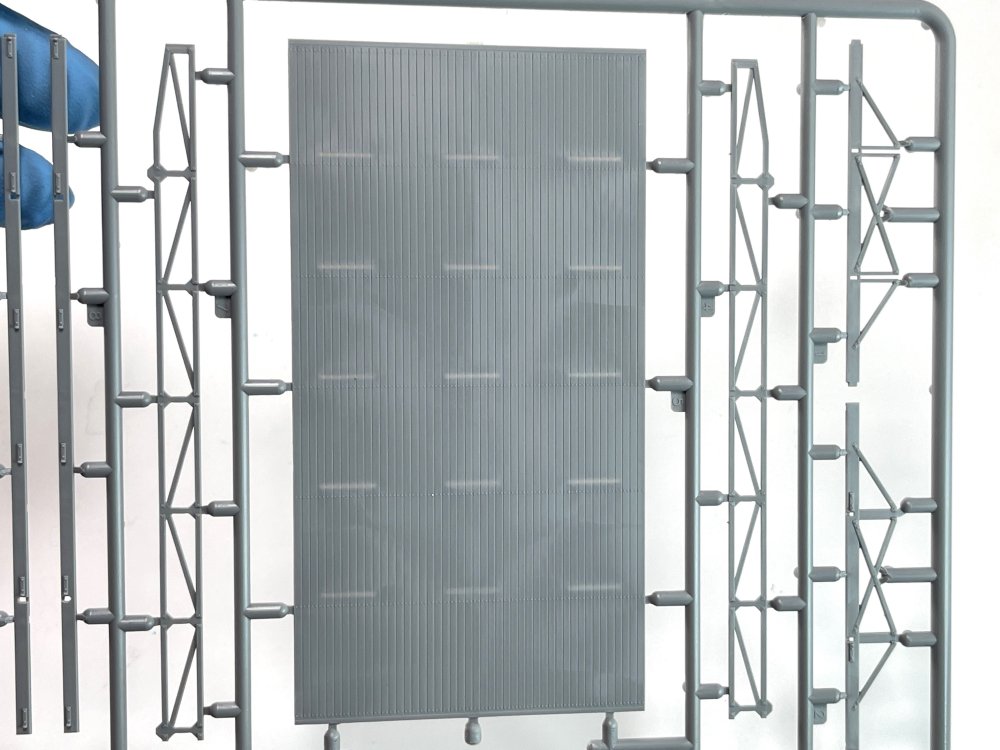
To finalize the combo, you get a M8A1 US Landing Mat.
Here also with no box, just the sprue and the instructions.

But for this, I leave you my review on it, here.
Conclusion:
Wow!! What a BIG combo kit of very large and big KIT!!
Hats off ICM for making this beauty and get all these together. You can see all the hard and long work made to make this one possible!
It`s the BEST model kit I EVER seen from ICM.
You can make a impressive and quite detail replica straight from the box and that`s something and I totally understand that ICM wanted to get there, as after all it`s not a cheap kit and it could be cheap! Is enormous and FANTASTIC.
But at the same it has plenty of room to get aftermarket guys in and the superdetailers.
It’s a FABULOUS Model kit combo
Just get one!!!!
VERY HIGHLY RECOMMEND
My thanks to ICM for making this fantastic kit.


-
4
-
-
On 4/1/2024 at 8:02 PM, CANicoll said:
Fran, I see you are doing the Monogram/Revell B-29 in 1/48. What are your plans for that if I may ask? I have that kit too, and the 1/48 B-58 Hustler...
Hi Chris.
I`m making the platinum onbe... the interior is all made... Then I made one big mistake... engrave the panel lines... Almost all done. I also start to detial the exterior with the Eduard PE set for the exterior.
Still have the problem for the engines and nacelles (and propeller)...
I saw the https://www.flightlineengineering.com/item_48_b29.html detail set for the engine... But the shipping and customs put me off....
So I`m seeing the Metallic detail sets but are more expensive than Flight Line....
As for the decals, using Kits World (wish me luck) "Top of the Mark" scheme
Fran
-
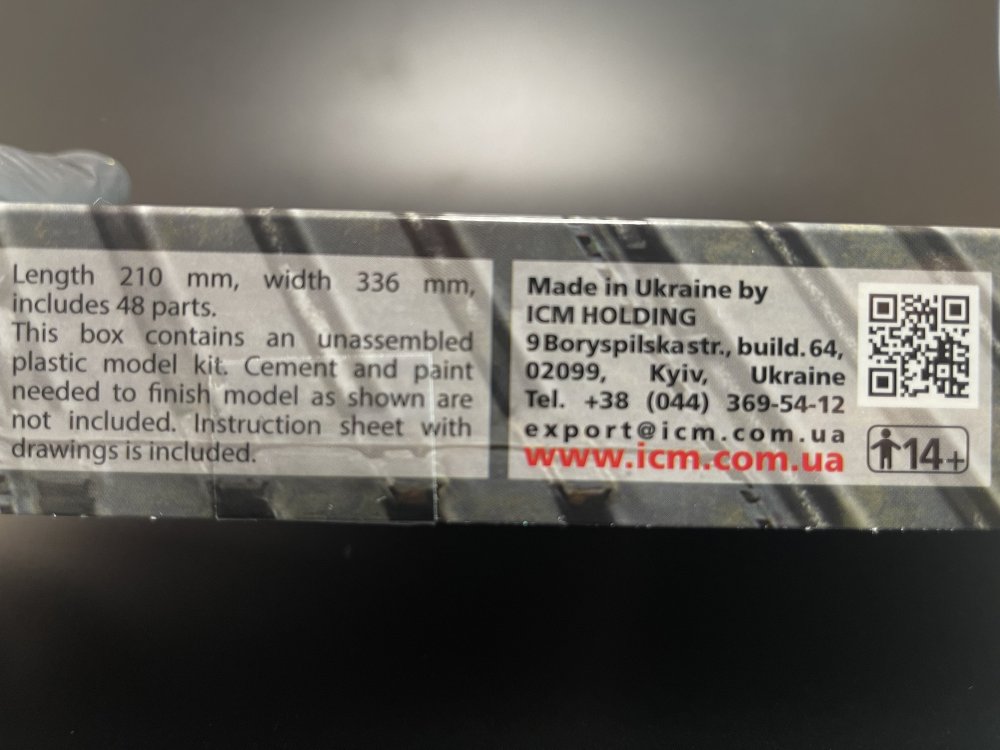
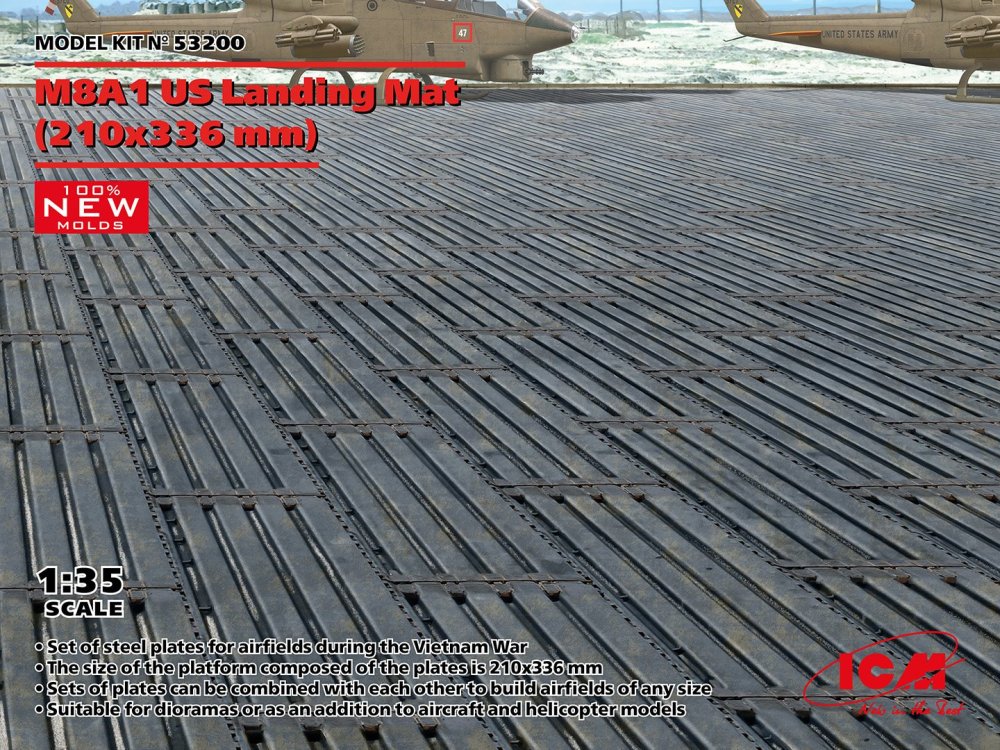
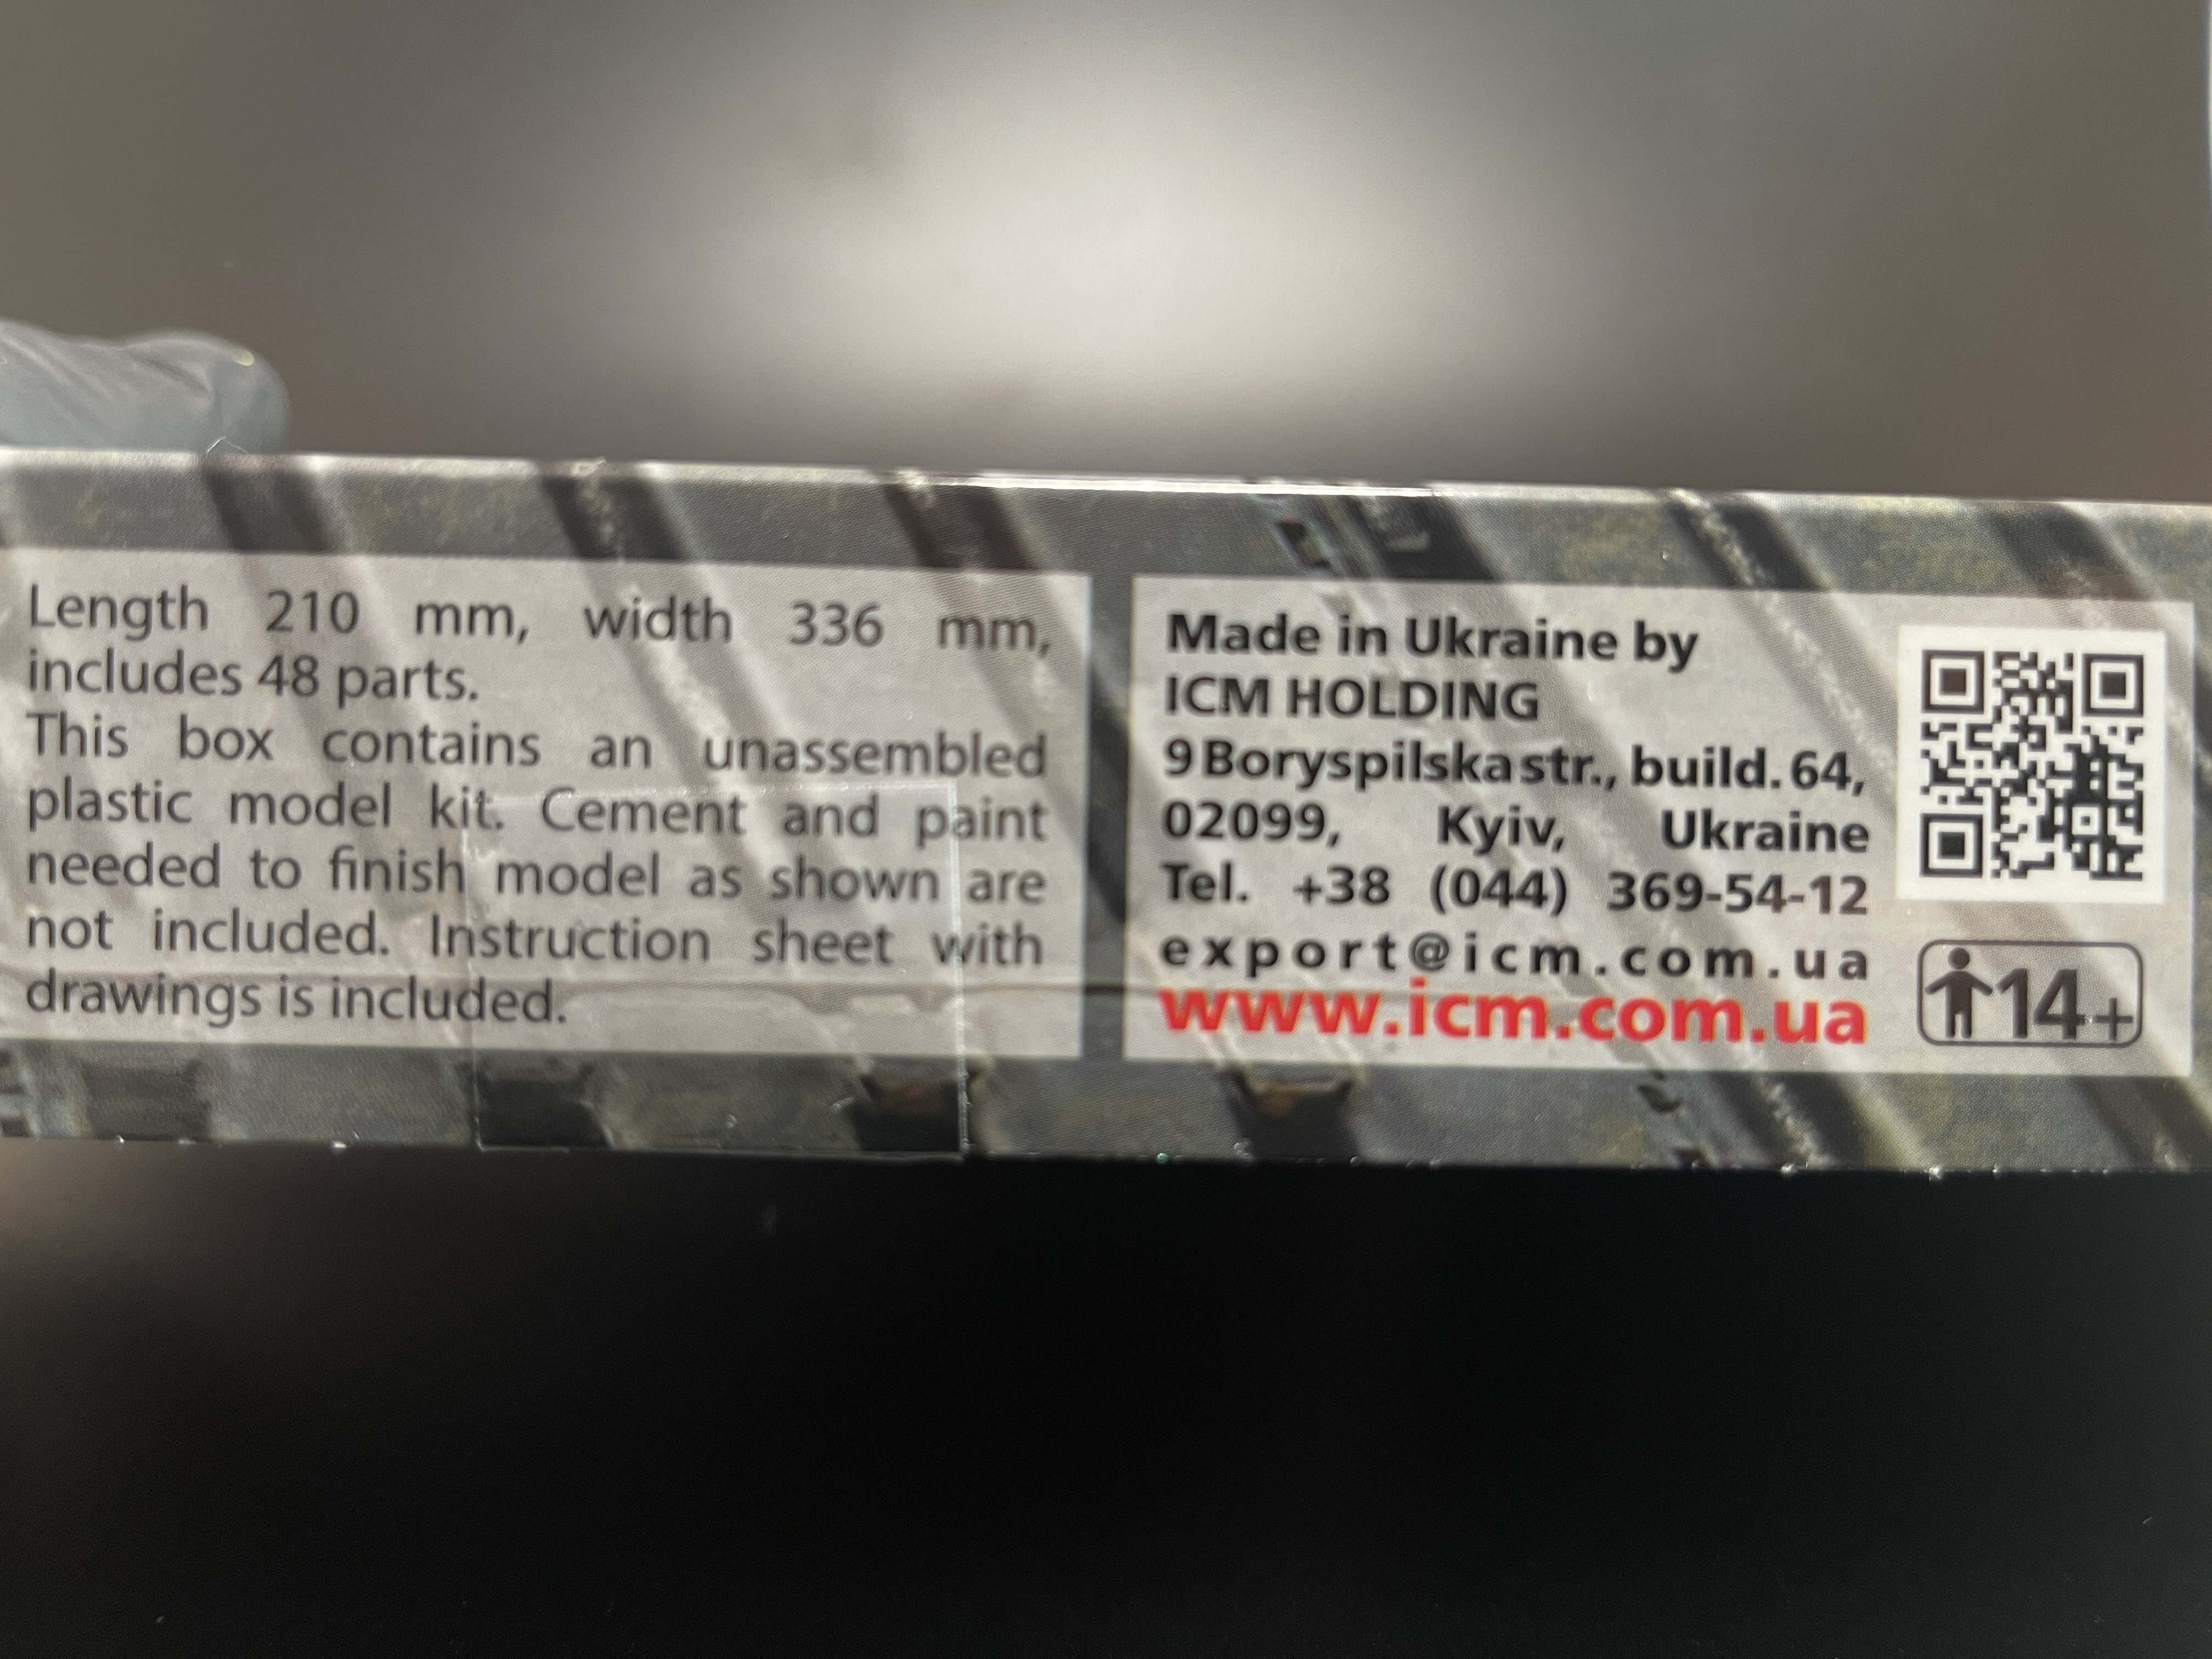
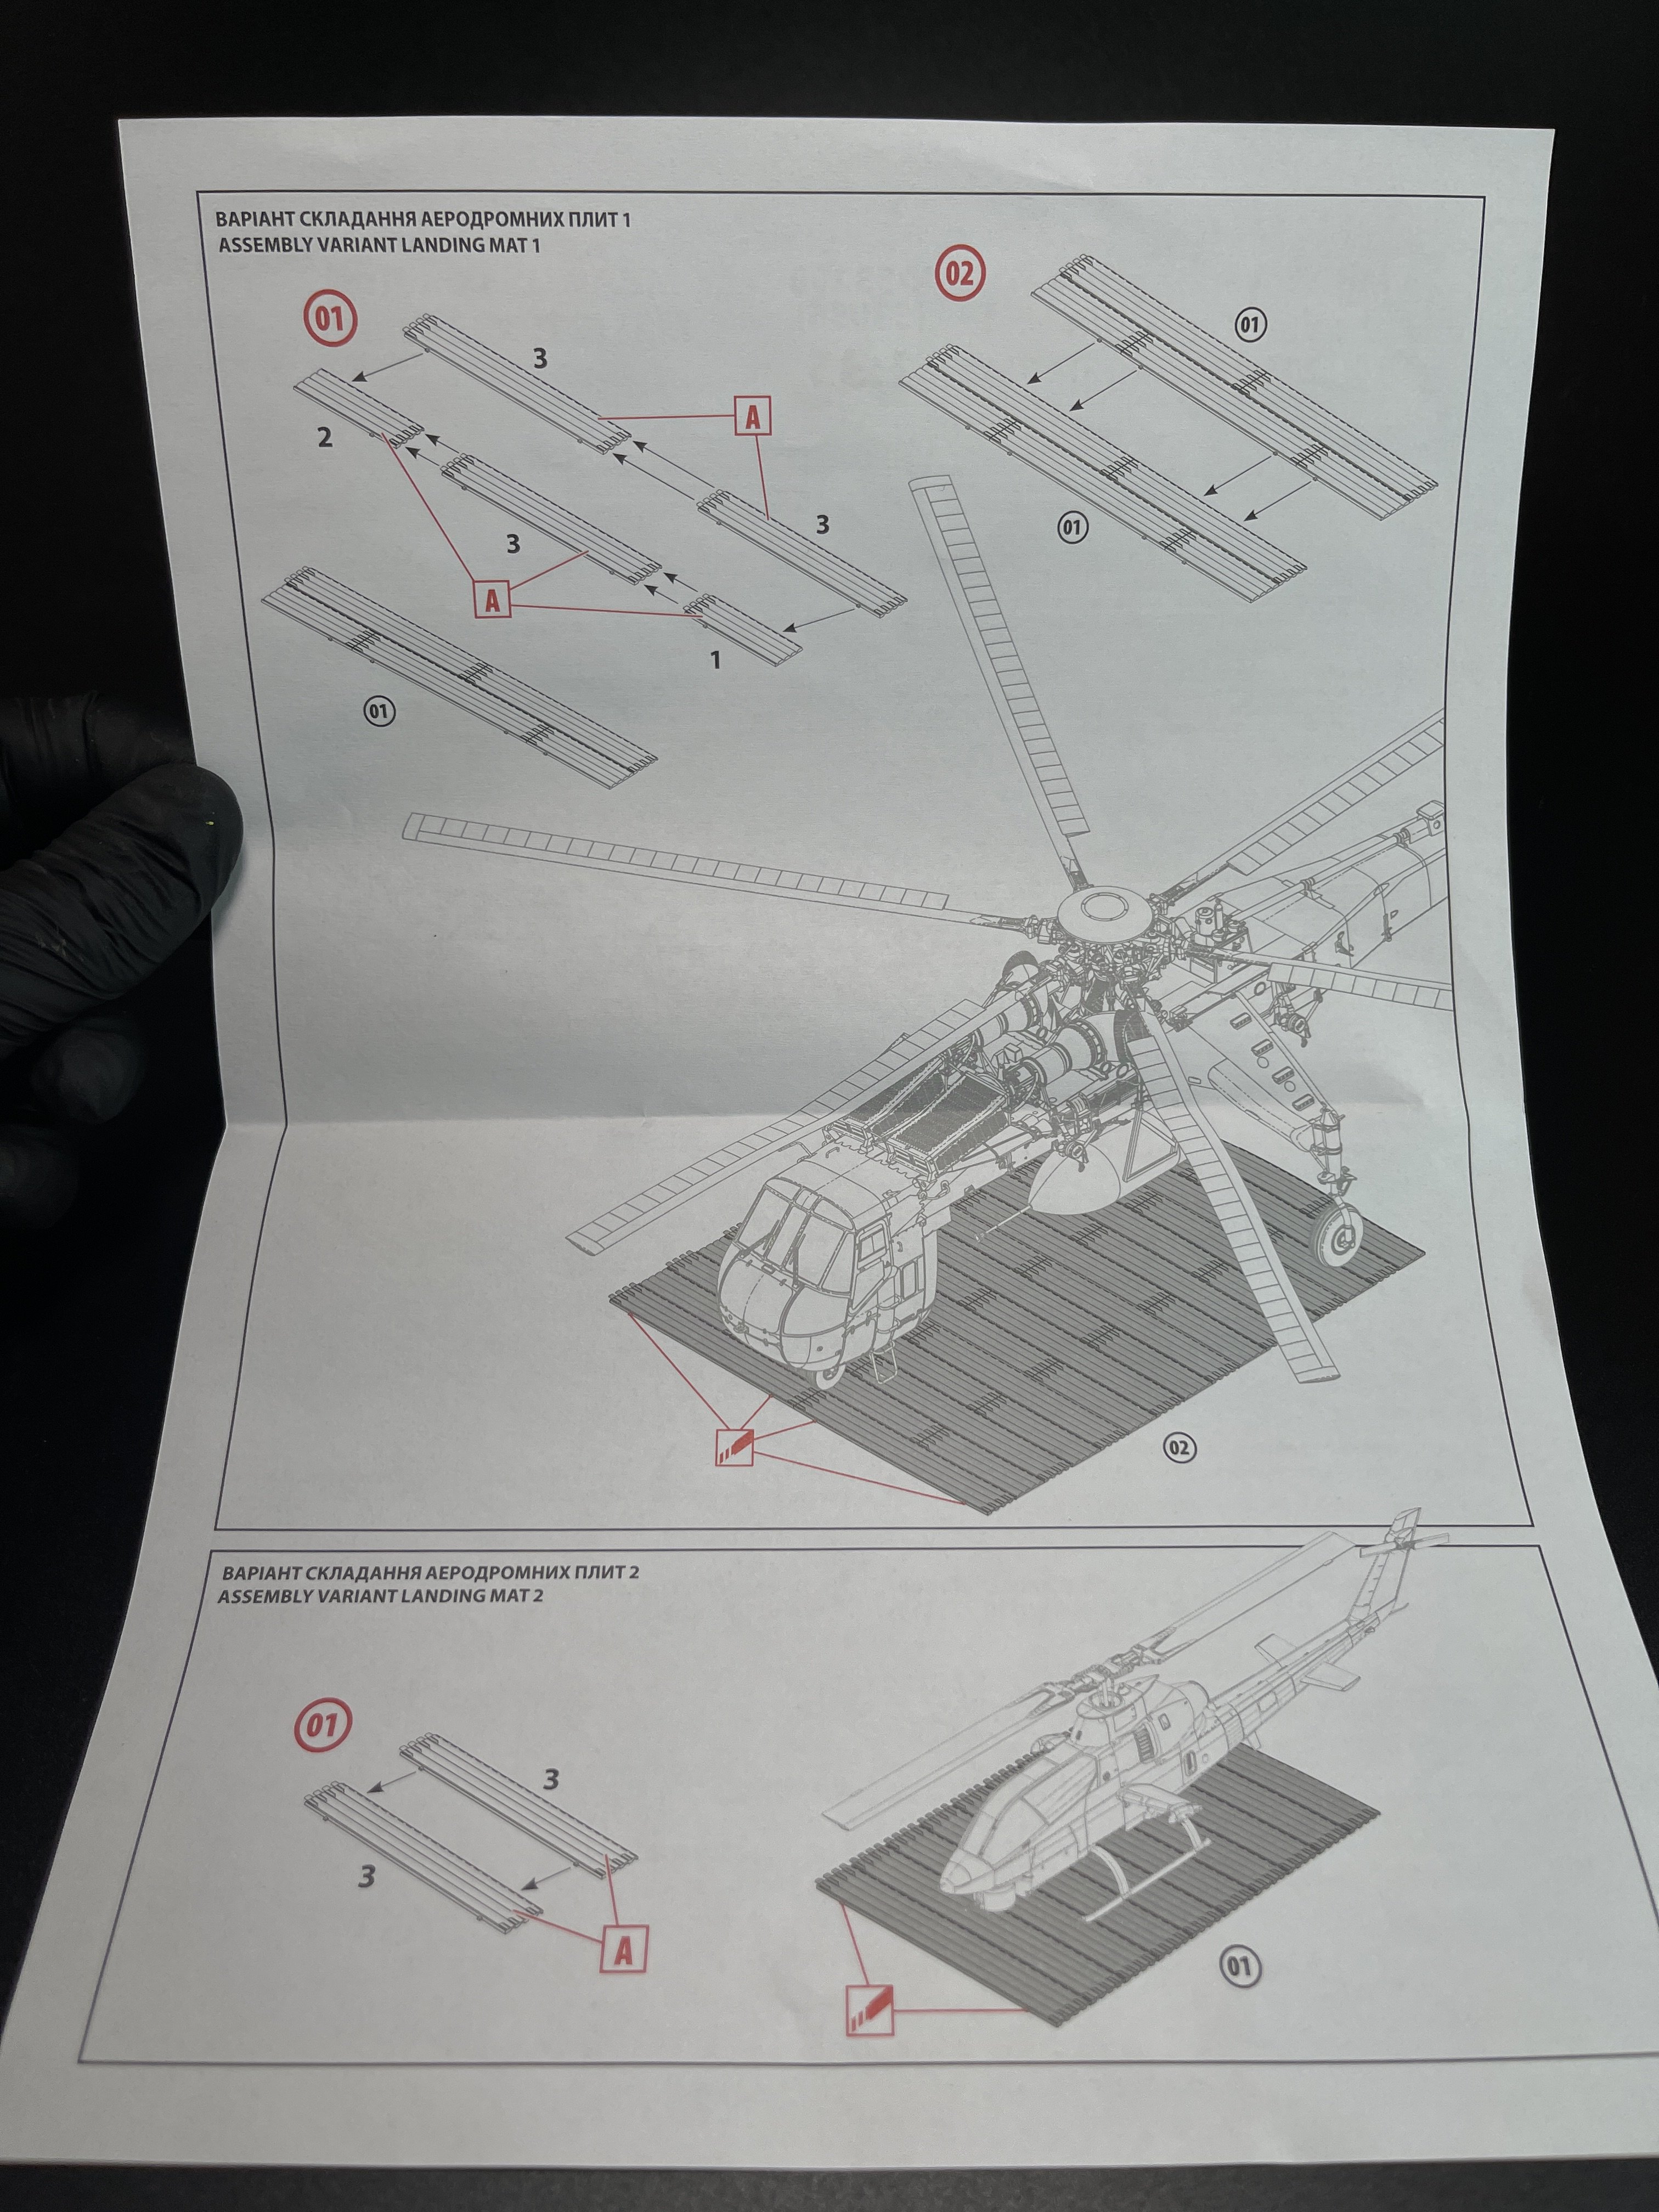
M8A1 US Landing Mat
ICM 1:35
Catalogue n.º 53200
Price tag: 13,10€
This set is a quite useful one in several sceneries of Vietnam and of course ICM thought about their own models, the CH-54 and the AH-1G Cobra.
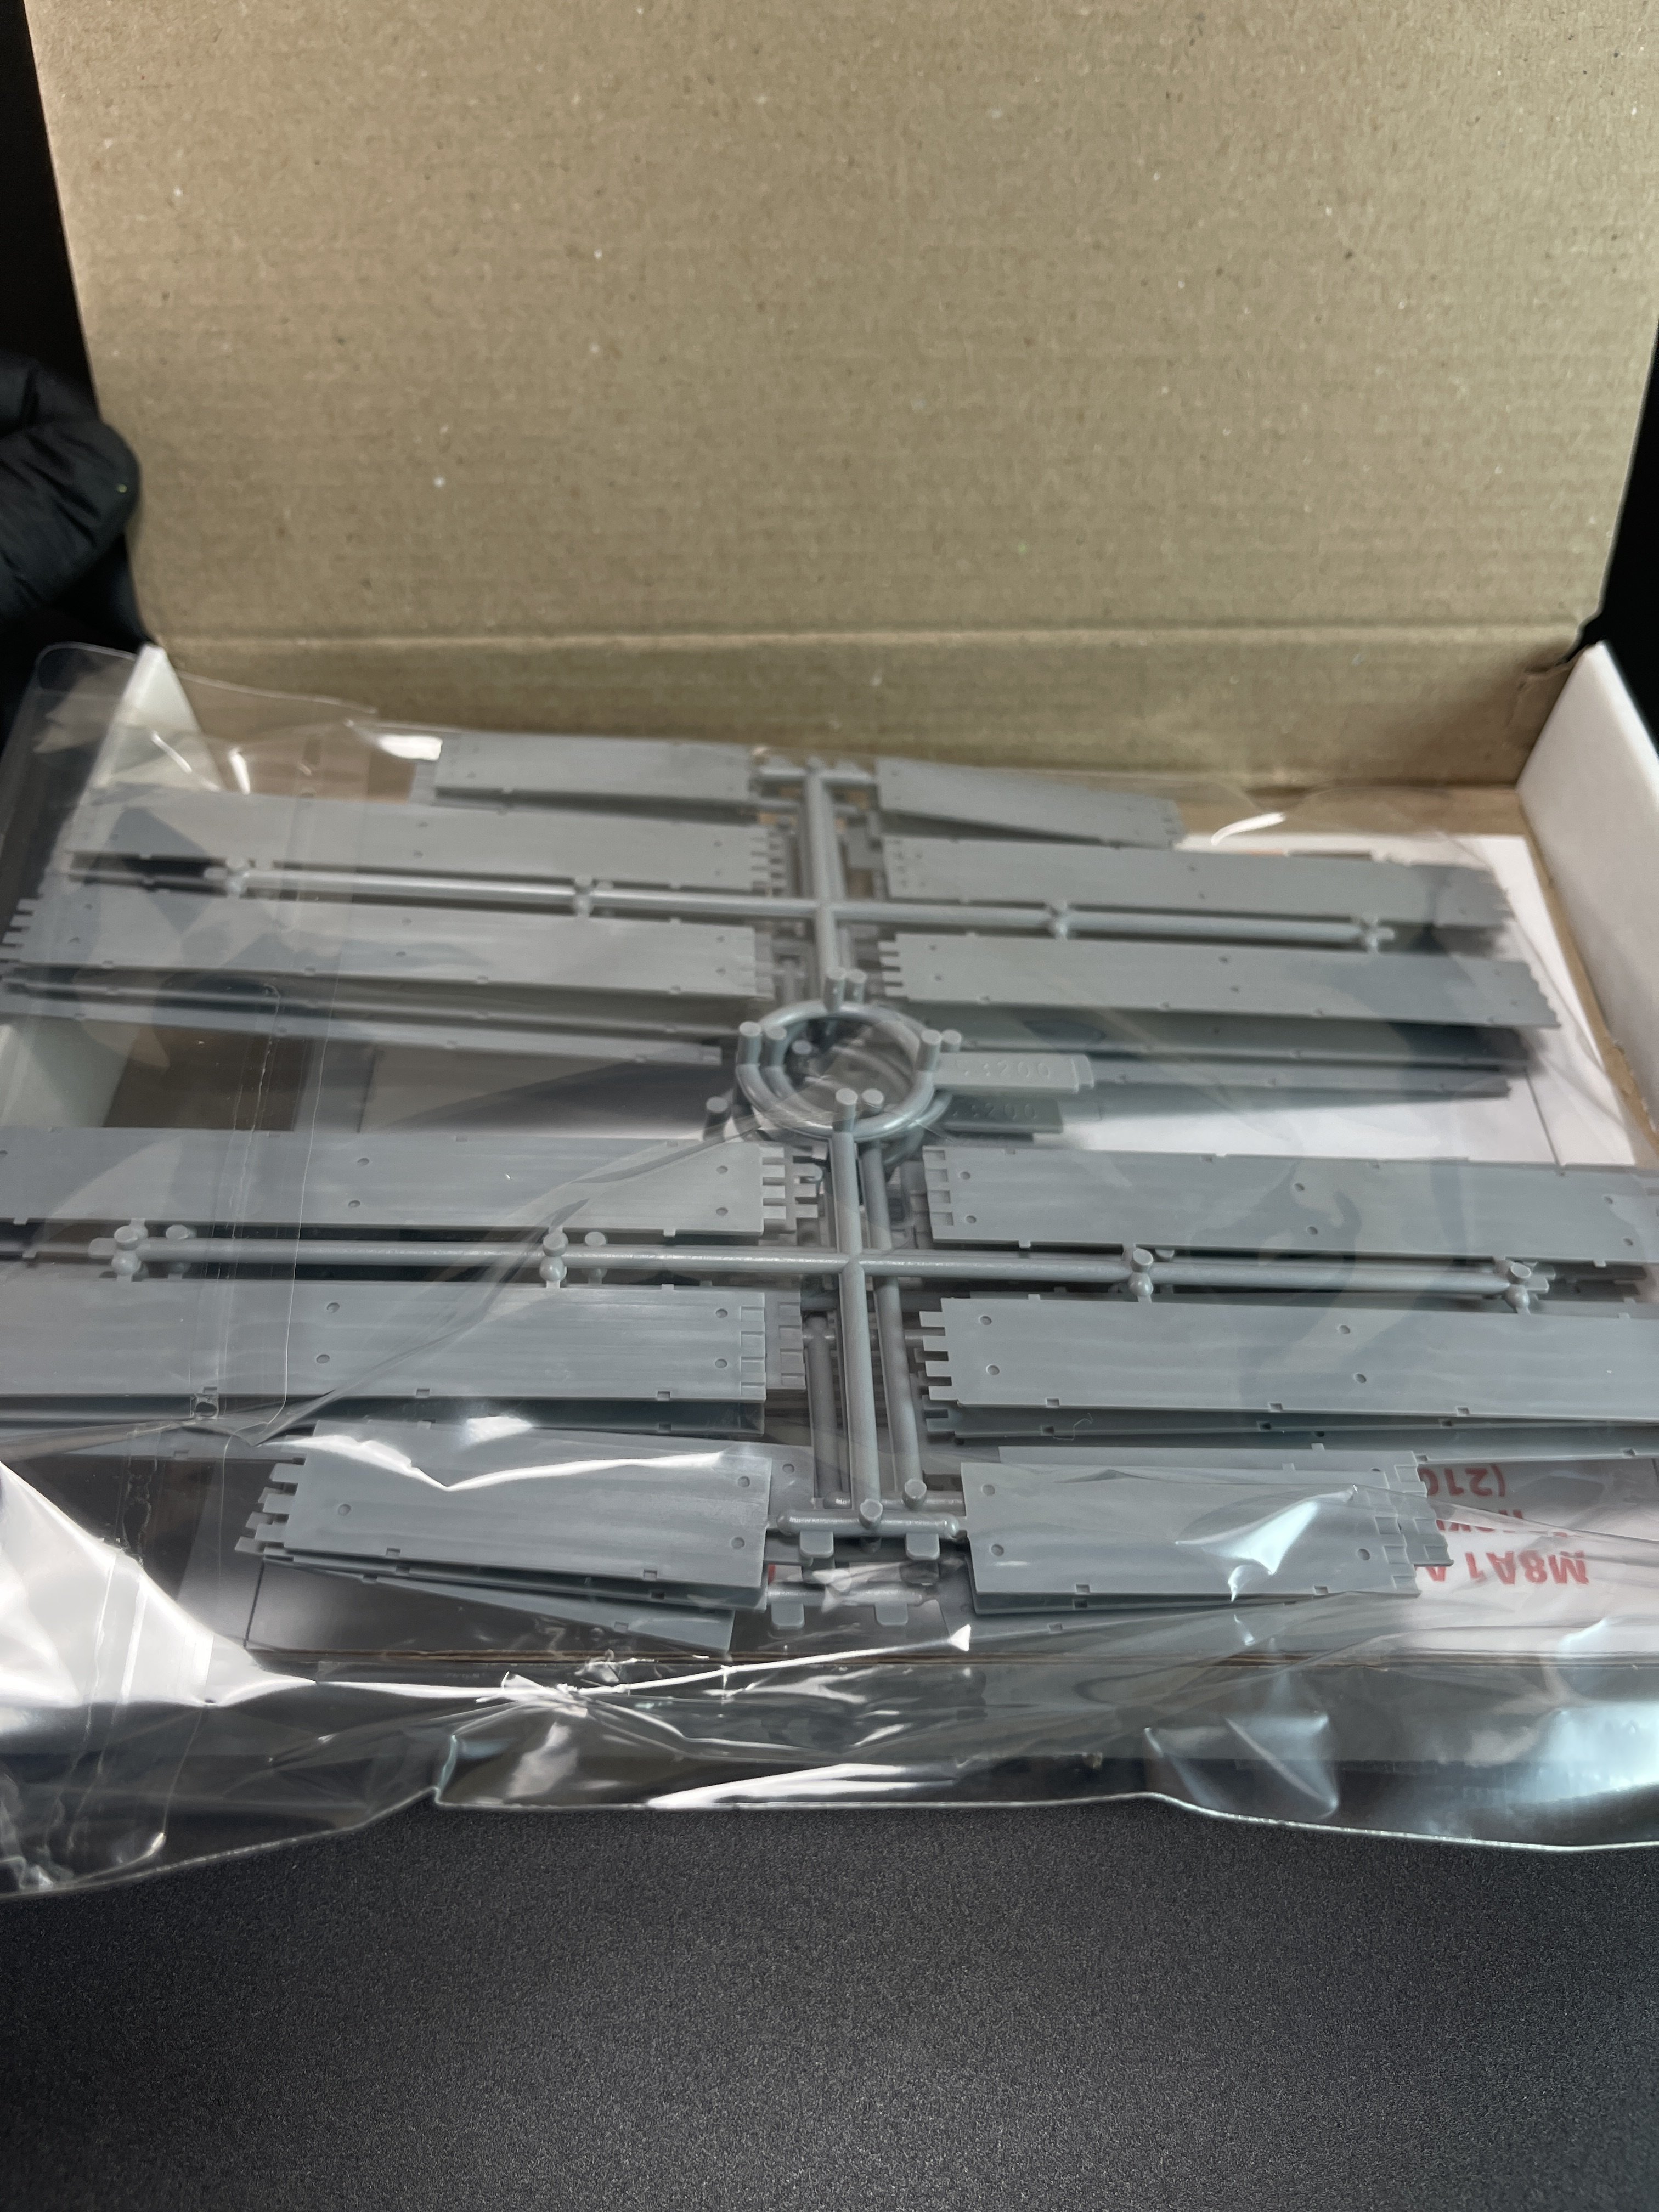
This set comes in a sturdy box with a lip top boxart.

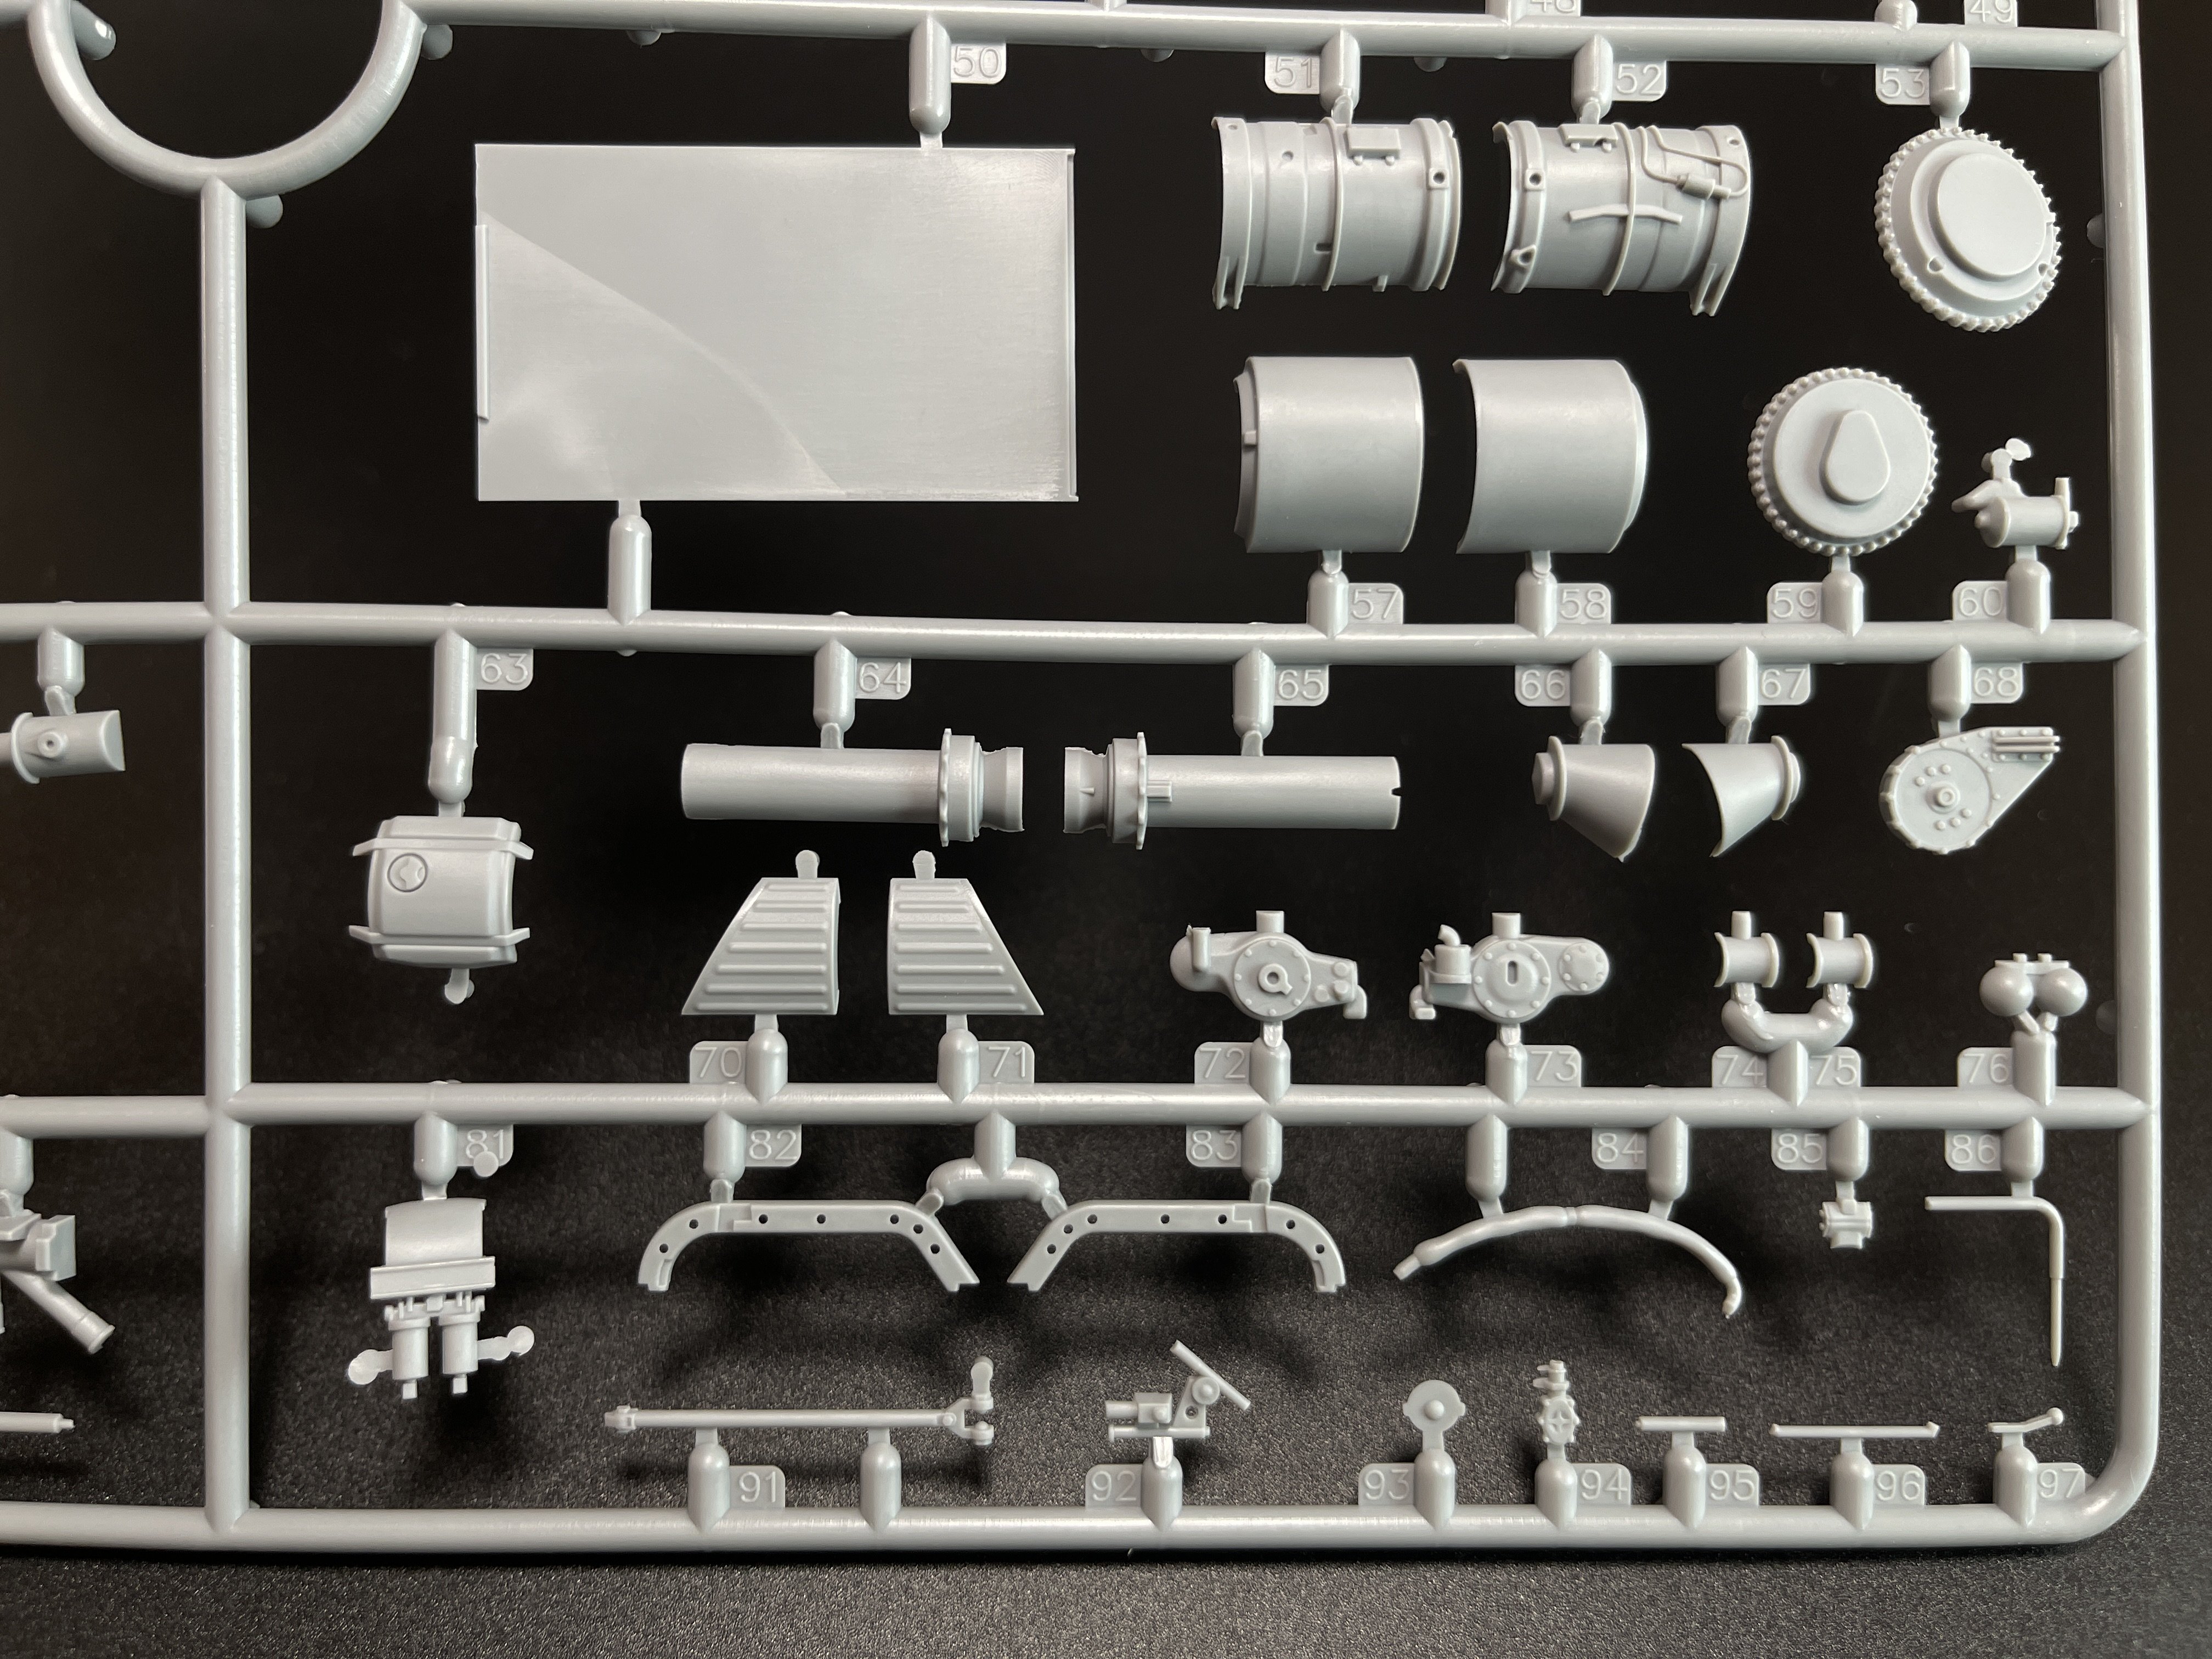
Inside you get 4 identical sprues containing
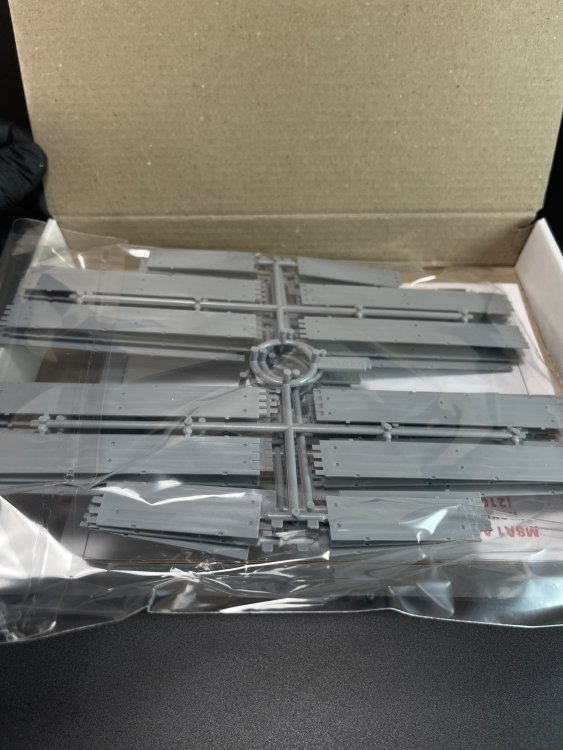
The injection mold is very well done with very fine details.
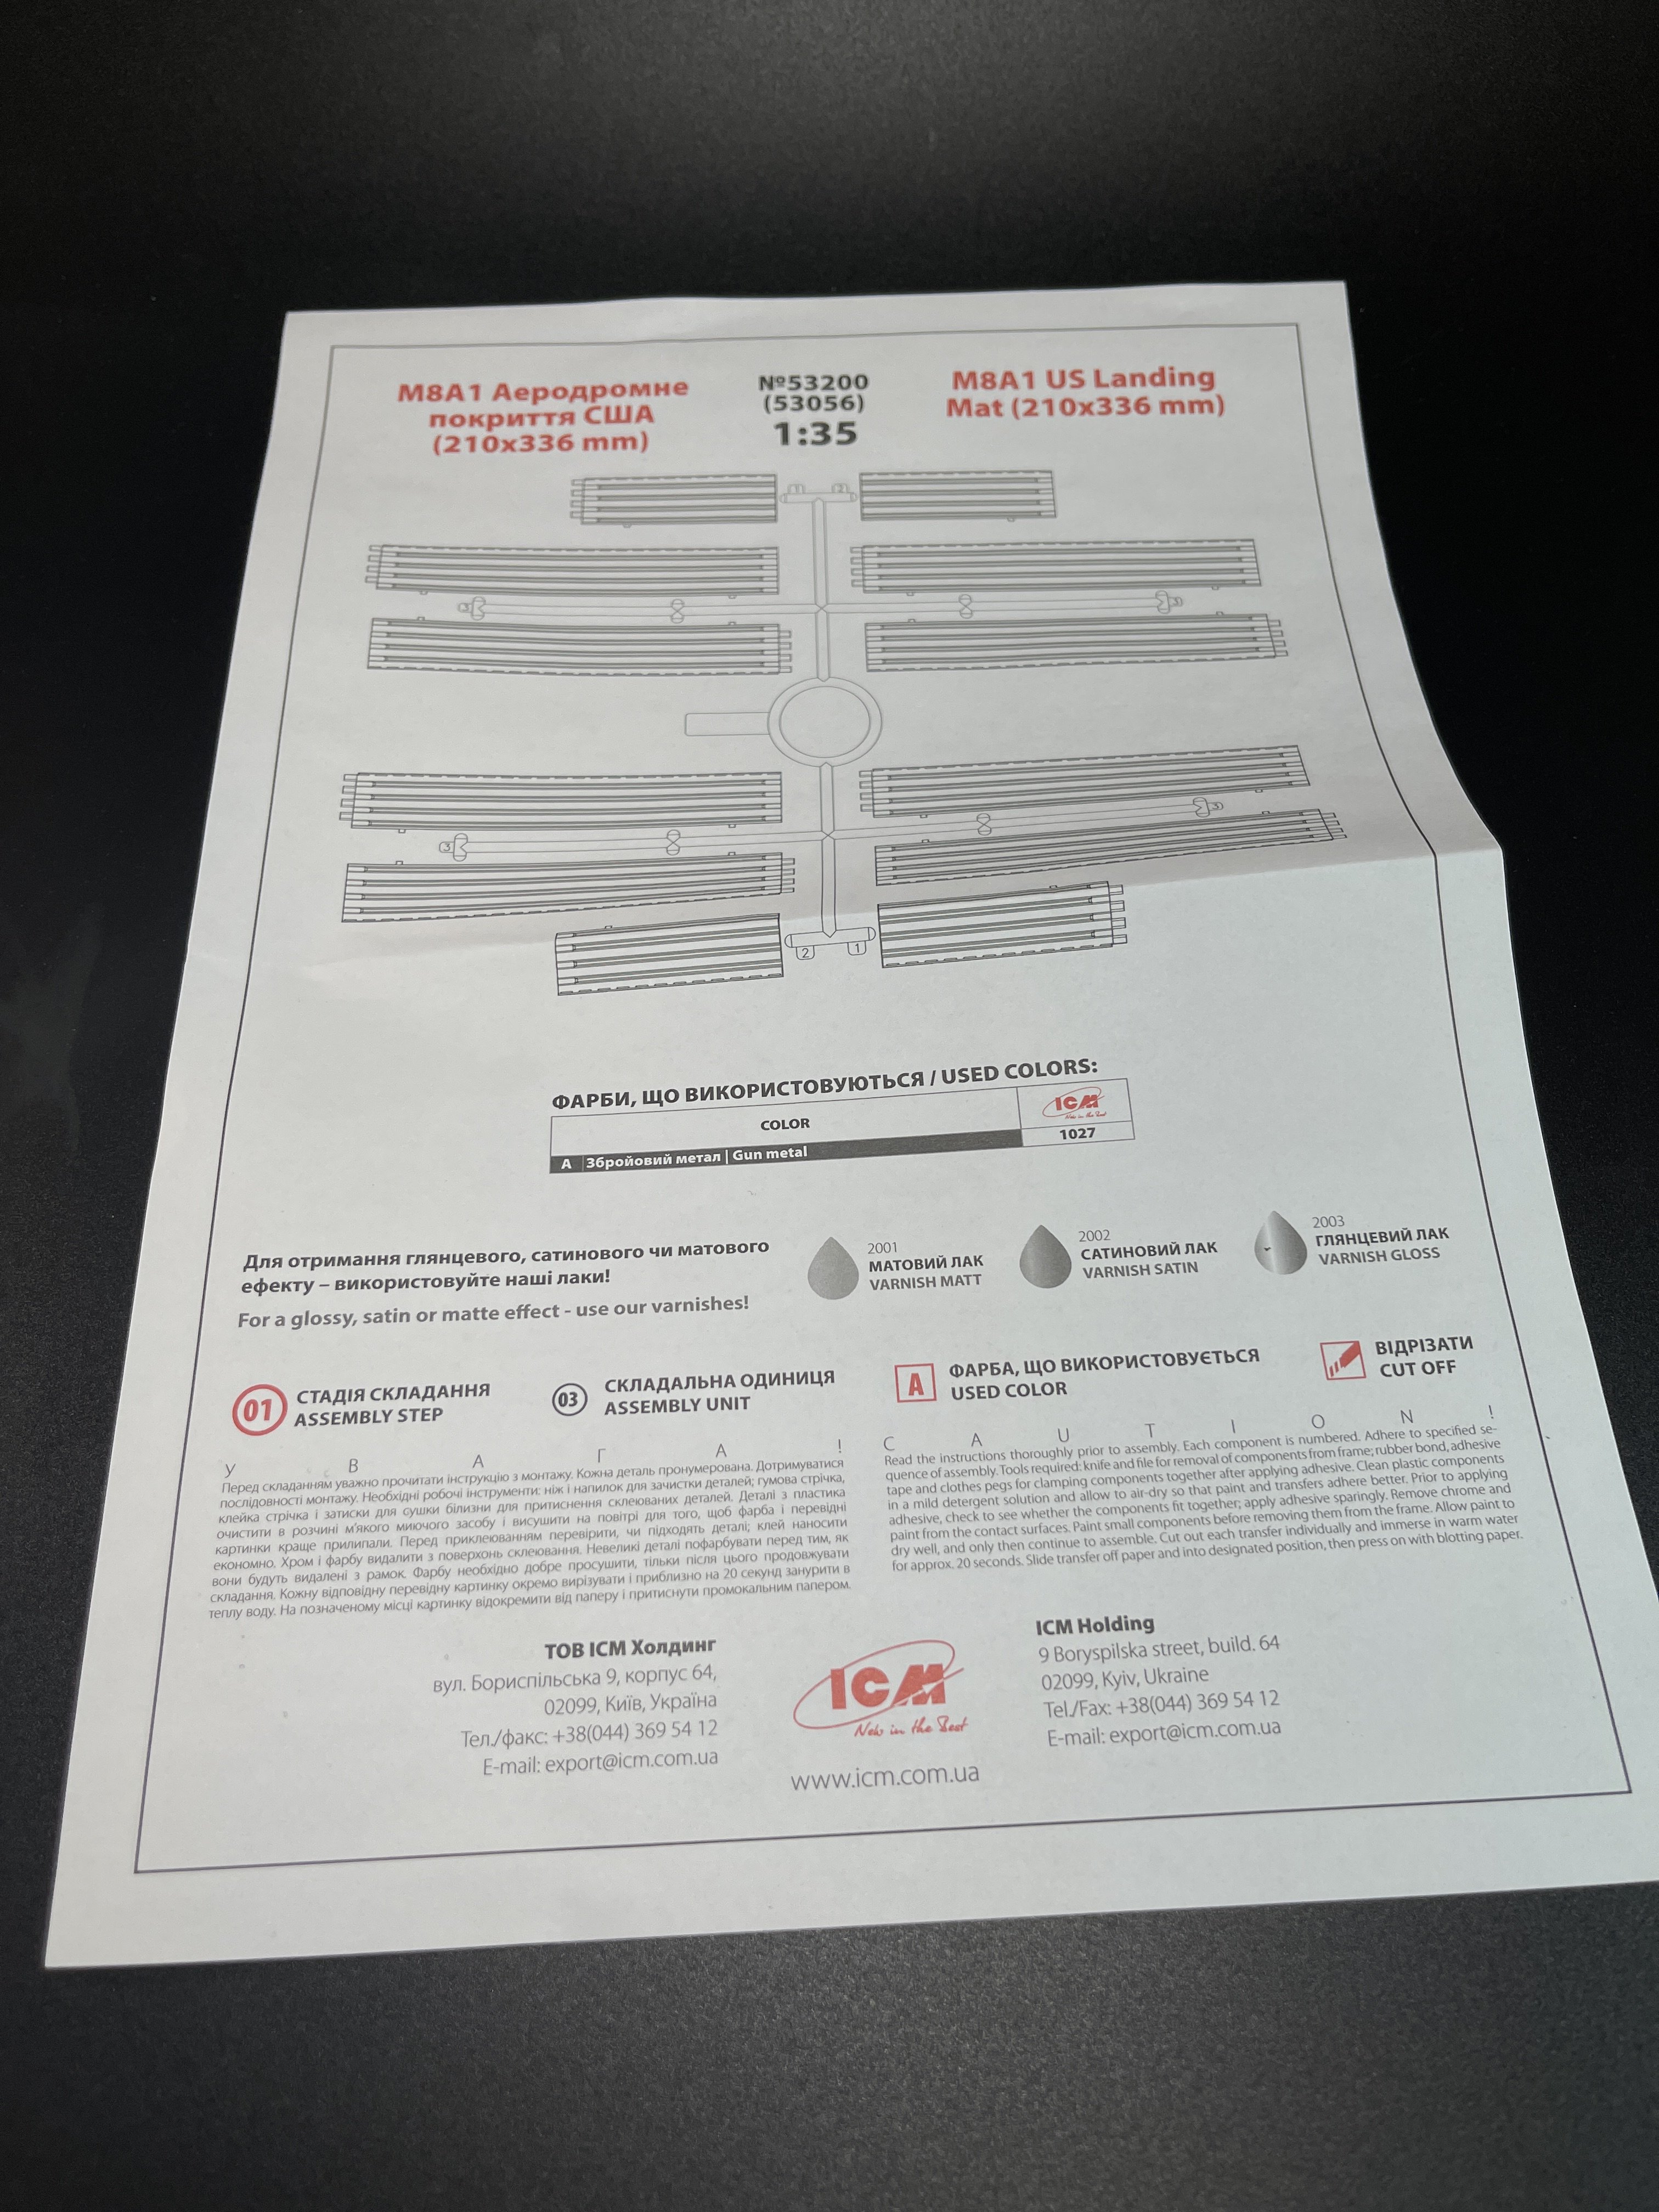
Its modular set that you can make all or just some and you even can build it in two different version as you can see on the instructions.

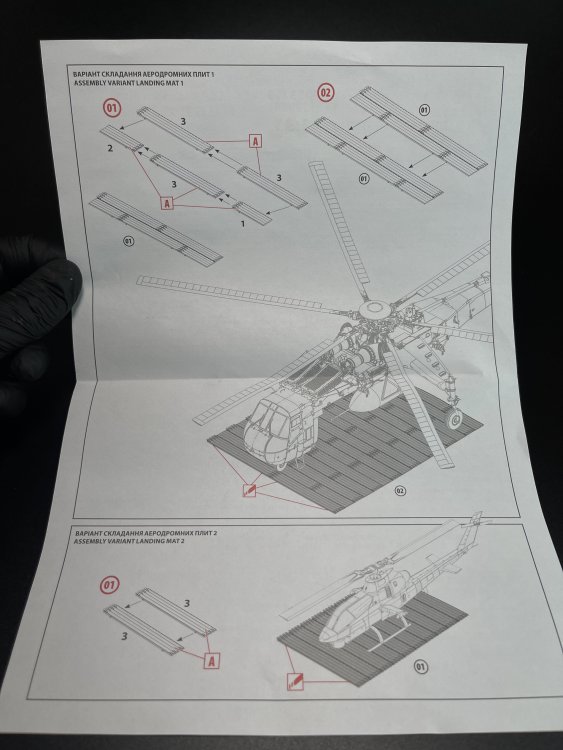
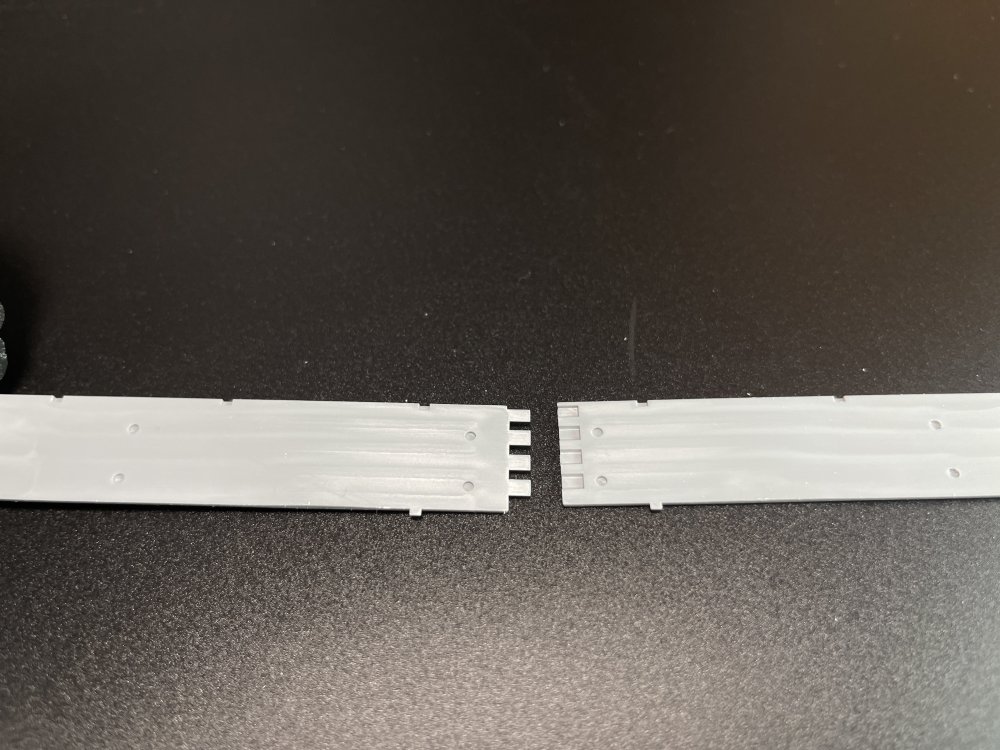
We build it in a few minutes part of the assembly variant mat 1… Quite easy and sweet!! Great surface detail and it could be a simple base for your heli and to be on little base with some scenario or even to be on a Vietnam diorama.
There`s is enought pieces to make at least two variant mat 2.
The instructions are very simple and easy to follow and the construction is quite straightforward and easy.
Conclusion
Great little set from ICM
A perfect add on to their 1:35 Heli, or any others that you have in your stash, at a very affordable price tag and in top of that, with extreme good quality.
Thanks ICM!!
Very Highly Recommend

Our thanks to ICM to make this set!
-
1
-
-
Hi guys.
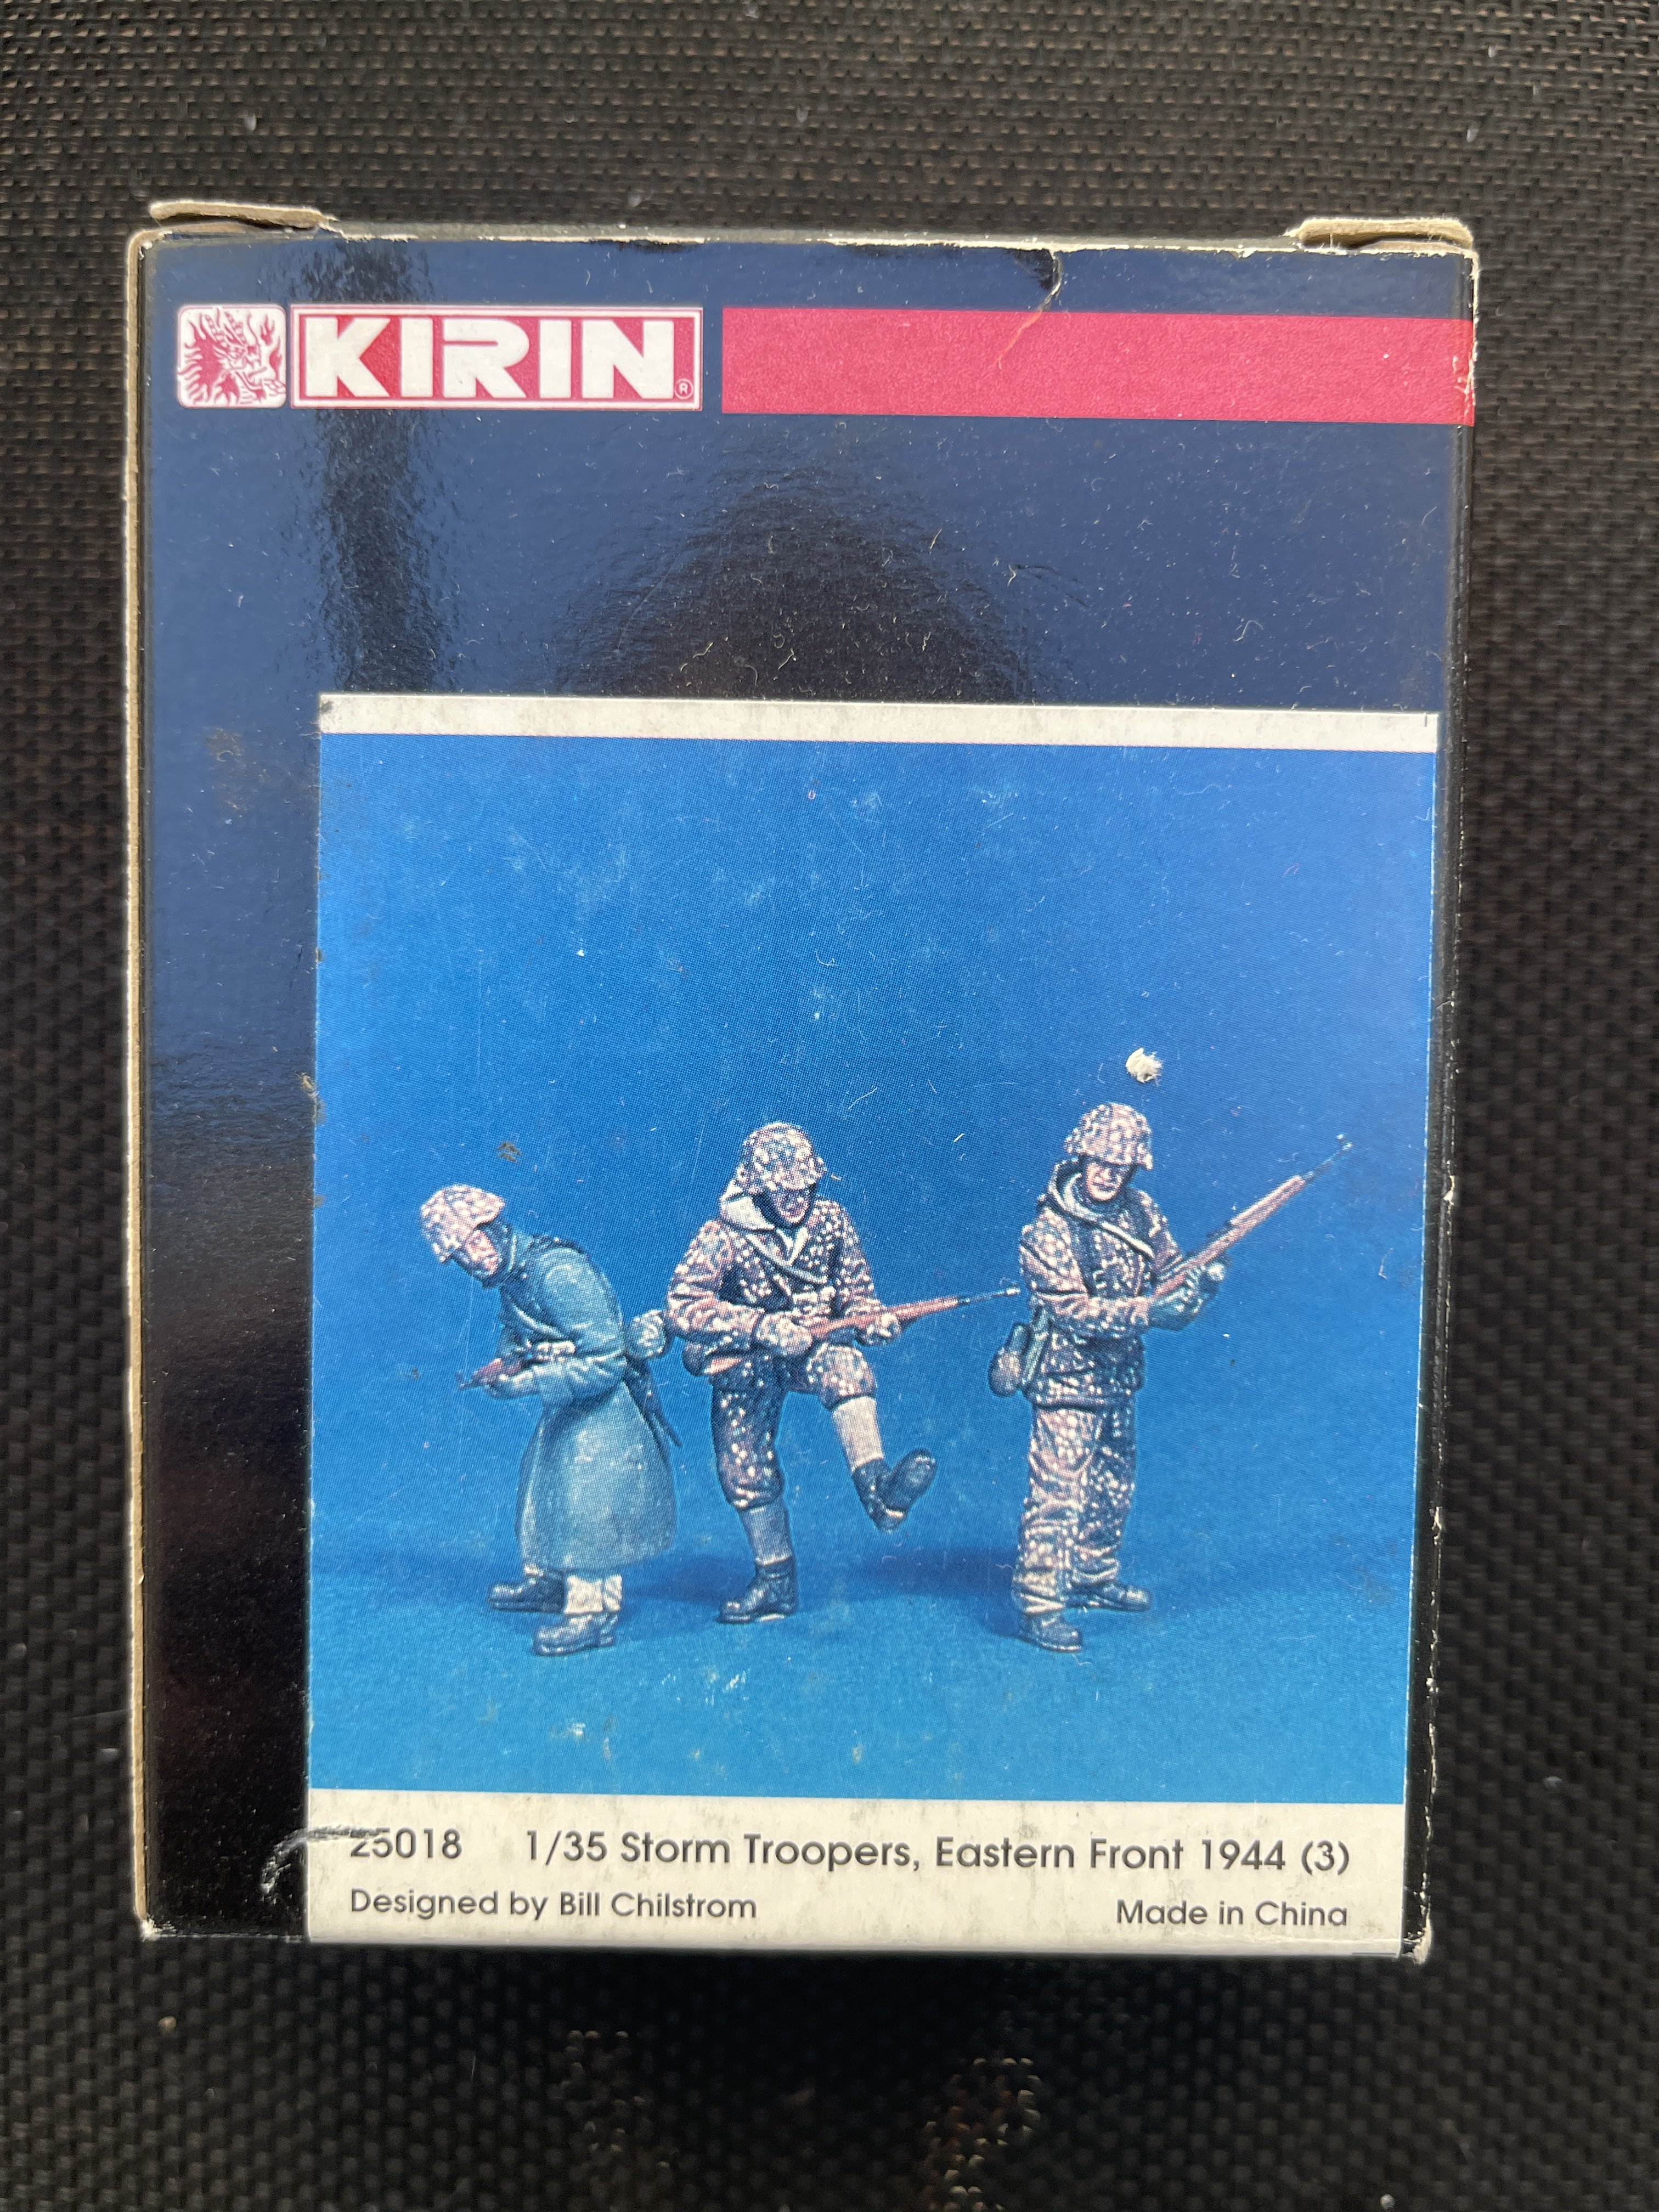
I want to sell these figures (one in 1:32 and two others in 1:35)
The single figures: 8 euros

The triple figure from Kirin - 20€

Paypal payment
Shipping at cost.
Fran
-
1
-
-
On 3/30/2024 at 12:03 PM, CANicoll said:
Wow, quite the upgrade and fantastic quality of work. Fran, thanks for the review. Are you using the kit in a build now?
Chris
I will build it, this Mk XII and both Mk XIV.... but probably next year... this year build log is full
-
2
-
-
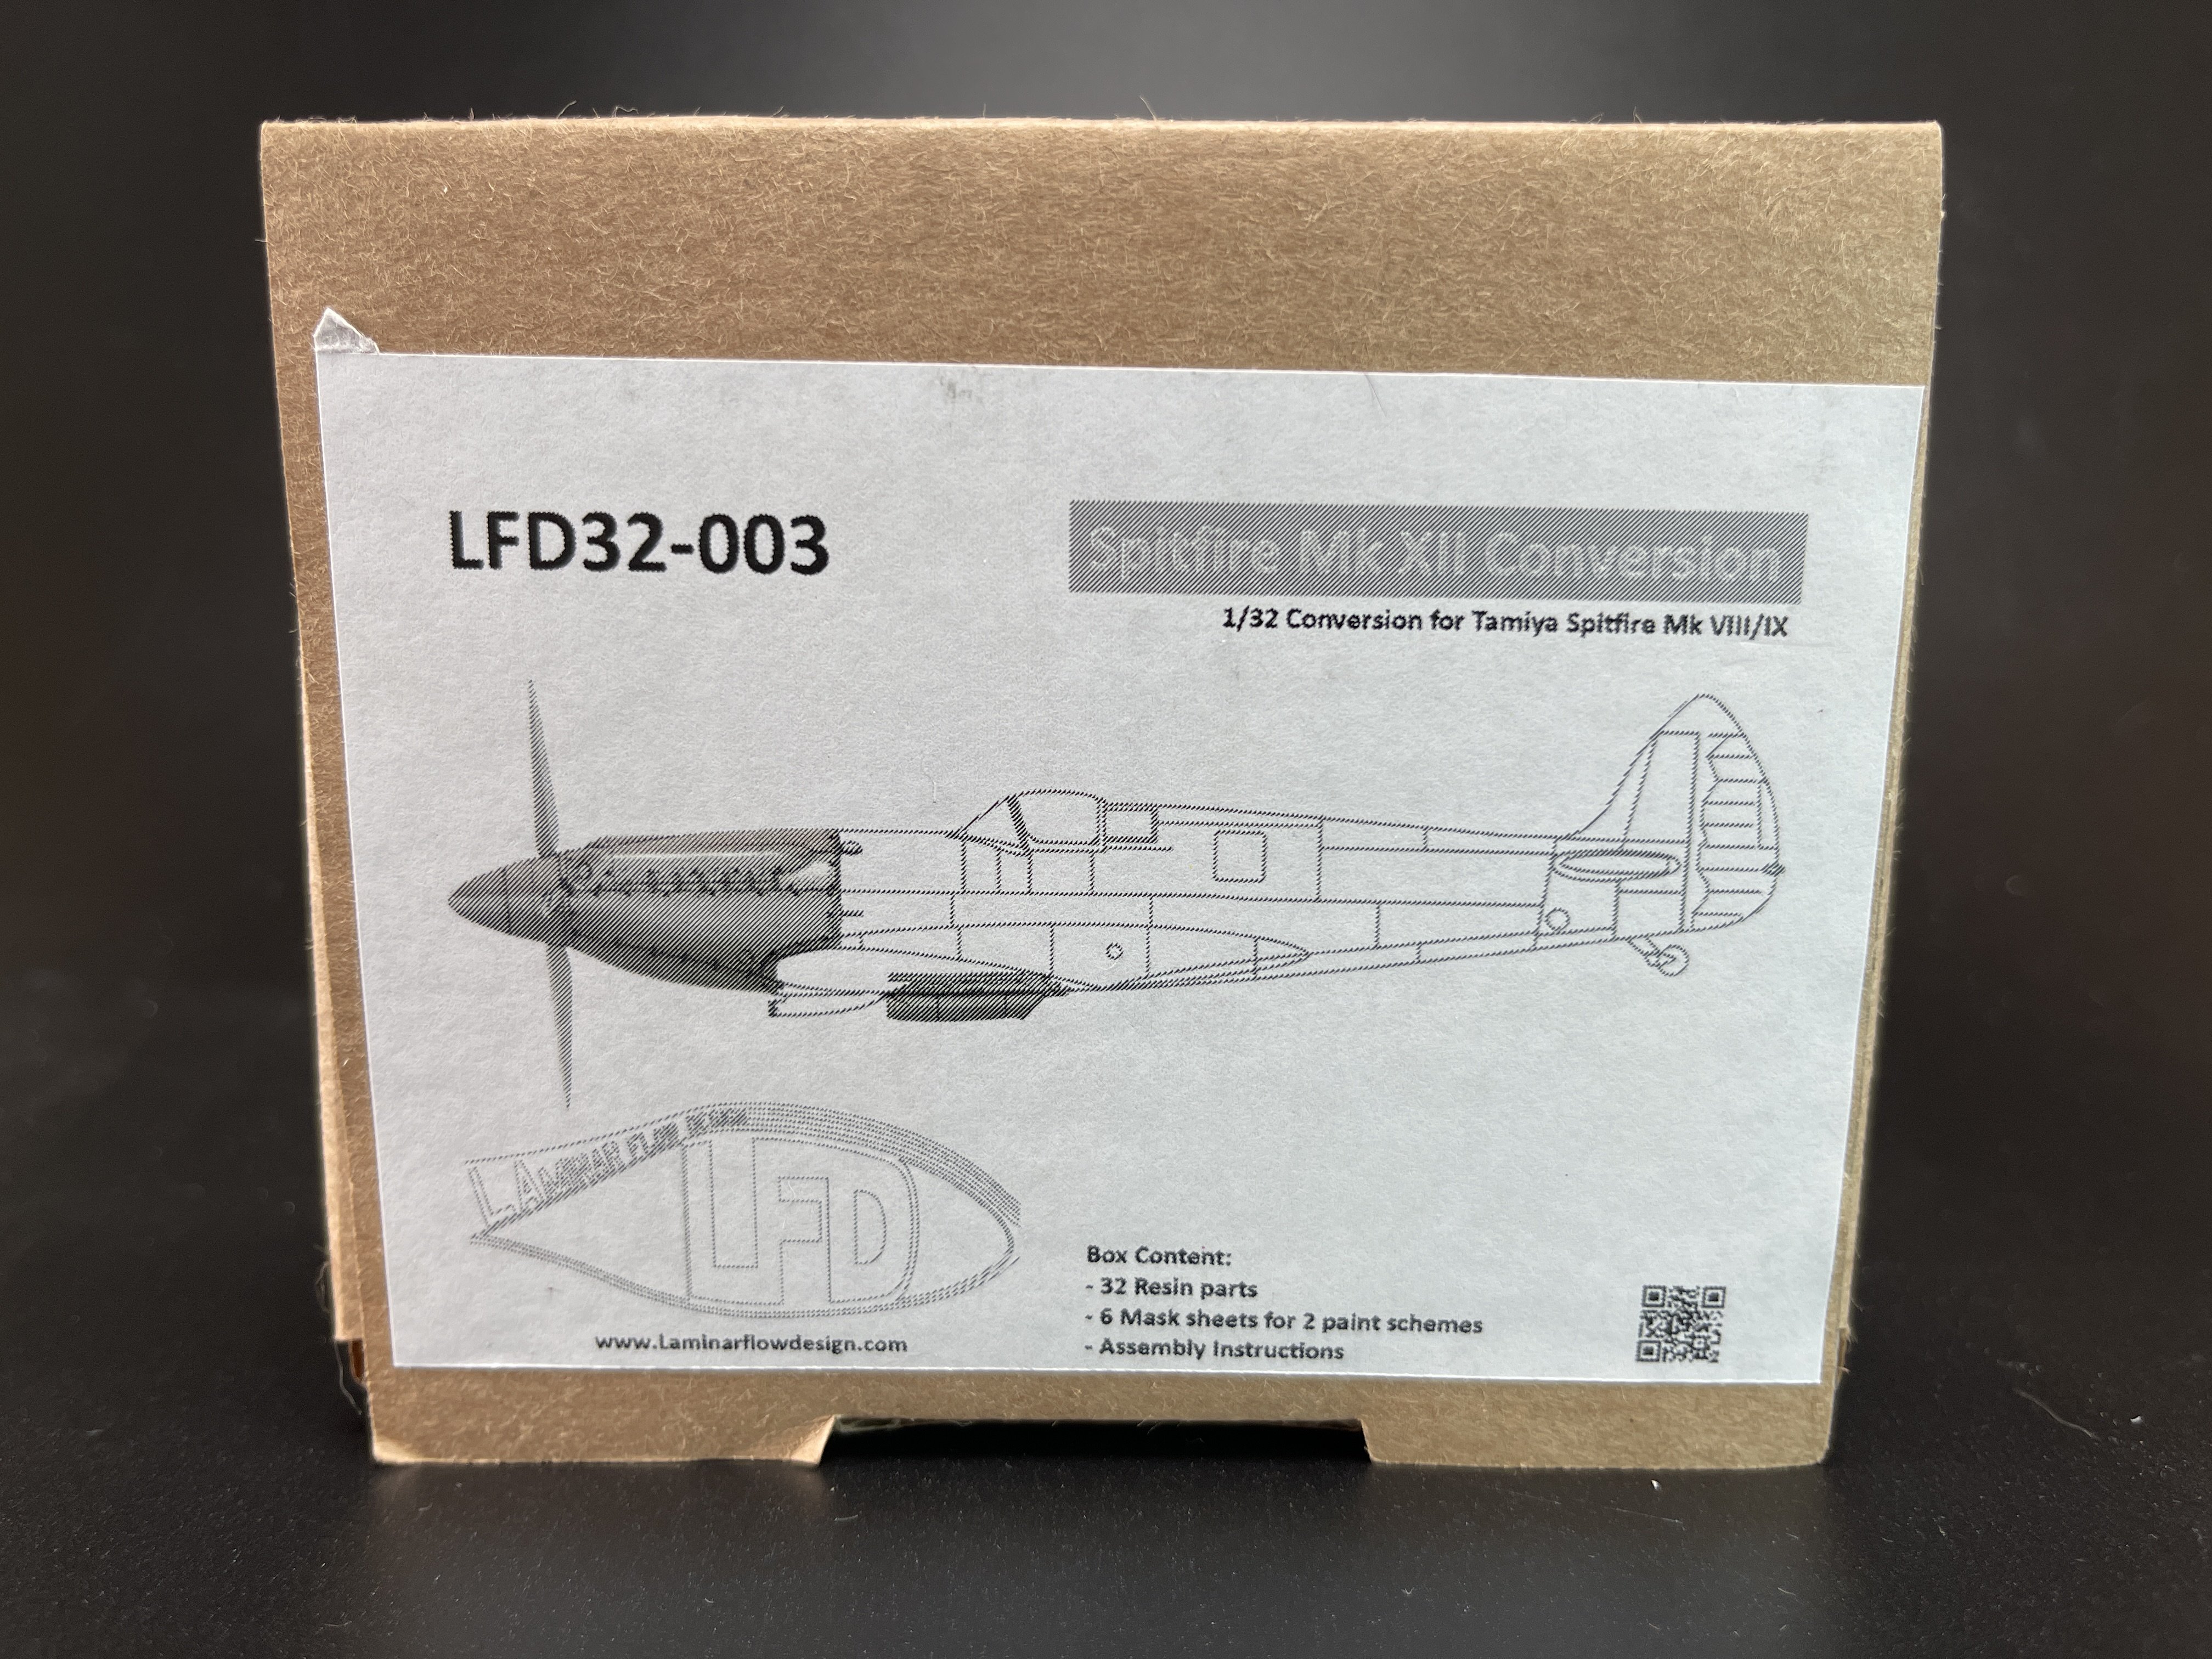
1:32 Laminar Flow Design
Spitfire Mk XII Conversion
for Tamiya's Spitfire Mk.VIII and IX kit

Laminar Flow Design, 1/32 scale
Catalogue n.º 32-003
Price Tag - €59,20
Purchase directly at Laminar Flow Design website – here
Laminar Flow Design new release!!
If you don’t know this company from Belgium with a one man work behind, and you`re an aviation modeller, you have been living out of the modelling world.
Laminar Flow, are, hands down, the best modelling company in aviation modelling in 3d printing.
The printing is flawless, with no printing line whatsoever and top quality on the surface detail.
You can see our full review of both Spitfire XIVe conversion for the Tamiya Spitfire XVI, here and here.
Today we are checking their latest conversion in their catalogue.
The Spitfire Mk. XII conversion for the Tamiya Spitfire Mk. VIII and IX.
“The Supermarine Spitfire Mk XII was the first Griffin powered Spitfire to enter service, doing so in October 1942. All production XIIs had clipped wings to optimise low level performance.
A total of 100 Mk XIIs were built, the type being retired from front line service in September 1944.”
Several fantastic pictures can be seen here: https://www.destinationsjourney.com/historical-military-photographs/supermarine-spitfire-mk-xii/
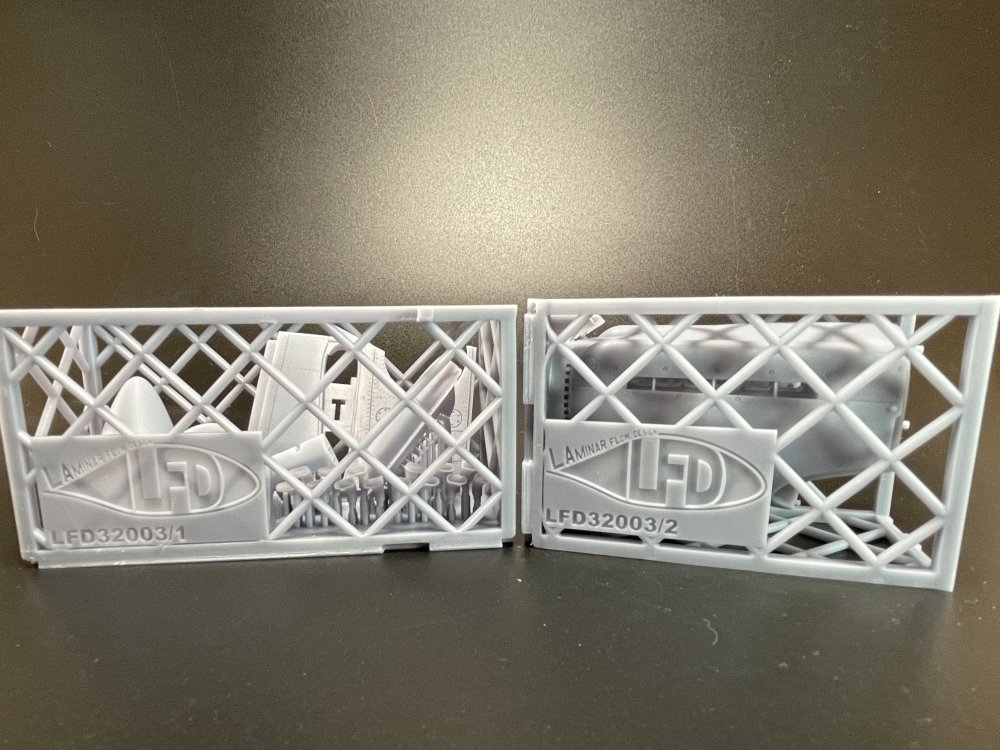
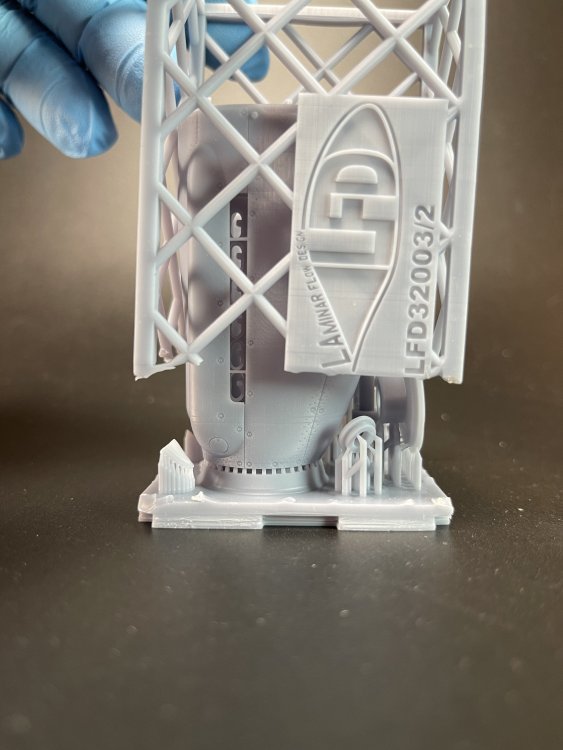
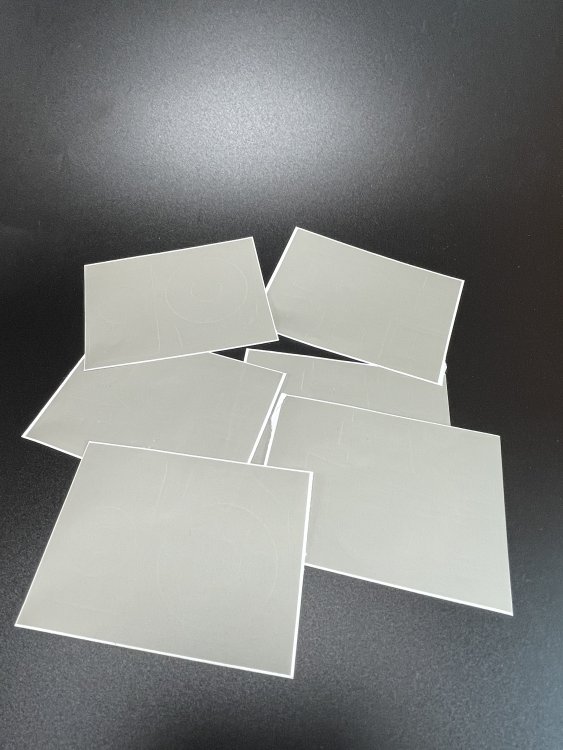
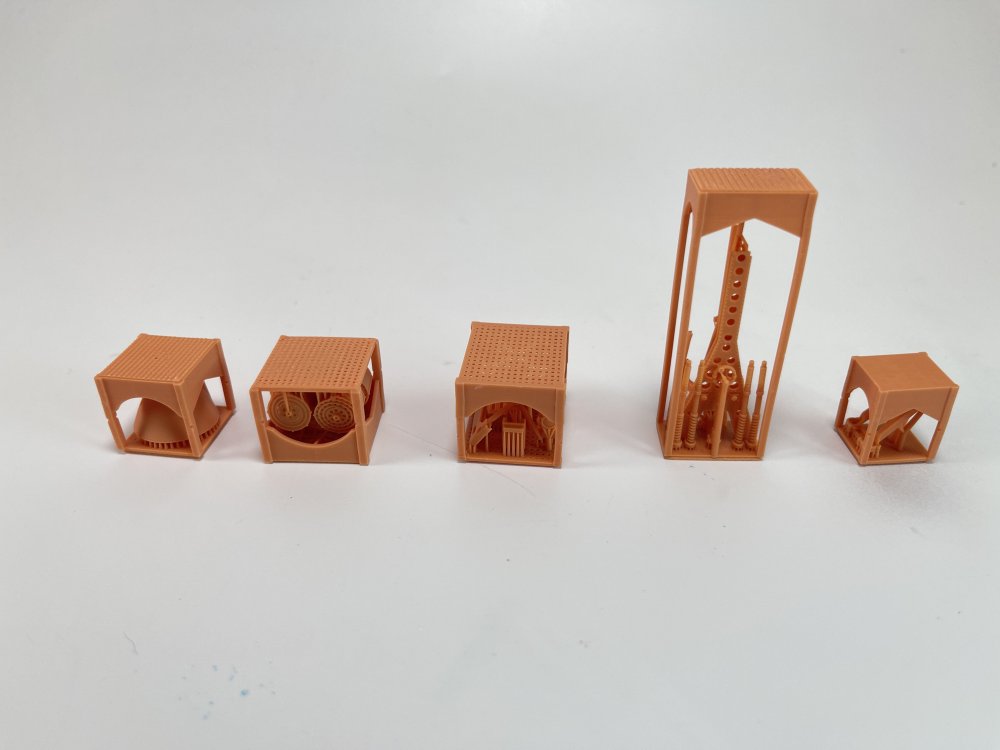
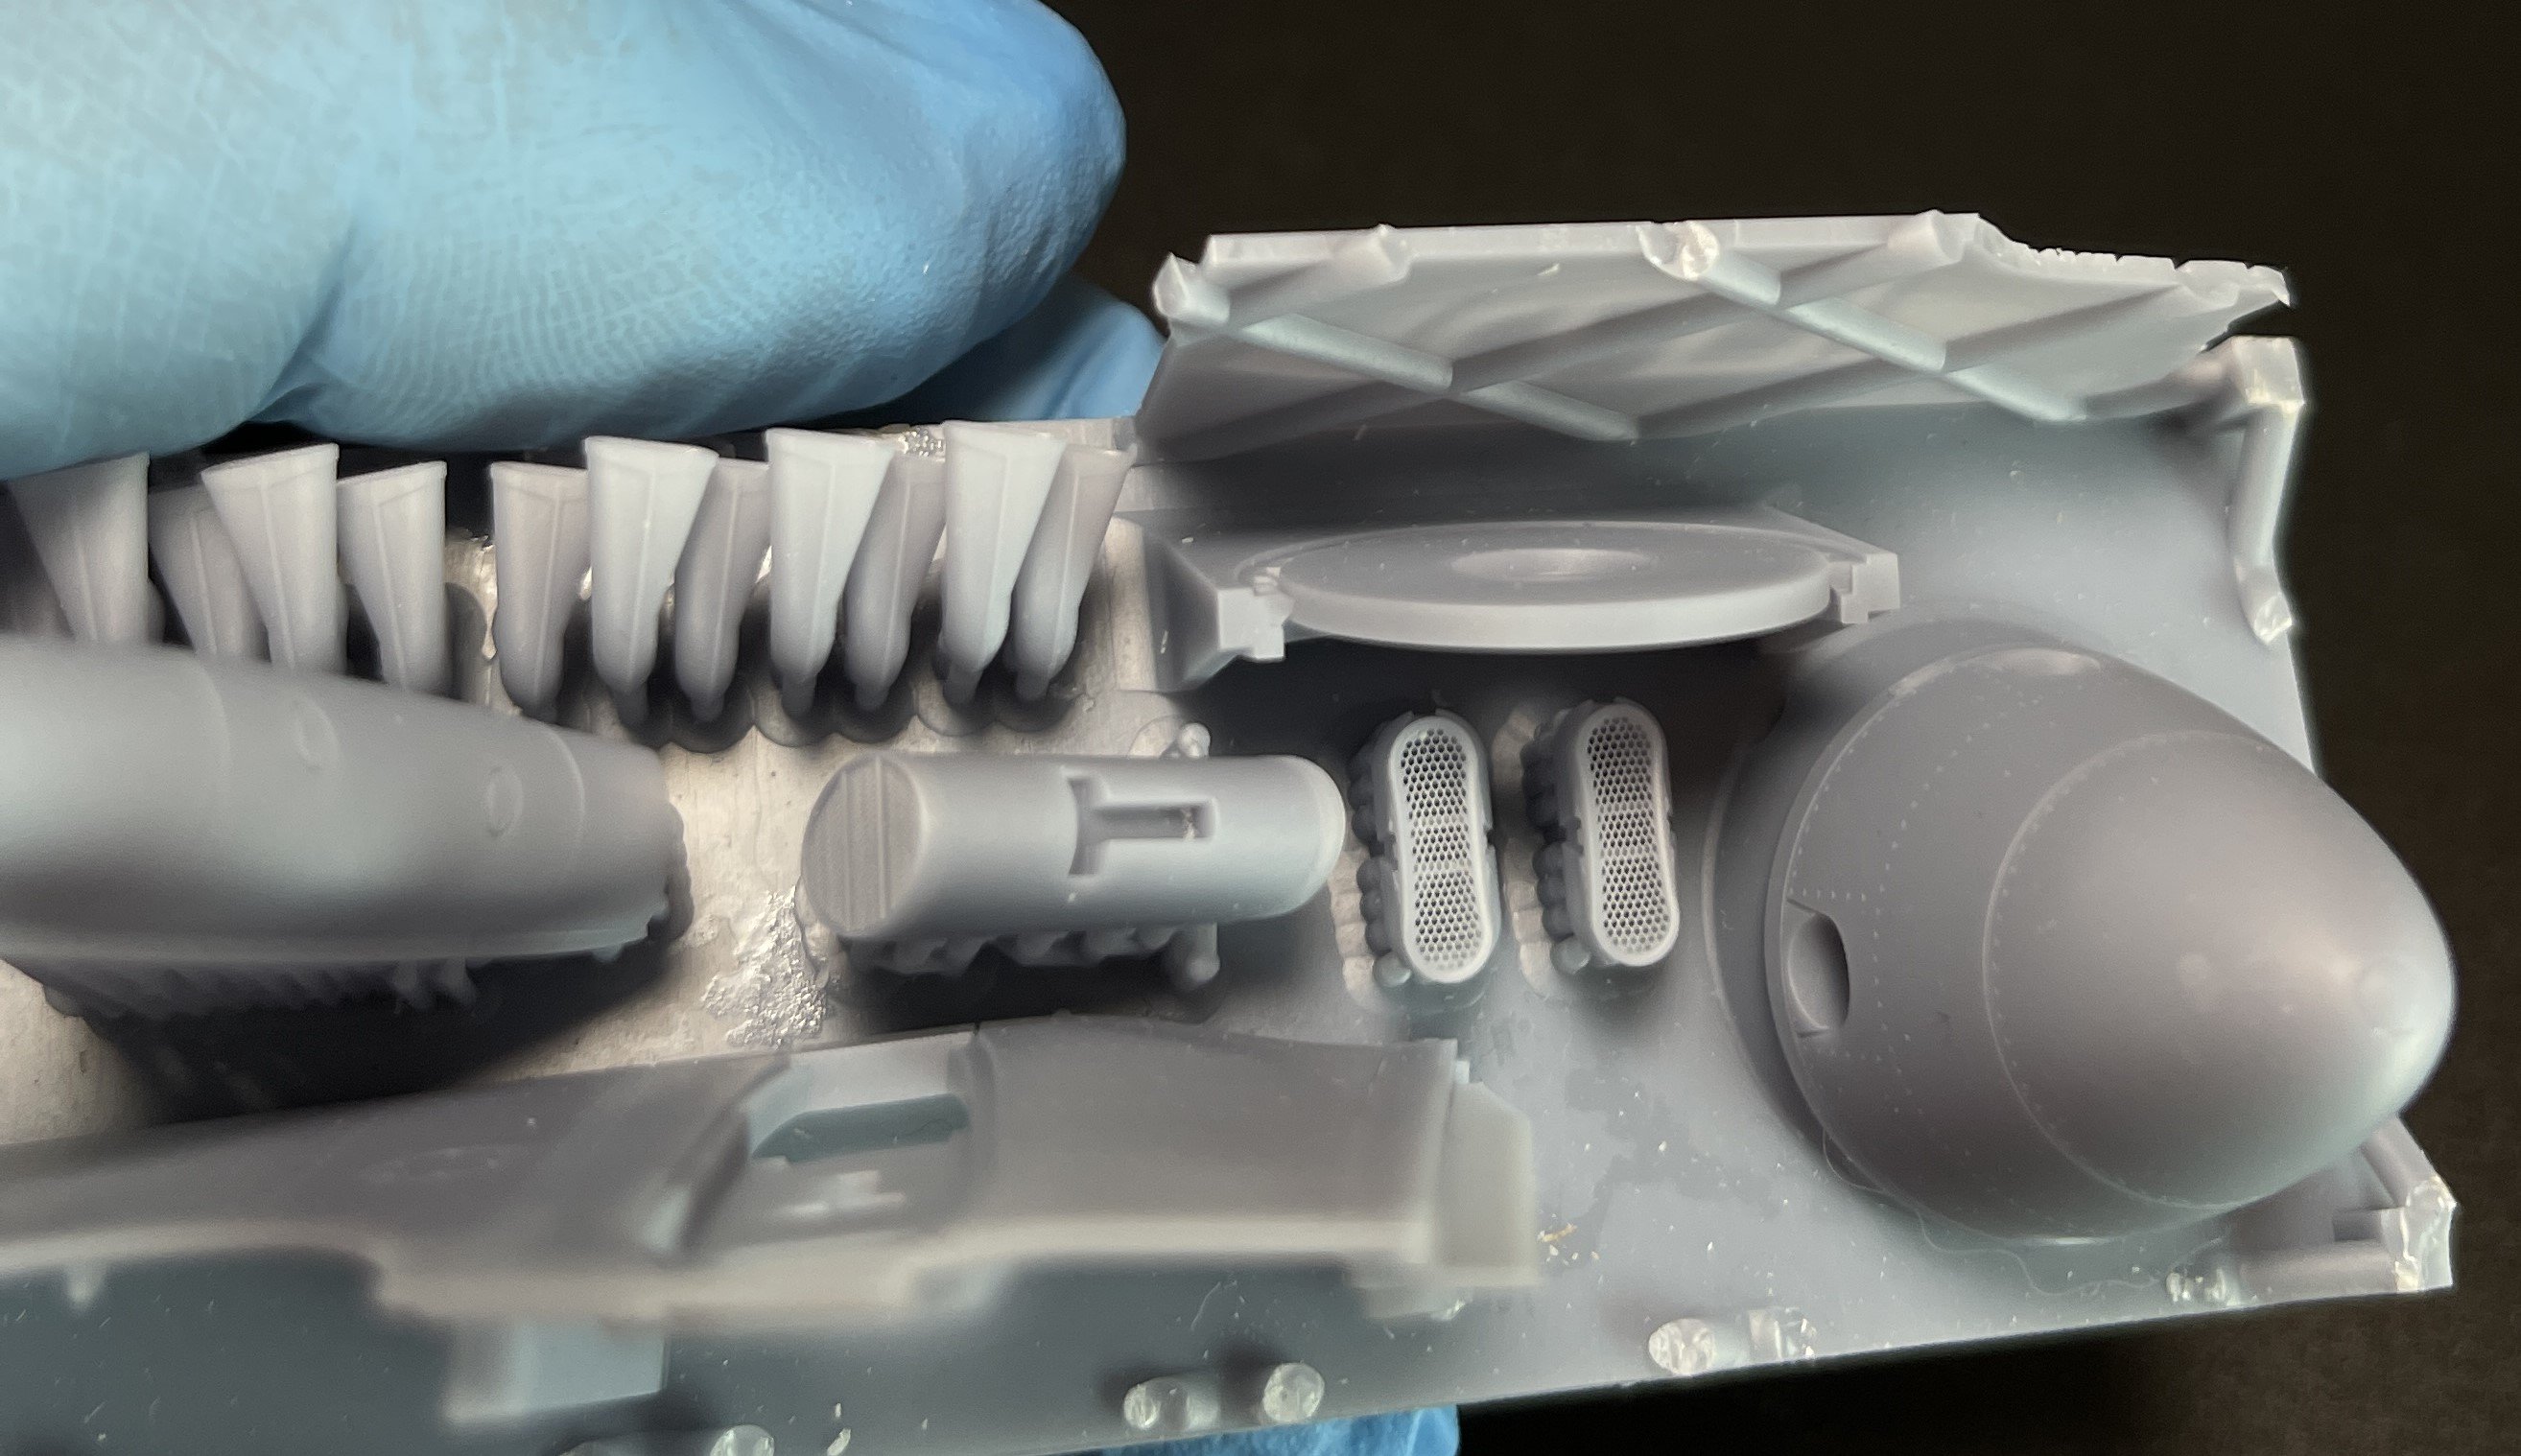
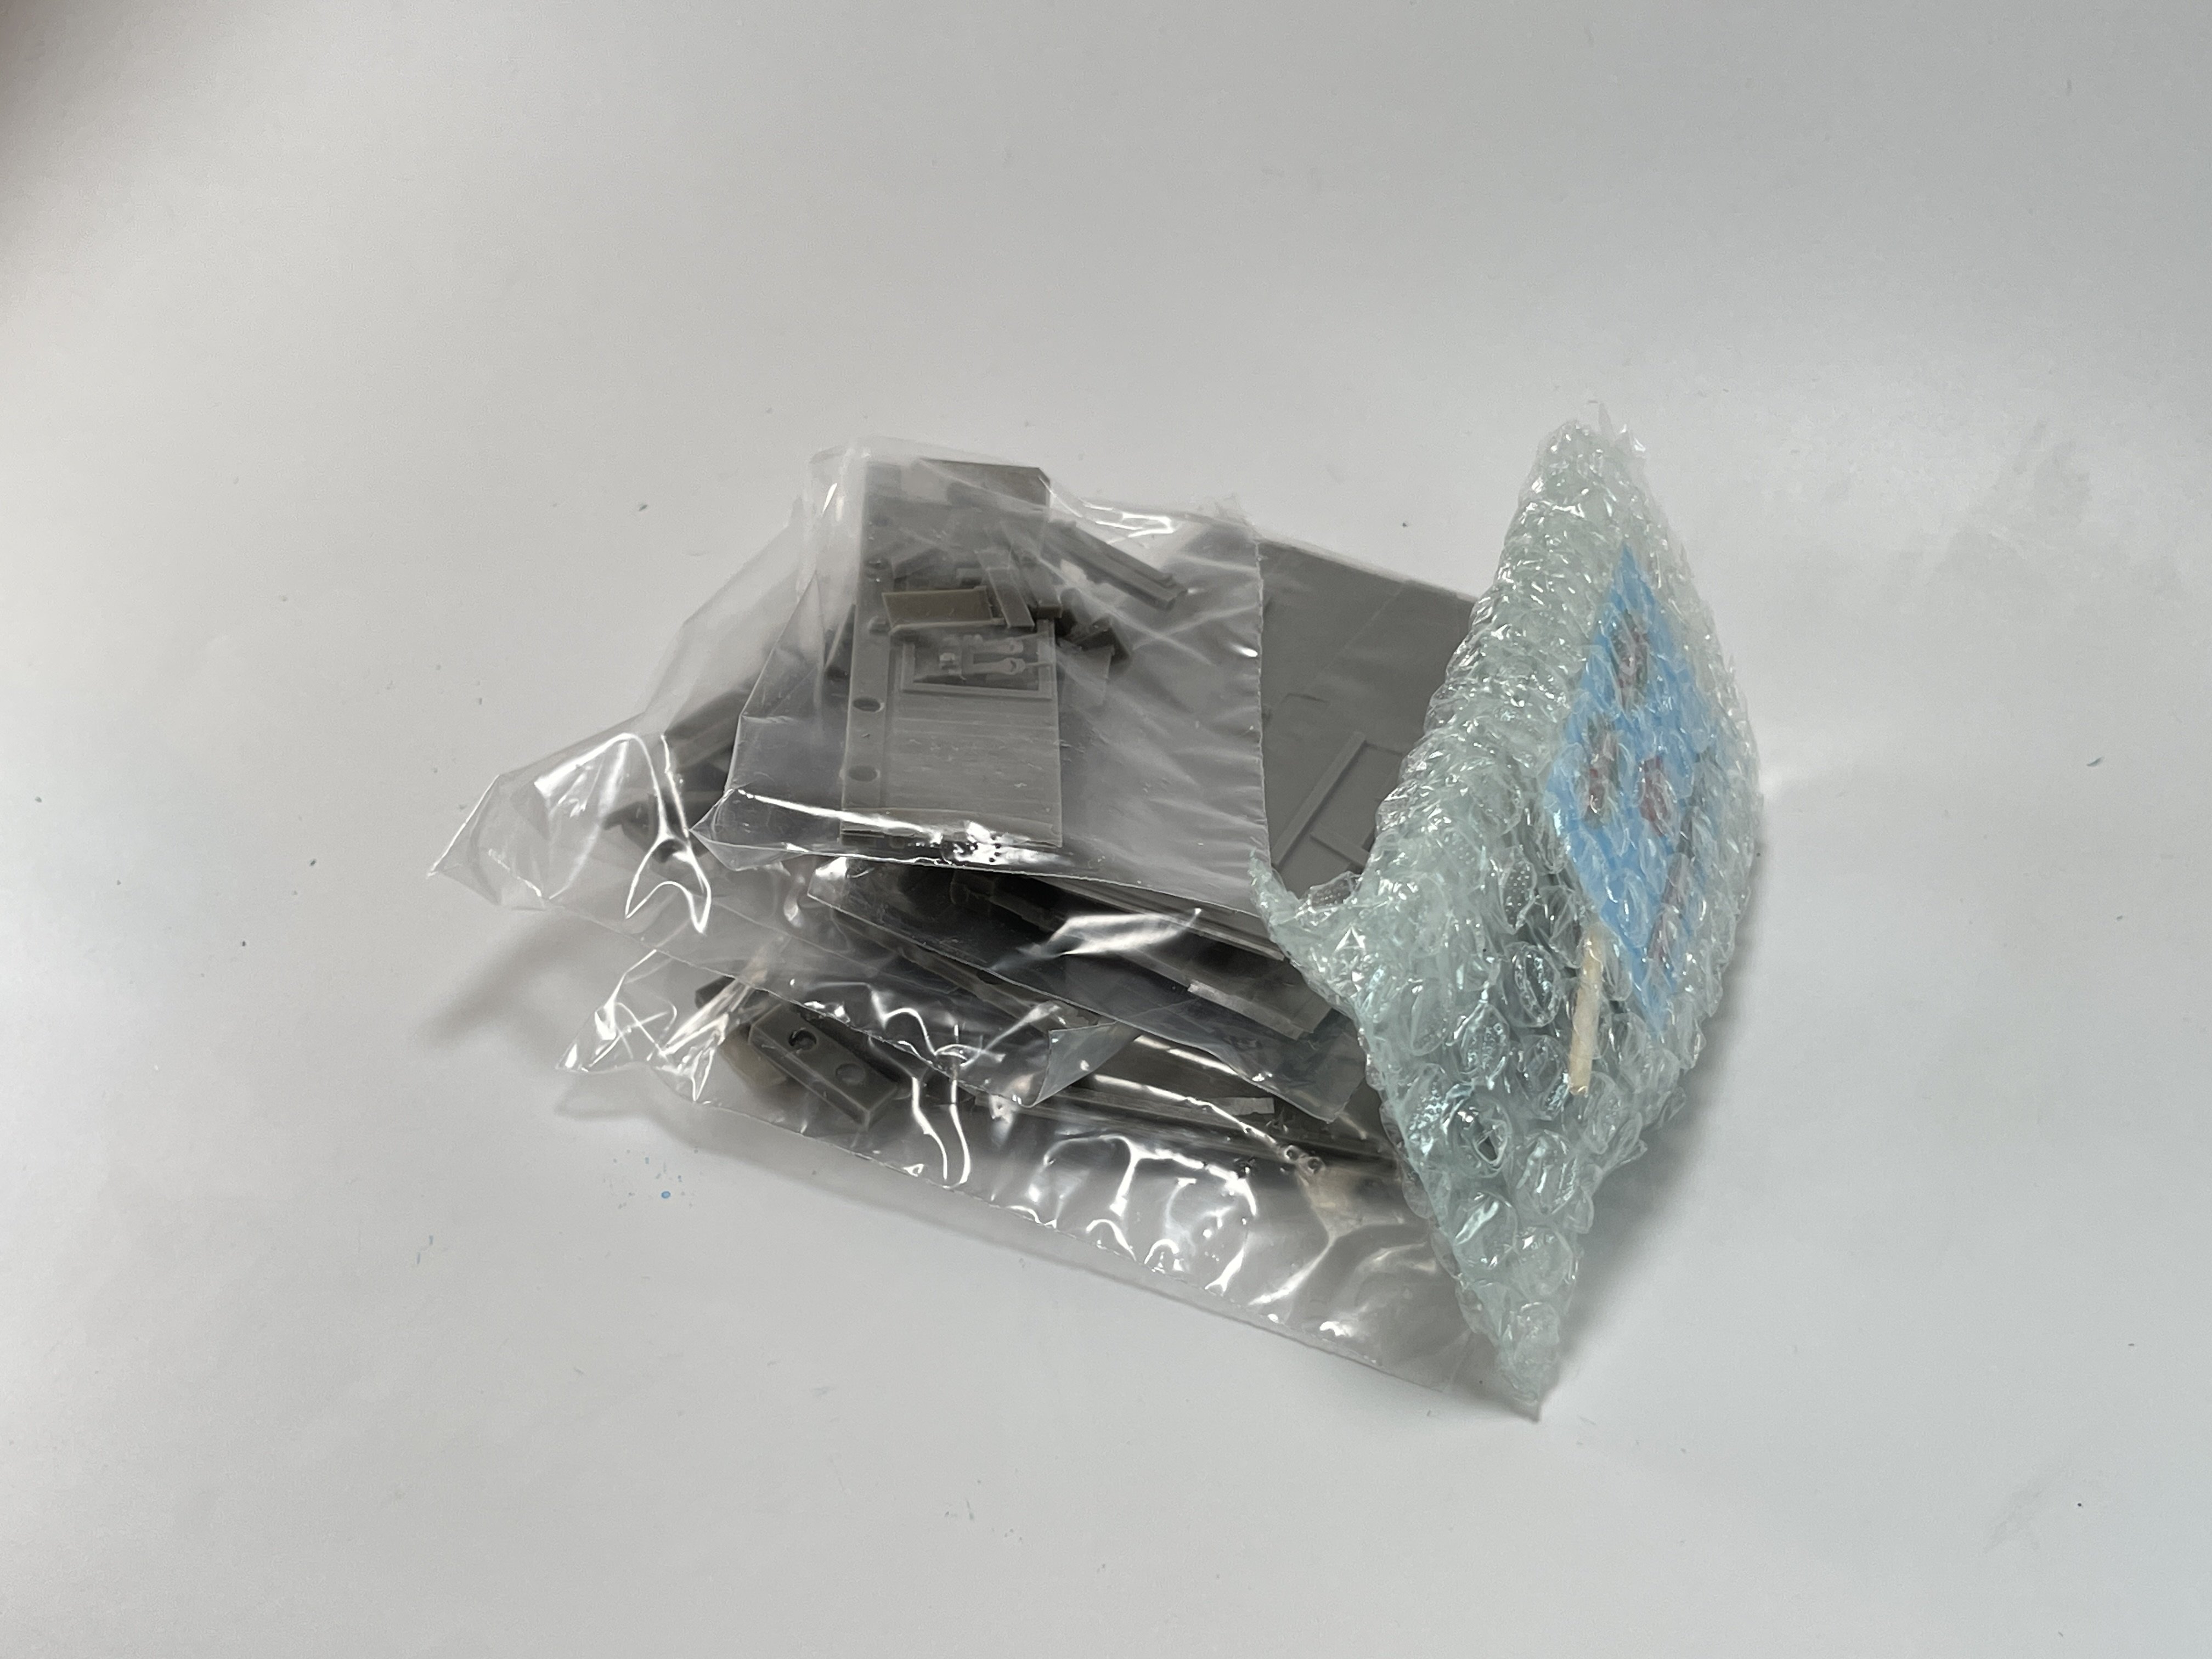
This set comes in a strudy little box with all the 3d parts inside two printing cages to protect them.
This set comes with four resin printing cages and inside of those cage, all the parts.
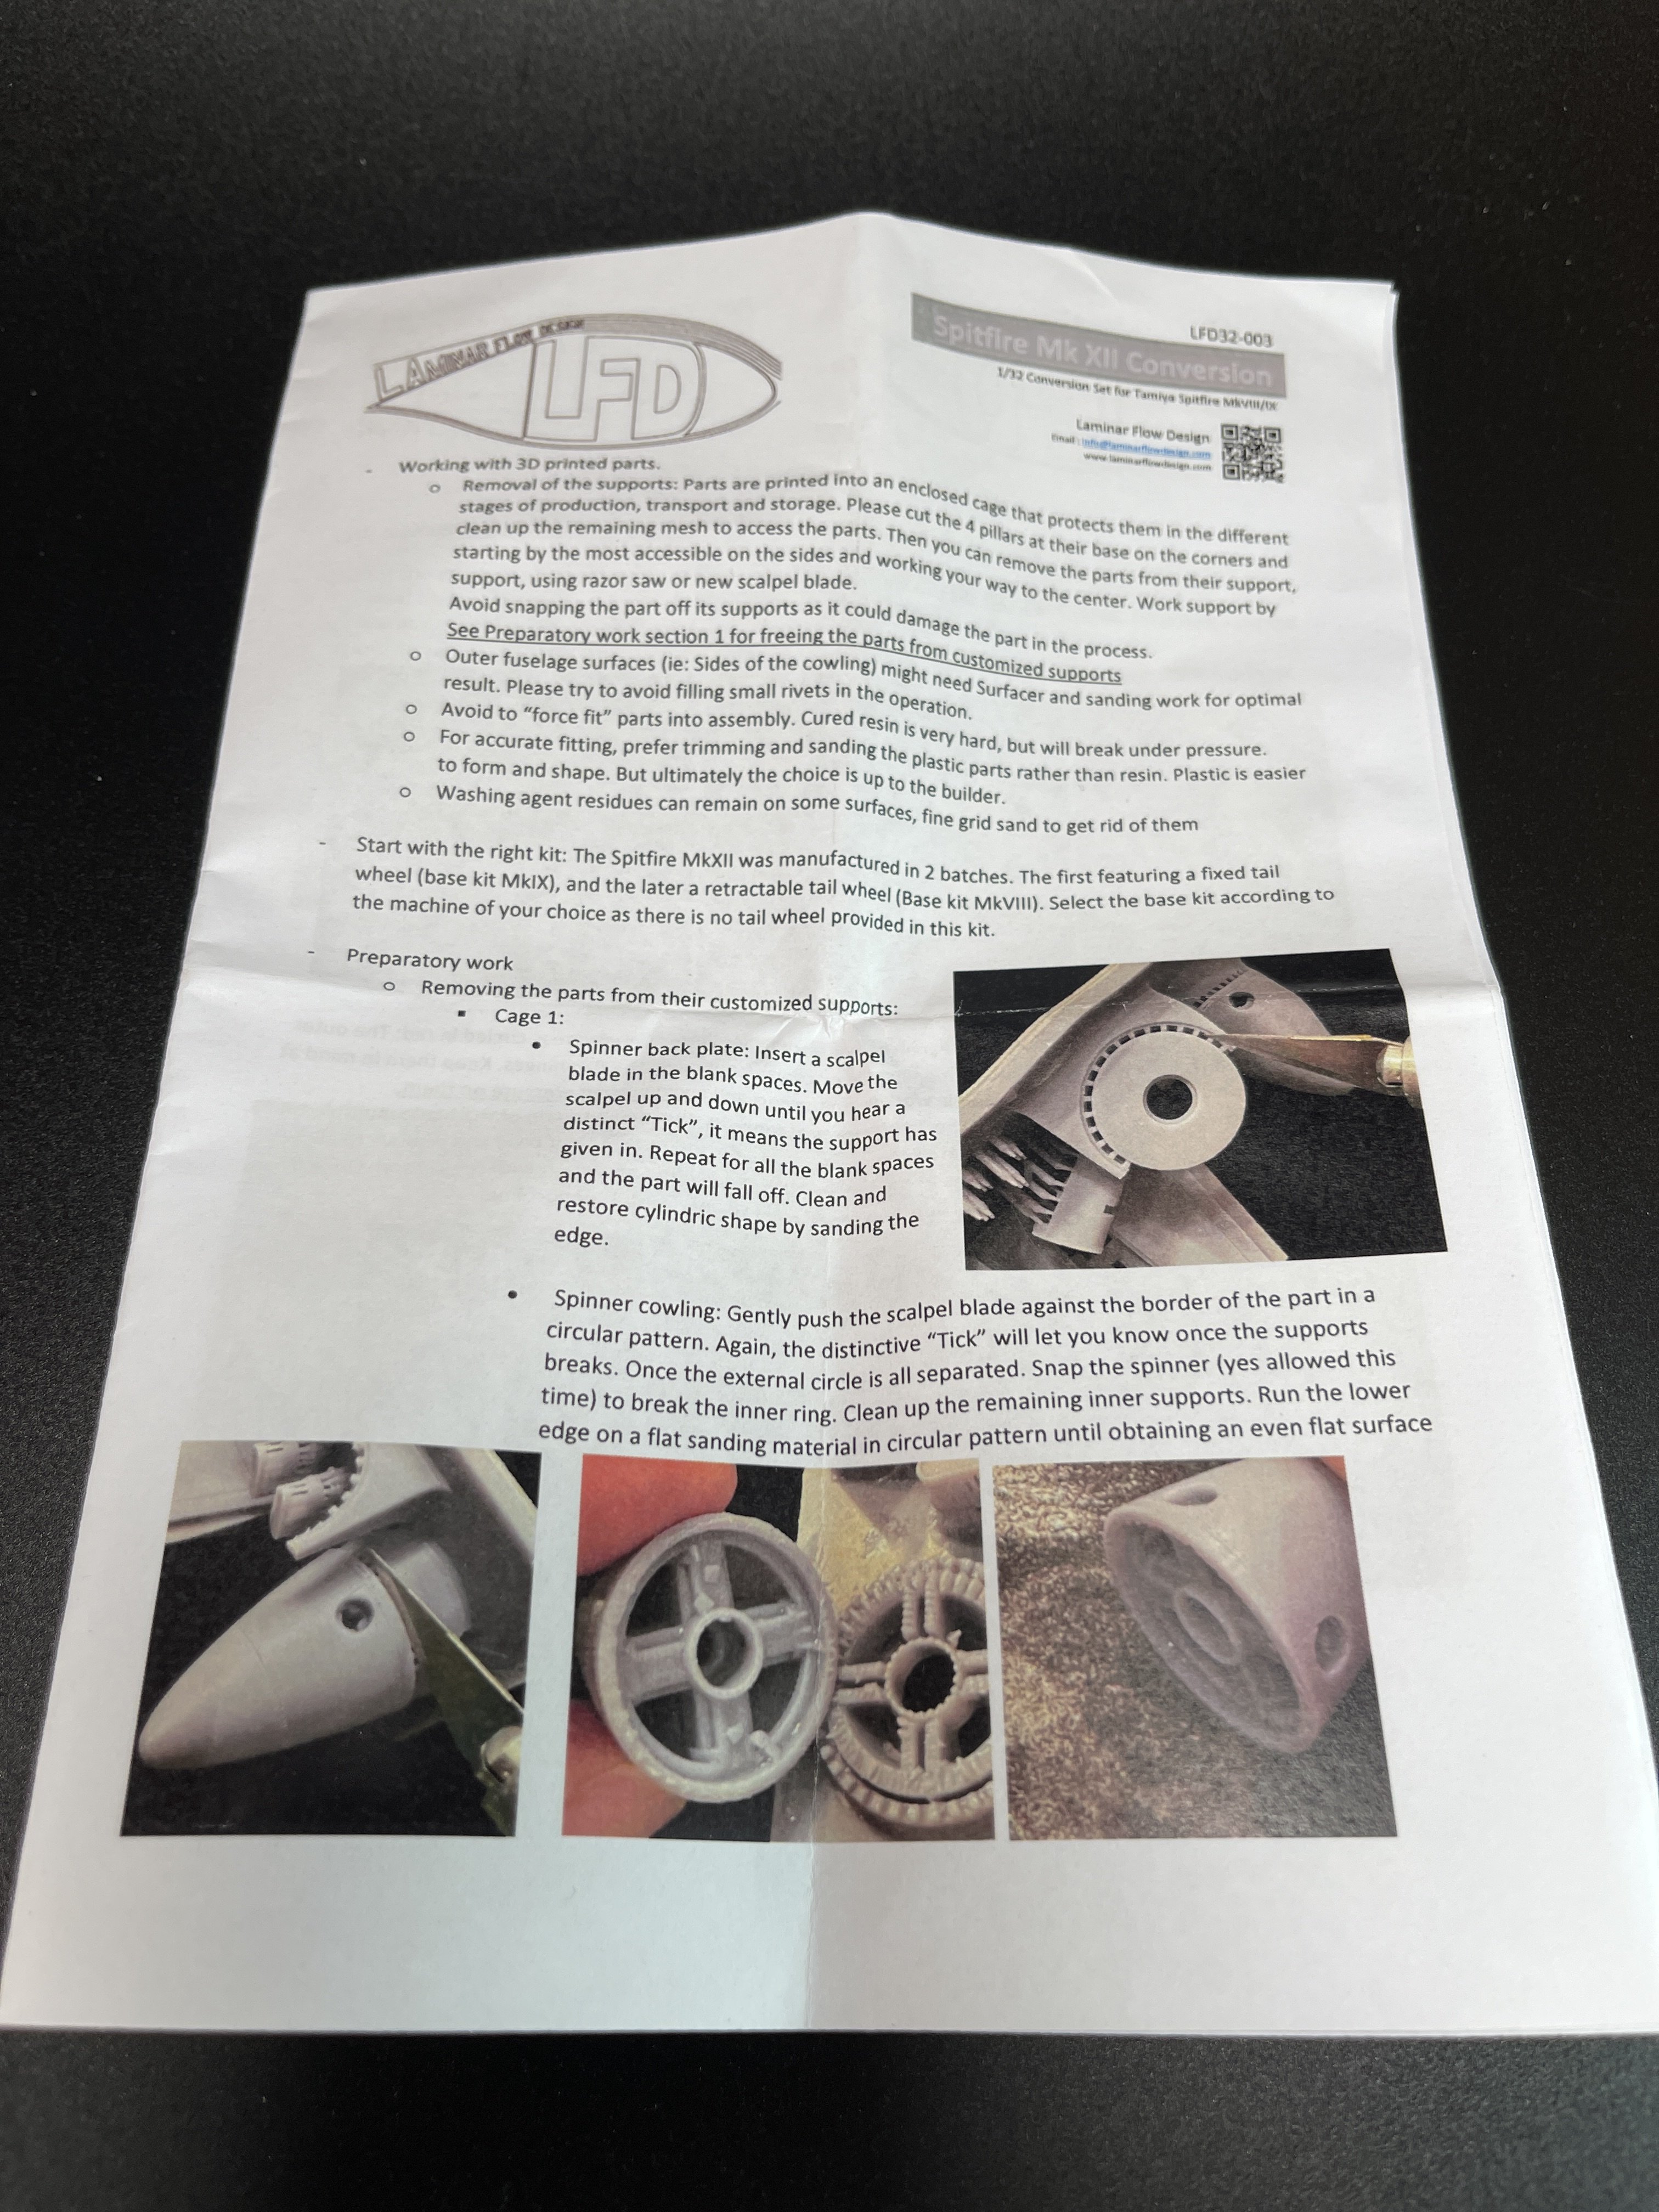
The best way to remove the cage is cutting the main 4 pilars at their base. It all in the instructions.
As result, the contents arrived perfectly safe and intact.
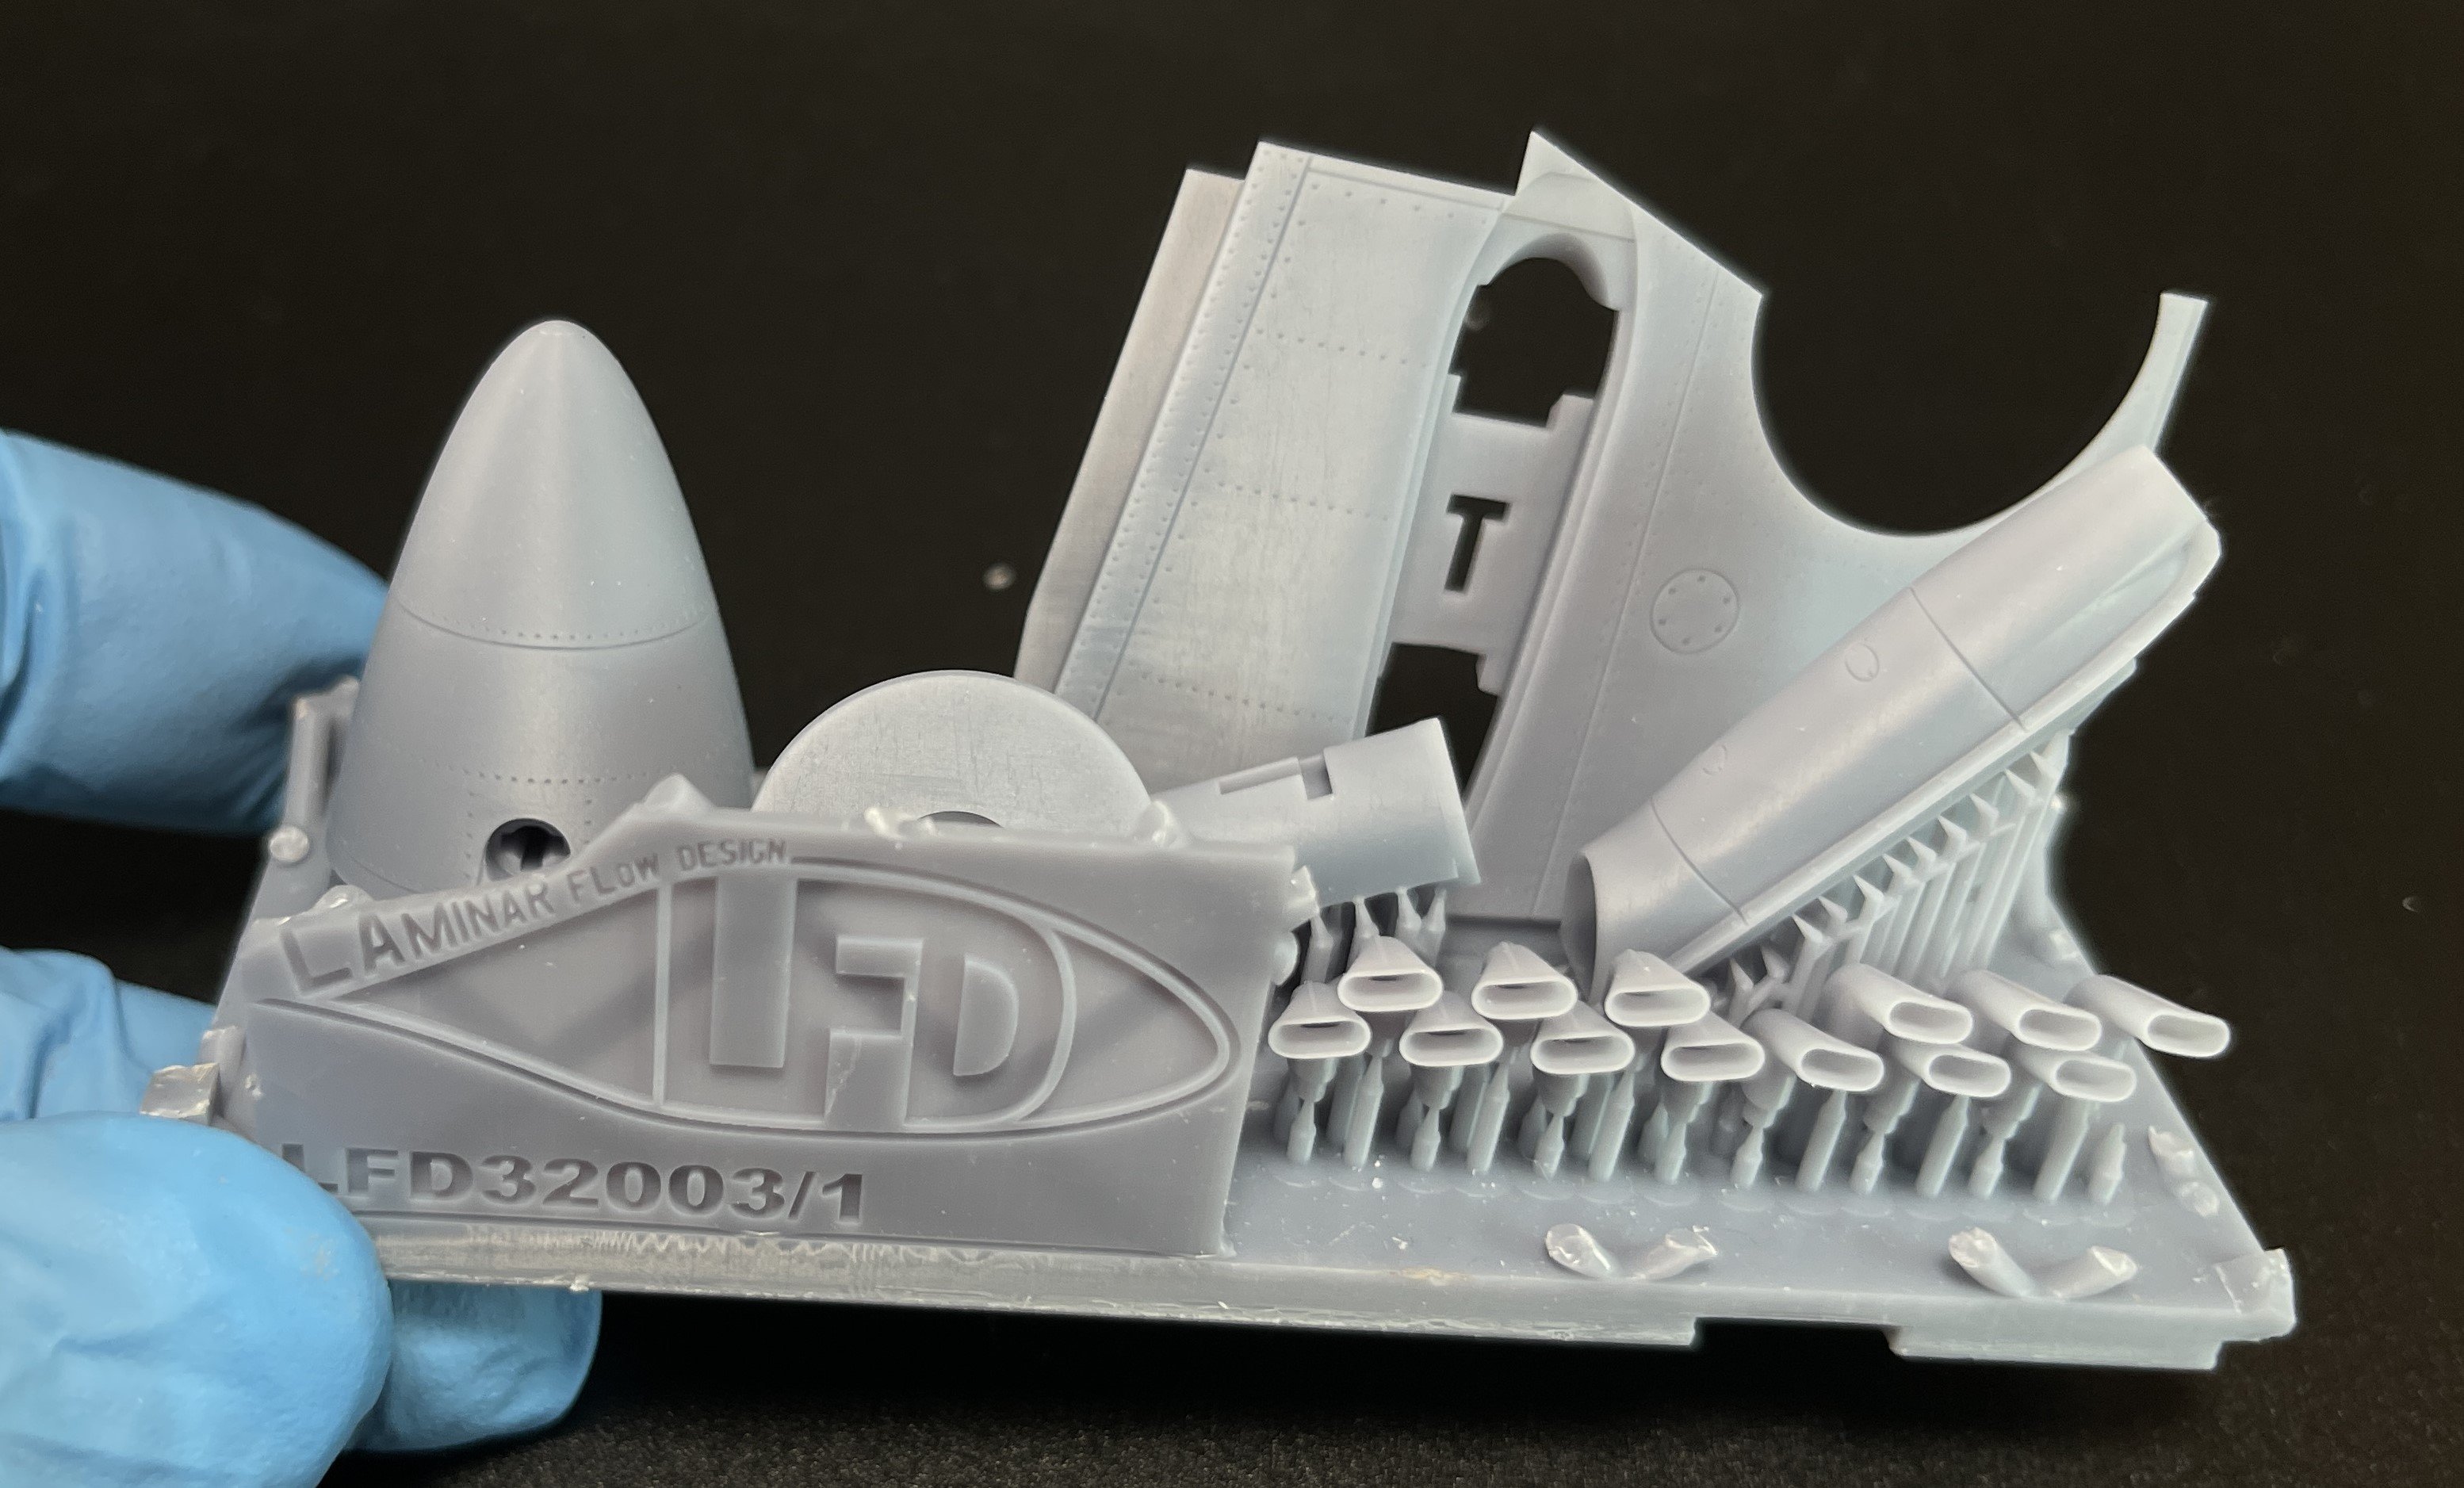
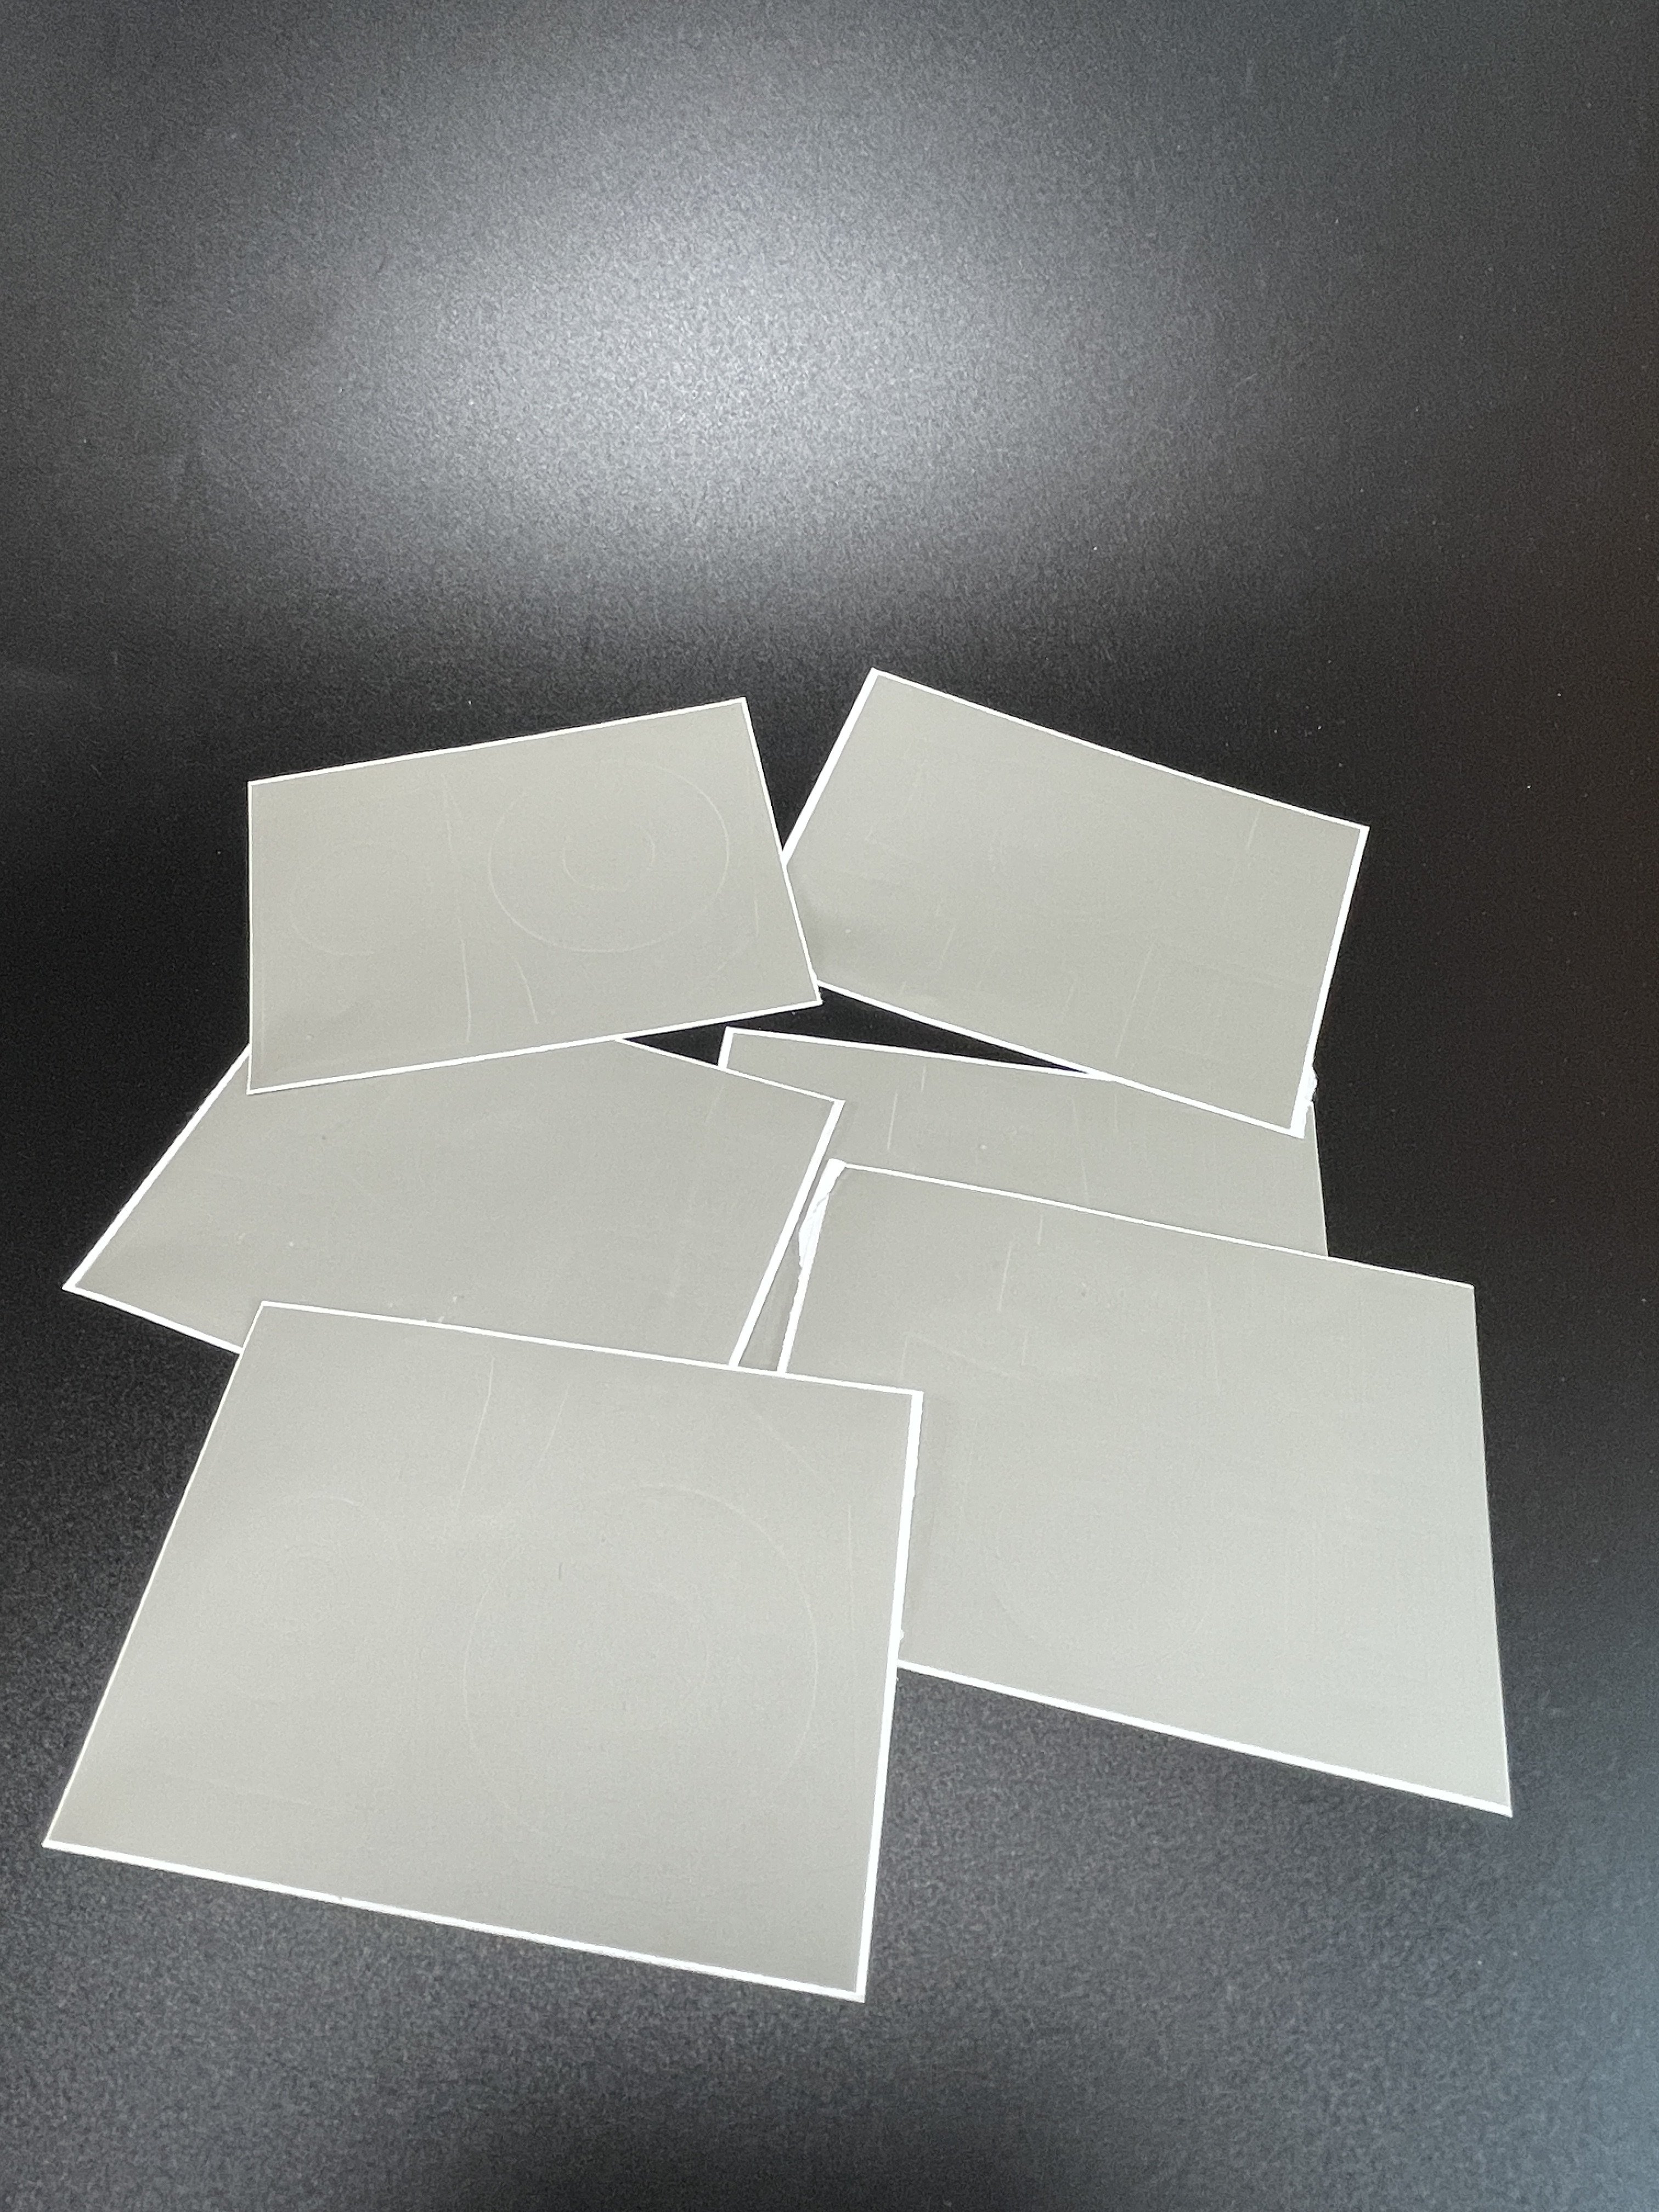
Inside, just 32 3D printed resin parts, and six die-cut masking sheets for two markings and instructions. If you don’t know Laminar Flow you would think how those 32 3D resin parts and mask sheets fits in just a small box. Laminar Flow is quite methodic, so everything is planned, And the answer is simply: a fantastic planning 3D print, to reduce space and to protect all the fragile parts.

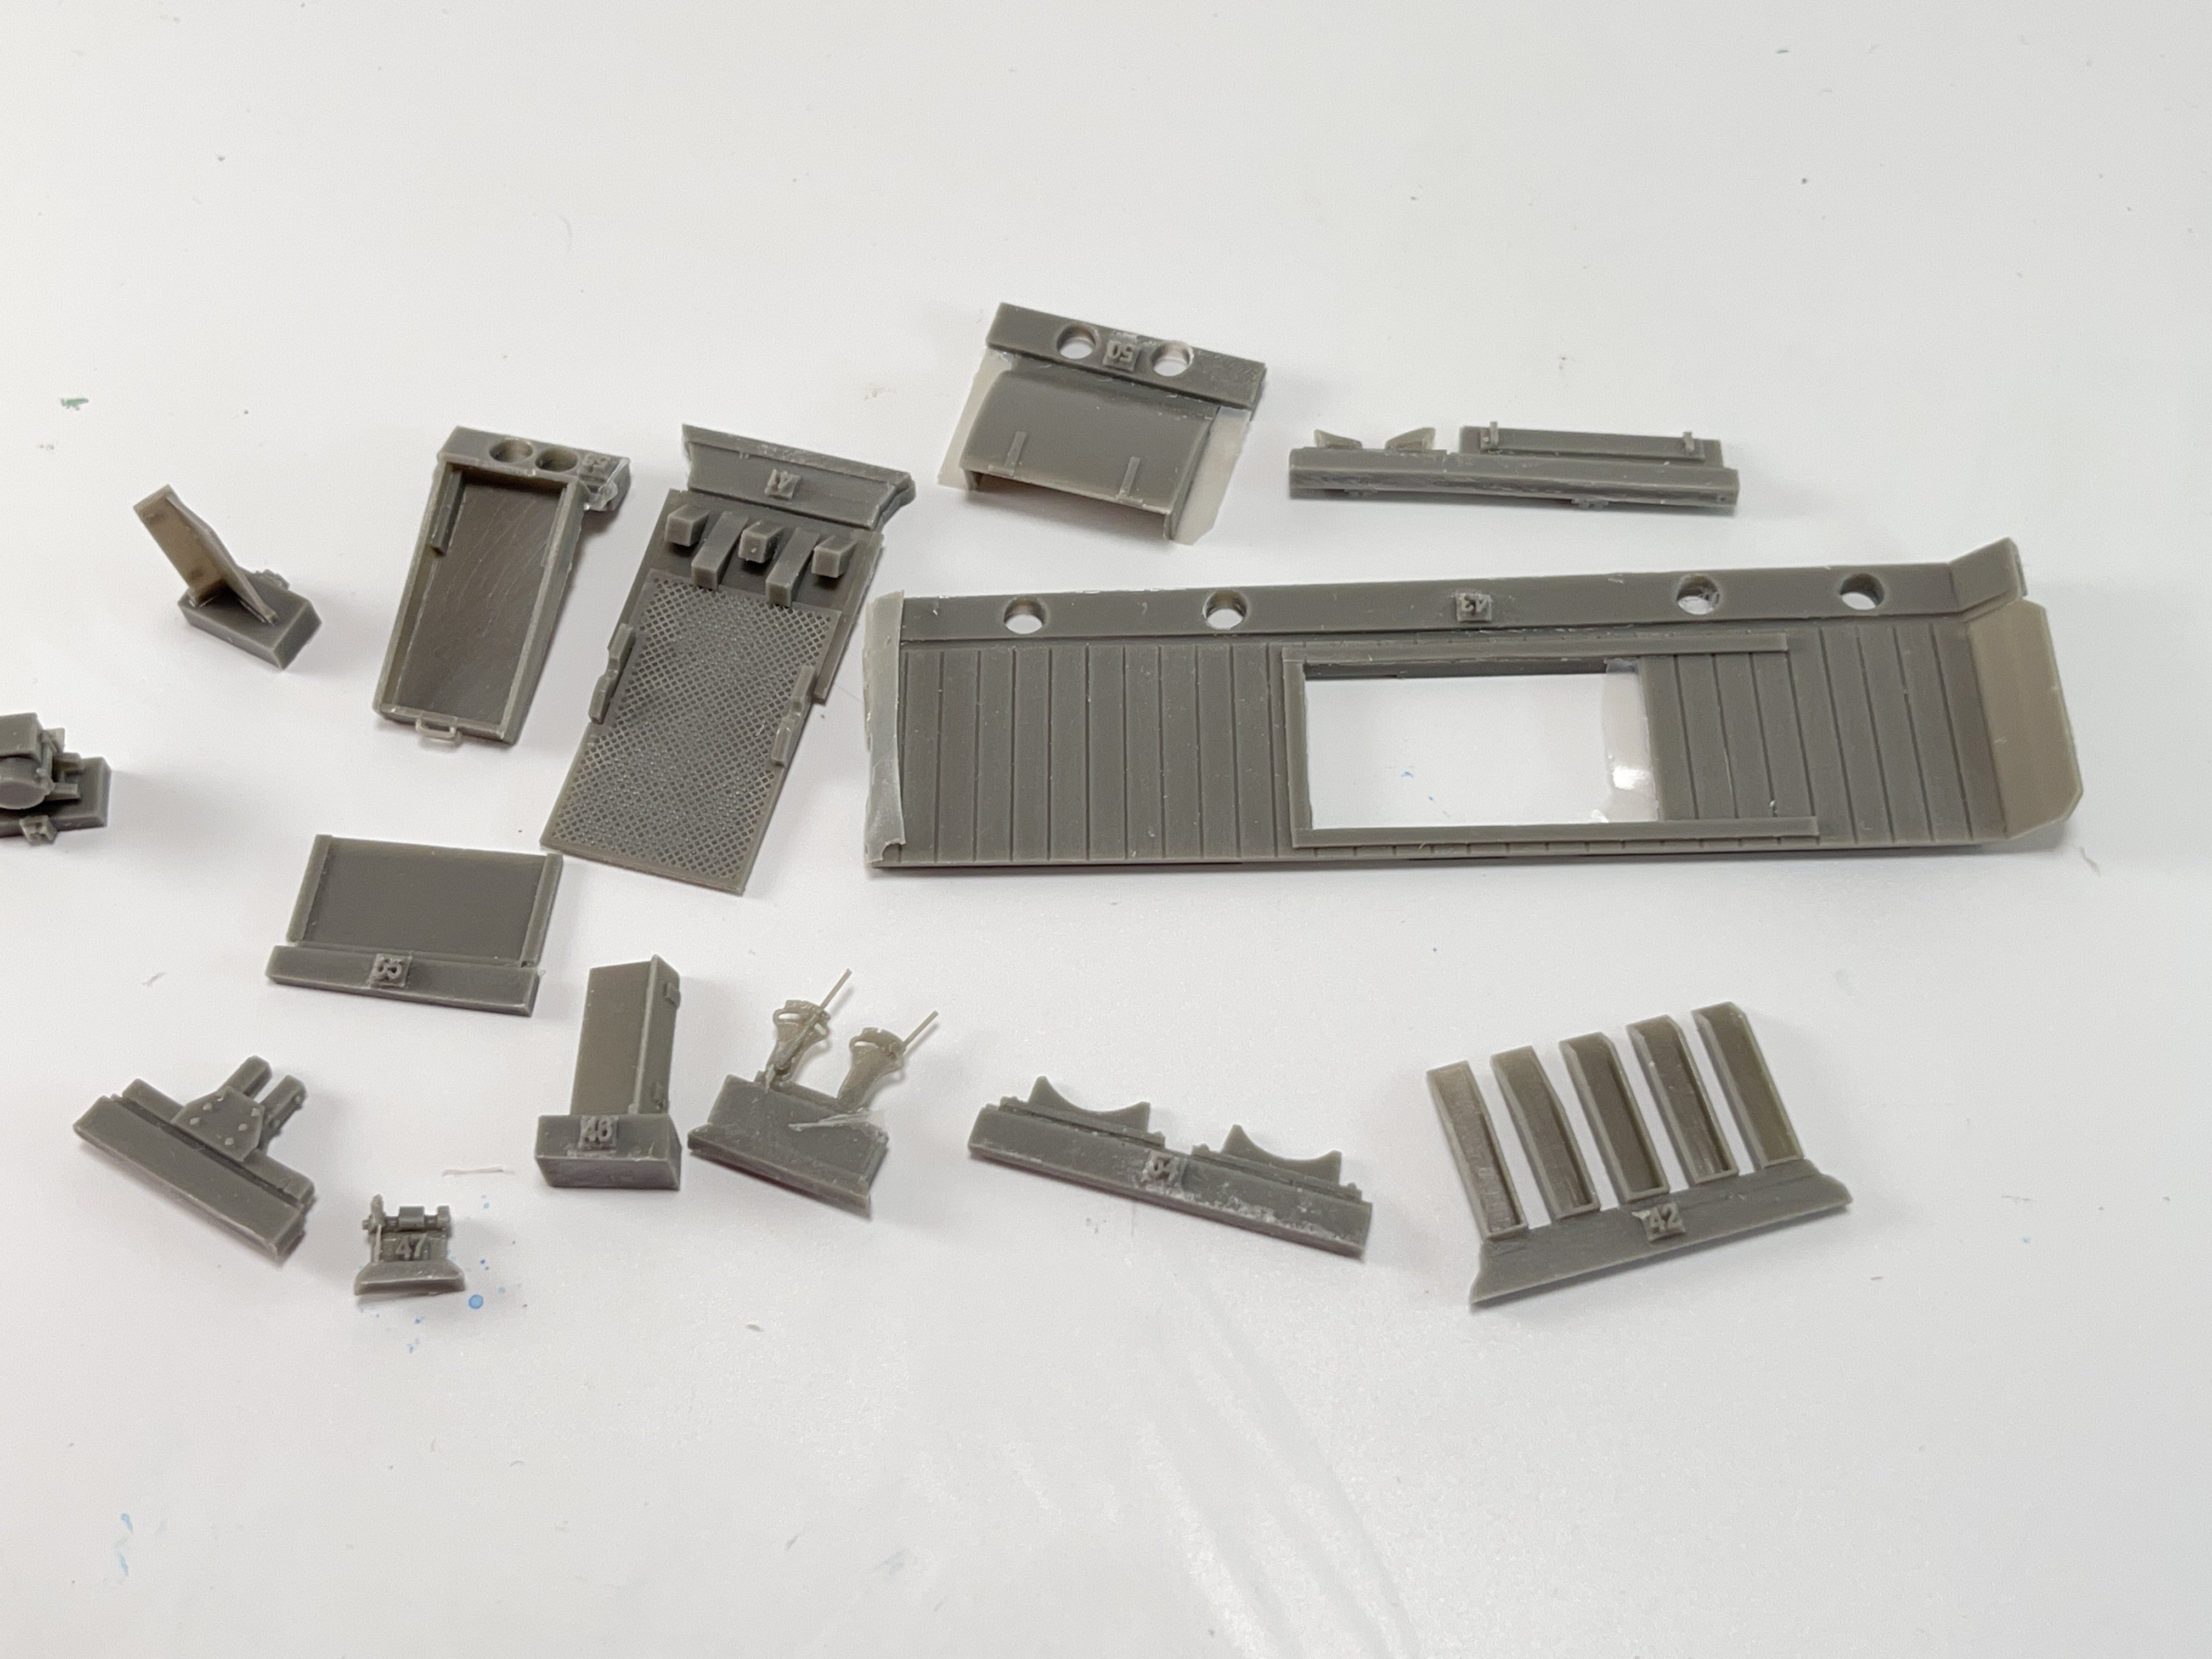
To take a good look to the parts, we need to start cutting…
Some parts are not easy to free, so you a new scalpel, a very good cutter and patience and time.
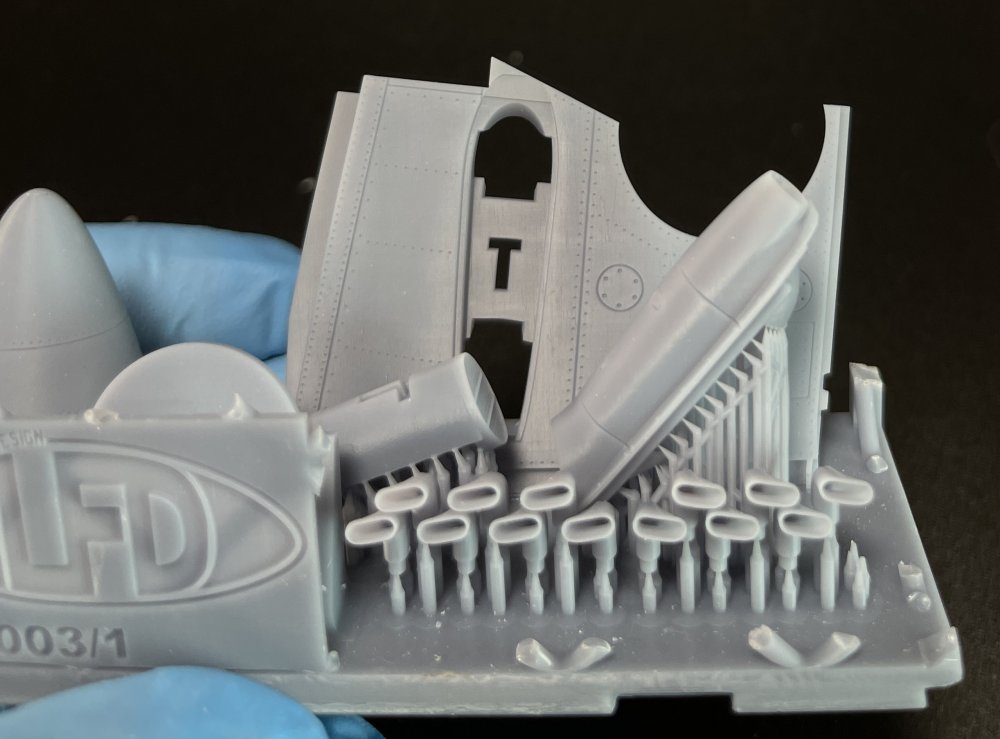
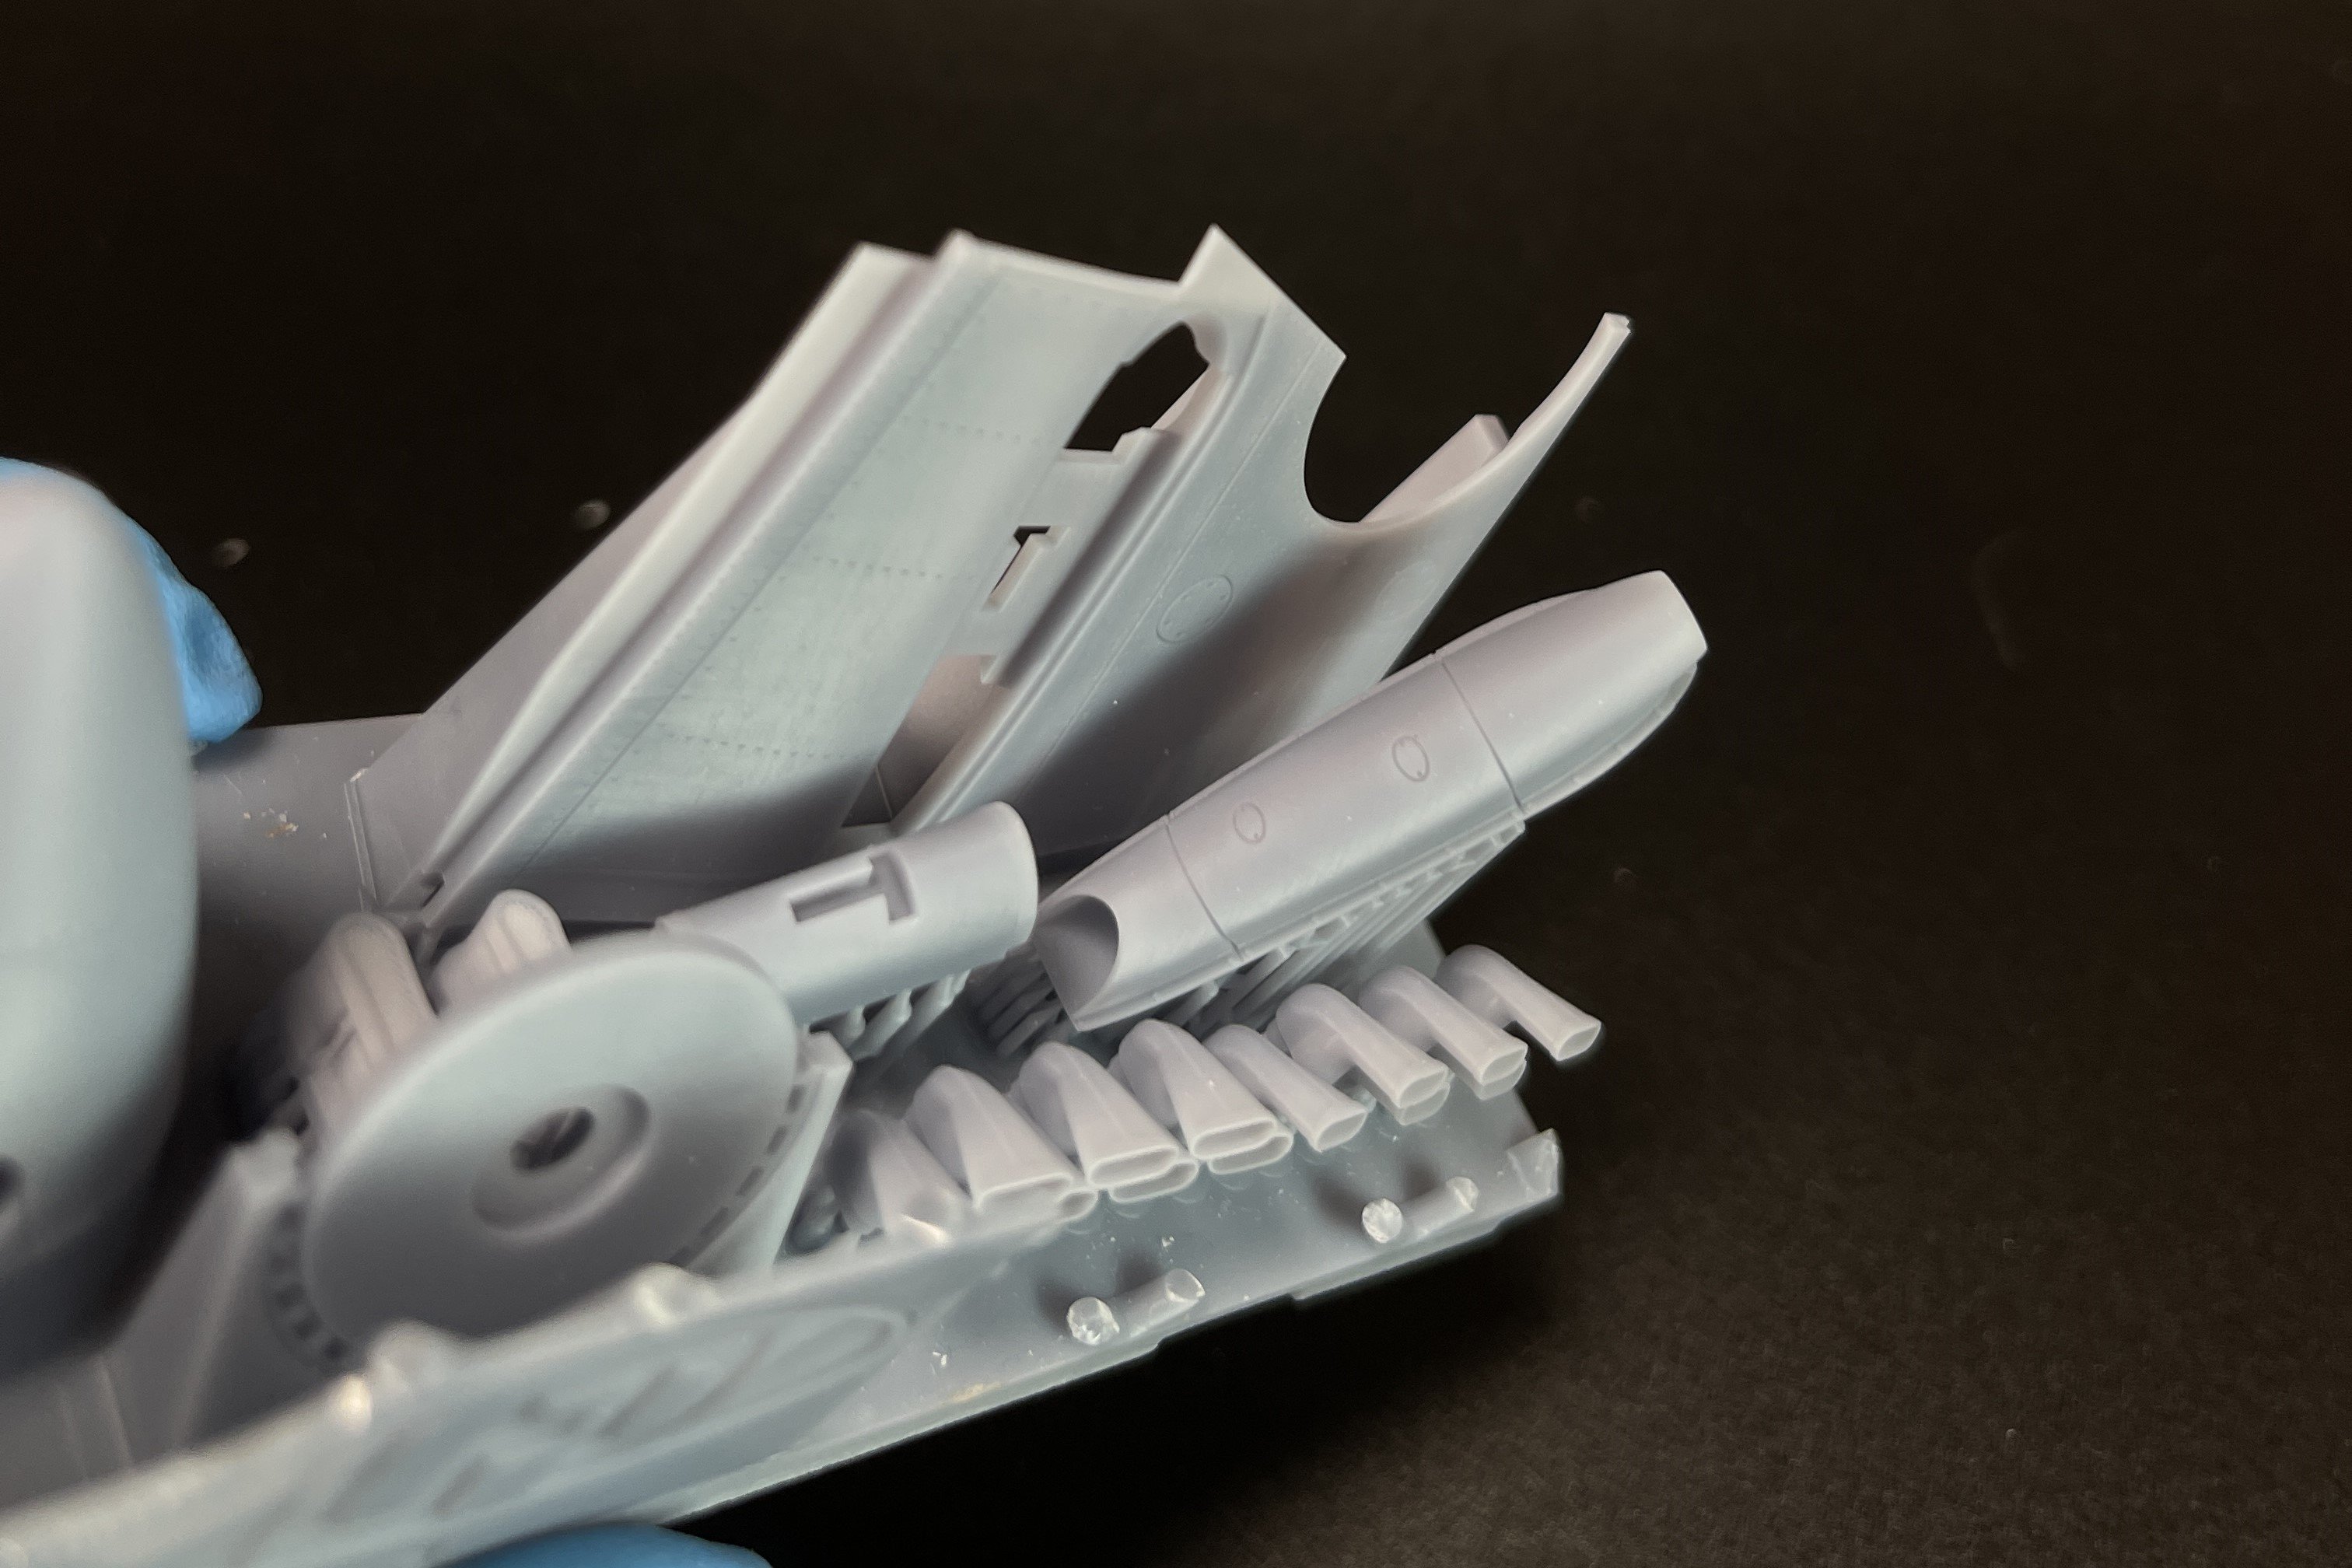
Once the parts have been free, you can appreciate the quality of this conversion, at its all splendour.


The printing quality is top noch. The surface is very smoth with no printing line visible whatsoever.
It’s at equal stage as the Tamiya surface detail of the donor kit with all the panel line, rivets, rib tape, fasteners, you name it! Brilliant work and printed in high resolution.
Hands down! I have seen quite a few models and detail set in 3D printing that are not very good as then have very prenonce printing line. Here, with Laminar Flow the quality is guarantee! No printing line whatsoever!!!
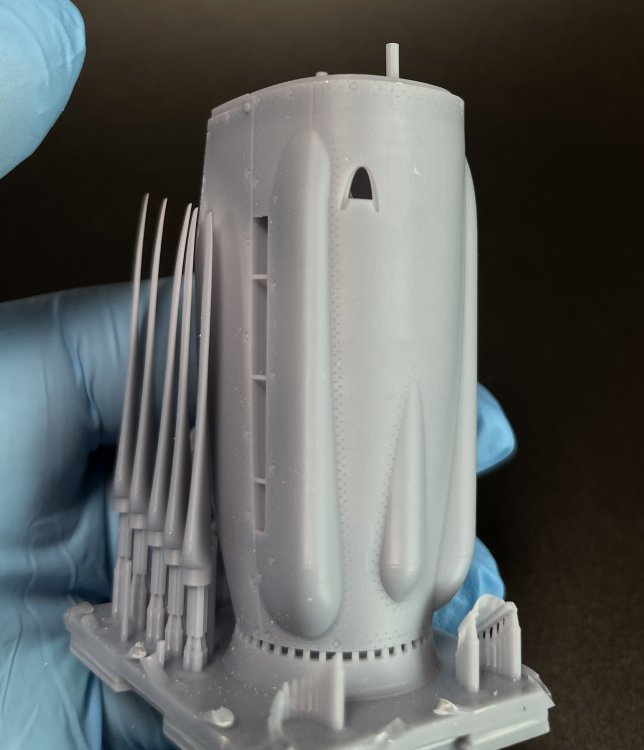
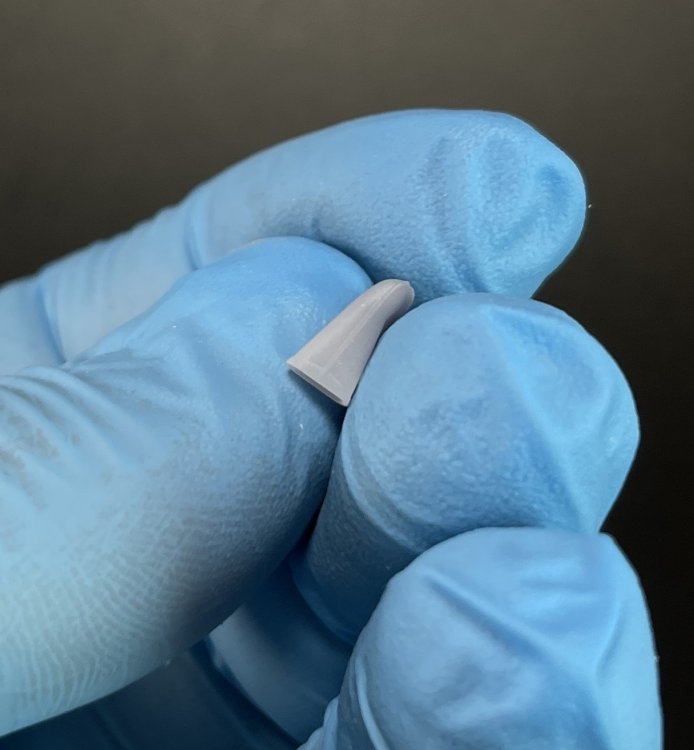
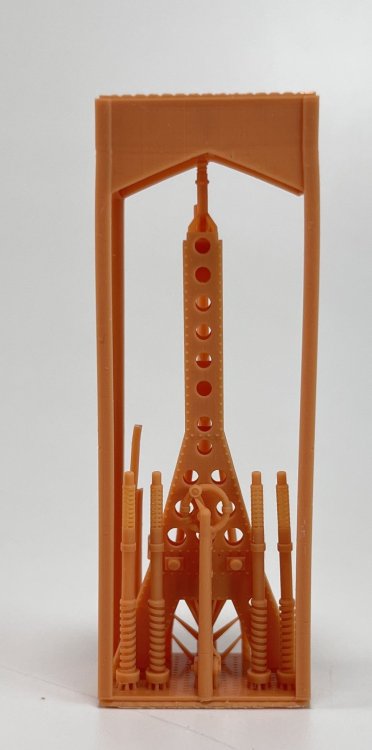
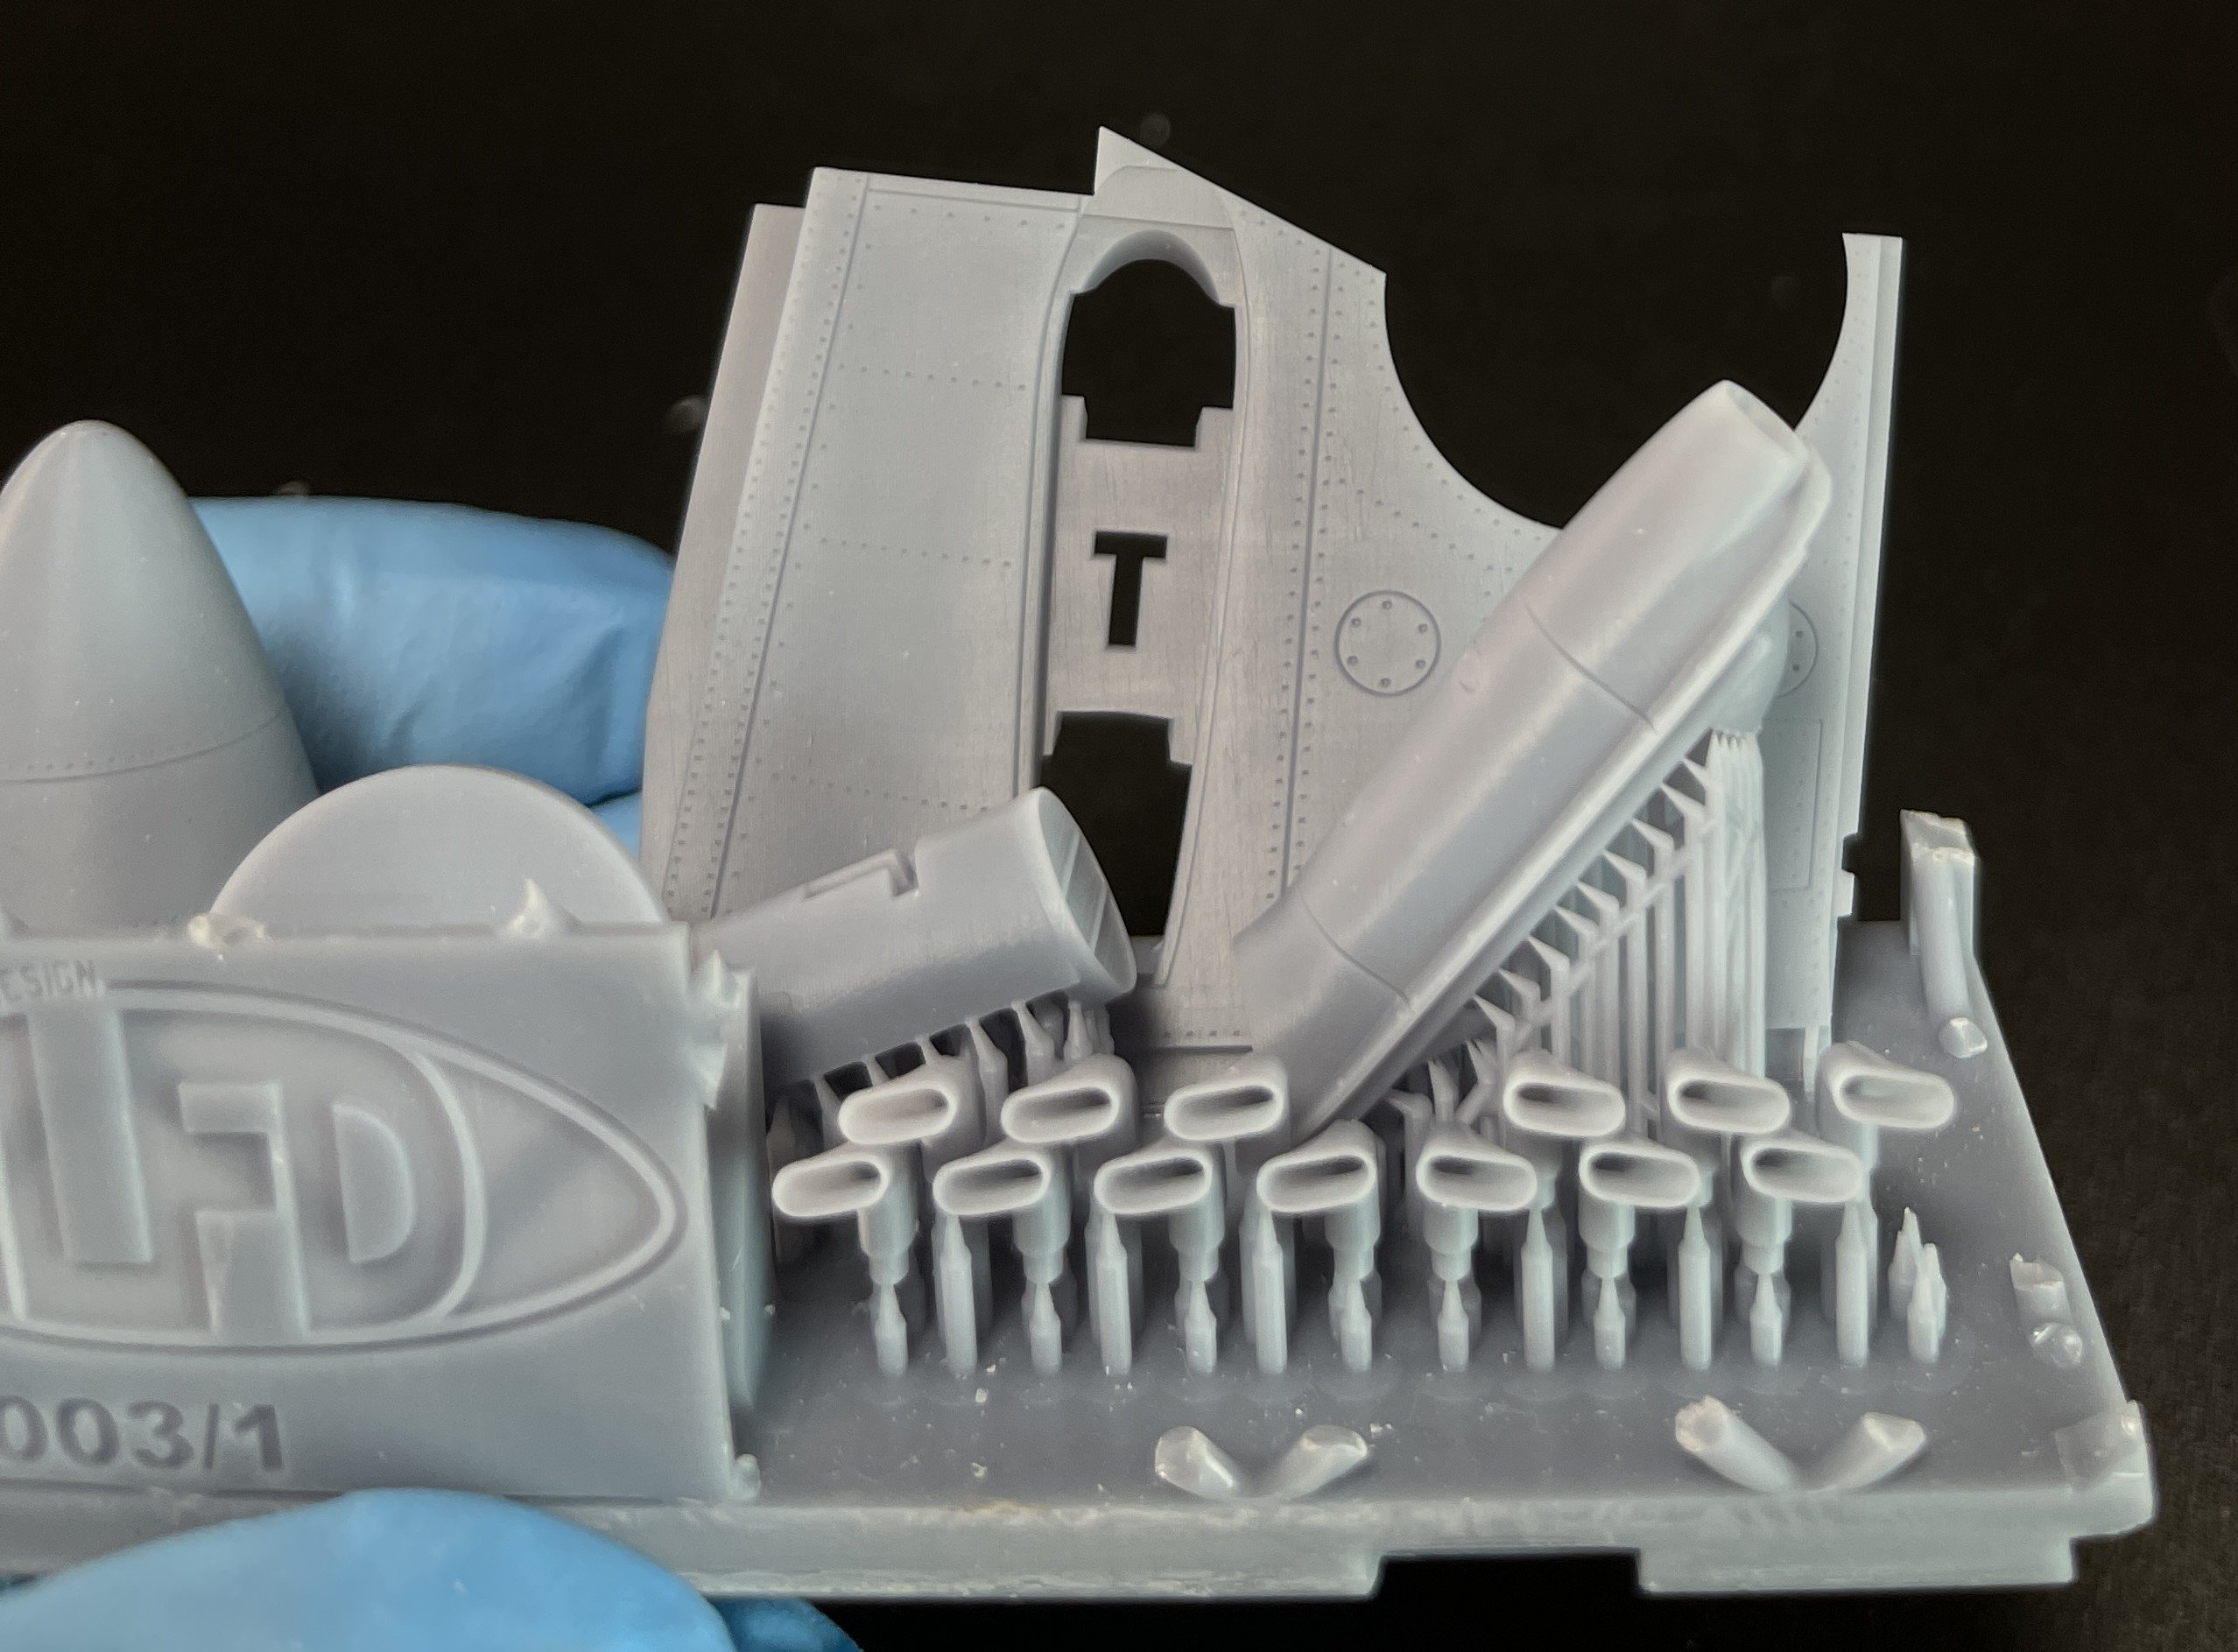
Starting with the most impressive part! The beautiful griffon nose.
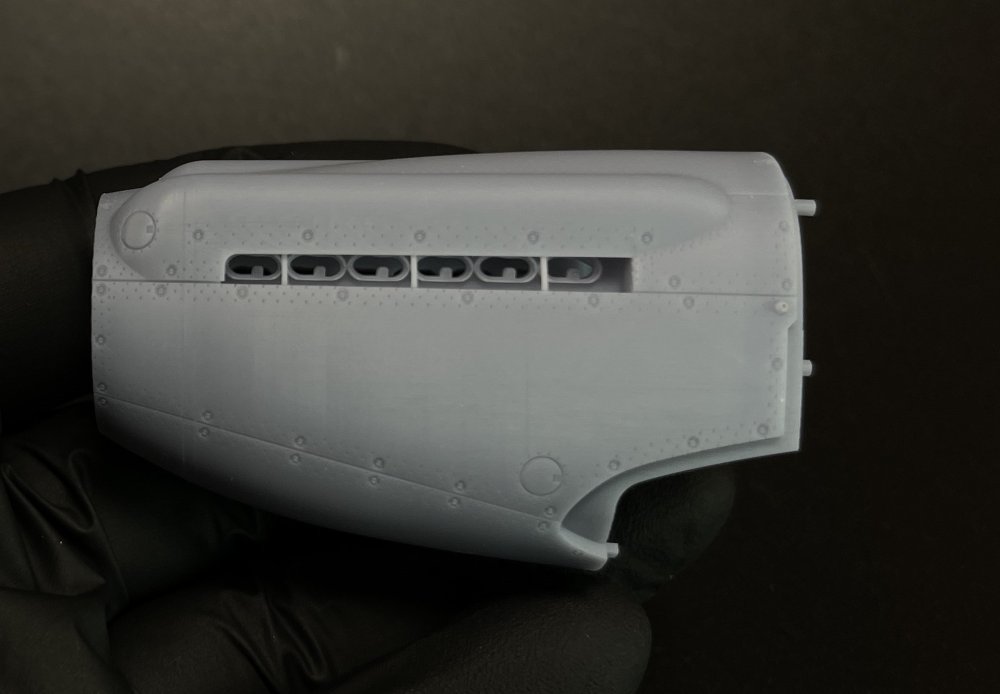
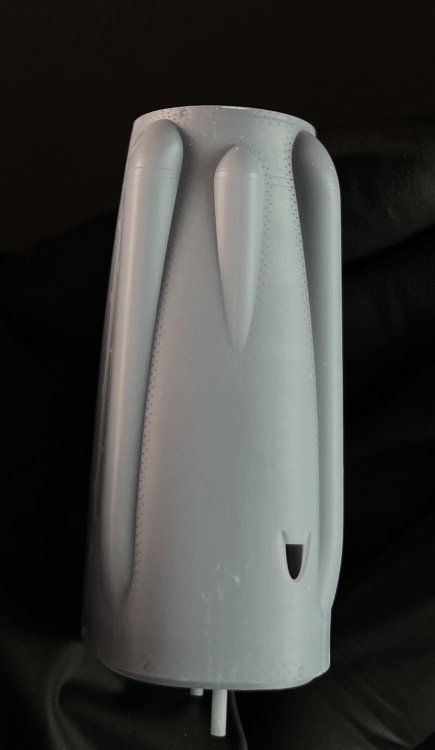
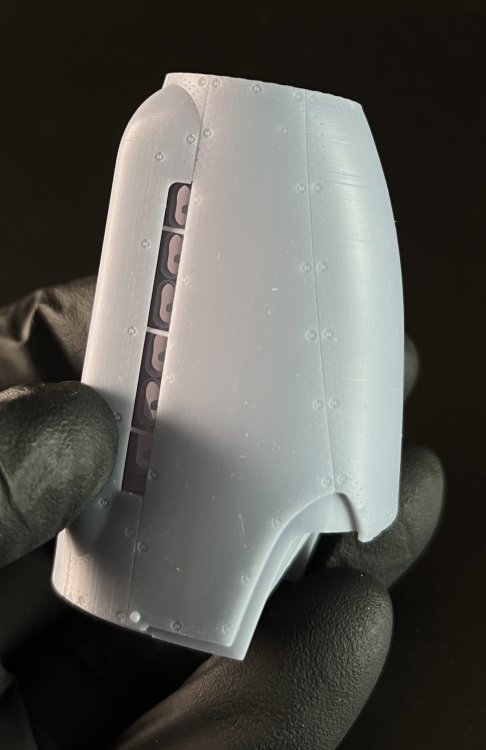
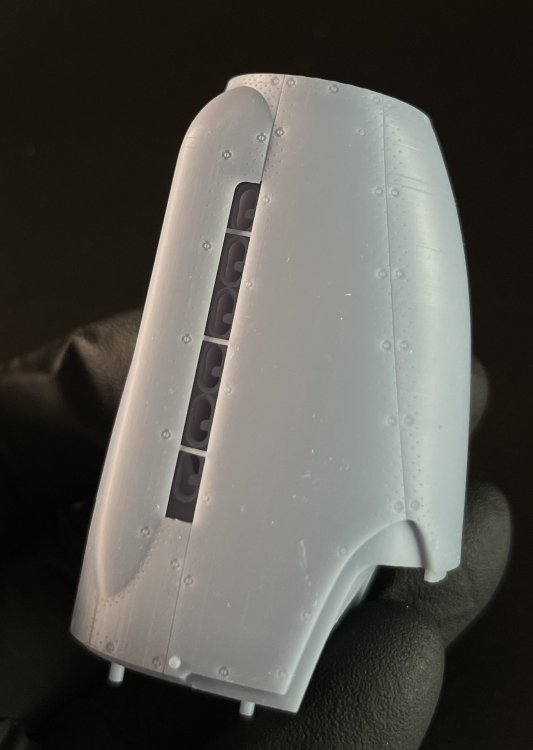
A single printing piece, as it’s a gorgeous piece of 3D resin!! Simply fabulous! Bye bye seam line in the upper nose!! I will have a smooth nose with no effort and this is even better that previous release. To put the nose you don’t need any surgery on the donor kit.


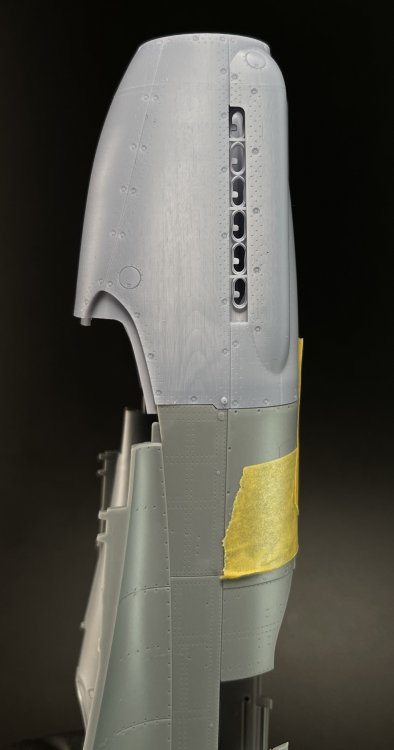
And the fit is simply perfect!! I have seen plastic model kits fitting much worse than this!!
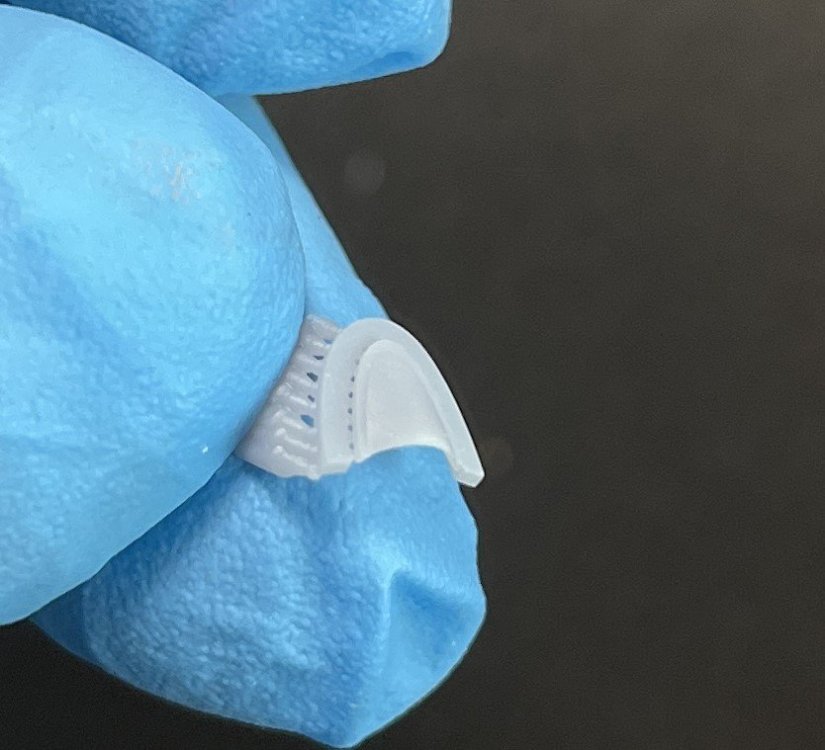
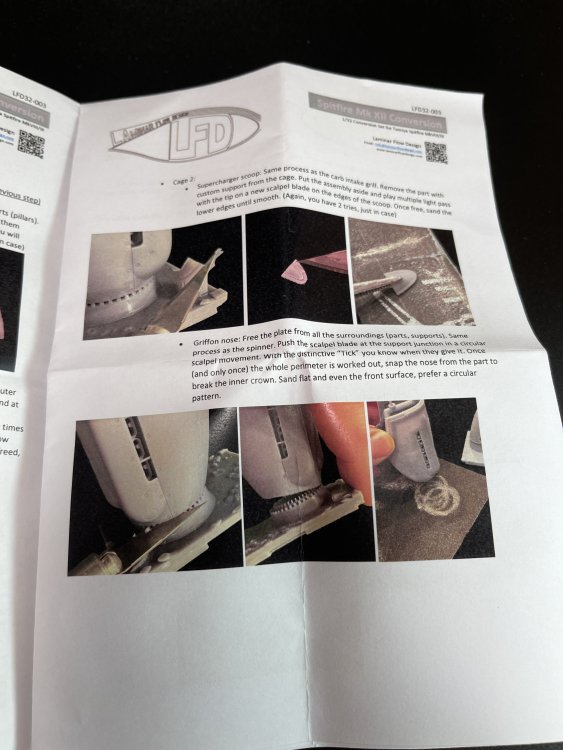
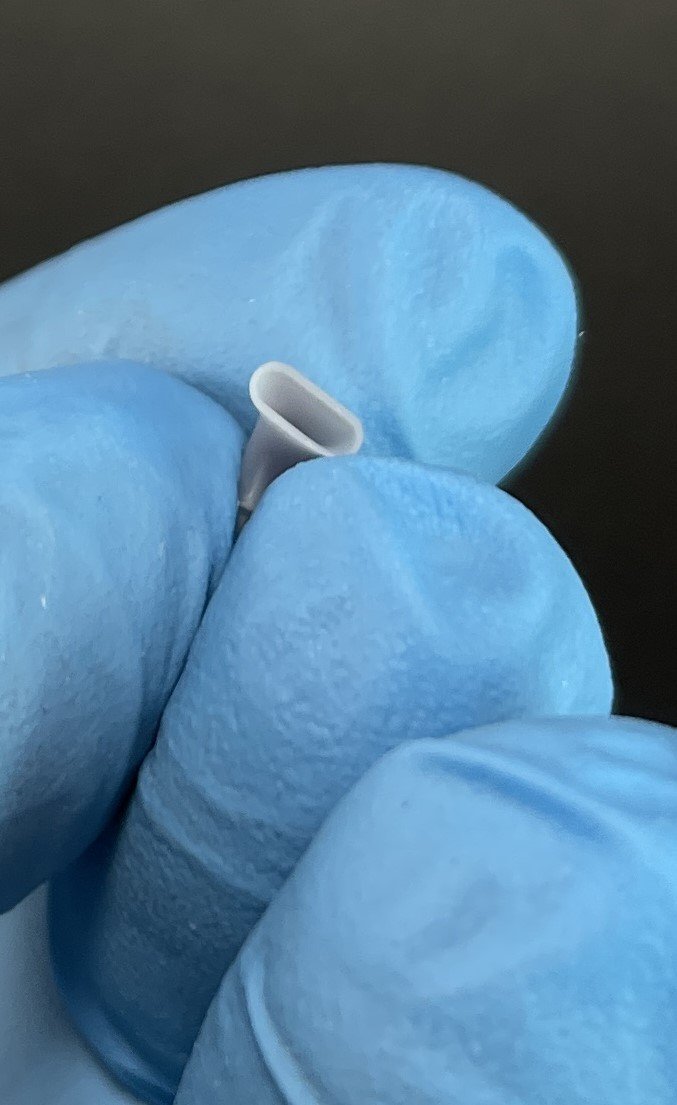
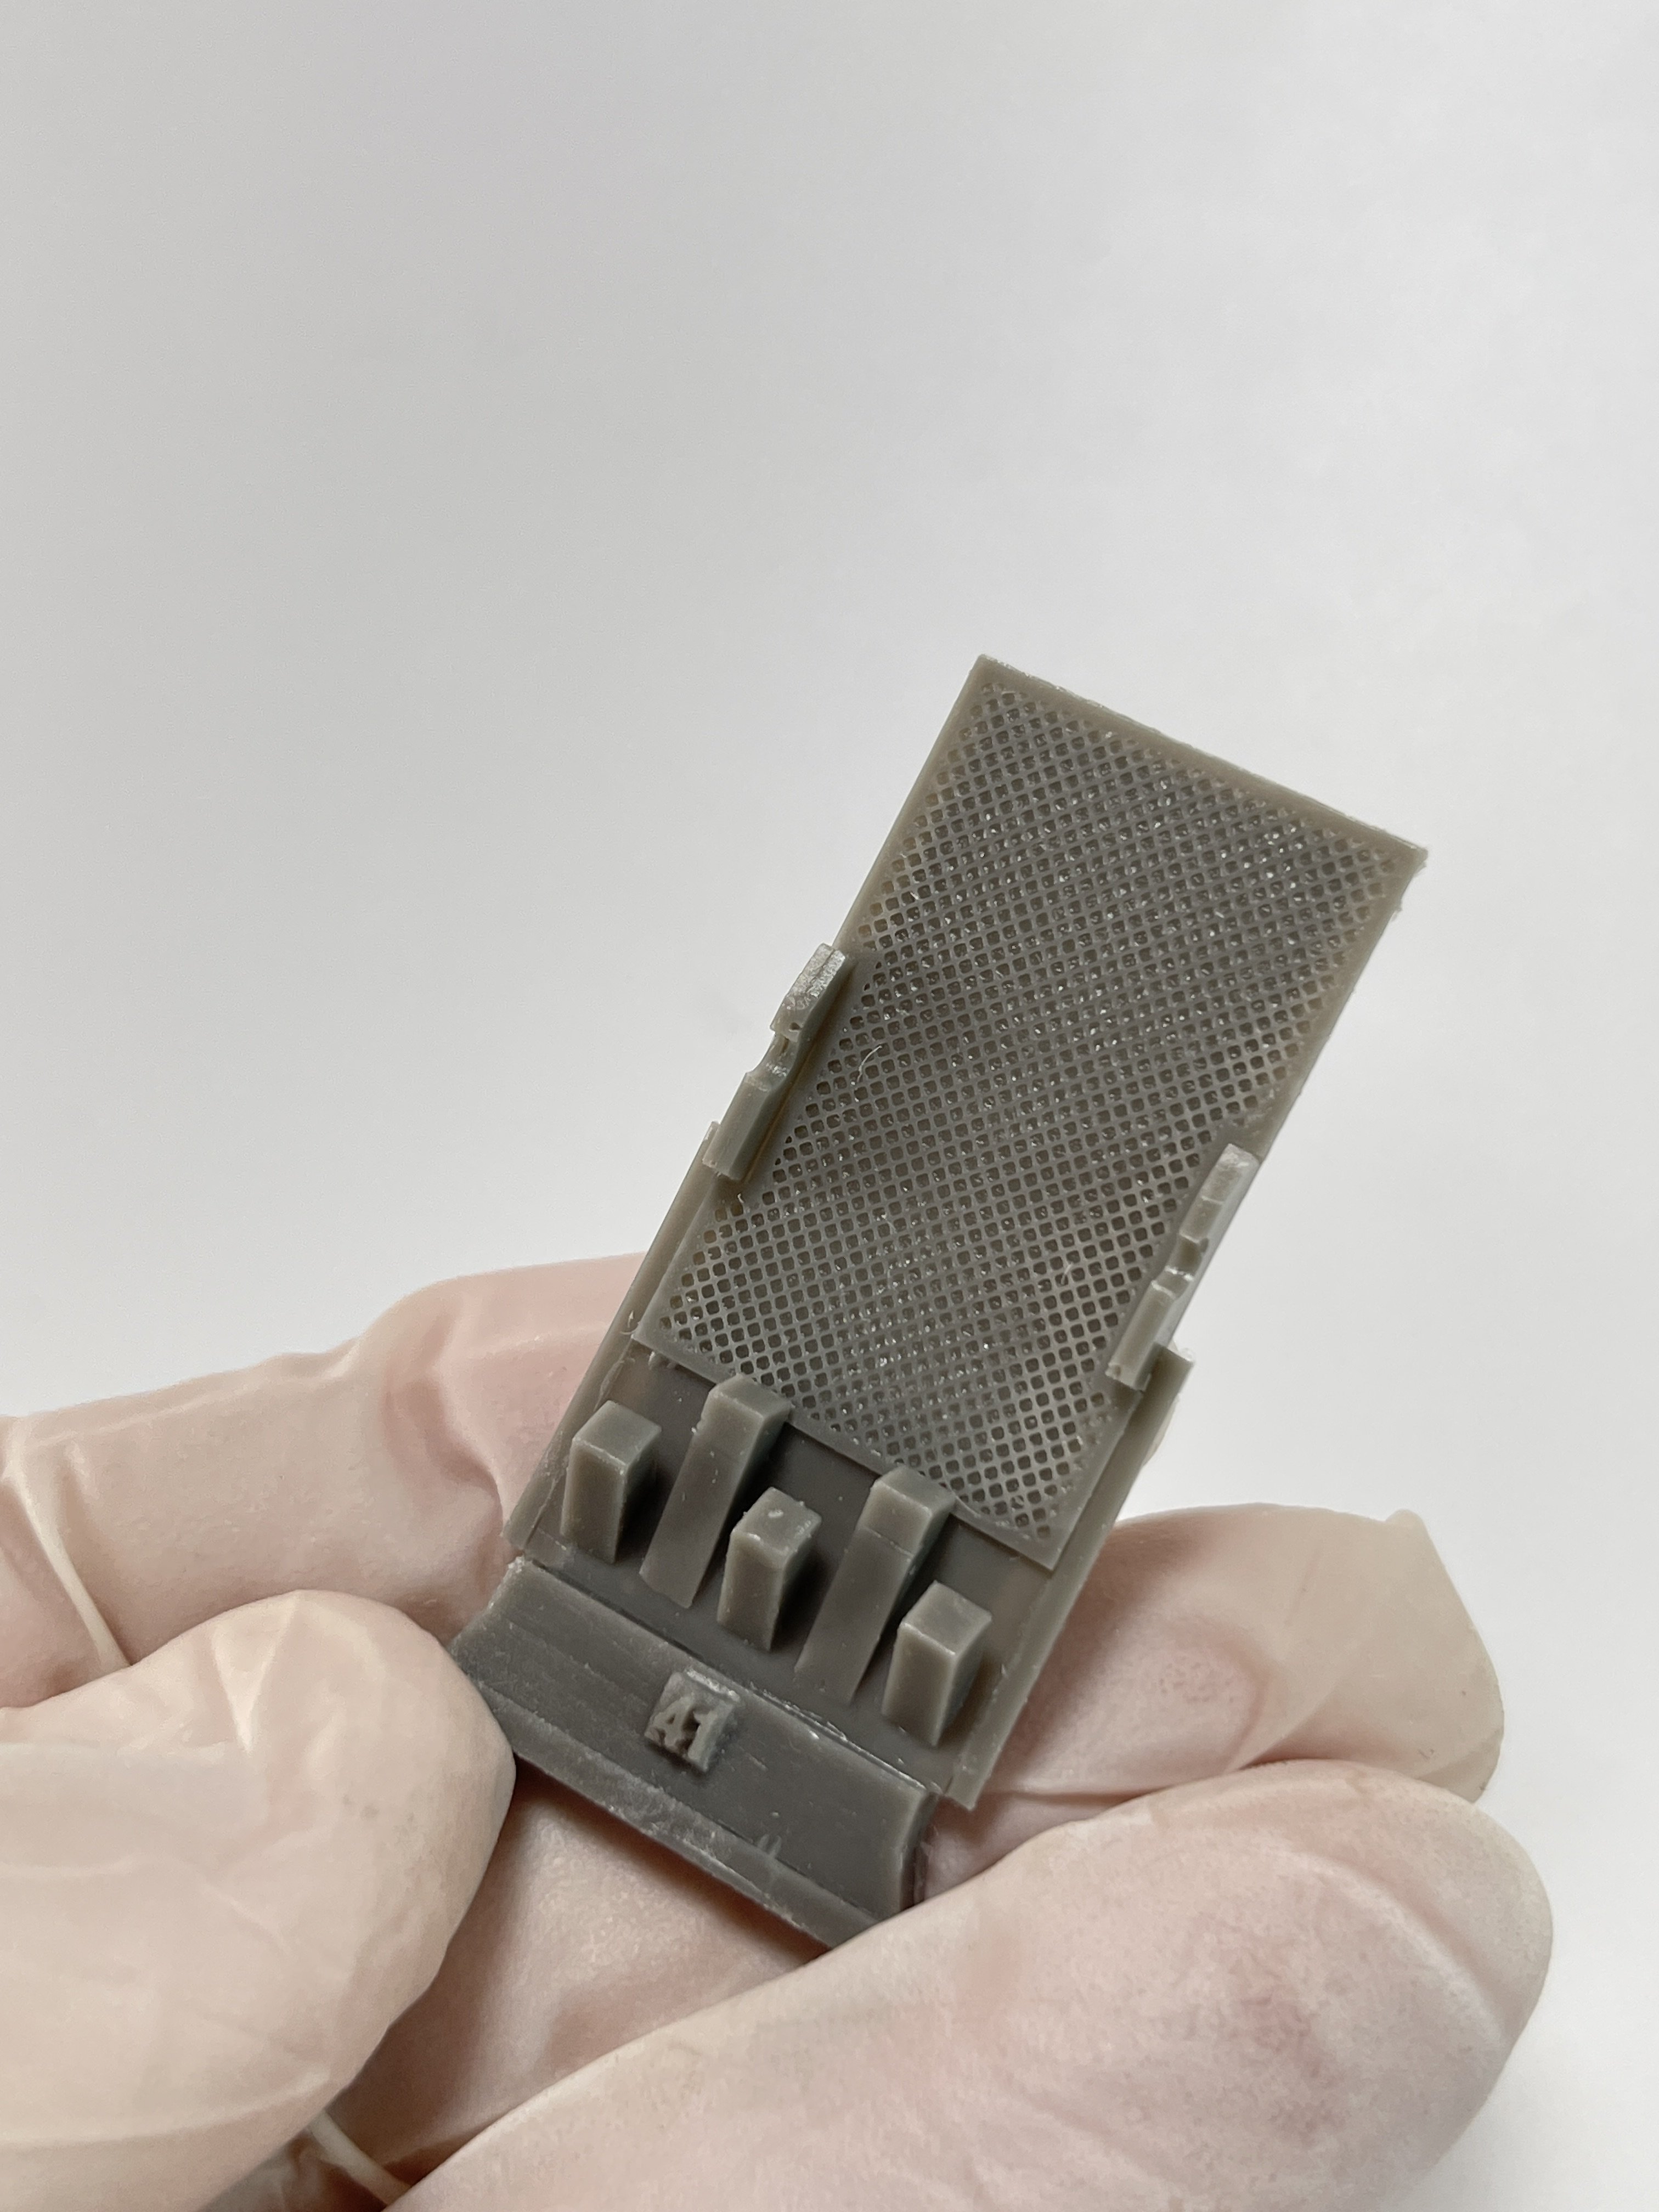
The carburate intake grill. Yes, a grill in very delicated 3d printing with no distroction or line printing. Perfect!

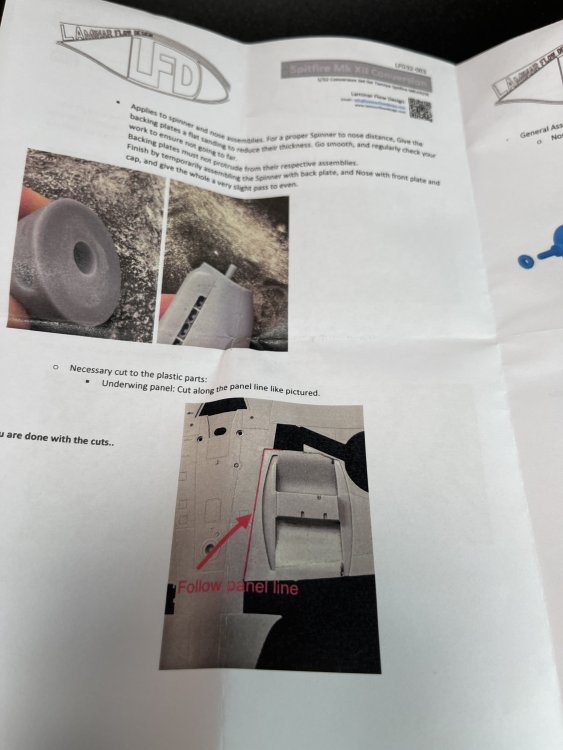
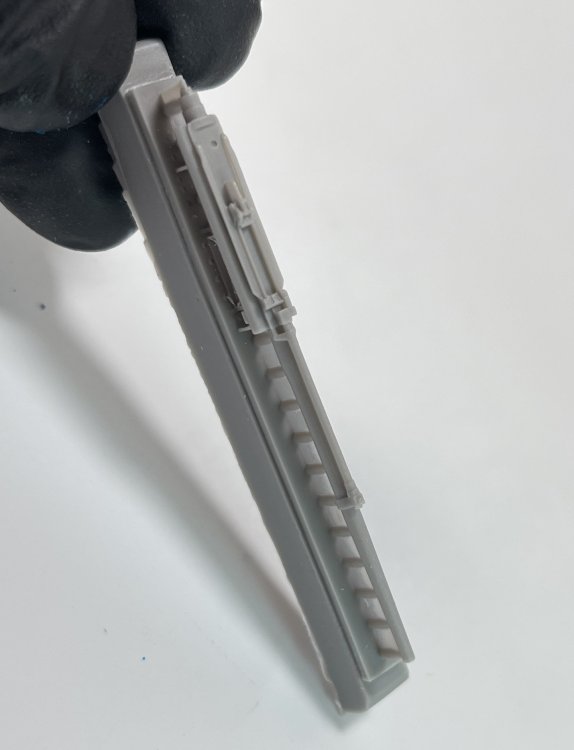
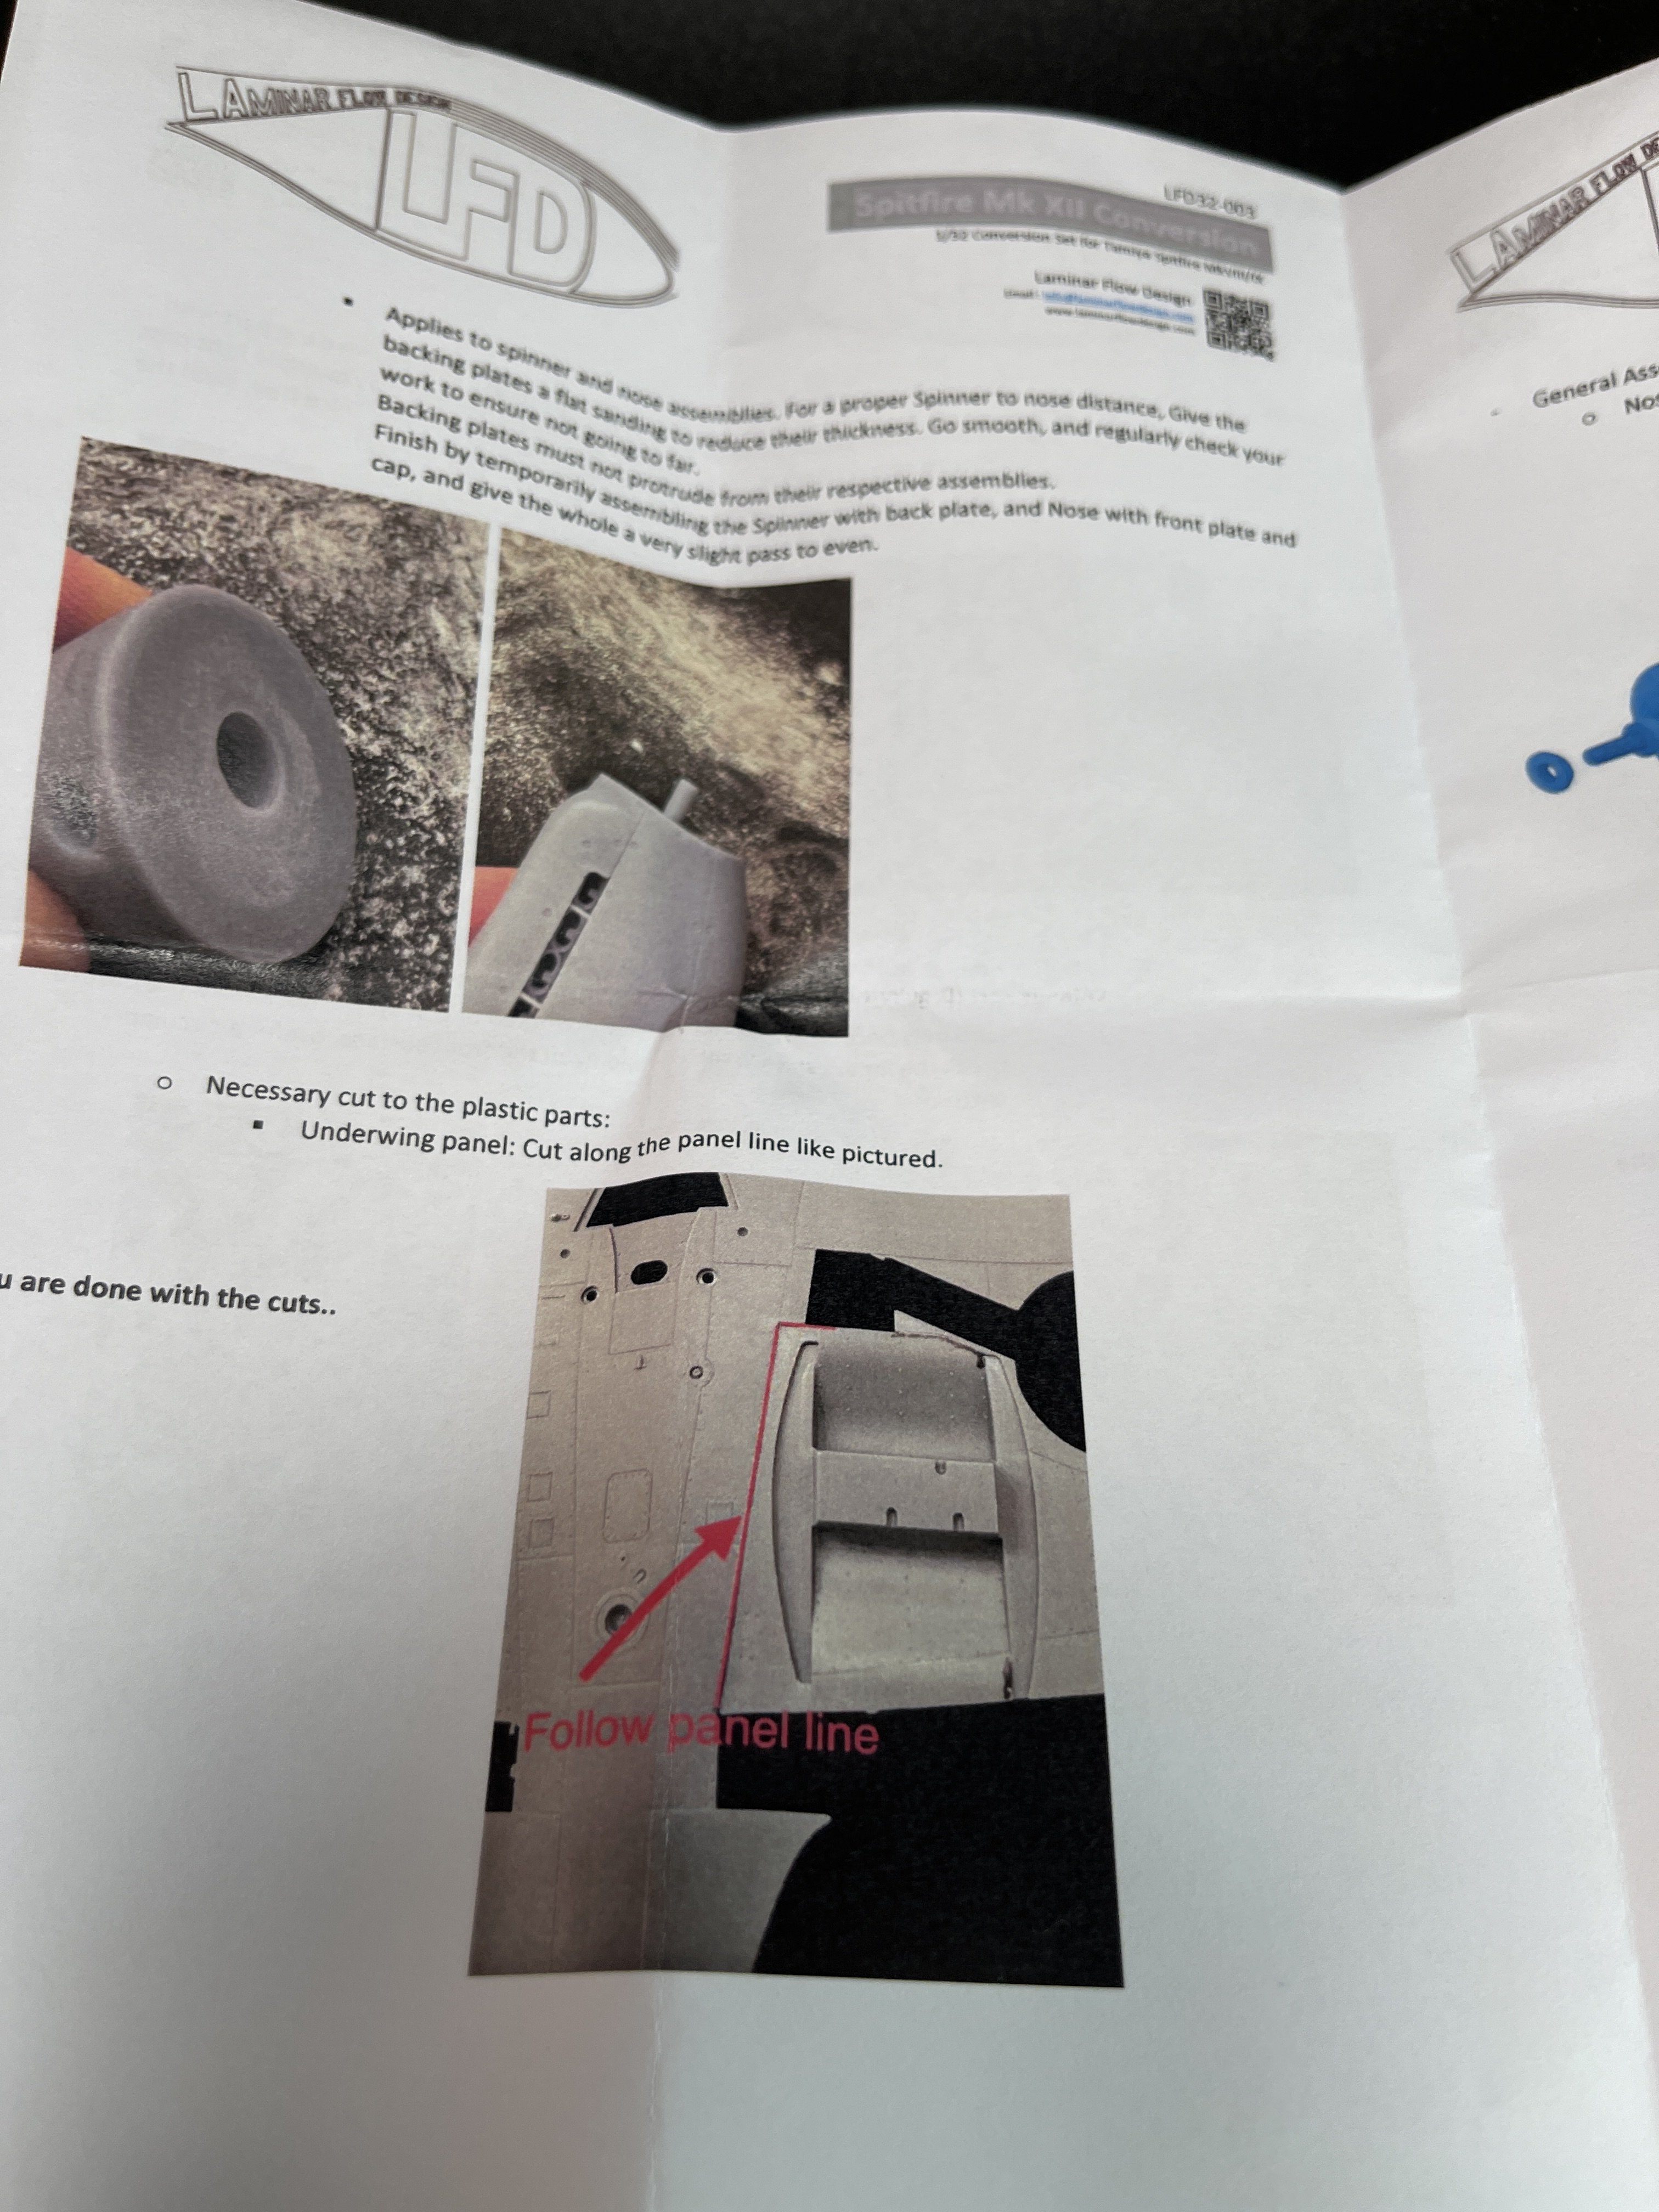
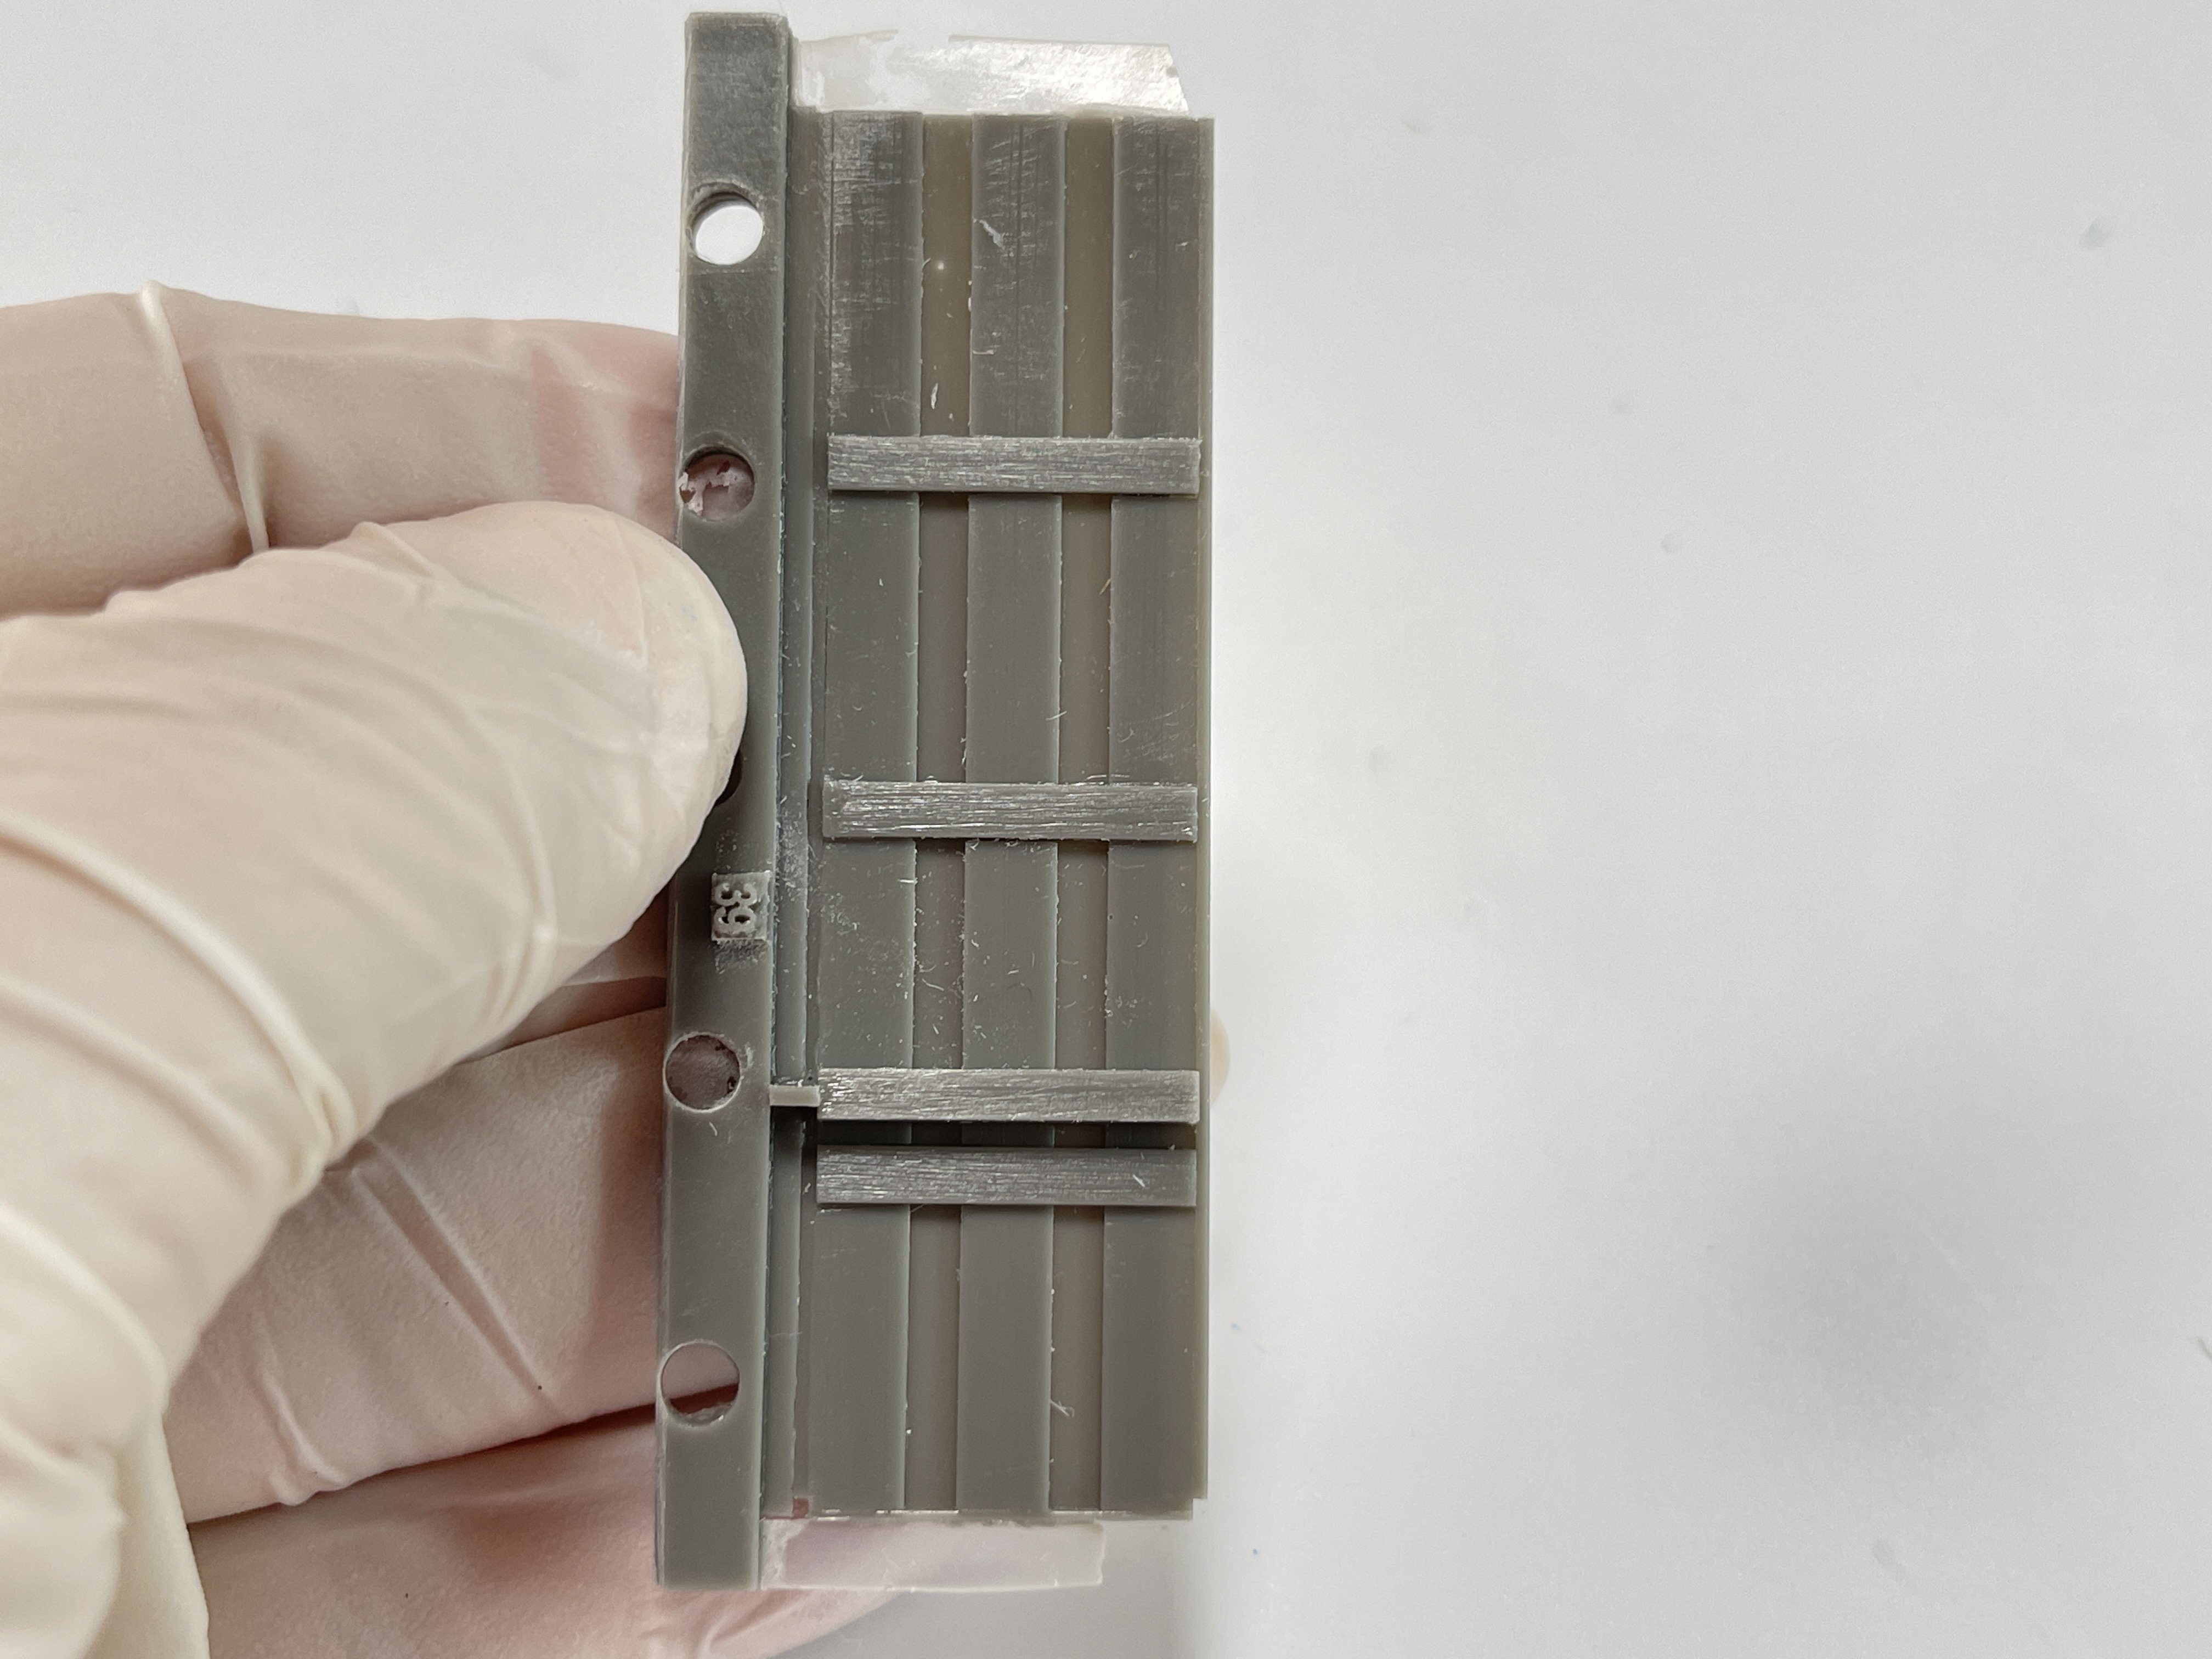
Another big different is the underwing panel.
Laminar always find the best solution (mean the fastest and easy way for the modeller to get a Spit Mk XII) so to install the underwing panel you only need to cut a chunck of the underwing along one panel line and that`s it. Then you just need to add the oil coller.

Amazing planning!
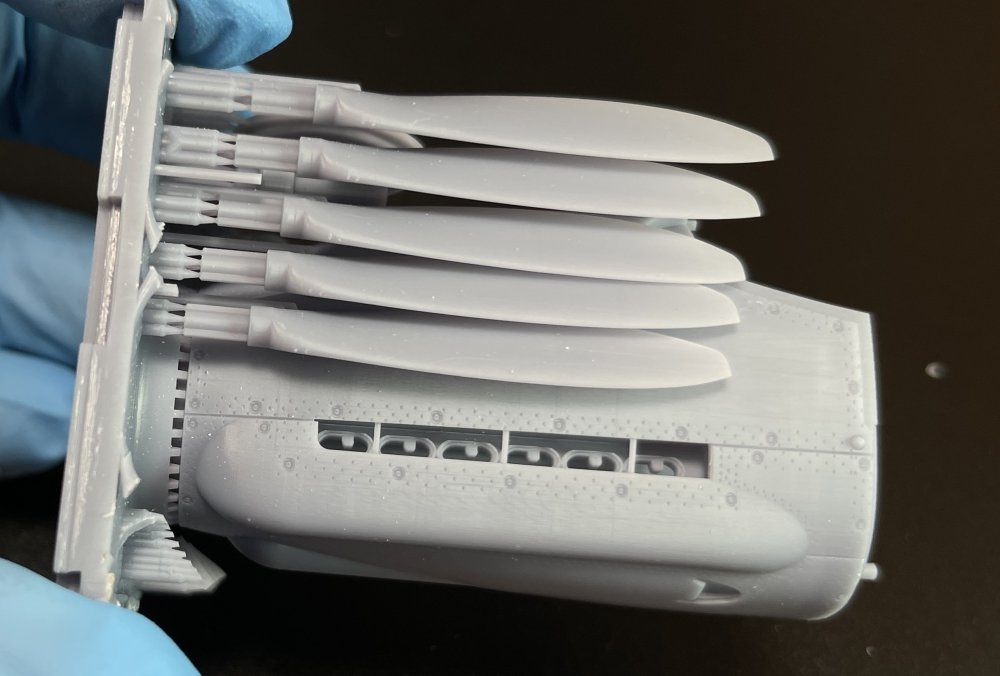
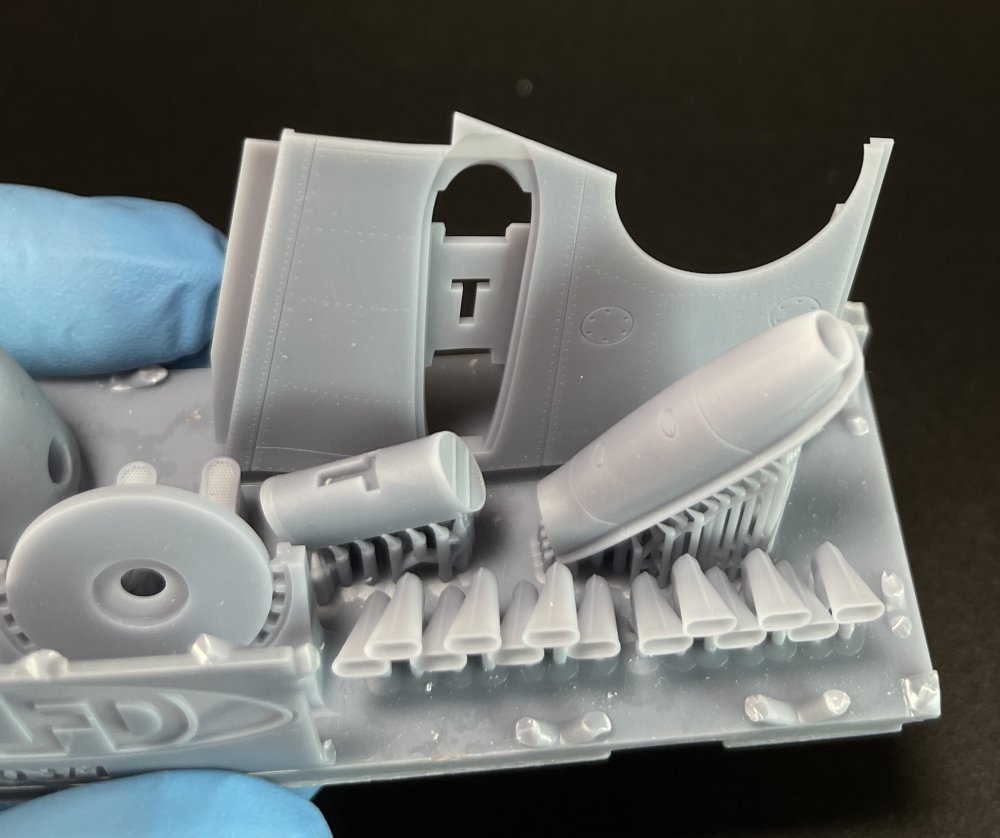
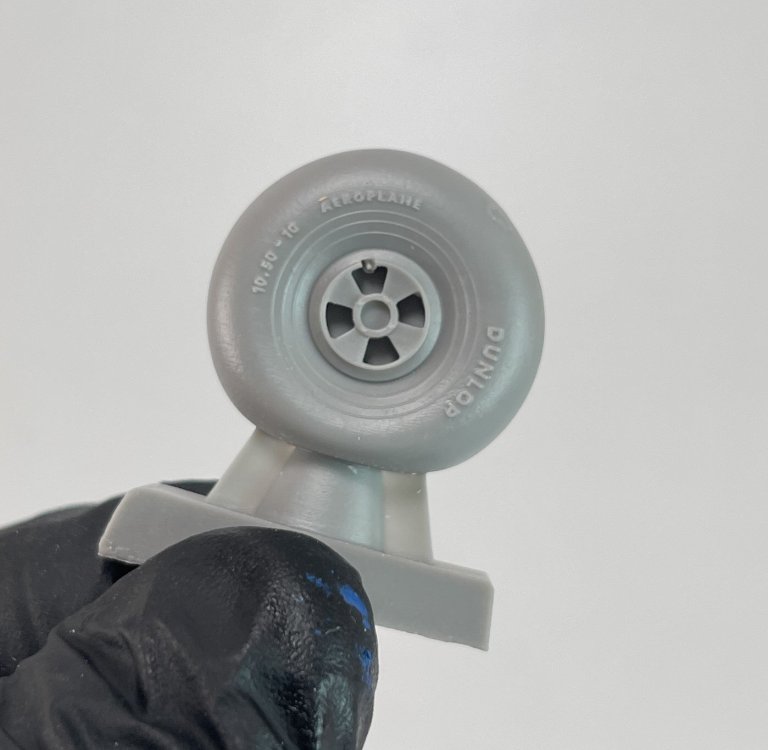
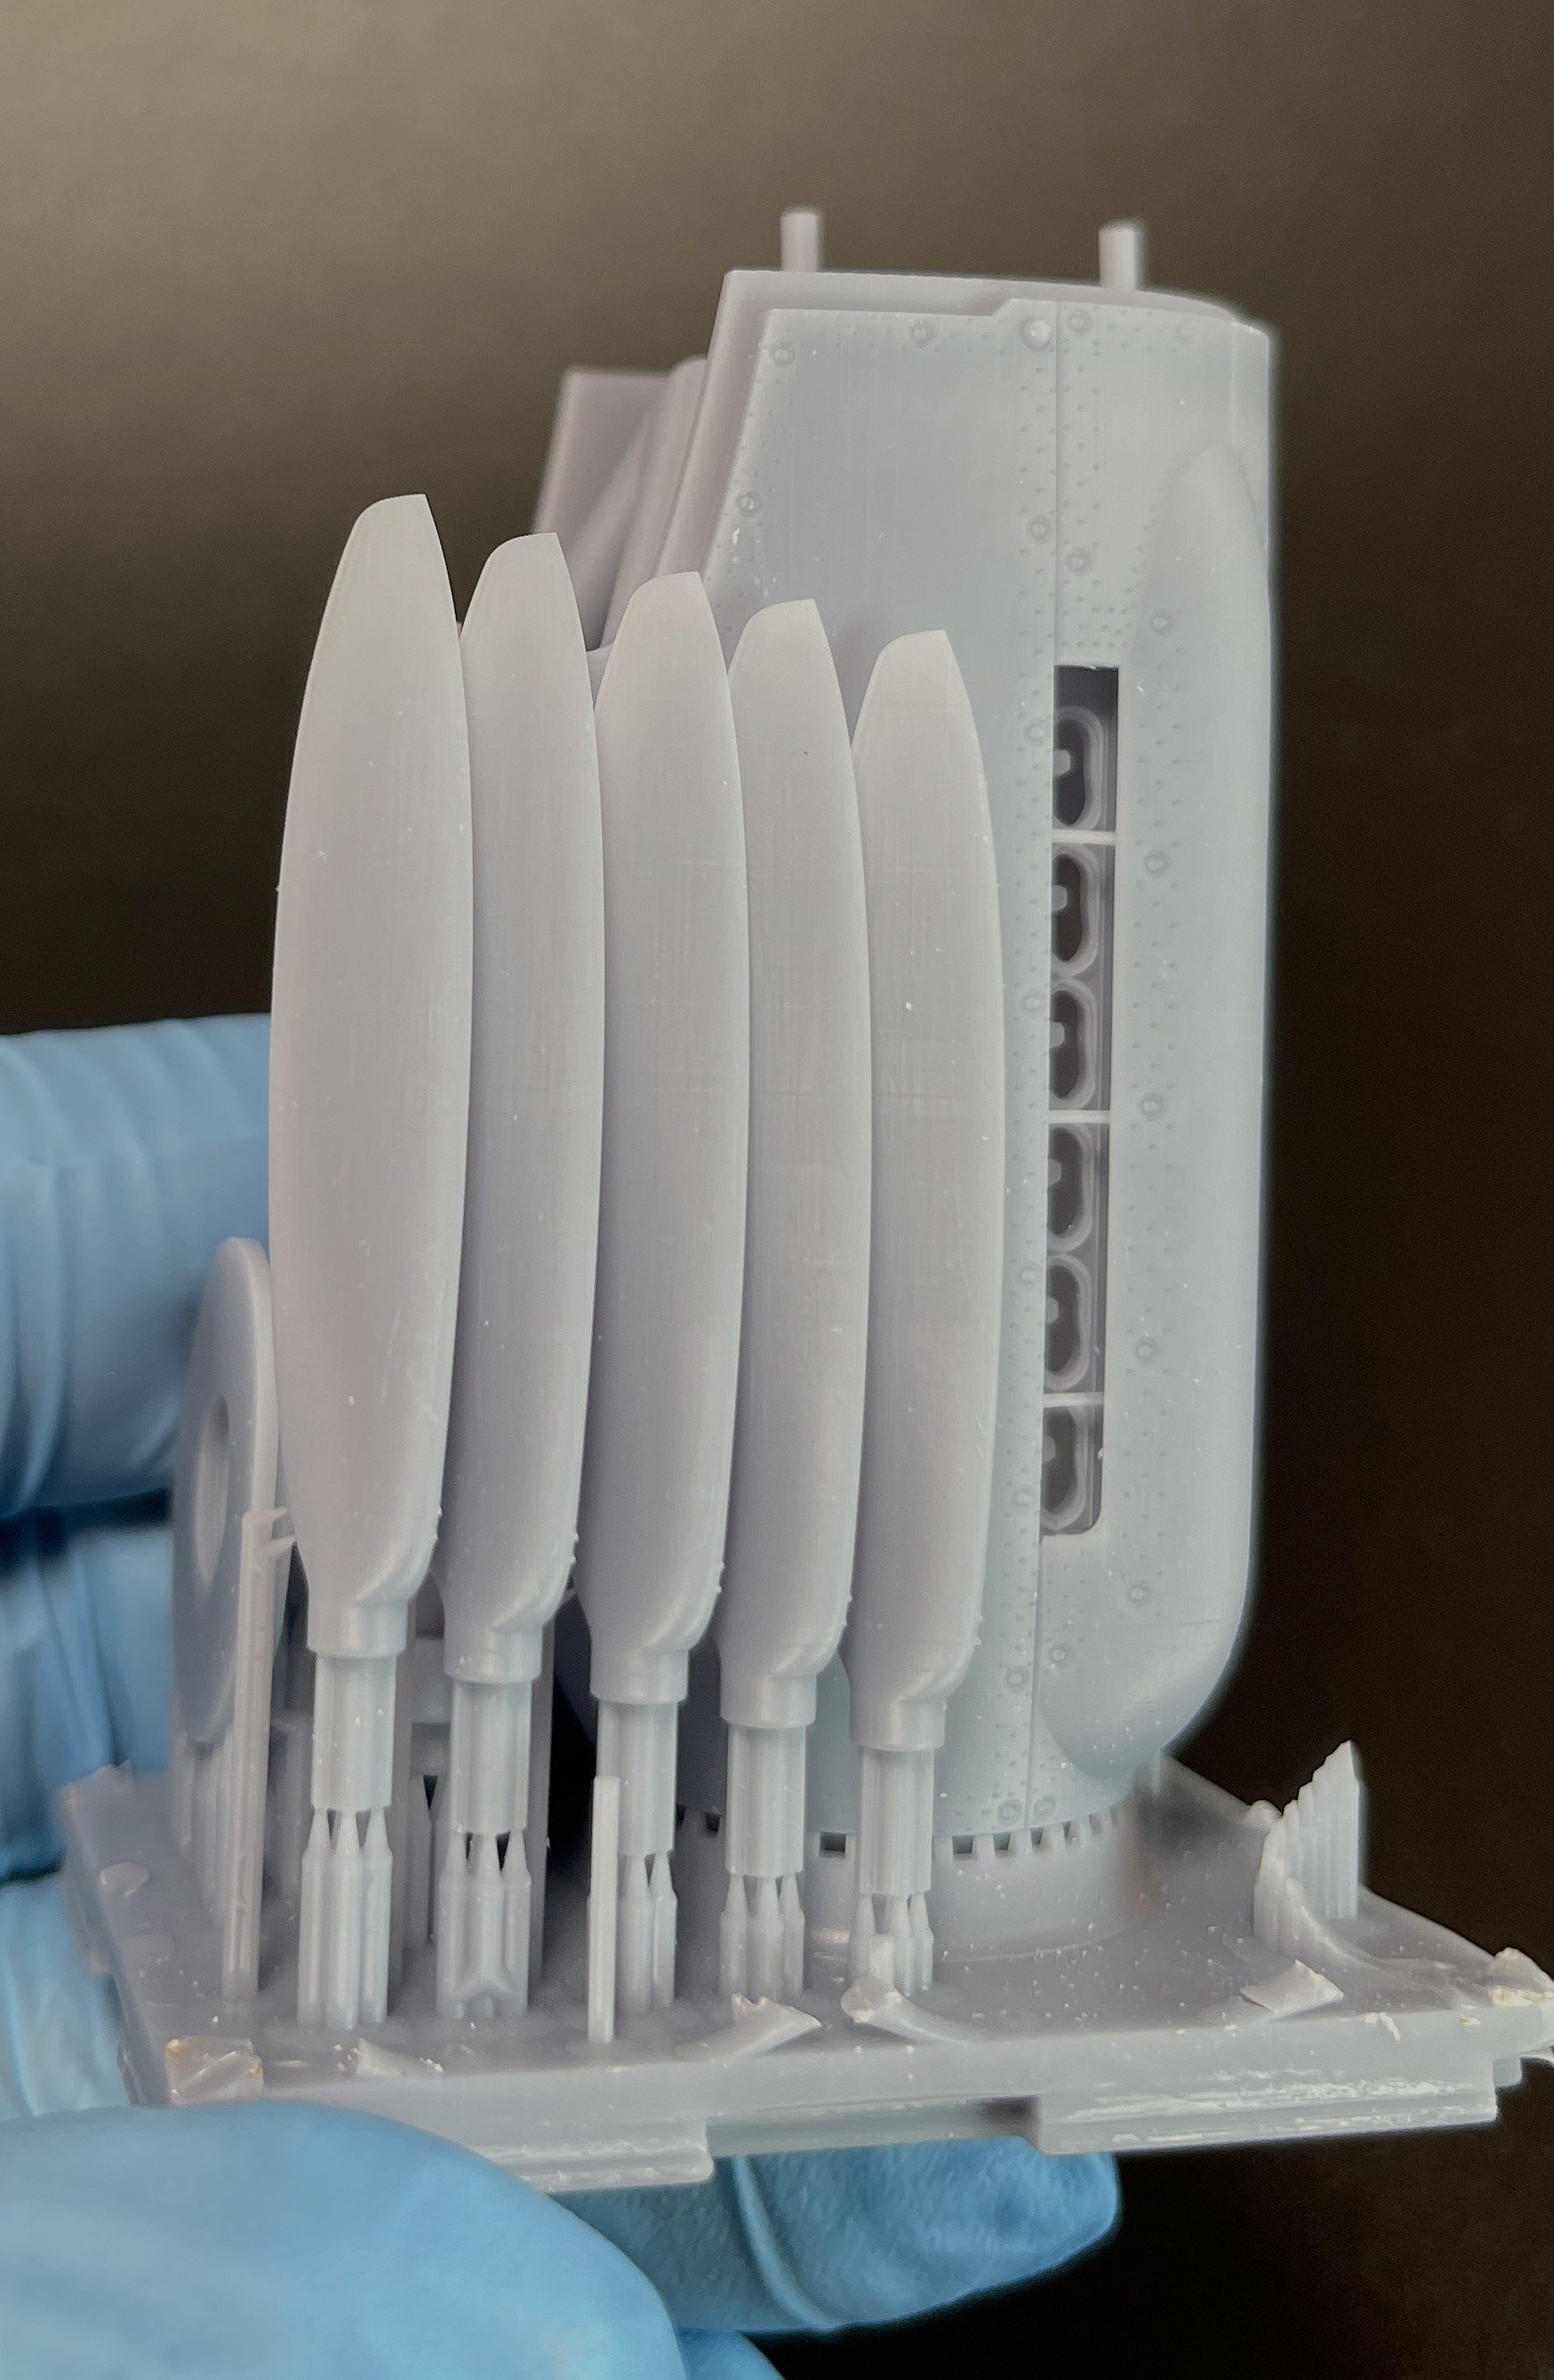
For the Mk XII we need a new spinner, propellers and exhaust.
The spinner and propeller are quite easy to make as all the blades have connections/intakes points, so there`s no room to error! Nice touch!
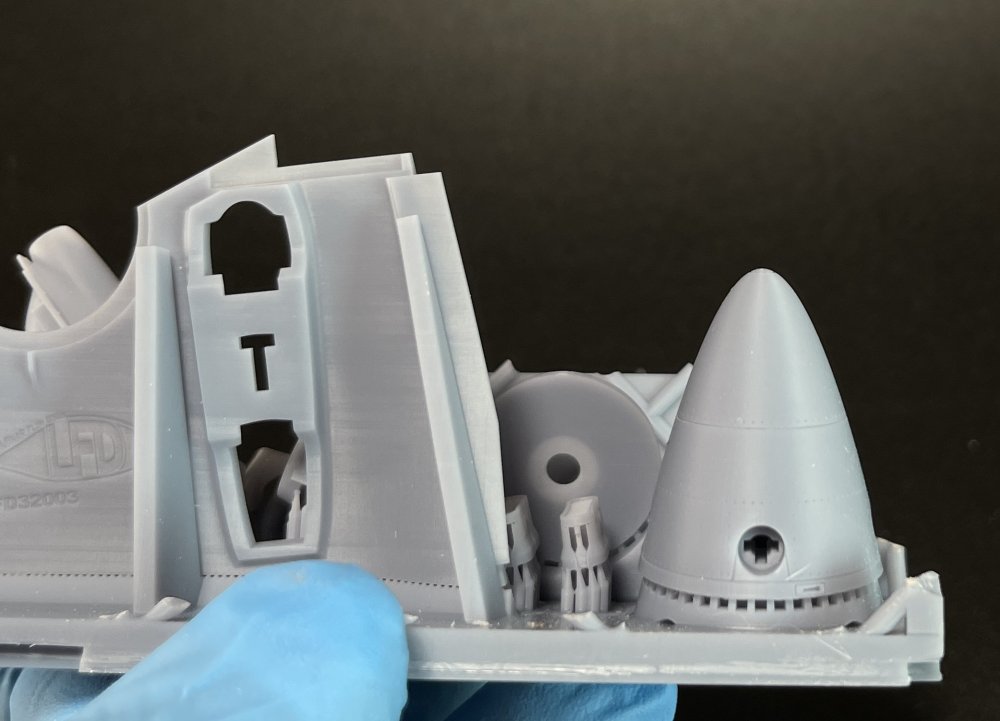

A full exhaust set all hollow, and all individual… Could be a bit boring to make but the final result should be fantastic!

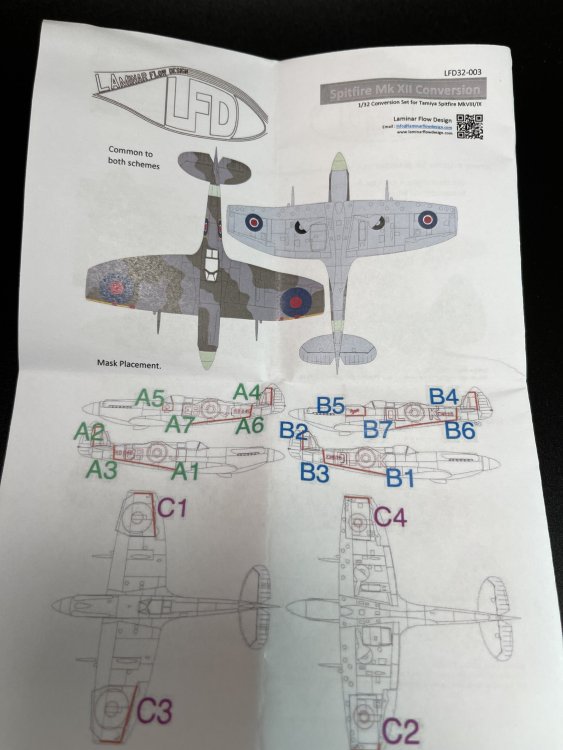
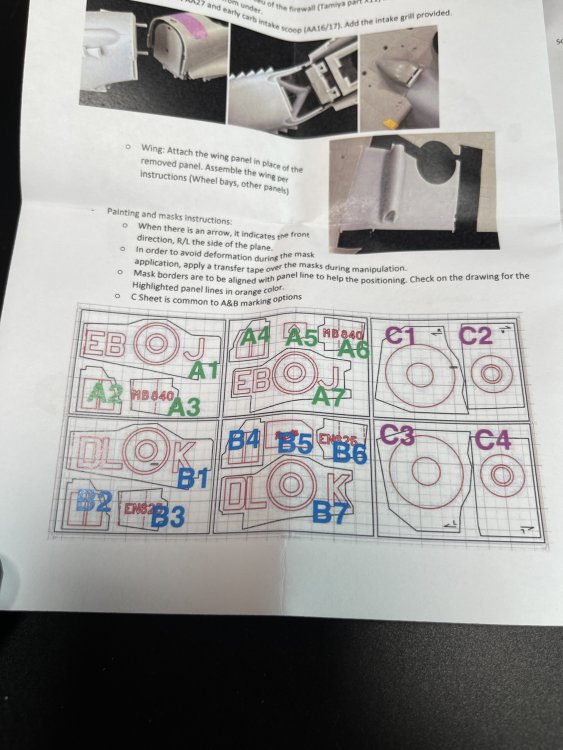
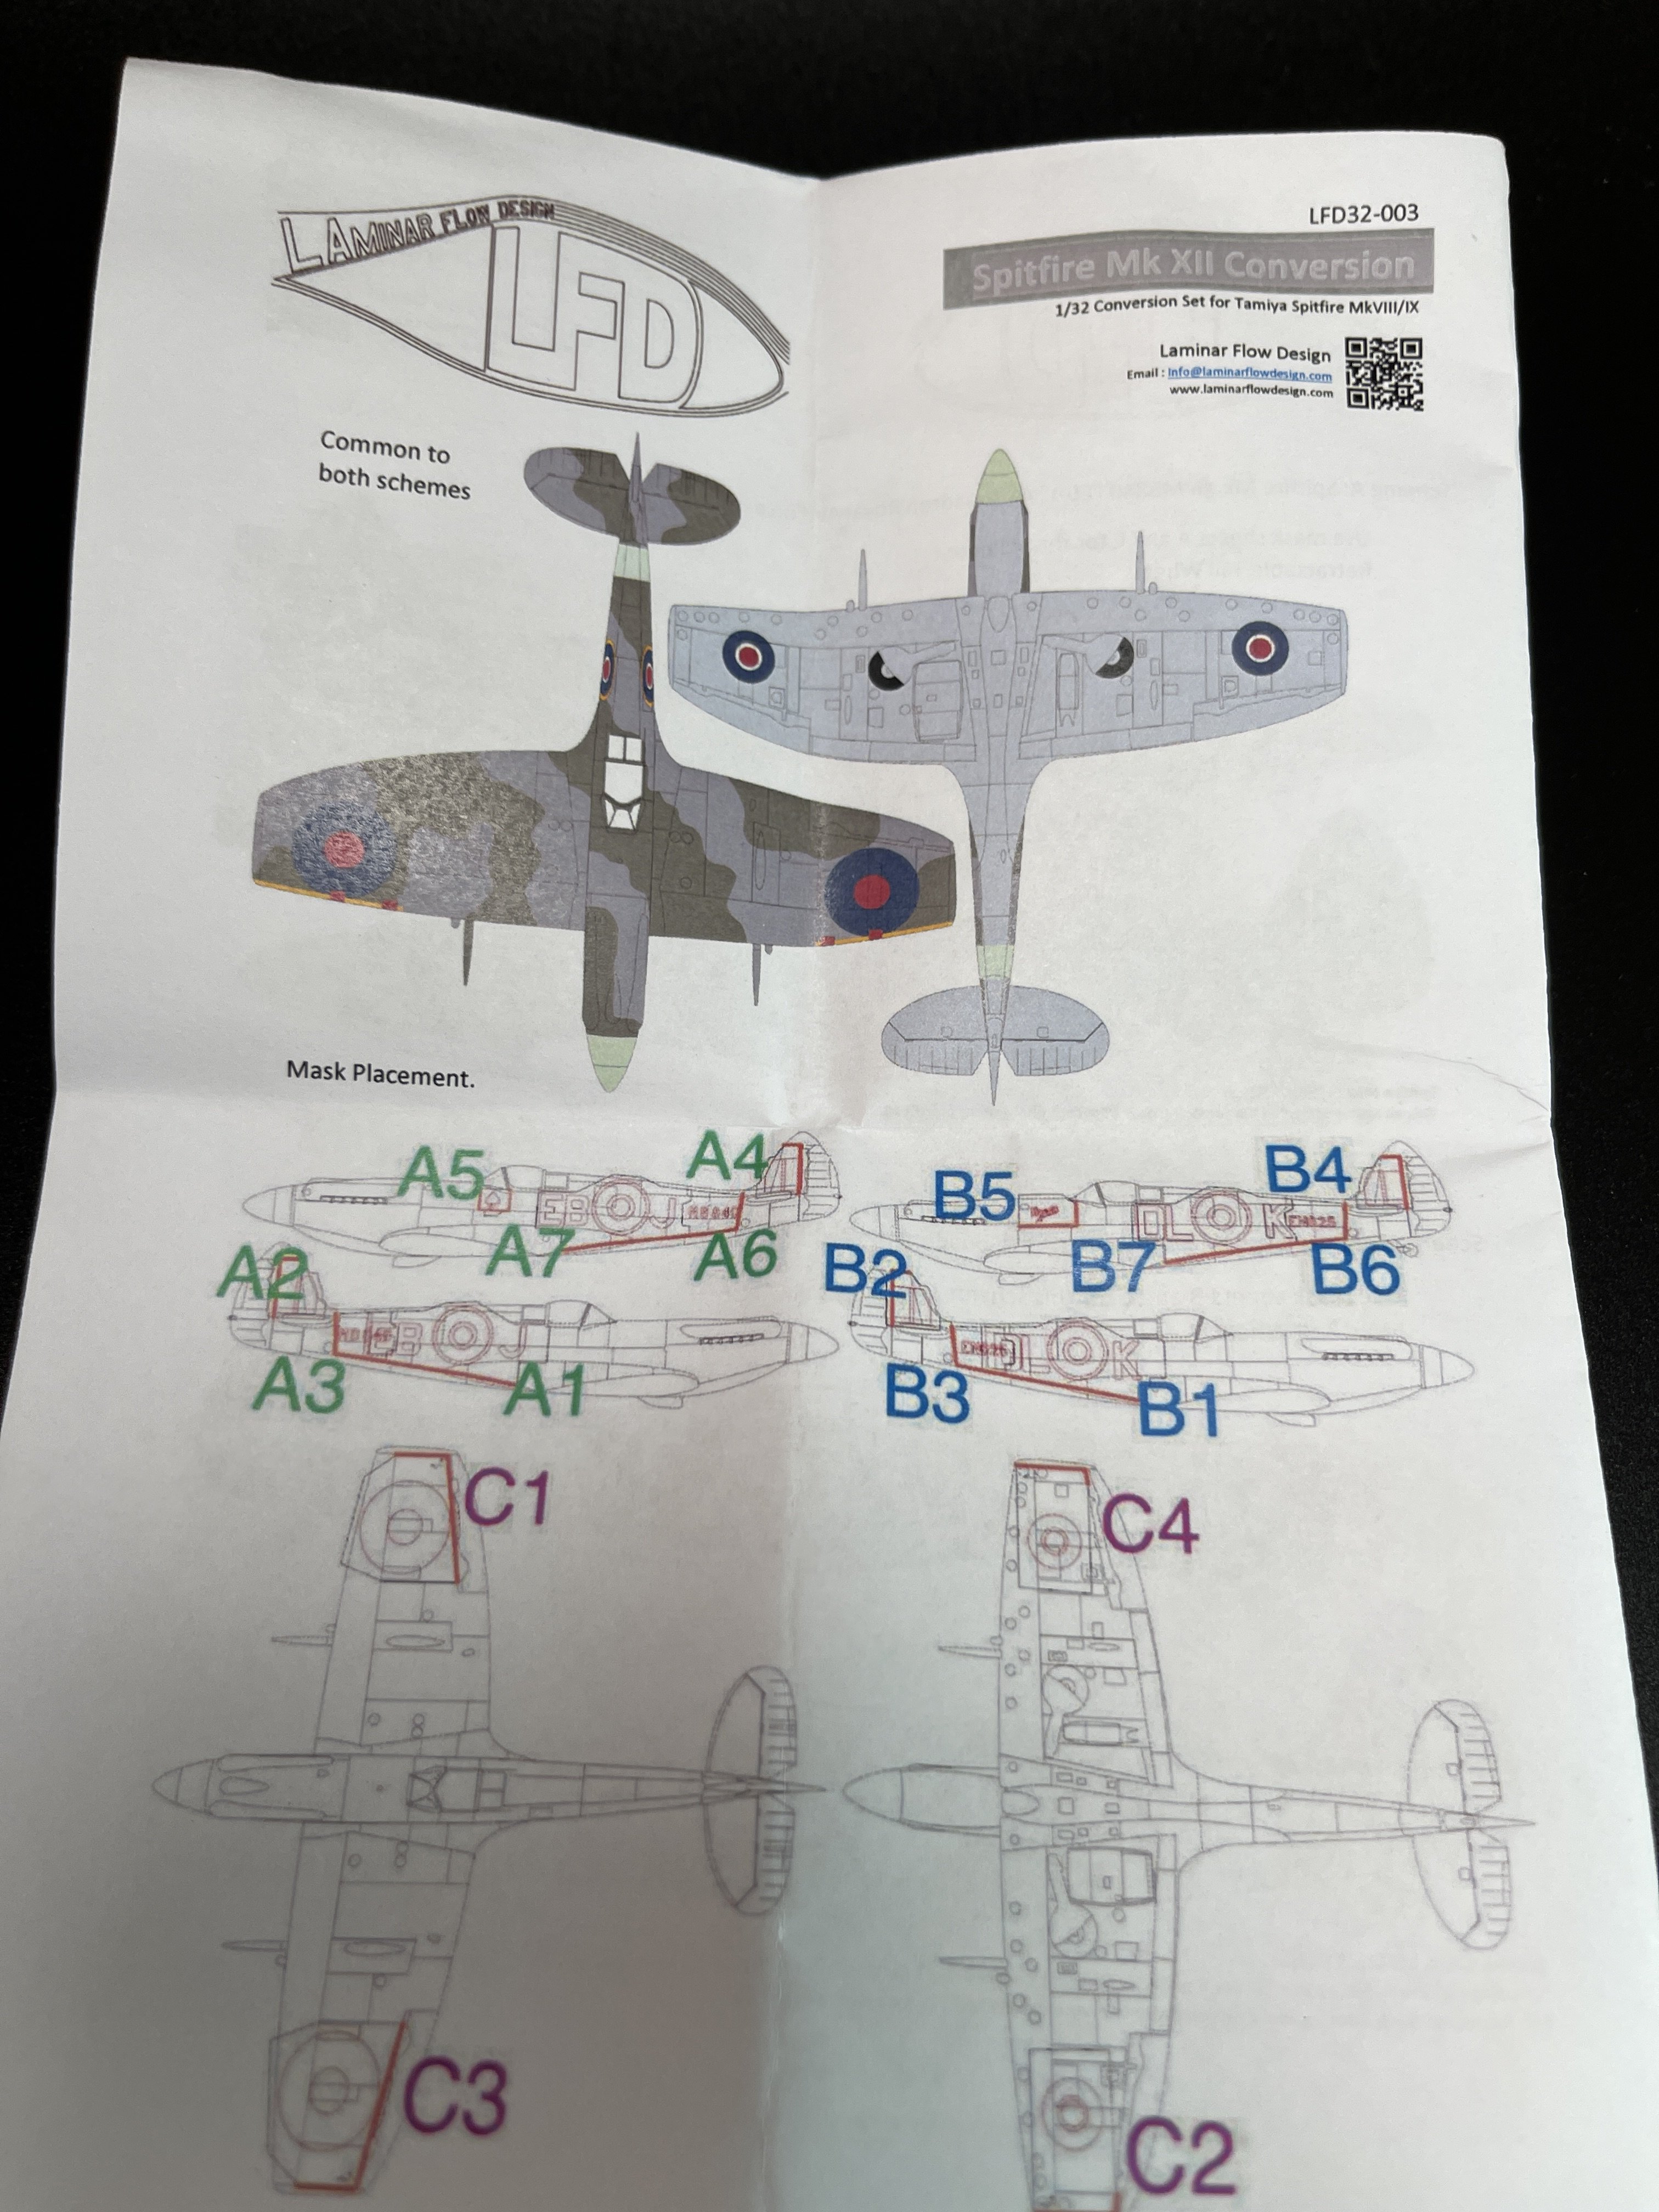
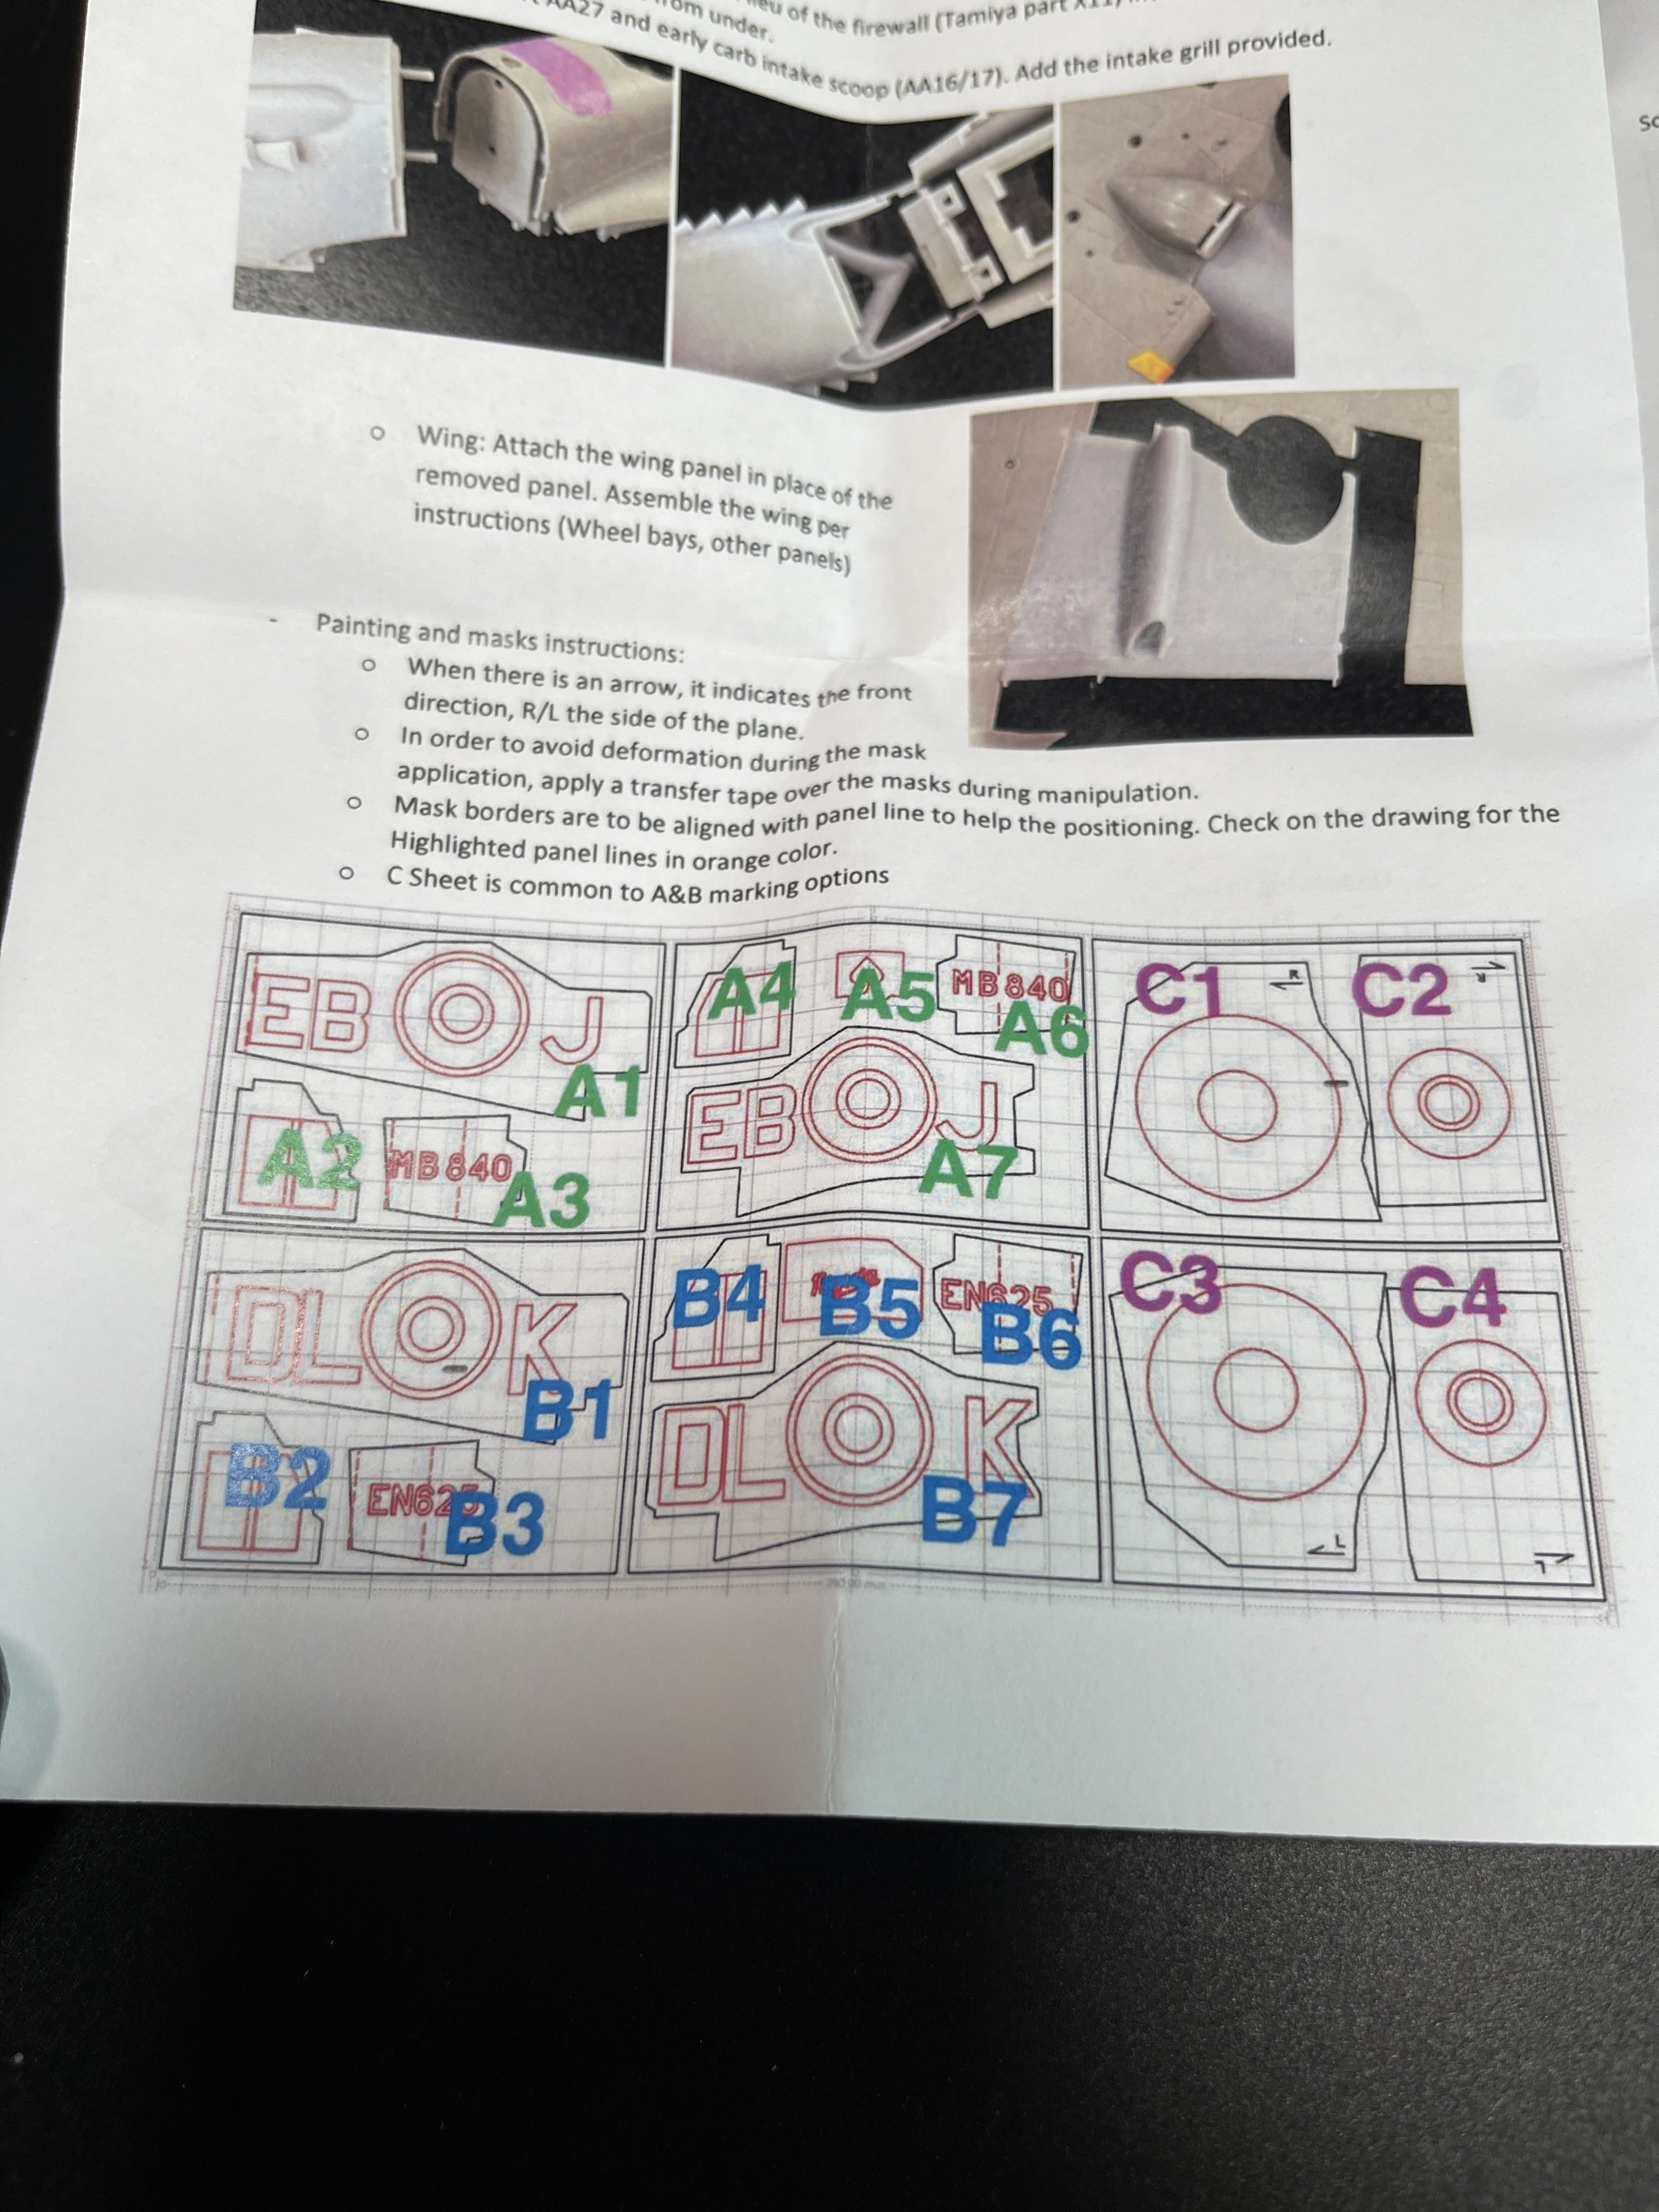
Next, the vinyl masks.
So you got 6 vinyl adhesives die-cut masks with insignia letters and patchs for two schemes:
1. Spitifre Mk. XII MB840 “EB-J” 41 Squadron Royal Air Force, April 1944.
2. Spitifre Mk. XII EN625 “DL-K” 91 Squadron Royal Air Force, May 1943;

The instructions are in A5 format with 8 pages.


They are clearly laid out and include text and photographic assembly steps.
The instructions are very well need as it has lots of tips and serious warnings and steps that you should consider to get it done.
One piece of advise: READ THE INSTRUCTIONS! All you need to know to free the 3D parts from the cage, and to make this conversion is there!
Conclusion:
Laminar Flow Design did it again!!! Another fantastic conversion.
The quality of the 3D parts is astonishing with the surface detail matching the high quality of the donor kit, the Tamiya 1:32 Spitfire. The bar has quite high and these 3D parts don’t disappoint.
This conversion is the easiest conversion on Laminar Flow Design catalogue, and probably on of the easiest conversion in 1:32, specially do to the work of Mathieu, the owner and designer behind Laminar Flow.
I do love Laminar Flow Design work! It’s the best model conversion that money can buy! So do yourself a favour and get one!!
Very Very Highly recommend
My trully Thanks to Laminar Flow Design for making this conversion!

-
2
-
2
-
-
My prayers to him and his family!
-
5
-
-
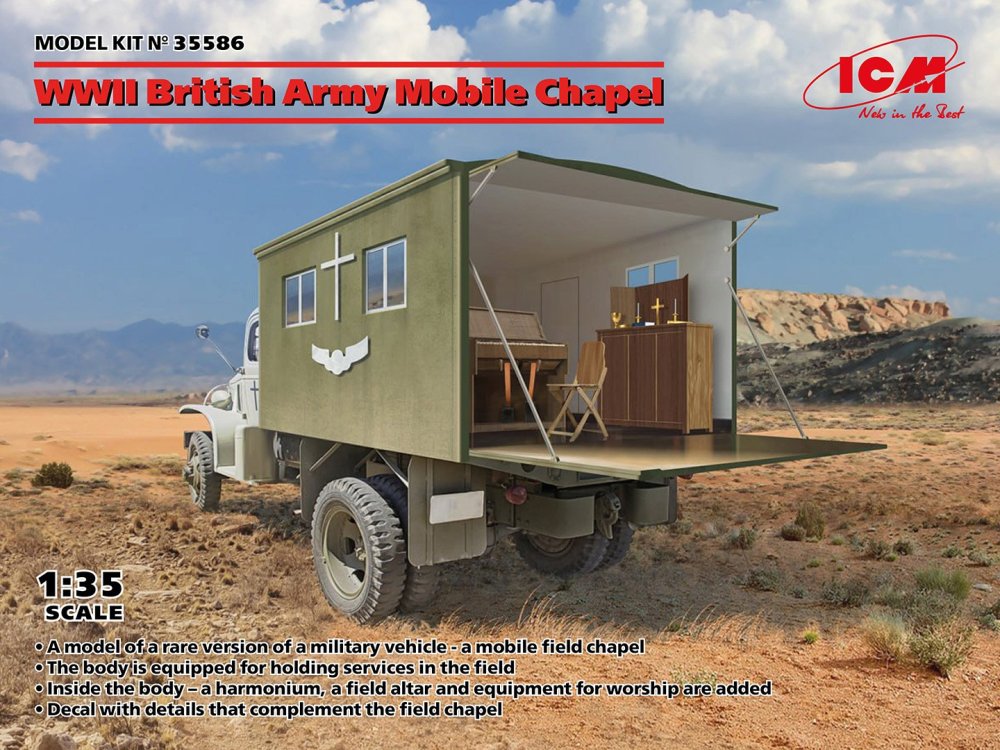
1:35
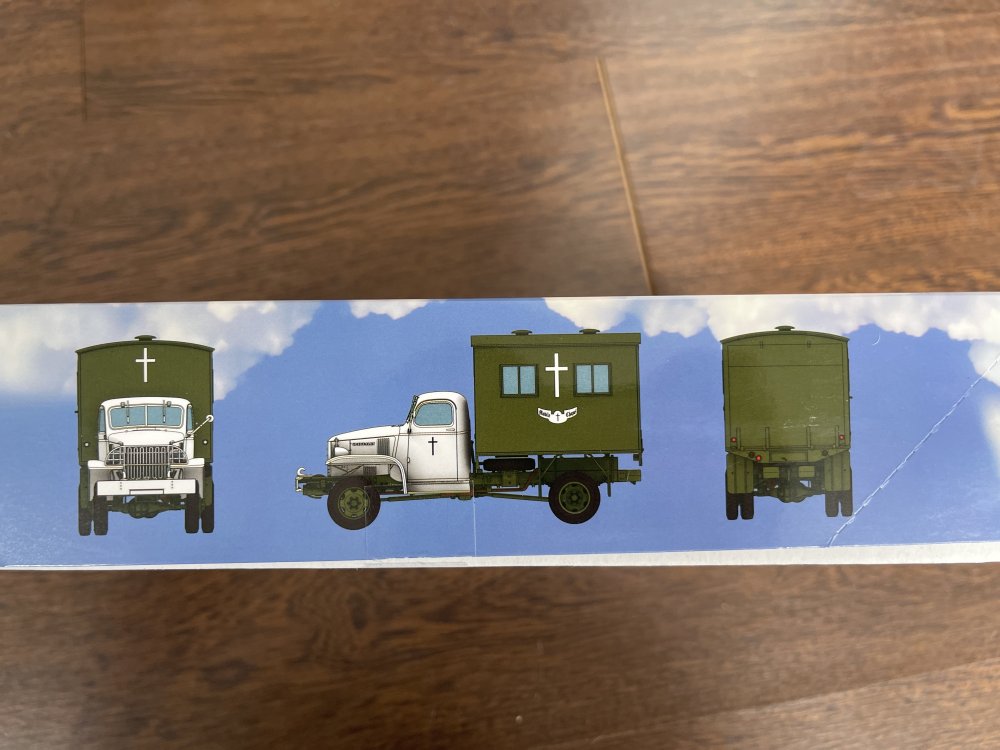
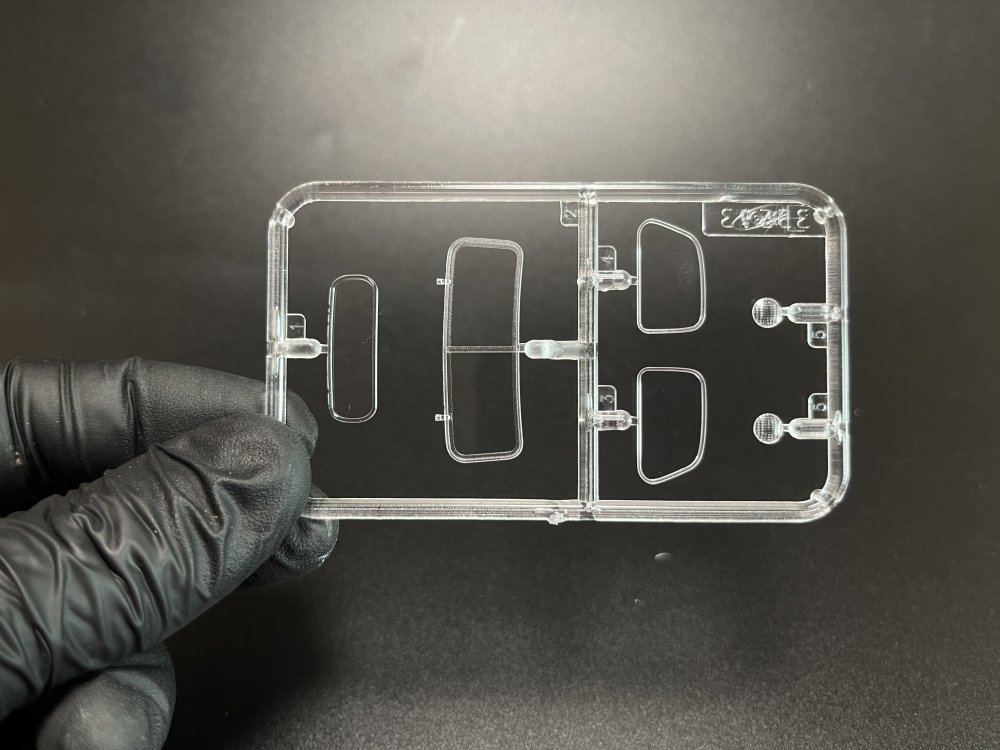
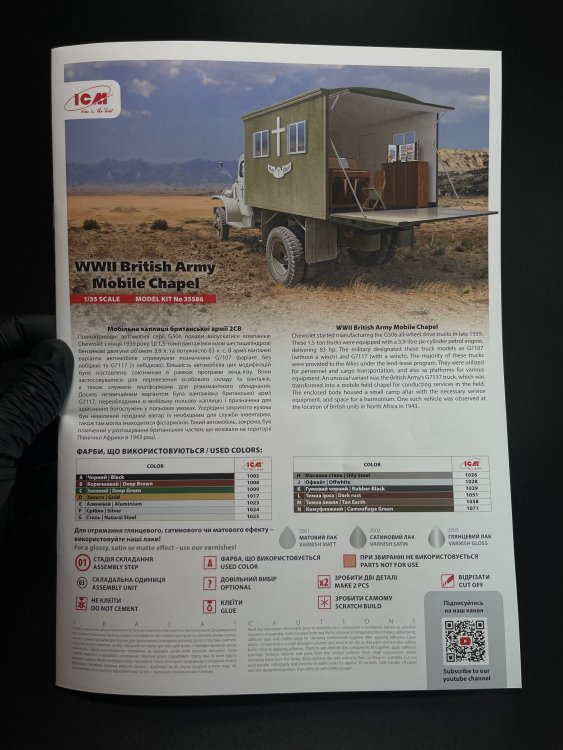
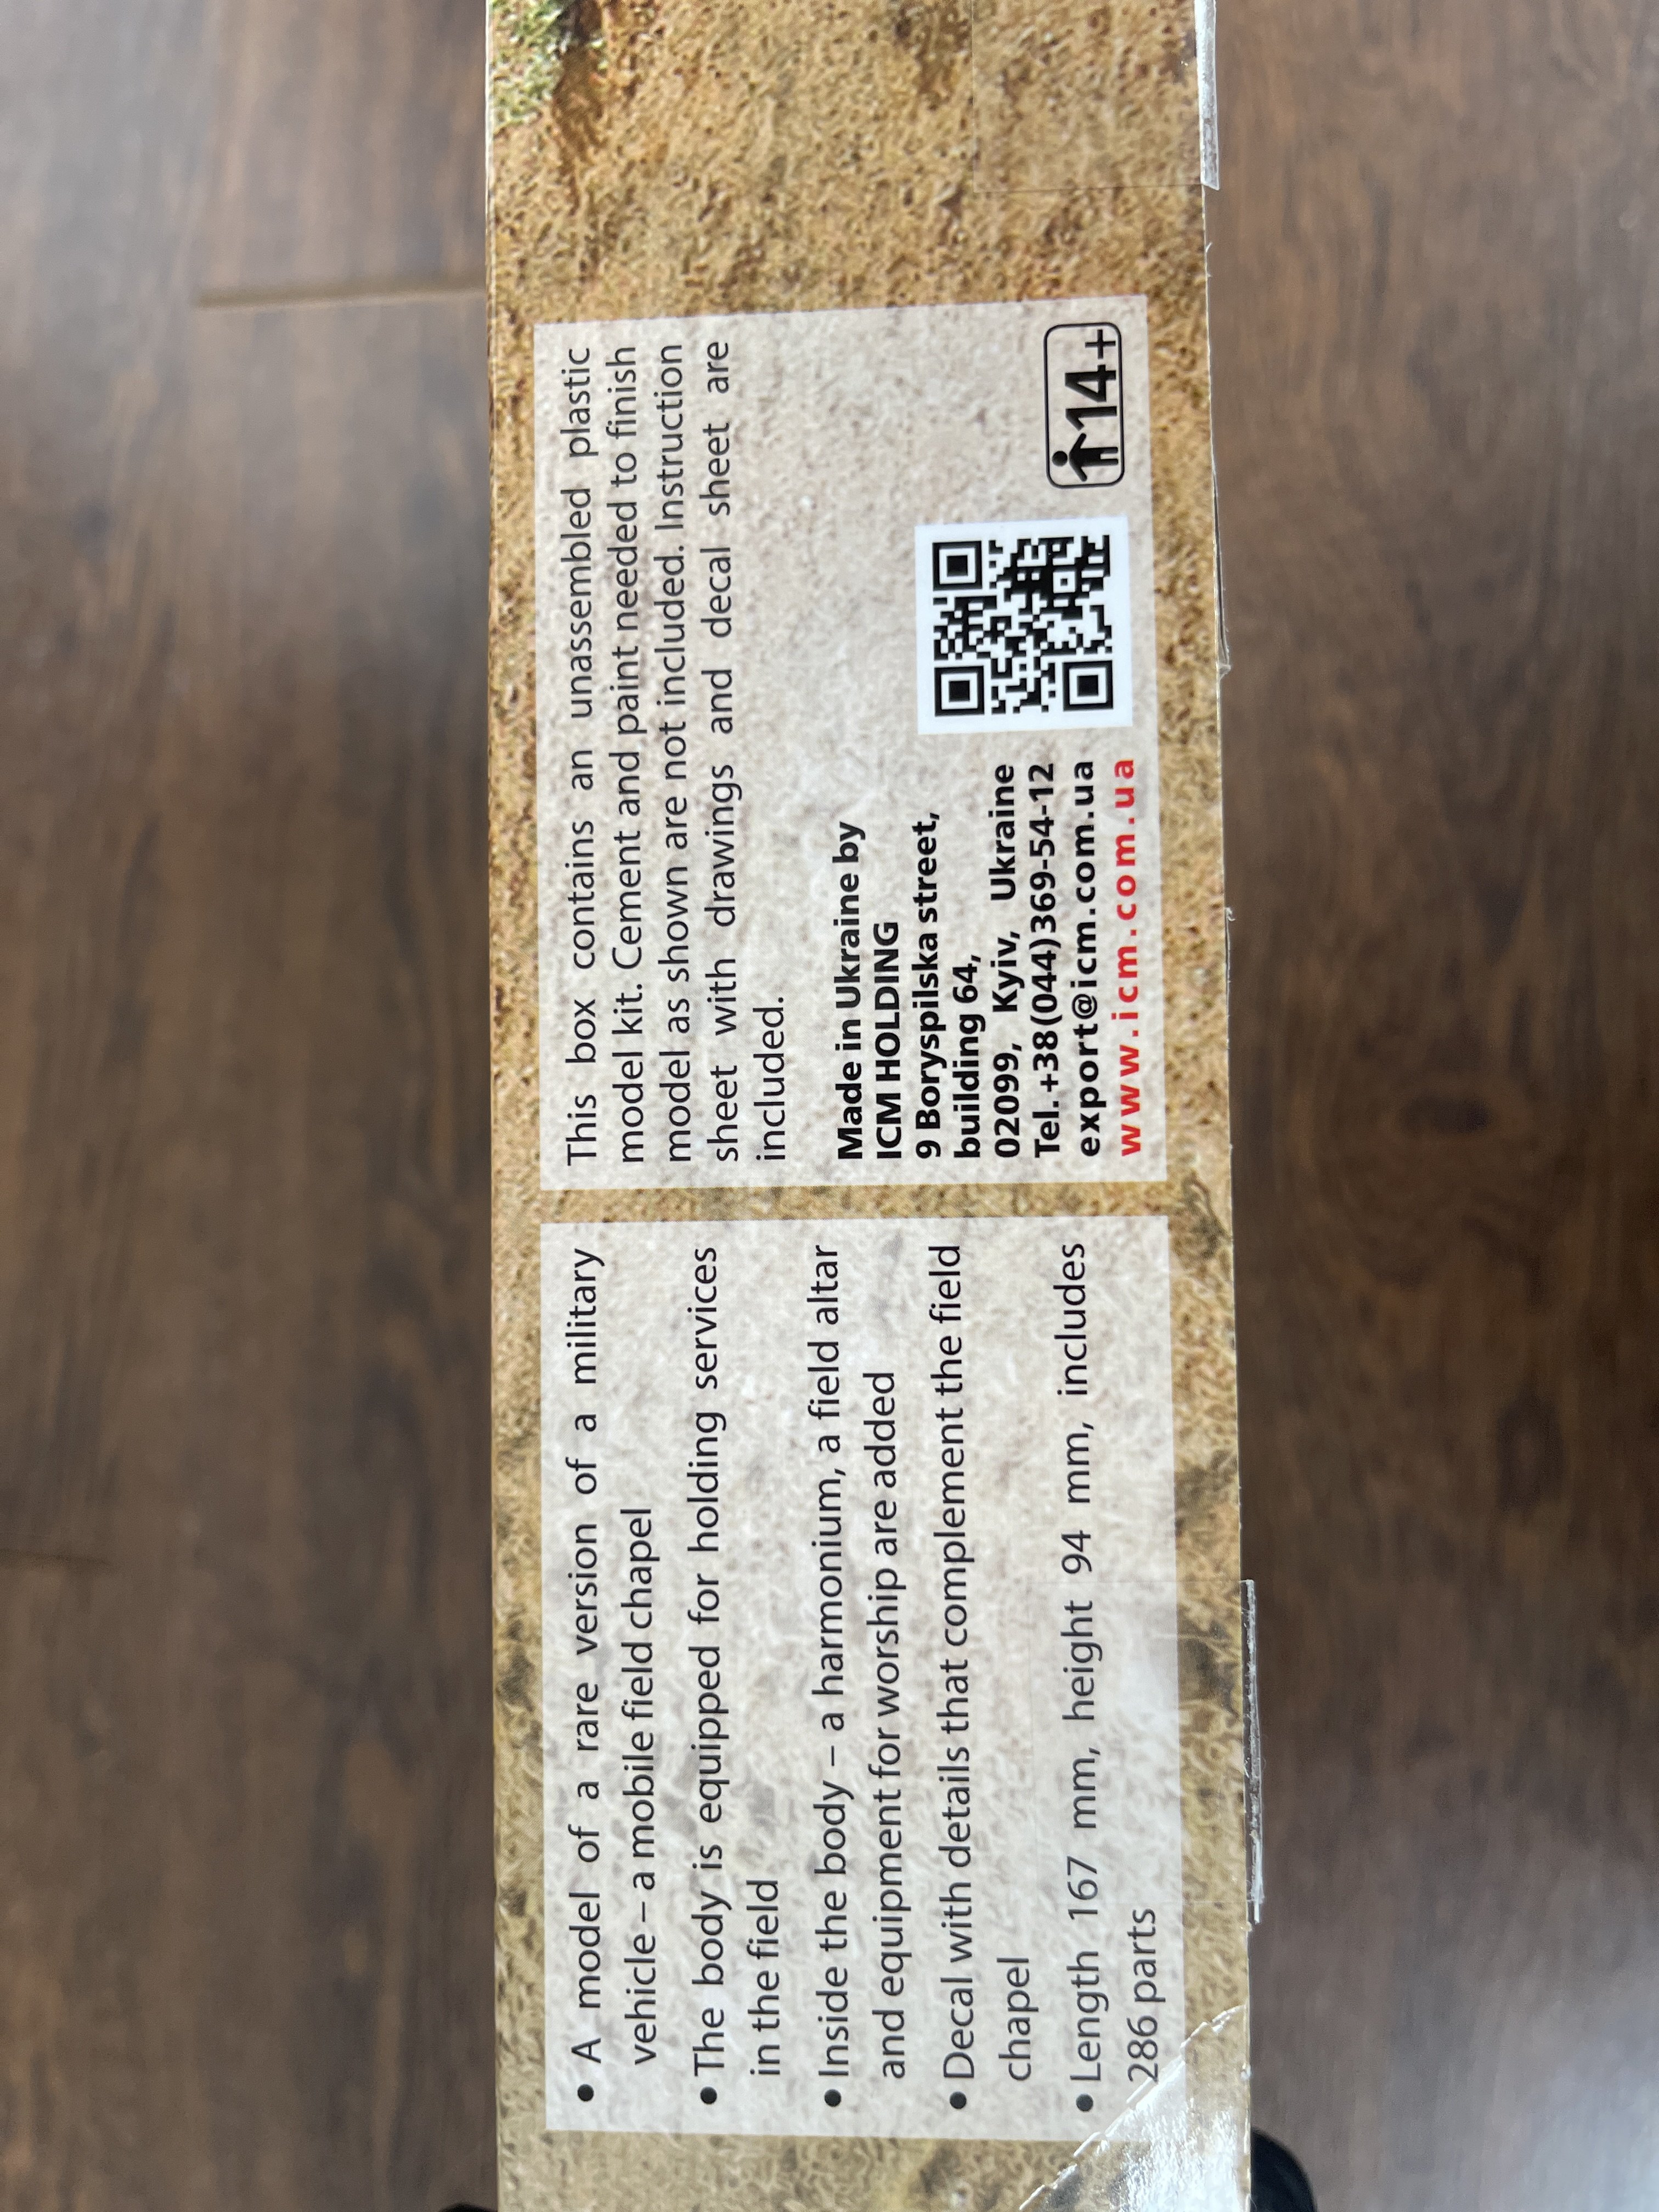
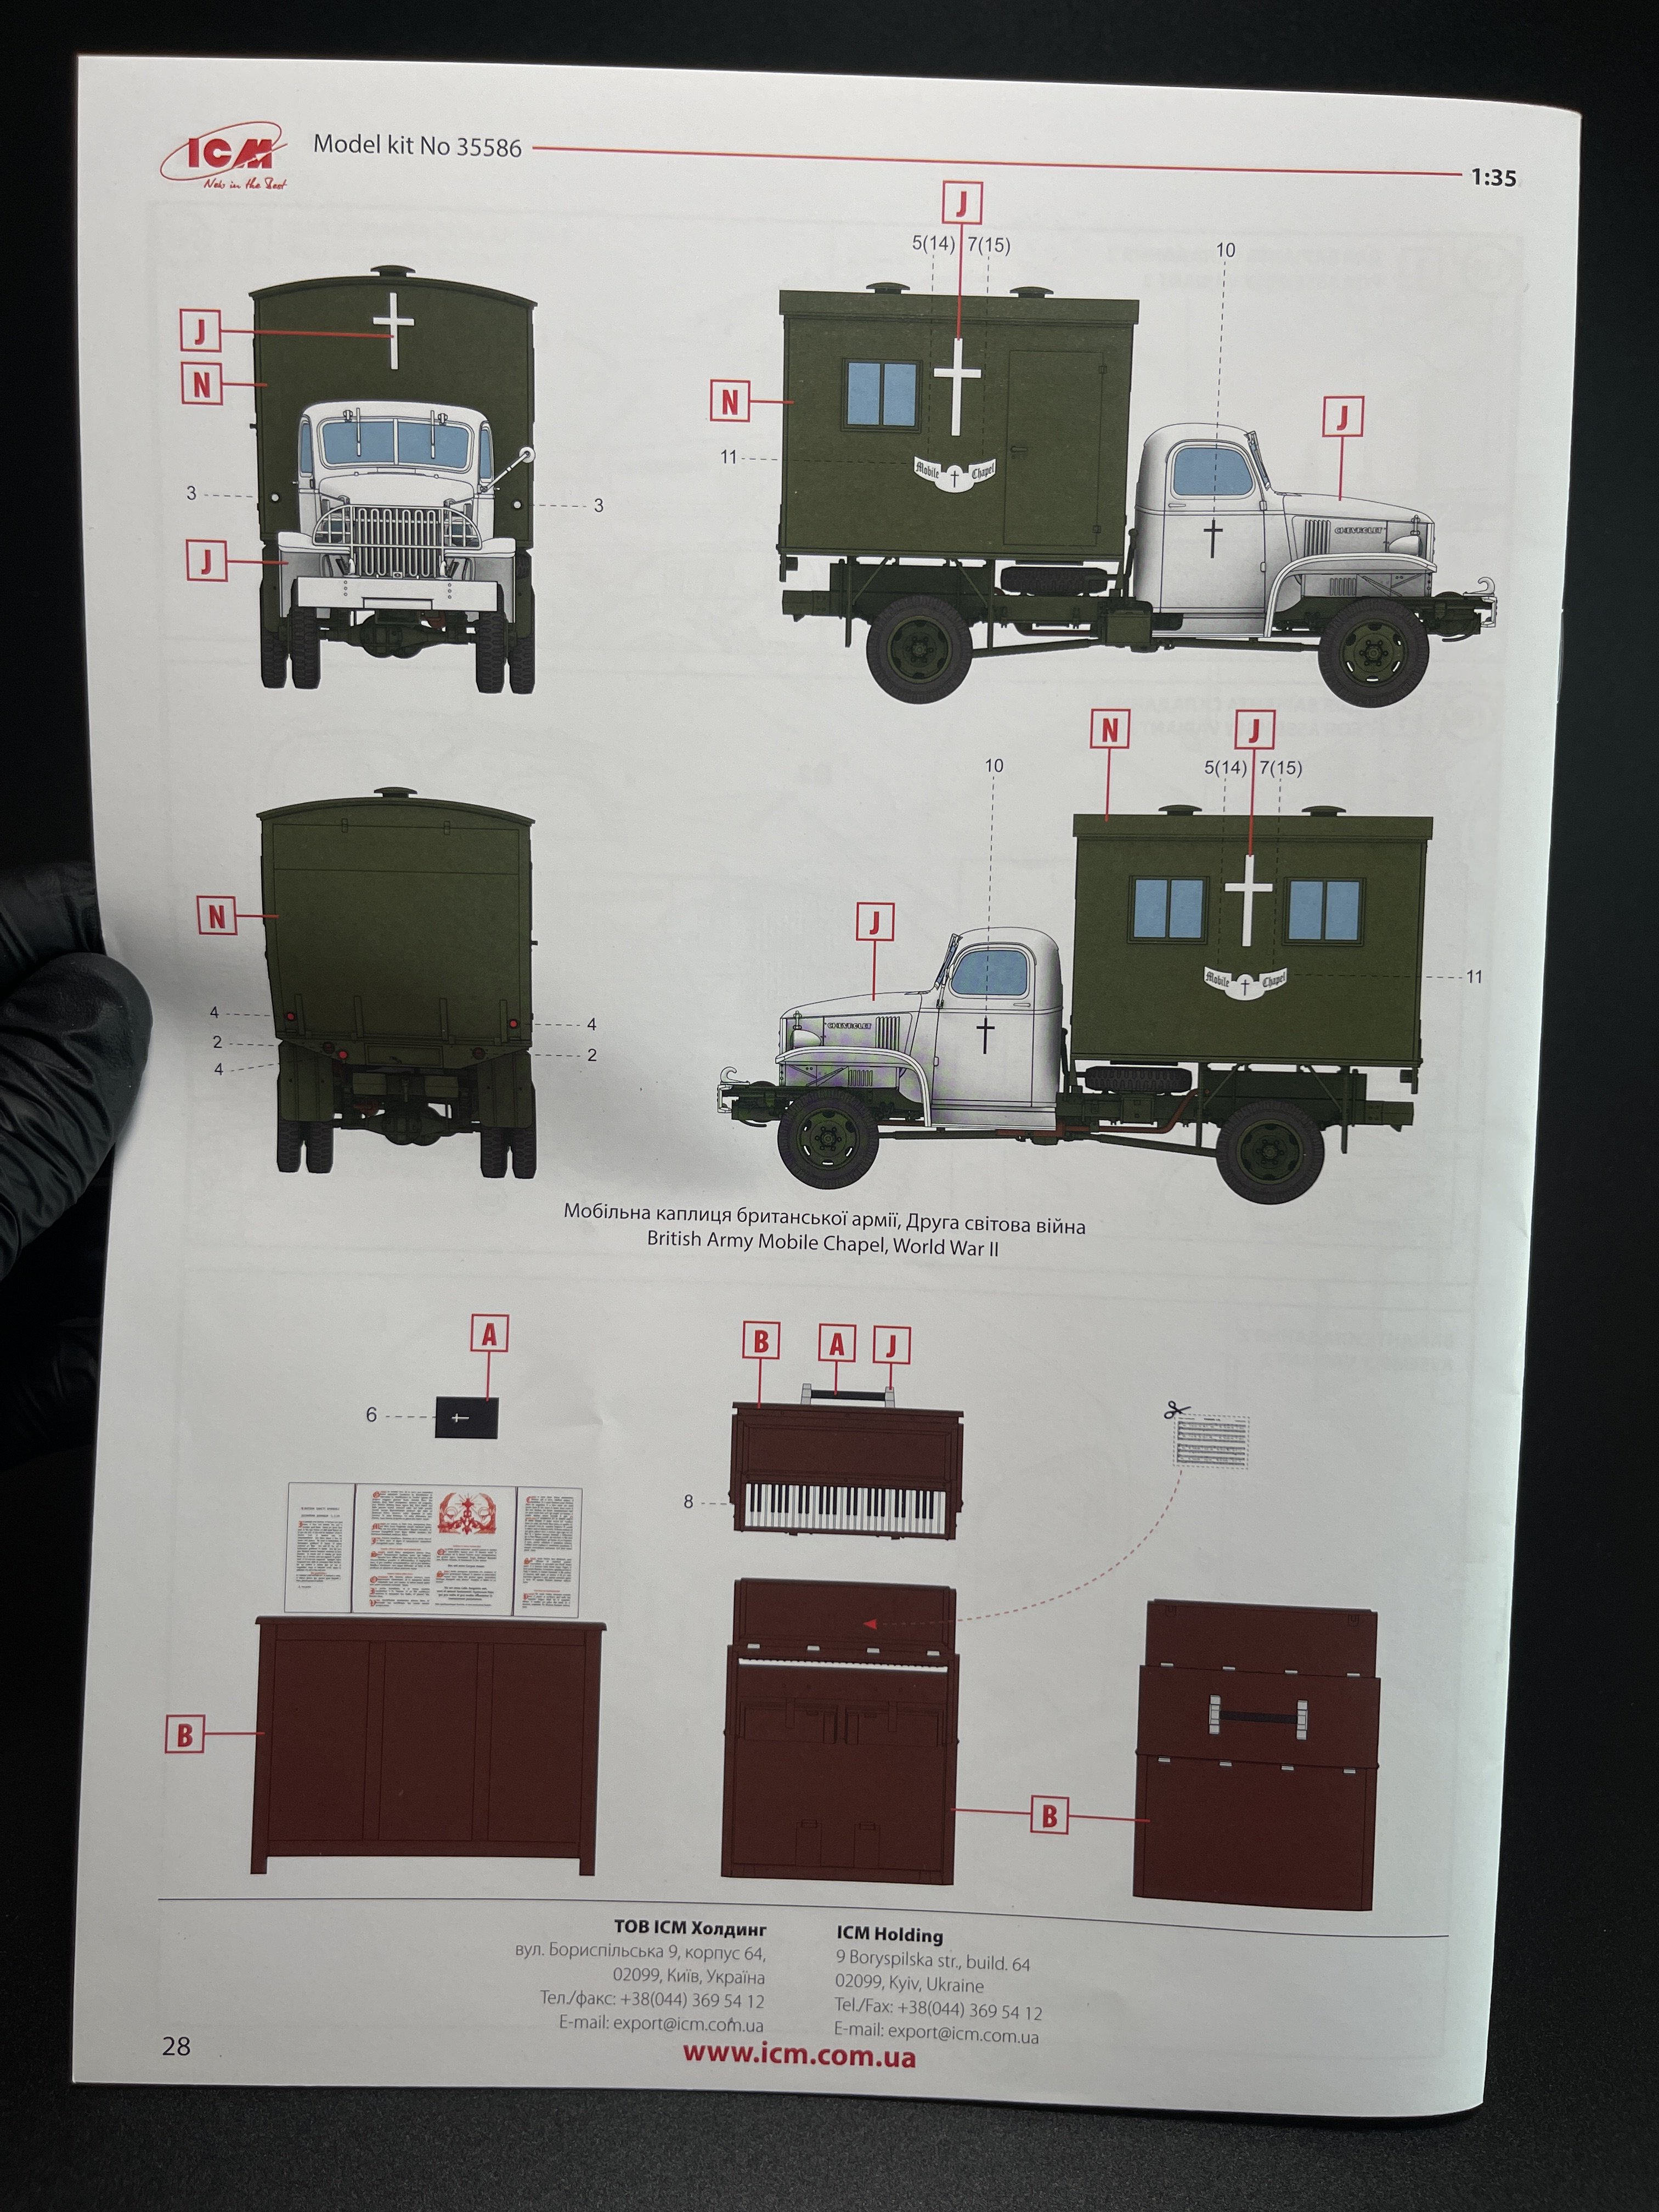
WW2 British Army Mobile Chapel (35586)
ICM
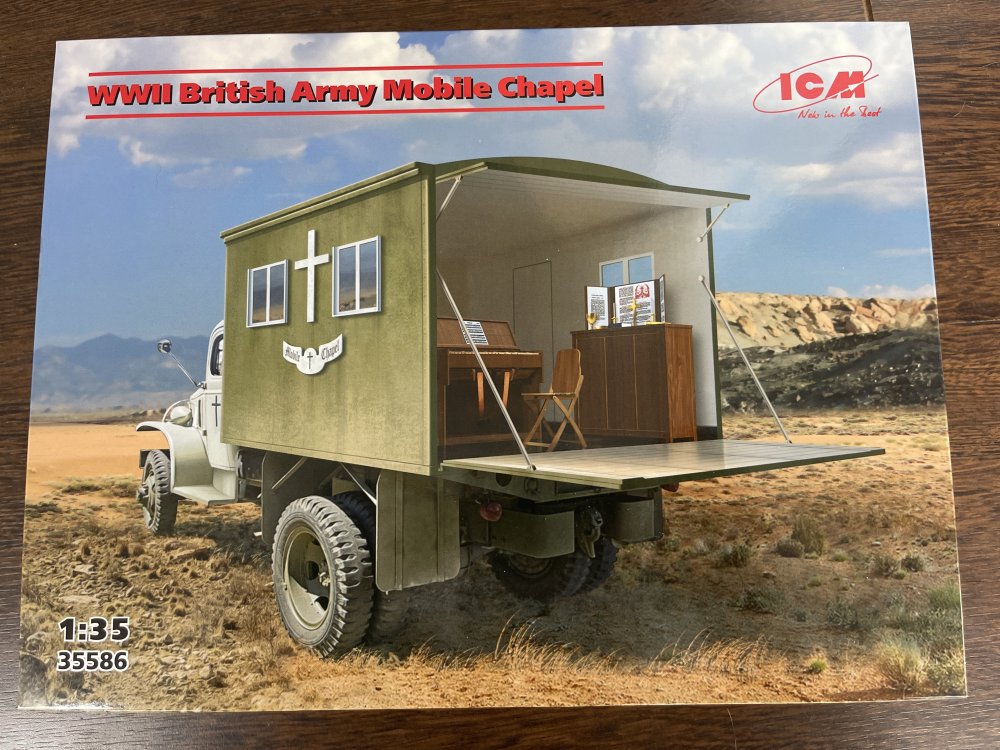
Catalogue number 35586
Price: around 45,50€
ICM has distinguished itself in the world of modeling for several reasons, including the quality and originality of its themes.
Today we have precisely one of the new very original kitsA British Army Mobile Chapel.
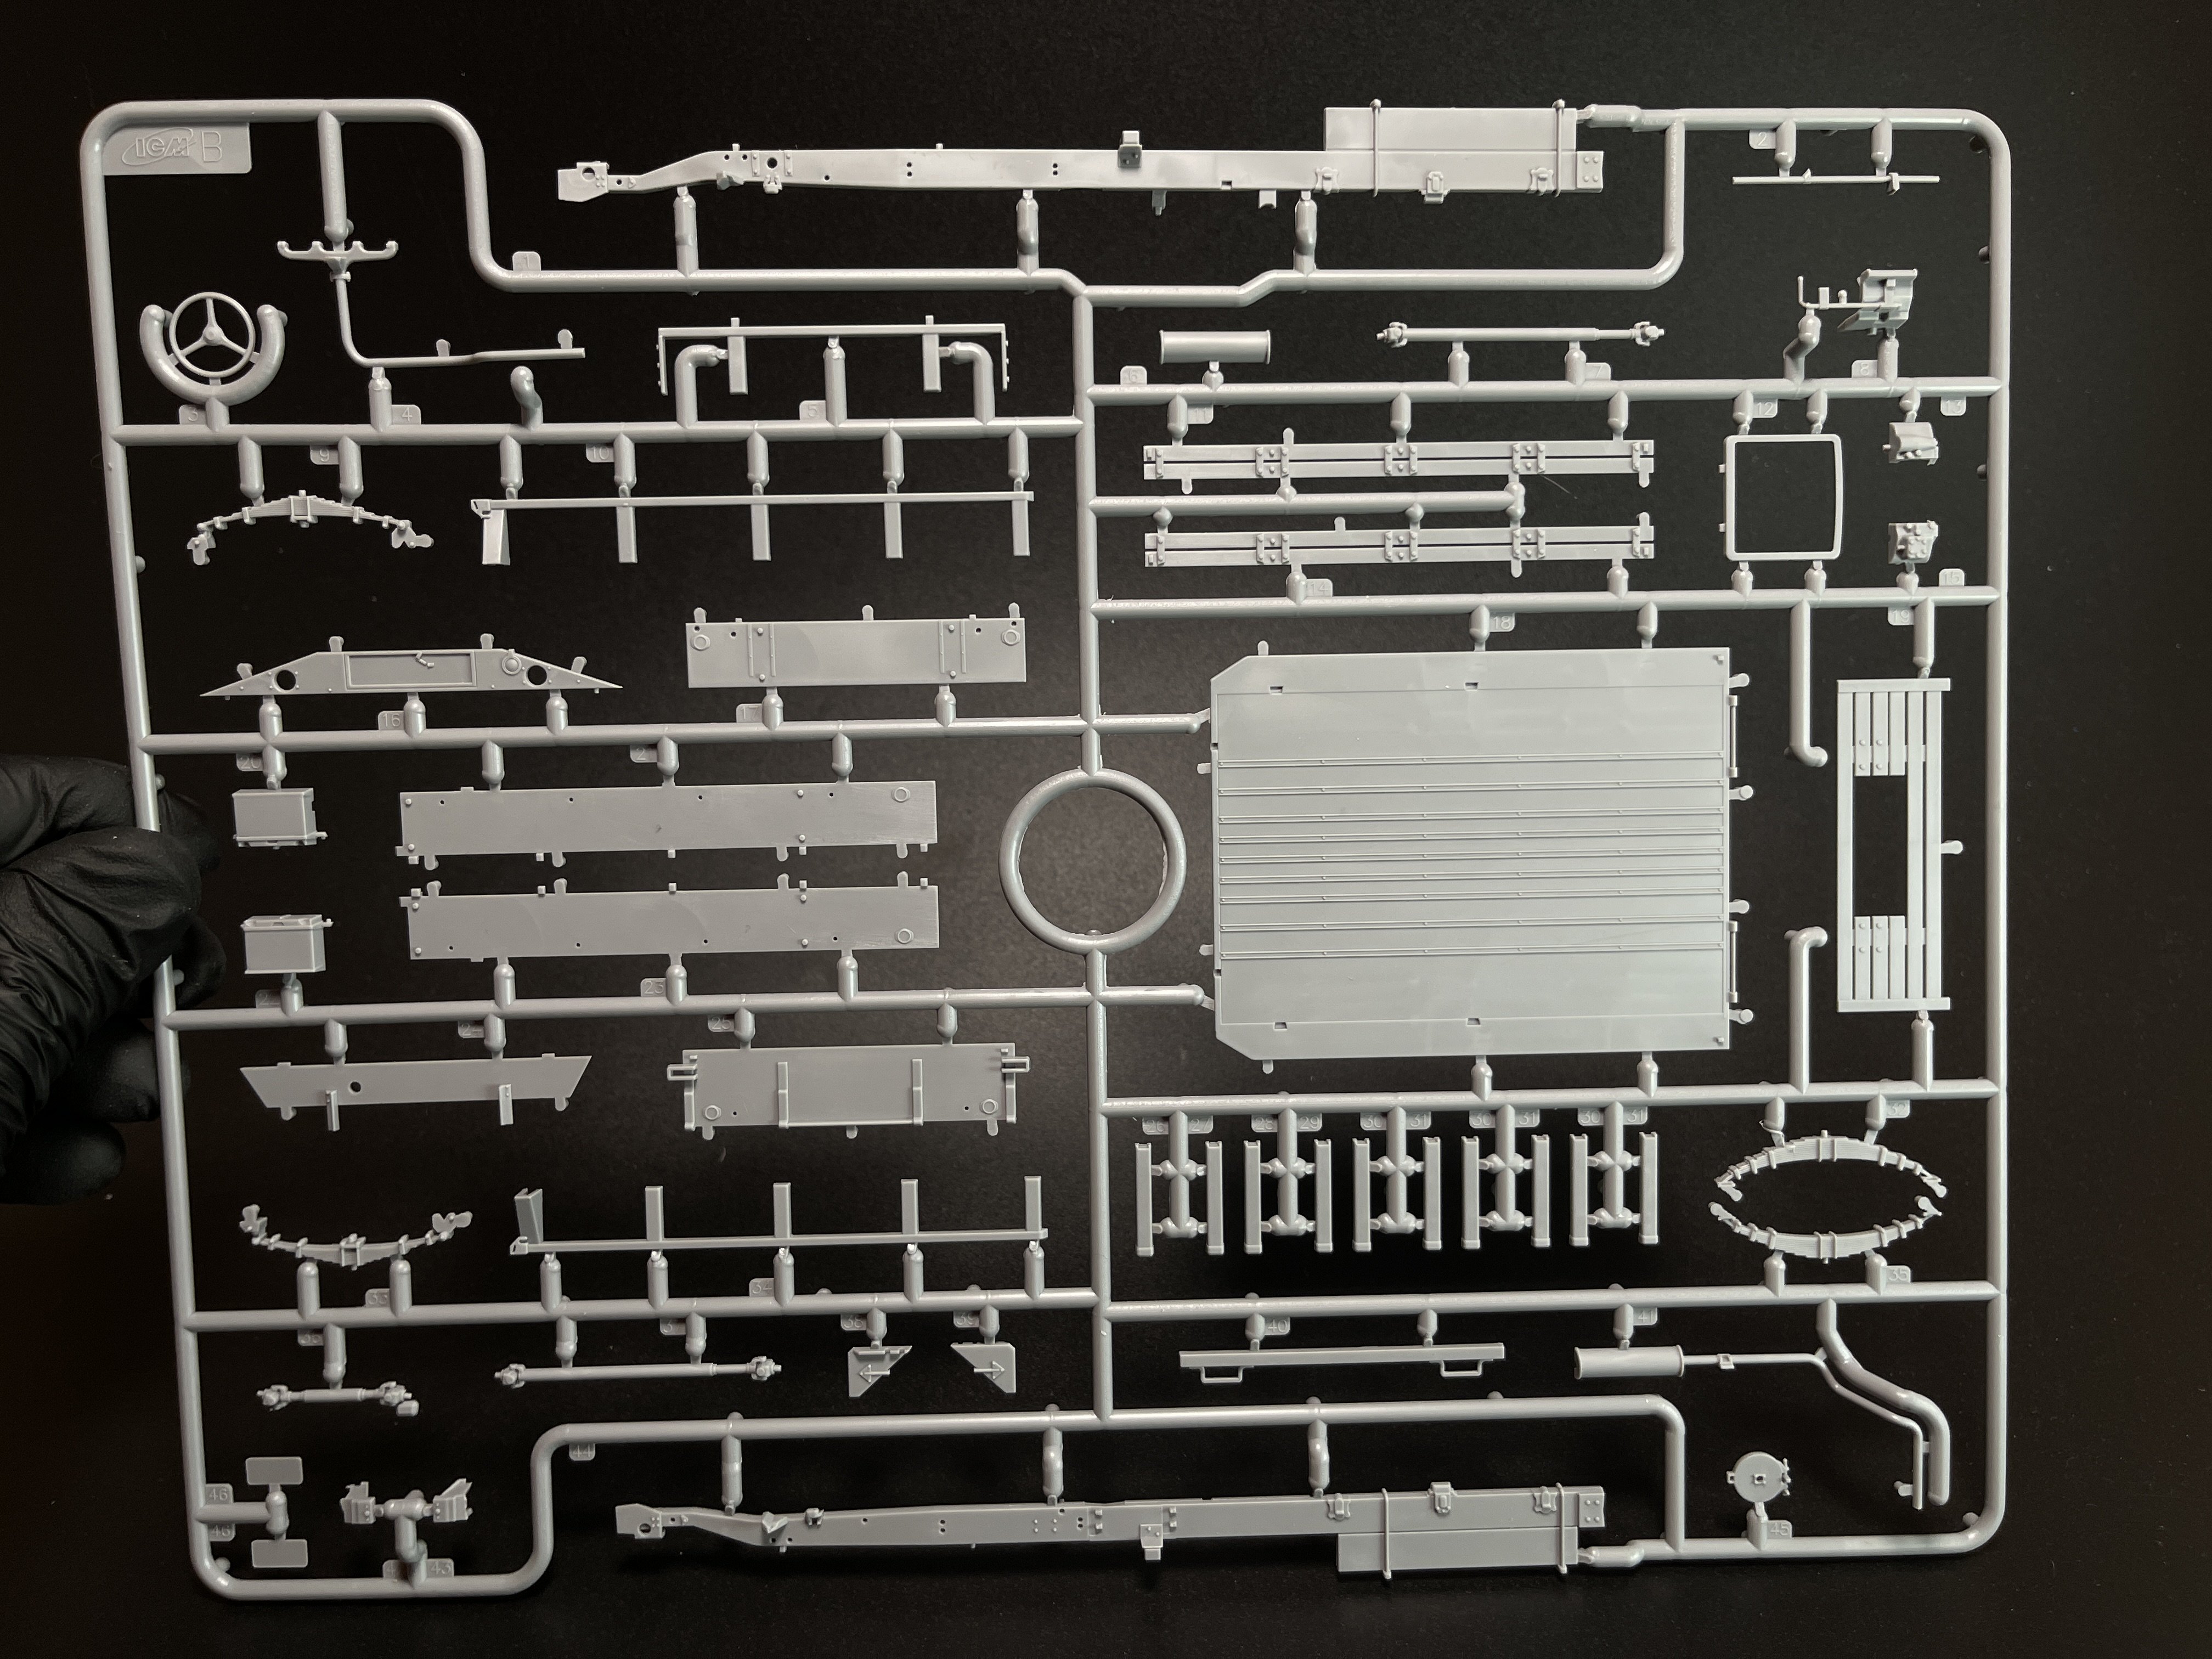
The model is a modified version of the G7107 WWII Army Truck that was release in 2021 but it´s the first time for us at Large Scale Model.
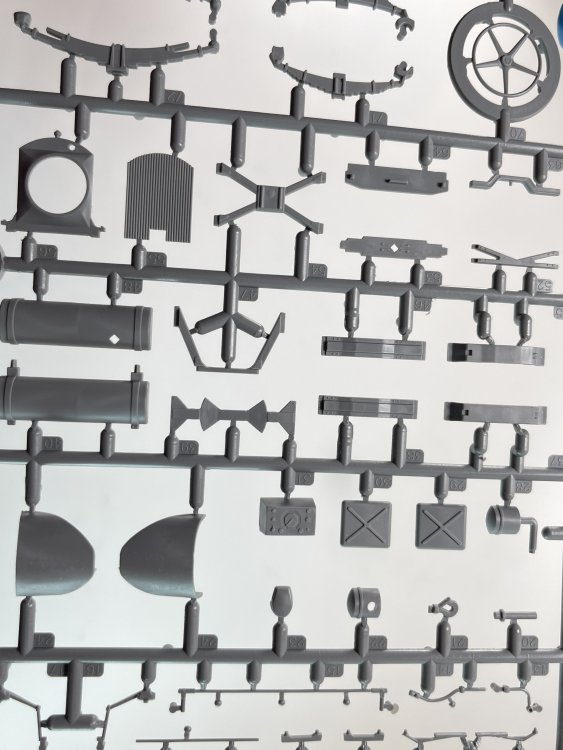
The Chevrolet G 7100 Truck, 1 1/2-Tons, 4×4 was a short truck, just 4,38 m long from bumper to bumper, for 1,99 m in width and 1,93 m in hight, as much as a standing tall GI. It weighted just 2,100 kg, its nomenclature weight corresponding to its empty, body-less chassis jauge. Its useful Payload took place on its rear flatbed, of 800 kg (Ibs). The latter was enclosed in a classic folding panels, hinged below, and secured by simple revolving pins and chains, to avoid accidental release after vibrations on a bumpy roads.
The 7100 was powered at the front by a Chevrolet BV1001, 6-cylinder in-line with overhead valves, gasoline-fed for a total capacity of 3,858 cc, or 72 horsepower. It was capable to giving the truck unladen a top speed, of a flat road of 80 km/h, for an operational range of 430 km. These figures varied with some specialized models.
History : https://truck-encyclopedia.com/ww2/us/Chevrolet-G506-7101-1.5-ton-4x4-truck.php
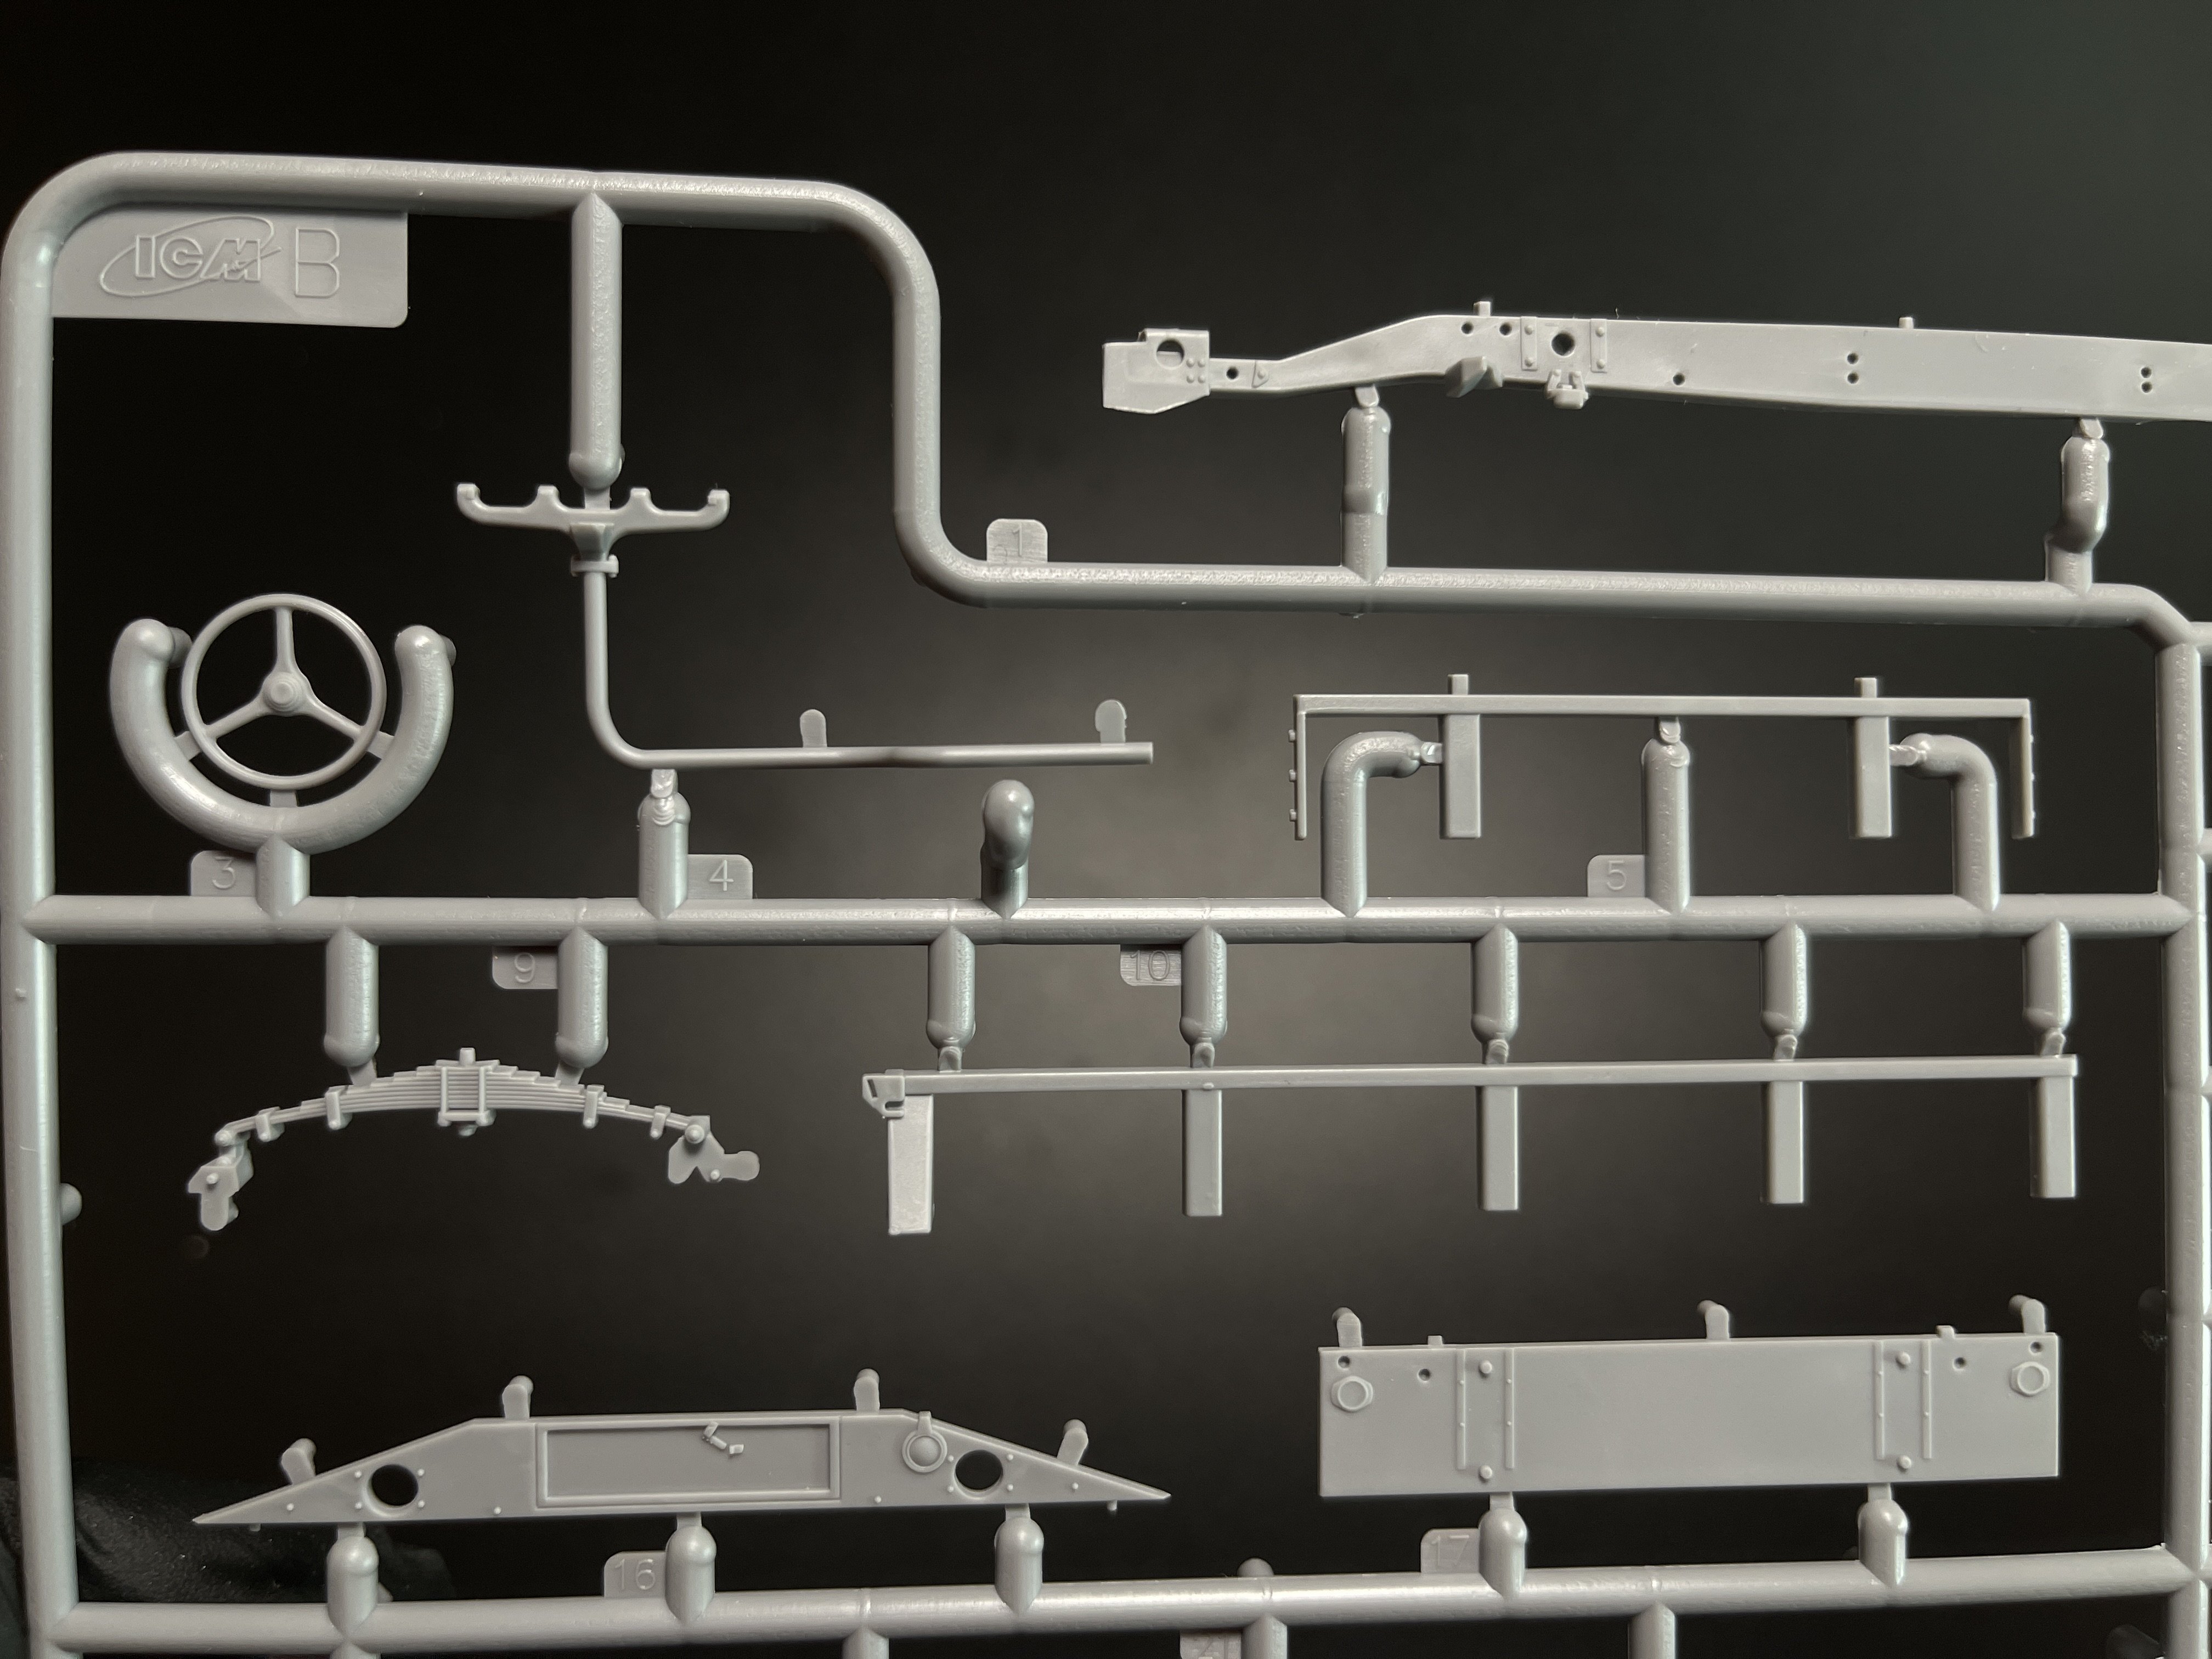
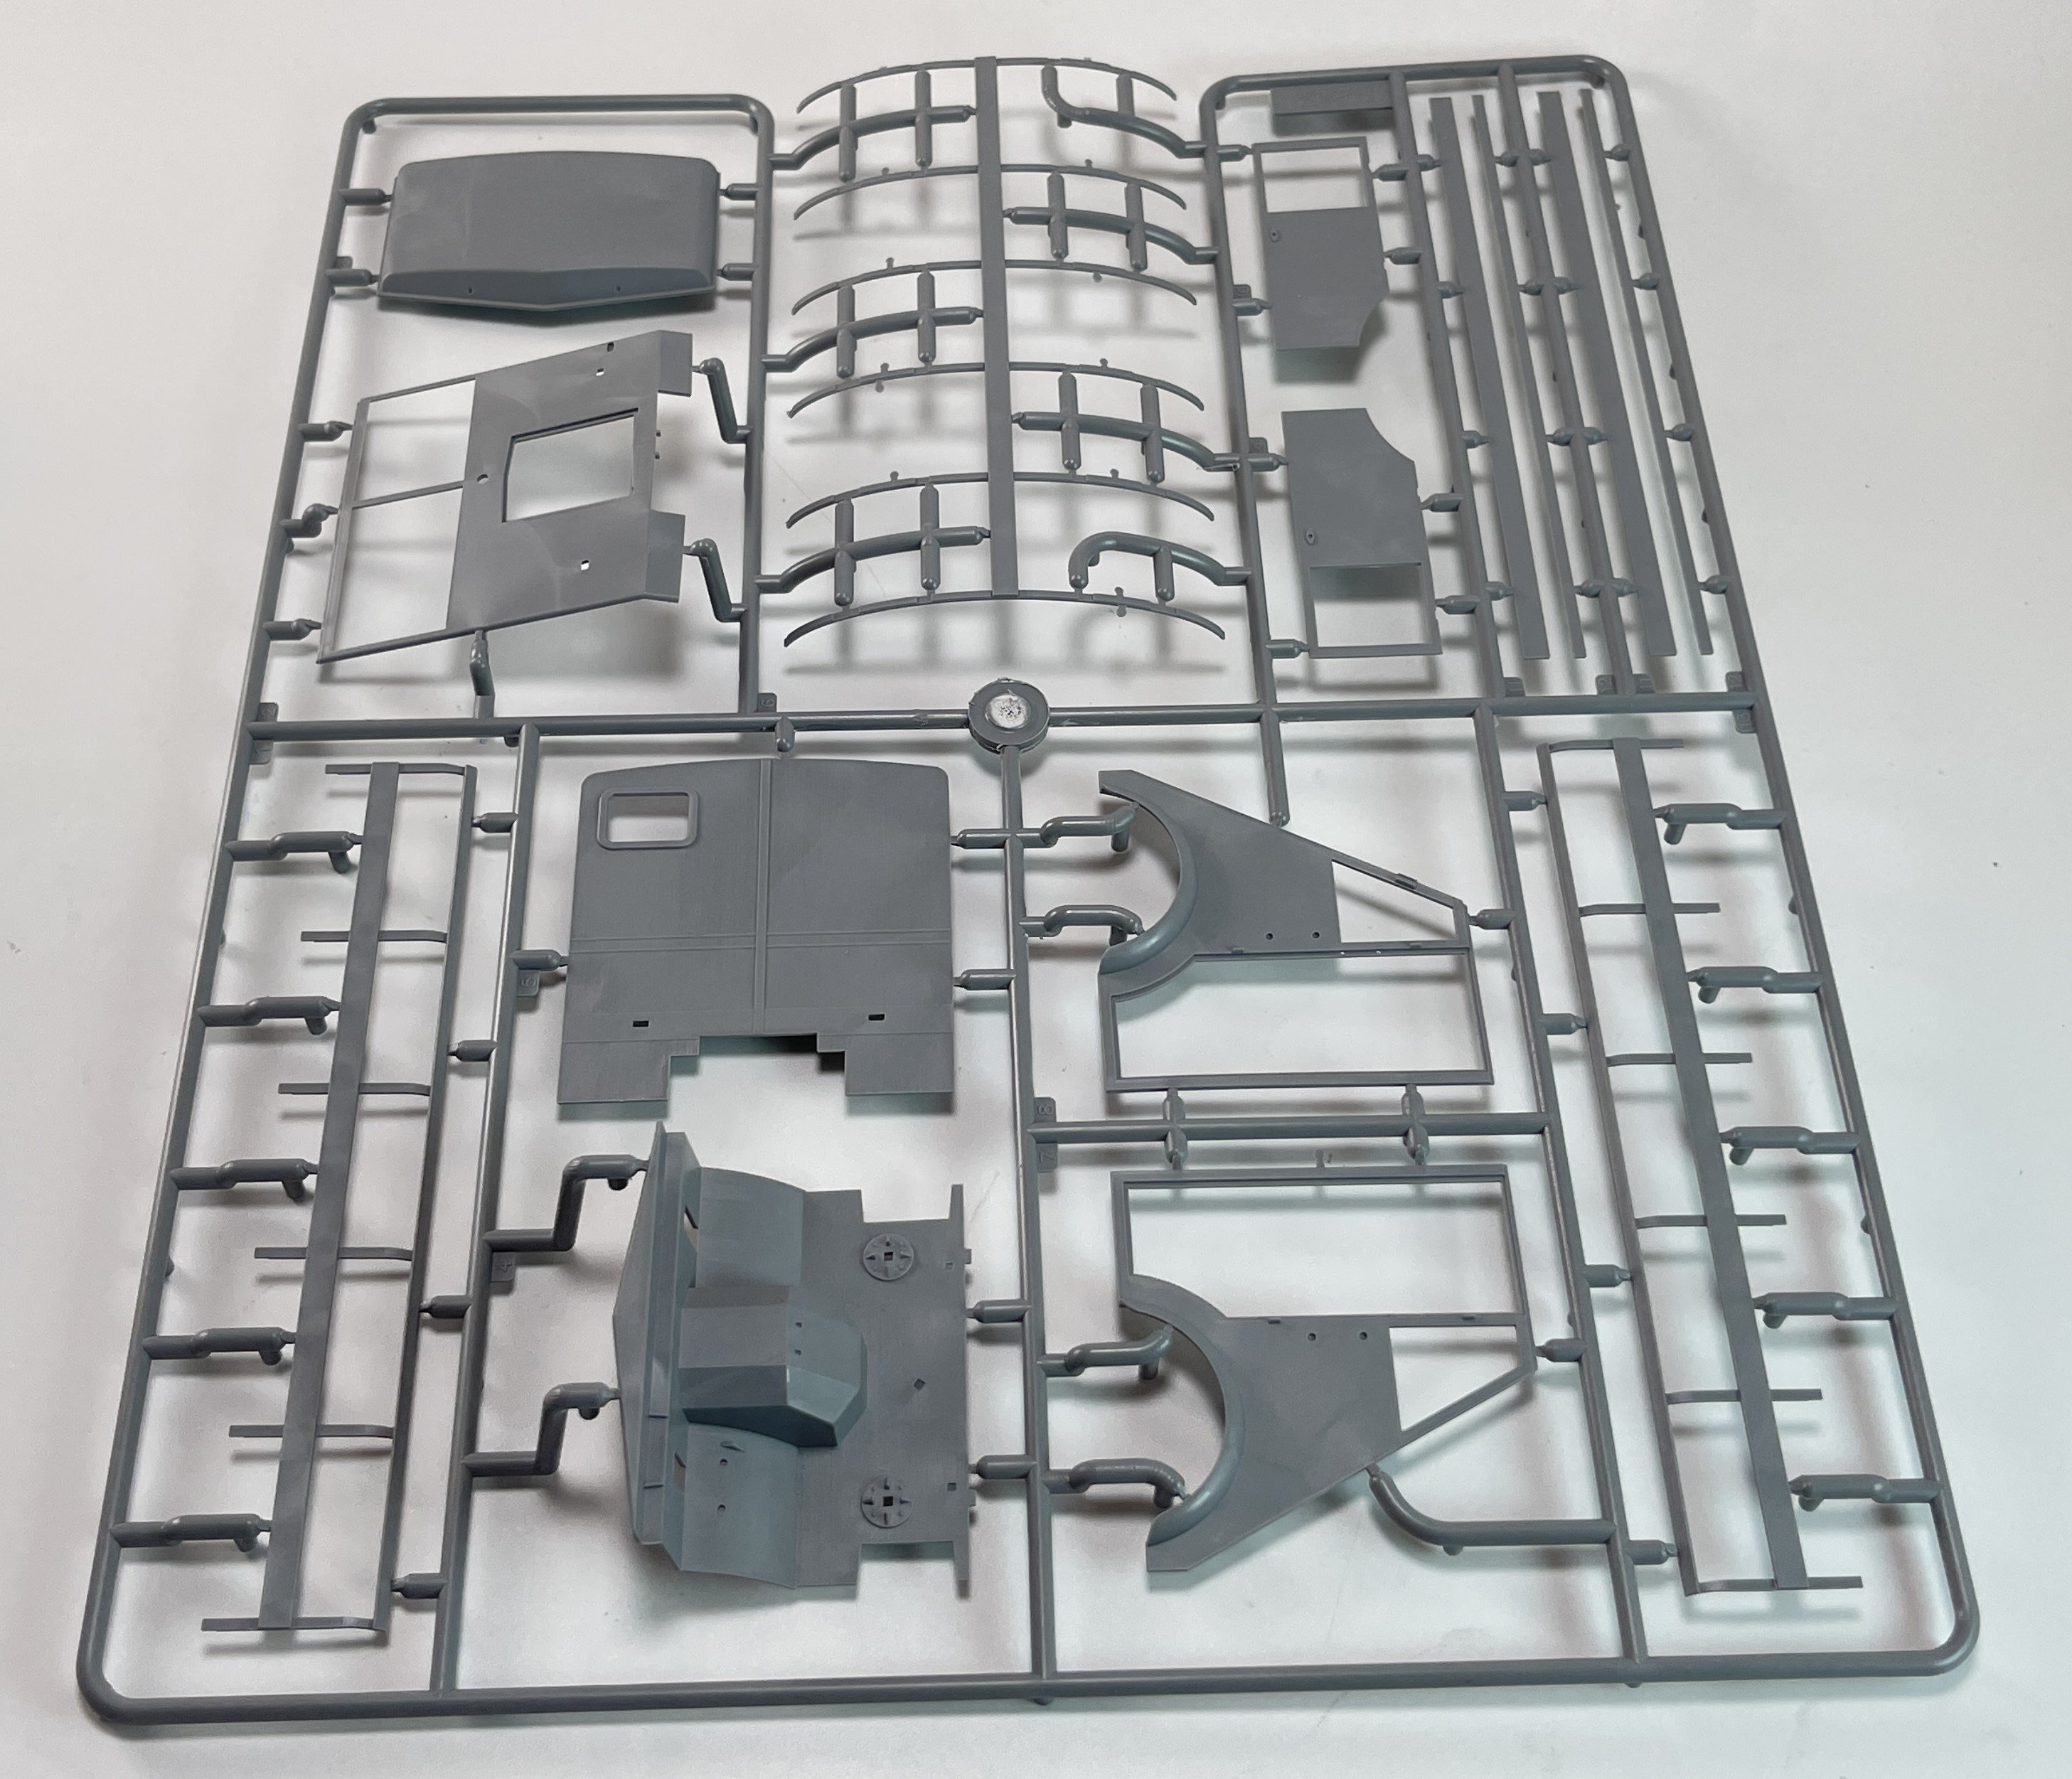
The package is the usual from ICM, with flip top cardboard with a separate card lid showing the artwork, a lovely artworks as usual.

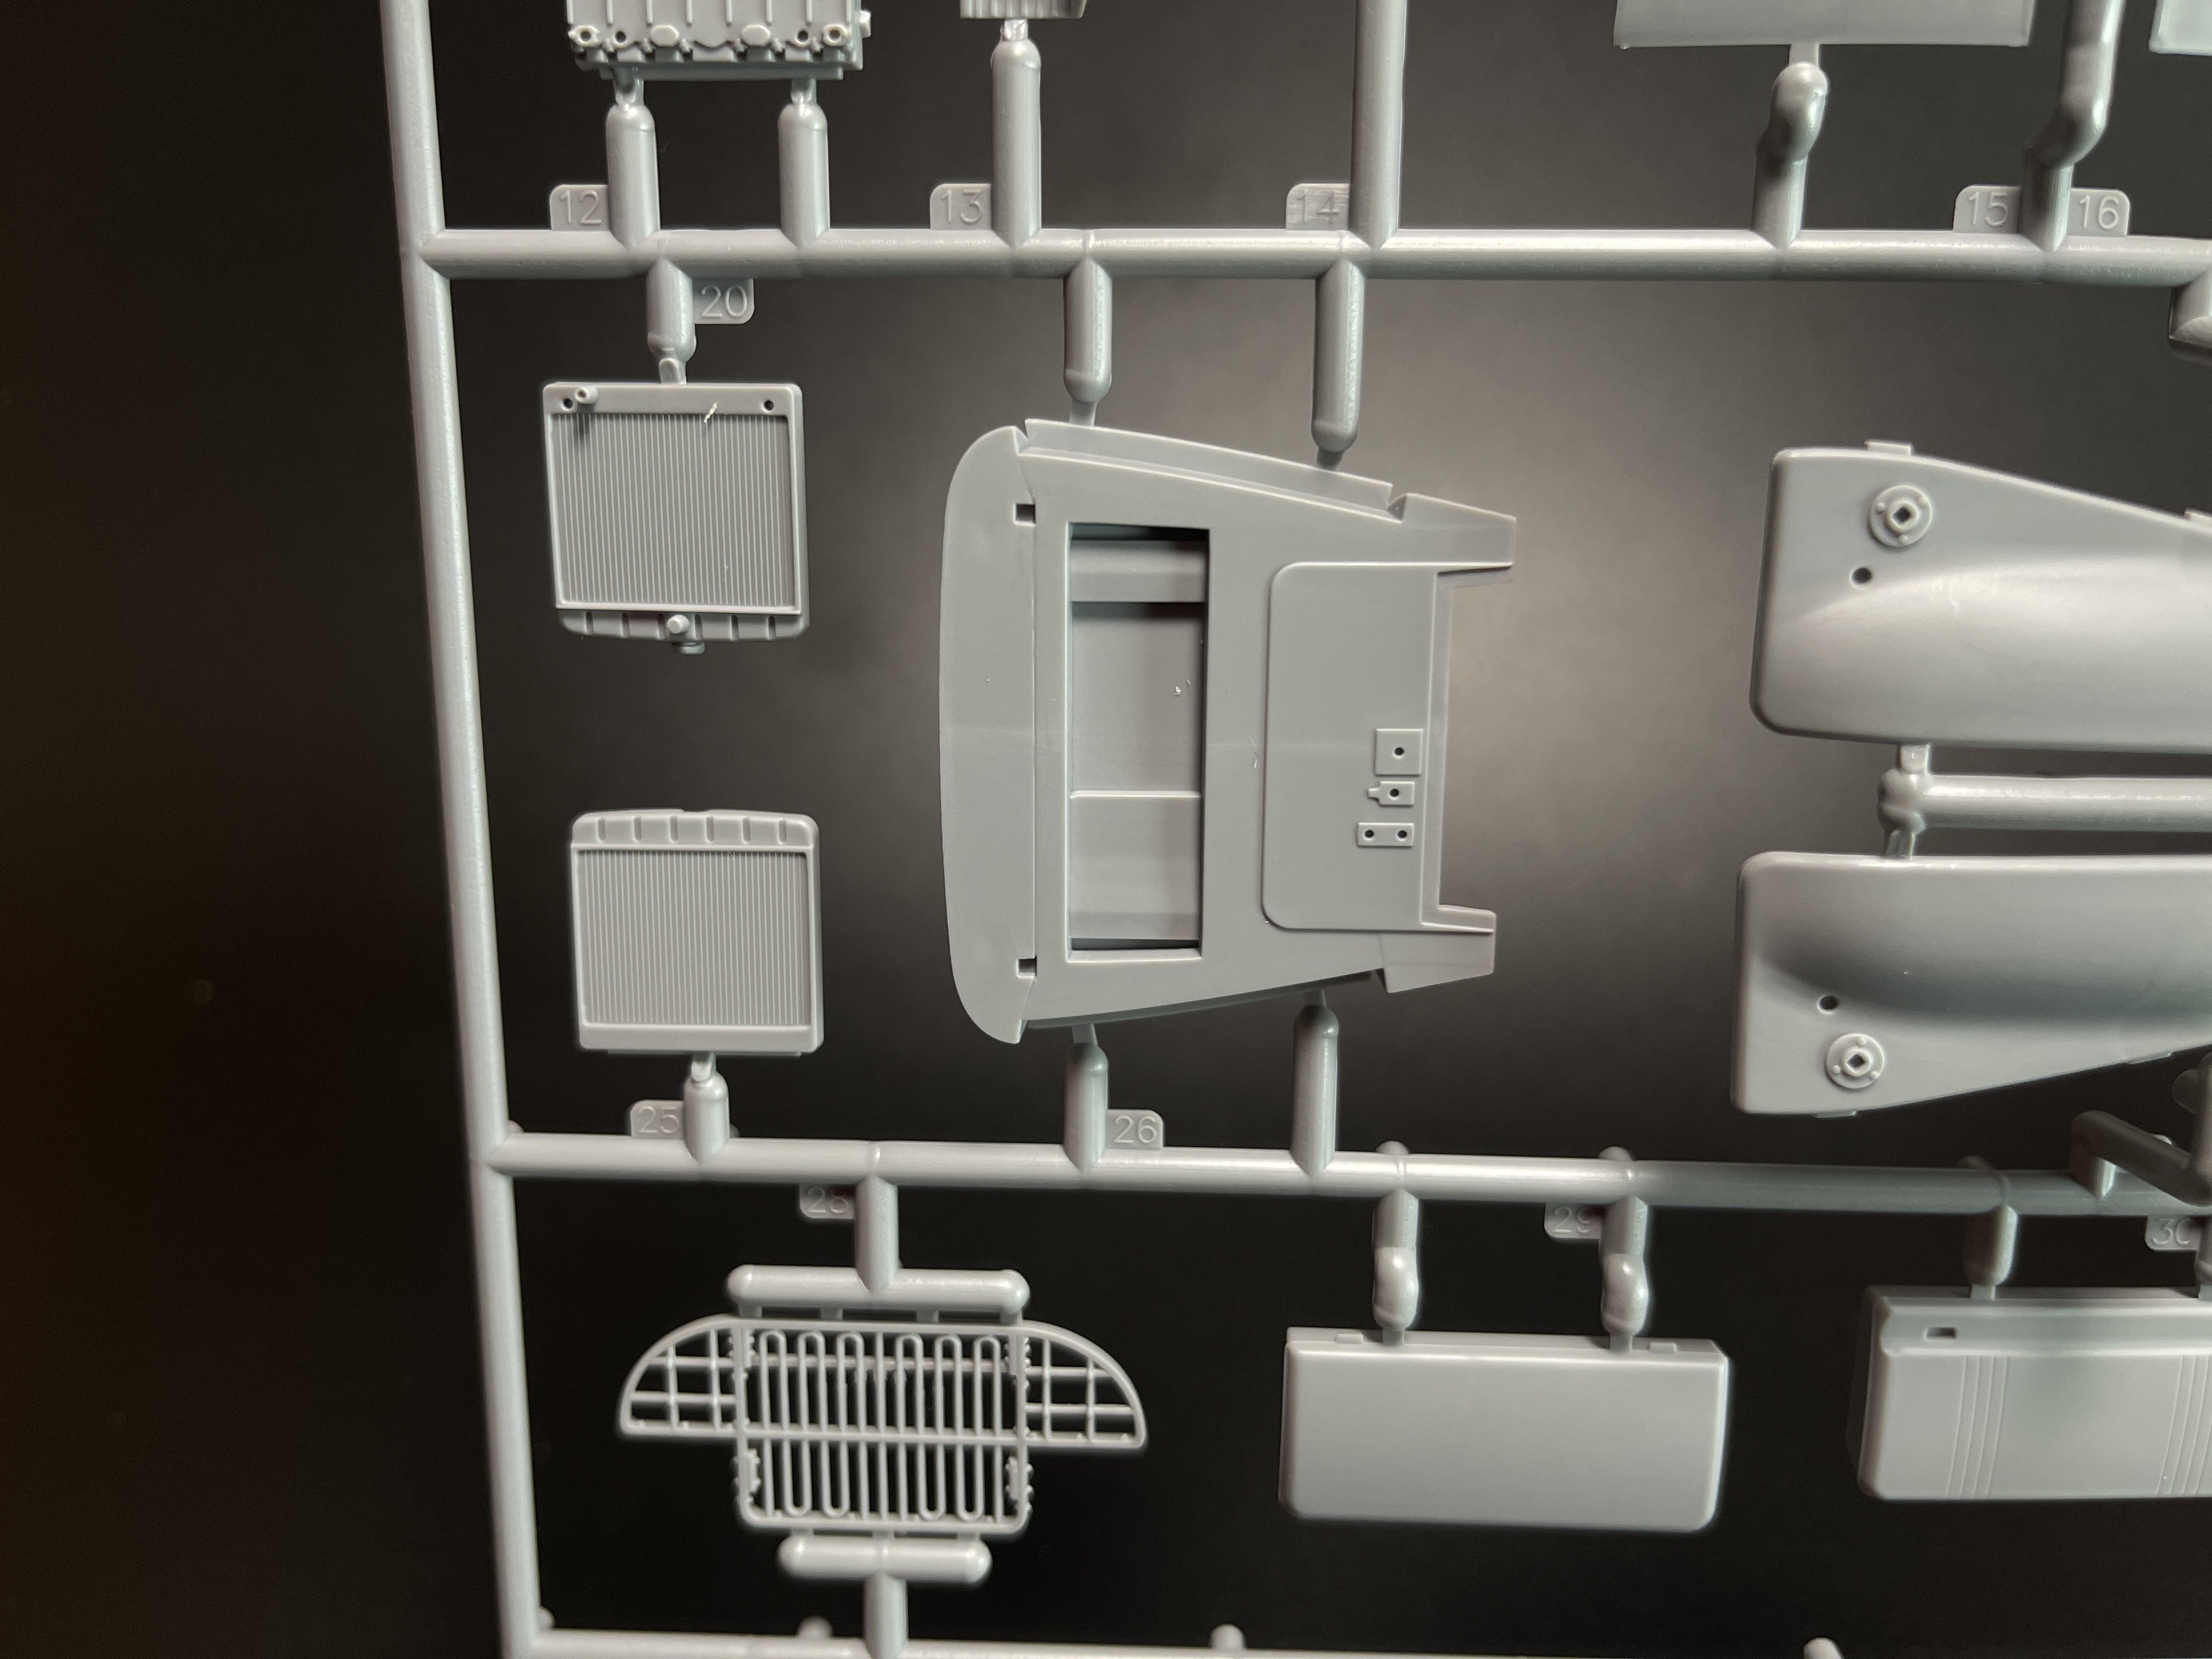
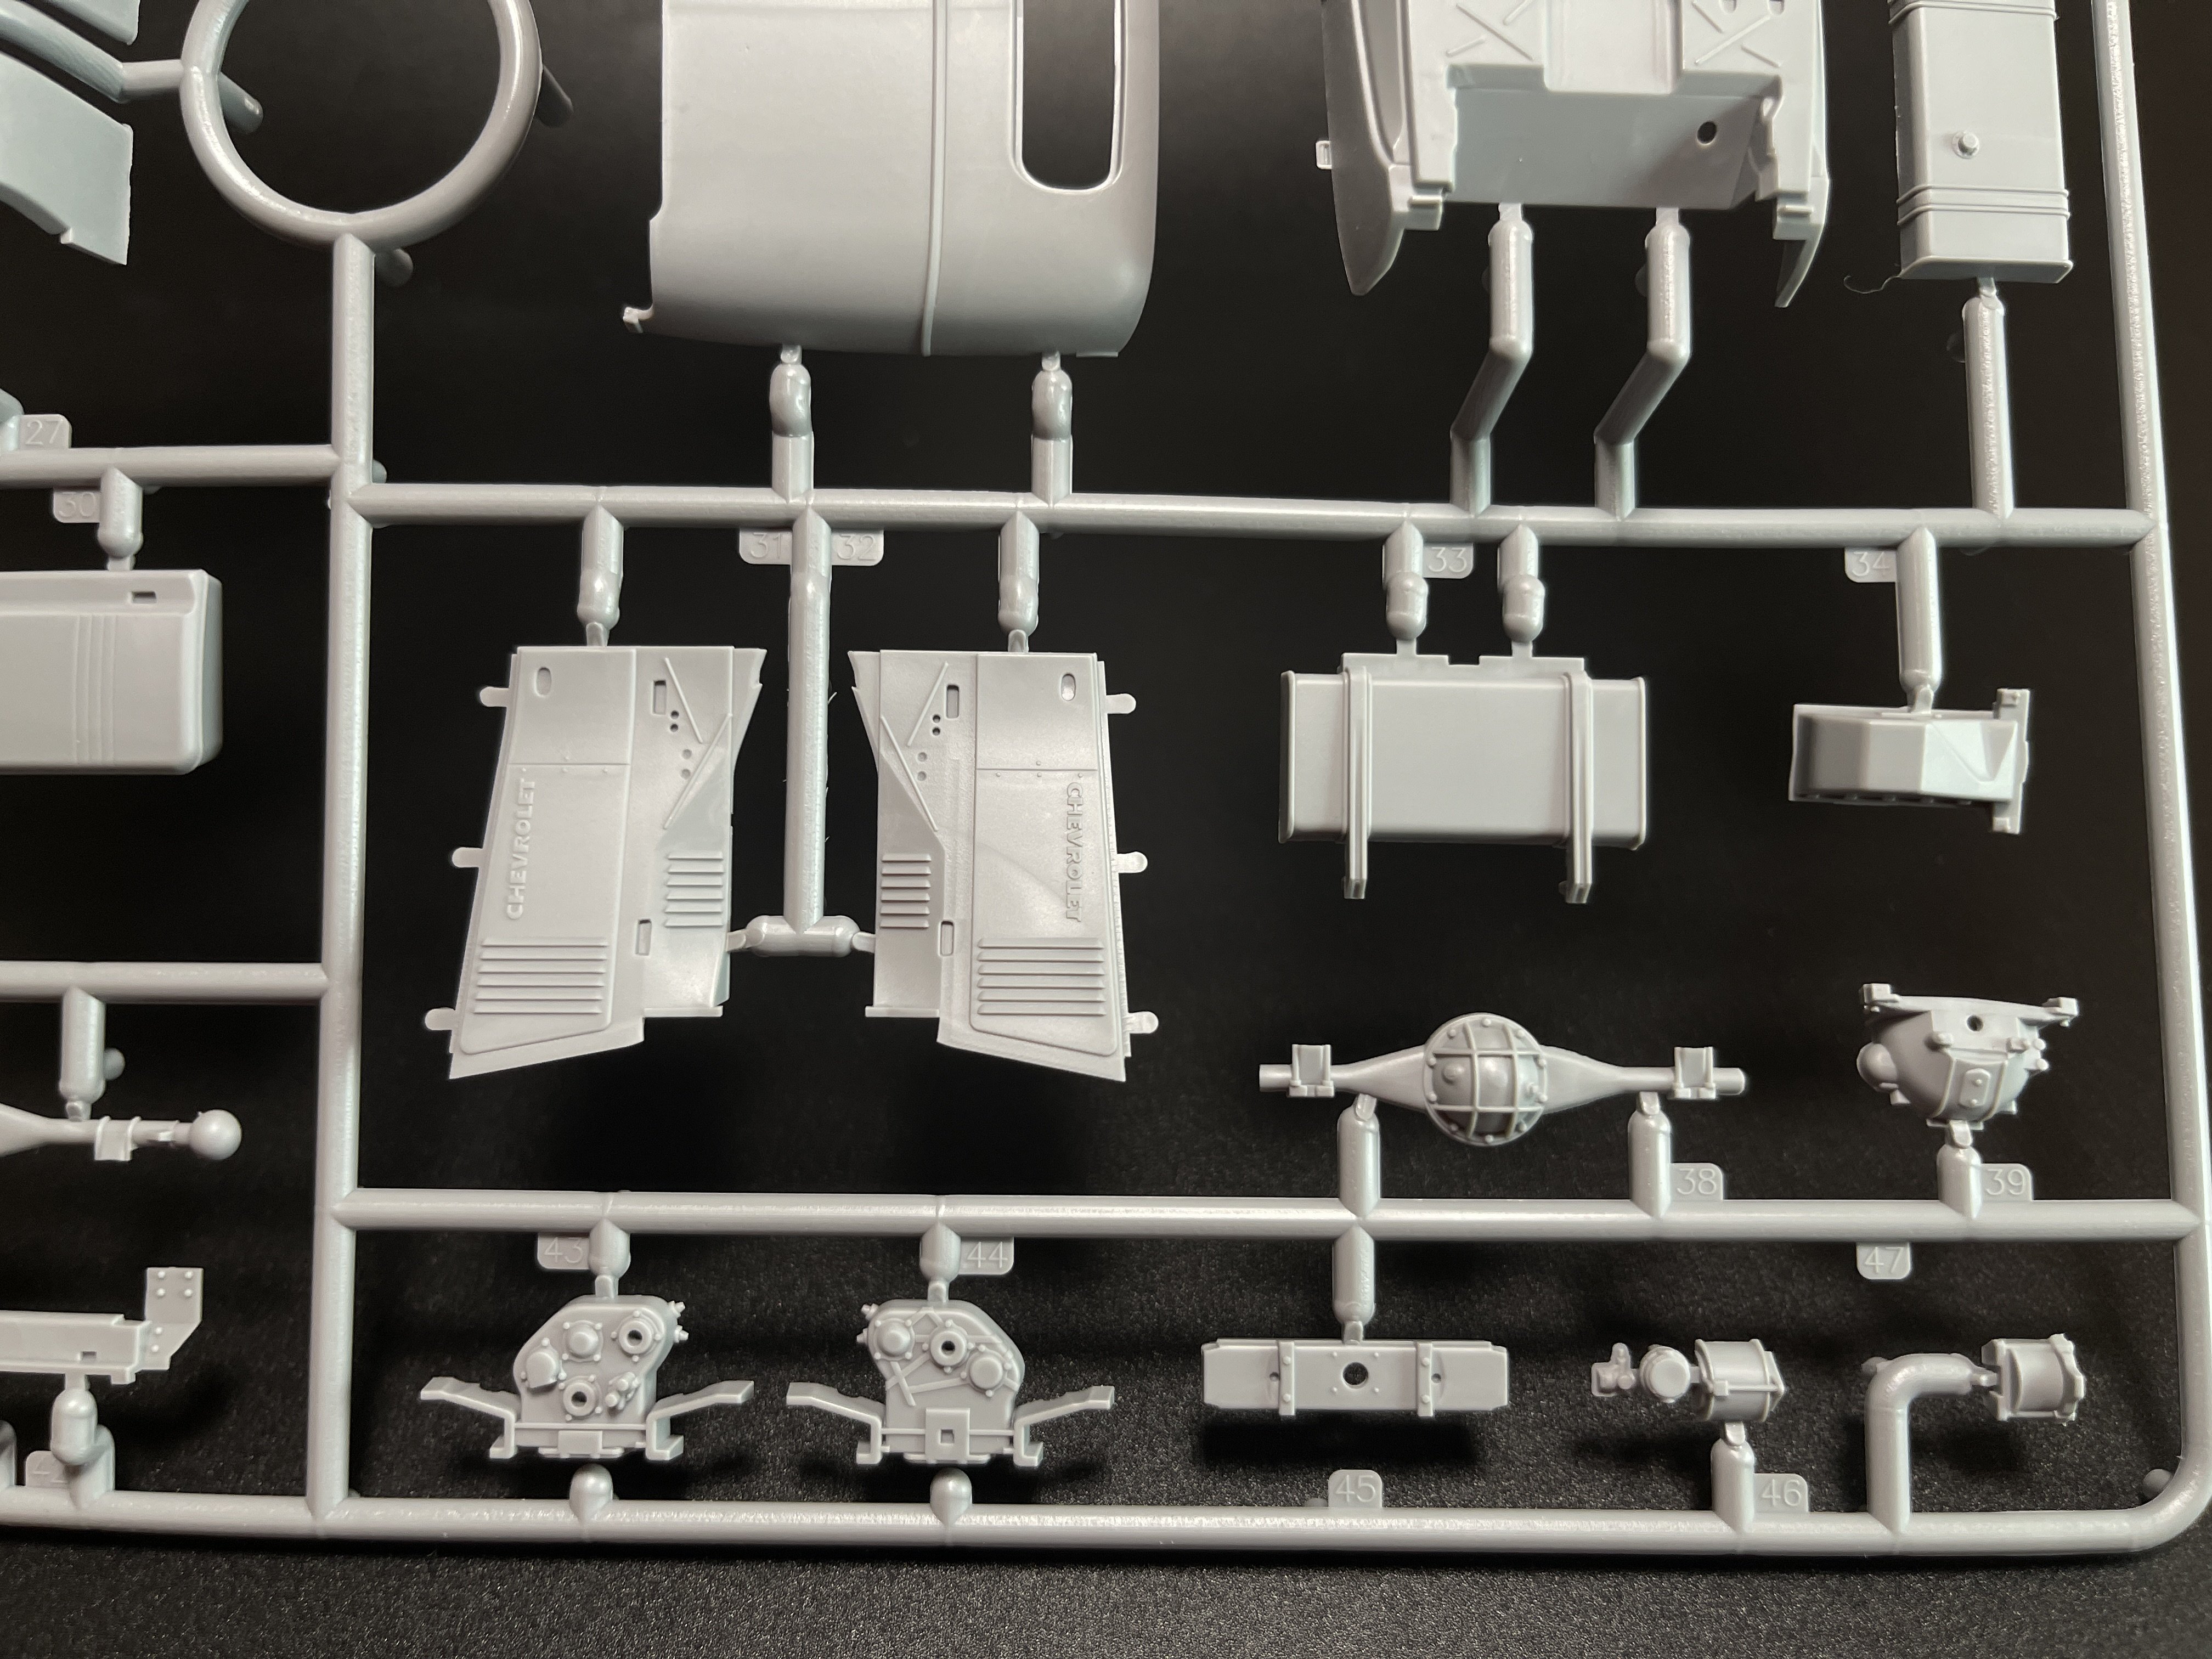
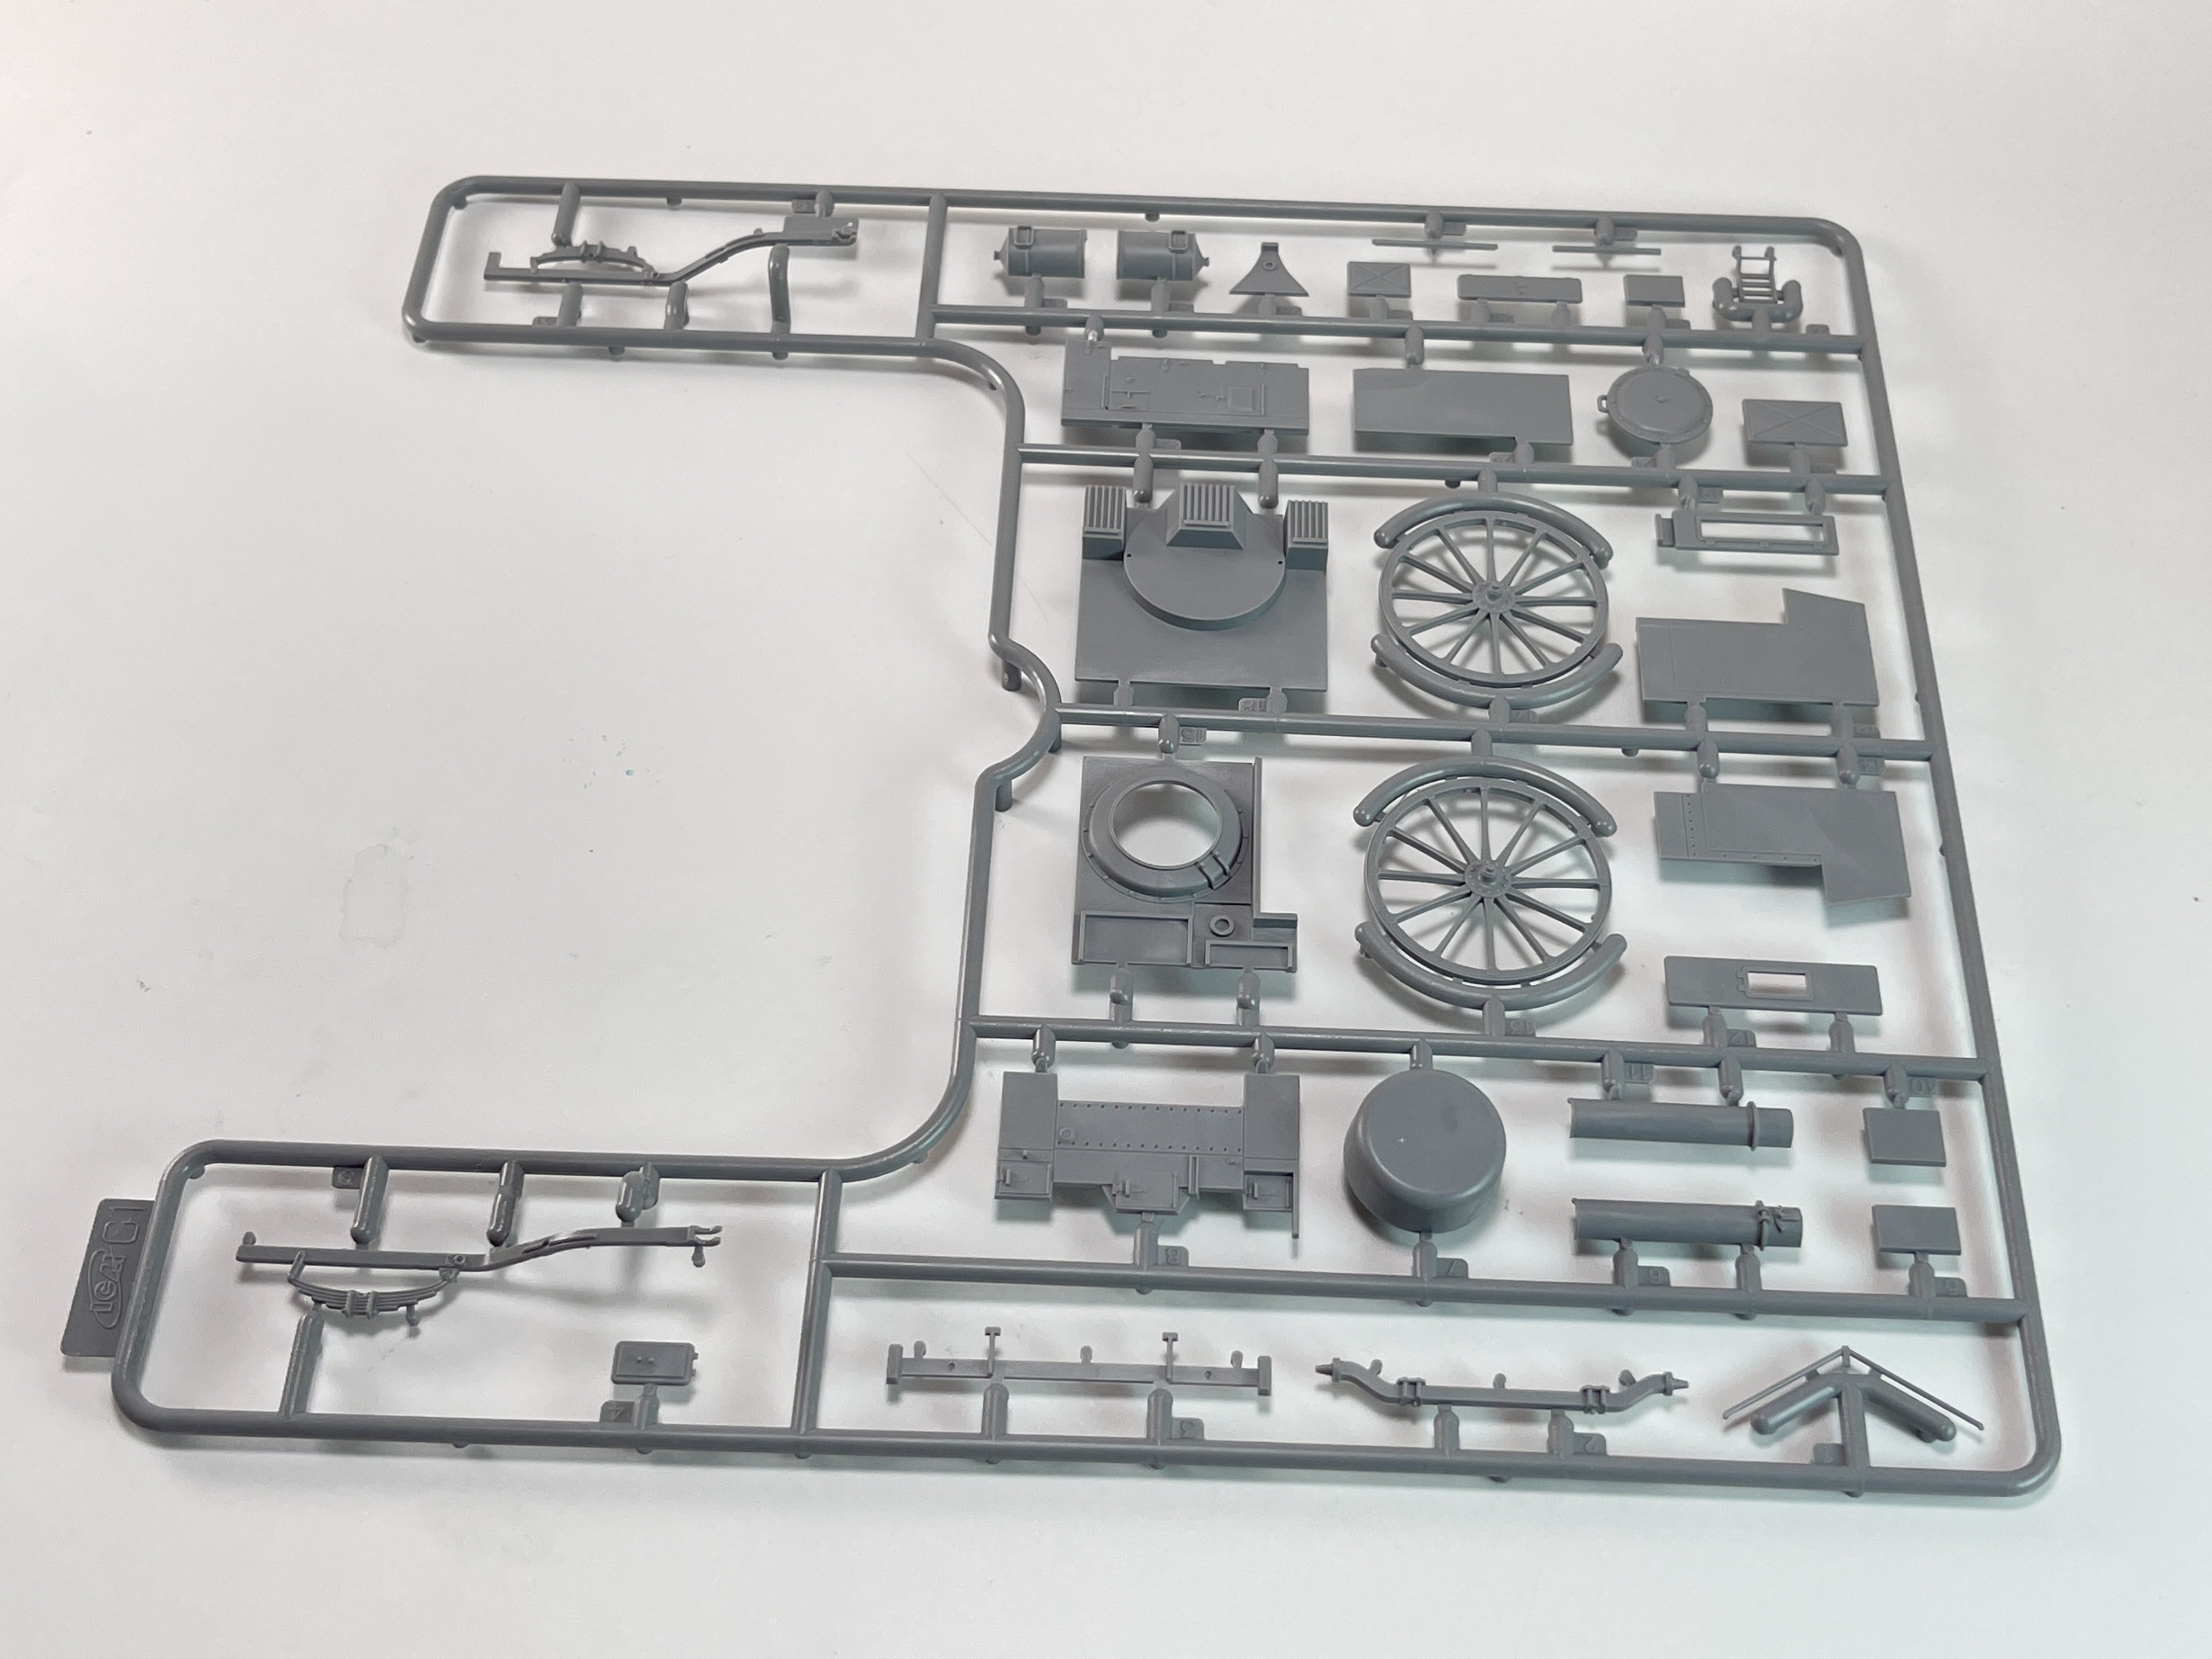
All the plastic sprue are in two plastic bags with the clear parts in other plastic bag inside, in a total of 286 parts.
Checking the plastic parts, the injection markings are very subtle and mainly in places that will be hard to see when build. It’s evident that ICM made the home work to make modeler live easier.
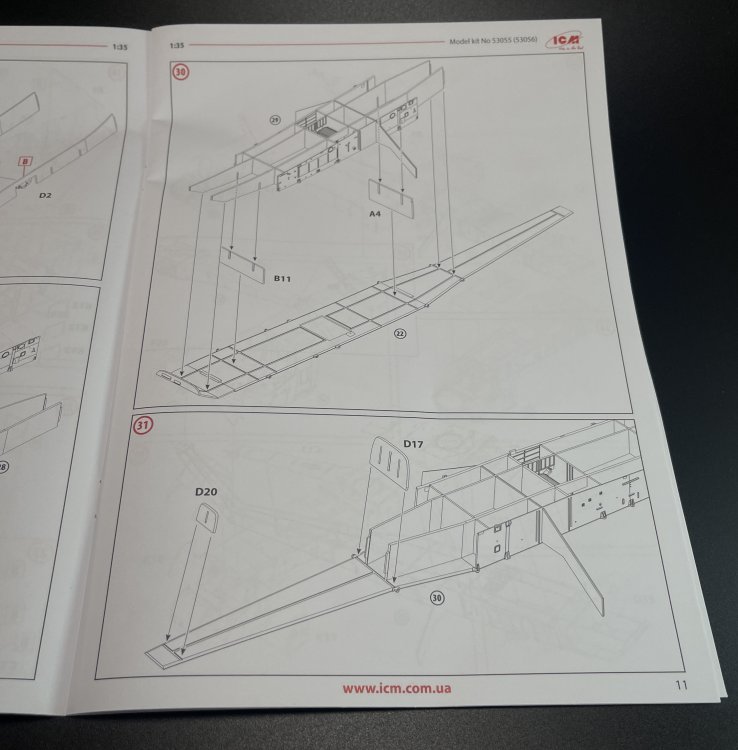
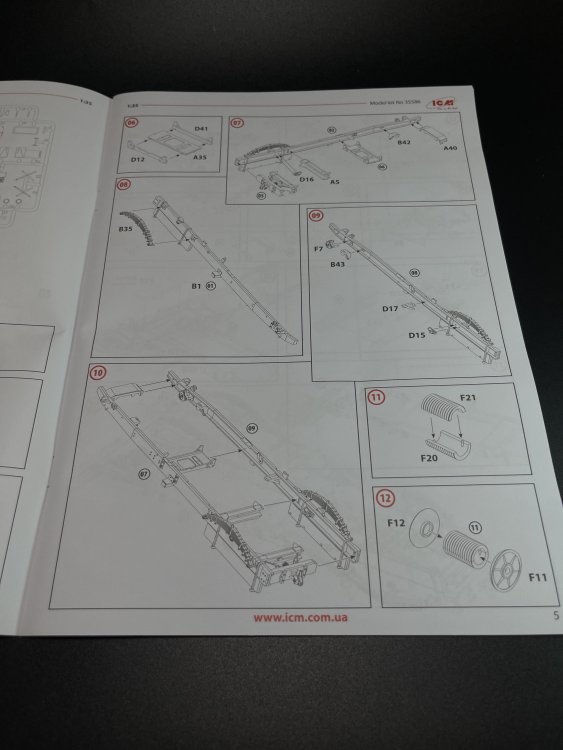
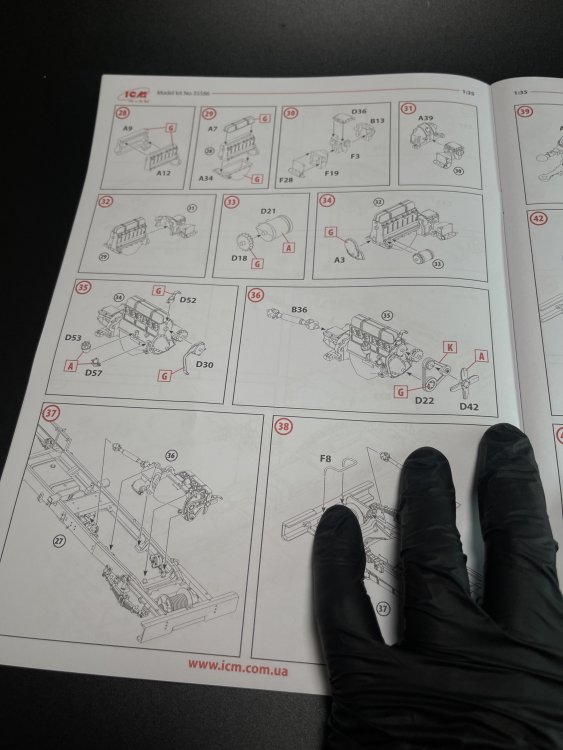
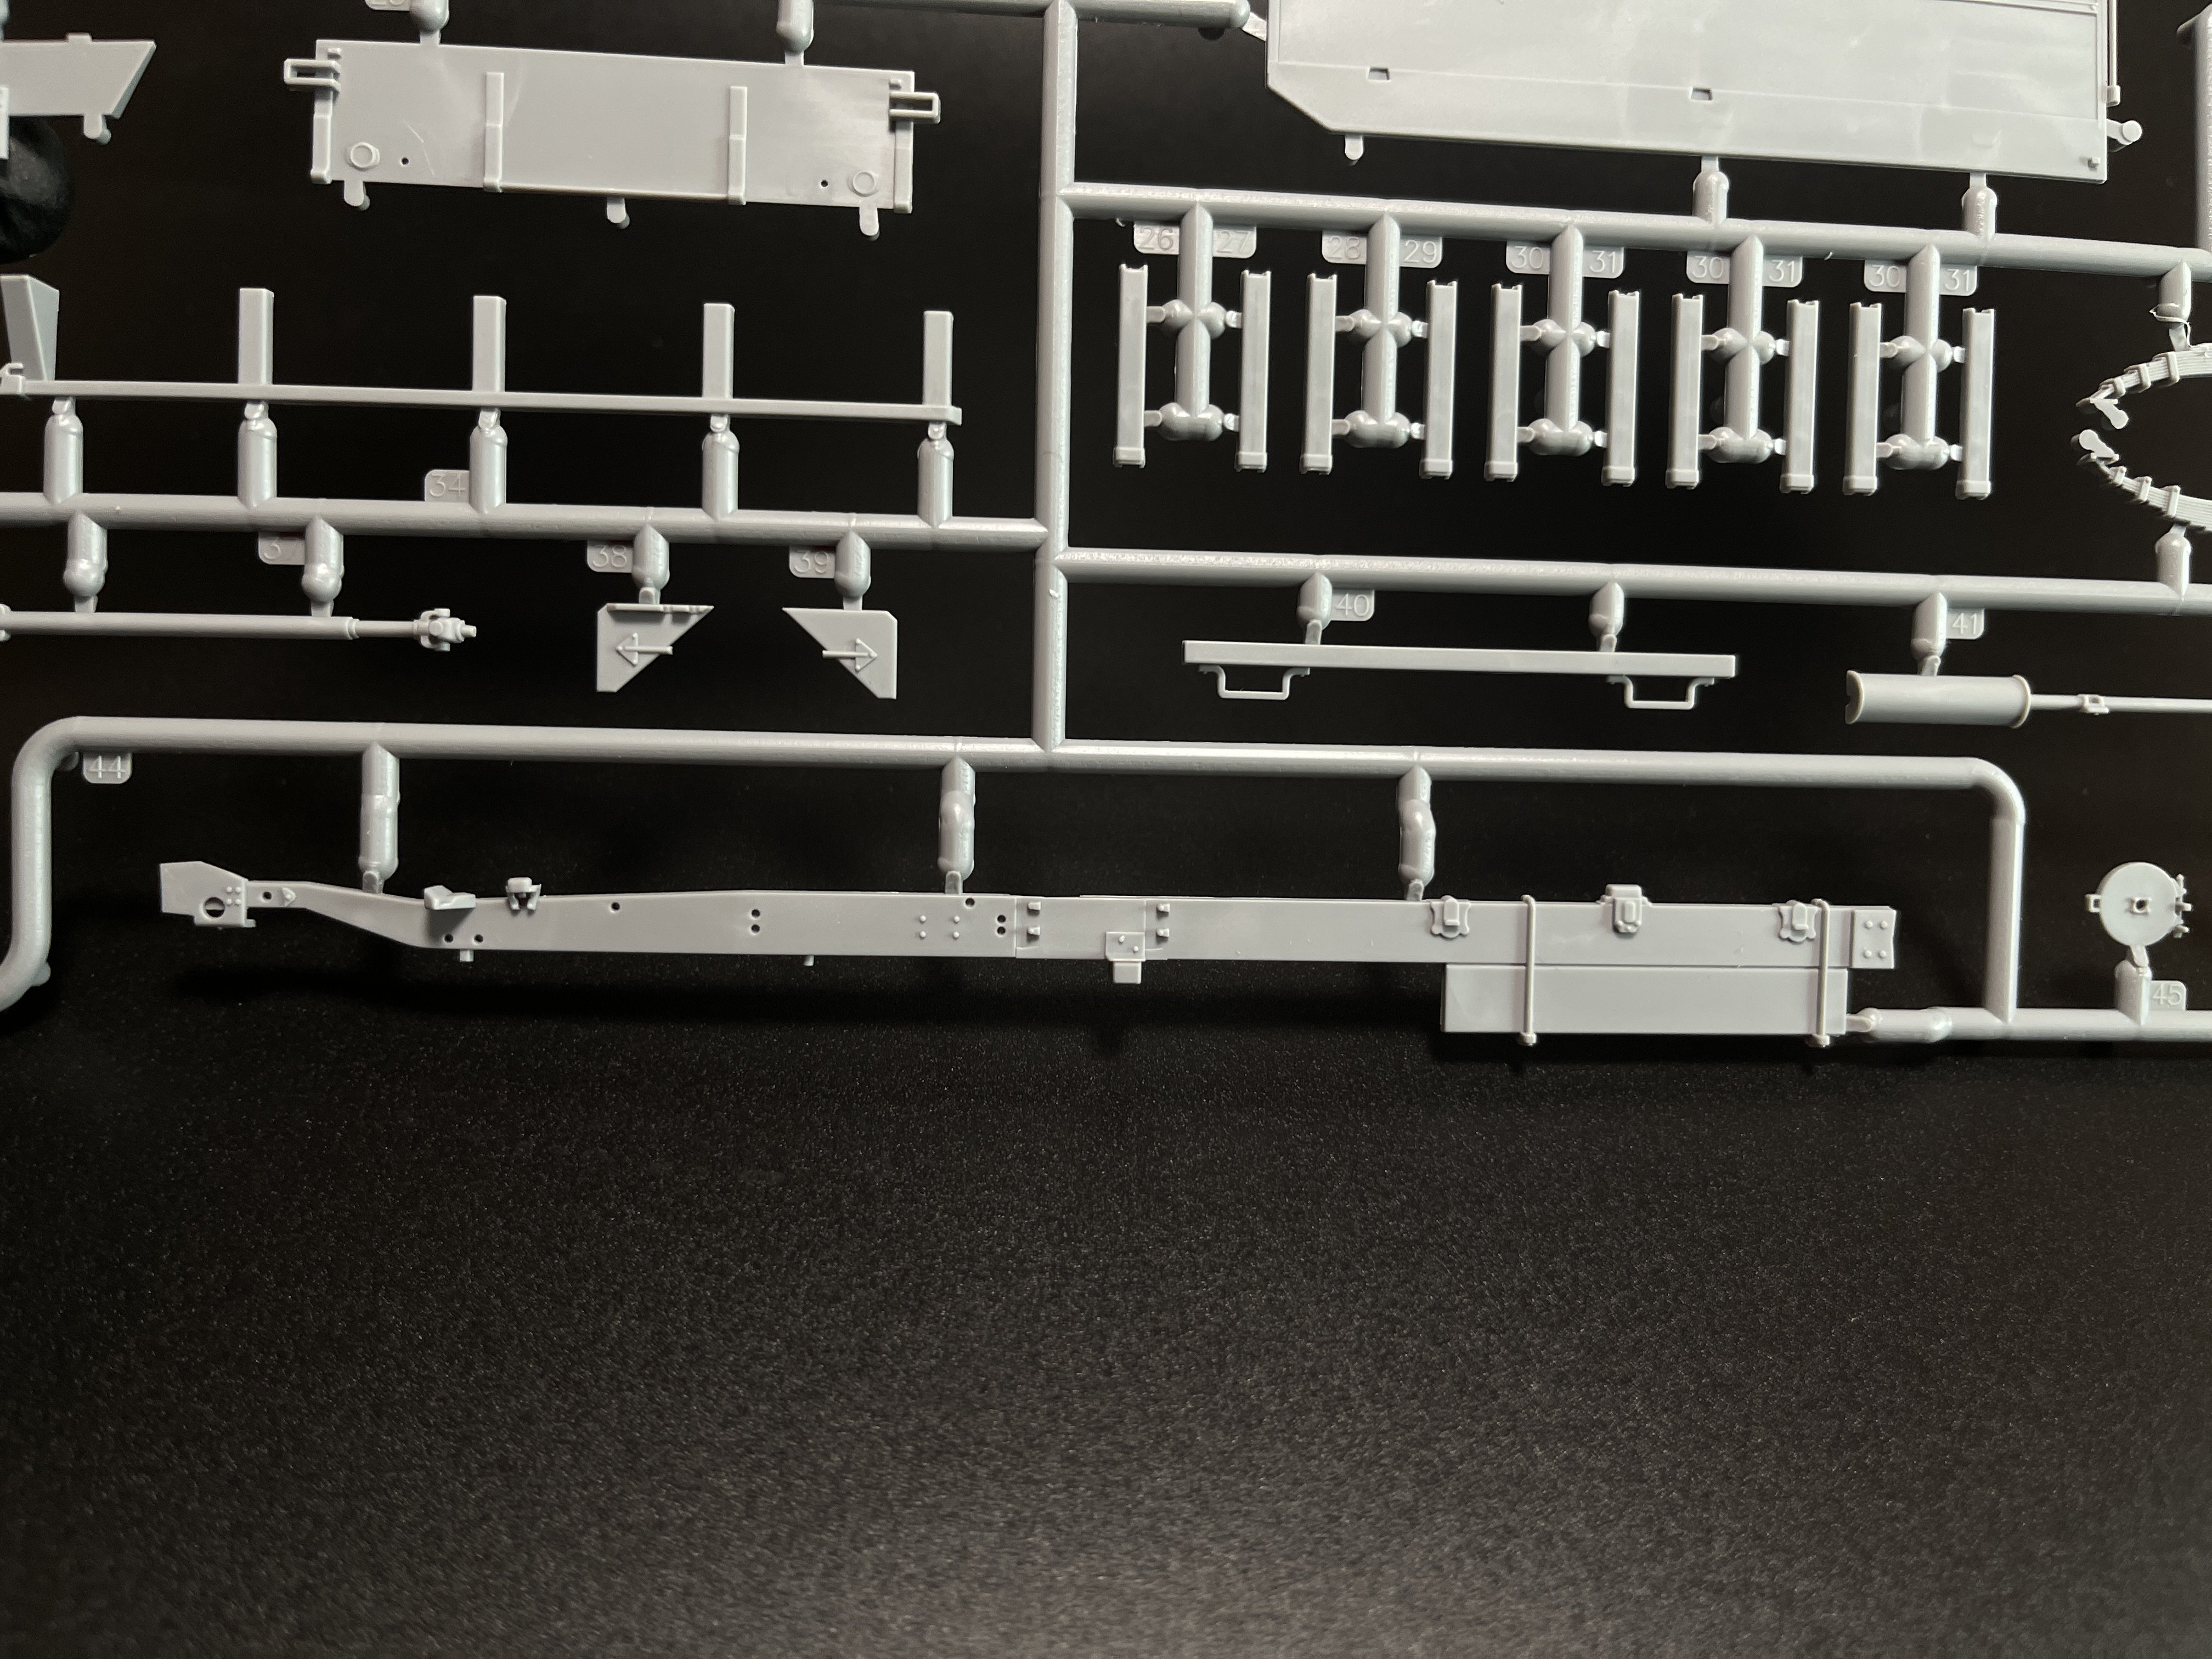
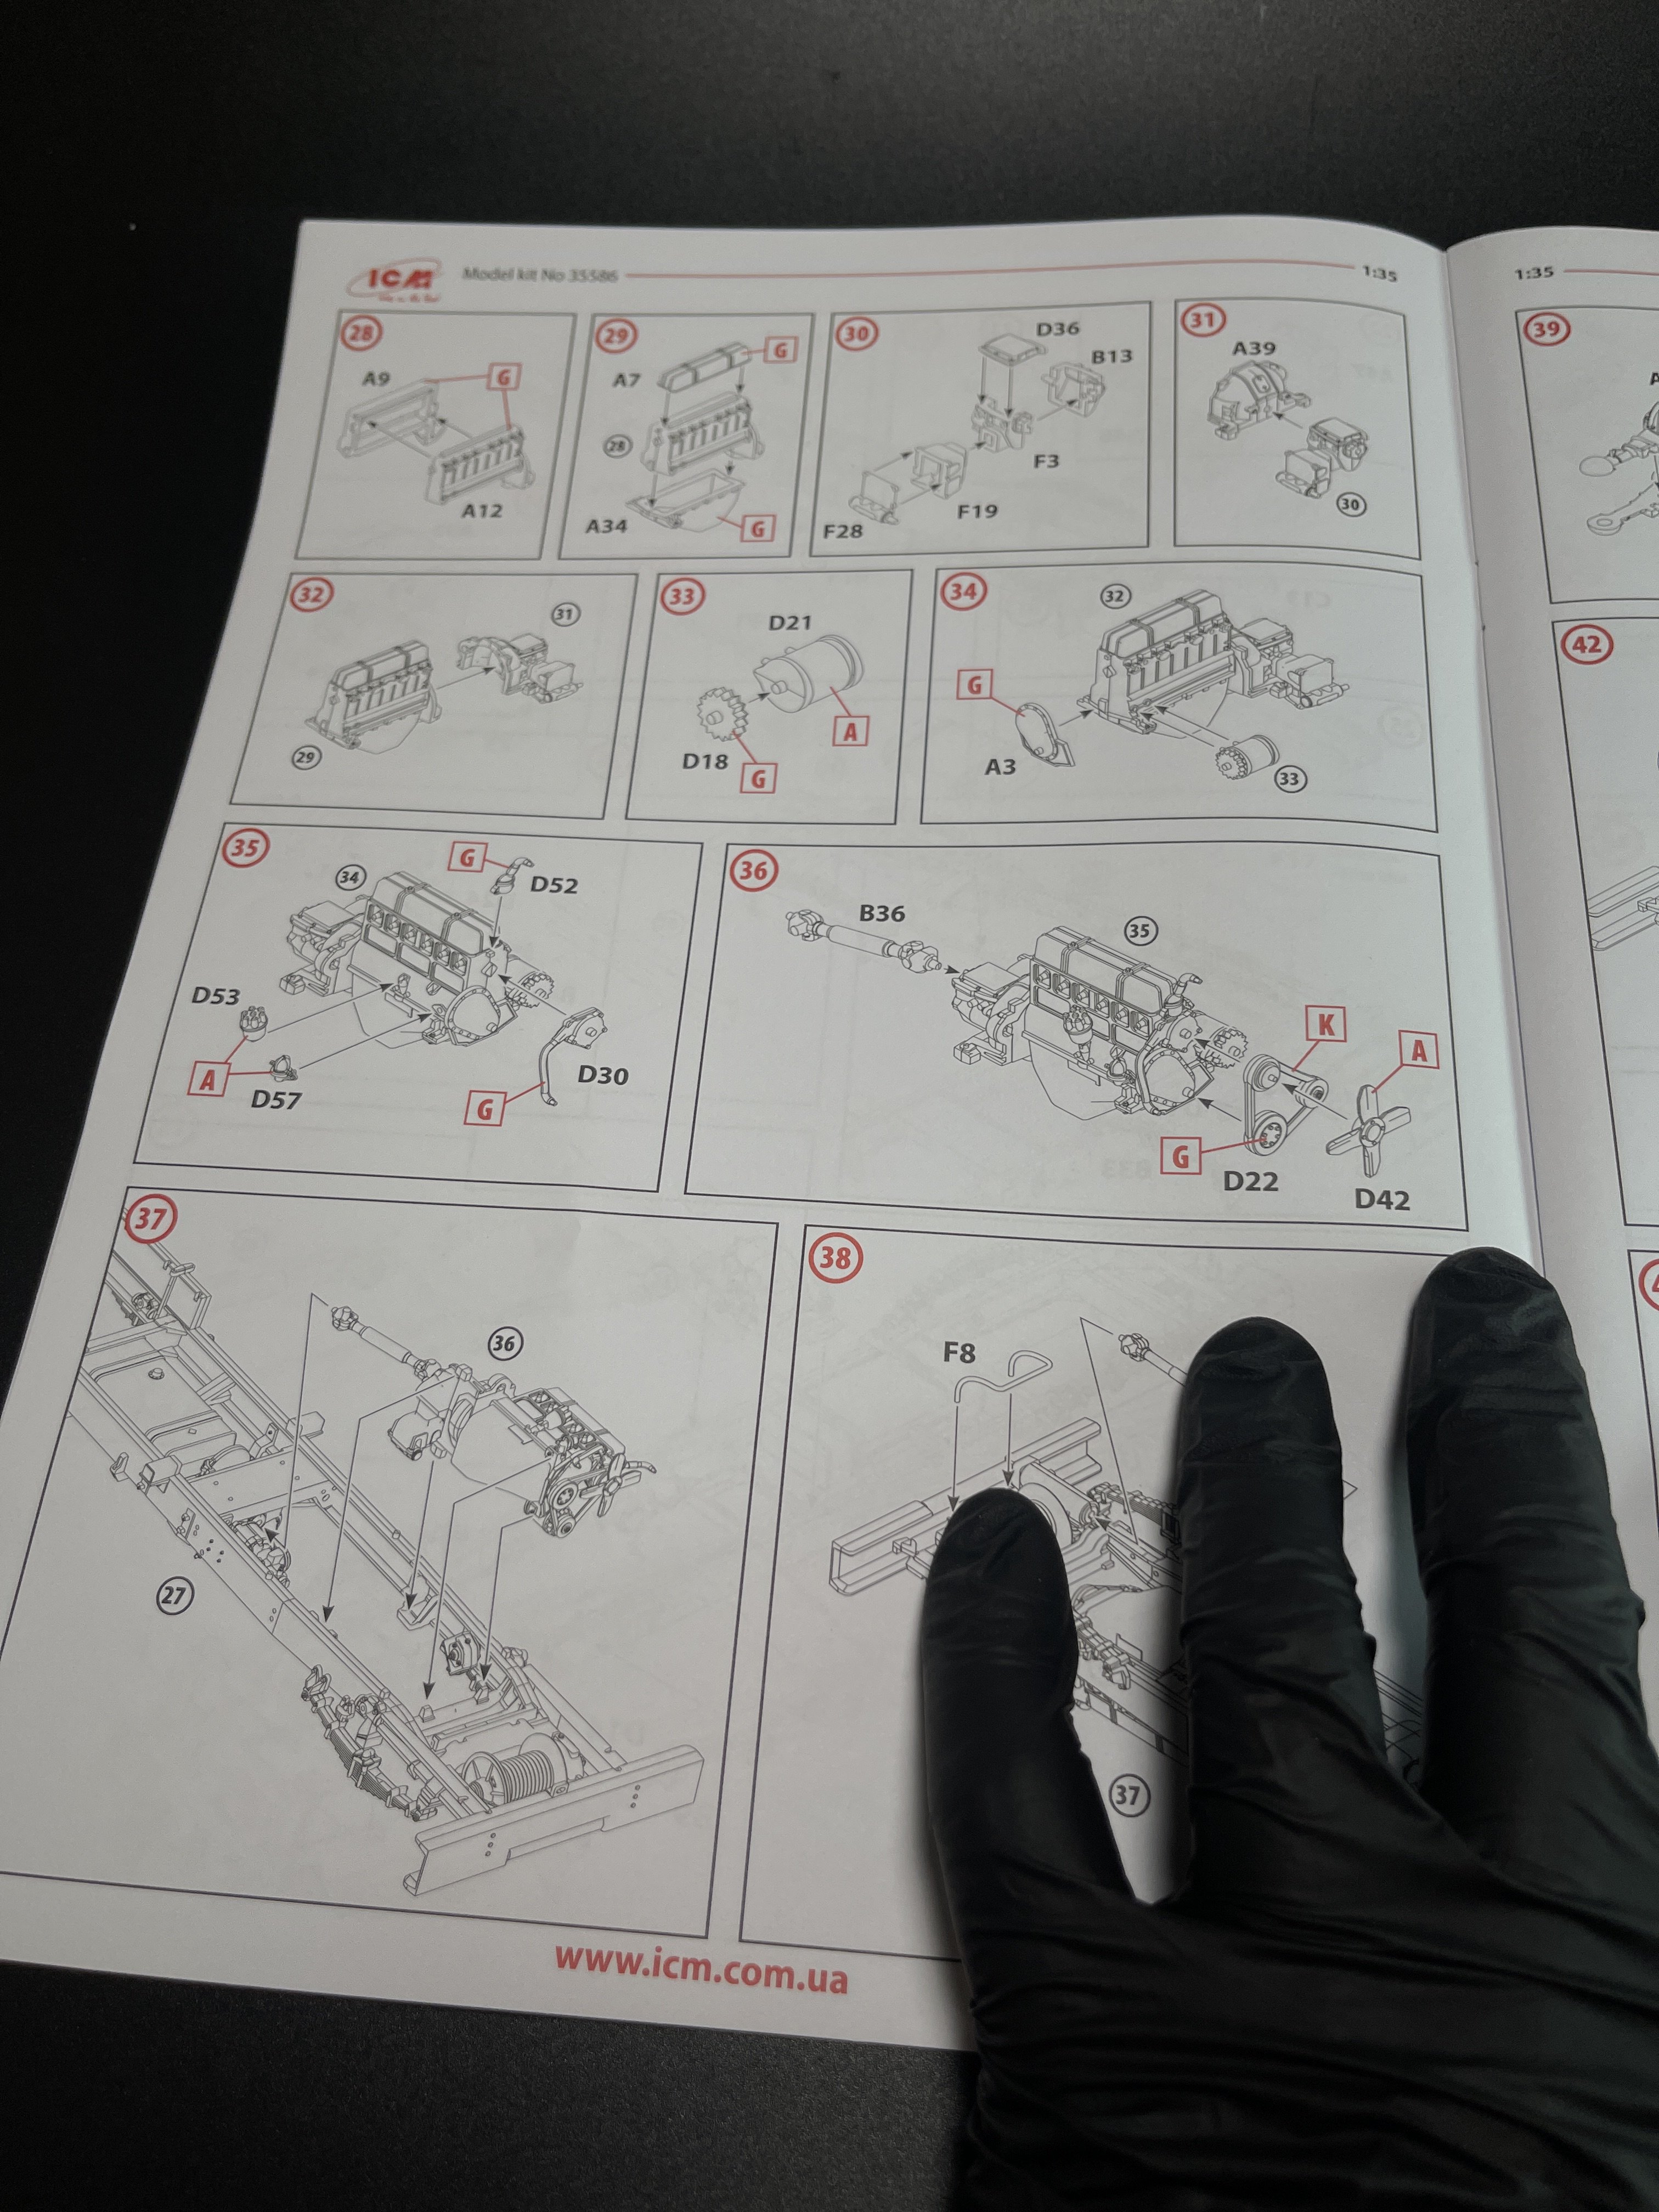
The construction looks quite straightforward starting with the main chassis in several parts. Here the alignment must be crucial so that all the construction could be done in the correct stand.
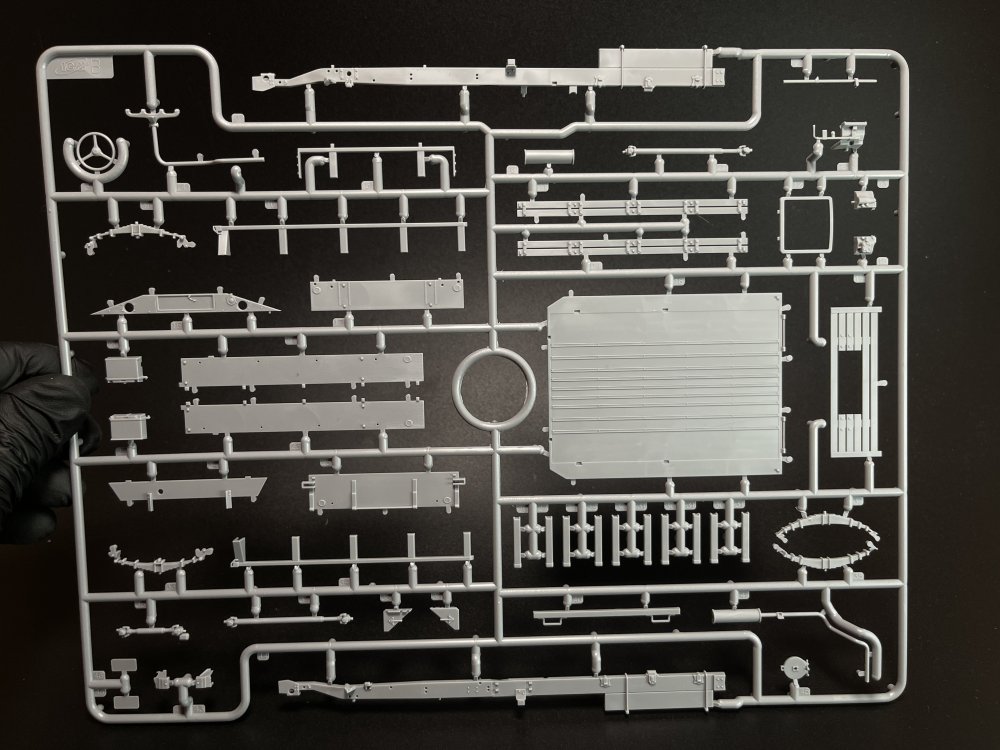
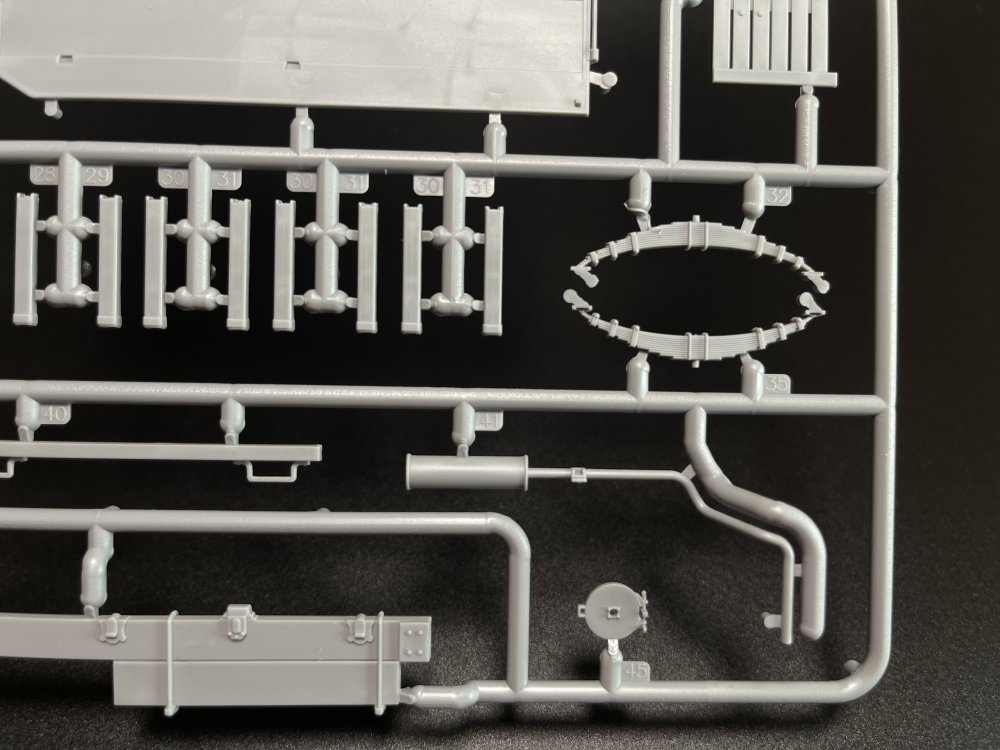
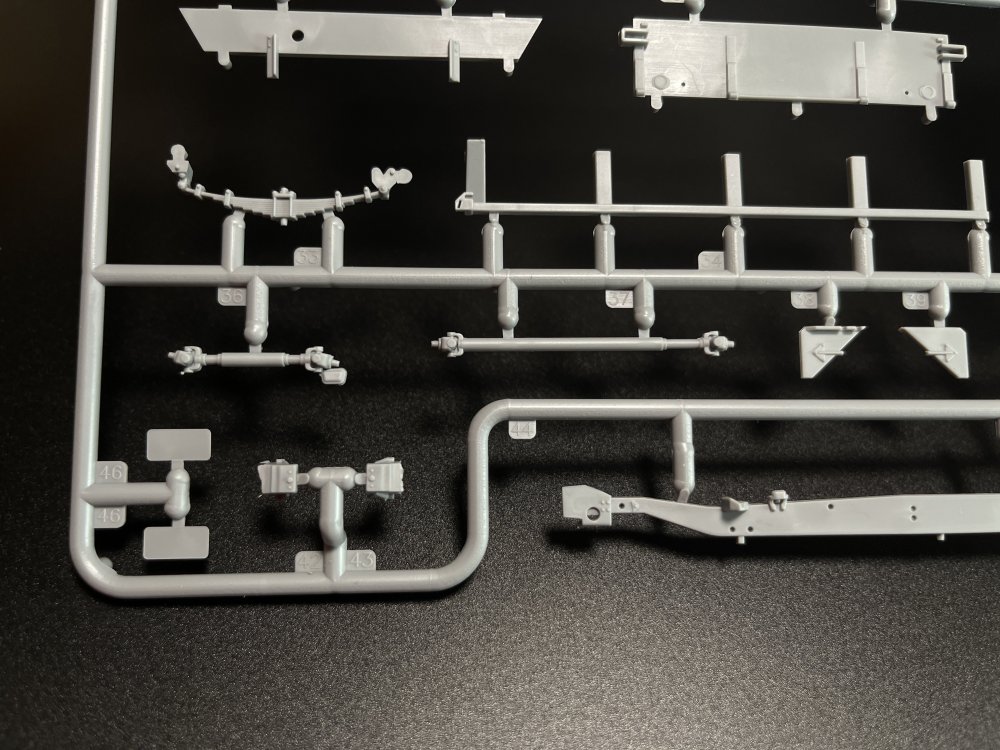
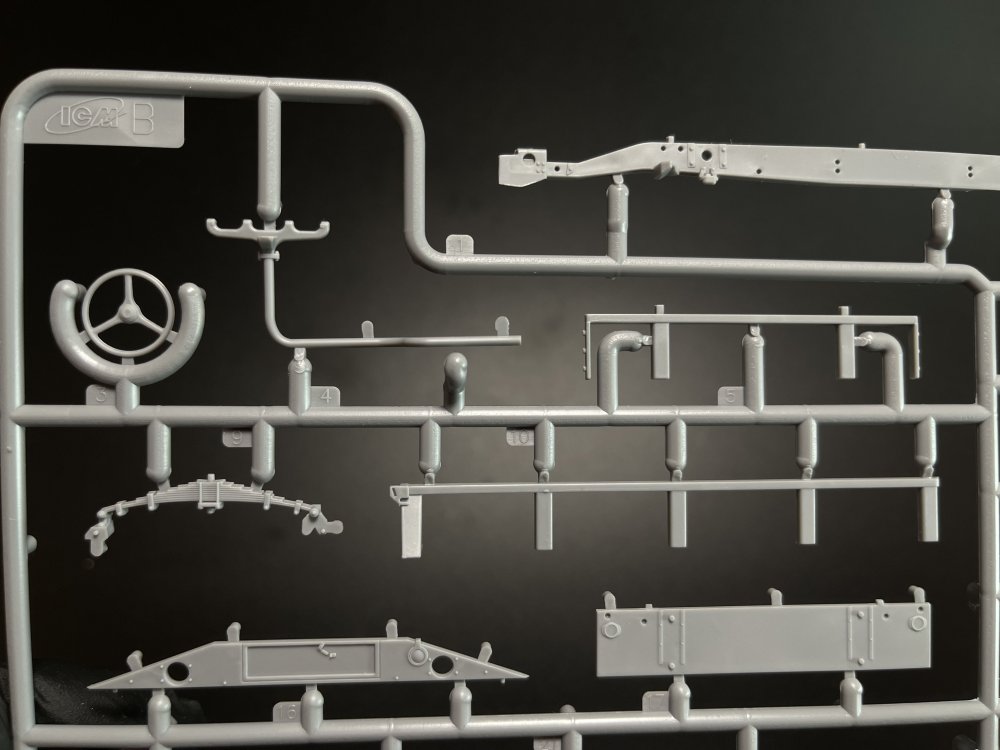

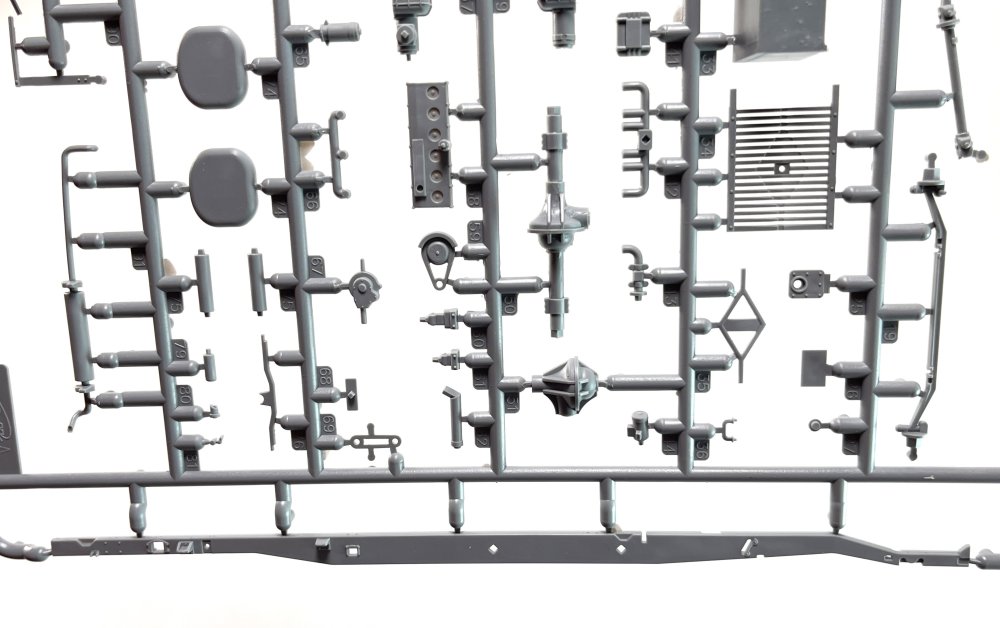
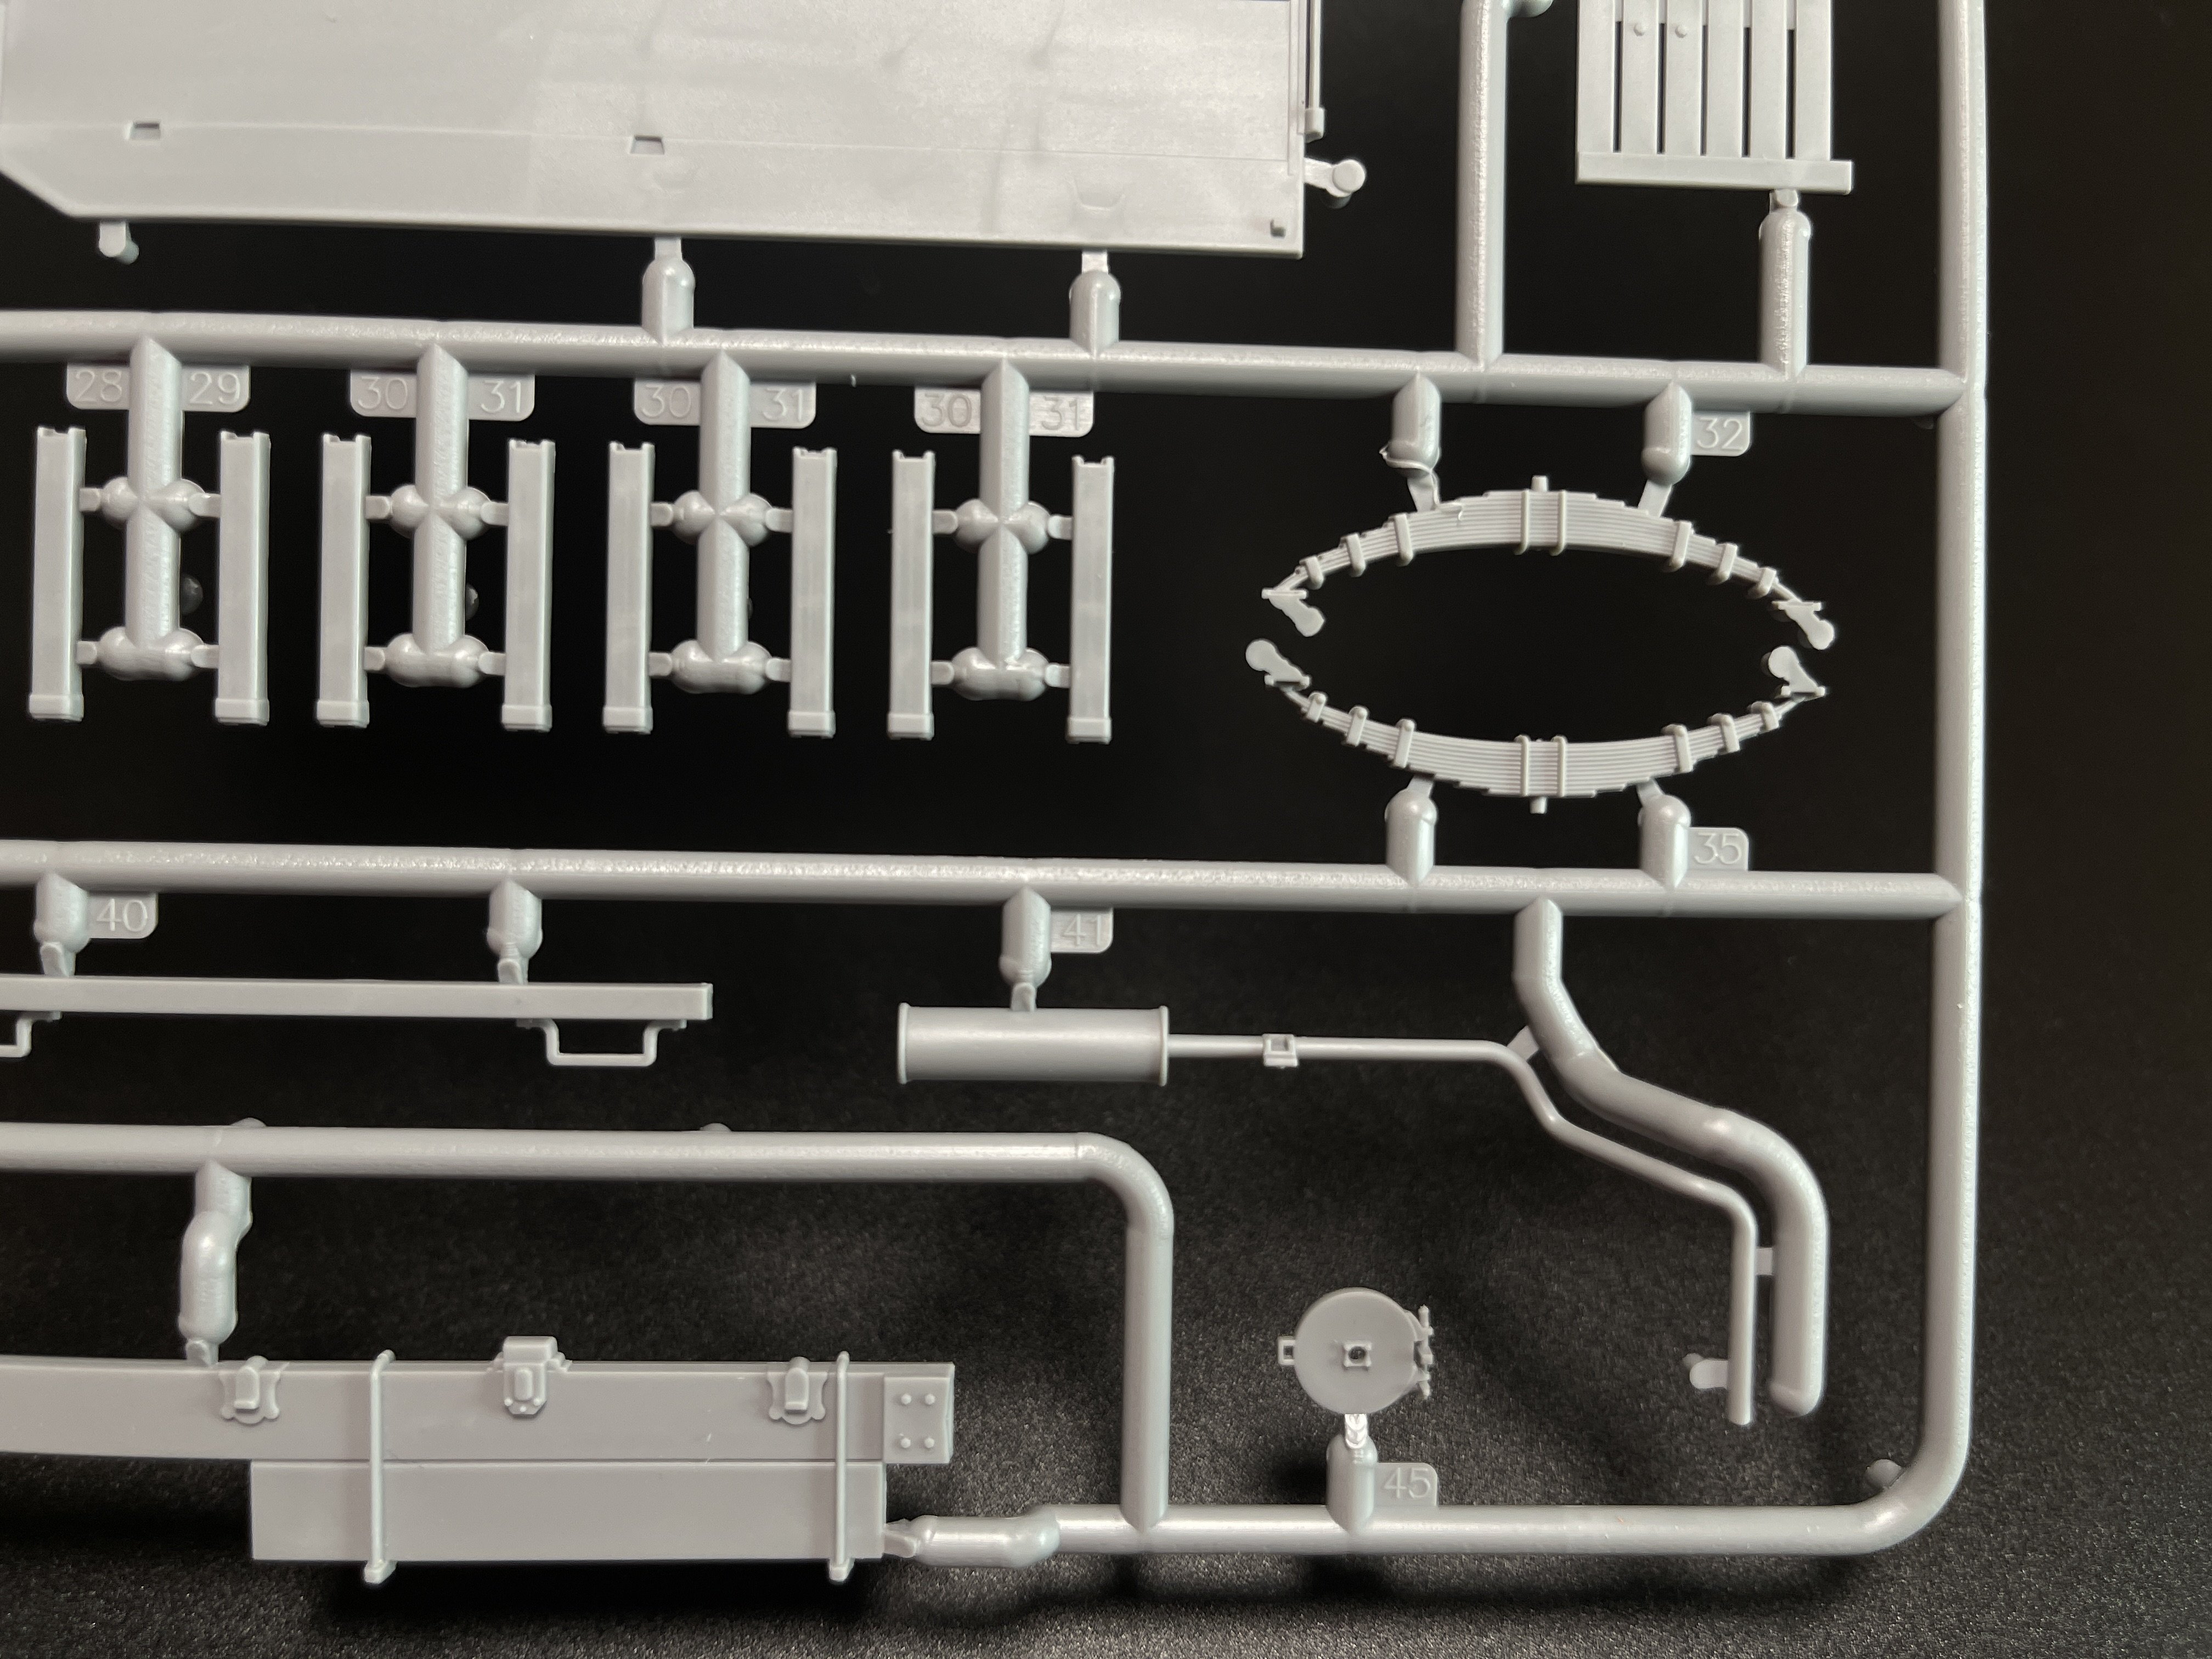
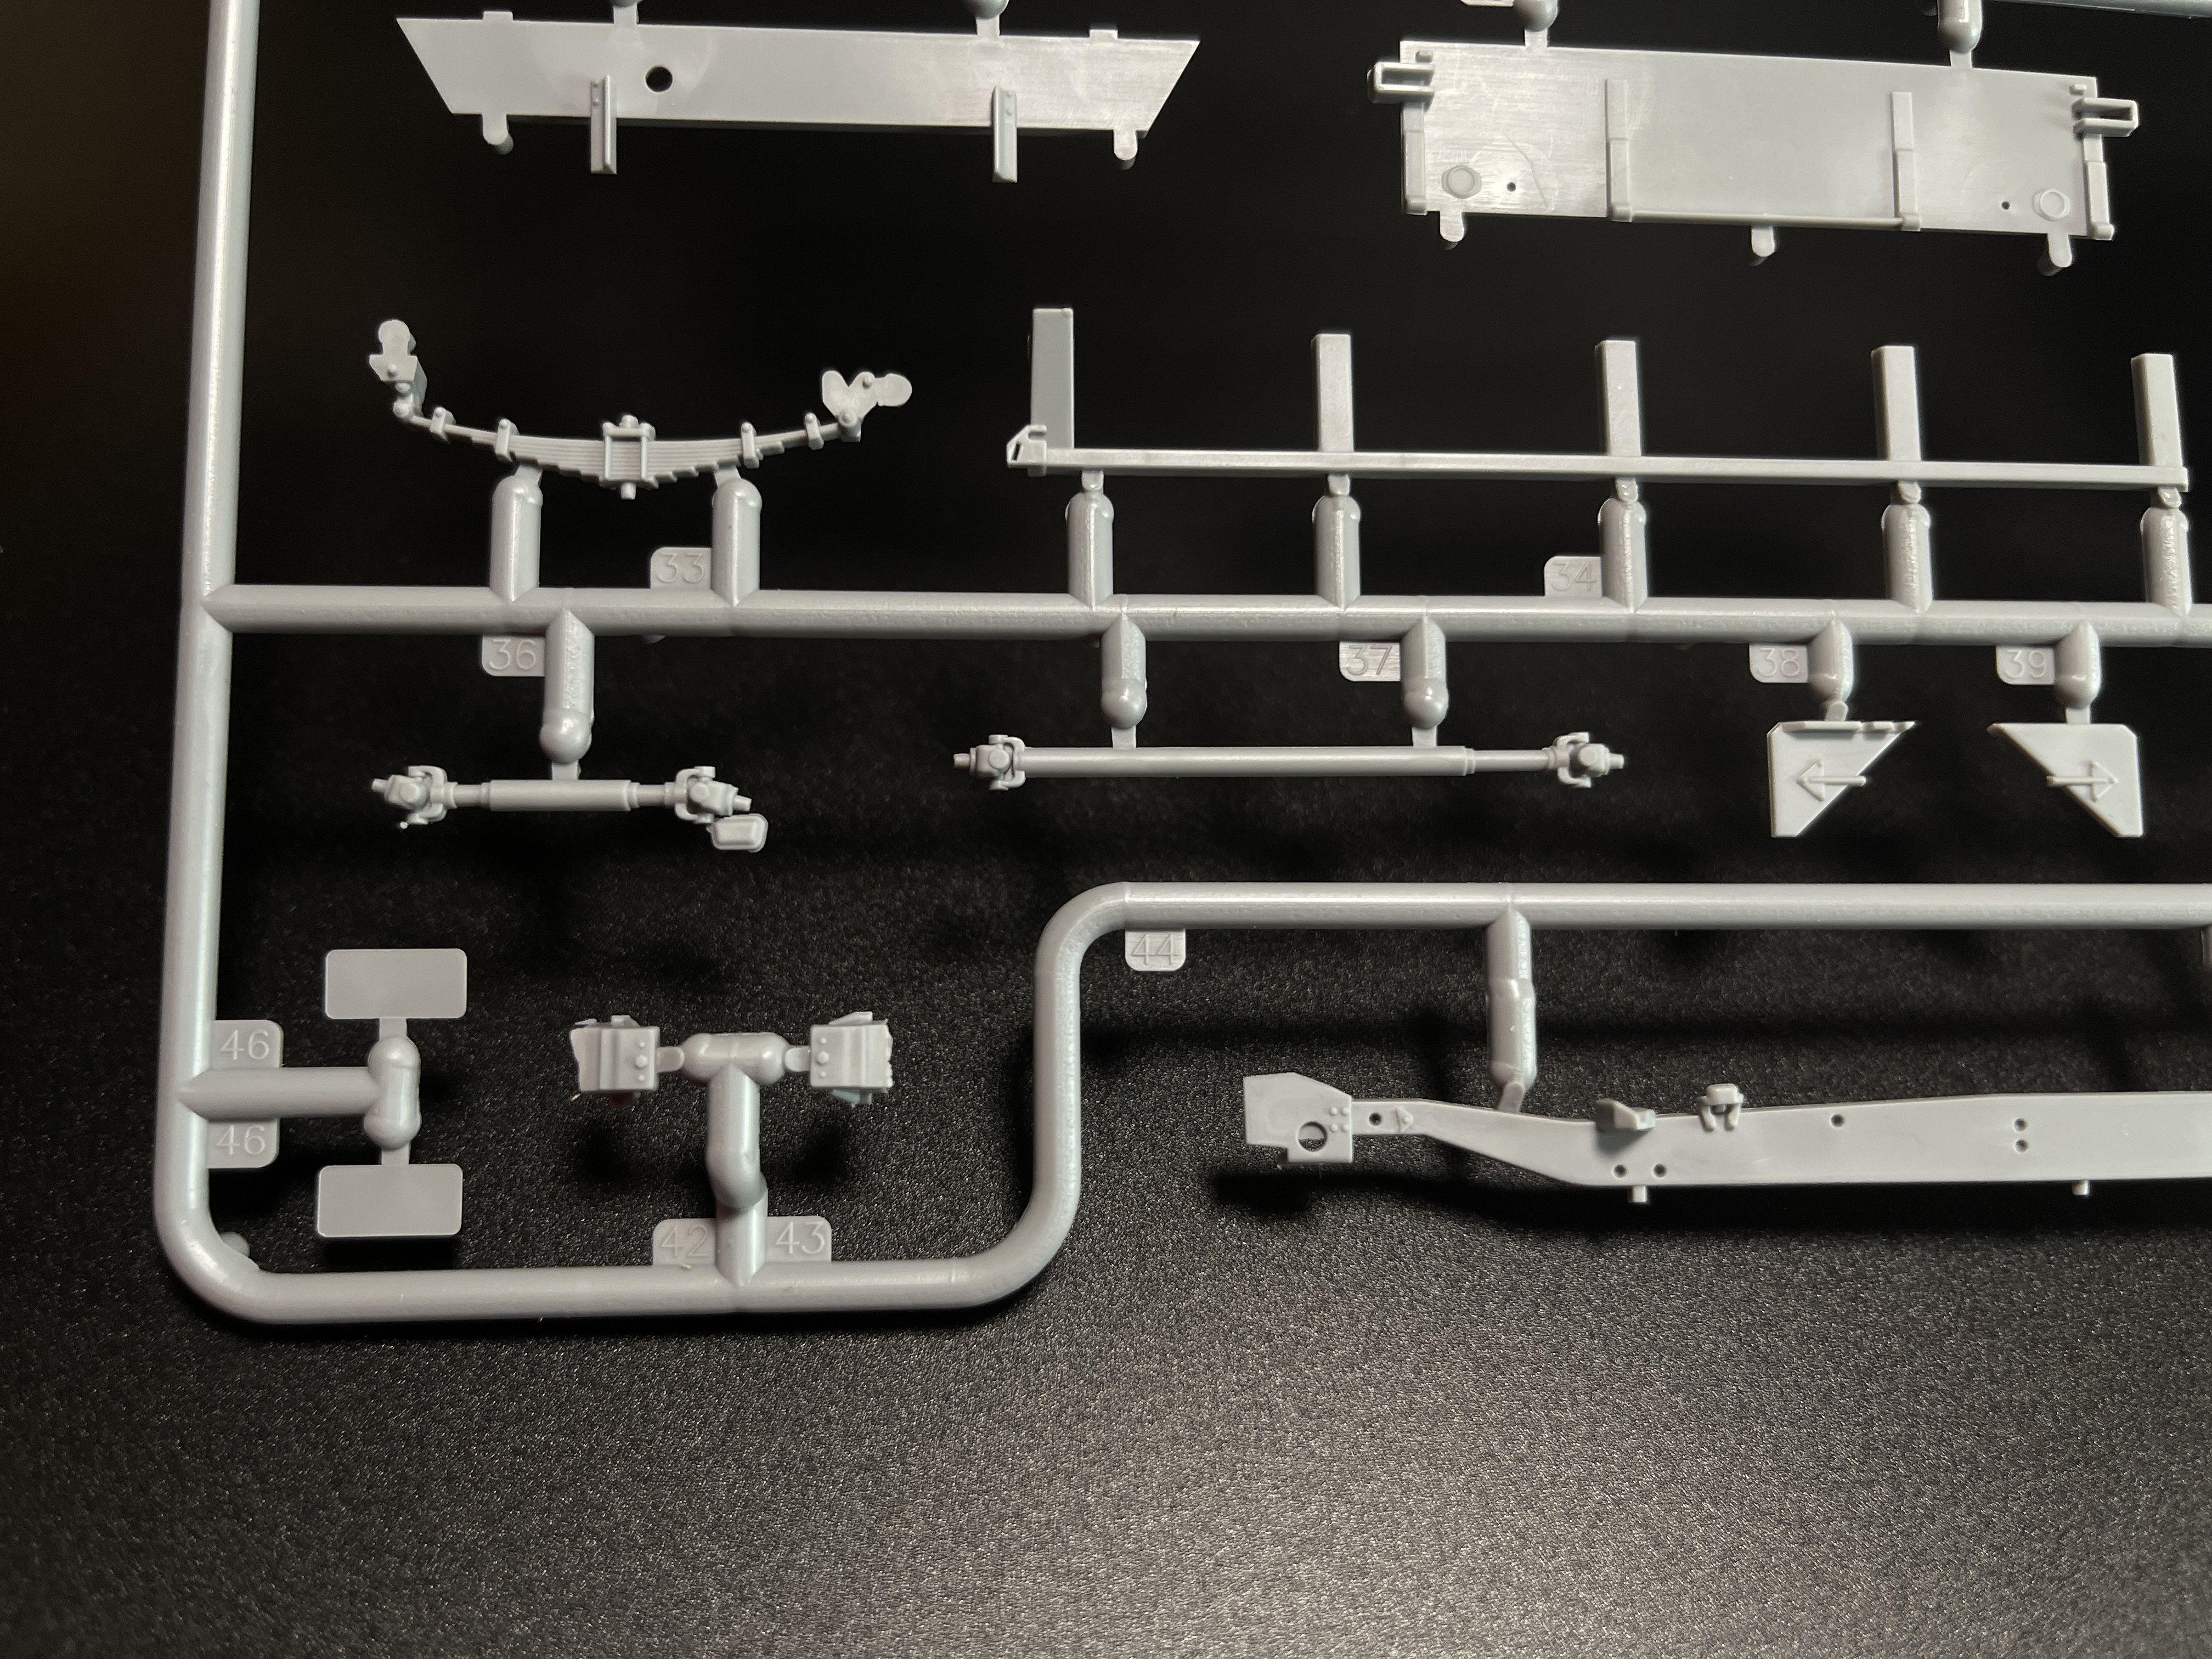
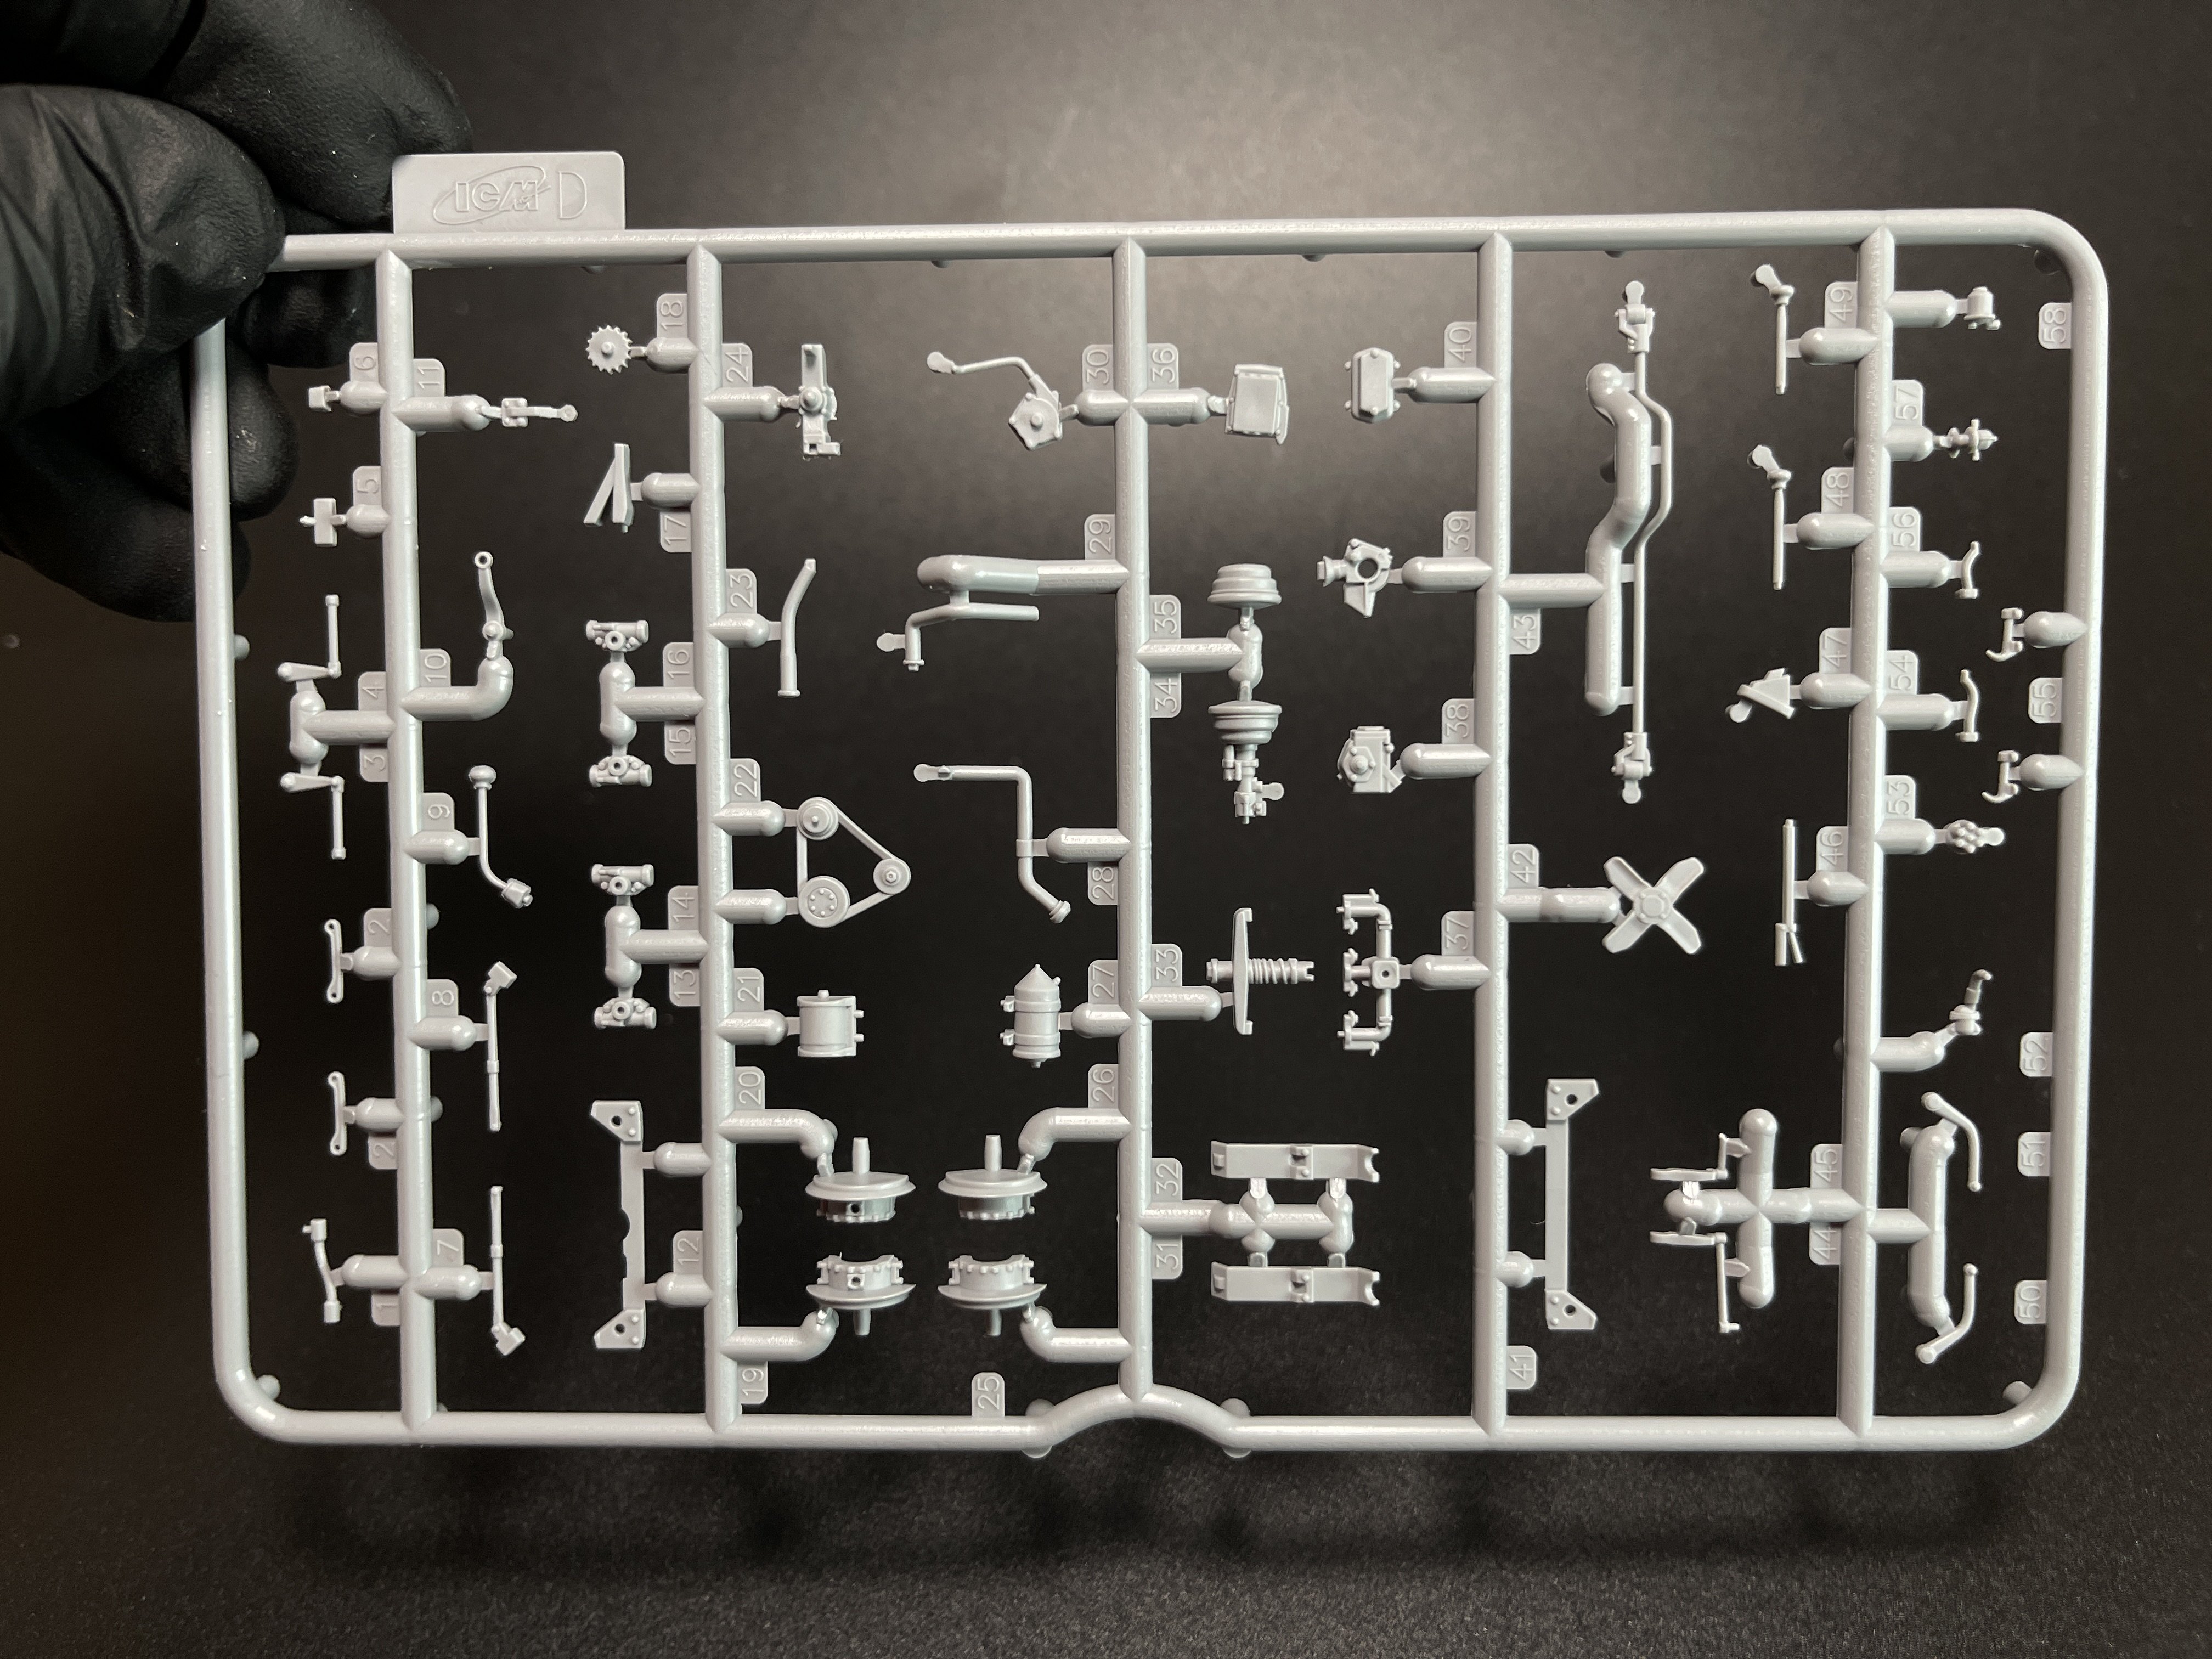
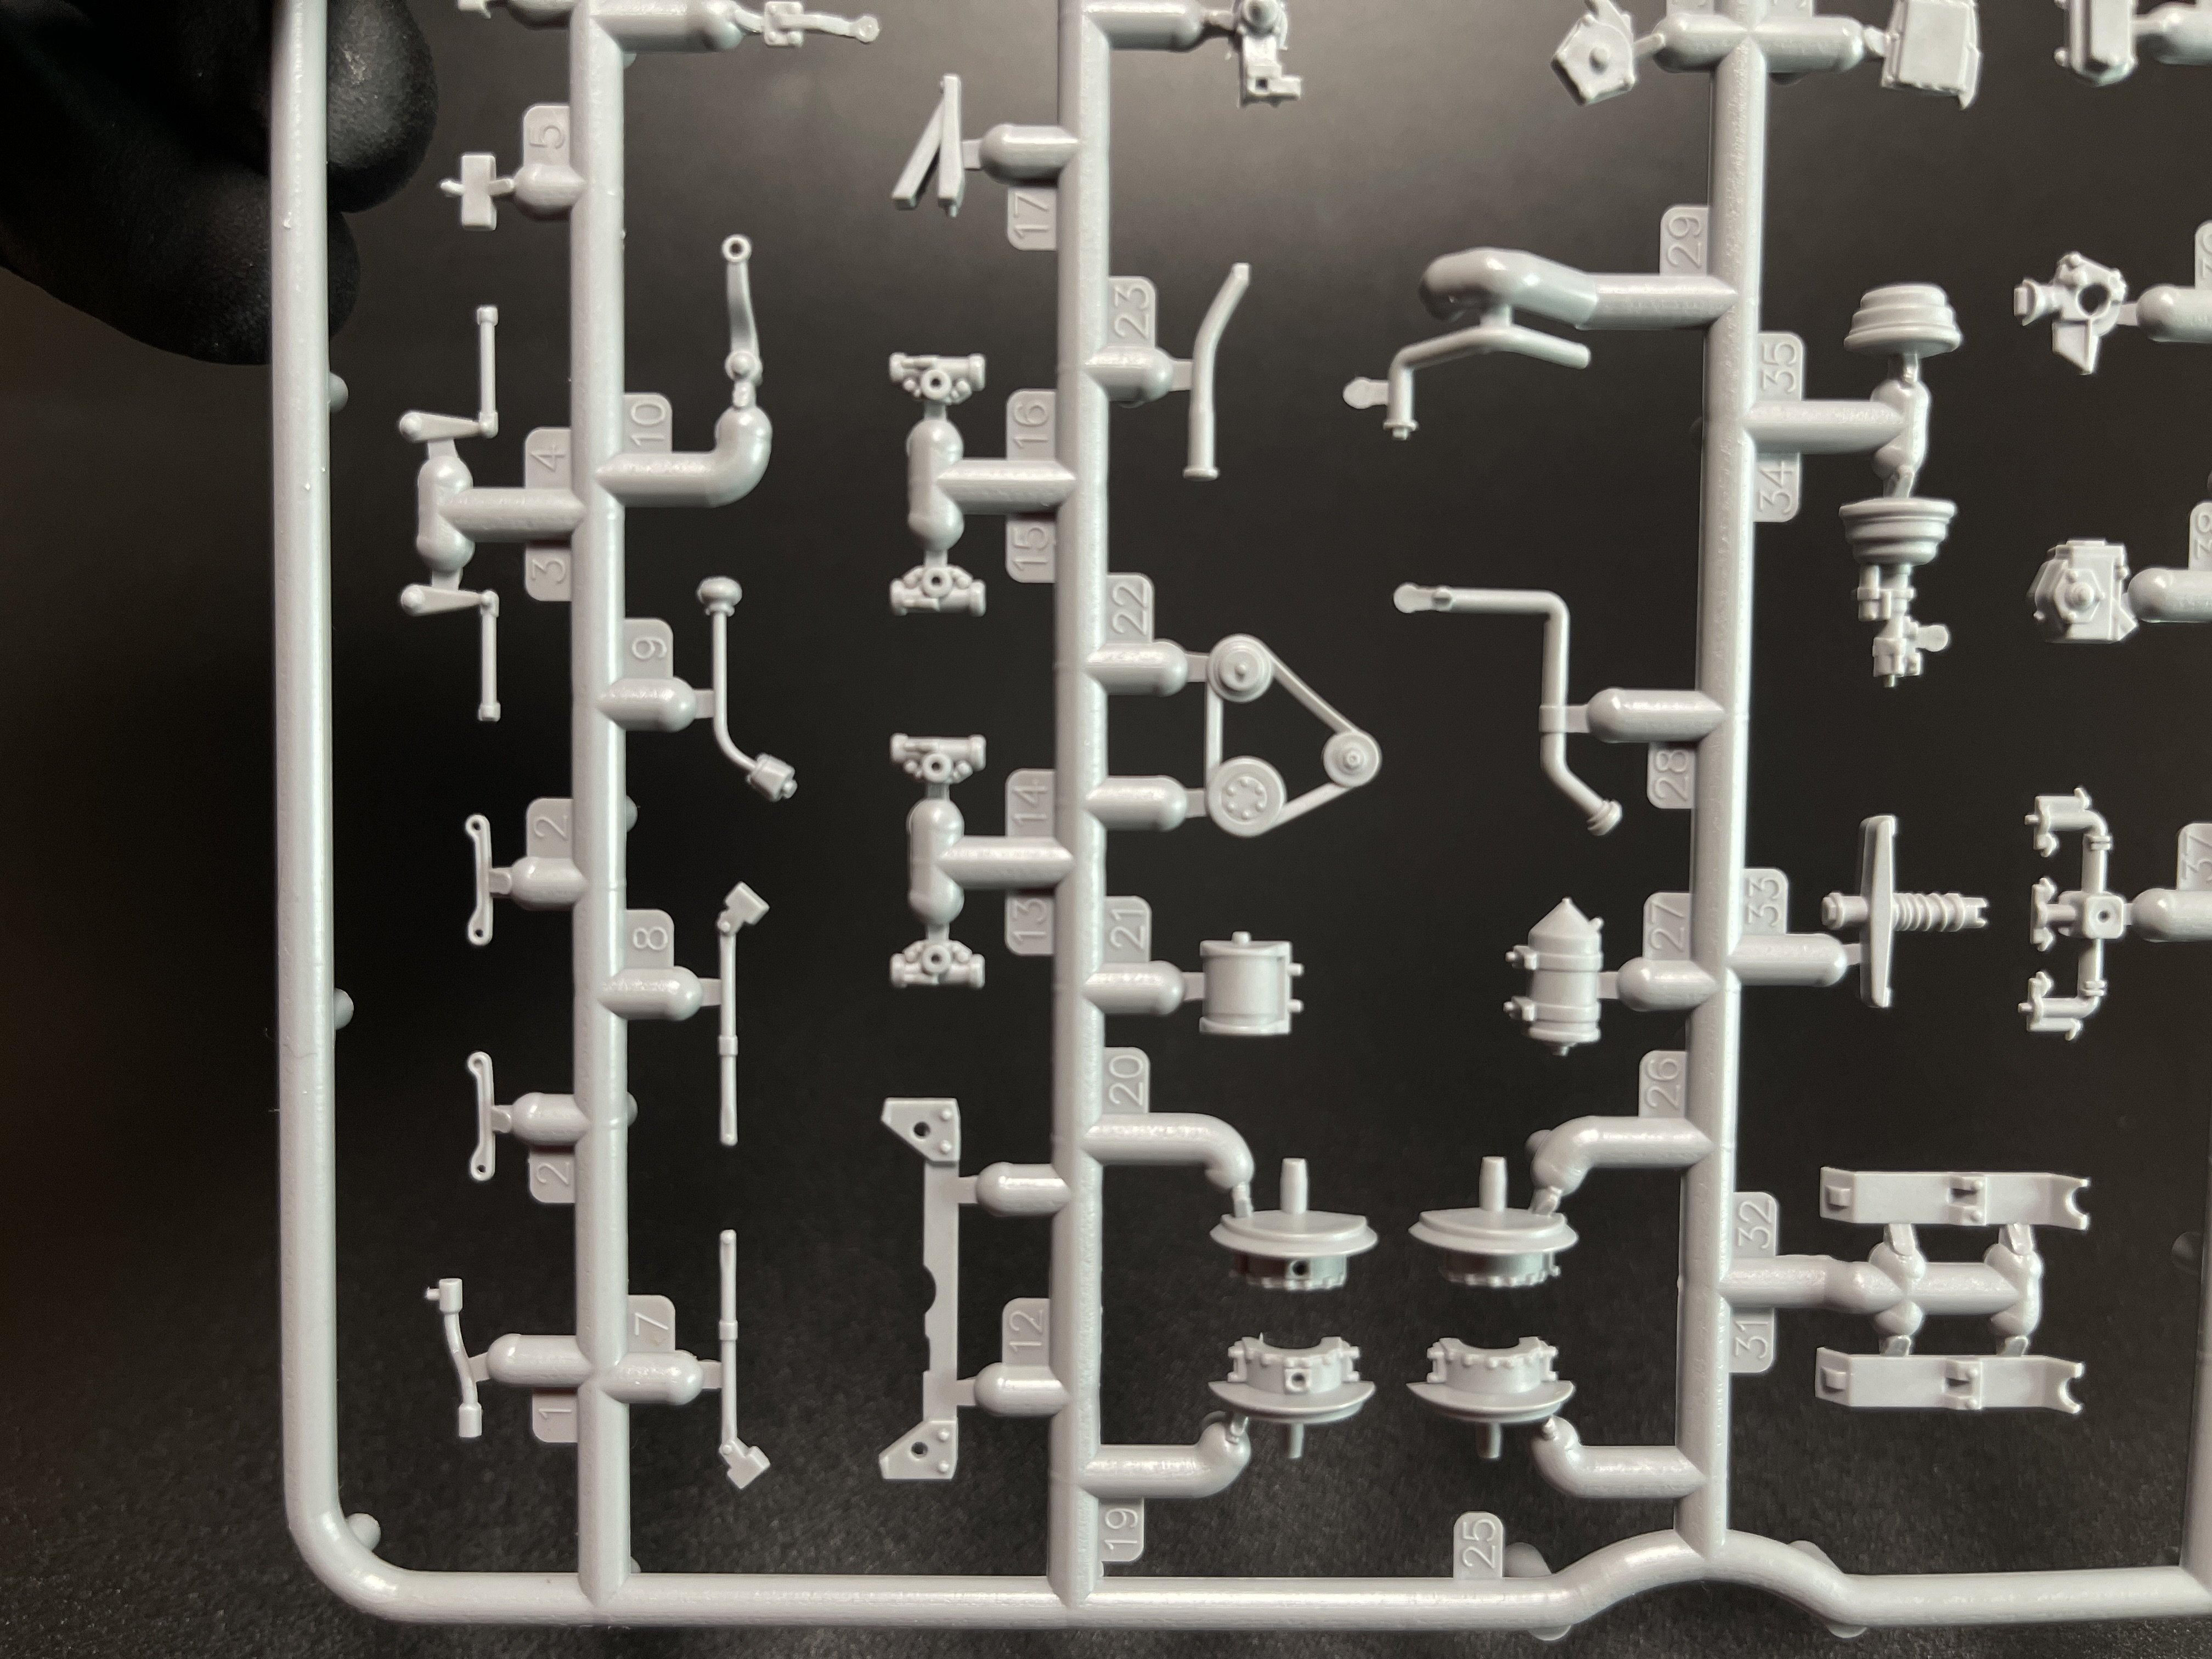
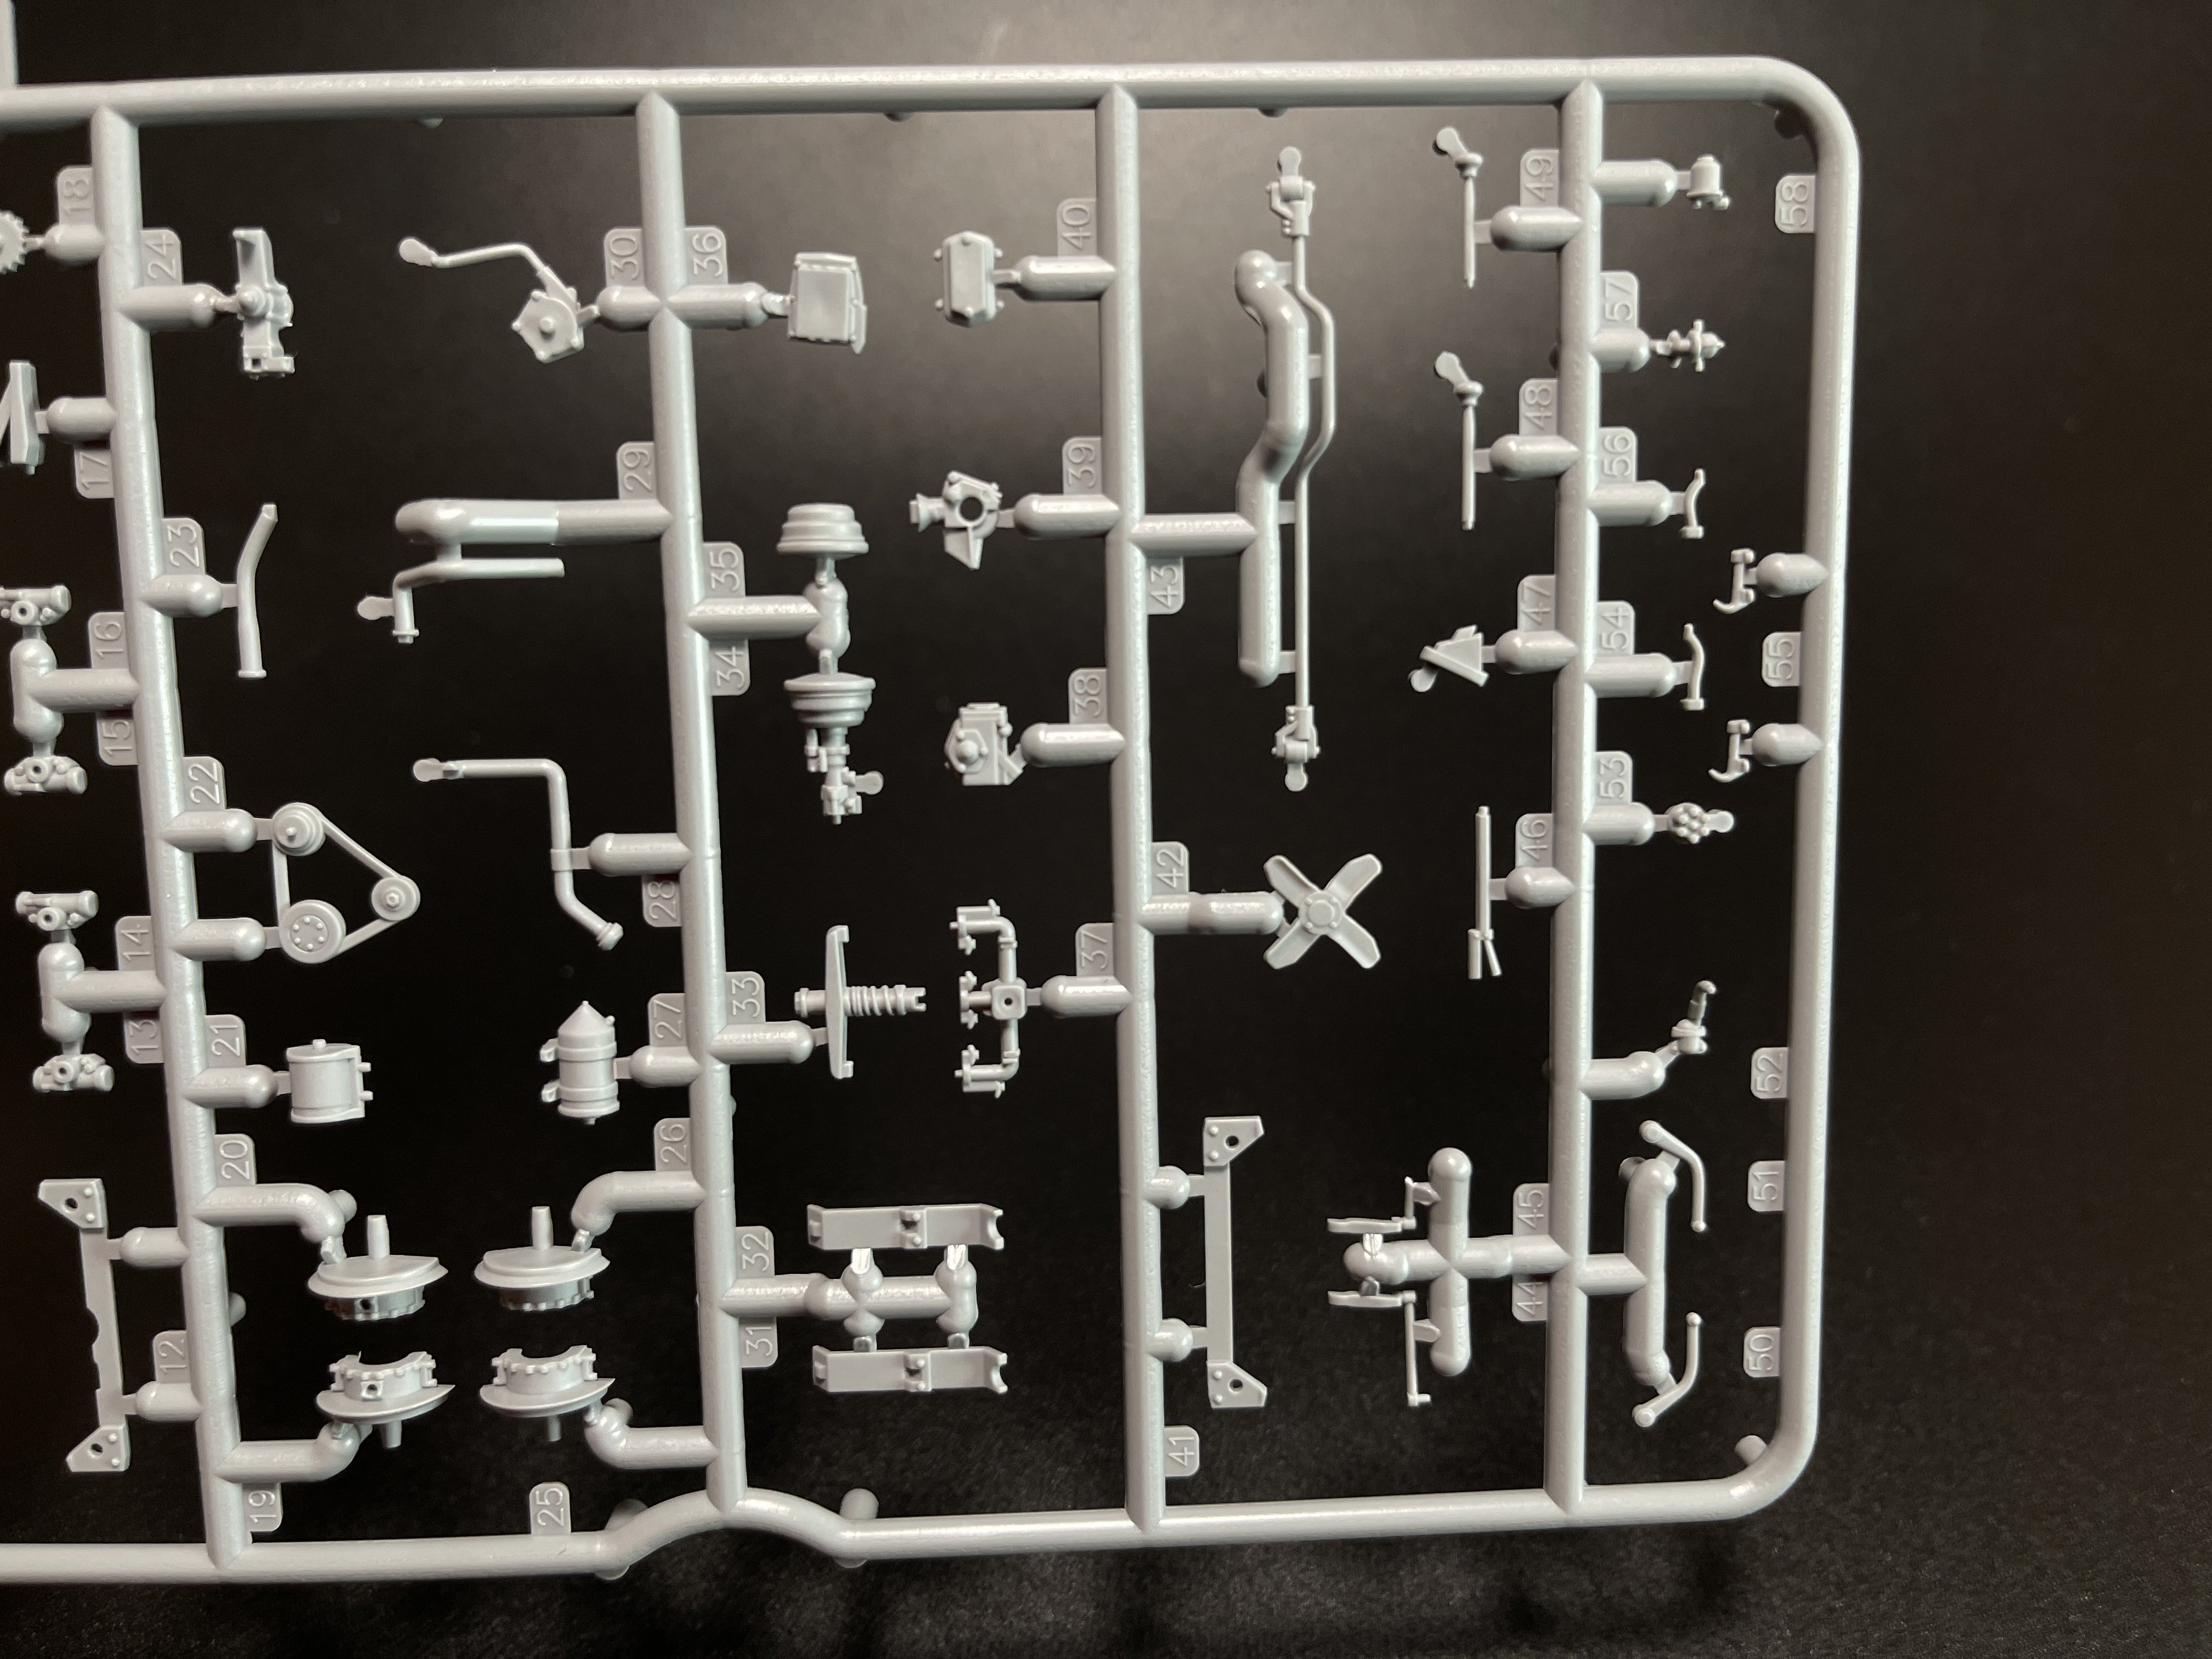
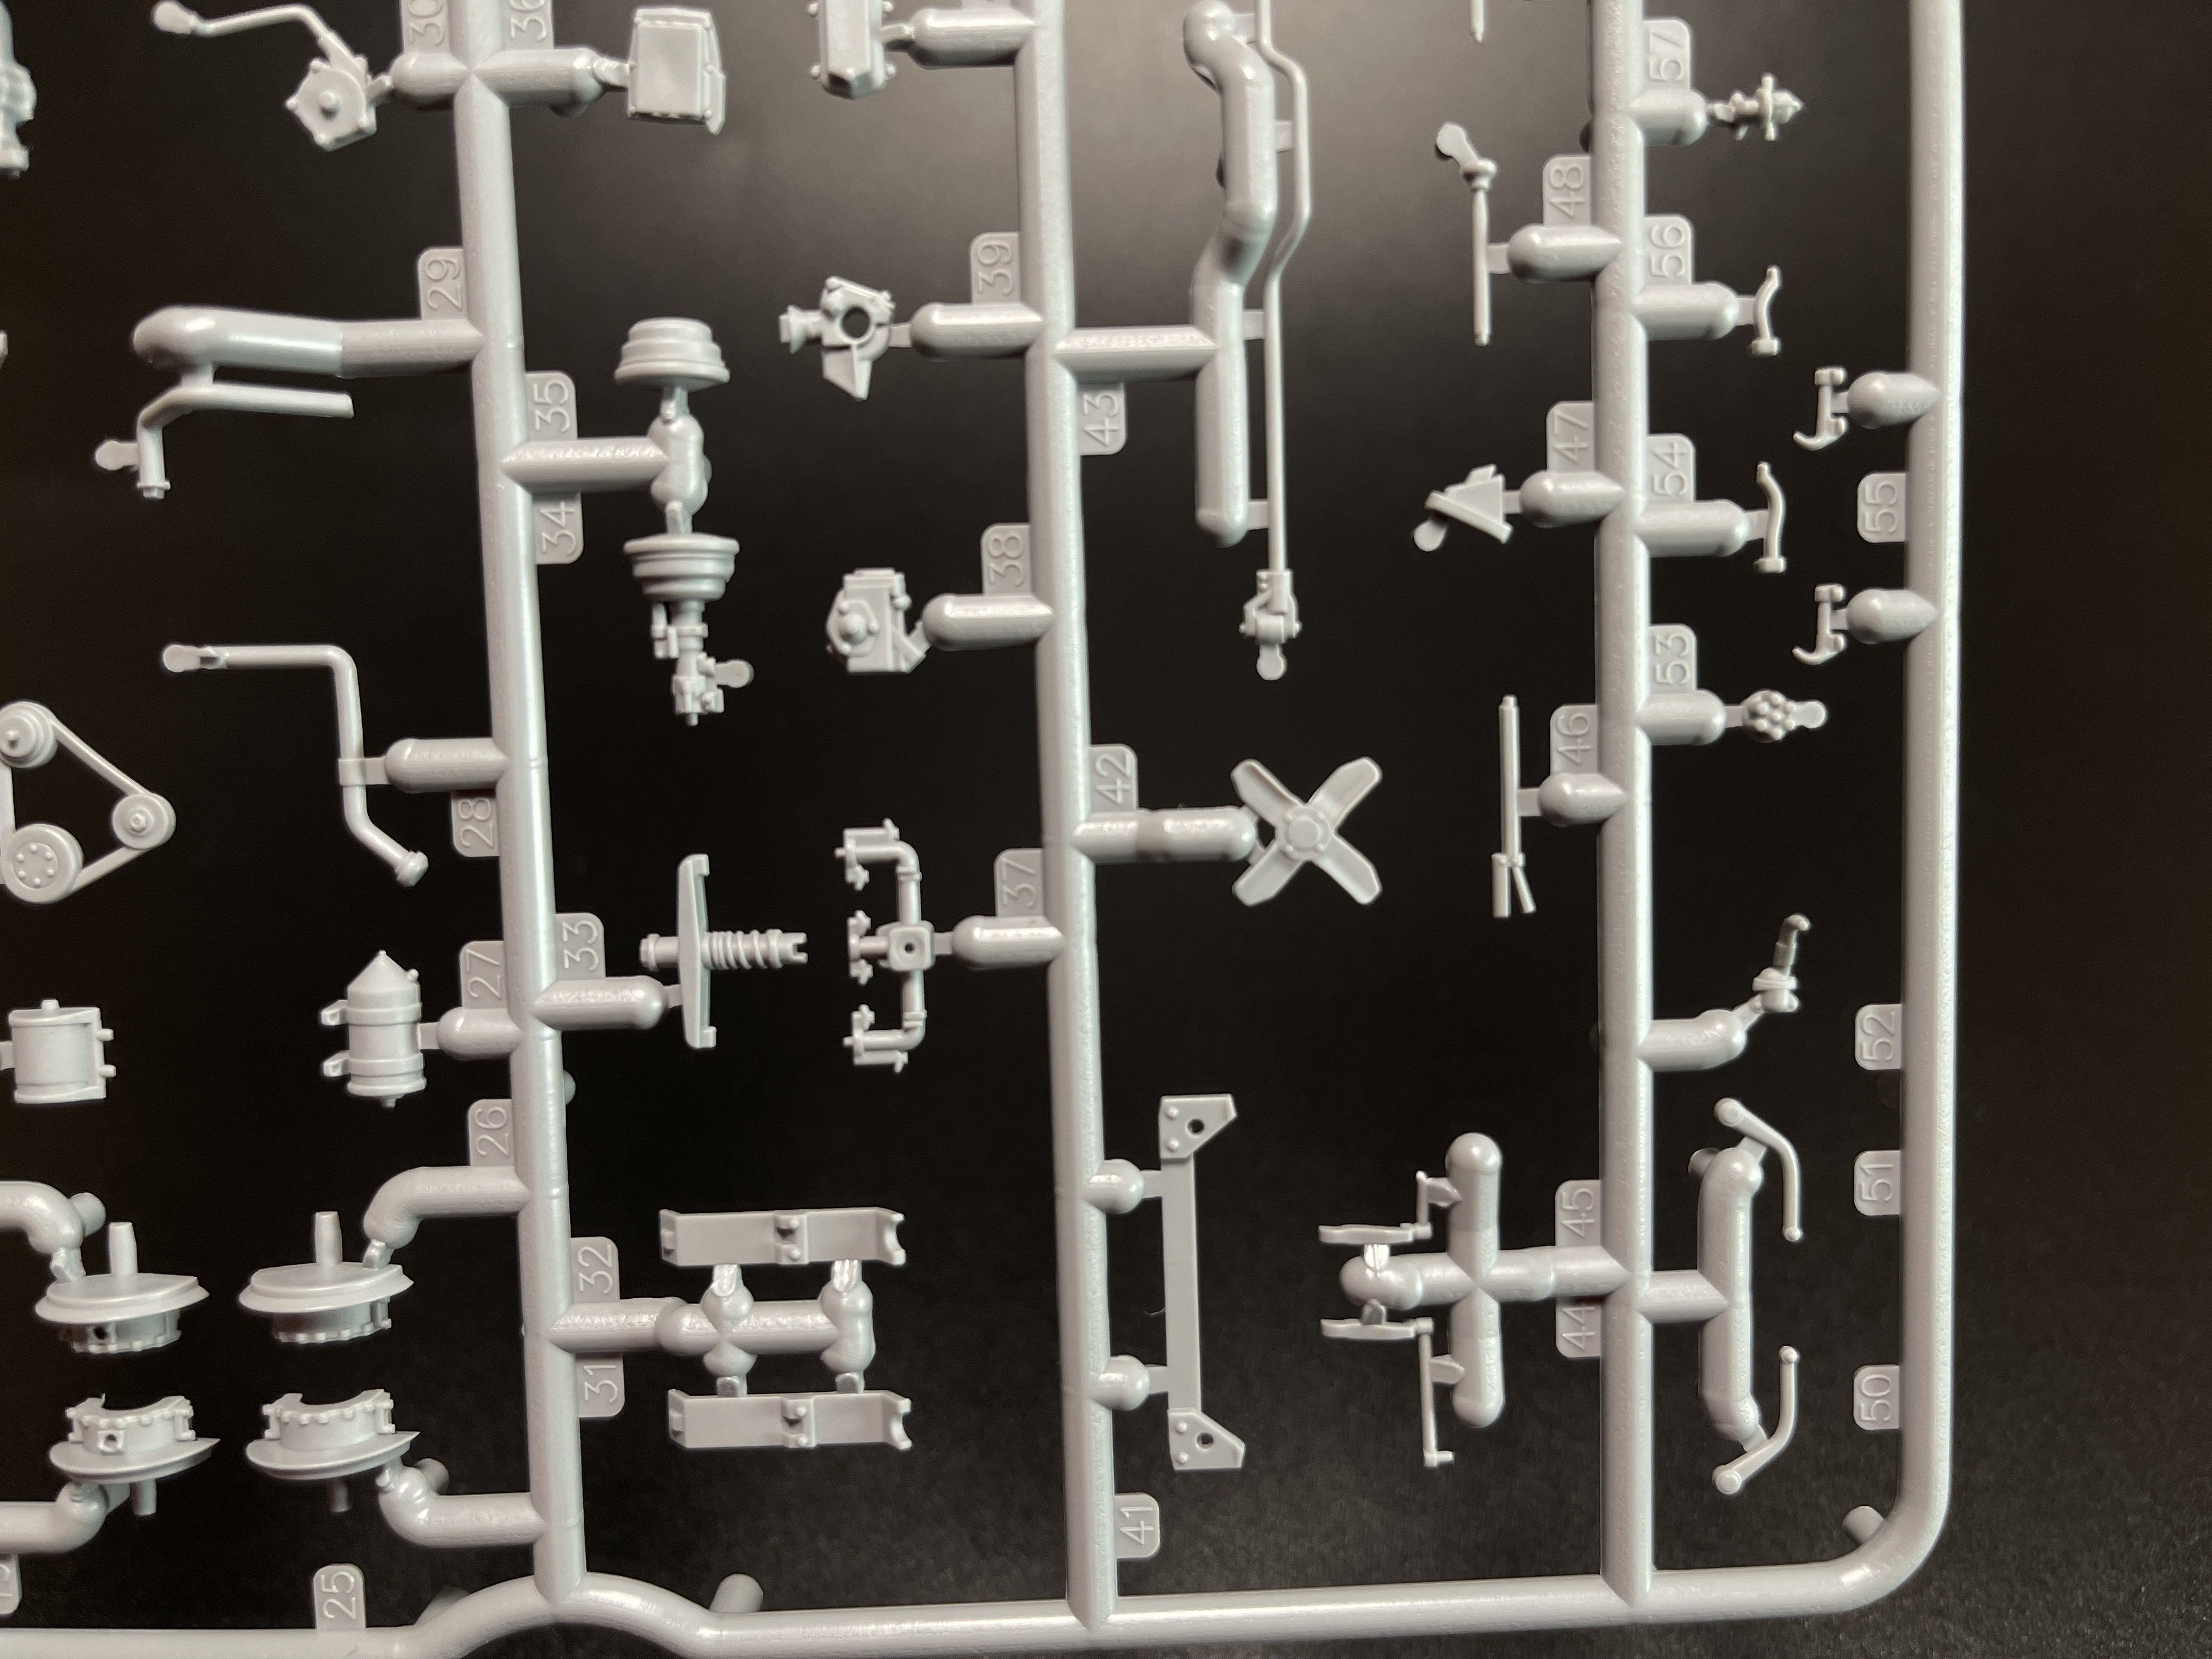
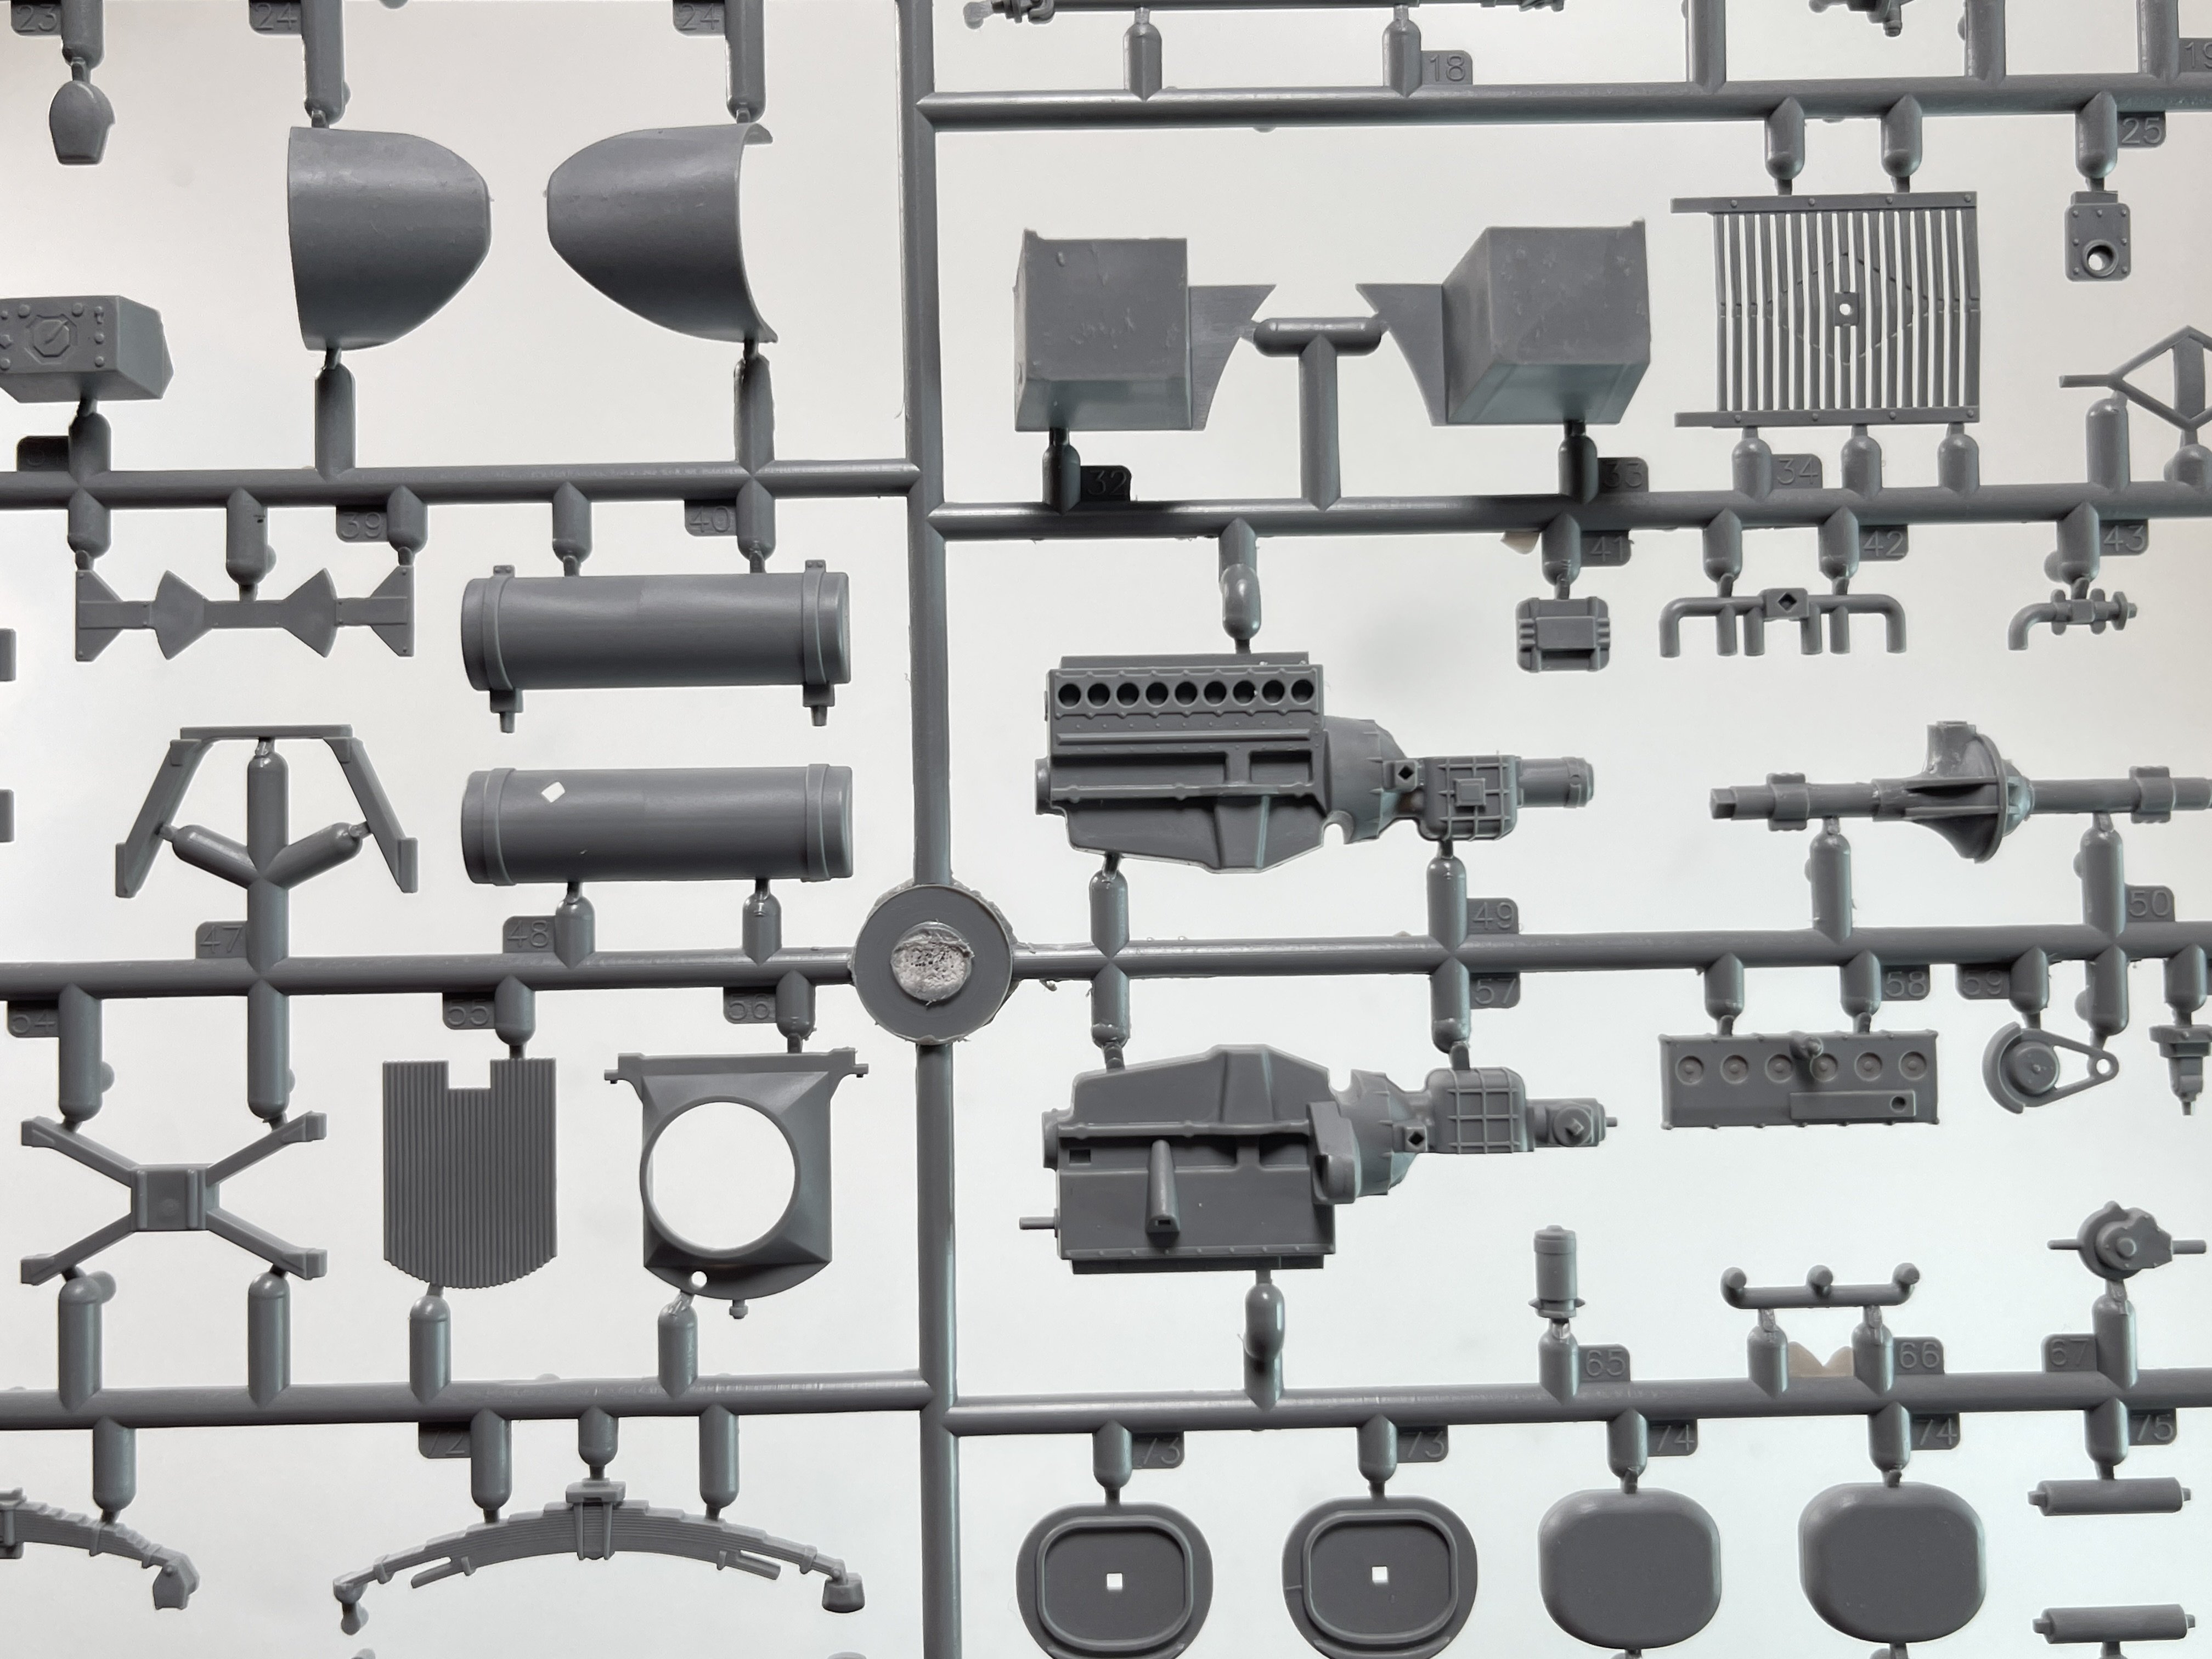
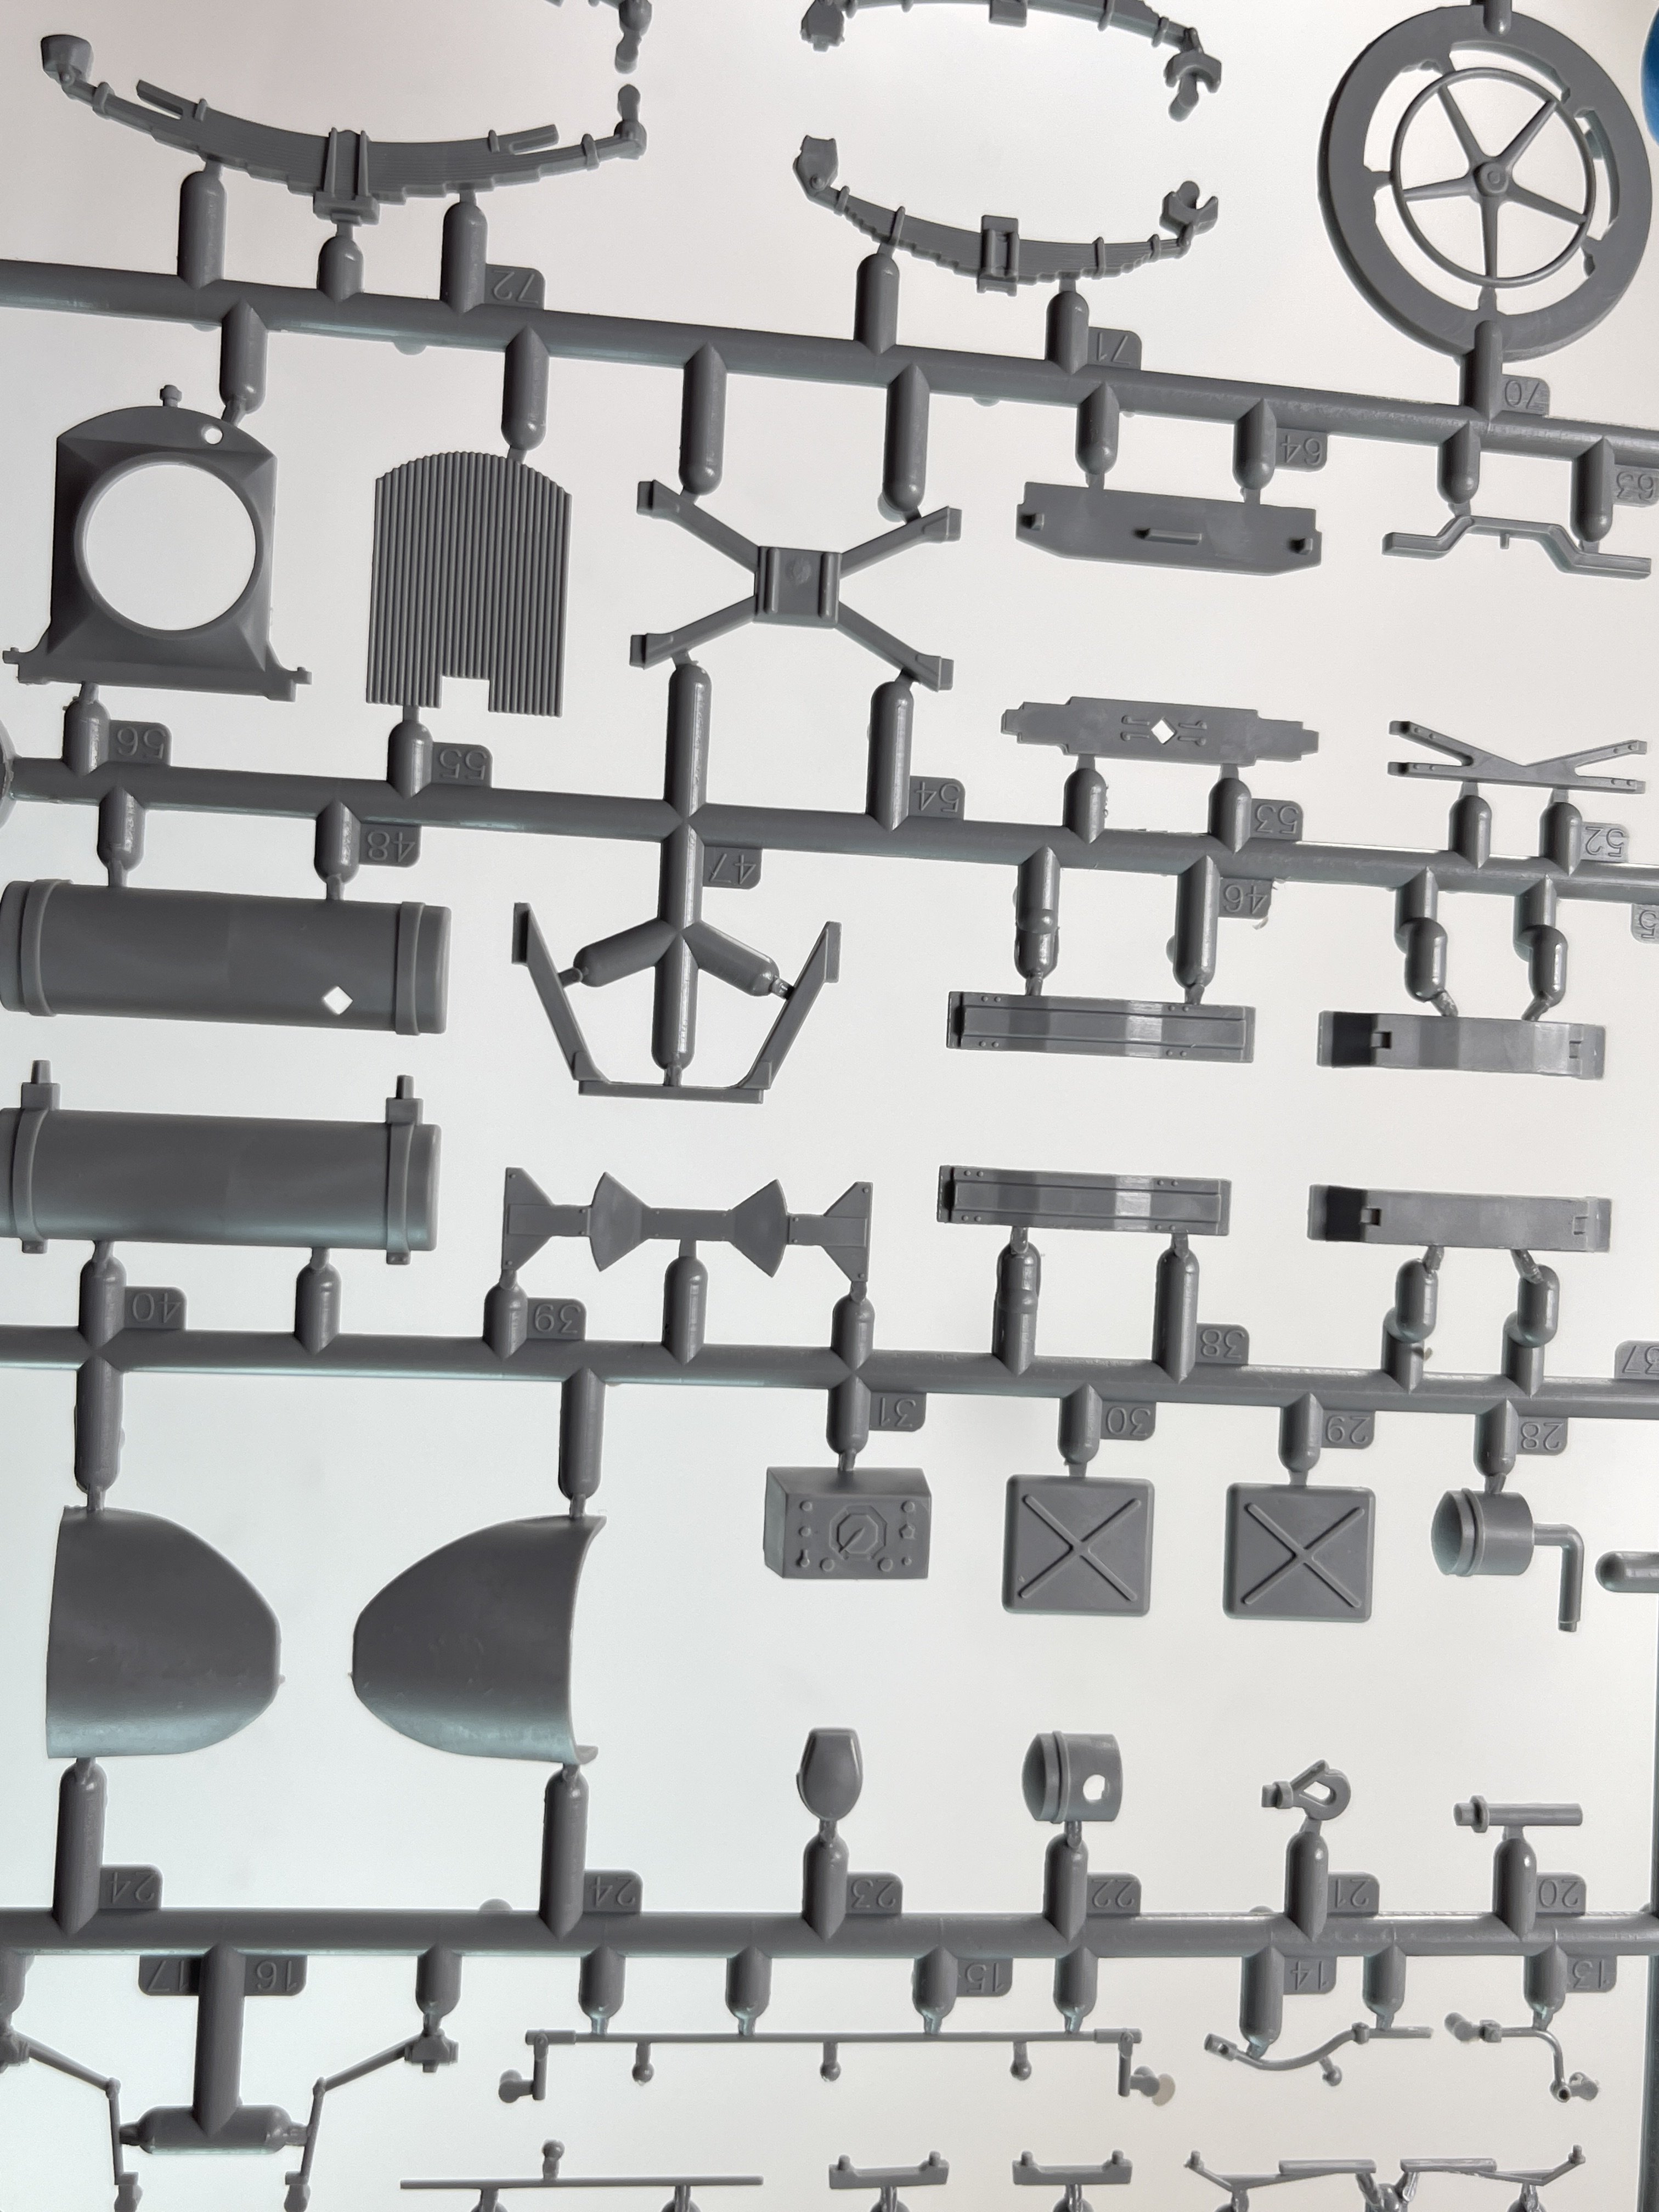
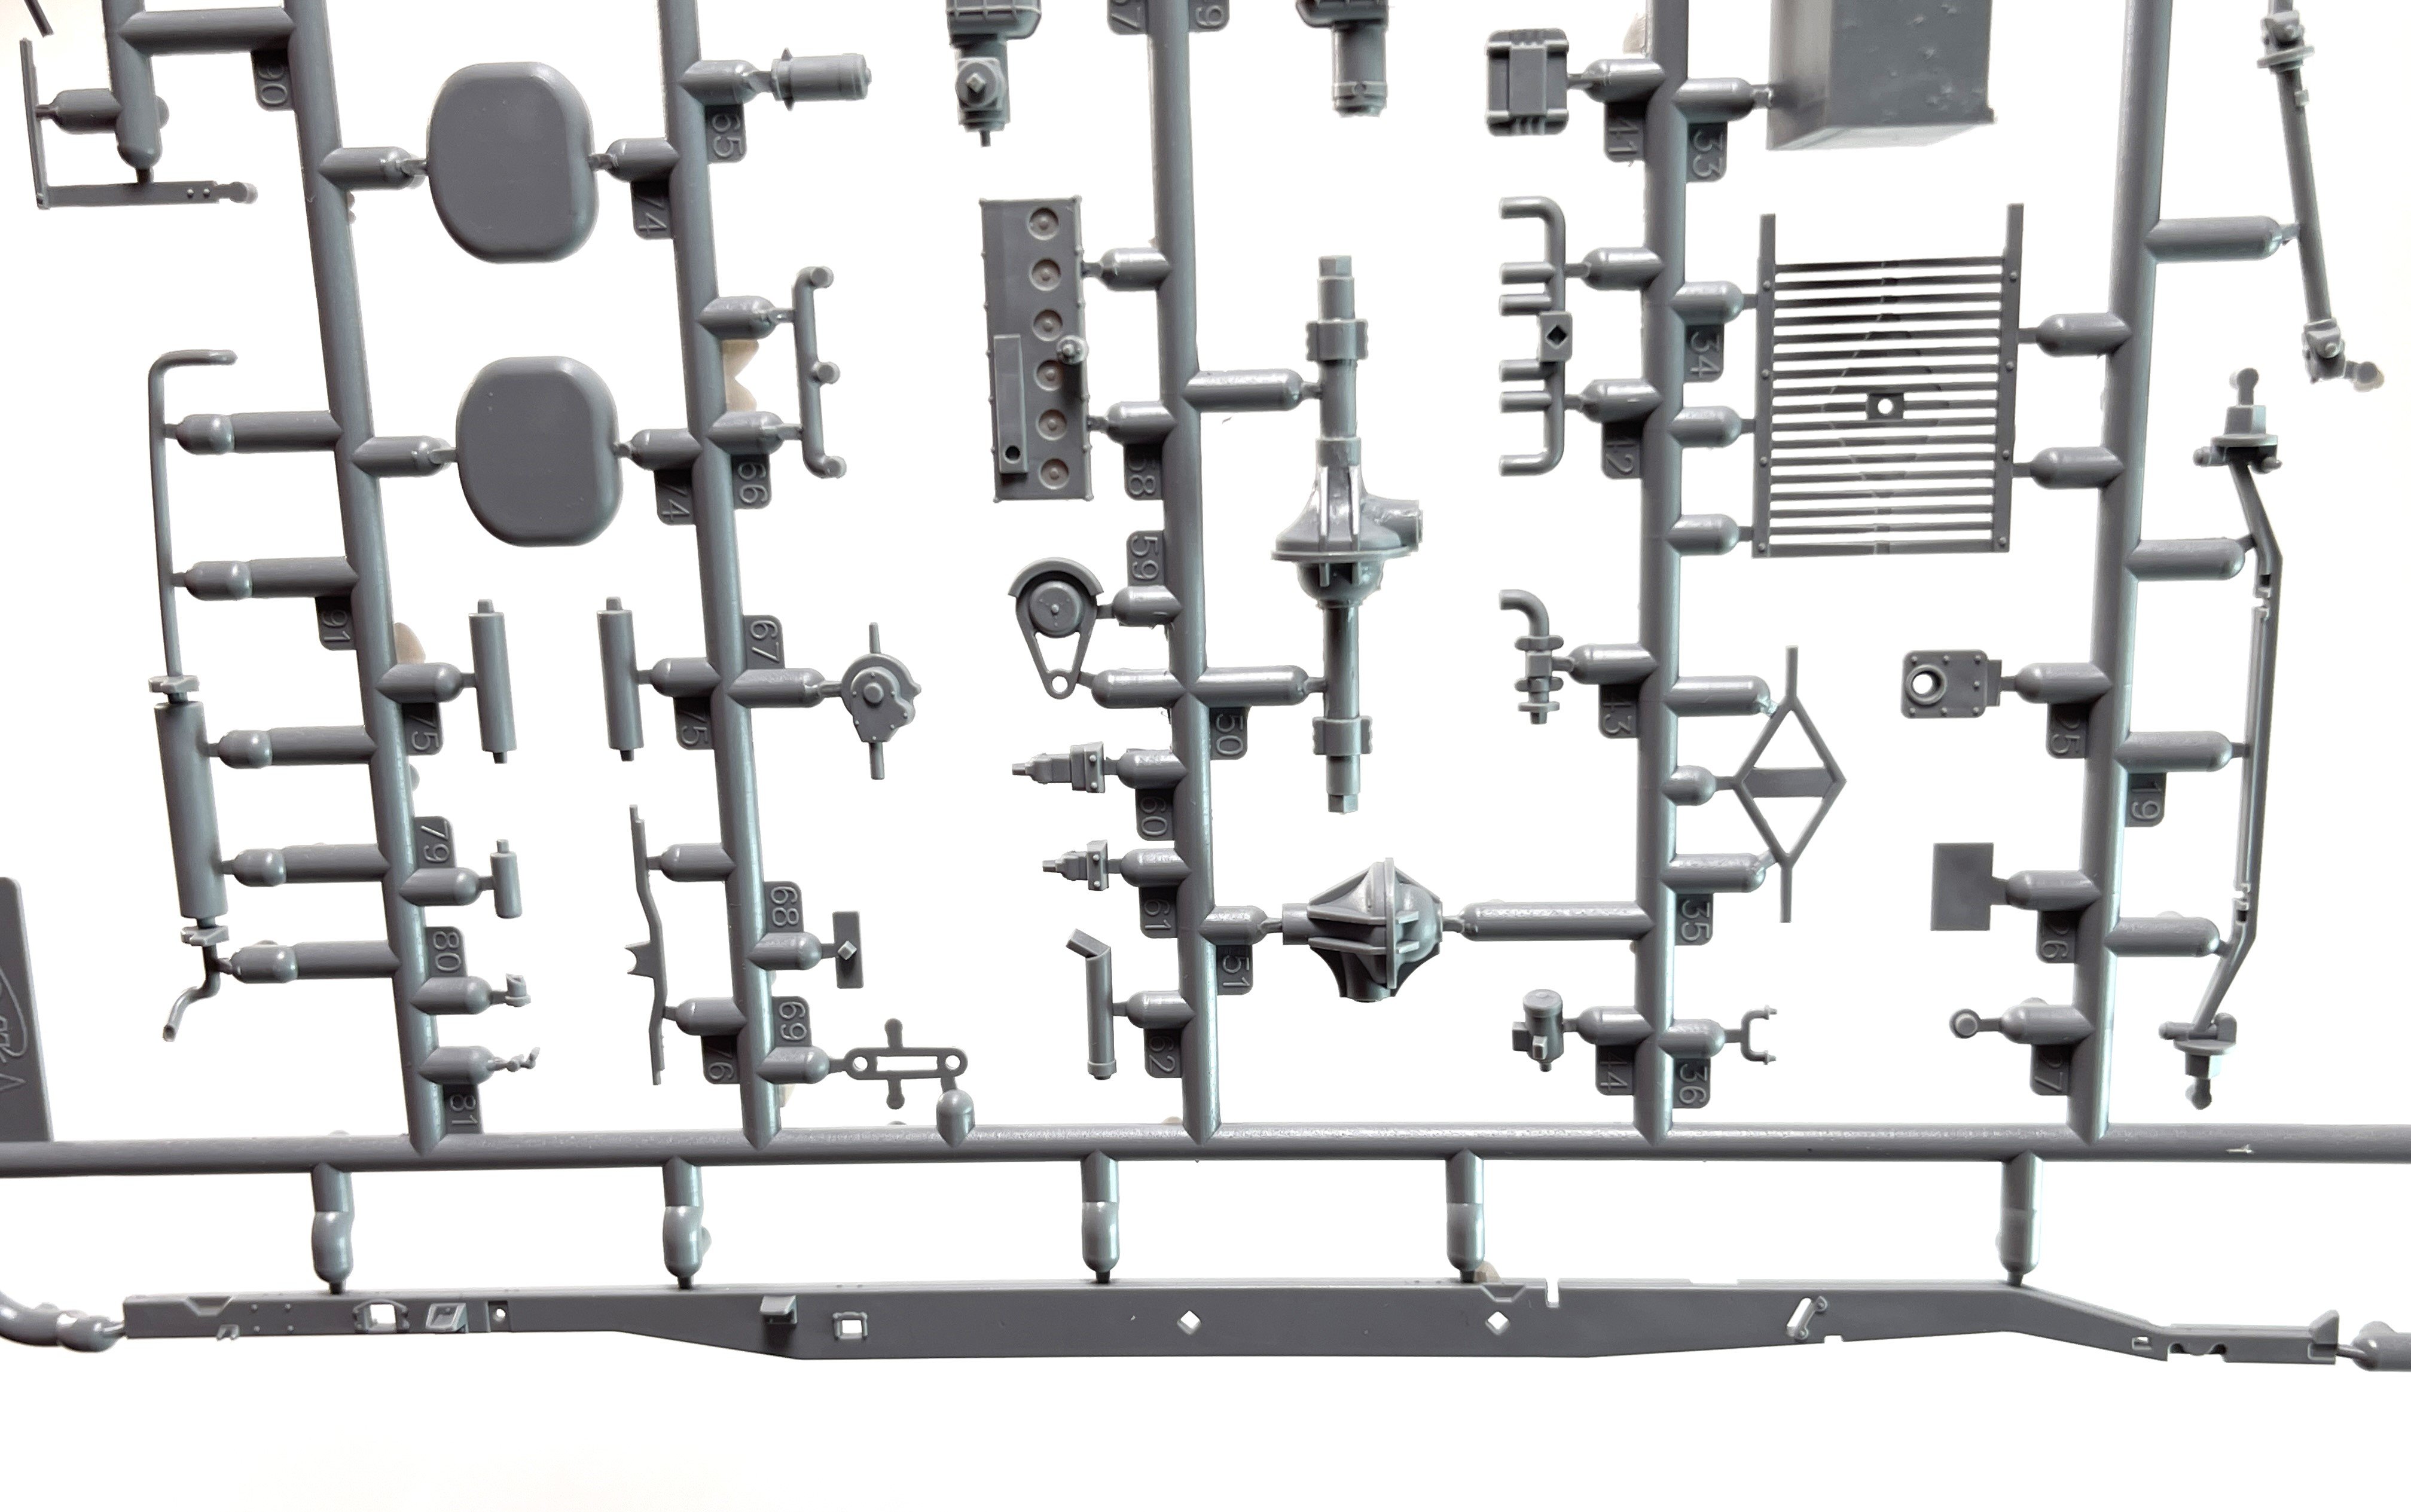
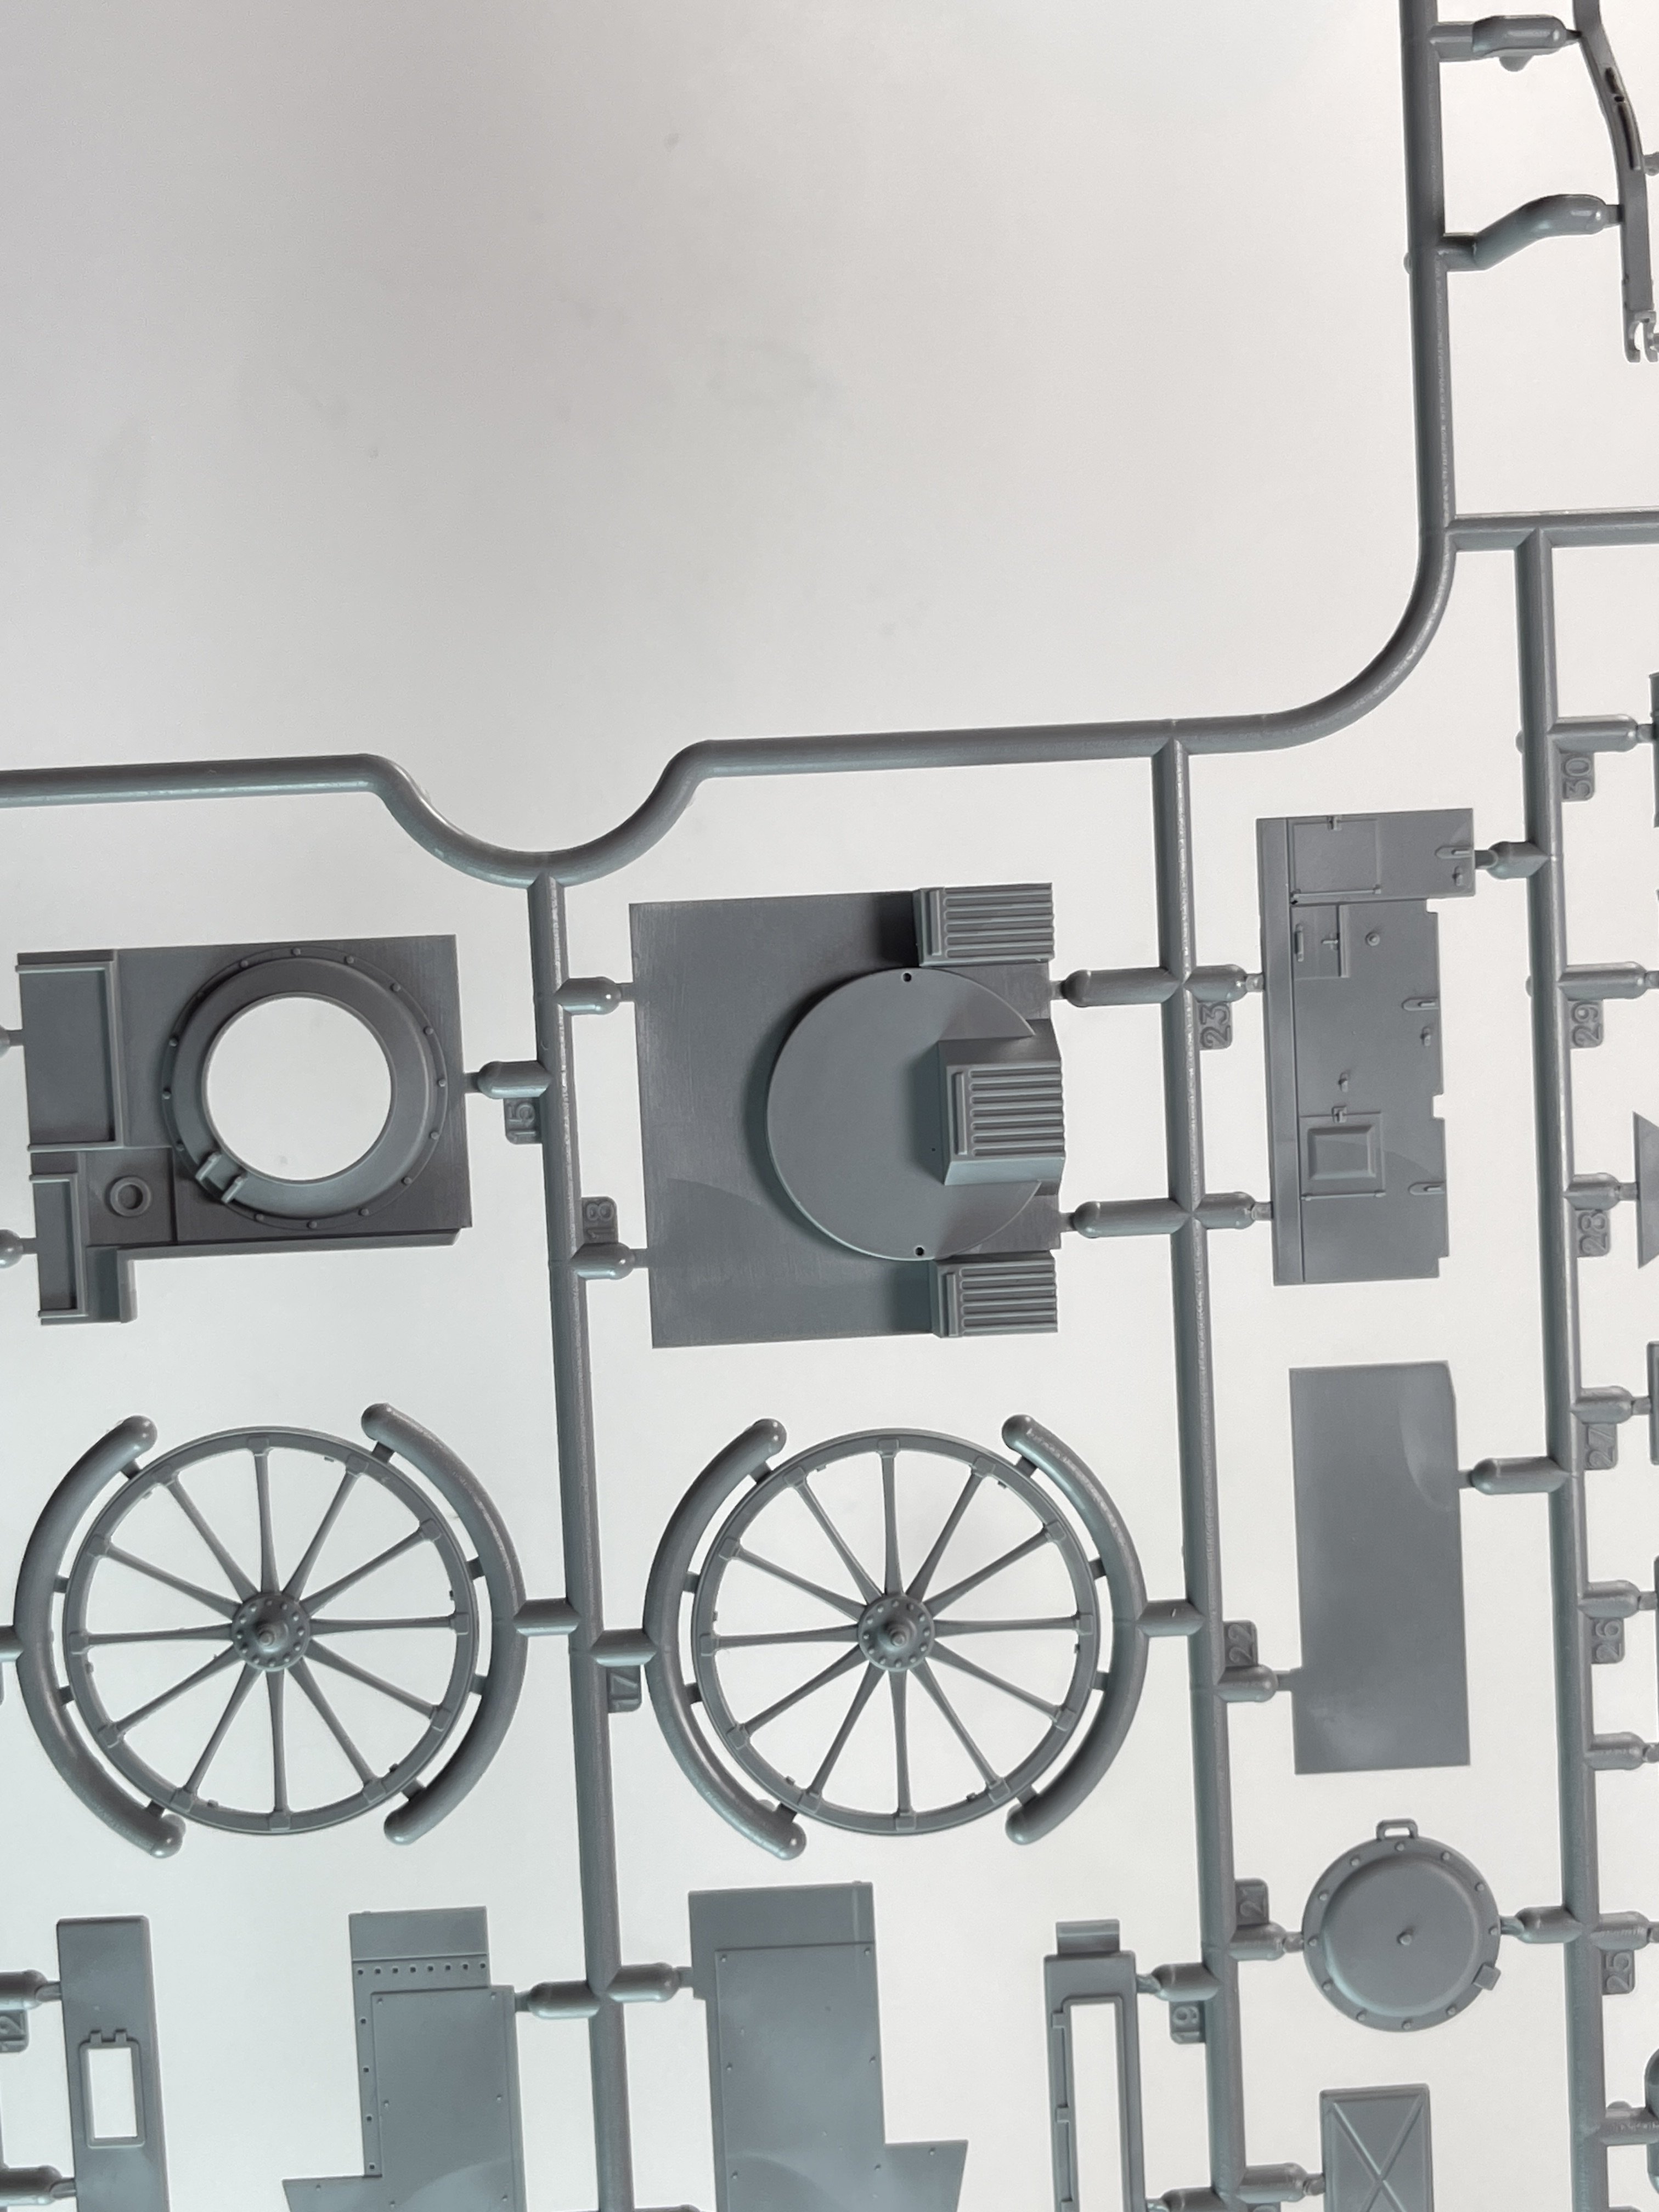
The detail on the chassis is quite complete with leaf-springs fore and aft, cross-braces and rear towing eye the rear bumper irons, fuel tank, transfer casing and front axle.
To add up even more detail, a very good OOB engine is given. Only wires are missing. You can make a hood open with all of the detail showing OOB and it will be outstanding. THAT is to show how good the detail is directly from the box.
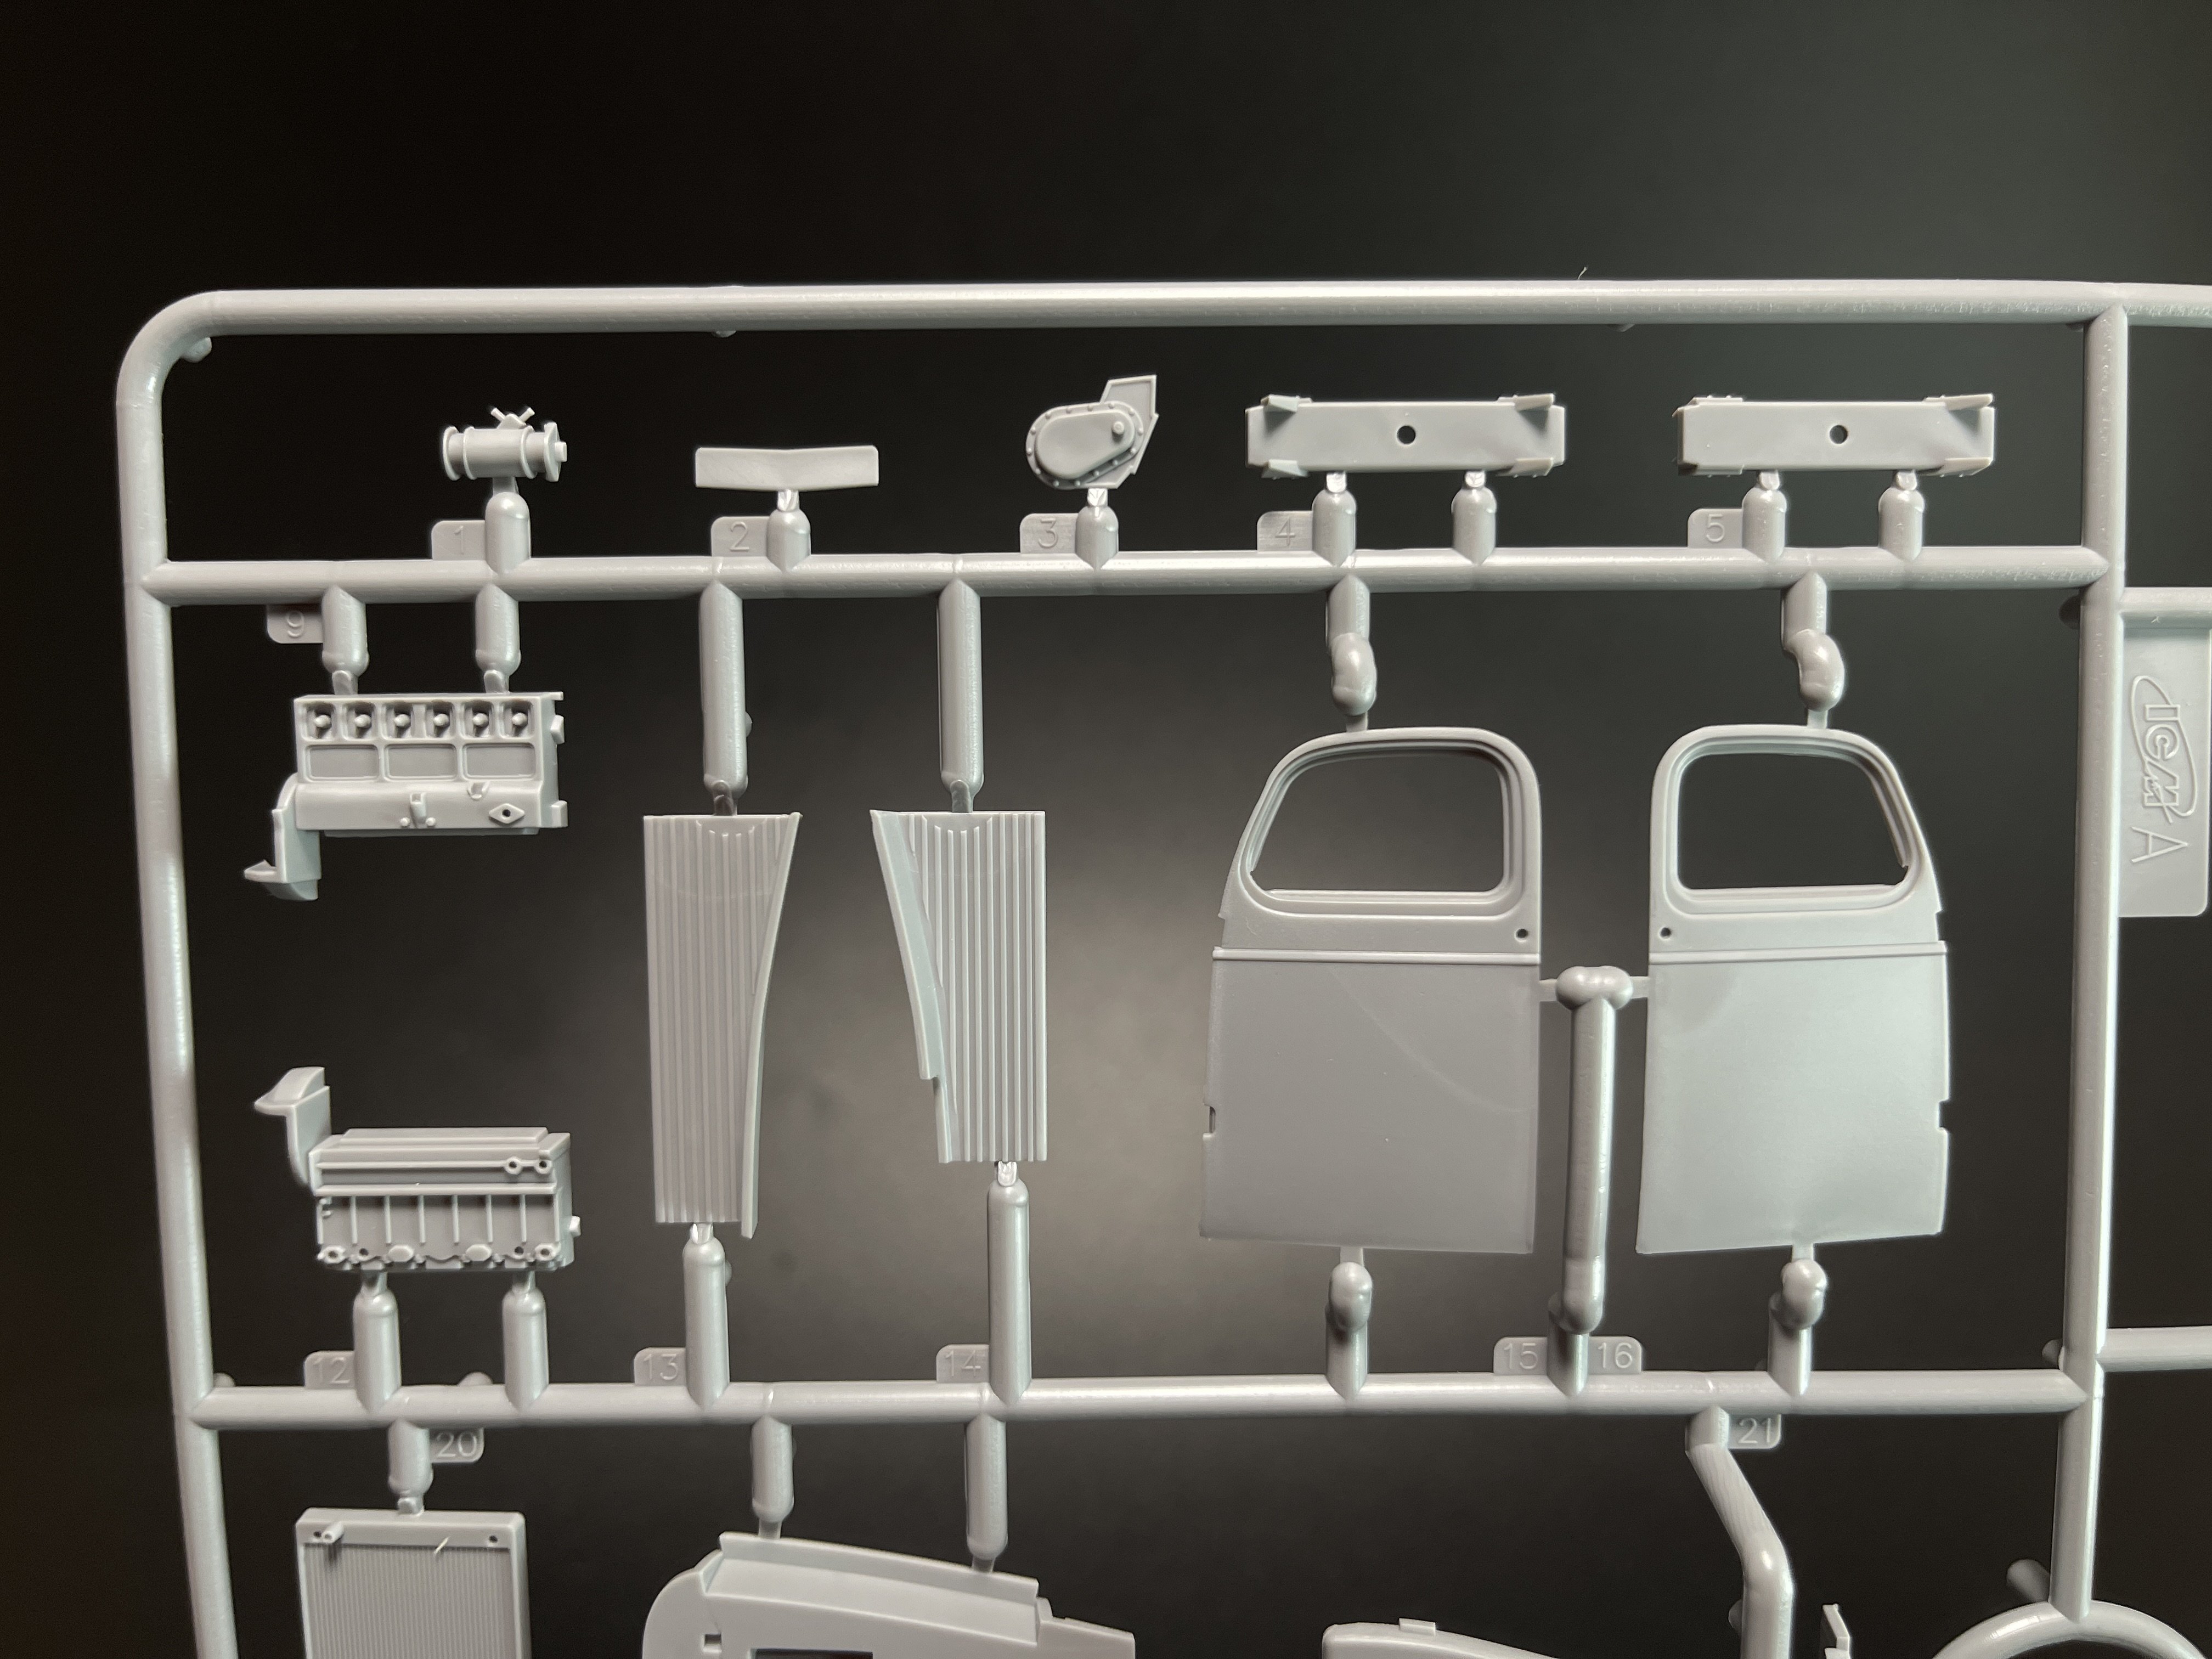
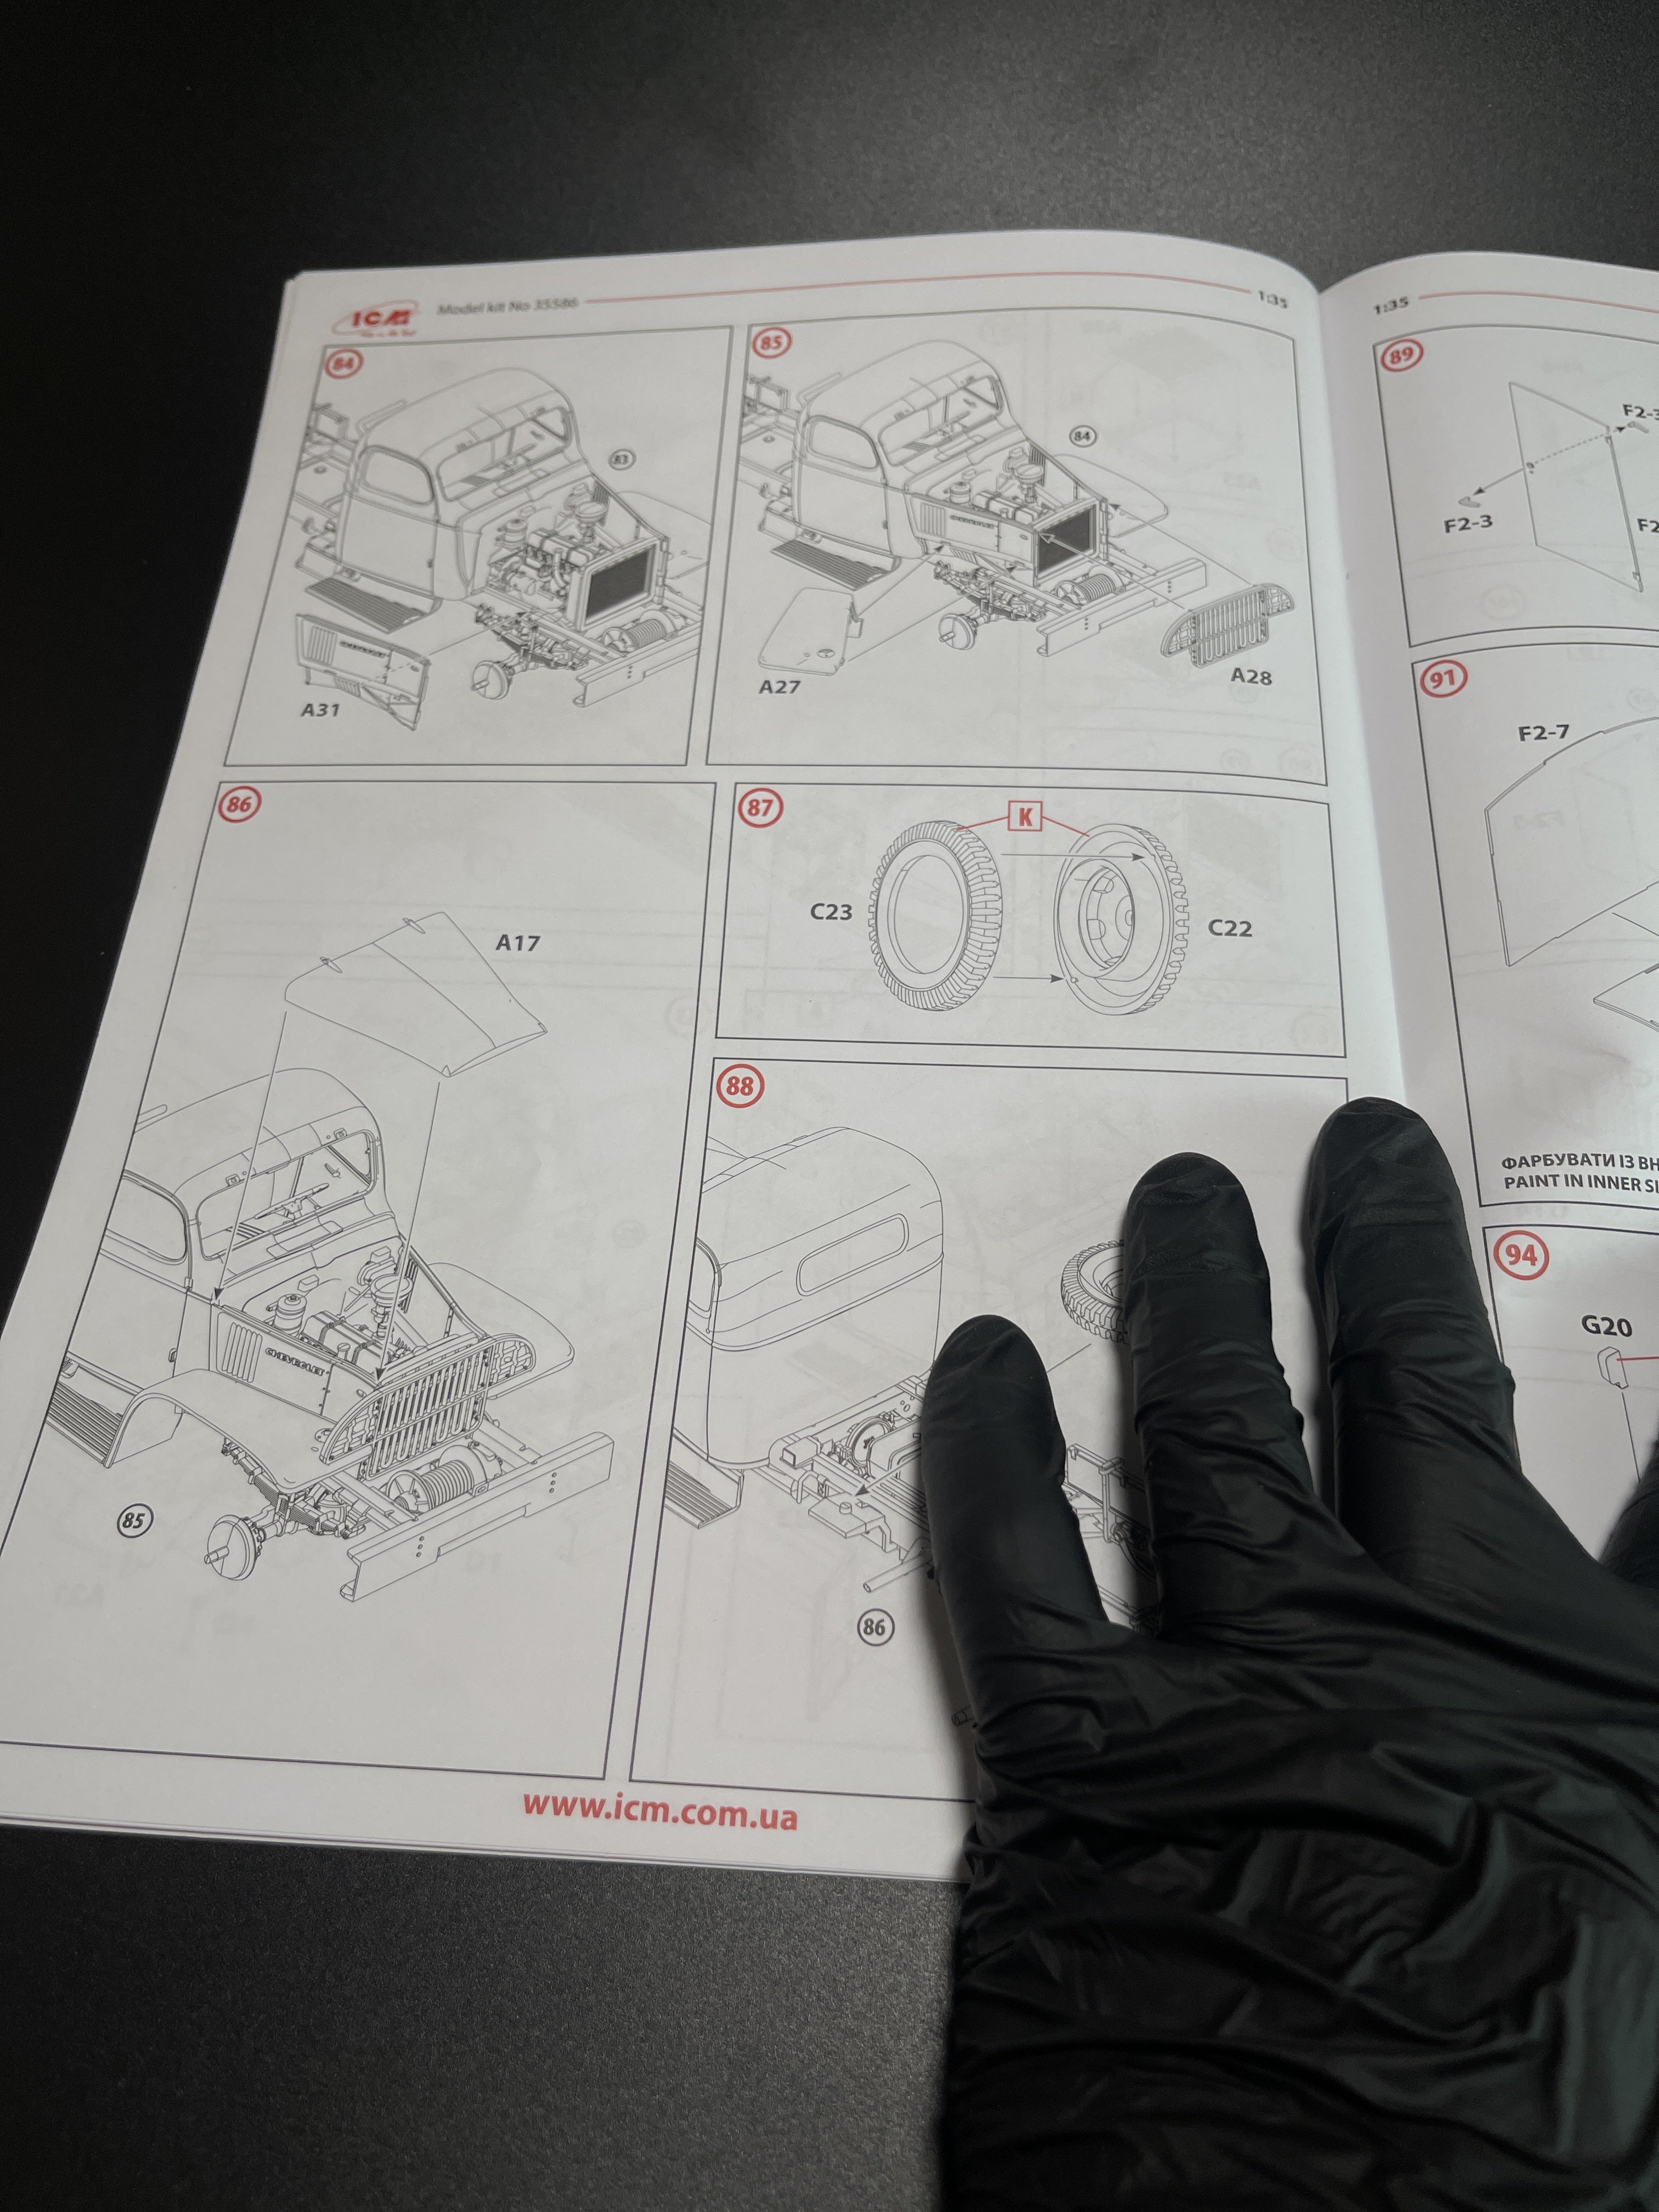
The cabin interior is quite complete with a nice dashboard, pair of levers, gear stick and hand-brake on the floor, three foot pedals and the steering wheel.
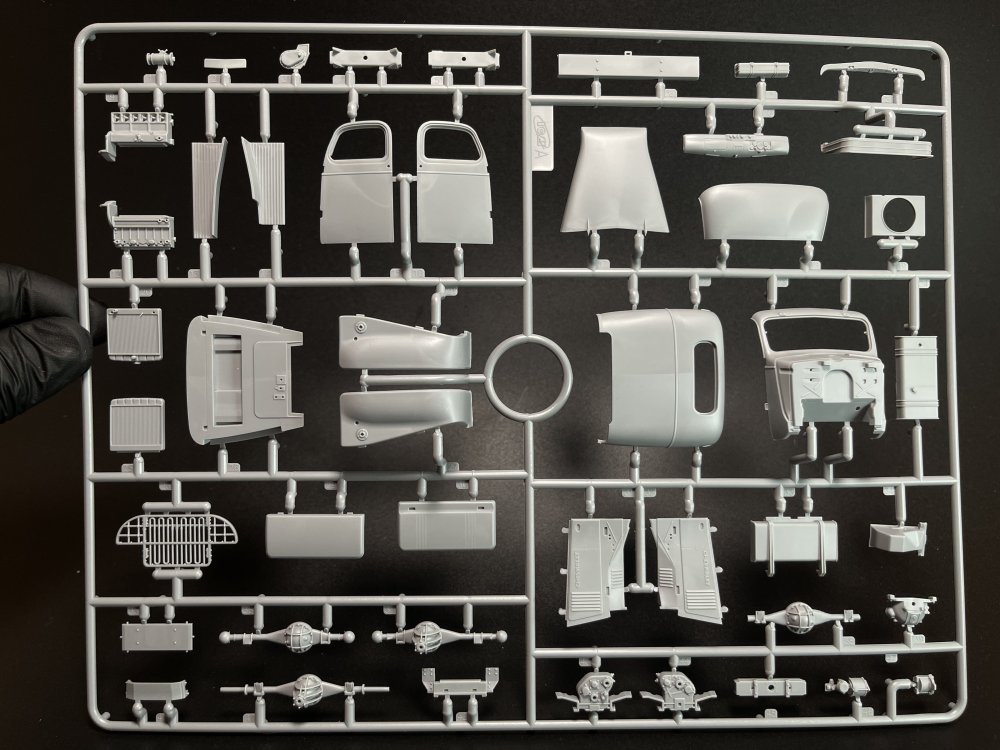
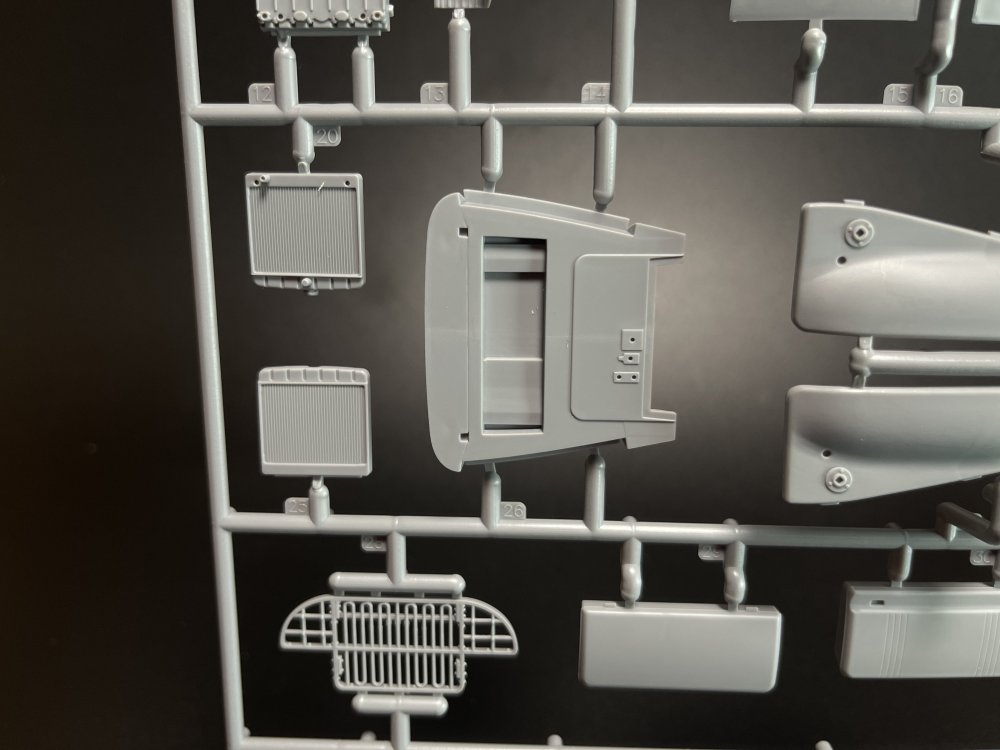
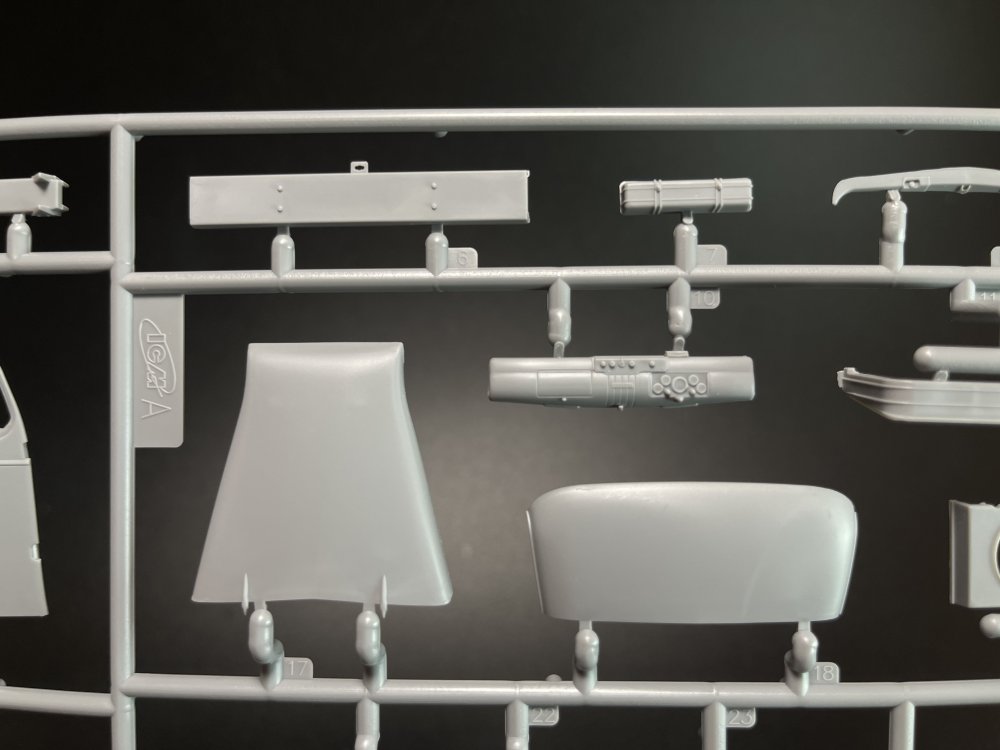
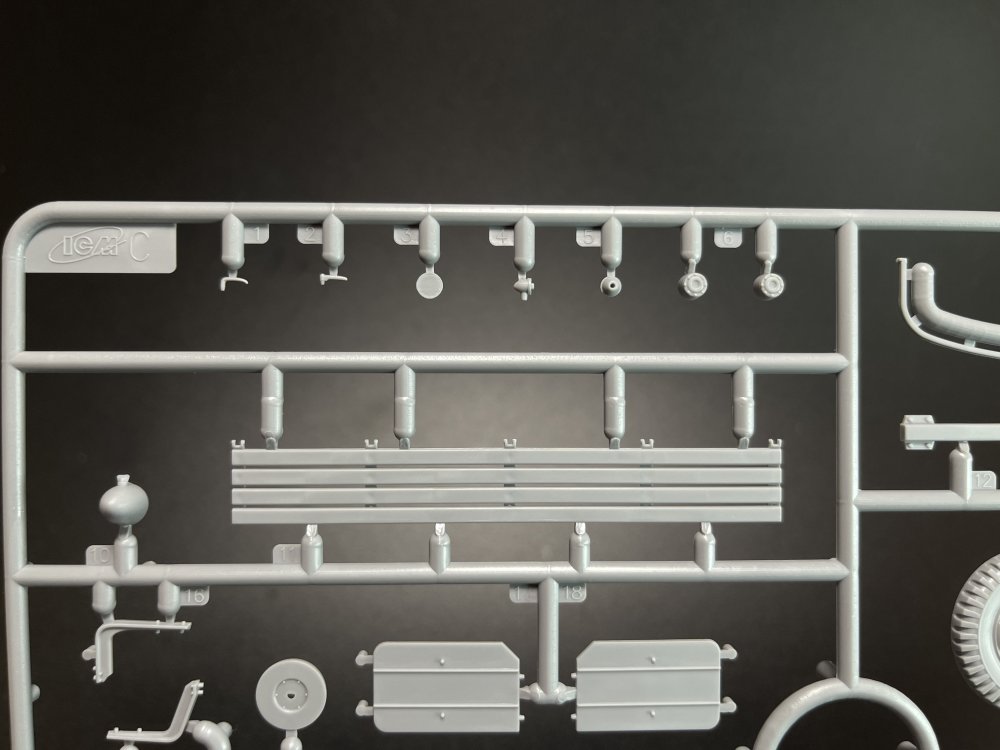
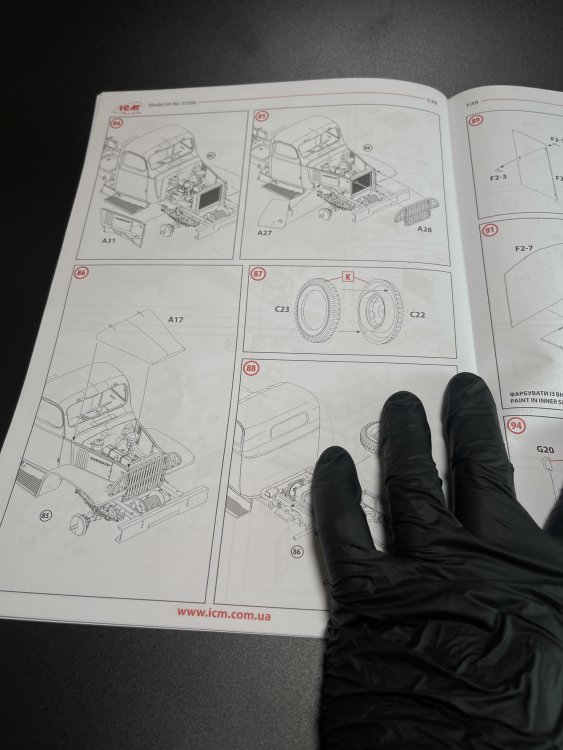
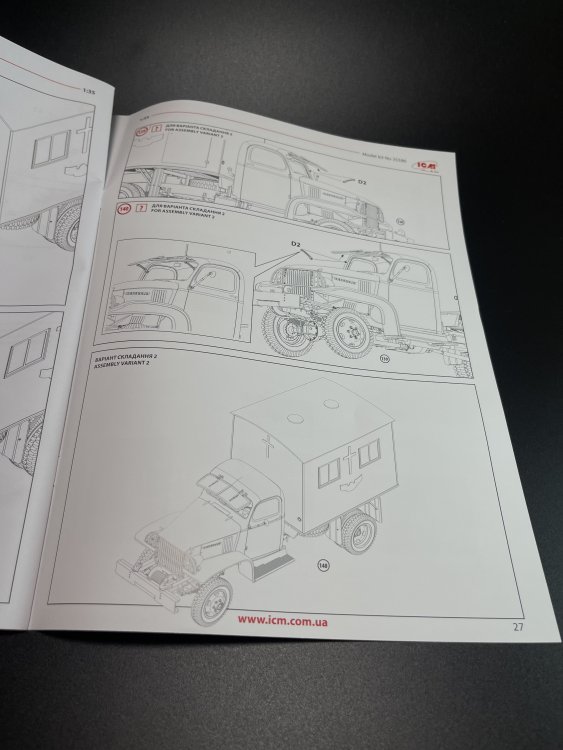
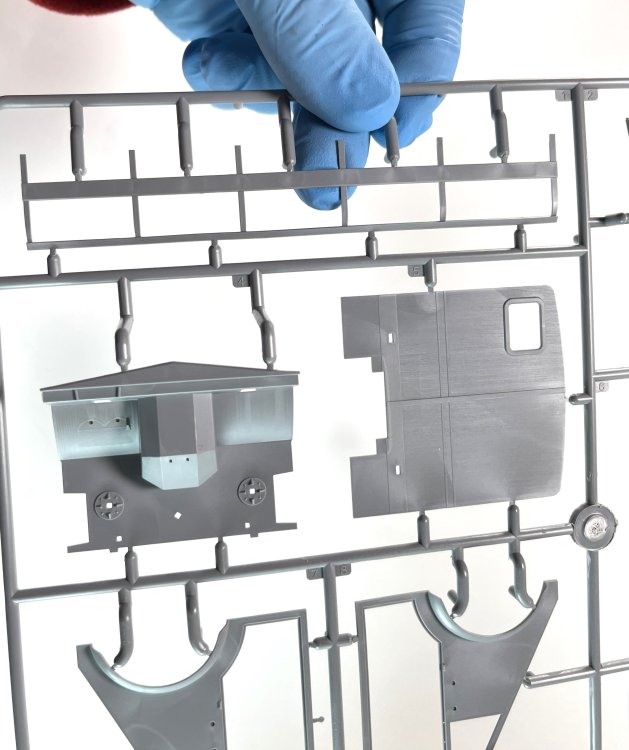
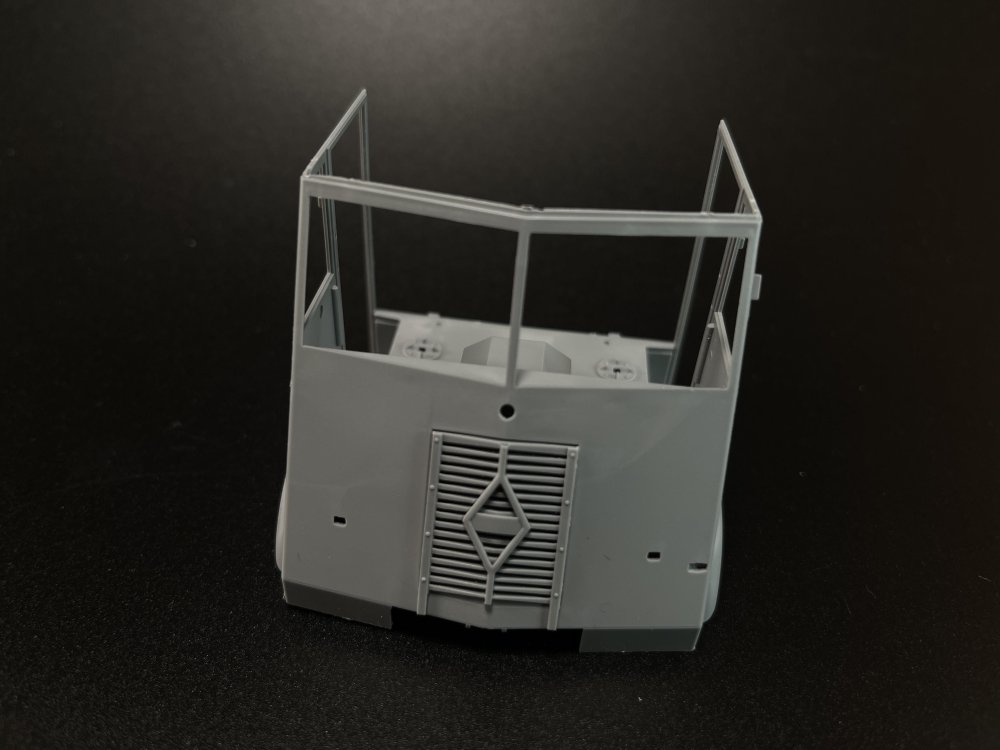
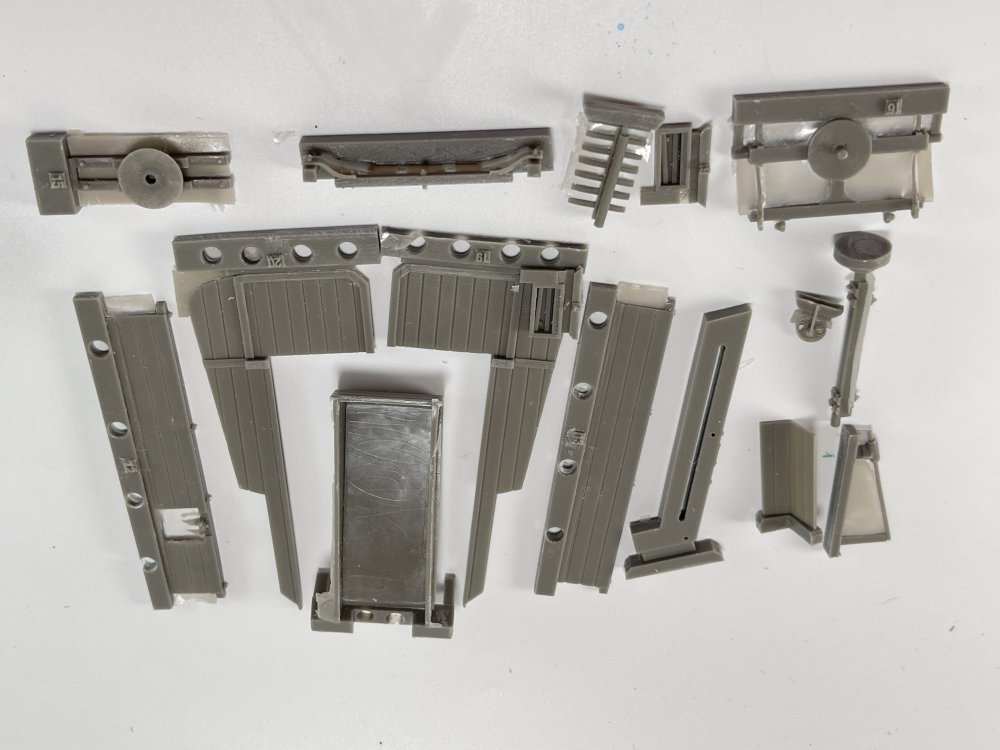
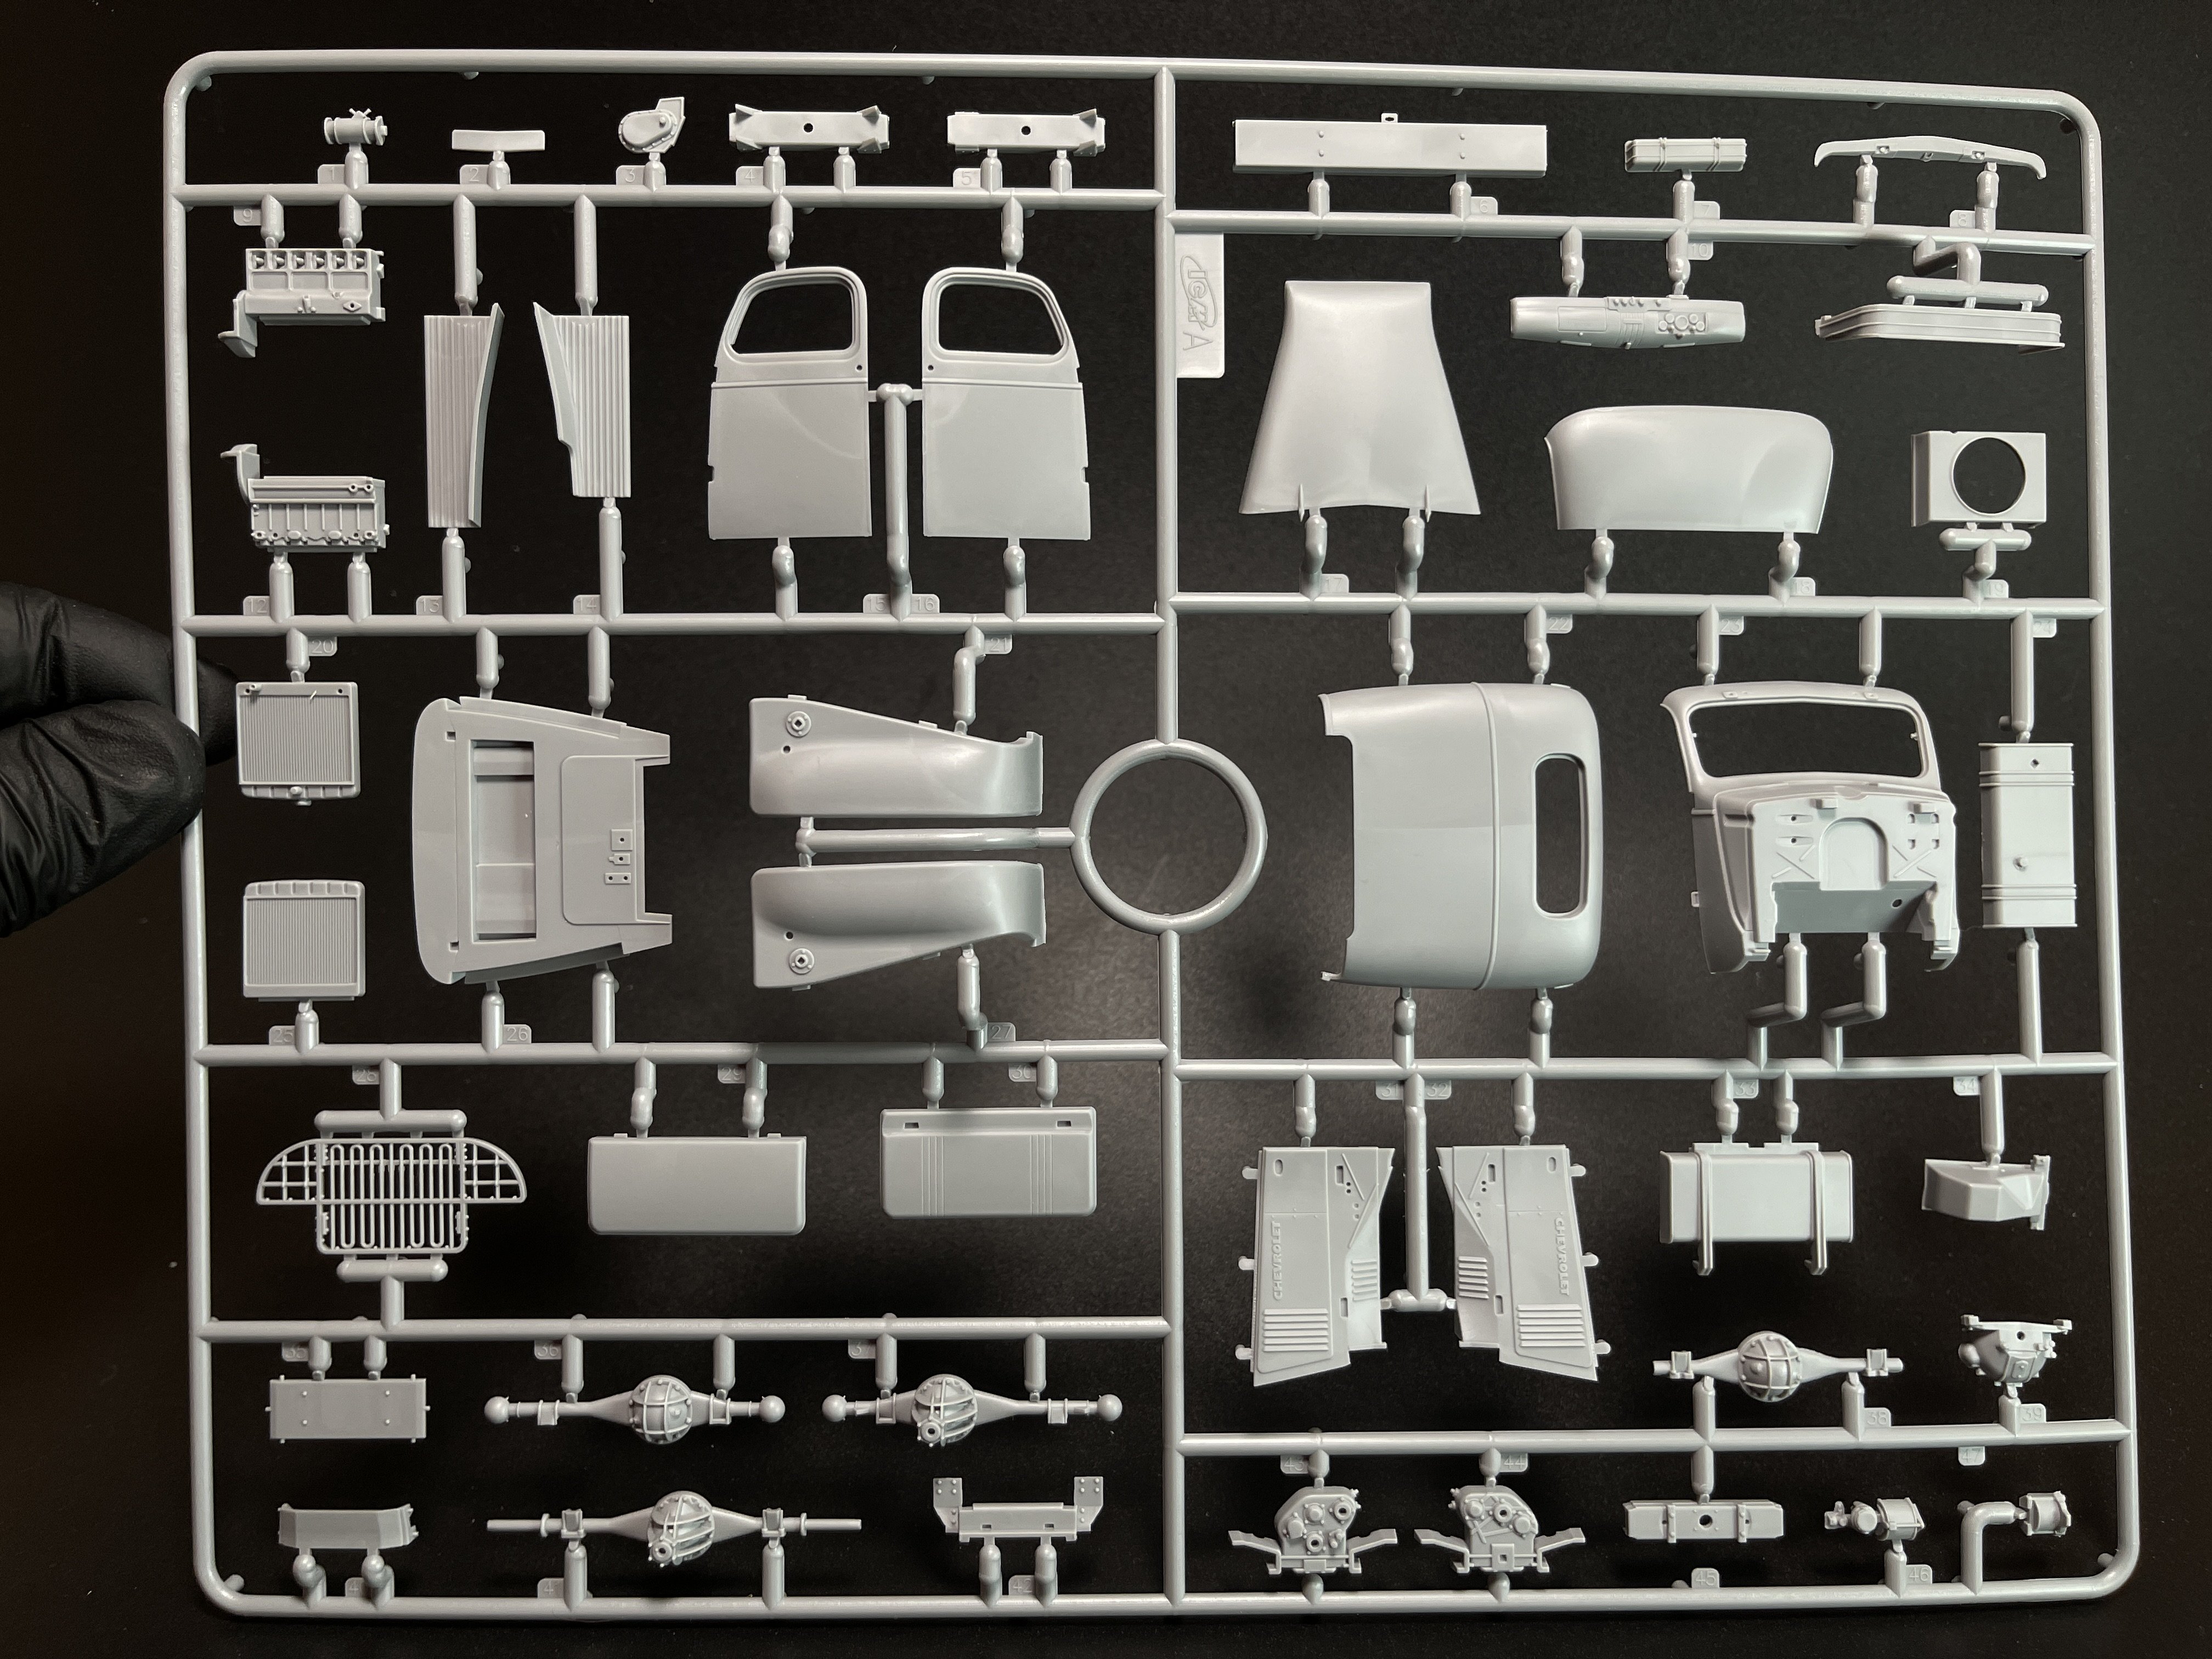
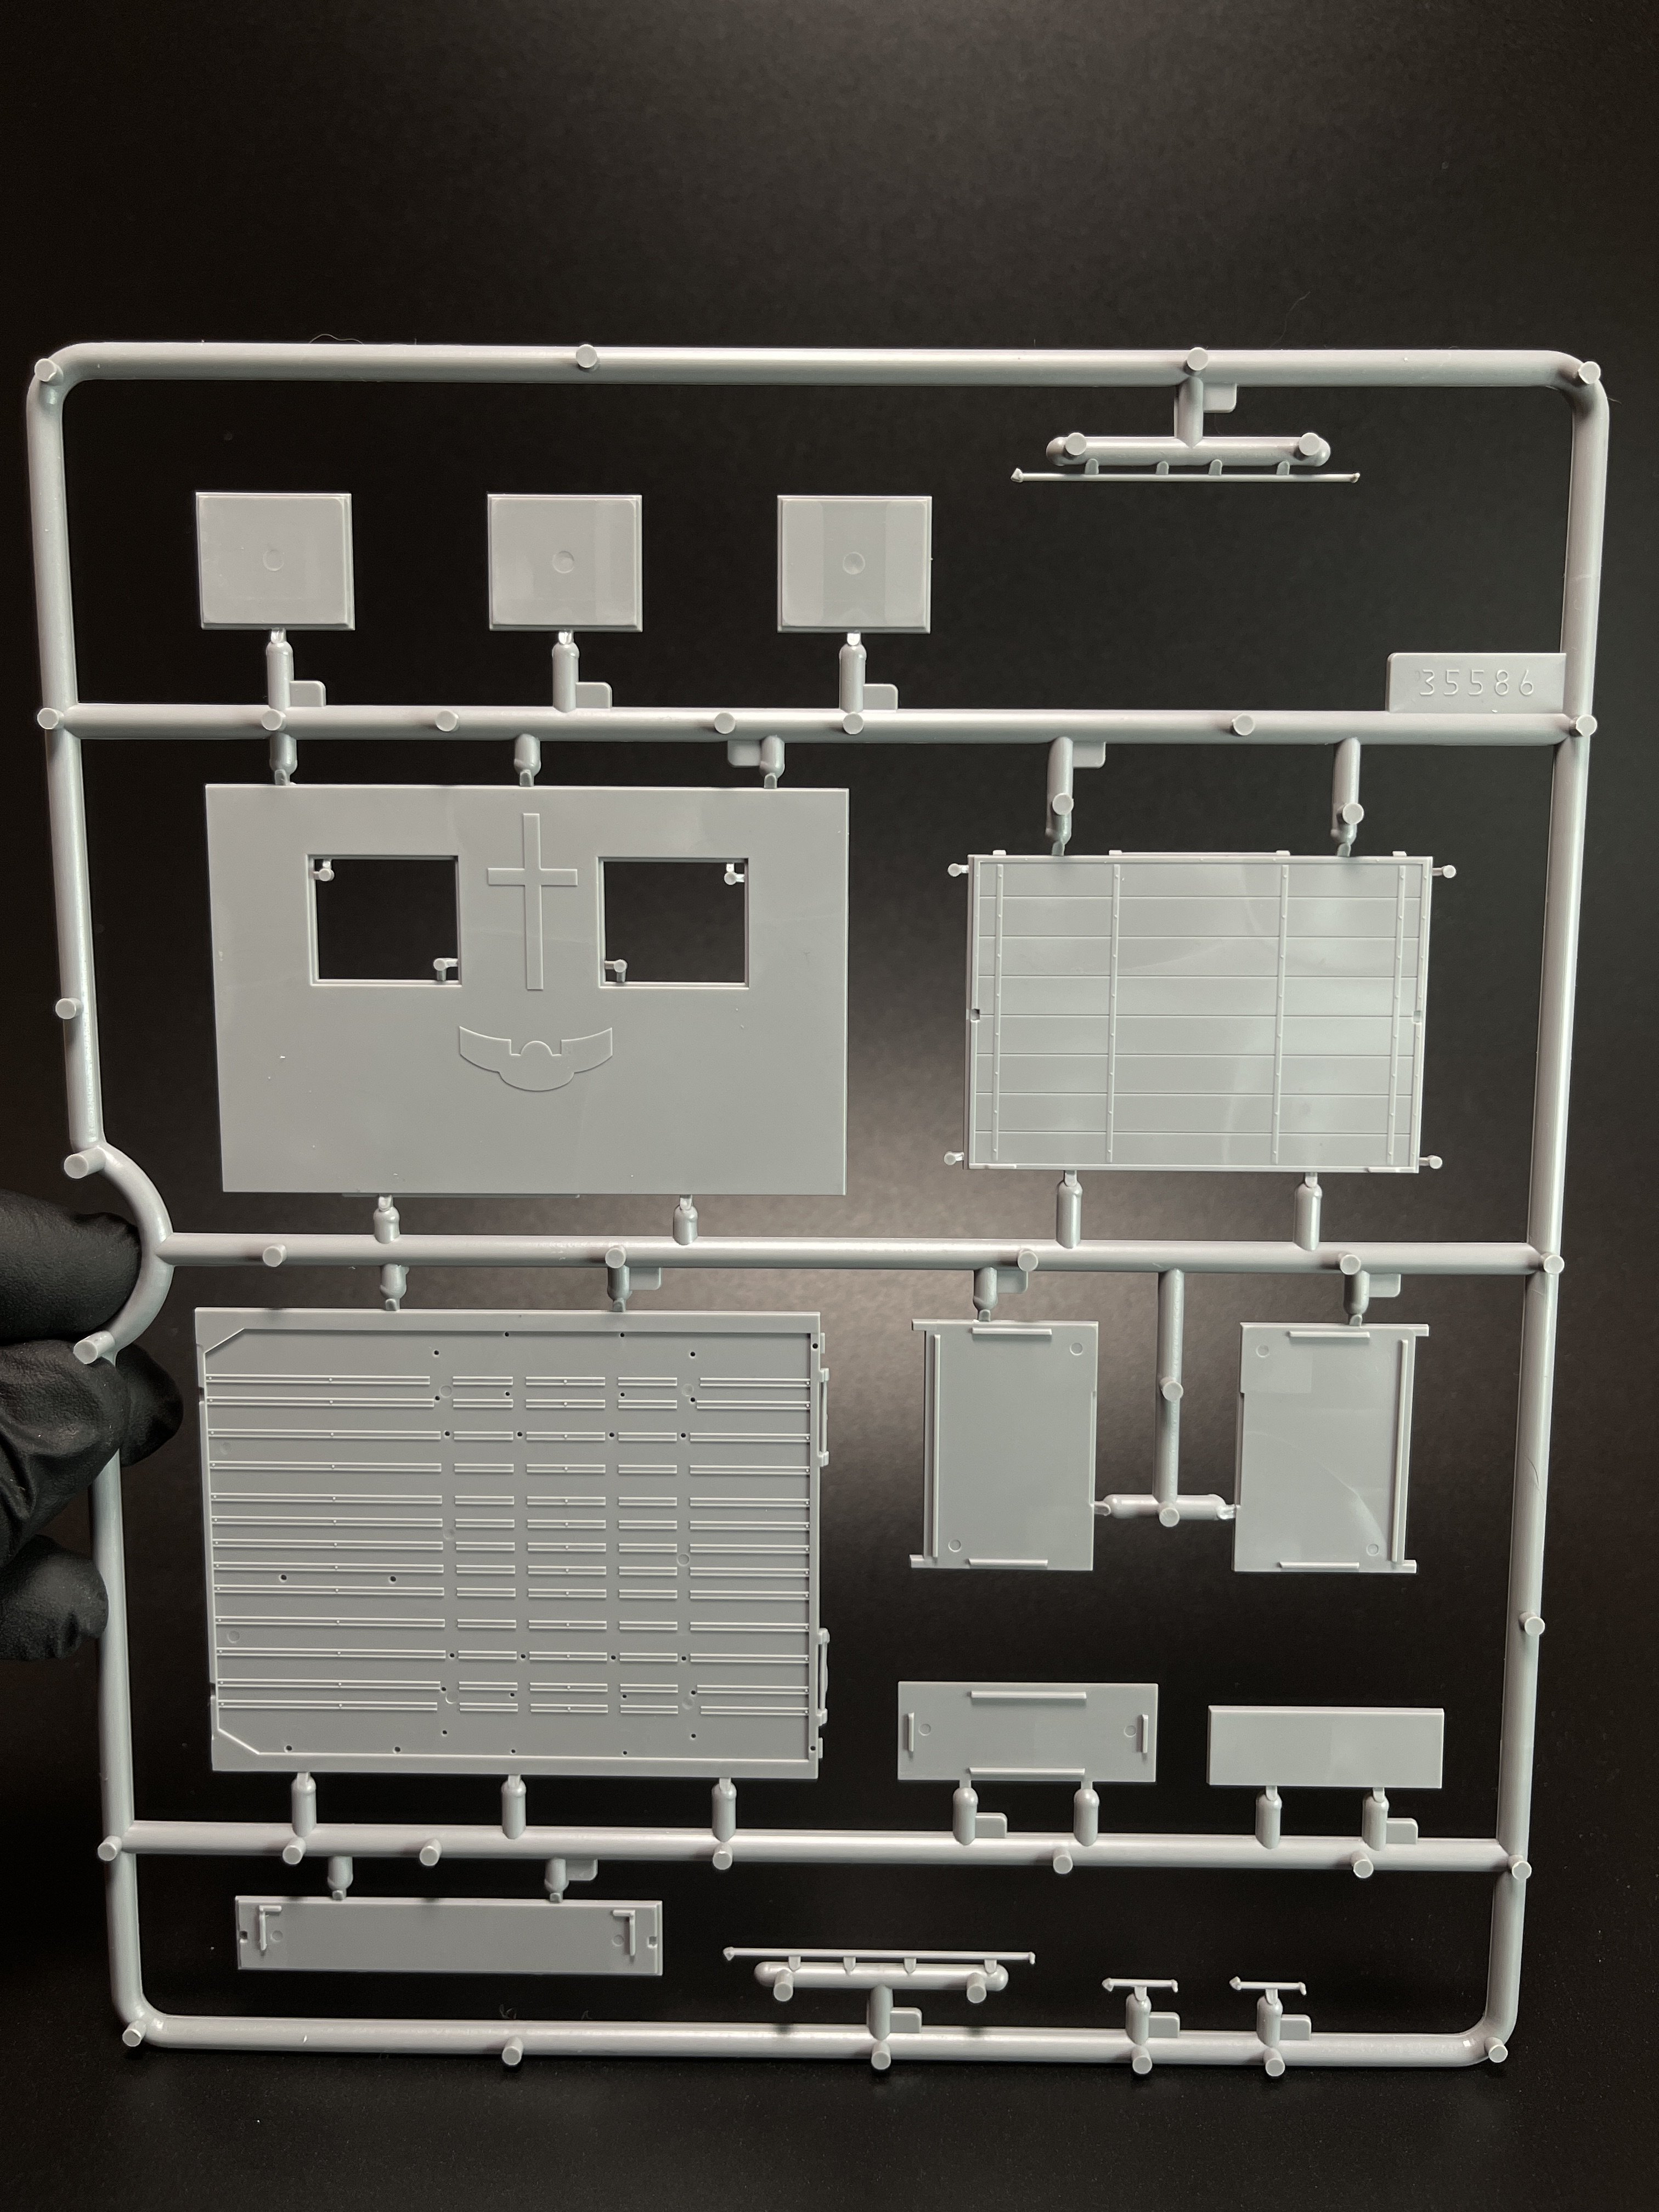
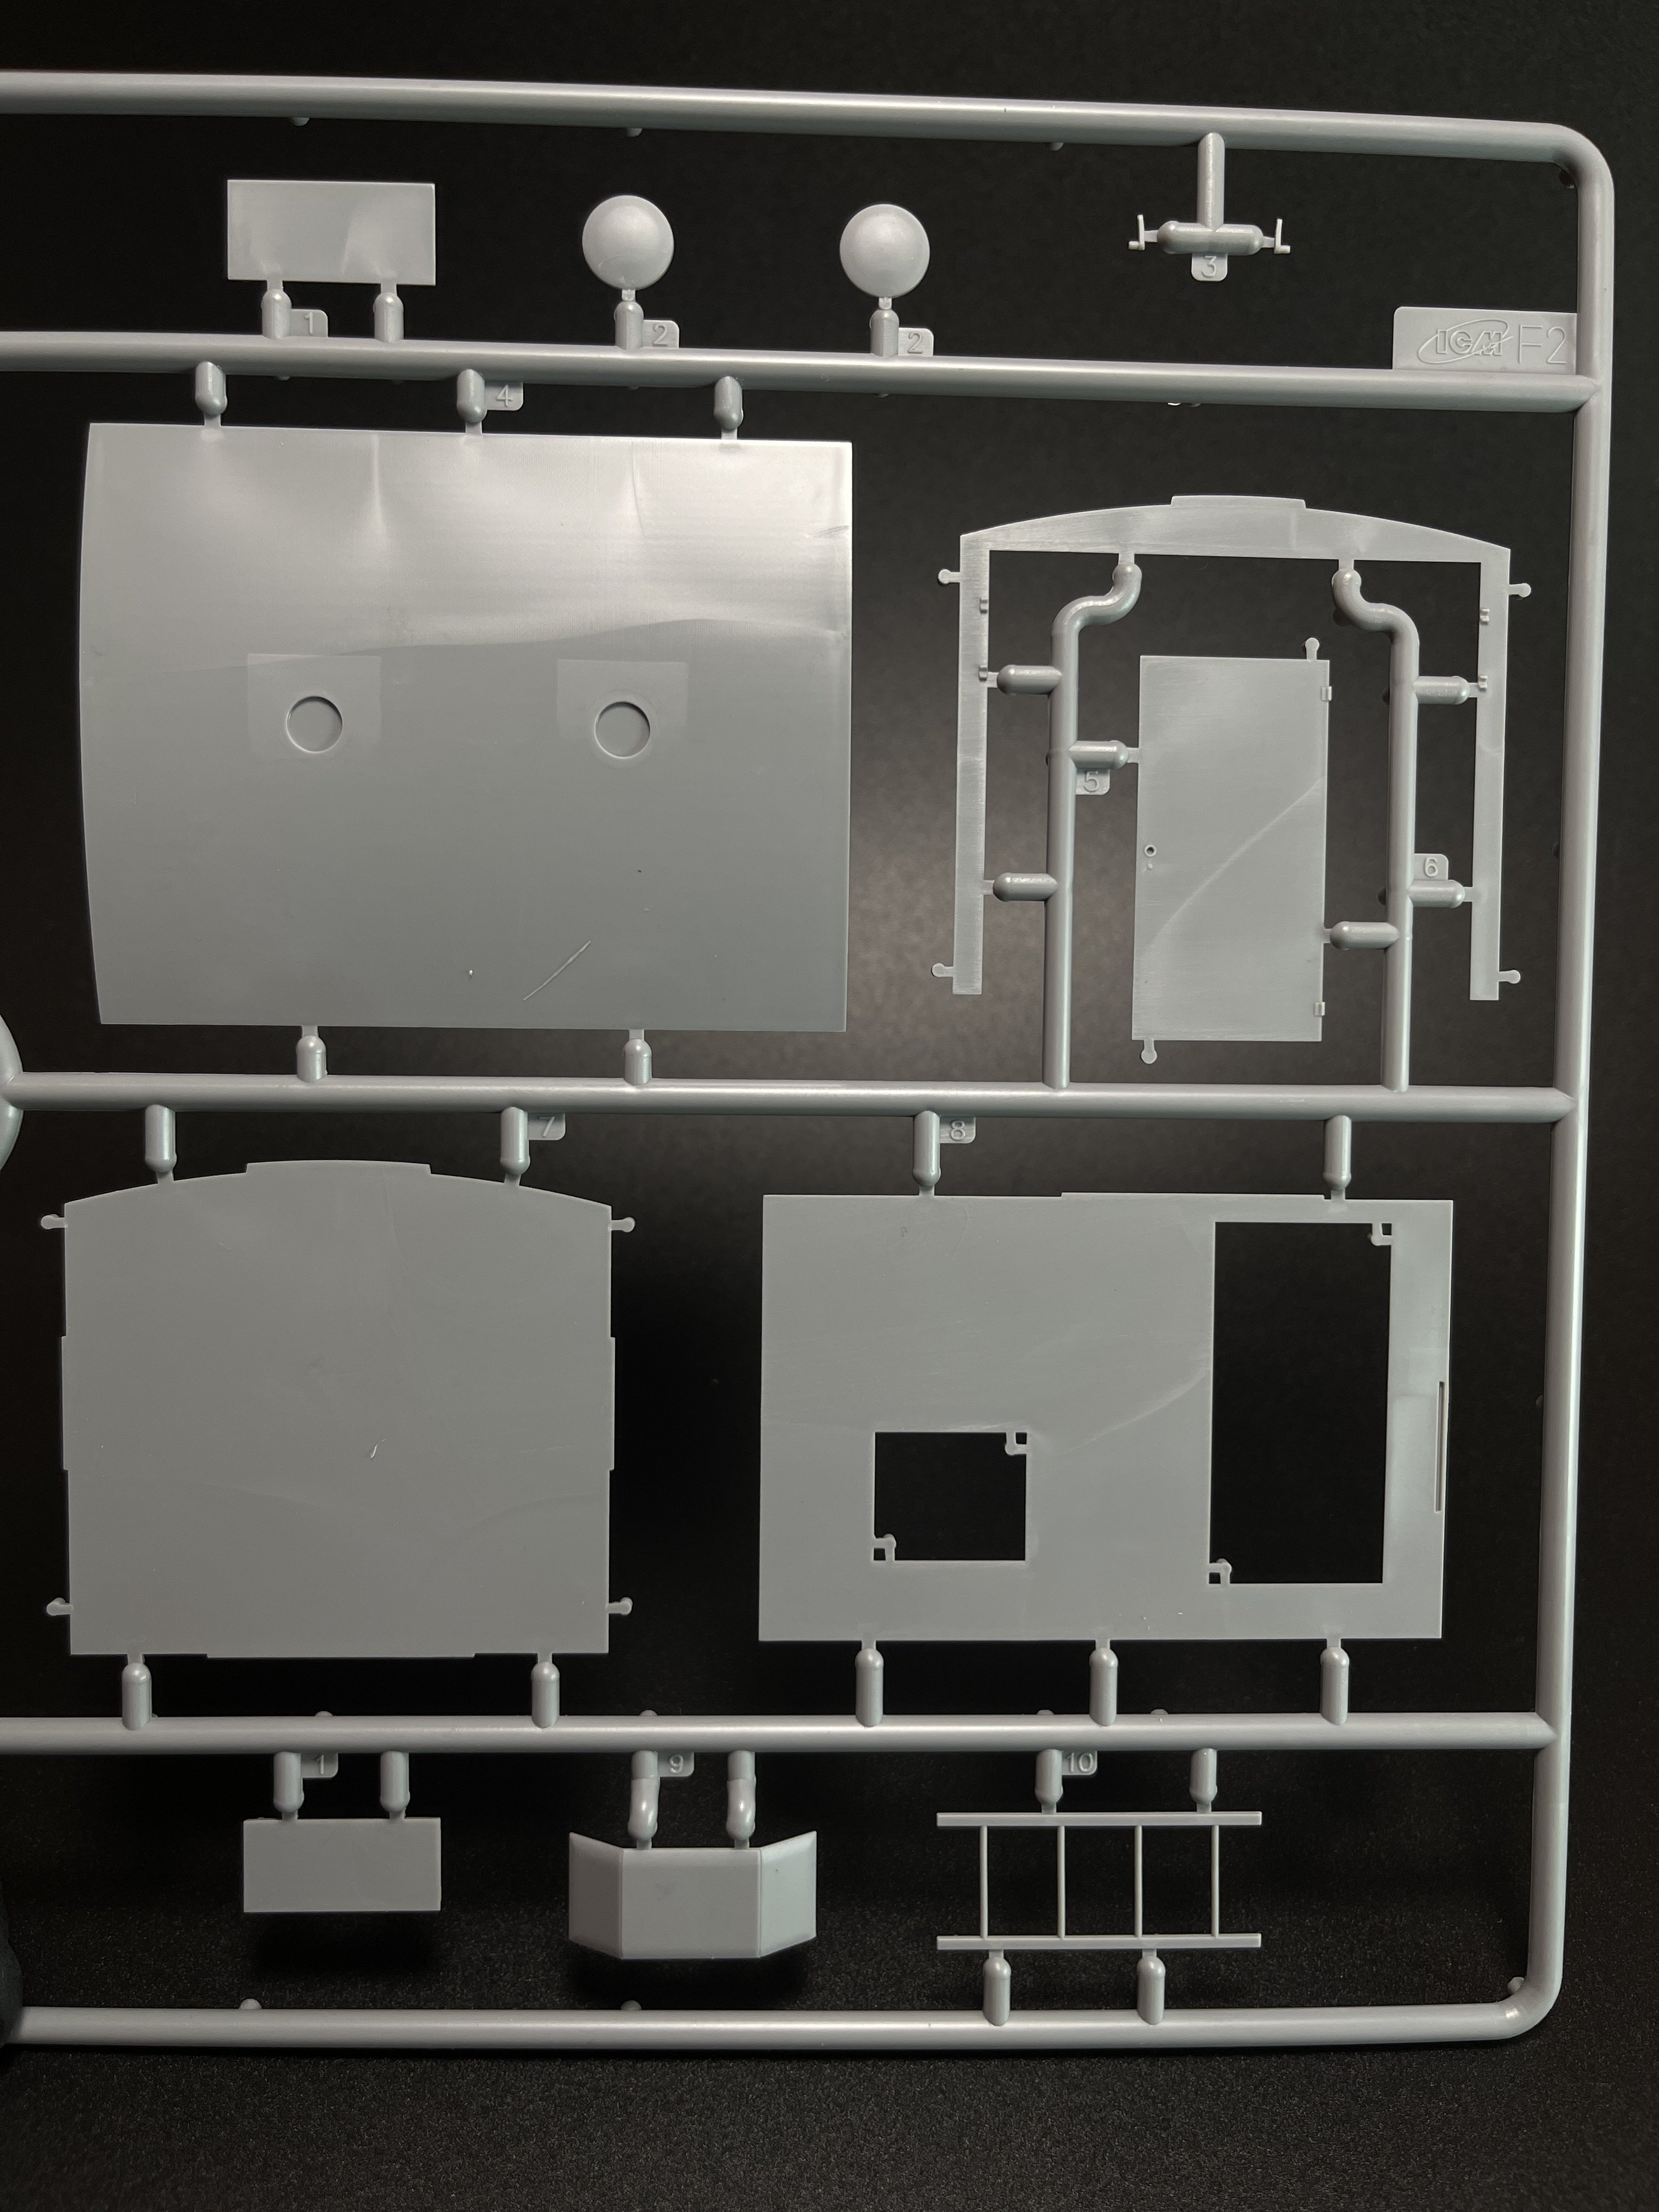
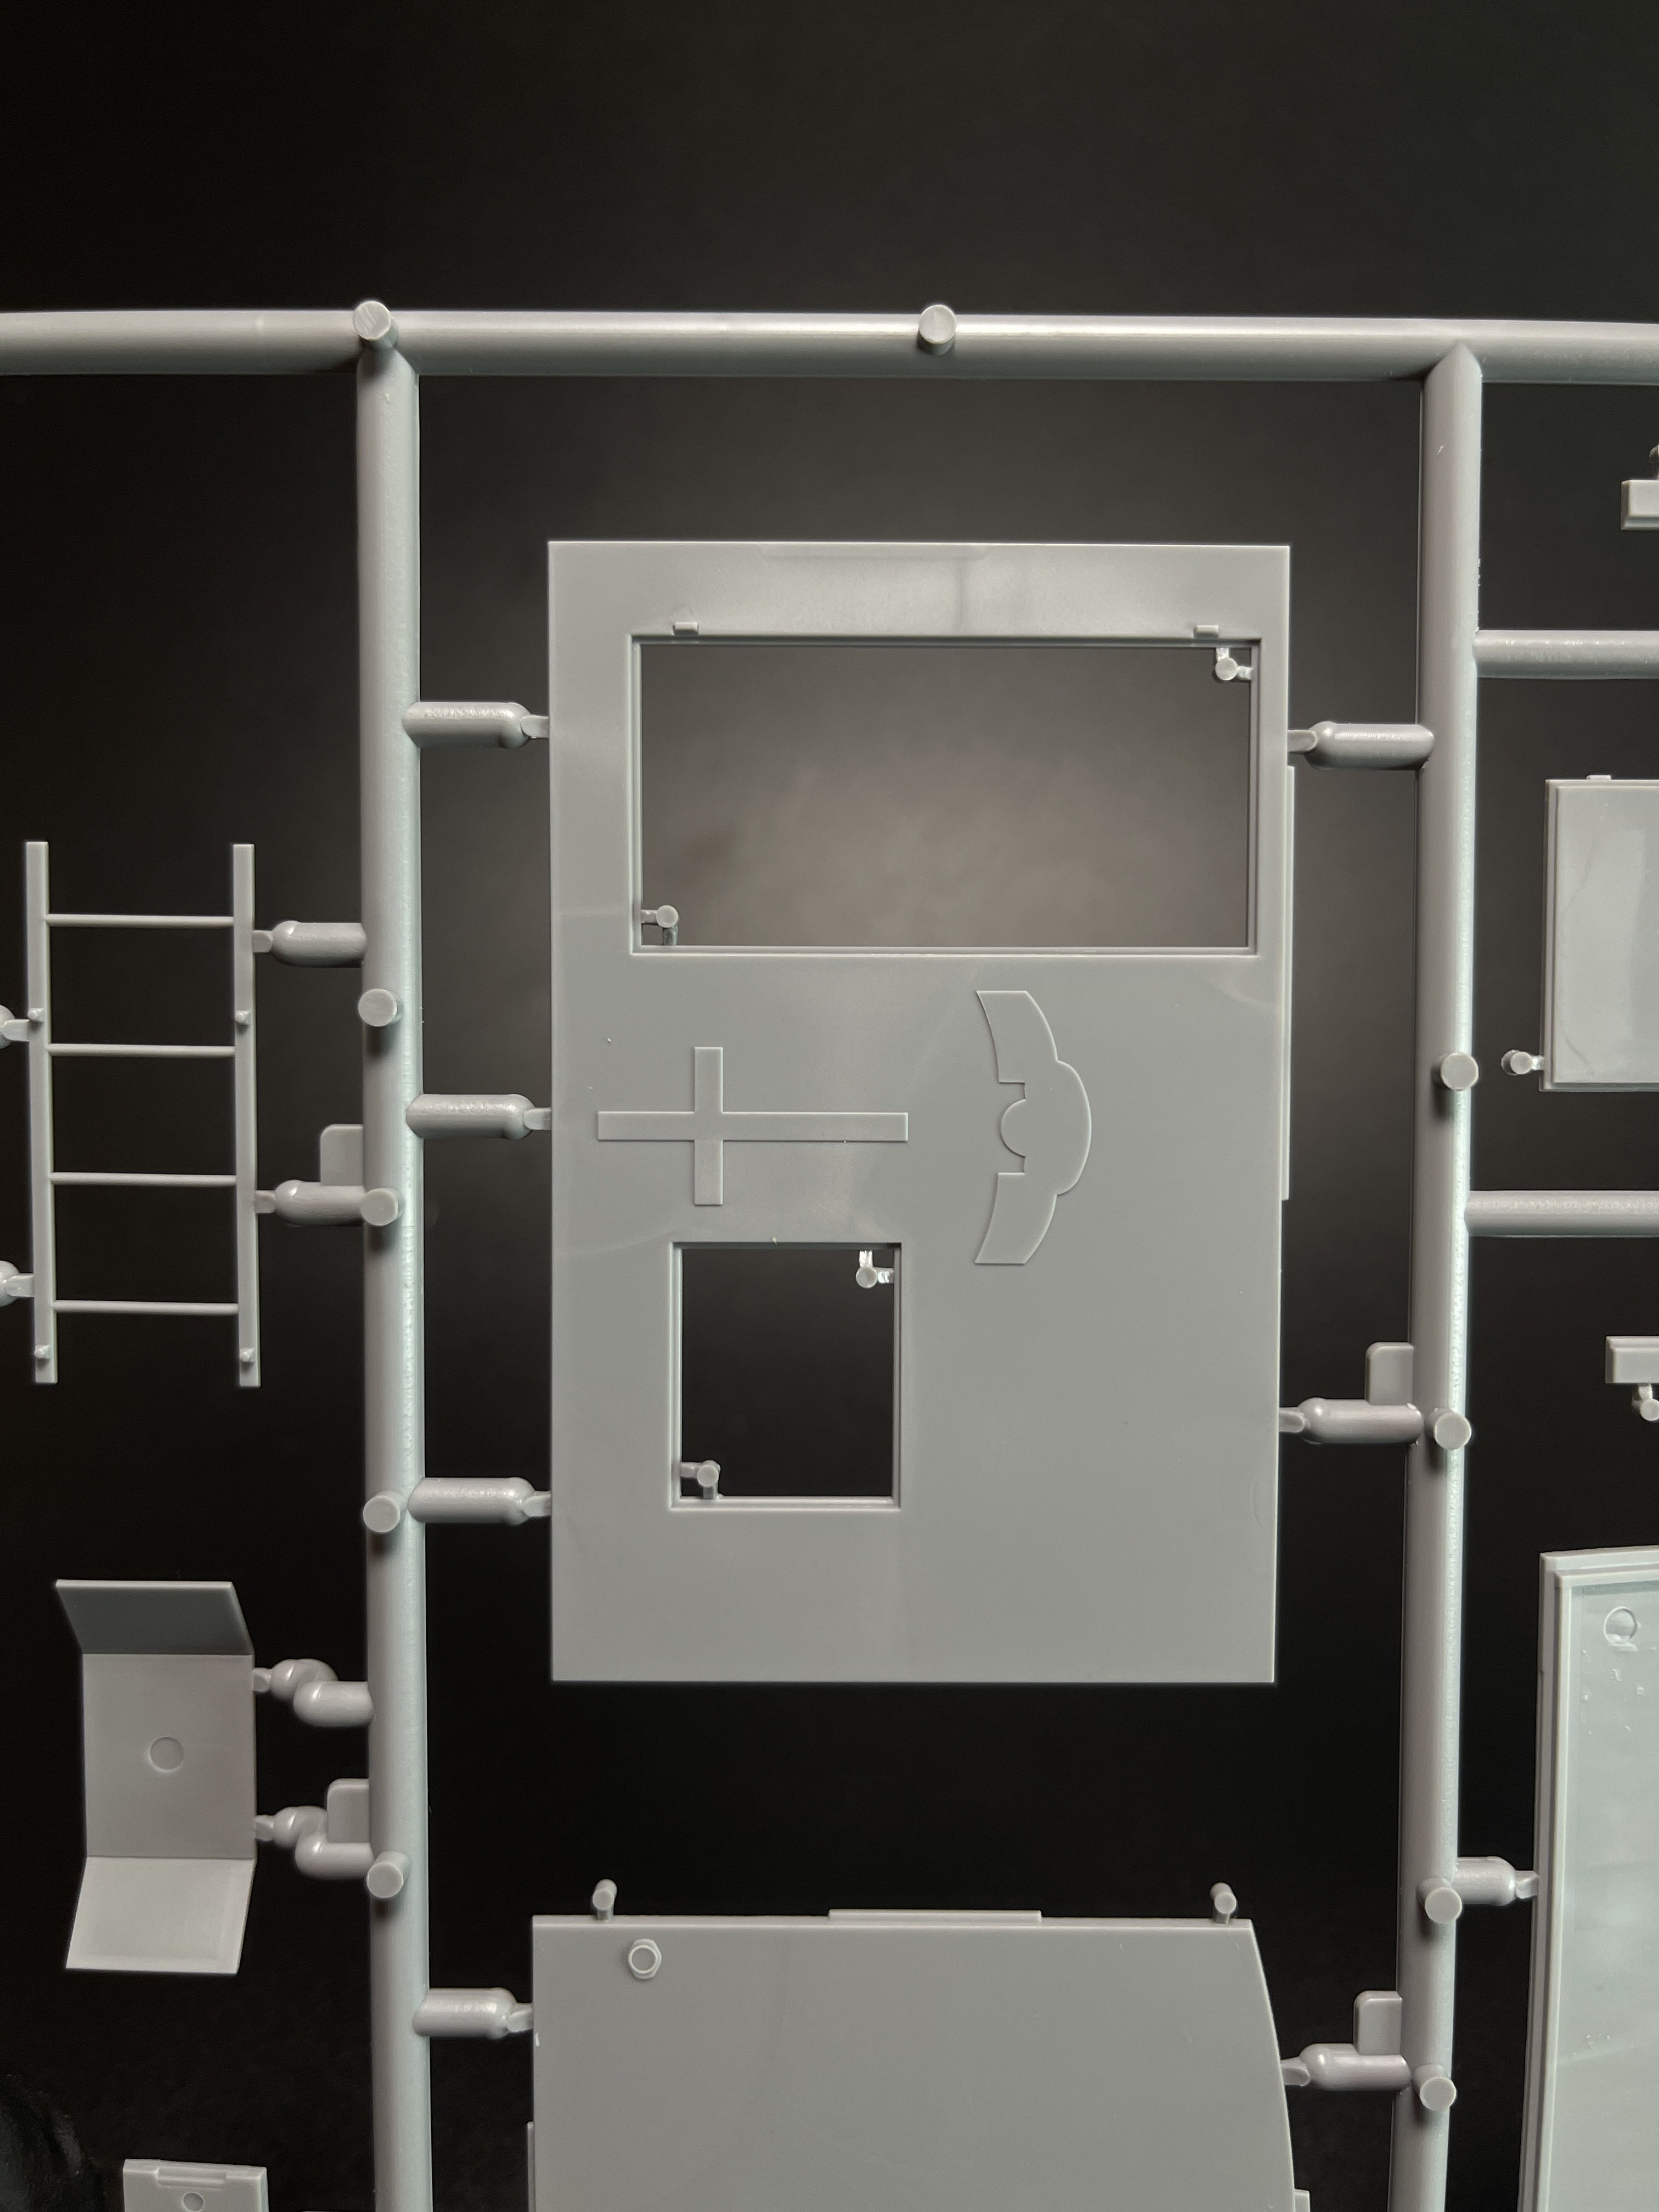
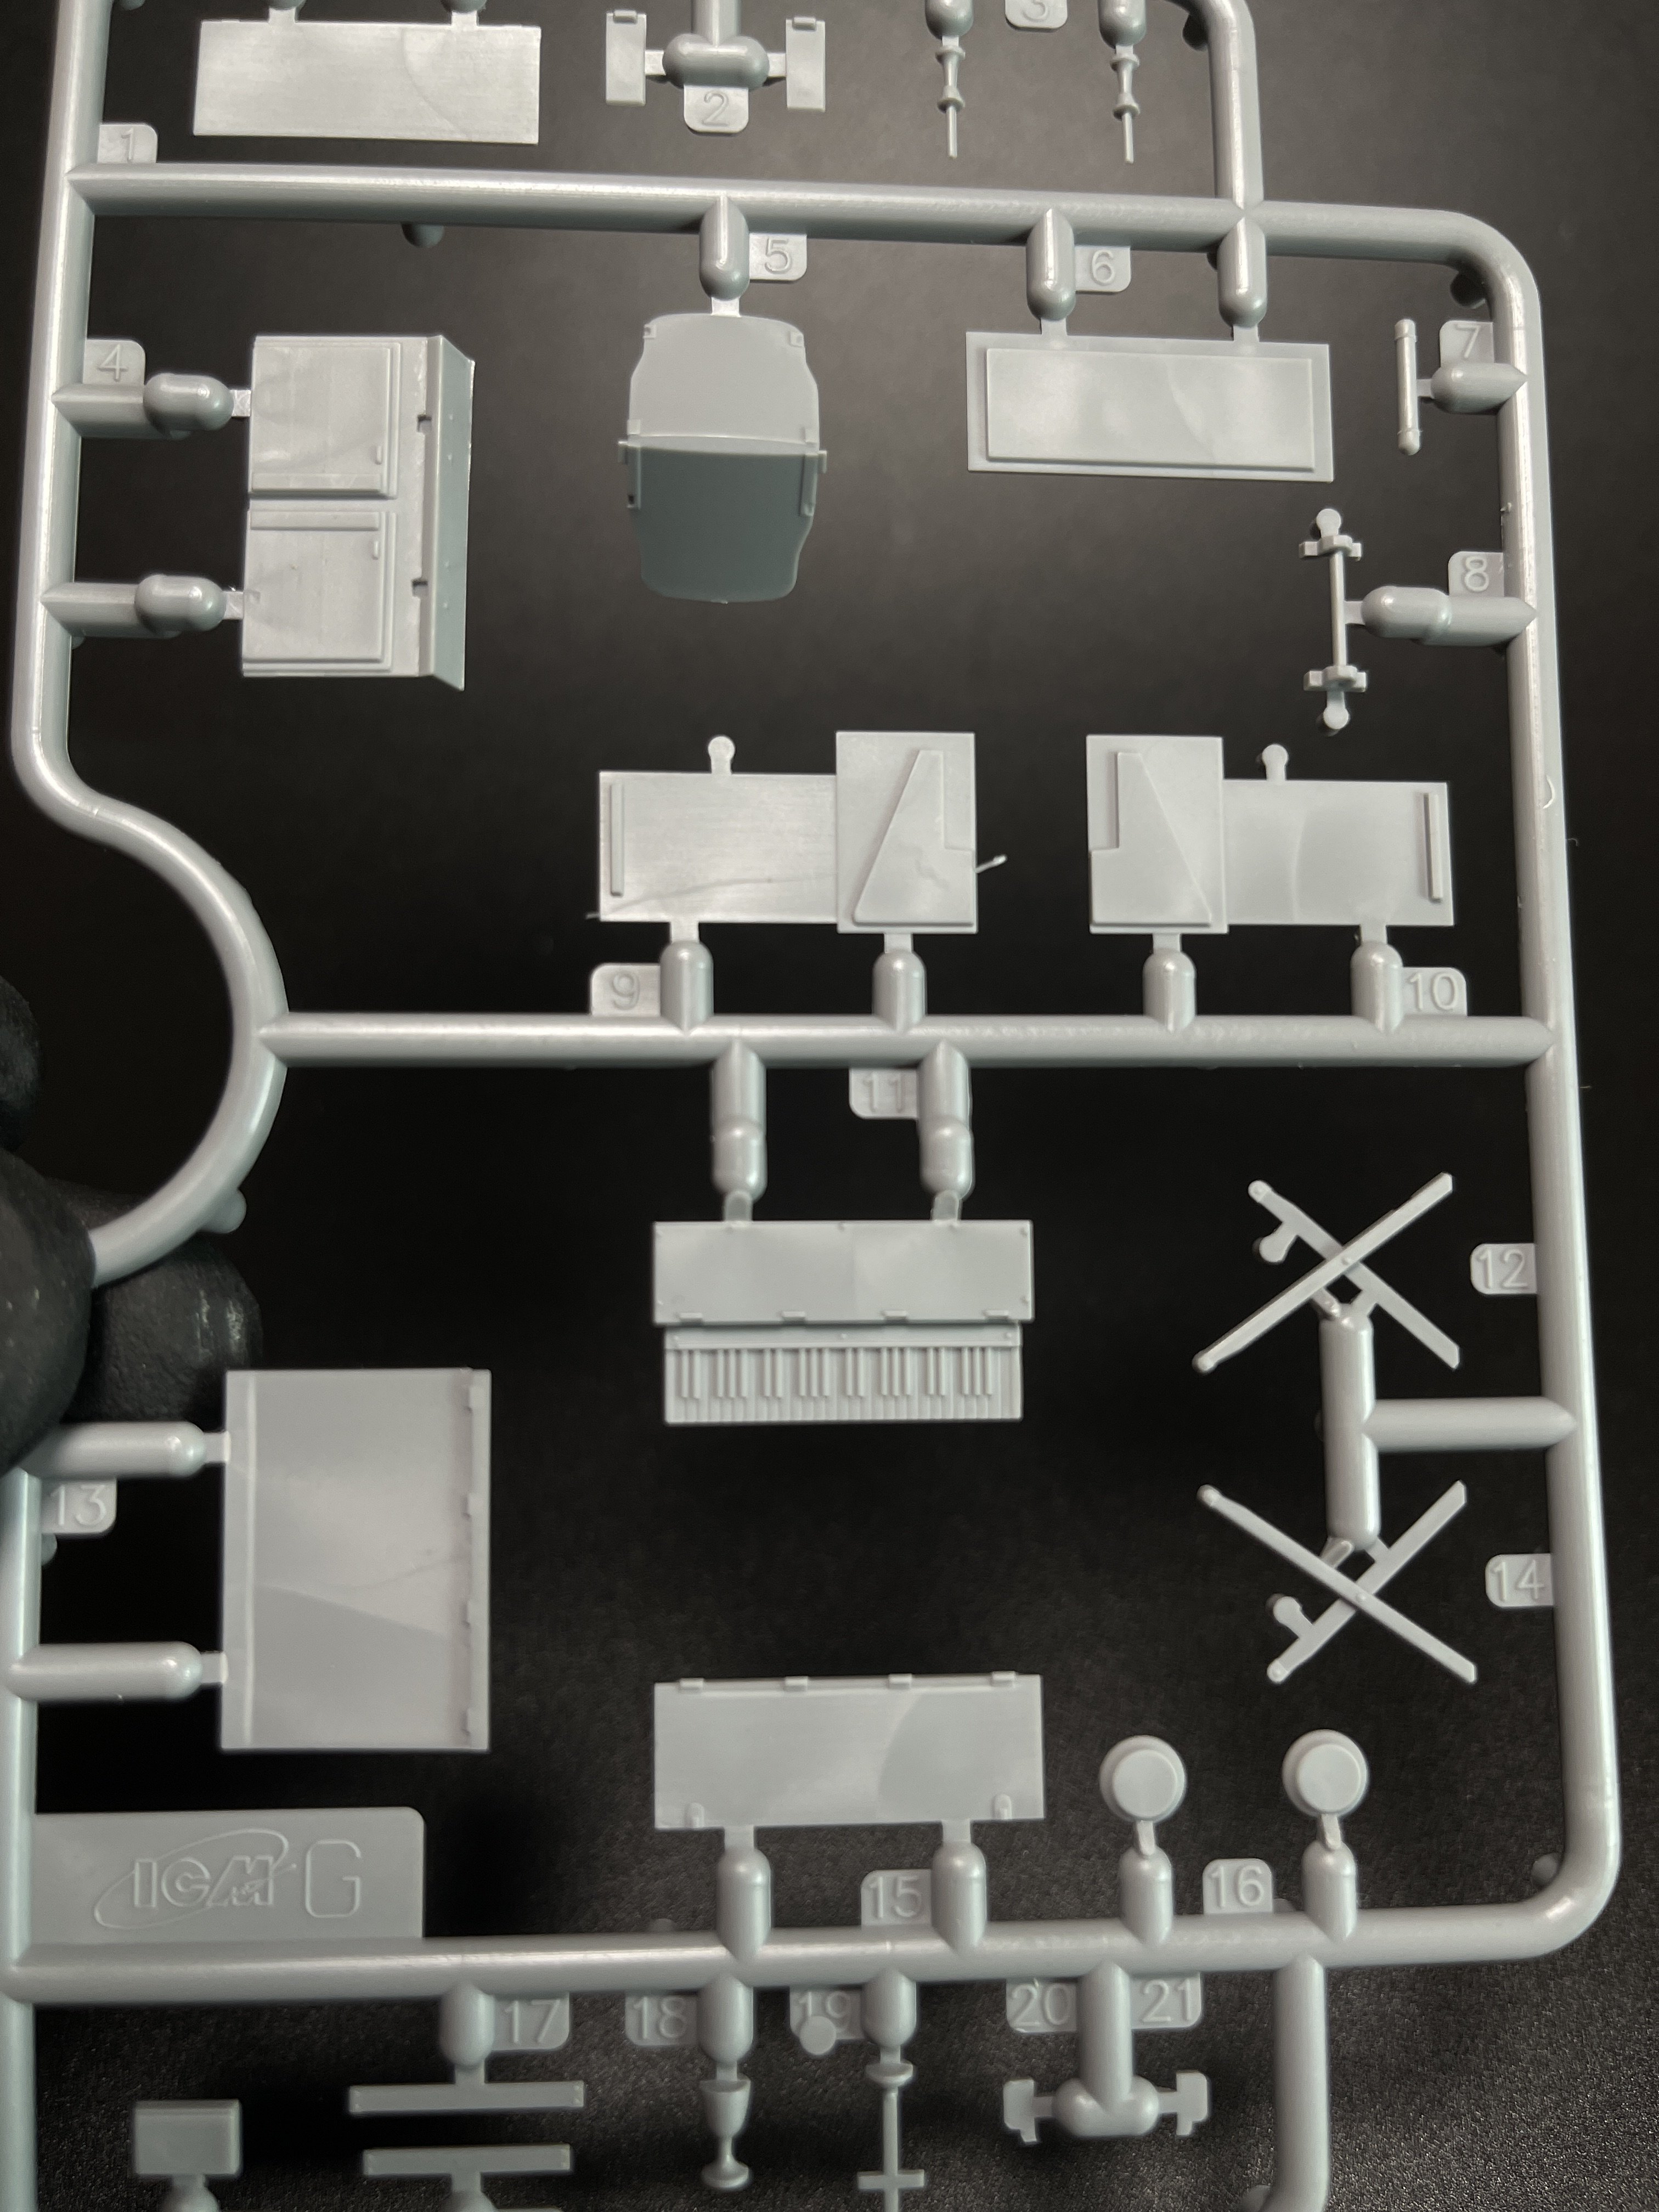
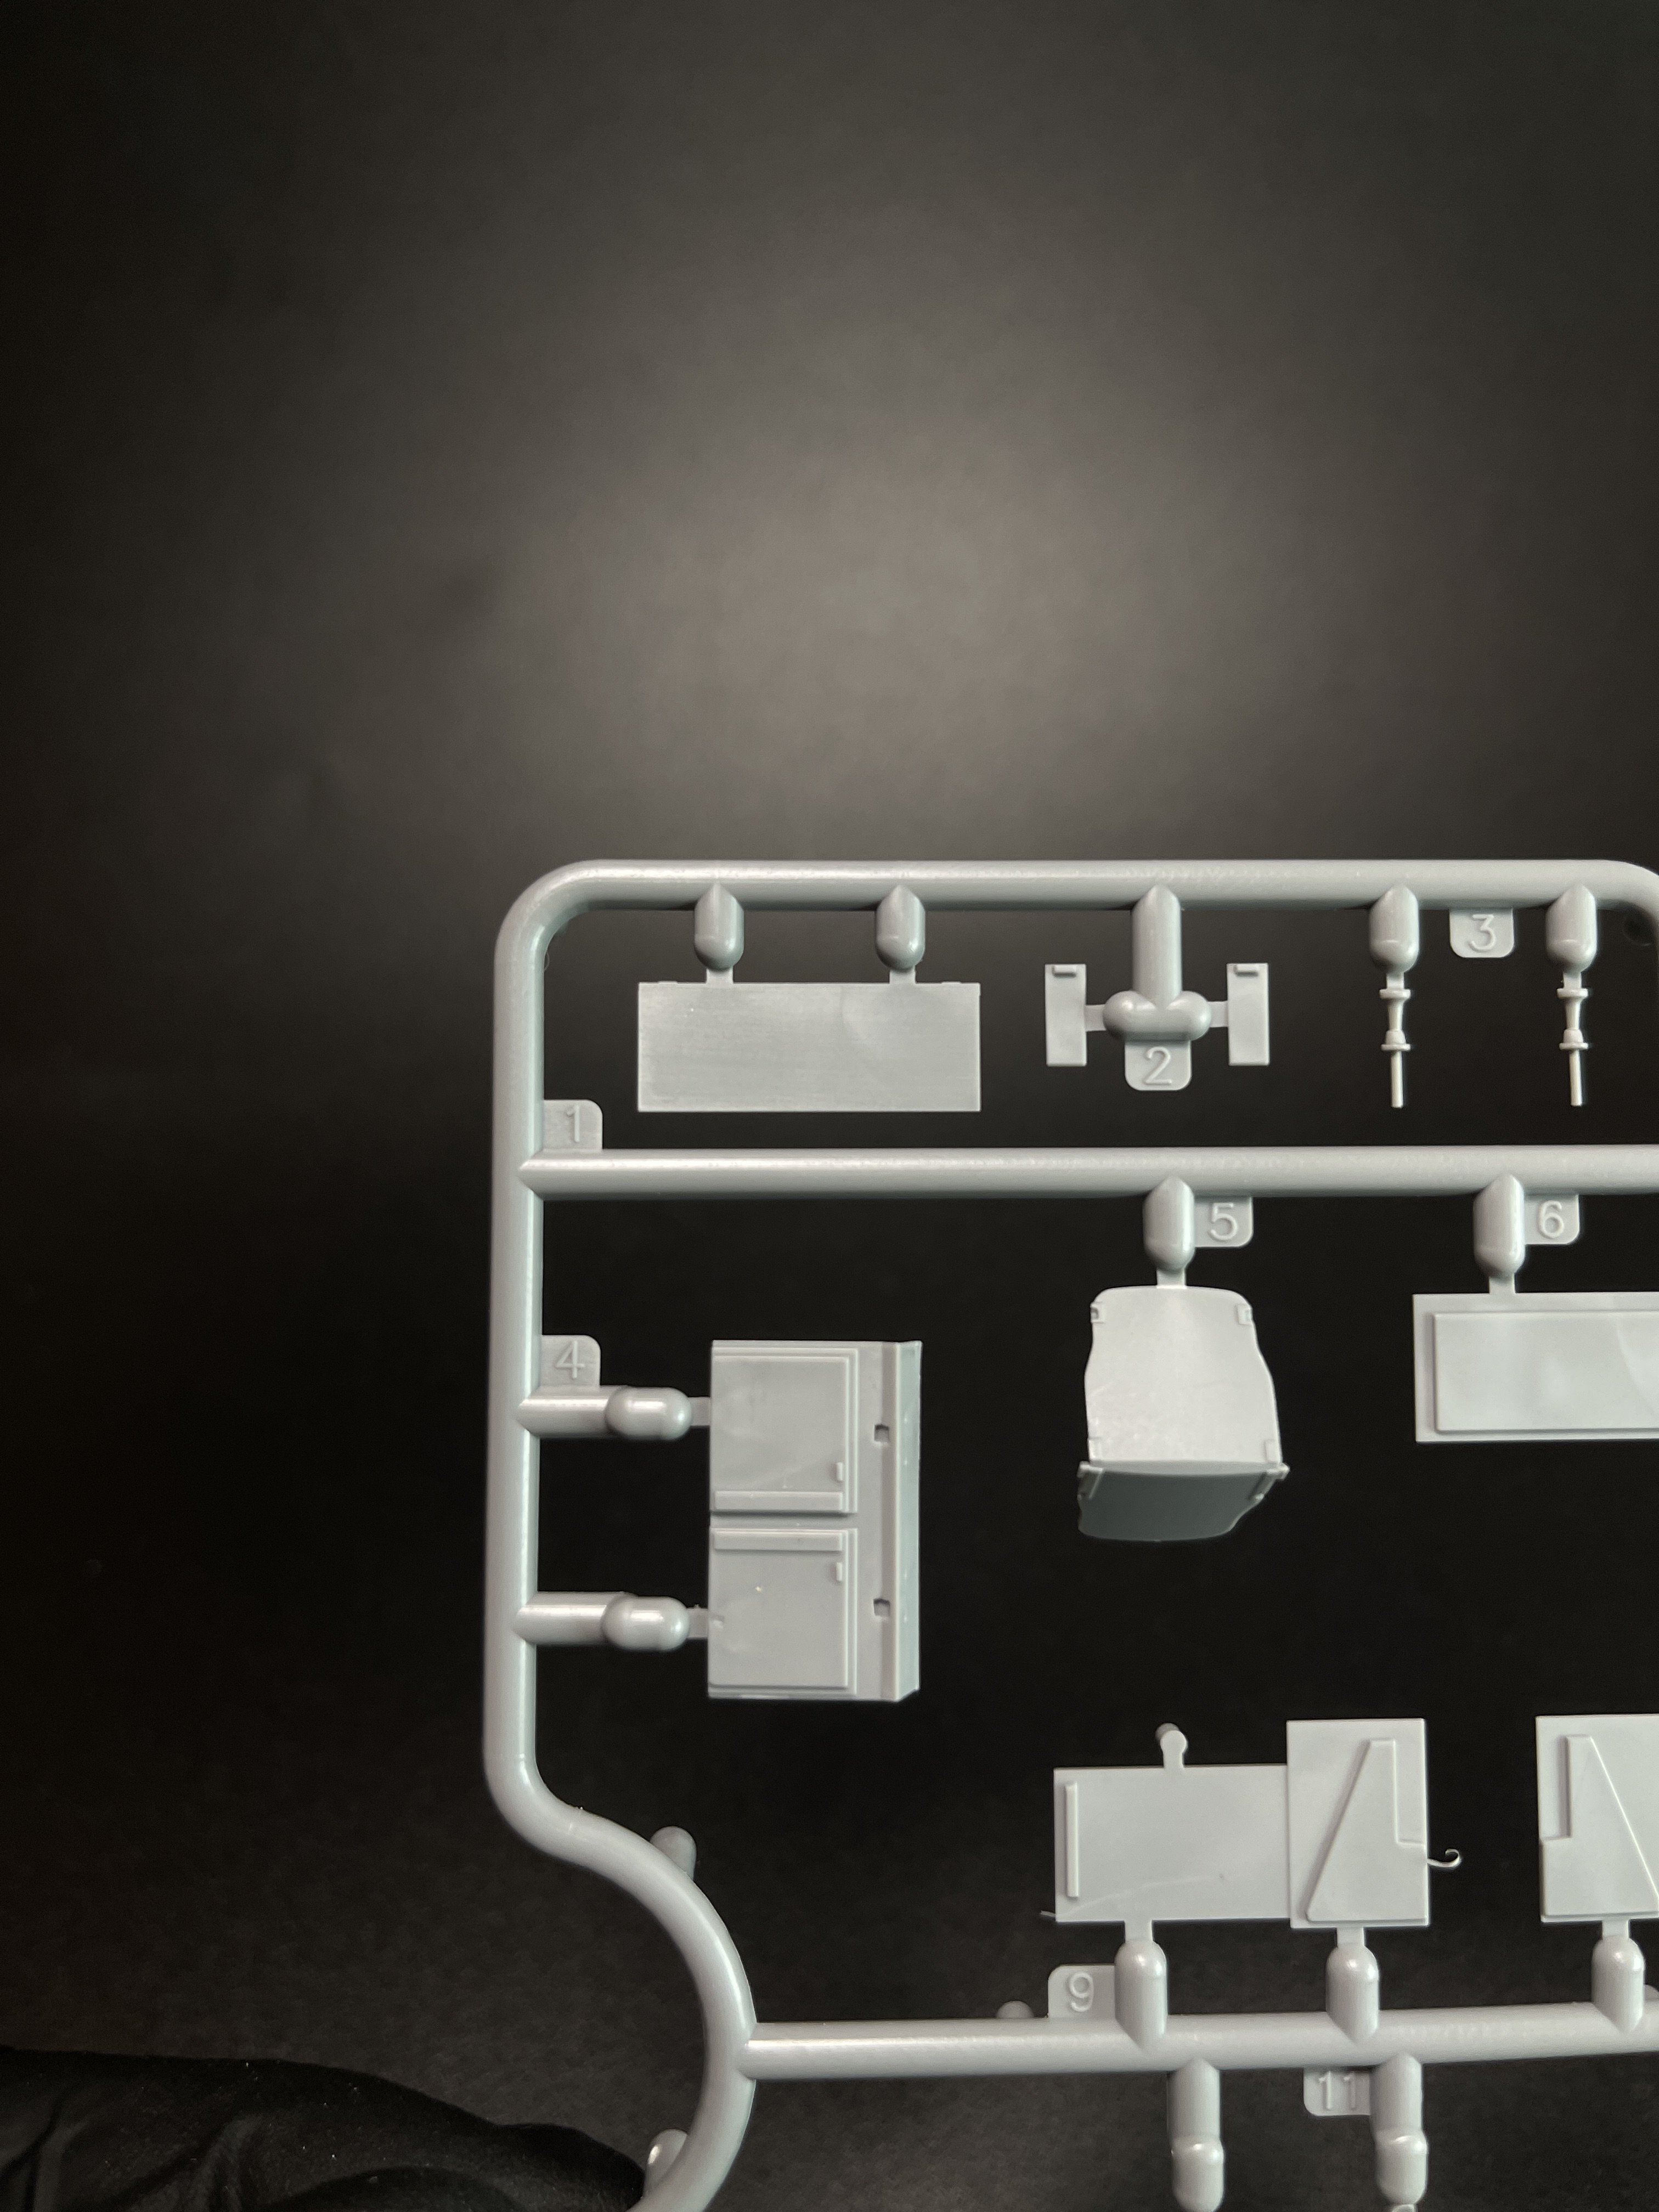
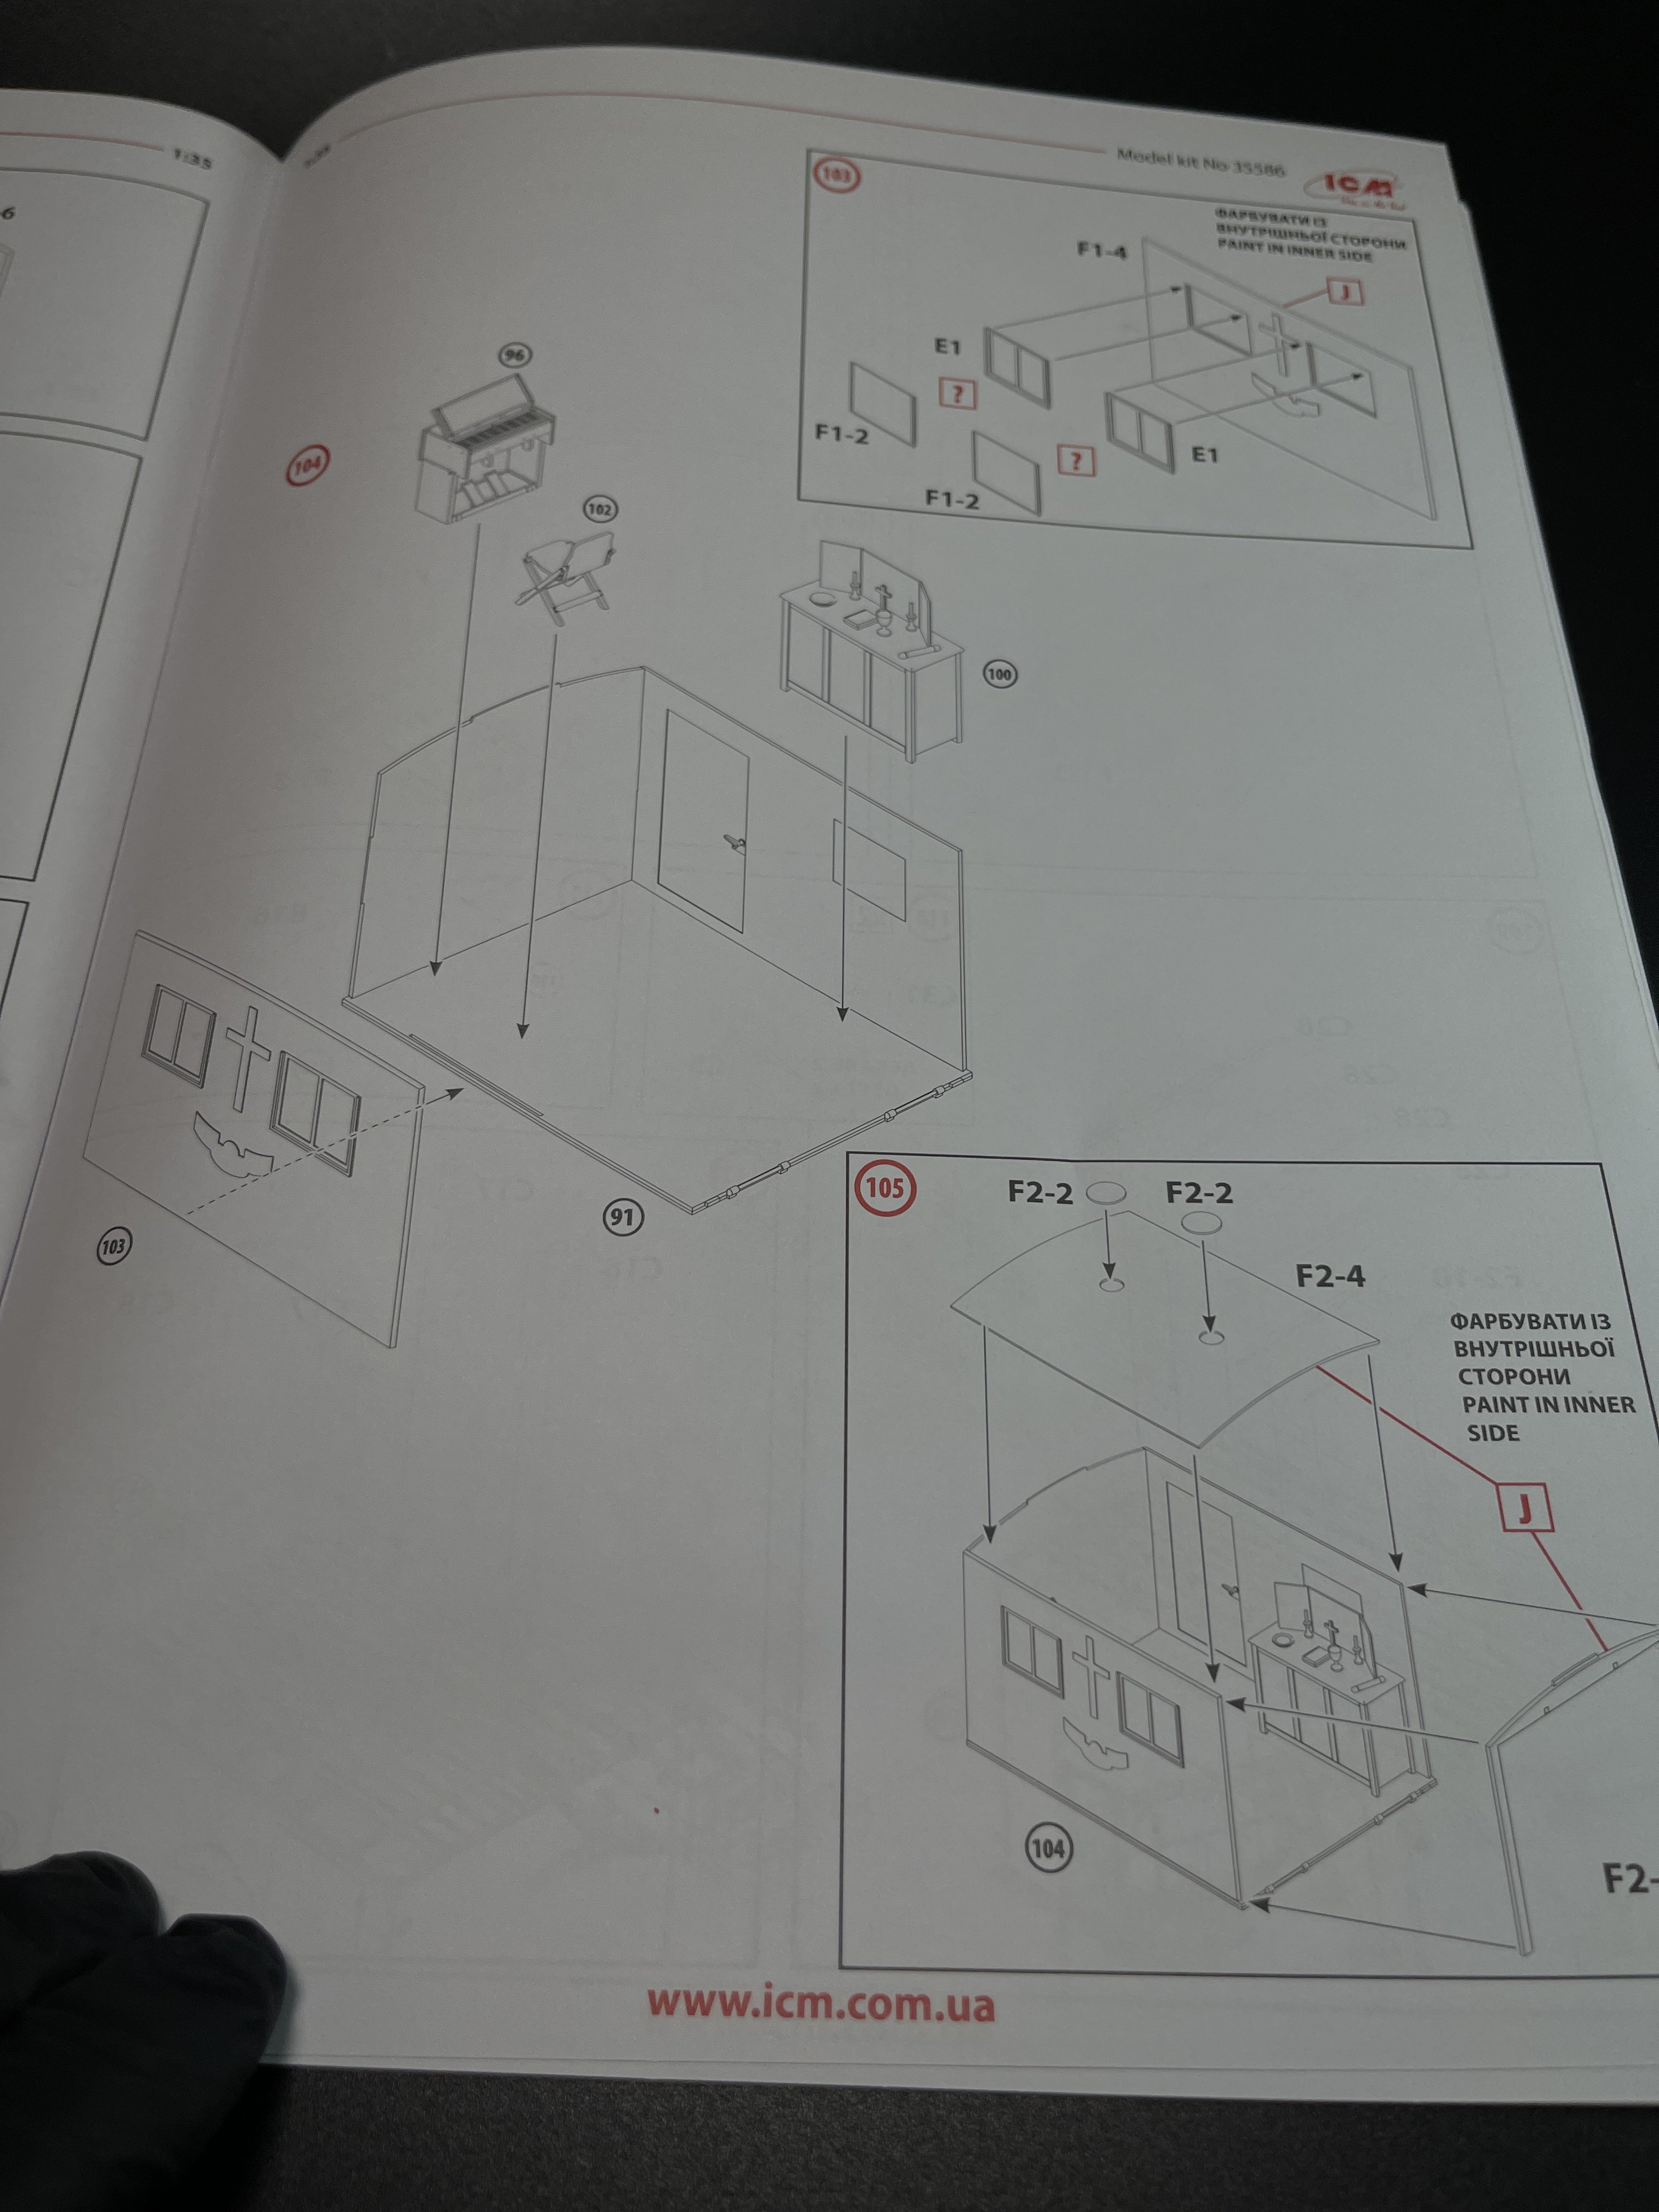
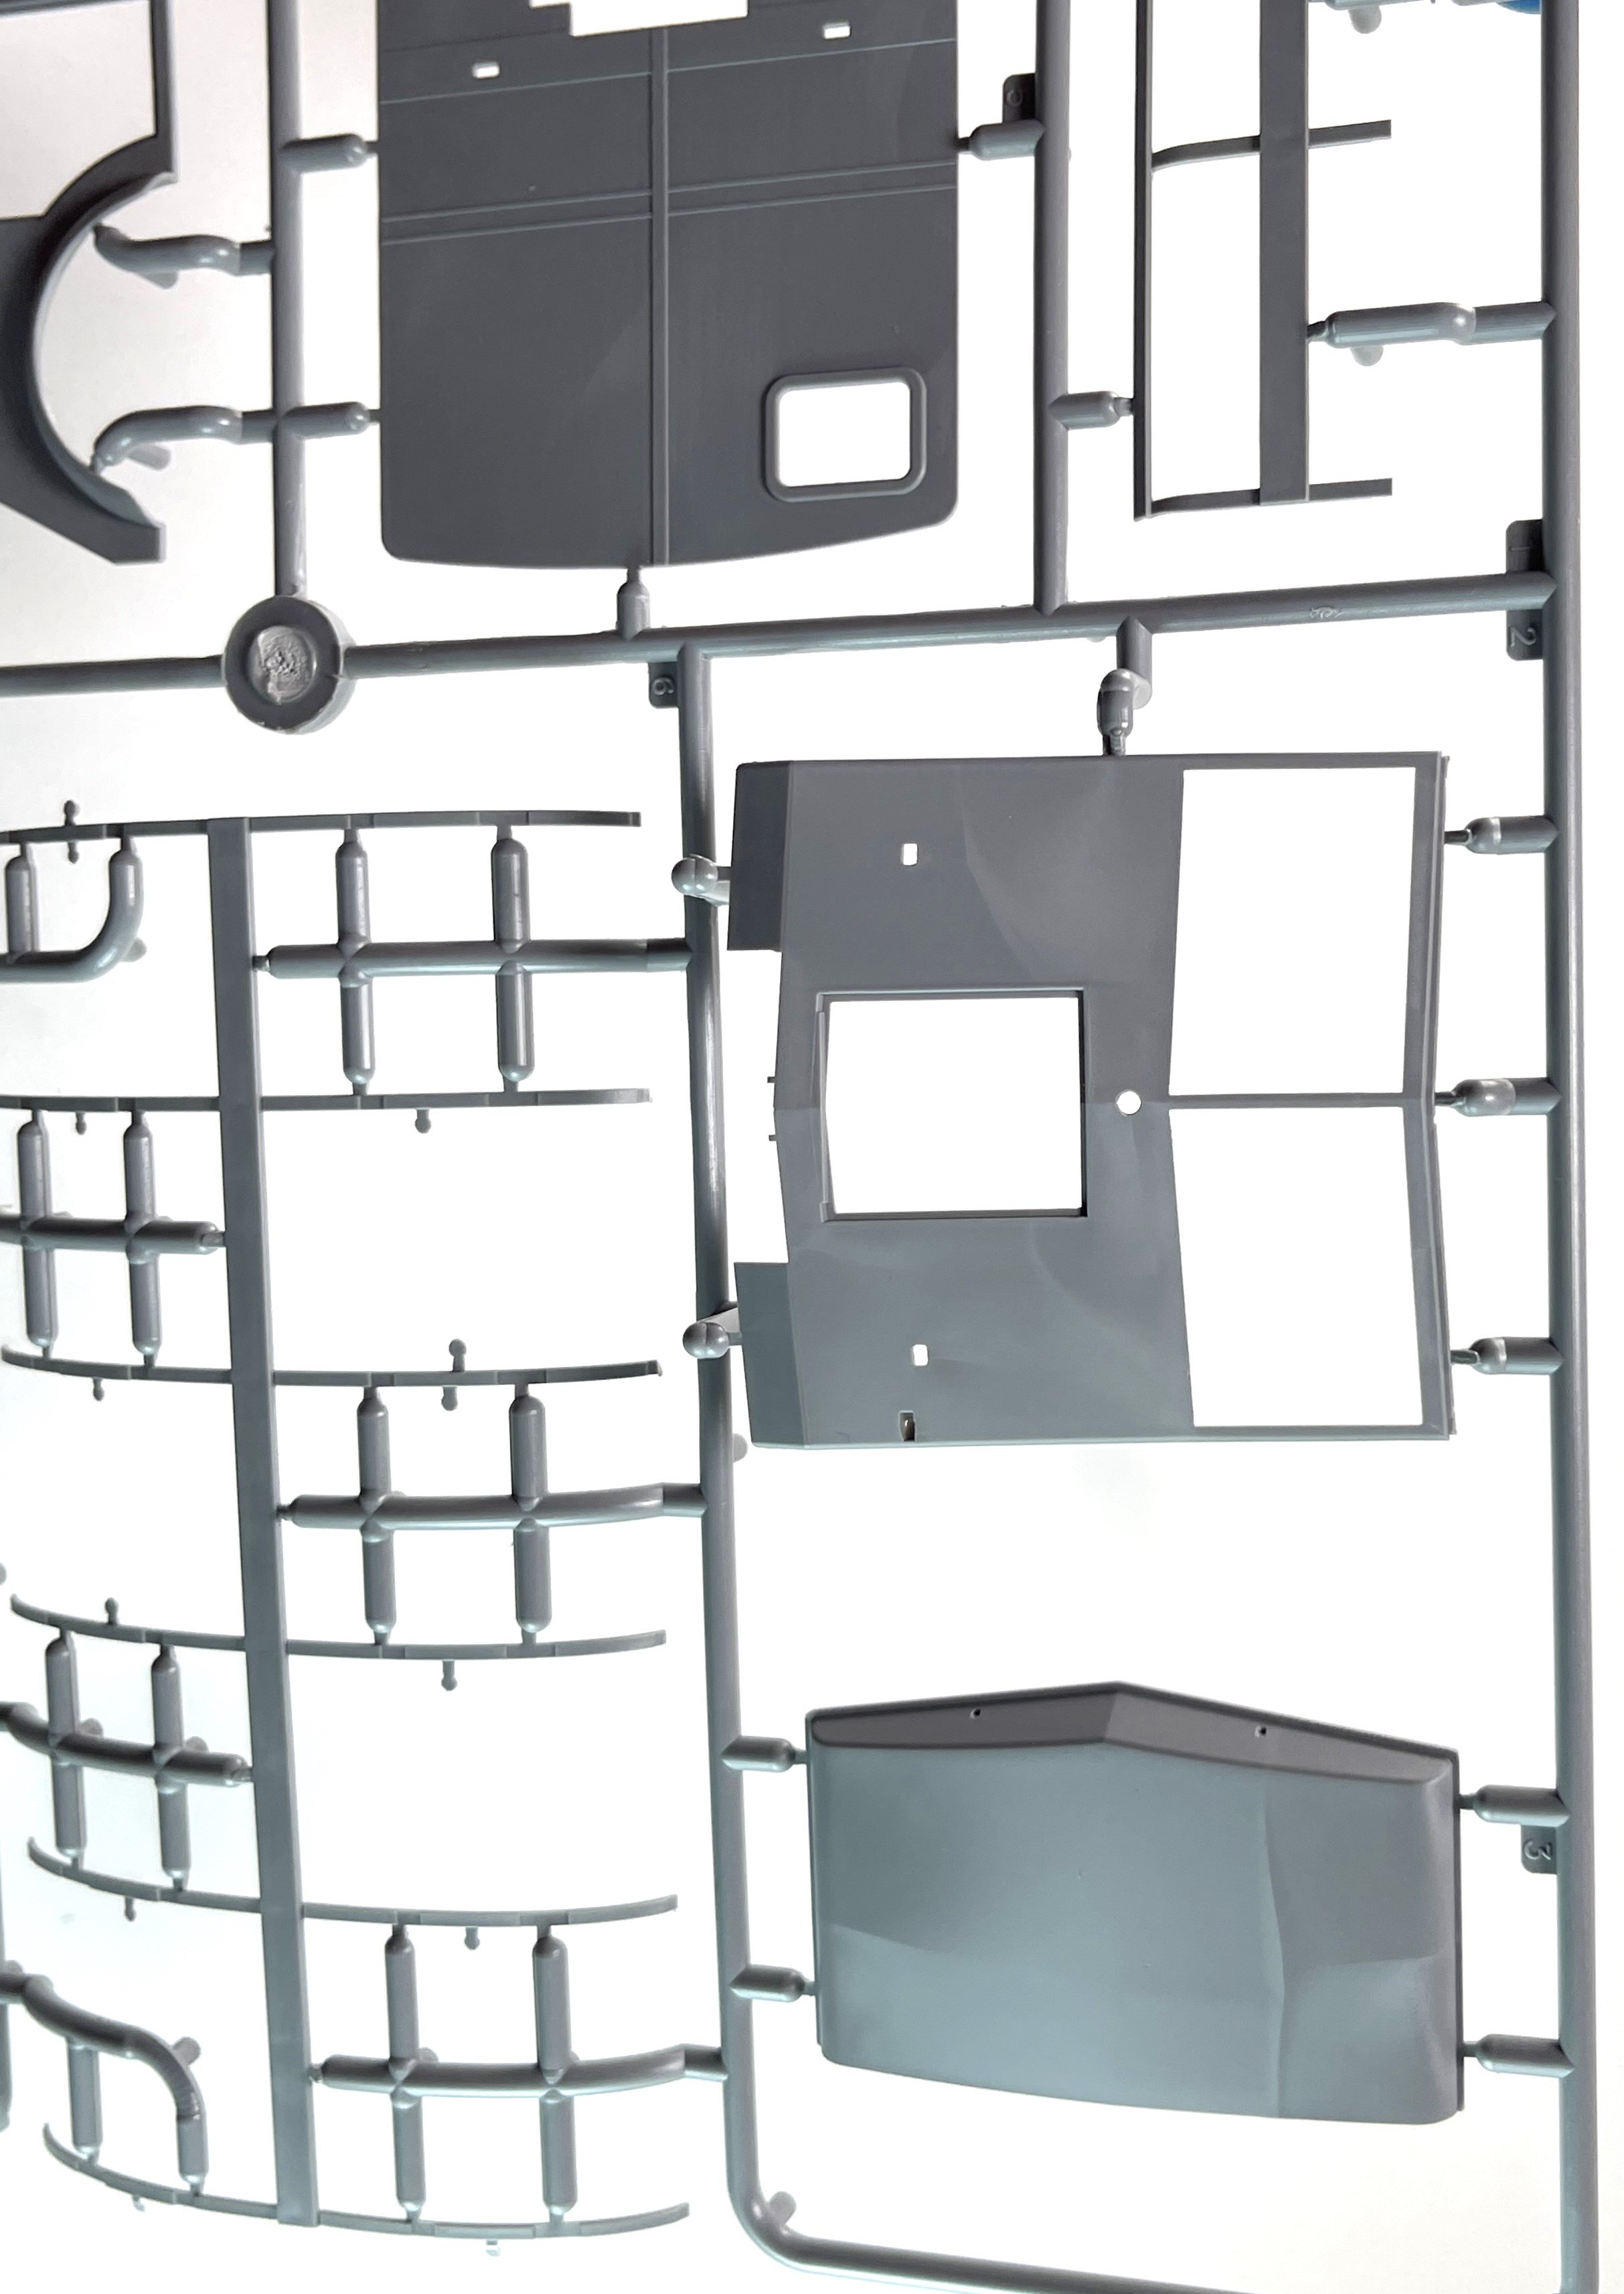
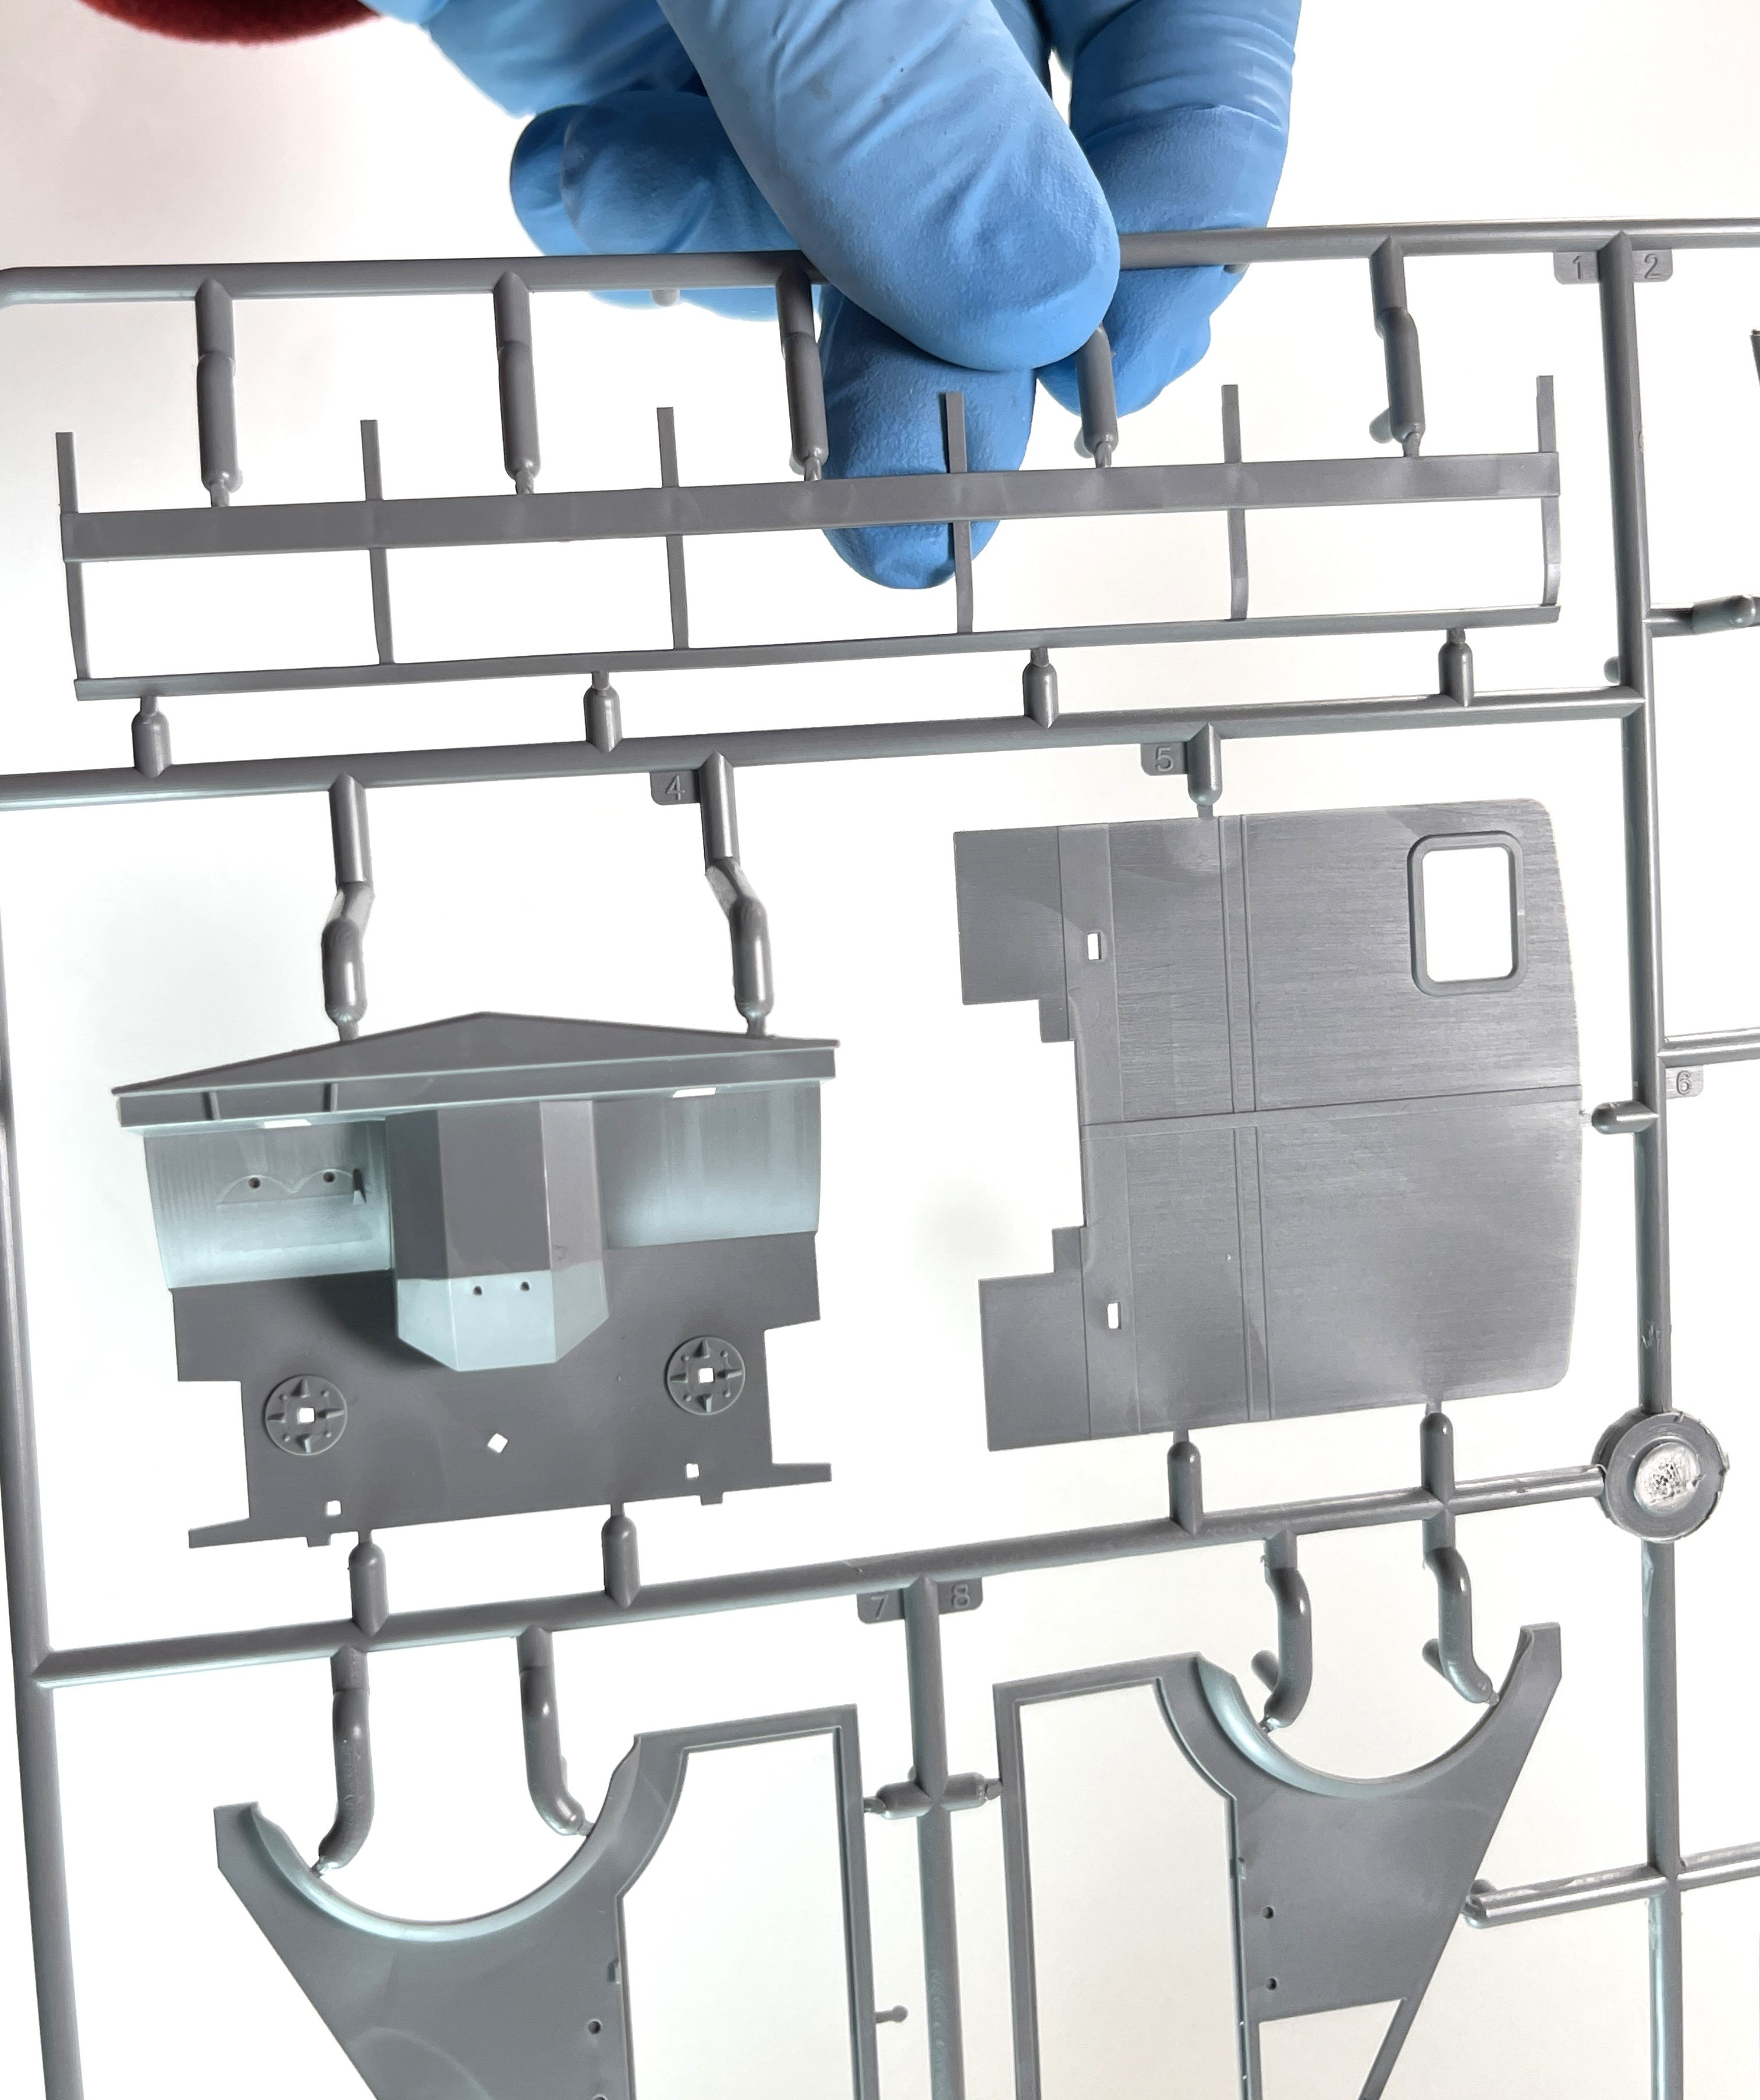
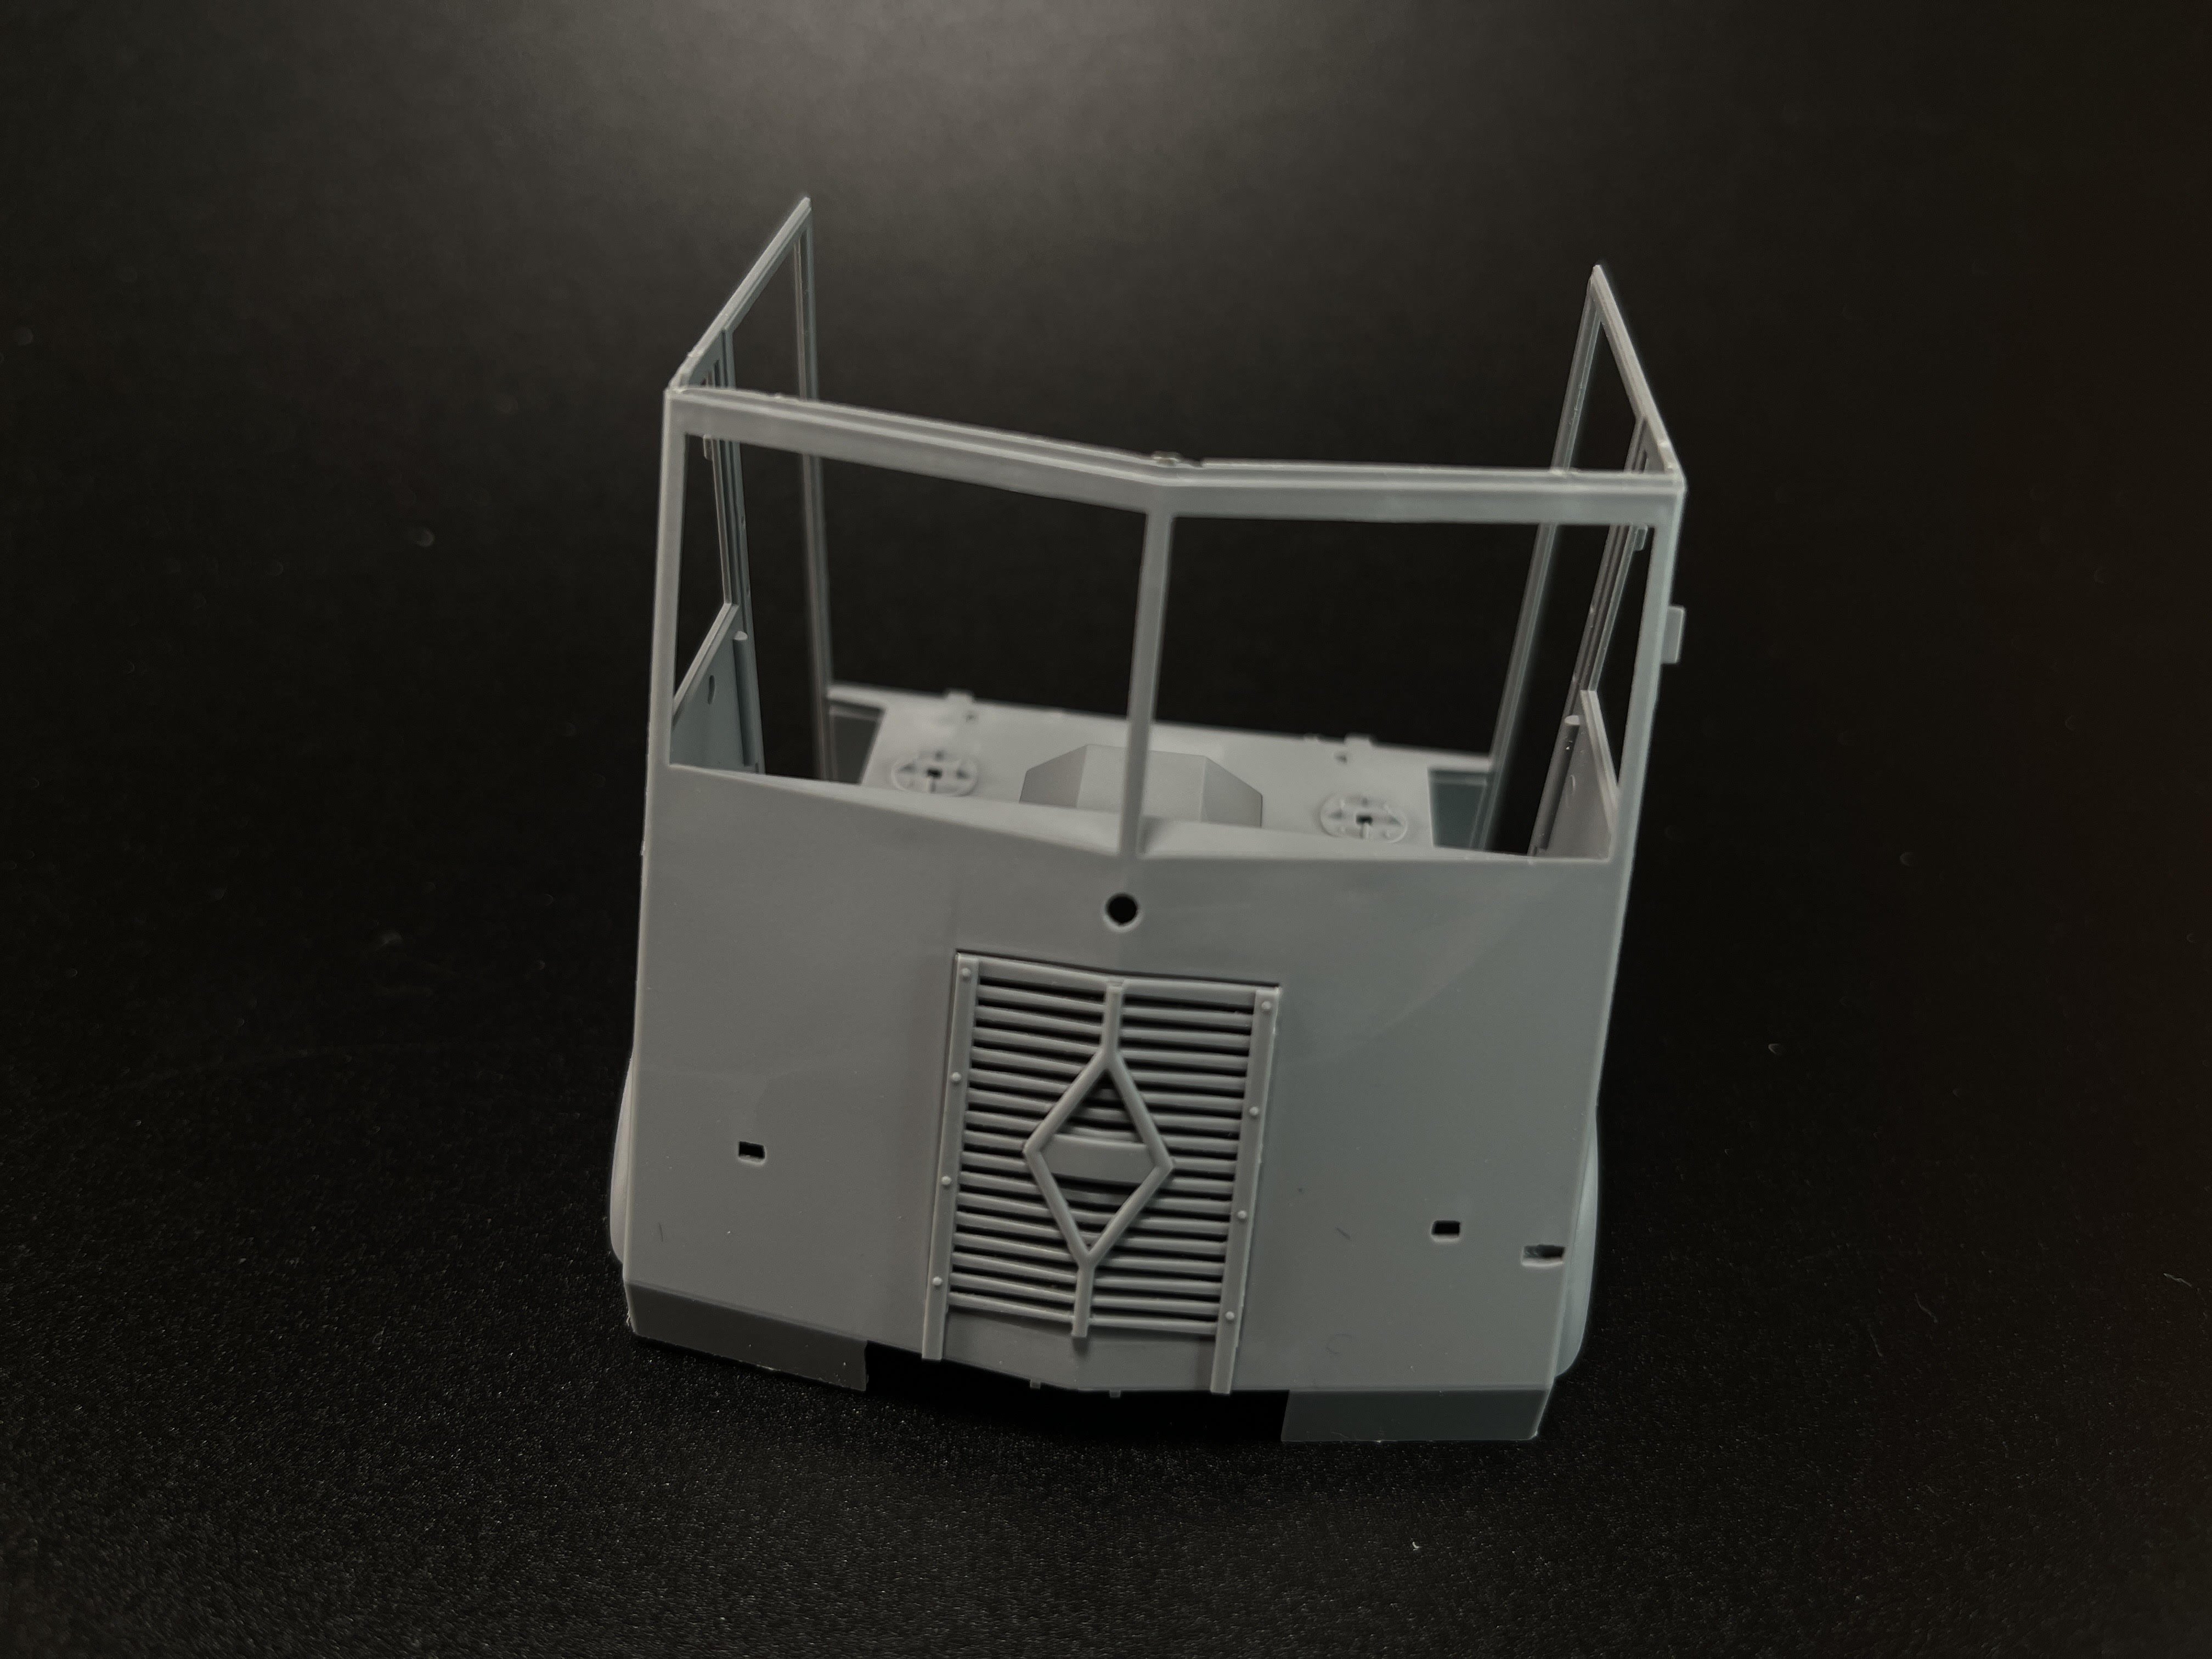
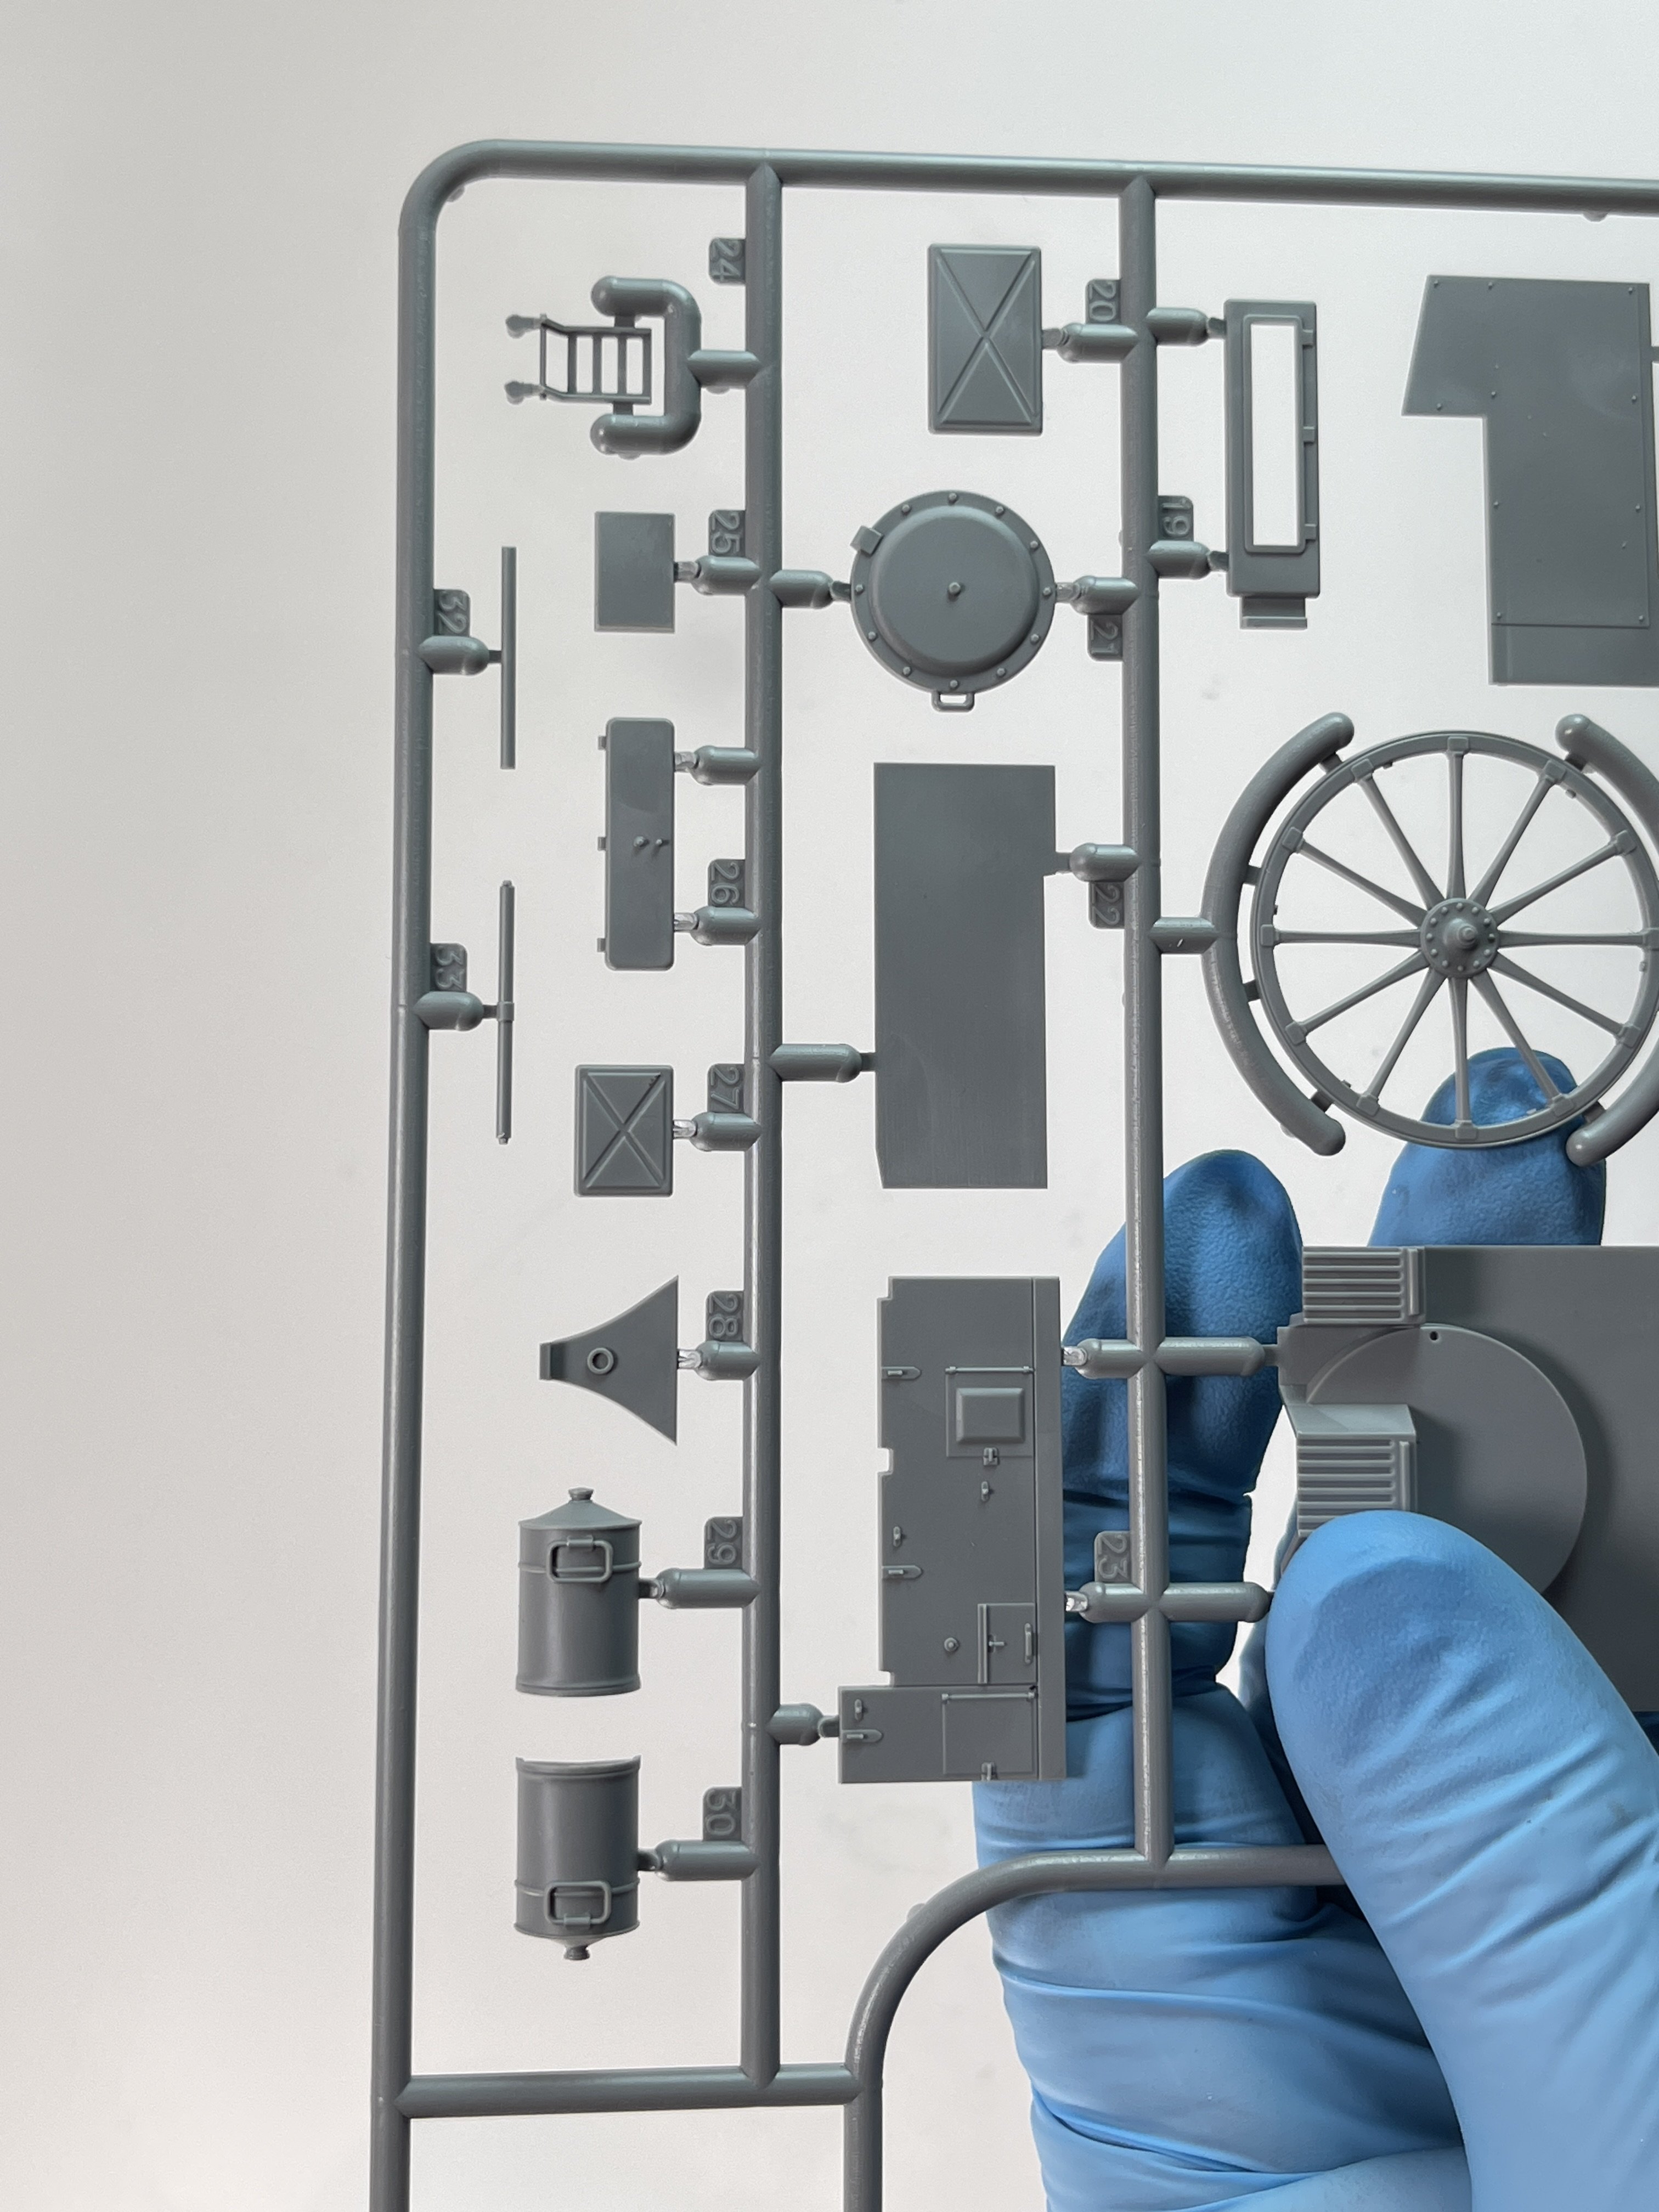
Now, the new part: The chapel.
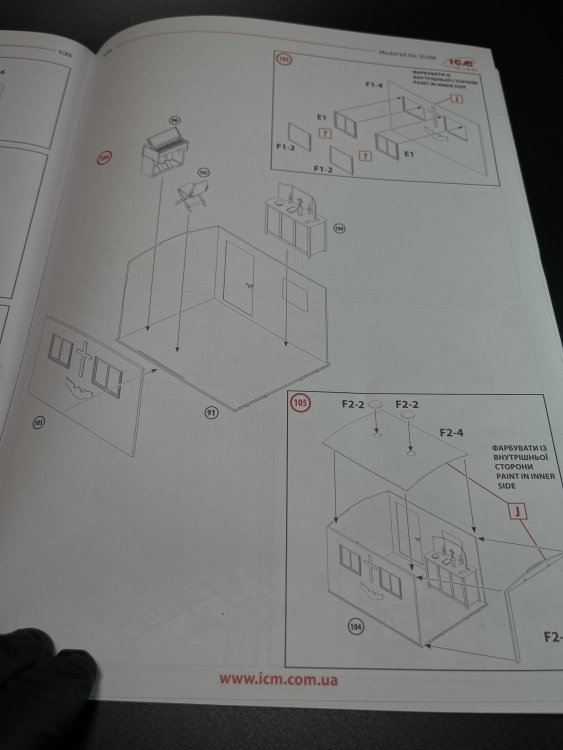
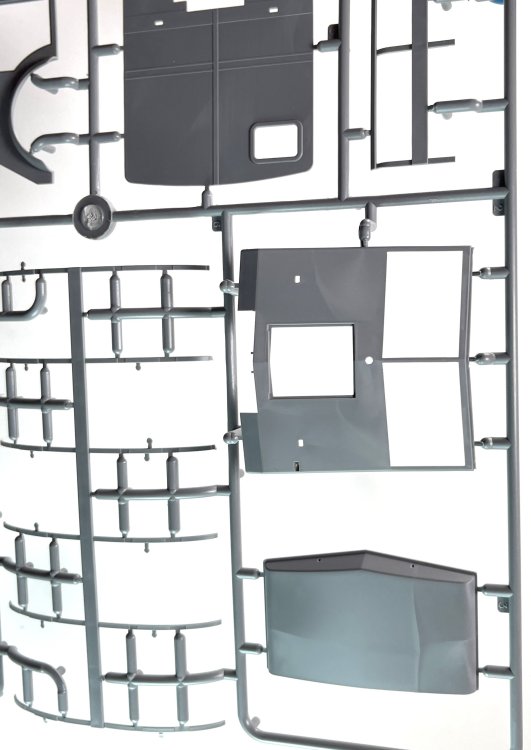
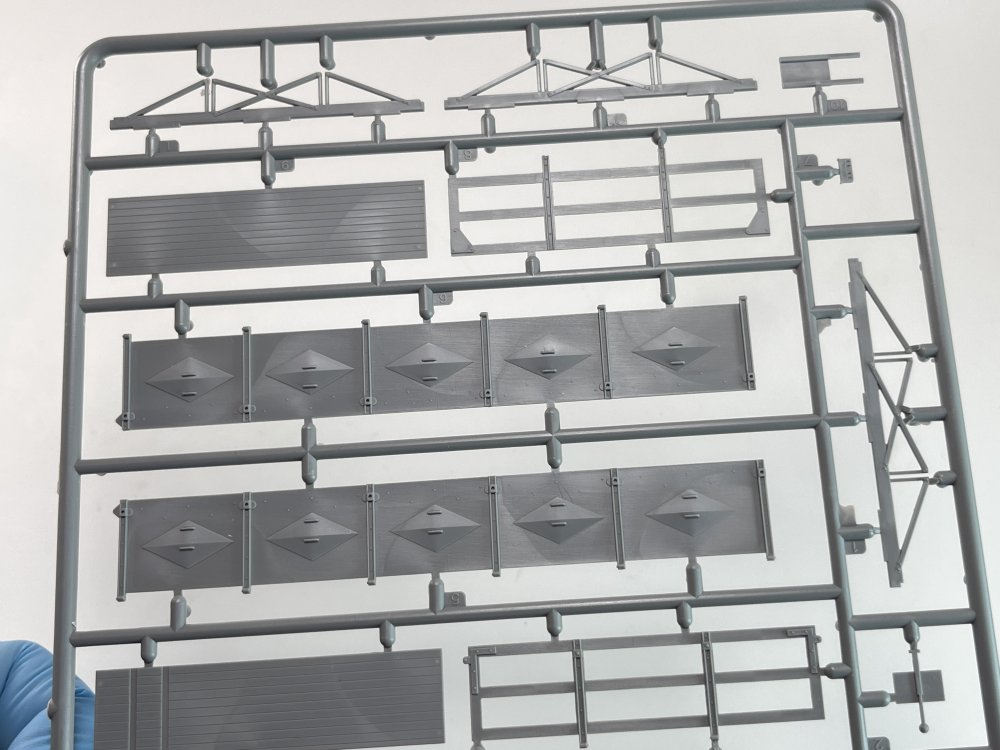
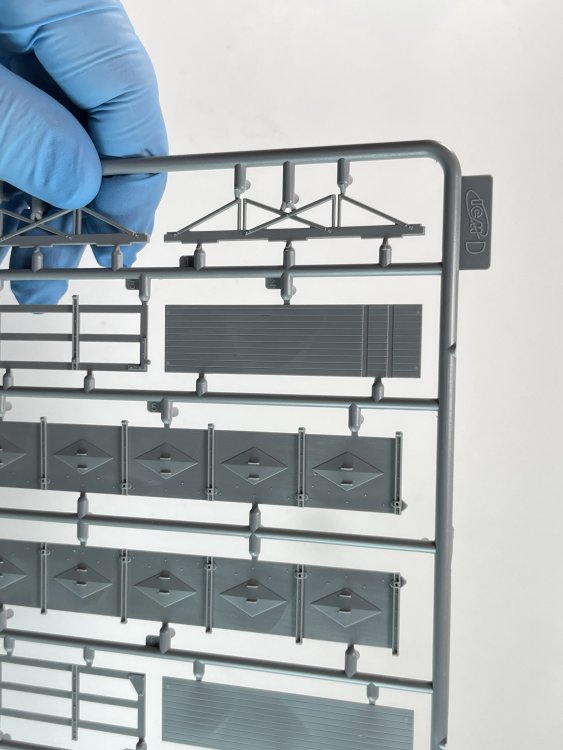
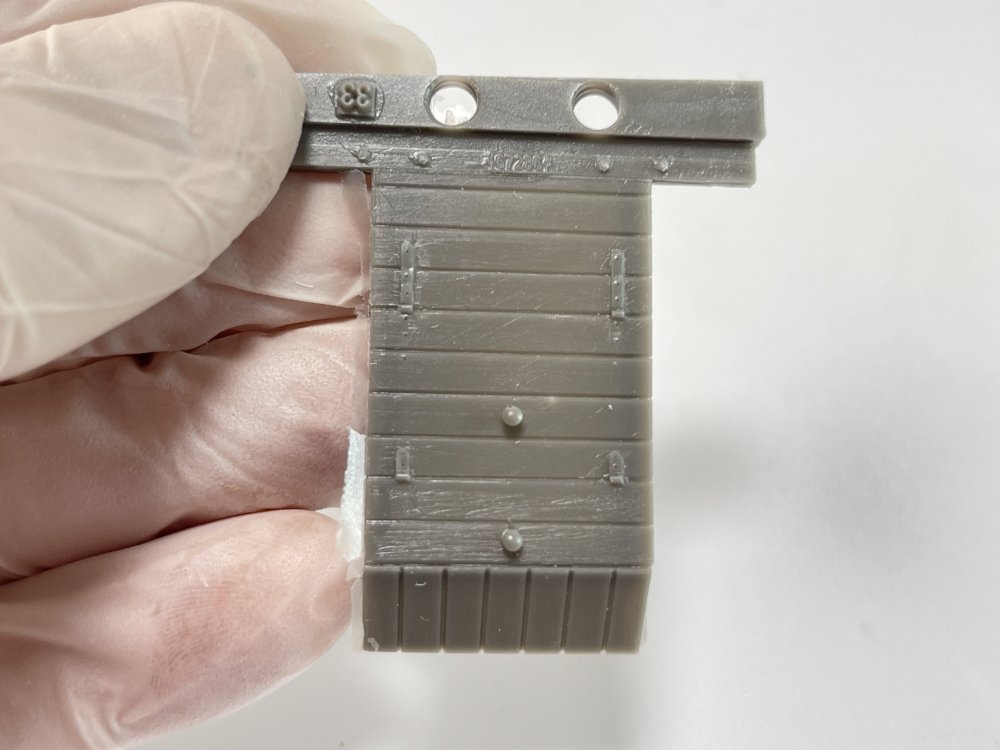
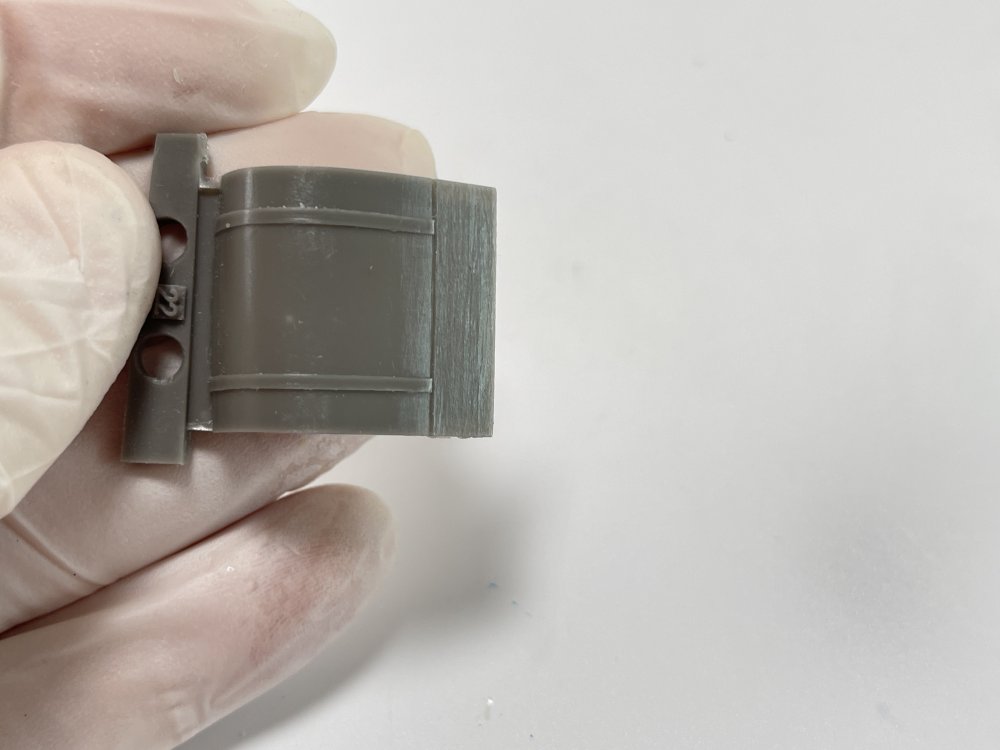
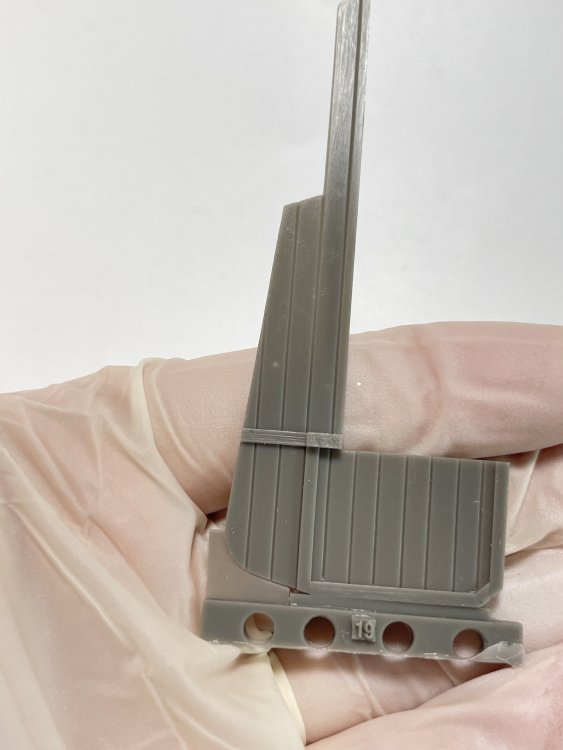
It is made in modular parts with separate panels, with great fitting, knowing ICM latest releases. All doors are molded separately, giving the option to the modeller to leave them open, that might be useful for some diorama ideas.
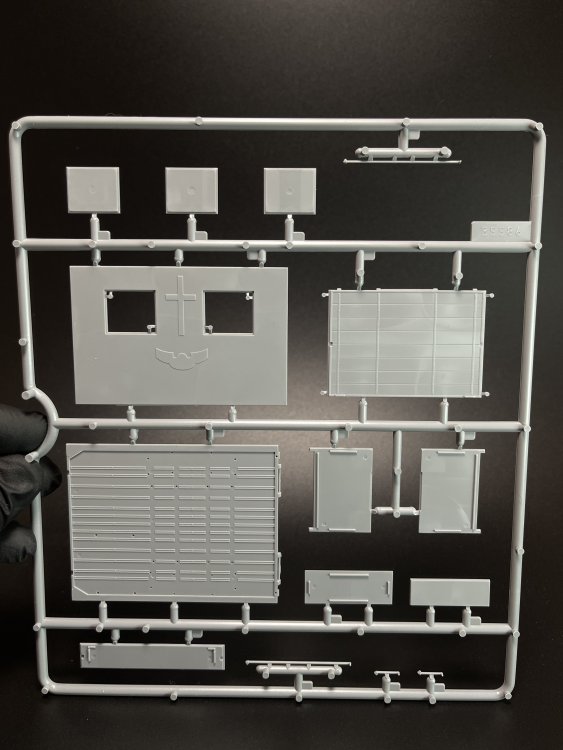
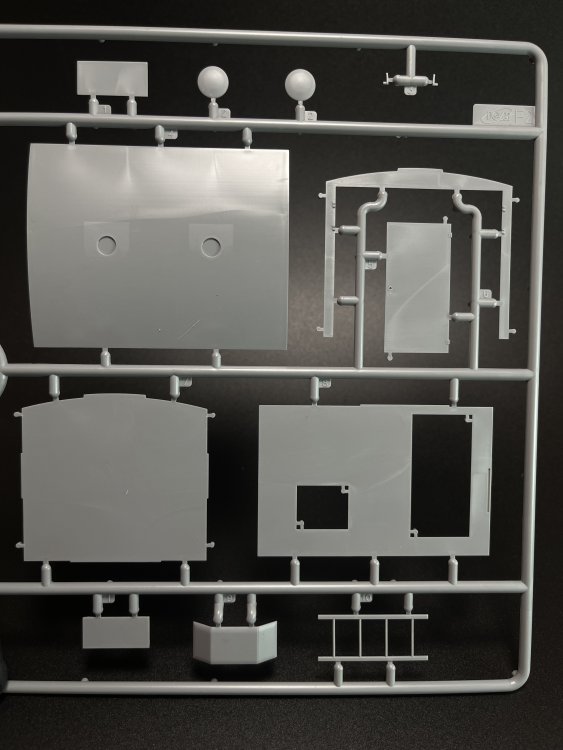
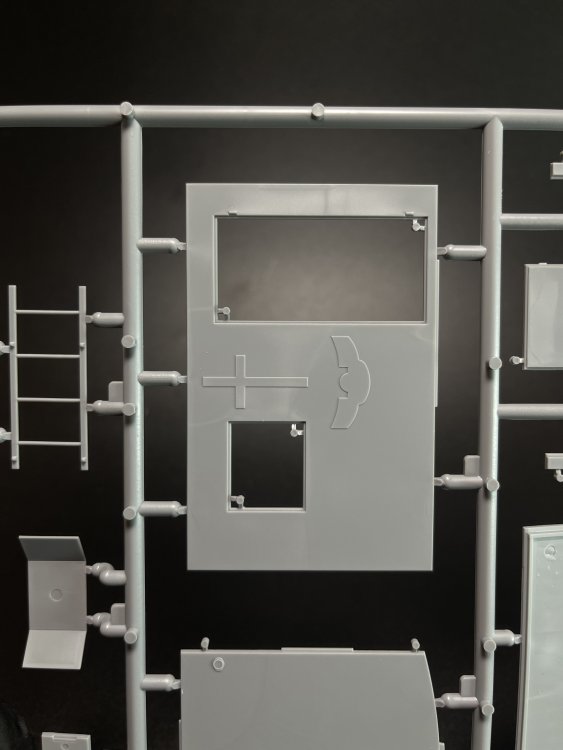
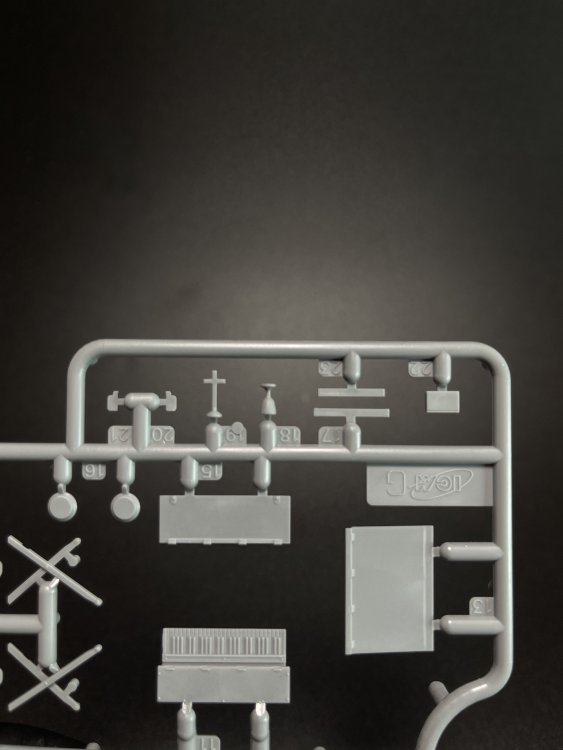
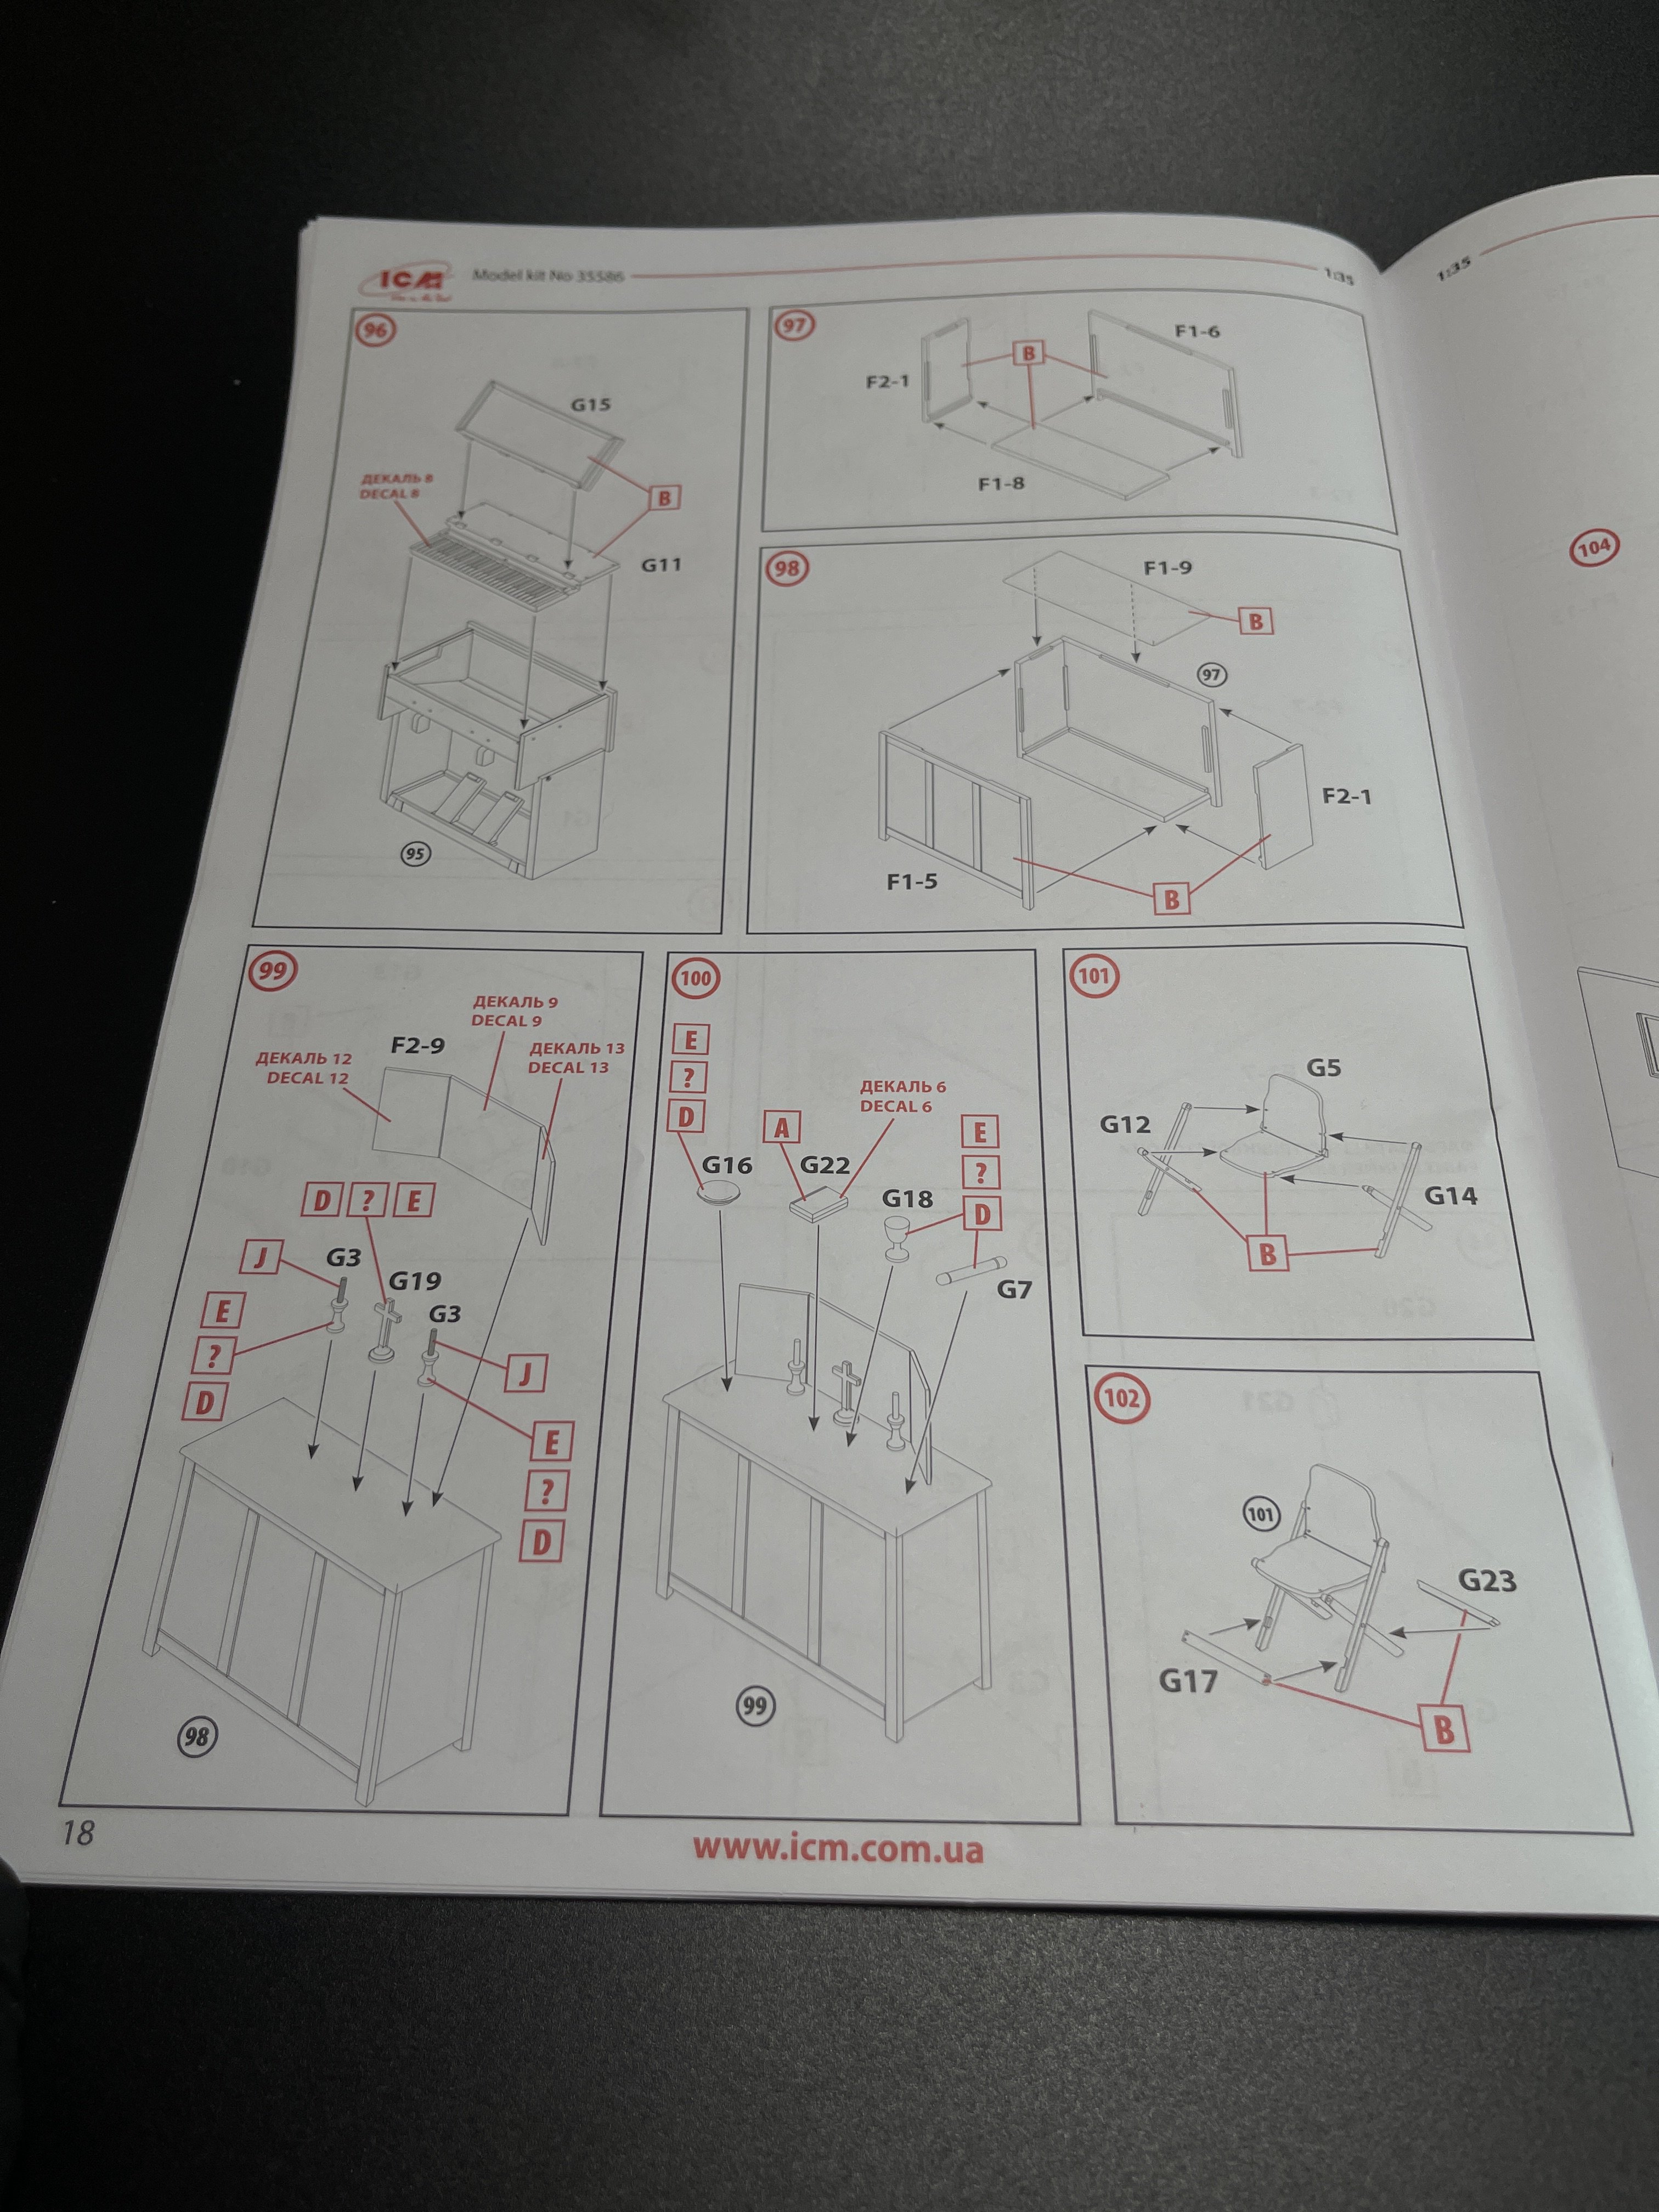
The level of detail into the interior of the chapel is quite good with religious artefacts a pulpit and piano.


The modular design facilitates customization, enabling modelers to depict the chapel in various configurations, not only the one that is proposal by ICM…
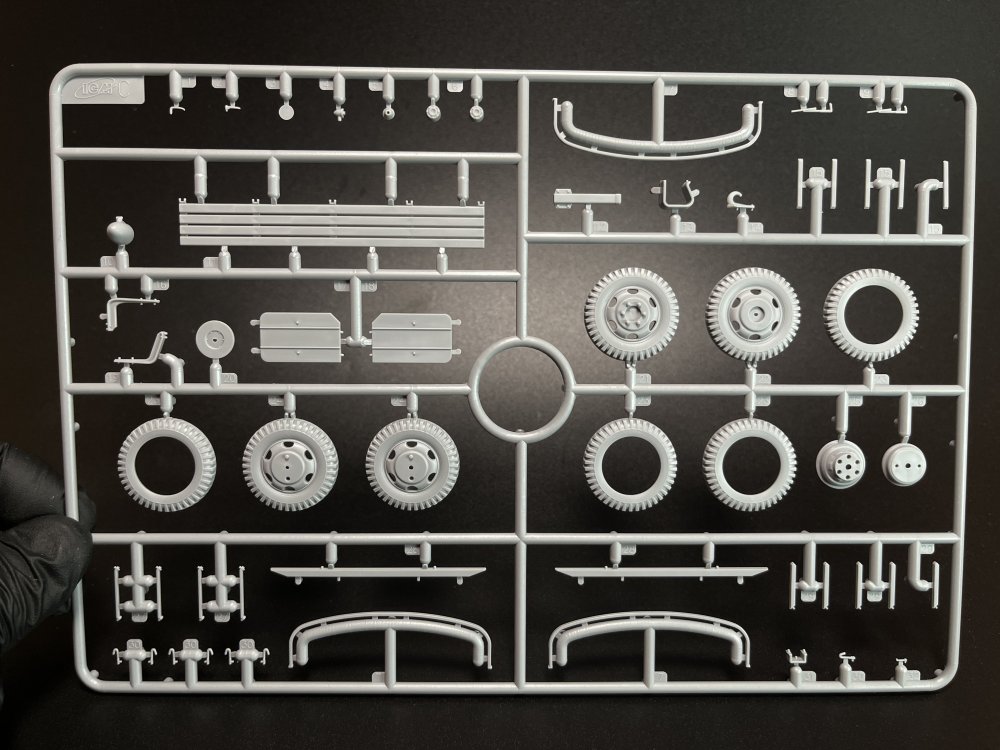
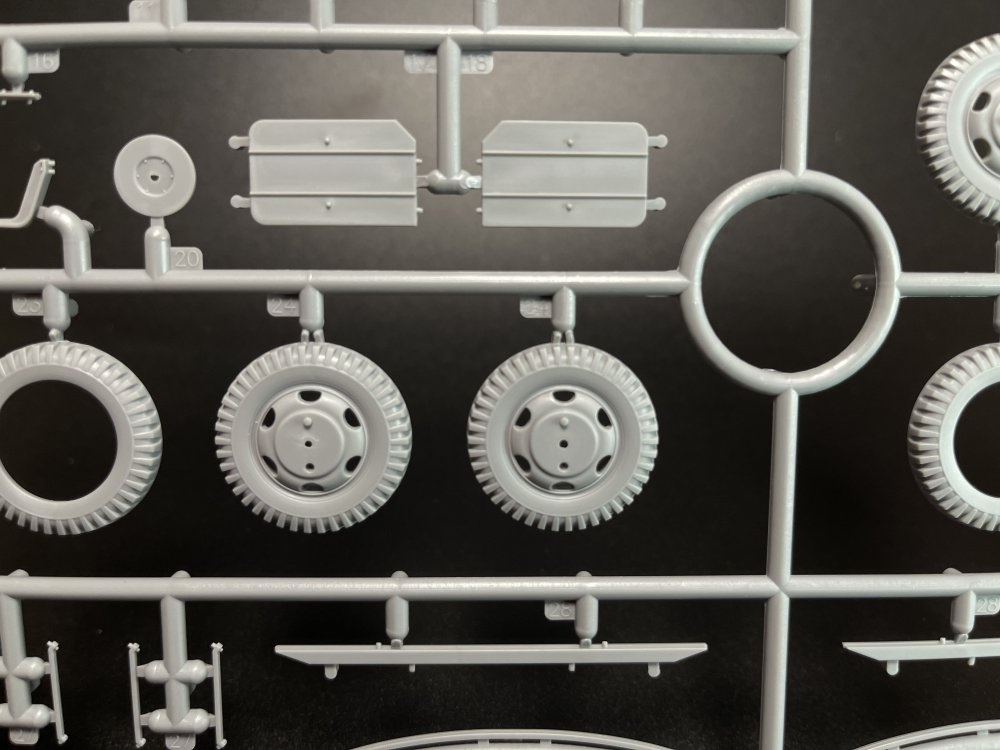
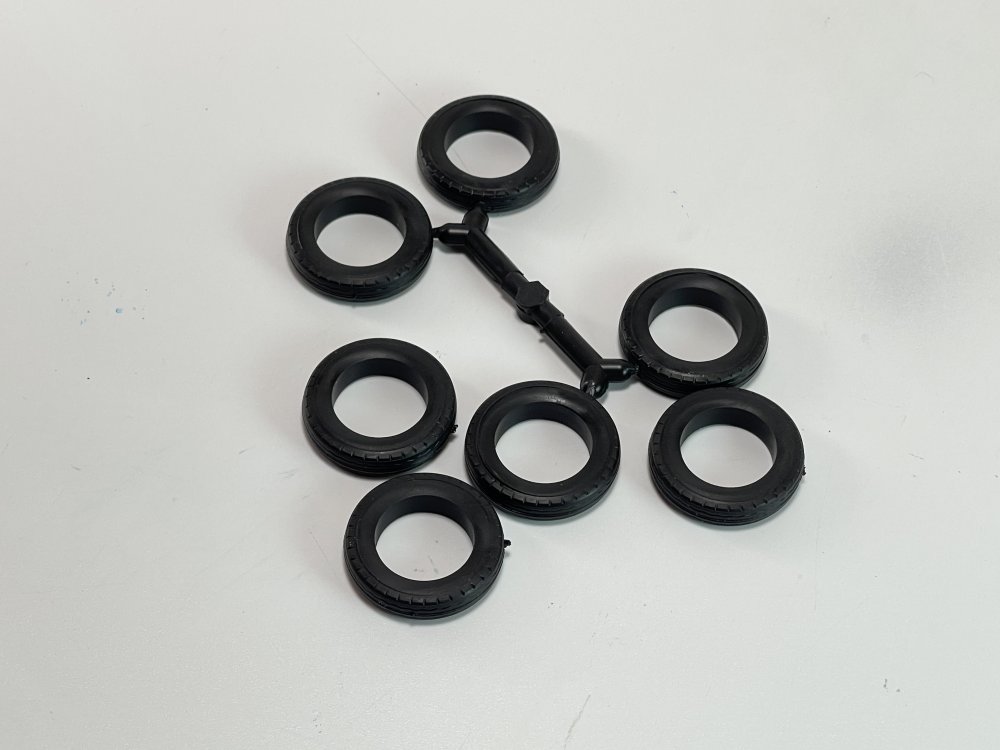
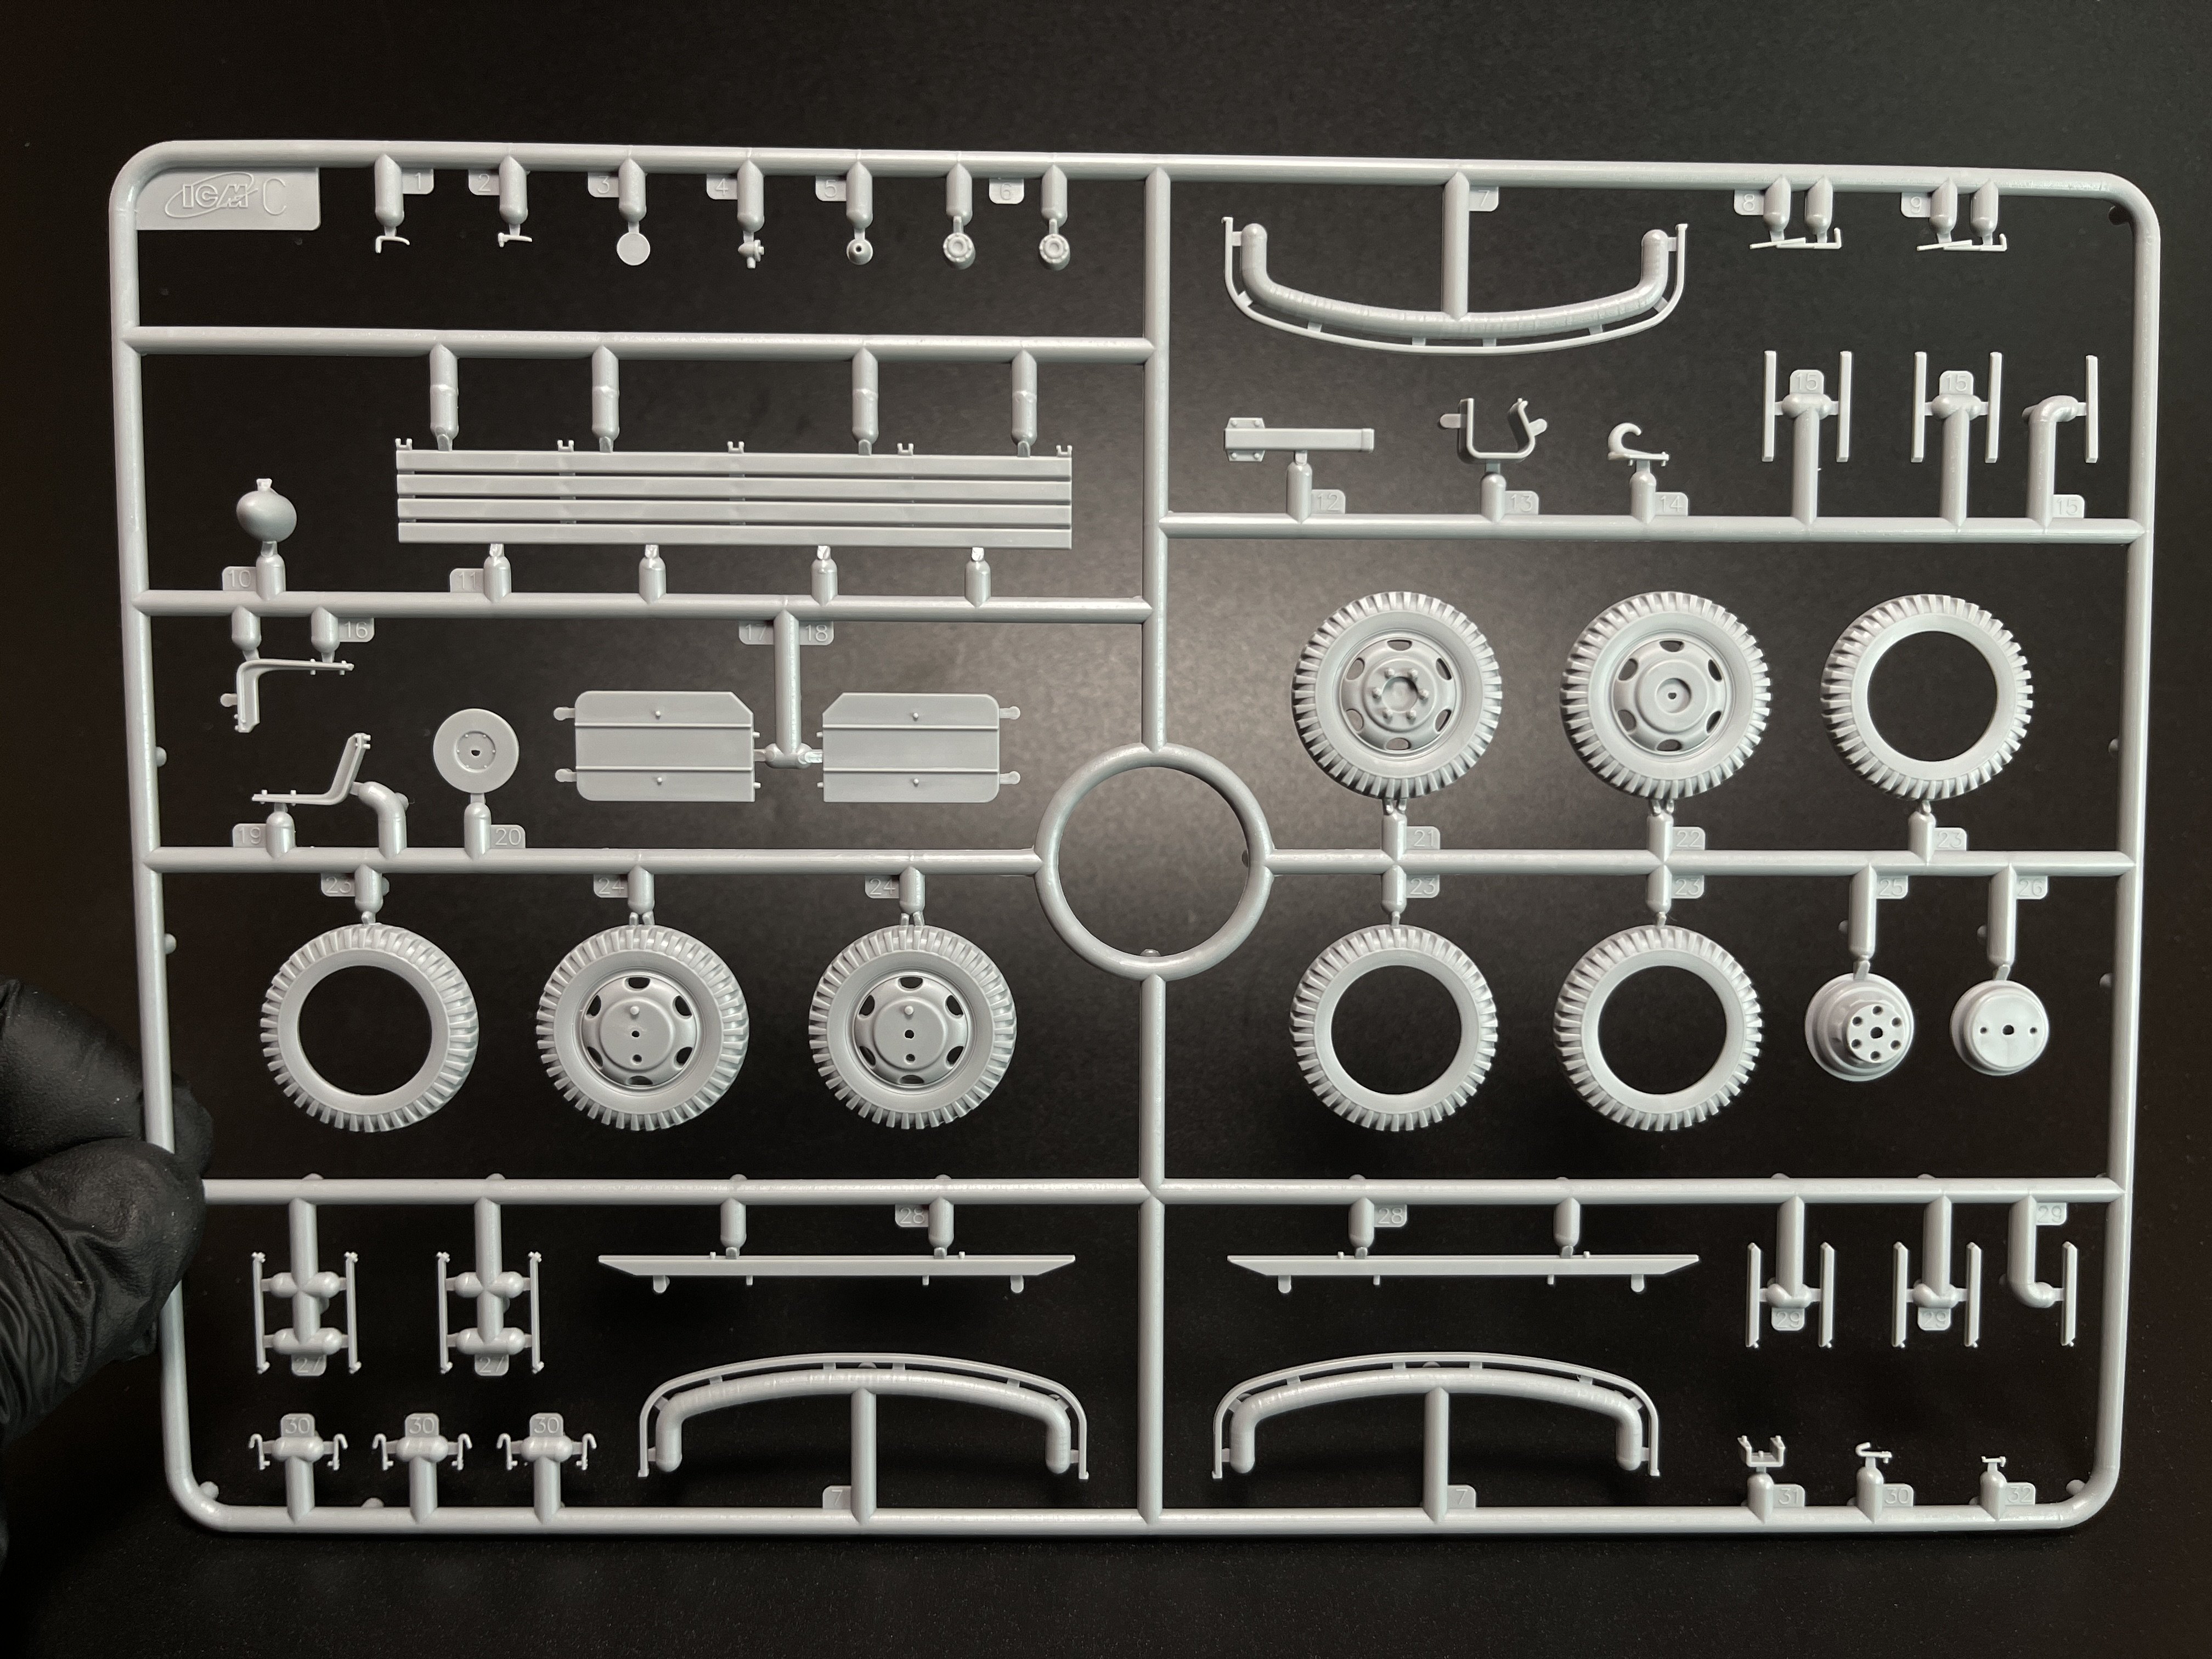
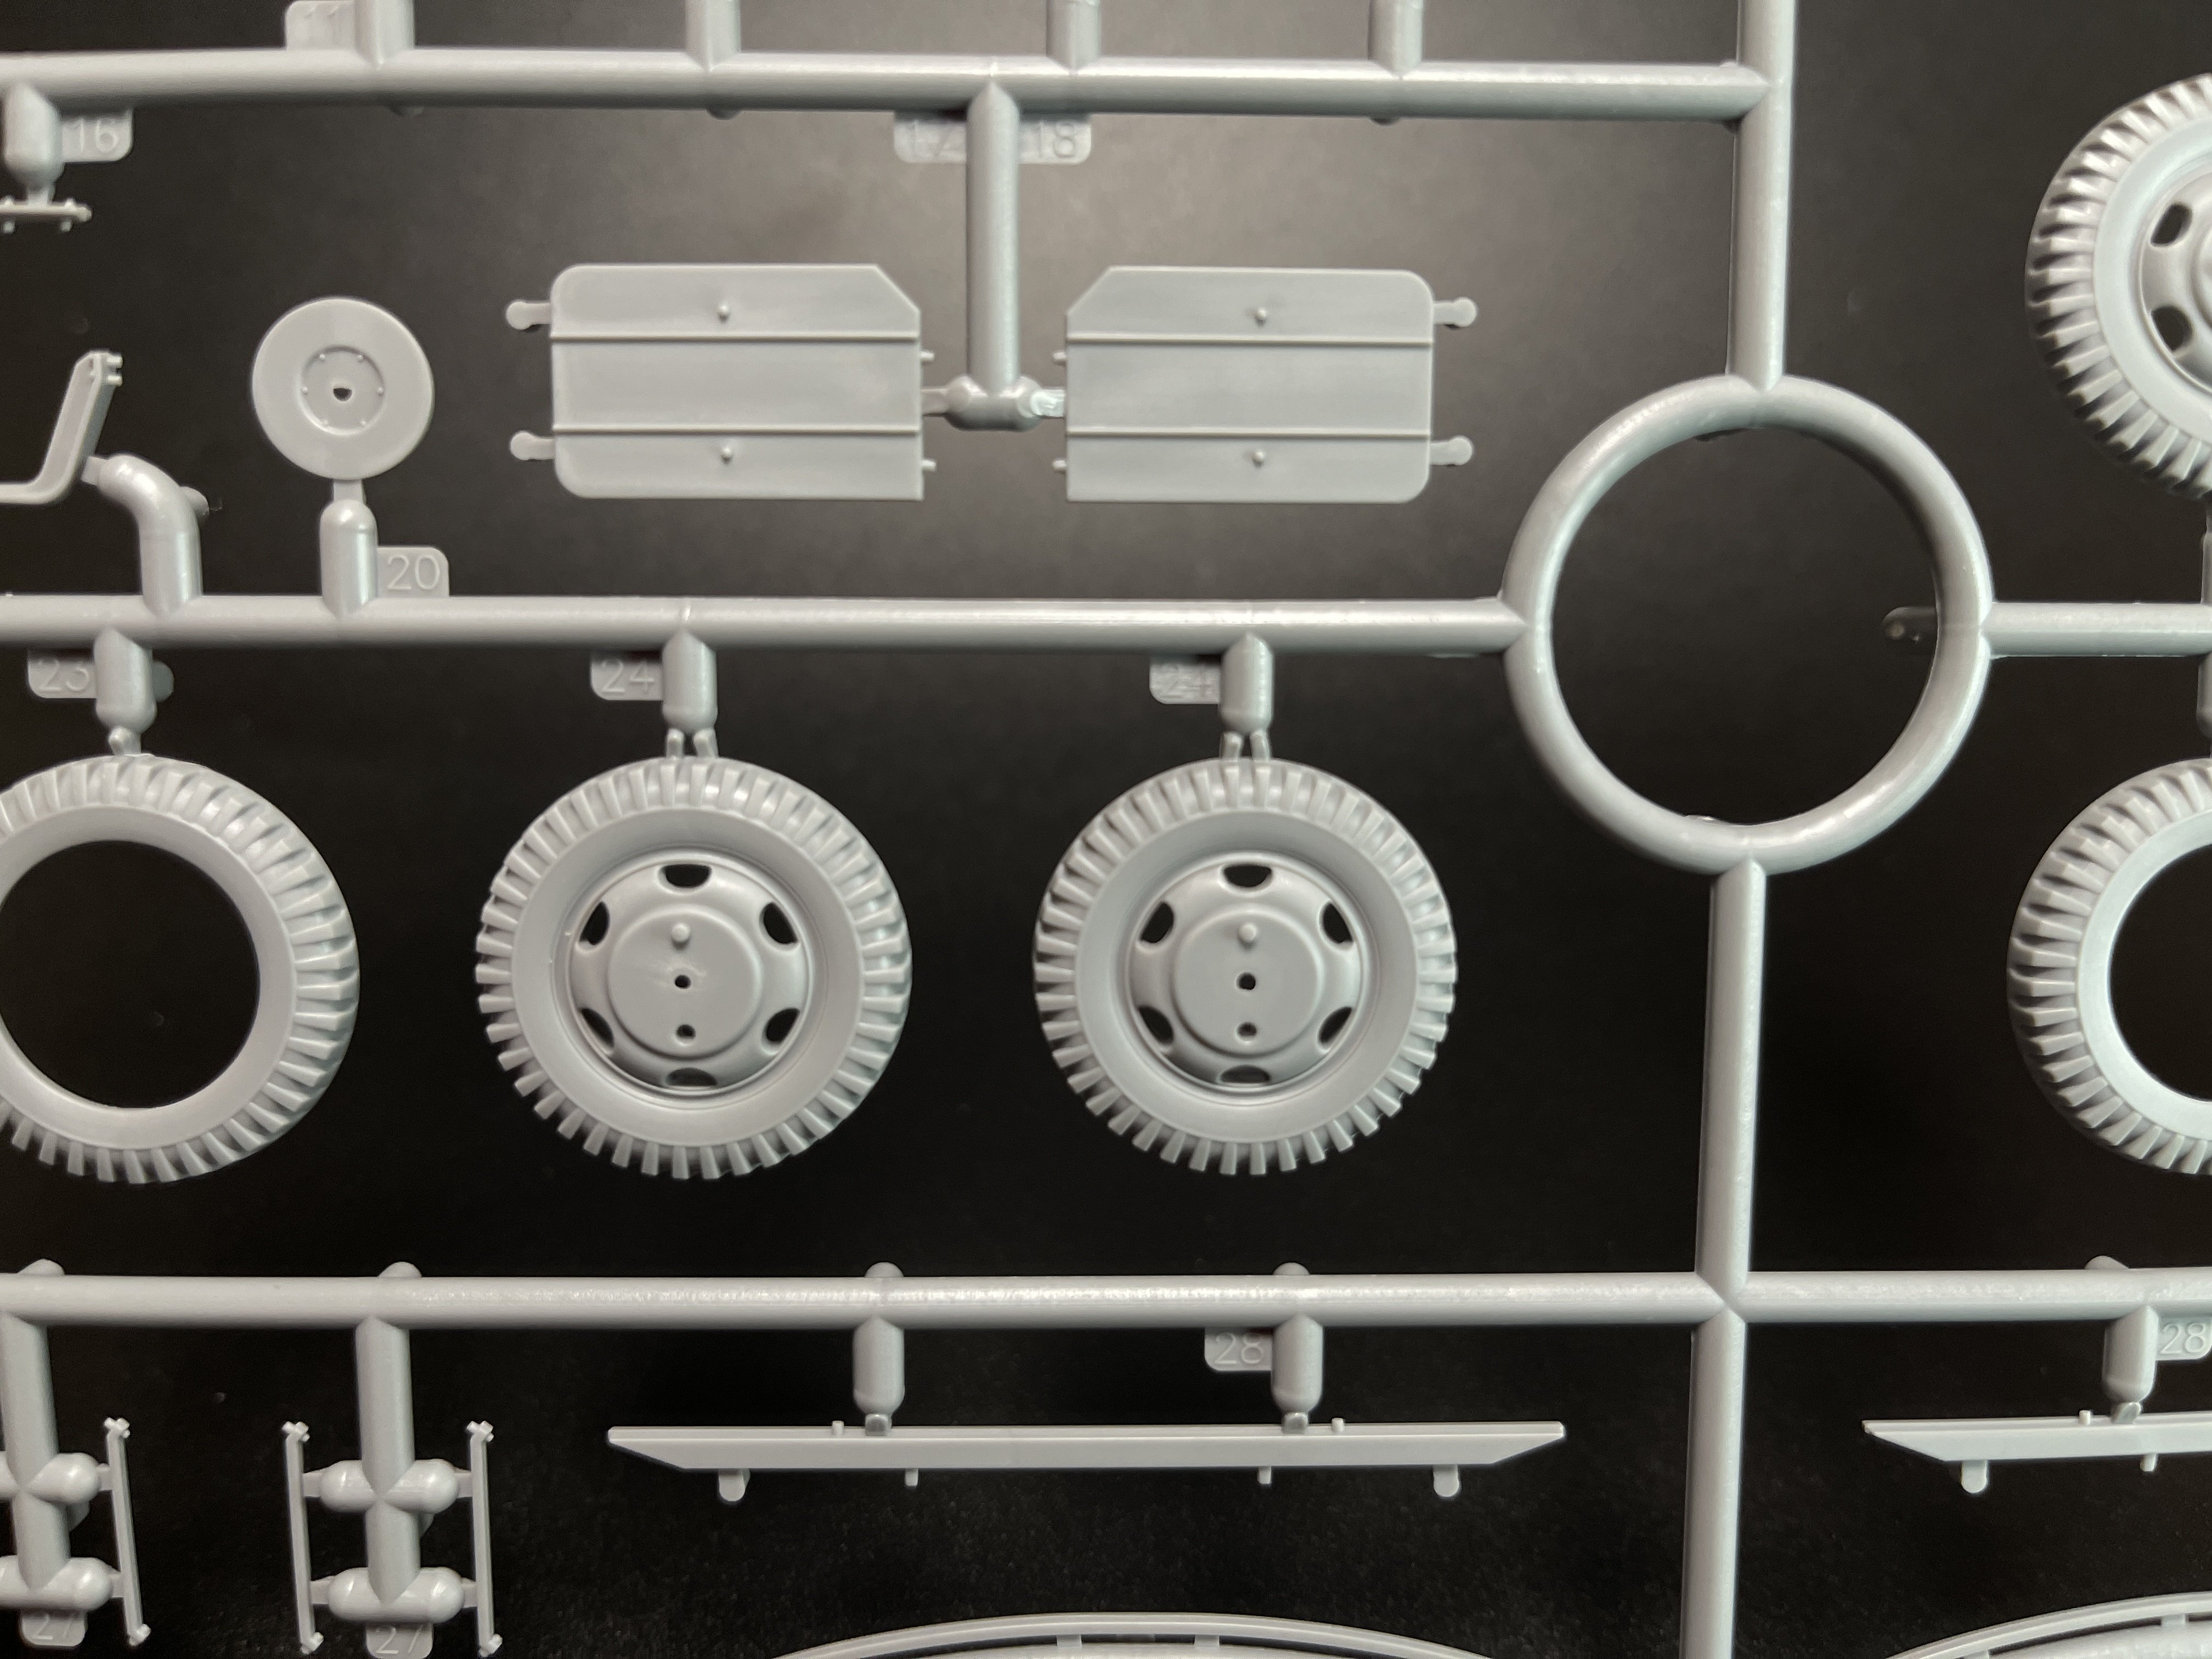
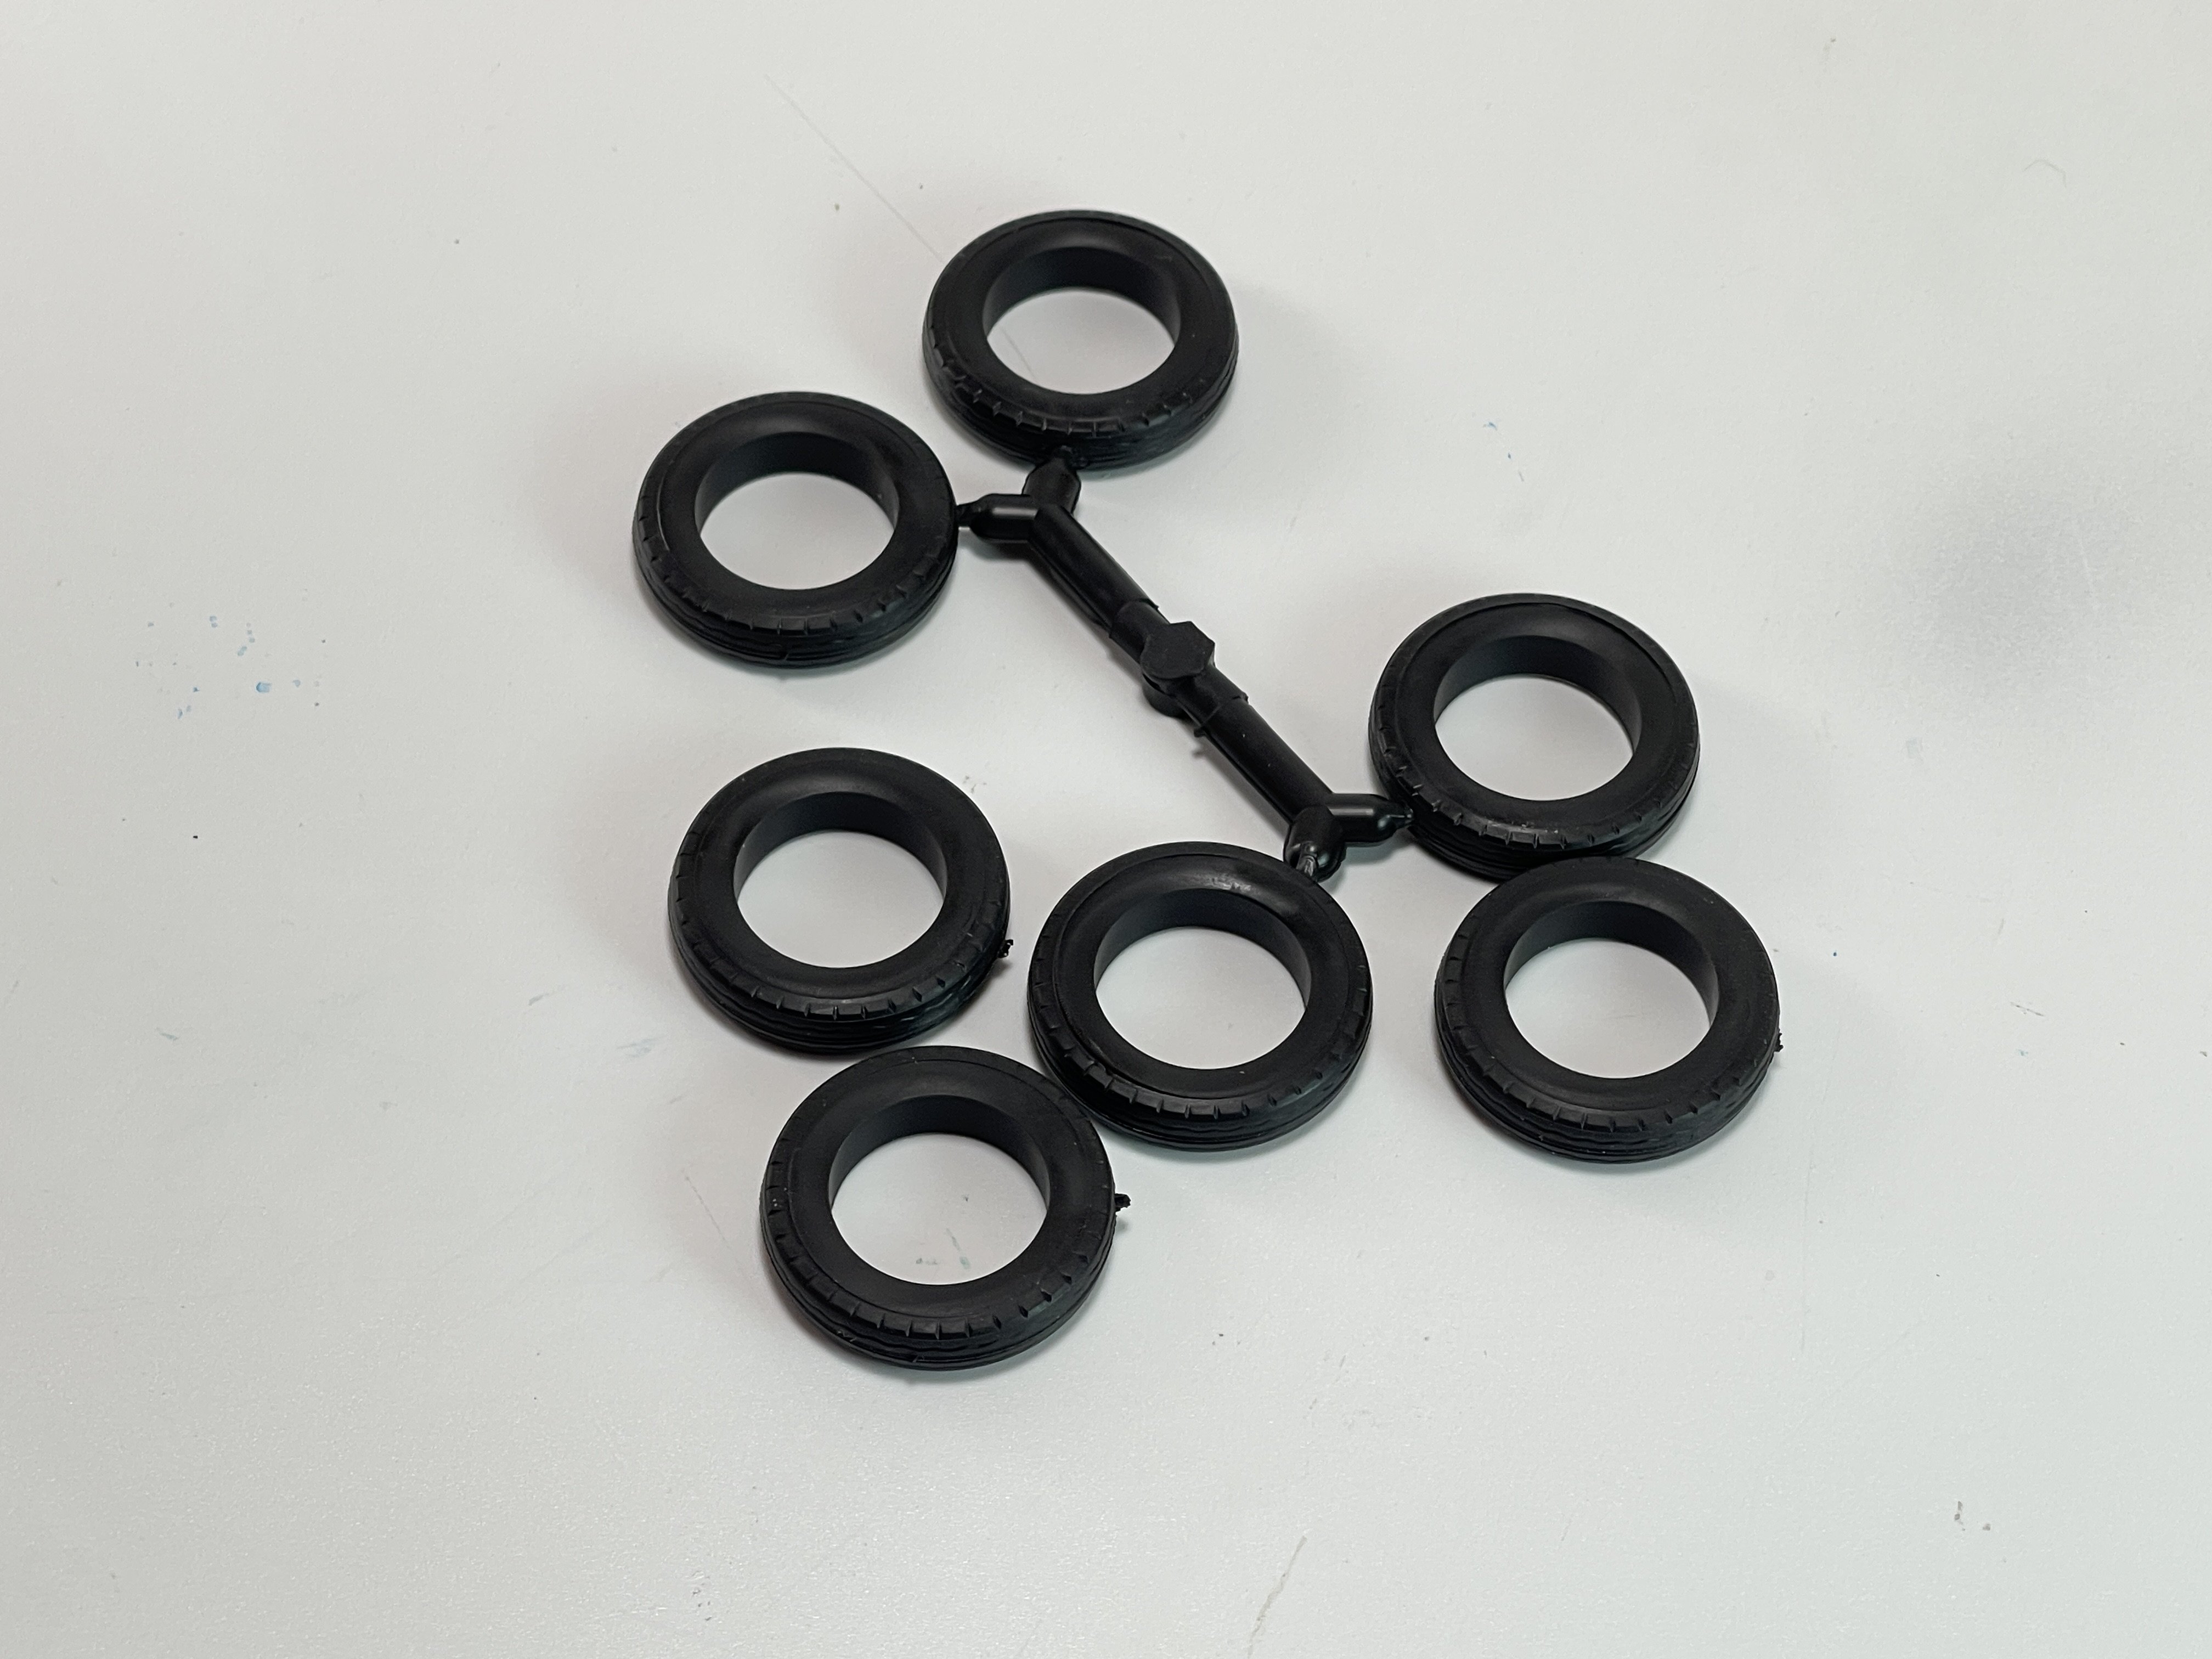
A first for me in ICM kits: The wheels are not vinyl!!! Perfect!! Now that’s the way! I still prefer in resin but if you don’t want to spend some extra money, you can use these one with great detail and with easy painting and weathering.
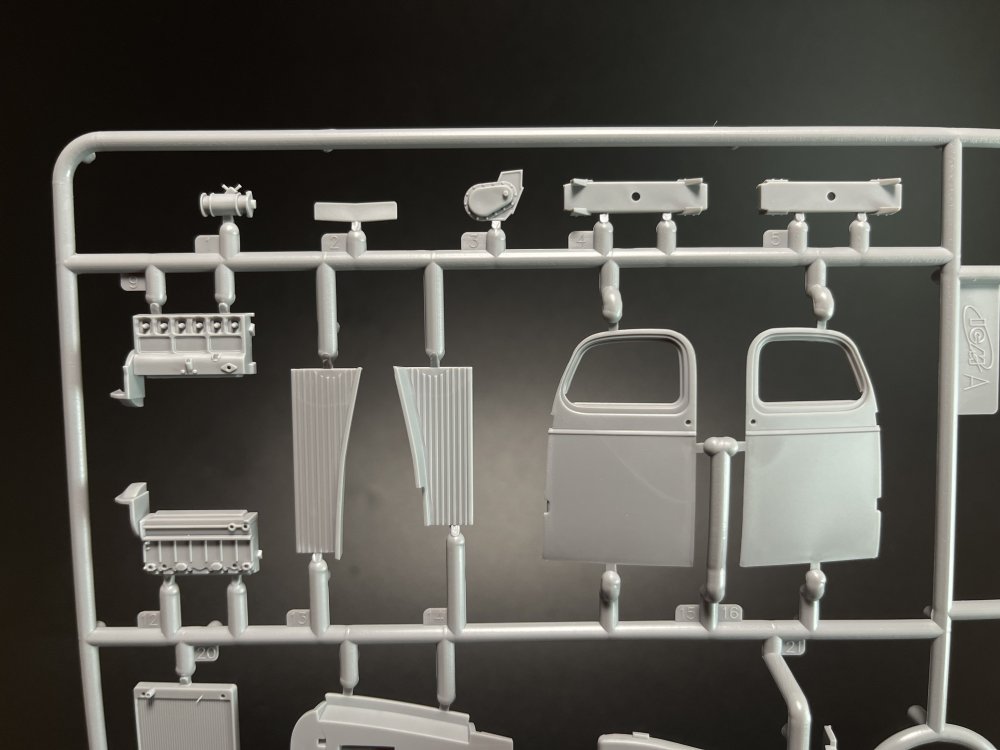
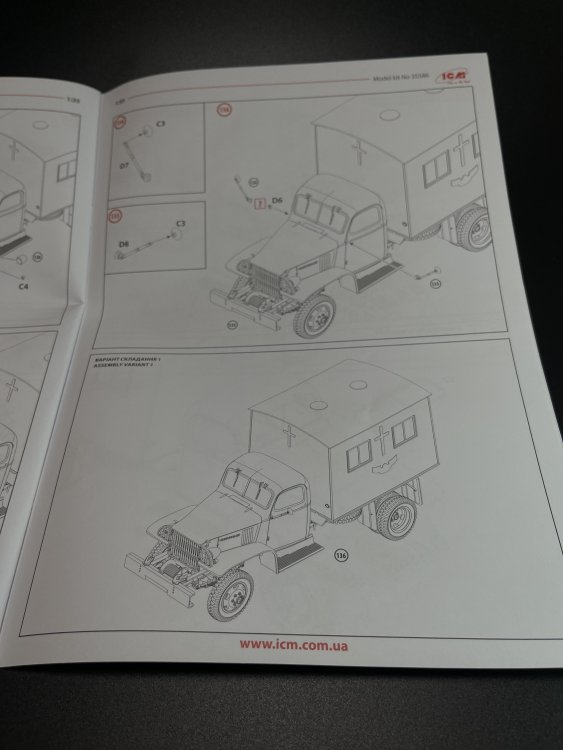
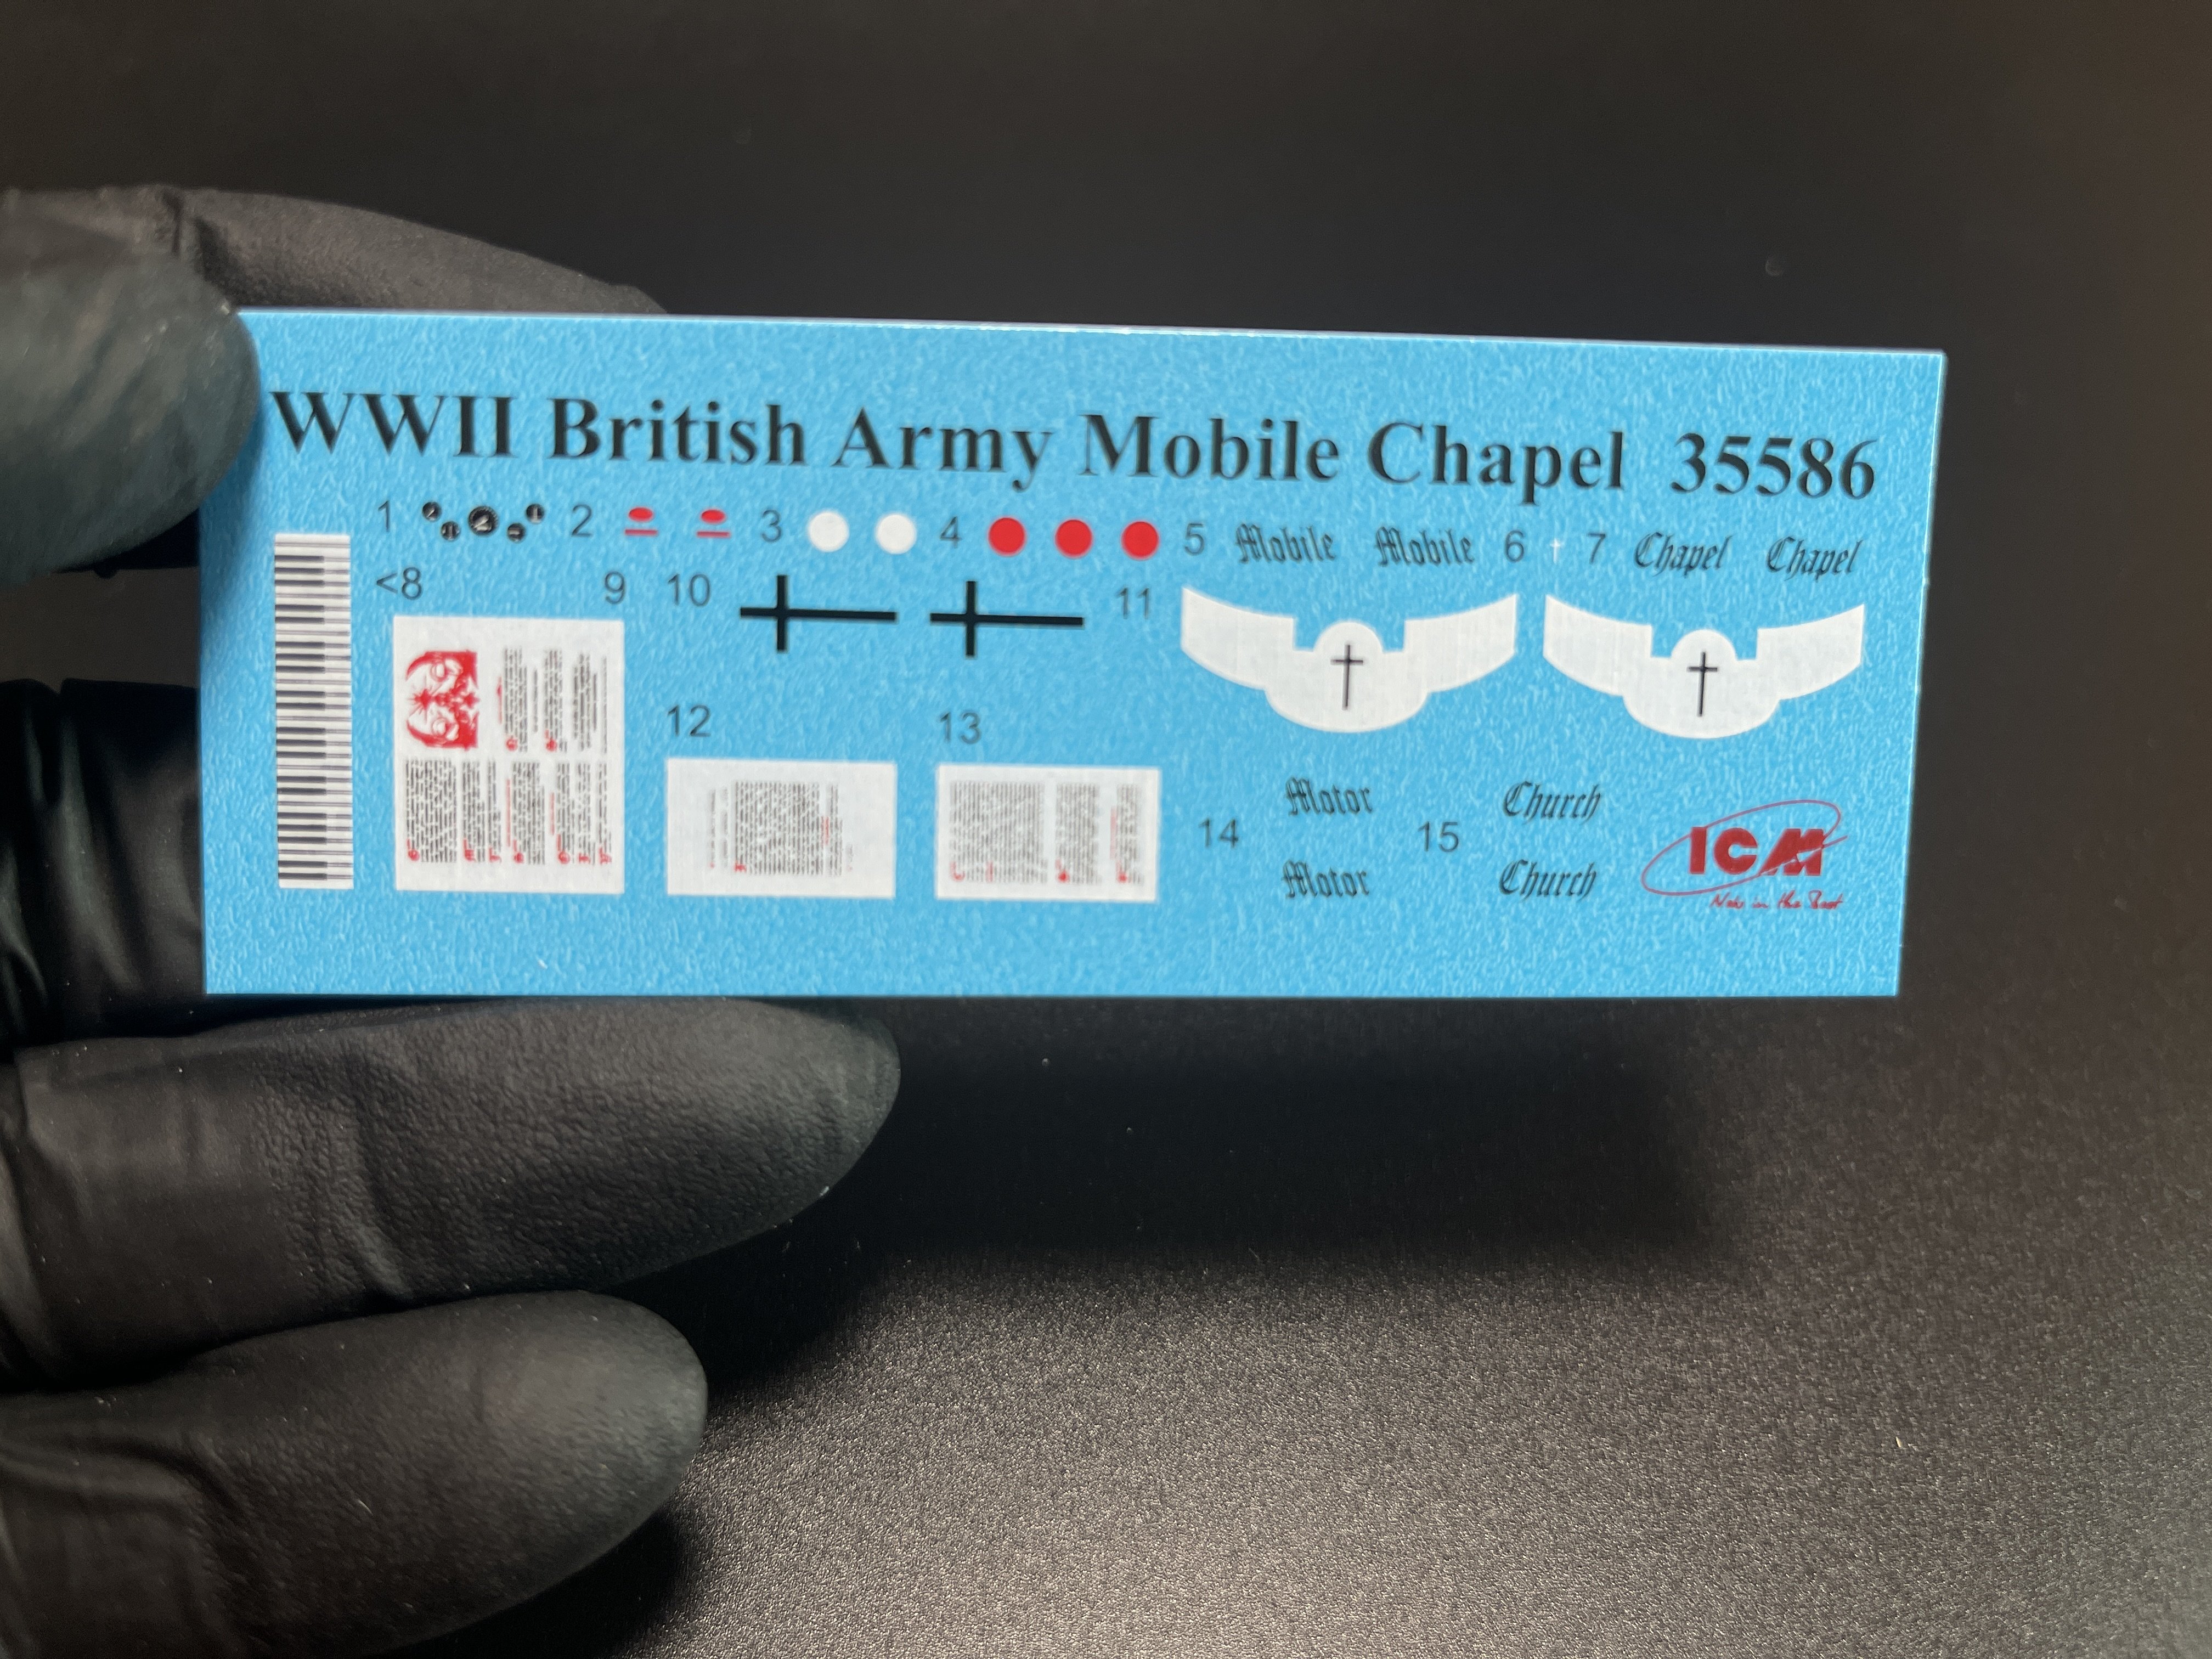
The decal sheet gives only marking option. Is a very small one with some markings, religious phrases, piano keyboard and a part of the bible.

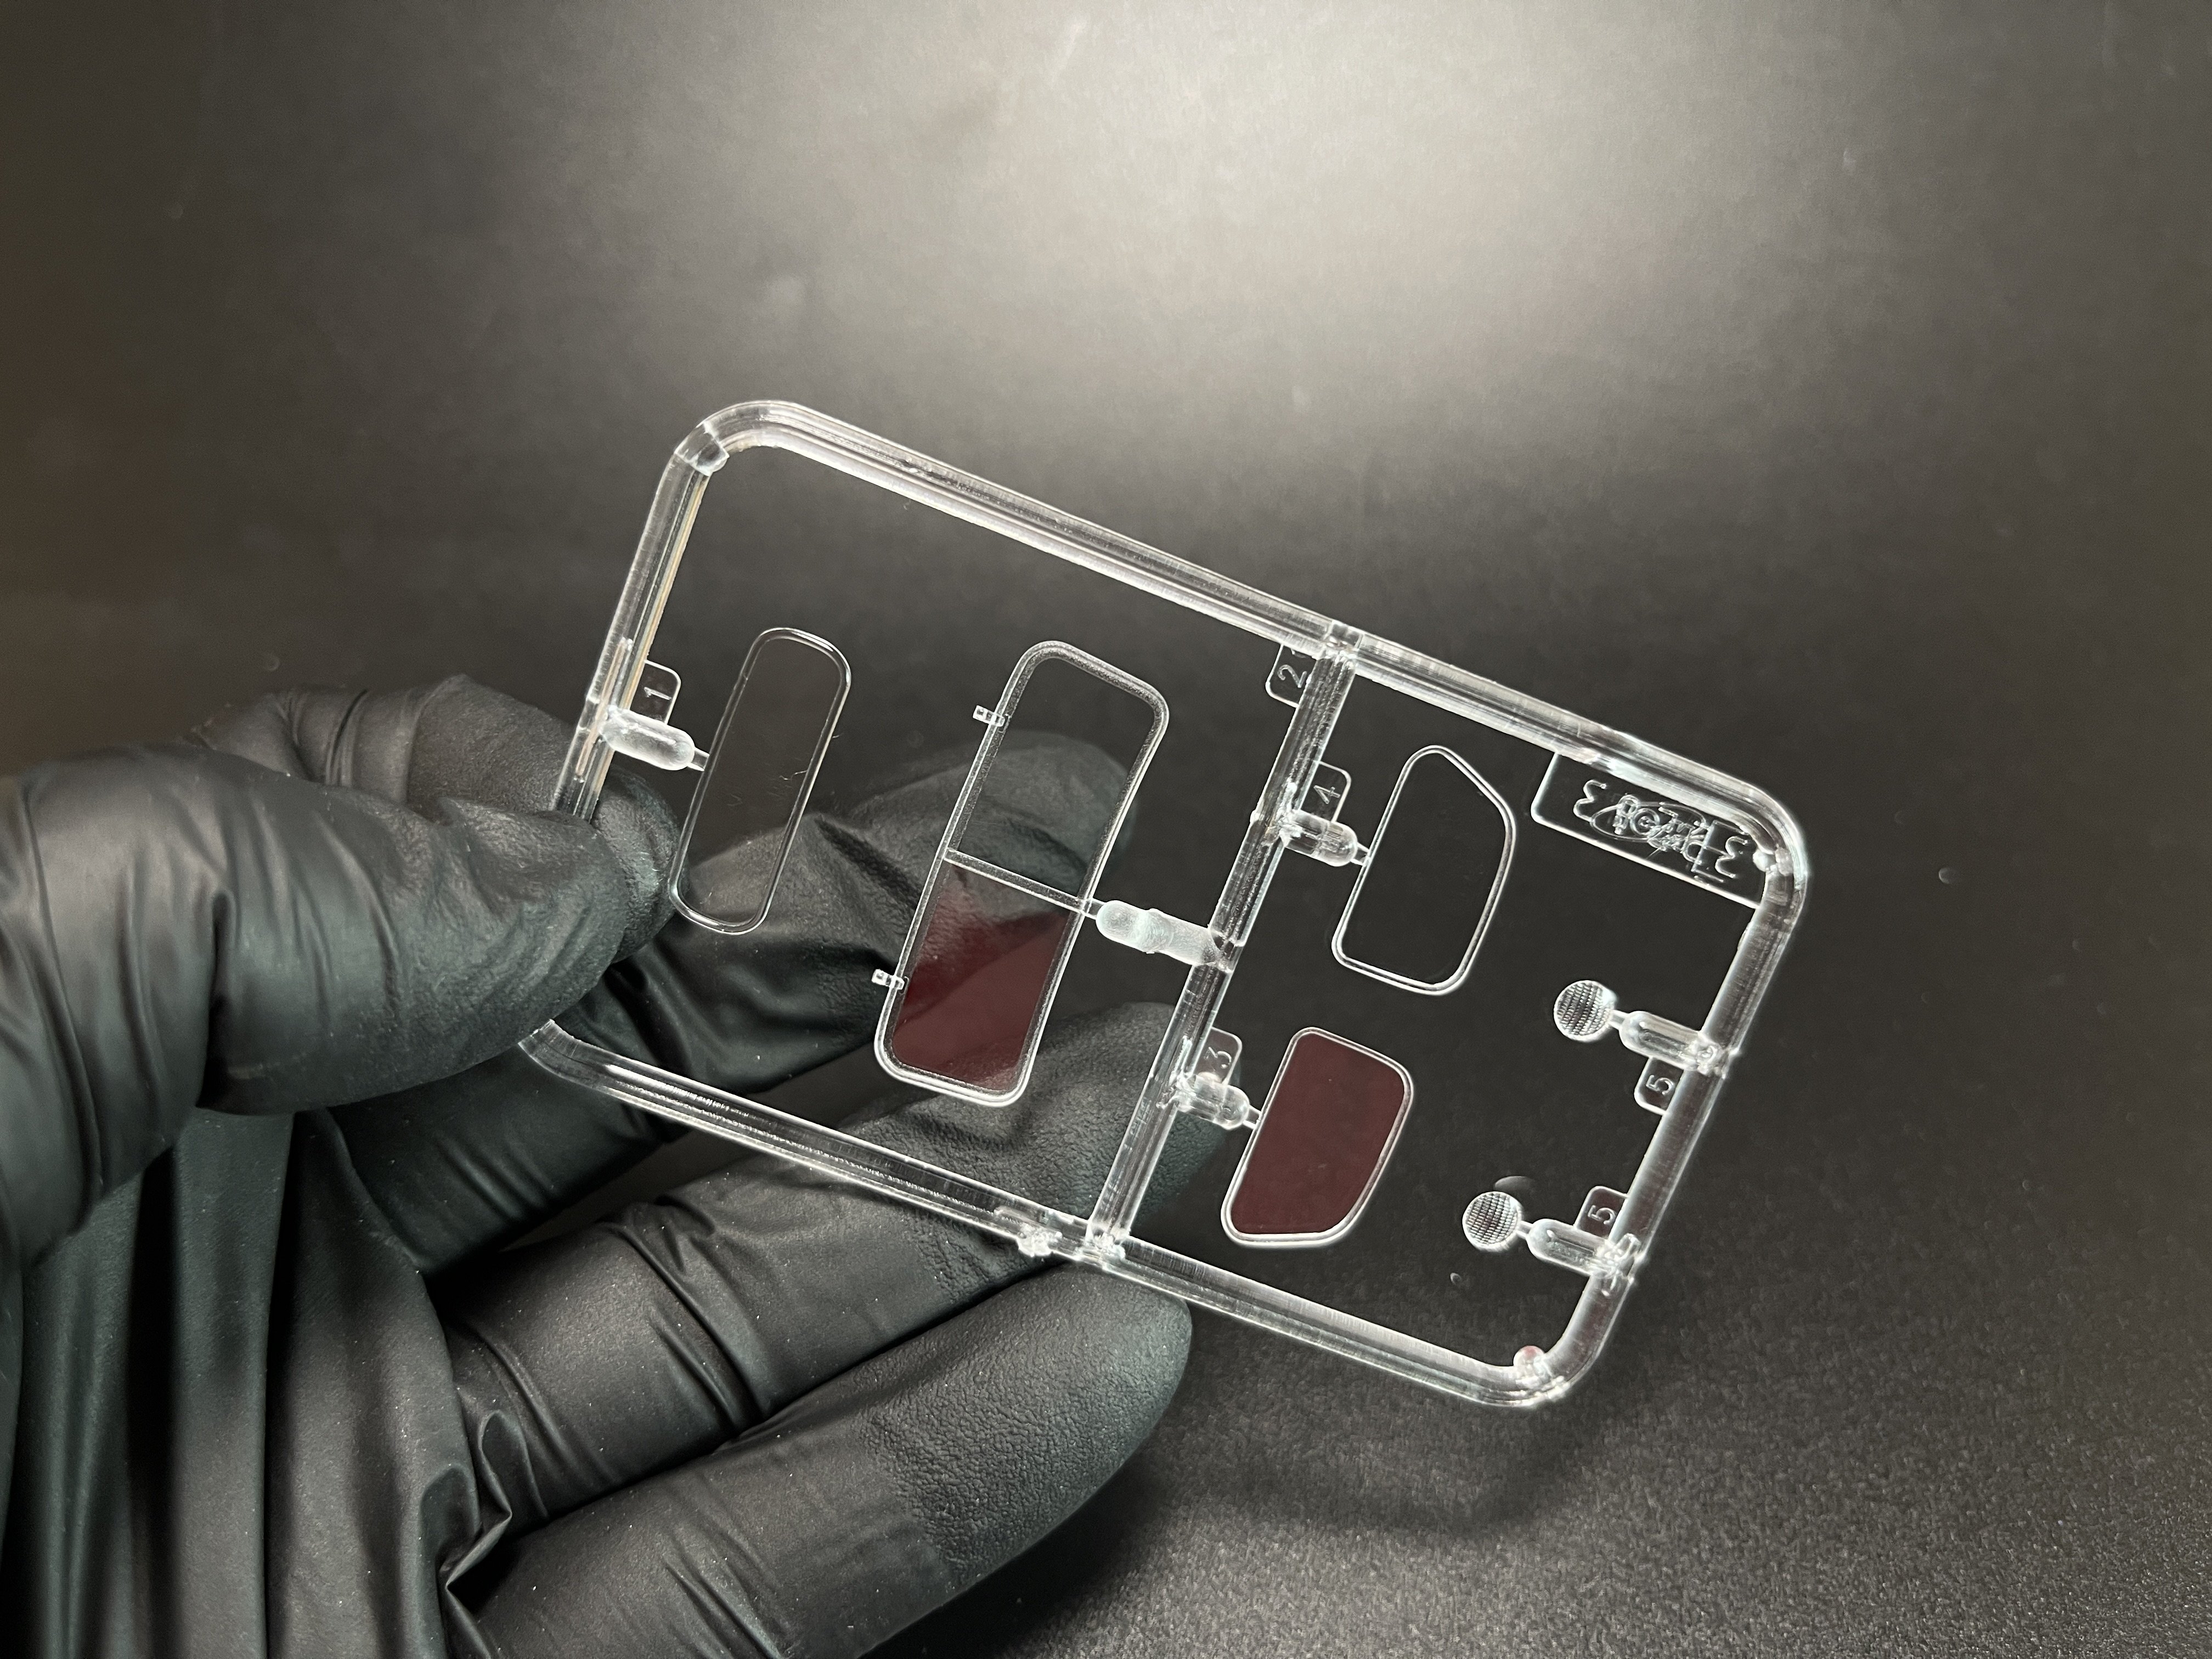
The clear parts are exquisite and no distortions and perfectly clear.

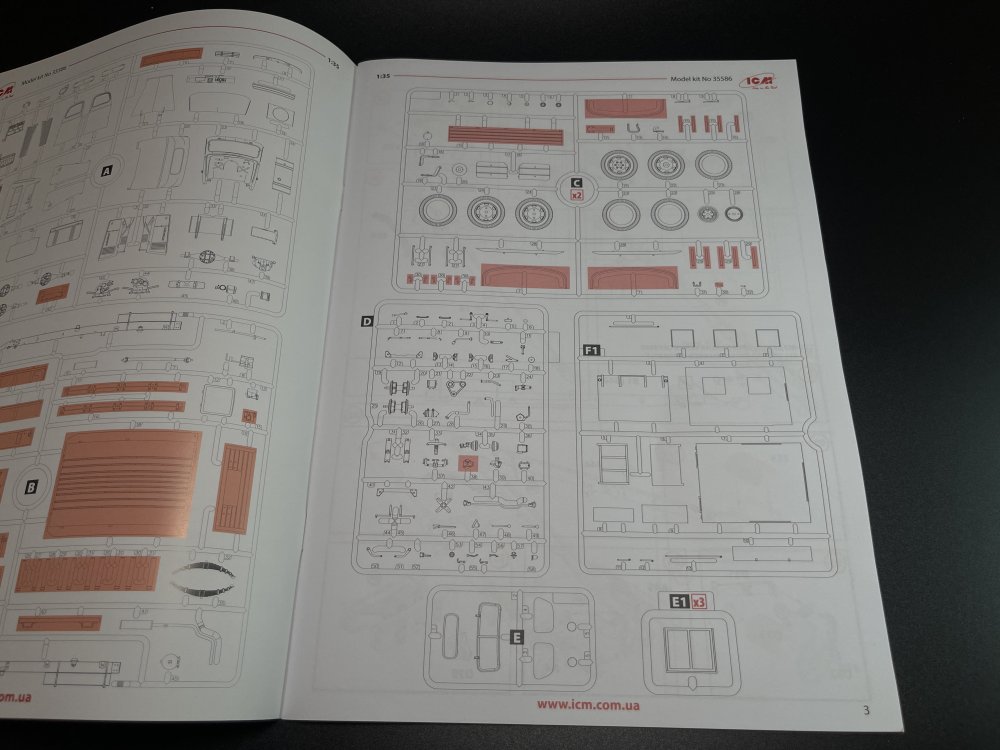
The instructions booklet with 28 pages, is typical ICM instructions, very clear.

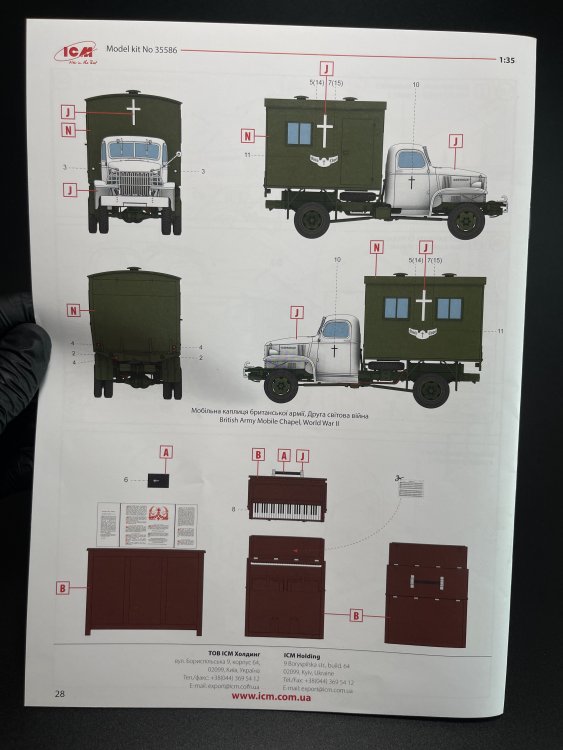
The only thing negative, for me, is the colour chart with ICM colour only.
Conclusion
Well, another great mode kit from ICM!! This 1:35 WW2 British Army Mobile Chapel stands as a testament to the company's commitment to excellence in scale modeling.
The lowdown, at least until a massification sales worldwide, is the colour indication, with only ICM colour, each are new and, for example, I never see how they work and how easy its to work with them.
Whether displayed as a standalone piece or integrated into larger dioramas, the mobile chapel serves as a poignant reminder of the human dimension of conflict and the importance of faith in times of adversity.
Highly recommend
It`s 9,8 out of 10.
A great kit with very good detail even has plastic wheels; Downside: the colors indication.
My sincere thanks to ICM for making this fantastic model kit.


-
2
-
-
7 hours ago, BlrwestSiR said:
Dune Ornithopter in 1/72!
Just announced by Meng.
me too!!! Right on my 2024 buy list....
Also the upcoming Eduard/HKM 1:48 B-17F "Bloddy Hundredth" edition.
-
2
-
-
Love it!! great paintjob!!!
-
4
-
1
-
-
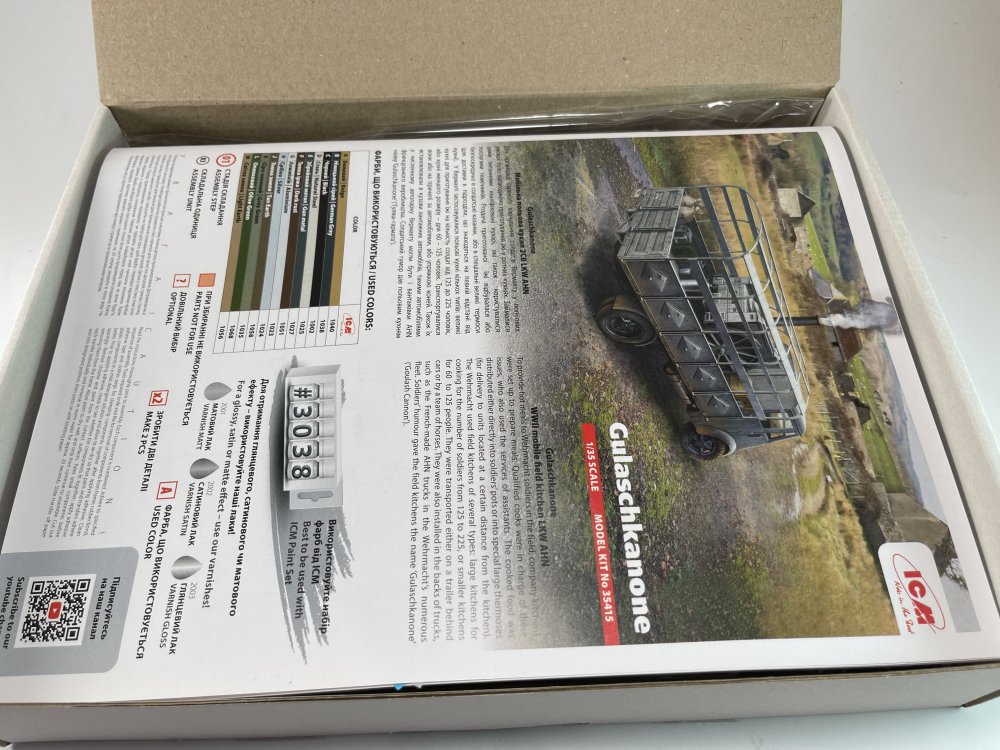
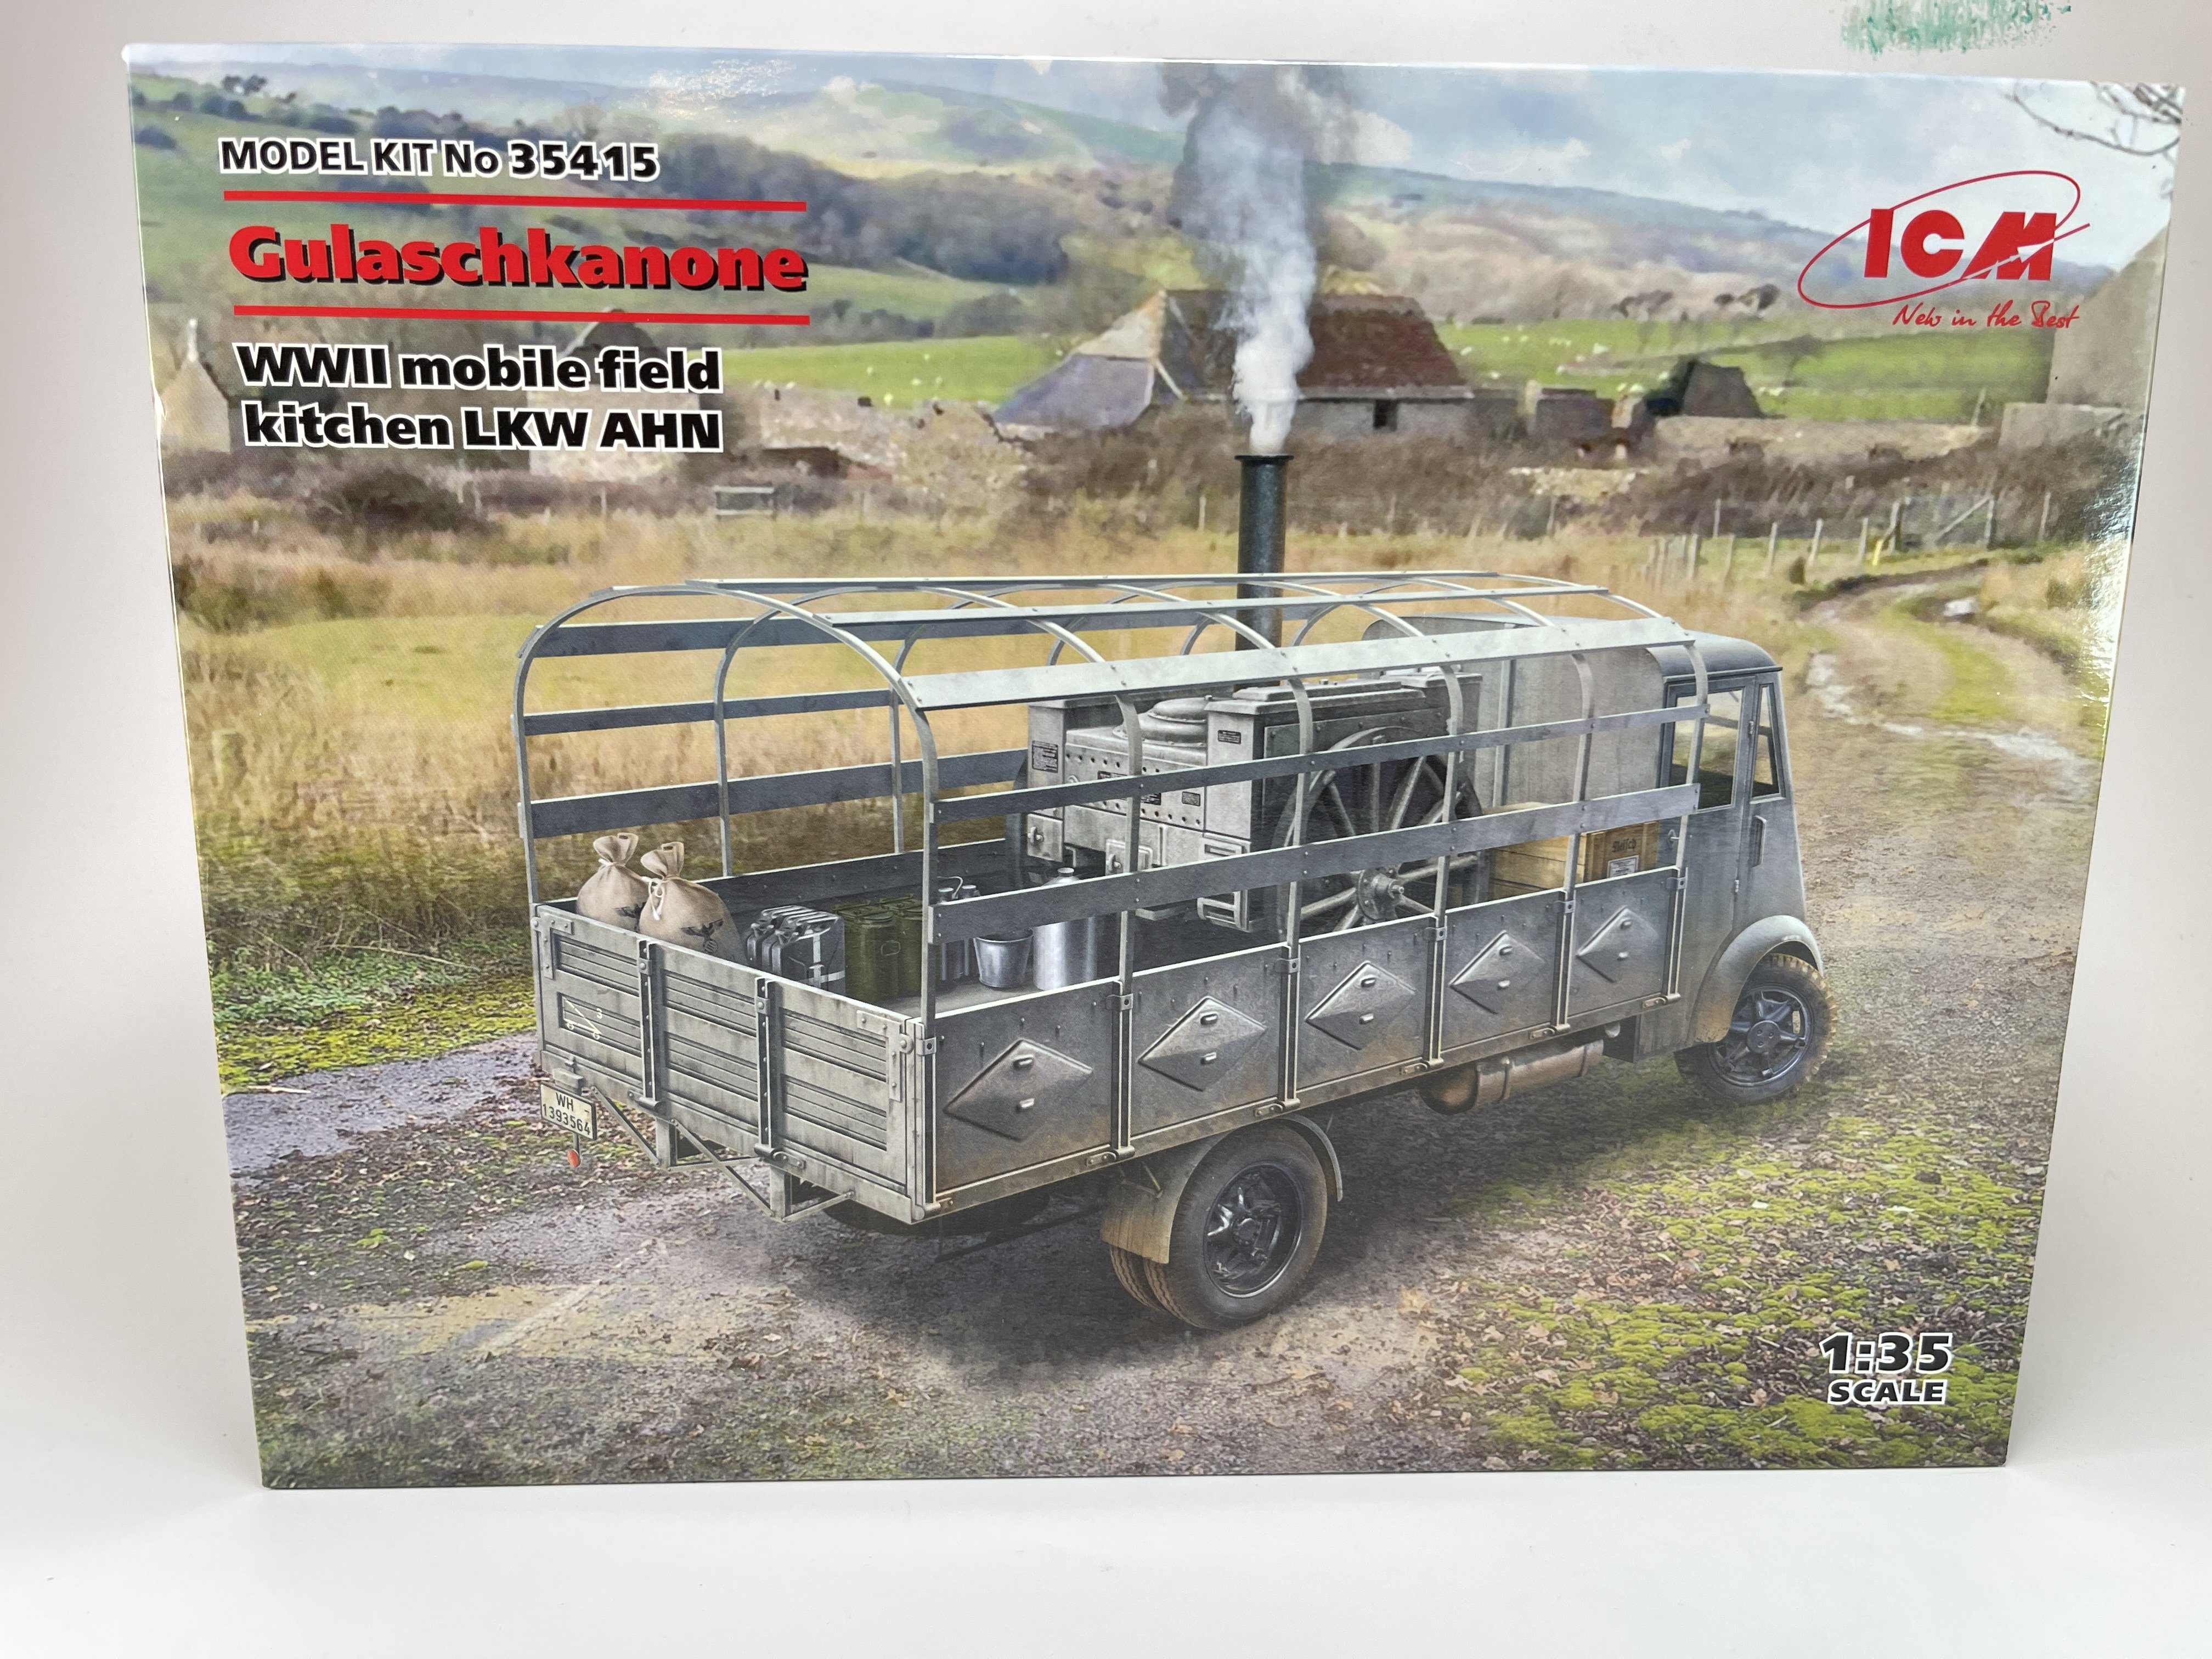
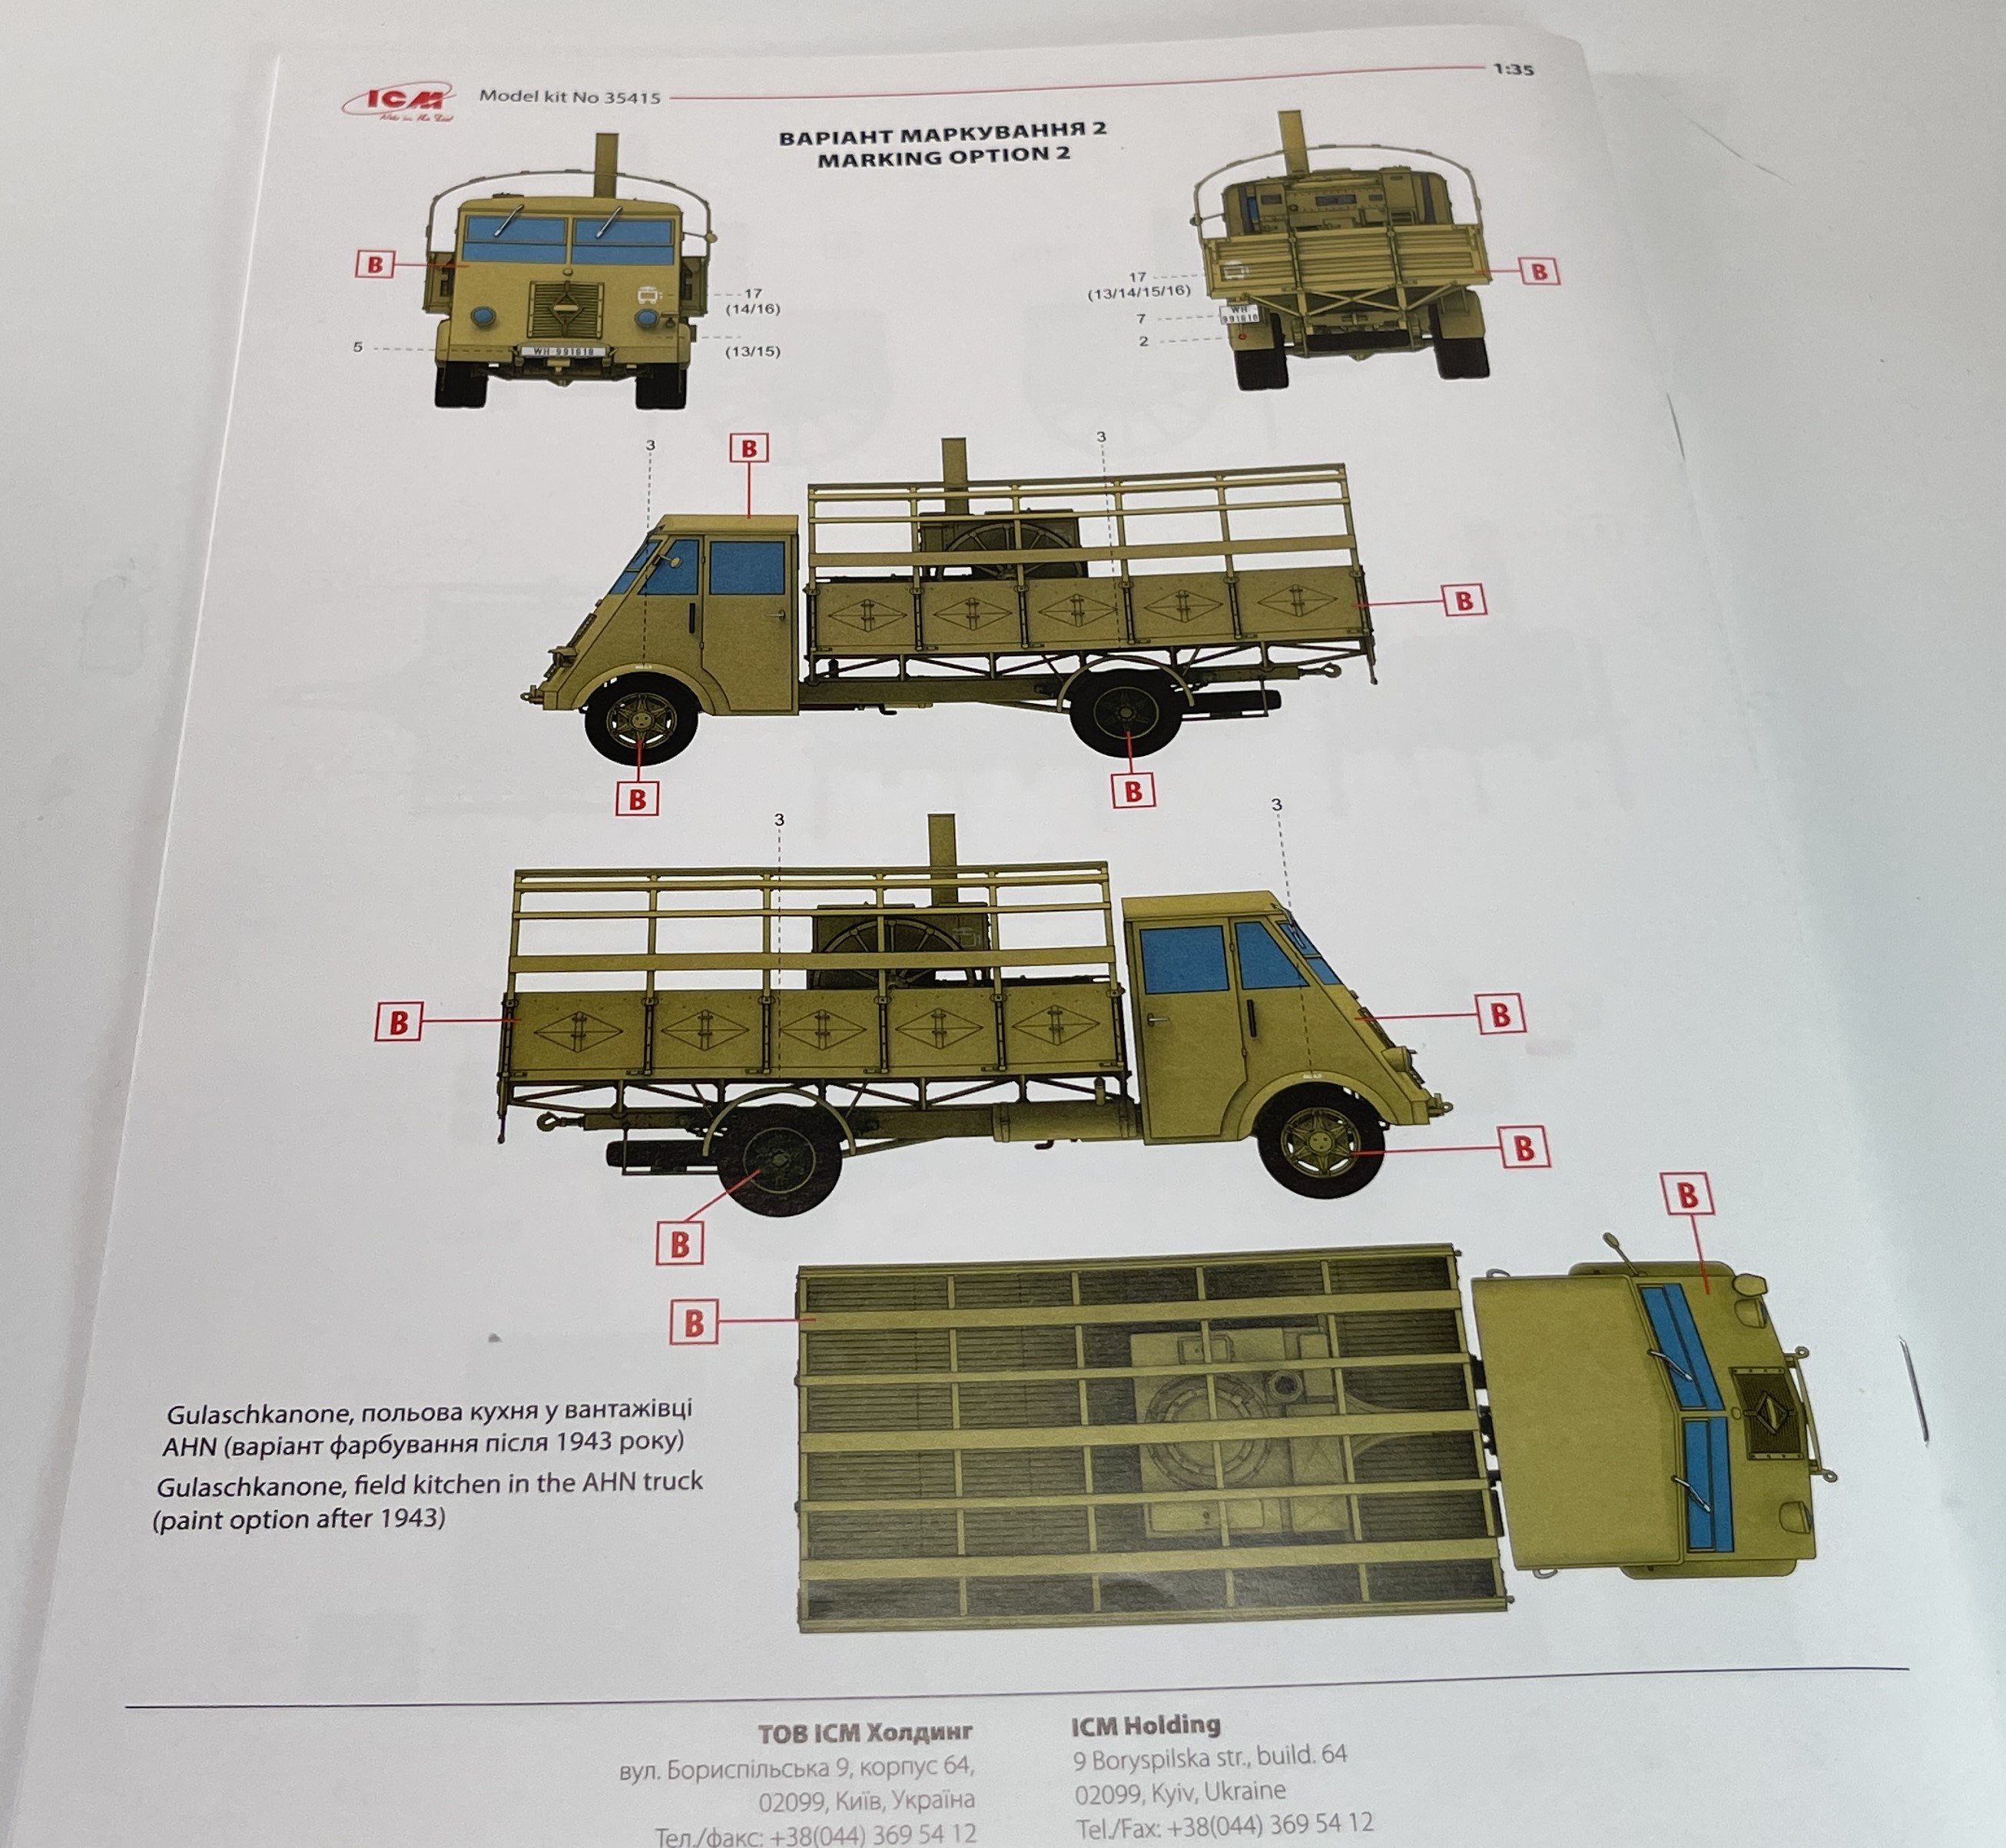
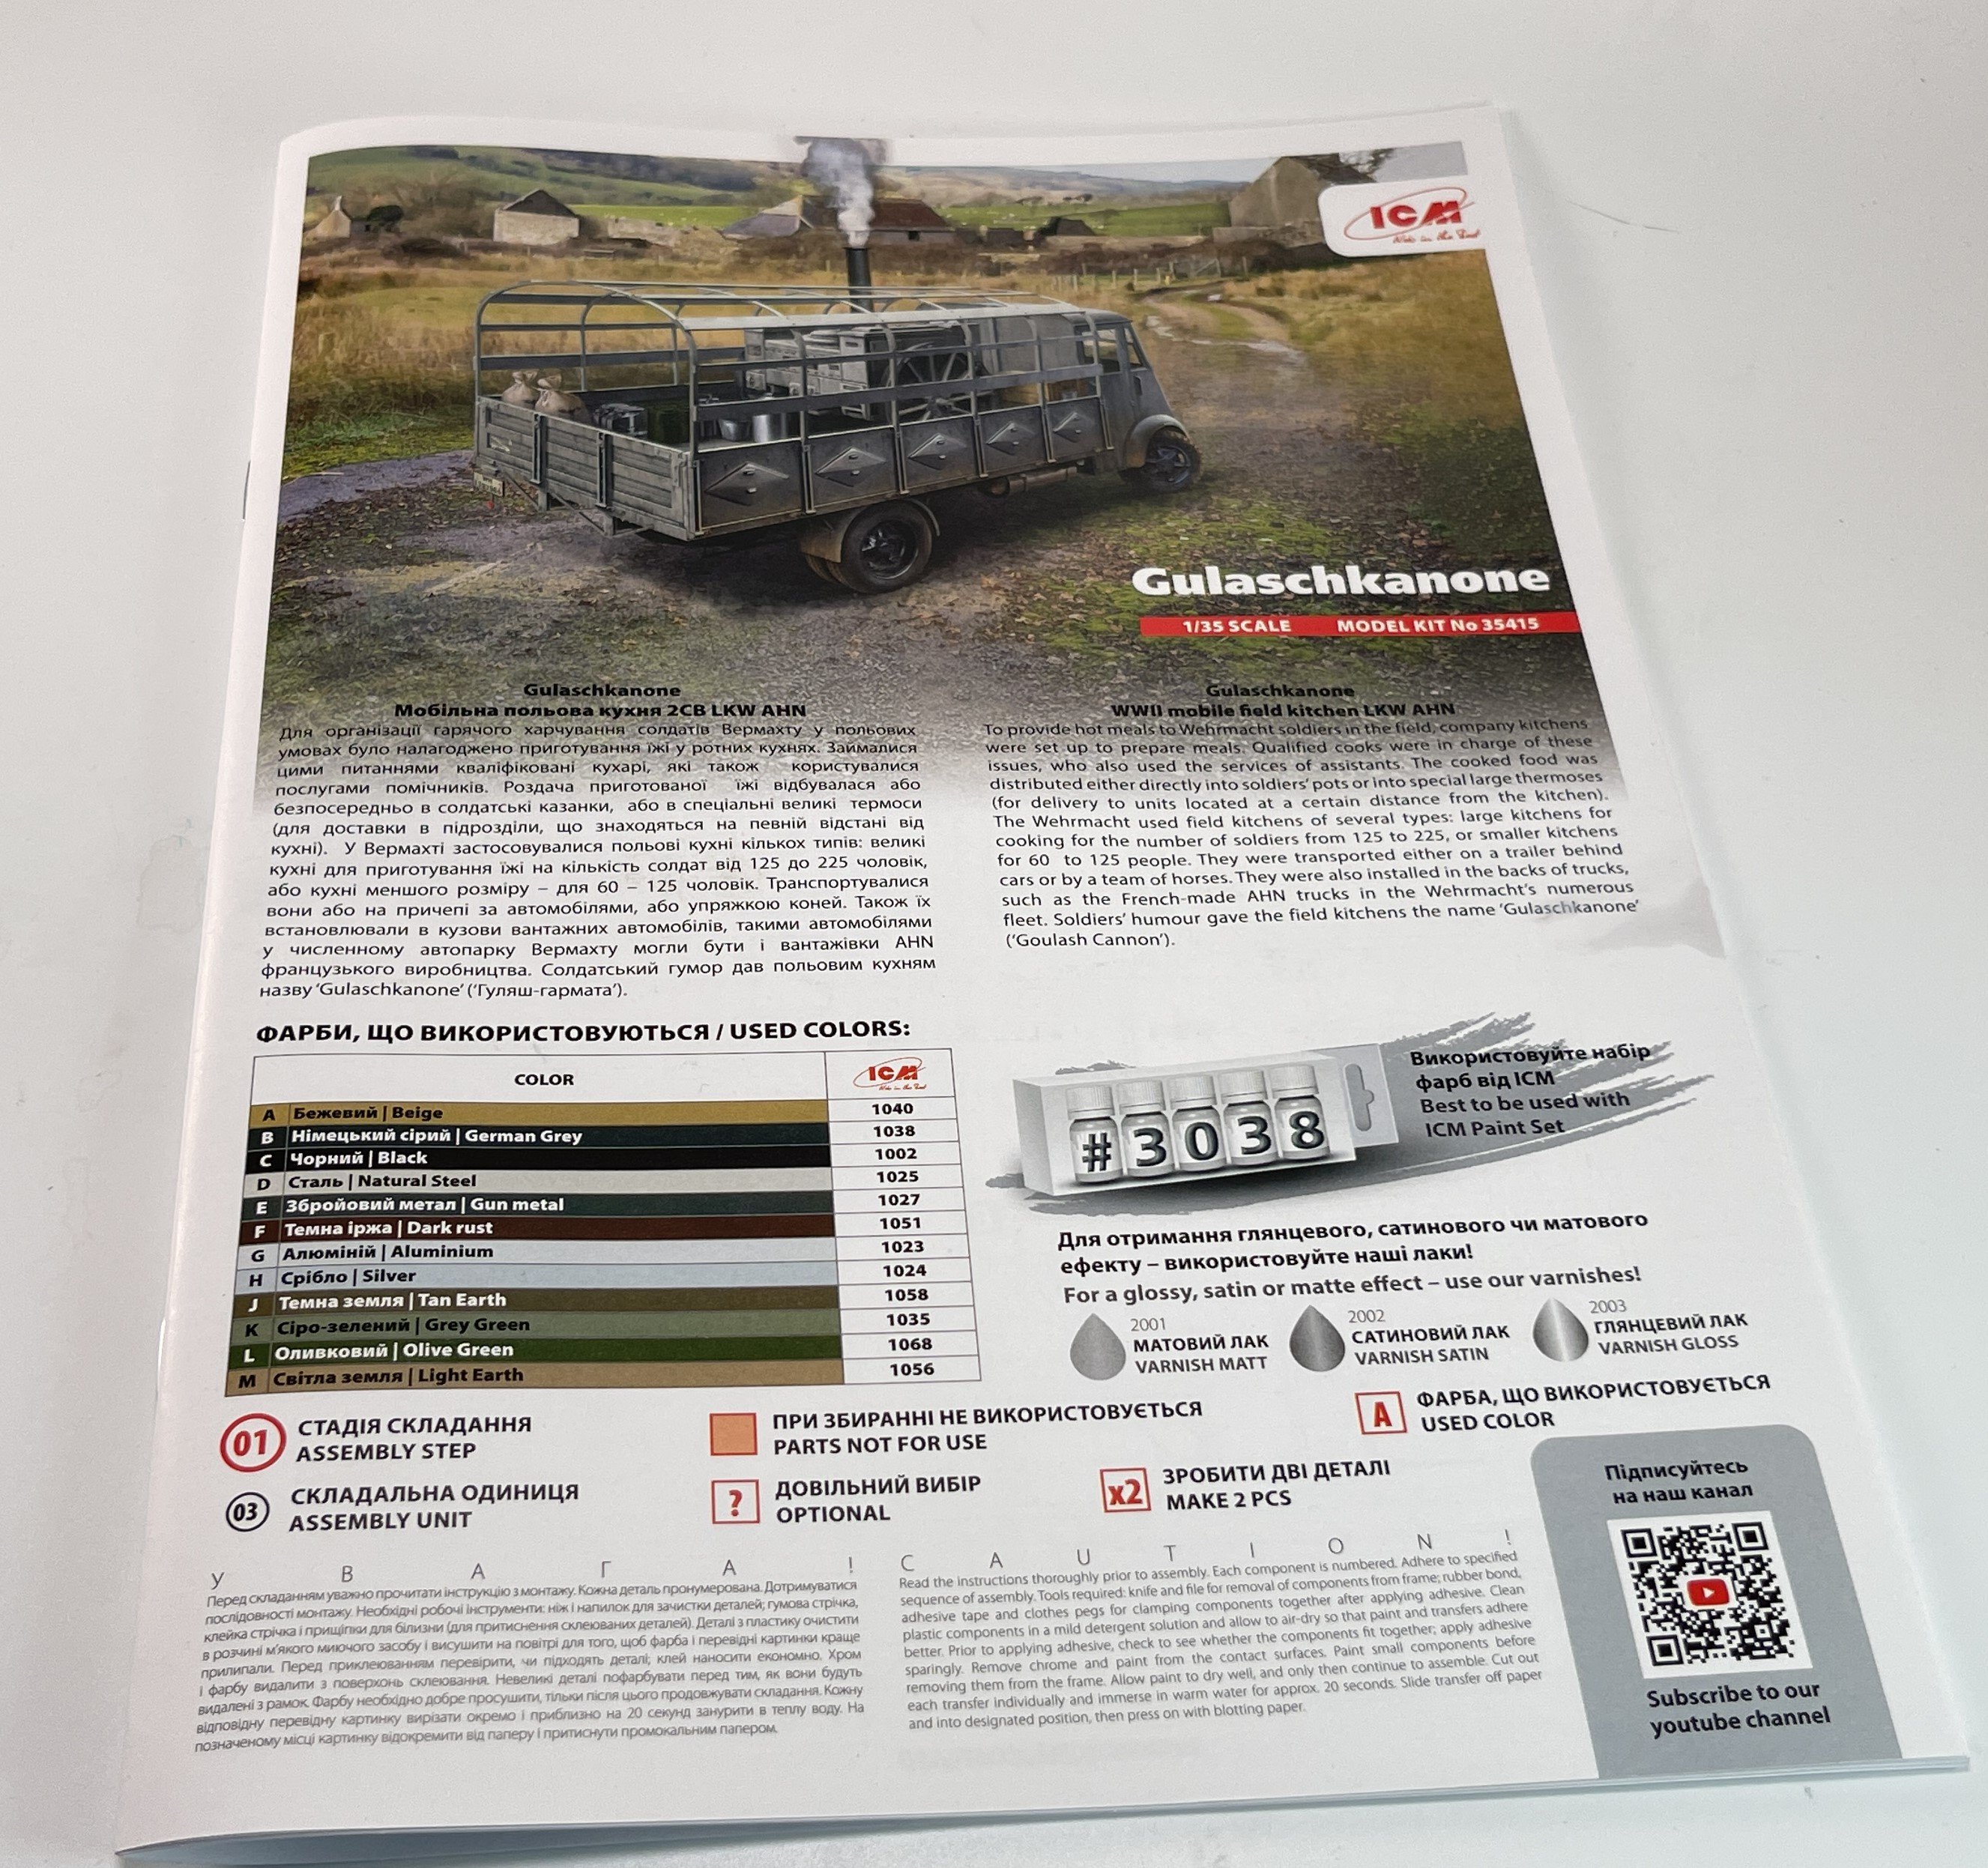
1:35 “Gulaschkanone”
WWII Mobile Field Kitchen LKW AHN

ICM
Catalogue n.º 35415
Price tag: 40,61€
First of all, I would like to praise ICM's enormous work capacity for producing and launching new products onto the market at a very high rate despite being at war.
And they launch esoteric products, with enormous quality, with exquisite detail and fantastic fit, all with enormous originality.
That said, let’s see what we have here.
A Renautl AHN Truck. Twenty years ago, I would say this truck would never see a injection model kit… so in 2014, ICM just told otherwise and I was very pleased that they did.
“The Renault AHx was a range of light/medium trucks with carrying capacities from 2 to 5 tonnes manufactured by Renault between 1941 and 1947. Various versions were used in World War II by the German forces.
A Renault AHN2 at an Italian town in 1943, during World War II
Prototypes of the first AHx truck, the AHS2, were unveiled by 1939. It was aimed at replacing the similar AGC truck (which had a maximum payload of 1.5 tonnes). The truck was designed to be used by the French military on the 2.5-tonne carrying capacity group, but it was rejected. The Wehrmacht in turn ordered the production of the model, reclassifying it as a 2-tonne payload model and naming it Lastkraftwagen 2 to. The AHN (4-tonne payload) was the successor of the AGR and was produced for the Wehrmacht with the designation Lastkraftwagen 3.5 to. The heaviest AHx model, the AHR, was produced with a 5-tonne payload and, as the two other versions, was used by the Germans. The Wehrmacht was supplied with about 23,000 AHS, 4,000 AHN, and between 1,000 and 2,000 AHR.[1]
After the war, evolutions of the AHS2 and AHN (AHS3/AHS4 and AHN2/AHN3) with 2 and 3.5 tonnes of payload respectively, were produced mainly for the civilian market. In 1947, these trucks were replaced by the Renault Galion. The AHx cabin was also the basis for a 7-tonne payload truck, the Renault 208 E1.[2]
The AHS has a 2.38-litre inline-four petrol engine (delivering 52 metric horsepower (38 kW))[3] while the AHN and AHR use a 4.05-litre inline-six petrol unit,[2][4] the latter with a power output of 75 brake horsepower (56 kW).[5] The three models had a 4-speed manual gearbox.[2][4] Both the Renault AHS and the AHN have gasifier-equipped versions using engines similar to the petrol versions. The AHS version (AHSH) has a power output of 35 metric horsepower (26 kW) at 2,800 rpm[3] while the AHN version (AHNH) has a power output of 52 metric horsepower (38 kW) at 2,800 rpm.[6]
The AHx range has a cab forward layout, a design introduced by Renault in 1934 and gradually extended to all its truck lineup.[7] The AHN has a height of 2.6 metres, a length of 6.4 metres and a width of 2.4 metres.[5]
(historical background from Wikipédia)
Let`s crack the box.
This release is a compose model kit as the AHN truck was release in 2022 and since then saw several version and several boxes, even from another’s manufactures, Tamiya included.
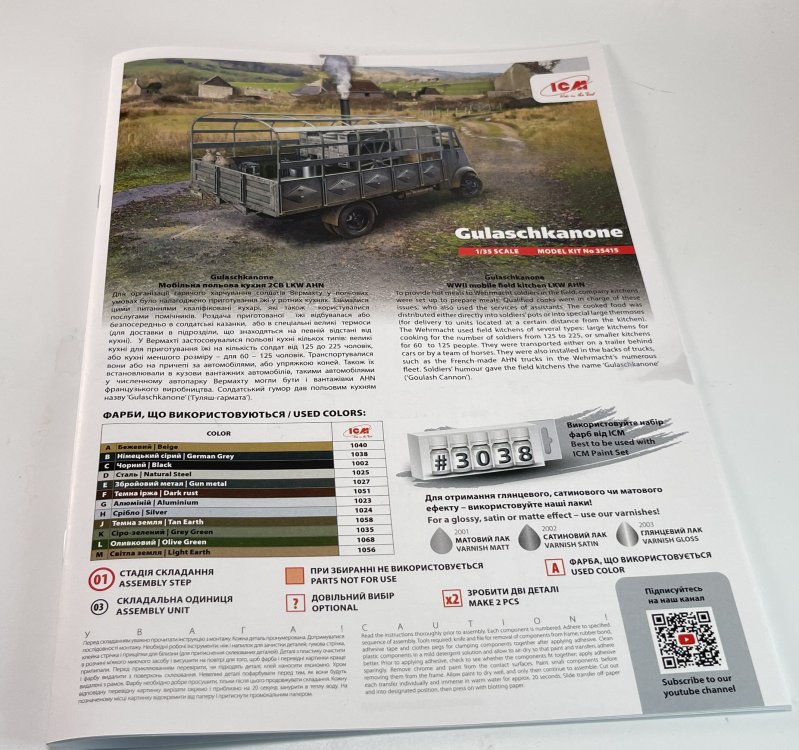
I really liked ICM boxes as they are quite sturdy and resistant. The box art is always a very appealing one.
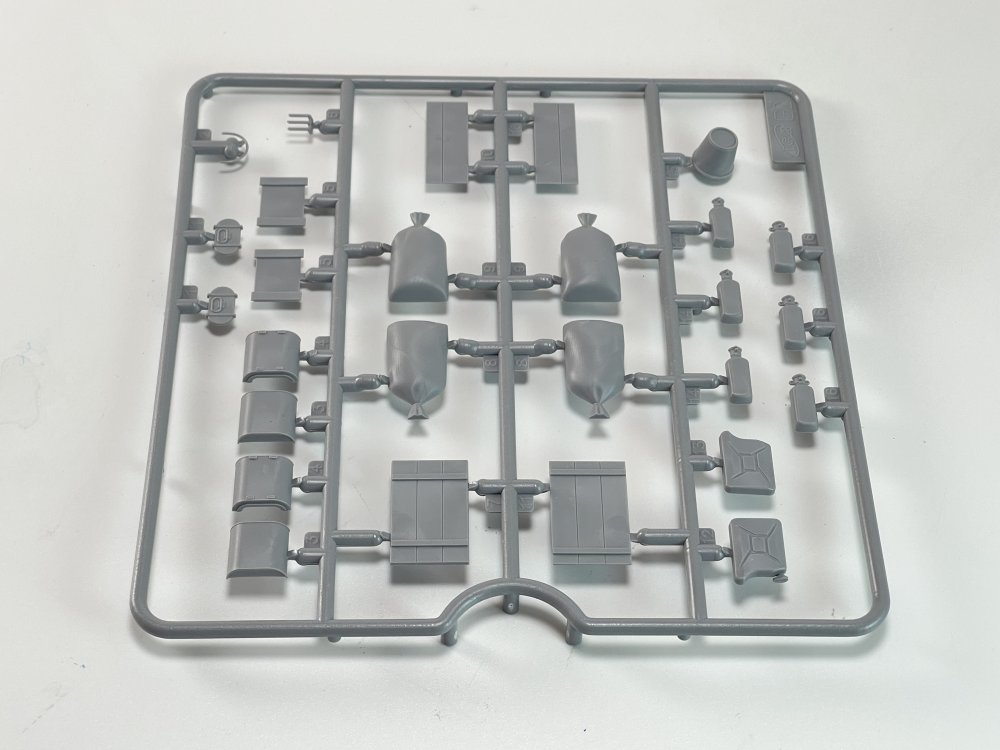
This specific truck is the AHN-2 that was release in 2022, and now ICM add a full mobile field kitchen and several kitchen items as flour bags, wood boxes, containers and buckets.
The field kitchen was best knowed as Goulash cannon (“Gulaschkanone”).
I never had the opportunity to look to the original release back in 2014 niether the AHN2 in 2022.
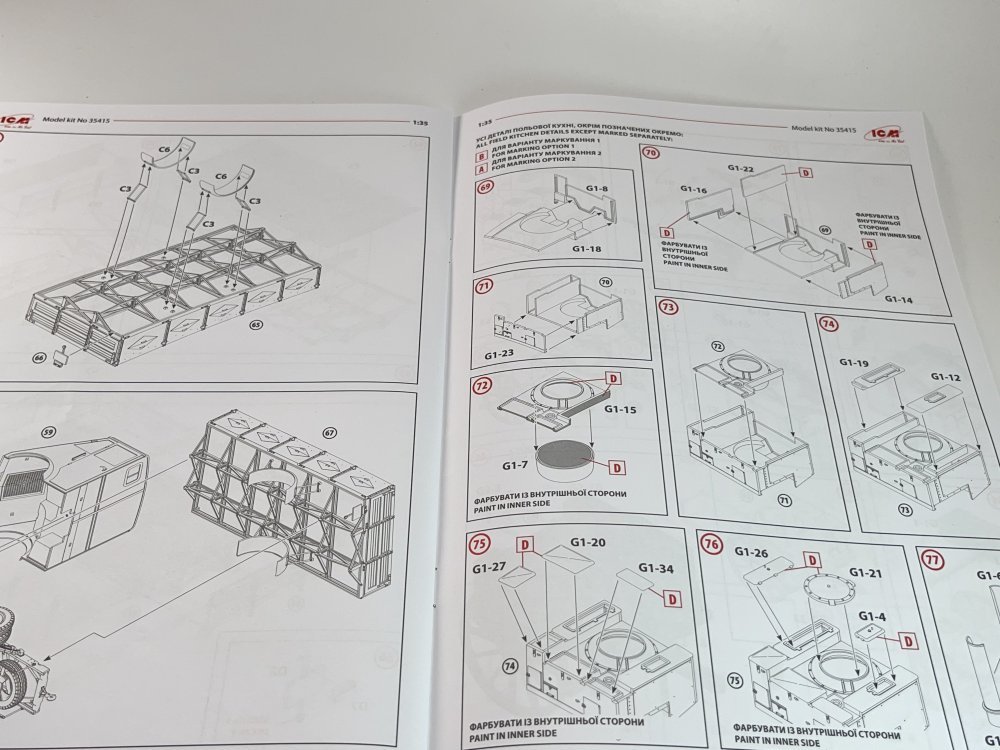
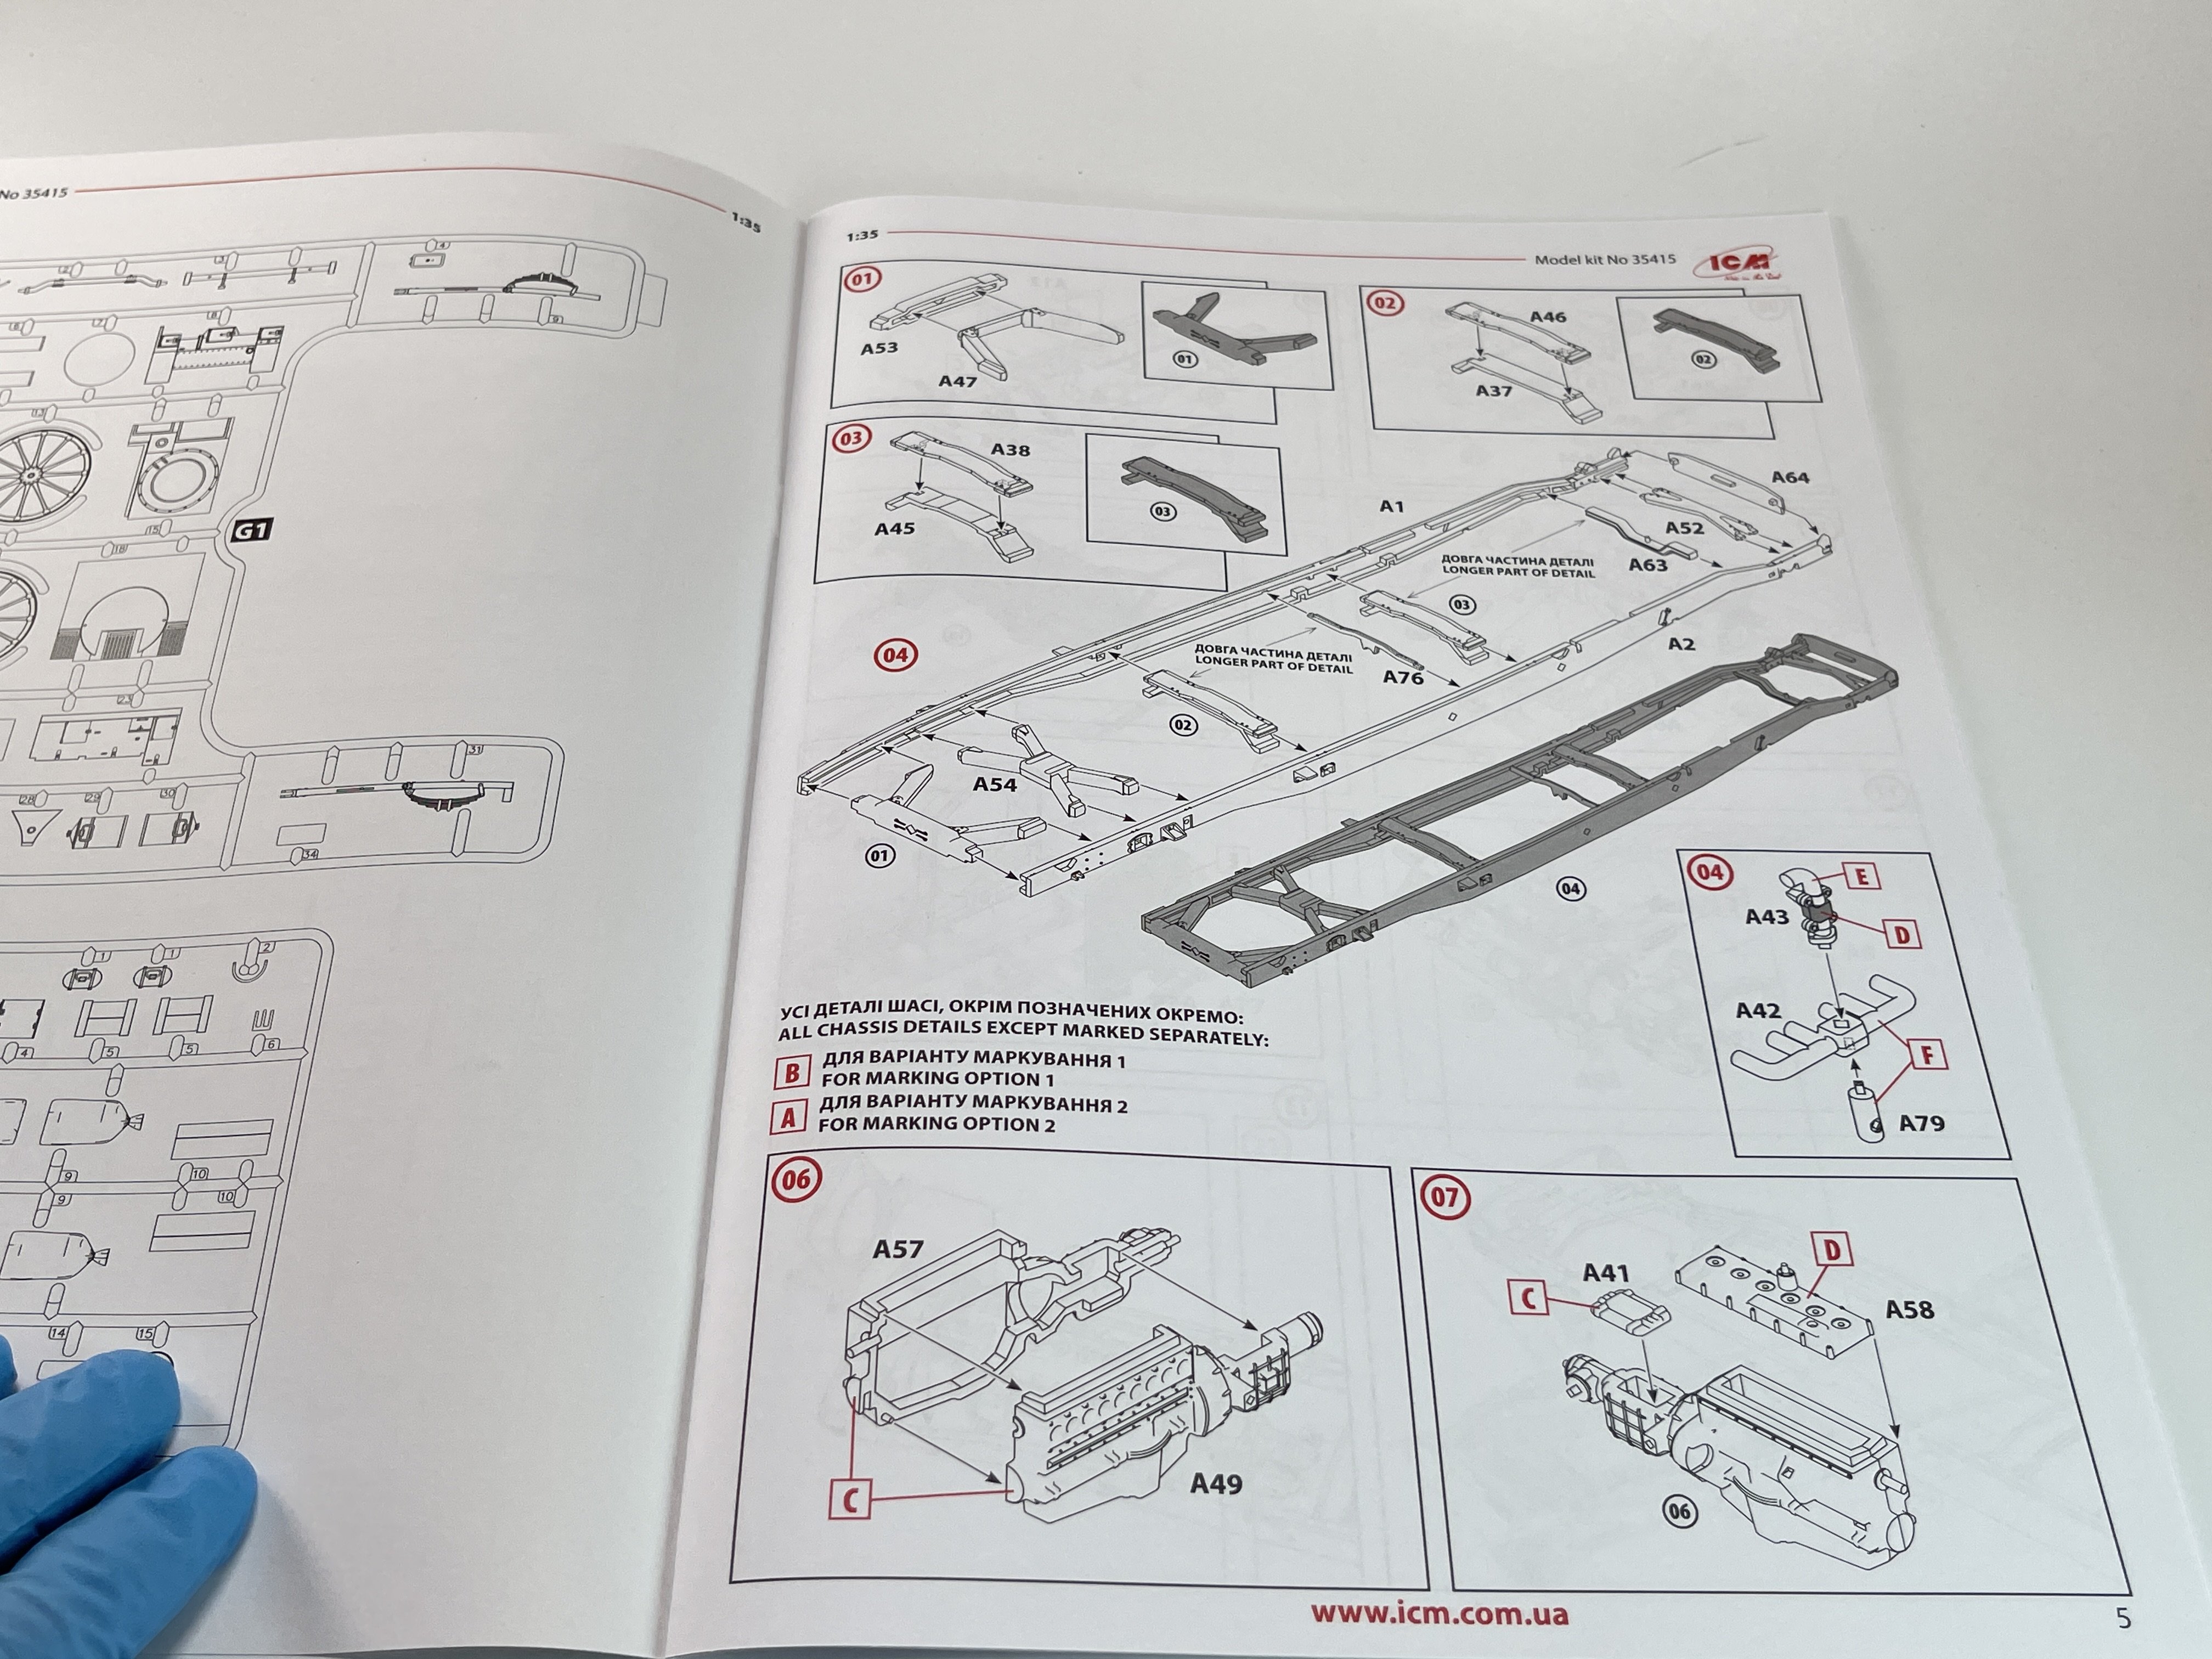
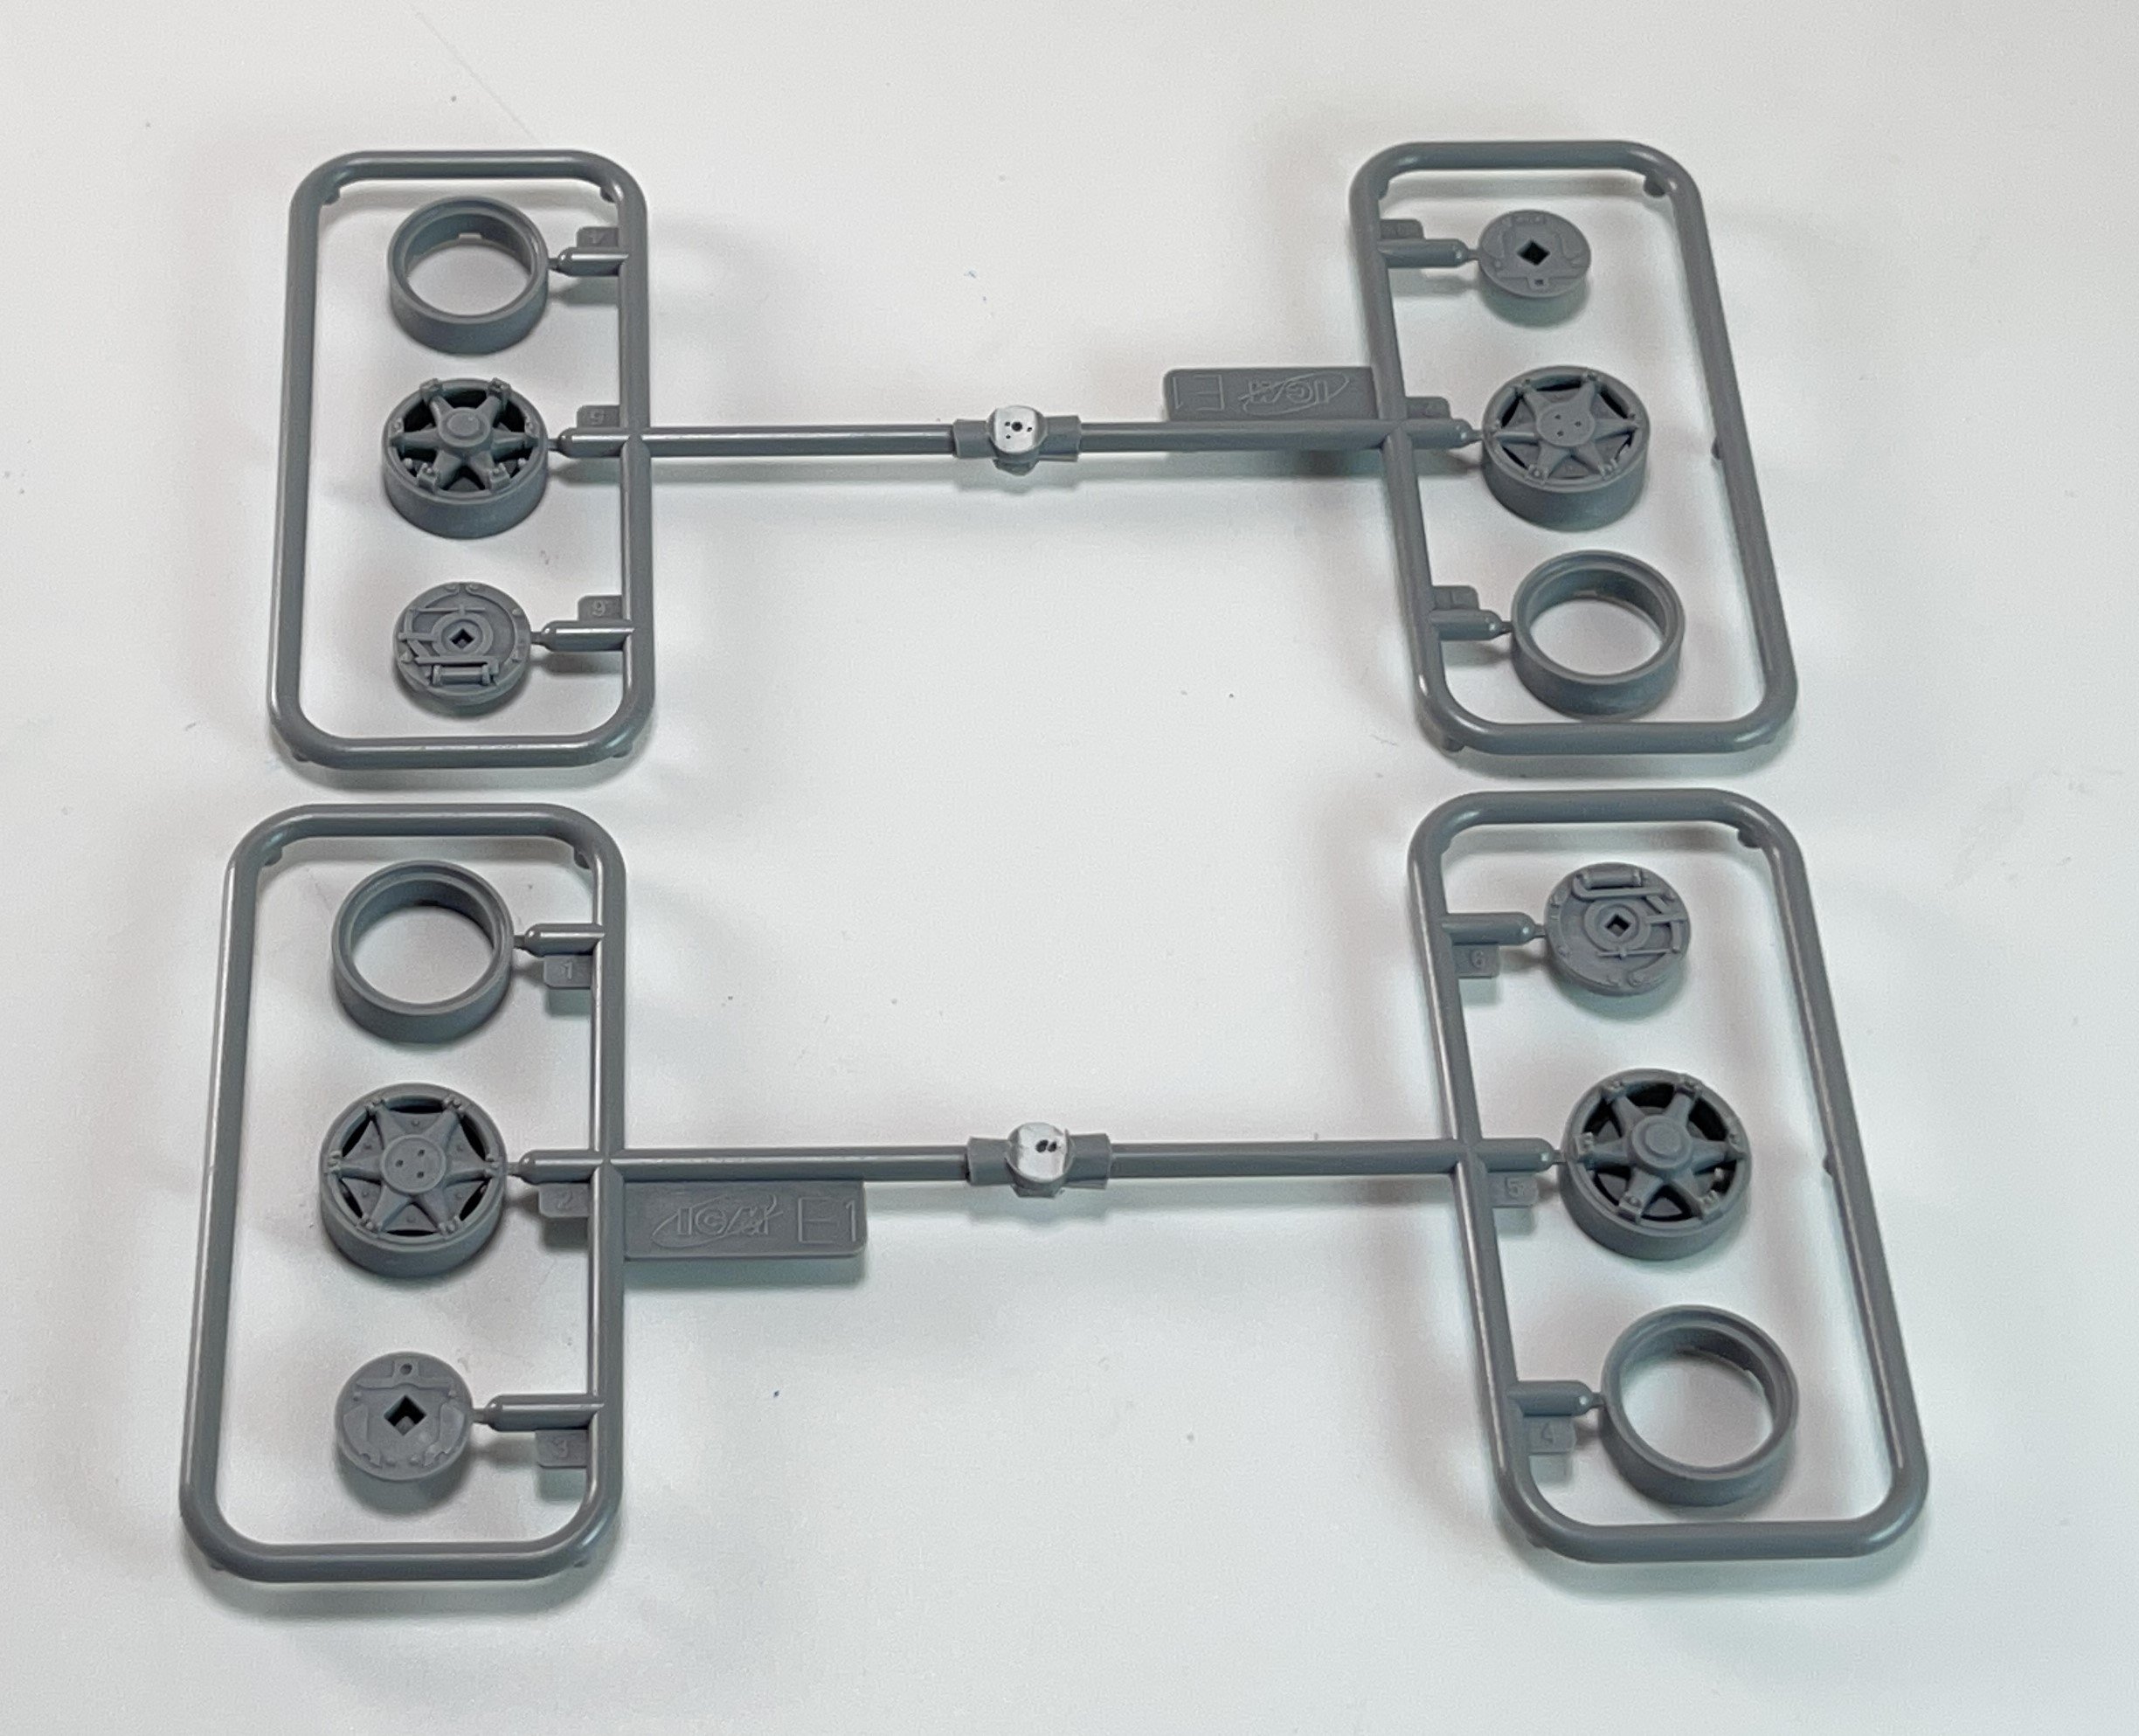
So, In the box you got seven plastic sprues for the AHN truck (six gray and one clear part) and three for the Goulash cannon (one for the goulash itself and two identical for the kitchen accessories.
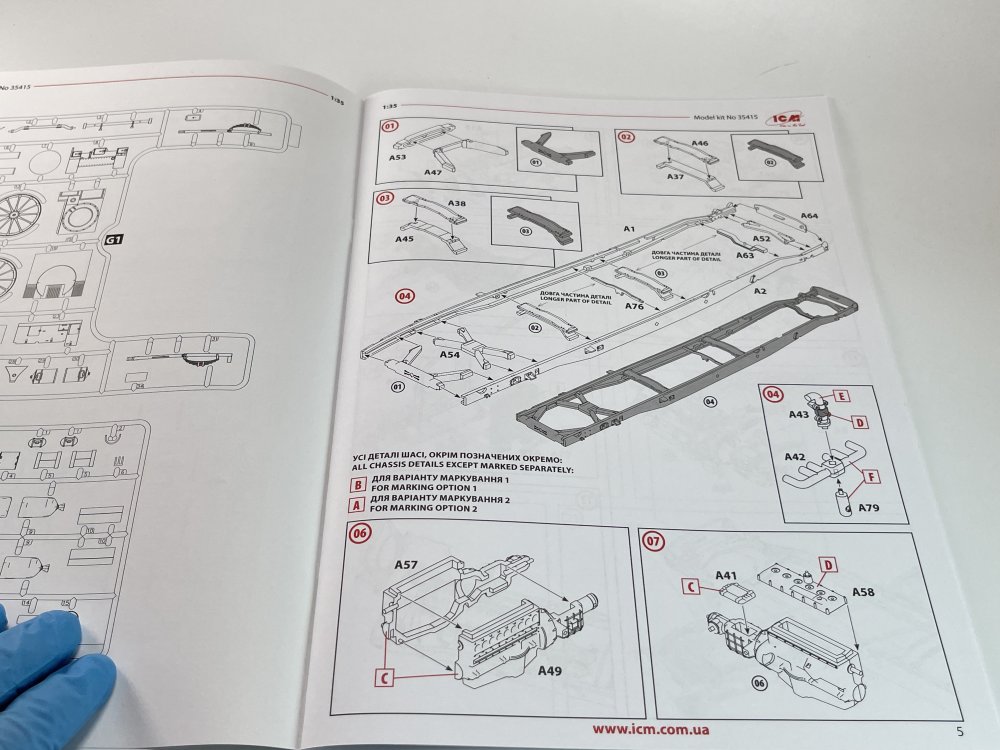
Starting with the truck, I notice that the main chassis is made of several parts, which could make this build a little more difficult because everything must be proper aligned so all the rest of the model could be done in the correct stand. That should be not a problem to all but the very novice modeler.
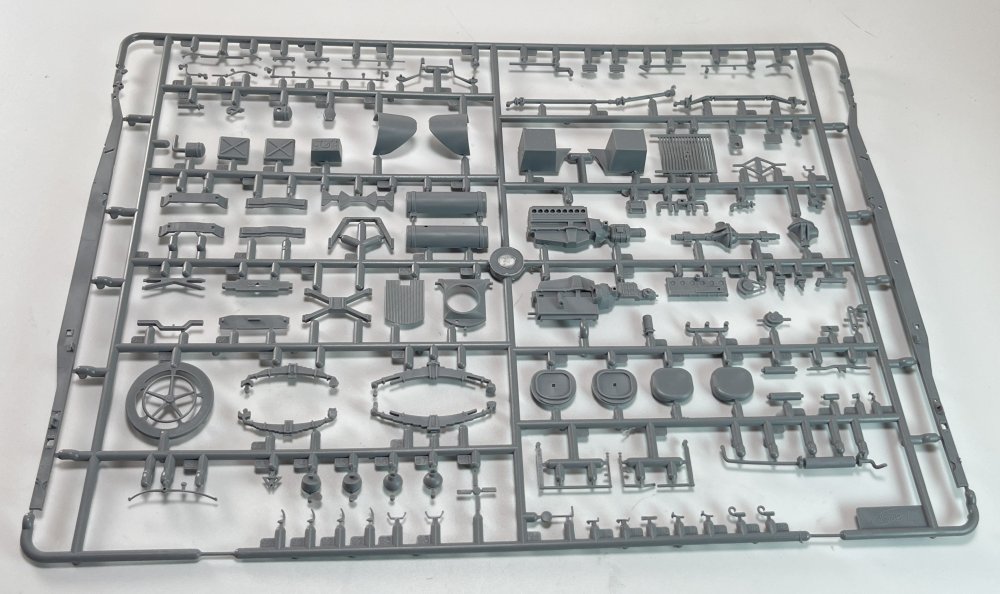

The engine and cooling system is included which is a very nice touch and detail.
One thing that I notice is that there`s no option to turn the front wheels like the latest offers from others Brands, namely AK Interactive. I understand that this model initially is from 2014, so I think that should be in mind of ICM for their next trucks.
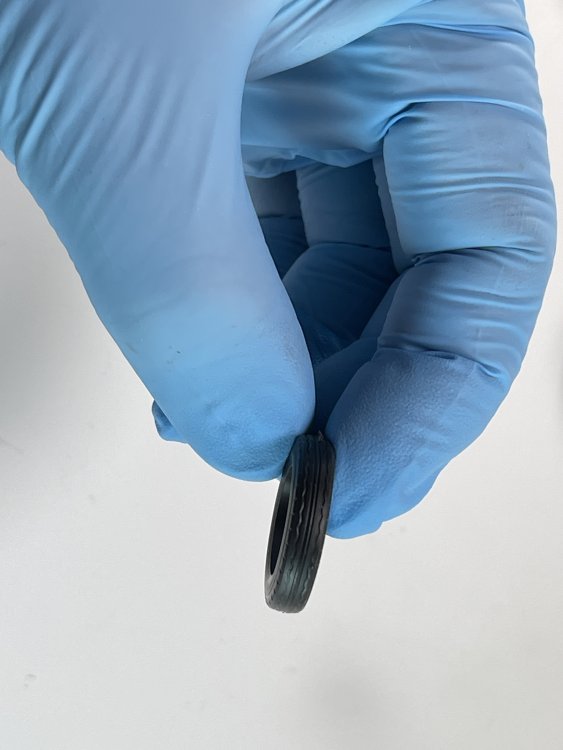
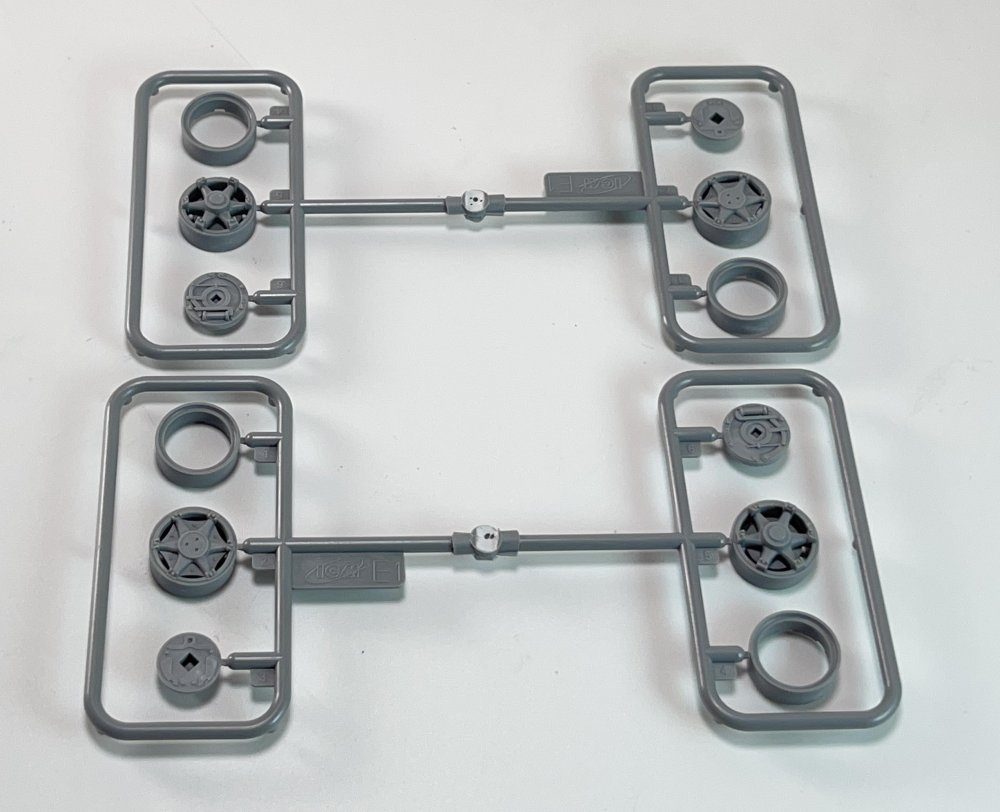
The wheels are in vinyl, which I frankly don’t like at all, because they are hard to paint and even harder to weathering. So, a resin aftermarket is most welcome here.
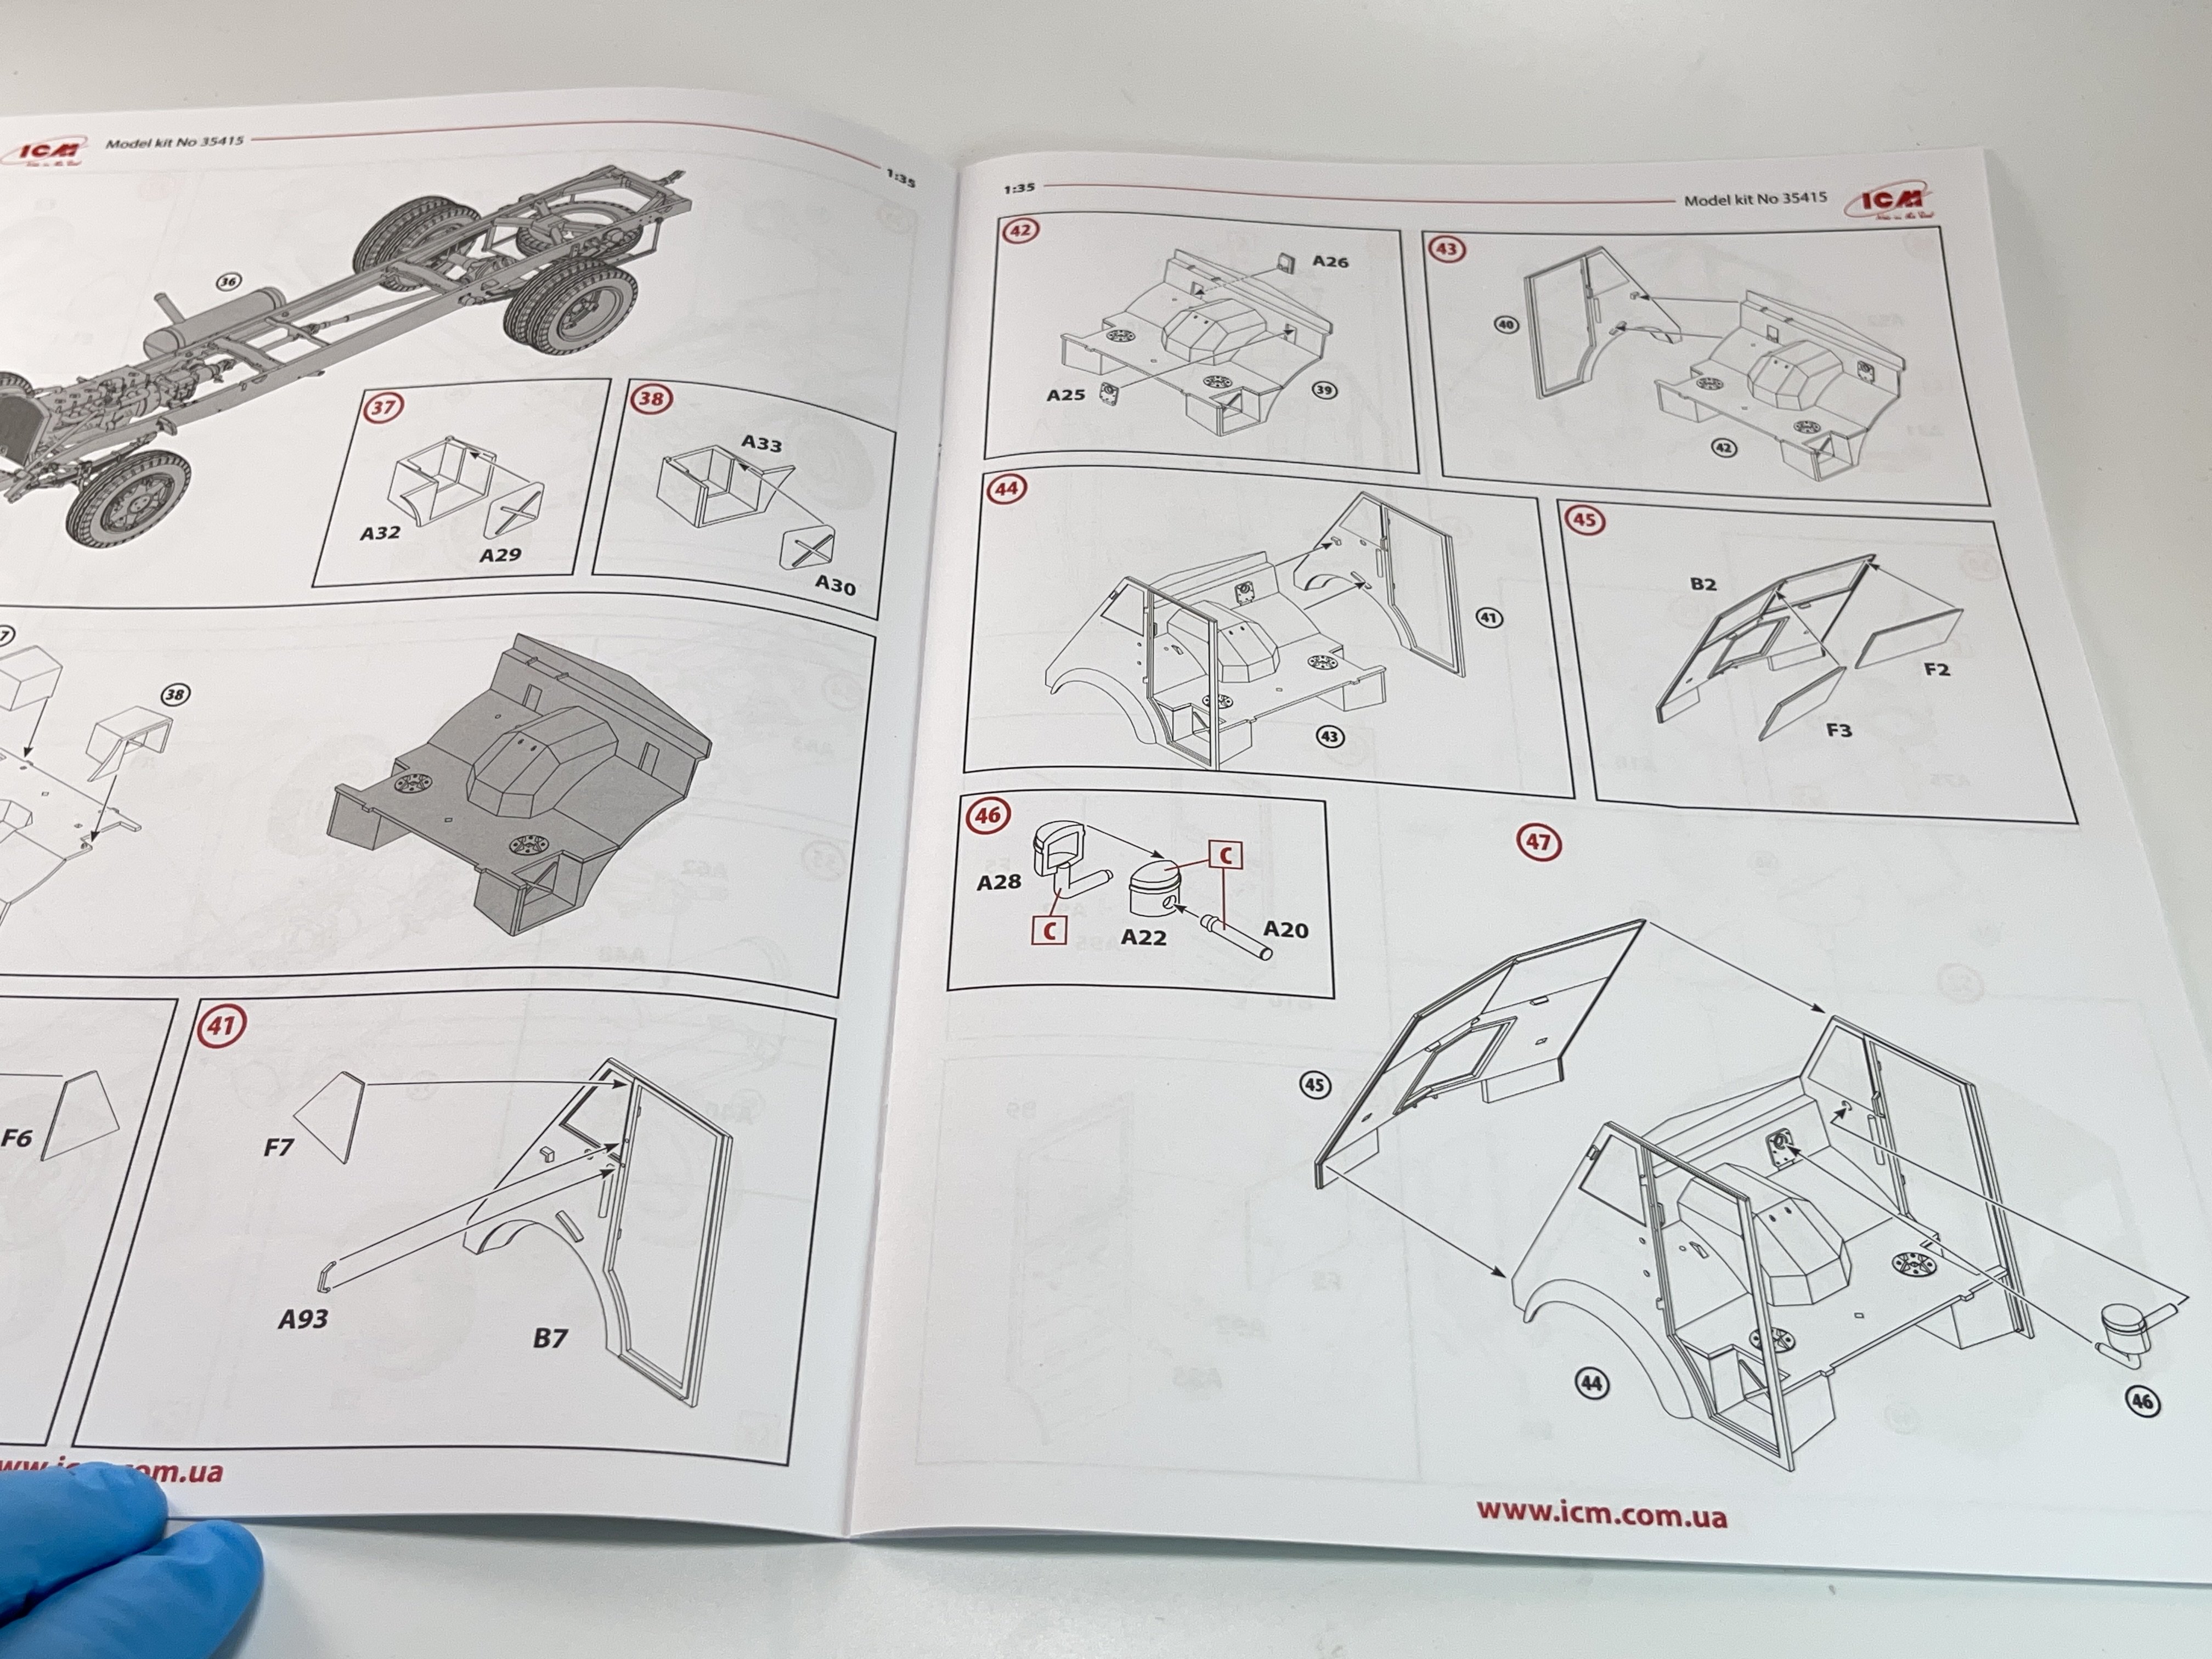
The Cabin is very simple as it should be.

At this time, as seeing this plastic and wondering if all this fit together well, I decided to start gluing the cabin…
.thumb.jpg.a4f1e90836c05fd586eab35fb51f5eee.jpg)
.thumb.jpg.81786d1c614ab3c0bcd05174905b179d.jpg)
I must say: It’s a gem! All is very simple to remove from the spure, easy and fits very very well and the plastic is quite good to work with.
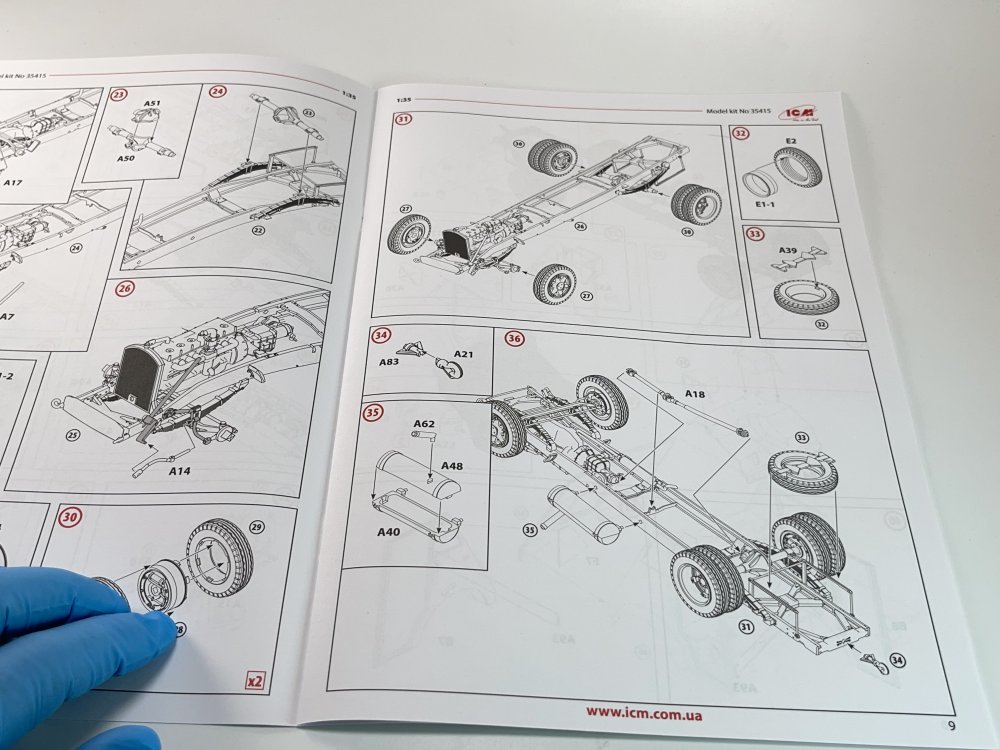
The rear bed details are of very high standard.

The skeletal frame of a canvas support could not be very easy to assemble but with care and patience and seeing how the cabin construction went, I think that would quite smooth.
Finally, the clear parts. They are perfectly clear with no distortions whatsoever and no risks. They come in their own bag.

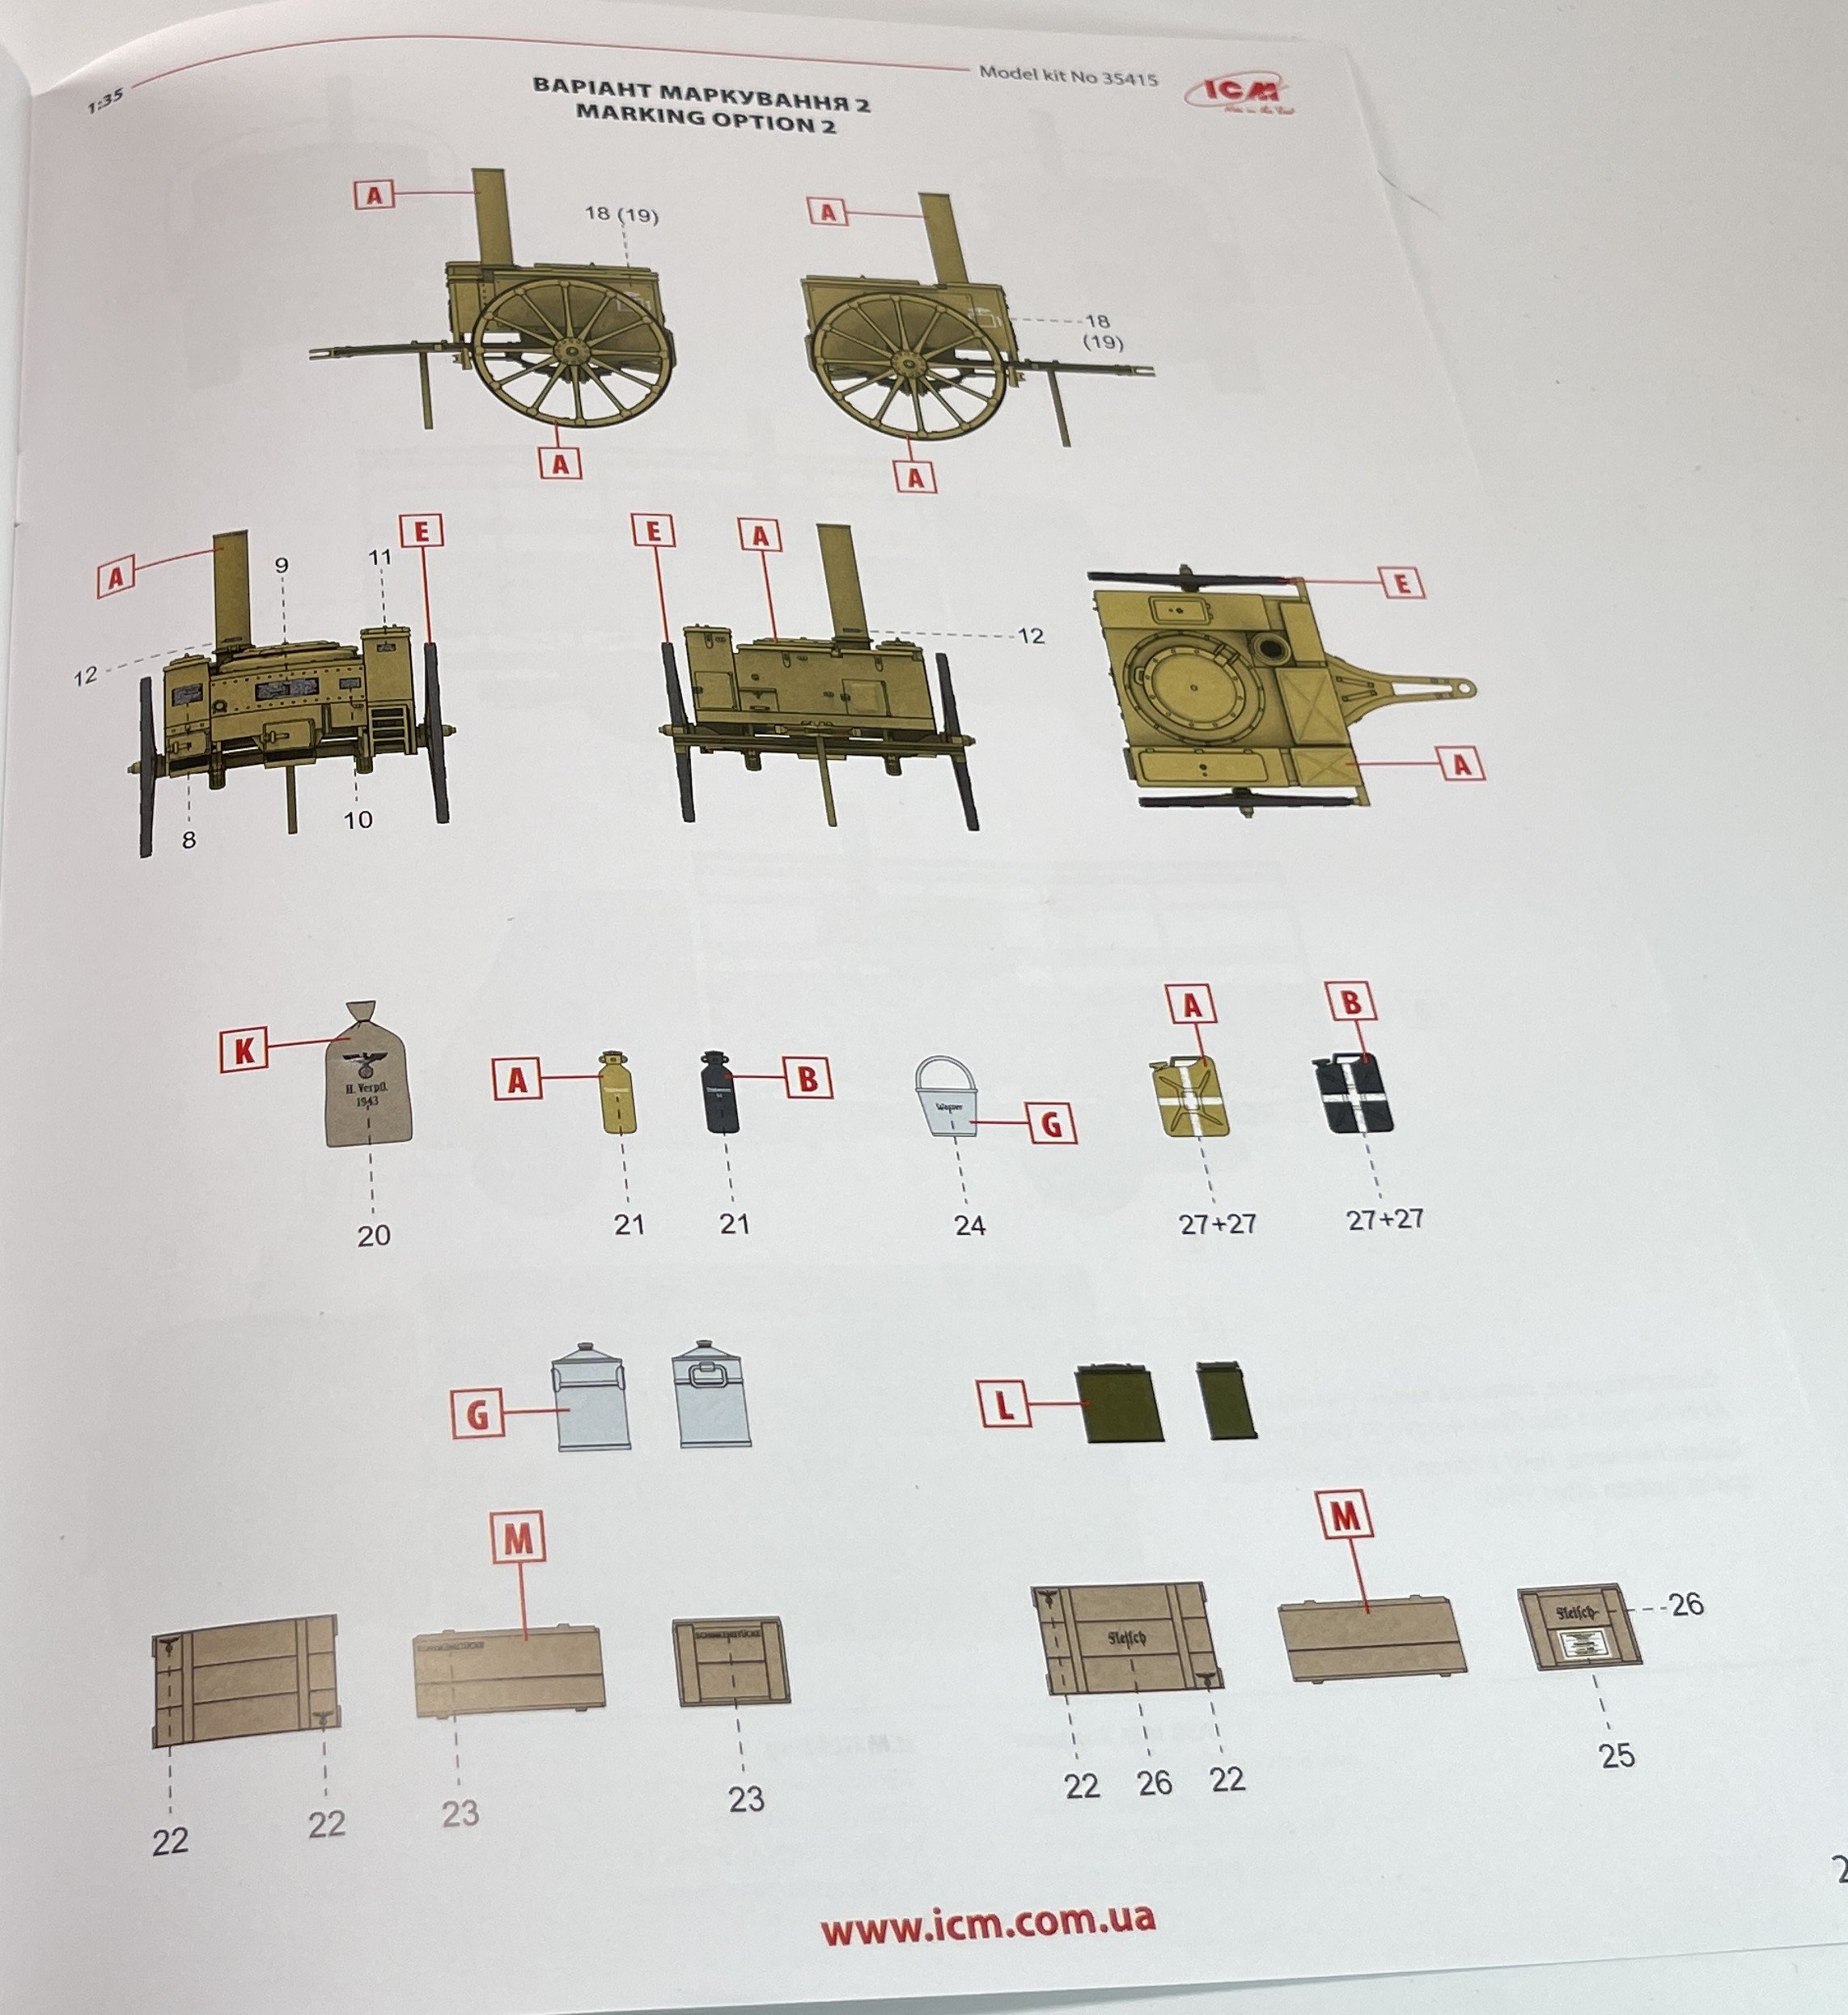
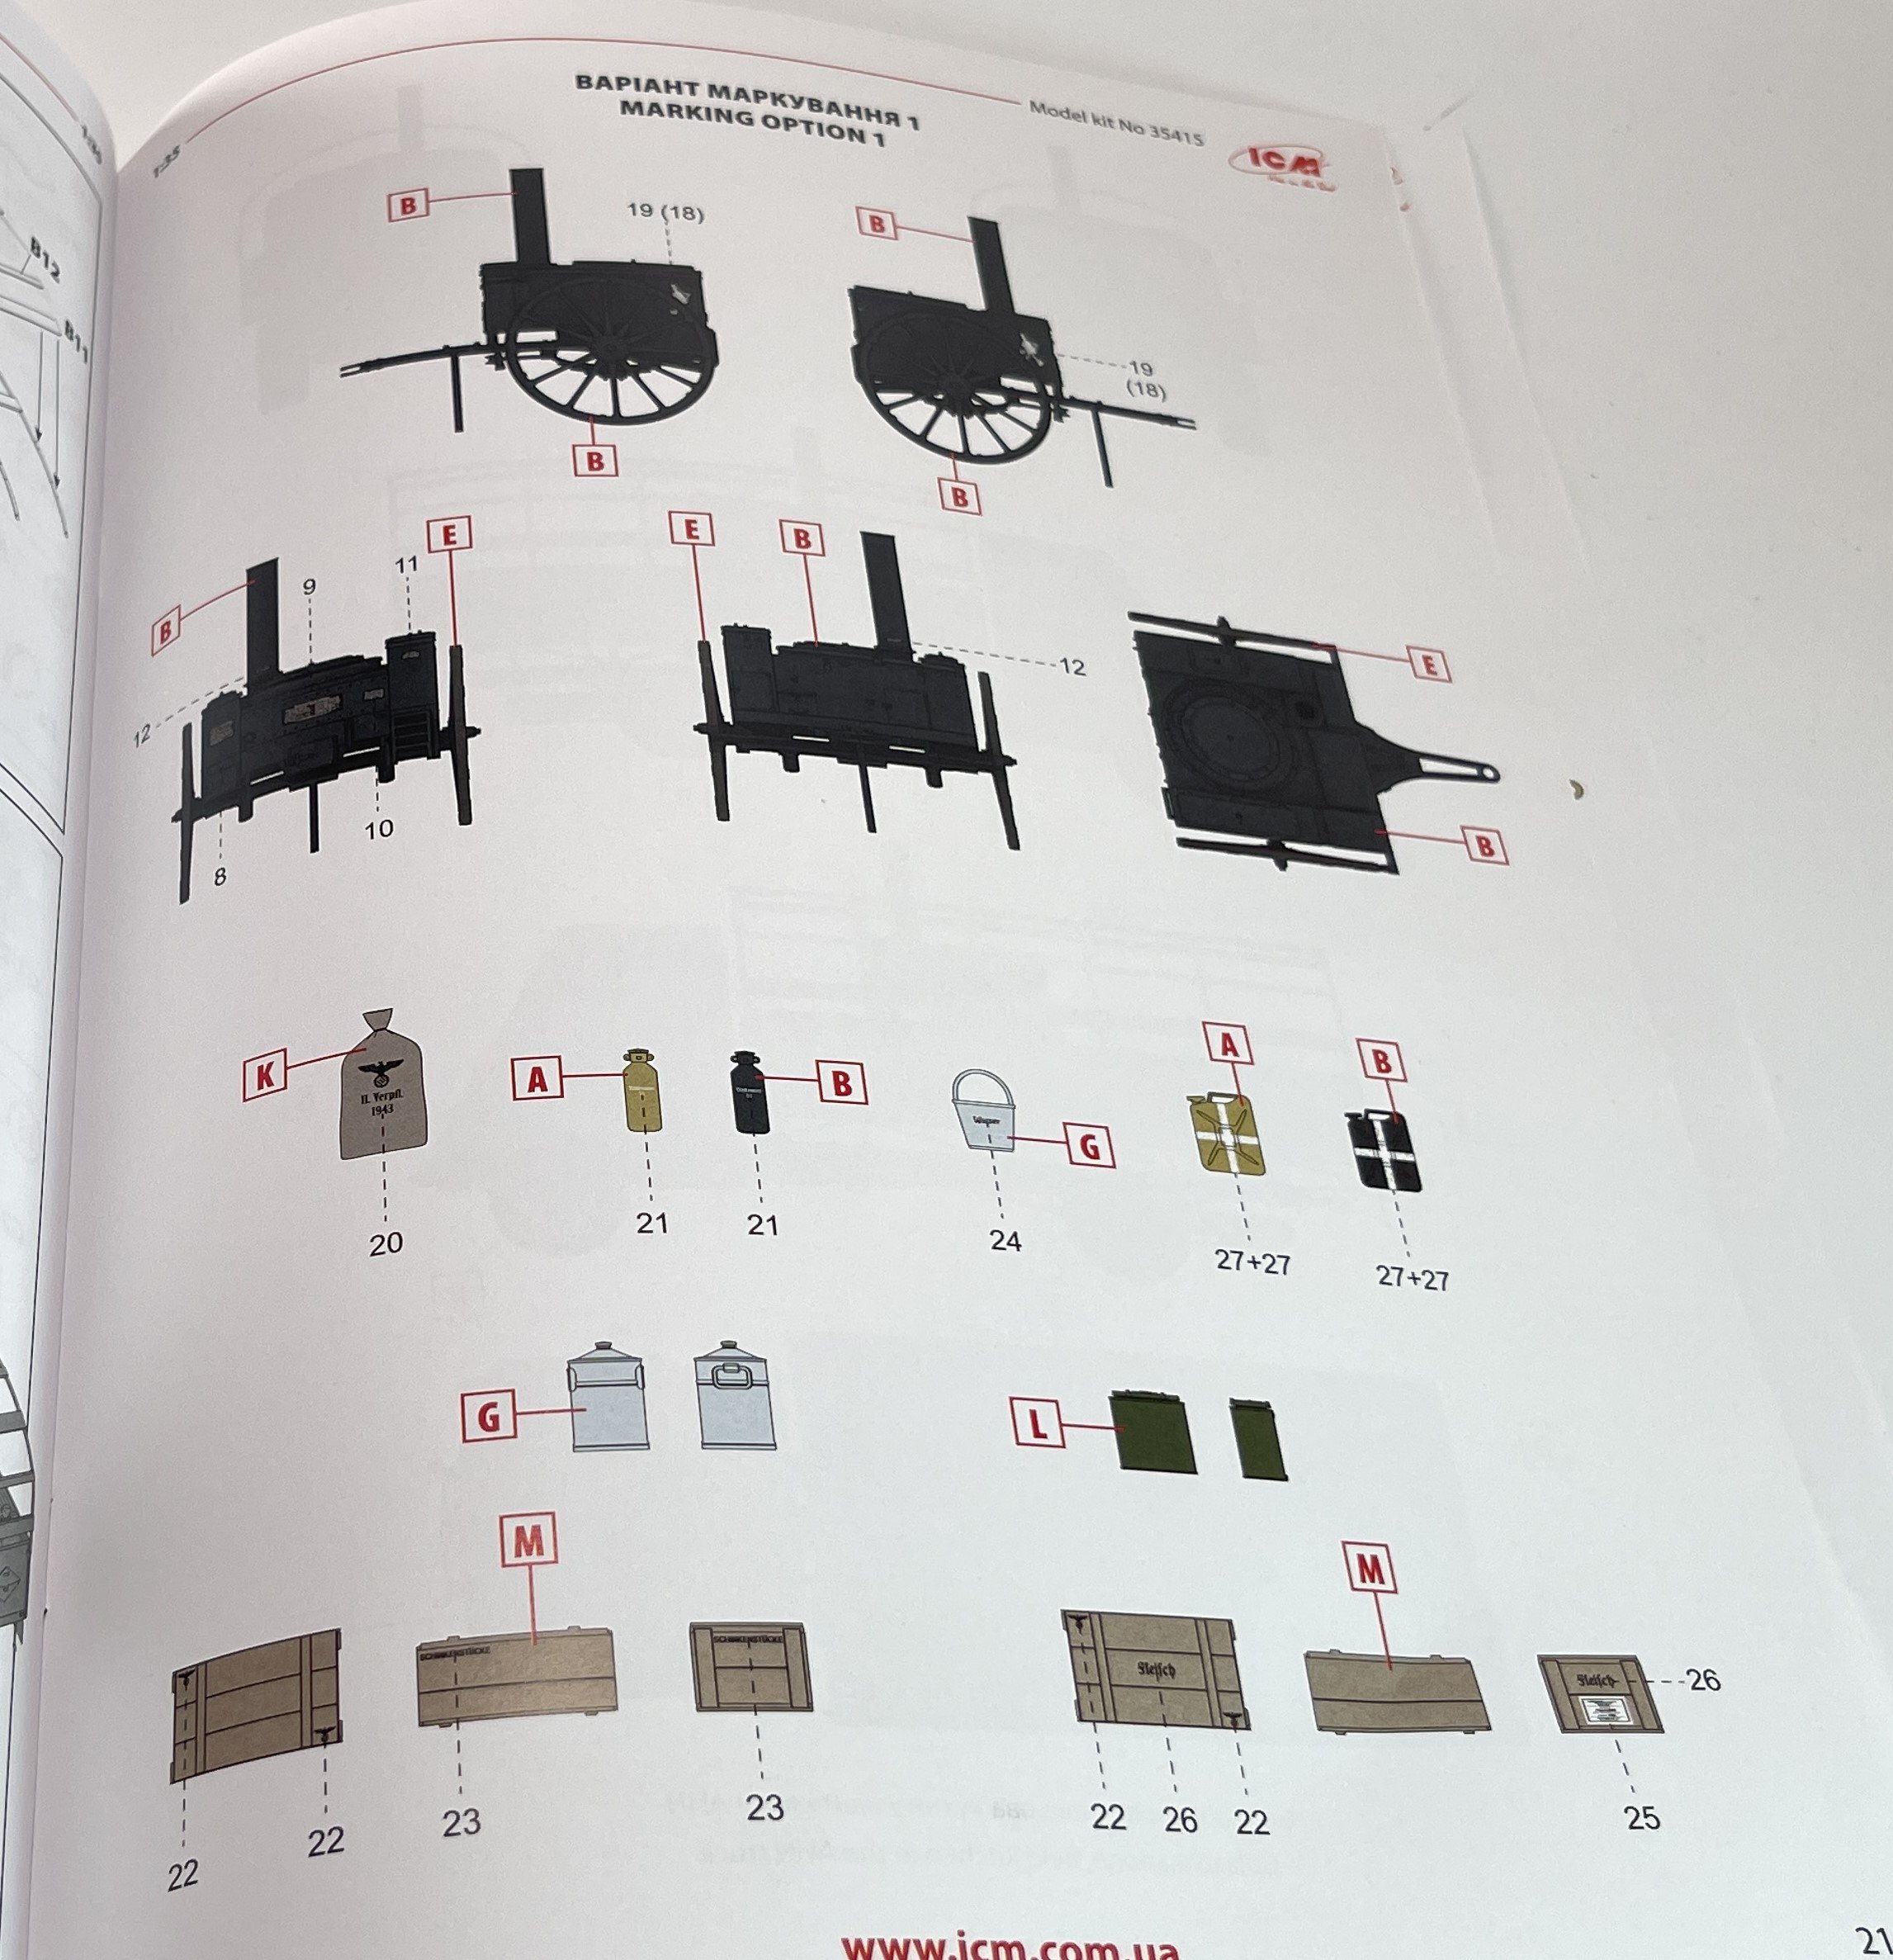
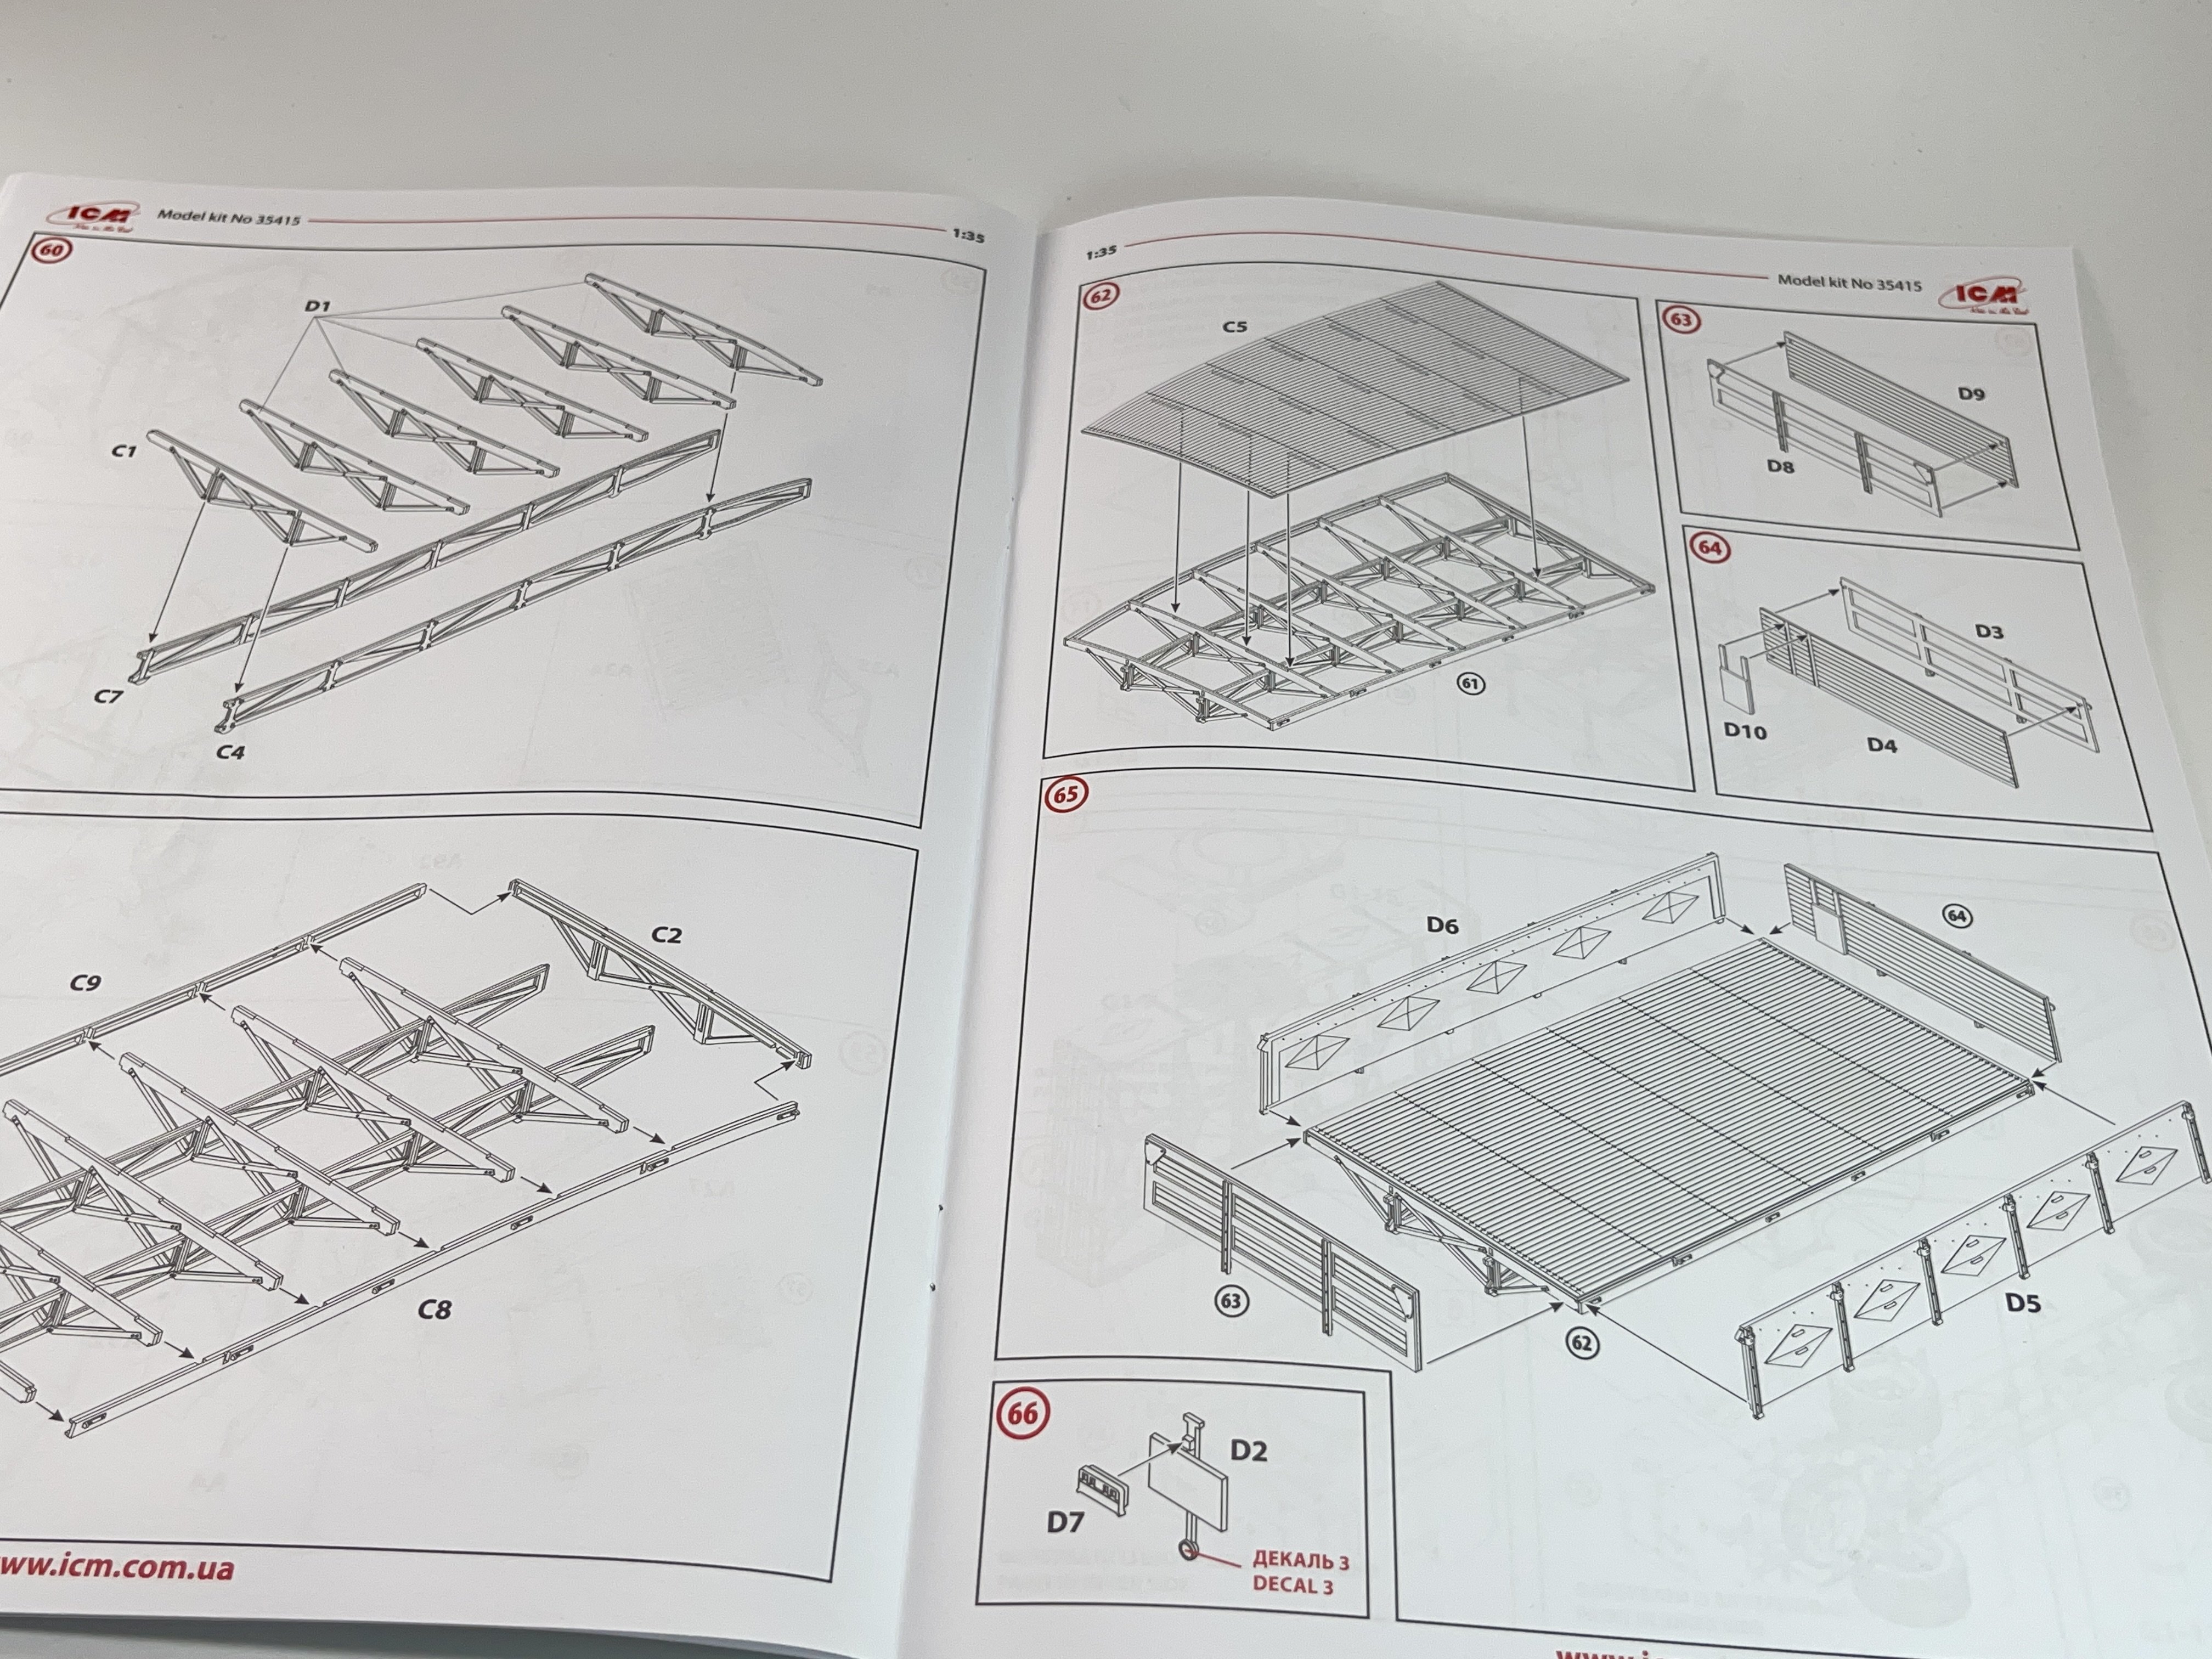
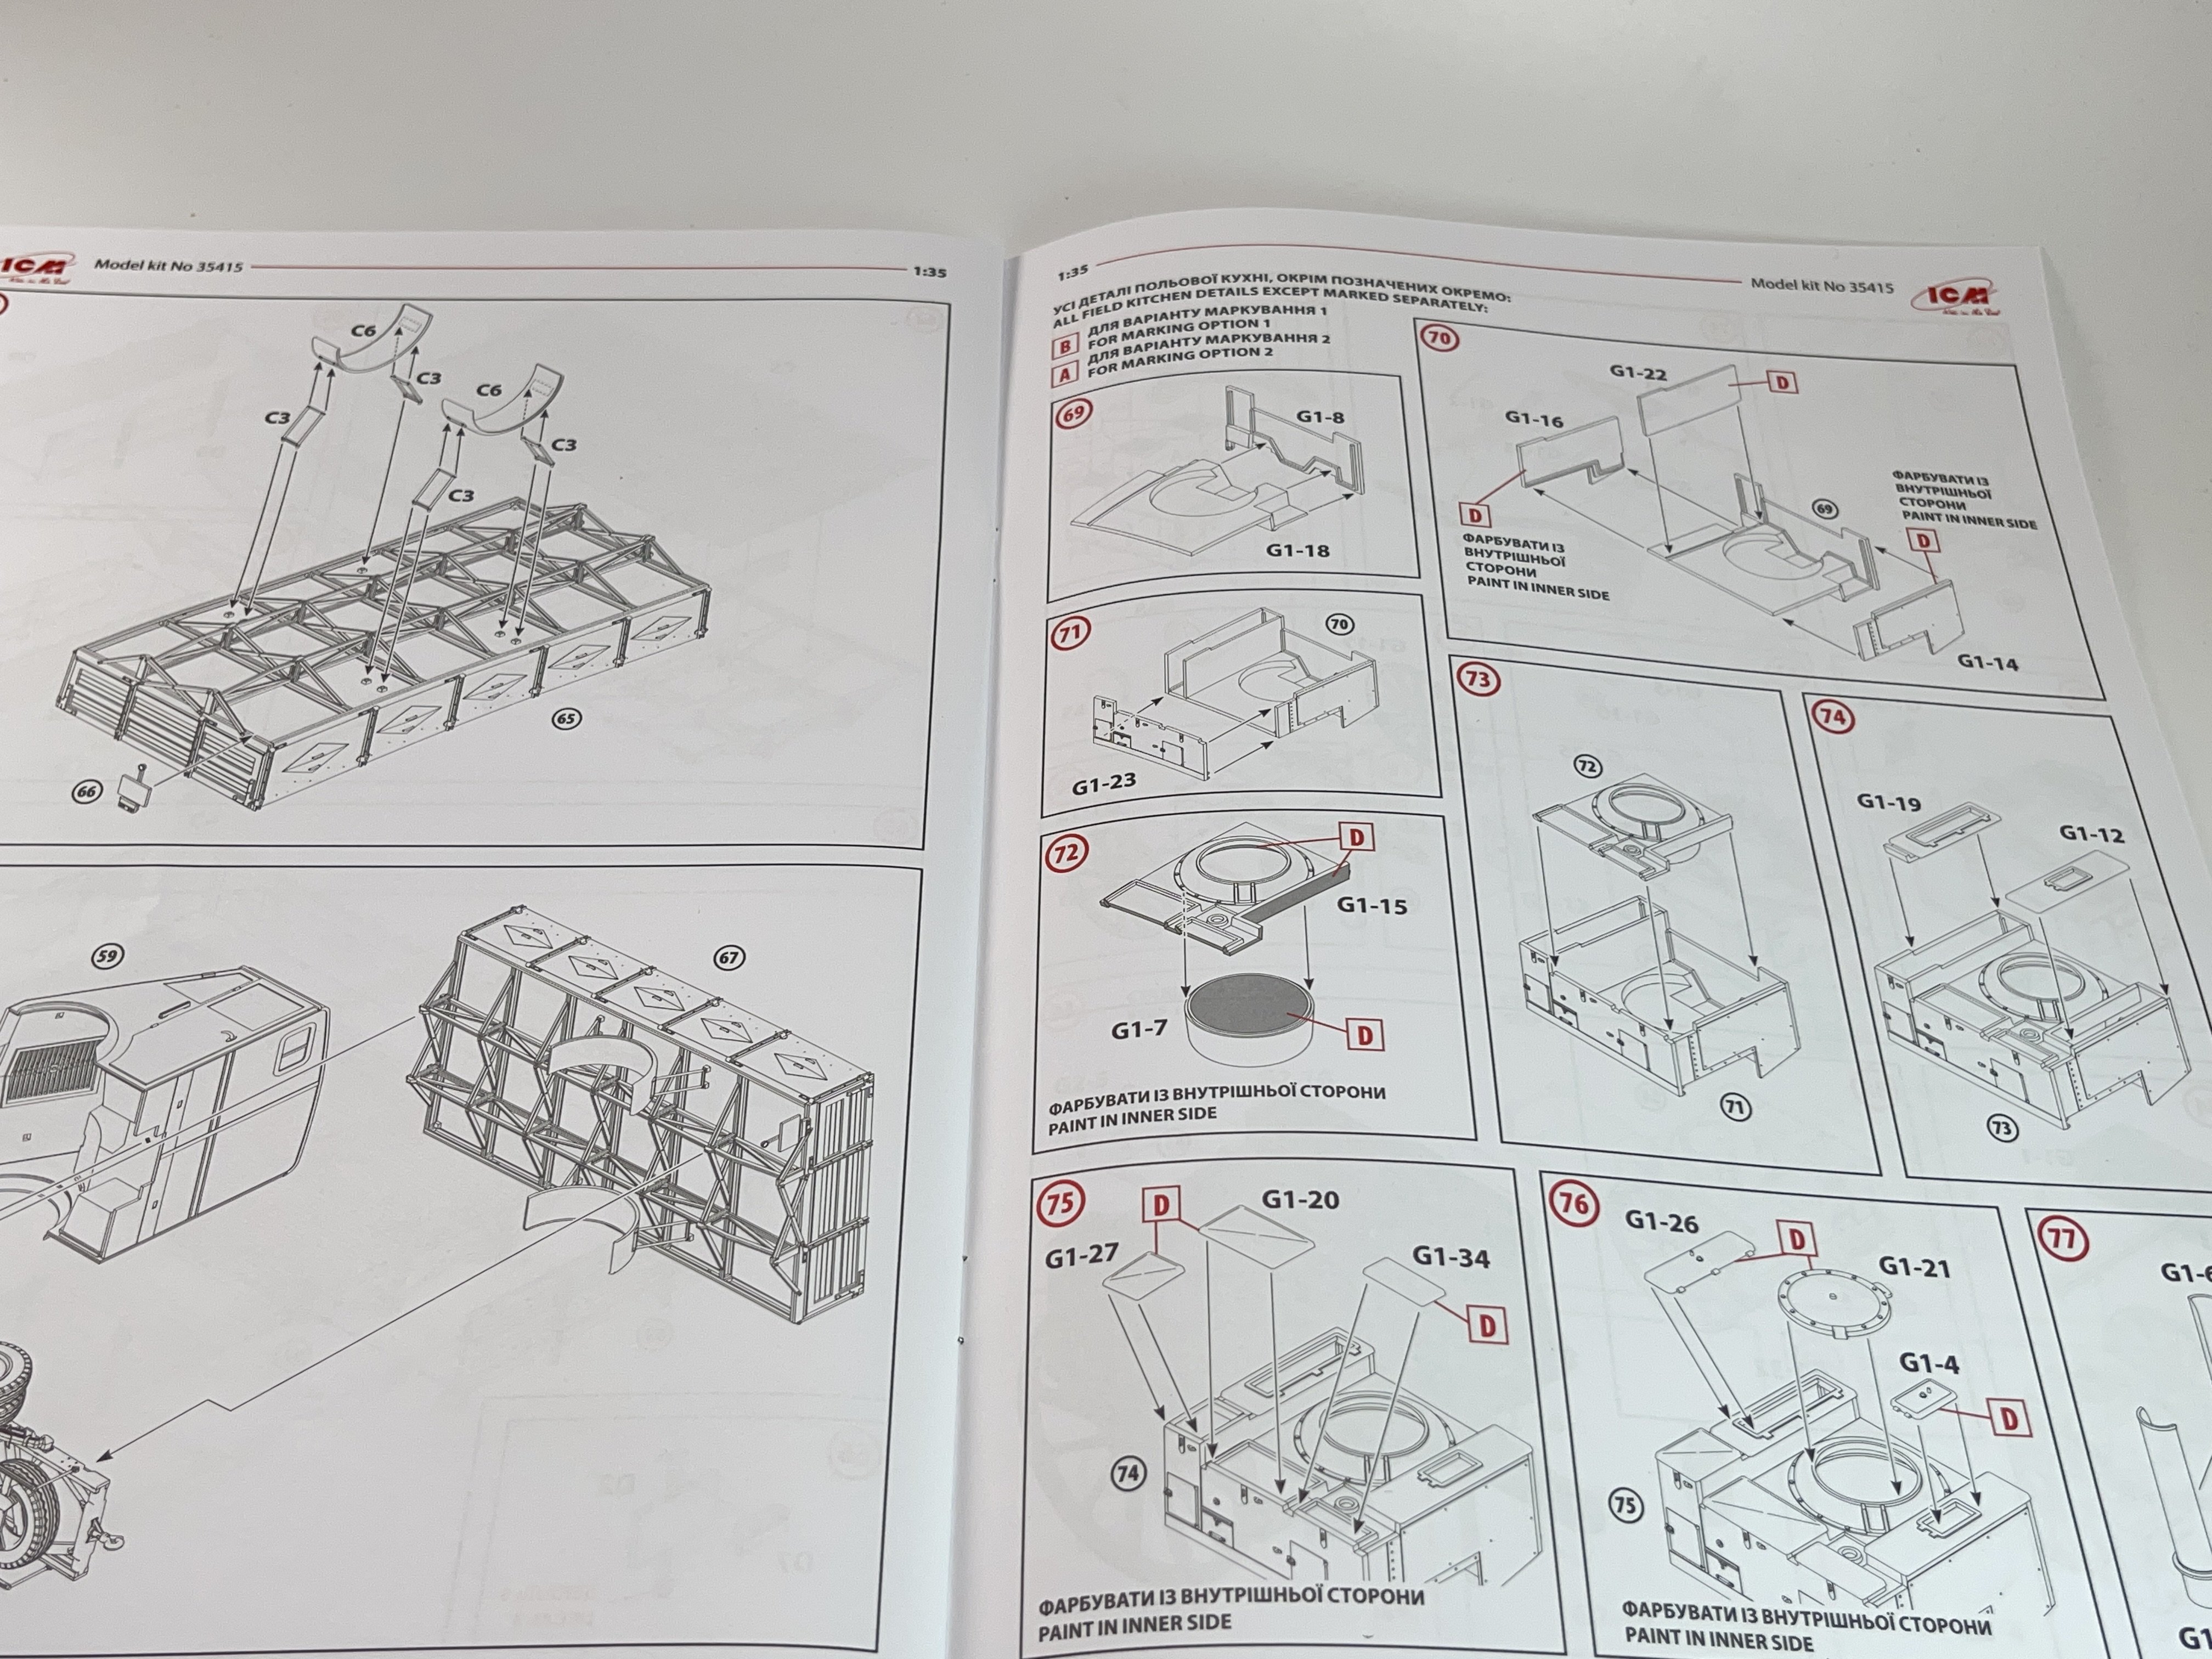
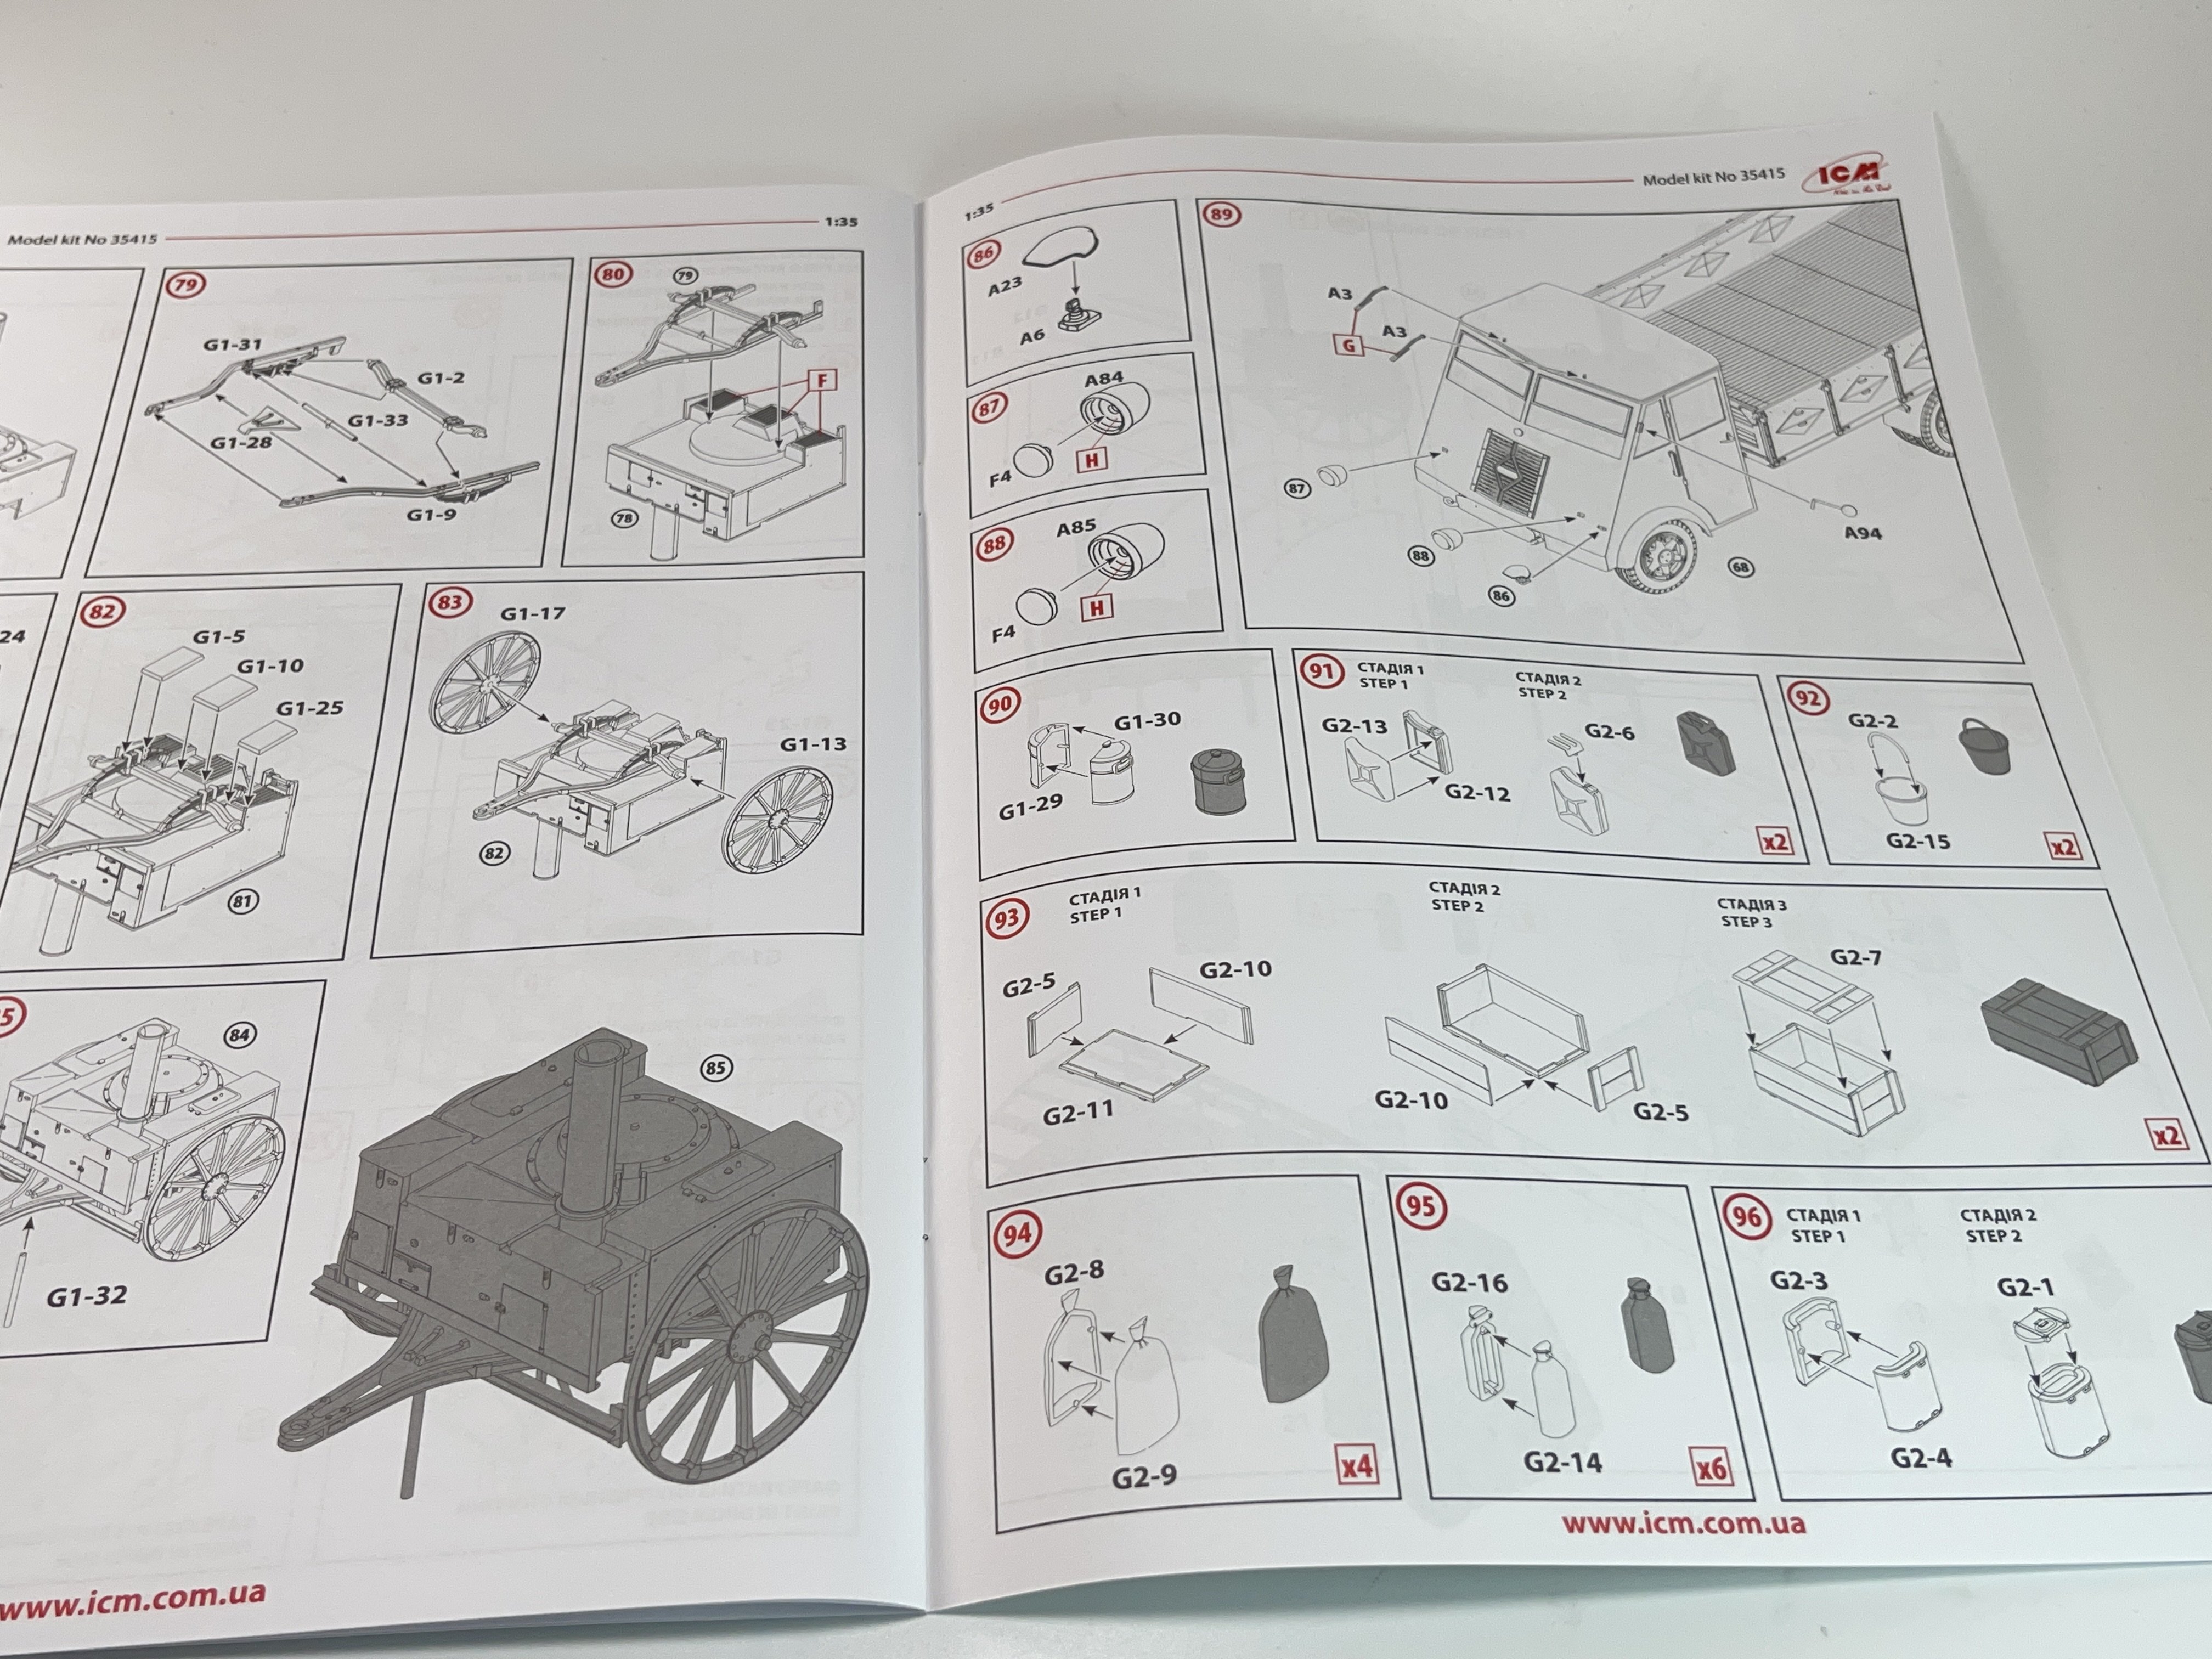
Moving to the Goulash cannon, the assembly steps are an incredible 17 steps (I thought that could be lot less).
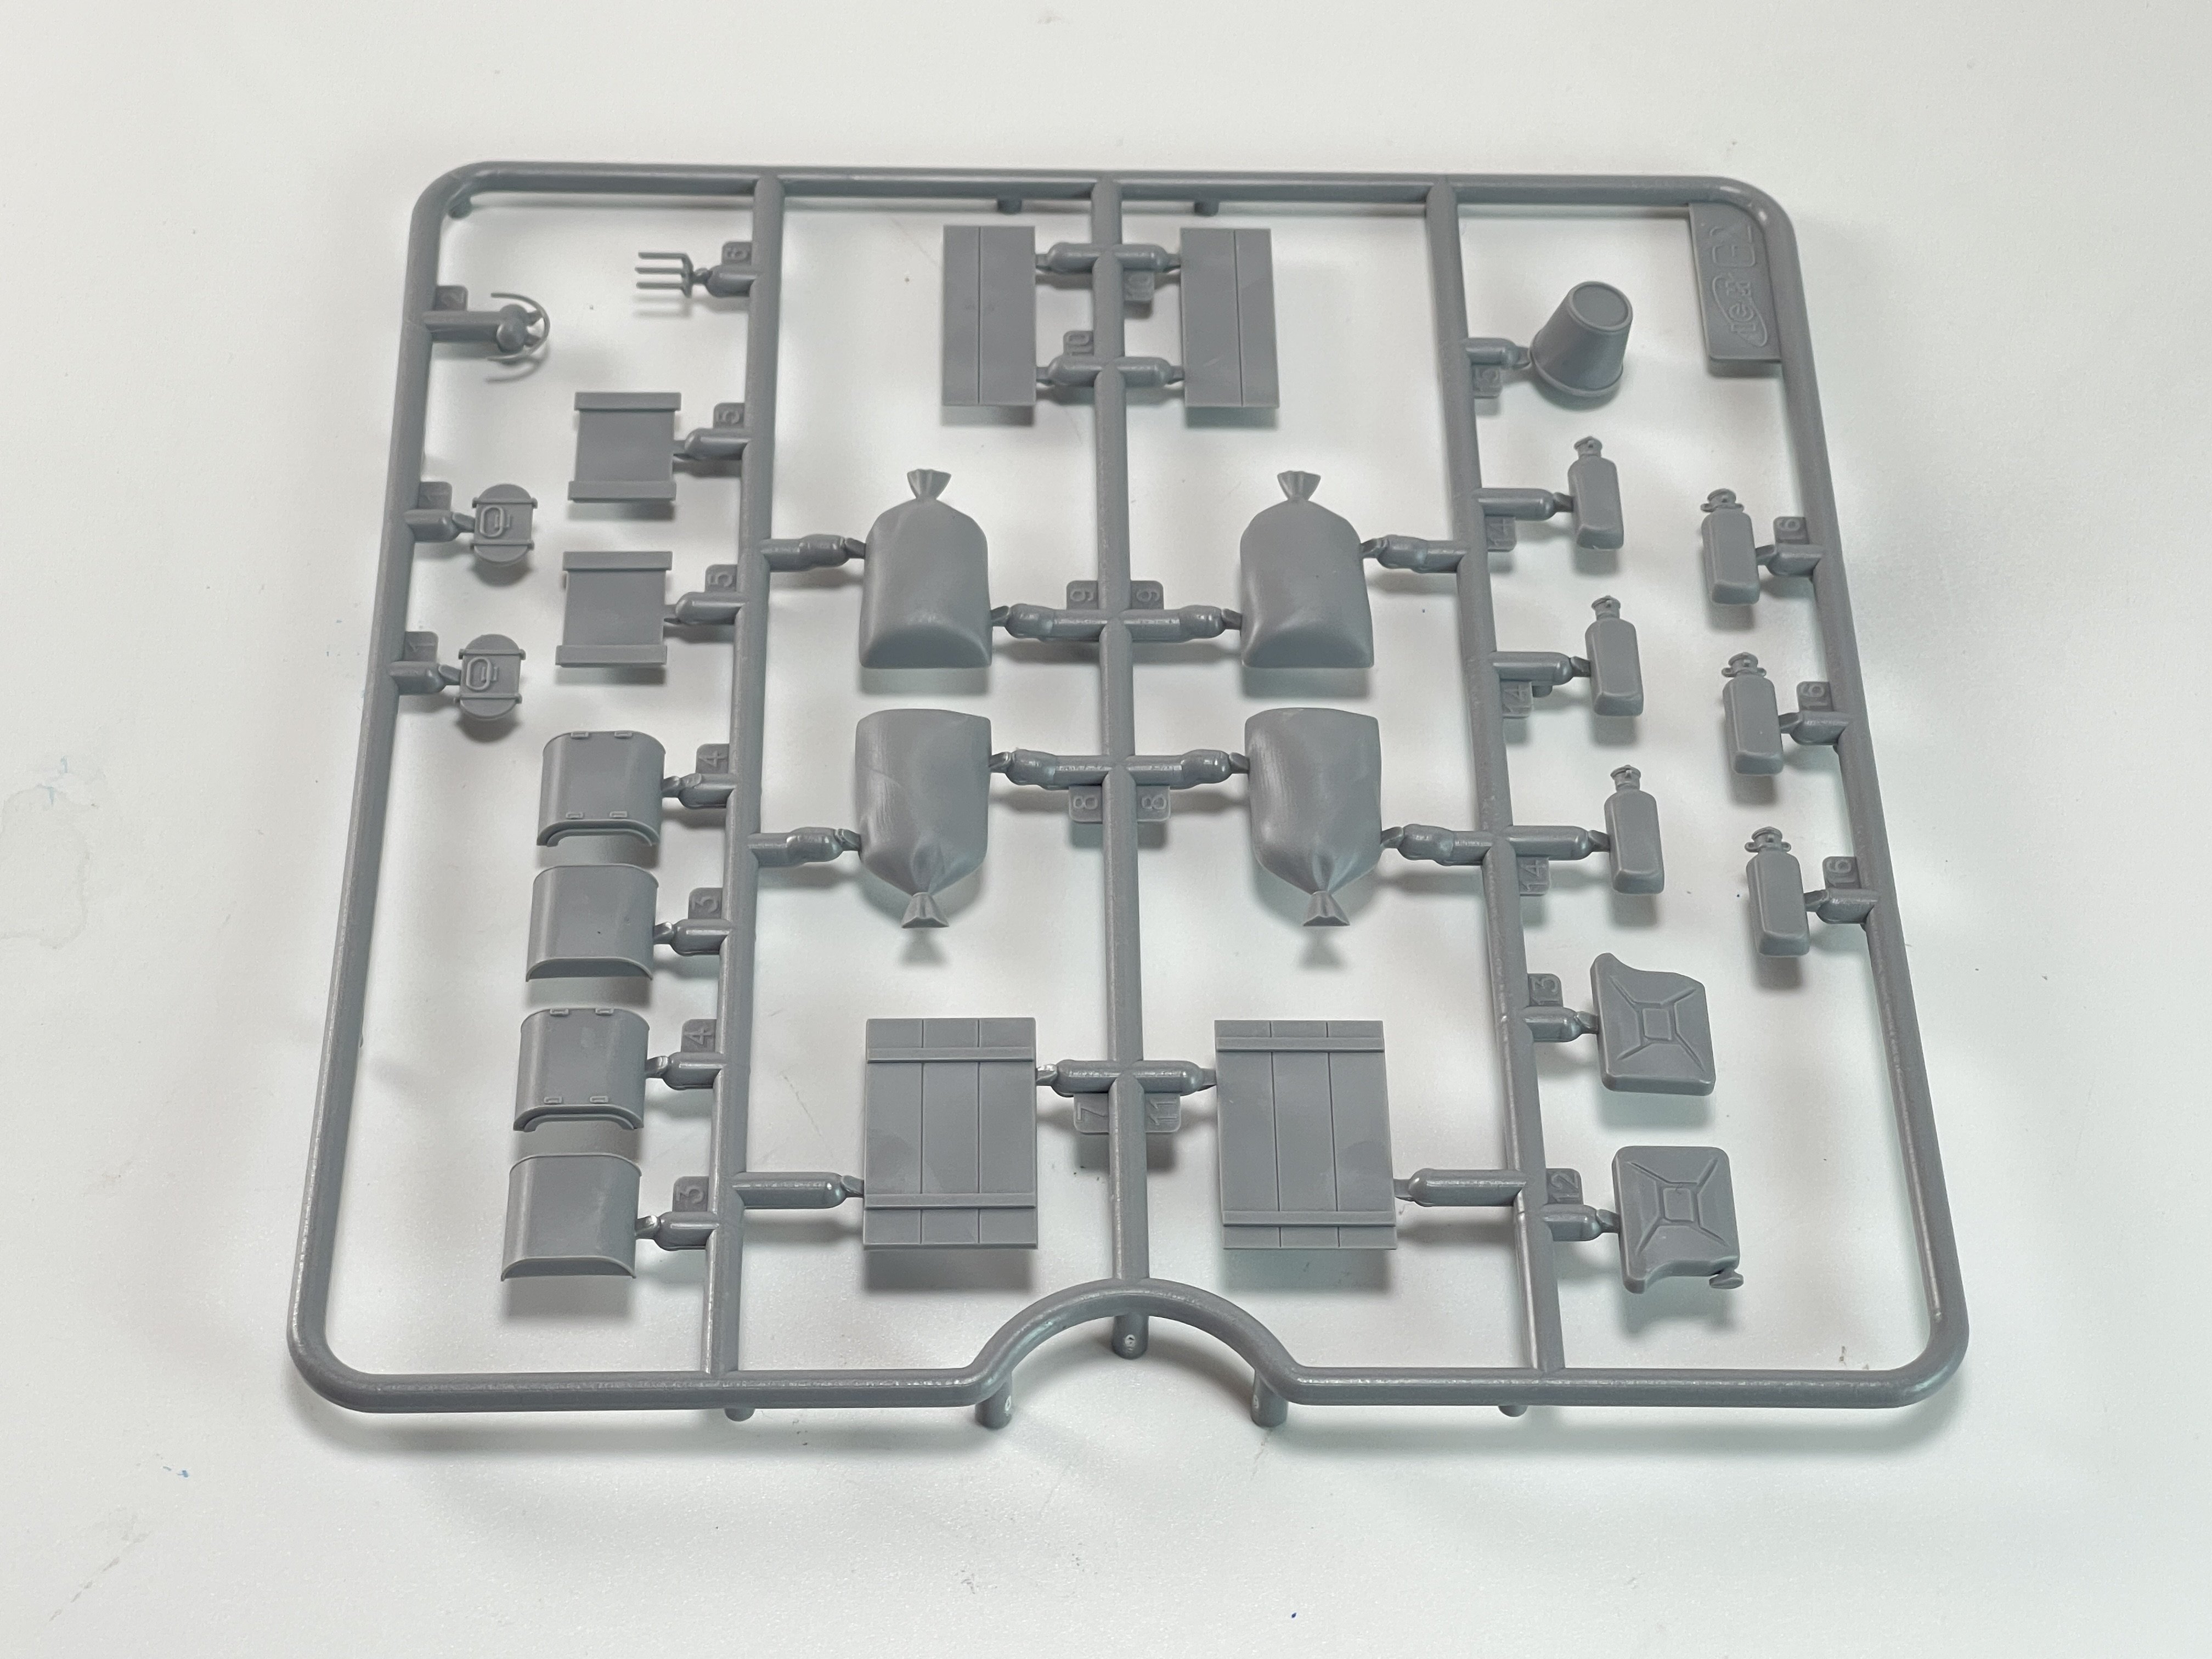
As for the accessories, you got 4 flour bags, 10 canisters, 2 crates2 buckets and 2 jerry cans with great detail.
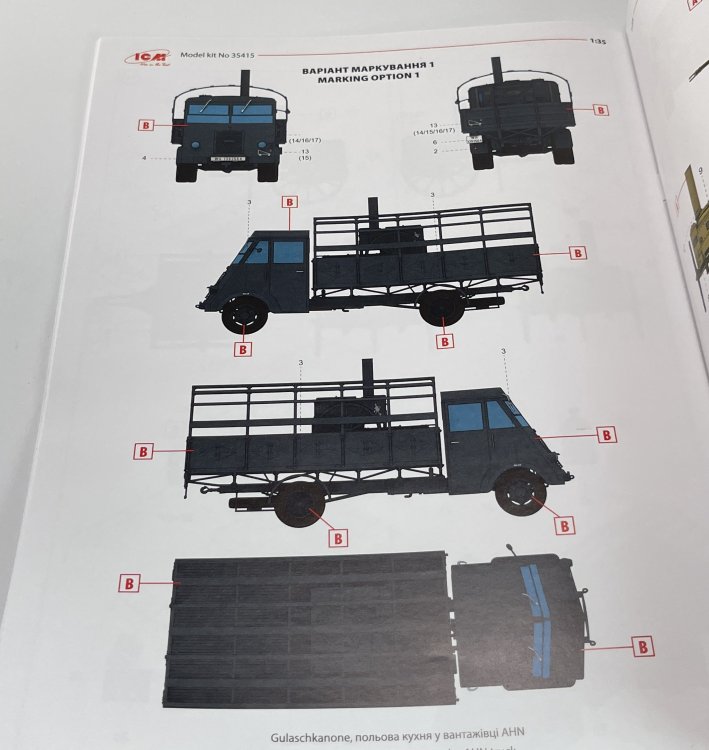
As for markings, there are only two options: Wehrmacht gray and Afrika Korps after 1934 (dark yellow).


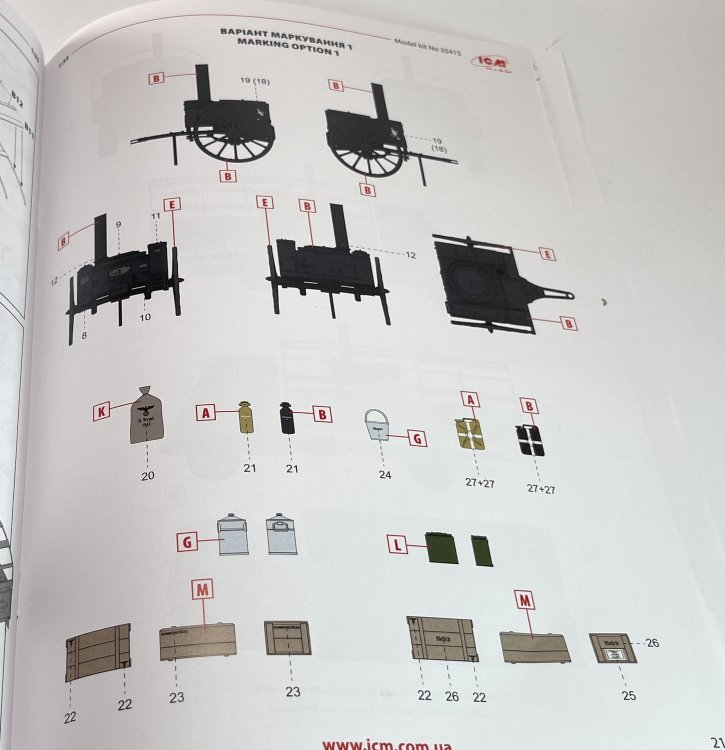
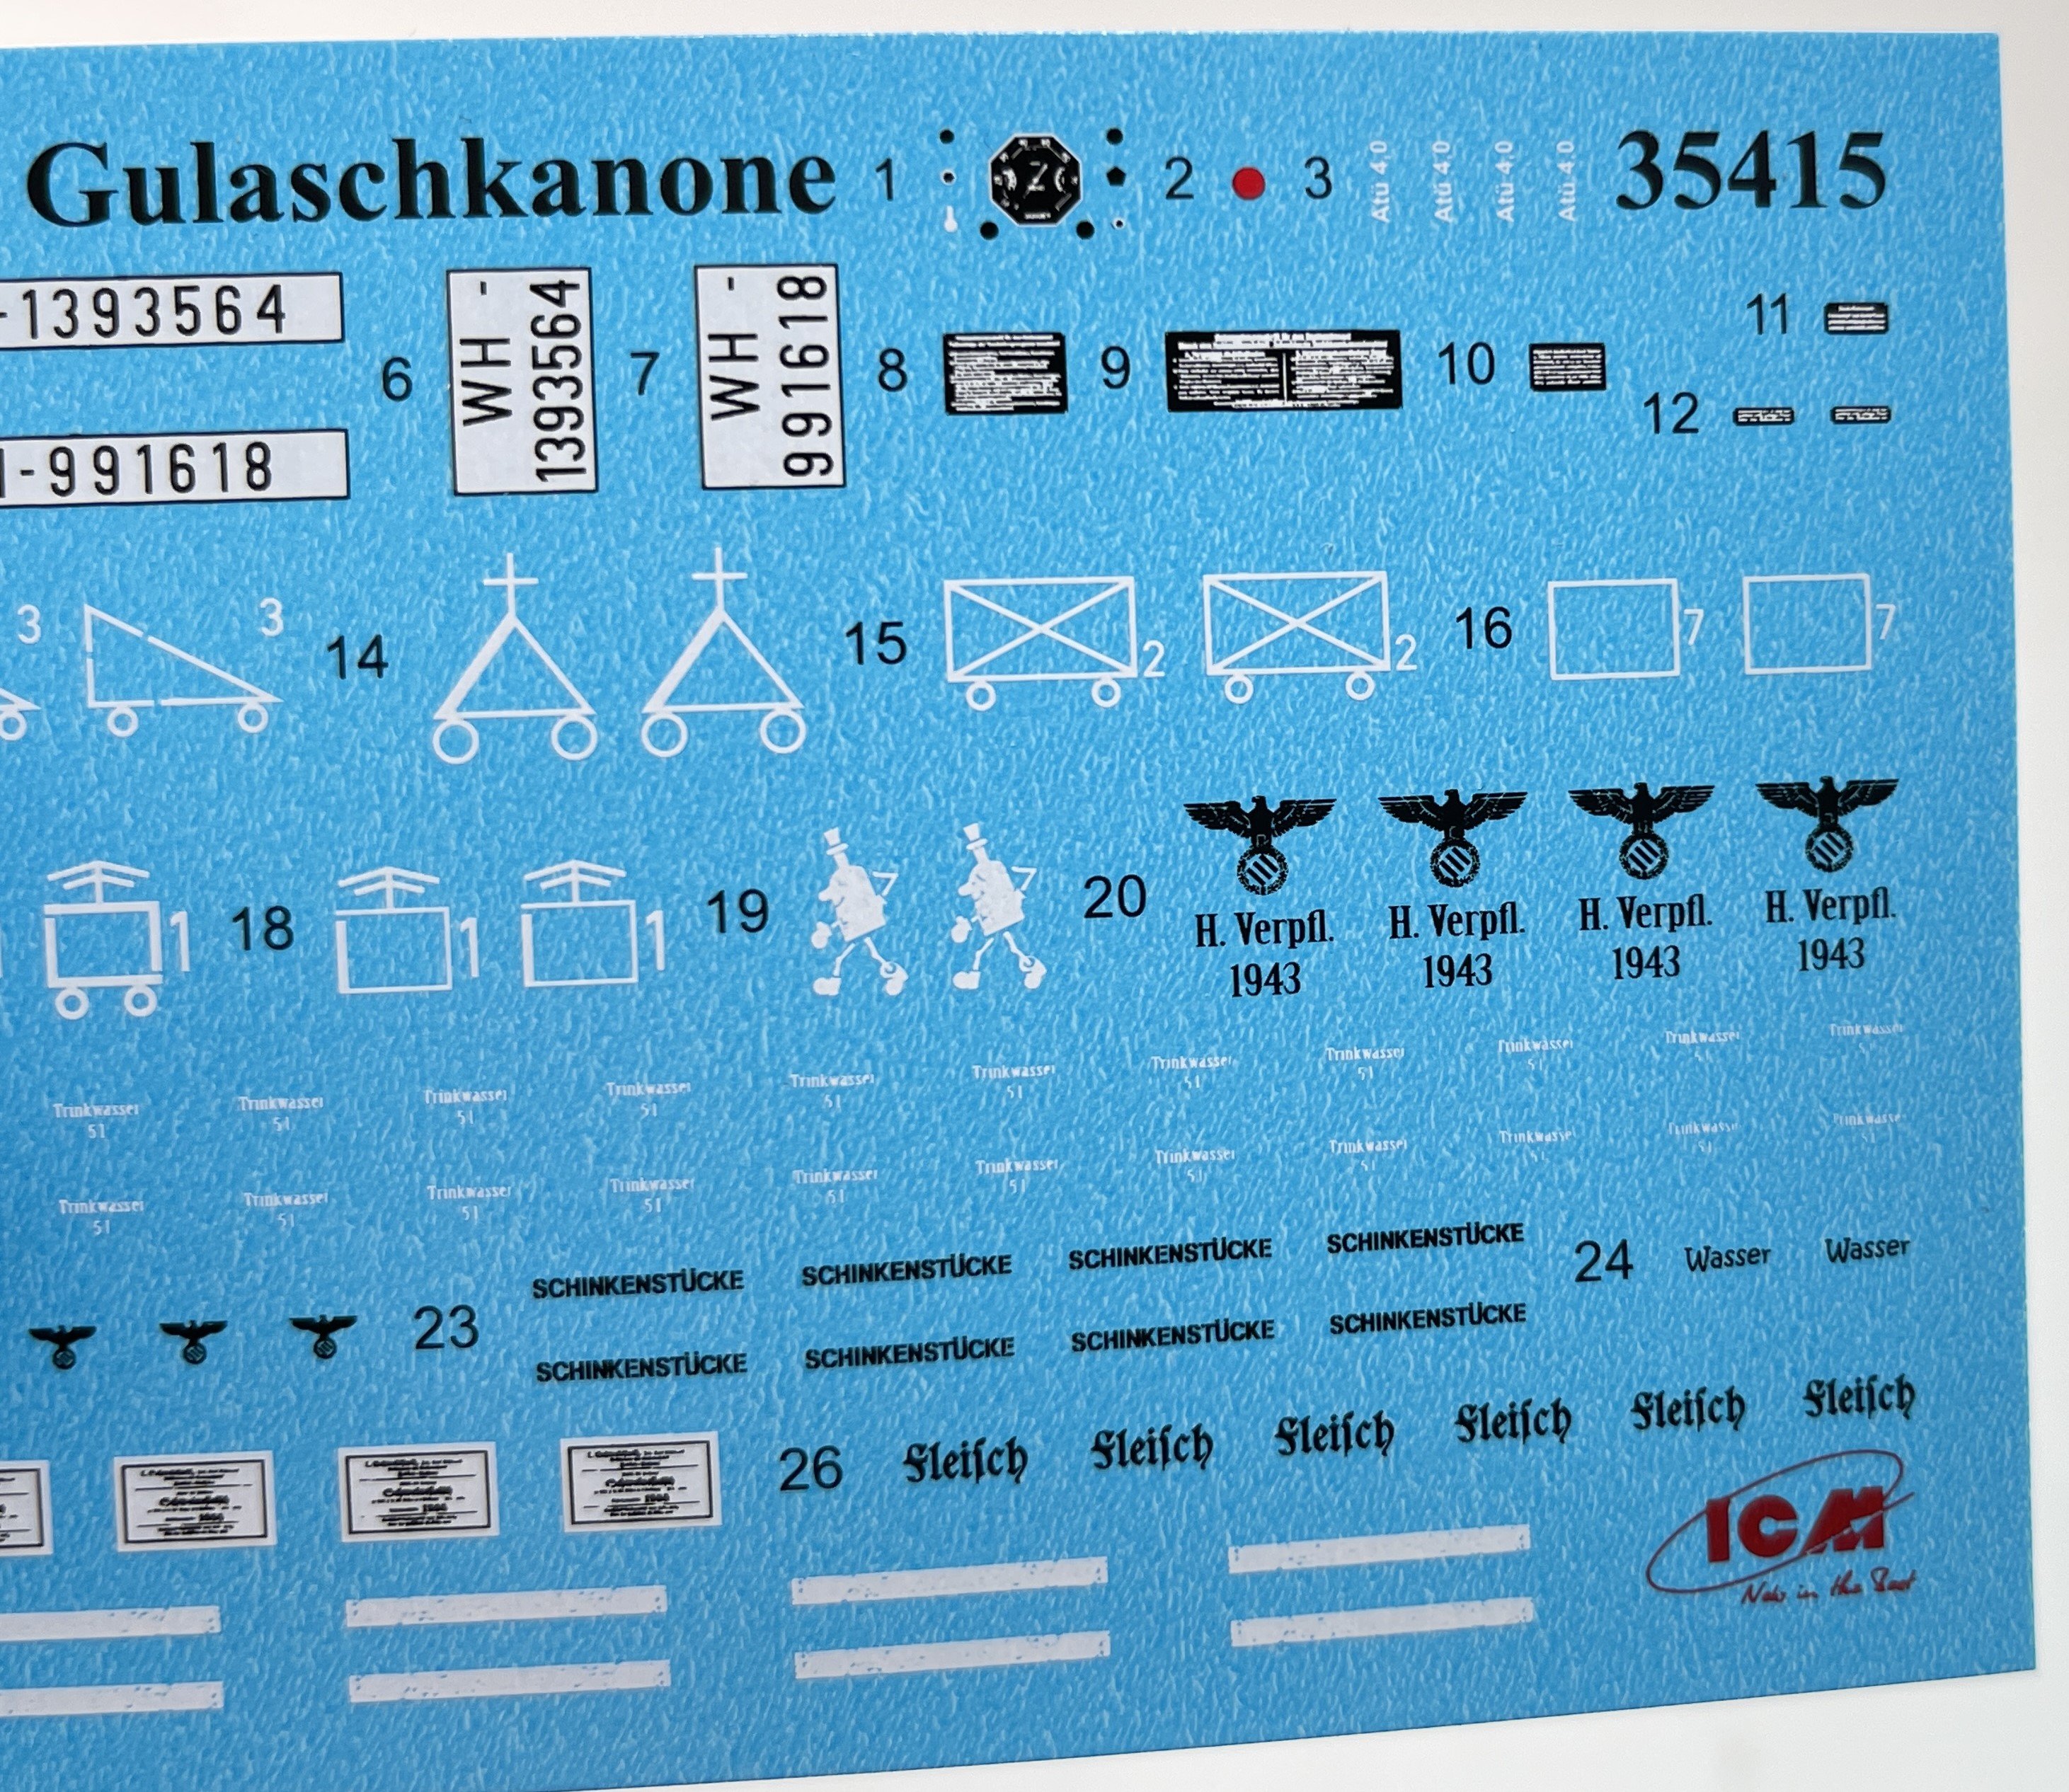
The decals sheets covers AHN markings and all the accessories
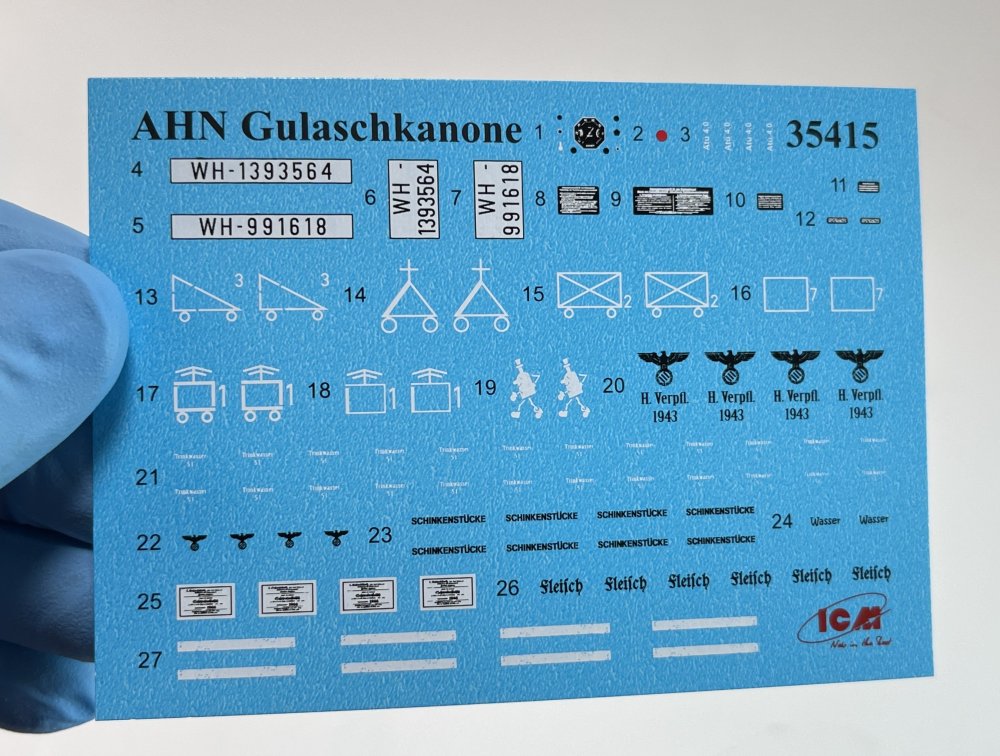
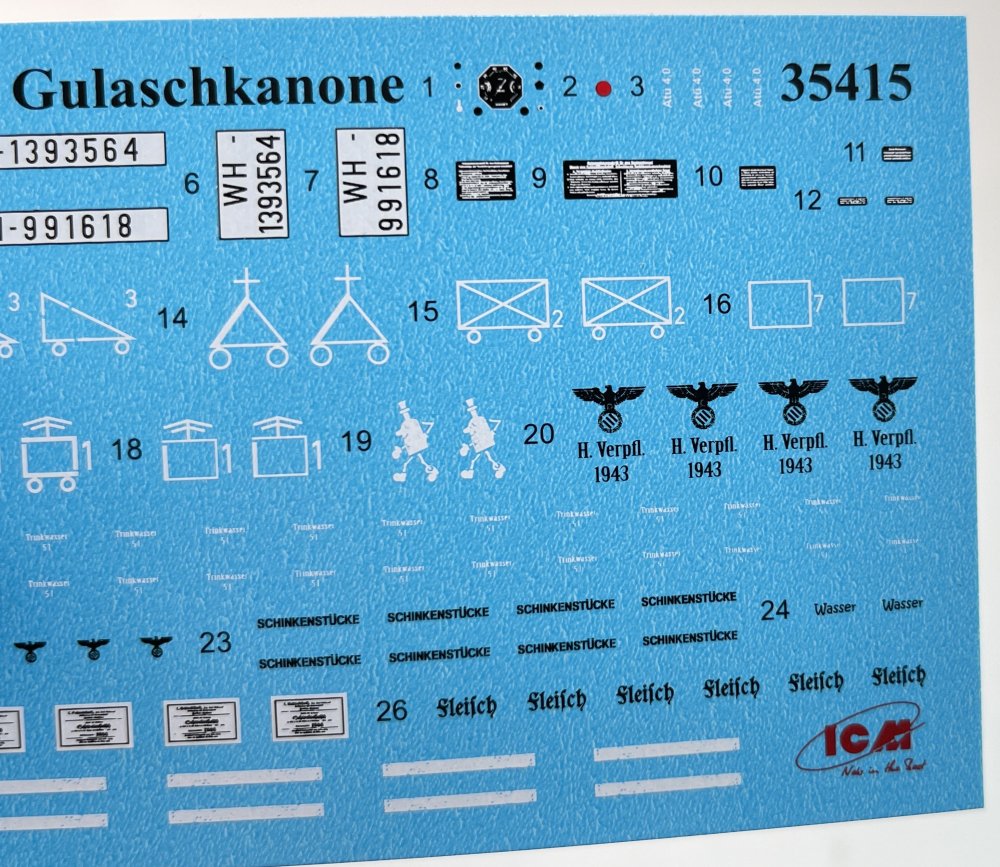
The decal sheet is made in house by ICM.
The only negative aspect that I can make of this sheet is that their no swastikas… the swastikas is substitutes by 3 lines… It´s no accurate and I really don’t like to “hide” the past”… But I understand the circumstances of today in Ukraine!
The instructions is a booklet with good drawings, simple to follow and see where all parts goes. I will repeat my self on this. The first 3 pages and the last 3 pages are in satin paper. It`s usually like this (is the same in the Beaufort and the He-111) and I don’t understand why and I don’t see any reason for that.


Now the thing I dislike the most: The colour indication.
So all the colour indication are ICM references. There`s not much color indication (could be better) and the ones that are, are ICM colour… ICM wants to have everything and I understand that and now having a wild range of paints I also understand that they want to promote their paints. Still I would prefer to have more colour indications.
Conclusion:
Suming up, it`s a fantastic kit right from the box.
You can get a really nice model straight from the box with the well-known high current ICM quality, even without any extra aftermarket parts (resin or PE).
The lowdown, at least until a massification sales worldwide, is the colour indication, with only ICM colour, each are new and, for example, I never see how they work and how easy its to work with them.
It`s 9,3 out of 10.
A great kit with very good detail OOB. Downside: the colors indication.
My sincere thanks to ICM for making this model.

-
2
-
-
1:32
Art Scale Kit
Mig-21

Several Sheets
Art Scale Kit (also known as ASK) is a model hobby shop but also a modelling tools producer, a resin 3D producer and also a Decal producer…
So It`s a name that is getting really quickly on the top of the modelling world and I`m lucky enough to have another bunch of decals for review.
Today, I´m going to review 5 (five) decal sheet from ASK.
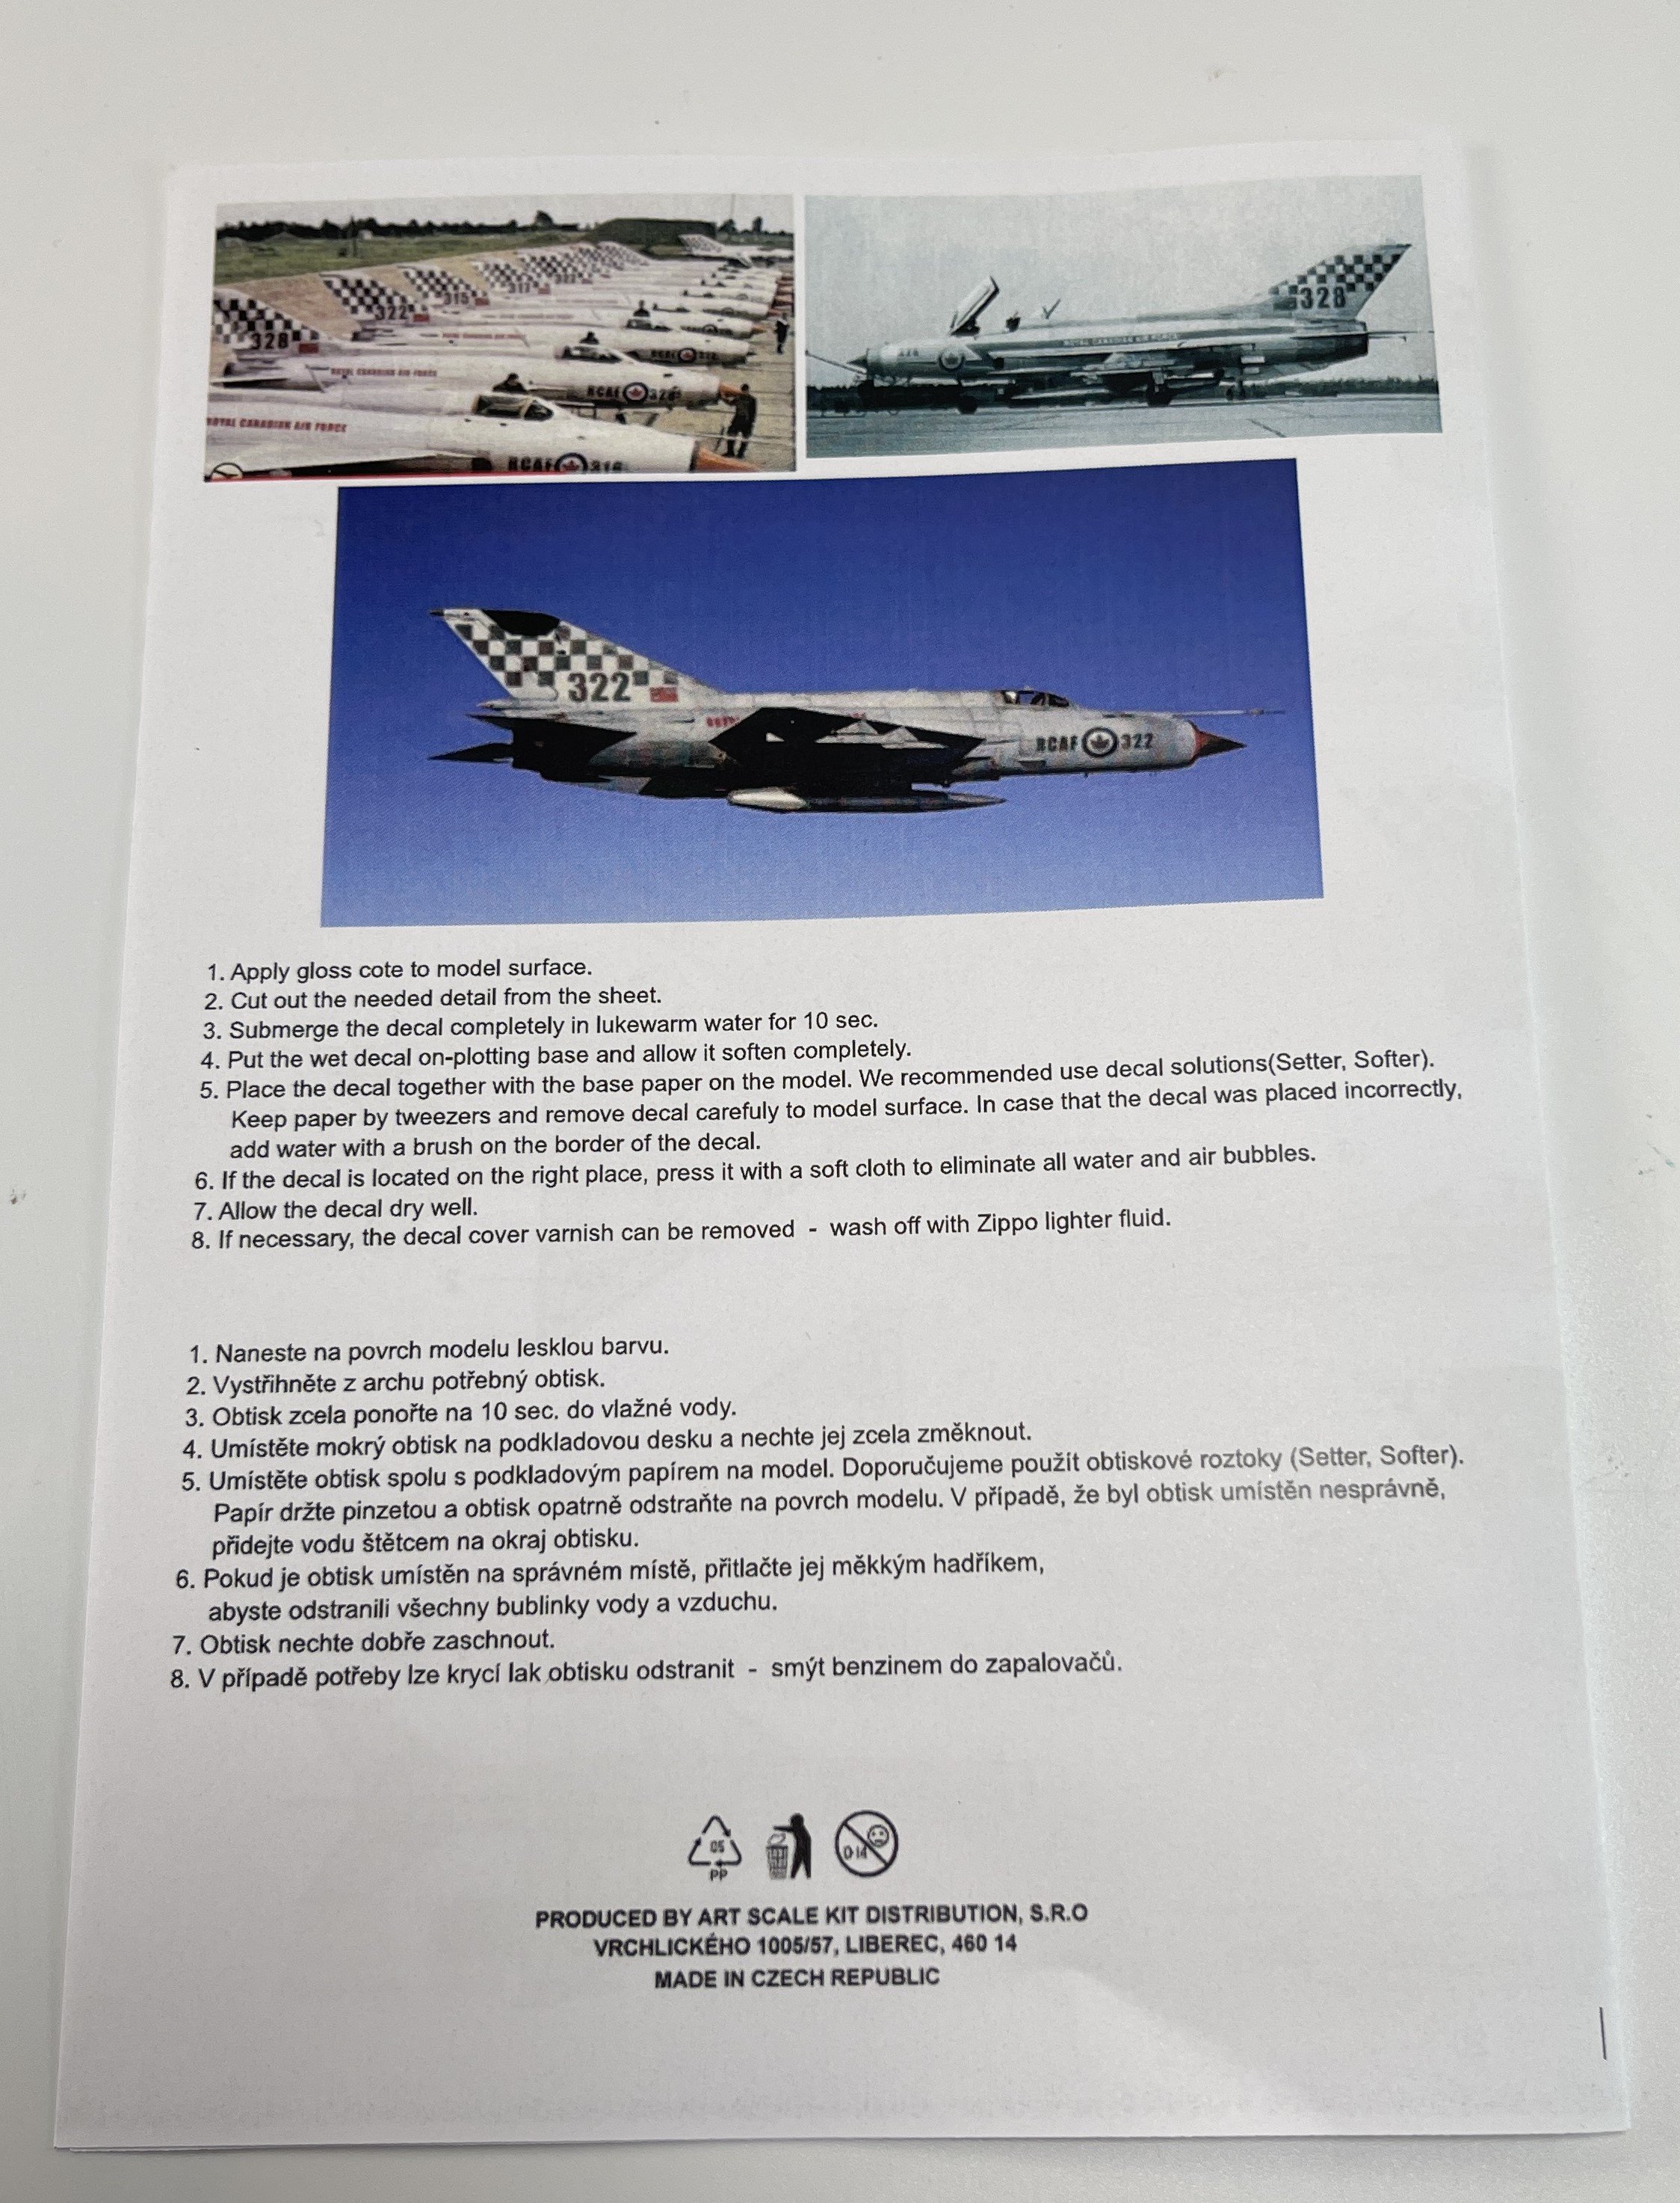
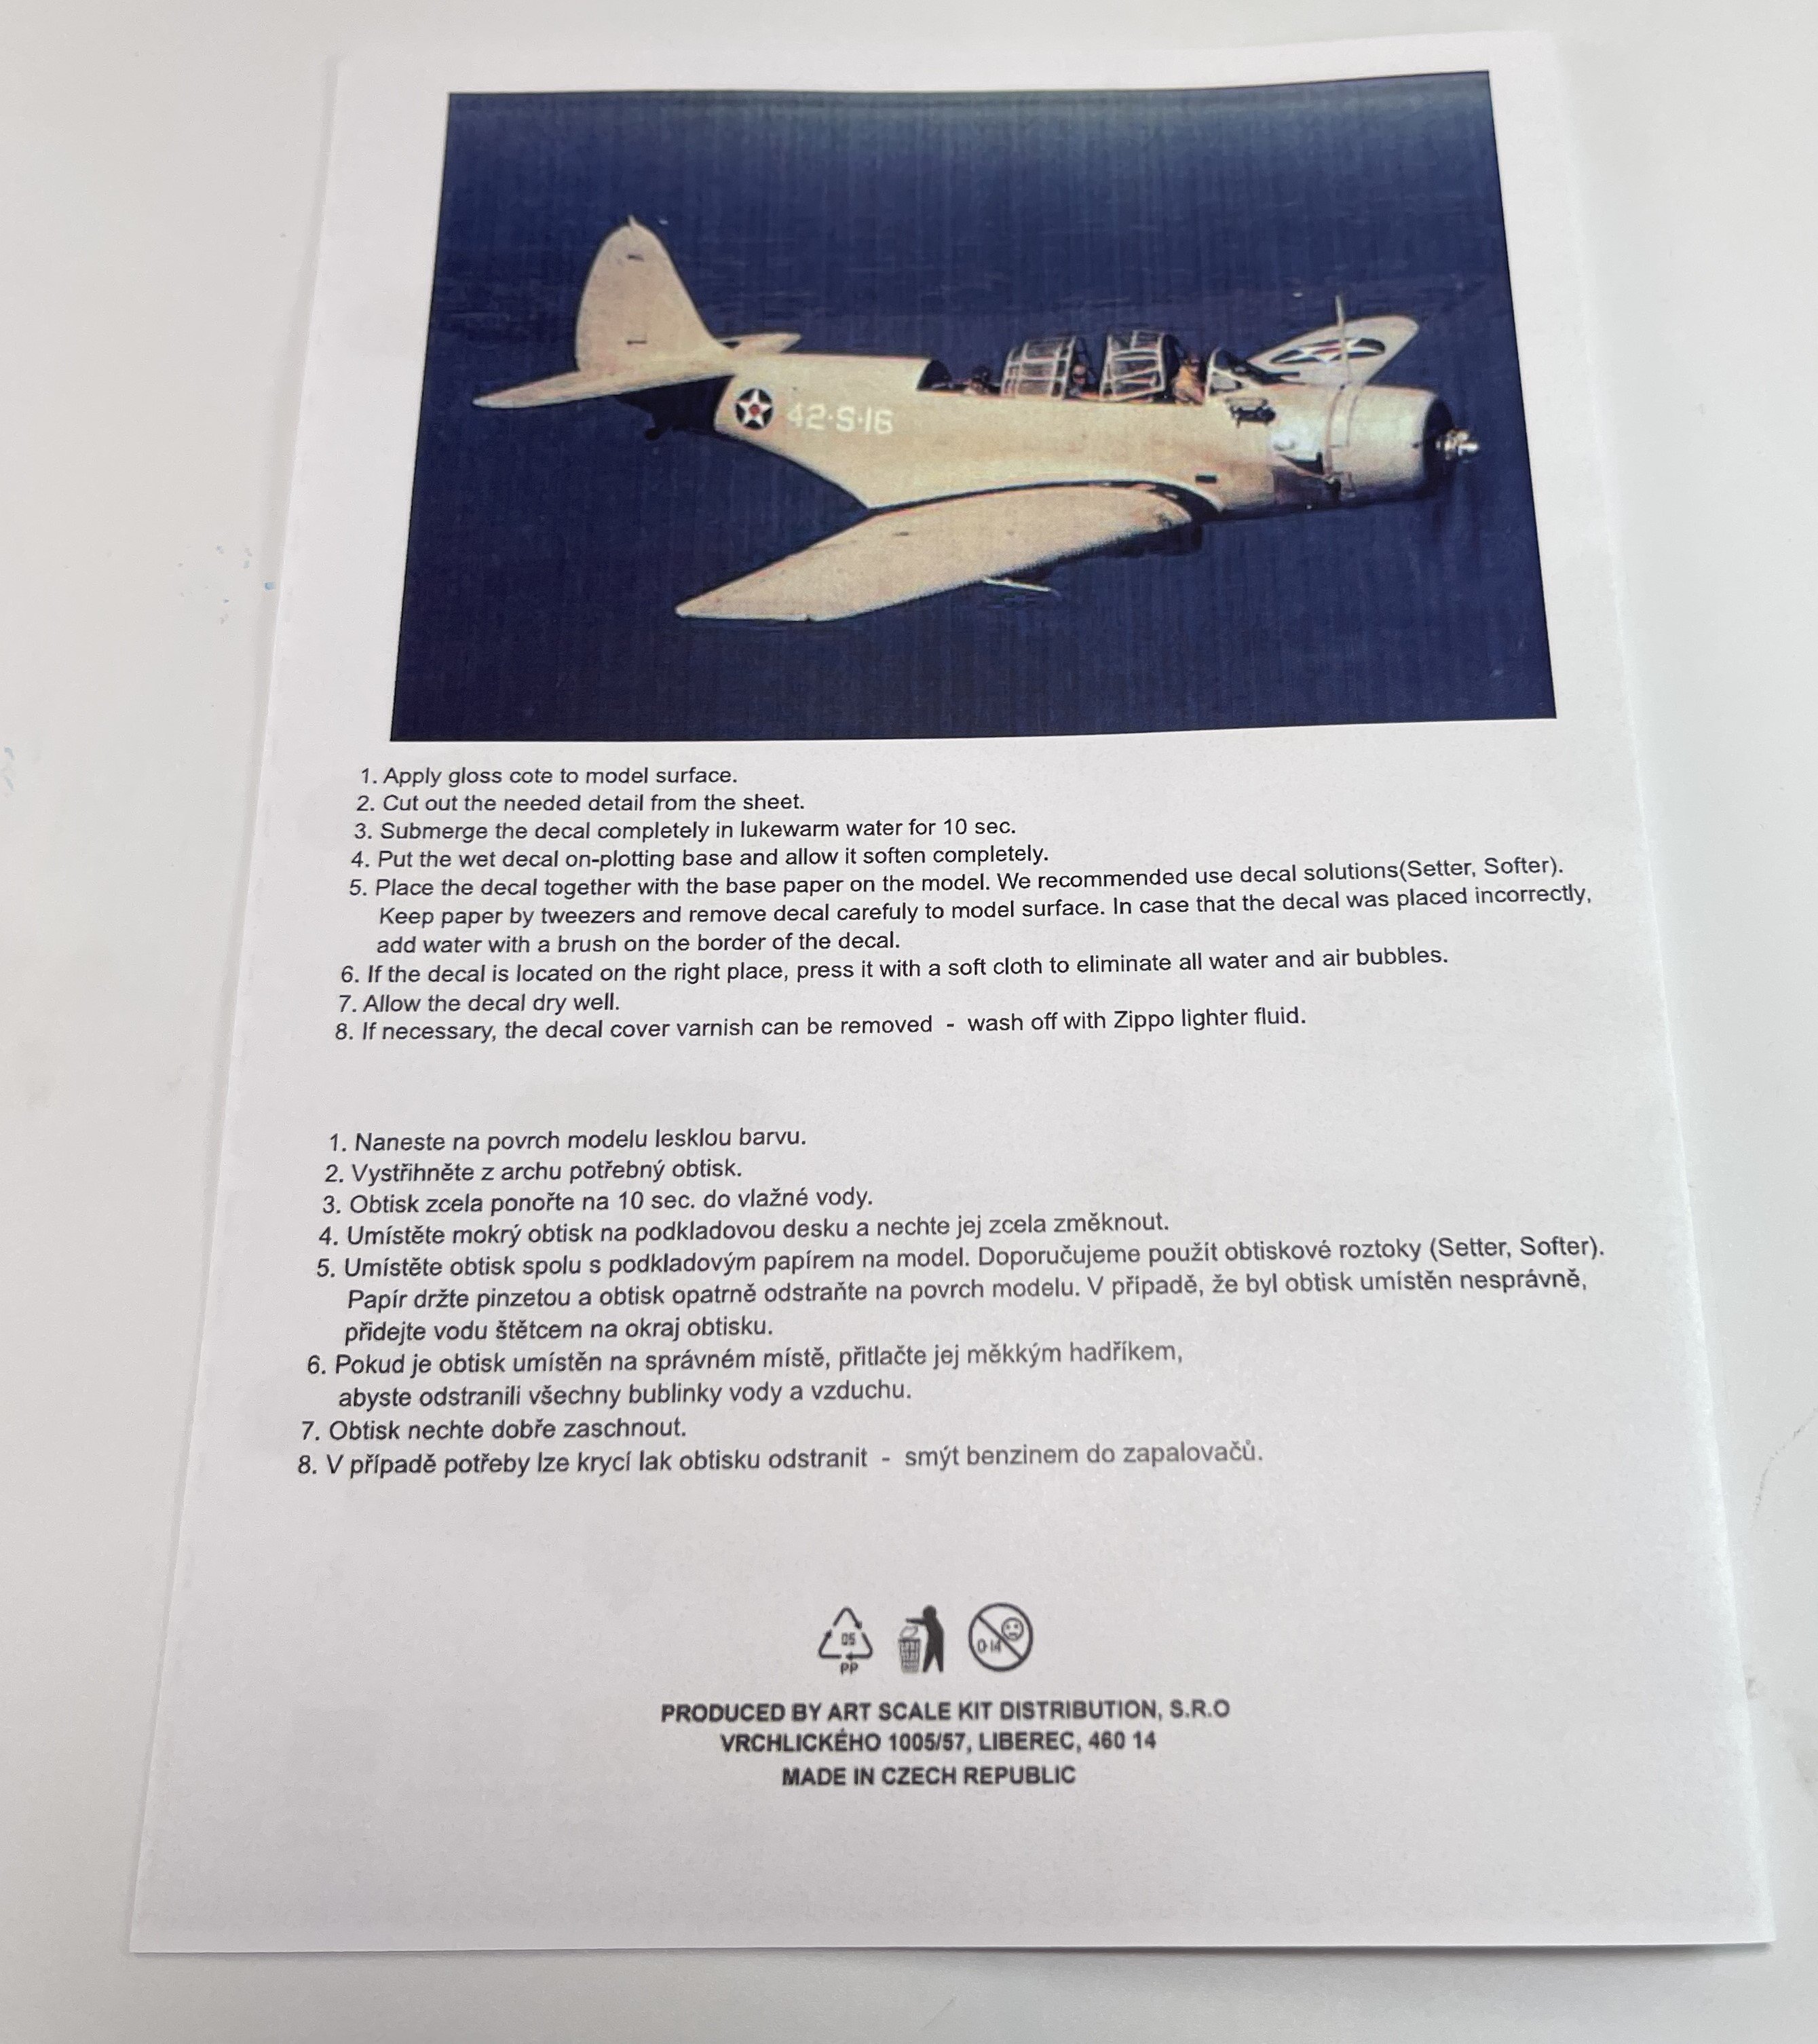
All sets came in a ziplog bag, small A5 size sheet with profiles colors instructions steps how to apply ASK decals.
So let’s looks to the option schemes that all decal sheets offer.
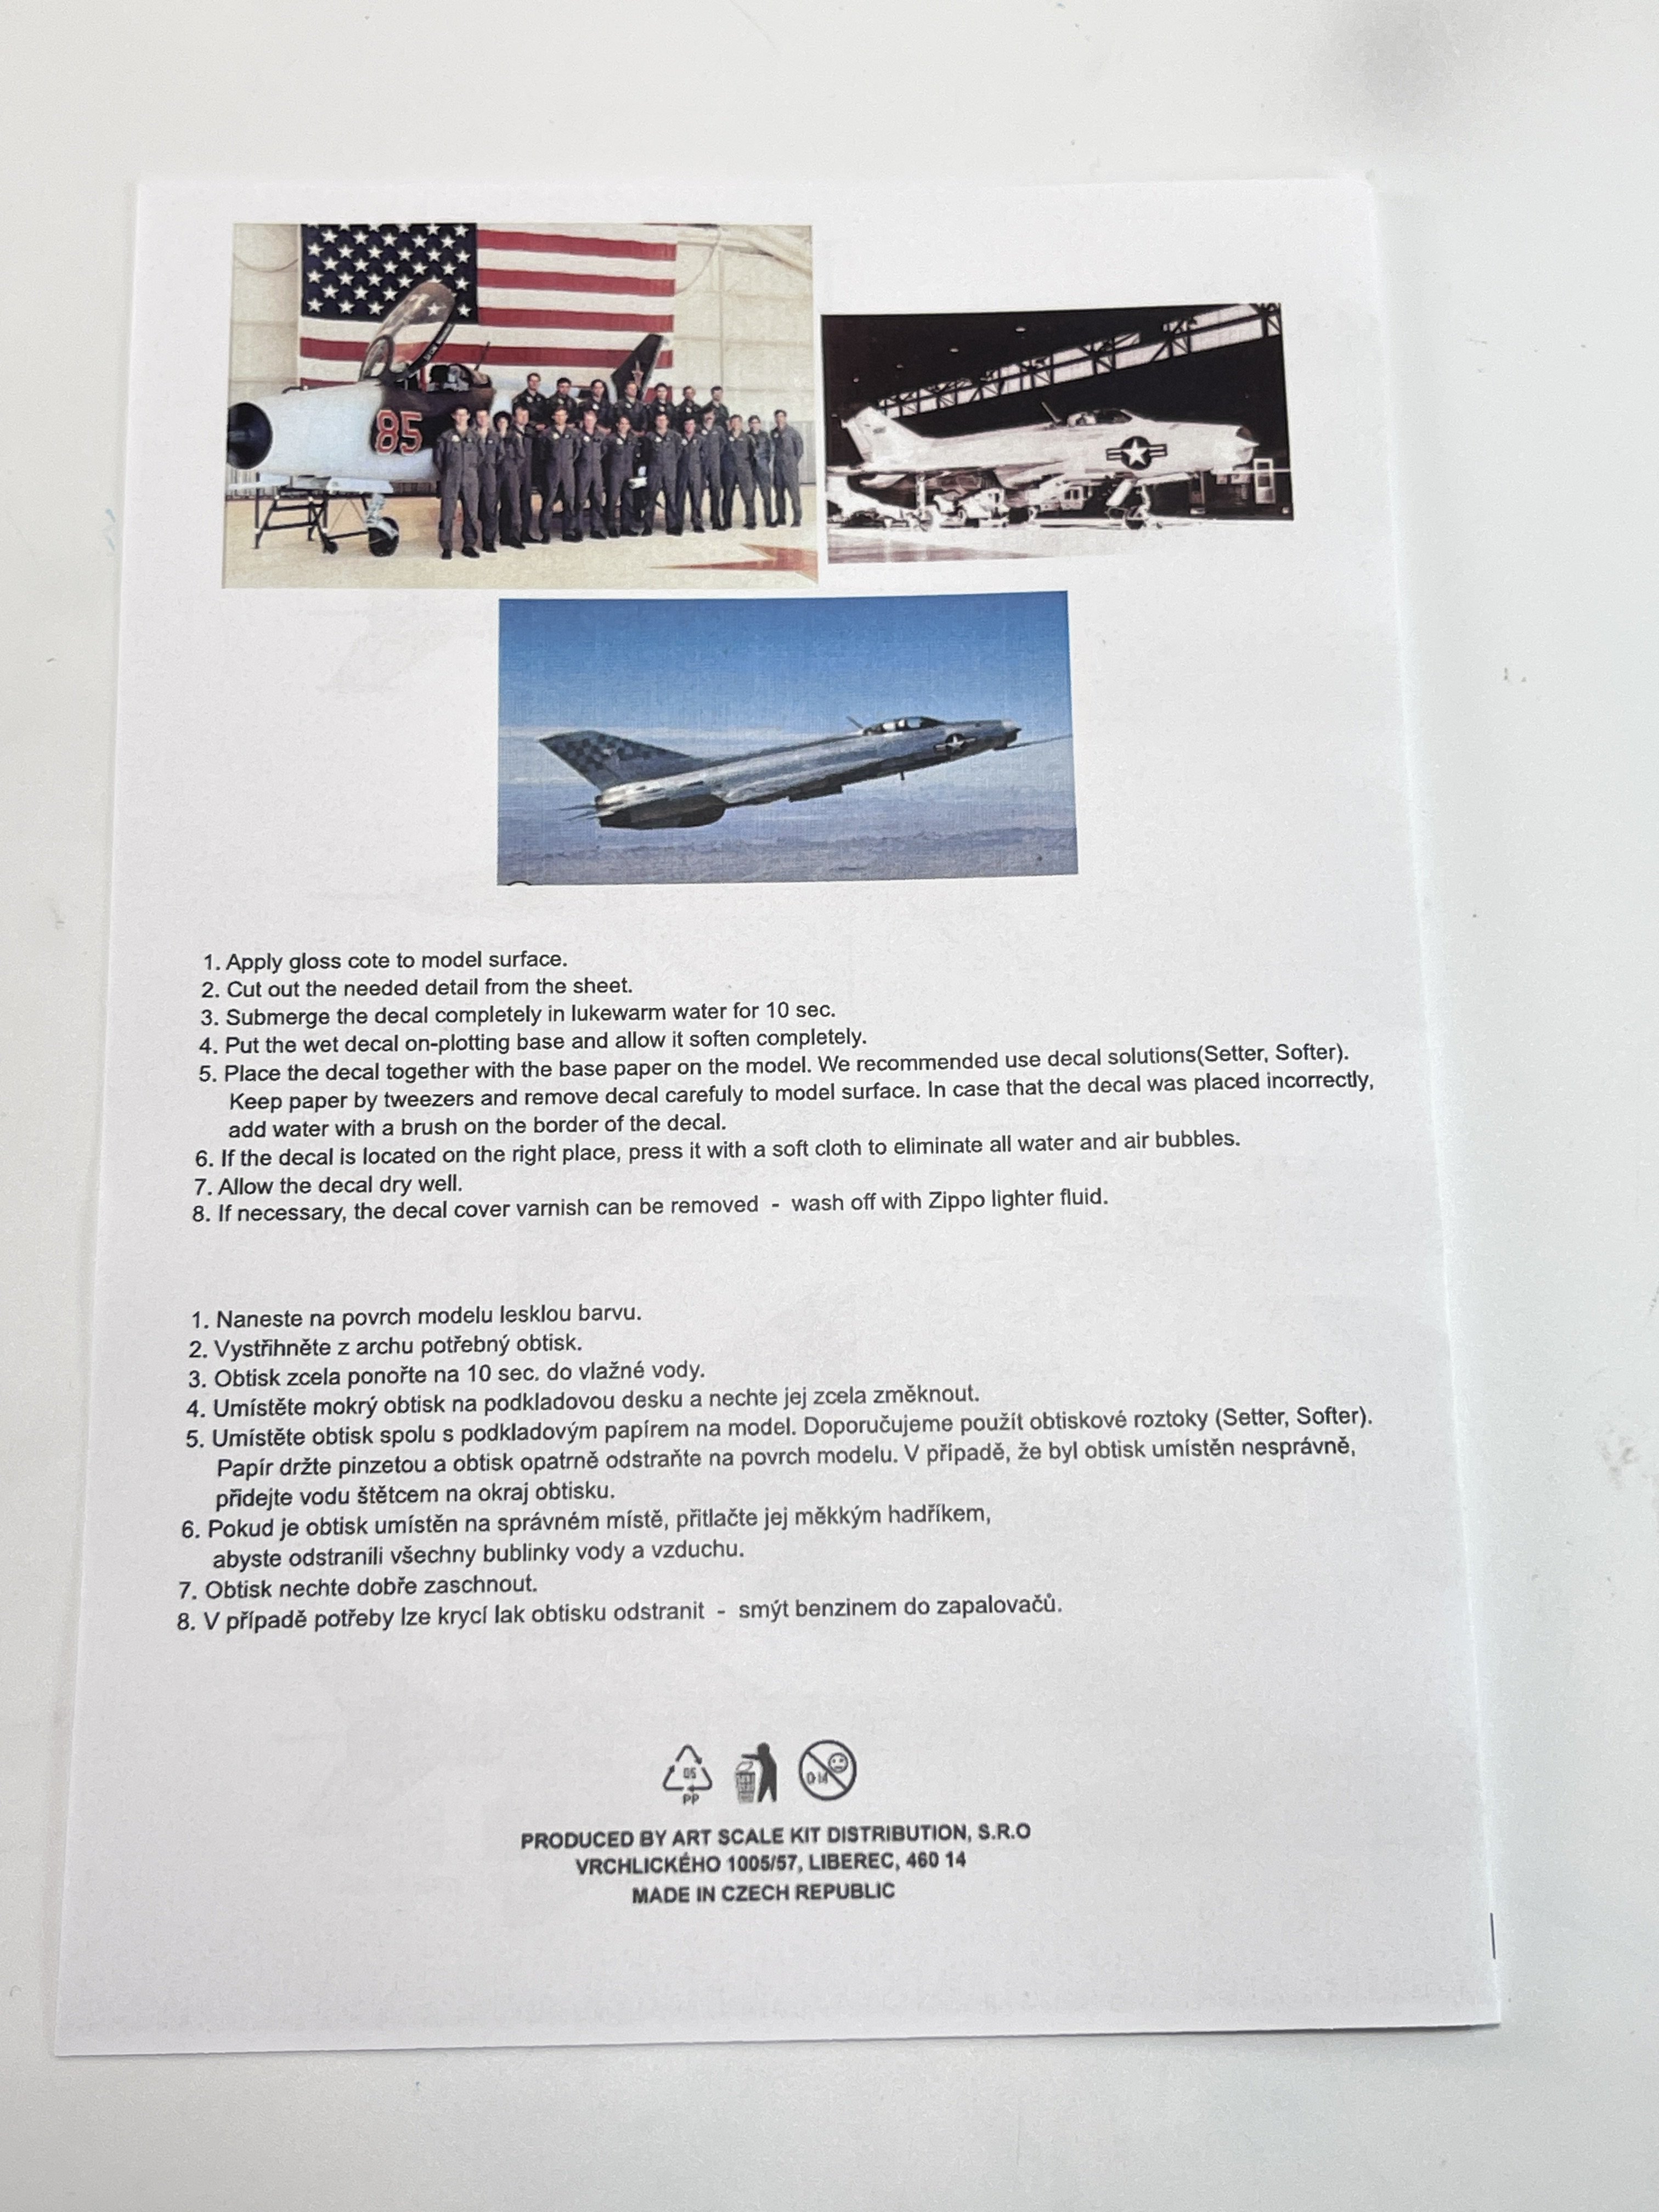
But first, one detail that I loved about. In the applying instructions, in all sheets, theres`a real photo of one of the airplanes that are represented on the decal sheets. I really love that "bonus"
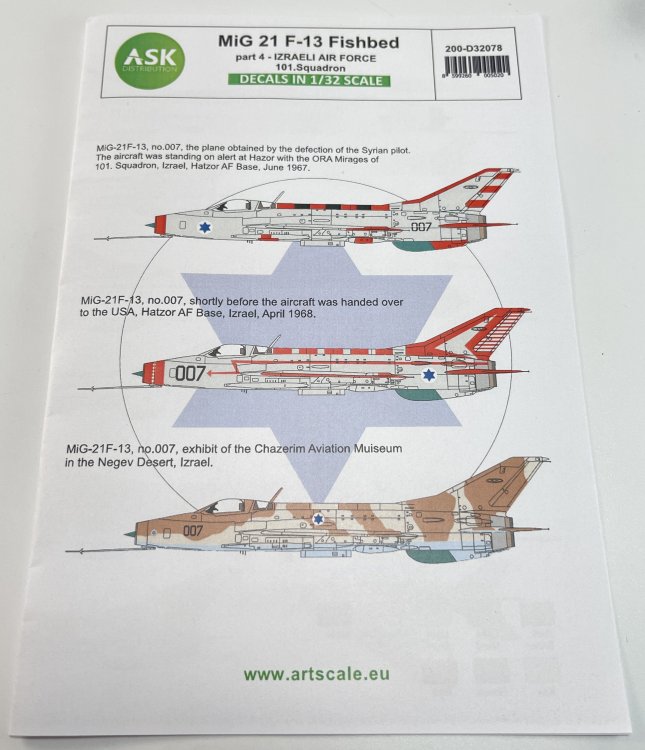
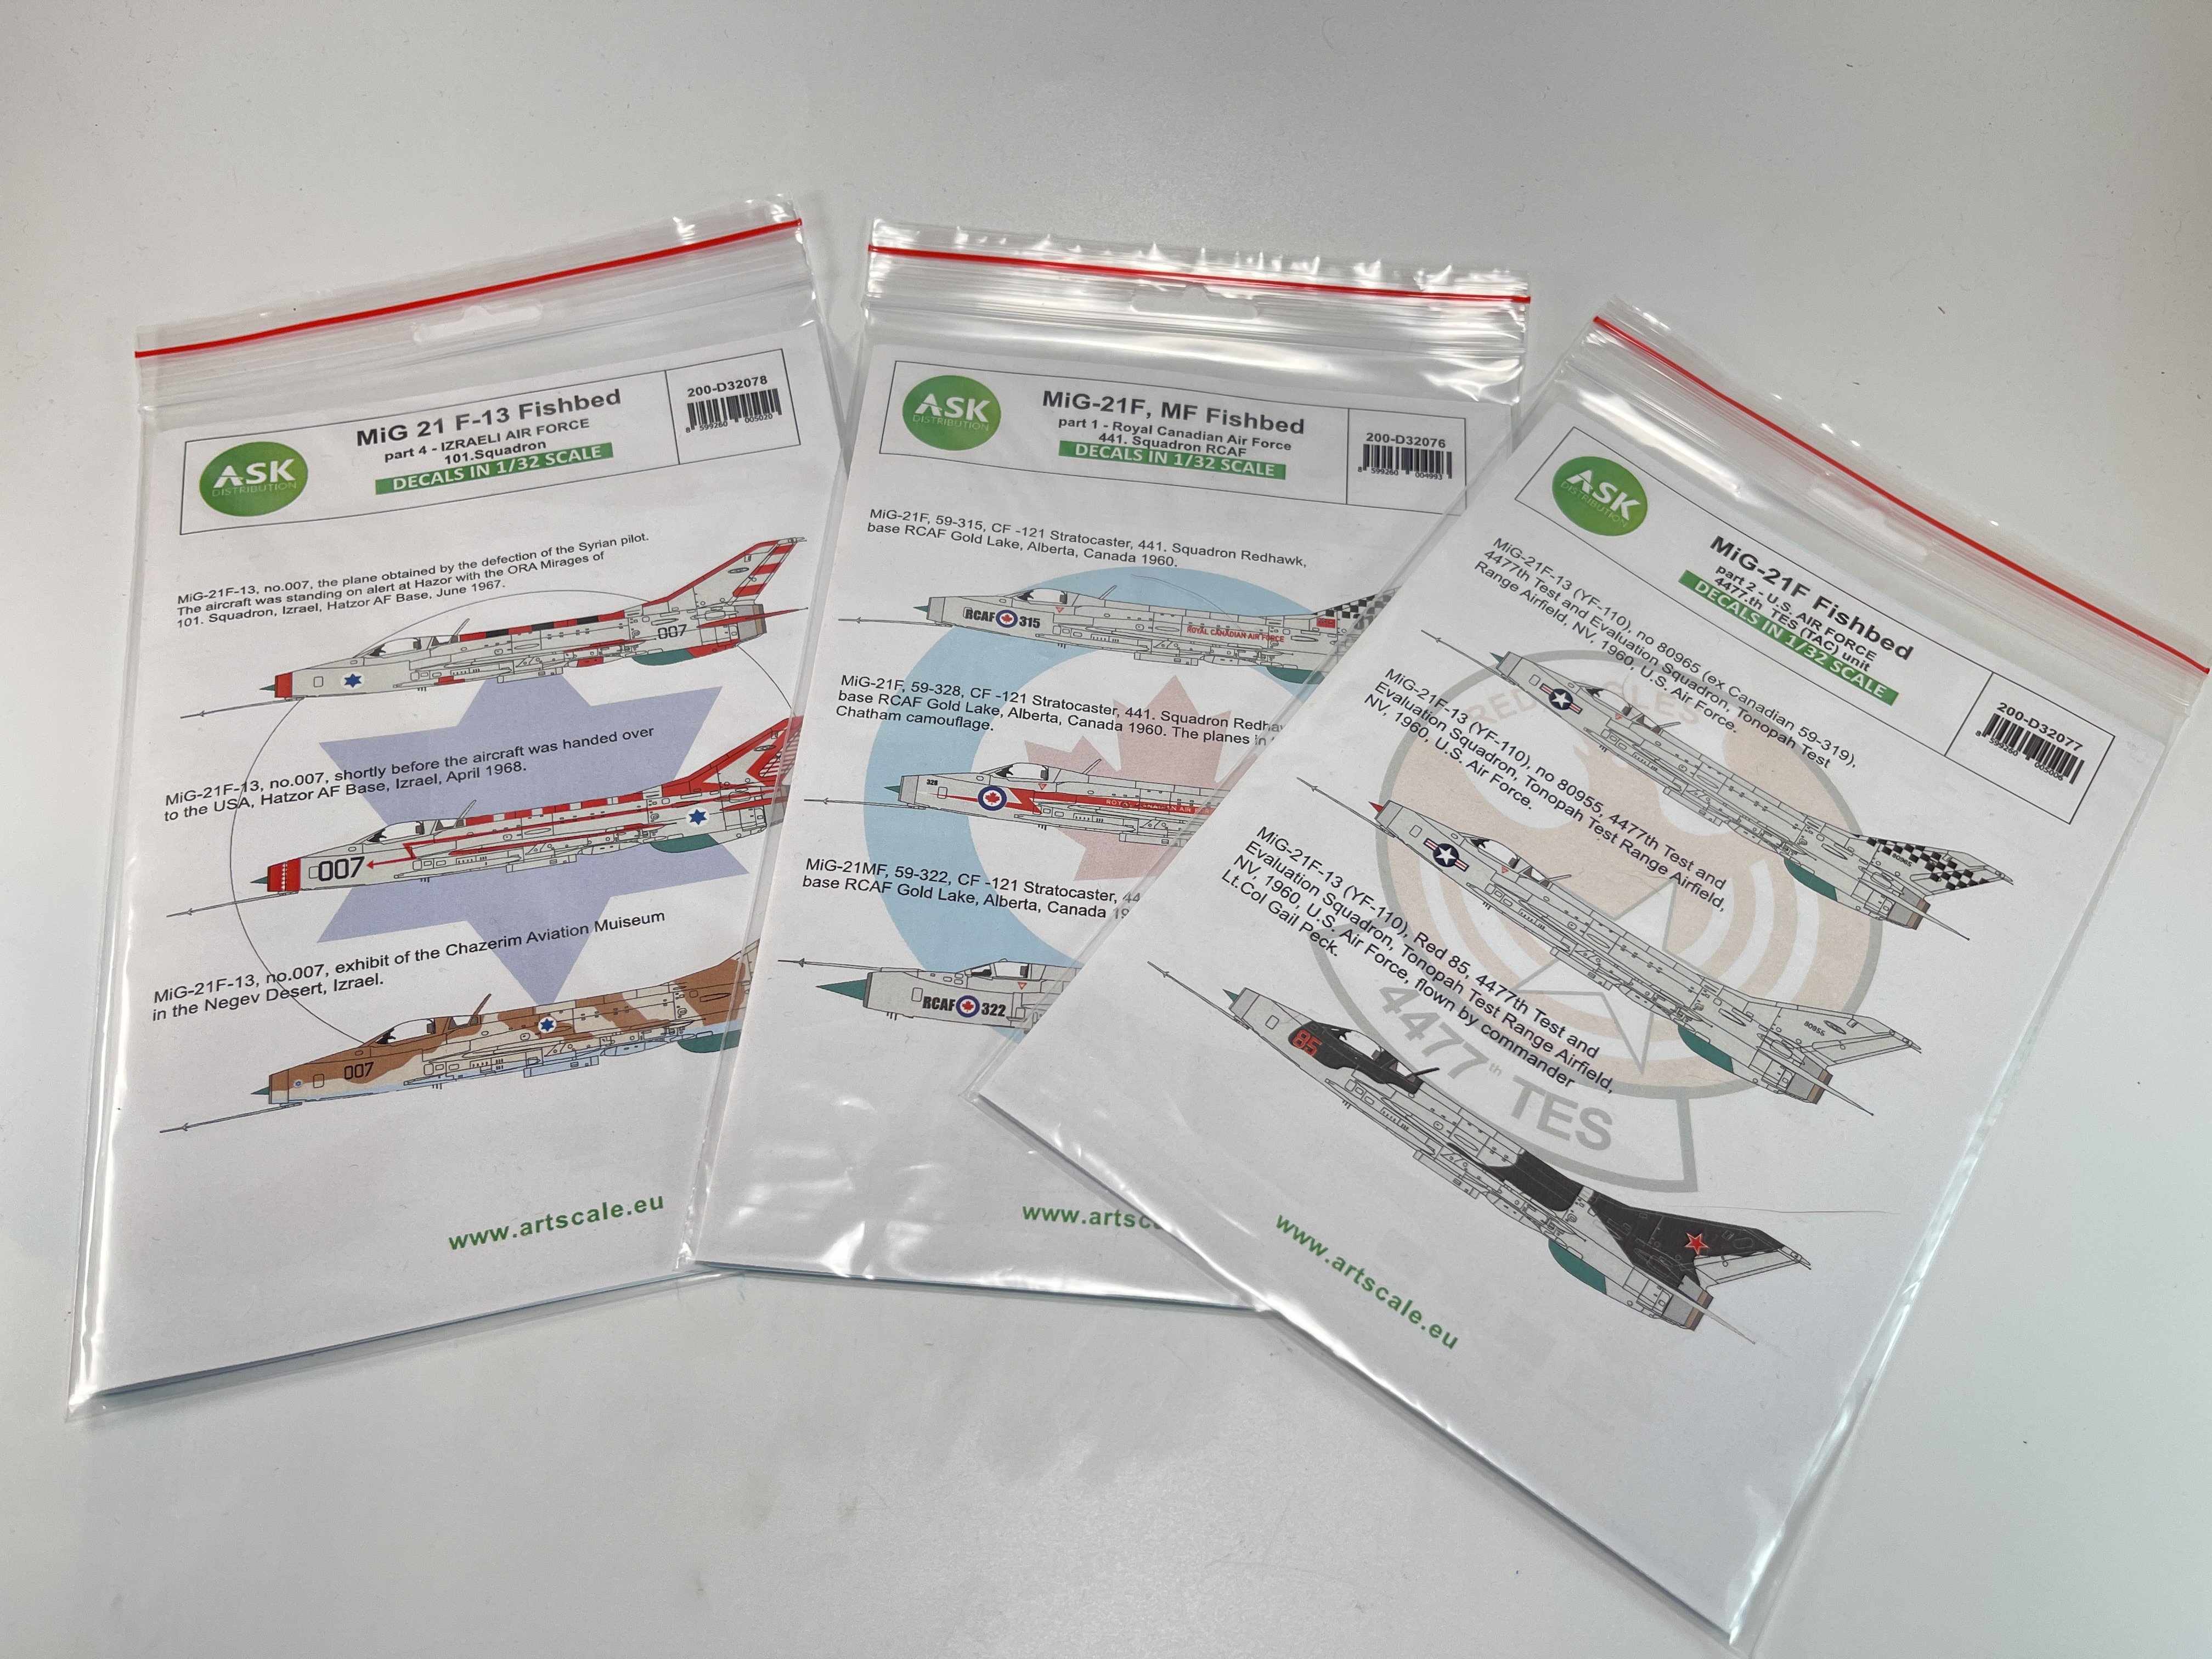
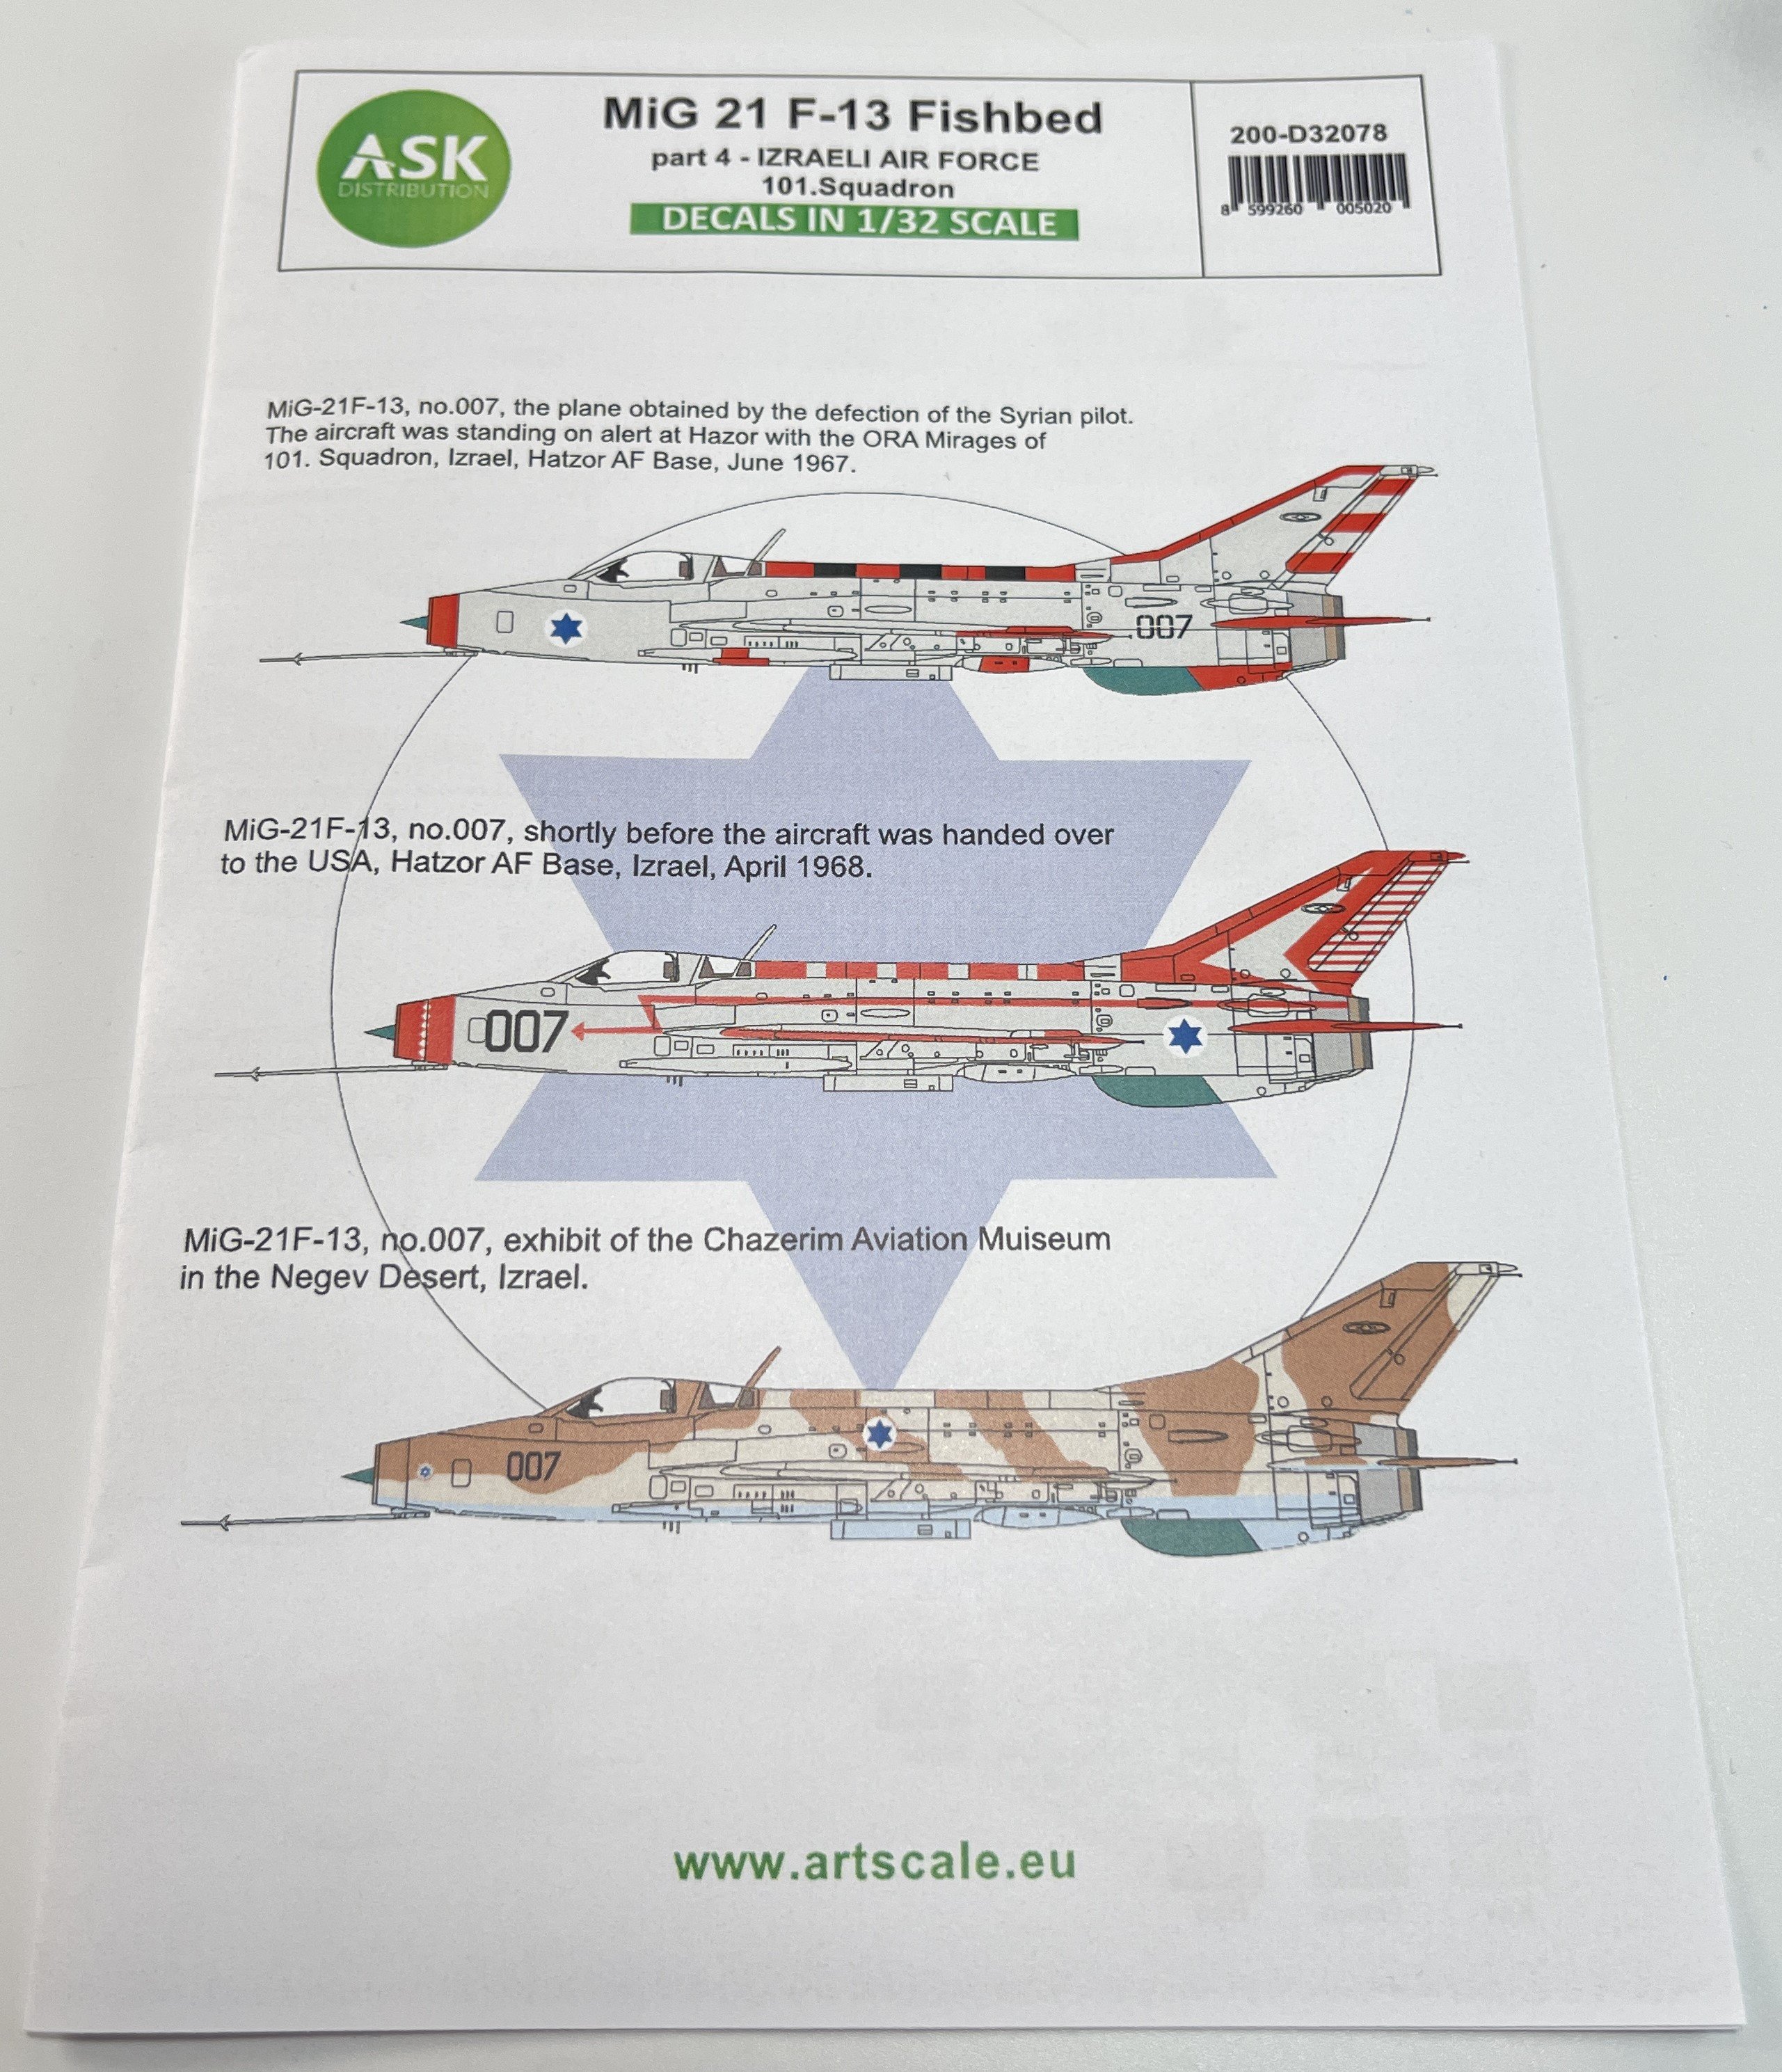
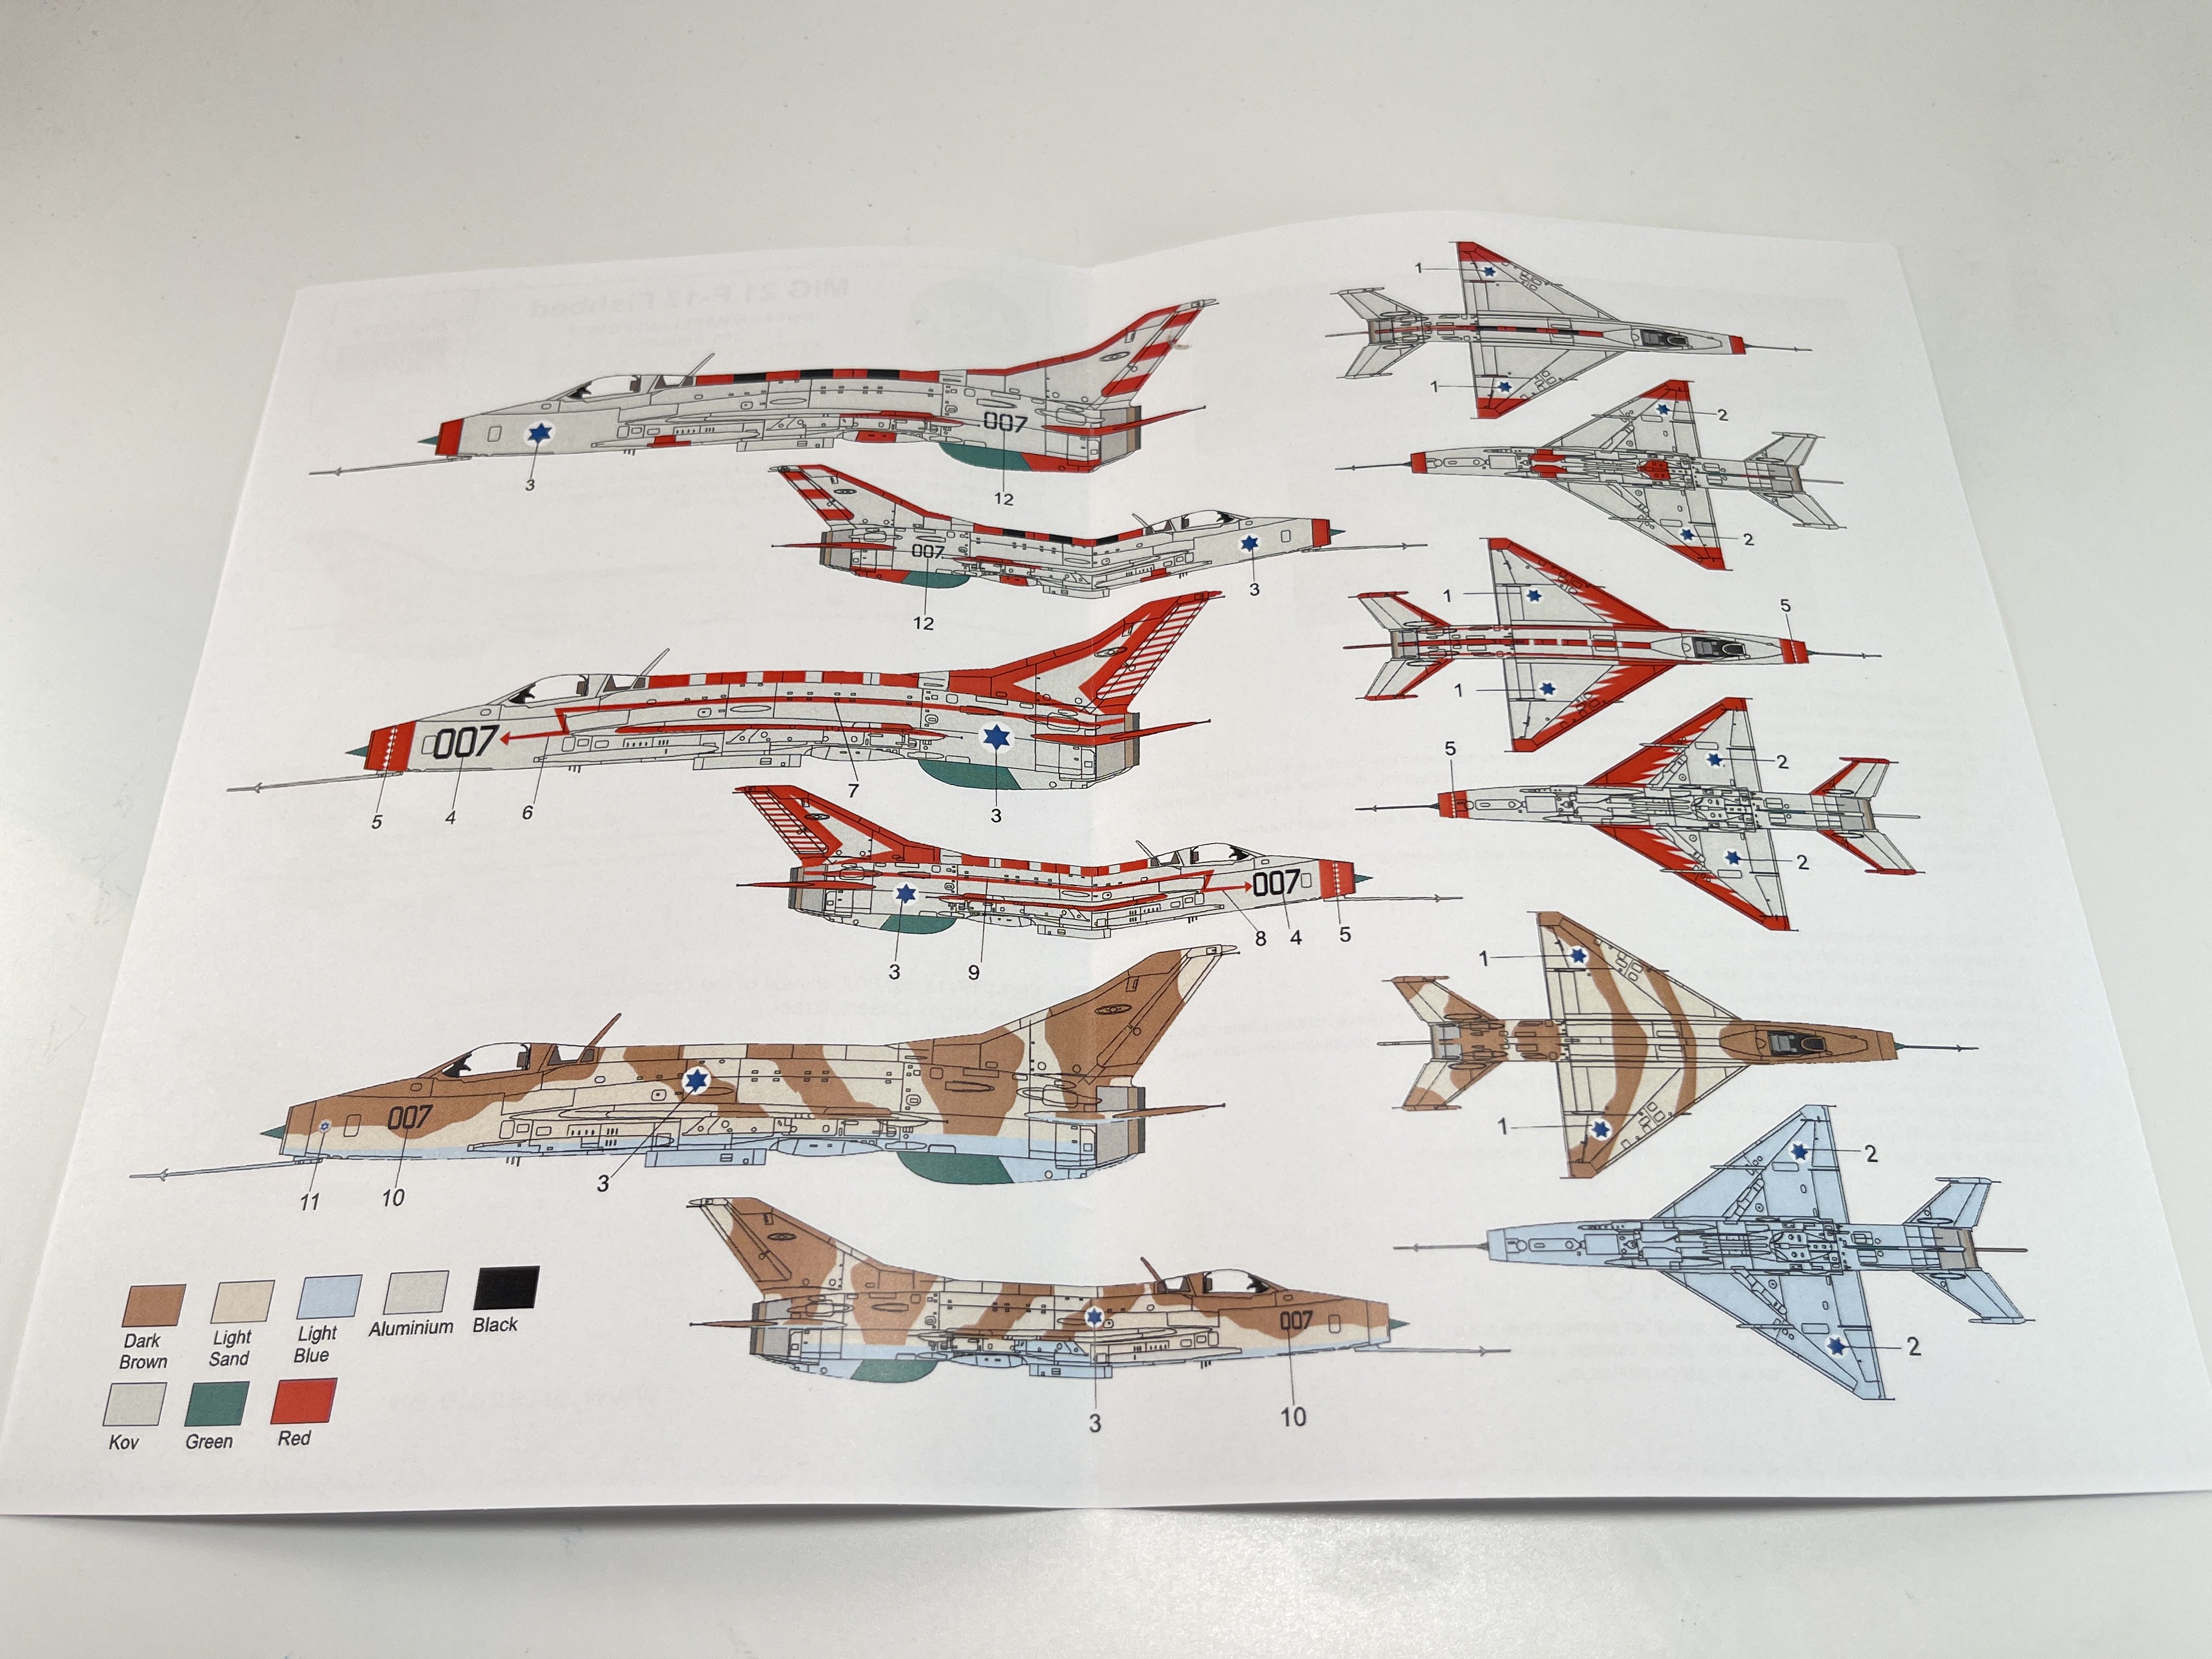
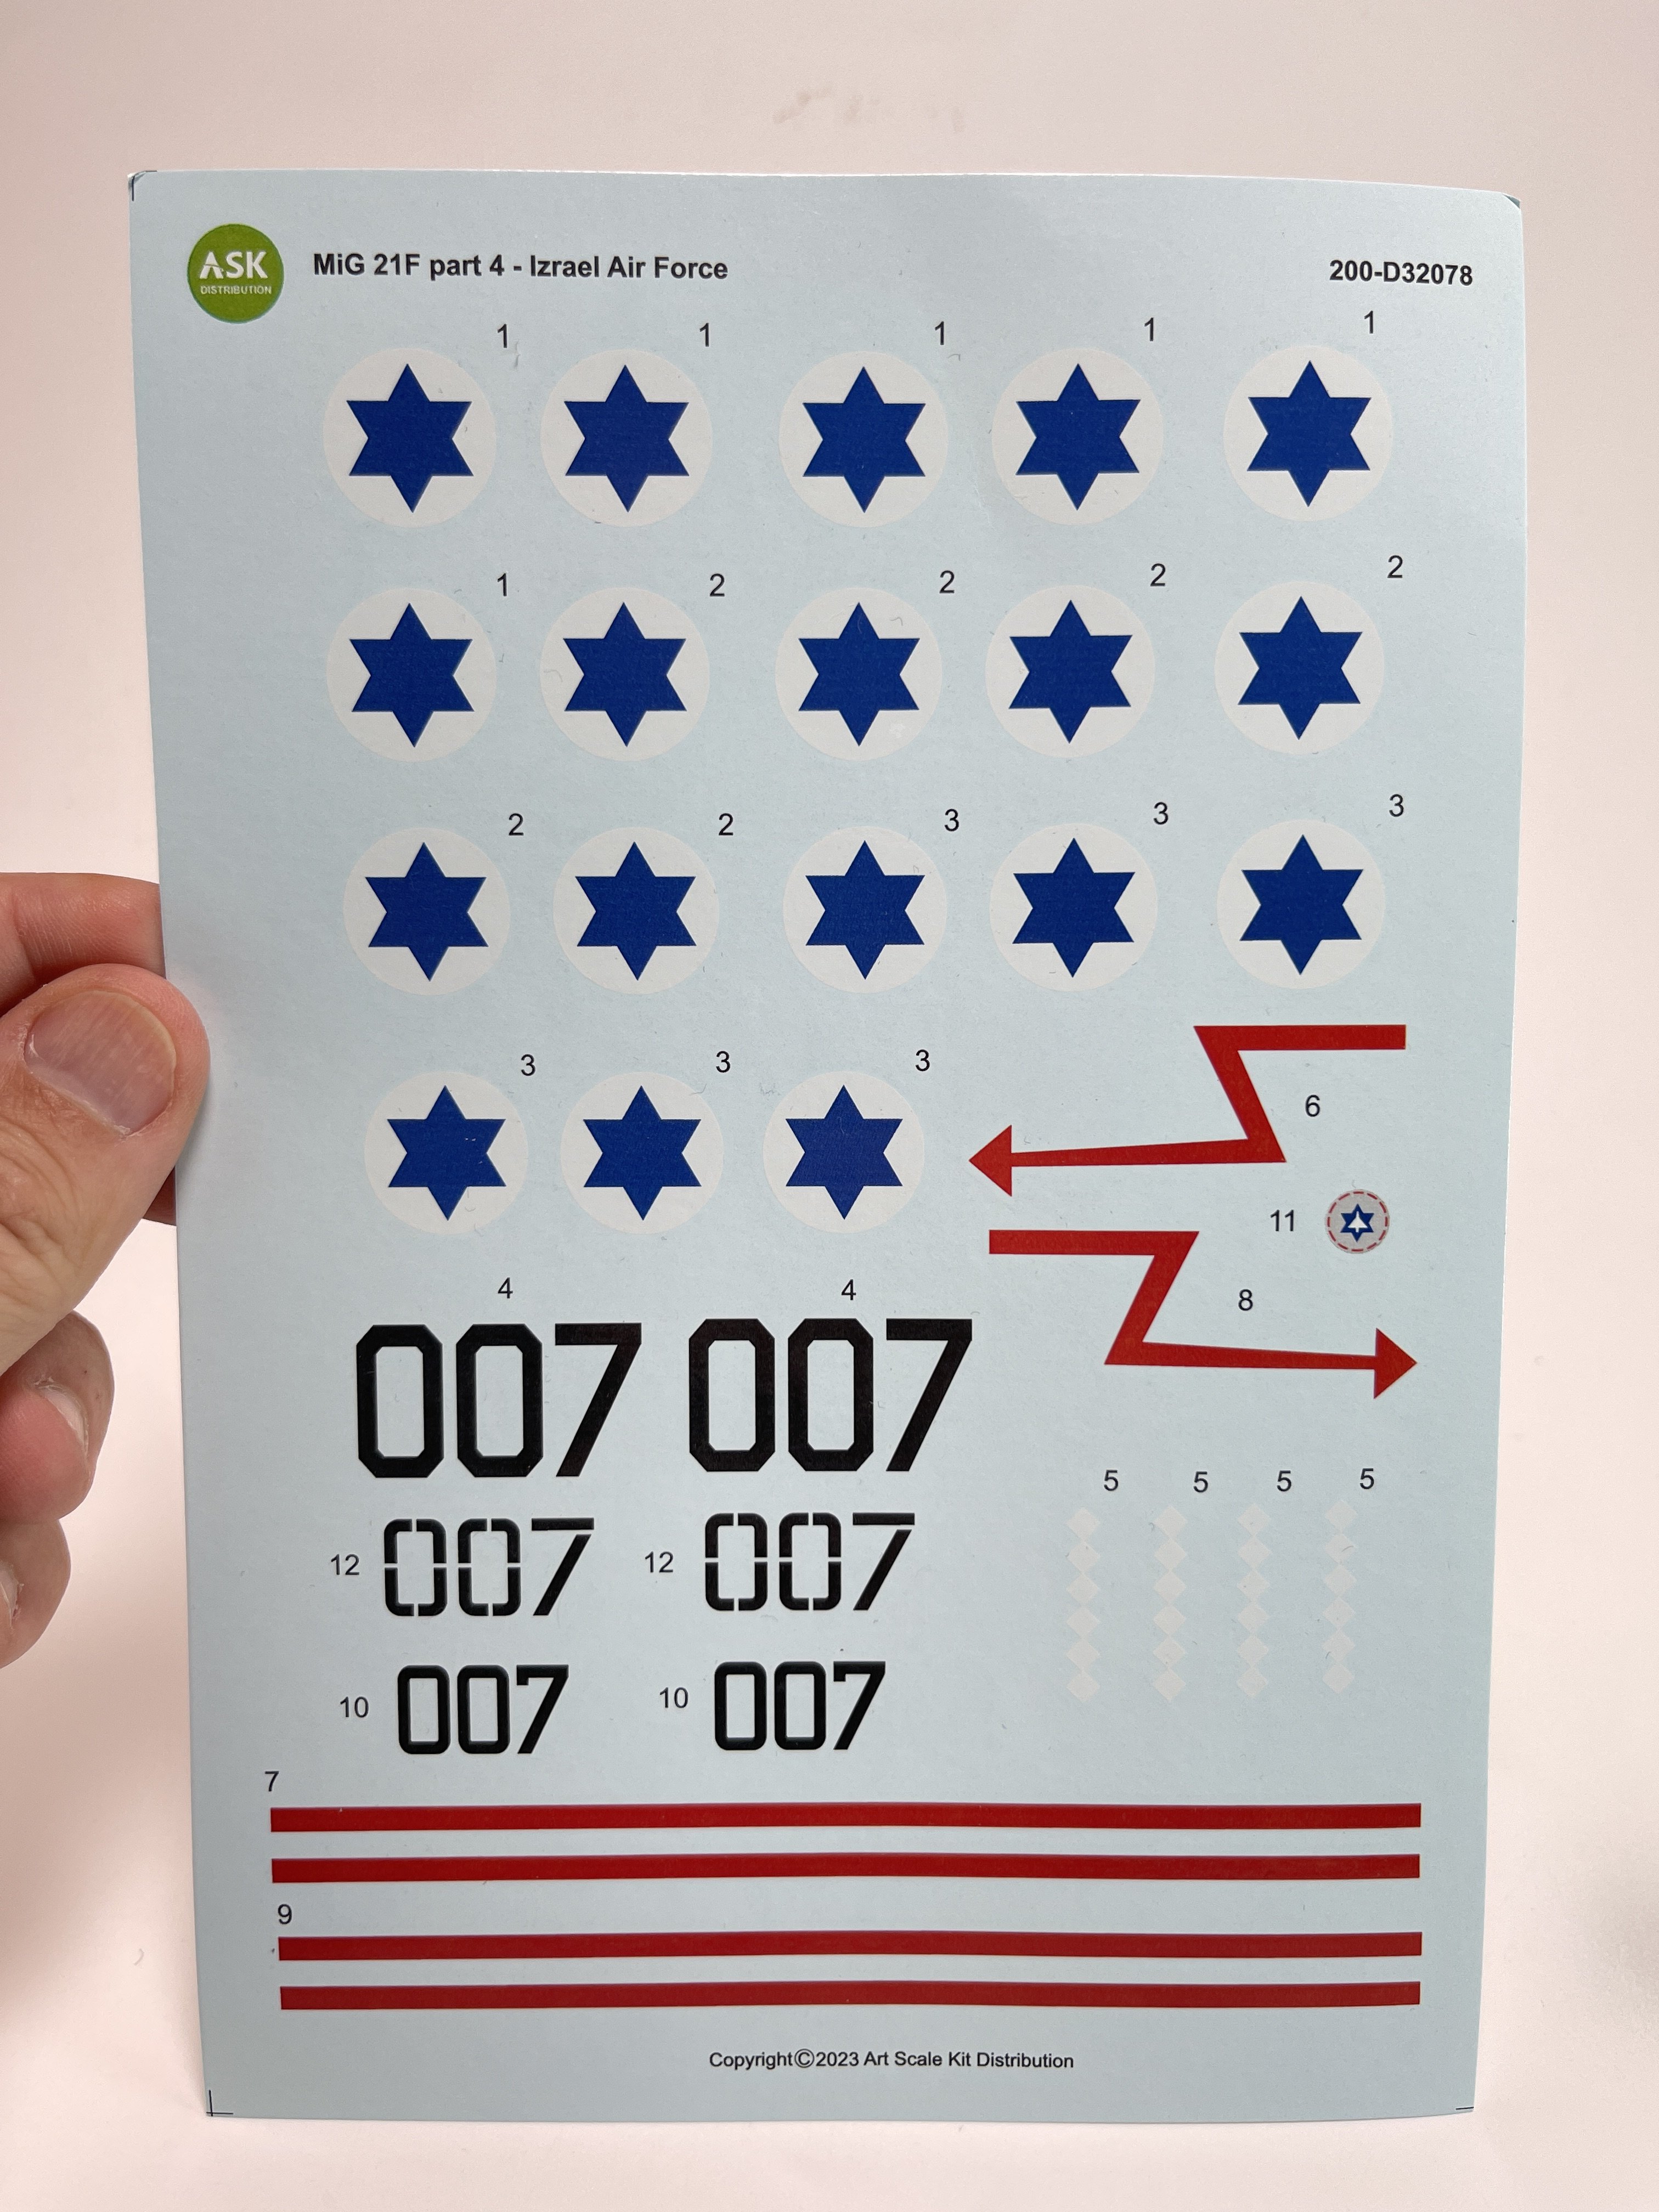
Mig-21 F-13 Fishbed – Part 4 – Izraeli Air Force
Catalogue number200-D32078
Price: 11,60€
To order, click here.
This sheet have 3 schemes options quite different between.

A Mig-21 in Izraeli Air Force is quite unsual and for sure that would be a special show stopper or something to talk between modelers.
The options are:
- MiG-21F-13, no.007 (the plane obtained by the defection of the Syrian pilot. The aircraft was standing on alert at Hazor with the ORA Mirages of 101. Squadron, Izrael, Hatzor AF Base, June 1967).
- MiG-21F-13, no.007 (shortly before the aircraft was handed over to the USA, Hatzor AF Base, Izrael, April 1968.)
- MiG-21F-13, no.007 (exhibit of the Chazerim Aviation Muiseum in the Negev Desert, Izrae)
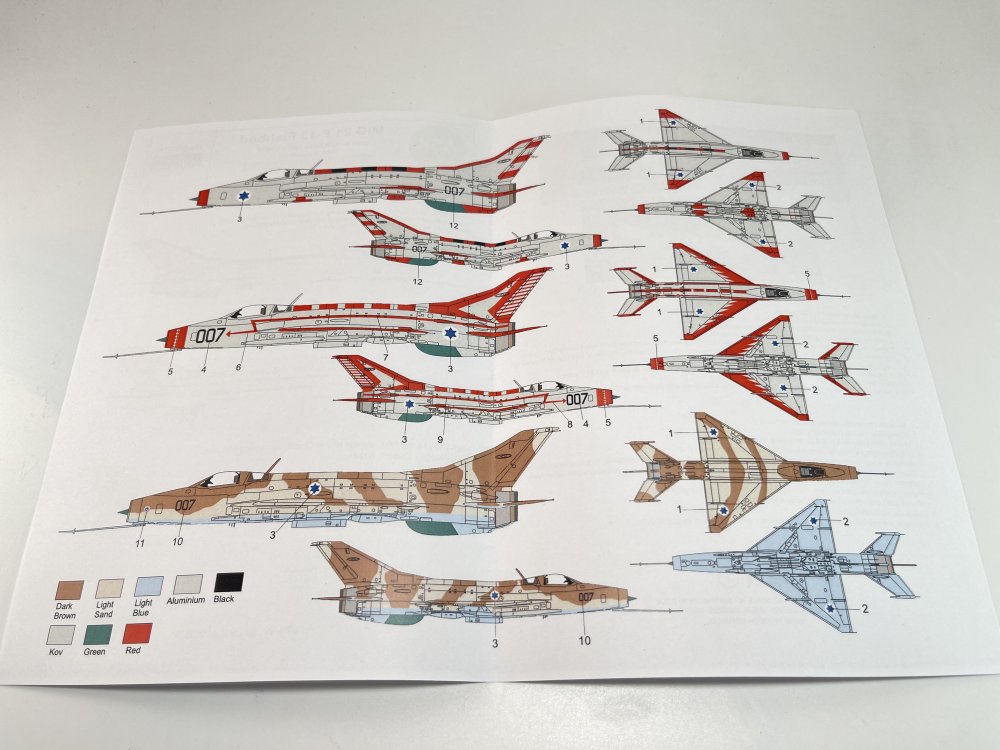
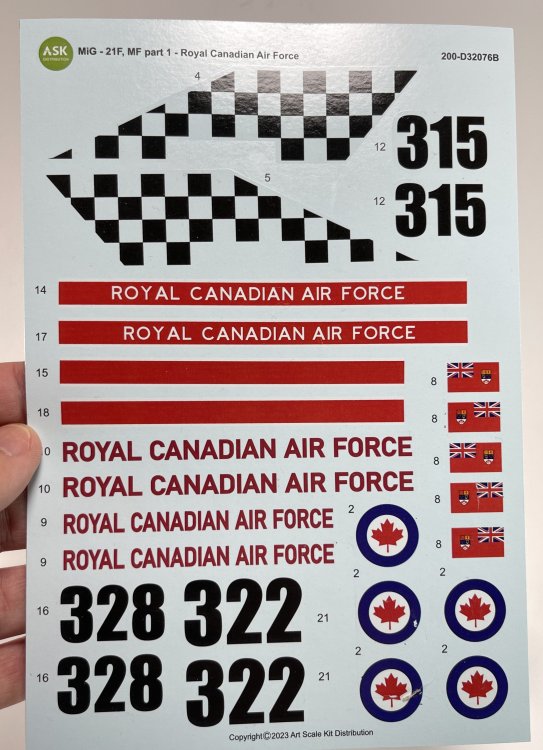
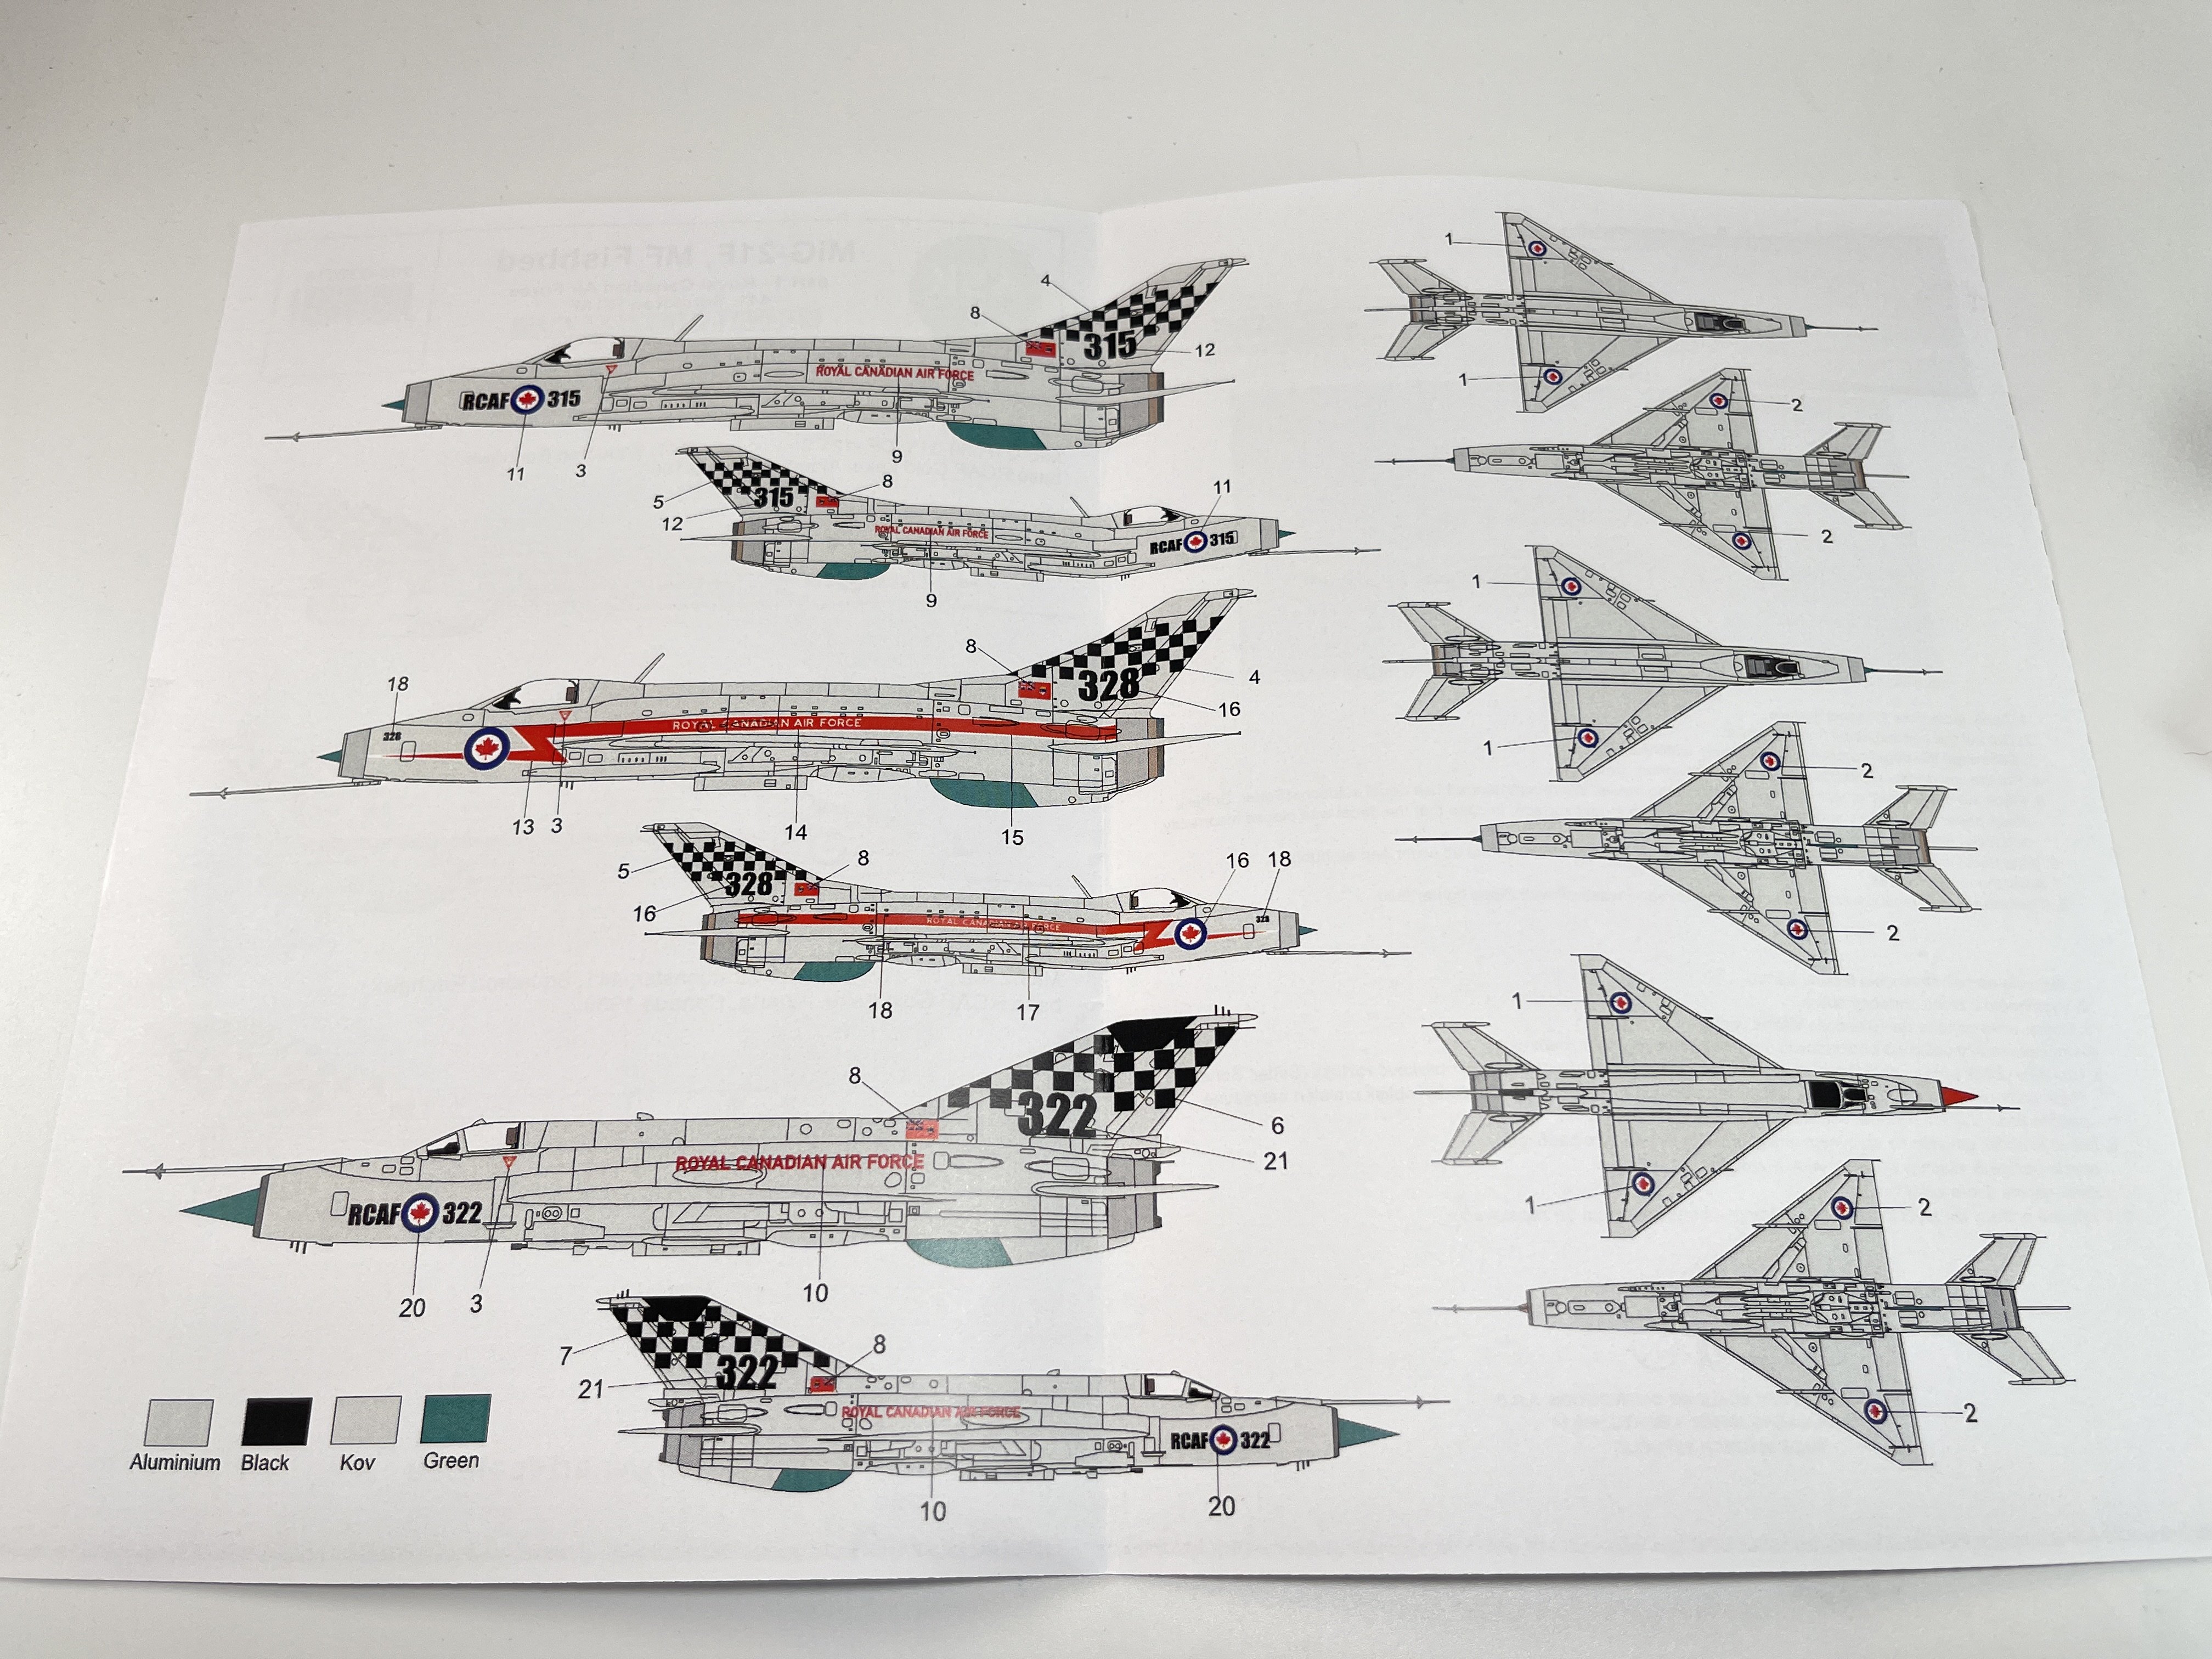
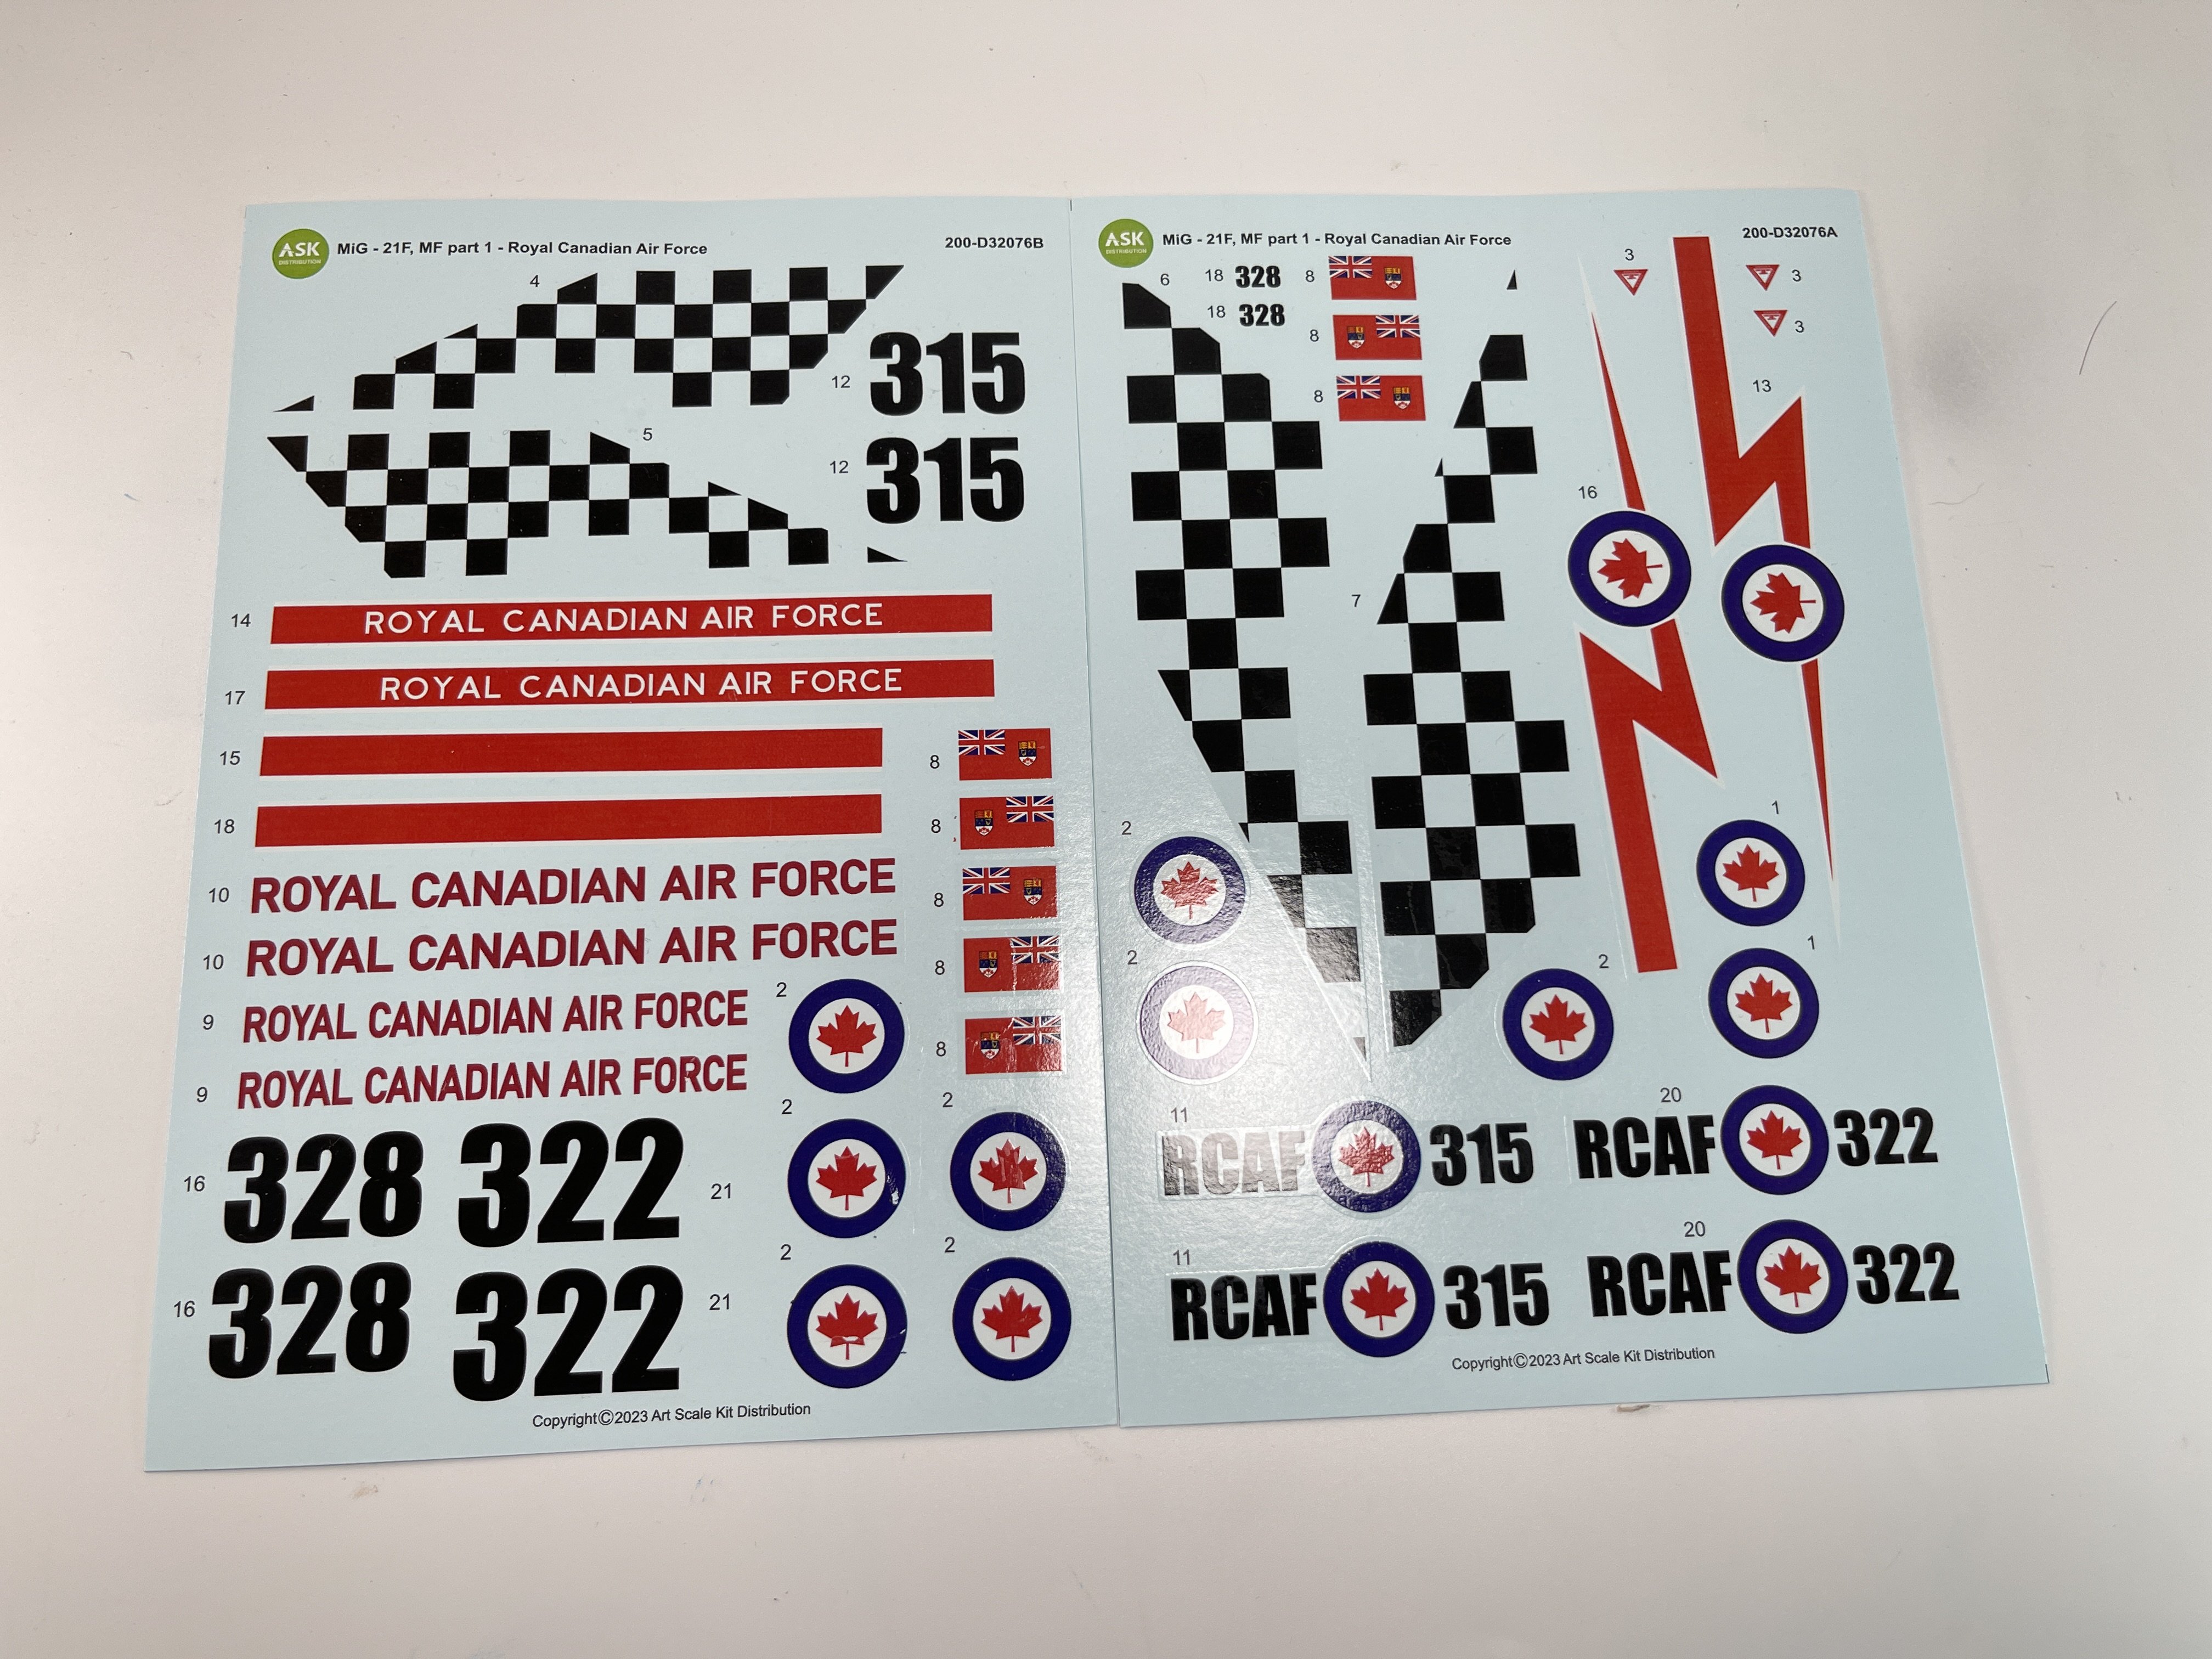
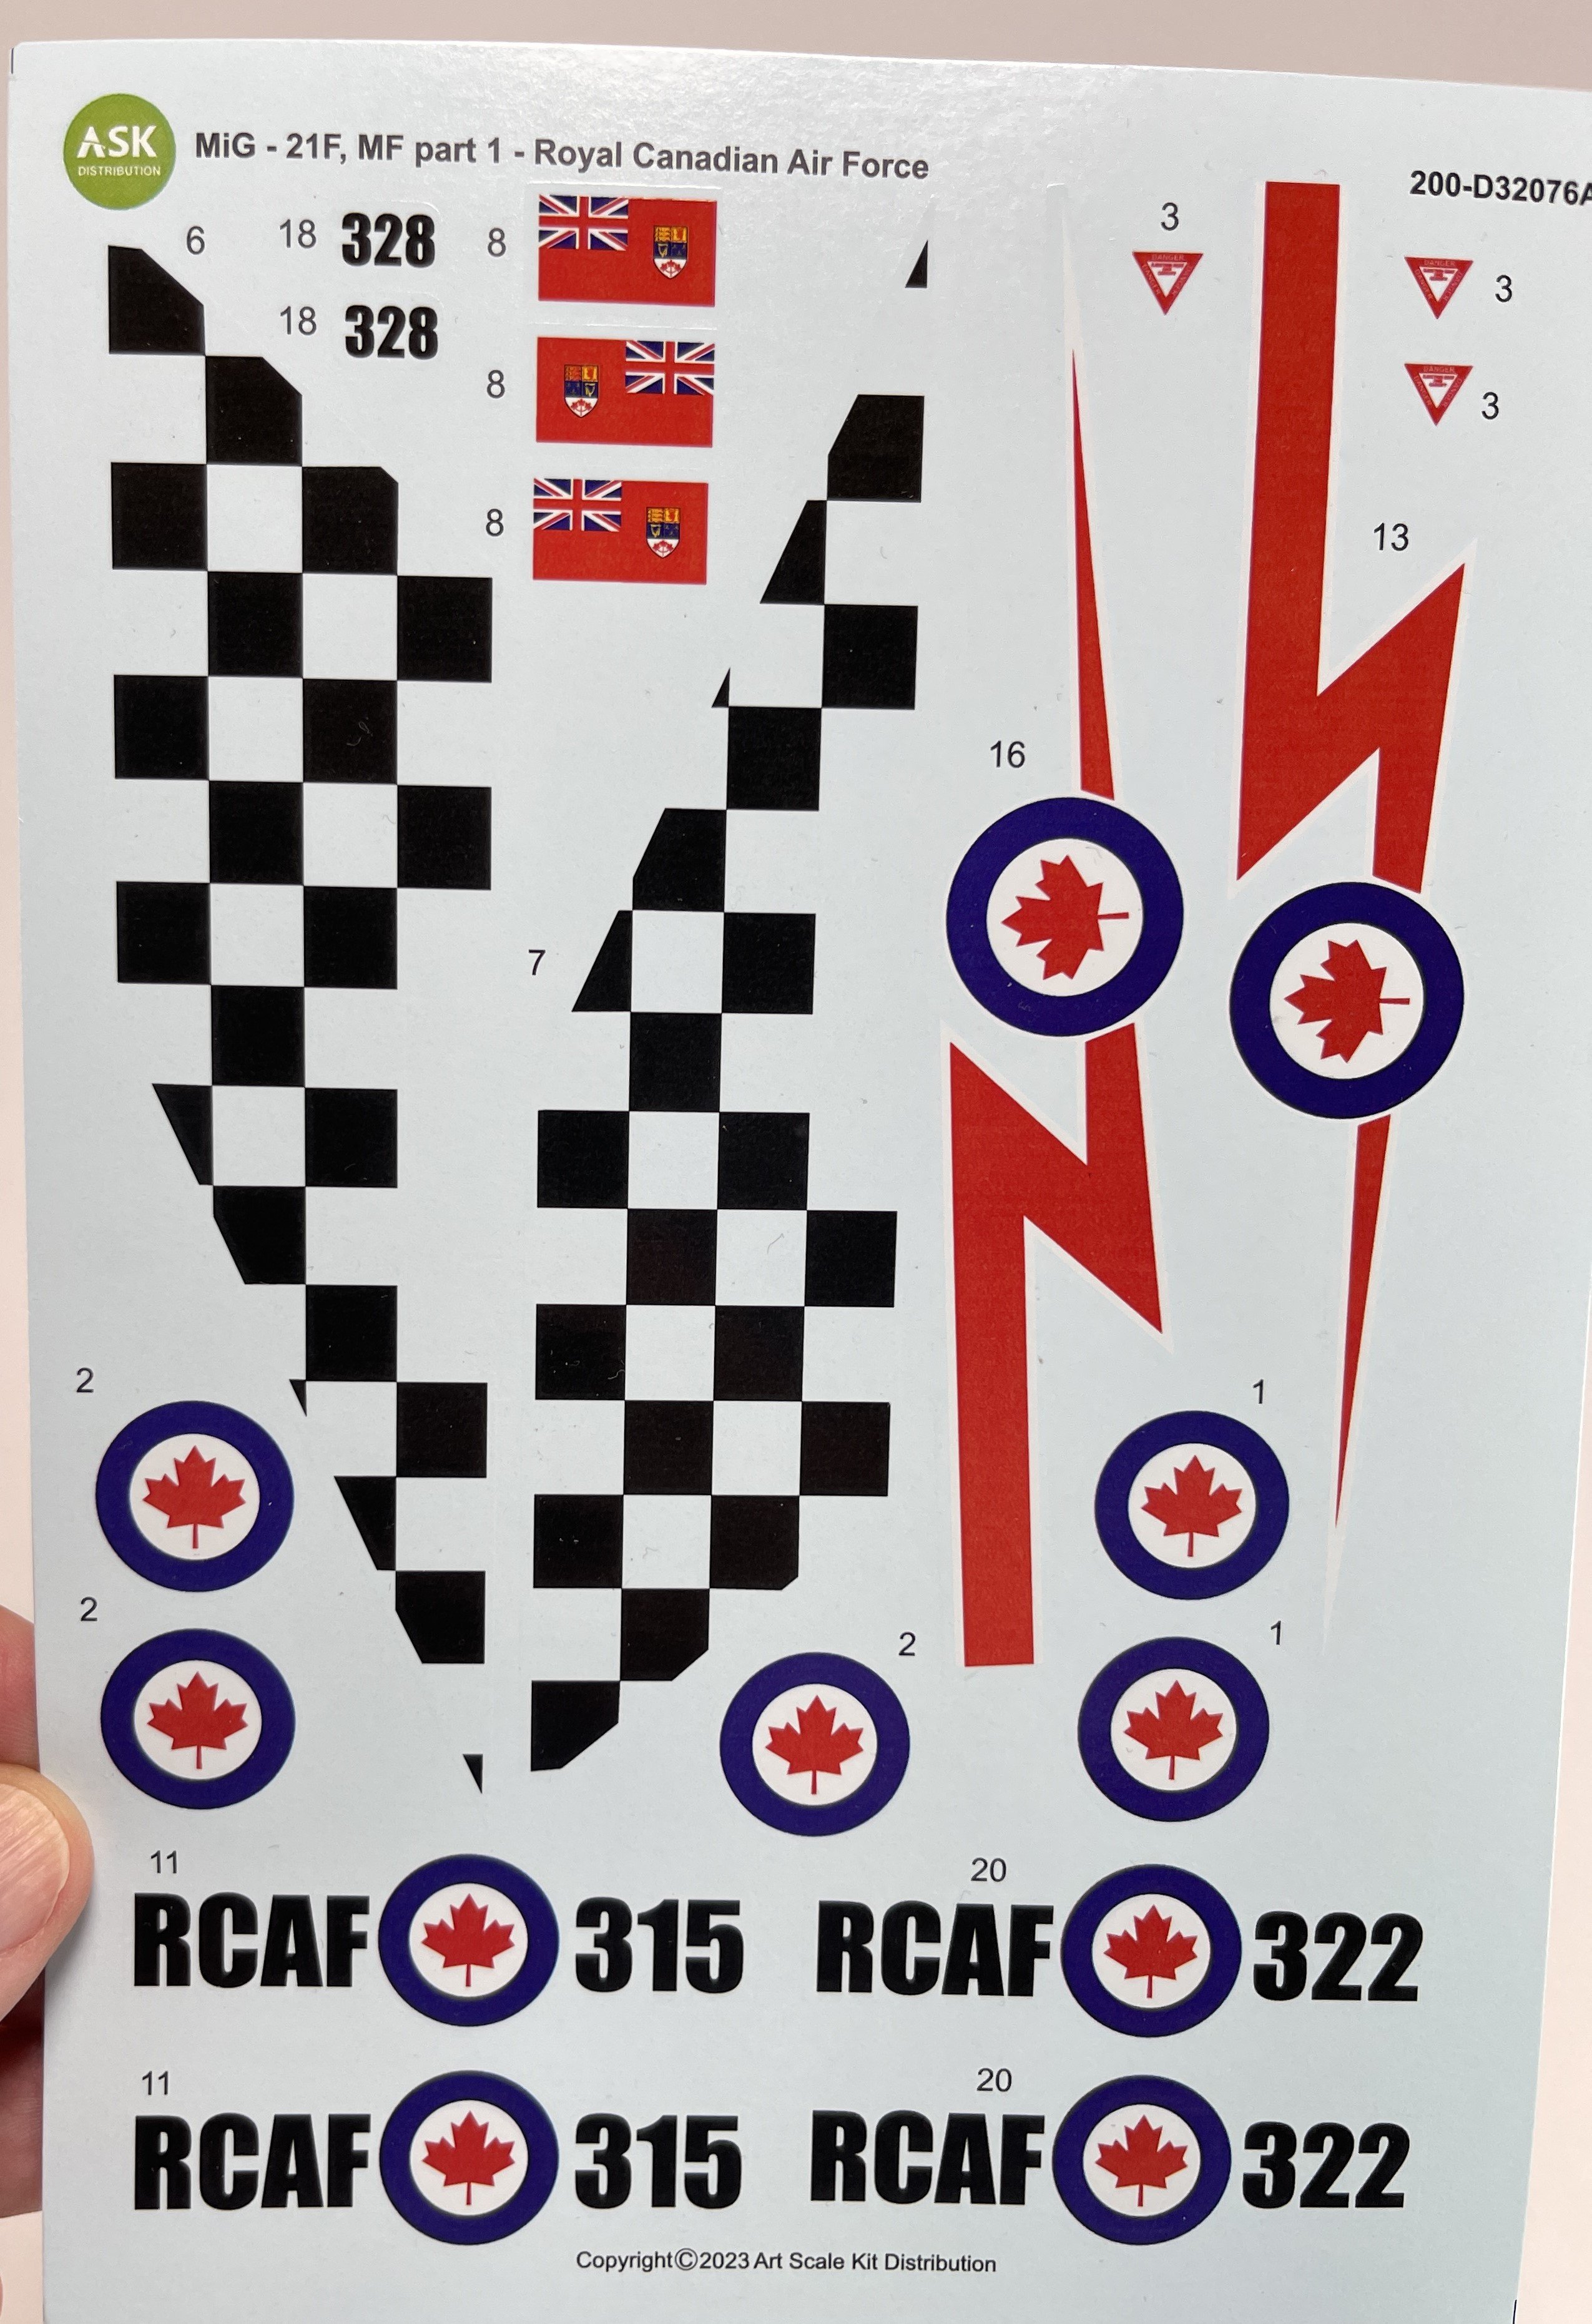
Mig-21F, MF Fishbed – part 1 – Royal Canadian Air Force 441, Squadron RCAF
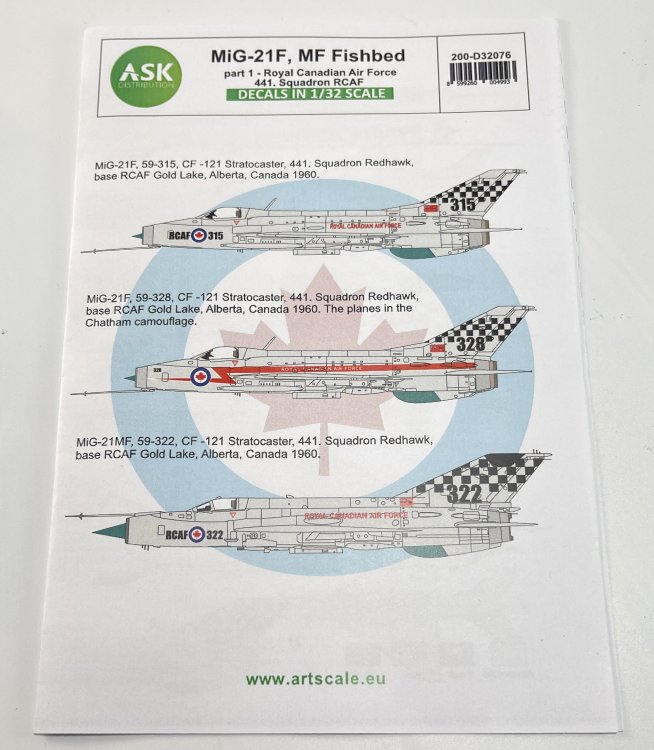
Catalogue number200-D32076
Price: 19,80€
To order, click here.
So, this sheet is quite sparkle.
A Mig-21 in Canadian colors? What? Even more surprised than with the anterior sheet.
But is in fact my fault not nothing about it.
Art Scale gives us a link for page will all the history:
I just love this little piece of history and I am already looking for a Mig-21 in 1:32!
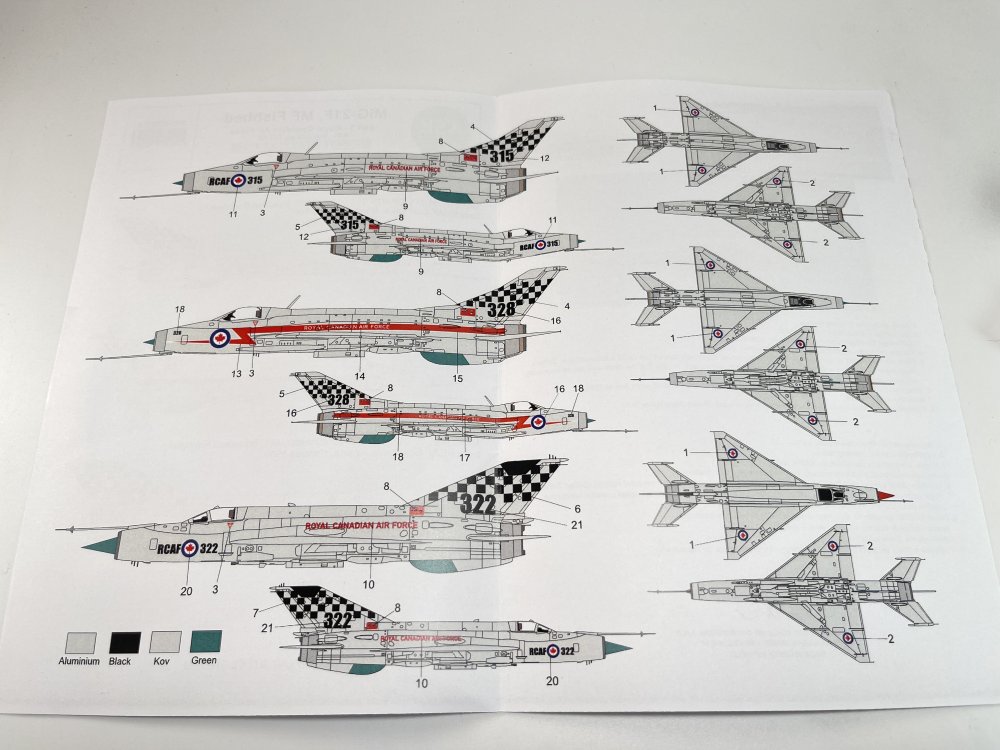

The options schemes are:
- MiG-21F, 59-315, CF -121 Stratocaster, 441. Squadron Redhawk, base RCAF Gold Lake, Alberta, Canada 1960.
- MiG-21F, 59-328, CF -121 Stratocaster, 441. Squadron Redhawk, base RCAF Gold Lake, Alberta, Canada 1960. The planes in the Chatham camouflage.
- MiG-21MF, 59-322, CF -121 Stratocaster, 441. Squadron Redhawk, base RCAF Gold Lake, Alberta, Canada 1960.


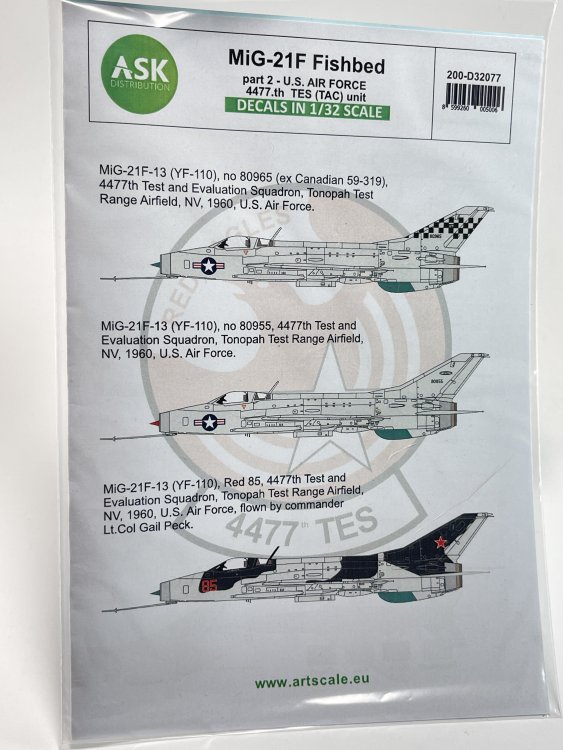
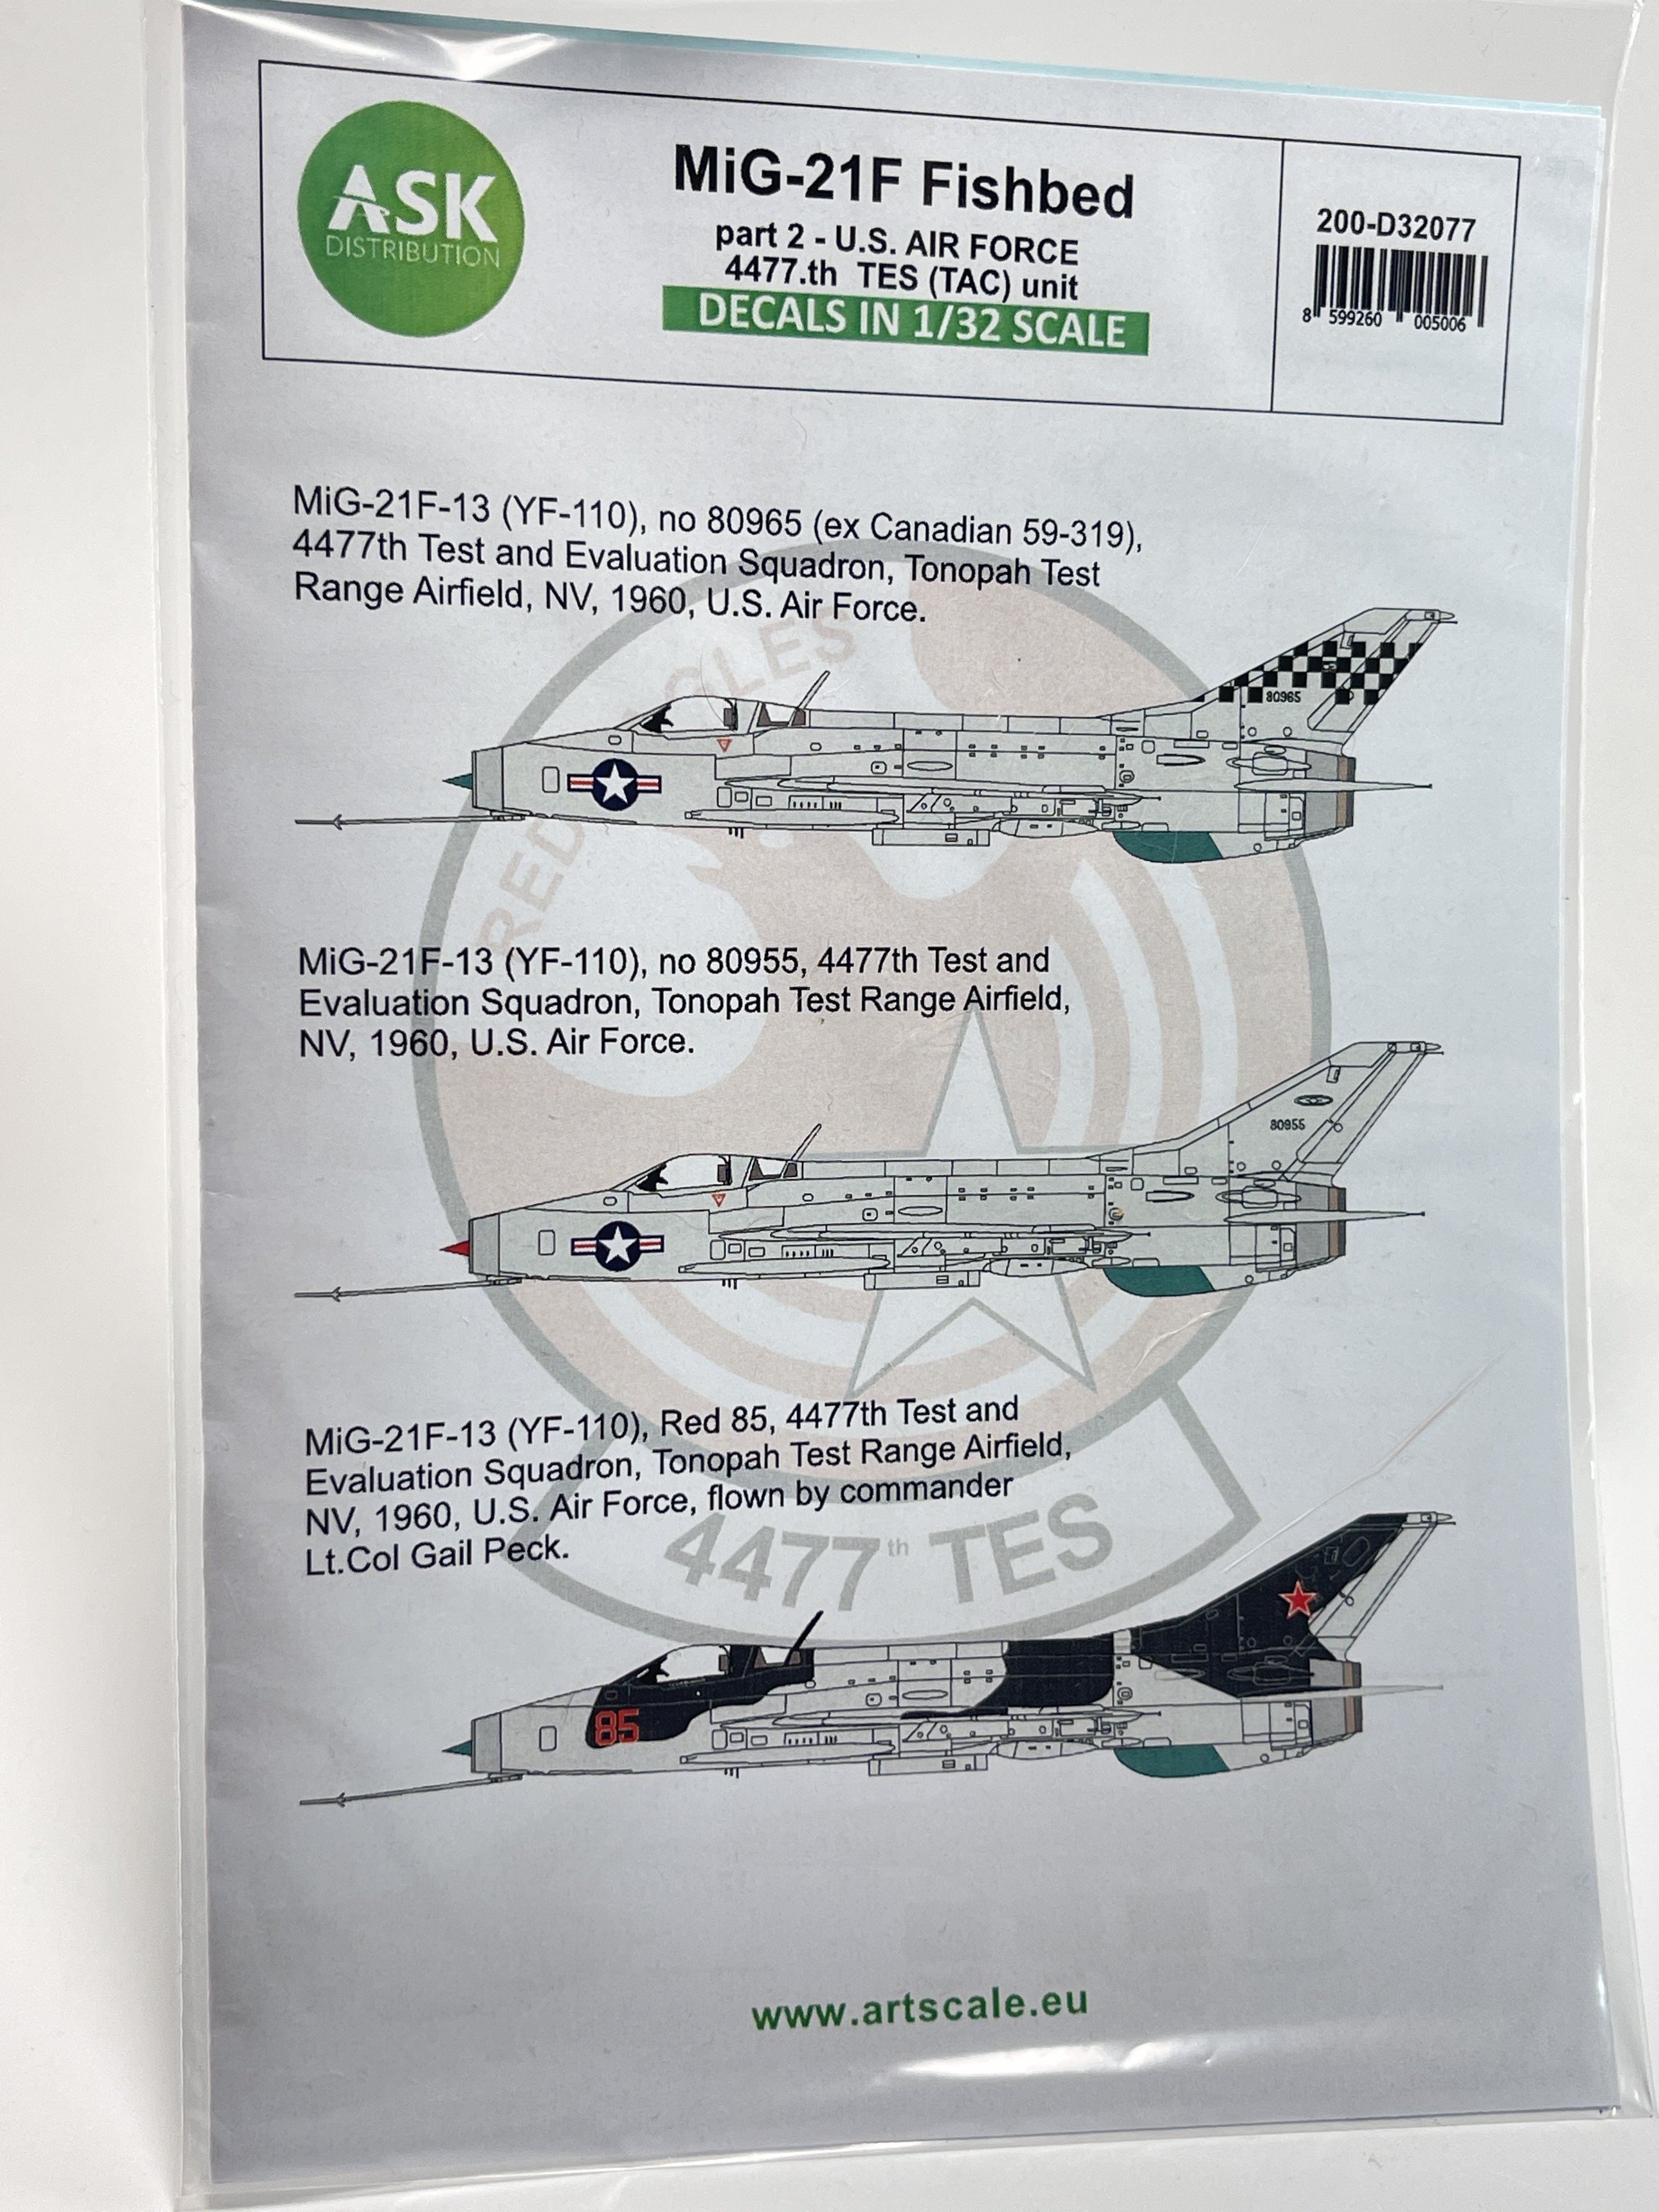
Mig-21F Fishbed – part 2 – U.S. Air Force 4477.th TES (TAC) unit
Catalogue number200-D32077
Price: 11,60€
To order, click here.
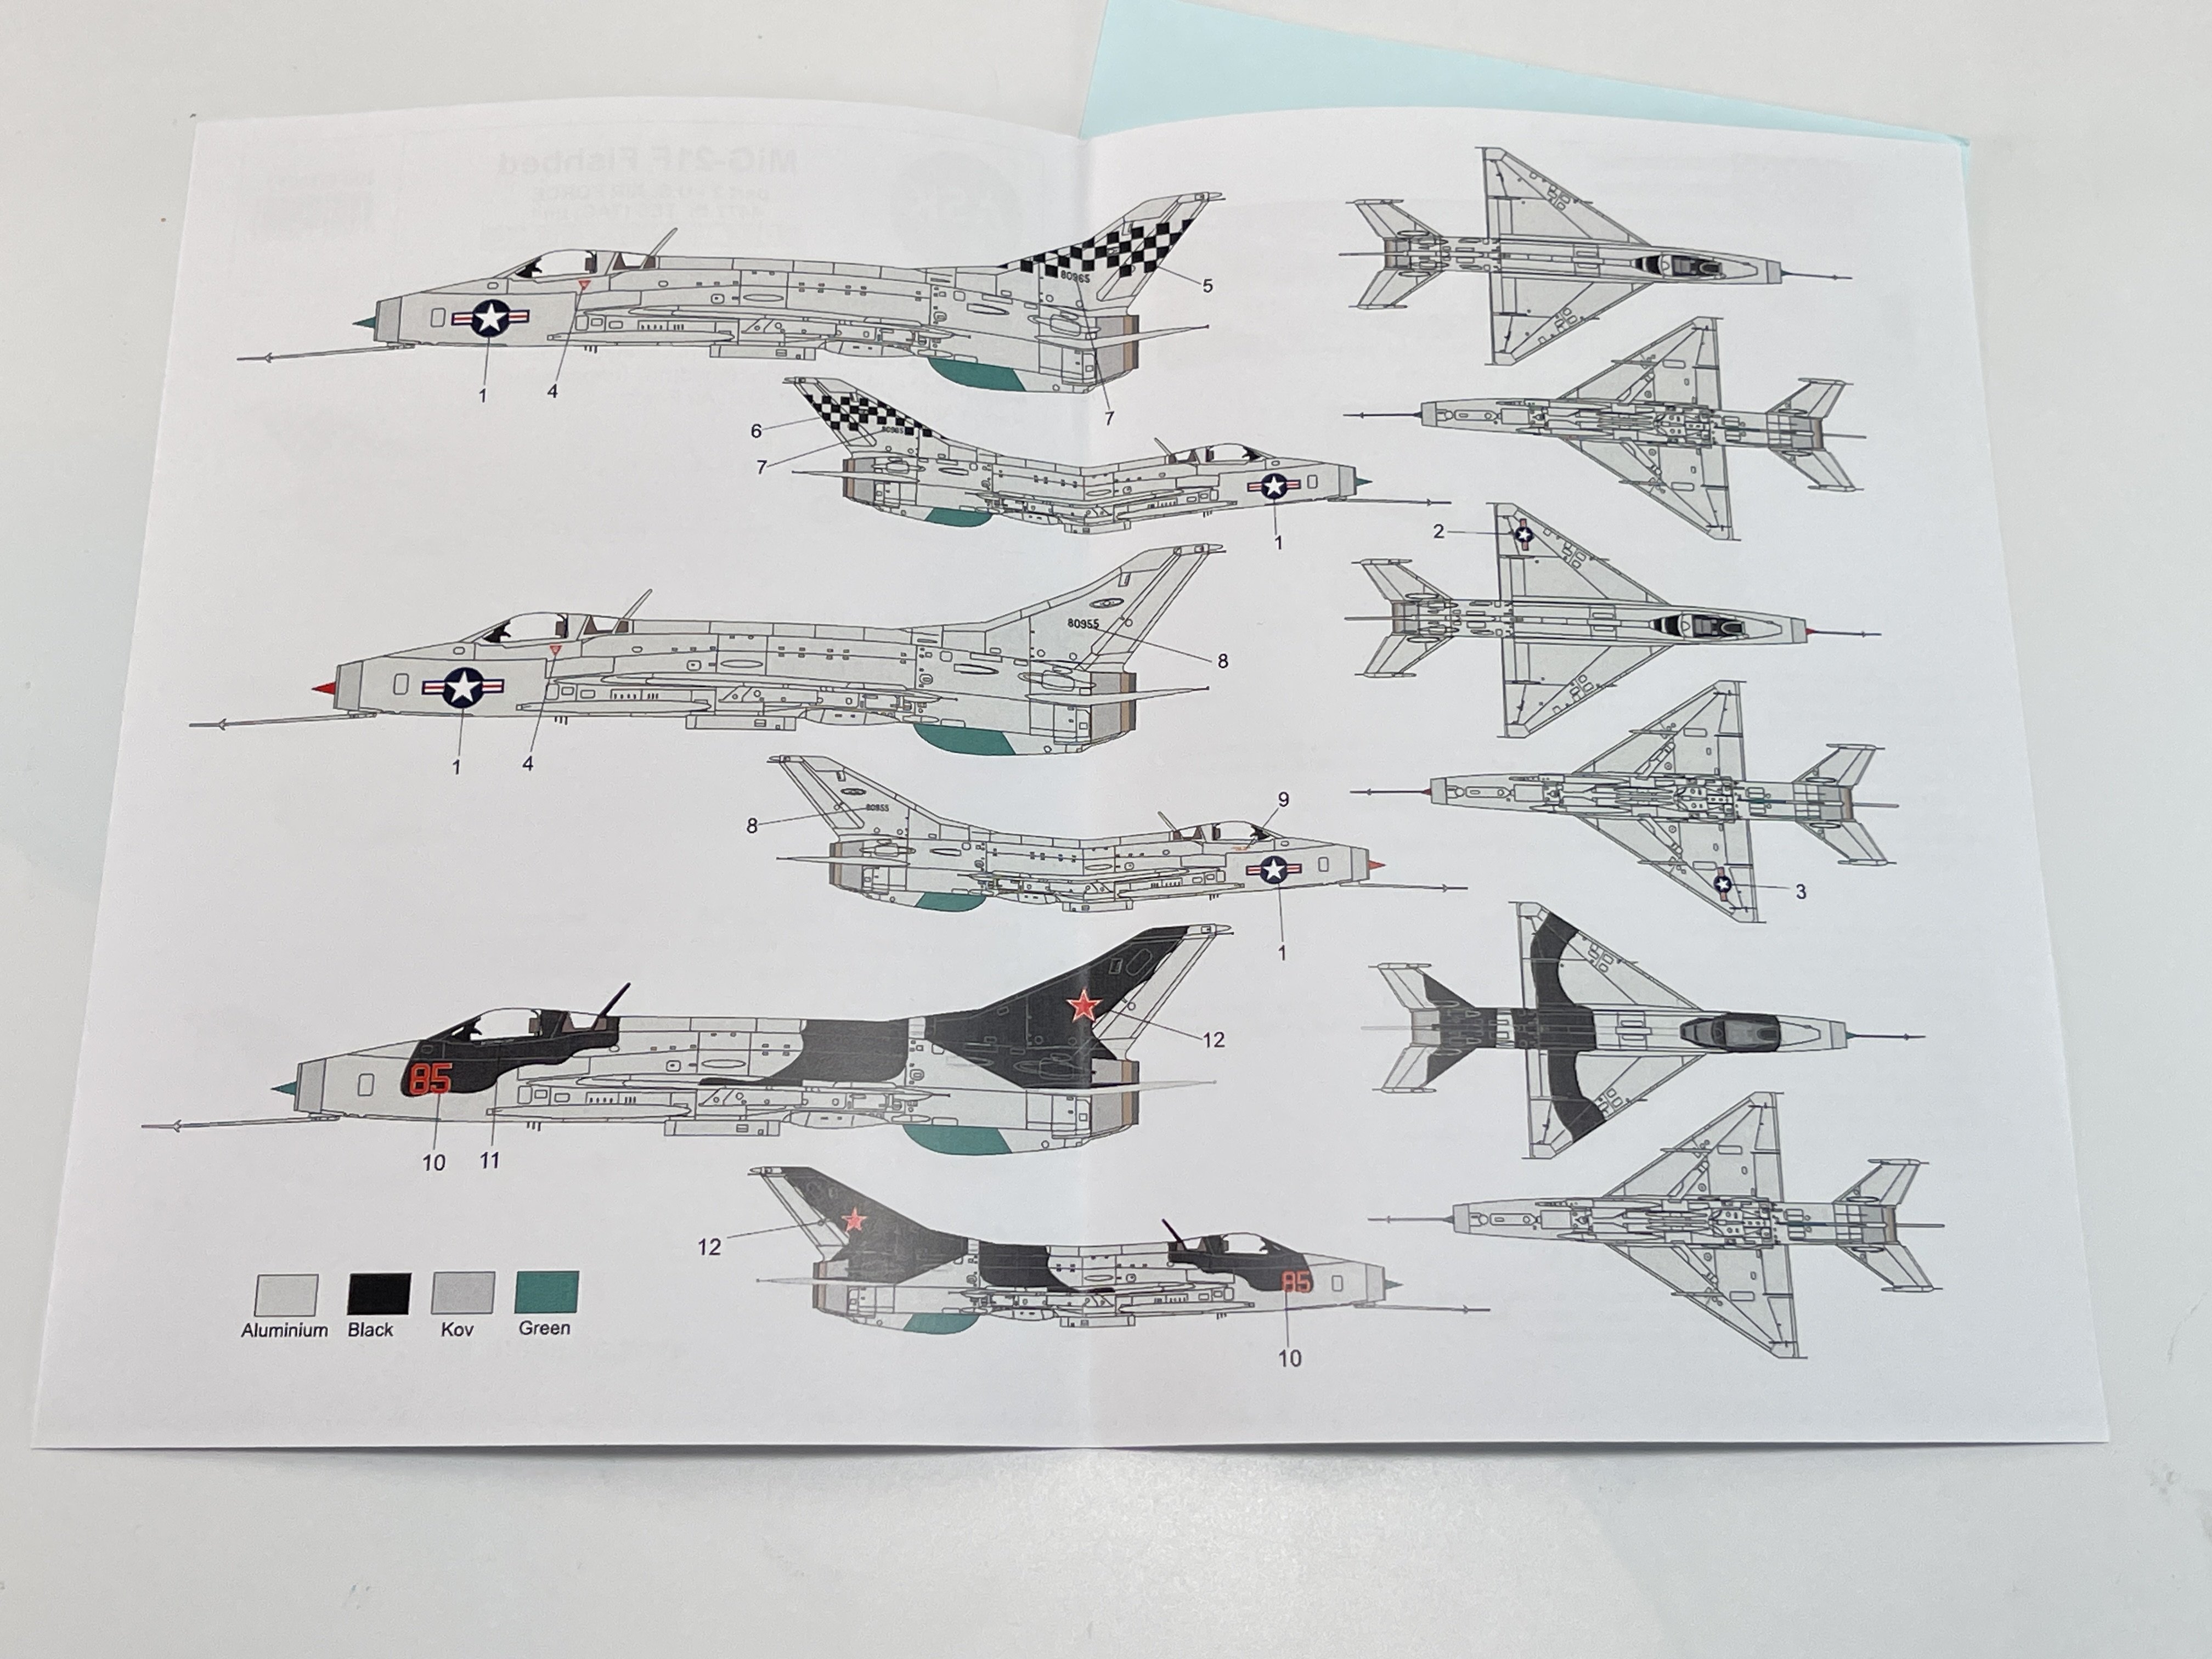
Here, 3 schemes are given:
- MiG-21F-13 (YF-110), no.80965 (ex Canadian 59-319), 4477th Test and Evaluation Squadron, Tonopah Test Range Airfield, NV, 1960, U.S. Air Fore.
- MiG-21F-13 (YF-110), no.80955, 4477th Test and Evaluation Squadron, Tonopah Test Range Airfield, NV, 1960, U.S. Air Force.
- MiG-21F-13 (YF-110), Red 85, 4477th Test and Evaluation Squadron, Tonopah Test Range Airfield, NV, 1960, U.S. Air Force, flown by commander Lt Col Gail Peck.
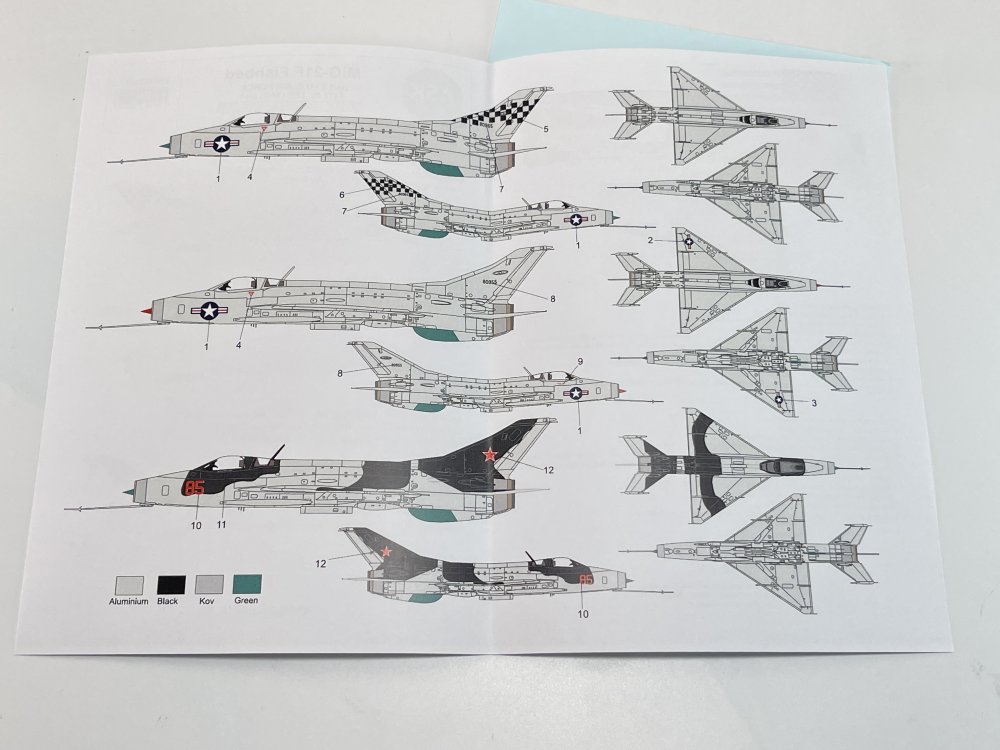


This sheet also give you some unusual Mig-21 schemes. Two Americans Mig-21 and one in Soviet markings and camoflage but pilot by an American pilot.
This sheet gives you the possibility the build all 3 options schemes which is great!
***
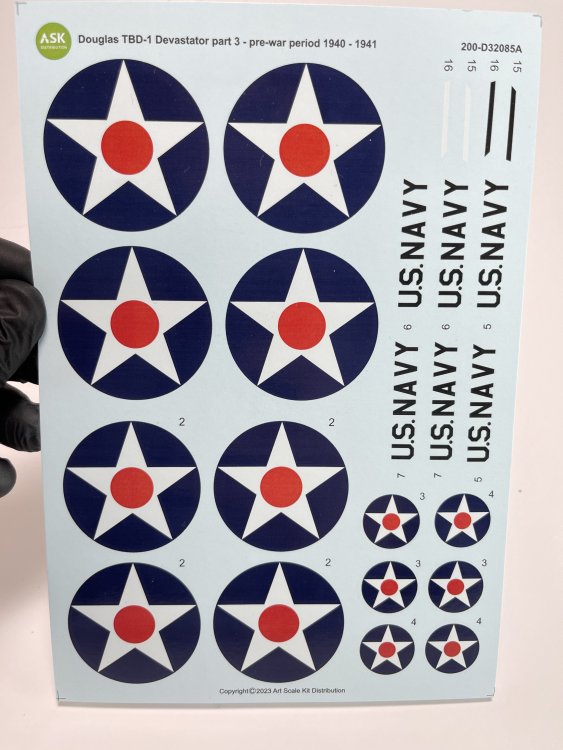
Analyzing the decal sheets, the color registration is great and a very good definition of the details. The decals have a thin film, in fact looking very thin and delicate.
There is no indication where are they printed so I assume that will be in ASK house. The printing quality is quite good, as they are sharp, with outline very well defined. The color look quite good and spot on.
The instructions are the general ones that are applicable to all decals, it is always important to remember the general principles of decal application. In this case, there is no specific rule for applying these decals.
The profiles draws contains lots of information, with side view (both side) and top view with precise decal indication.
Conclusion:
Gotta love ASK endorsement and commitment to the modelling community in releasing these decals!!
There`s a lot to choose from and always with great printing and fantastic color pigmentation.
The location indication of the decals is quite good and very perceptible.
The decals as already said, have a very good colour registration, very thin, with minimum decal film, and they work quite nice!
And these Mig-2 are definitely different and will be a show stopper for sure.
My thanks to Art Scale for producing these fantastic decals.

Francisco Guedes
.
-
1
-
-
1:32
Art Scale Kit
TBD-1 Devastator
Several Sheets

Art Scale Kit (also known as ASK) is a model hobby shop but also a modelling tools producer, a resin 3D producer and also a Decal producer…
So It`s a name that is getting really quickly on the top of the modelling world and I`m lucky enough to have another bunch of decals for review.
Today, I´m going to review 5 (five) decal sheet from ASK.
All sets came in a ziplog bag, small A5 size sheet with profiles colors instructions steps how to apply ASK decals.
So let’s looks to the option schemes that all decal sheets offer.
But first, one detail that I loved about. In the applying instructions, in all sheets, theres`a real photo of one of the airplanes that are represented on the decal sheets. I really love that "bonus"
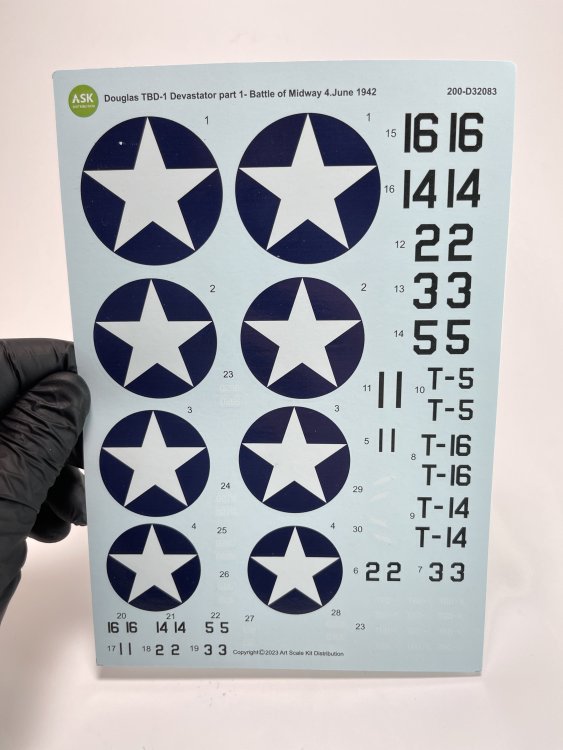
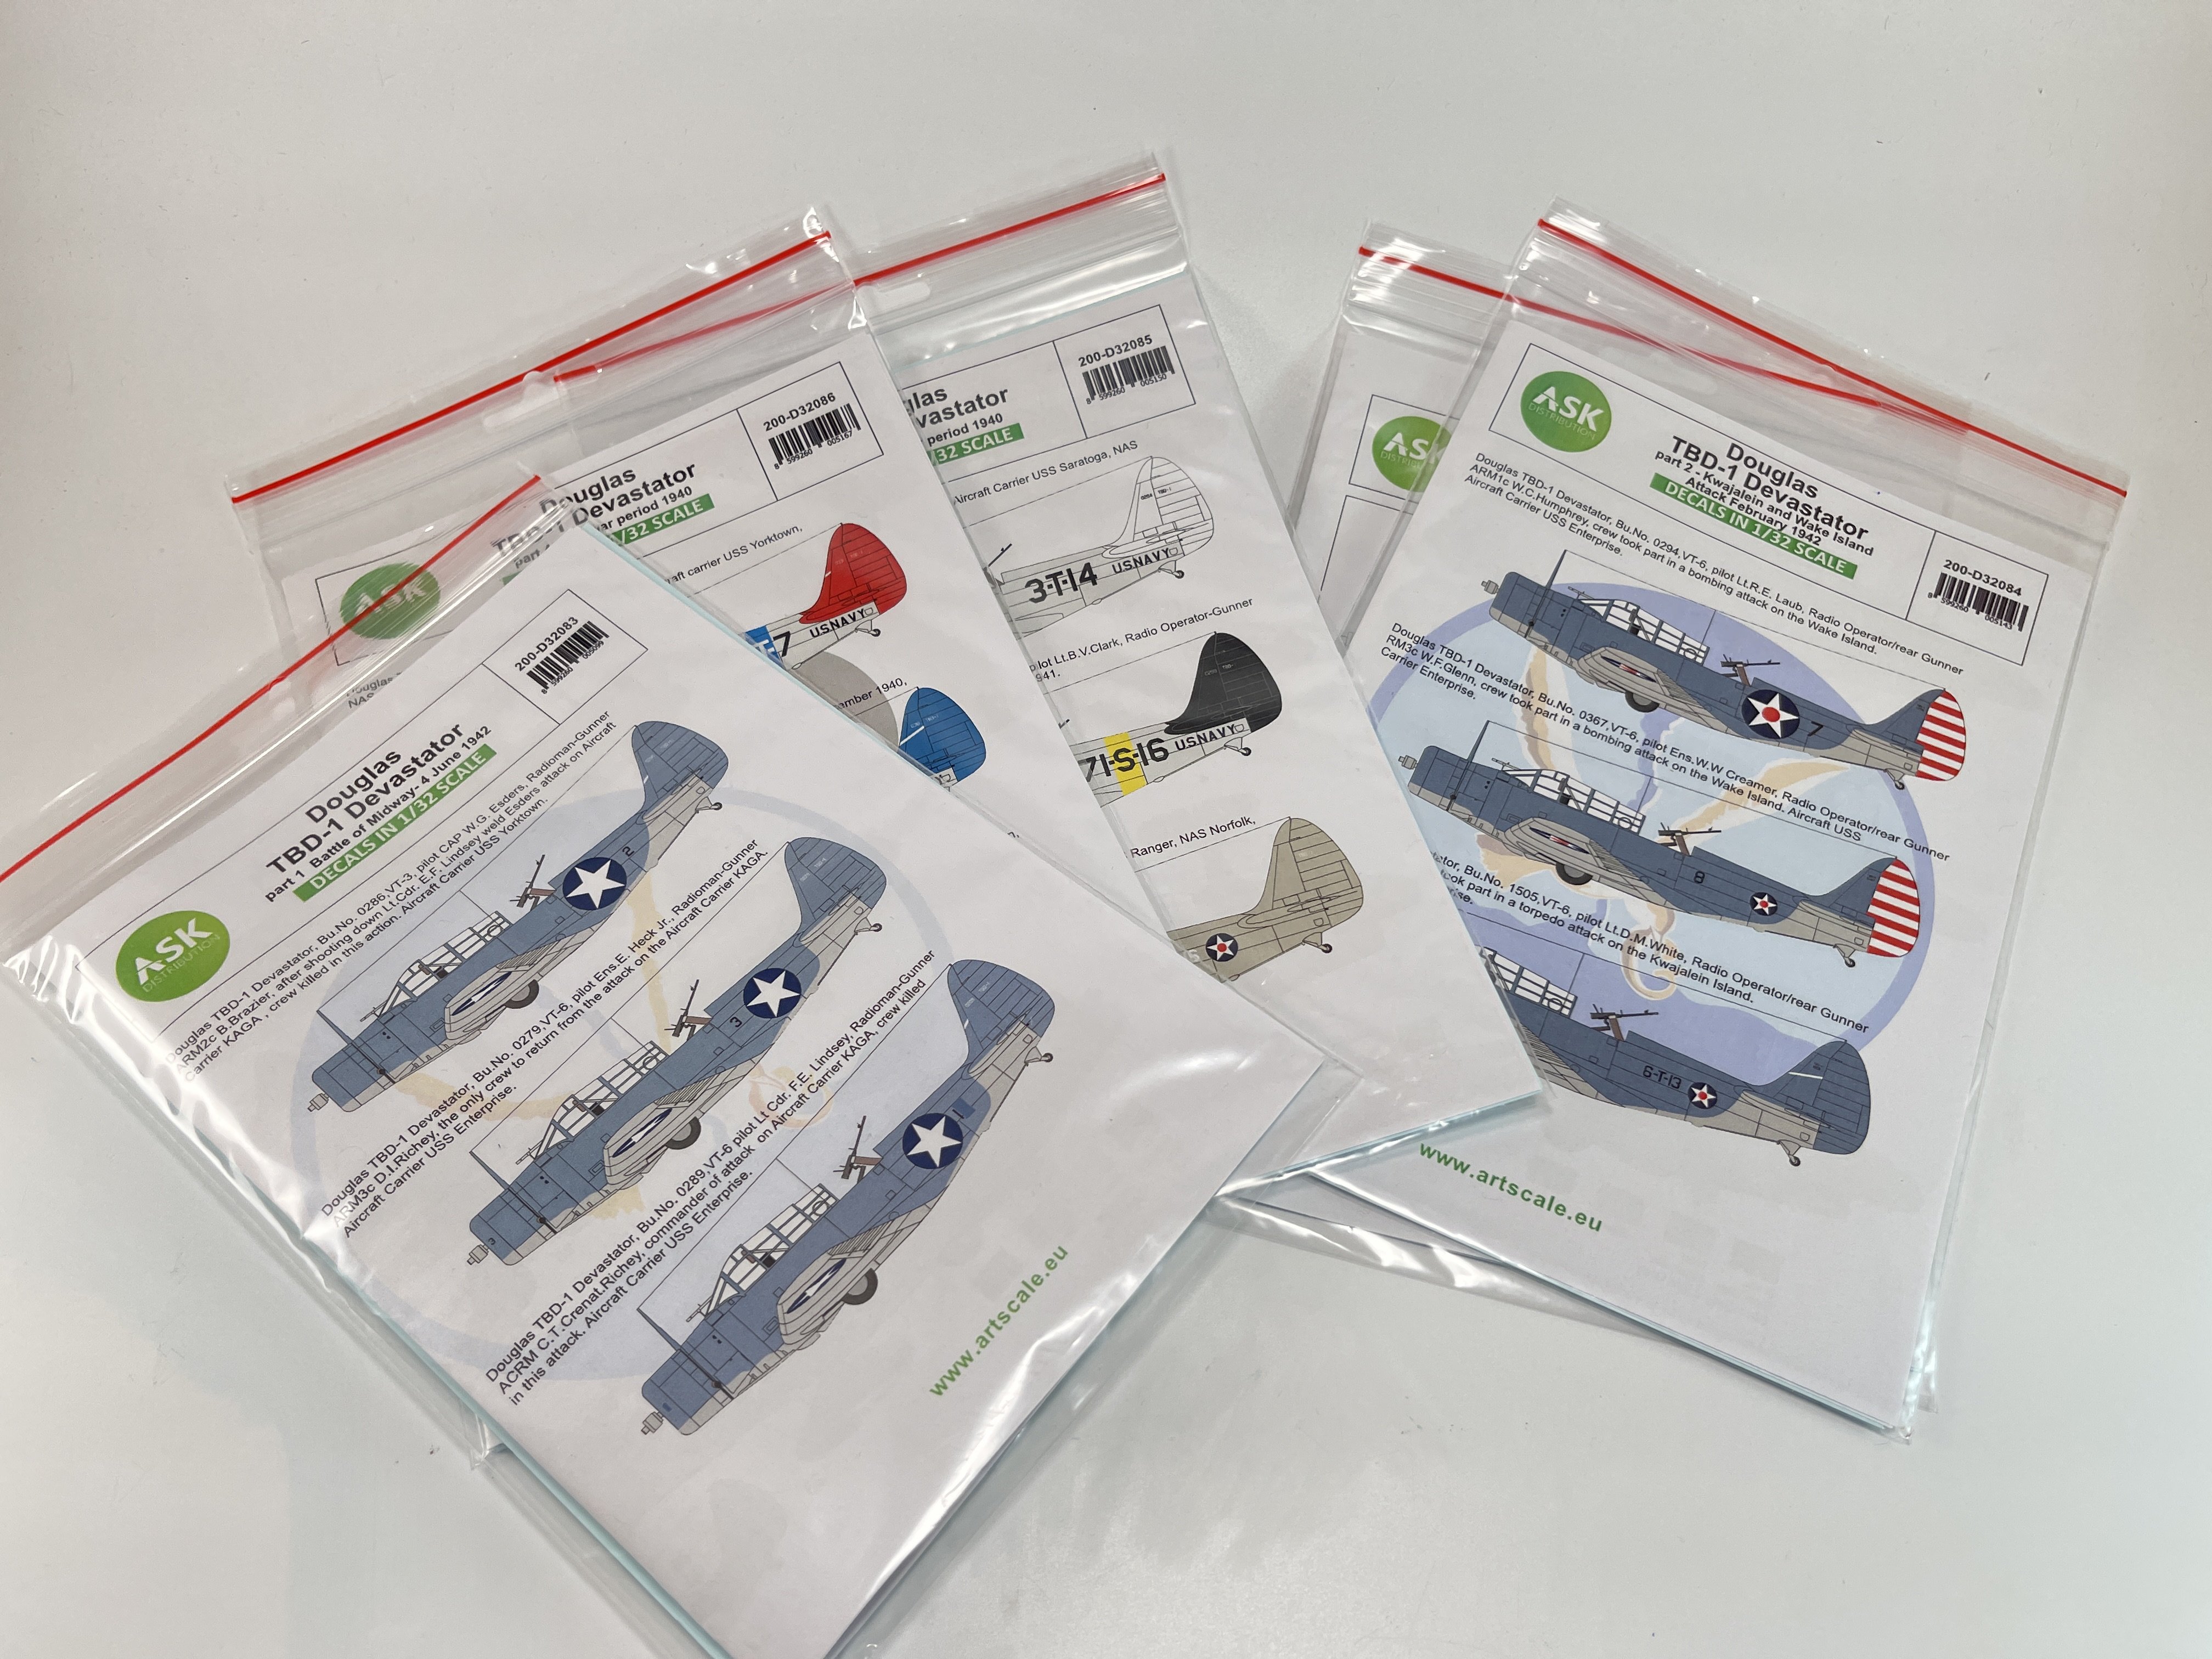
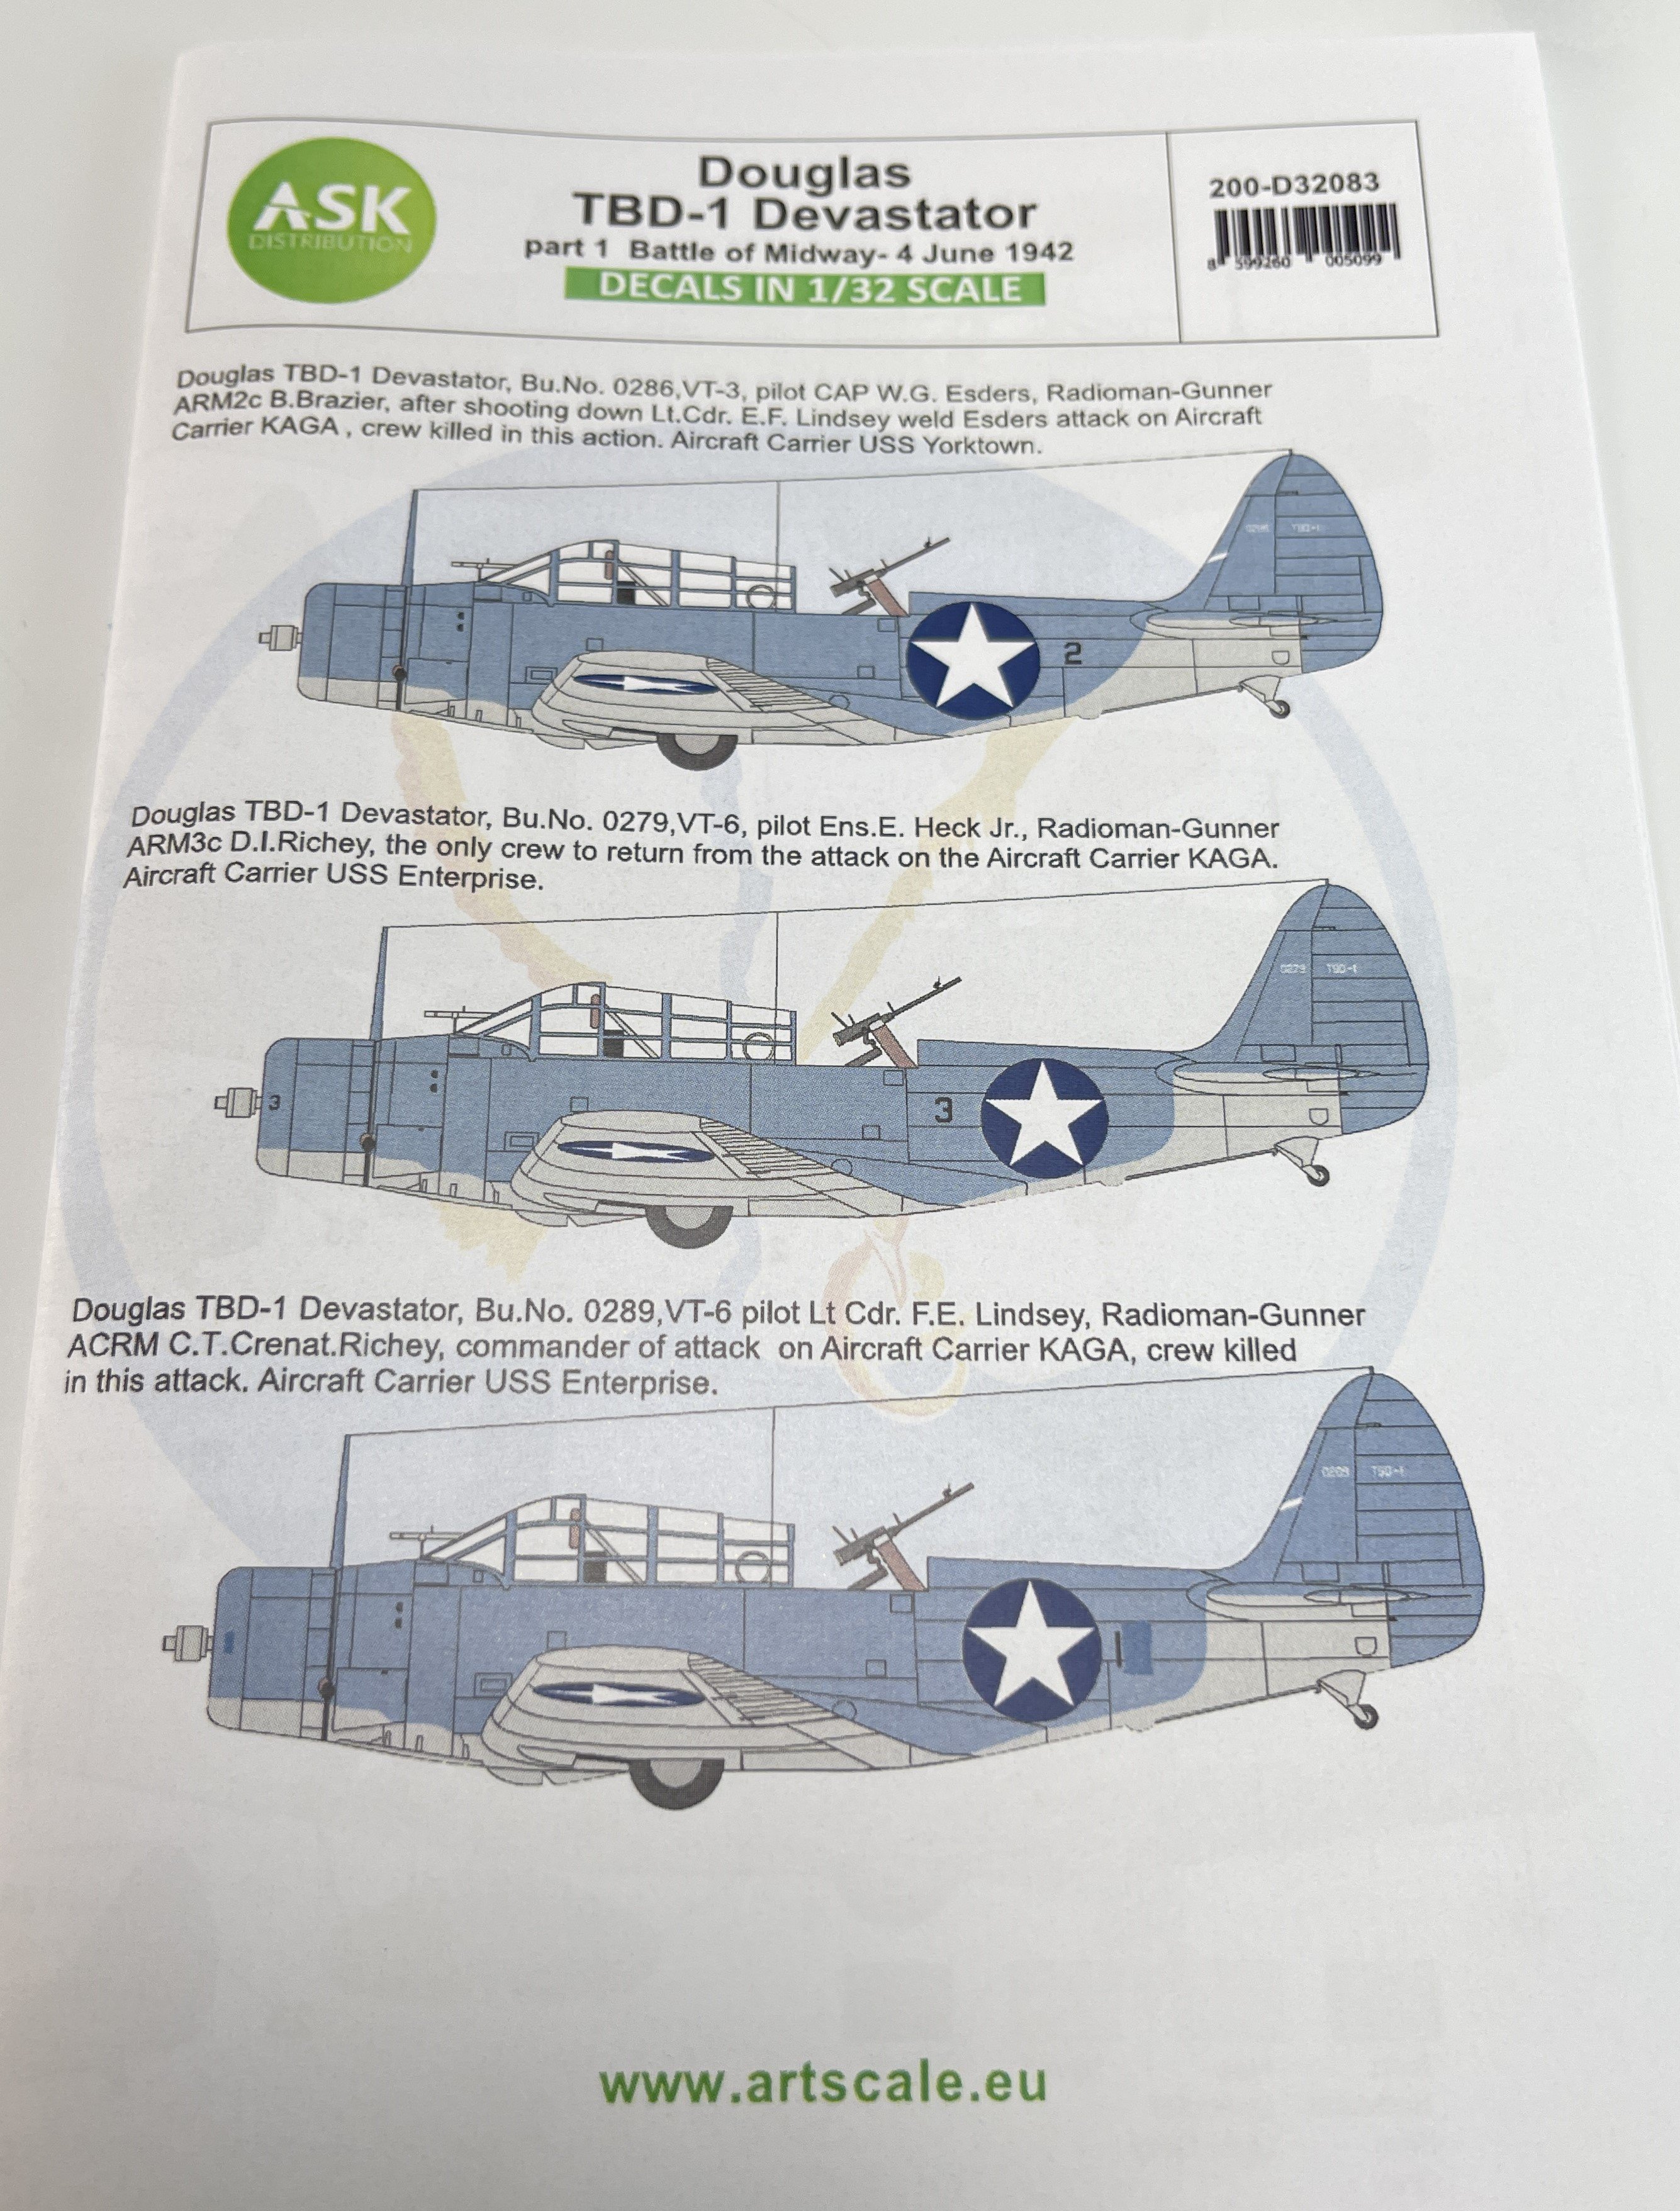
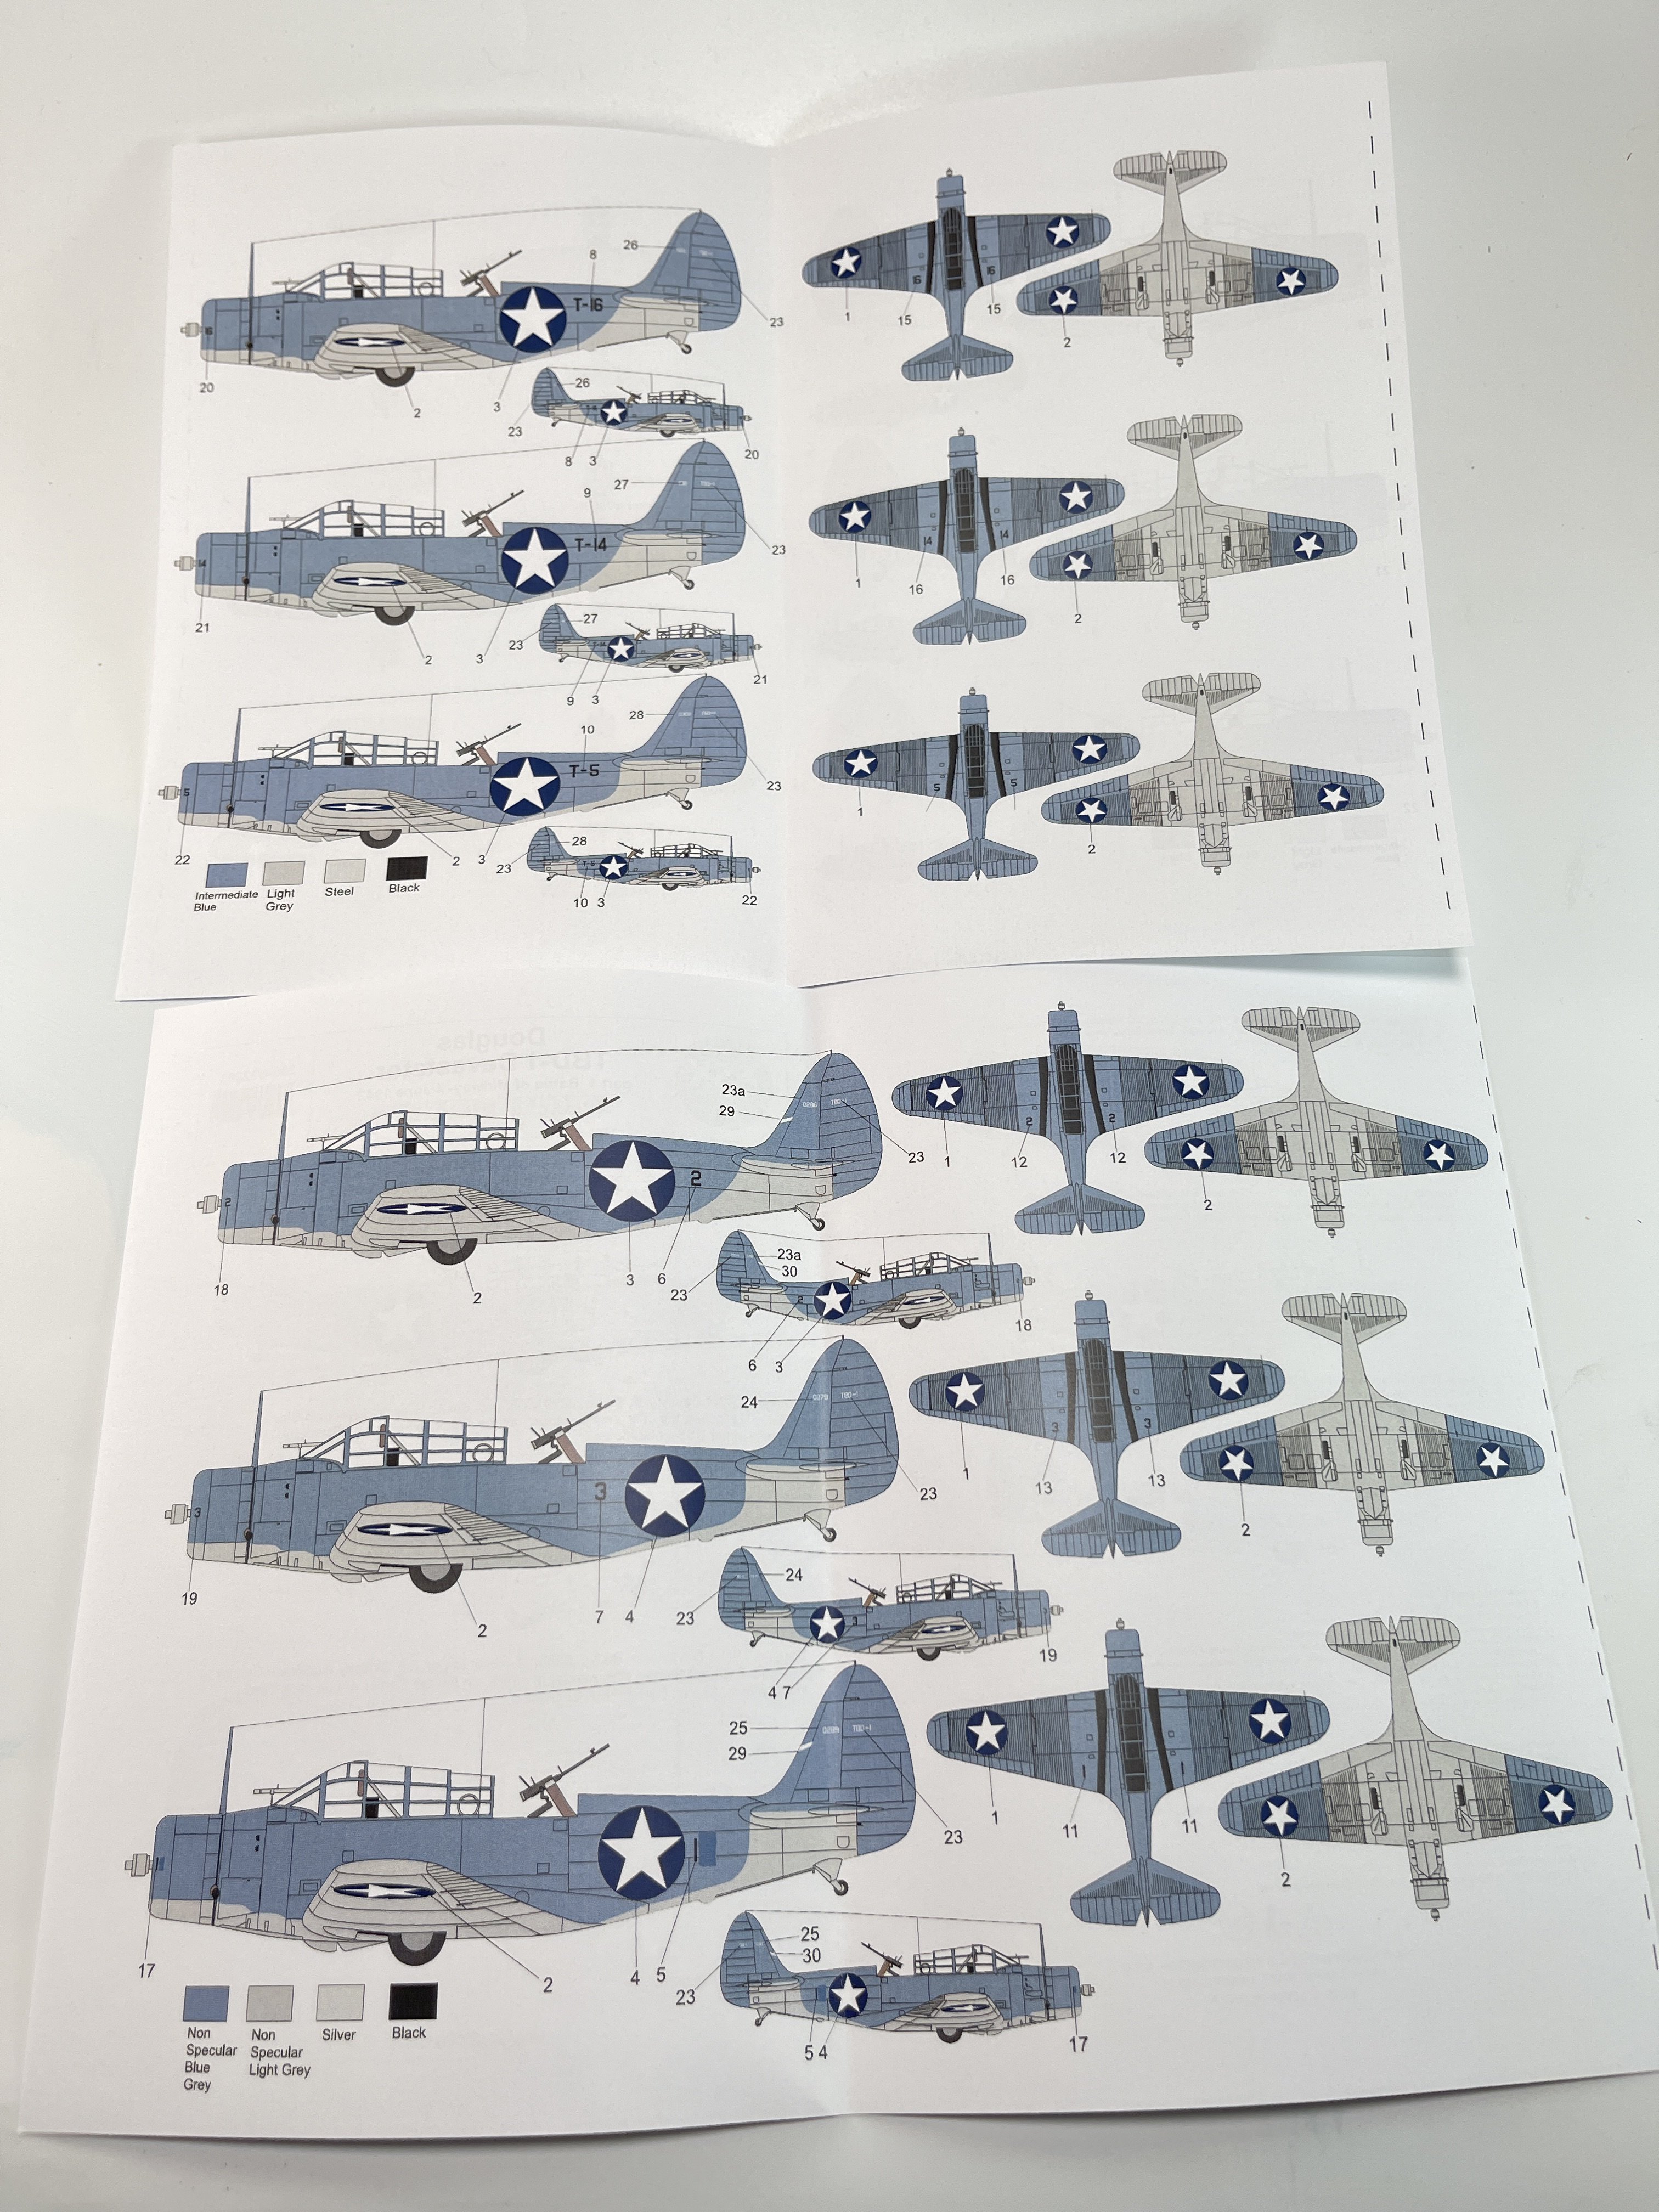
Douglas TBD-1 Devastator– part 1 – Battle of Midway – 4 June, 1942;
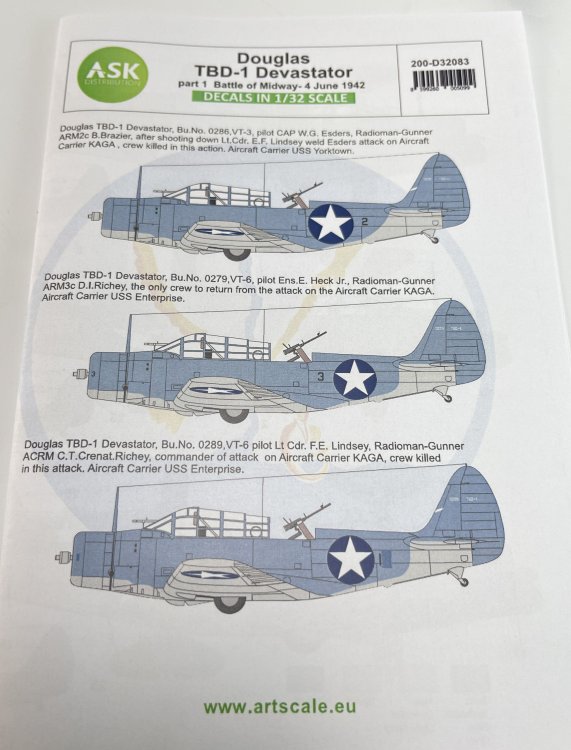
Catalogue number200-D32083
Price: 12,00€
To order, click here.
This sheet have 6 options for the same schemes. It’s a fantastic historical schemes sheet to all Midway and WWII lovers.
- Douglas TBD-1 Devastator, Bu.No. 0286,VT-3, pilot CAP W.G. Esders, Radio Operator/rear Gunner ARM2c B.Brazier, after shooting down Lt.Cdr. E.F. Lindsey Esders leads attack on aircraft carrier KAGA, the crew was killed in this action. Aircraft Carrier USS Yorktown.
- Douglas TBD-1 Devastator, Bu.No. 0279,VT-6, pilot Ens.E. Heck Jr., Radio Operator/rear Gunner ARM3c D.I.Richey, the only crew with returned from the attack on the Aircraft Carrier KAGA. Aircraft Carrier USS Enterprise.
- Douglas TBD-1 Devastator, Bu.No. 0289,VT-6 pilot Lt Cdr. F.E. Lindsey, Radio Operator/rear Gunner ACRM C.T.Crenat.Richey, commander of attack on Aircraft Carrier KAGA, the crew was killed in this attack. Aircraft Carrier USS Enterprise.
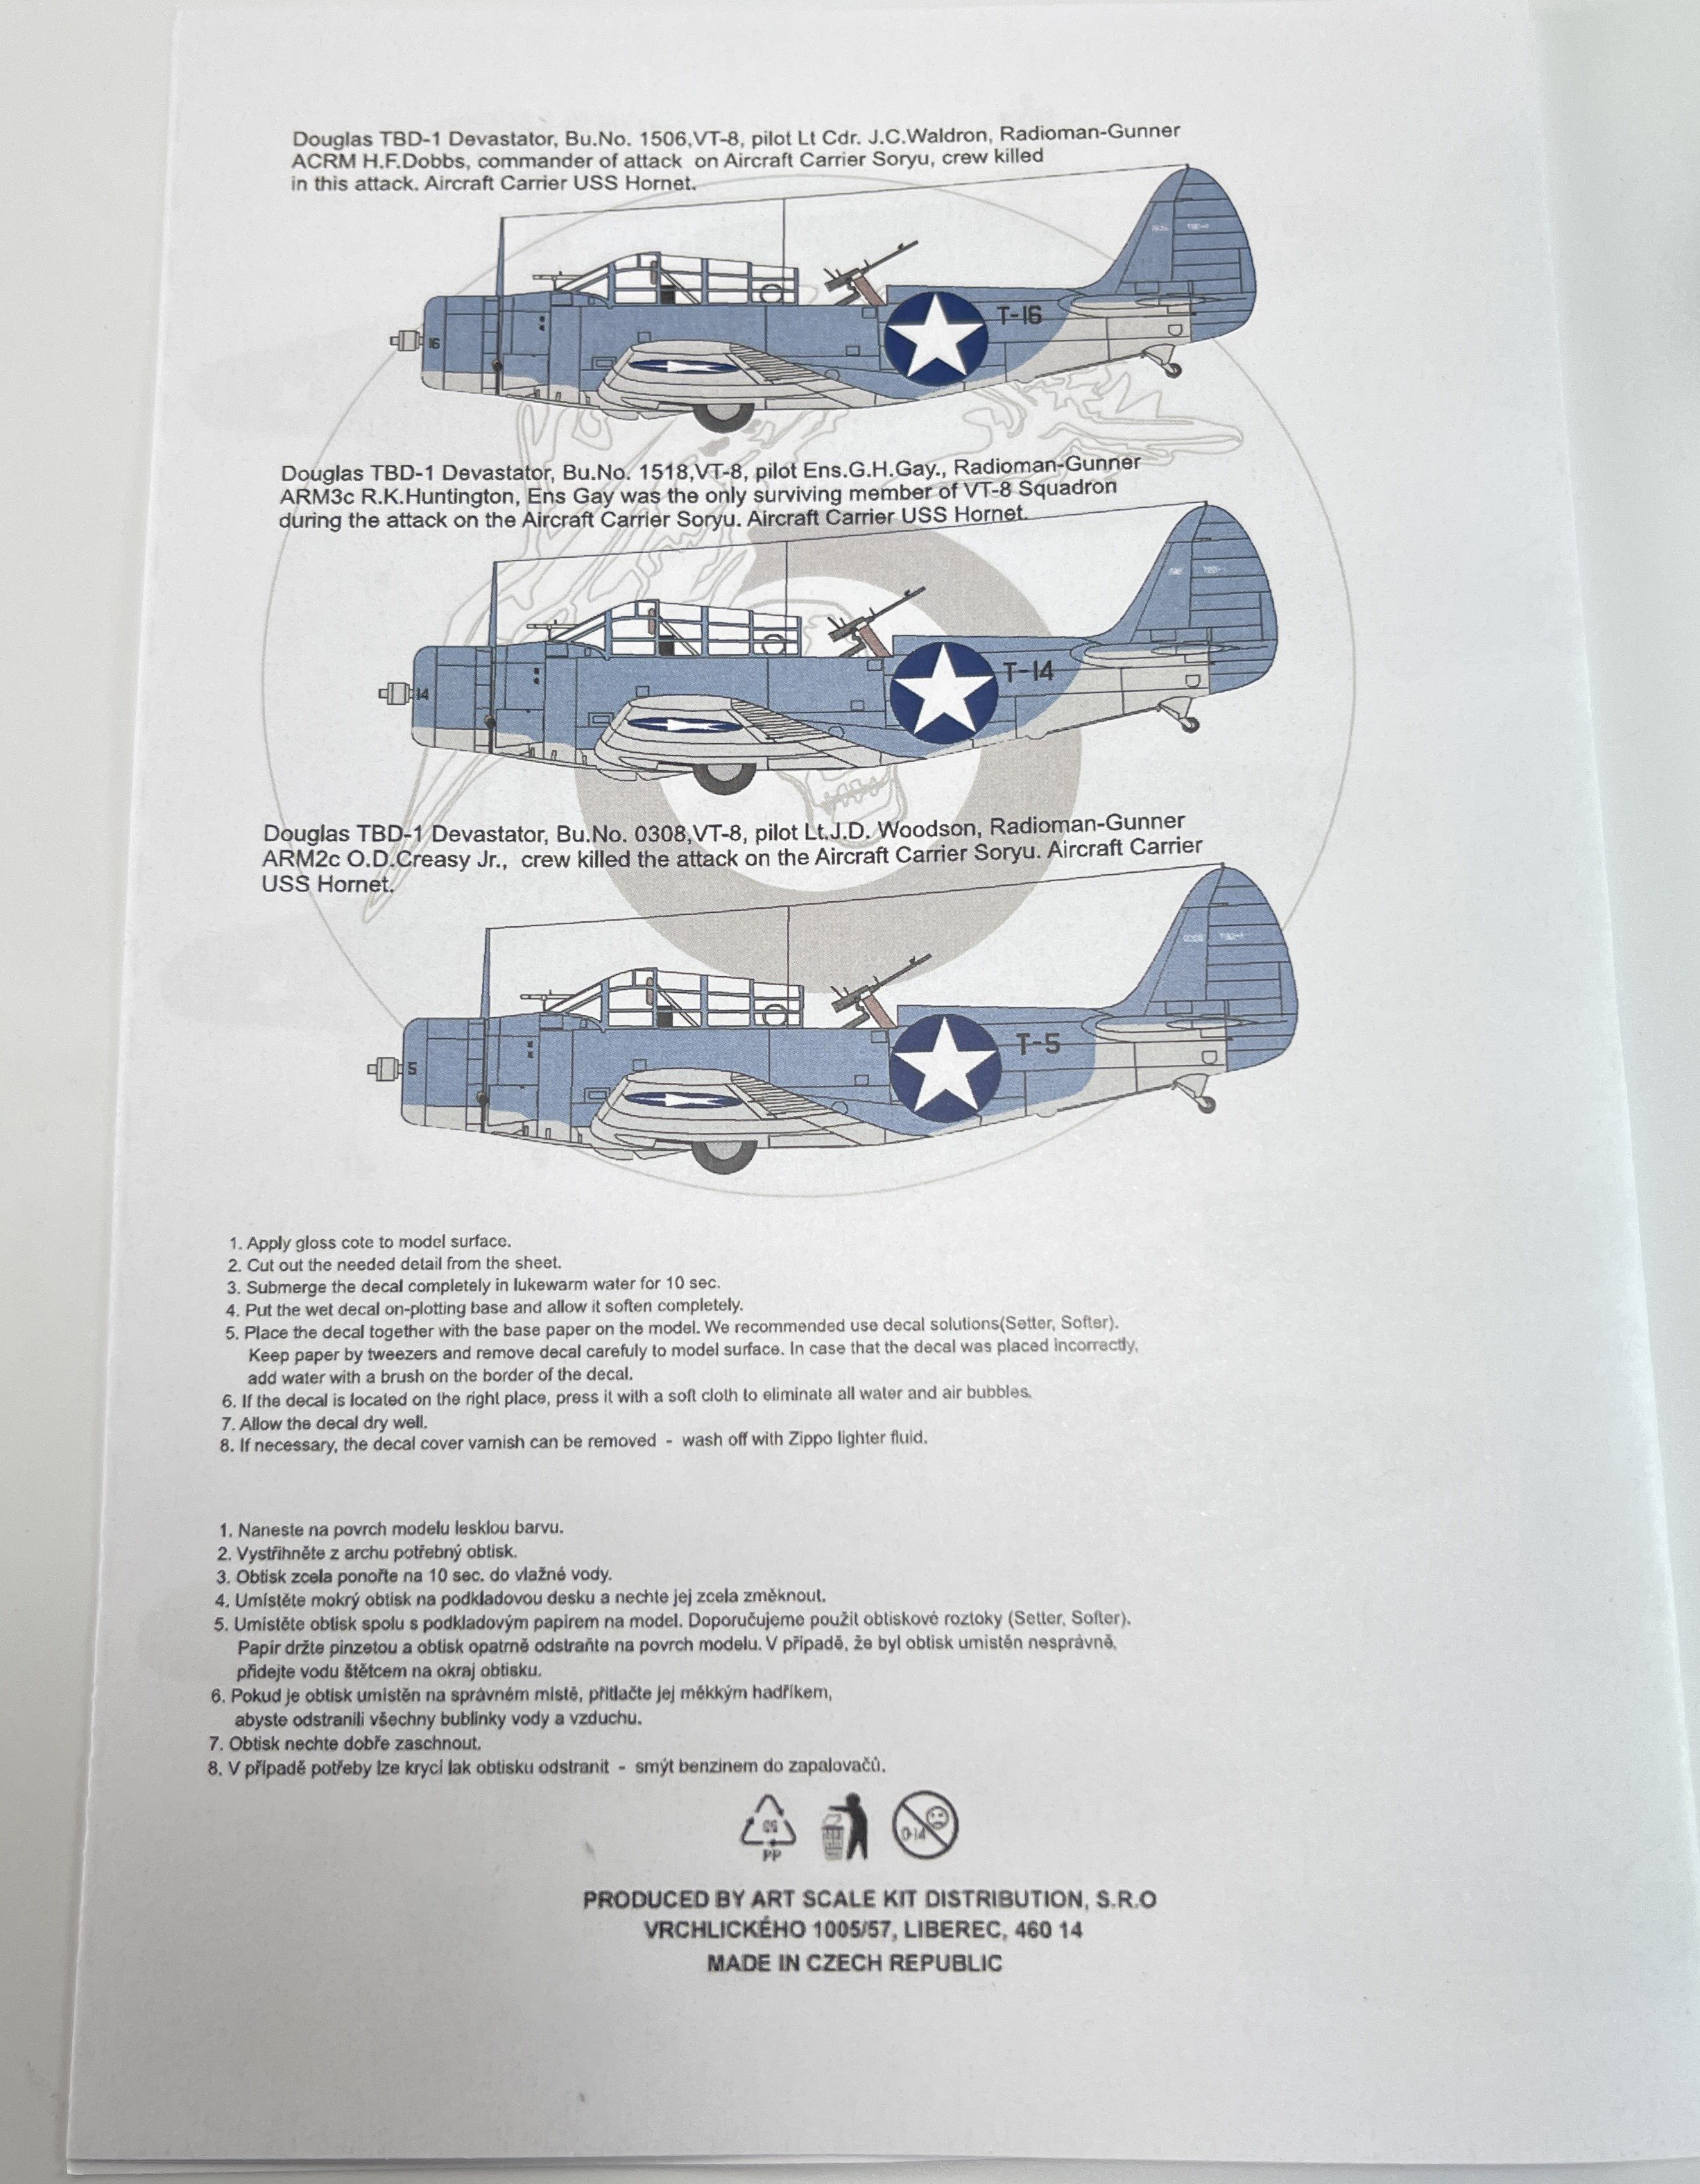
- Douglas TBD-1 Devastator, Bu.No. 1506,VT-8, pilot Lt Cdr. J.C.Waldron, Radio Operator/rear Gunner ACRM H.F.Dobbs, commander of attack on Aircraft Carrier Soryu, the crew was killed in this action. Aircraft Carrier USS Hornet.
- Douglas TBD-1 Devastator, Bu.No. 1518,VT-8, pilot Ens.G.H.Gay., Radio Operator/rear Gunner ARM3c R.K.Huntington, Ens Gay was the only surviving member of VT-8 Squadron during the attack on the Aircraft Carrier Soryu. Aircraft Carrier USS Hornet.
- Douglas TBD-1 Devastator, Bu.No. 0308,VT-8, pilot Lt.J.D. Woodson, Radio Operator/rear Gunner ARM2c O.D.Creasy Jr., the crew was killed the attack on the Aircraft Carrier Soryu. Aircraft Carrier USS Hornet.
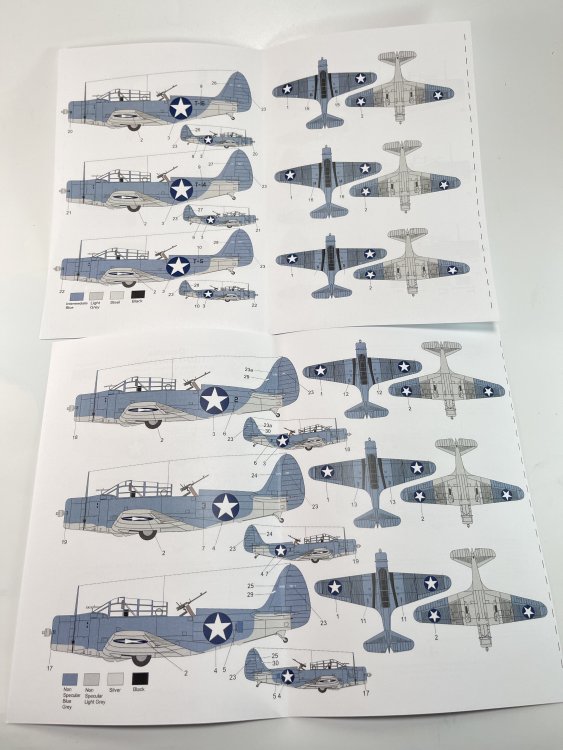


Despite having six options, you only get insignias for two planes.
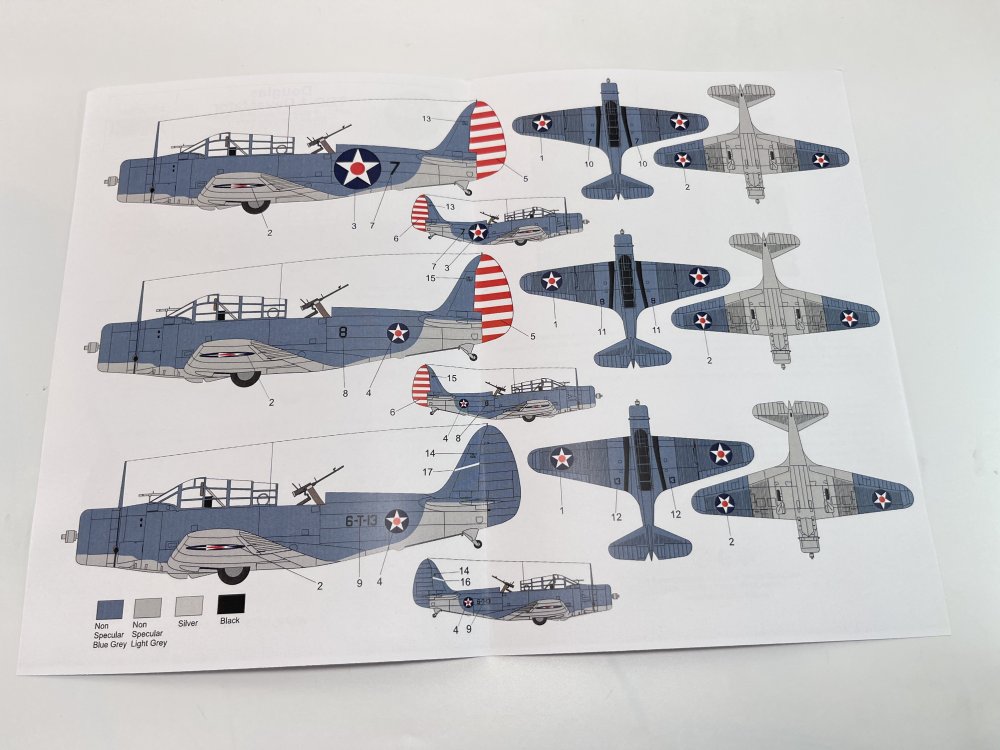
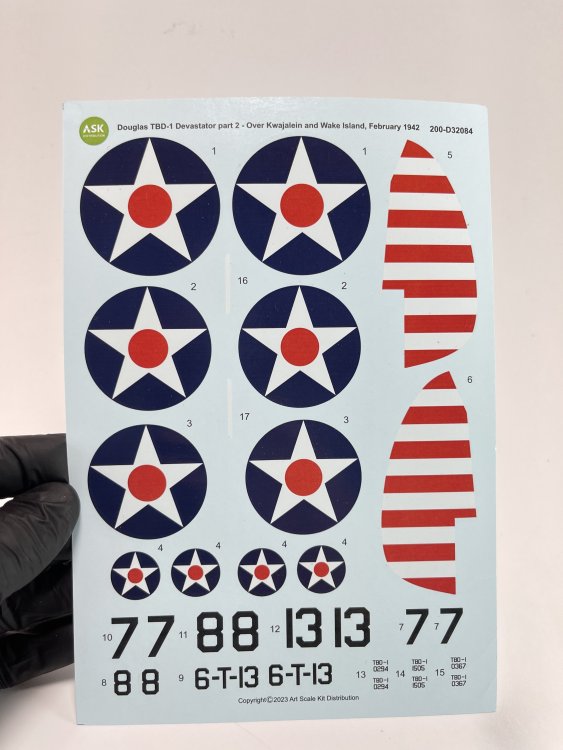
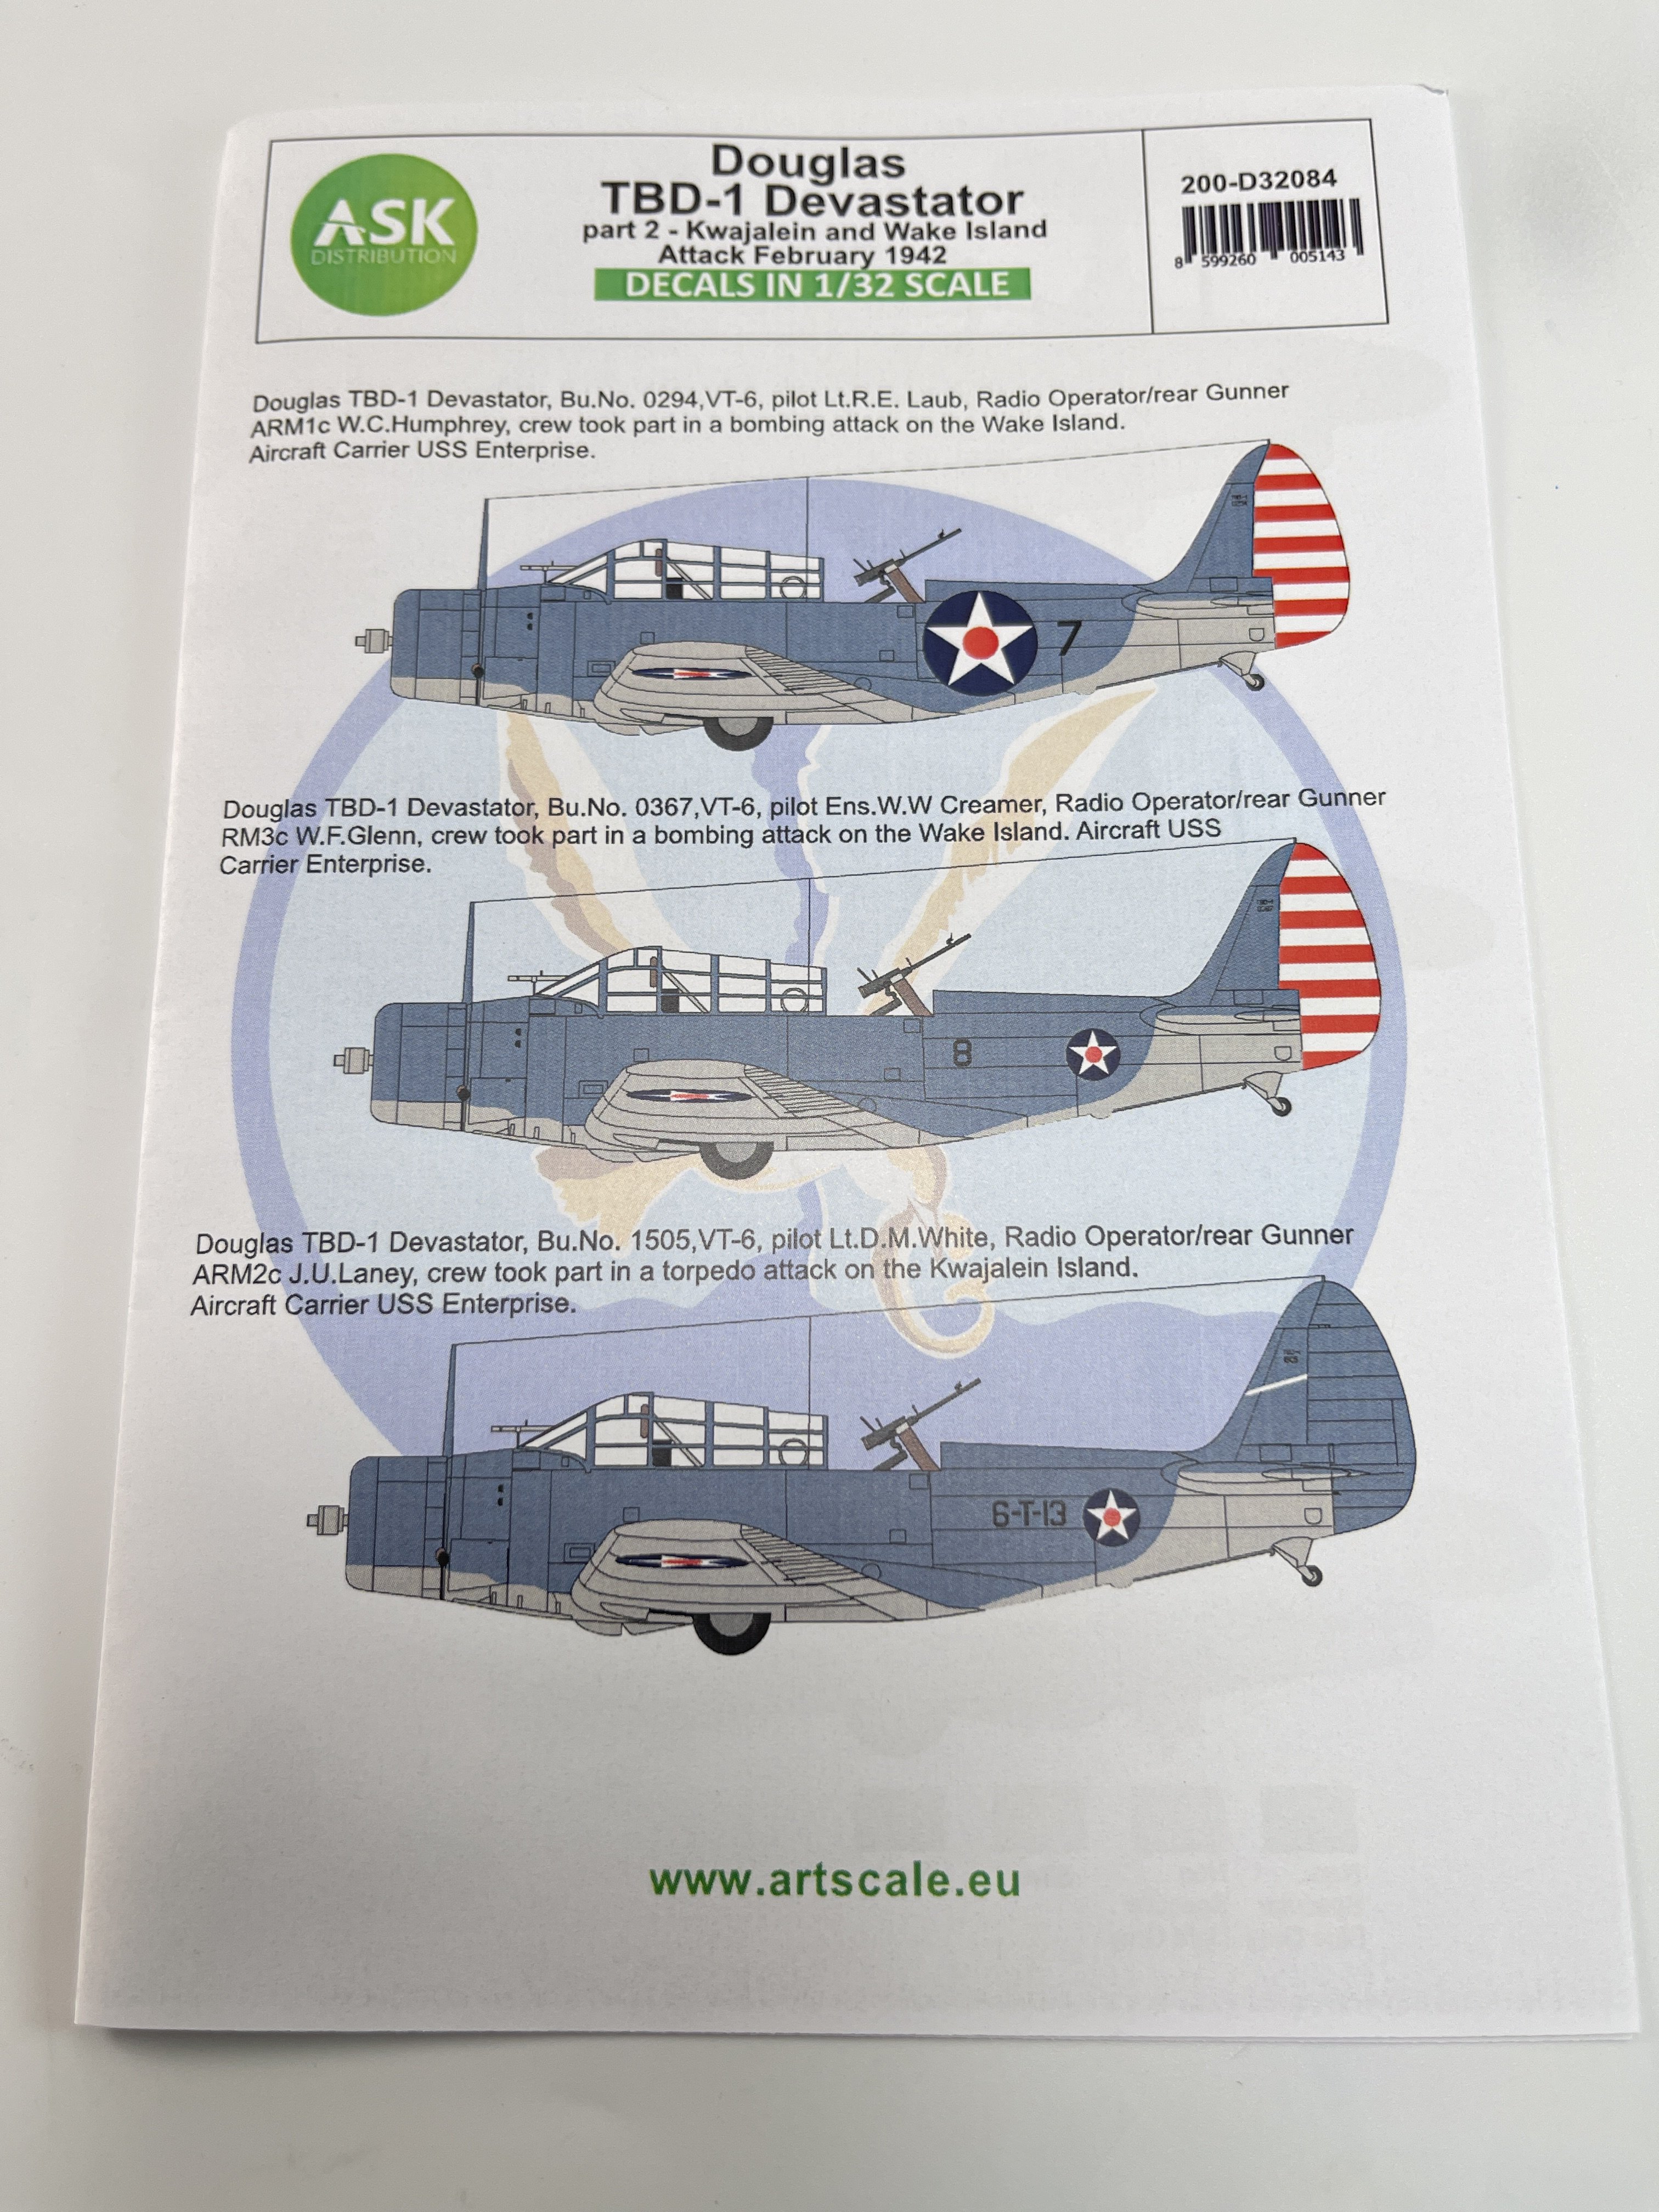
Douglas TBD-1 Devastator– part 2 – Kwajalein and Wake Island Battle of Midway – 4 June, 1942;
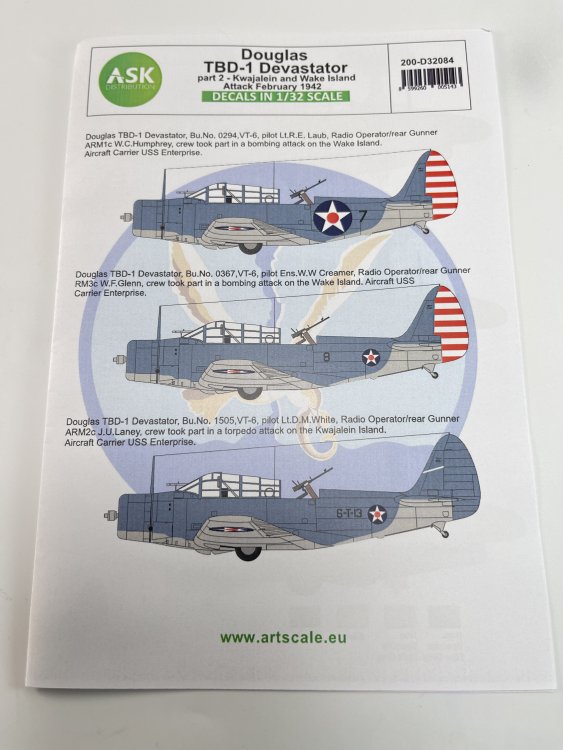
Catalogue number200-D32084
Price: 12,00€
To order, click here.
So this sheet is not very different from the previous one but at least the schemes are a bit different and you also get only 3schemes (you only have insignias for two):
- Douglas TBD-1 Devastator, Bu.No. 0294,VT-6, pilot Lt.R.E. Laub, Radio Operator/rear Gunner ARM1c W.C.Humphrey, crew took part in a bombing attack on the Wake Island. Aircraft Carrier USS Enterprise.
- Douglas TBD-1 Devastator, Bu.No. 0367,VT-6, pilot Ens.W.W Creamer, Radio Operator/rear Gunner RM3c W.F.Glenn, crew took part in a bombing attack on the Wake Island. Aircraft USS Carrier Enterprise.
- Douglas TBD-1 Devastator, Bu.No. 1505,VT-6, pilot Lt.D.M.White, Radio Operator/rear Gunner ARM2c J.U.Laney, crew took part in a torpedo attack on the Kwajalein Island. Aircraft Carrier USS Enterprise.
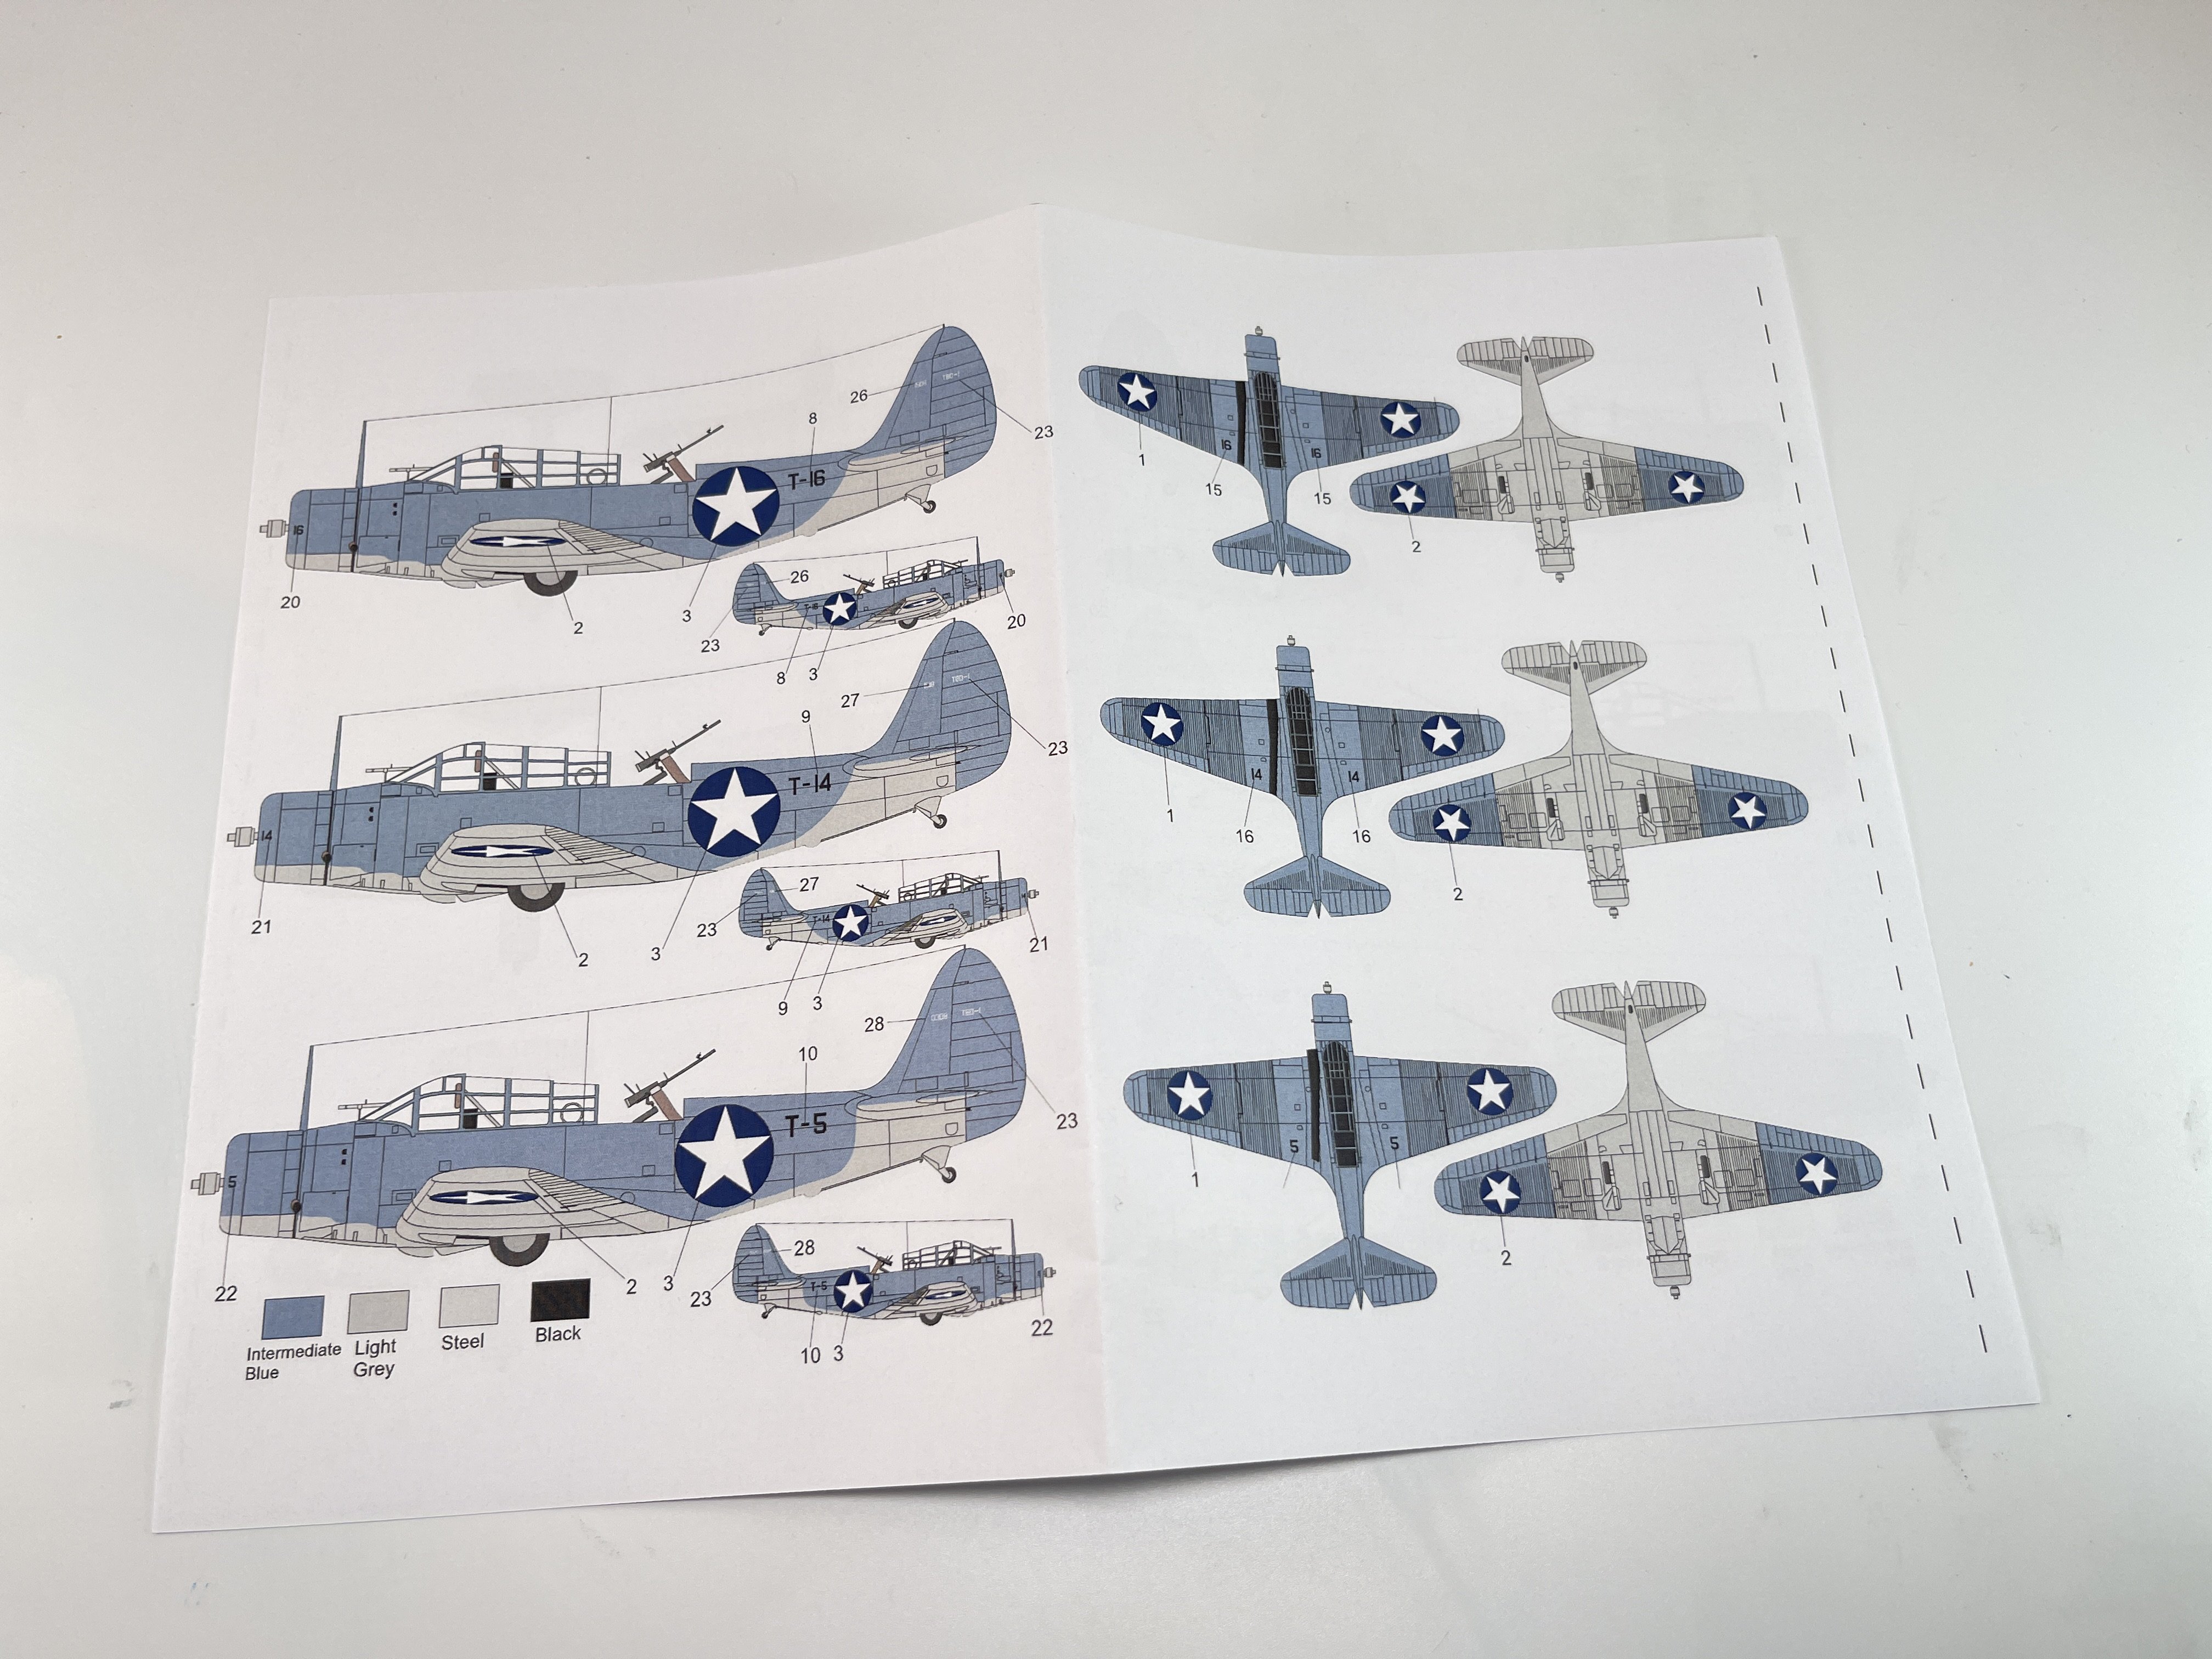
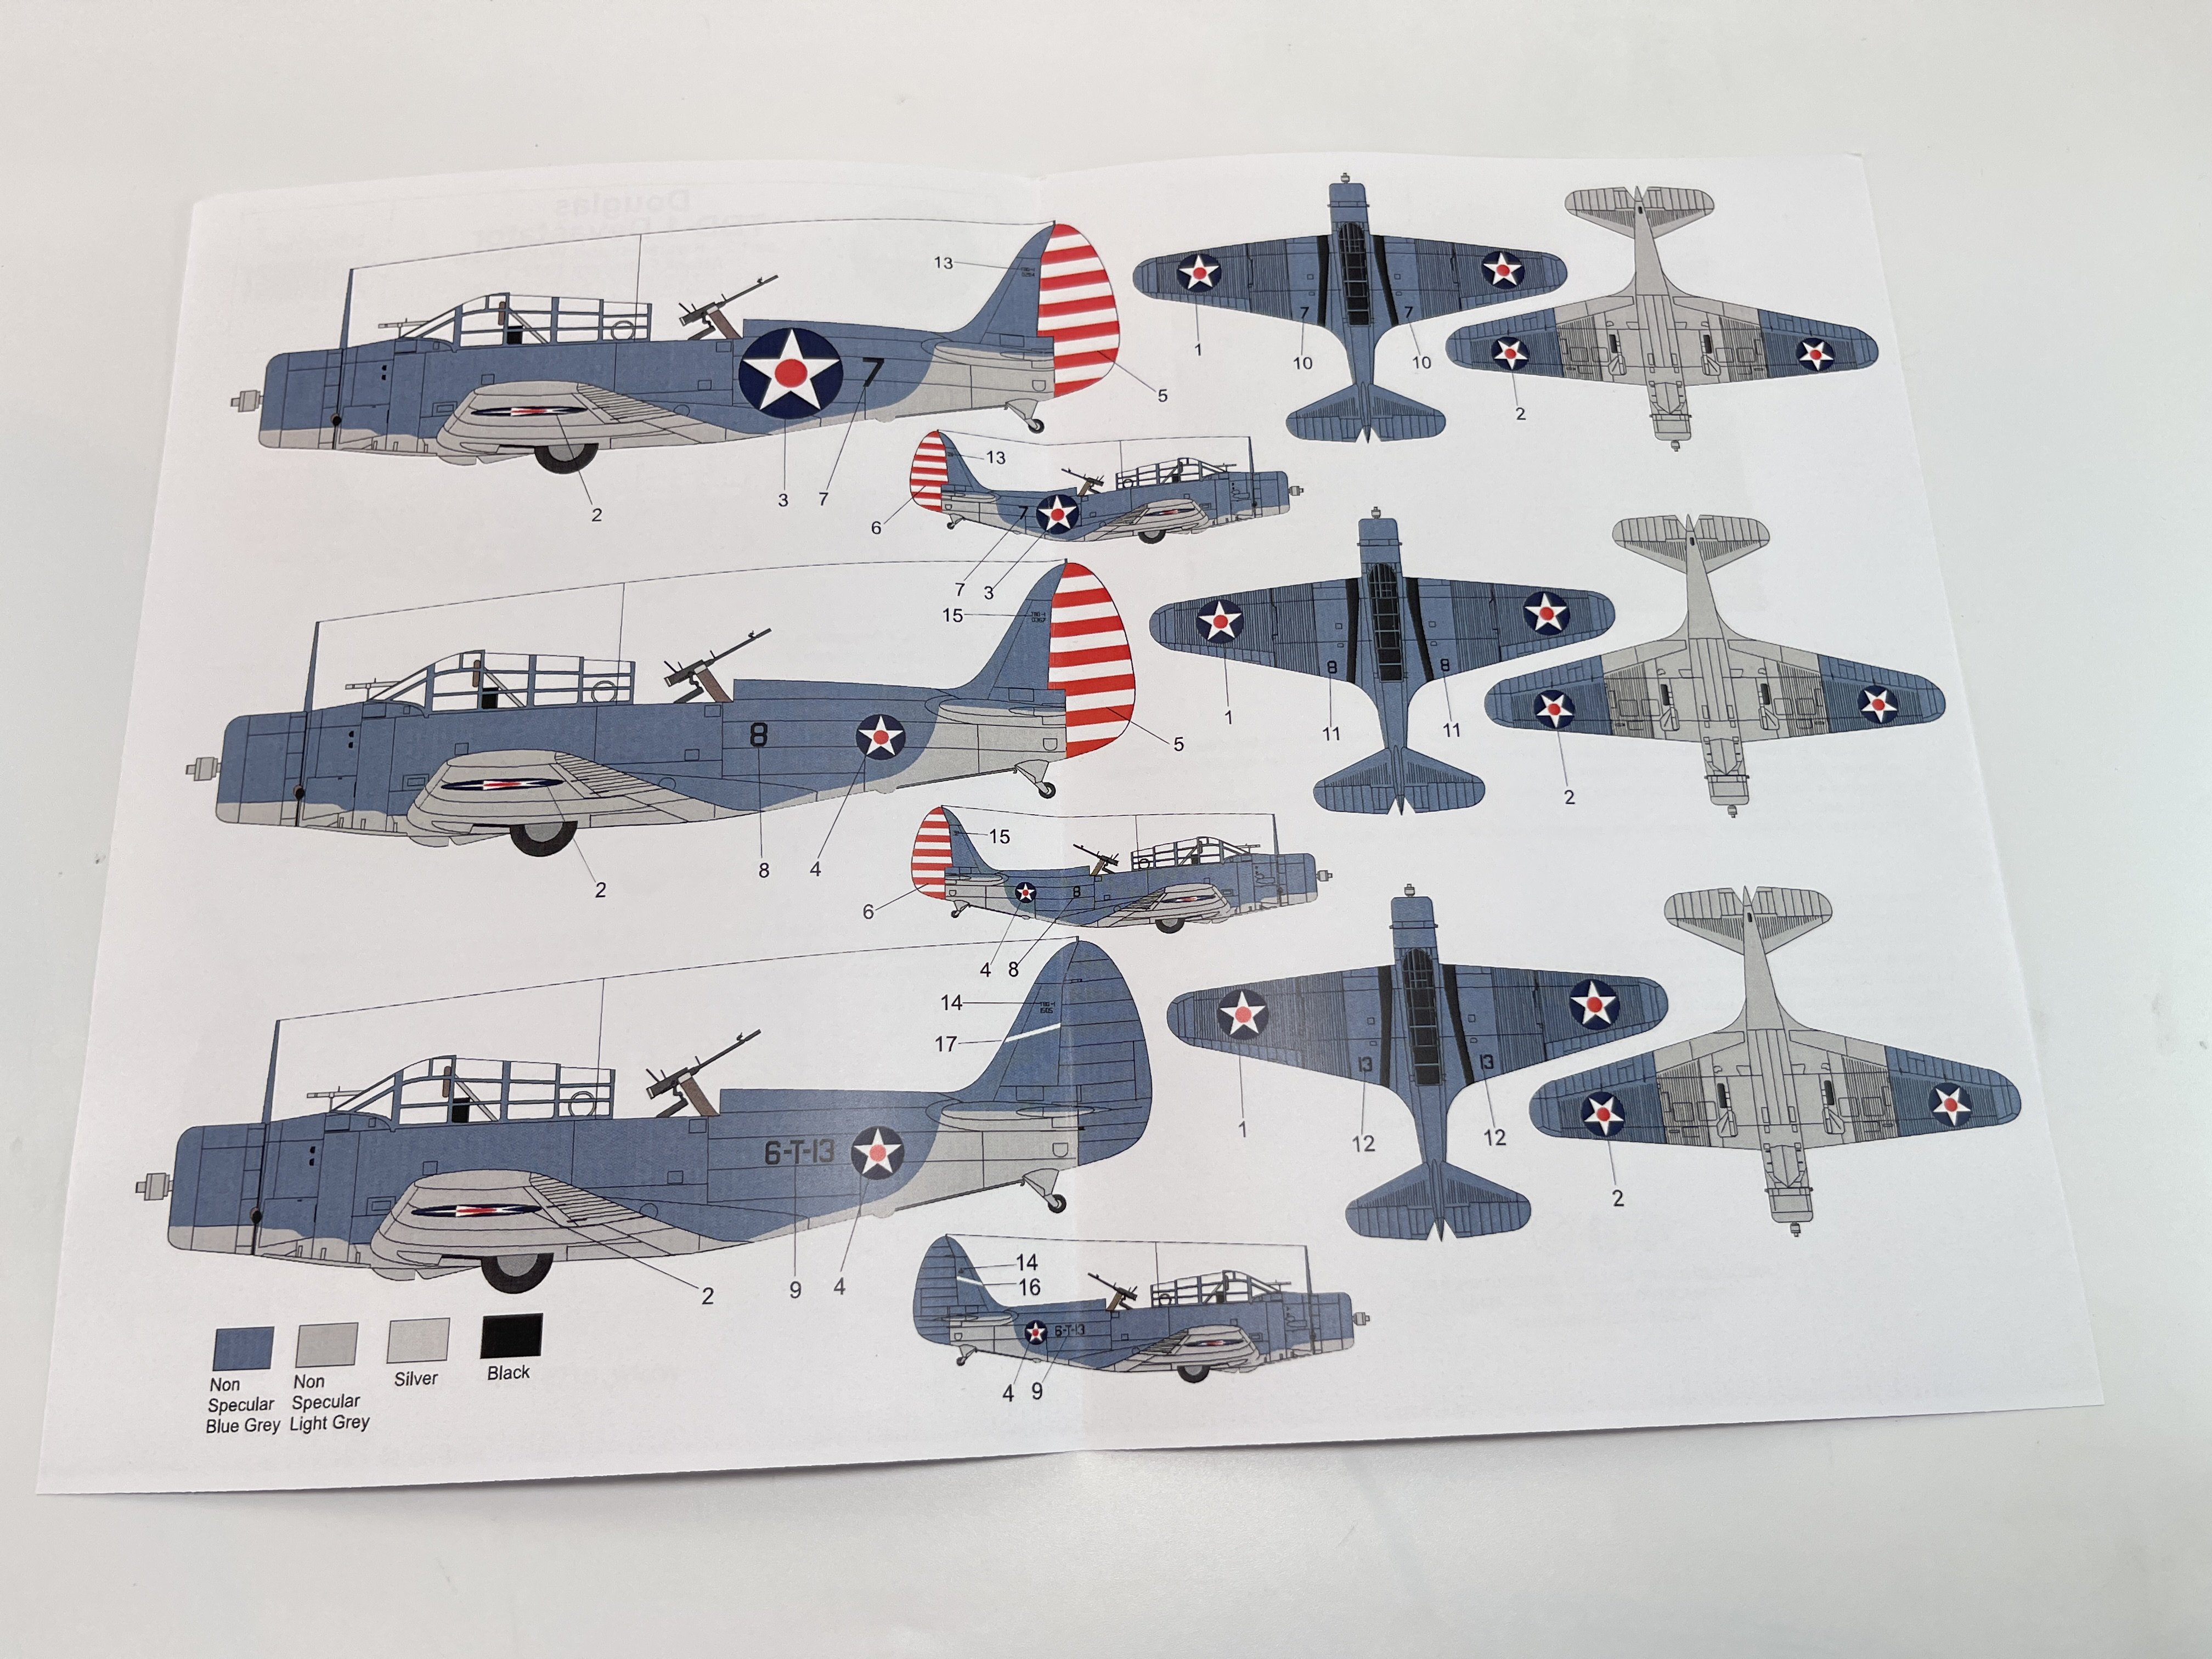
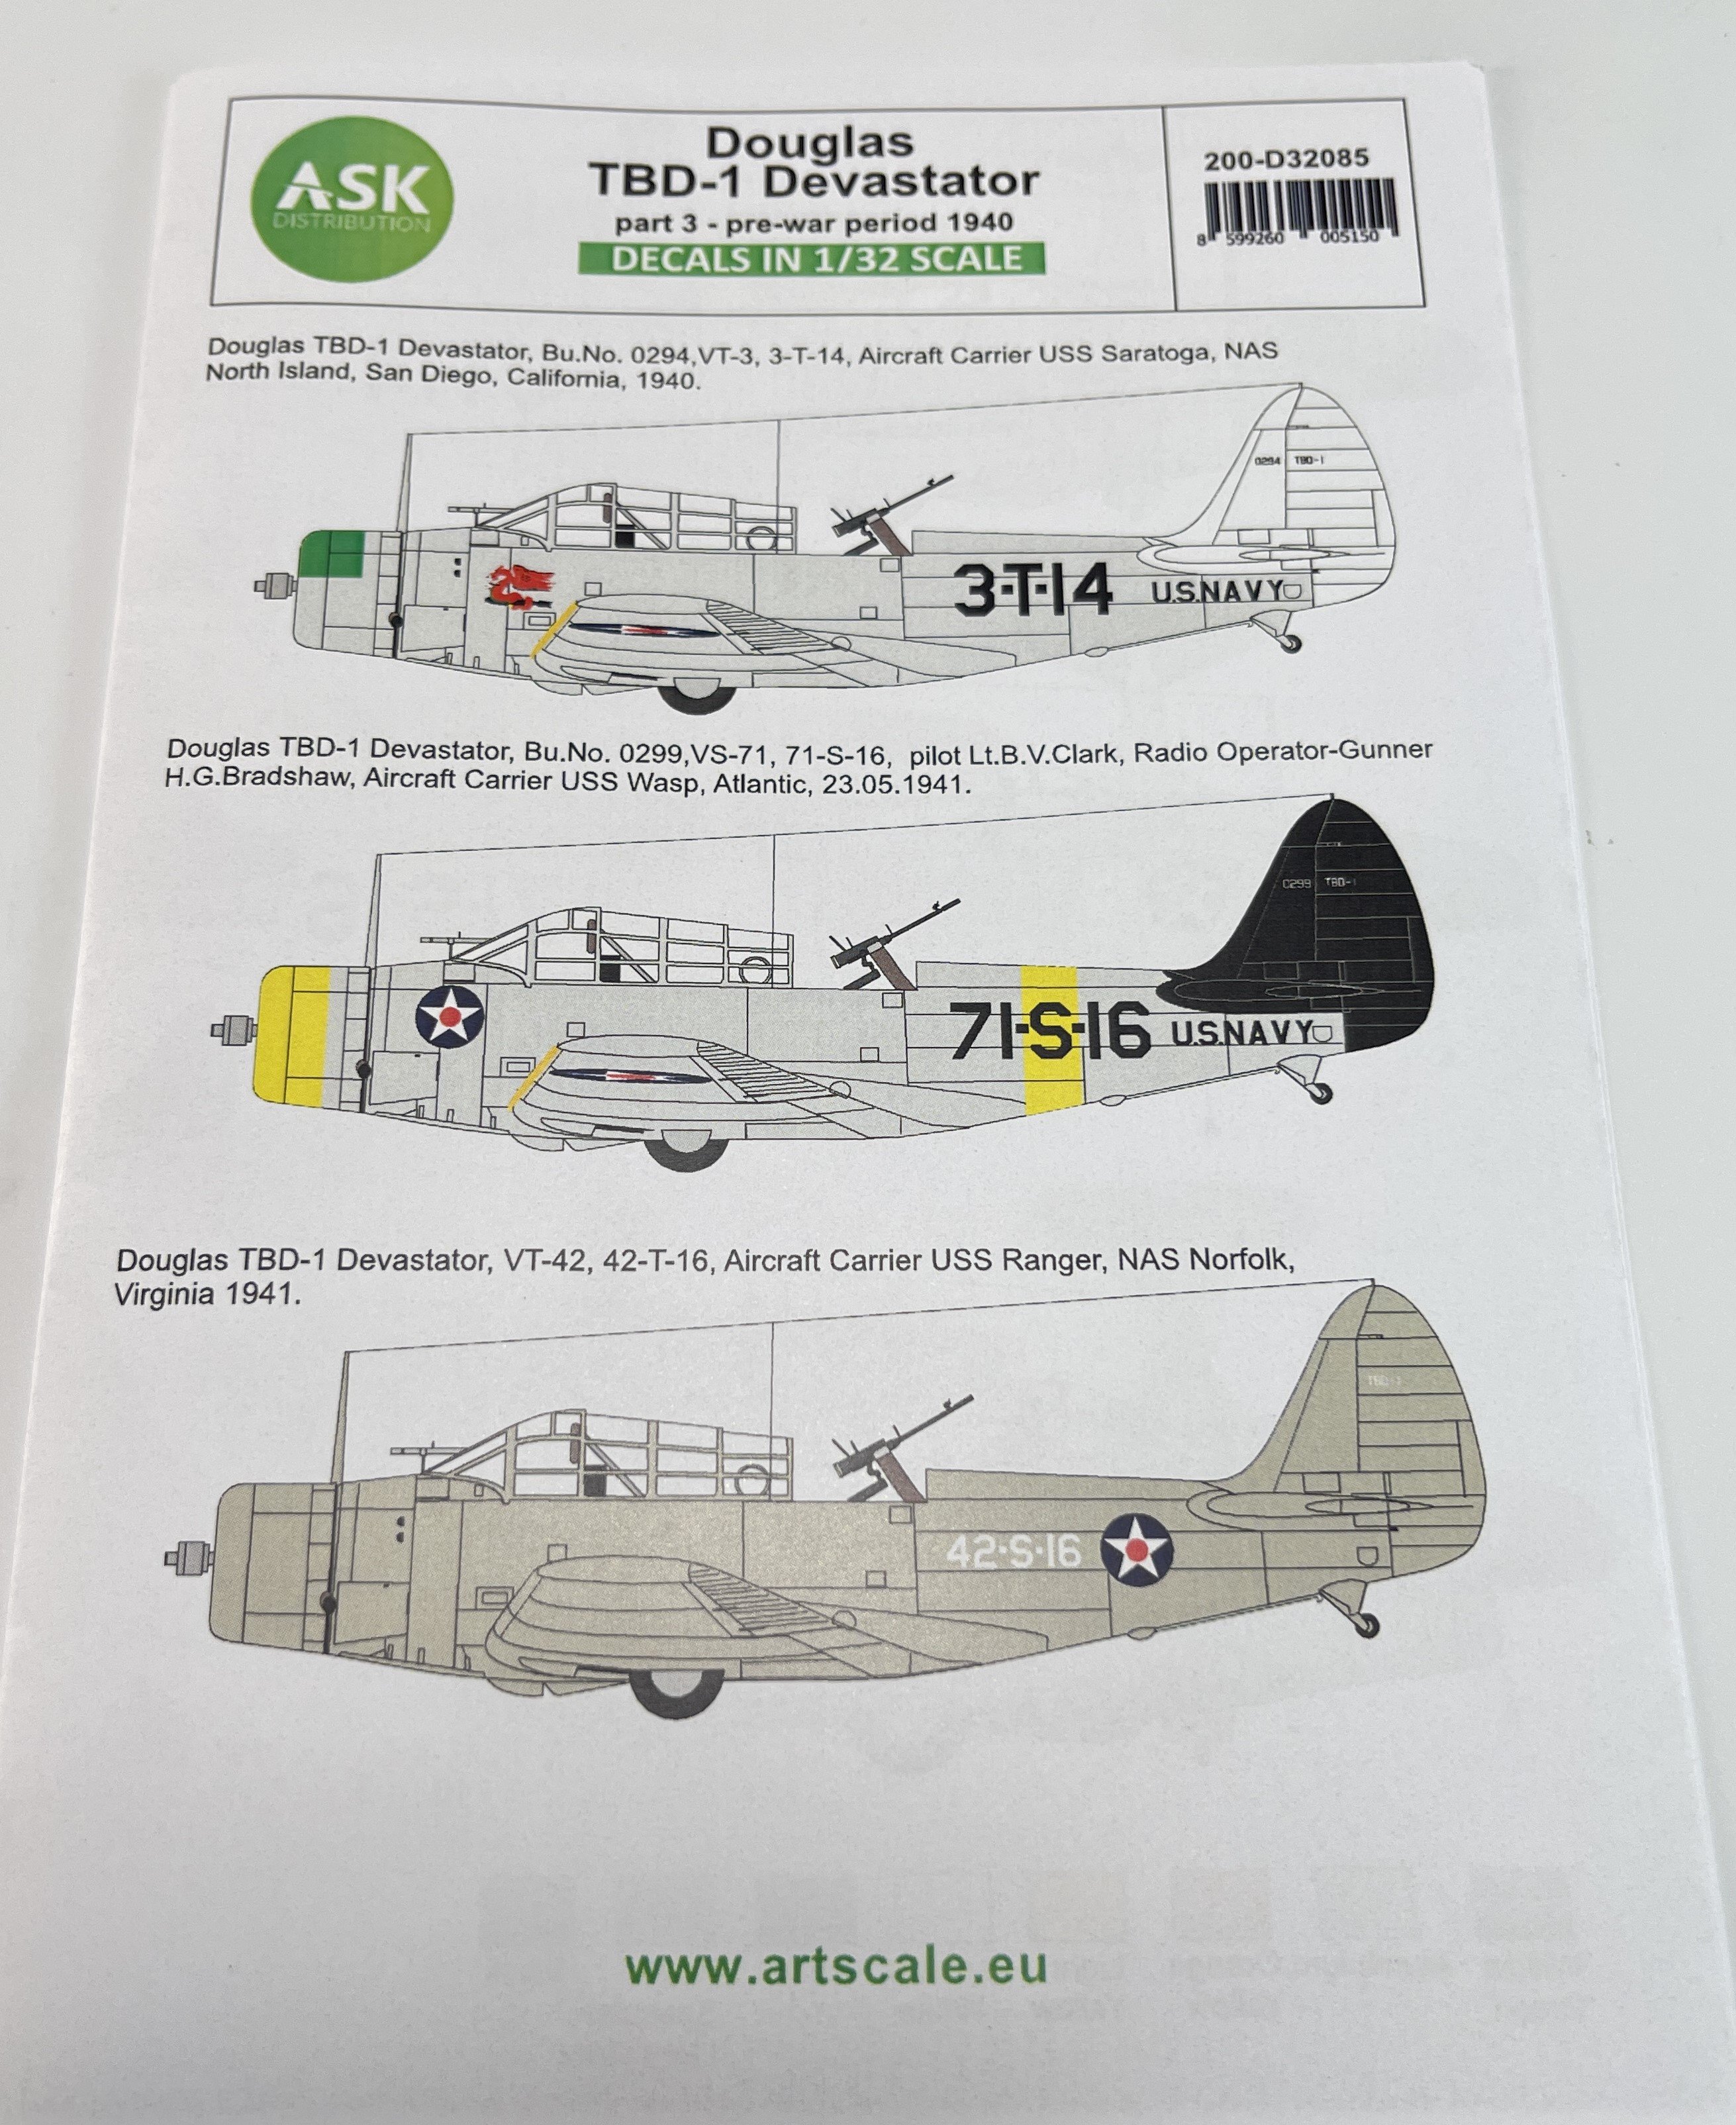
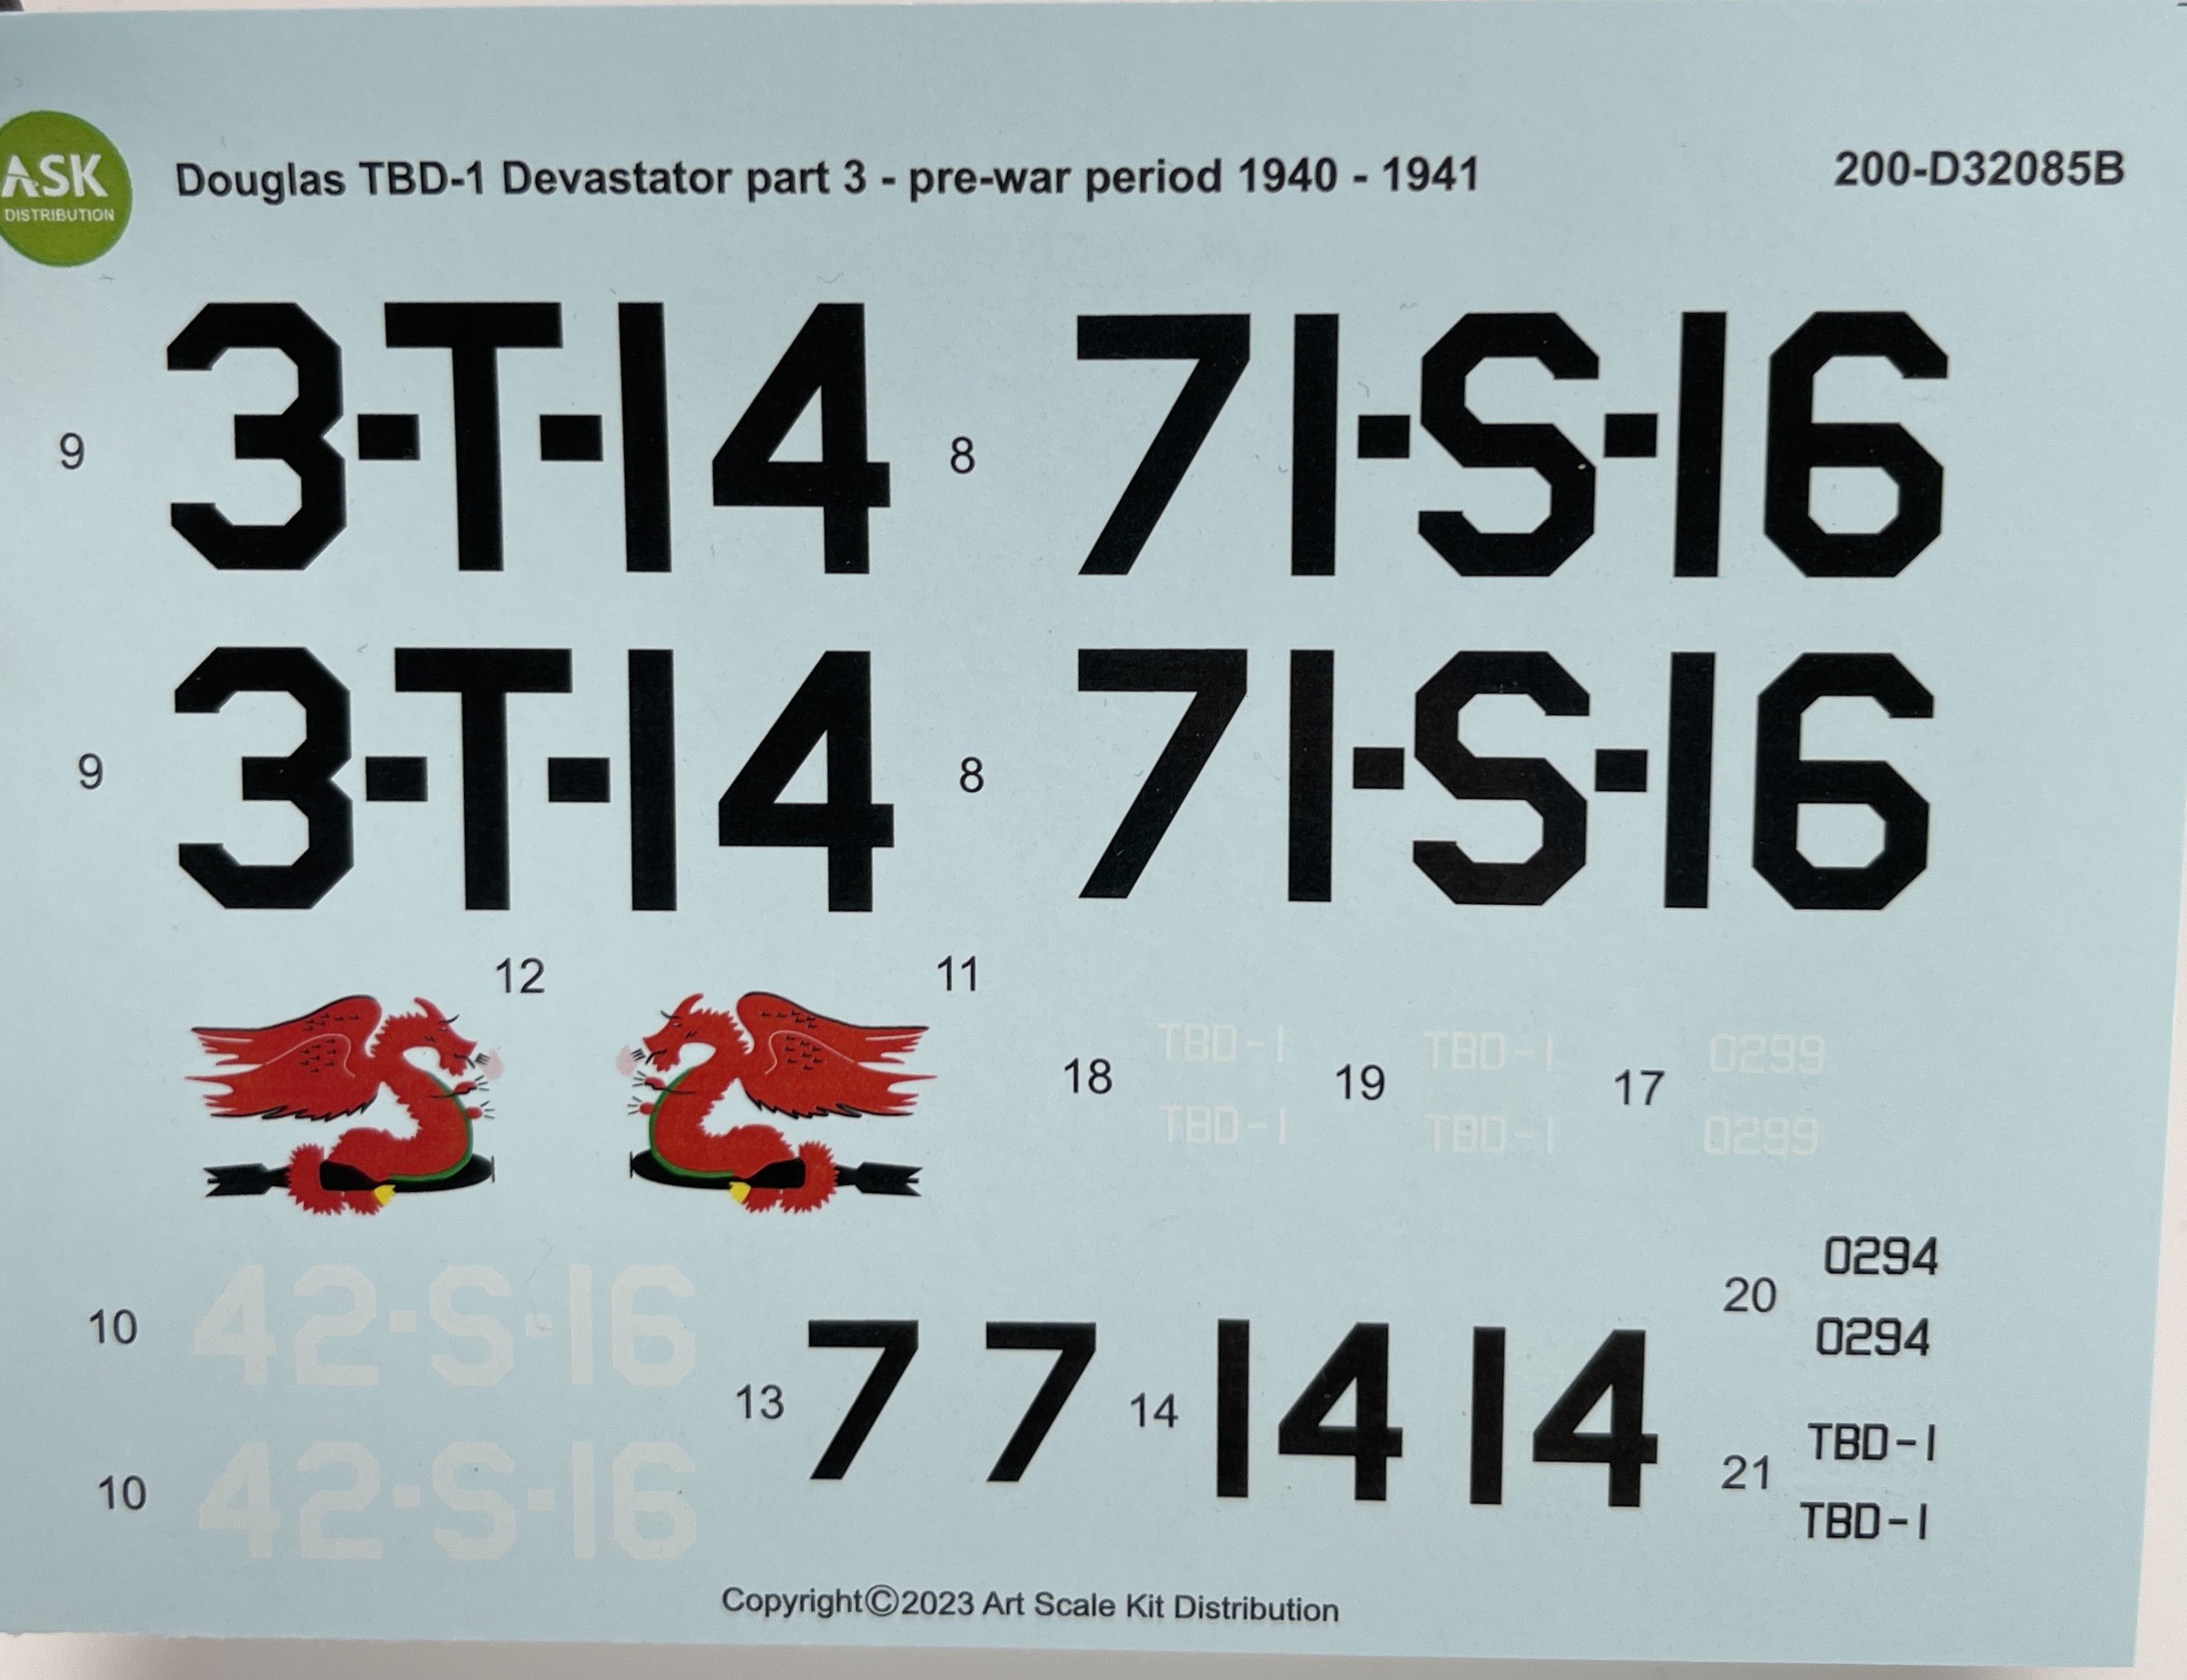
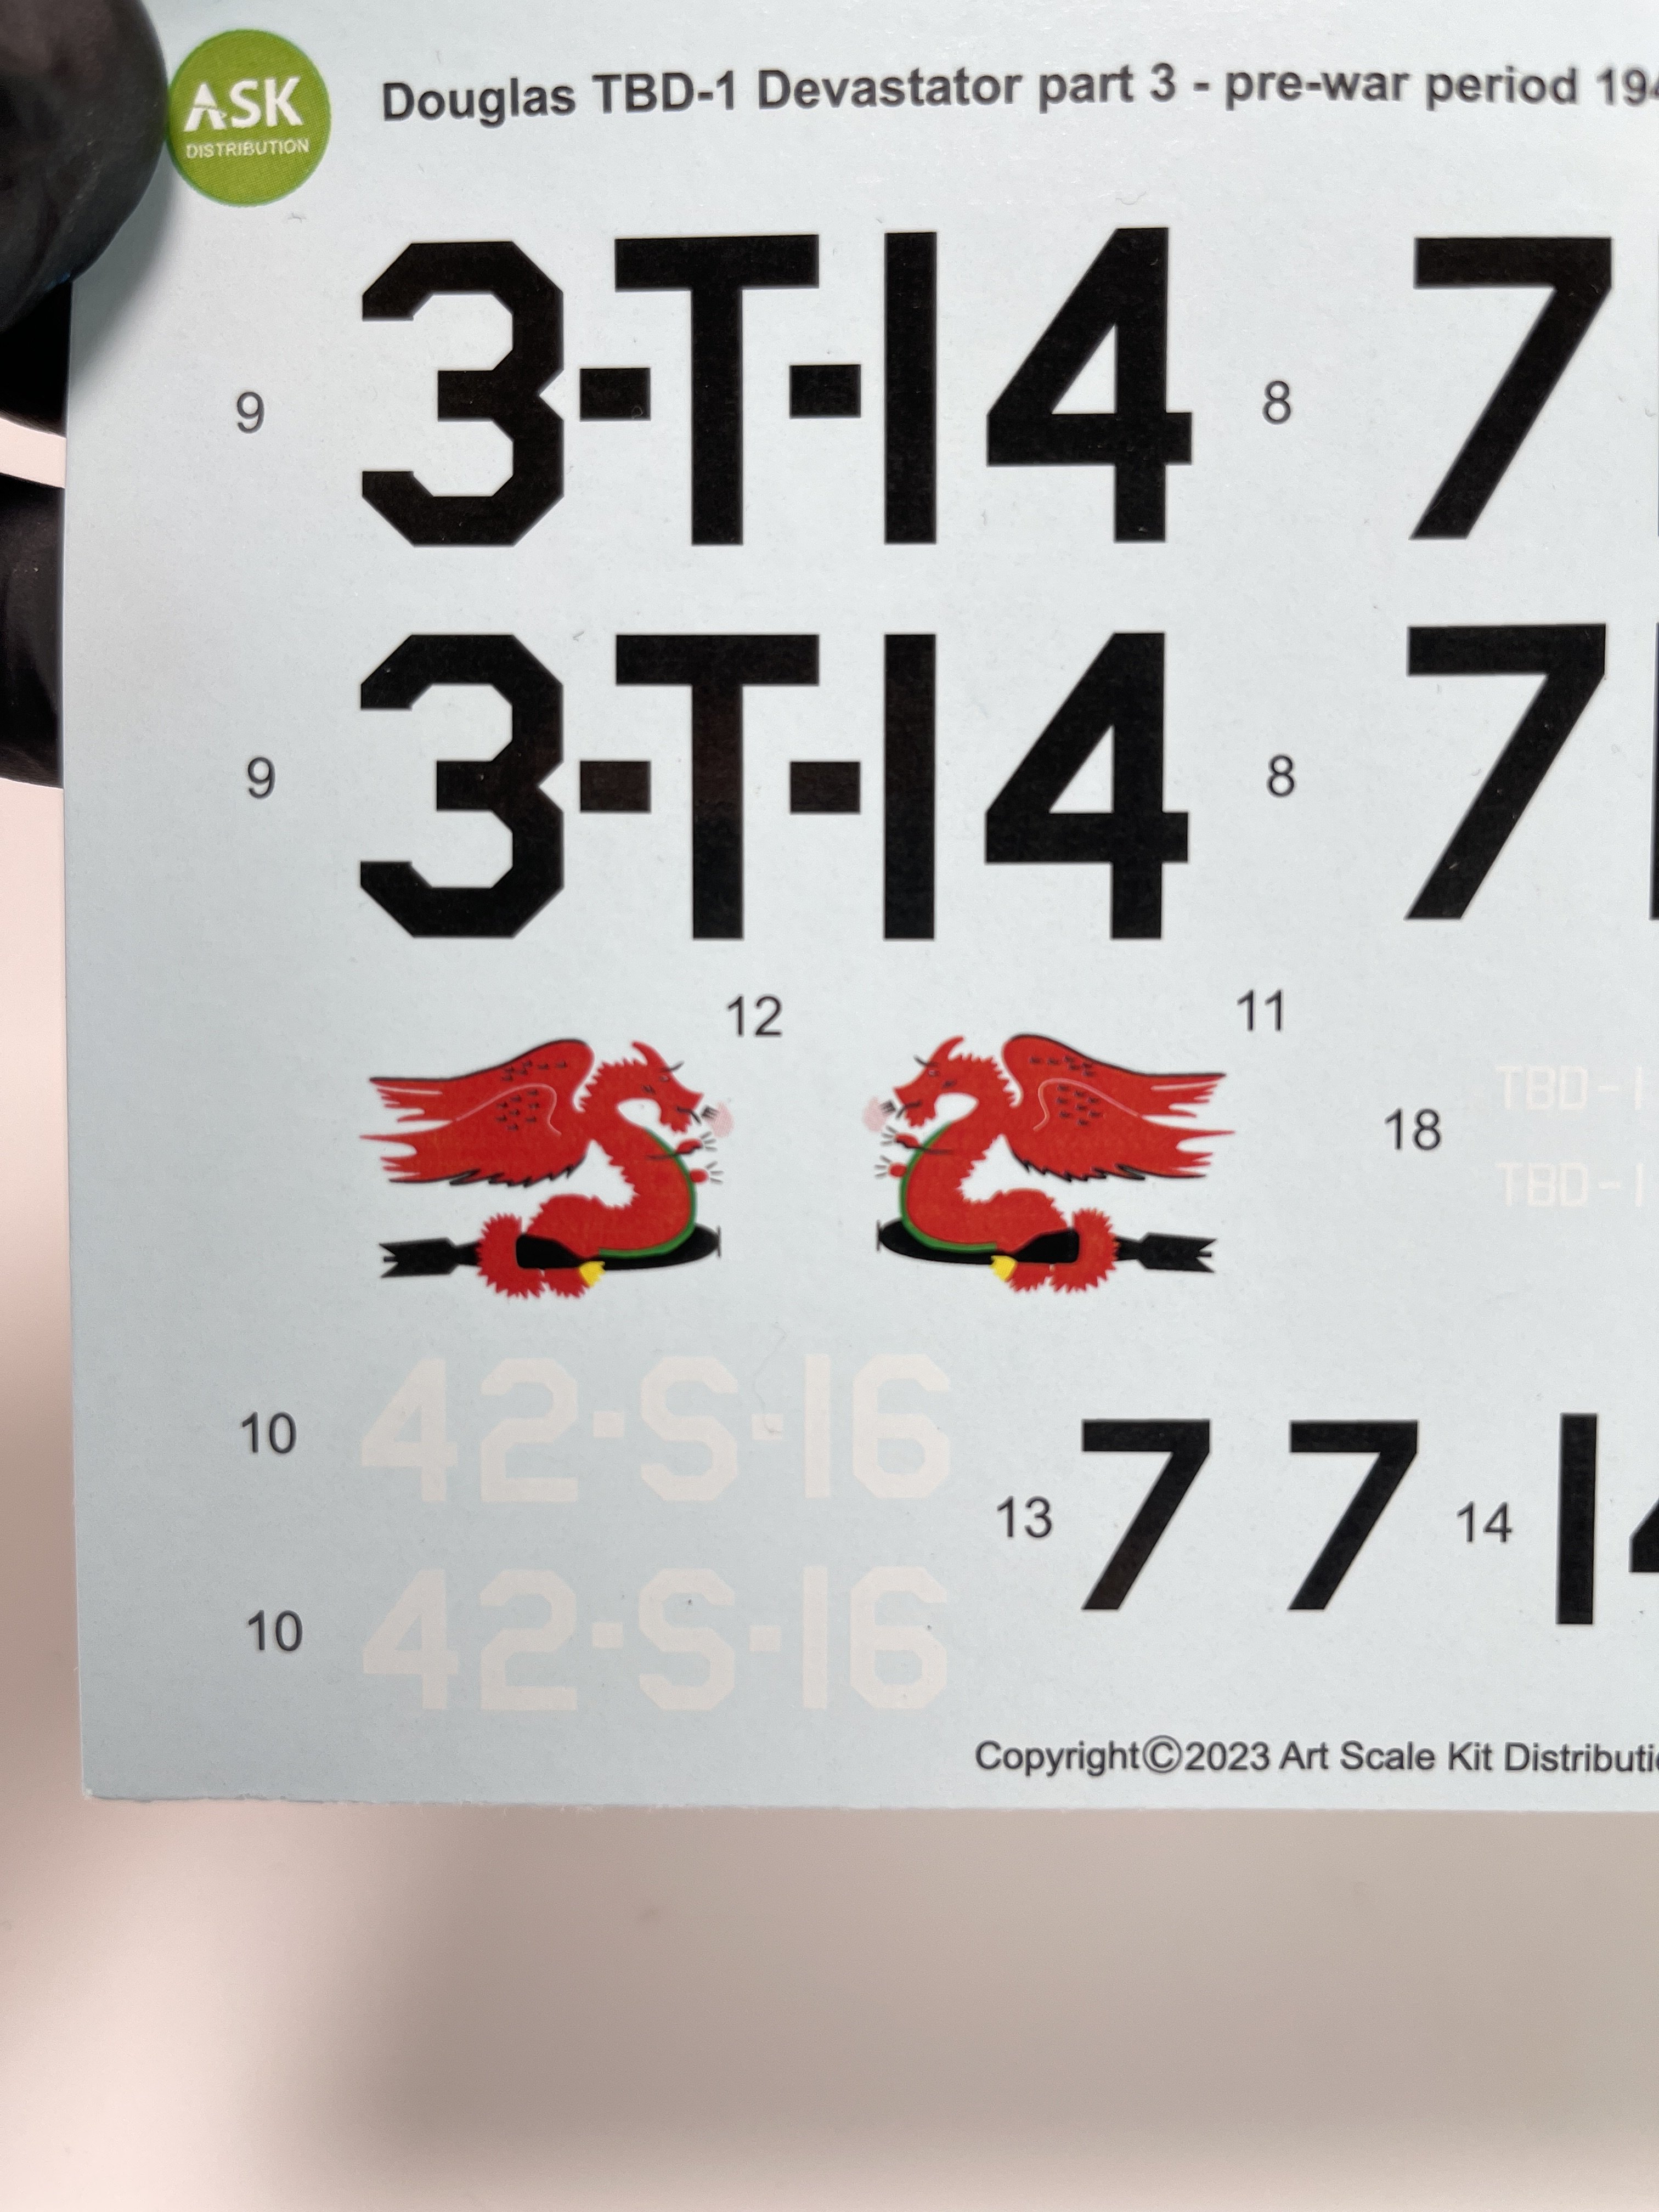
Douglas TBD-1 Devastator– part 3 – pre-war period 1940;
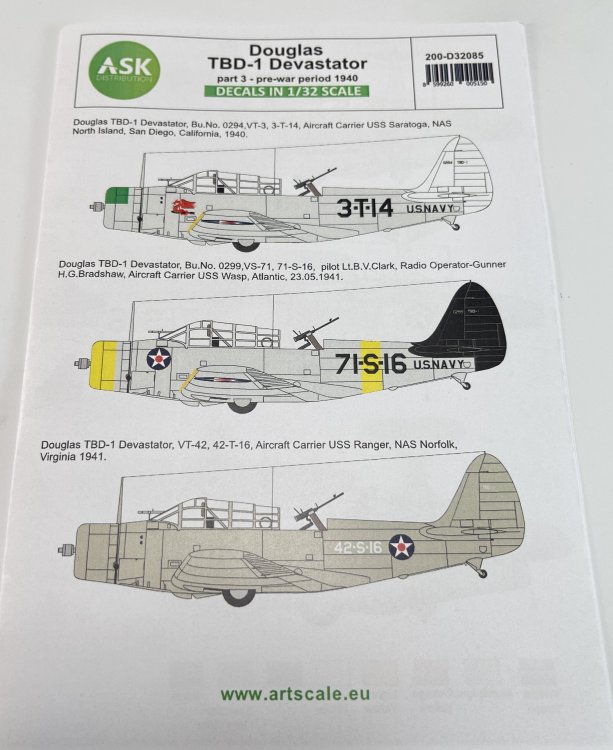
Catalogue number200-D32085
Price: 18,30€
To order, click here.
Now, the pre-war schemes. At least for me, these schemes are much more appealing in the Devastator!!
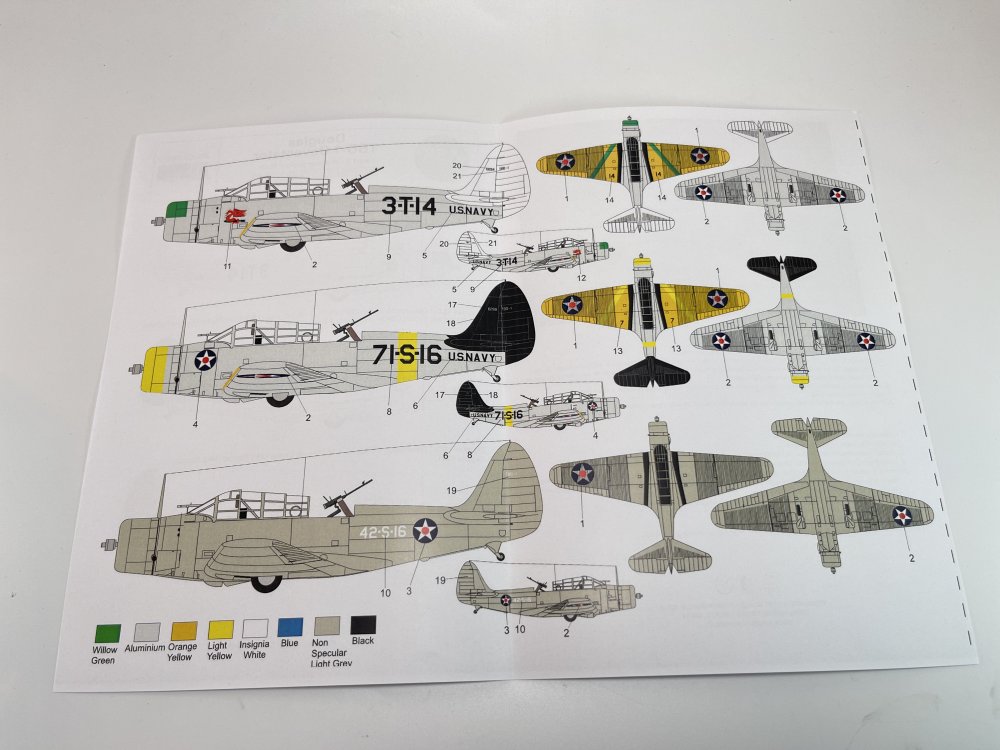

- Douglas TBD-1 Devastator, Bu.No.0294, VT-3, 3-T-14, Aircraft Carrier USS Saratoga, NAS North Island, San Diego, California, January 1938.
- Douglas TBD1 Devastator, Bu.No.0299, VS-71, 71-S-16, pilot Lt.B.V.Clark, Radio Operator/rear Gunner H.G.Bradshaw, Aircraft Carrier USS Wasp, Atlantic, 23.05.1941.
- Douglas TBD-1 Devastator, VT-42, 42-T-16, Aircraft Carrier USS Ranger, NAS Norfolk, Virginia 1941.
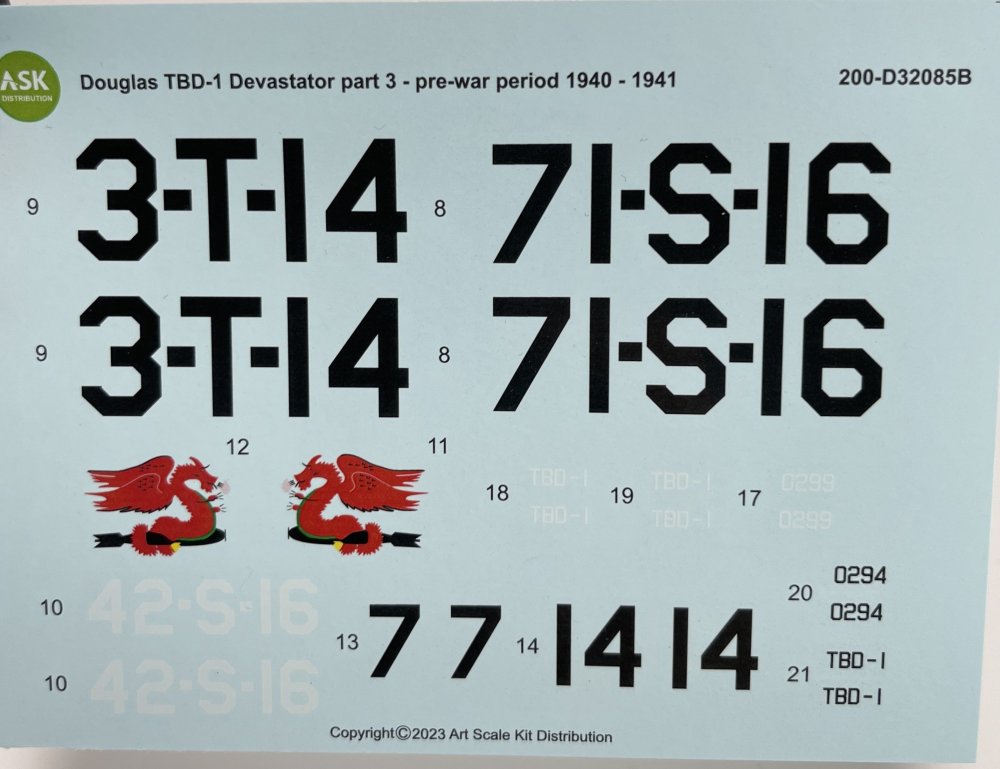

The second scheme, pilot V Clark and Radio-Operator Bradschaw, is my favorite with a black tail and yellow wings!
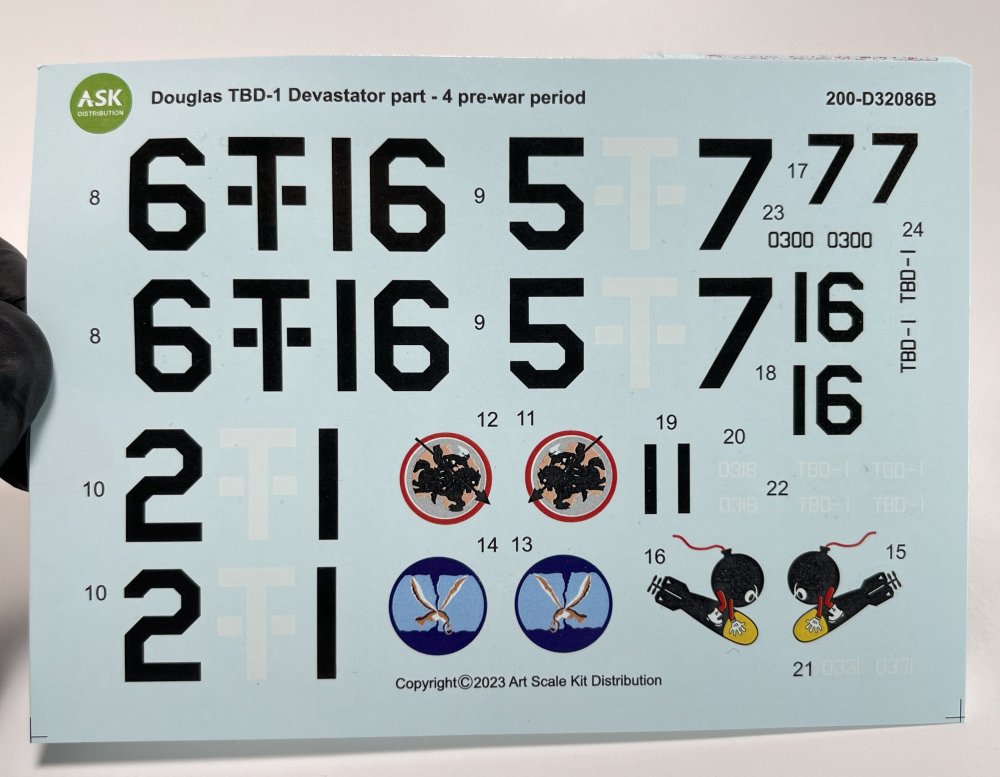
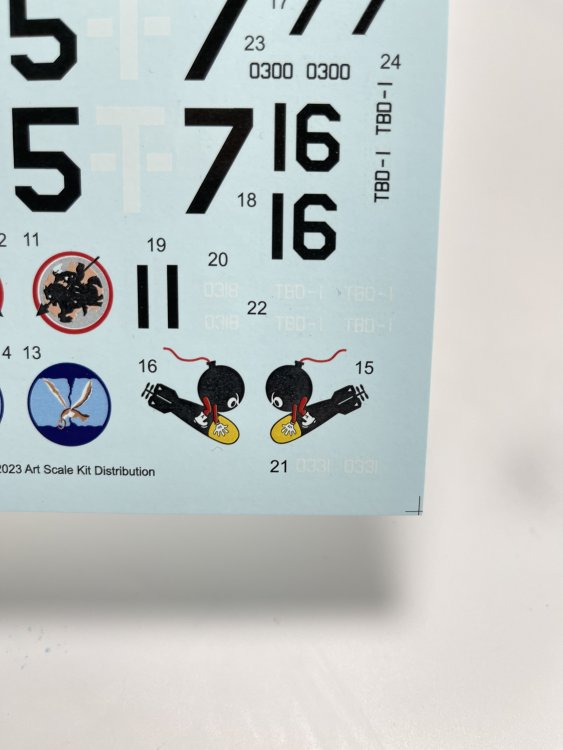
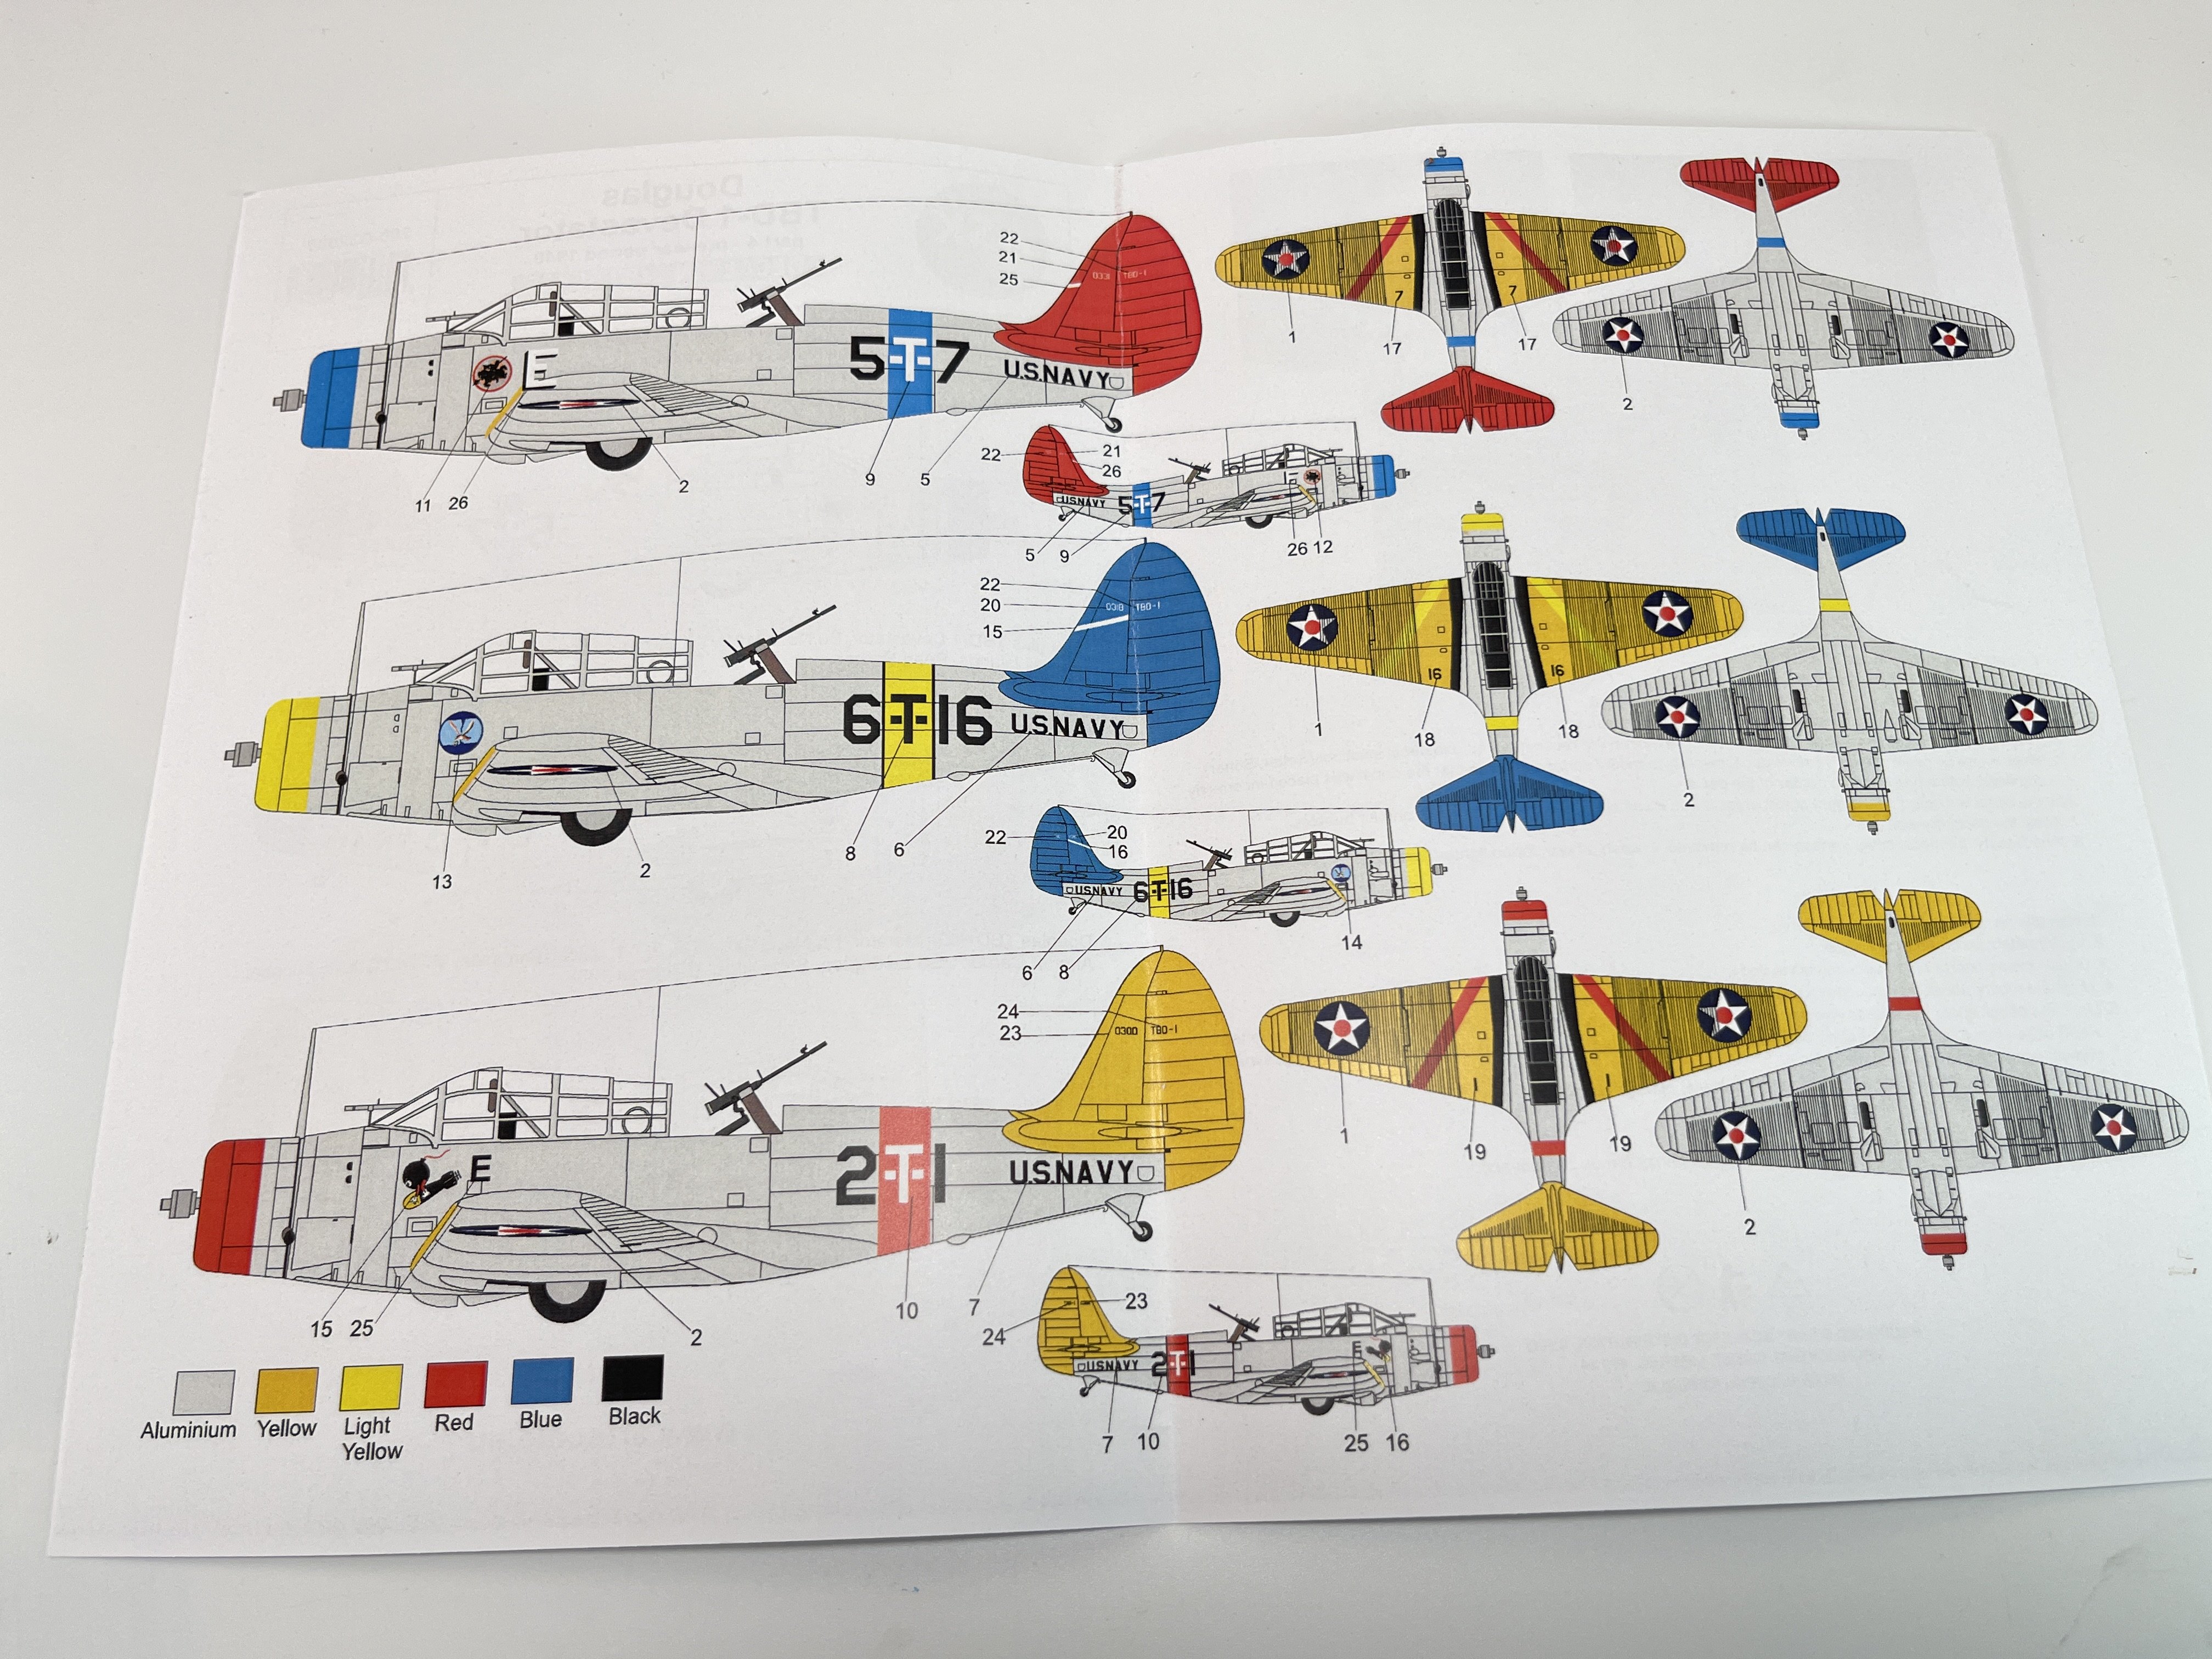
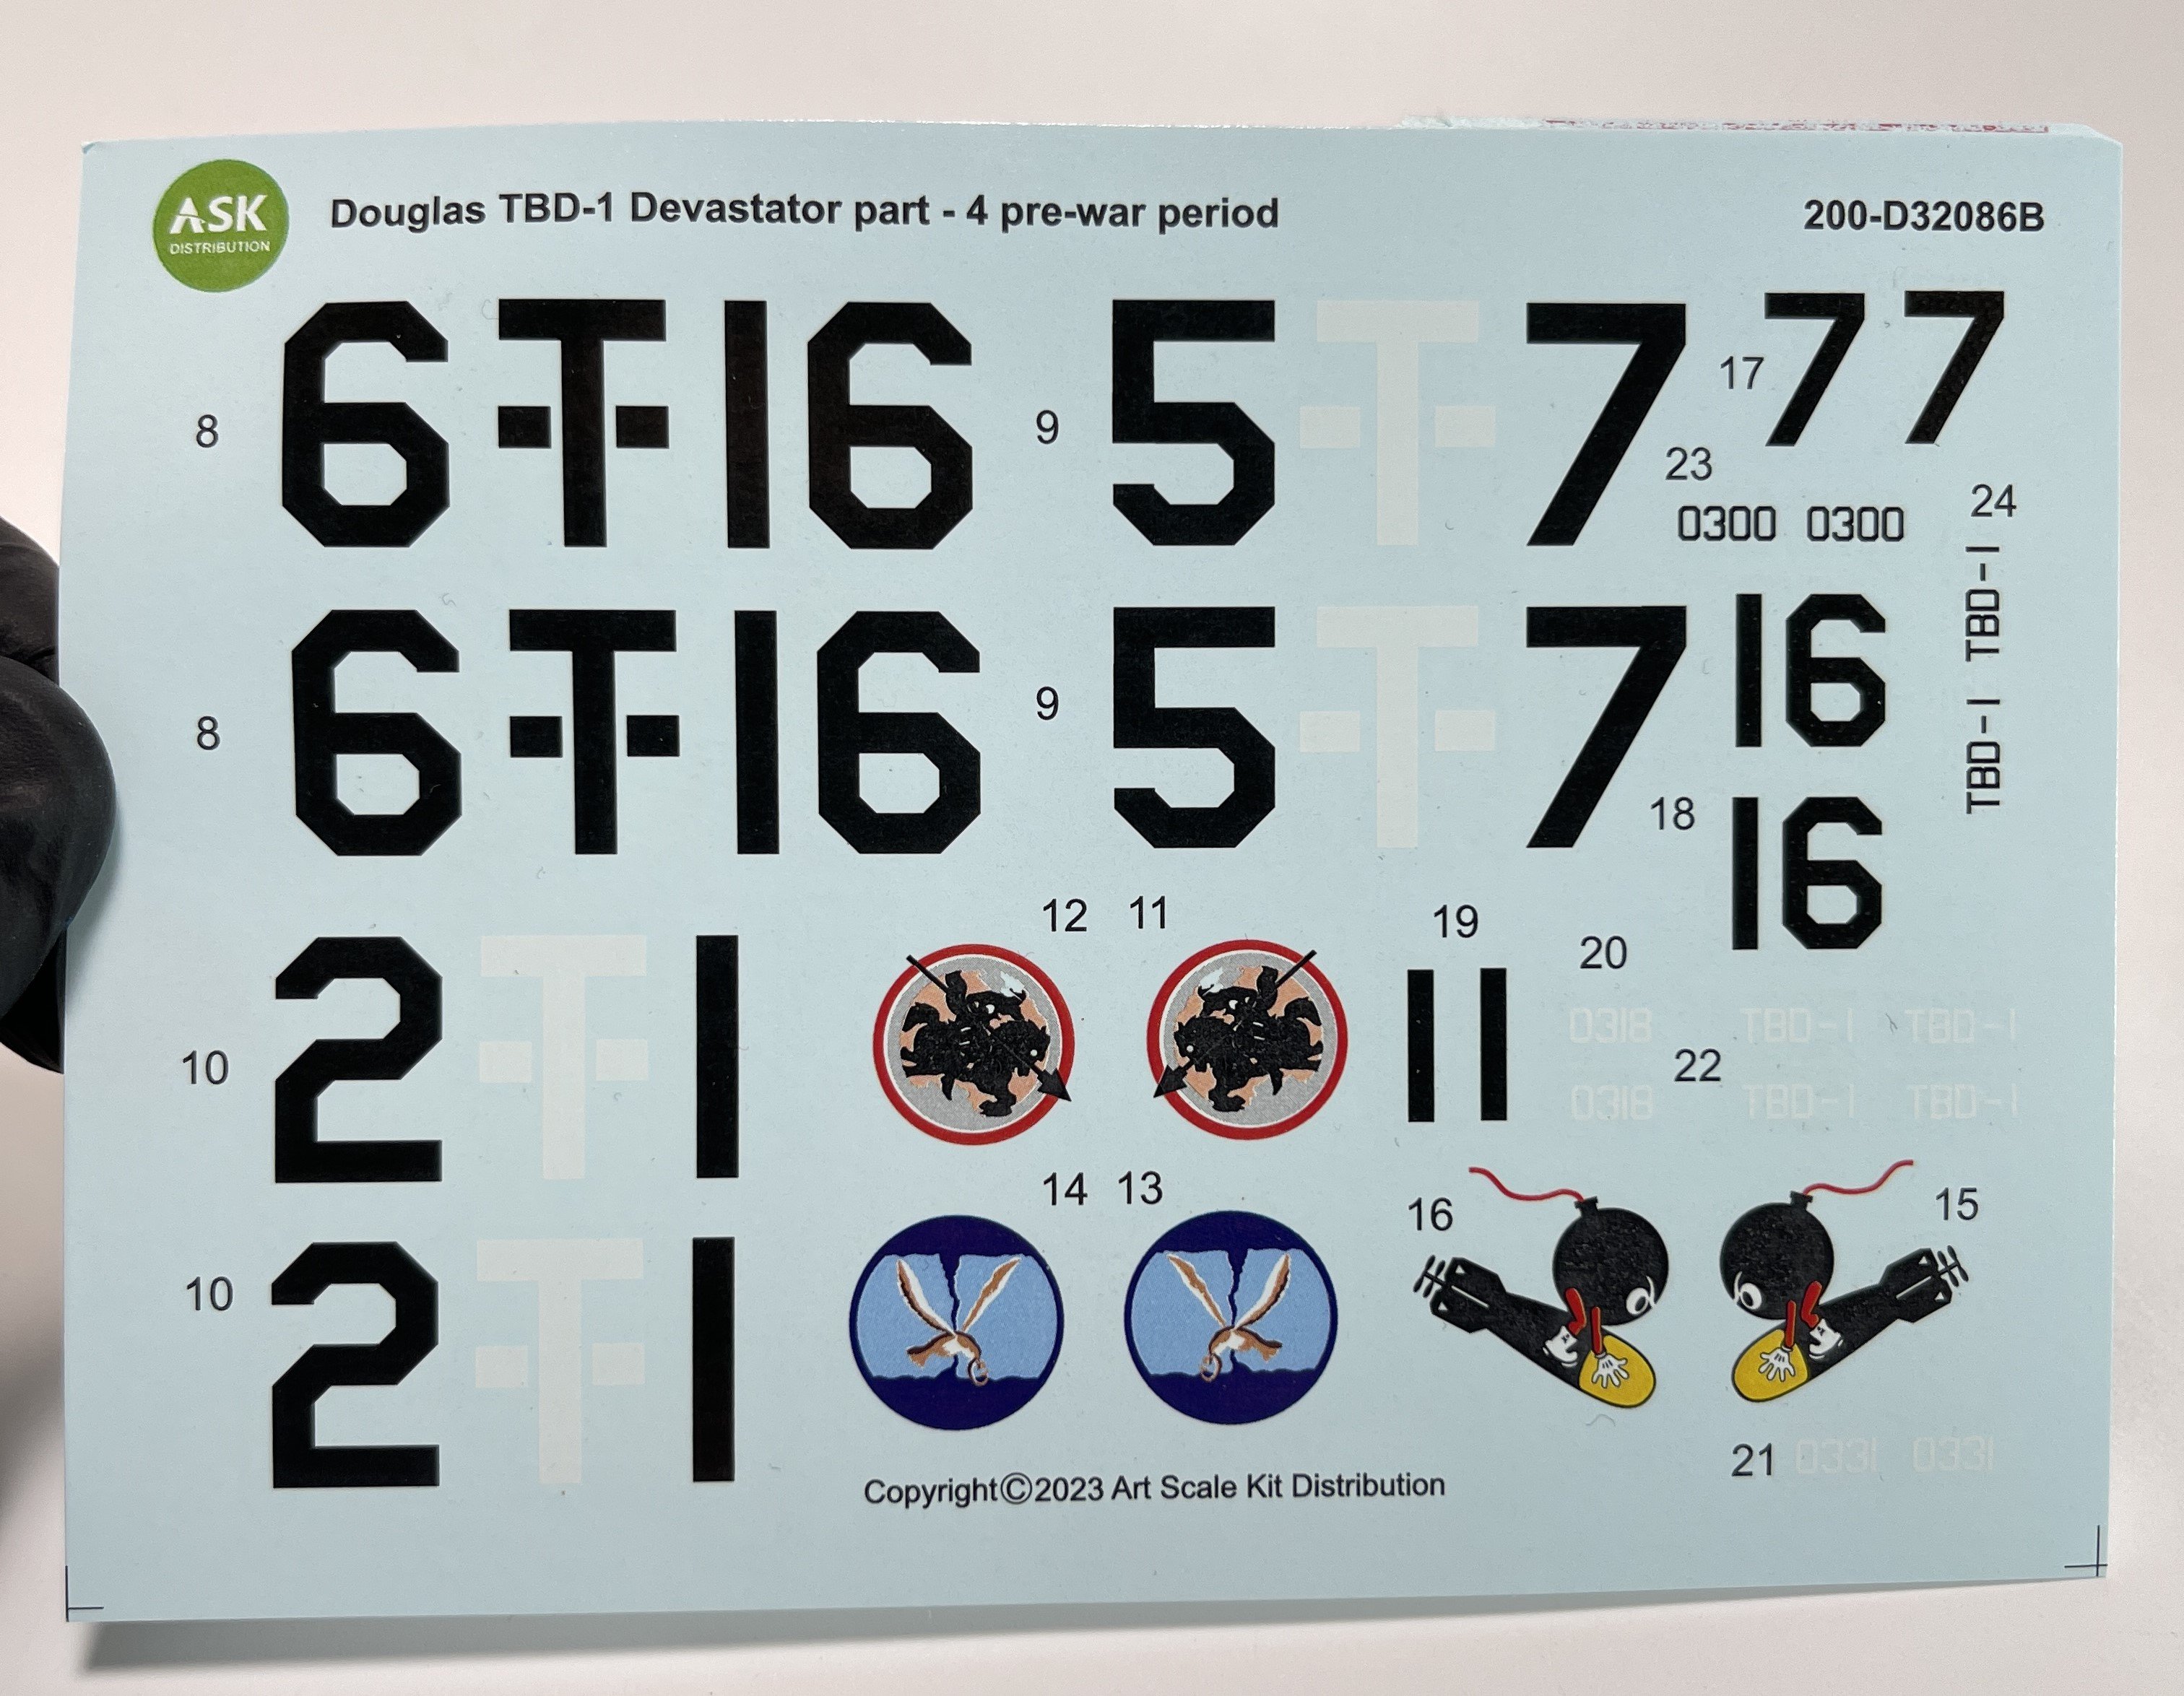
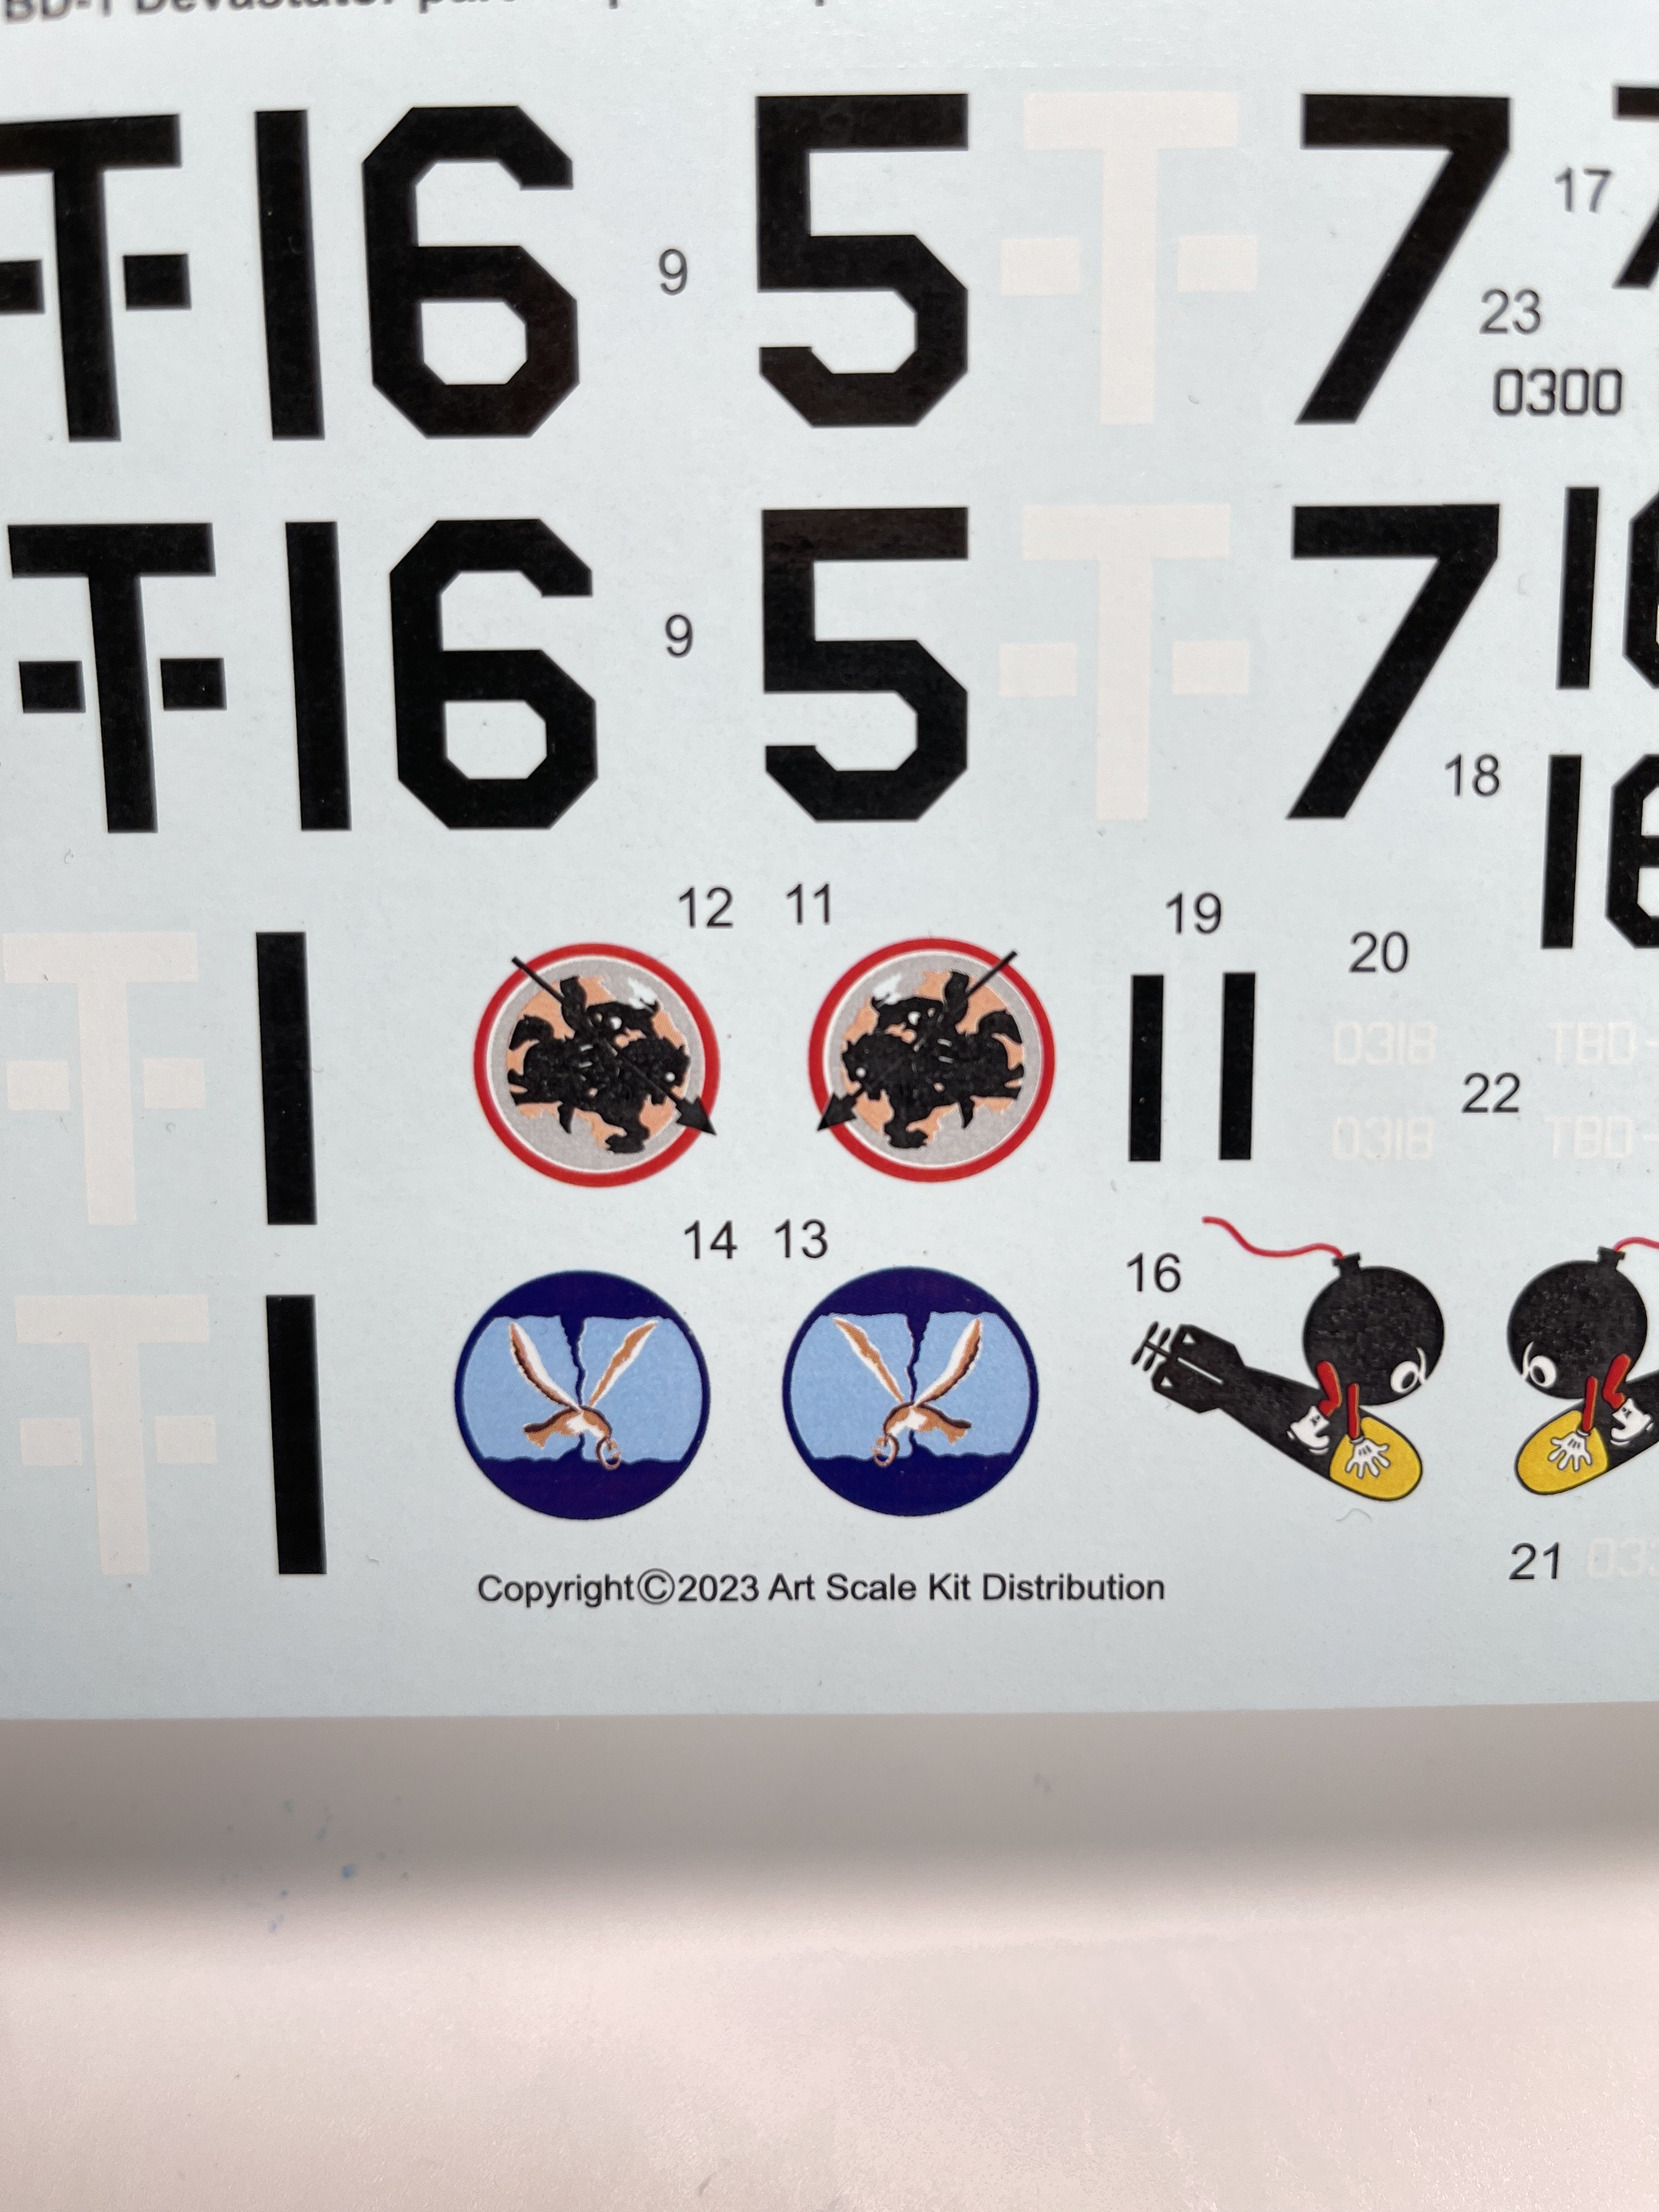
Douglas TBD-1 Devastator– part 4 – pre-war period 1940;
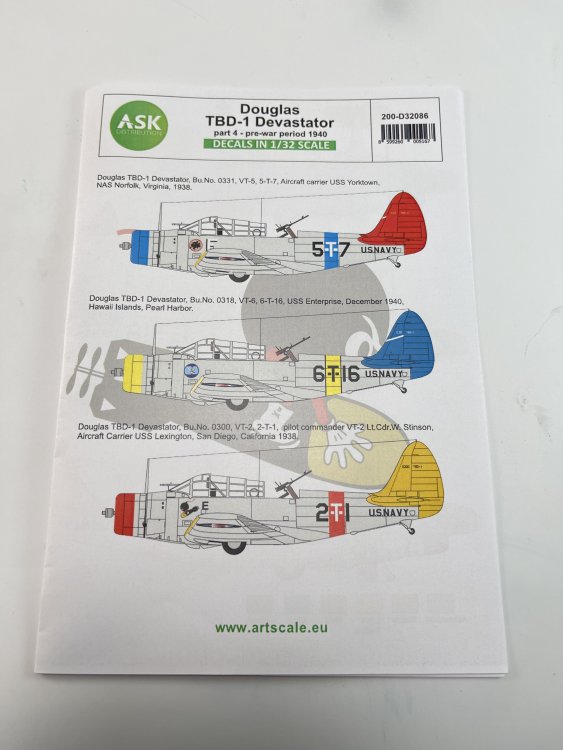
Catalogue number200-D32086
Price: 18,30€
To order, click here.
This sheet is the most colorful one. All have very good nose arts and all tail are painted in bright color. Of all sheets, this, for me, is my favourite.


Here, like the others, there`s insignia for two planes.
- Douglas TBD-1 Devastator, Bu.No. 0331, VT-5, g-T-7, Aircraft carrier USS Yorktown, NAS Norfolk, Viginia, 1938.
- Douglas TBD-1 Devastator, Bu.No. 0318, VT-6, 6-T-16, USS Enterprise, December 1940, Hawaii Islands, Pearl Harbor.
- Douglas TBD1 Devastator, Bu.No. 0300, VT-2, 2-T-1, pilot commander VT-2 Lt.Cdr.W. Stinson, Aircraft Carrier Lexington, San Diego, California 1938.


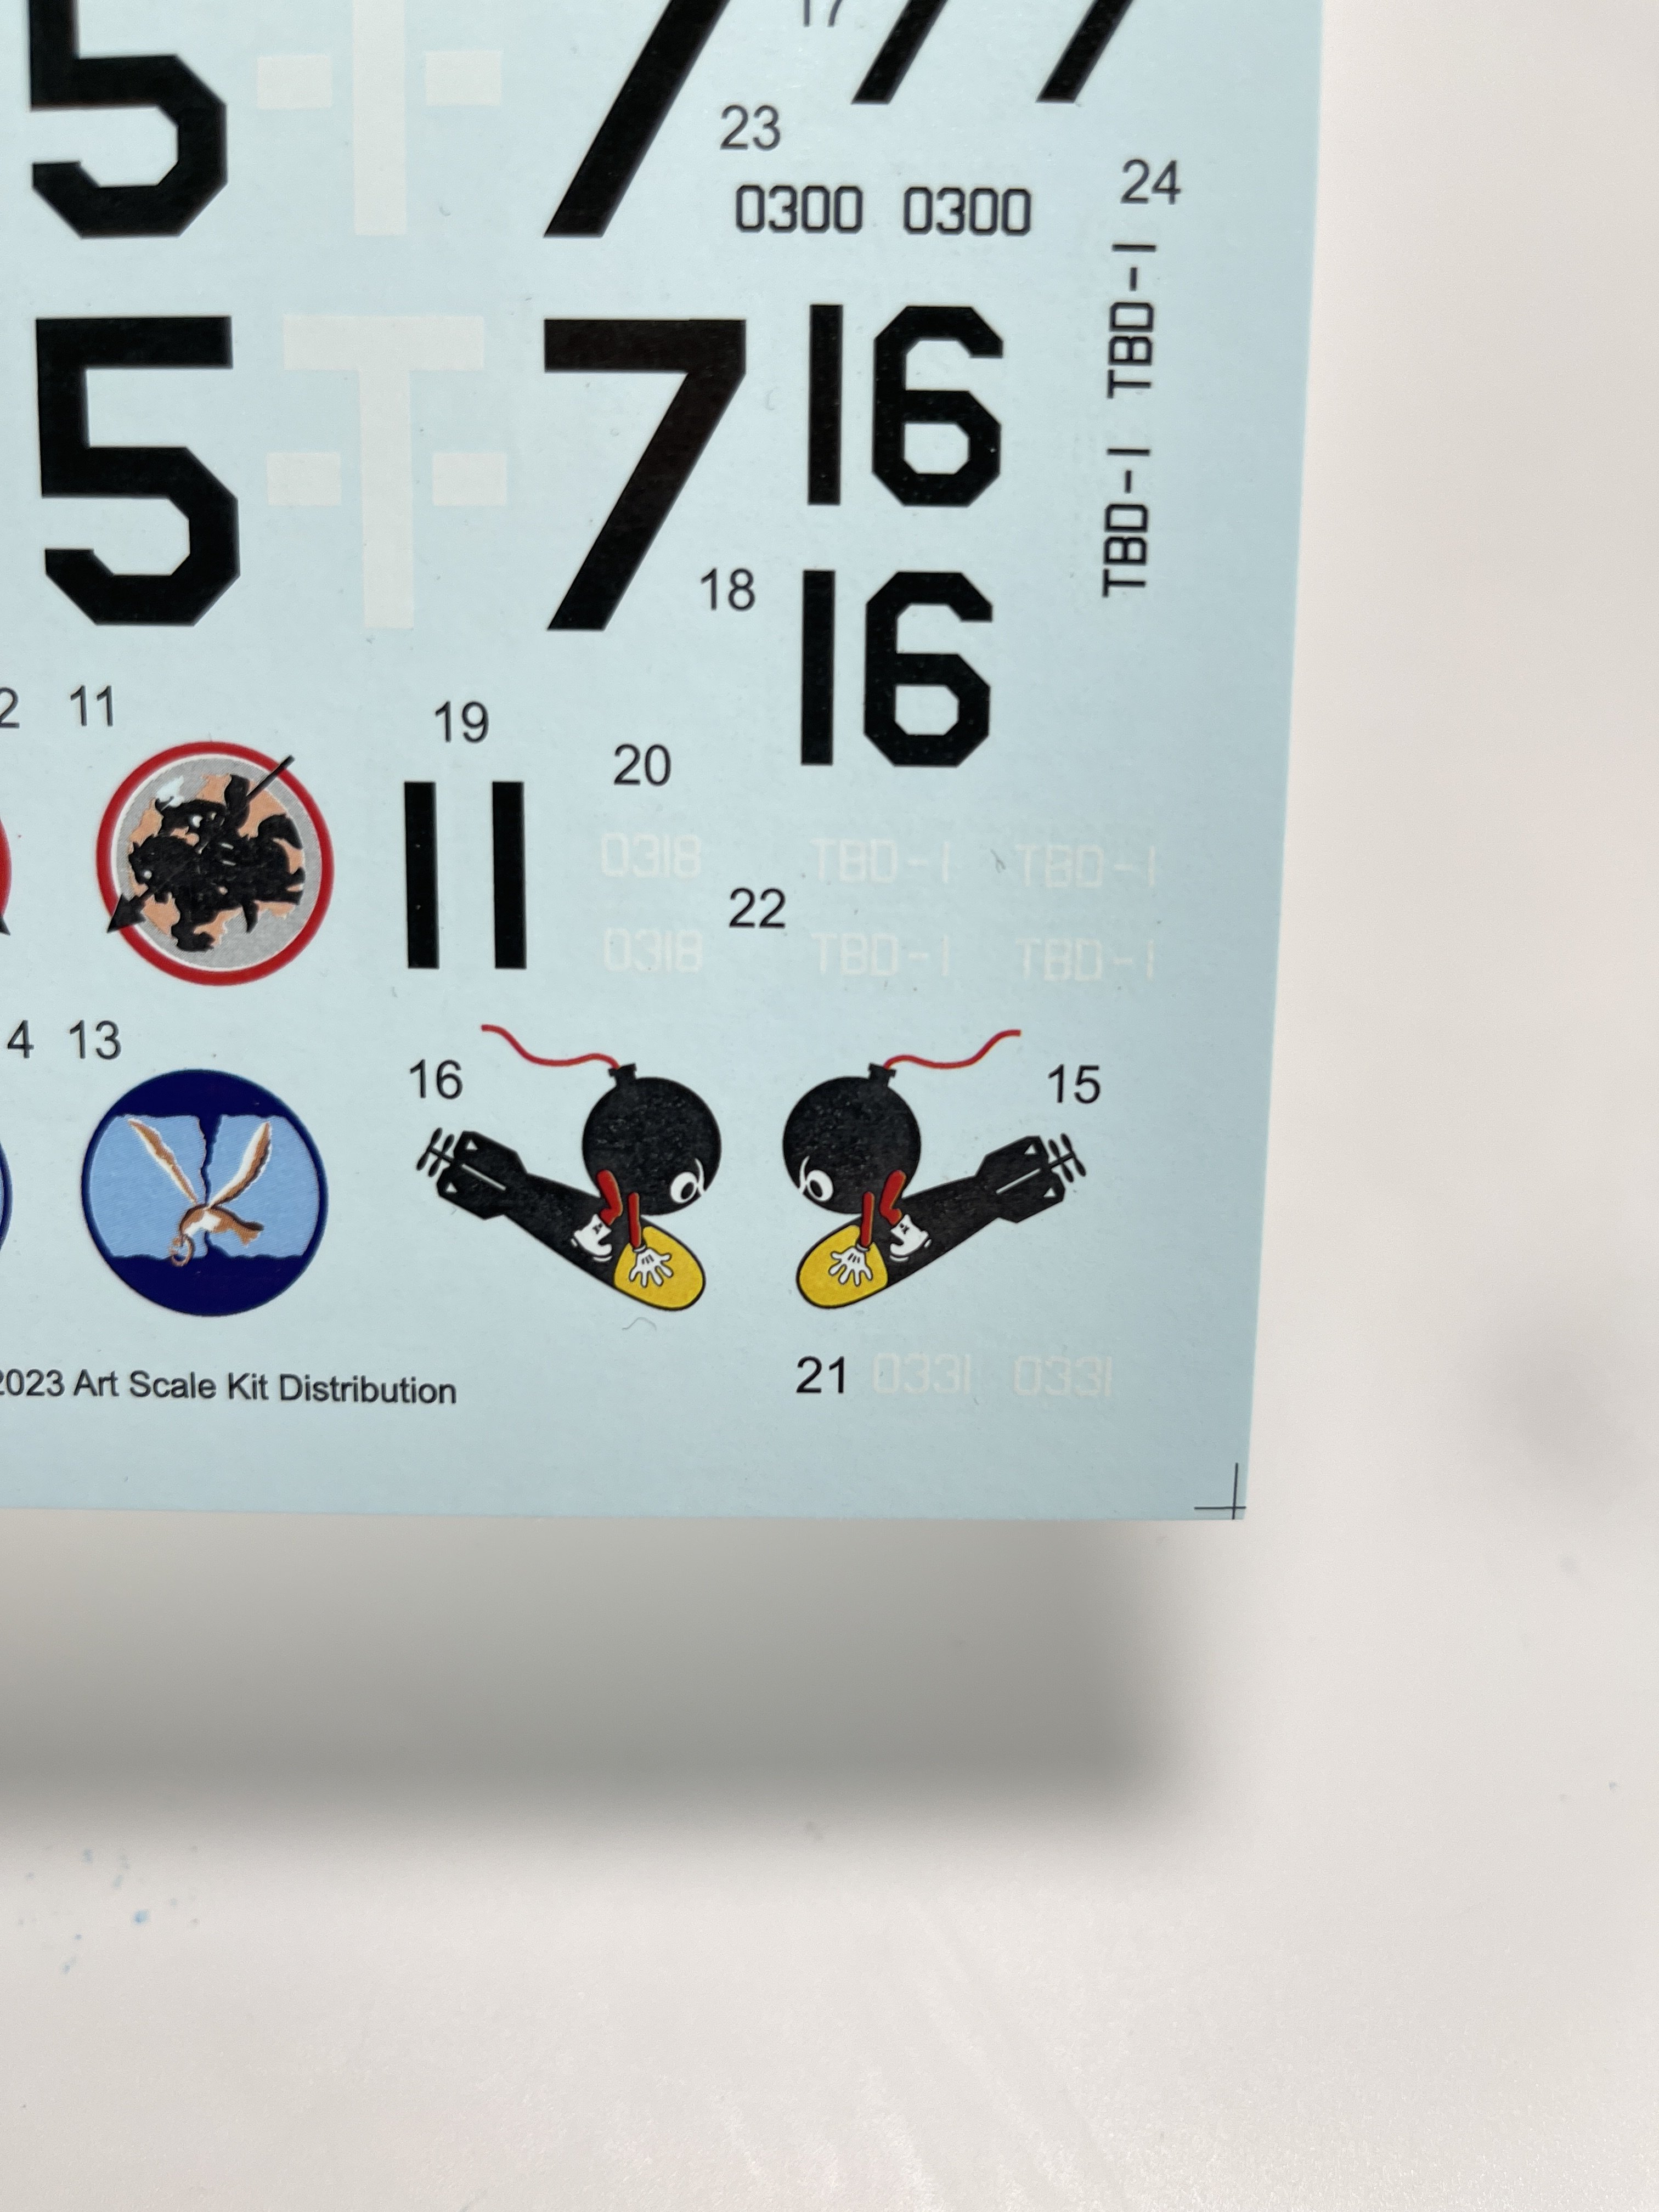
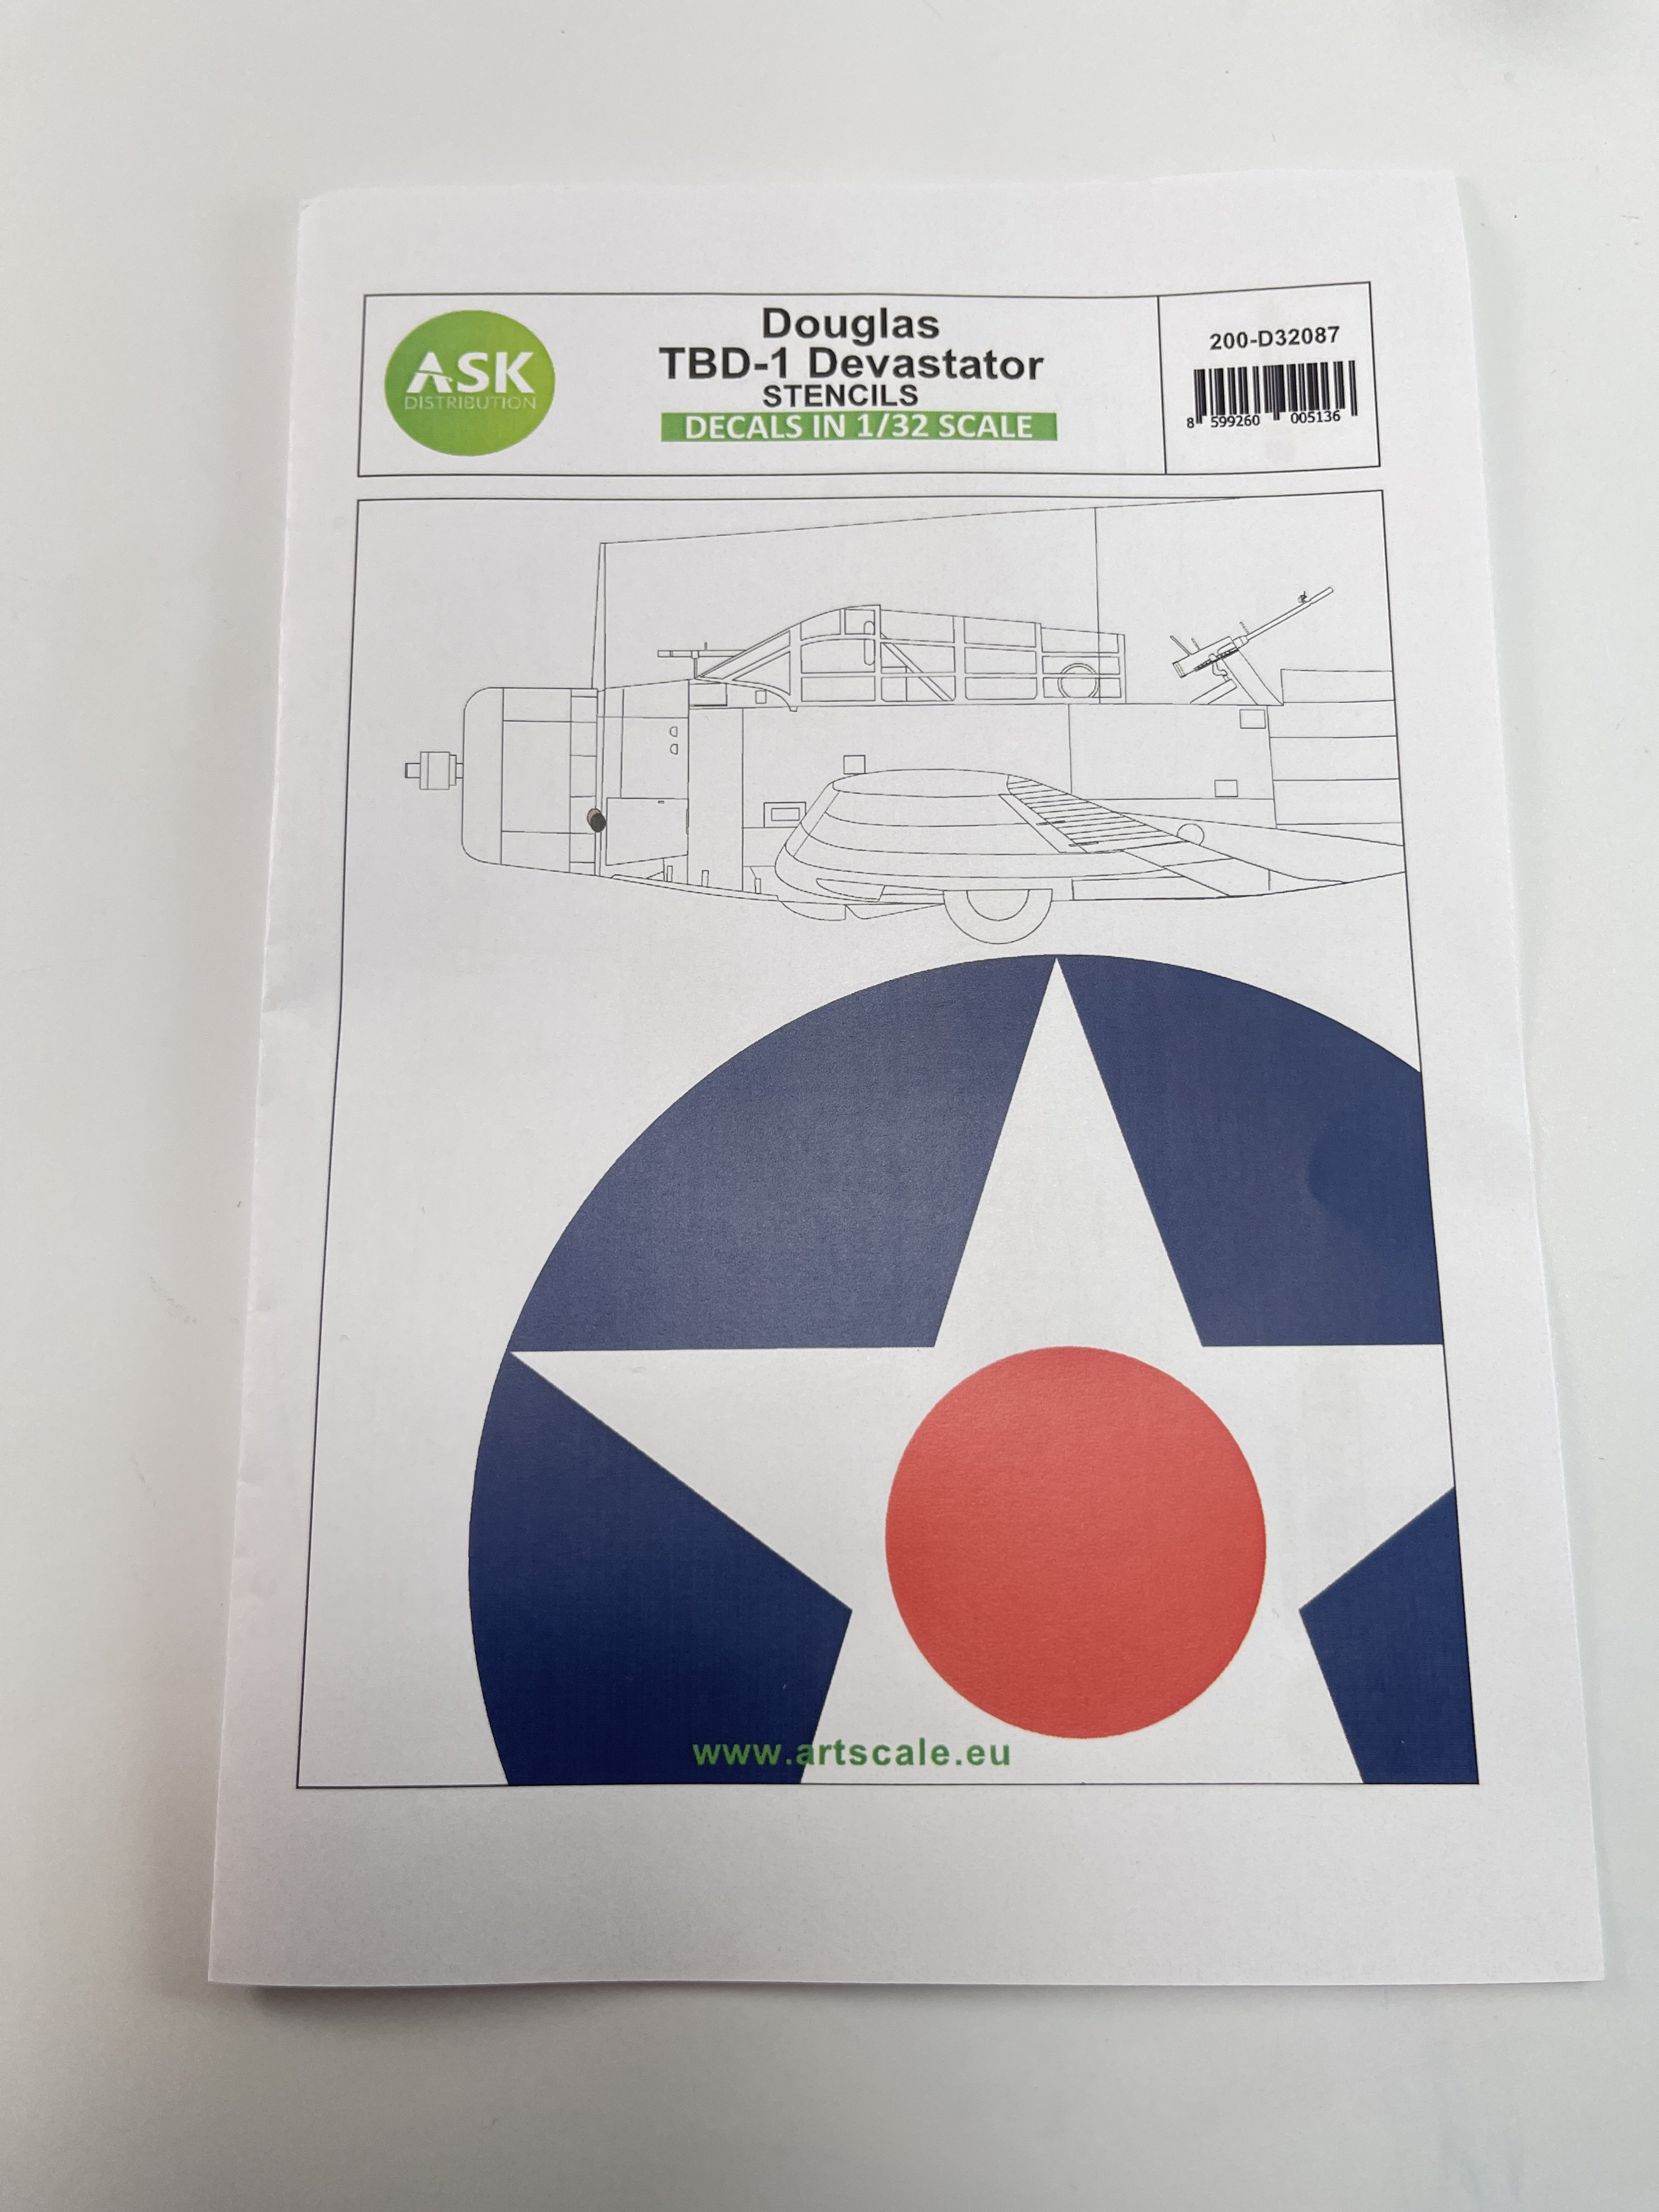
Douglas TBD-1 Devastator Stencils

Catalogue number200-D32087
Price: 8,10€
To order, click here.
Now, the sheet that every modeler that have a Devastator in the stash must have. Stencils!
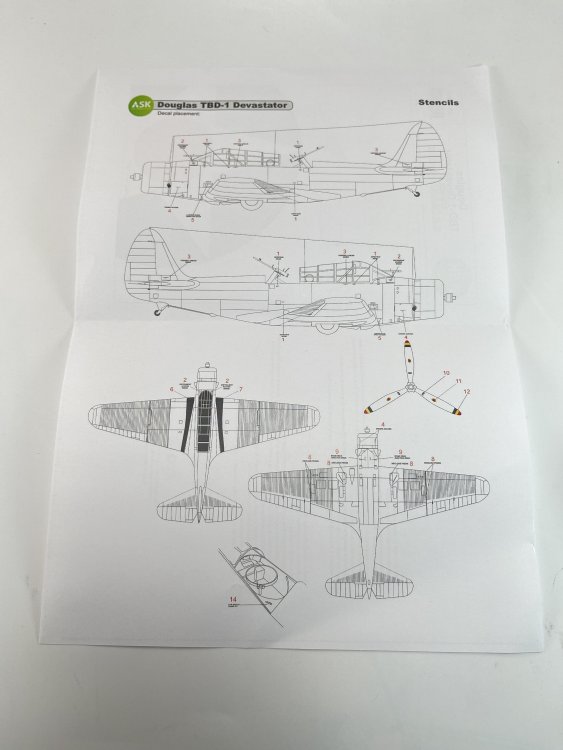
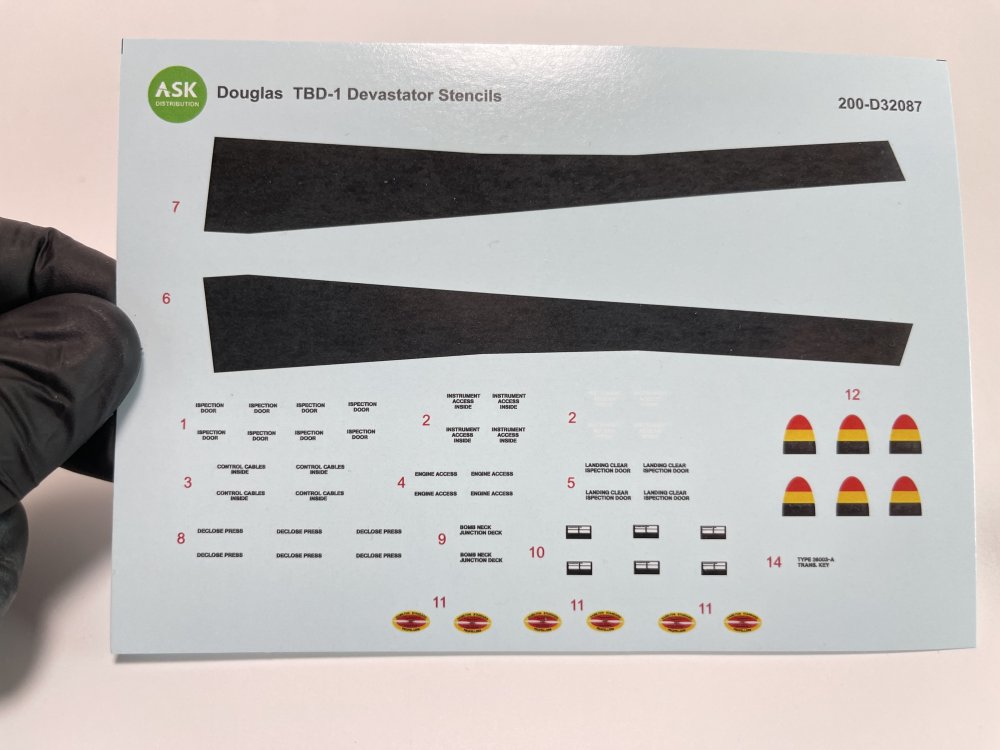
The stencils are very thin, with small decal film on the edge to prevent to maximum silvering and not blurry, being quite comprehensive.
**
Analyzing the decal sheets, the color registration is great and a very good definition of the details. The decals have a thin film, in fact looking very thin and delicate.
There is no indication where are they printed so I assume that will be in ASK house. The printing quality is quite good, as they are sharp, with outline very well defined. The color look quite good and spot on.
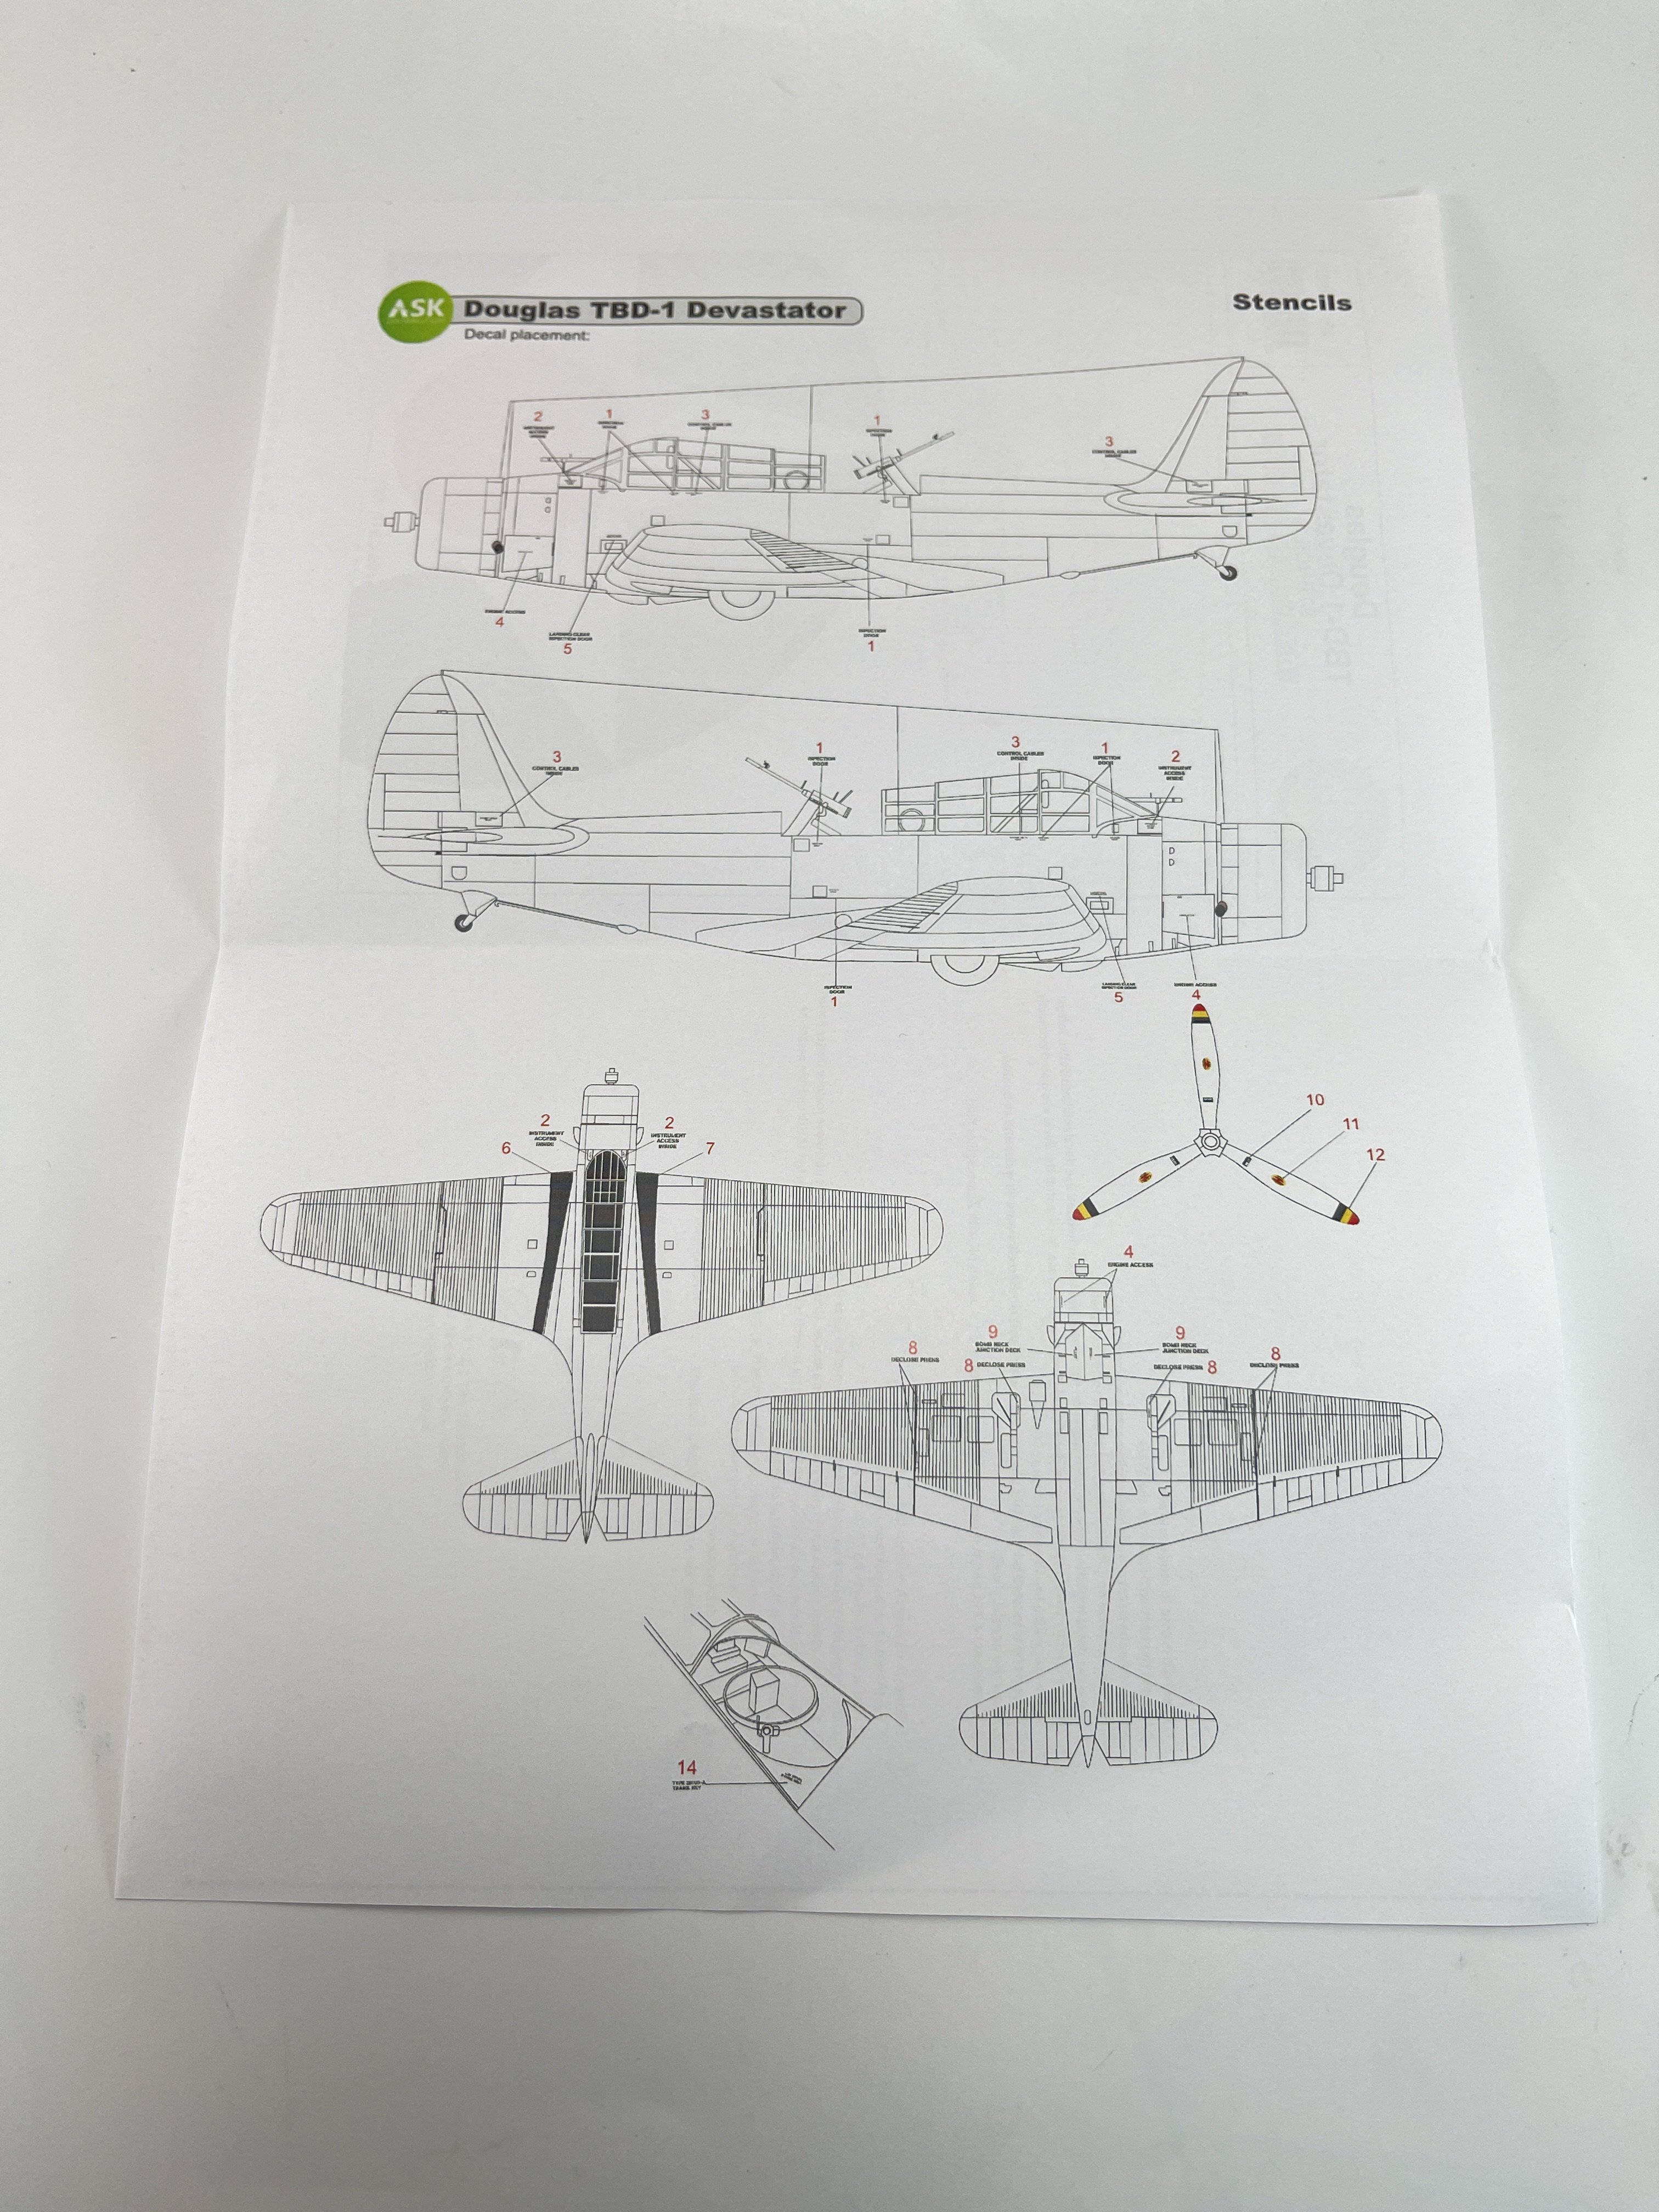
The instructions are the general ones that are applicable to all decals, it is always important to remember the general principles of decal application. In this case, there is no specific rule for applying these decals.
The profiles draws contains lots of information, with side view (both side) and top view with precise decal indication.
Conclusion:
ASK is a firm manufacture now when it comes to decals!
There`s a lot to choose from and always with great printing and fantastic color pigmentation.
The location indication of the decals is quite good and very perceptible.
The decals as already said, have a very good colour registration, very thin, with minimum decal film, and they work quite nice!
So all Devastator lovers must one at least one of these sheets.
My thanks to Art Scale for producing these fantastic decals.

Francisco Guedes
.
-
4
-
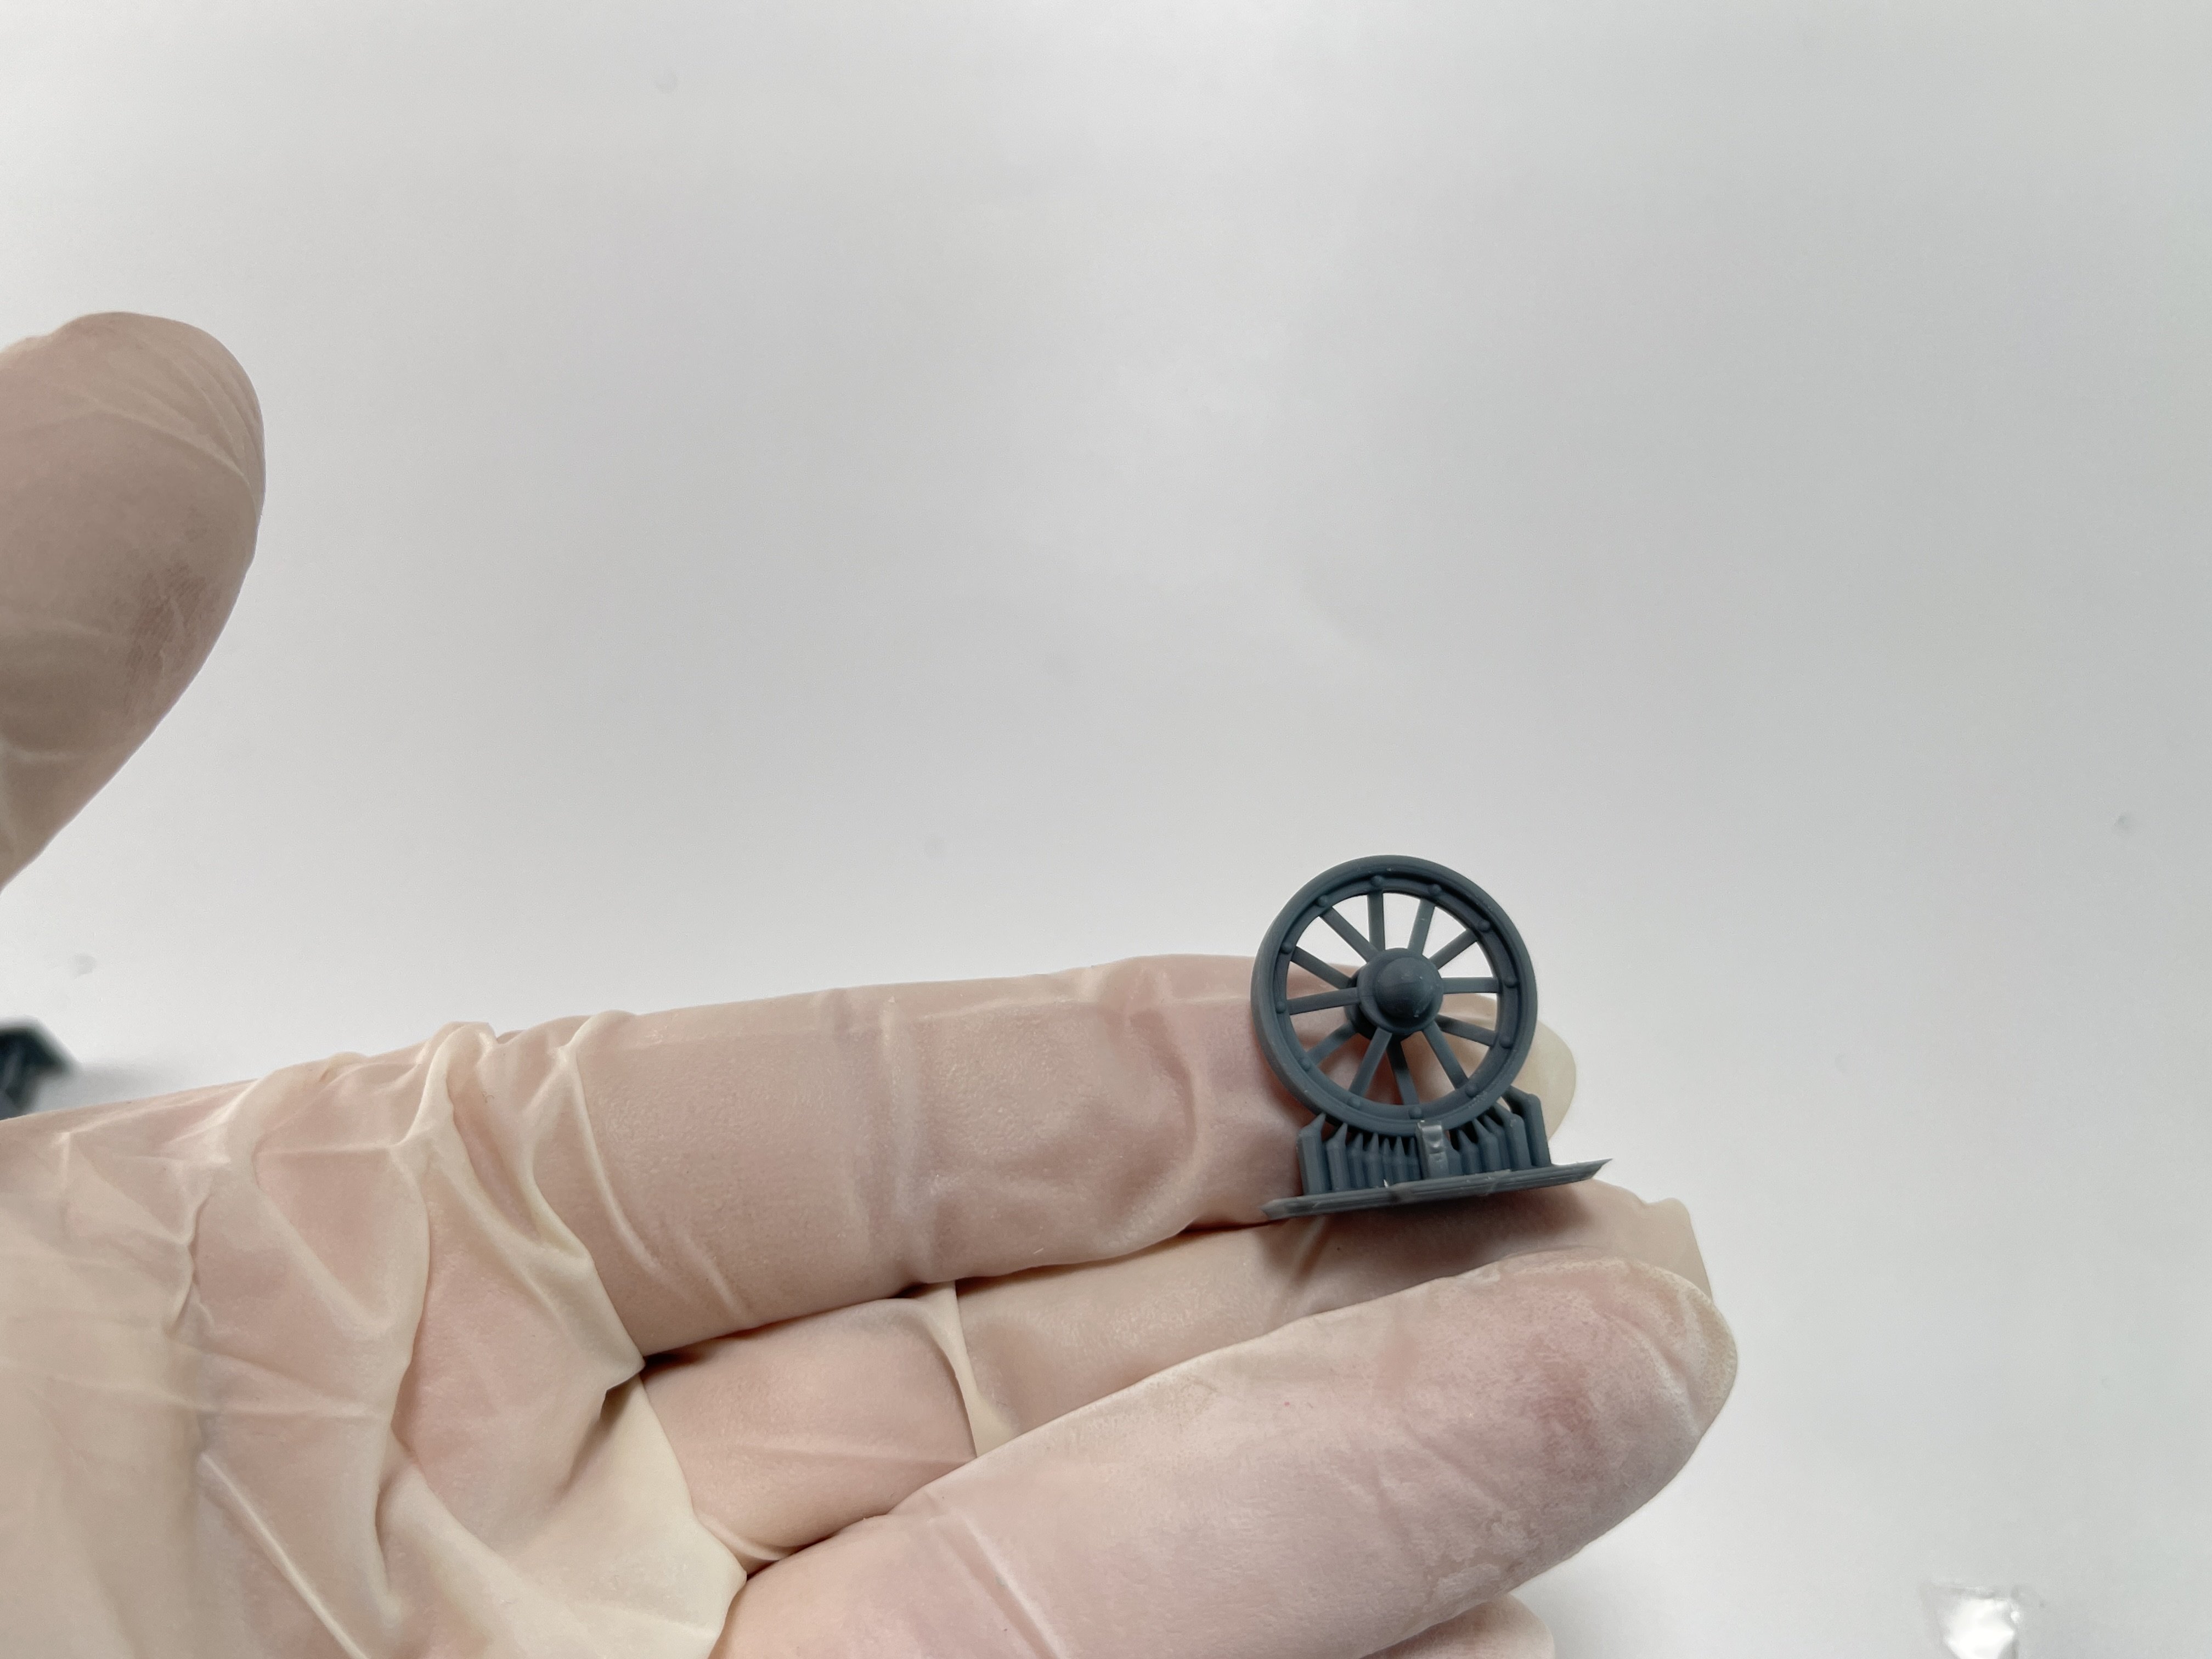
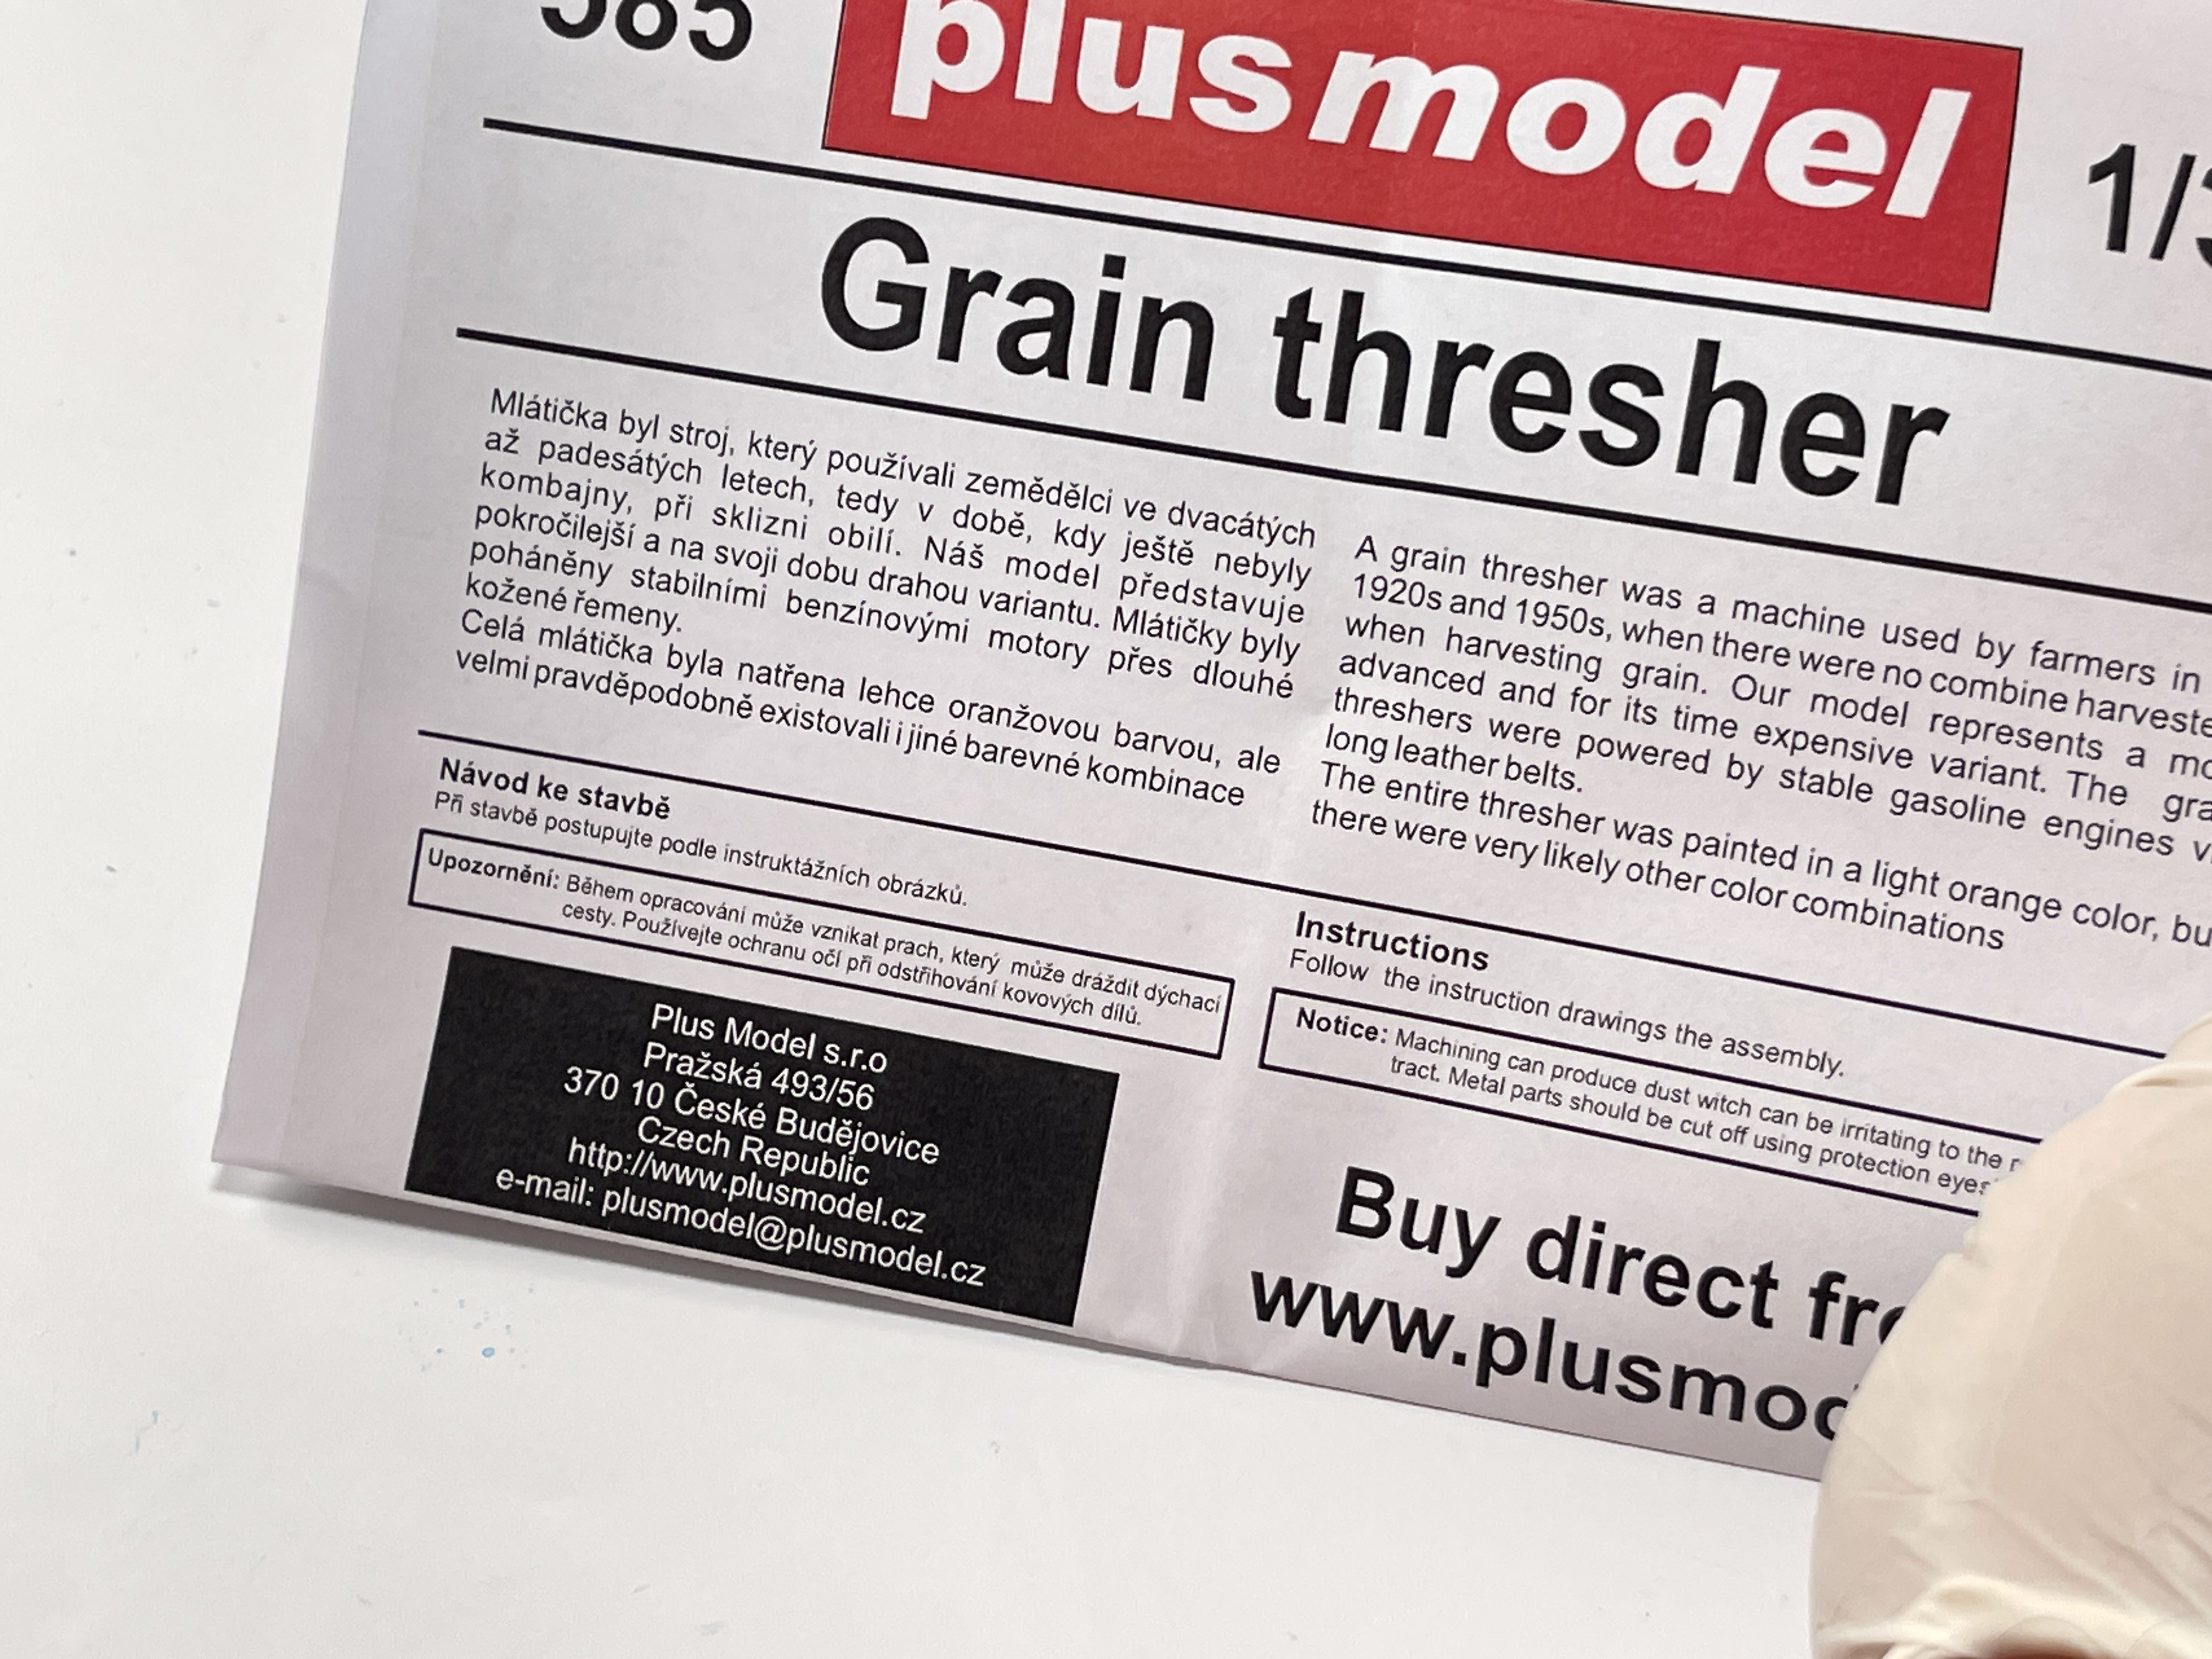
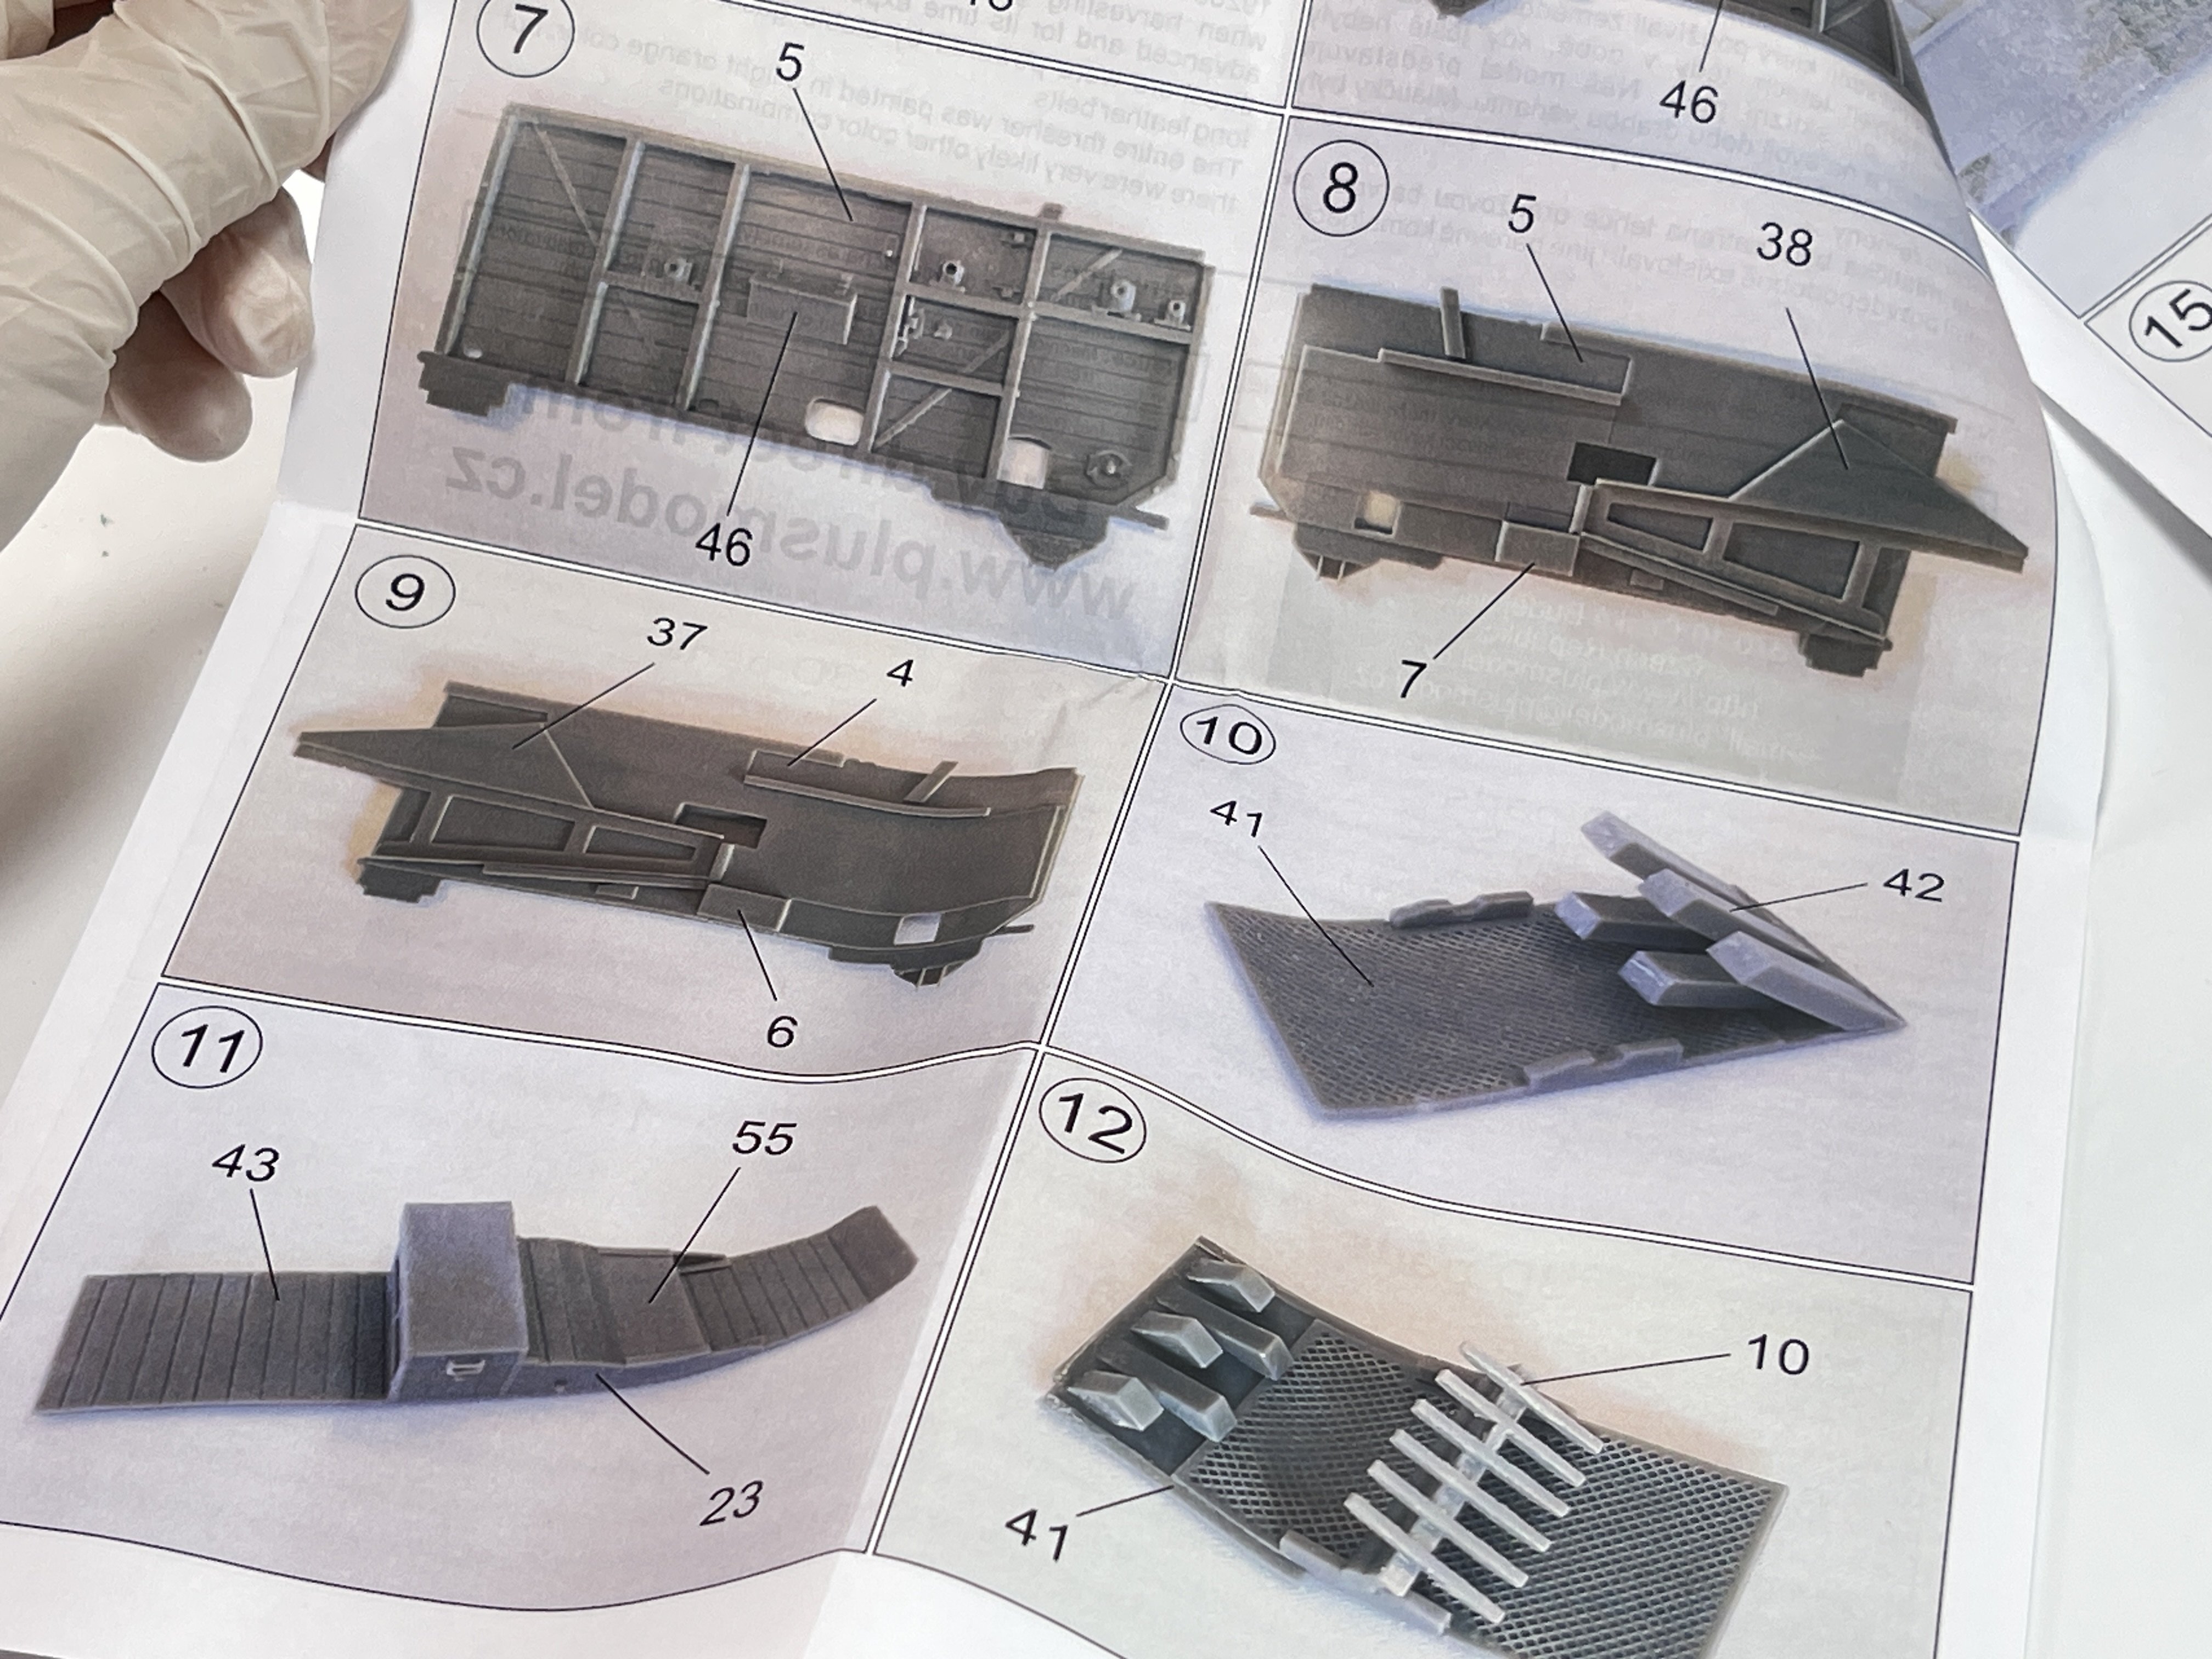
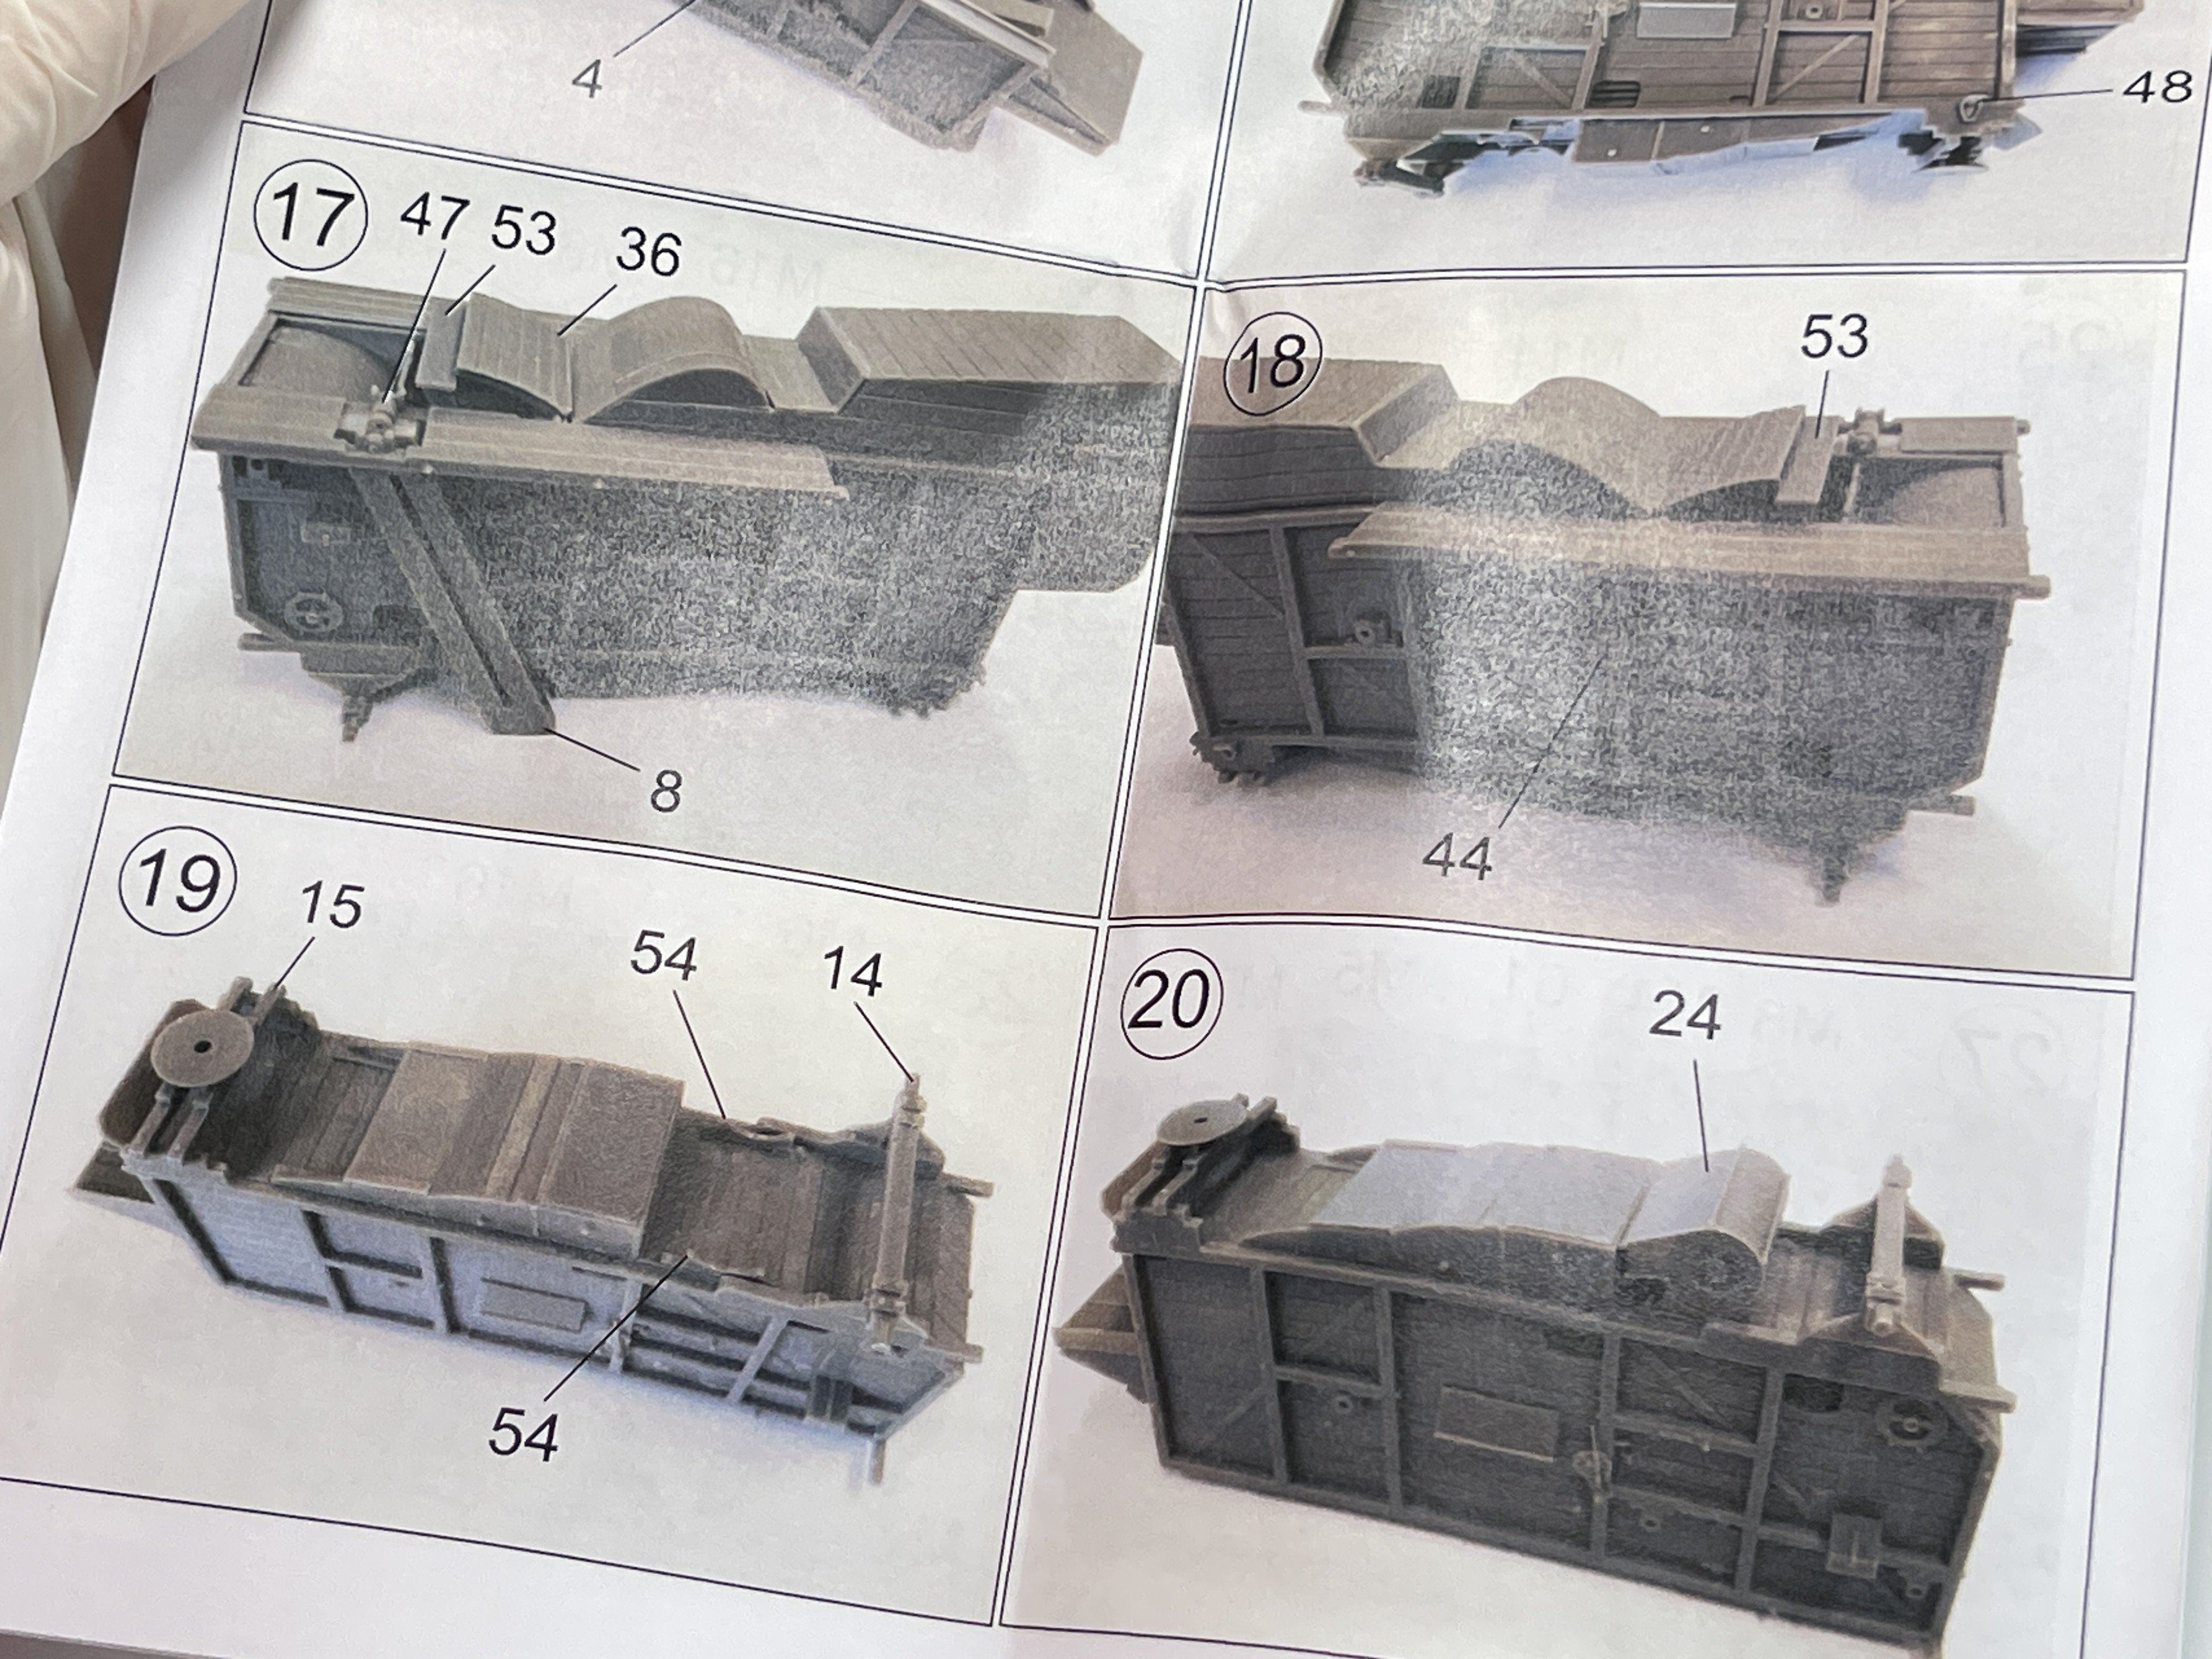
1:35 Grain Thresher
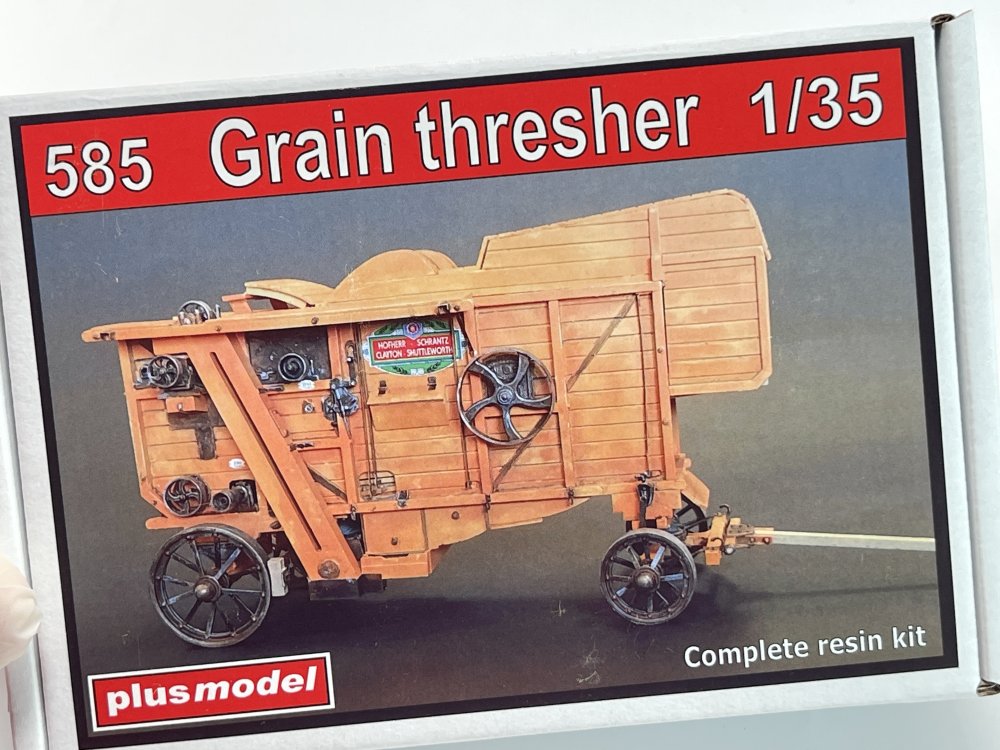
Plusmodel
Catalogue #585
Available from Plusmodel for 86,88€Plusmodel always had a touch of creativity and boldness when they choose their subjects to be release.
But I confess that when I got this model kit I wonder: “What the hell is this??”
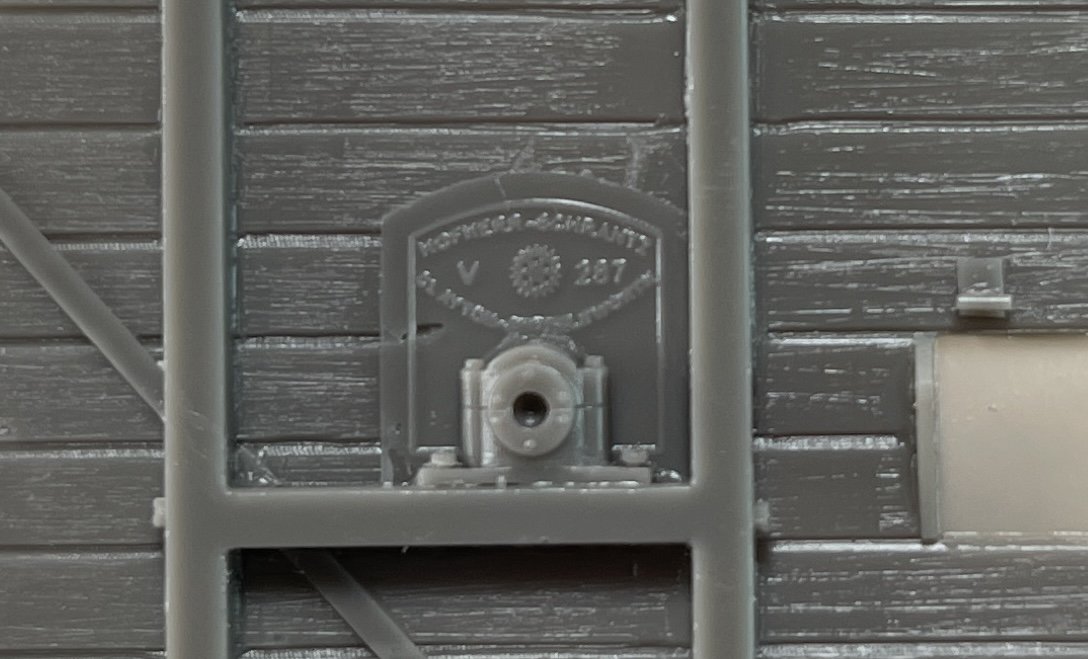
Plusmodel gives a brief introduction saying “a grain thresher was a machine used by farmers in 1920s and 1950s, when were no combine harvesters when harvesting grain. Our model represents a more advanced and for its time expensive variant.”
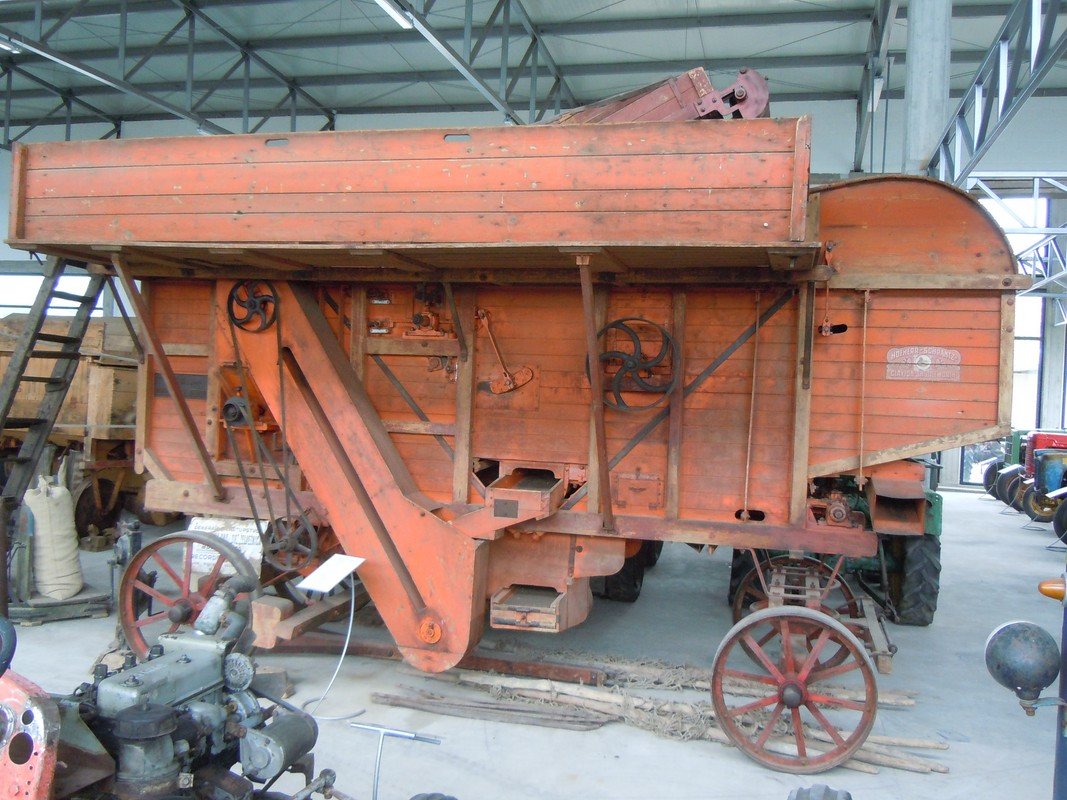
Well I start looking on the internet and didn’t found nothing like this treshing machine that is represented by Plusmodel
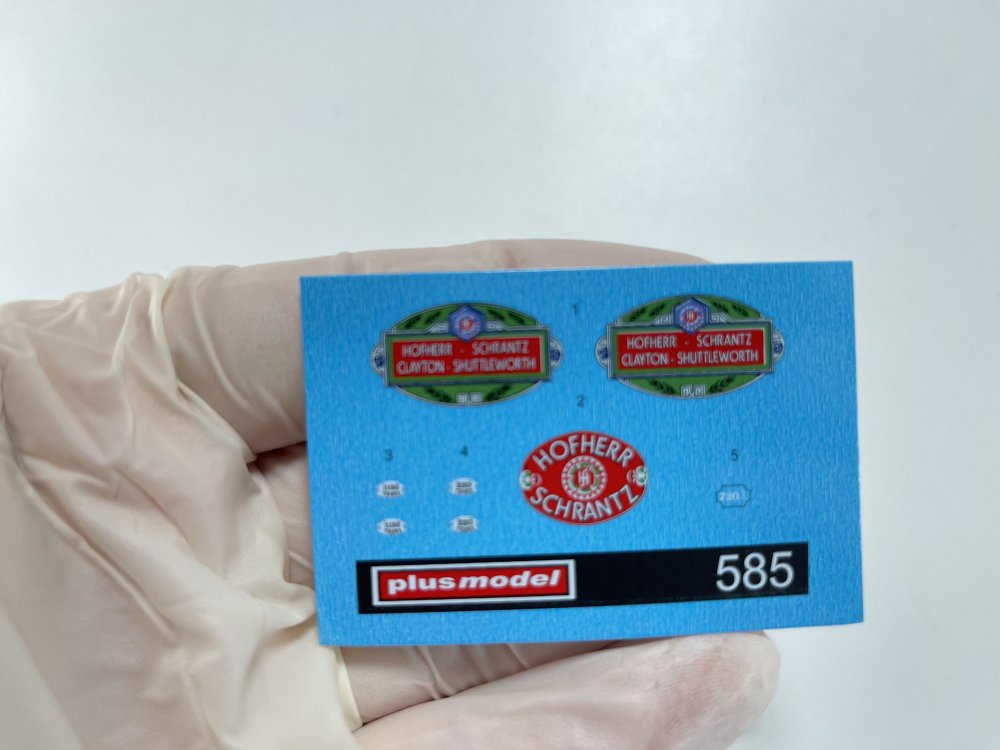
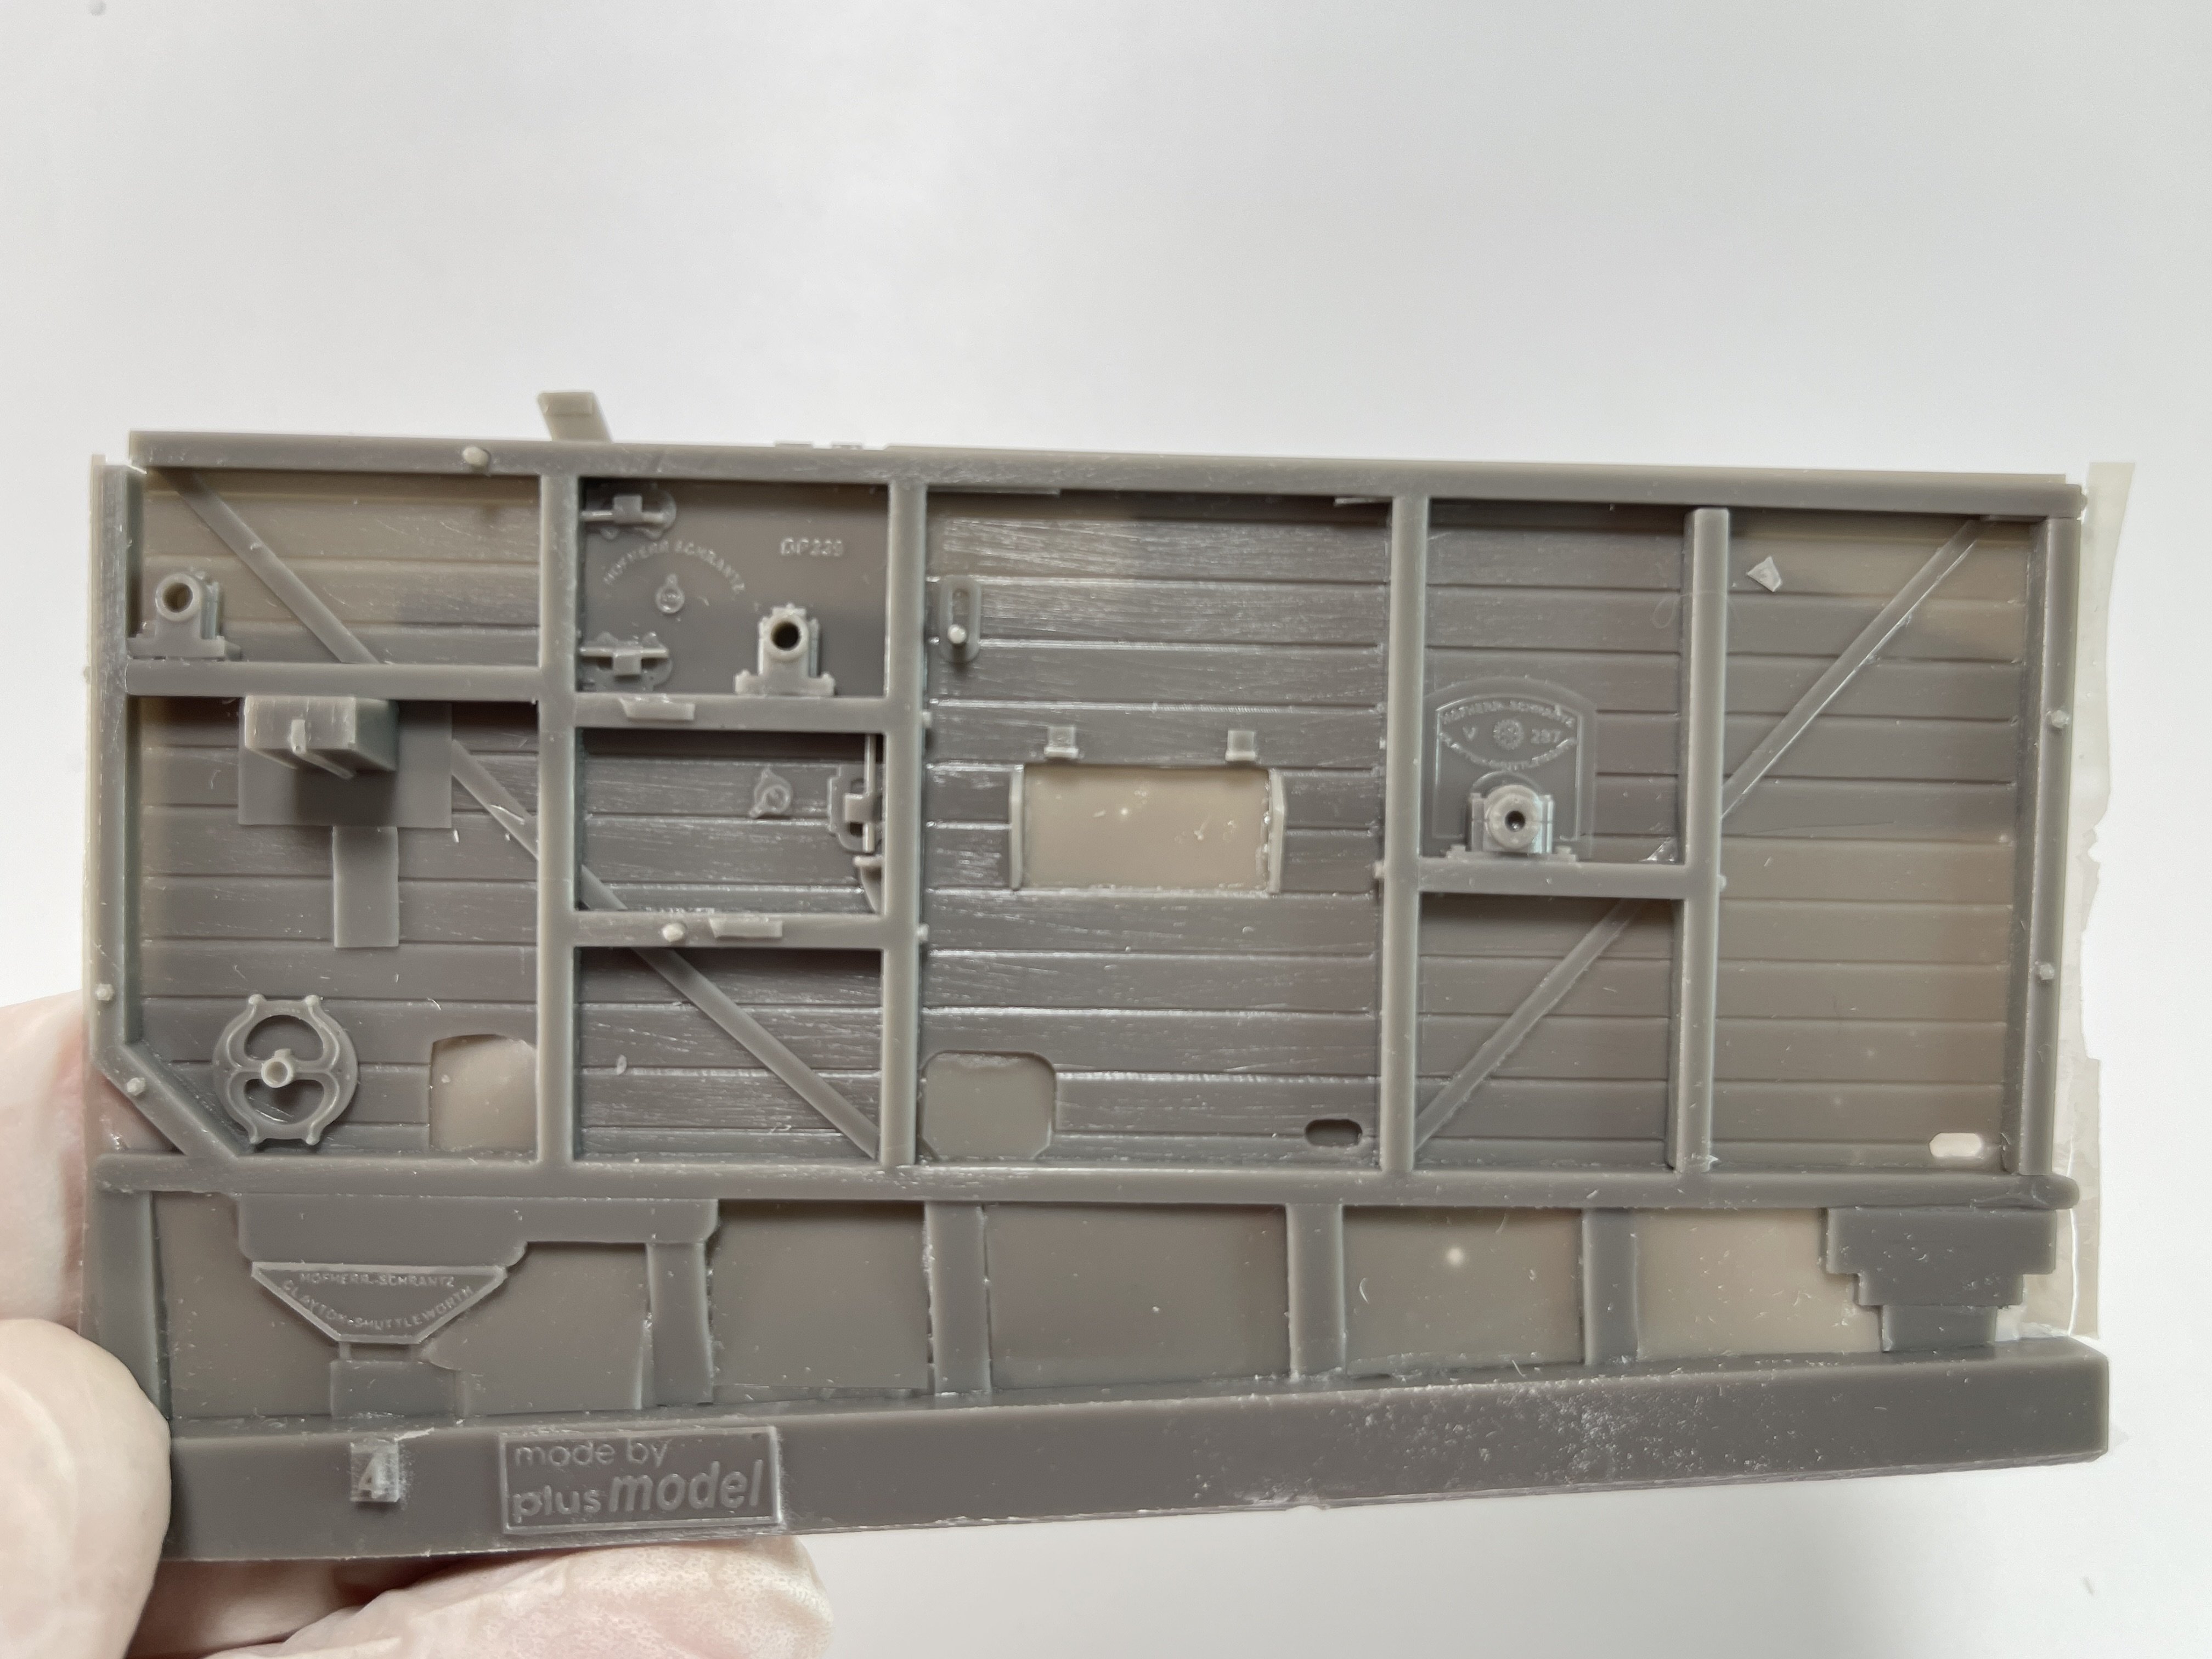
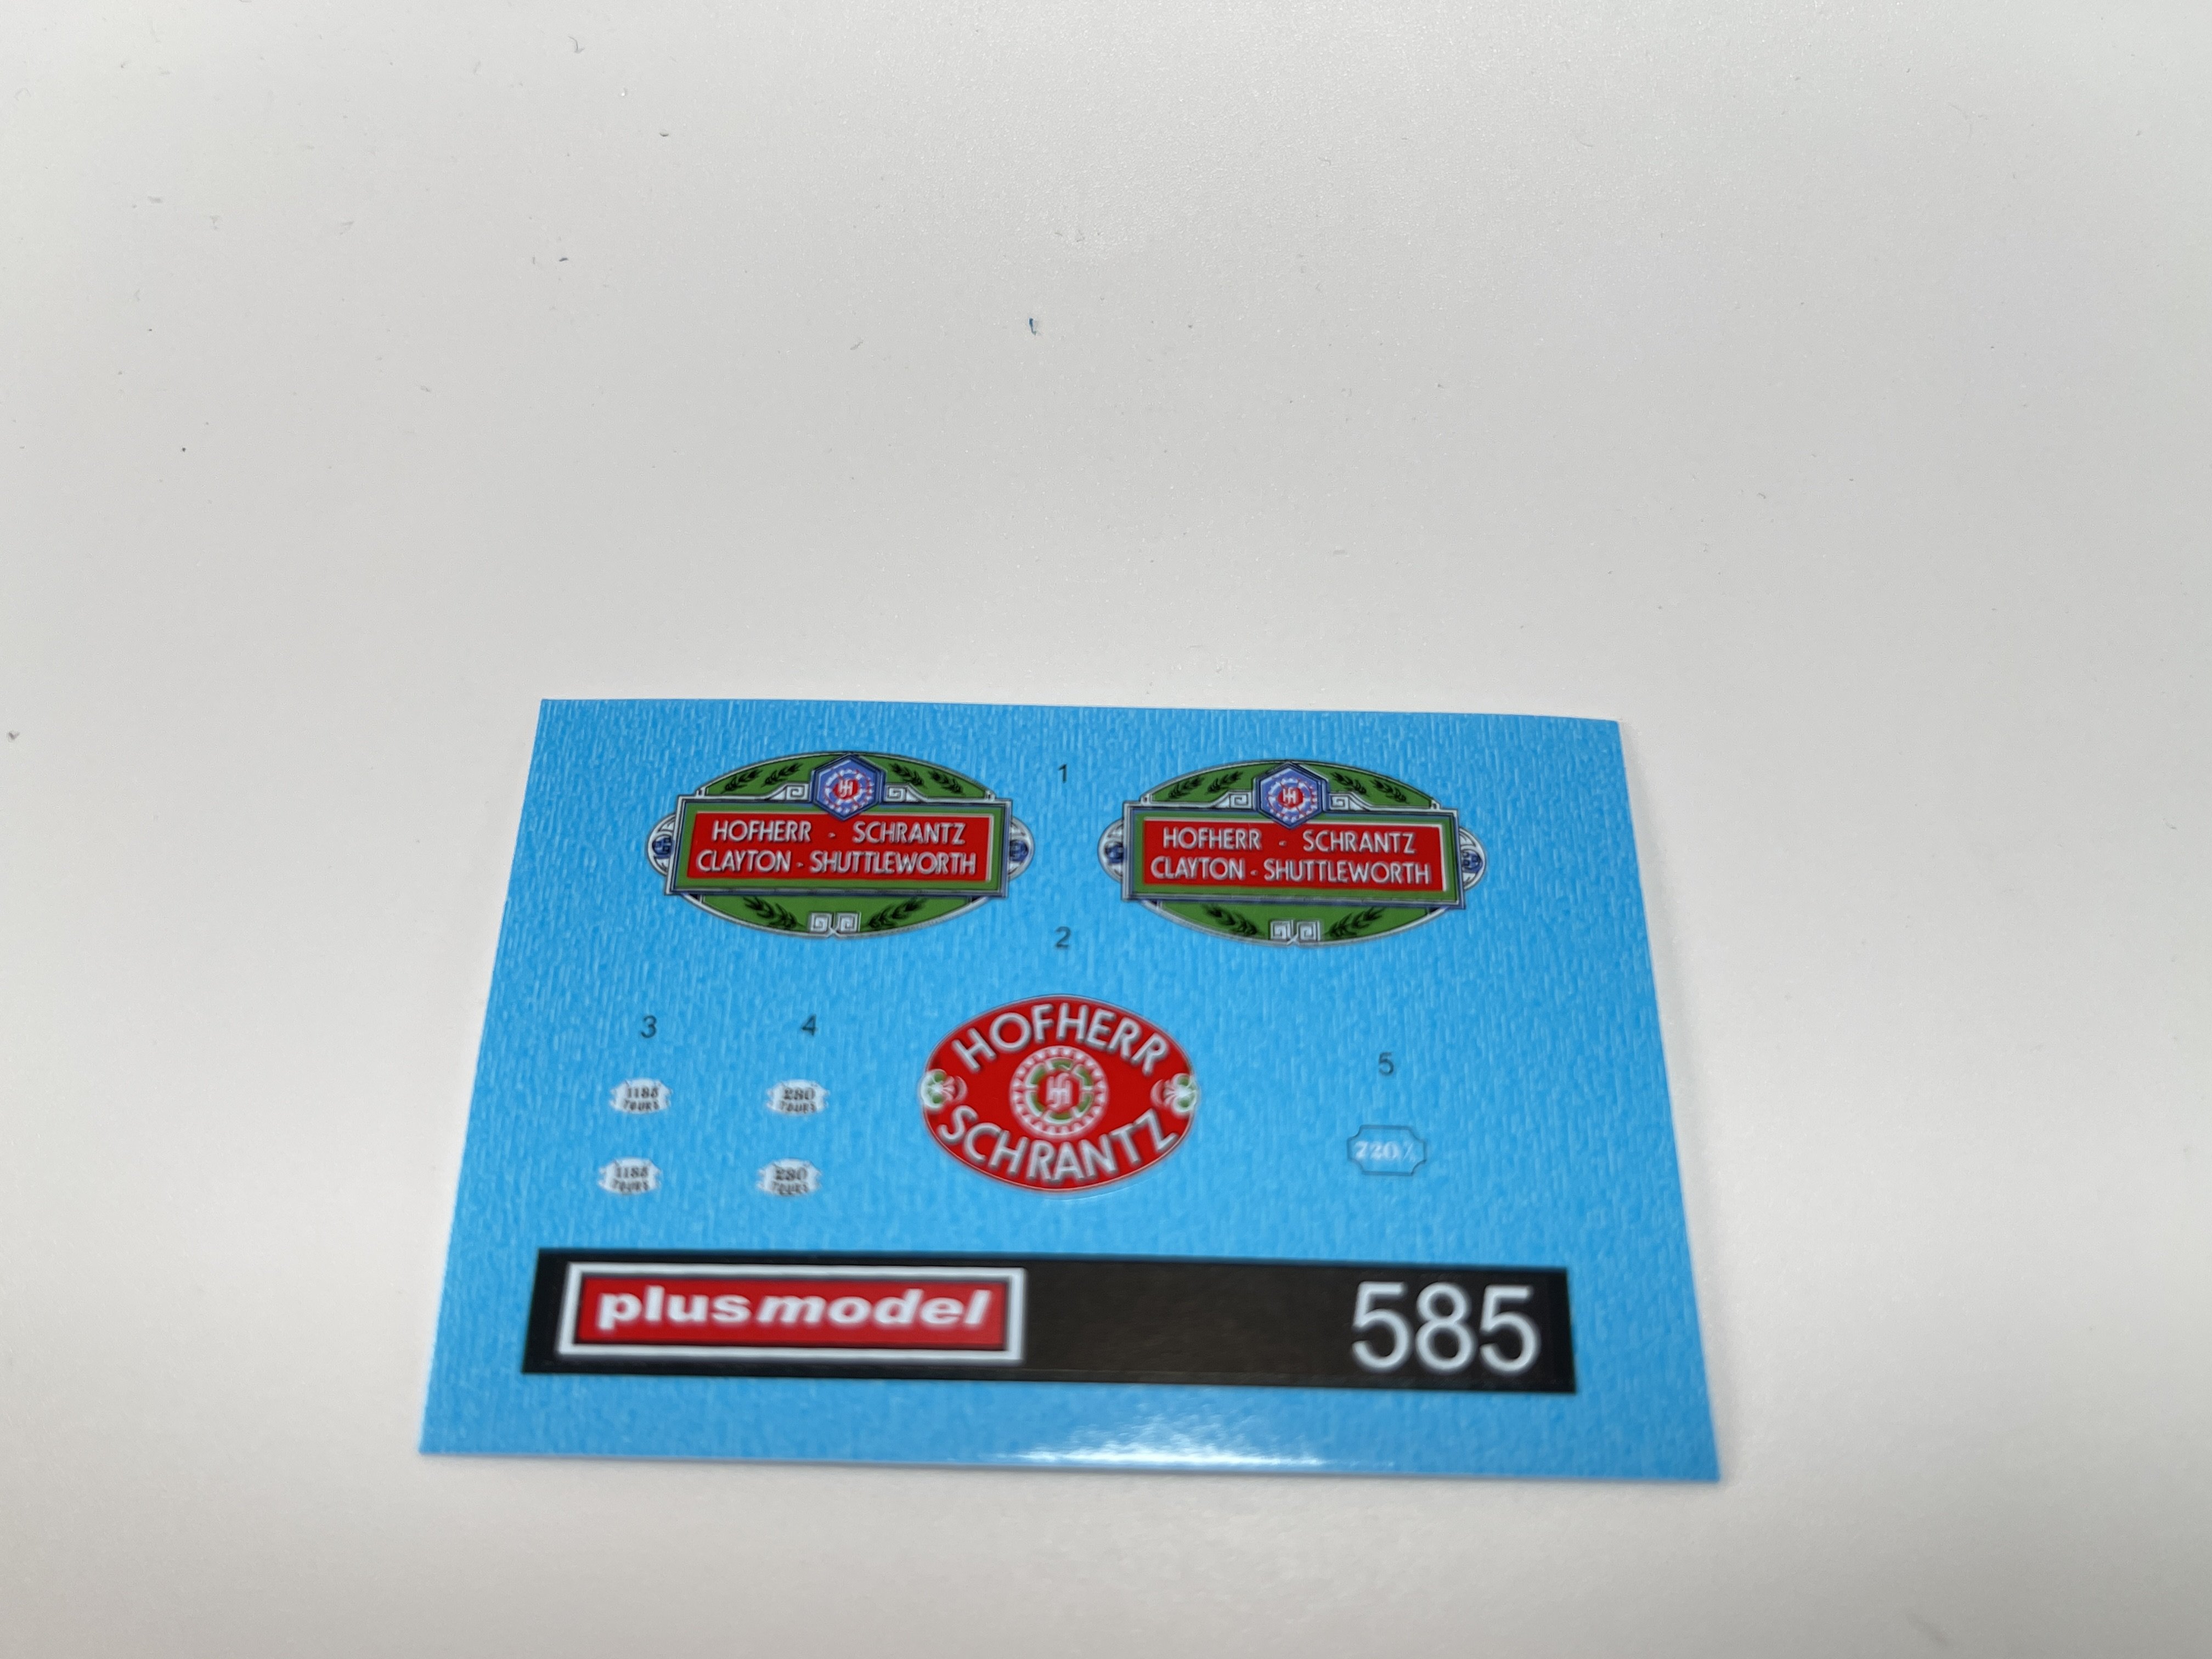
Until, cheing carfully in the box, I found the manufacture on the decals - HOFHERR SCHRANTZ.
And there it is:

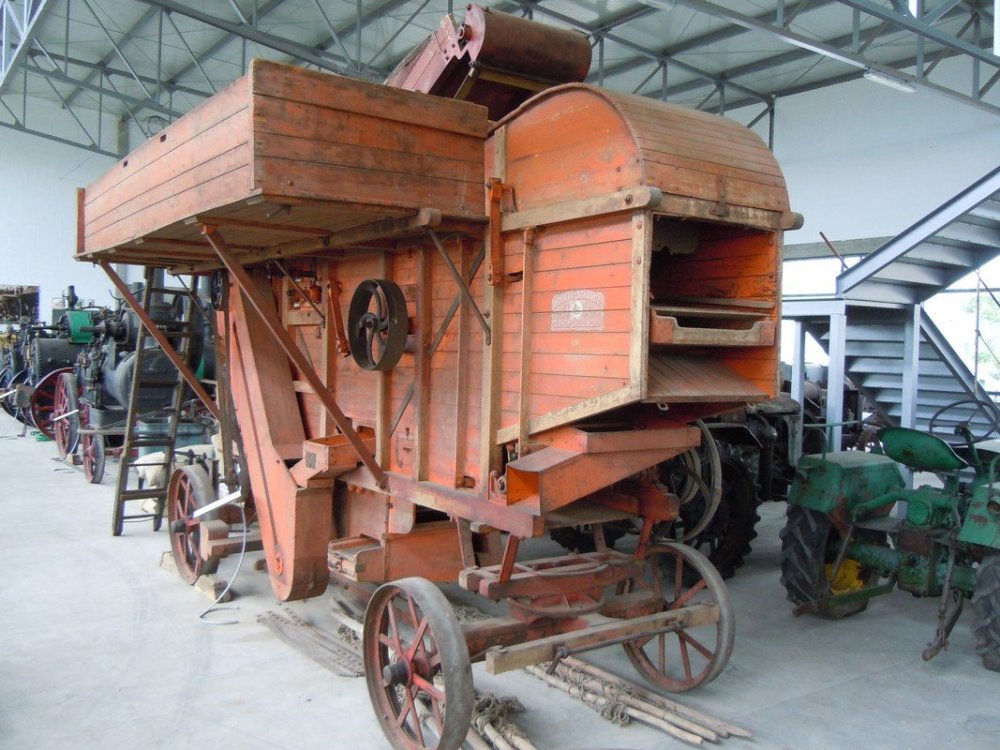
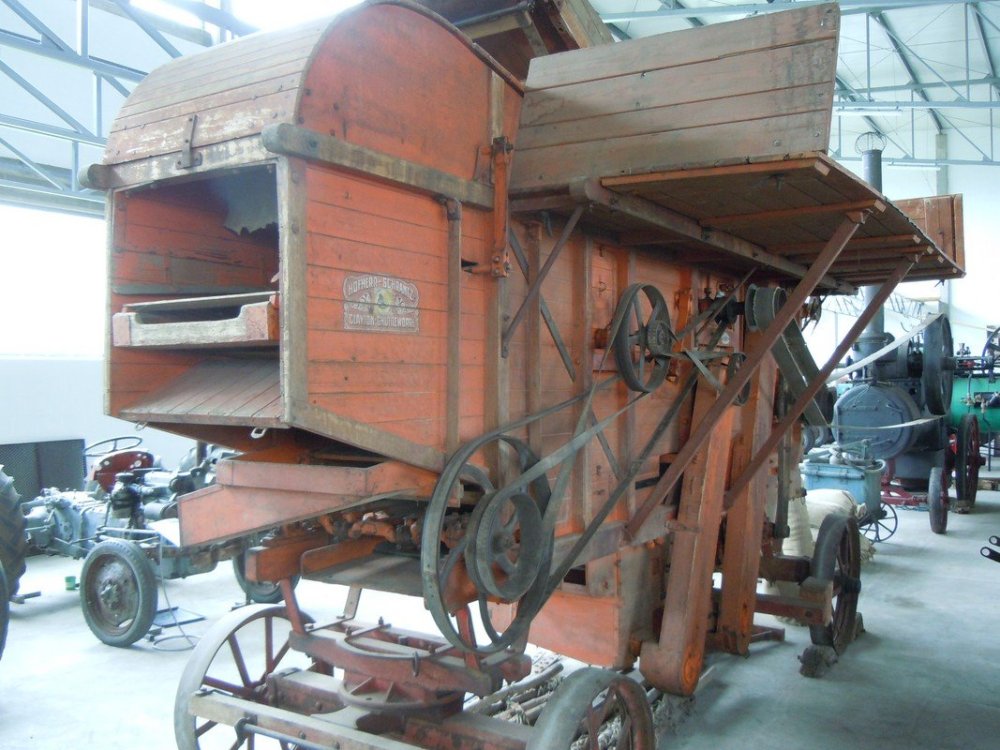
Those pictures were taken of this website:
https://www.muzejzeravica.org/en/item/196
Amazingly, I also found a video with this grain tresher (or treshing machine) at full work!
https://www.youtube.com/watch?v=M-m-dLnv3GU
So, this machine was made by Hofherr Schrantz Clayton Shuttleworth, from Budapest, Hungary and it was produce in 1924.
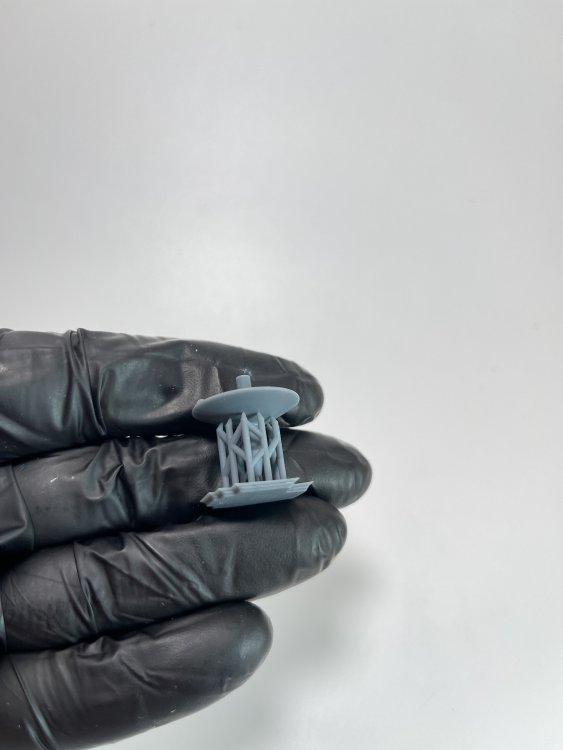
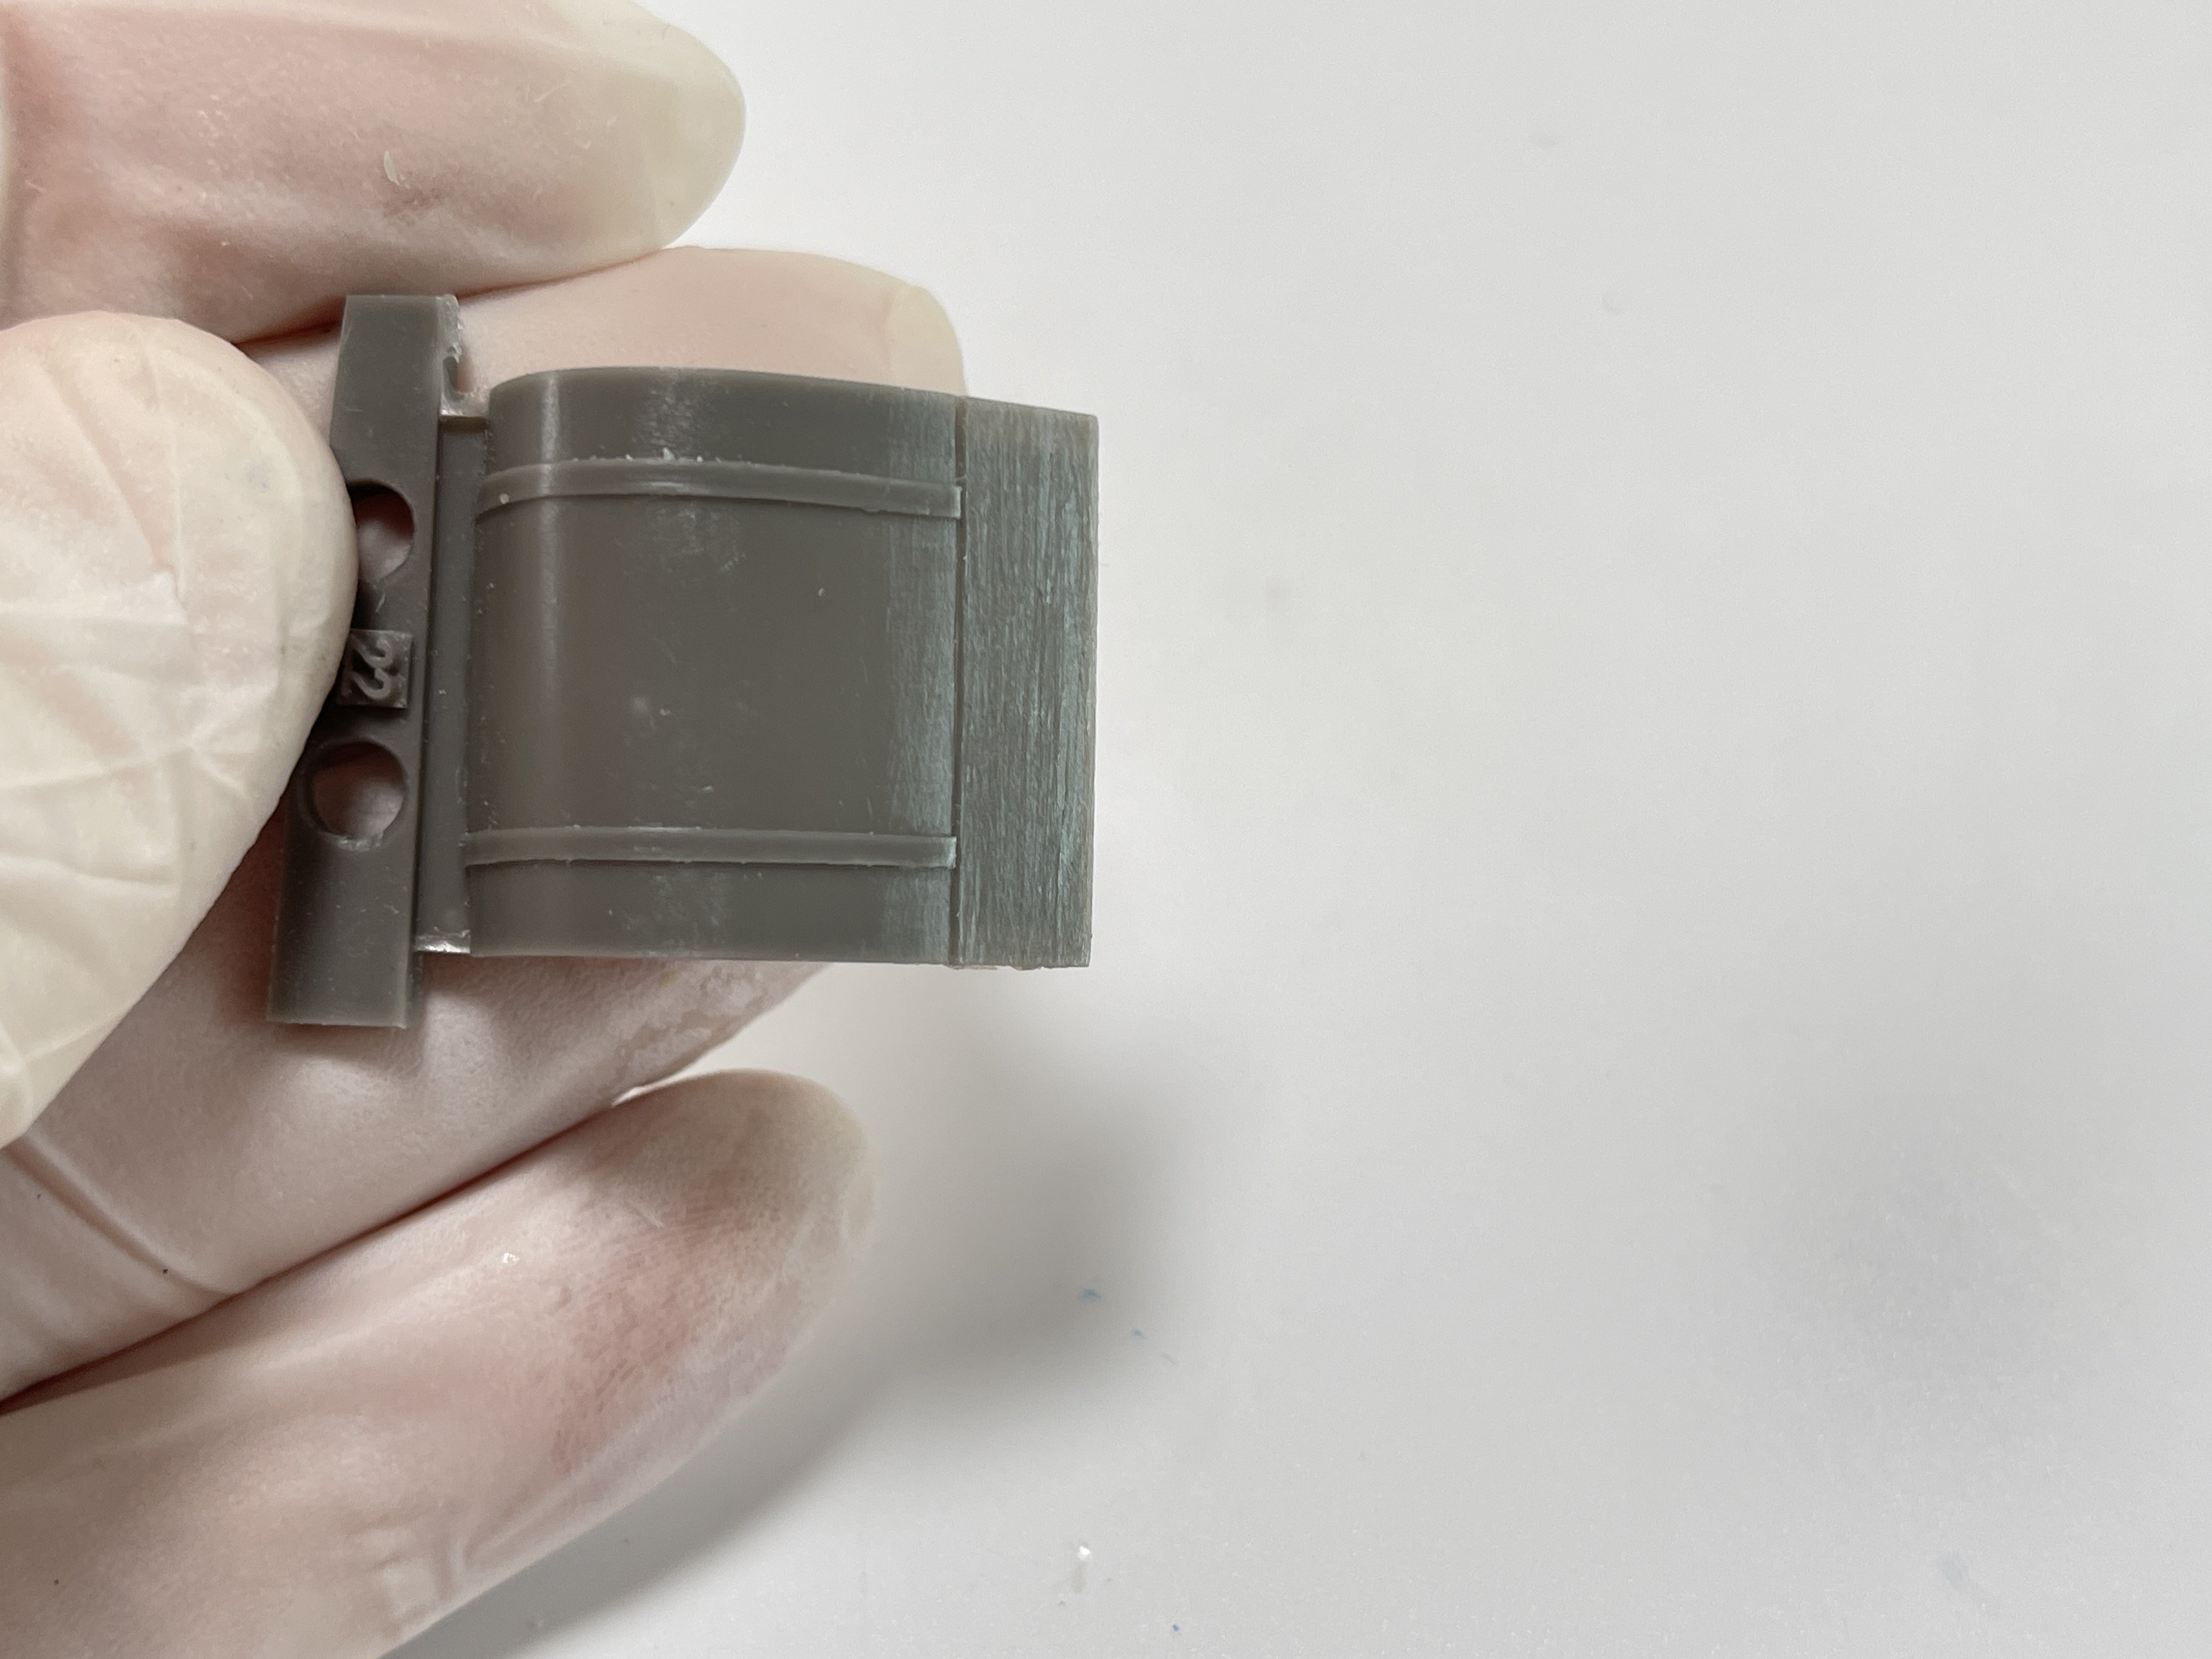
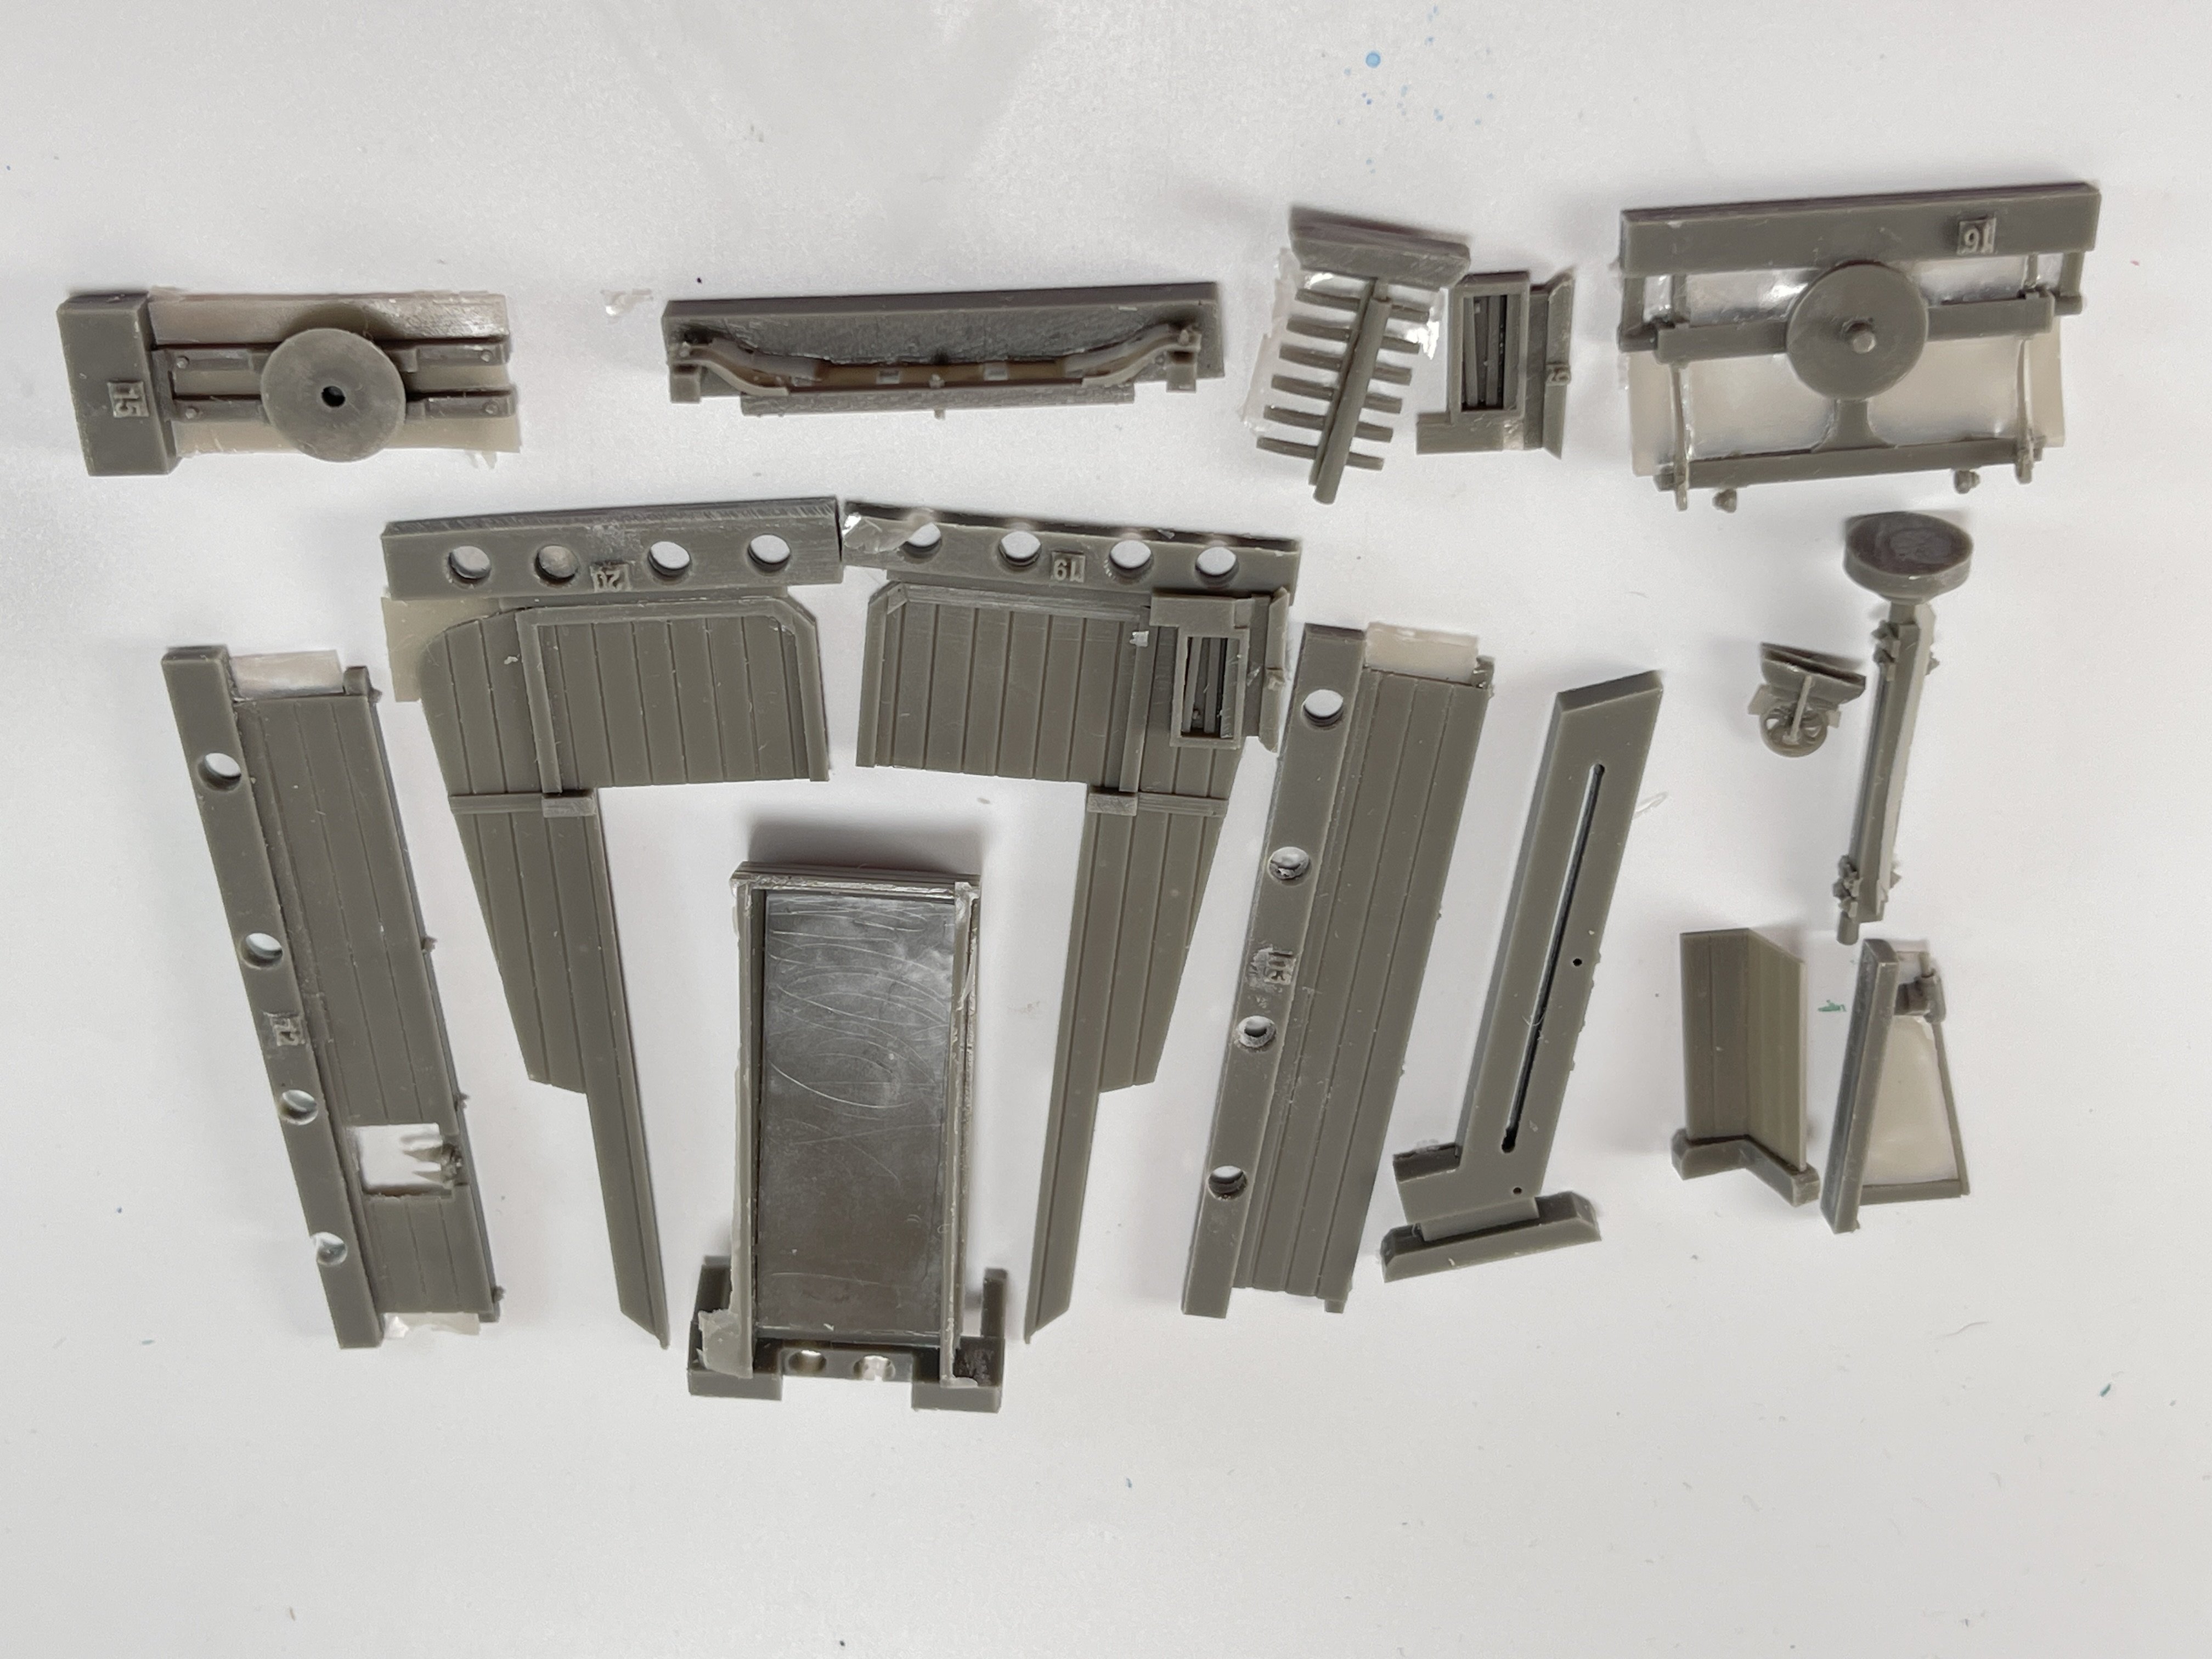
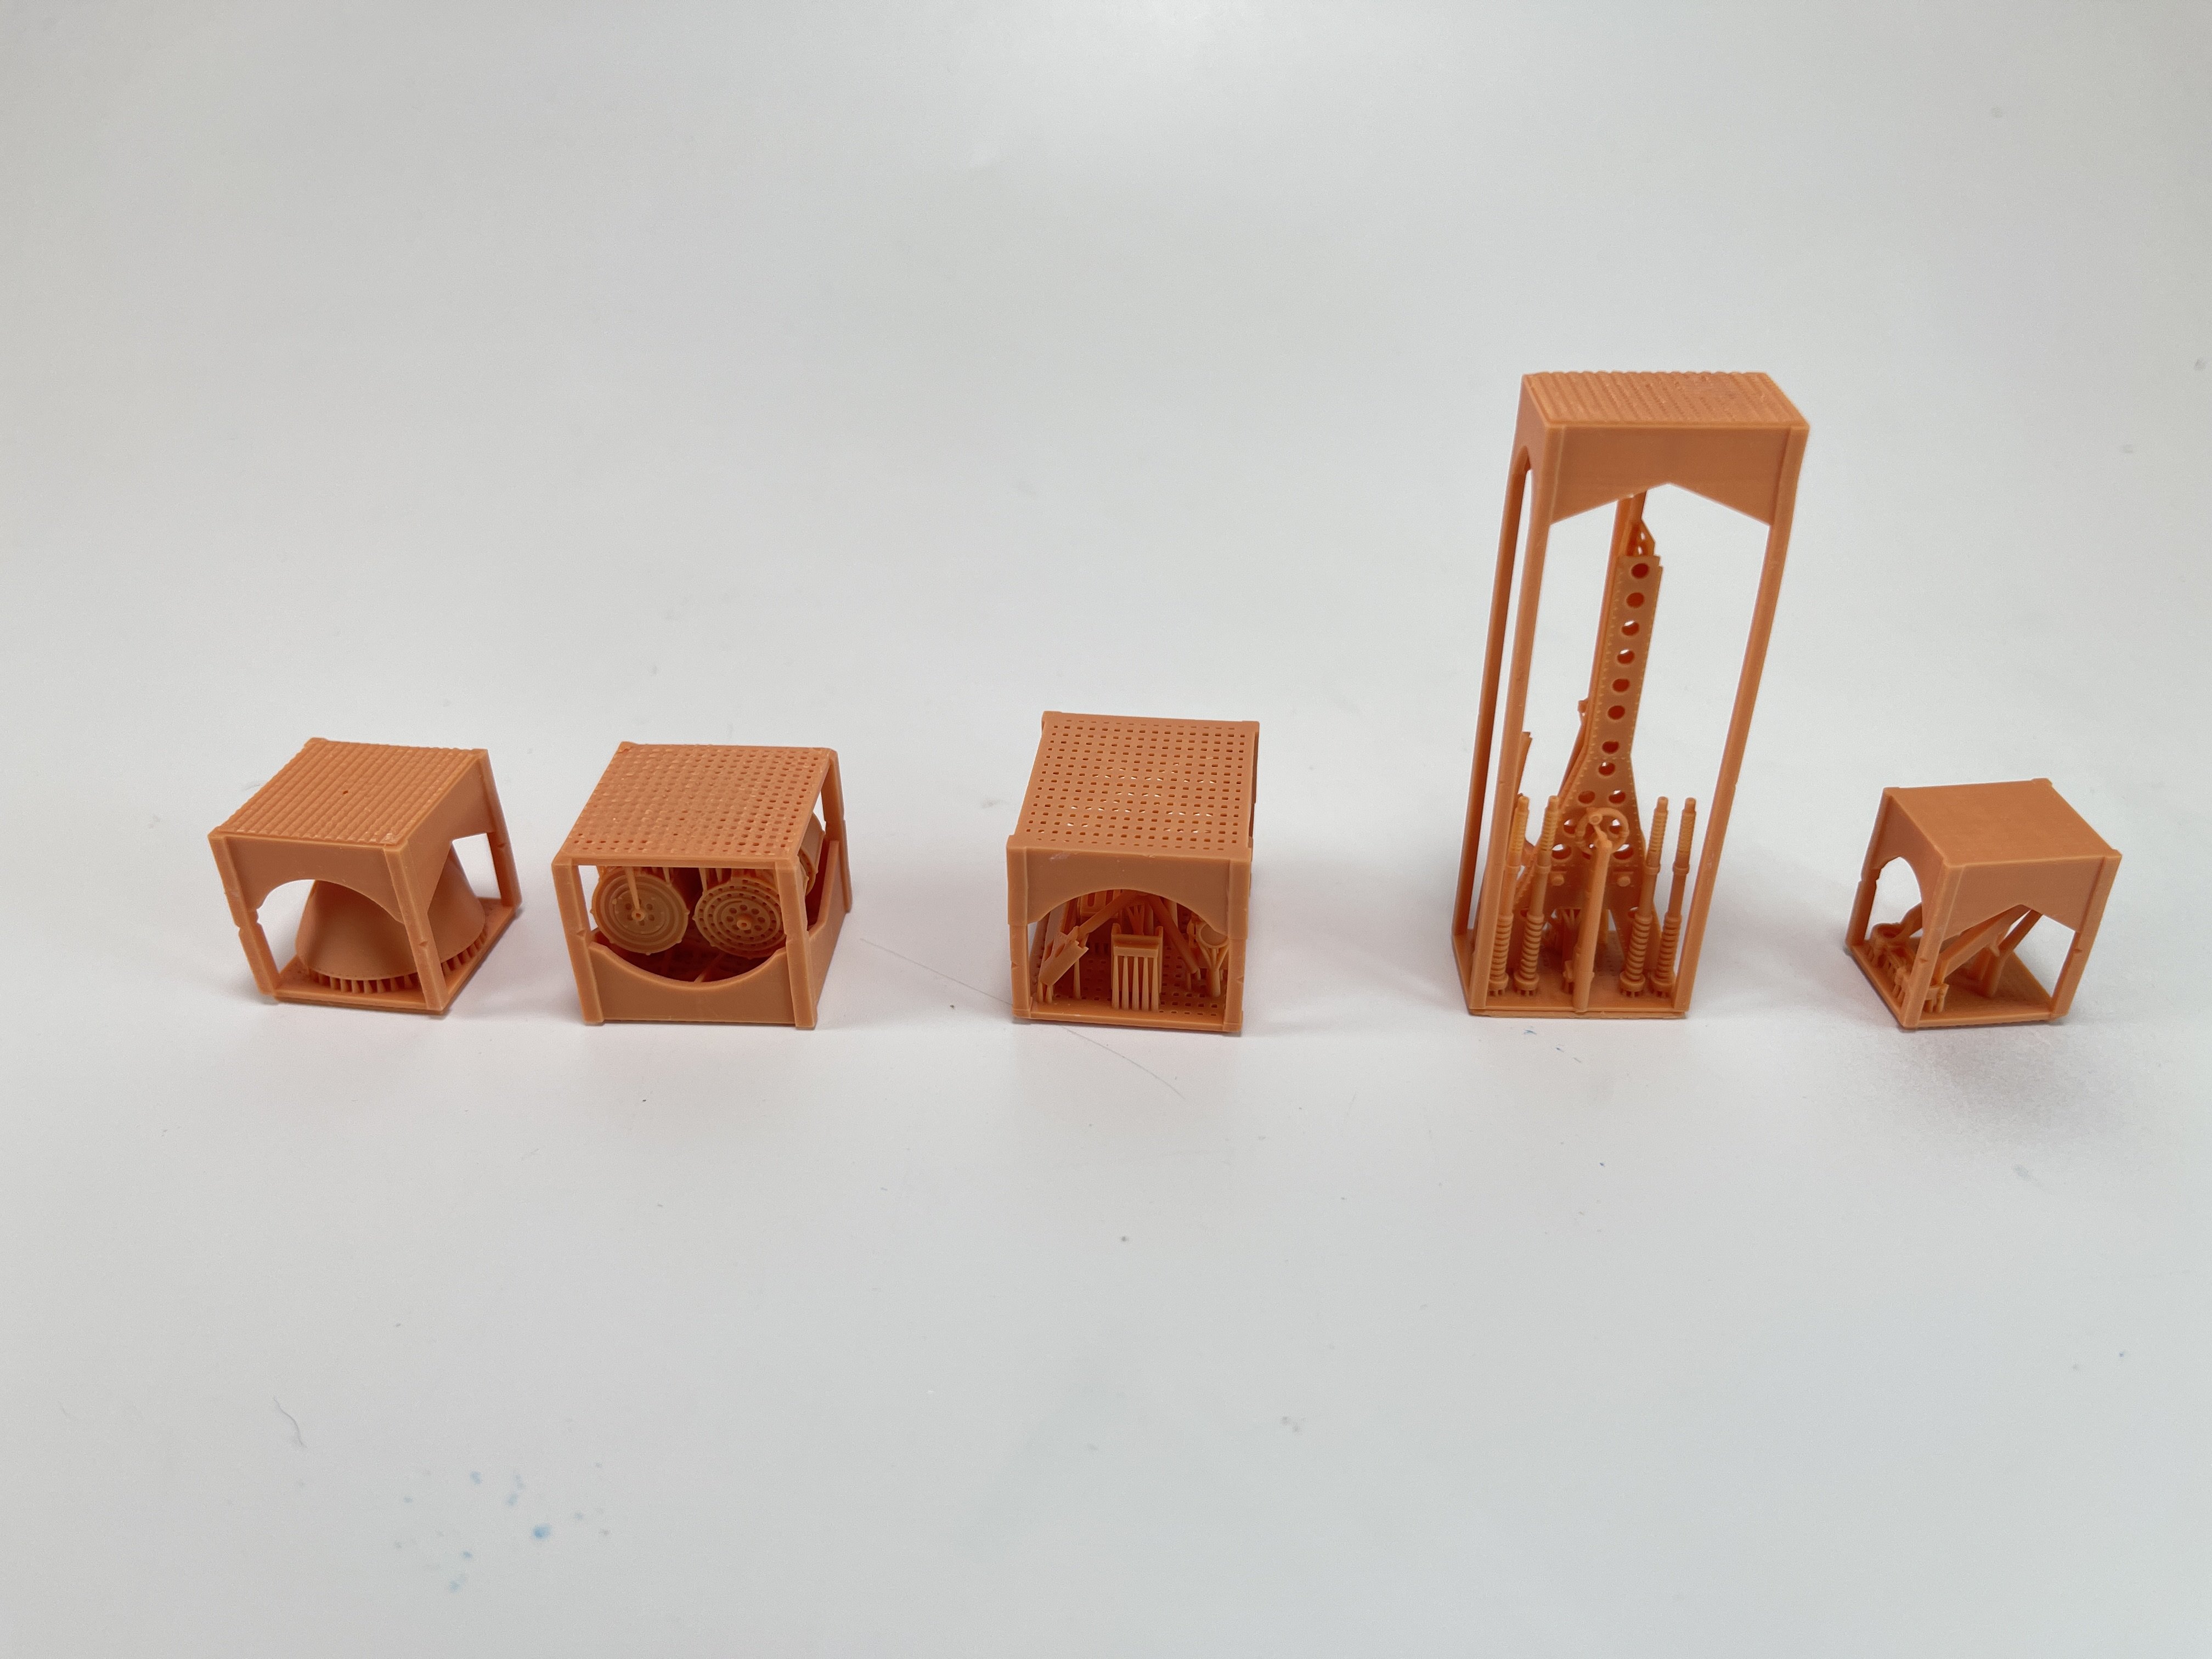
Now cracking the box, inside you will find a box full of resin bits, in tradicional way and in 3D way.
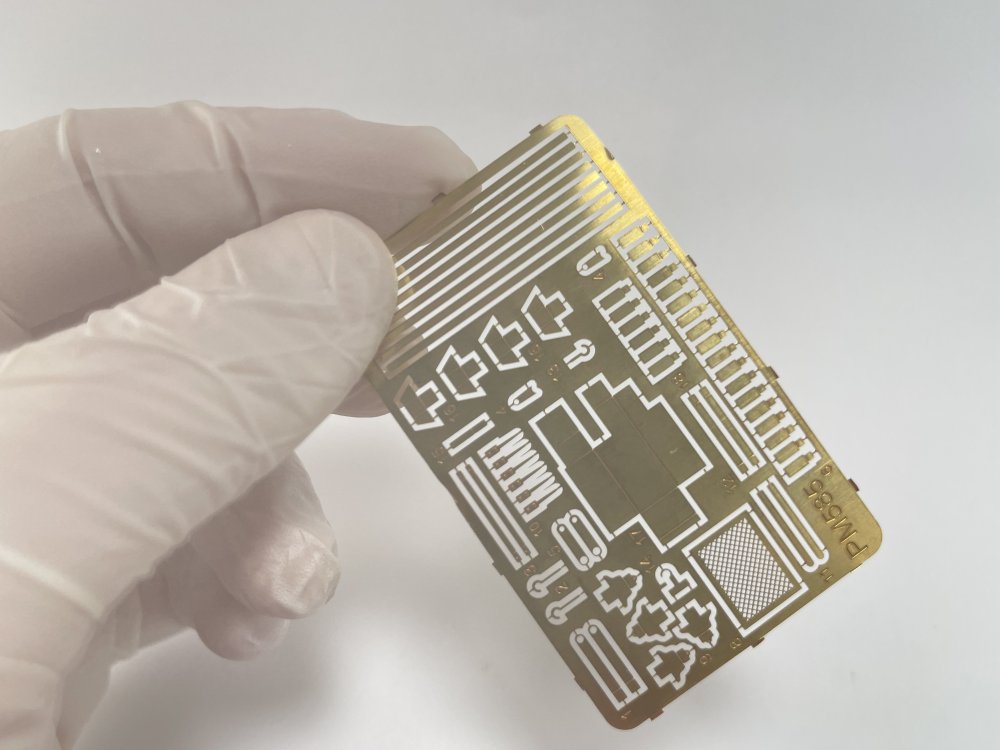
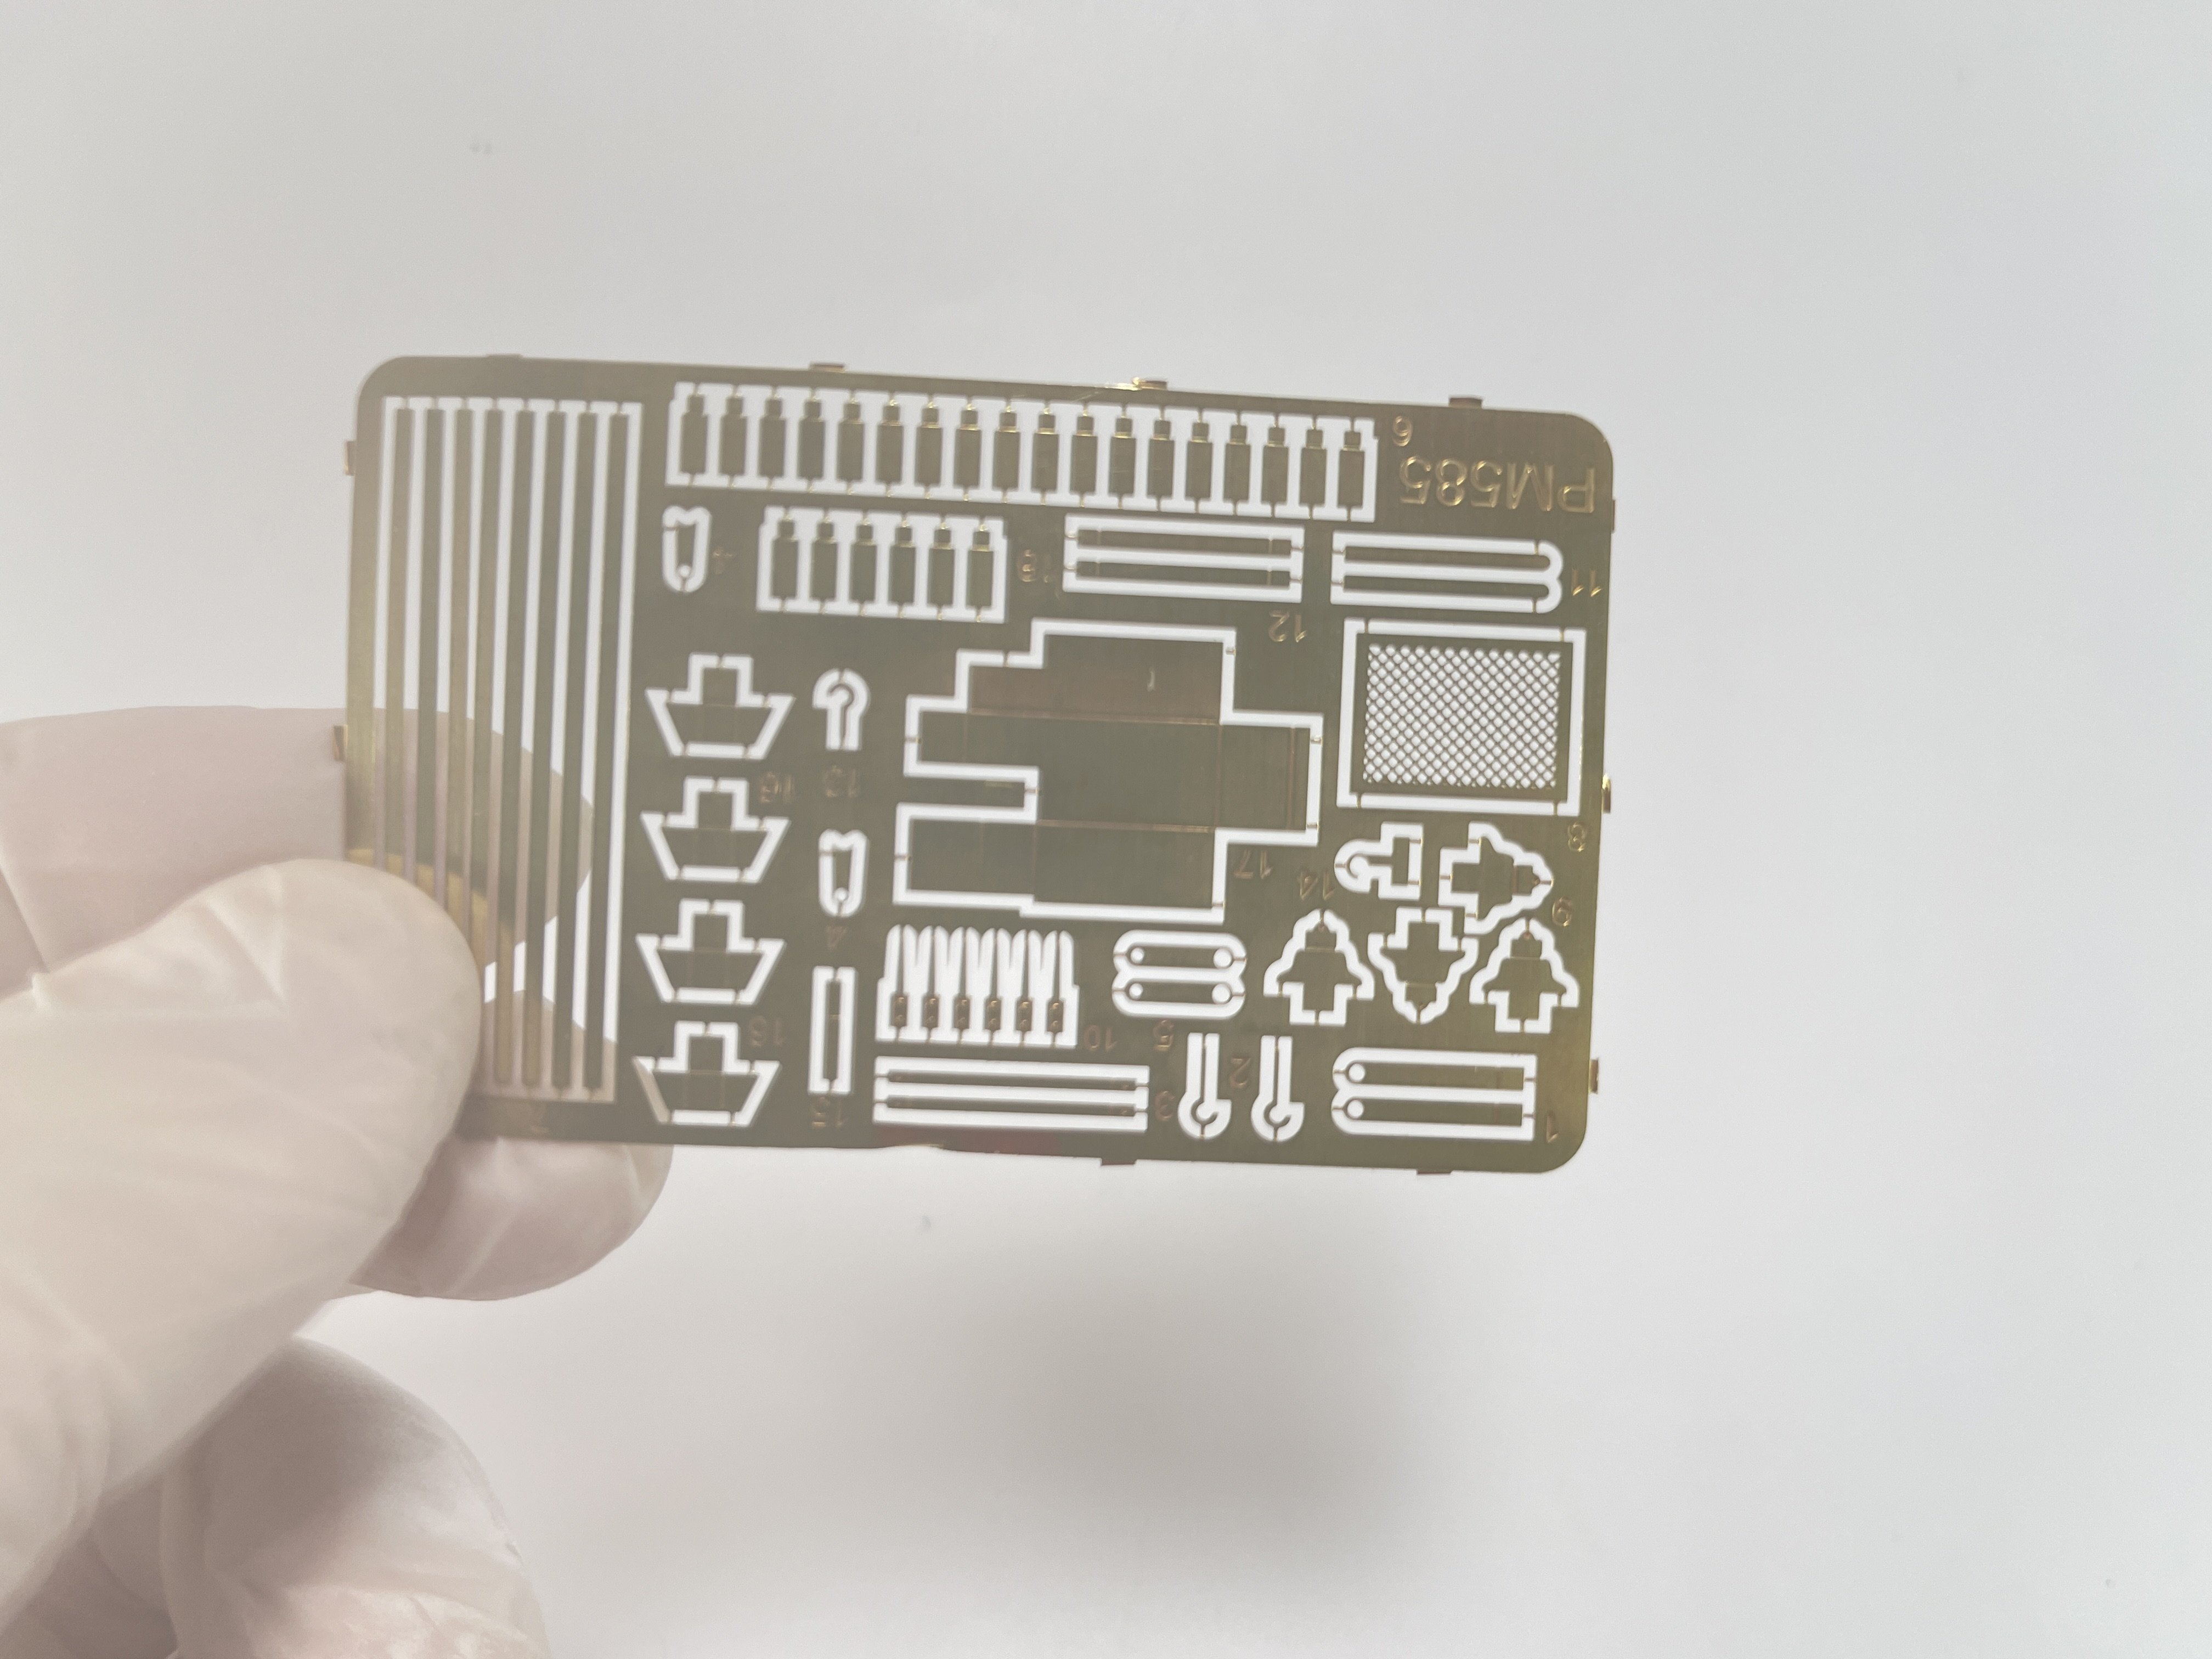
Also a small decal sheet and also a small photo-etched sheet.
The resin parts are in tradicional grey colour.

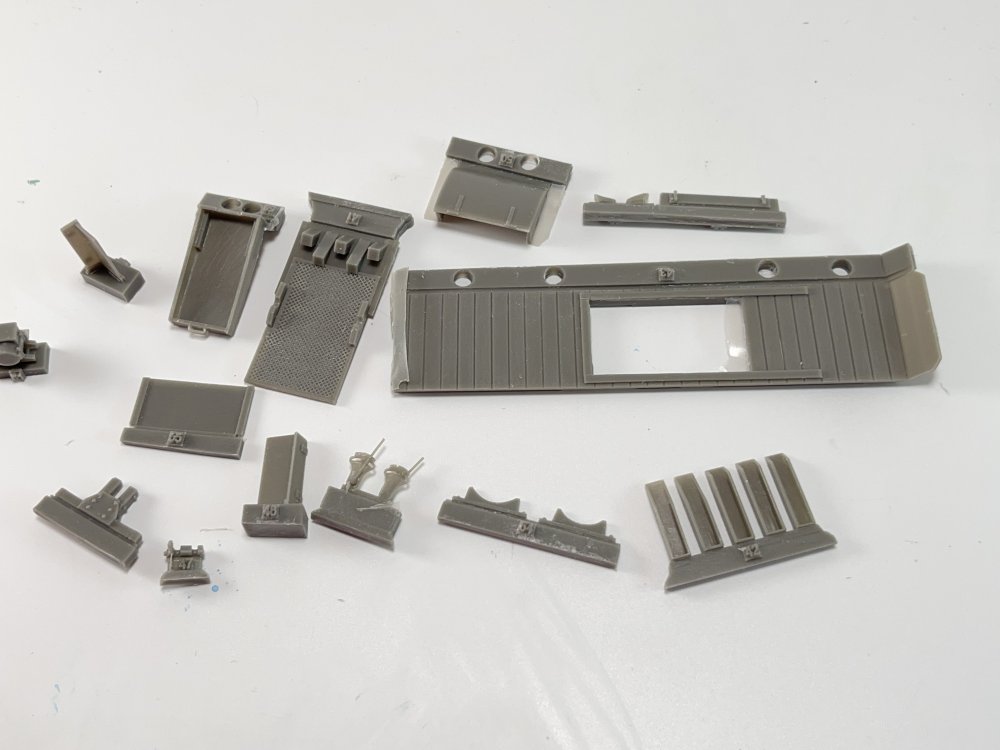

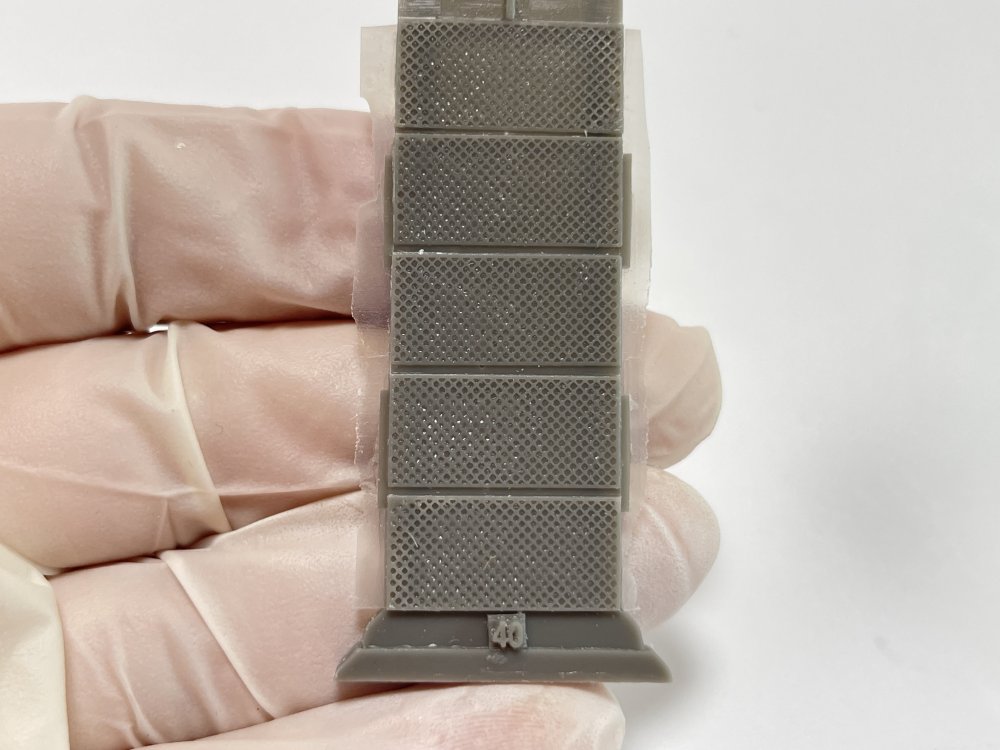


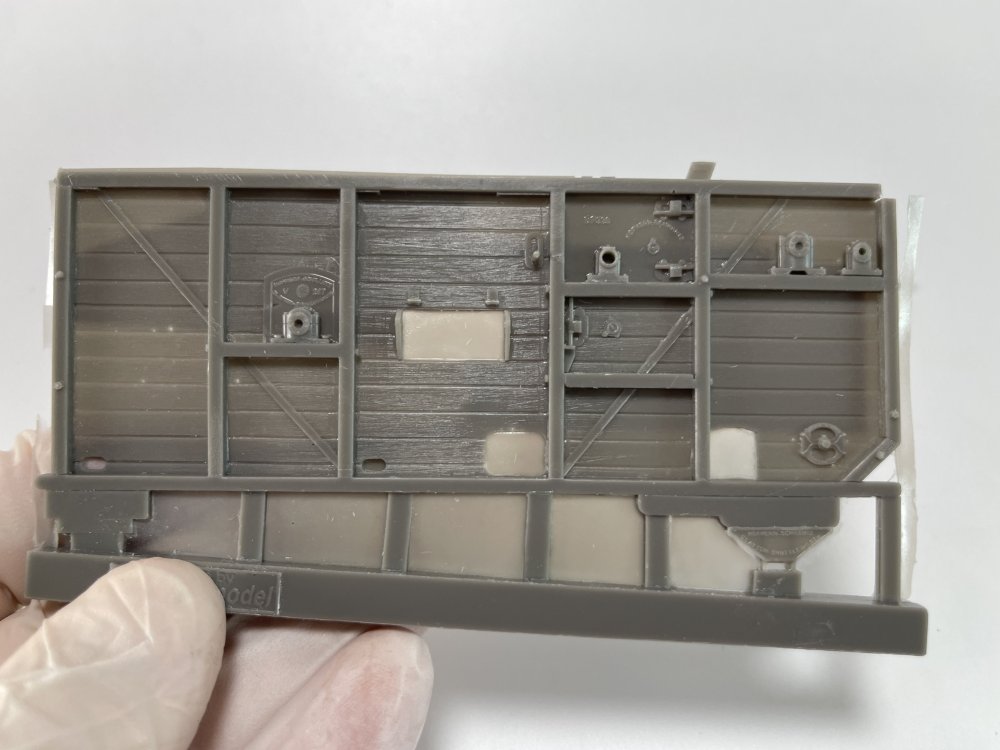
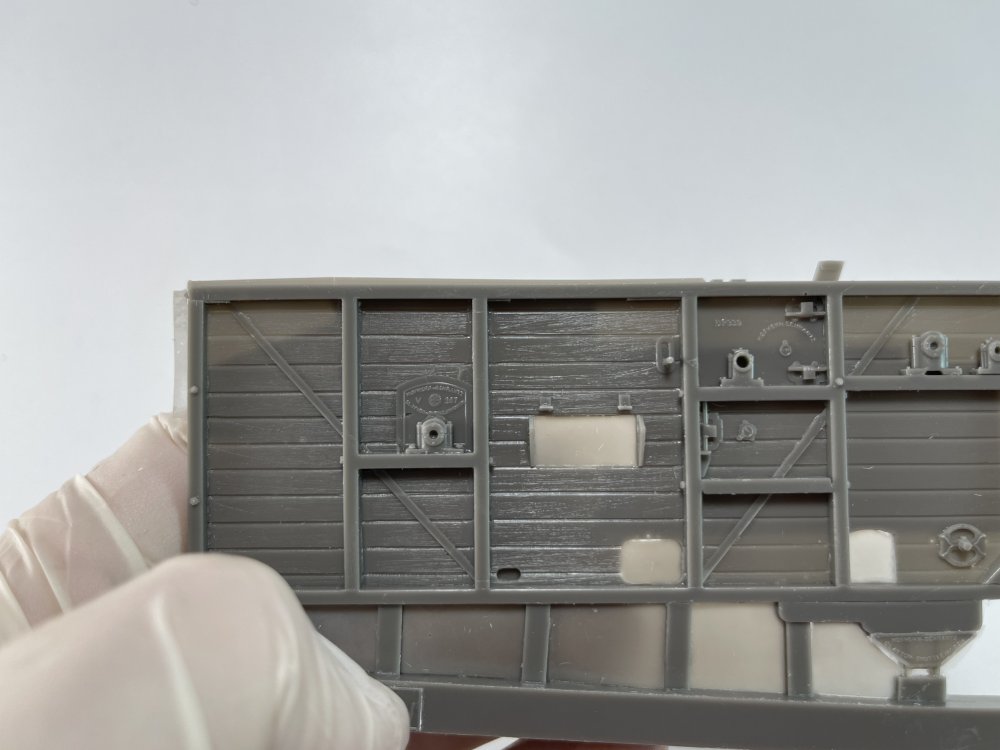
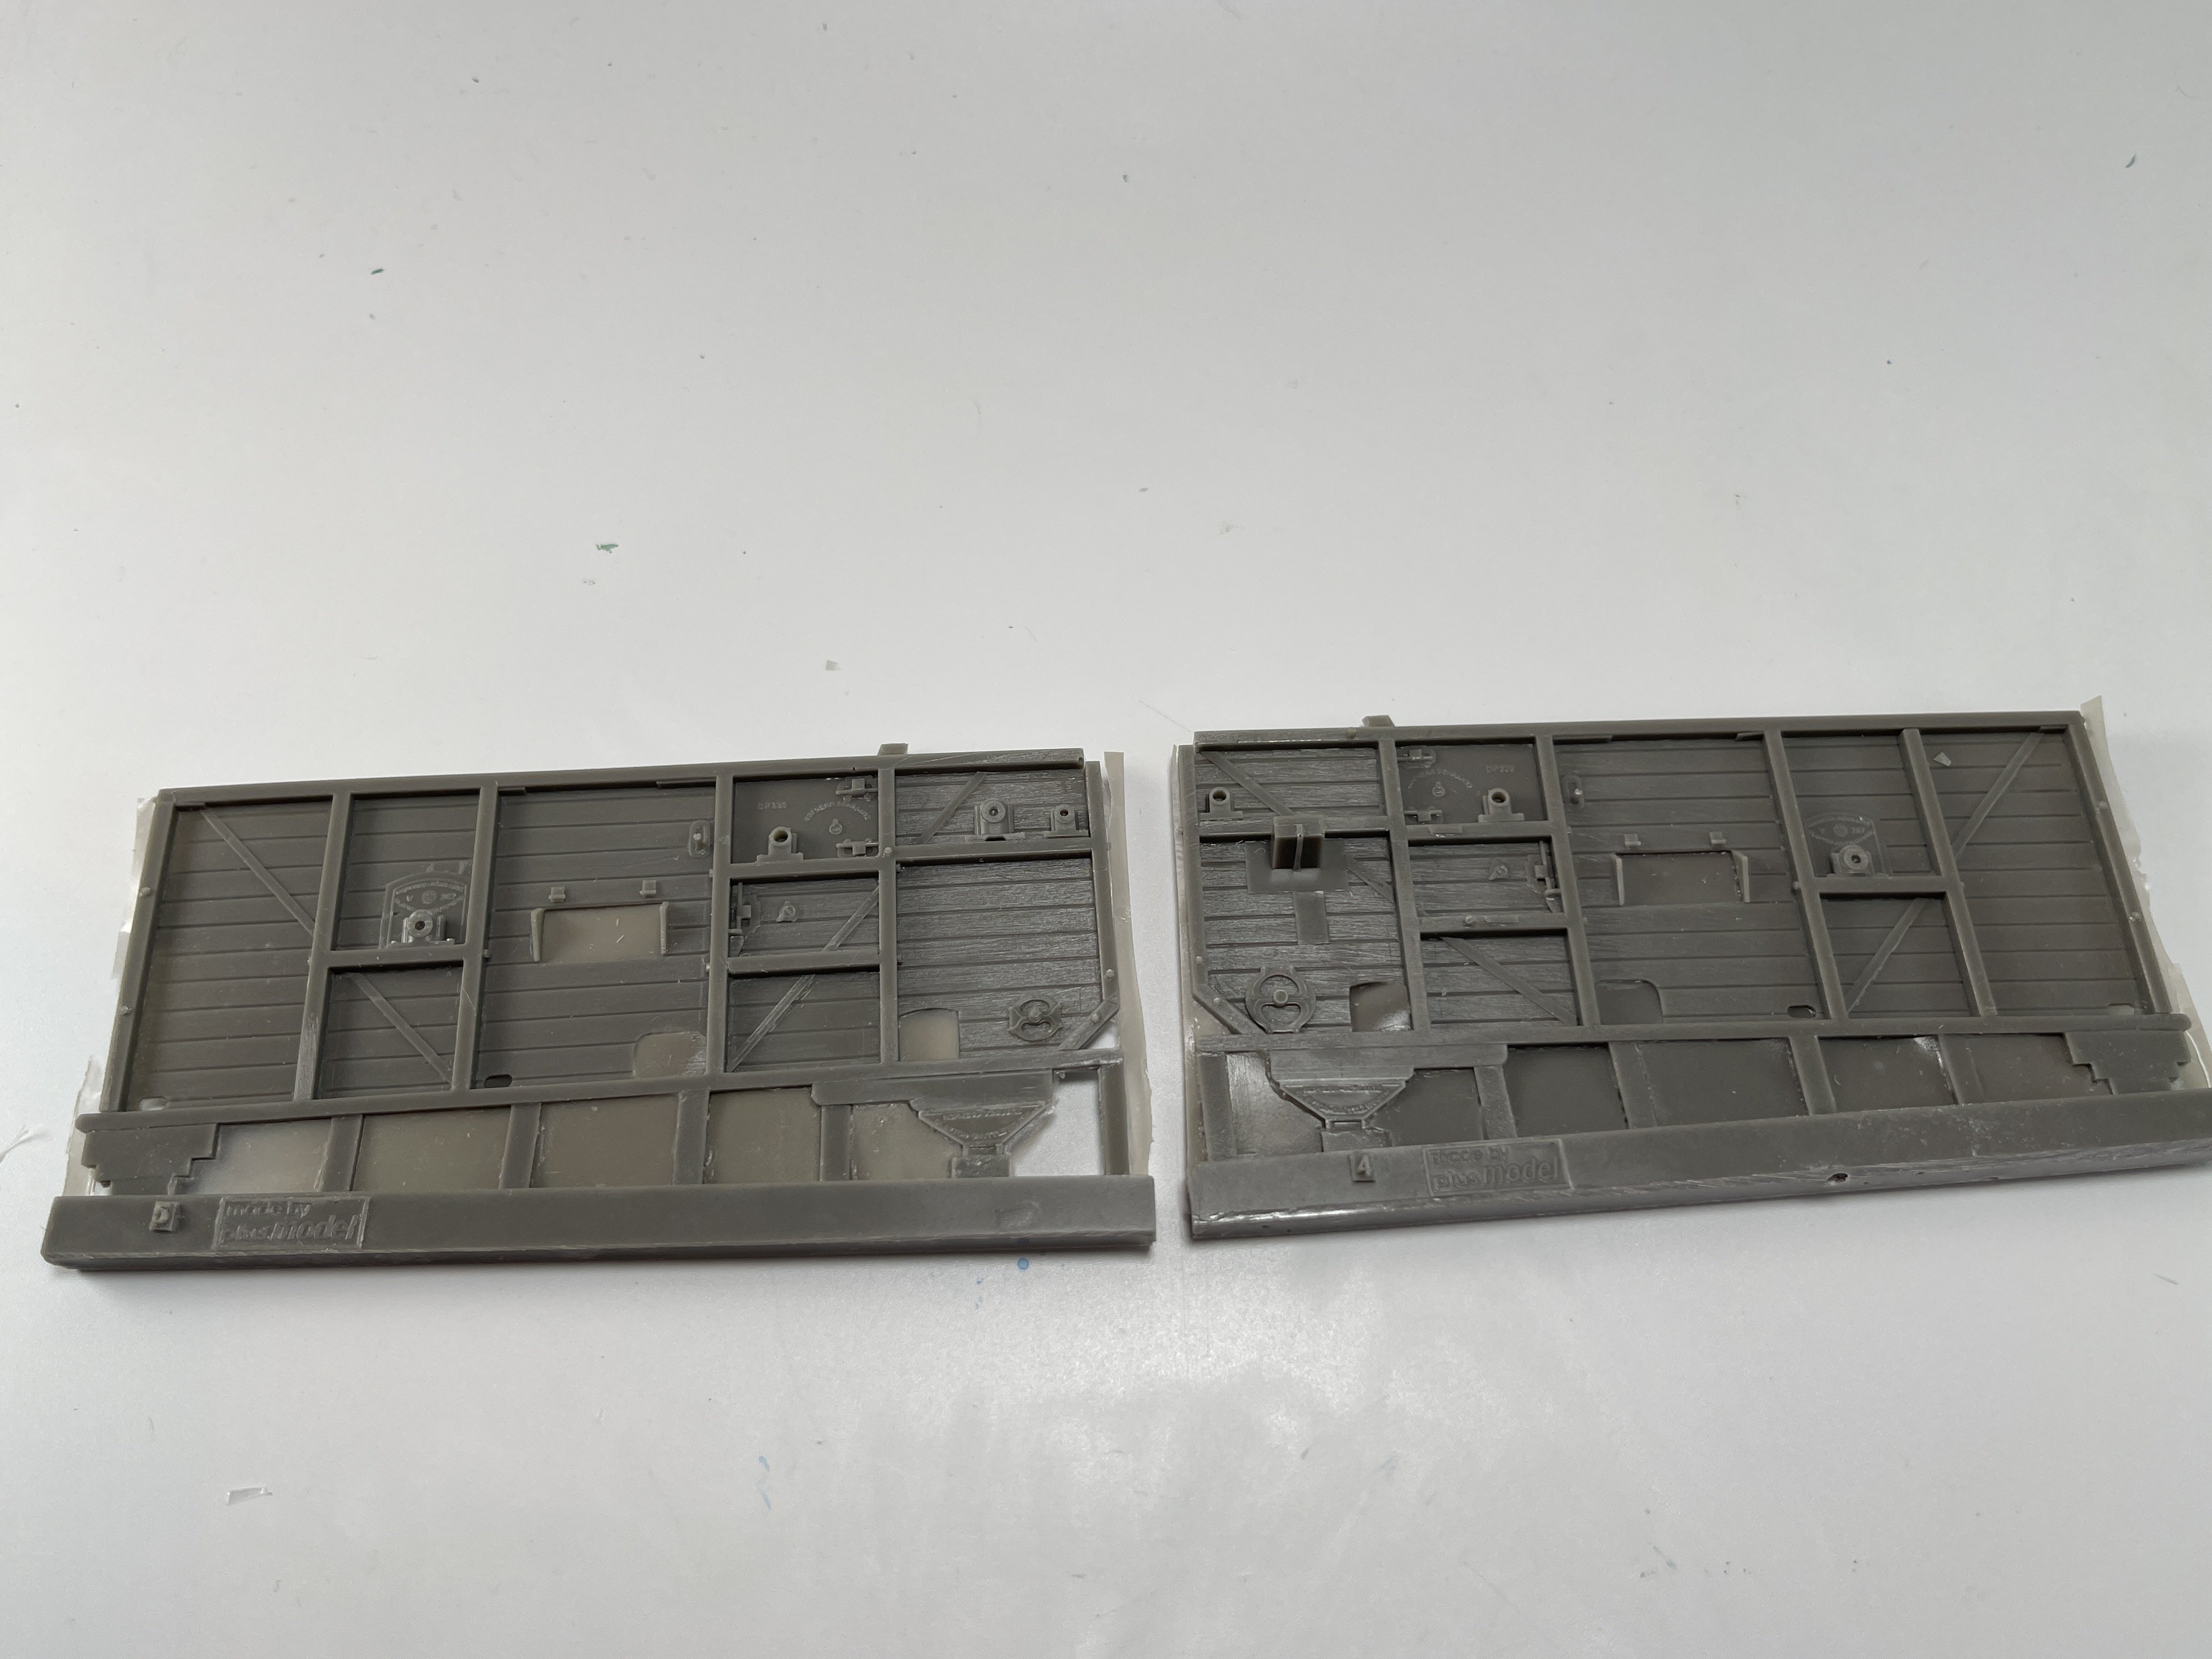
The surface detail is outstating. Being made of wood, the main pats of it have the wood veins very soft but perfectly designed.
All the surface details (rivets, bolts, wood veins) and manufacture logo are very well represented.

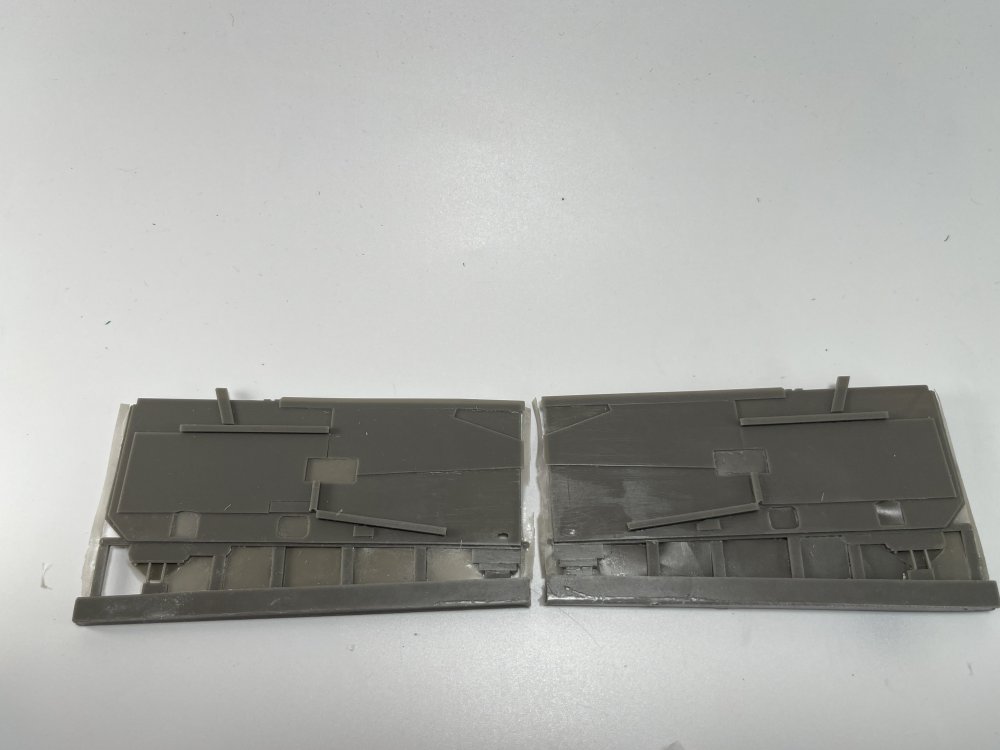
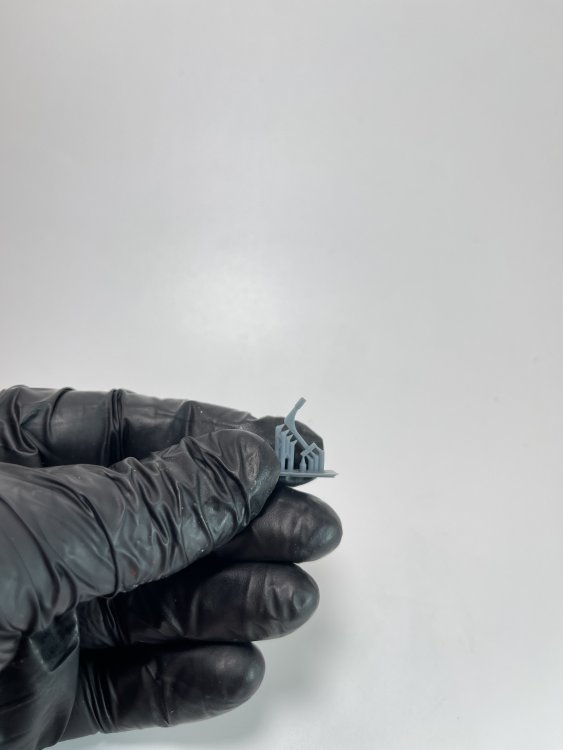
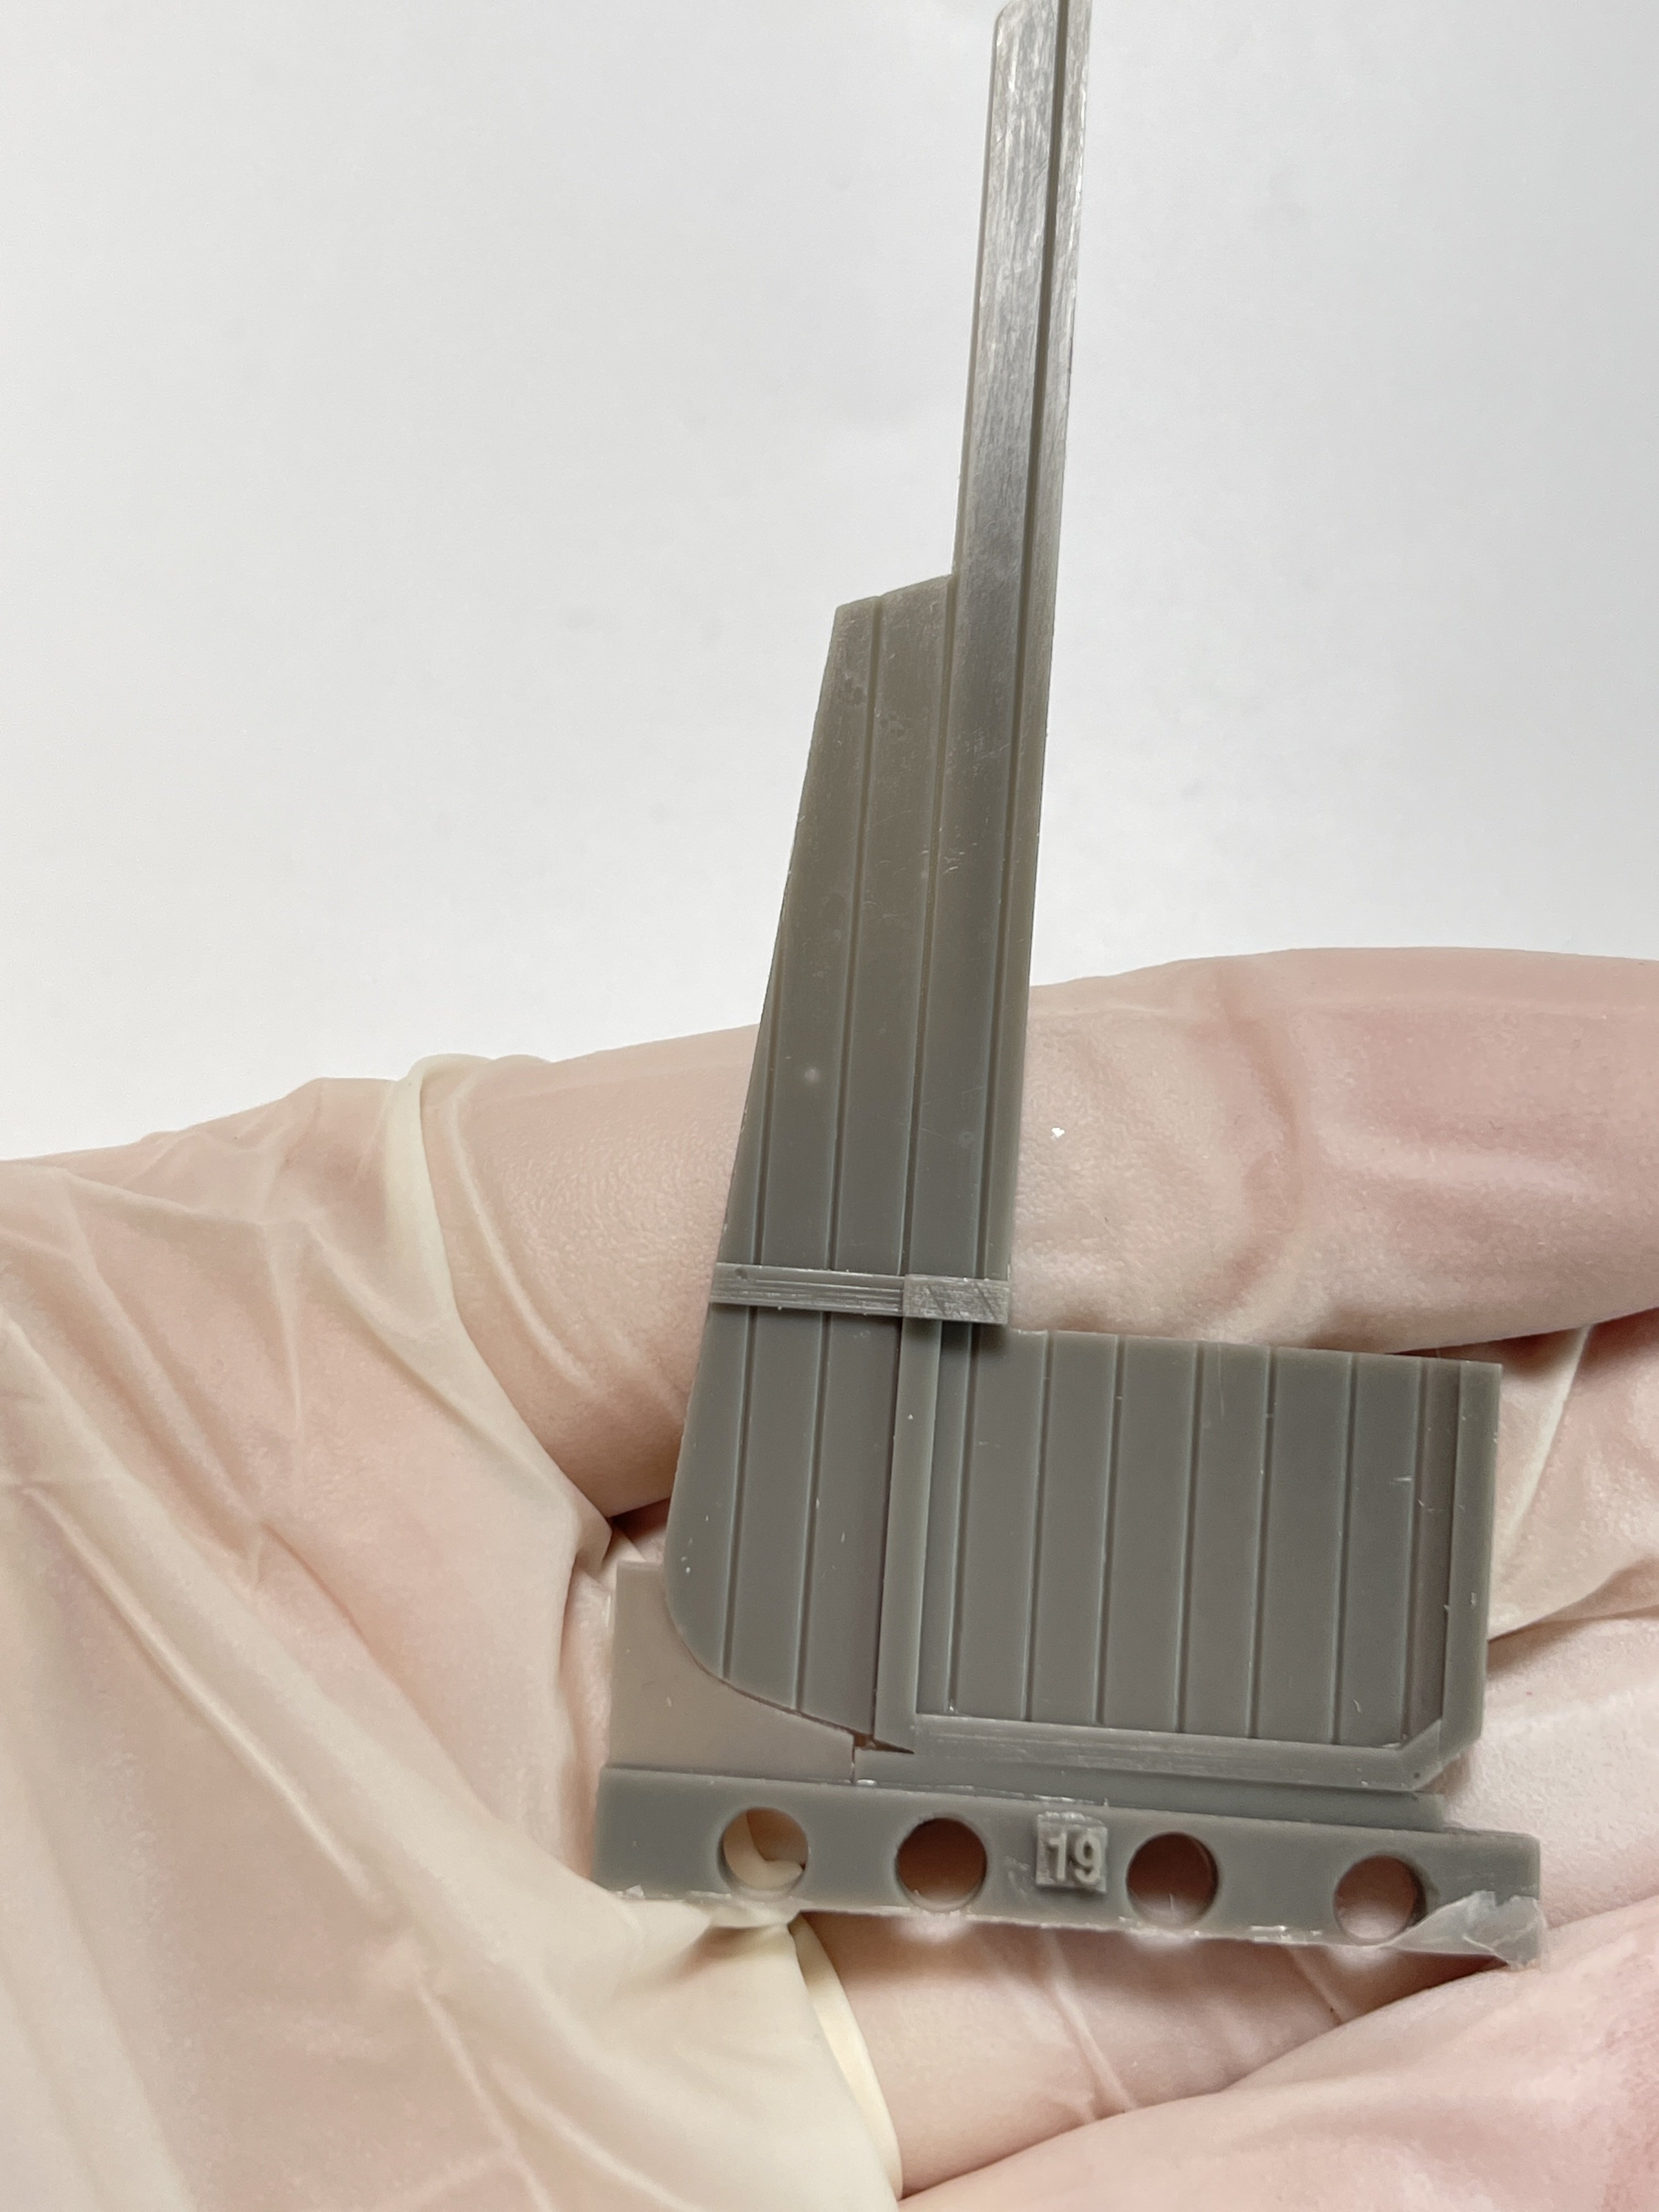
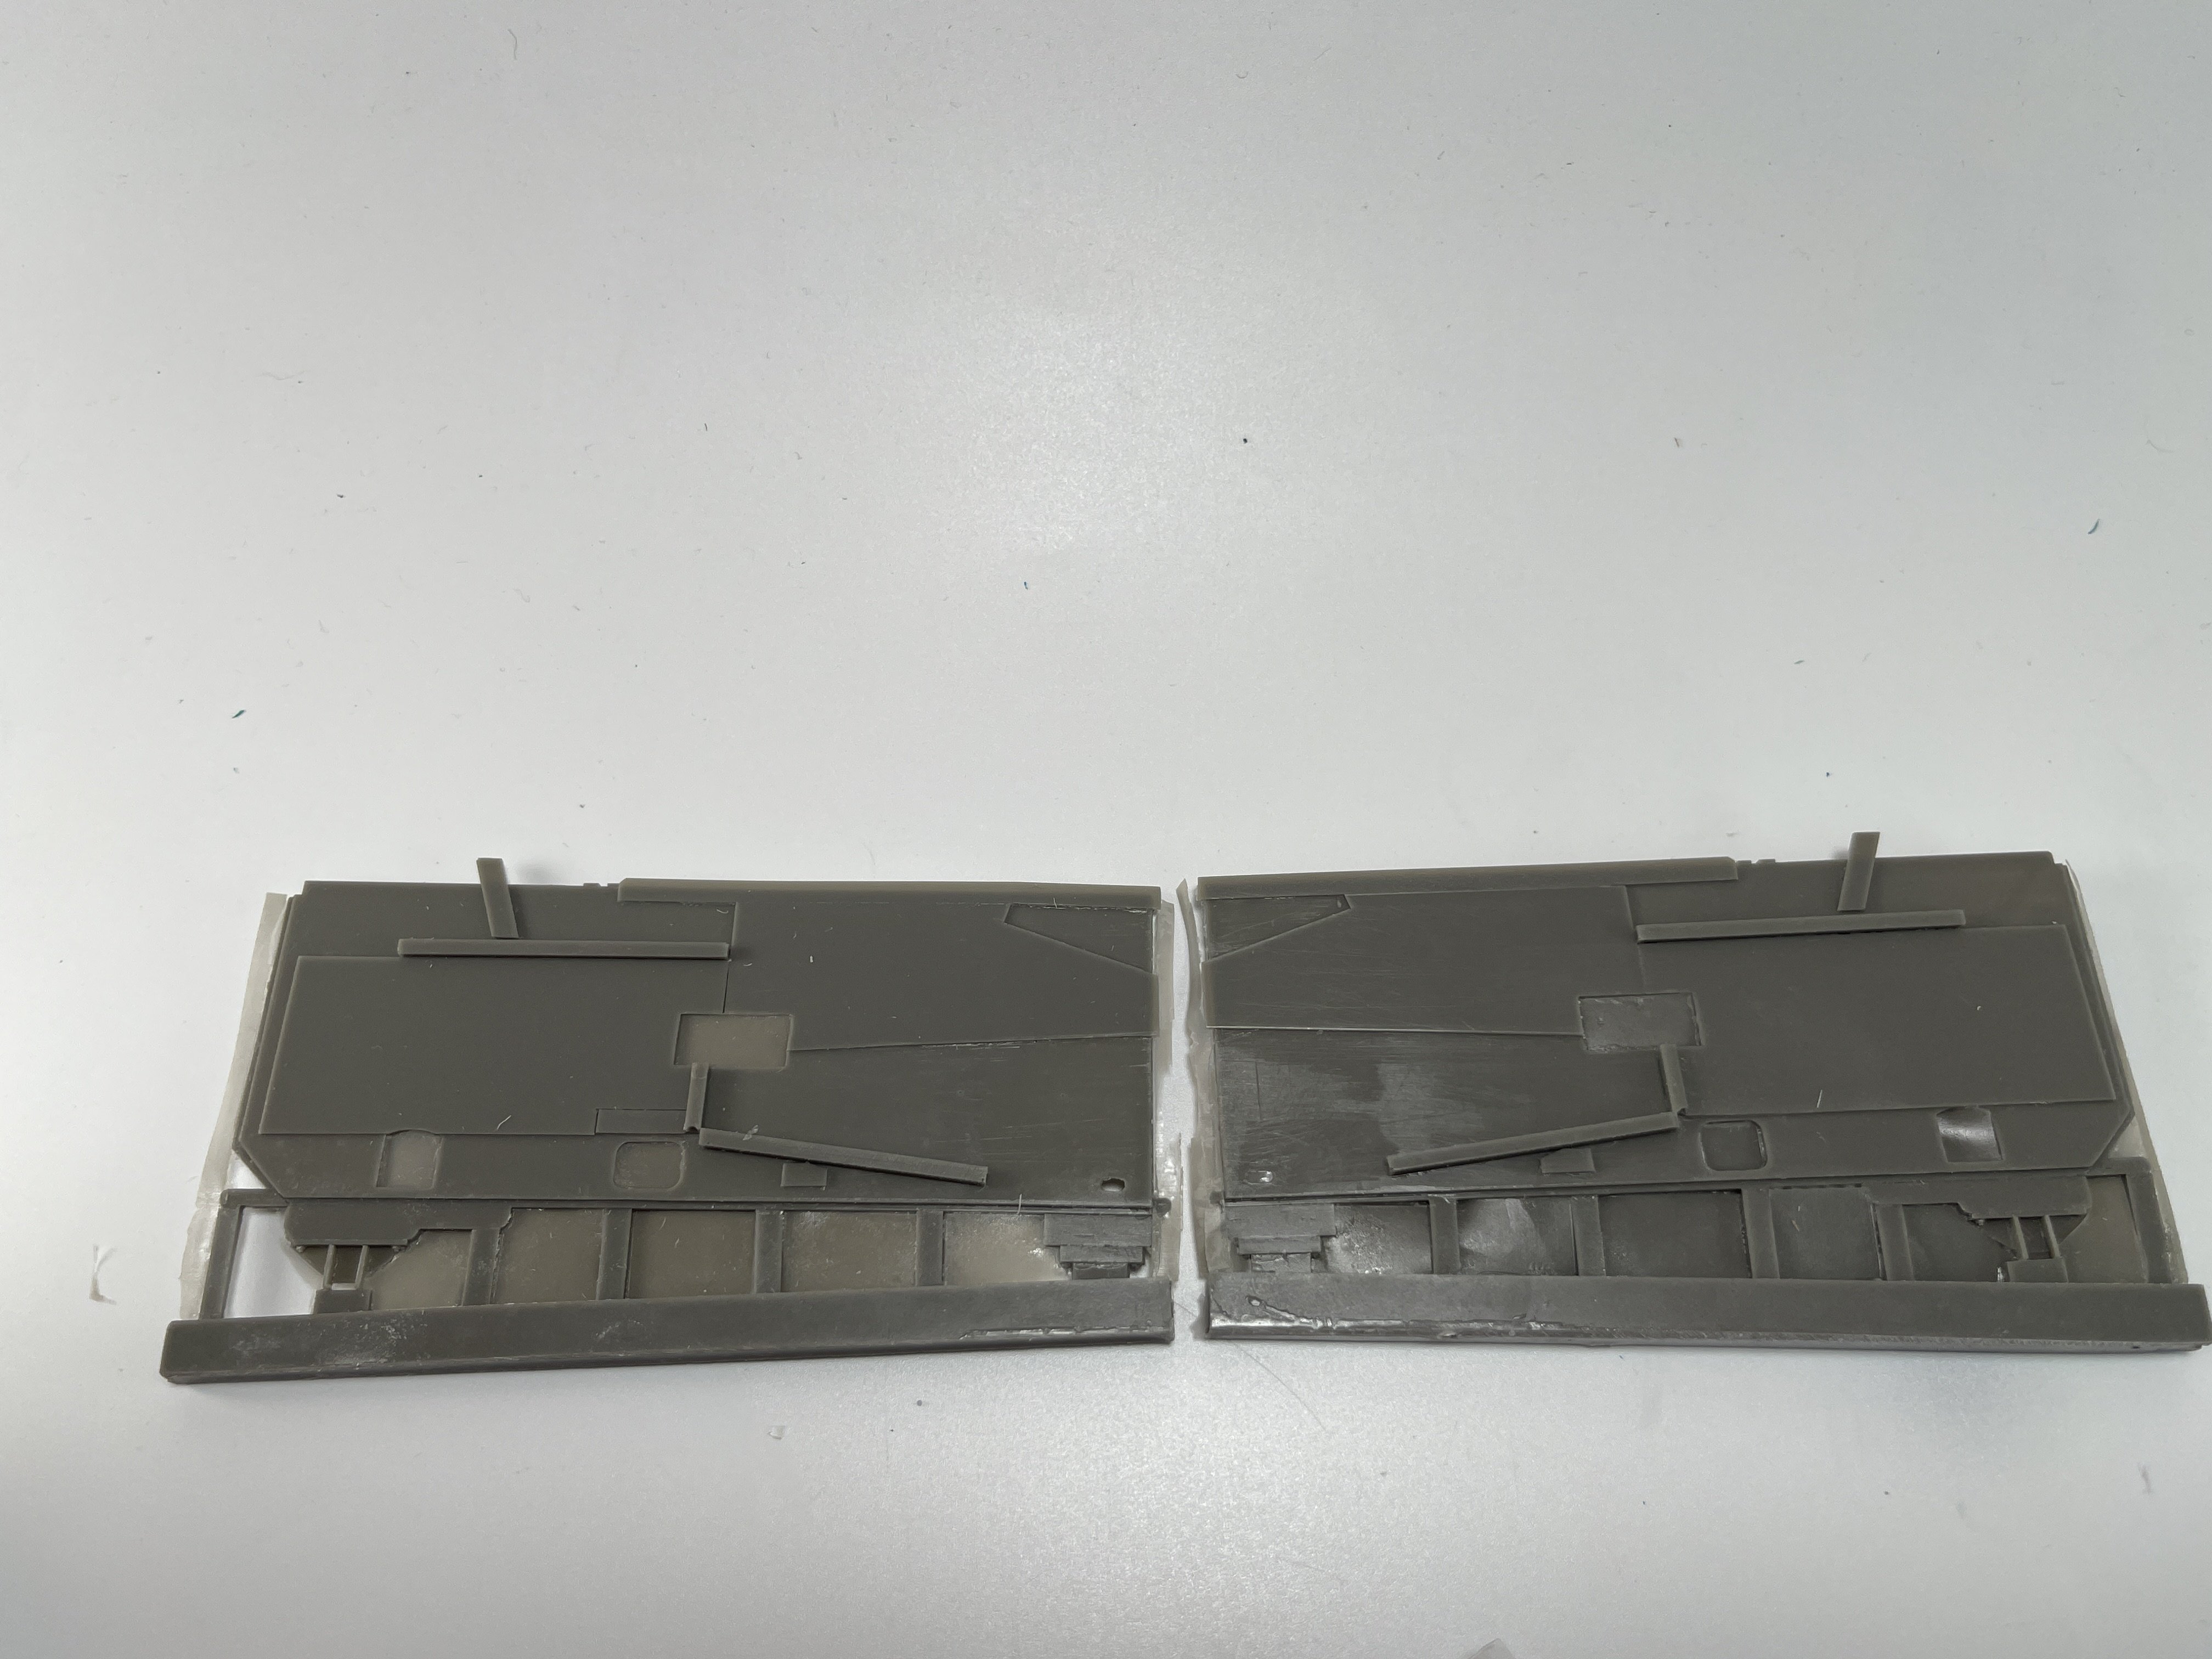
The structural parts and subassemblies are made in the tradicional resin parts.
These parts are perfectly casted with no bubbles or warps.


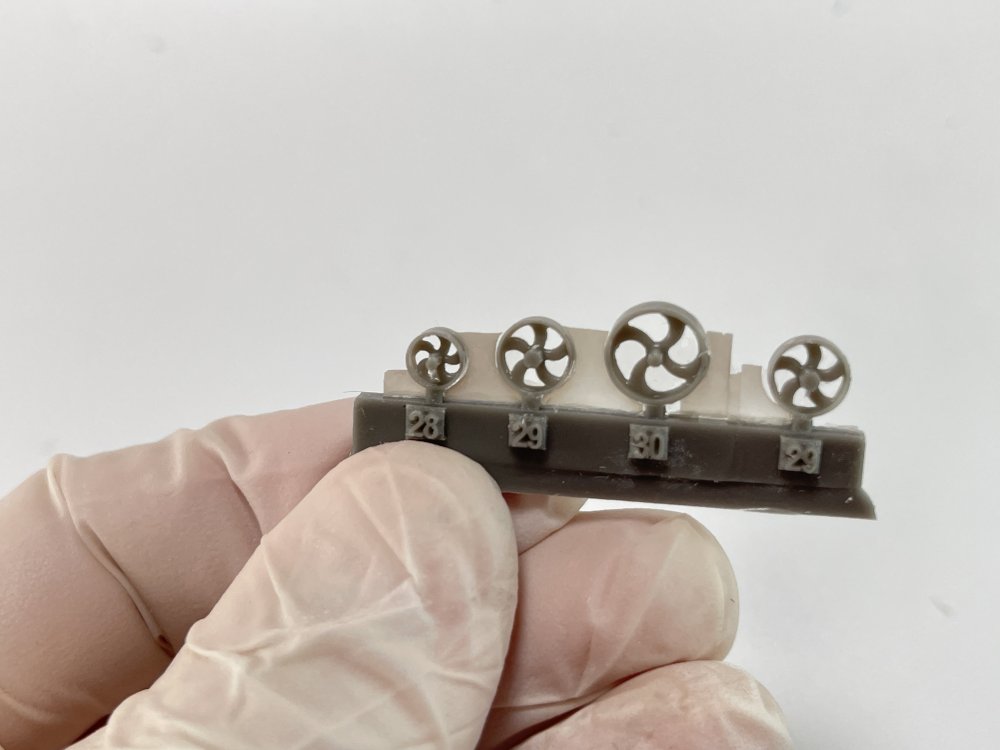
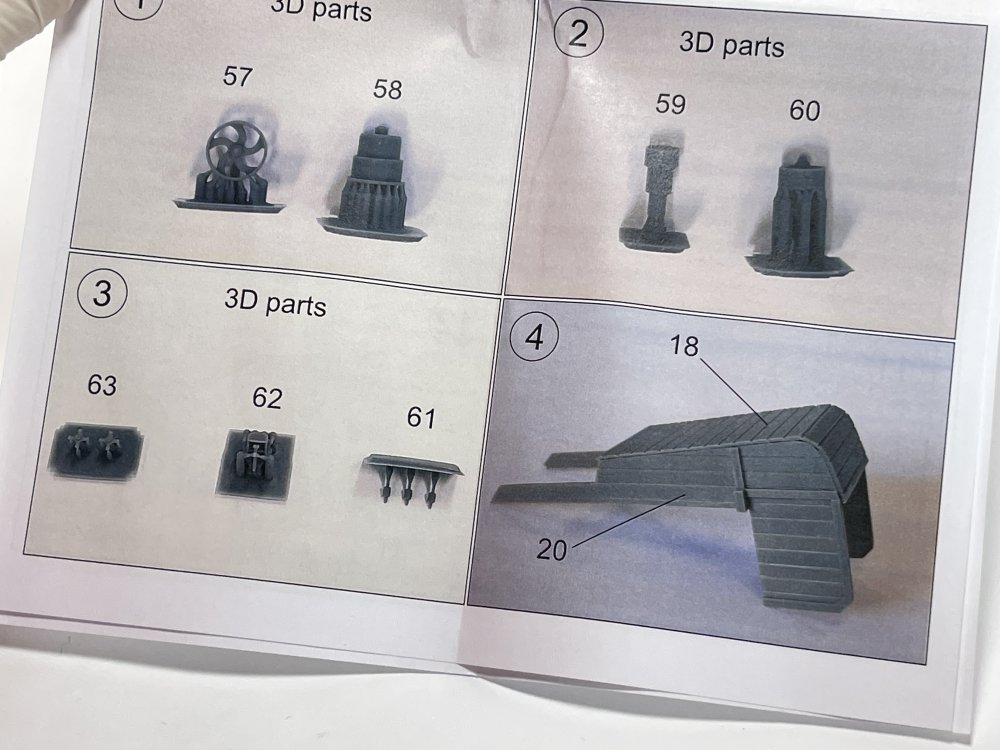
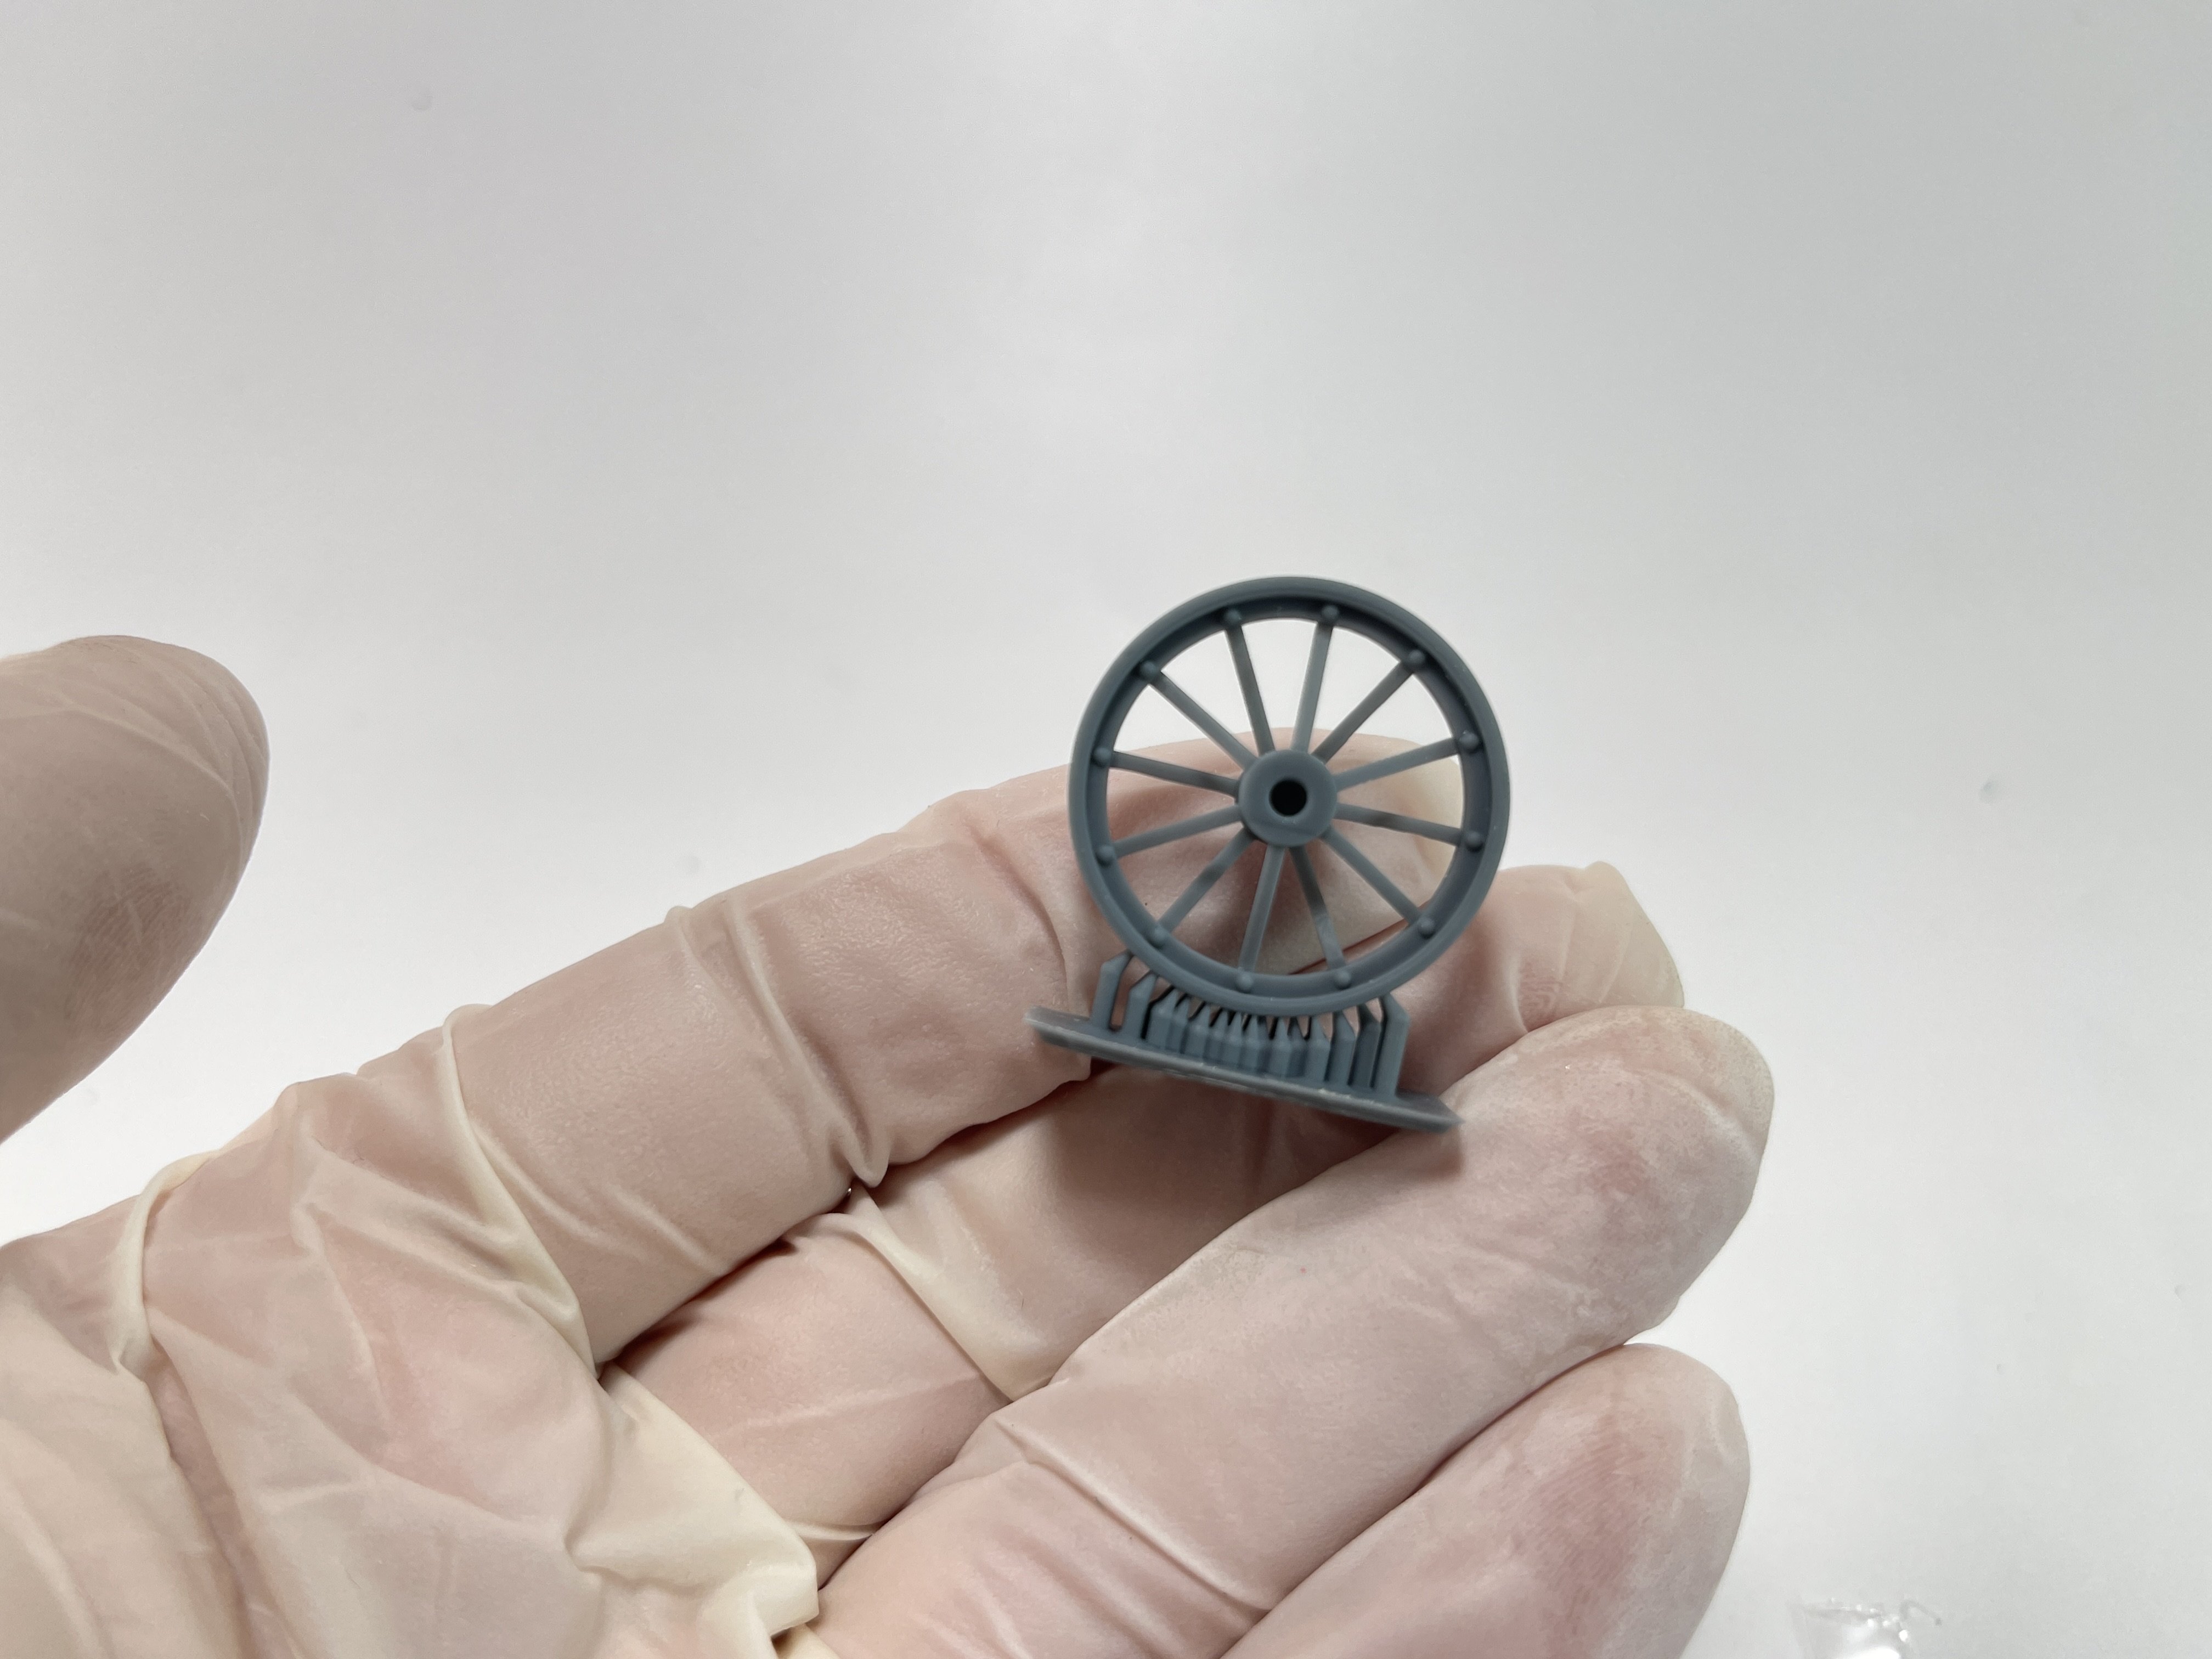
The details parts like wheels, handles and others small stuff are made in 3D.
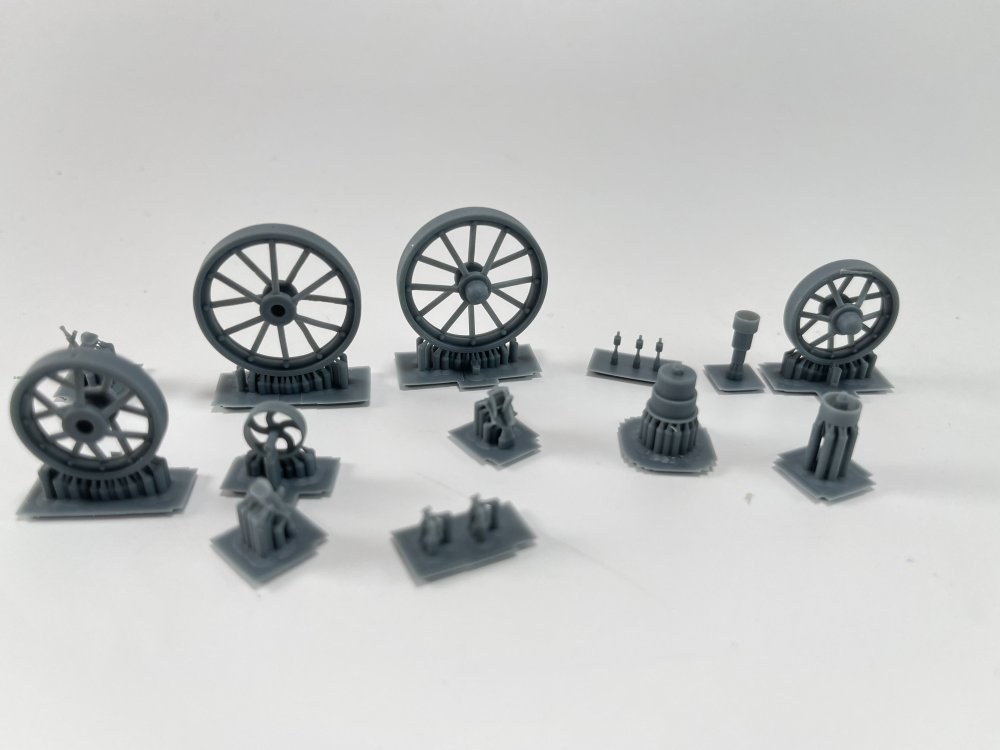


The printing on these is very good, with no printing lines whatsoever, and really good and detail surface detail.
The intricate detailing of the thresher's components, including the drum, feeding mechanism, and collection chute, is truly great. Plusmodel once again has paid careful attention to replicating the authentic look and feel of a vintage grain thresher.
The small PE is for the small hinges and other very small detail that make the difference.


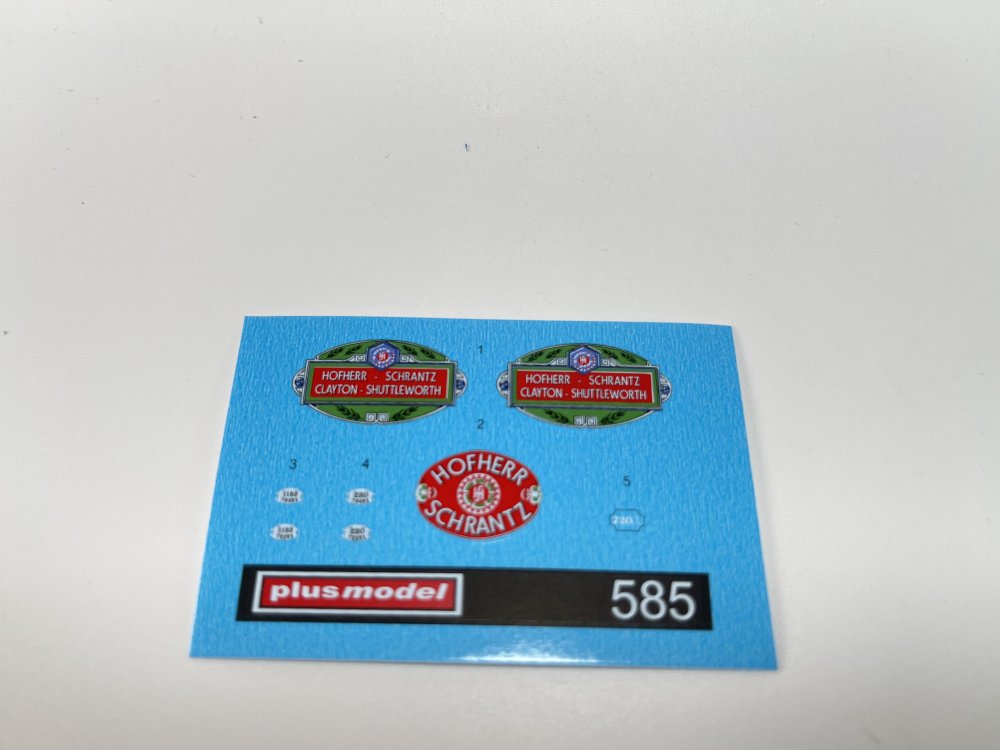
The decals sheet is Plusmodel productions that gives you the manufacture logo and weight indication. It’s a small decal sheet but the detail is quite amazing with good color pigmentation and very well defined so its easy to see what is written.
The instructions are an almost step by step visual manual with parts identification.


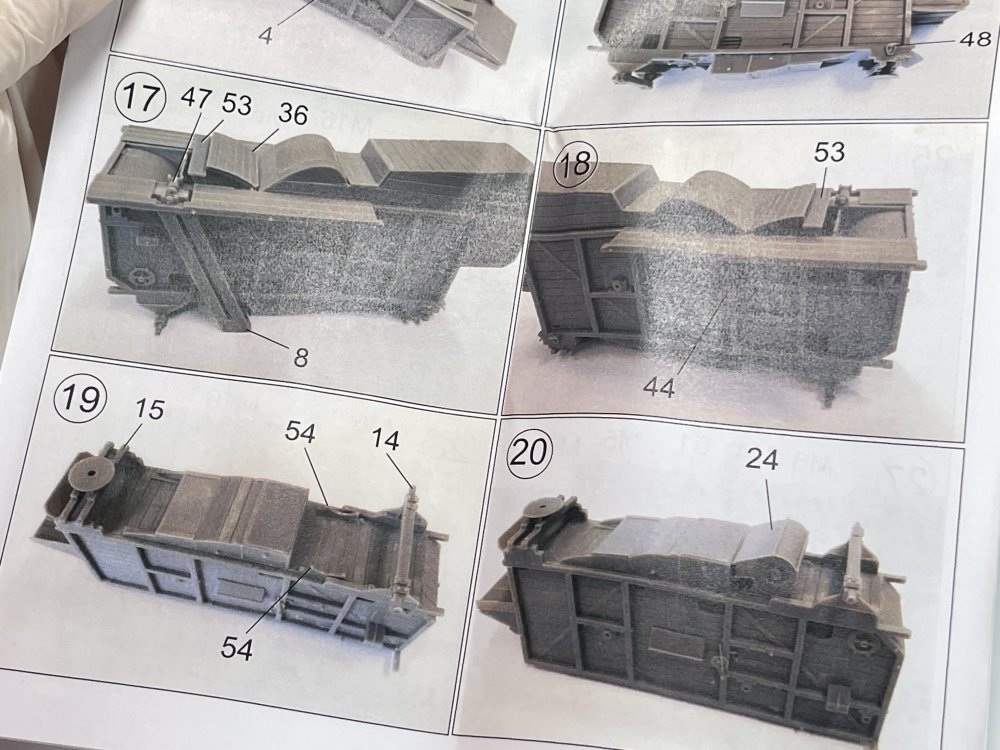
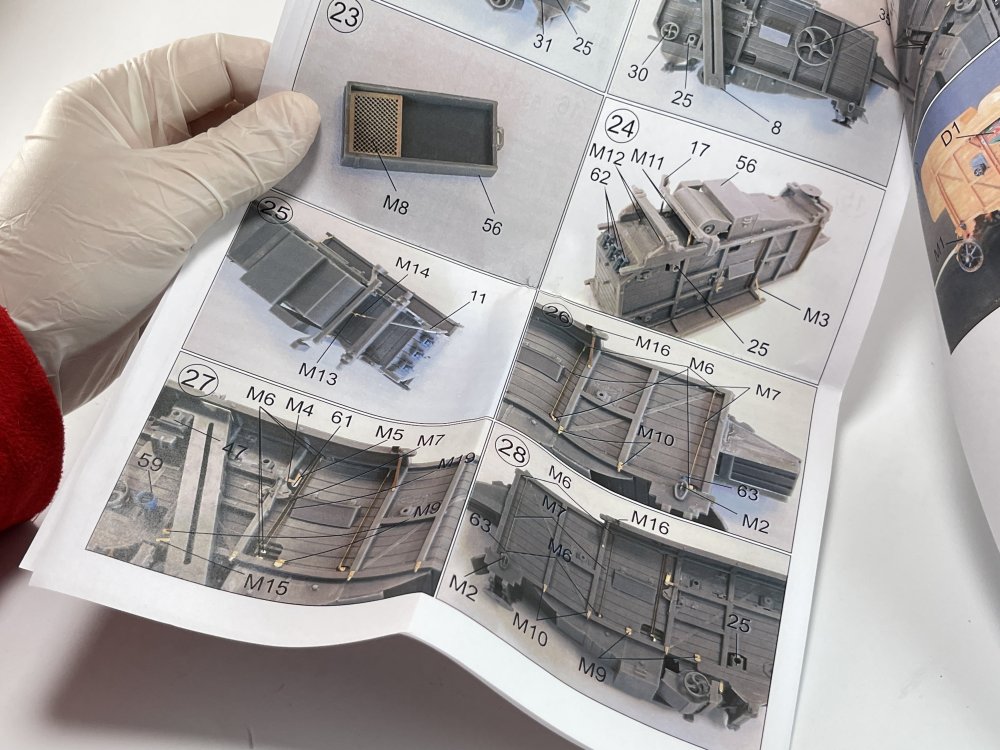
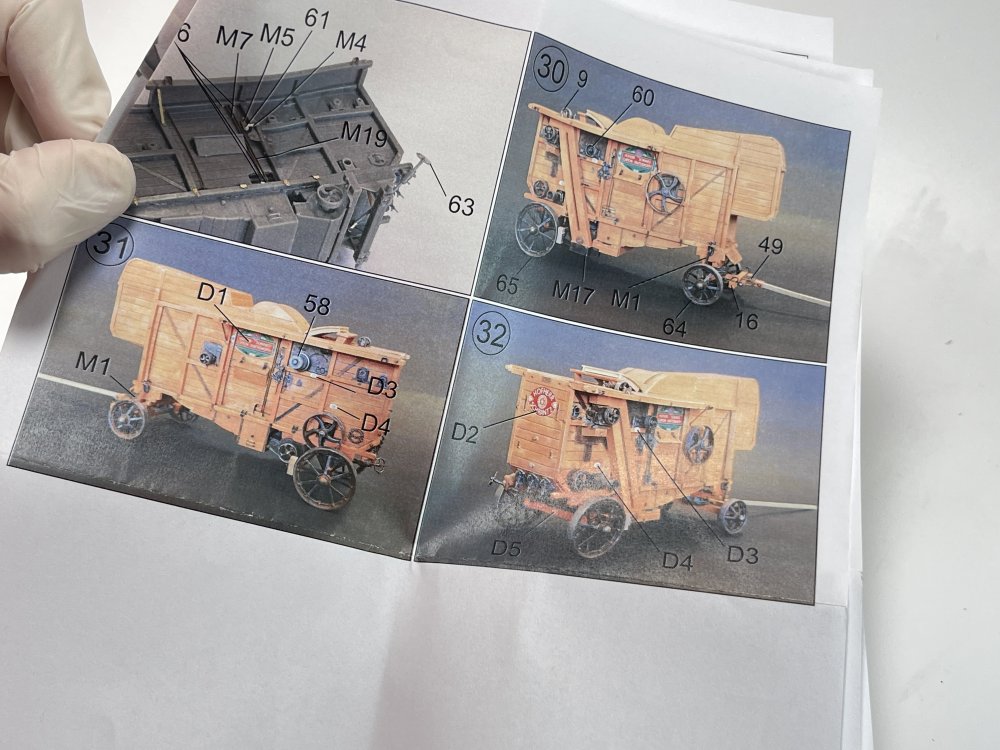
There`s no color indication but honestly there`s no need of any. Its wood and steel basically.
Although the decals indication is quite easy to follow and most welcome.
CONCLUSION
As usually, the quality is present in all Plusmodel items and this is no exception…
This model is not for beginners but is a finely crafted model kit that brings to life the essence of agricultural machinery from a bygone era. Designed with meticulous attention to detail, this model captures the essence of traditional grain threshers, making it a standout piece in any diorama.
Again with its great detailing, authenticity, and versatility, it stands as a testament to Plusmodel's commitment to quality and crafts-manship.
And as always, this model captures the imagination and trans-ports viewers to a bygone era of farming and really inspired me with ideas for dioramas… As mostly an aircraft modeller, and with some new 1:35 options in the market, I already have some projects where I can put this beautiful grain thresher.
Very Highly recommended
Francisco Guedes
Our thanks to Petr from PLUSMODEL for producing this beautiful kit.

-
2
-
2
-
-
Diorama Accessories Sets and a Railway Guard House
Available from Plusmodel for the prices indicated below on the text
Plusmodel continues their quest in being one the brand that you have to consider when you think in dioramas. If your project is a vignette or a diorama, then Plusmodel is your solutions.
They also keep the quality and originality of their products.
All the samples come with the usual packing, in small paper boxes with the parts wrap in bubbles plastic.
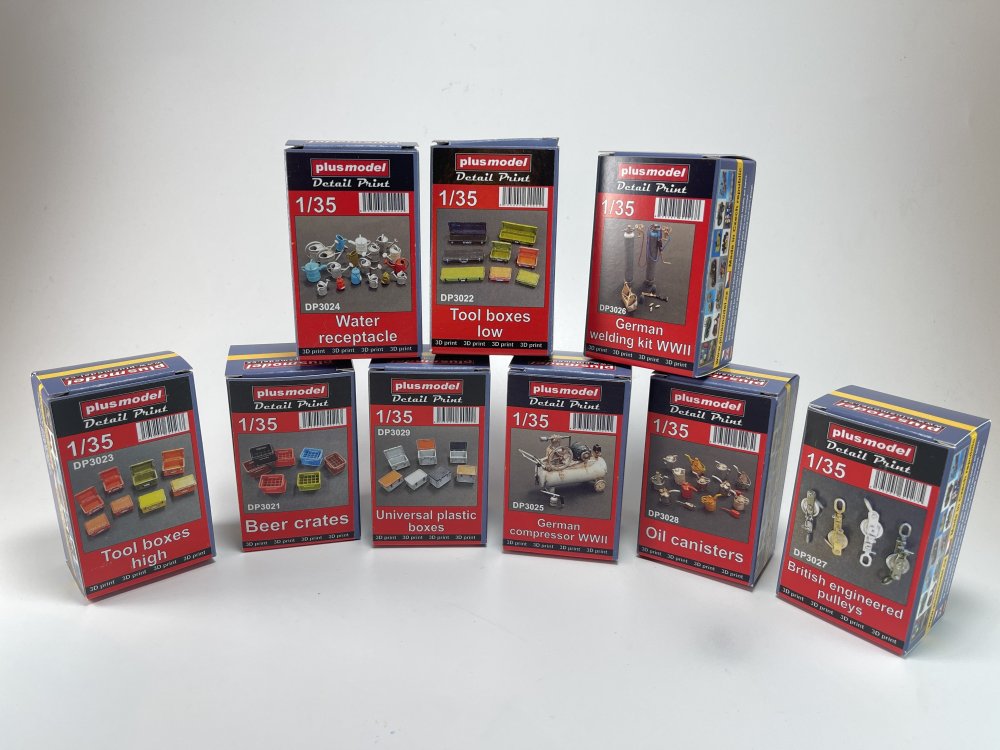
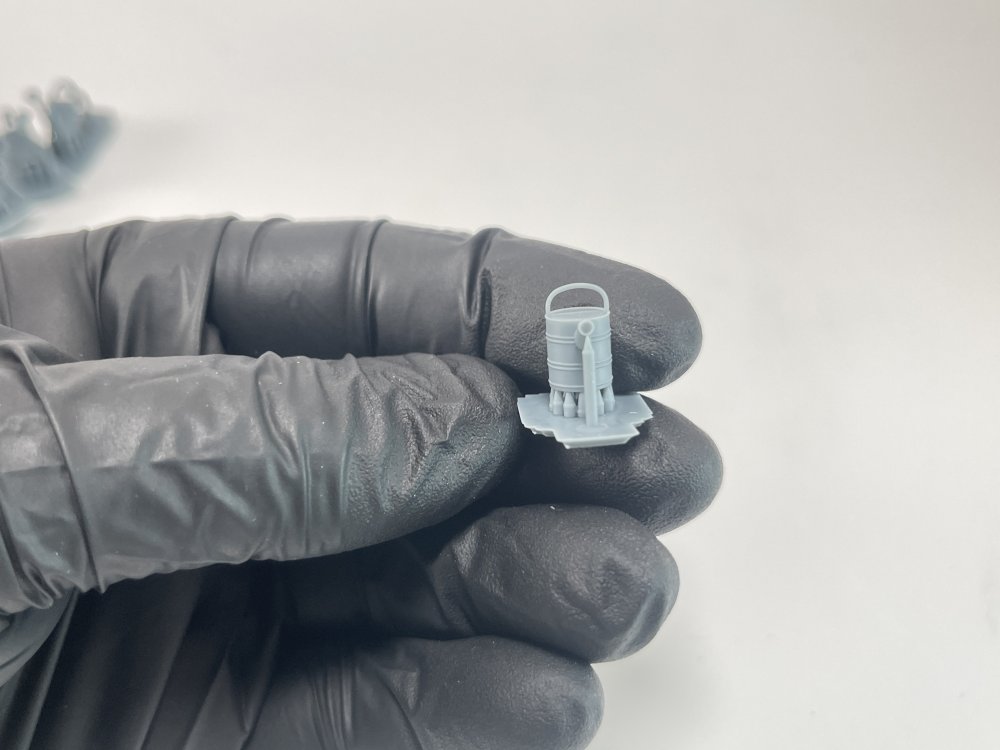
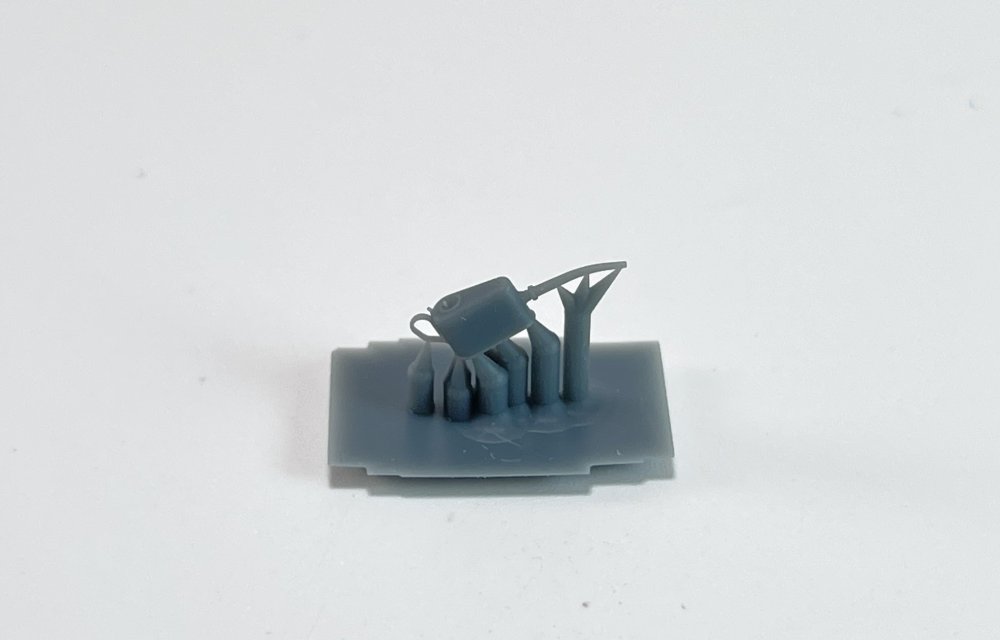
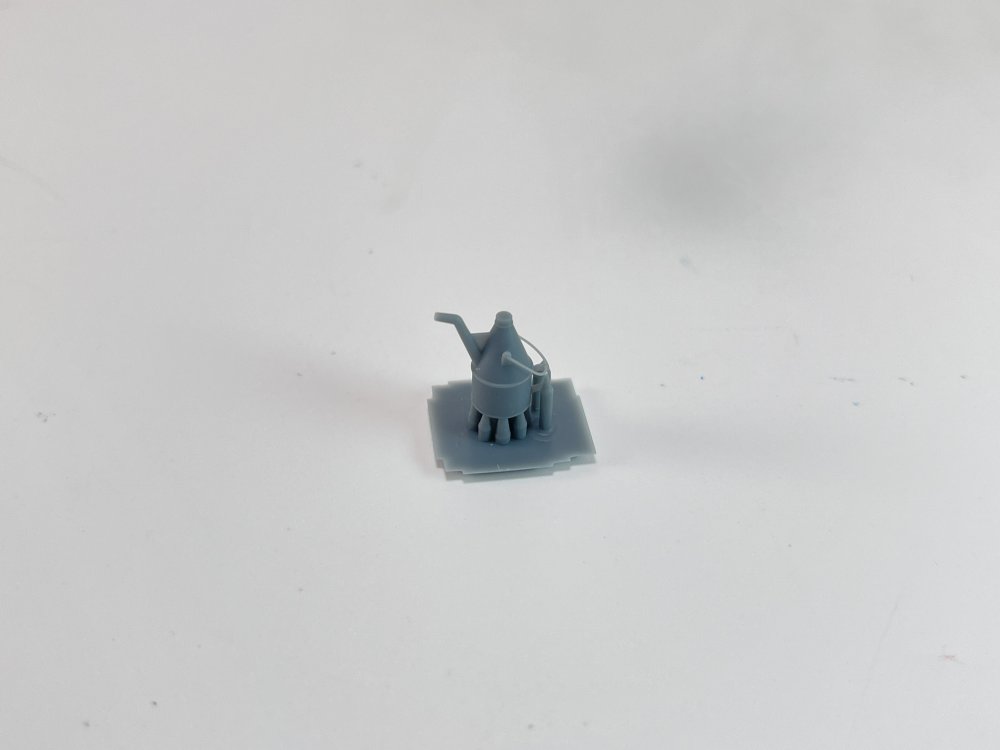
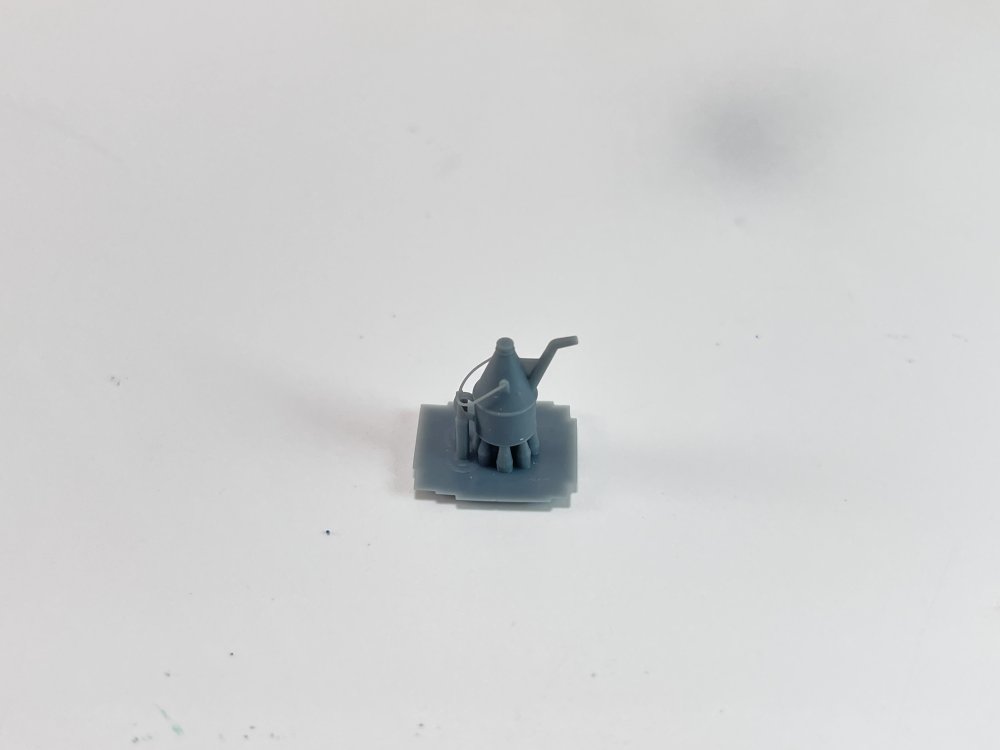
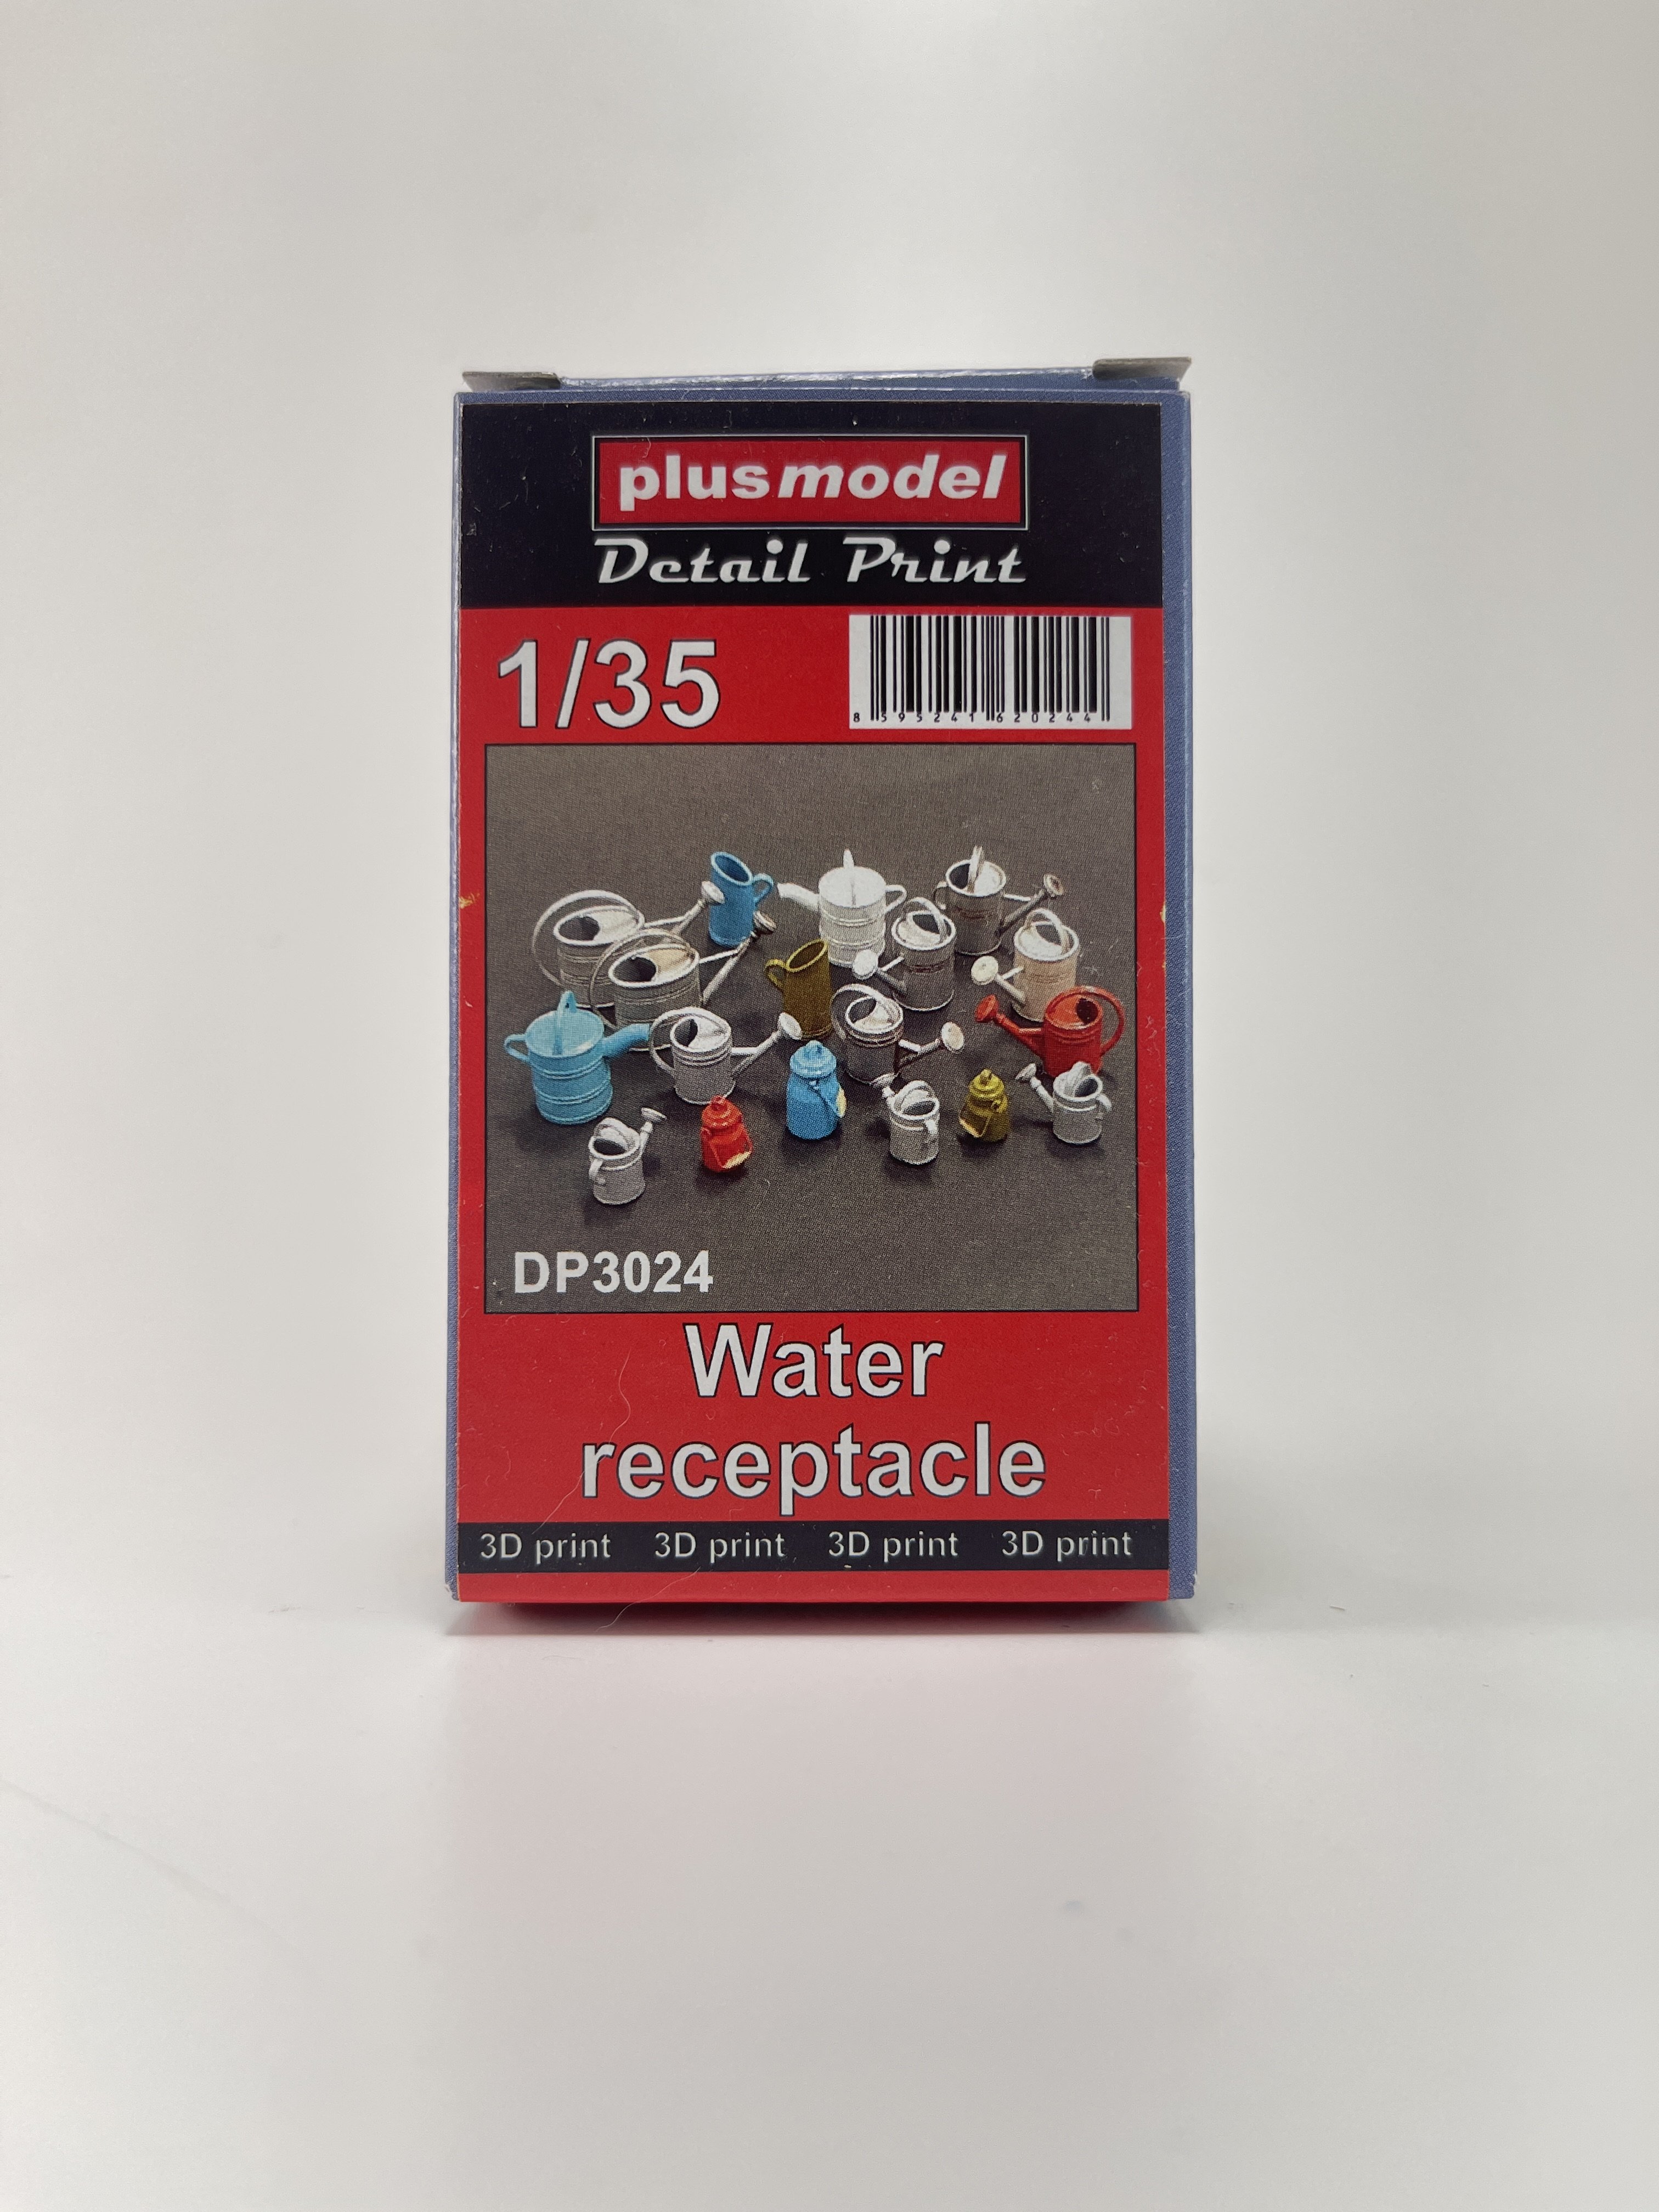
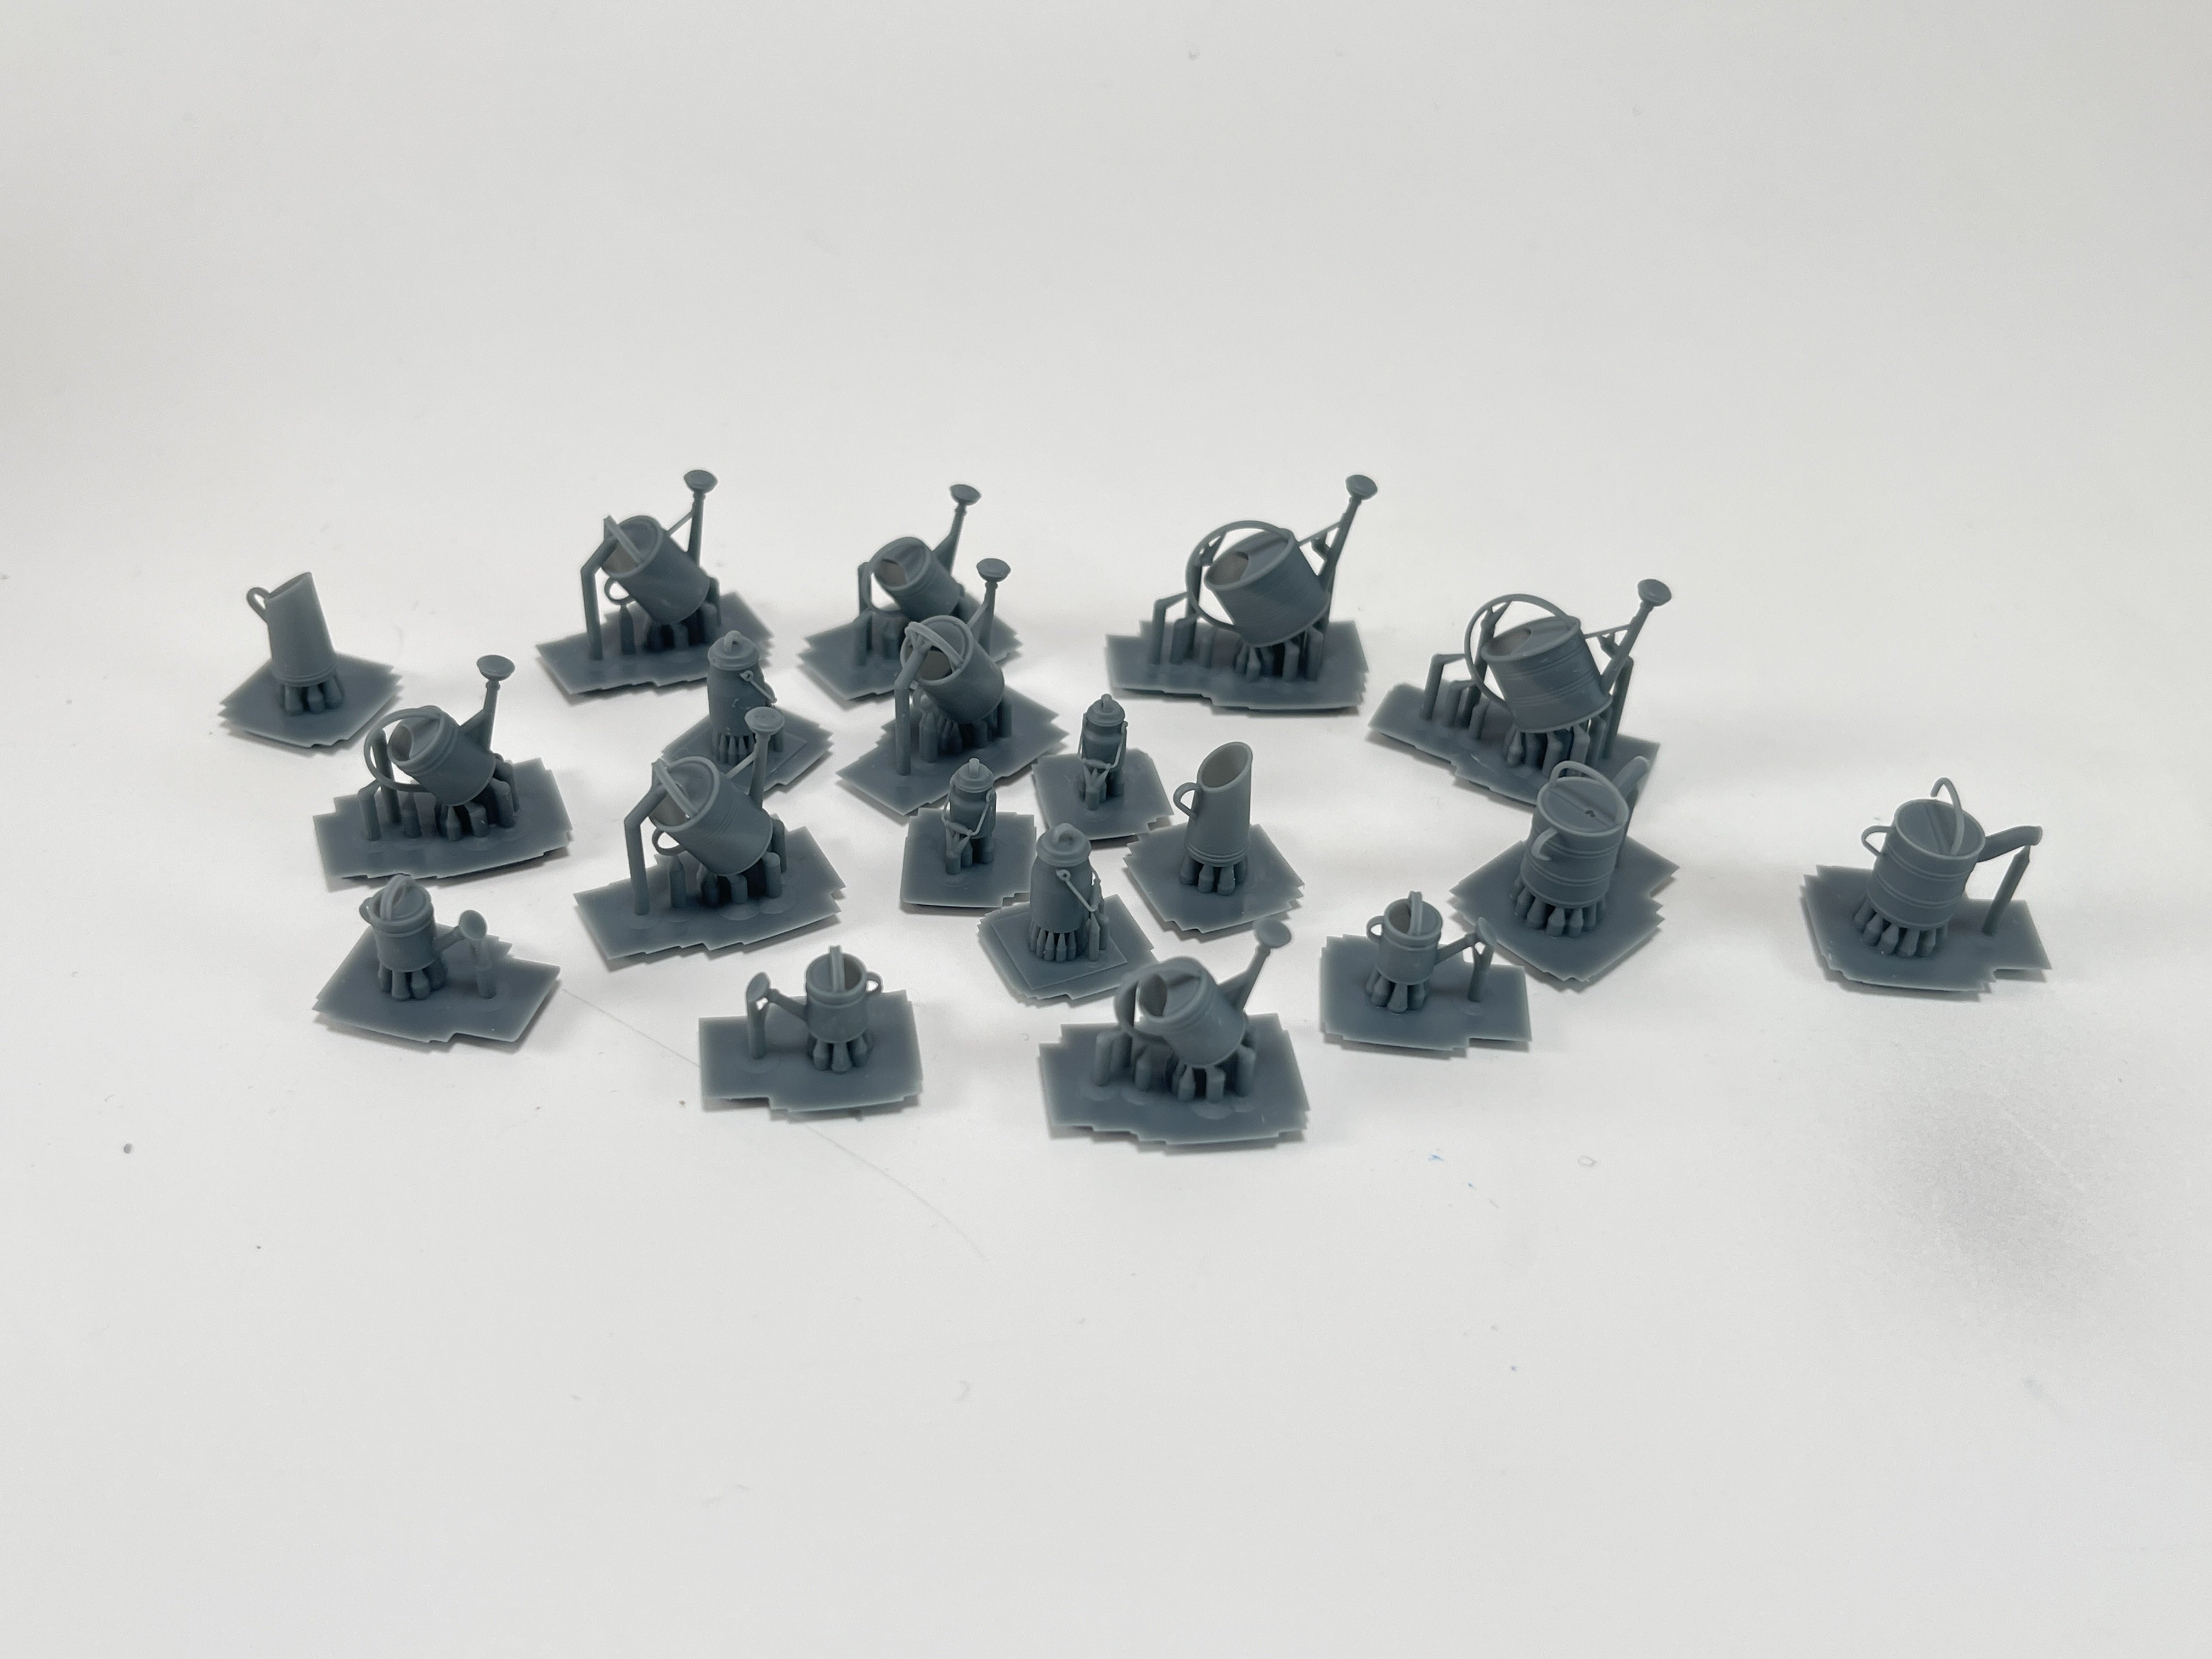
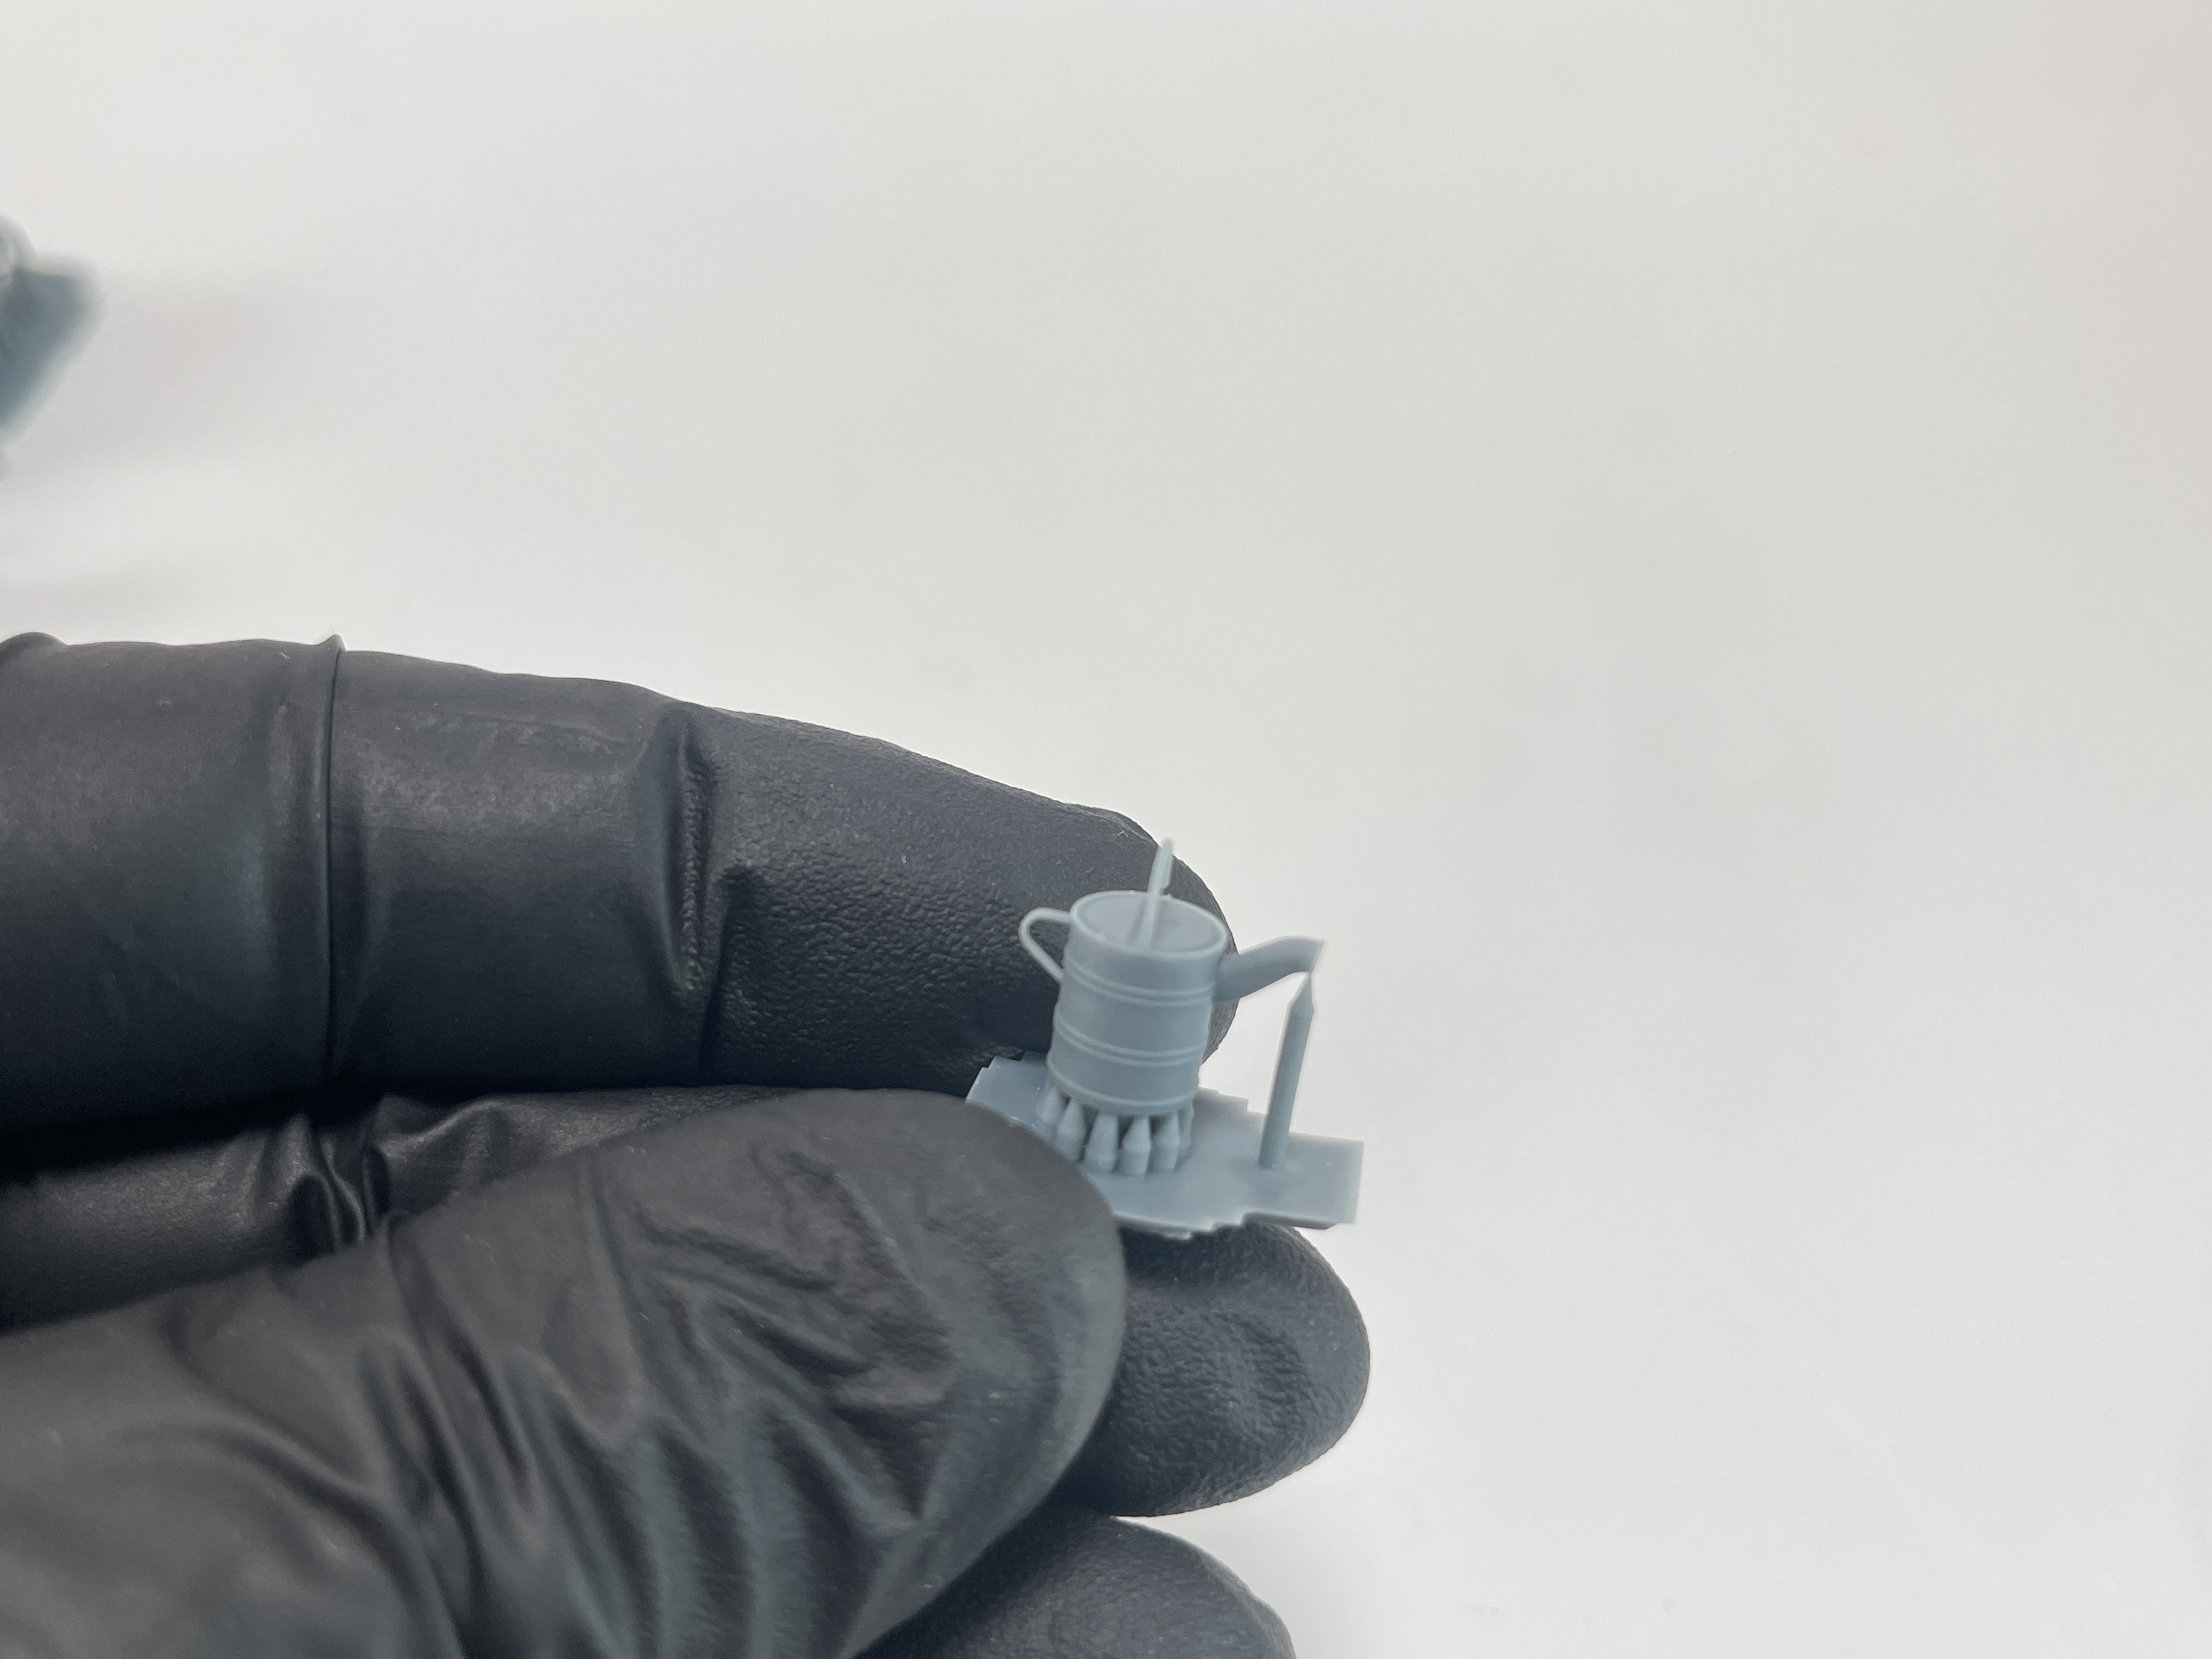
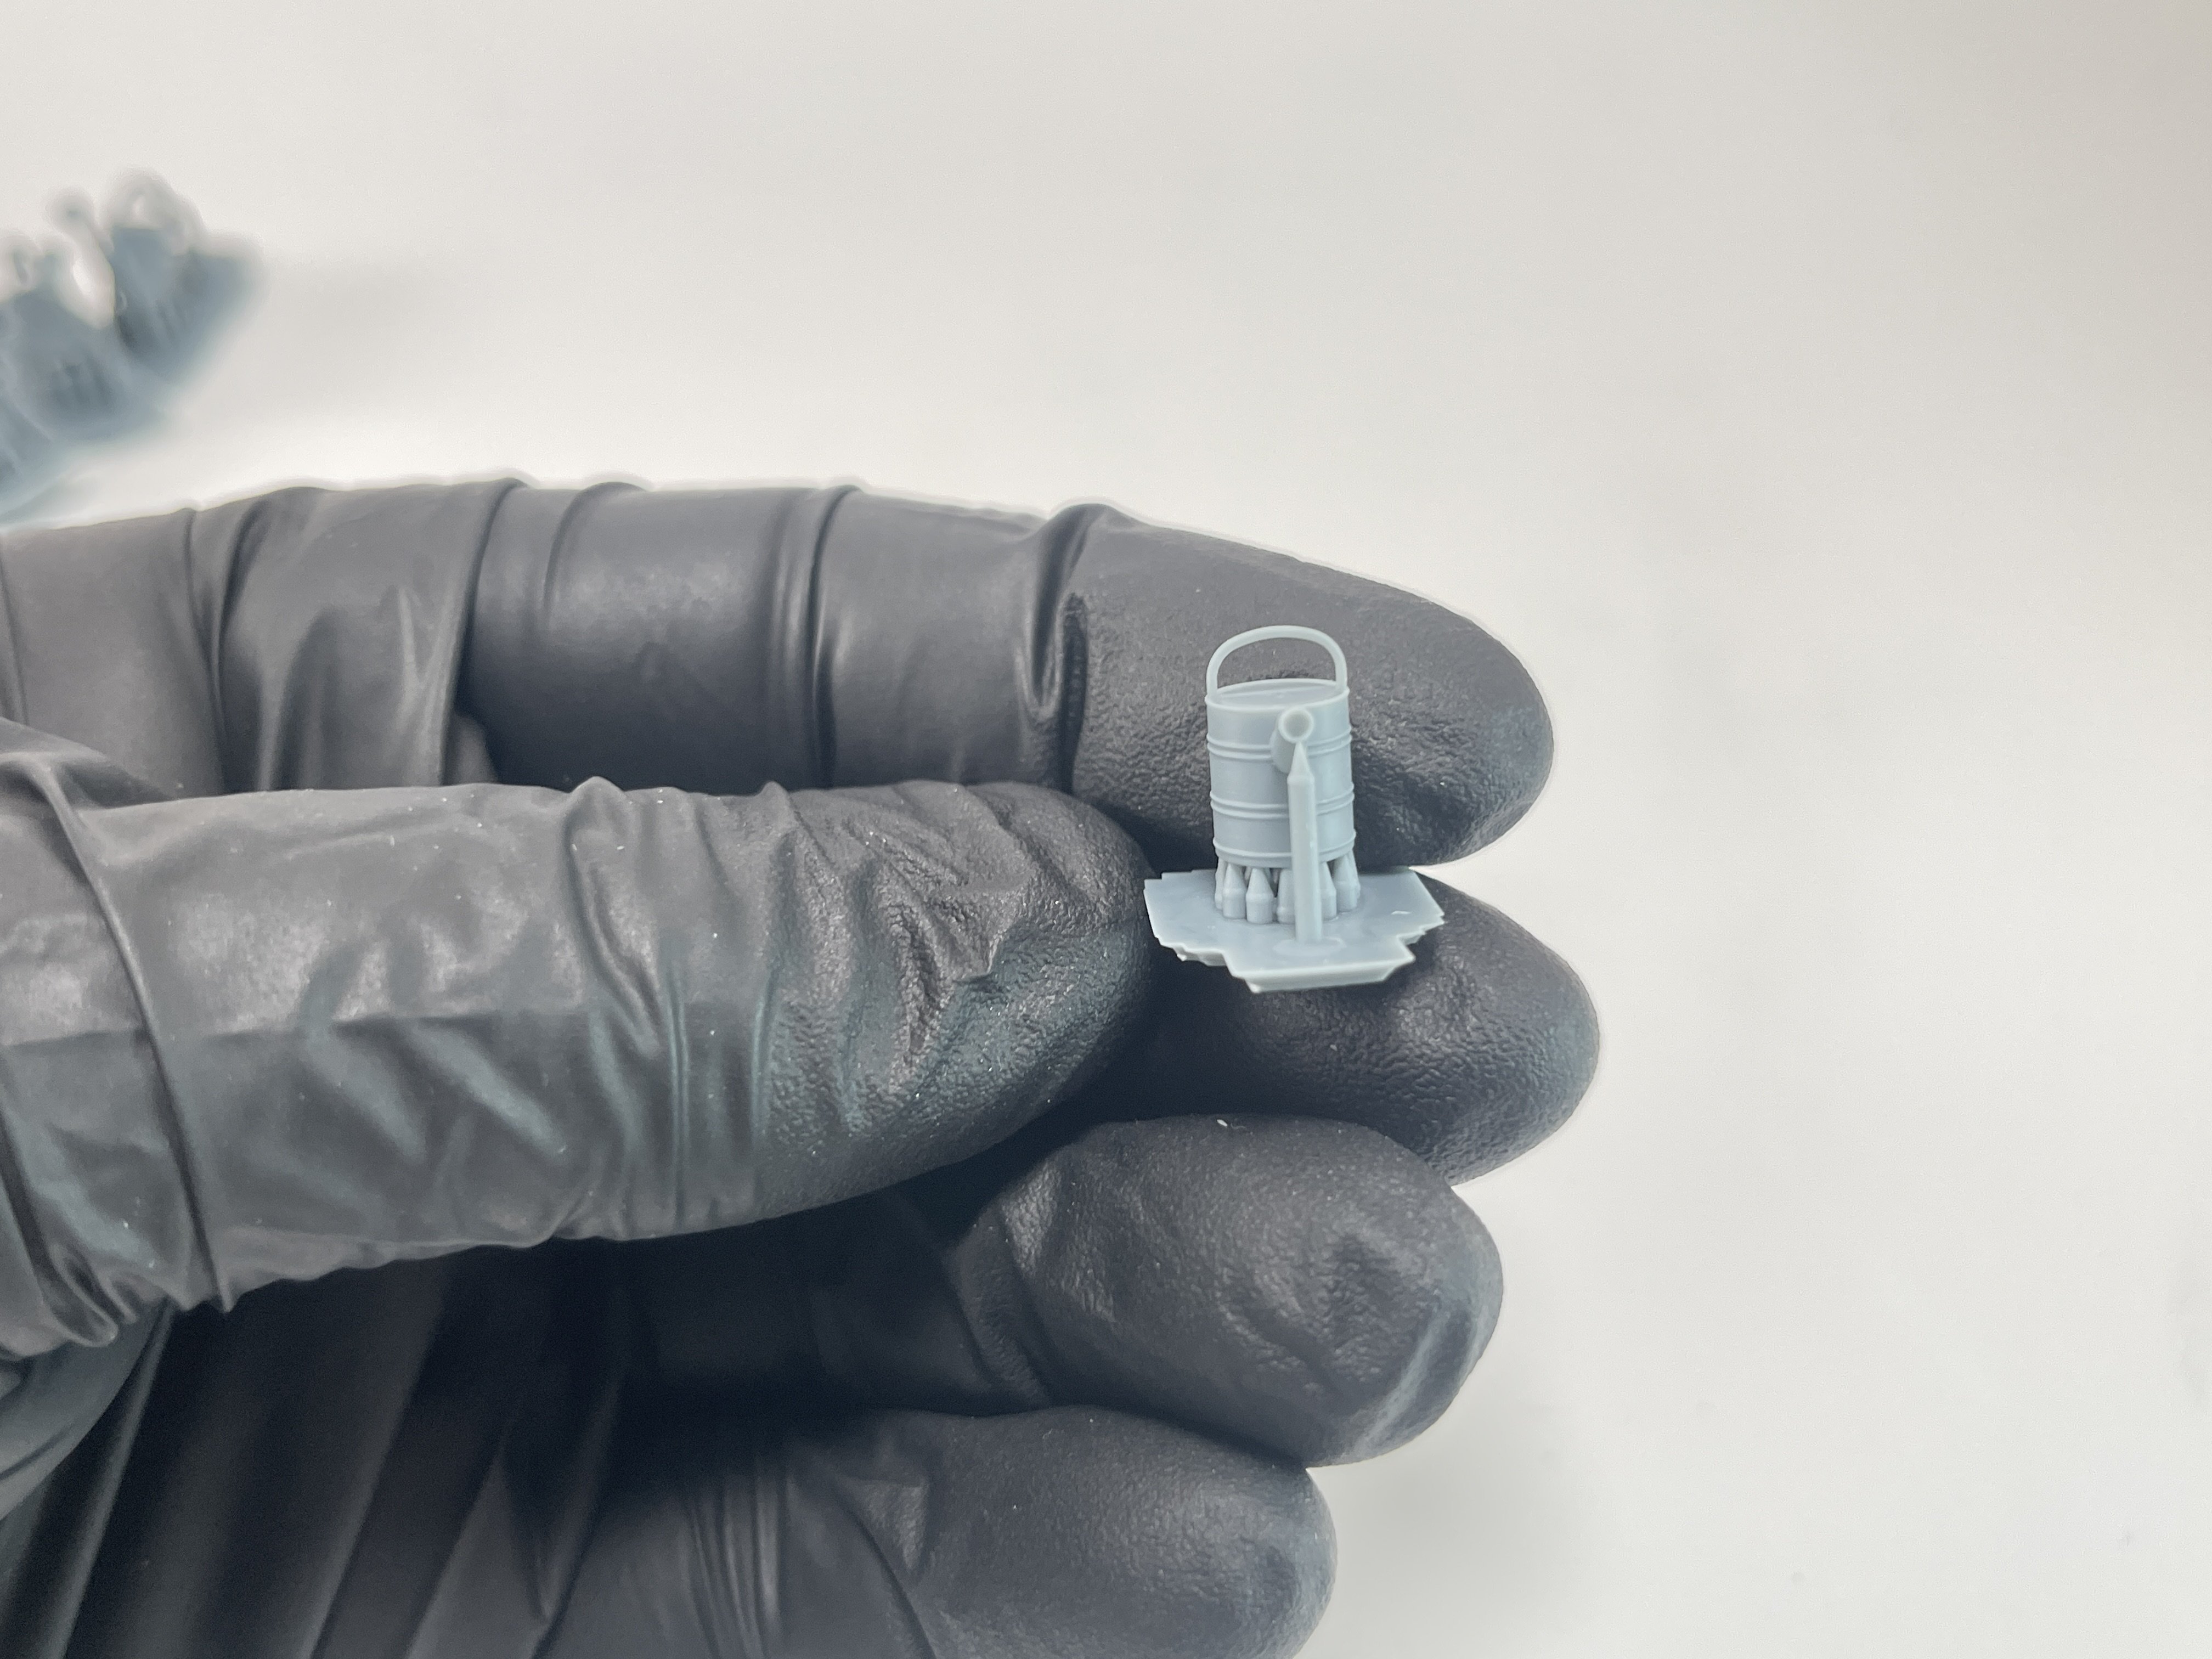
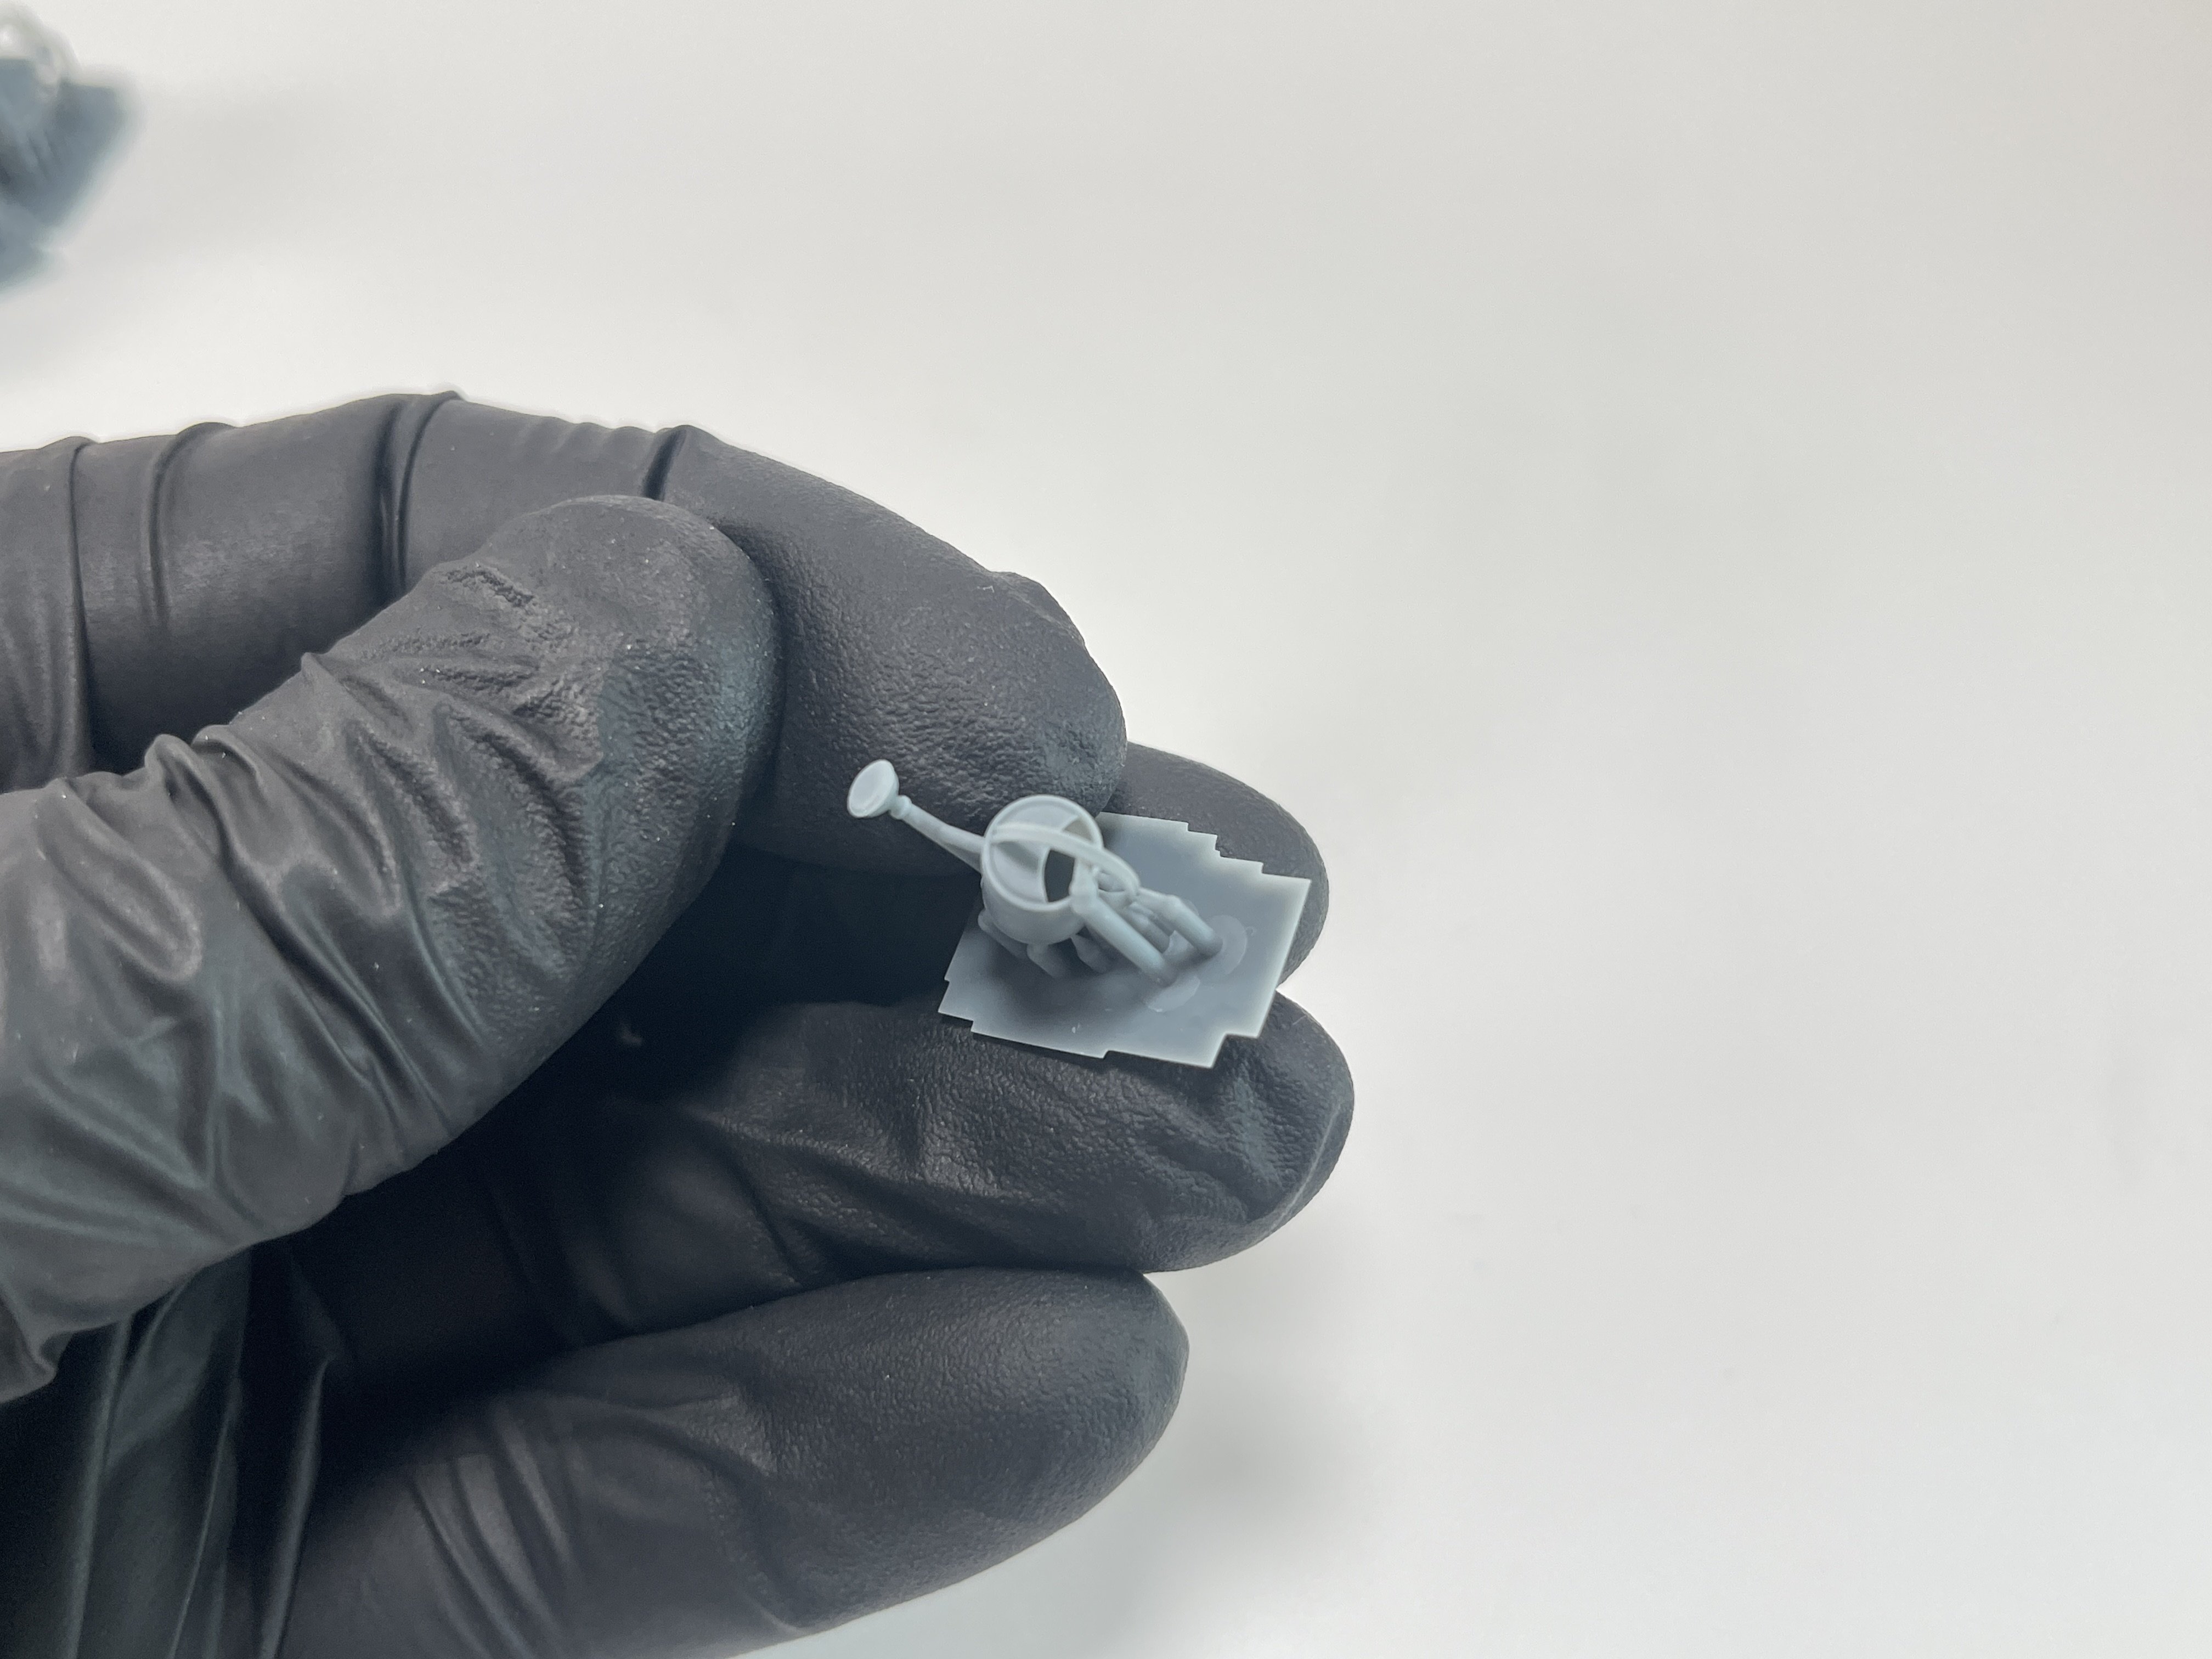
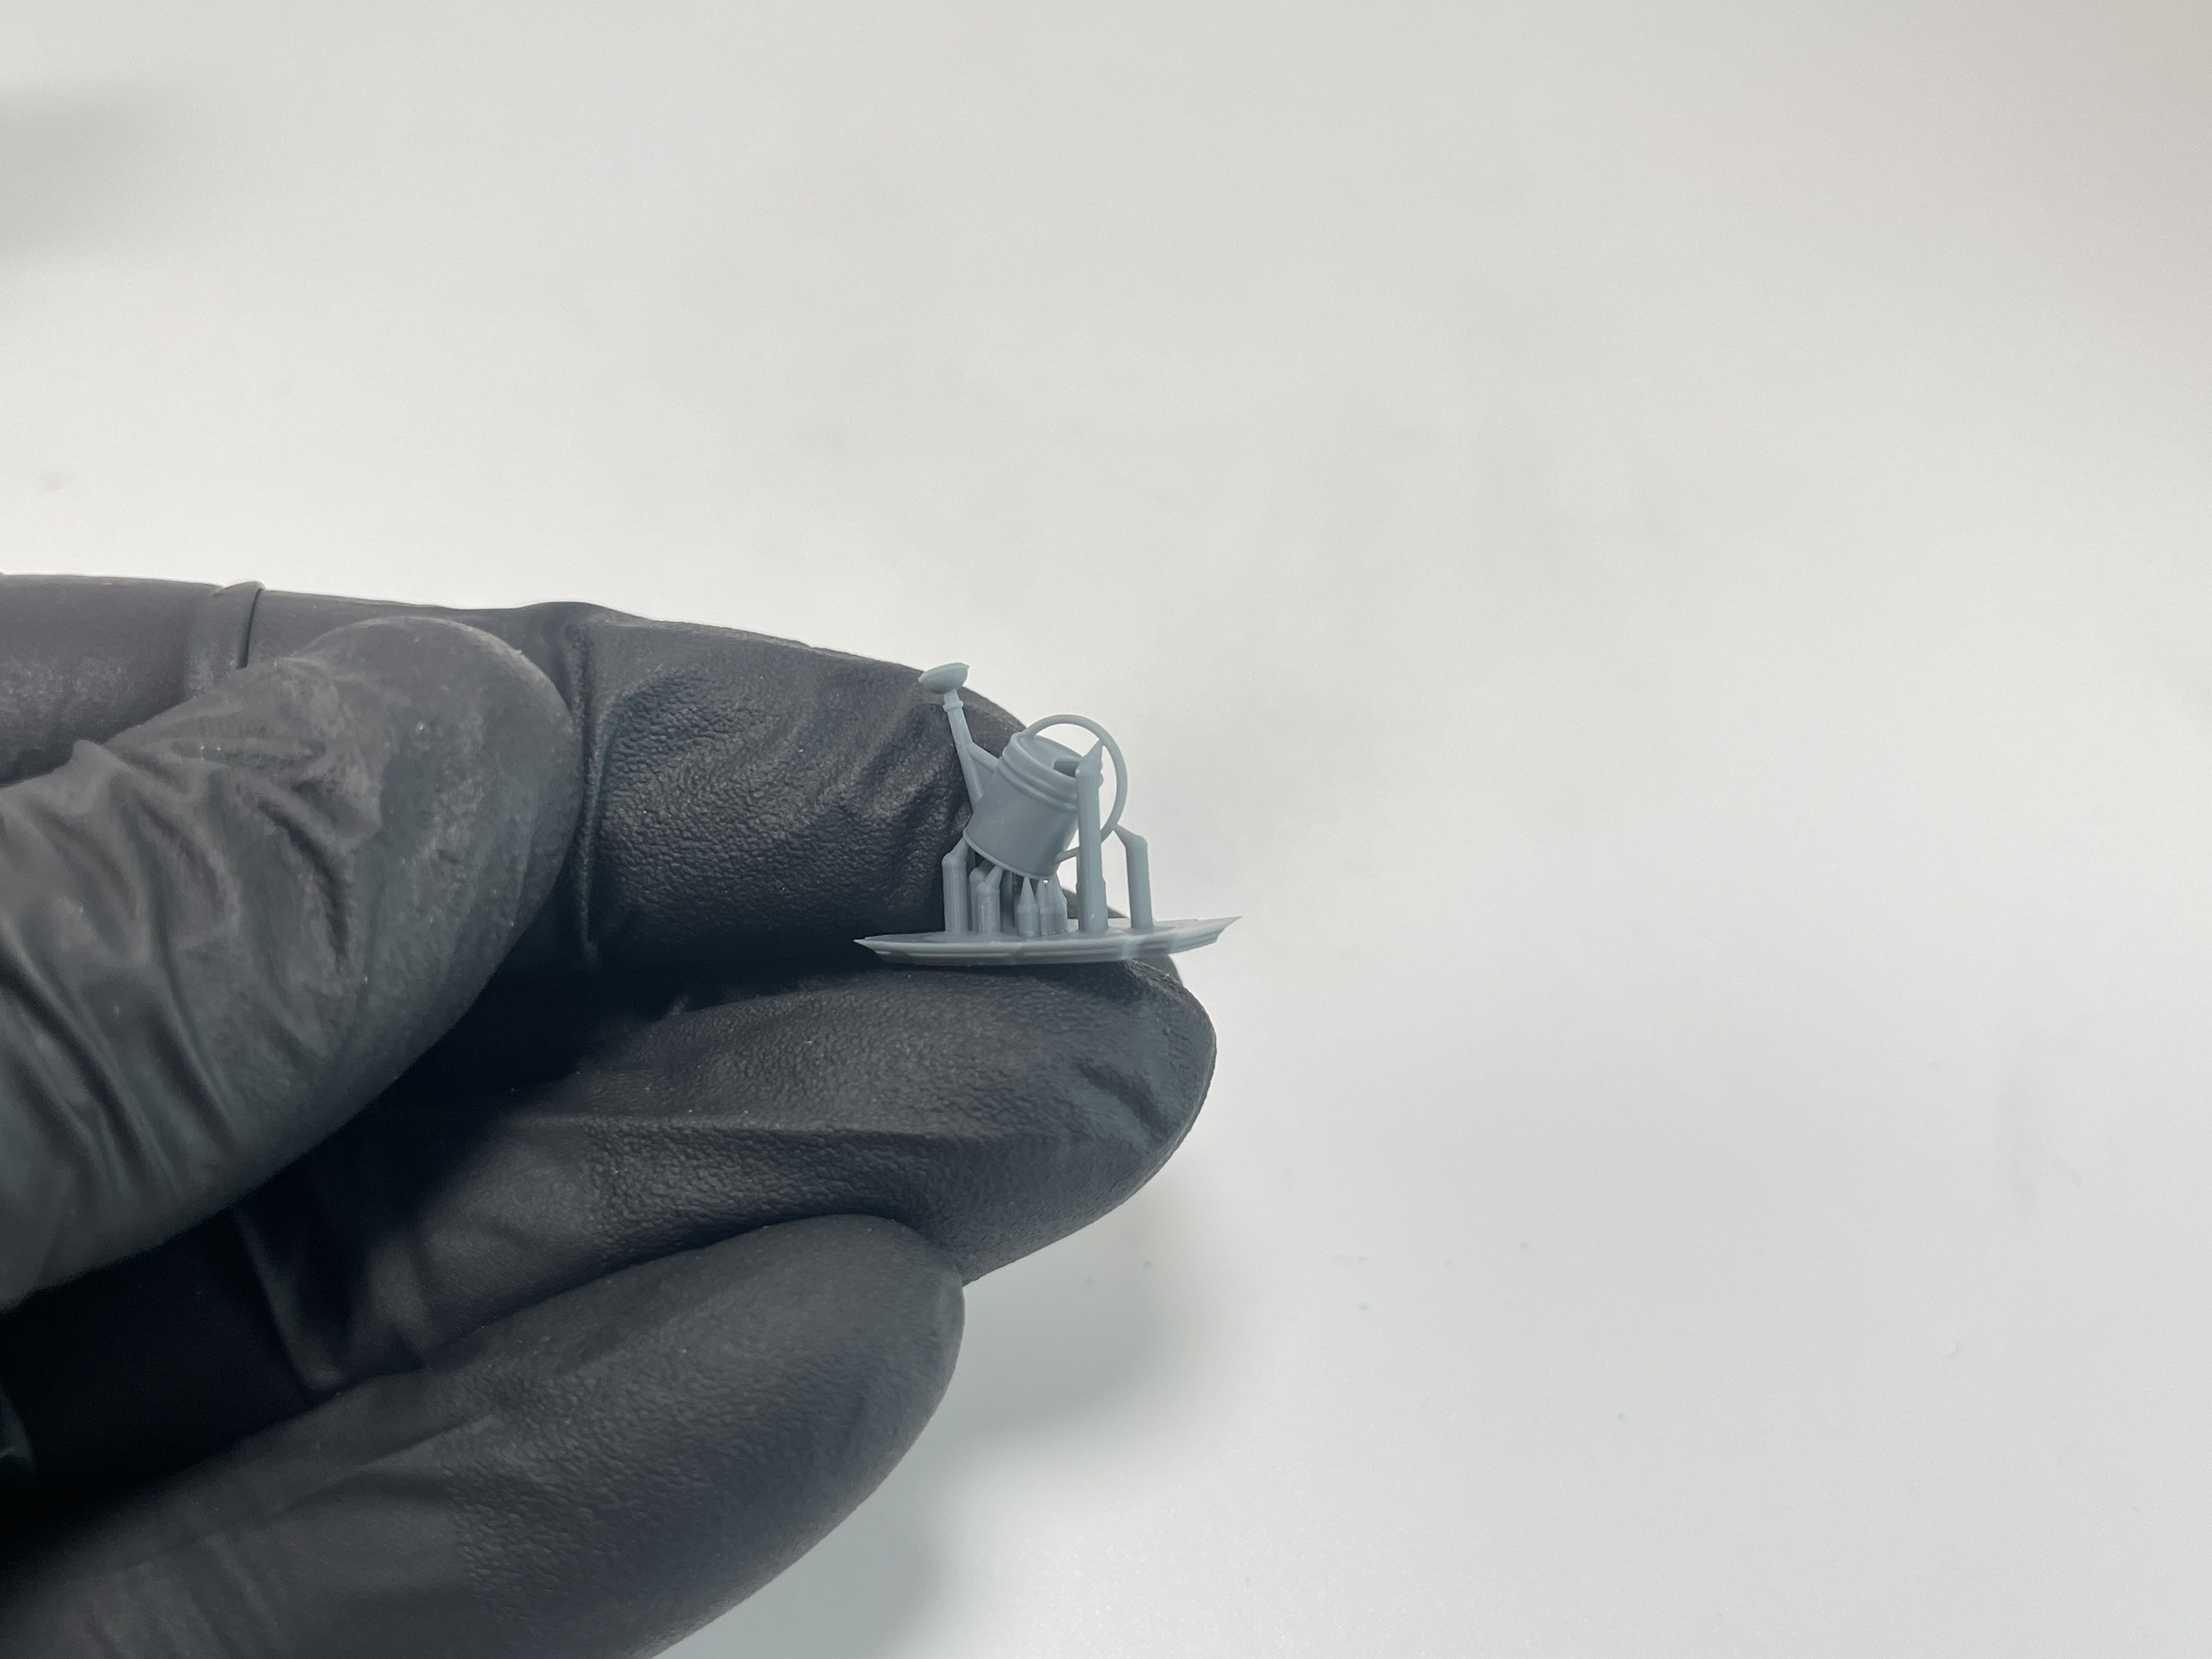
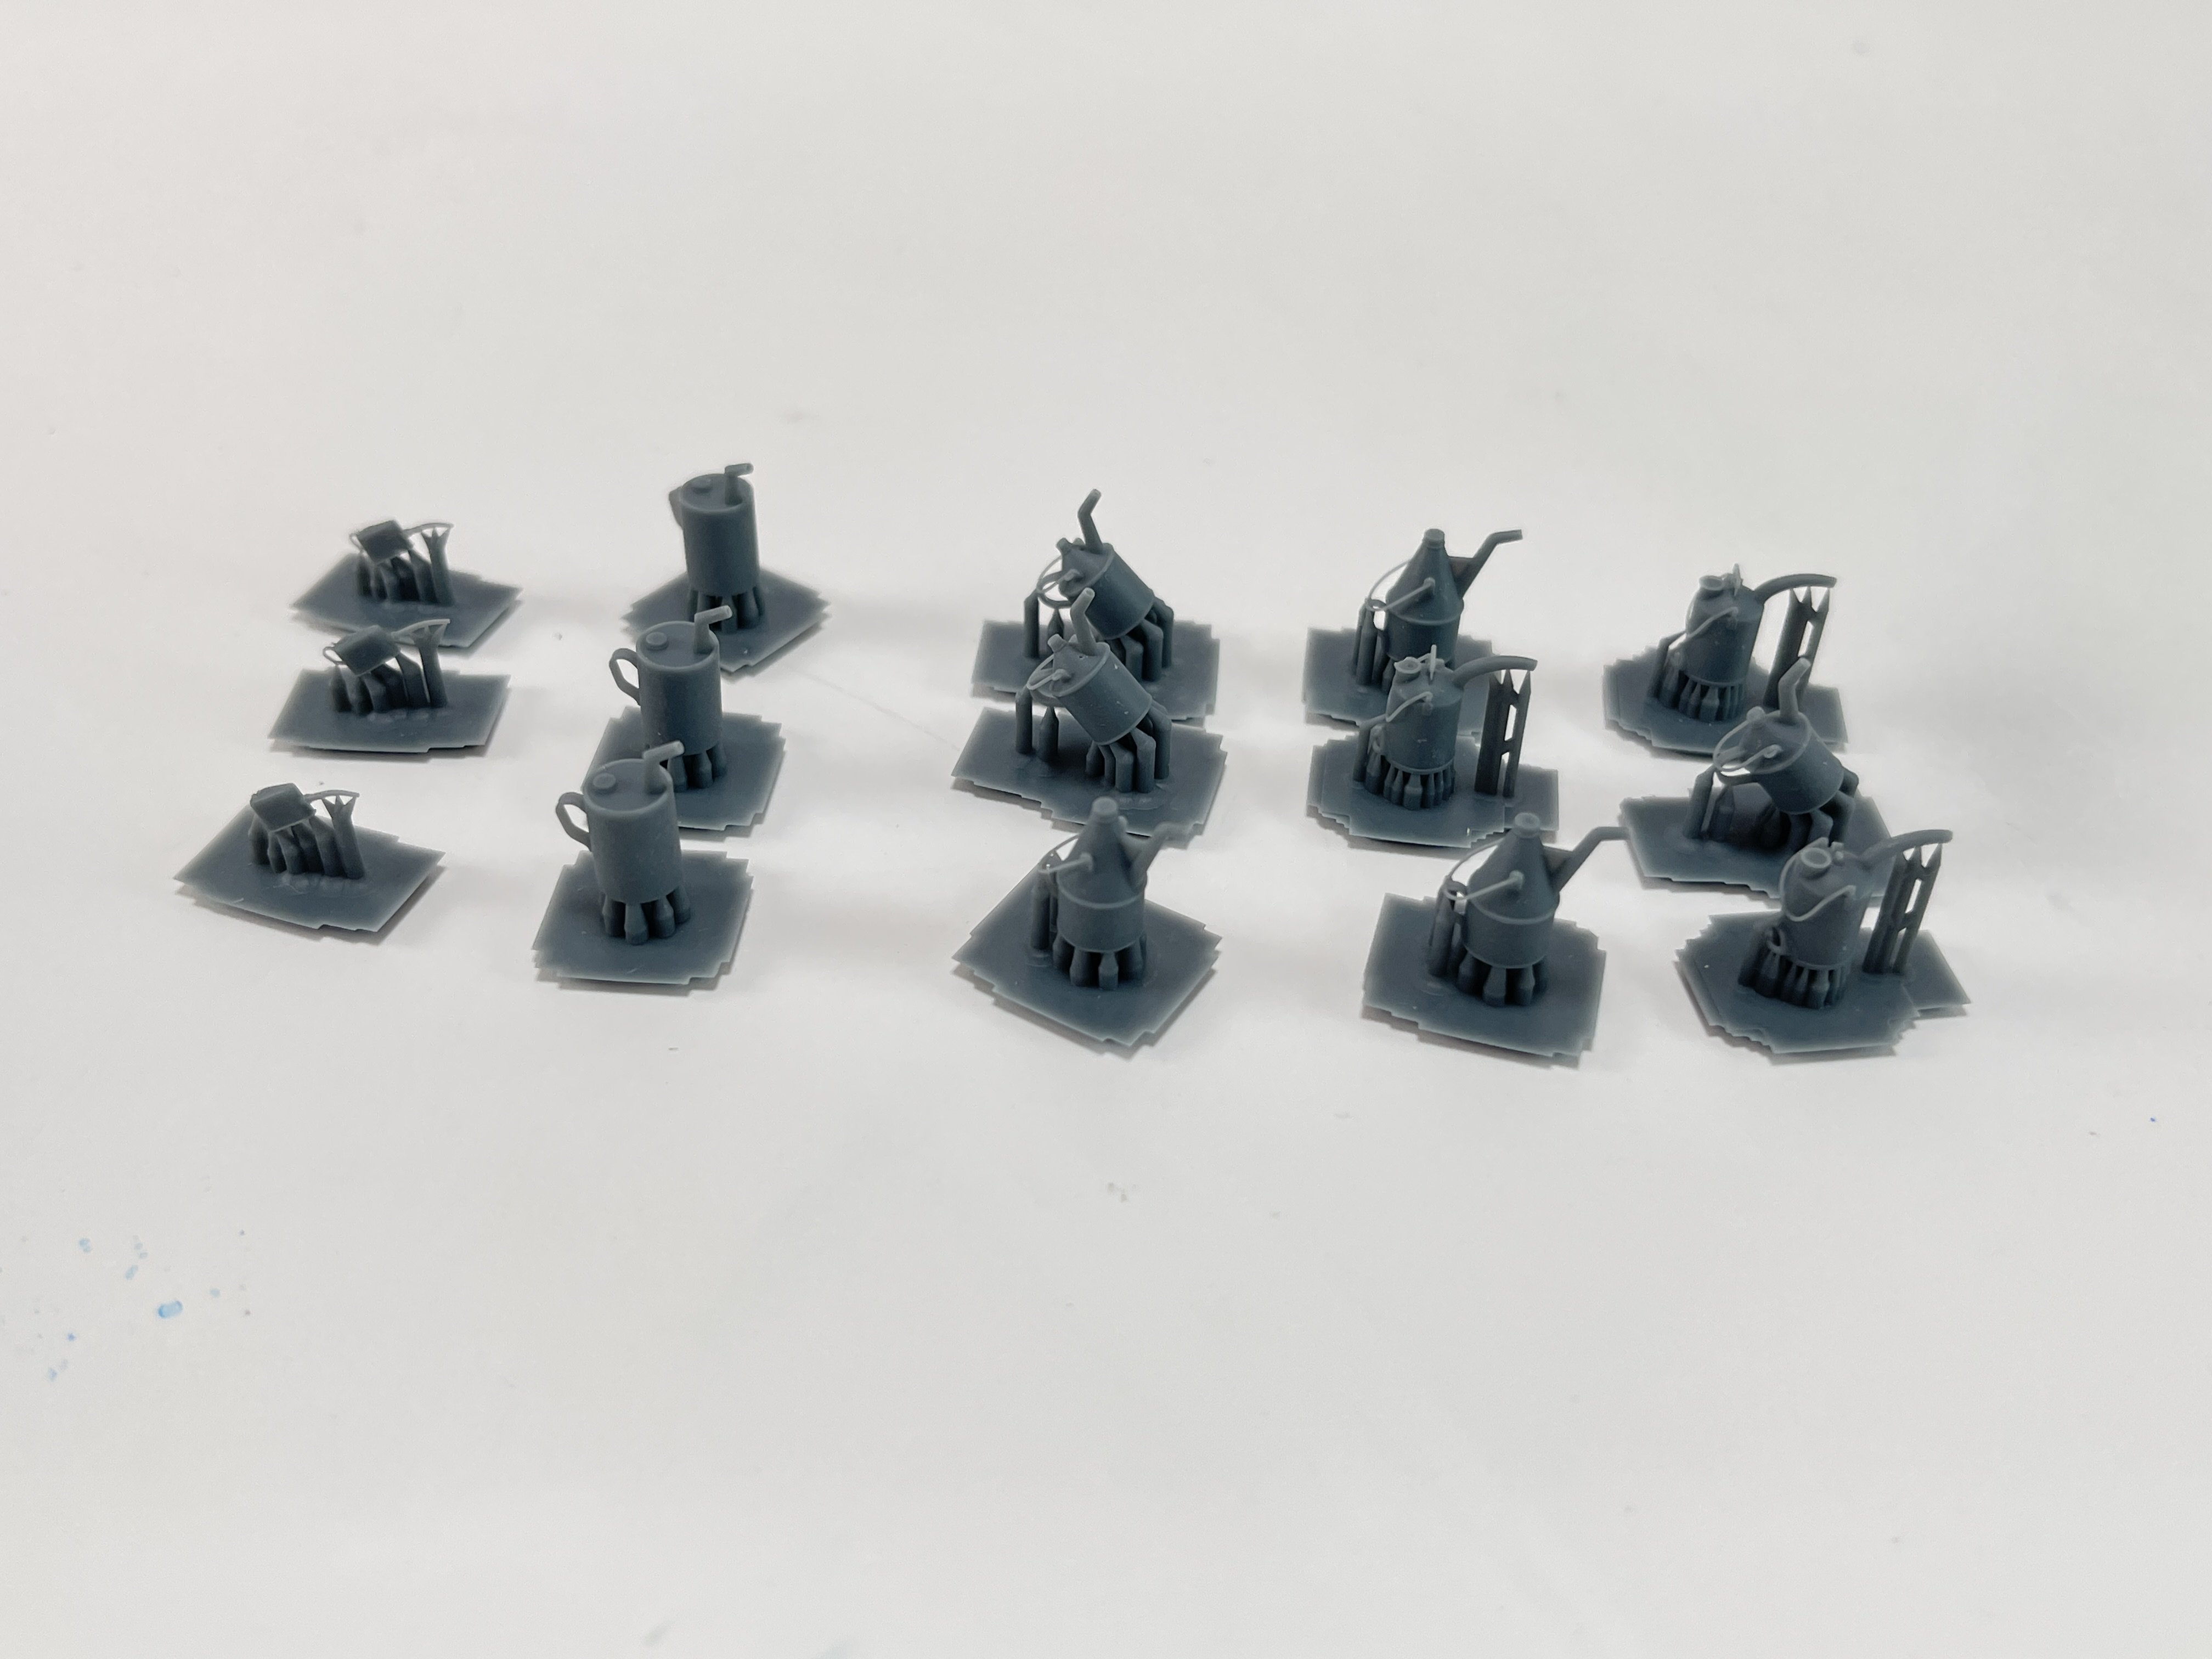
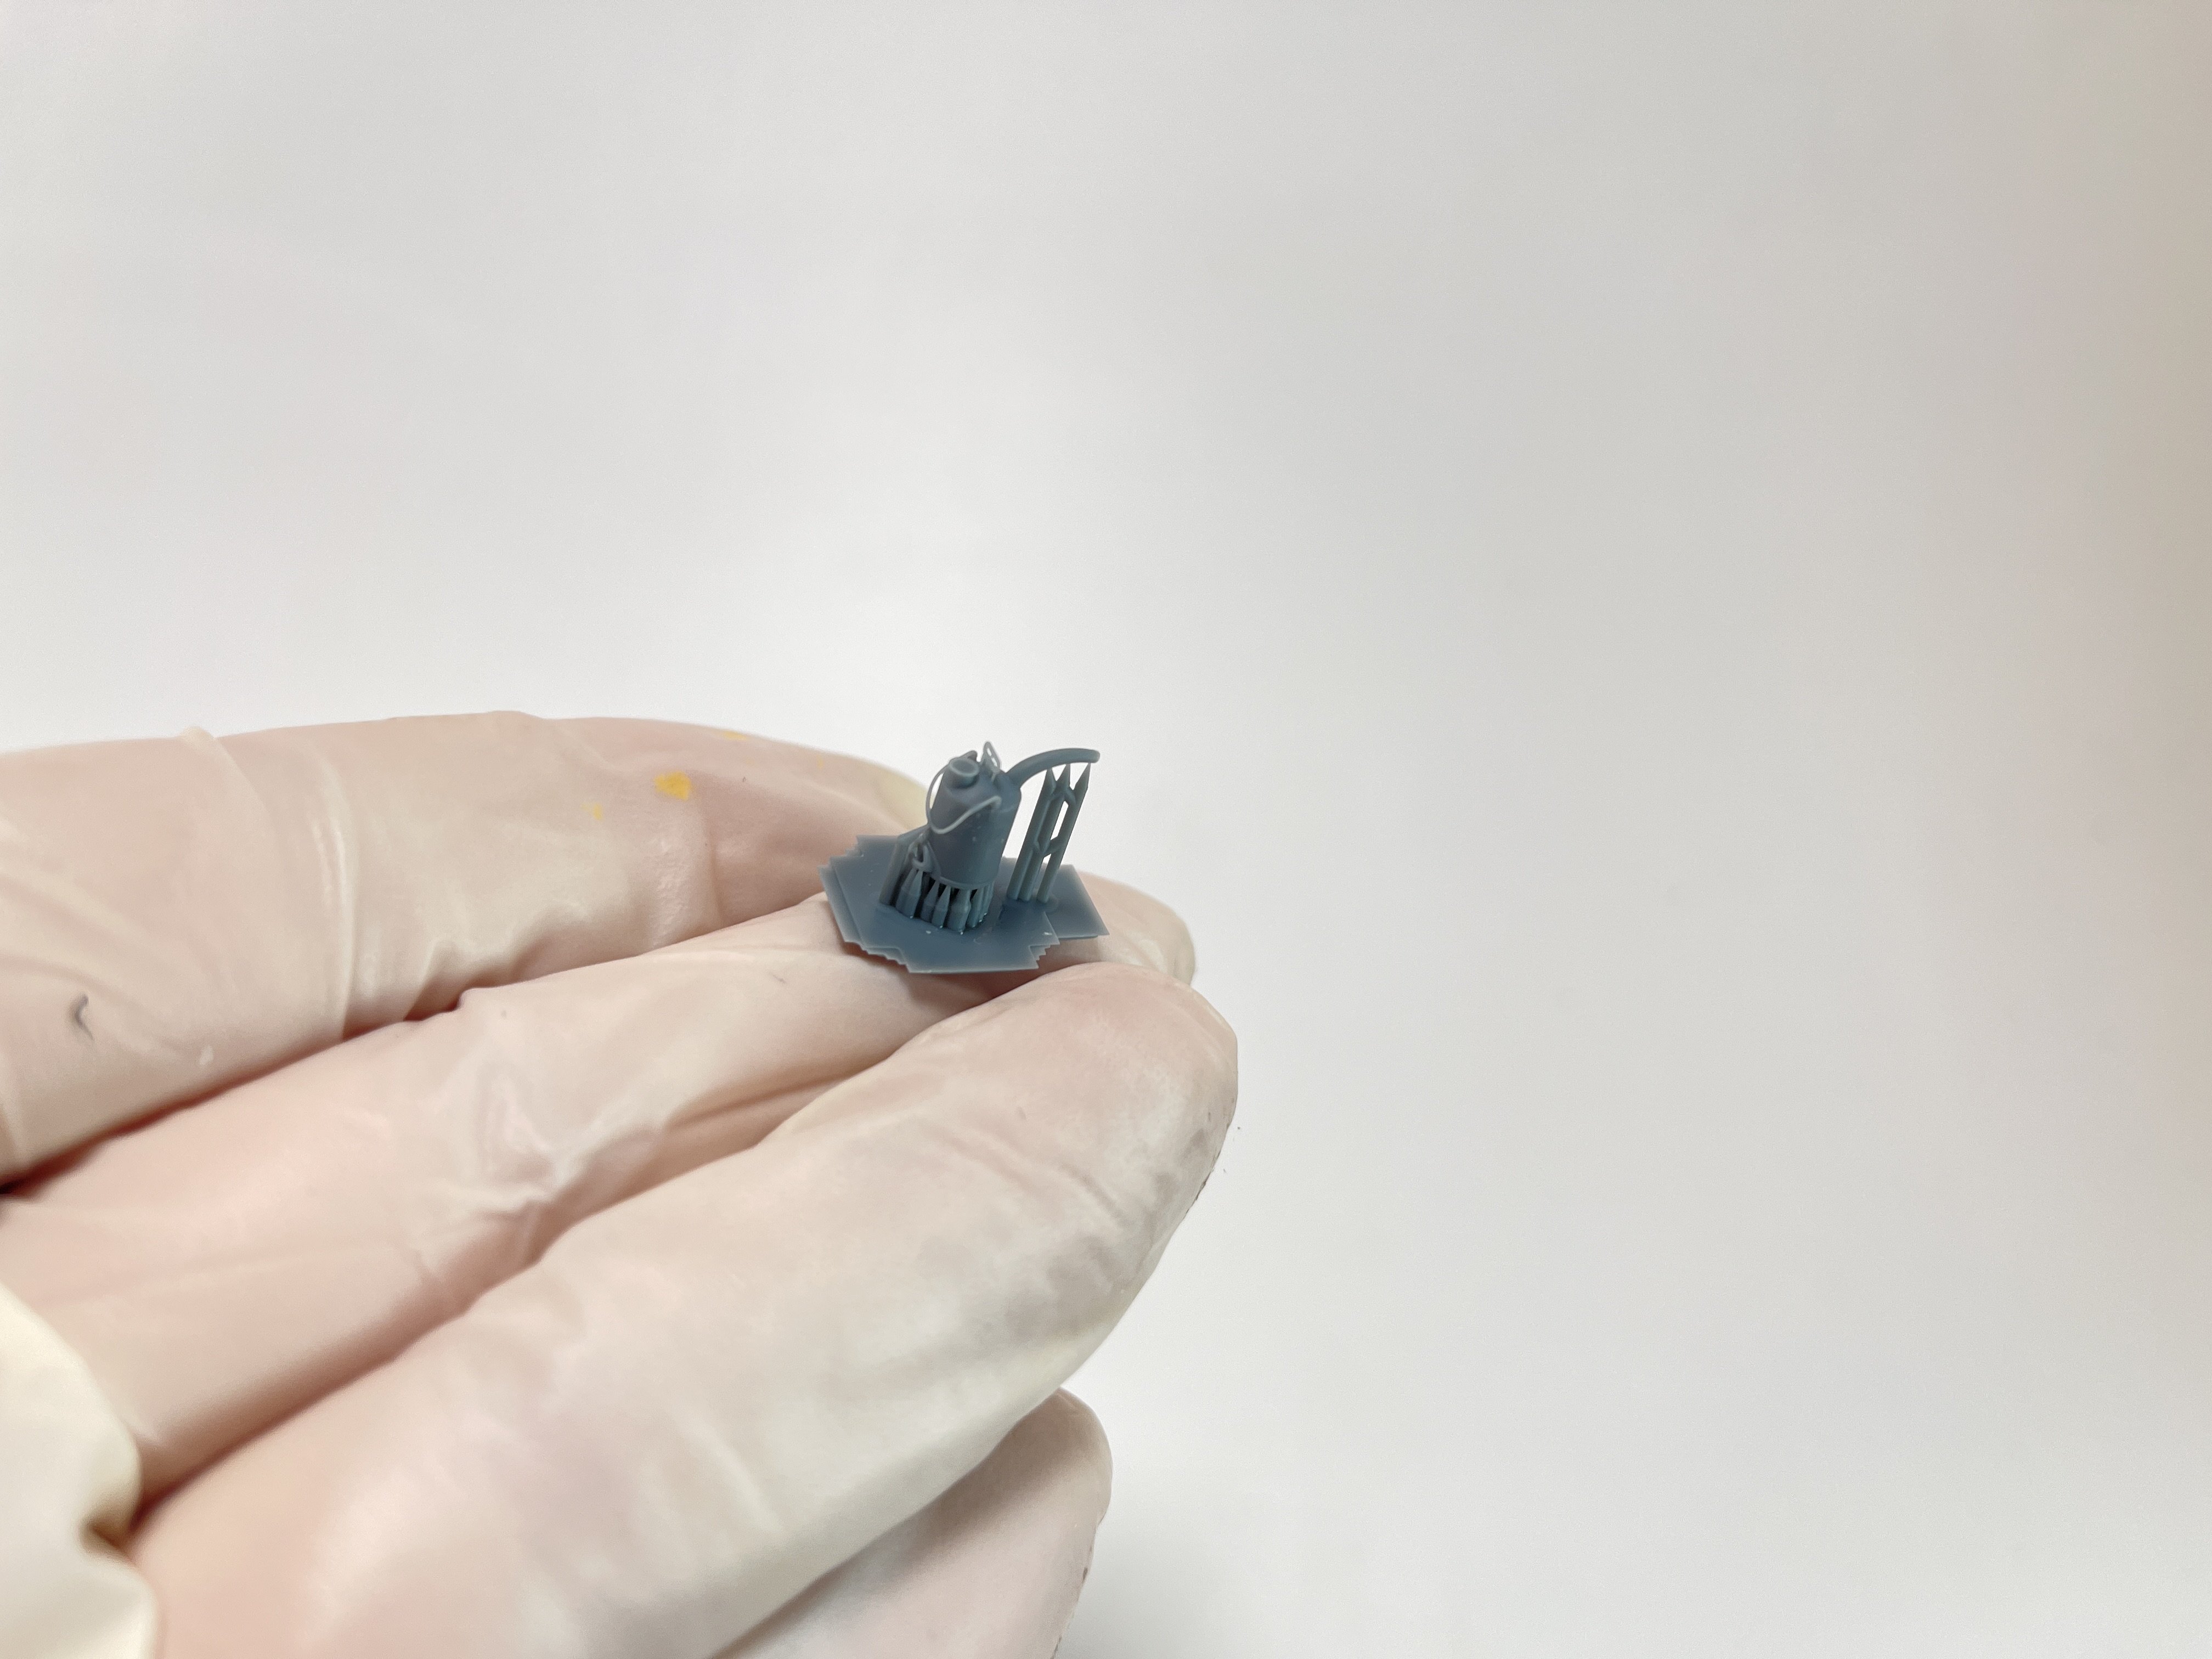
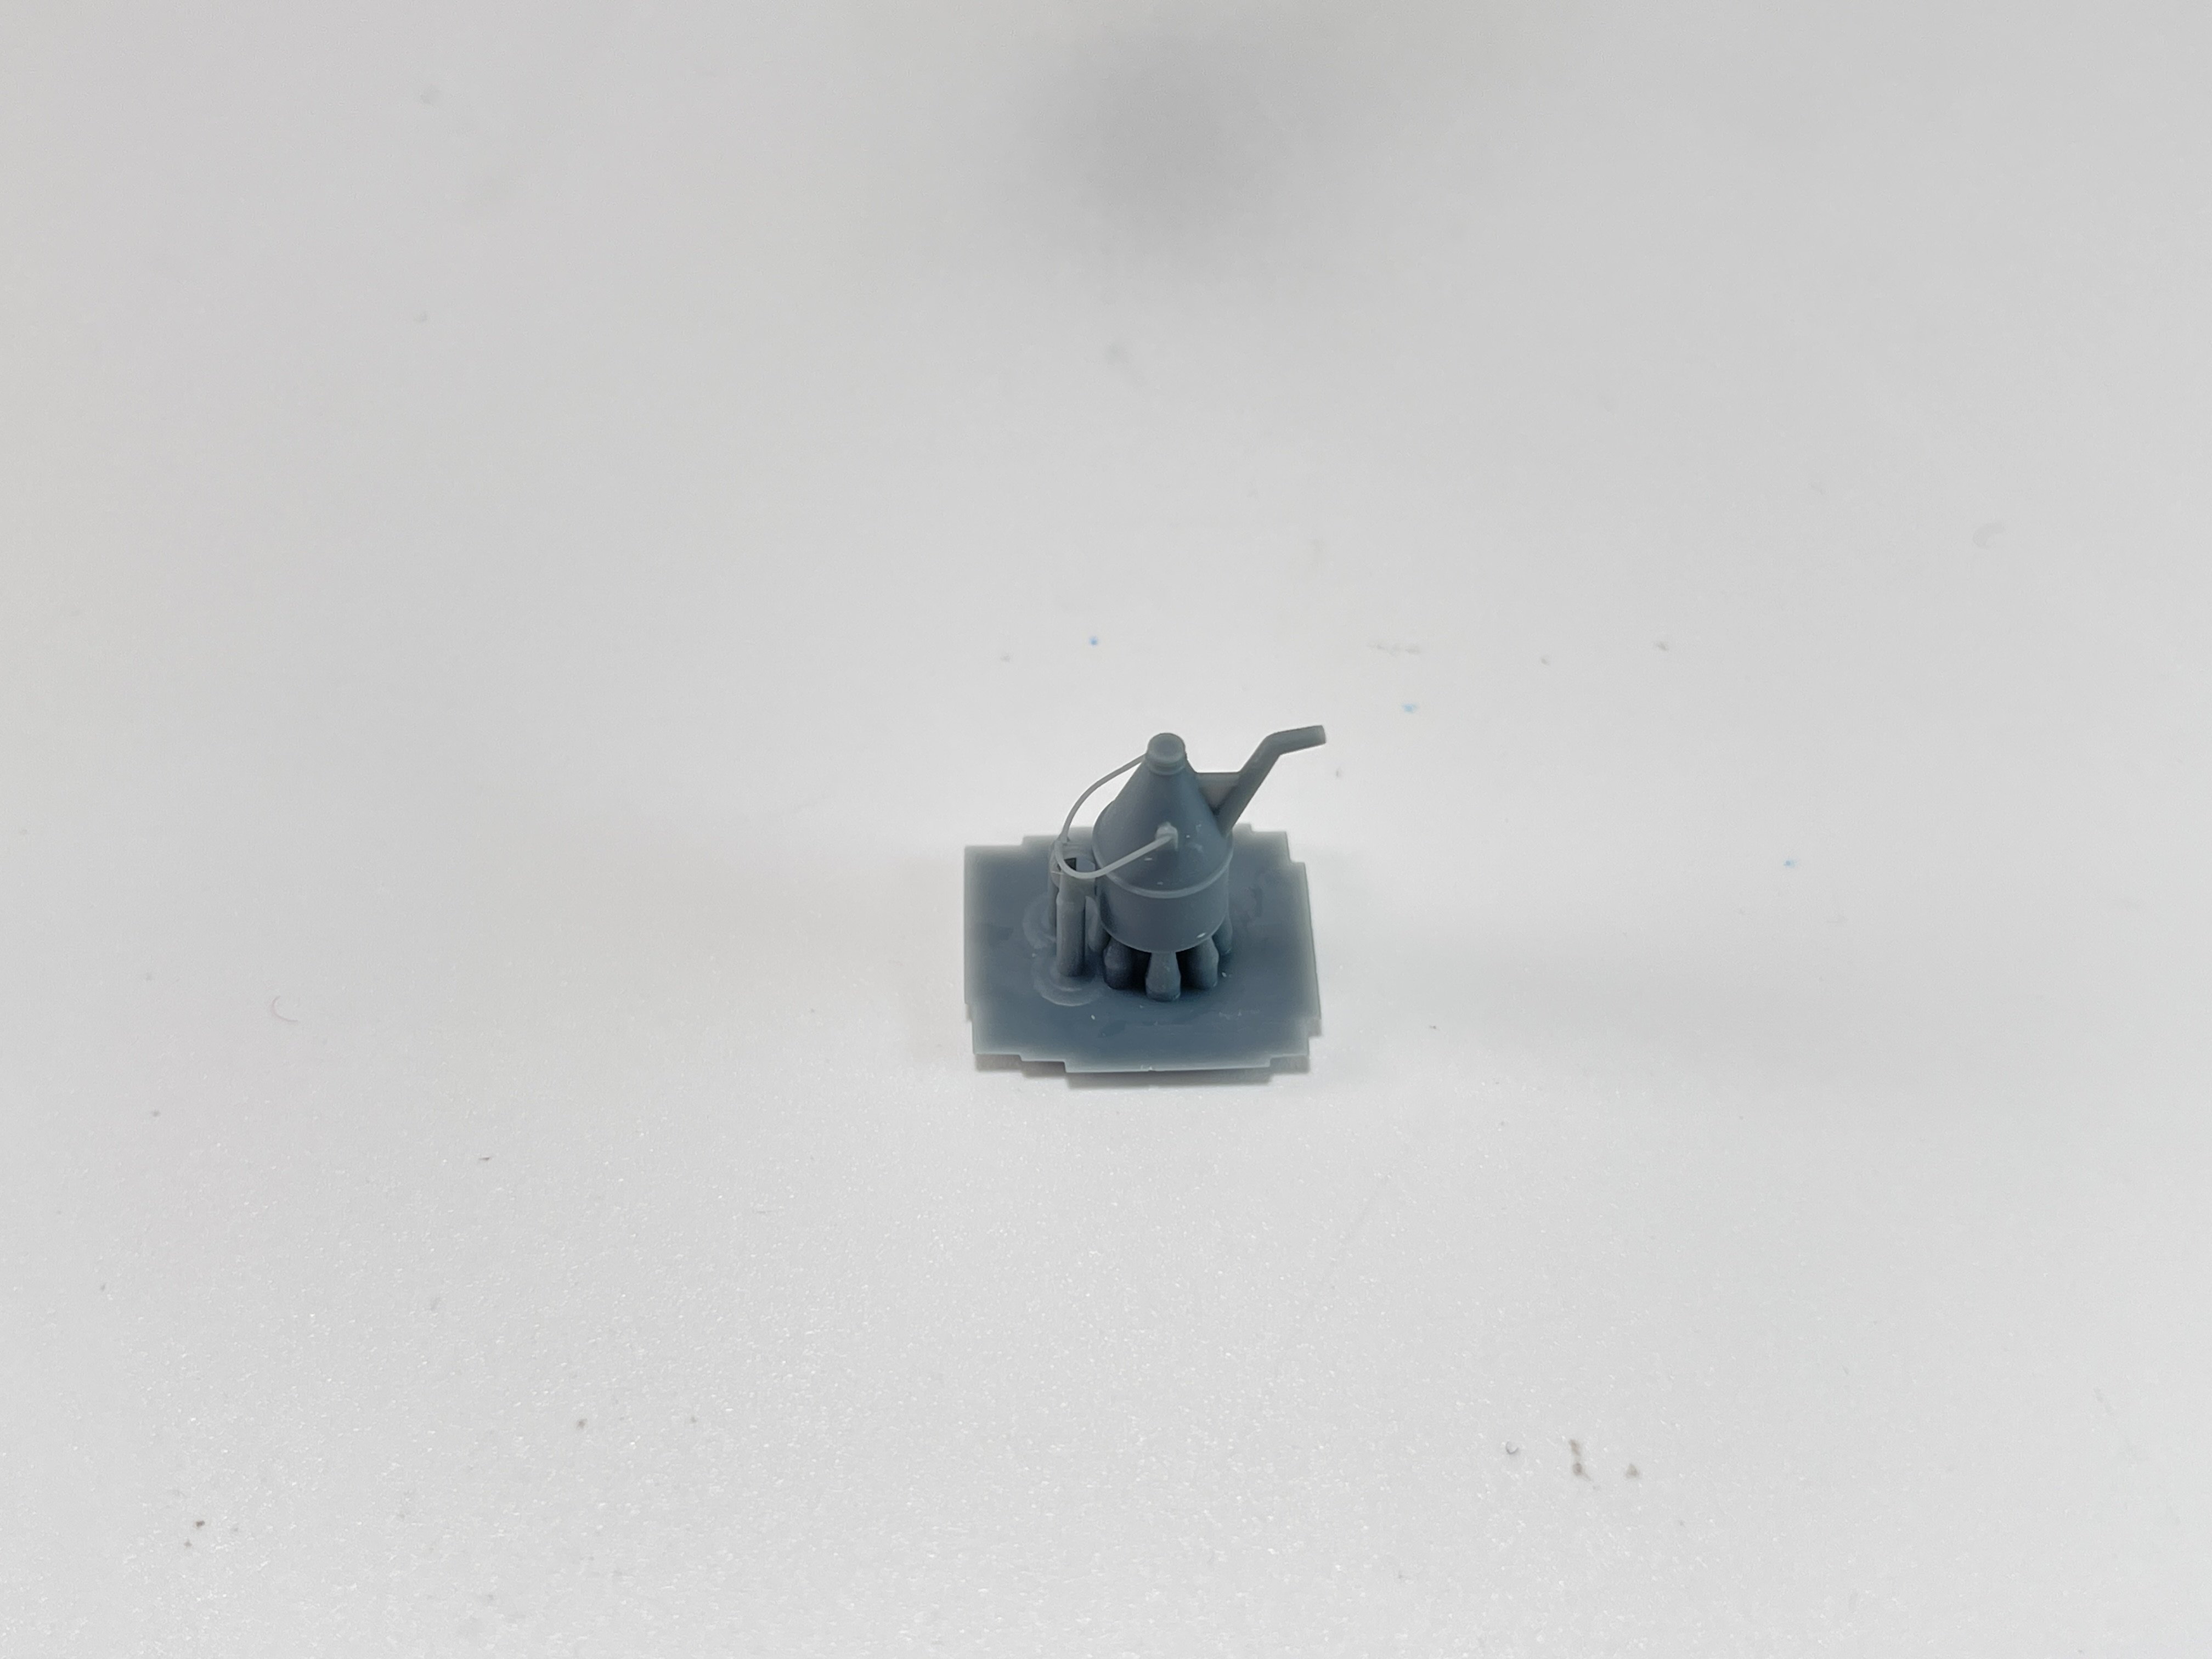
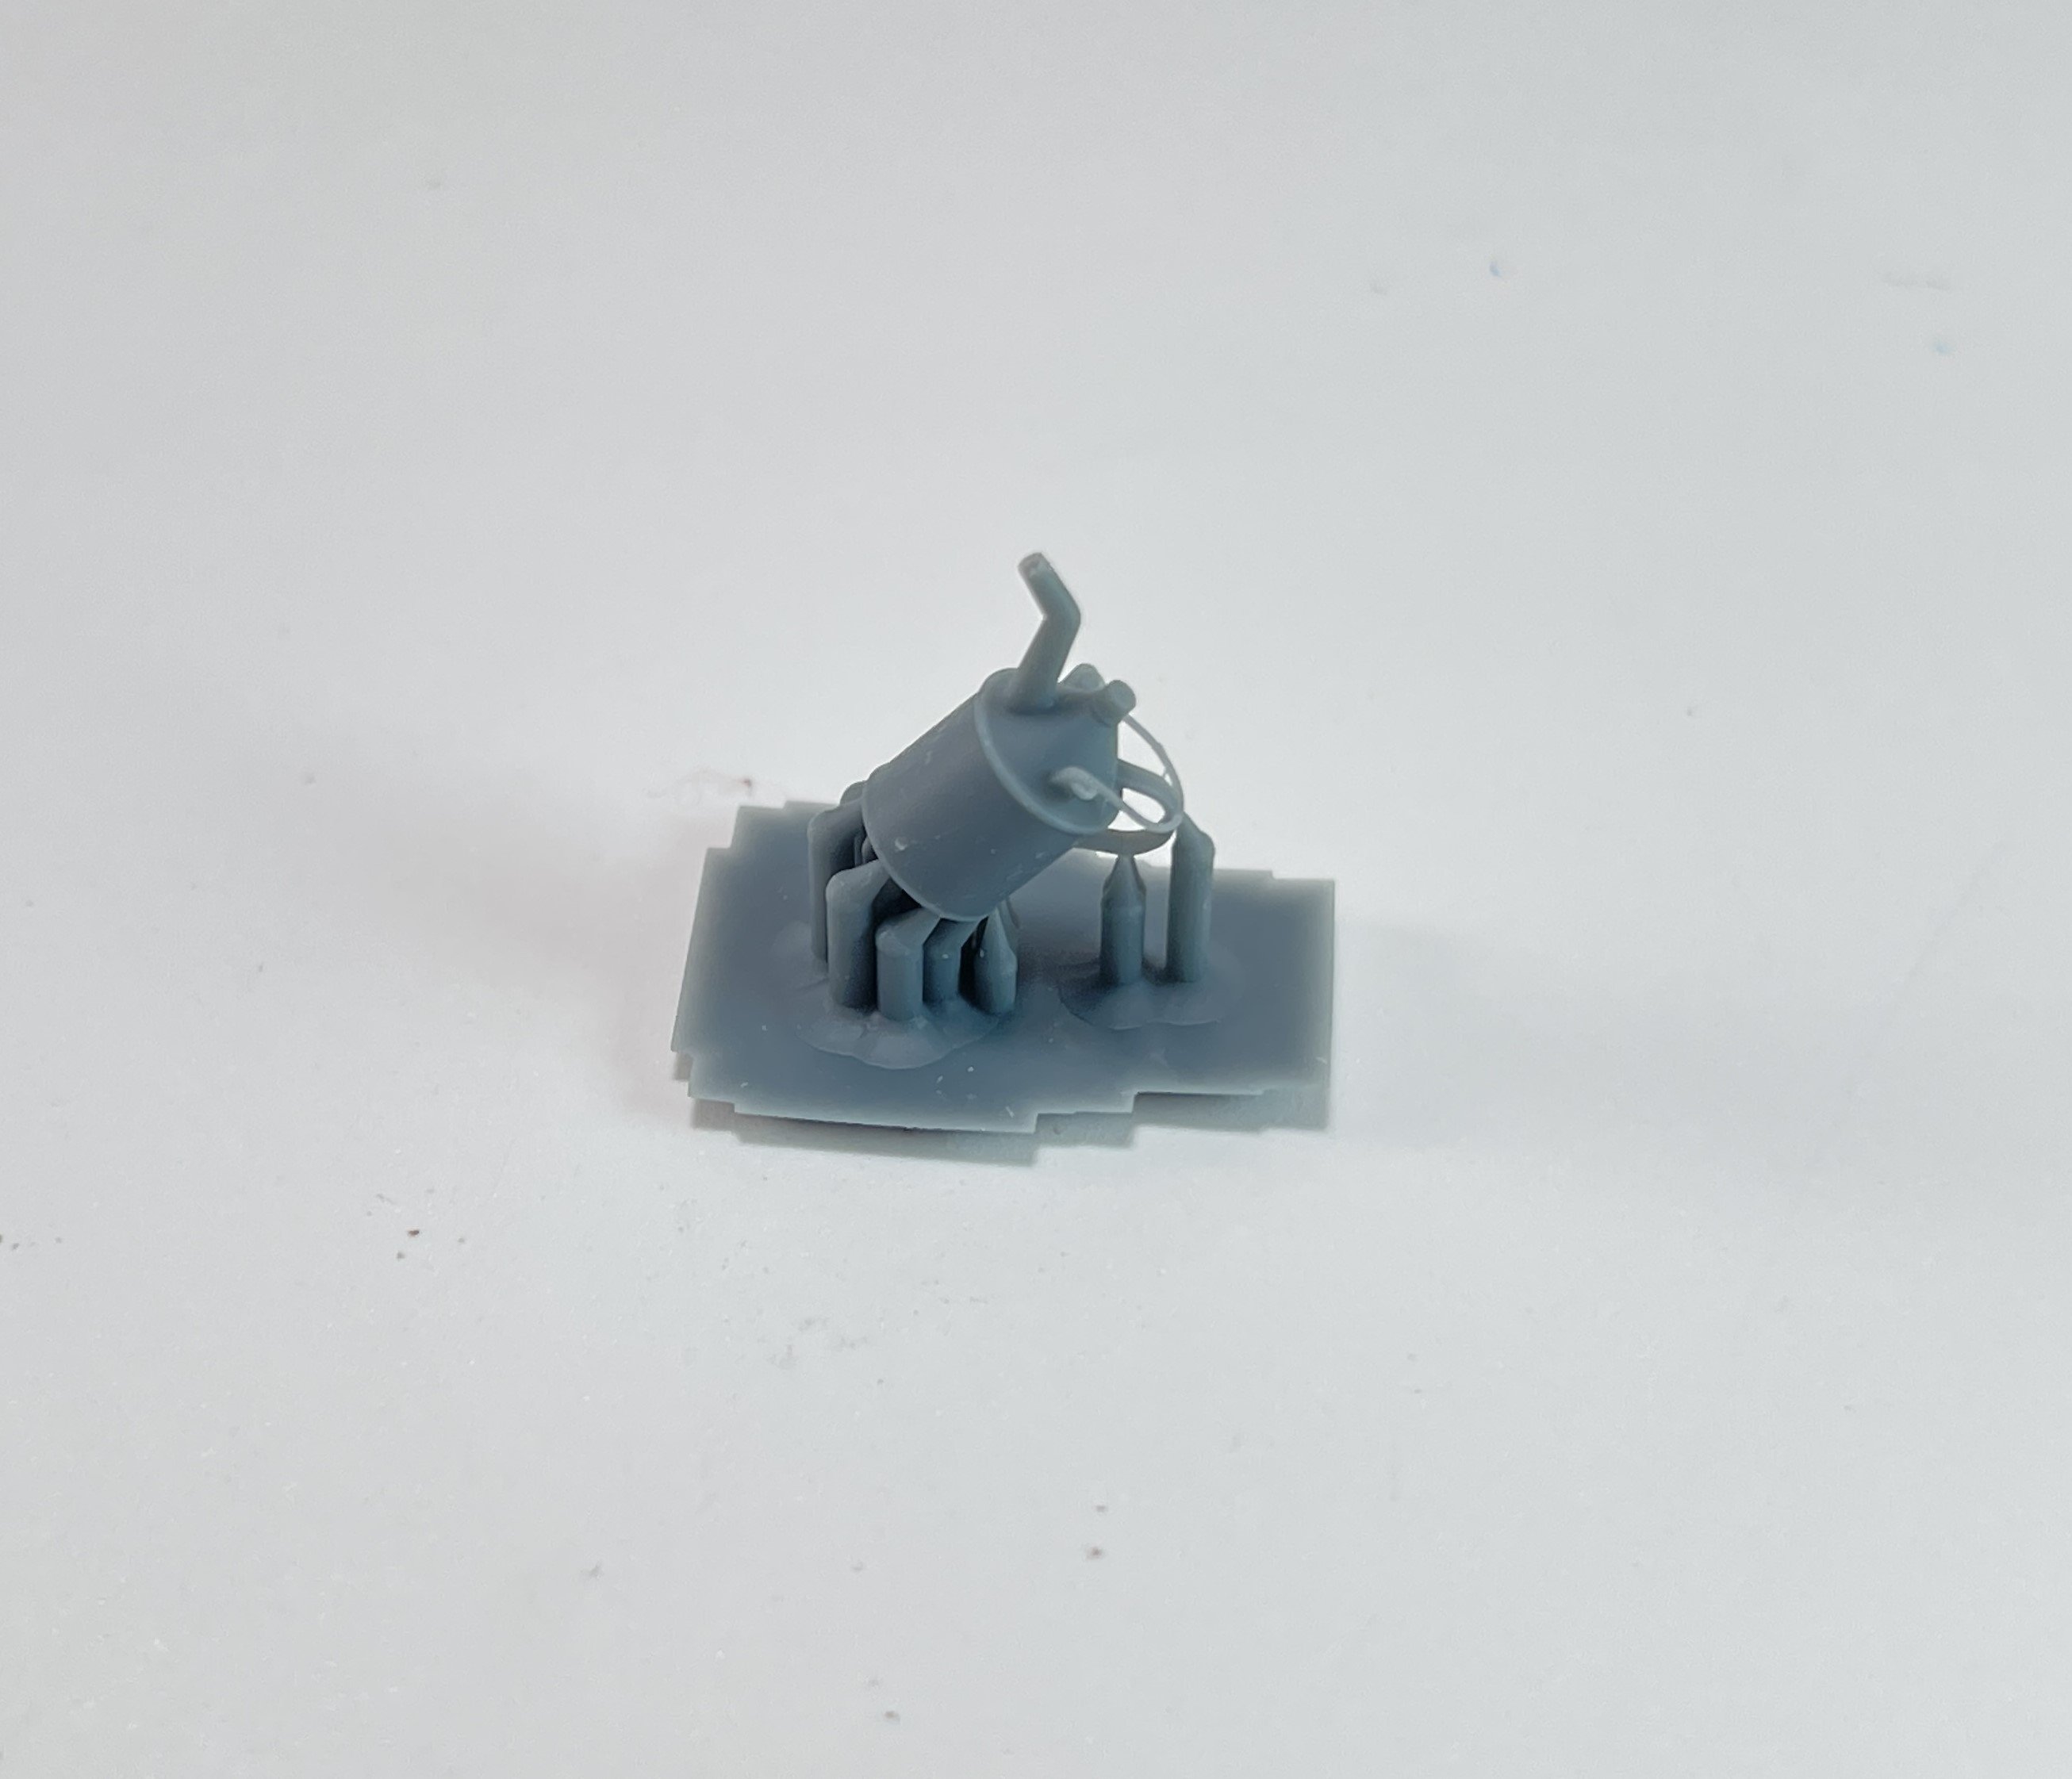
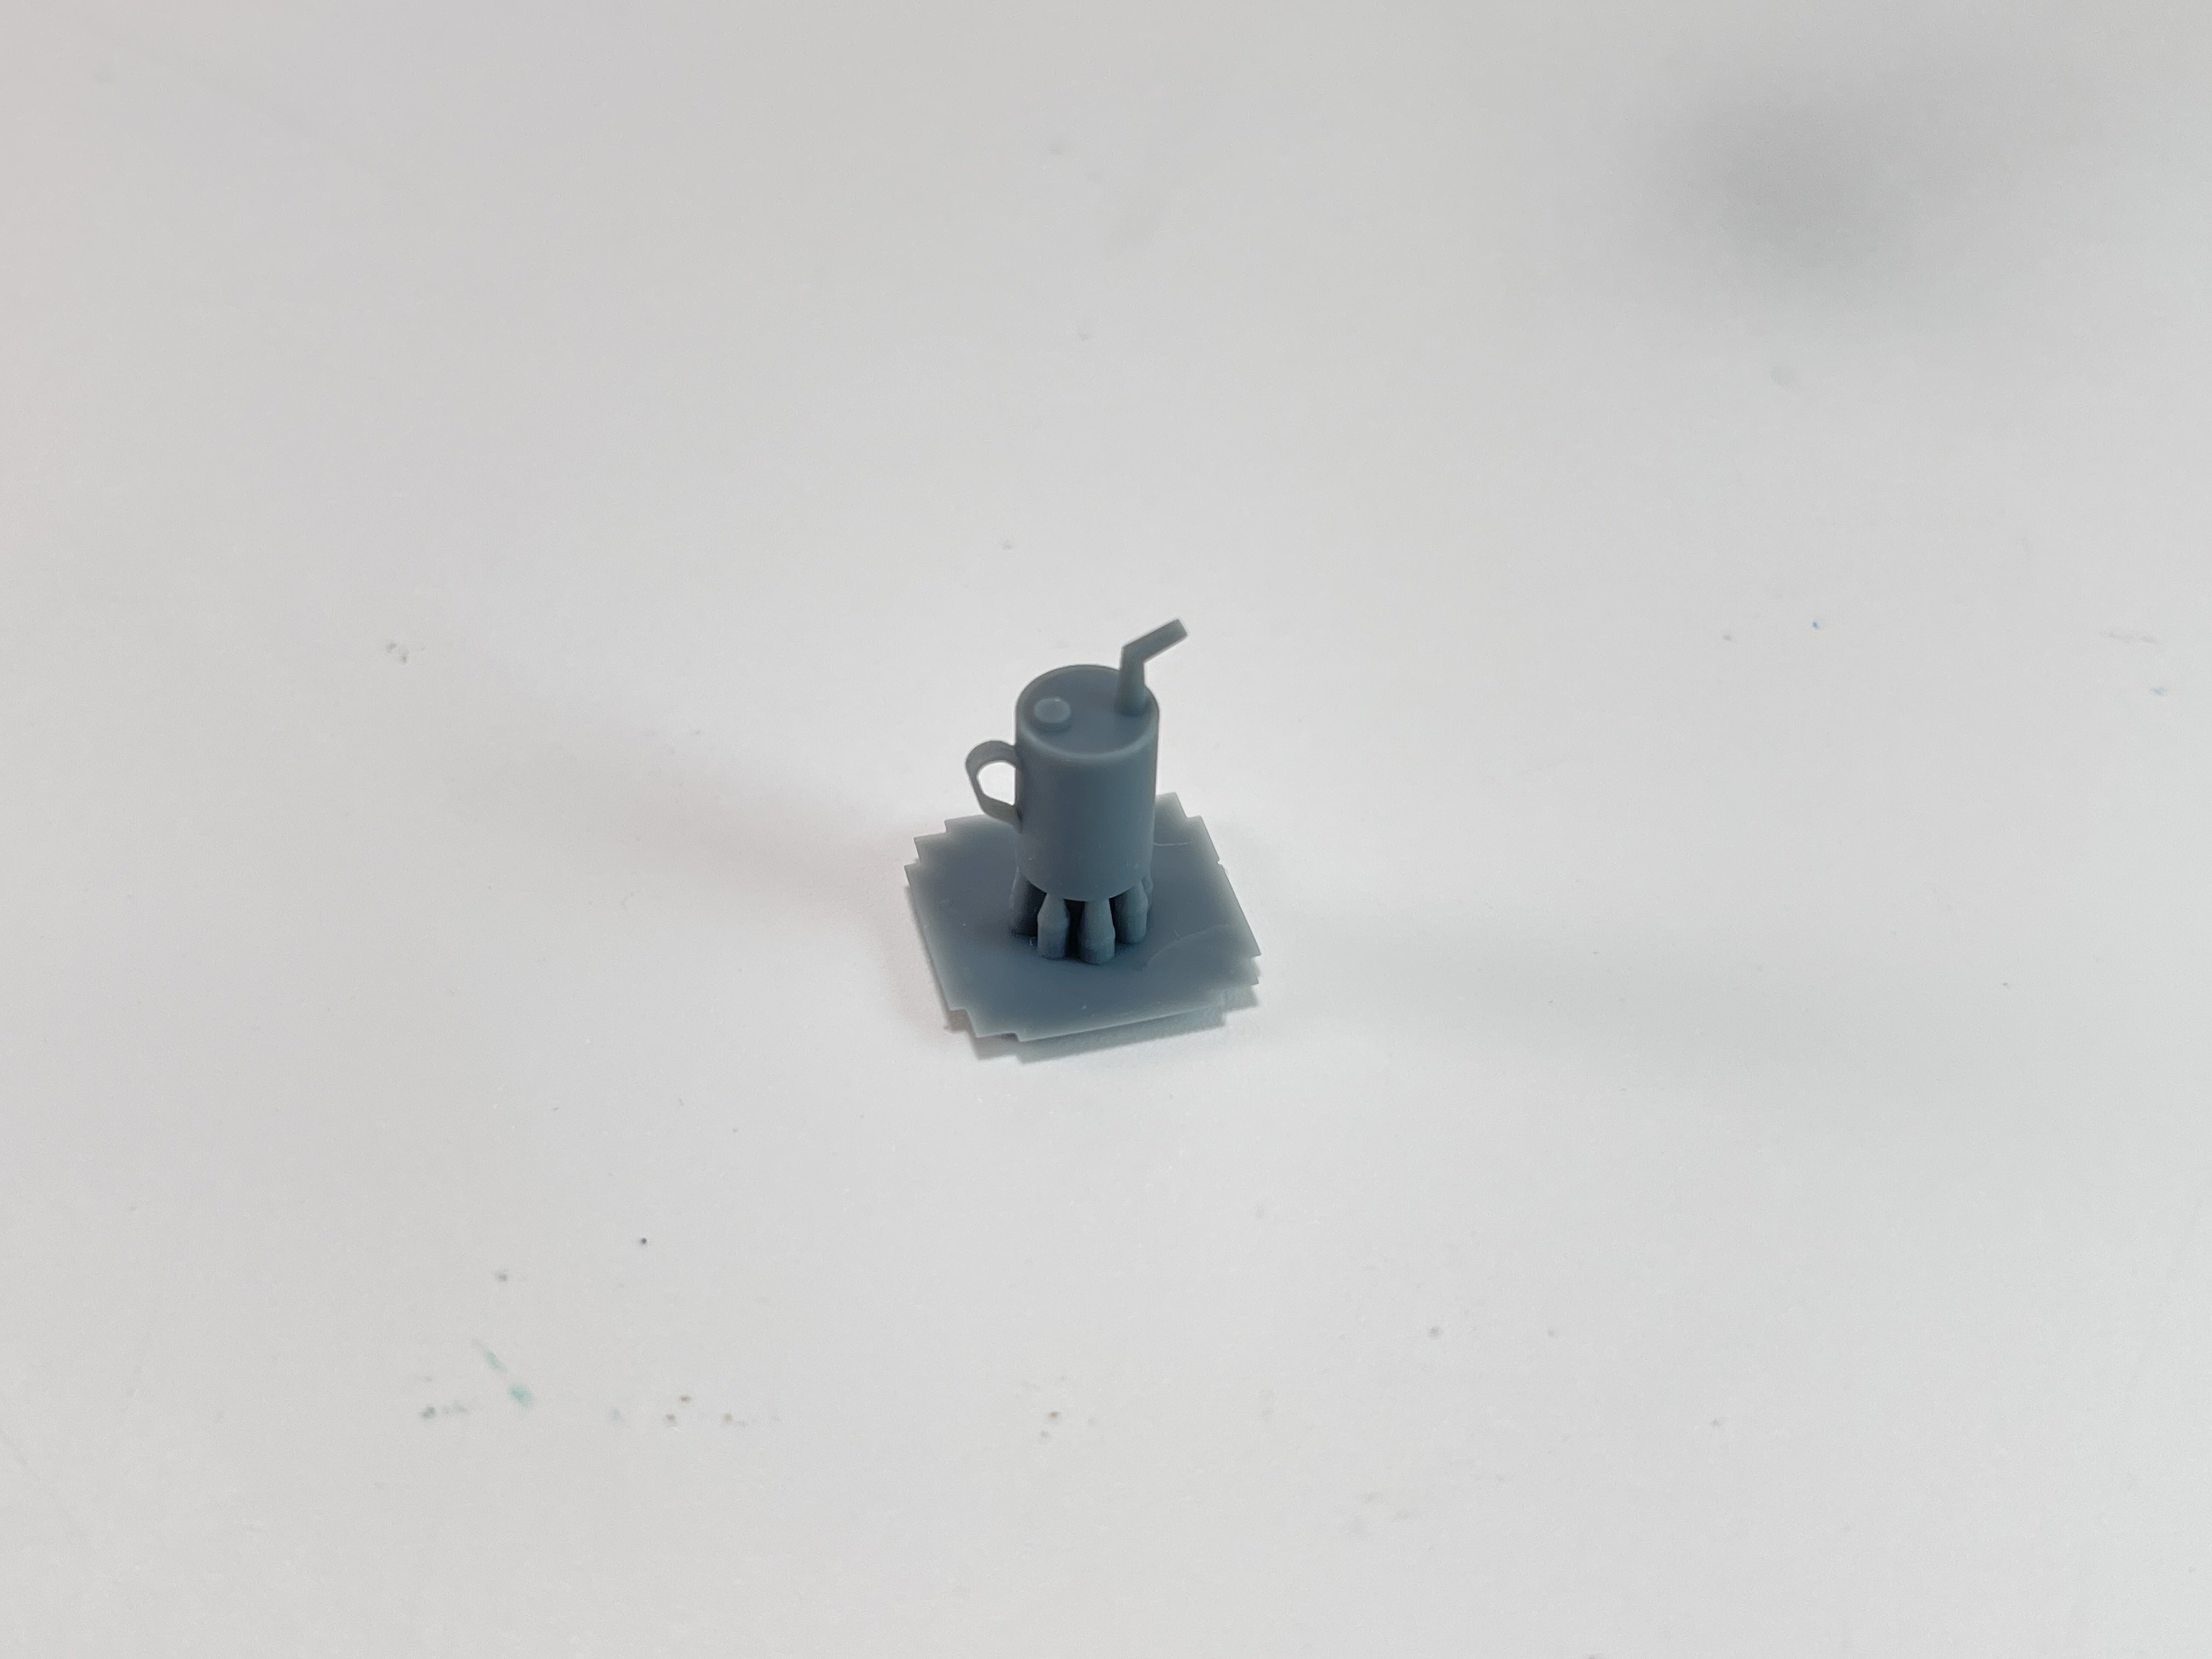
Water Receptacle

Catalogue n.º DP3024
Price tag: 10,86€
In a diorama, the small details are the ones that give live to your work.
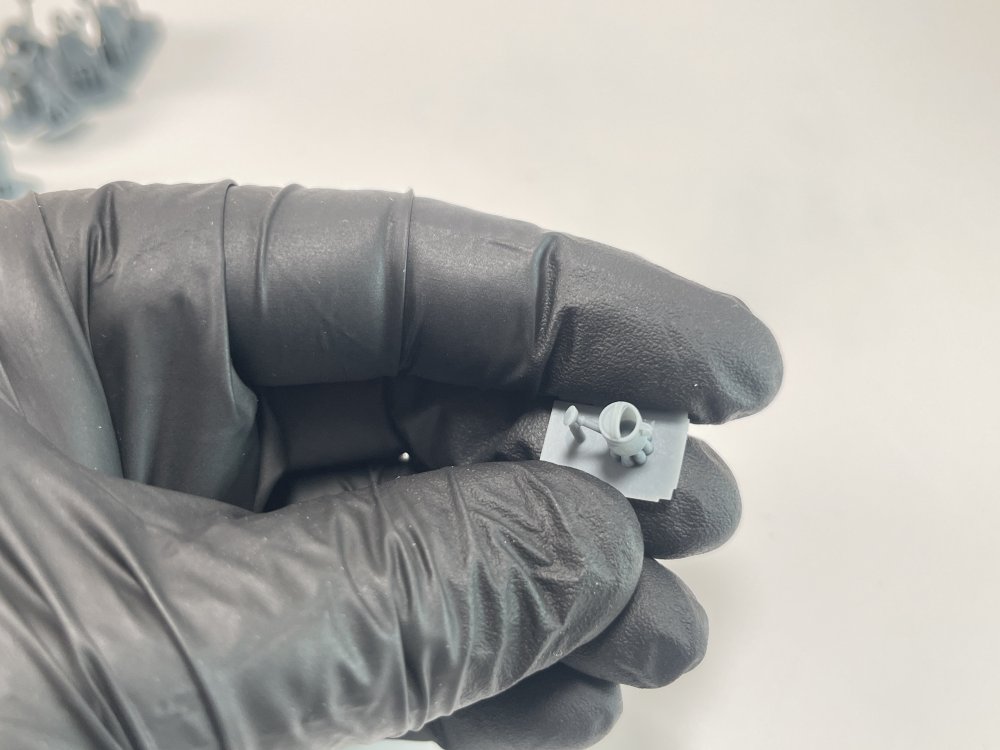
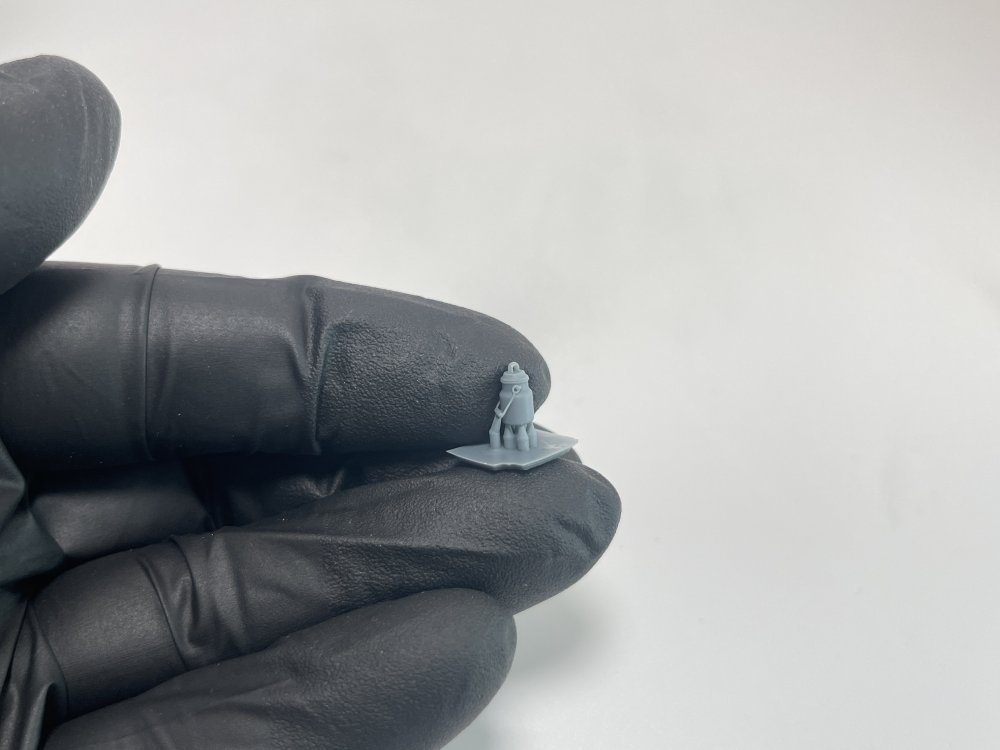
And here several watering cans, in a total of 19.
Watering cans of different shapes, types and dimensions. Watering cans for all tastes.
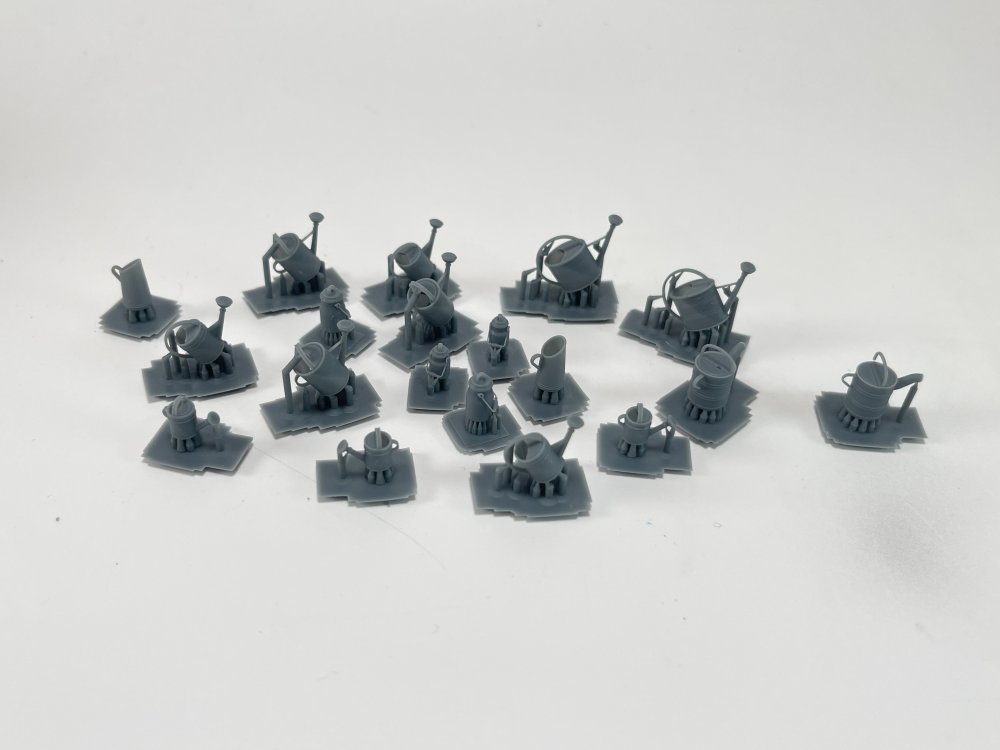
They are 3D printed, truly hollow, and with good detail and good shapes, clearly being watering cans.
And its use is universal!


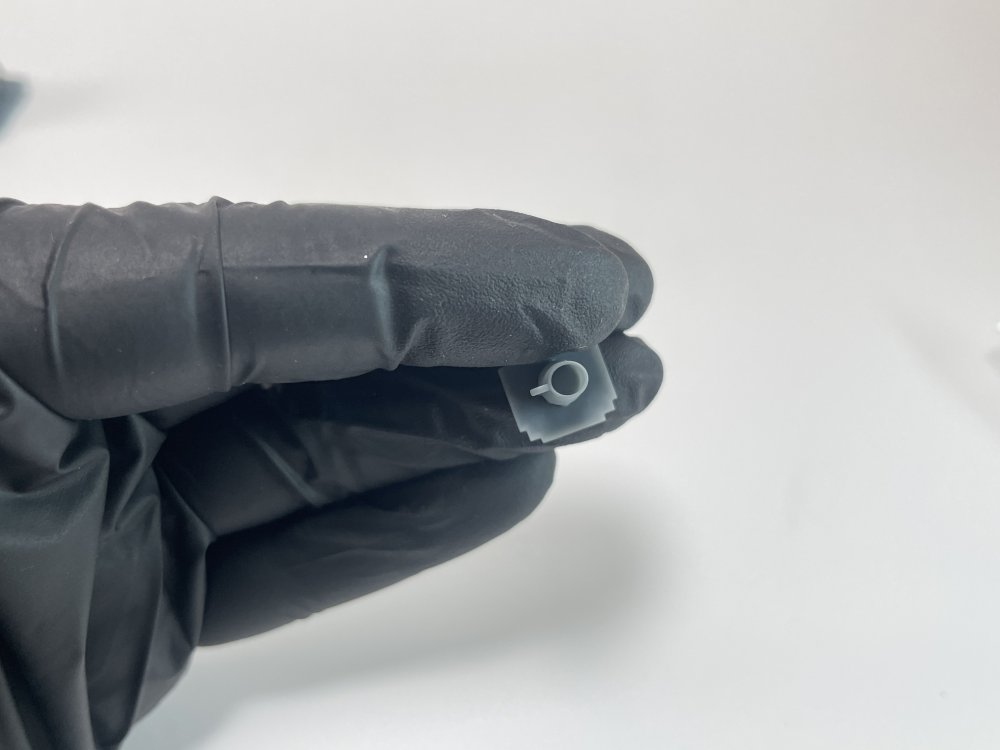
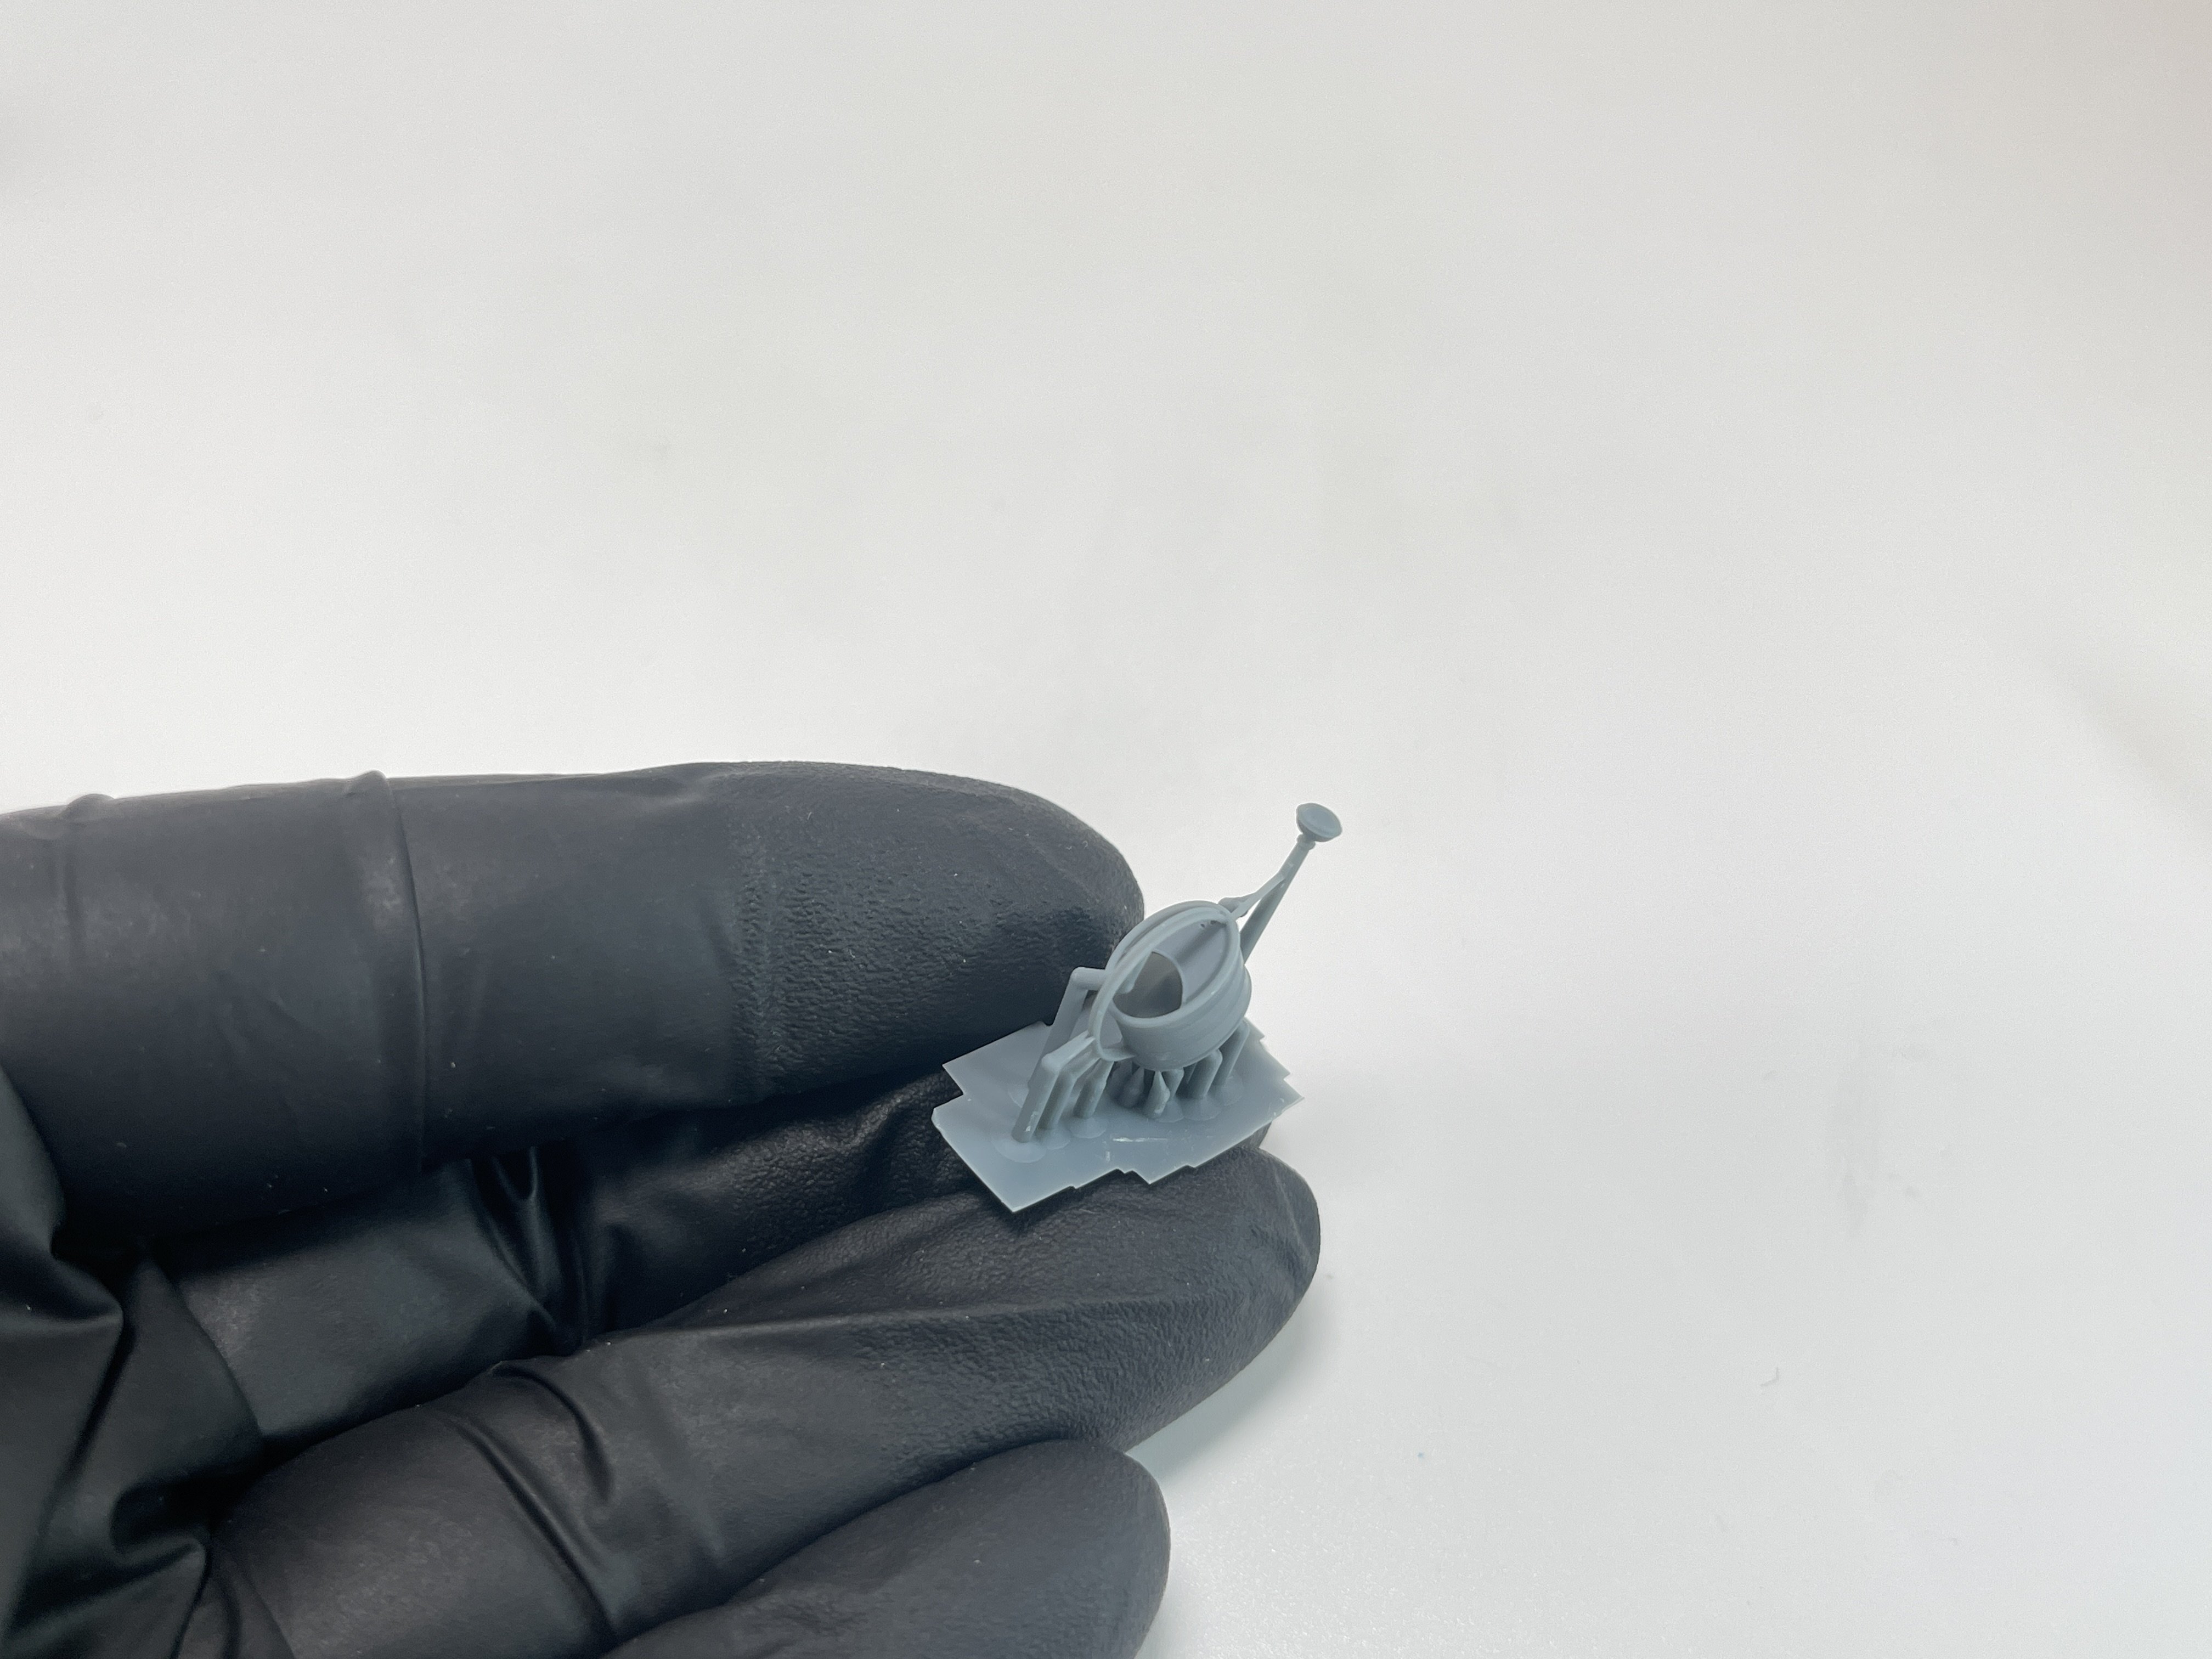
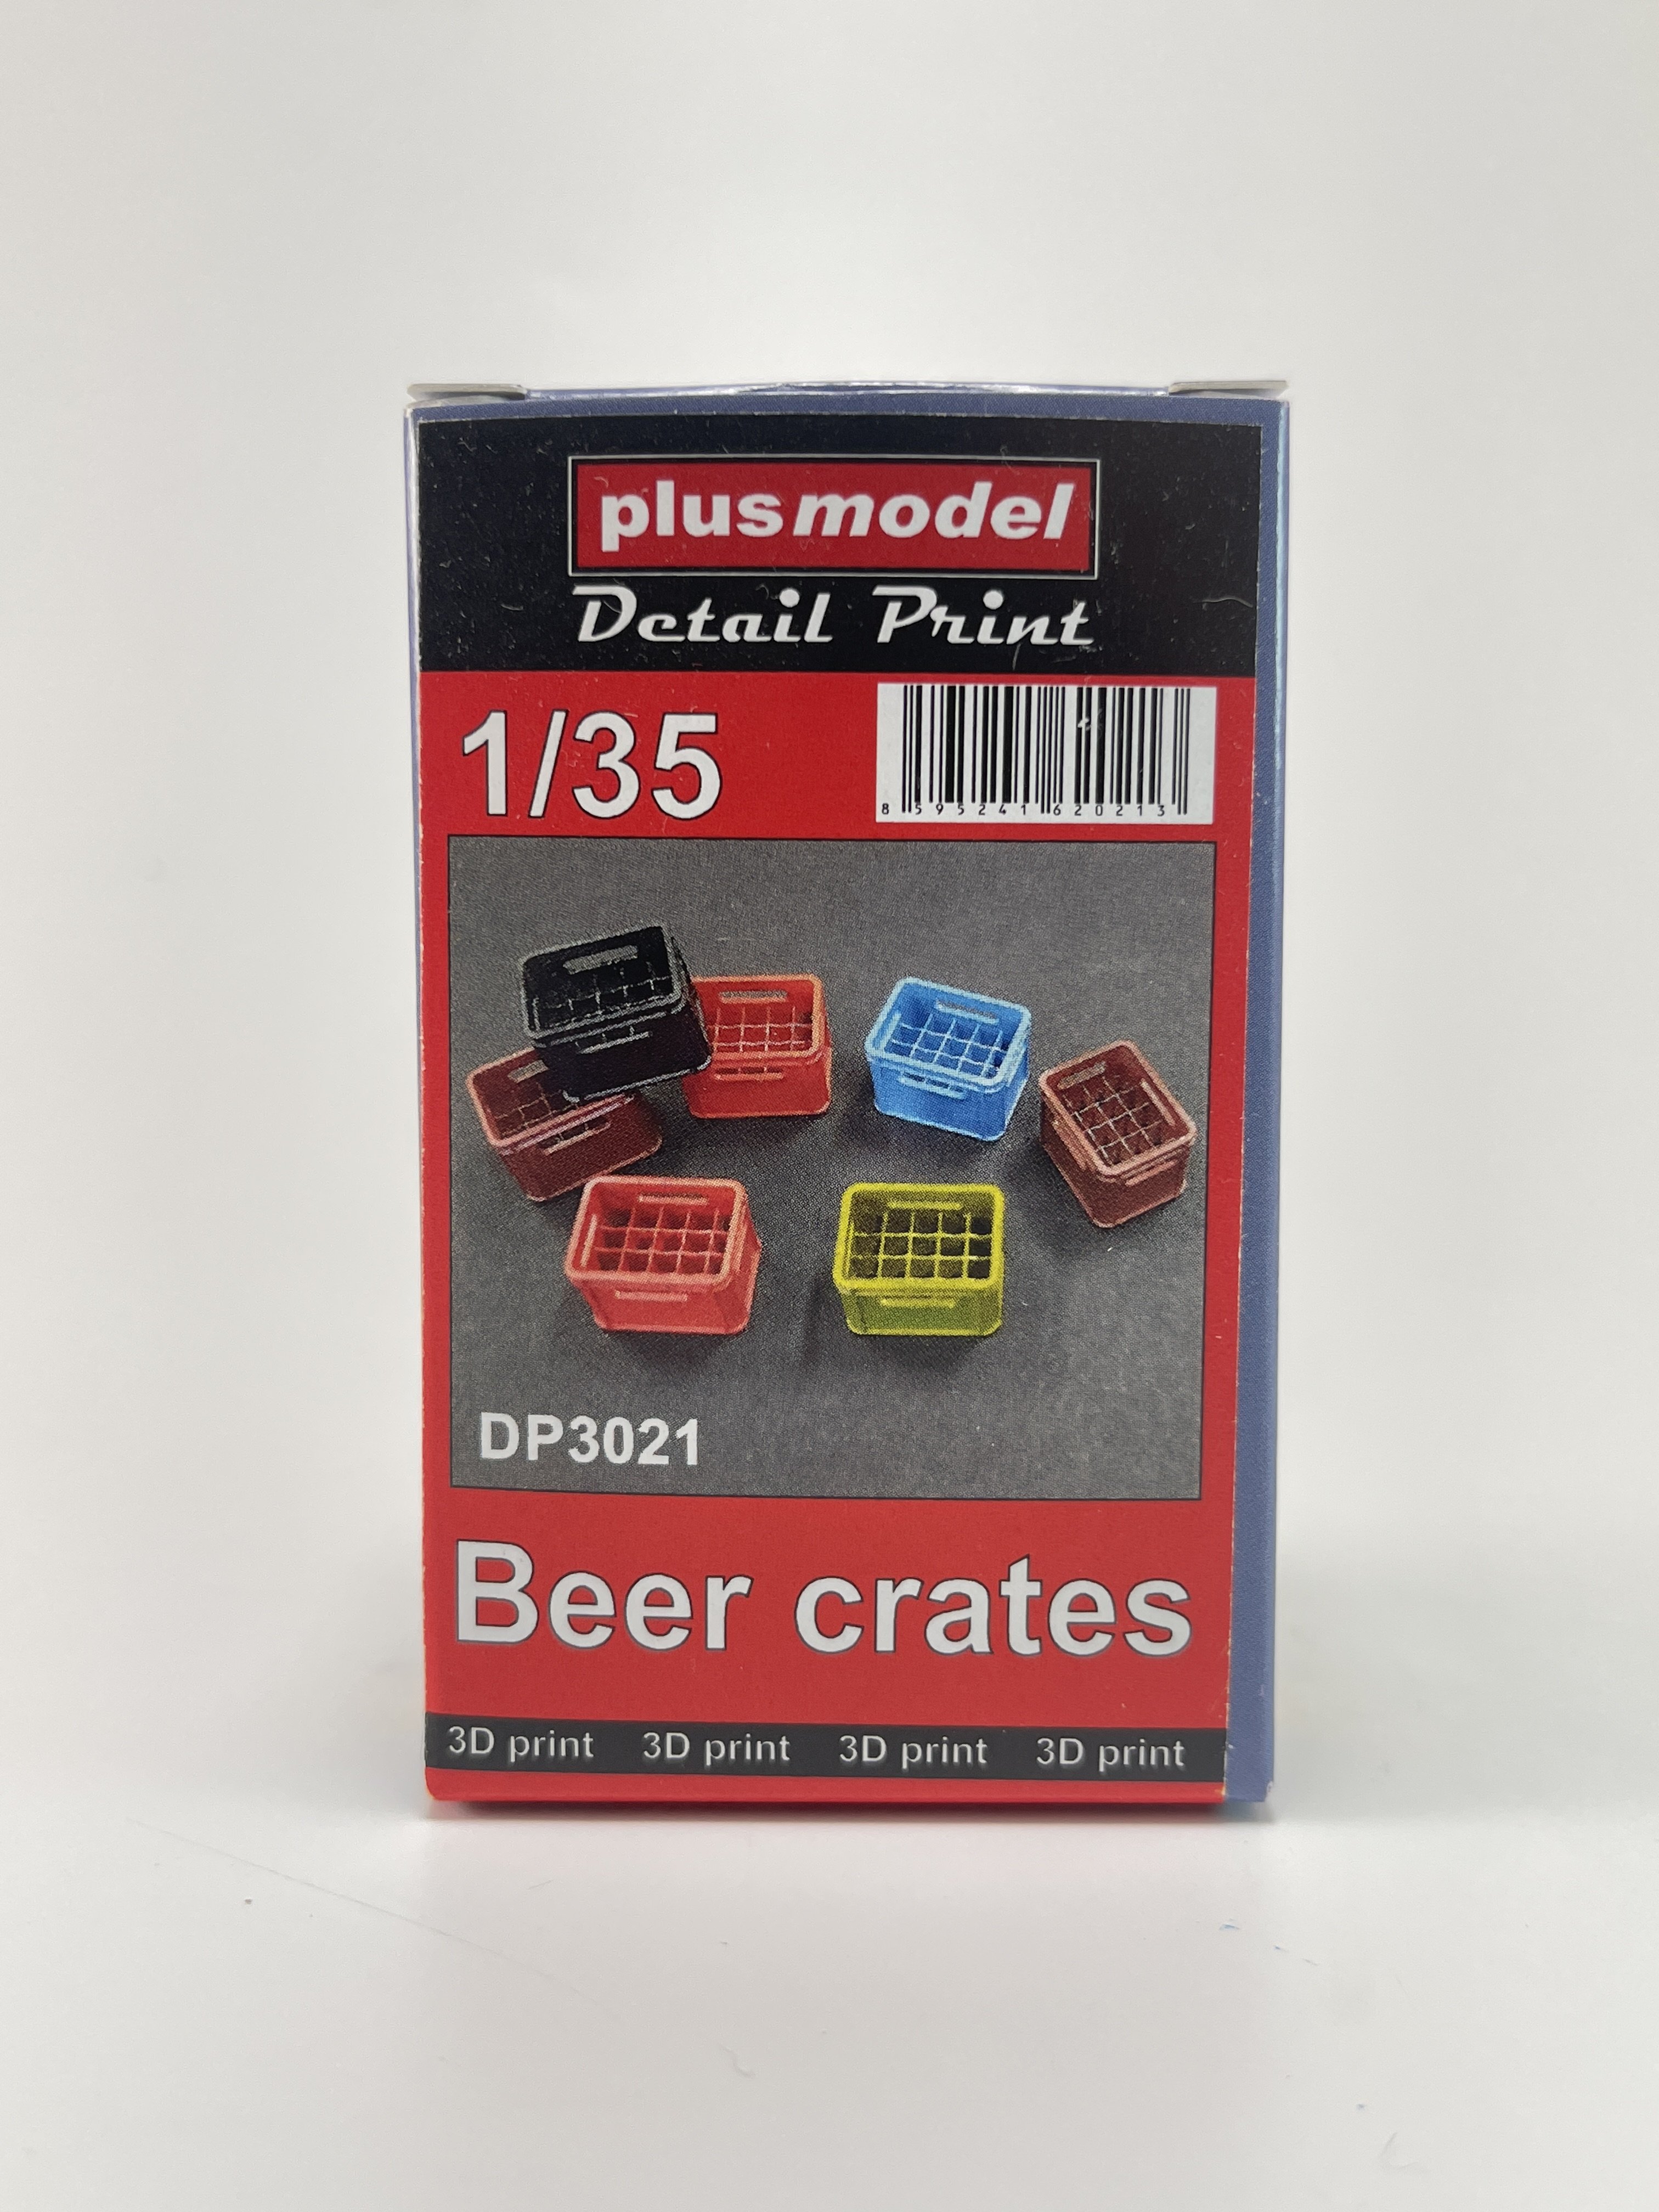
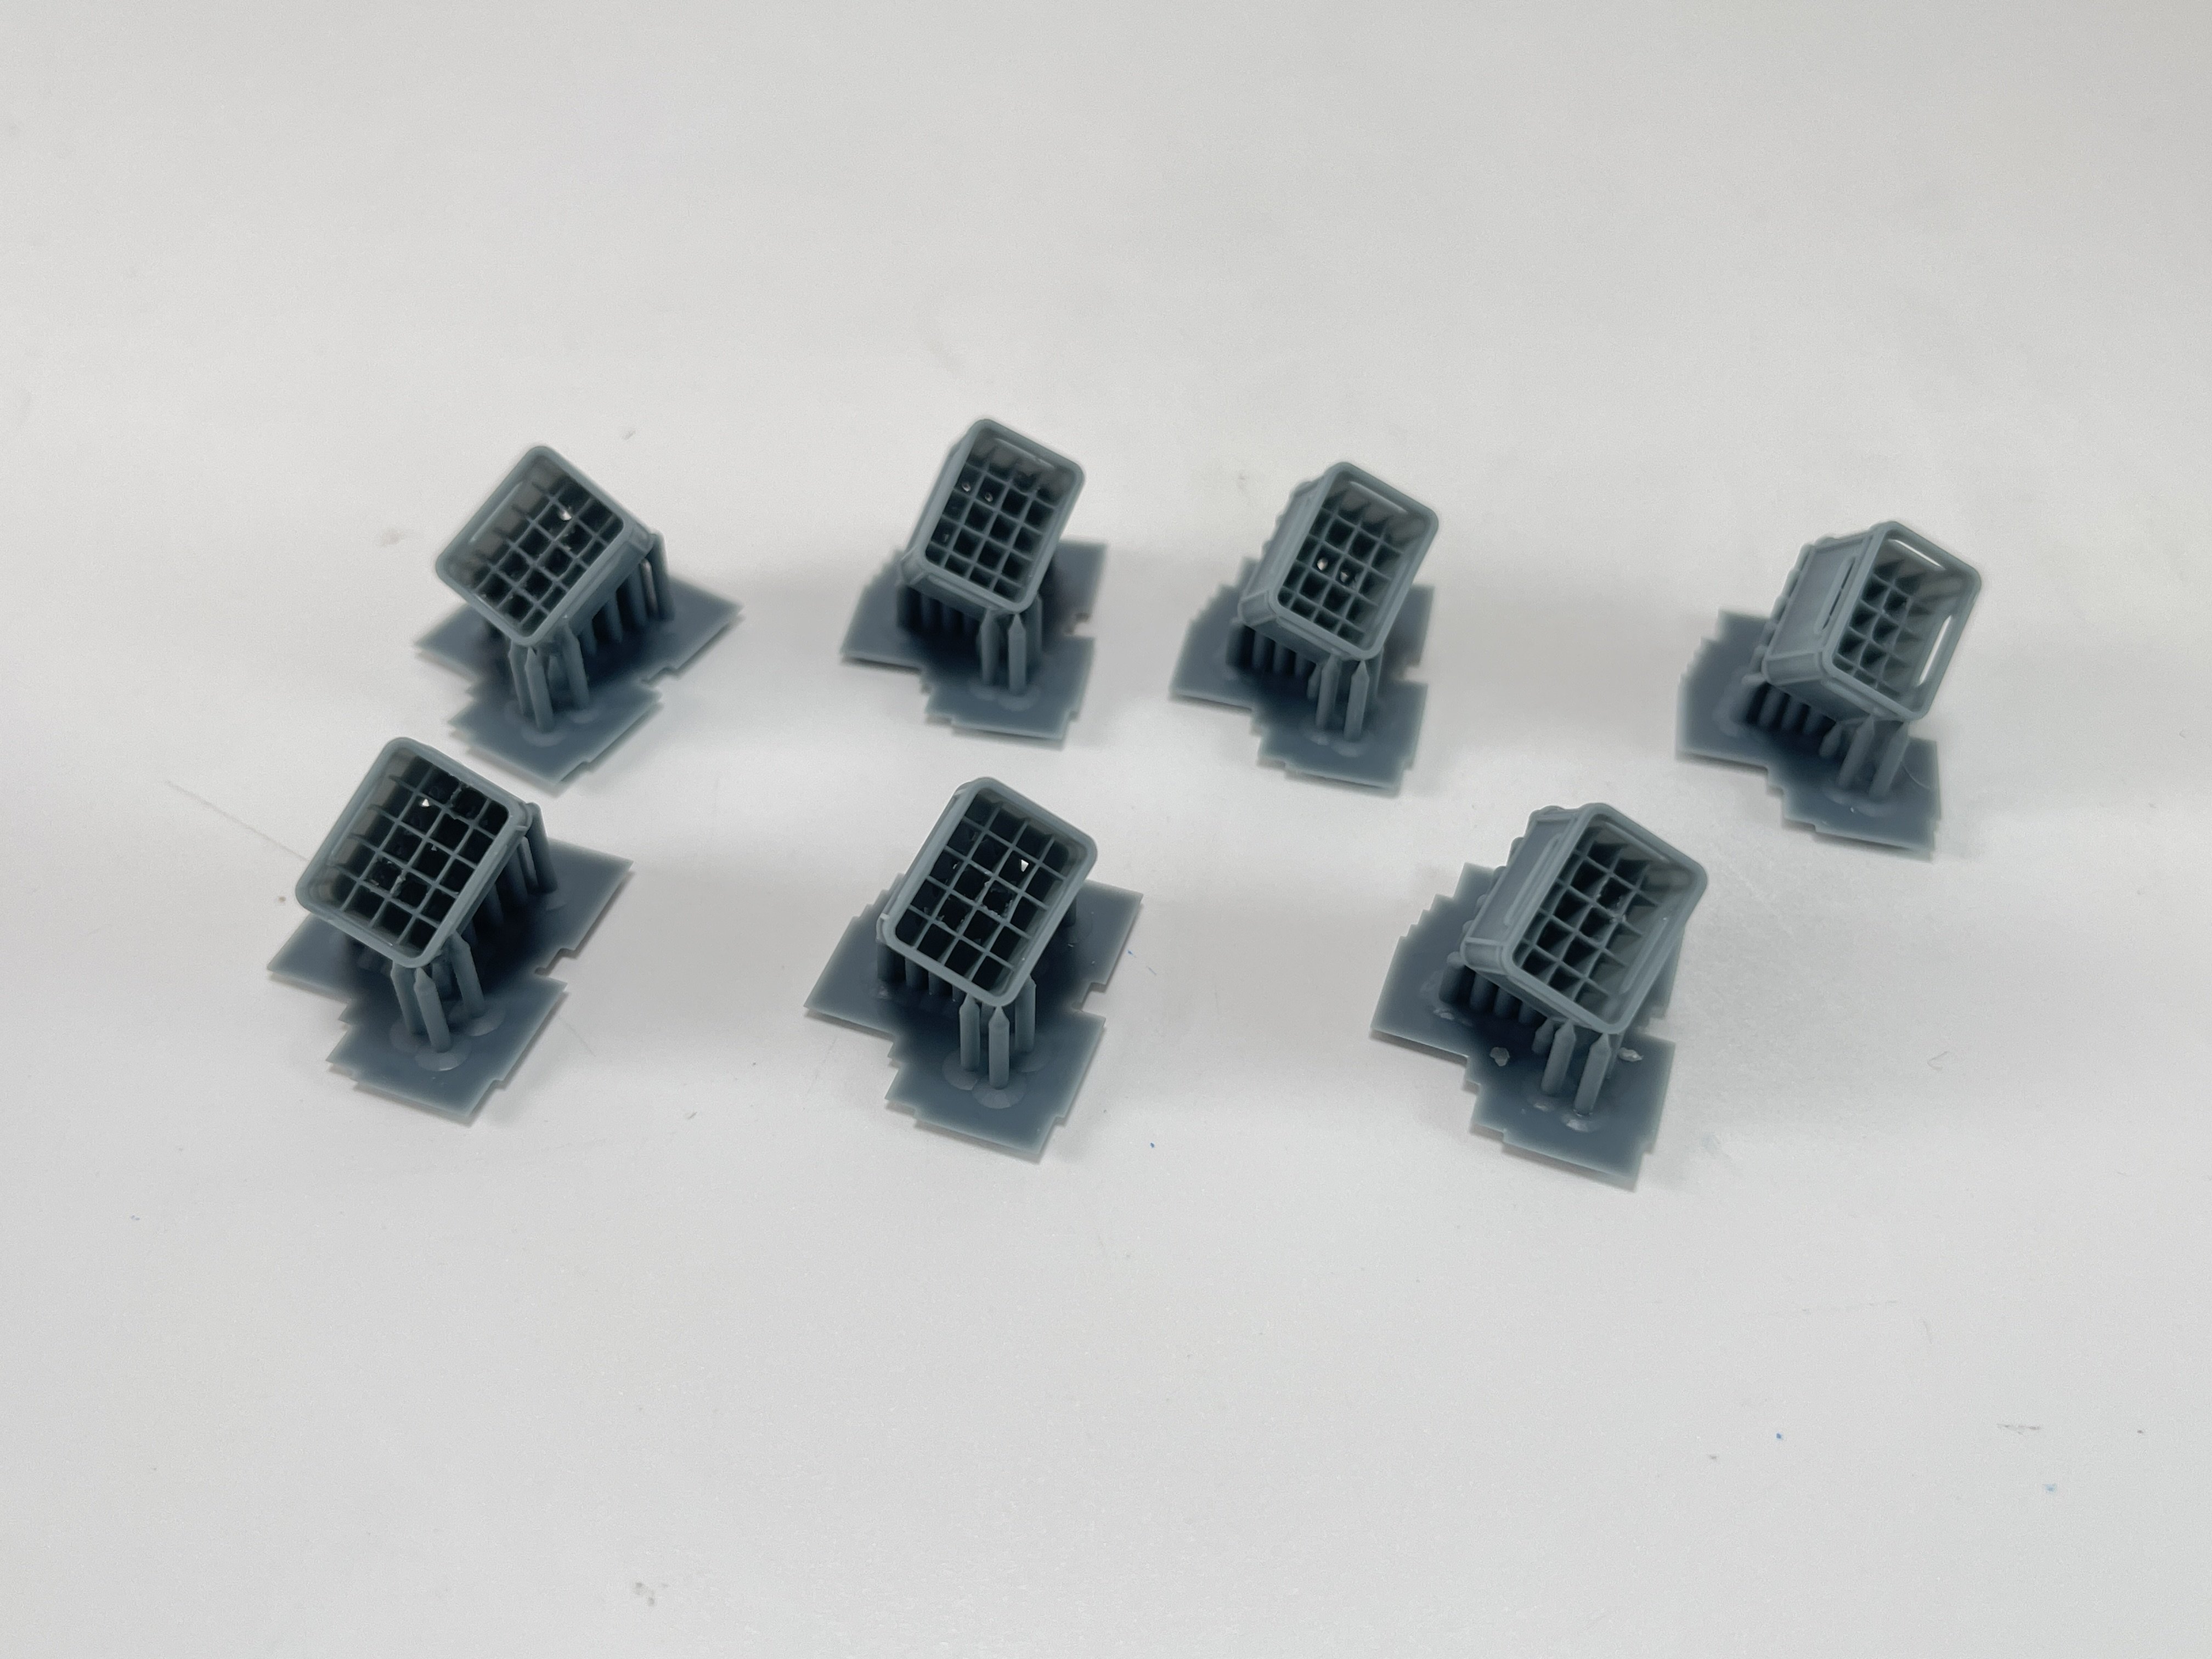
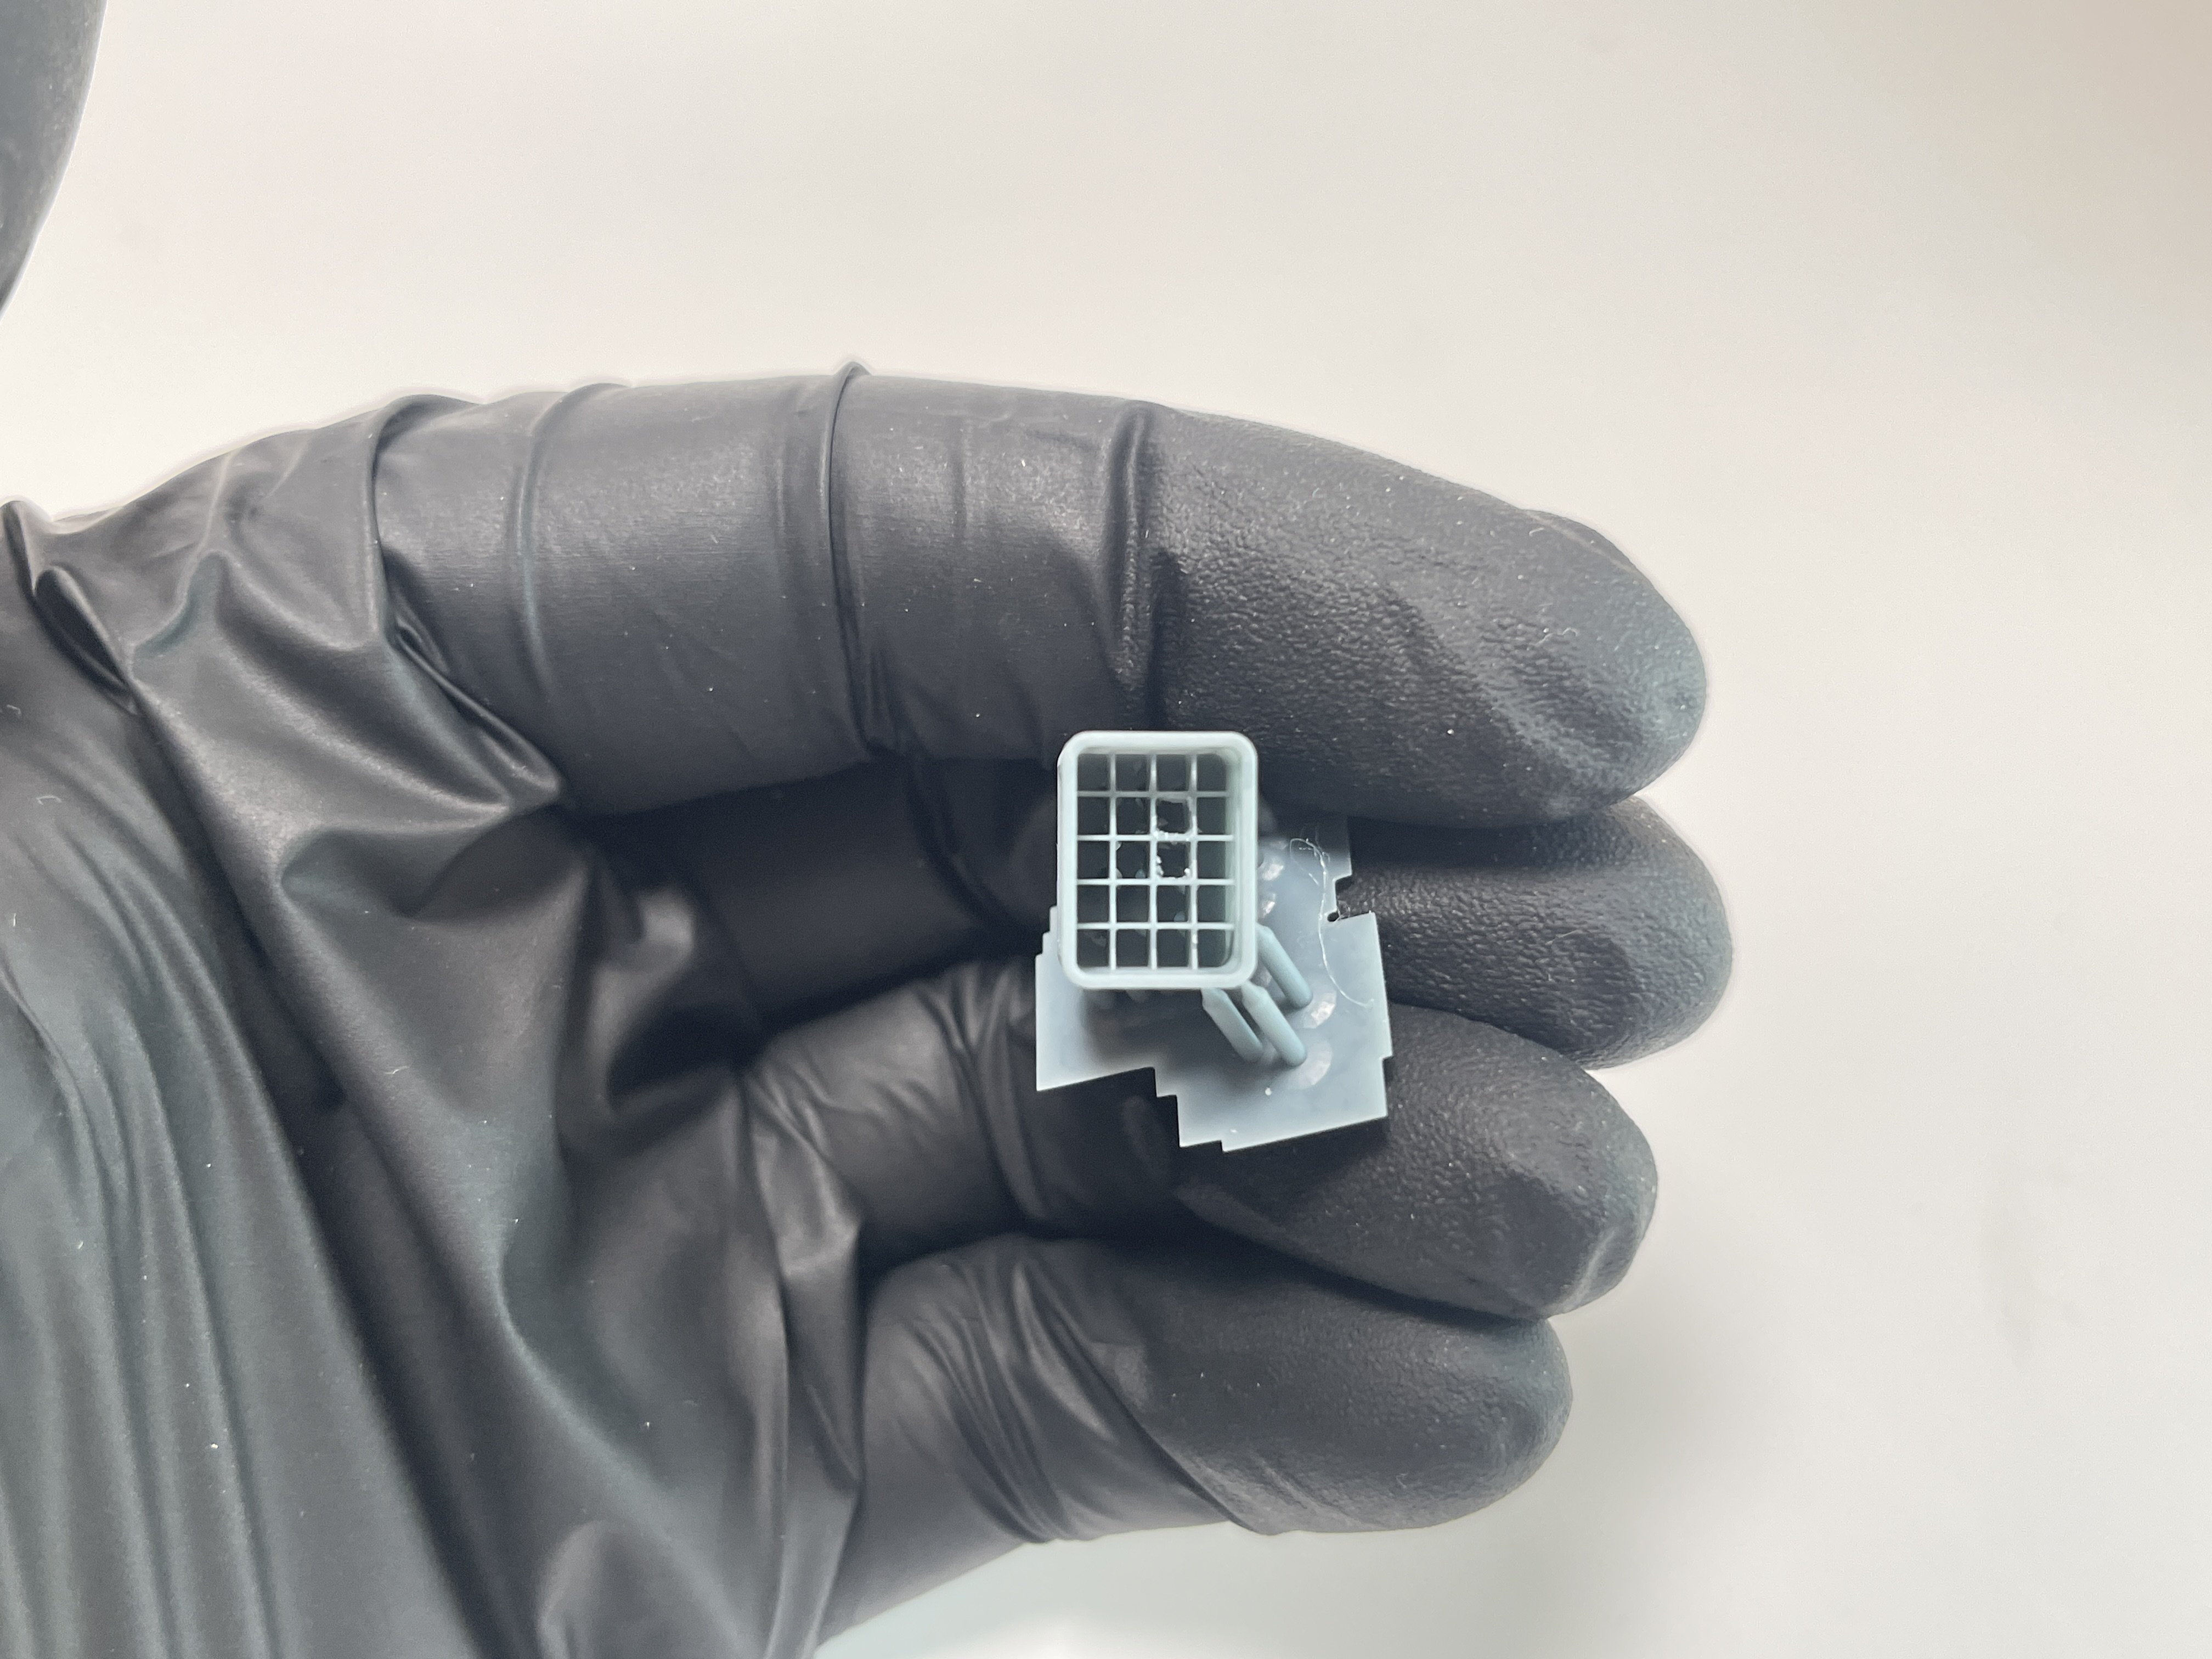
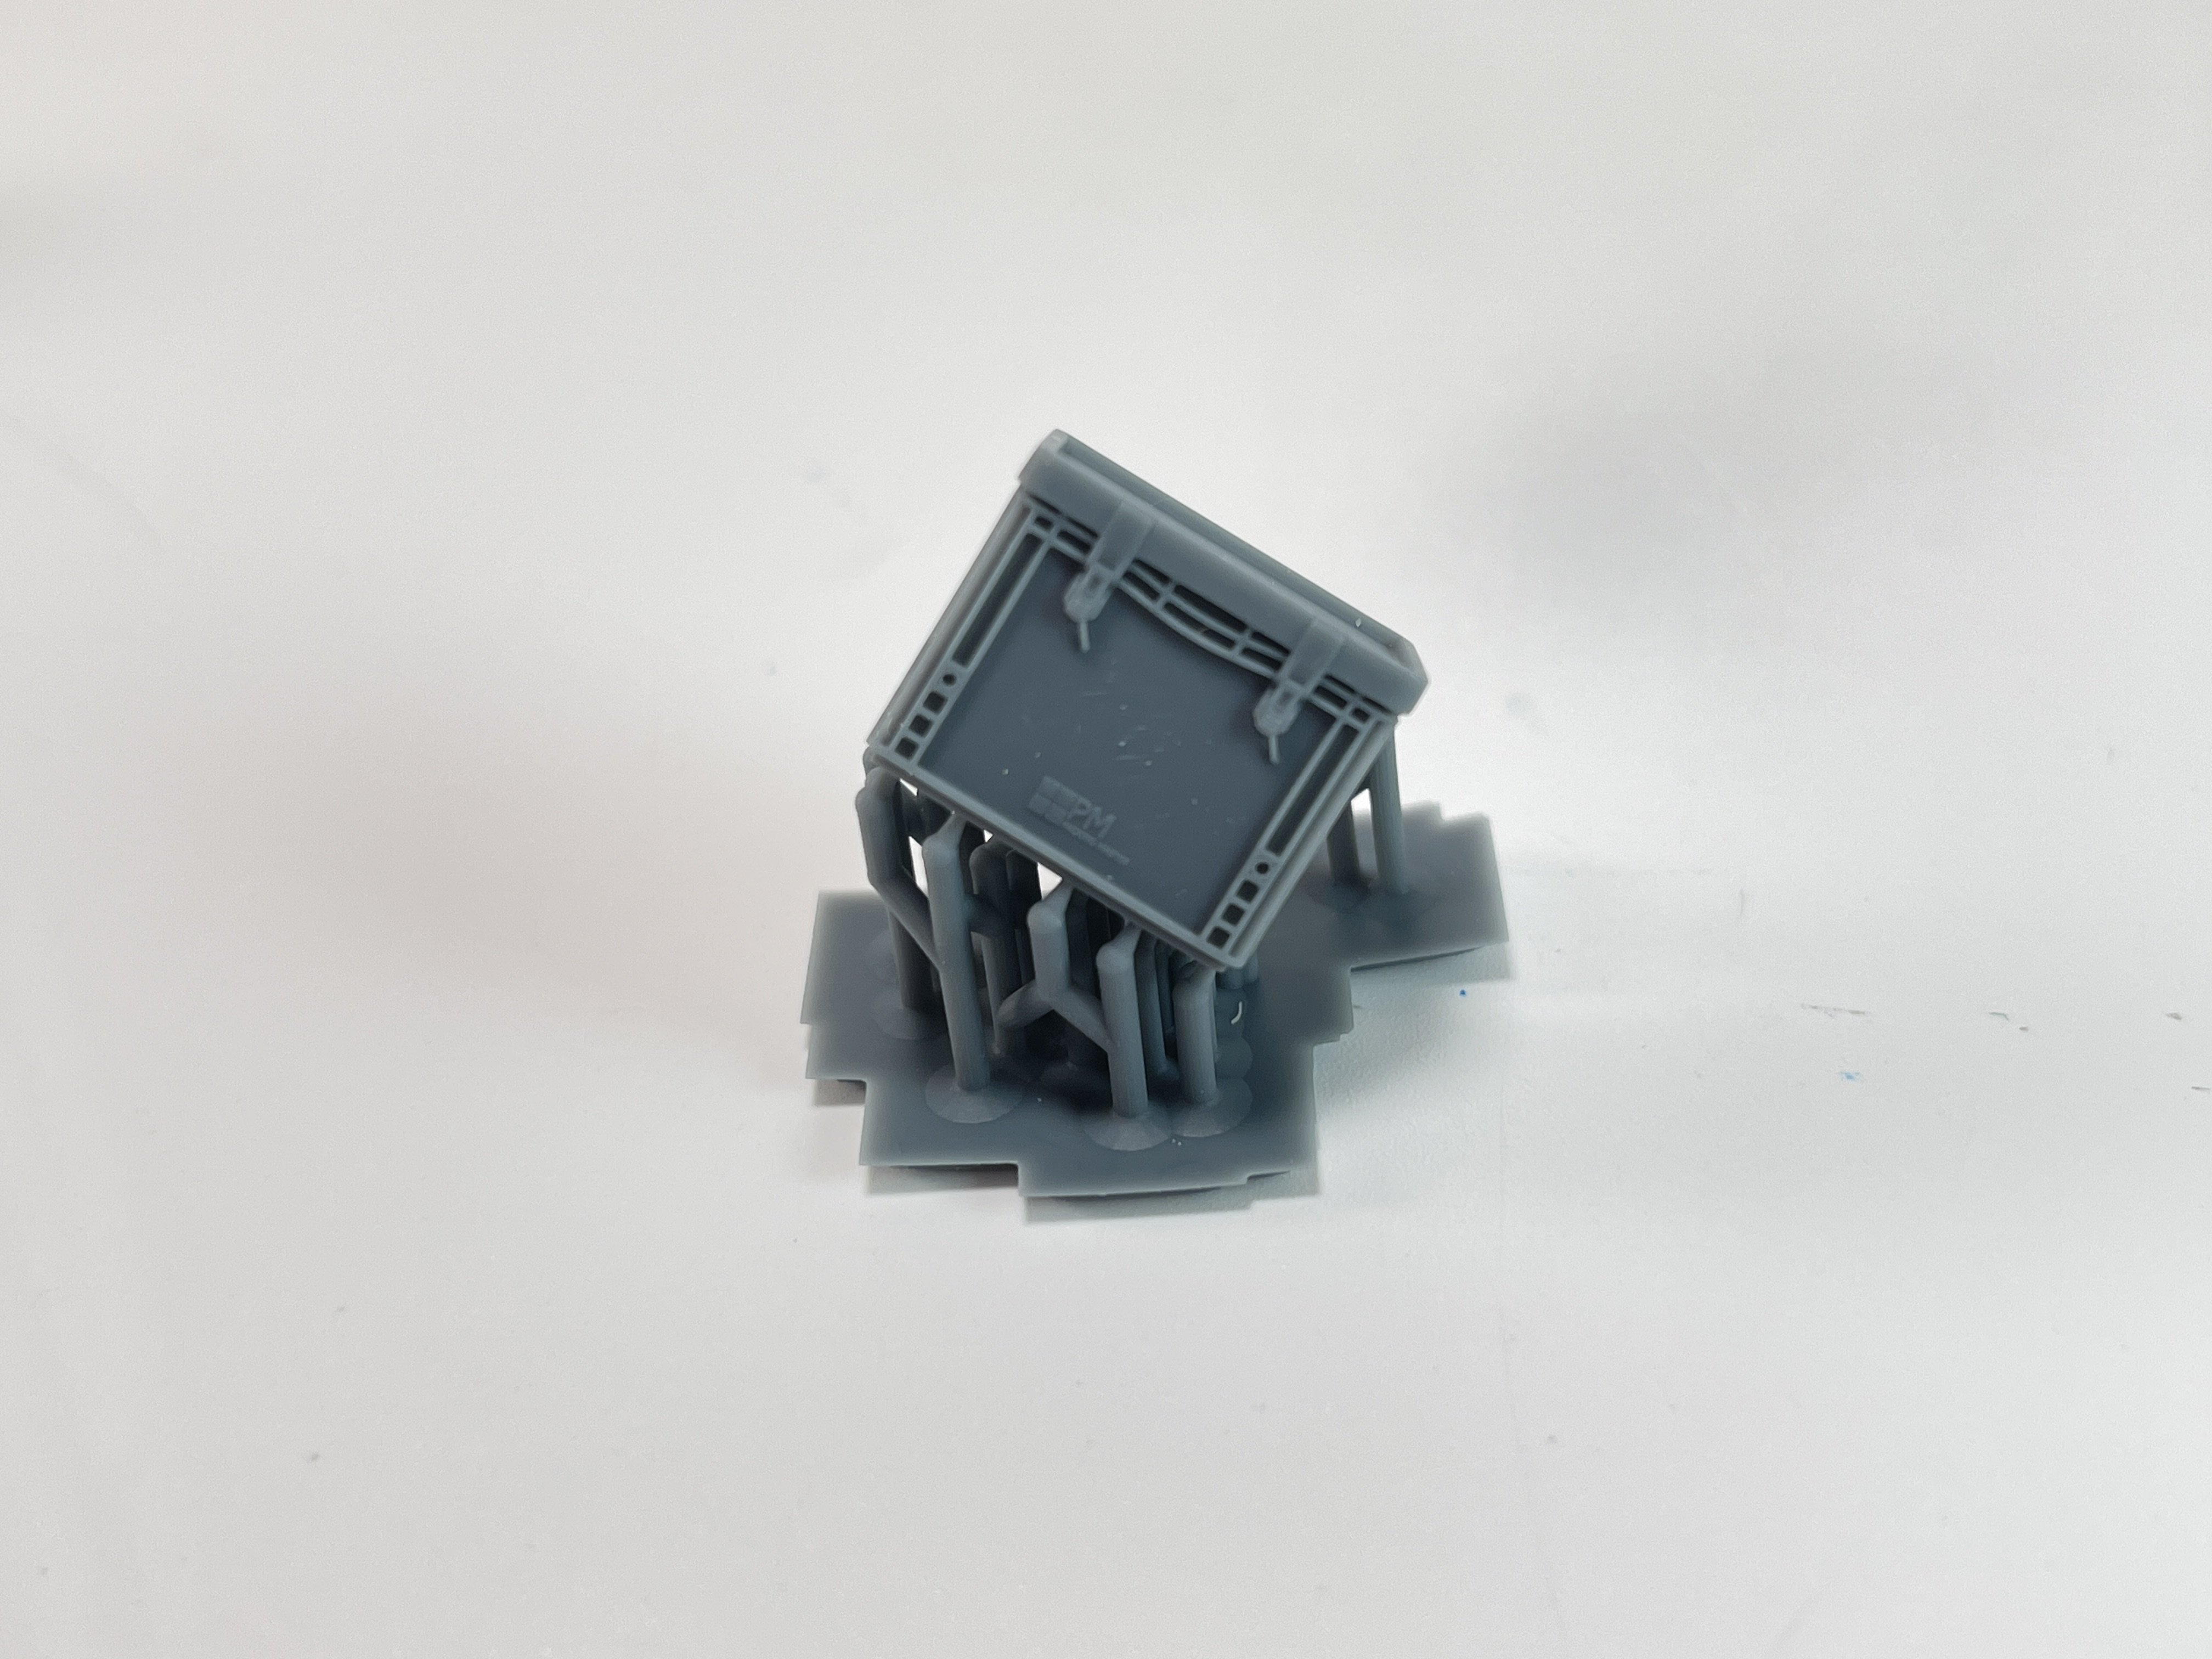
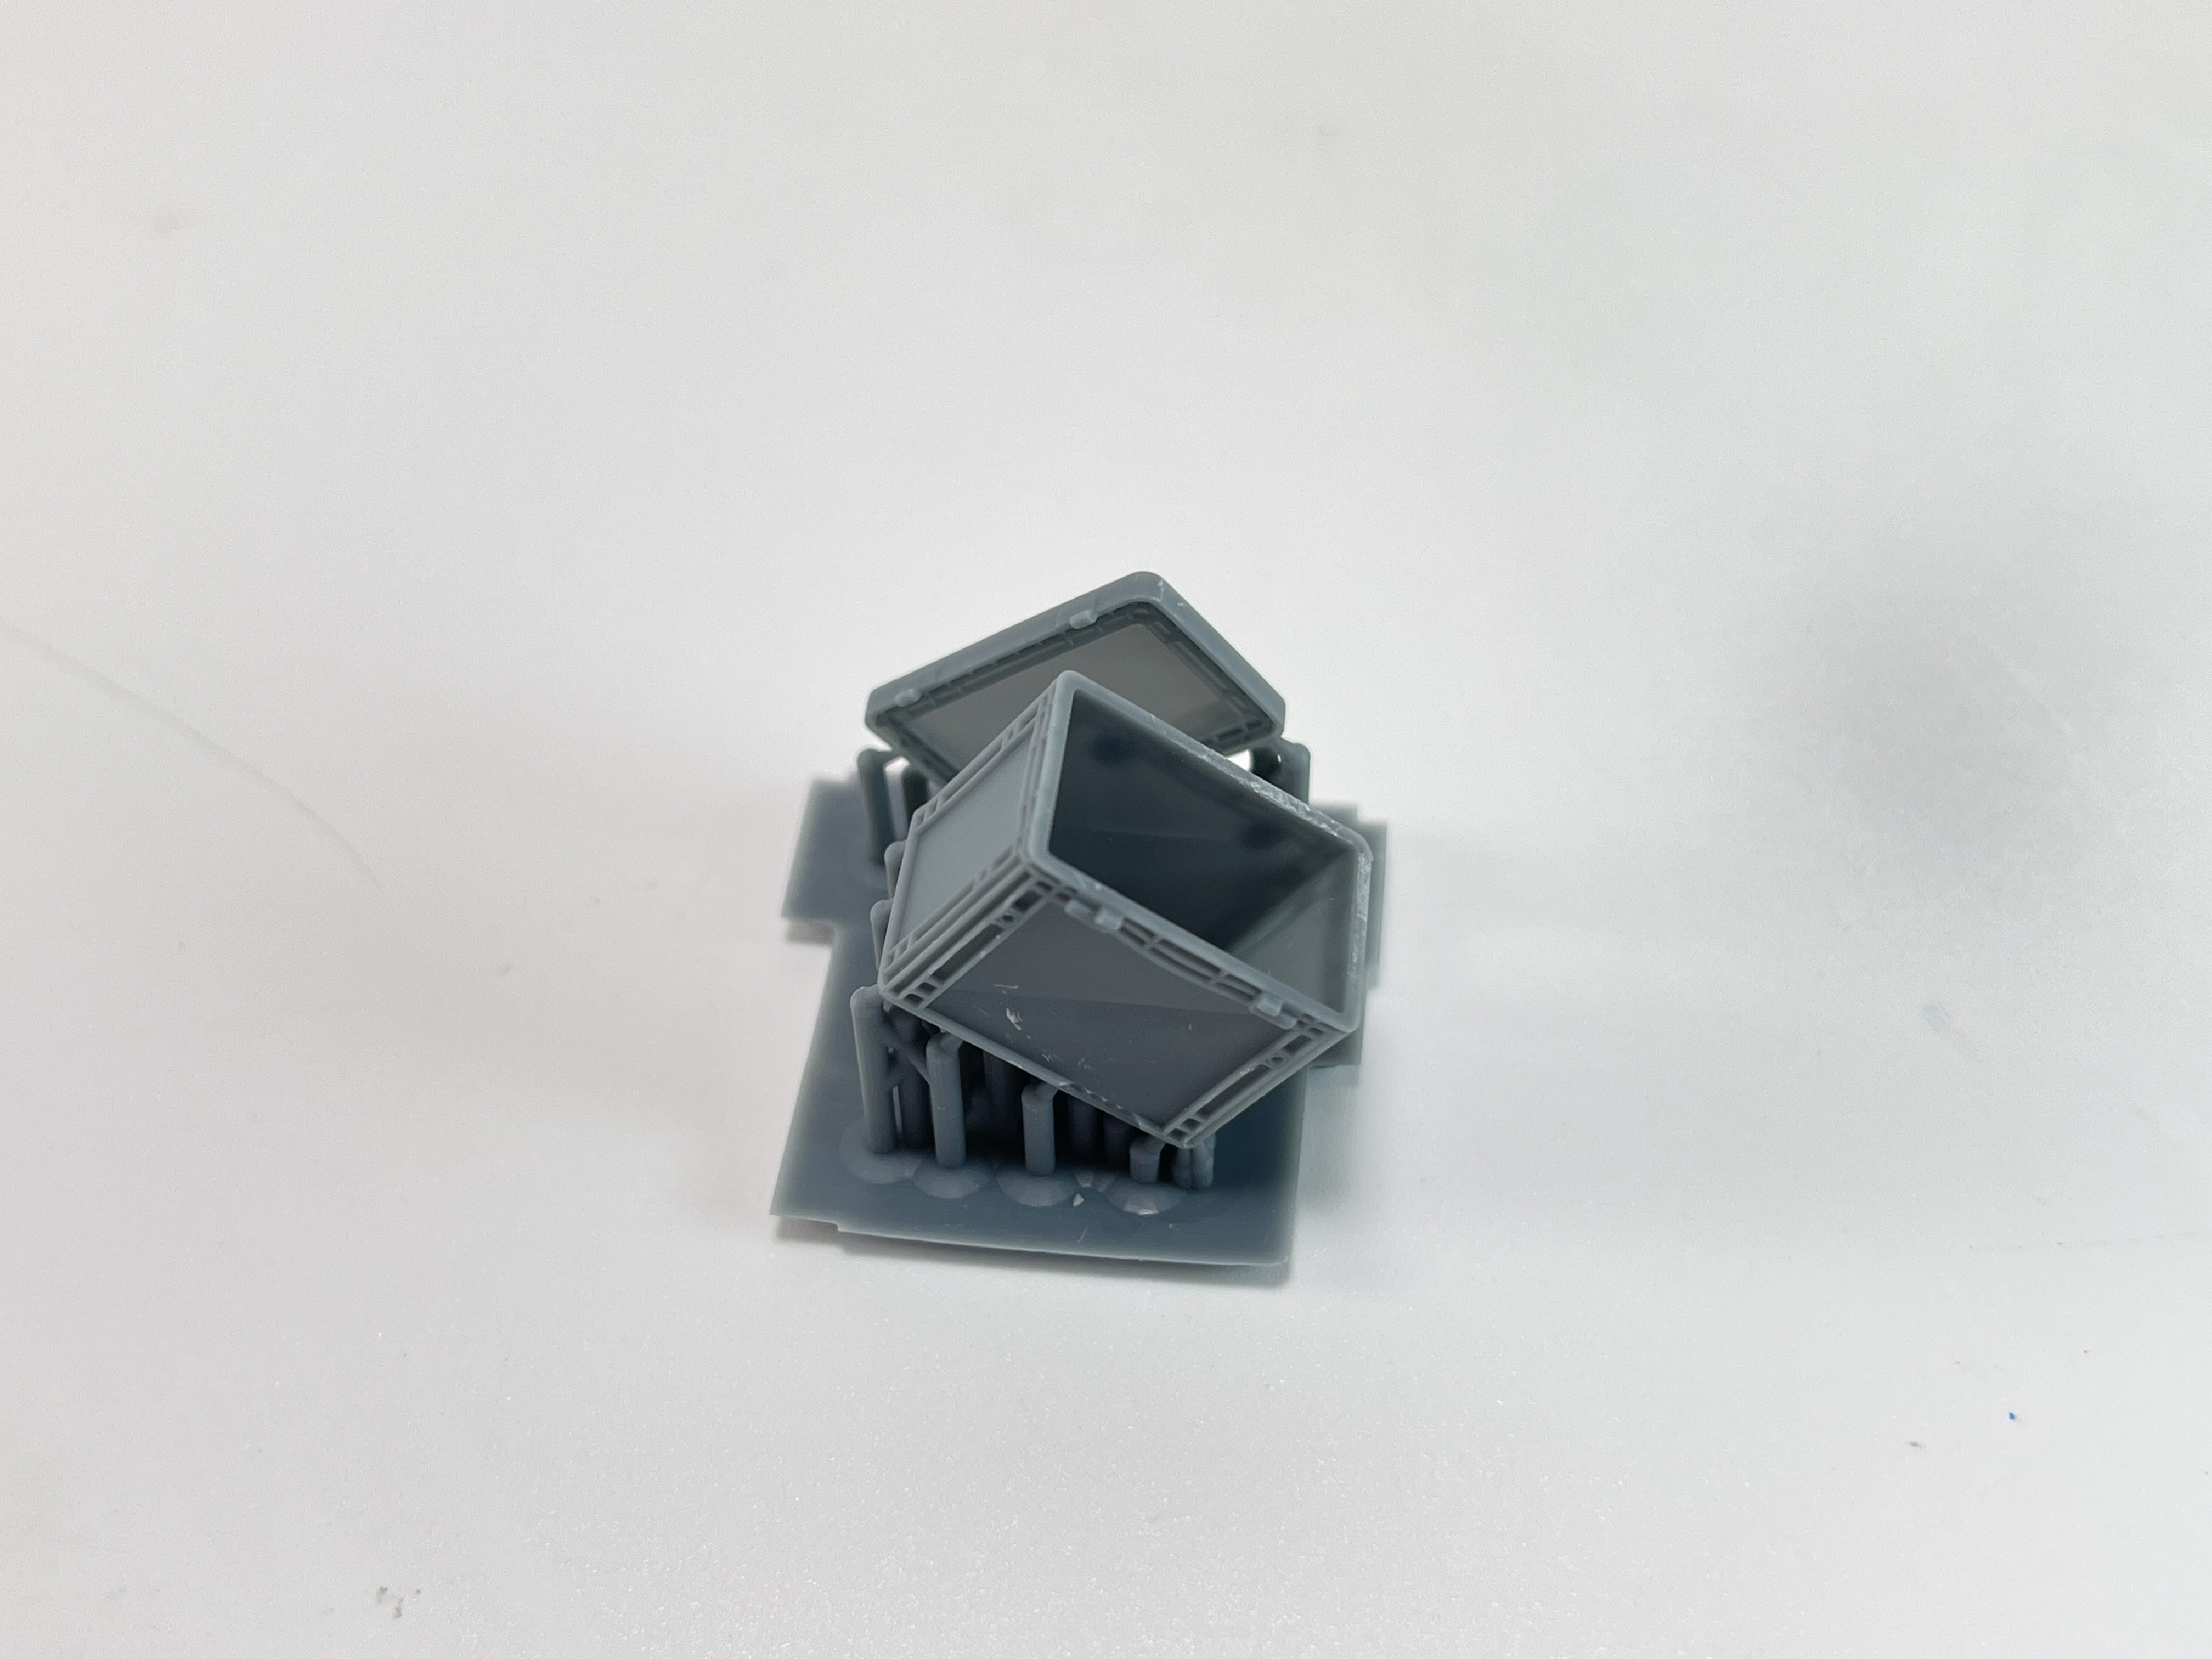
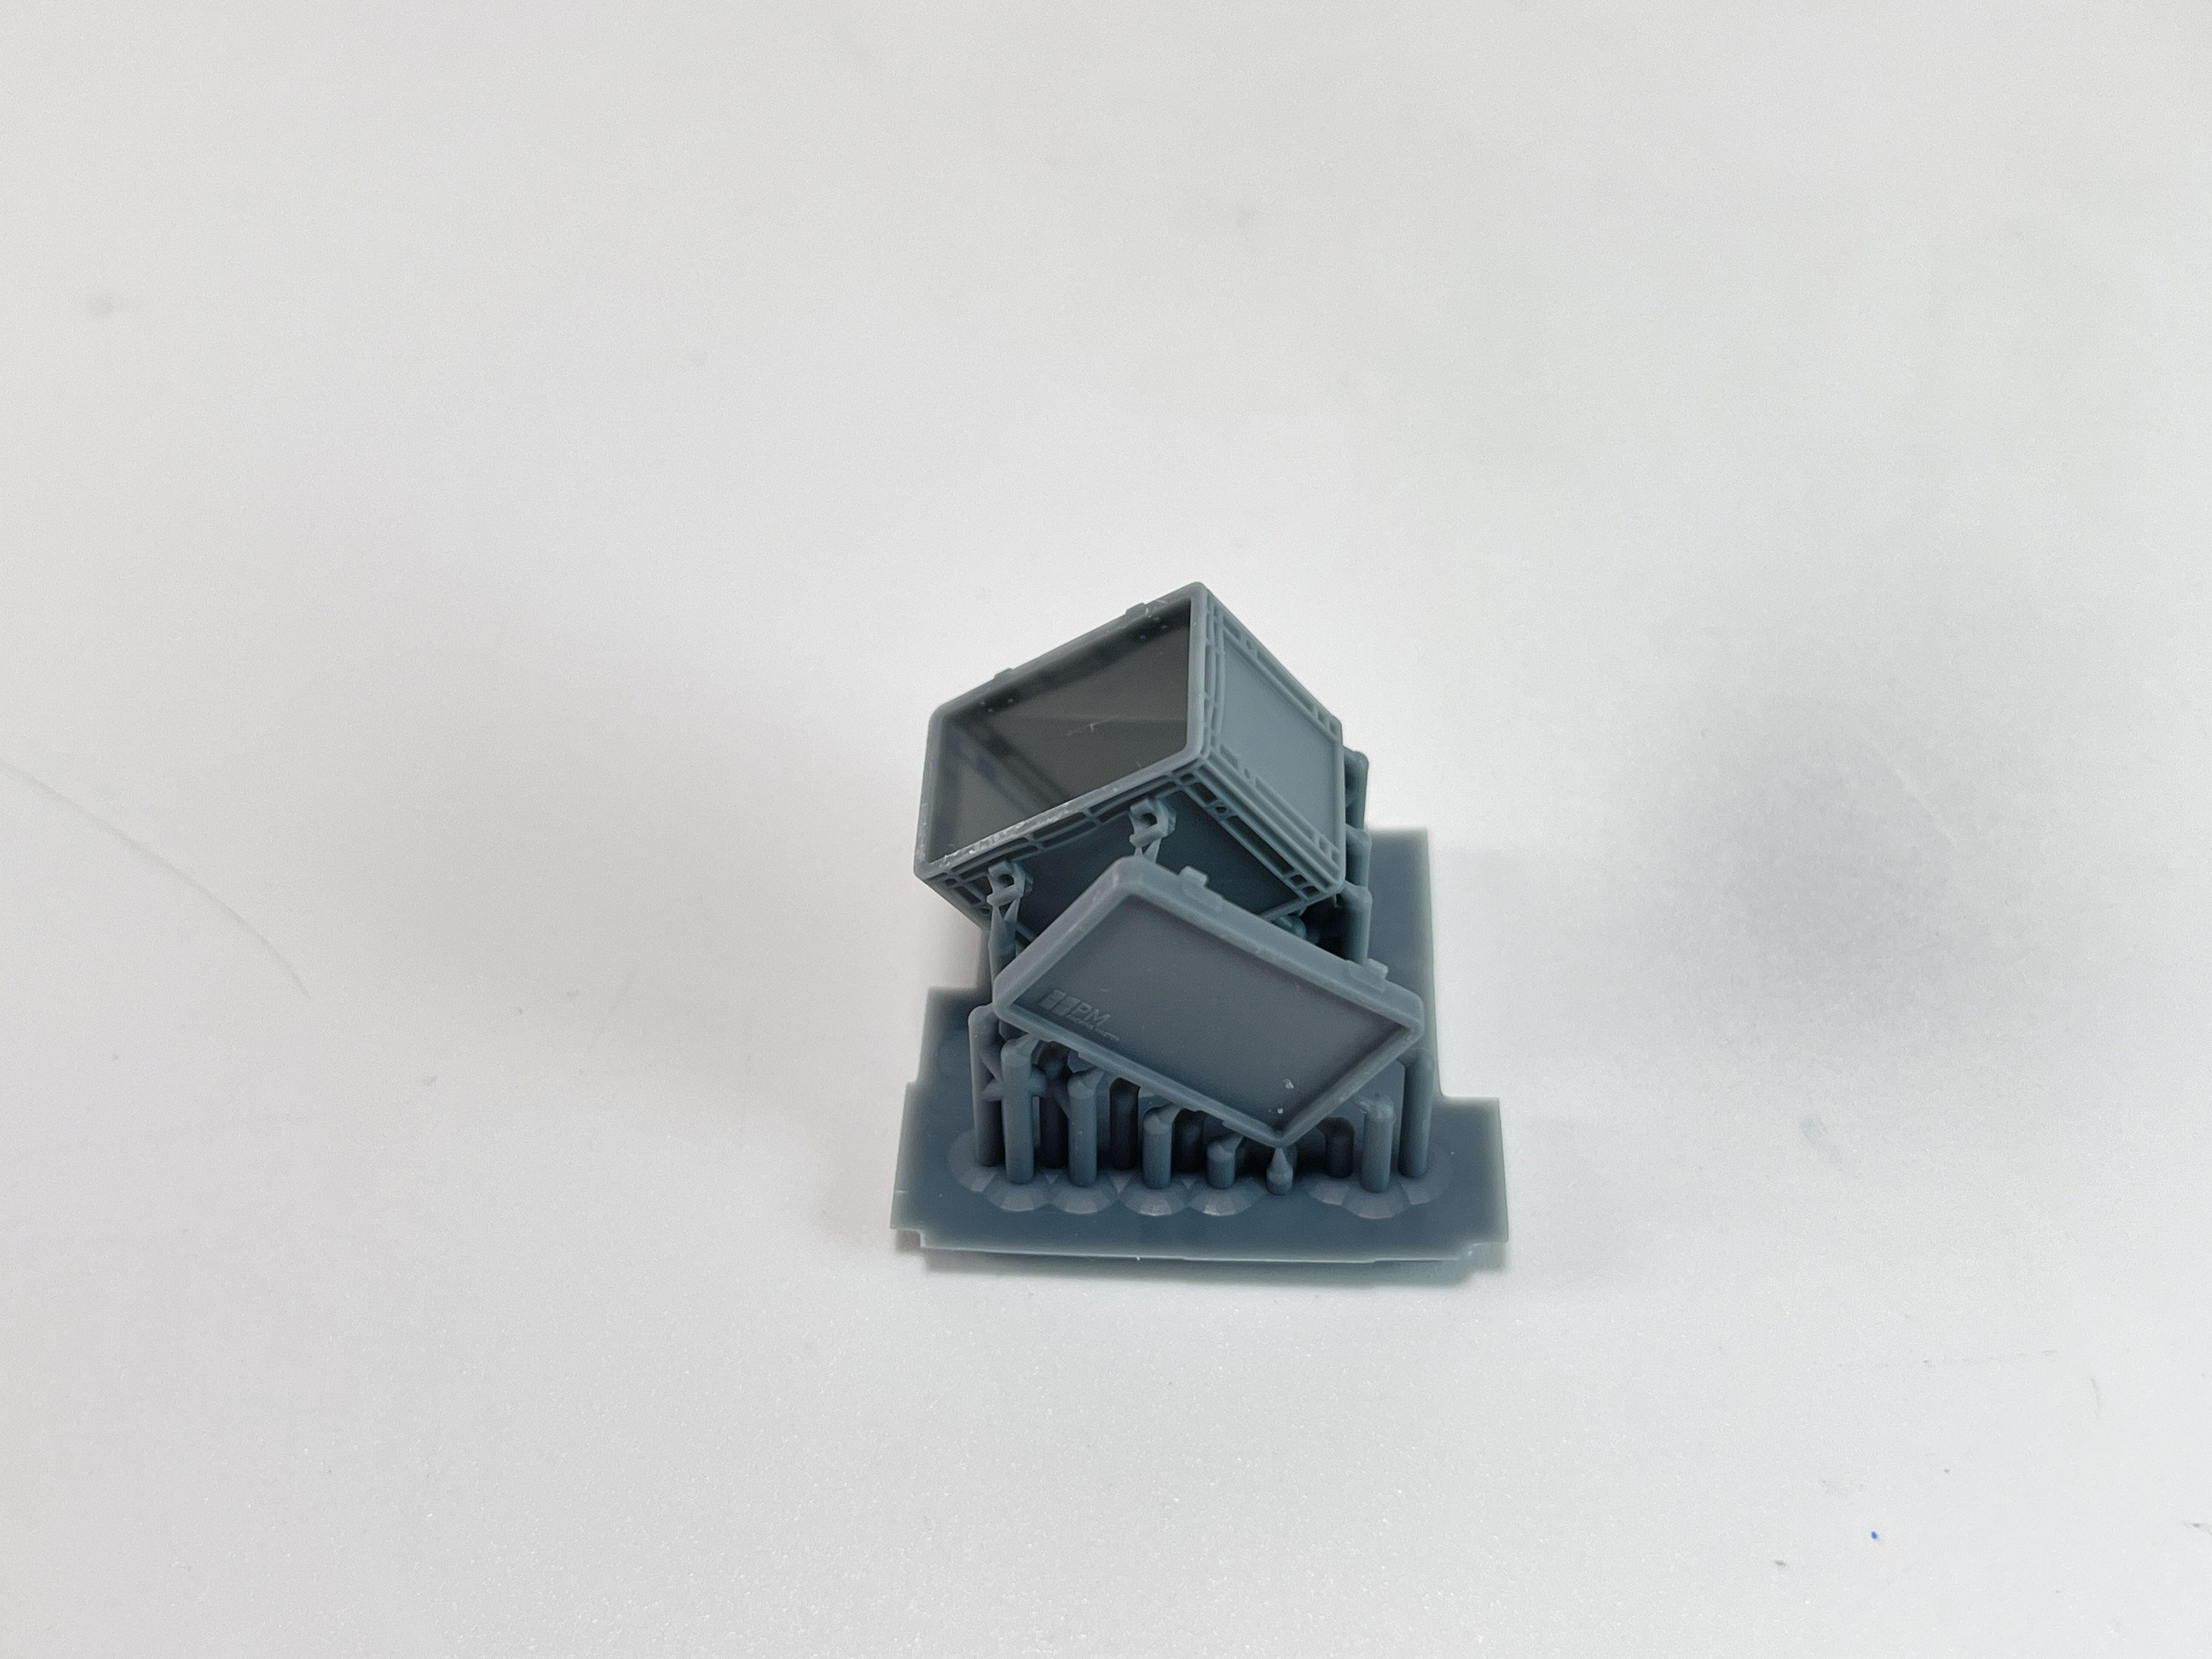
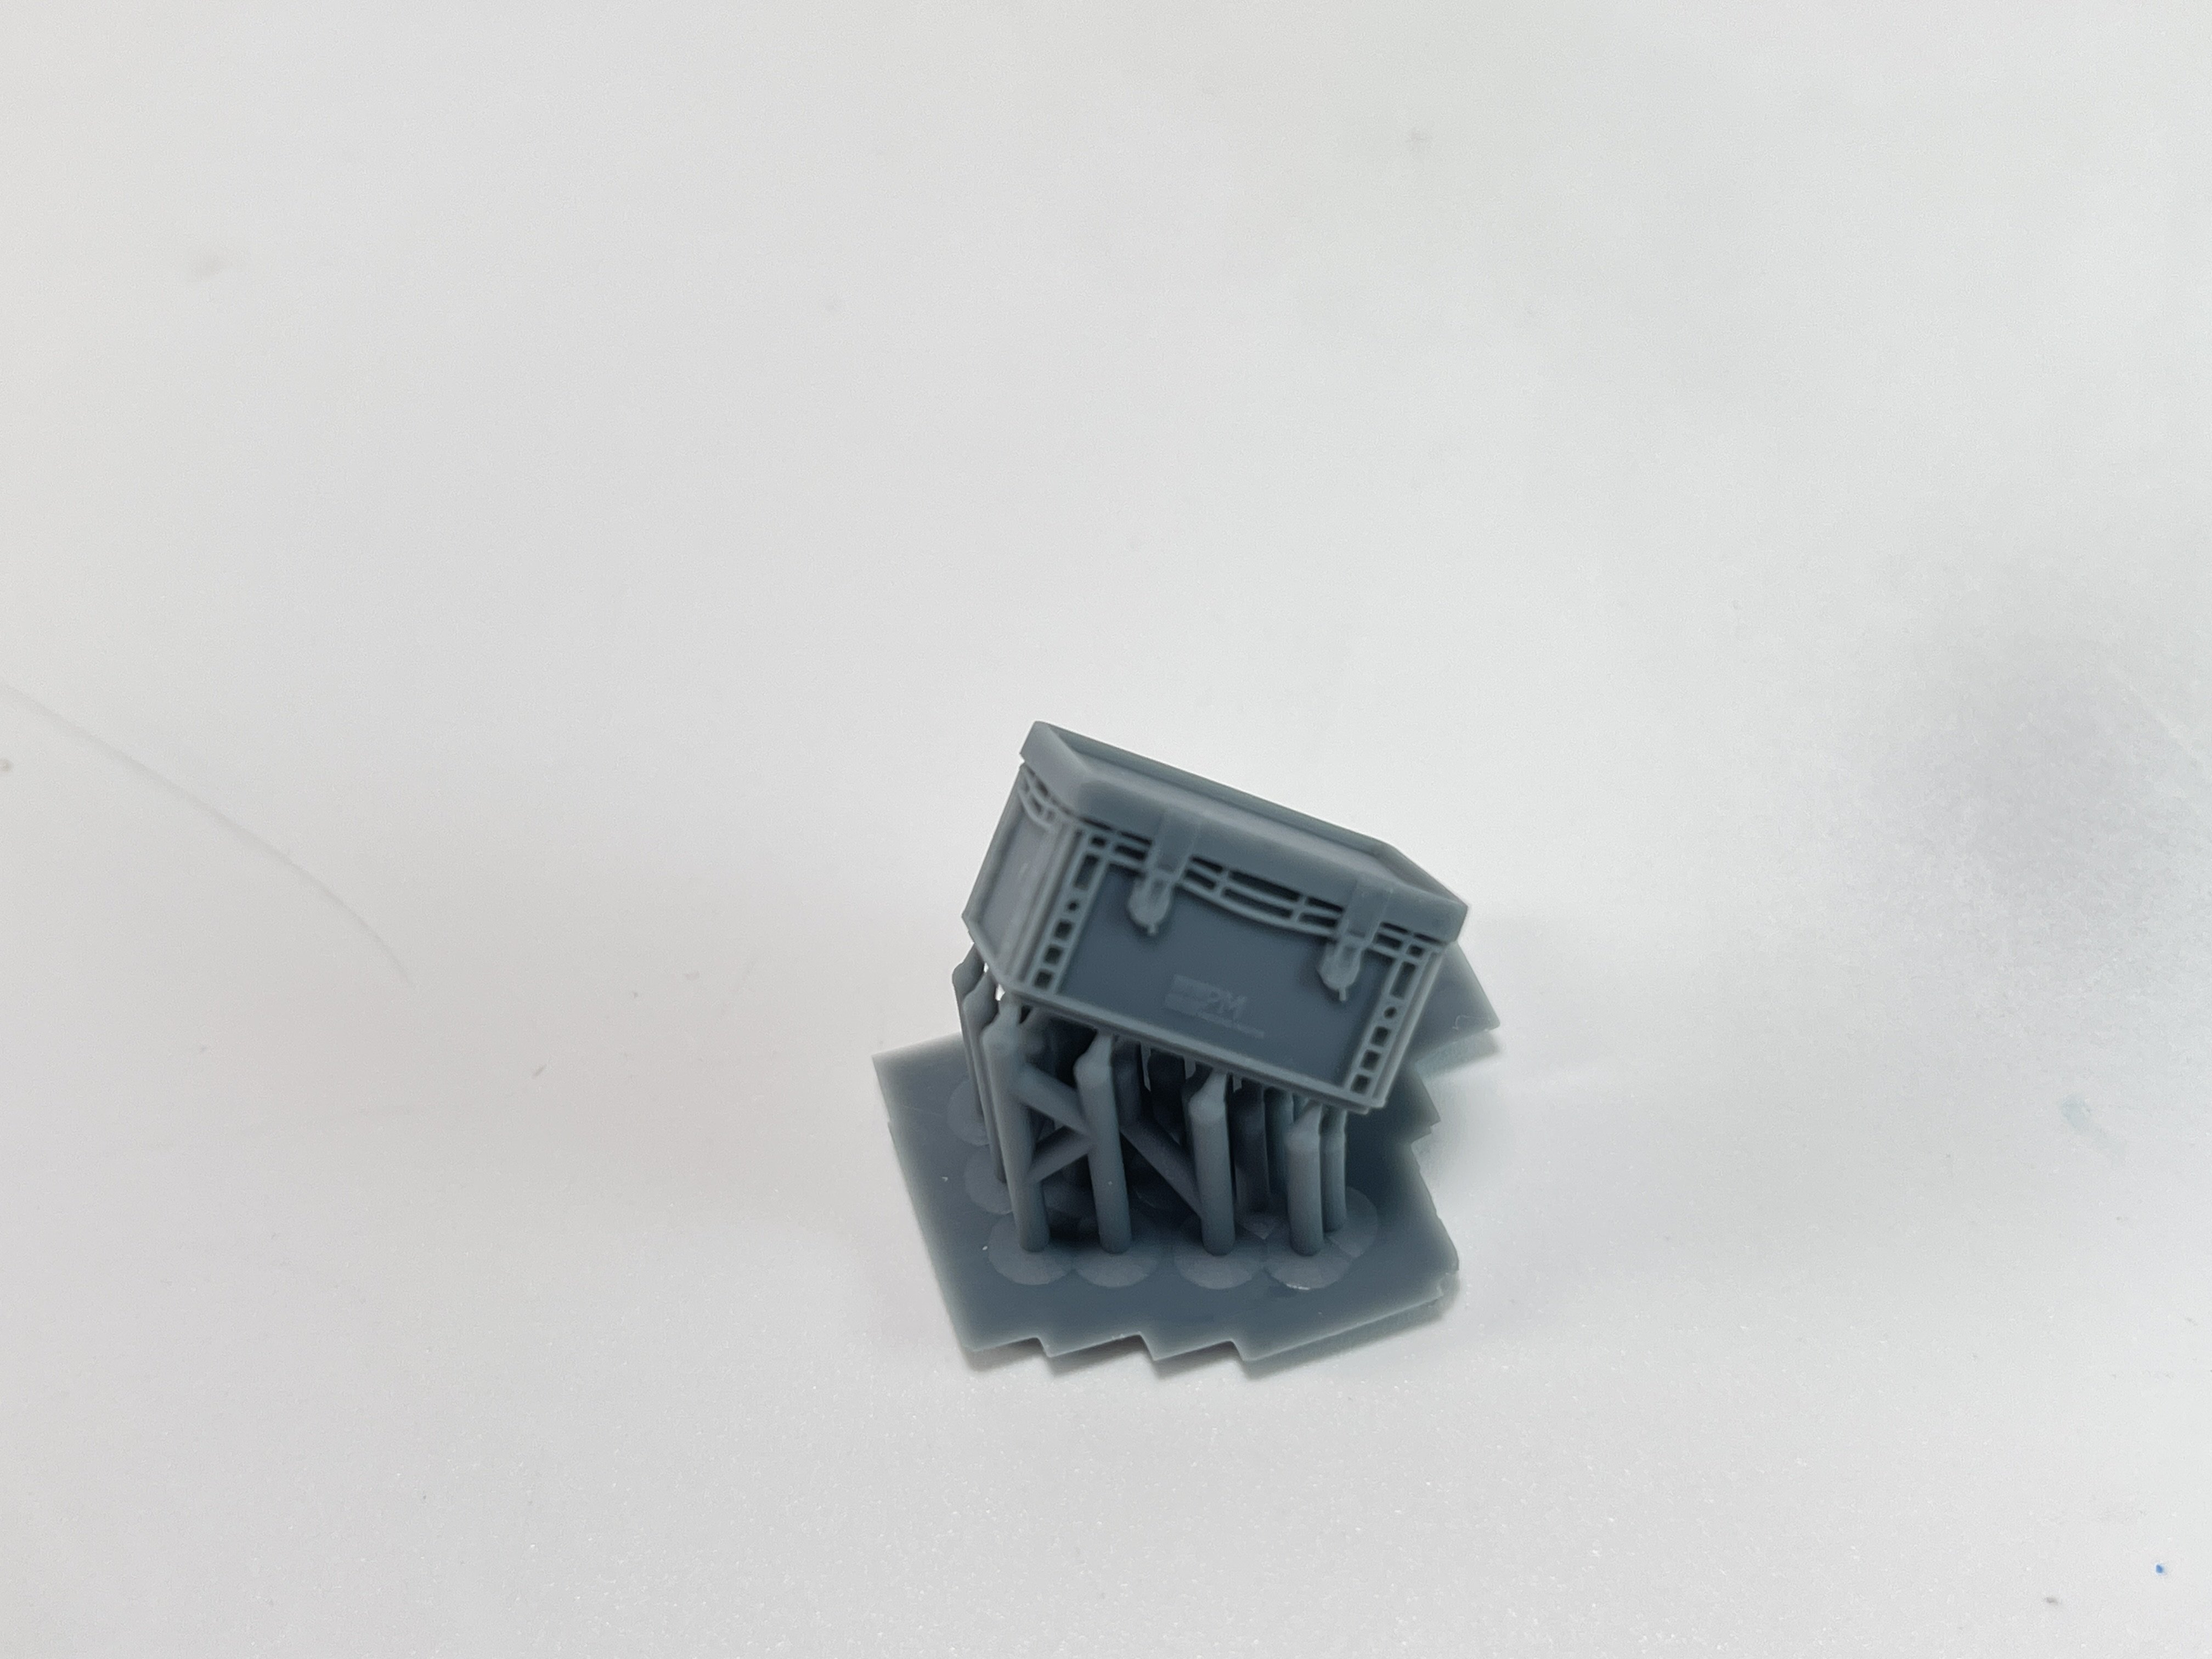
Beer Crates
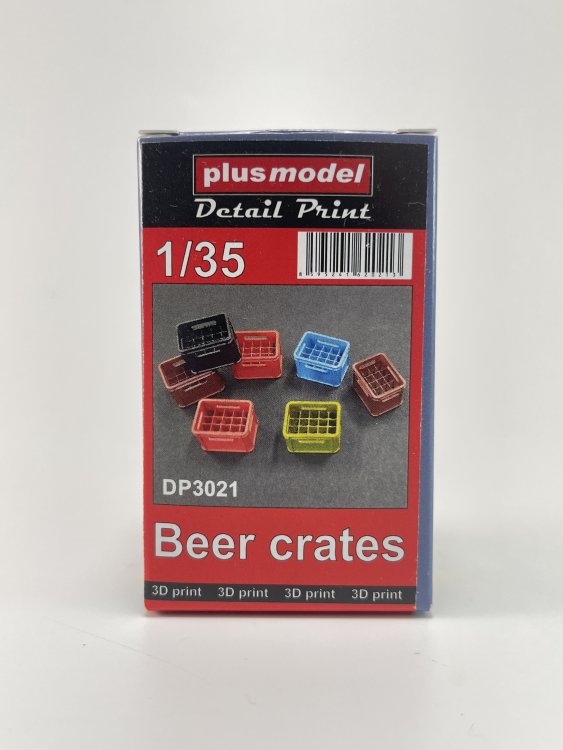
Catalogue n.º DP3021
Price tag: 8,60€
Now a set for modern subject, BEER! What not to like!
This set is also in 3D printed (all new catalogue number start with DP is #D printed)
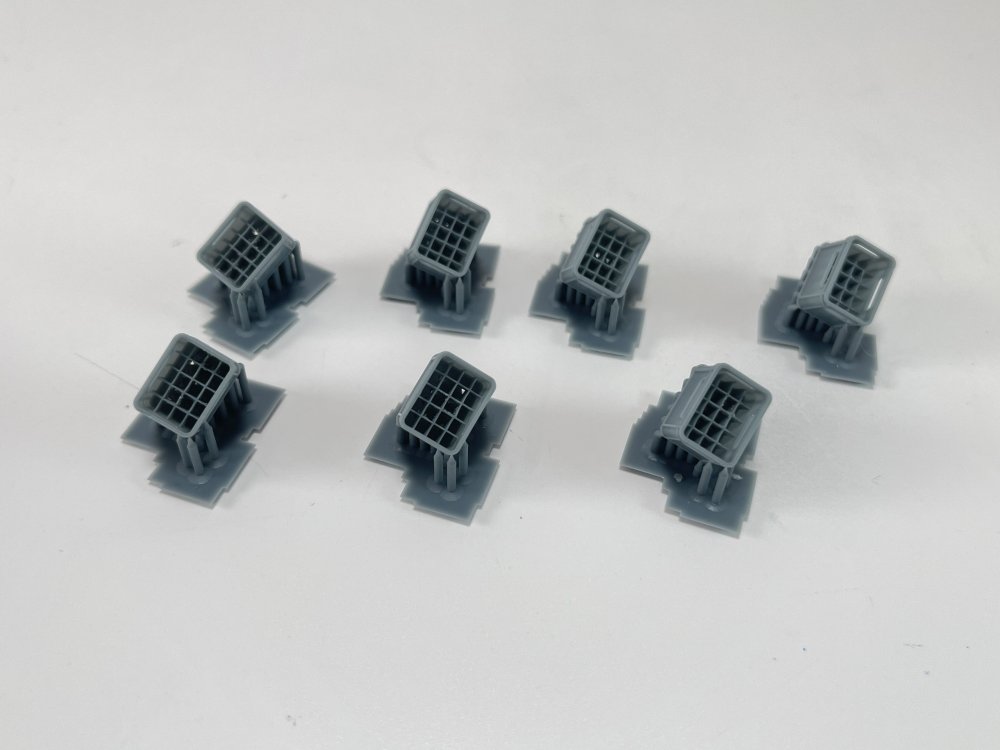
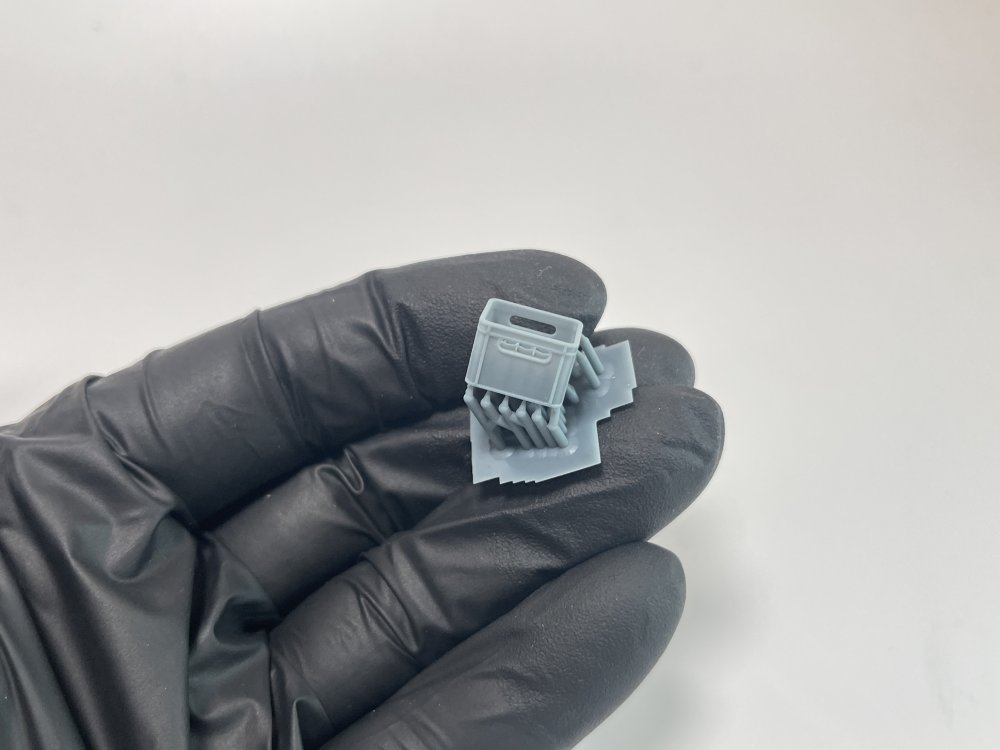
All the parts are printed in light gray resin and no warps, or casting imperfections.
No decals or beer brands but are perfect cast and you got two different crates.
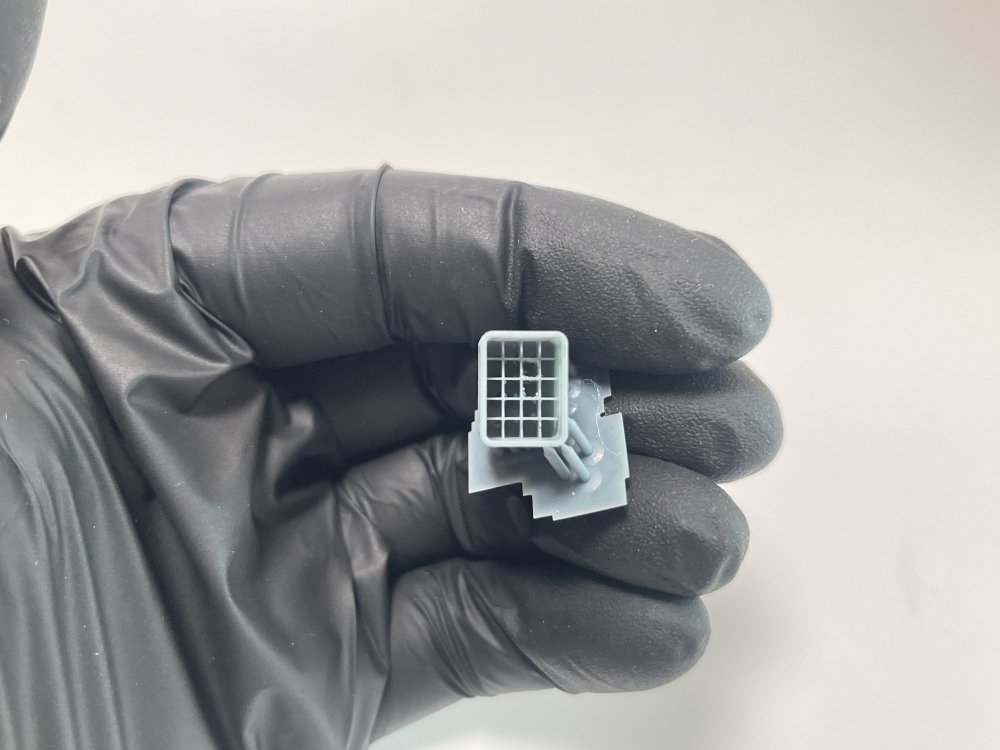
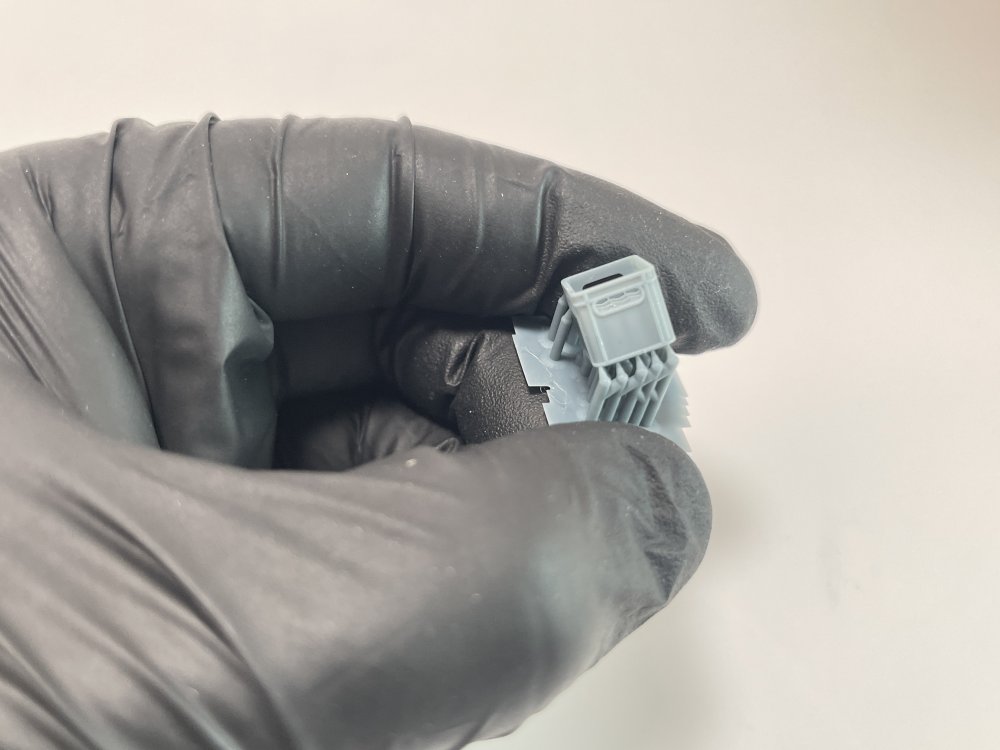
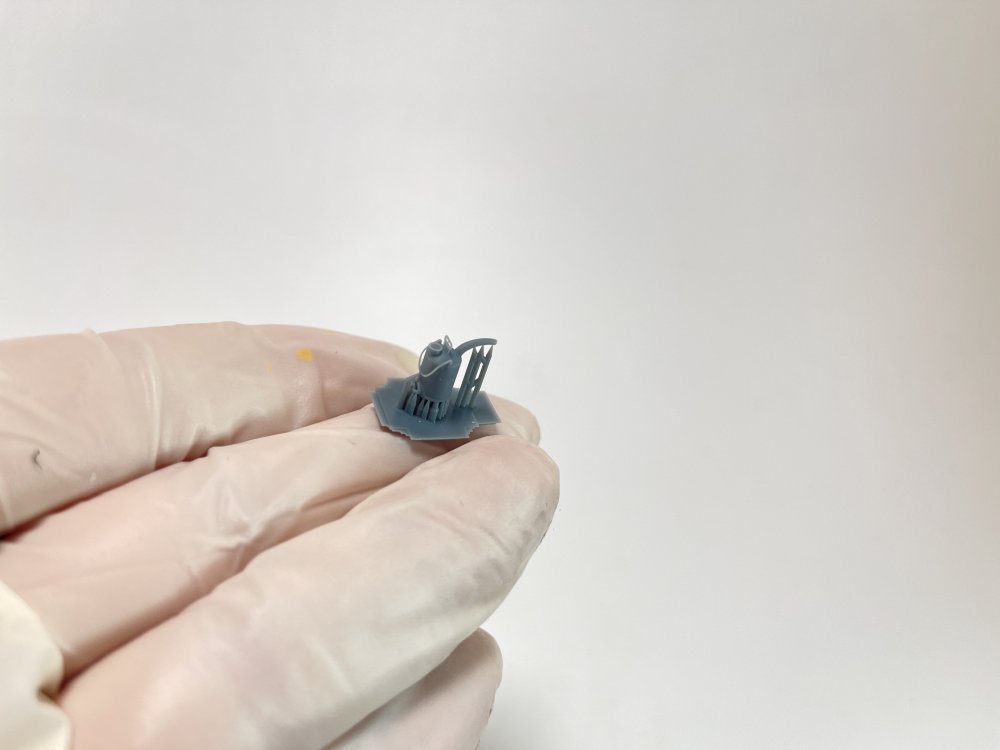
Oils Canisters
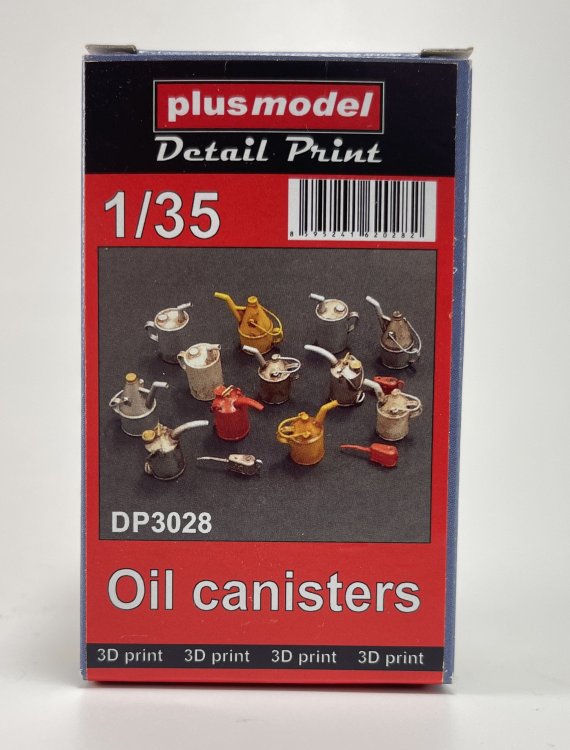
Catalogue n.º DP3028
Price tag: 9,33€
Another universal set that is useful in any diorama.
Several oils canisters of different types and shapes, very well printed, and with different sizes and very realistic, with good surface detail and hollows, giving it the correct structure.


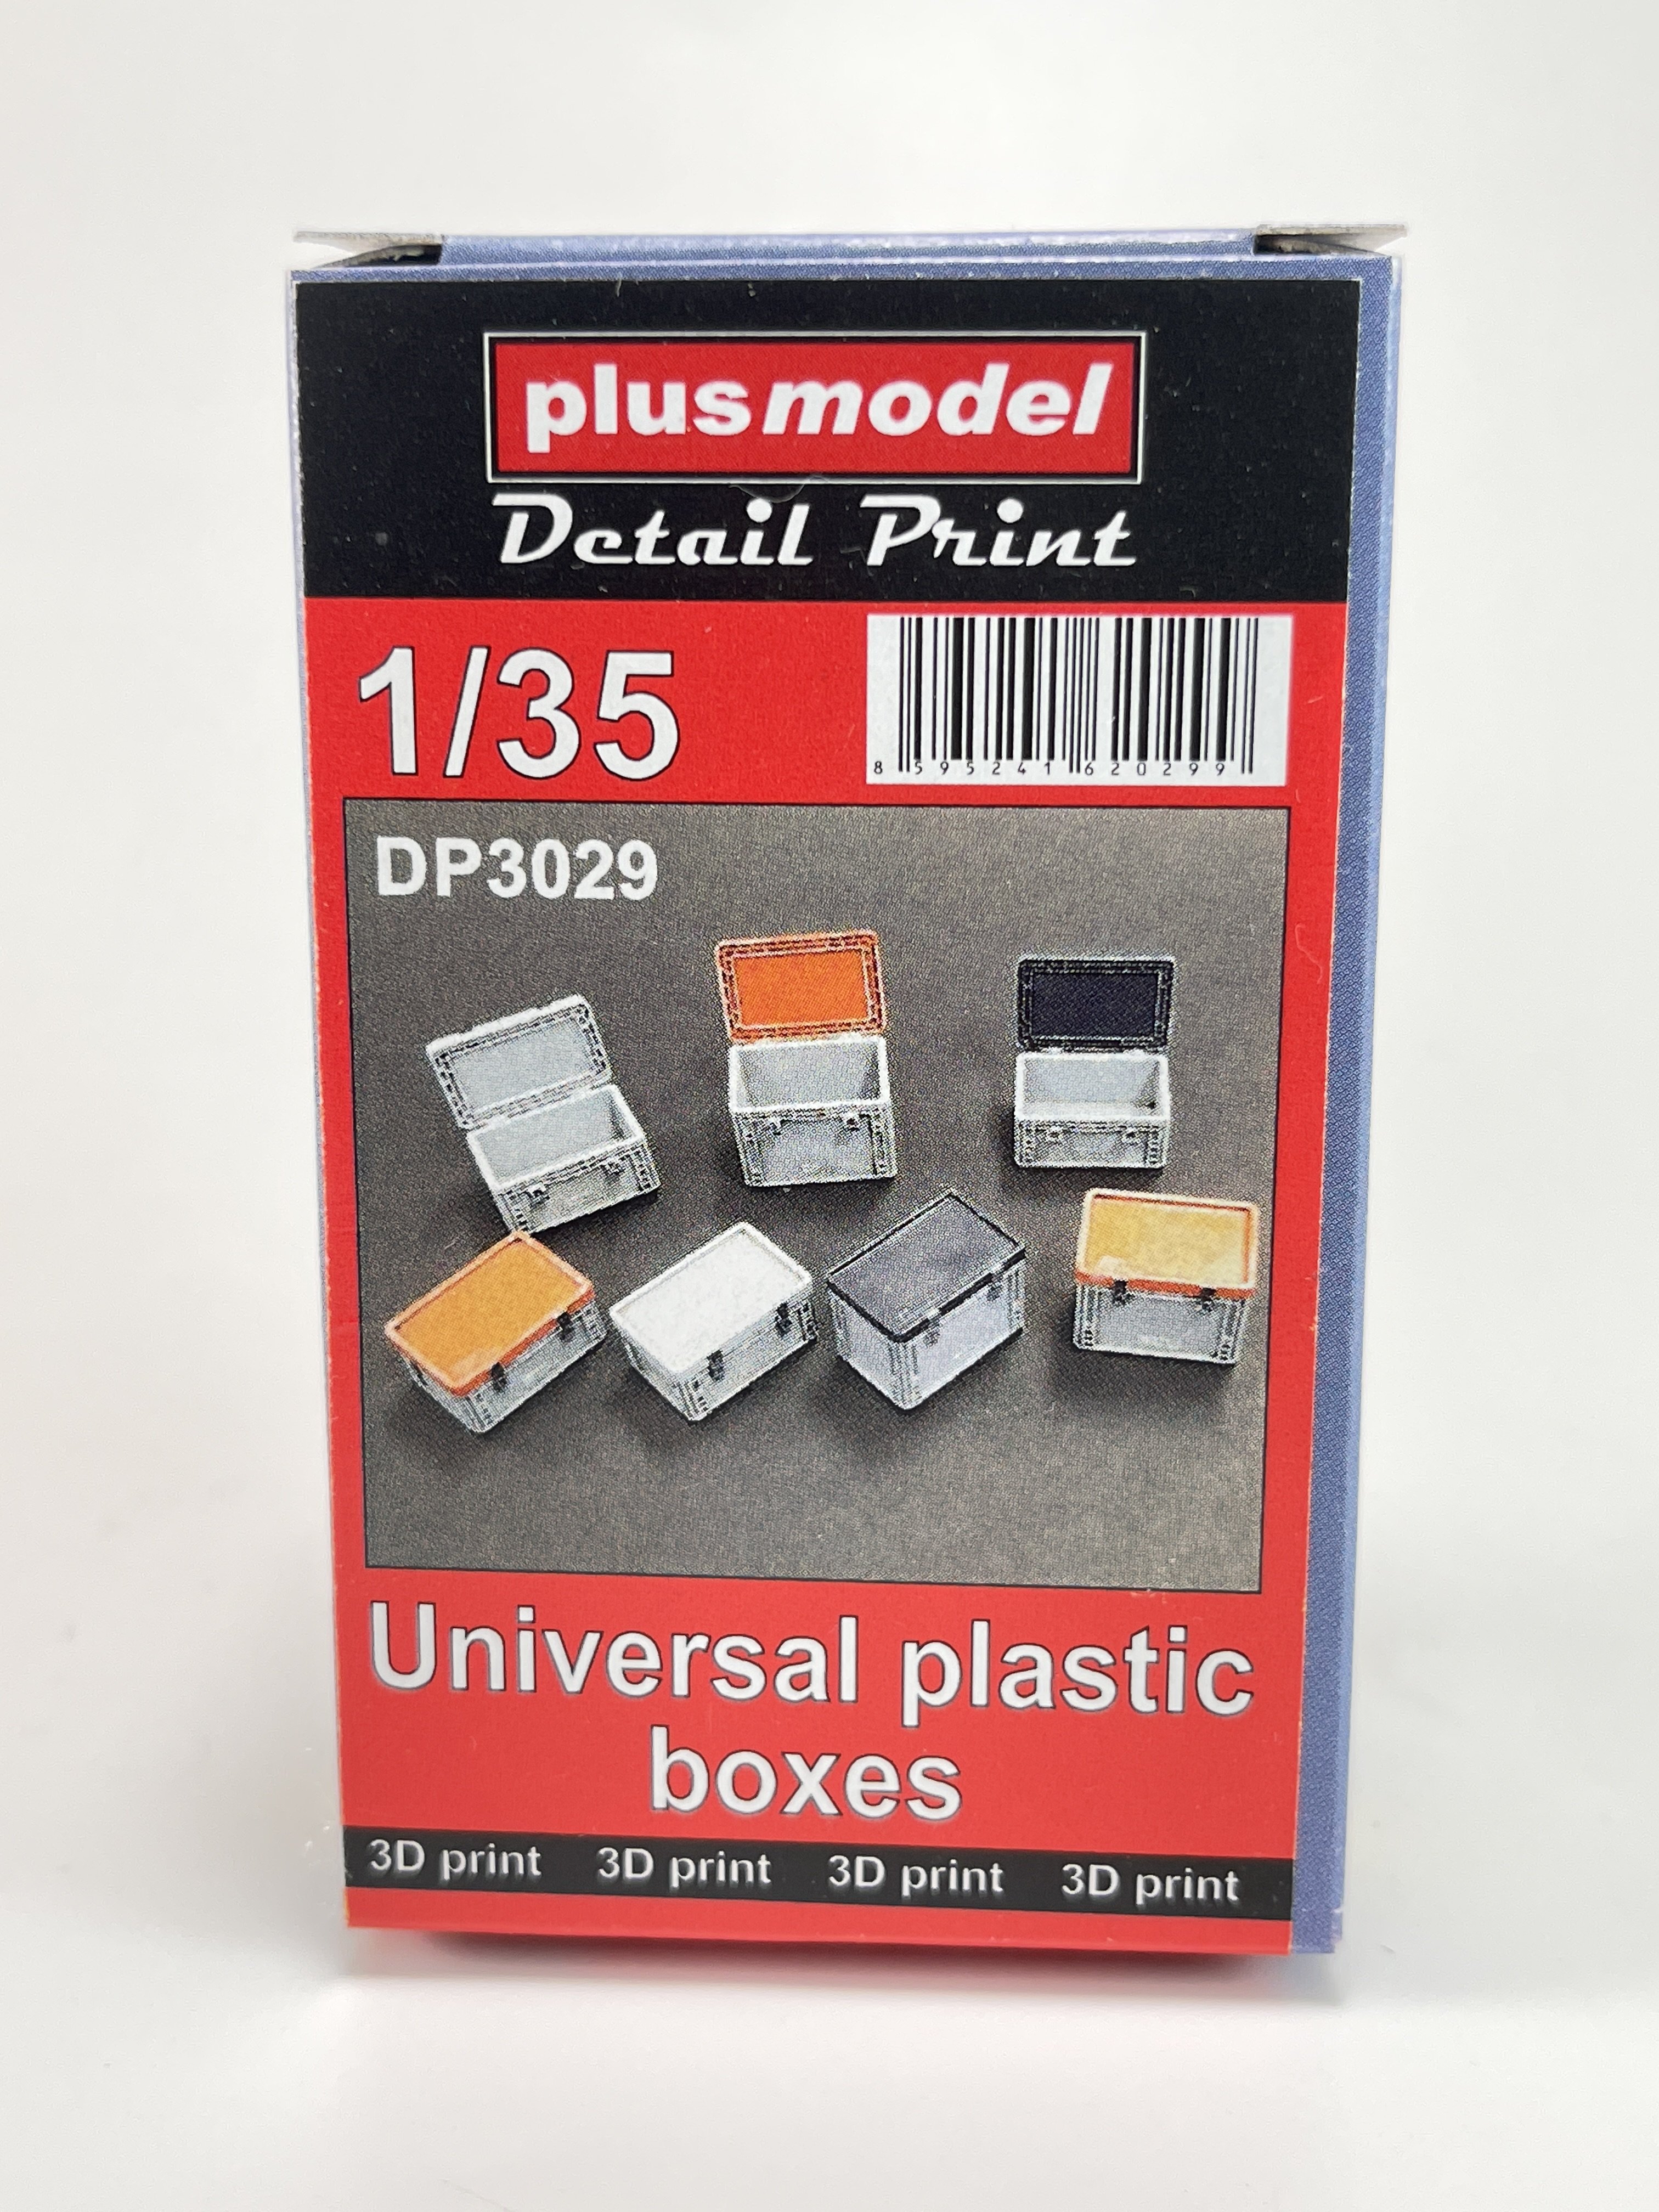
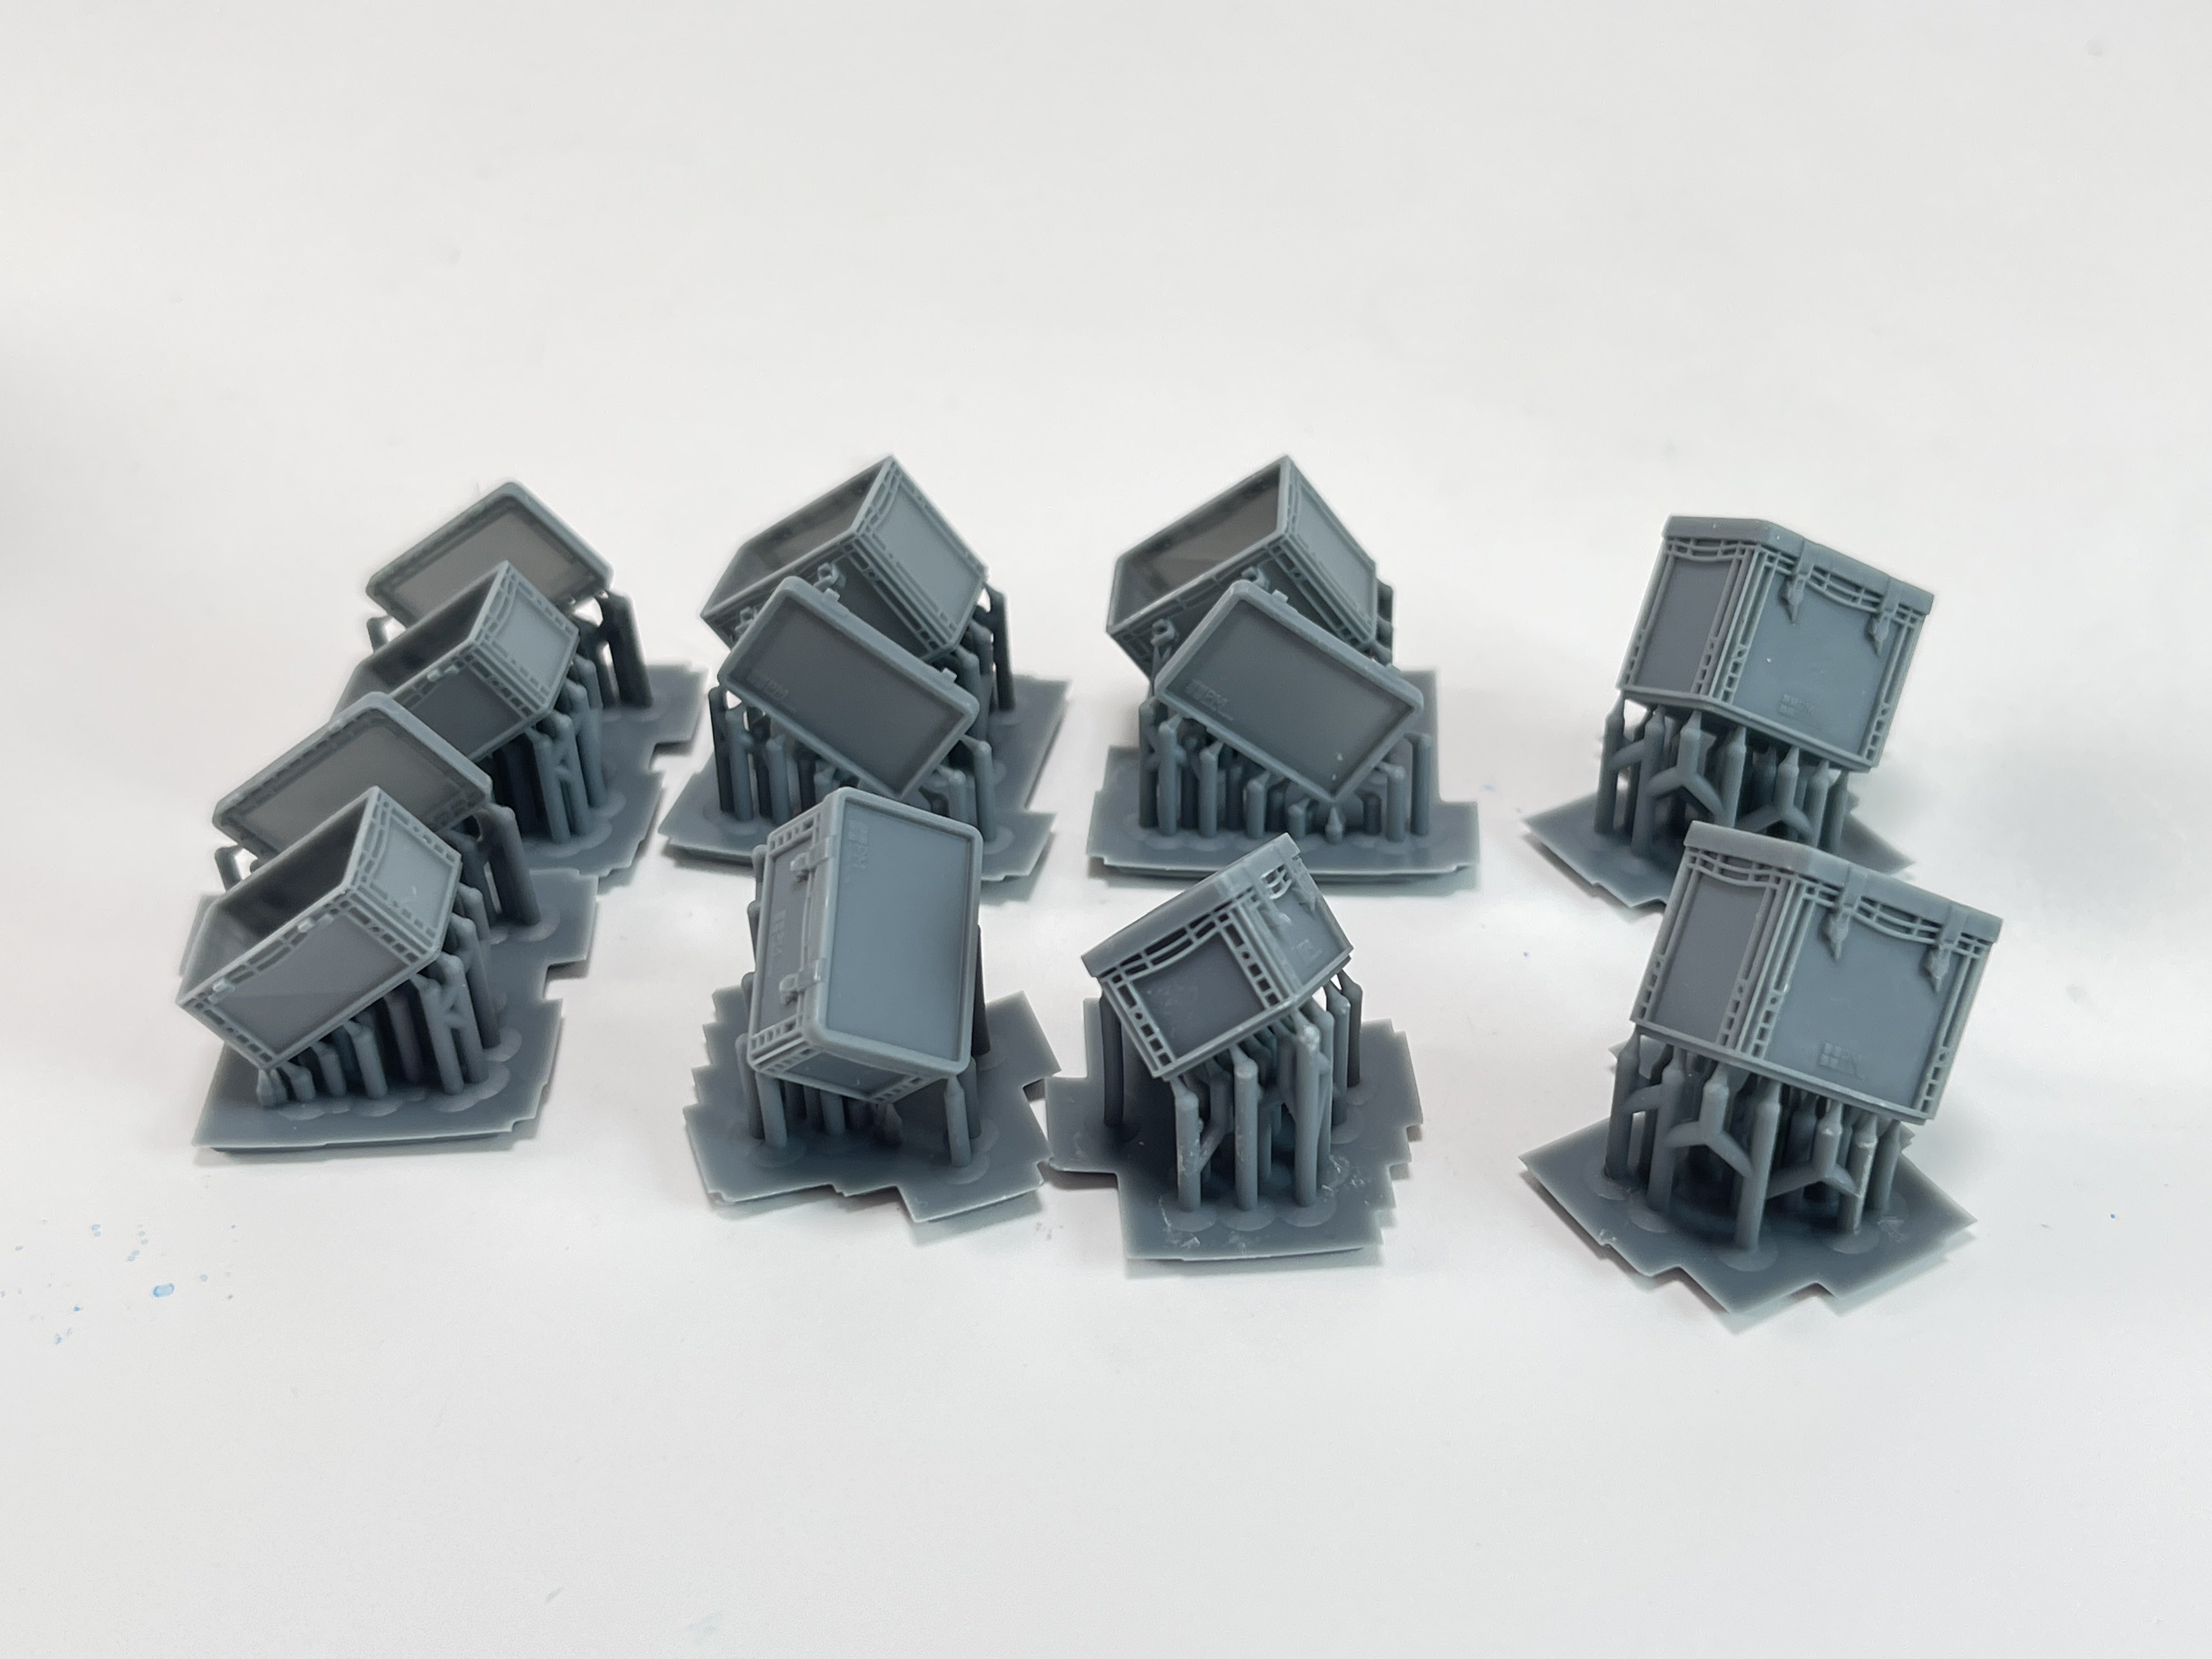
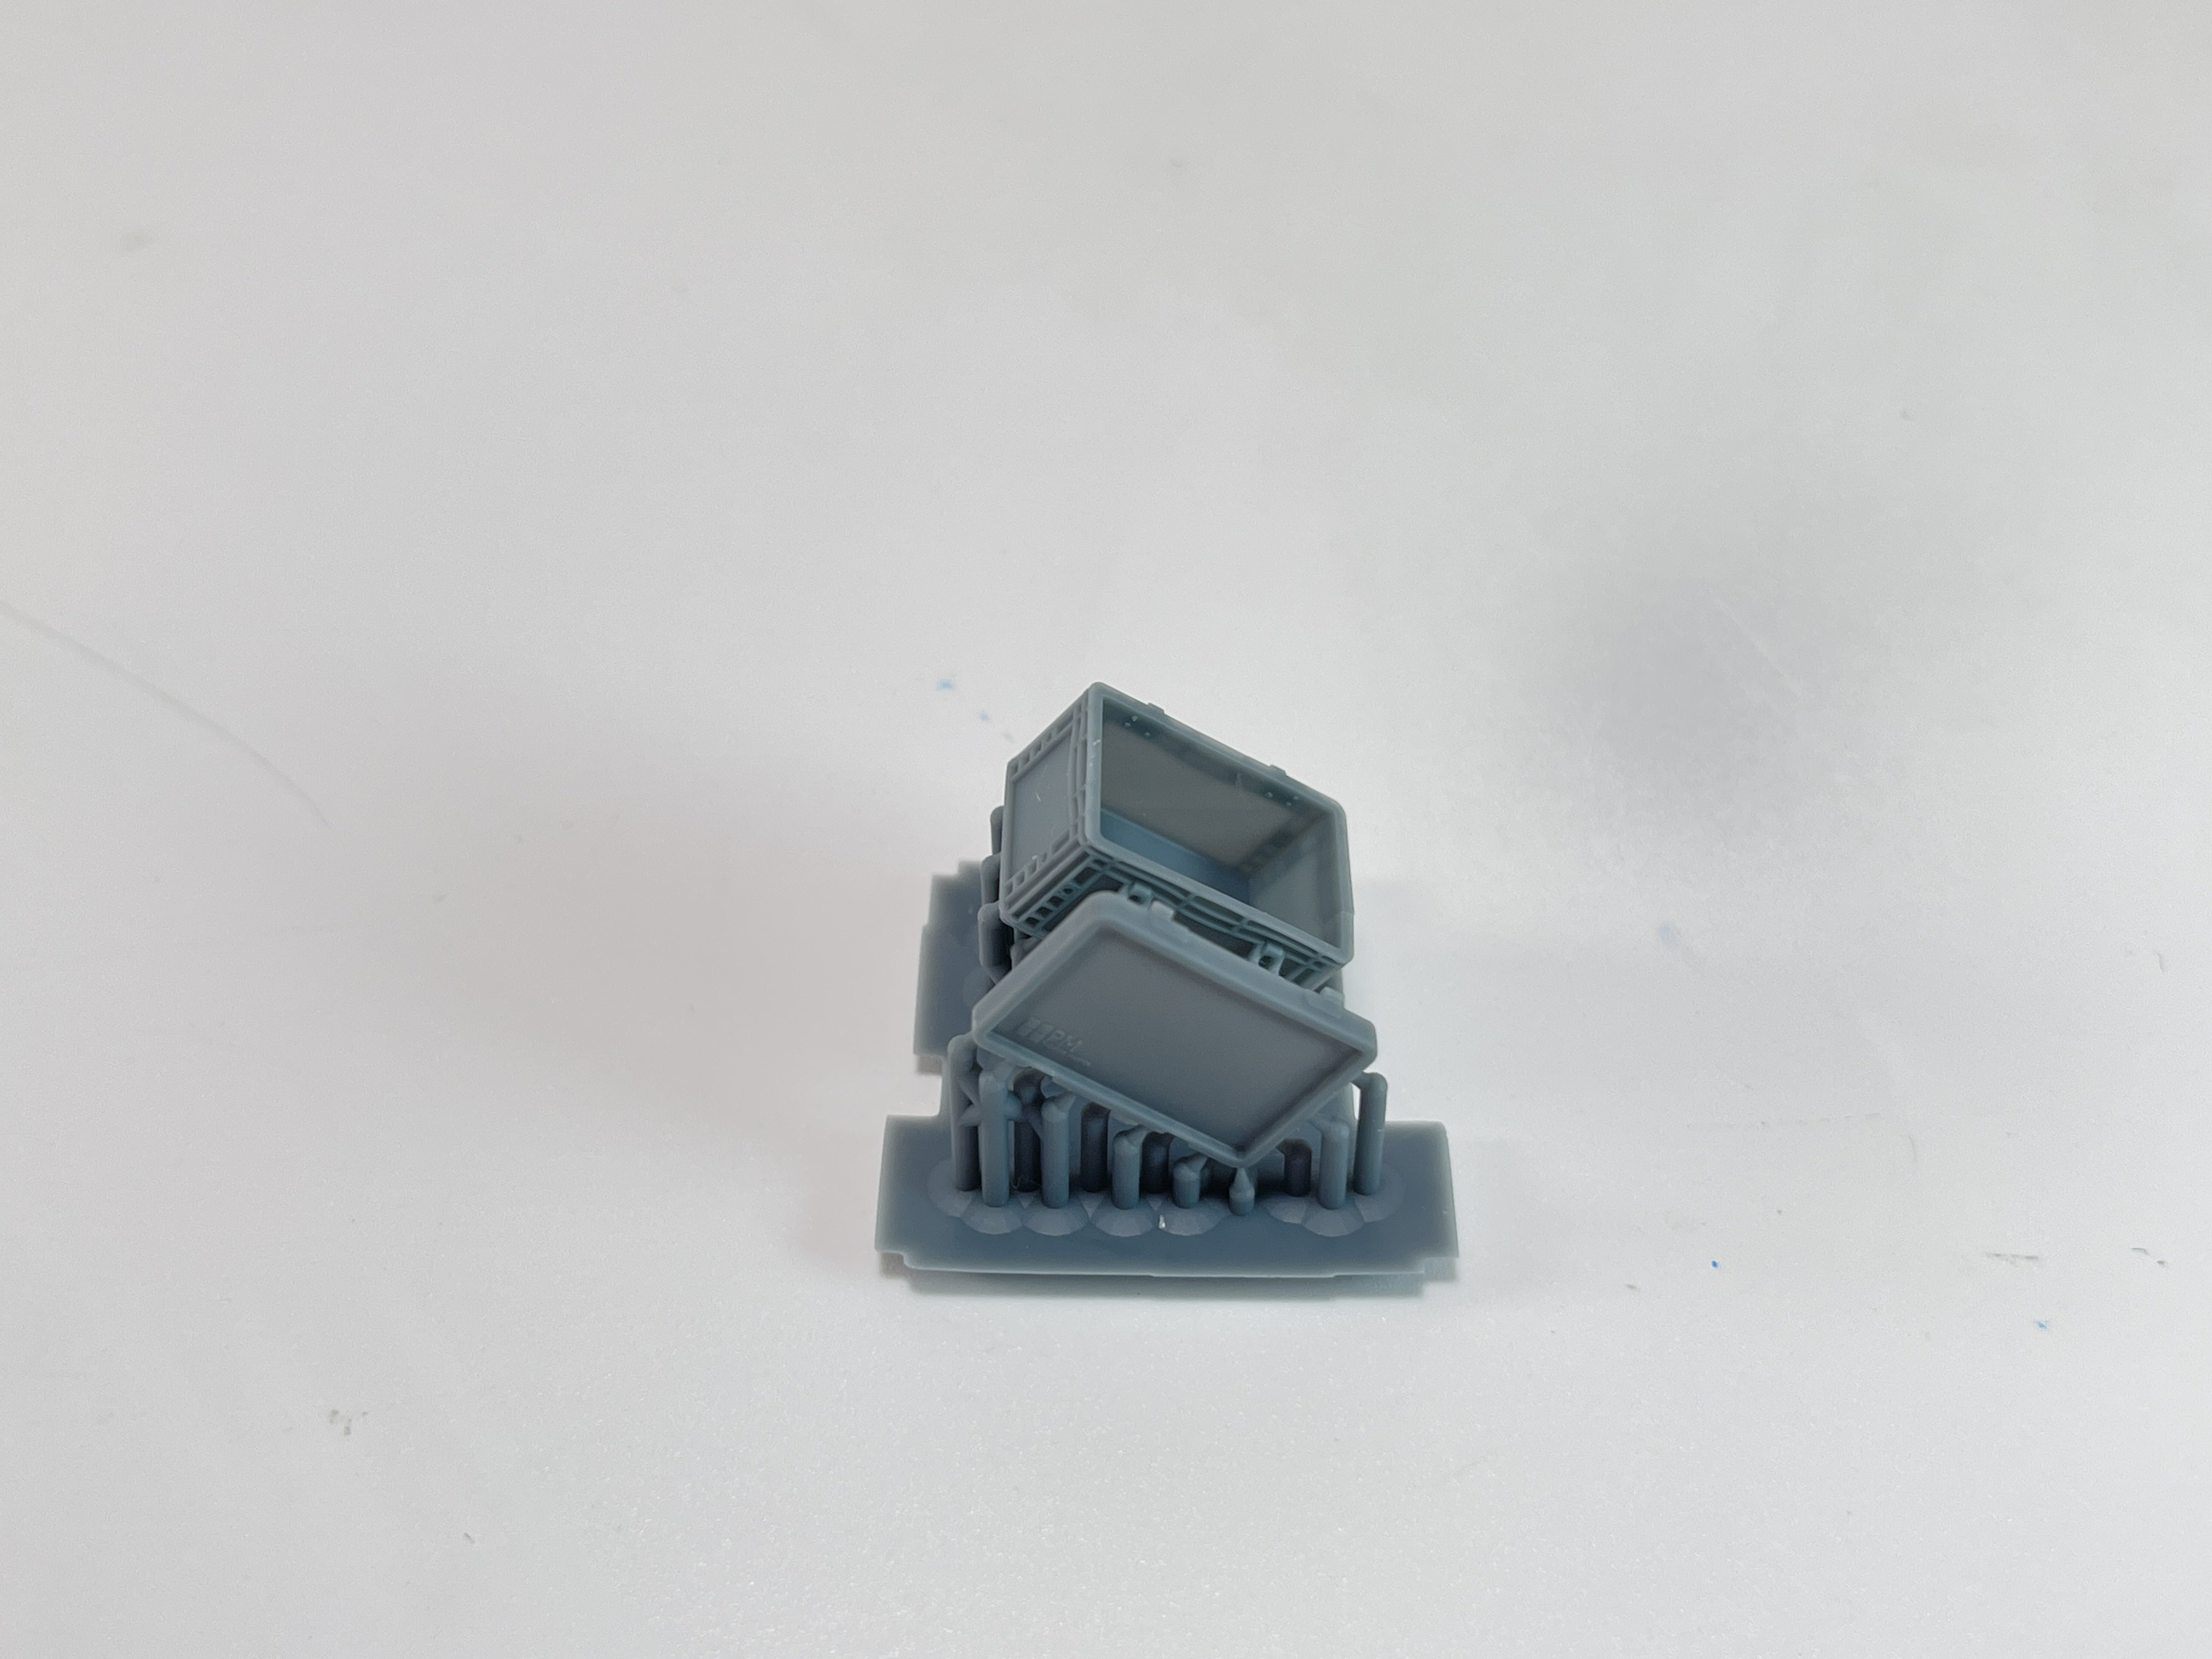
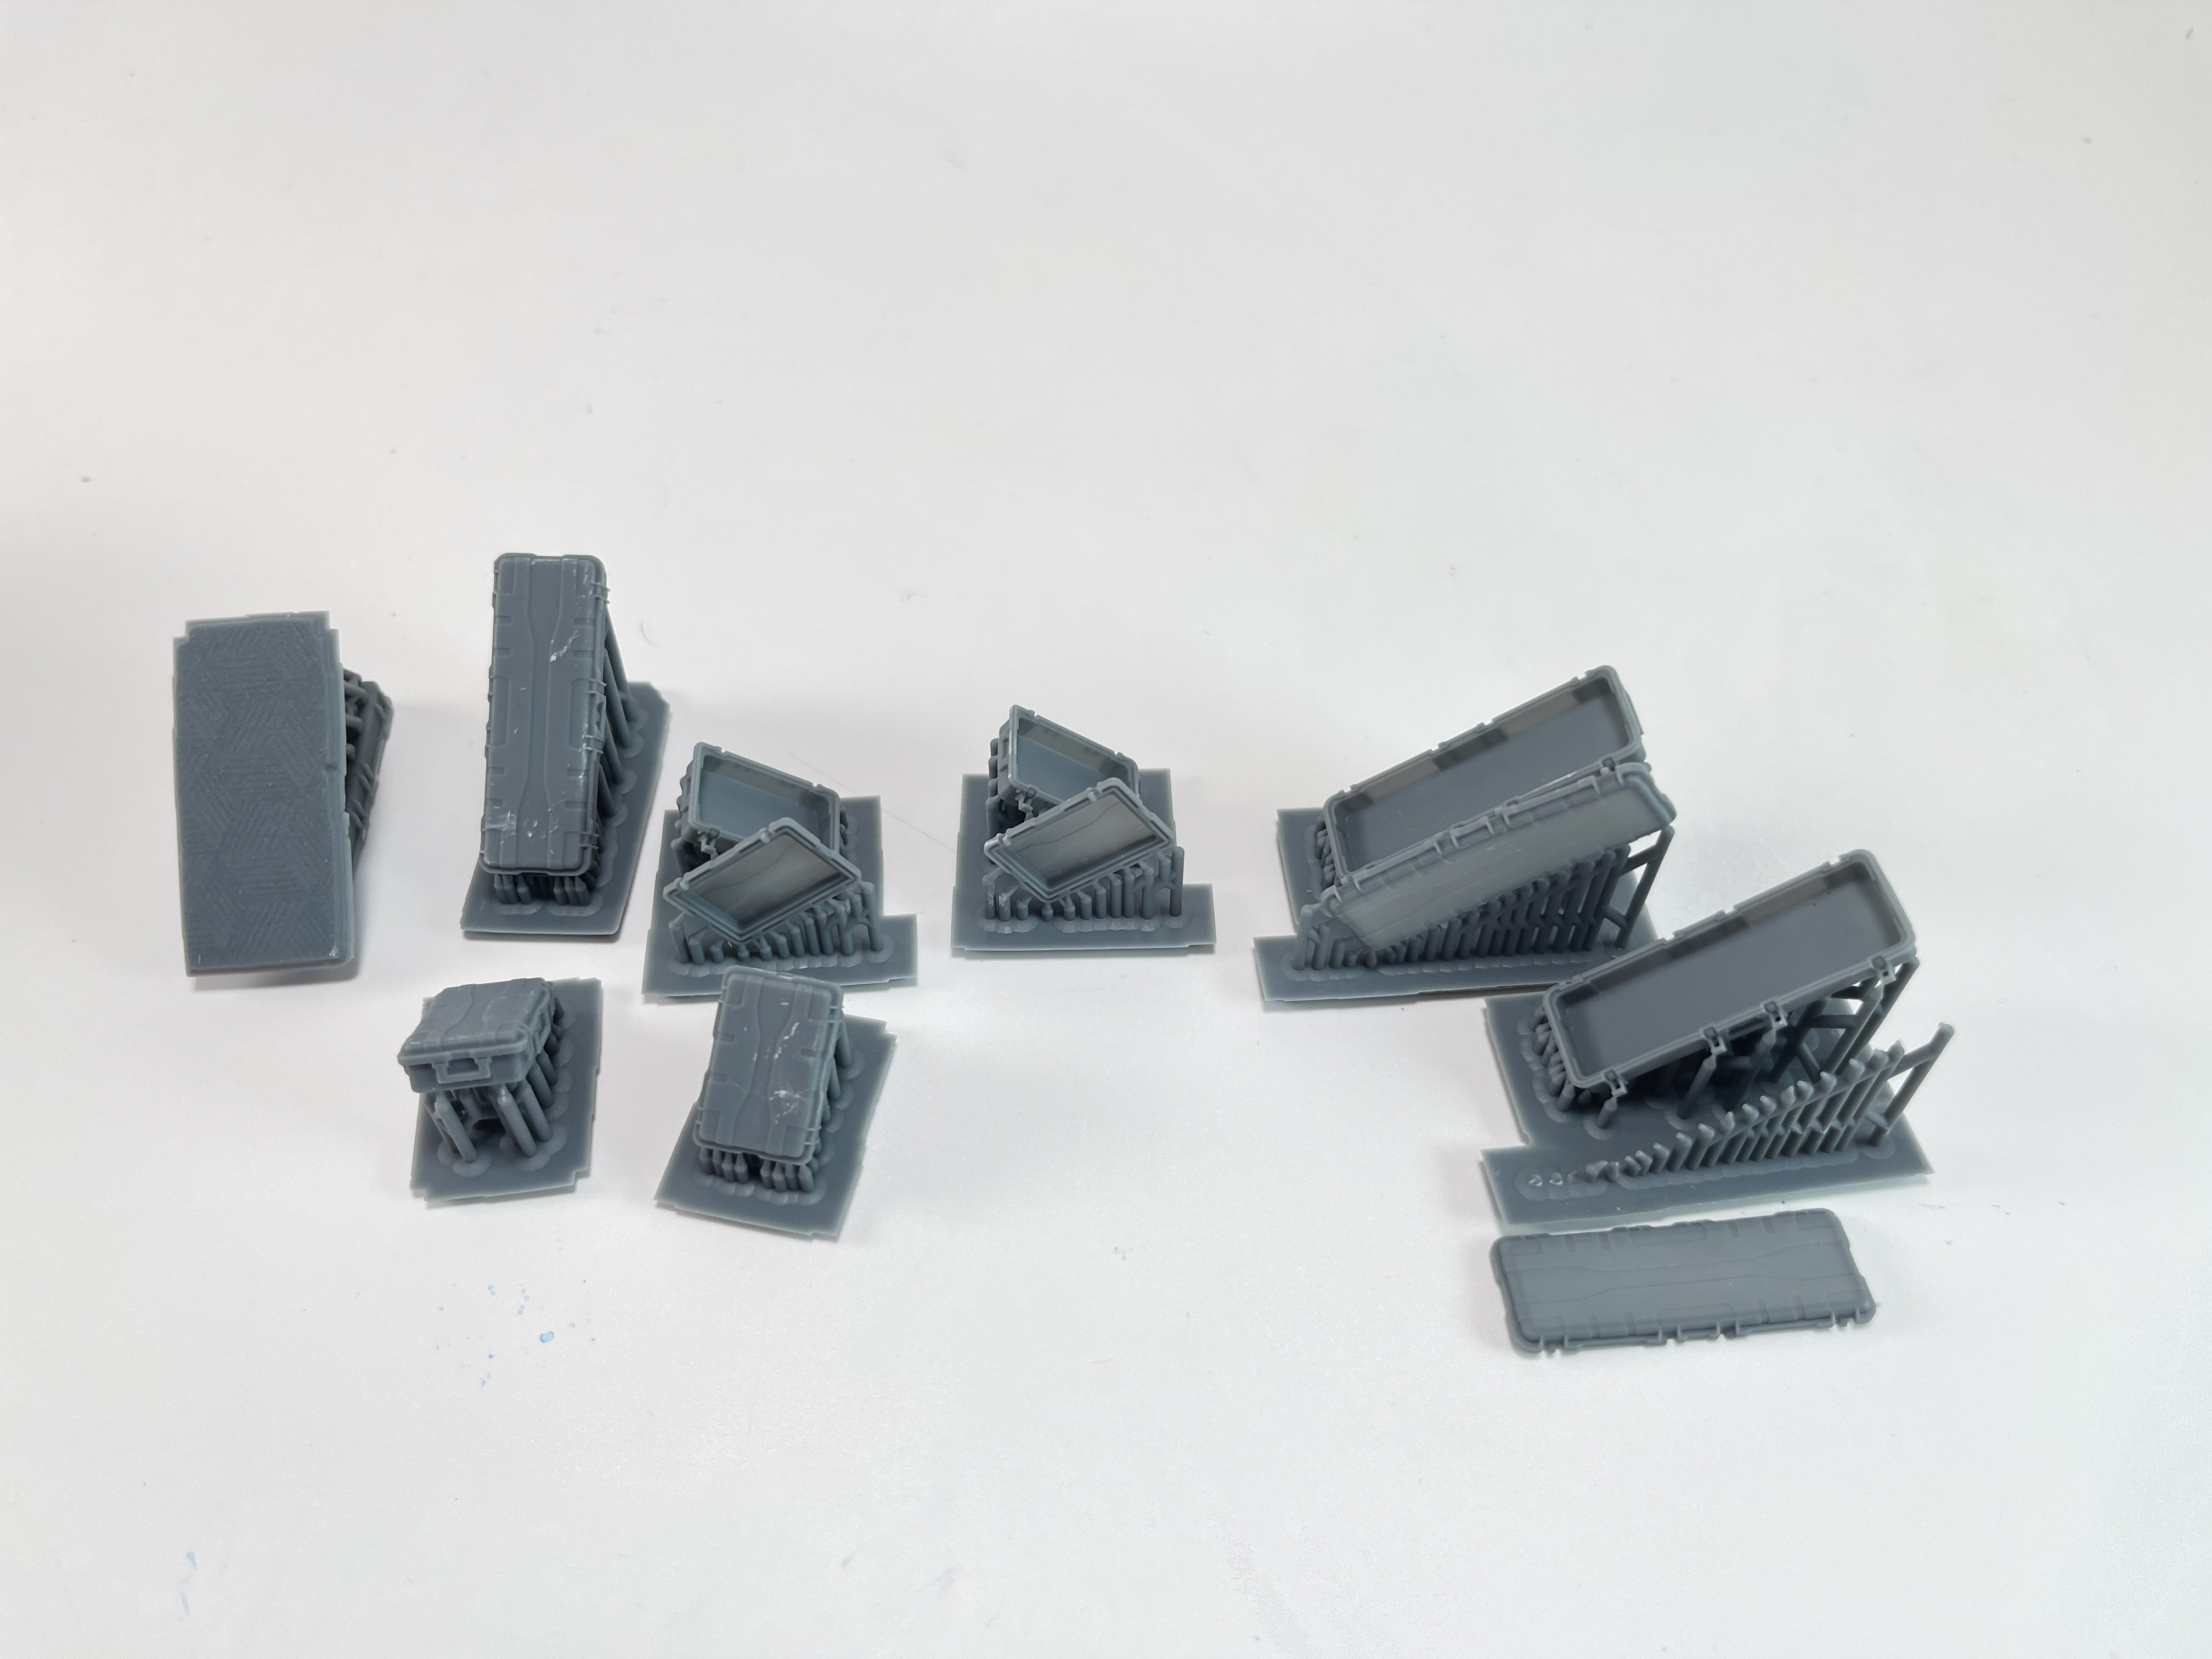
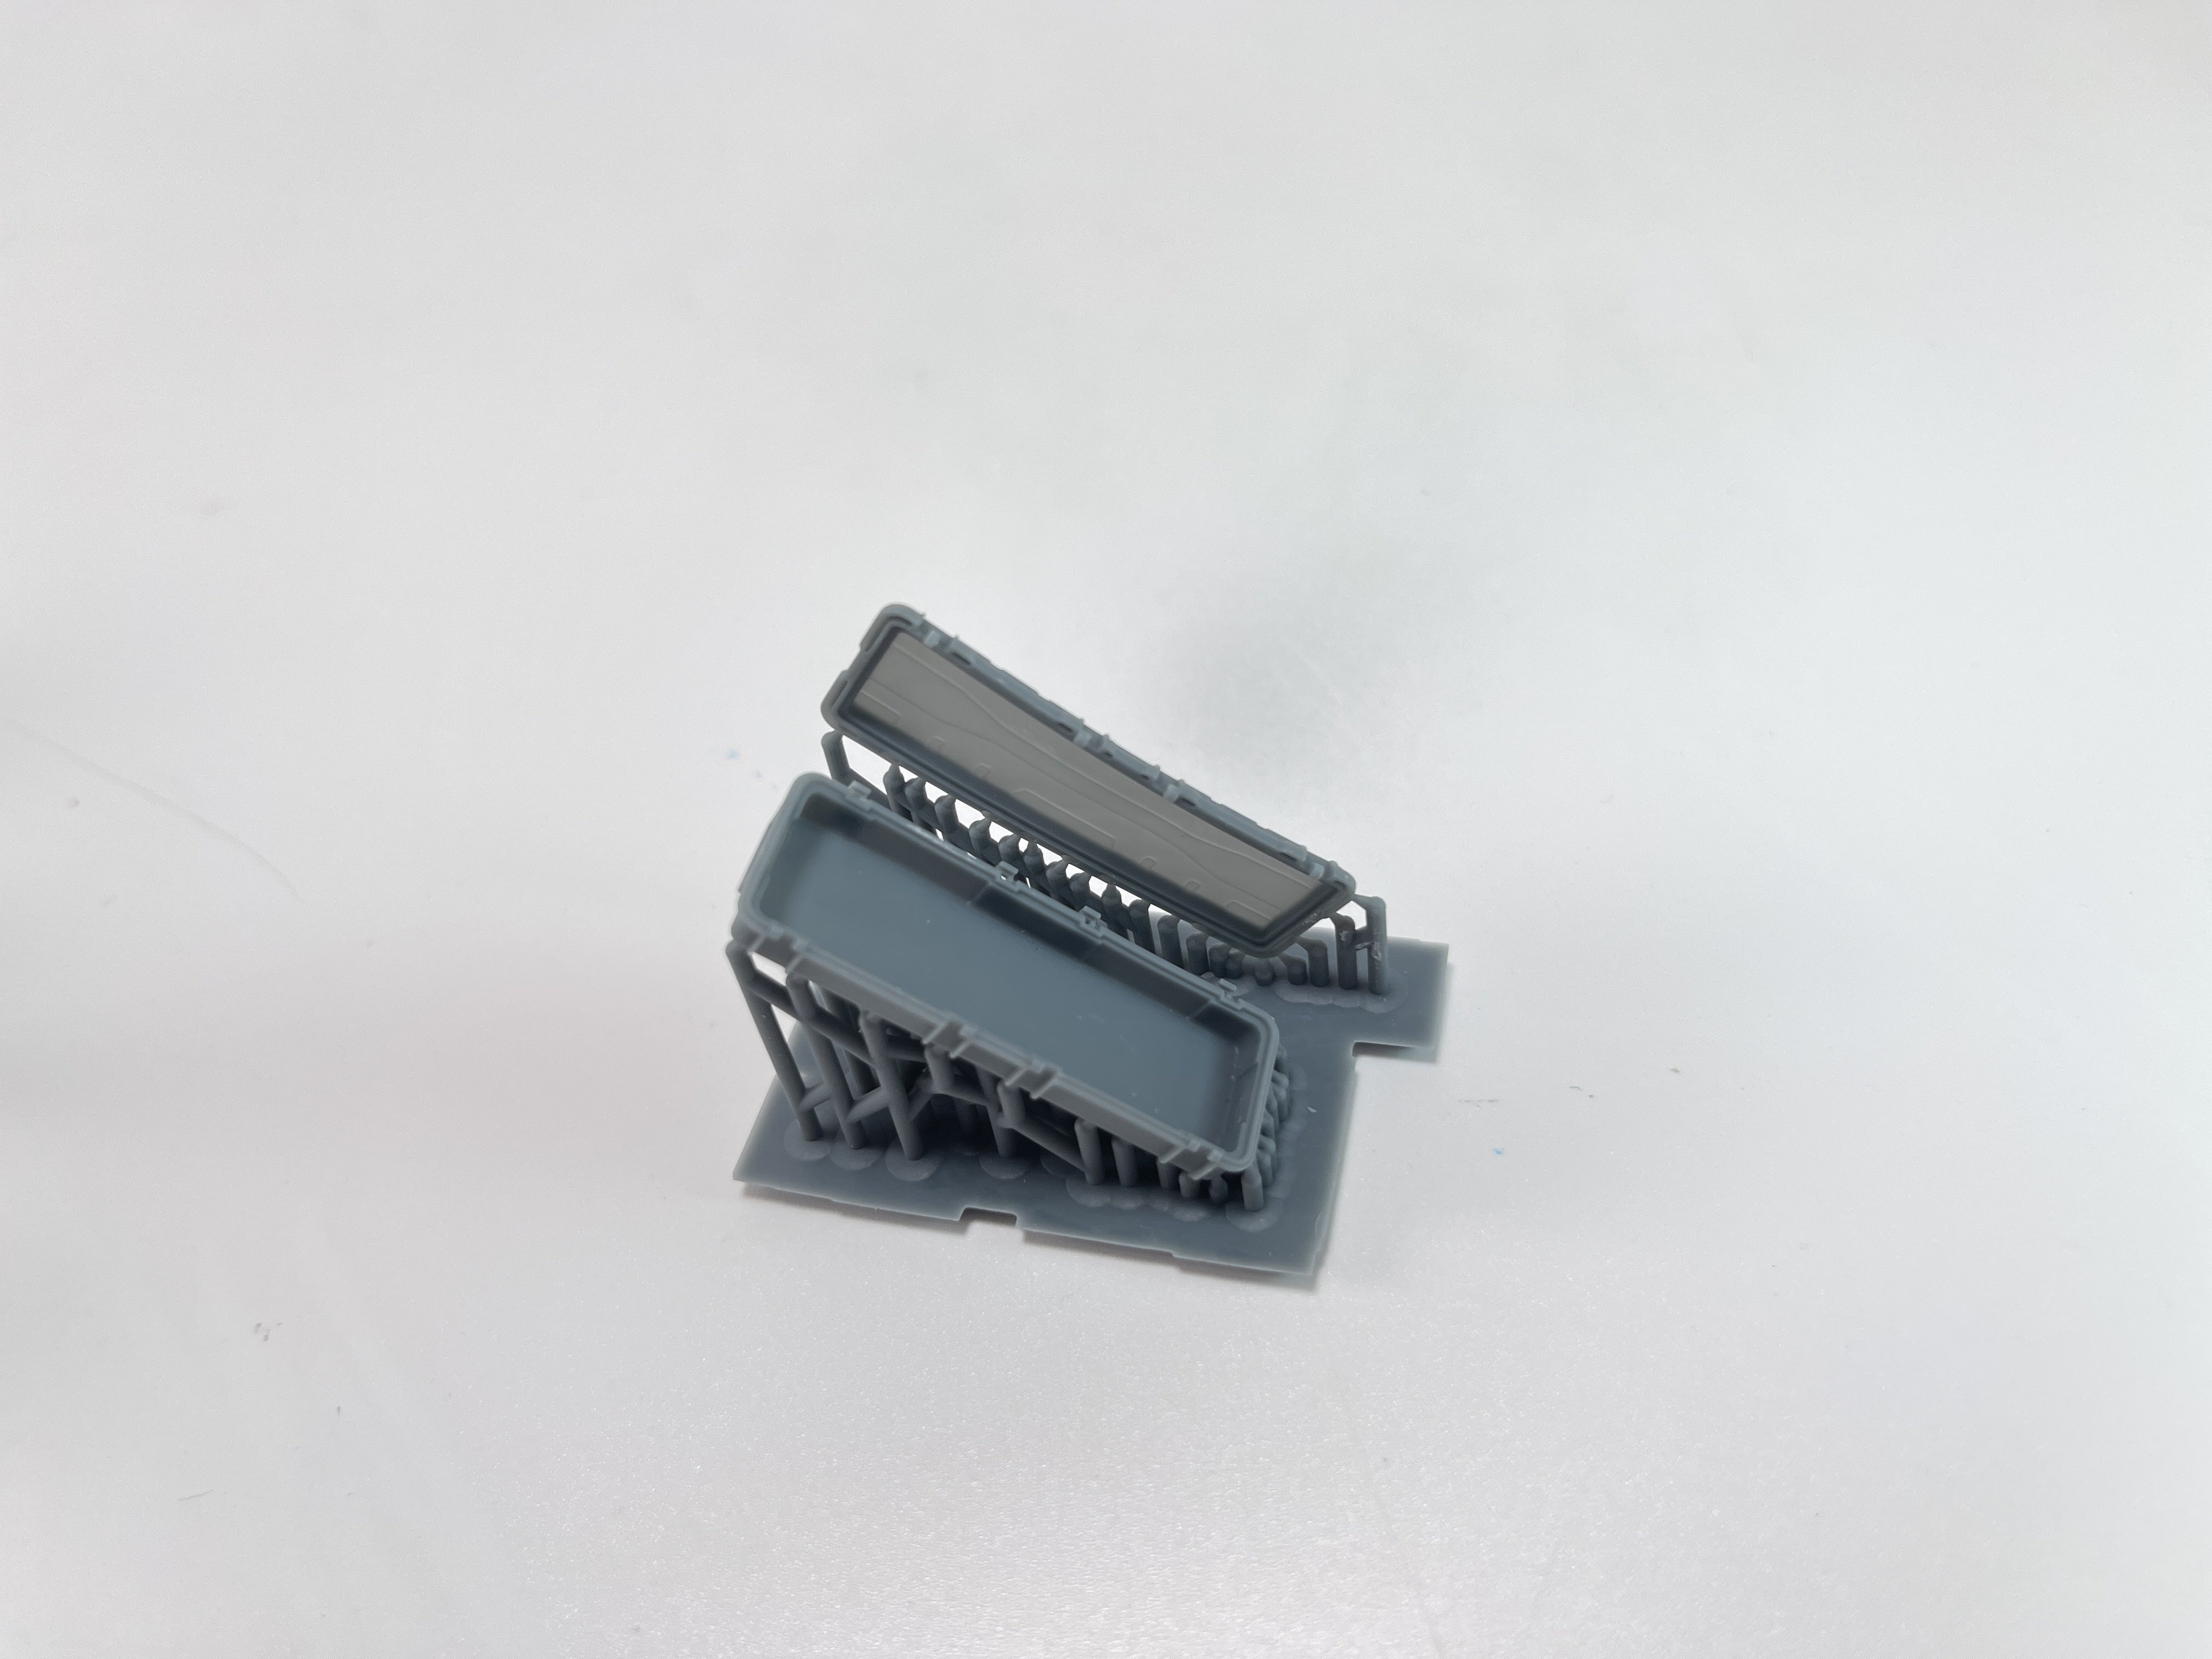
Universal plastic boxes
Catalogue n.º DP3029
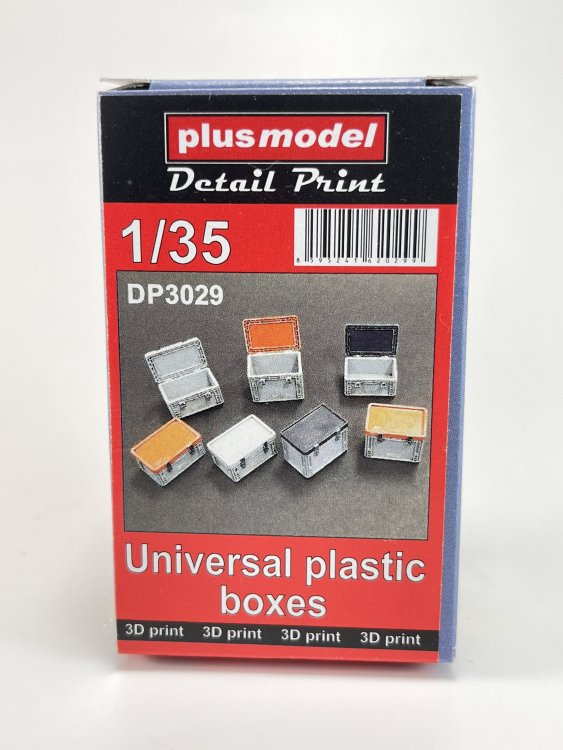
Price tag: 10,59€
Another generic set but this time, for more modern scenarios.
Several plastic boxes, well molded and with excellent printing.


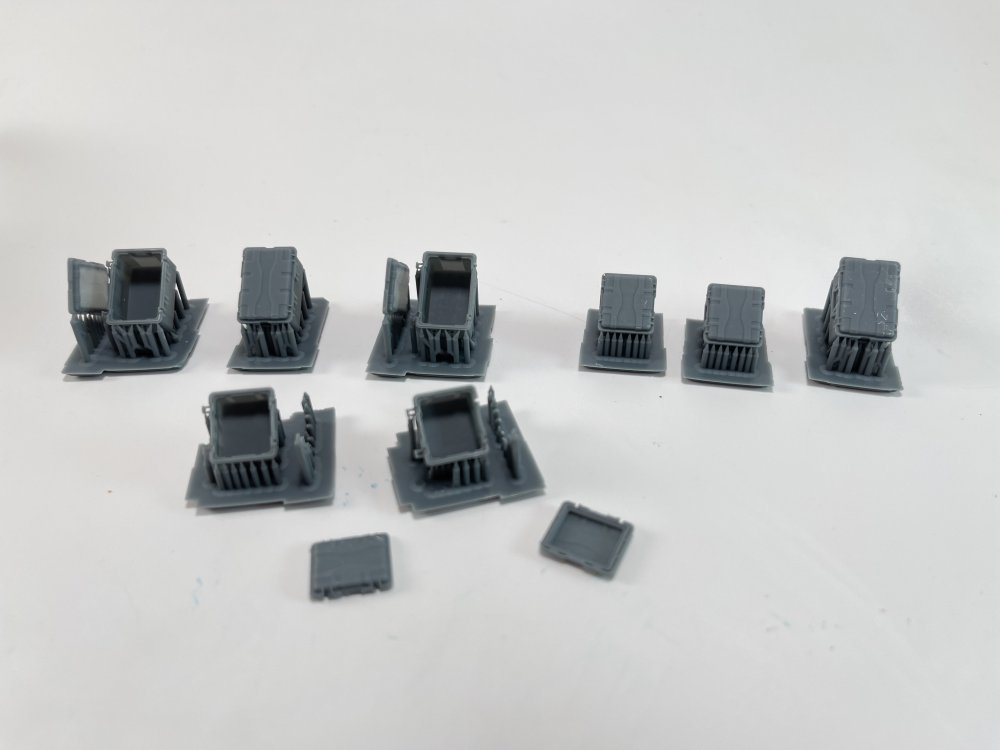
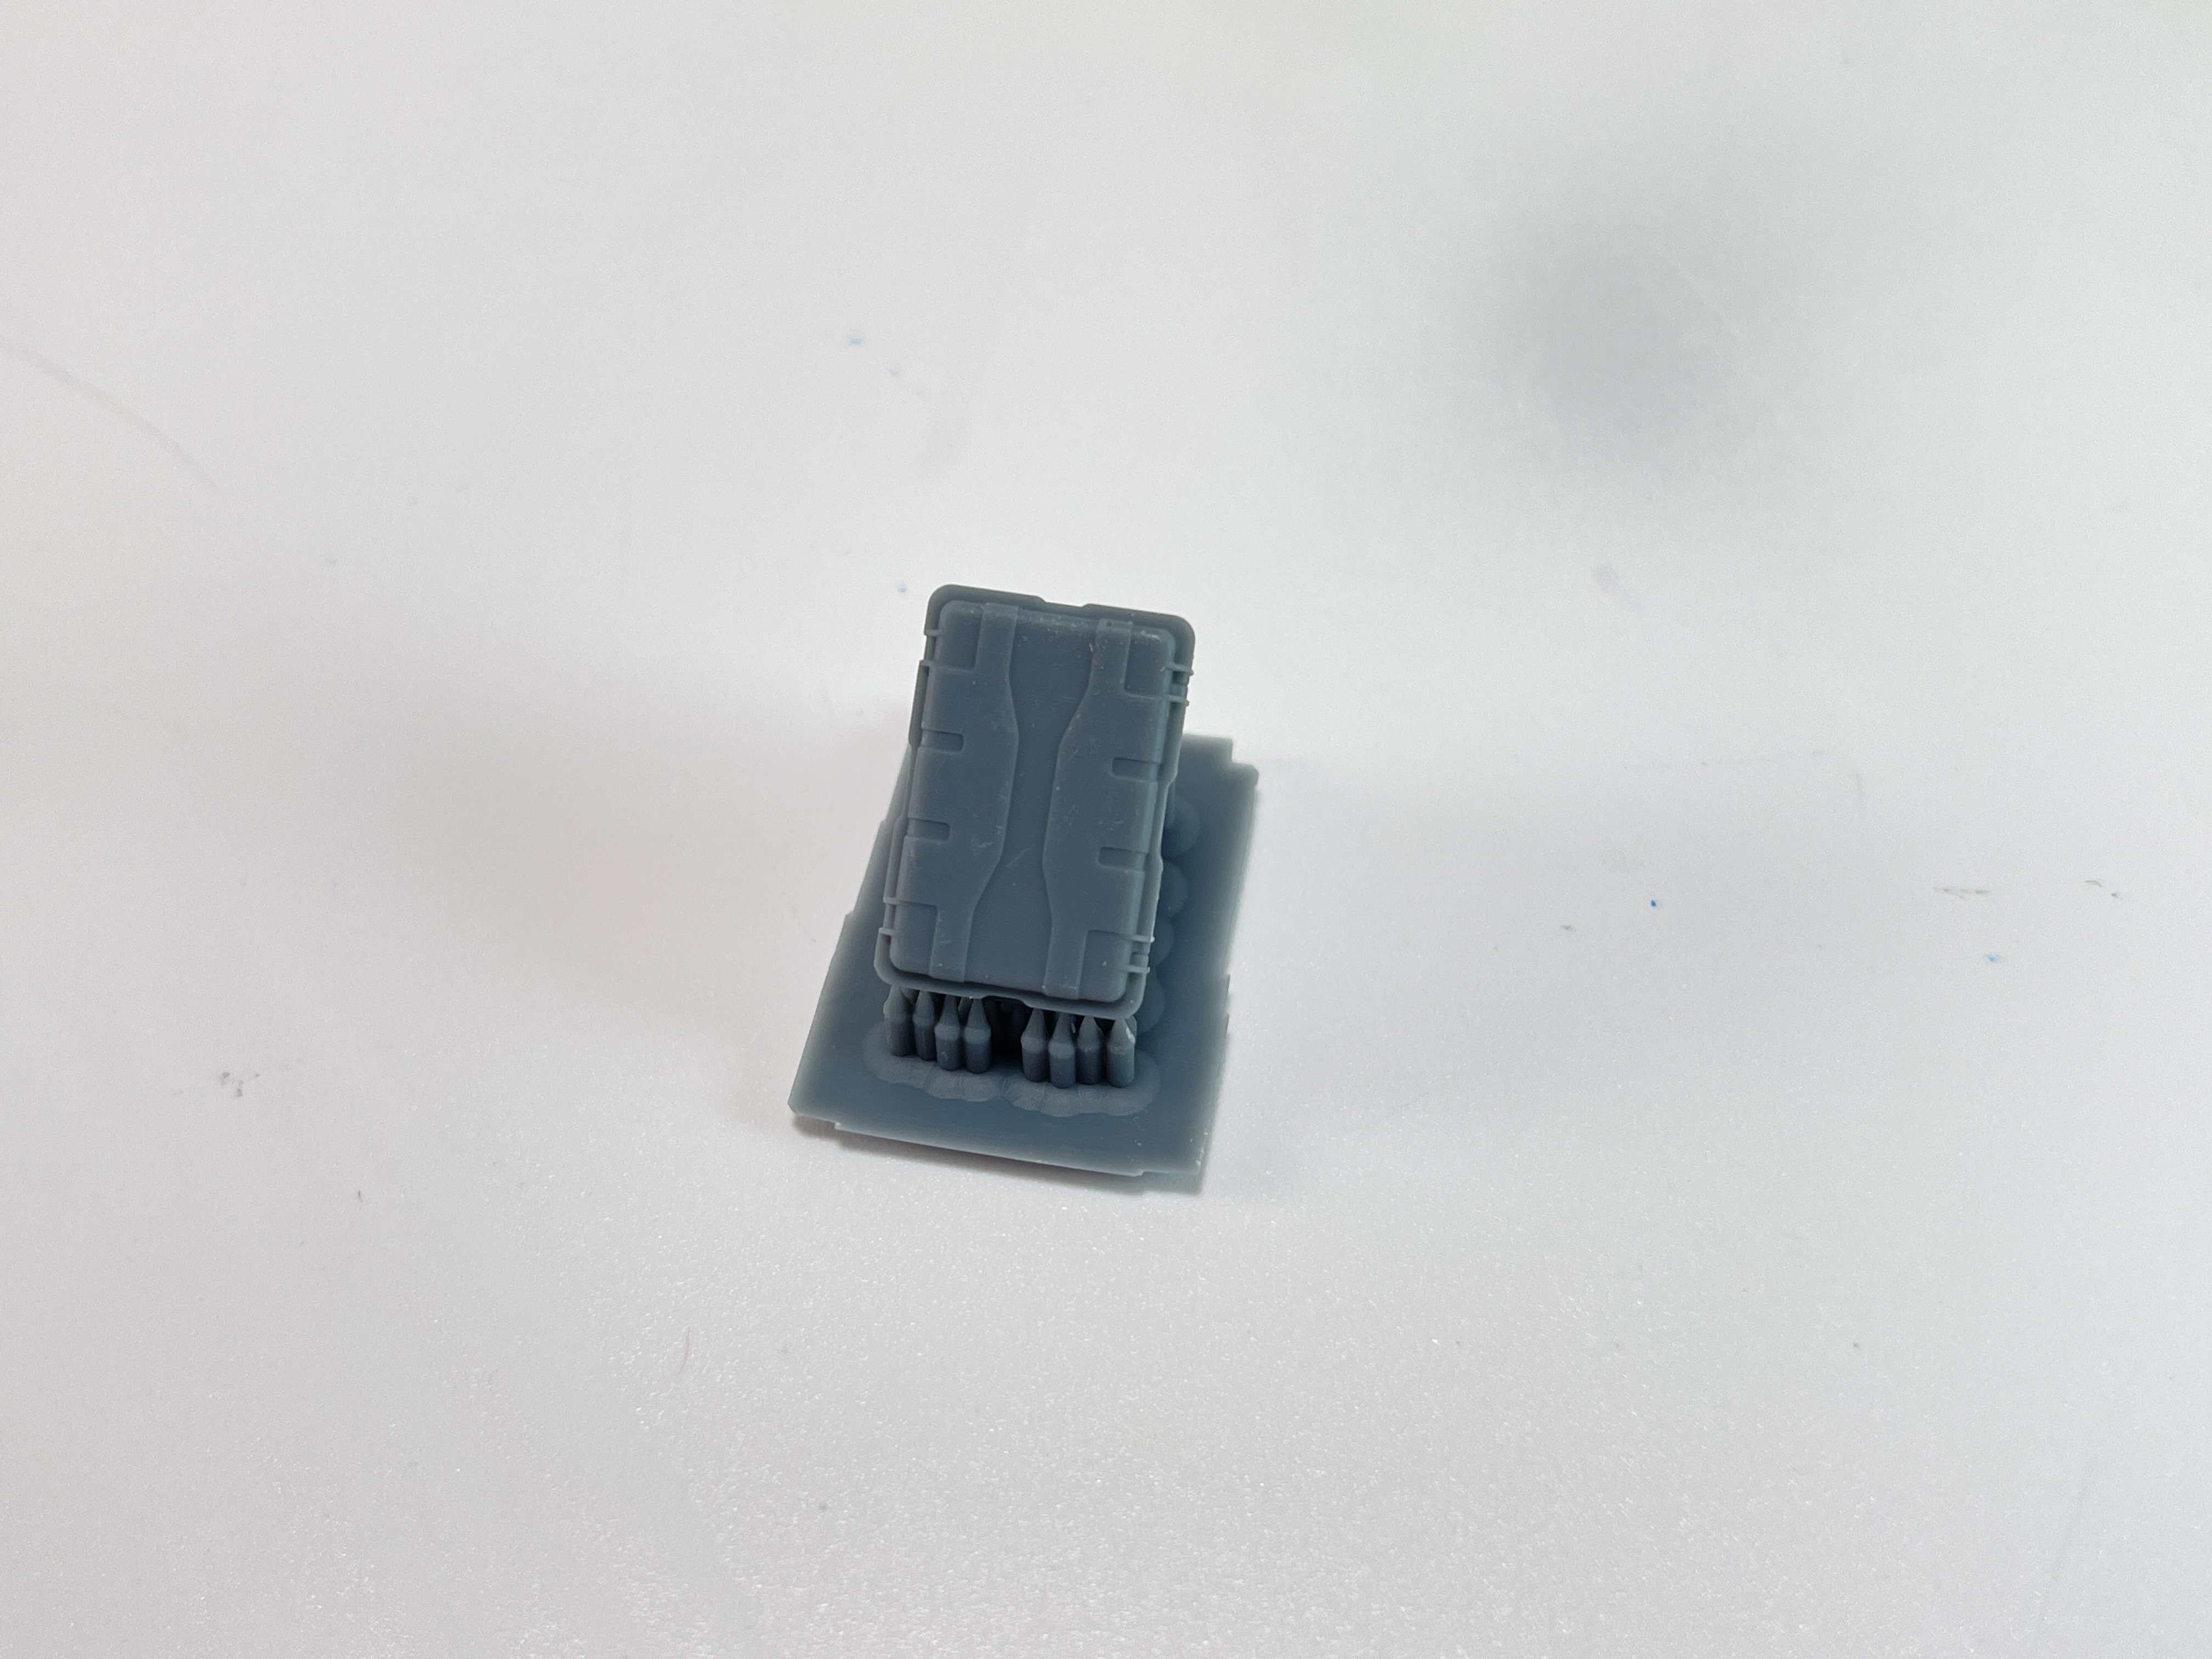
Tool Boxes high
And
Tool Boxes Low
Catalogue n.º DP3022
Price tag: 11,95€

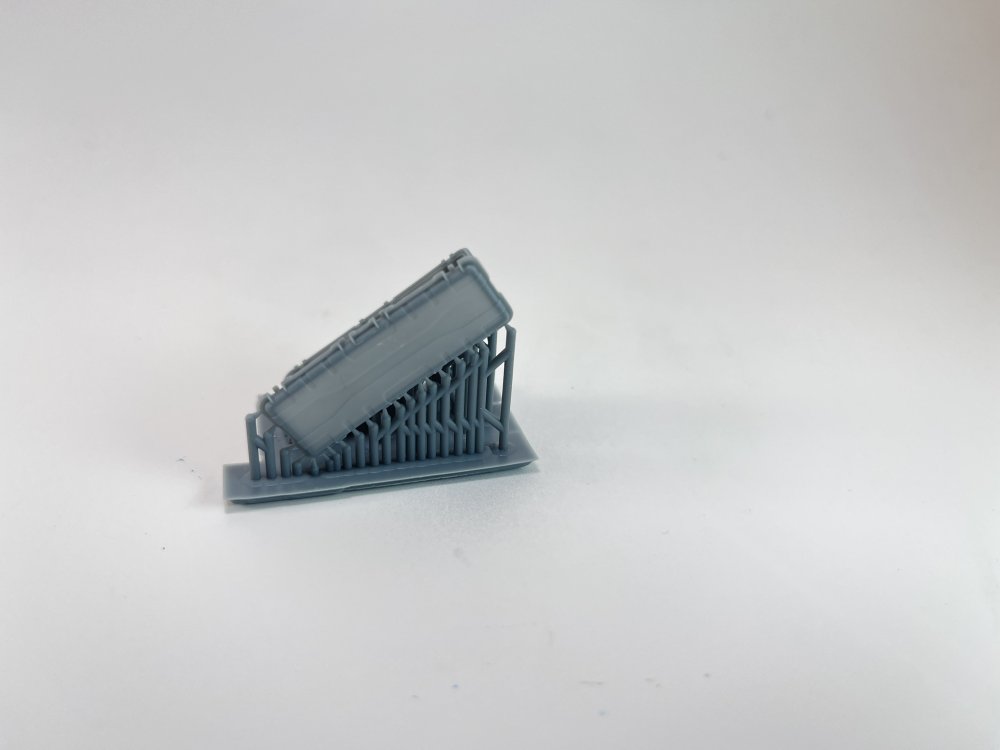

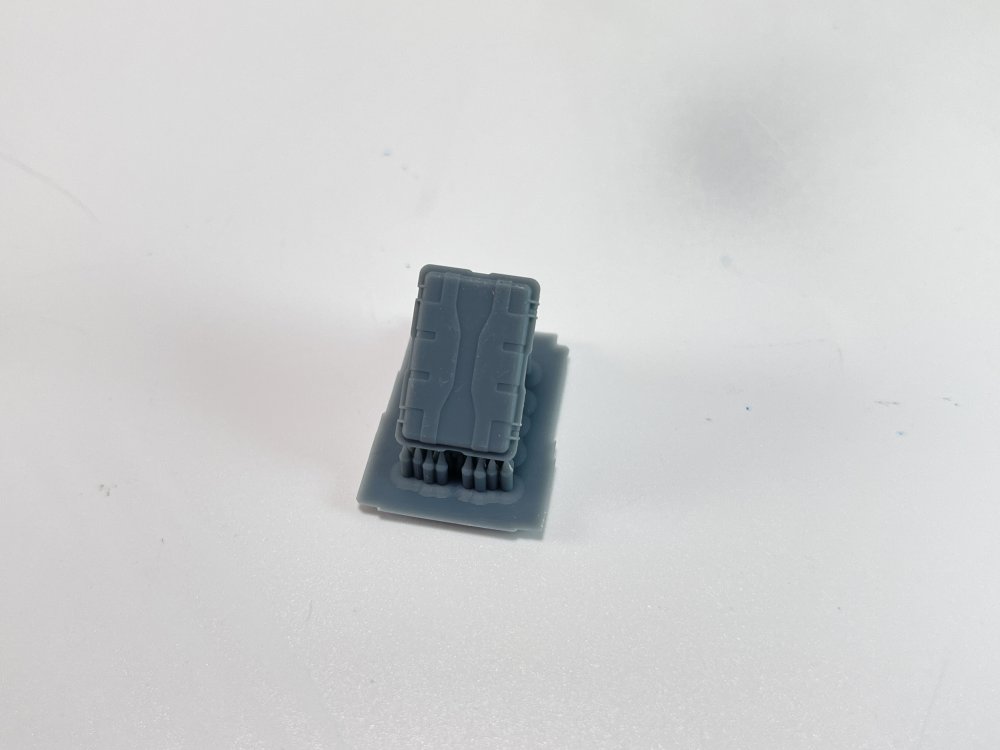


Catalogue n.º DP3023

Price tag: 11,95€
Here are several toolboxes of different shapes and sizes, whether low or tall.
They are once again very well printed, without any imperfections.
Looking at these toolboxes, I don't know if they could be from the WII period or earlier.
They seem to me to be much more modern tool boxes and therefore only seem to be suitable for a period of time from the 60s and beyond.

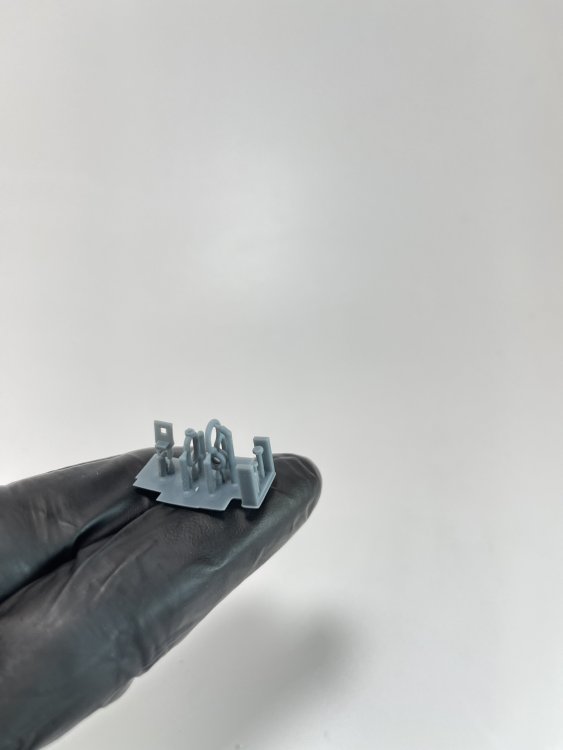
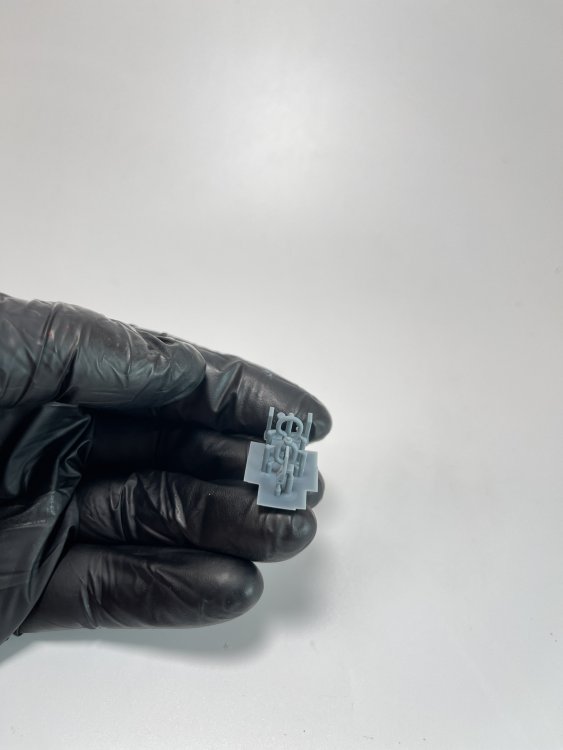
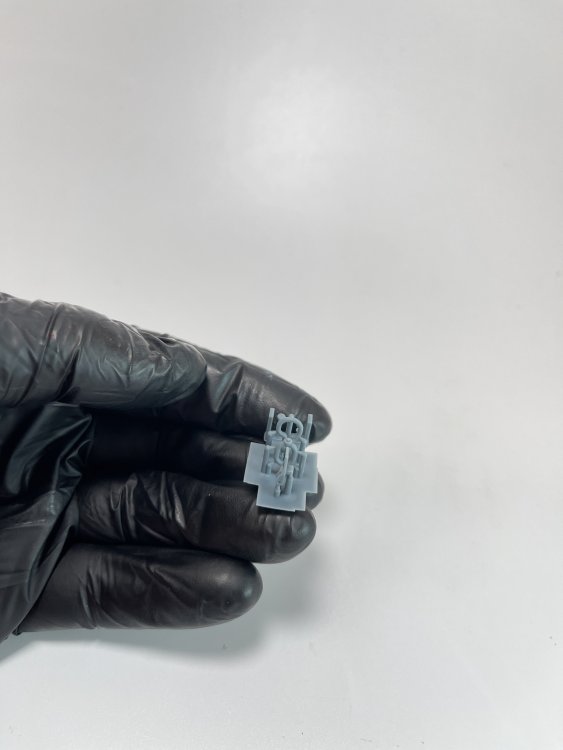
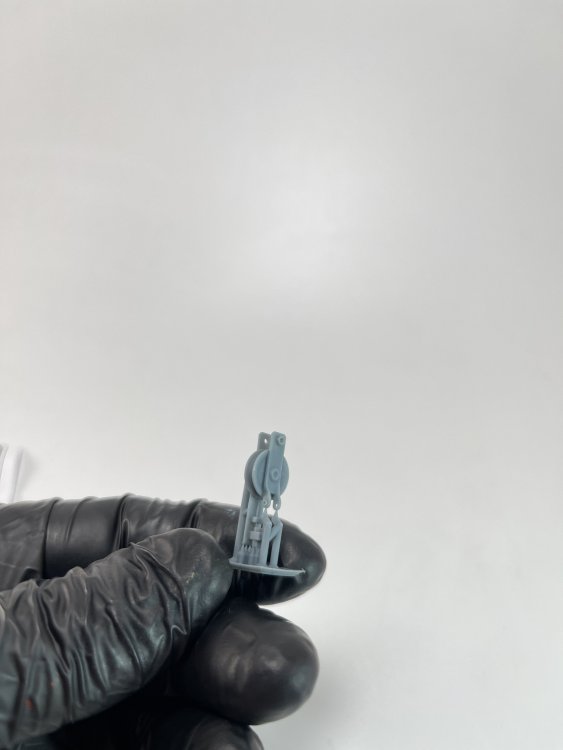
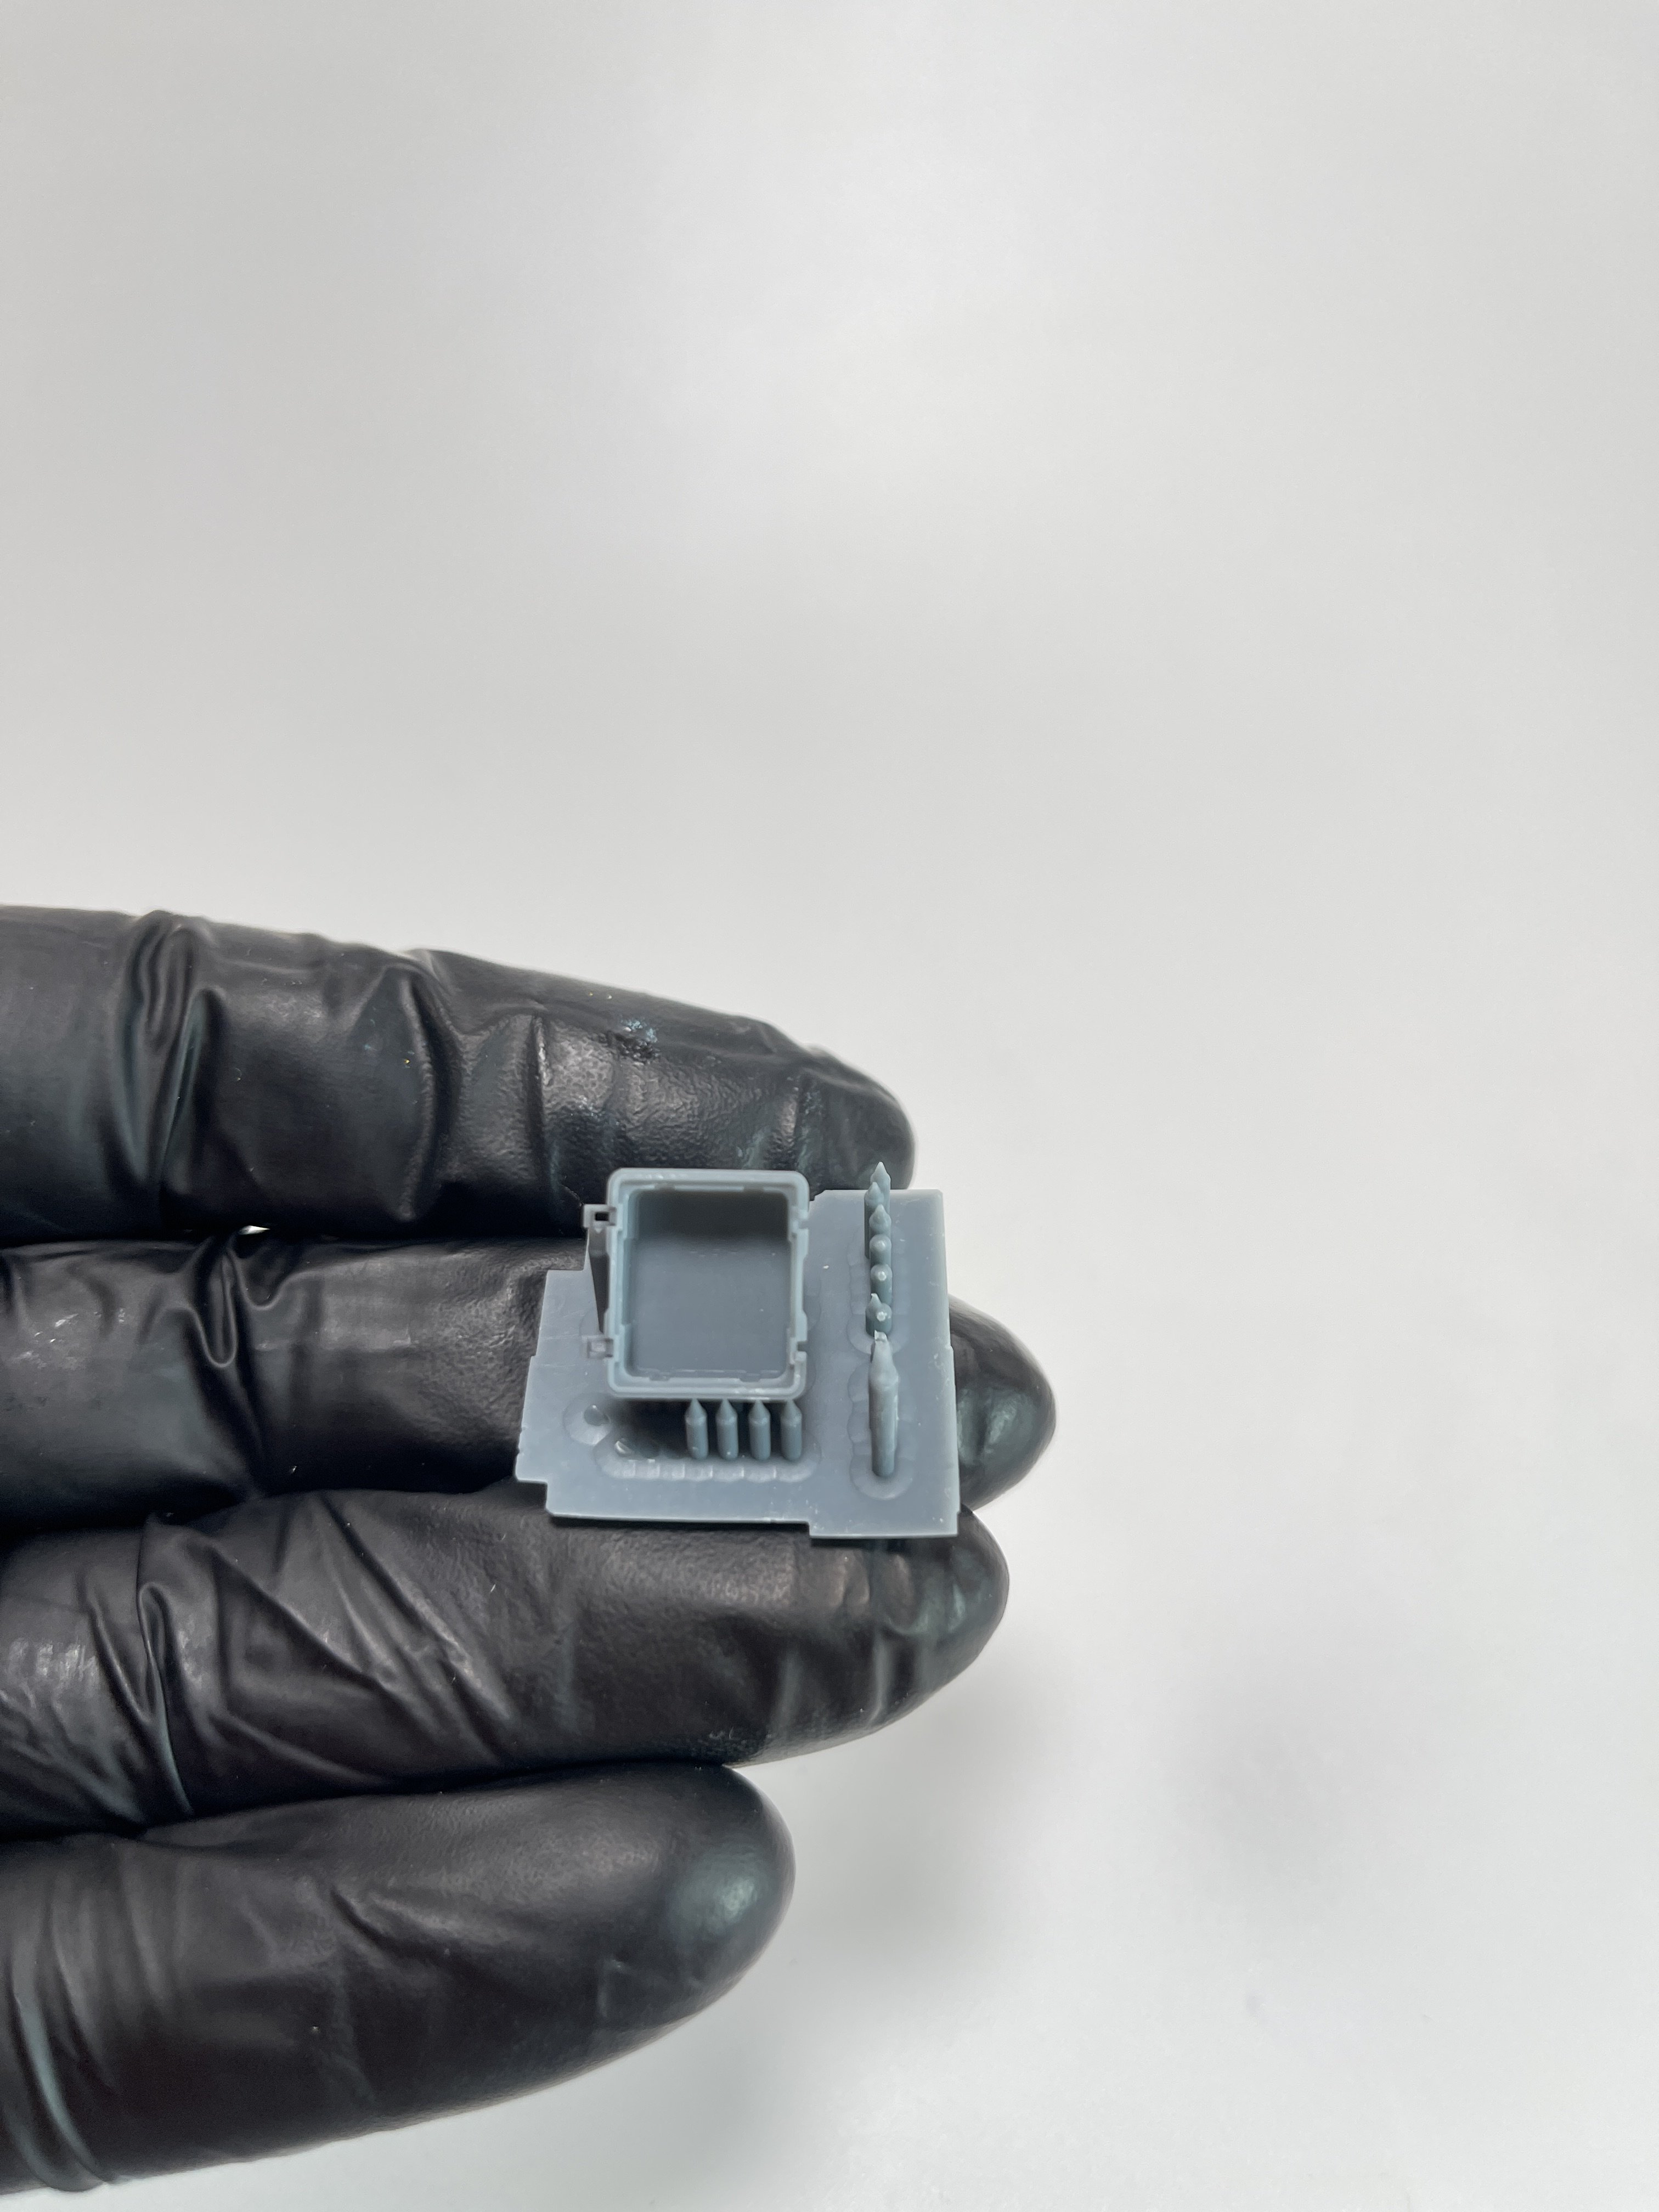
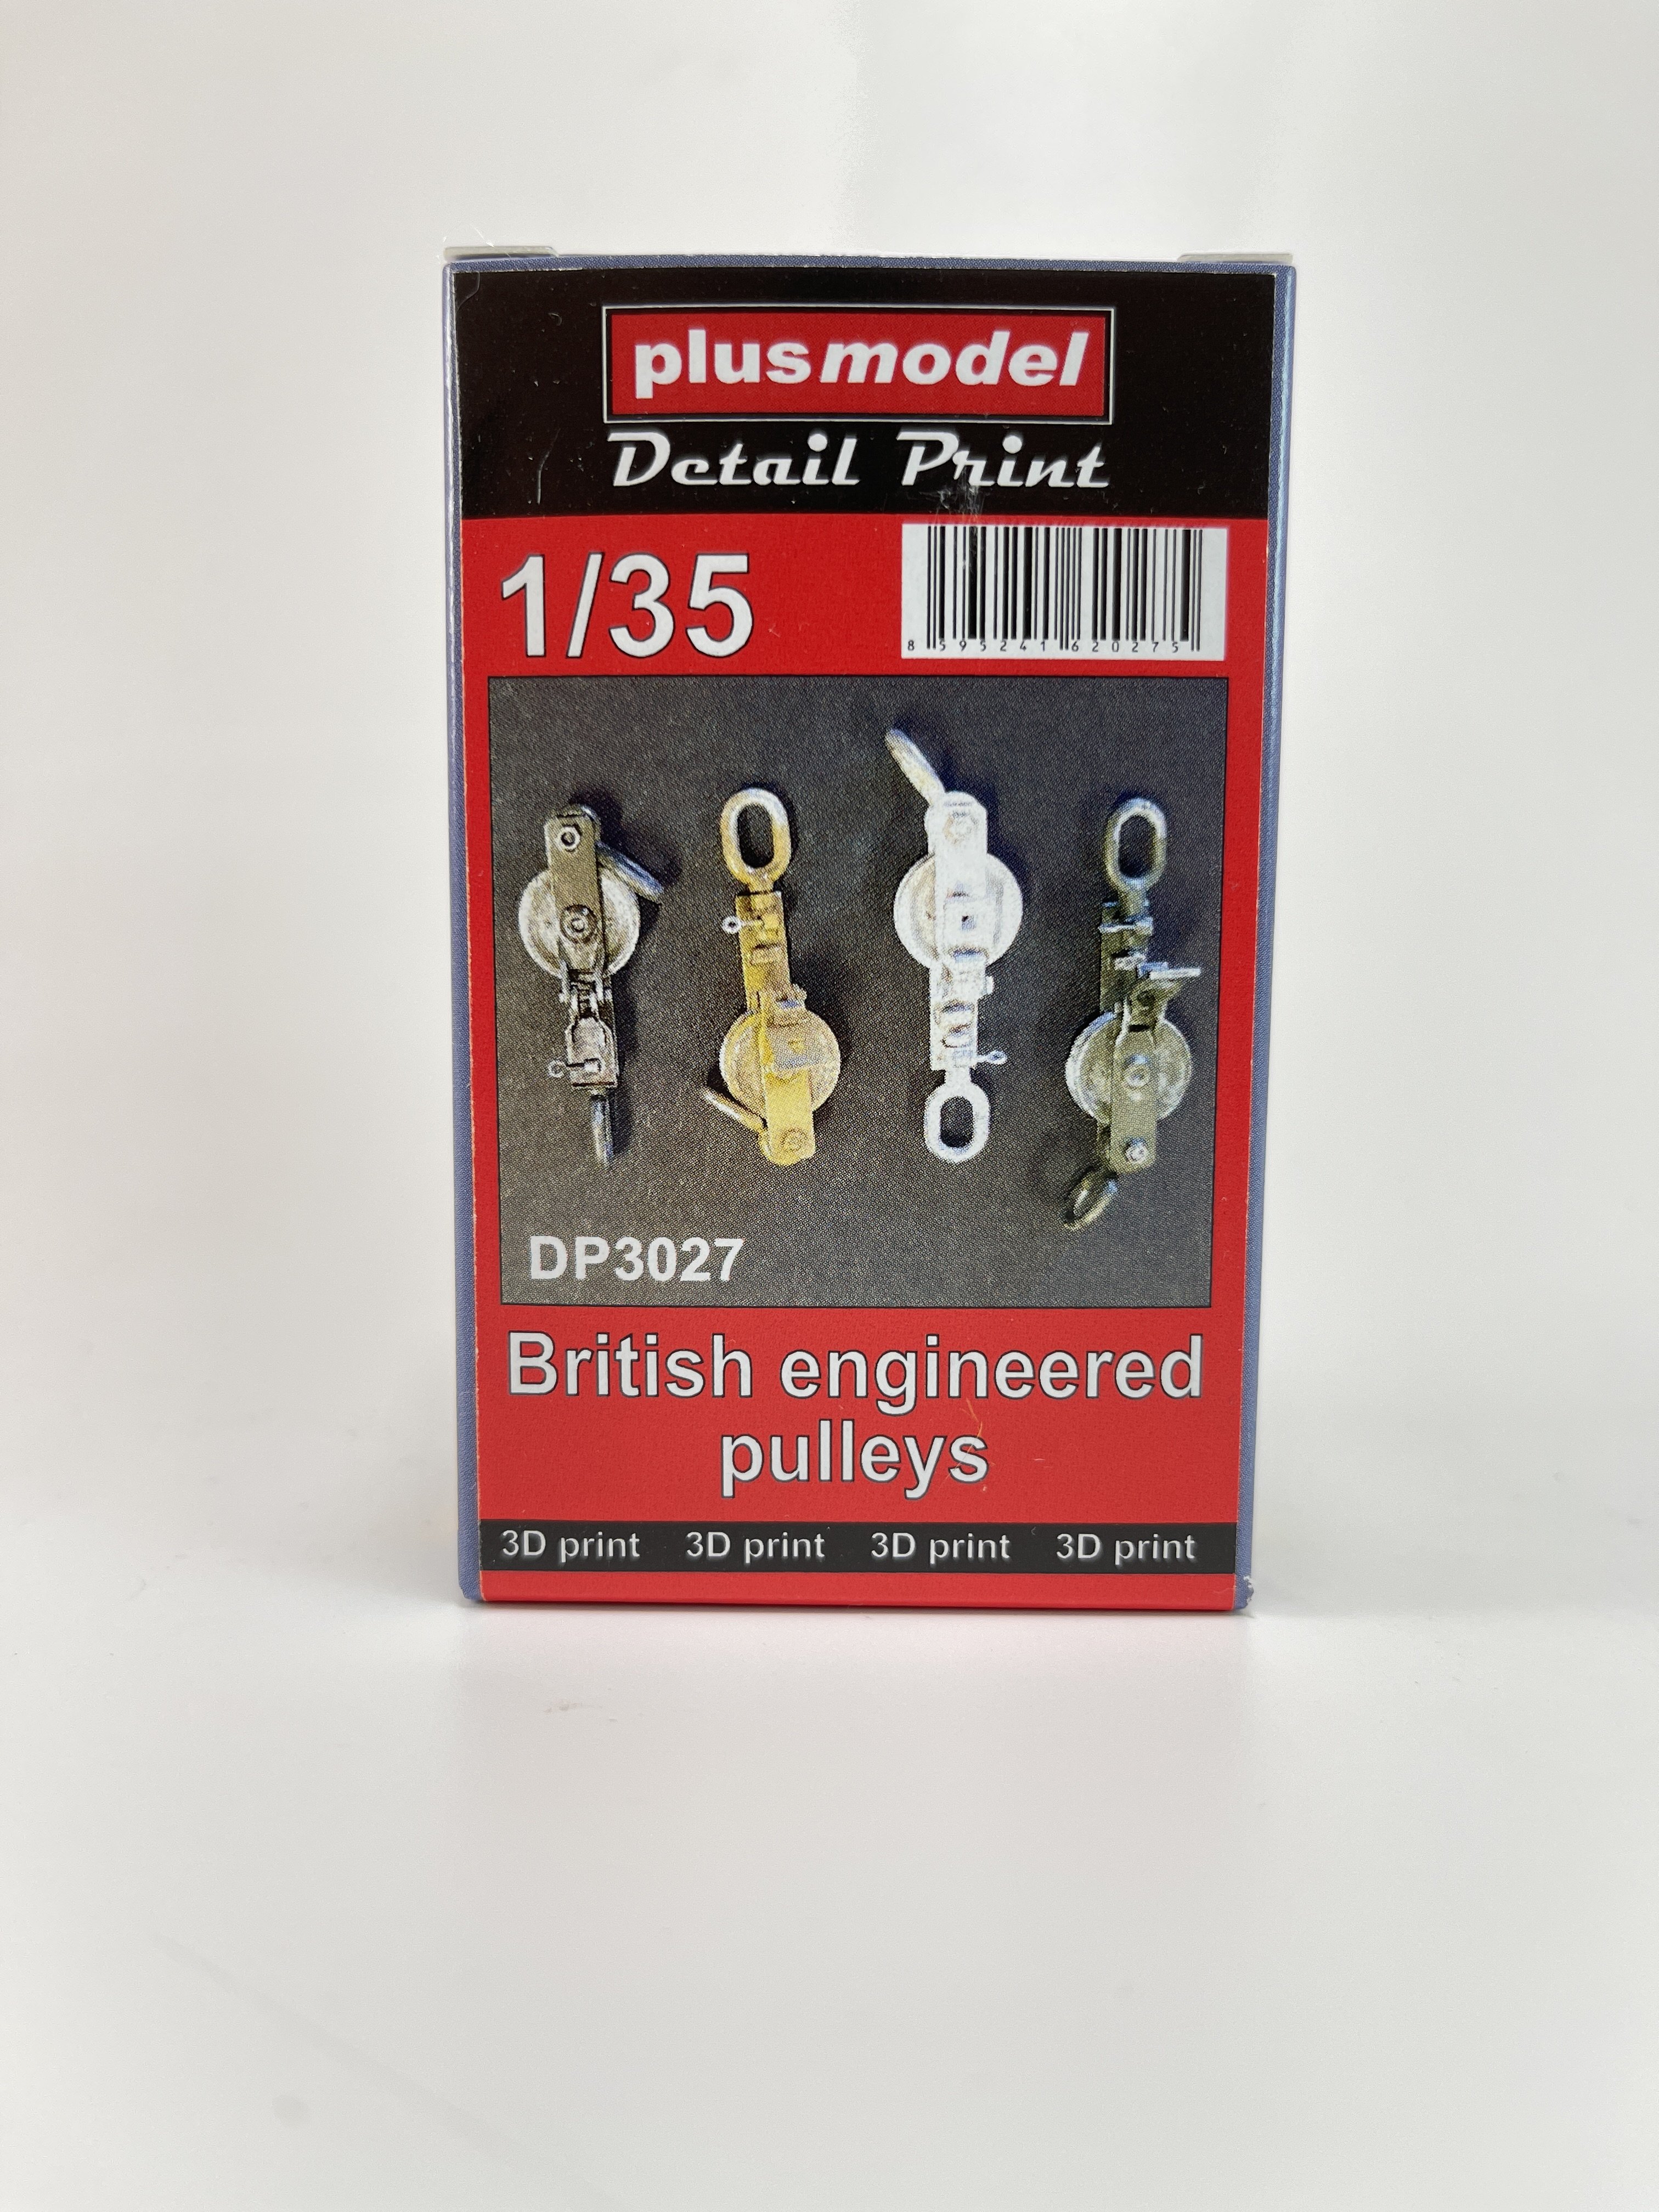
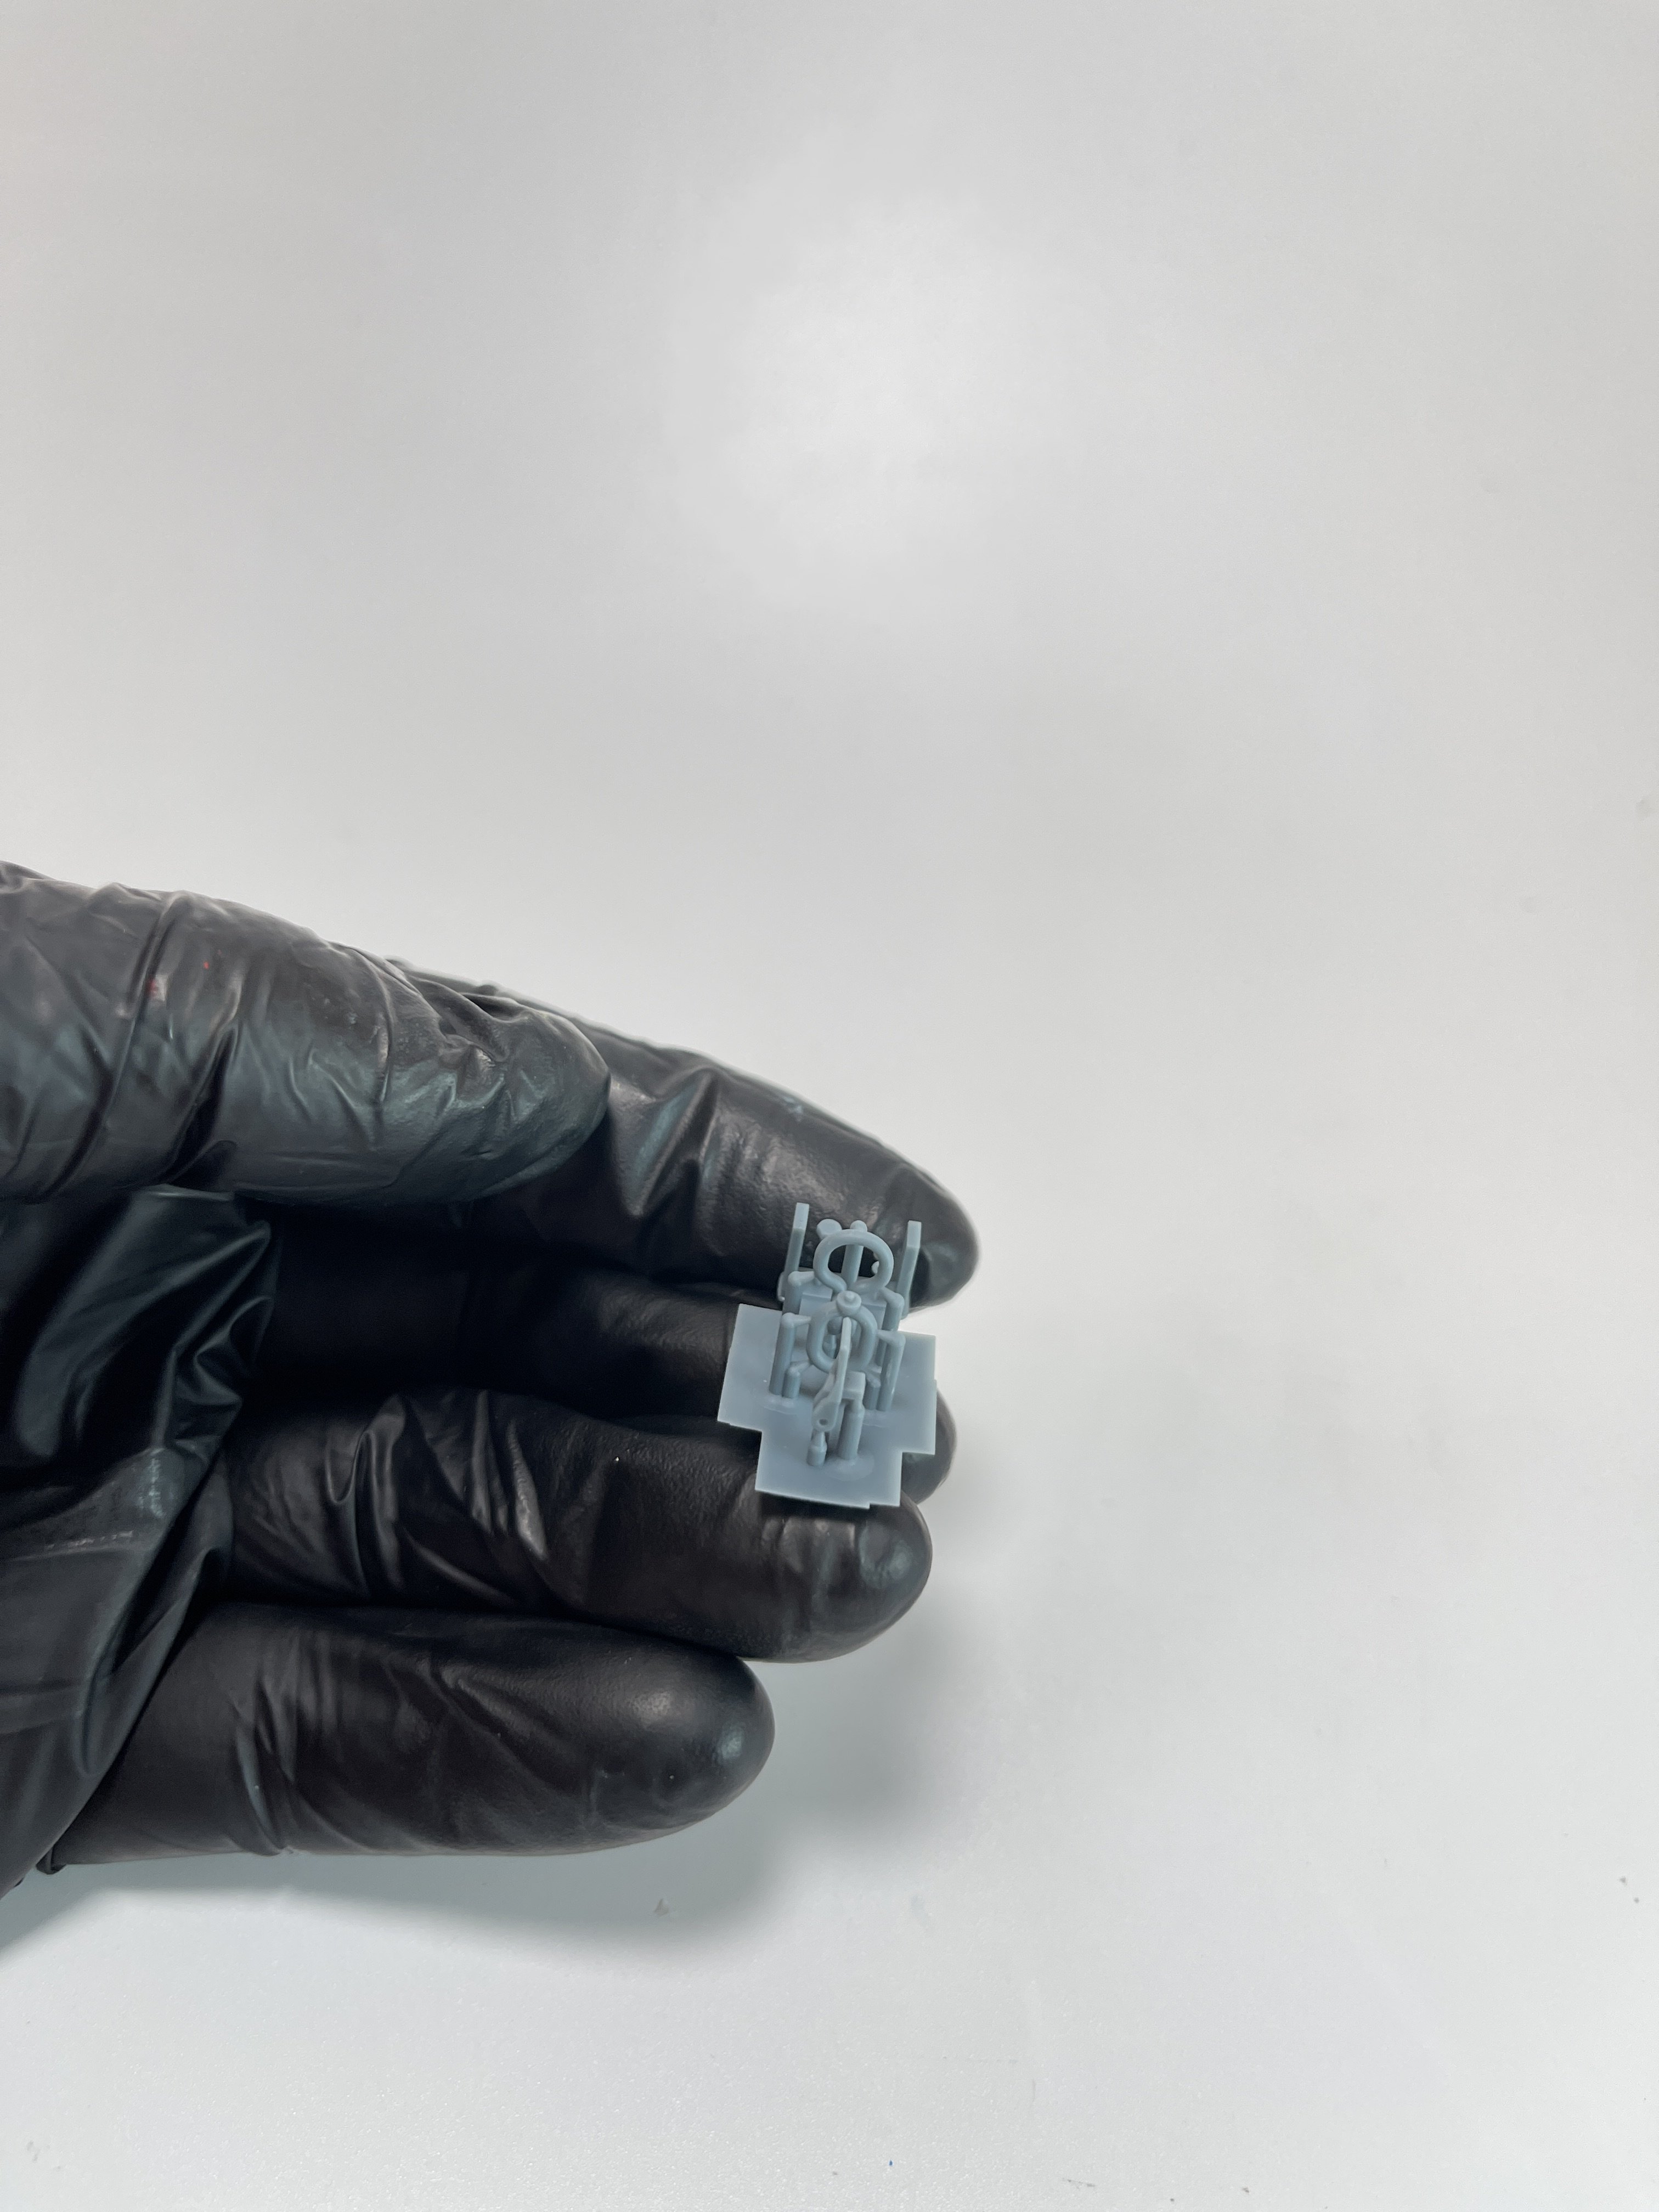
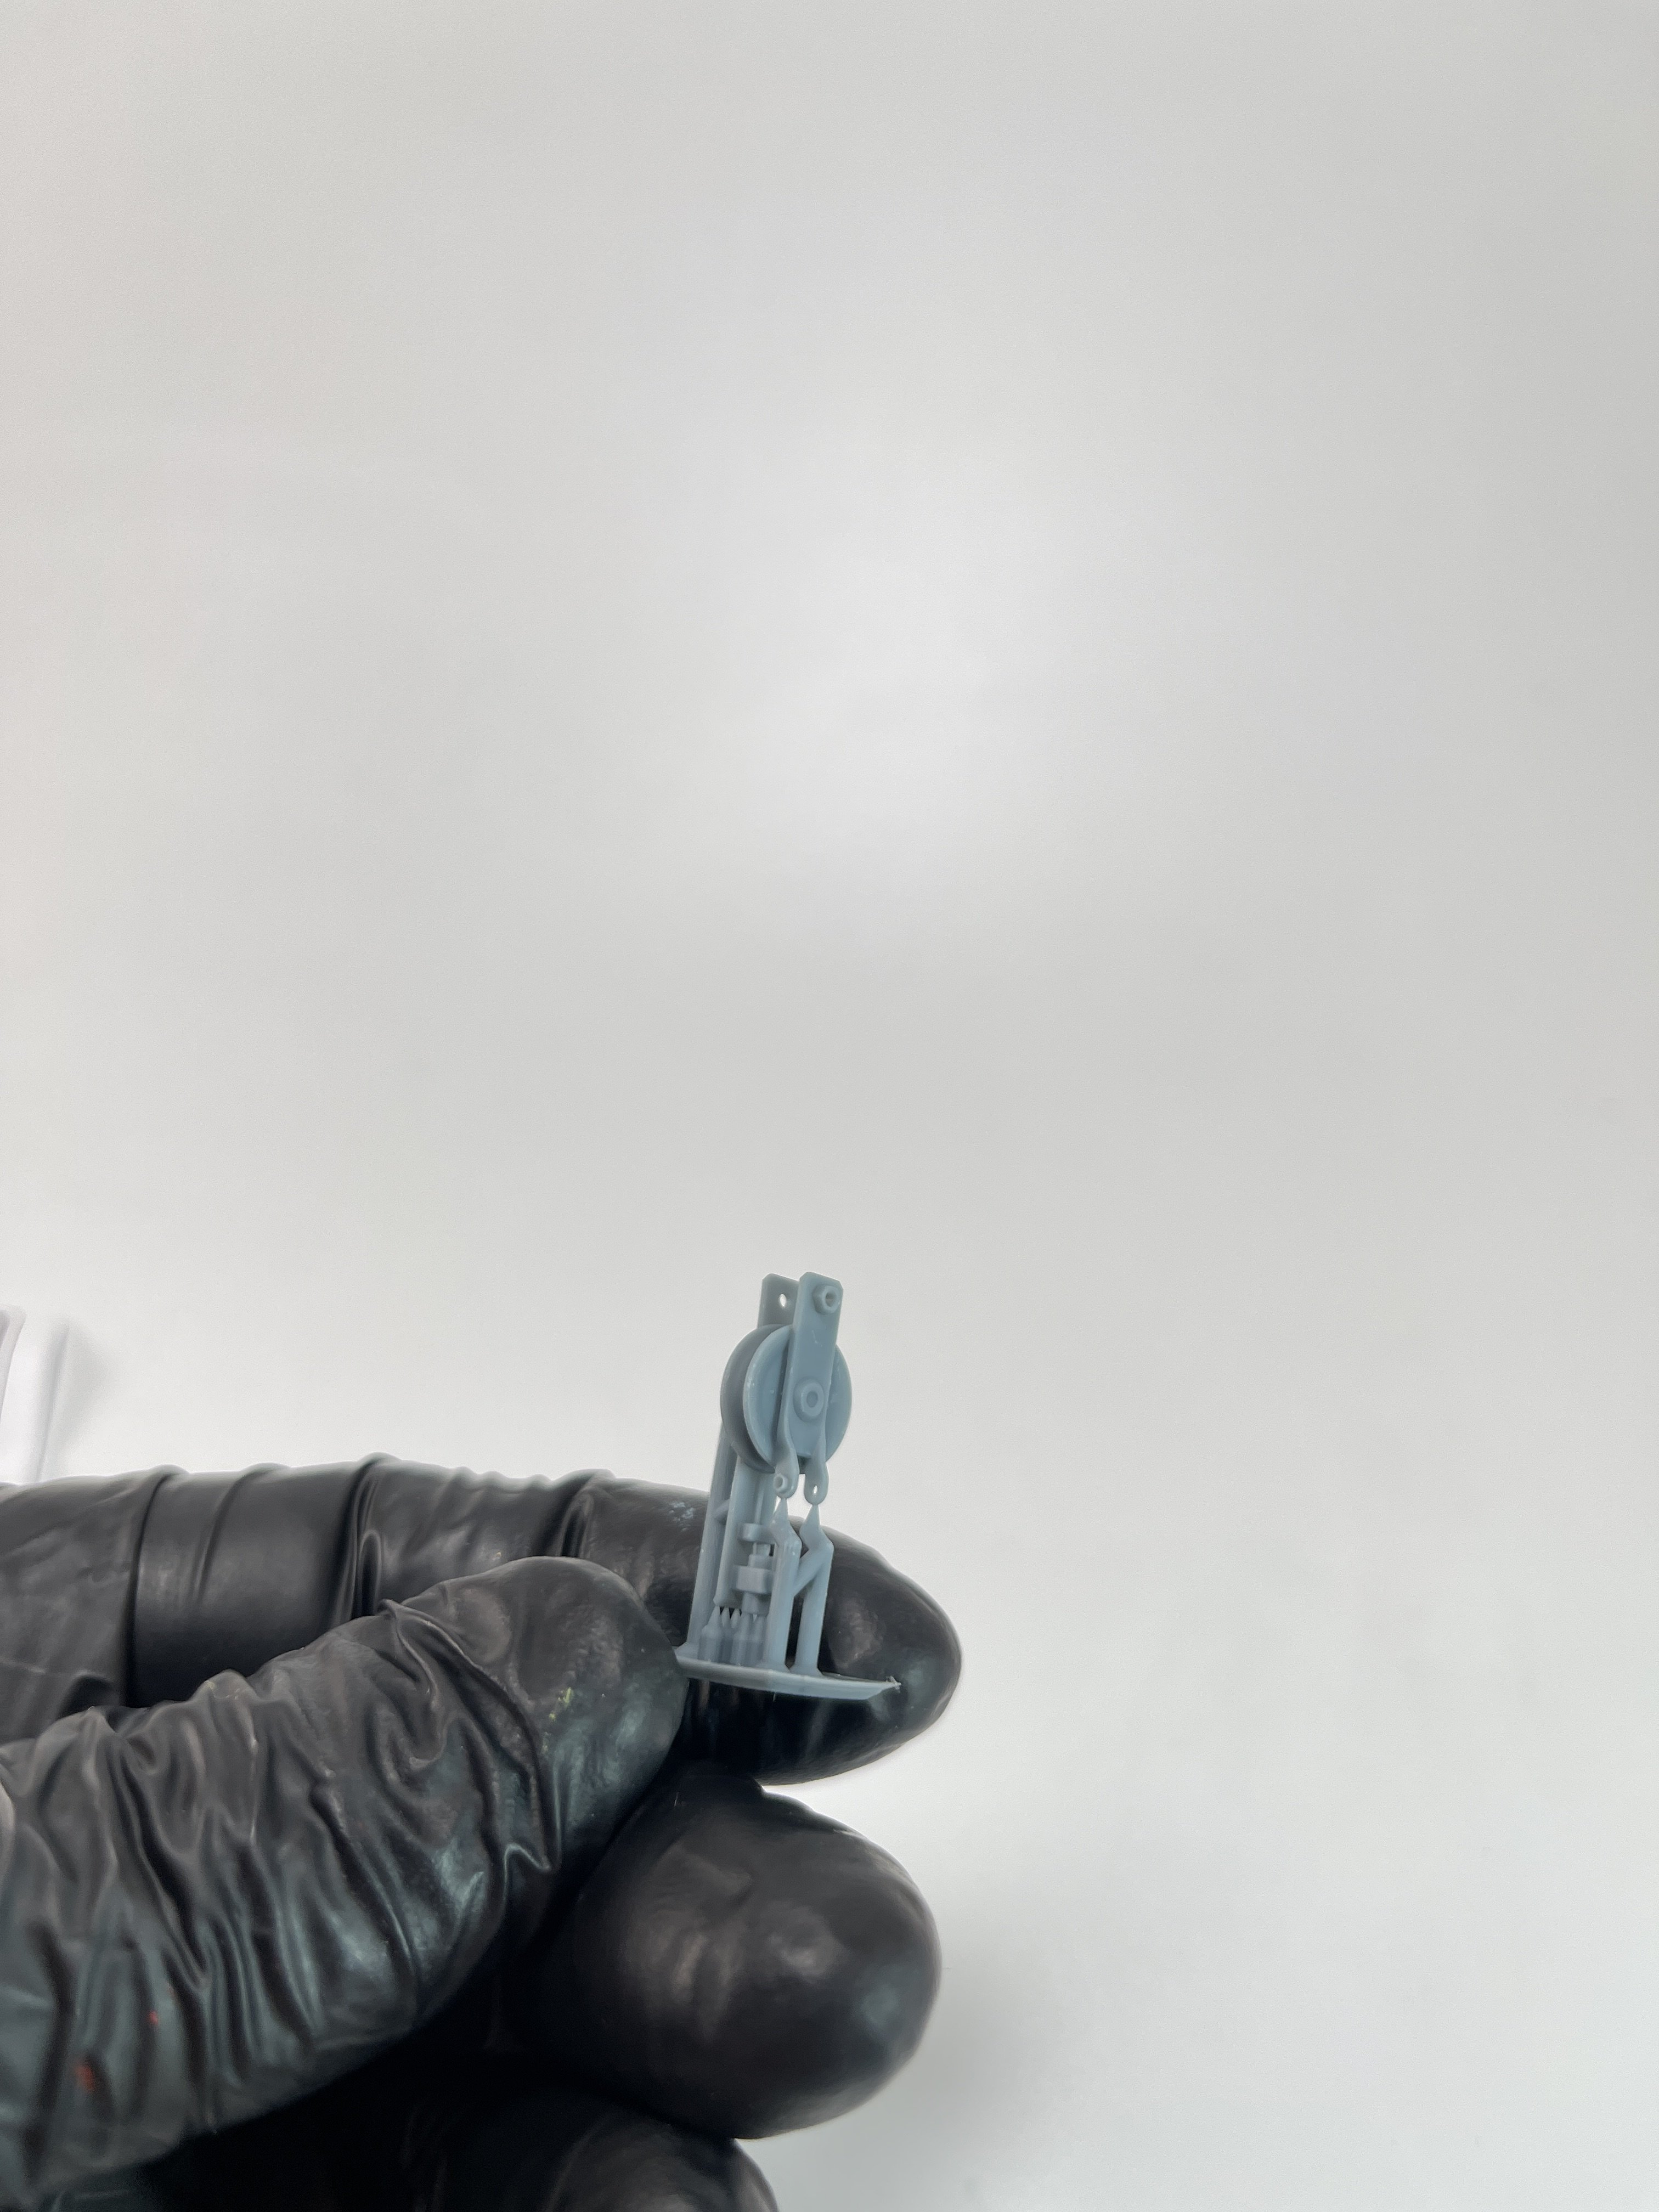
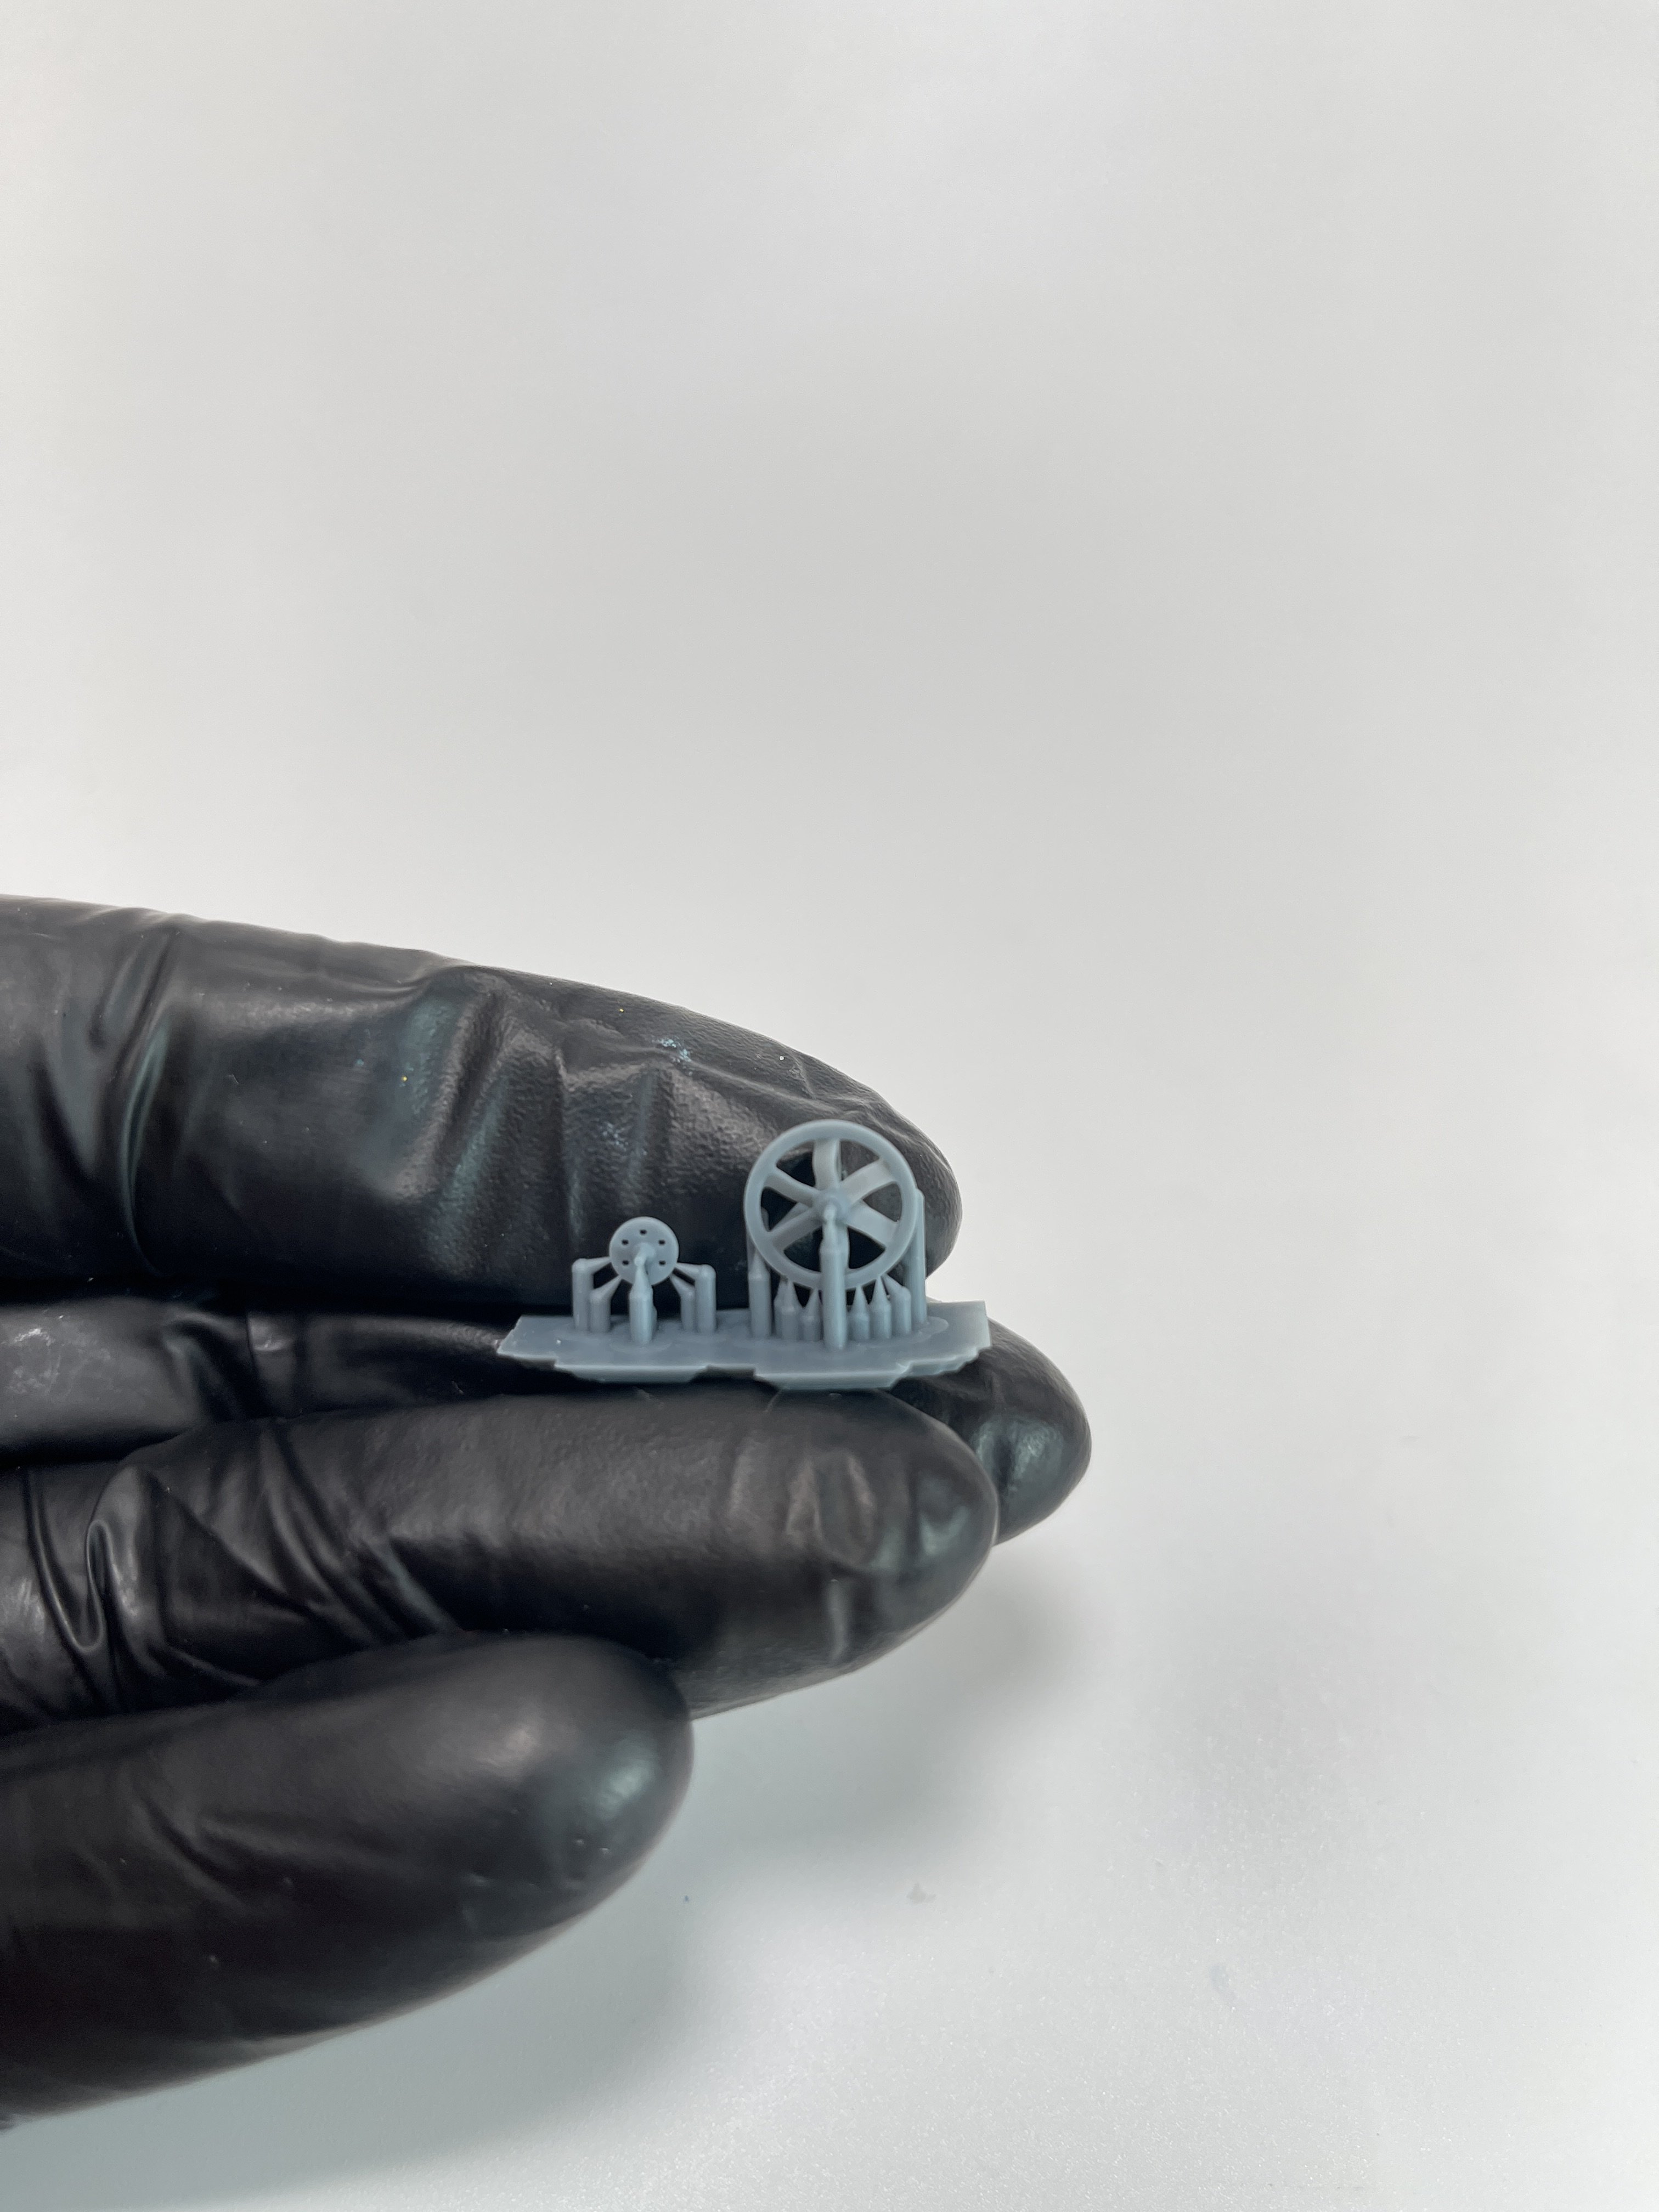
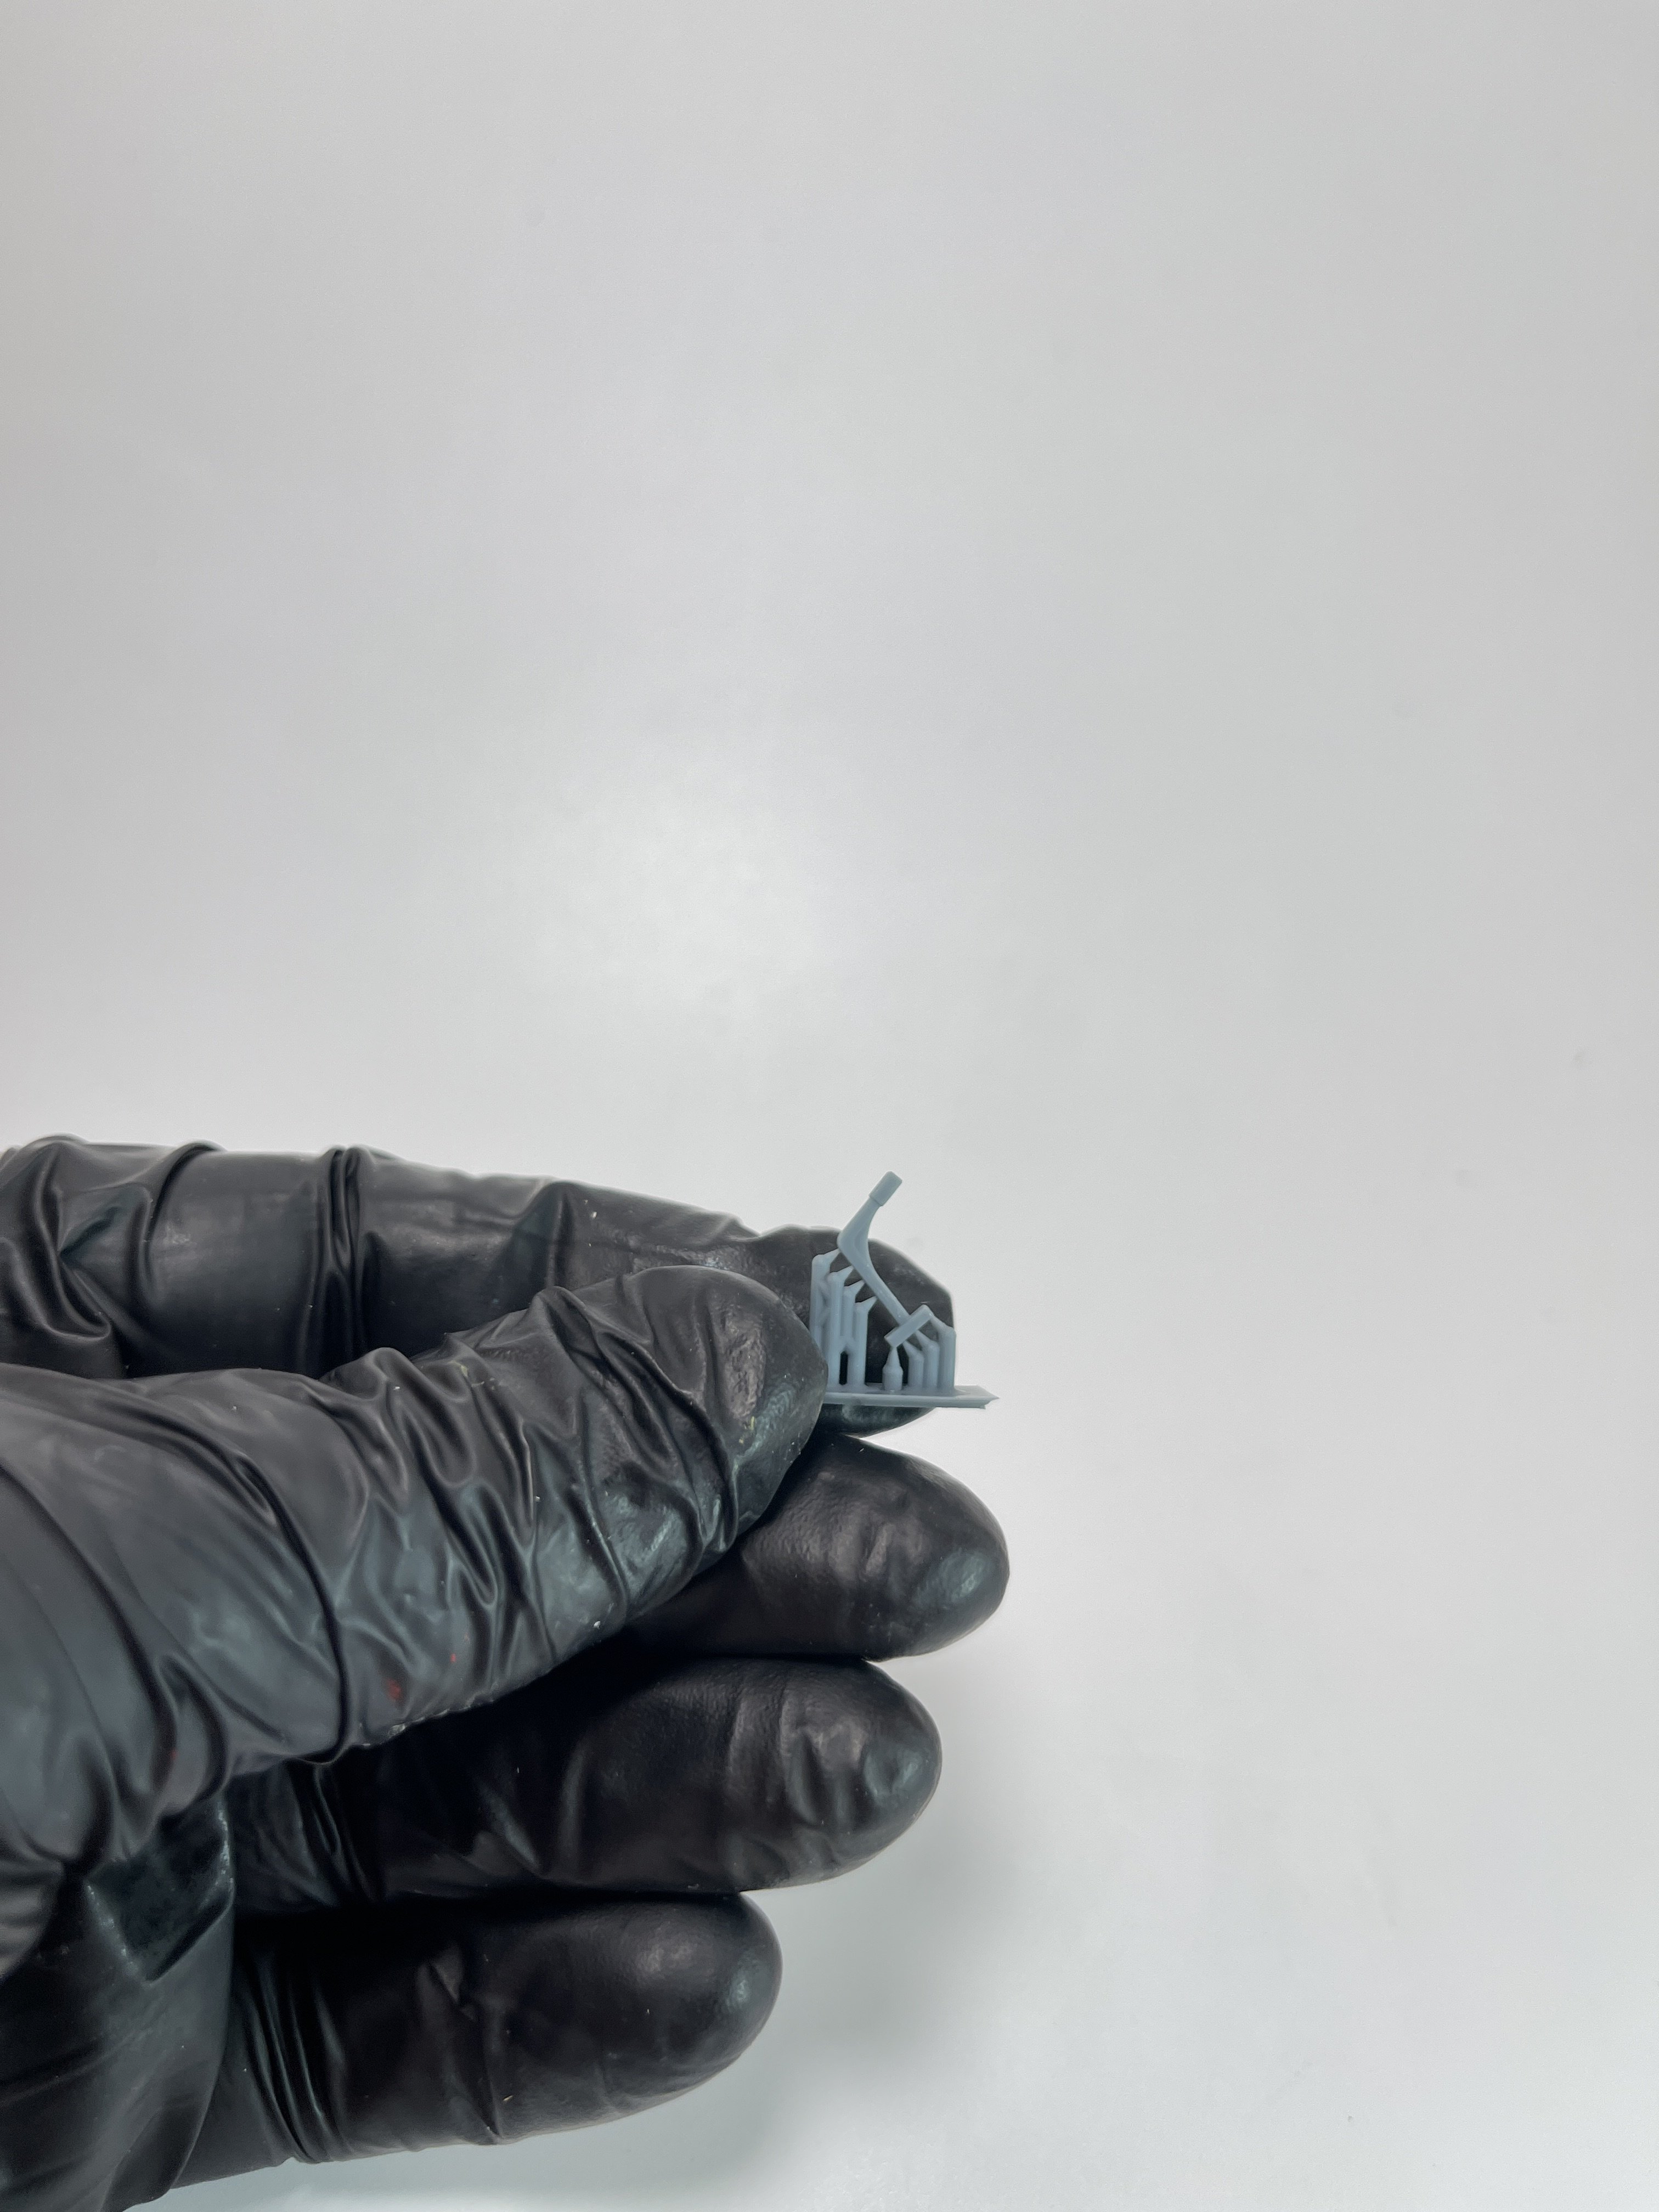
British Engineers Pulleys
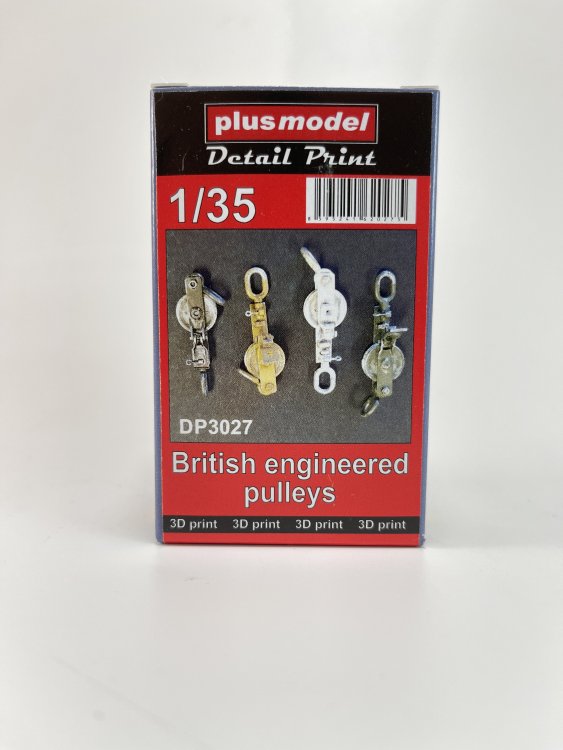
Catalogue n.º DP3027
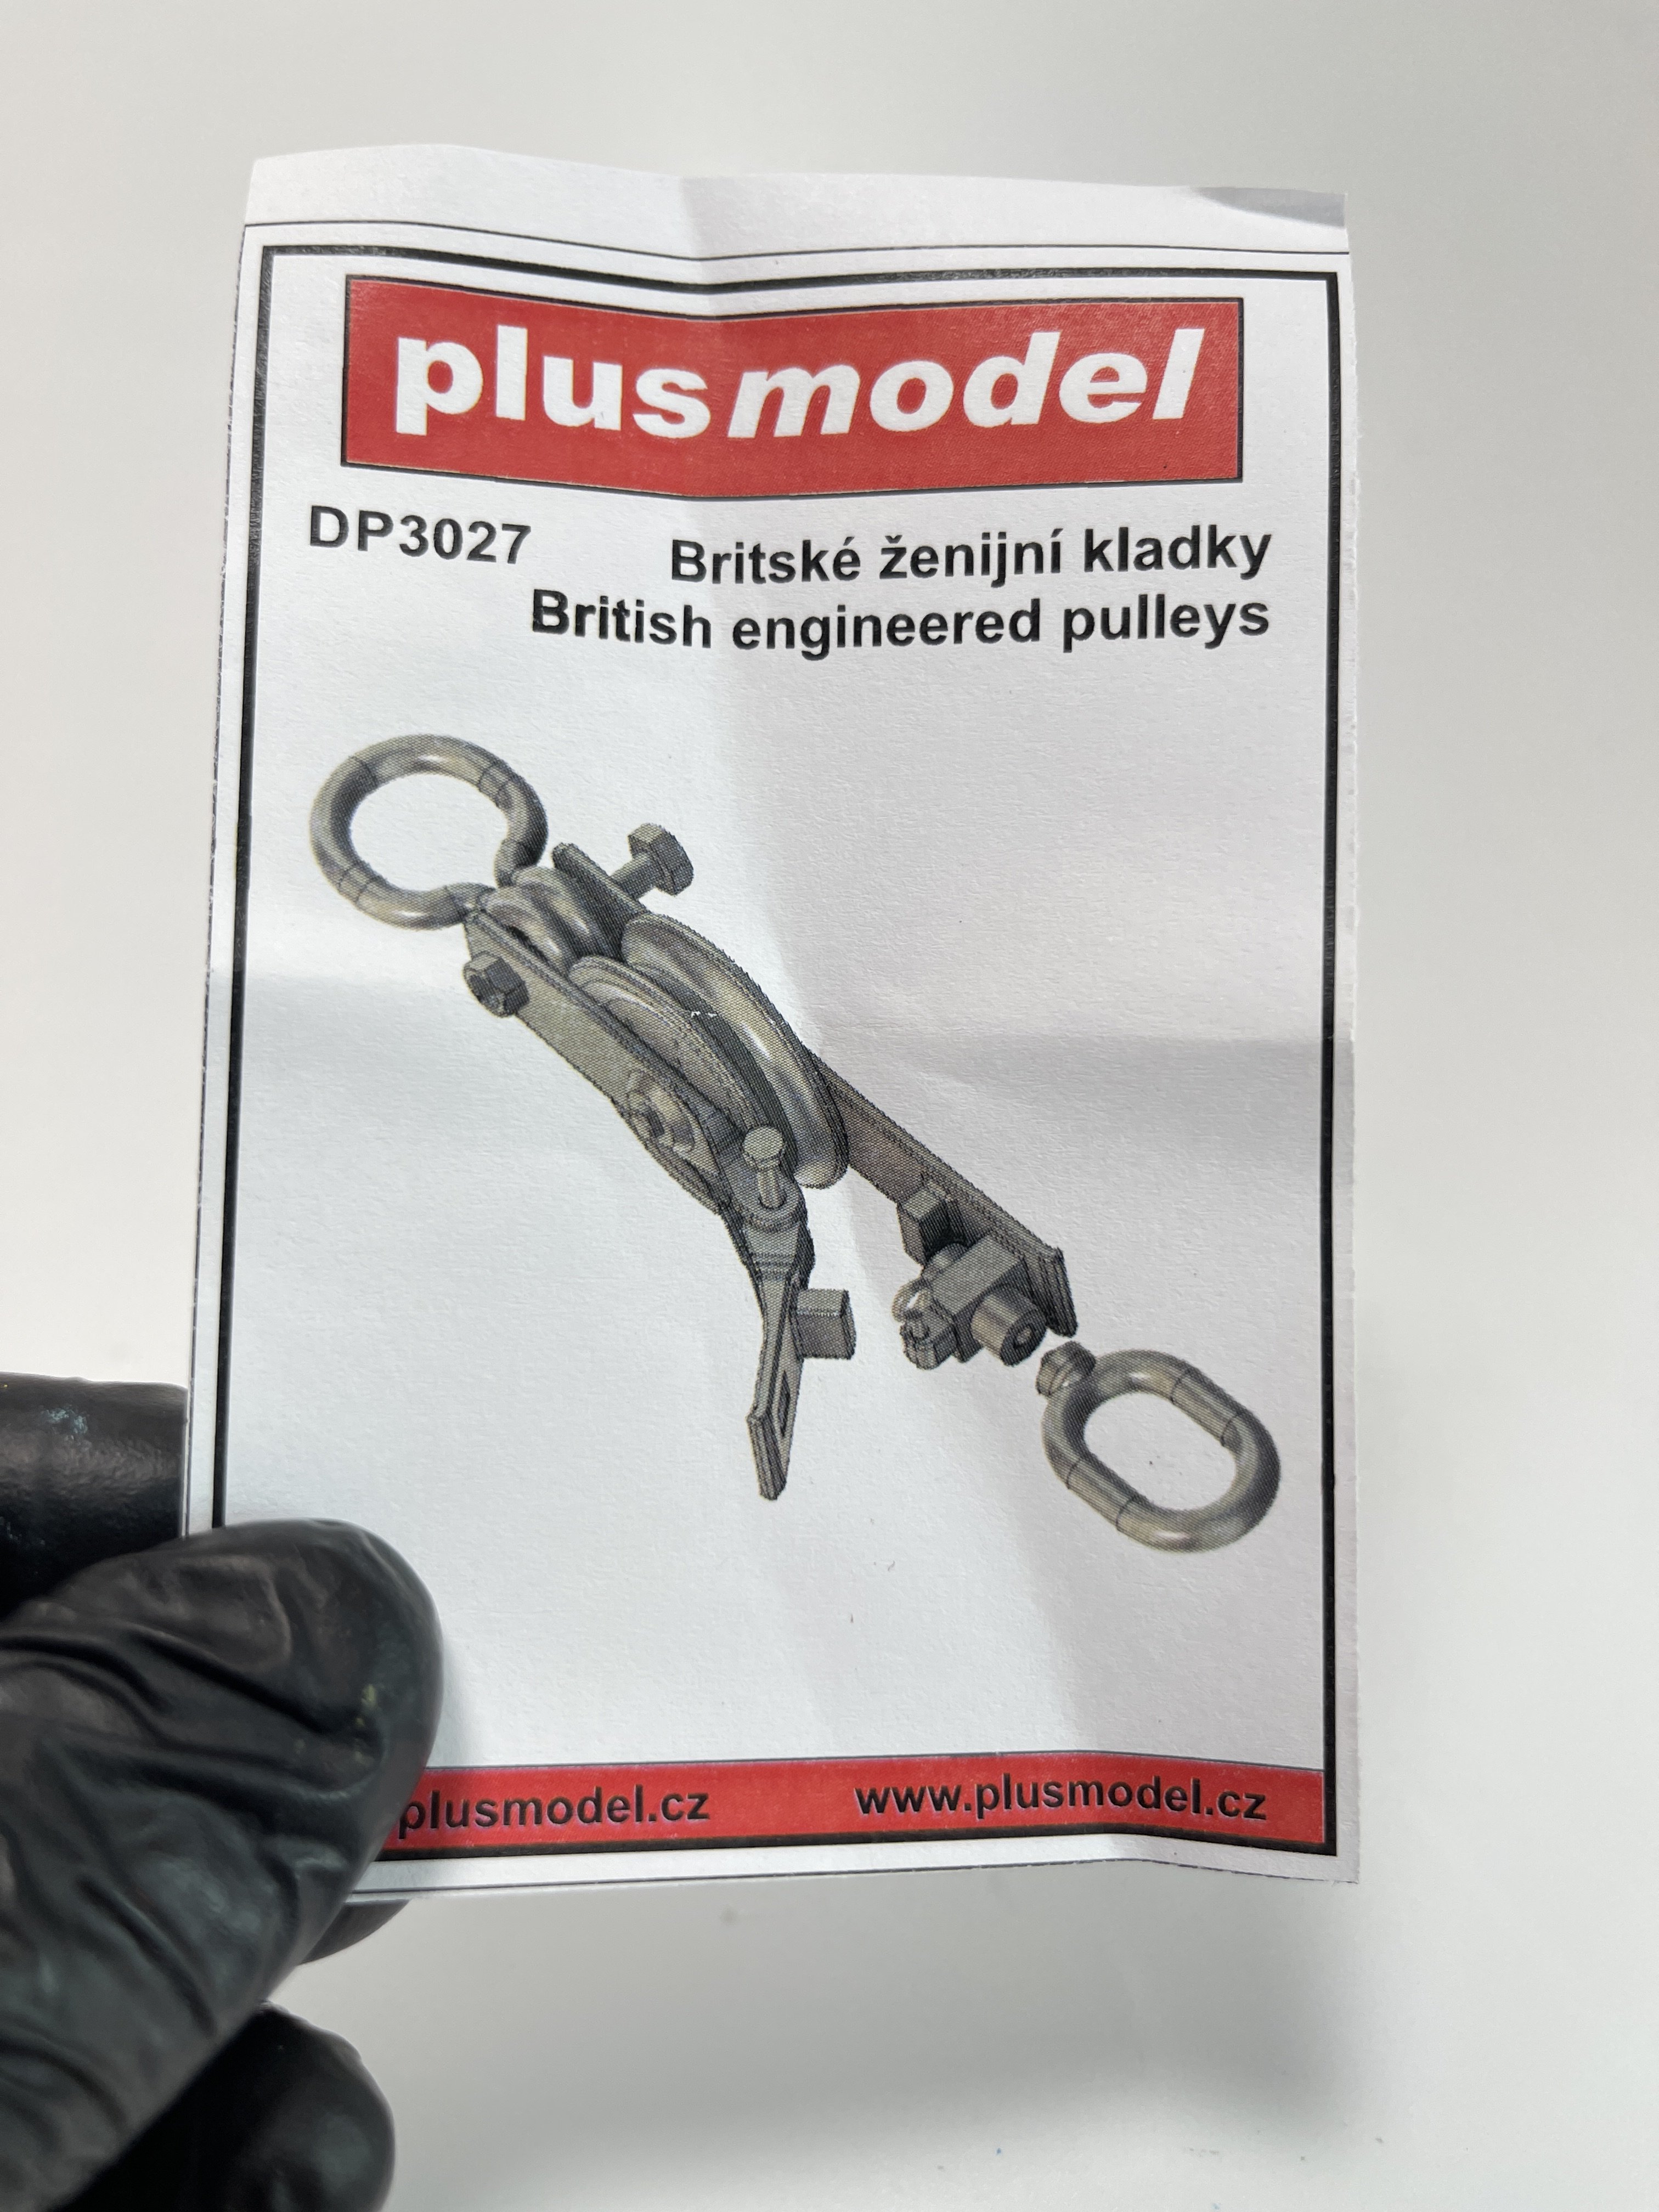
Price Tag: €10,45
Well, are only four but it is a quite complex building with lots of parts, namely many screws and nuts. It’s not an easy build because you don’t get any instructions but a full image of it. So this set can`t be for a novice modeler at all but expert modeler (or a high intermediate modeler)
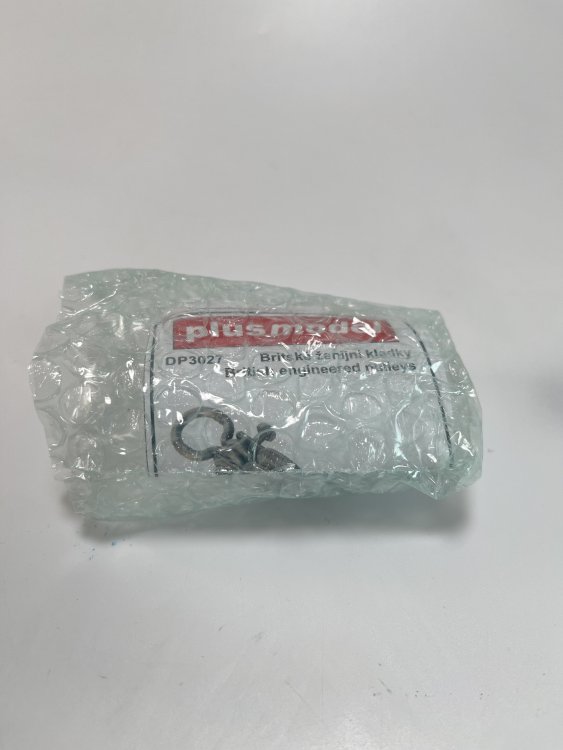
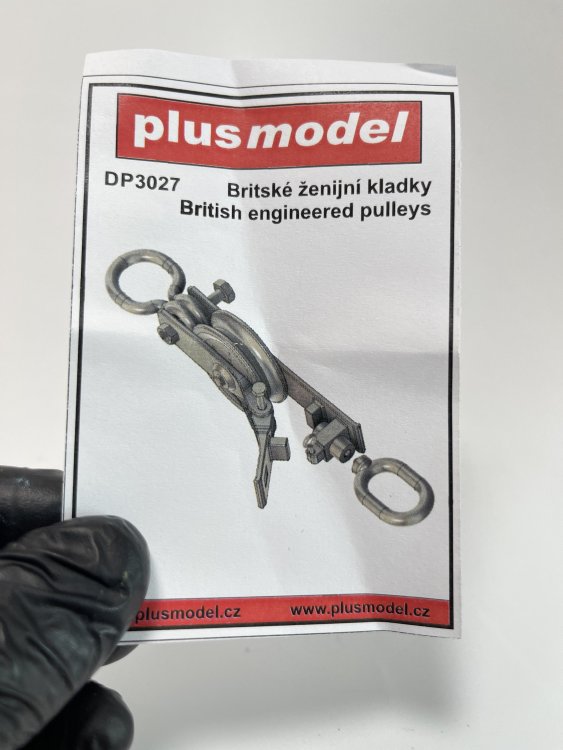
The detail, once again is impressing and everything and these can by use almost in every diorama with British recovery vehicle or in a workshop.
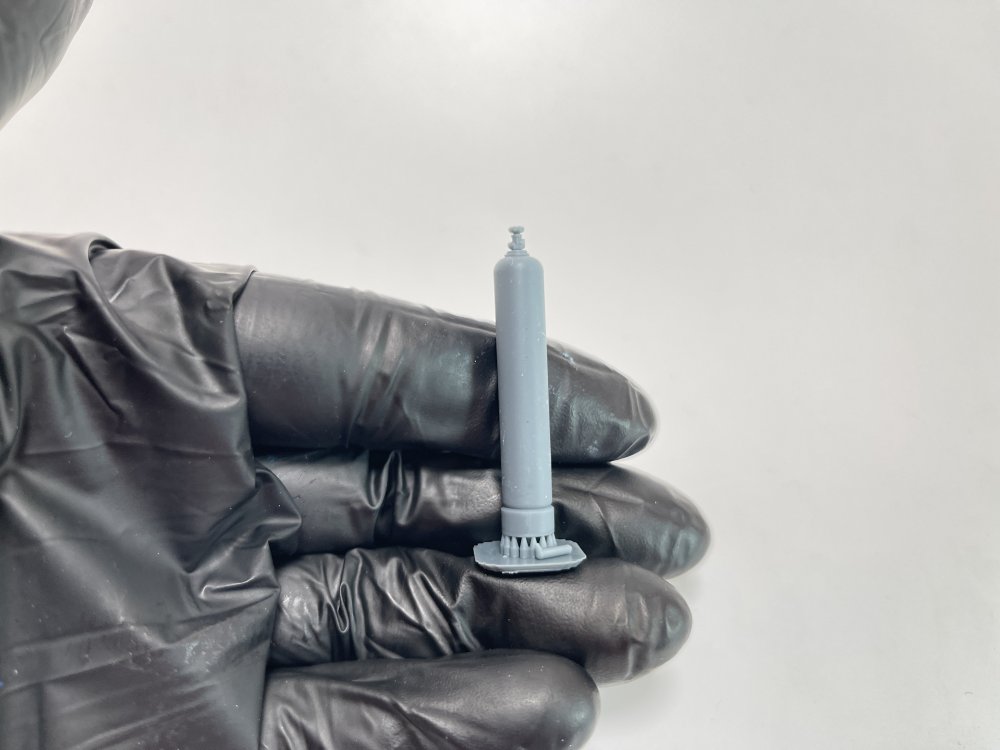
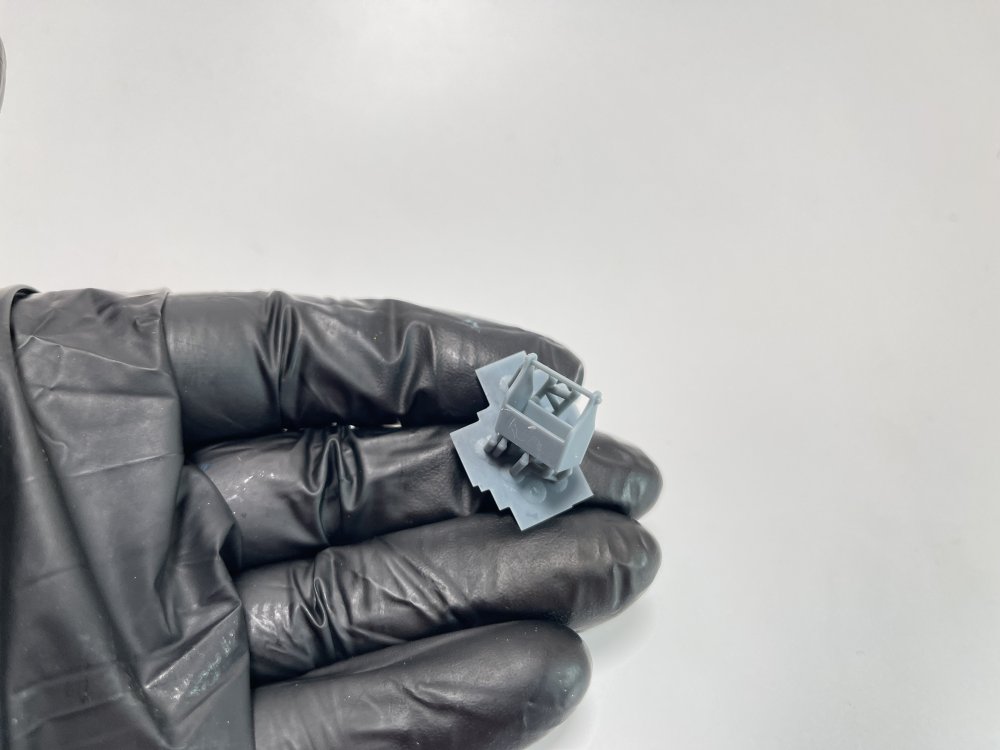
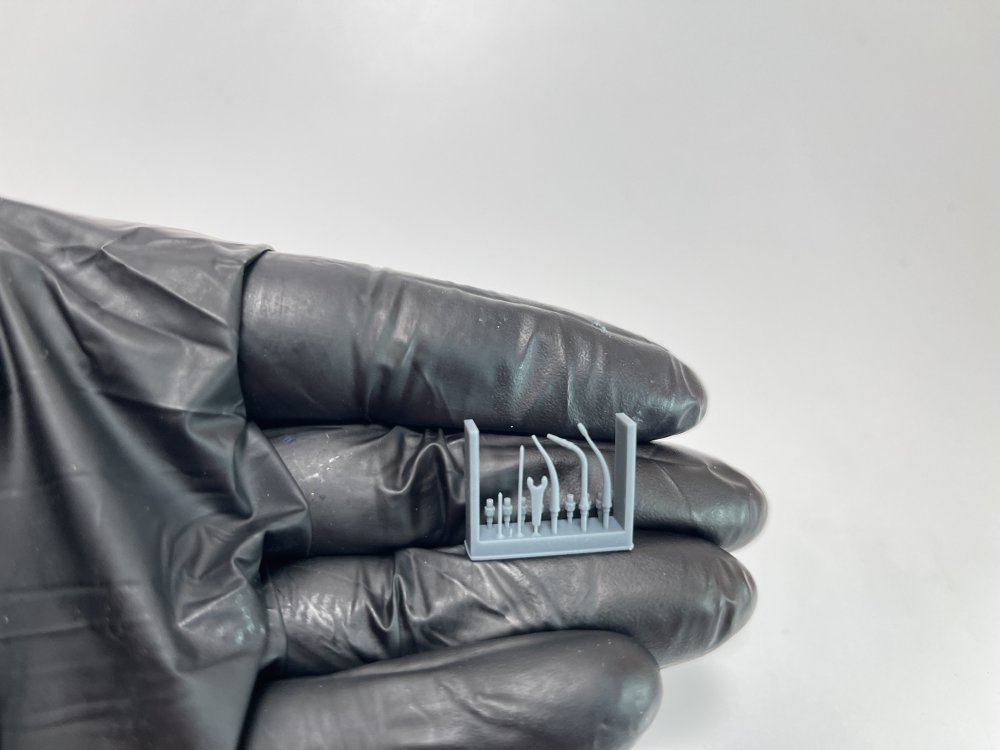
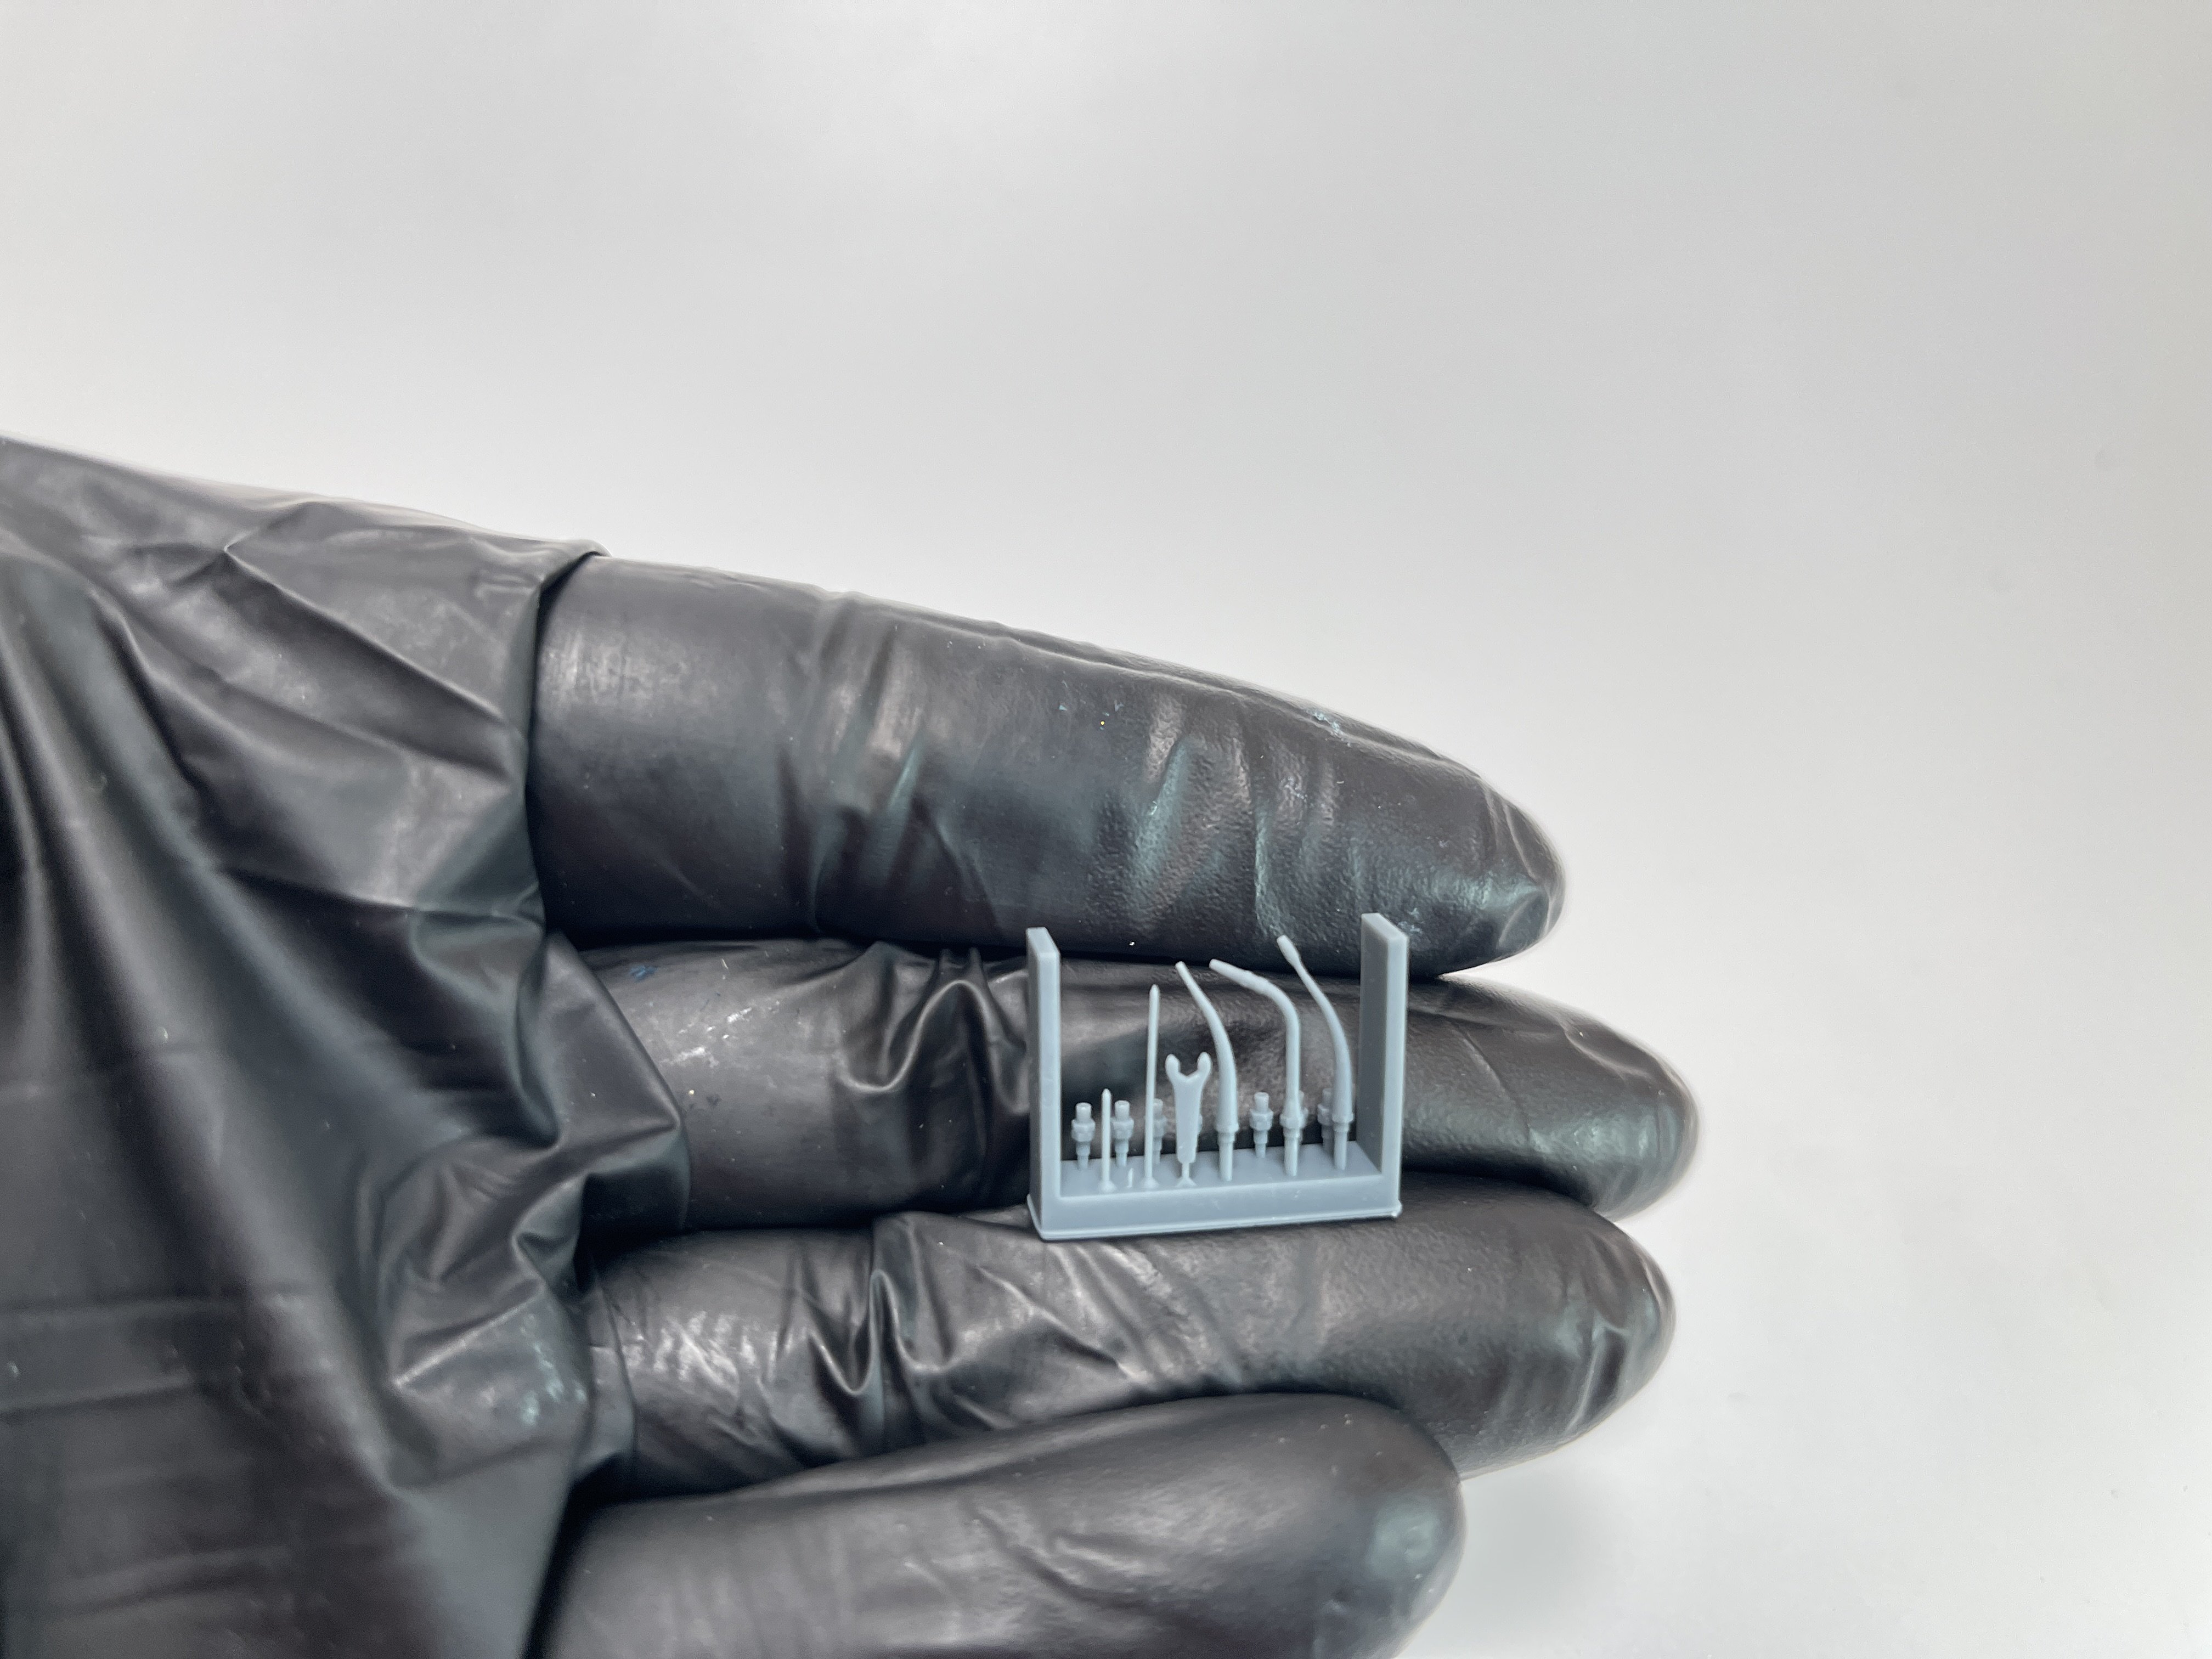
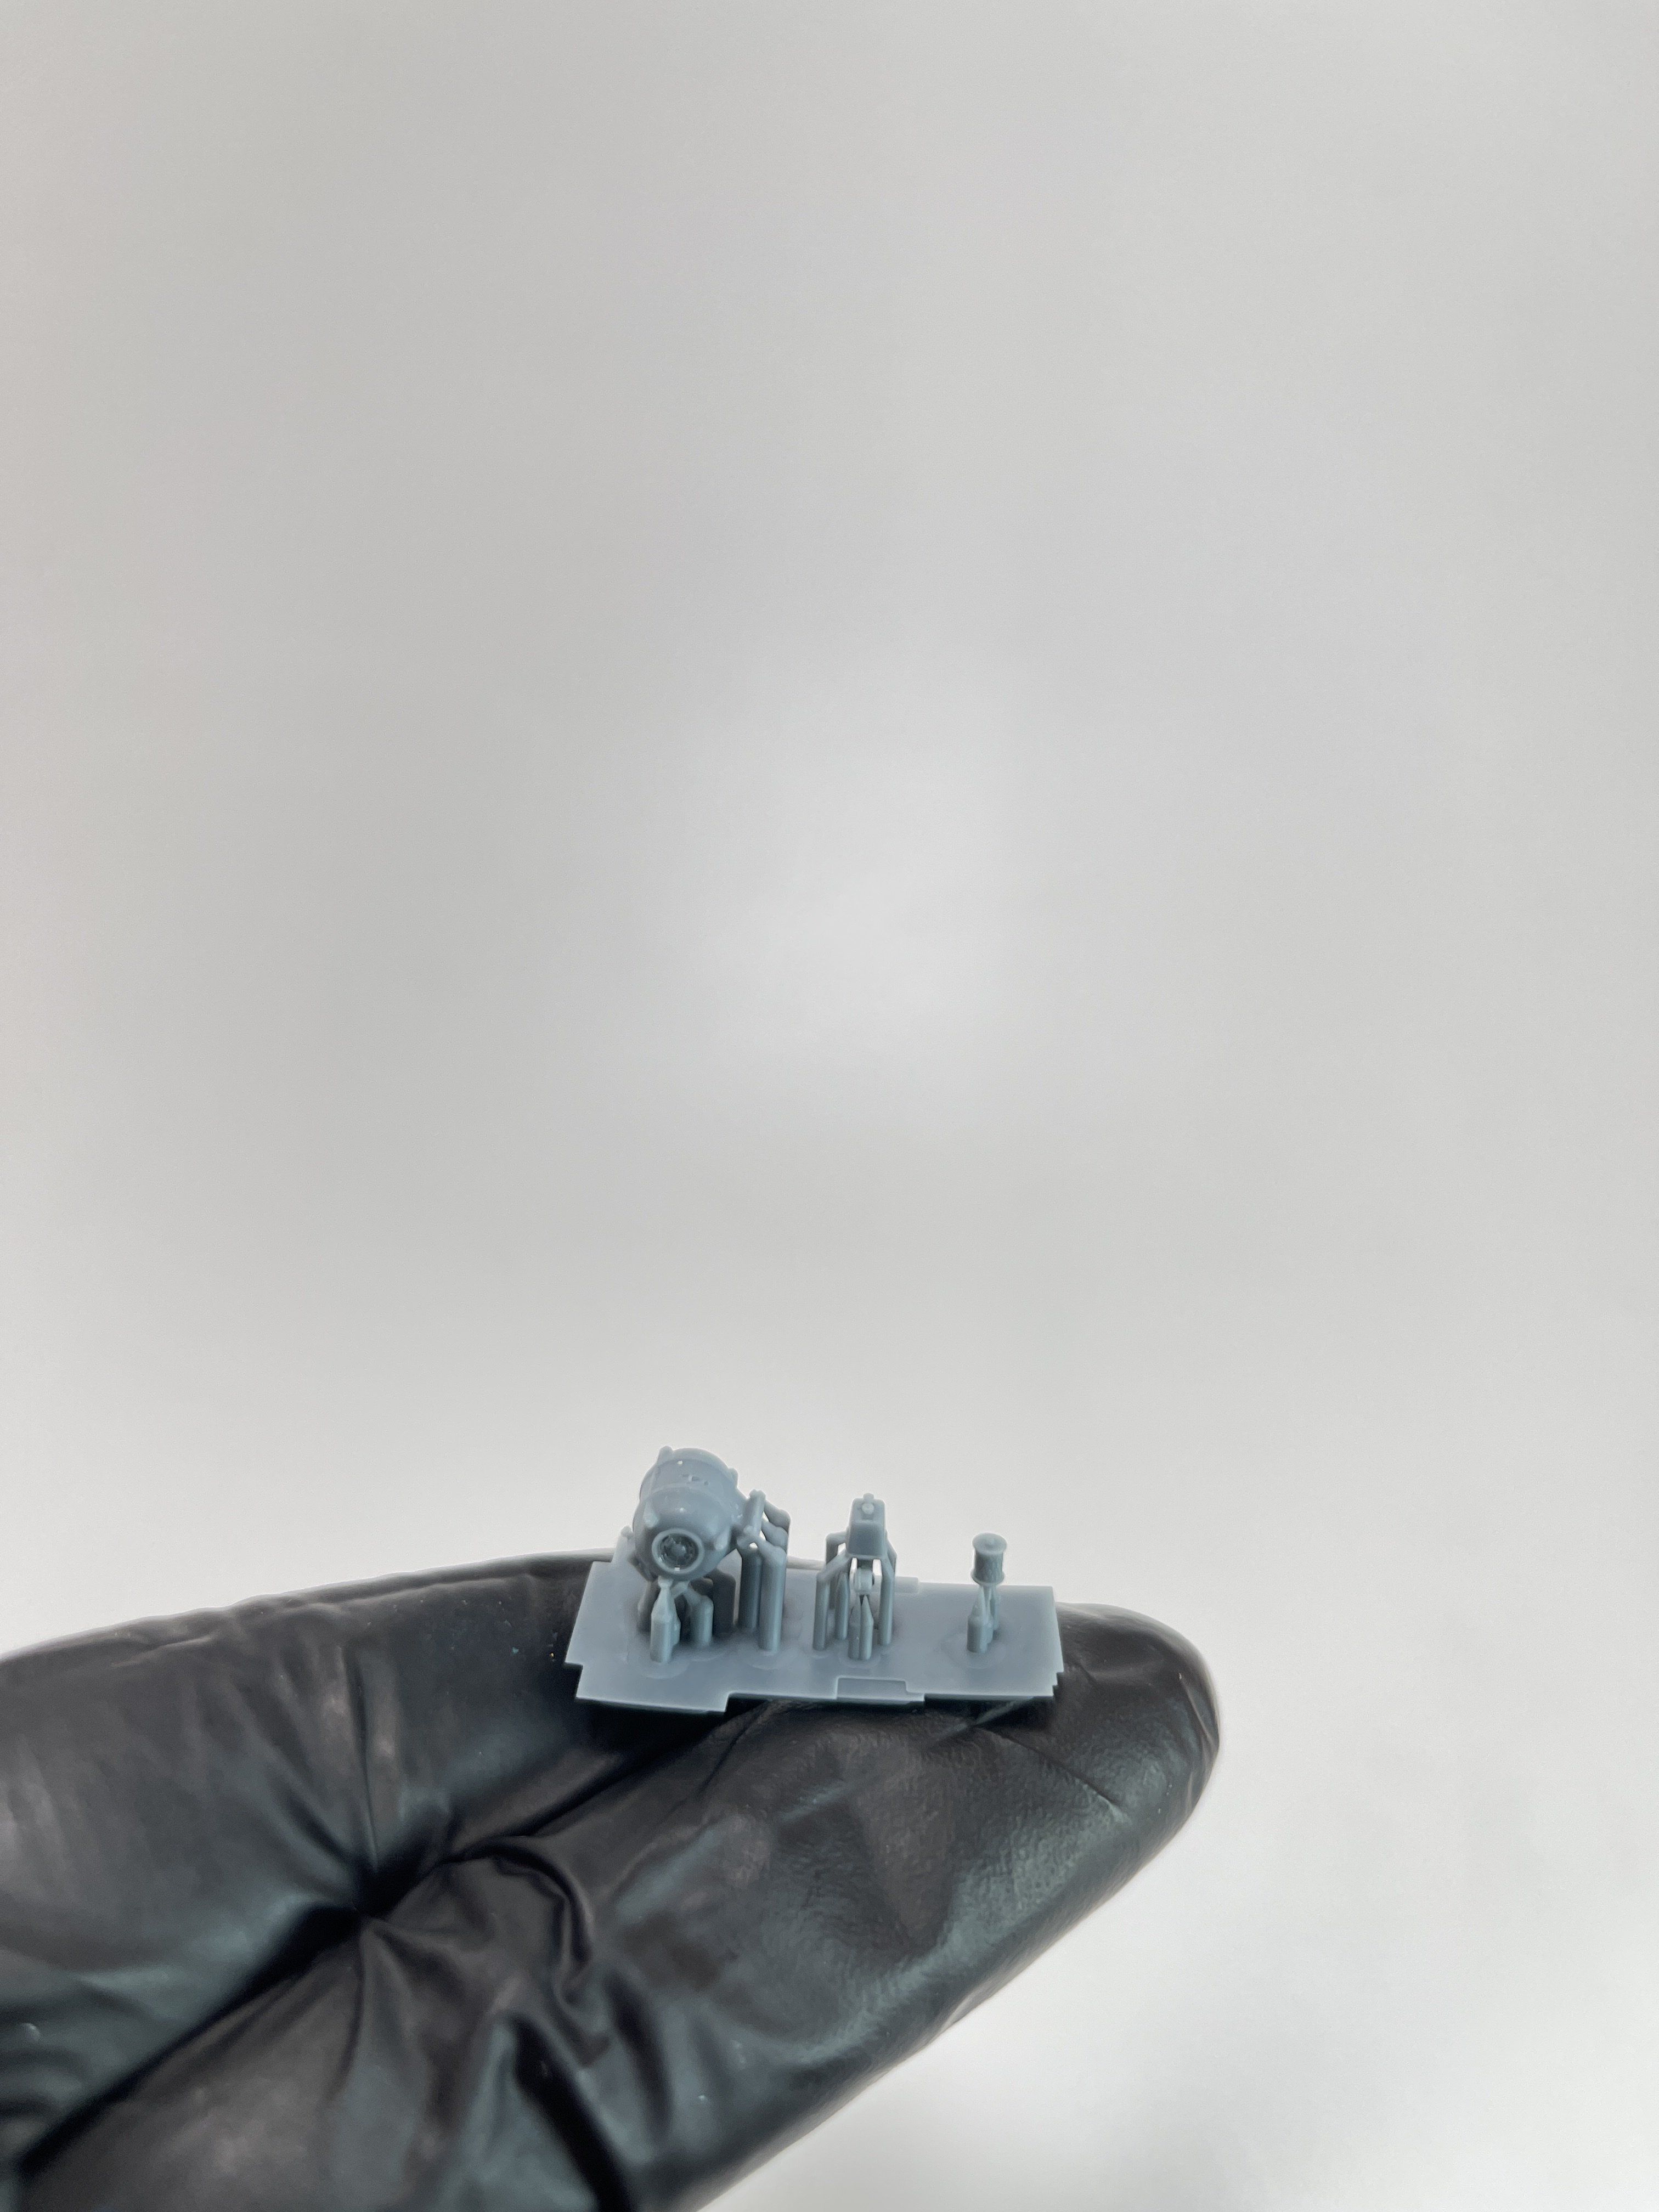
German Welding Kit WWII
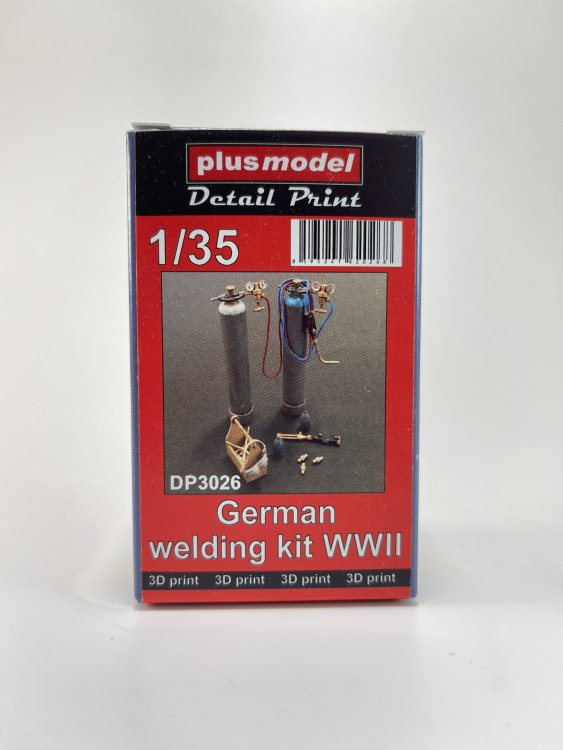
Catalogue n.º DP3026
Price tag: 12,30€
This set is perfect for any WWII period workshop.
With this set, the modeler receives two gas cylinders, a welding system, valves and respective tools and the respective box to place the tools.
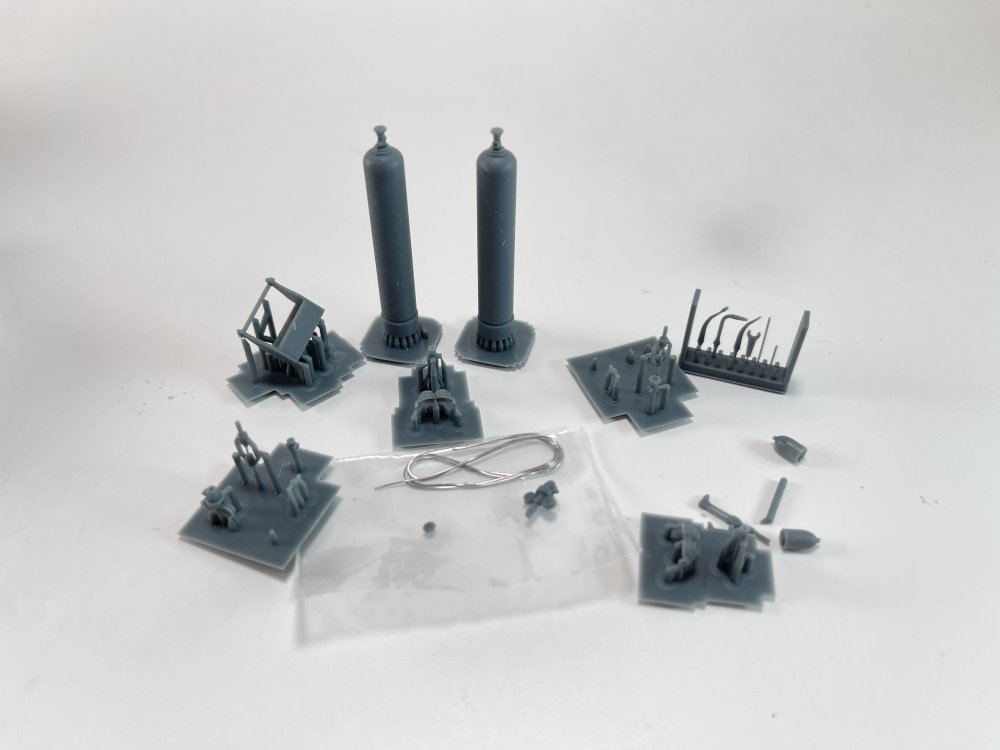

The instructions are sparse, you must follow the small instructions on the small instruction sheet and the rest must be observed by the box art that has the entire kit built.
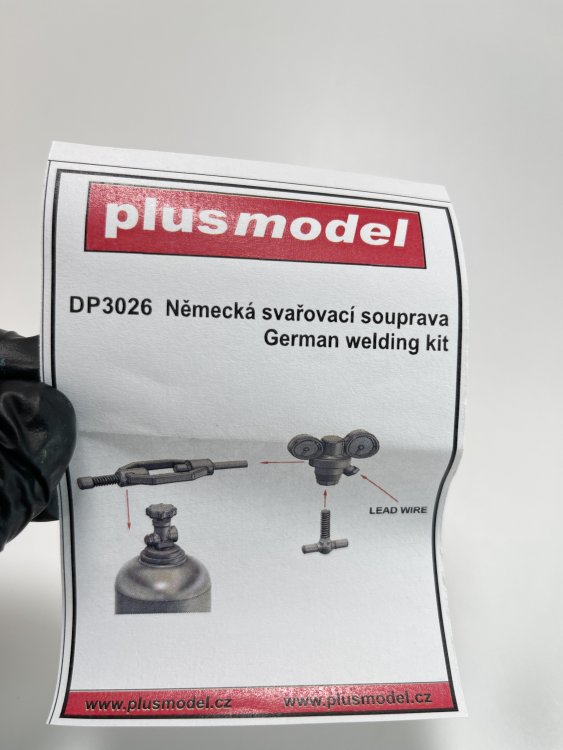
There is no decal or any indication of painting, leaving it up to the modeler how he wants to paint it.
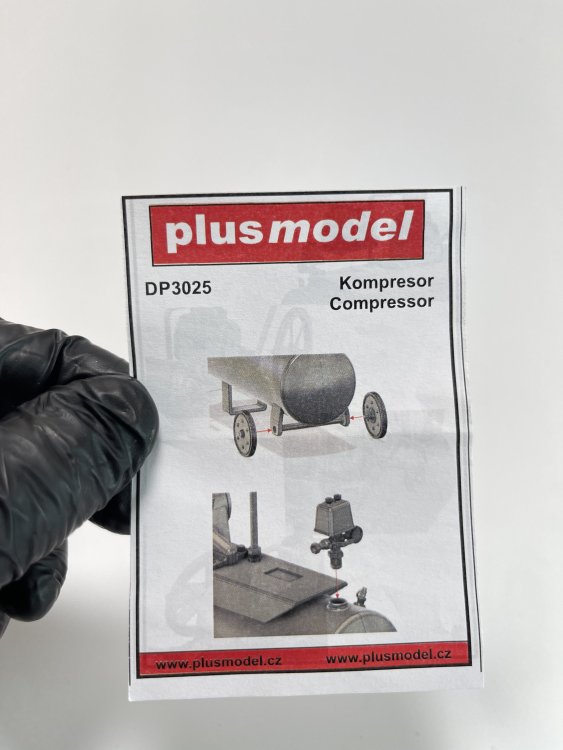
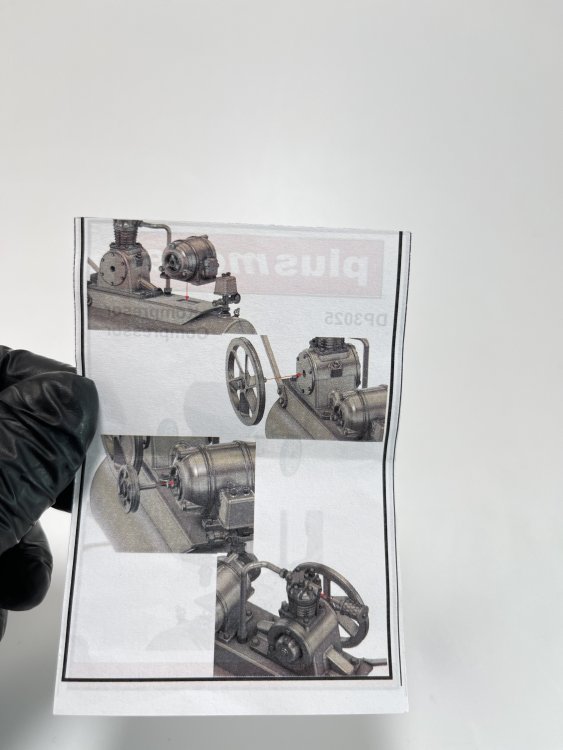
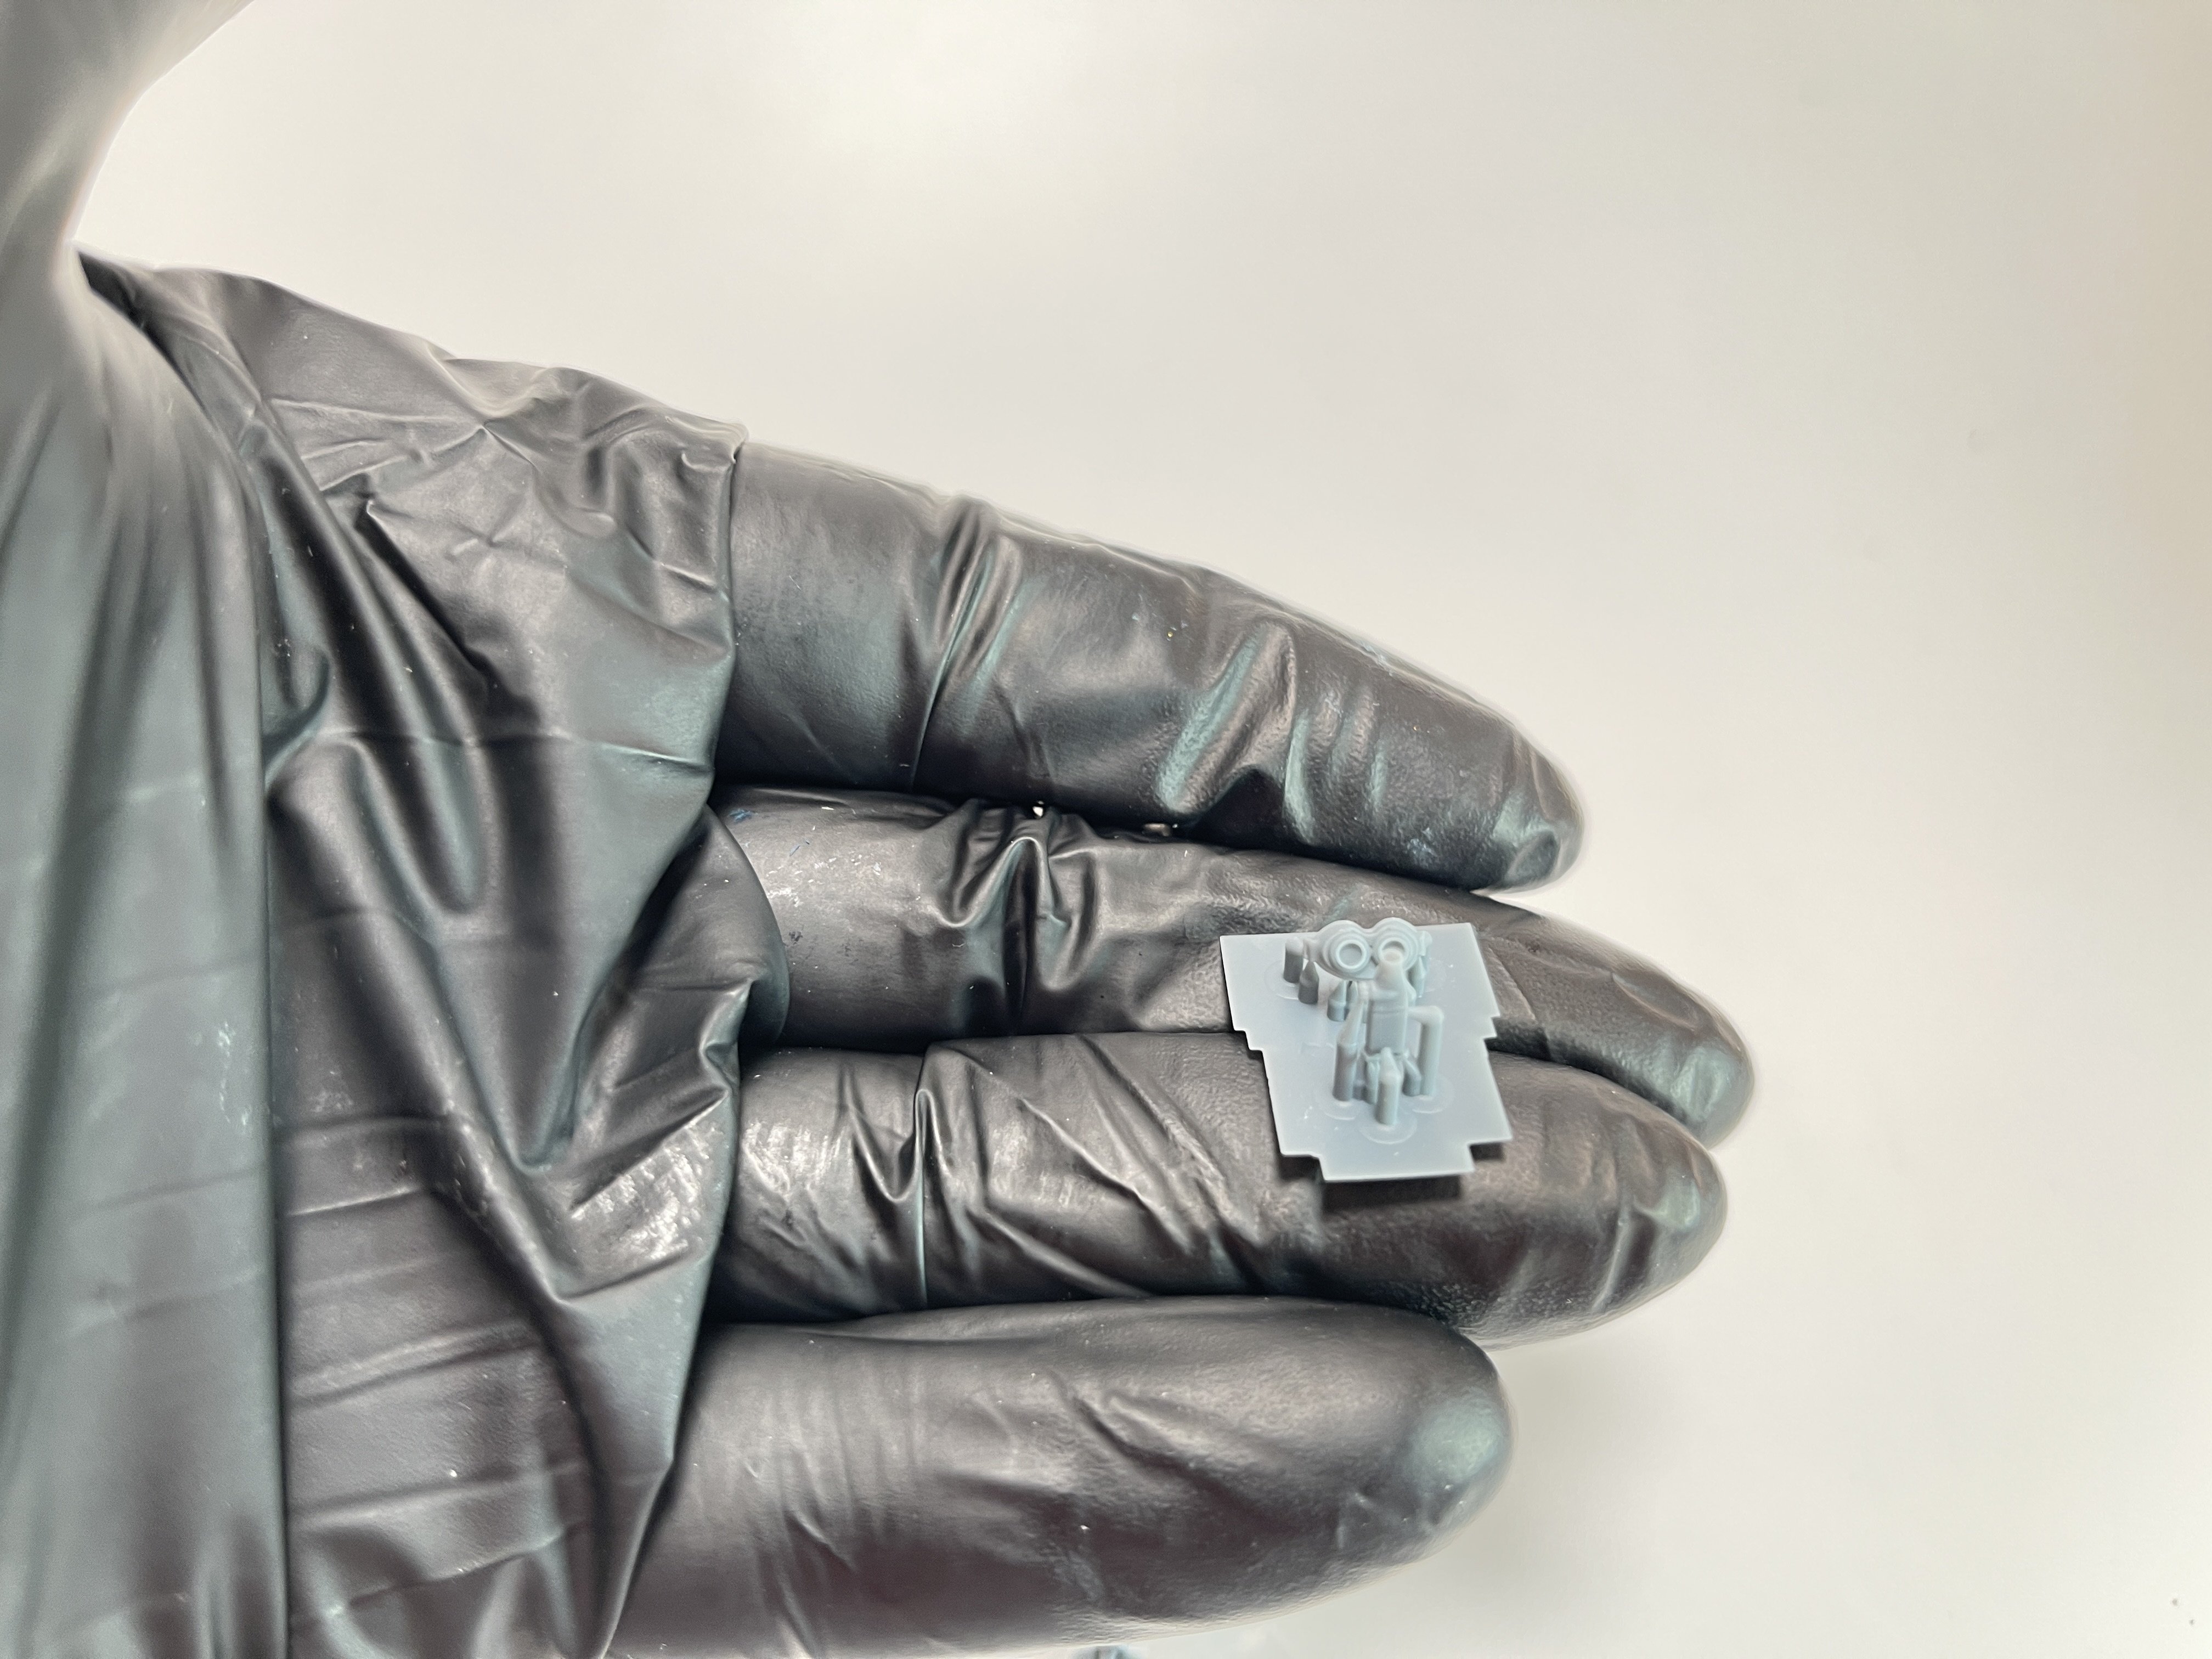
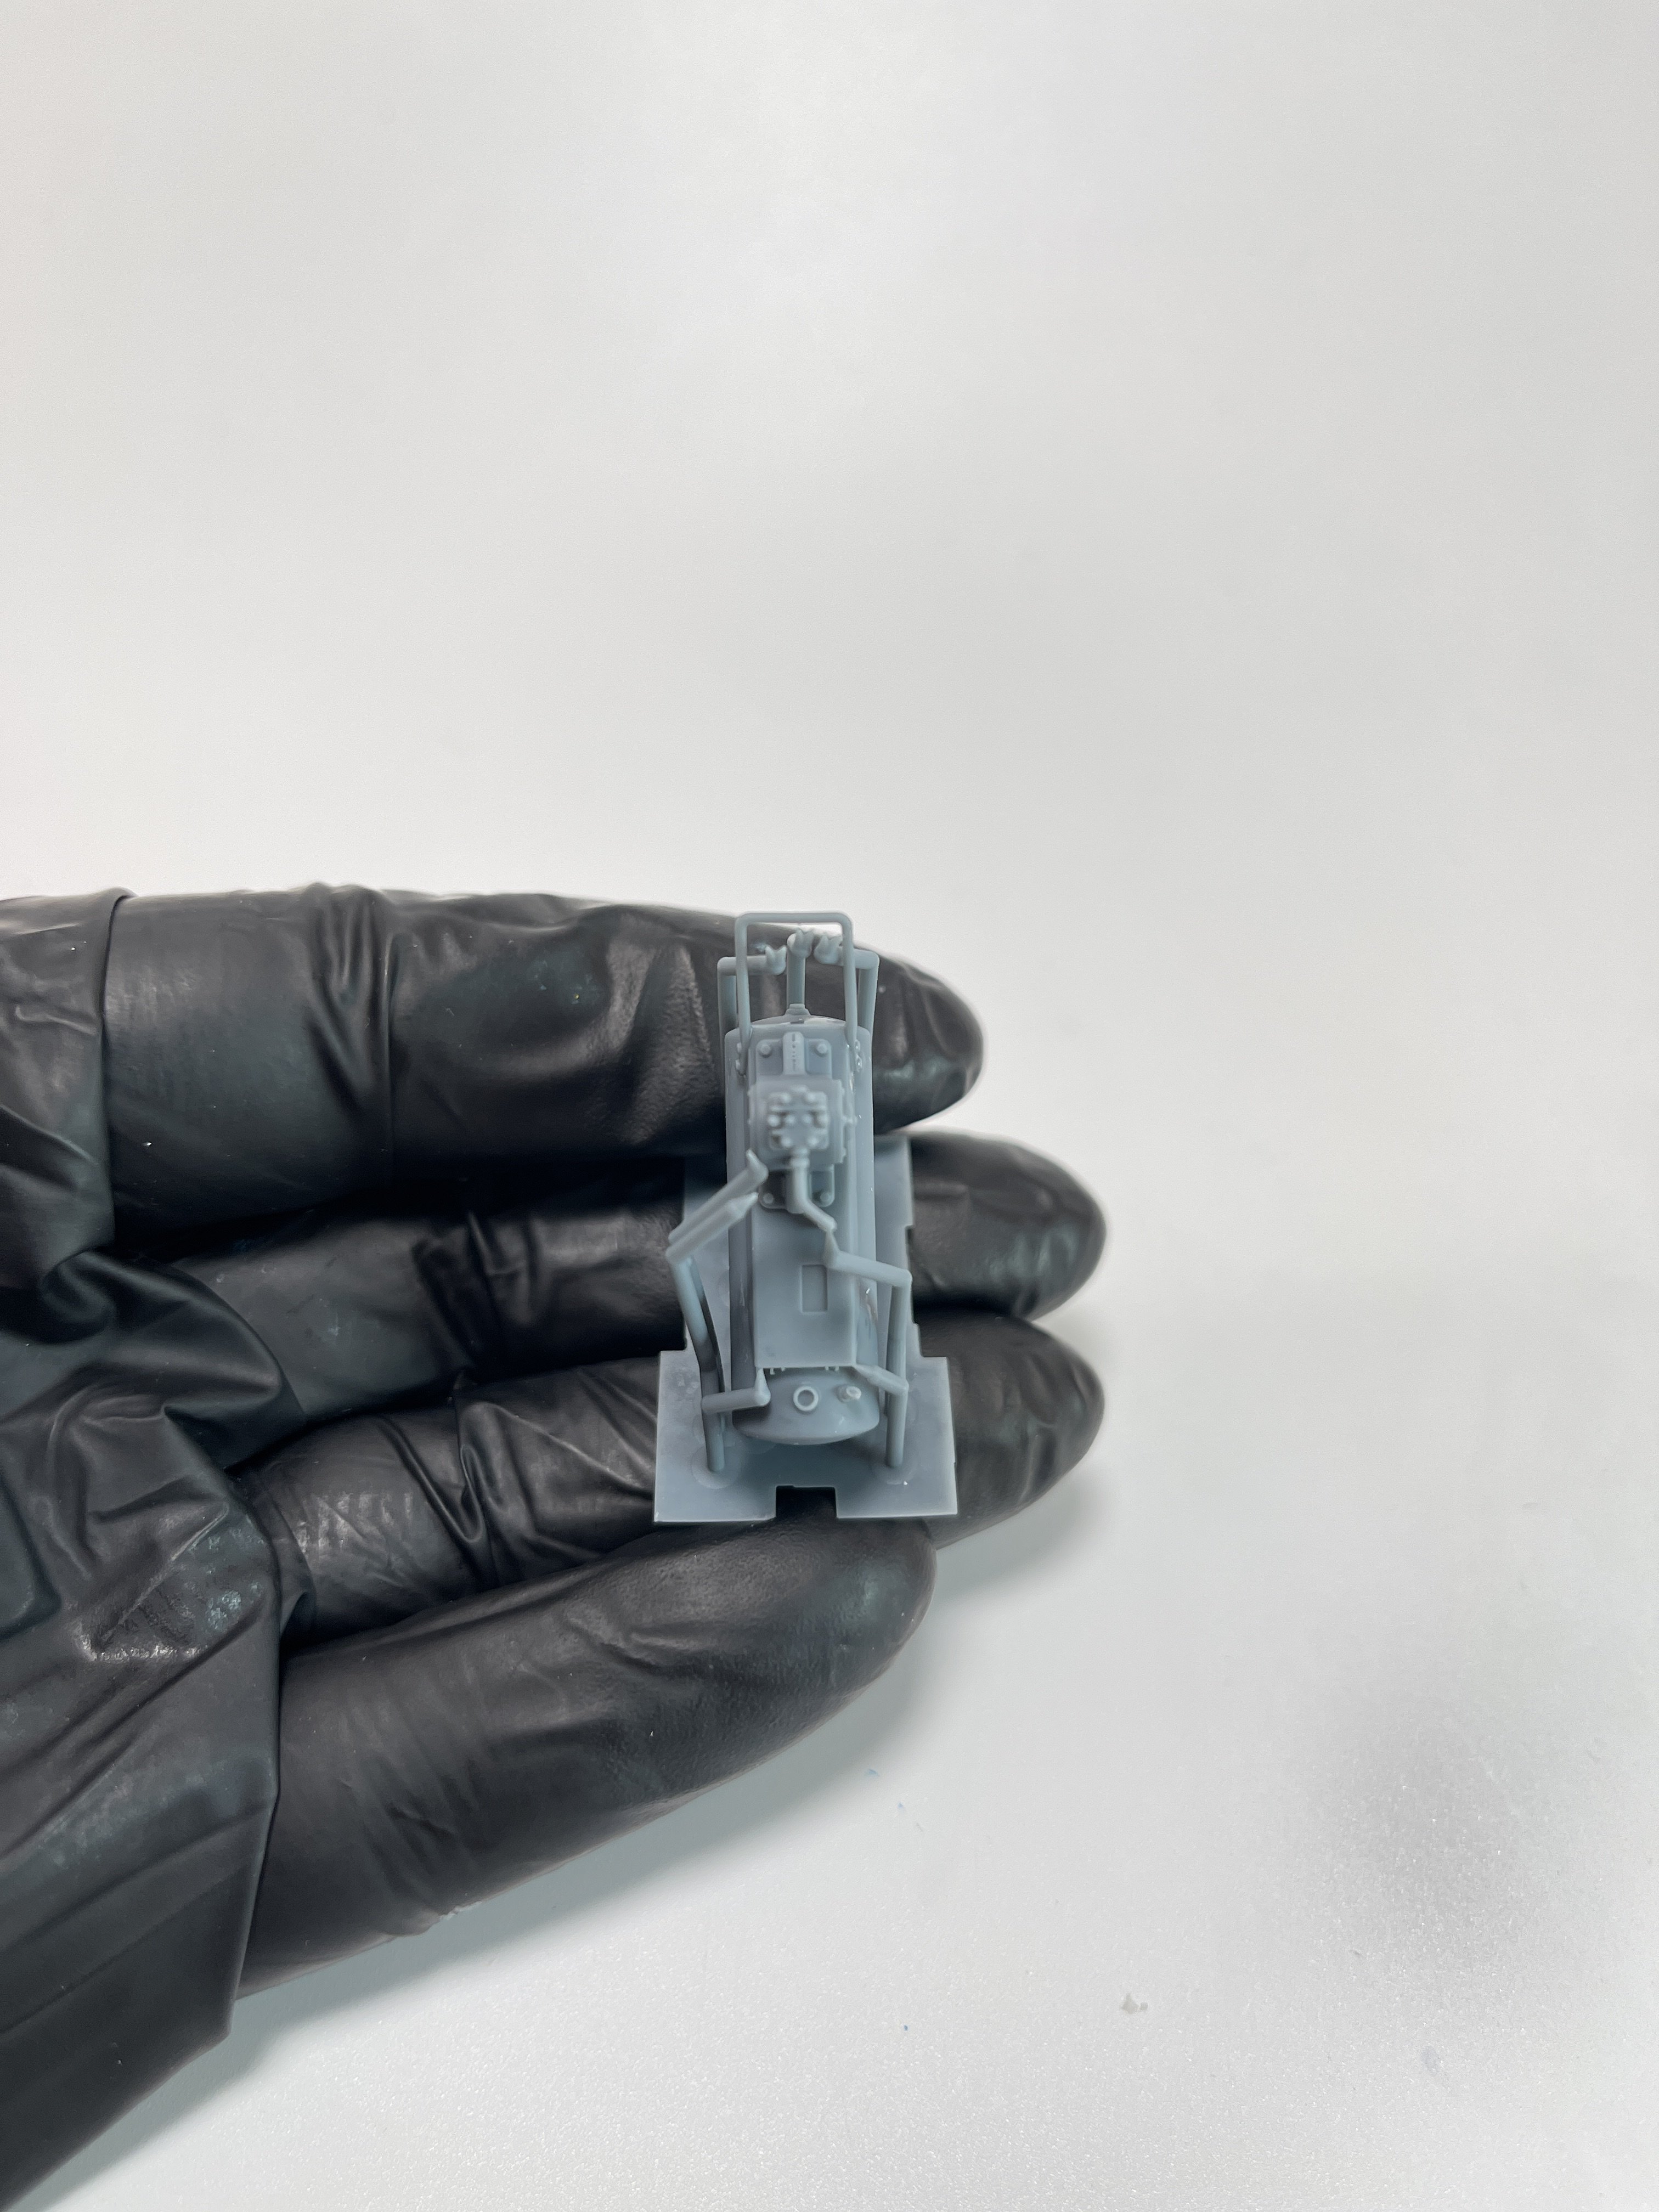
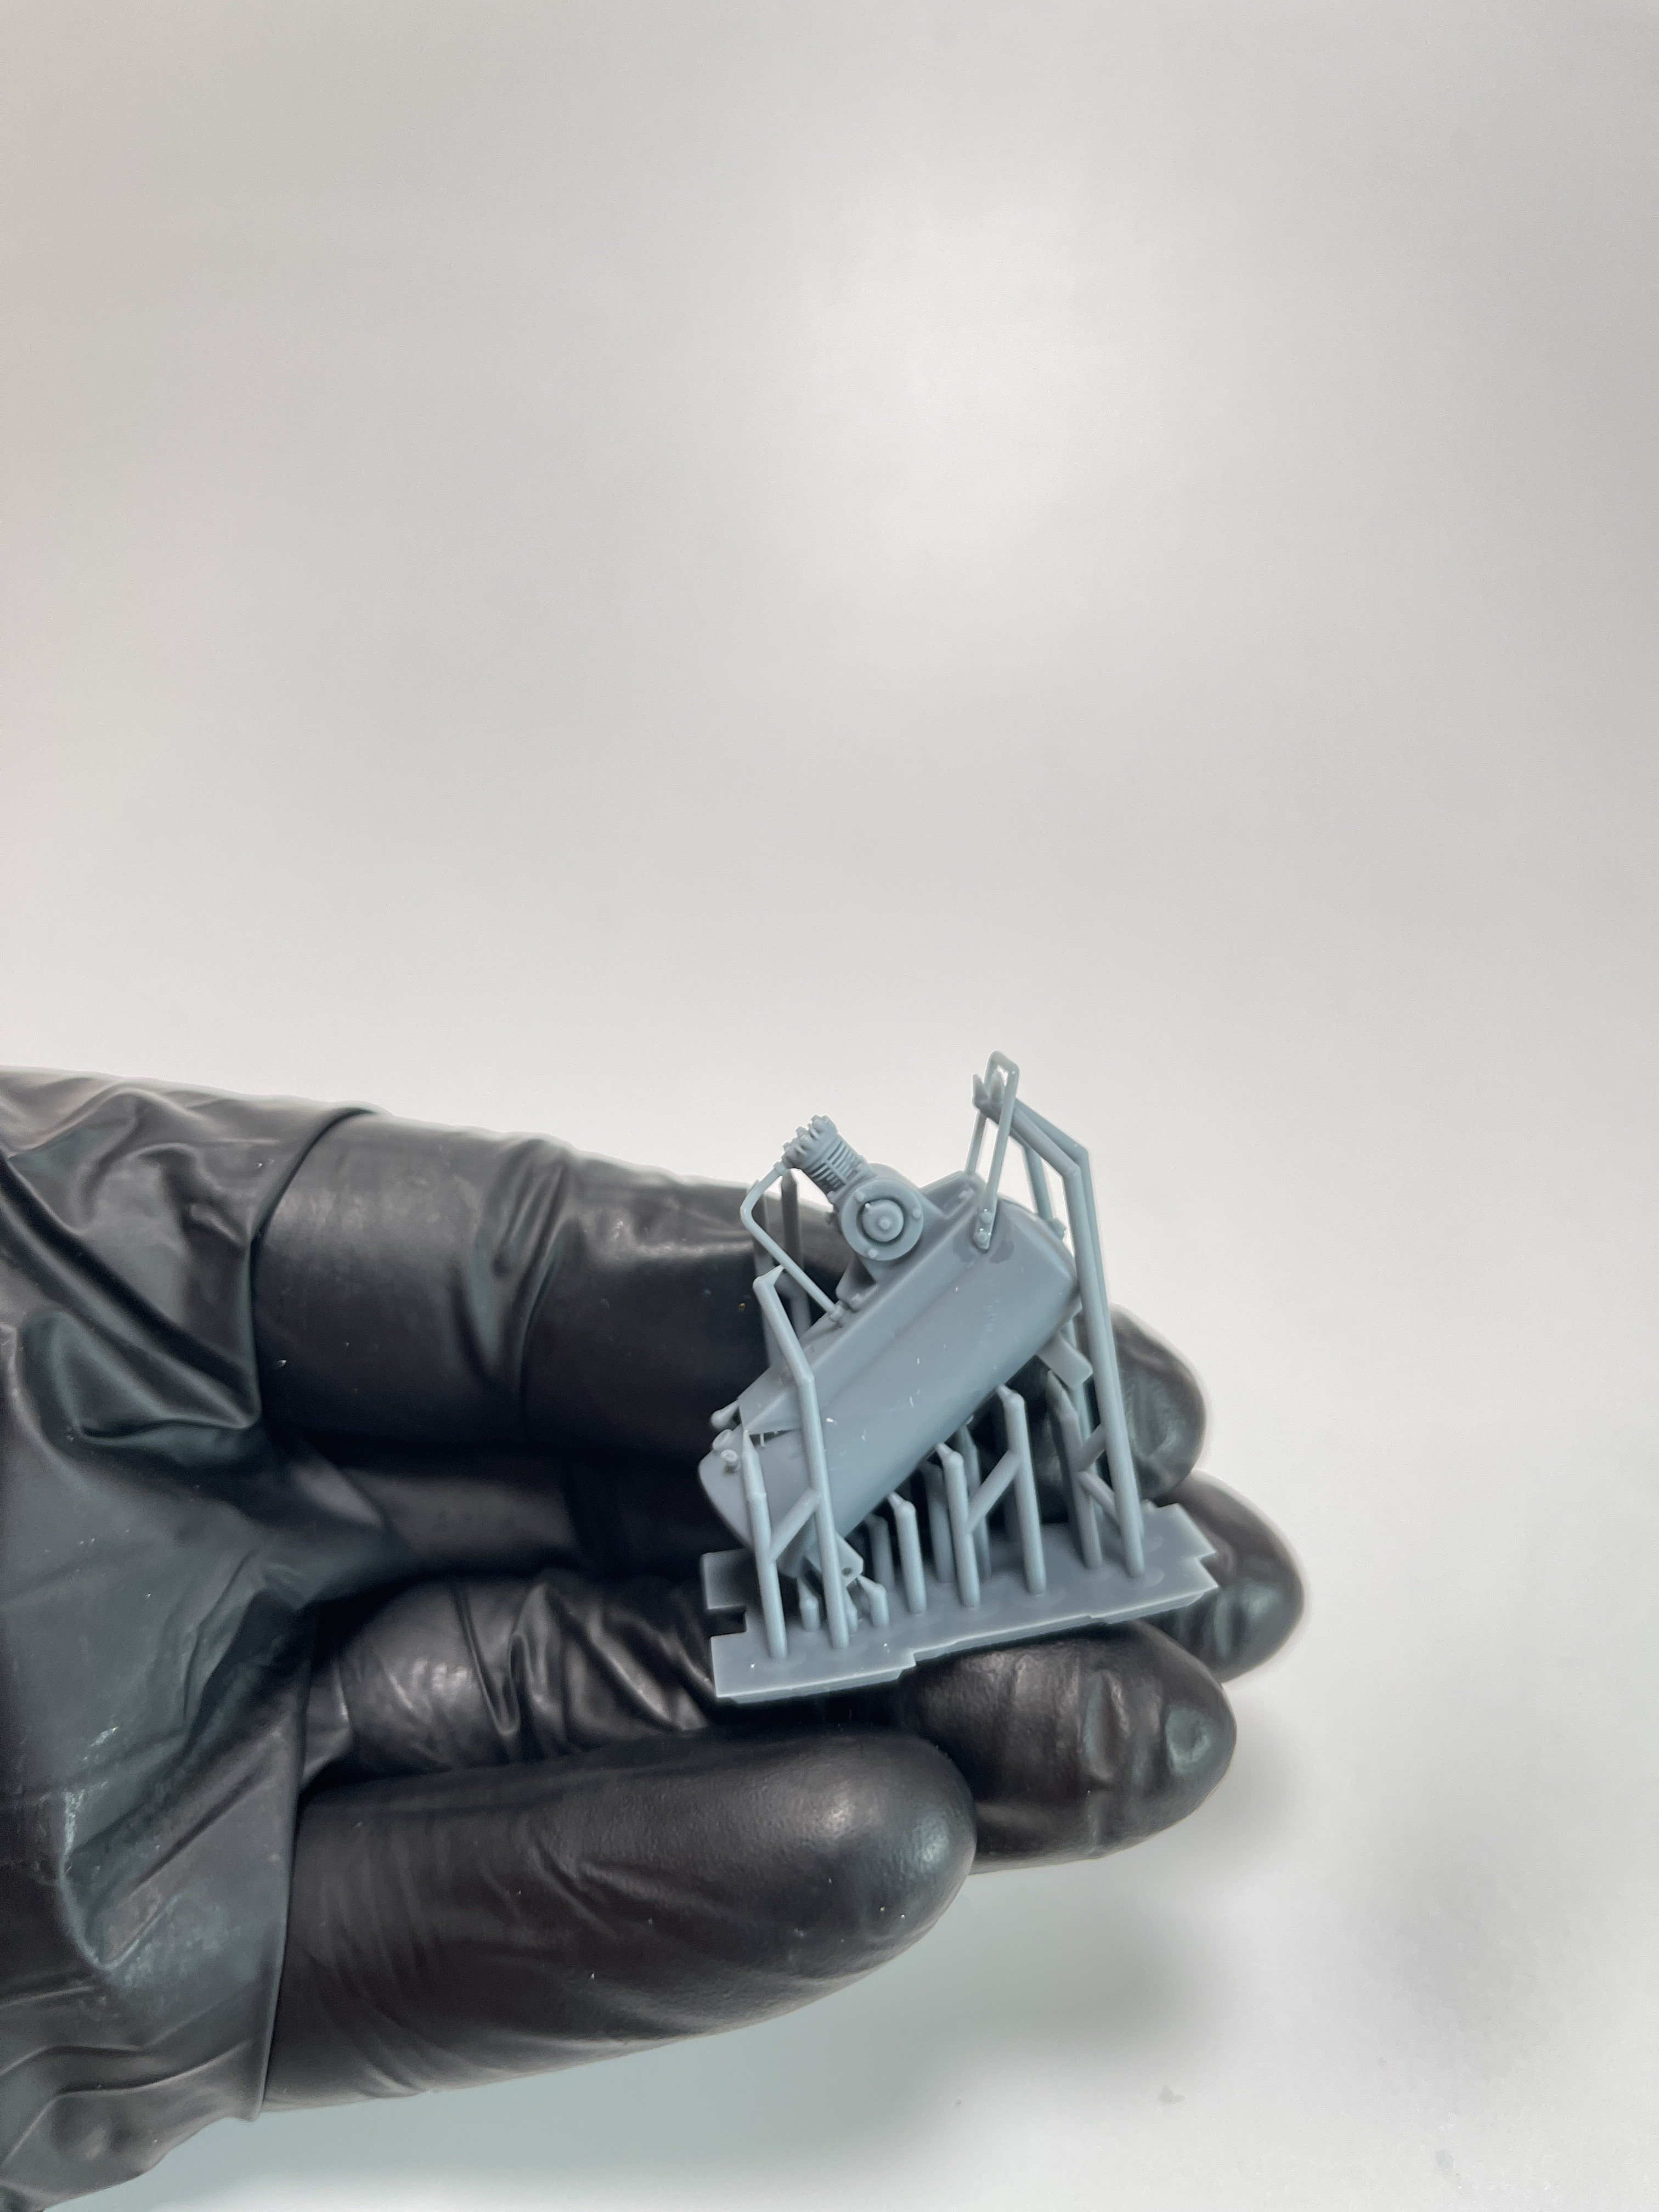
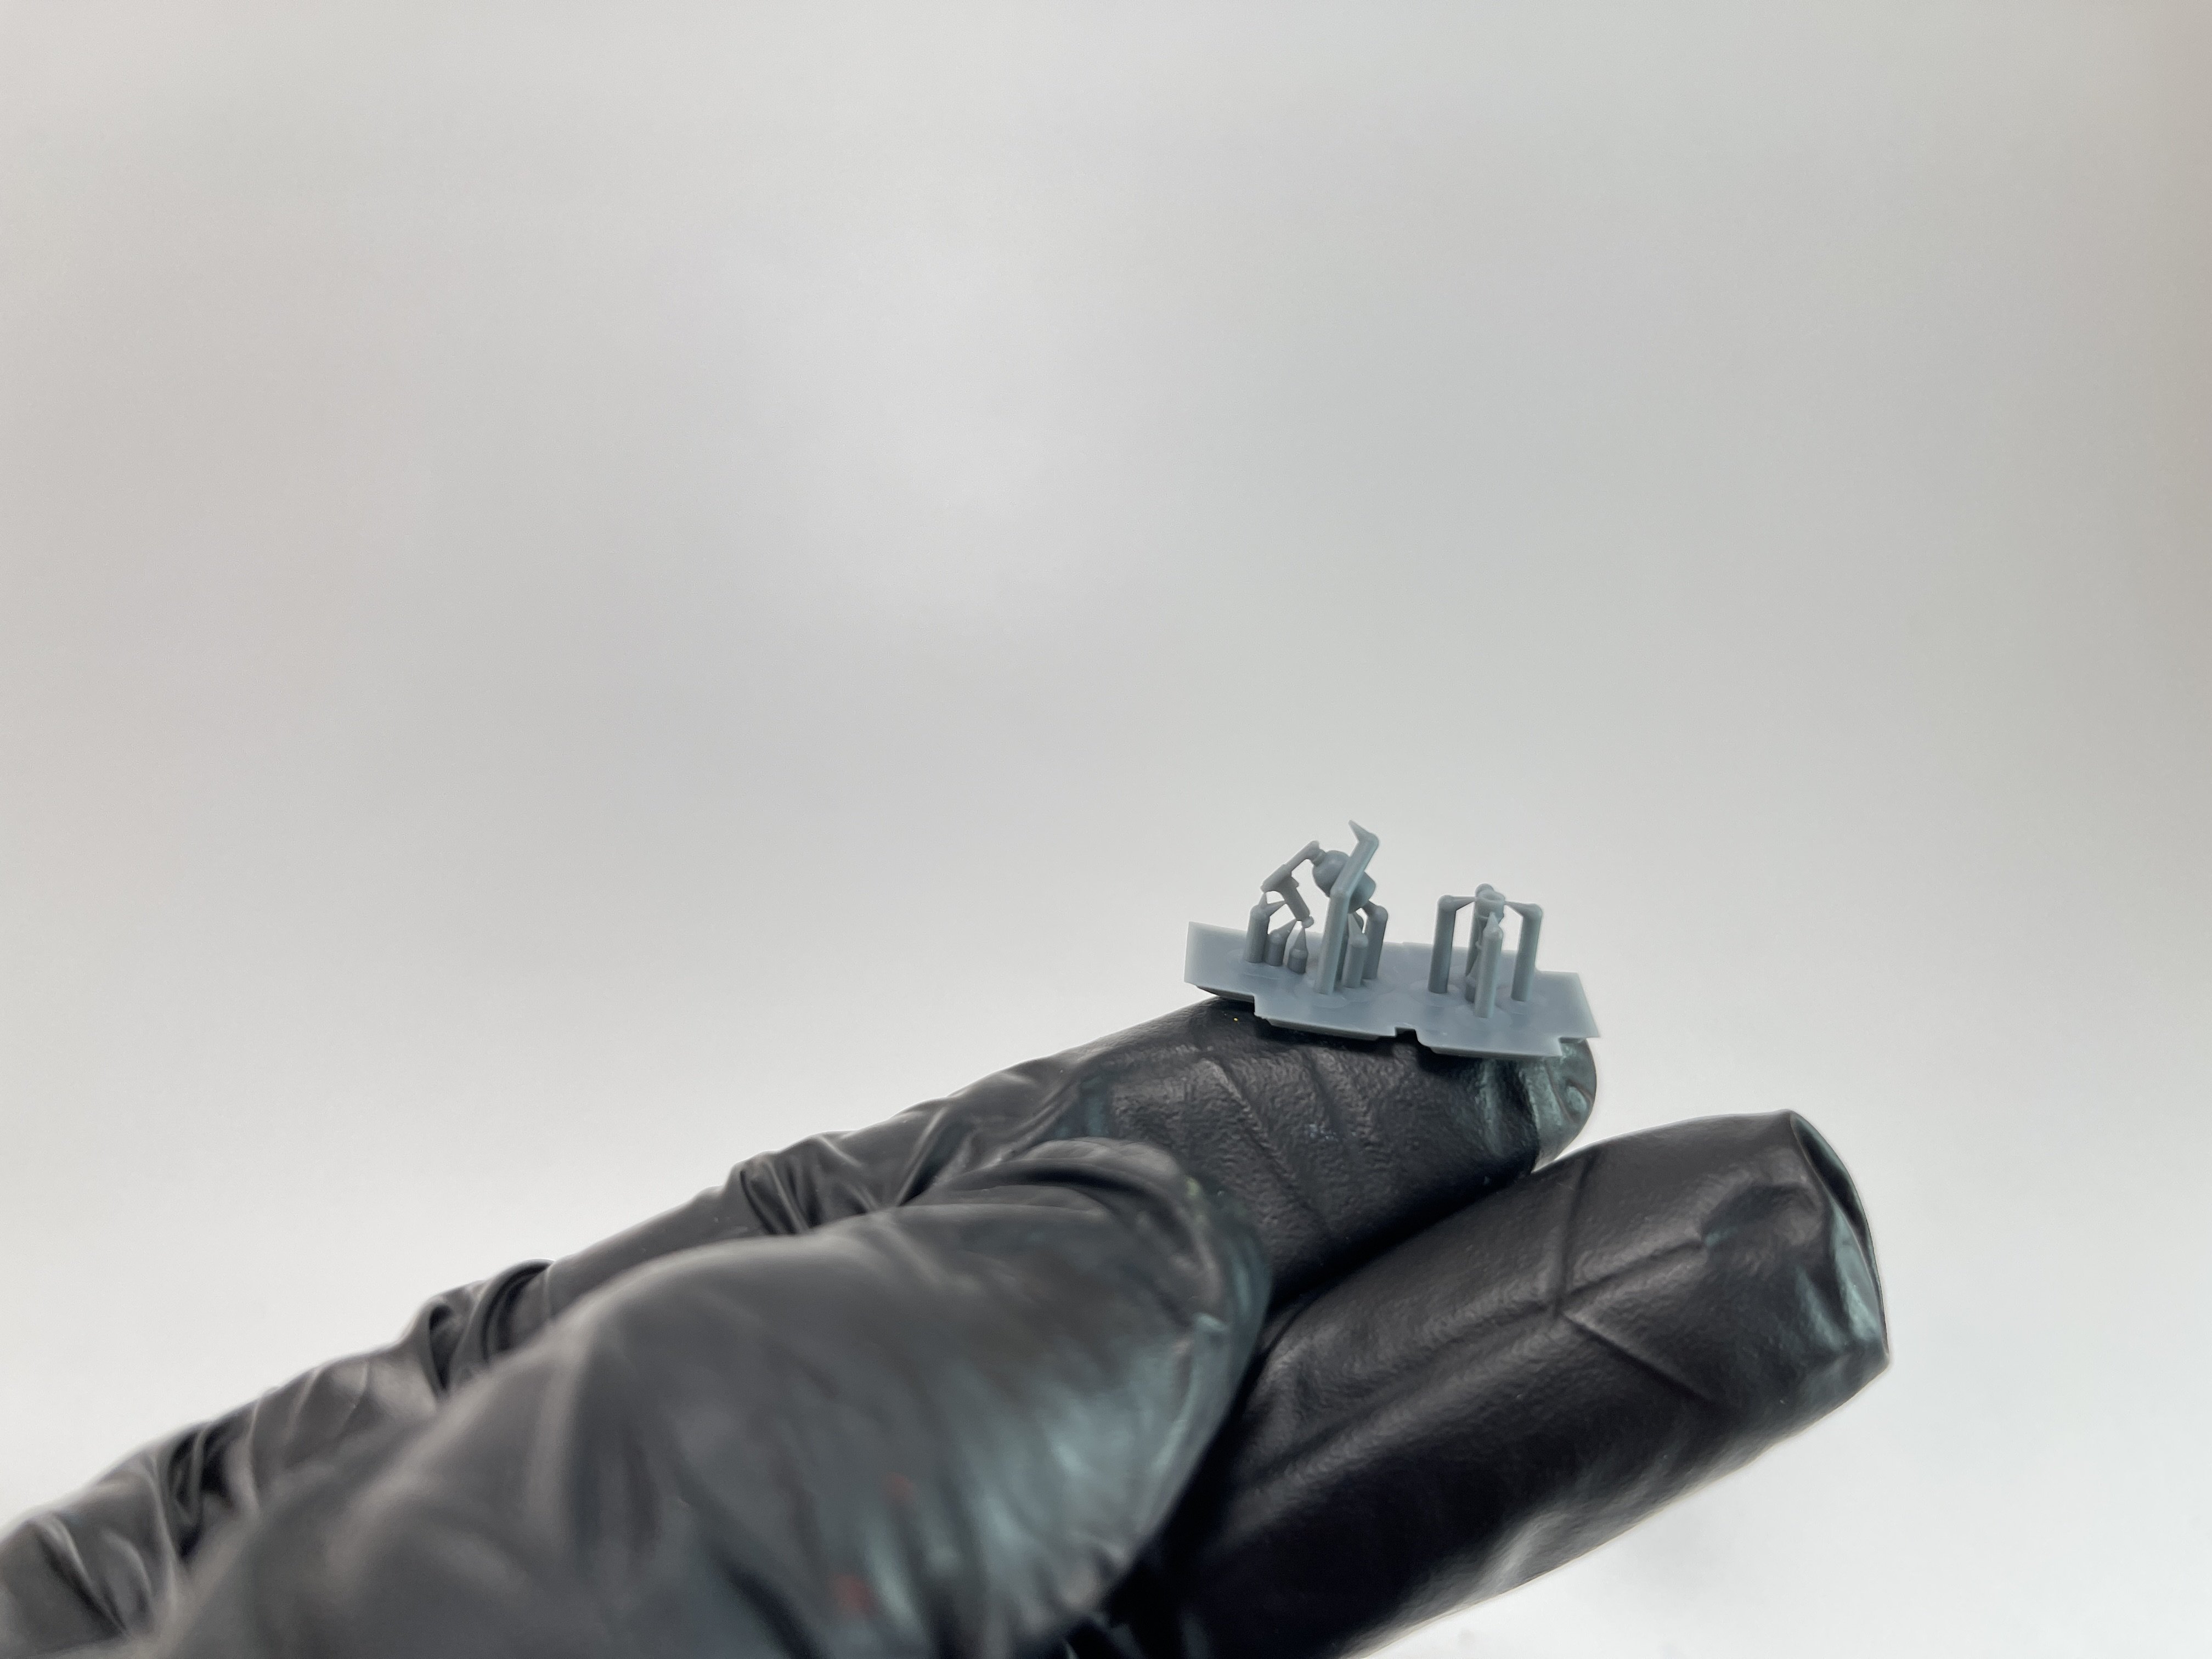
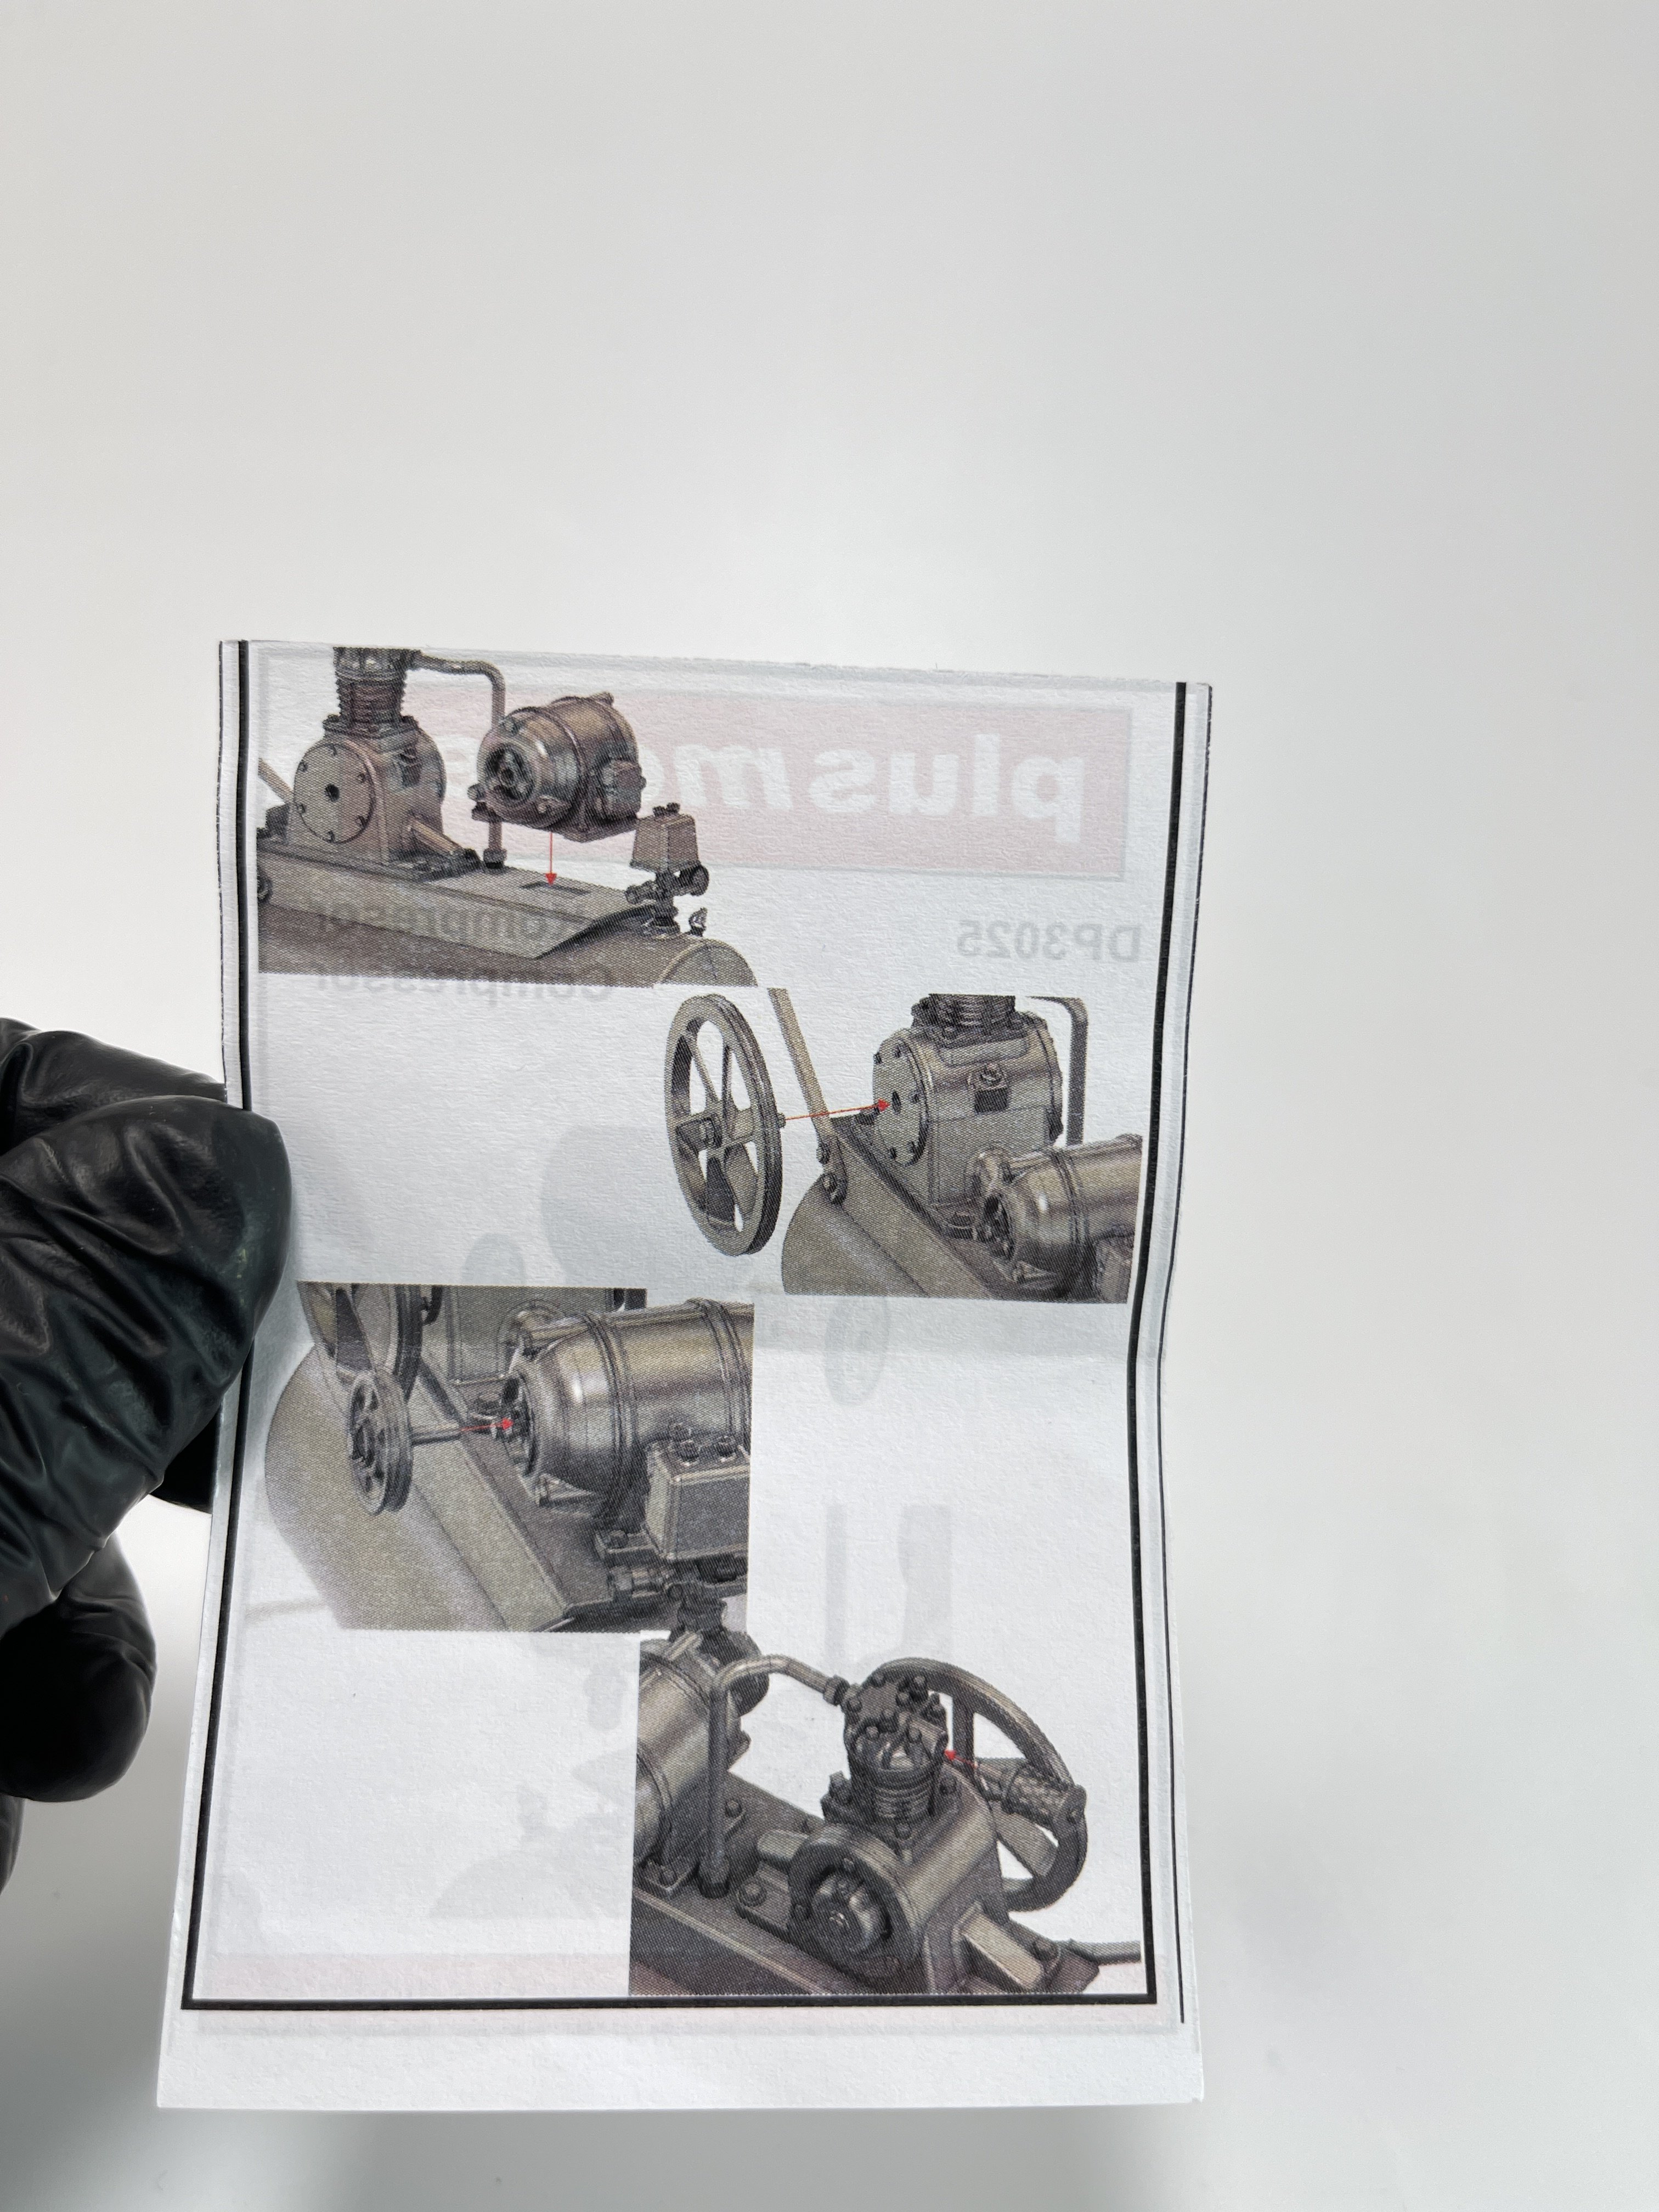
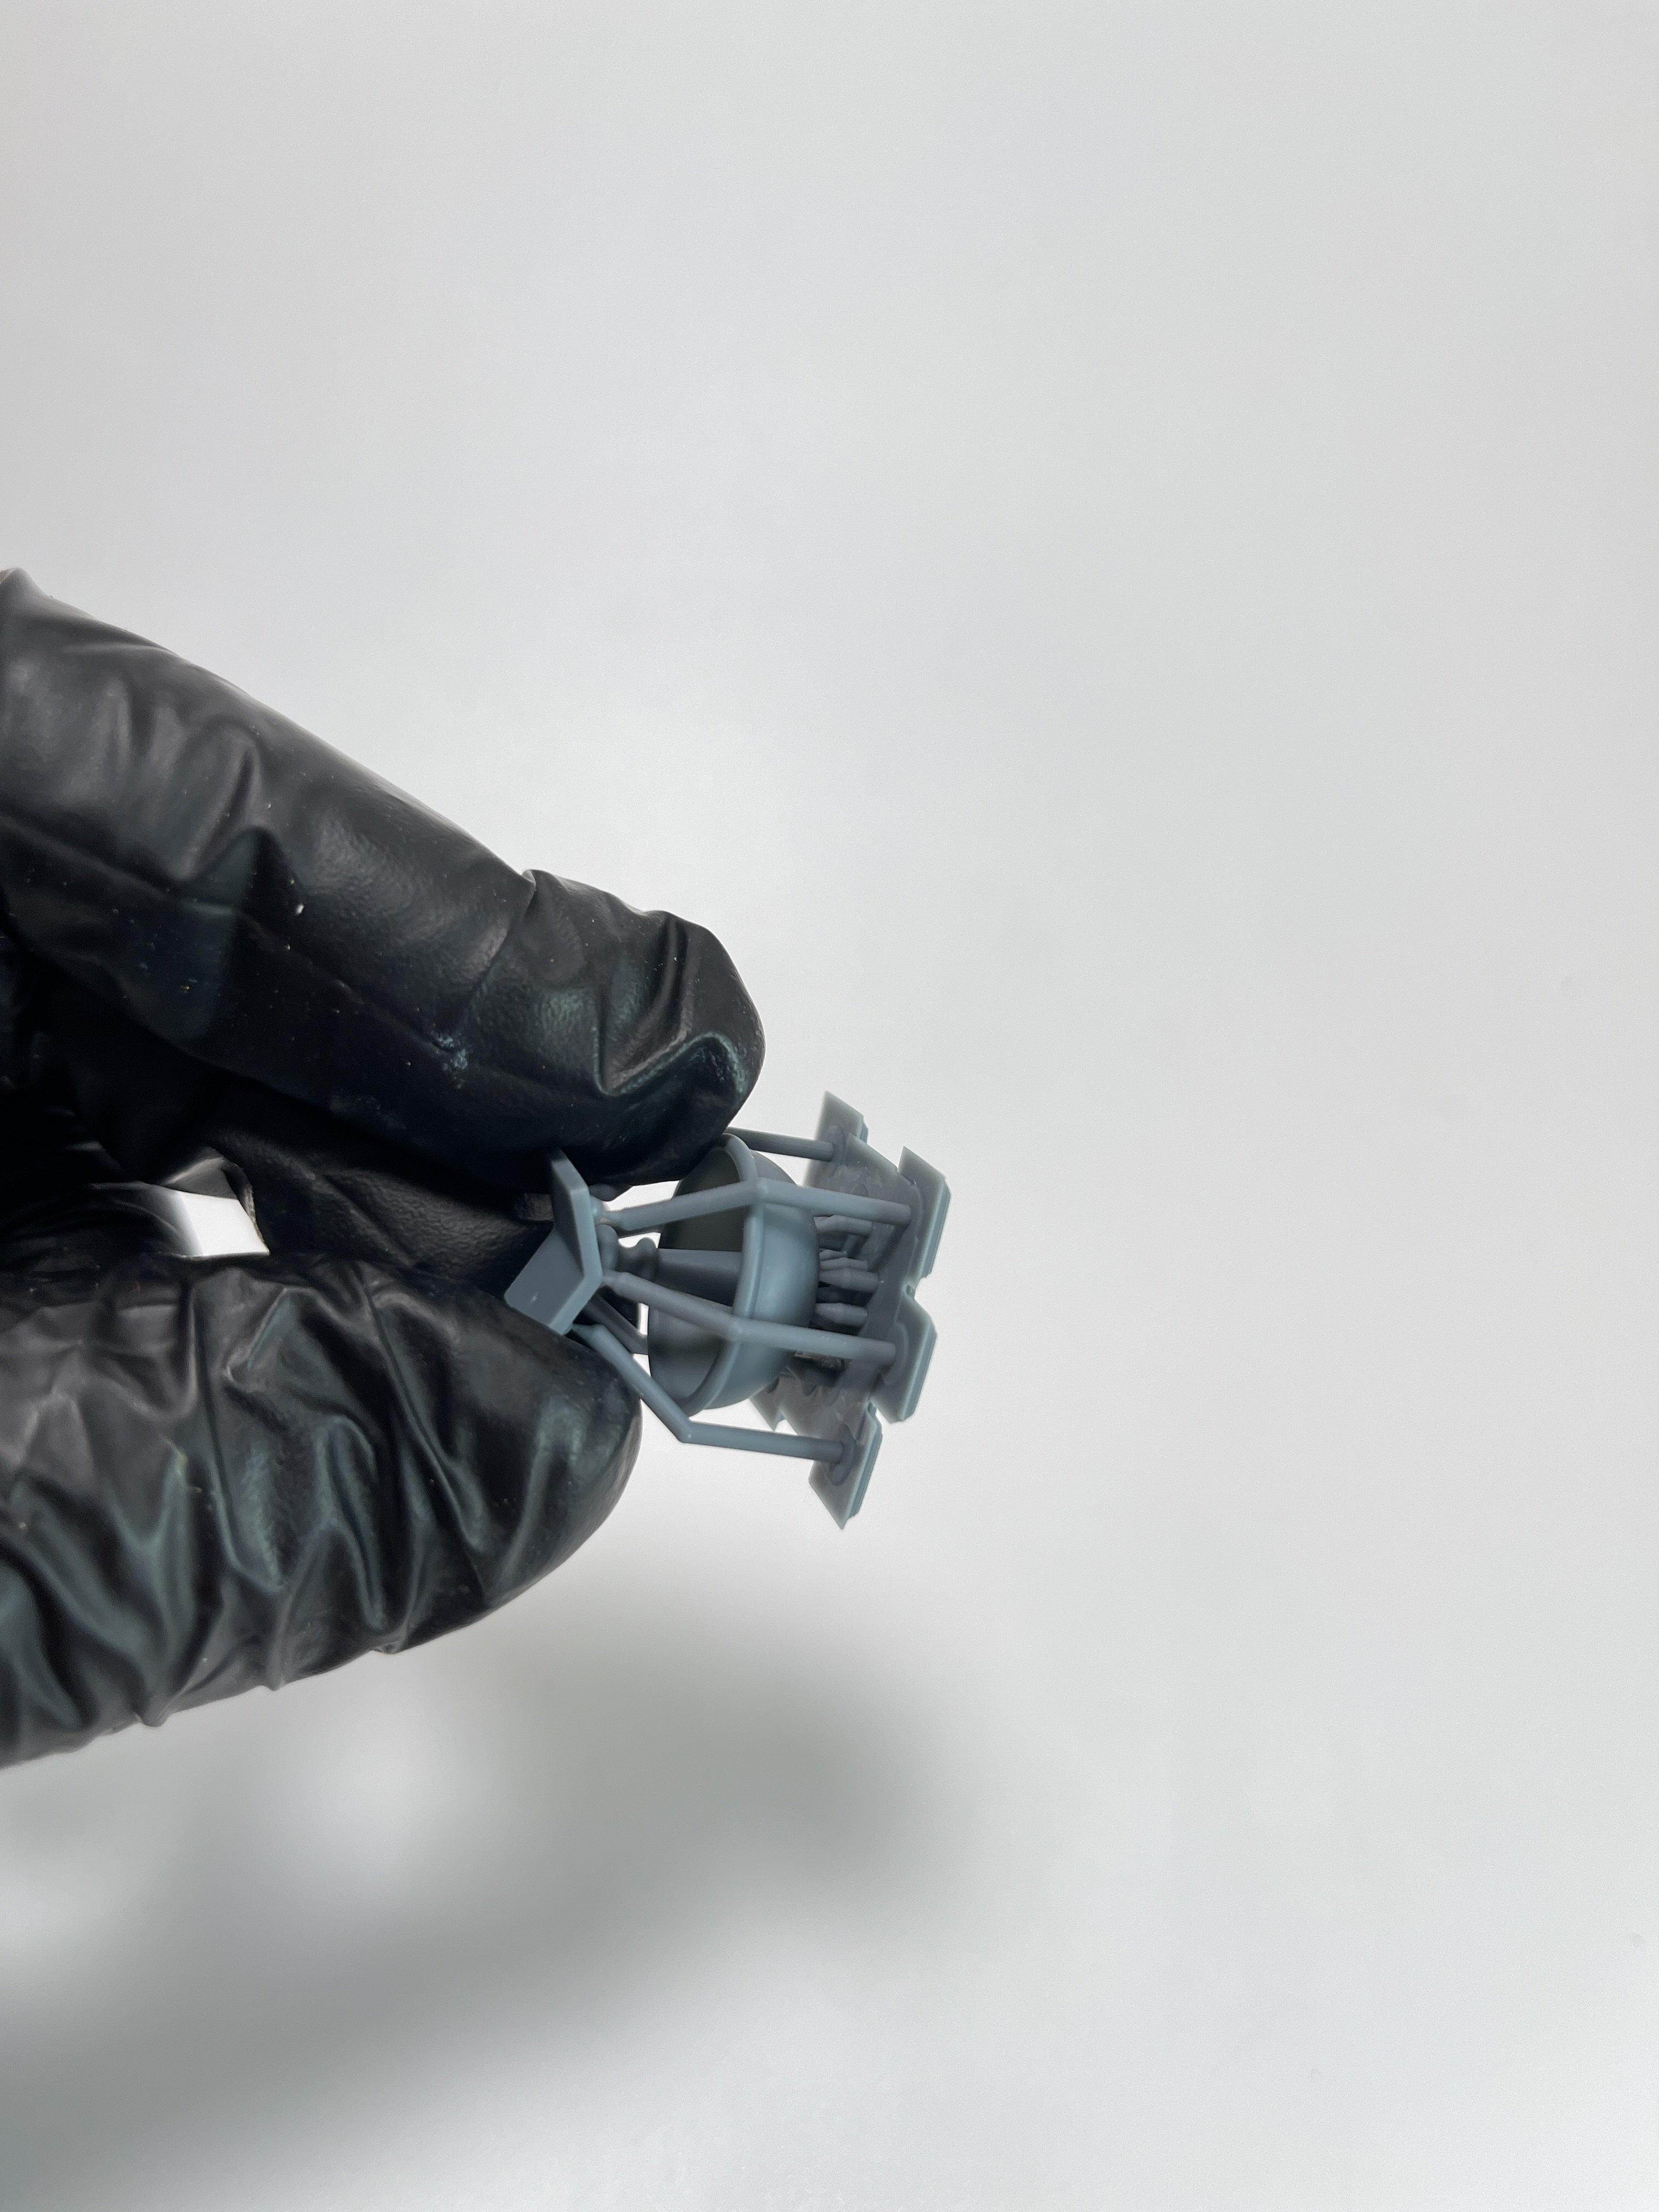
German Compressor WWII
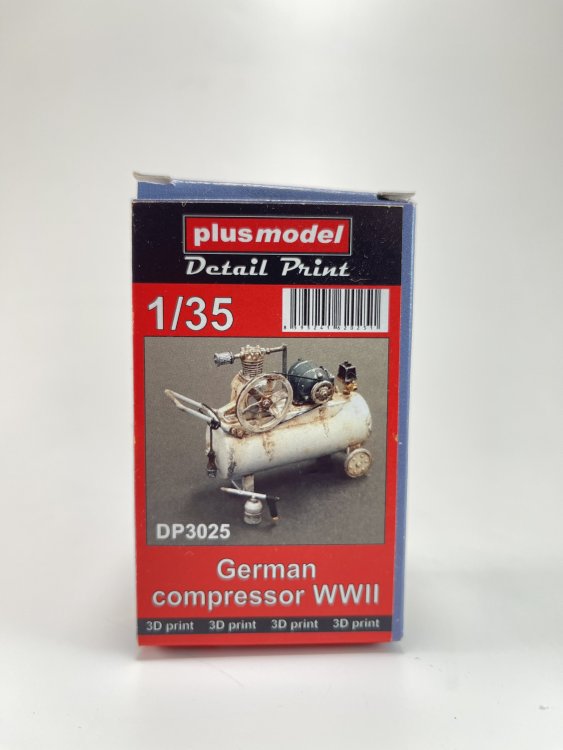
Catalogue n.º DP3025
Price tag: 12,37€
This set is complementary to the previous set, being certain that both live well without each other.
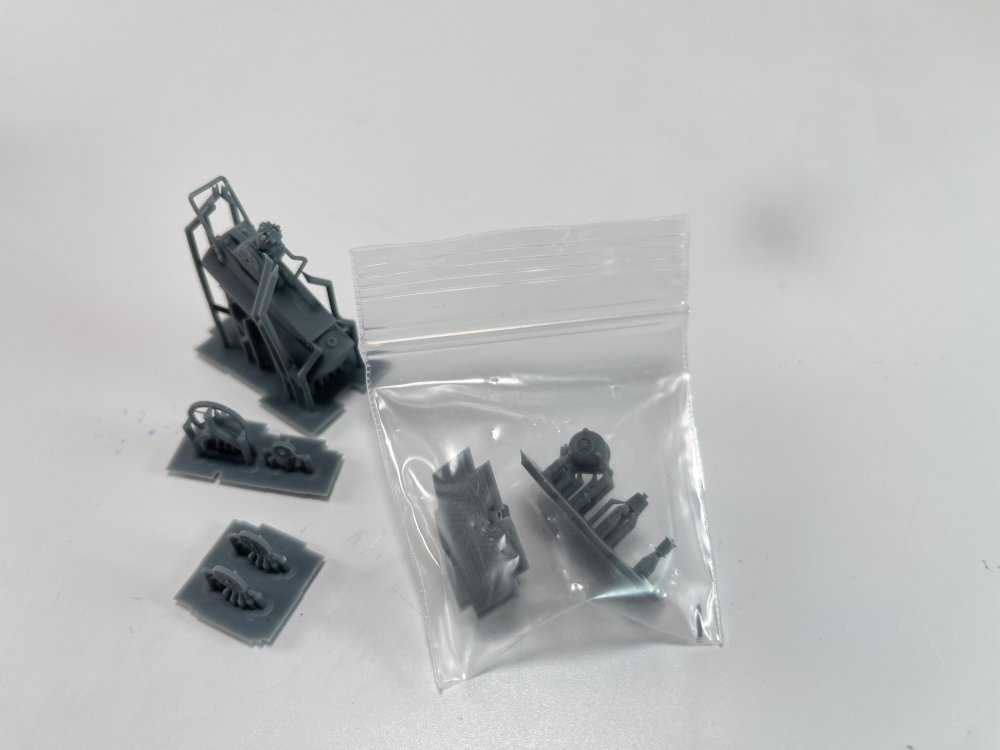
The set consists of 10 pieces, and the reservoir comes in a single piece, brilliantly printed in 3D with no printing line or flash.
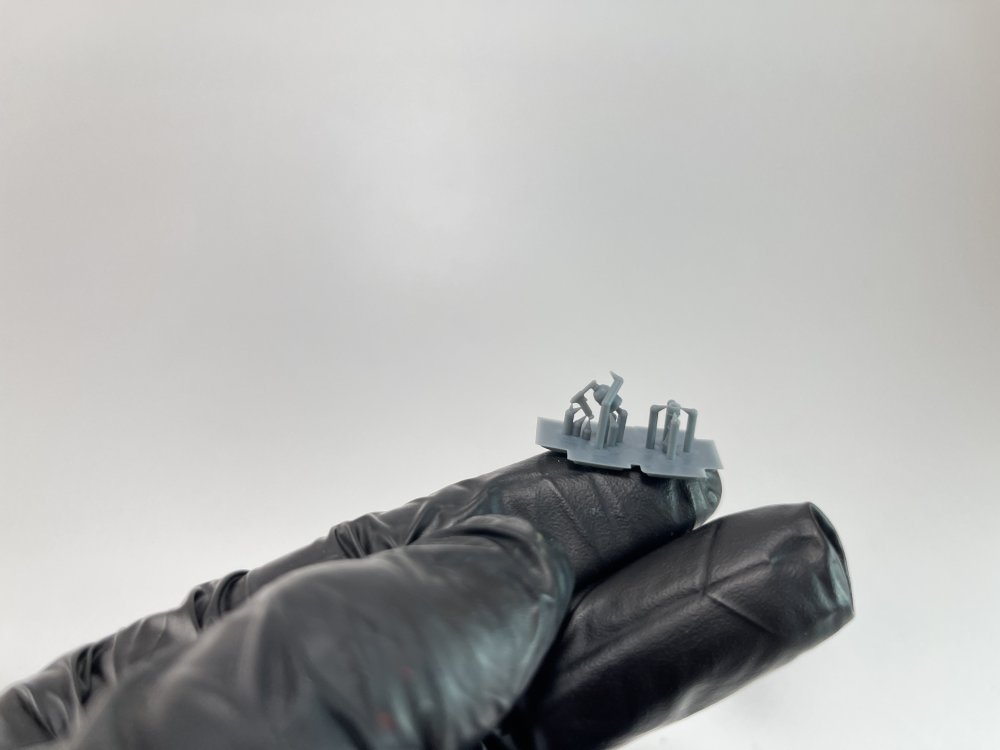
The motor system is very well detailed.


The instructions are much better than the previous set, giving the different steps with the different pieces and their placement.
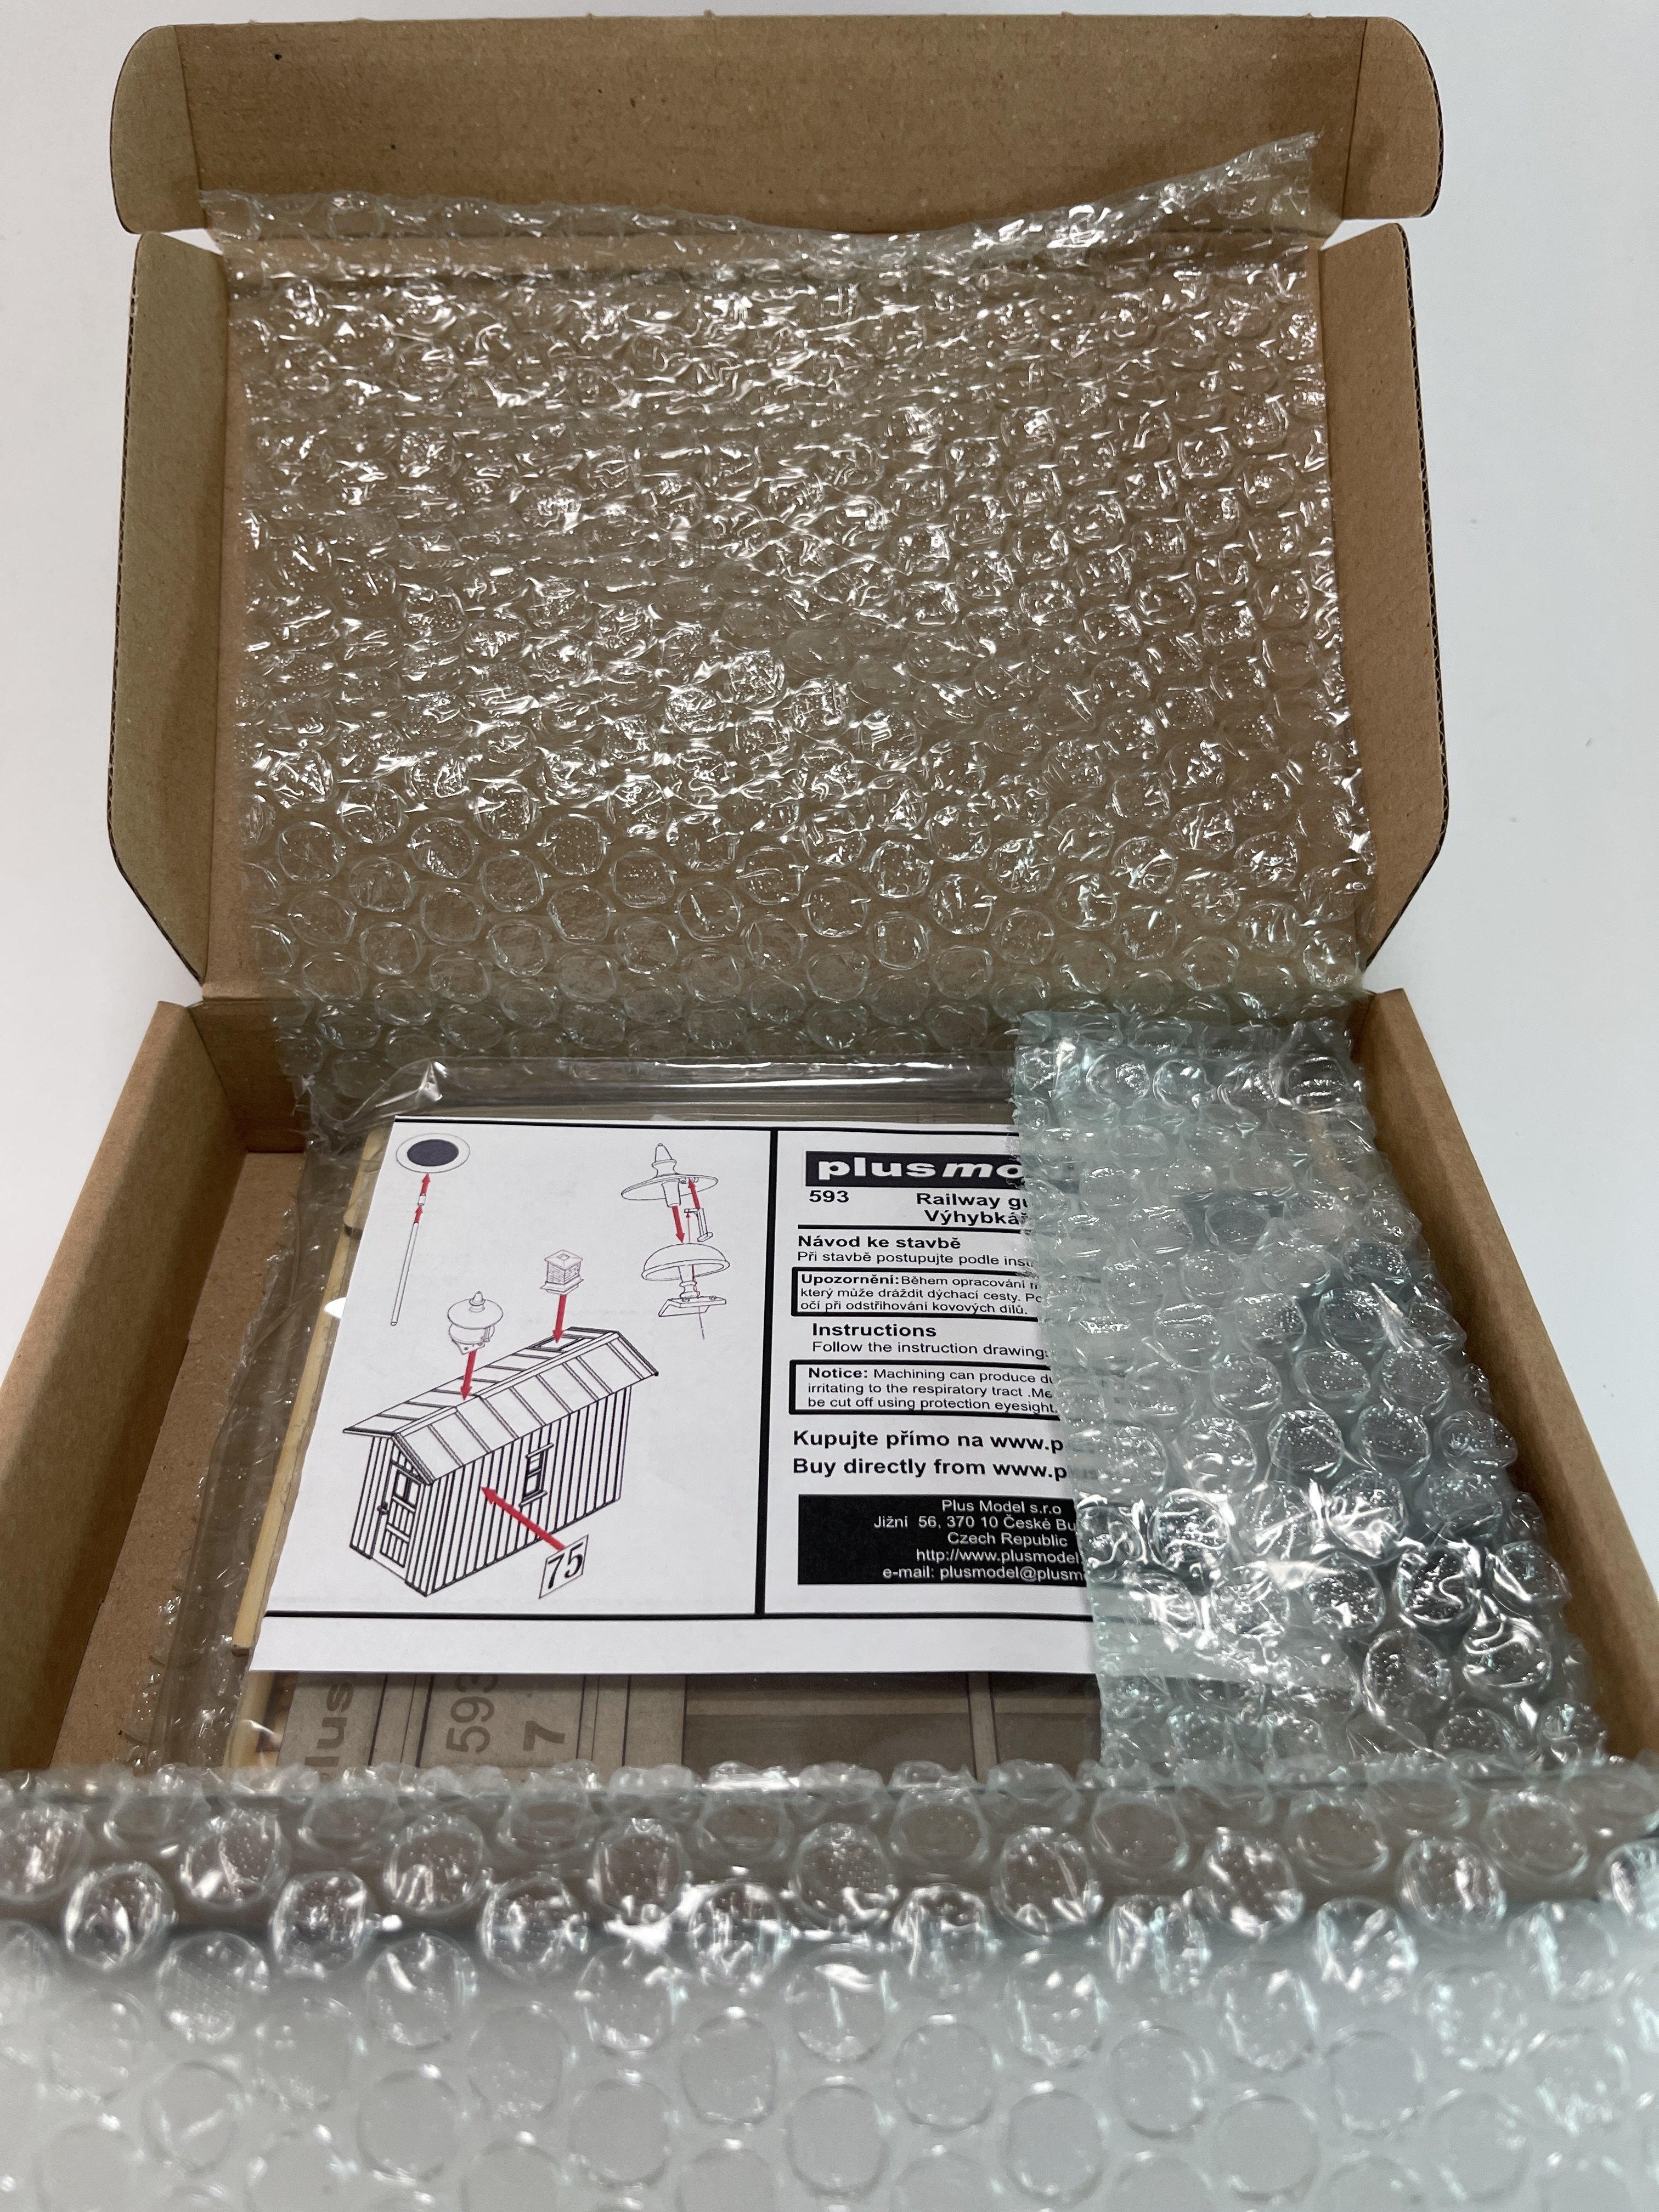
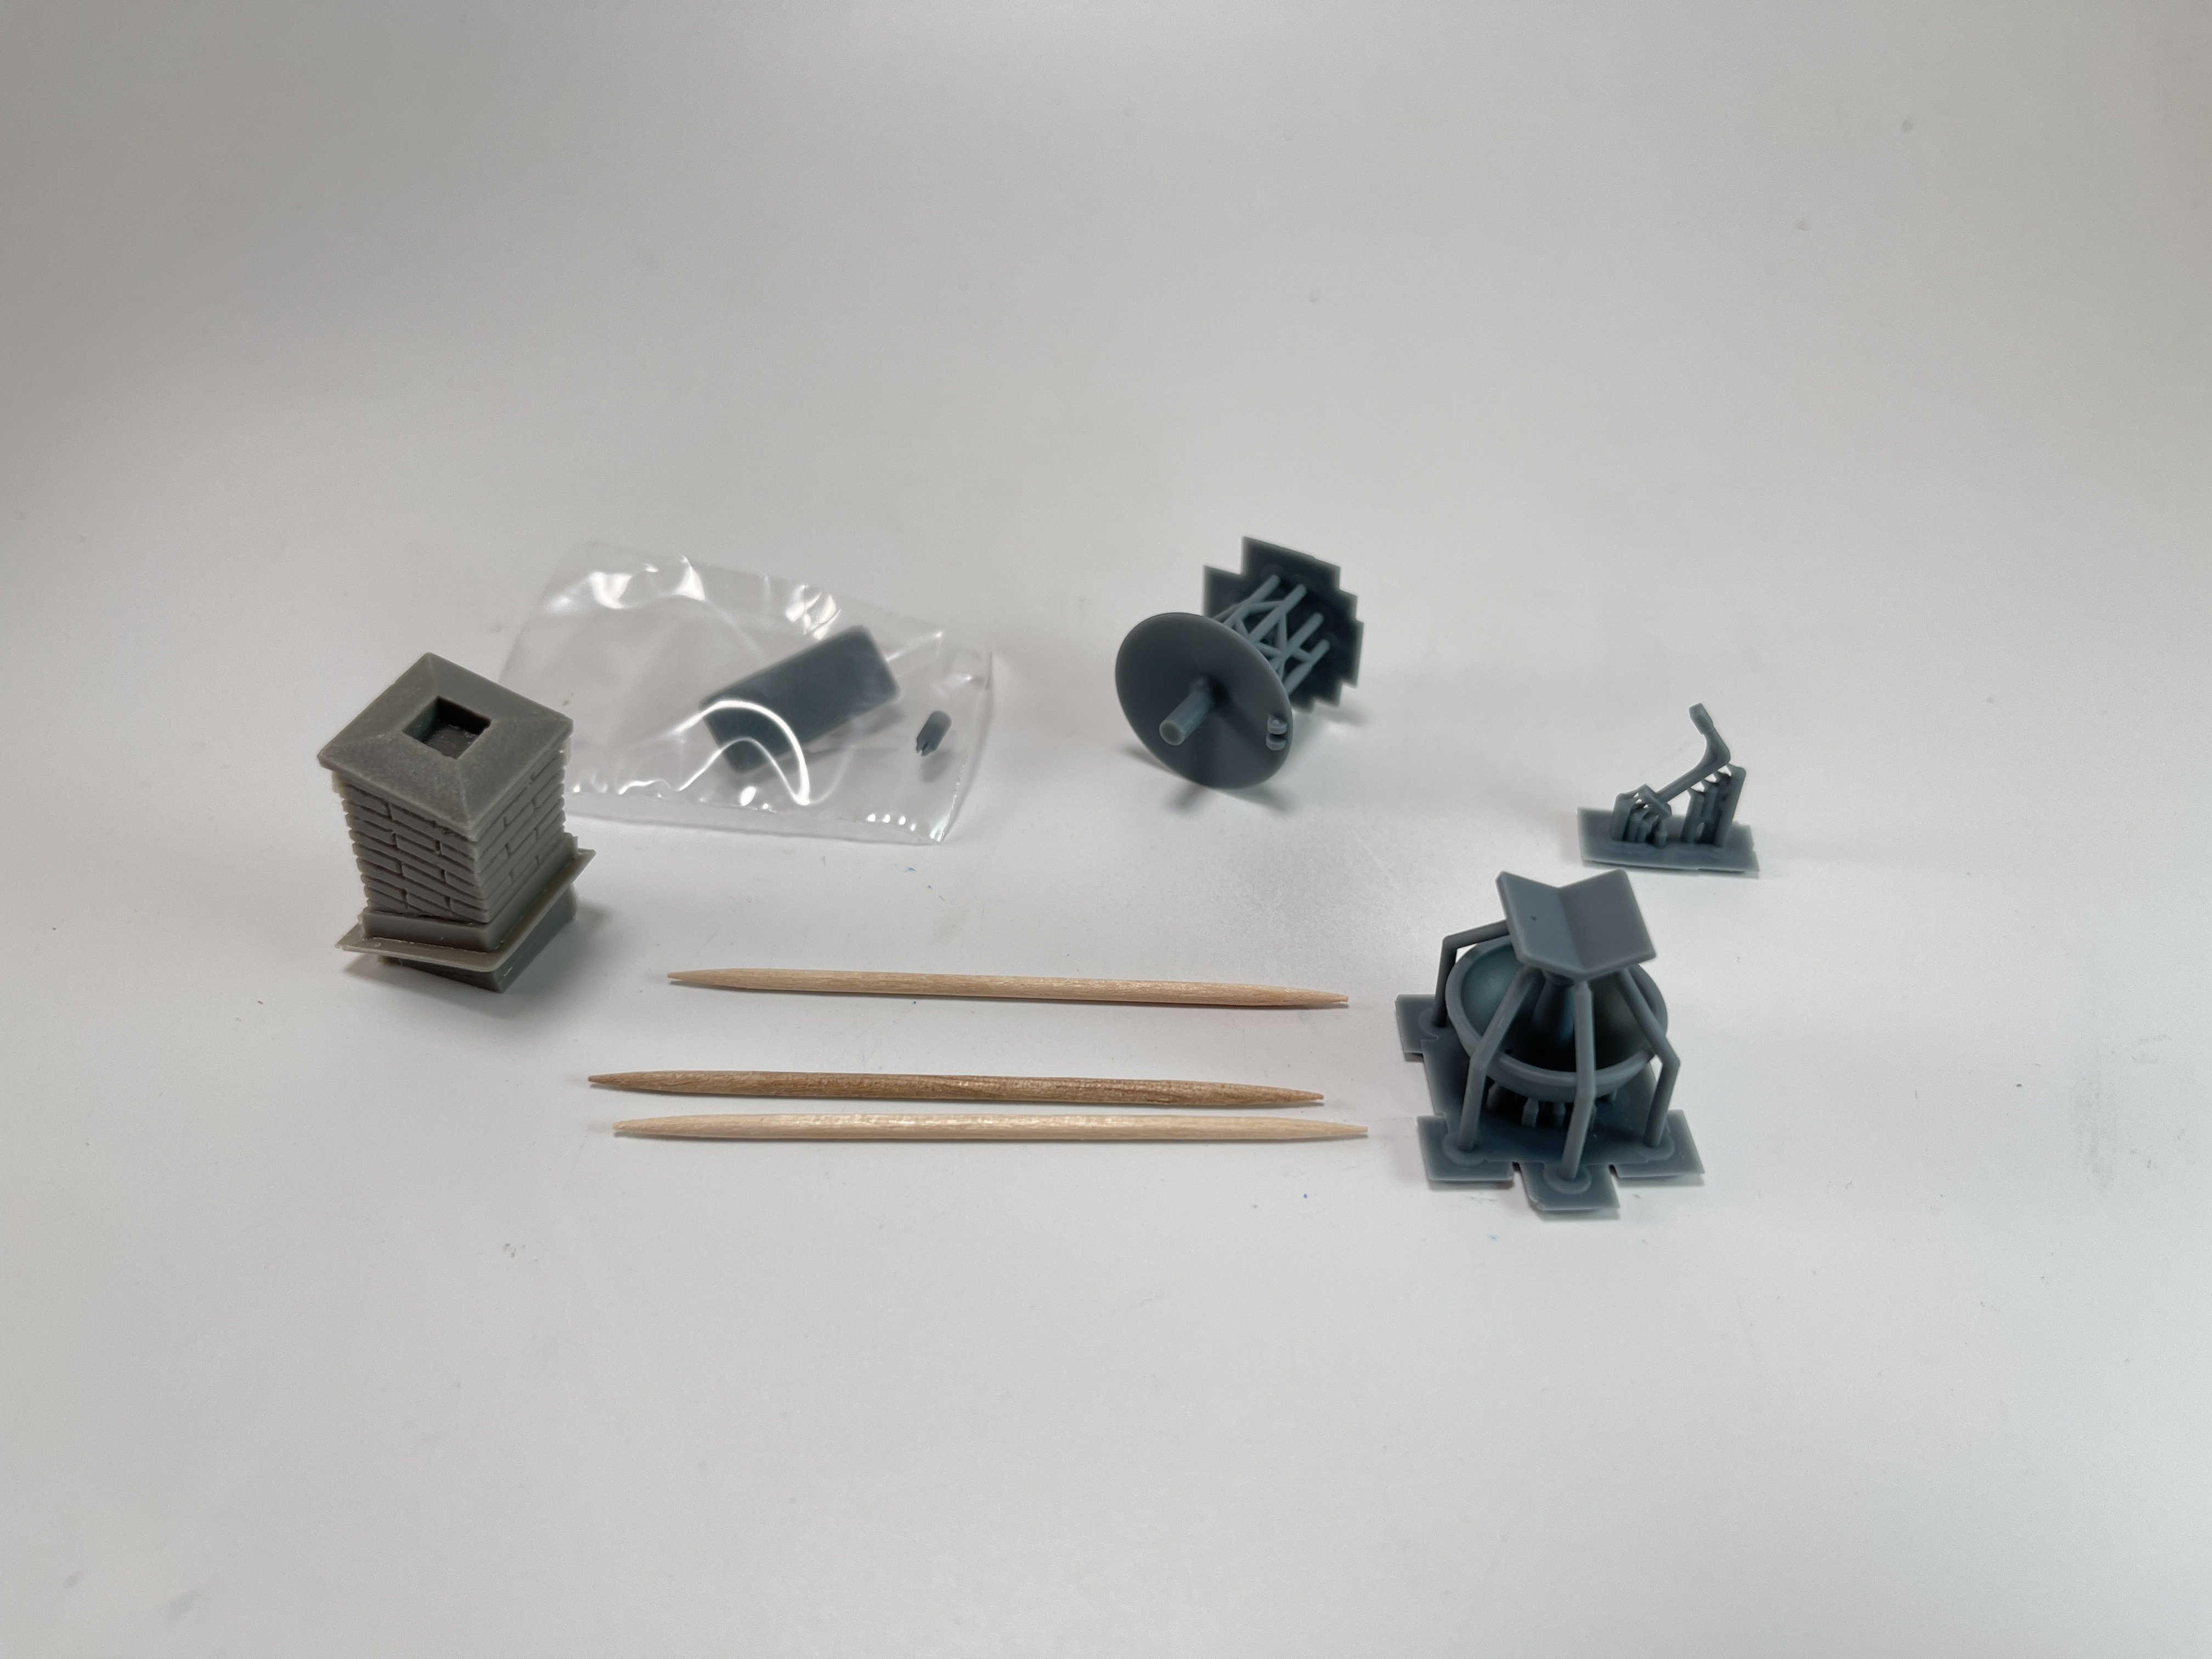
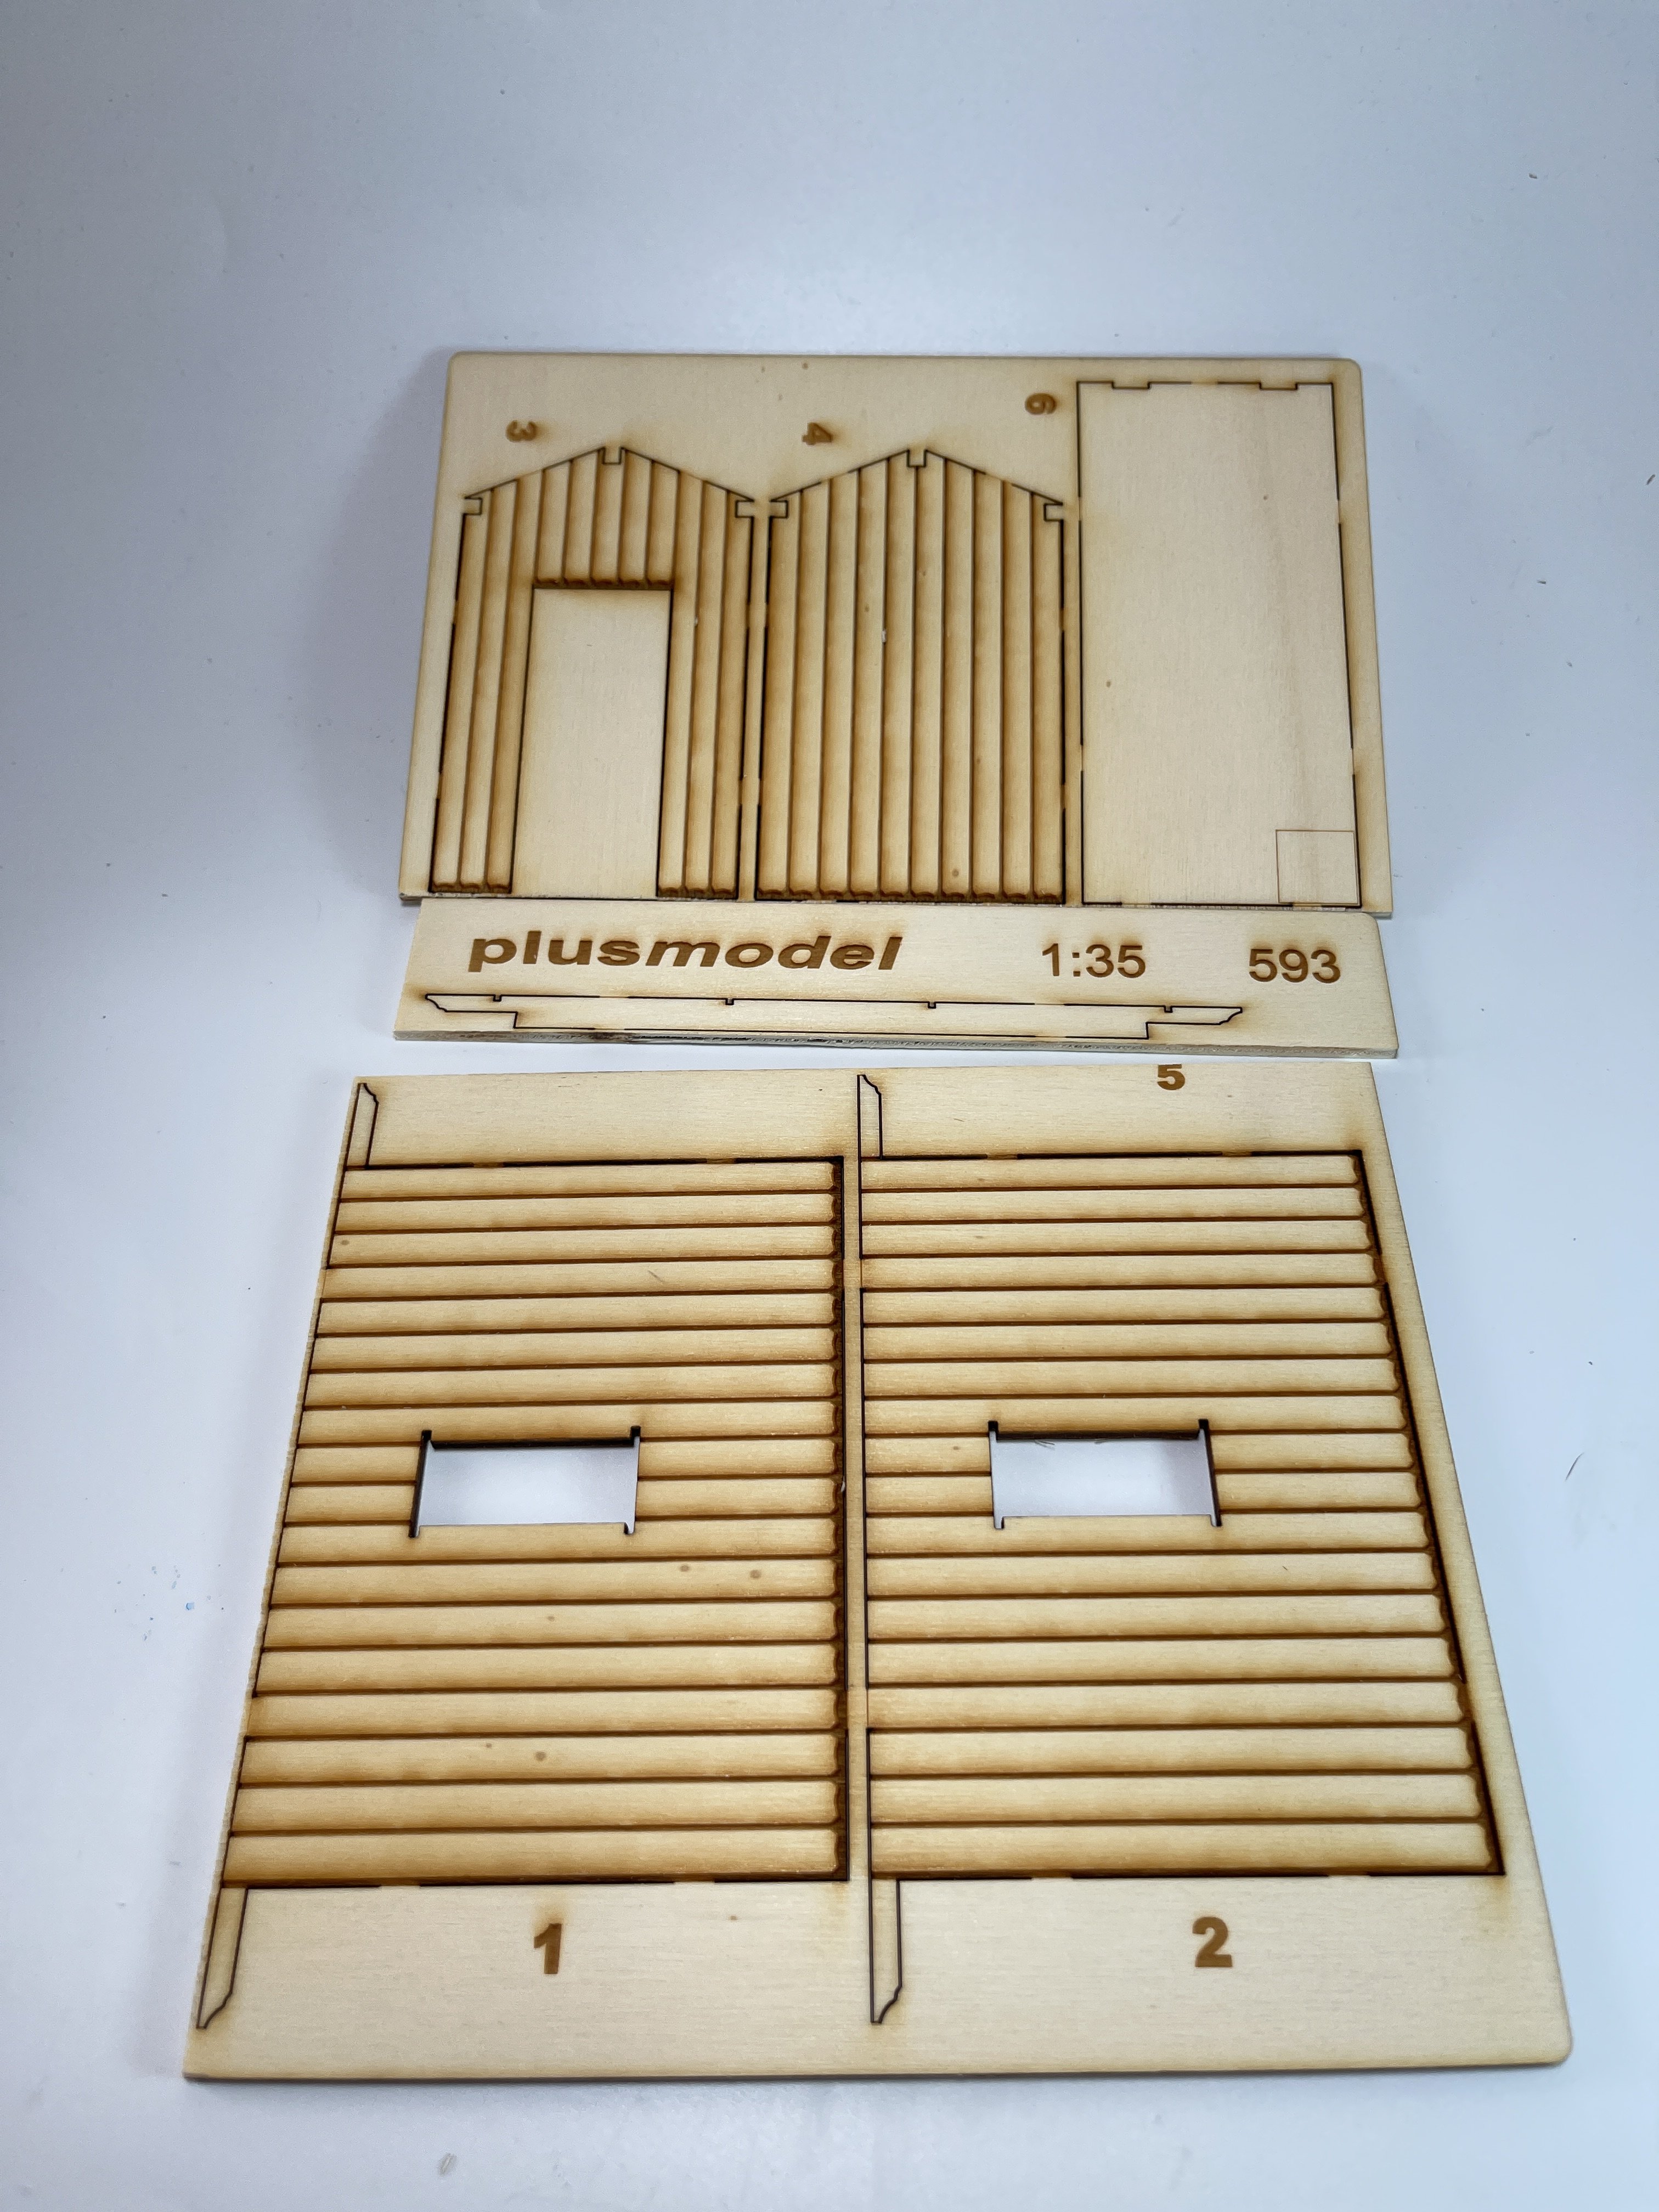
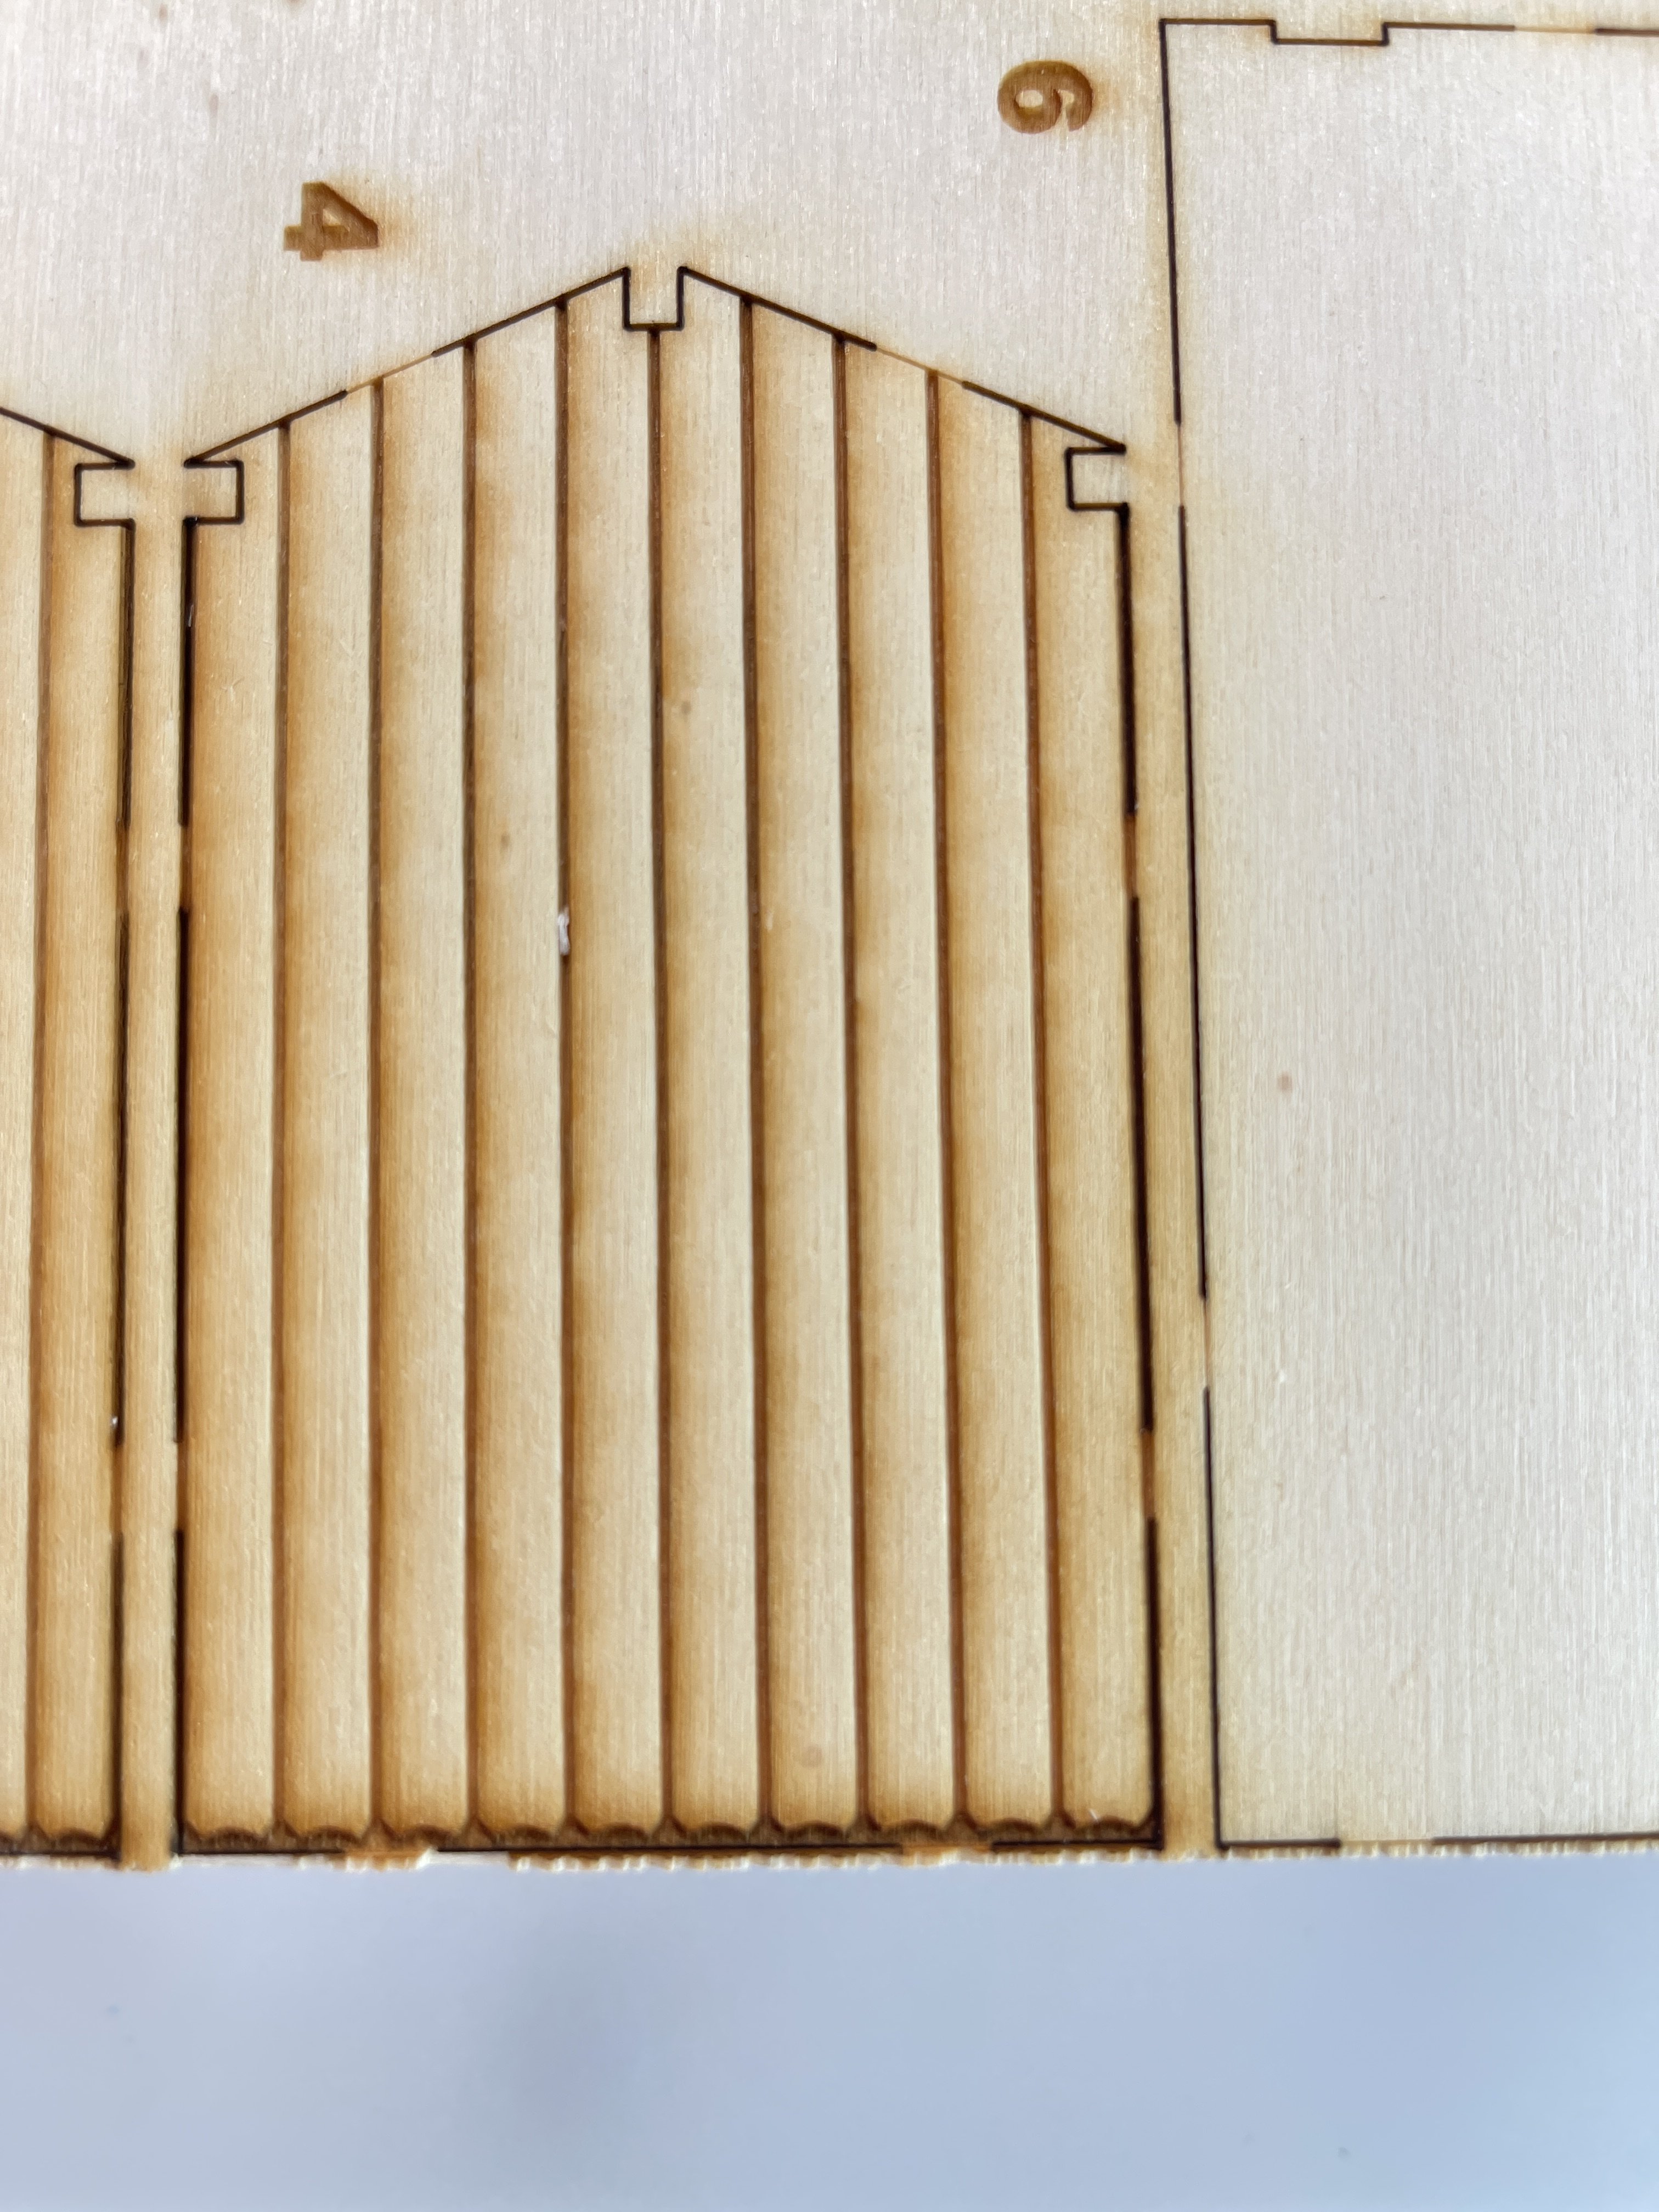
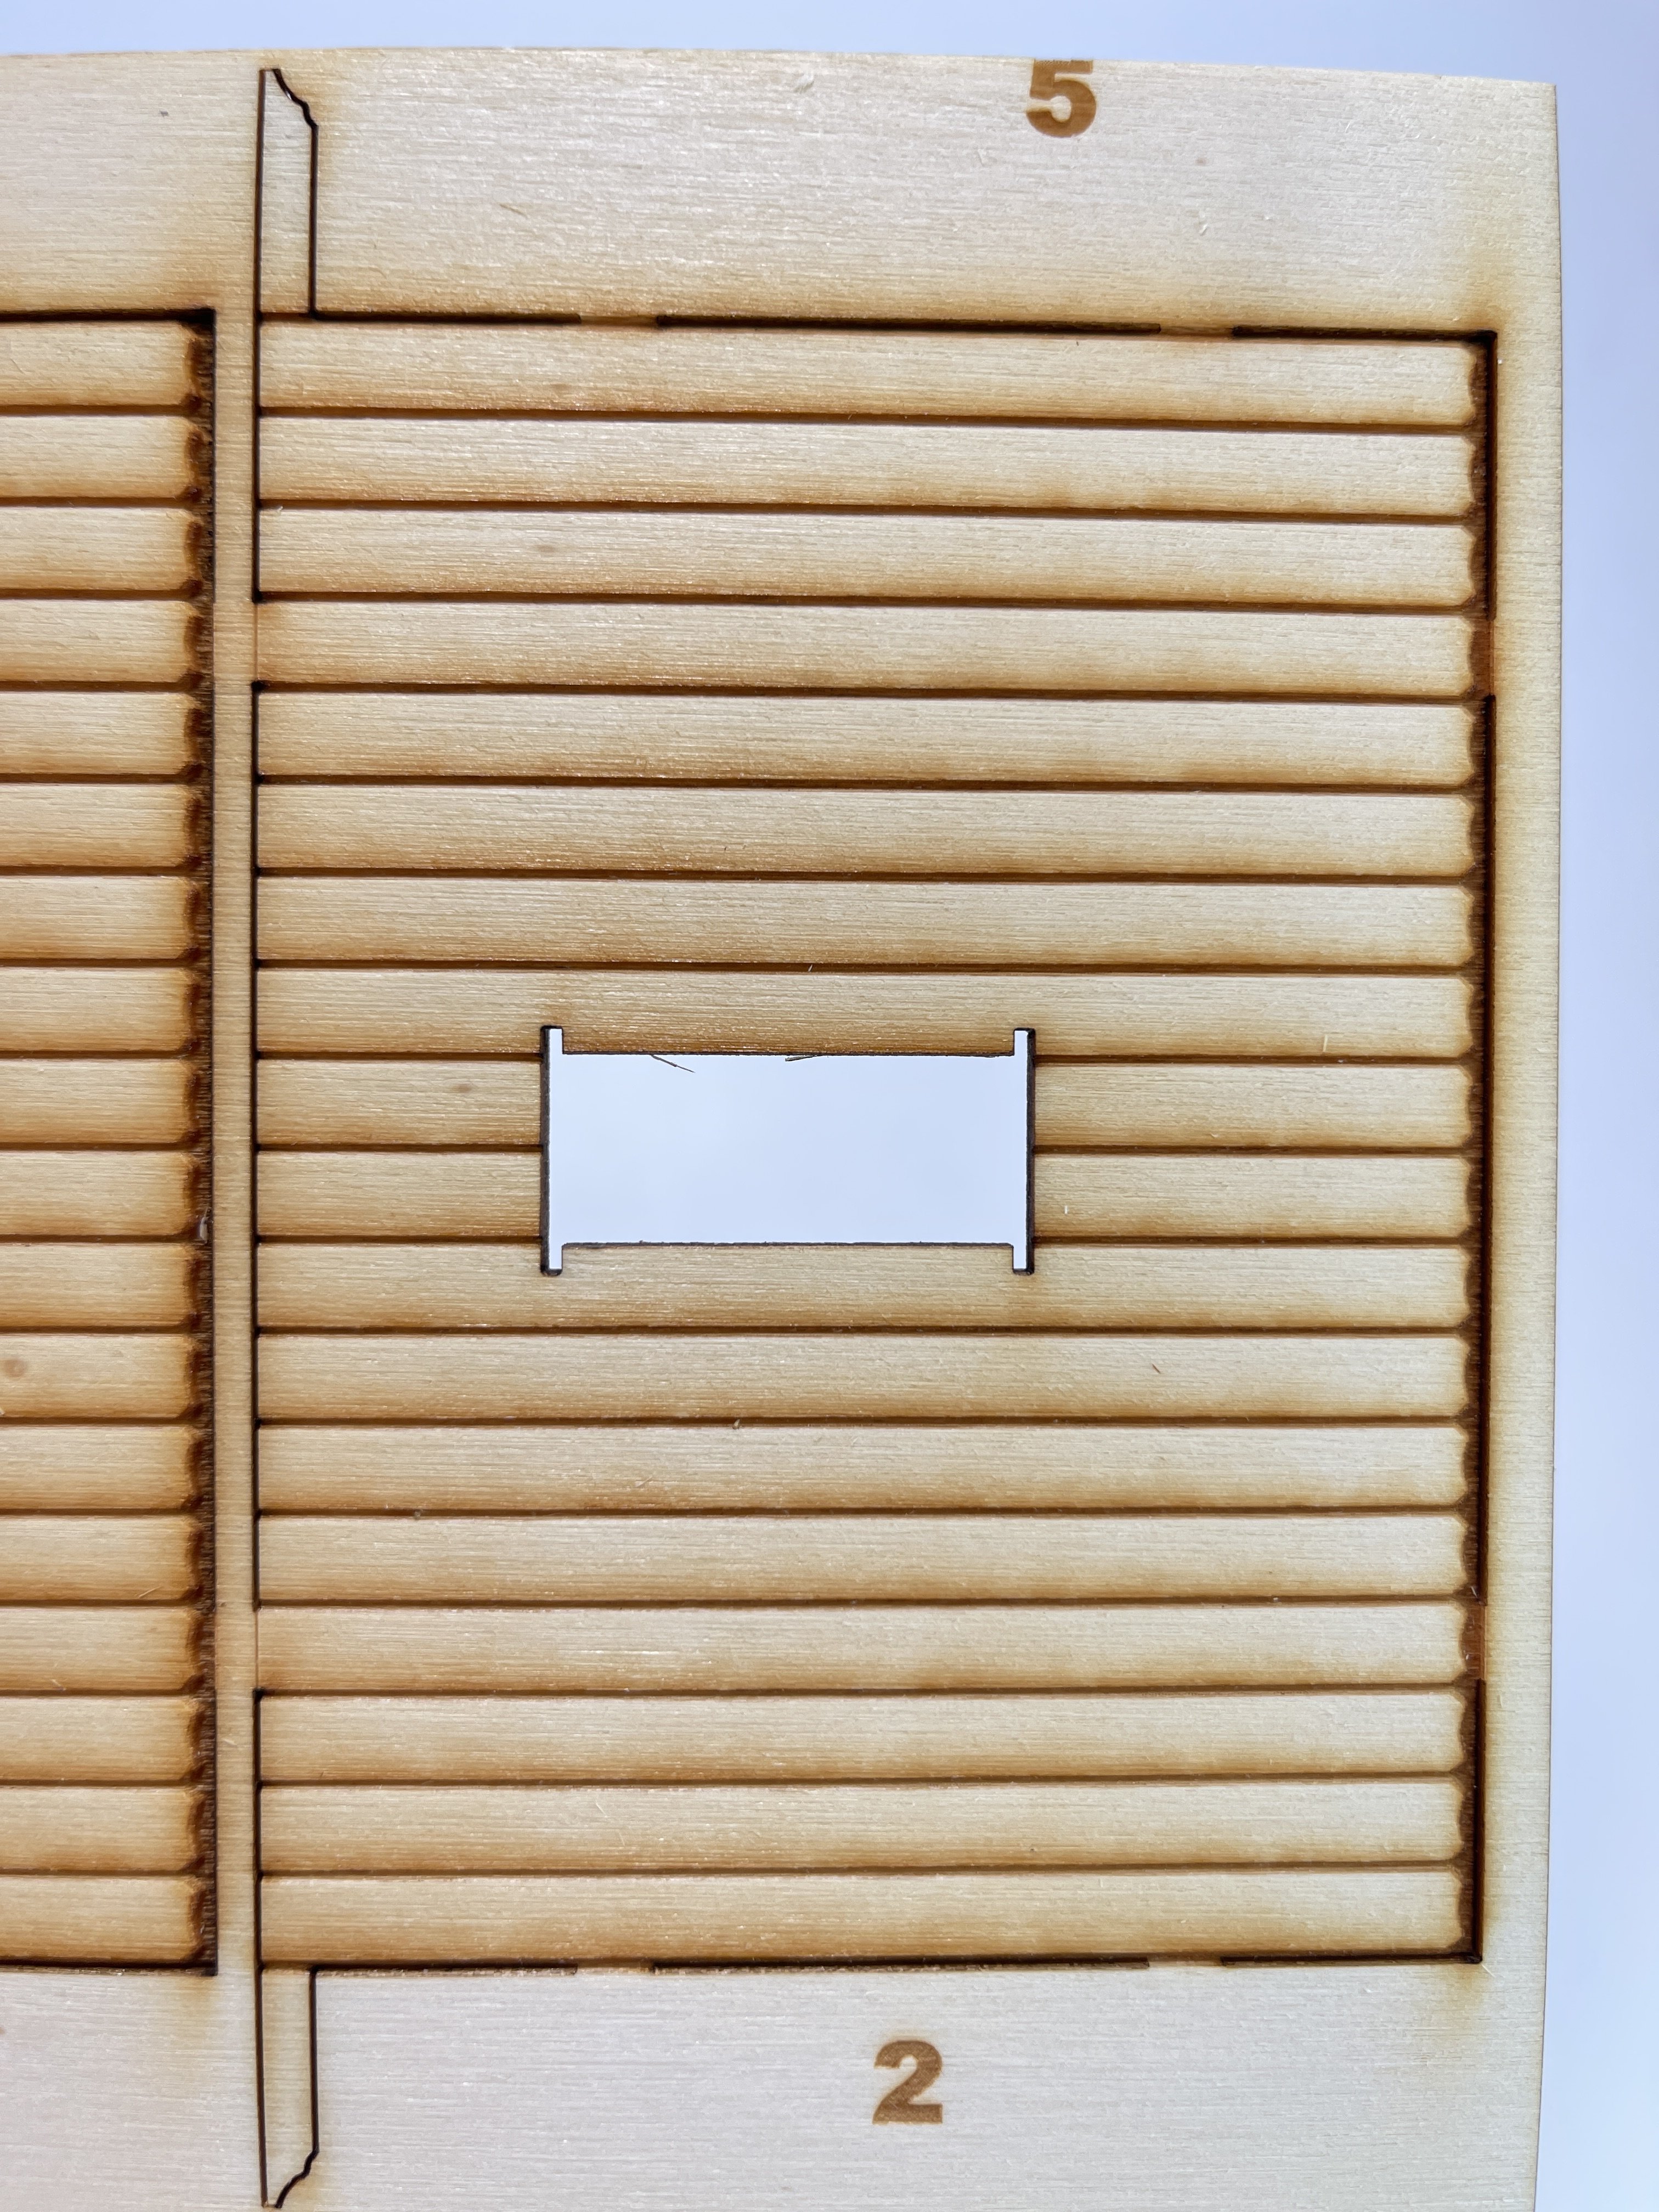
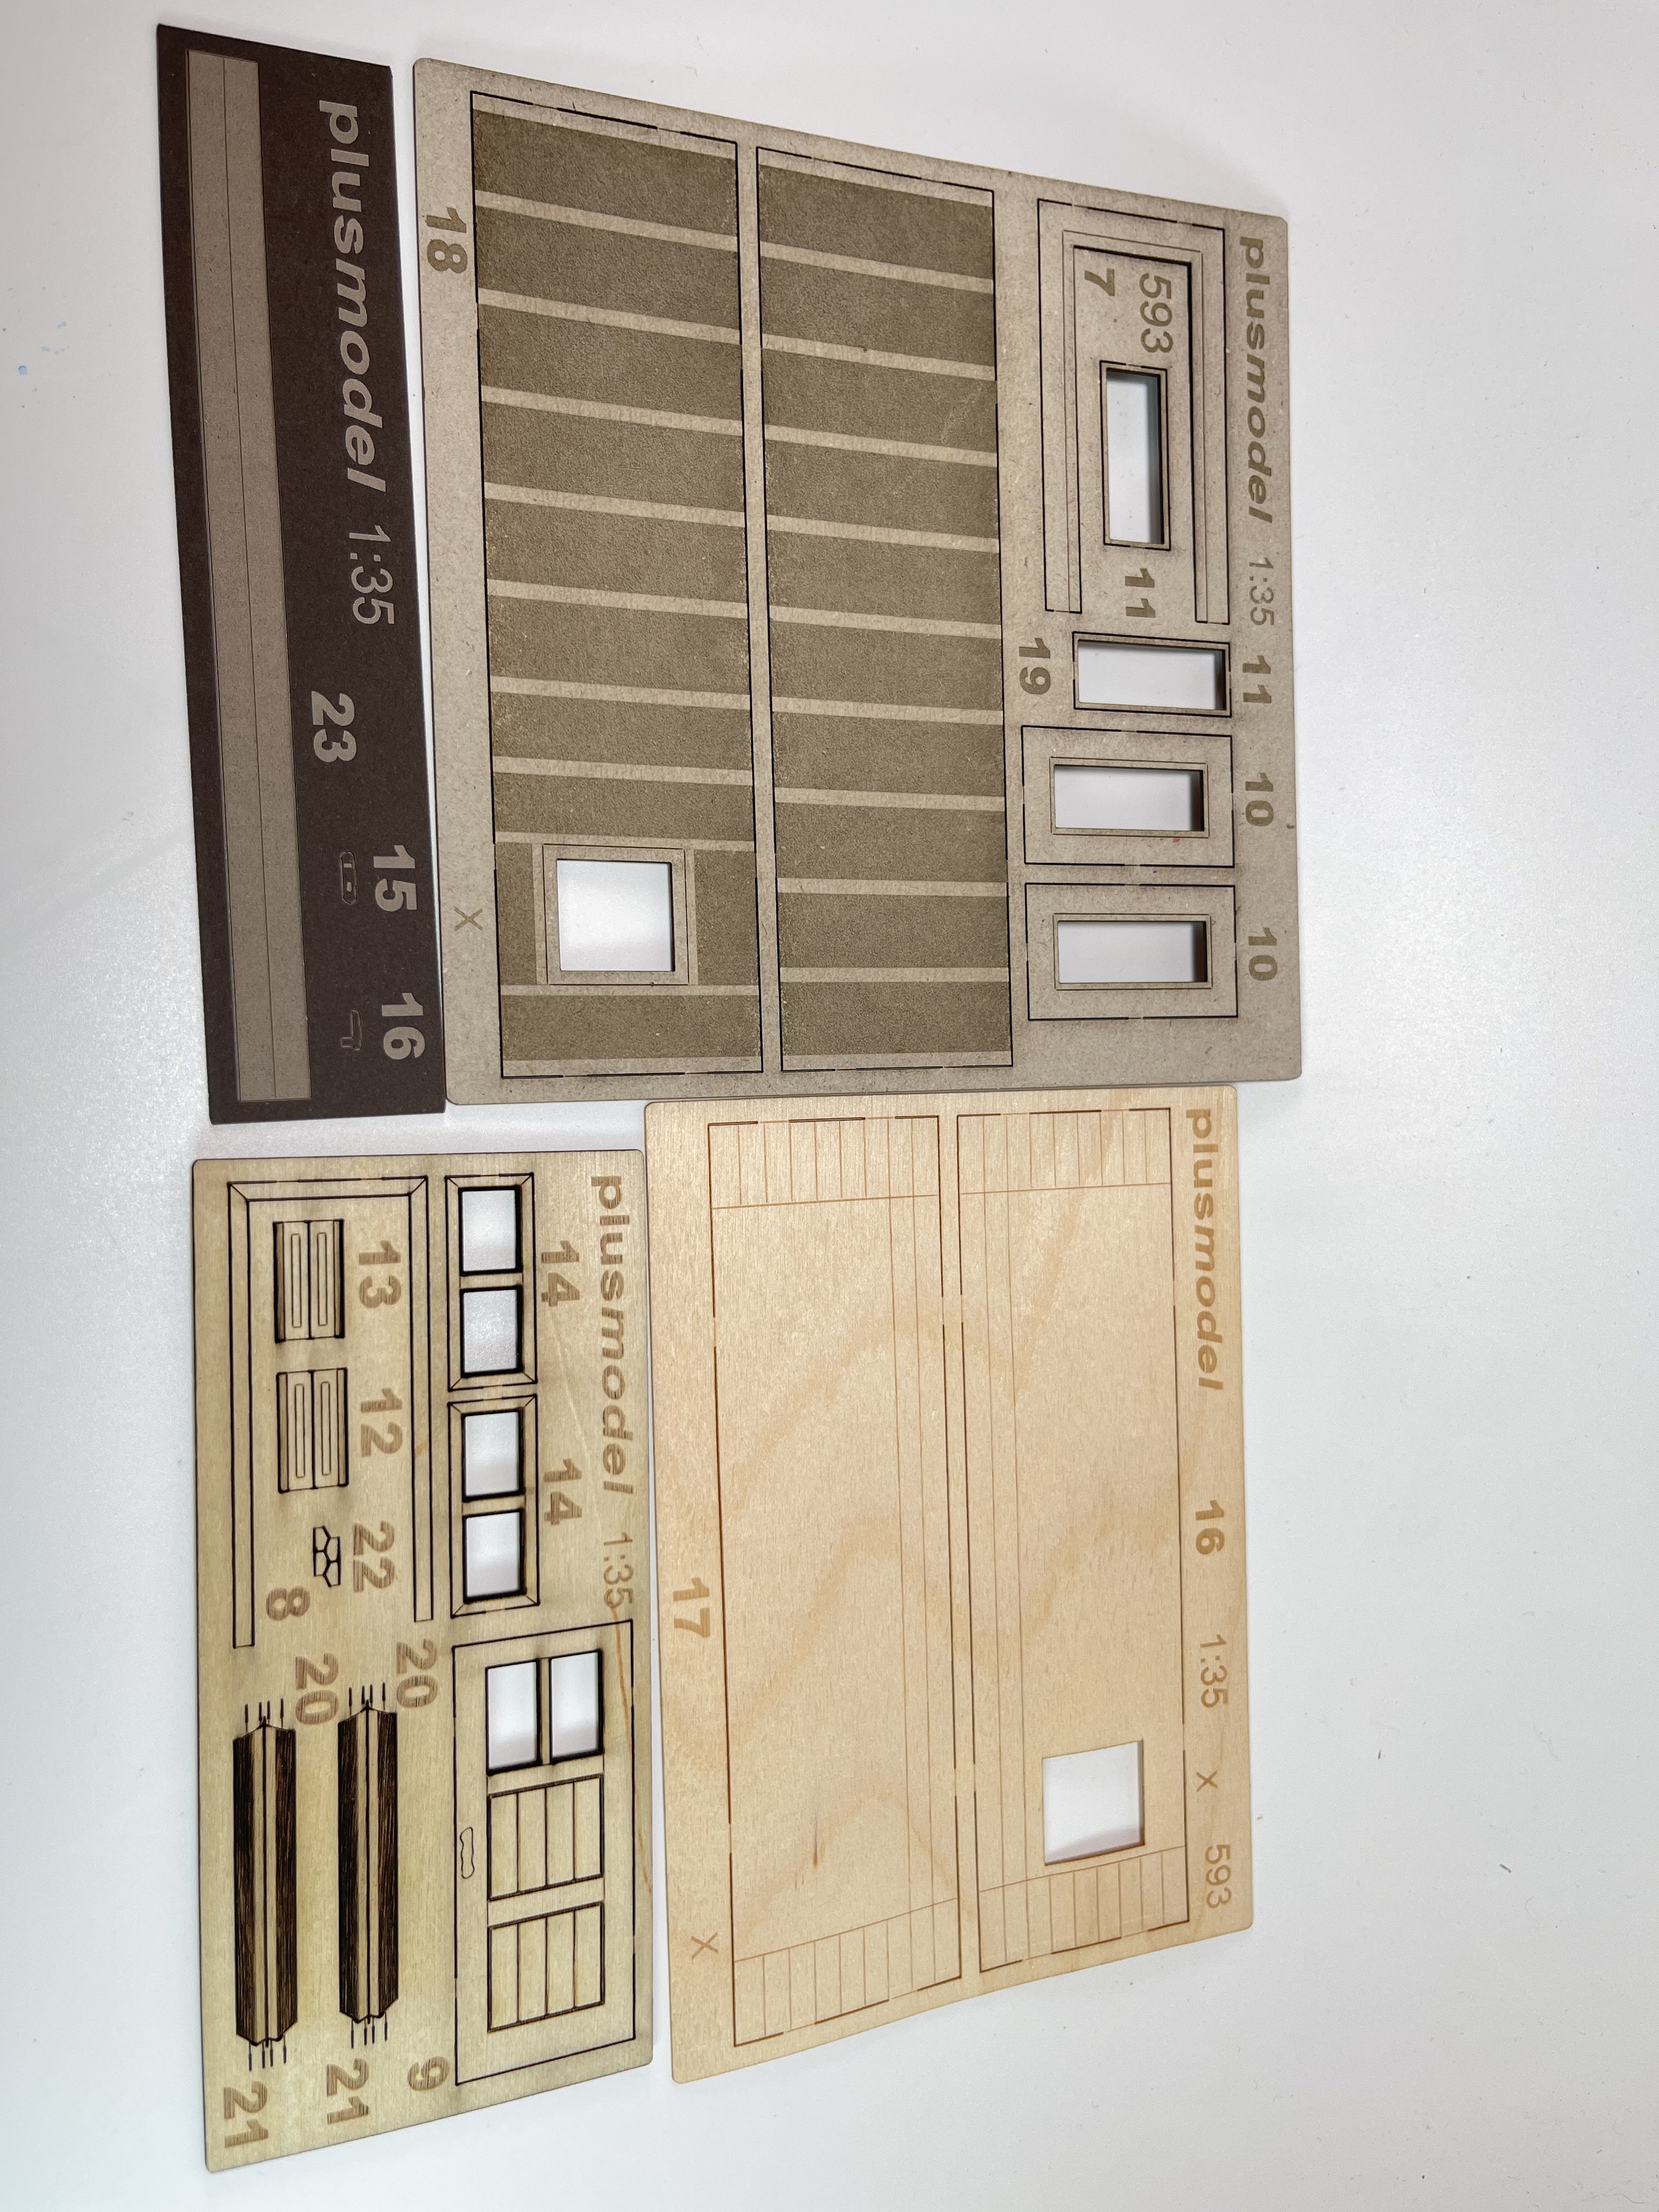
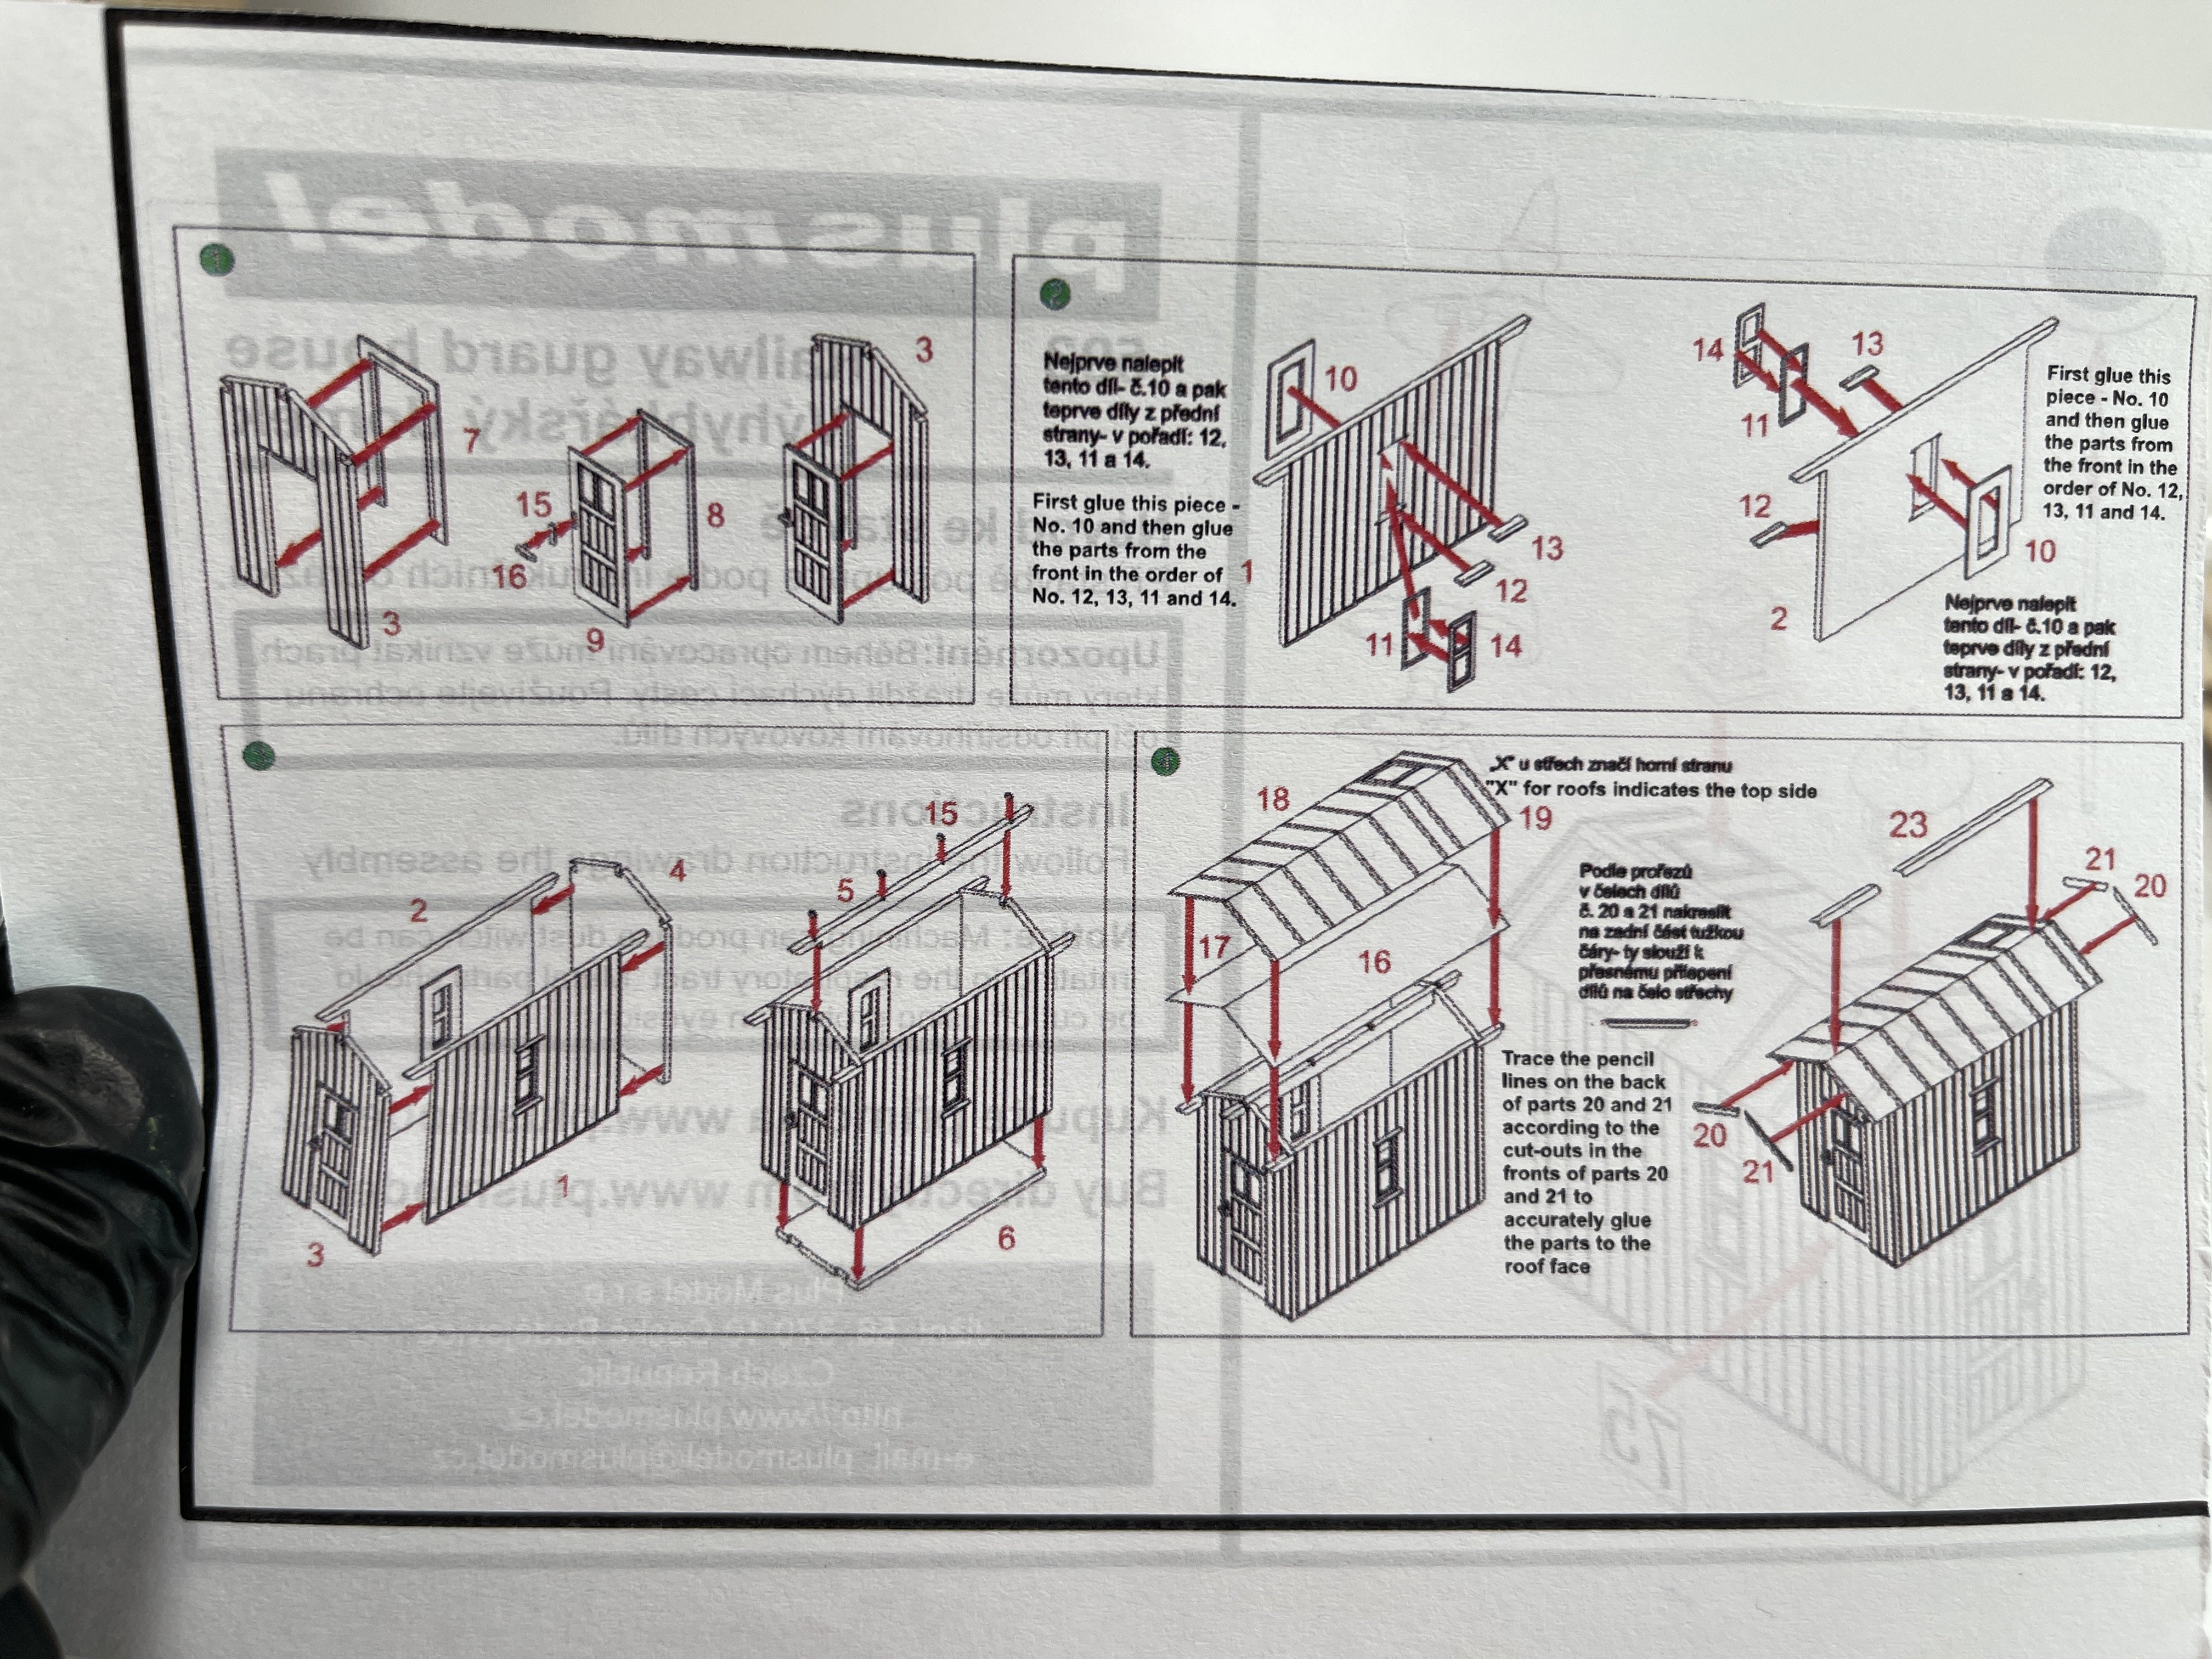
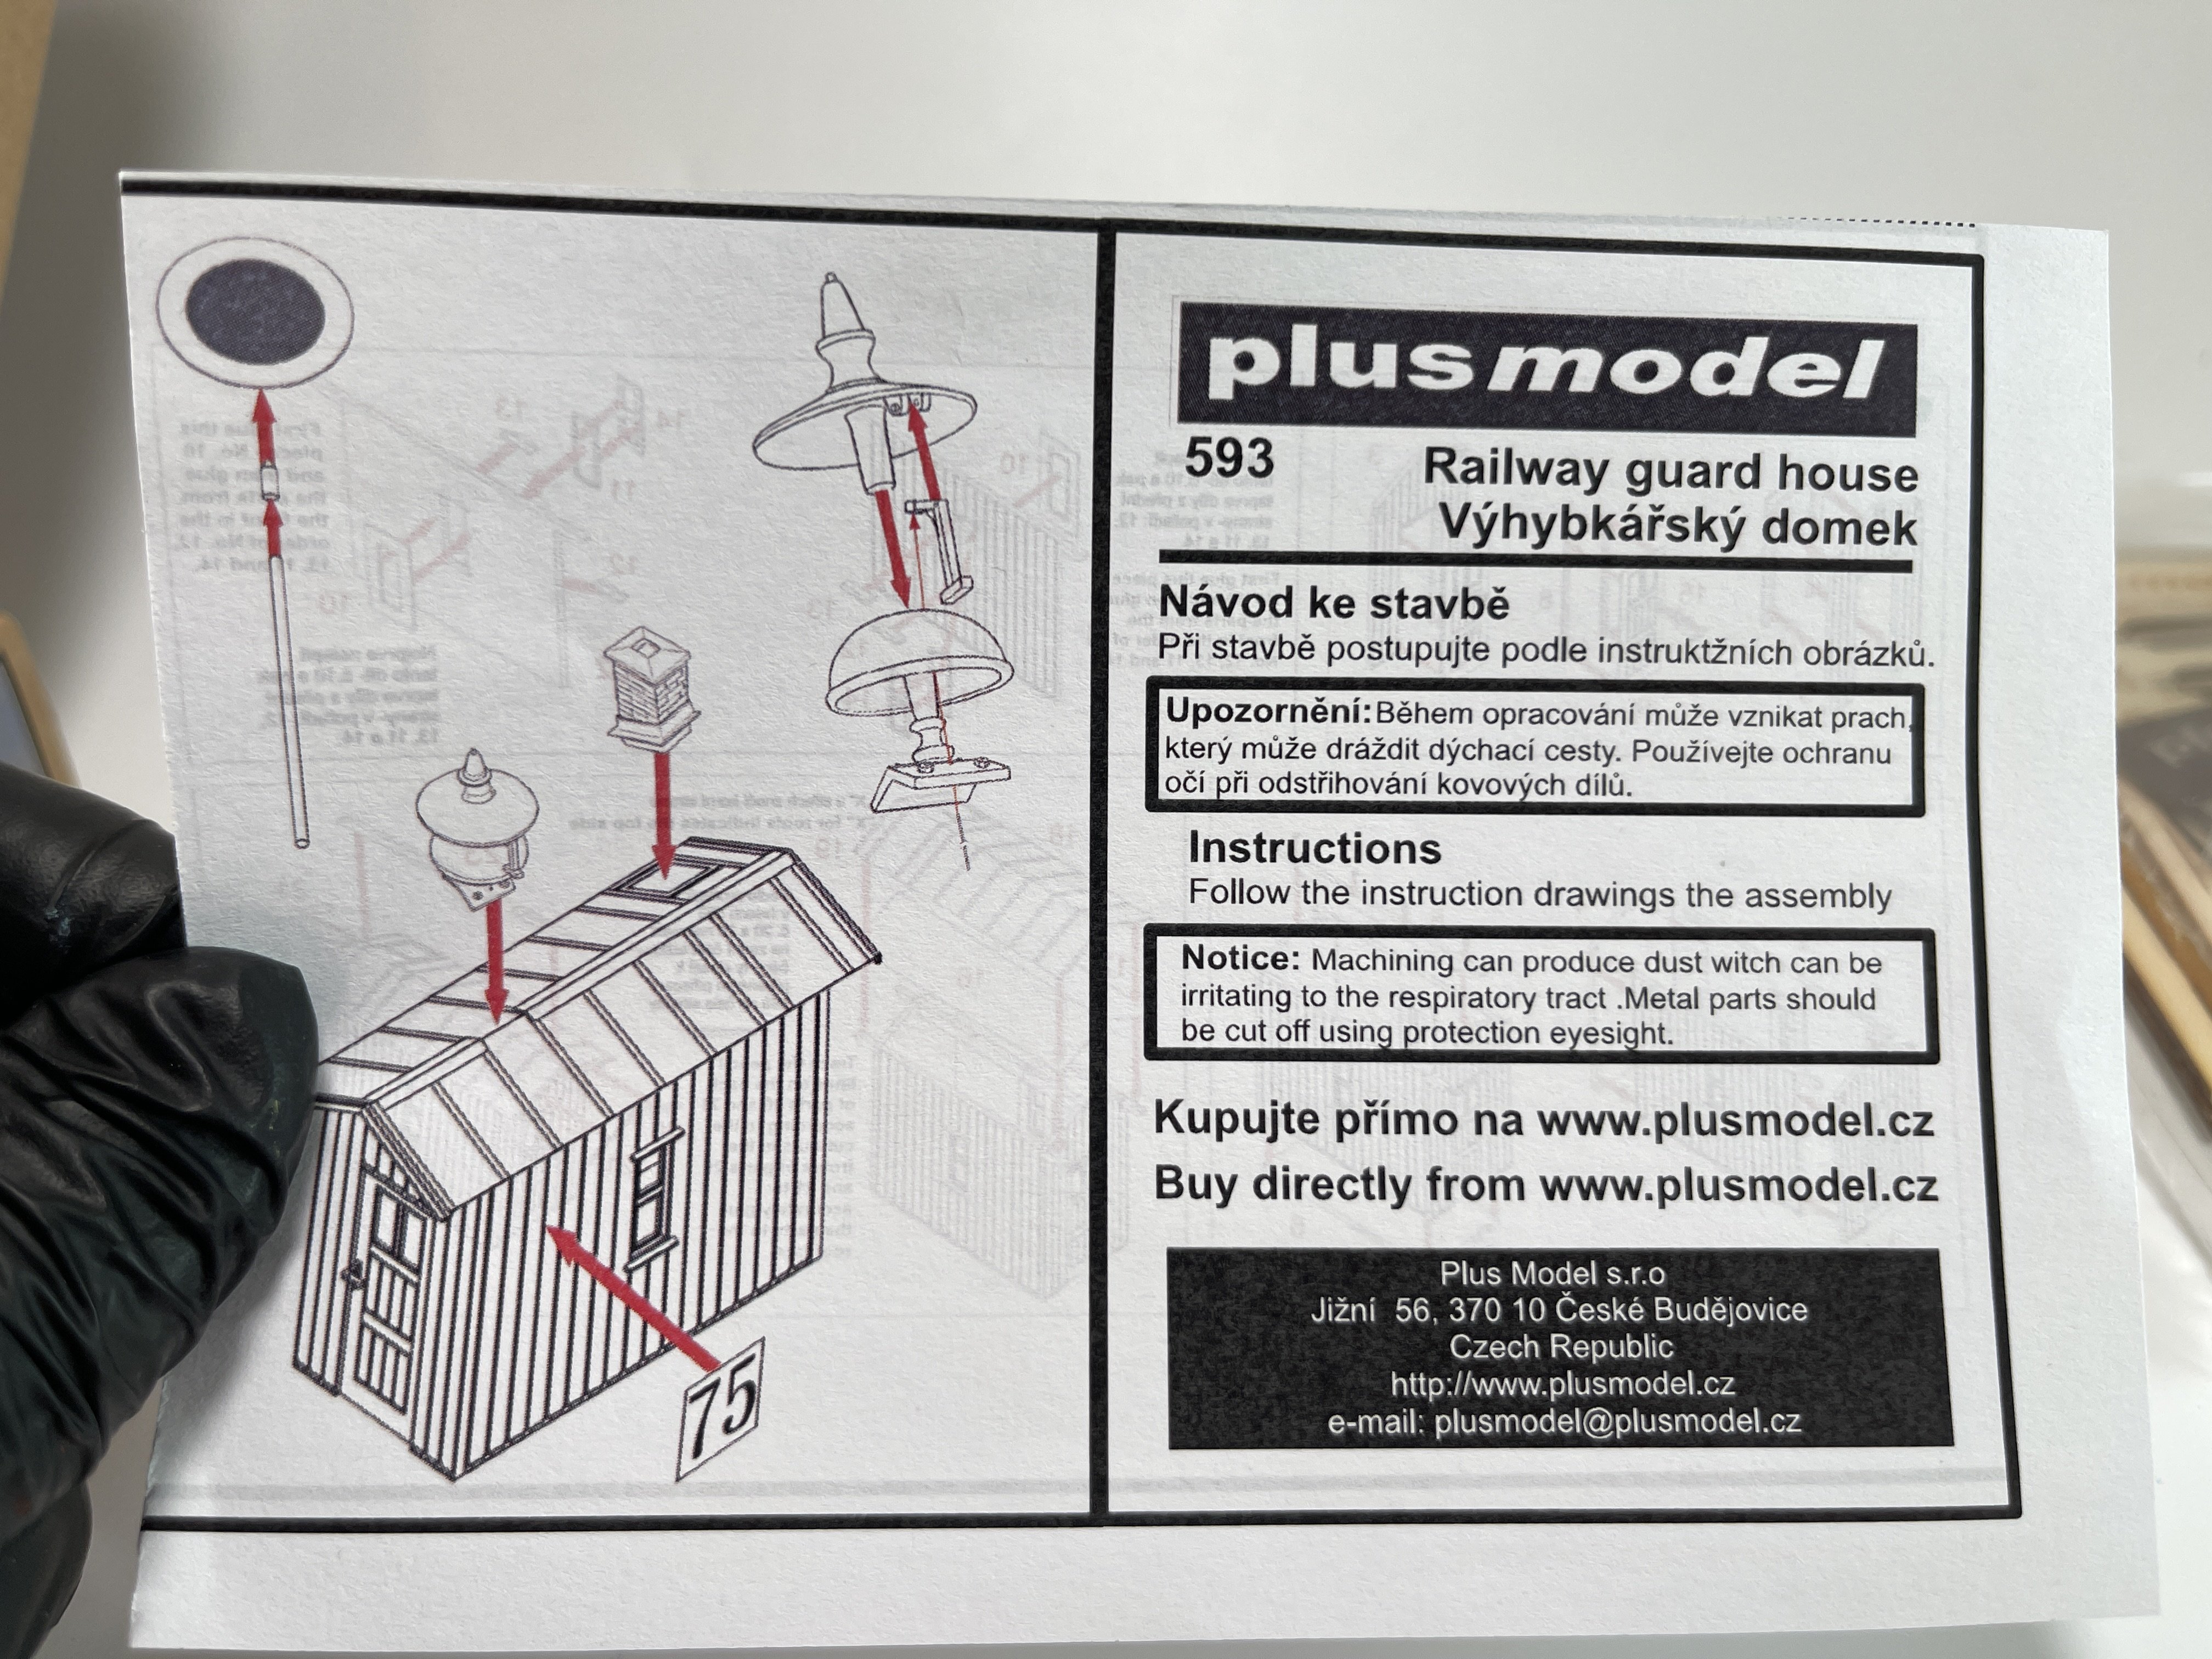
Railway Guard House
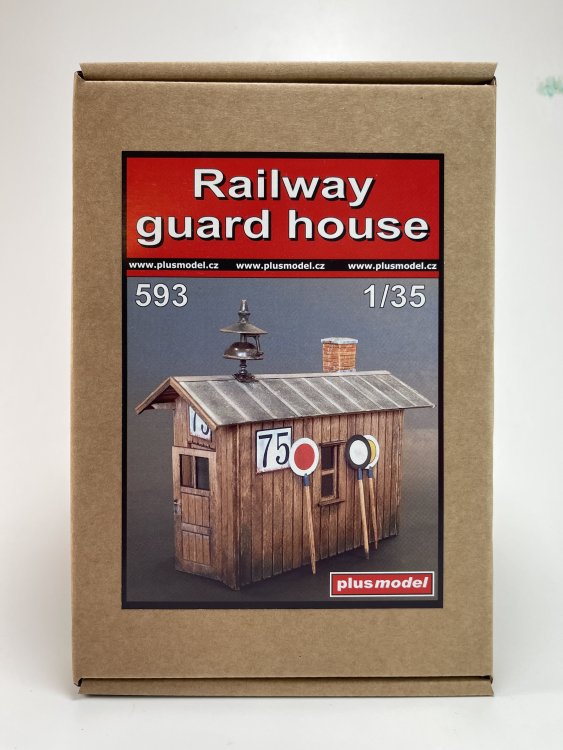
Catalogue n.º 593
Price tag: €53,60
And the top model of this review: the Railway Guard House.
I was quite surprise about the content of this release as its quite complete and a very unusual set.

Perfect to all 1:35 rail scenario, specially with the new releases that are popping in 1:35, either AFV or AIR.
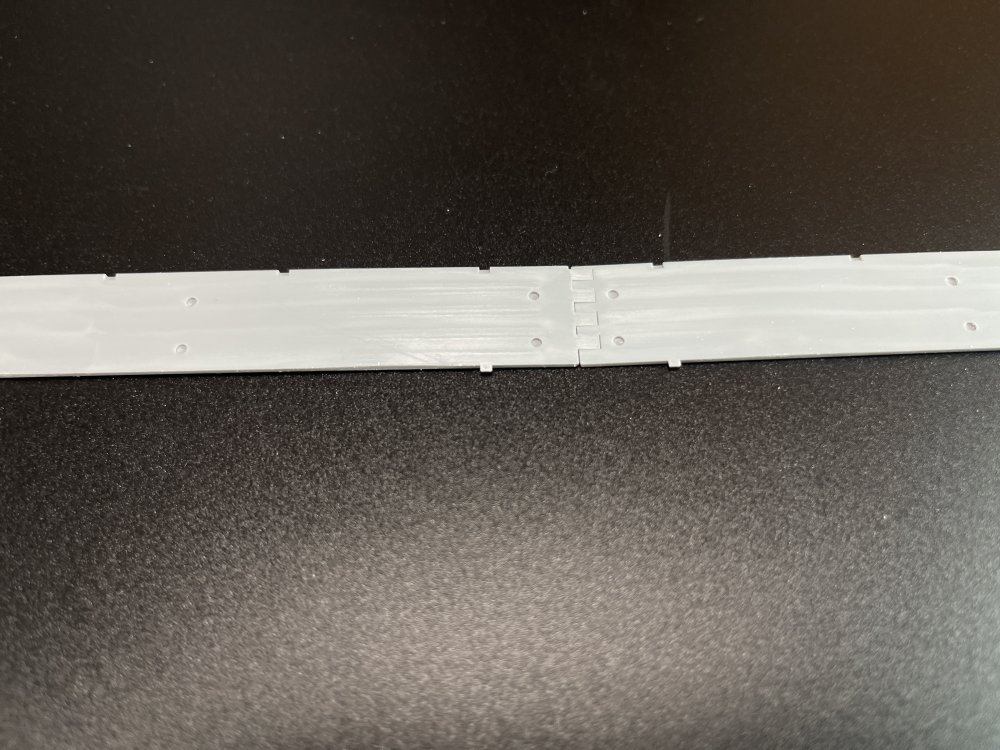
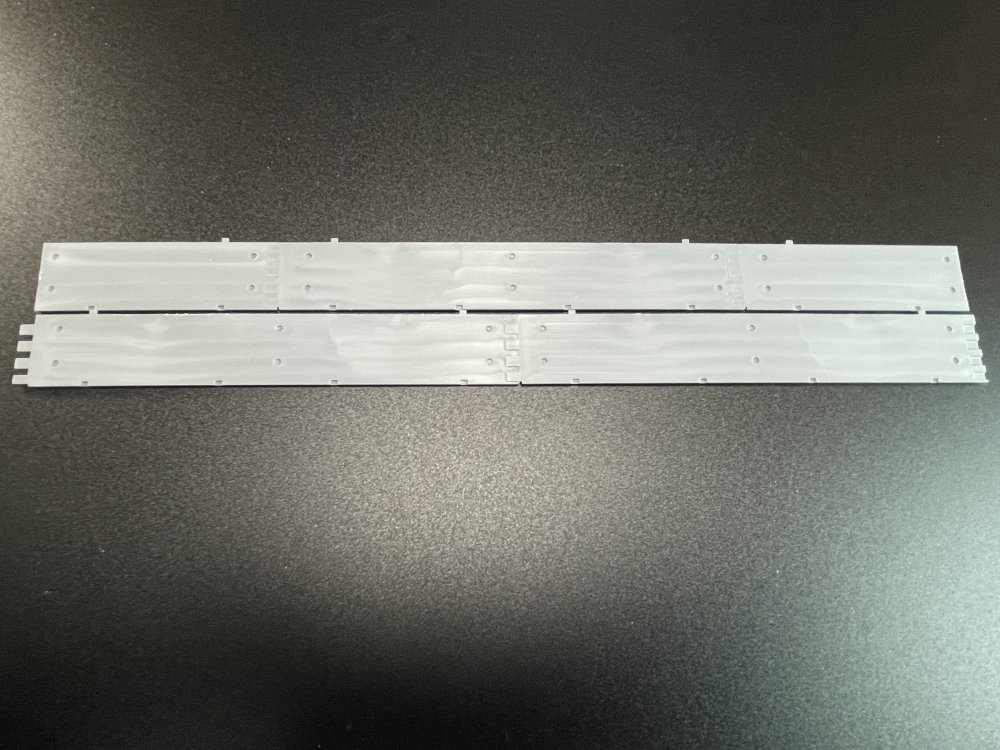
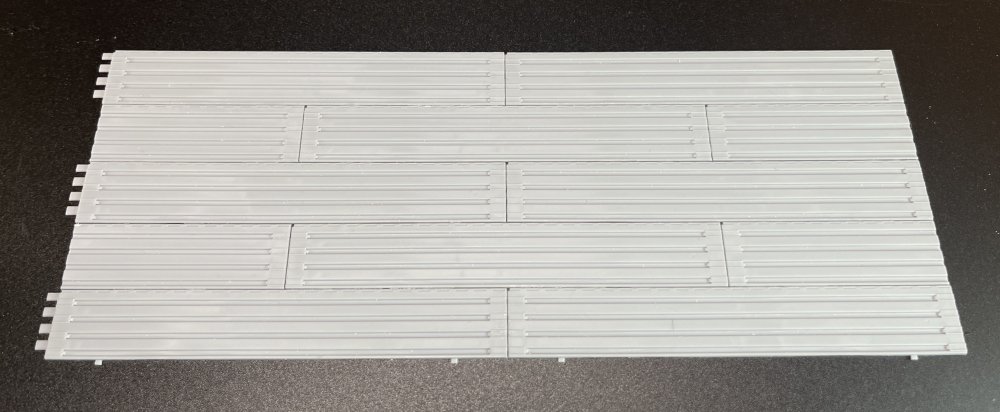
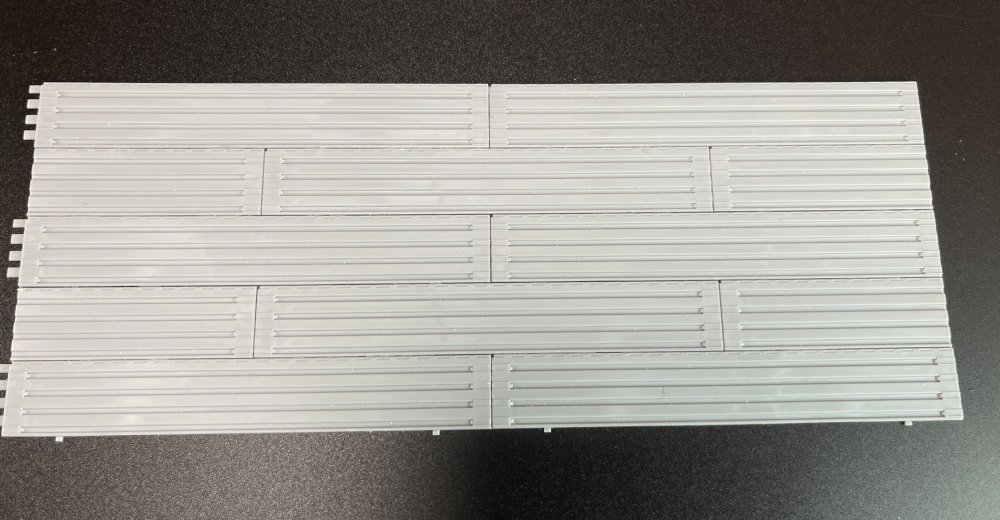
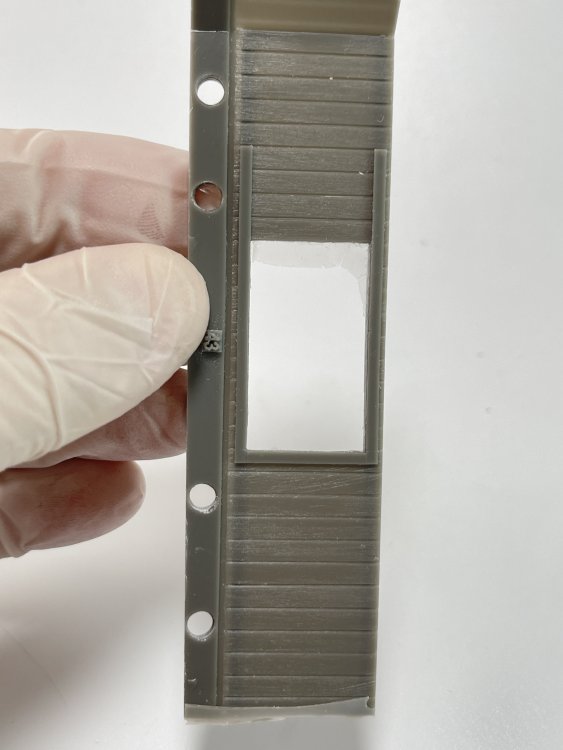
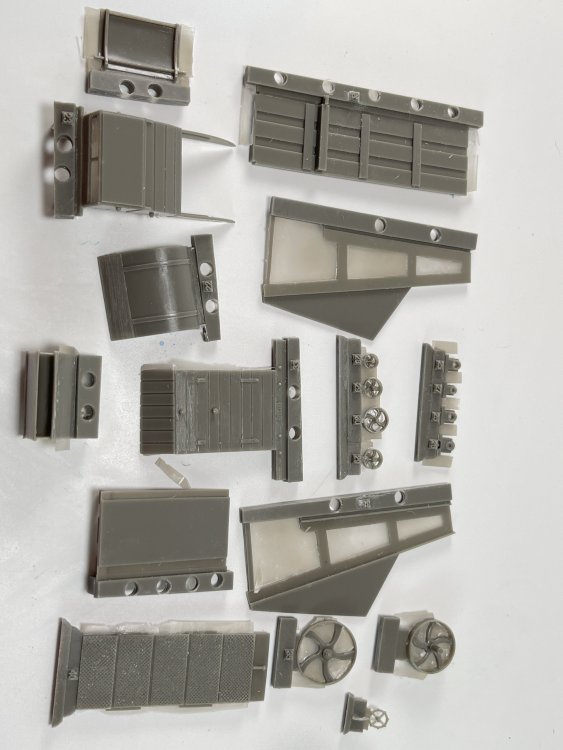
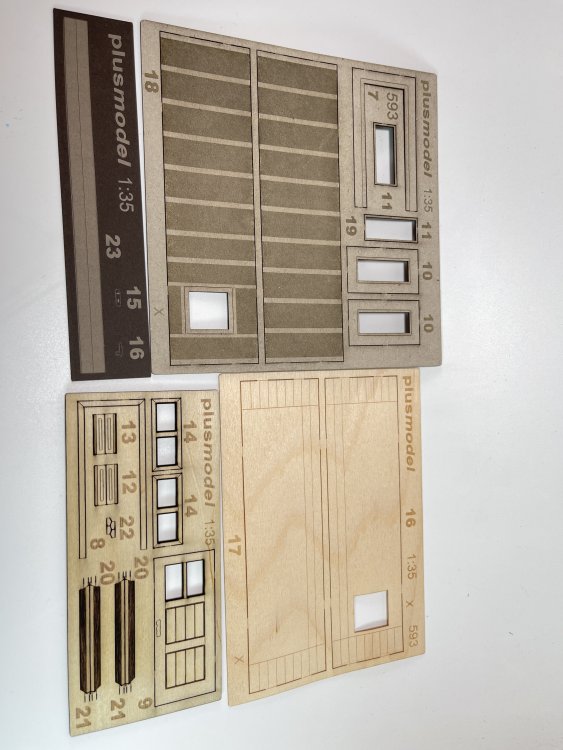
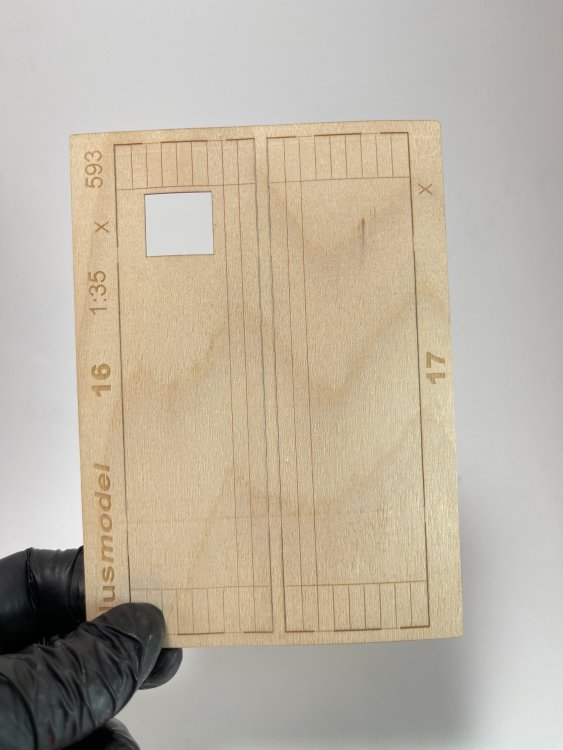
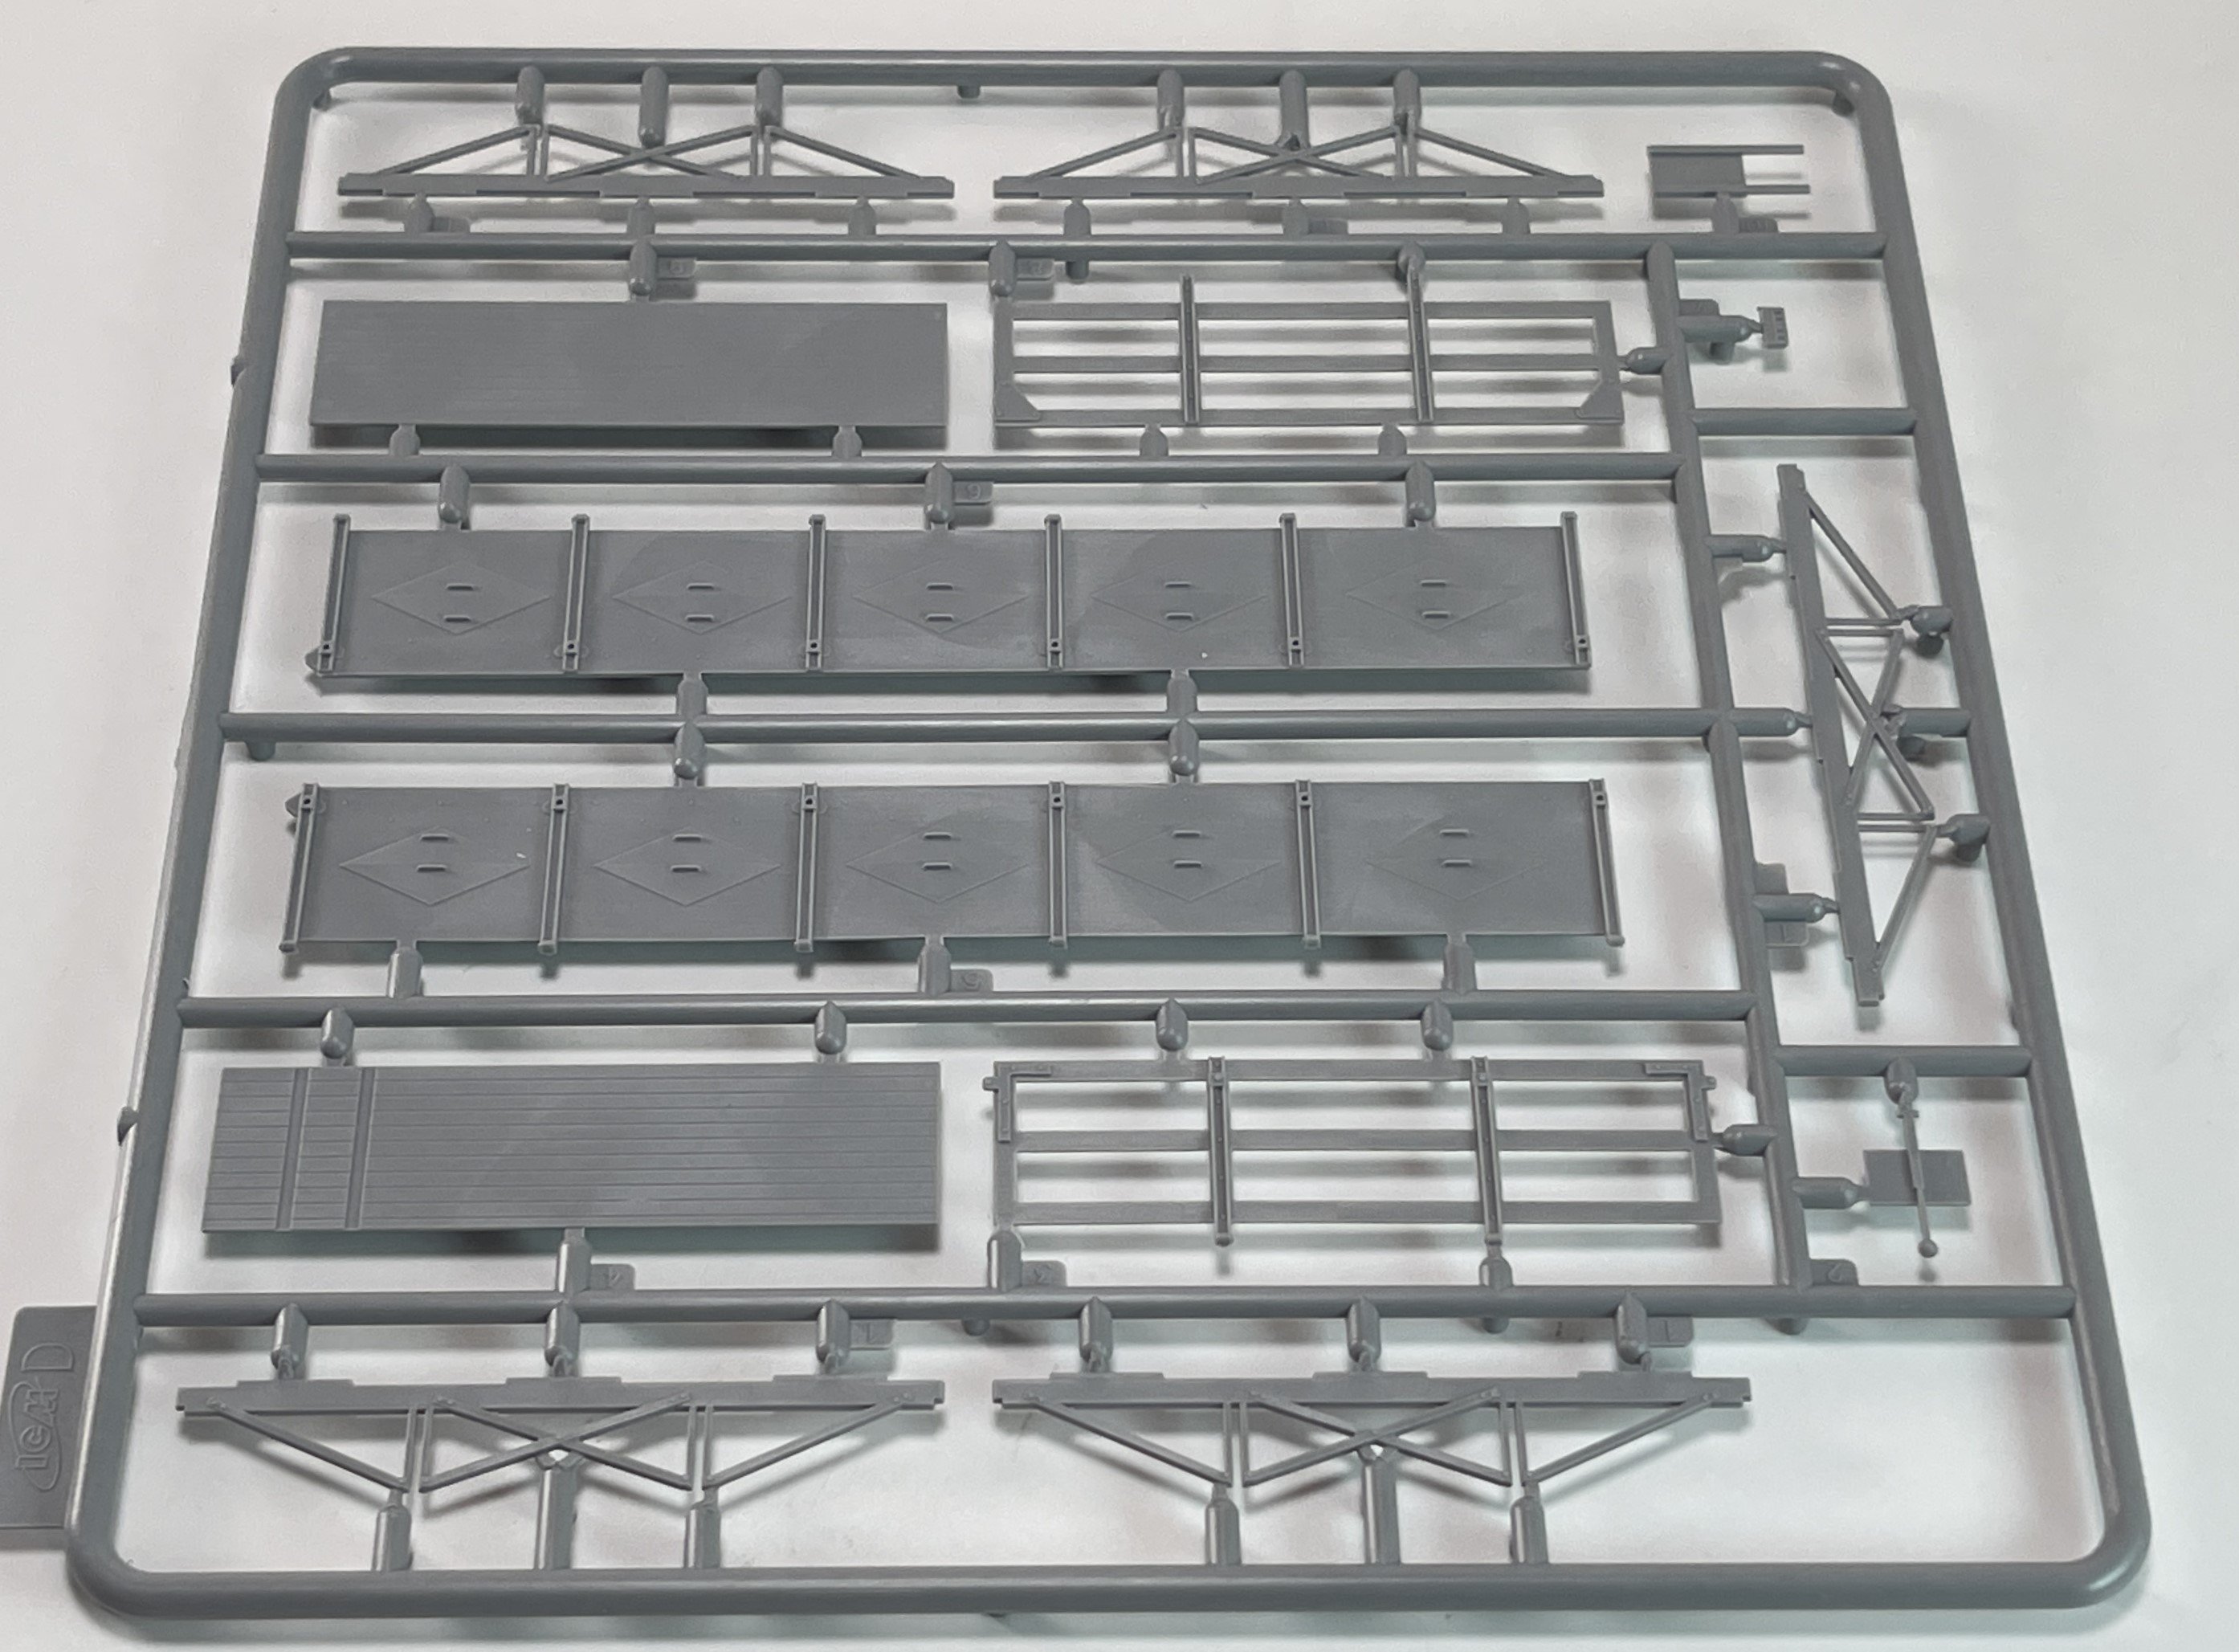
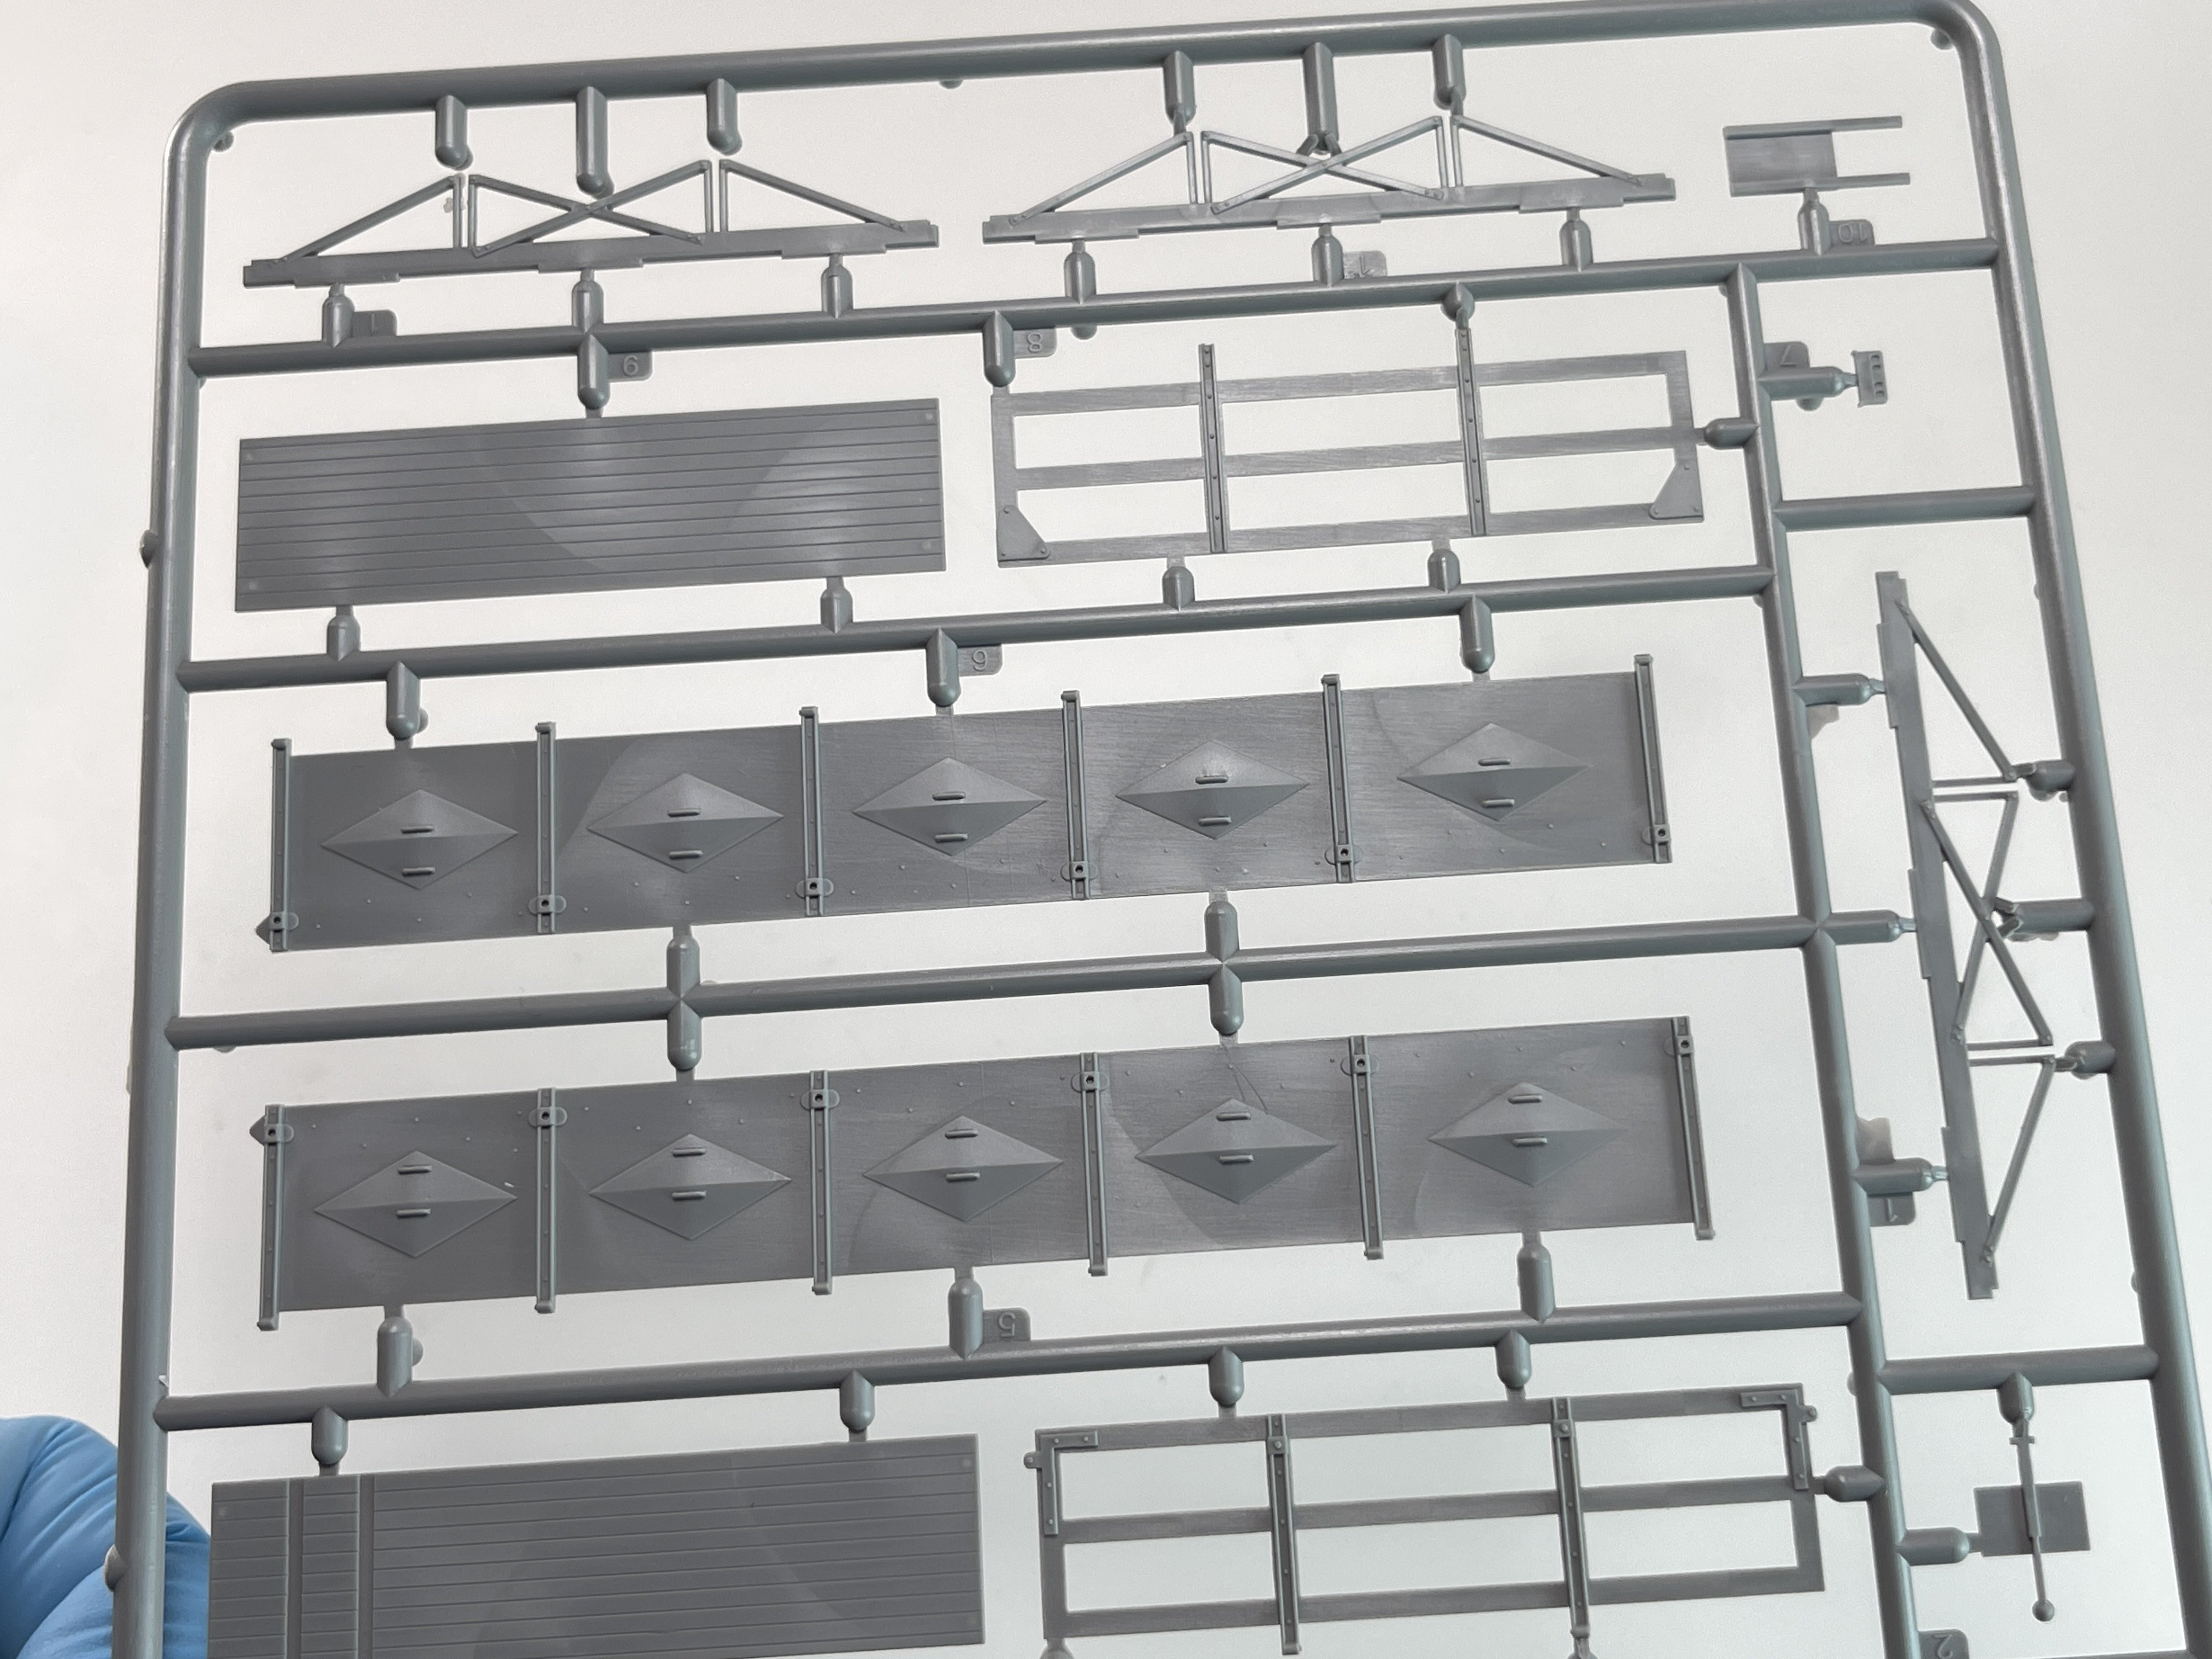
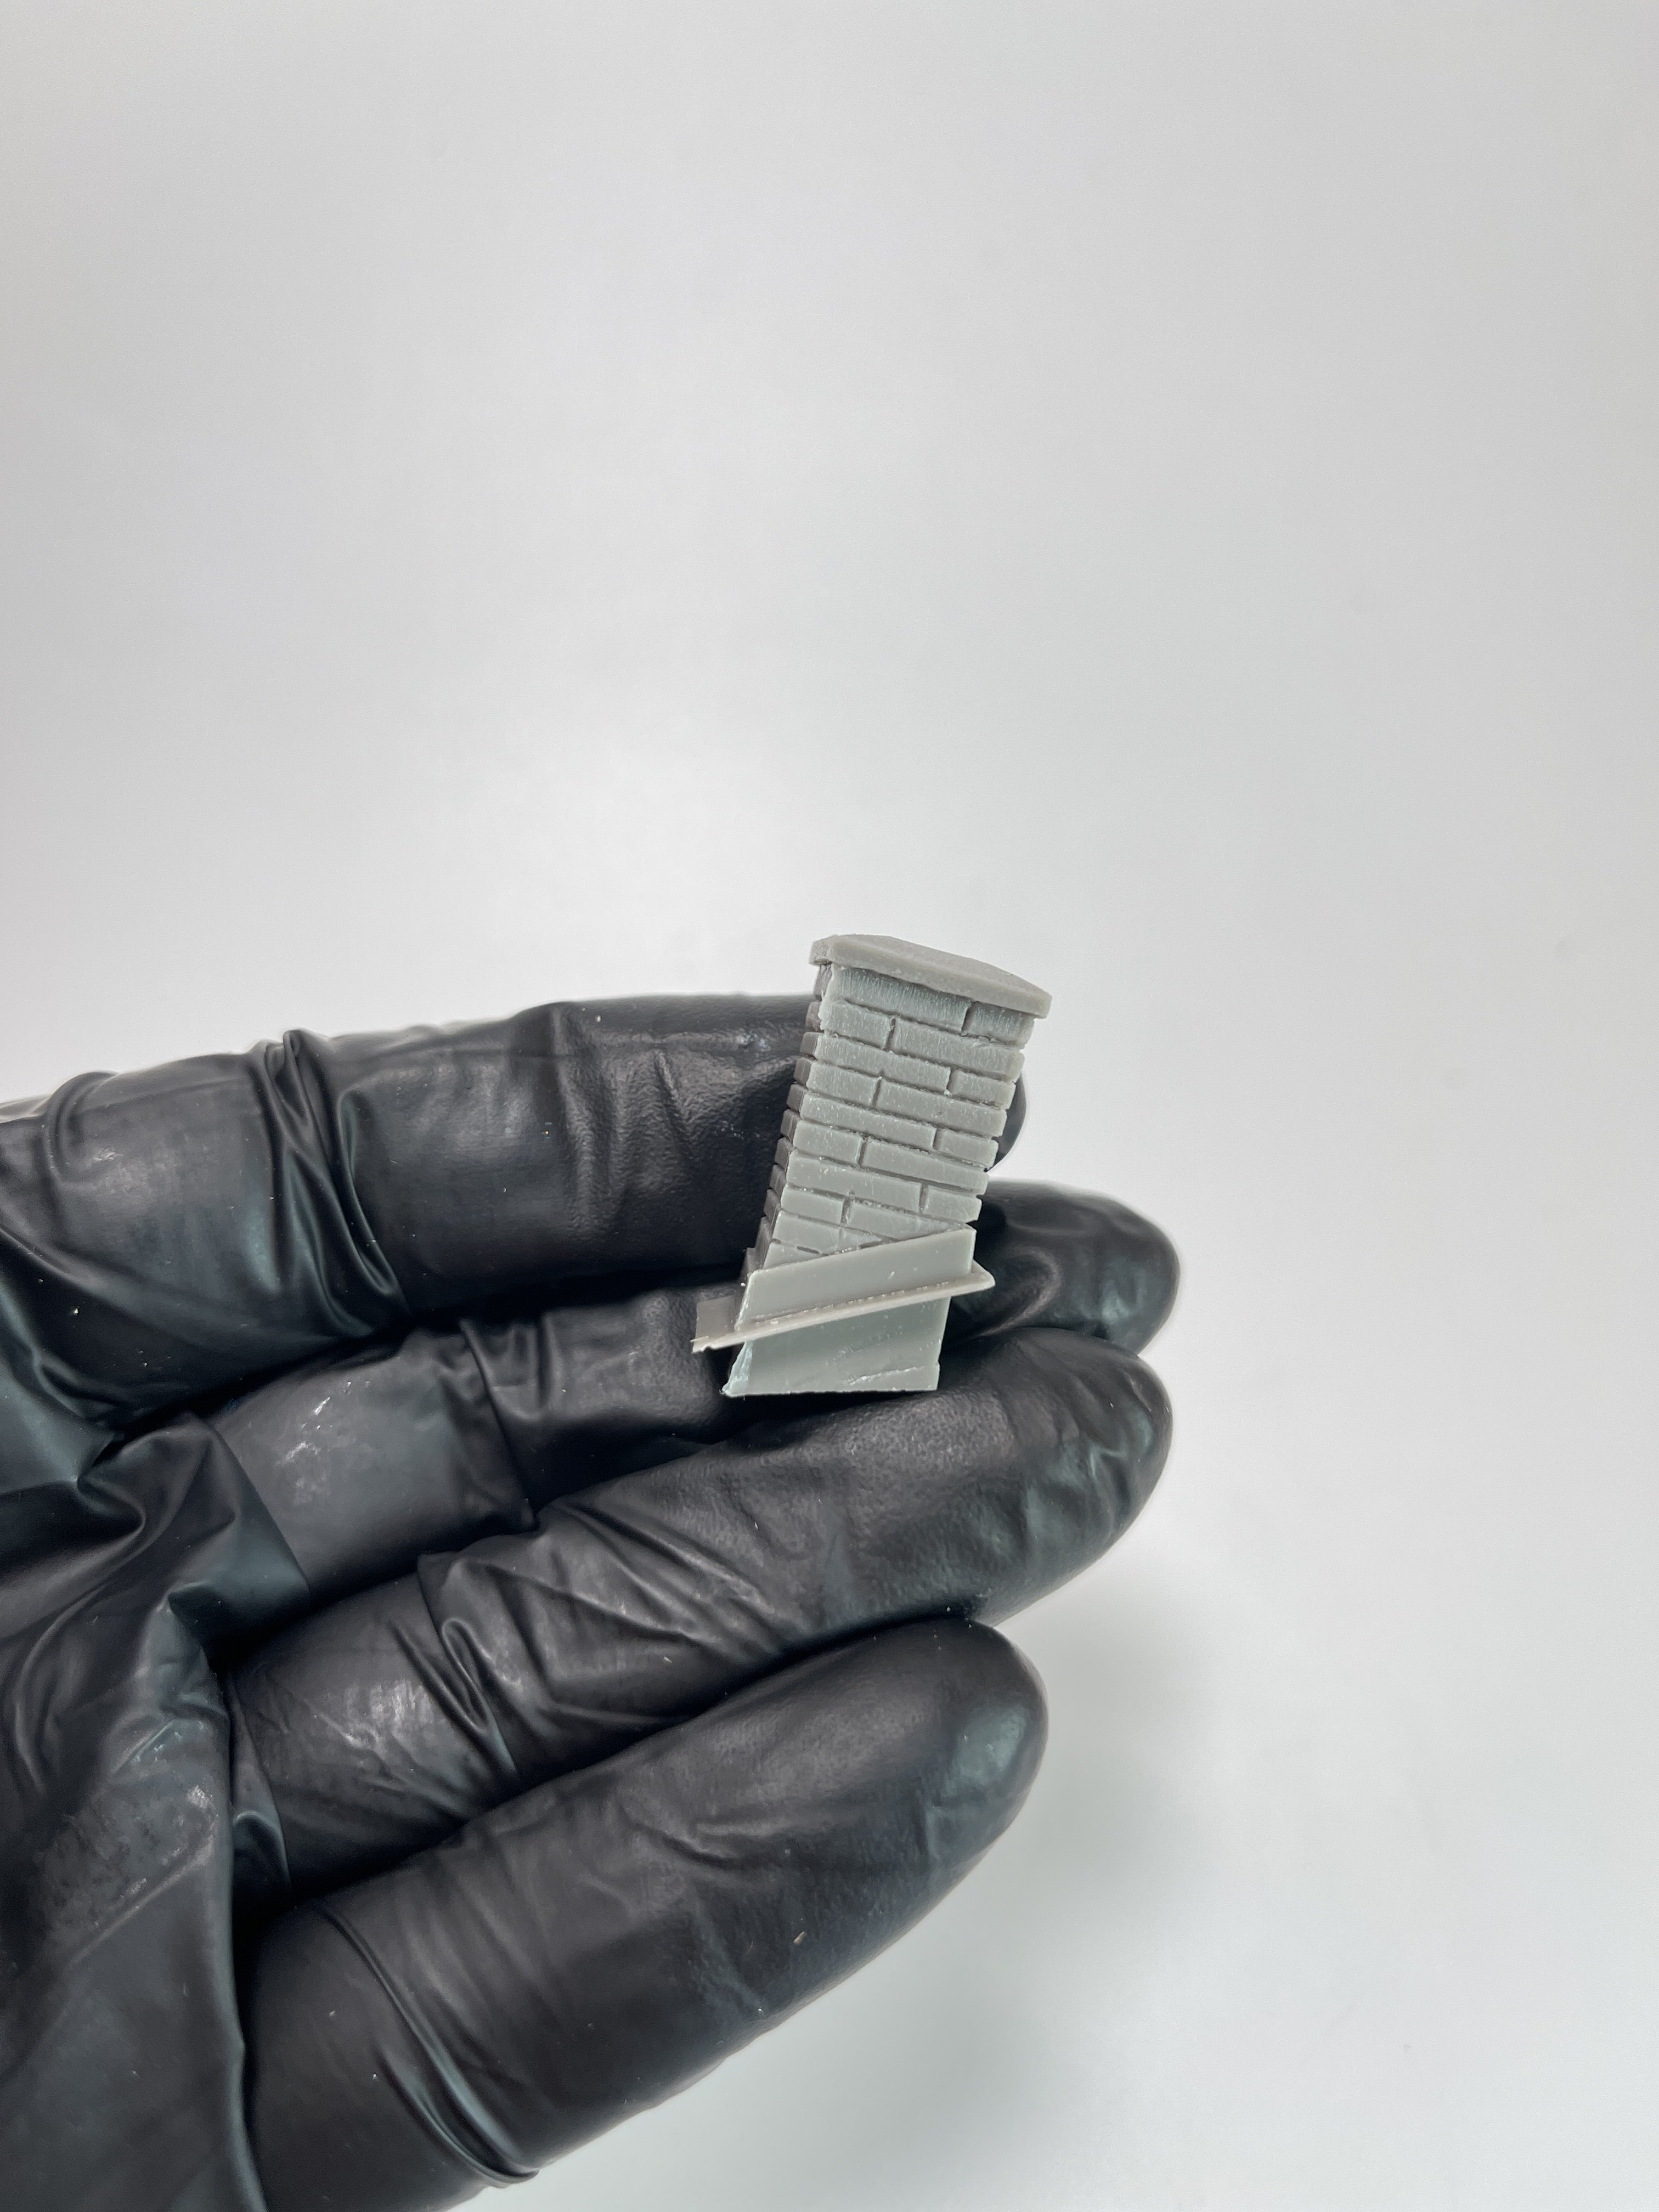
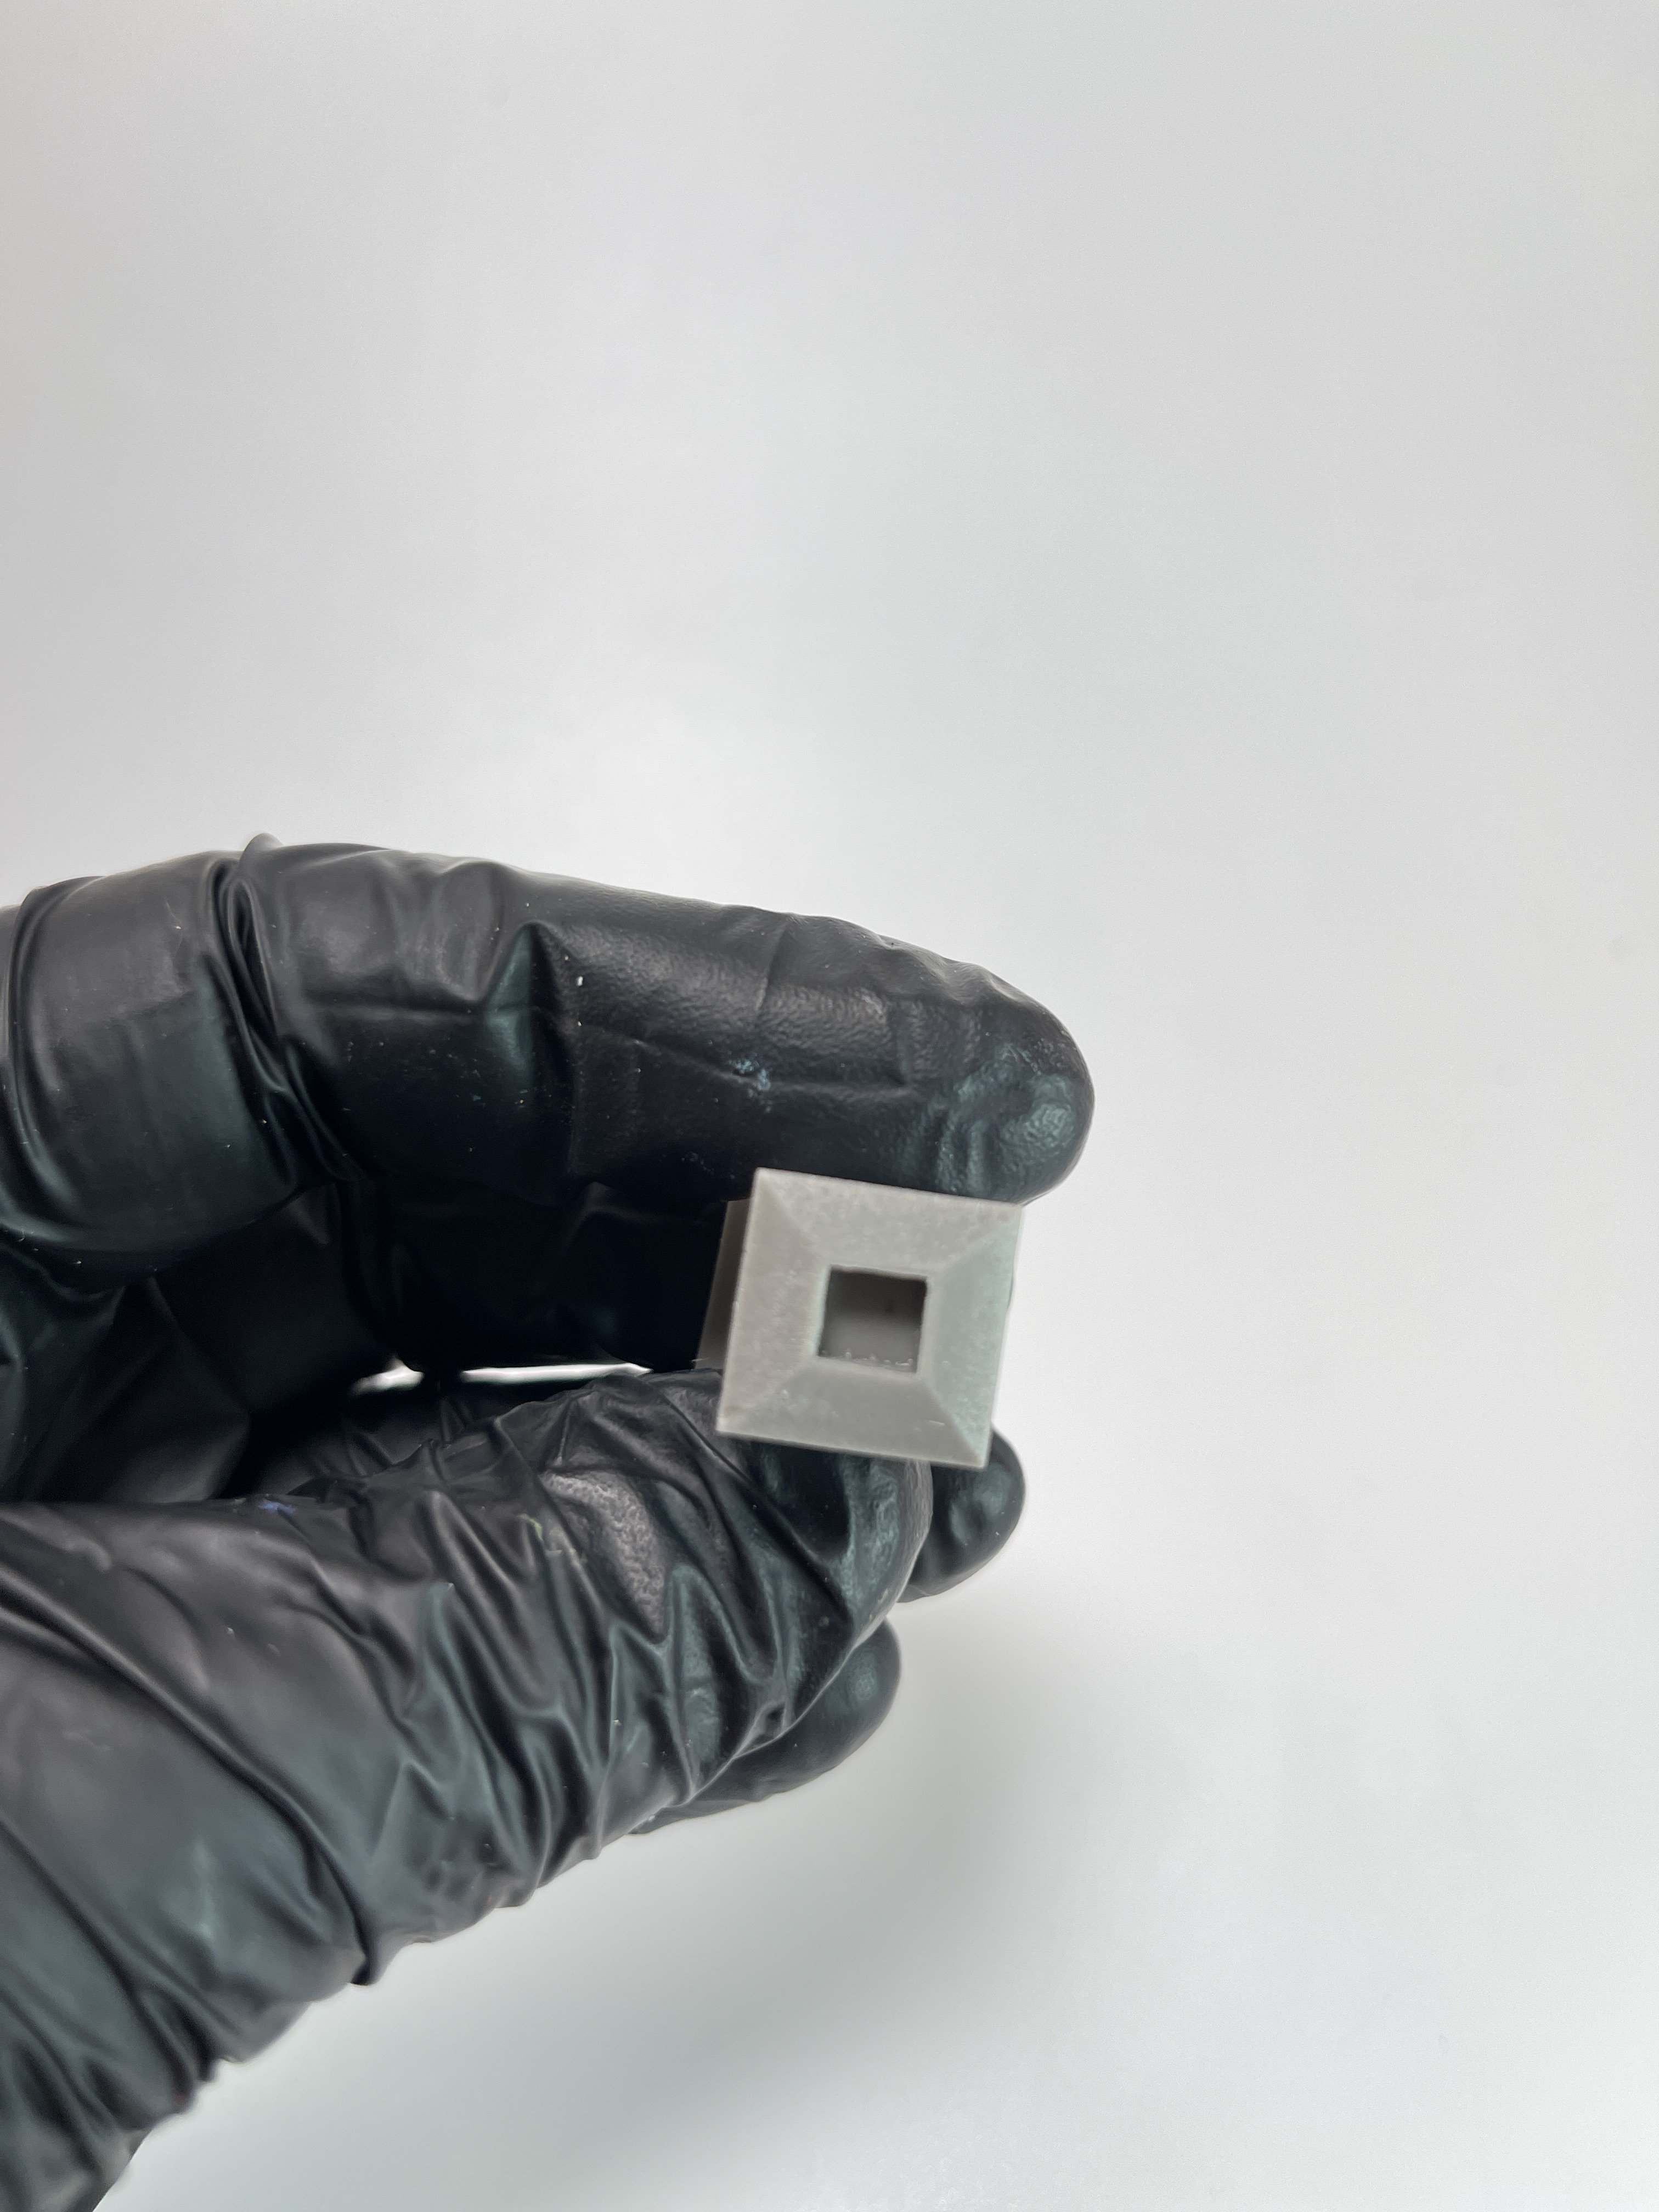
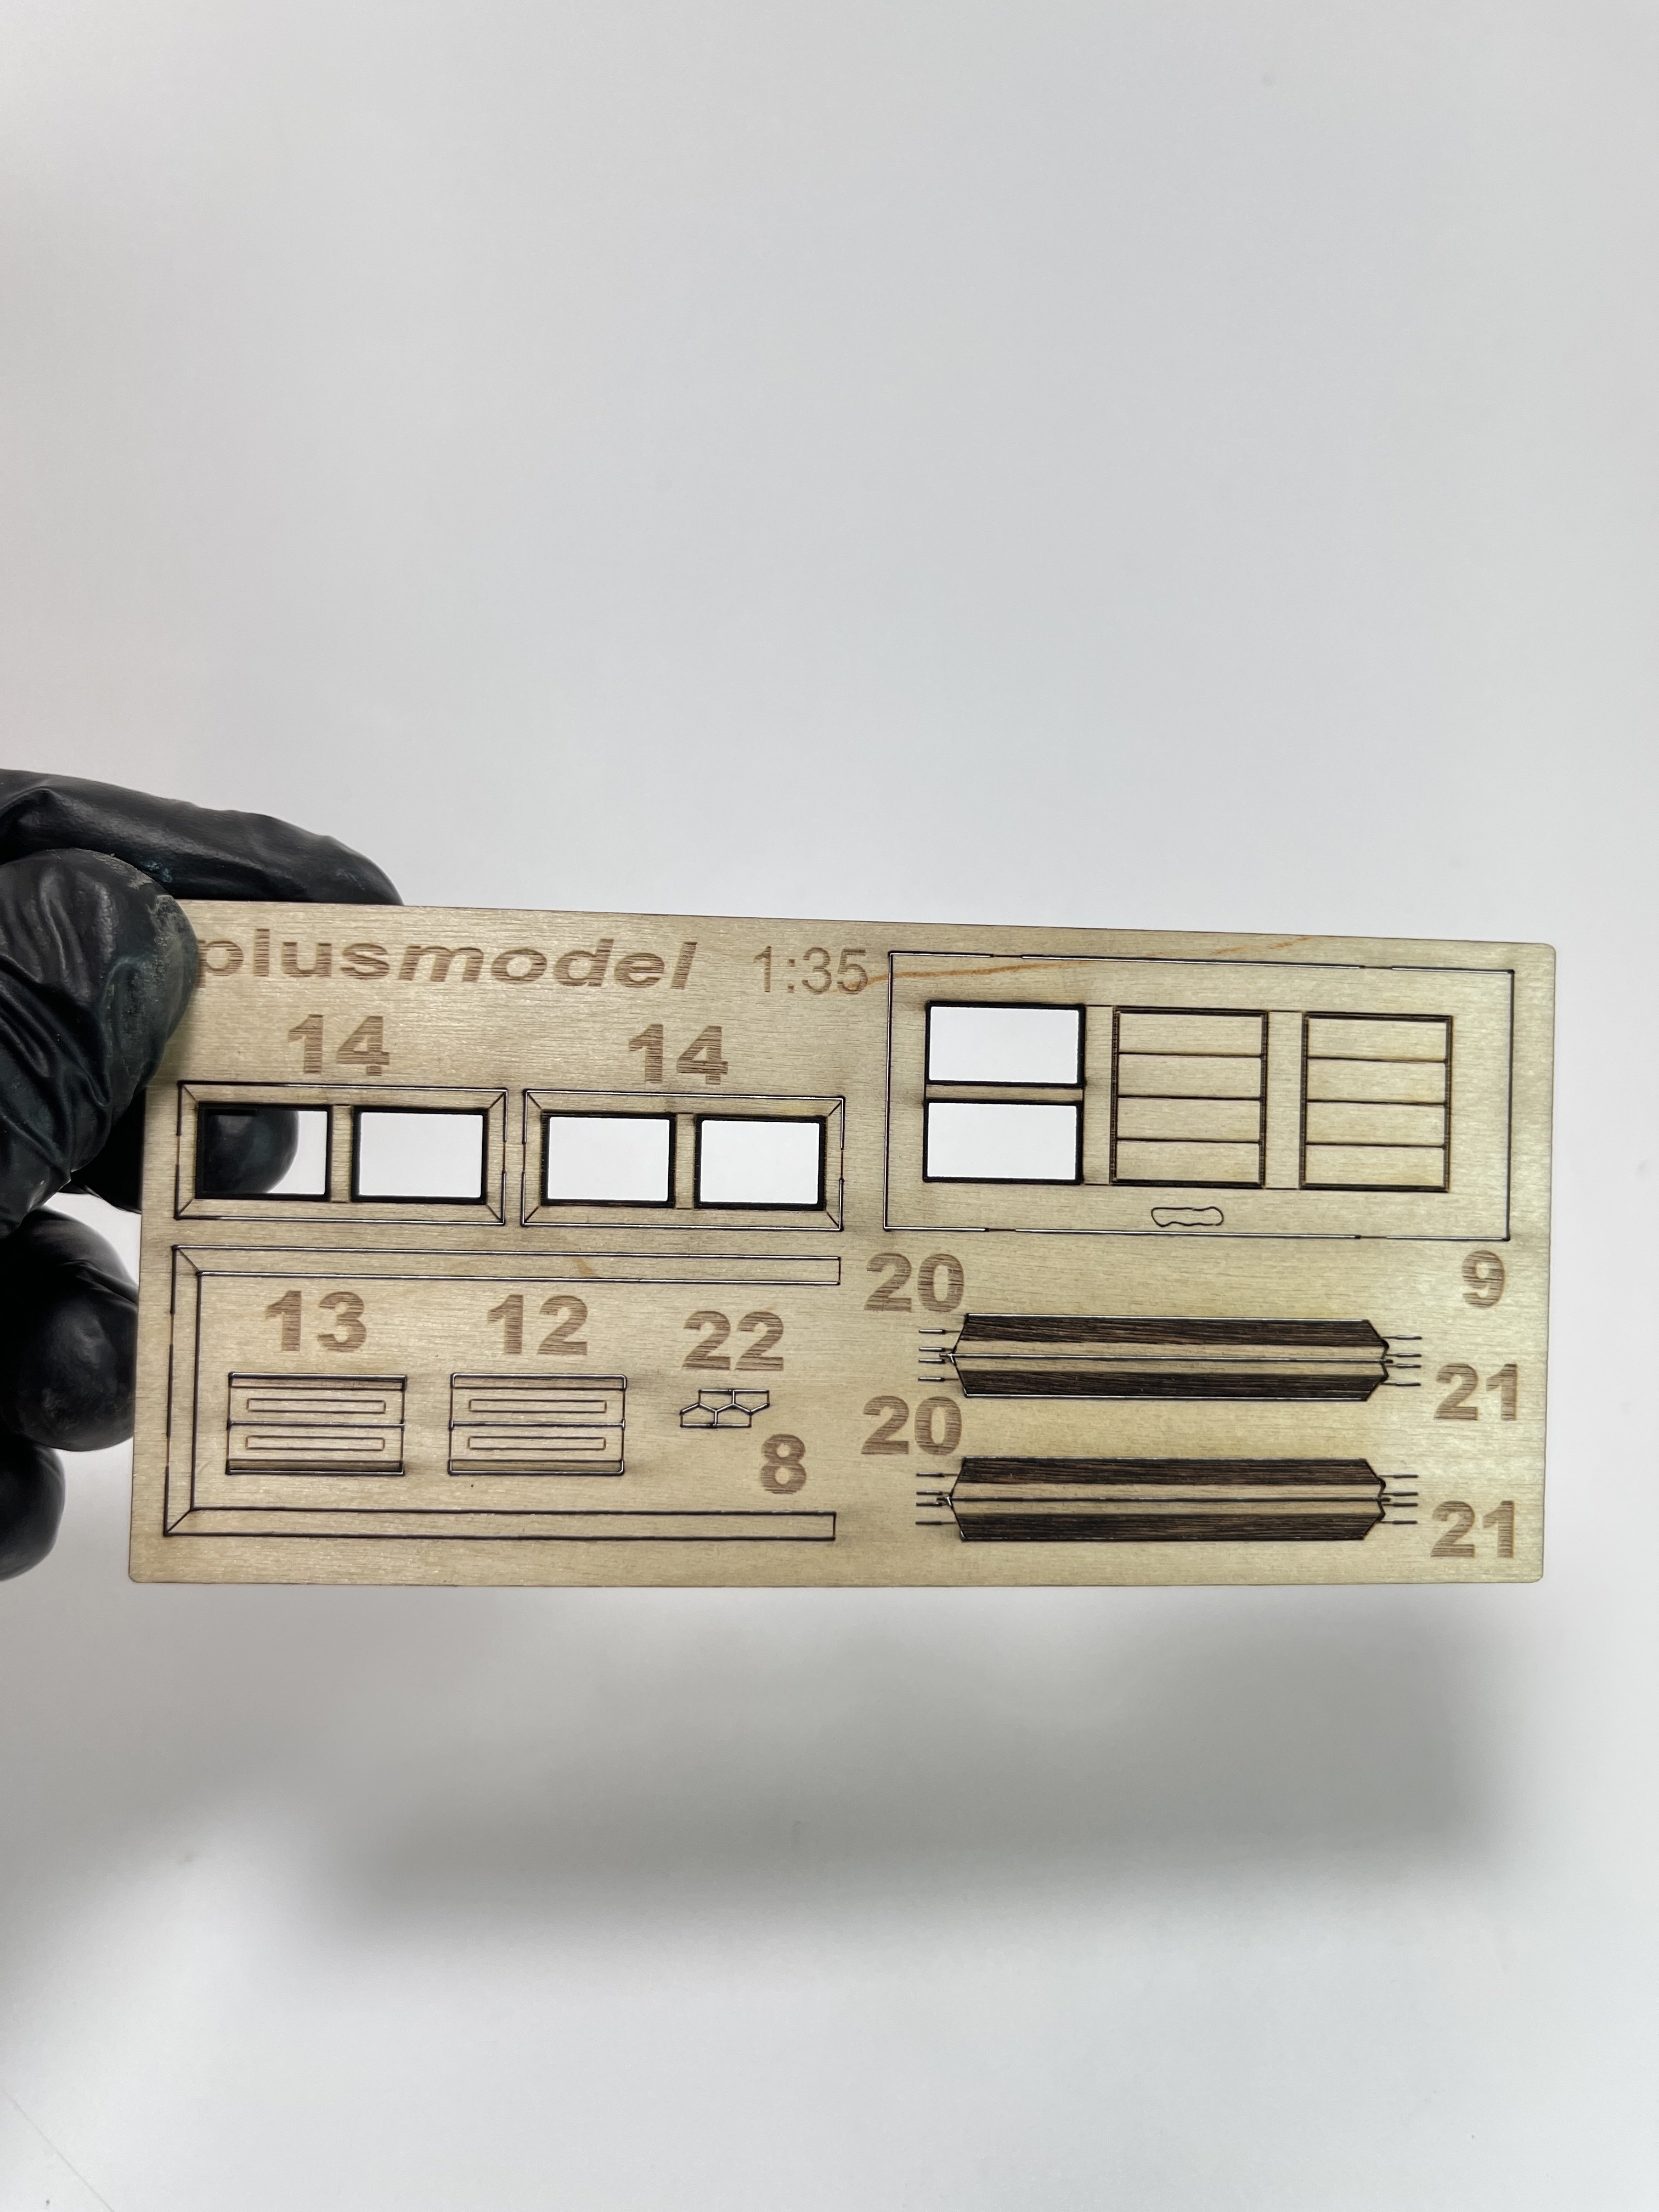
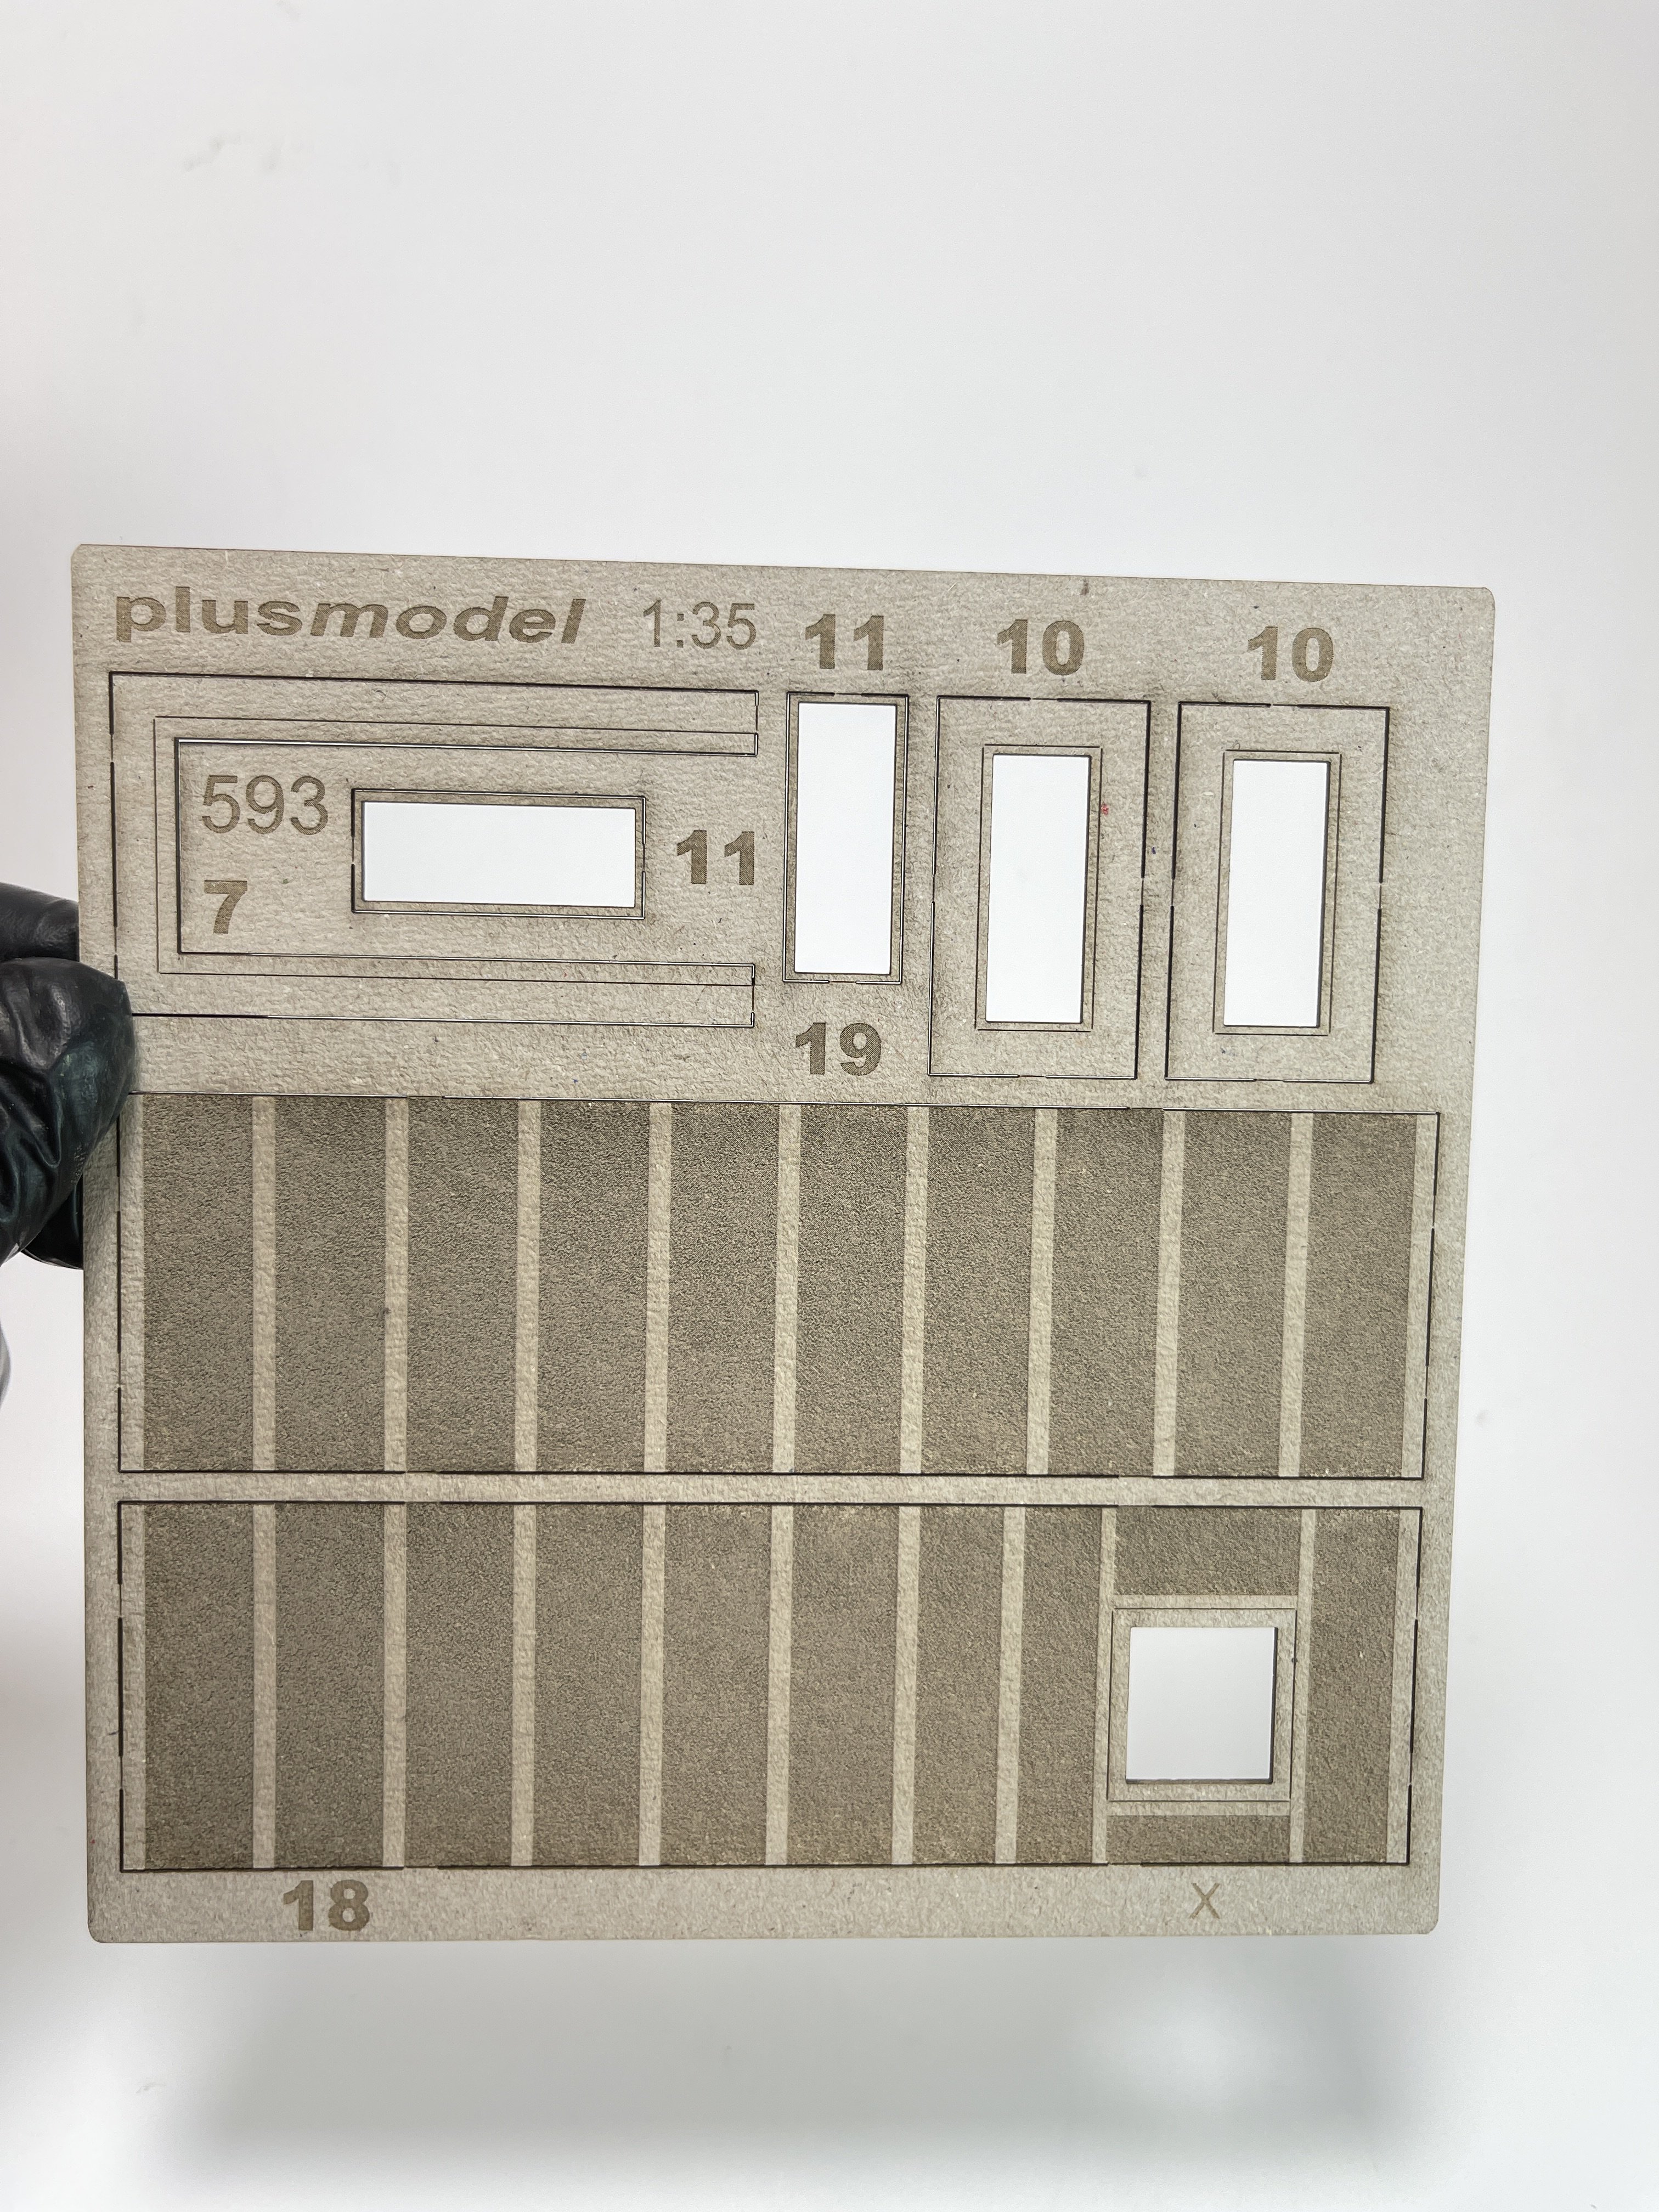
So, this set is compose with wooden laser-cut parts, one resin parts and several 3D printing parts.

The resin piece is the chimney. The piece is complete, without flash and with very good casting.
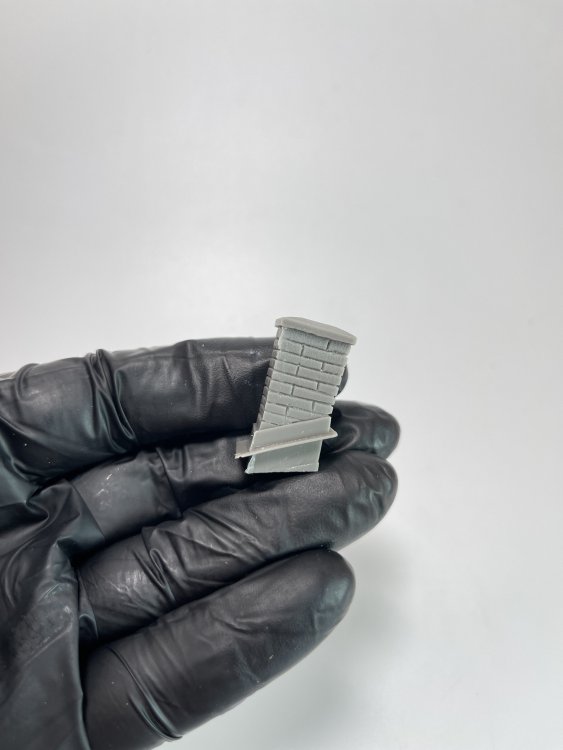

The 3D parts are very good printed with no printing lines and very good definition.

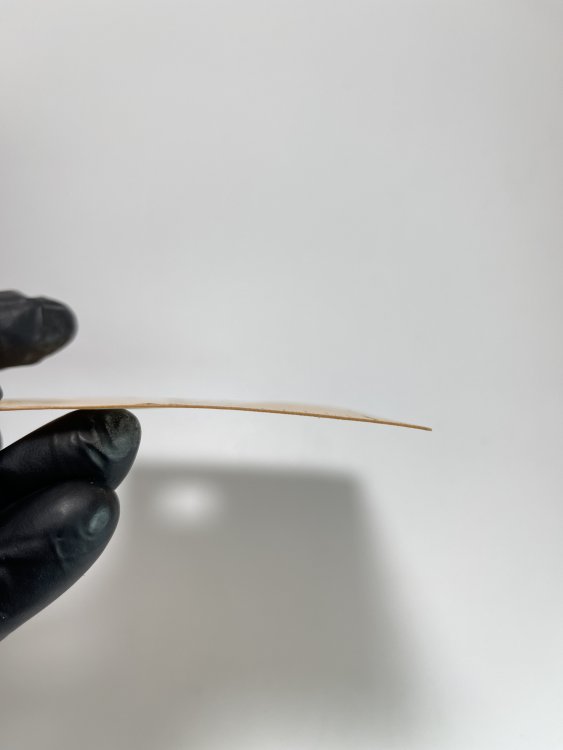
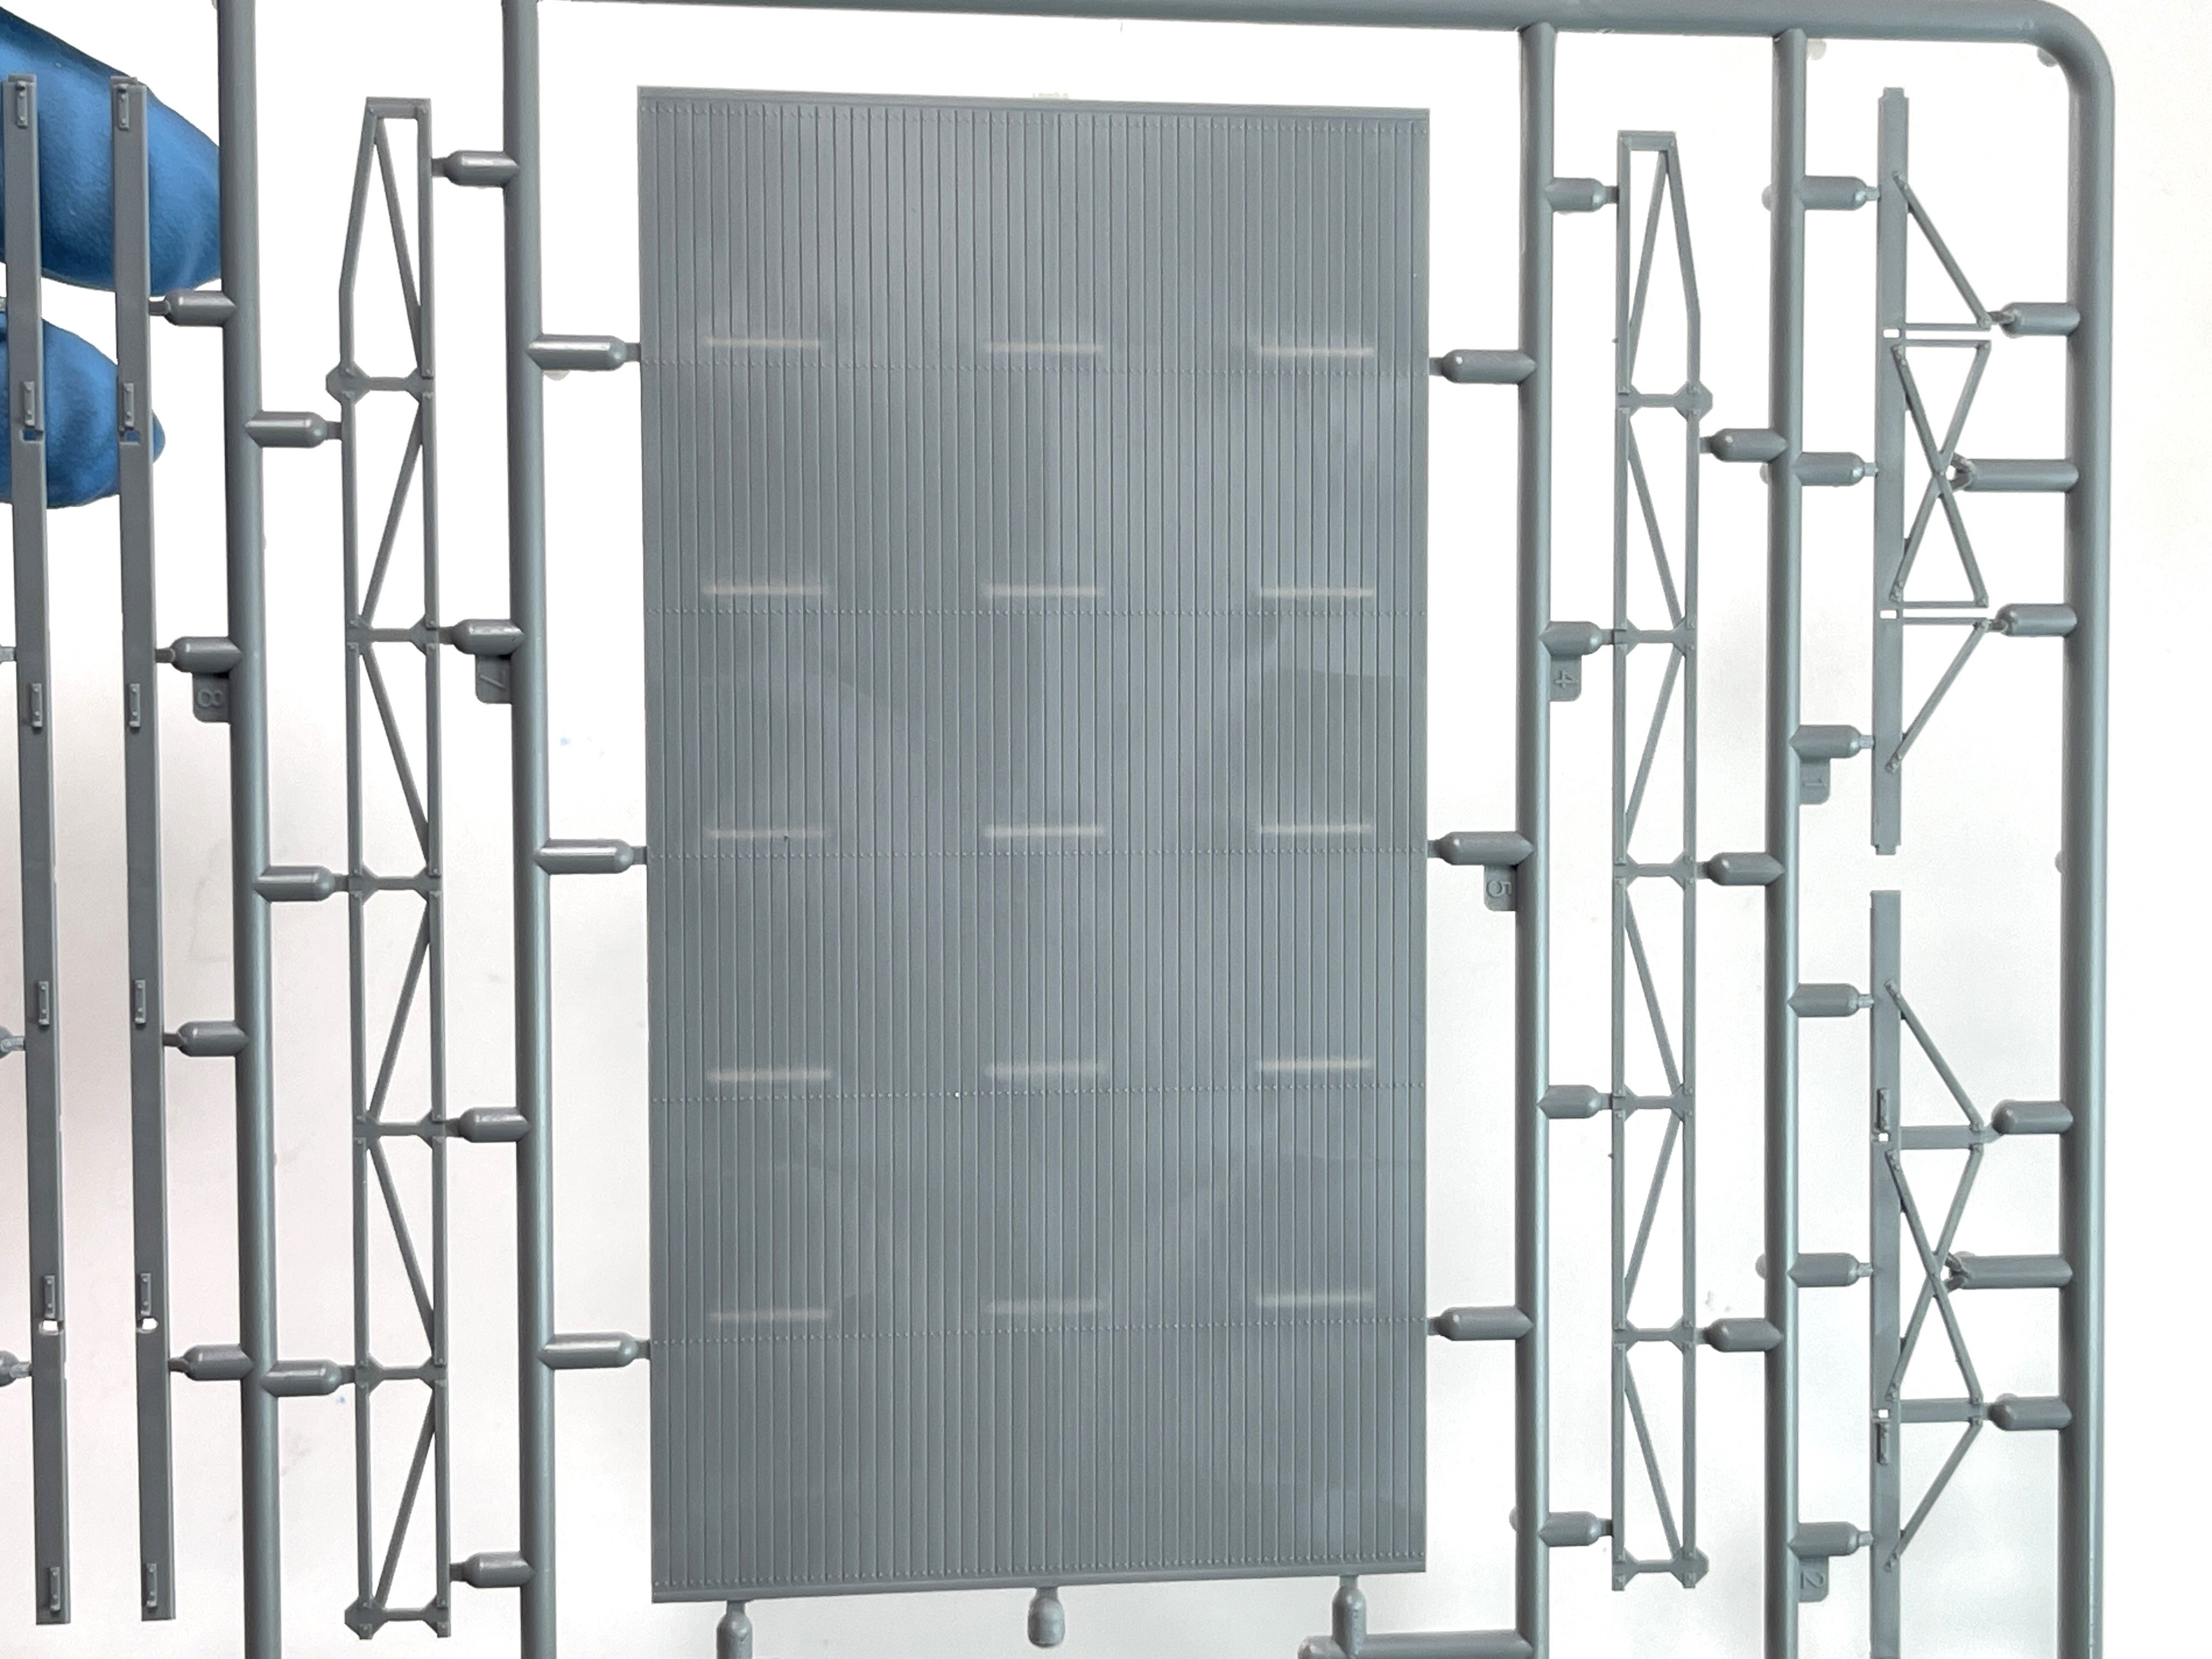
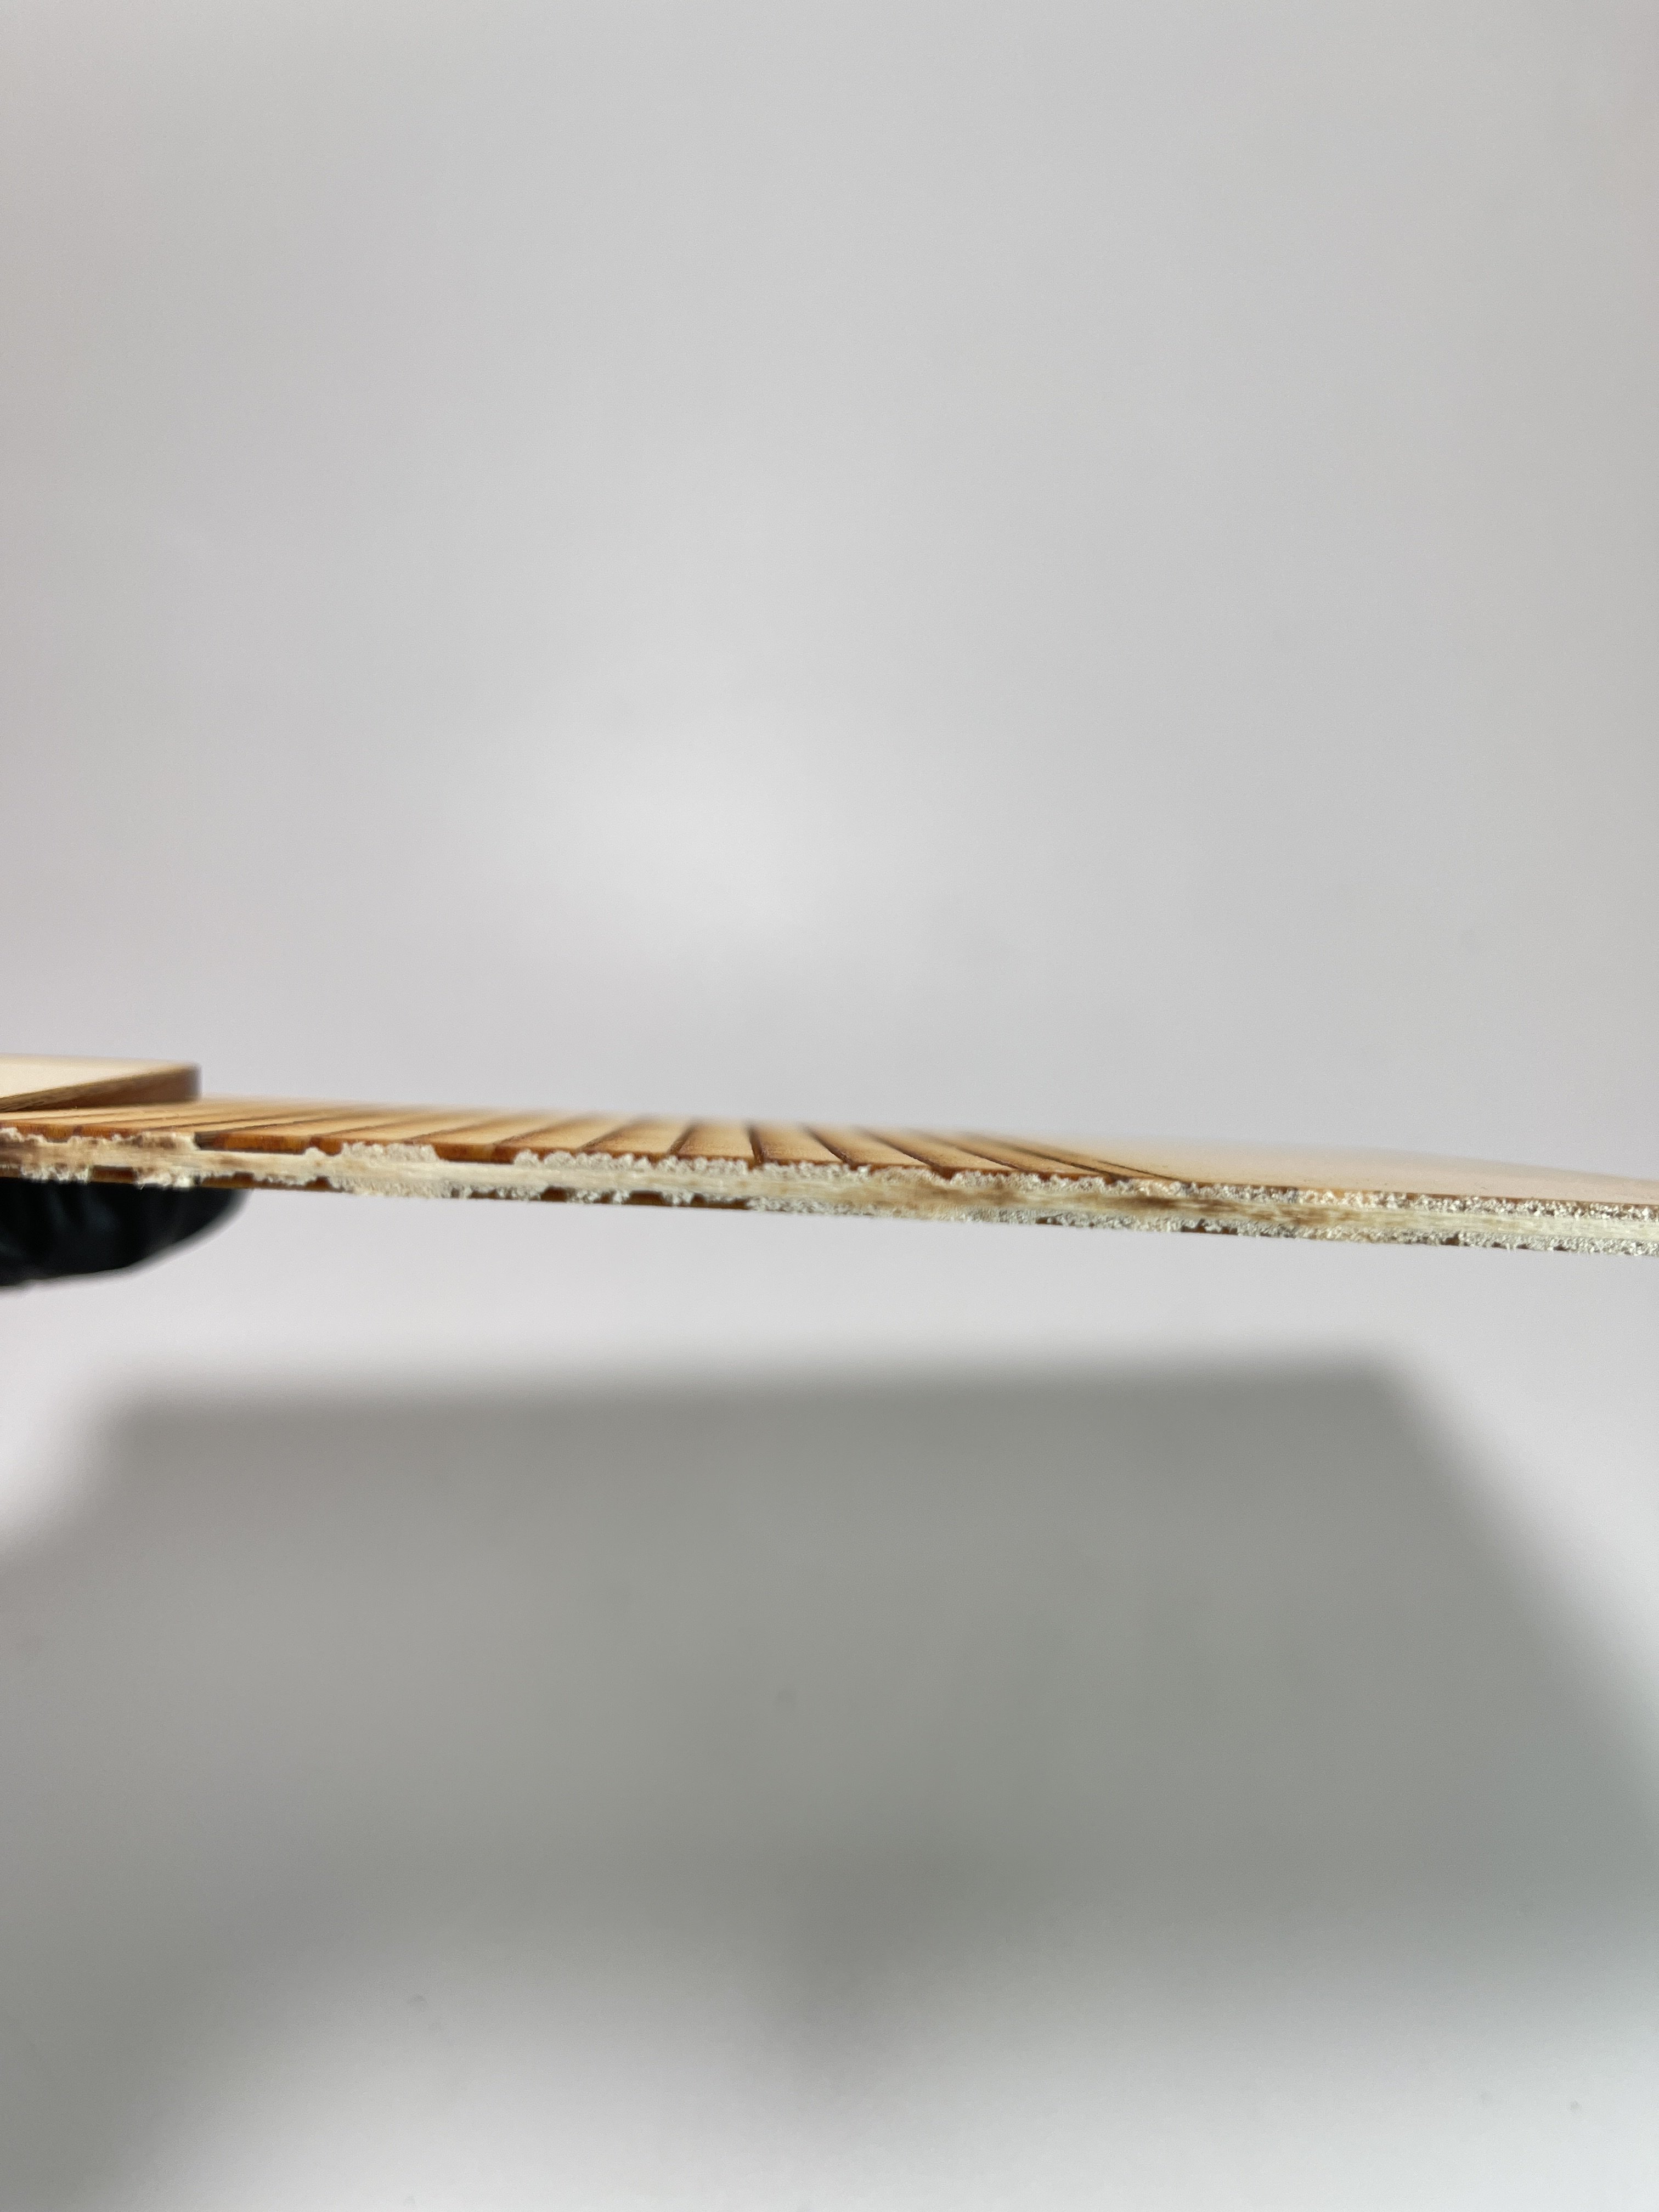
The main parts, (wall) are made of lasercut balsa wood with 2/3mm thickness. Therefore, it is the structural part of the house.


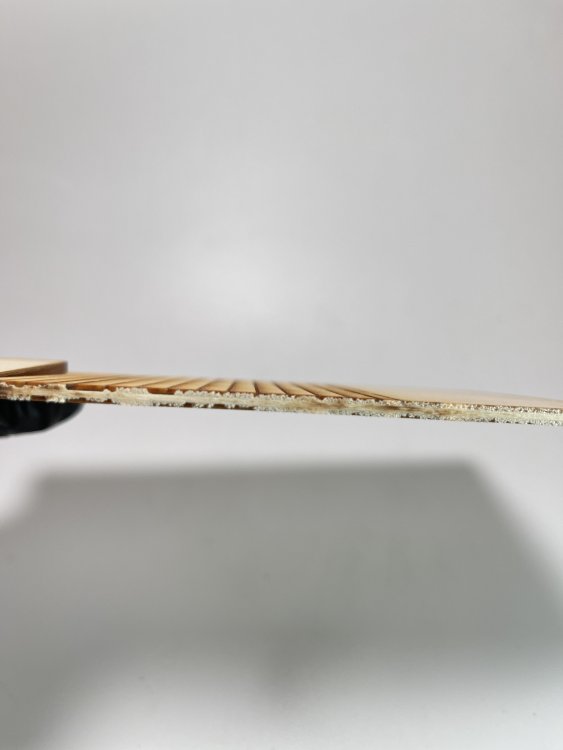

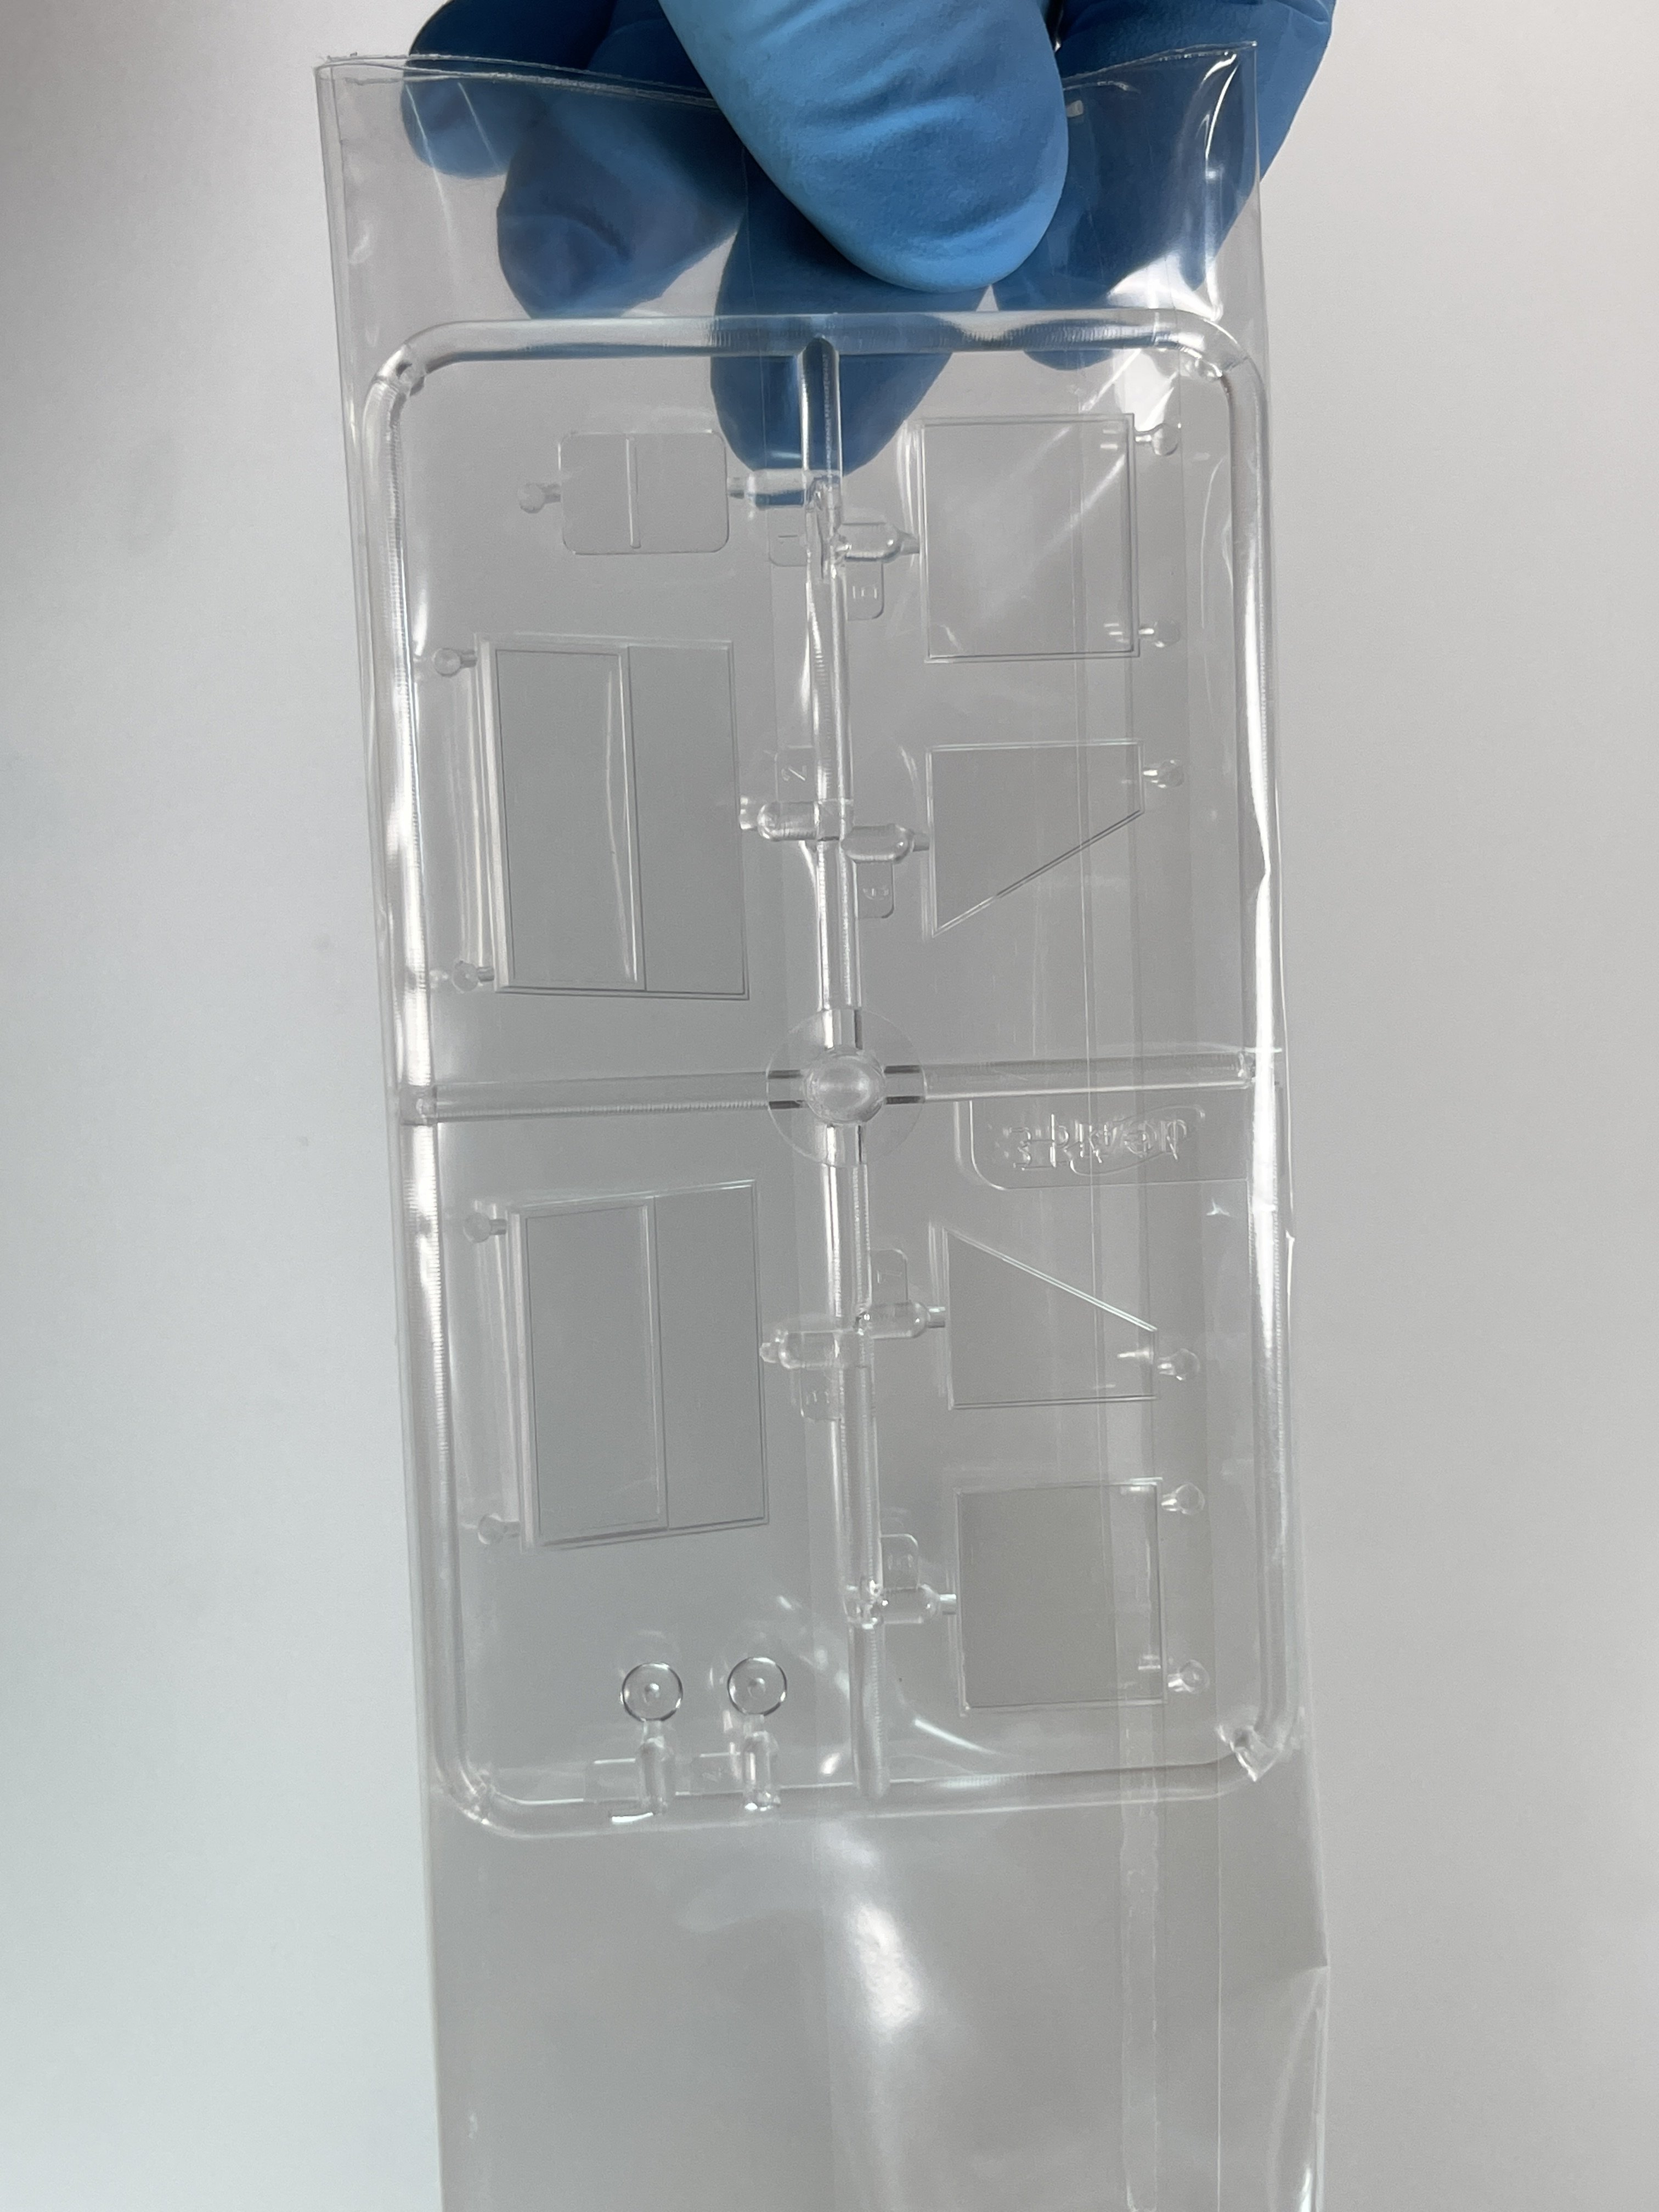
The windows and roofs are made of thick paper and very thin balsa, thus allowing good proportionality to the entire structure of the house.
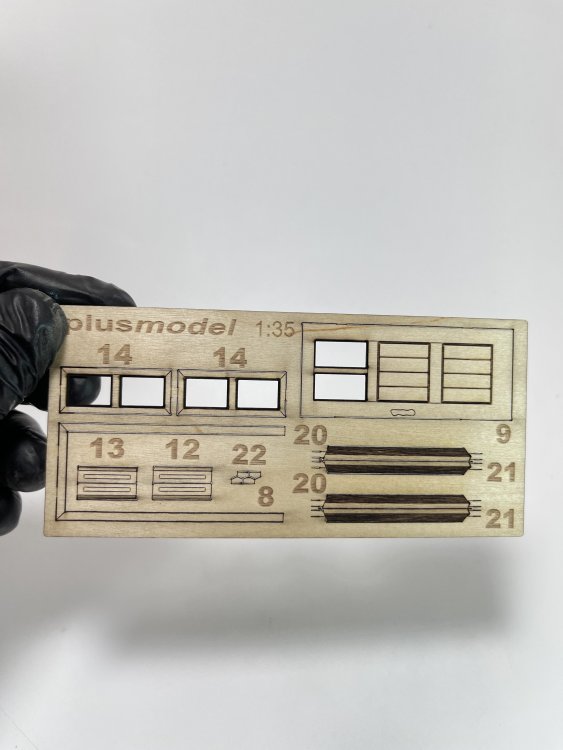

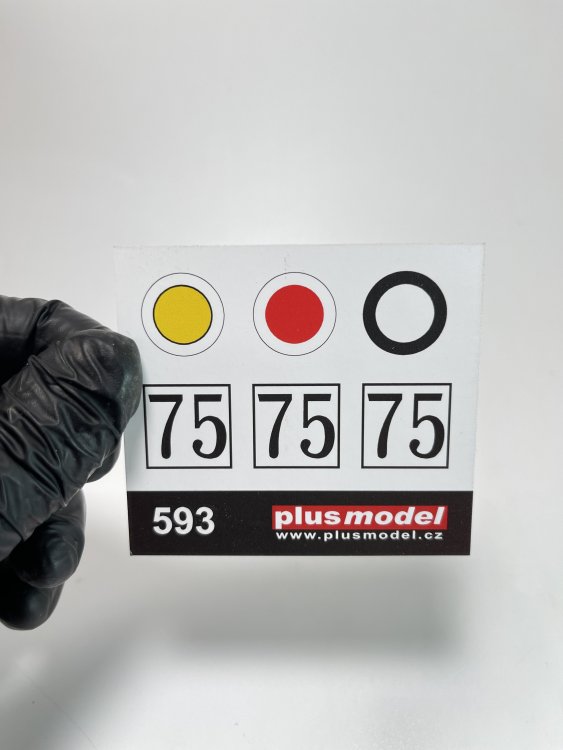
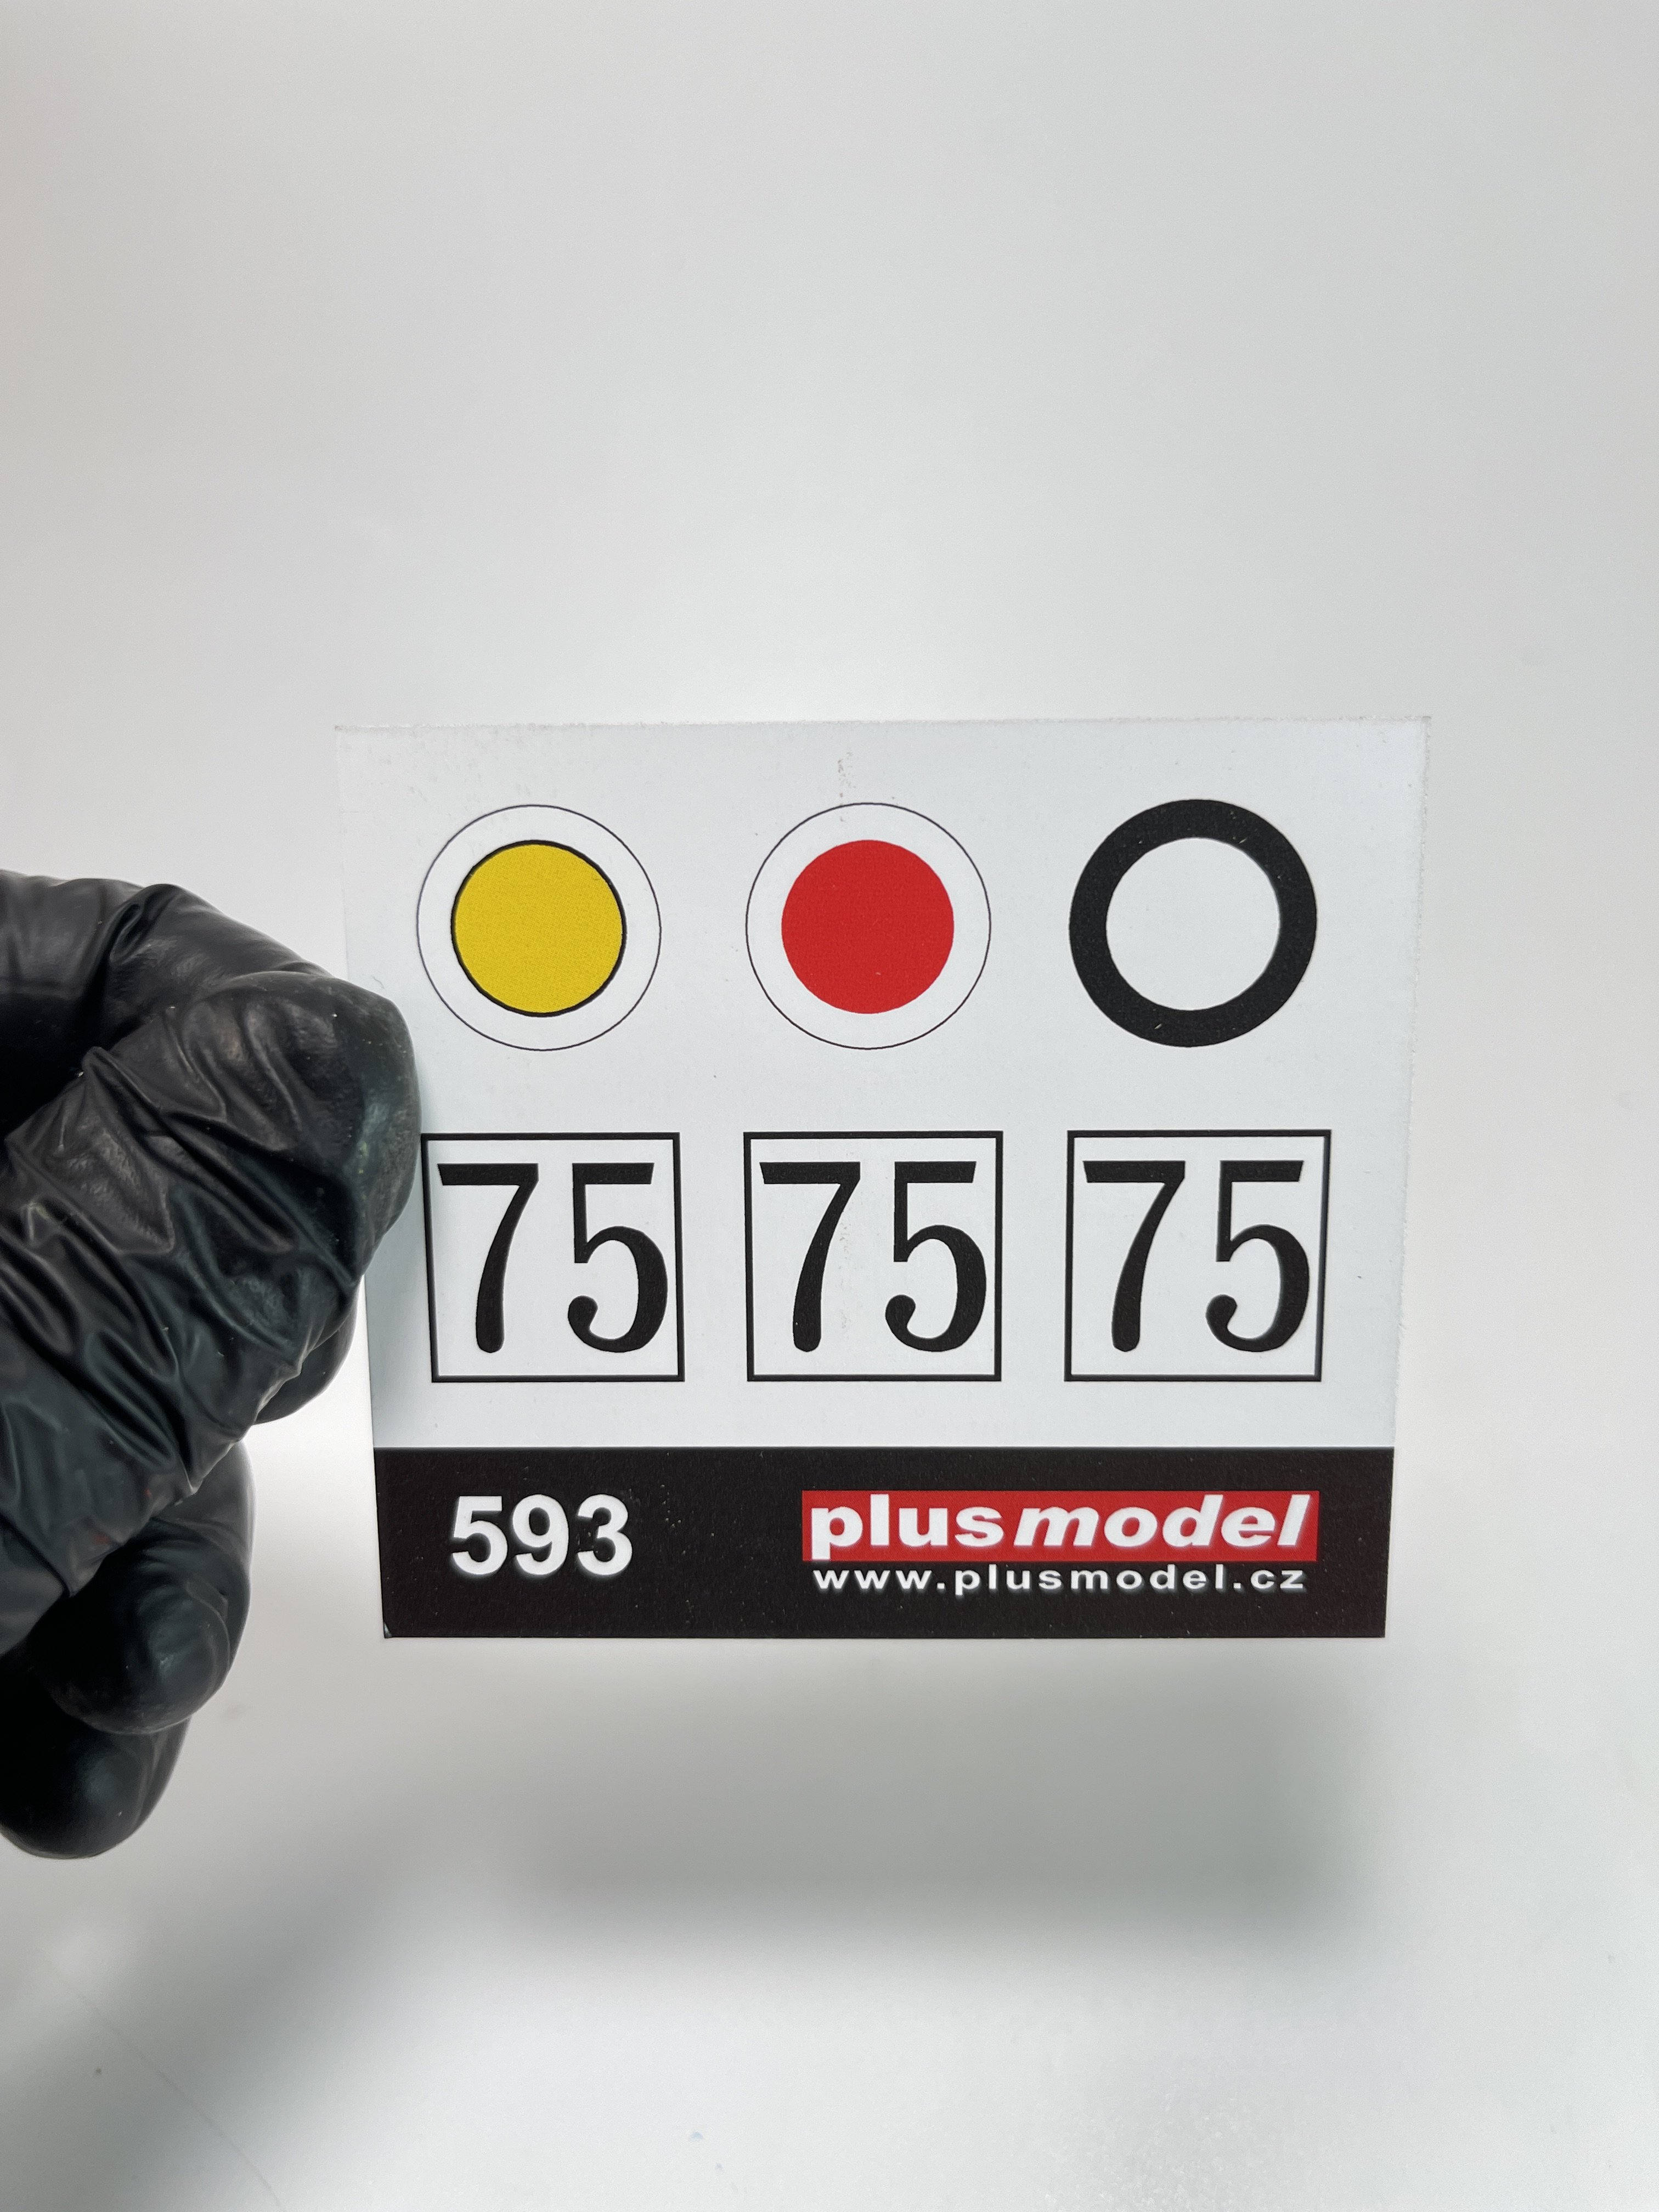
There`s also a paper sheet with colored signs that you need to cut to the correct size. For the colored signs Plusmodel gives 4 toothpicks to use with the signs.
The instructions are quite simple but effective. I only think that they could give a large sheet to better view of them.


Conclusion
Once again, Plusmodel sets are very good and it`s a secure bet to all modellers that want to add up a little their work or adventure themselves to diorama world.
These sets just have everything for your diorama: quality, easy to construct, originality and good prices.
VERY HIGHLY RECOMMEND
Our truly thanks to Plusmodel for making theses sets.

-
11 hours ago, ScottsGT said:
Now we just need that J/K.
Its out from Hk Models. It`s hitting the shelves anytime now!
-
2
-
-
Hi Neil.
You got some WWI tanks from Takom i n135 (also a Mark Iv from Tamiya)
As far for armour car, just check Copper State Models as they have several armour cars in there catalogue and are very very good.
-
1
-
1
-
-
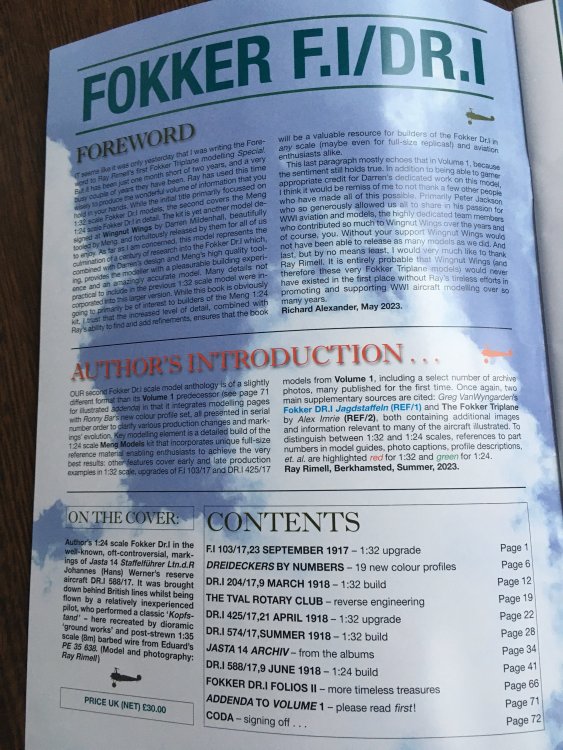
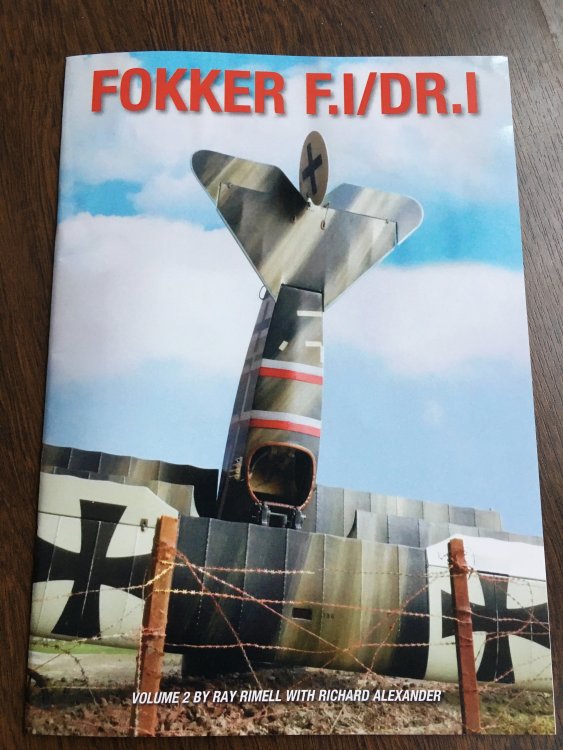
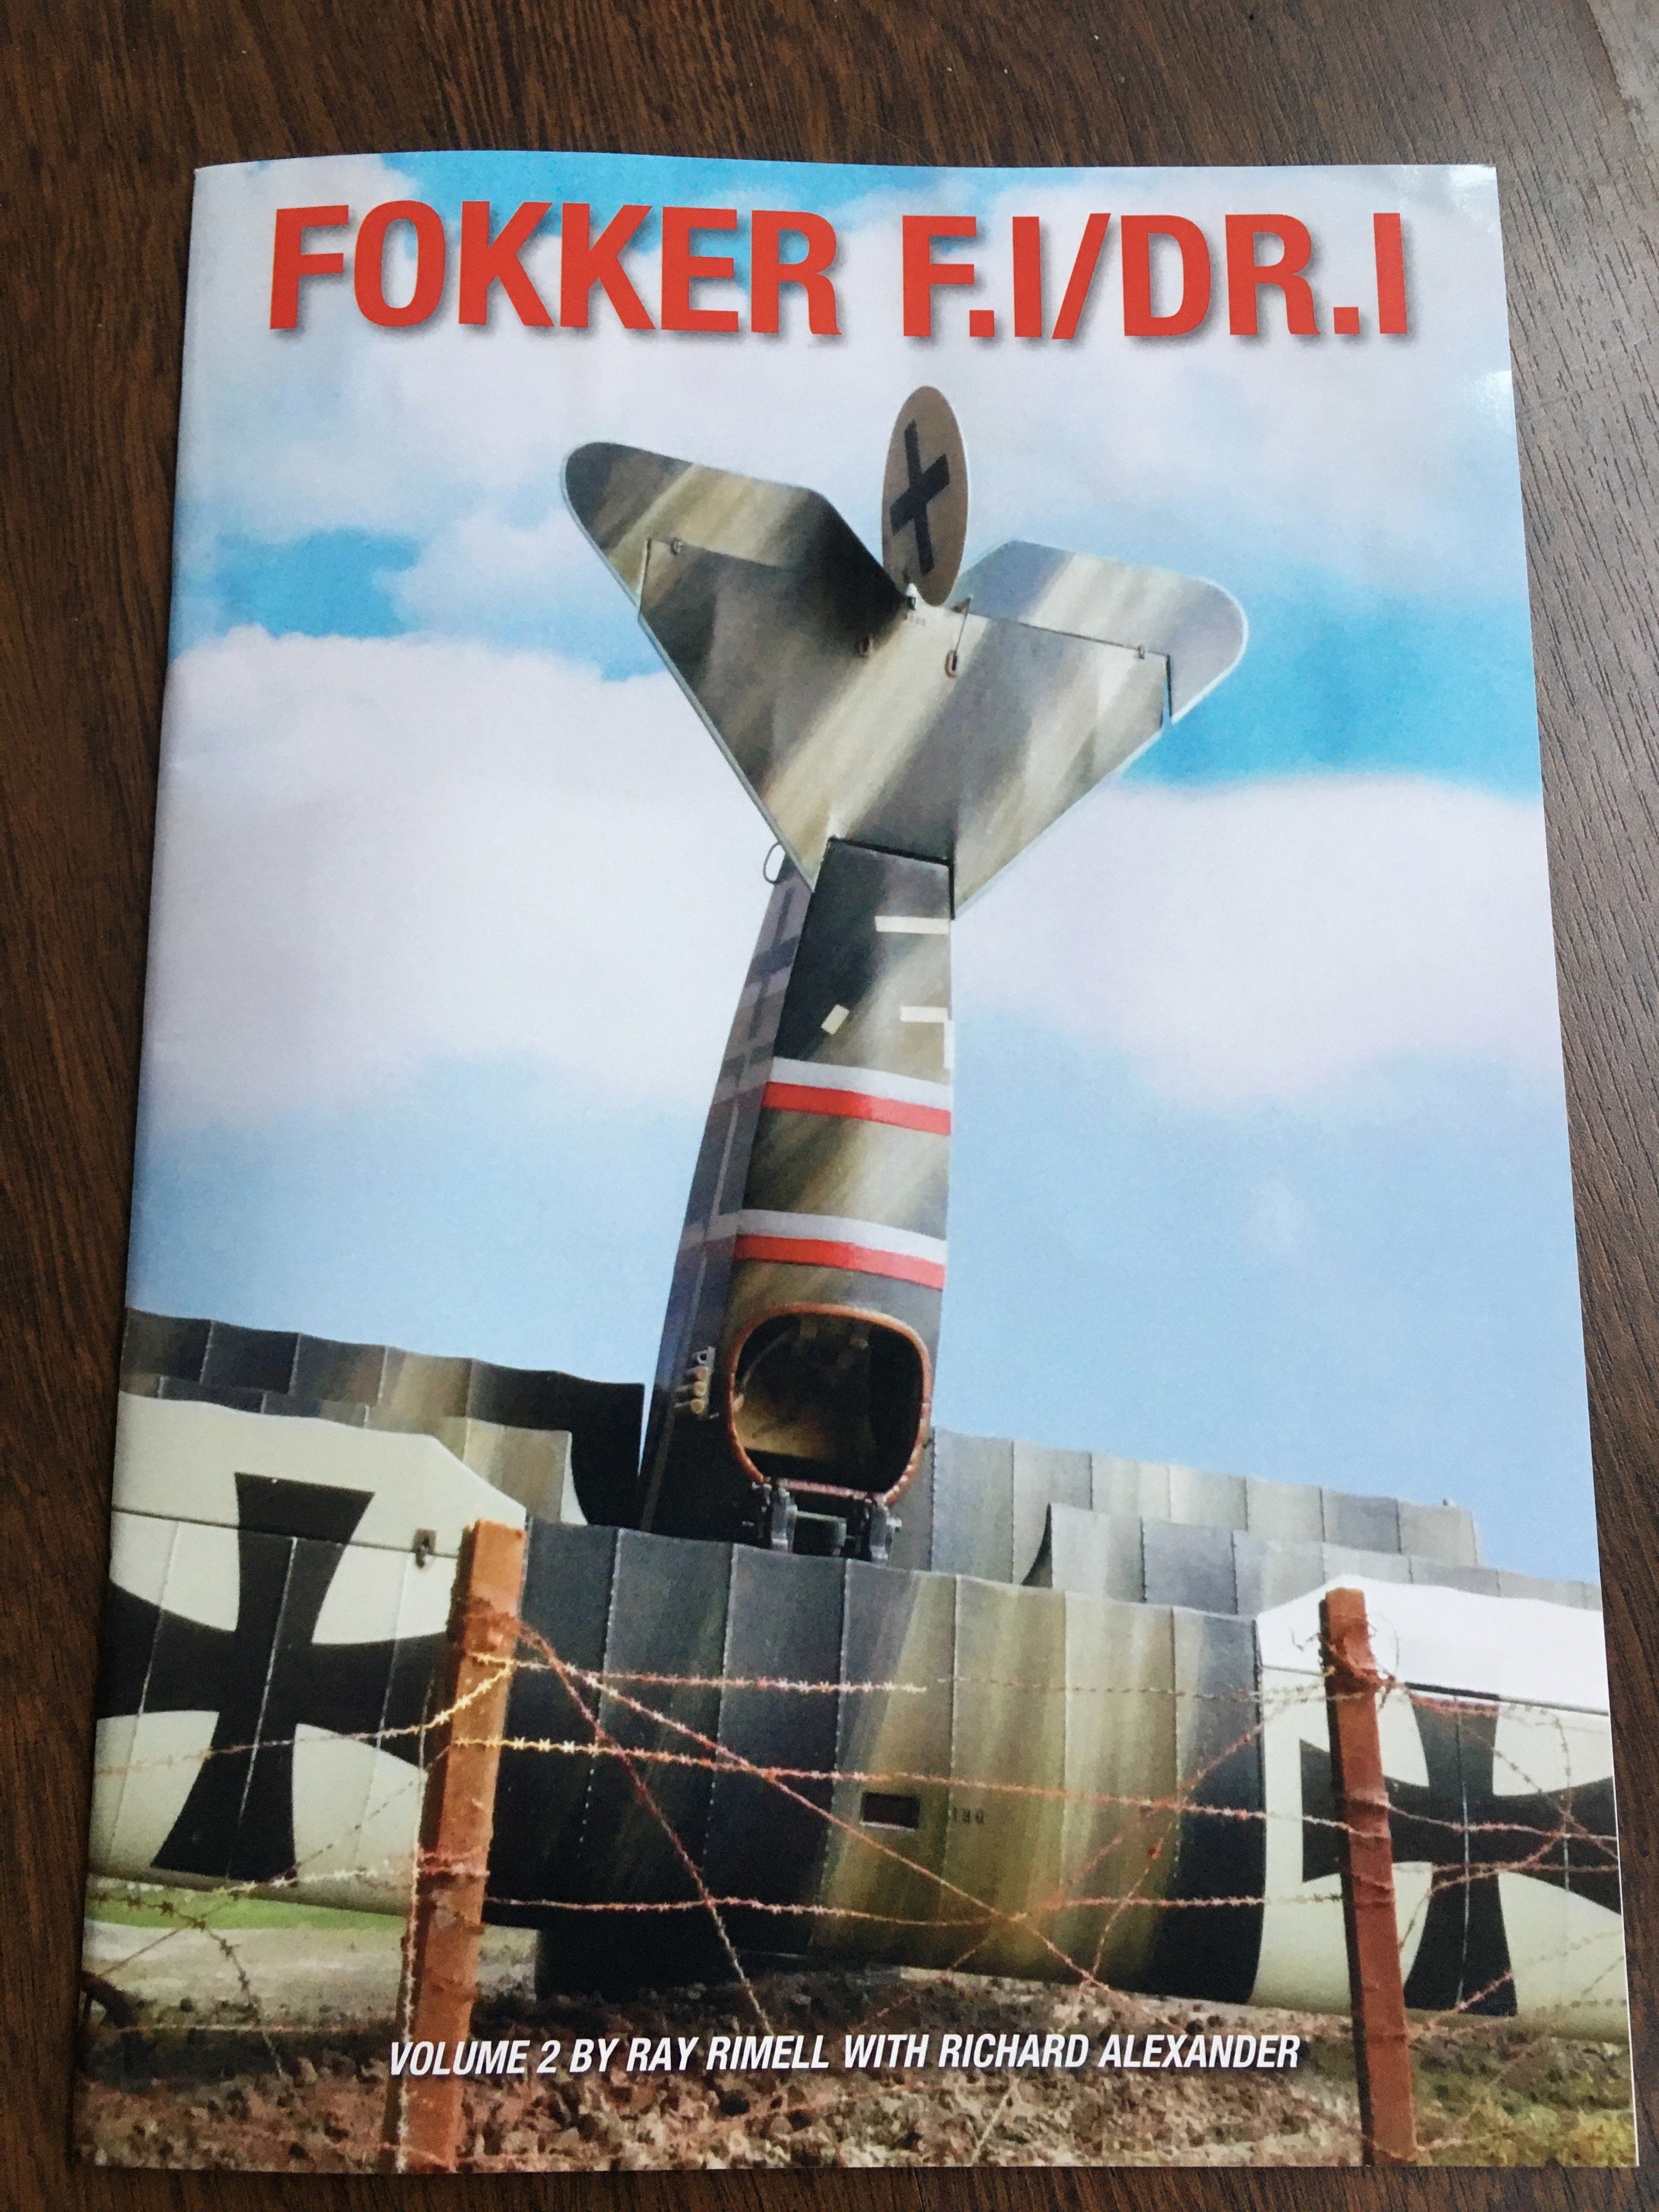
Fokker F.I/DR.I.
By Ray Rimmel with Richard Alexander
Volume two
Anthology Series

Available at http://www.windsockdatafilespecials.co.uk/
The new Windsock book is the second most expecting one by Ray Rimmel, as the first one was the first volume of the Fokker Dr. I anthology.
As it happen in the Vol. I, this one also has Richard Alexander collaboration, former Wingnut Wings General Manager.
This volume is the ending part of the a true Fokker Dr.I must have to all modellers as once again is dedicated entirely to Meng Fokker DrI in 1:32 and 1:24 scale.
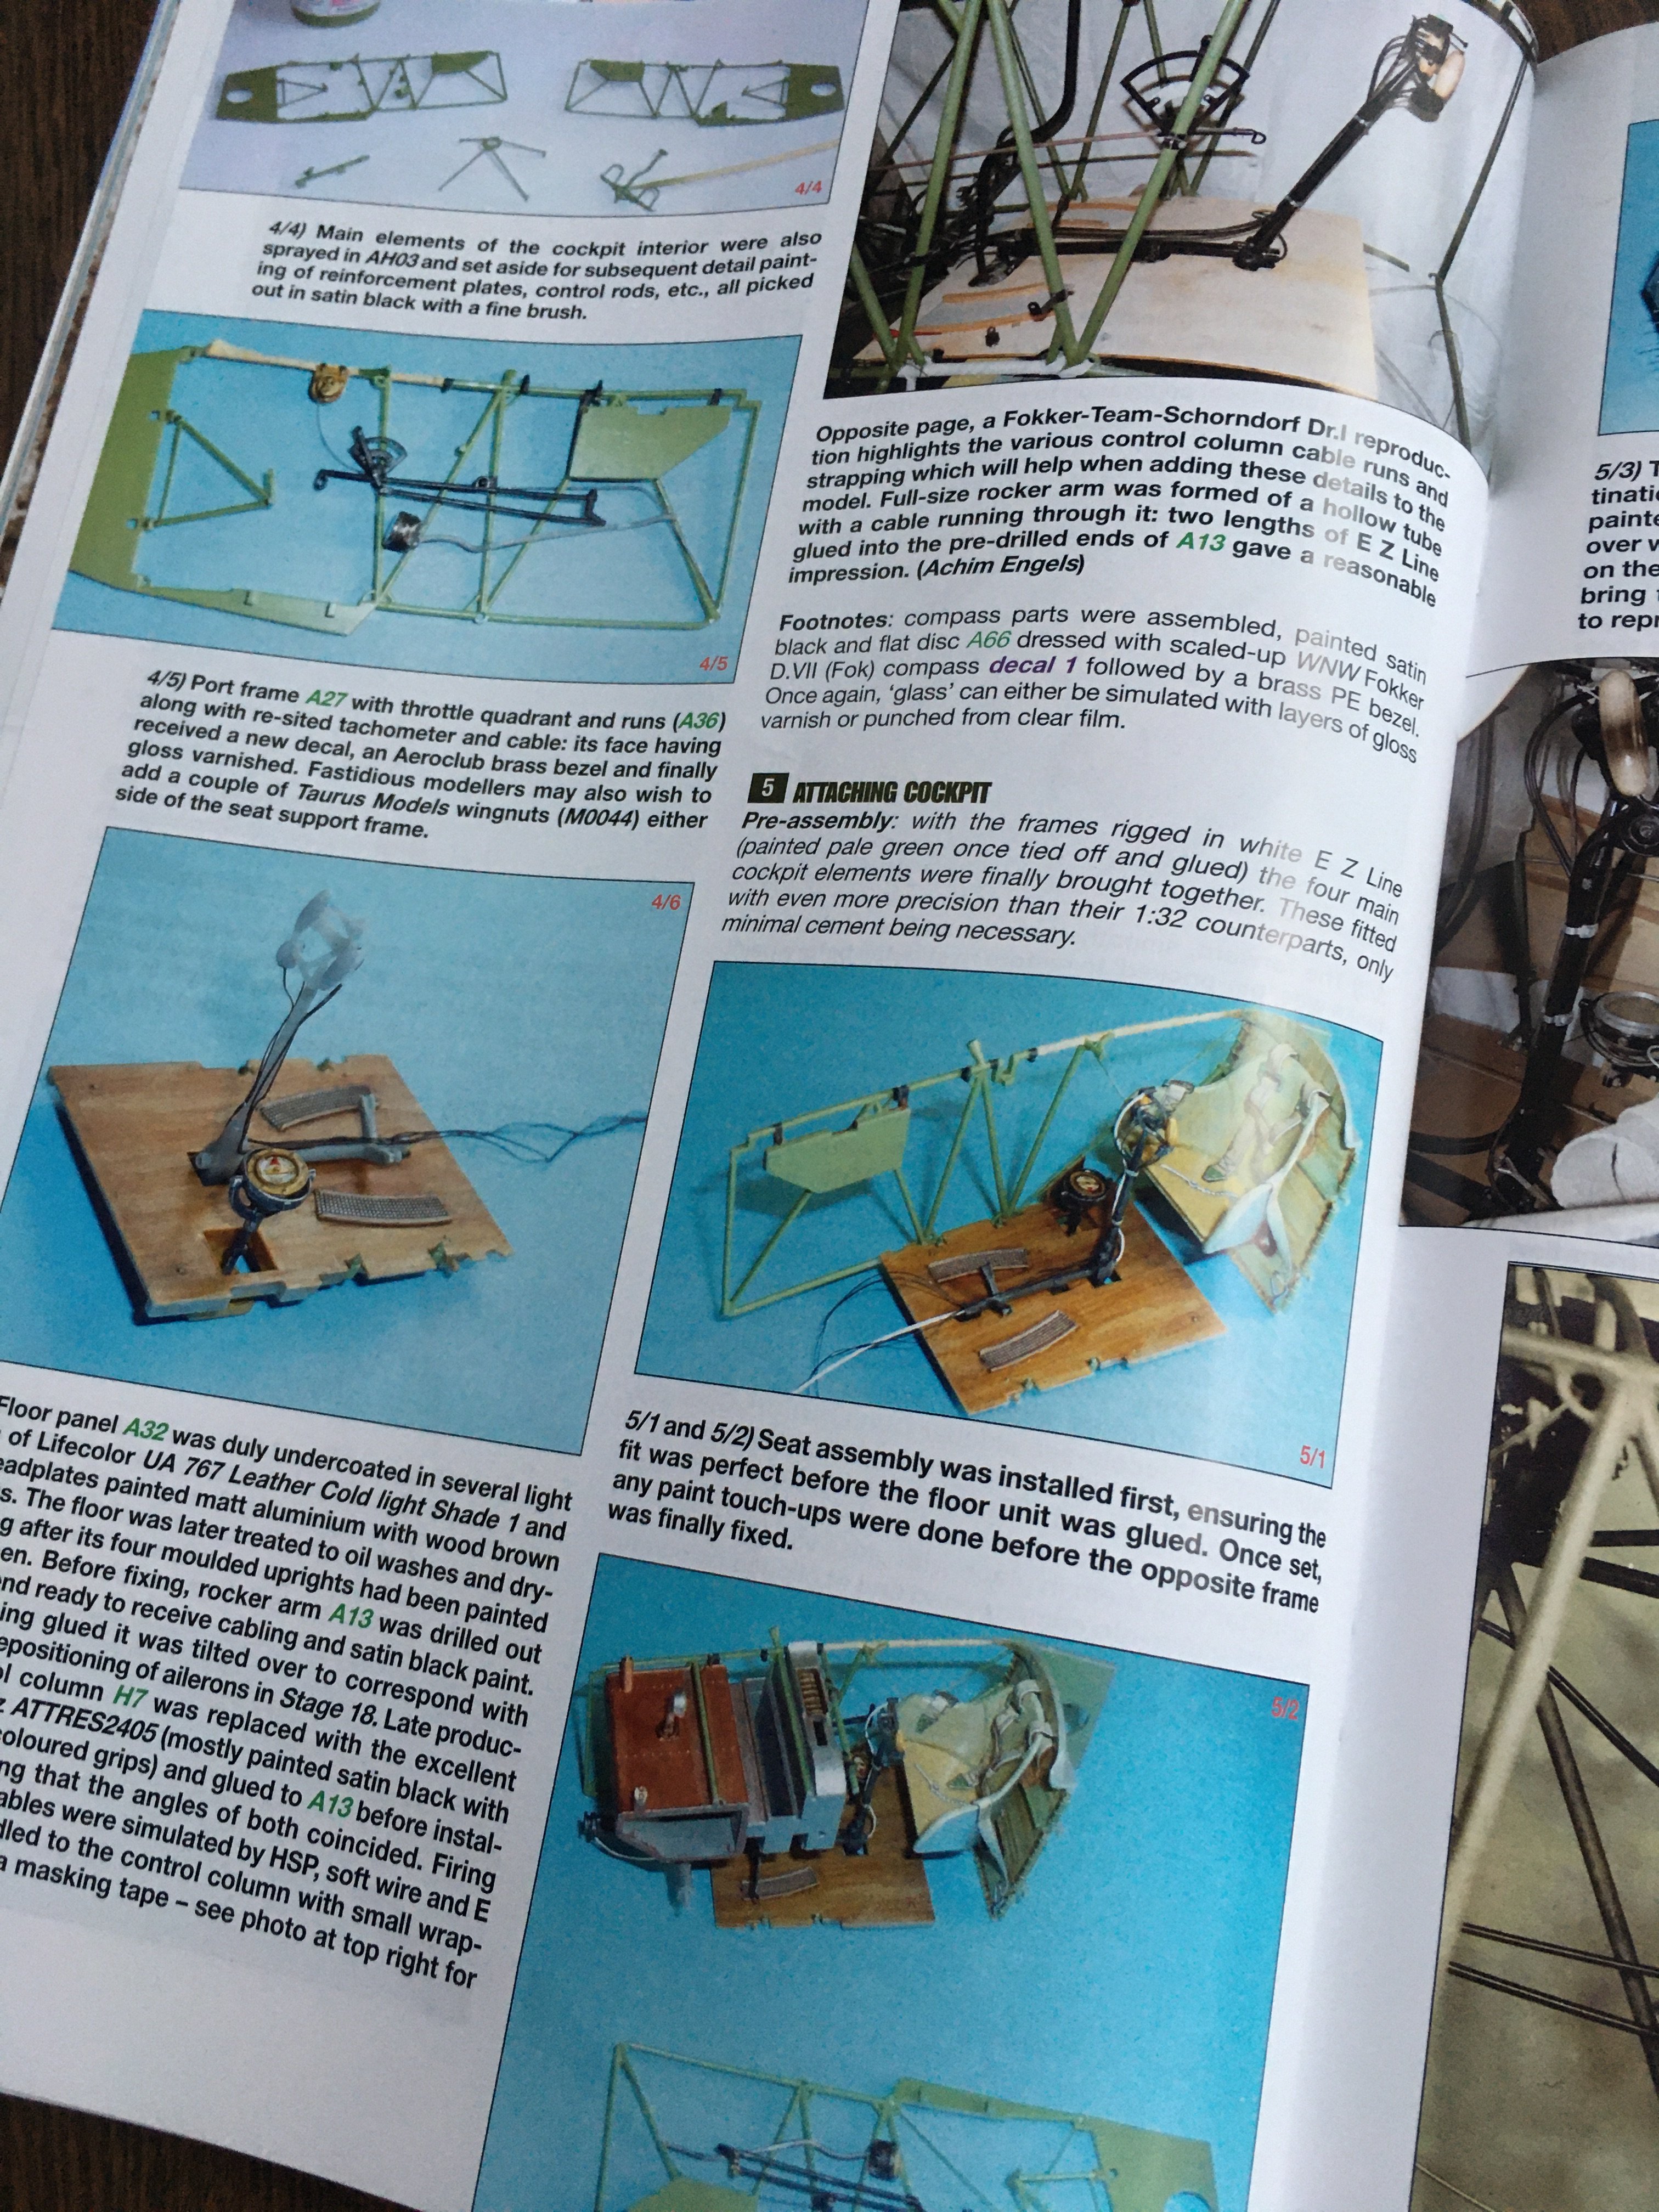
This volume does have an 1:24 Fokker Dr.I in full dept step by step construction.
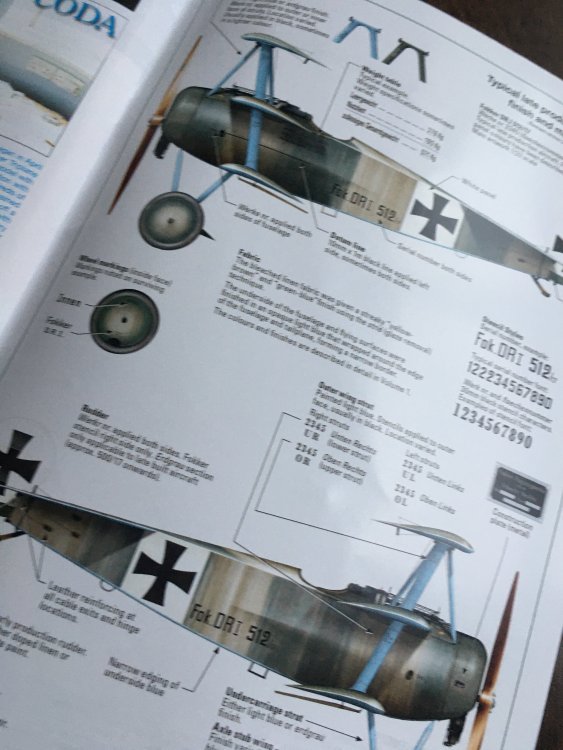
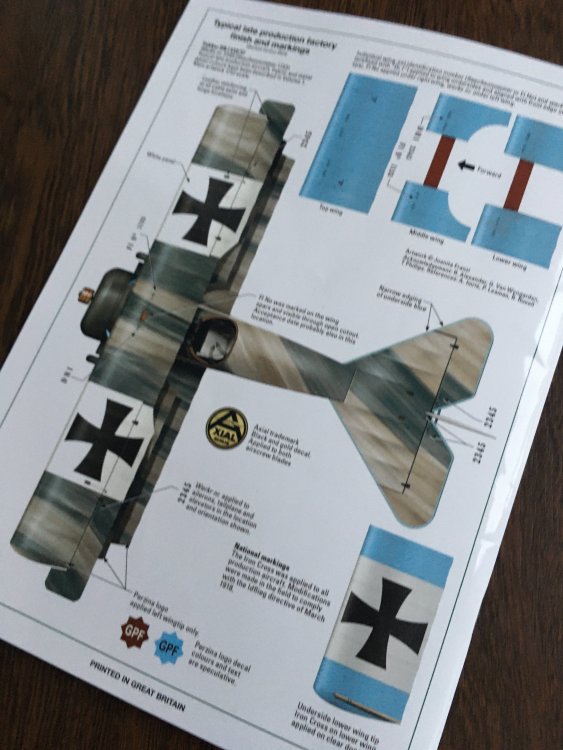
On the cover, it’s an 1:24 Meng Fokker Dr.I, made by Ray Rimmel with the markinf of the Jasta 14 Stafellfüher Ltn.d.R. Johannes (Hans) Werner`s reverse aircraft Dr. I 588/17.
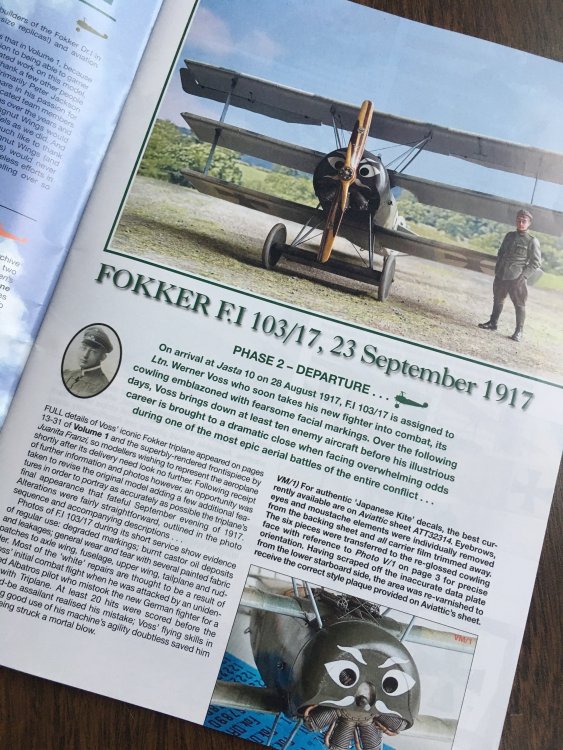
So, on this second volume of the mythic Fokker Dr. I, it`s offer to the modeler and reader:
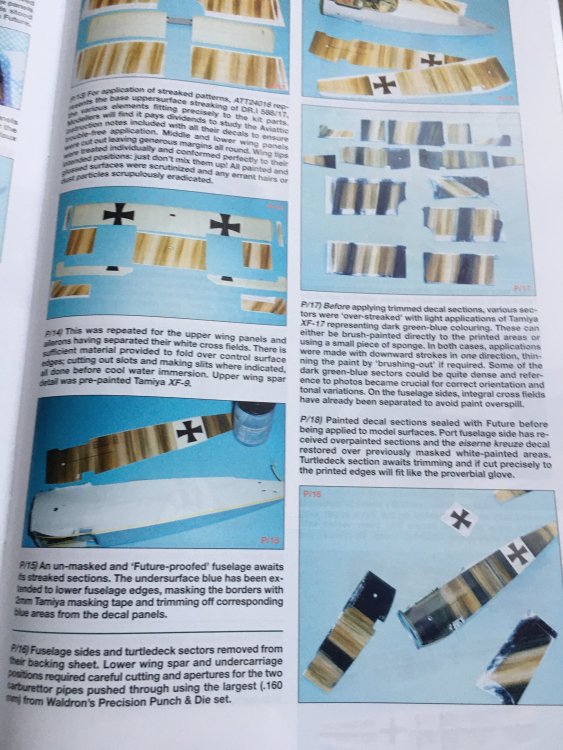
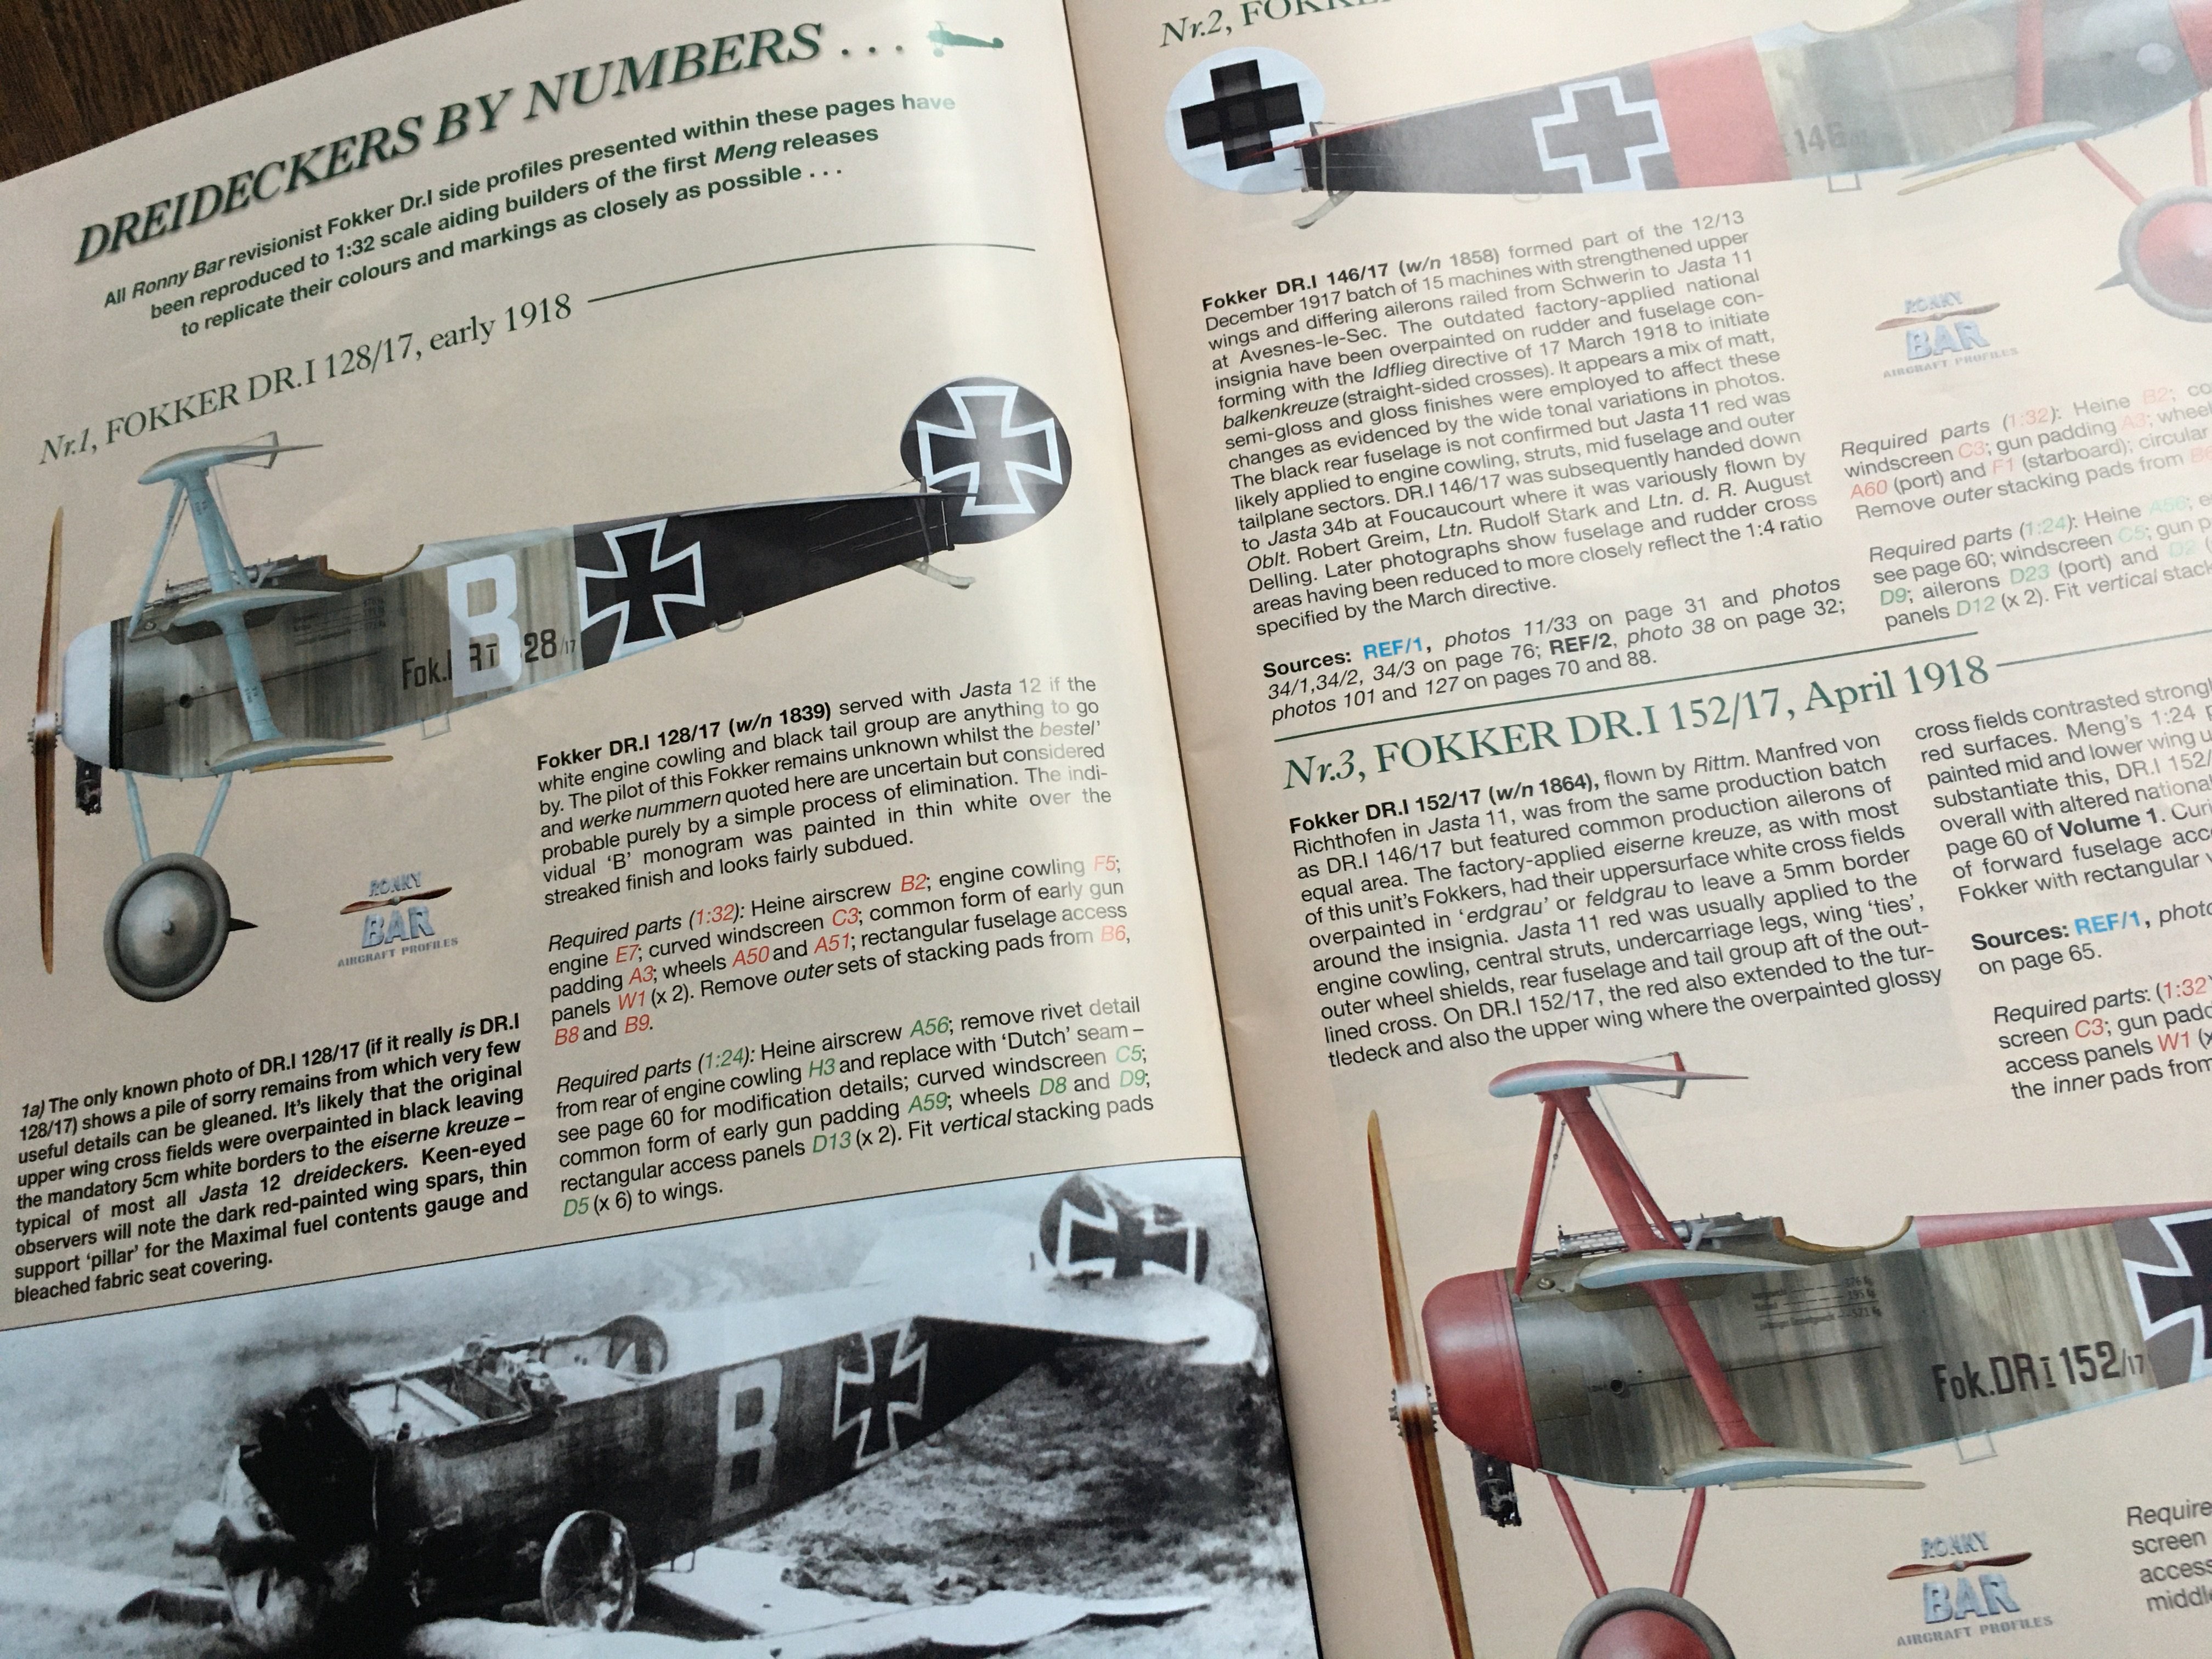
ü 1F.I 103/17, 23 September 1917 – 1:32 upgrade;
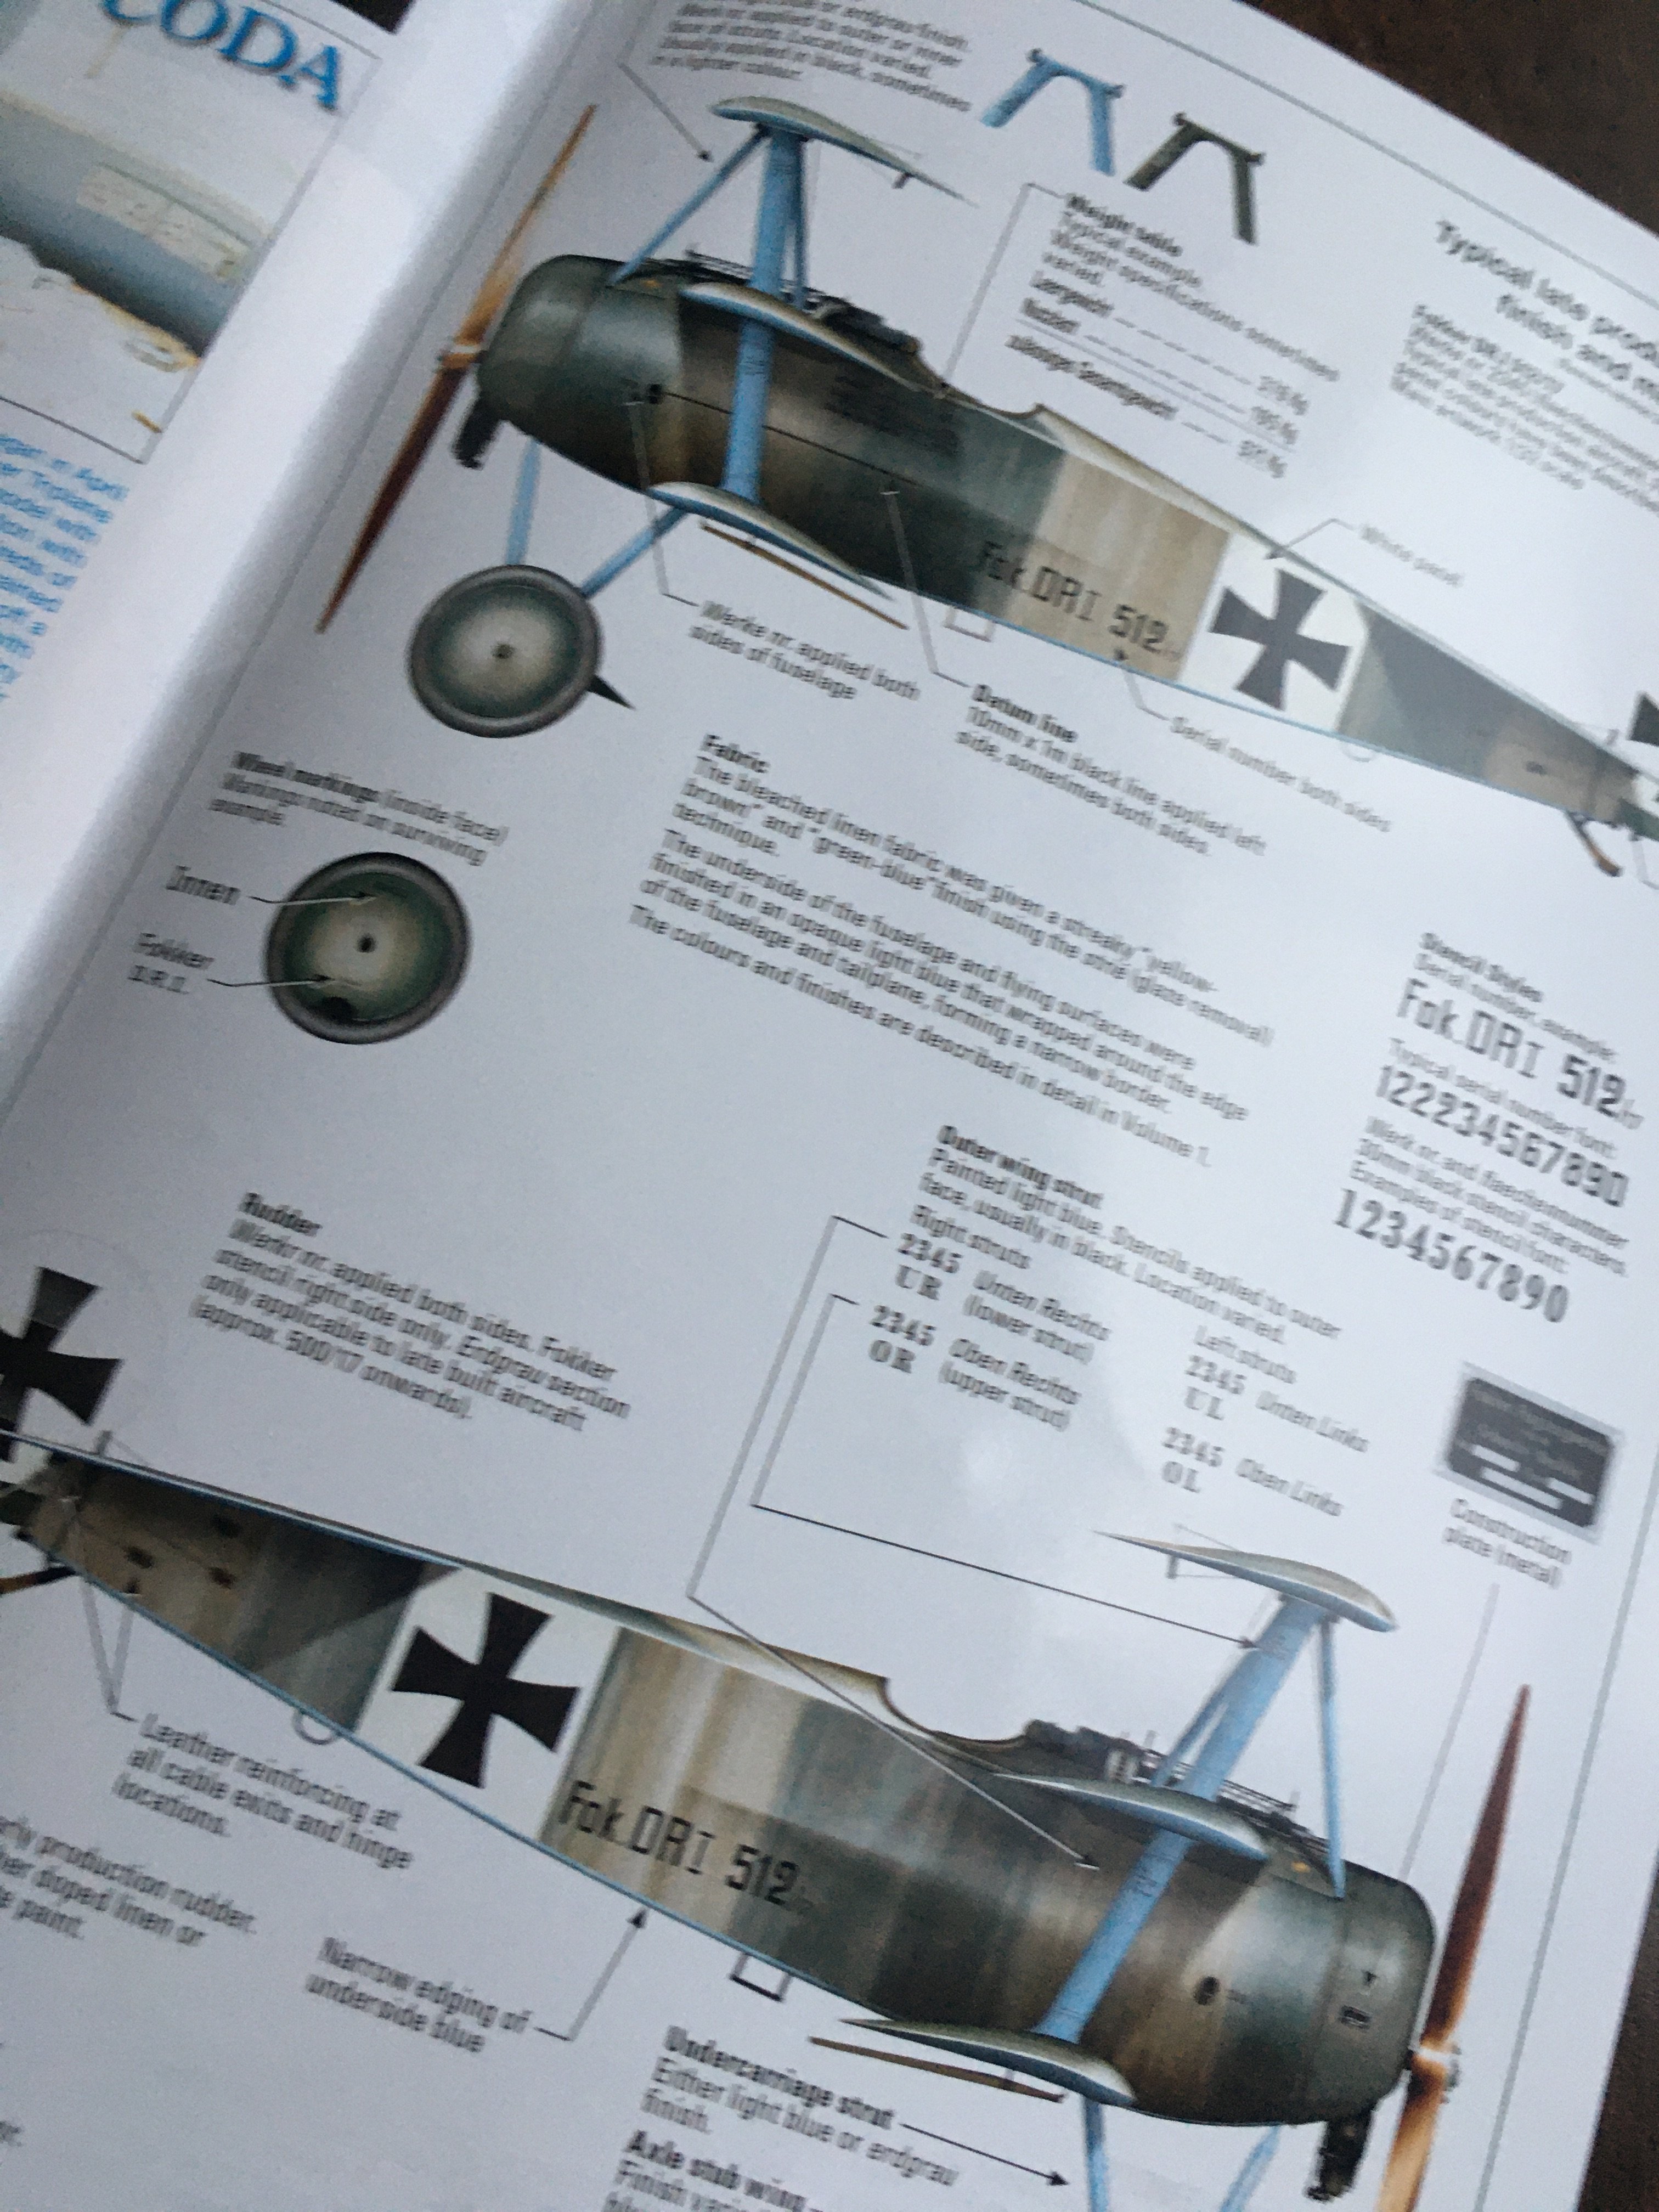
ü Dreideckers by numbers – 19 new color profiles;
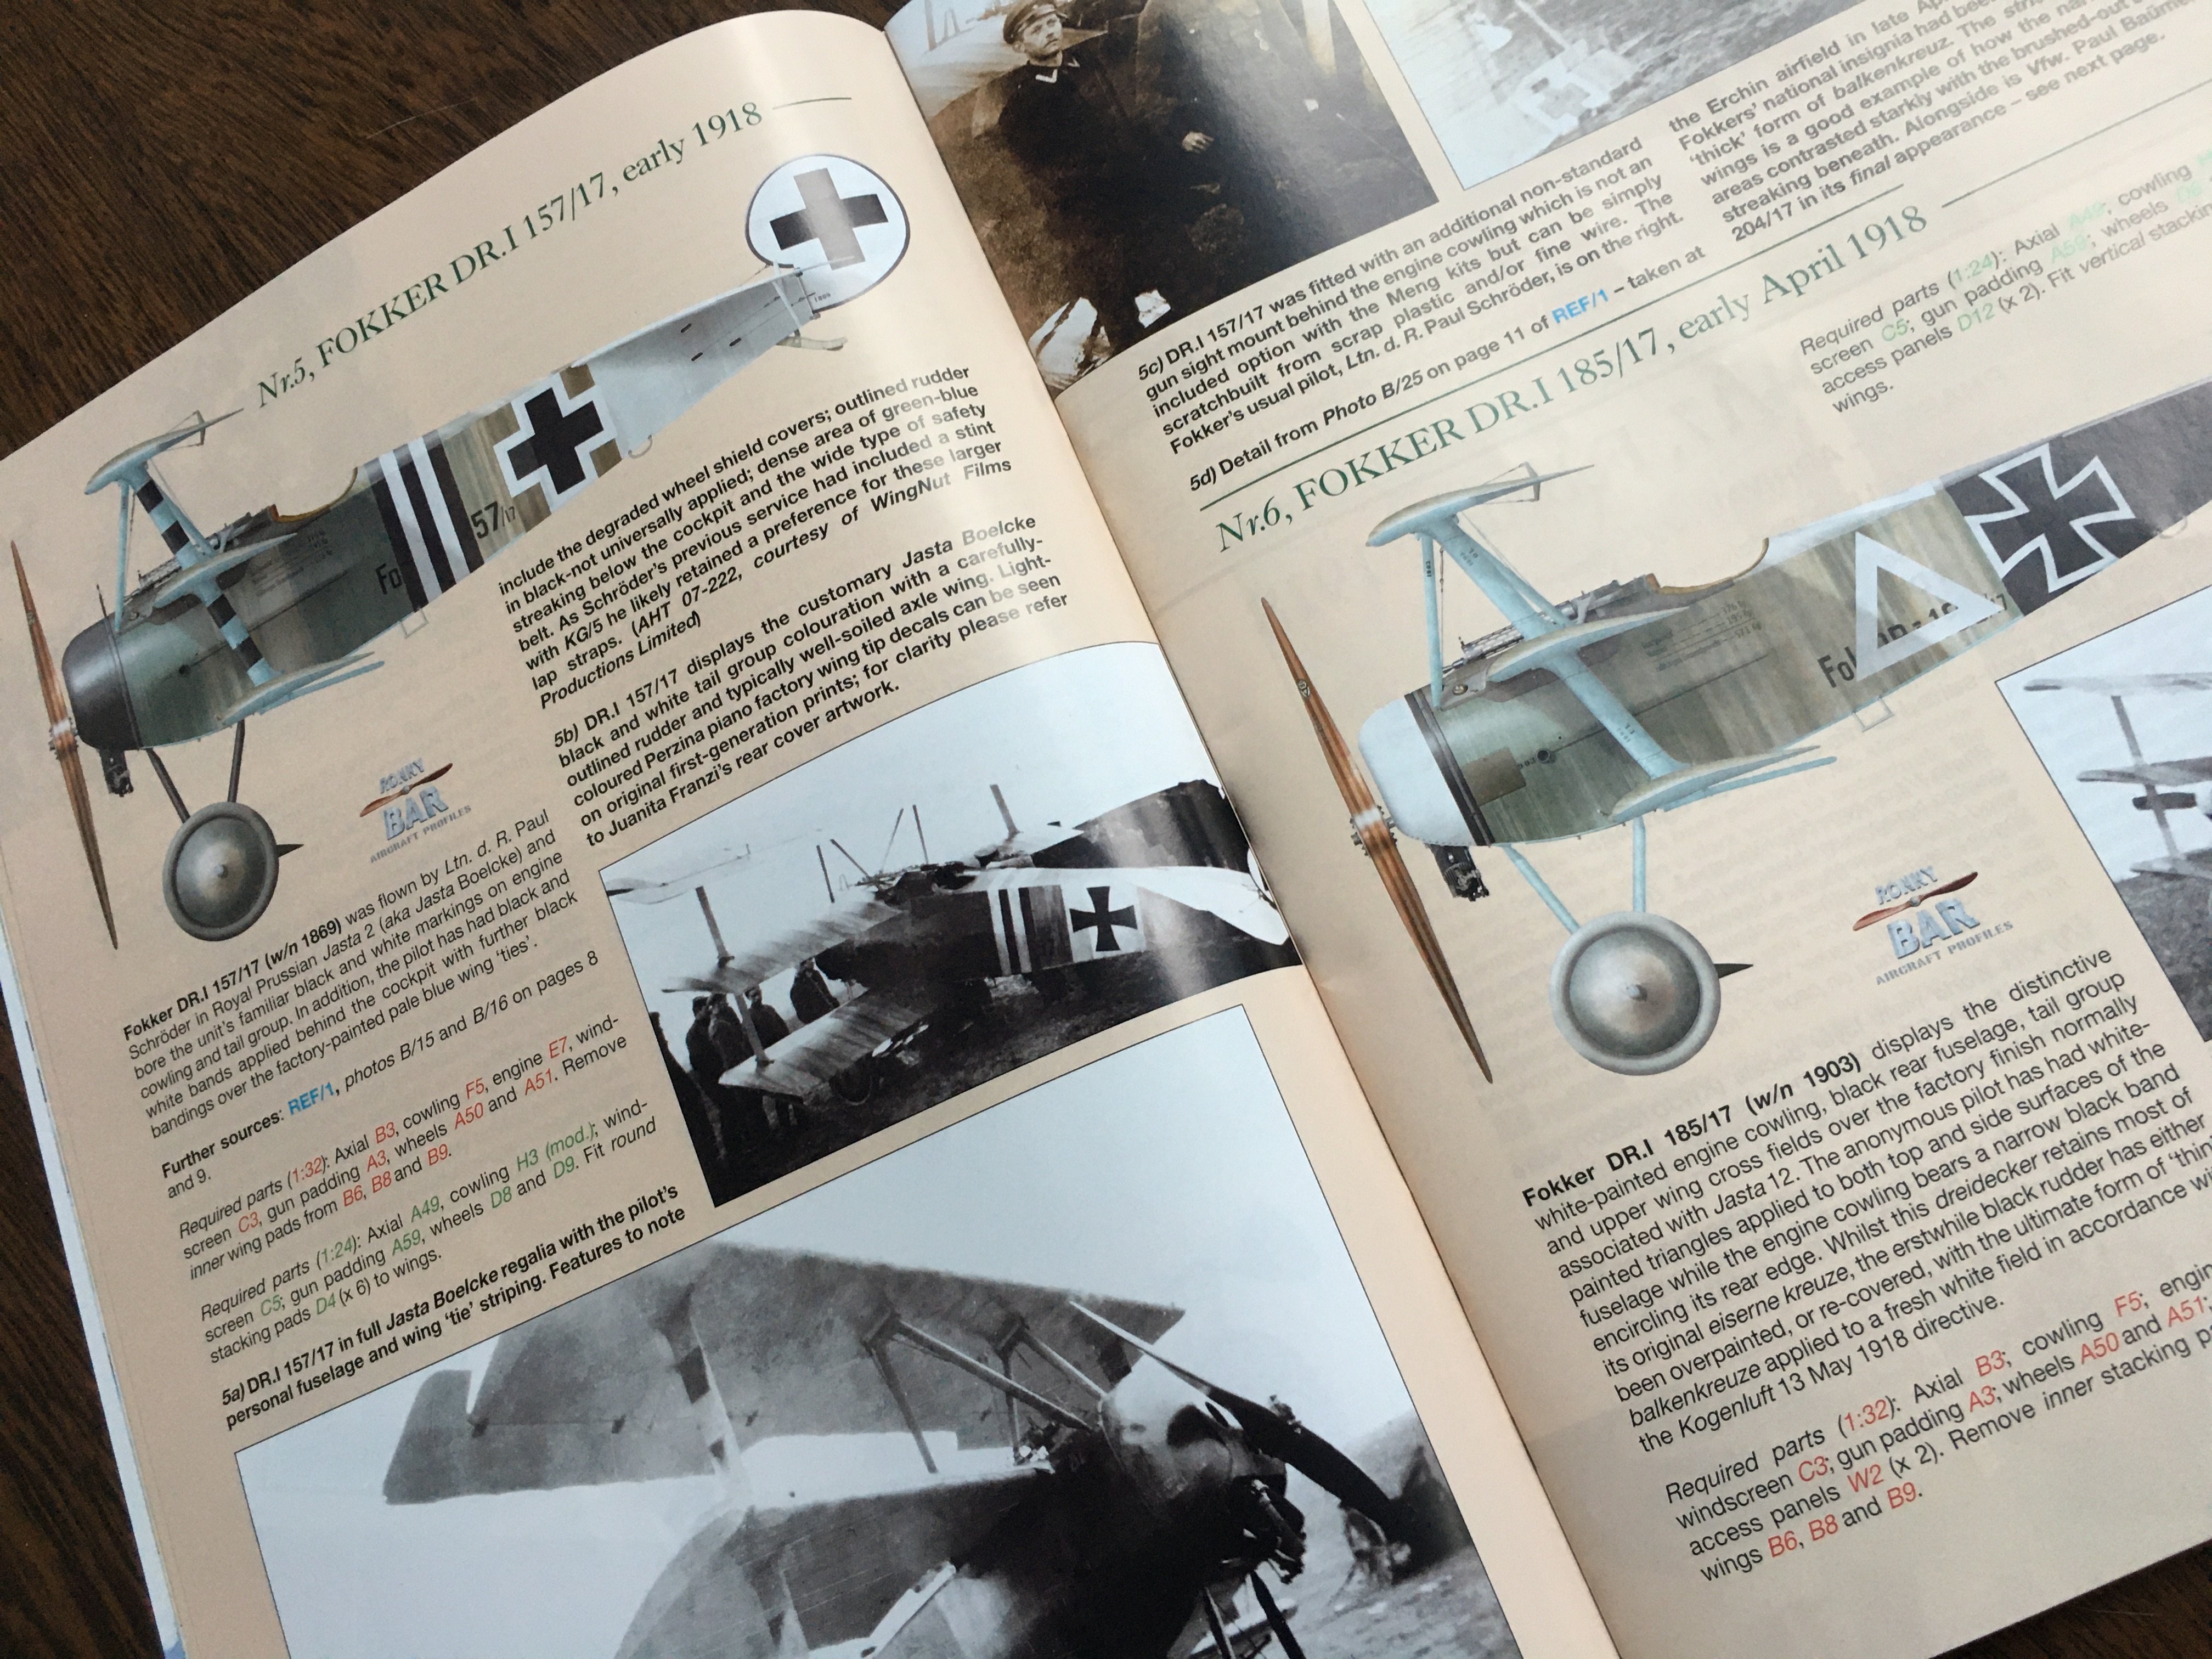
ü Dr. I 204/17, 9 March 198 – 1:32 build;
ü The TVAL Rotary Club – reverse engineering;
ü Dr. I 425/17, 21 April 1918 – 1:32 upgrade;
ü Dr. I 574/17, Summer 1918 – 1:32 upgrade;
ü Jasta 14 Archiv;
ü Dr. I 558/17, 9 June 1918- 1:24 build
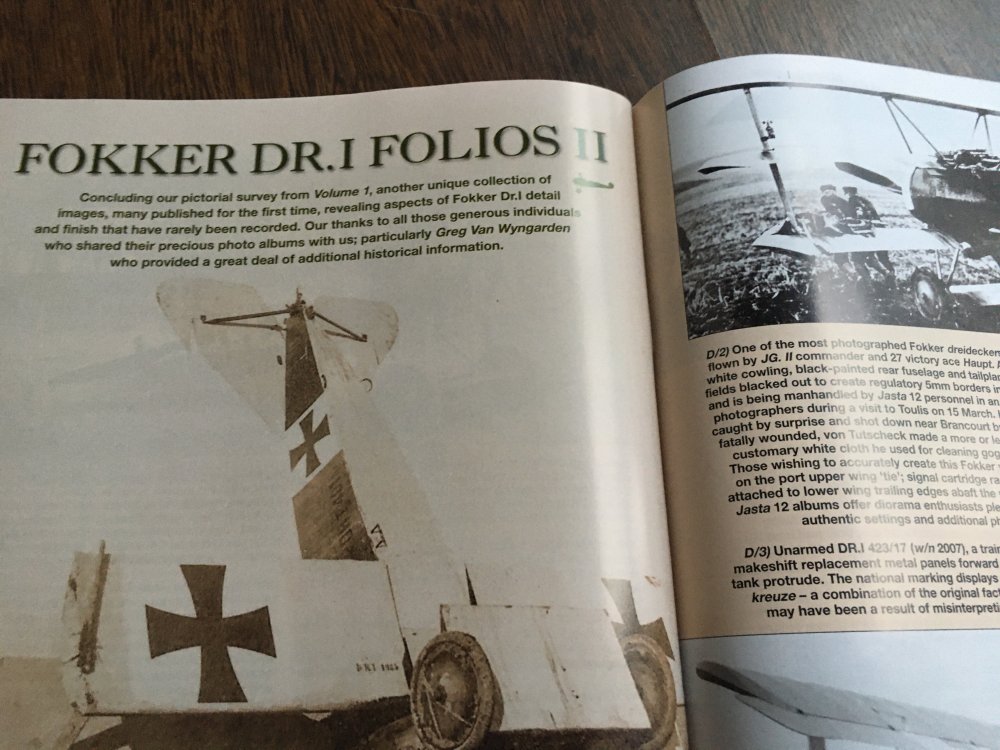
ü Fokker Dr. I Folios II – more timeless treasures;
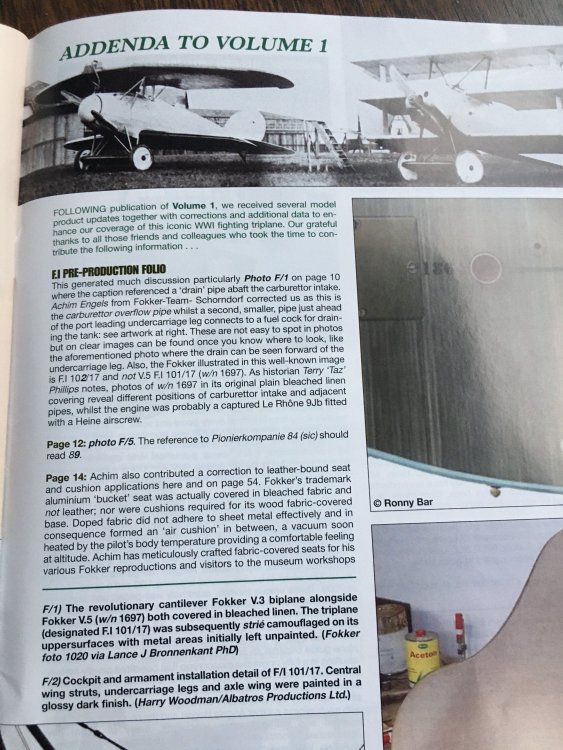
ü Addenda to Volume I
With 74 pages on gloss paper of which at first glance has the typical structure and winner receipt of the previous datafiles but with almost the double of pages of a normal datafile.
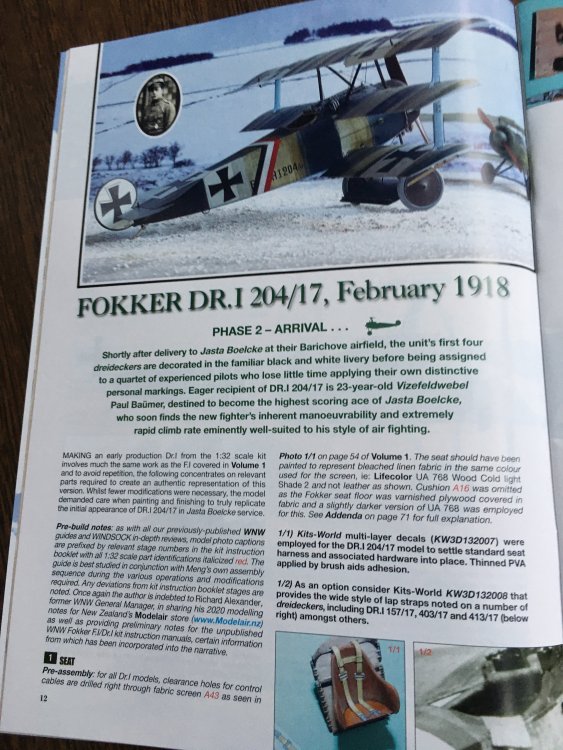
In the opening (back of the cover), as usual, a fantastic profile by unique and unmistakable Ronny Bar. The particularly profile is from Fokker F.1 103/17, flown the famous Werner Voss.

On this volume, Ronny Bar gives 20 new beautiful profiles as usual thah has the background history and real pictures of real aircraft.
To complete such information, Ray gives the modeler, in every single one, an information of what parts to use (required parts), available in the box (1:32 and 1:24 models), to get an accurate model. Is a fantastic information and very usefull to the modeler that want to make any of these profiles.
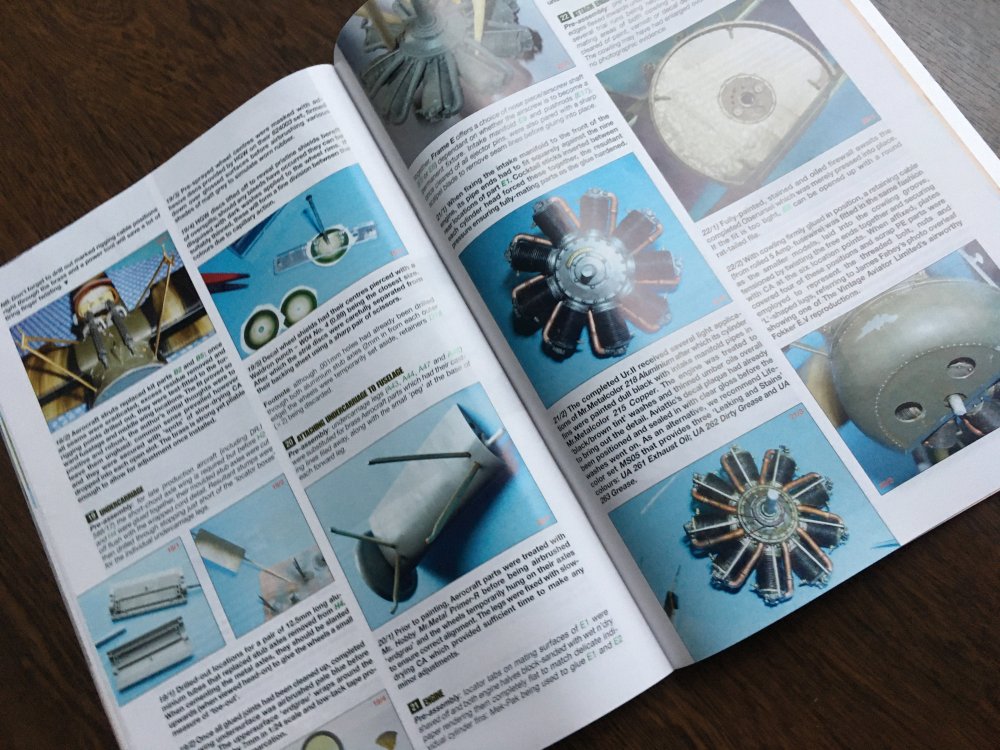
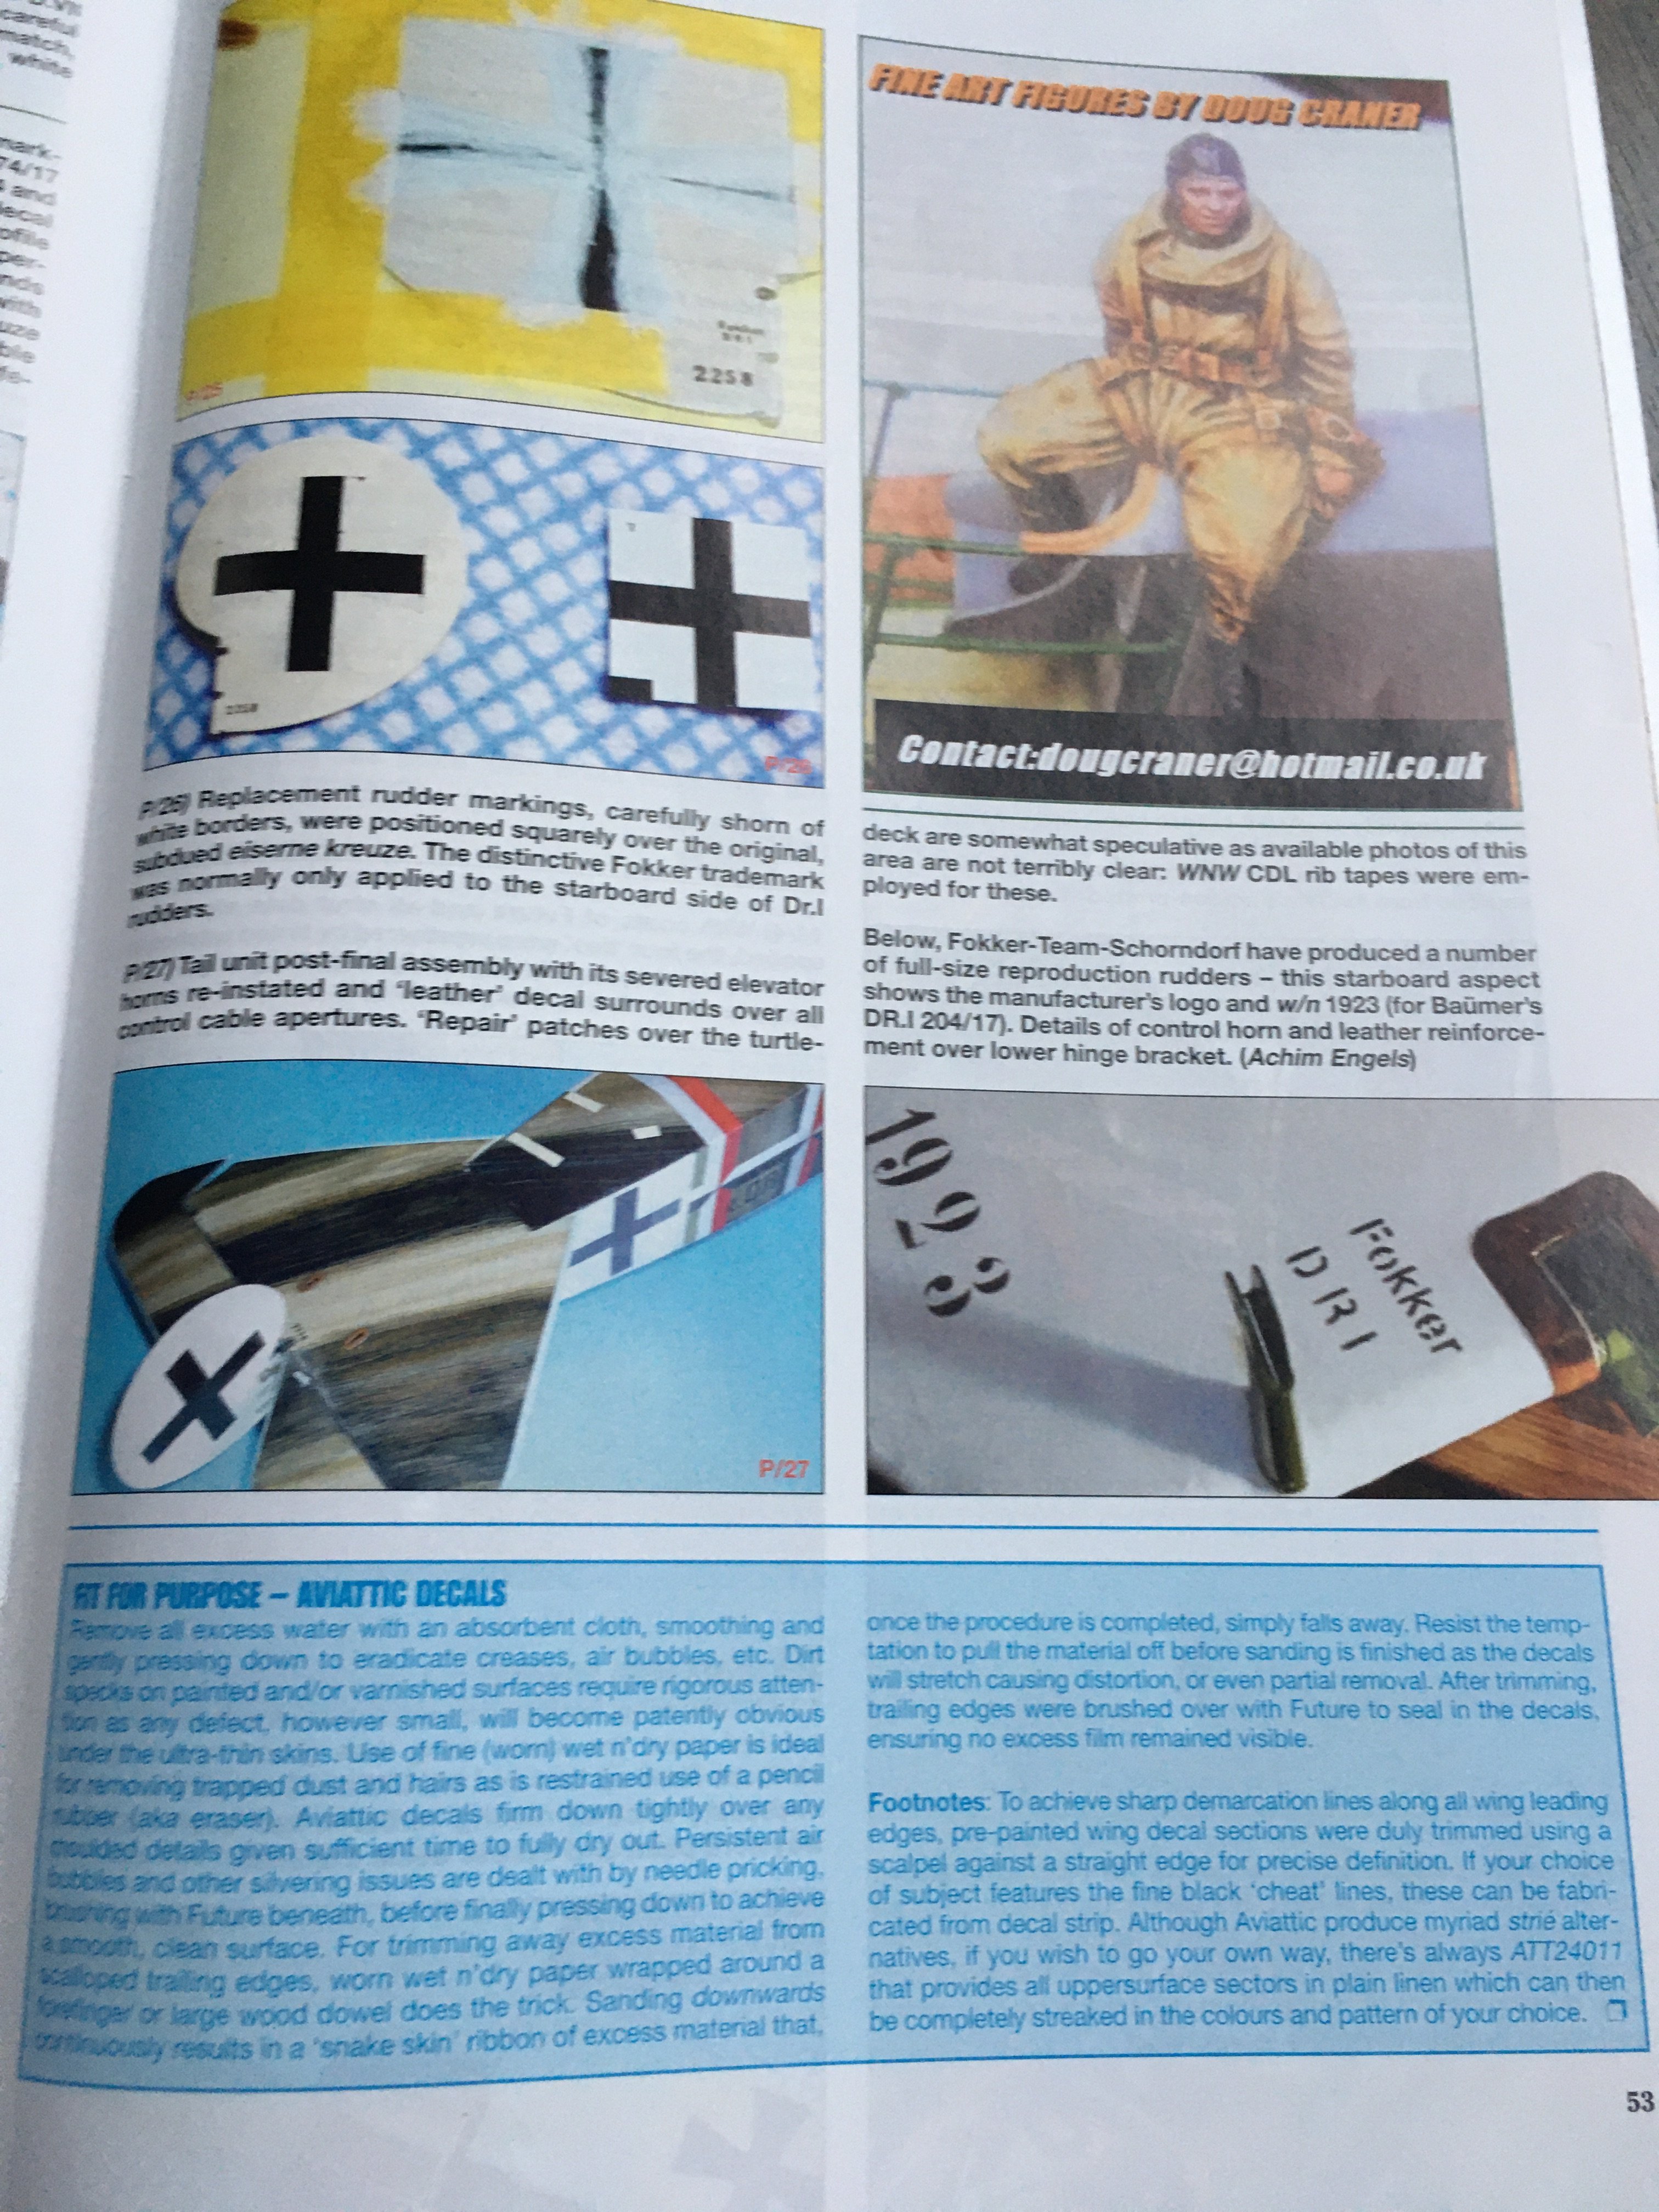
All the builds made by Ray are almost with step-by-step, with fantastic pics and very good tips and fantastic craftmanship.
All steps are cover with a full text explanation and several pictures of the ongoing build with close-ups and real pictures in detail to help the modeler out with location and specially, with detail.


Conclusion:
Got no more words to said! It`s a fantastic little book of the Fokker Dr.I !
It`s simply a must have to all WWI models and to modeler in general!! A Fokker Dr.I is a must in any aircraft collection!
Do yourself a favor and get Fokker Dr. I Vol. I and Vol II!
Very Highly recommend.
My sincere thanks to Ray Rimmel and Windsock for making this fantastic book..
-
1
-
-
on sale this month!

-
6
-
-
Great work!! love the LWS!
-
1
-
-
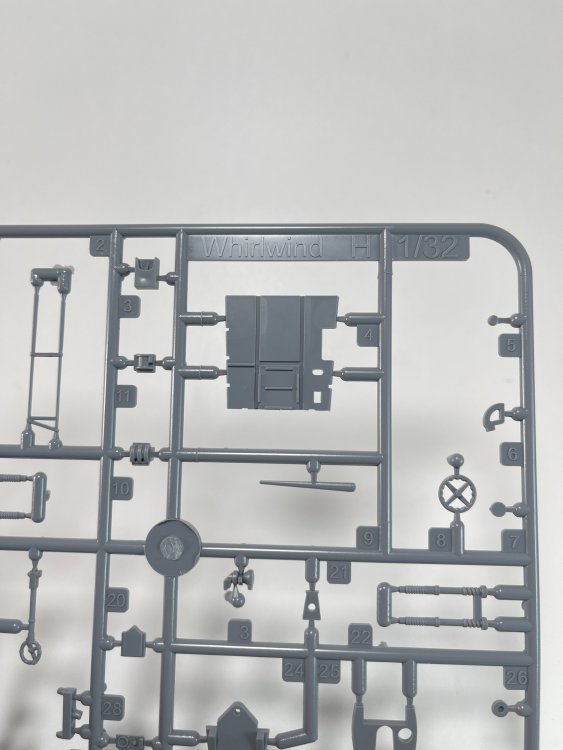
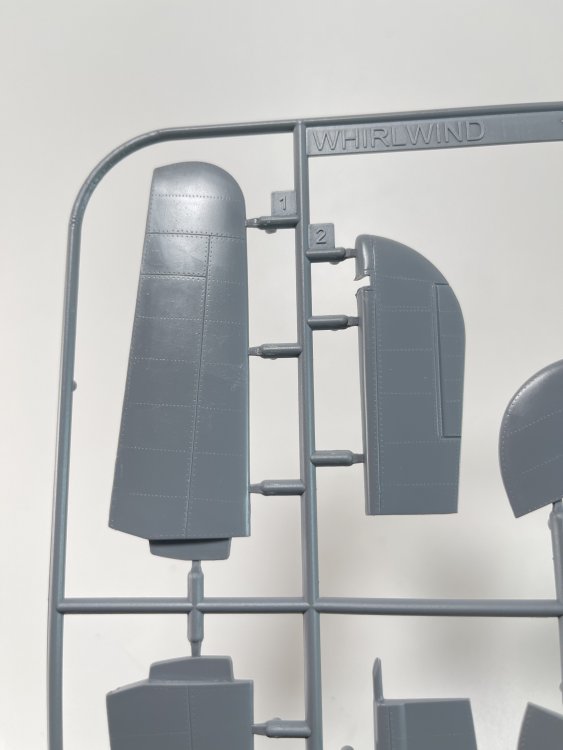
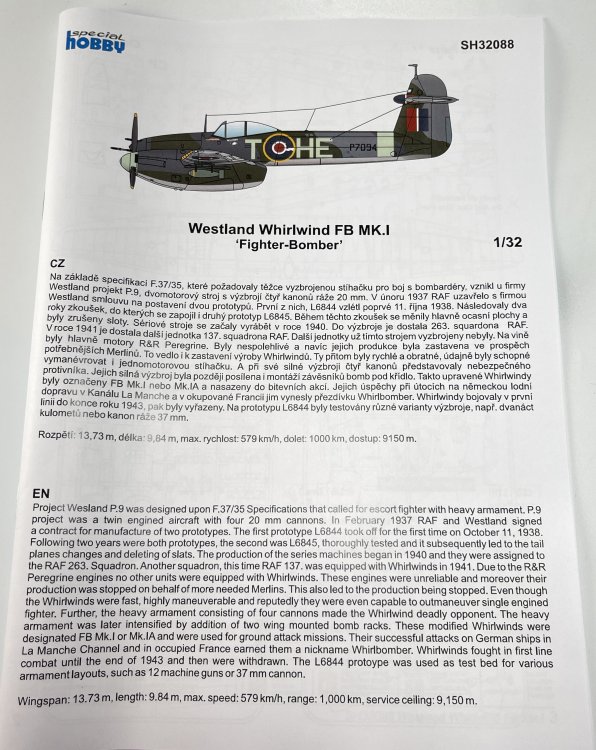
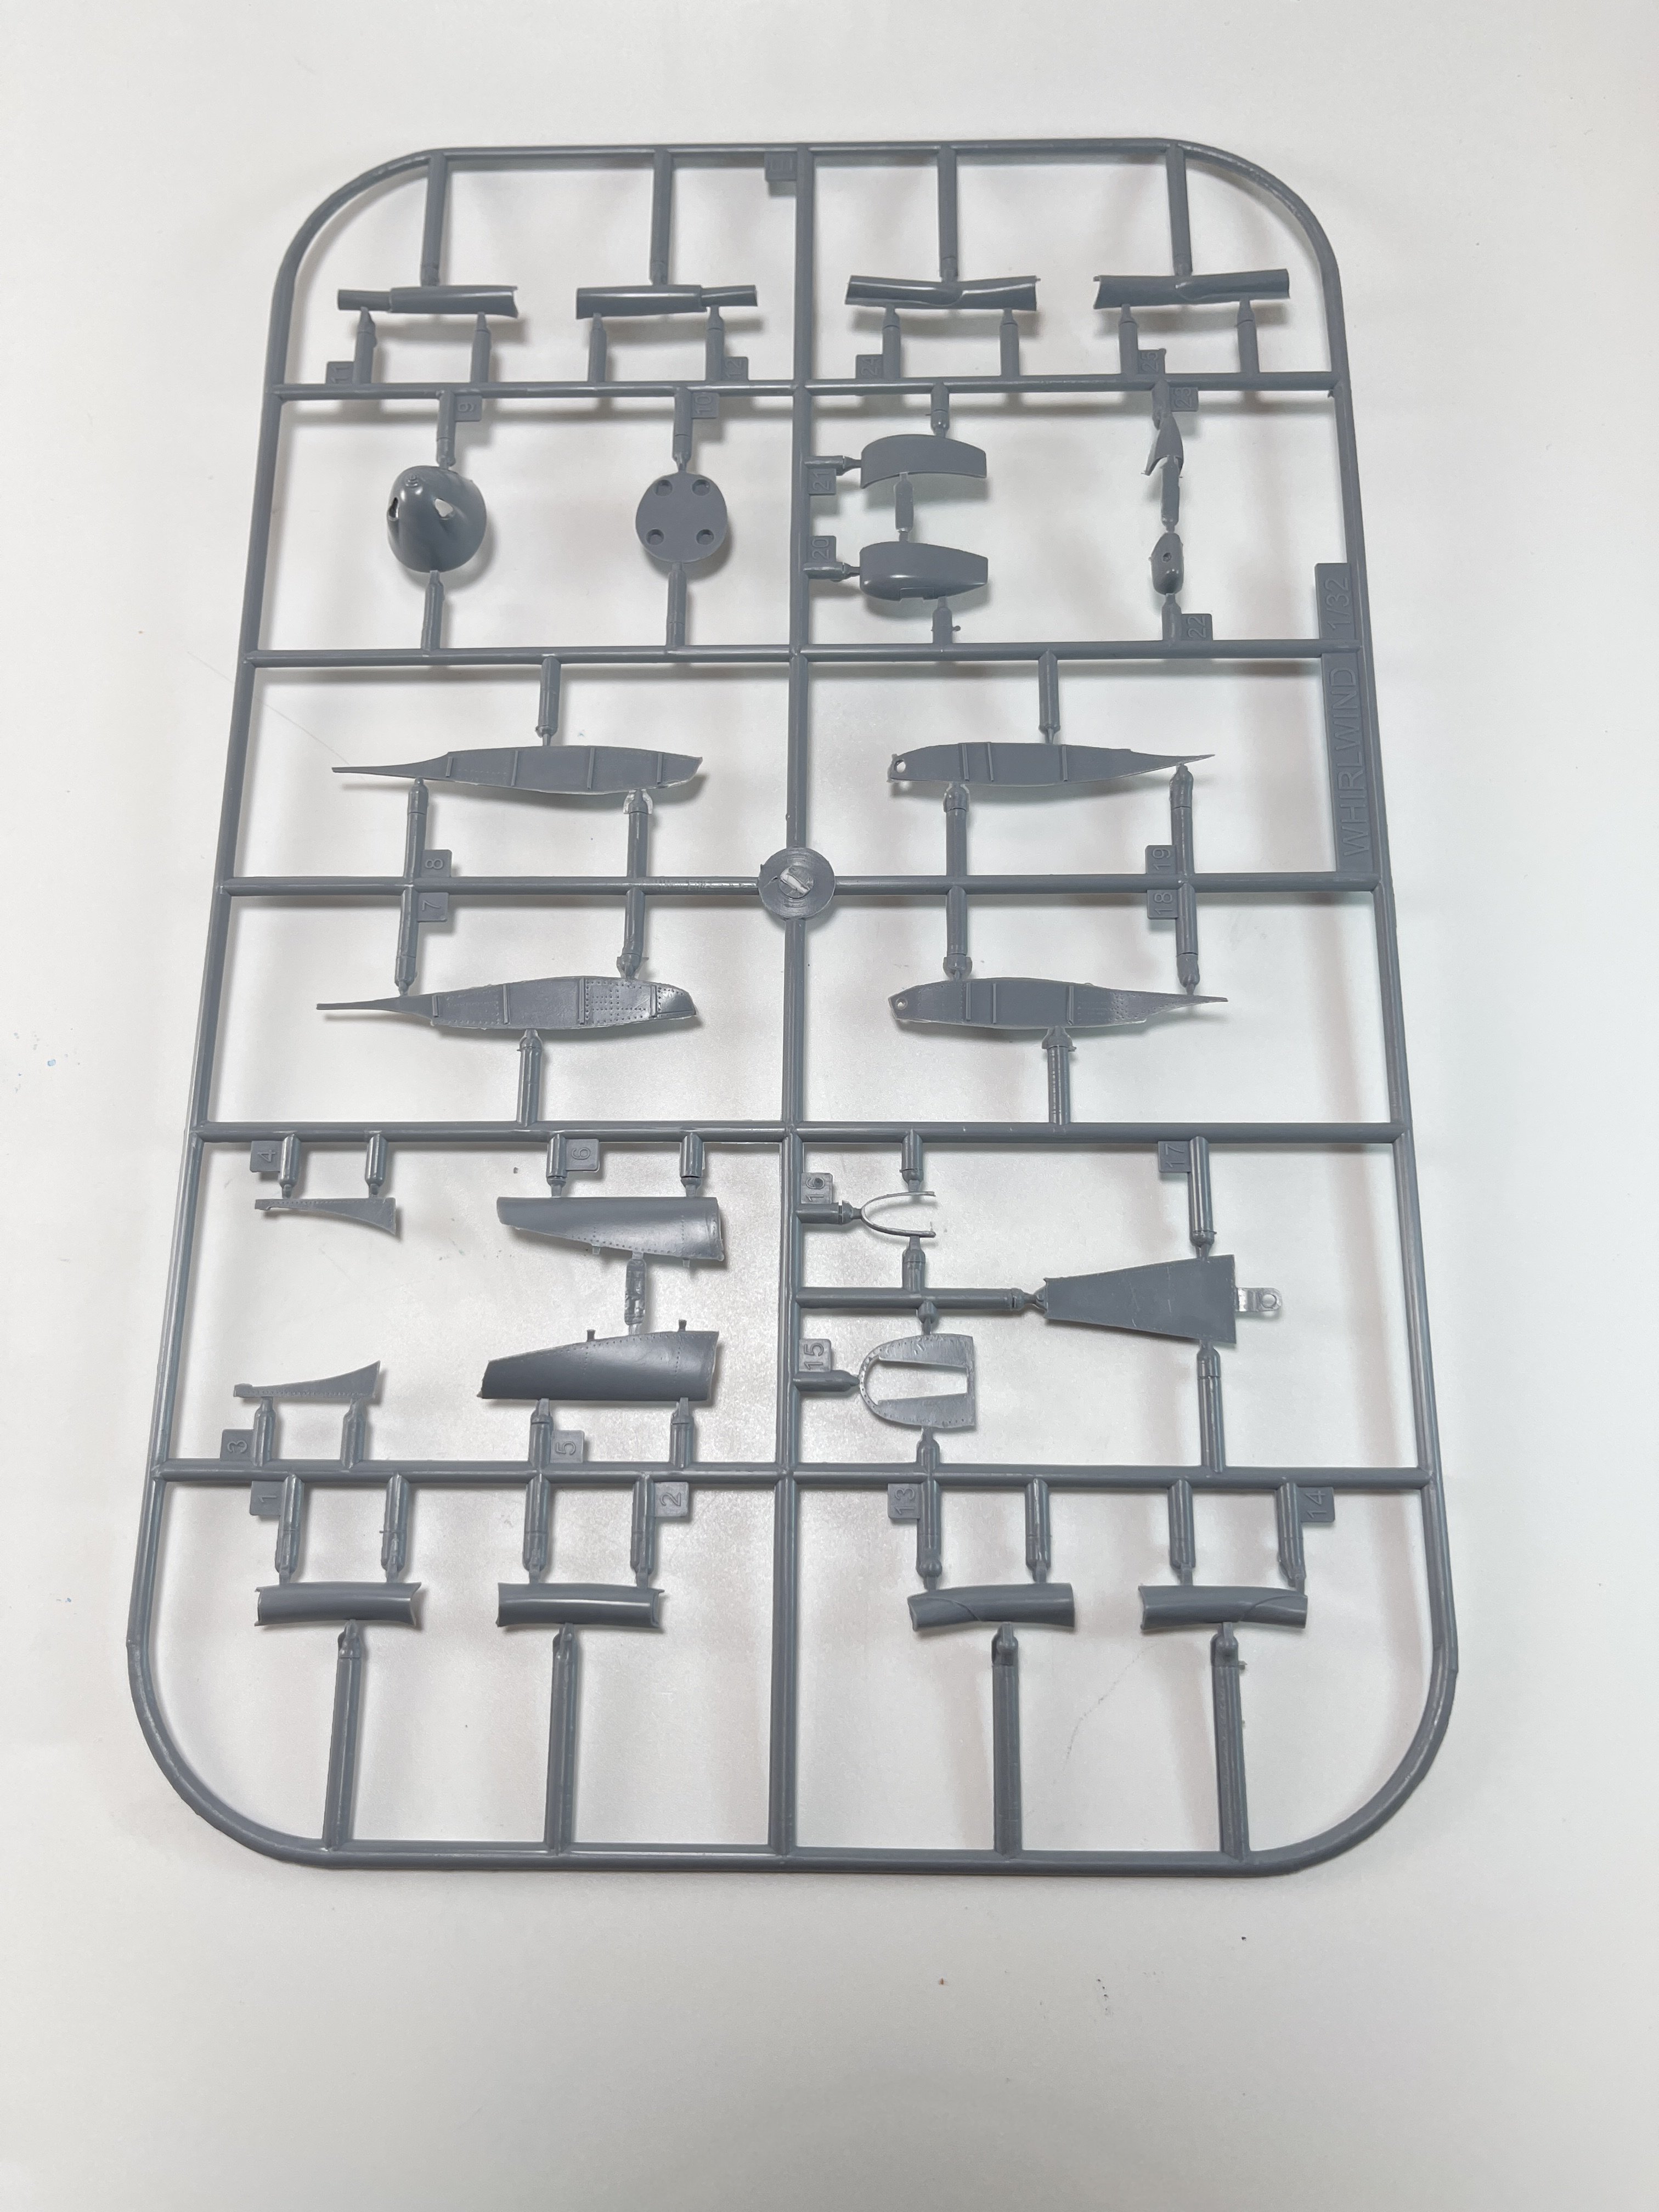
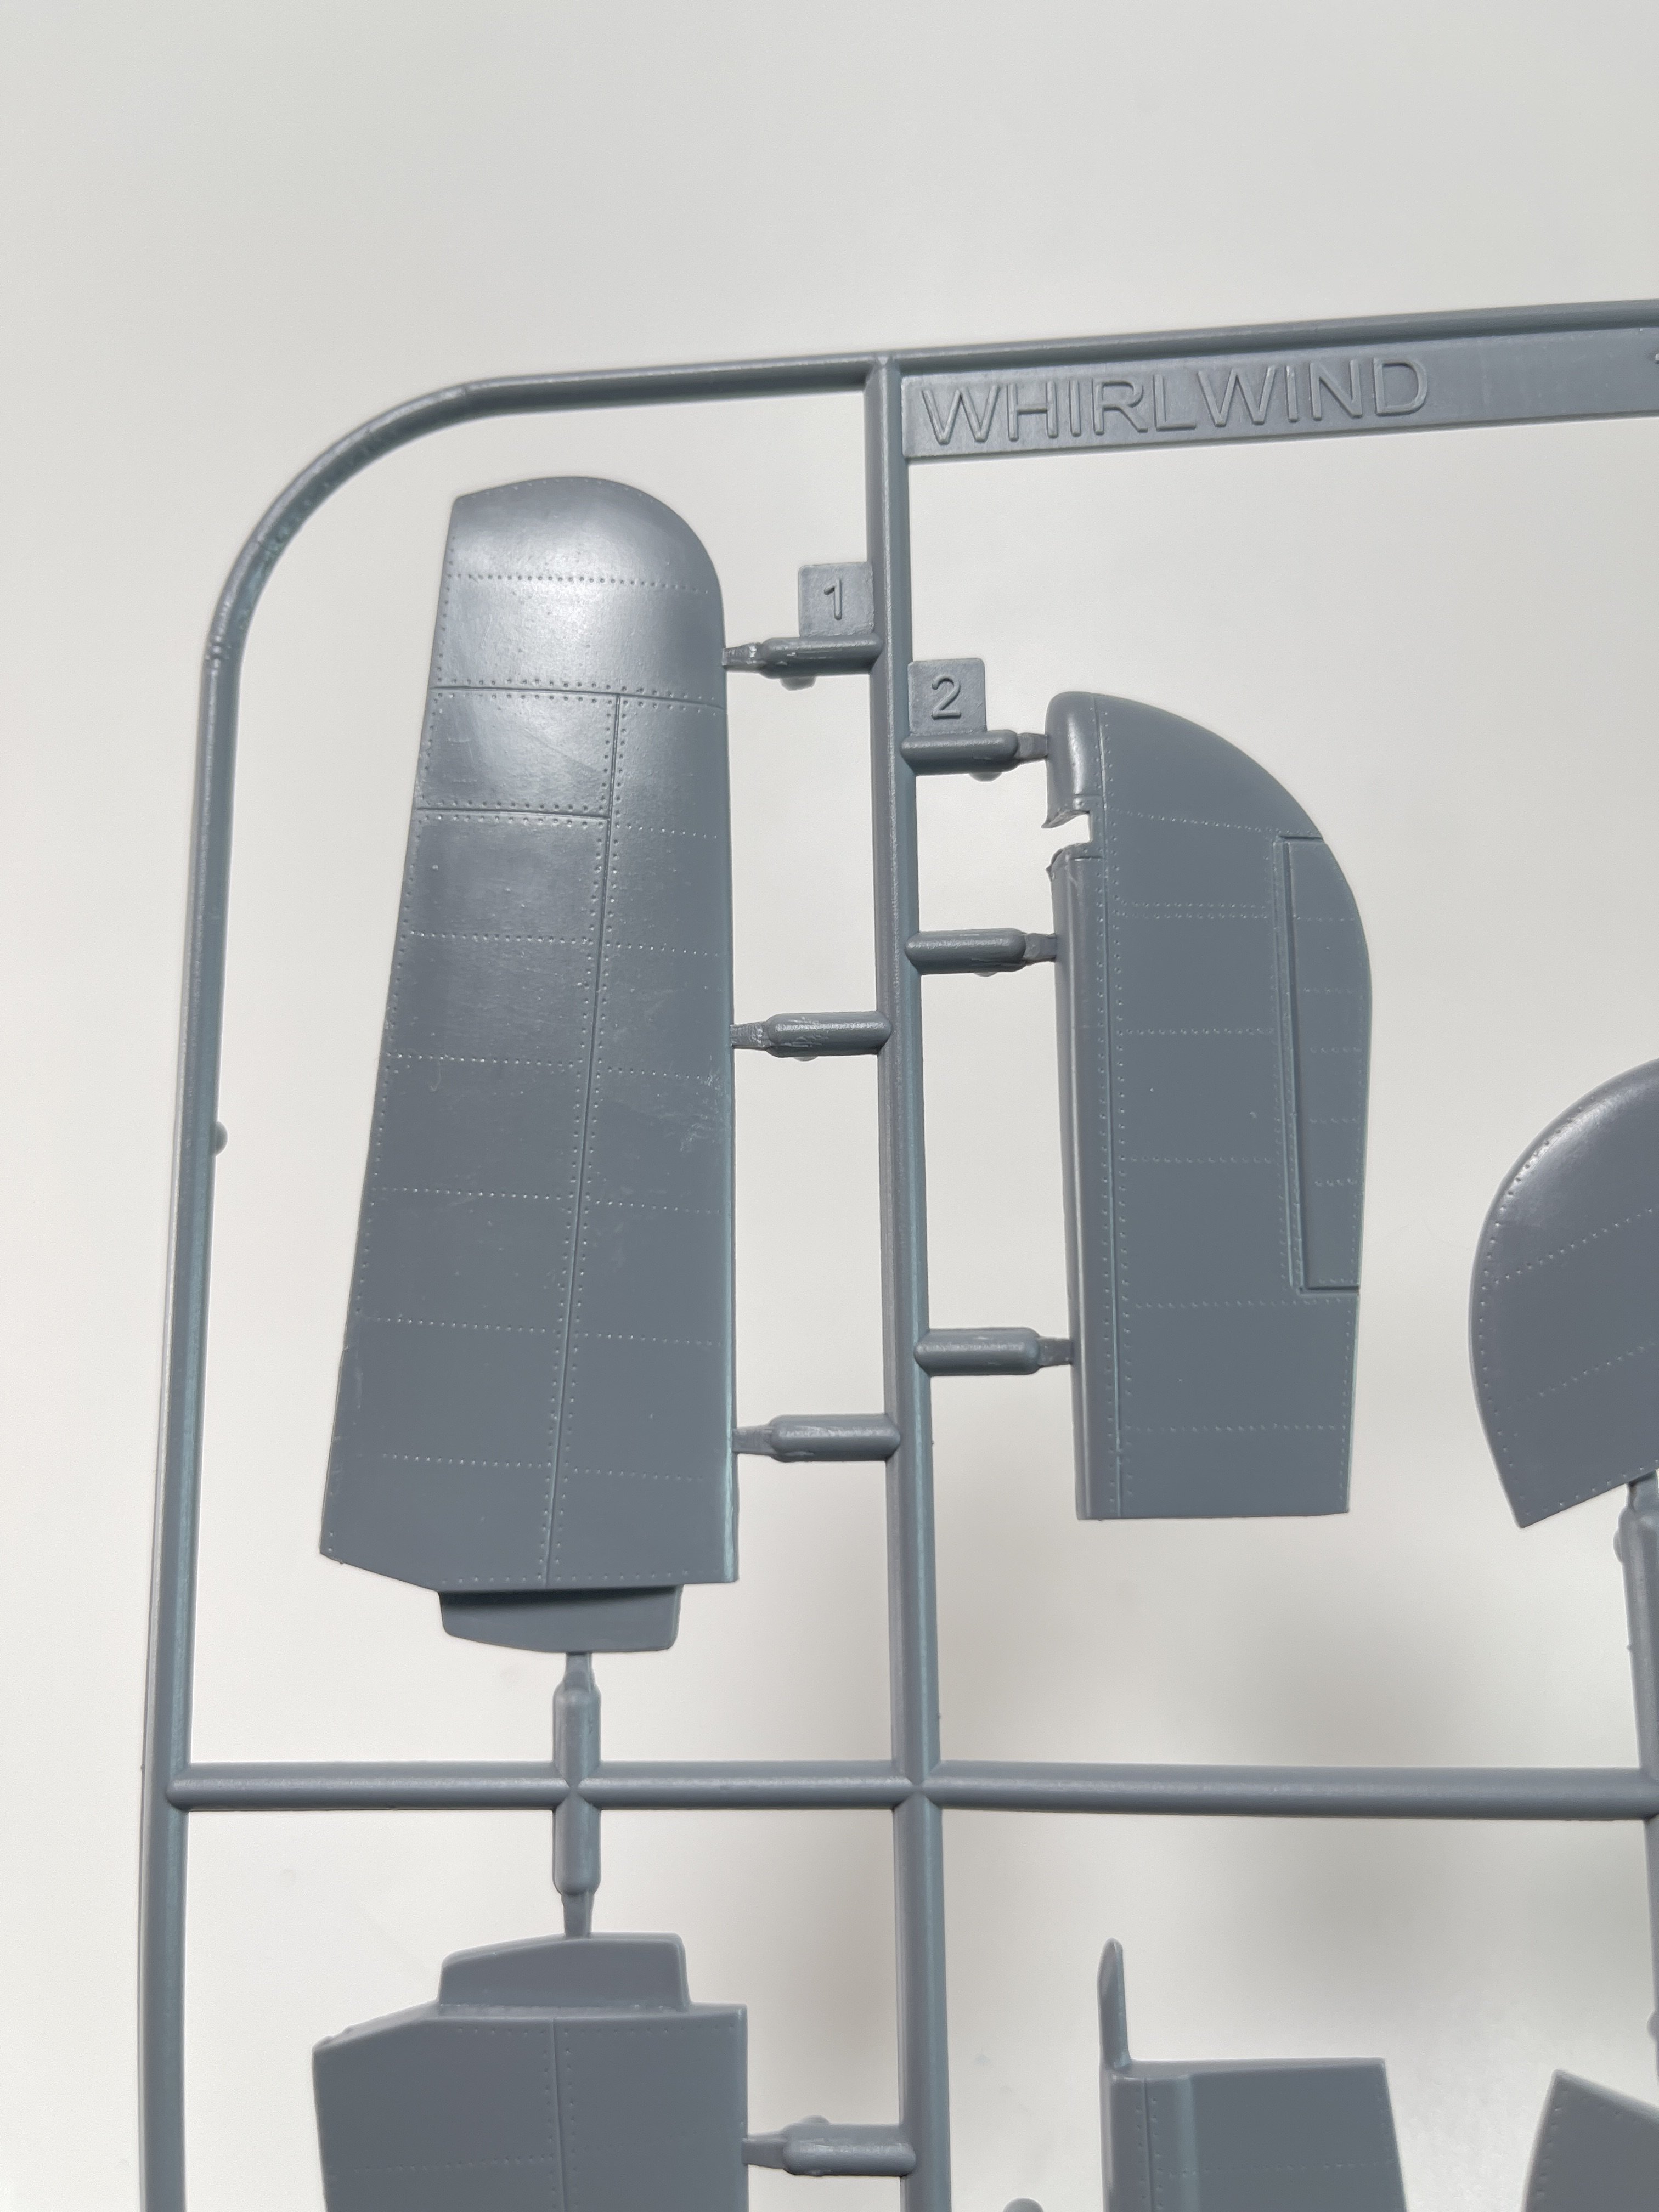
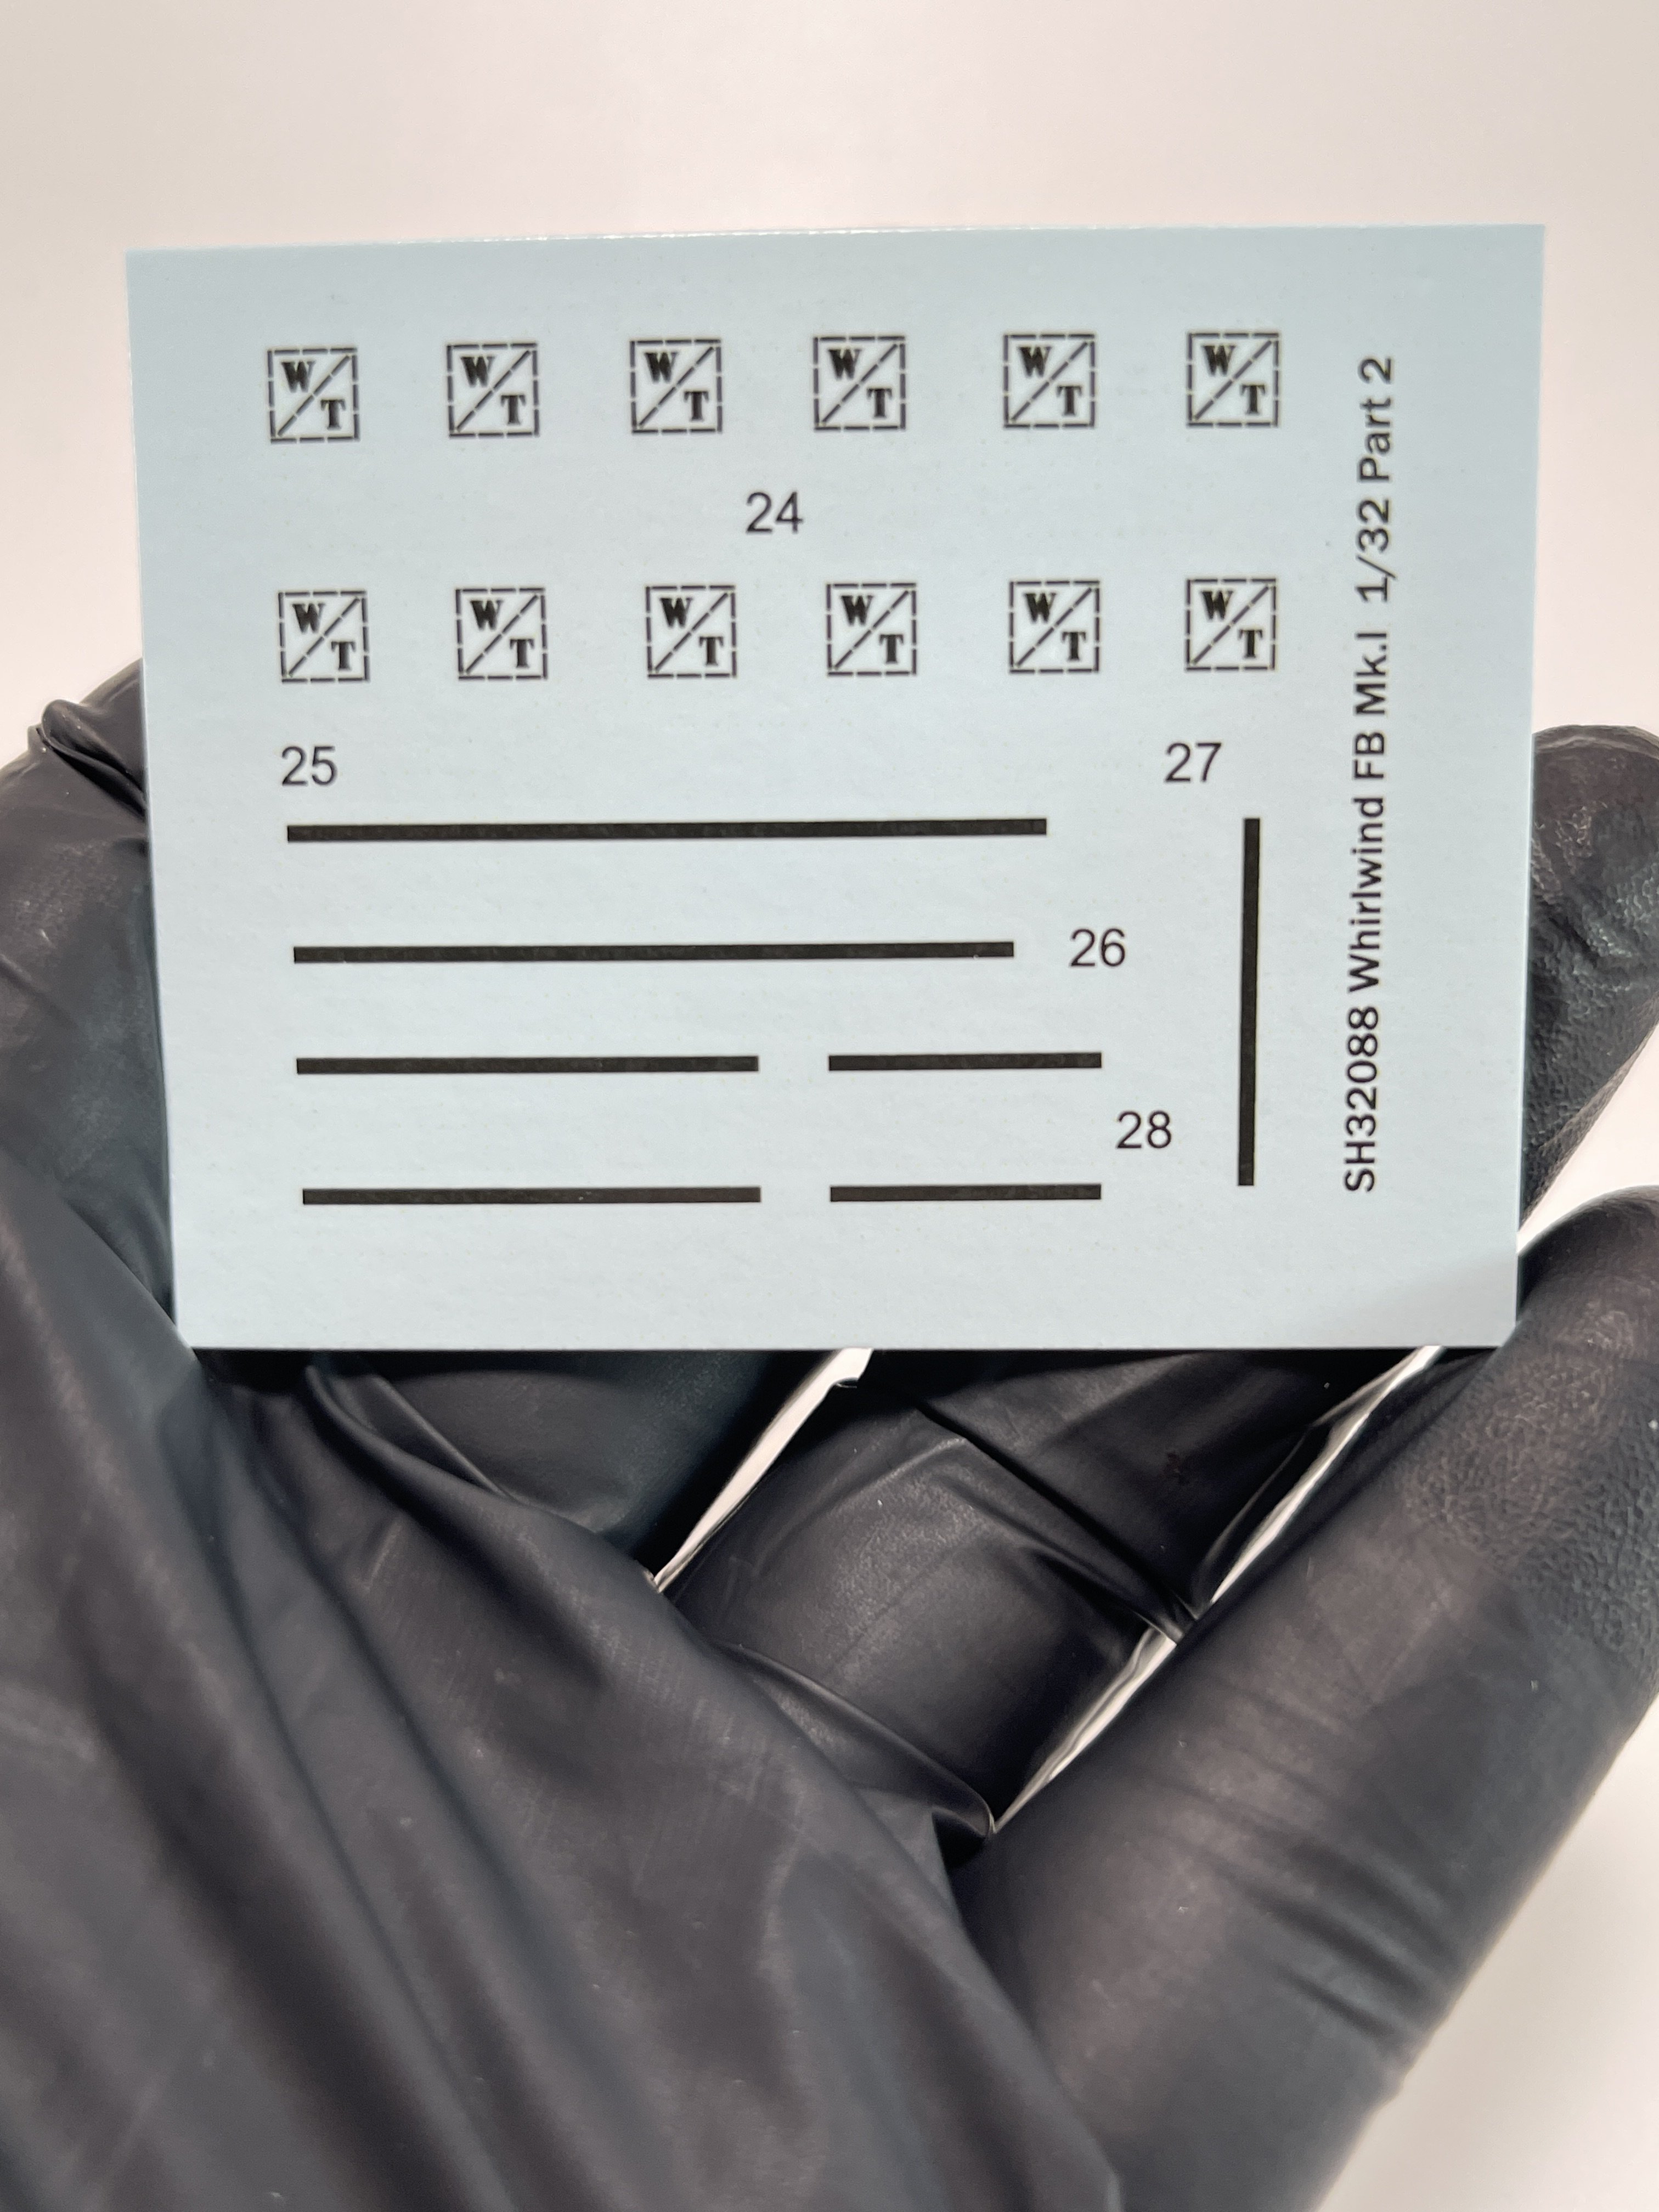
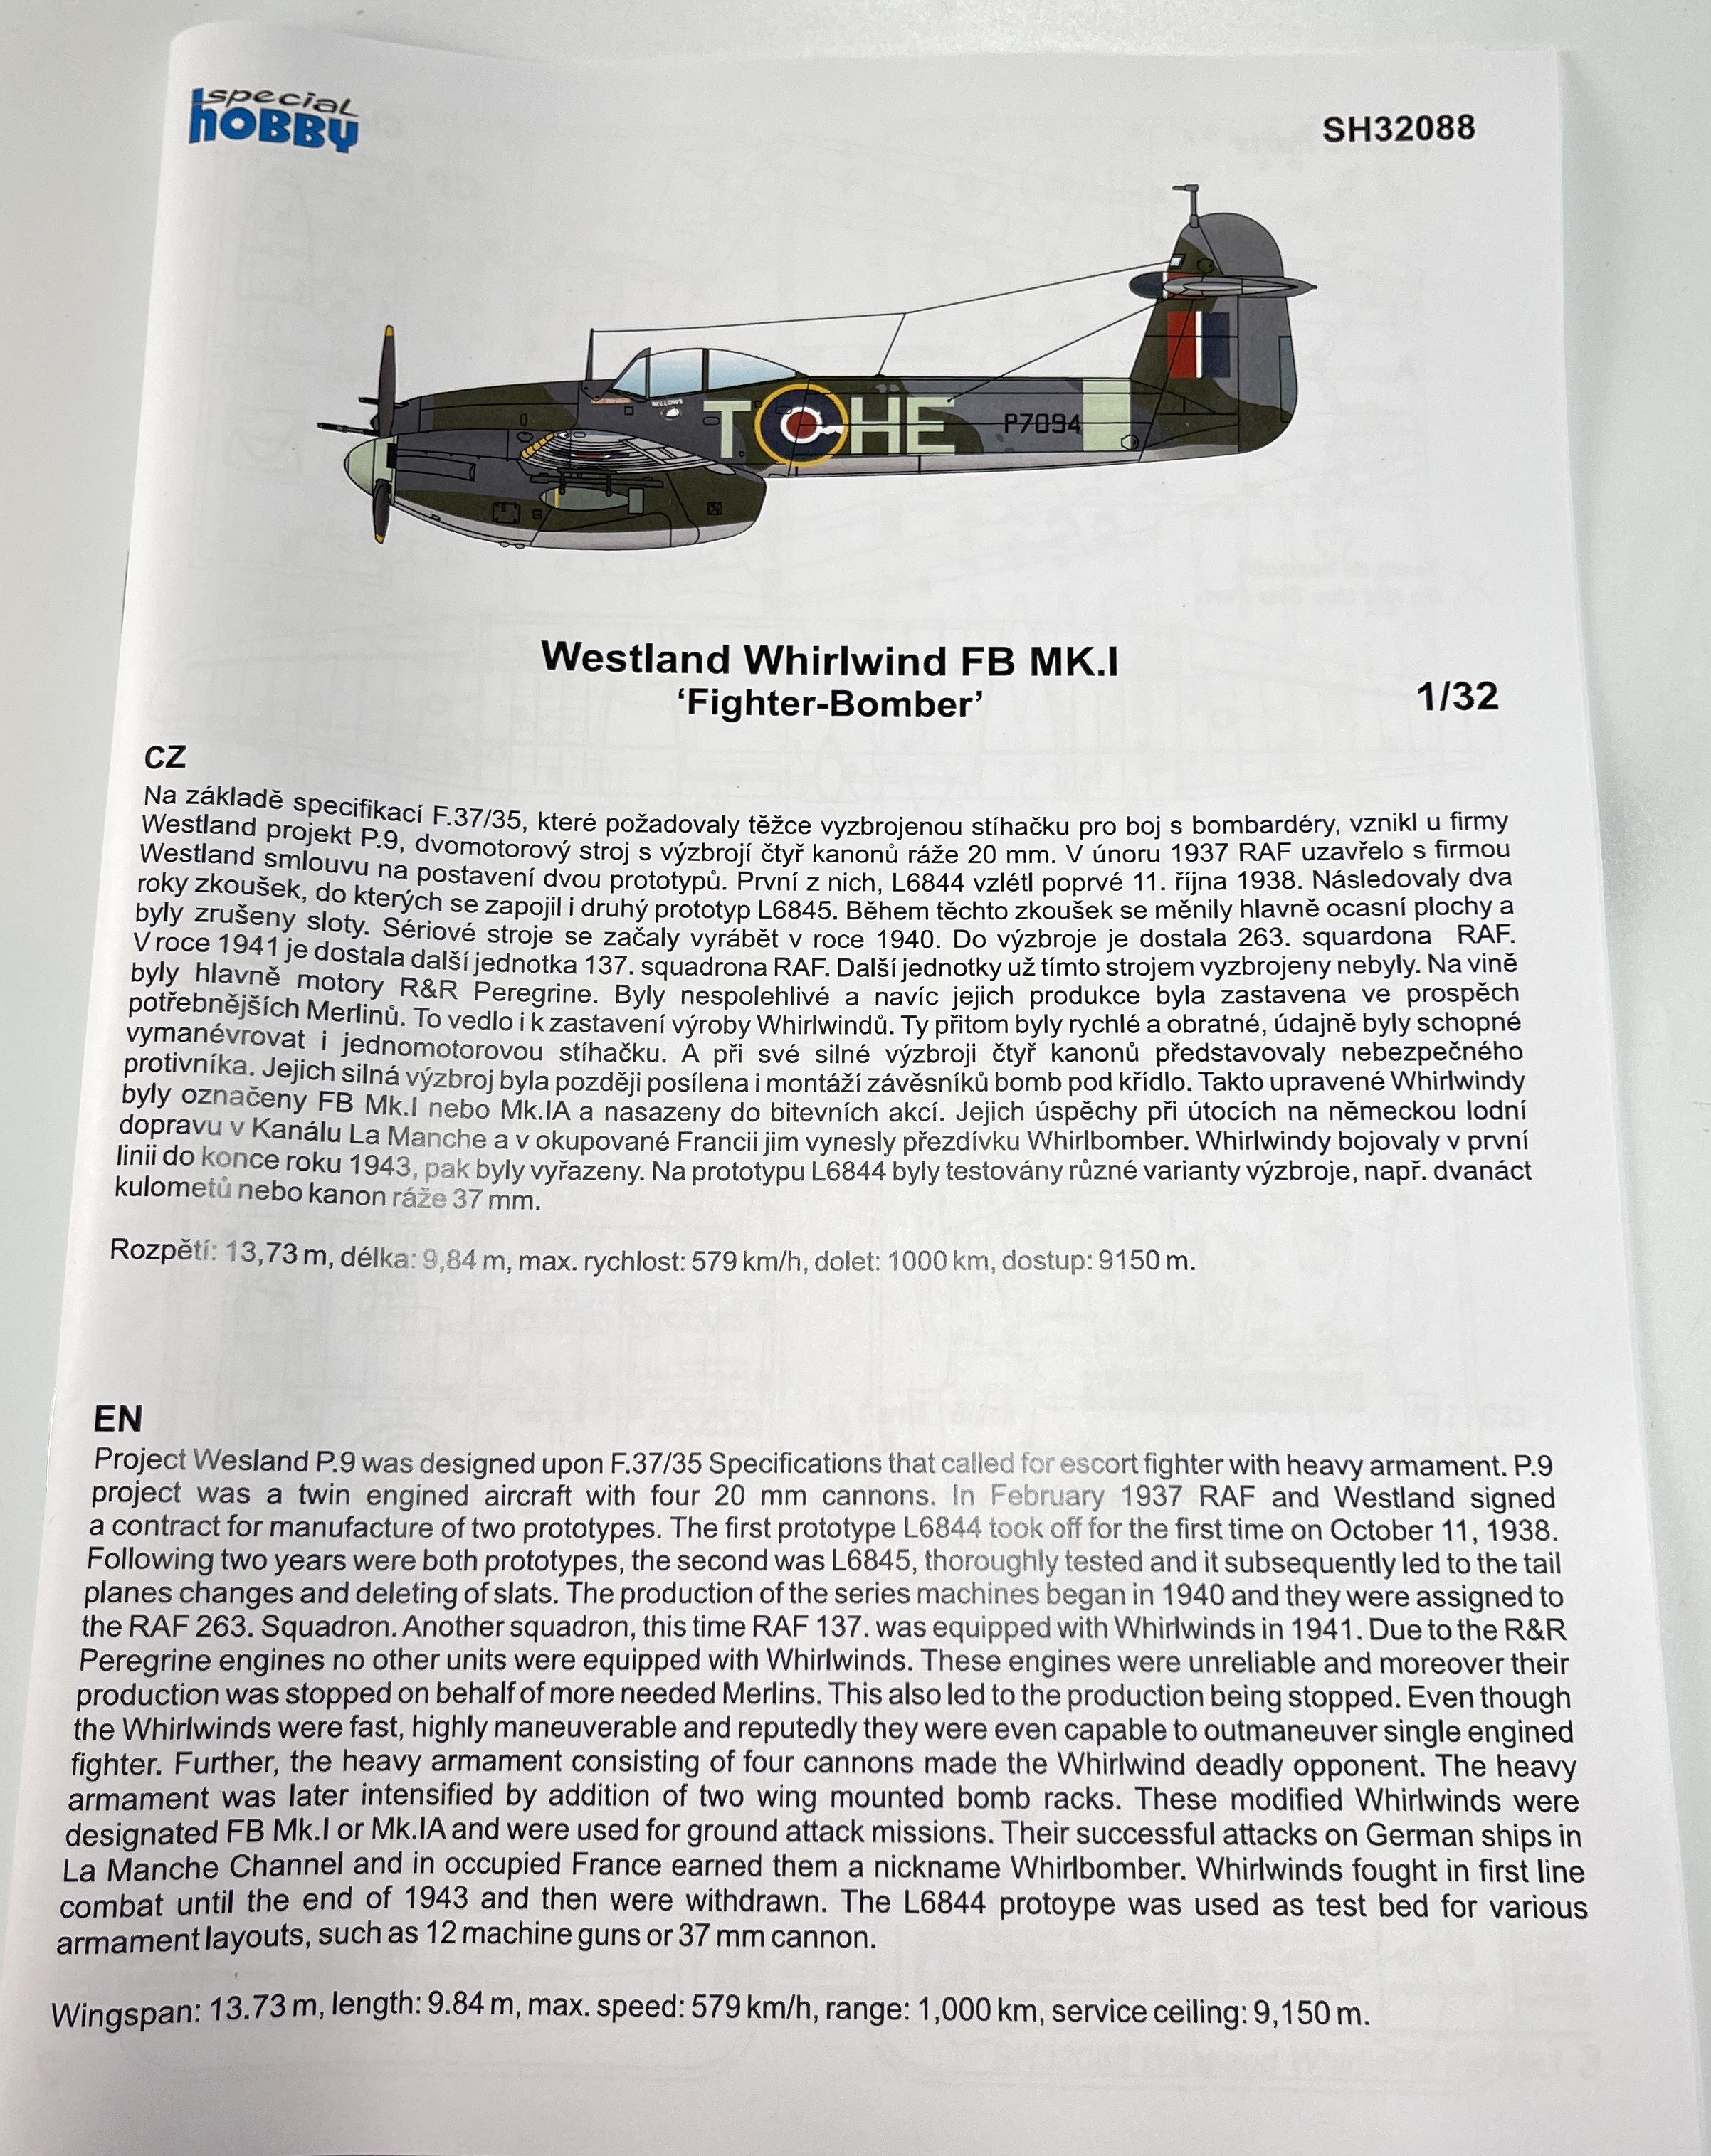
Westland Whirlwind
FB Mk. I
“Fighter Bomber”
1:32
Special Hobby
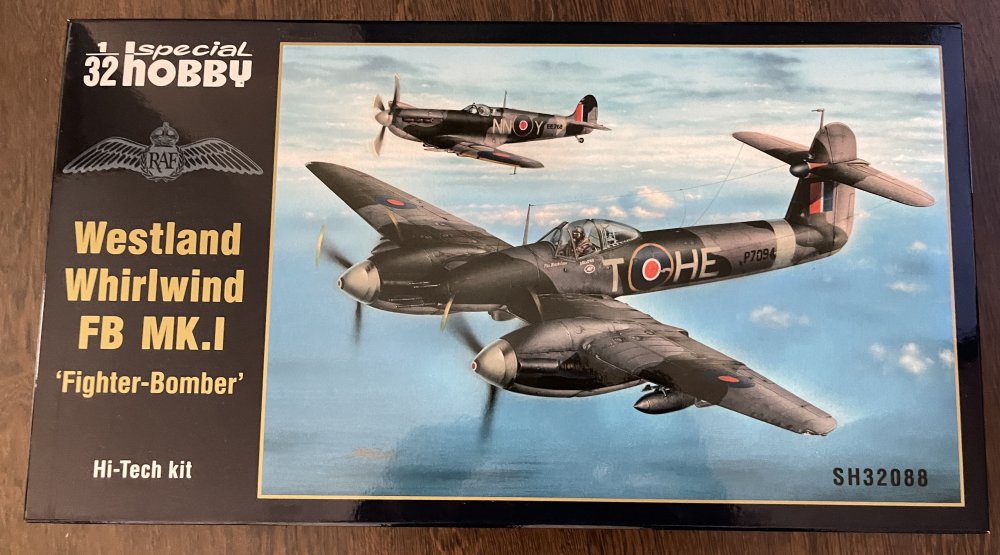
Catalogue number SH32088
This is not the first time that we, at LSM have the honour to have a 1:32 Special Hobby Westland Whirlwind in review.
Back in 2021, Our James Hatch review the Special Hobby brand new release standard release of this beautiful twin-engine fighter.
You can see his outstanding review right here.
I will leave the historical introduction as you can read it in the hyperlink given.
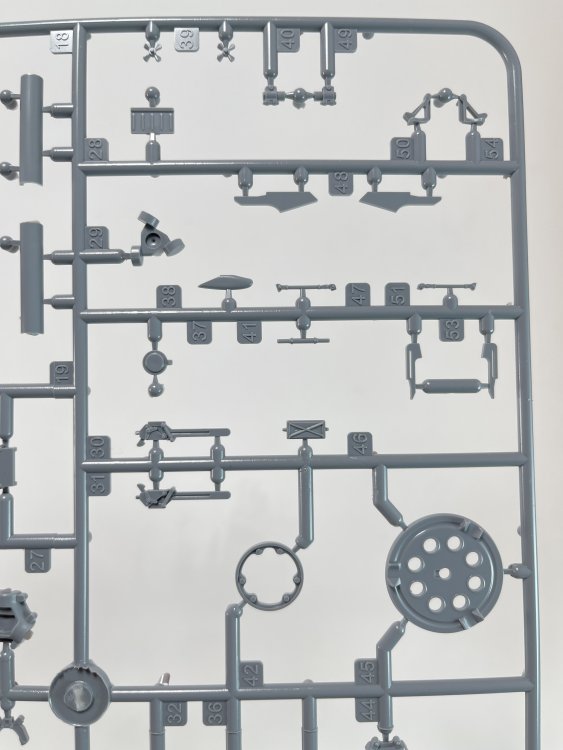
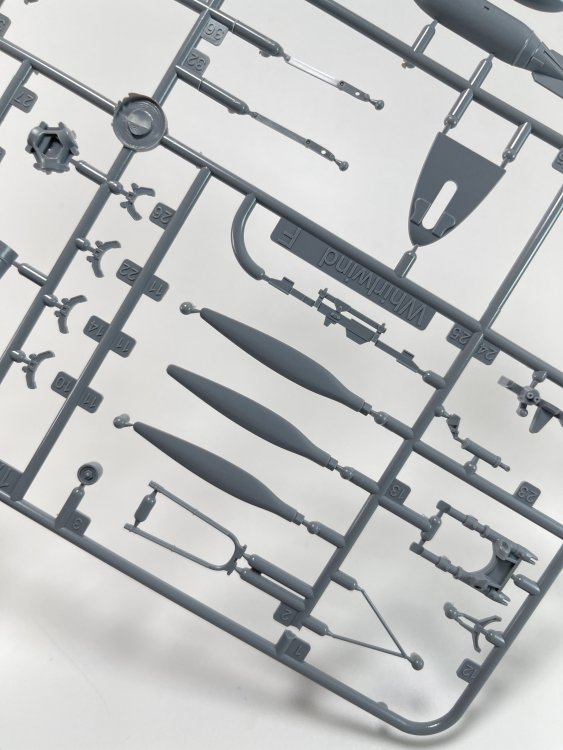
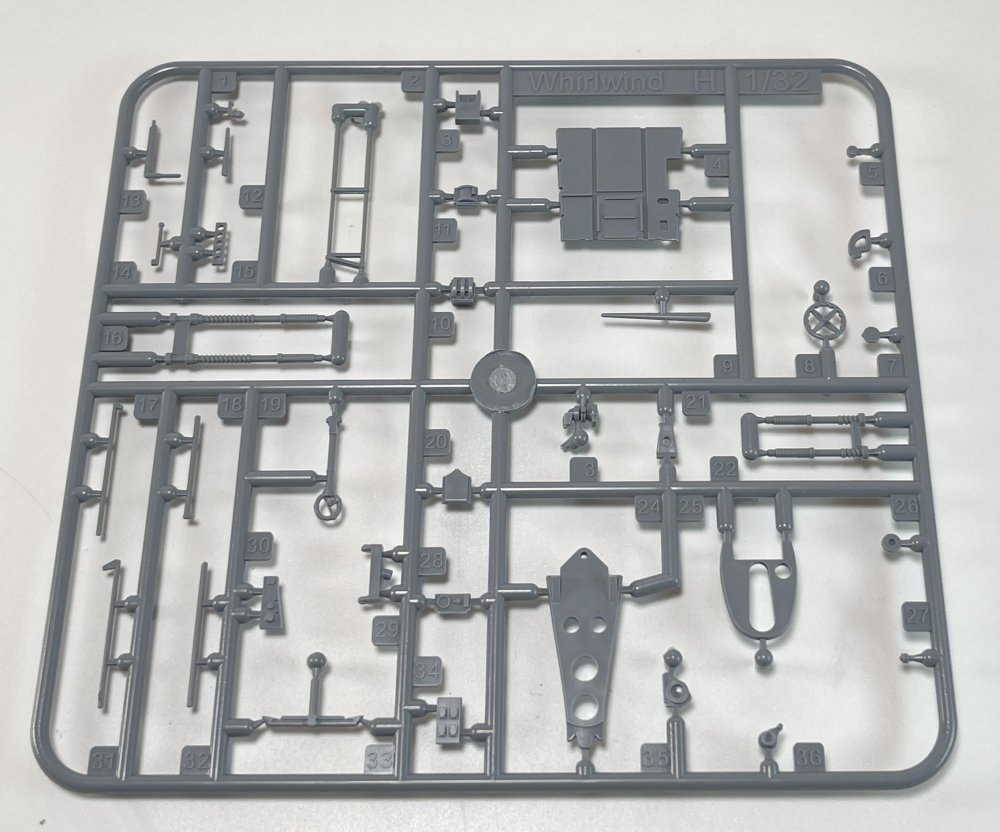
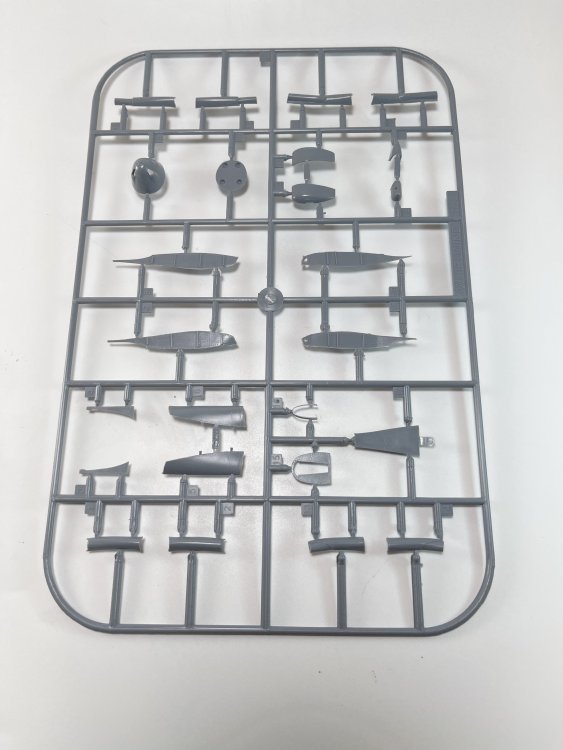
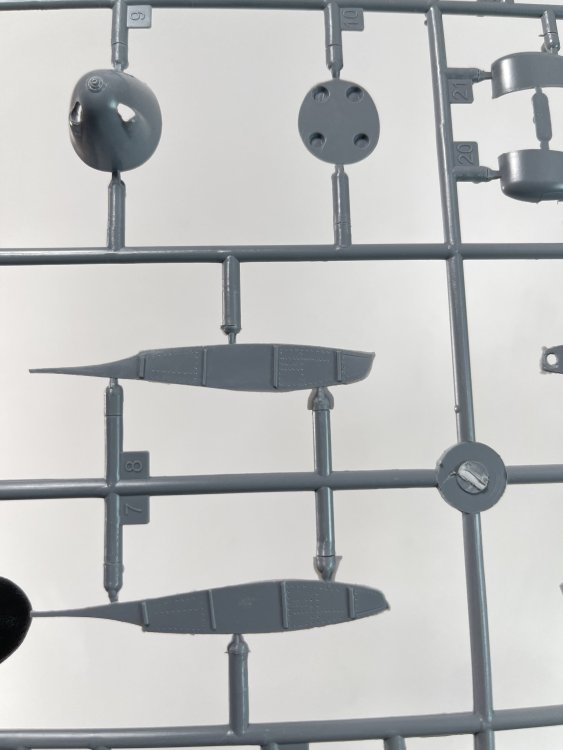
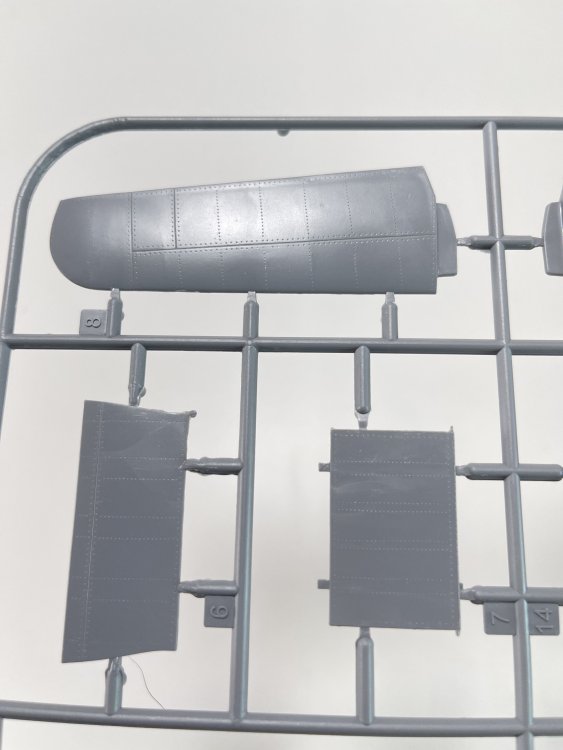
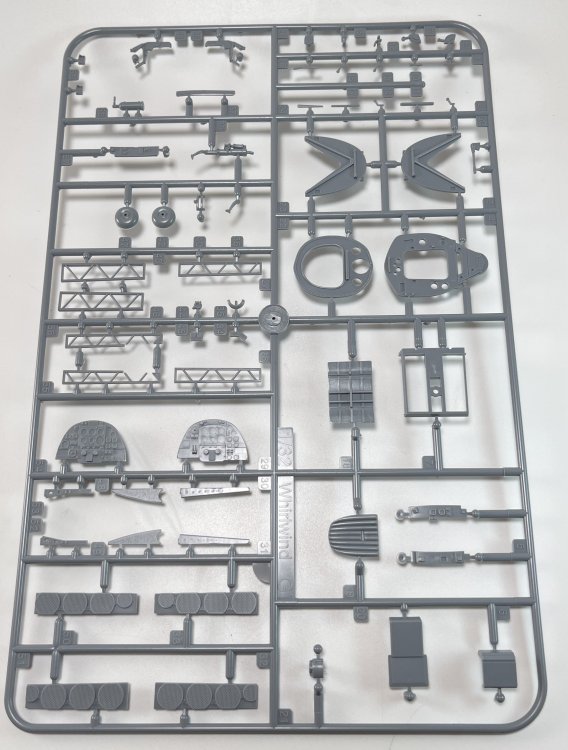
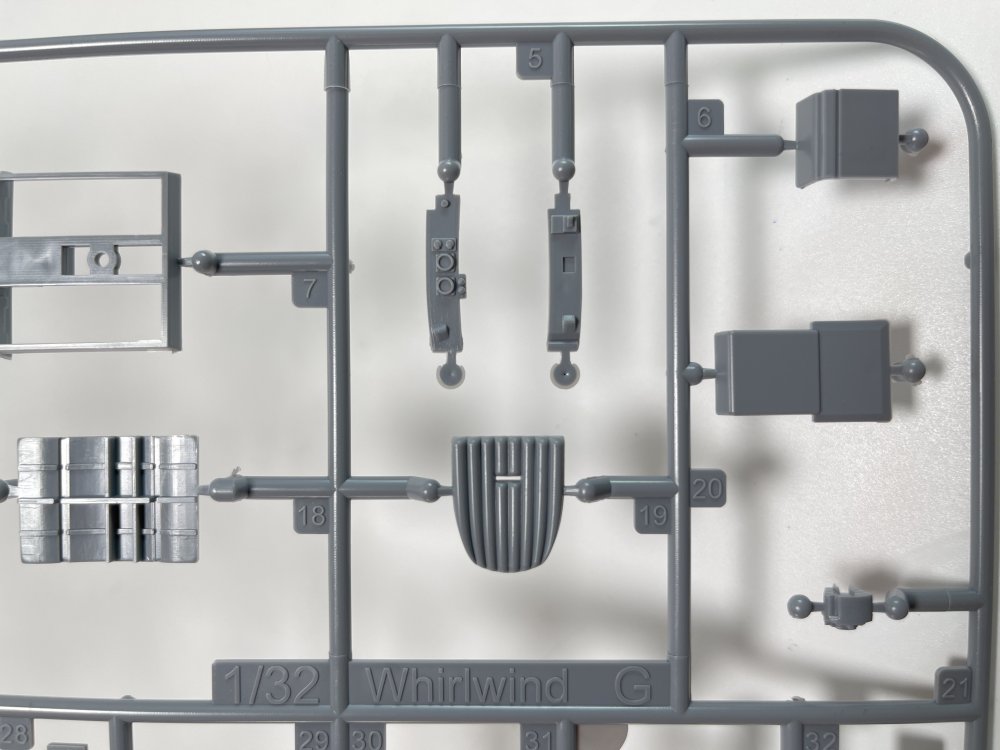
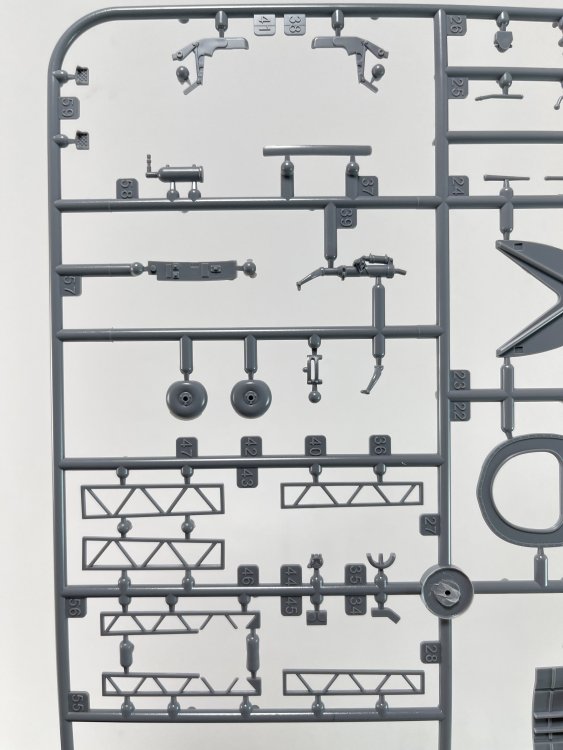
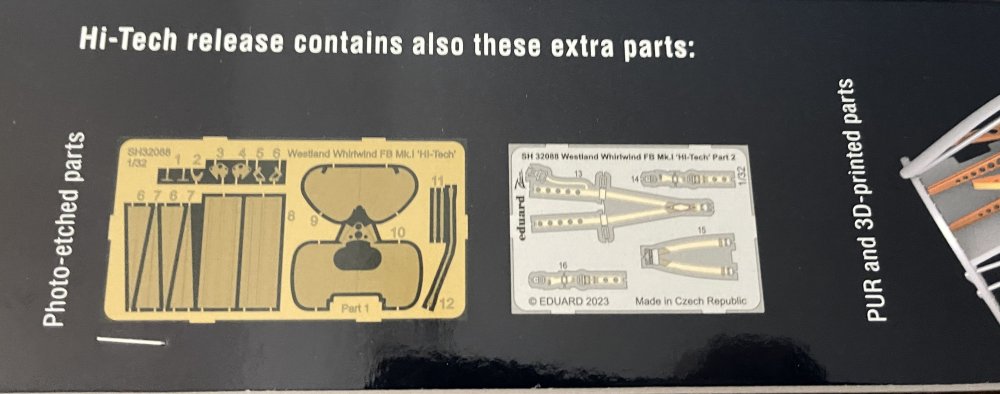
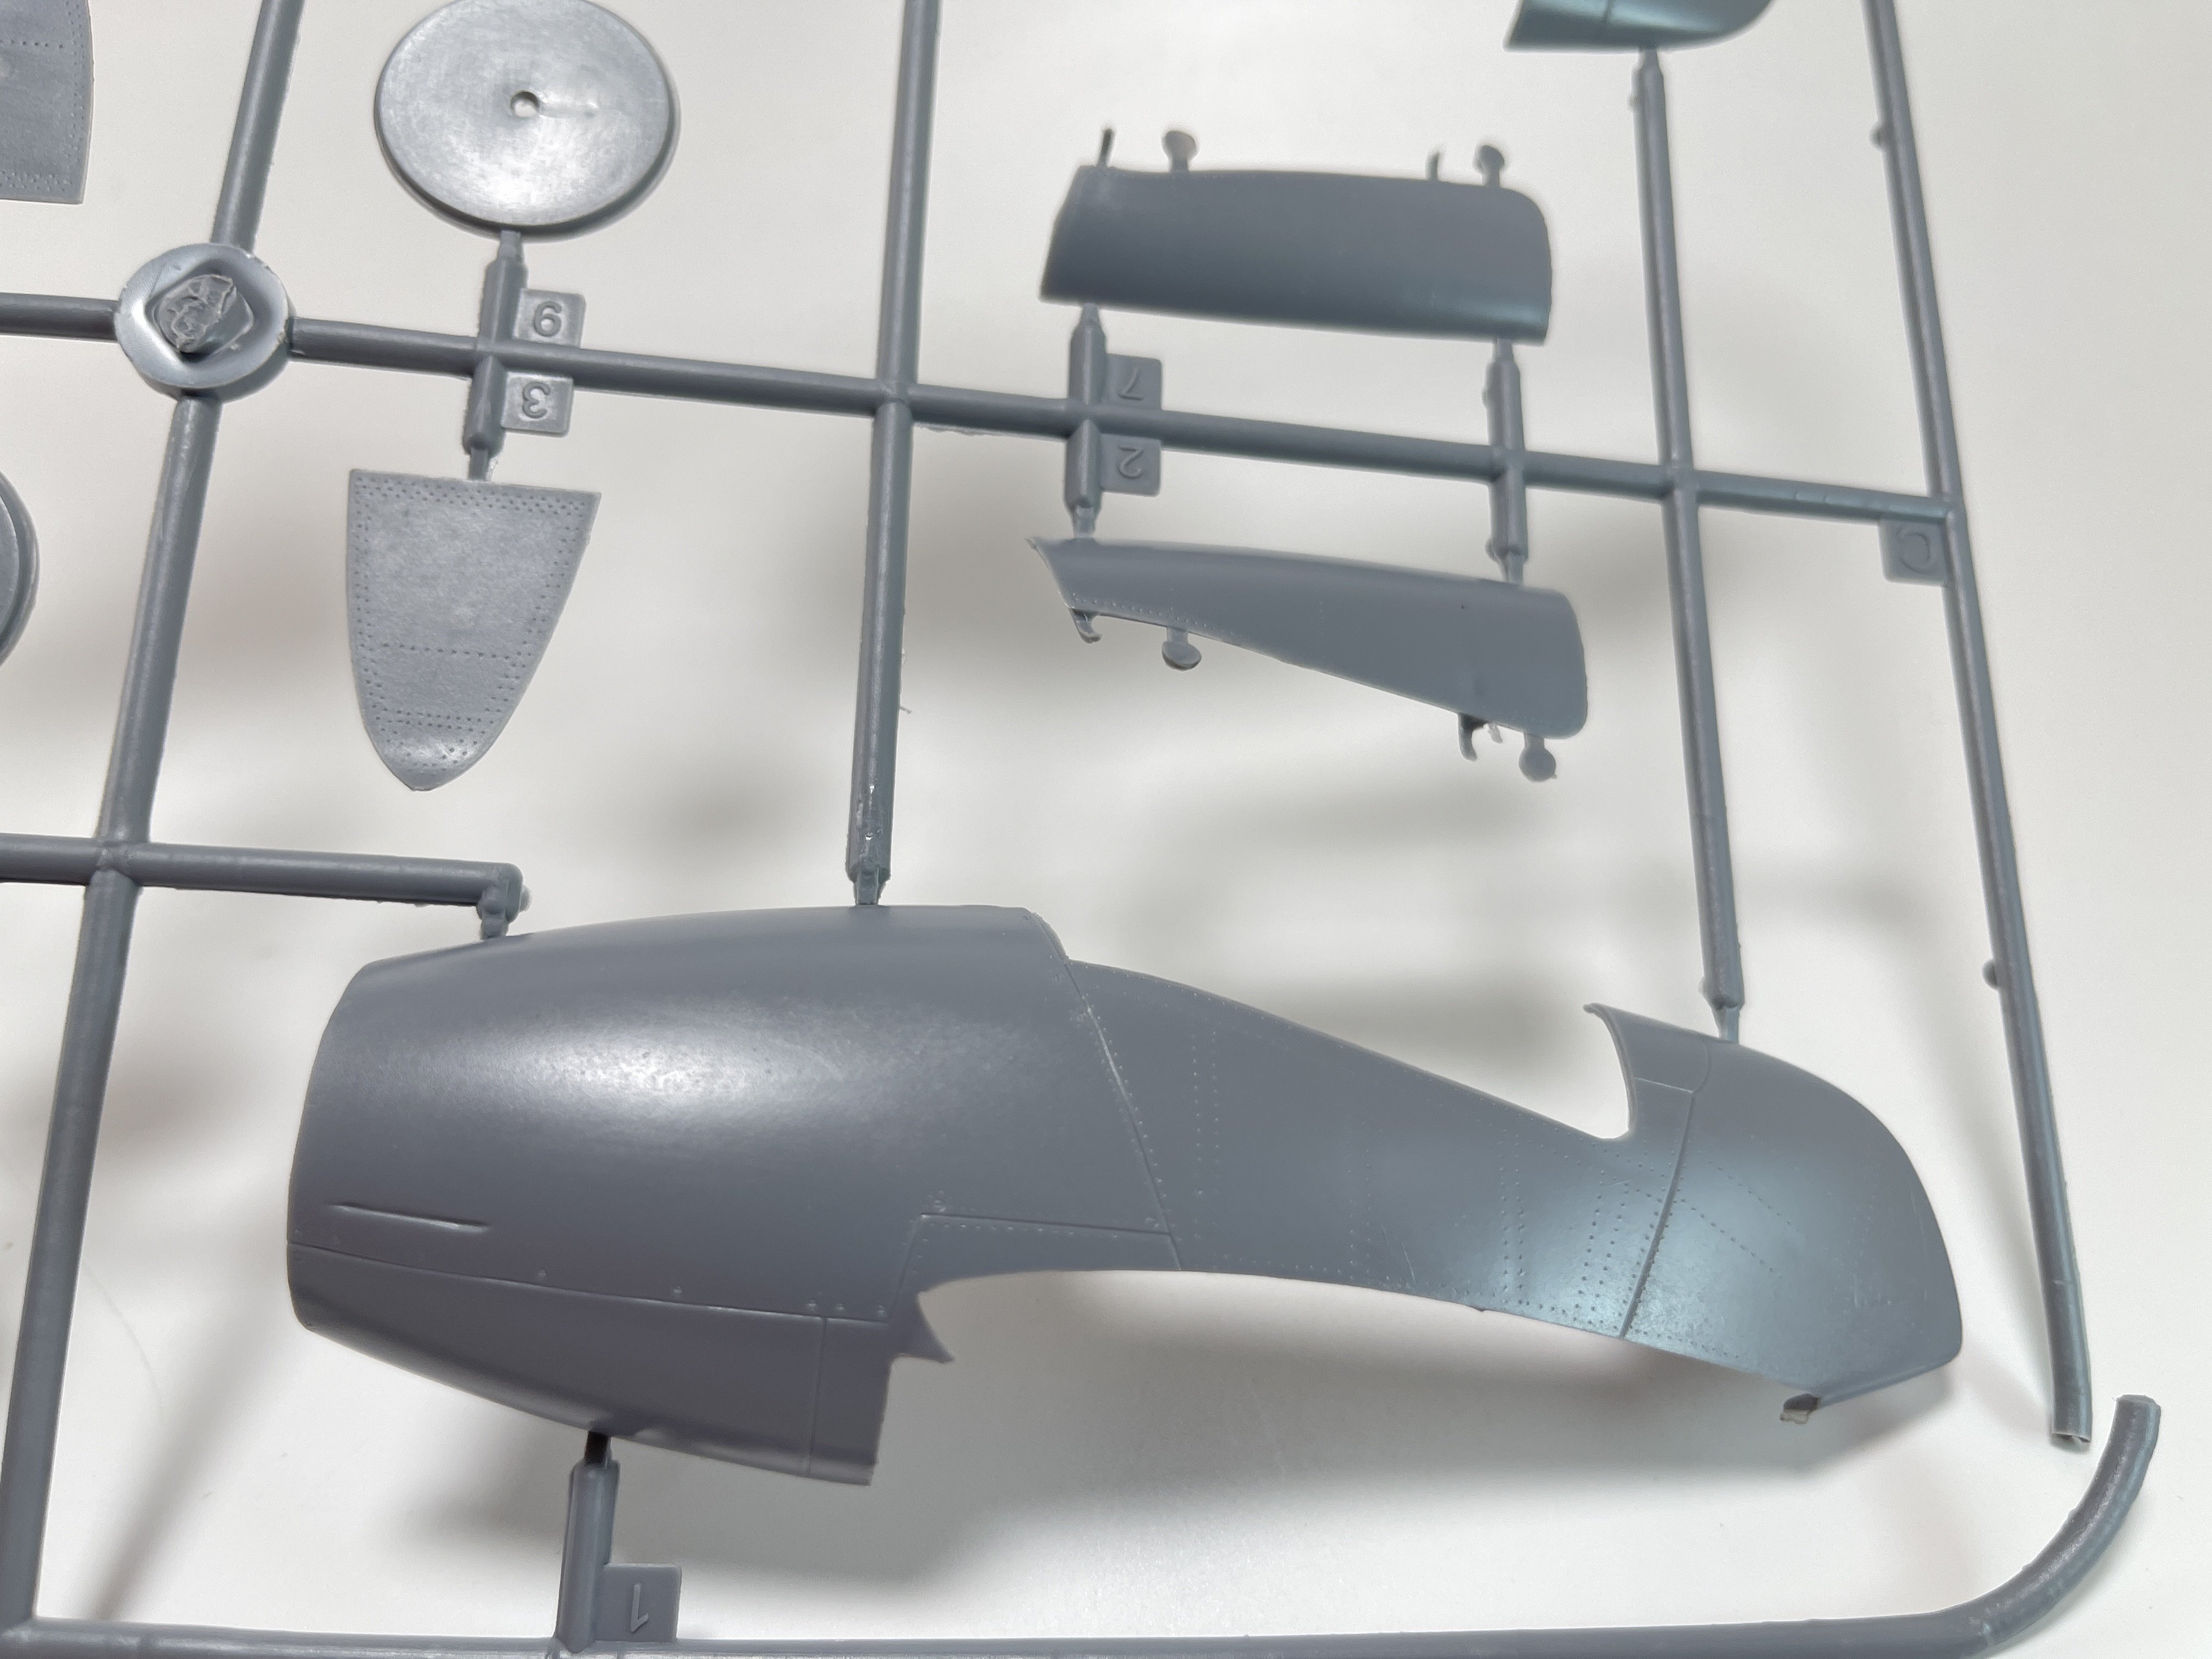
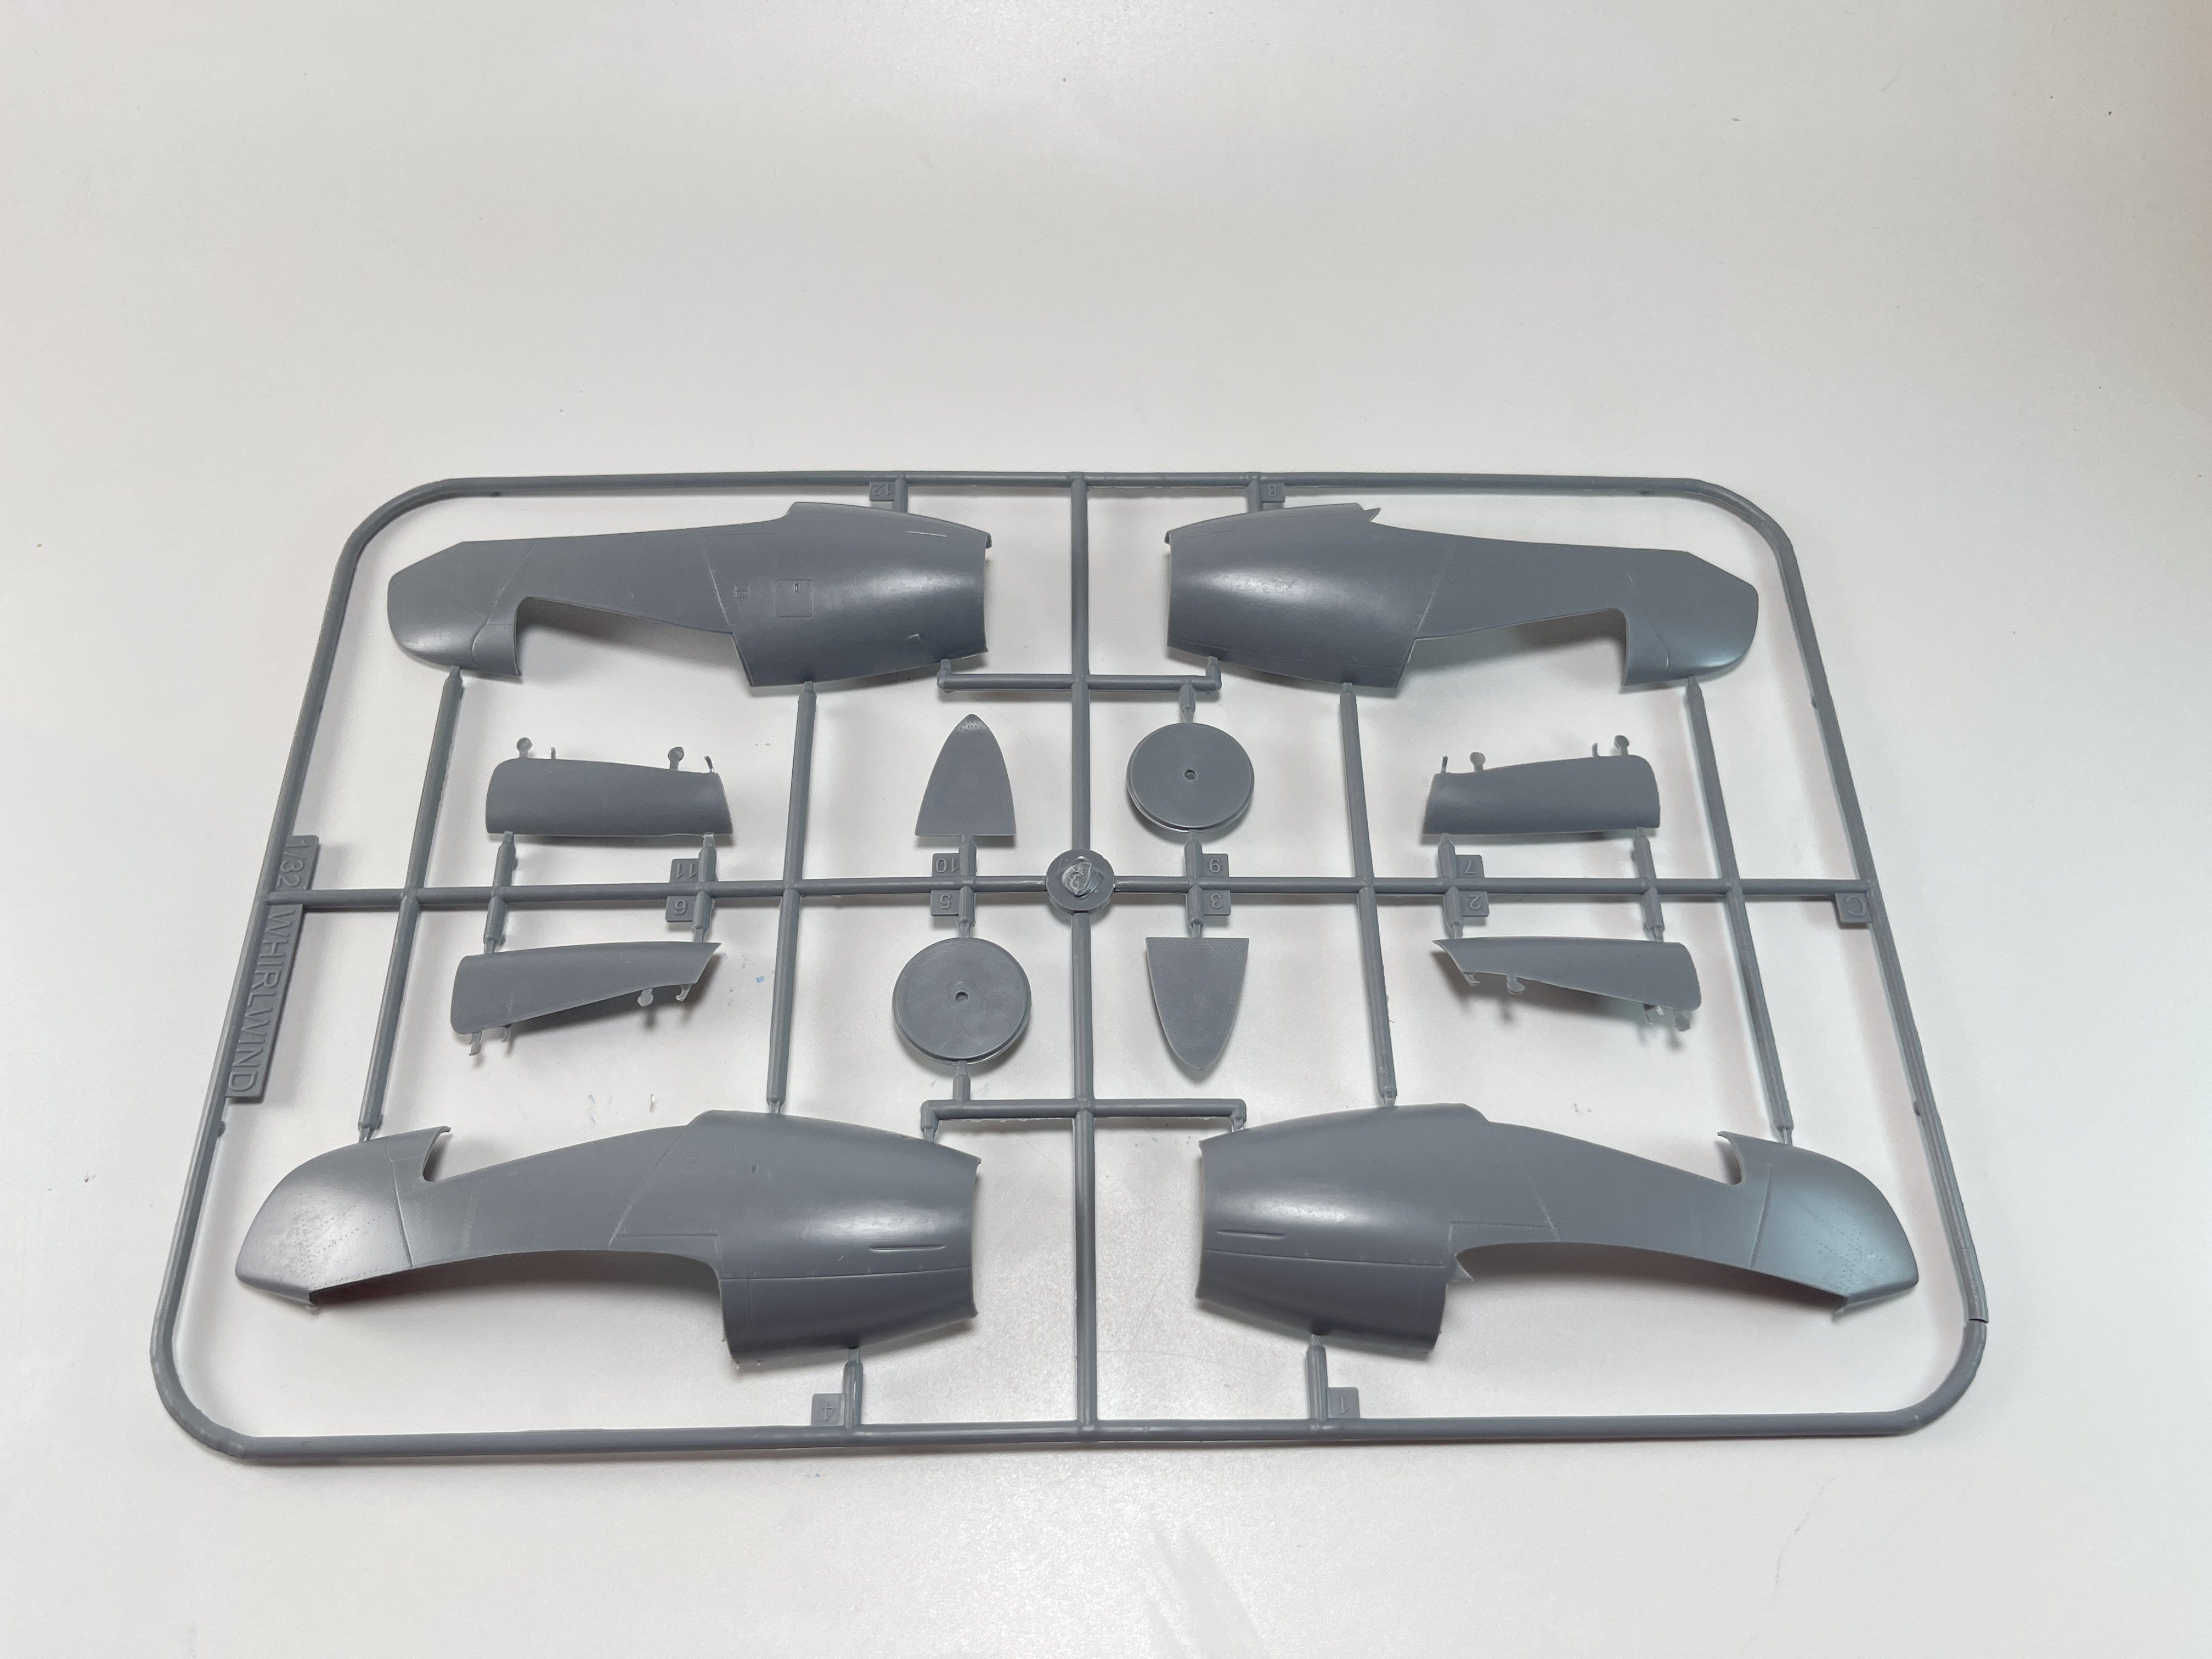
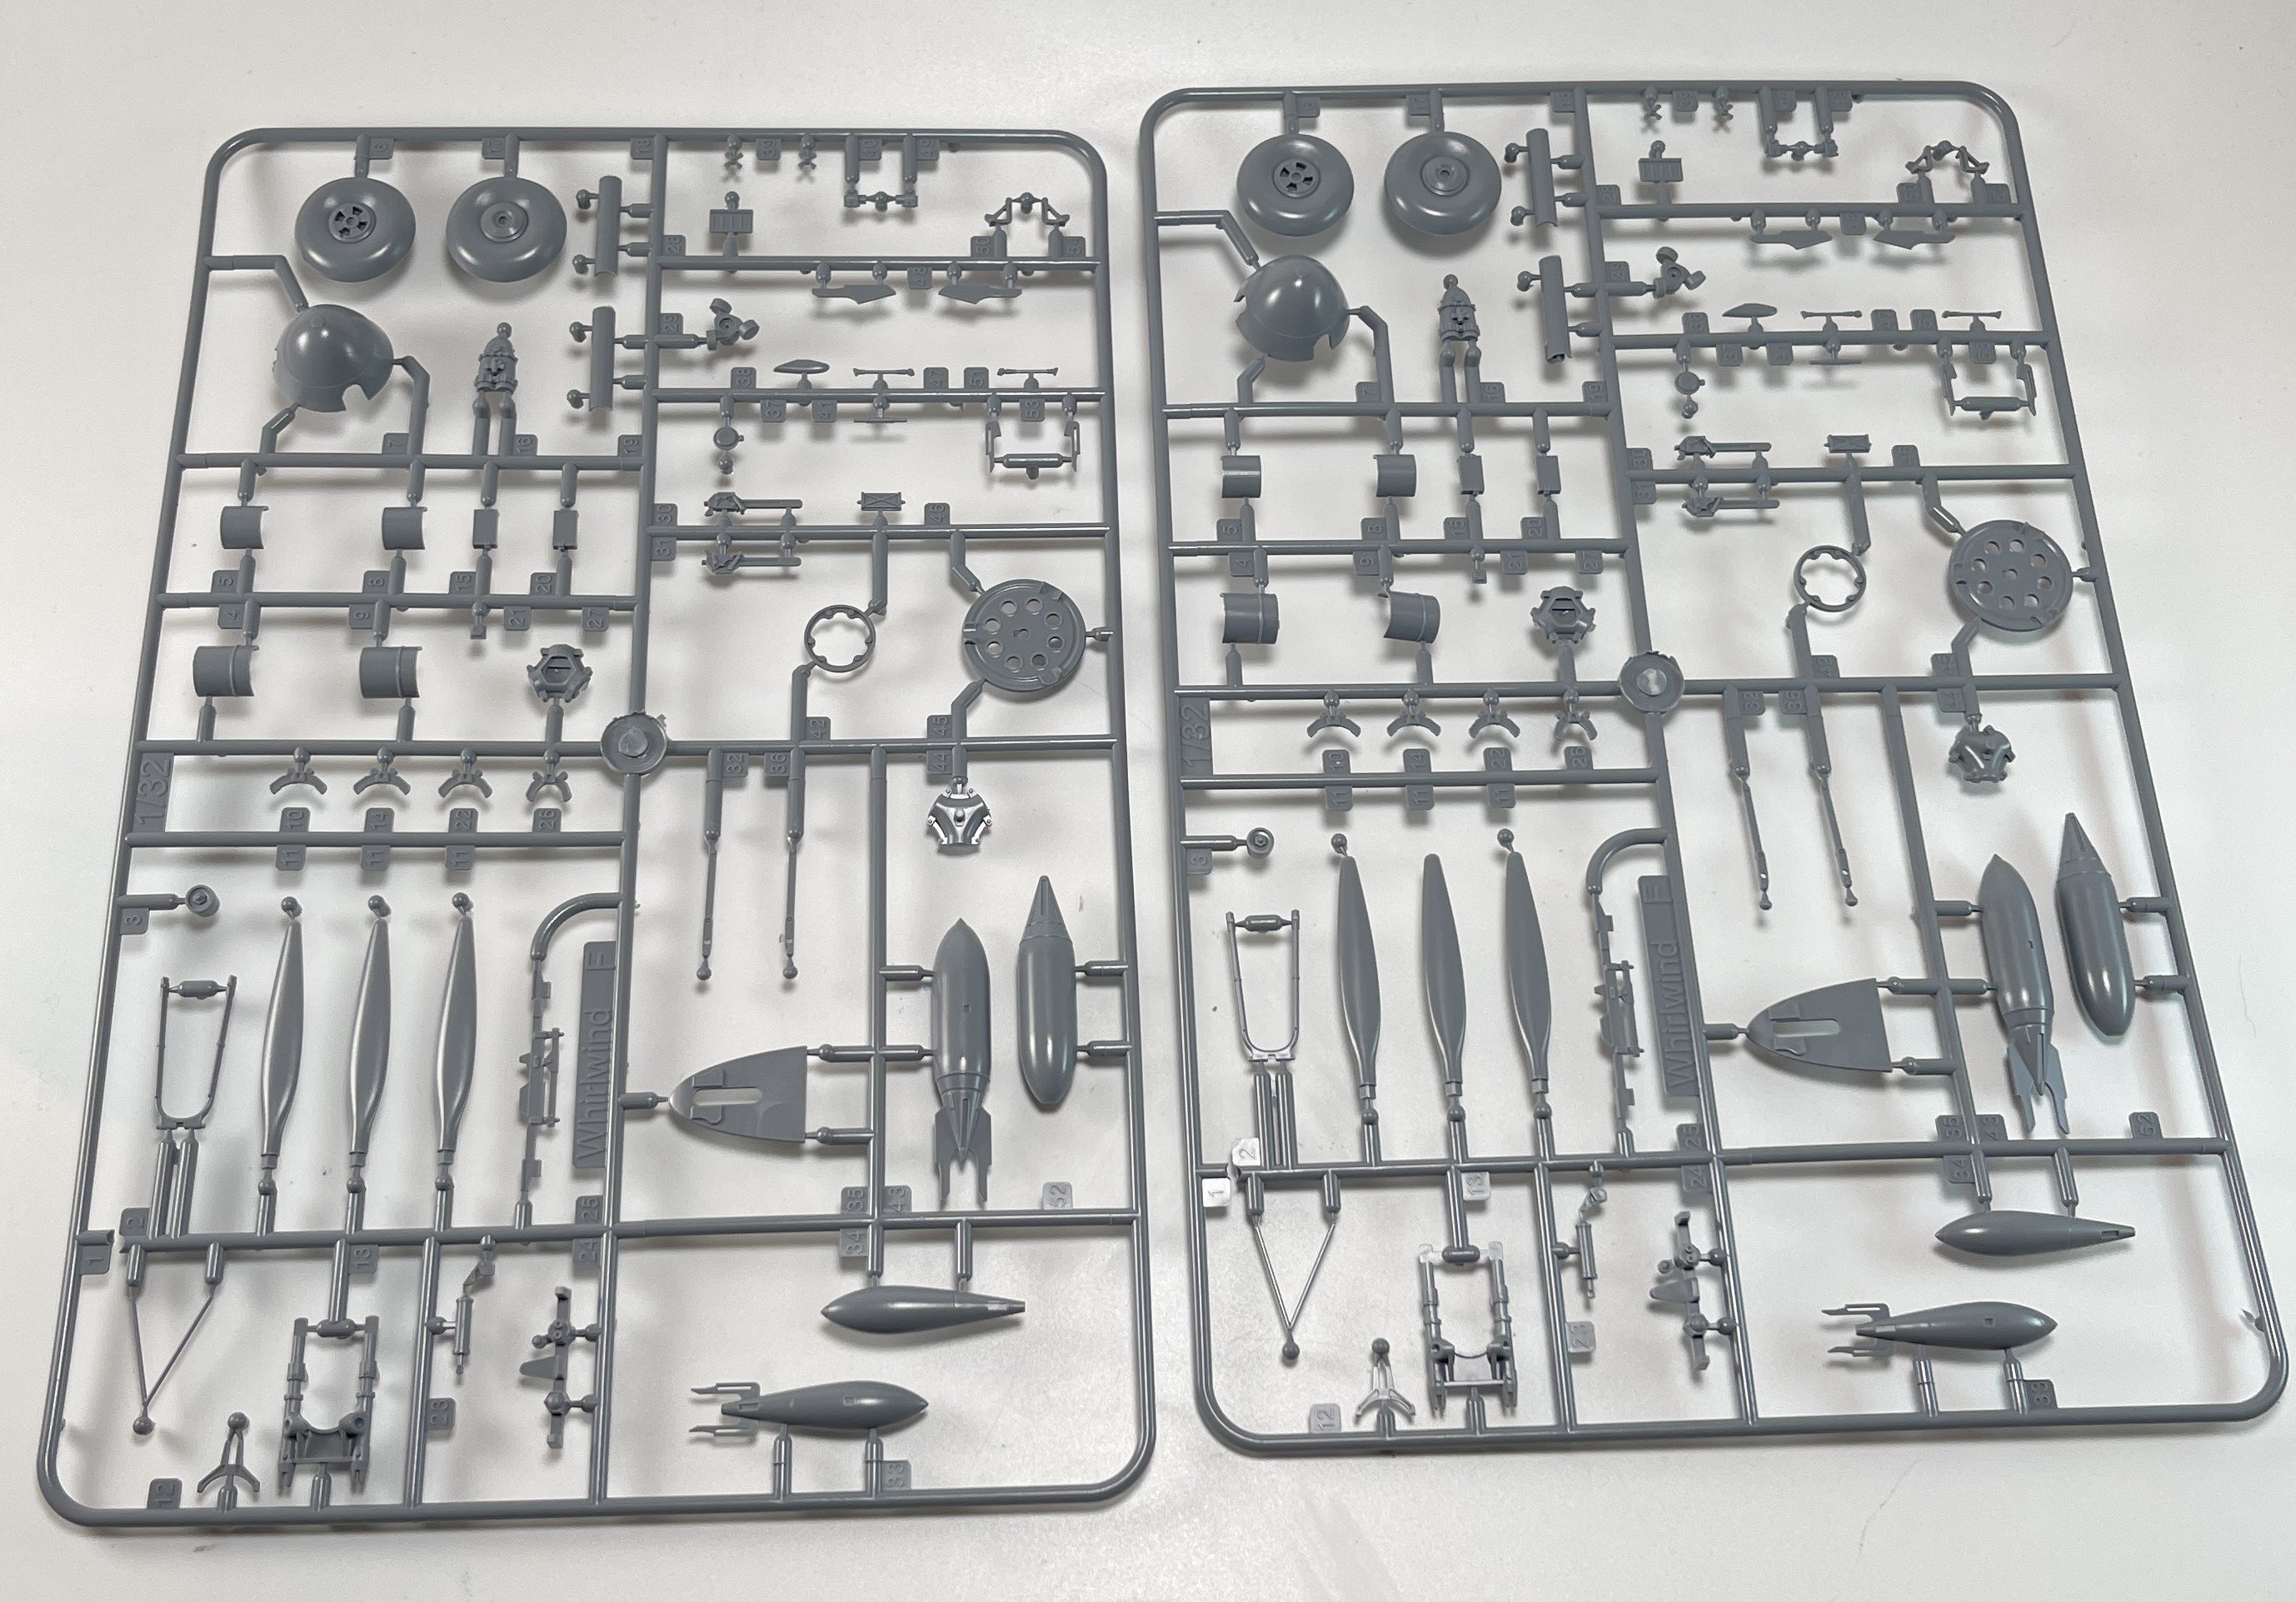
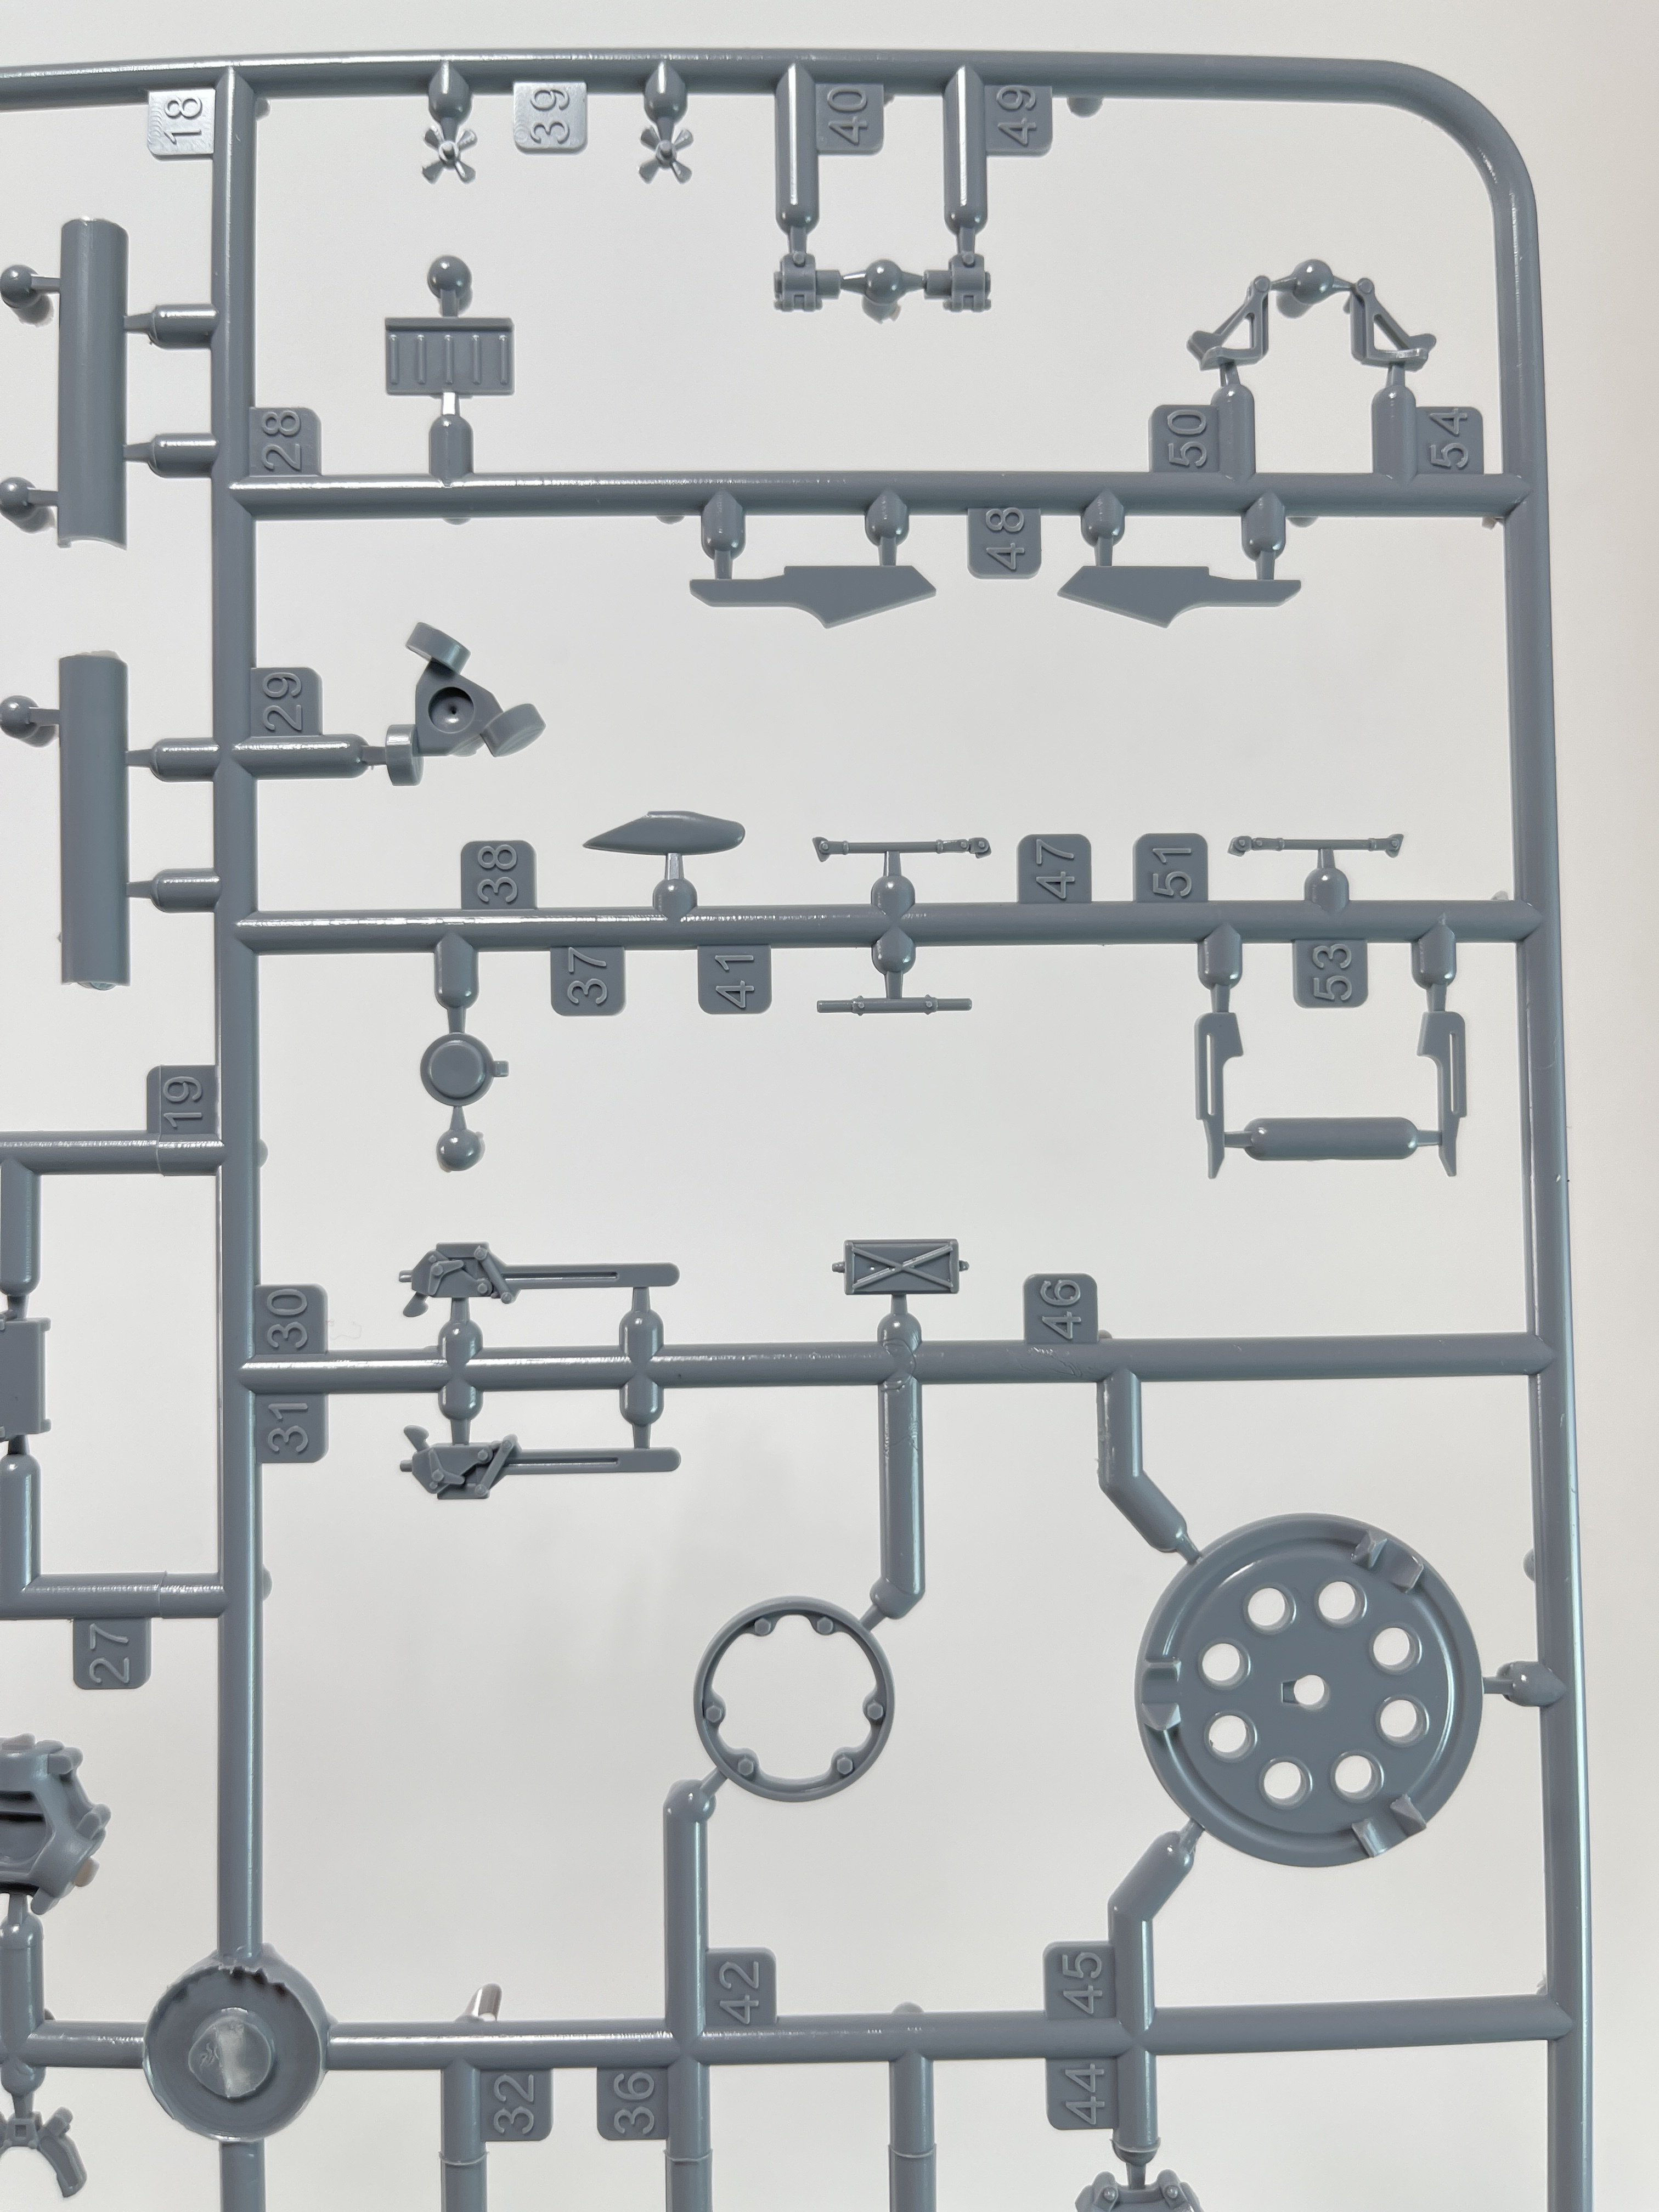
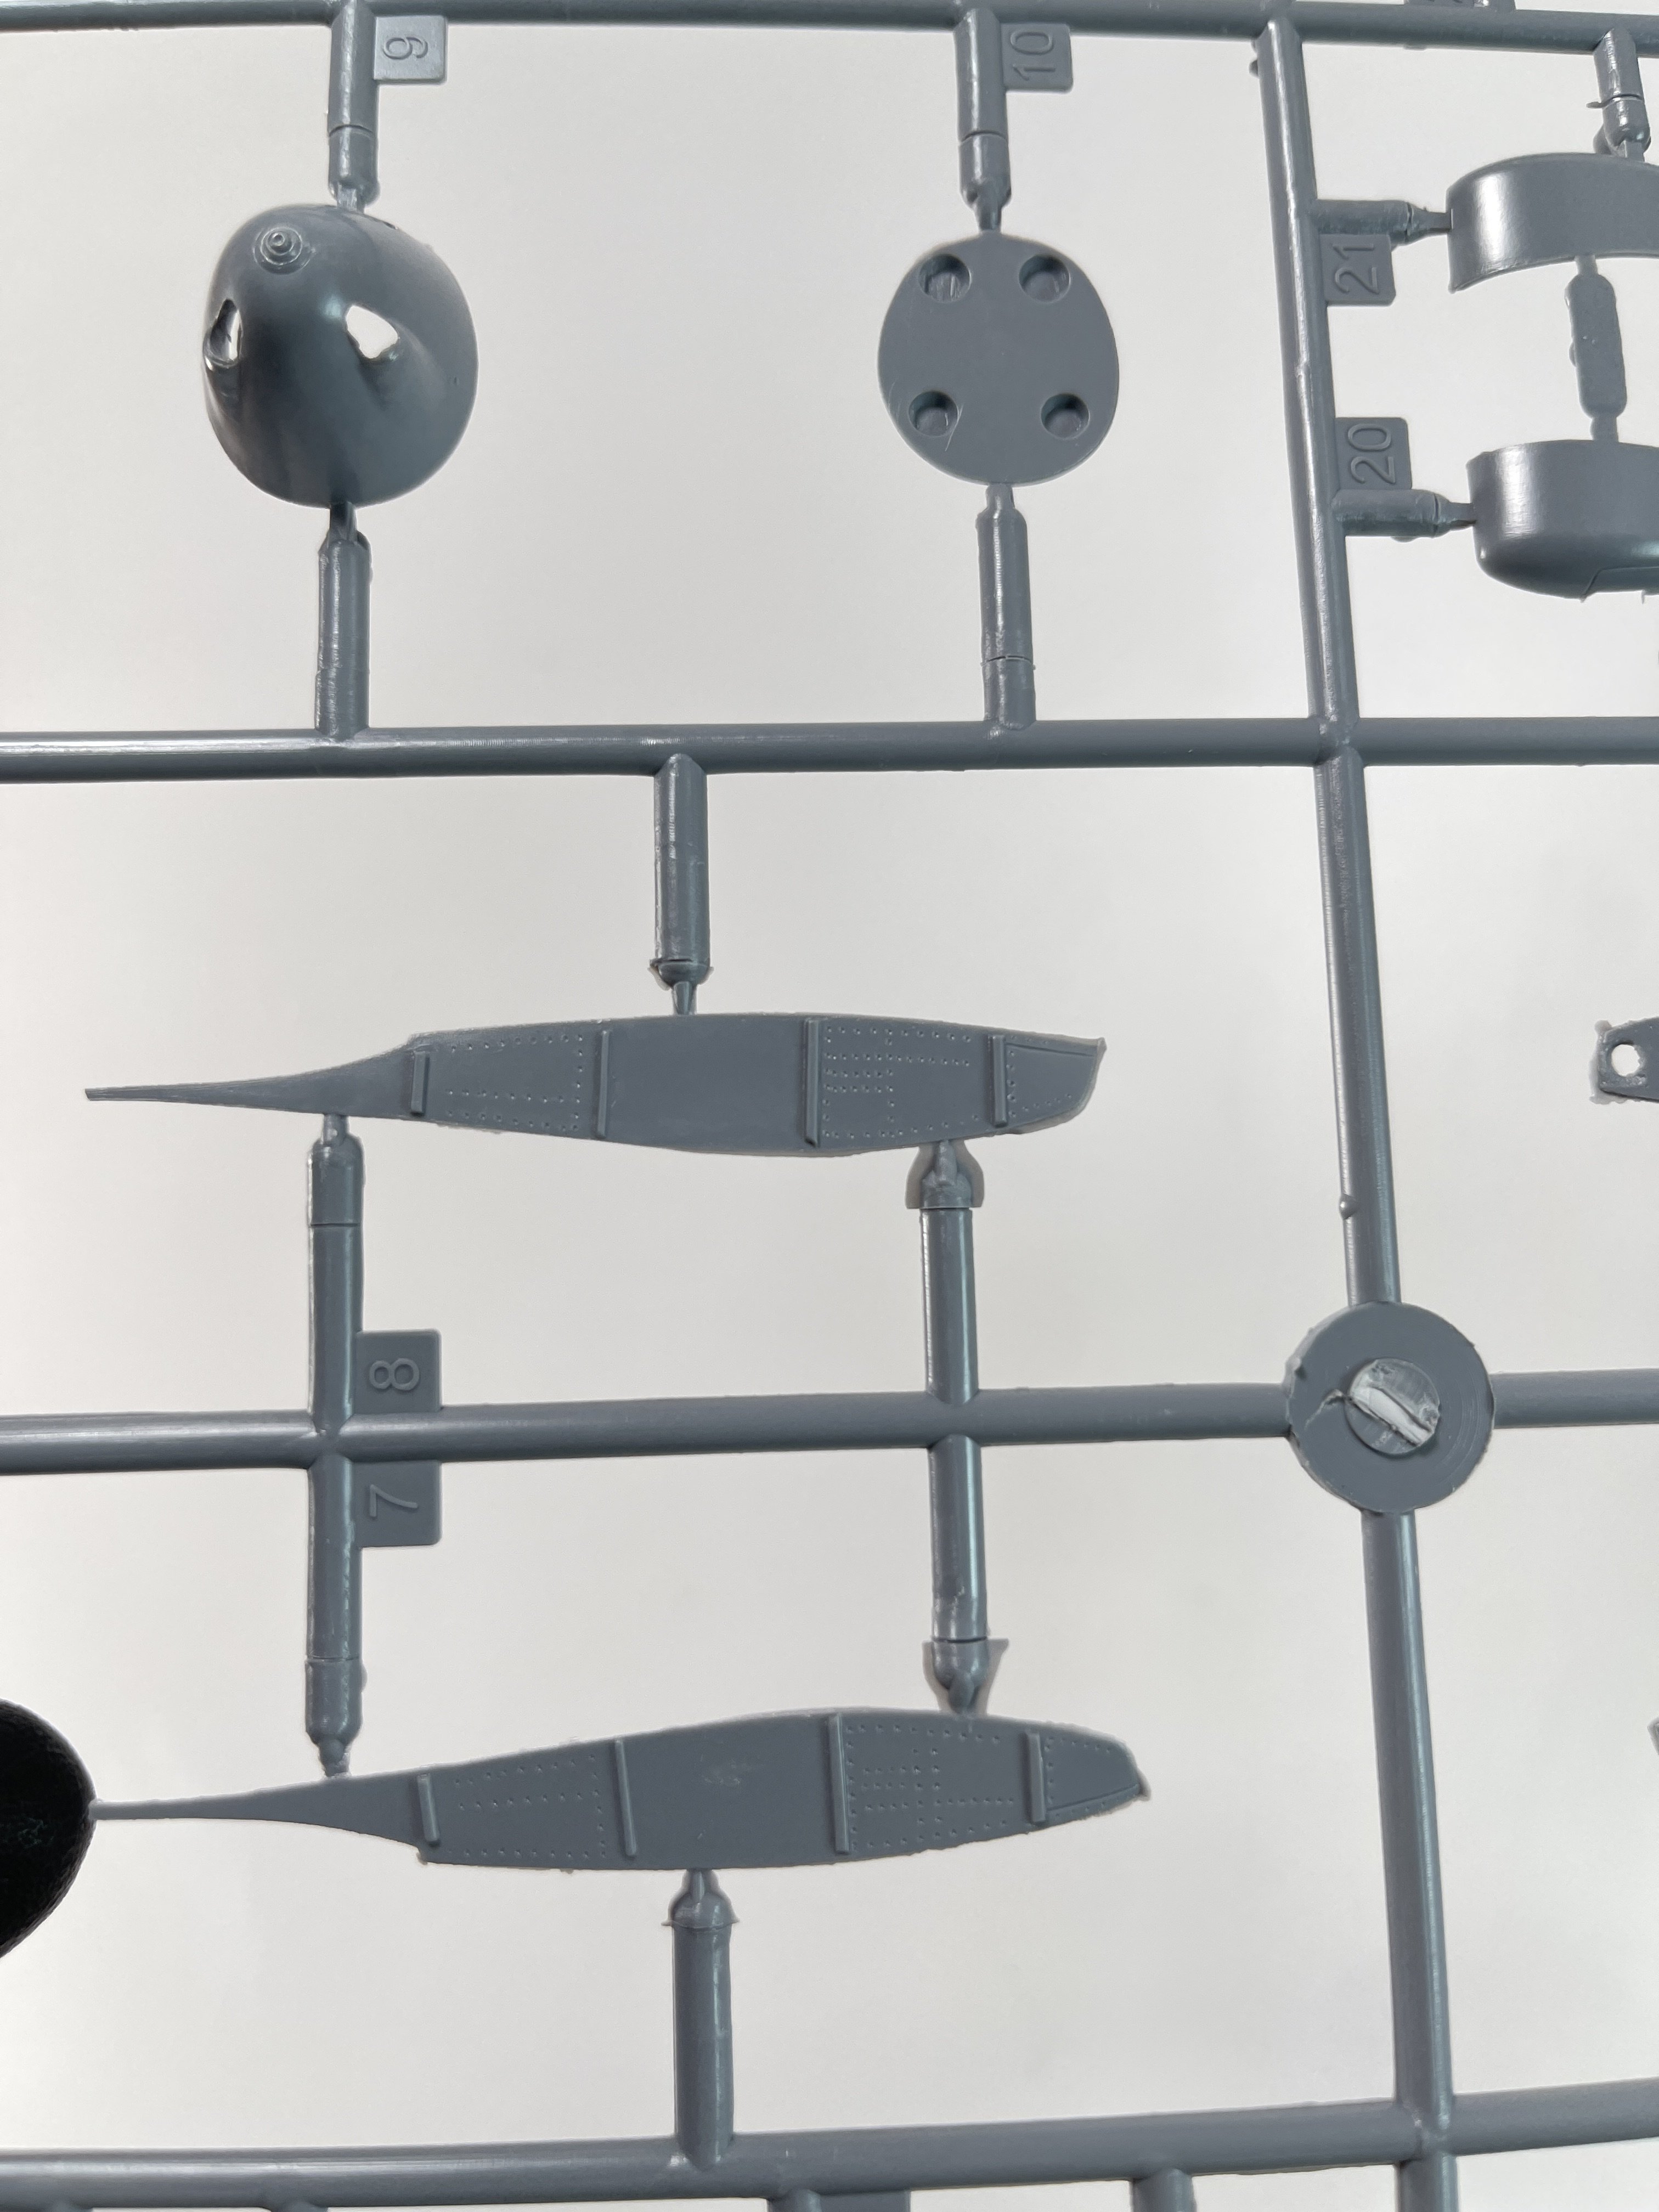
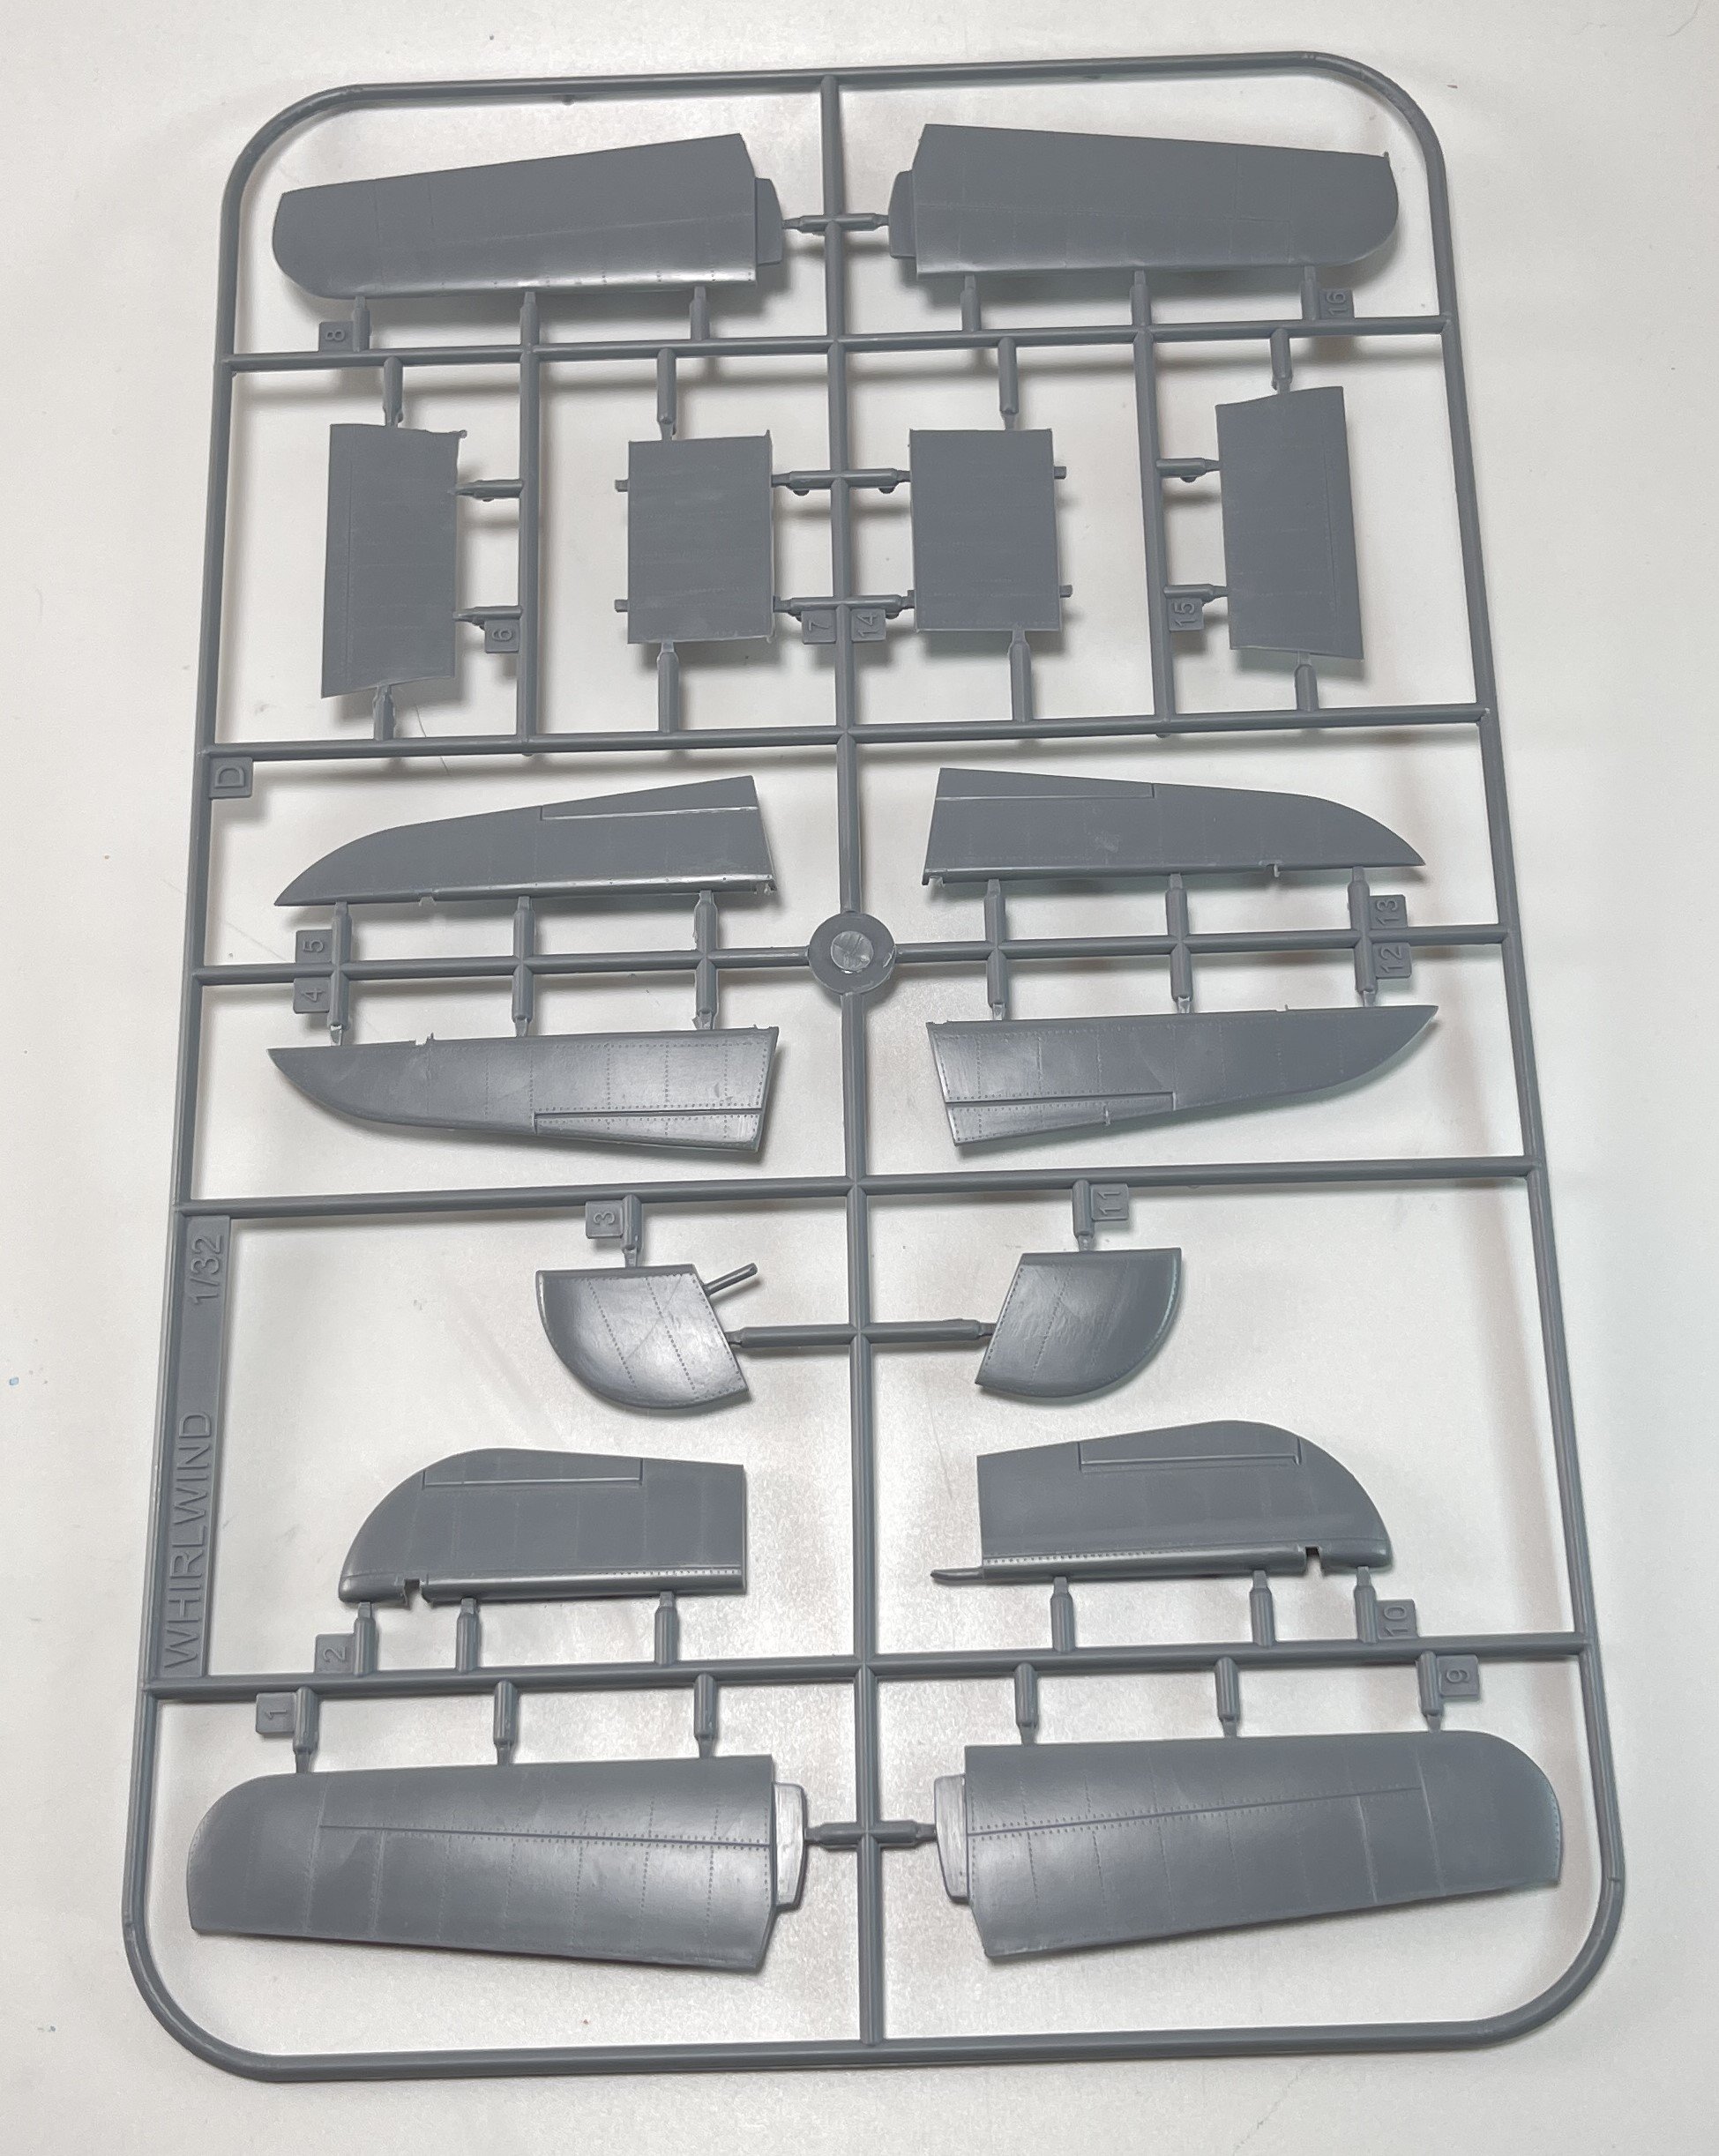
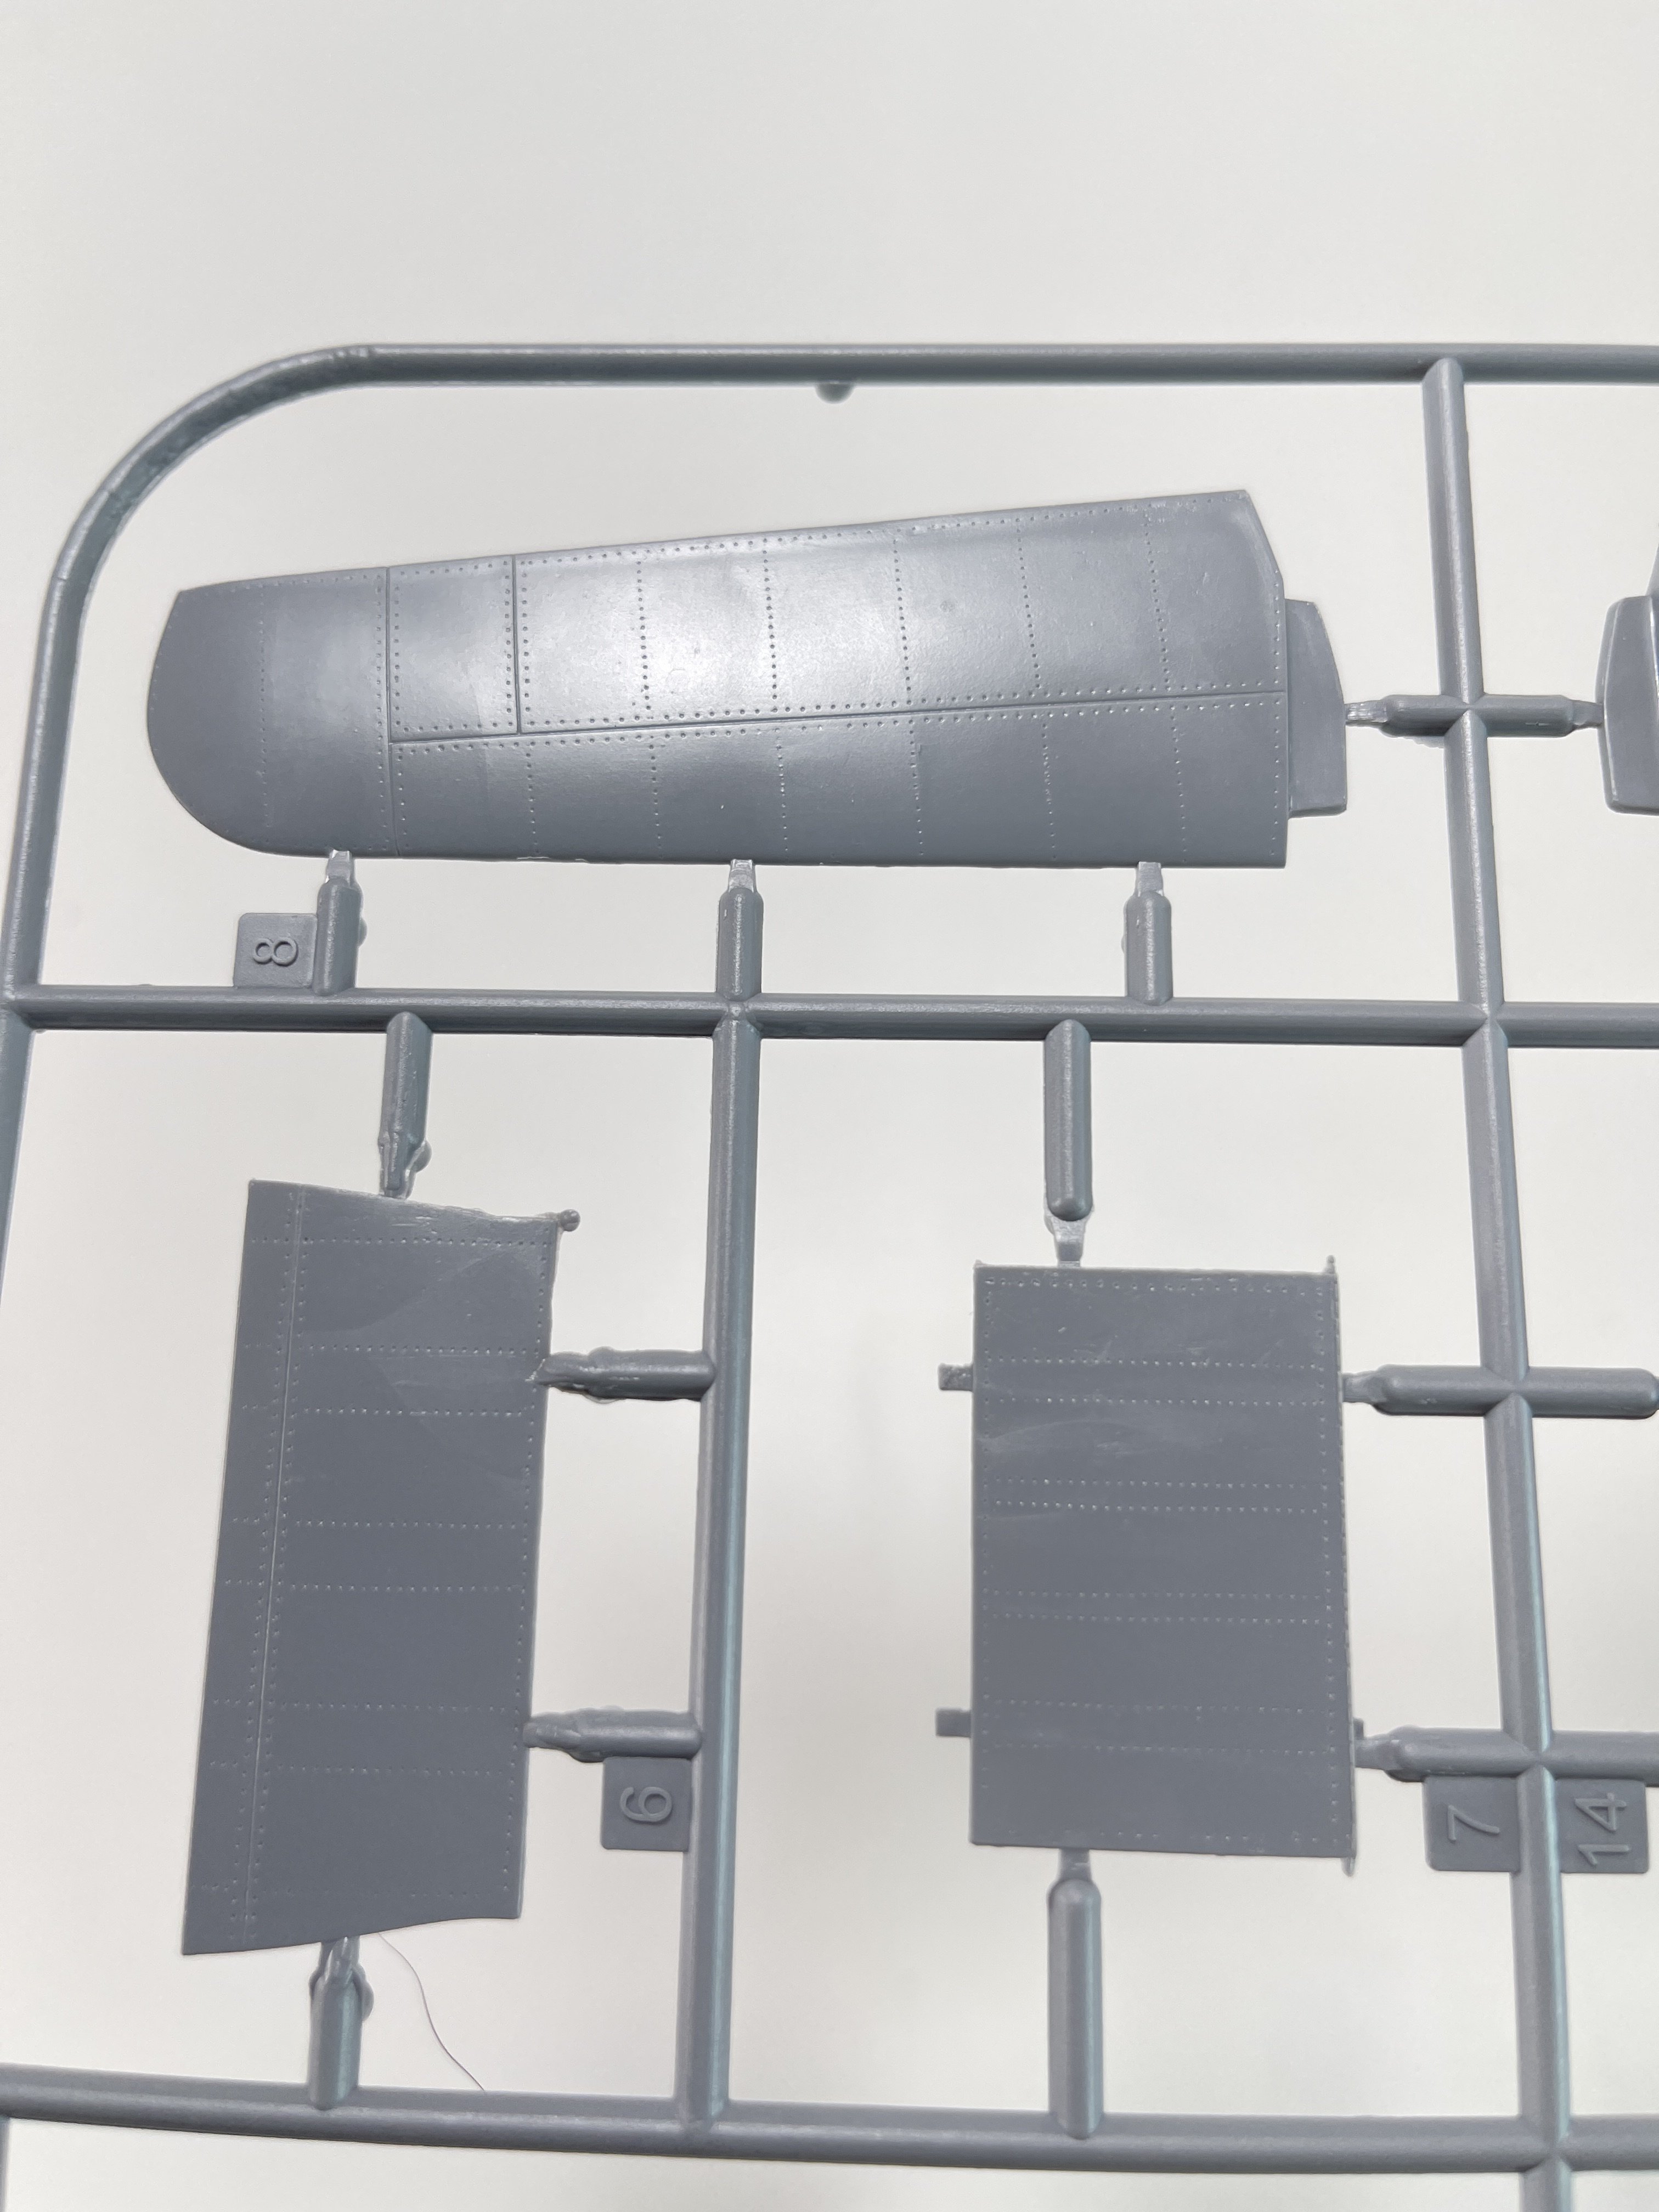
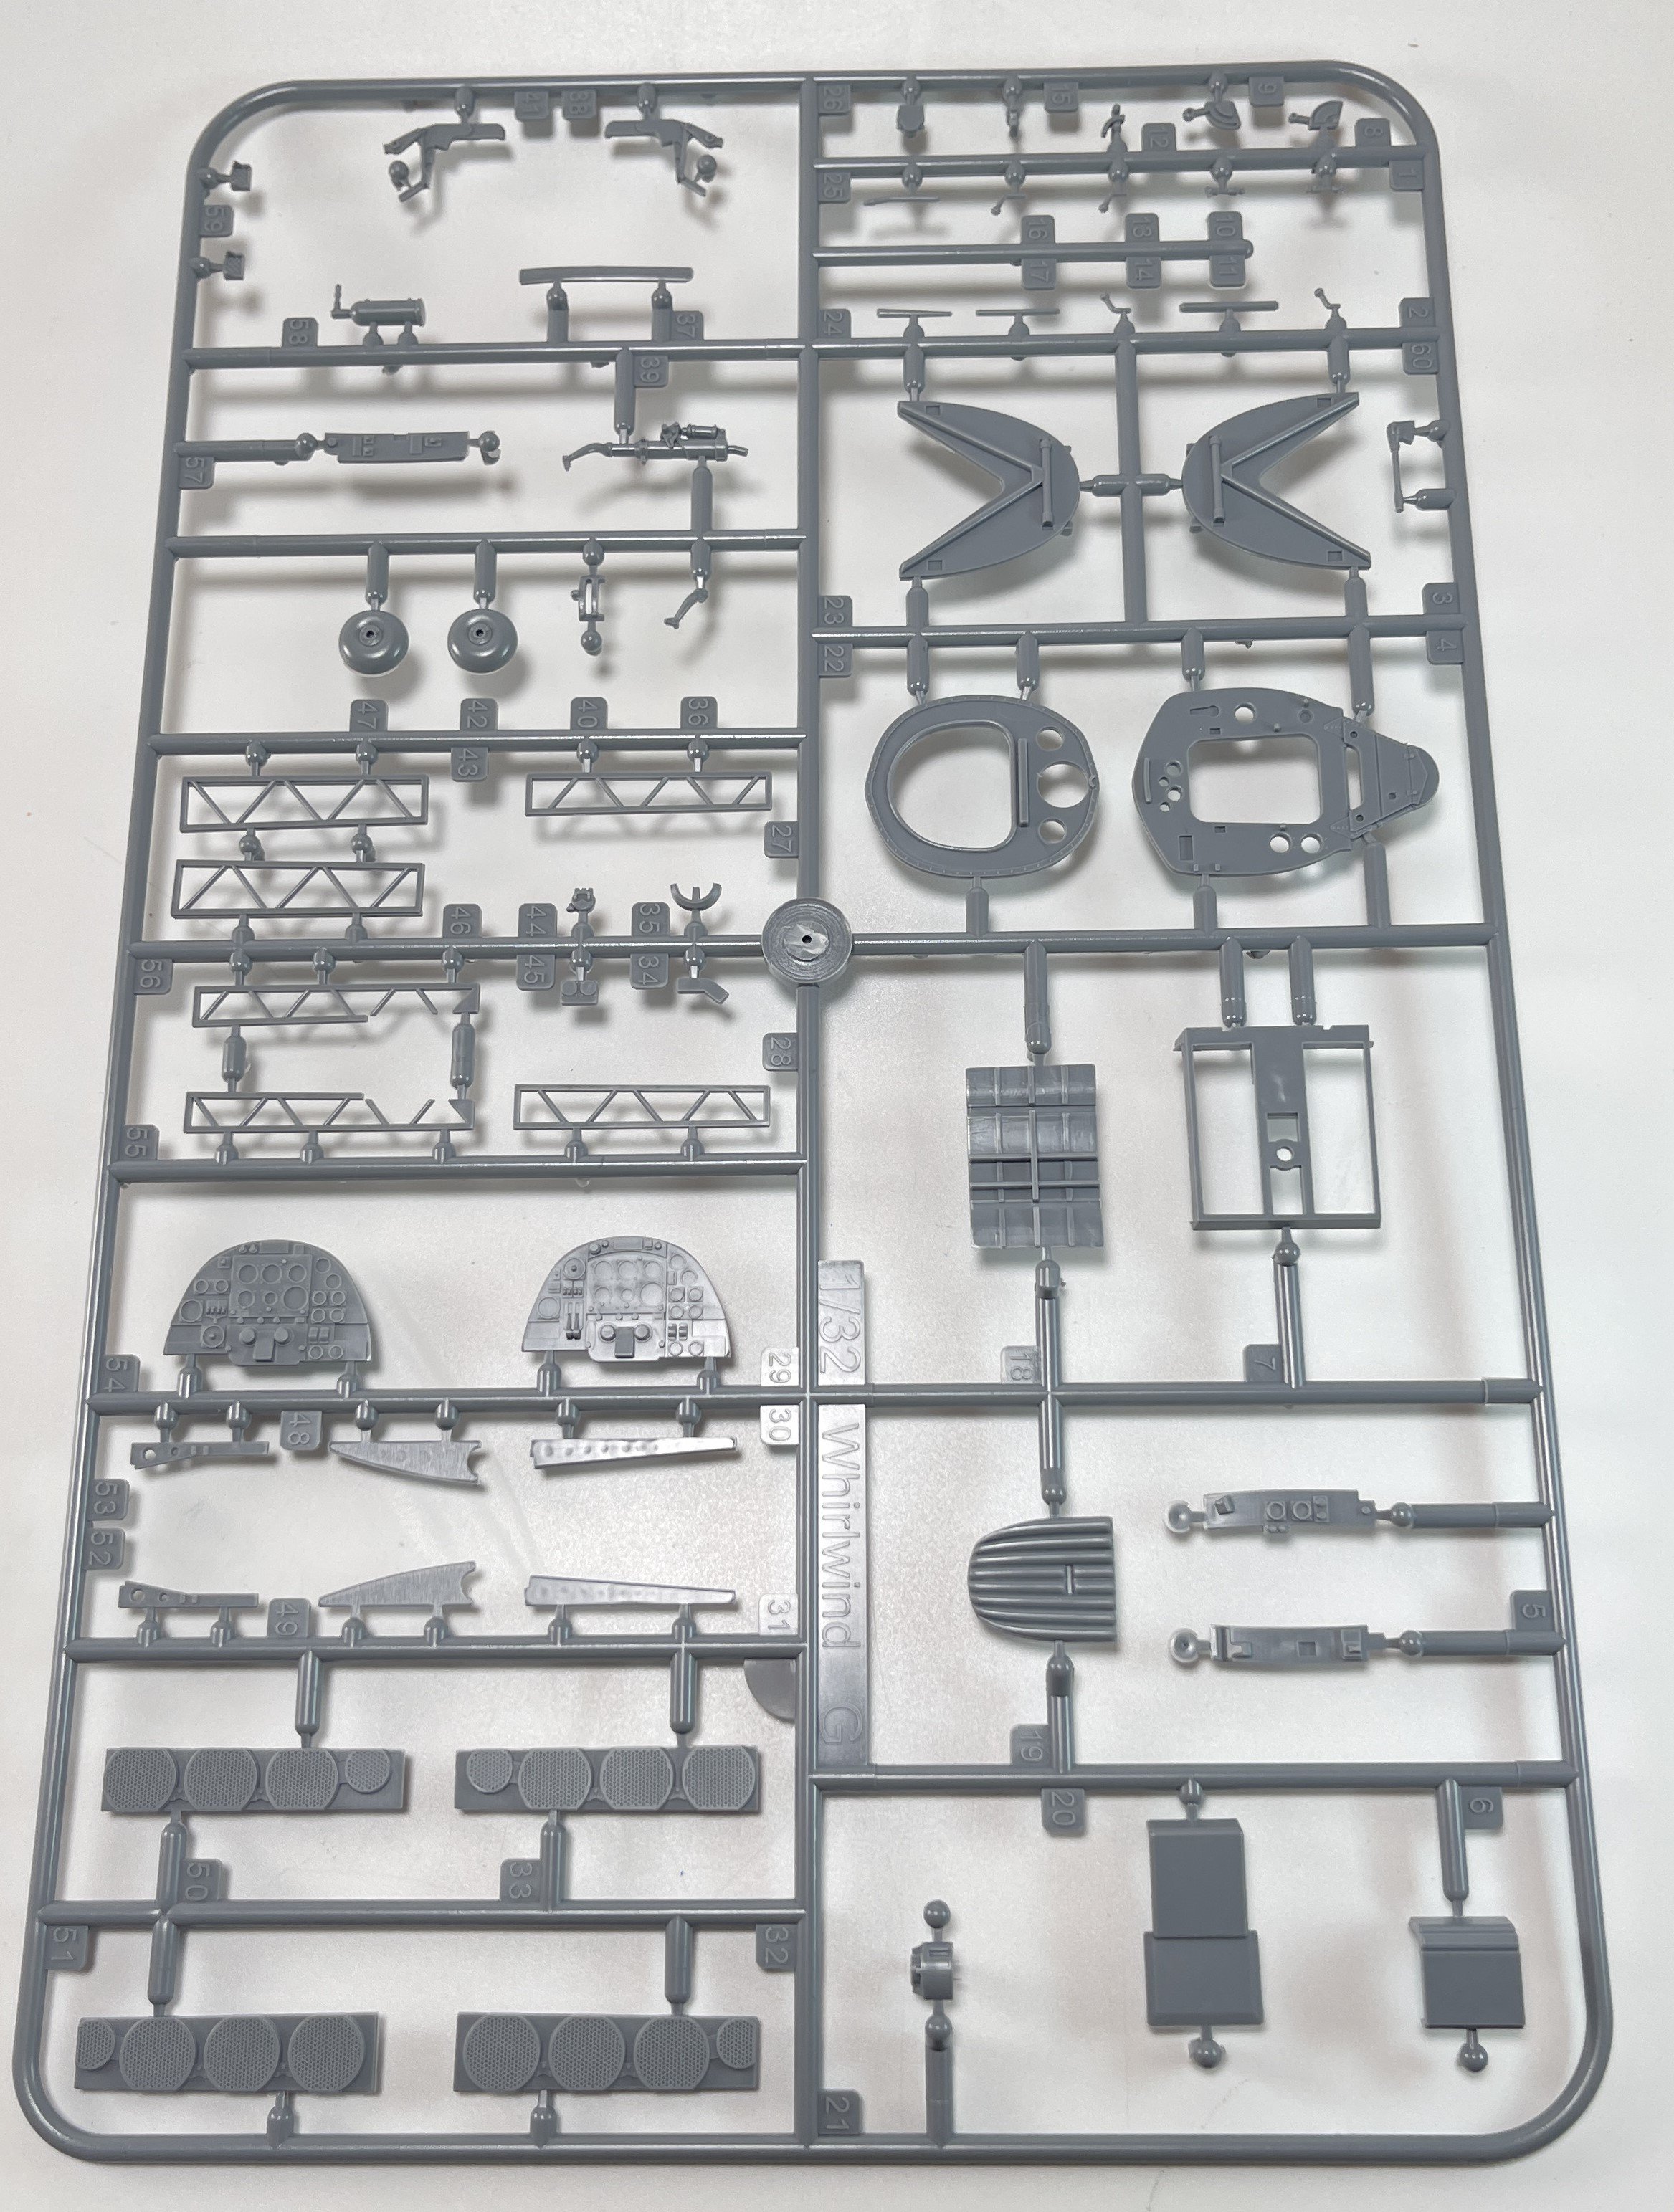
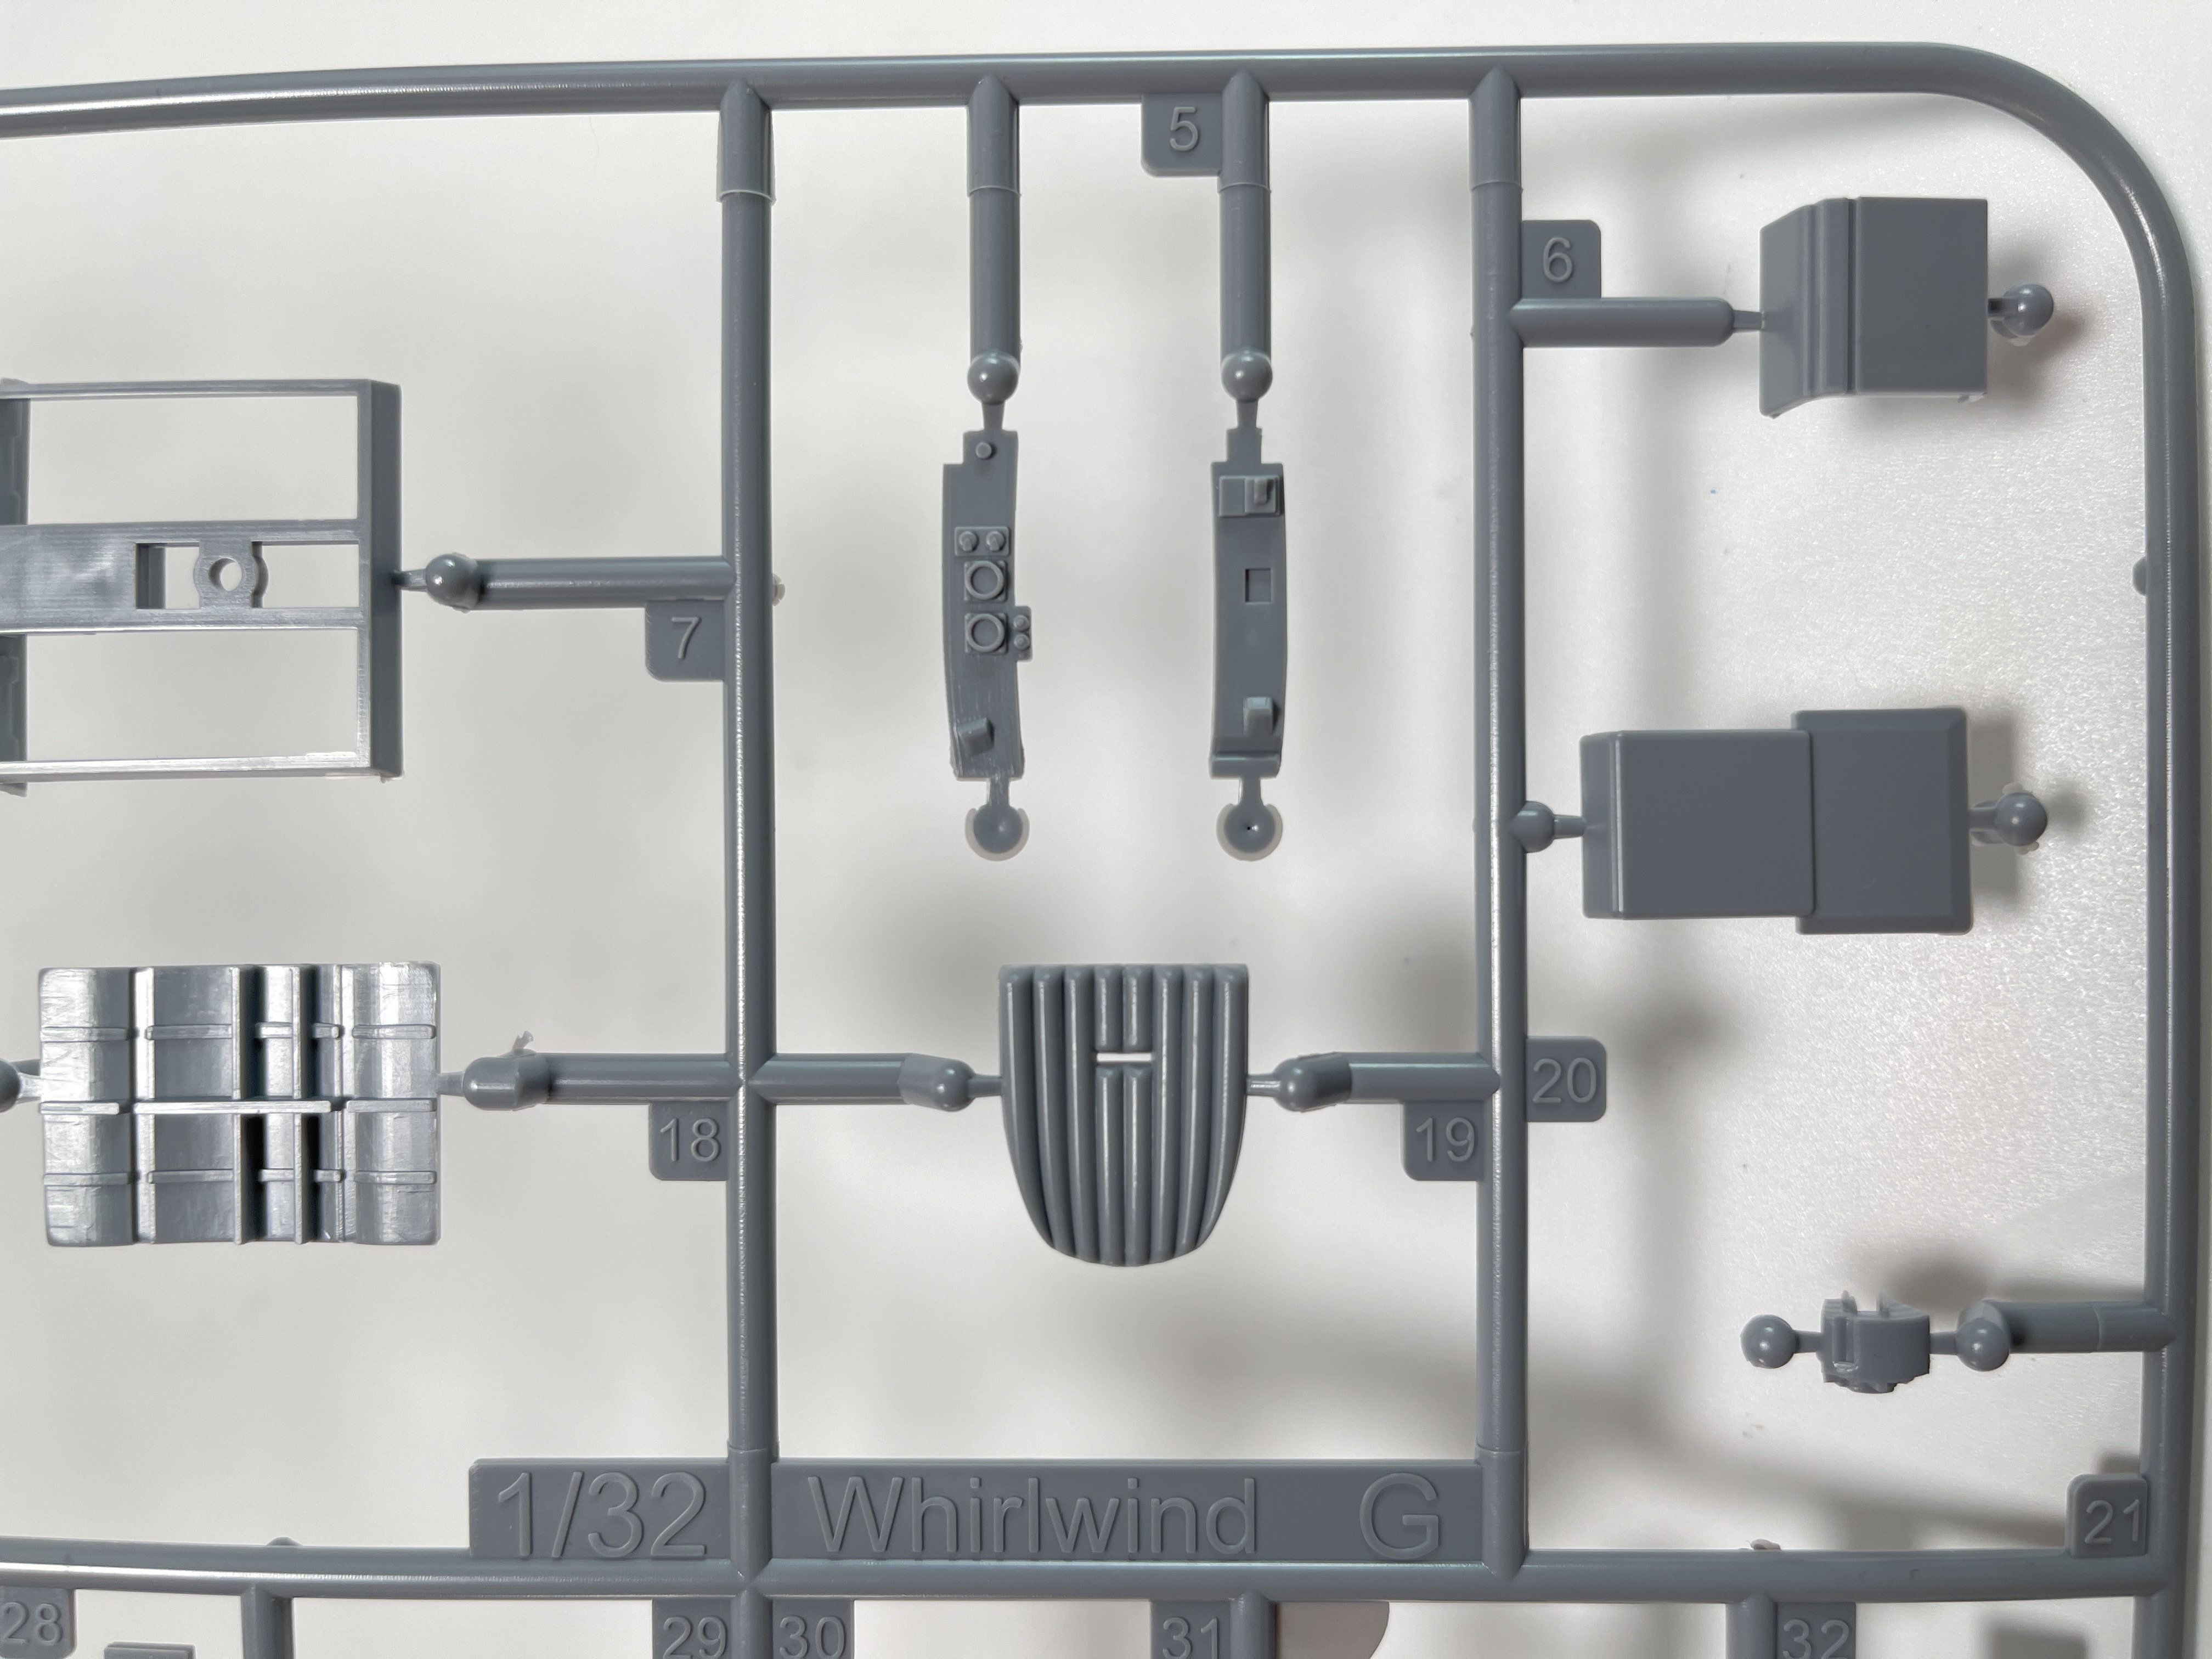
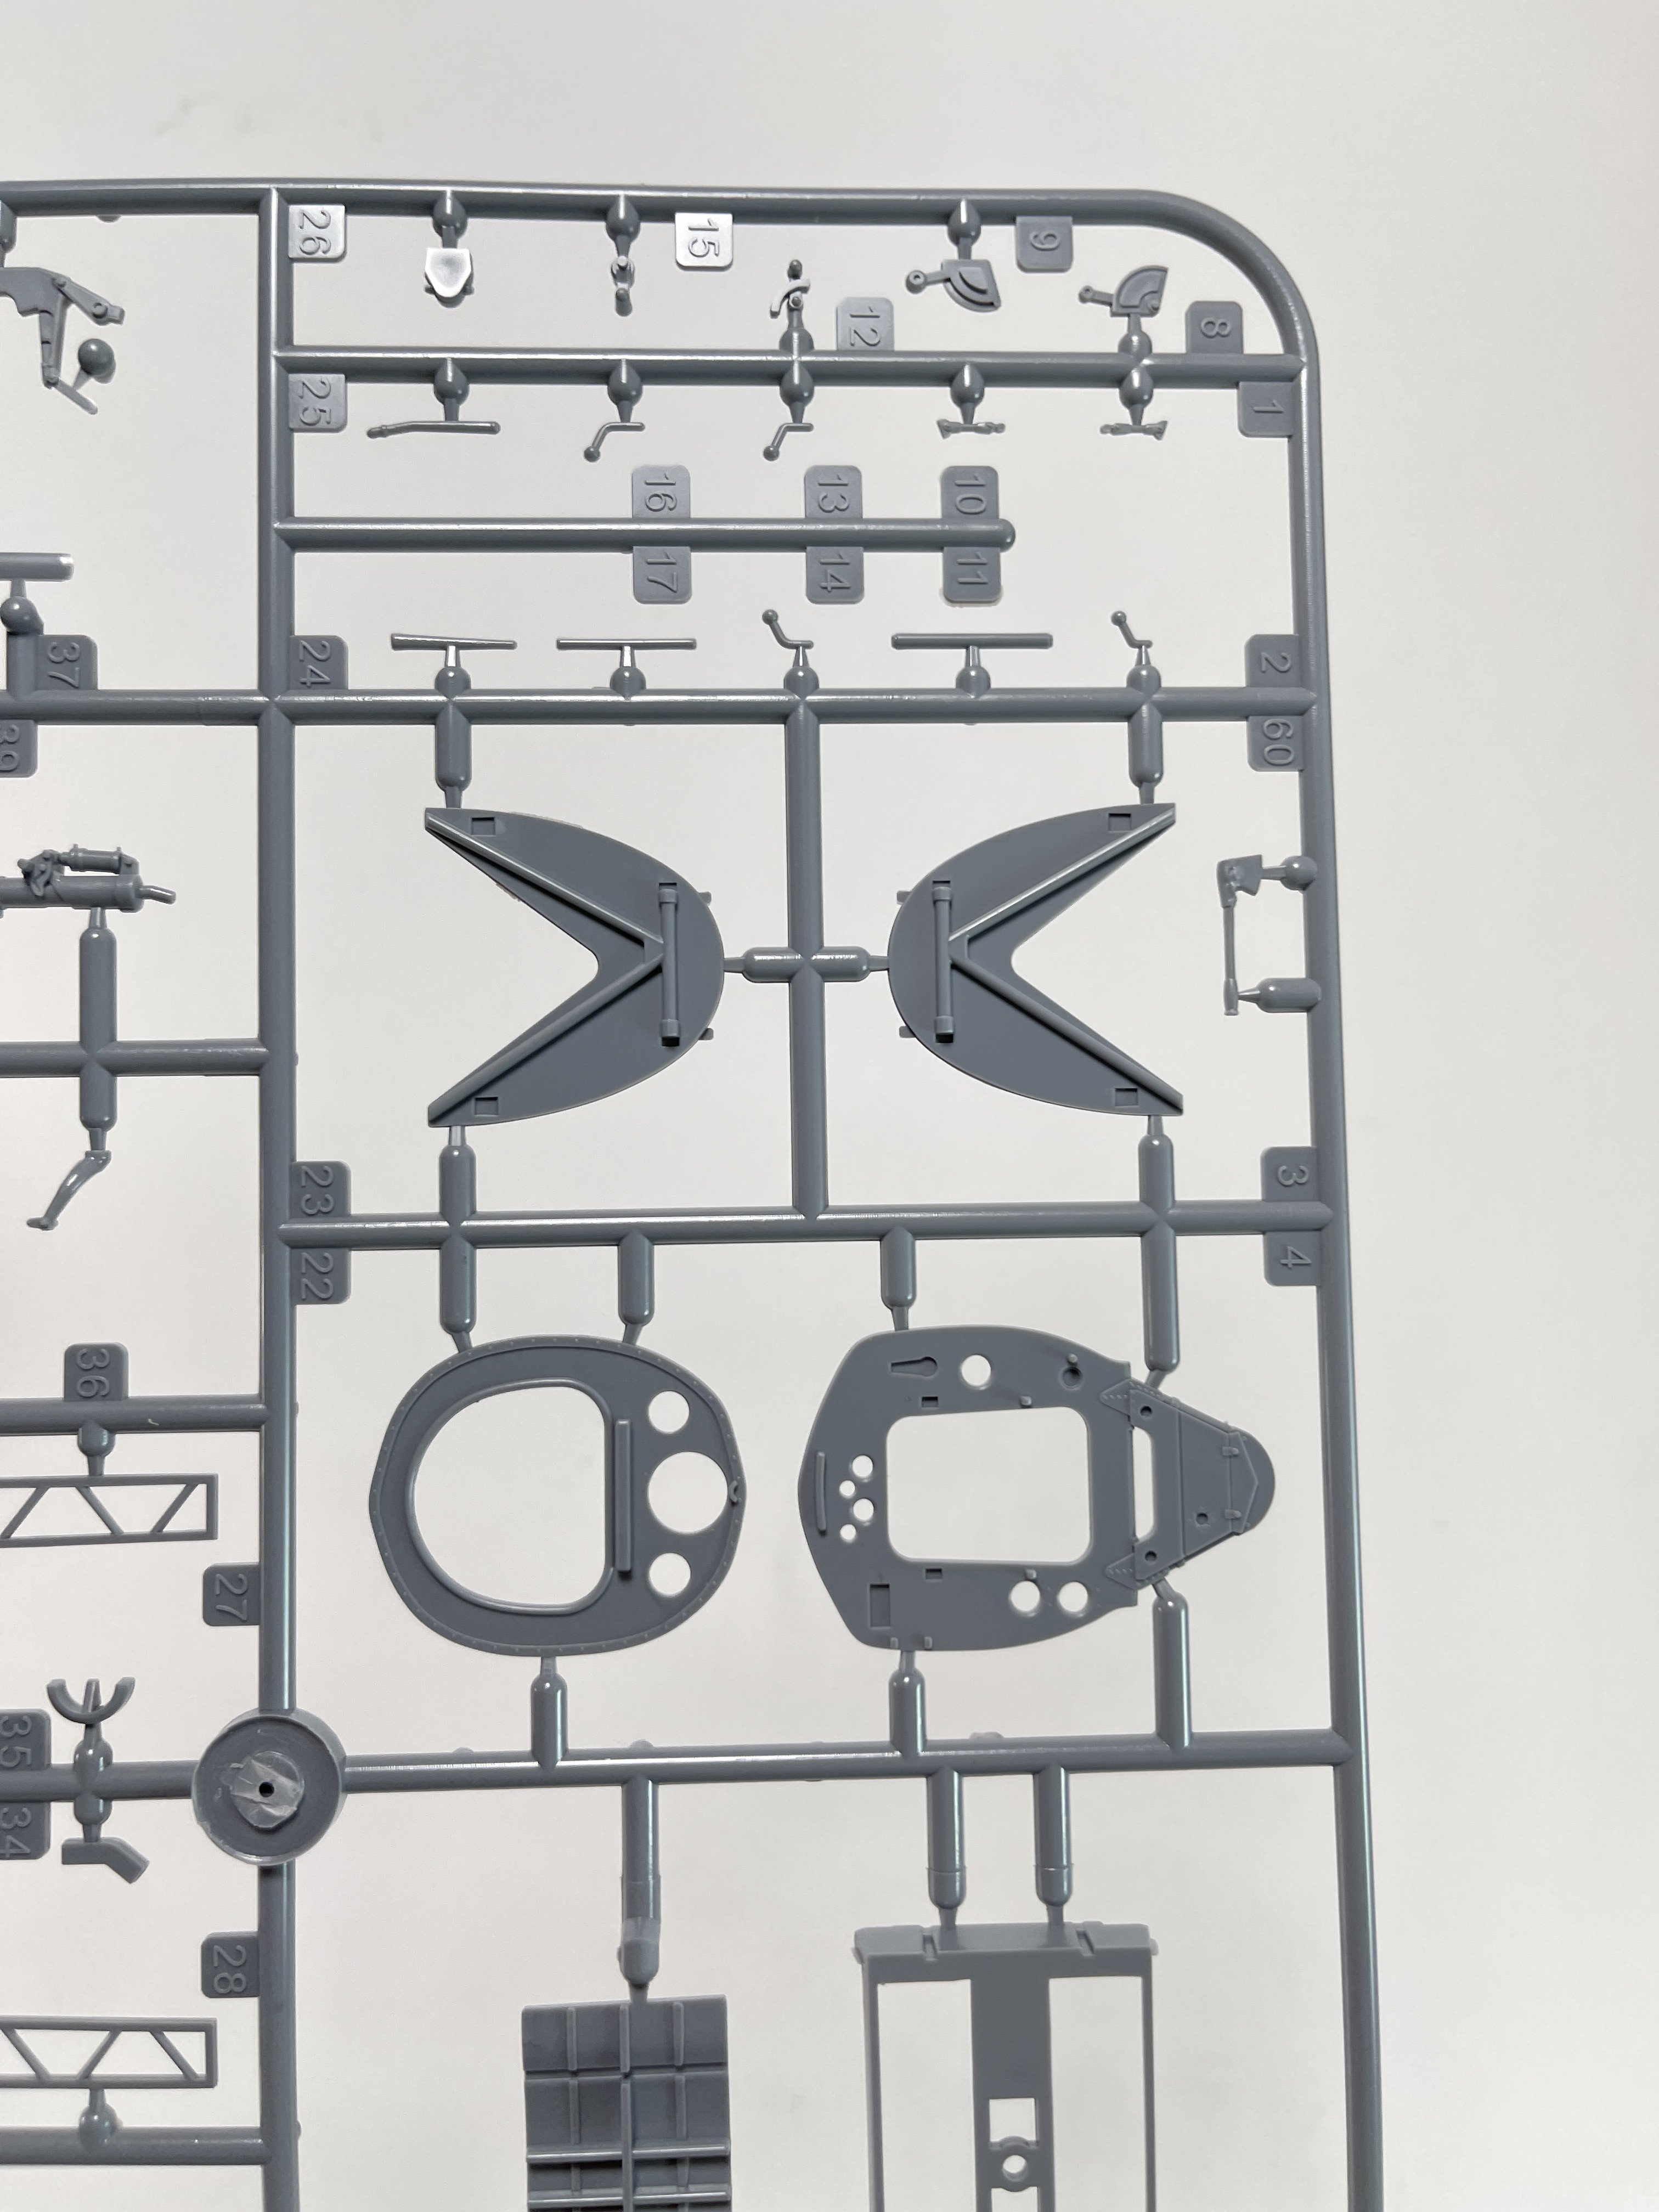
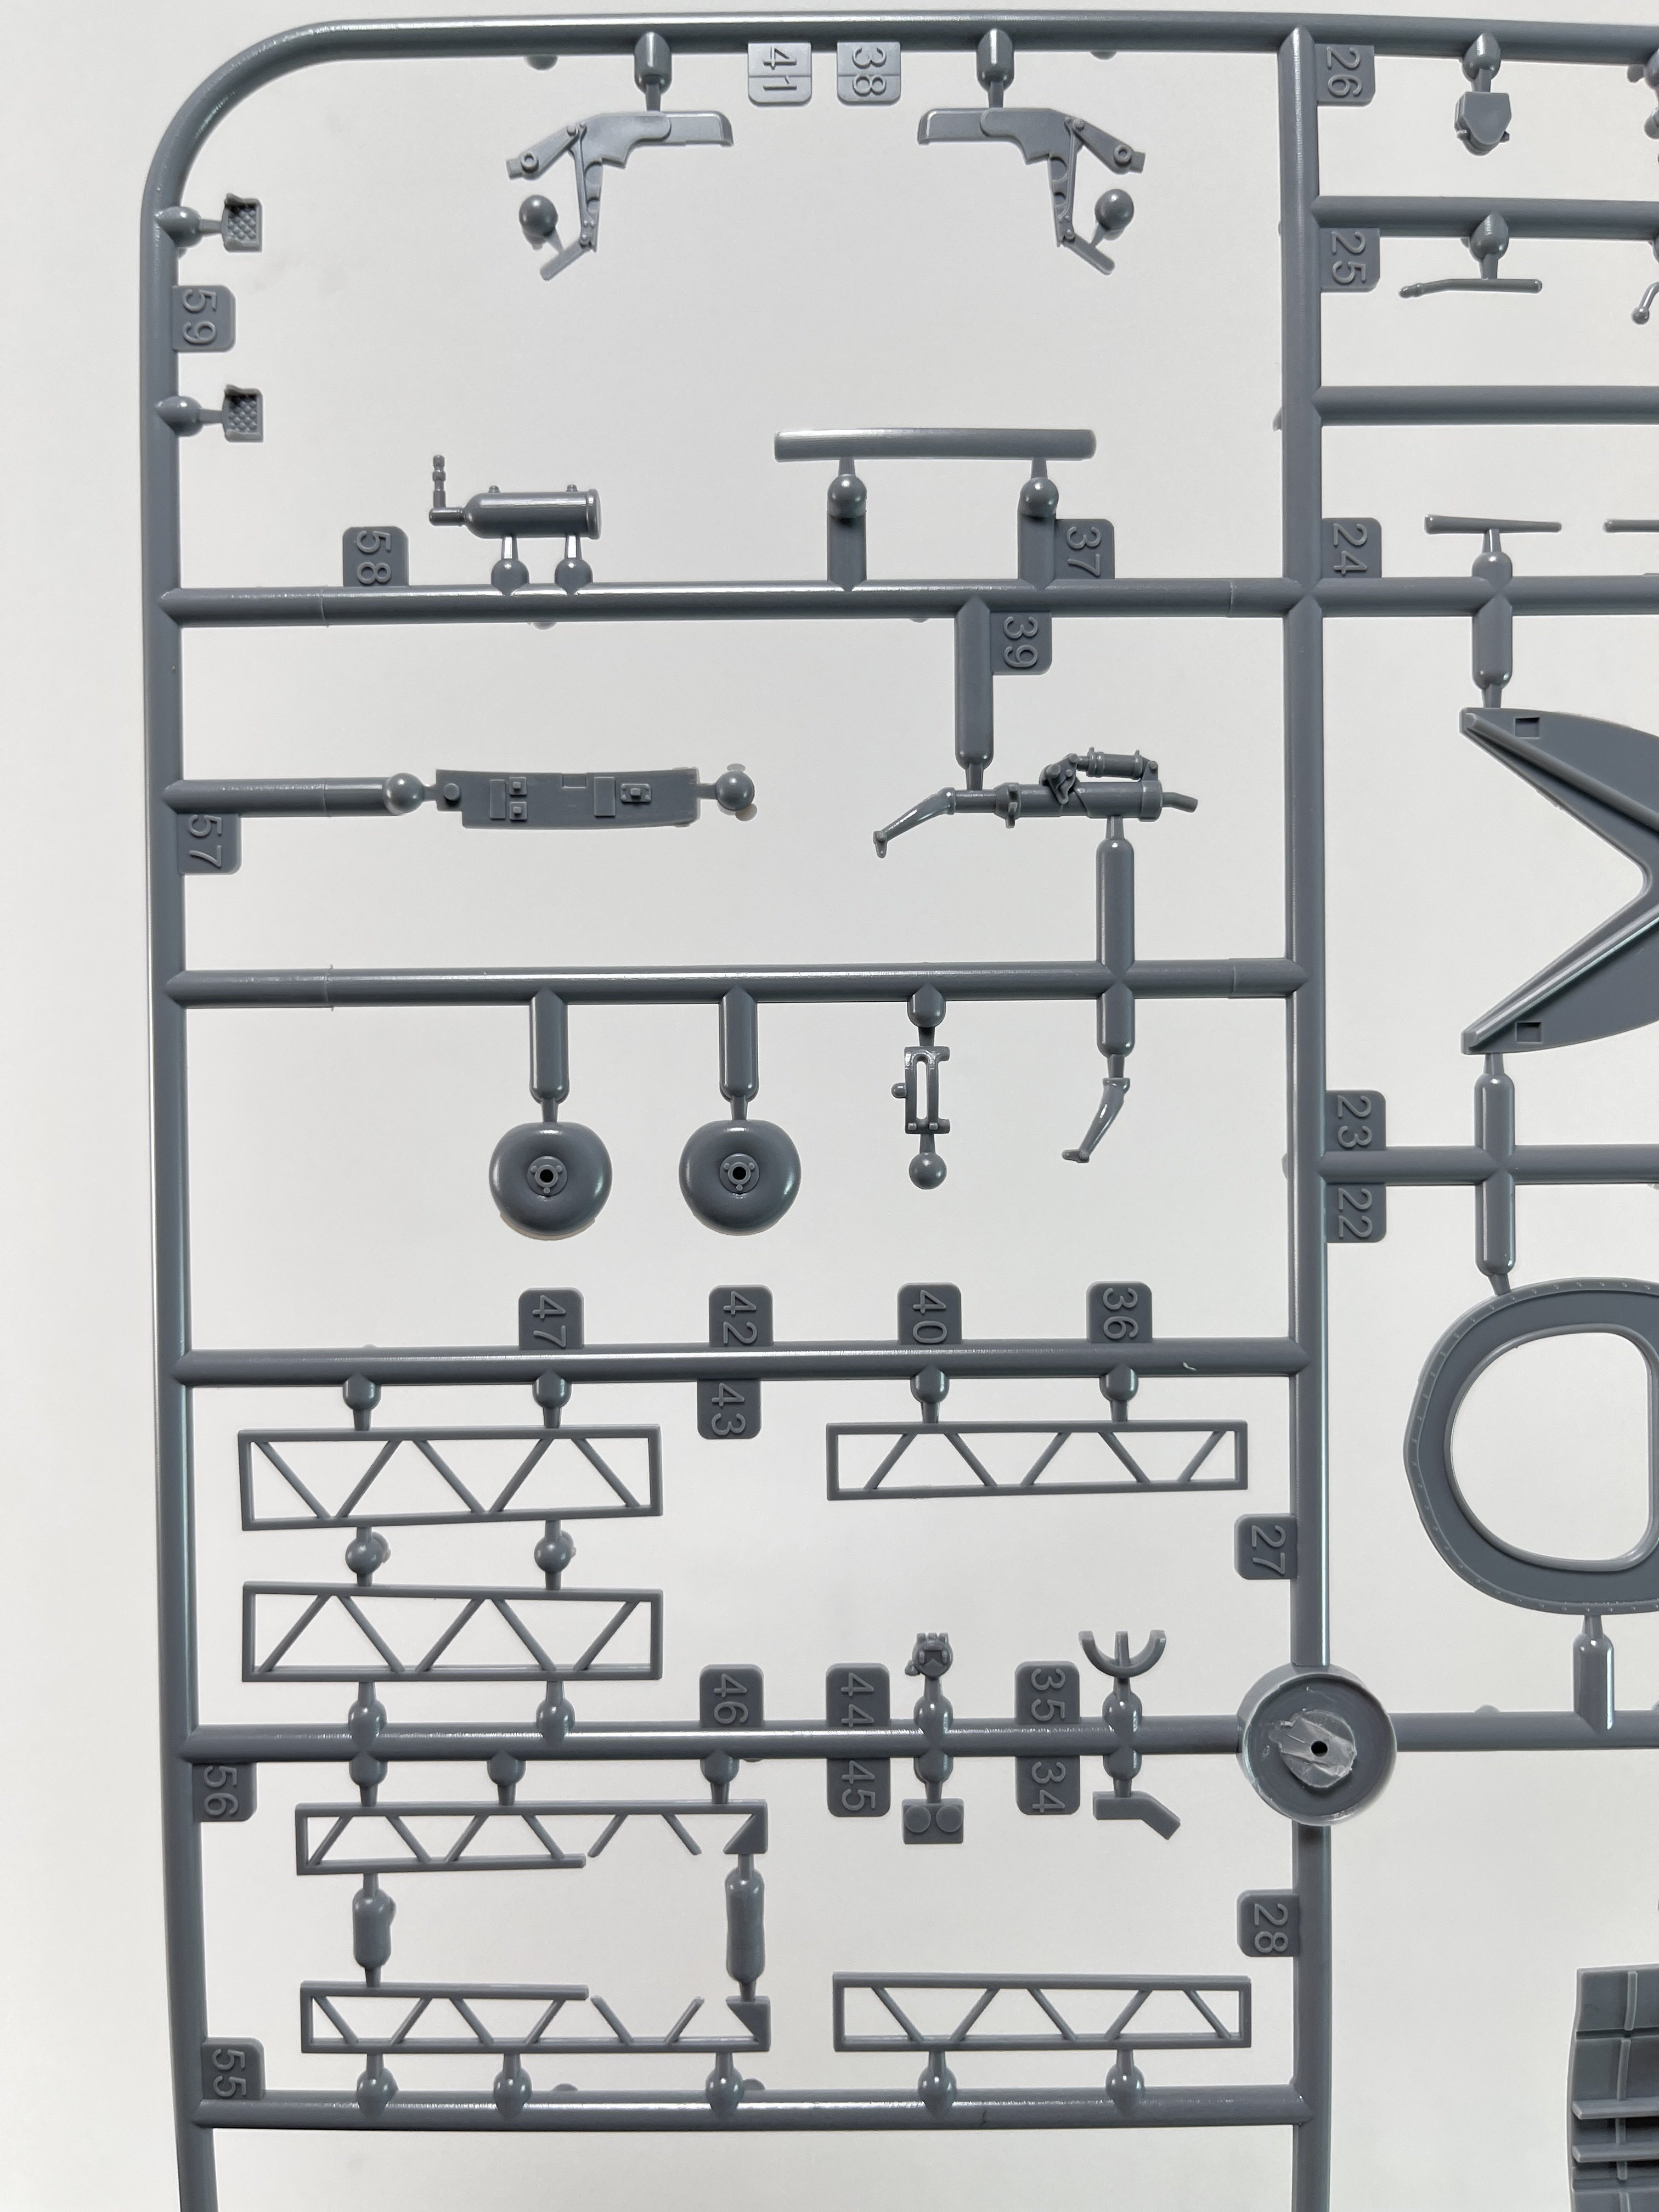
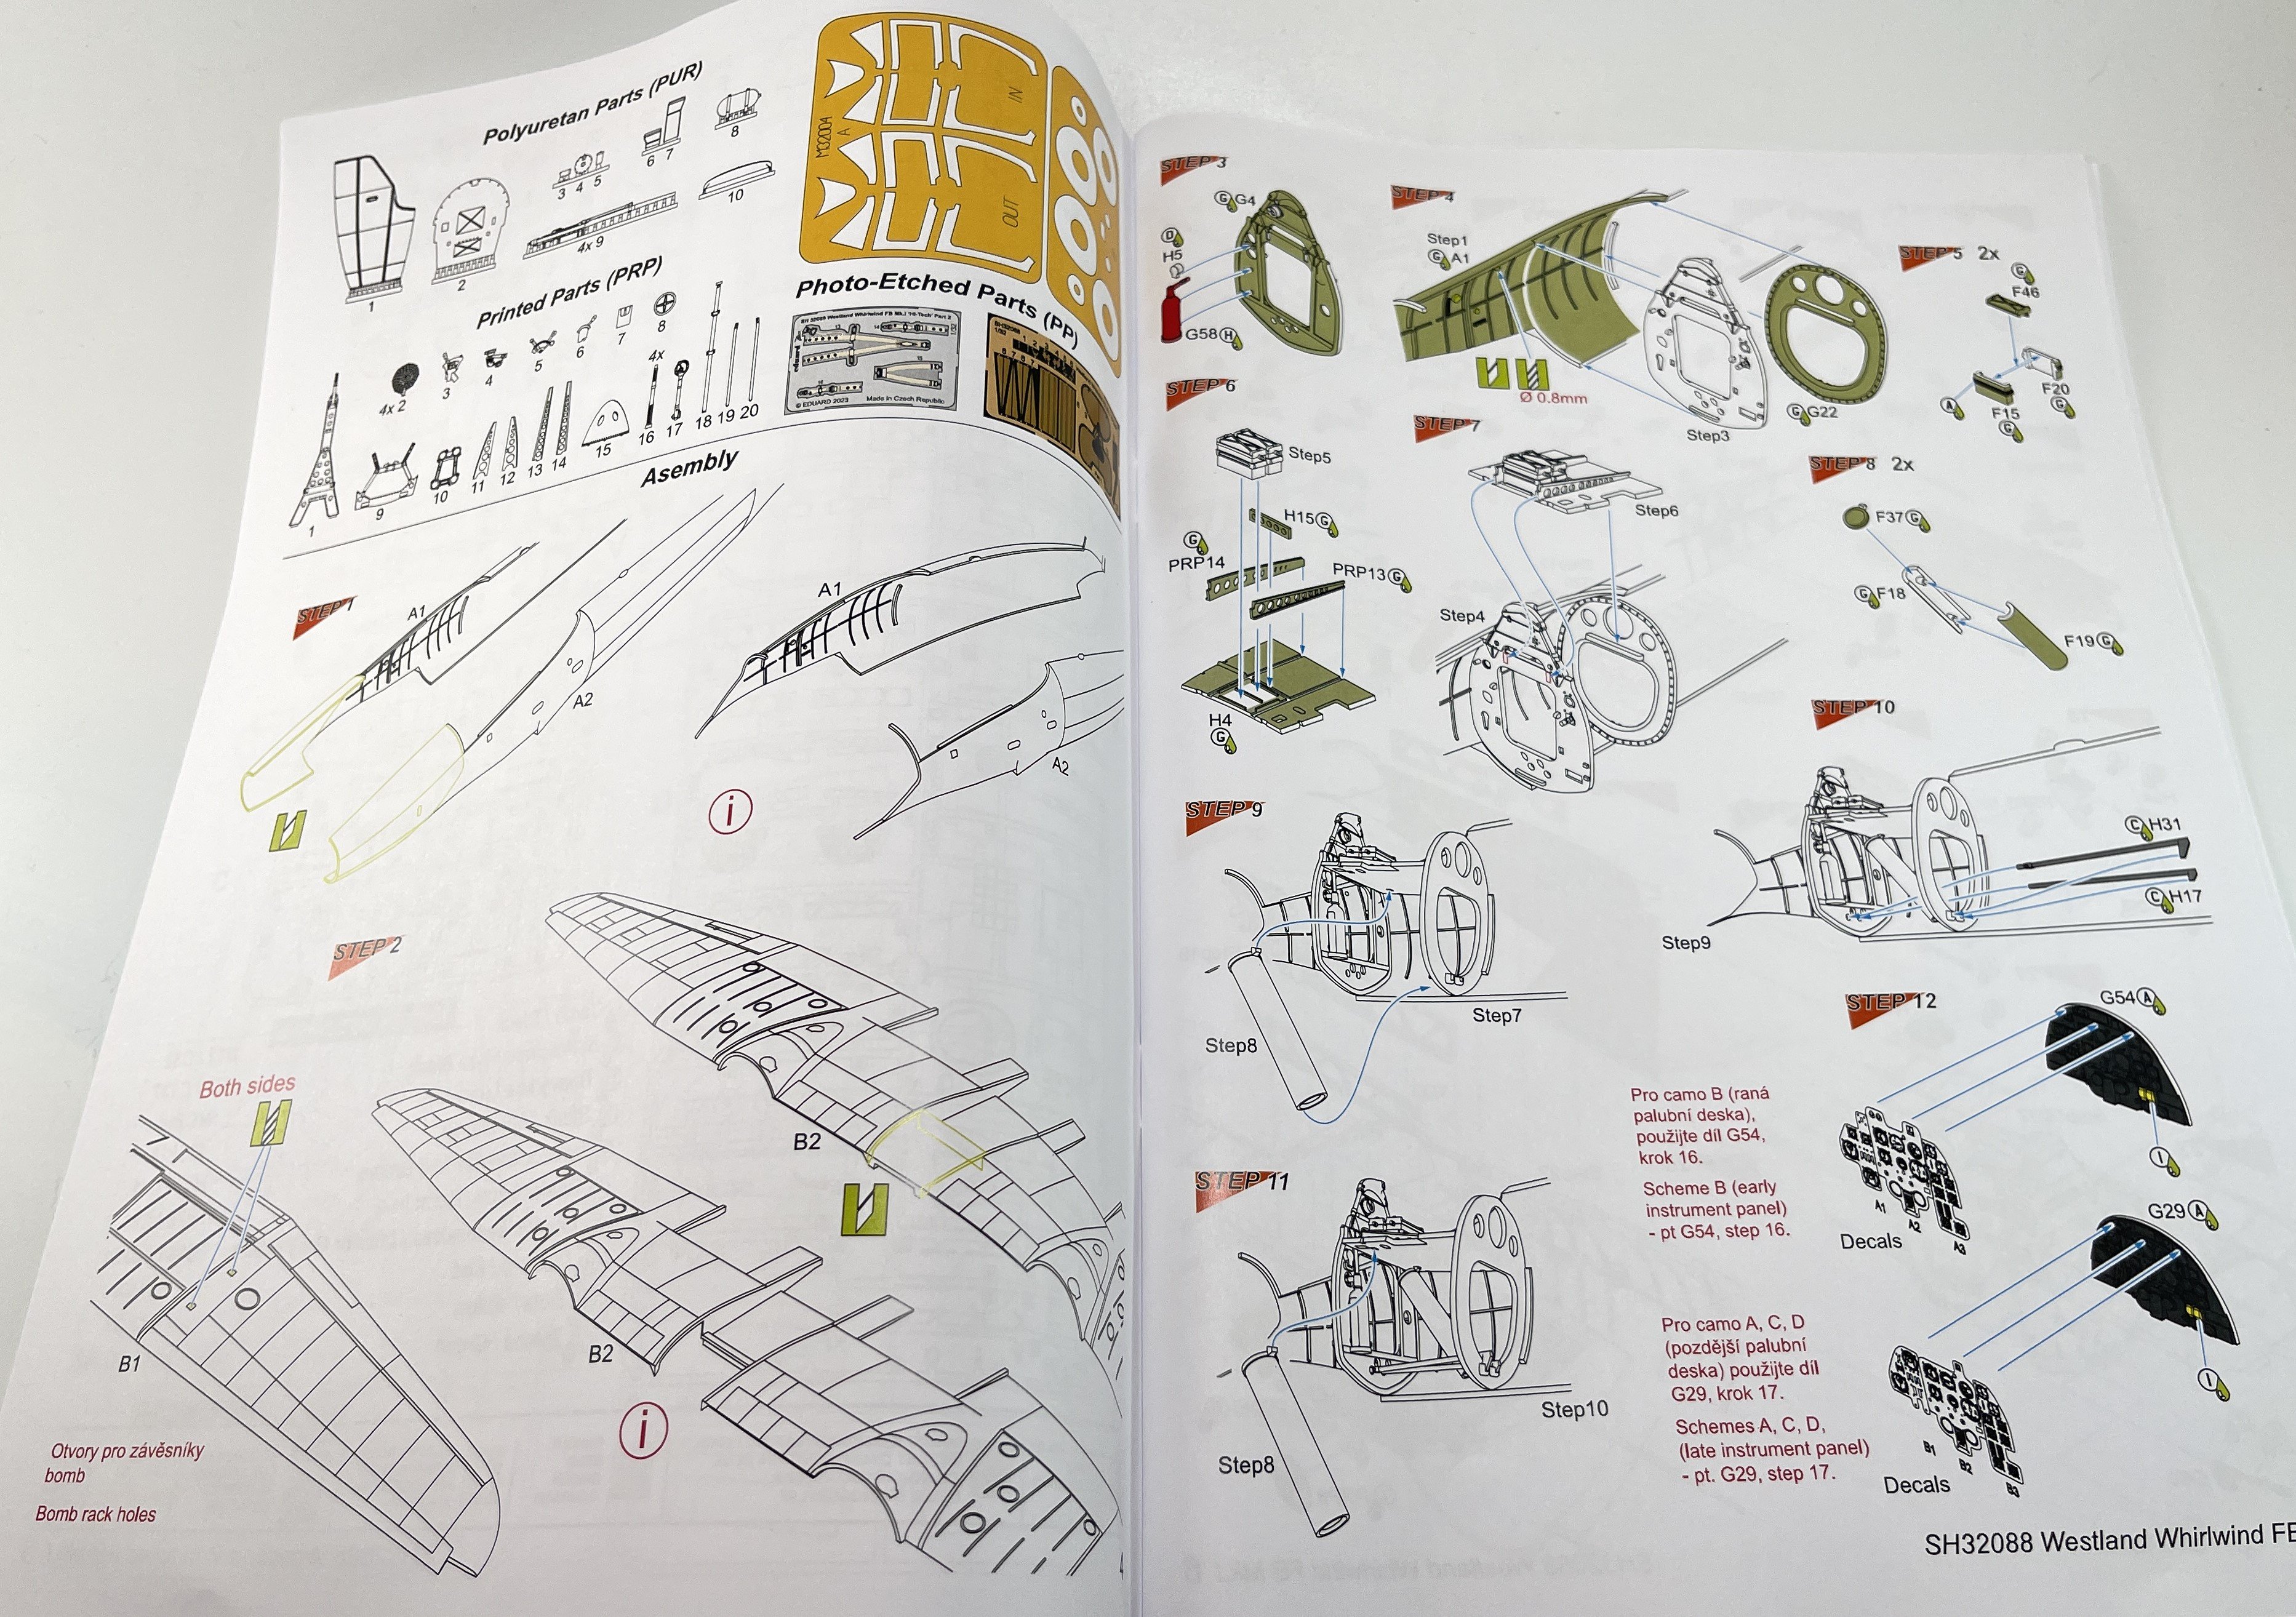
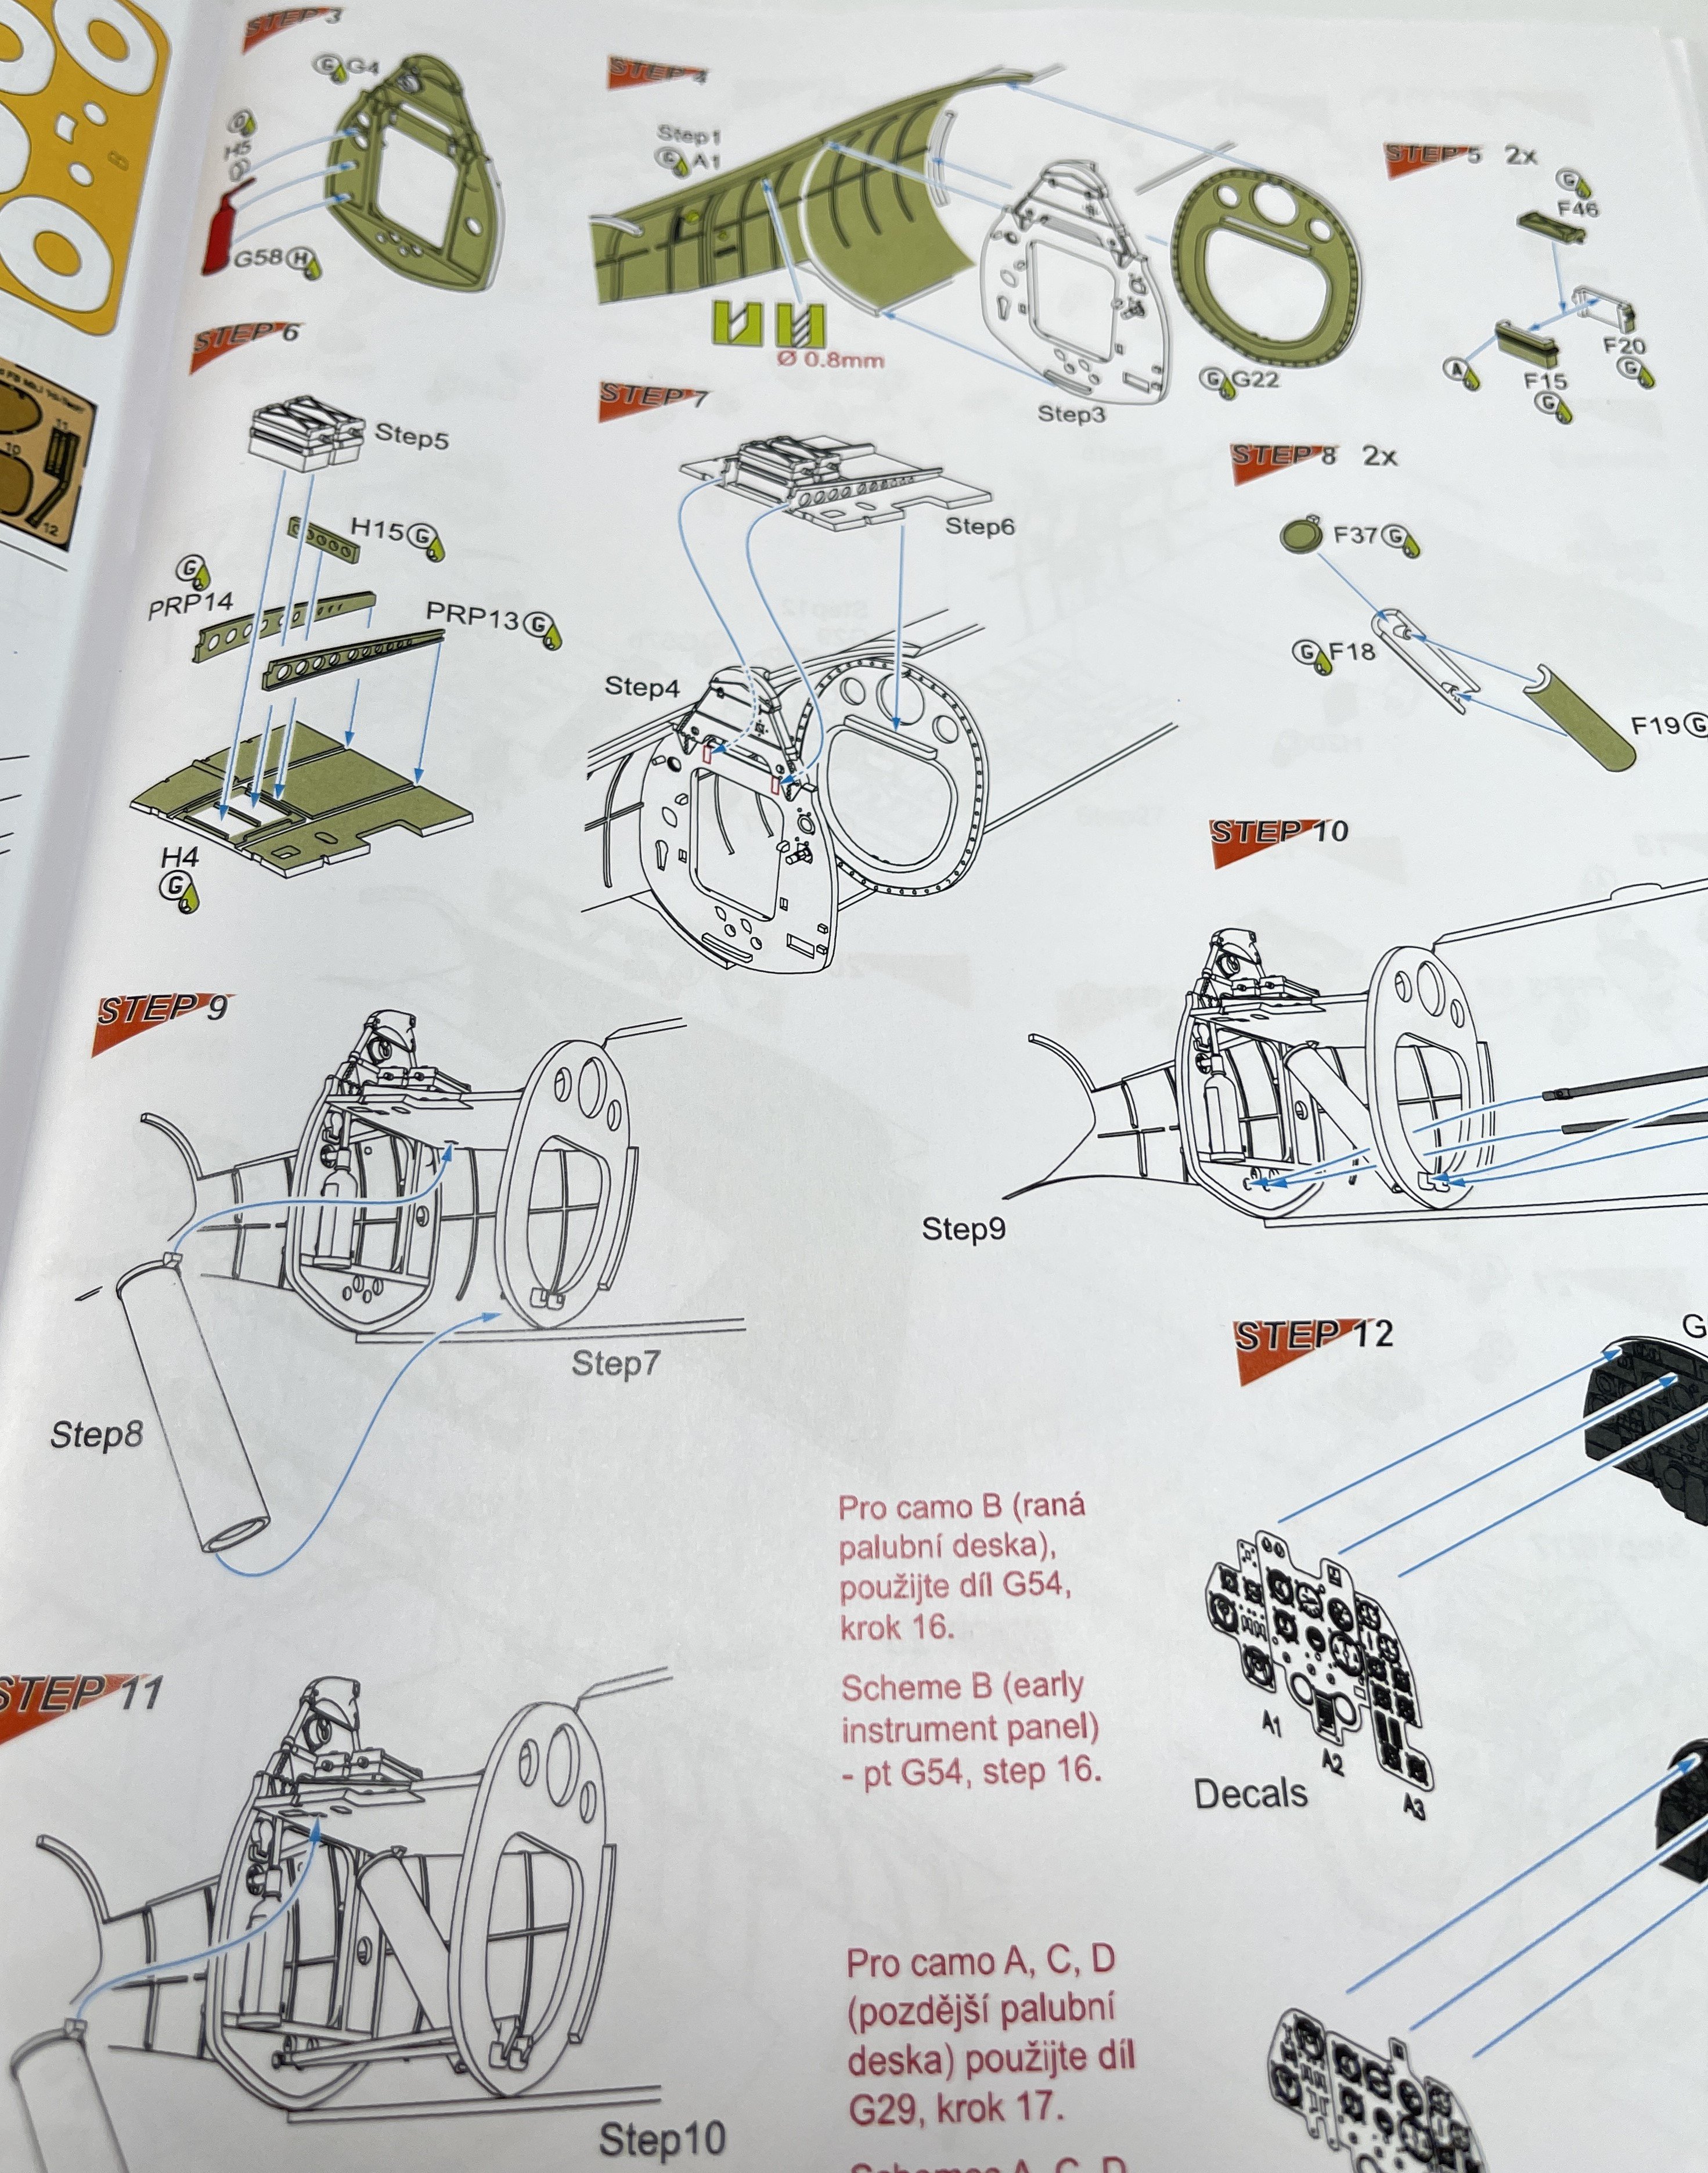
Today, we got the hi-tech version that has everything from the standard version, with a lots of goodies made by Special Hobby (and CMK) all inside the box.
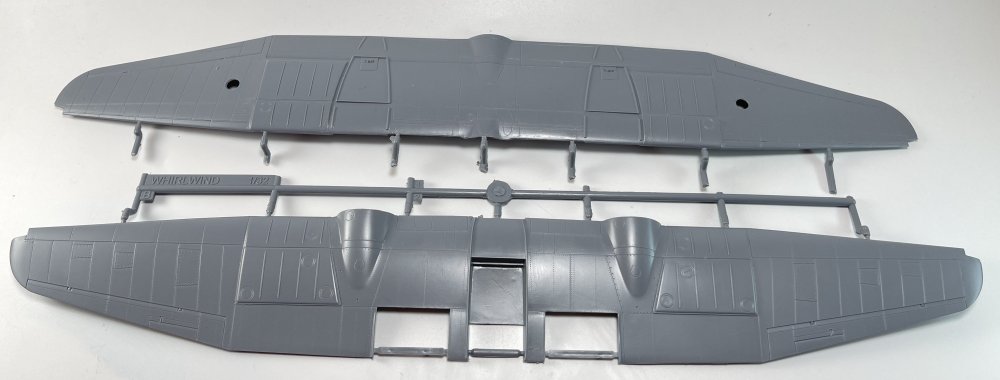
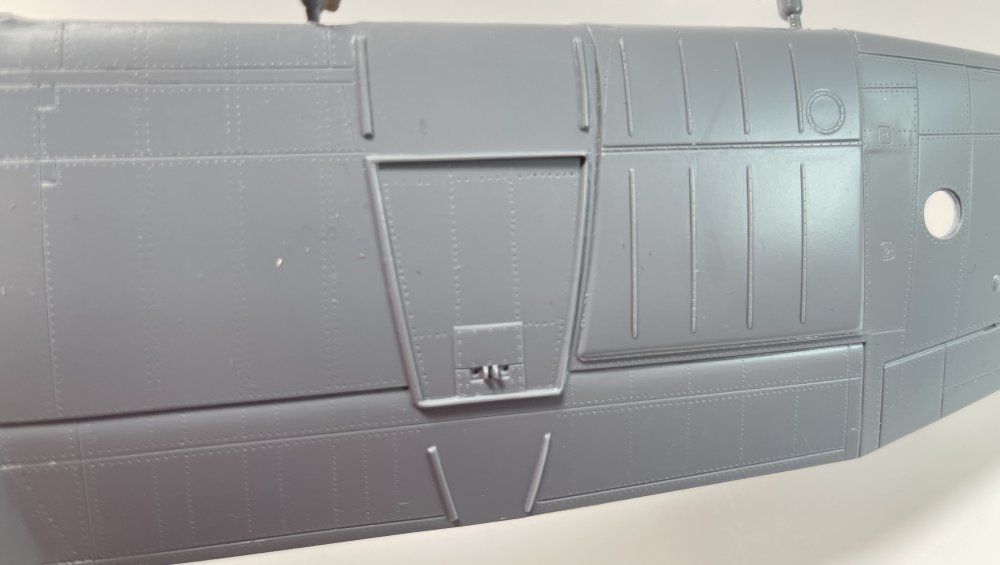
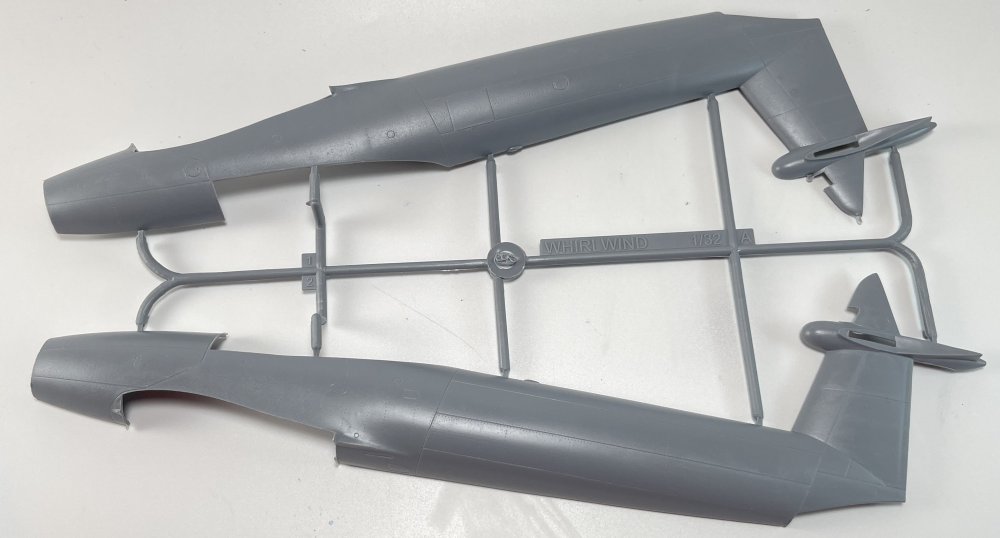
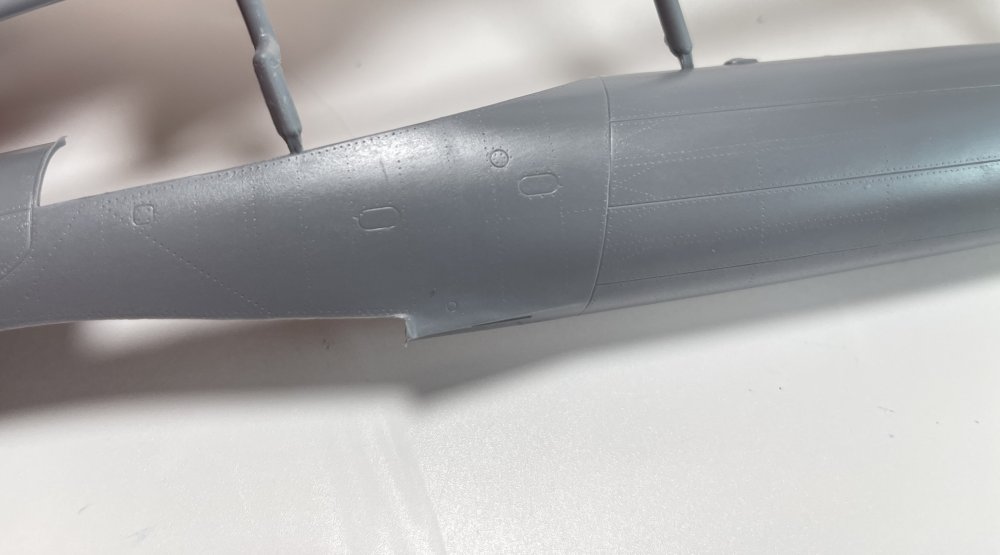
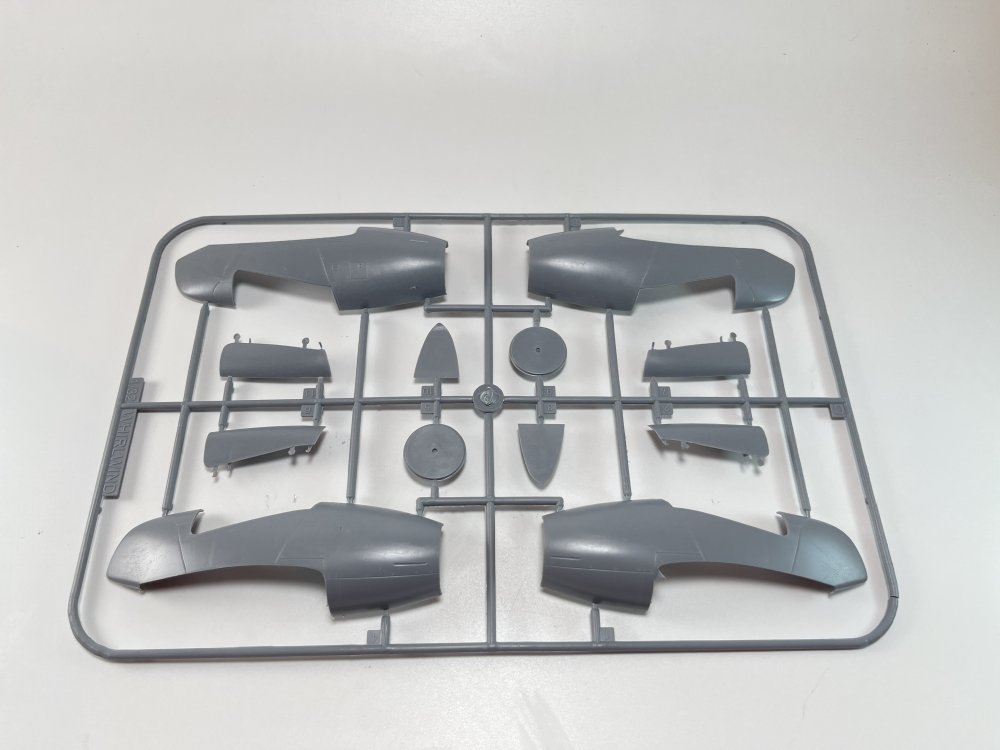
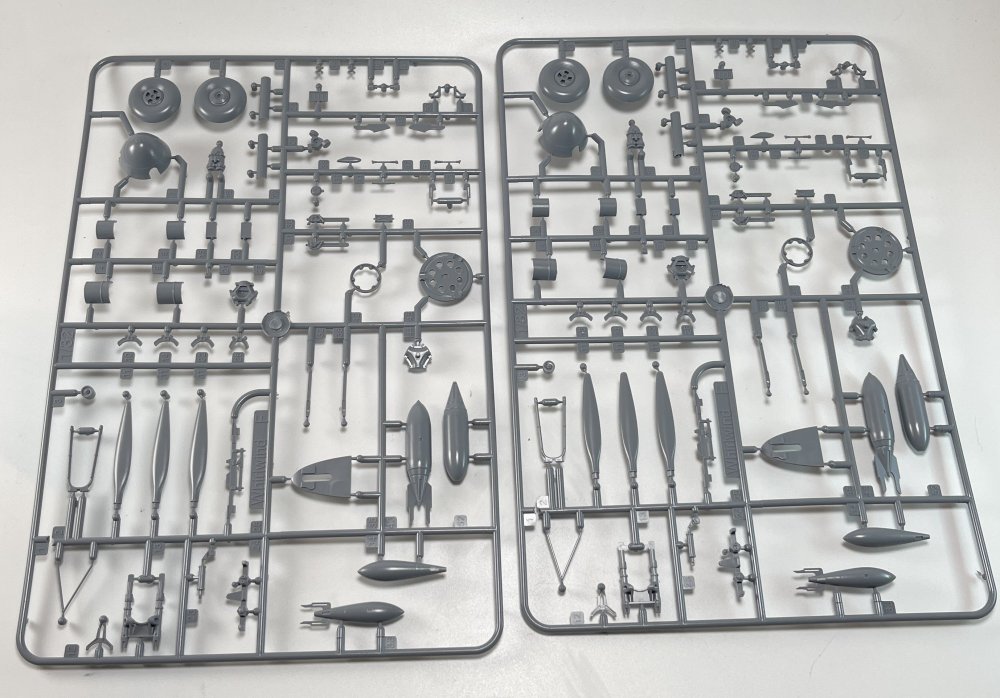
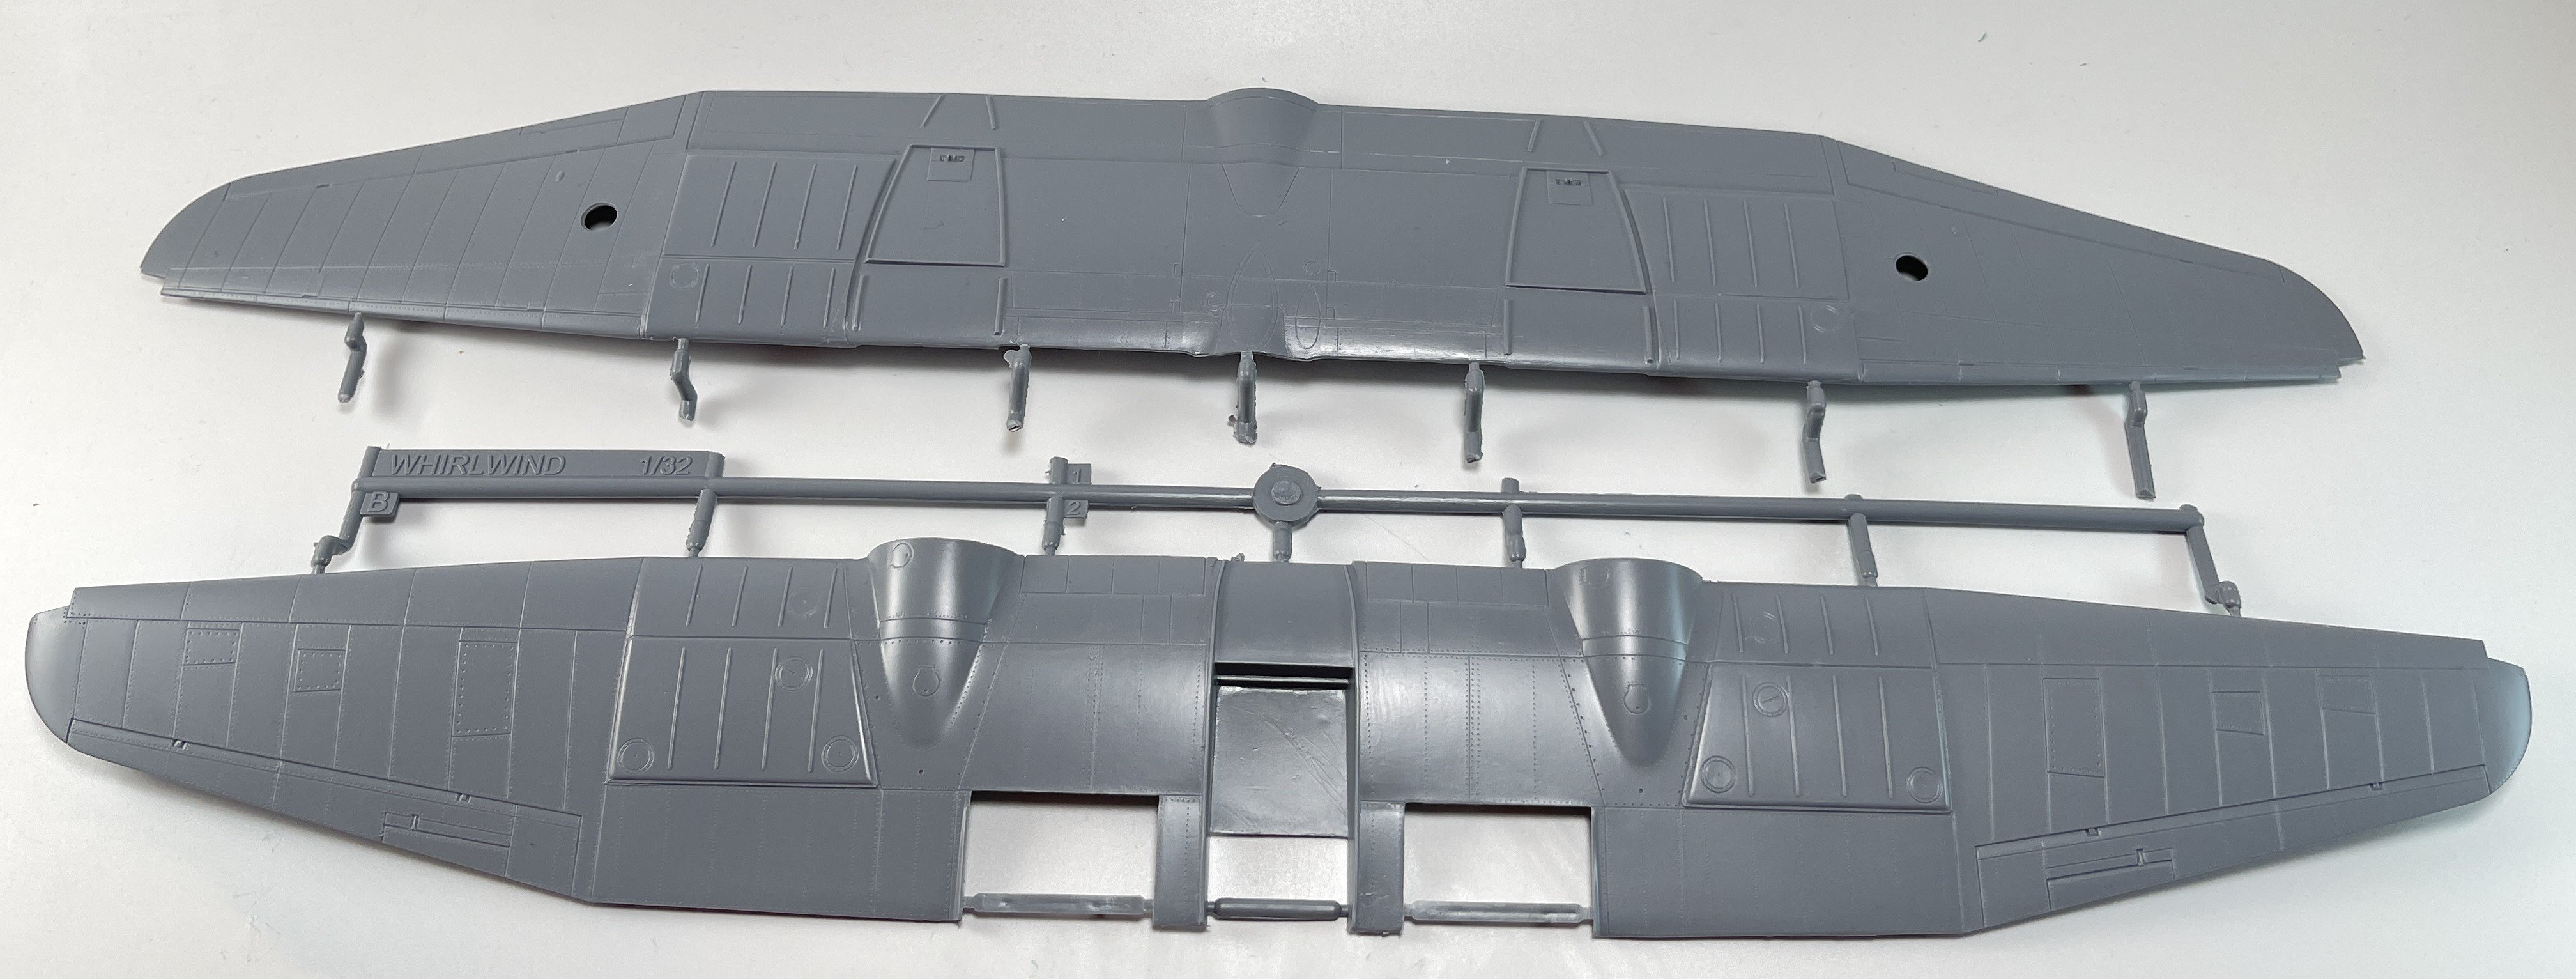
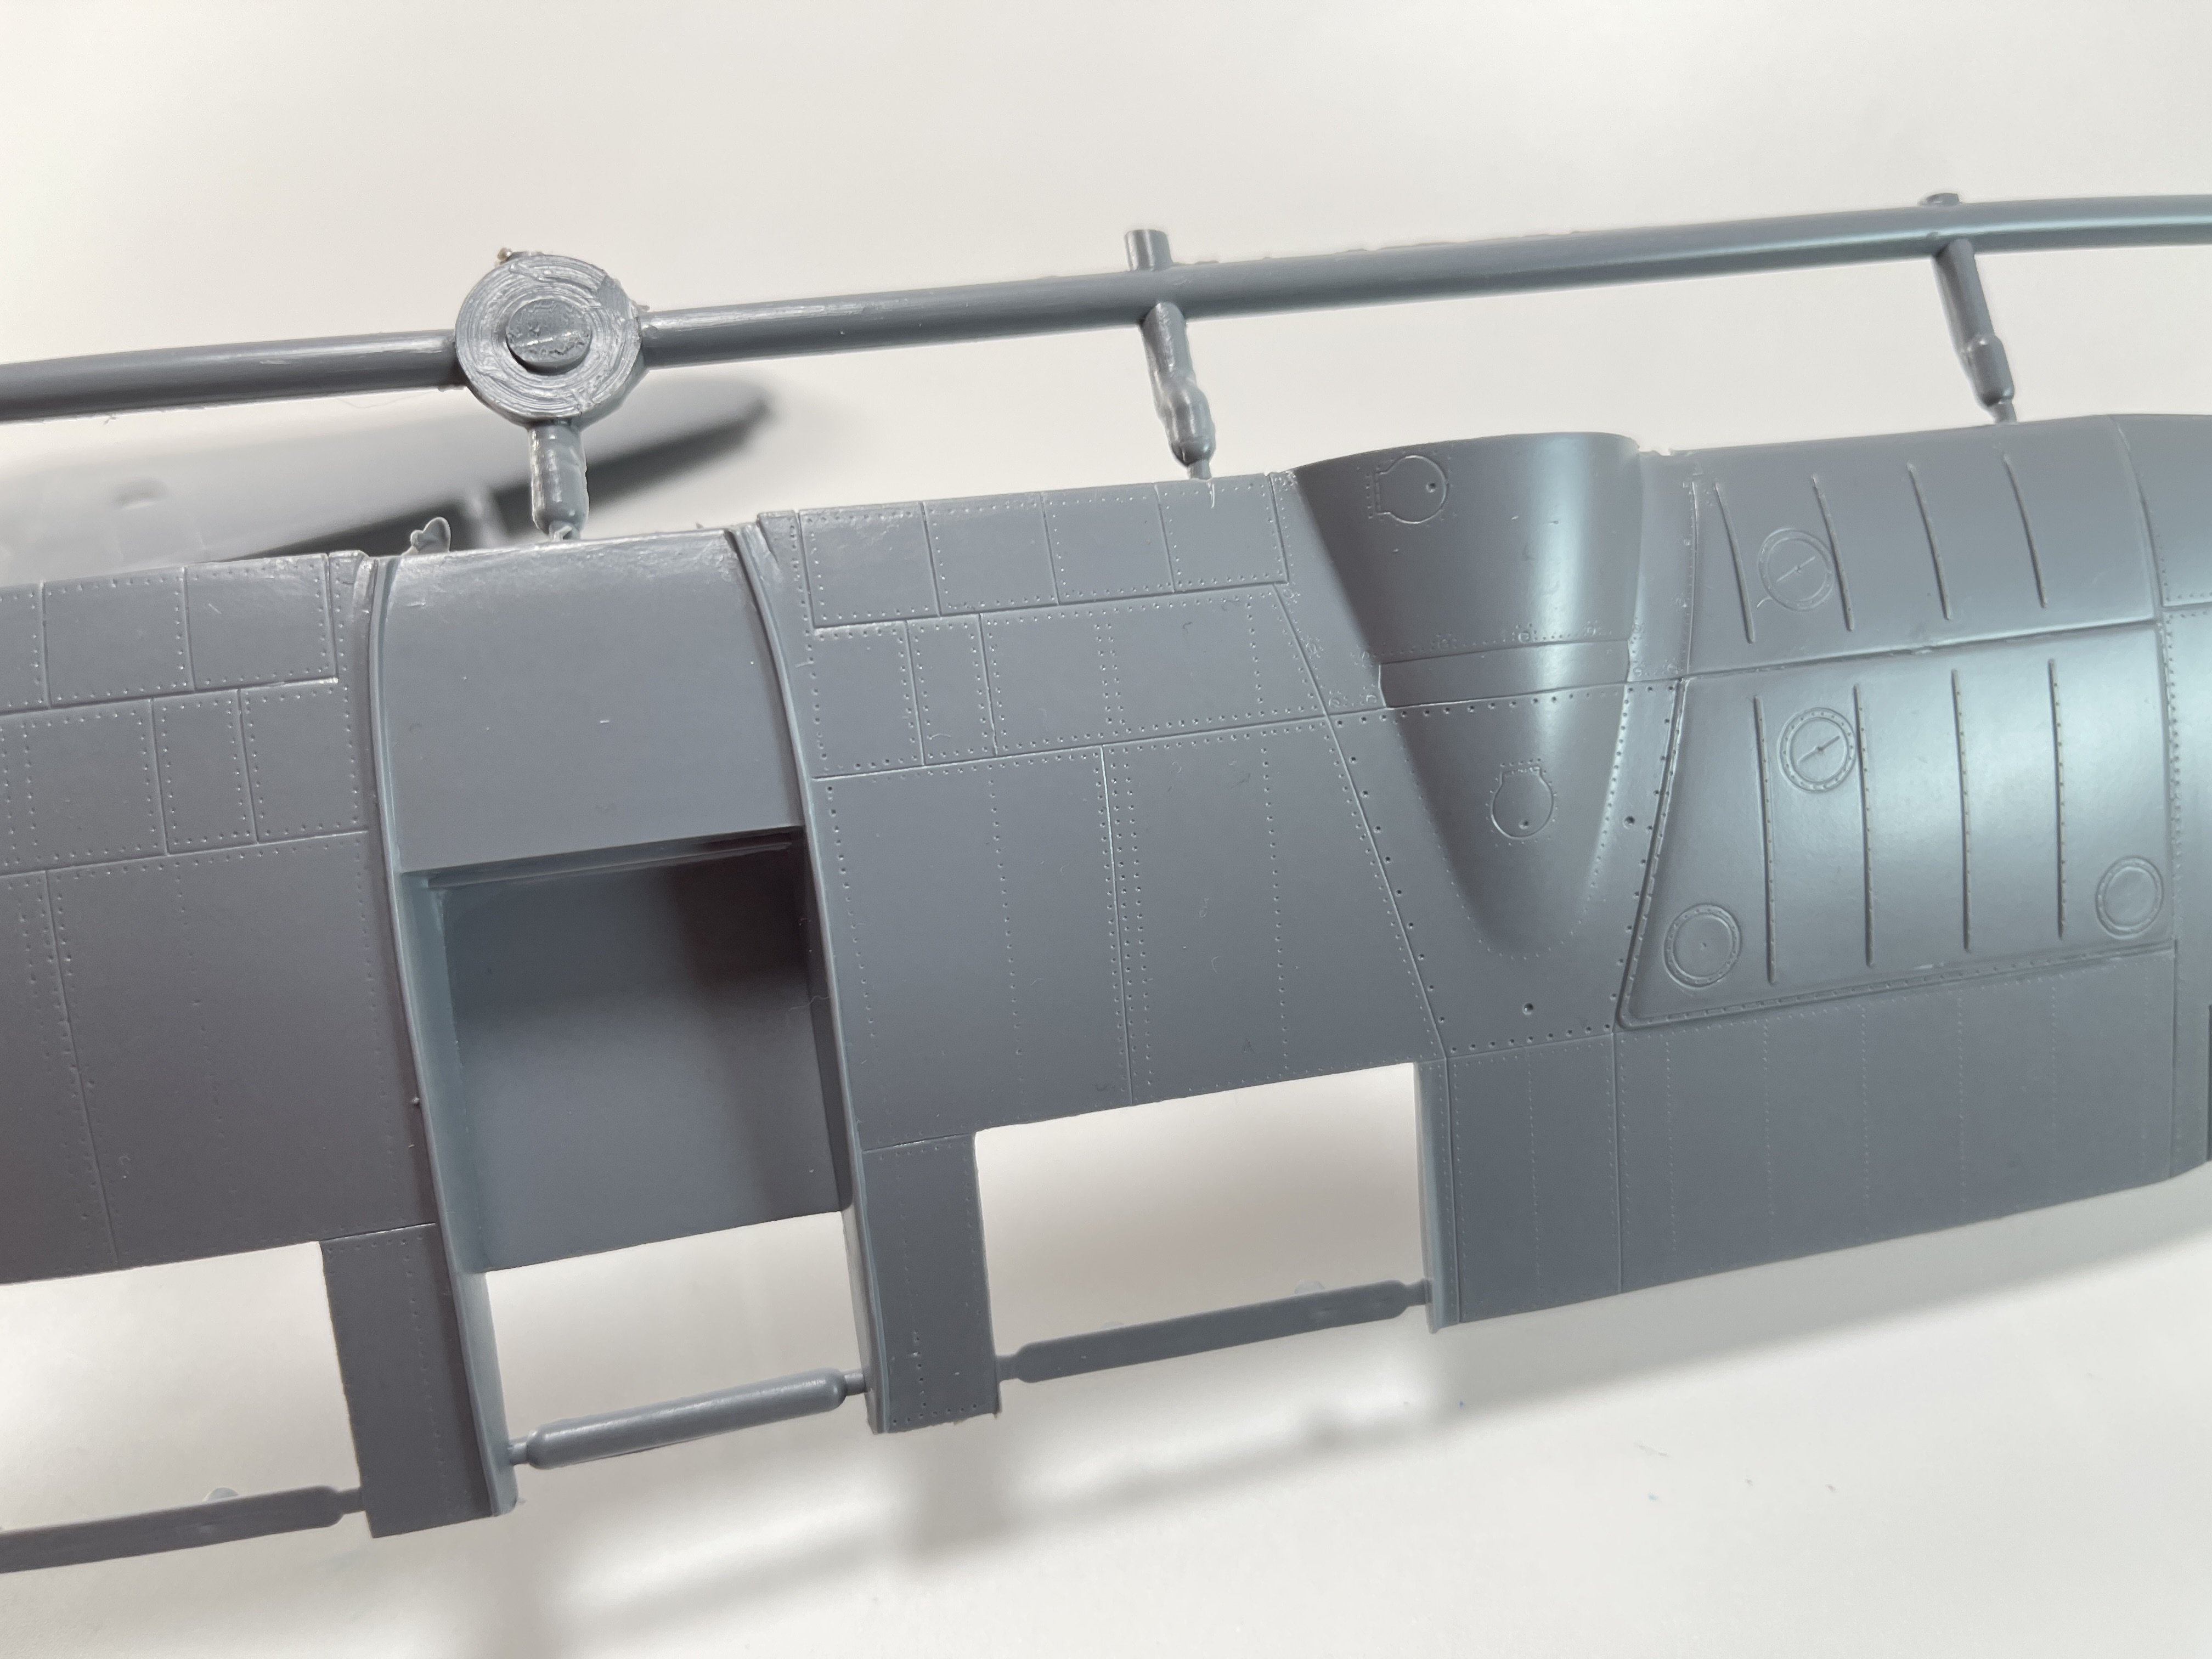
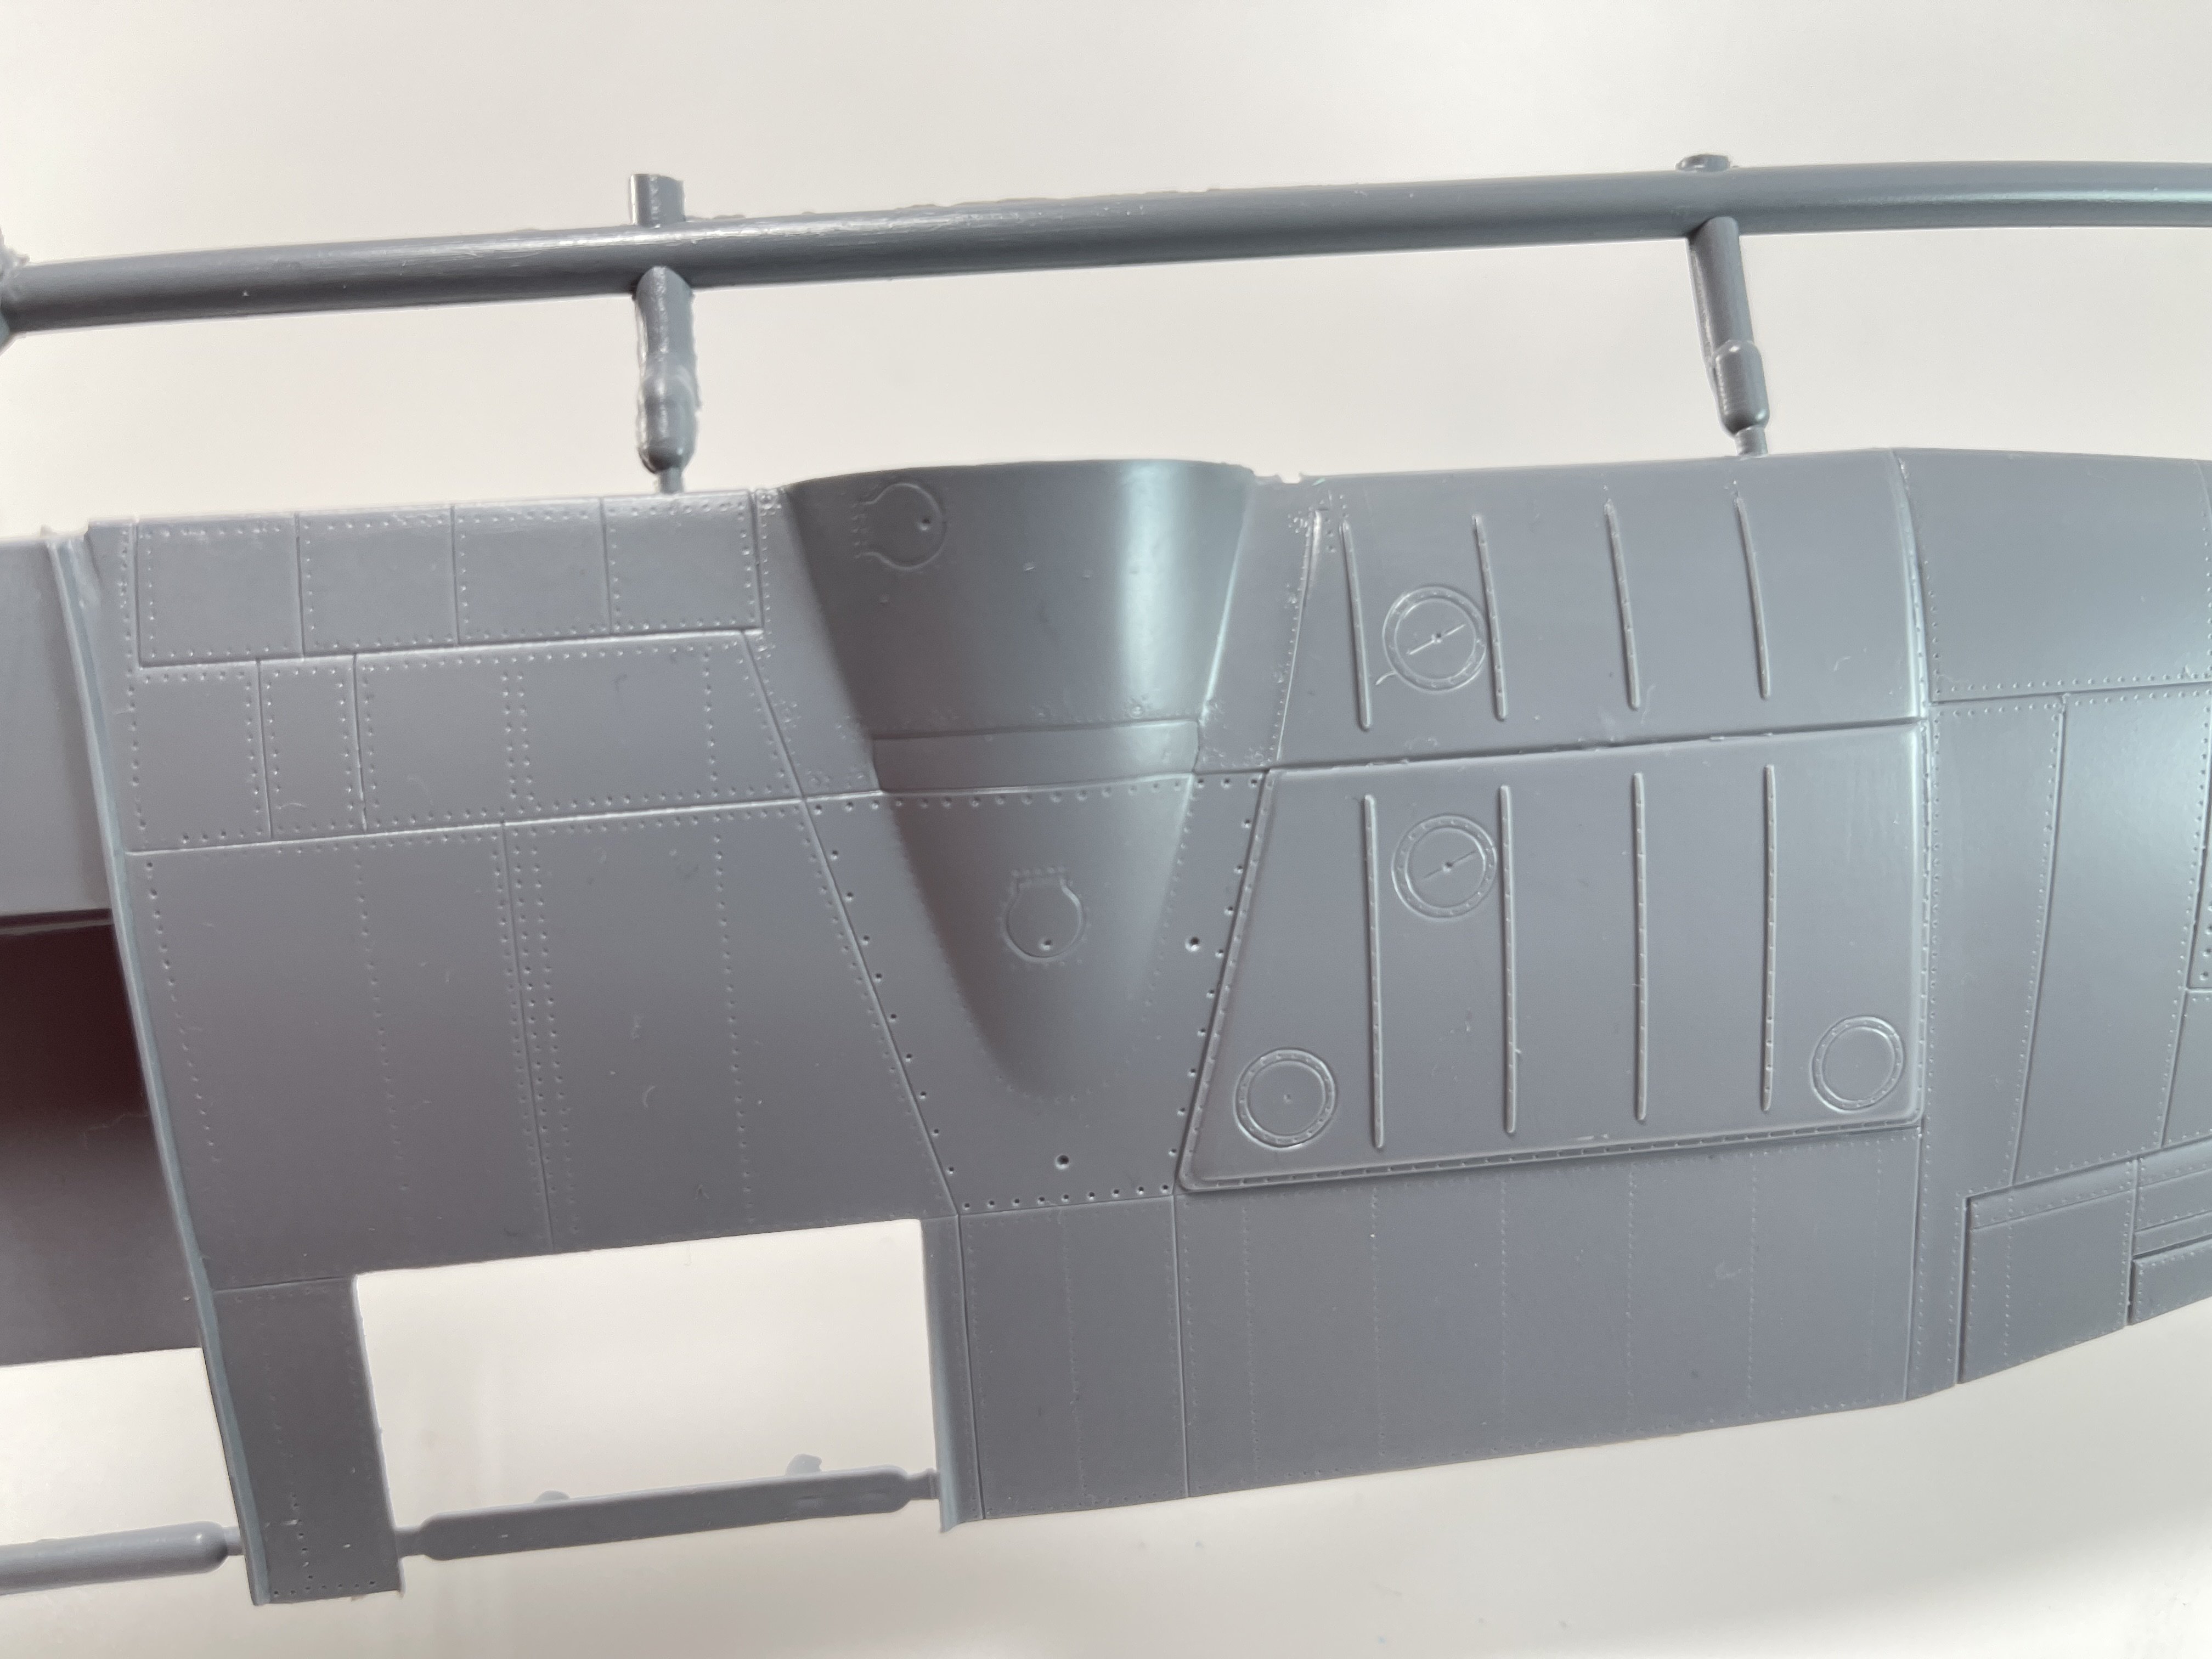
So the plastic parts are the same as James`s review. However I will absent of talking about them as James said everything but I put some pictures here of them.

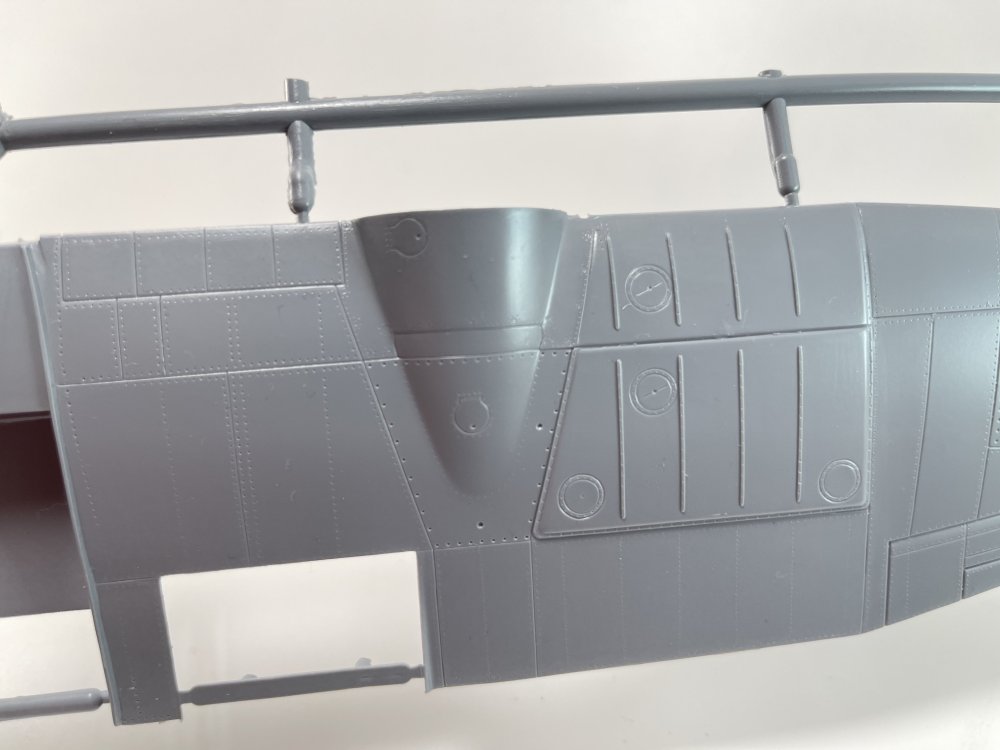


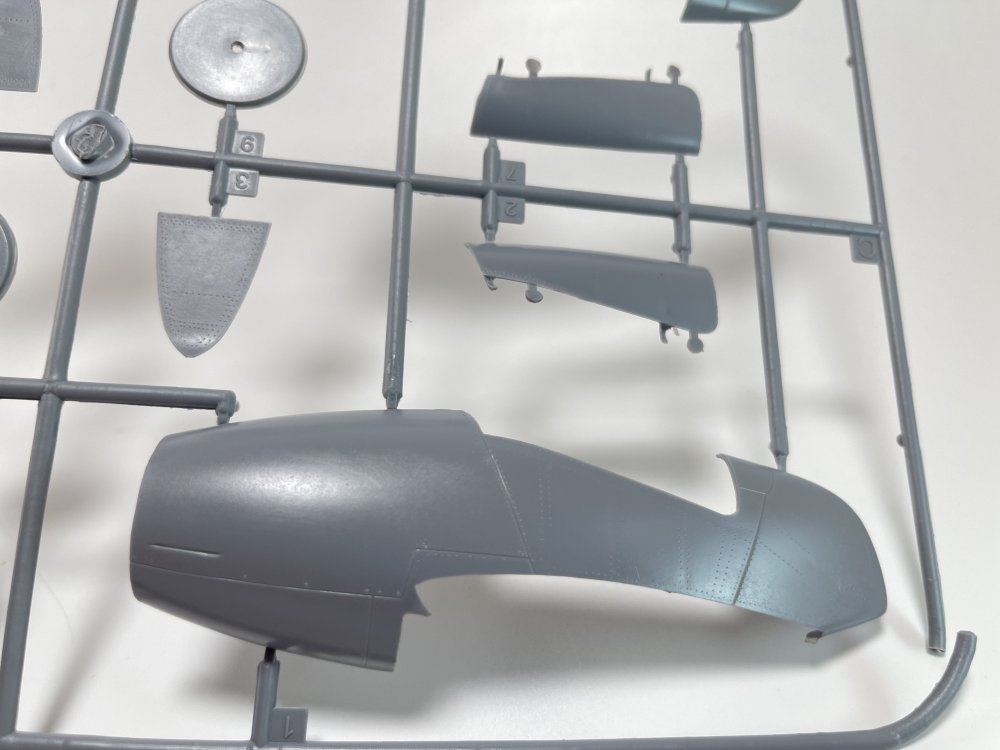
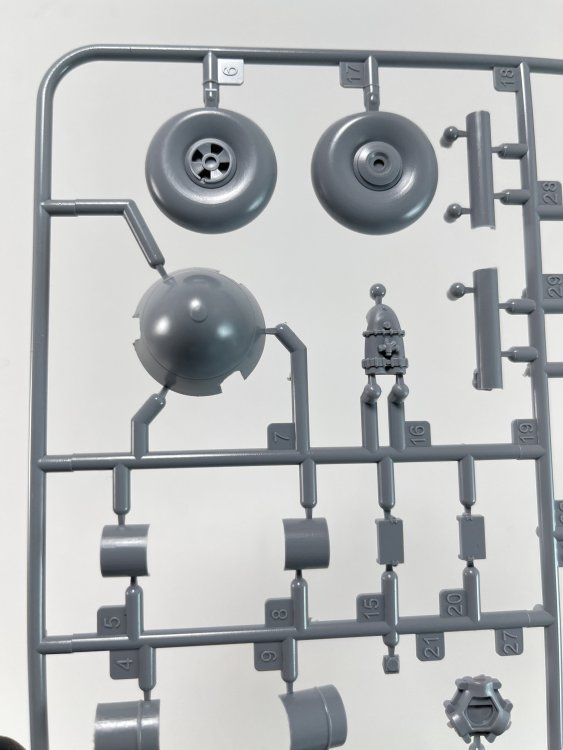


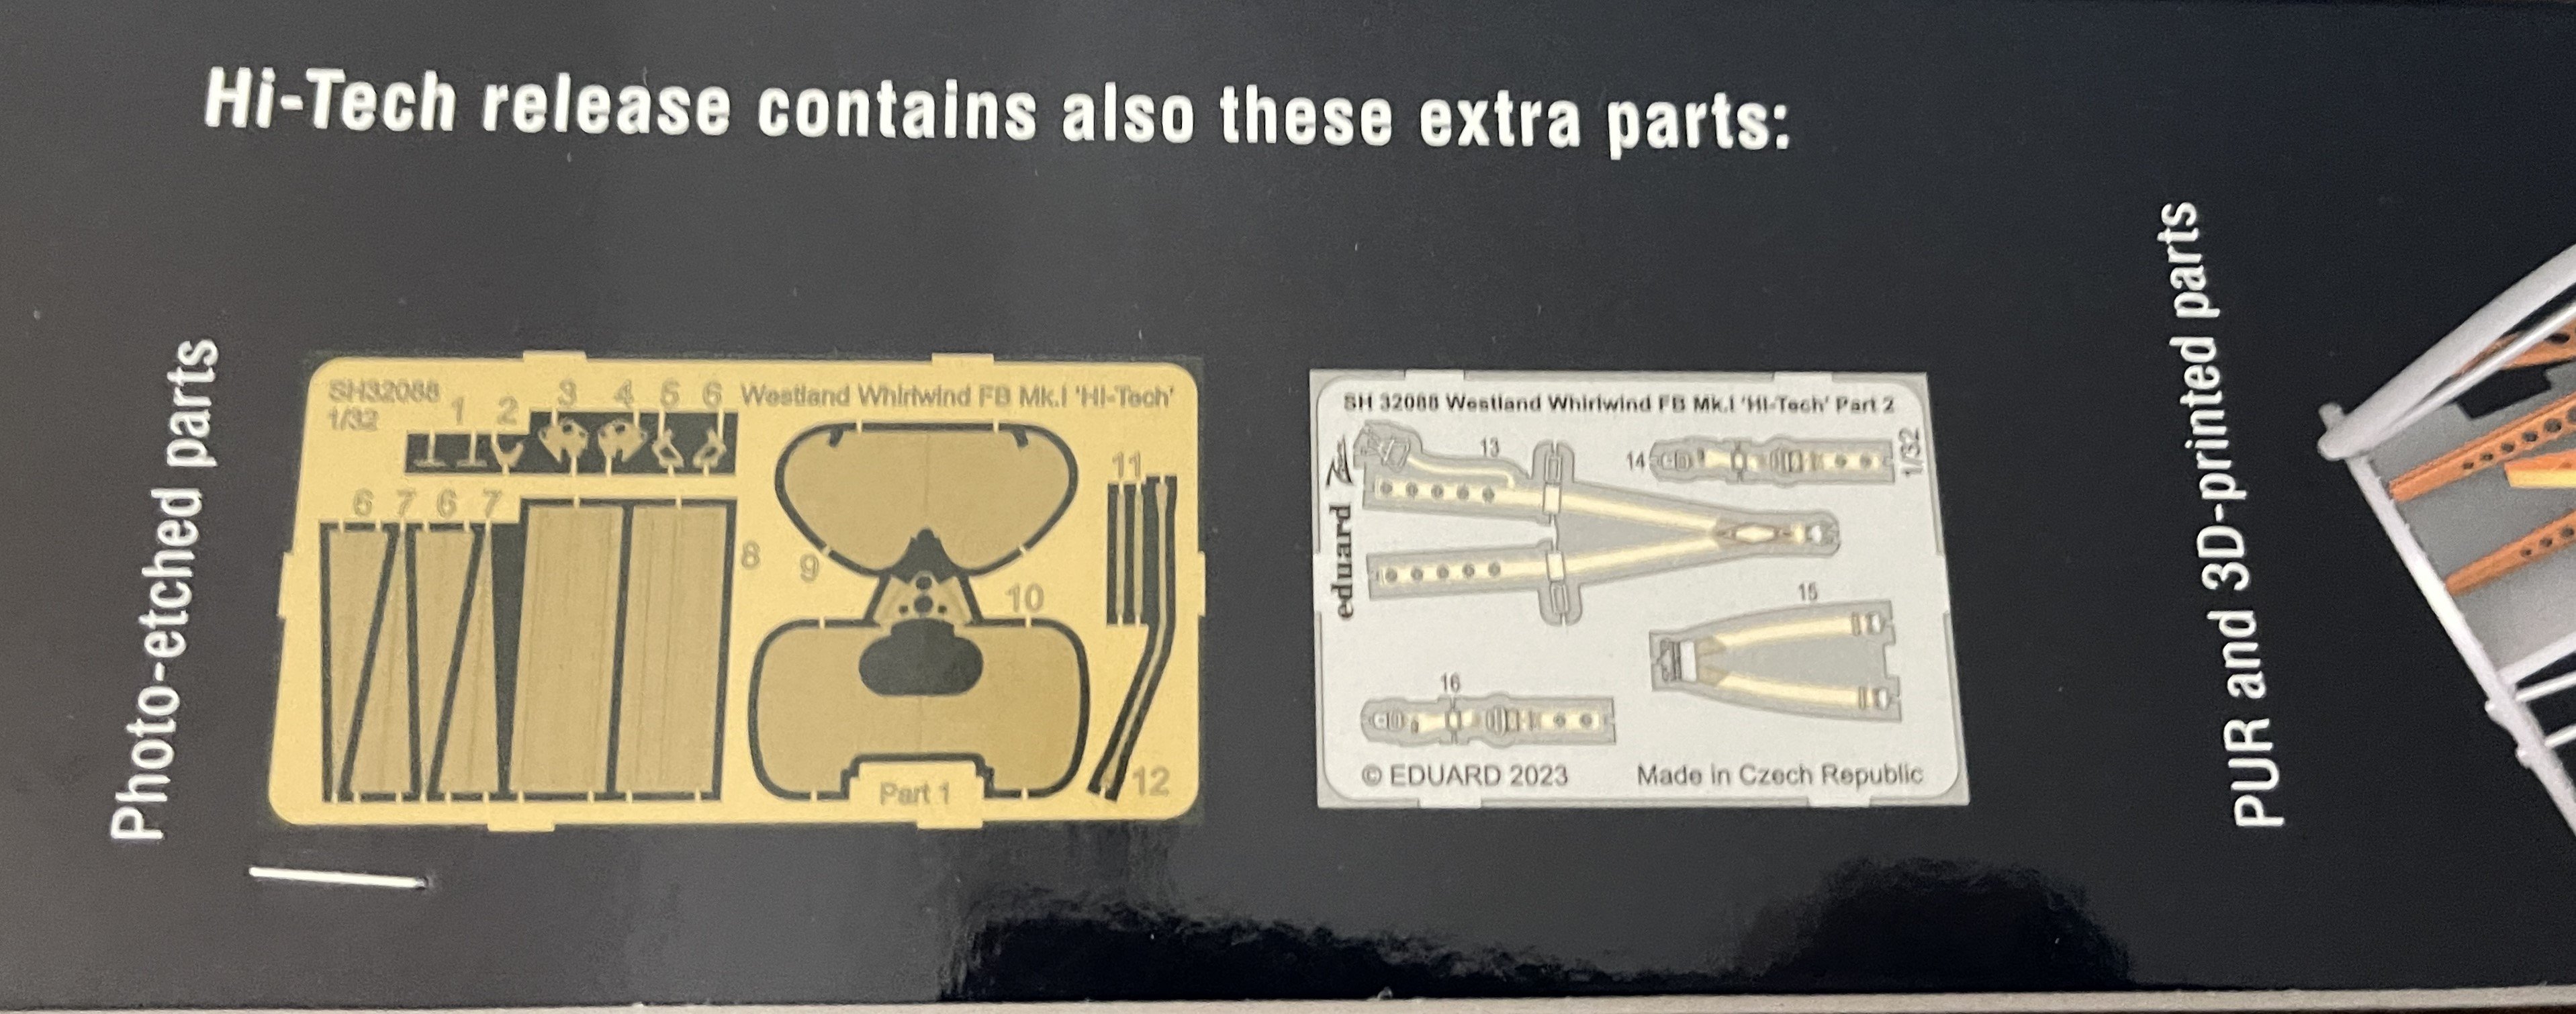
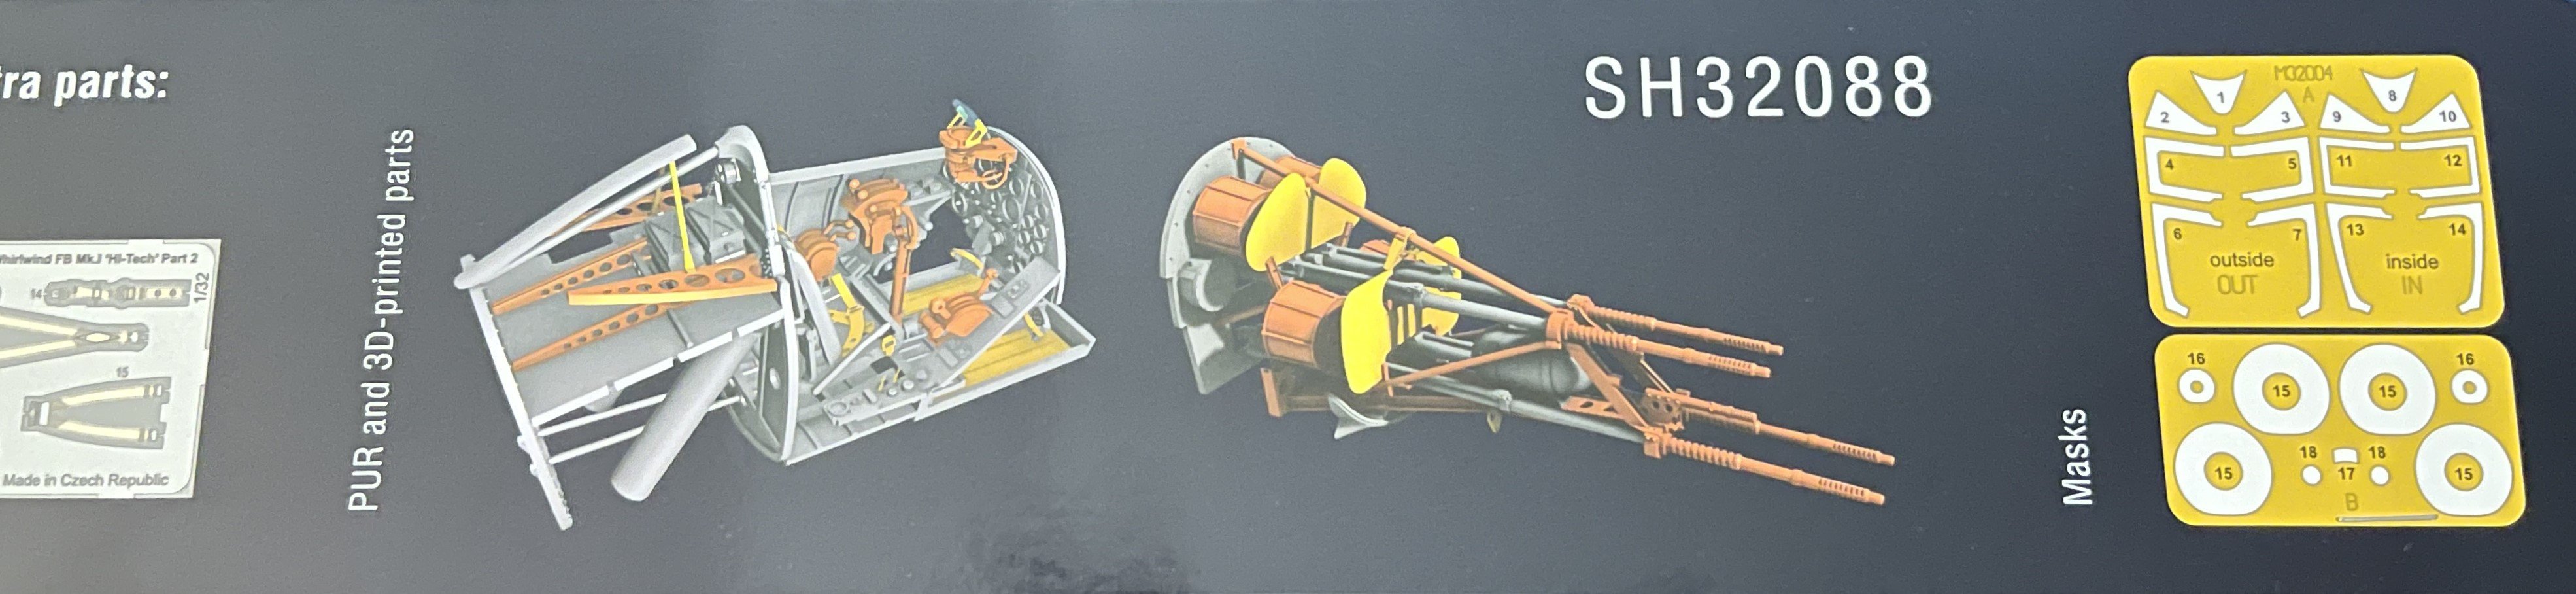
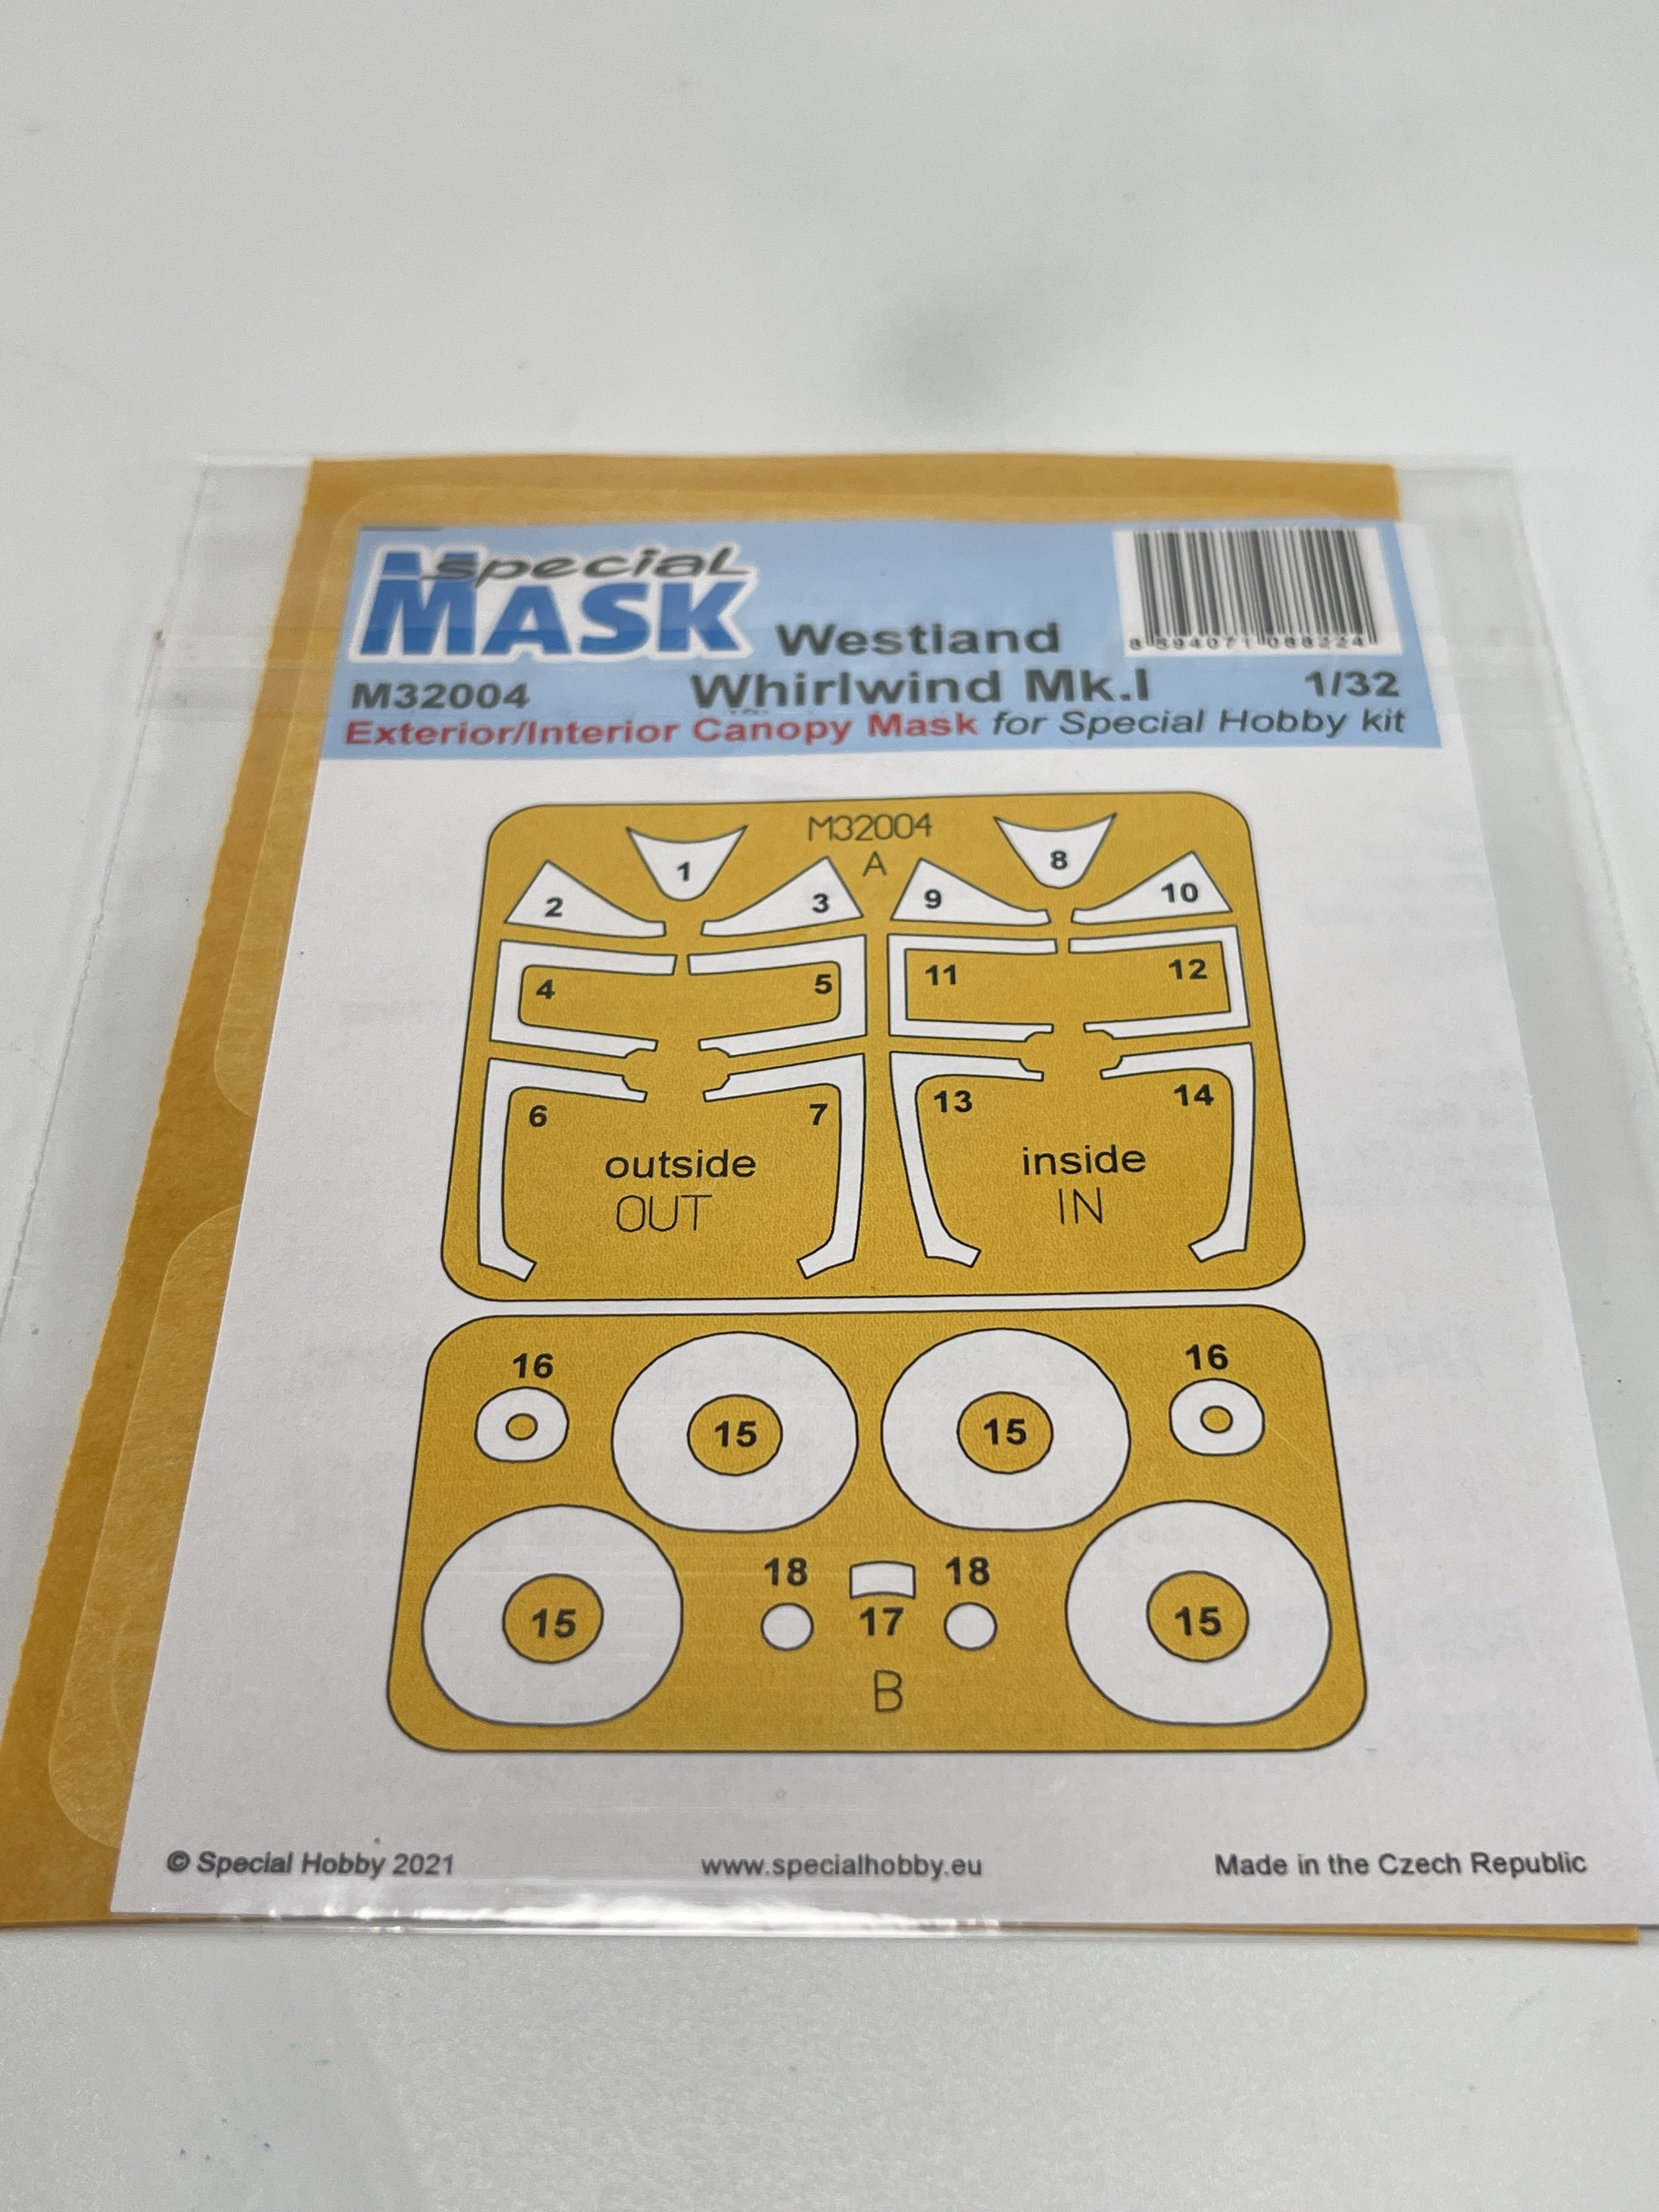
The hi-tech gives the modeler two photo-etched sheet, PUR resin parts and #D resin parts and a canopy and wheels mask.


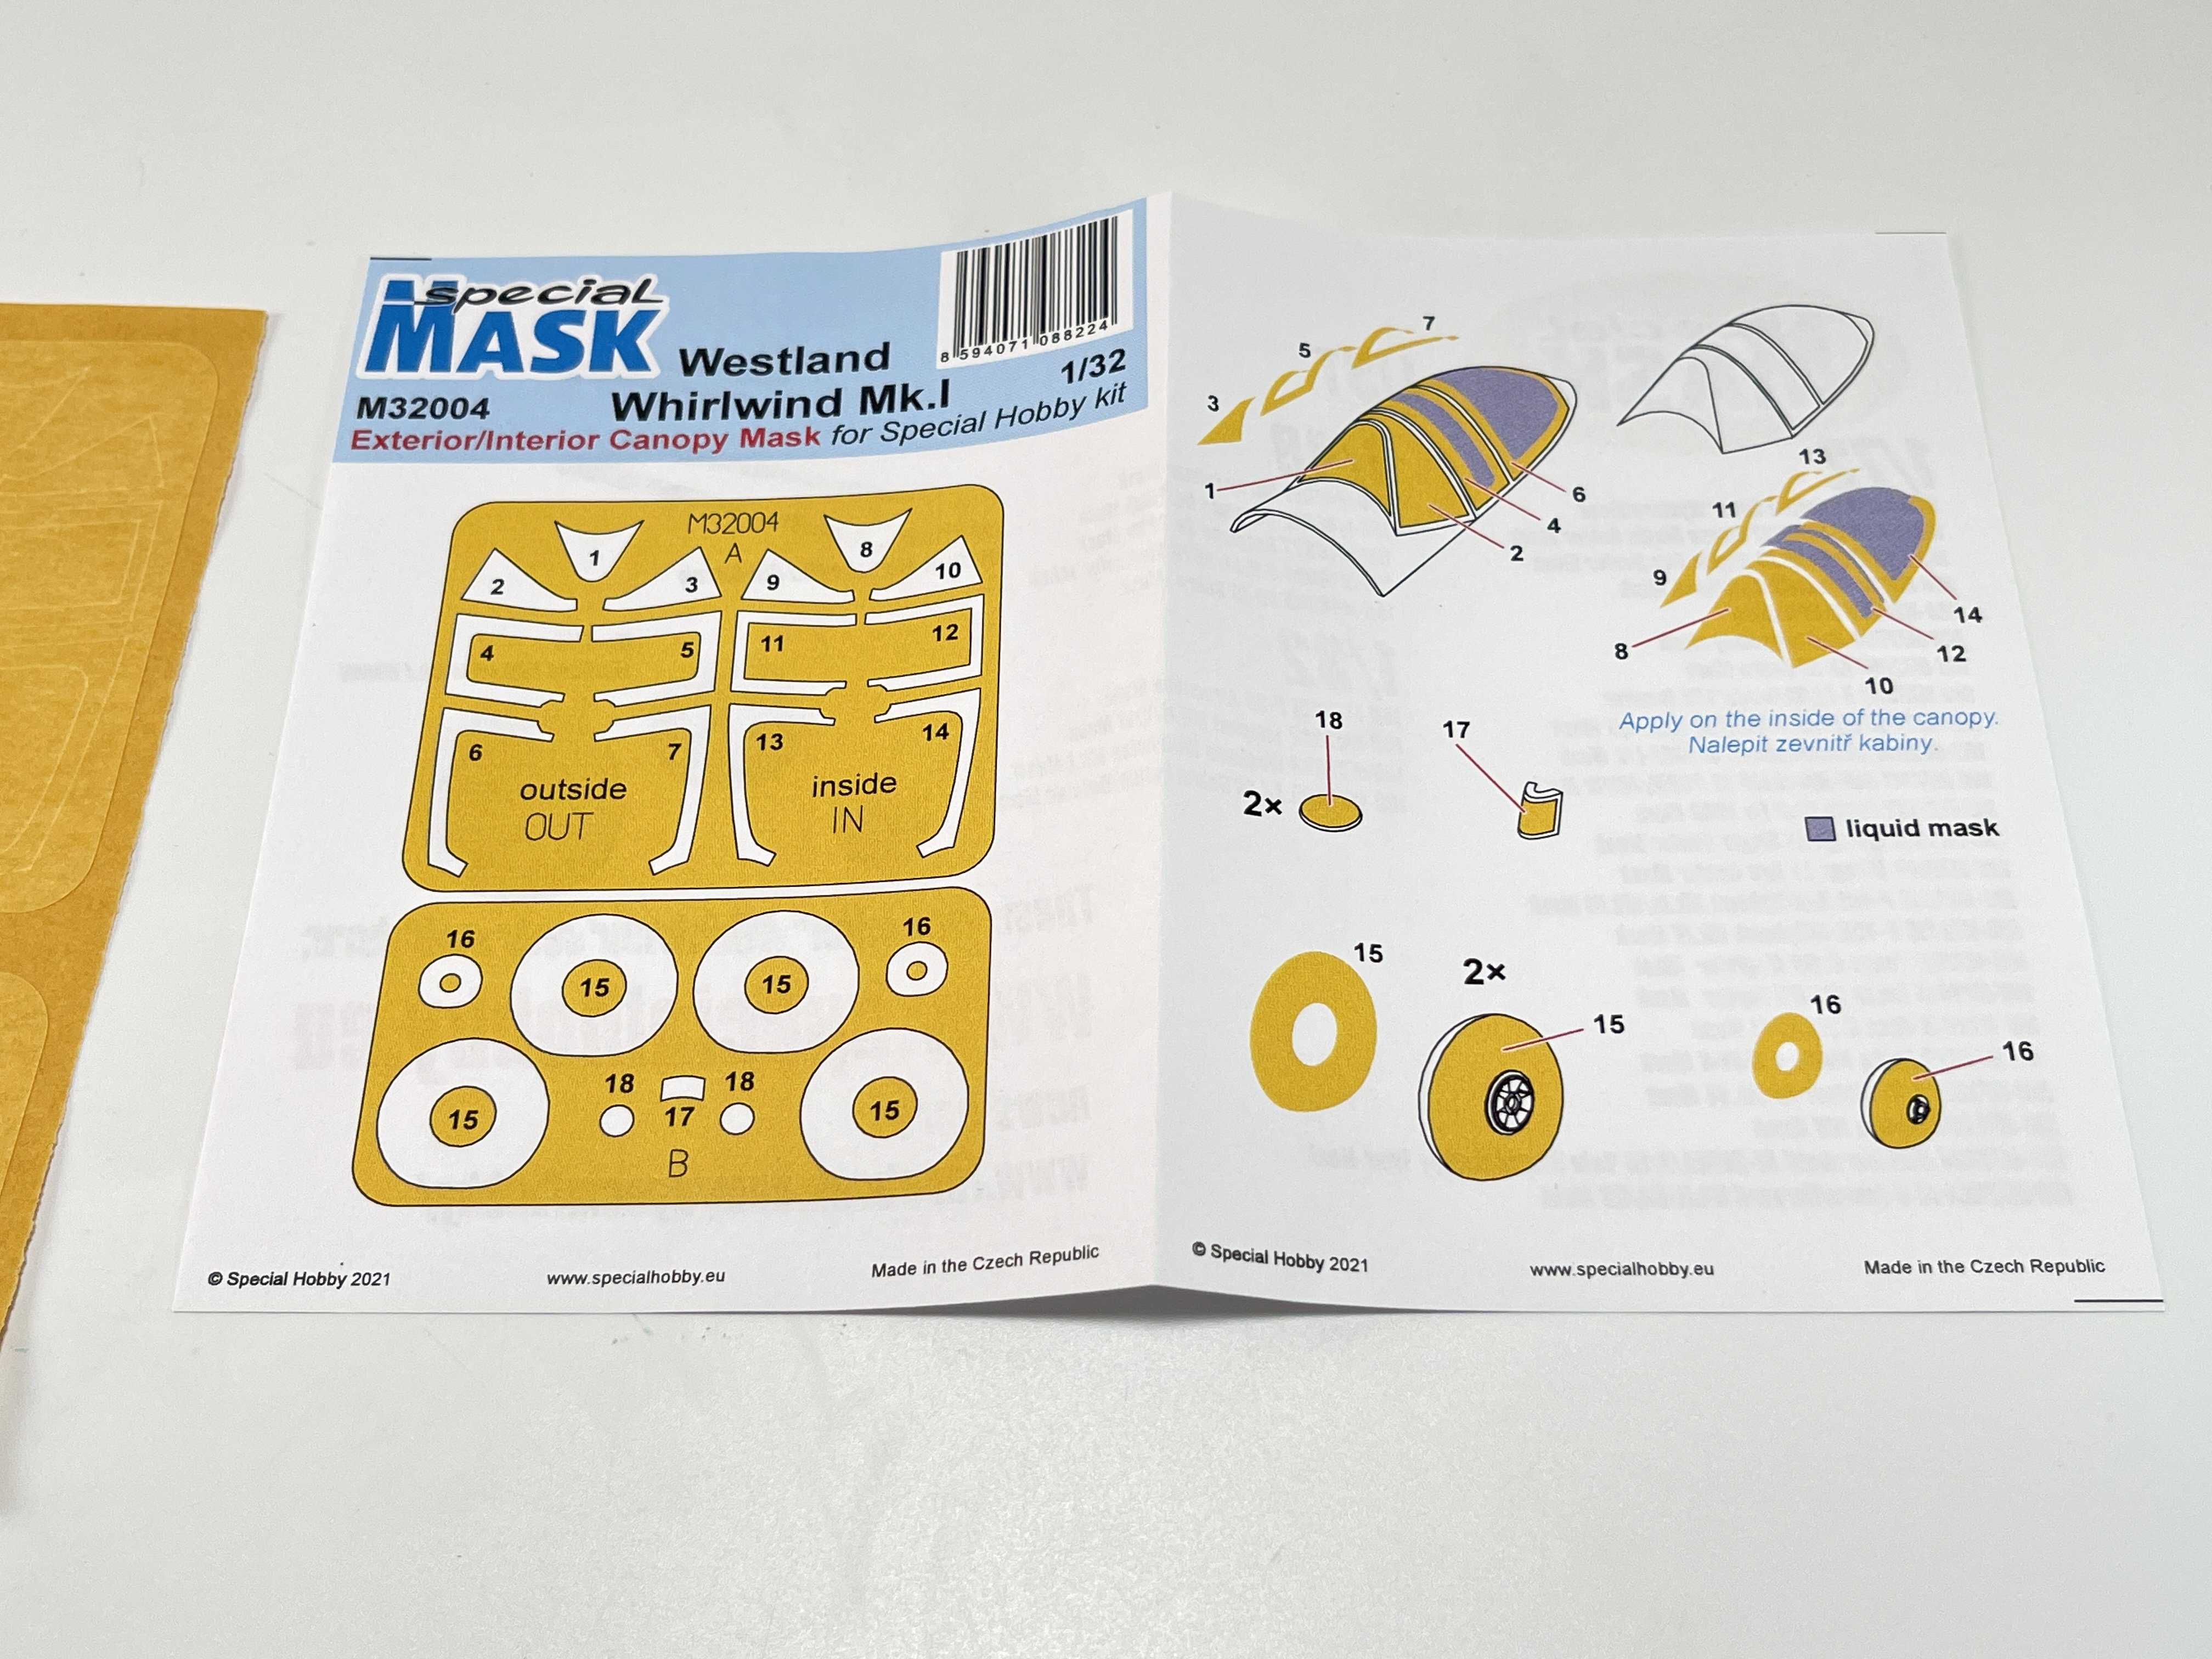
Starting from these, there`s two masks – one for the canopy and other for the wheels.
The canopy one gives the cover along the frame and for the windshield, full cover mask of the windows. To noted that these masks are for the outside and also inside, which, for me, is quite relevant in 1:32 scale specially for those aircraft to post in open canopy.
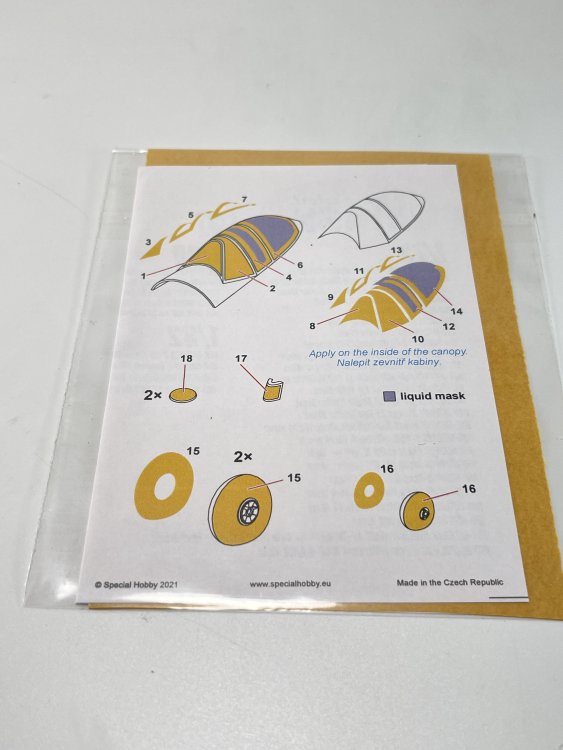

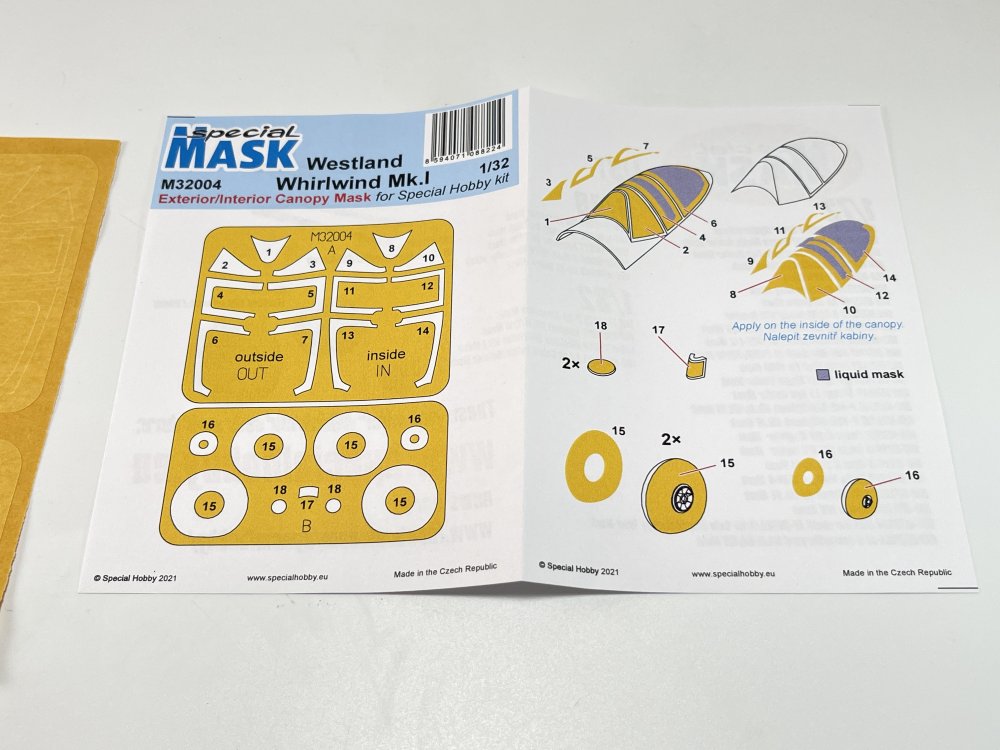
For wheels you get hub masks.
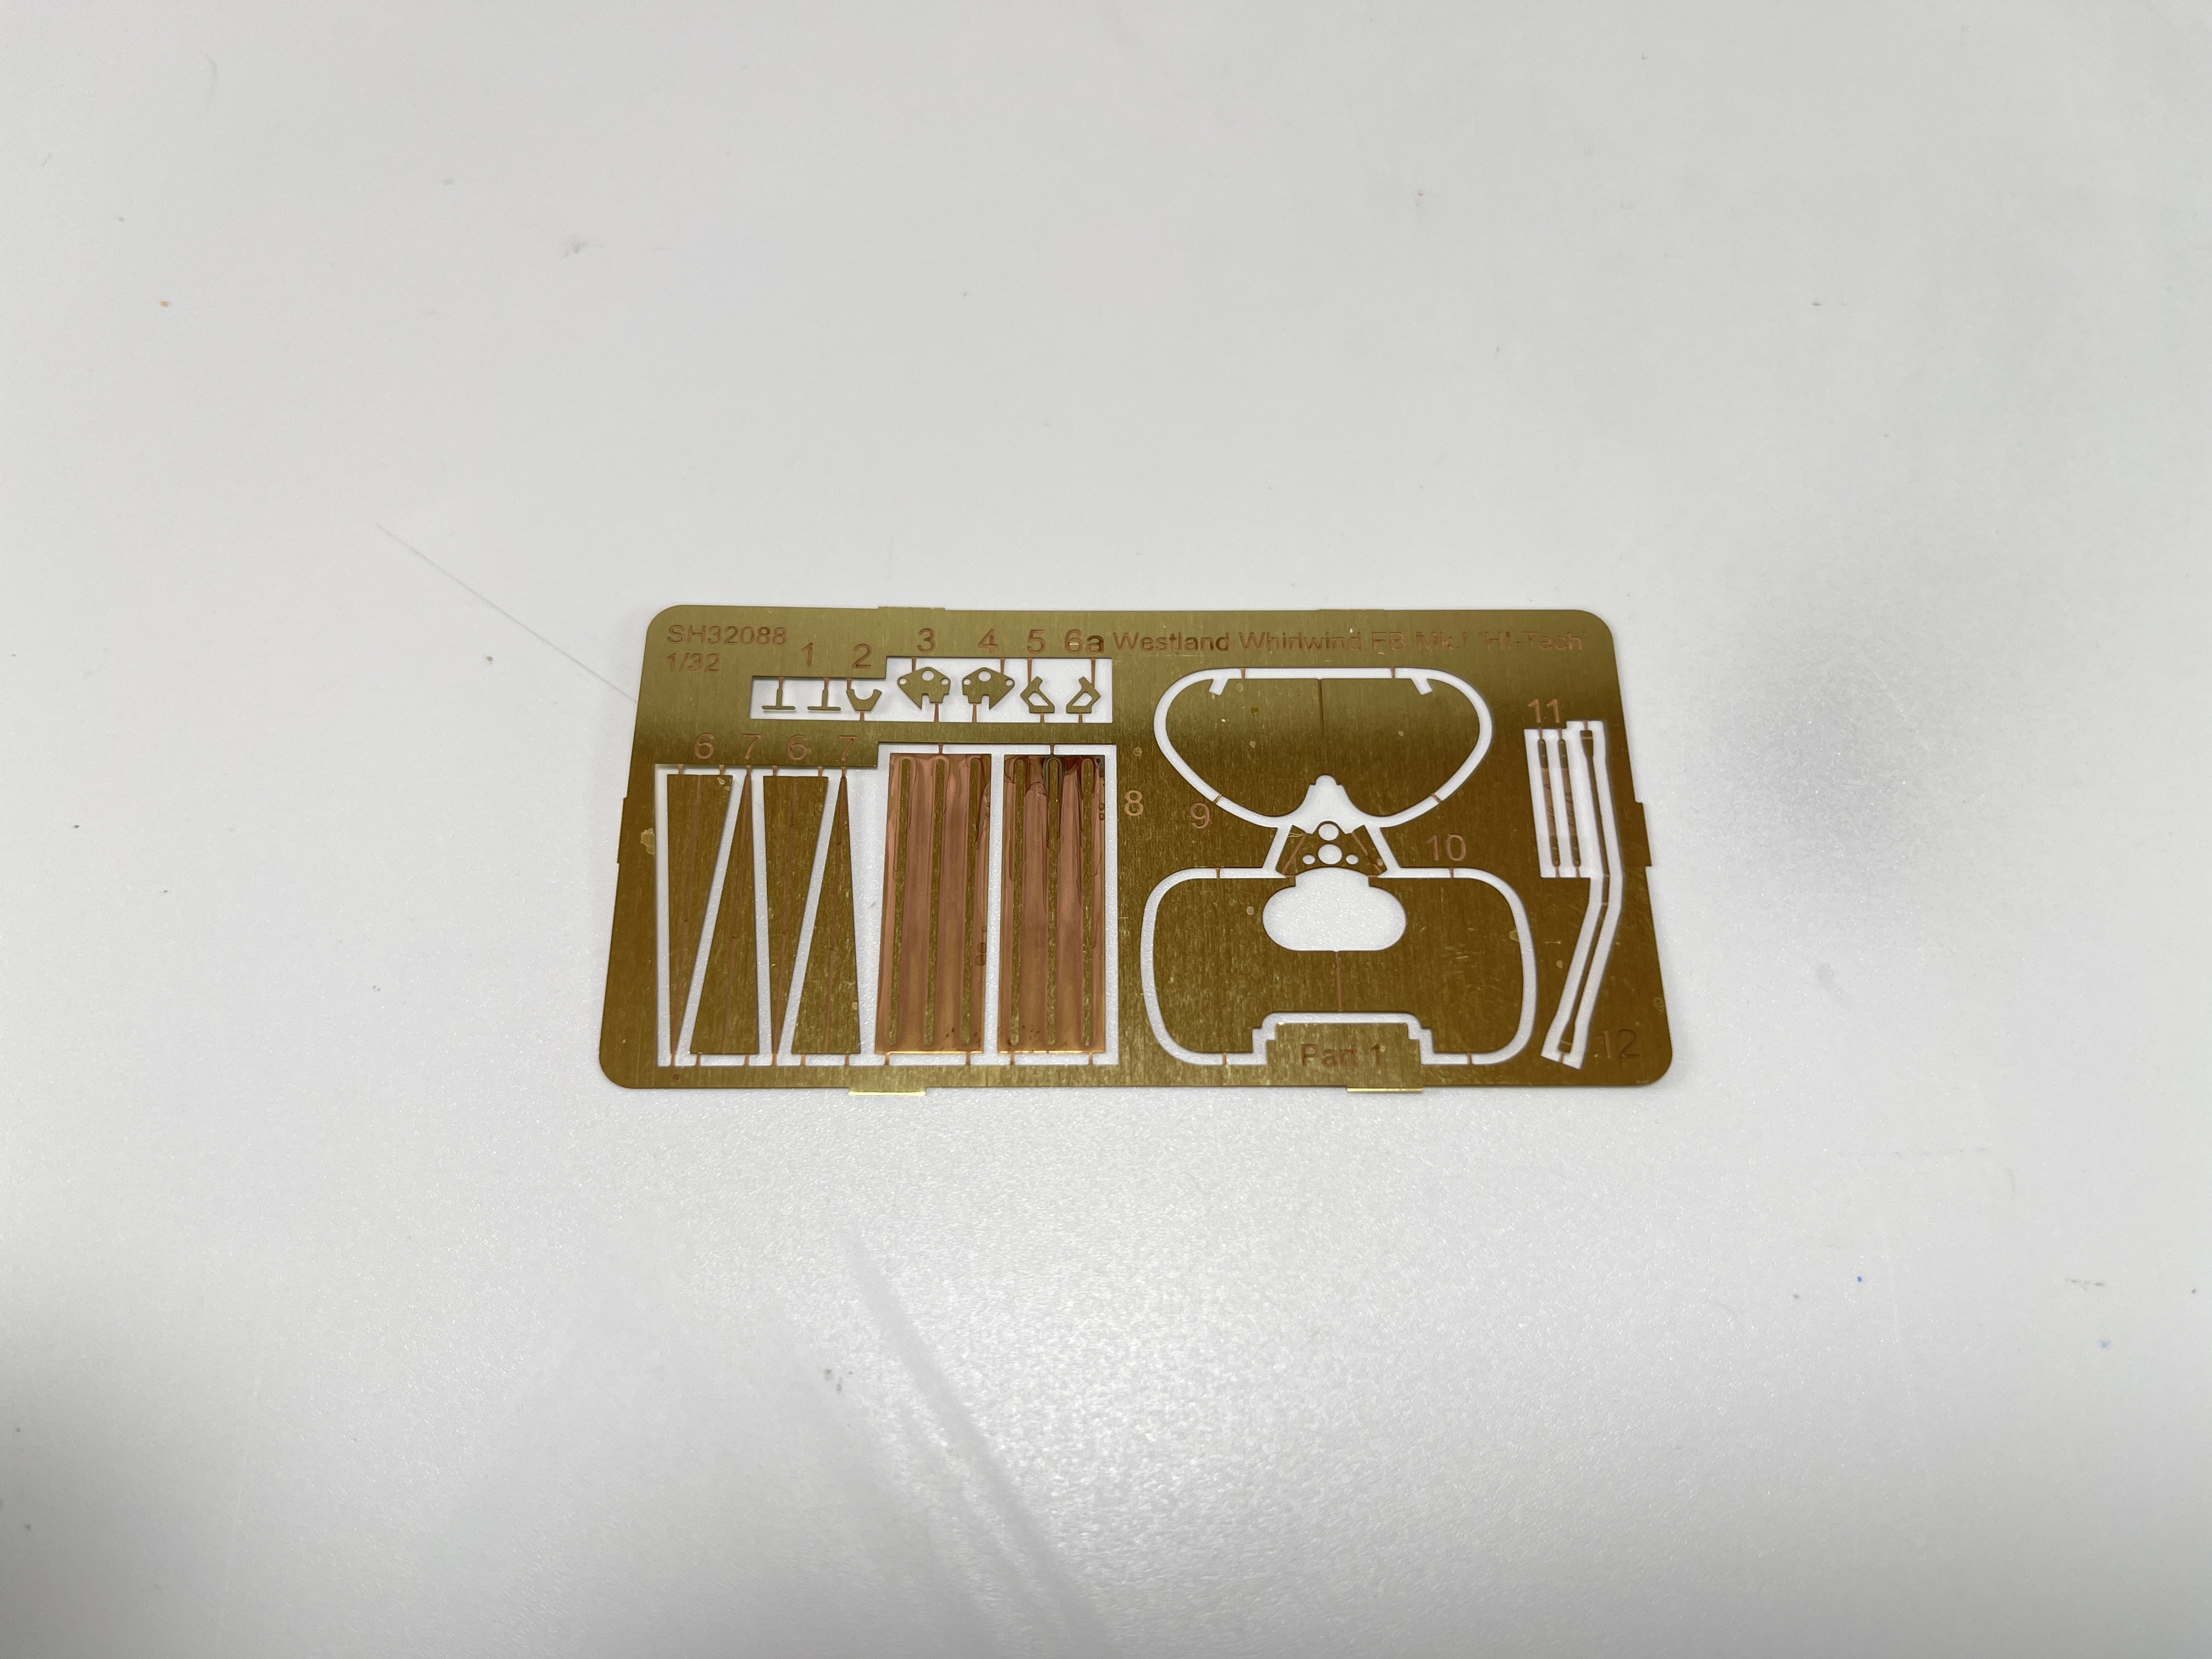
The main PE sheet is in brass made by Eduard (so quality is not an issue) with some radiator grill ,handles and levers, and nose plate for the guns.
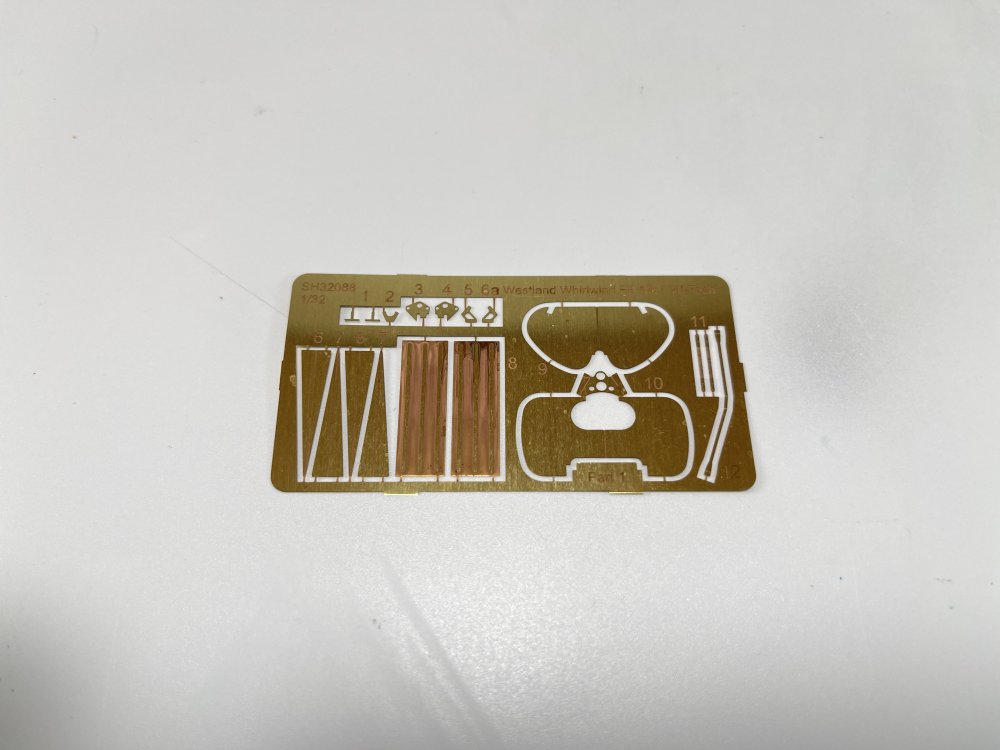
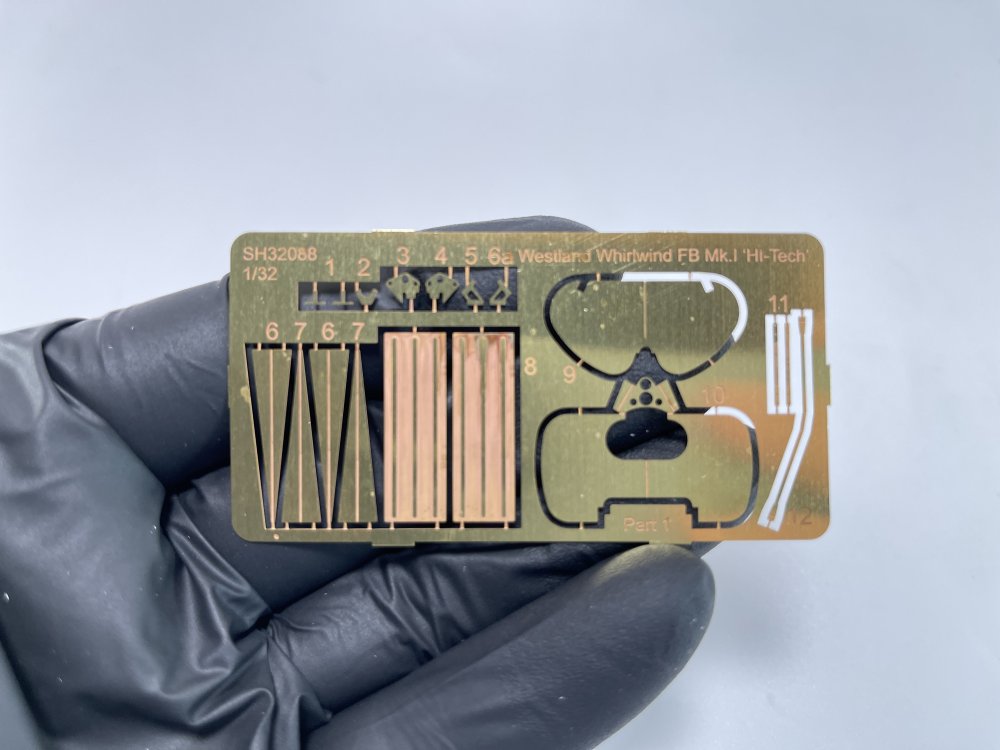
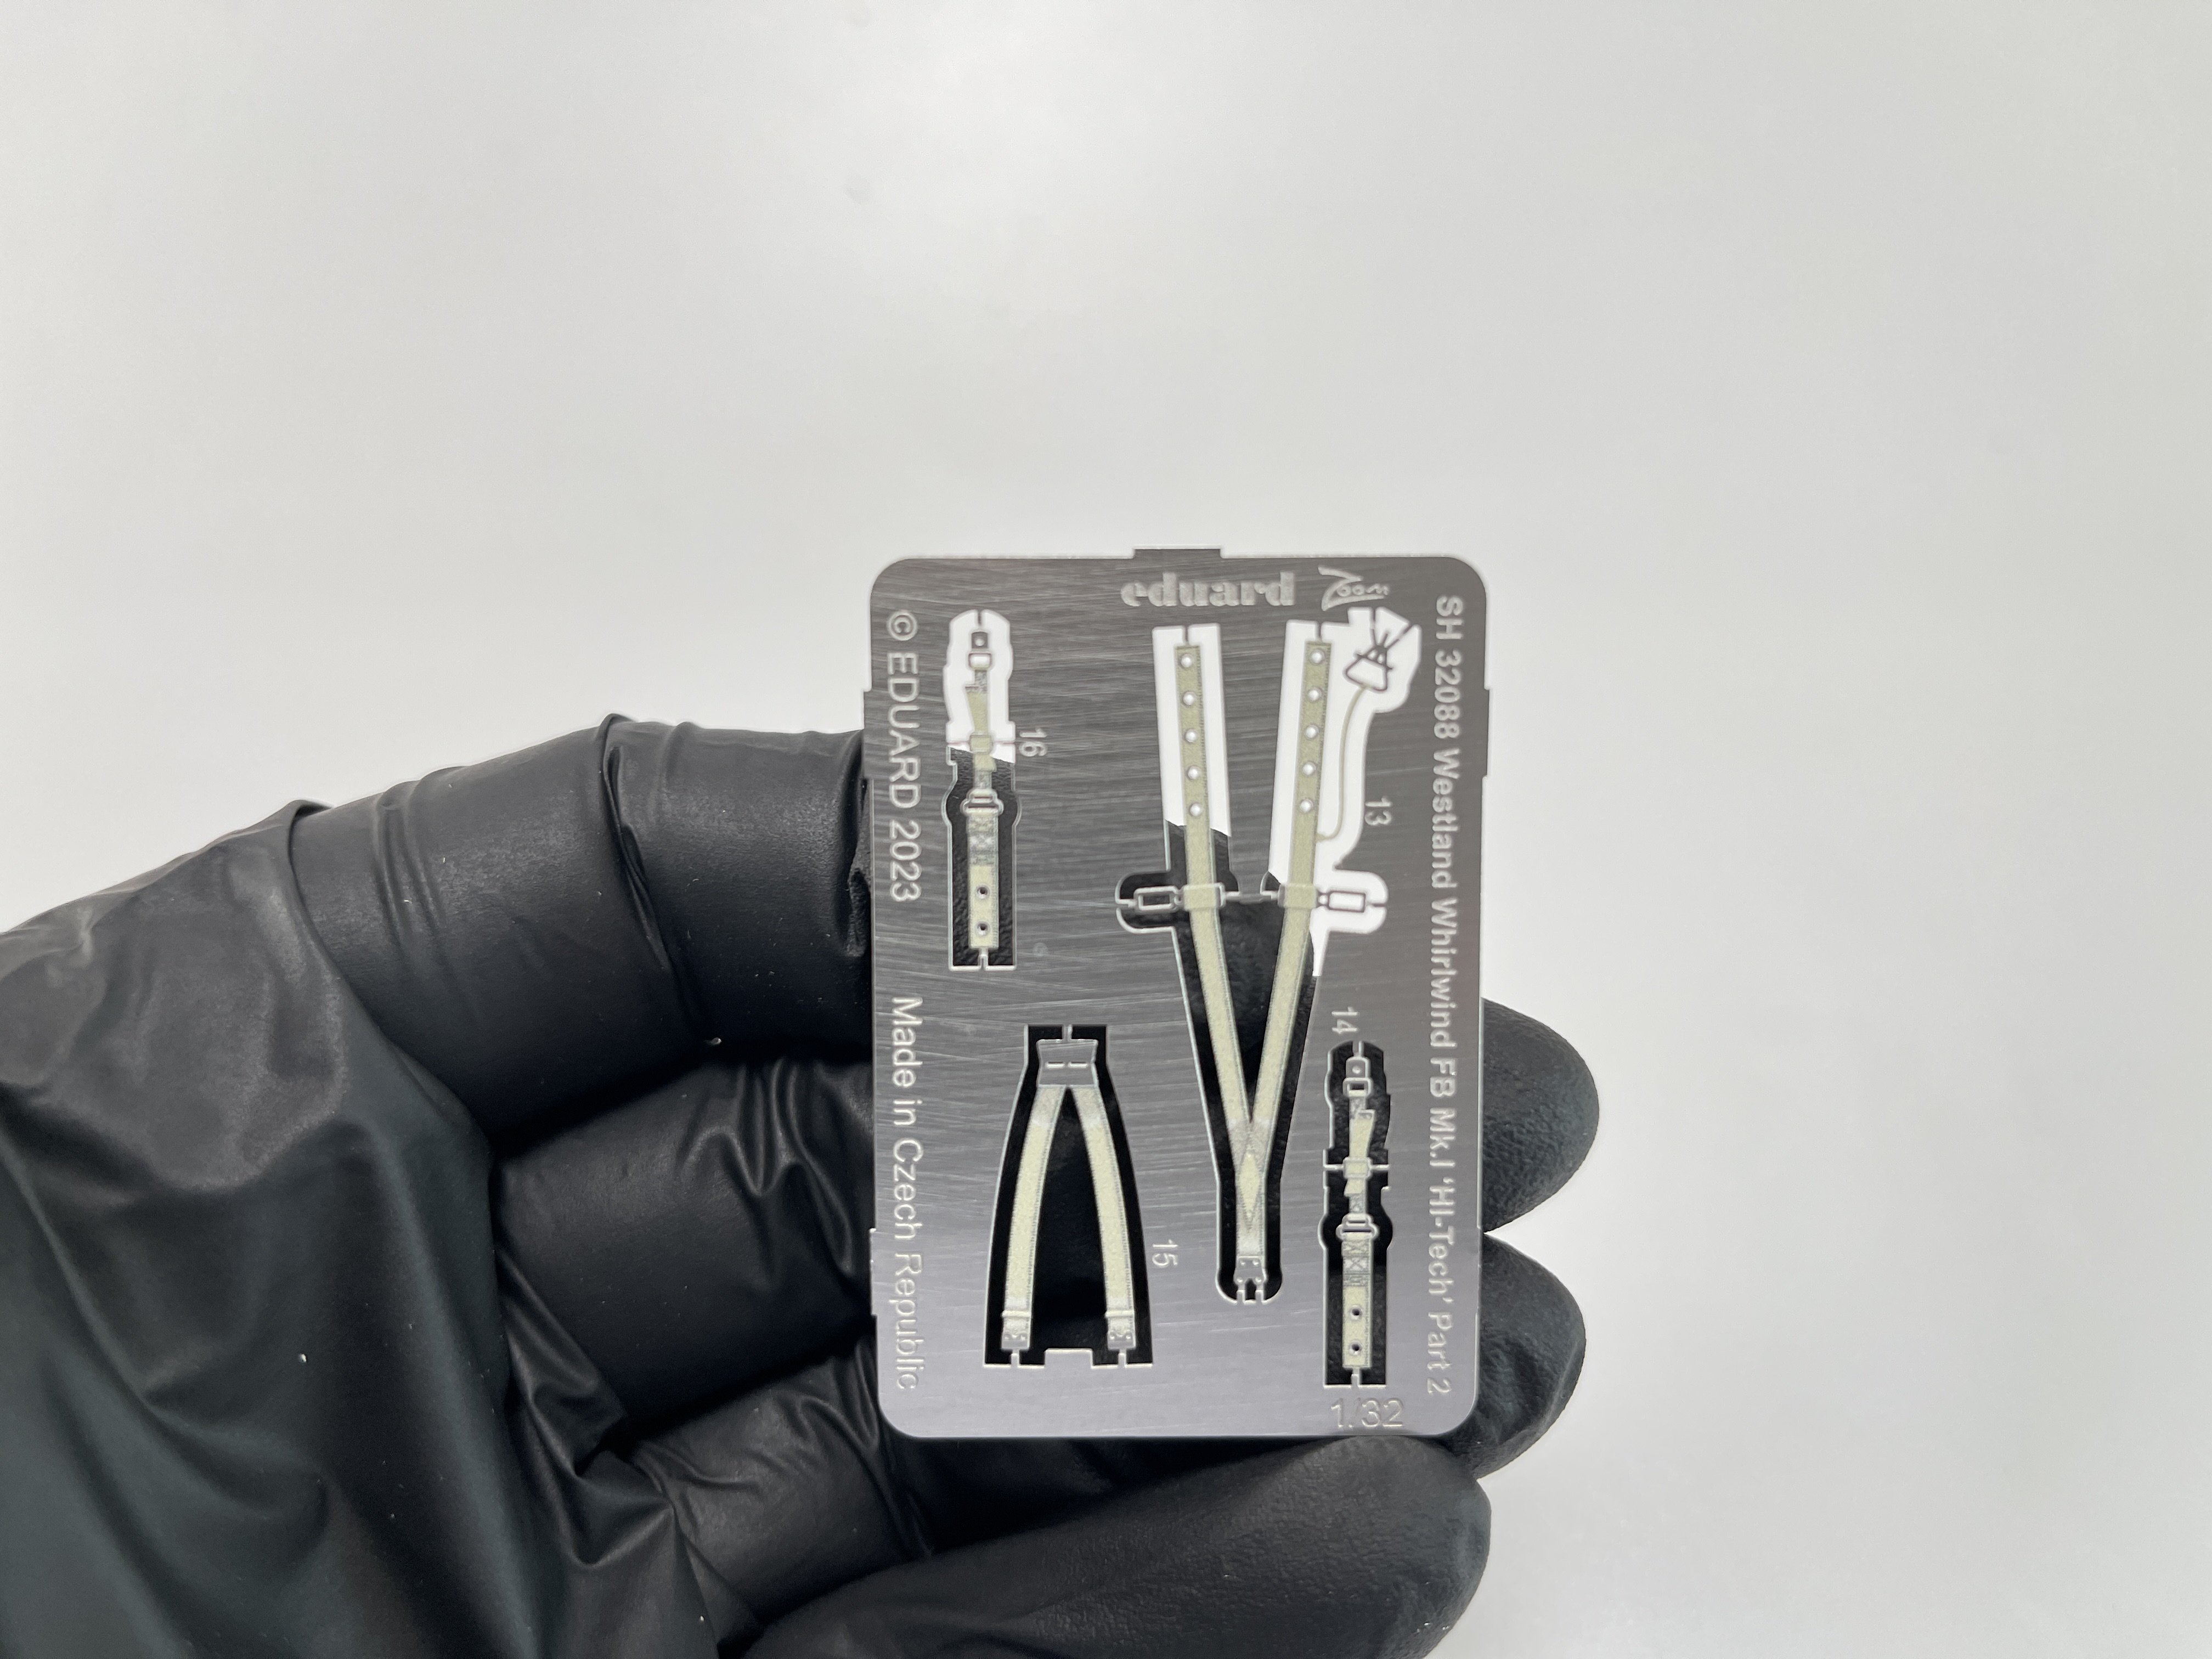
The second sheet are seatbelts, color ones also by eduard.

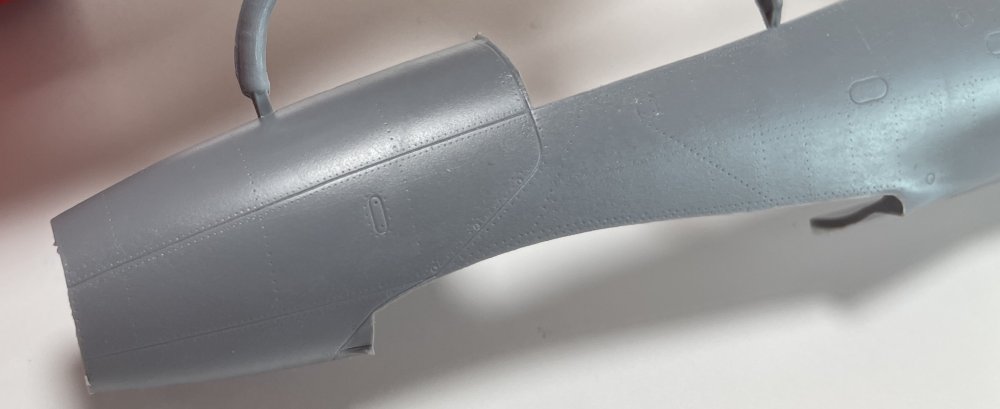
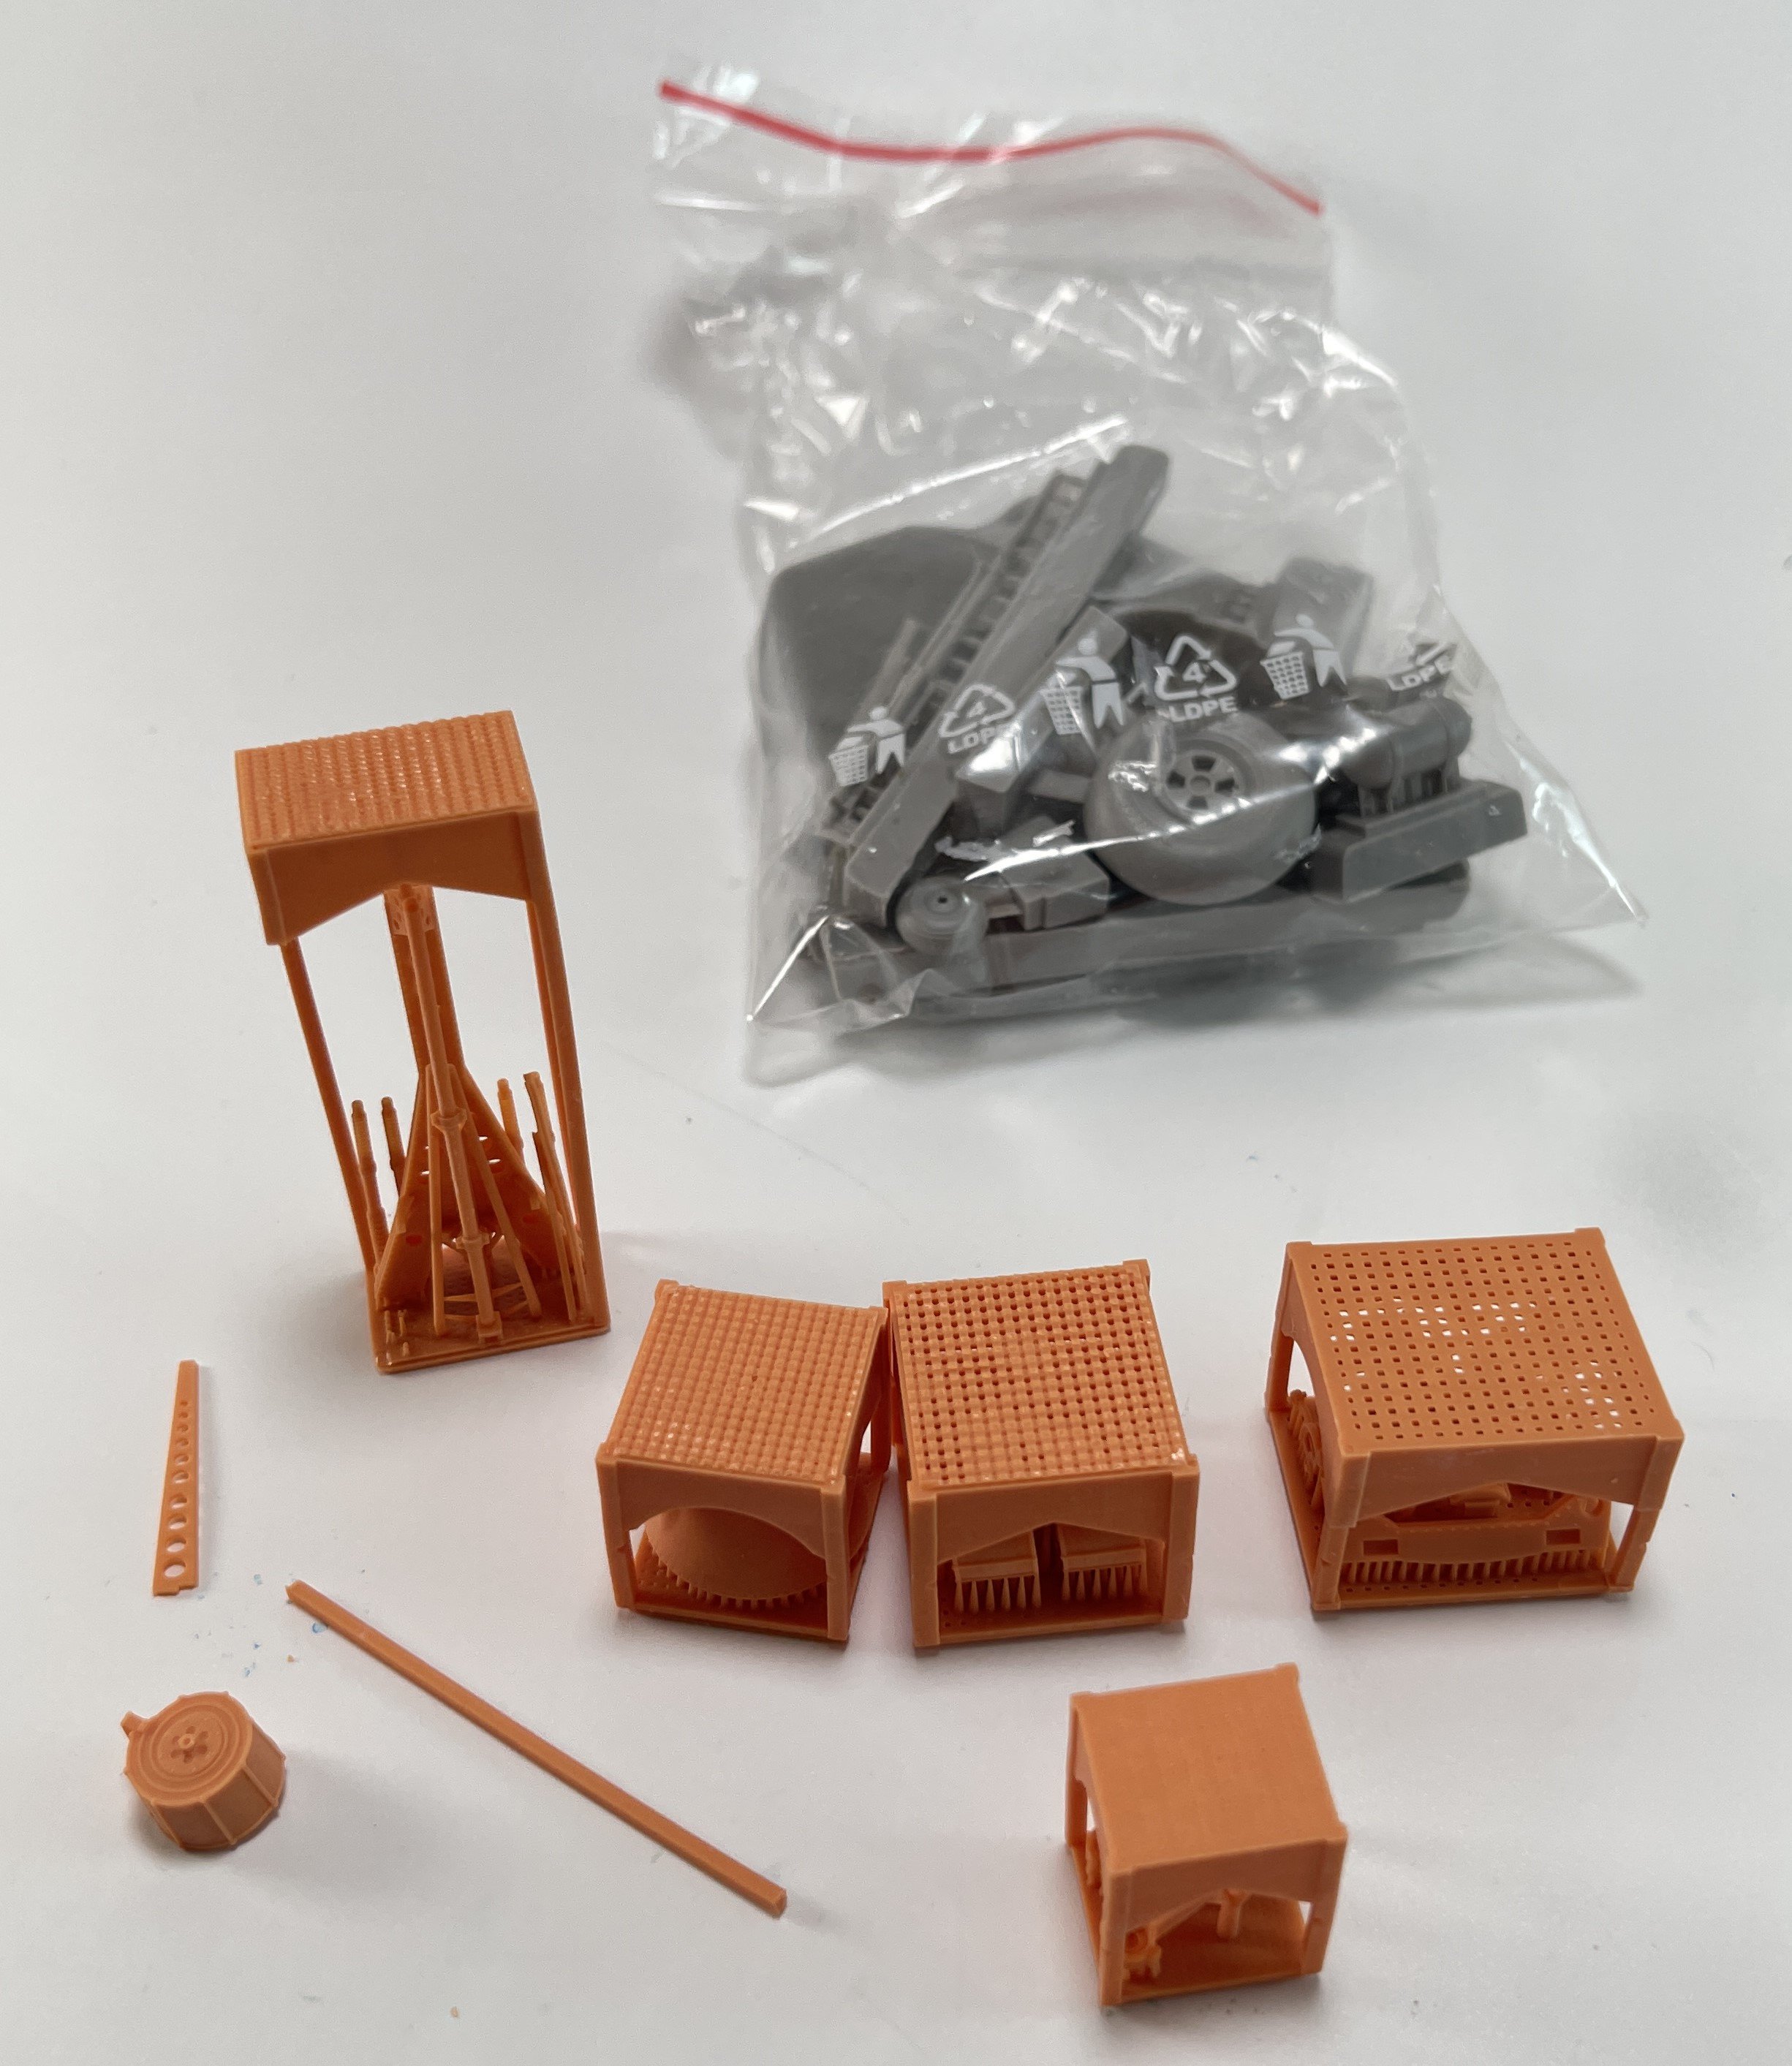
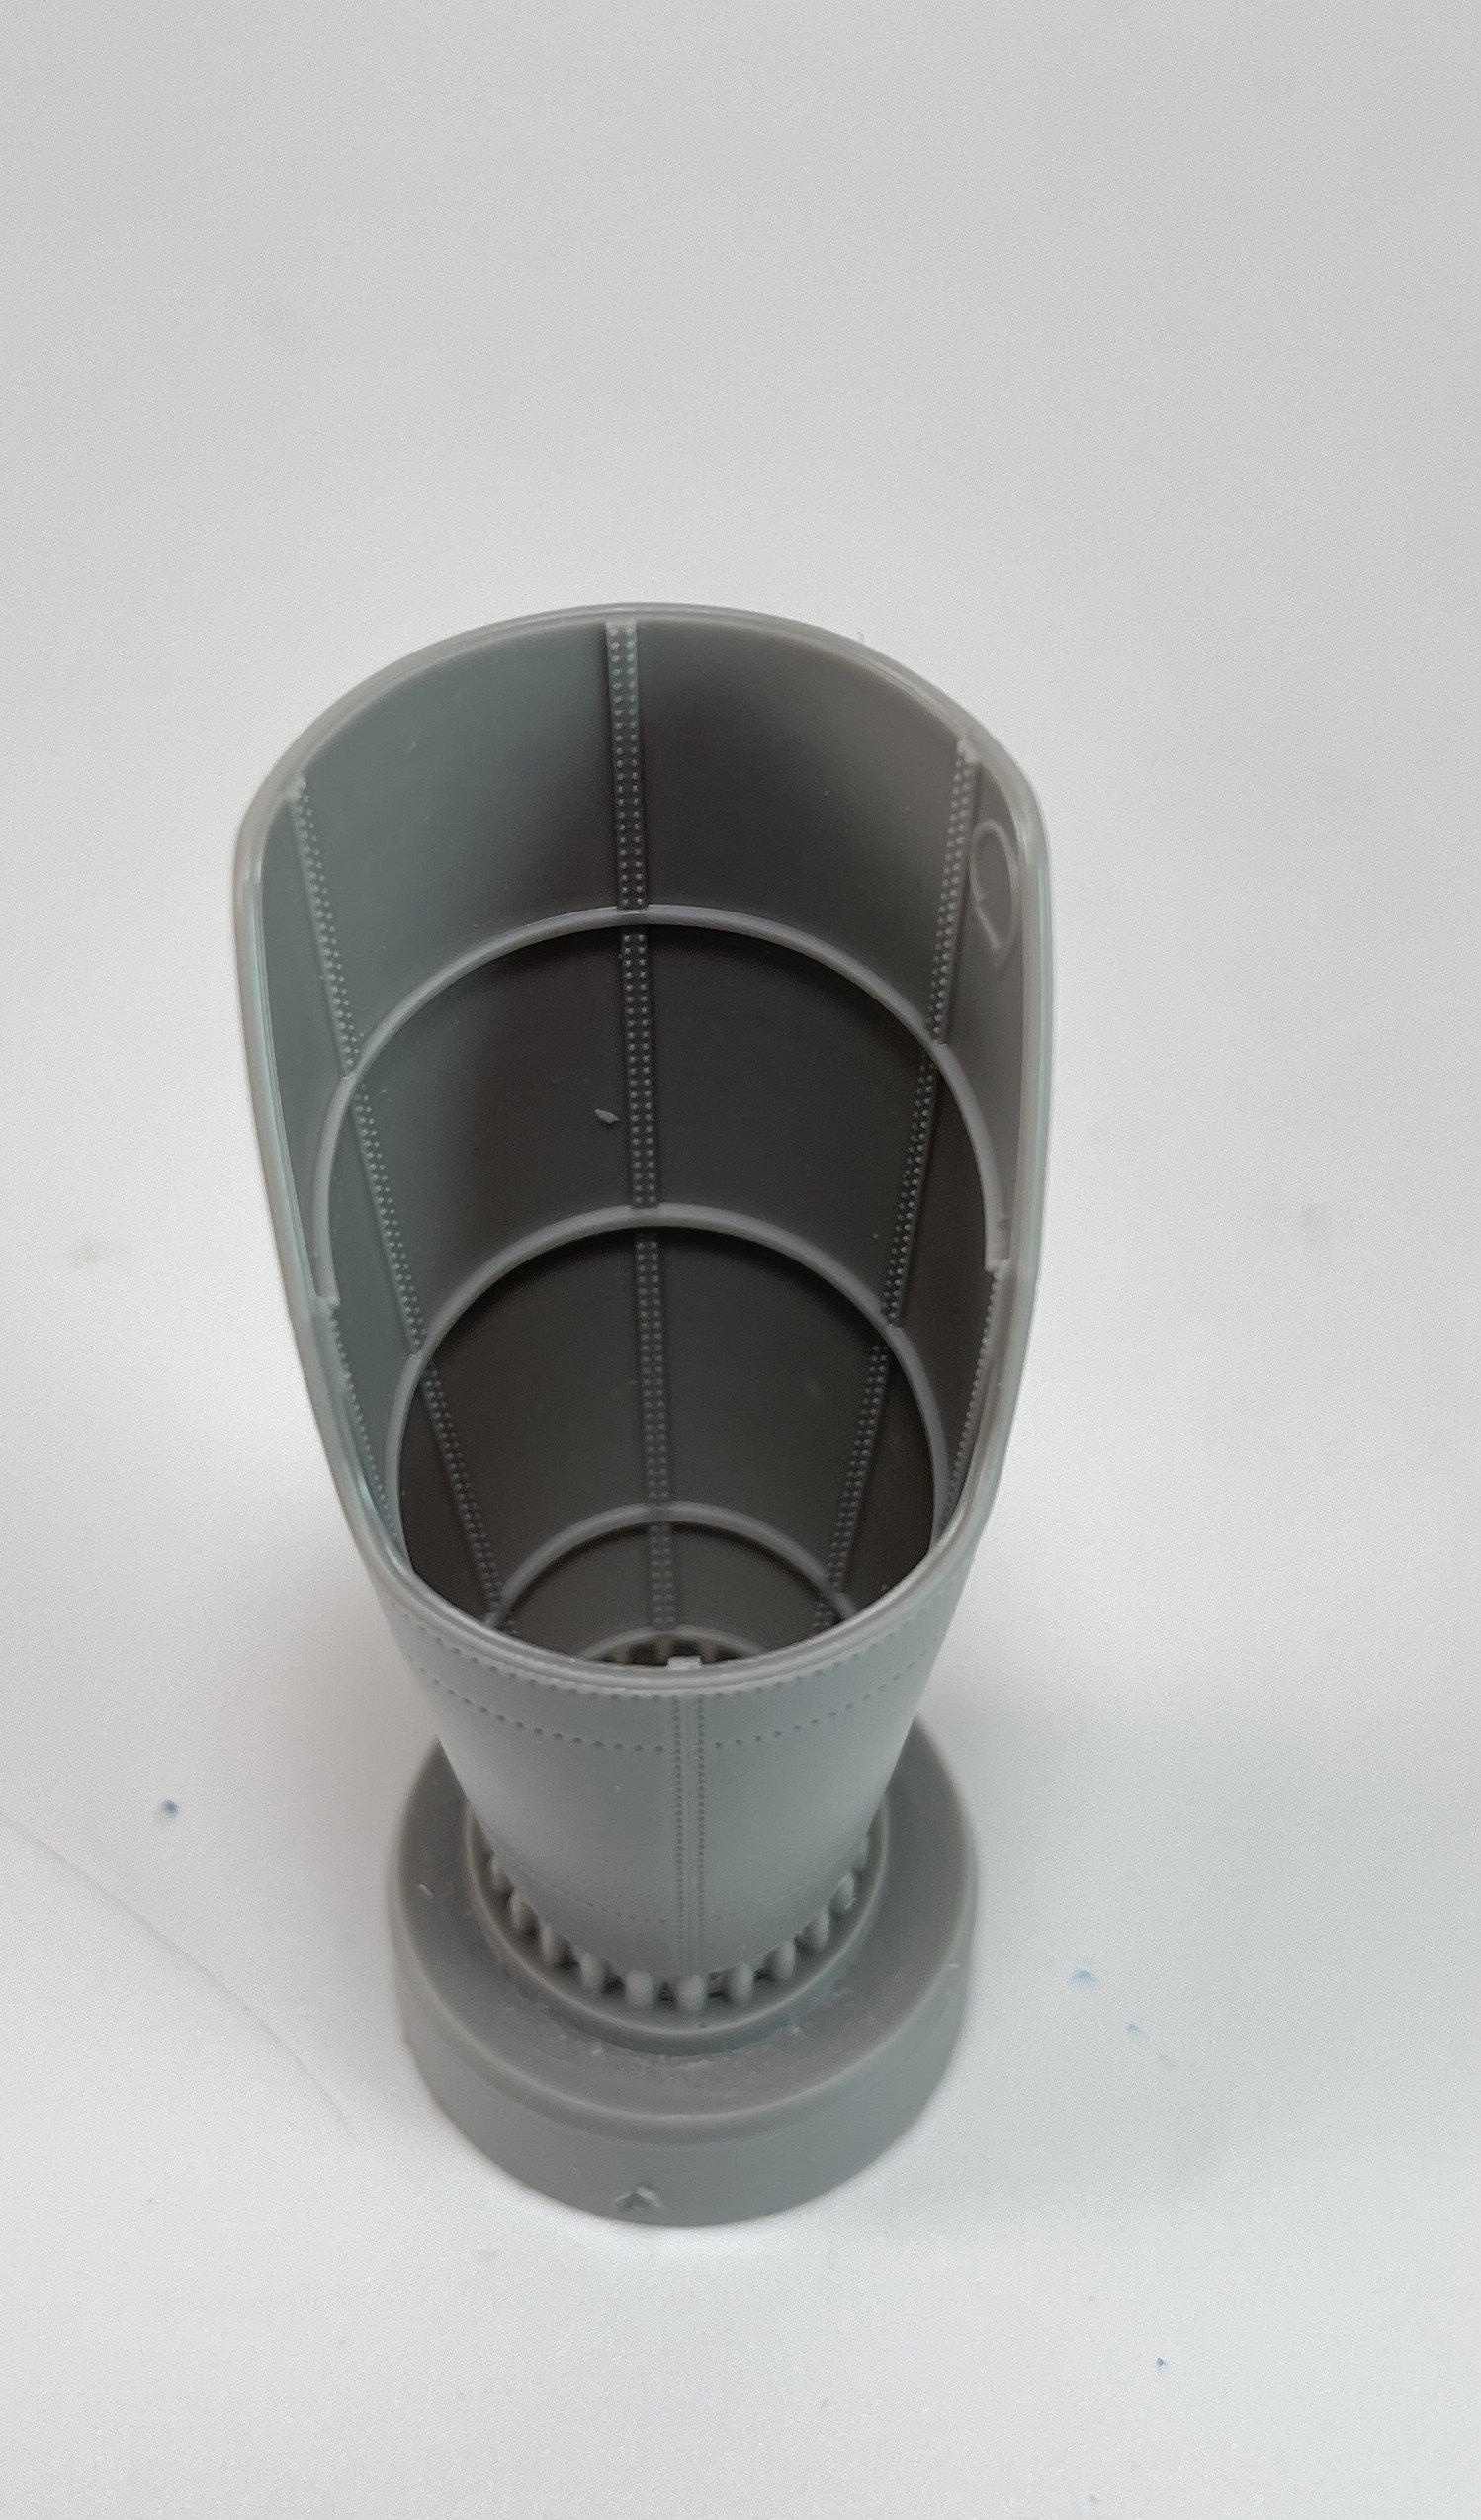
The resin parts and 3 D parts, are, for me, the real gem of this release.
The polyuteran one, are in gray resin, and, as usual of CMK (Special Hobby) are perfectally cast, with no bubble at all, and with some beautifull surface detail Top noch as usual.
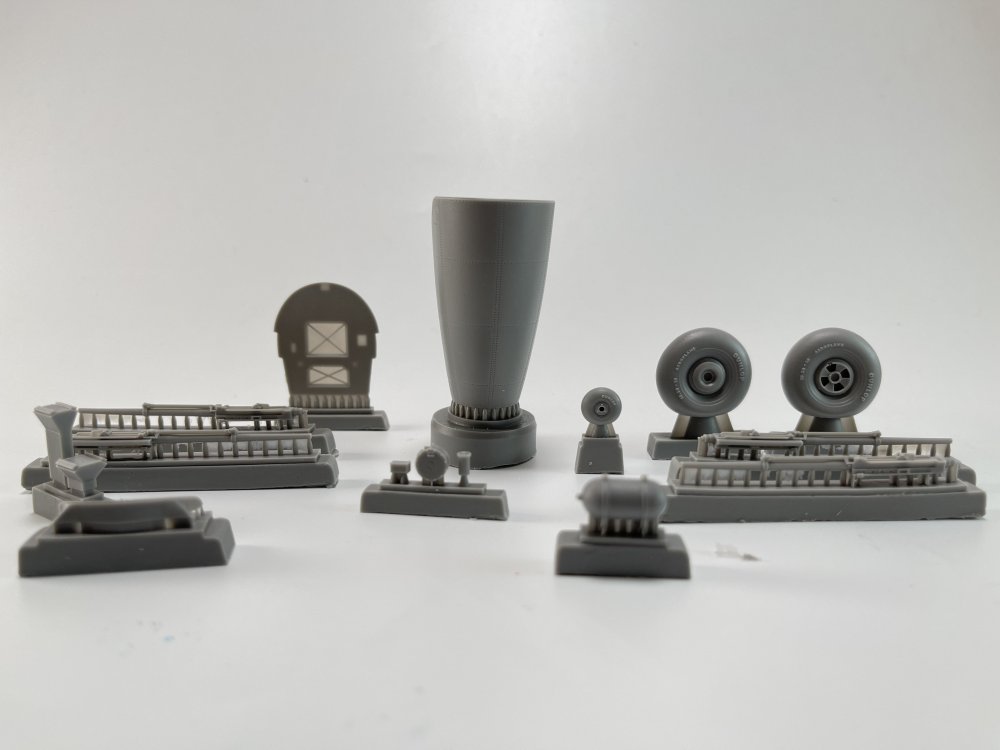


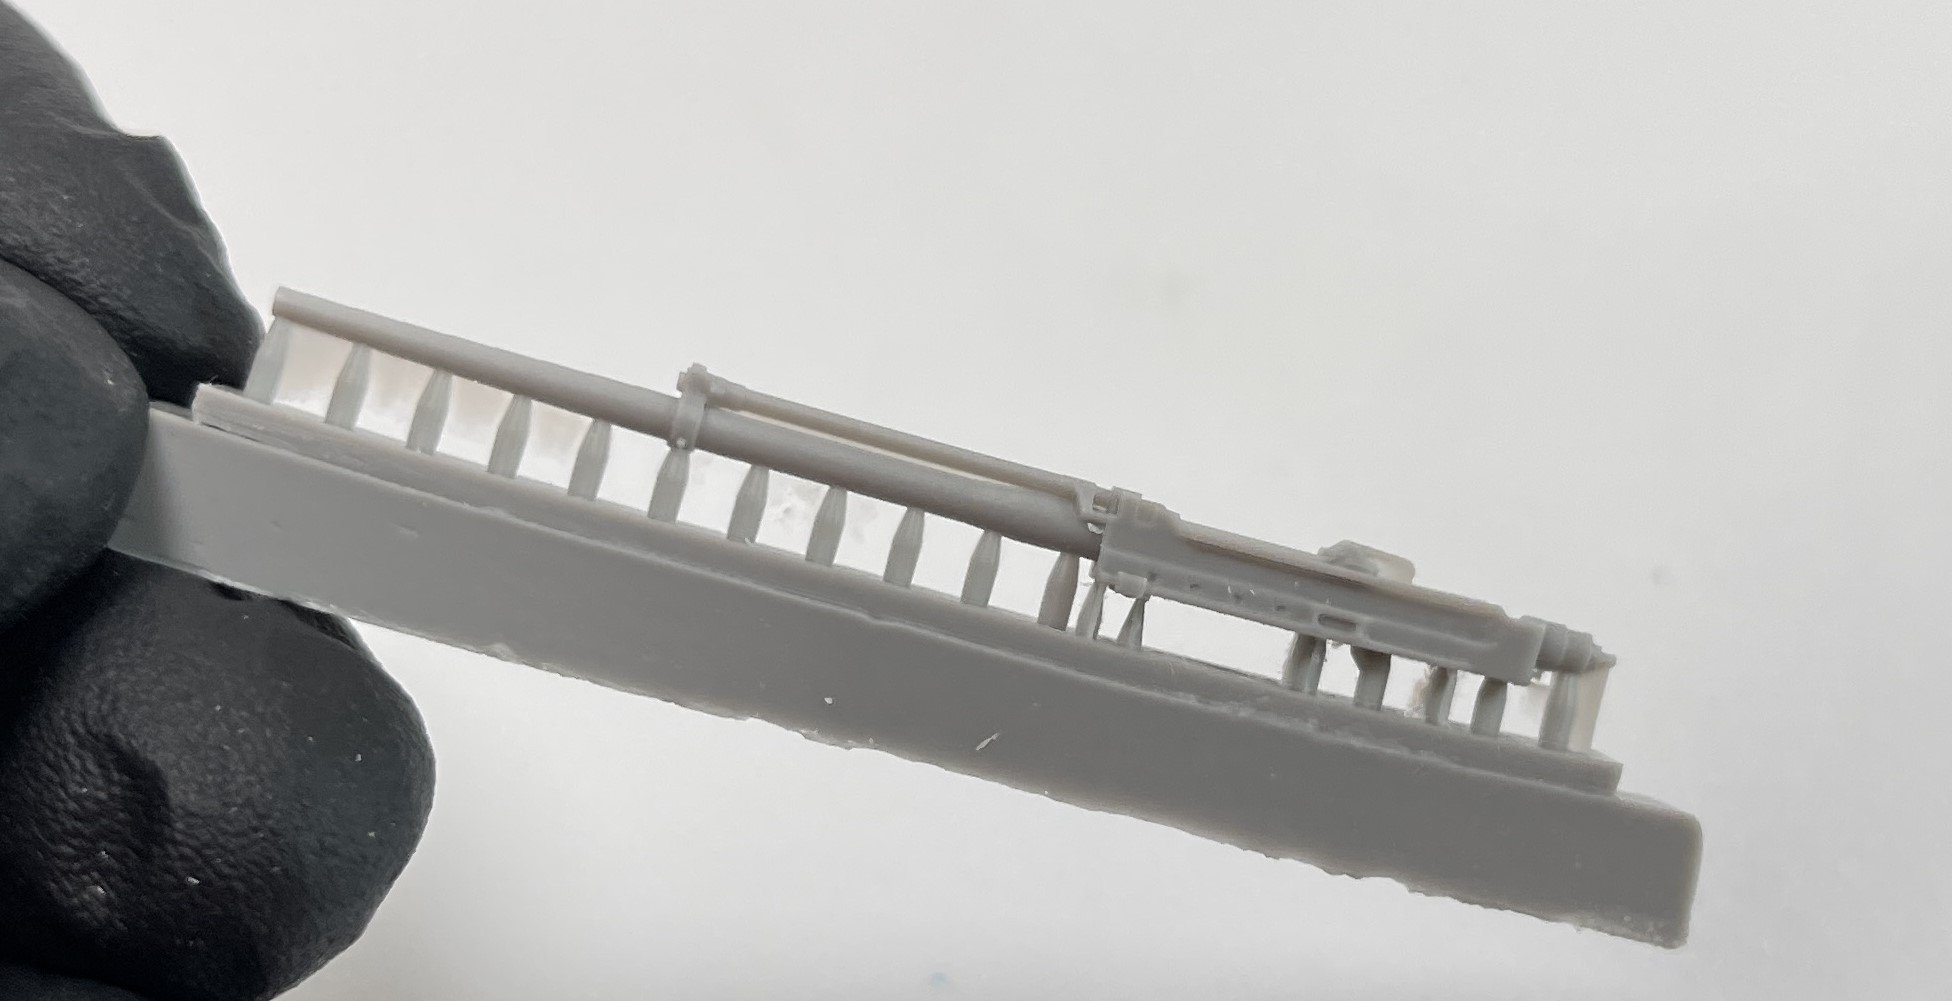
The new entire nose isa fantastic craft pice. To instally this one you need to make a big but straightforward surgery on the fuselage removing carfully the entire nose… The fuselage will be with no nose and the end part will be quite fragile… So should be handle carefully.


In resin all the four 20mm canons, that have no sag and are perfectly detailed to be expose.


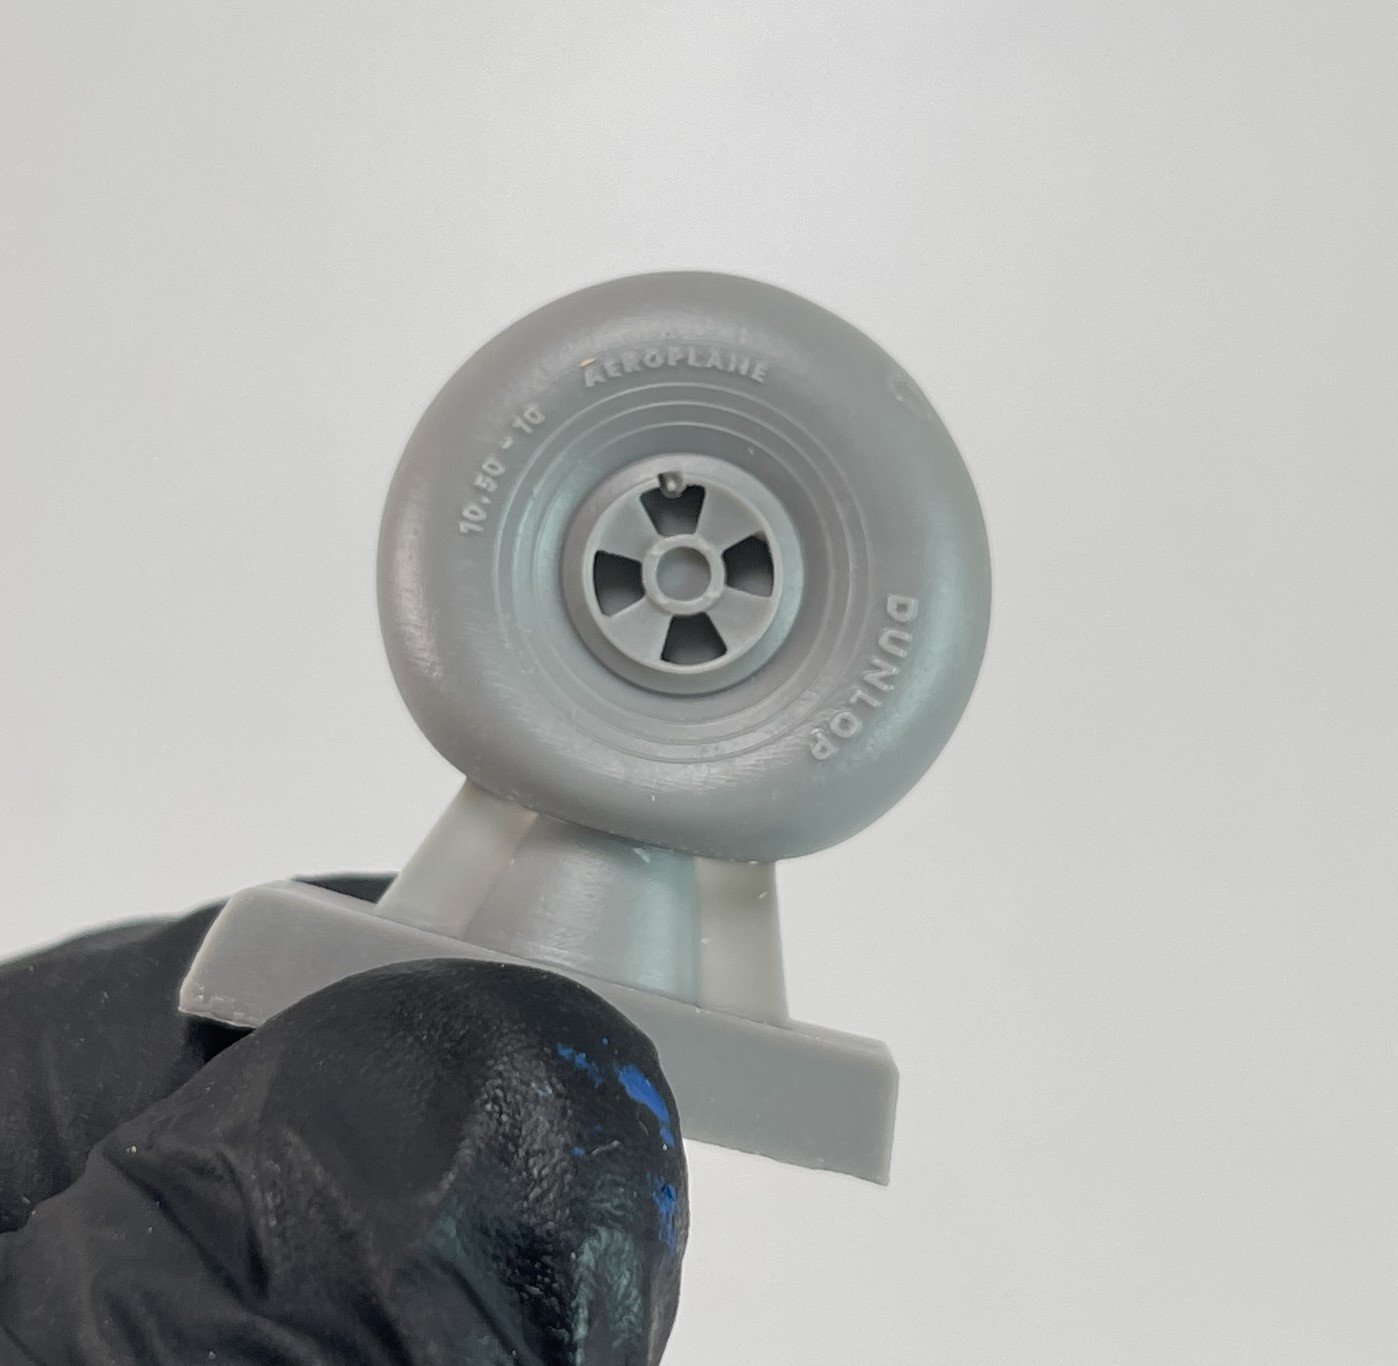
Another add up in resin are the wheels. I`m sucker for resin wheels. They are always better that the plastic ones.
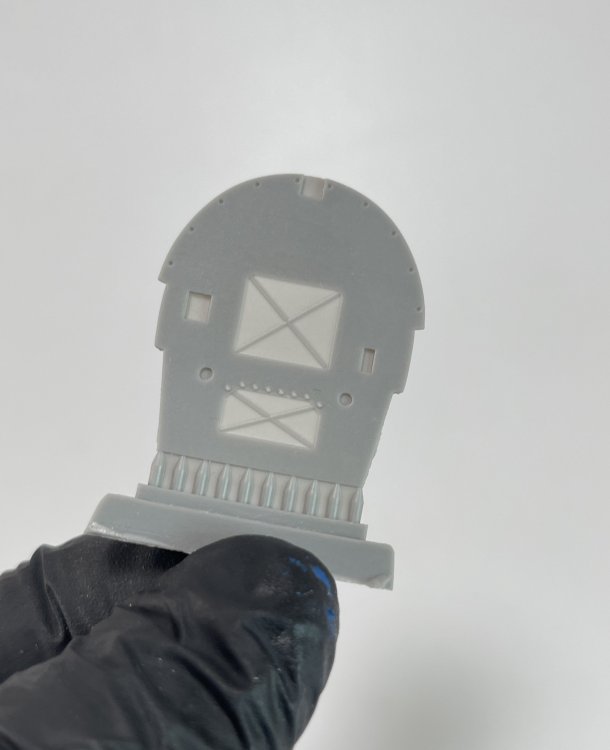
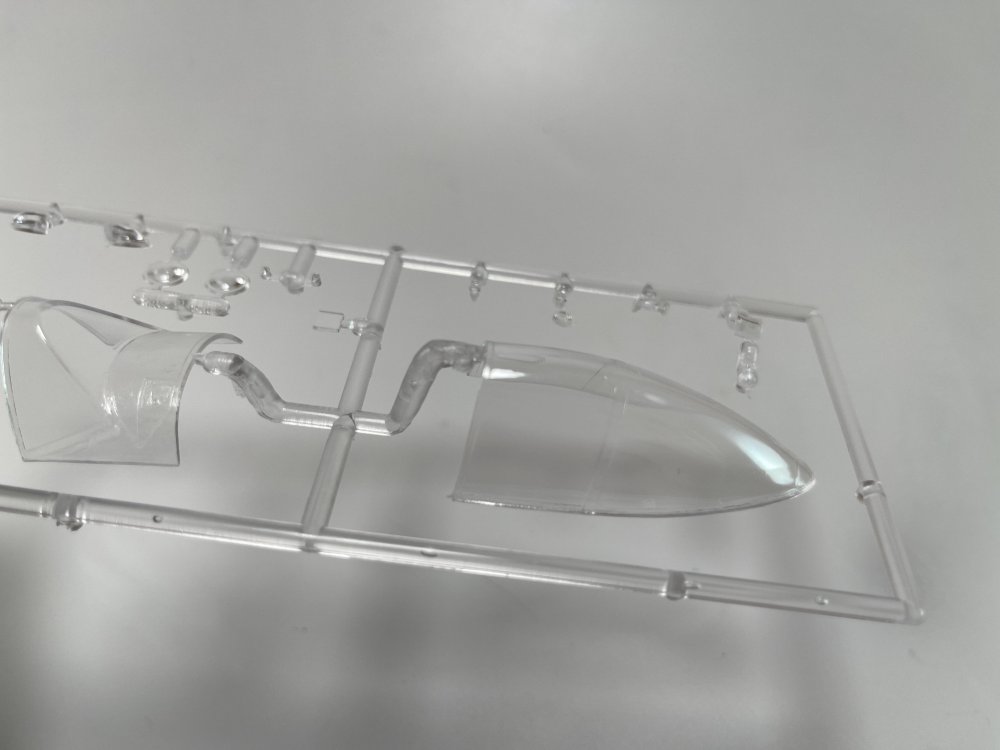
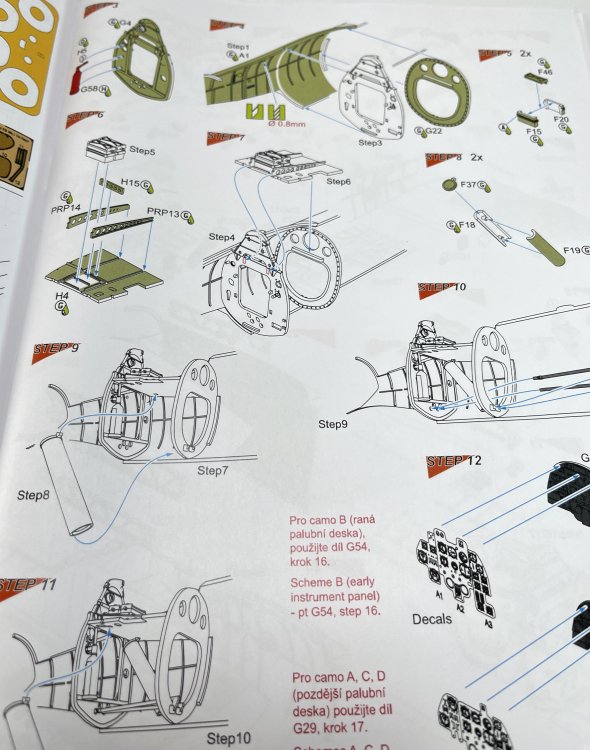
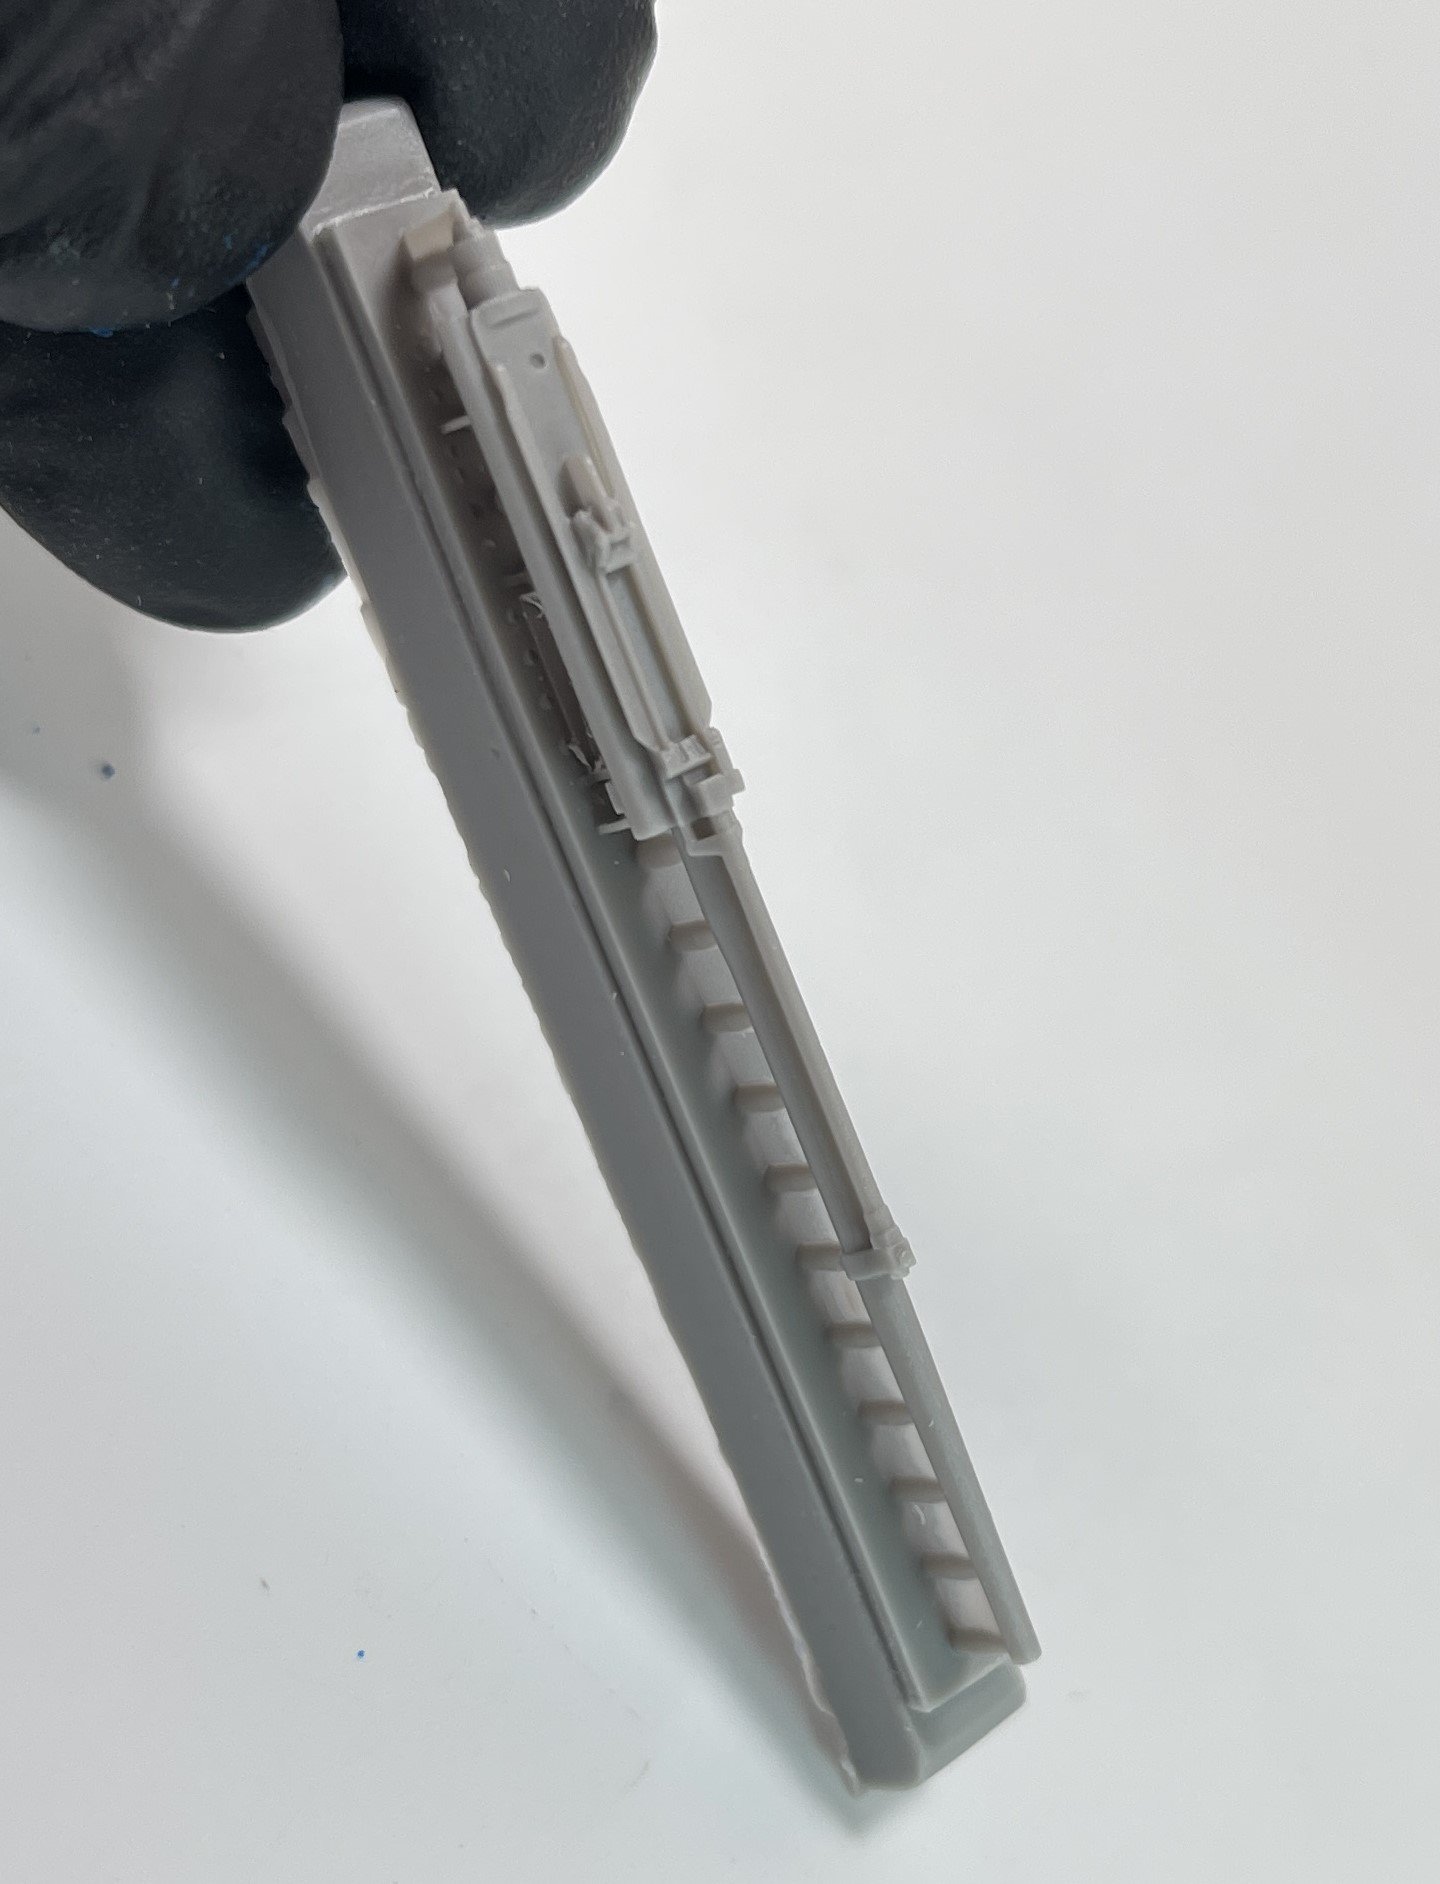
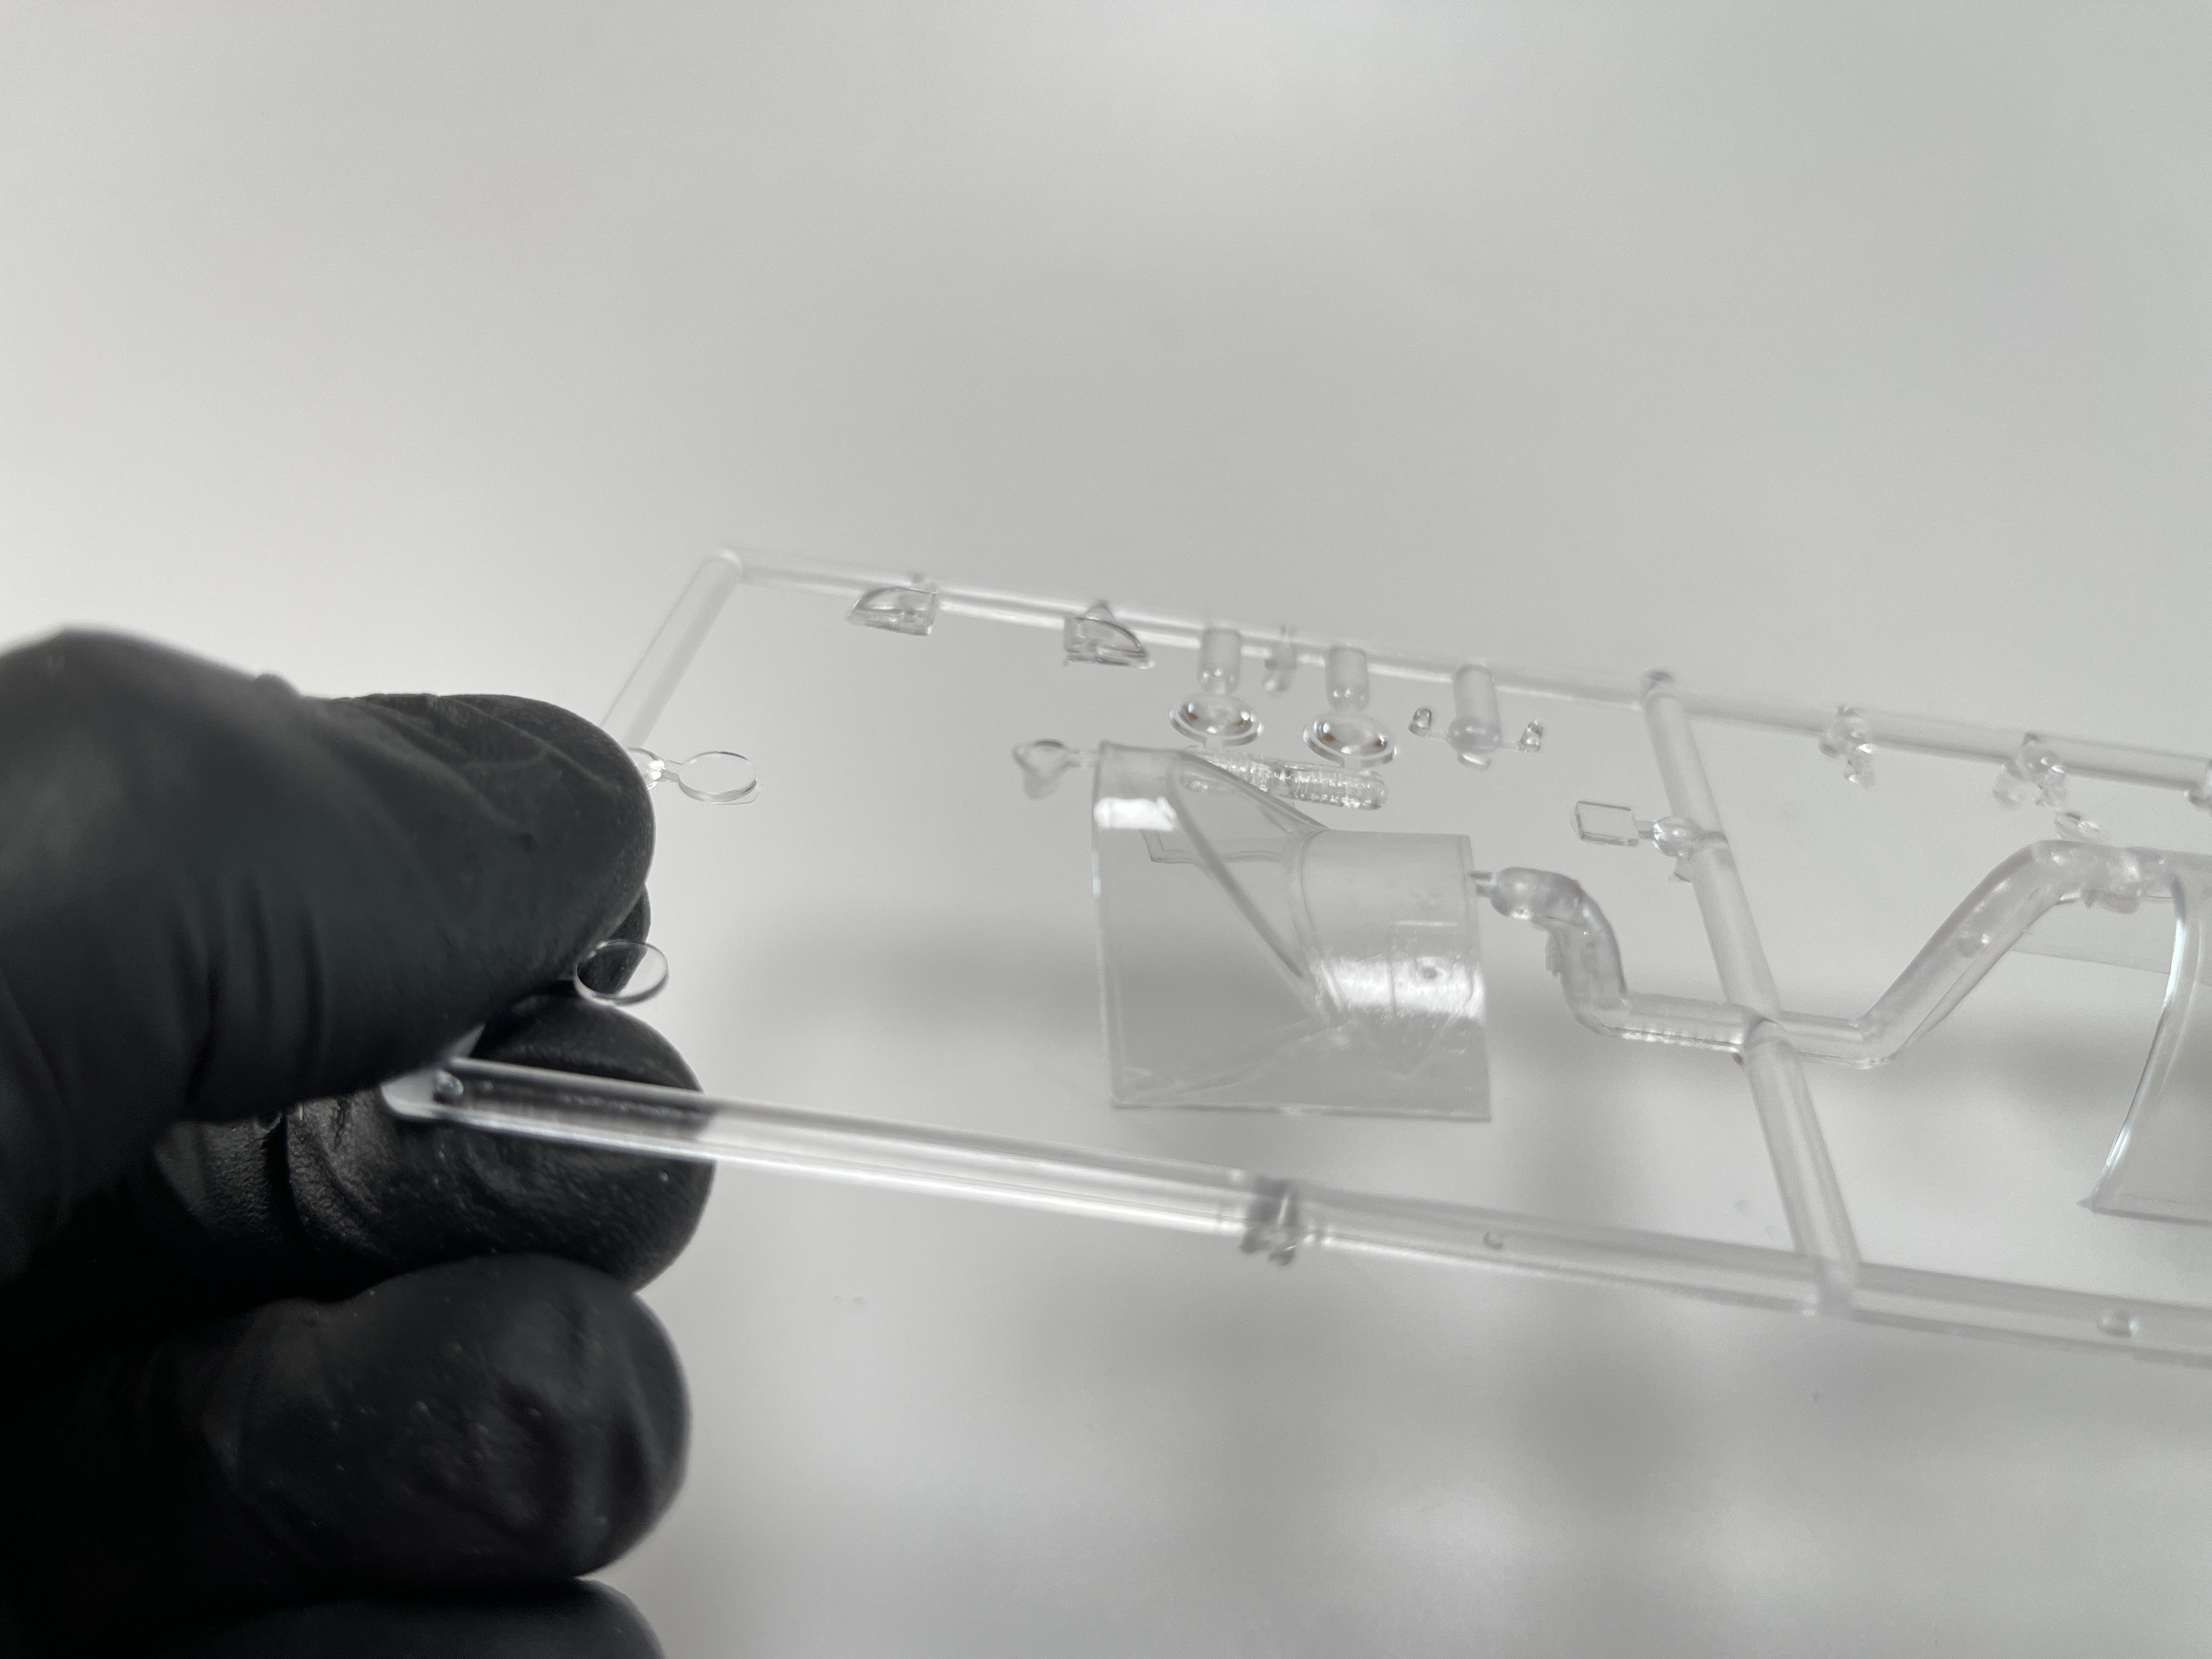
Now the 3D printed resin parts, that come in orange.
Not a familiar color for resin parts, so I don’t know how it could affect the paint on top of it. Probably a resin gray primer would solve it.
In these parts, we got nose top with exit for the guns, and cockpit details, like throttle consoles and control column.


Mainly the rest of the parts are to the nose armament to let you make an open nose like the ammunition drums and cannon structure.
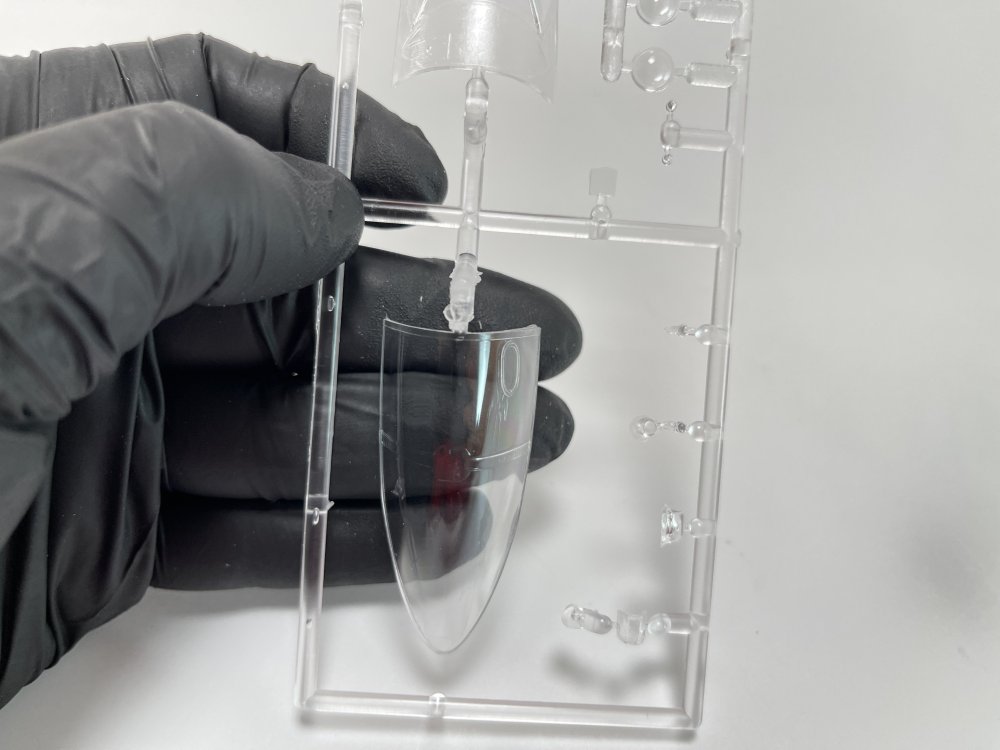
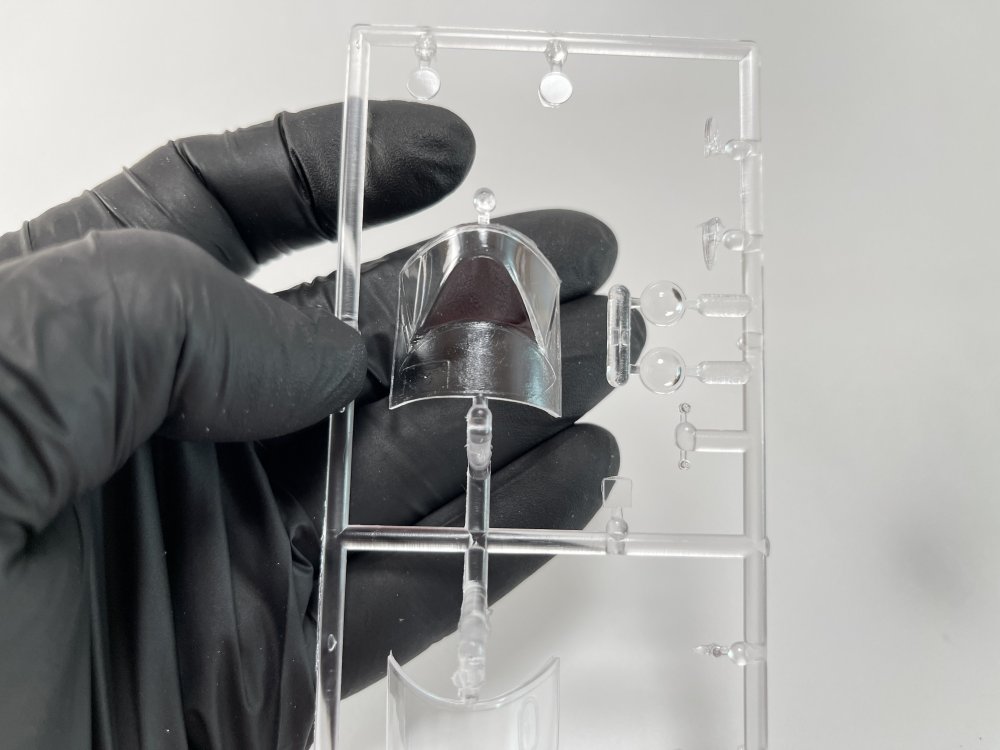
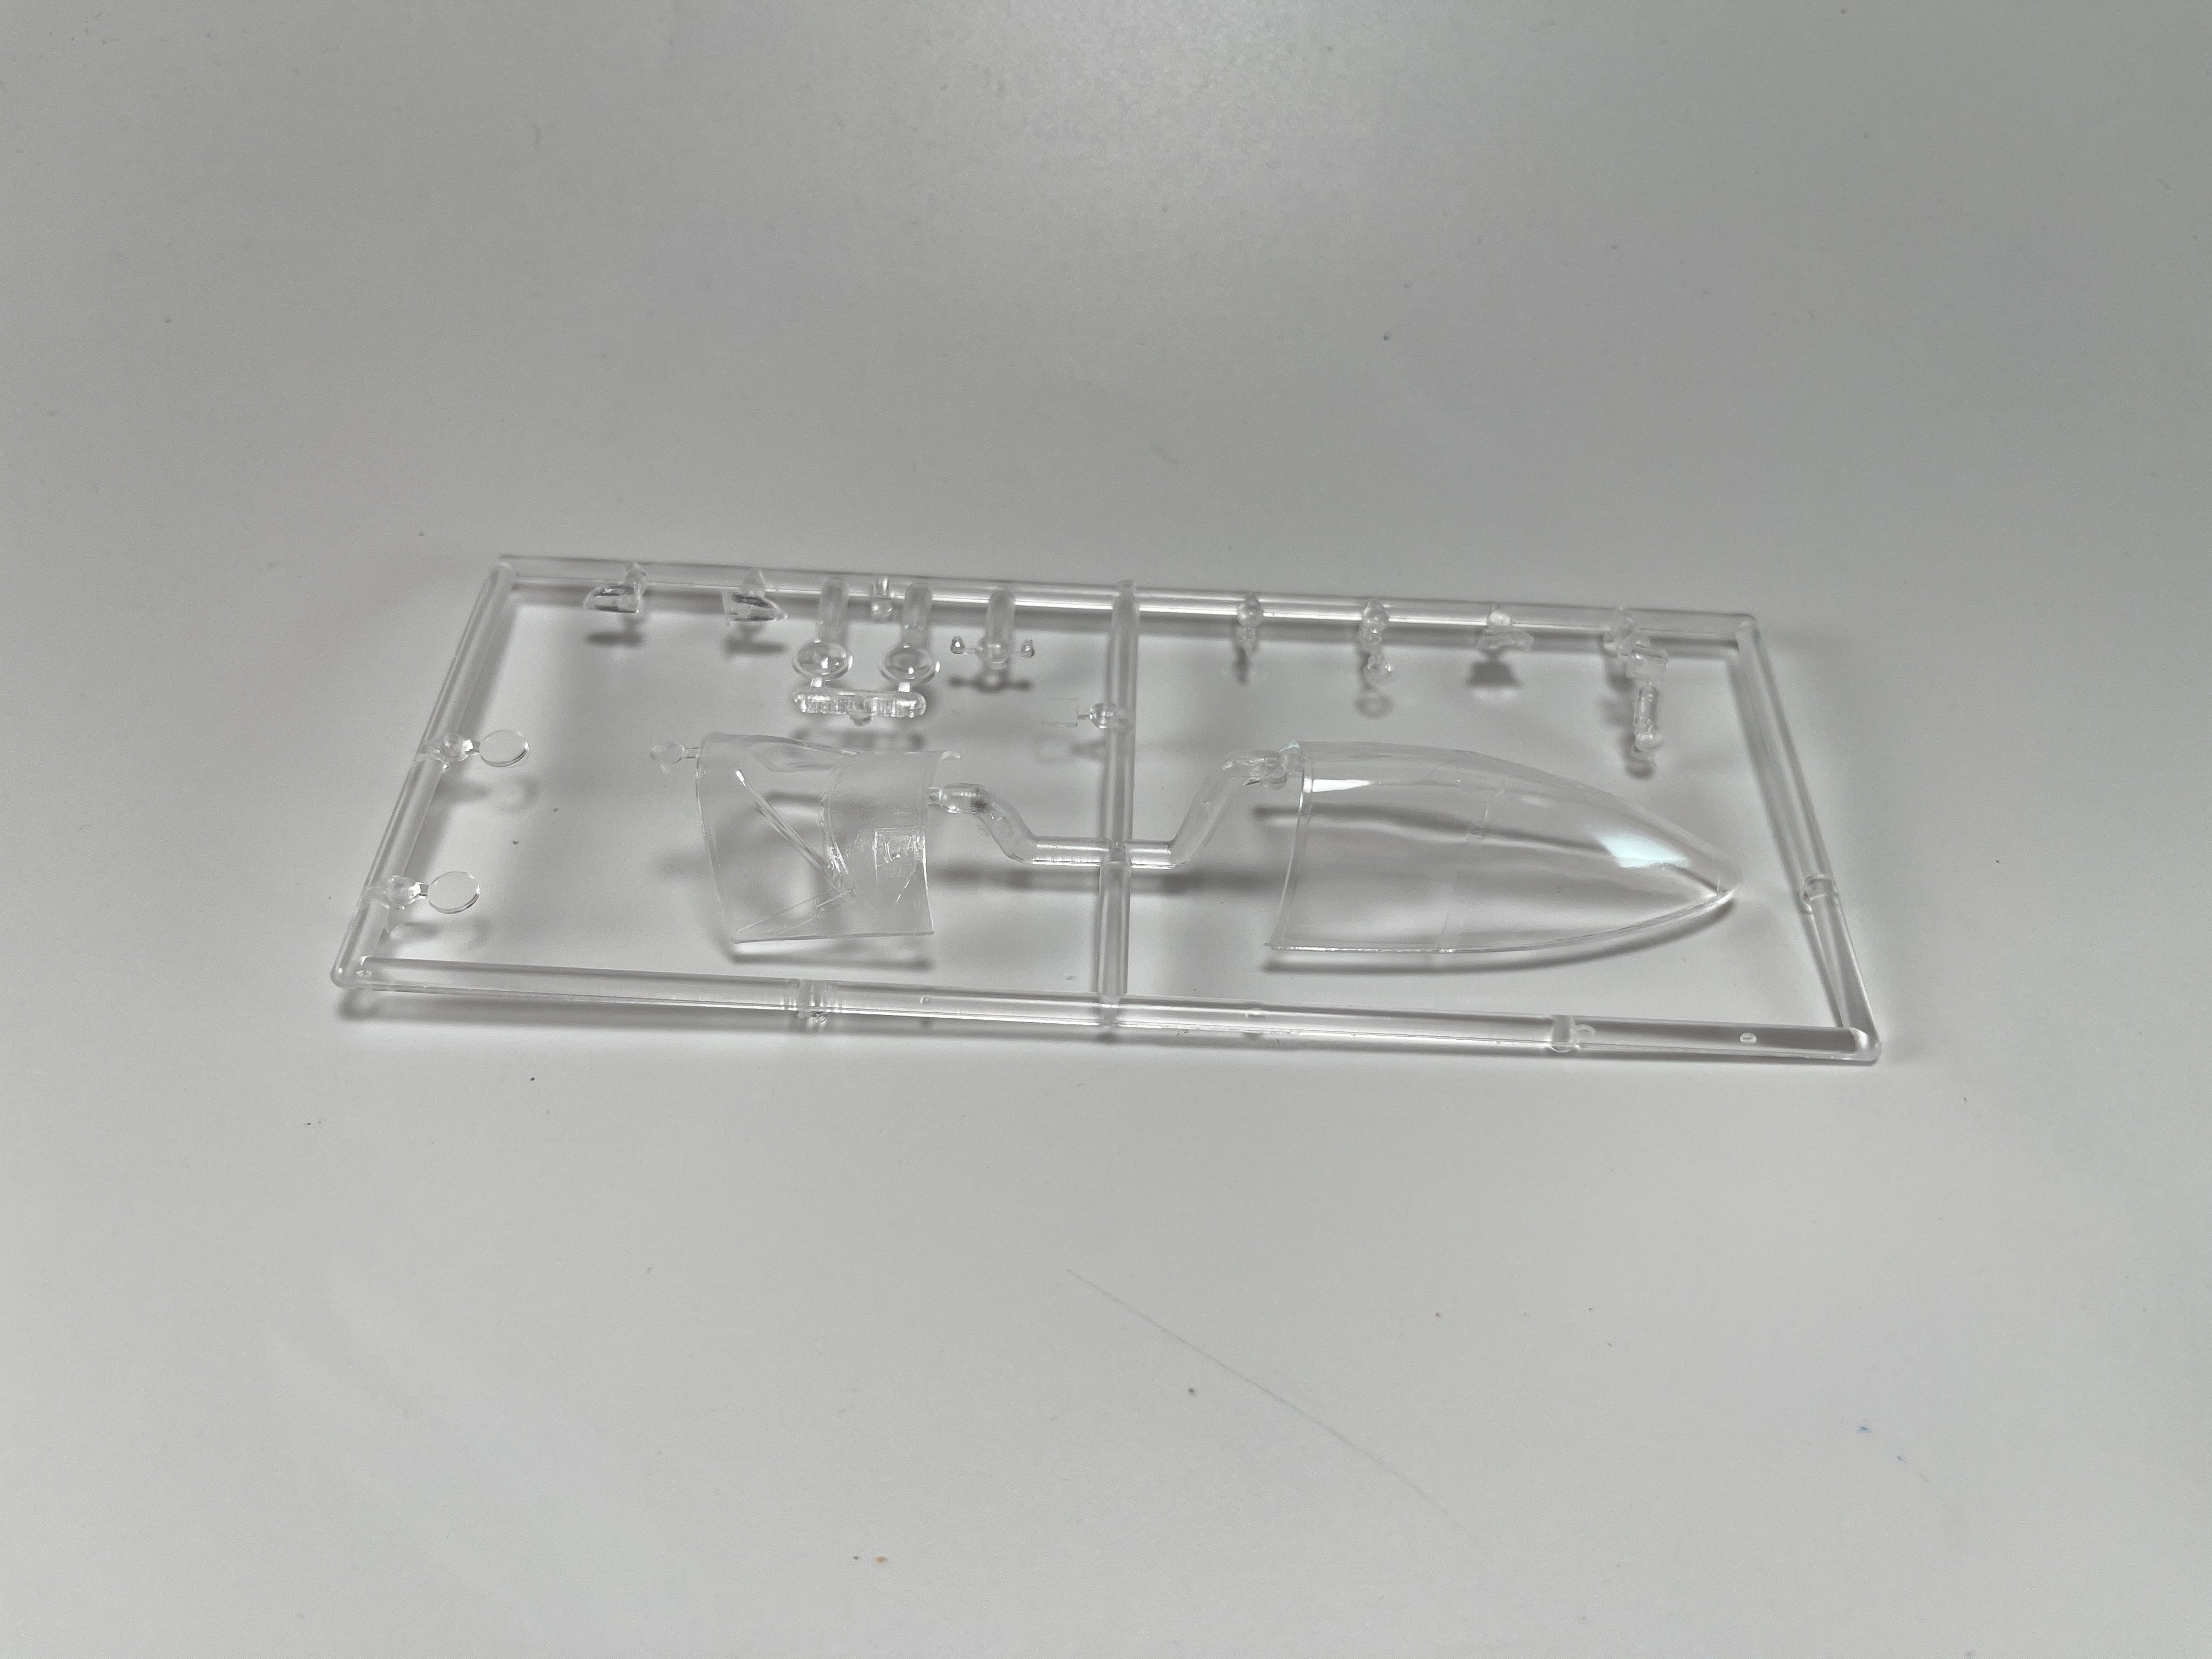
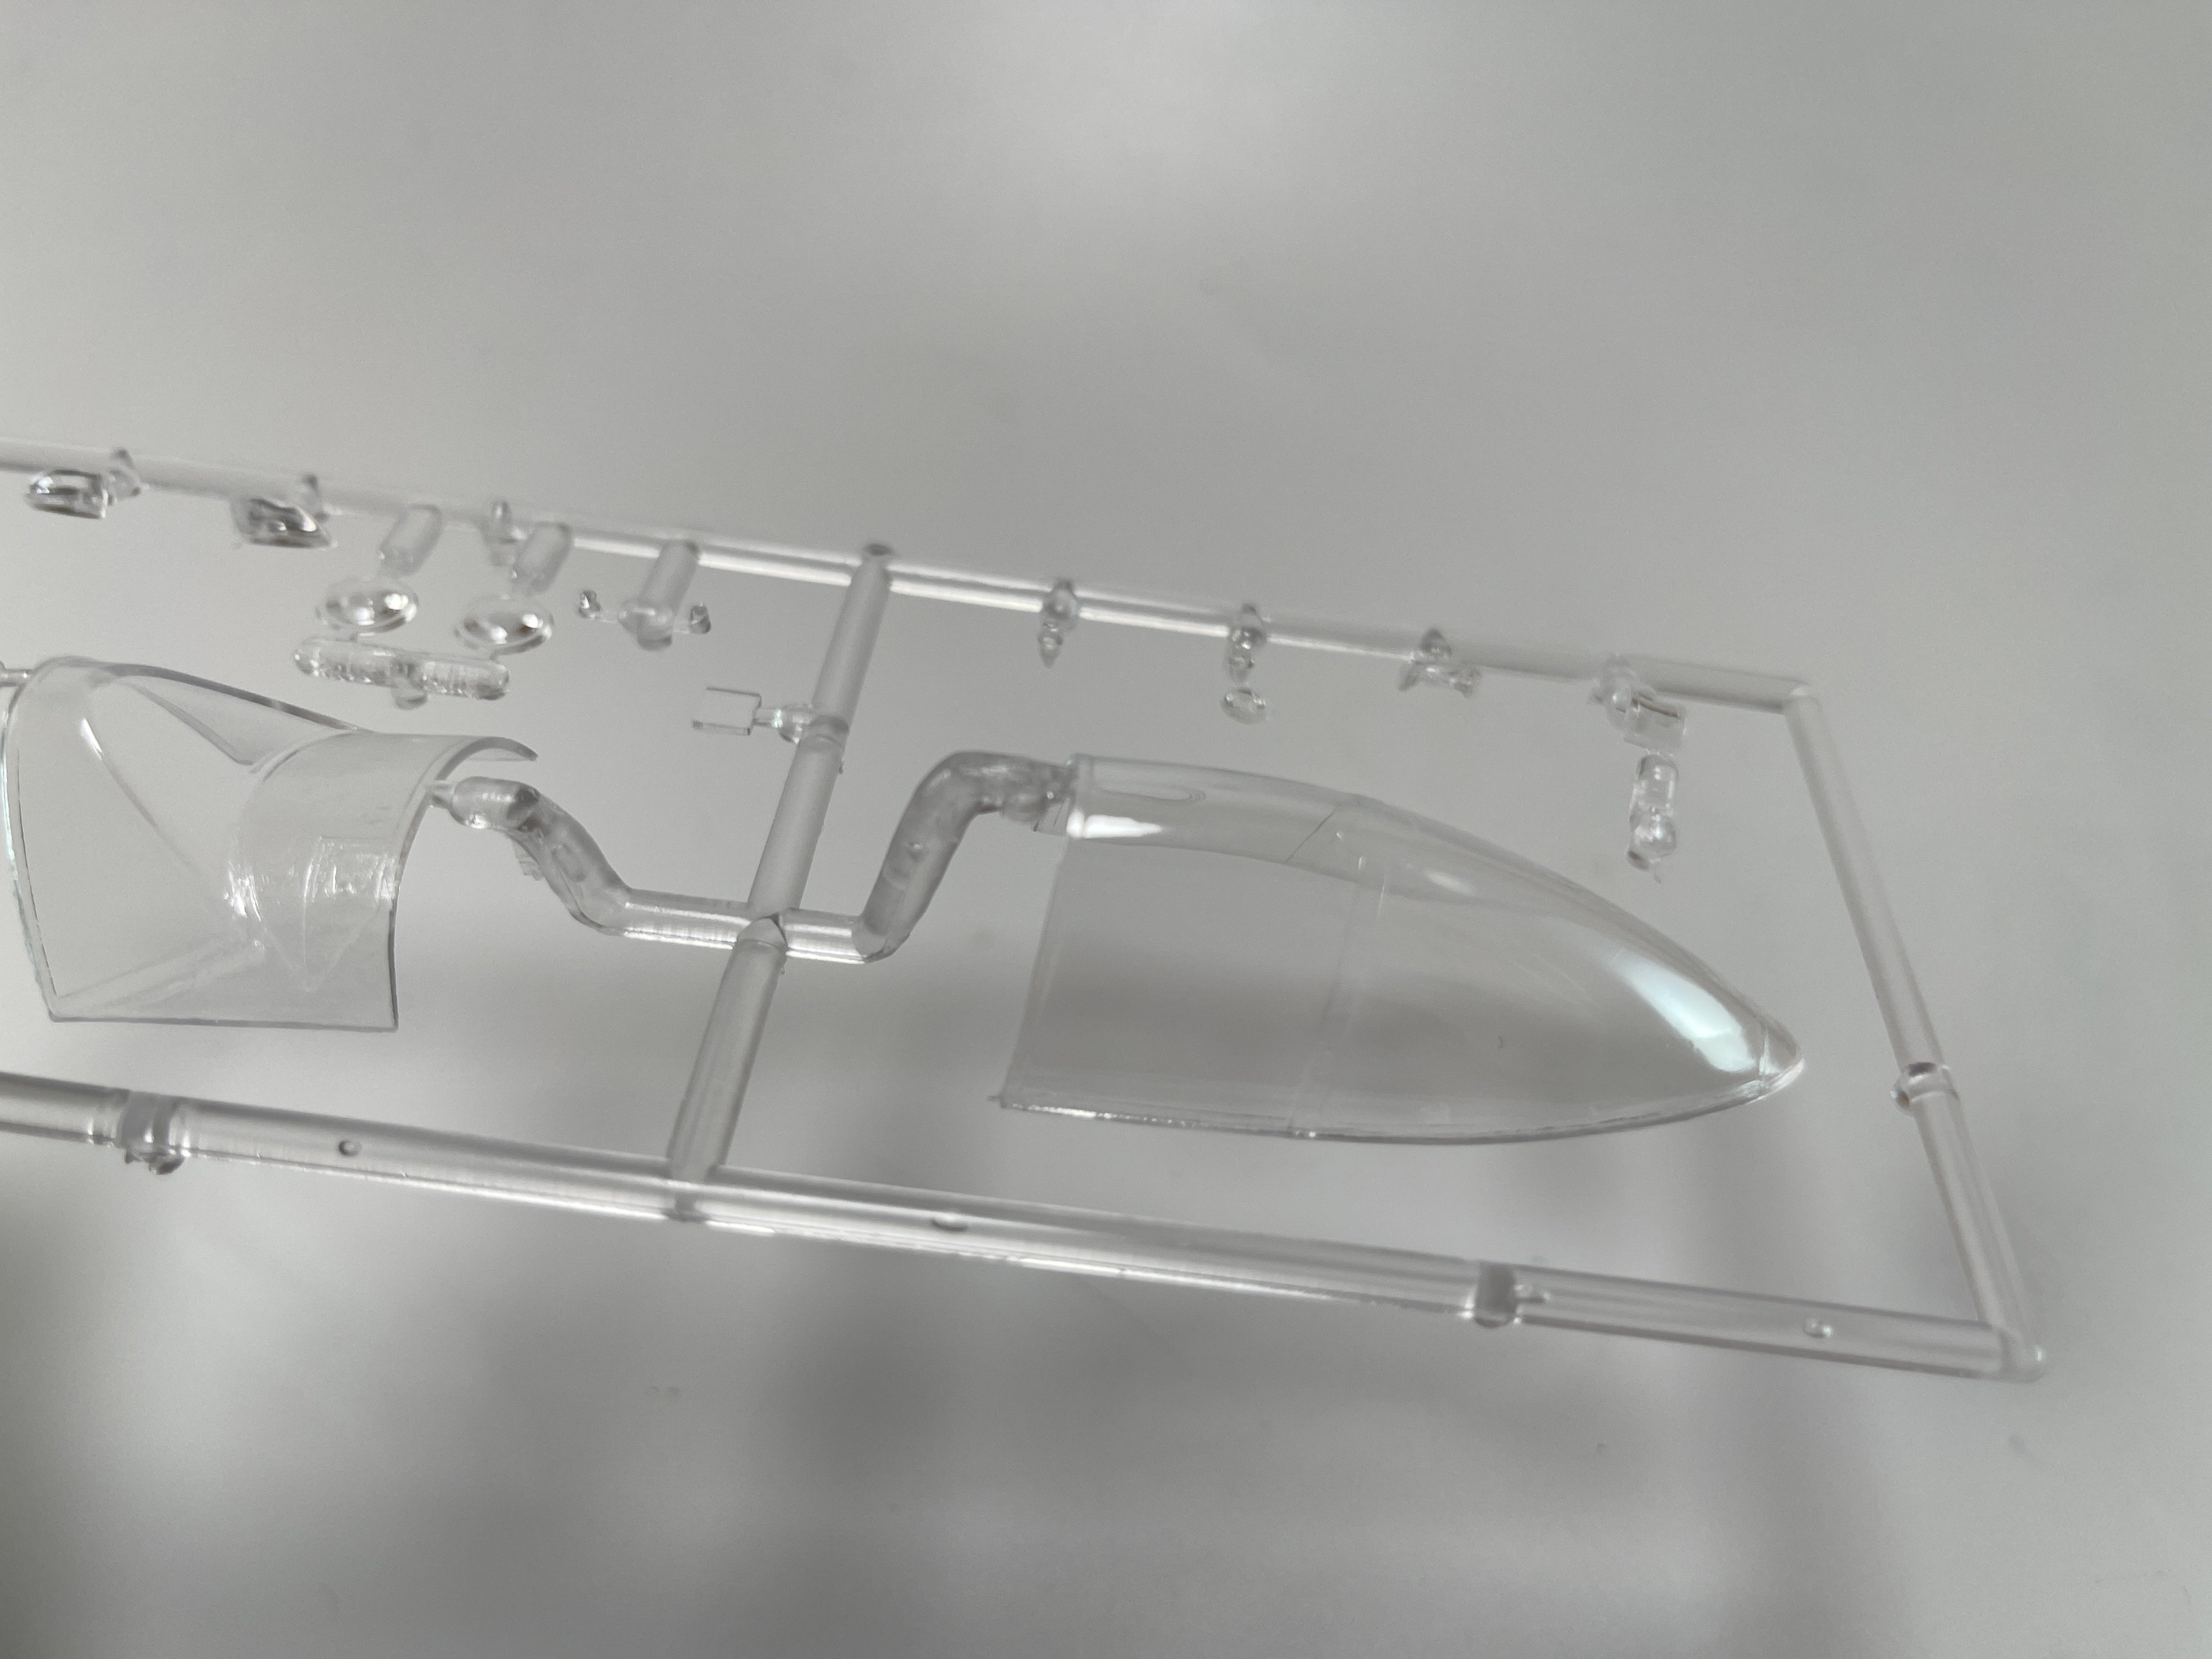
The clear parts are very well molded with good frames delimitation and also good clearance and transparency.
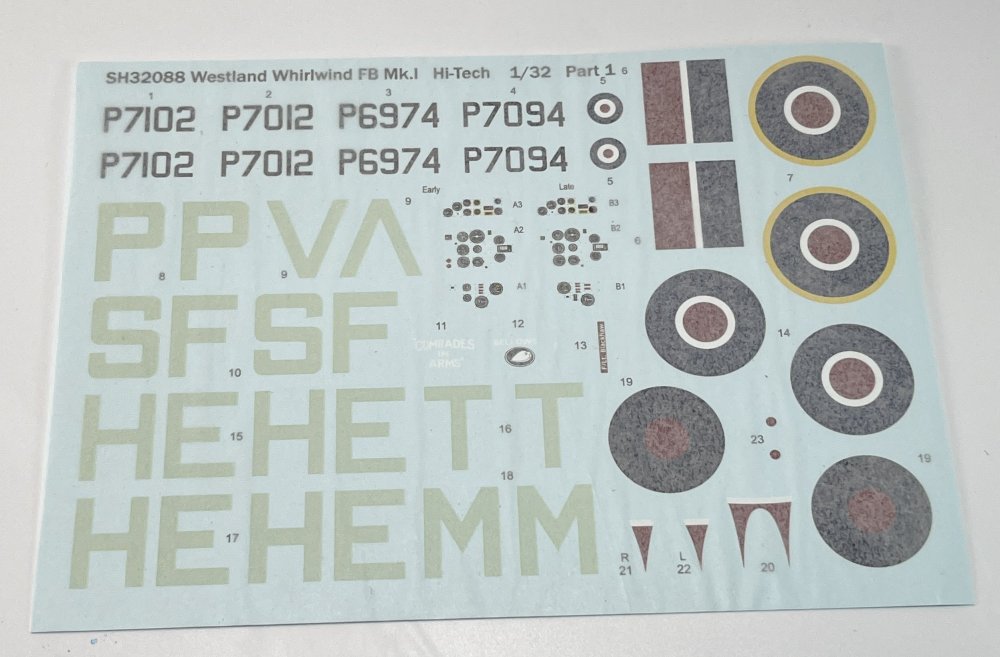
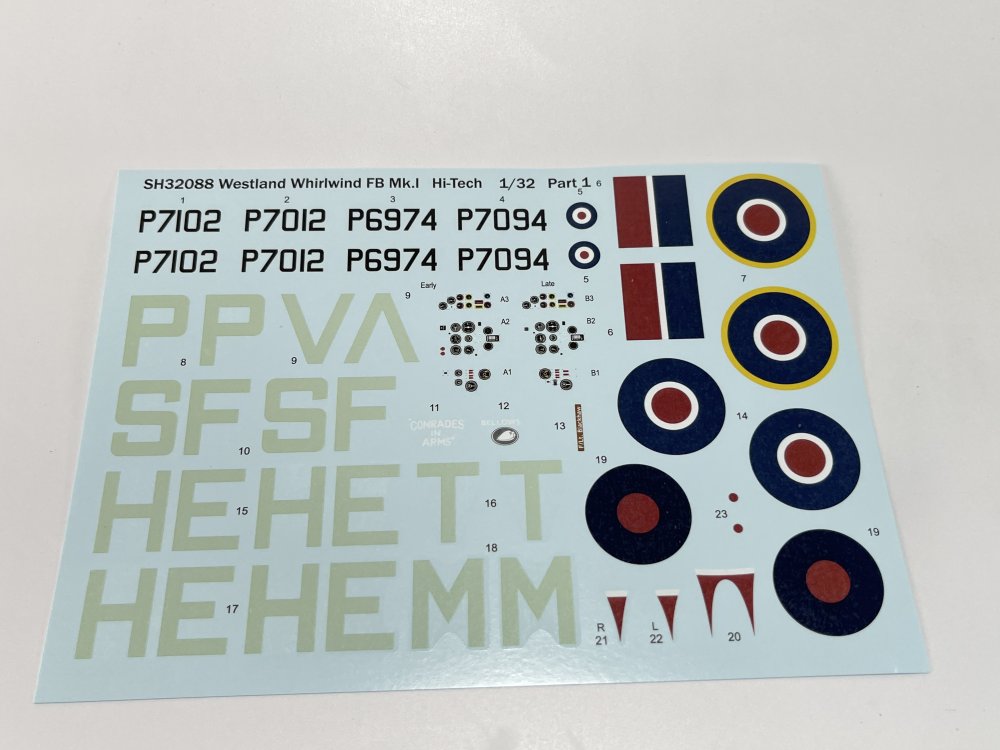
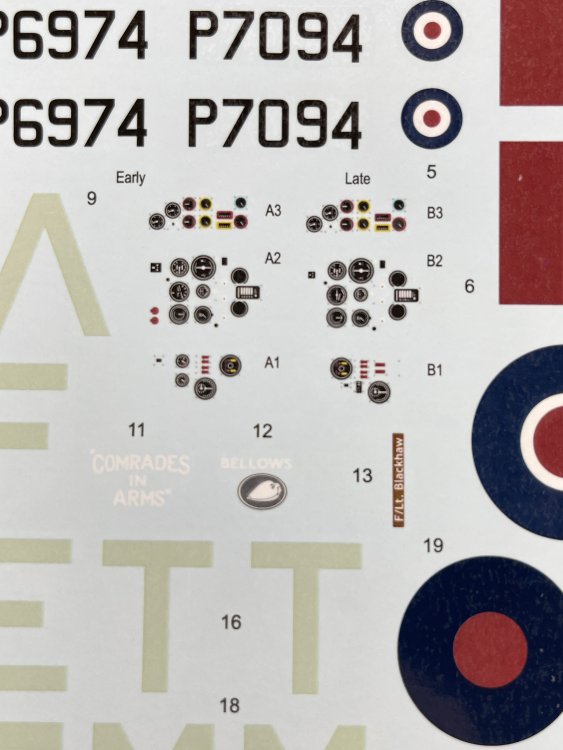
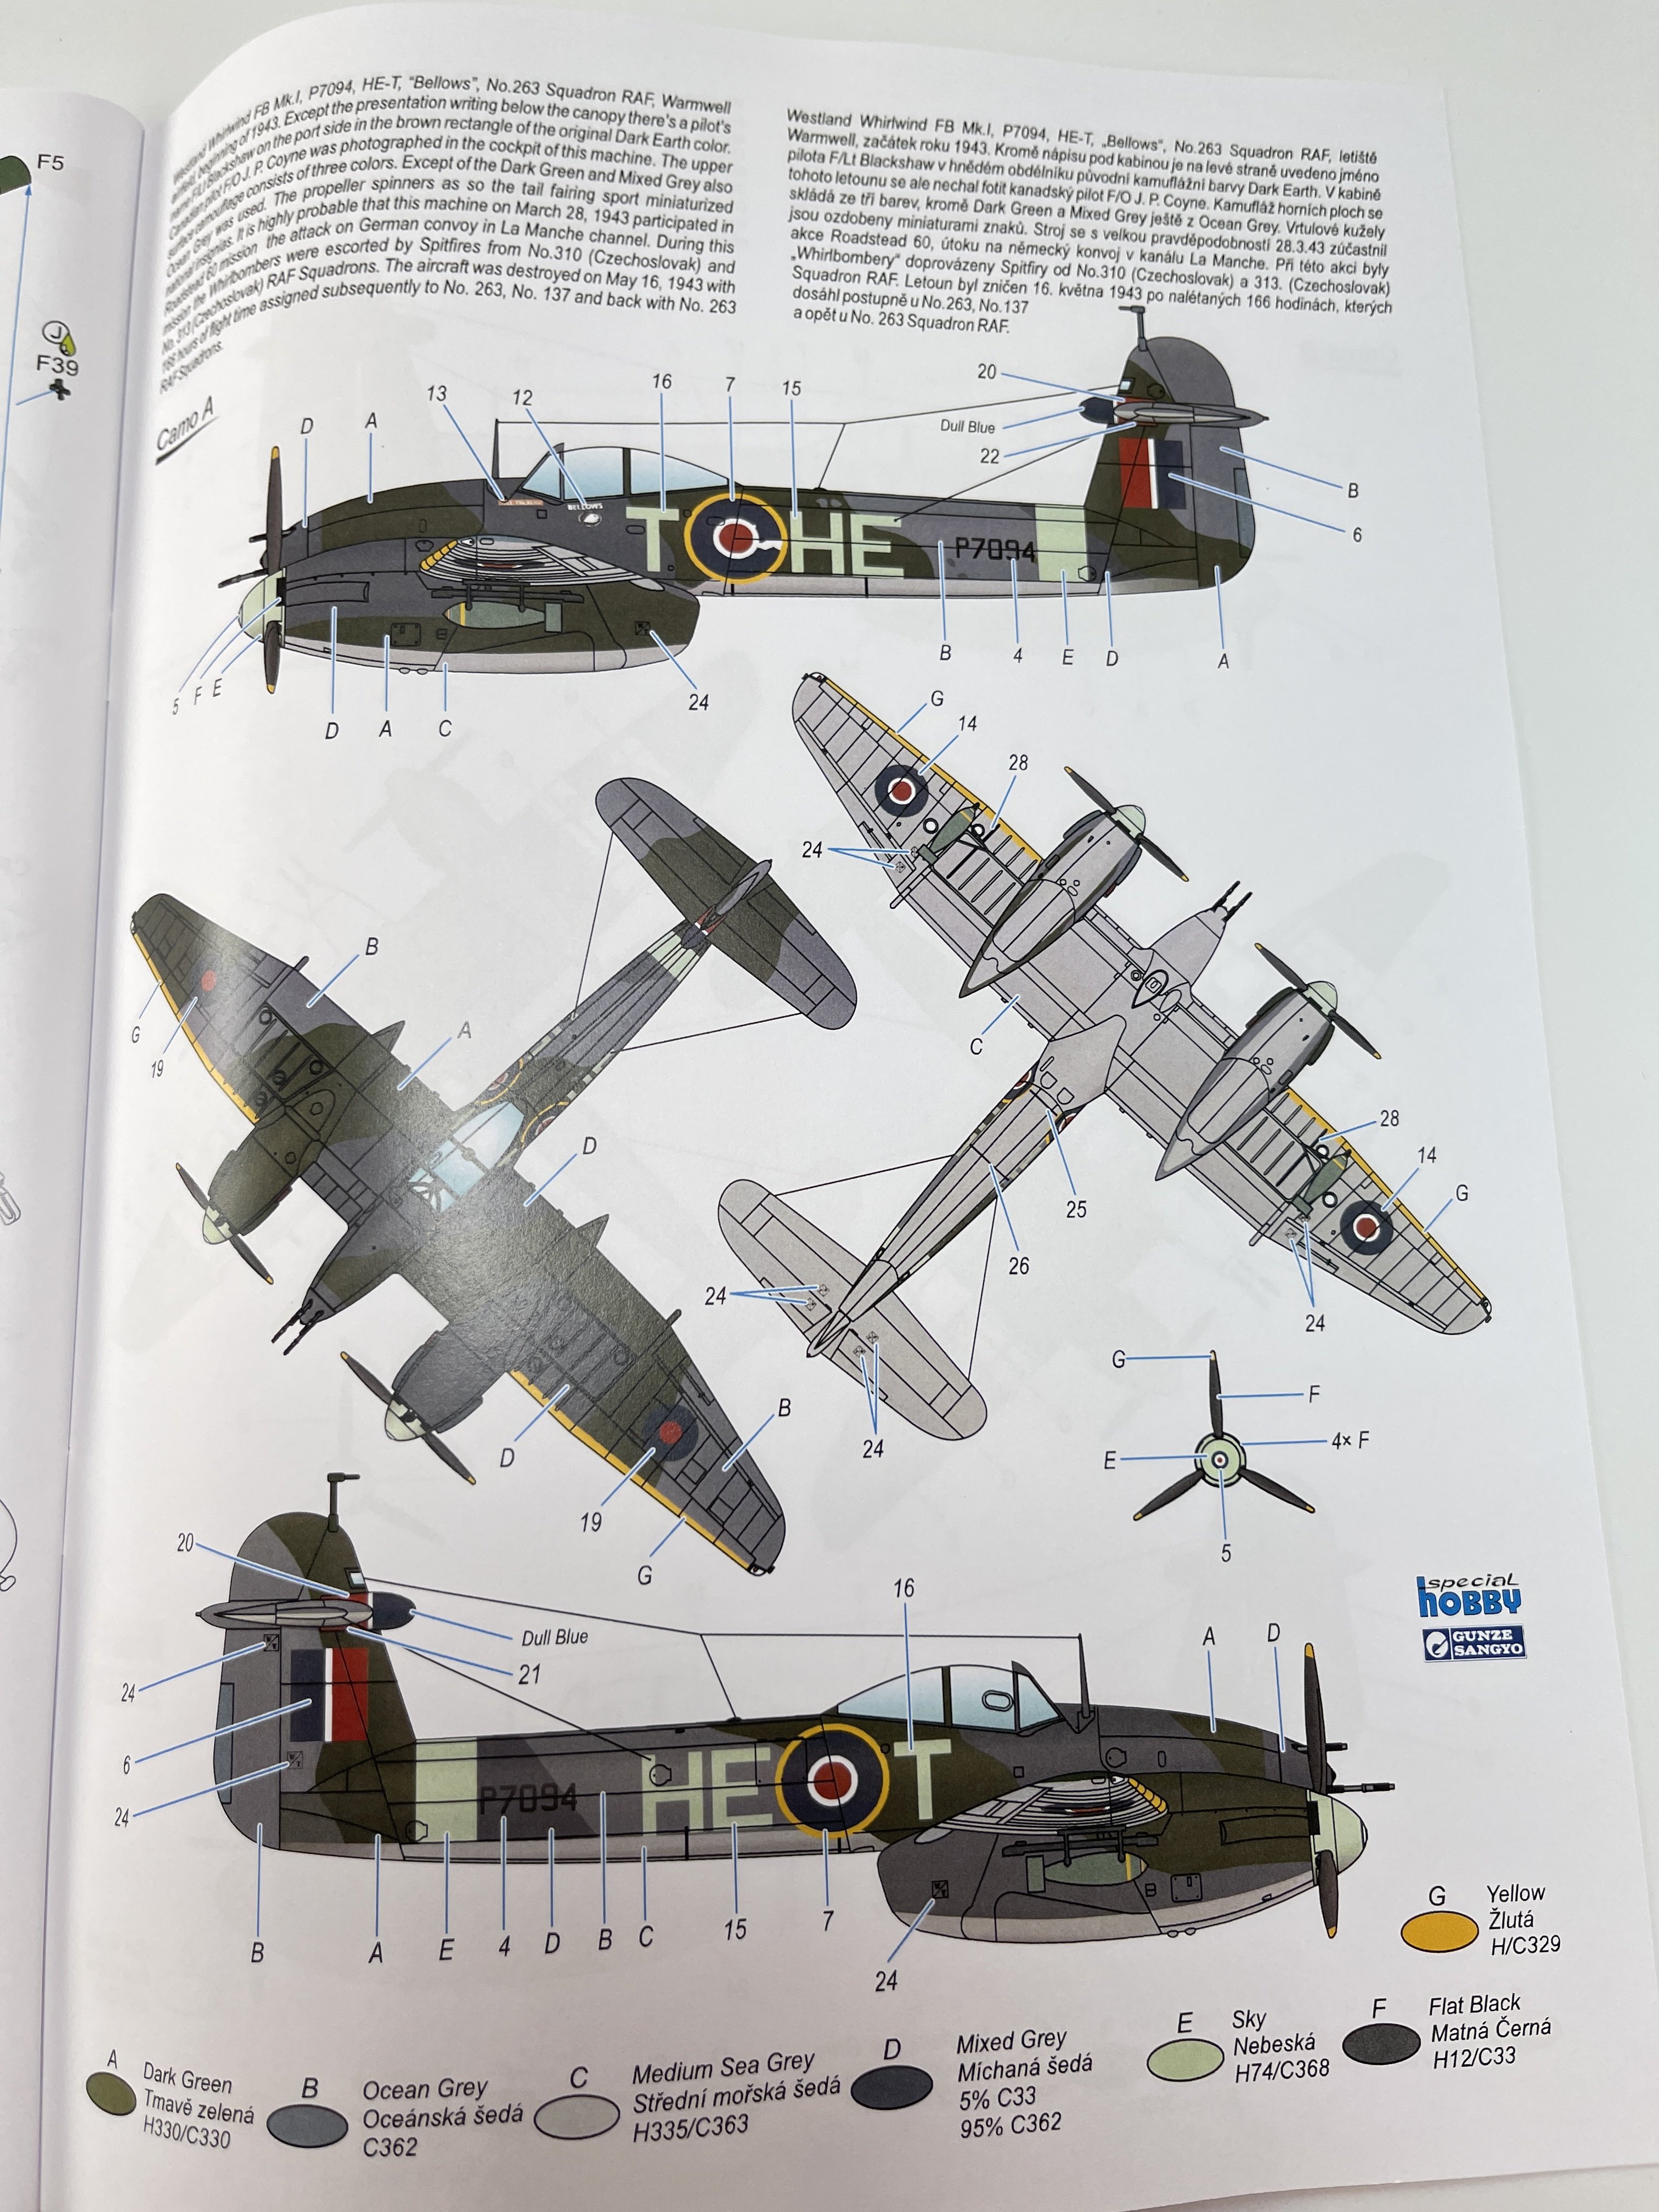
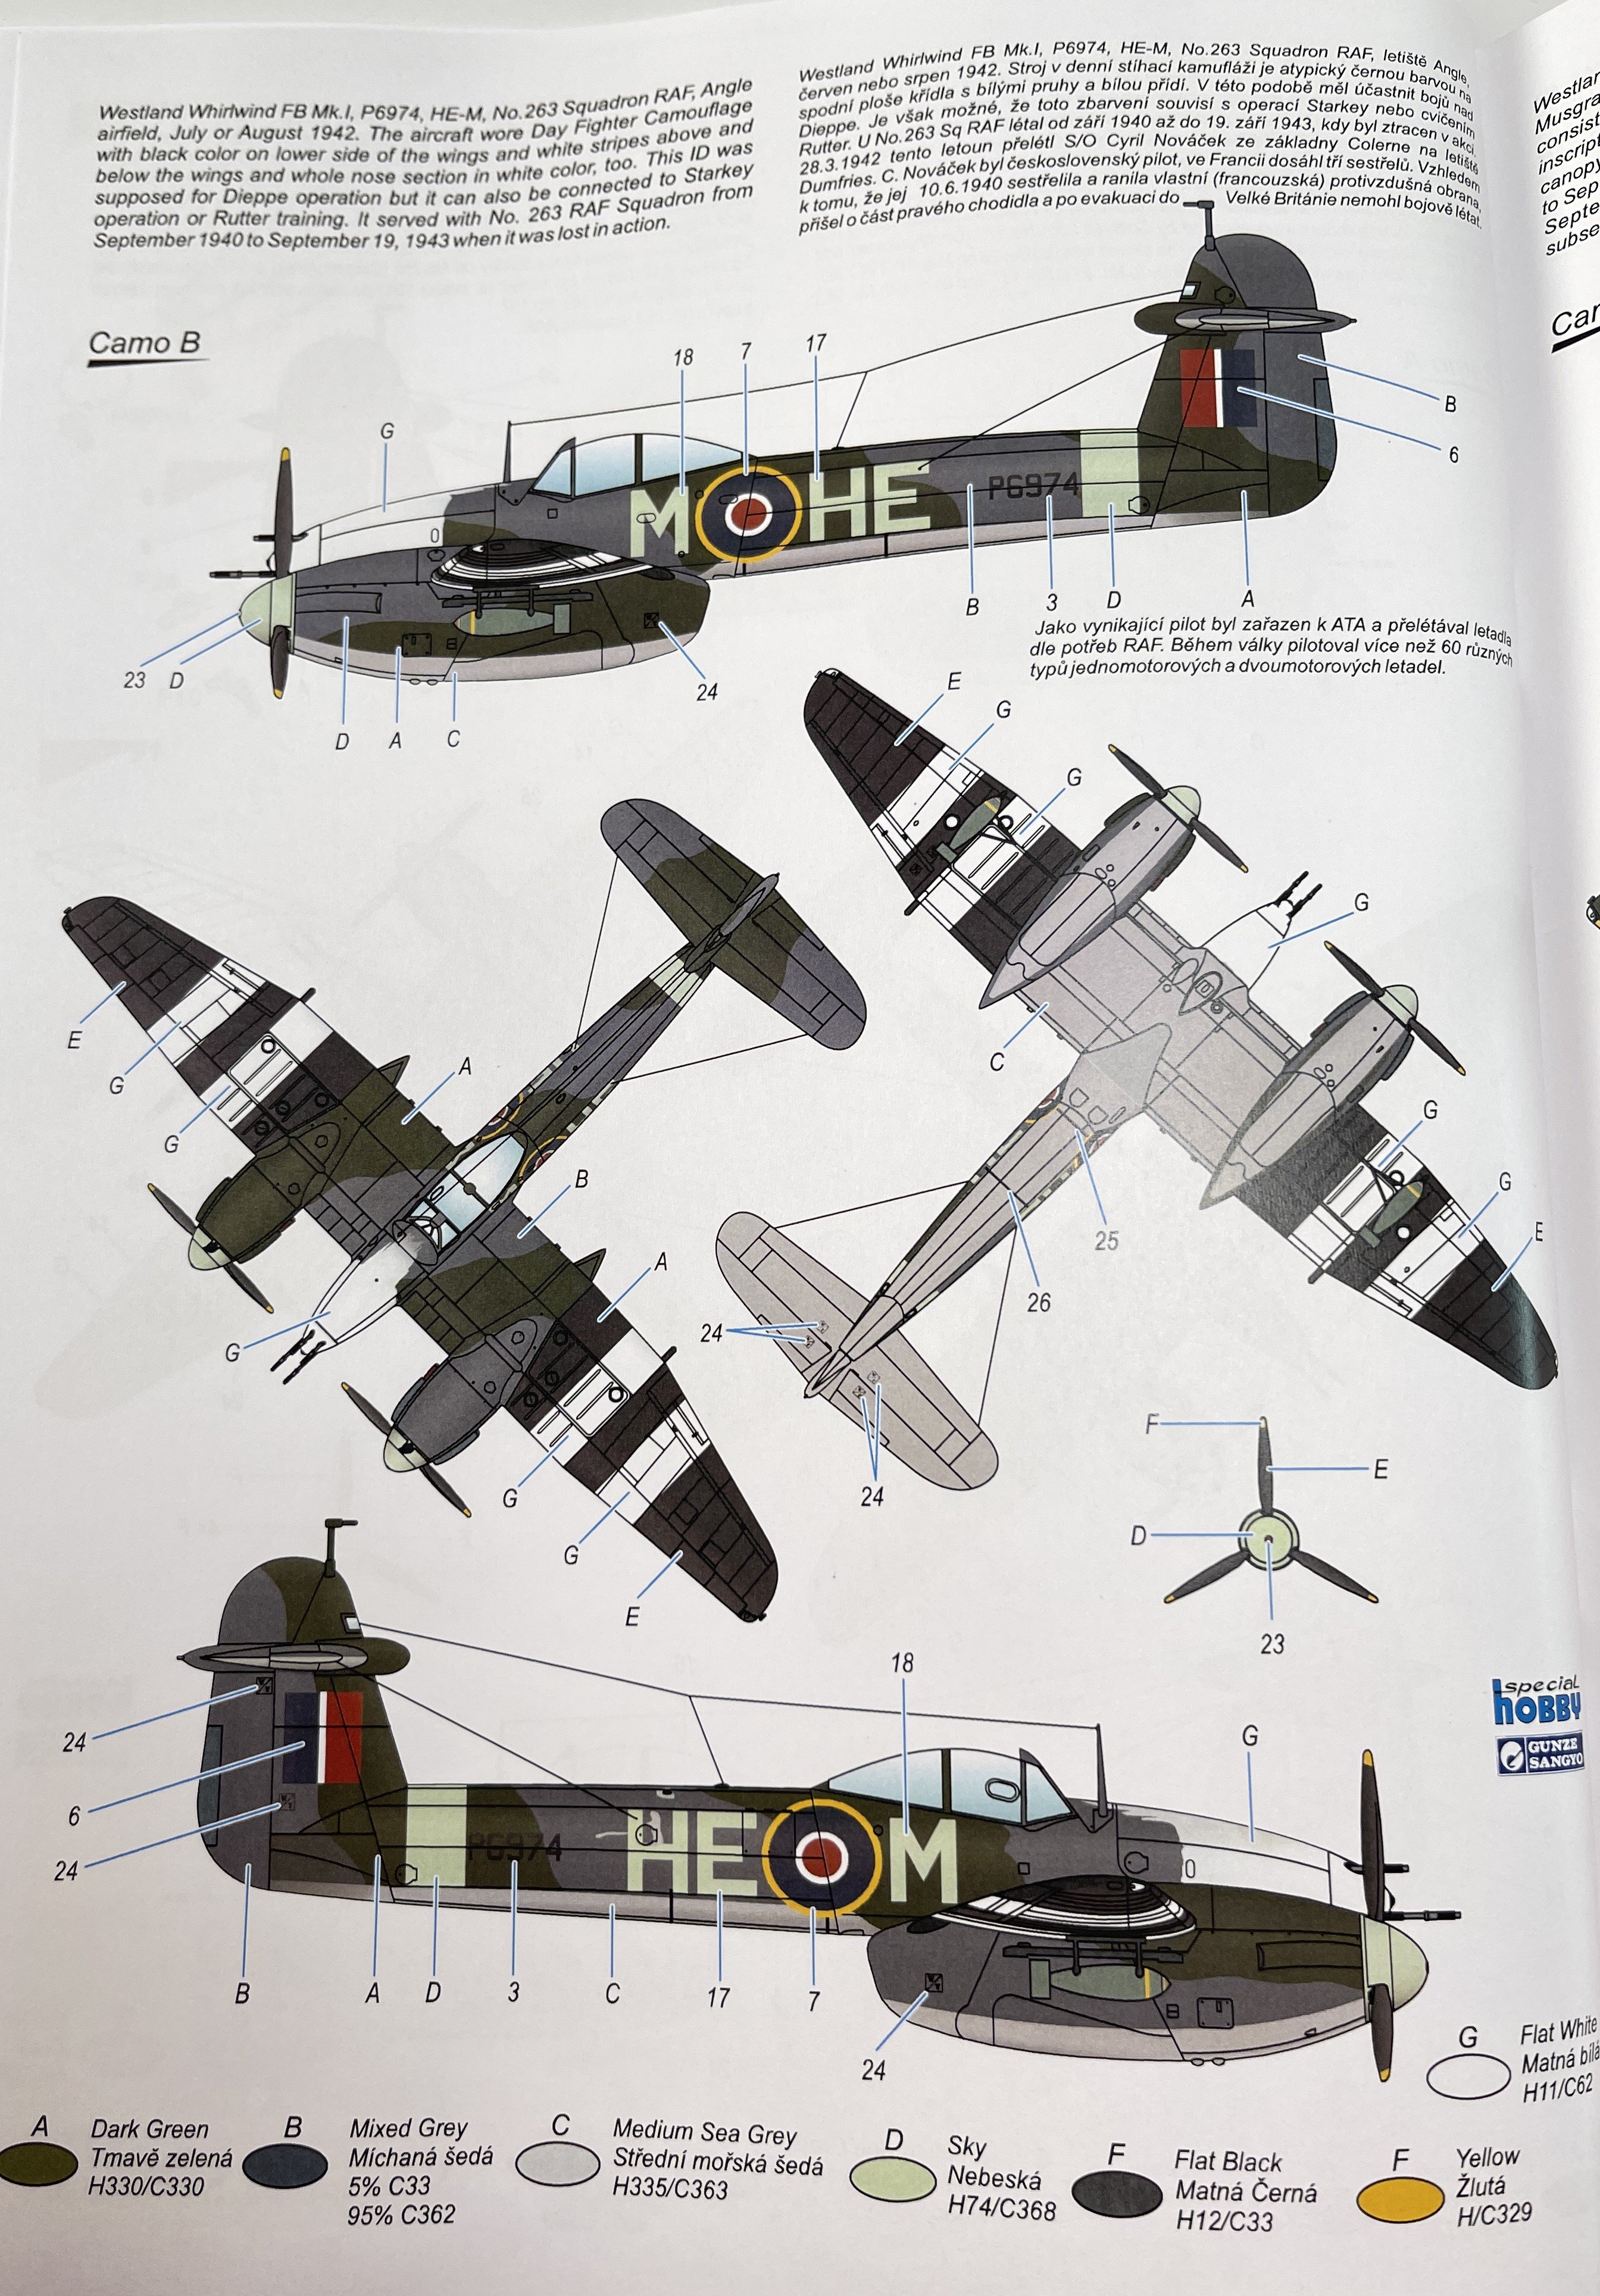
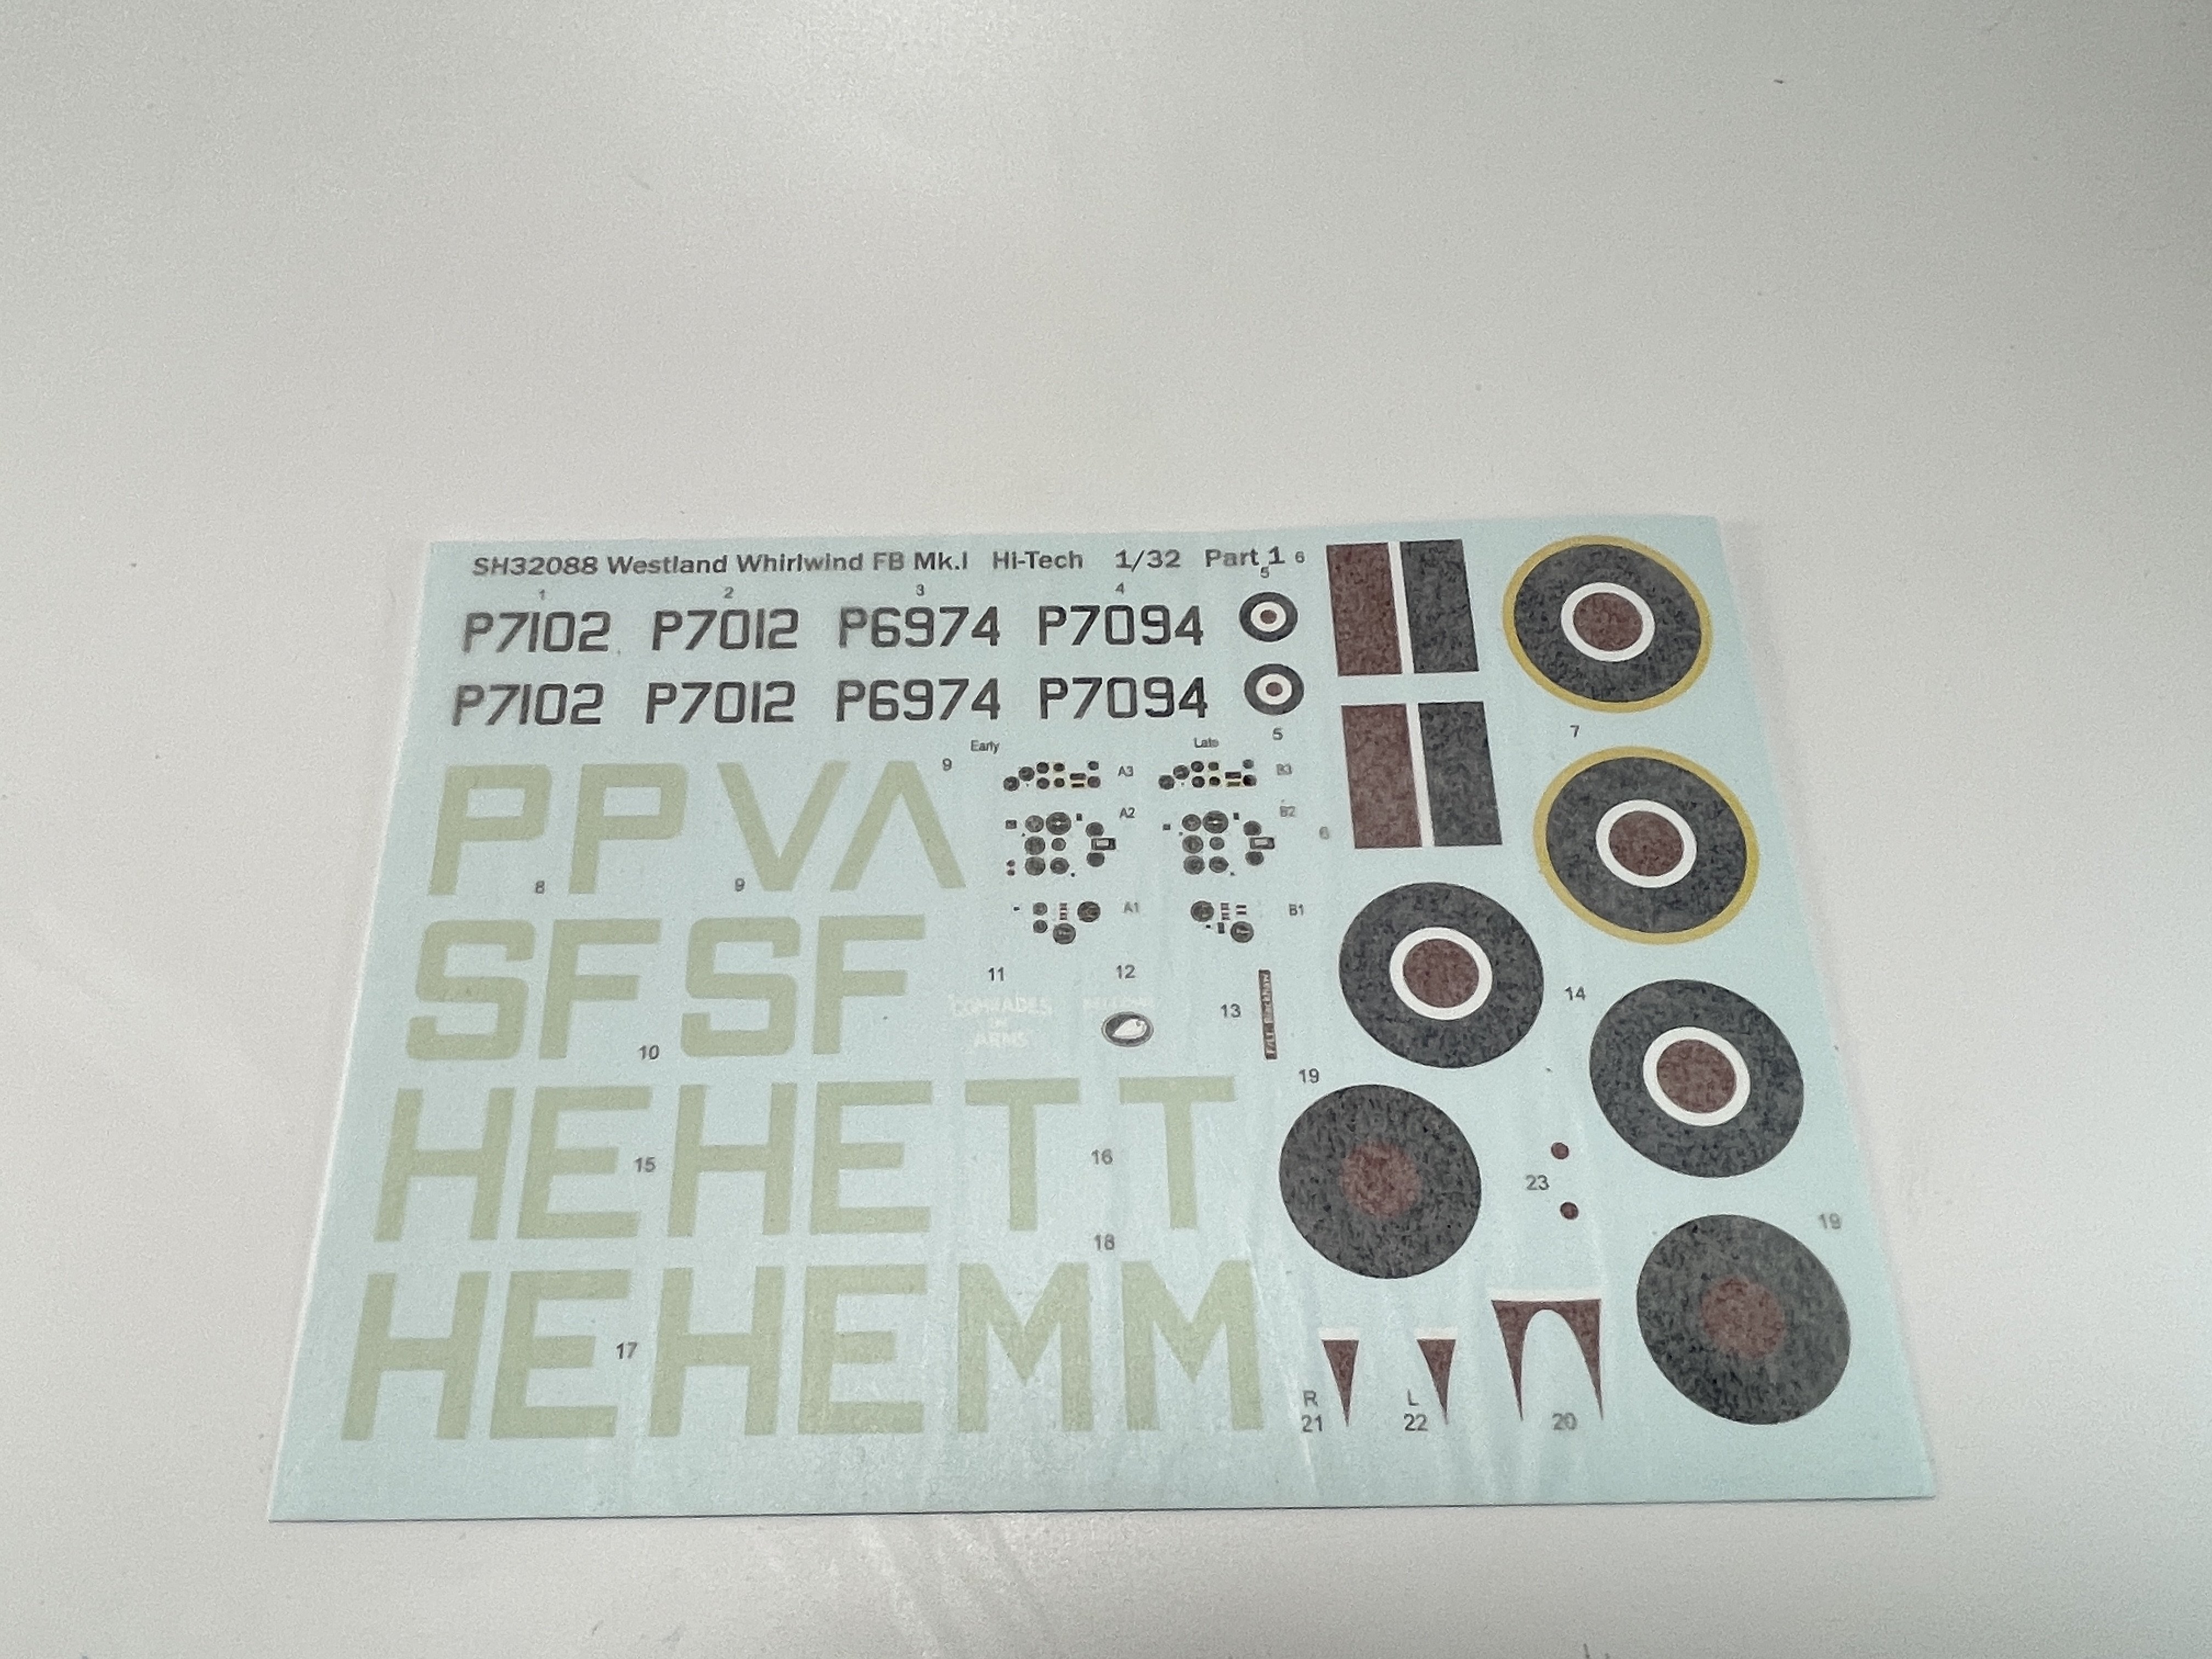
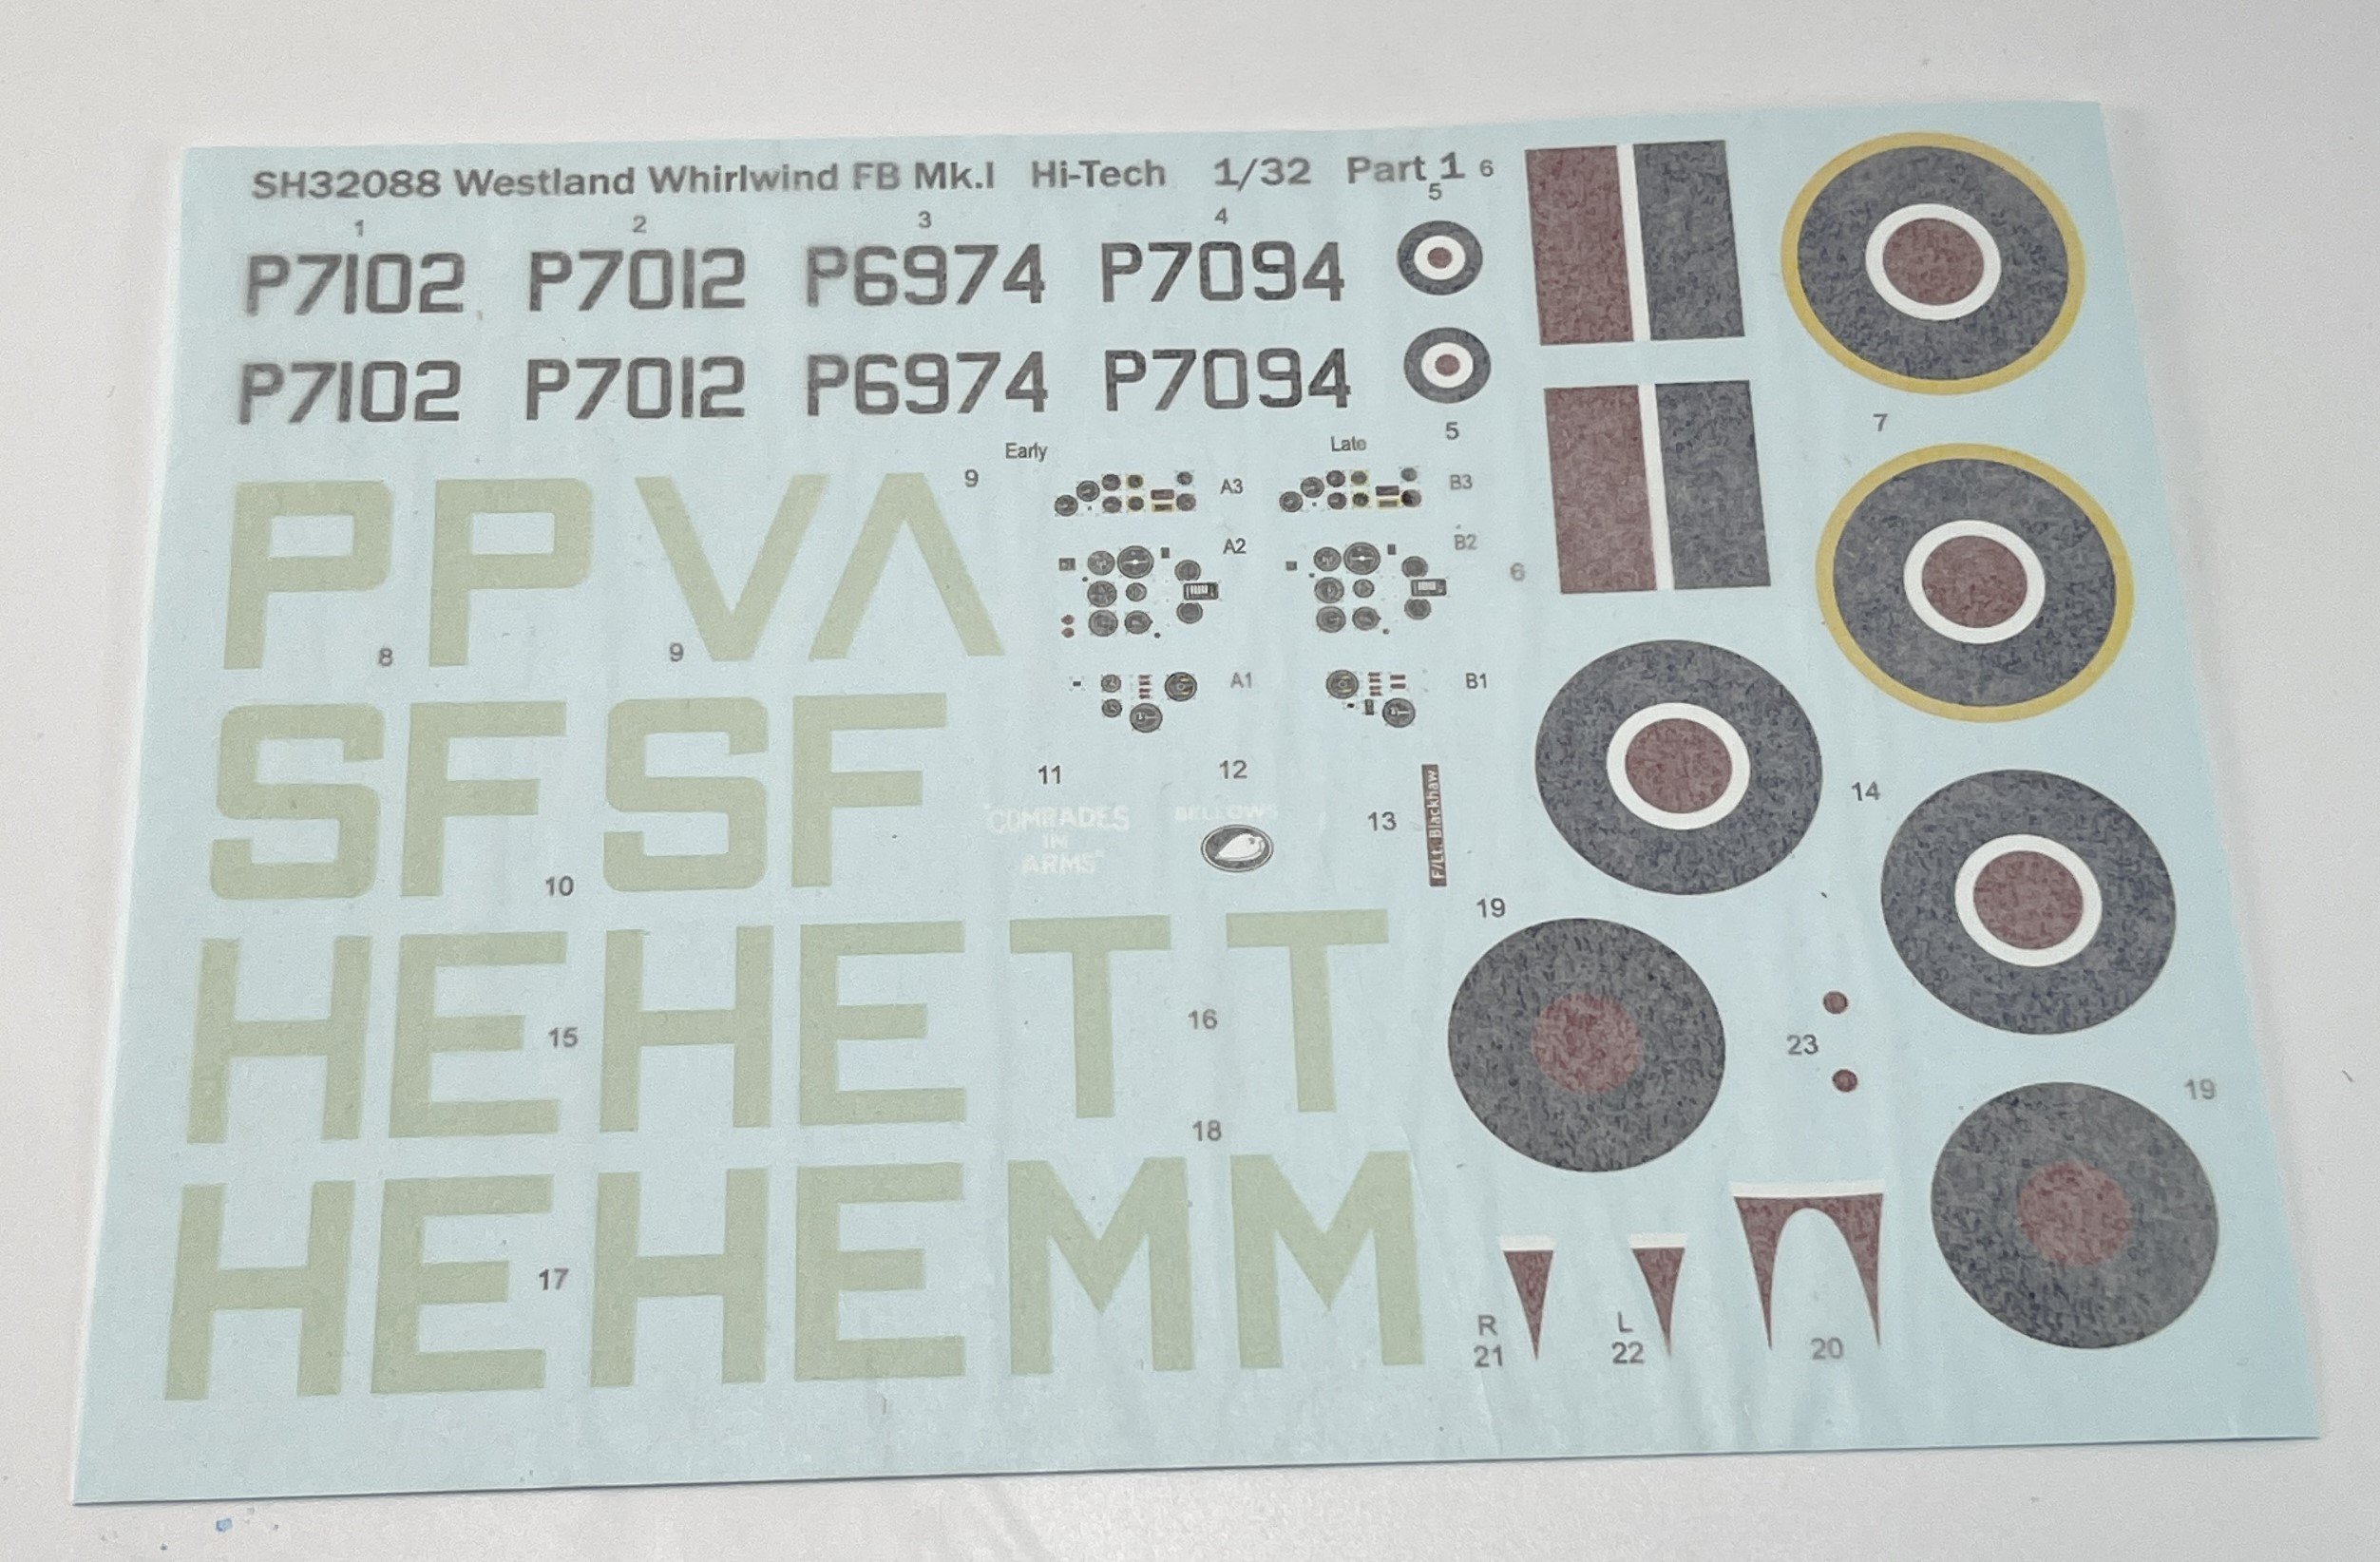
As for the markings, it offer four markings options on the decal sheet:
Westland Whirlwind FB Mk. I, P 7094, HE-T, “Bellows”, n.º 263 Squadron RAF Warmwell Airfield, beginning of 1943;
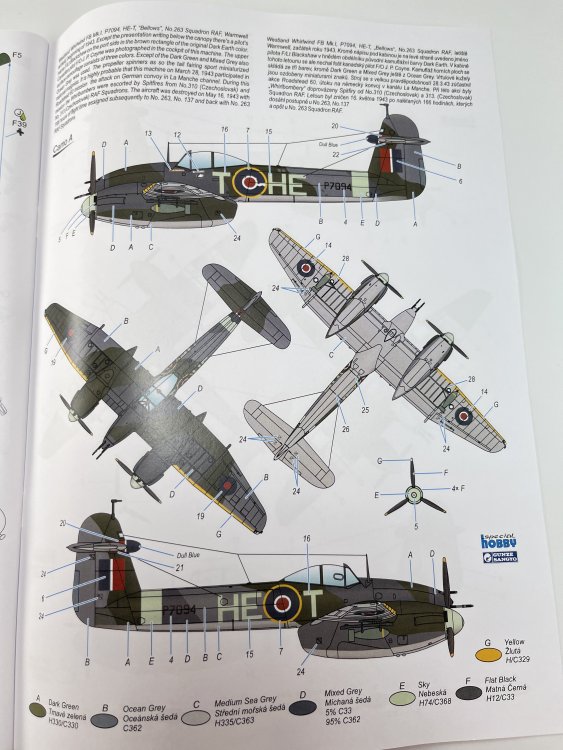
Westland Whirlwind FB Mk. I, P 6974, HE-M, n.º 263 Squadron RAF Angle Airfield, July/august 1942

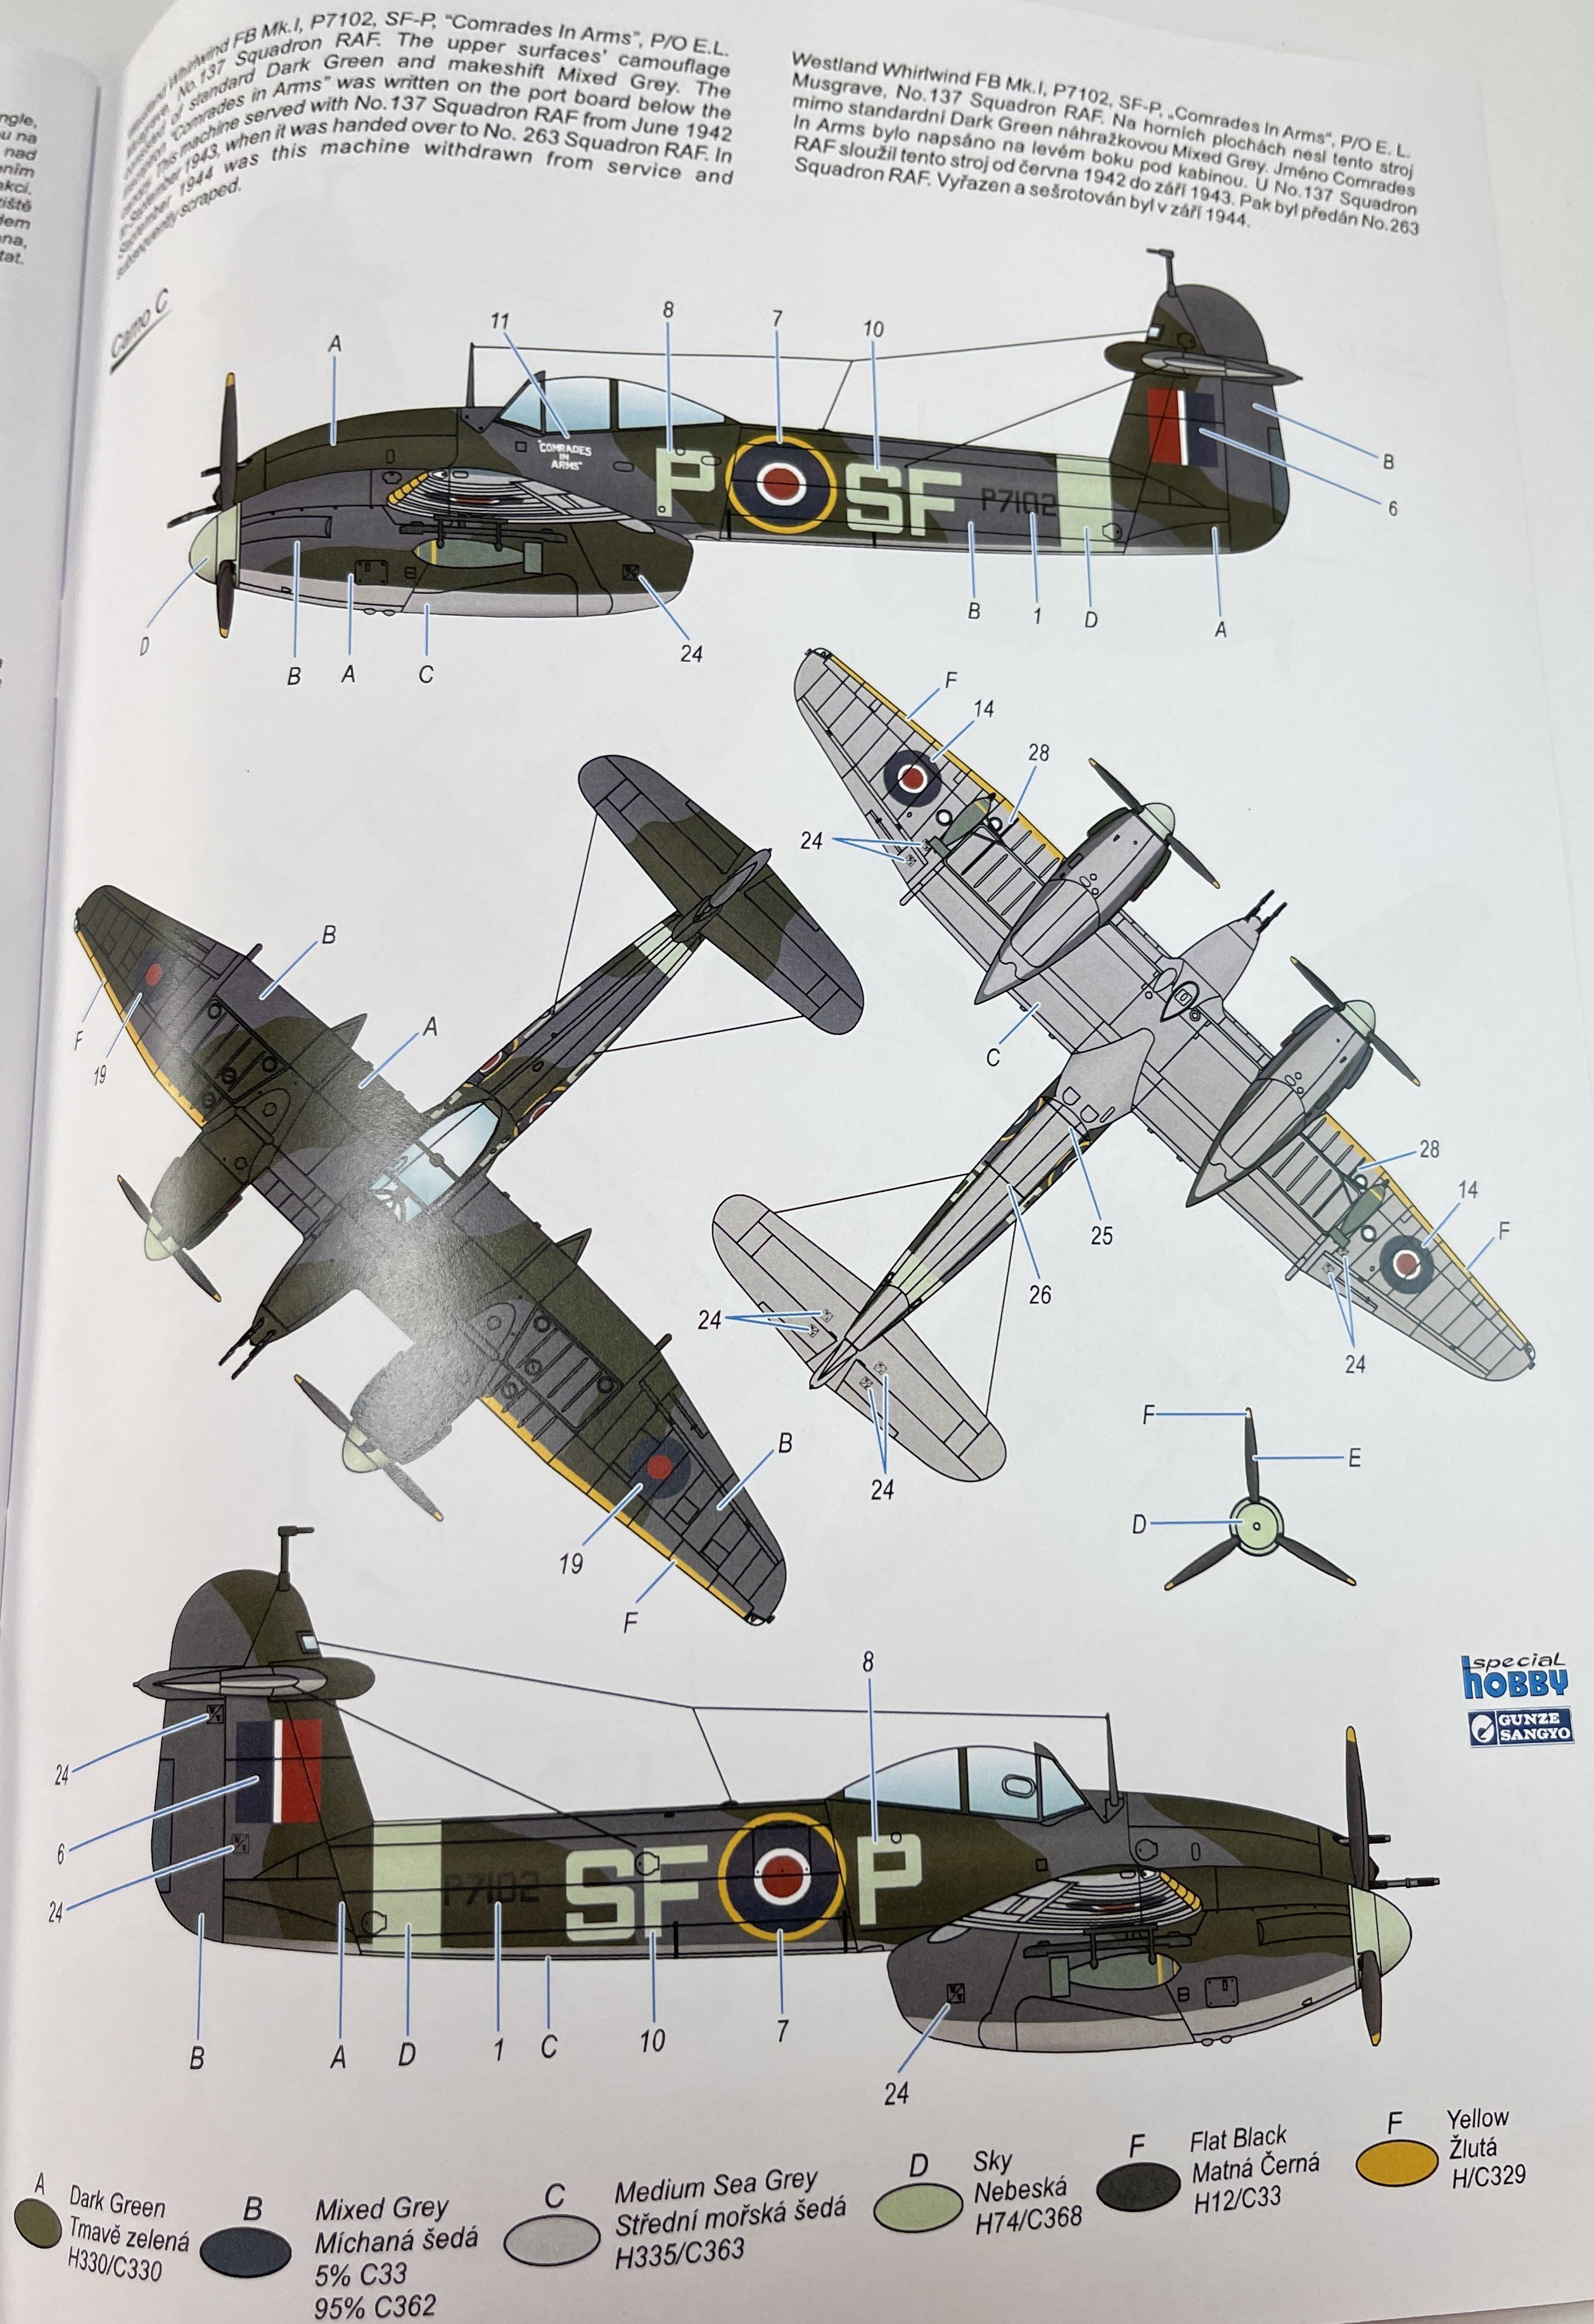
Westland Whirlwind FB Mk. I, P 7102, SF-P, “Comrades in Arms”, P/O E.L. Musgrave, n.º 137 Squadron RAF;
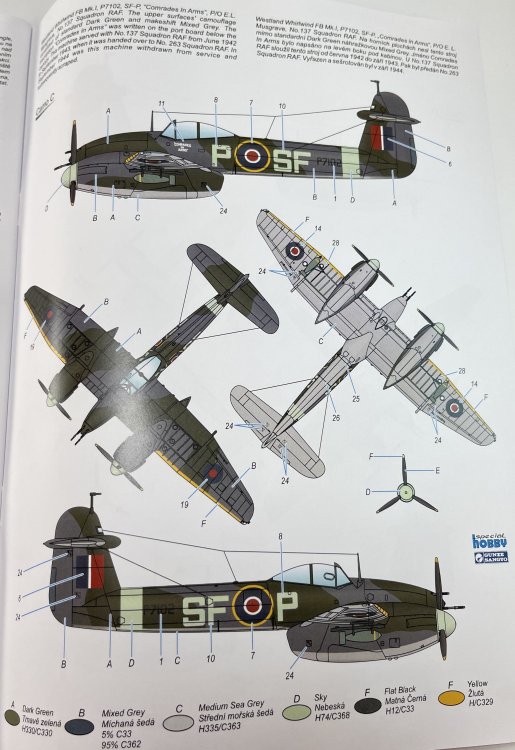
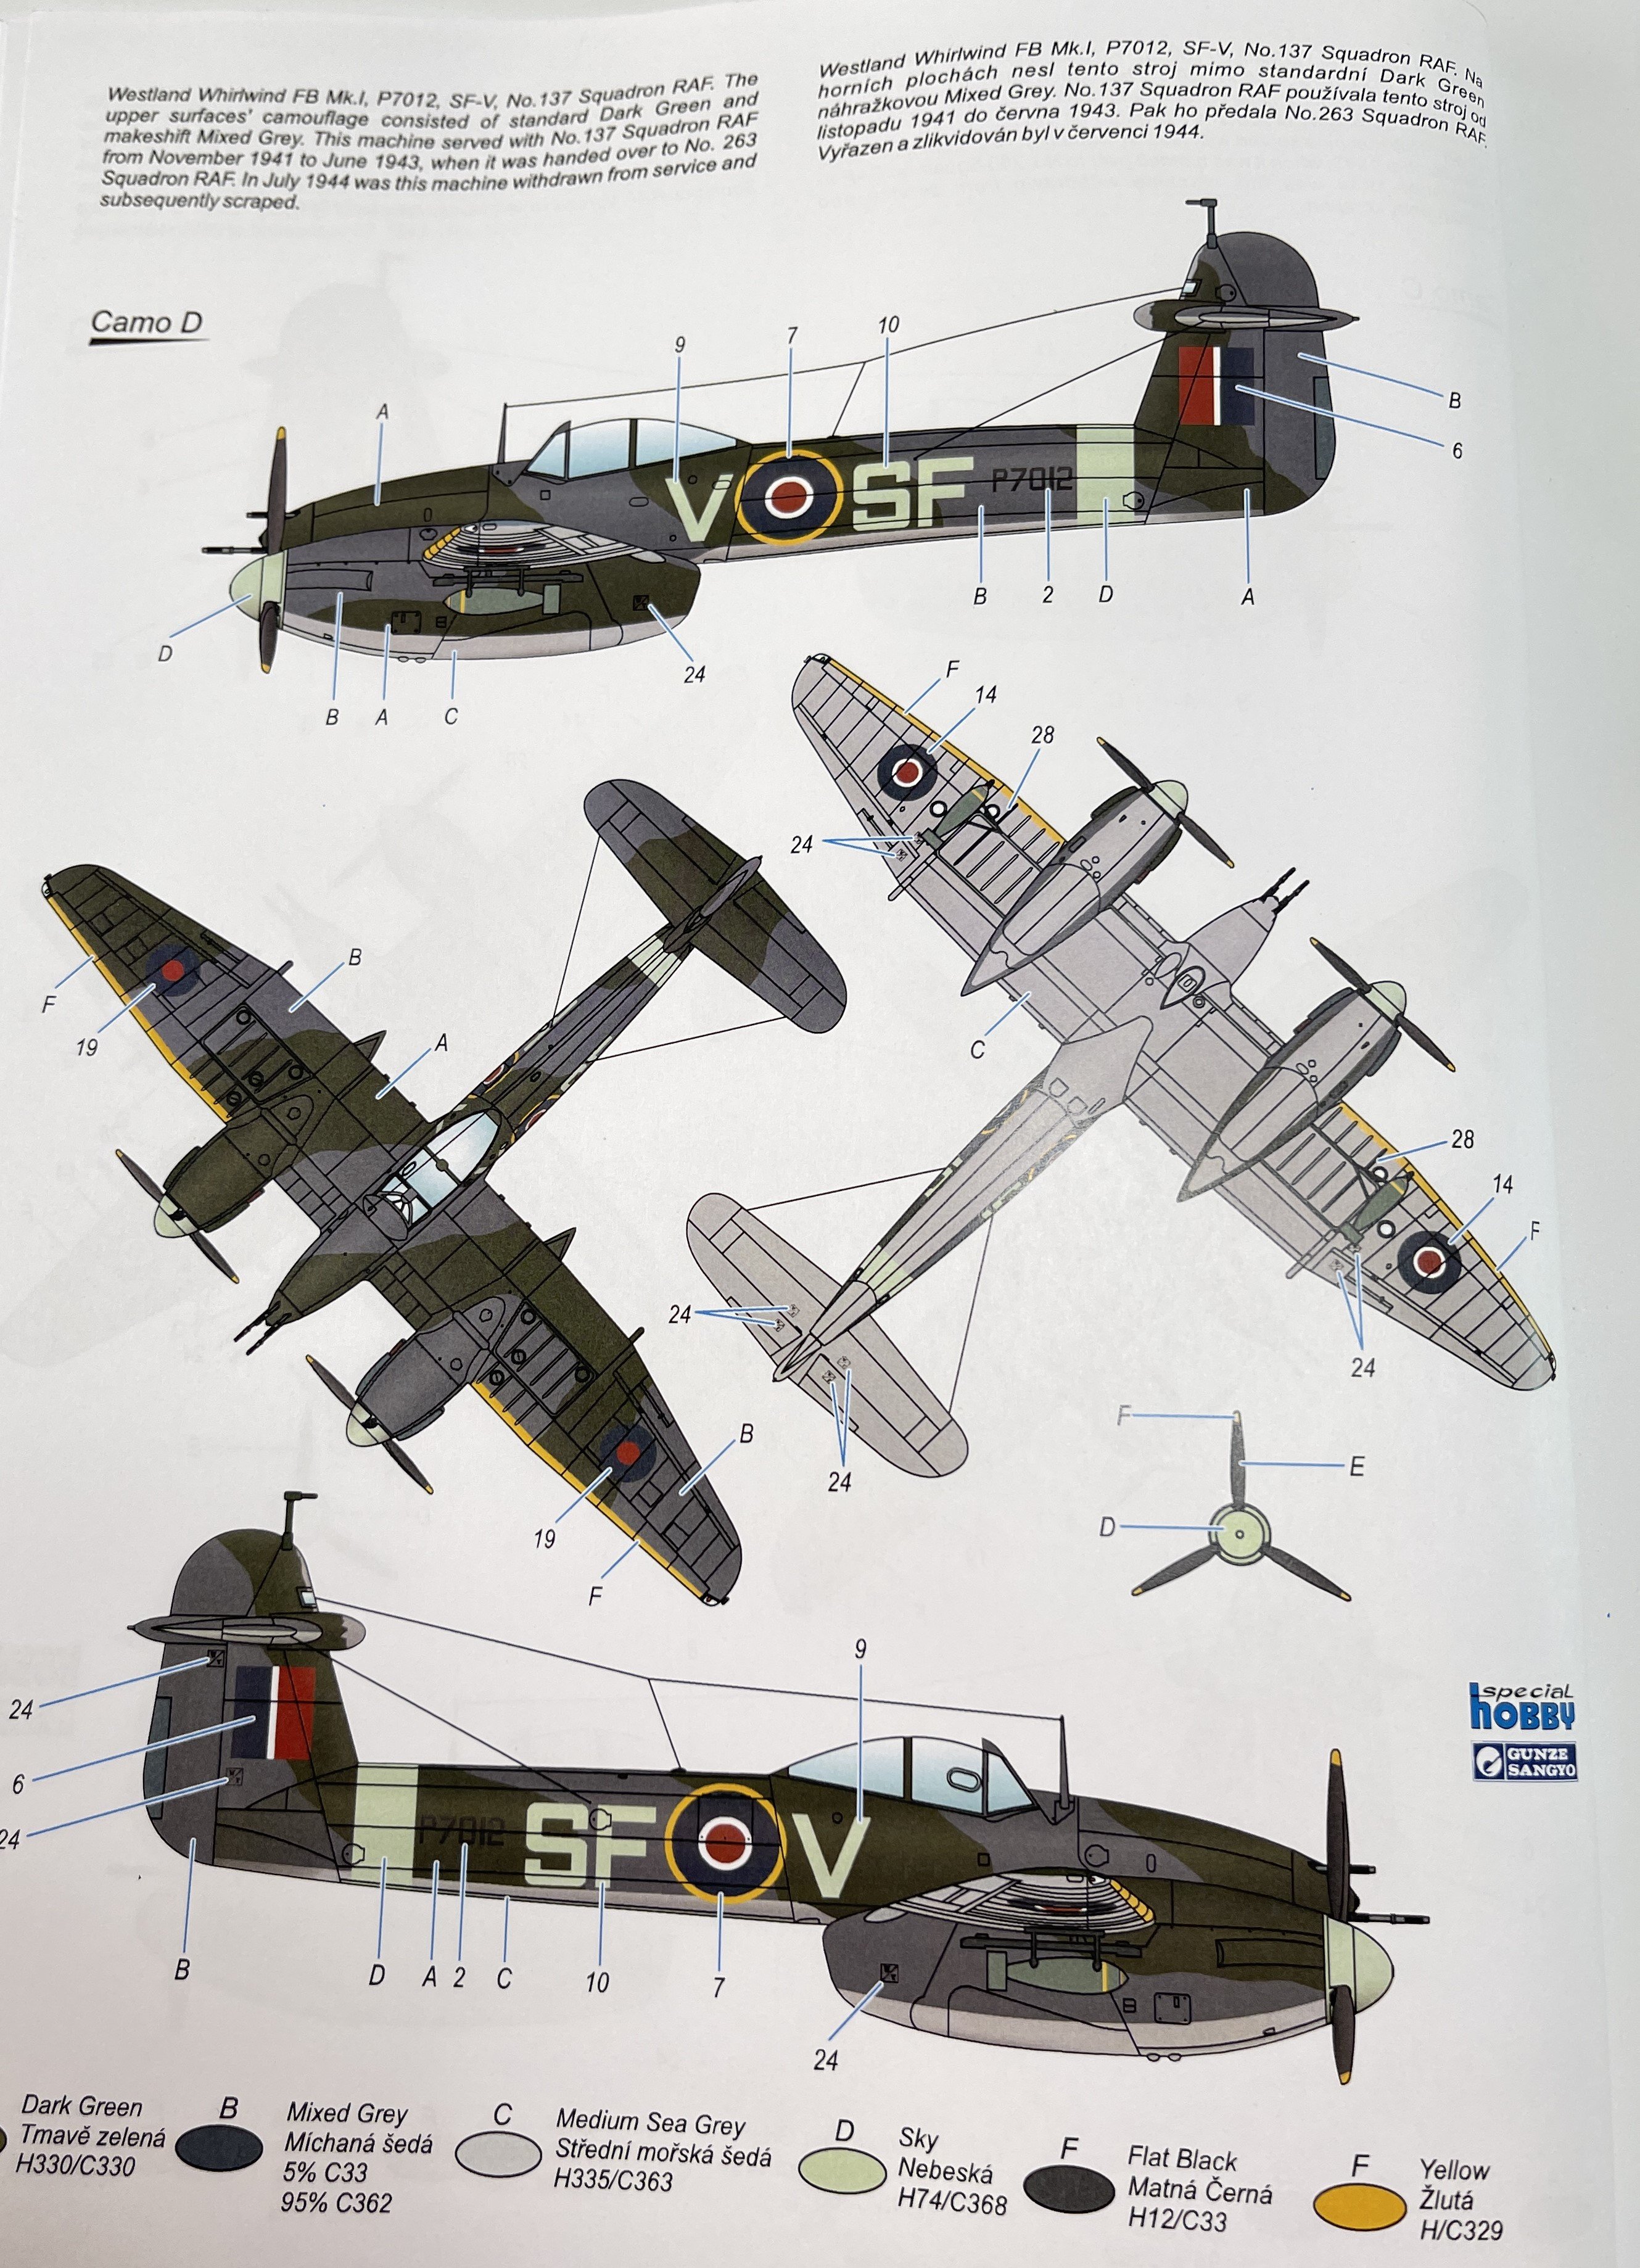
Westland Whirlwind FB Mk. I, P 7012, SF-V, n.º 137 Squadron RAF;
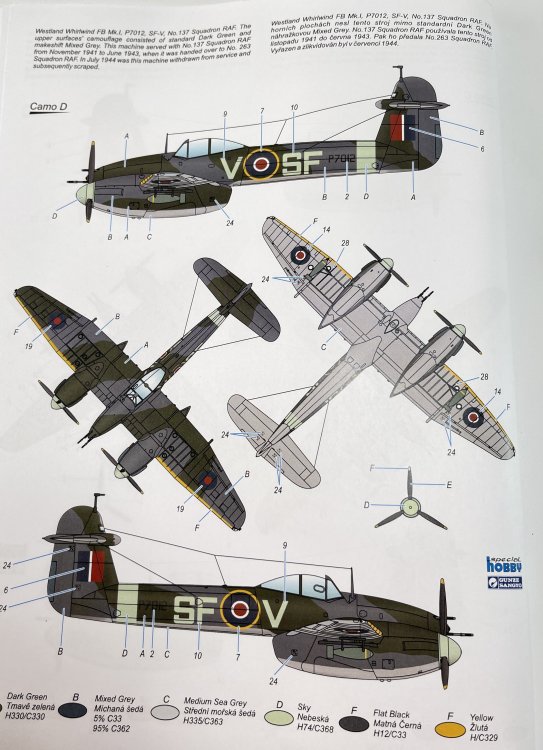
The decals look quite good with good definition and color pigmentation. I don’t know who printed them as its no reference at all of the manufacture so I don’t know how they will work out.


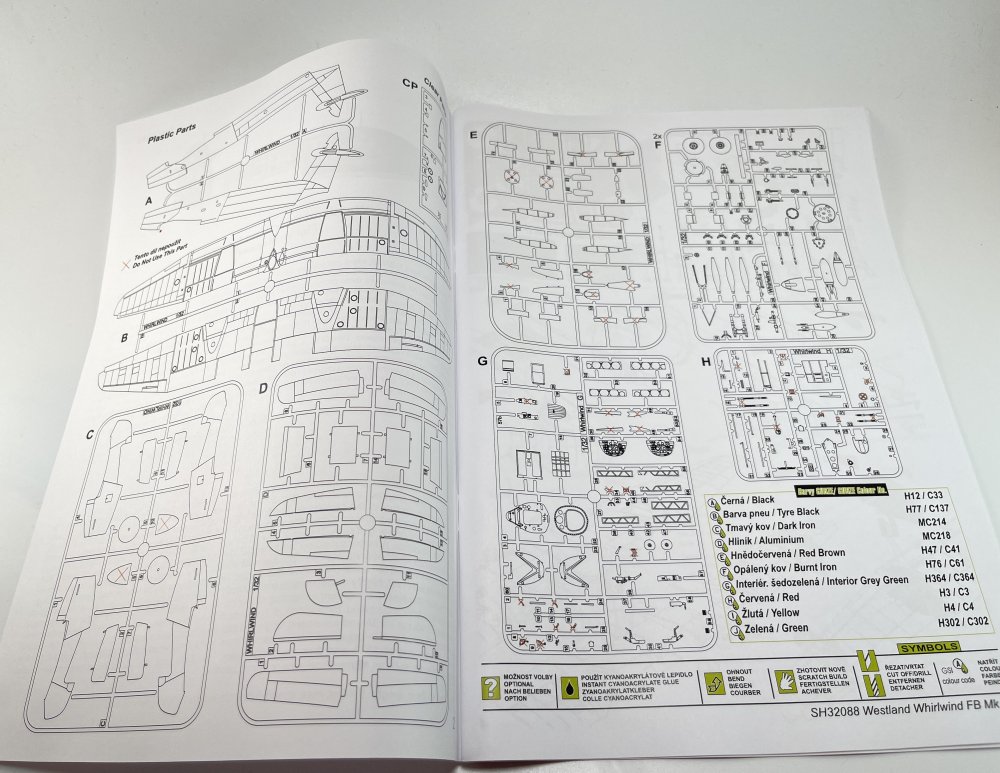
The instruction are a booklet with 20 pages, in satin paper, with good drawings and location parts and even with aftermarket suggestion (of their brand) along the way (nice Special Hobby).


The painting indication given are only for Gunze Sangyo.
Conclusion
What a kit!!
I have soft spot for the Whirlwind and this model with all these goodies is a must have to all modeler that like, even just a little bit, the Whirlwind.
The new parts are most welcome and being a limited run model kit and with all the resin, is not a beginner model. To be perfect, it only needs the engine!!
Kudos to Special Hobby for keeping release these beauties of some more rare aircrafts!
VERY Highly recommended.
My trully Thanks to Special Hobby for making the model.

IMG_0086.AAE IMG_0158.AAE IMG_0162.AAE IMG_0164.AAE IMG_0165.AAE IMG_0166.AAE IMG_0167.AAE IMG_0169.AAE
-
4
-
1
-


.jpg.611fed5ace9c96054b273a6f63de16ce.jpg)

.jpg.7929086bf62c5b131f3fff3934b68226.jpg)


.jpg.827c5482bbd9f78844fa9e68eb073220.jpg)
.jpg.ebc2d05f78f6477045996c2fd2c772d1.jpg)


Very Bad News
in General Discussion
Posted
So sorry to hear this Peter. Best wishes to Diane for a speedy recovery!