dr_gn Posted December 13, 2015 Author Share Posted December 13, 2015 Fins ain't what they used to be:Continued with the fuselage - the nose is similar to a barrel, with narrow sections forming the compound curves:And the underside with the cannon shroud dropped in place:the nose and the herringbone tail sections will be the most time consuming bits, so I thought I'd get them done first.Also started to experiment with an oil paint "glaze" or filter. This is a strip of Raw Sienna, very thin, mixed with Blitz Dry to speed up the cuting process:It gives a bit of depth to the colour, and gives the grain more definition. You can also play tunes with the shades of individual panels if necessary. Link to comment Share on other sites More sharing options...
dr_gn Posted December 14, 2015 Author Share Posted December 14, 2015 Another fine installment in the 'Wood Grain Revisited' manual. Threads like this should be categorized in a How-To department. Thanks! Personally I'm not passing judgment until it's done - still a long way to go with various processes, but so far so good. Finished the other side of the forward fuselage tonight: I'll do the door when the PVA has fully cured on the surrounding decals. I'll aply it oversize, then trim around the panel lines to get a perfect profile. Hopefully. Link to comment Share on other sites More sharing options...
dr_gn Posted December 17, 2015 Author Share Posted December 17, 2015 So this evening there was more cutting templates, cutting decals and PVA-ing them to the fuselage:I've found that cutting the decals slightly oversize to the templates is best: I can always trim the decals freehand with a #11 blade along the pencil panel lines if they are too big. If they are too small, it's game over for the entire panel... Link to comment Share on other sites More sharing options...
Wingco57 Posted December 18, 2015 Share Posted December 18, 2015 Beautiful work. Cees Link to comment Share on other sites More sharing options...
dr_gn Posted December 21, 2015 Author Share Posted December 21, 2015 Fuselage finished (more or less):And most of the wing undersides. I've used a slightly finer and darker grain for the fuel tank covers. Most of the models I've seen have these in aluminium, and it's an easy mistake to make becasue they have loads of fasteners and features within them and around their edges, but a bit of research confirms they are wood:The bomb door edges were made darker by applying a second strip of decal over the first. The ejection ports still need their surrounds darkening like this. 1 Link to comment Share on other sites More sharing options...
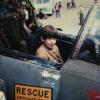
dr_gn Posted December 23, 2015 Author Share Posted December 23, 2015 So the wing undersides are done, or at least all the decals ore on. Just the undersides of the tailplanes to go now:Had a trip to the Yorkshire Air Museum at Elvington today. Really nice place, and they have Mosquito HJ711, which is slowly being restored to taxi-able condition by owner Tony Agar. I asked one of the staff if I could get a closer look, and he was happy to oblige. I was able to put the last pieces of the jigsaw into place i.e the tailcone teardrop/elevator fairings are indeed aluminium:And the rear lamp colours:And the mysterious "thing" mounted on the roof of the canopy:...is a flare pistol.I also found out the bomb doors are edged in aluminium, not hardwood - a day after I edged them with hardwood decals. Dammit.Anyway I got quite a few more detail picures of the aircraft. I did ask if I could open the cockpit door, but the guy immediately saw where that line of enquiry was going and politely declined It was worth a try though. Link to comment Share on other sites More sharing options...
dr_gn Posted December 28, 2015 Author Share Posted December 28, 2015 Tried oil painting the tailcone, but it didn't really work, so I tried agiain using decals. very fiddly, but it looks better than paint. Maybe needs a bit of fettling, but it will have to do:Also corrected the bomb door surrounds from hardwood to aluminium:I used off-cuts of the woodgrain carrier film border, sliced into strips and sprayed aluminium. The ejector hole surrounds were hand painted with aluminium. Link to comment Share on other sites More sharing options...
crazypoet Posted December 28, 2015 Share Posted December 28, 2015 I love this build!!! Thanks for walking us through the whole process 1 Link to comment Share on other sites More sharing options...
dr_gn Posted January 2, 2016 Author Share Posted January 2, 2016 I love this build!!! Thanks for walking us through the whole process No problem, I hope the end result is worth the effort! Thanks for the info. I think the elevators were also fabric on early versions. Drilled out the wing tip lamp covers and dotted some Tamiya clear red and green/blue in the holes to represent the coloured bulbs: And added some brake lines to the u/c legs. The thick lead wire will form a couple of oil pipes from the tanks through the bulkheads: Also painted the brass machine guns for the nose. I wrapped bits of tamiya tape around the barrels to help centre them in the oversized holes in the nose cone: 1 Link to comment Share on other sites More sharing options...
dr_gn Posted January 5, 2016 Author Share Posted January 5, 2016 Started final assembly tonight. I used Araldite to fix the wings - I'd thinned the spars down to give a bit of wiggle room to get a tight fit against the fuselage, and so I needed some adhesive with gap filling properties:And fitted the u/c:Quick check that everything was square (nothing worse than a wonky undercarriage):Hopefully get it finished this week. 2 Link to comment Share on other sites More sharing options...
dr_gn Posted January 9, 2016 Author Share Posted January 9, 2016 Last in-progress pic is of the rear upper nacelles being filled after fitting, and masked for final painting: Finished pictures here: http://forum.largescalemodeller.com/topic/4396-172-tamiya-dehavilland-mosquito-wood-finish/ Thanks for looking! 1 Link to comment Share on other sites More sharing options...
Administrators JeroenPeters Posted January 9, 2016 Administrators Share Posted January 9, 2016 Totally missed this. AMAZING stuff... 1 Link to comment Share on other sites More sharing options...

Recommended Posts
Create an account or sign in to comment
You need to be a member in order to leave a comment
Create an account
Sign up for a new account in our community. It's easy!
Register a new accountSign in
Already have an account? Sign in here.
Sign In Now