


polsen
-
Posts
151 -
Joined
-
Last visited
Content Type
Profiles
Forums
Events
Gallery
Posts posted by polsen
-
-
On 19. Dezember 2018 at 6:14 AM, KUROK said:
Yes the are quite appropriate1
Were gurls going bald beaver way back then?
......I guess you'd have to check your references then
")
Beavers aside, should be an interesting build , keep us posted and all the best.
Cheers, Pete
P.s I love your avatar btw, very cool ! Are those your cats ?
-
 2
2
-
-
hi Mike, I wasn't real happy with the canopy in my set either as i found the frame definition to be a little poor in some areas. Actually it kind of put me off the conversion to be honest. I'll be very interested to see what you do with the kit canopy. I wish you all the best for your build,
Cheers,
Peter
-
2
-
-
Thanks guys, much appreciated.
cheers,
Pete
-
3
-
-
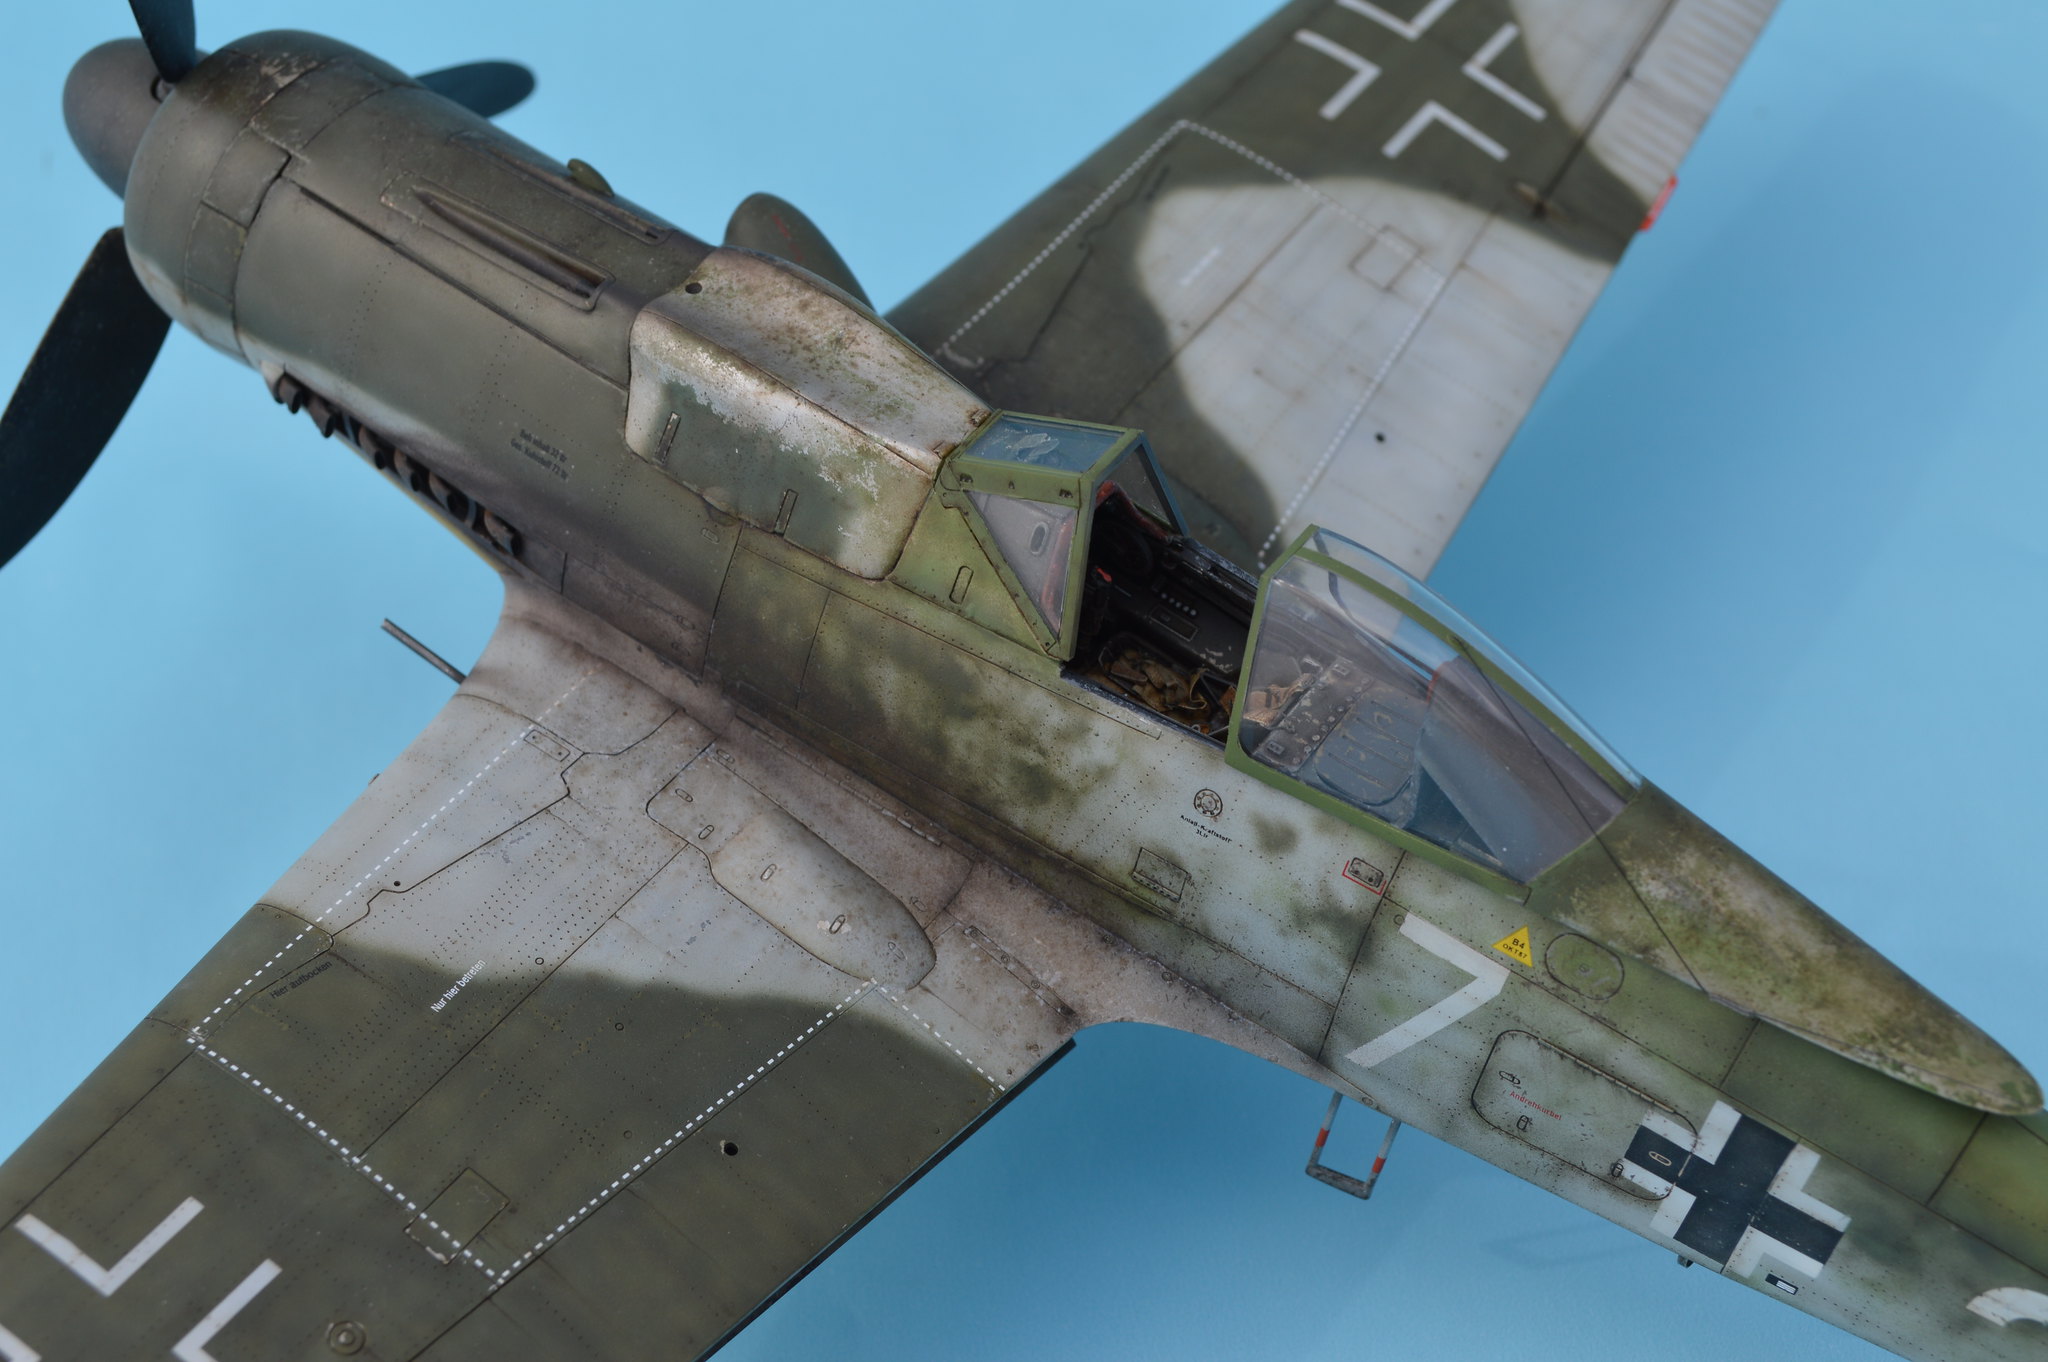
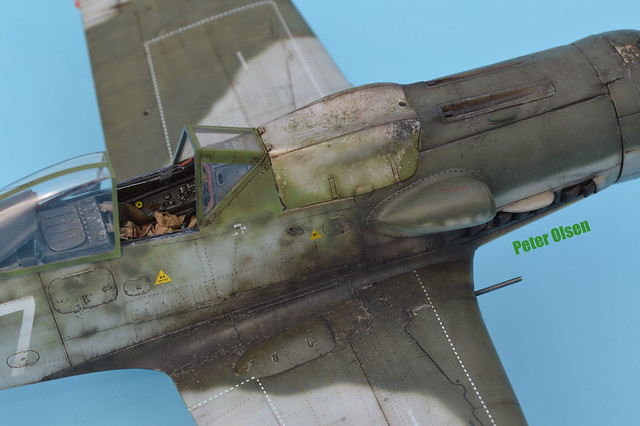
Hi Folks, Here is my 1:32 Hasegawa Fw 190d-9 finished as "White 7" from JG 51. My main inspiration was from the artwork and black and white photos from the JaPo book "focke-wulf Fw 190D camouflage and markings" starting on page 360. I was really taken by the supposed 76/83 wing colours, the dense and intricate fuselage mottles,( those which you can see in the photo at least) and what looks to be a patched up or replacement cowl. I really thought this would make a cracking scheme.
Well, here it is finally finished ...... some of you may have seen it at the Monson show in Hungry this year. I'm sorry to be sparing with the photos but I'm saving it for publication as I'm working on a book in wich this model and other works of mine will be published. I hope to share my tips, techniques and insights whilst imparting my enthusiasm to the model community around the world. Hopefully your responses will urge me to keep going with this as its proving to be quite involving.
 DSC_0103 by Peter Olsen, on Flickr
 DSC_0123 by Peter Olsen, on Flickr
I hope you like it. All the best,
Cheers,
Peter Olsen

-
14
-
-
I'm waiting on some replacement parts as both my airbrushes are out of action plus I have alot on my plate at the moment but I'll update when I can.
-
3
-
-
What.... huuuh ......who said that ?
")
-
2
-
-
Looking good Jeroen
Cheers,
Peter
-
Very nice James, I'm looking forward to the article....
Peter
-
Looks great Laurent, I like the rust mapping
Cheers,
Peter
-
Hi folks, its been a while but I've got some paint on now. I chose " White 7" of JG 51 and my main inspiration was the black and white picture and the colour profile in the JaPo camouflage and marking book, page 361. I found it quite interesting that they suggested the possibility of a RLM 76/83 finish on the wing upper surfaces. looking at the existing photograph of this machine there is a small section of the upper wing surface that's visible along the leading edge. I'm not sure if its just the way the sunlight was hitting it or the way the photo turned out or the possibility of a high contrast scheme. While the Jerry Crandall book suggests 75/74 or 75/83 amongst other possibilities; I thought 76/83 would be quite a unique looking finish and since there is evidence of other FW 190 d-9's in these colours I decided to run with it.

I used Gunze acrylics for all of the airframe airframe colours except for the mottling on the fuselage which was my own custom mix of Testors and Humbrol enamel paints. I find that I can get enamels to spray much finer then acrylics.
 DSC_1021 by Peter Olsen, on Flickr
Here's a shot of the underside and you can see that I've started weathering in selected areas, whilst other panels such as forward of the wheel bay are still waiting to receive treatment. There is still a lot of work to be done and I haven't even started on the top side weathering yet.

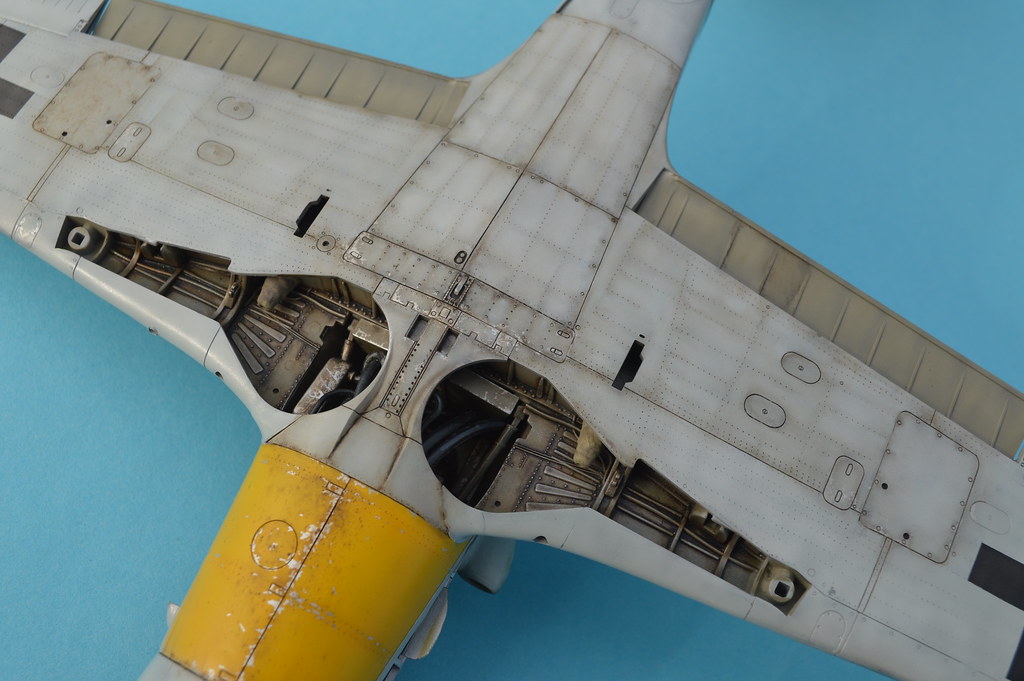 DSC_0844 by Peter Olsen, on Flickr
Thanks for looking everyone, I would love to post some more pics but unfortunately for the time being I'm saving this model for publication. Actually, I'm in the process of writing my own book so all my techniques and info on this model will be available sometime in the future. I would love you to pick up a copy when its available.
Ok, see you later !
Happy modelling,
Cheers Peter.
-
8
-
-
Non complex english eh...... mmmm , me can do that
Thanks James, I'll send them an email.
Pete.
-
Hi James, looks like this will be a fantastic project, I'm looking forward to what you do with it.

Was it easy enough to get the replacement part ? The reason I ask is because I have this kit in my stash but some of my clear parts are fogged and I would love to have them replaced. I bought the kit about two years ago at the BRNO show in Czech but unfortunately I've lost the receipt.

All the best for the build, I'll be following along.
Cheers,
Peter.
-
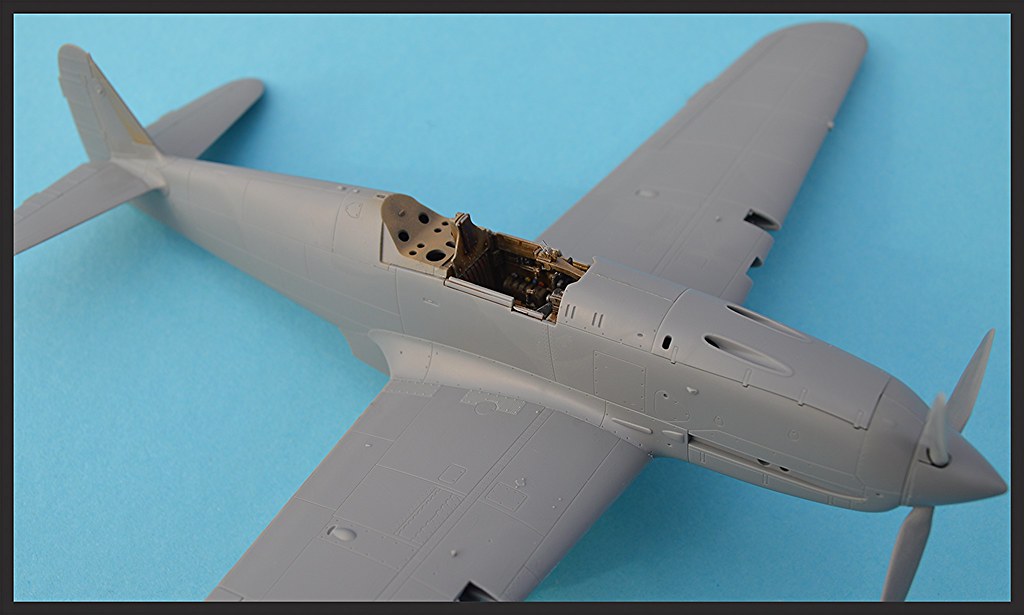
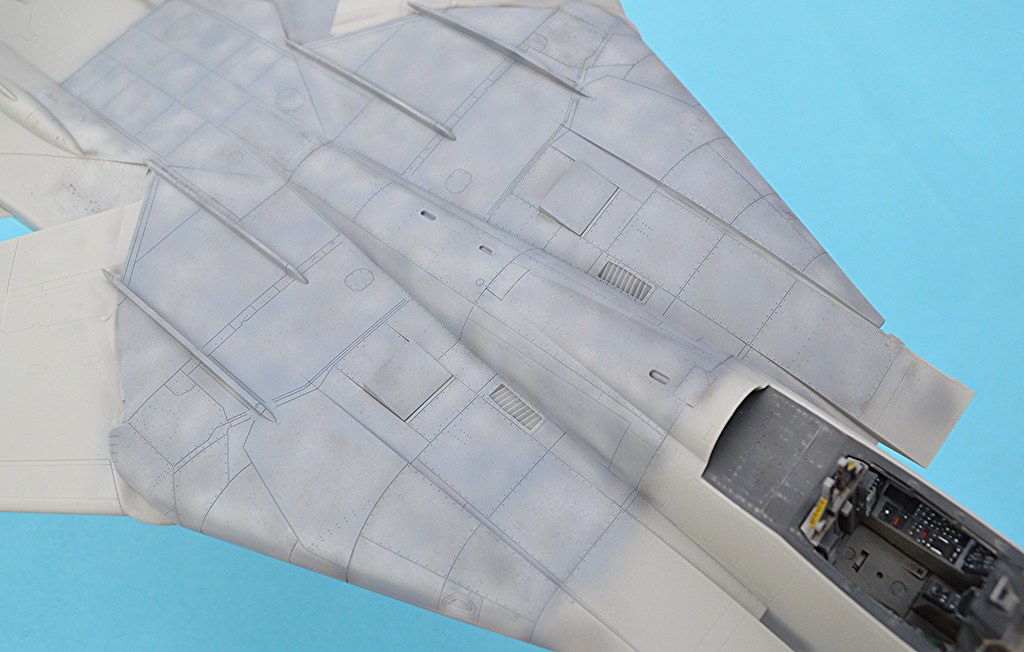
Construction continues with the Ki-61....
Well, what can I say other than this kit really goes together beautifully, but you knew that already right.
")
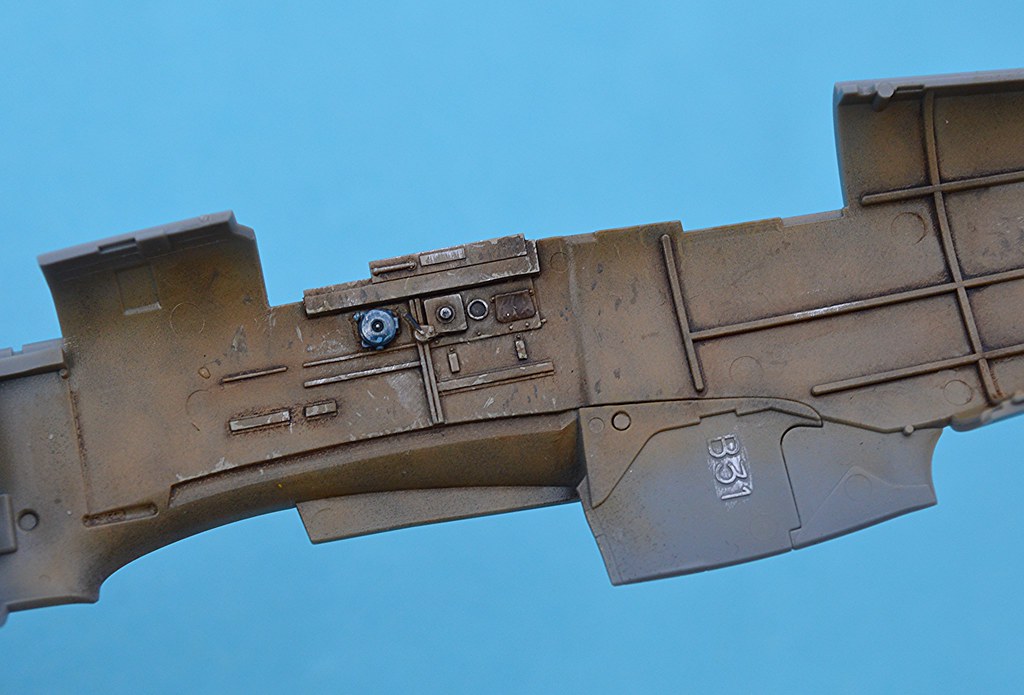
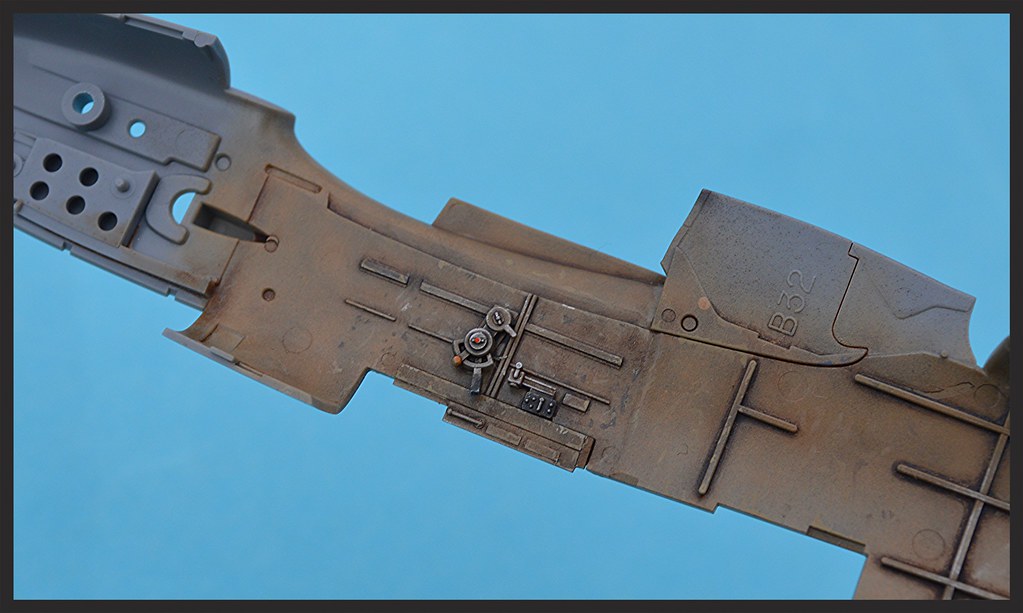
Here's a picture of the main wing assembly and with this shot it gives you a nice look at the wonderful surface detail on the kit.
 DSC_0327 by Peter Olsen, on Flickr
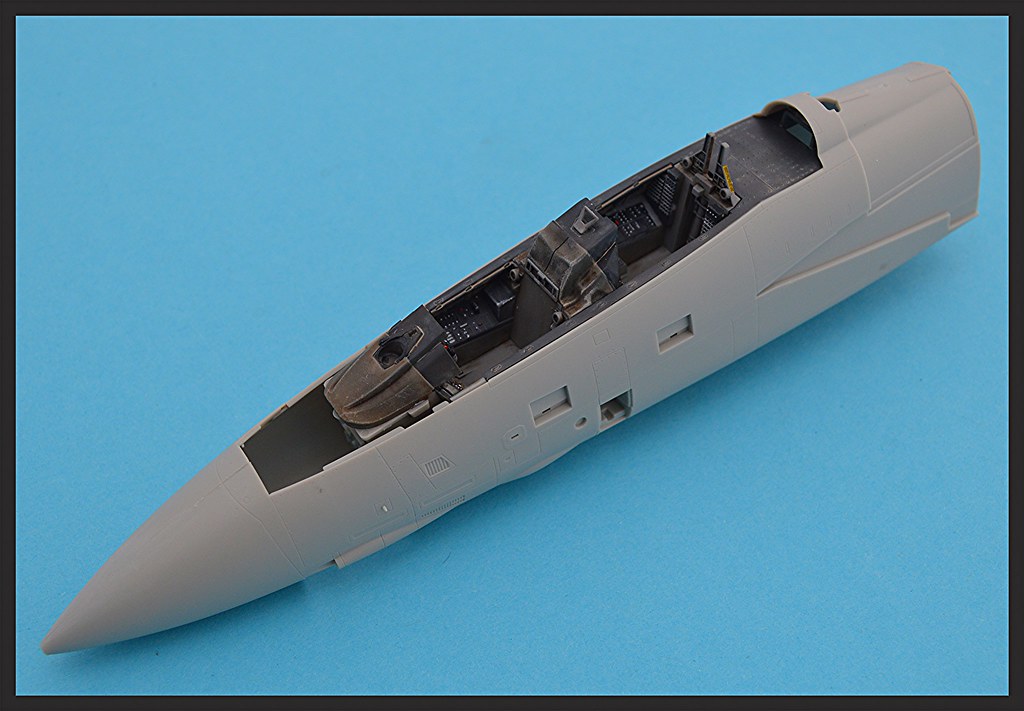
The cockpit fits quite well into the fuselage and you can install it after gluing the two main fuselage halves together. I still have to weather the rear canopy sill to match the rest of the cockpit.
 DSC_0355 by Peter Olsen, on Flickr
Please be aware that at this stage I have not cleaned up any of the seams yet and I've simply placed the upper engine cowl on the forward fuselage just for the pics.
 DSC_0339 by Peter Olsen, on Flickr
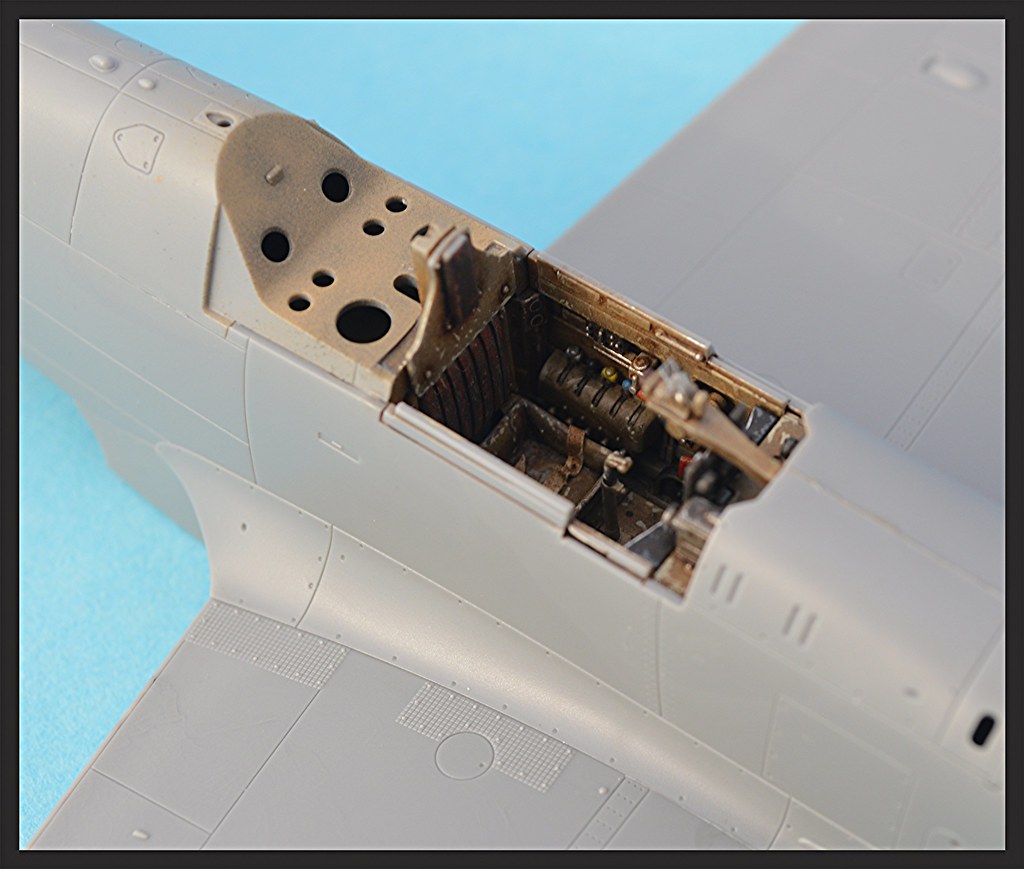 DSC_0353 by Peter Olsen, on Flickr
I really love the shape of the Ki-61, it's so aesthetically pleasing.
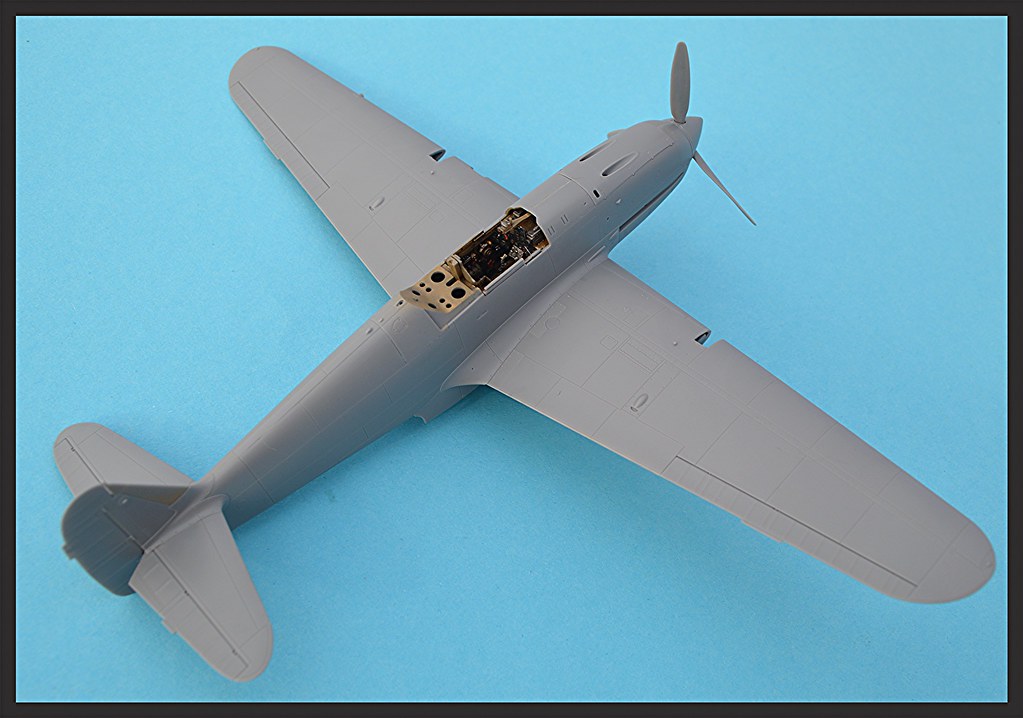 DSC_0361 by Peter Olsen, on Flickr
I've got a few more things to add to the building stage, then I'll clean up the seams and mask the canopies and I'll be ready for paint.
Thanks for following,
Cheers,
Pete.
")
-
3
-
-
Welcome aboard Alberto.
Cheers,
Peter
-
A little bit of paintwork on the upper fuselage.......
 DSC_0277 by Peter Olsen, on Flickr
I started out with a pre-shadow of a home mix of Tamiya Scale black ( black, white and brown basically ) along the panel lines and mottled in selected areas. Next up I sprayed some Tamiya flat white in a small and patchy mottle type manner again in selected areas. finally, I oversprayed with gunze H307, fs36320 Dark Ghost Grey.
Working slowly, I repeated these steps over again until I gradually built up a faded weathered tone that I was happy with.
 DSC_0280 by Peter Olsen, on Flickr
Thanks for all your comments guys and for following along

more to come, stay tuned....
-
1
-
-
Hi folks, Here's my WIP on the new Tamiya Ki-61d. When this one arrived over the fence I couldn't help but make a start on it, I just love this aircraft !
For the base colour I use Gunze RLM 79 with a little Tamiya Xf-59 buff to make it a tad lighter. Weathering was done with an oil wash while splotches and fine detail painting were Applied using Vallejo acrylics. I also made my own seat belts using some left over material from a HGW set and the buckles were made from fine coper wire
It's a pretty nice kit with lovely detail, superb fit and great engineering.......pretty much what we've all come to expect when it comes to the latest releases from Tamiya. I particularly like the selected rows of recessed rivets on the wings. They're quite delicately represented and very much to scale just like on their F-14a.
So far, my only criticism of the kit is the instrument panel which much like their older 1:48 scale releases are simple raised circular dials. Instrument decals are of course included with the kit but I had to remove each one separately with my punch and die set. I would have liked to seen some fine raised instrumentation detail instead or at least individual instrument decals that fit into the dials perfectly.
The kit is not overly complicated at all so it goes together quite quickly
Ok, onto the pics ...........
first up, the wonderful boxtop artwork.
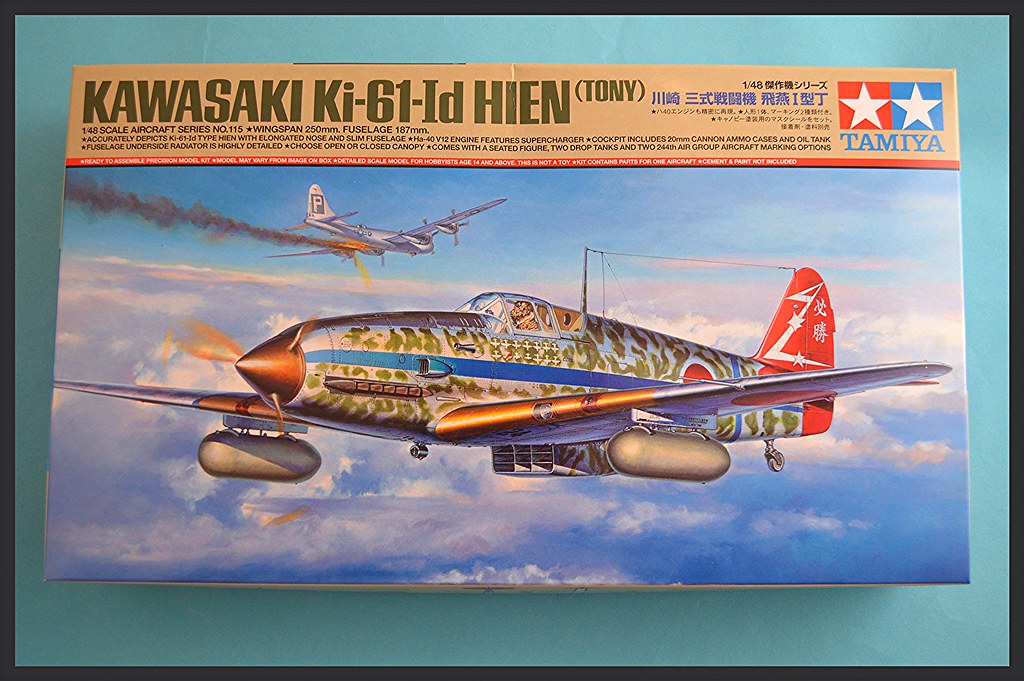 DSC_0305 by Peter Olsen, on Flickr
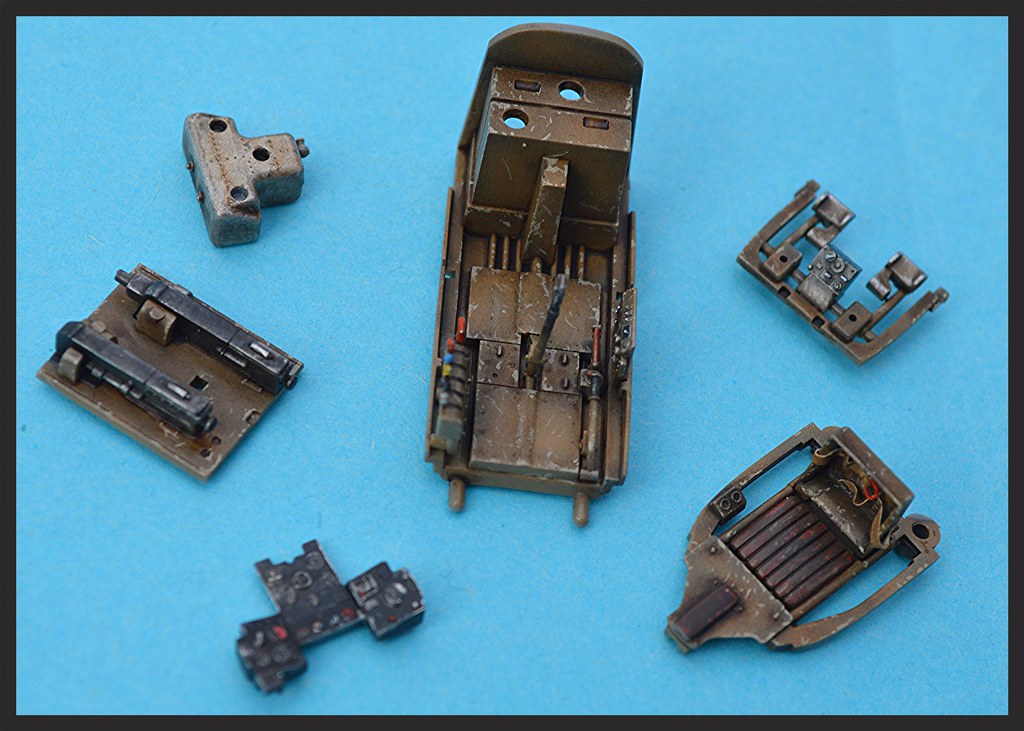
Some of the cockpit parts.
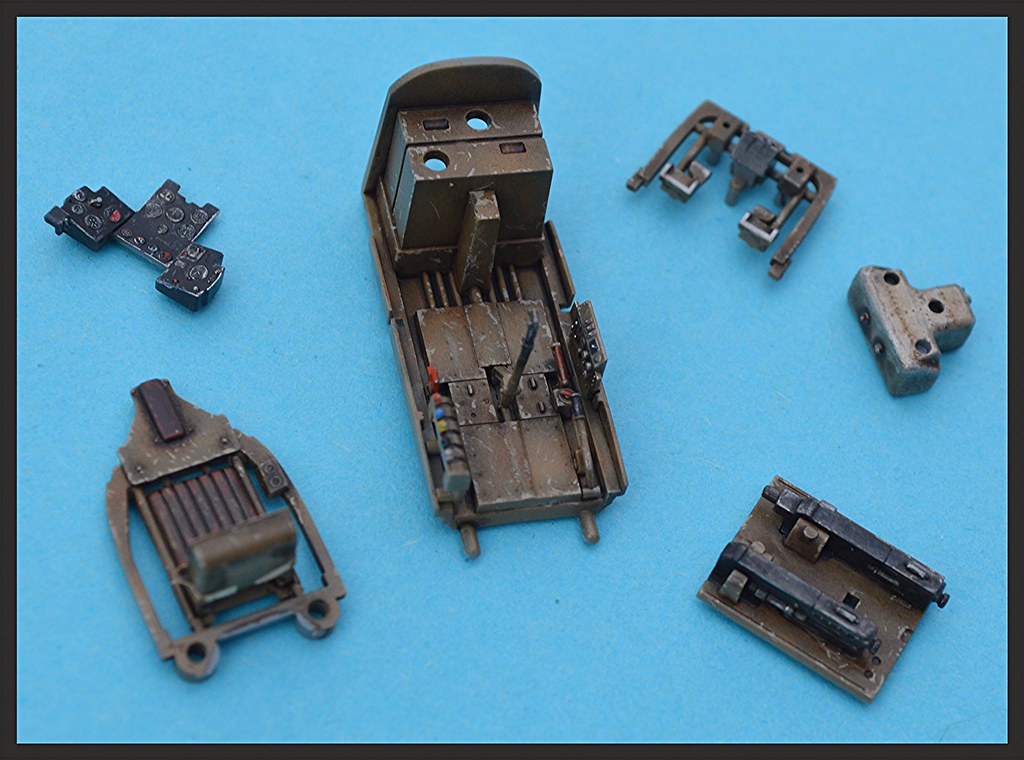 DSC_0299 by Peter Olsen, on Flickr
The left cockpit side wall with throttle detail...
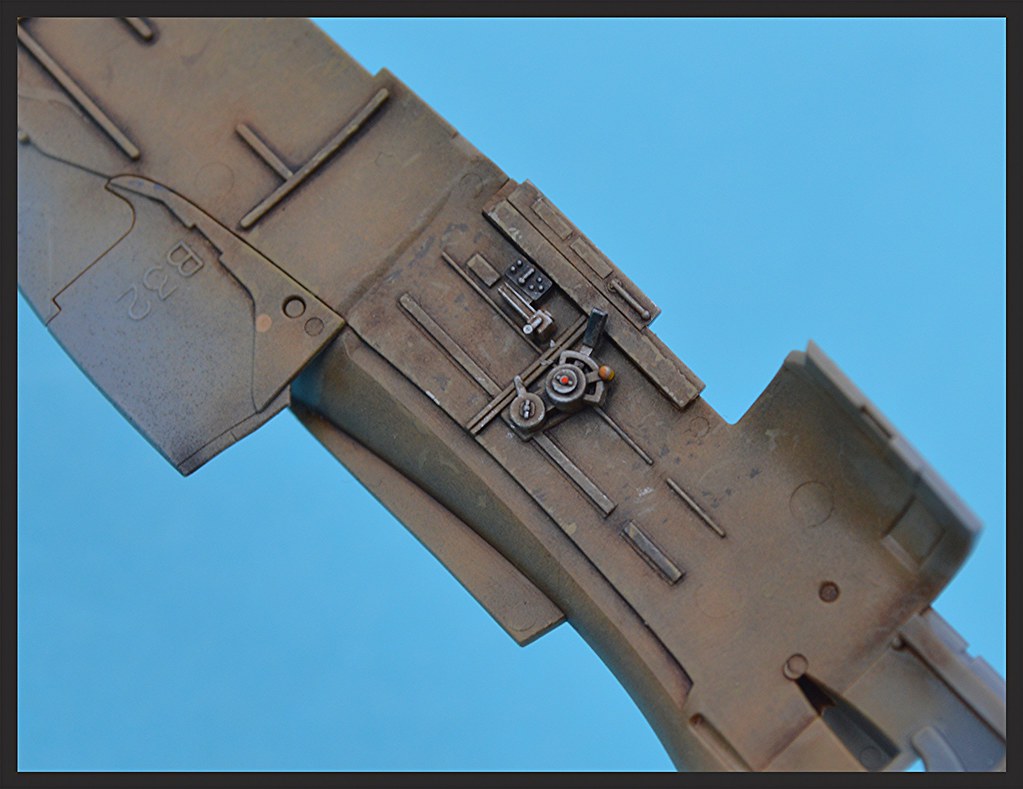 DSC_0298 by Peter Olsen, on Flickr
And the right....
 DSC_0296 by Peter Olsen, on Flickr
And the left again but upside down this time.........well, I am from down under
 DSC_0294 by Peter Olsen, on Flickr
And I'll leave you with one last shot of the cockpit parts, thanks for looking,
Happy modelling,
cheers,
Pete.
 DSC_0303 by Peter Olsen, on Flickr
-
1
-
-
A little more work on the tomcat for your viewing pleasure.

The forward nose section...
It fits perfectly into the rear part of the fuselage, no swearing necessary; but hey that's Tamiya for you.
")
Most pictures of instrument coamings on F-14's appear to be black so I may have to repaint mine to be accurate. It's a bit of a shame from an artistic point of view cause I like the way it looks so I'm quite tempted to just leave it.

 DSC_0018 by Peter Olsen, on Flickr
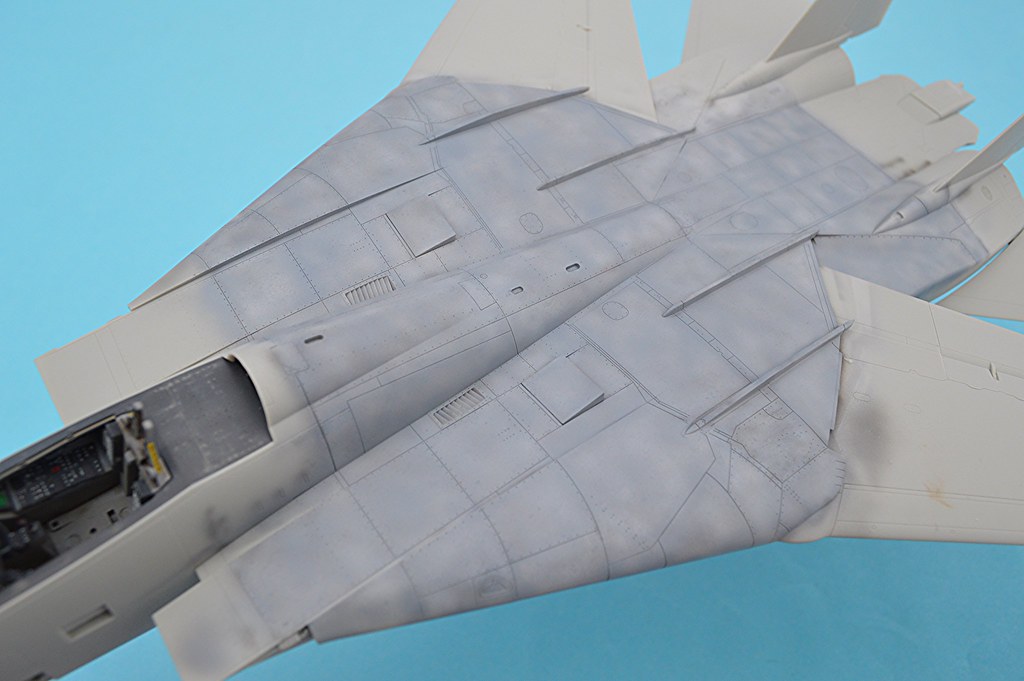
The inside of the main fuselage and rear wheel bays with a coat of Tamiya Flat White.
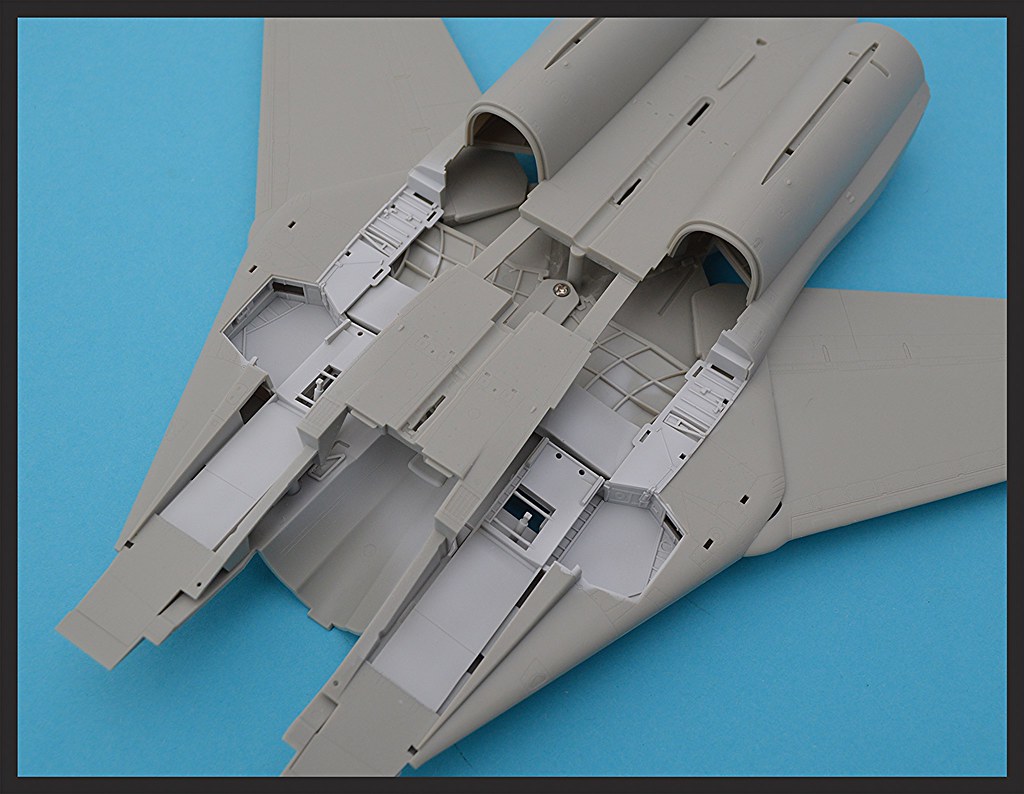 DSC_0033 by Peter Olsen, on Flickr
I just have to mask the canopies and make a few touch ups here and there and it will be ready for paint. Time to let the cat out of the bag.

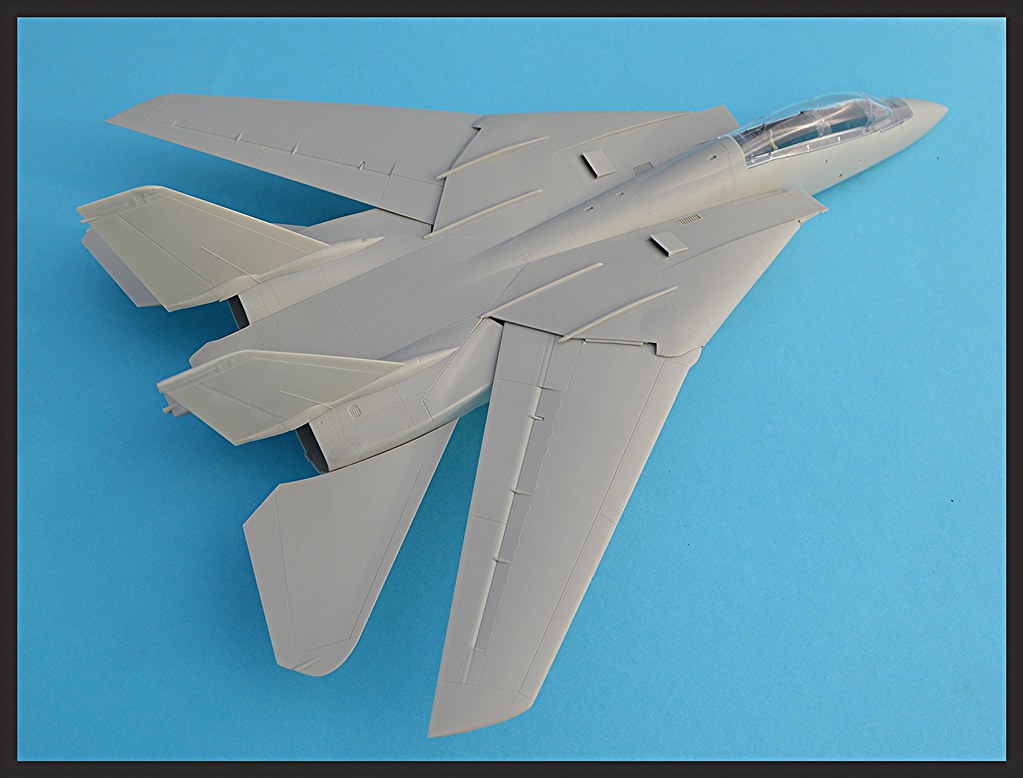 DSC_0082 by Peter Olsen, on Flickr
This is the aircraft I plan on painting, mostly because of its heavily weathered state. For the time being I'm not sure where I could source markings from, does anyone have any suggestions ?
 f-14a miramar by Peter Olsen, on Flickr
Thanks for looking.
Happy Modelling,
Cheers,
Pete.
-
1
-
-
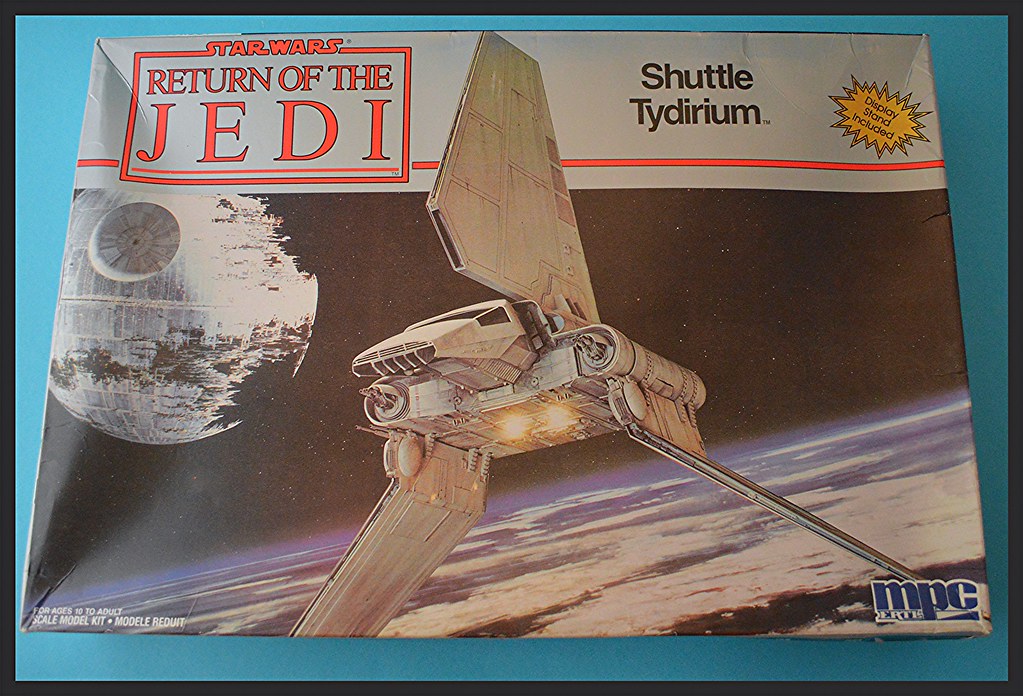
I remember my grandmother taking me to see 'Return Of The jedi' for the first time in the Cairns movie theatre when it was released.
Ever since then, the Imperial Shuttle has always been my absolute favourite vehicle from the Starwars trilogy... well,ok, also the Millennium Falcon. When ever I watch the movie again or see the Imperial Shuttle I'm always have reminded of my childhood memories of that time.
In terms of detail the MPC kit isn't to bad but it is showing its age compared to the likes of modern Star Wars kit manufactures such as Bandai or Finemolds. Personally, I think it has a lot of potential, and if you want build up a kit of the Imperial Shuttle it's pretty much the only game in town... if you can find one. Other than that you're stuck with Revell's recent release in their 'easy kit' line which is quite suitable for younger modellers or beginners but unfortunately a little to simplified and toy like for my tastes.
" If they don't go for this Chewie we're going to have to get out of here pretty quick".......
 DSC_0243 by Peter Olsen, on Flickr
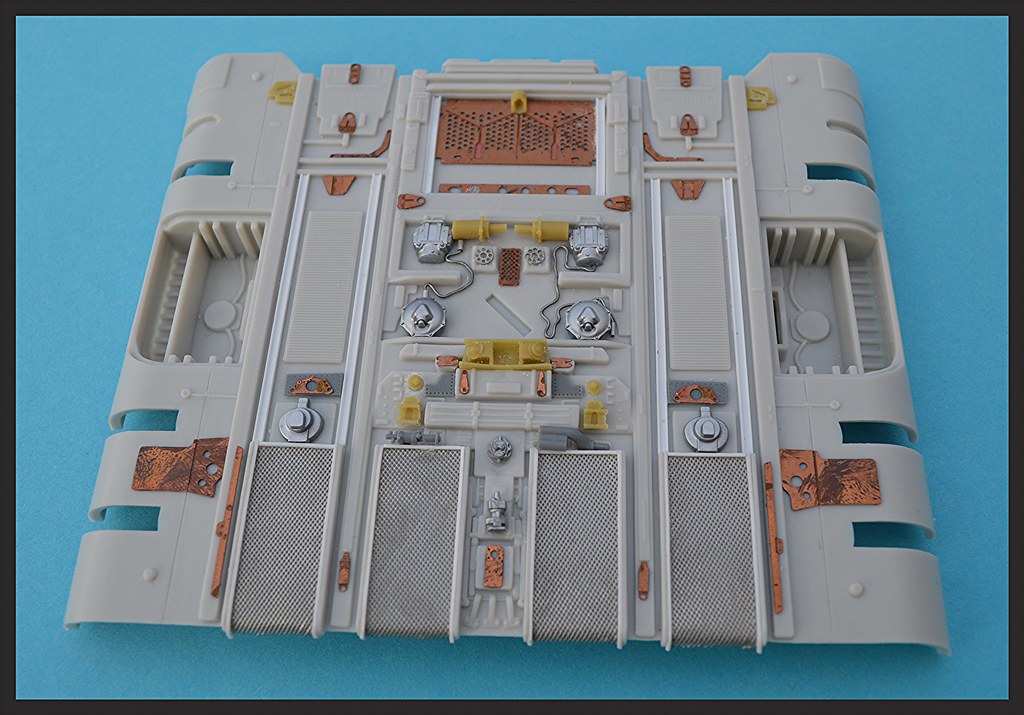
Unlike most flying subjects work did not commence within the cockpit but on the underside of the fuselage instead.
Here you can see the 'before' shot ....
 DSC_0141 by Peter Olsen, on Flickr
......and the 'After'
Ok, it's not strictly studio accurate but in the spirit of how the original Star Wars models were built I added details with plastic strip, solder wire, resin, photo etch and spare parts from other kits.
I've omitted detail work in the undercarriage bay as I intend to pose this model with gear up and in flight.
 DSC_0223 by Peter Olsen, on Flickr
Some surface detail shots of the kit parts...
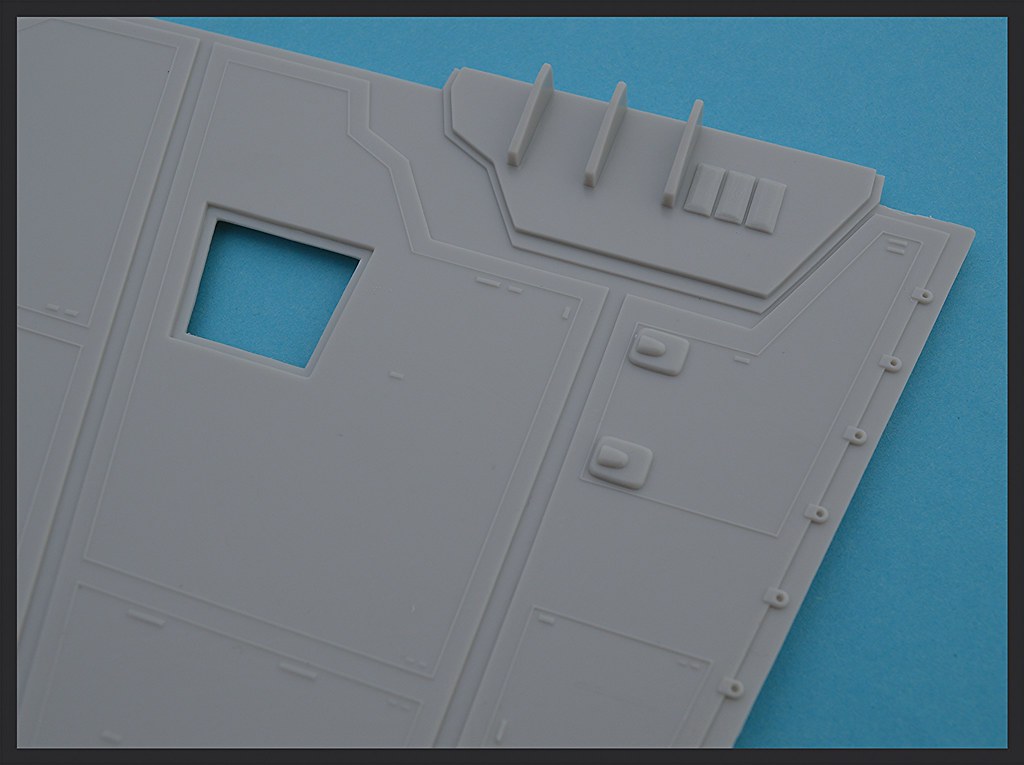 DSC_0166 by Peter Olsen, on Flickr
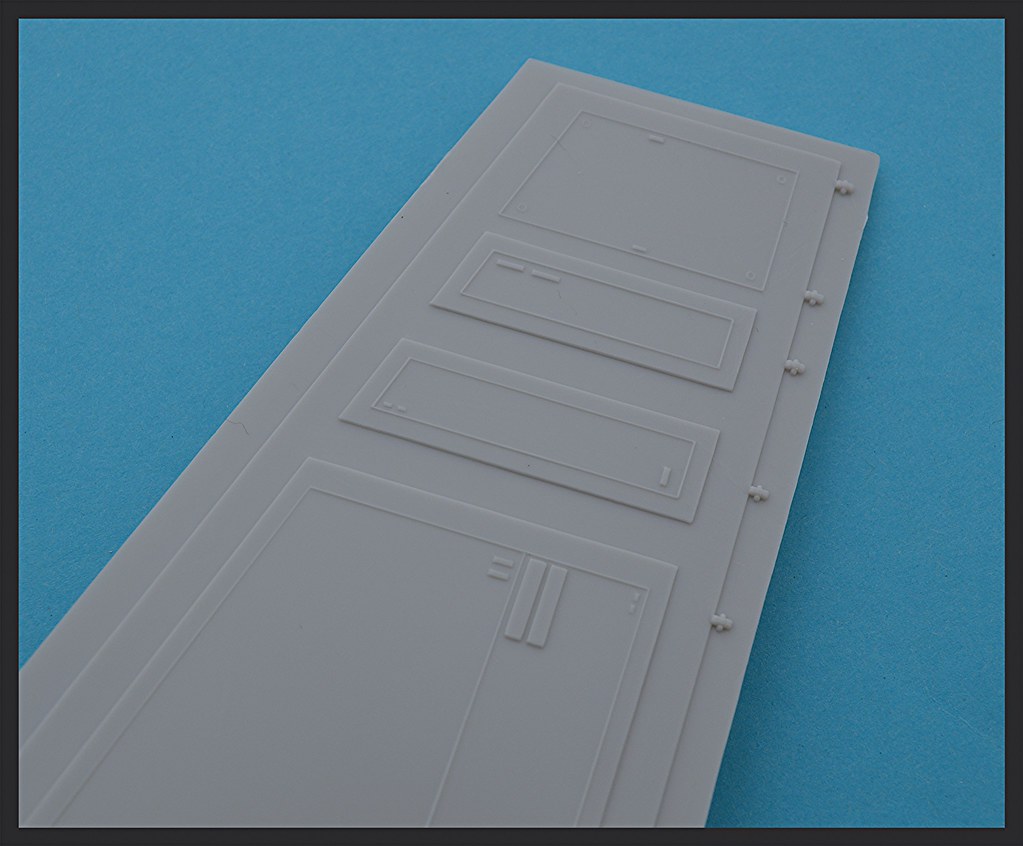 DSC_0156 by Peter Olsen, on Flickr
Raised panel lines....
"Its an older code Sir but it checks out, I was about to clear them...... Shall I hold them ?"
" No, leave that to me, I will deal with them myself !"
"As you wish my Lord !".....
 DSC_0209 by Peter Olsen, on Flickr
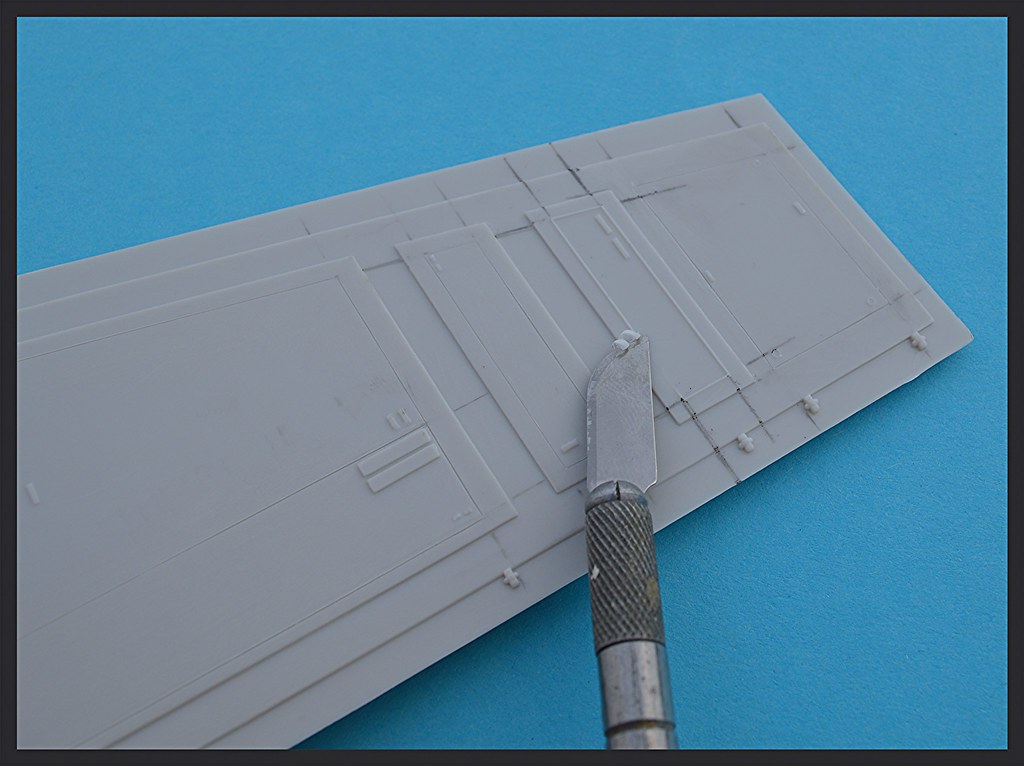
Ok, enough with the Star wars lines. but if you want to scribe your own lines you don't need the power of the dark side, just these few simple tools...
"you have that power too Lea, In time, you'll learn to use them as I have"
 DSC_0217 by Peter Olsen, on Flickr
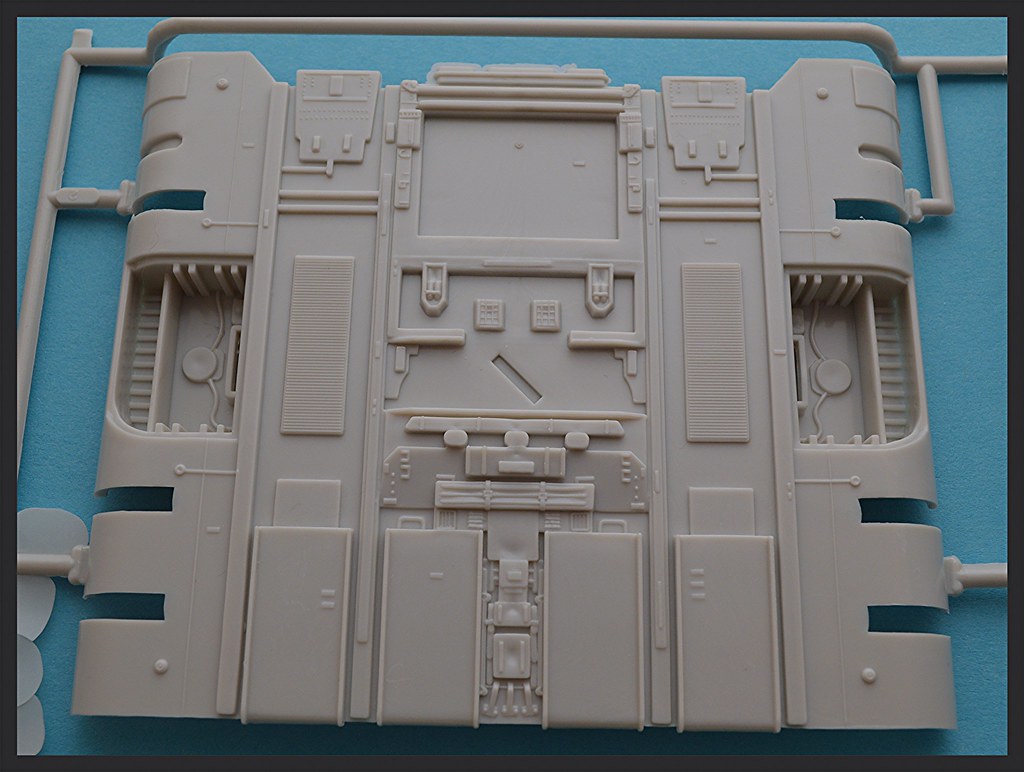
Here's a look at some of the other parts in the kit, these will be the next in line to receive detailing. Until then I have a galaxy of scribe work to do. This could be a new definition of pain and suffering as it's slowly digested over a thousand years.
 DSC_0175 by Peter Olsen, on Flickr
That's it for now.
" Already know you, that what you need."
Happy Modelling,
cheers,
Pete.
-
6
-
-
Wow, that's beautiful Marek ! Very nicely done .
-
-I know, imagine it 32, that would be nice ! ...still, It's a darn nice kit in 48 that's for sure.
It definitely makes you wonder what their next 32 warbird release will be............ My wish is for a 1:32 Fw 190d-9, that would be awesome.
thanks guys,
Peter
-
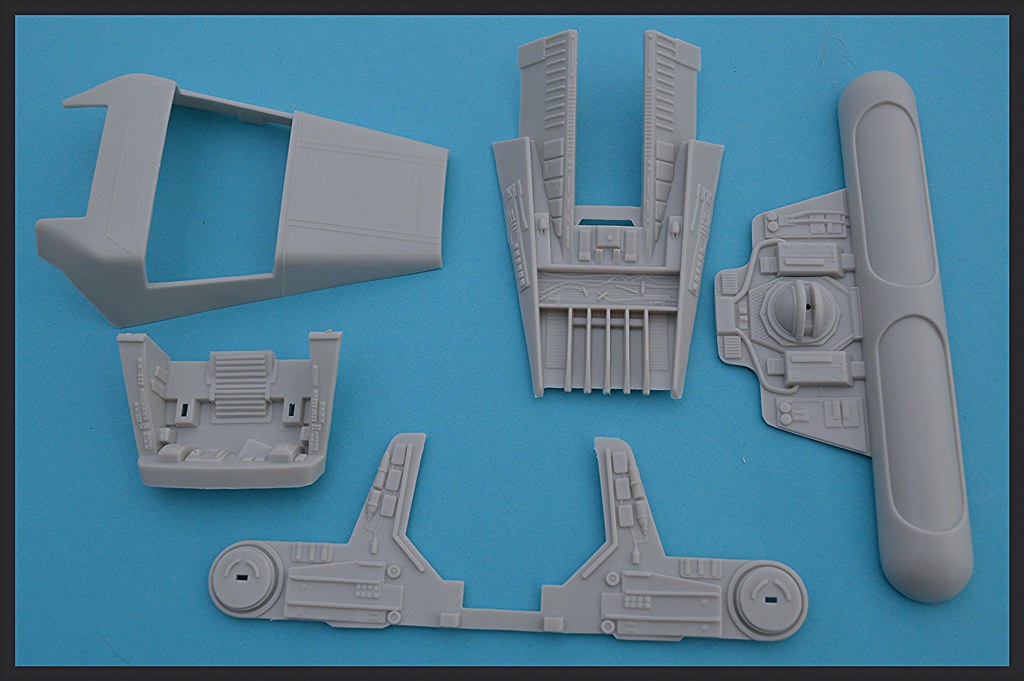
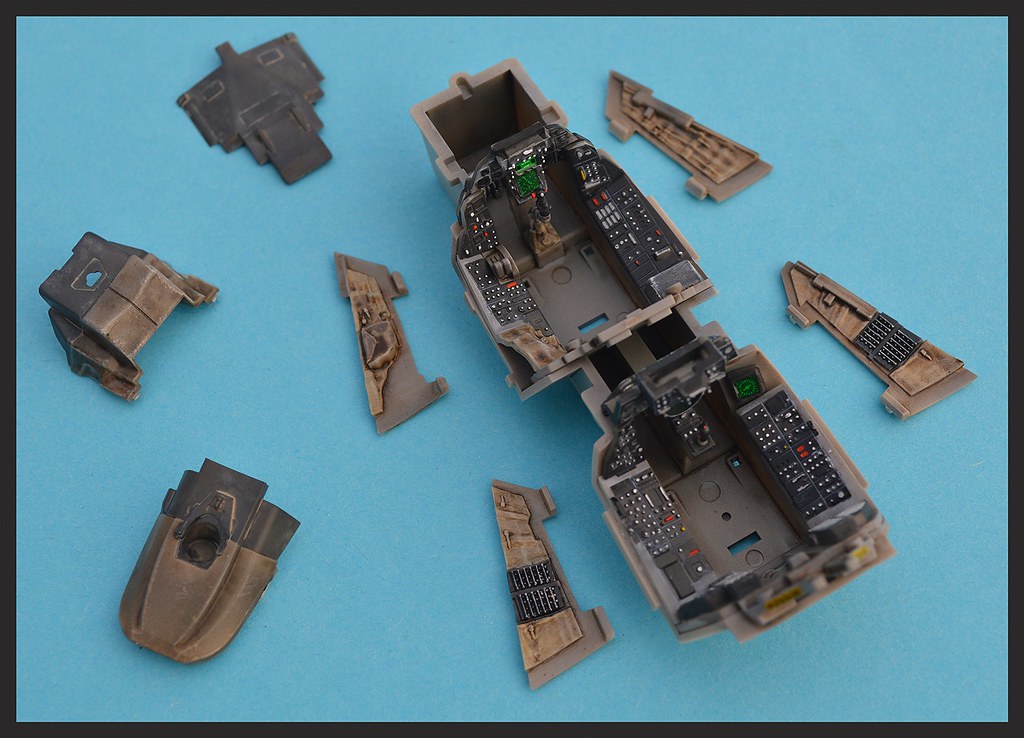
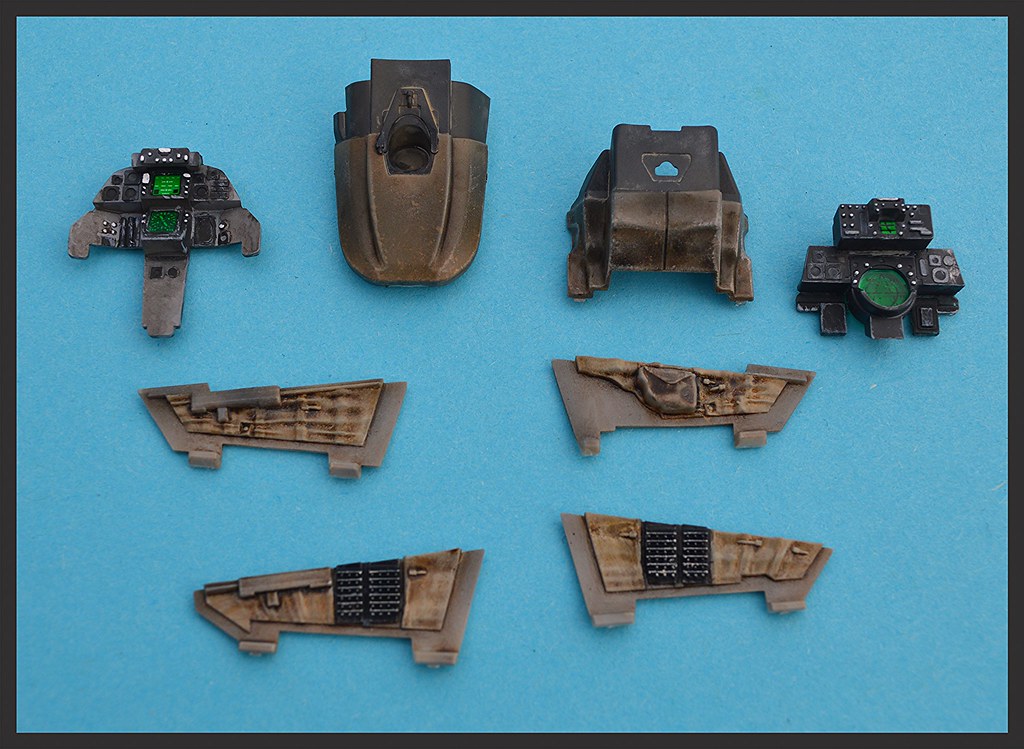
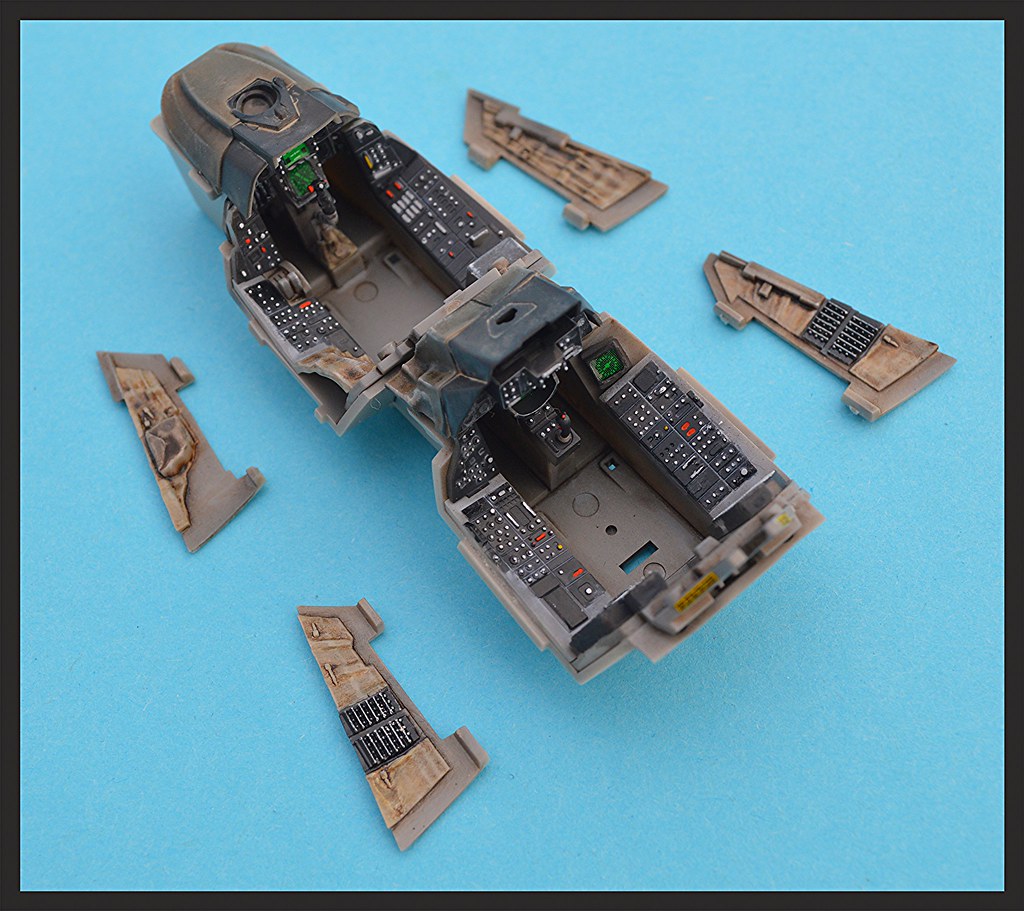
Hi folks, here are a couple of WIP cockpit shots of the brand new Tamiya F-14. This is definitely one model kit that lives up to the hype, it really goes together brilliantly ! If your modelling mojo is down in the dumps then this is a great kit to get your modelling juices flowing again, even if you don't build aircraft. Ok, there are always details somewhere that can always be improved upon but honestly, I'm just going to enjoy this one for what it is..........just like the real thing, a really cool ride !
-Base colour Tamiya acrylic sky grey, Vallejo for the fine details and Testers and Humbrol for dry brushing. Winsor and Newton oil wash
Onto the pics.........
Thanks for dropping in, I hope you enjoyed the pics, happy modelling.cheers,Peter-
2
-
-
Very interesting James, pit looks nice. Keep us posted,
Cheers,
Peter
-
Wow that turned out great !!!
Cheers,
Peter
-
Very nice Bevan ! I've always wanted to add the 1:48 GWH Mig-29 to my collection. But hey, 50 AUD for a Trumpeter Mig-29, that's a nice deal!
I'll let you know when I make some progress on my 190. life 'outside the modelling bench' is a bit full on at the moment to say the least.
Cheers,
Pete
-
1
-
Hasegawa Nakajima Ki-84.
in LSM 1/35 and Larger Work In Progress
Posted
Hi Sir Desmond, I'm glad you got your tail plane issue corrected and horizontal. I agree with "1 to 1 scale's " post ; if the prongs on the tail planes don't link up correctly they will result in a offset angle. You also won't see real aircraft exsisting with such a offset tailplane angle either. Anyway, Alls well that ends well and you got it sorted.
Thank God we're getting some rain down there those bush fires have been absolutely horrible to say the least. I'm living overseas and It's very difficult to see or read anything about it on the news. We donated and I encourage others to do so too.
All the best for the rest of your builds and stay safe
Cheers,
Pete
P.s -don't you just love WW2 Japanese aircraft !