


Plastic surgeon
-
Posts
22 -
Joined
-
Last visited
Content Type
Profiles
Forums
Events
Gallery
Posts posted by Plastic surgeon
-
-
Wow! STUNNING!!!!! Flawless job you've done, sir!!
-
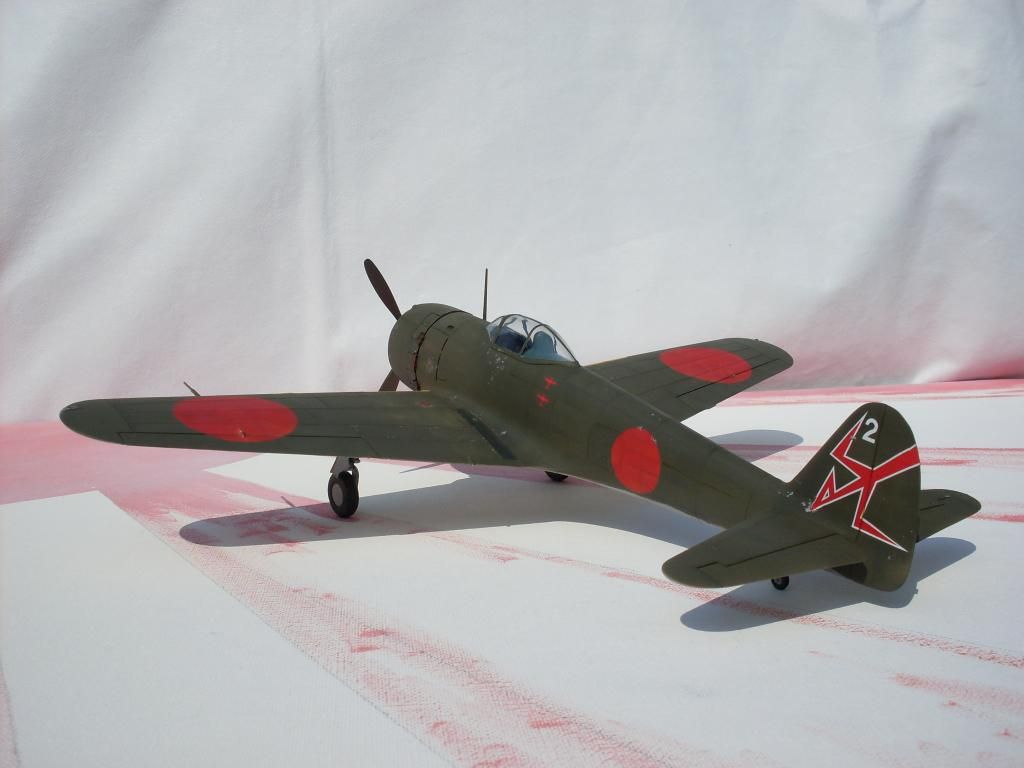
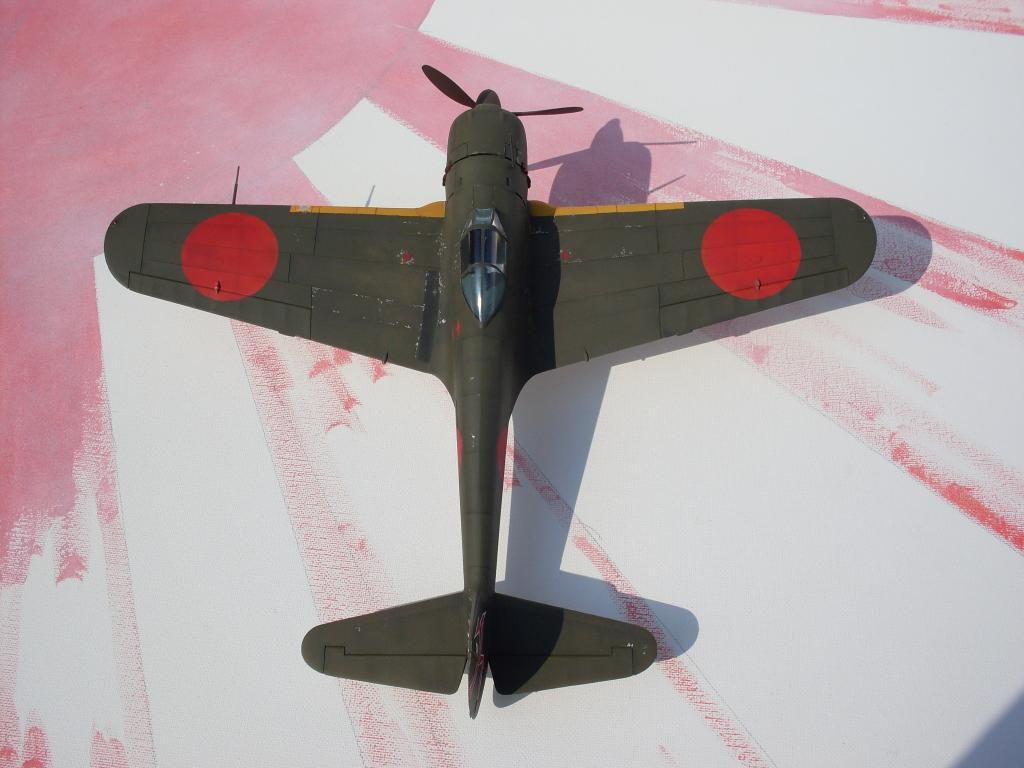
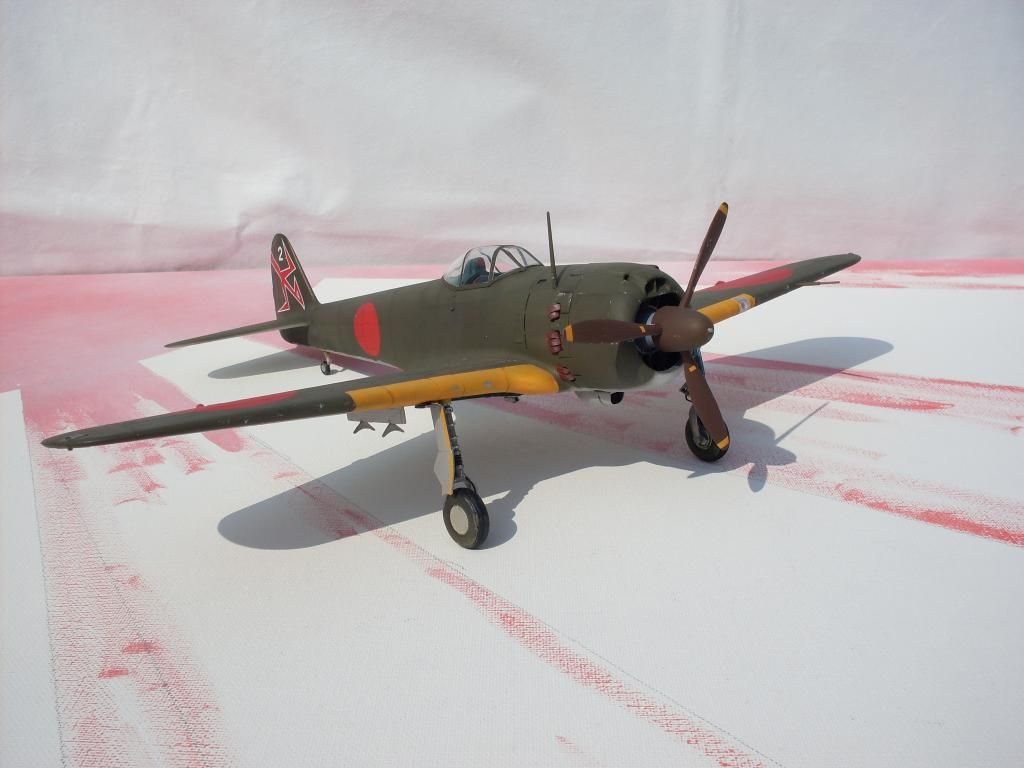
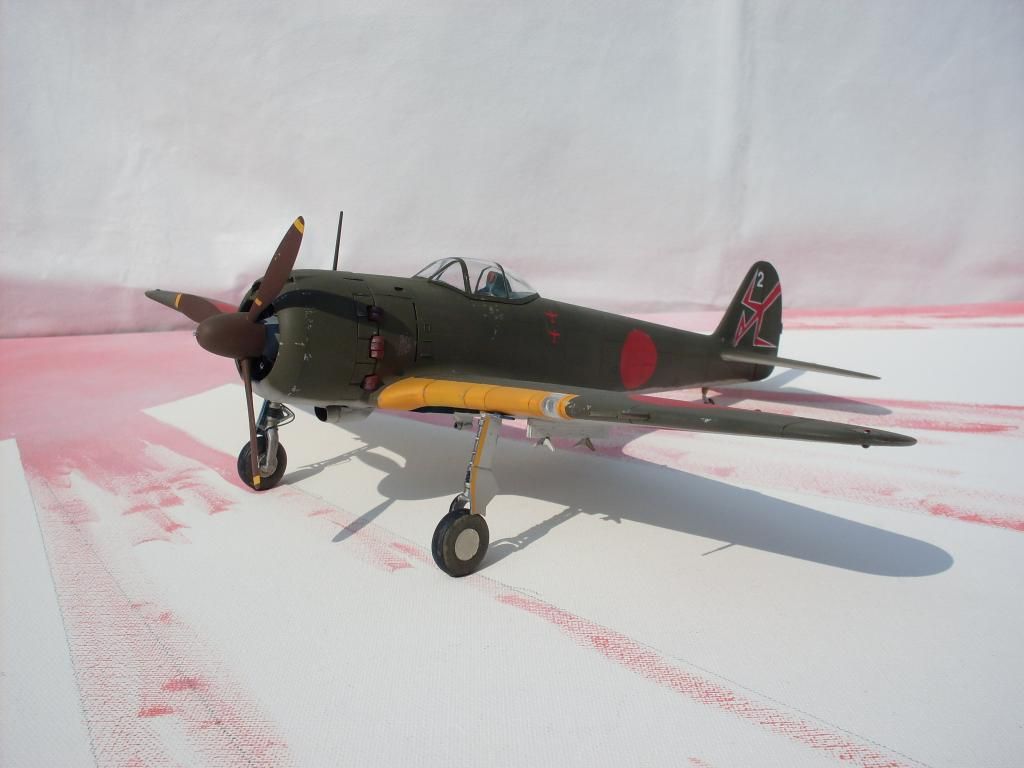
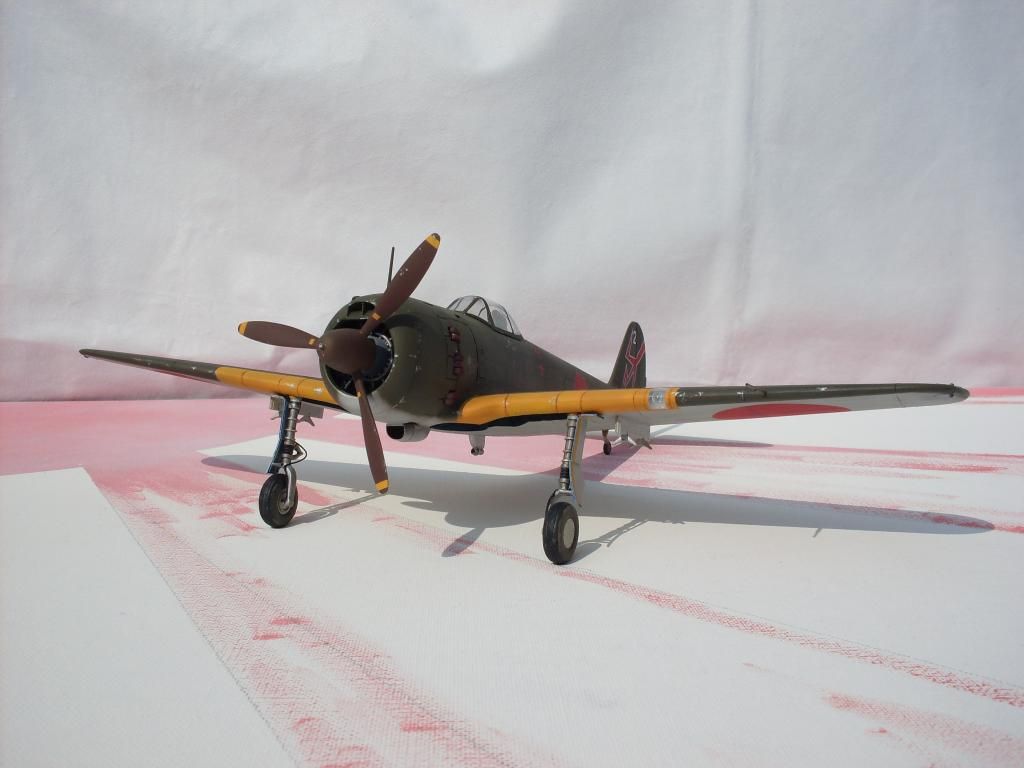
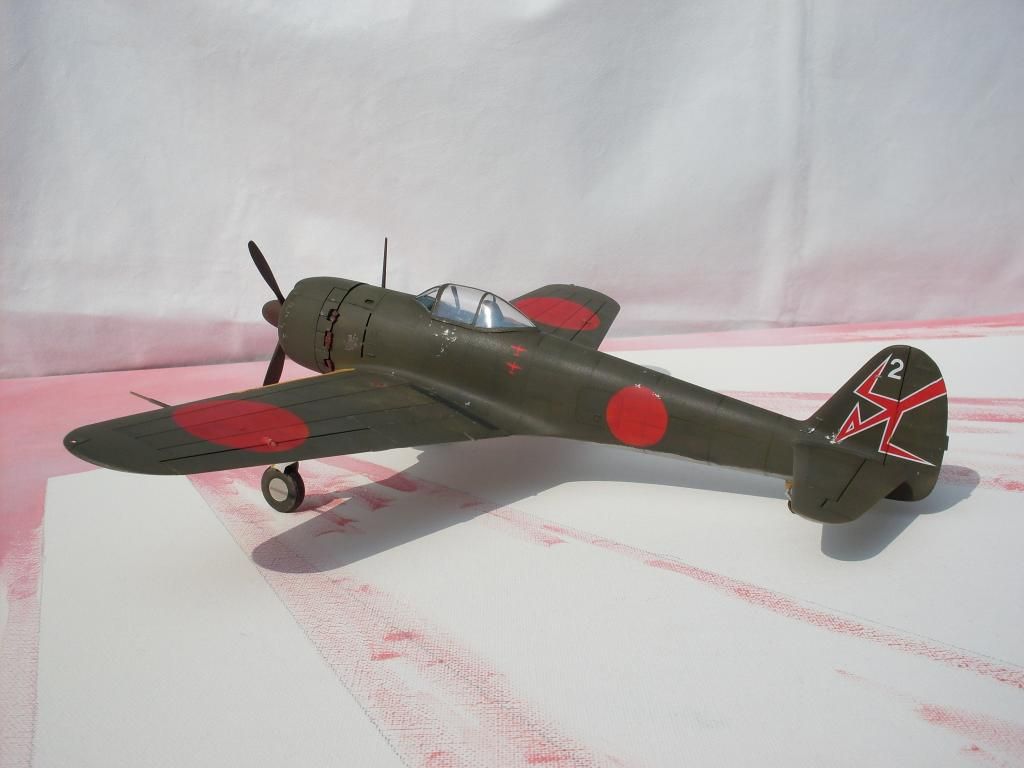
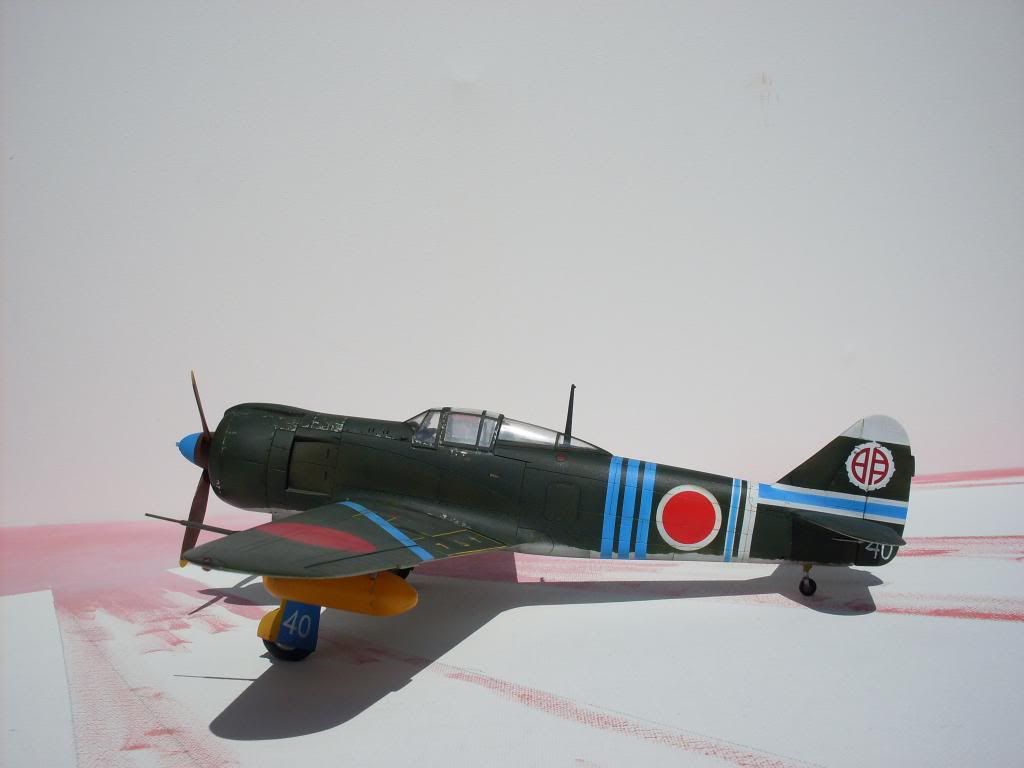
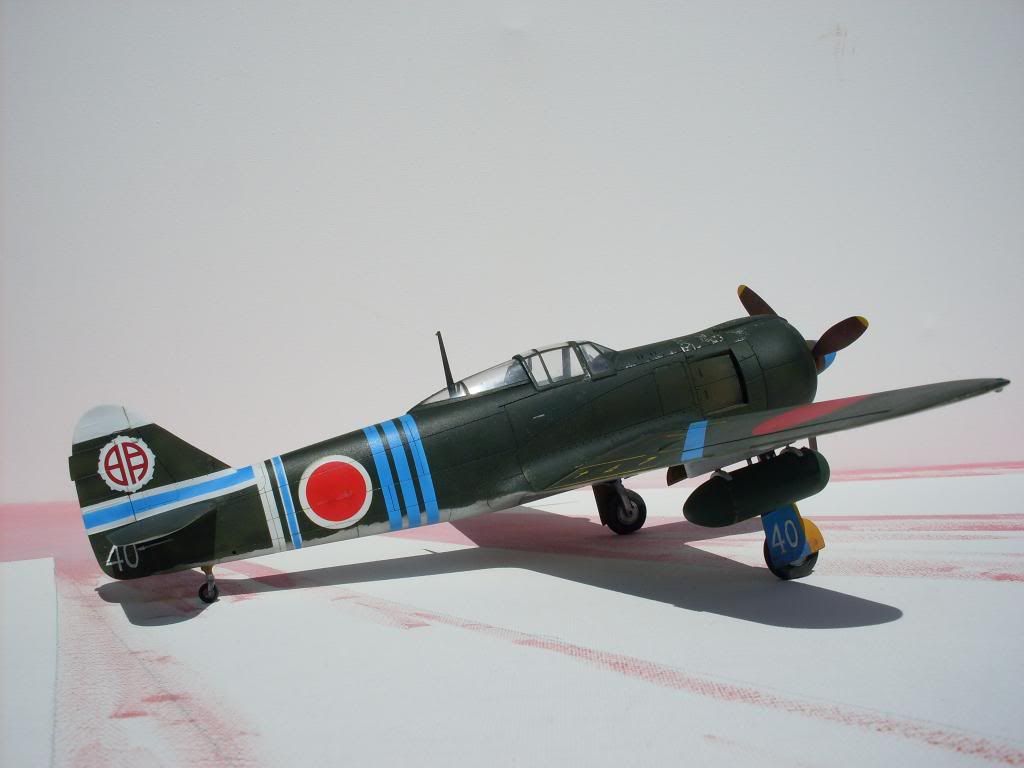
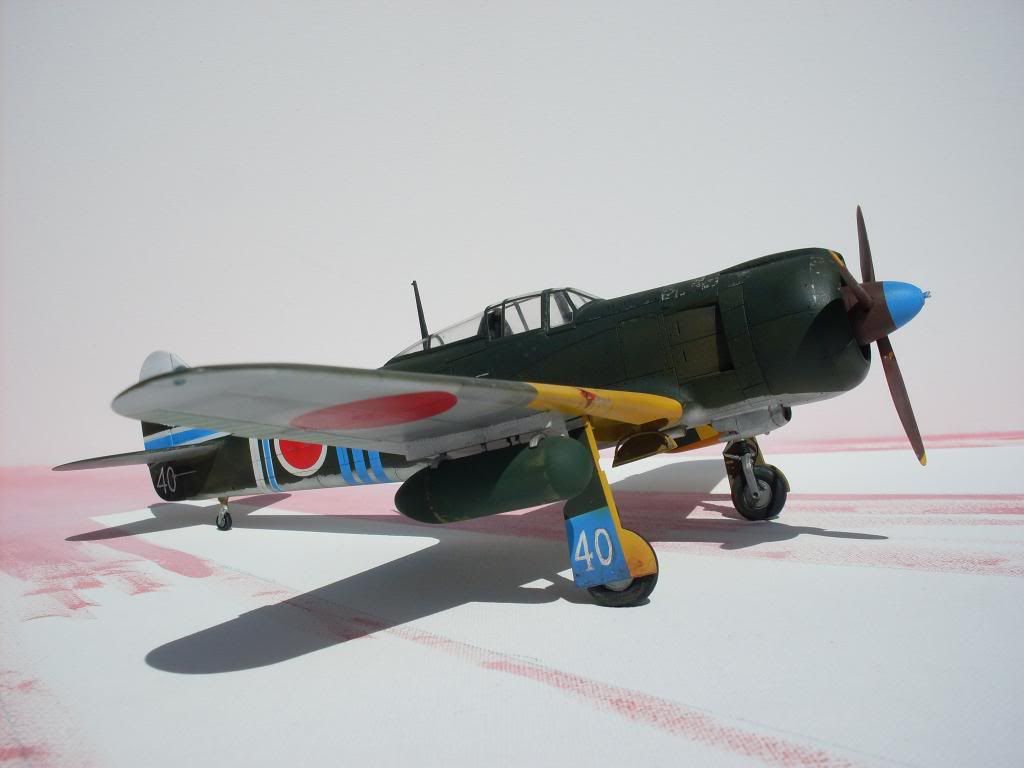
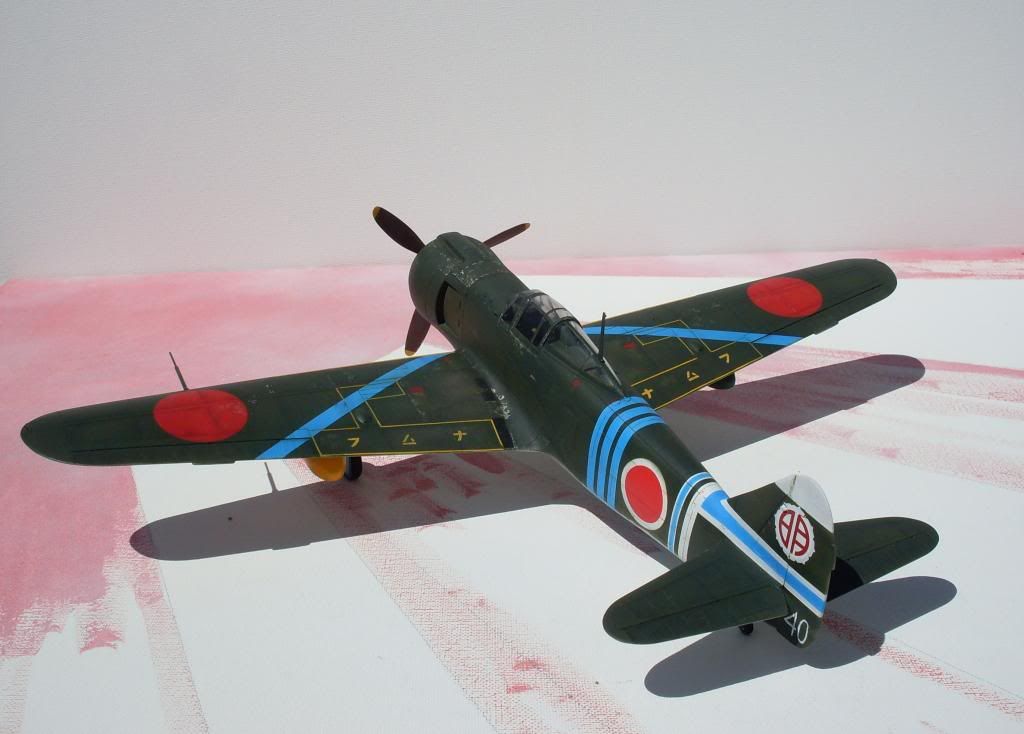
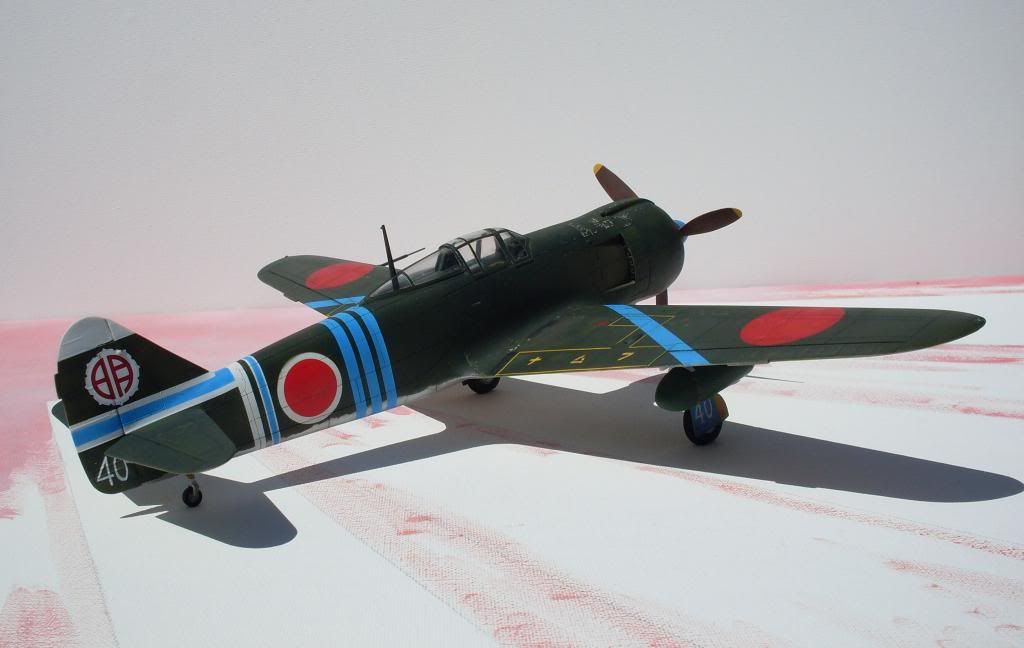
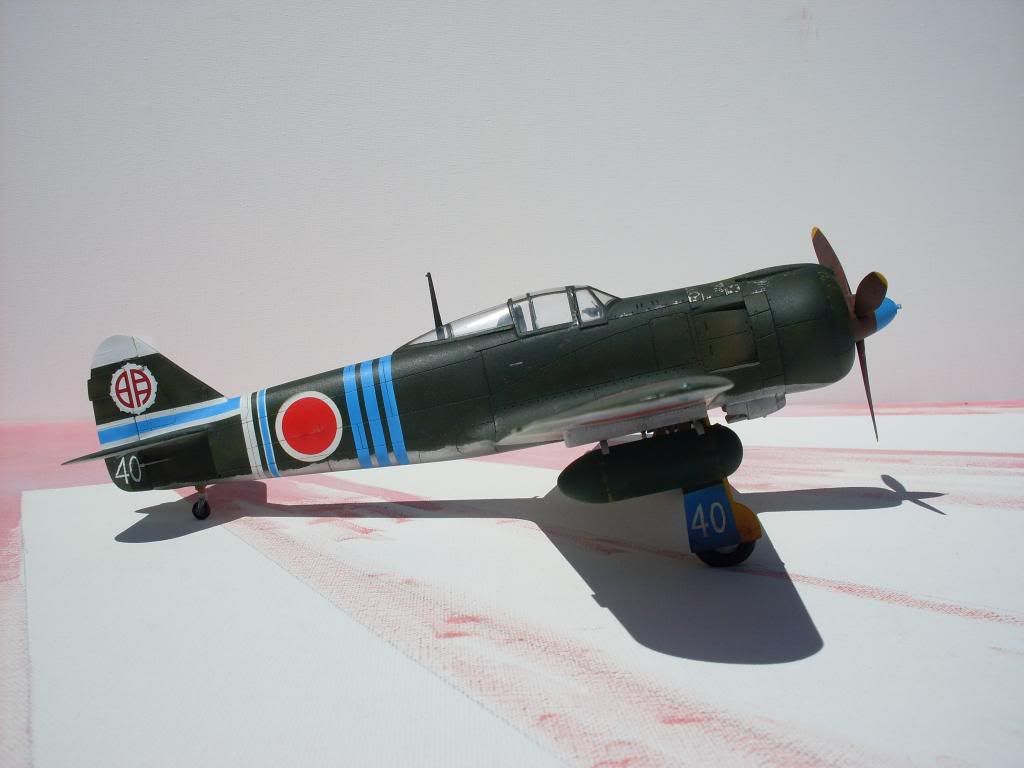
Finished this one last week. Waited all week for the sun to shine so I could take some photographs.
The kit is Hasegawa’s 1:32 scale Ki-43-II Hayabusa that I converted into a Ki-43-III koh.
Modified the airscoop with putty, scratchbuilt a couple of exhaust pipes and that thing on it’s belly ( don't know what it is ) of Evergreen.
The plane is sprayed with Tamiya acrylics. IJA Green with a pinch of brown on top. Tamiya silver , titanium and alluminium for the bottomside.
Weathered with Revell enamel silver for the chipping, Revell sand colour for the tyres.
Vallejo washes were used and Tamiya weathering pastels.
39th fighter unit markings and number on tail are from a Hasegawa 1:32 Ki-61 Hien.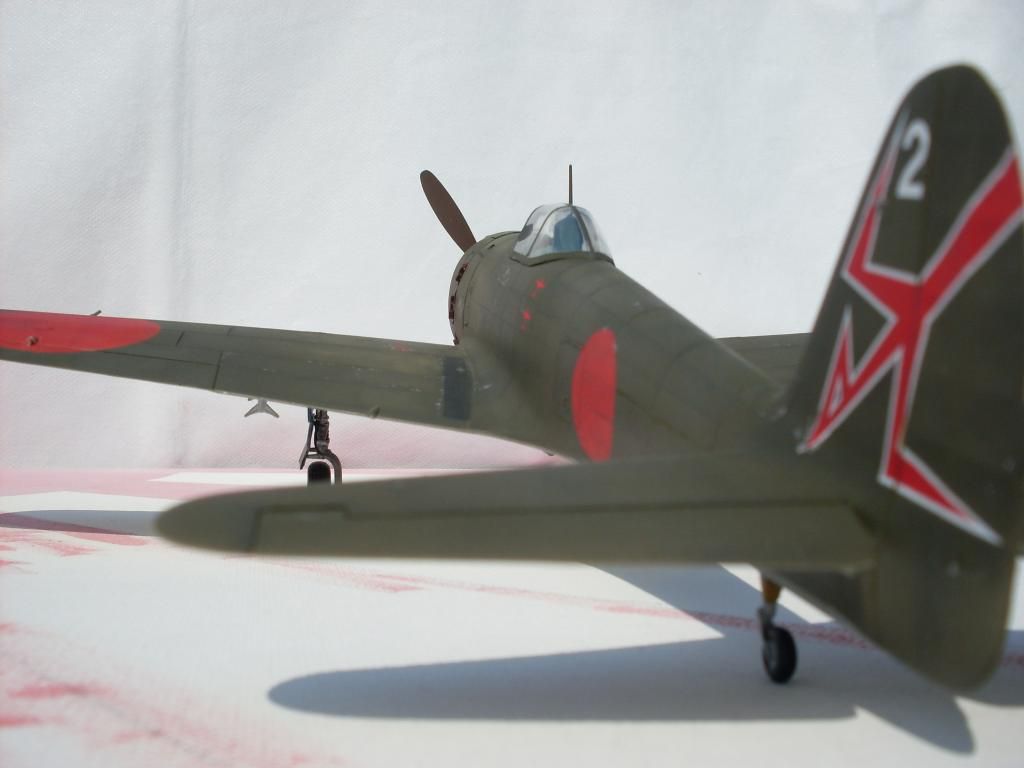


Best regards;
Ulrich Schütt
-
 4
4
-
-
Wow!!!! Not my kind of aircraft but you made an very ugly plane ( in my opinion) look very good!!! Awesome job!!!
-
-
Wow nice job!!!! It certainly looks a bit weird with those stars and bars......
-
1
-
-
Thank you guys for the nice words!
-
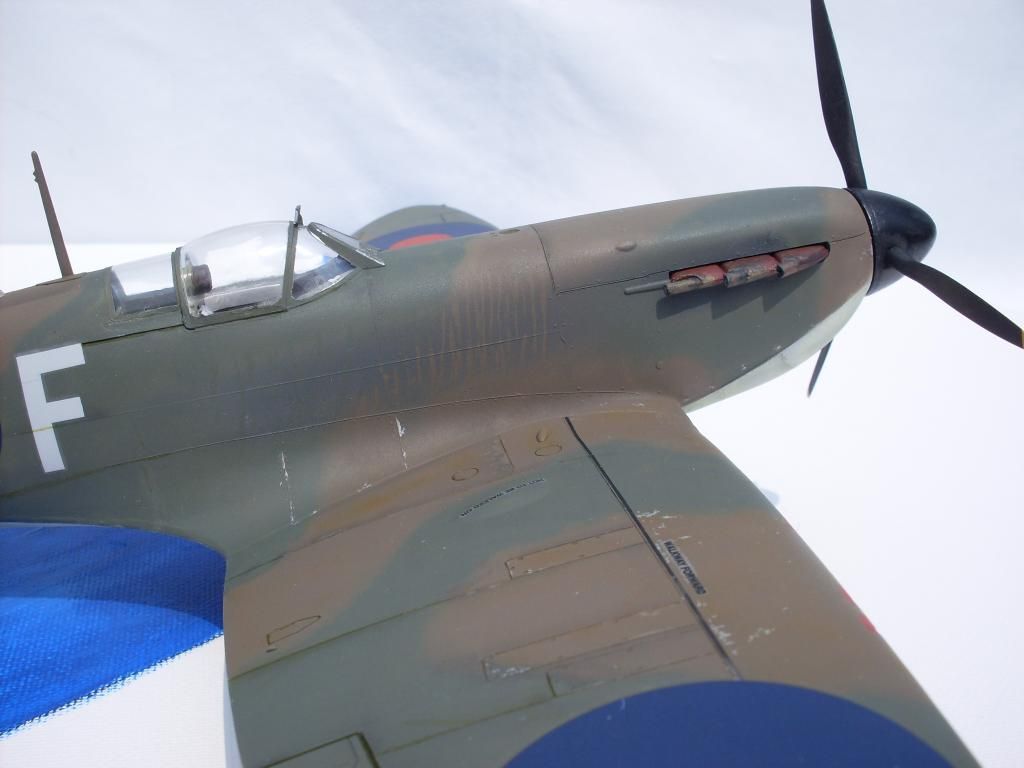
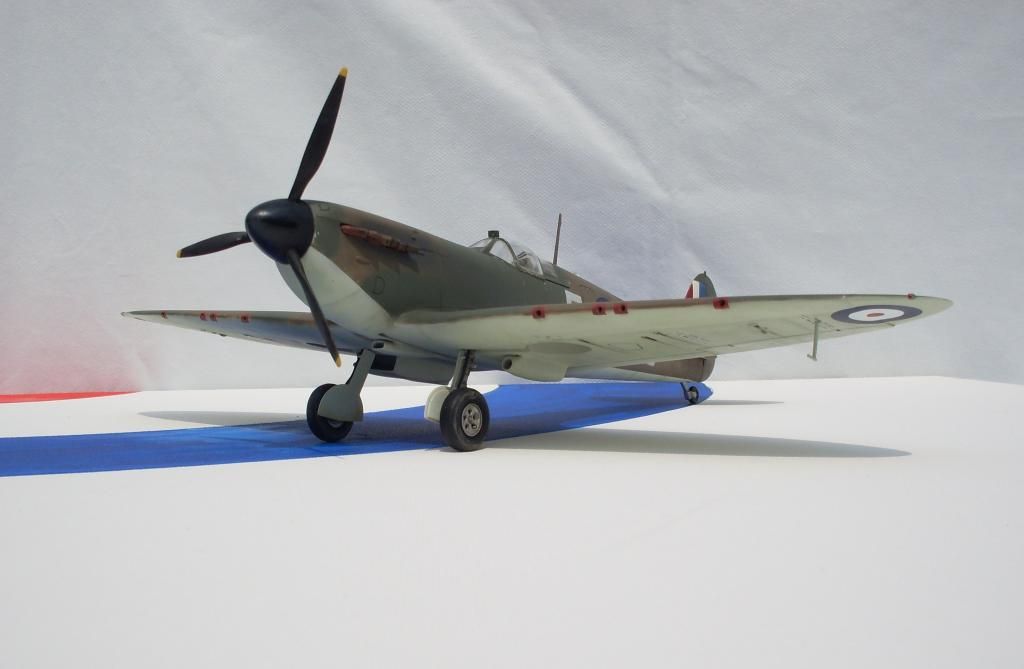
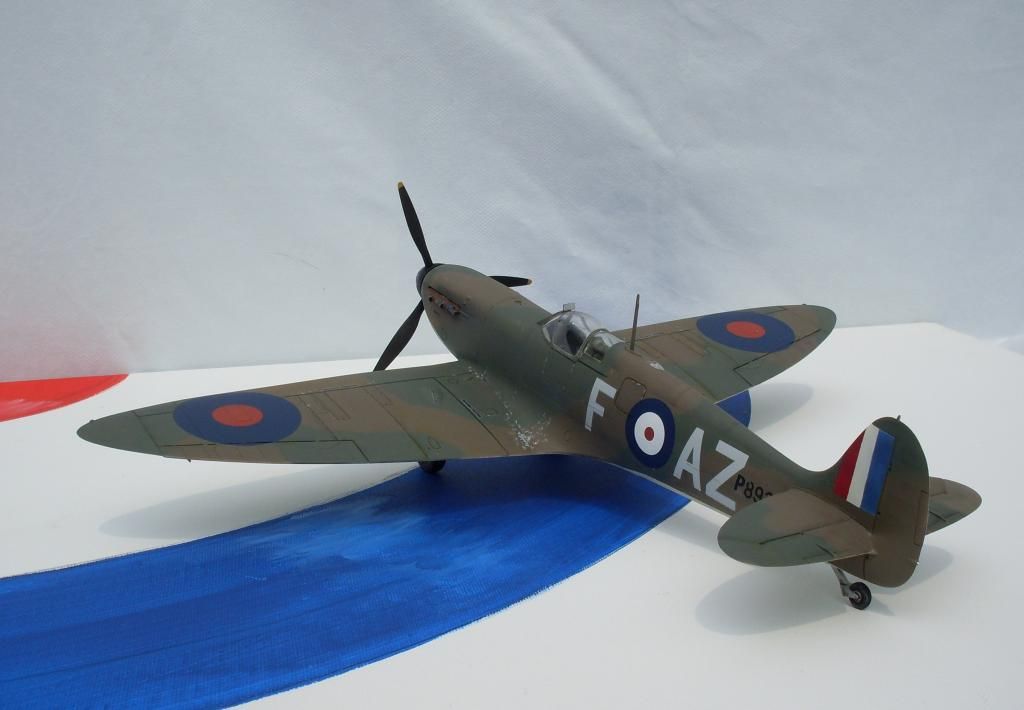
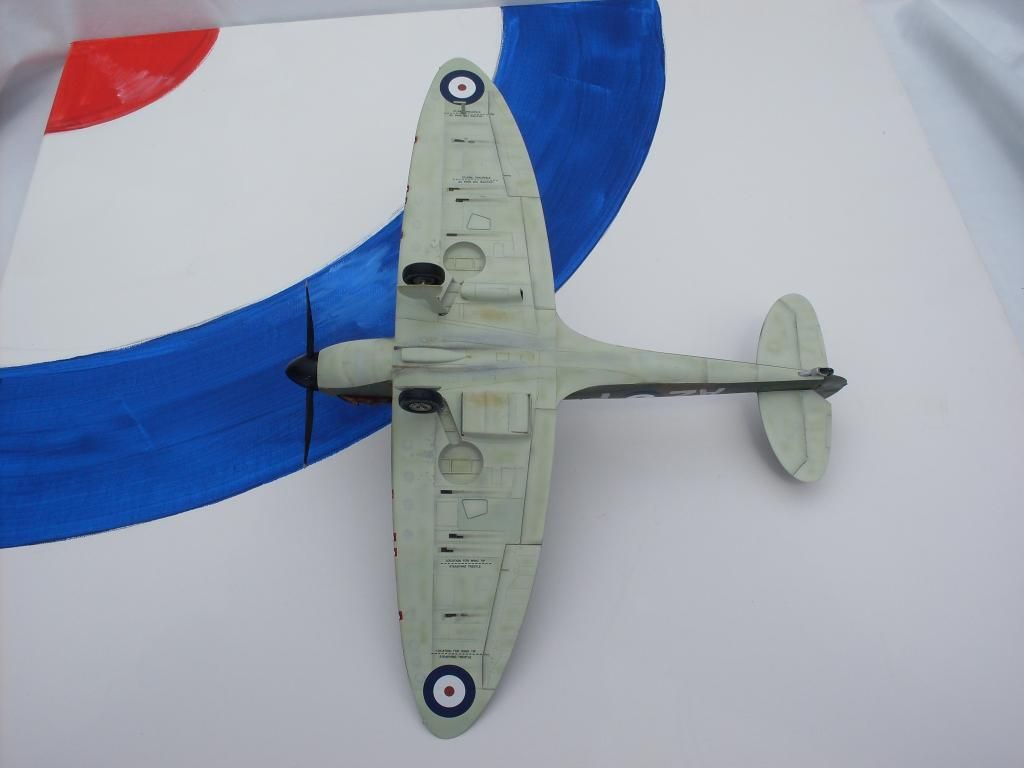
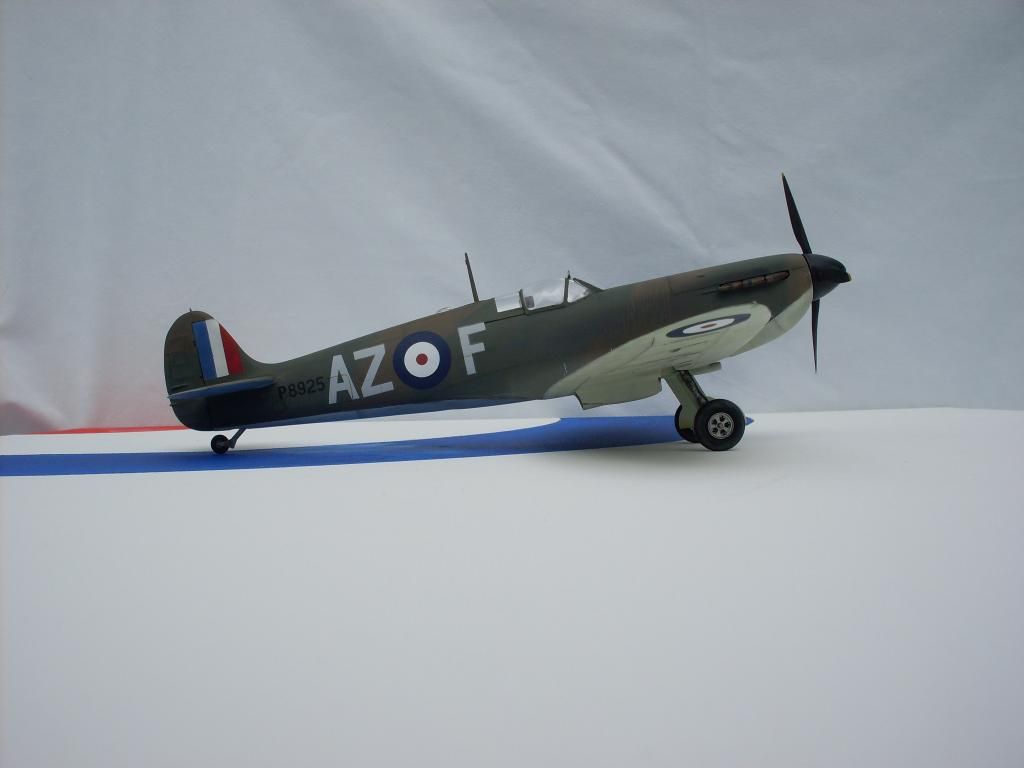
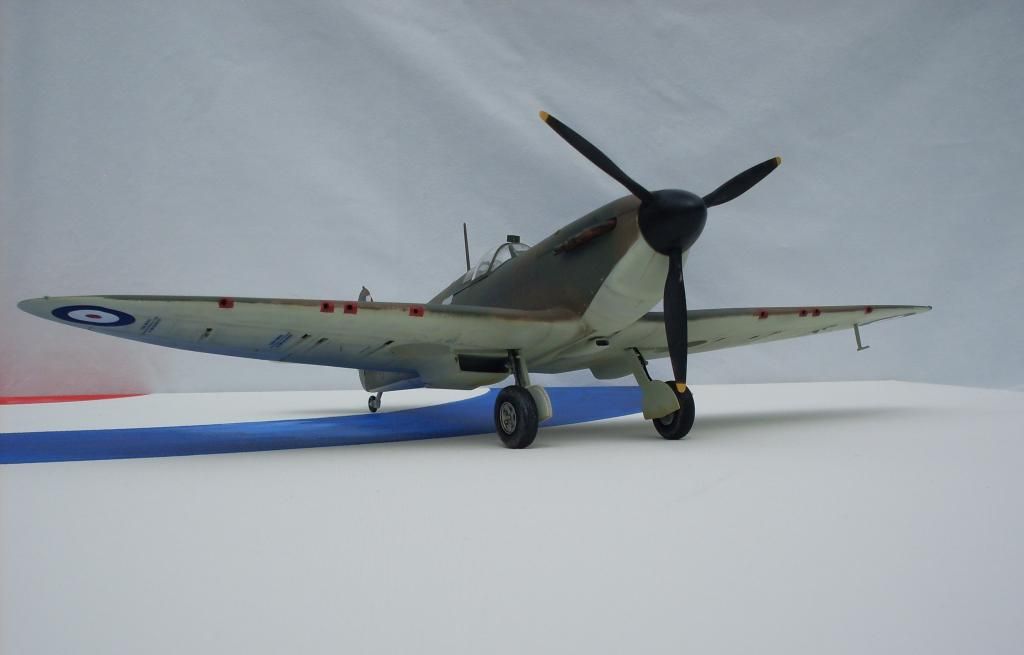
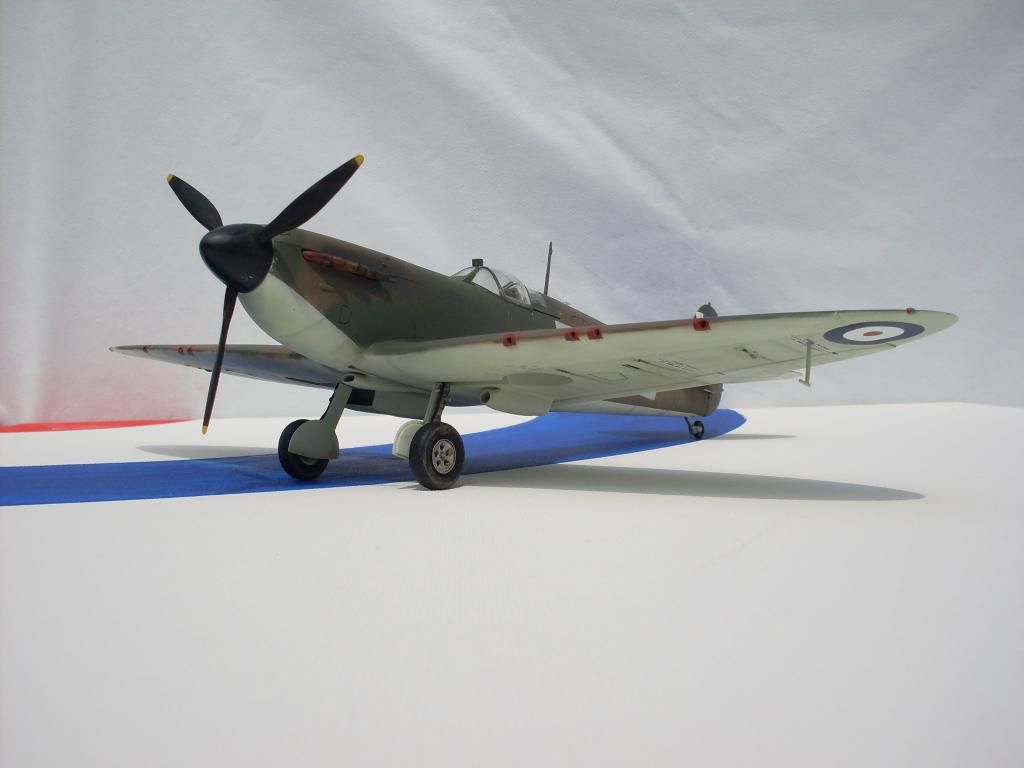
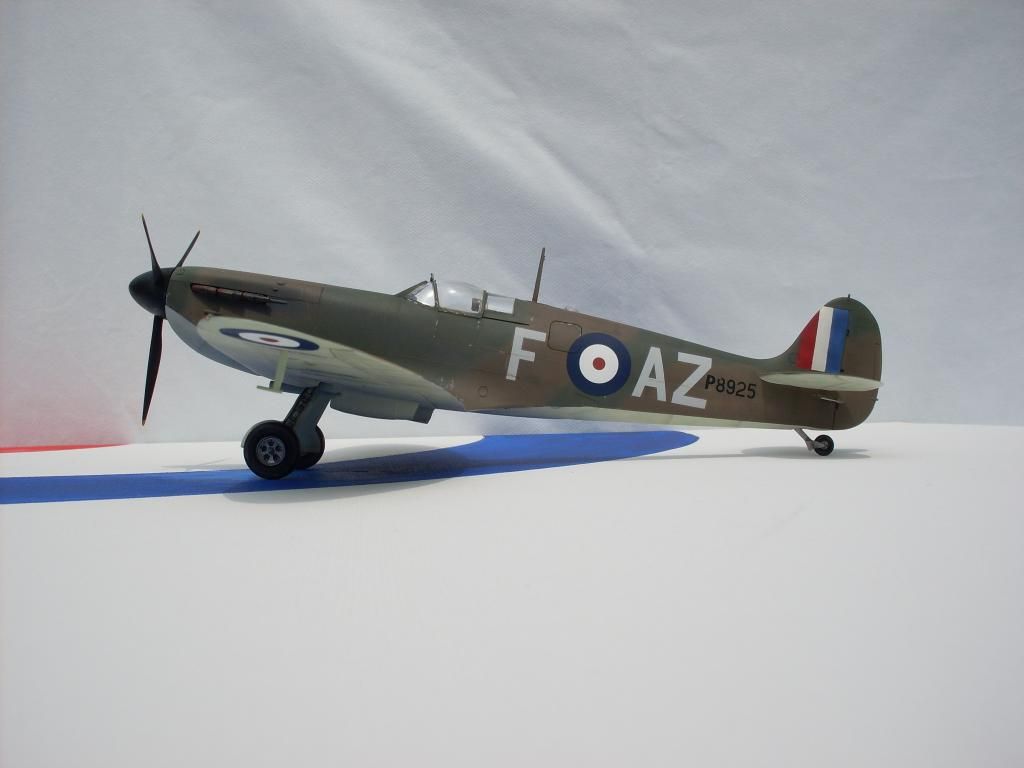
My latest build, the Revell 1:32 Supermarine Spitfire Mk.1 actually it's the Revell/ Hasegawa "mongrel" ( Revell parts and Hasegawa parts in one box) . I must say...it was an easy build!
The only set back was the raised panel lines on the fuselage......The Spitfire was sprayed with Revell enamels.
Vallejo washes were used.
Kit's decals were used except for the roundels on the fuselage and underneath the wings. Tri-clour on the tail is sprayed and the blue looks to light on the pics. ( Don't know why.....)
The funny thing is I don't like Spitfires....but I think the early ones ( Mk.1 & Mk.2) look okay....
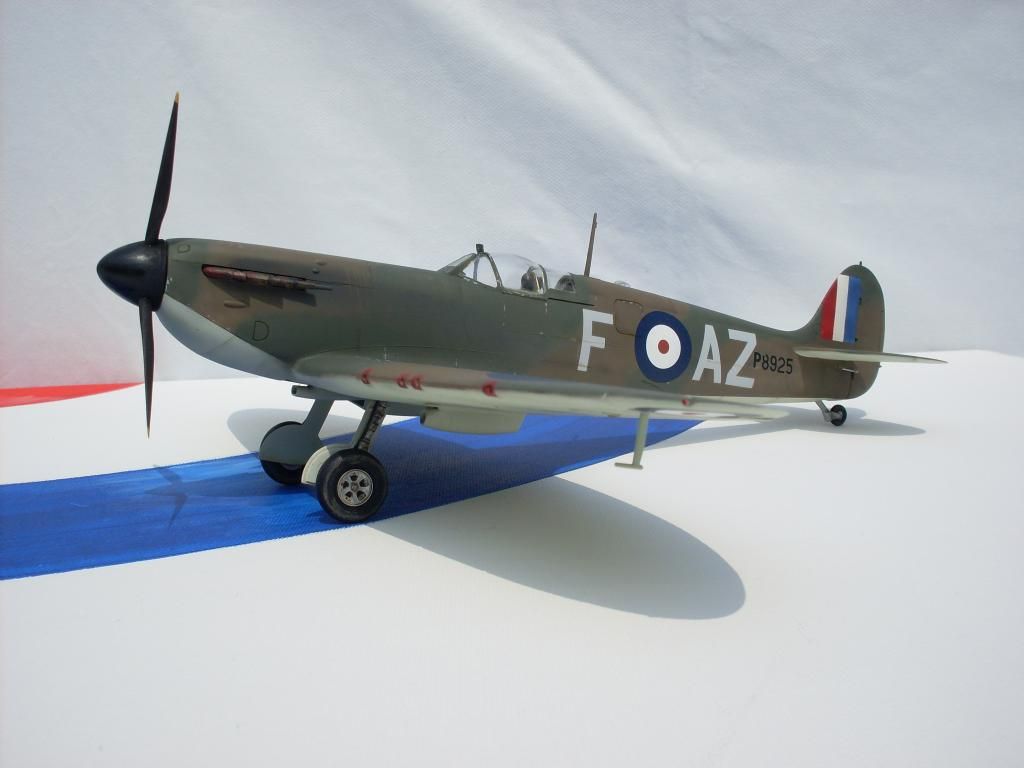

Build report in Dutch can be found here;
http://www.modelbrouwers.nl/phpBB3/viewtopic.php?f=1&t=43341
Best regards;
Ulrich Schütt
-
1
-
-
Finished this one last week.
The Hasegawa Ki-61 kit with the Alleycat Ki-100 resin fuselage. A first glance at the resin gave me the impression that I was in for an easy build. Nice panel lines, no bubbles, nice detail. The stuff looks the part. and that’s were it ends
The fuselage was warped. Tried to bend it using warm water but to no avail. One fuselage half was a couple of millimeters short . Had a hard time trying to get the fuselage and cowling ring in the correct postion to get a flush fit.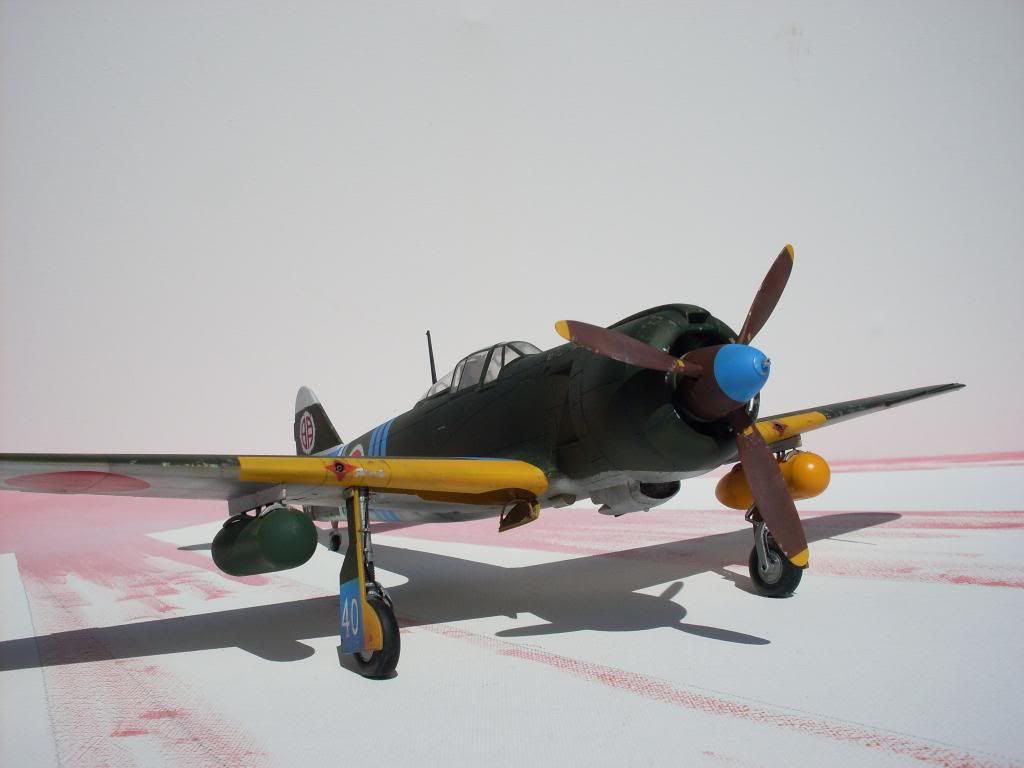

The aircraft is painted / sprayed with Tamiya acrylics.
Vallejo washes are used for the panel lines,
Exhaust stains are made with Tamiya acrylics ( airbrushed) , Kanji are made with home made stencils and paint is applied with a sponge .
Tamiya pastels are used for the gun sooth and oil streaks.
Weathering of tyres are done with artist pencils.
Chipping is done with Revell enamels, silver , green.
Only decals used are the red Hinumarus on the fuselage and the Akeno training squadron marking.
The a/c depicts a Ki-100 of 2nd Battalion Major, Yohei Hinoki, Akeno flight training division, 1st flight training squadron, July 1945The build and more pics can be found here; ( in Dutch) http://plakkers-inc.....php?f=8&t=2568
Best regards;
Ulrich Schütt-
2
-
-
I've seen this one one LSP...... Awesome job you've done ,sir!!! Excellent paintjob and weathering!!!
-
Bloody hell...THAT IS ONE MIGHTY FINE Doppeldecker!Very very nice!!!
-
Wow!!! Nice paintjob, awsome weathering!!! Love the way the "part" where the exhaust stains are done with those dripping oil-streaks. Yep nice!
-
Wow!!!! That is one very fine job you've done , sir!!!! Especially because it's the OLD Revell kit.
Very nice indeed!!!!
-
Really nice job turning the 21st century 32nd scale "toy" plane into a beautiful "Scale Model". Can you tell me why the camouflage changes from squiggly circles to splotches from one wing to the other. That's very unusual if it is an actual documented color scheme.
Ed Okun
Thank you for your compliments!
@ Ed; The smoke rings / splotches scheme came to my mind when I saw a picture of a Macchi with two different schemes ( The pic can be found in the link to the Dutch forum in my first post) . Which depicts an aircraft with a "replacement" wing after being repaired. The scheme i did is "fictional"

Best regards;
Ulrich
-
This is a build I've done a couple of years ago.
It is a ,1:32 scale, 21st Century Macchi C.205 Veltro converted into a C.202 Folgore. The 21st Century Veltro and Folgore are basicly the same kit. The only difference is the oil cooler under it's nose and the spinner is not correct for a Veltro, it's a Folgore spinner.
I have scrathbuild the air intake for the oil cooler and the small wheel covers, added "hoses and wiring" in the wheelbay, wheels were to small so I enlarged them with Evergreen, putty and glue.
I had a hard time glueing this plane because of the strange plastic that was used.
(Build in dutch can be found here; http://plakkers-inc.nl/viewtopic.php?f=8&t=1619 )


Best regards;
Ulrich
-
2
-
-
Awesome job!!! Love the paint scheme!!
I have build this kit too.... well kind of...
I converted it into a Macchi C.202 Folgore. Had a hard time glueing the parts together because ordinary Revell glue didn't work on the plastic.
Hmmmm....think I'll post mine here too...
-
Uhmmmm, I posted a reply but something went wrong, I guess.... for the second time...
Very nice job, nice paintjoob and very nice subtile weathering !!!! Nice!!!
-
To all; Thank you for the kind words!
Best regards;
Ulrich
-
lawman56, on 25 Sept 2013 - 9:02 PM, said:
Thanks guys. Since my surgery, my fingers have temporarily lost their finer motor skills, so I've had to shelve the WNW Albatros. Meanwhile, maybe I'll finally finish my M7 Priest diorama, or my 120mm Roman Legionnaire, (120mm is large scale, right?
 ), or plan my HK B-17 assembly. Maybe even work on my new HO railroad layout plan....
Can you tell I like to multi-task? Actually, it keeps me from getting burnt out on any one project.
Once my fingers start to behave again, I'll be able to get back into the detail work I love so much.
Maybe you should have started on a couple of jugs, after surgery to get your "feeling" back.....
( For those with a dirty mind, I meant the P-47's, big planes with big parts.....
 )
)Nice build by the way......
-
1
-
-
Very nice build! Yep.....very nice indeed!!!
-
My first post here......so an introduction would be nice.
I'm Ulrich Schütt, live in the Netherlands, I build mainly Japanese WW2 stuff with wings in 1:32 scale and (sometimes in 1:48 scale).


Best regards;
Ulrich Schütt
build report ( in Dutch) can be found here;
-
4
-
1:24 Hawker Typhoon Mk.1b
in LSM 1/32 and Larger Aircraft Ready for Inspection
Posted
Wow! This is very very very very very nice!!!! Love the blue colour on the spinner and the "shark mouth" !!!!!