FlyingMachines
-
Posts
4 -
Joined
-
Last visited
-
1:32 IBG PZL p.11c
FlyingMachines replied to FlyingMachines's topic in LSM 1/35 and Larger Work In Progress
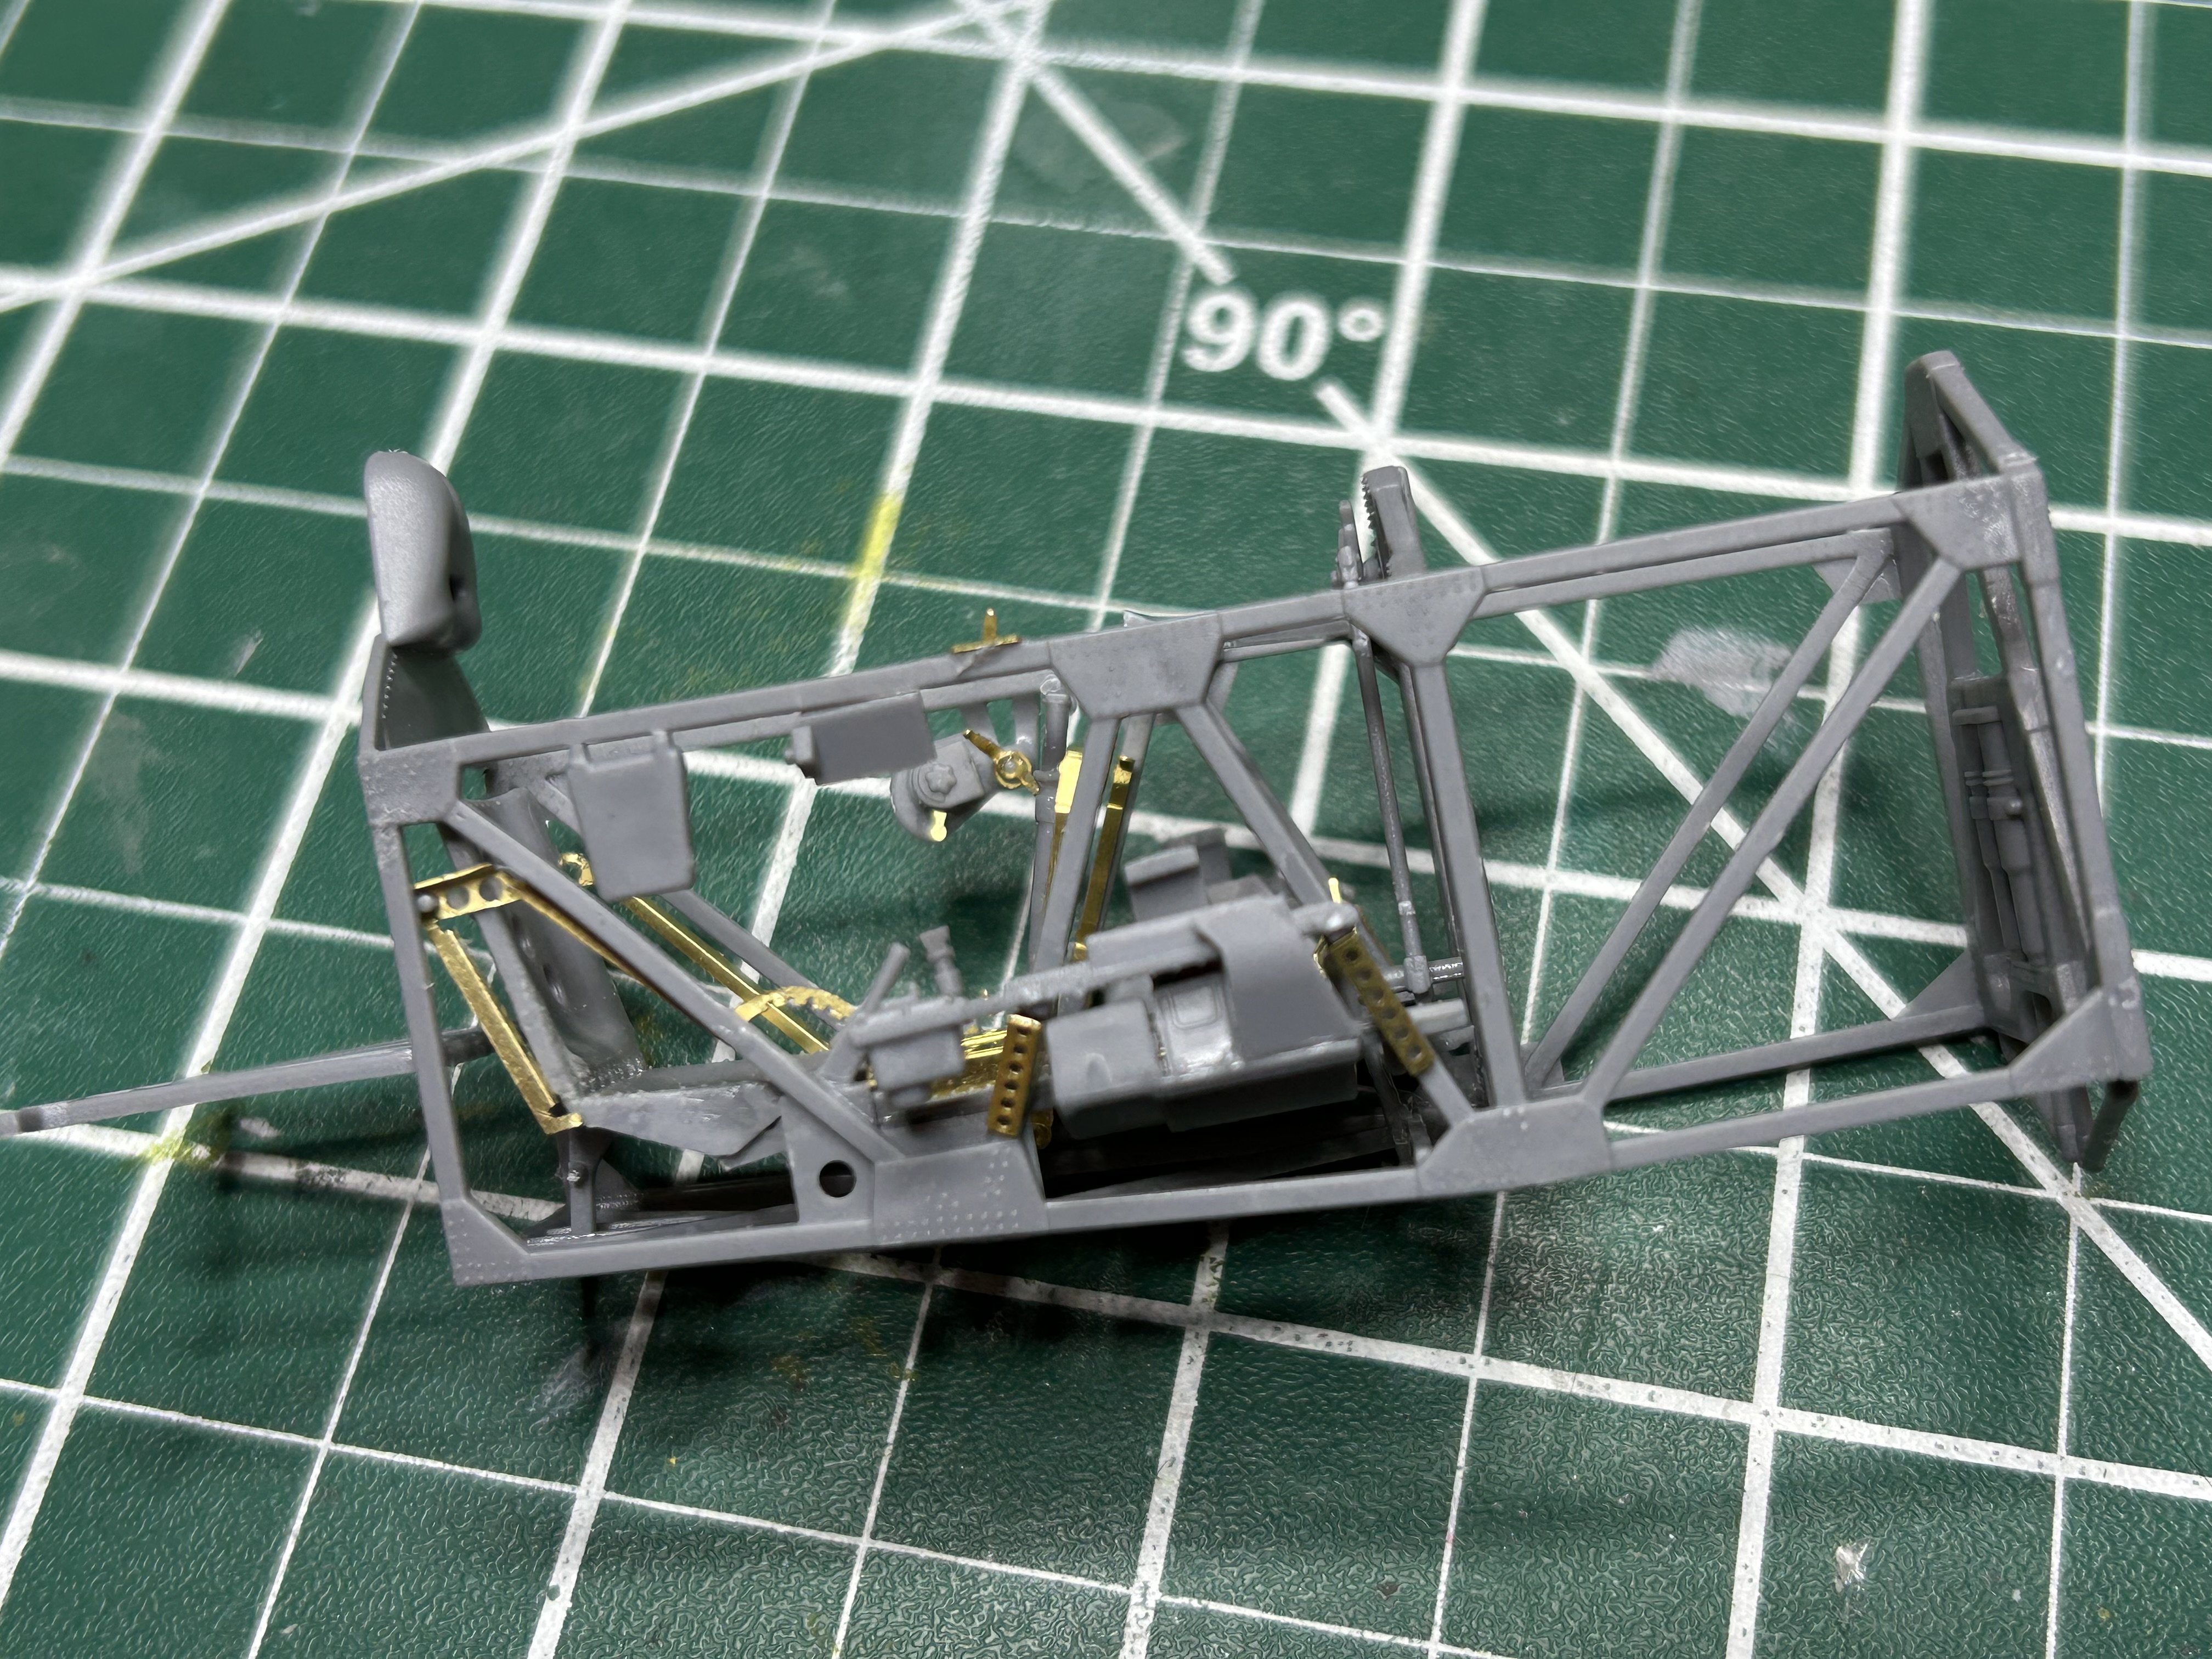
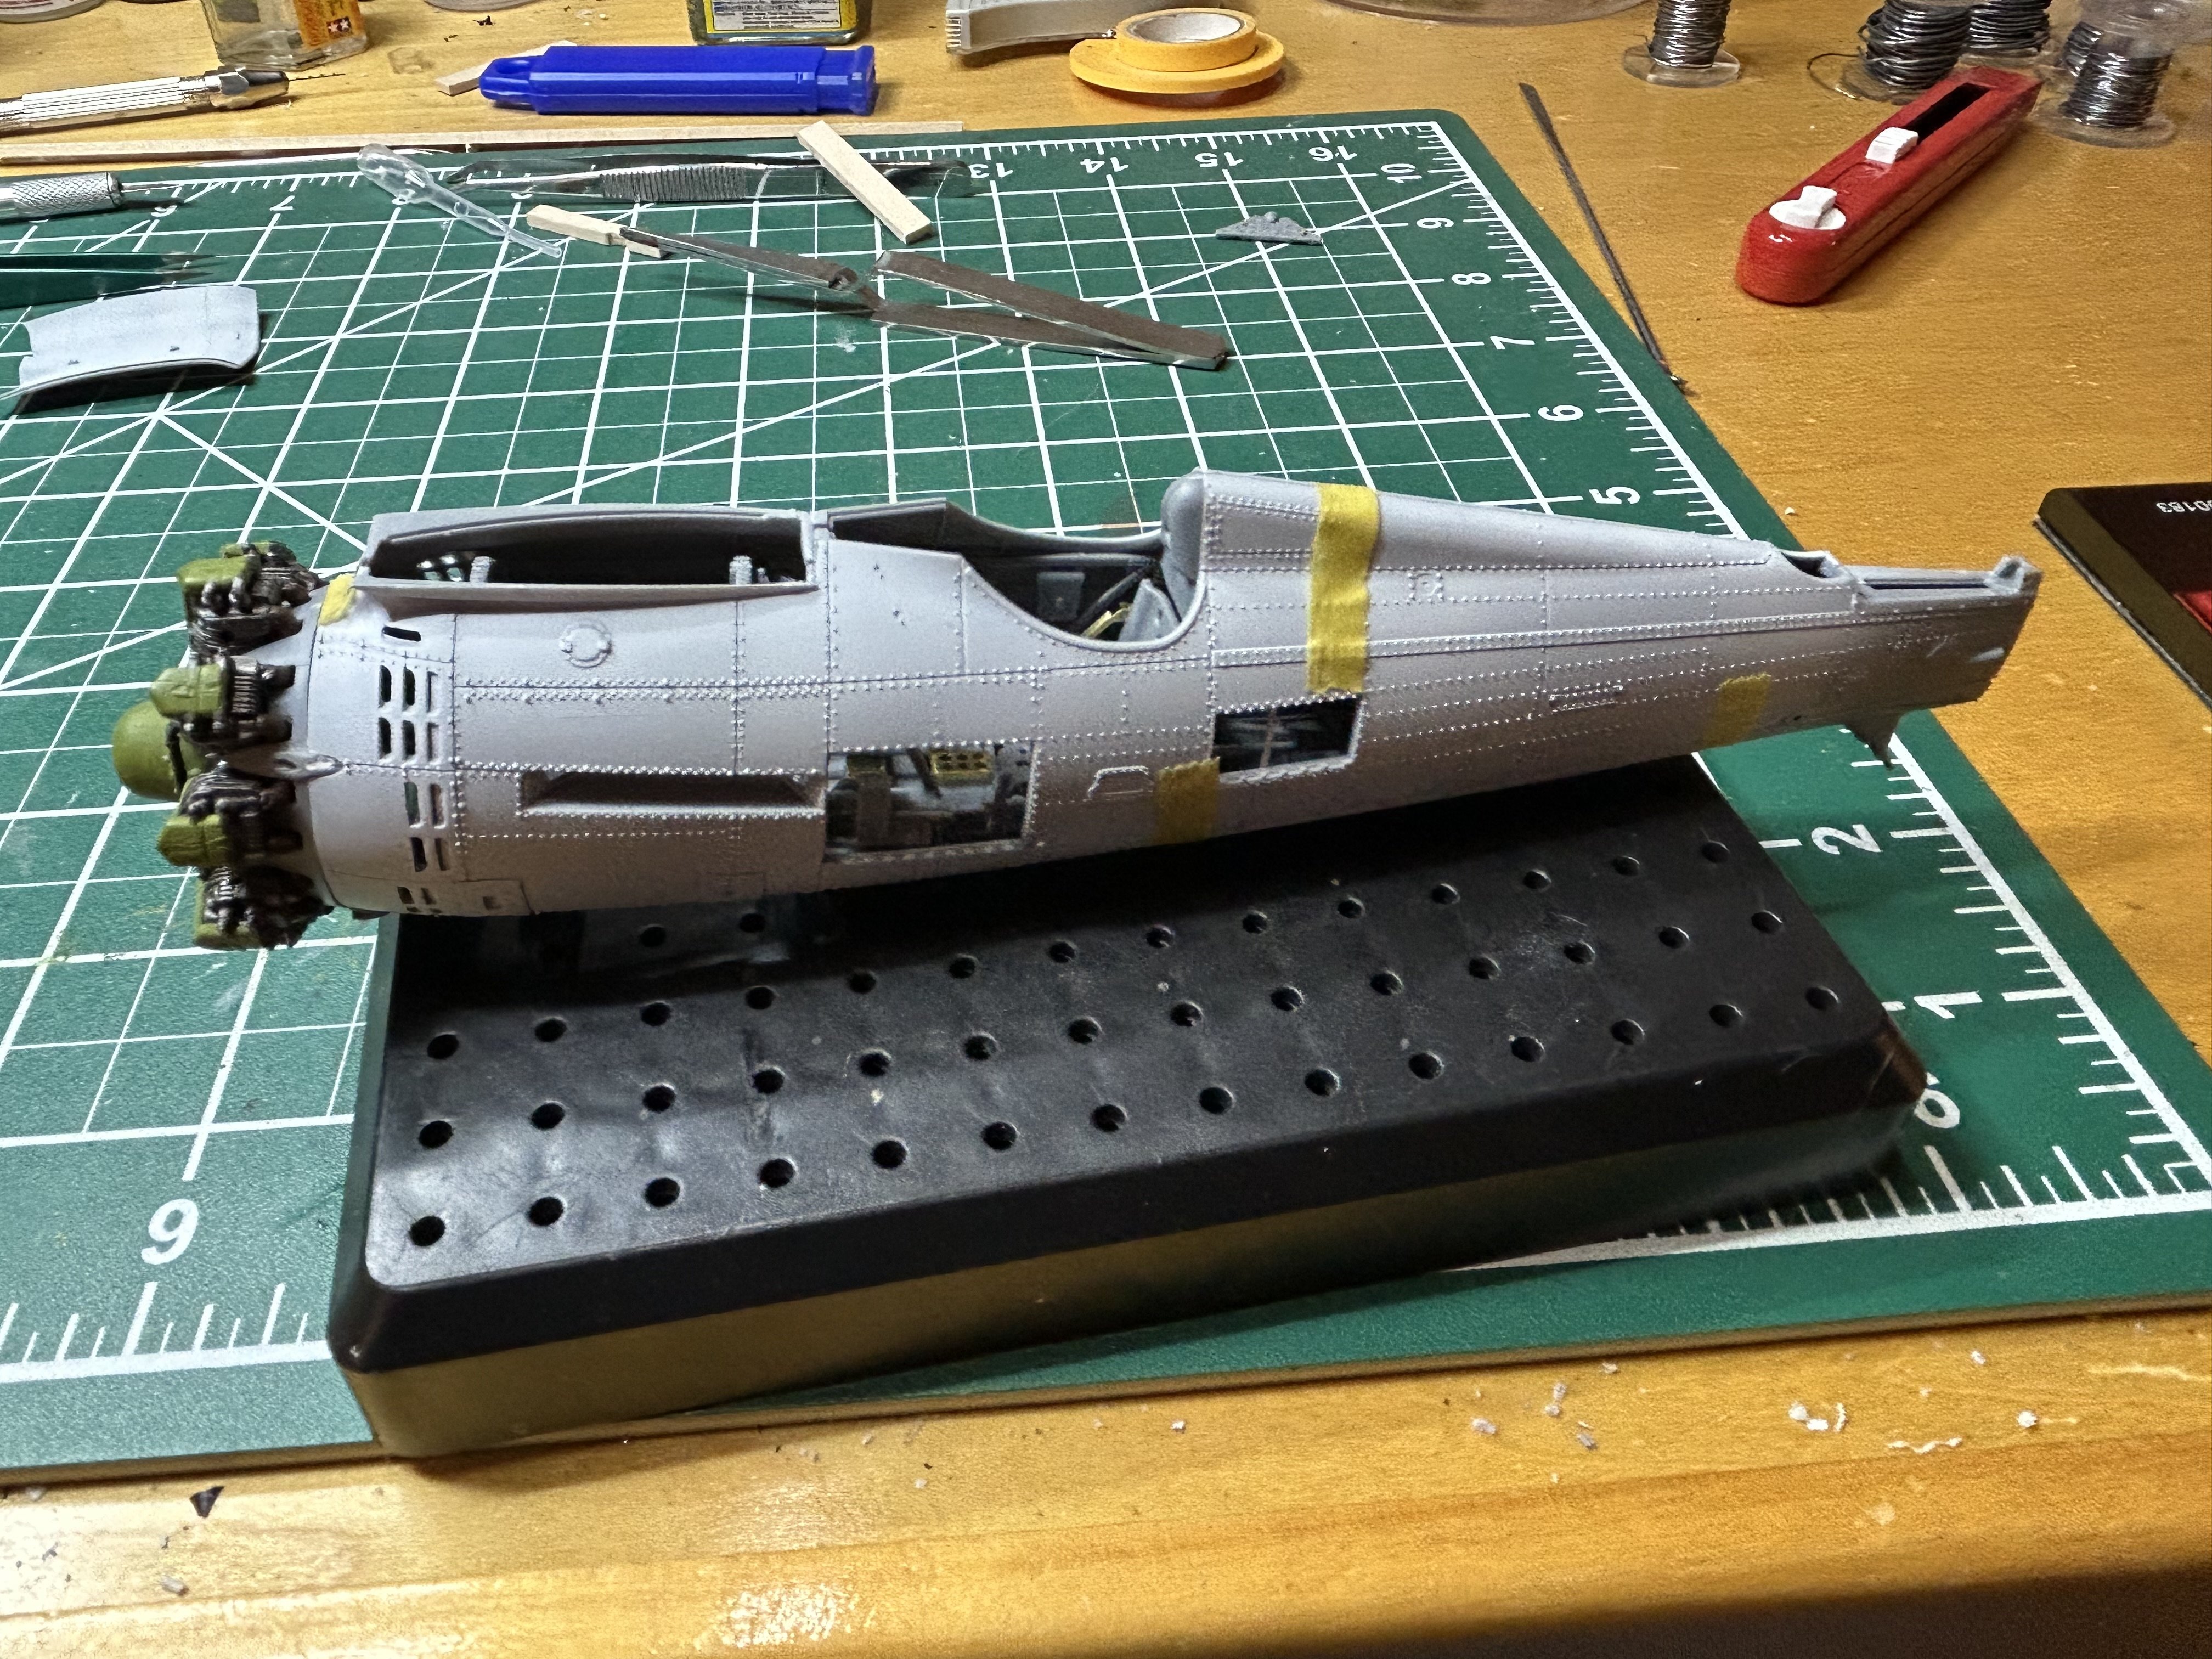
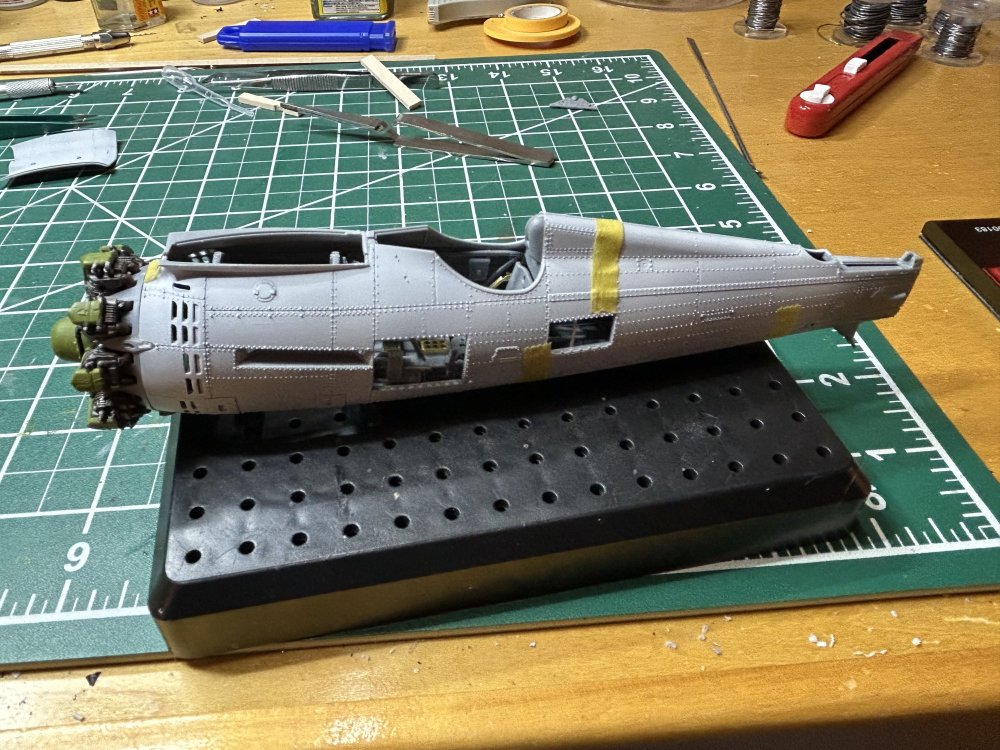
A little more progress this morning. Painted the cockpit with duraluminum, added an oil wash to the floor, and then did some detail painting to controls to match the photos of the cockpit I’ve been able to find. Used the decals that came with the kit for the instrument panels, fixed in place with a generous dash of Solvaset. I still need to add a drop of clear to each to simulate the glass and considering using a contrasting aluminum shade on the plates on the frame to add some contrast. I will wait until this is cemented into the fuselage half before adding in the cables and tubing that can be seen in the photos I’ve collected.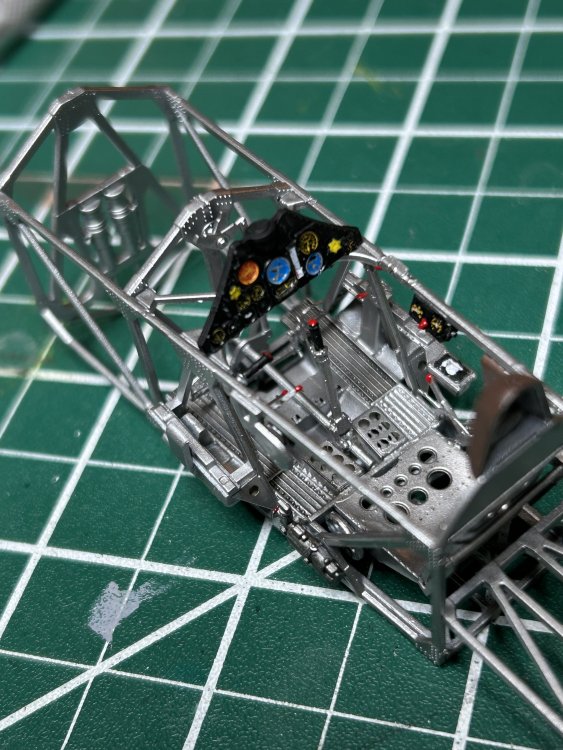
-
1:32 IBG PZL p.11c
FlyingMachines replied to FlyingMachines's topic in LSM 1/35 and Larger Work In Progress
The quality of the molding is among the best I’ve ever seen, but the engineering and instructions aren’t quite up to Tamiya level. Locator pins are often very small or missing, requiring a fair amount of guess work on the part of the modeler. But once you figure out how it goes together the fit is fantastic. Definitely not a kit for beginners. -
1:32 IBG PZL p.11c
FlyingMachines replied to FlyingMachines's topic in LSM 1/35 and Larger Work In Progress
Nothing debonder couldn’t fix after my first guess (and second, and third) at how the PE bracing was attached turned out wrong. But for the instruction manual deficiencies, I’d say this is one of the best kits I’ve ever worked with. -
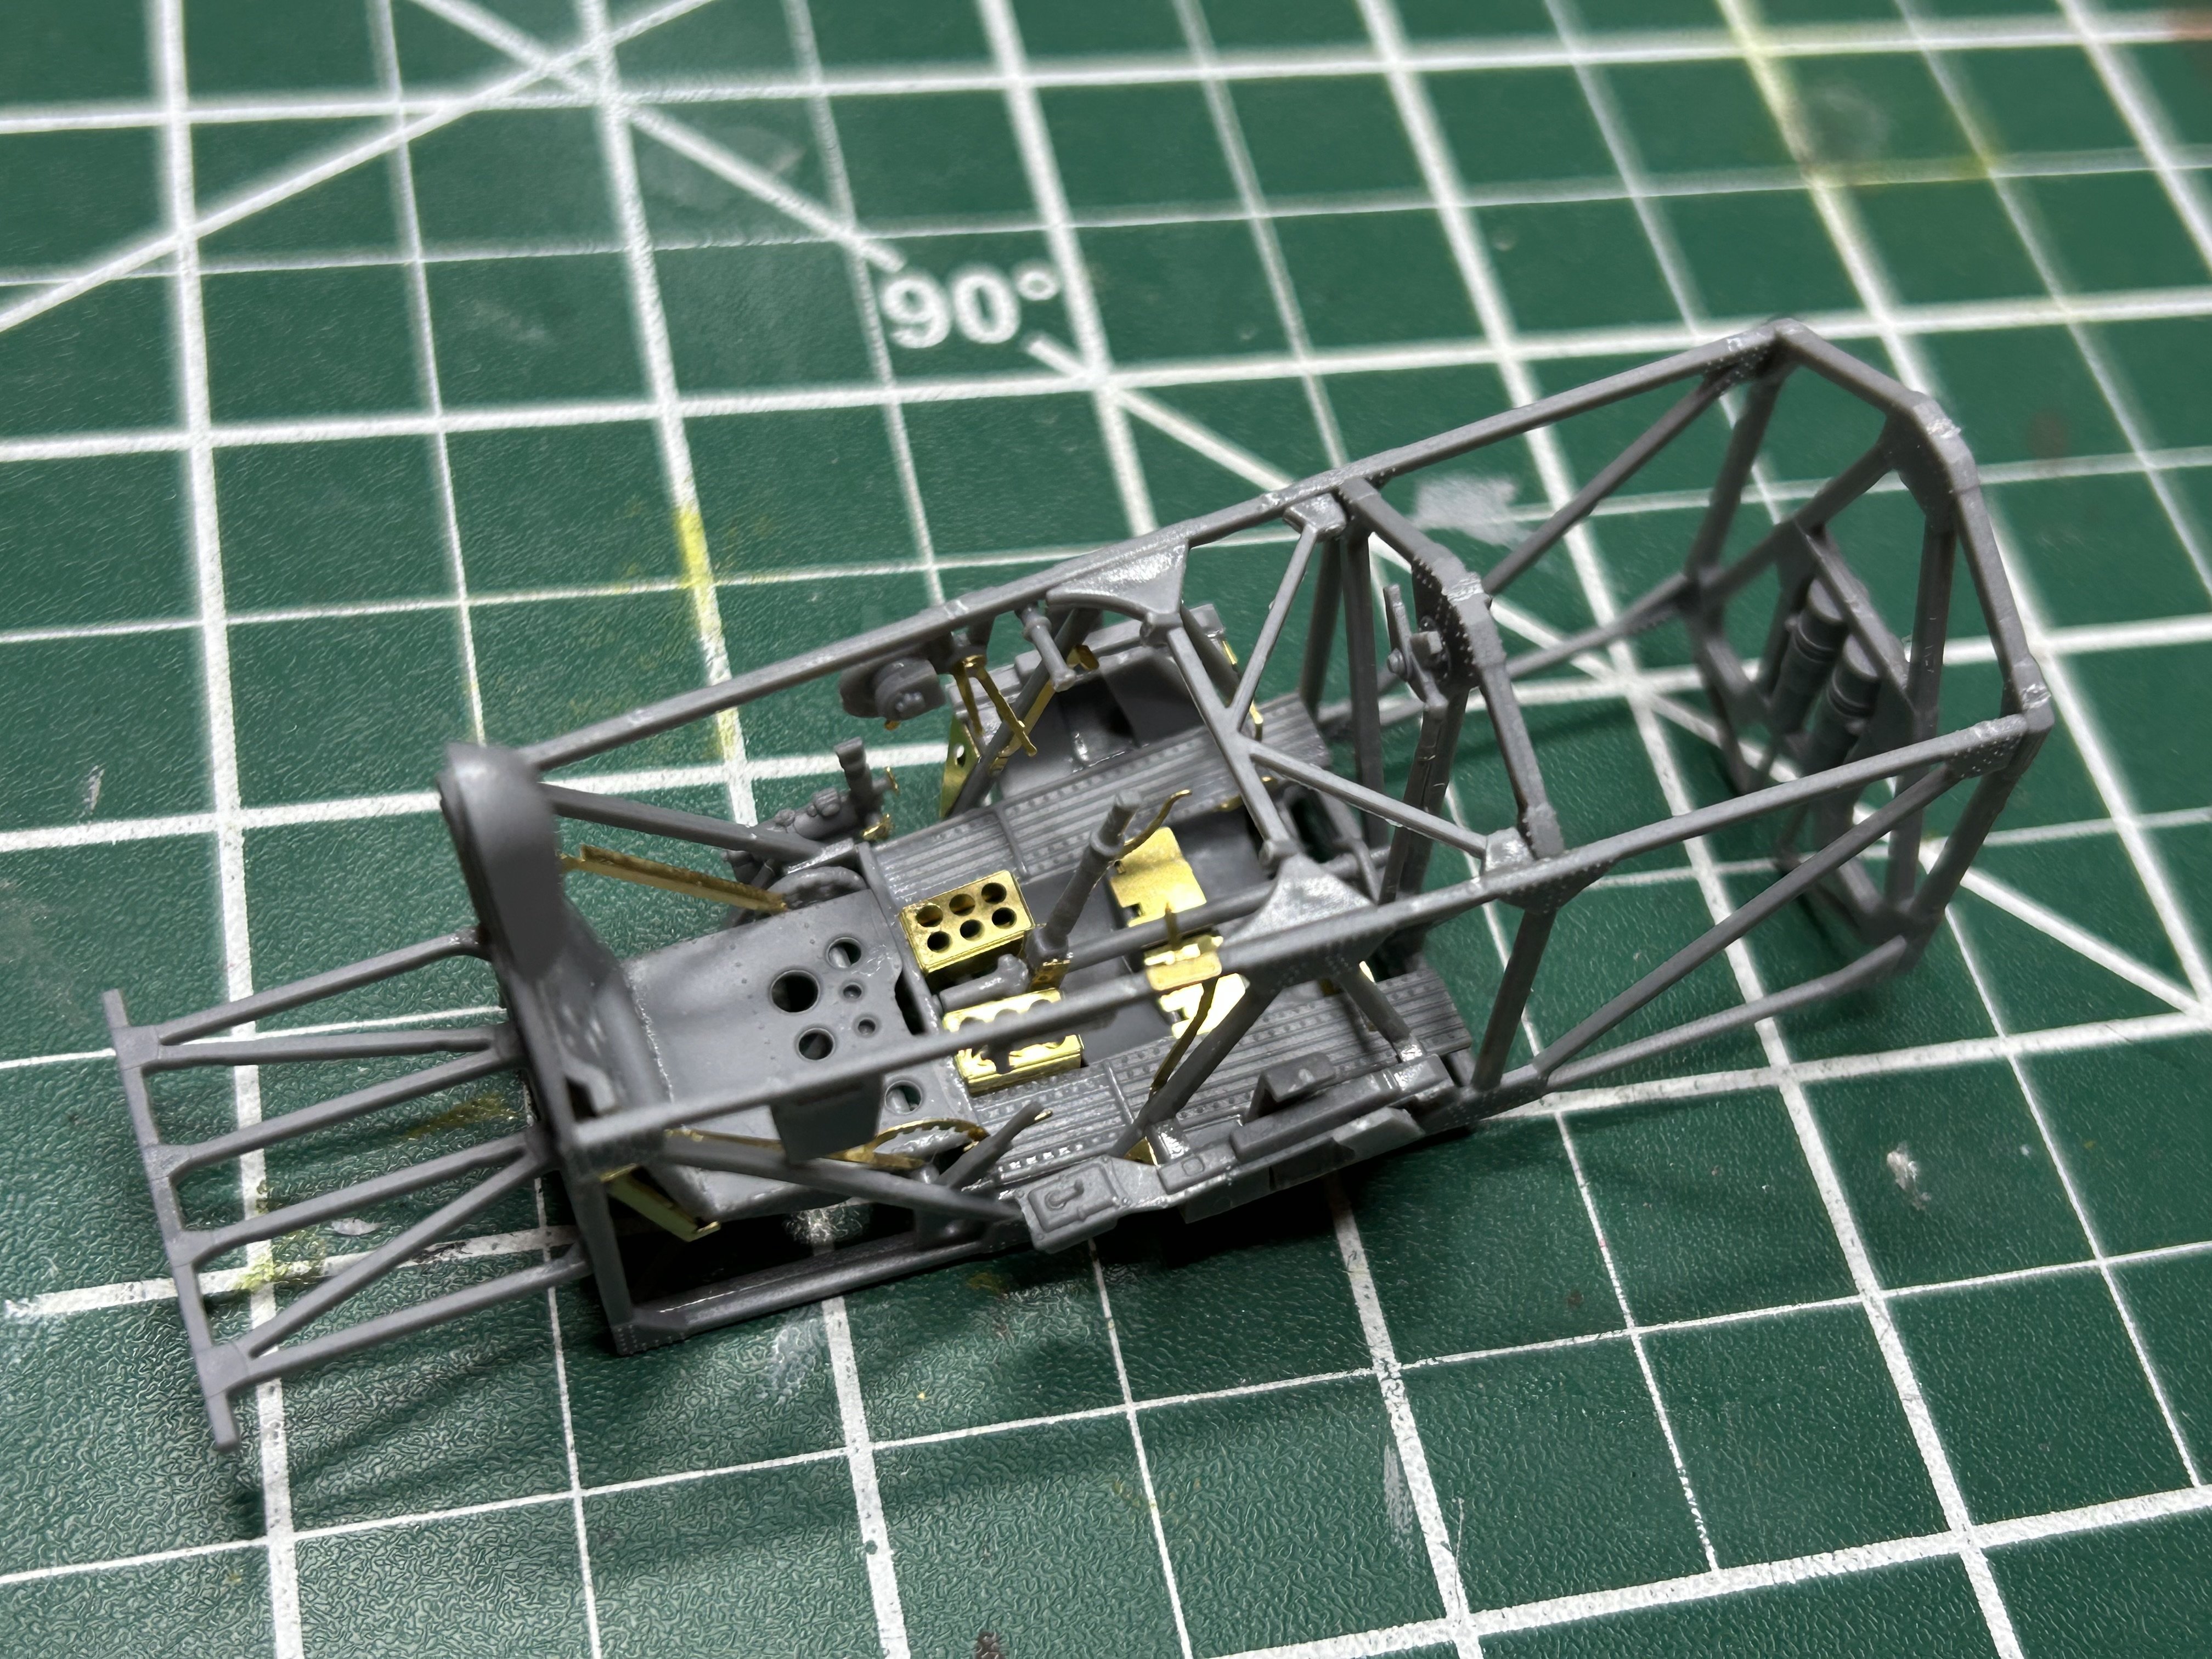
I started building this kit about two months ago. I’ve been a fan of this scrappy little fighter for a long time, so I was excited when the kit first arrived and I saw the impressive level of detail in the molding and the PE which comes with the kit. My excitement began to ebb as I finished building the major components of the engine and moved on to the cockpit. There are numerous very delicate part to the cockpit, including quite a bit of very fiddly PE. My frustration wasn’t with the delicacy of the parts - rather it is with the instruction manual which I found quite lacking. Lots of cursing as I tried to figure out exactly how the seat is assembled - so much swearing that I finally had to set it aside and walk away for a couple of weeks, letting the puzzle knock around in my subconscious in hopes the solution would come to me one day. That day finally arrived today, so back to the bench I went. After three hours at the bench, the cockpit assembly finally came together. Despite the poor instructions, I’ve fallen back in love with this little kit after seeing how this delicate little cockpit assembled and ready for primer. I didn’t want to stop there, so I dry fit the cockpit, engine and fuselage, and I must say it all fits perfectly. Now on to painting…


- 10 replies
-
- 11
-