


richdlc
-
Posts
15 -
Joined
-
Last visited
Content Type
Profiles
Forums
Events
Gallery
Posts posted by richdlc
-
-
Hi - I know it's been done to death, but this is serious research for a model company.
Could you let me know your top 'wants' in 1/32 or larger - bearing in mind that since this was last done, several have been released or are forthcoming. I don't have time to trawl through hundreds of threads looking for what's already been said...
It doesn't matter if it's really obscure.
What I really need to know (and bearing in mind that many of you are a lot older than me (36)) are the subjects that modellers have been waiting years for.
Do you think your choices are commercially viable / potentially profitable and why?
I will leave this thread up for a couple of weeks, and also post a similar one on other sites, then I will collate all the data and fire it off to the relevant person for discussion
Thanks very much in advance!
Rich
-
 1
1
-
-
*update 14th August 2013*
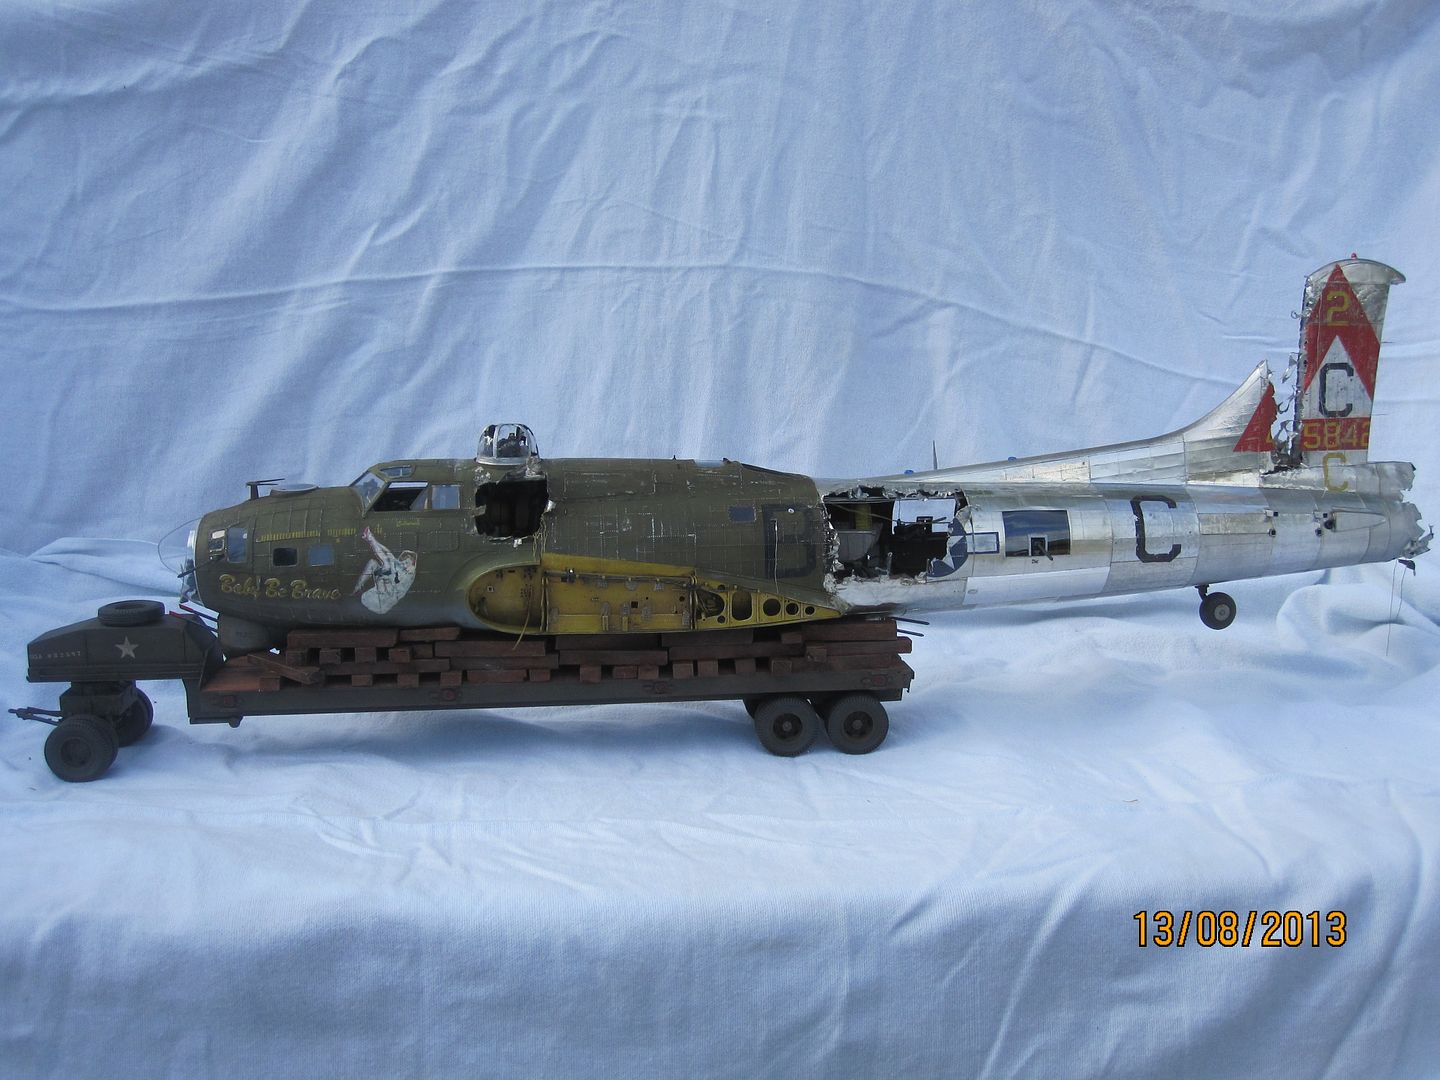
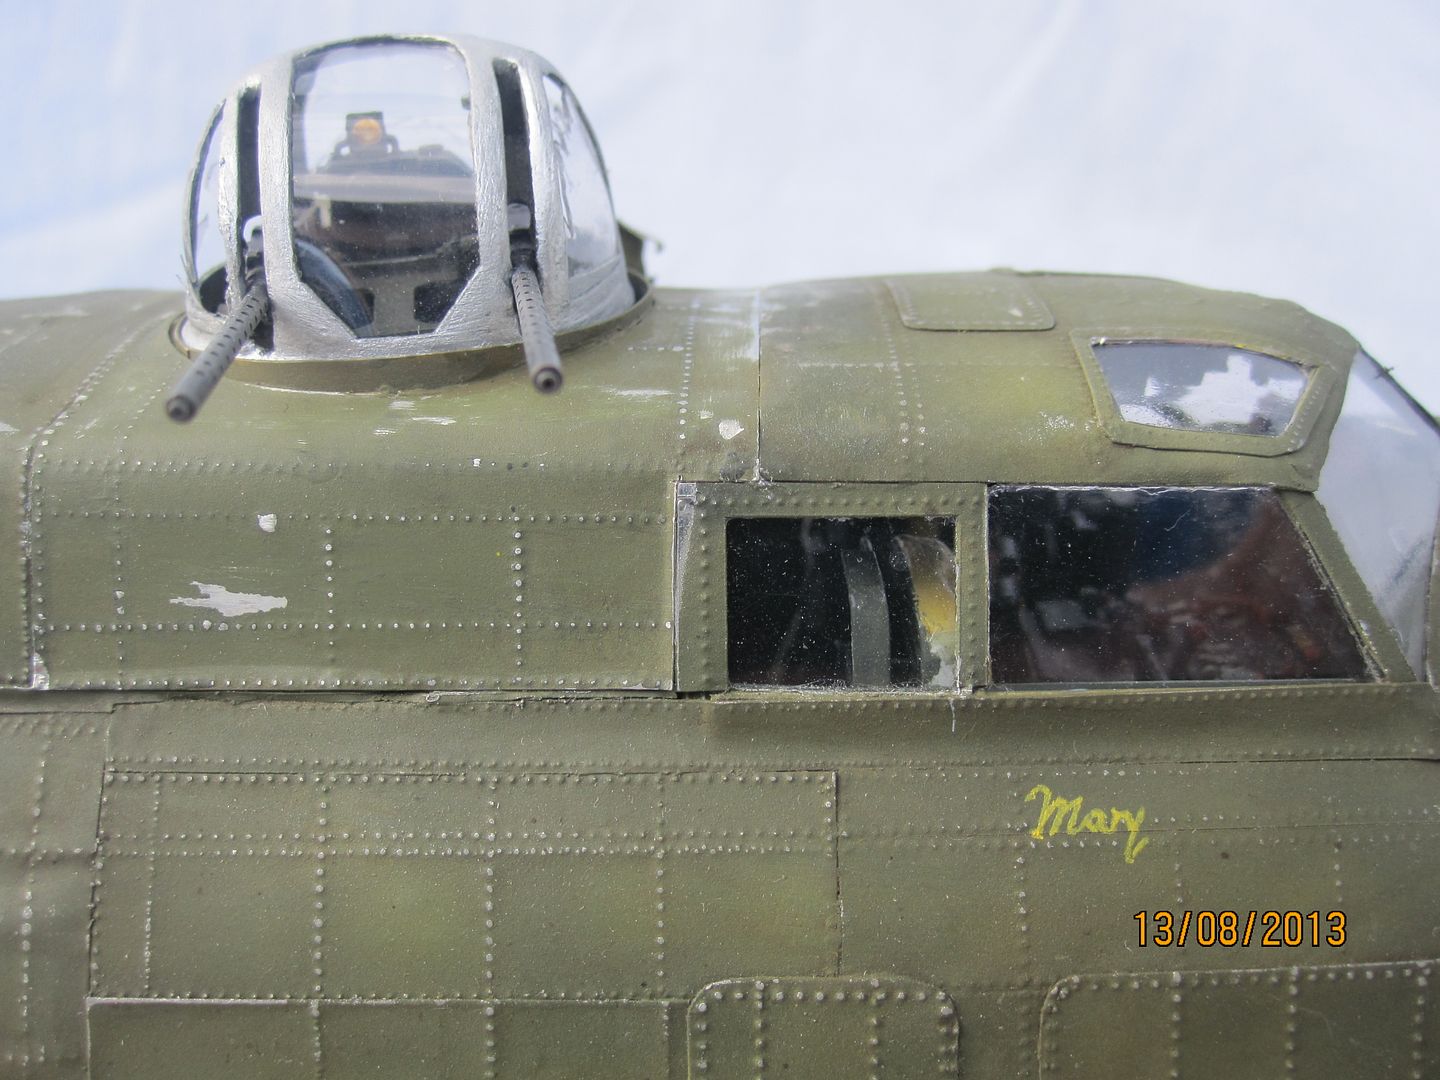
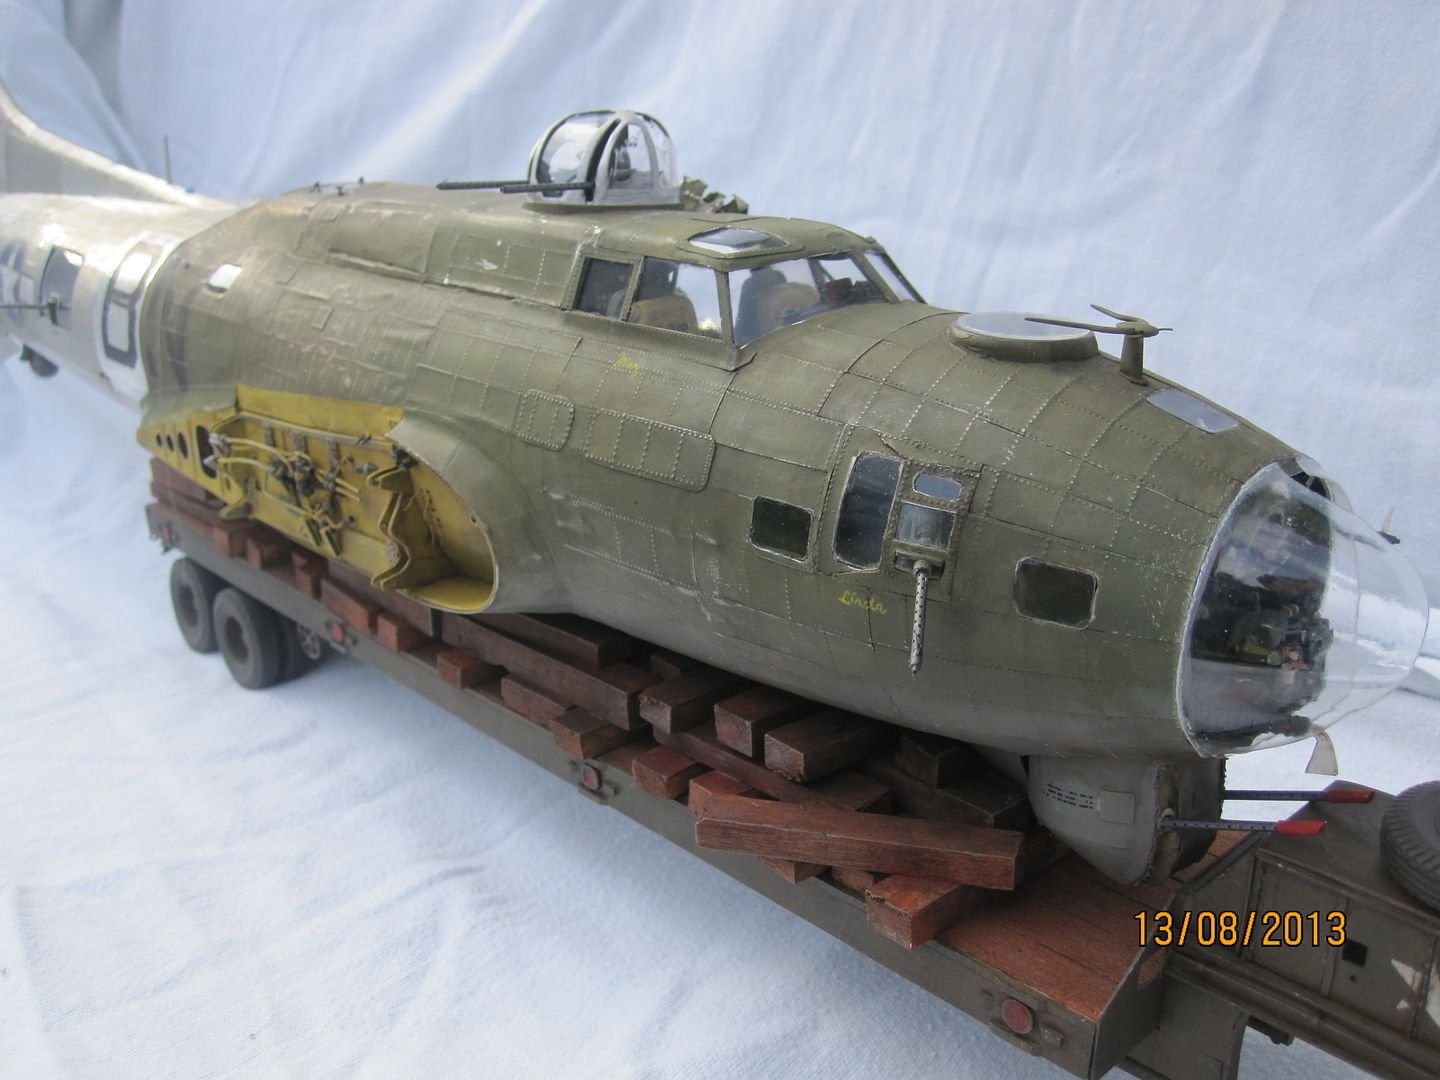
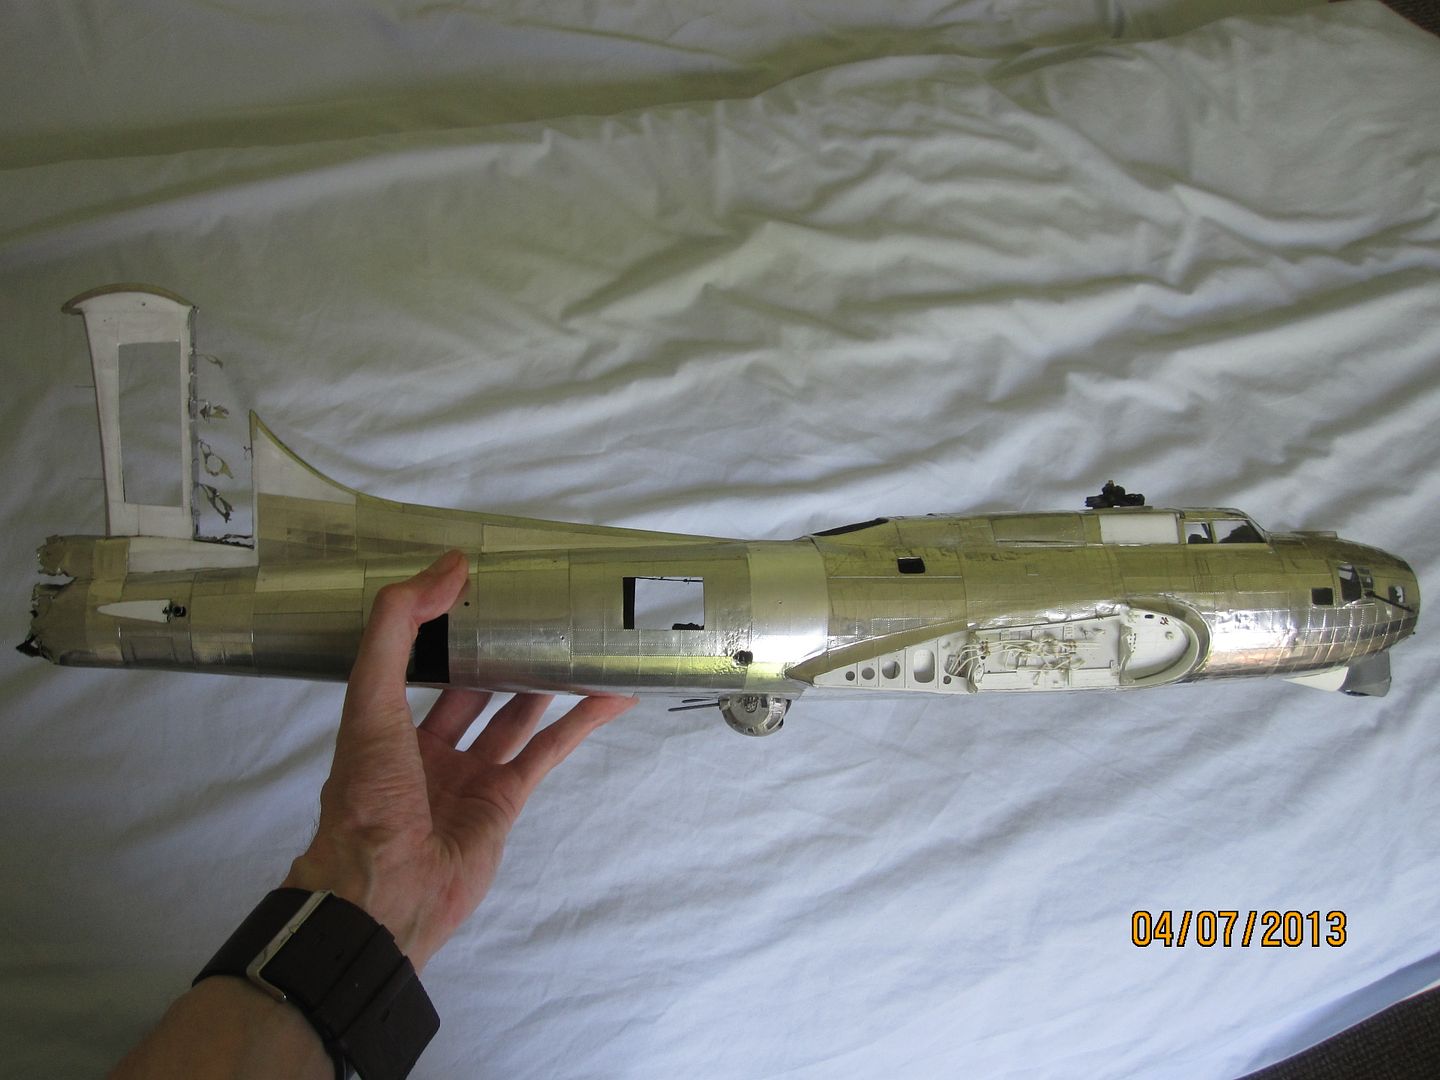
Hi guys! Well, that special moment has come where I realized there is little more I can add to the Fort. So as of now, I am calling it 99% done! There's a couple of aerials I can add, plus I need to detail the large radio room roof window (removable on the real thing so I'll have it removed & lying on the ground). So I'm going to post up some pics - I'd really appreciate it if you find any glaring errors to let me know - now is the time to fix them! I've got just under 3 months until the Nationals and next up will be the diorama - which means buying / creating / painting some figures and doing some groundwork.
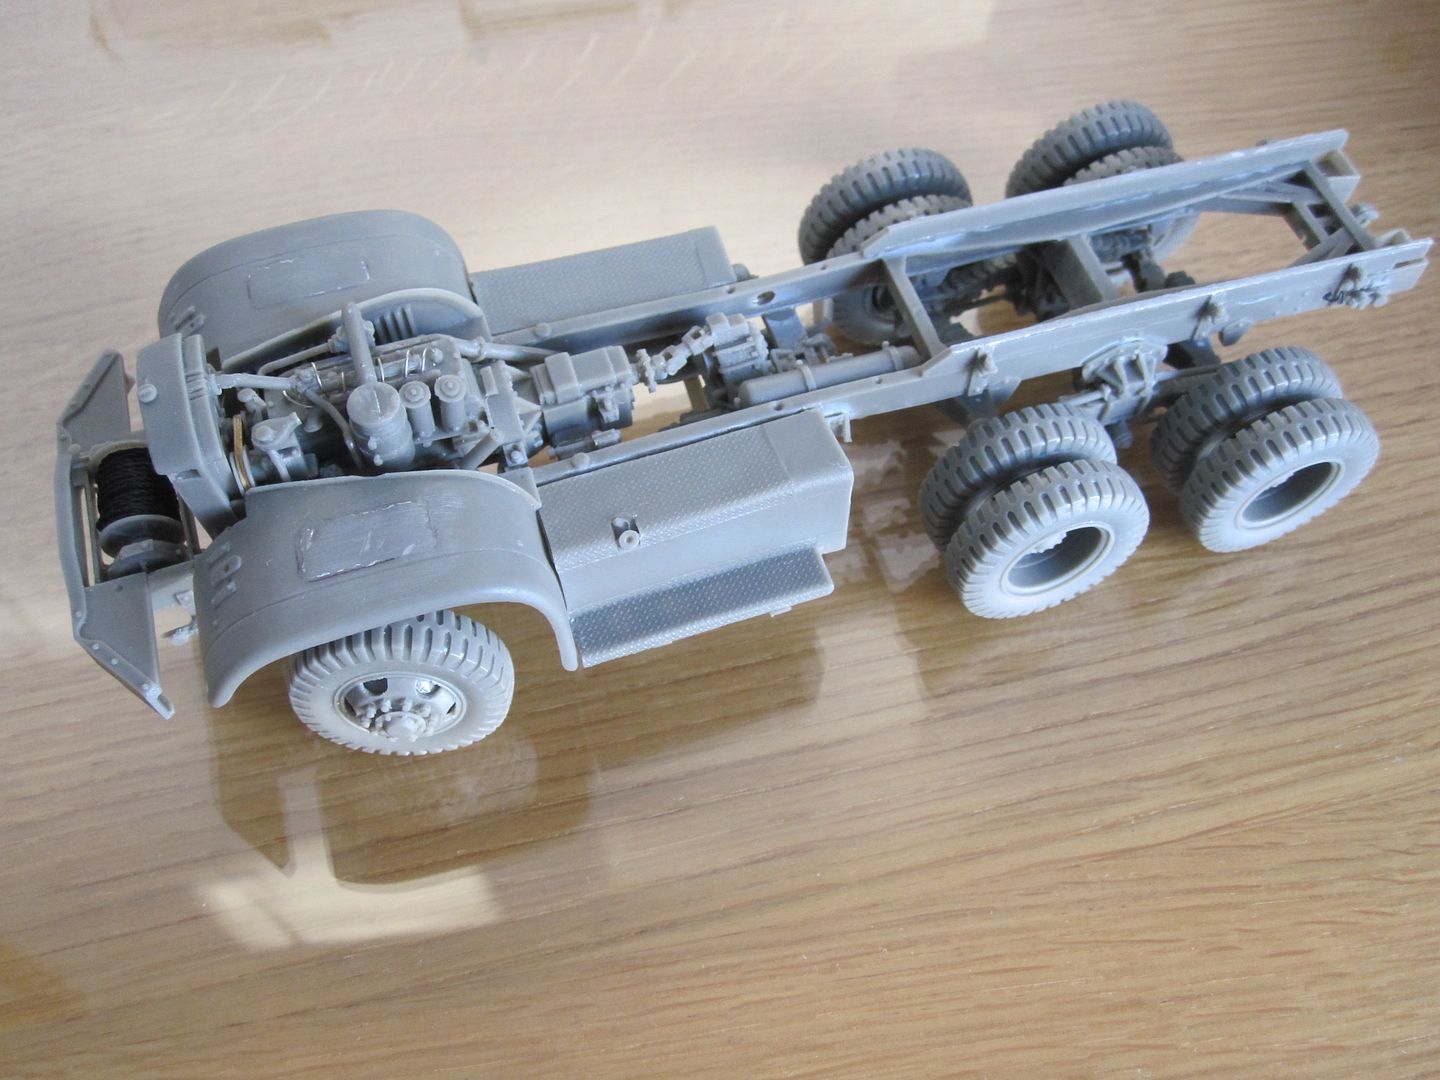
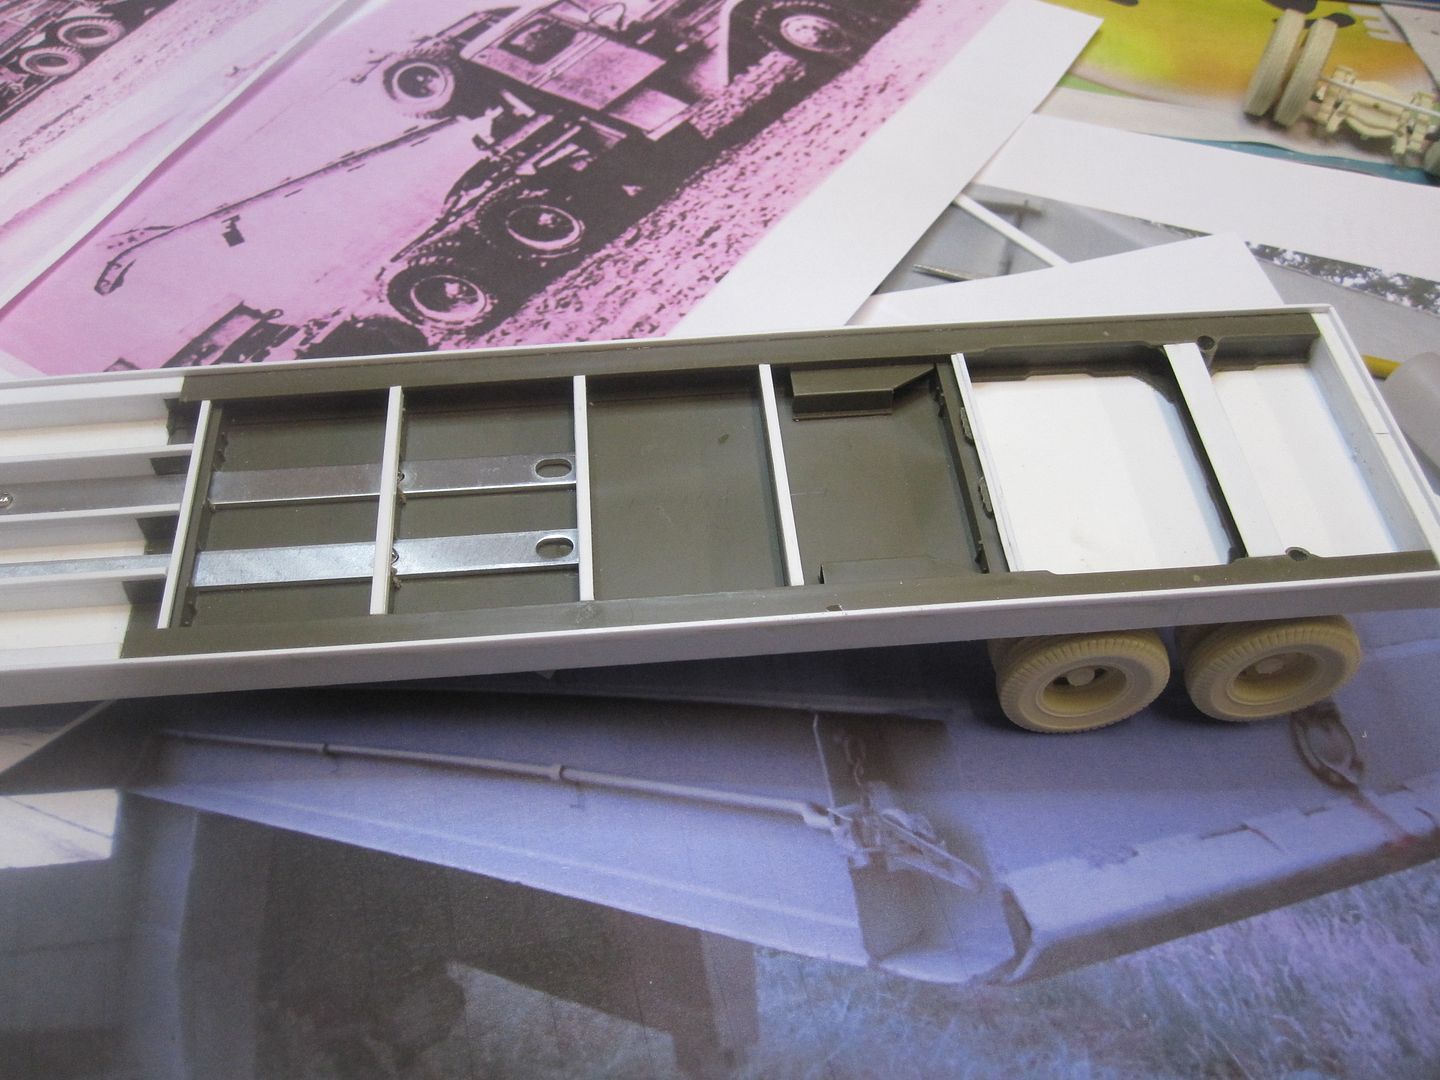
Until the diorama is complete I can't call the Fortress 'complete' really as everything is interconnected... so once I really have finished I'll create a 'ready for inspection' thread - with the moderators' permission of course as strictly speaking this isn't just an LSP build. I will be updating the 'non-LSP works' thread about the wrecker / trailer with some diorama build pics etc. in the coming weeks..
OK - to business.
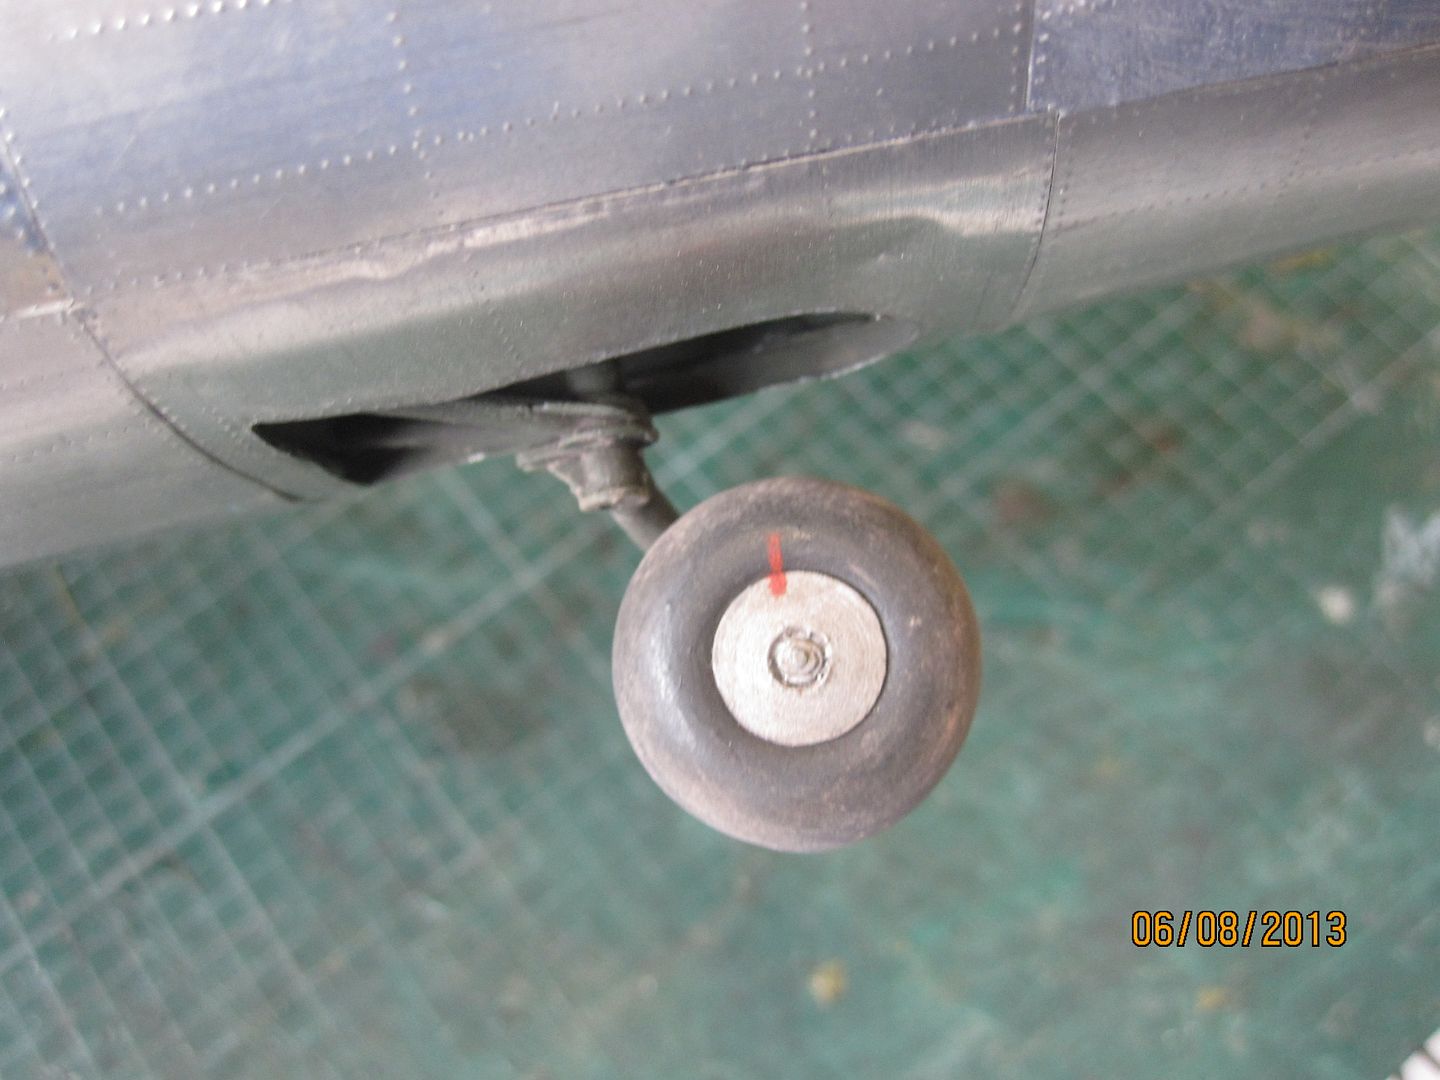
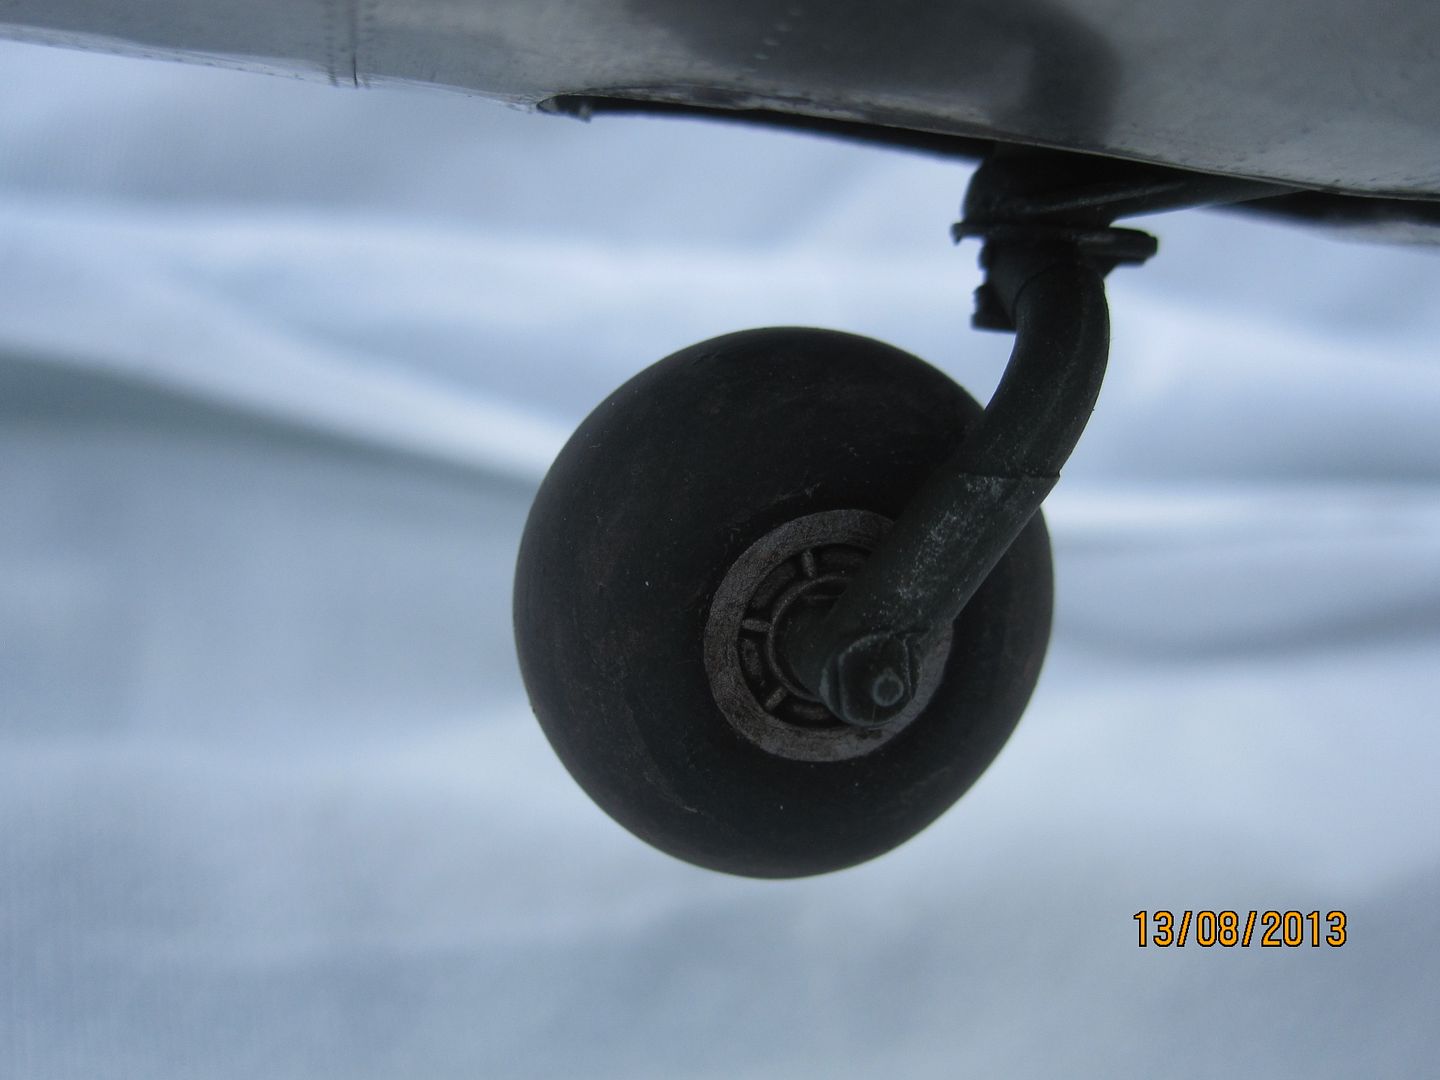
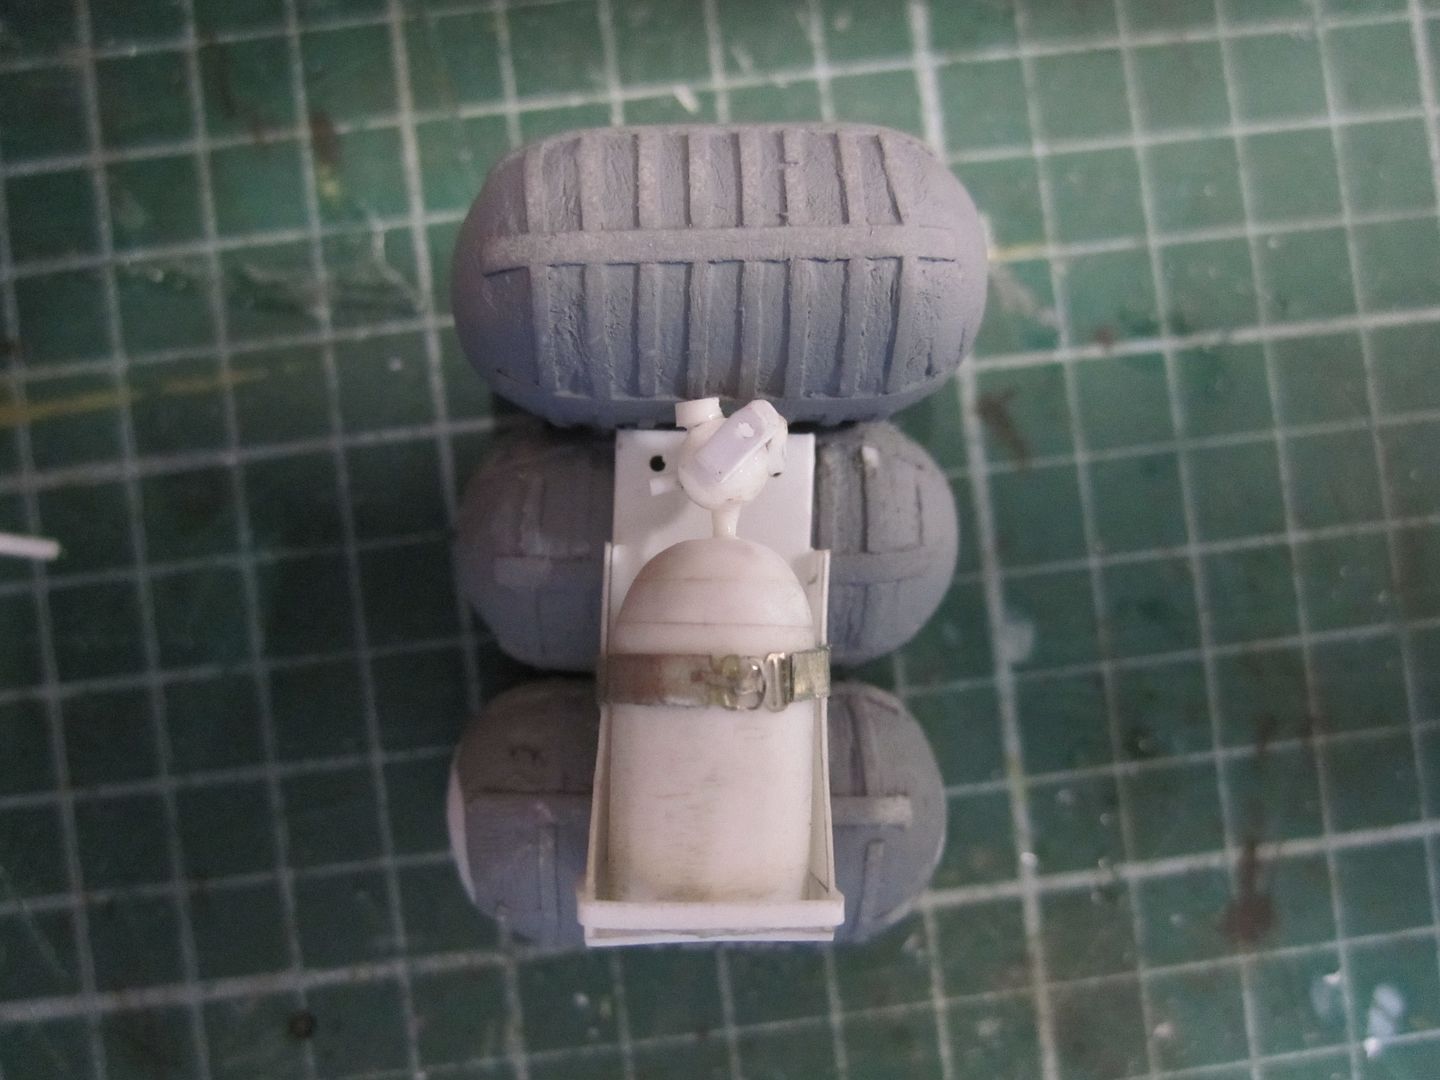
One of the very few parts I cannibalized from the HK Models test shot I had was the tail wheel assembly - HK provides this with a bulged tyre, so, I simply built up the bulged bit again with plastic card & blended it in:
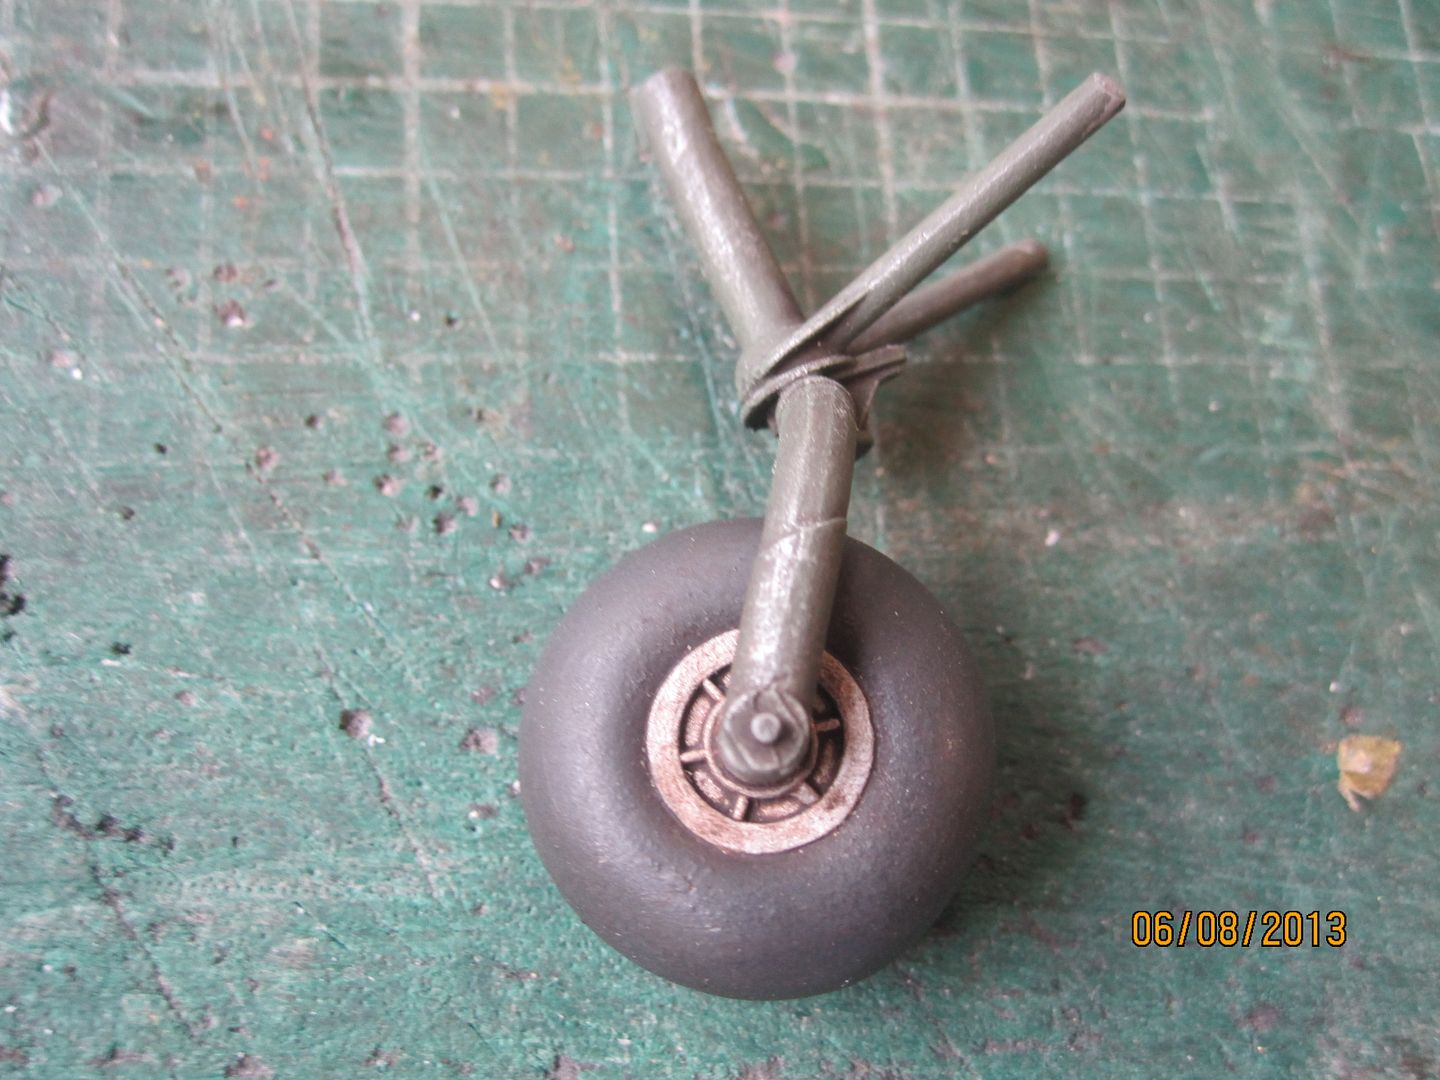
Here it is attached - dust & dirt added from MiG pigments:
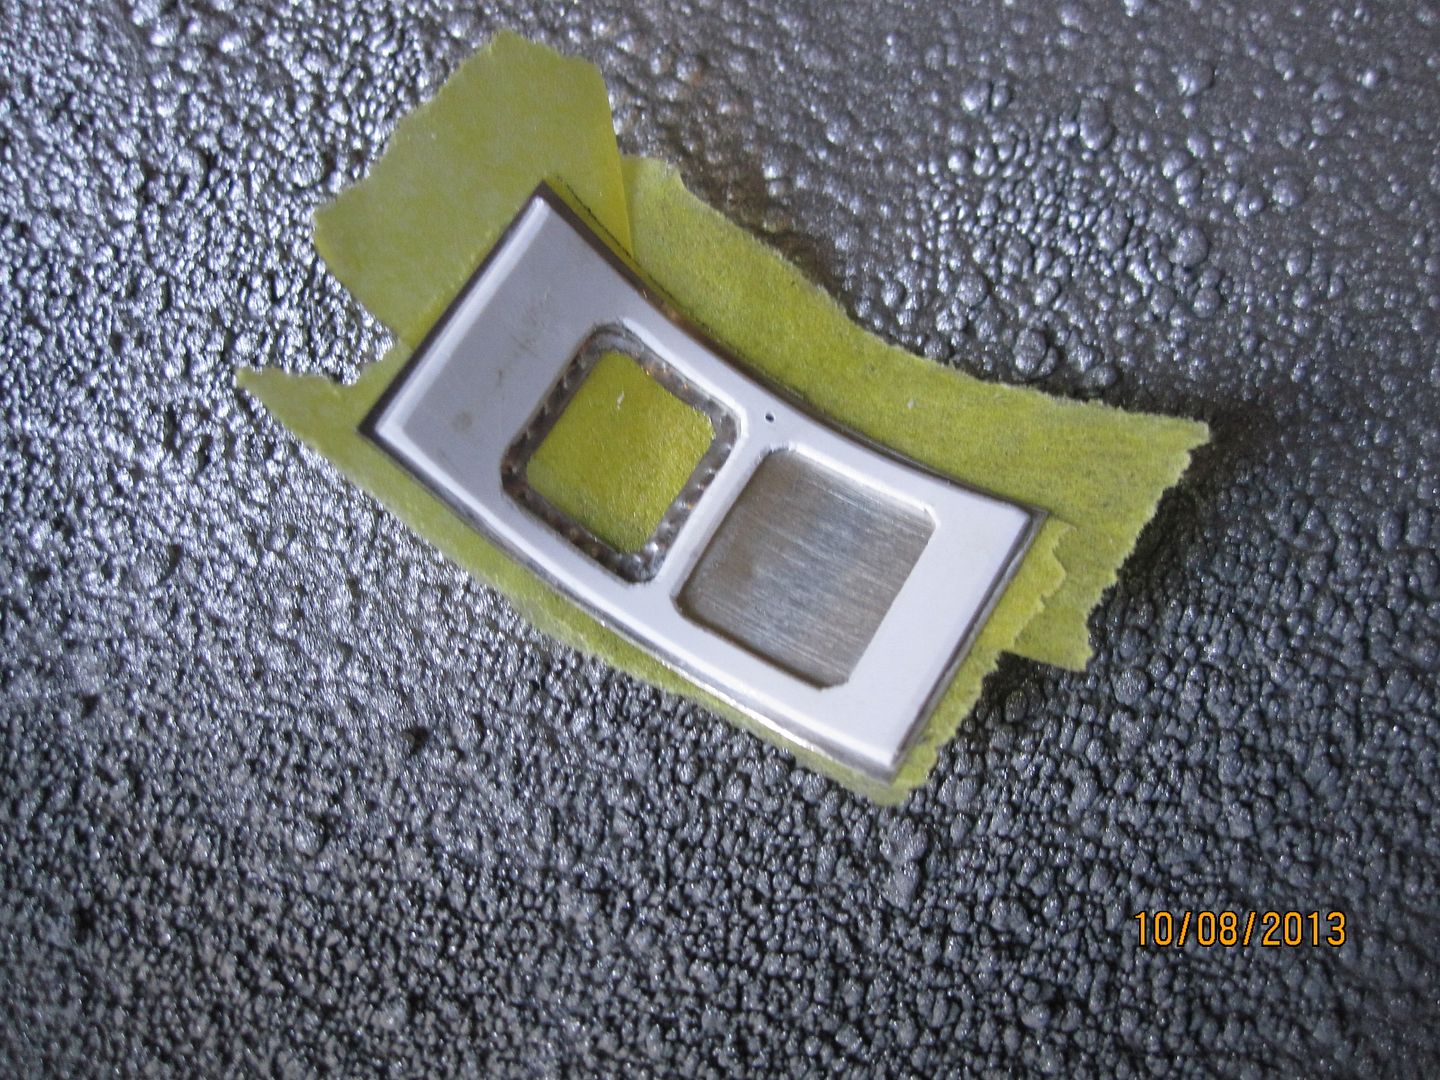
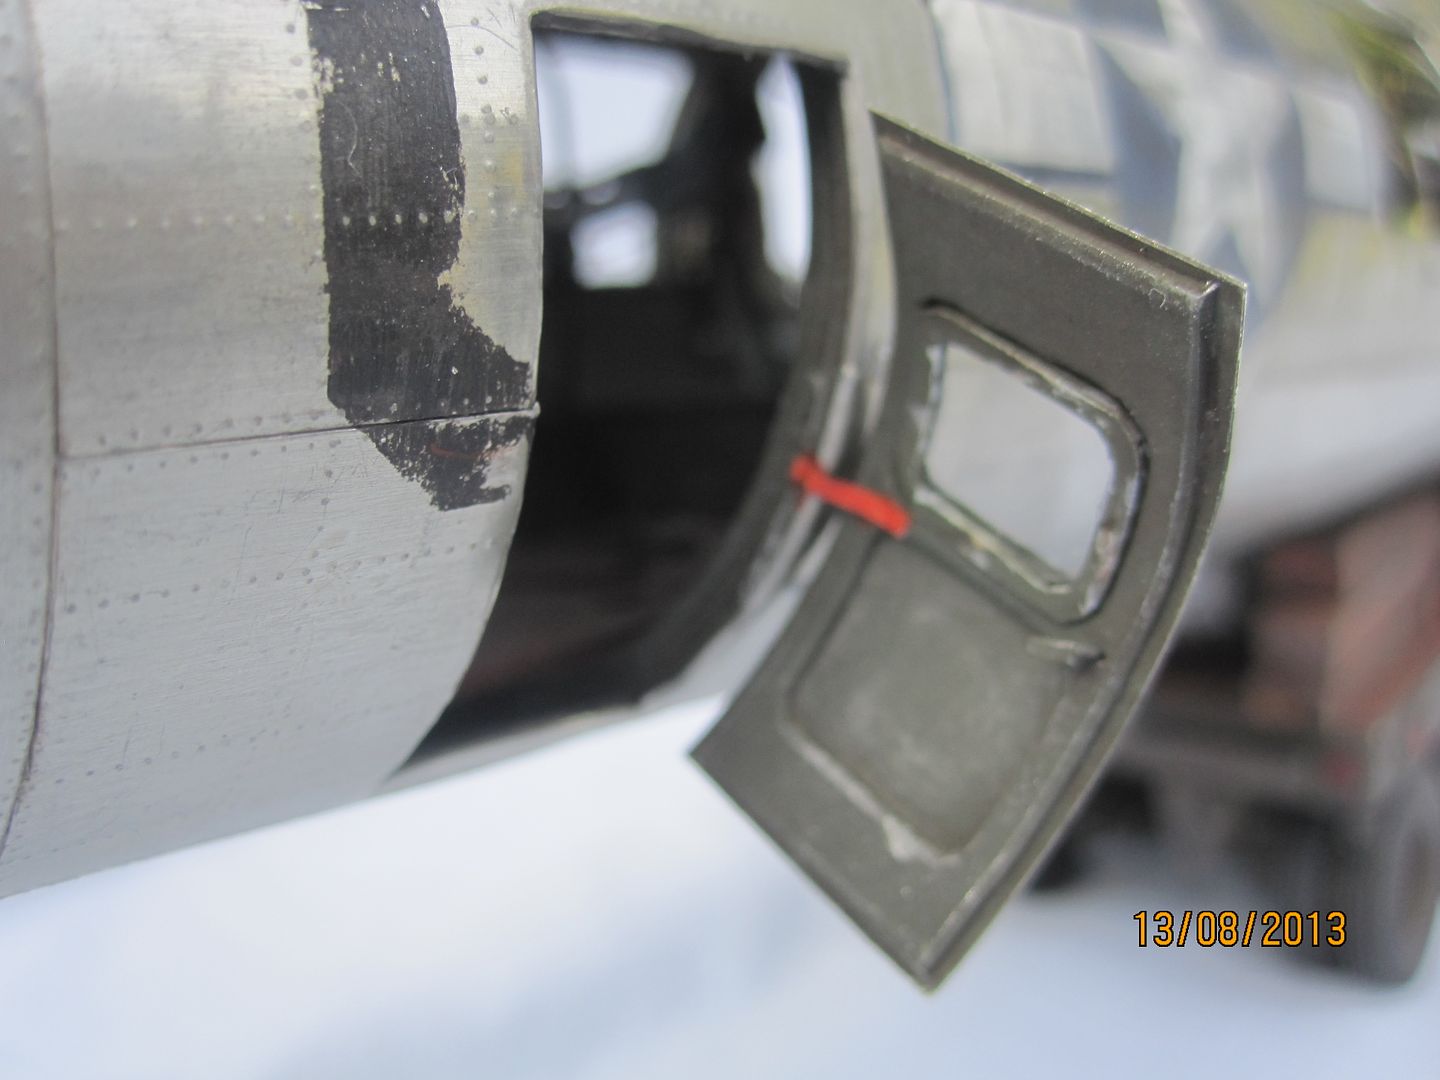
I also needed to make the rear crew access door, which I did from a piece of pewter & some heat-formed plastic card - here it is prior to painting & window installation:
And in place:
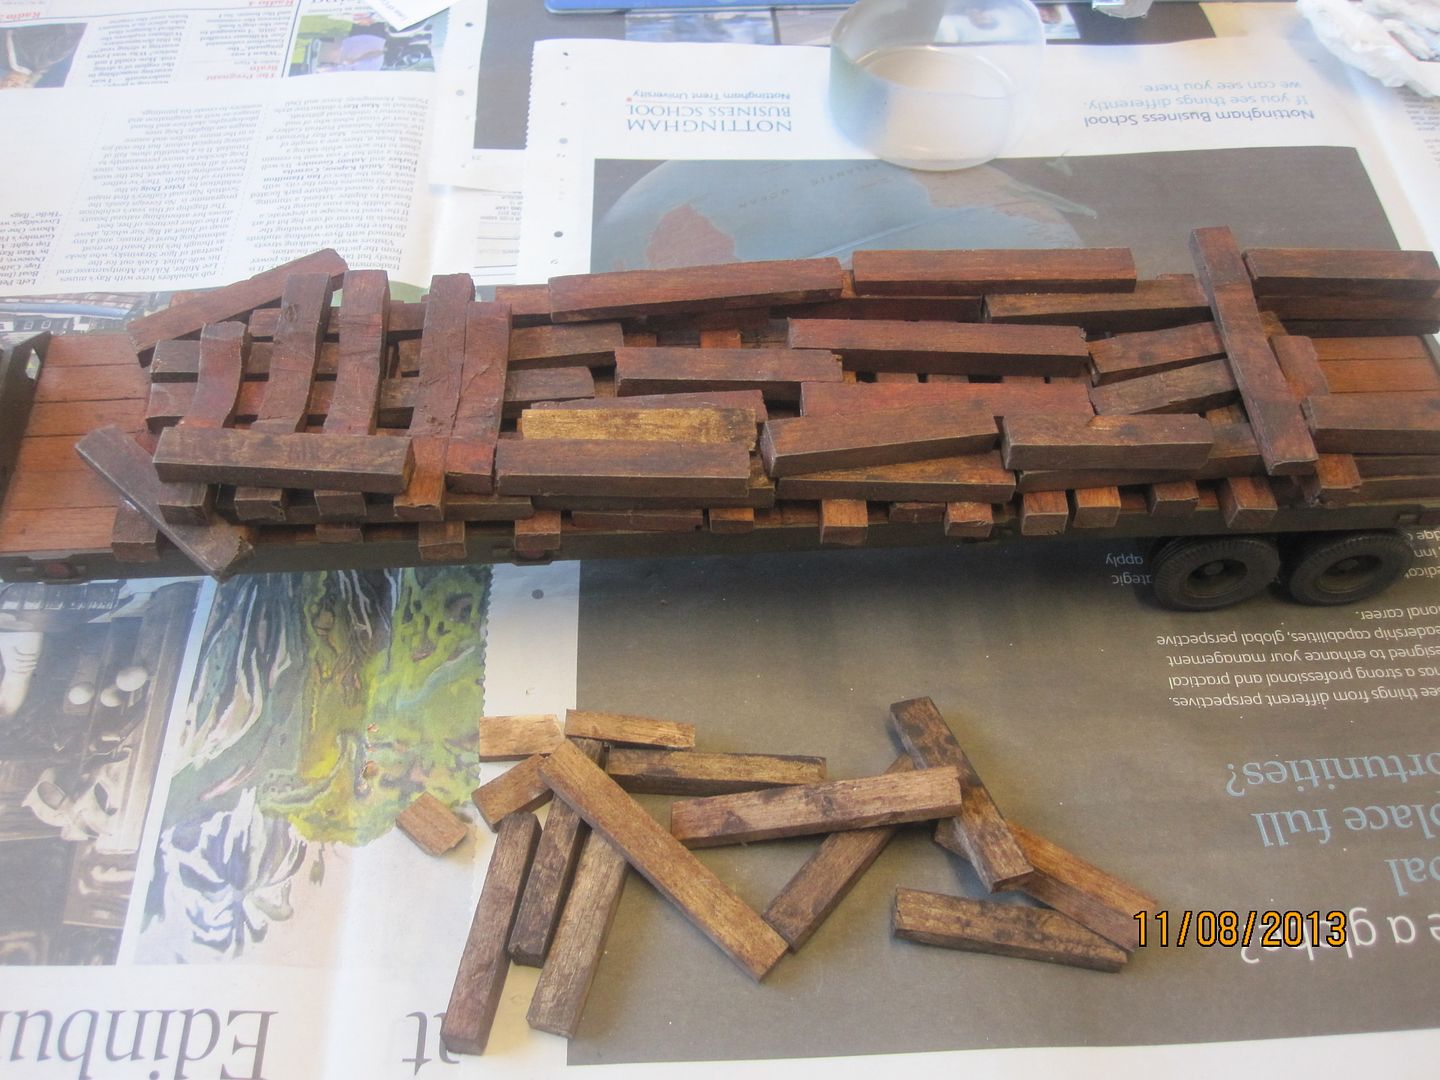
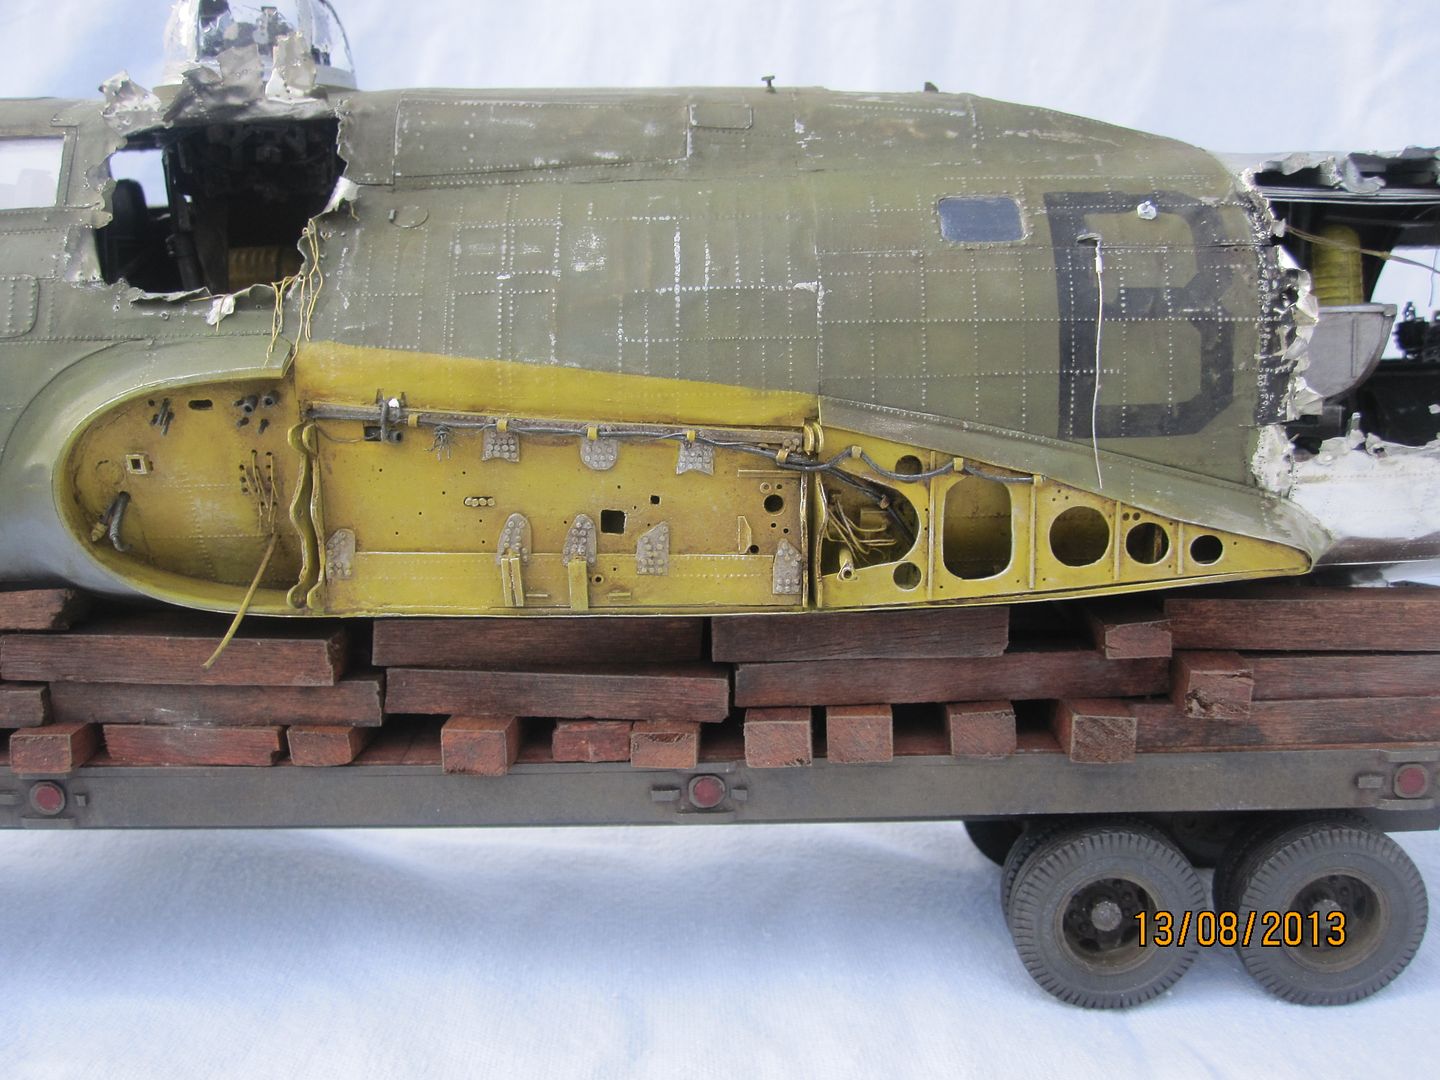
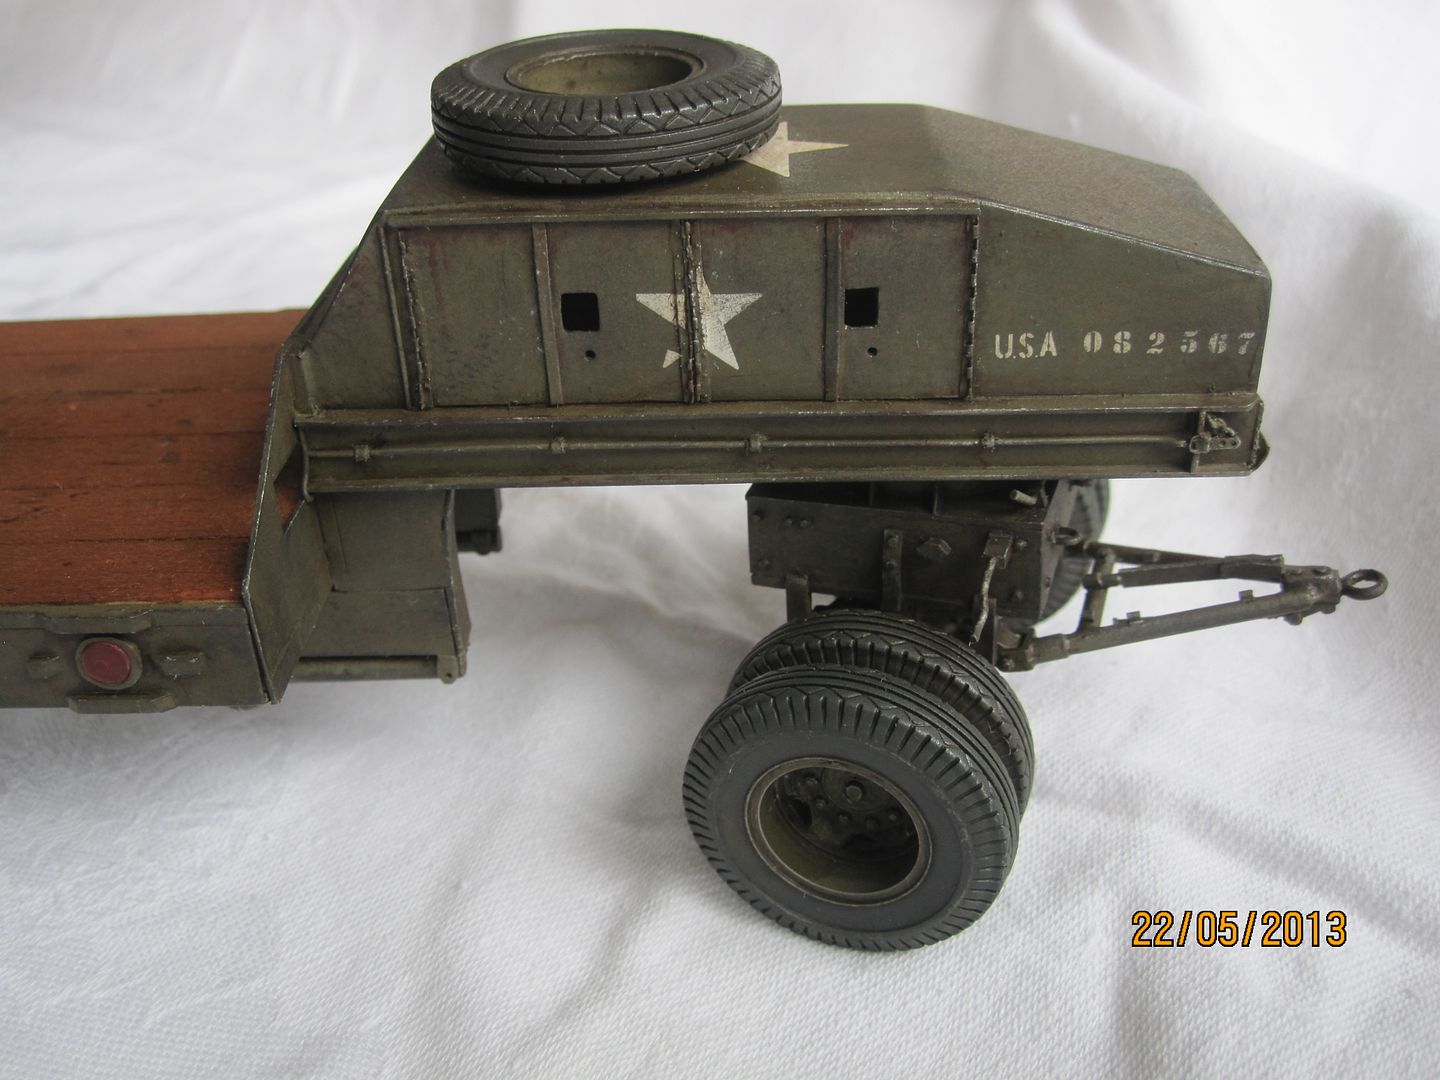
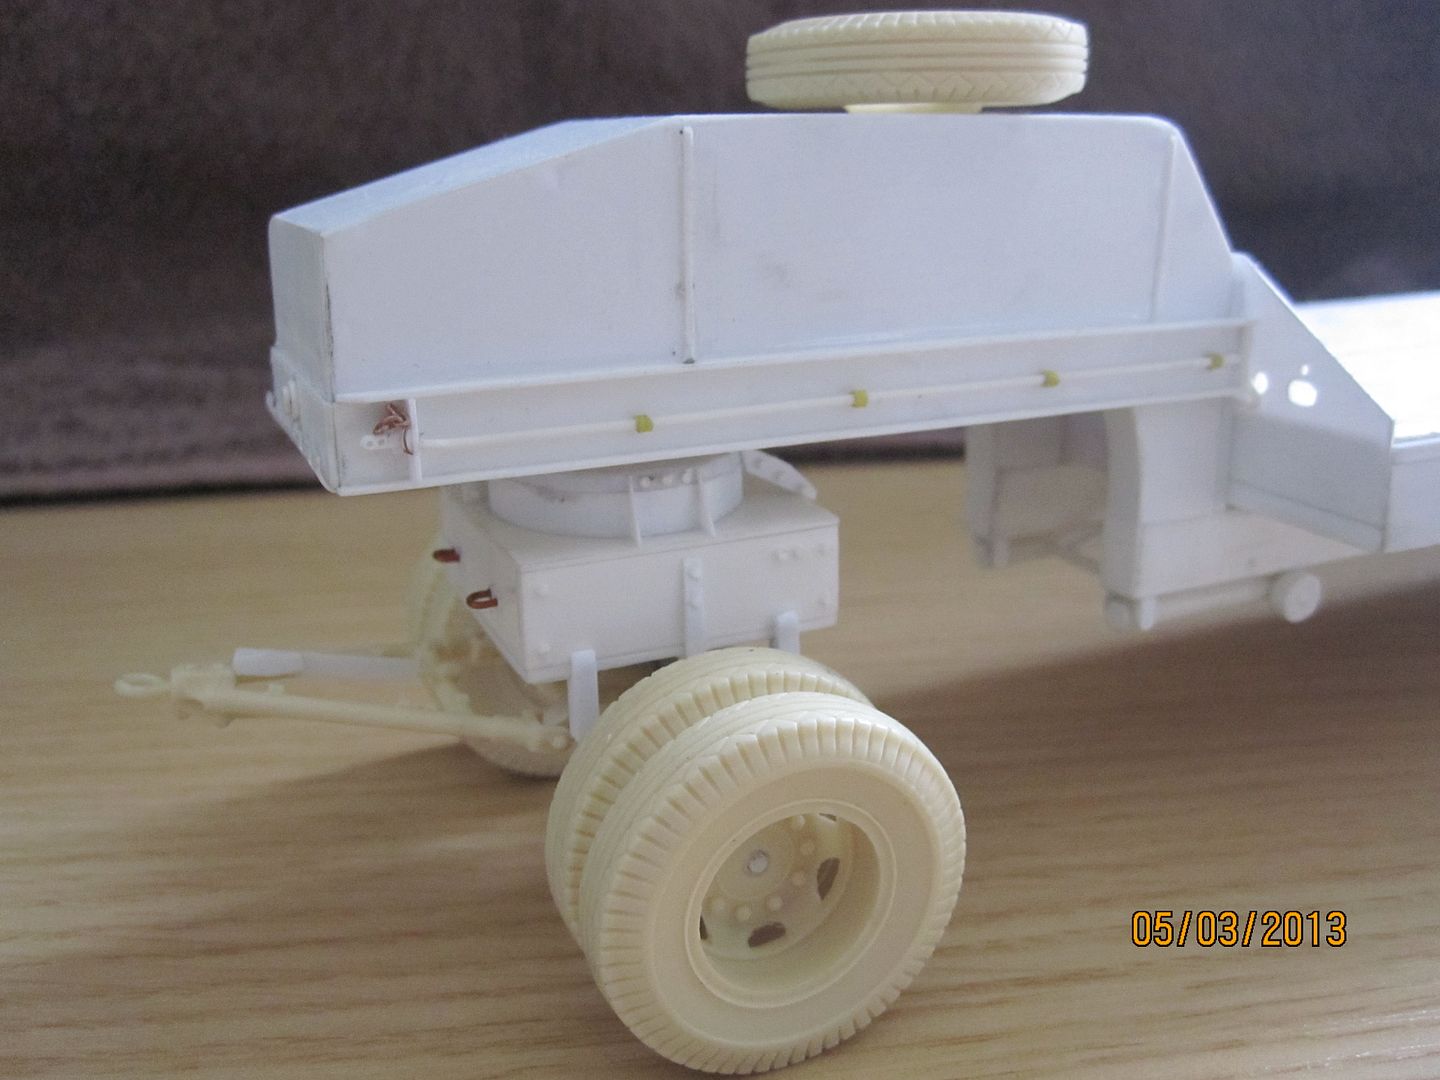
My reference pics showed the real Fort fuselages resting on a tonne of wooden dunnage & other crap on the back of the trailer - I replicated this effect with some chopped up balsa (bulk buy from the Model Zone liquidation sale!) - stained with oils & drybrushed etc it makes a nice cradle for the fuselage to sit on:
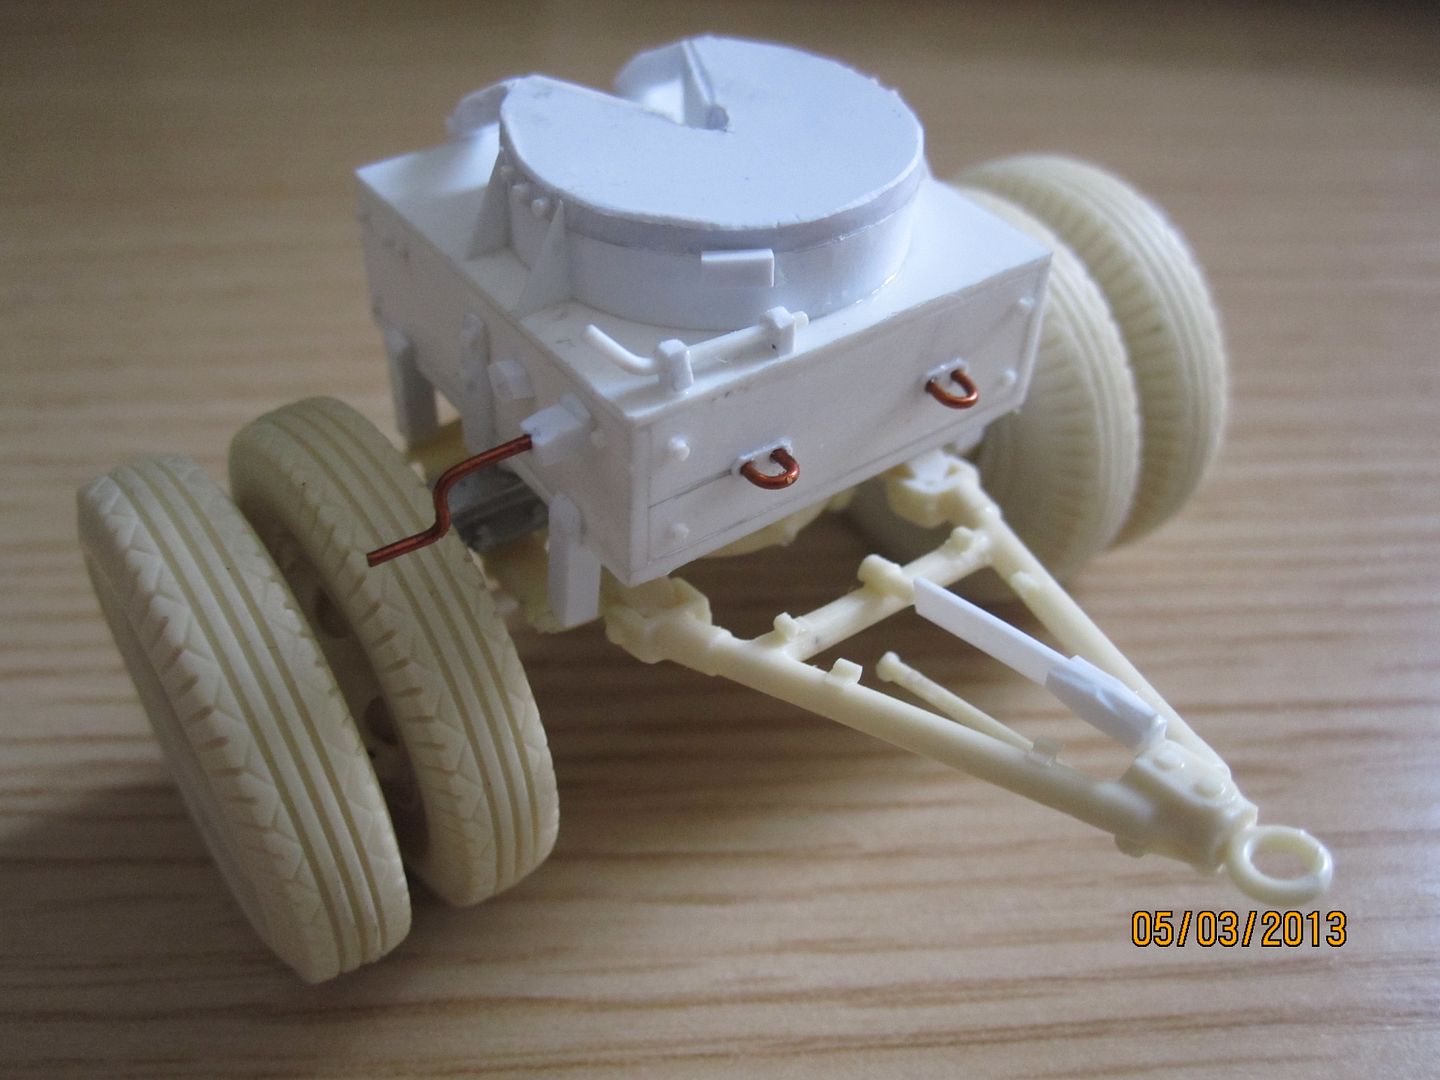
The fuselage was attached to the trailer with a suitable screw - I drilled right through the bottom of the trailer into the bomb bay - as this area is hidden & un-detailed it was no biggie:
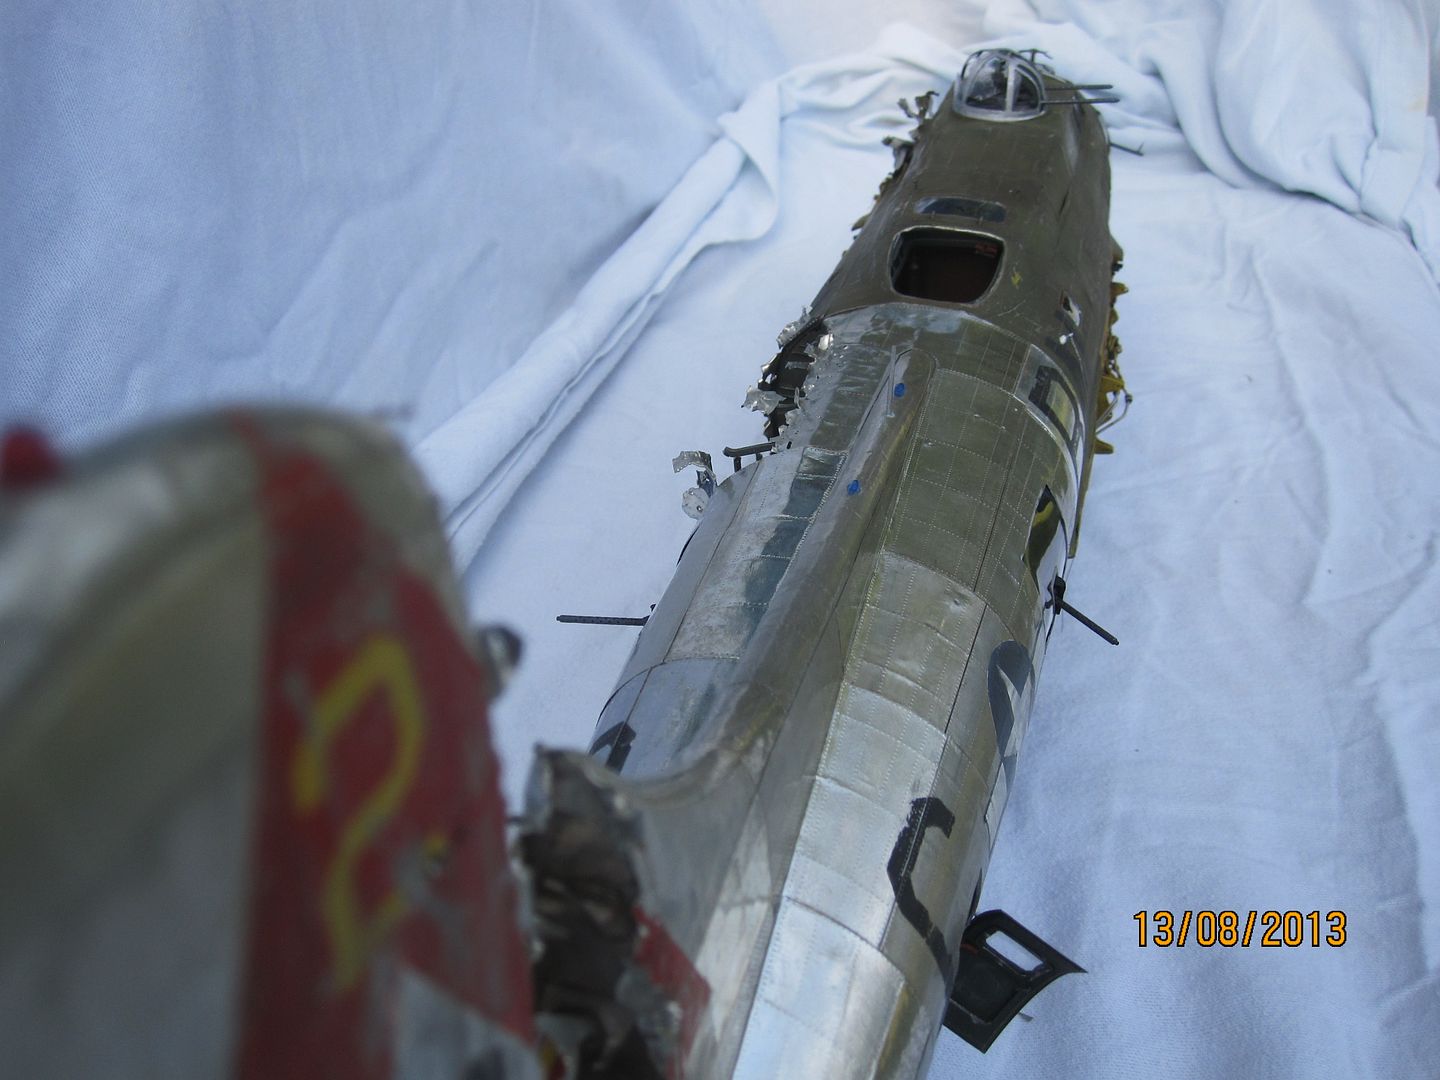
Waist gun windows were made with clear thermaform which was bent to shape after immersion in boiling water. It took a few attempts but I was (kind of) happy with the results. I had a full set of transparencies - two actually - from the HK kit, but unfortunately, as discussed in earlier posts, my build and the kit don't match up in terms of dimensions...
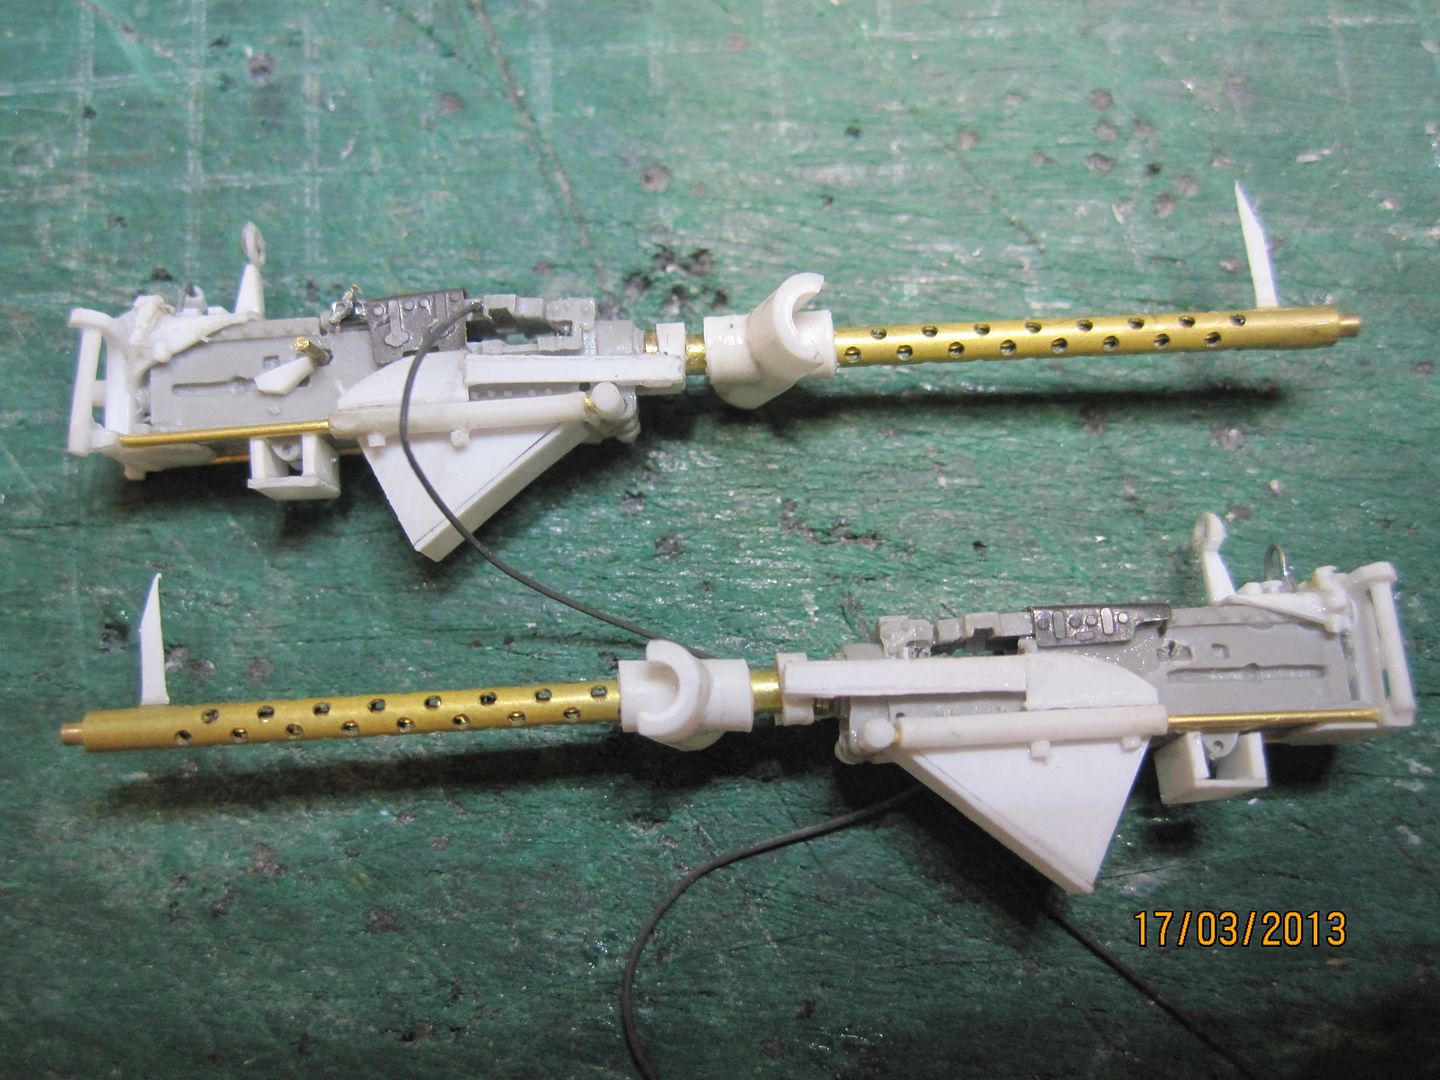
It looks horribly distorted & dusty here (damned macro images!) but in real life if about as clear as I can get it. The waist guns were mounted at the same time. I attached those with normal plastic cement, and the transparencies with Gator's Grip Acrylic glue (good stuff!):
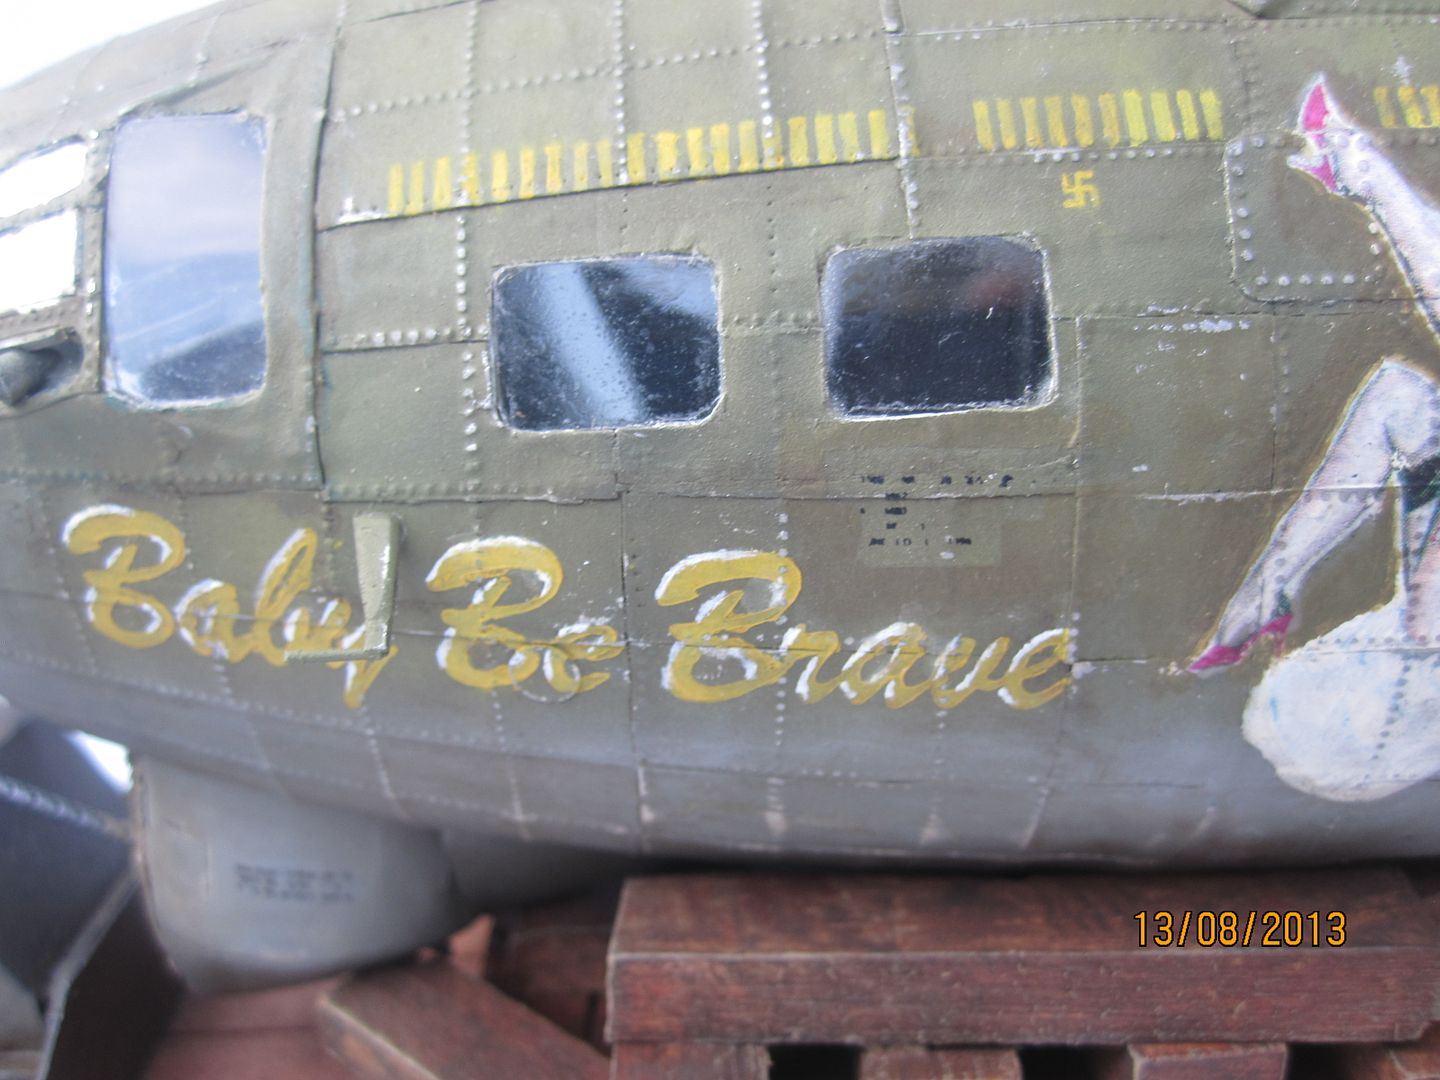
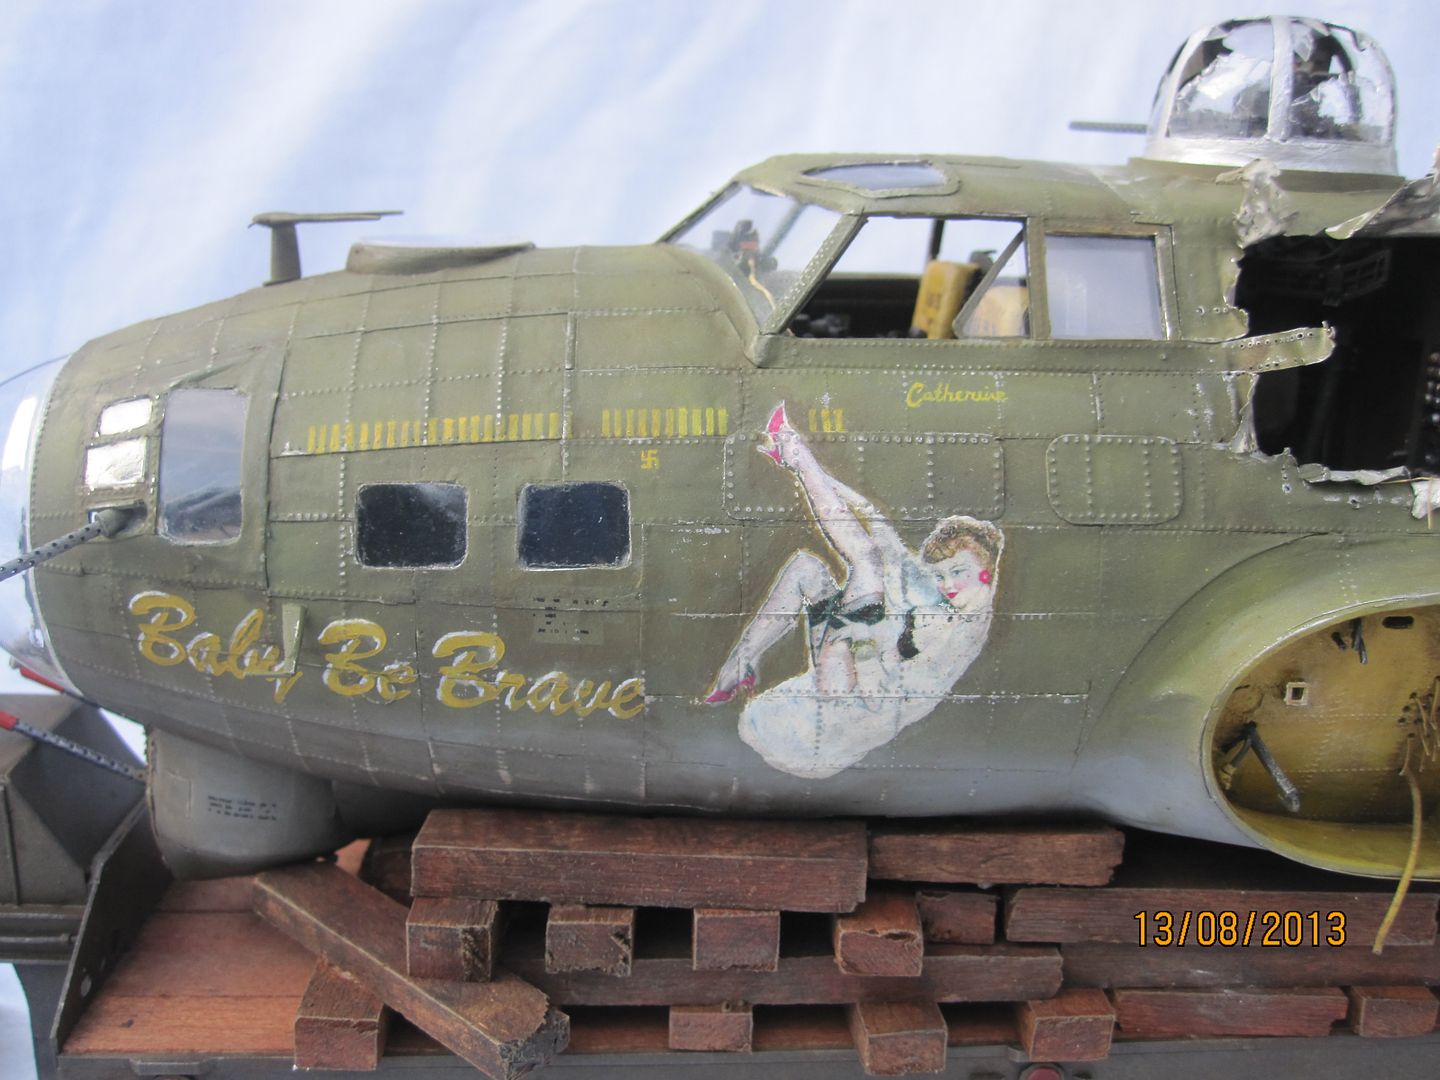
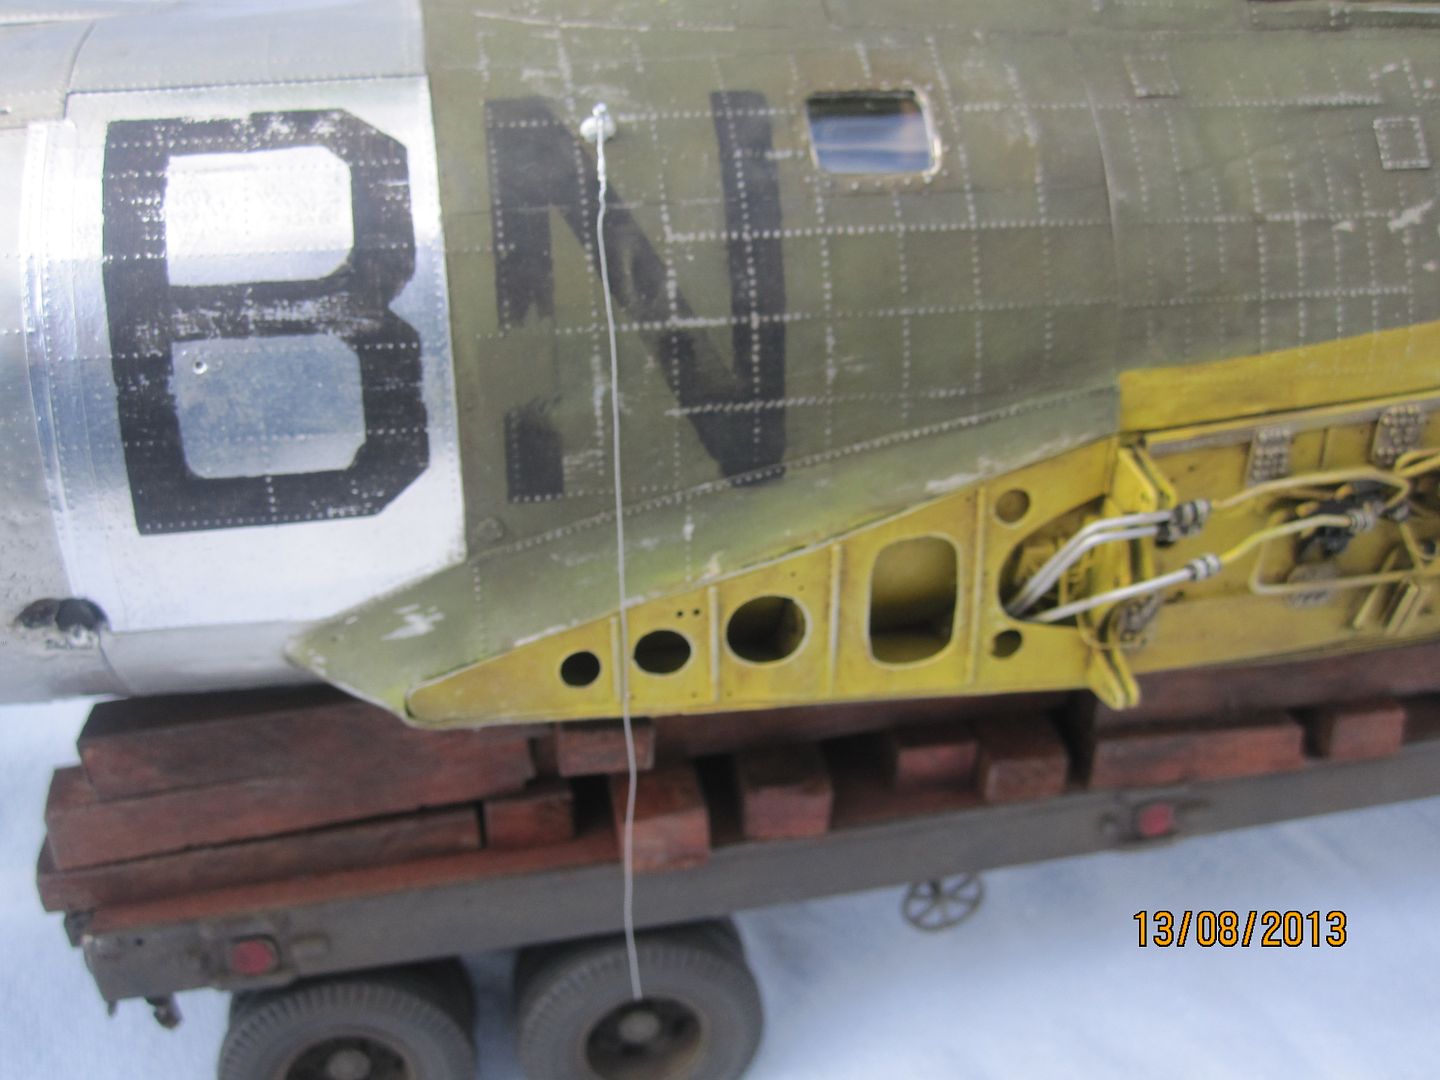
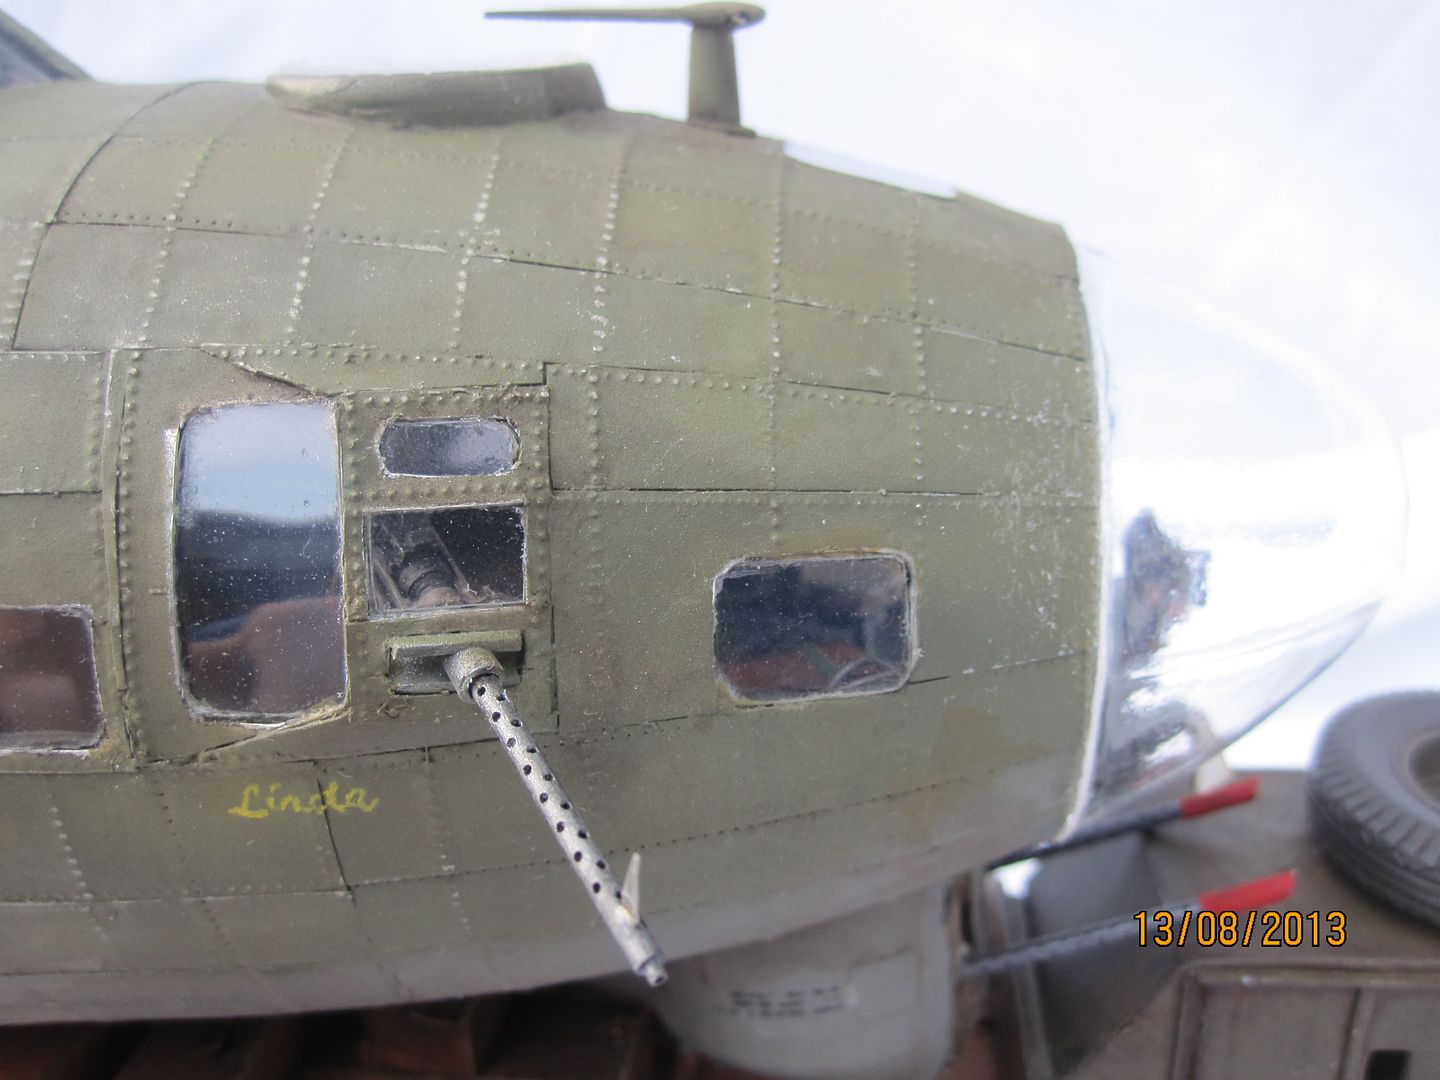
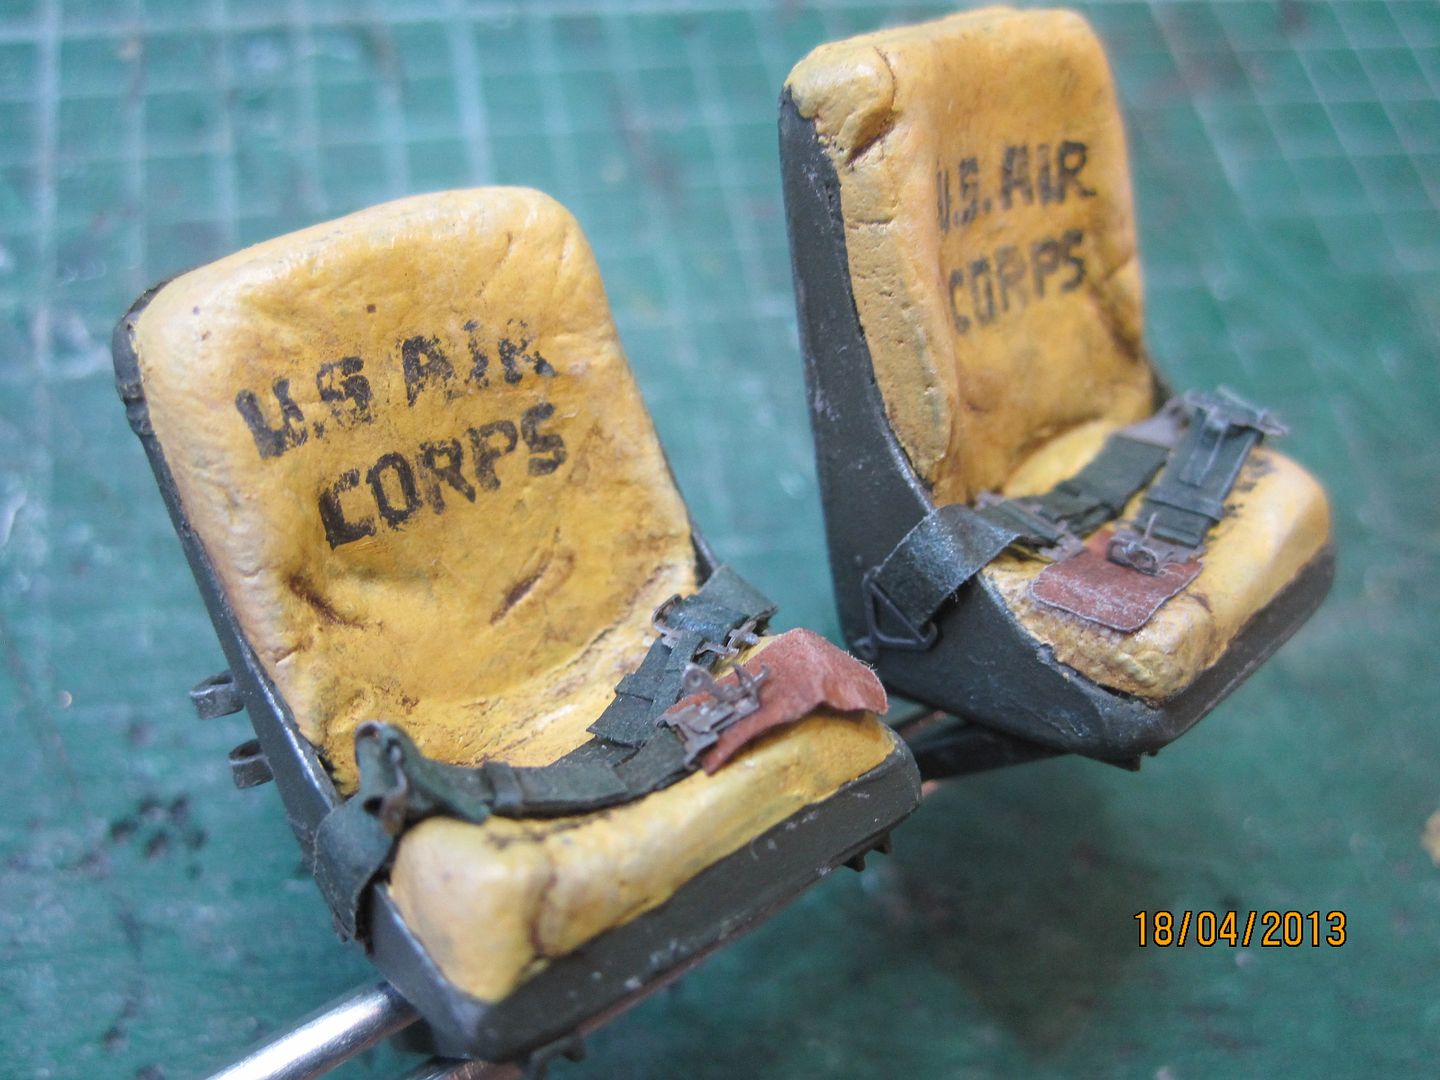
Before the fuselage was attached to the trailer, I of course has to finish the painting & weathering. I wasn't happy with the decals, so I hand painted everything except the pin-up girl. Here's the name & mission markings - the name was painted using the custom masks, the mission markings and all gun-station names were painted freehand.
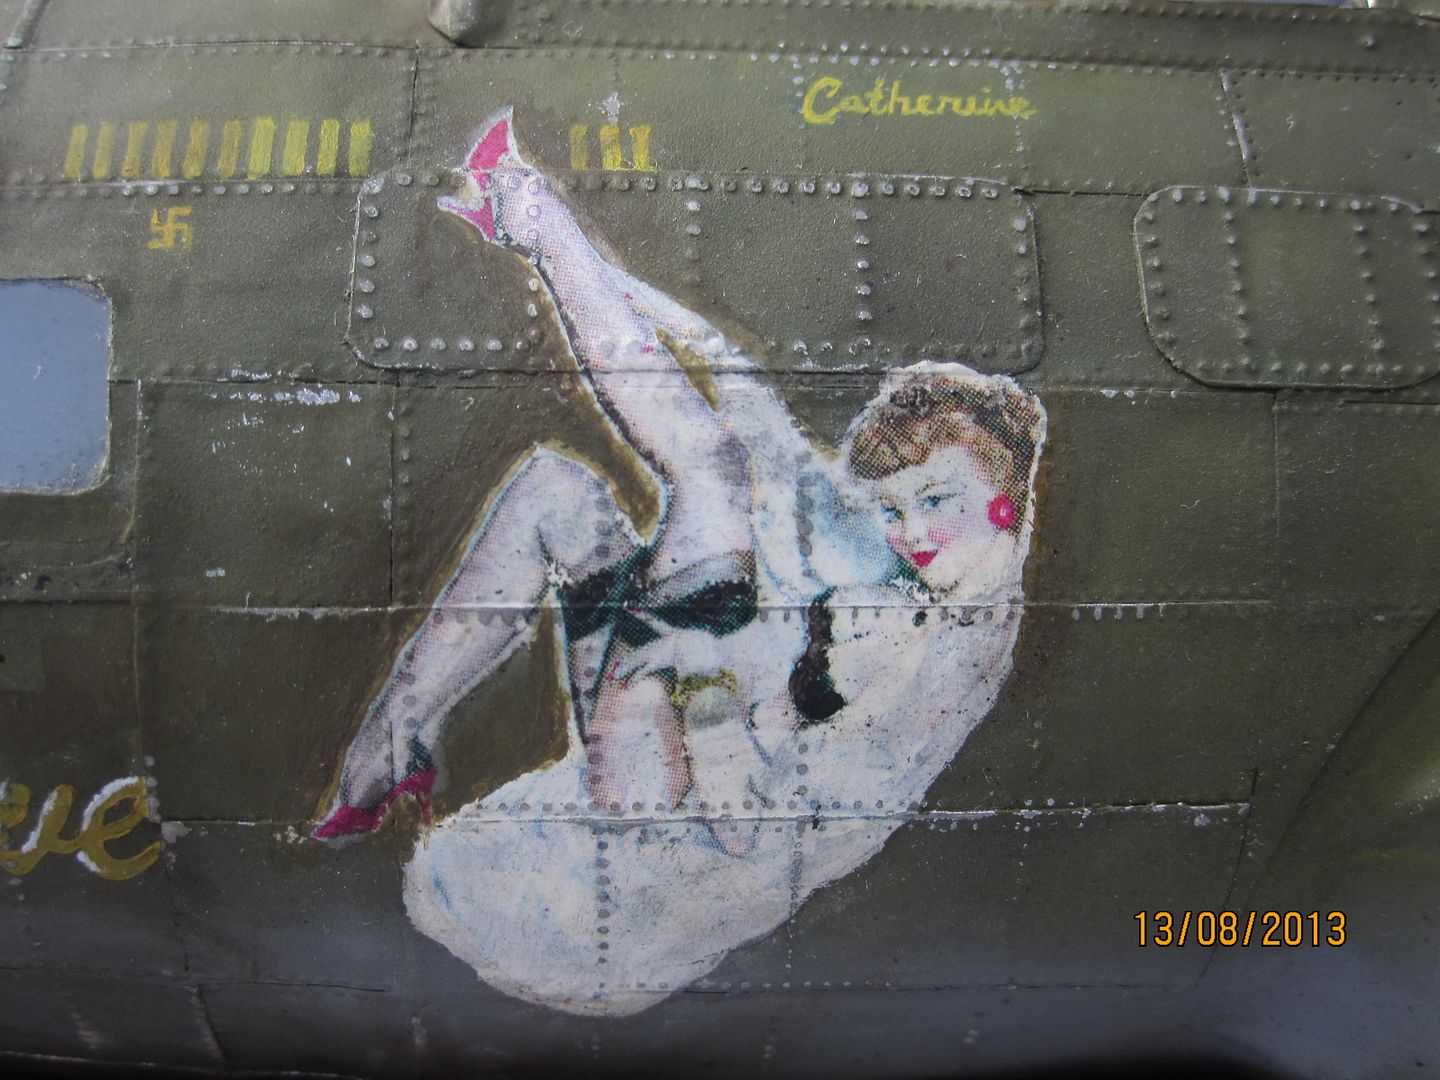
And here's the pin-up girl. I was happy with the decal for this one, and in the end got it looking nice! It was semi-transparent & shows up the weathering of the aircraft's skin nicely for a realistic effect. I sealed it in (and at the same time sprayed the entire front section) with Testor's Dullcote for a nice, flat finish.
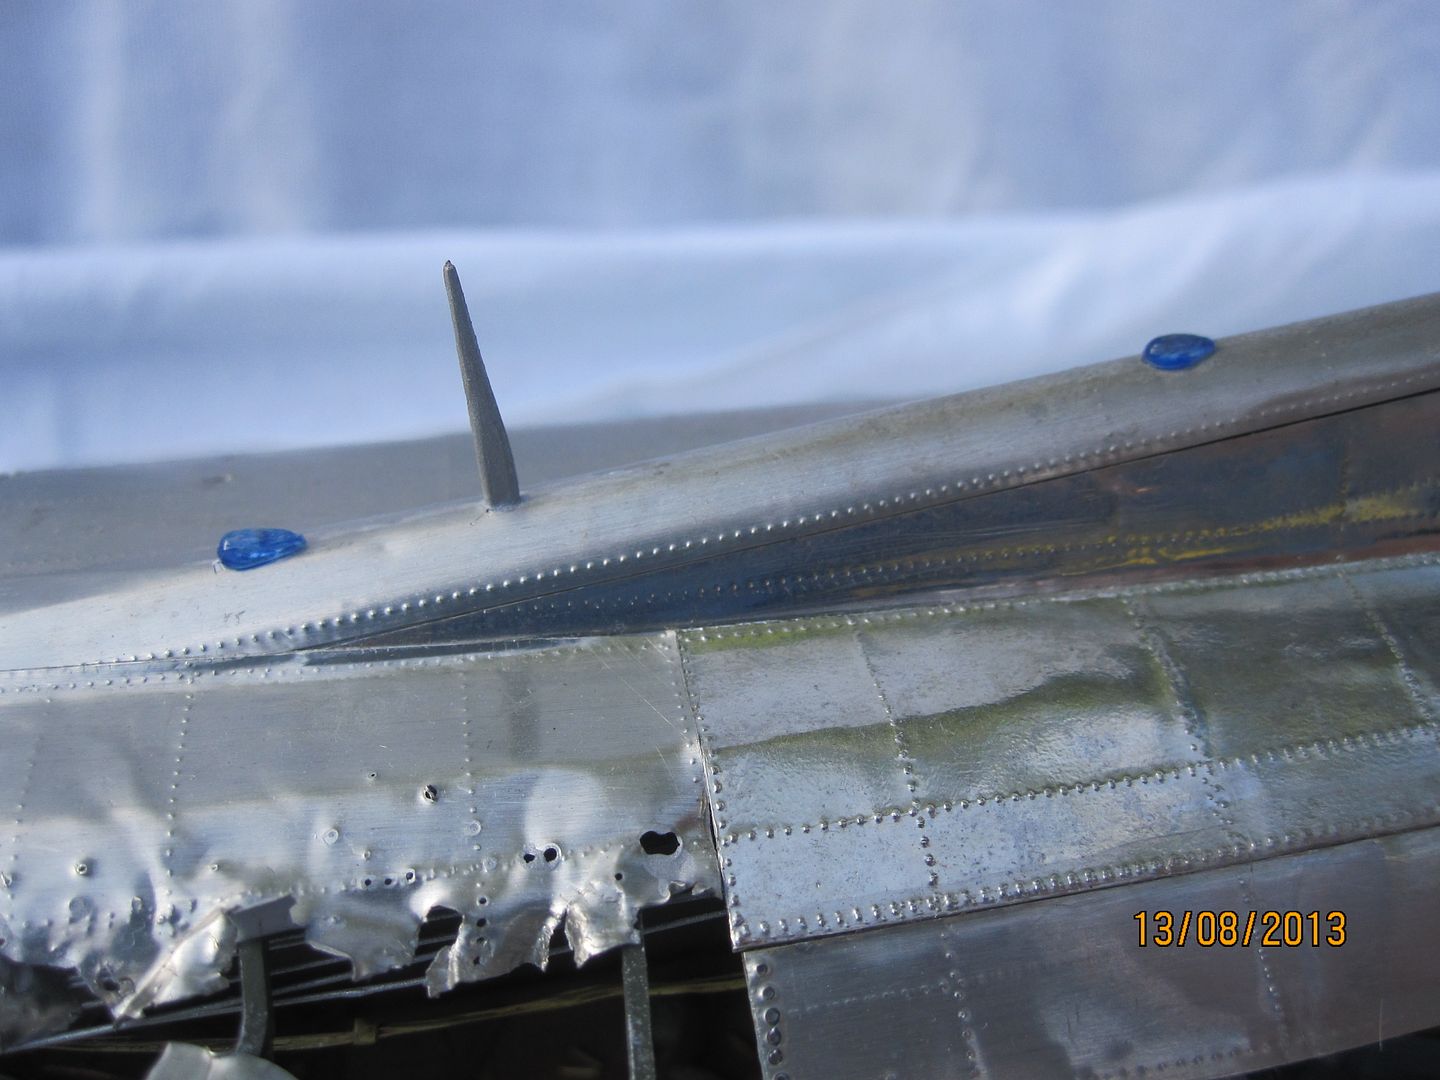
Final details like these formation lights and the antenna were added:
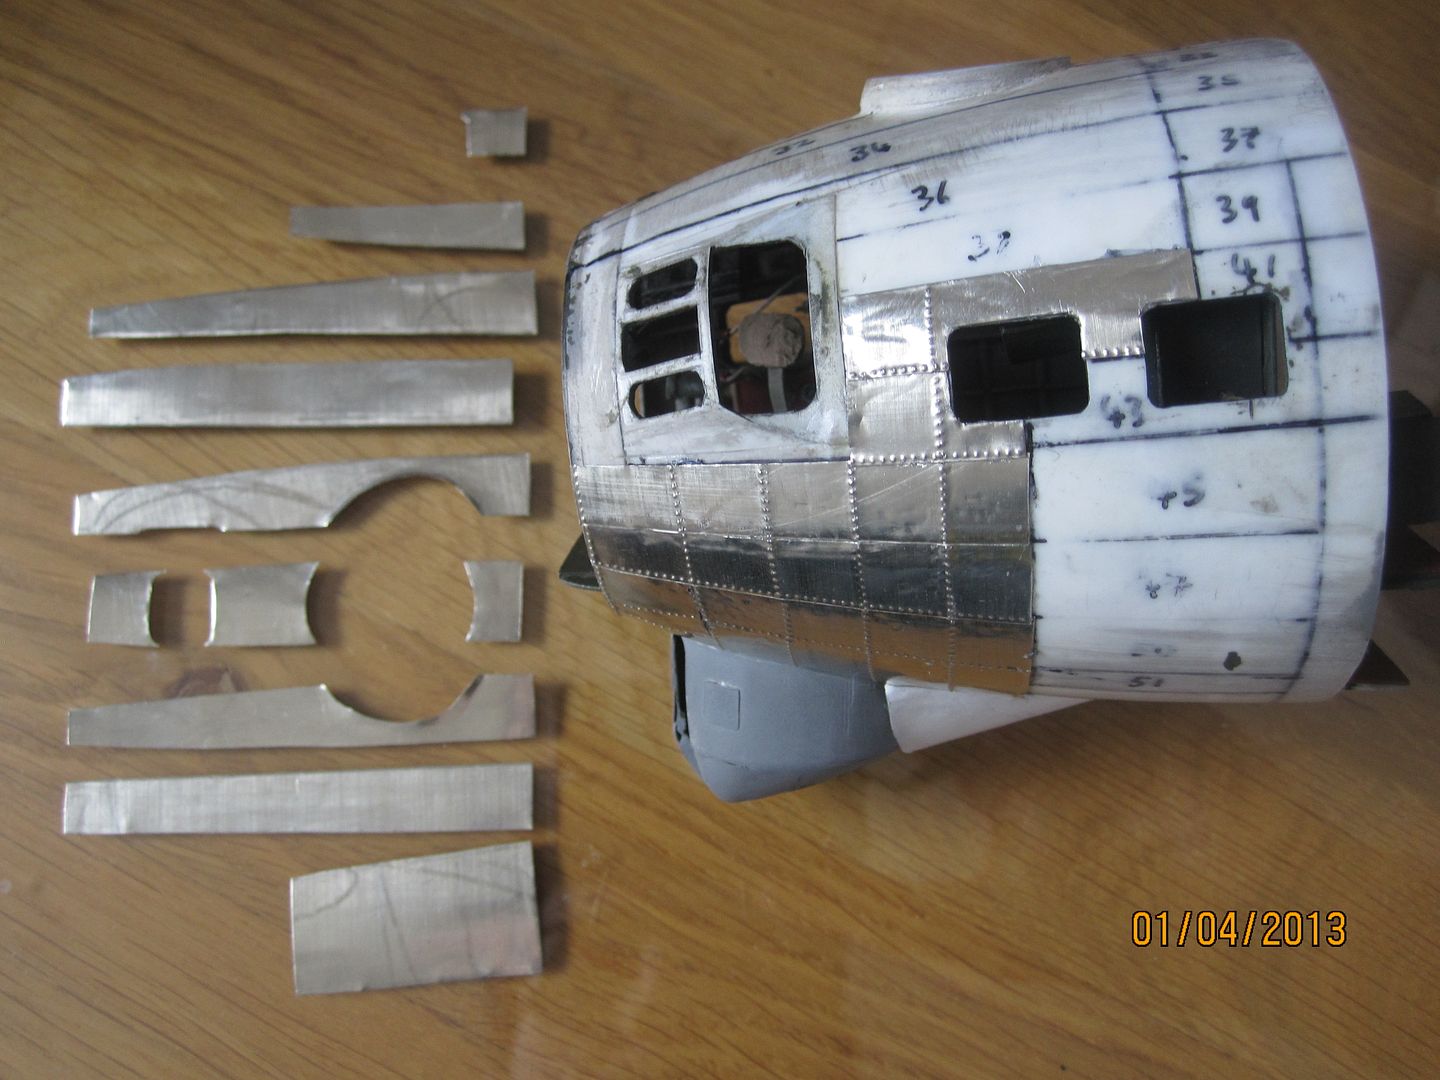
That final skin panel was attached:
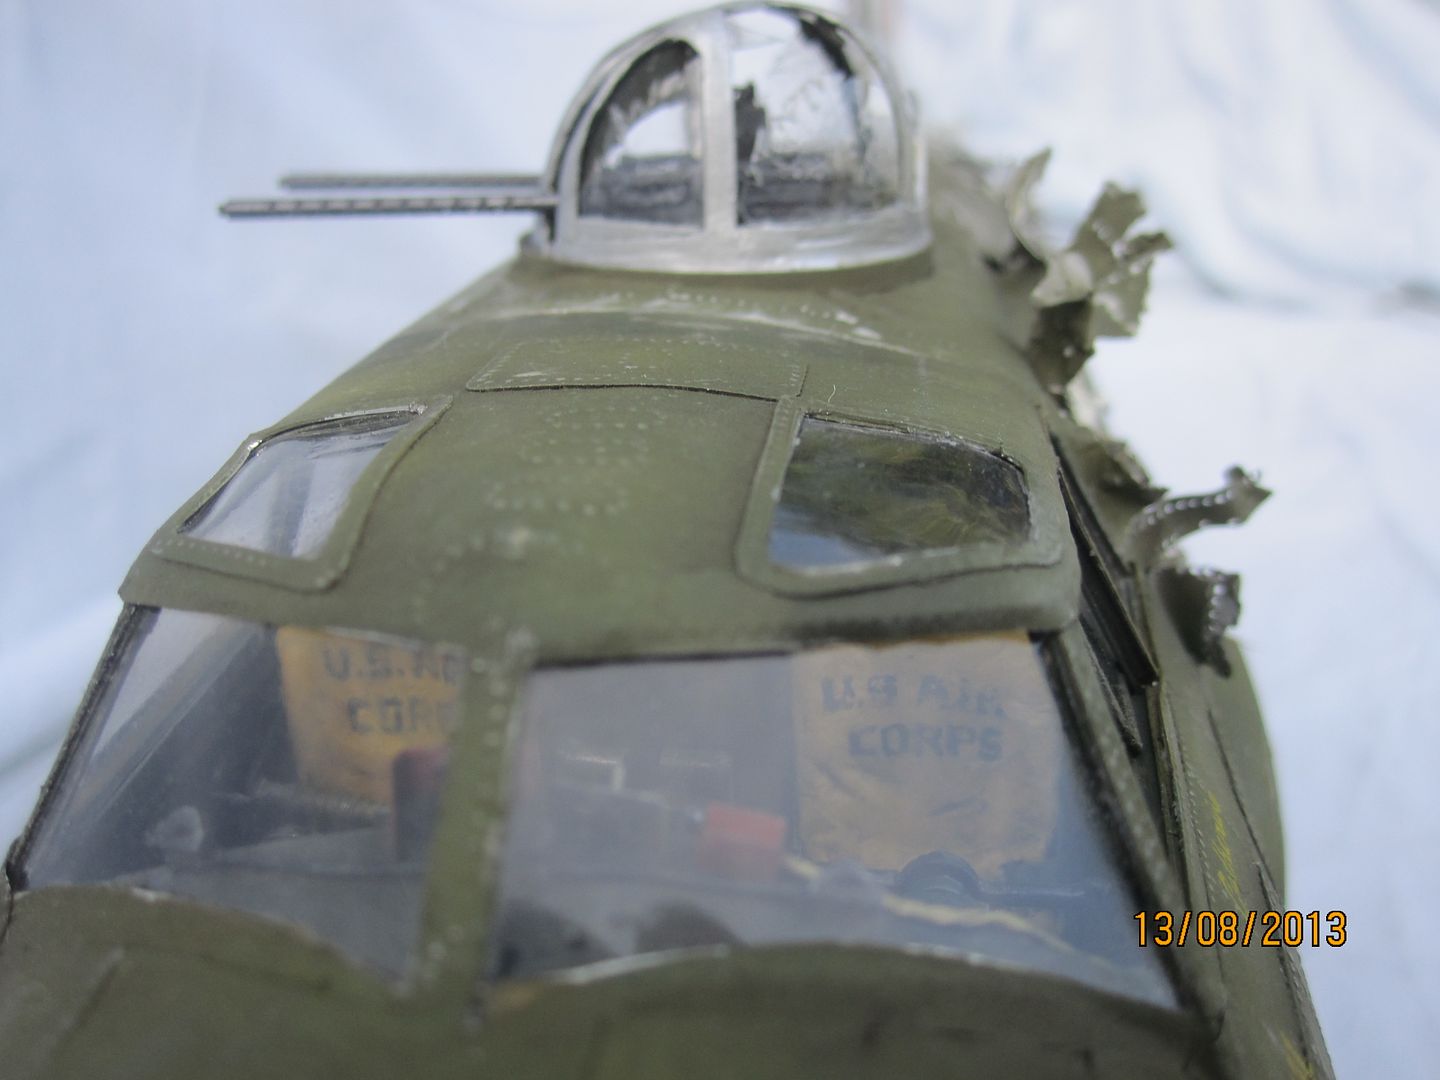
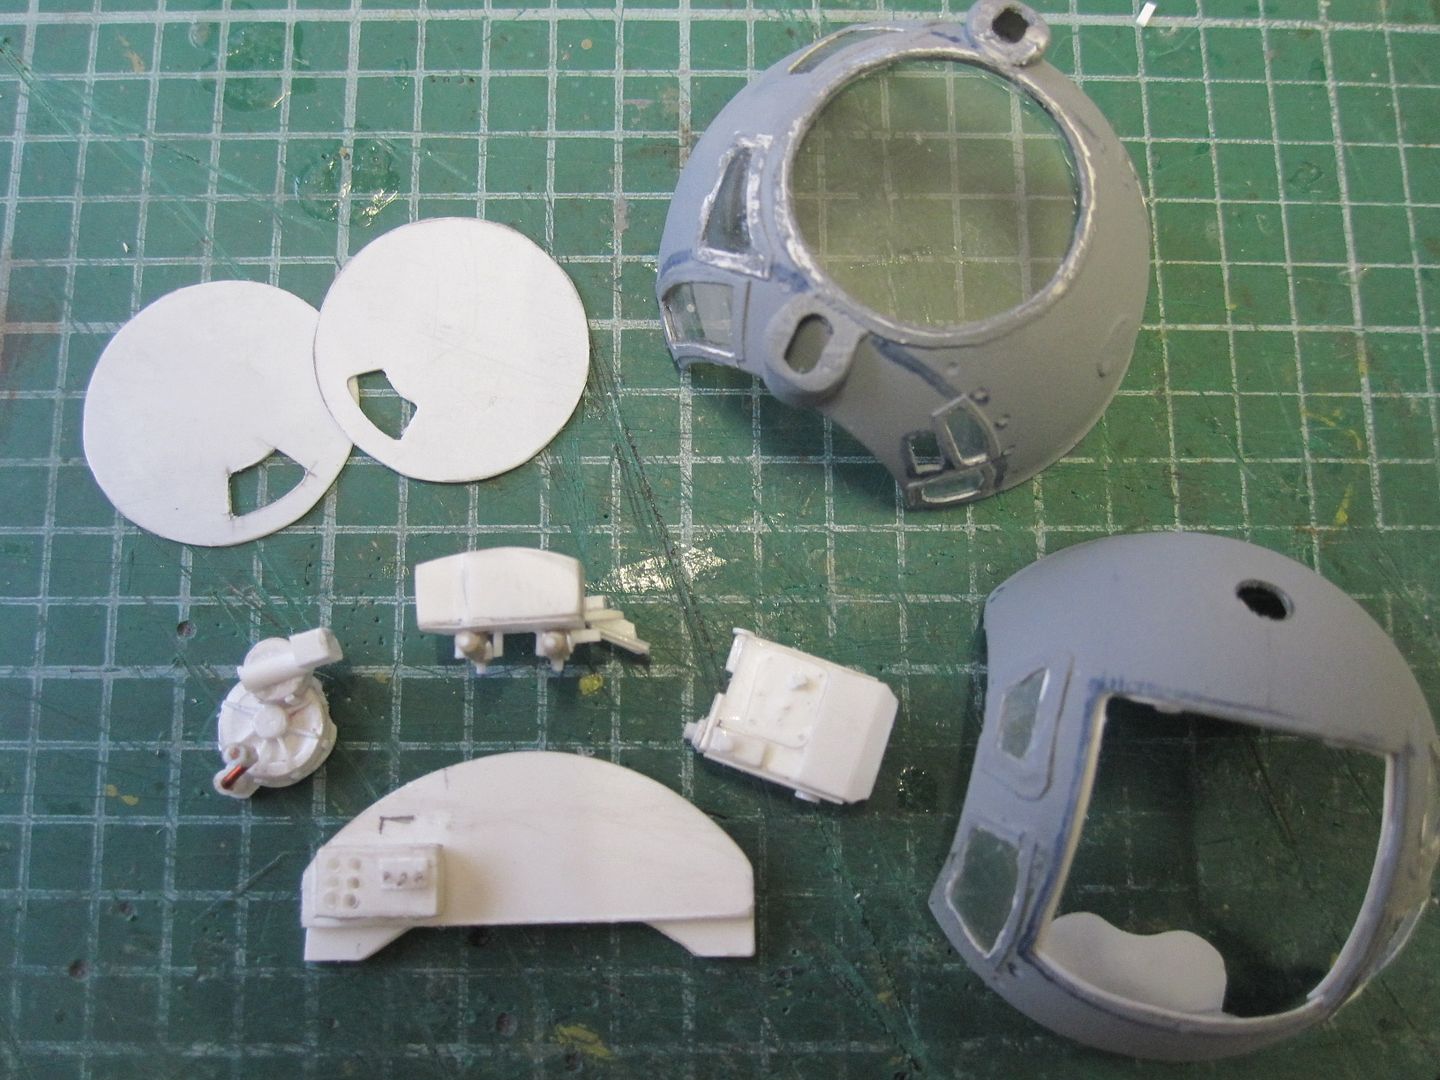
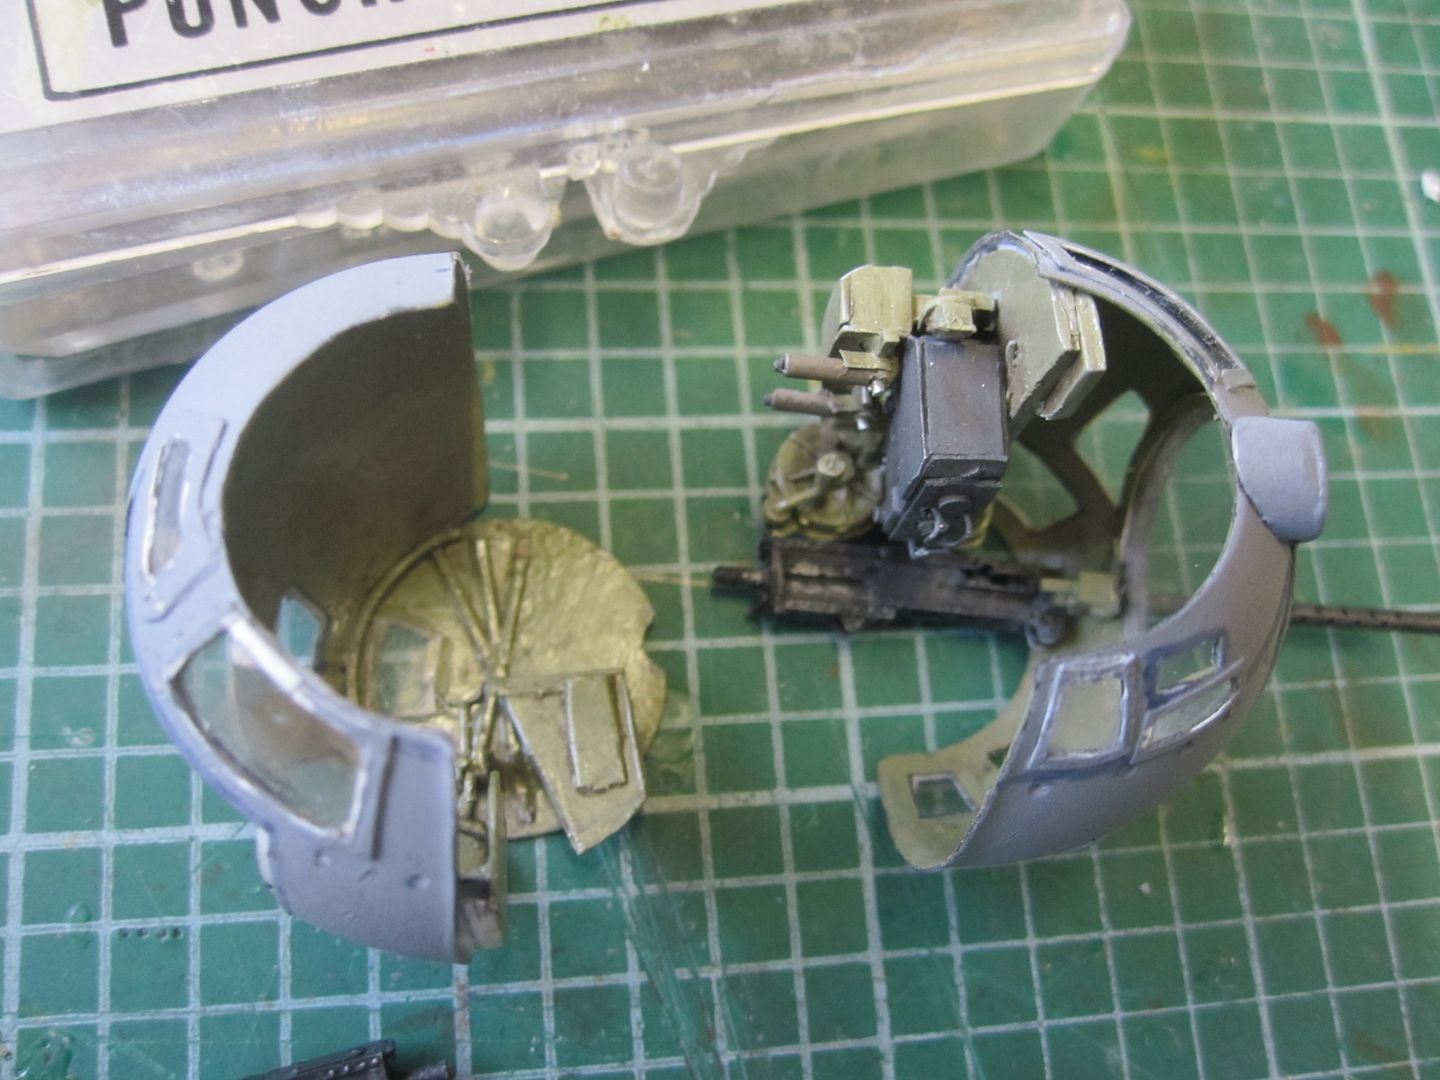
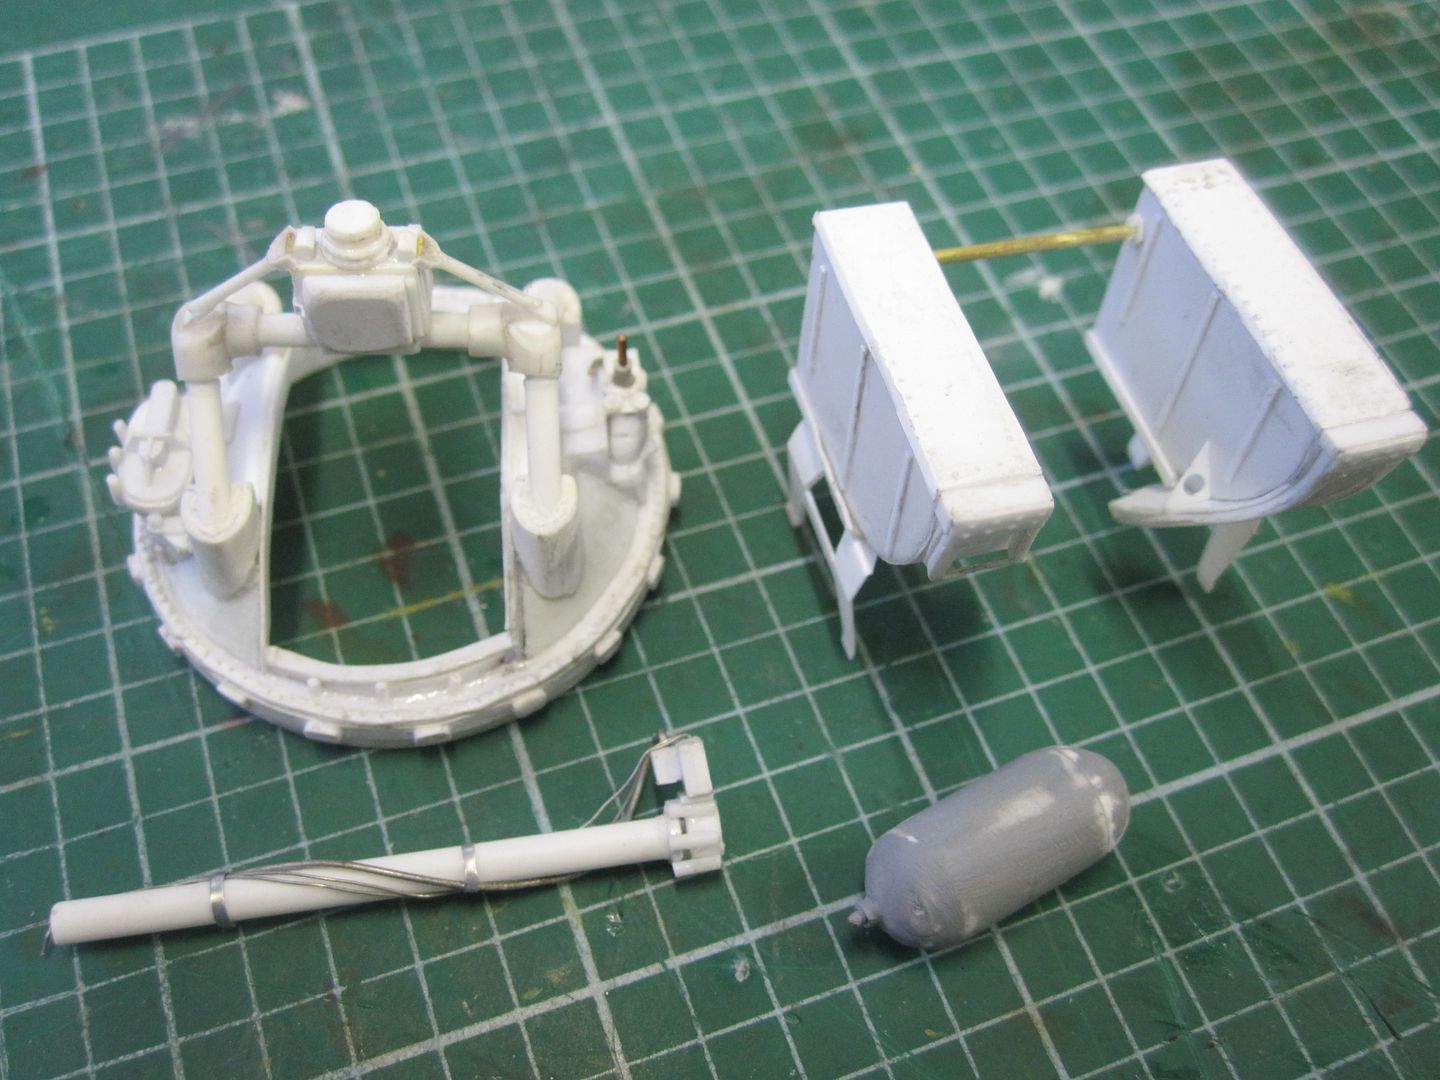
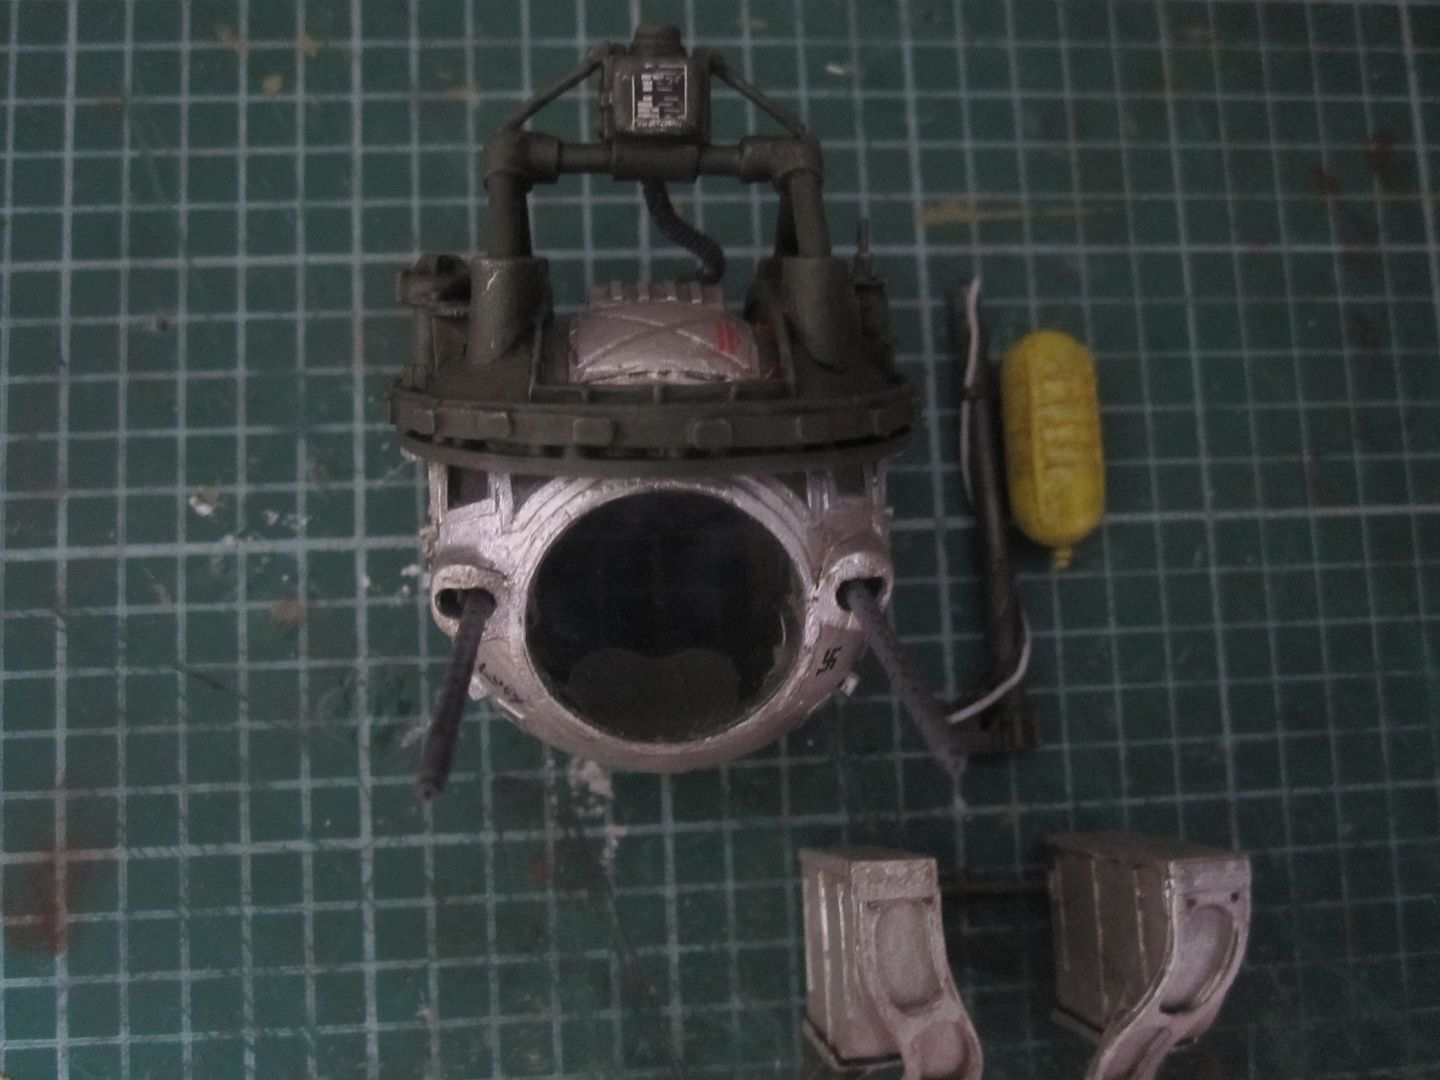
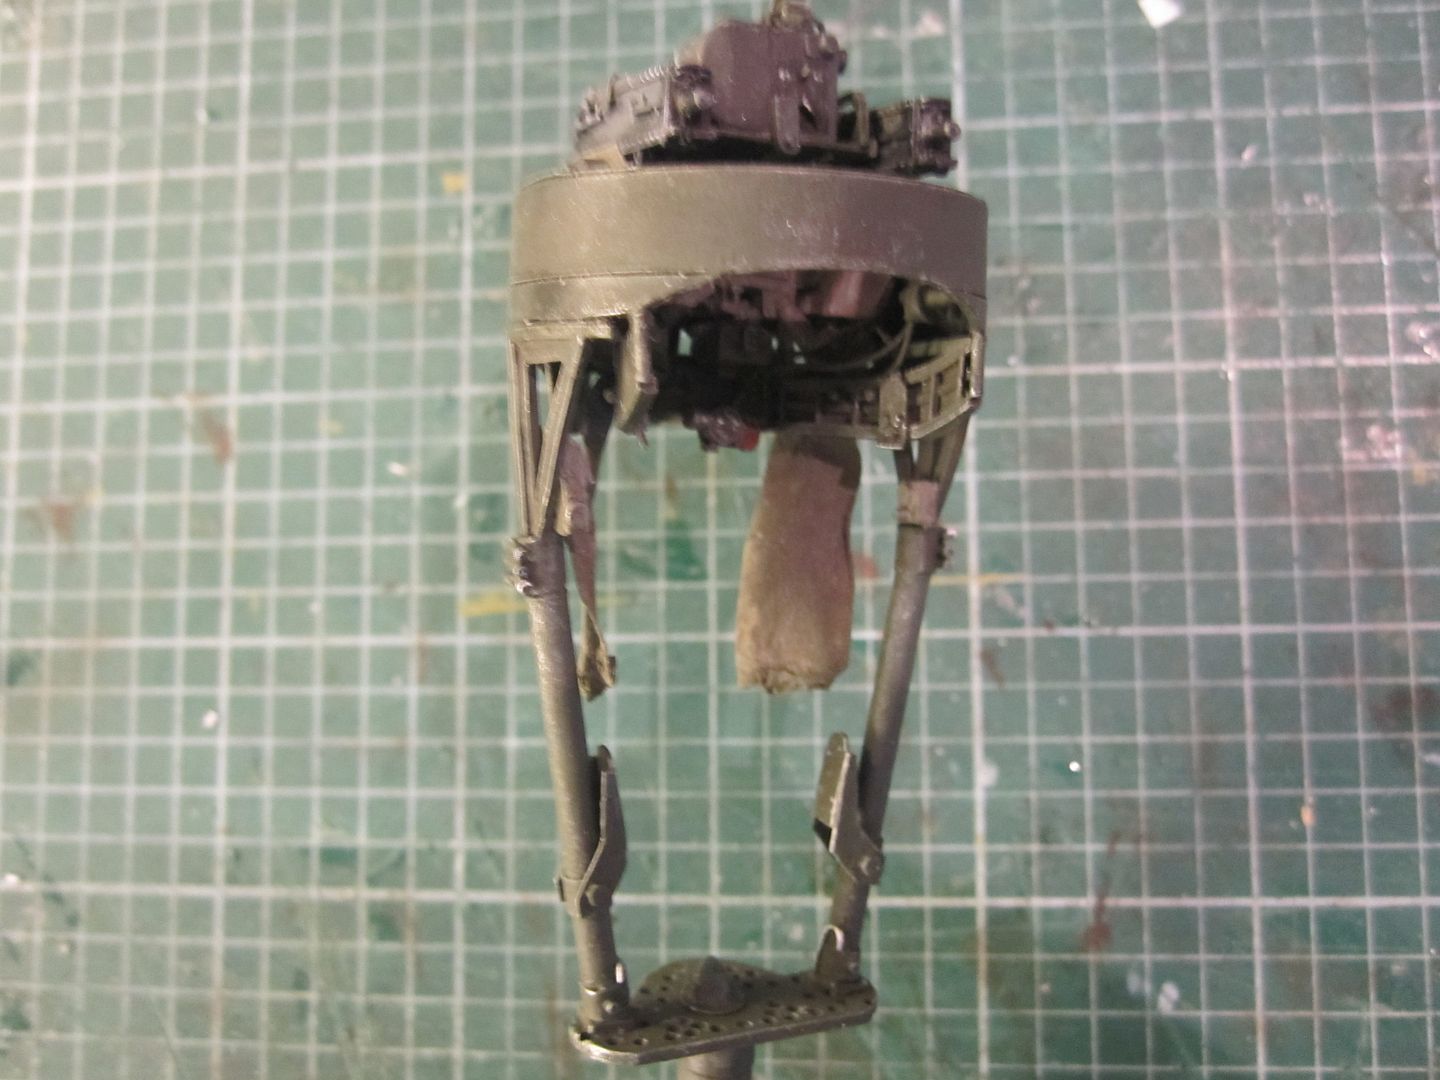
and the top turret finally fixed in place:
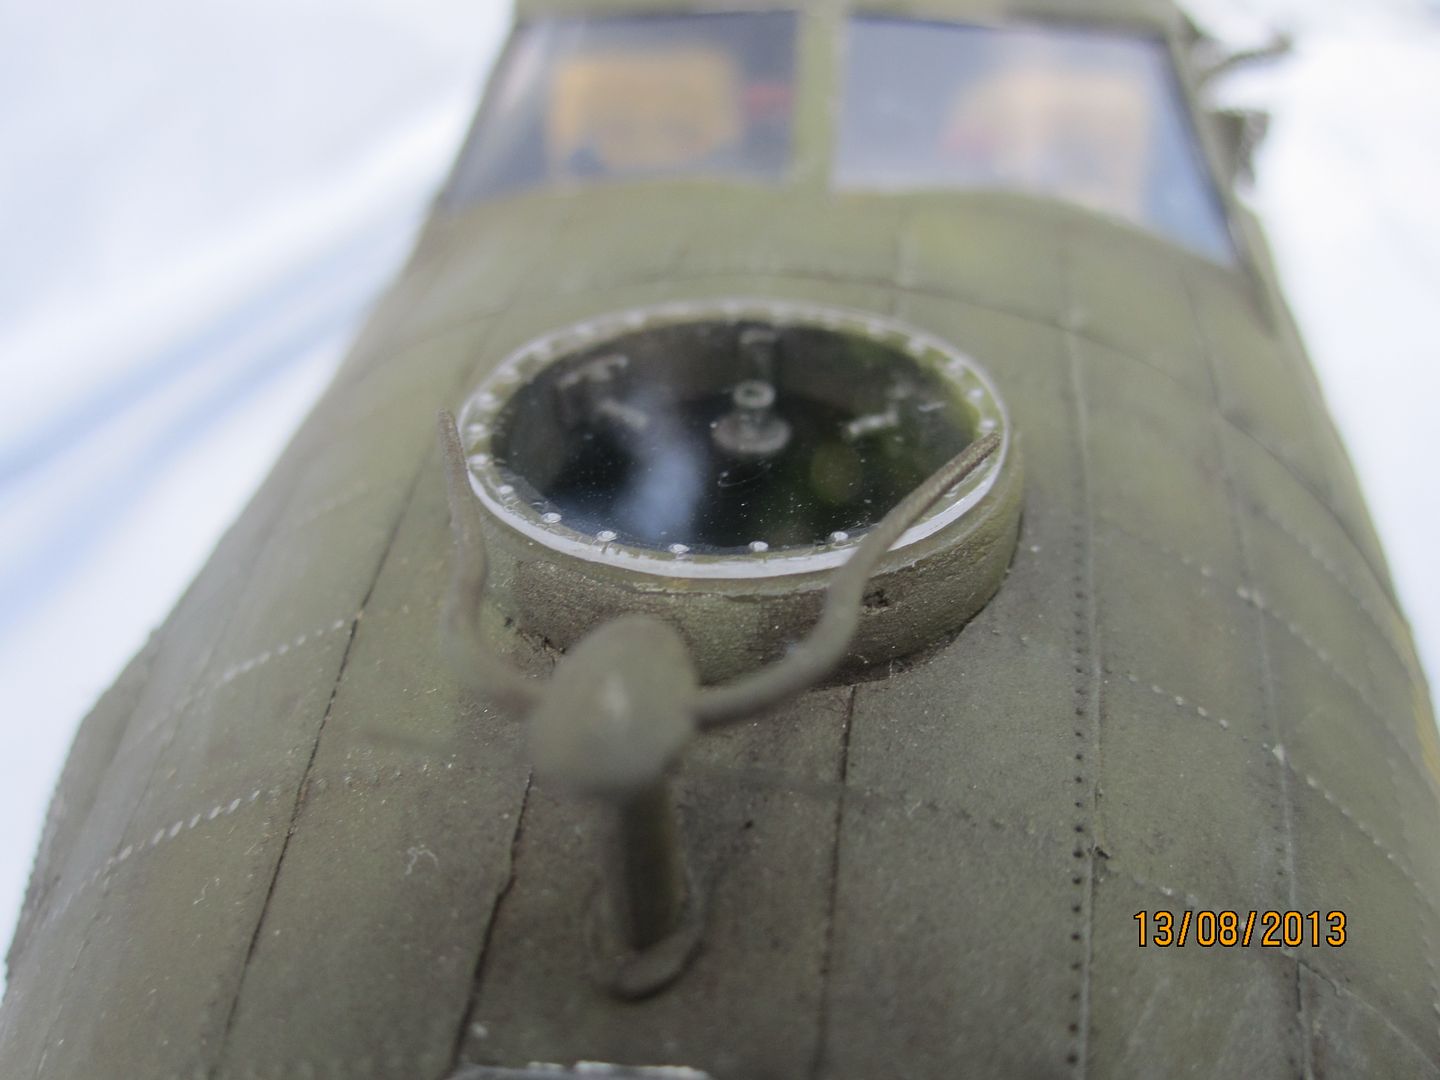
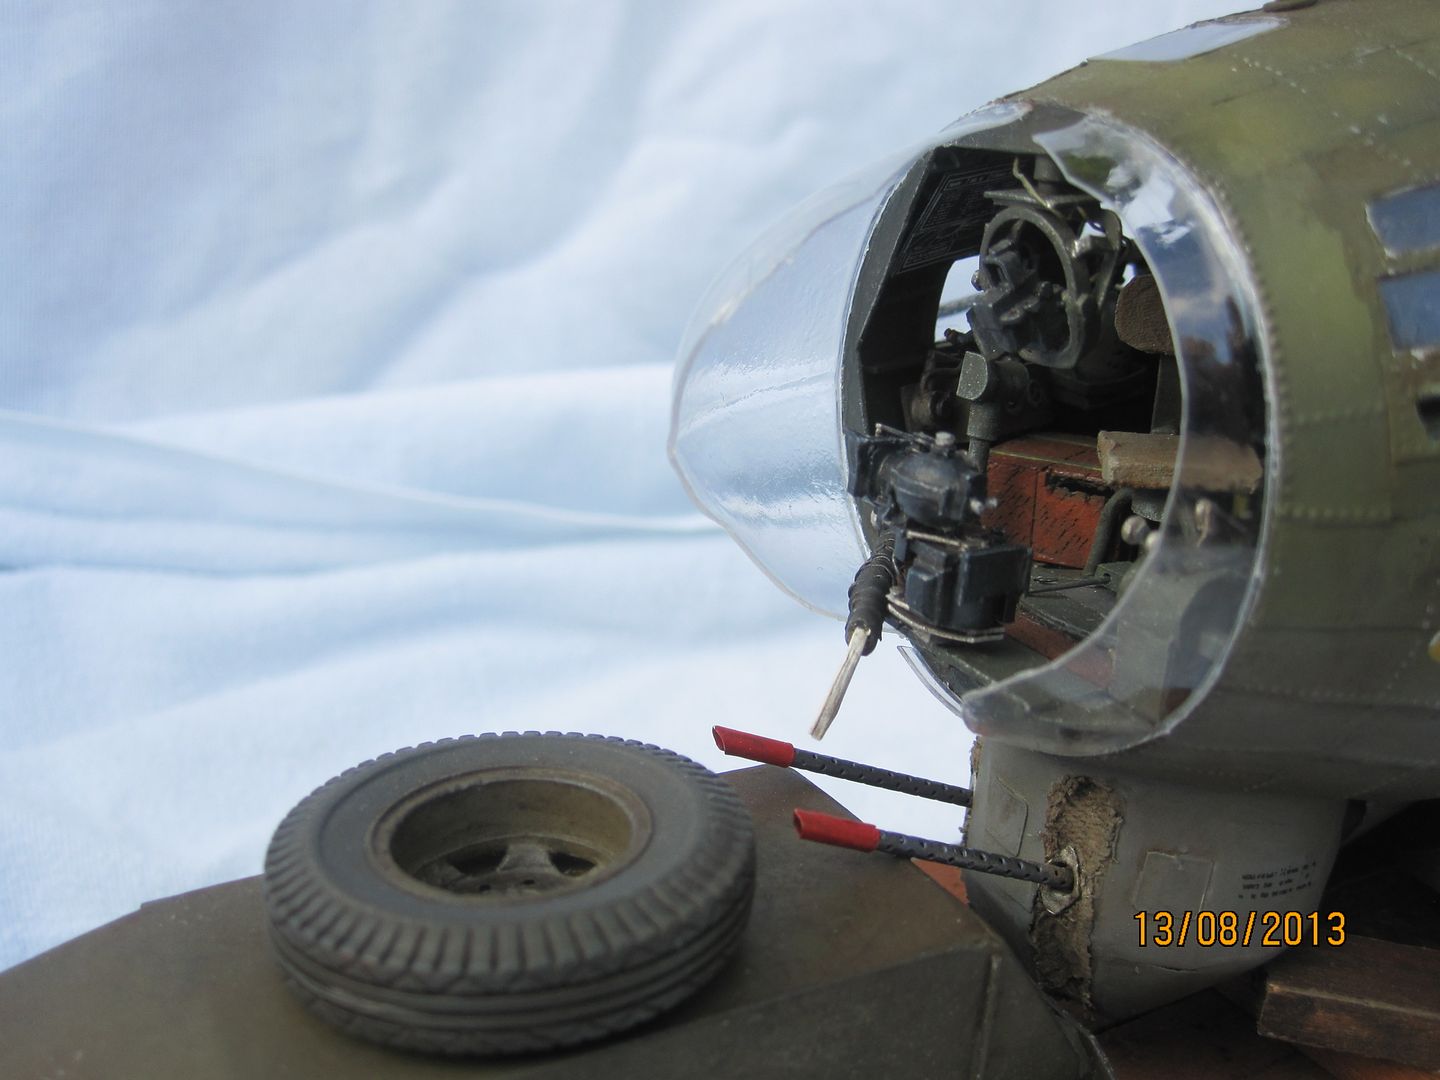
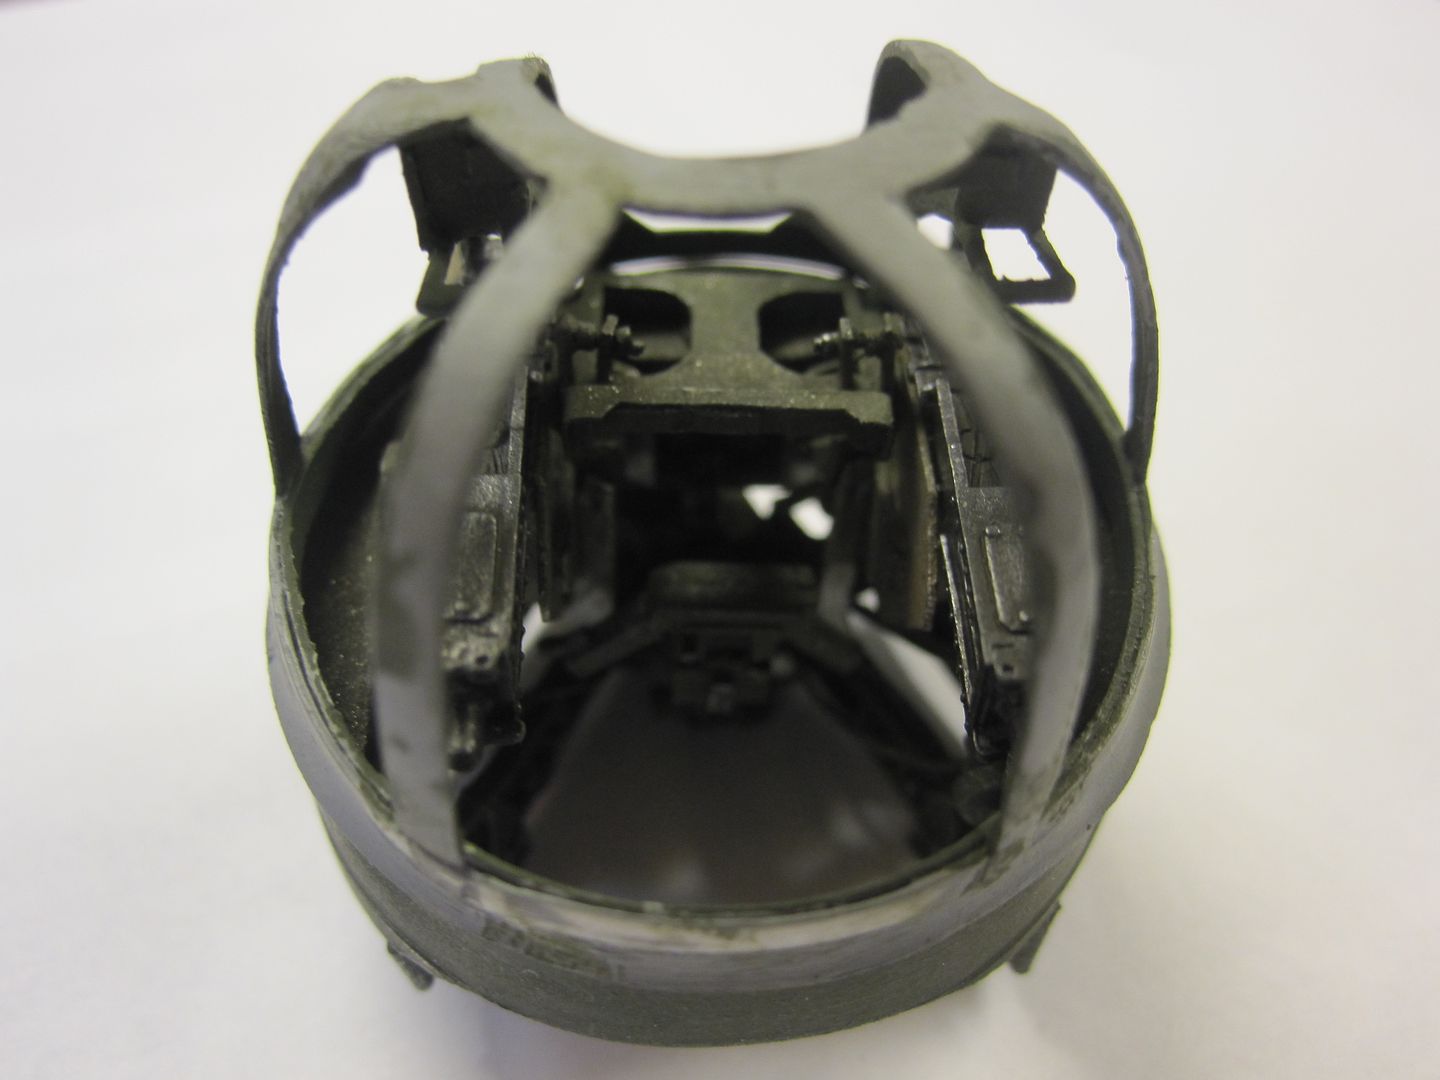
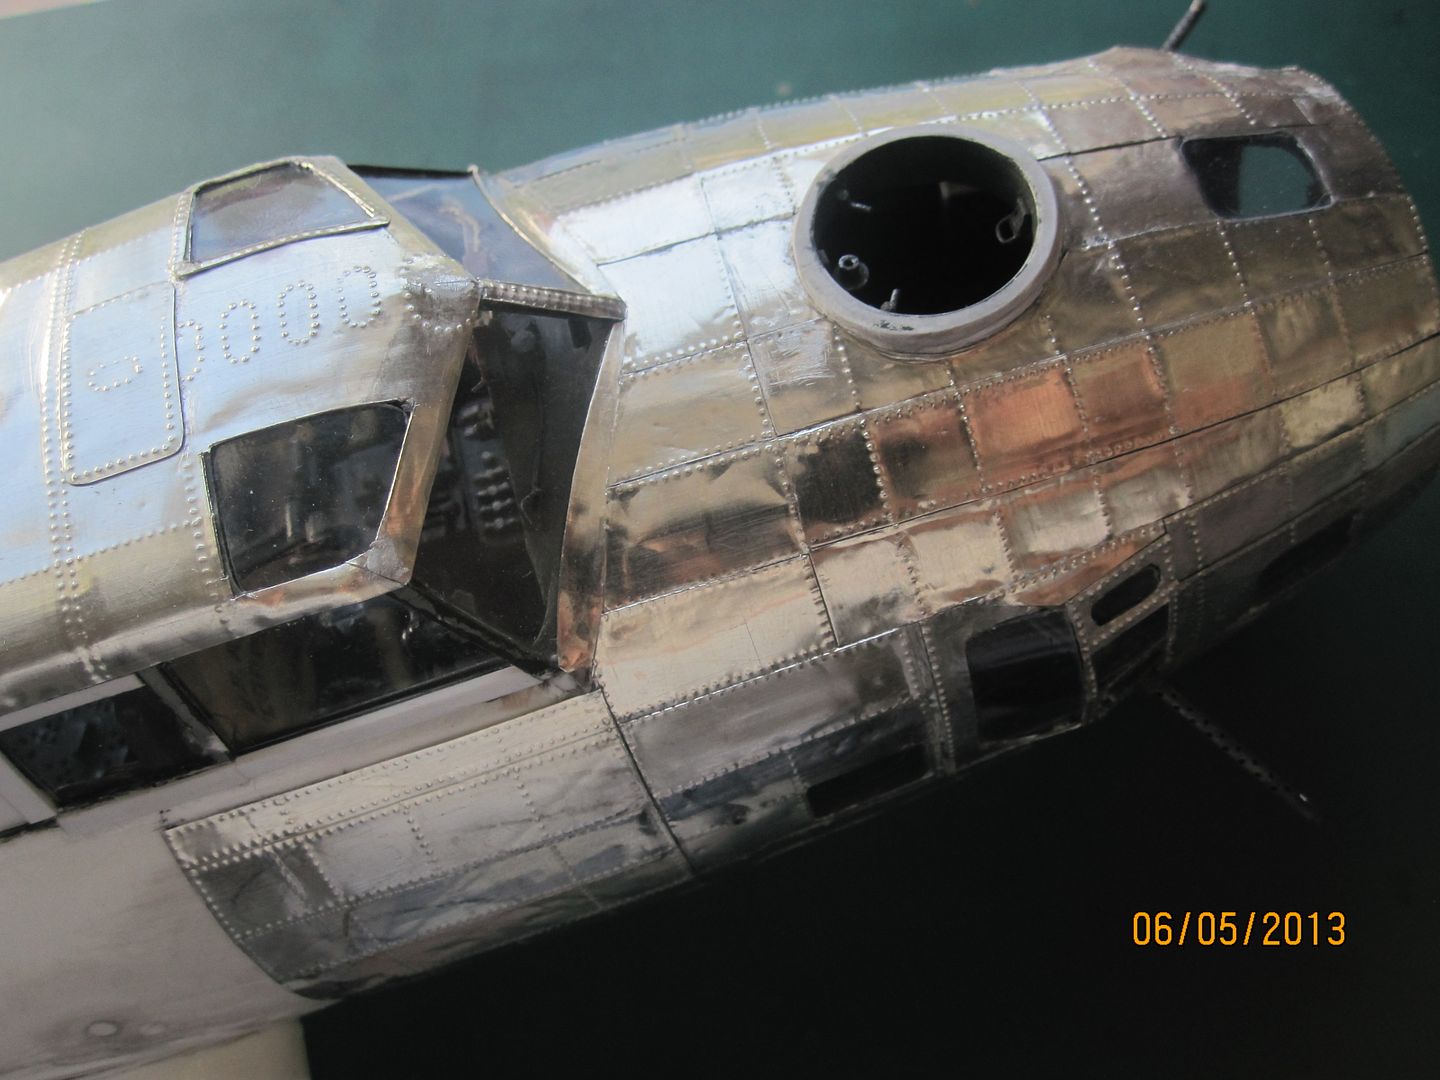
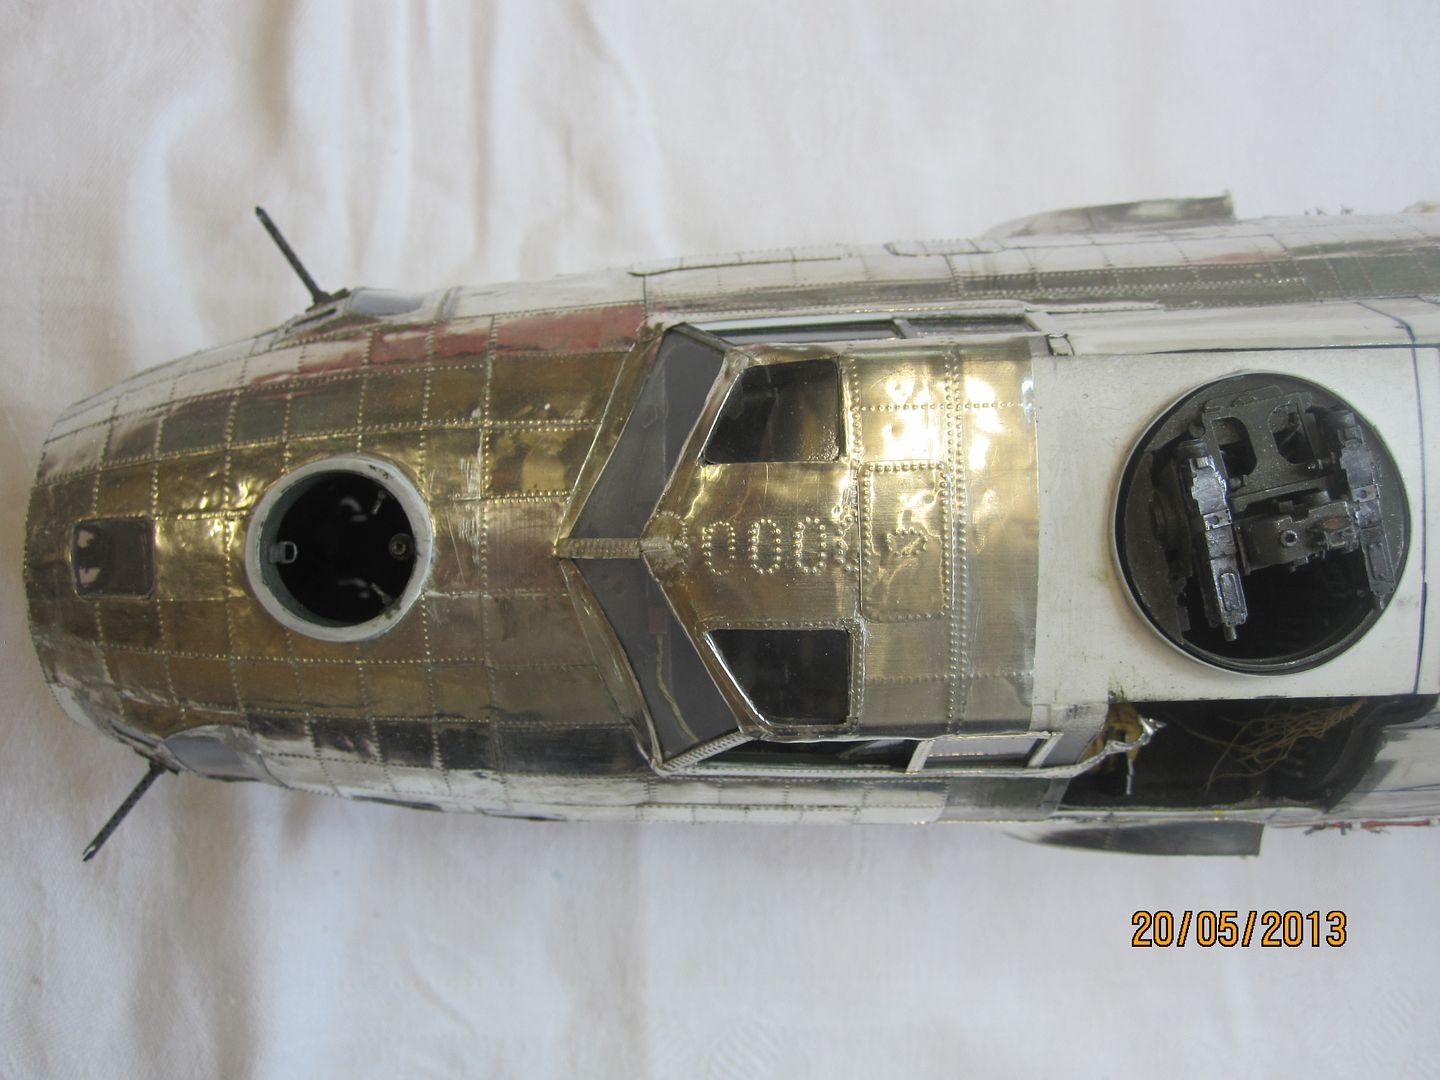
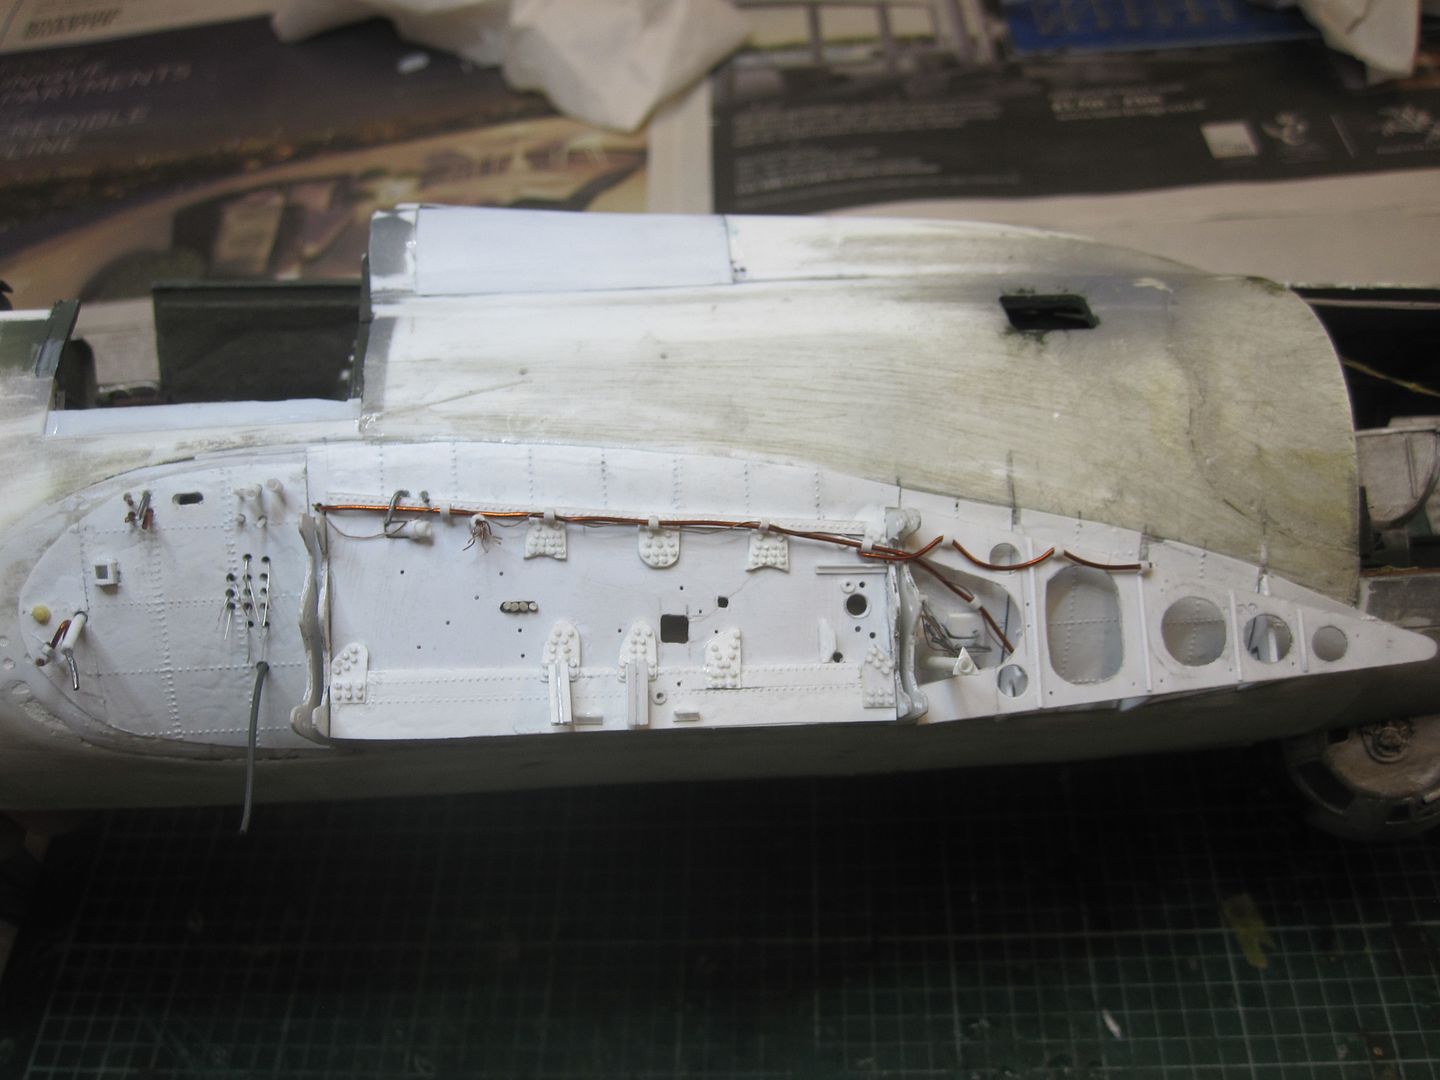
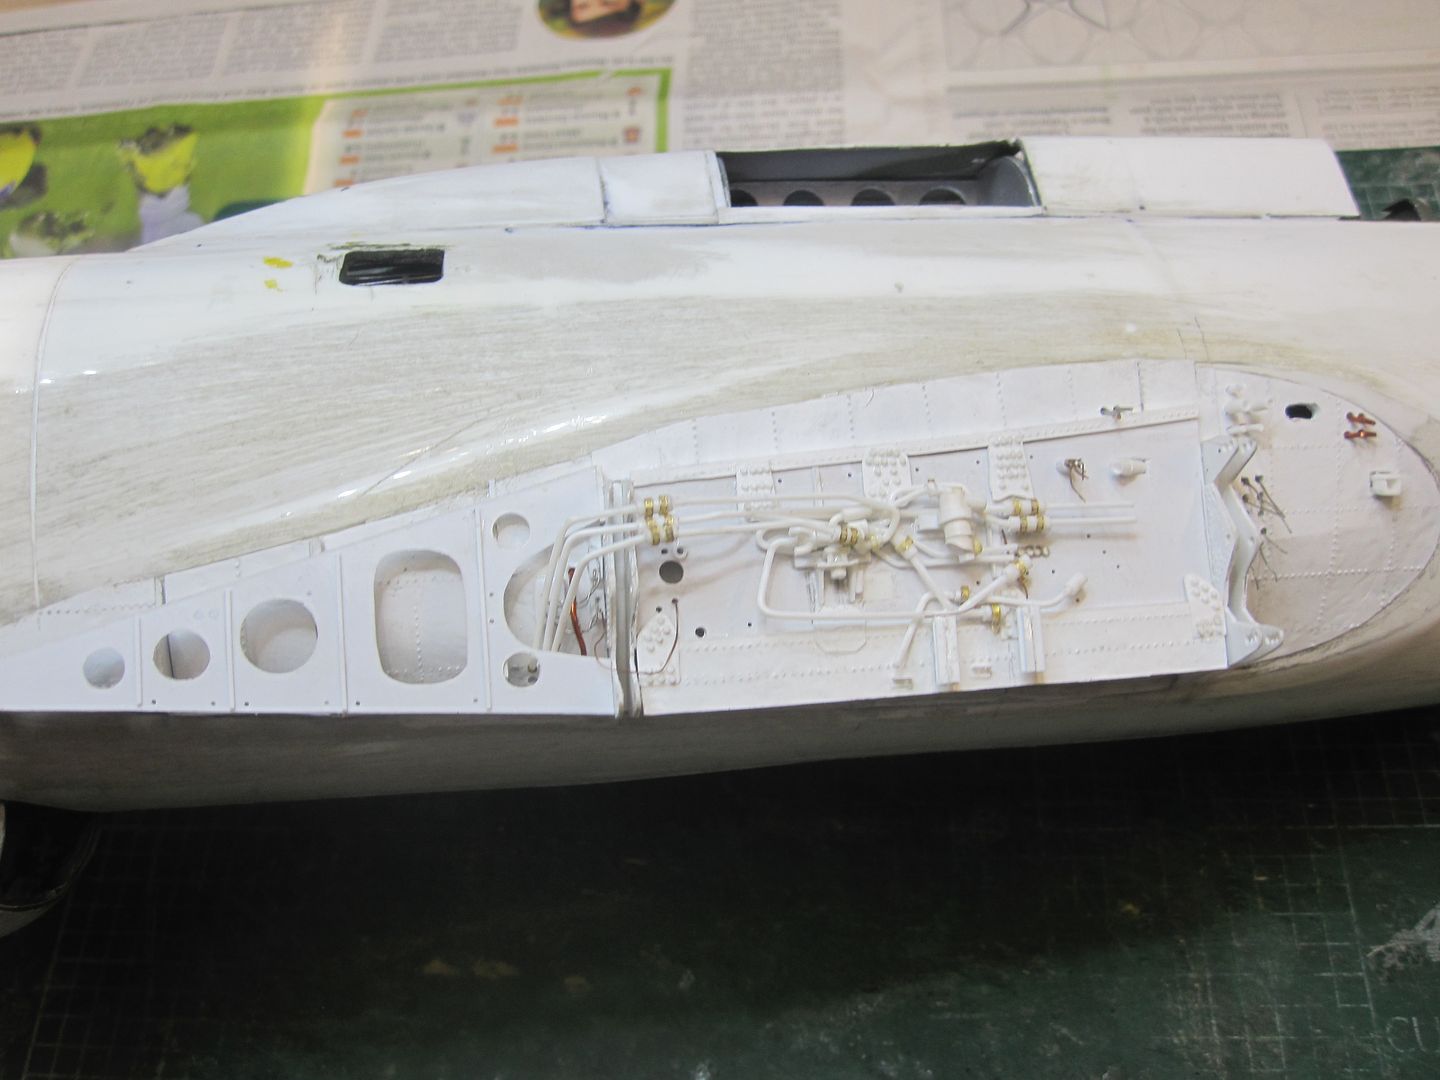
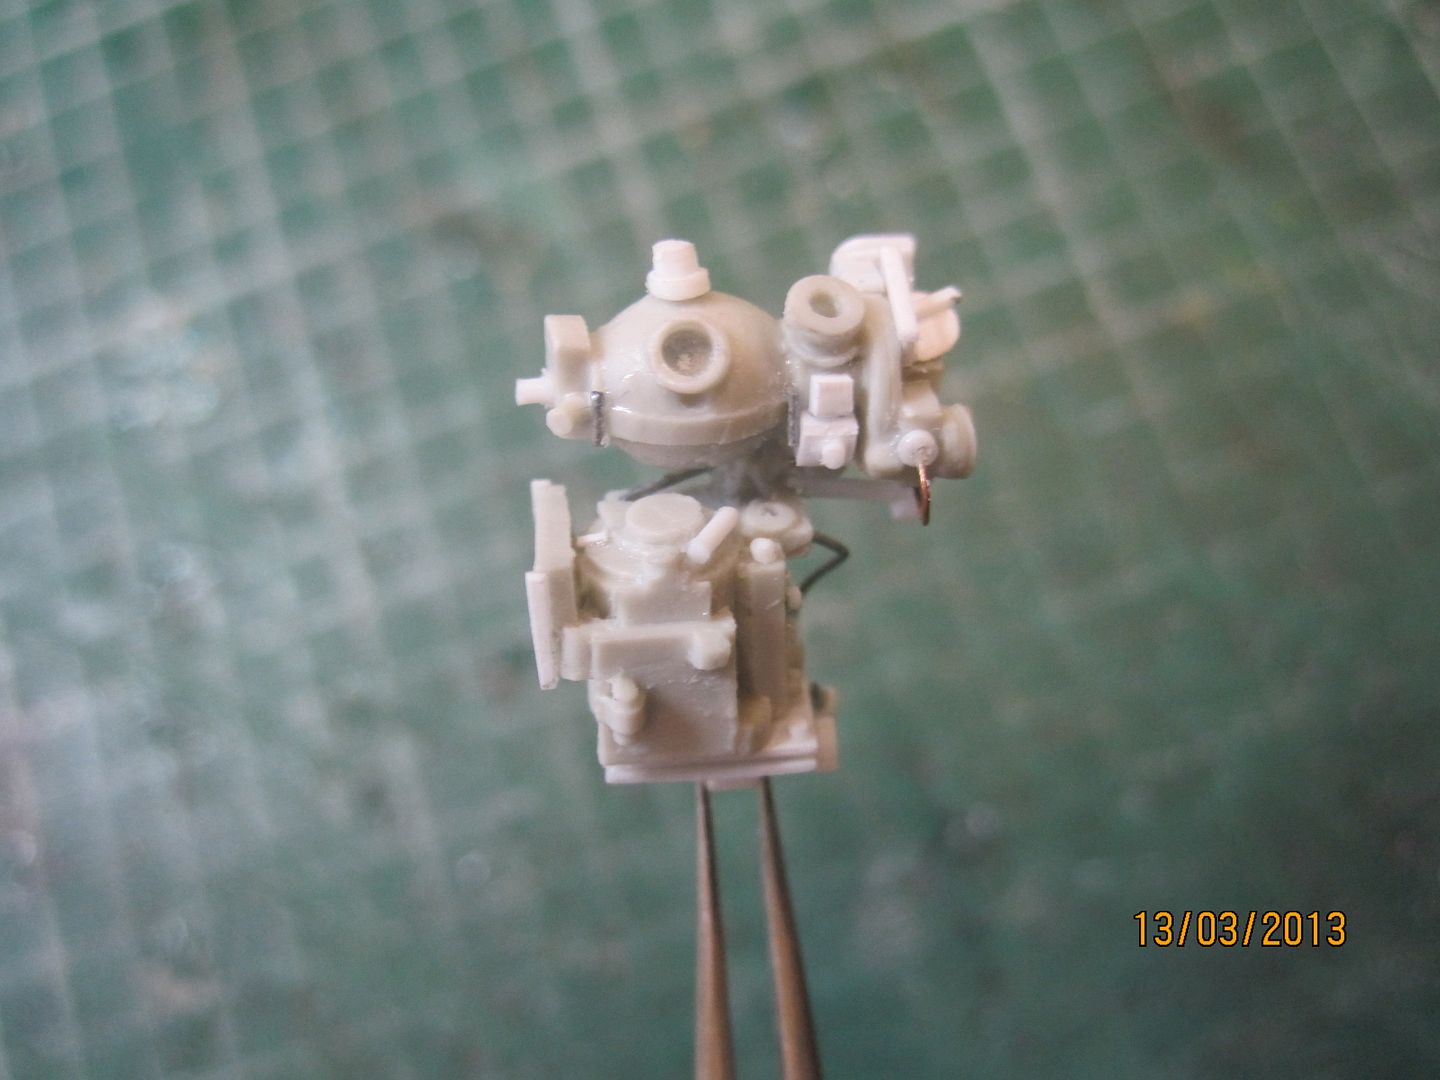
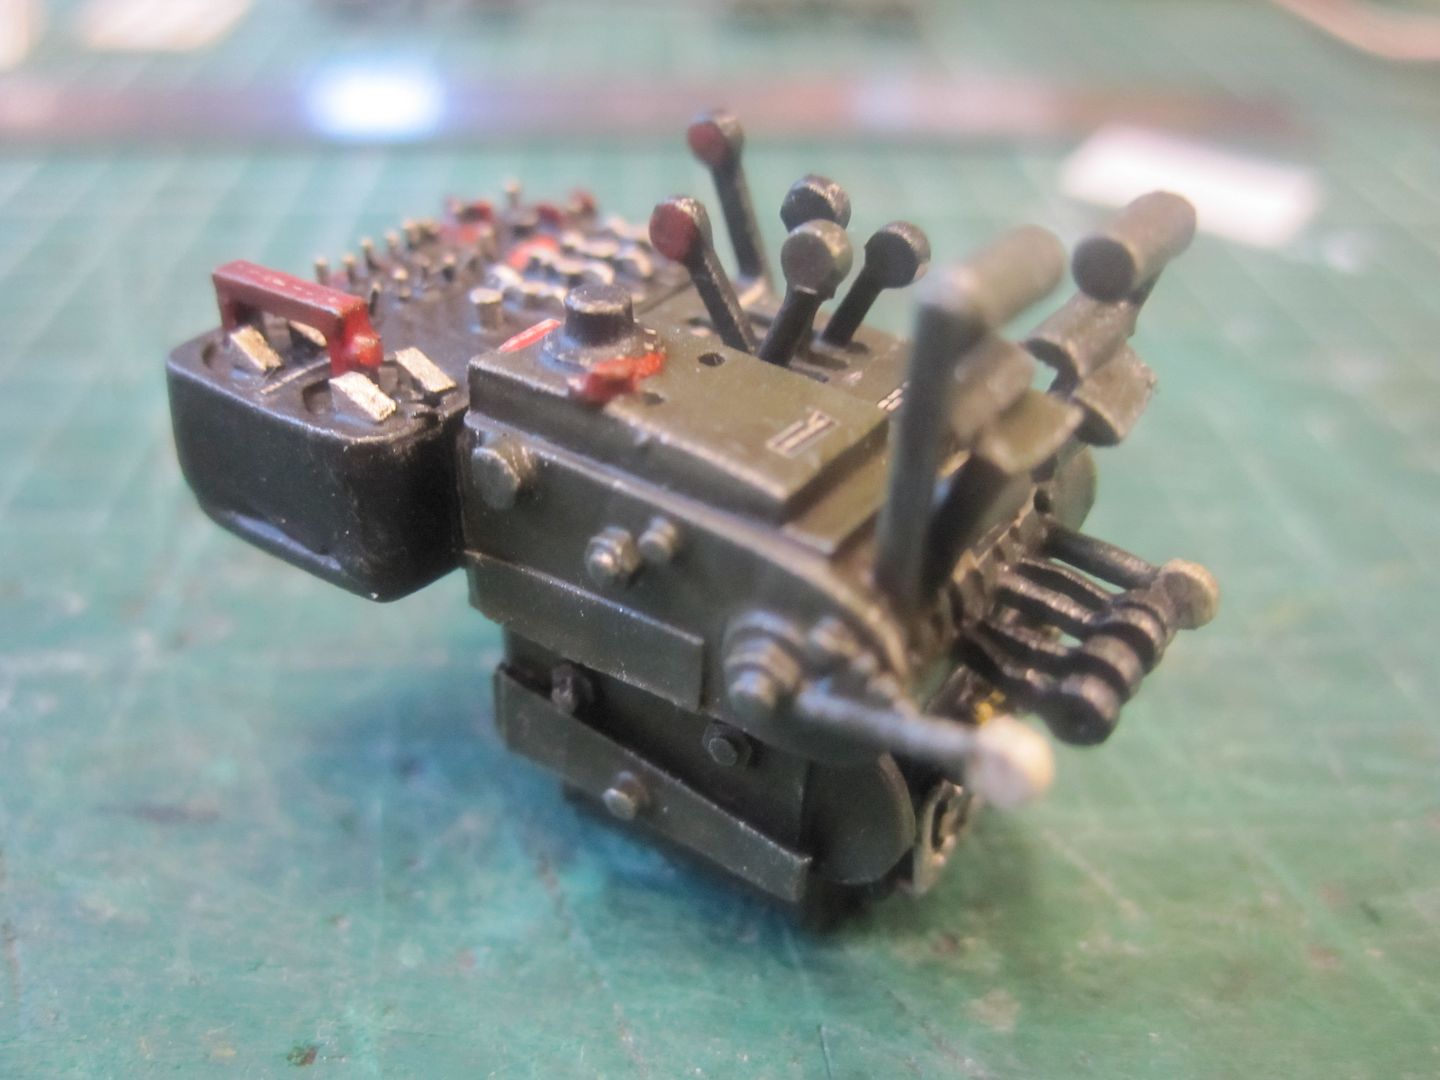
The problem of the vac kit's crappy astrodome was fixed when I found out that this was sometimes retrofitted in the field with a flat piece of perspex (also note in front of that another piece salvaged from the HK kit, namely the AN/ARR-1 antenna)
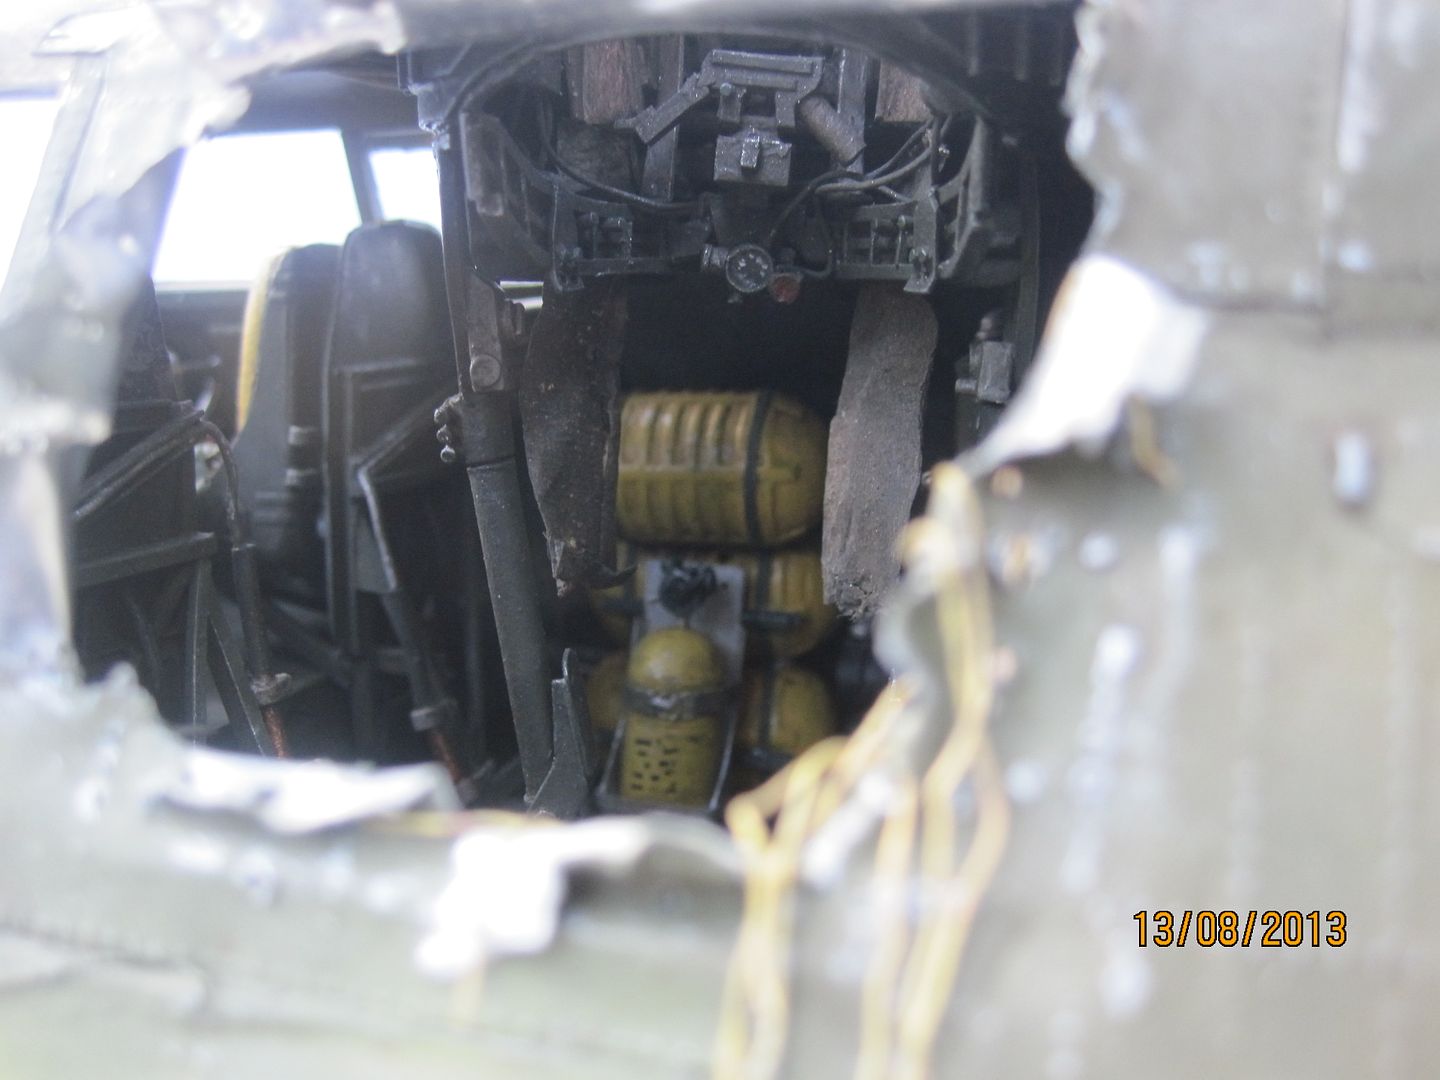
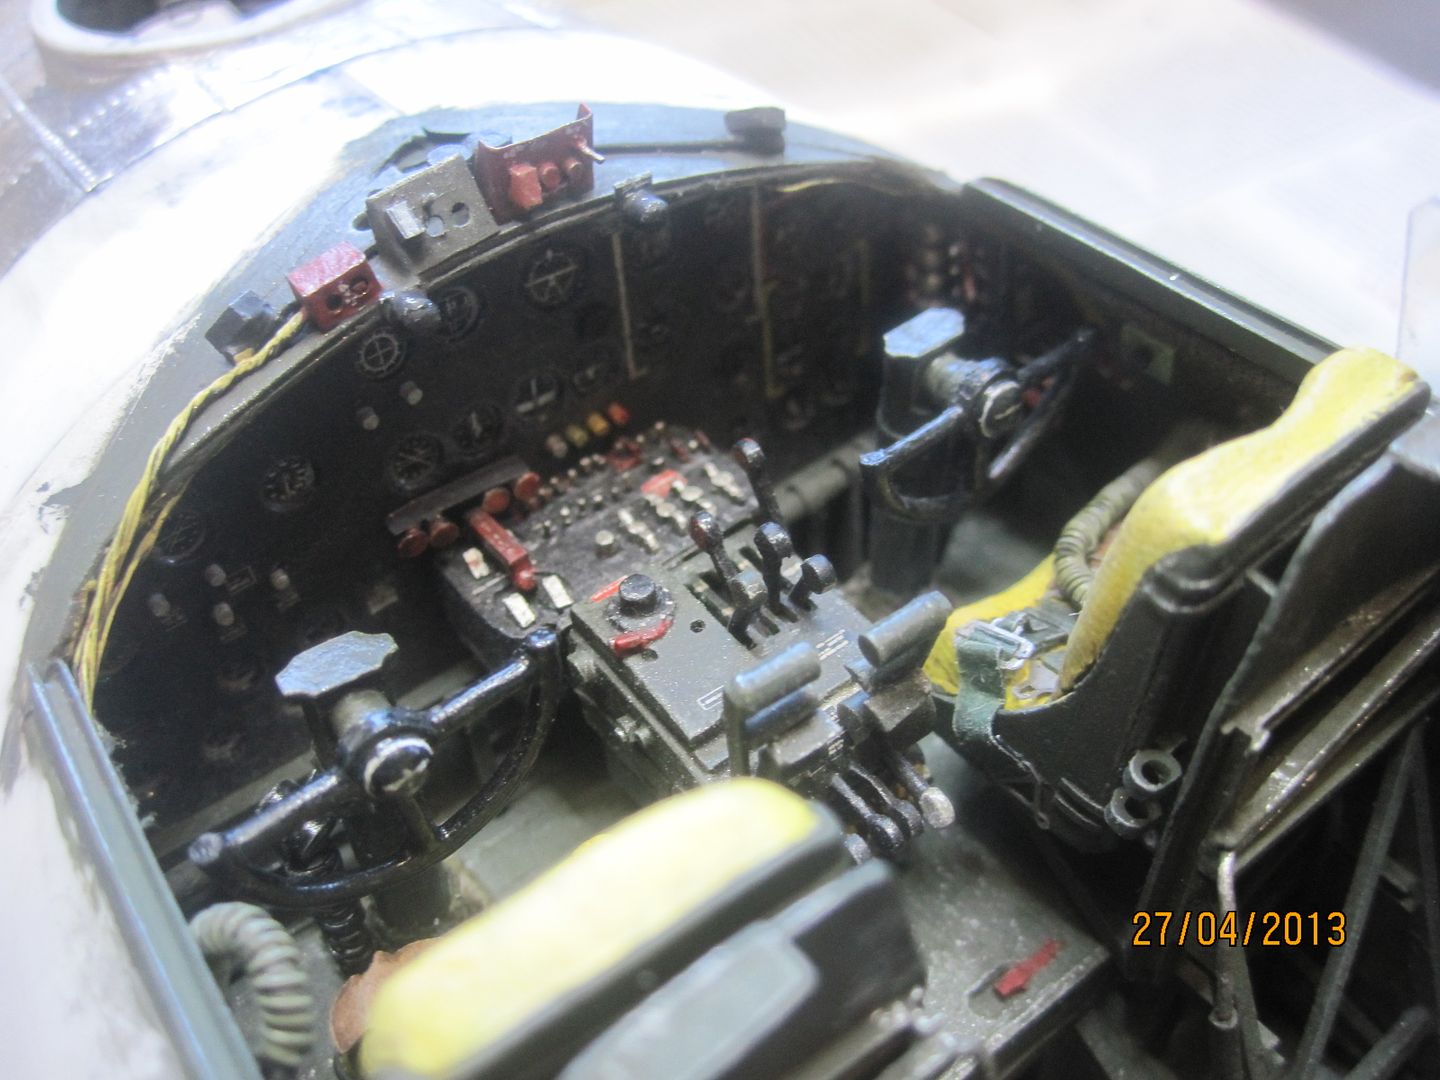
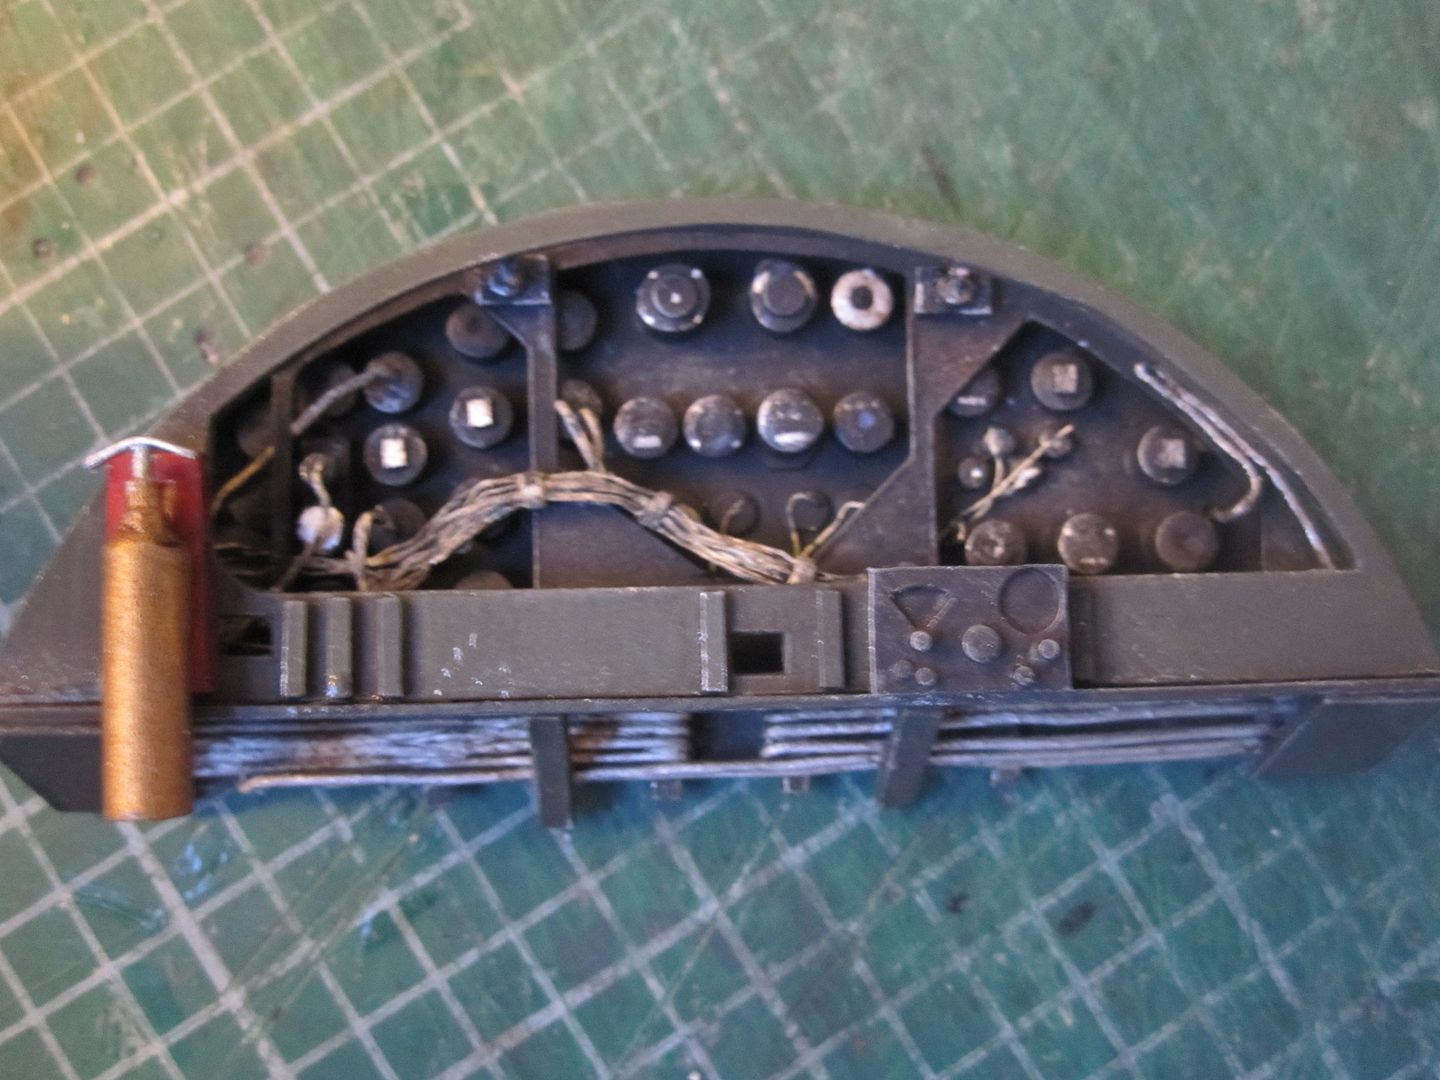
I also attached one of the final pieces, the Norden bombsight. I scratched the hot air defrosting pipe system as well, which is always missing from restored aircraft (and the HK kit incidentally) - the nose transparency is from the vac kit - I wasn't at all happy with its clarity, and even with a couple of coats of Klear it doesn't loook great...oh well. At least it fits! I had a spare HK one which I smashed up and tried to replicate the same effect - unfortunately it's extremely thick (and also has the correct profile and shape - something I'm afraid mine doesn't) so it doesn't really fit onto my kit's nose...
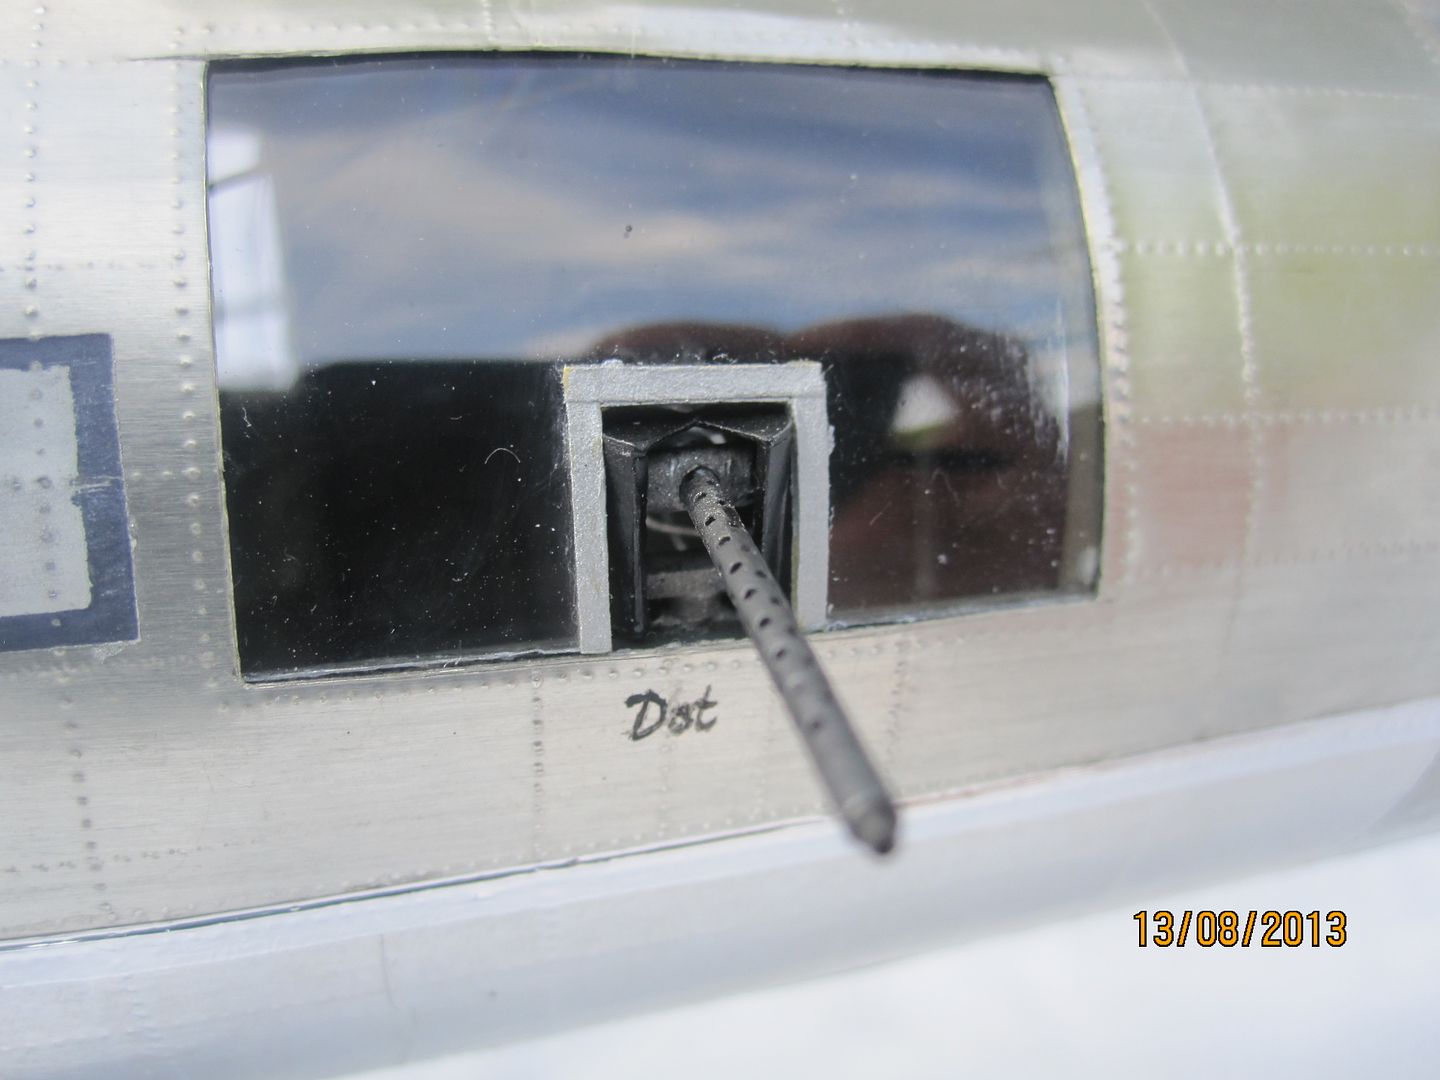
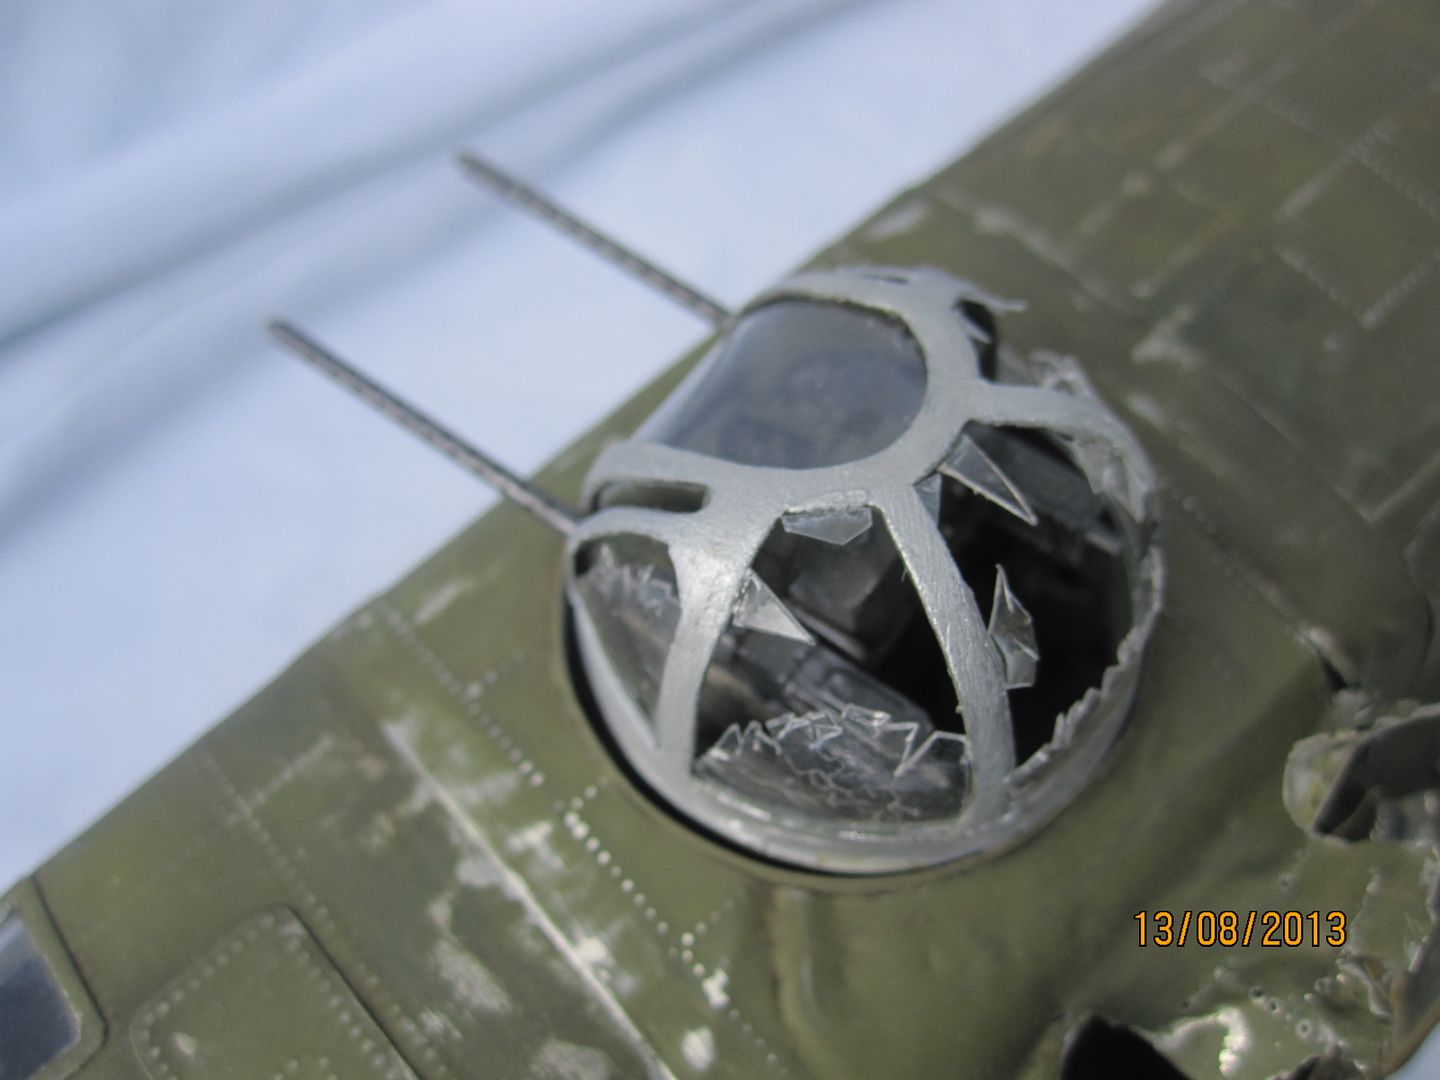
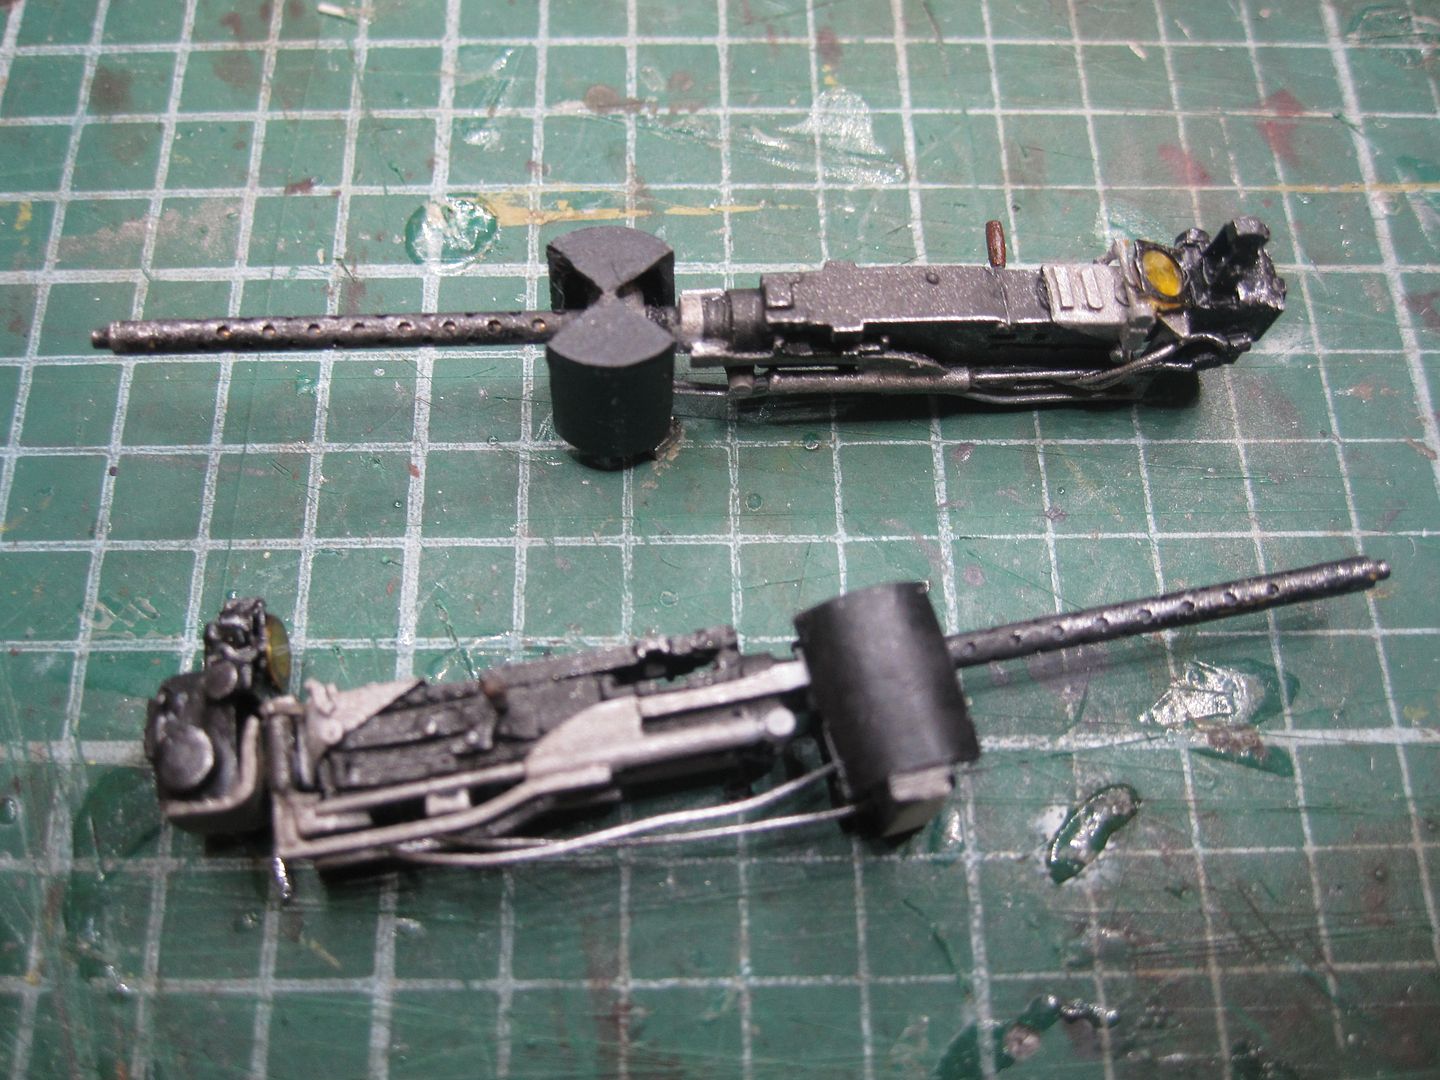
This pic also shows the chin turret attached. I made the flash eliminators for the guns from rolled up bits of pewter. On the real aircraft, these were added as early Fort crews found the continued flash & shock from firing those big guns could crack the nose glass.

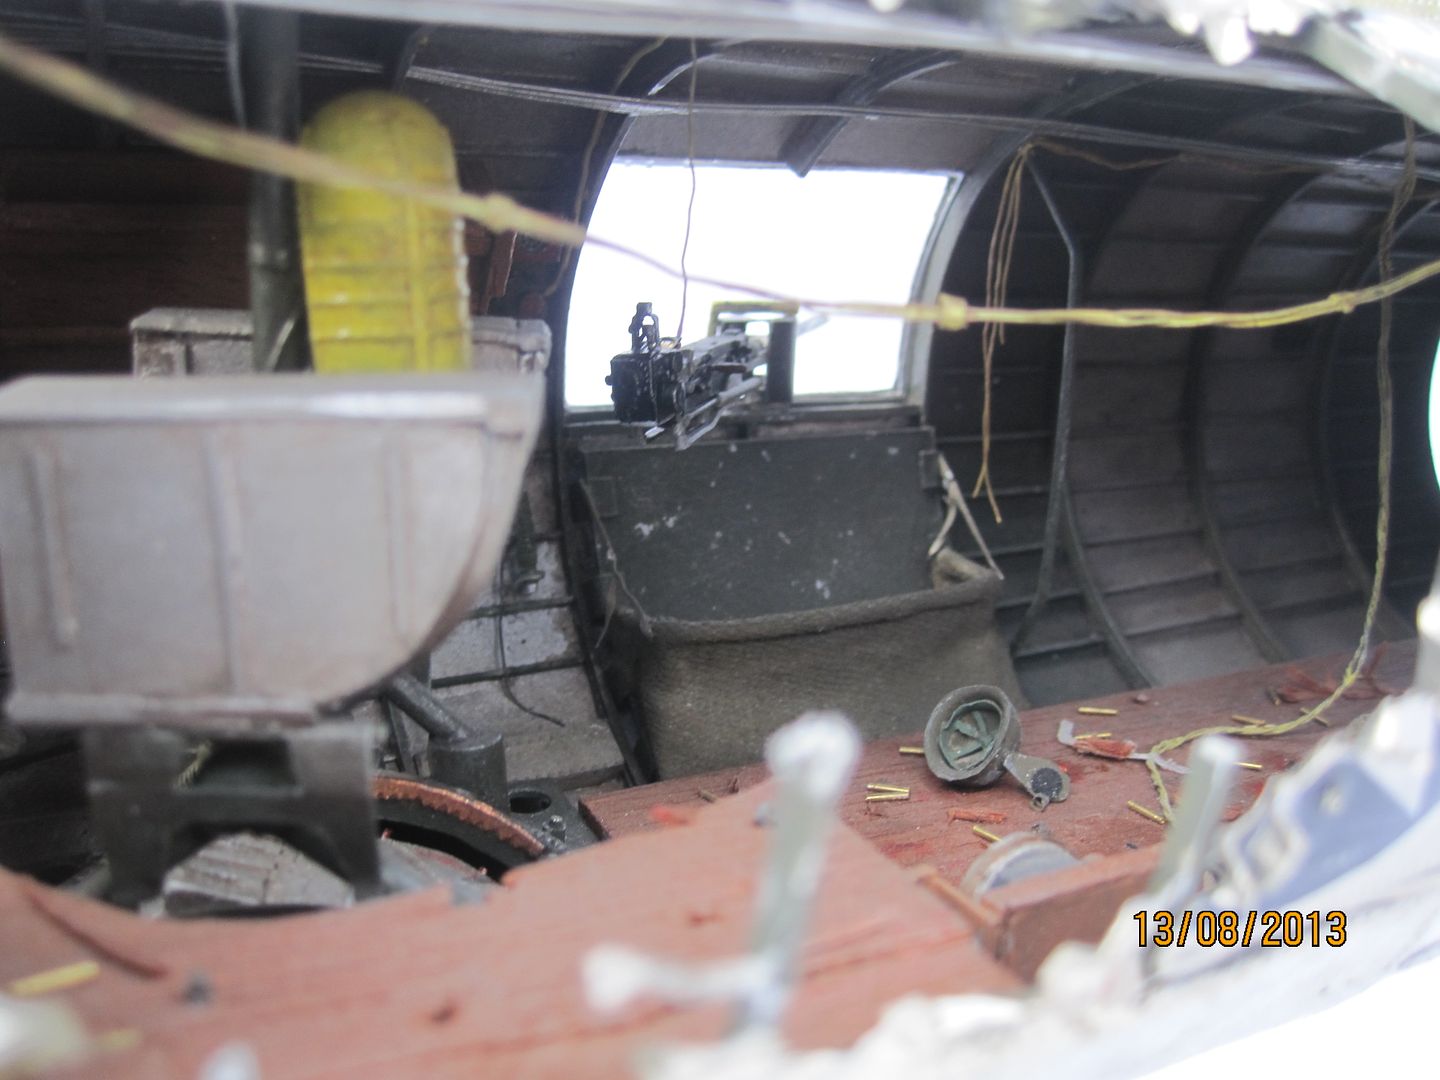
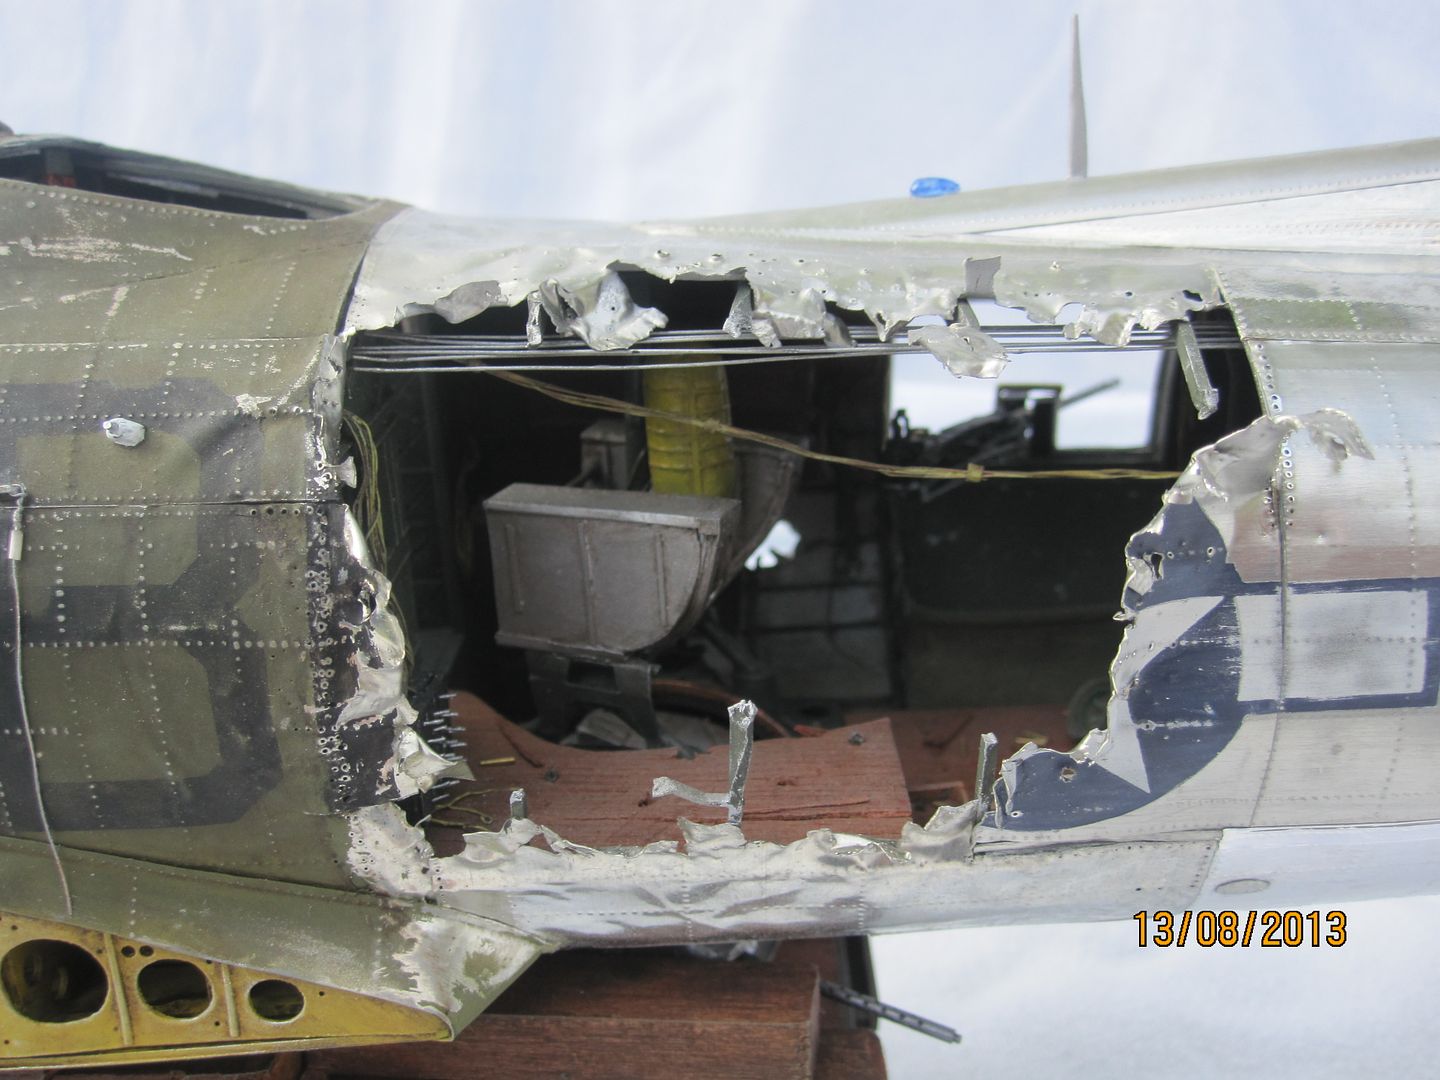
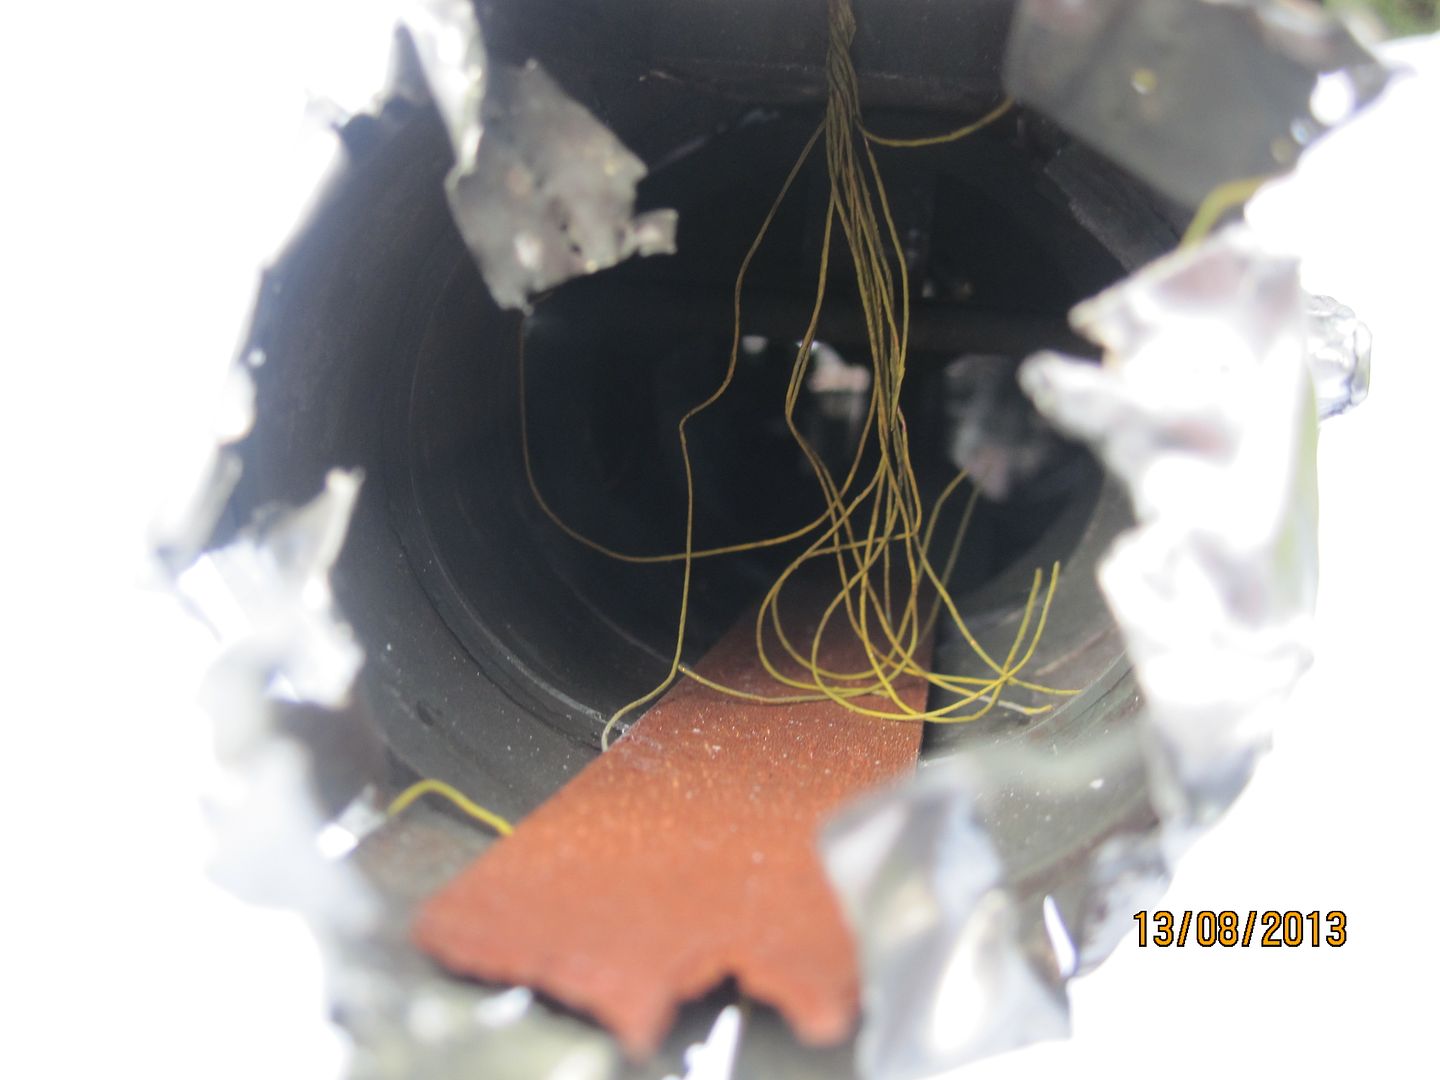
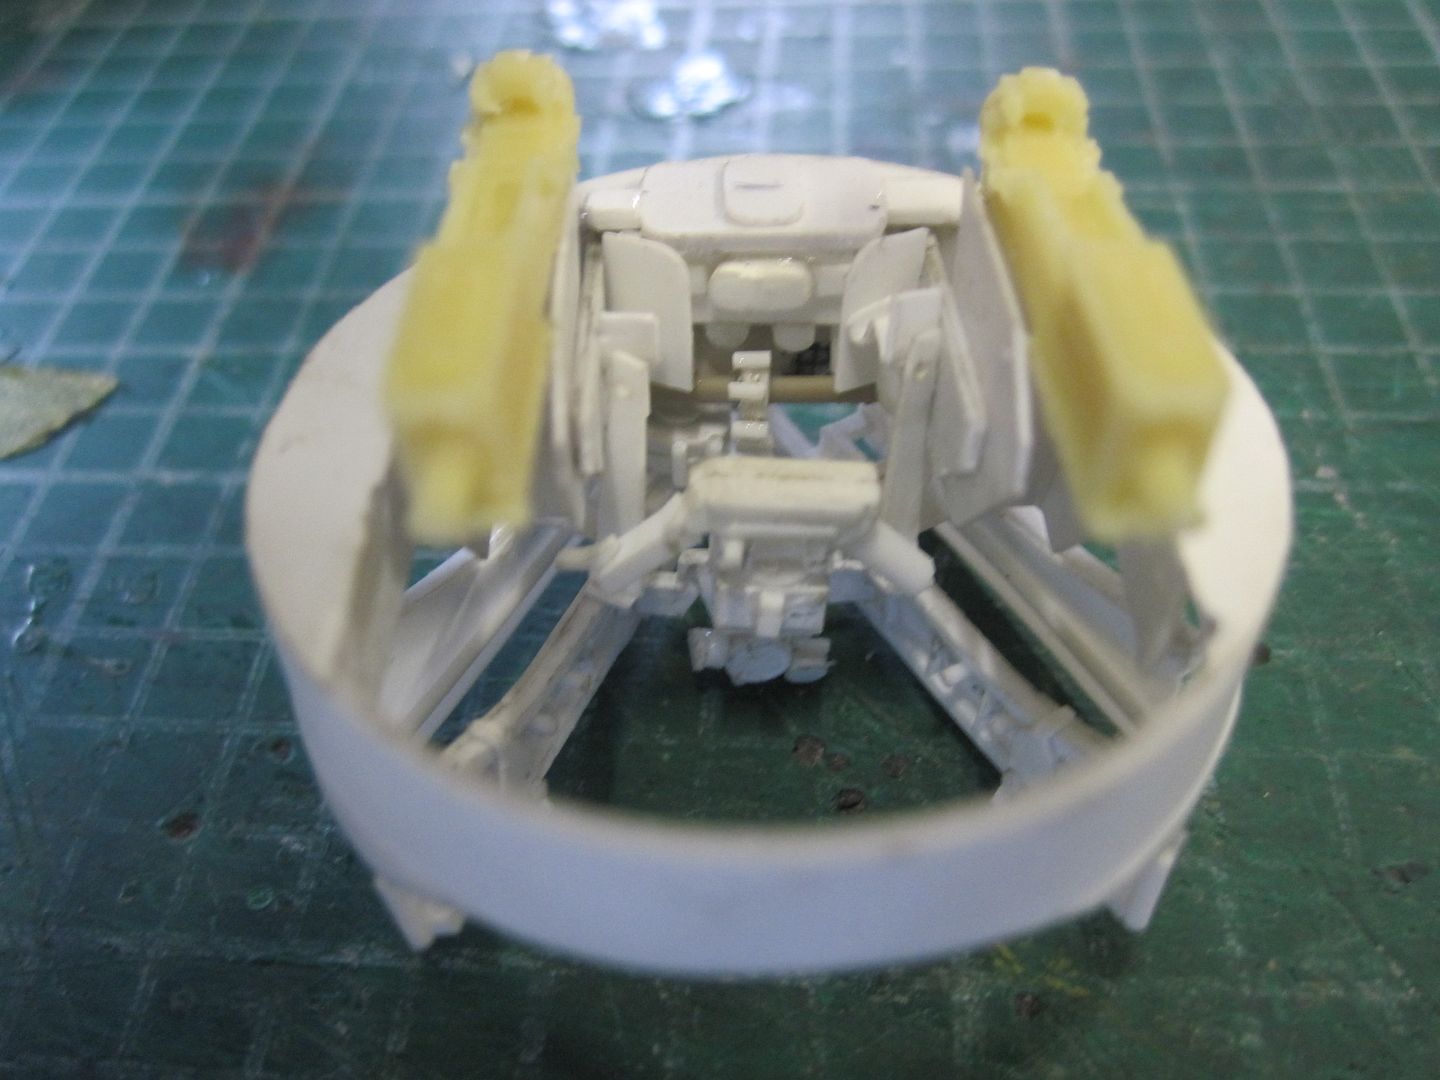
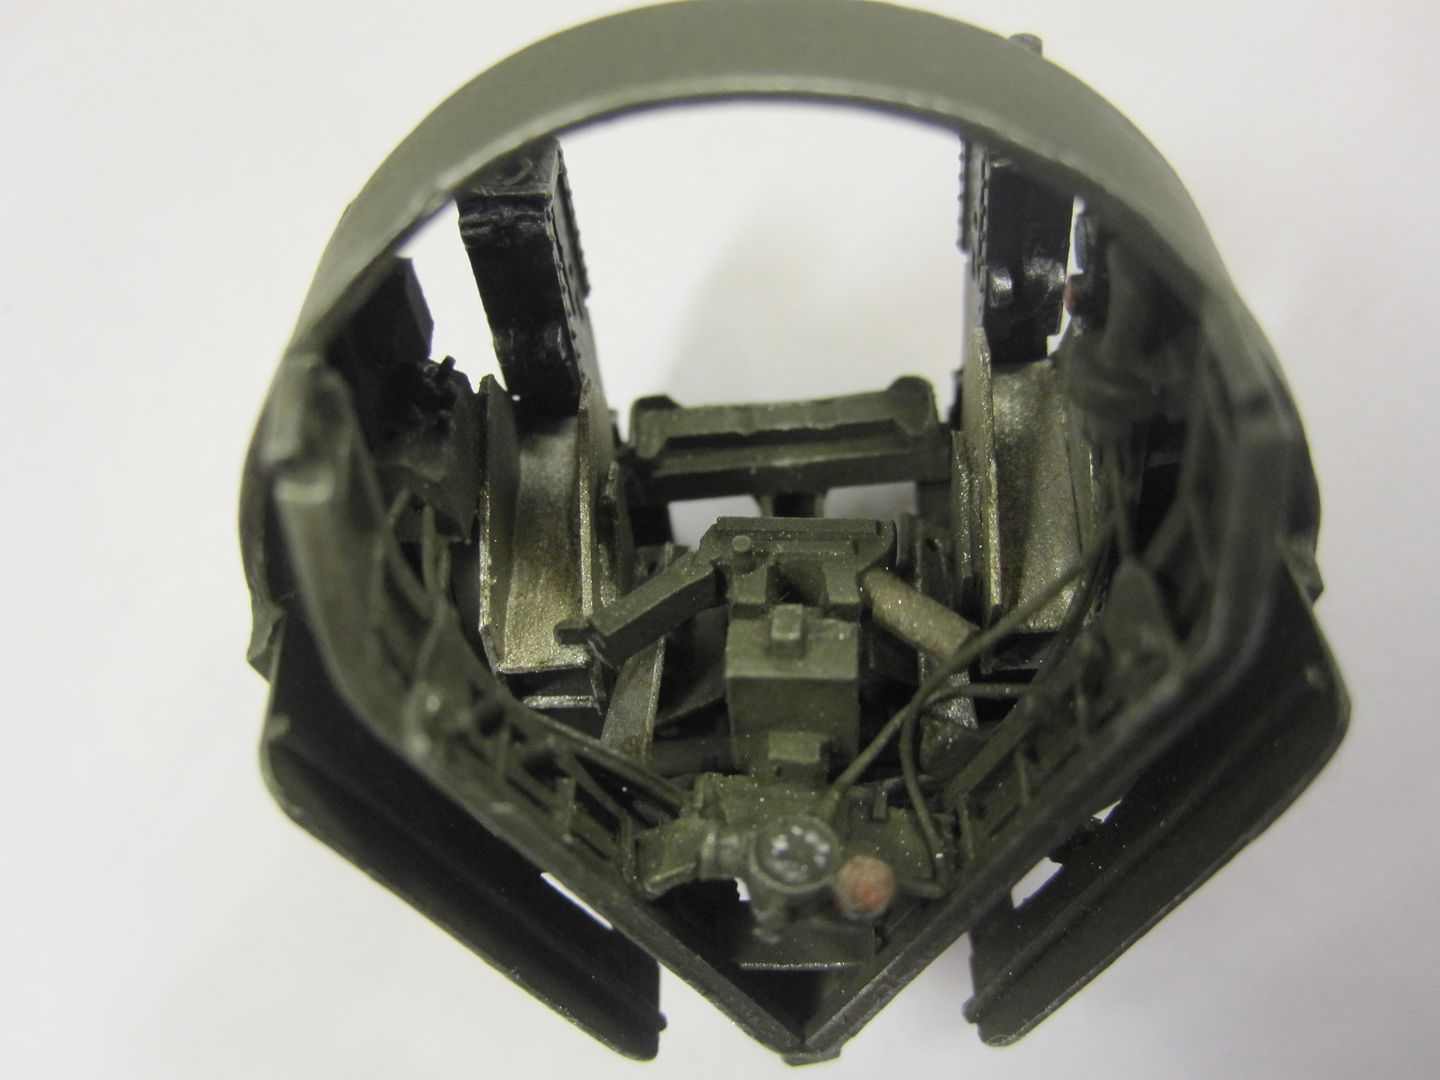
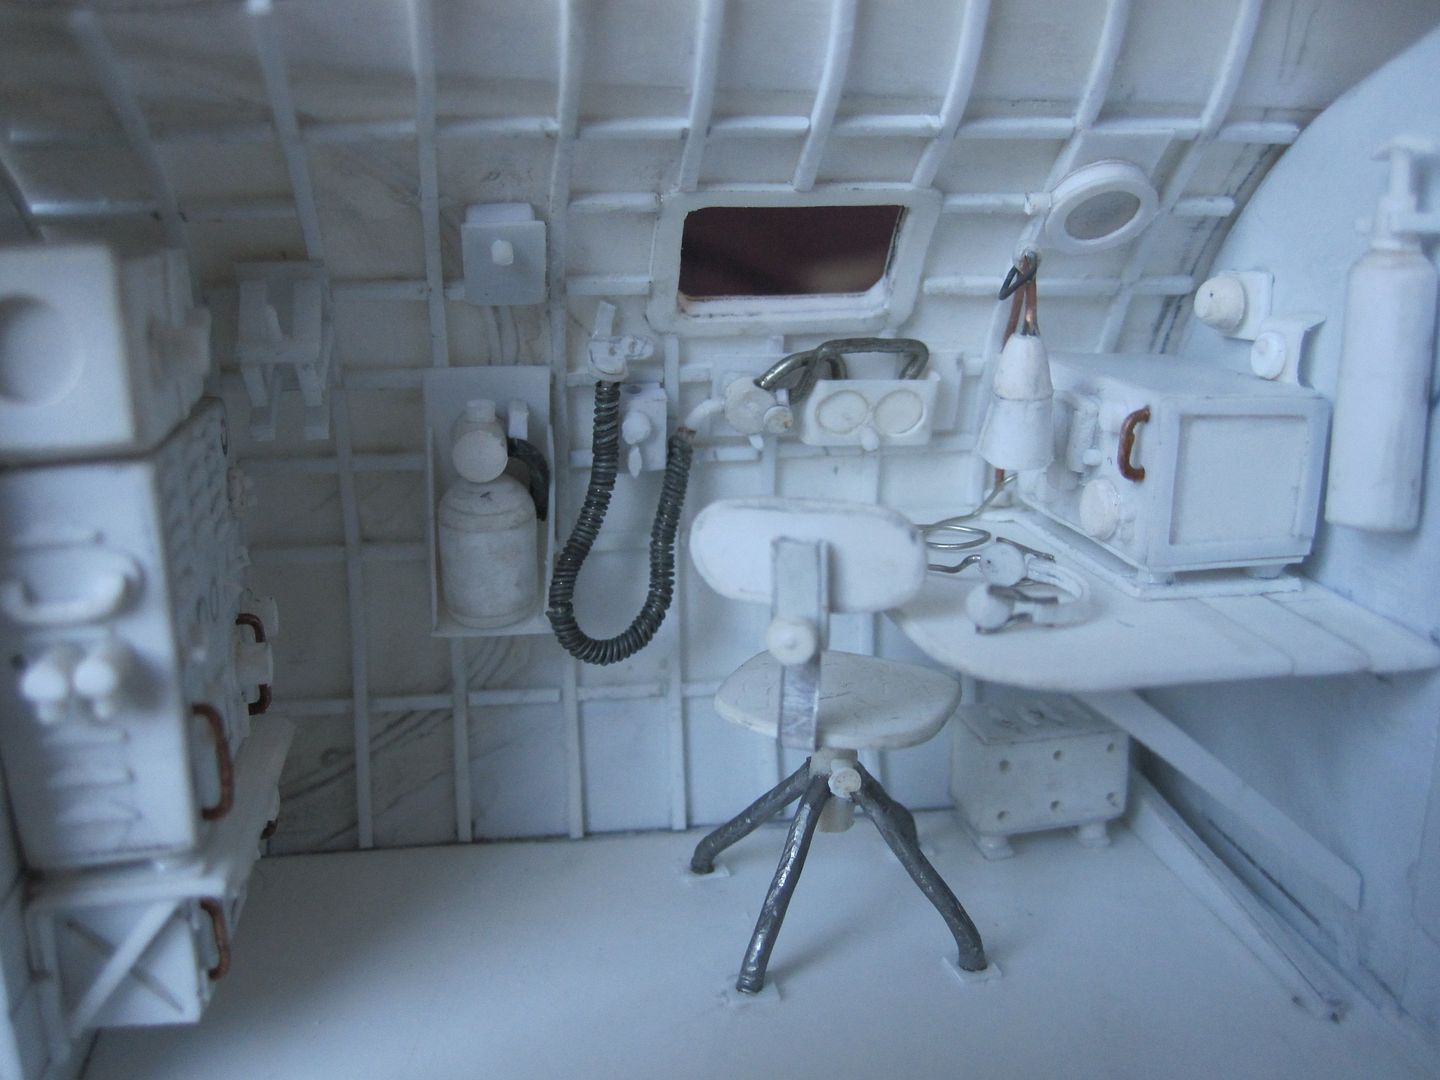
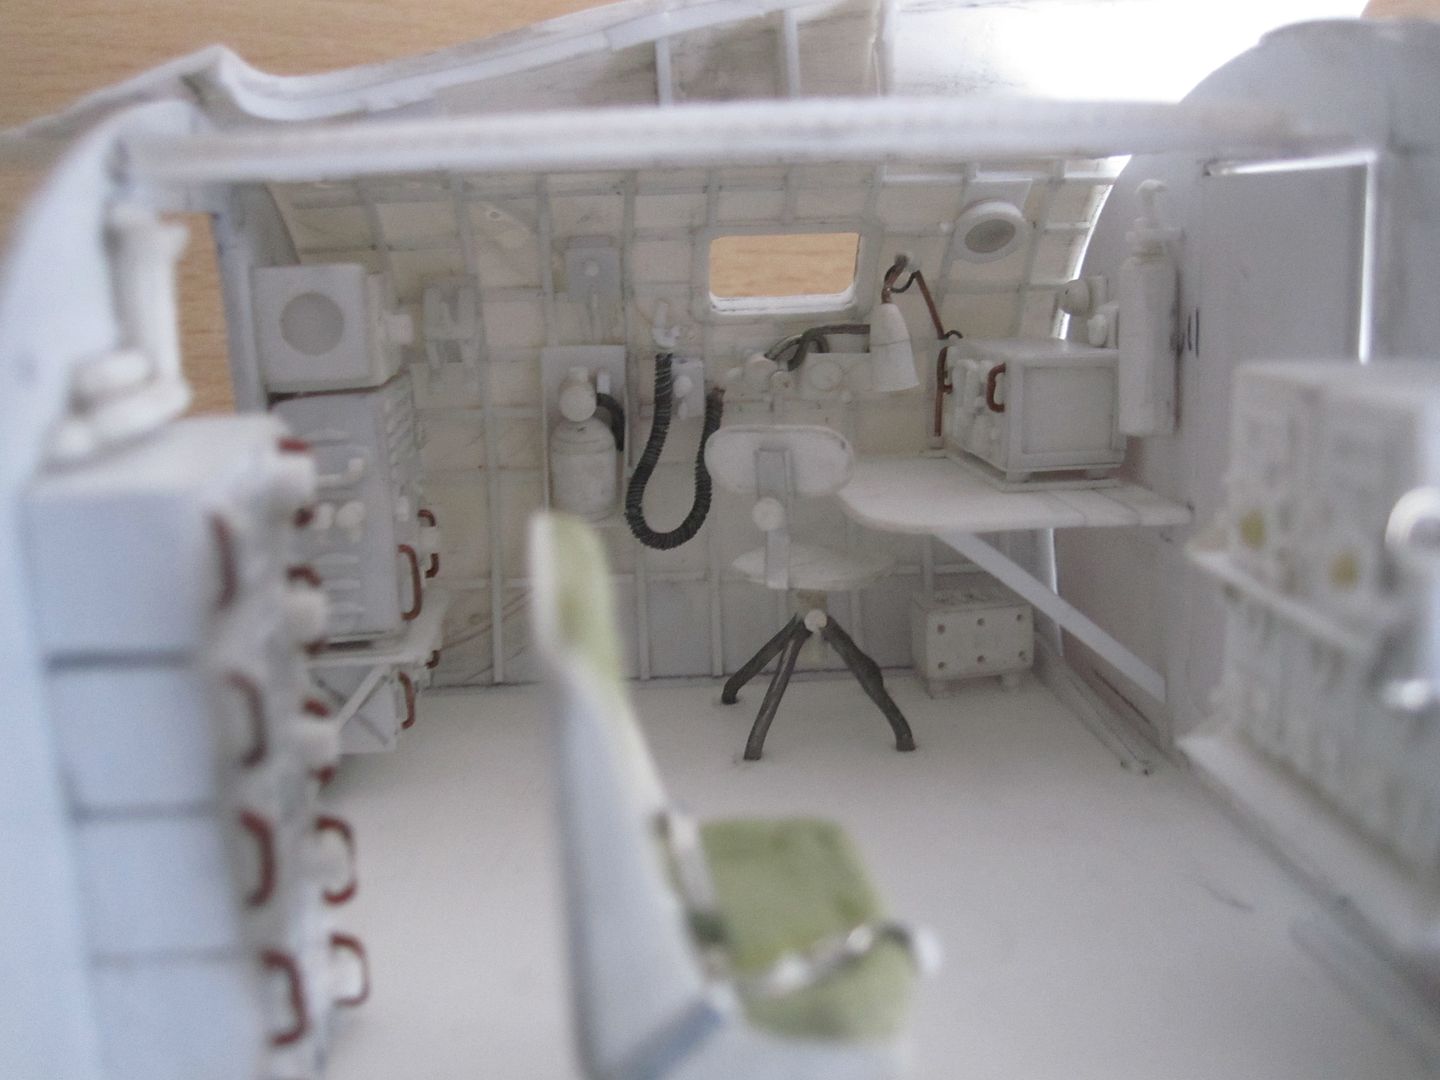
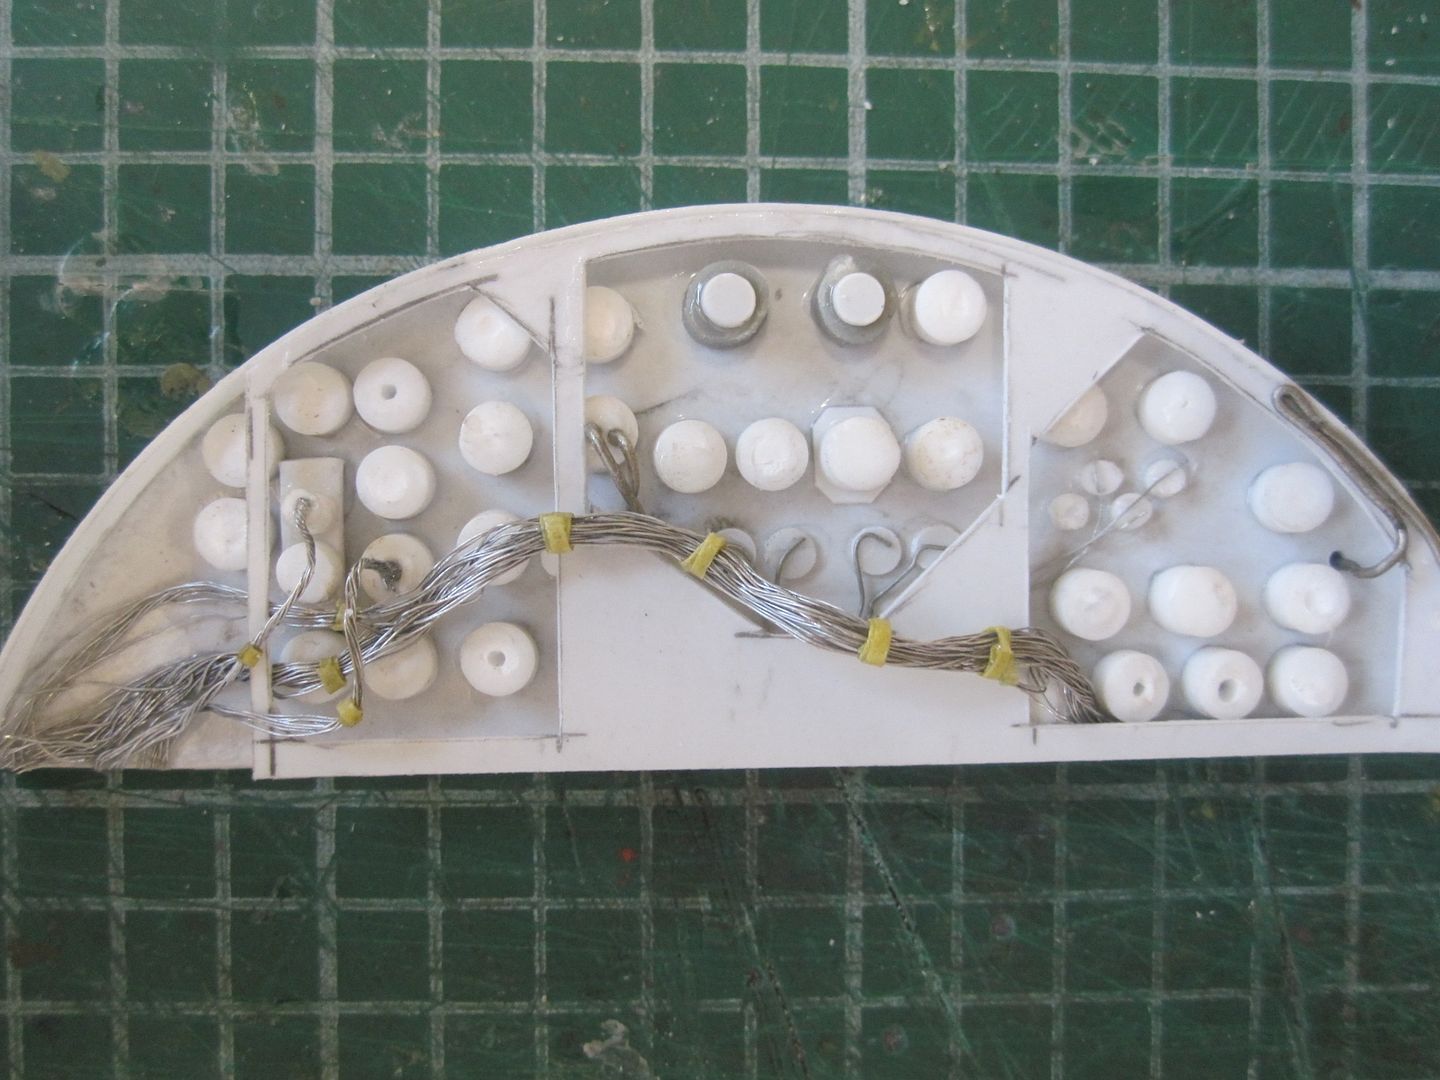
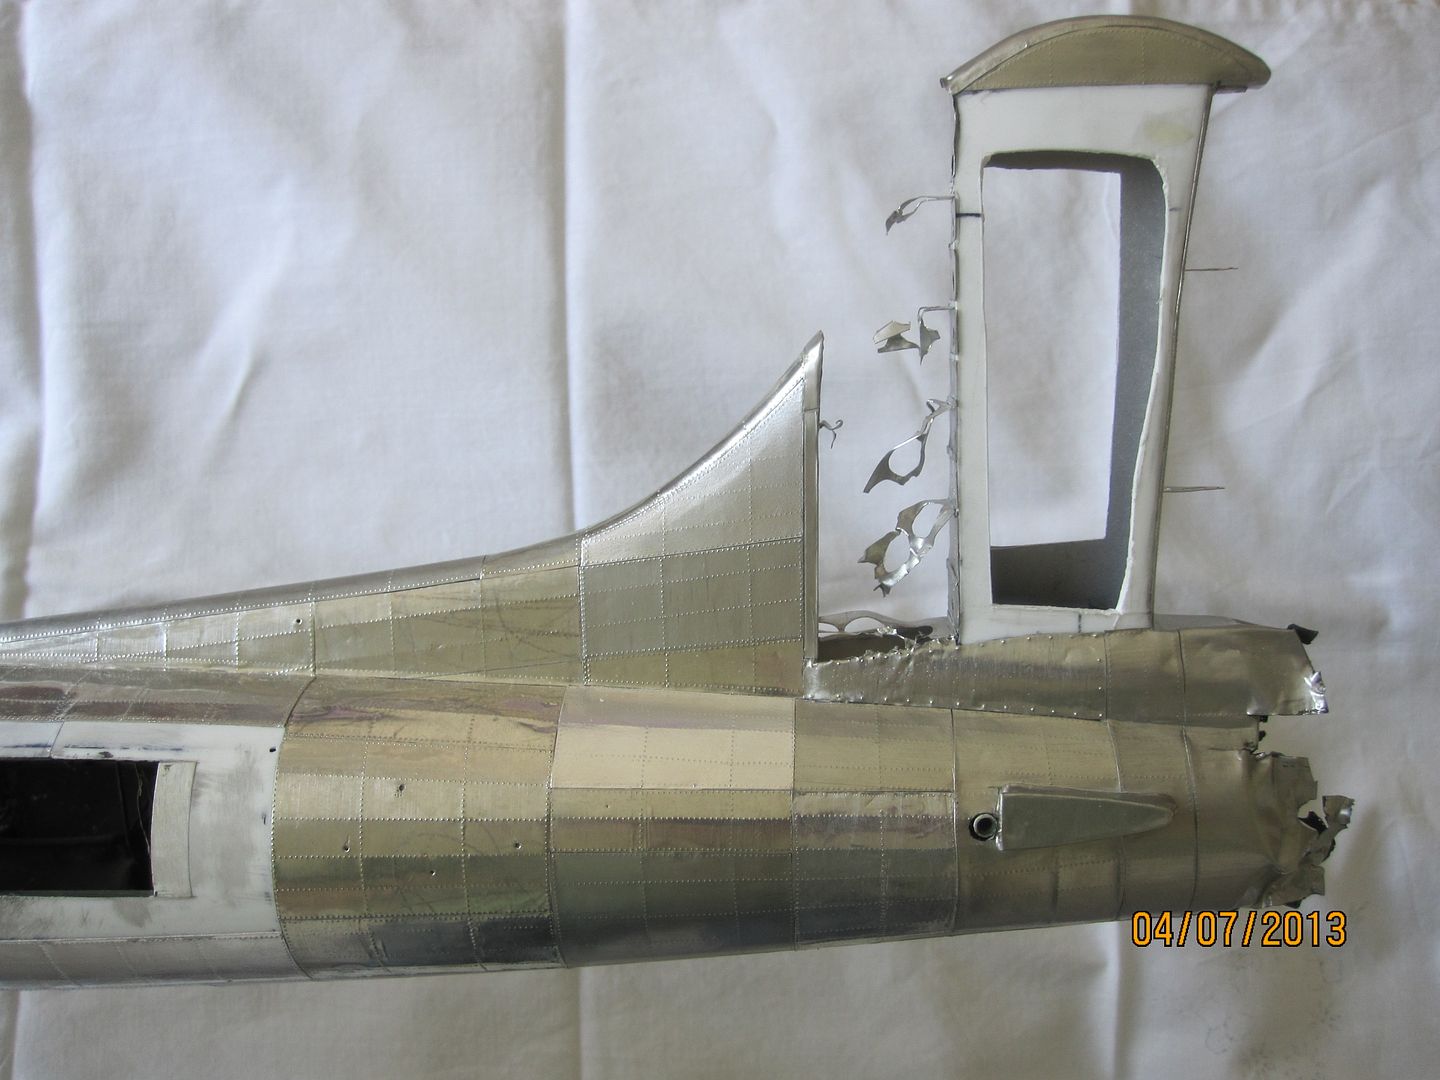
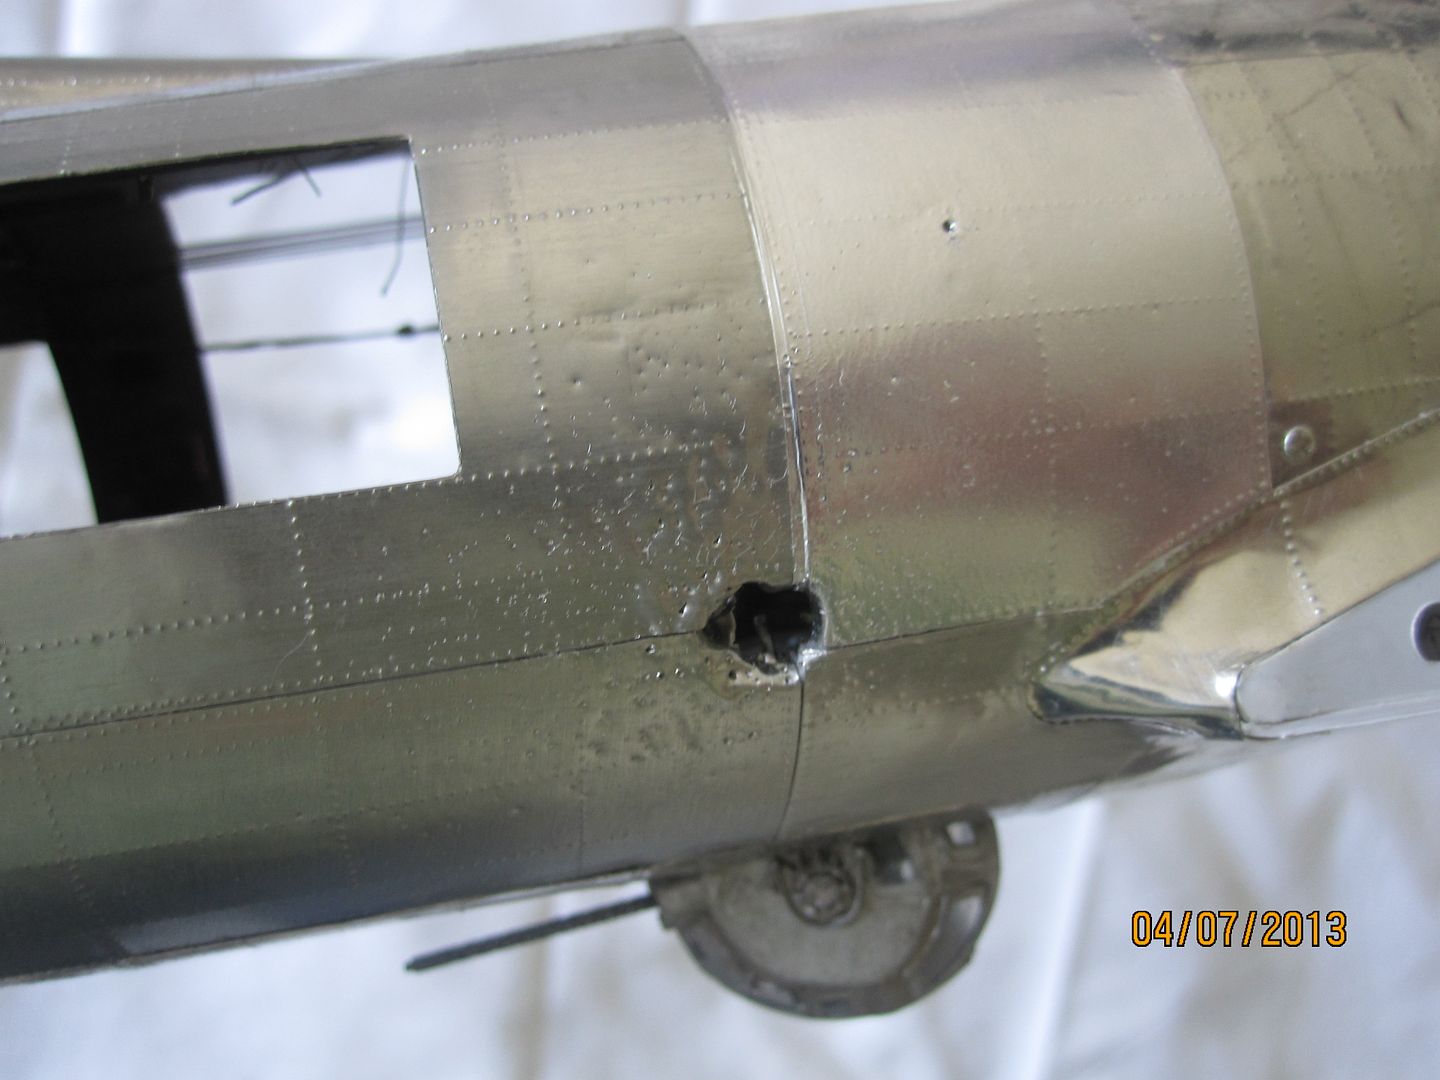
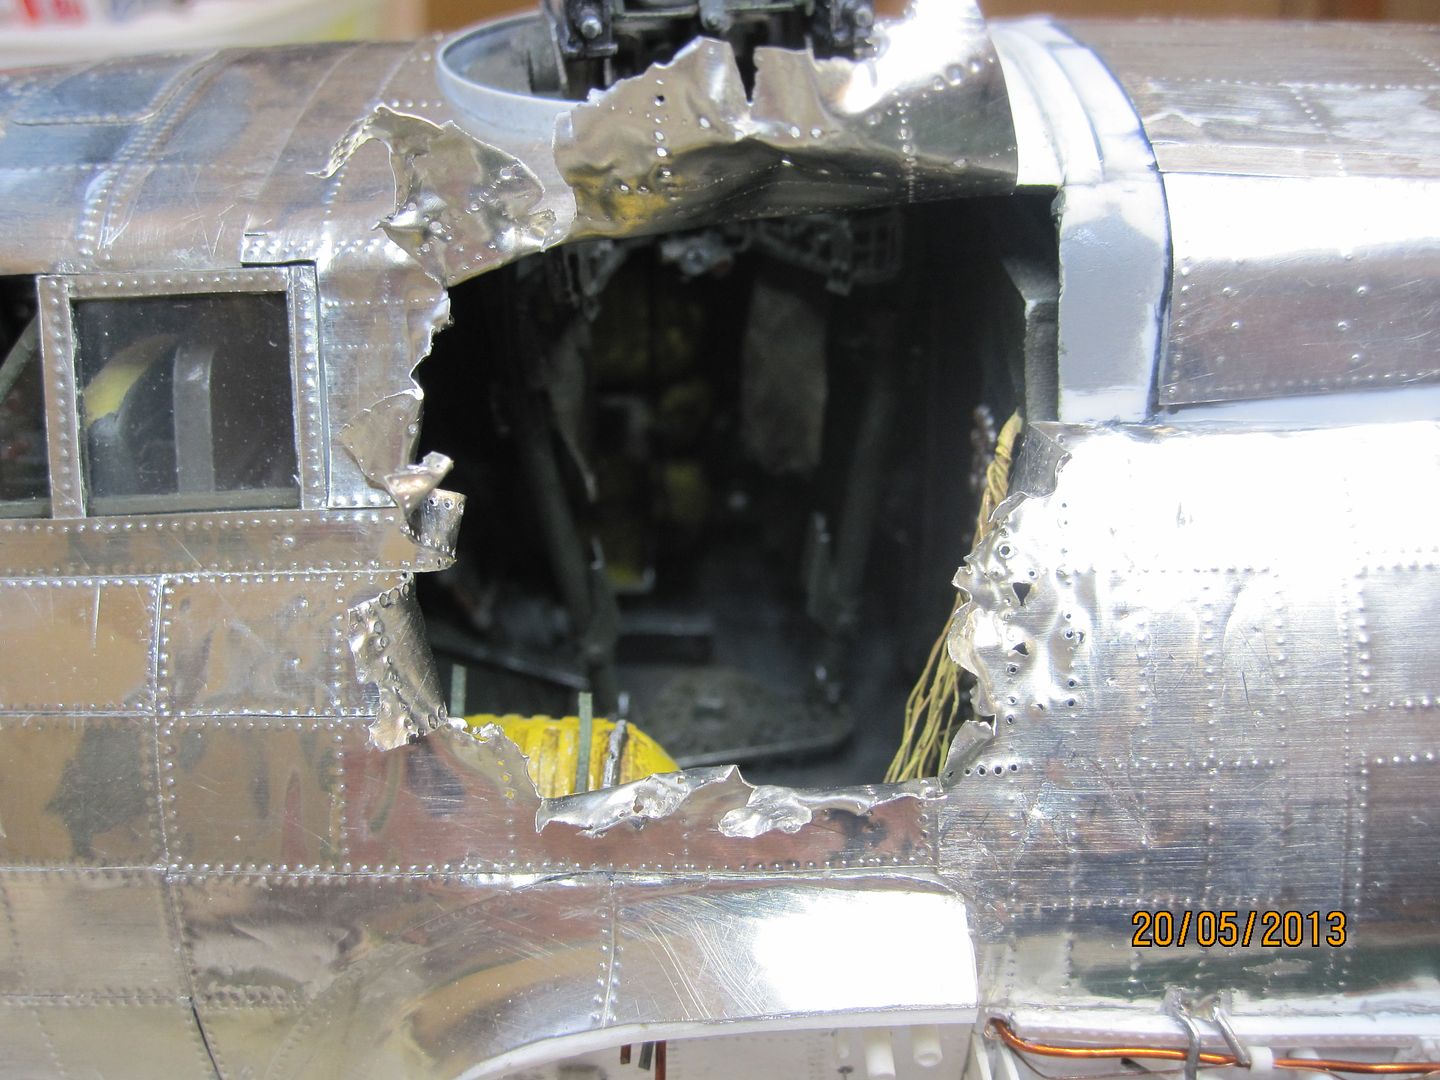
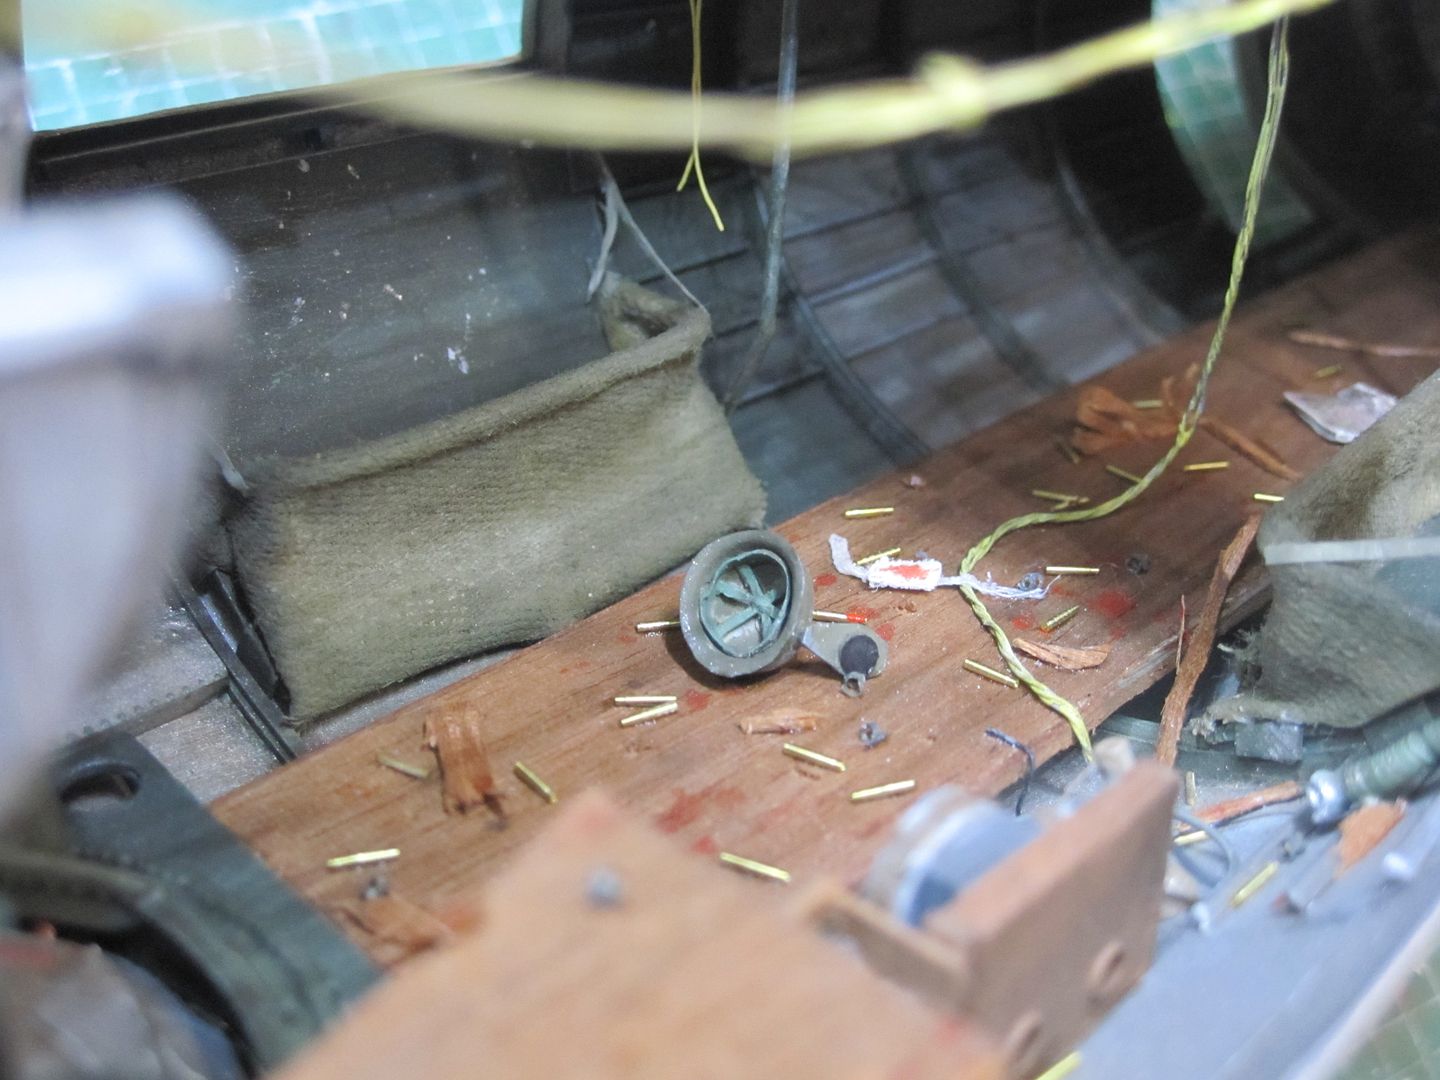
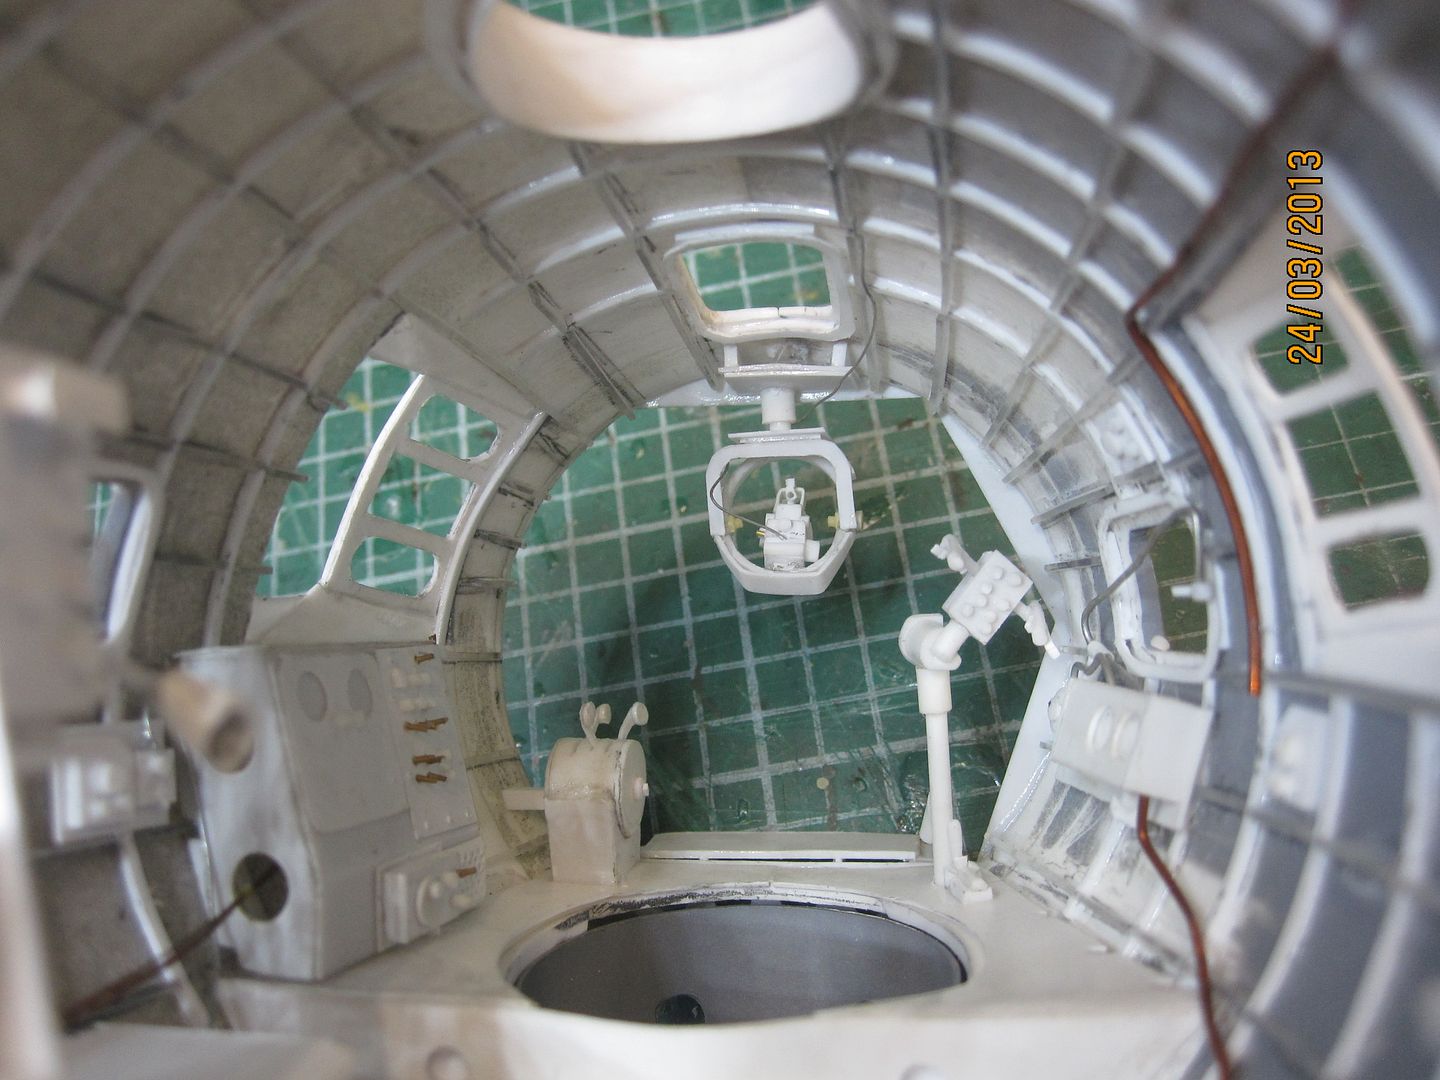
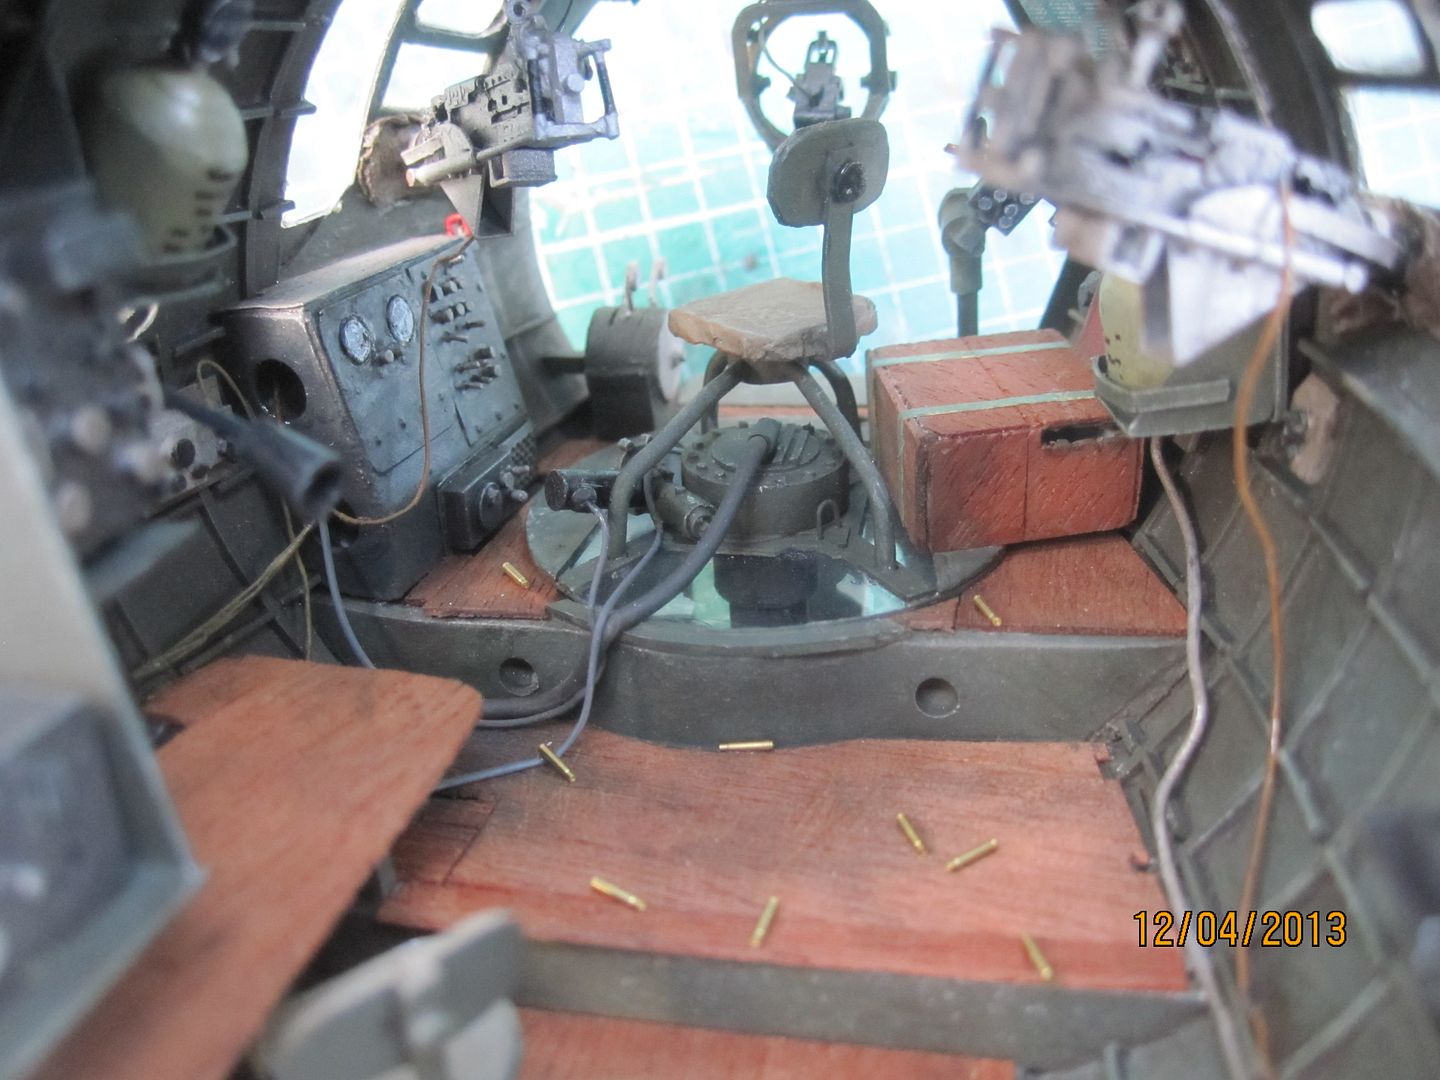
I also kind of solved a problem I had with the destroyed tail cone - if you look inside there's a big void where no doubt I could have added some more detail. I created a bunch of cabling to hang down from the ceiling and made sure the twisted metal hid a lot of what's visible. Nevertheless, if you look inside in strong enough light I think you can see a pleasing enough representation of what's really there...in any case I'm happy with it:
Right - enough teasing! Here's some walkaround pics, taken in natural light...
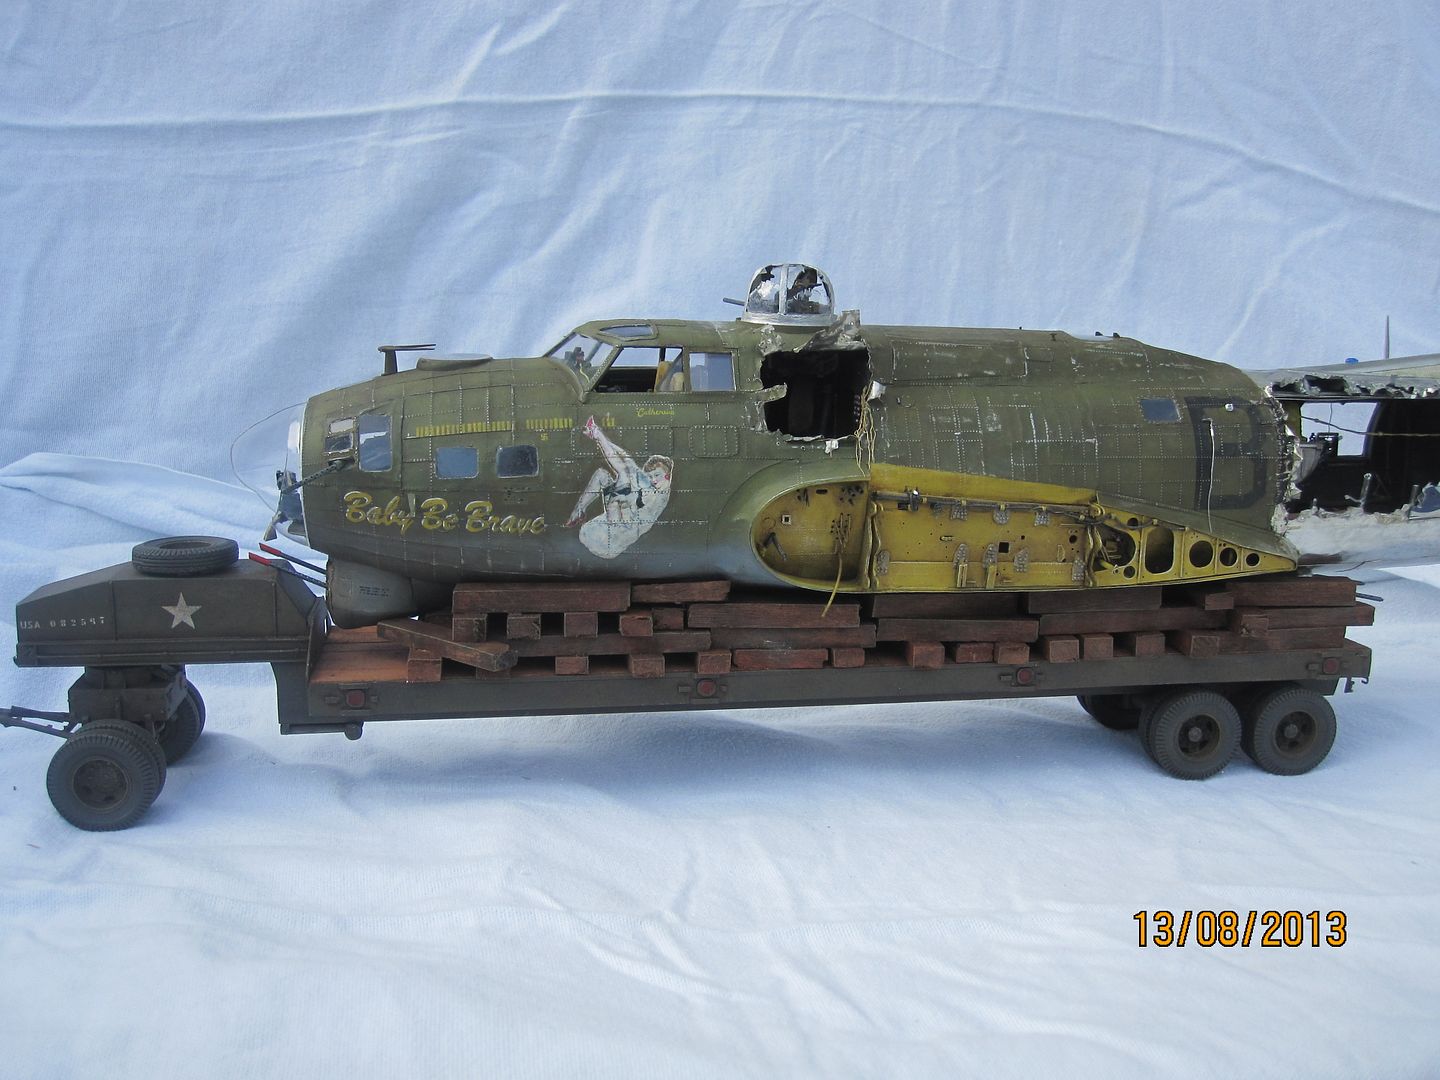
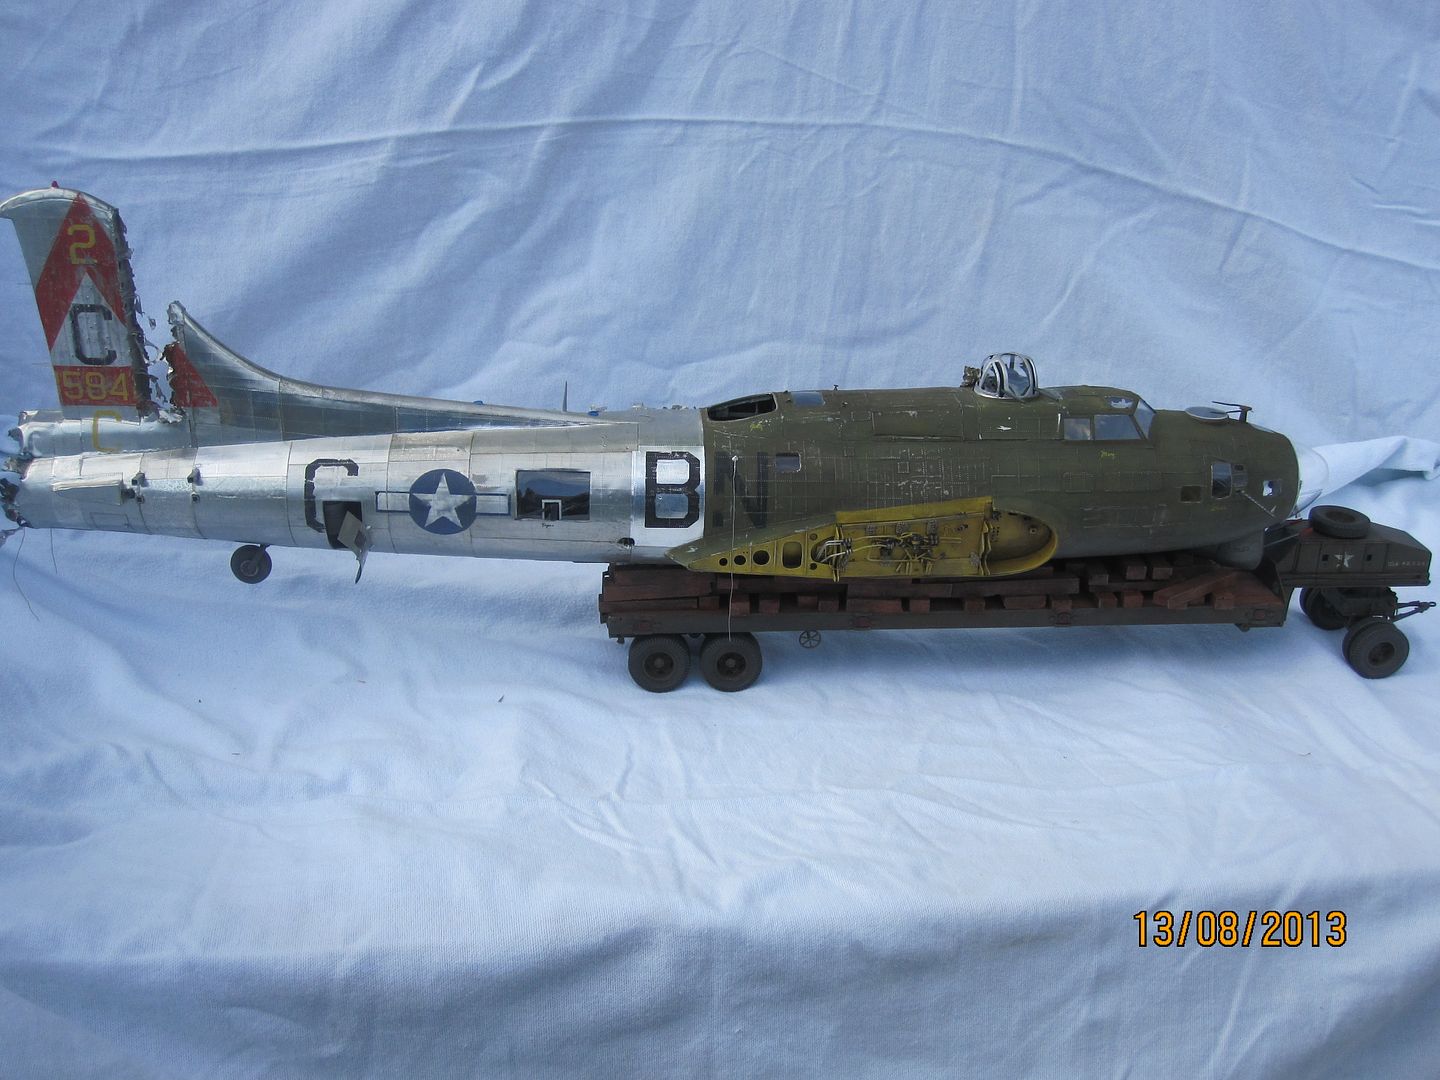
That's about it for now... as I say I will be updating the trailer/truck build thread with progress shots from the diorama.
Oh yes - I will be securing the Fort to the trailer with some chains / tie downs / ratchets or what have you - can't just have it sitting there!
Until next time, thanks for looking
Rich
-
Hi - for glue that dries rock hard but not instantly, you could do a quick google search for the Gator's grip range - there's more than one kind though! It gives you a few minutes to reposition stuff, but once it dries you are never getting that part unstuck!
-
Having seen this at Telford last year, I can attest to the insane level of detail within that box - it really is a masterpiece. Really looking forward to seeing one built!
This site should really help you - also features a Catalina walkaround by yours truly from one of the Duxford airshows

-
ace paint job jeroen, looks fantastic
-
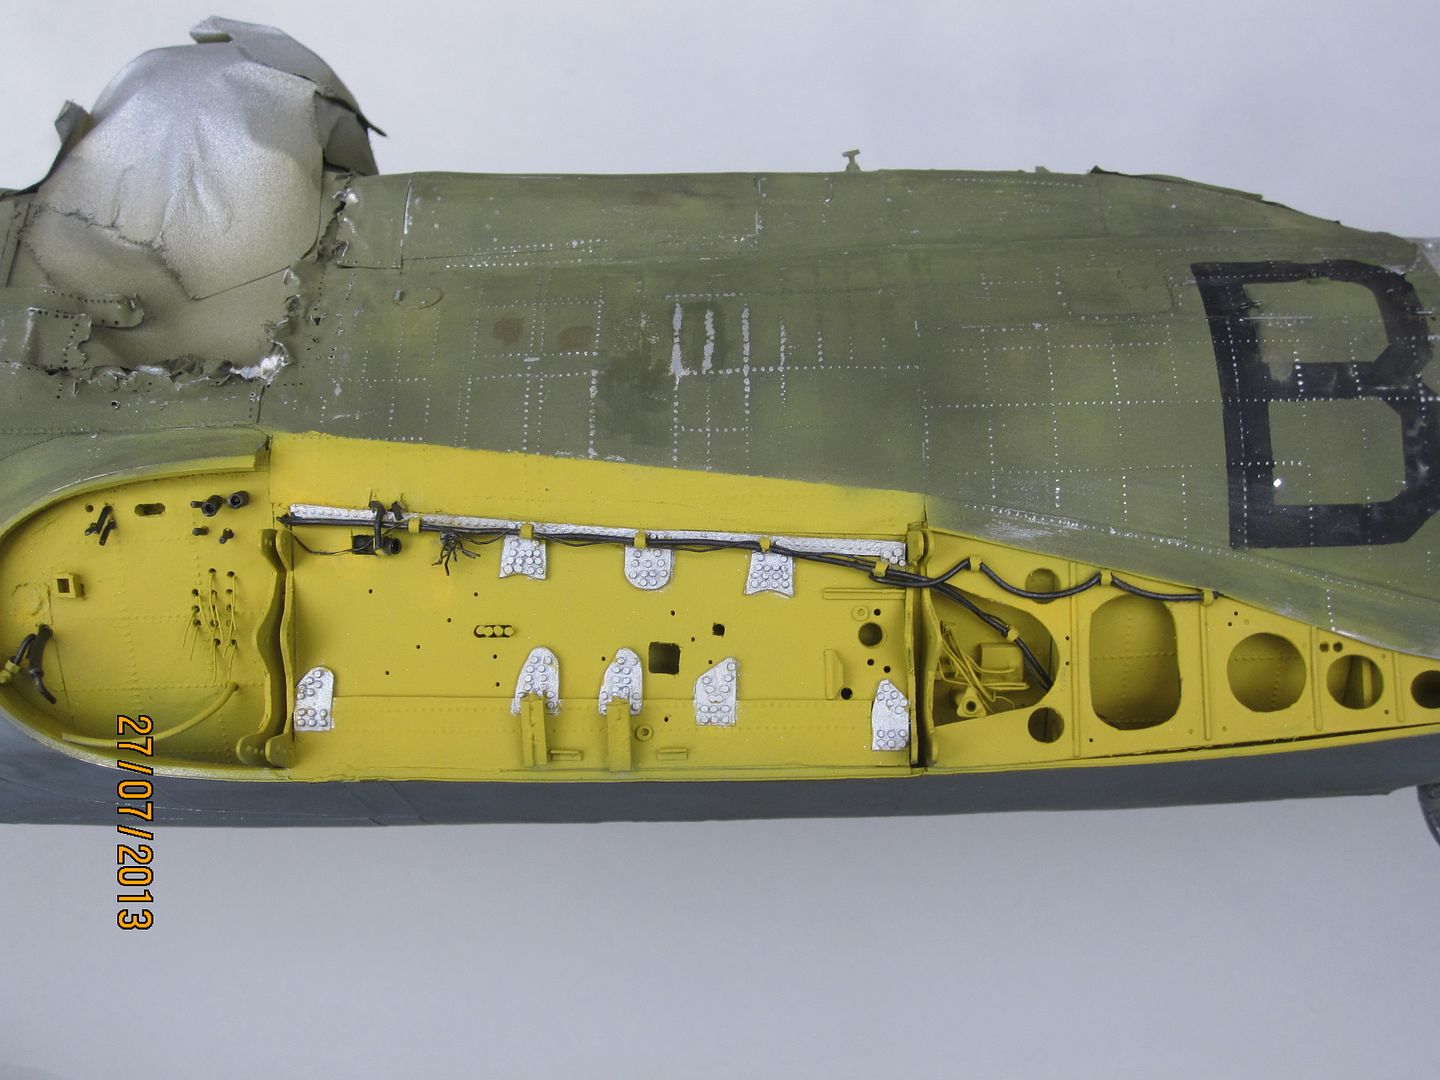
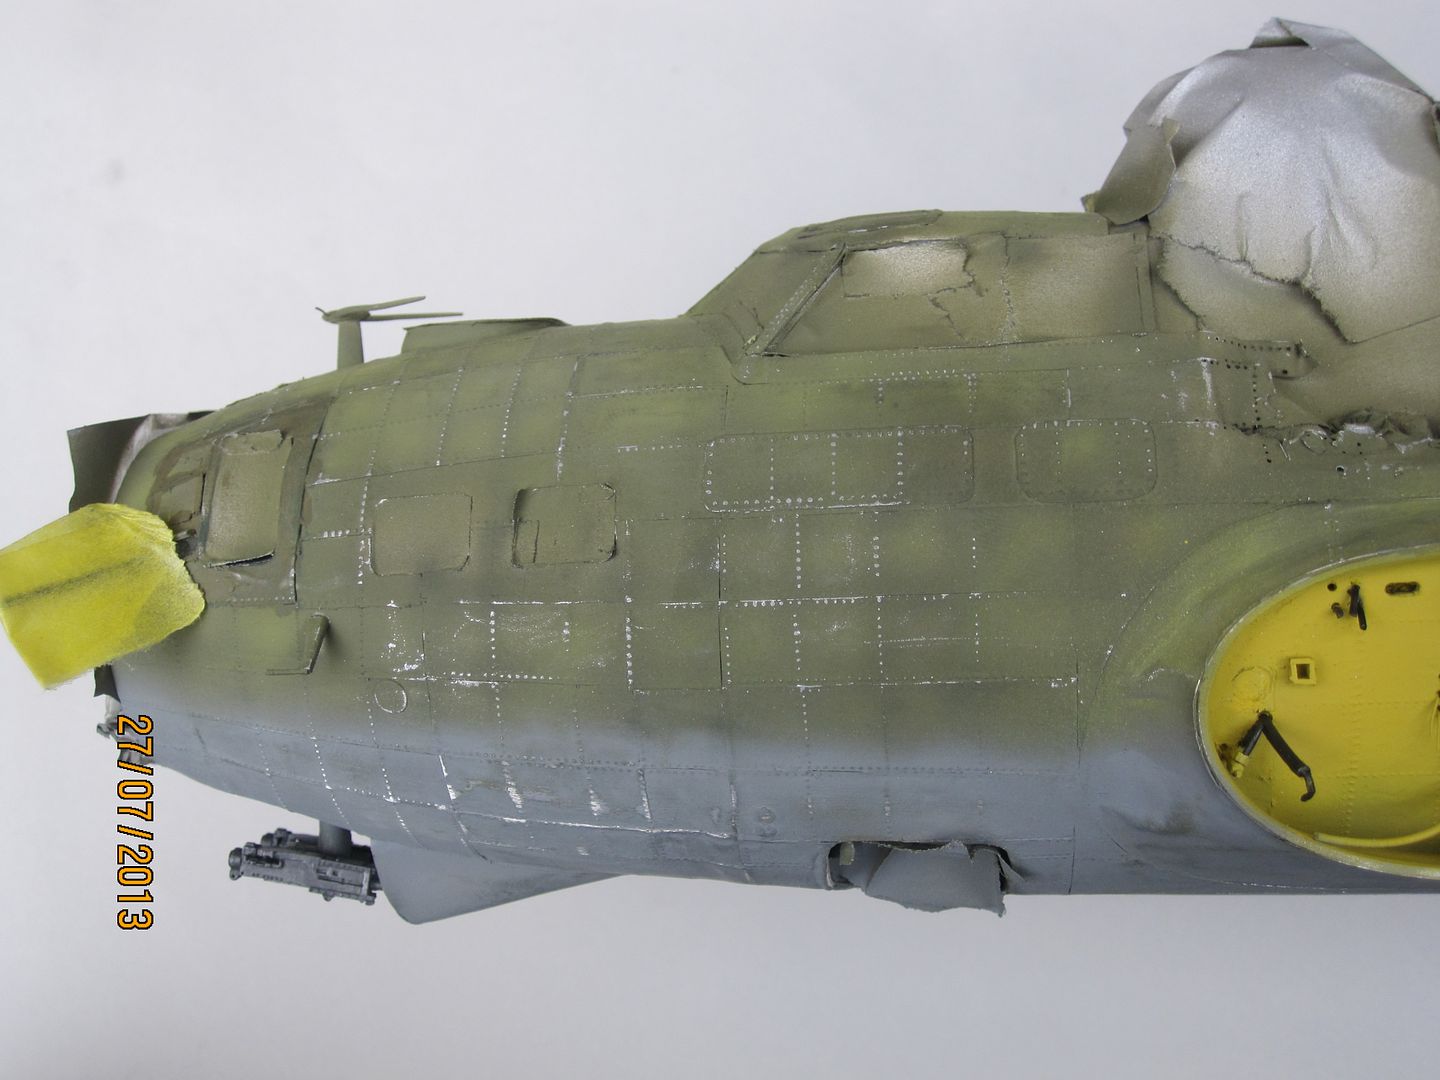
This is obviously the natural metal half of the plane - but I may add some yellow primer to this area as per the real thing. I'm not sure they would even have bothered priming at this stage of the war though.
Now we move on to other markings and paint - the forward half of the aircraft is older than the rear - and finished in Olive Drab. I carefully studied colour photos of the real aircraft - the finish varied widely in hue, from faded yellow to green to brown - even purple. I mixed Humbrol 155 (Olive drab) with yellow and a touch of green, and highlighted with lighter shades of the base colour. Prior to this I had undercoated the entire front end with automotive silver paint, over an undercoat of automotive grey. I then pre-shaded the panel lines with black. This was the first time I've attempted to do this properly, and I was happy with the result. I added some blotches in plain olive drab to depict flak patches & touched up areas, and also painted the left cheek gun in OD to give the effect of a replaced part. The underneath was finished in a shade of grey that looked right. The wing joins were finished in Yellow primer. I then applied the 'sanding as weathering' technique again on the front section - here are some pics. There's no other weathering here except pre-shading and sanding. Once I've applied the noseart decals and sealed them in, I'll probably weather it some more using conventional washes & drybrushing:
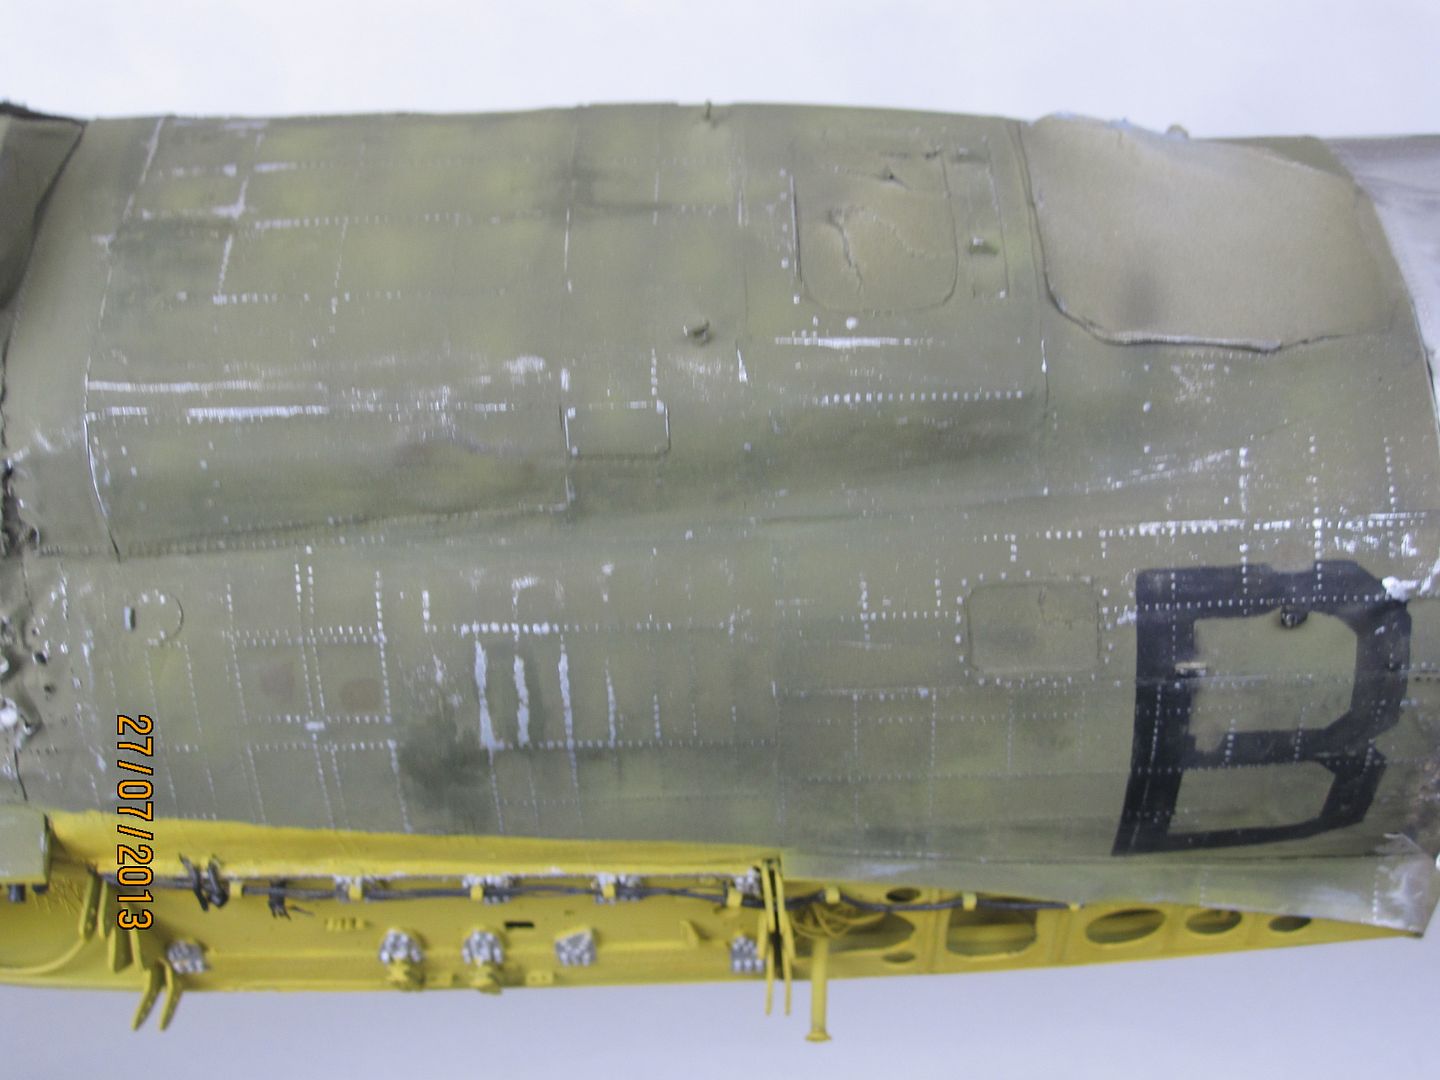
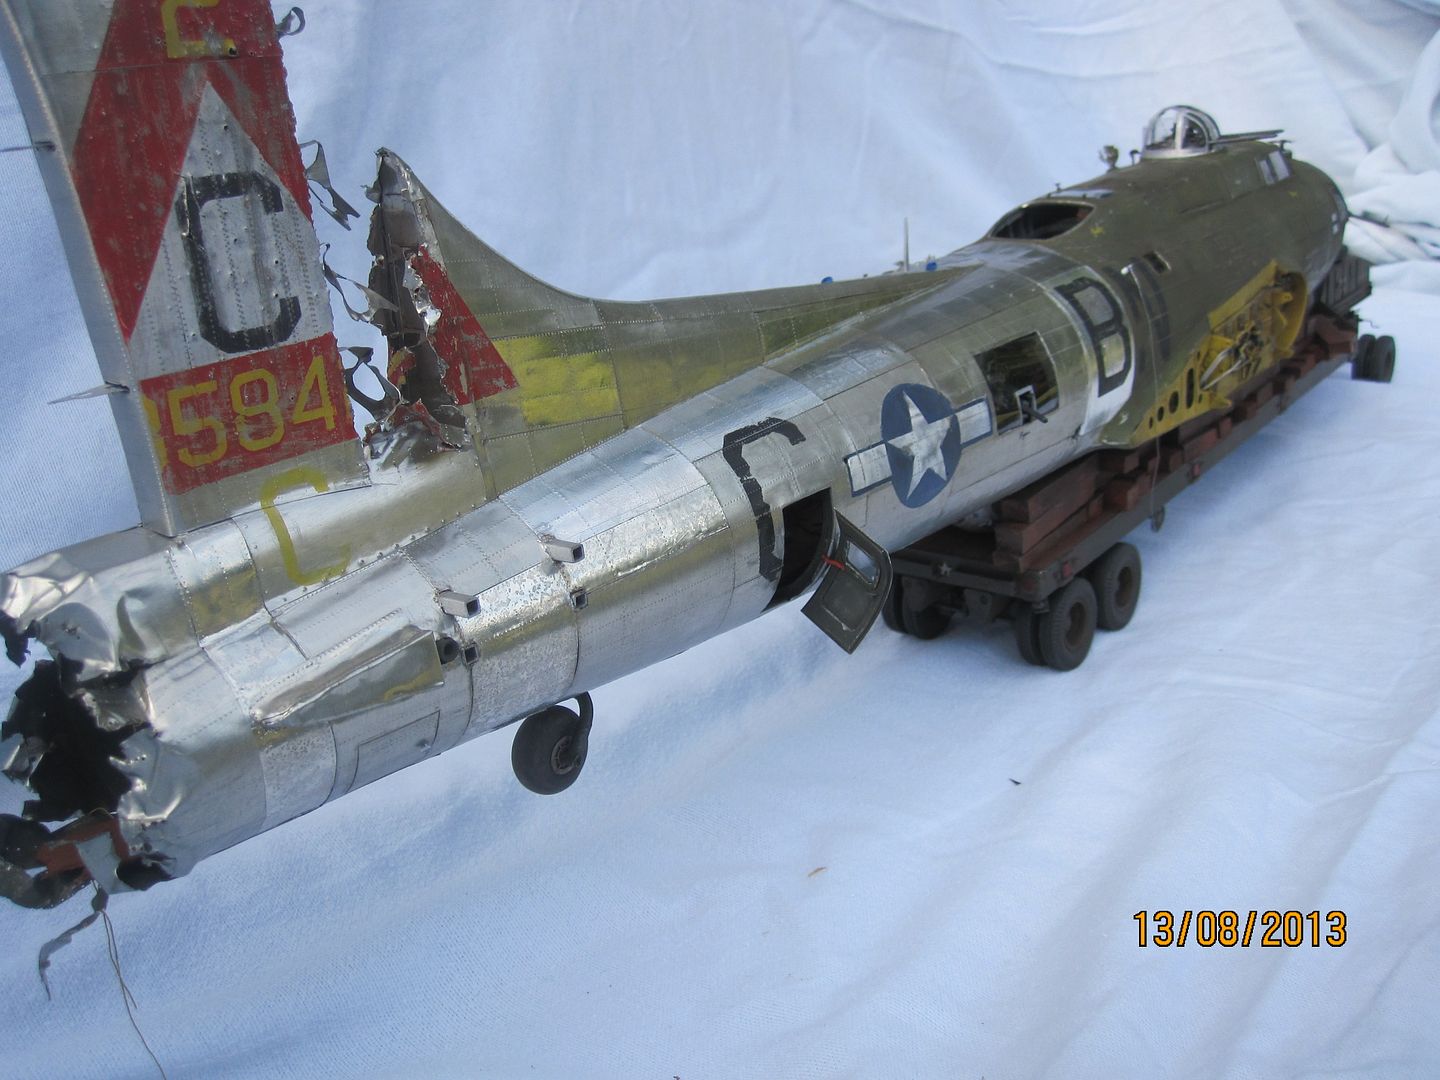
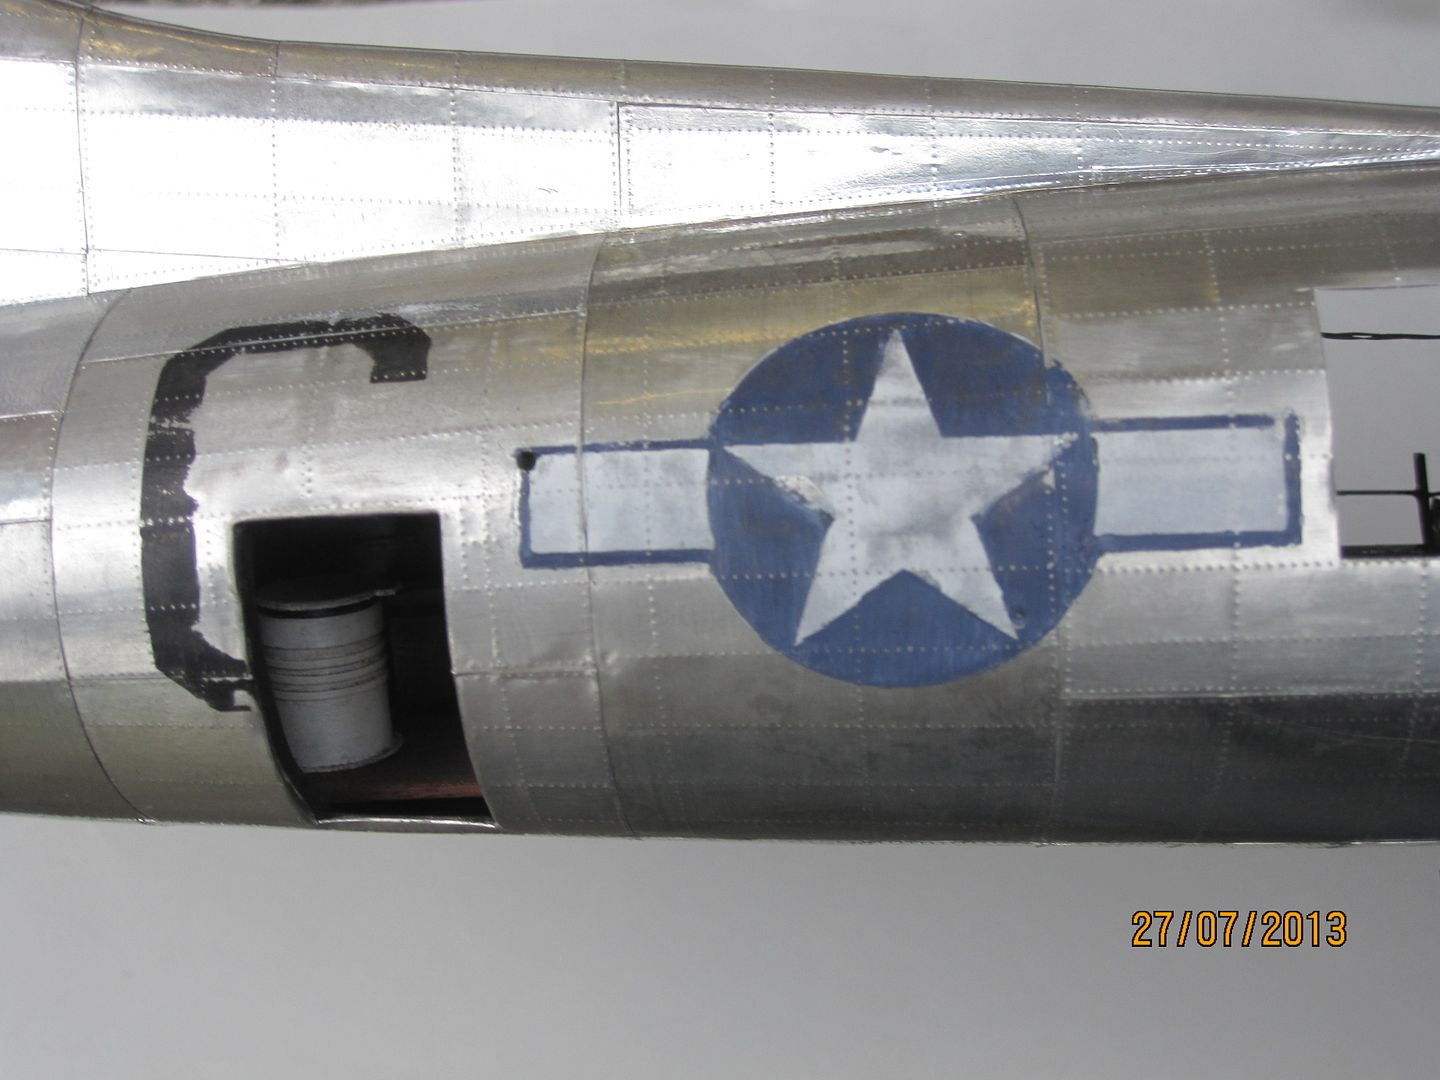
Finally for this update, here's the national markings and the radio call letter "C' (in honour of my sister Catherine who designed the nose art) - here's the right side, with the same sanding as weathering technique.
and the left side - there's only 1 more panel to attach. I need to fit the waist guns and windows before I can do that:
And an overview (the top turret is obviously still masked off here) - distorted perspective at work...the fuselage is 2 feet long!
That's it for now - I estimate I'm a couple of weeks away from finishing the Fortress. My custom base and case have arrived, so next up I hope to be able to show the completed model, and to have made a start on the groundwork for the diorama. Once I've bought some suitable figures we're in business!
Feedback welcomed as always,
Rich
-
1
-
-
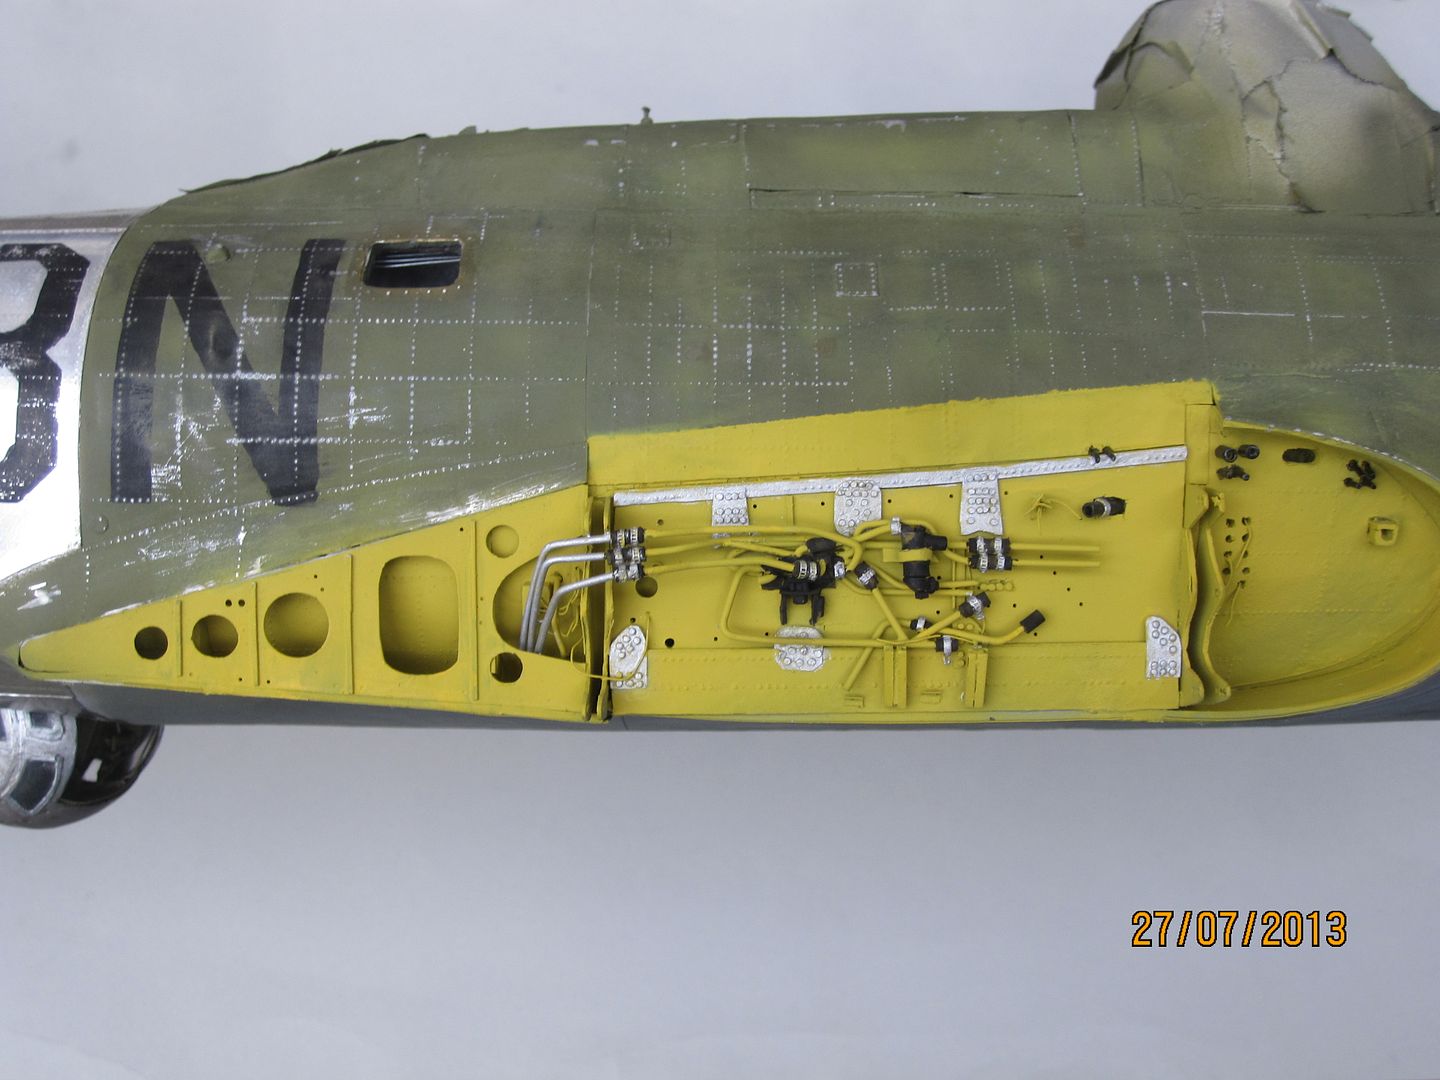
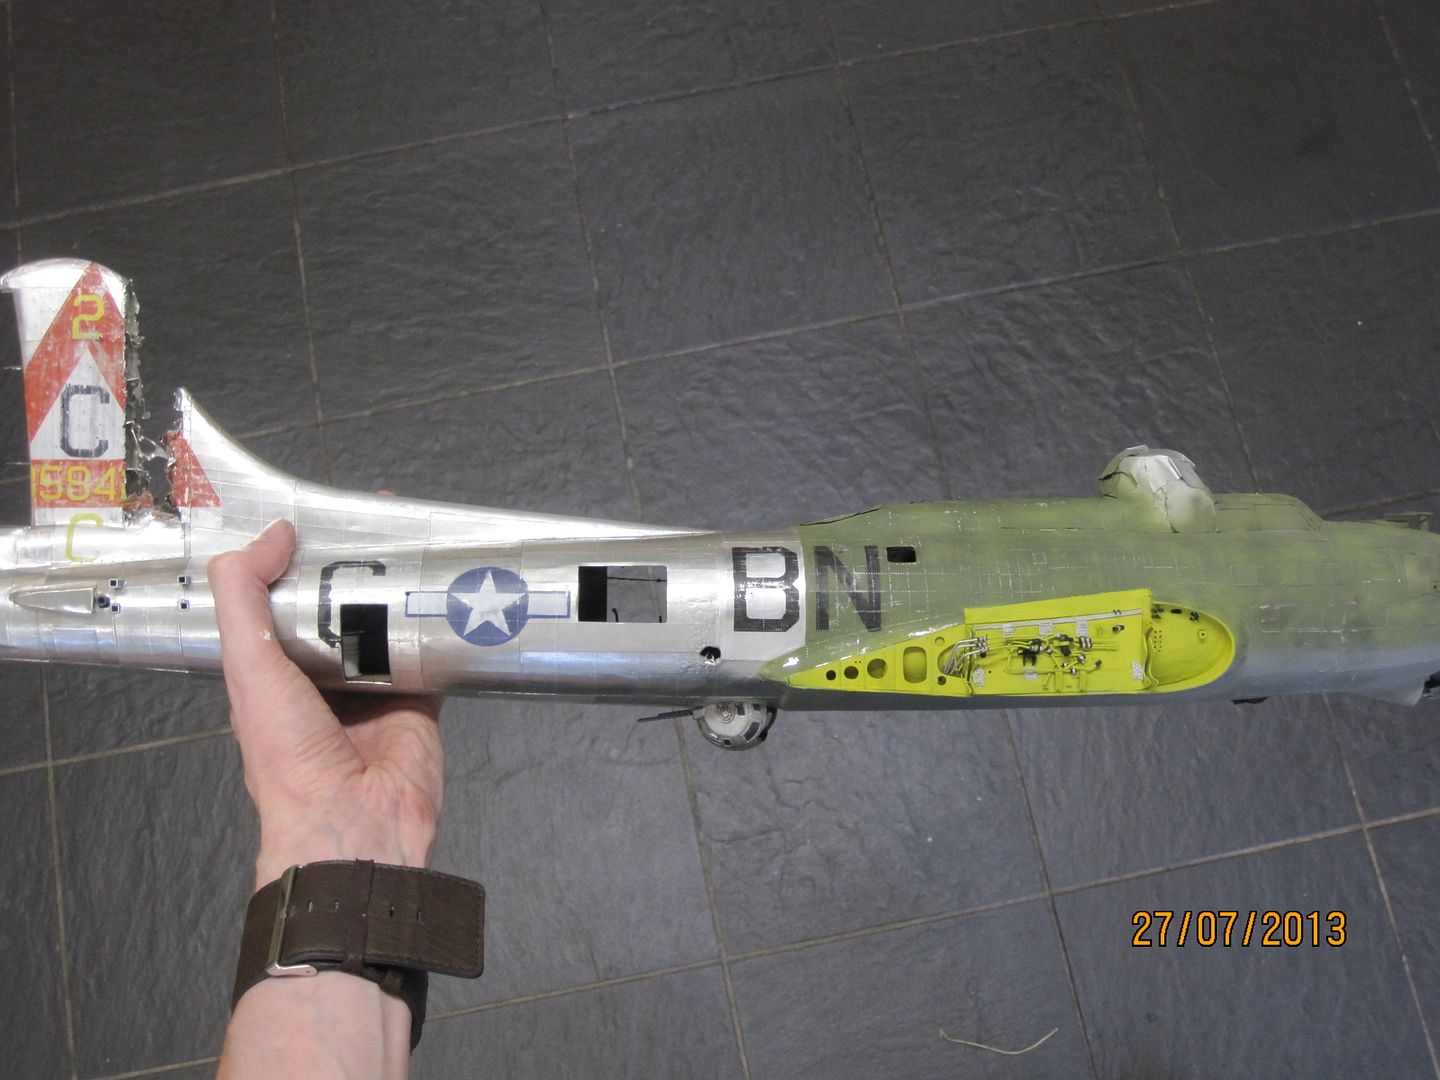
*update 27/7*
Hi guys - time for a quick update. I've managed to get some paint on the Fort. I got some custom masks & decals made to my specifications for a fictional machine of the 359th Bomb Squadron, 303rd Bomb Group, 8th Air Force, 1st Air Division - 41st Combat Wing, Molesworth, England in late 1944 / early 1945. The decals and masks were made by a fella named Steve Croasdale (who posts on the large scale planes.com forums as krow113)
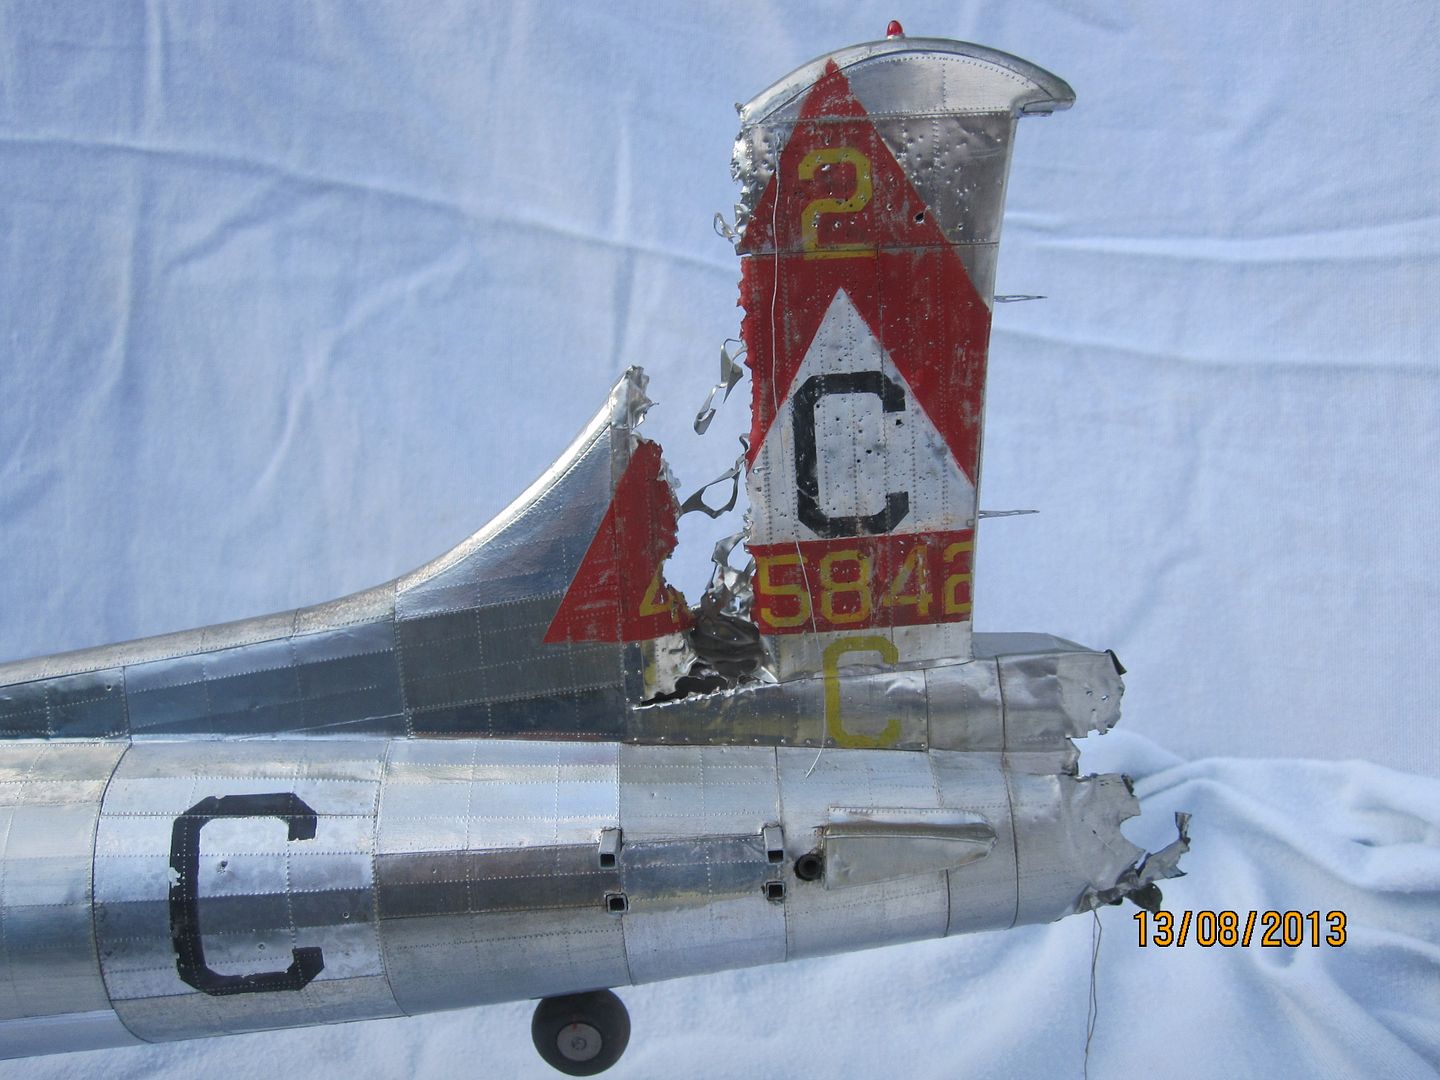
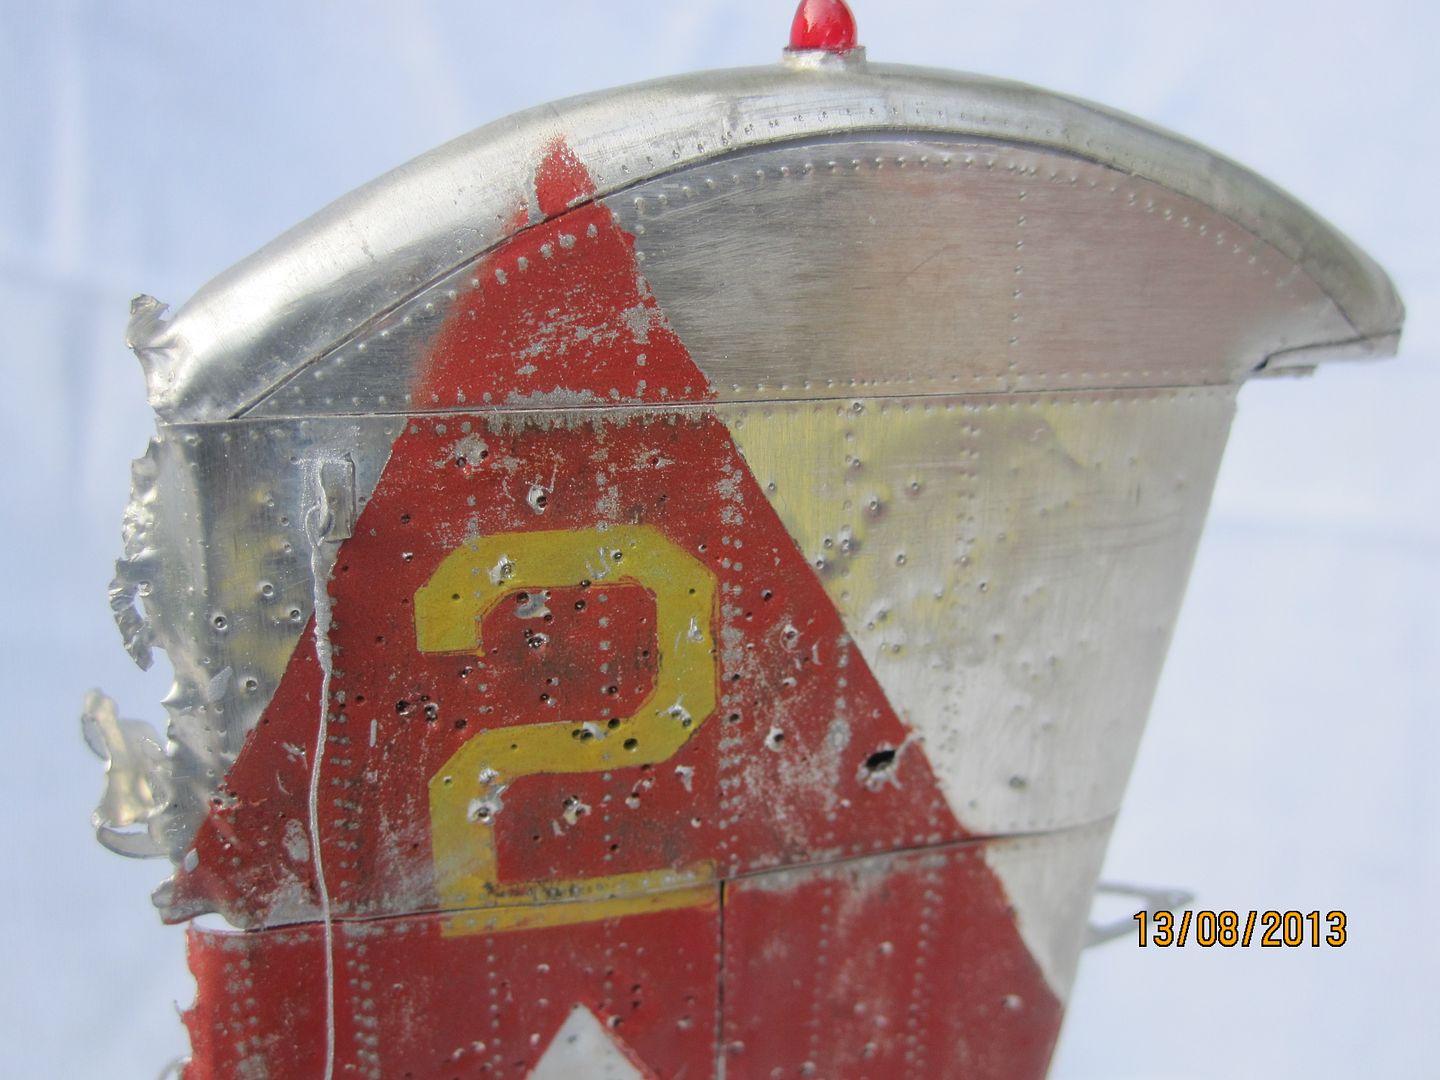
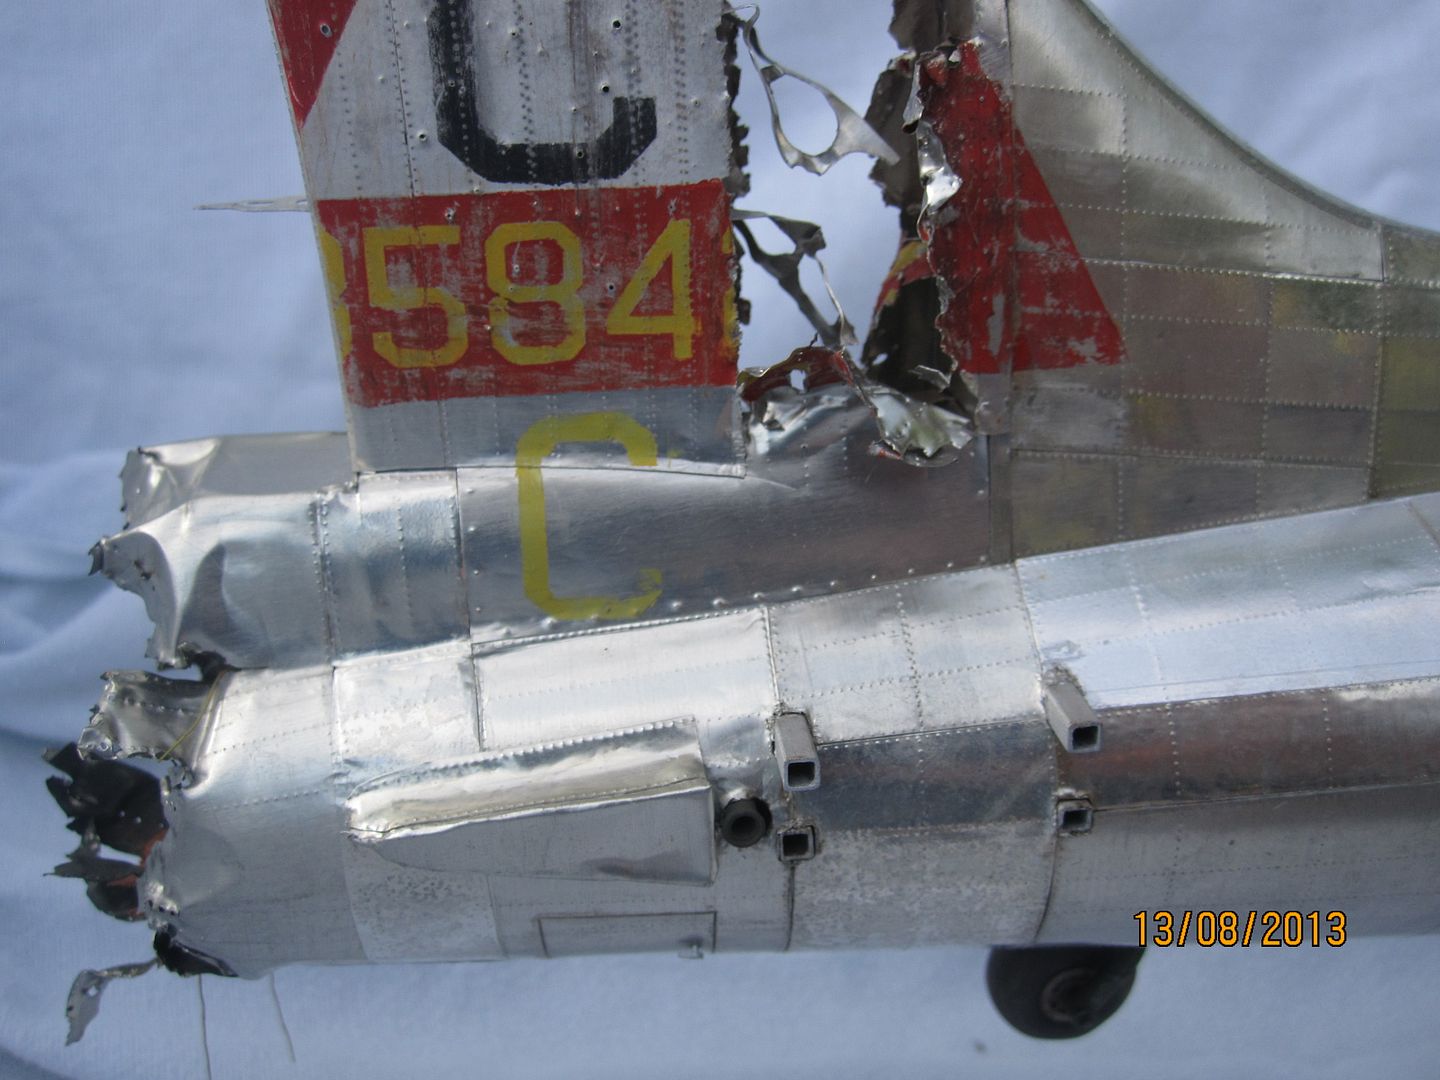
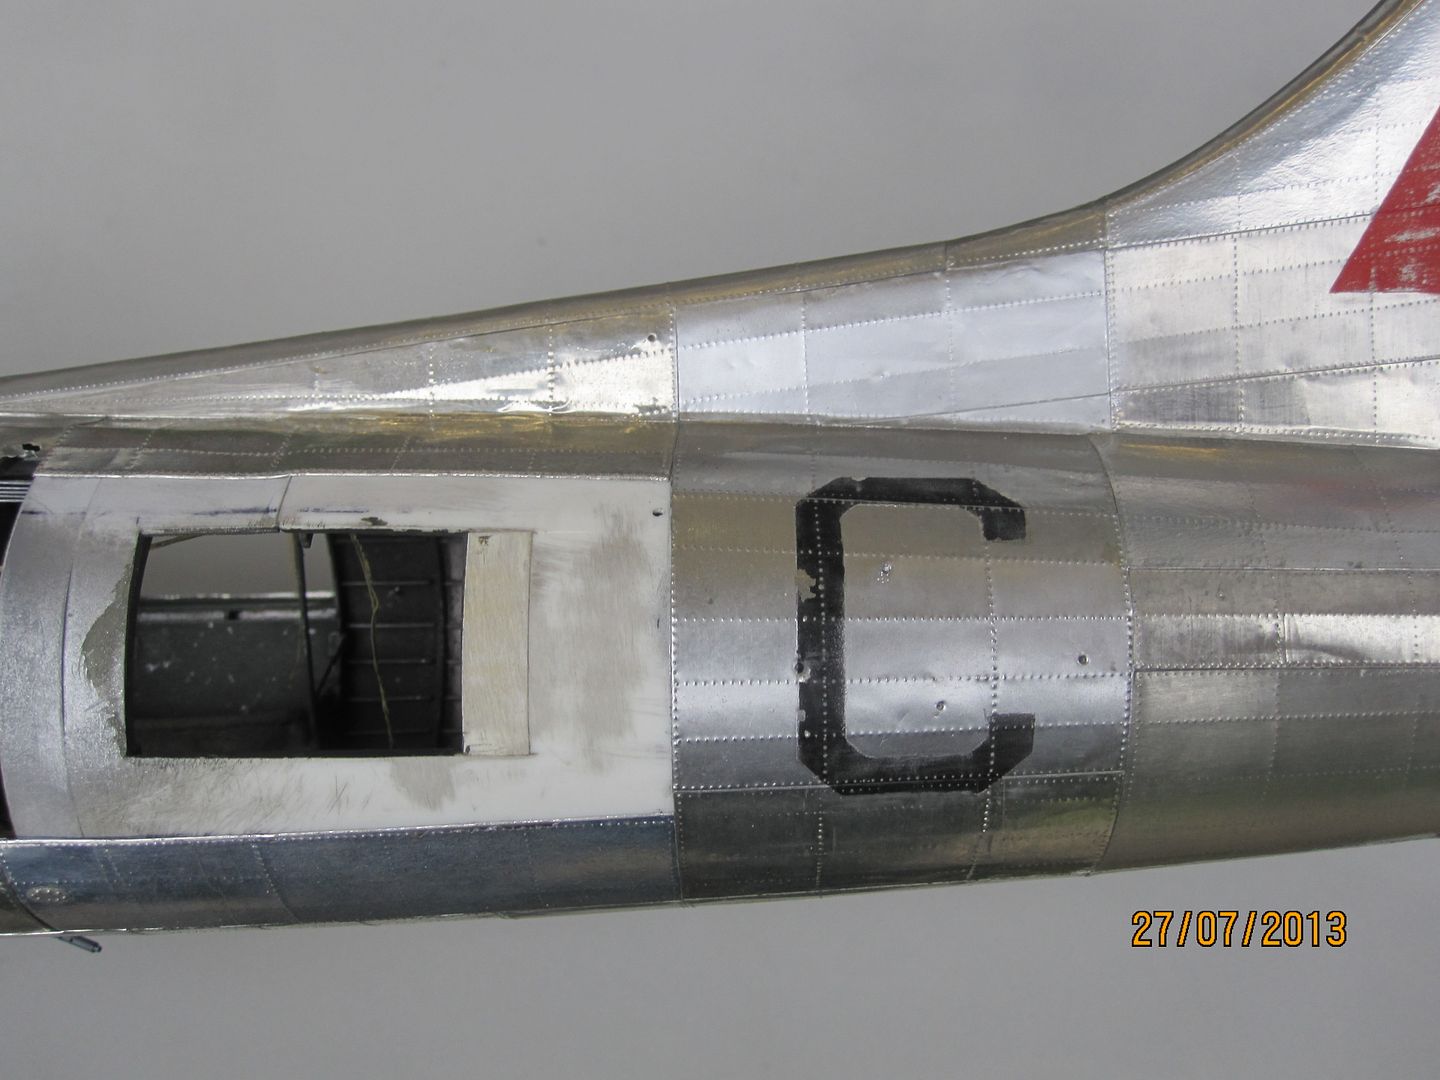
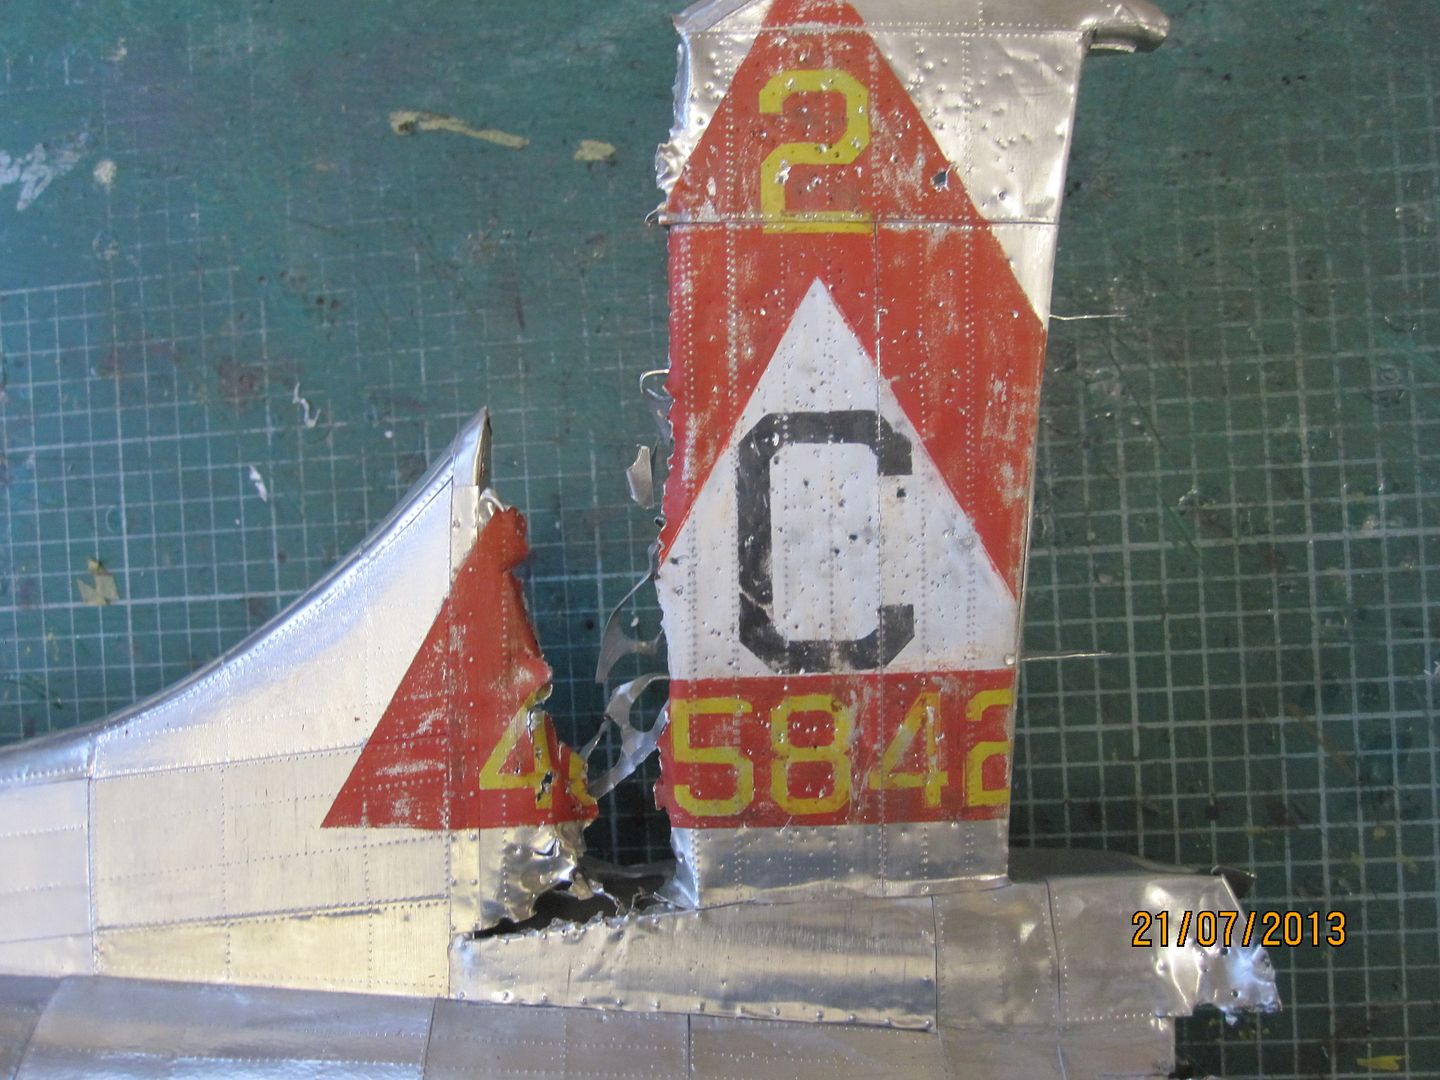
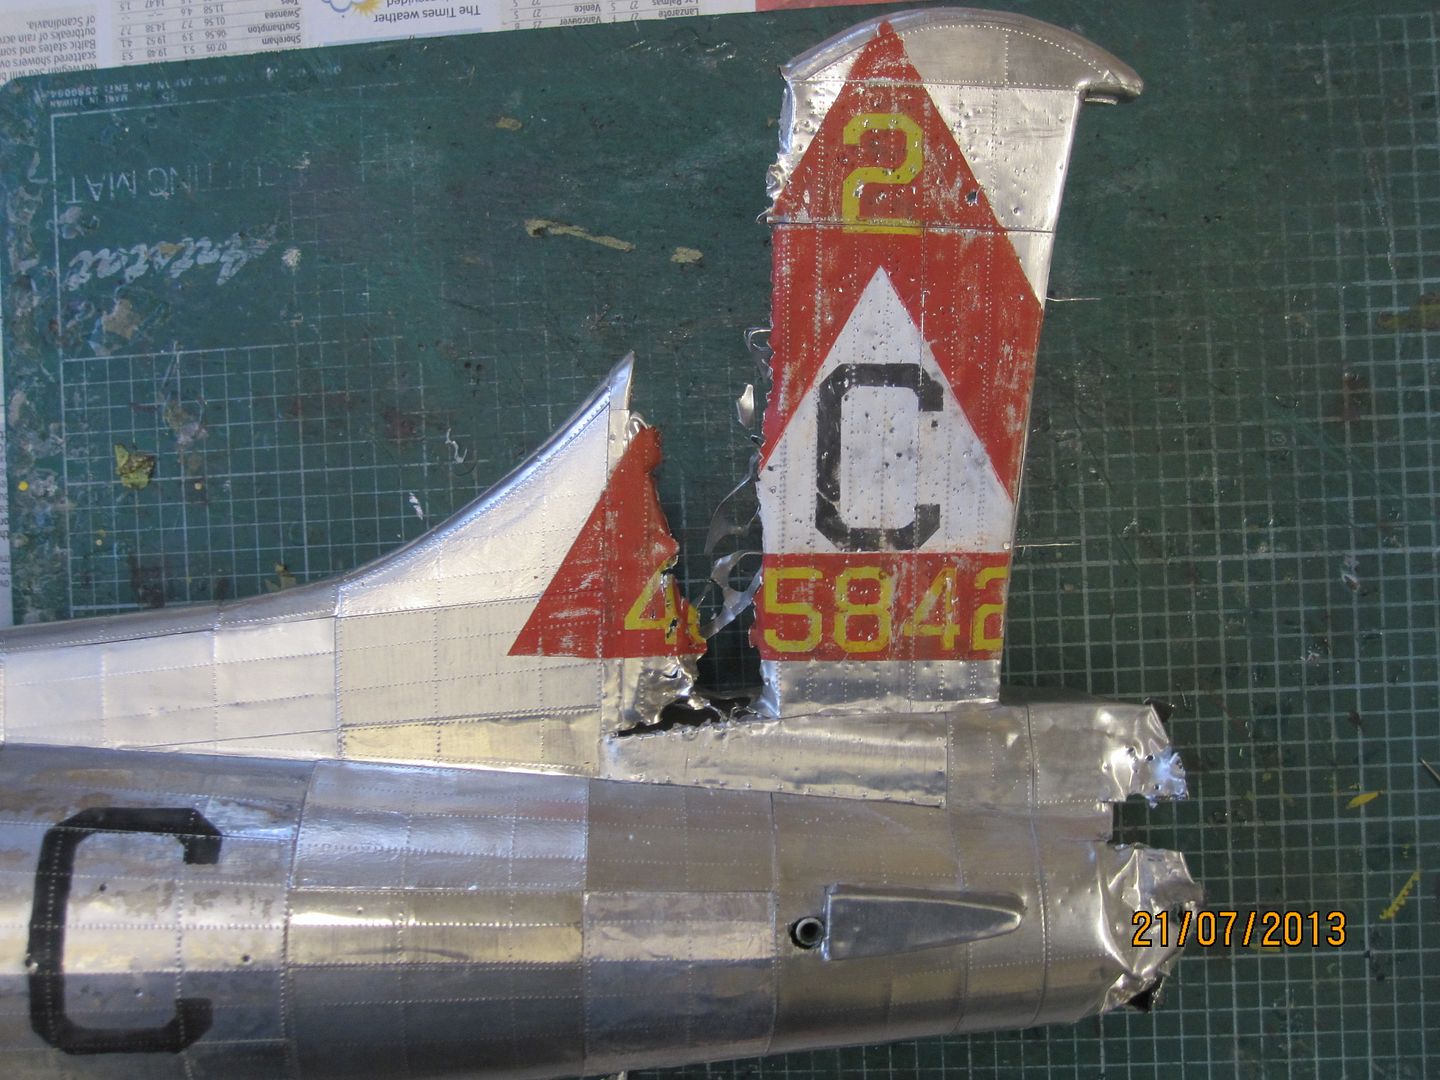
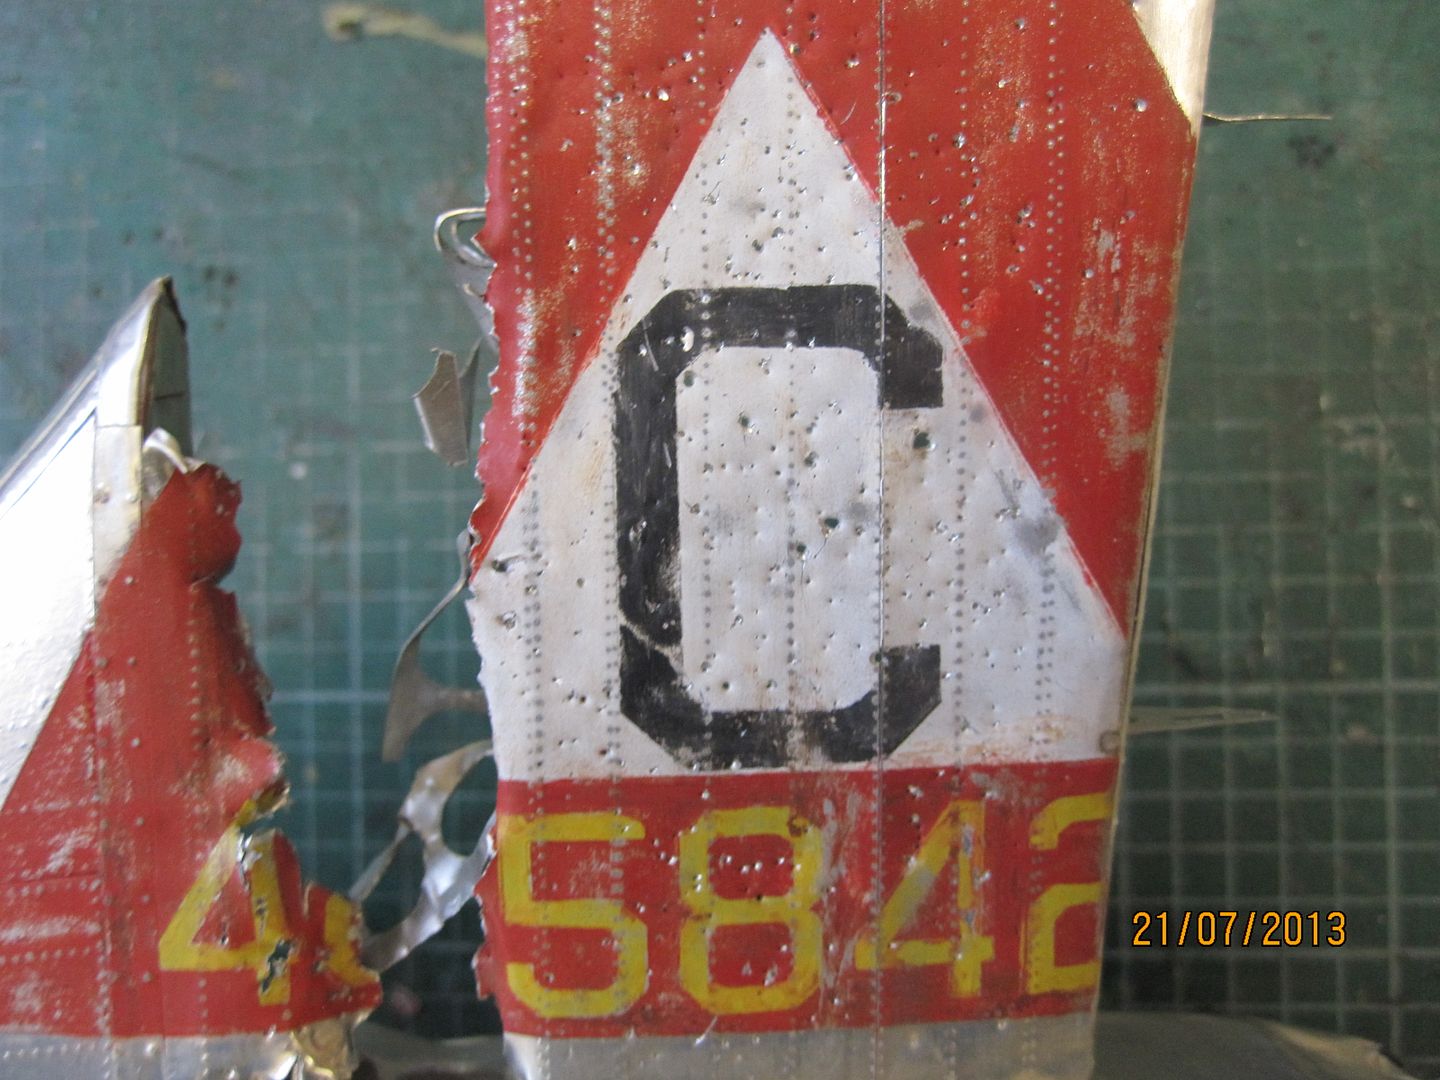
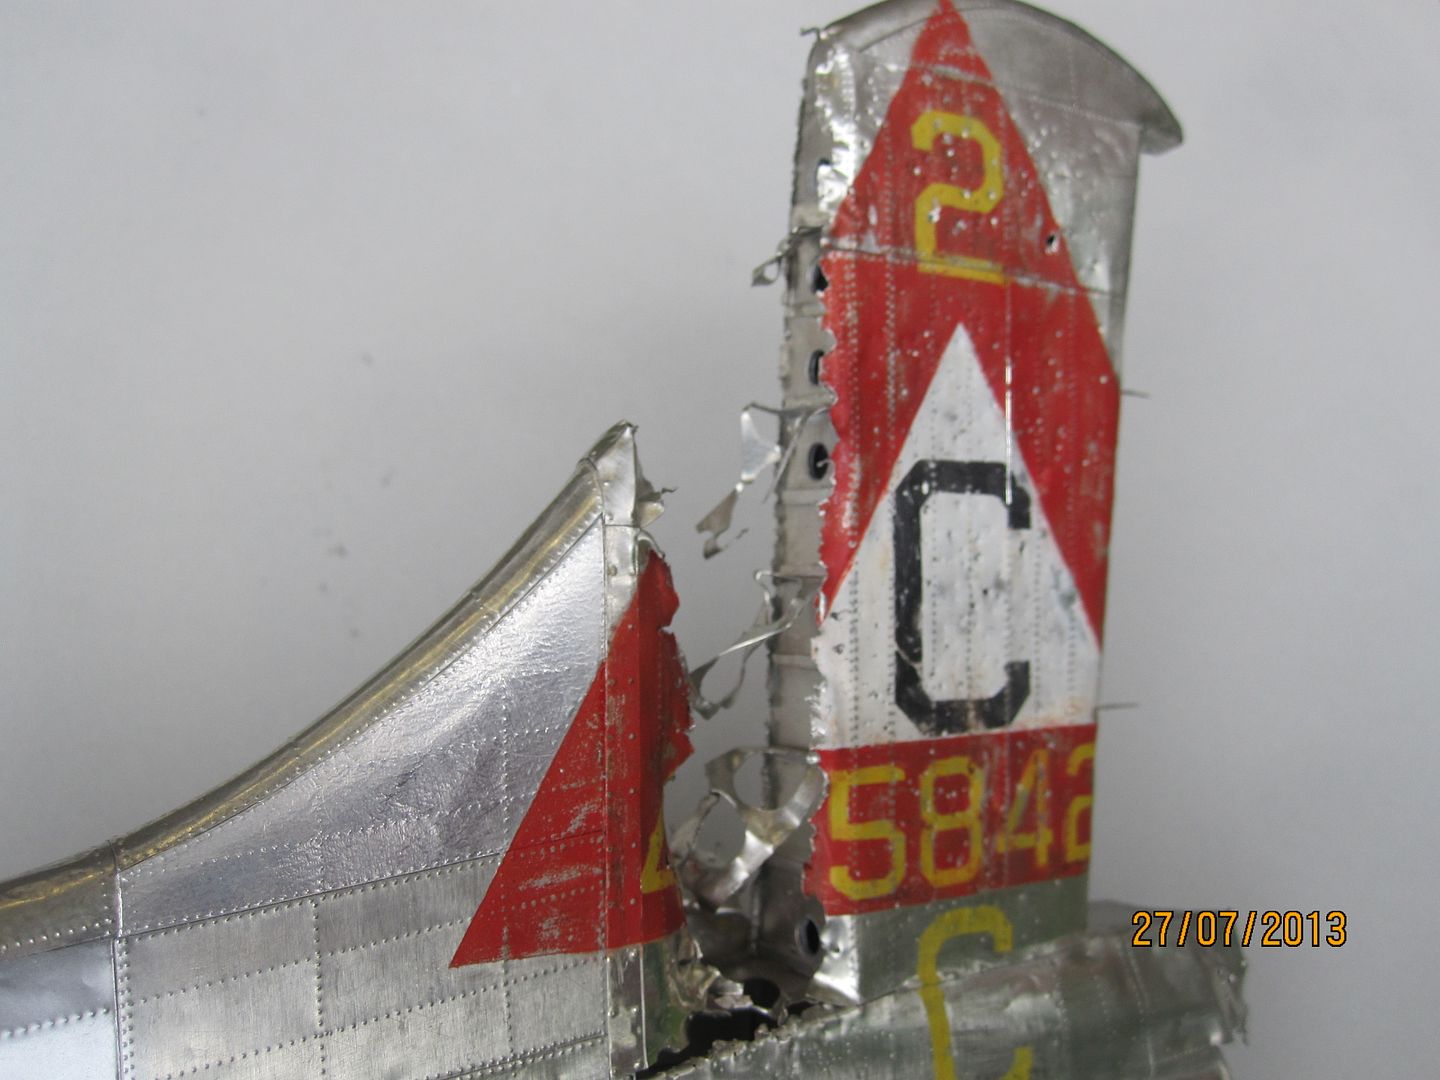
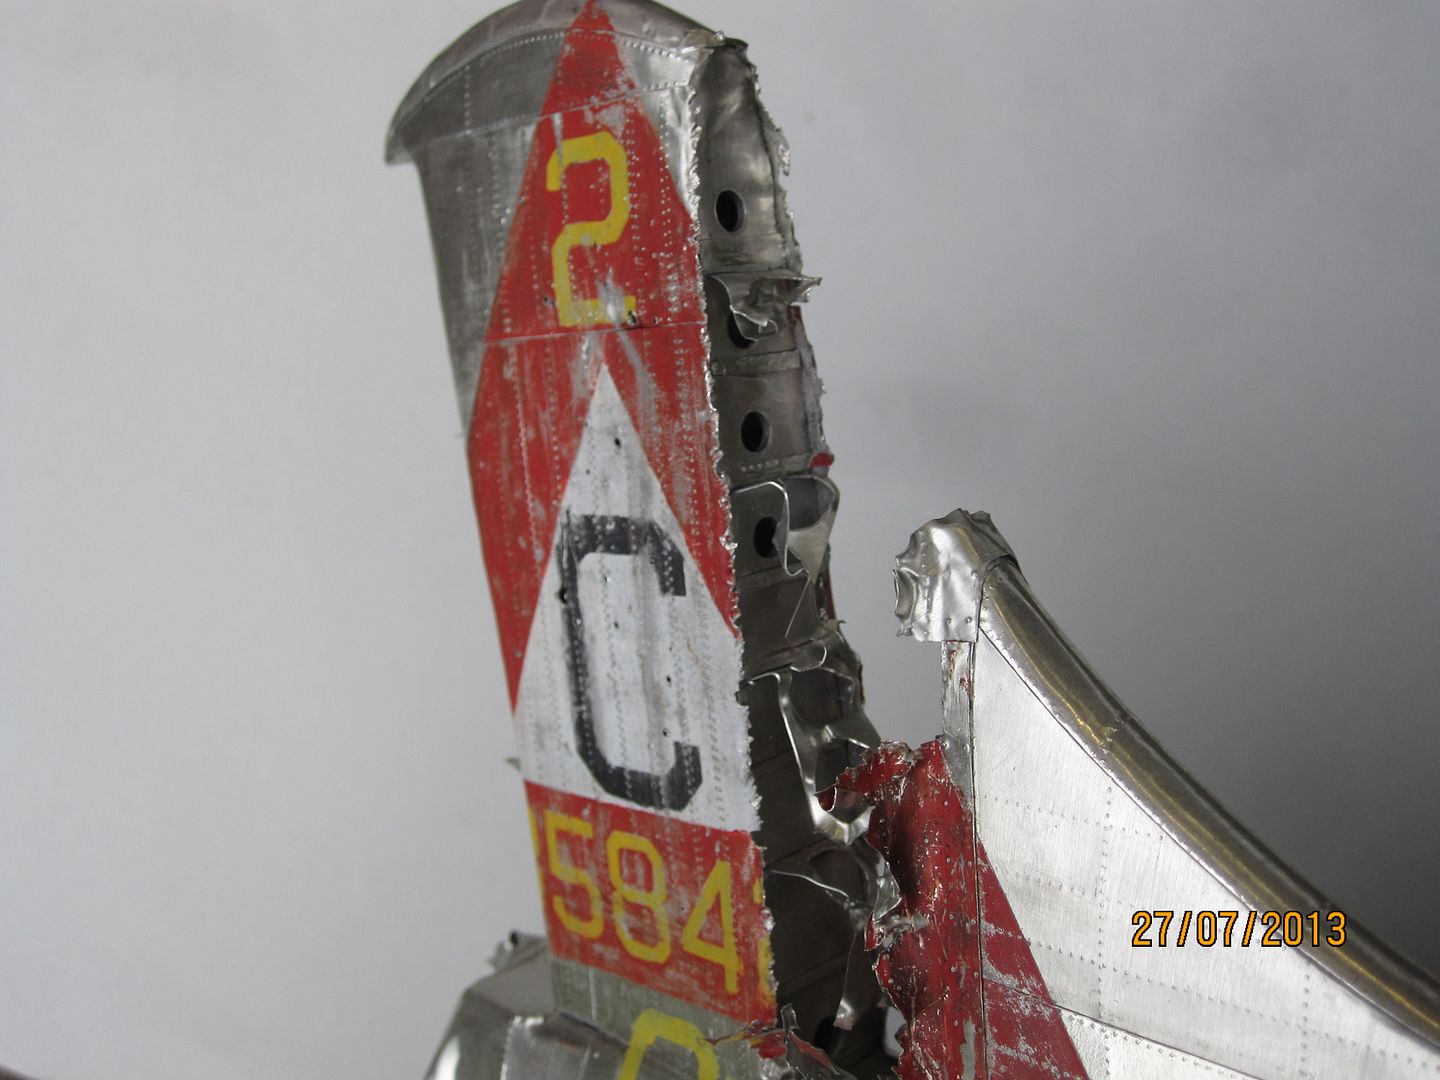
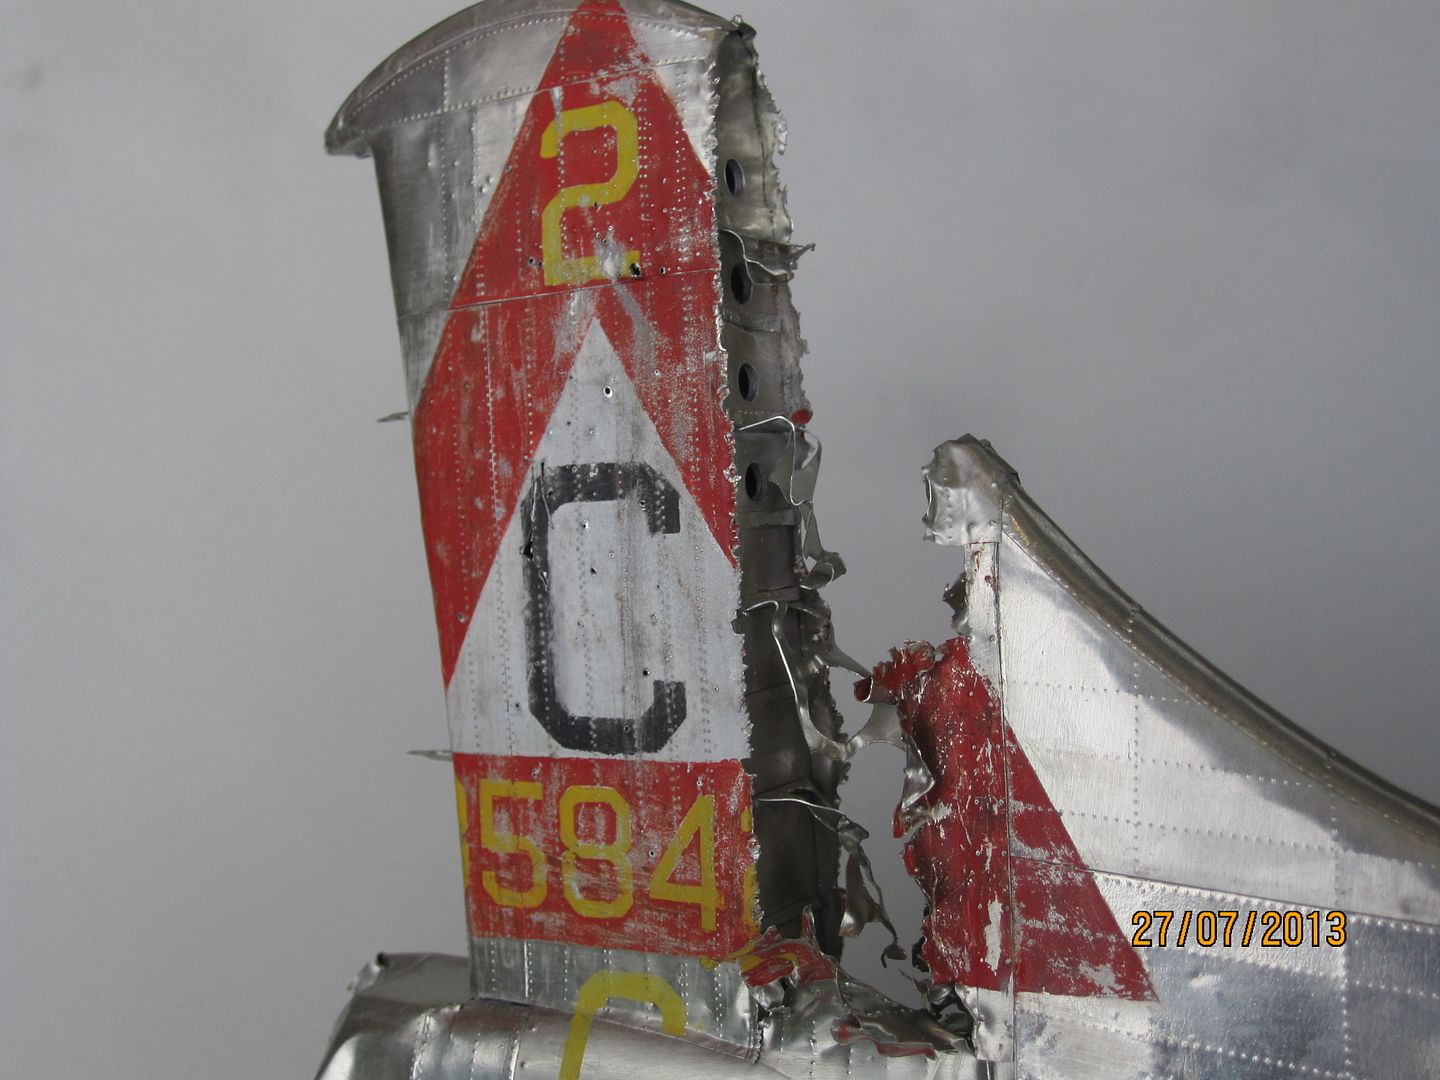
First of all, I tackled the tail area - as I posted in my last update, I cut out large sections of the tail fin so that I could show the skin panels full of little holes - the most realistic way to do it was to have a void behind the panels. The 303rd had a distinctive tail marking, a white triangle inside a red one with the group insignia 'C'. Here are the panels painted up using the masks - as I was going to weather them by sanding, there was no need for them to be pristine. I actually managed to do all the painting in one sitting, waiting around 5 minutes for each different colour to dry. After drying, I lightly sanded the painted markings with fine grade sandpaper - here's a photo. On the left, the sanded / weathered panels for the left side. On the right, the just painted, unsanded panels for the right.
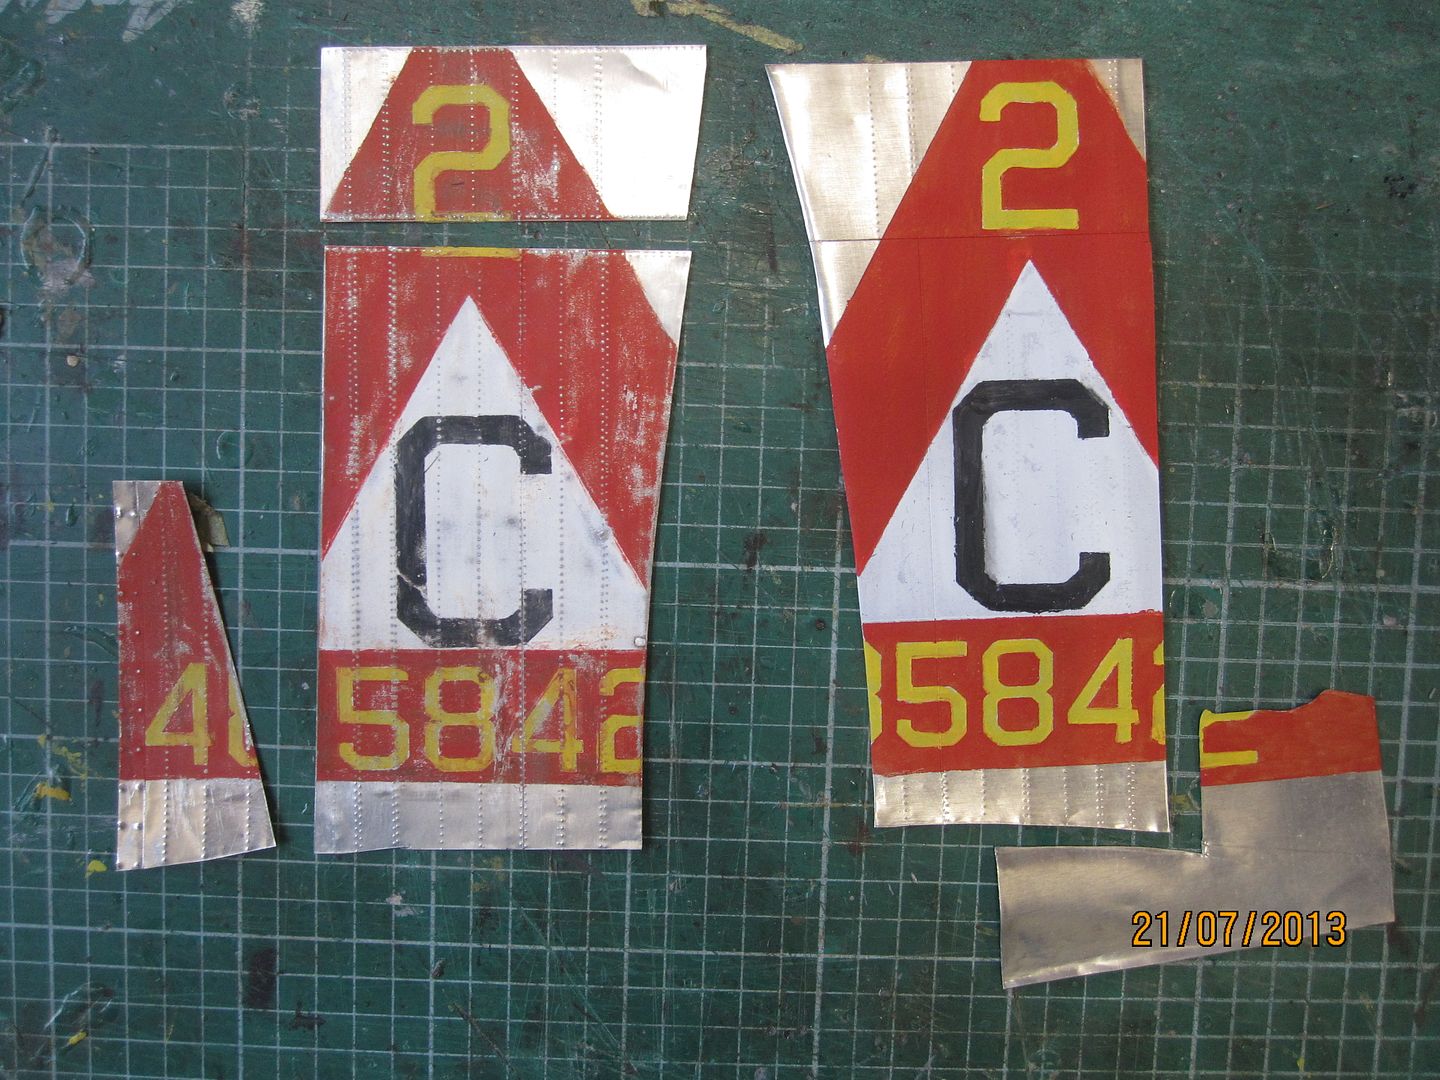
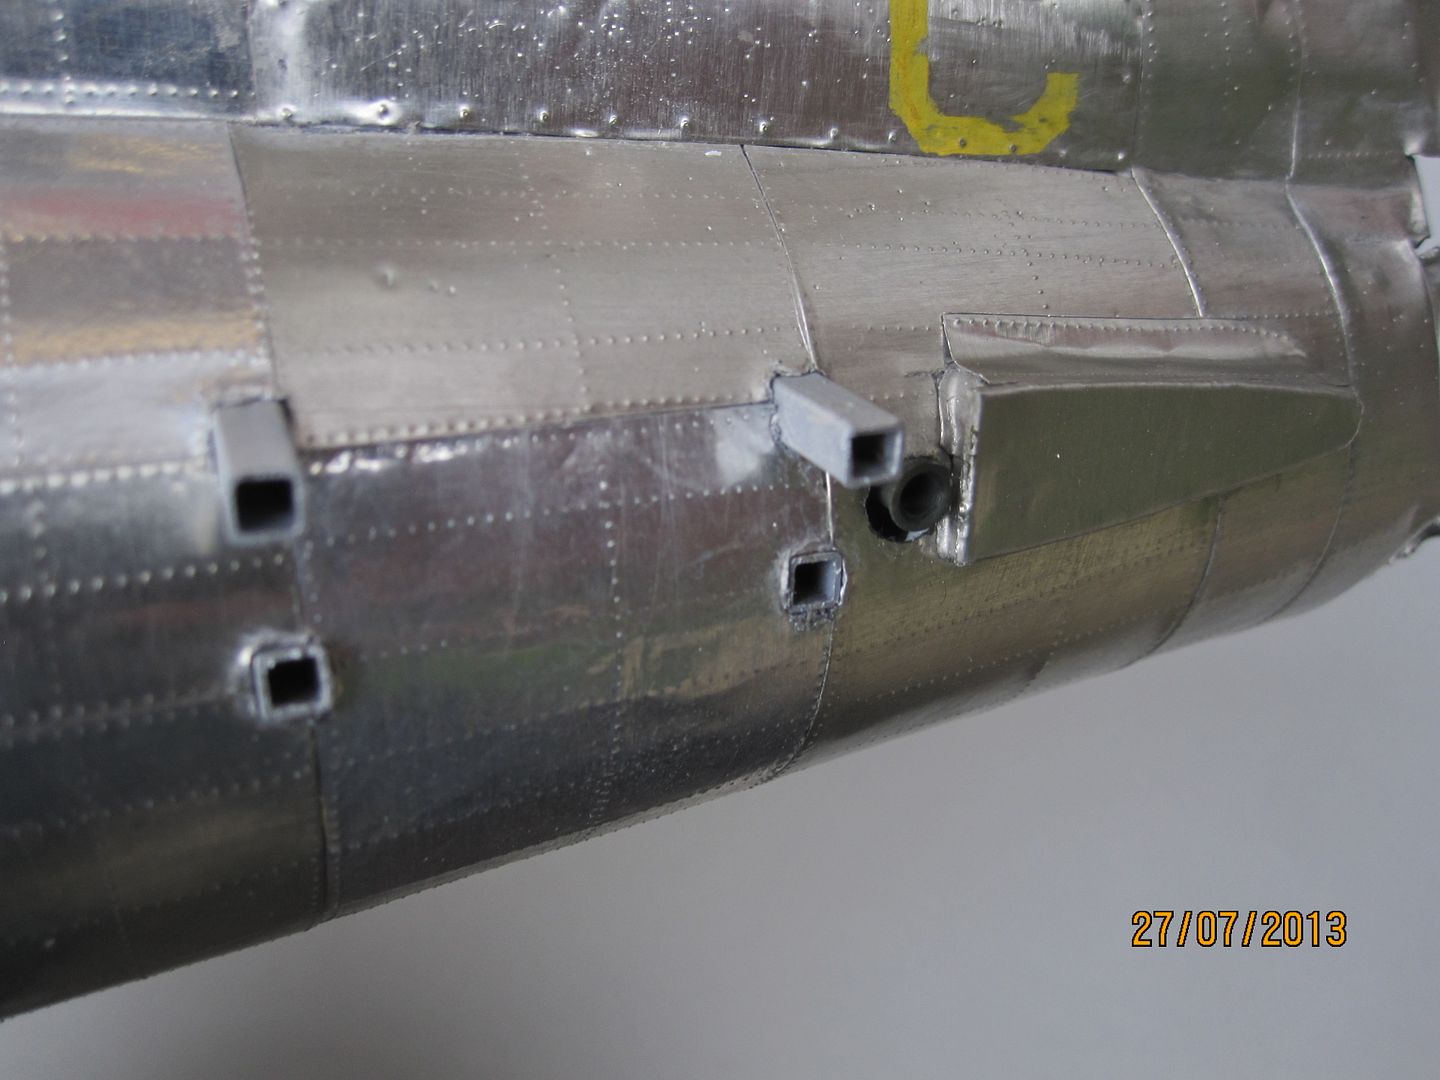
I then replicated the 'shrapnel peppered' effect by punching hundreds of tiny holes through the metal, using a variety of tools. The damage on the tail goes from the left to the right - therefore panels were punched in on the left, and blown outward on the right.
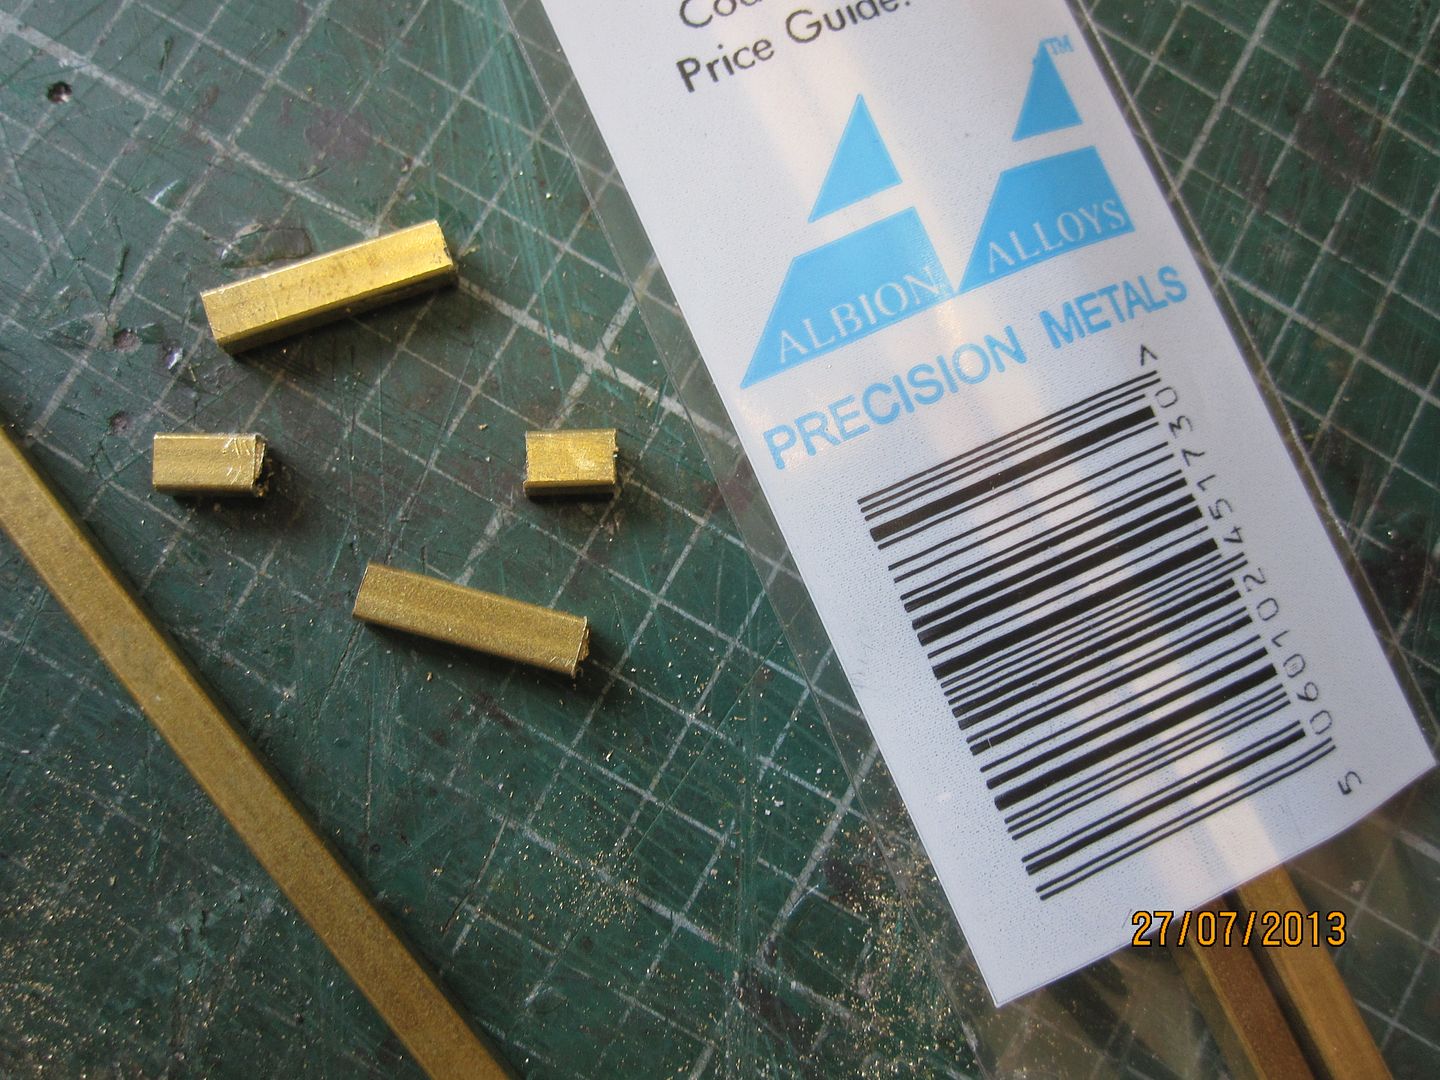
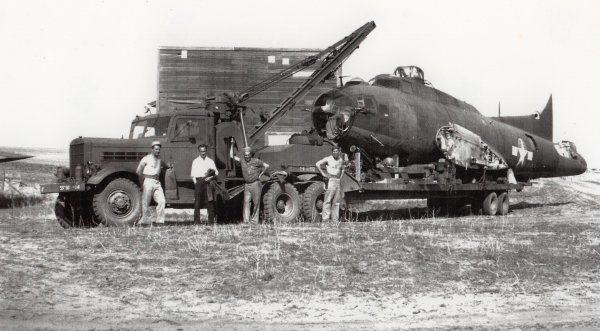
I then realised that I had forgotten to add the mounting pegs for the tailplane - here are the real ones seen on the 'Mary Alice' at Duxford:
I used some square brass tube from the Albion Alloys range to replicate the pegs:
-
1
-
-
hopefully matt, yes...
-
hi guys, thanks for the warm welcome!
Glad to see some familiar names on here too...
more updates ASAP. Am tackling the paintjob next..
-
-
-
-
-
Hi guys
my name's Rich, I'm 35 and live in the grim North of the UK
I've been making models for over 30 years on and off. My old man has been making them for 60 years (ish) and was a founding member of the IPMS back in 1963 (he's also current UK Magazine editor) so I blame him for my fetish. Whilst he concentrates on fiddly little toys in 1/72, I stick with the true scales of 1/32 and larger
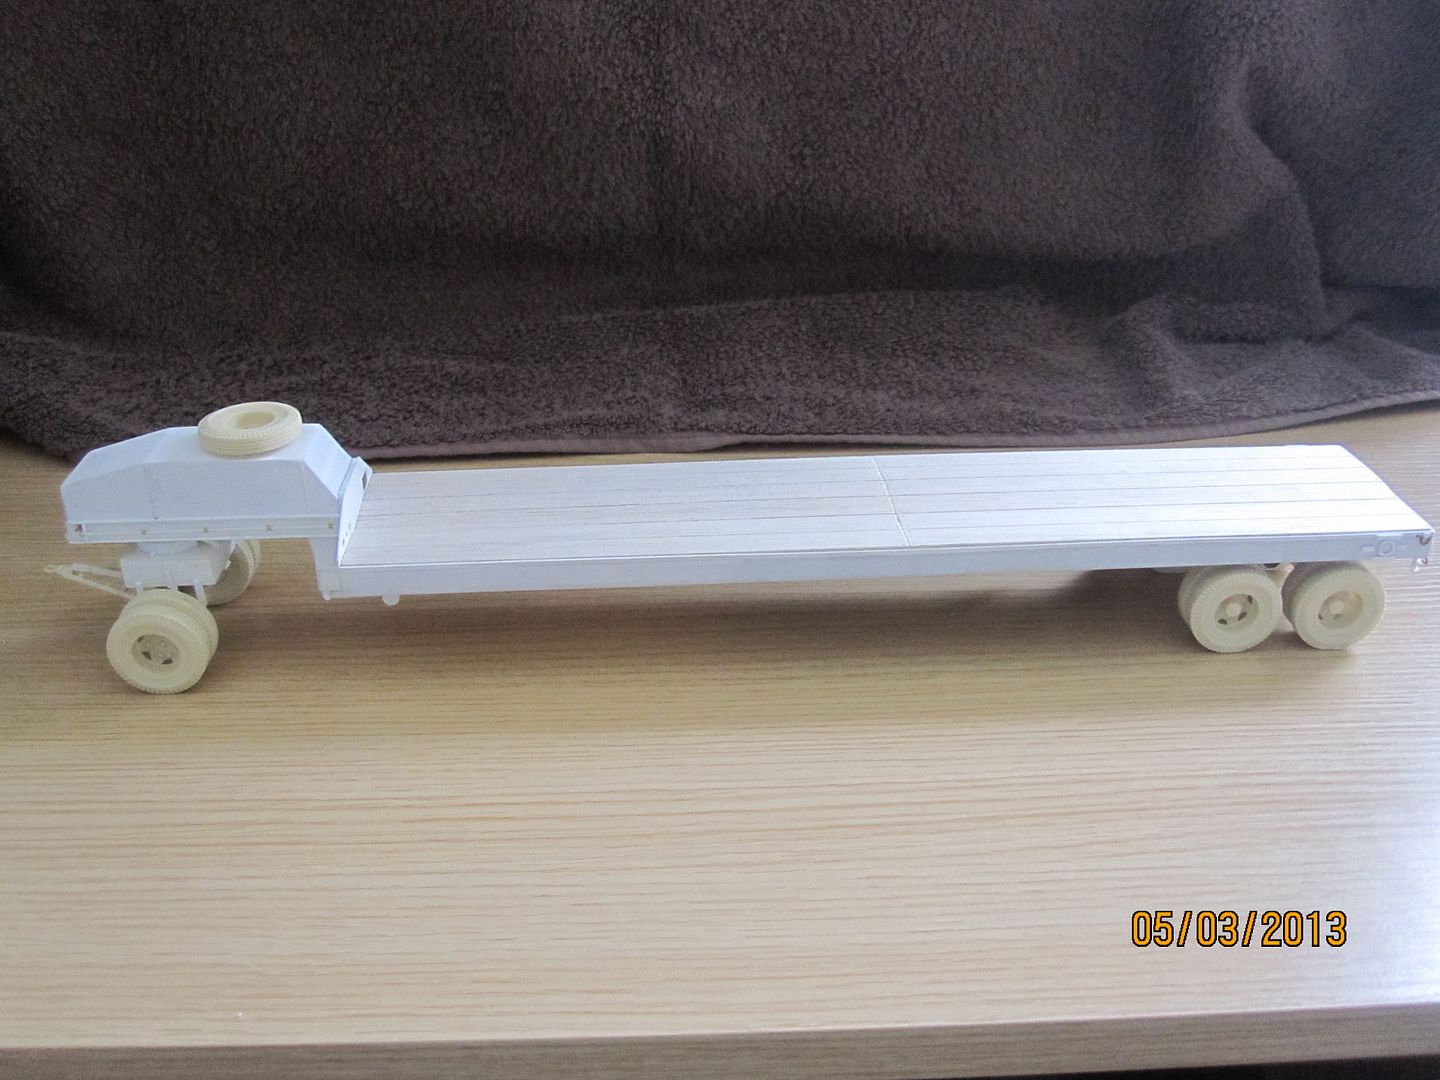
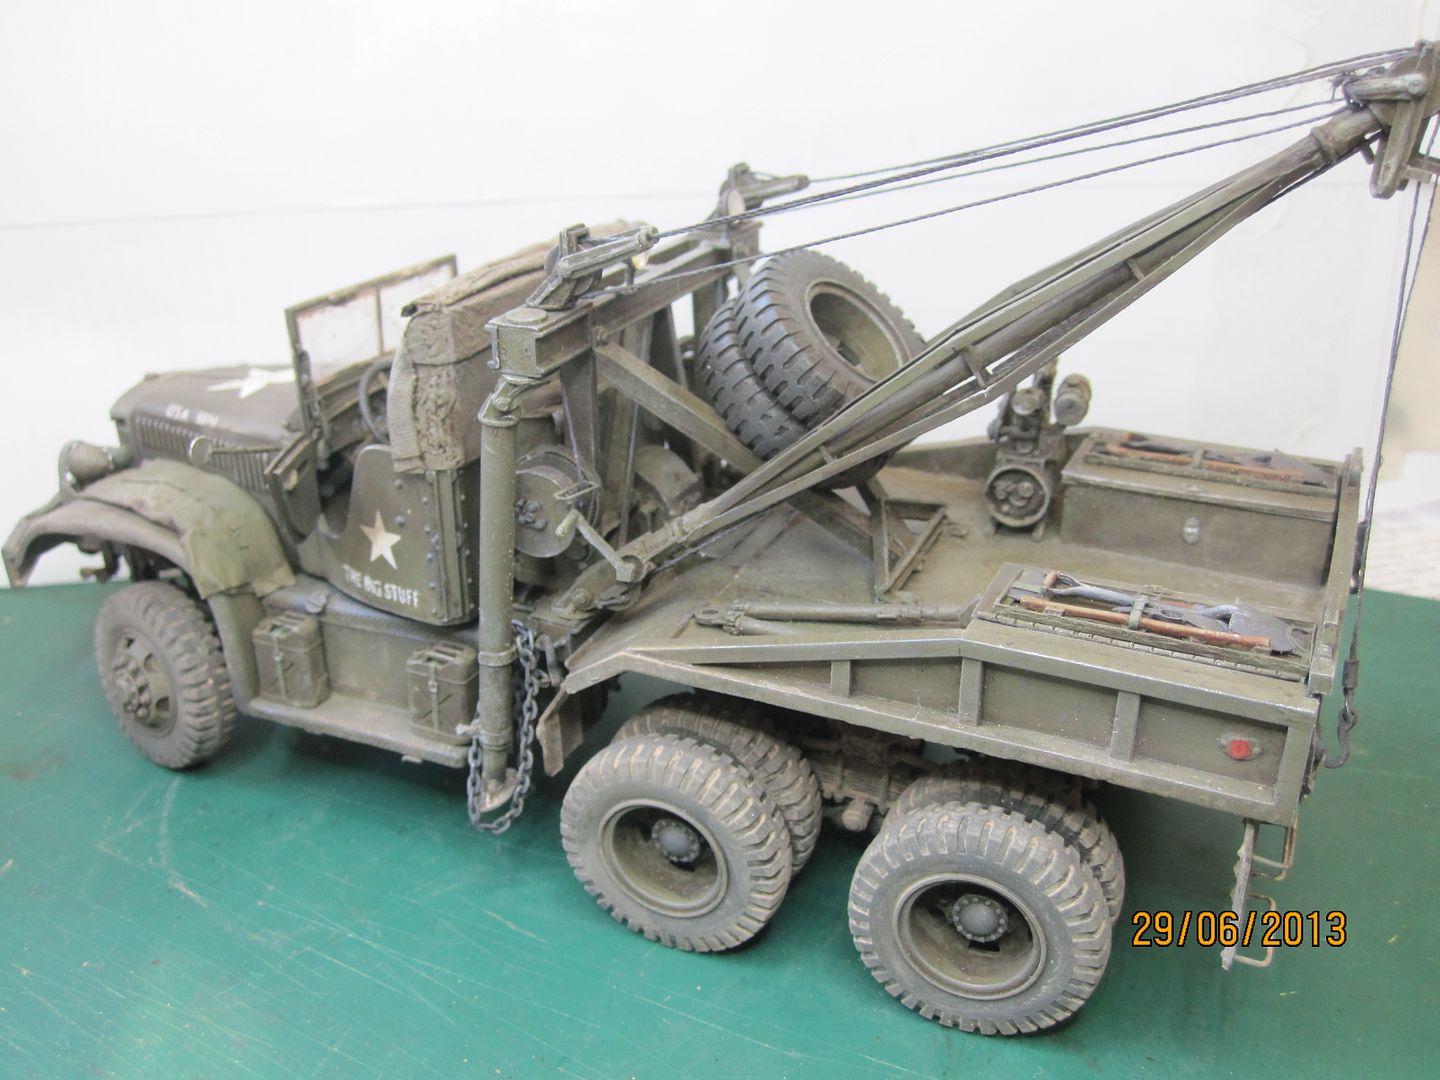
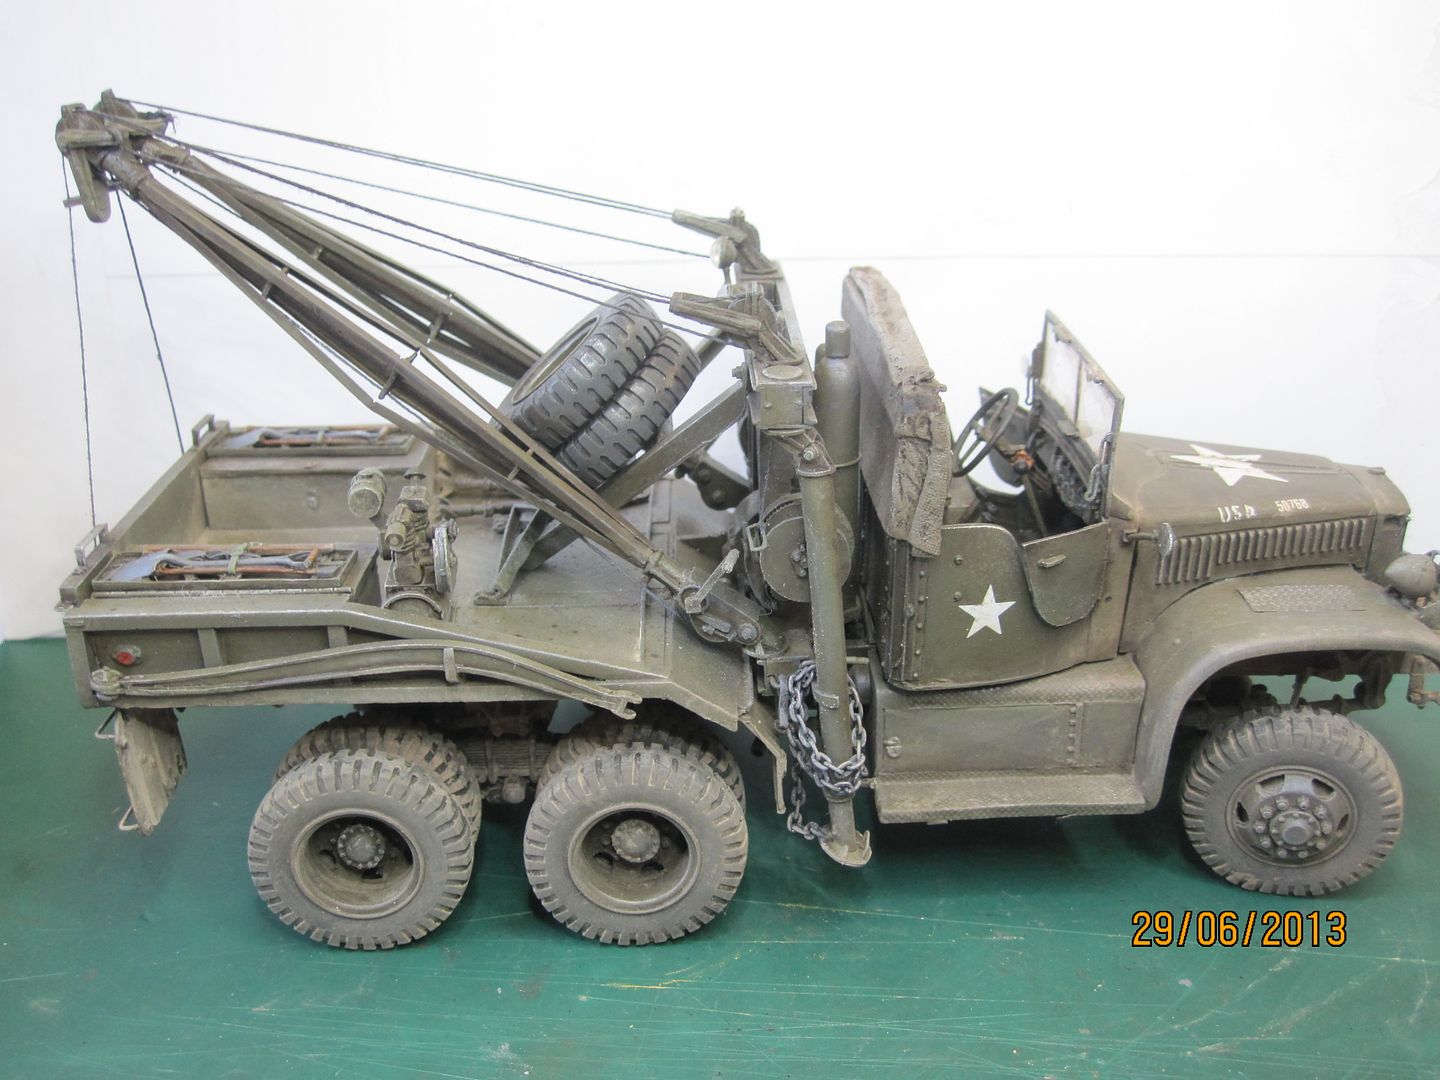
Anyway, I am scratchbuilding a B-17 based on the Combat Models vacform shell - just a fuselage though, on a trailer (also scratchbuilt) , being pulled by a wrecker. This will be a diorama of a (fictional) aircraft of the 8th AF being towed away to be a 'hangar queen' or to be scrapped, with an interested crowd of personnel, pilots and civilians looking on...
I'm skinning the entire thing in pewter sheet, and getting decals and masks custom made. My little sister designed the pin up nose art for me.
I'm around 16 months in and approaching the painting stage for the Fortress - I've got a couple of build threads going on other forums, but there are hundreds of pics so I'll cherry pick a few for you - you can see the entire thread here:
http://forum.largescaleplanes.com/index.php?showtopic=38905
I will post more in this thread with my next update, but for now, here's some images:
-
2
-


Market Research - your top 'wanted' kits in 1/32 & larger please!
in General Discussion
Posted
thanks for the answers guys, very helpful
I should stress that I meant 1/32 and larger AIRCRAFT
thanks & keep it coming