


repeater
-
Posts
340 -
Joined
-
Last visited
Content Type
Profiles
Forums
Events
Gallery
Posts posted by repeater
-
-
Hi Tim,
Any new updates?
Cees
Hi Cees, no progress just yet, hoping to get back into it very soon
Tim
-
 1
1
-
-
Hi Clark, not much progress due to an international relocation.. still yet to setup my workbench.any updates on this interesting build?
Clark Cone
Next step is rescribing and rivetting.. i have the tools but am fairly new to it.. I'll need a dummy run on something else

cheers, Tim
-
1
-
-
Excellent build again Mike, I remember a red legged jg300 g-14 (?) you did a while back and i think this one is even better.
And for me +1 for the hasegawa kit!
Tim
-
1
-
-
Great work so far. Assembled undercarriage is looking very nice indeed.
Tim
-
1
-
-
Great work Brad. Interesting scheme.. I wonder if it is still in service

Base is fantastic.
tim
-
1
-
-
I agree with Cees.. cockpit is looking great.
Tim
-
1
-
-
Superb work Rick.
Nice touches on the bombs.. I gotta get my bomb building that good!
-
1
-
-
Thanks all.
Progress check - with Mr Surfacer 1200 coat - in order to check for gaps. Slow progress on the nose - using CA glue as filler, the gaps are now mostly filled but not yet completely removed. Very much a work in progress.
The Hasegawa upper cowling will need to be blended in further also.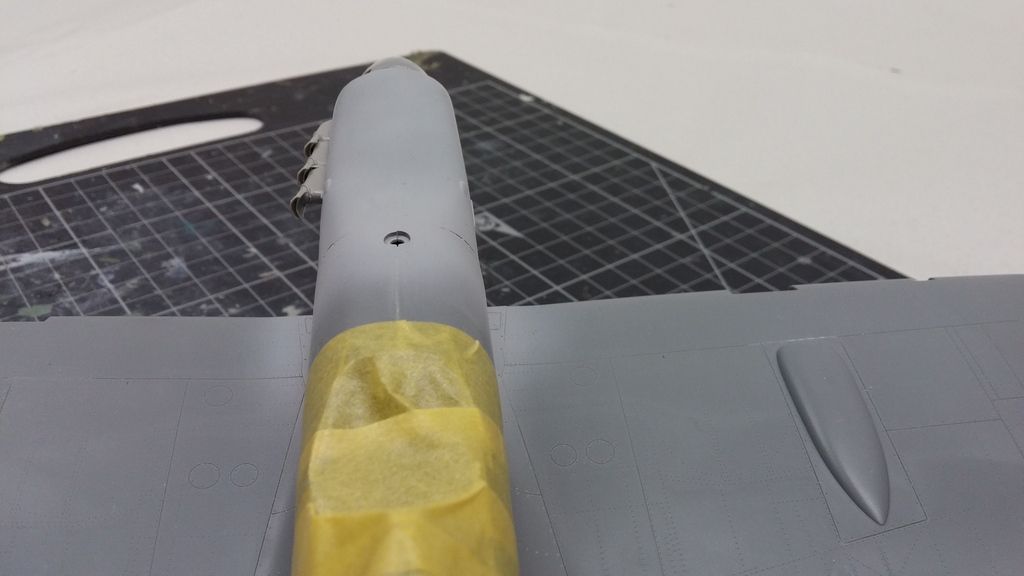
 The visible gaps above will be filled and when all looks good I’ll be on to the scribing/riveting.Thanks for checking in.Tim
-
2
-
-
Time to get cracking!
-
1
-
-
Excellent.. I'll be watching. Great idea with the naked scheme. Now that would look good.
-
1
-
-
There's a very interesting thread on a Greek Vc based on Crete, would make a great model subject http://www.britmodeller.com/forums/index.php?/topic/234982280-spitfire-vc-ef566-paint-scheme-question/
Thanks! That's a great scheme (both alternatives) - I will consider it.. I'm yet to chose the scheme. Too many options to chose from. Either Mediterranean or Pacific options - I'll decide once the 'plastic surgery' is complete.
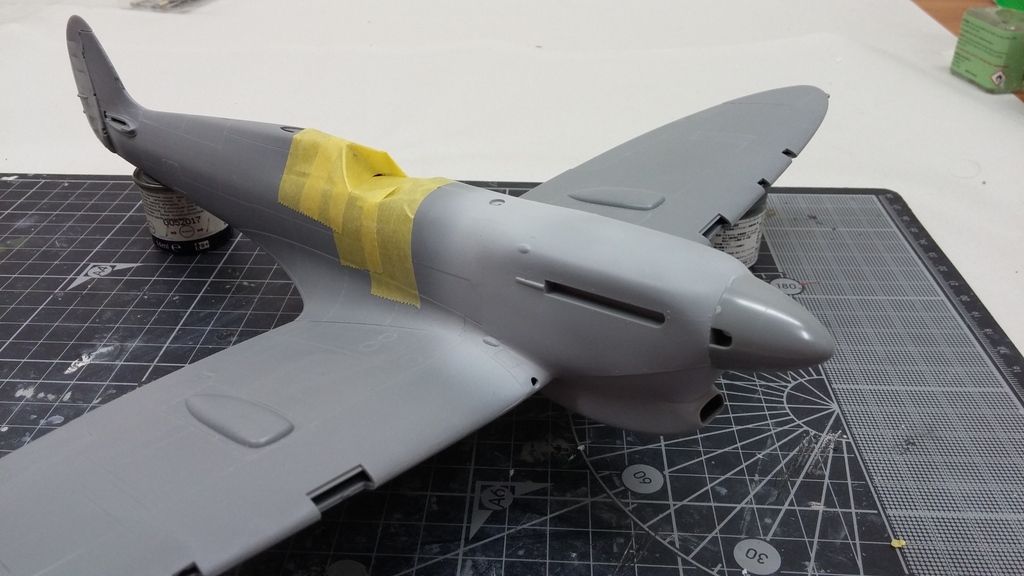
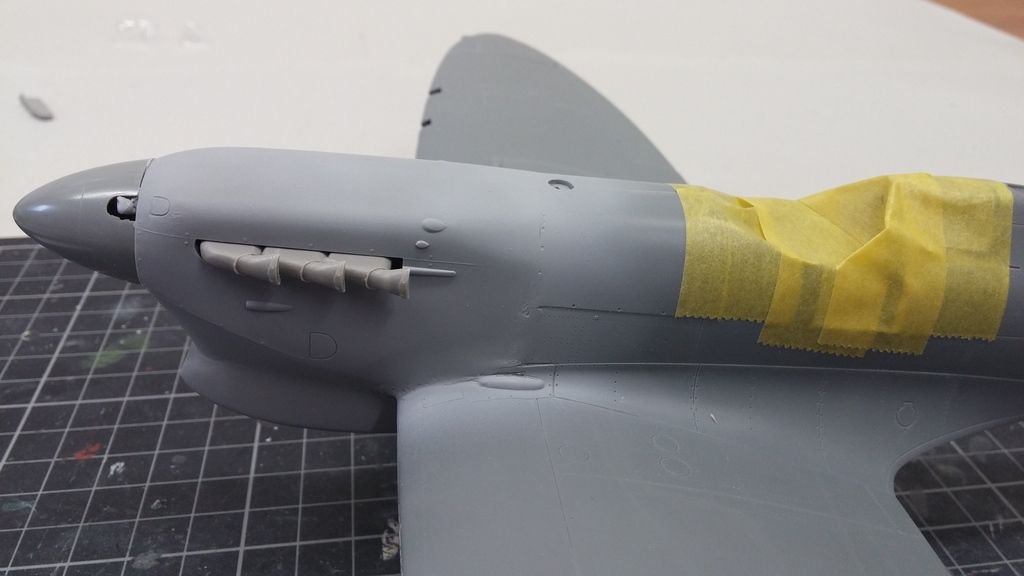
Back to the construction work, the wings and fuselage are assembled and ready for the nose job. I've cut and attached part of the Tamiya lower cowling in readiness. Pics below:
 The Hasegawa nose was glued using CA glue. I did a sloppy job in removing the Hasegawa nose - you can see the very poor join at the wing root but it is 'fixable'.
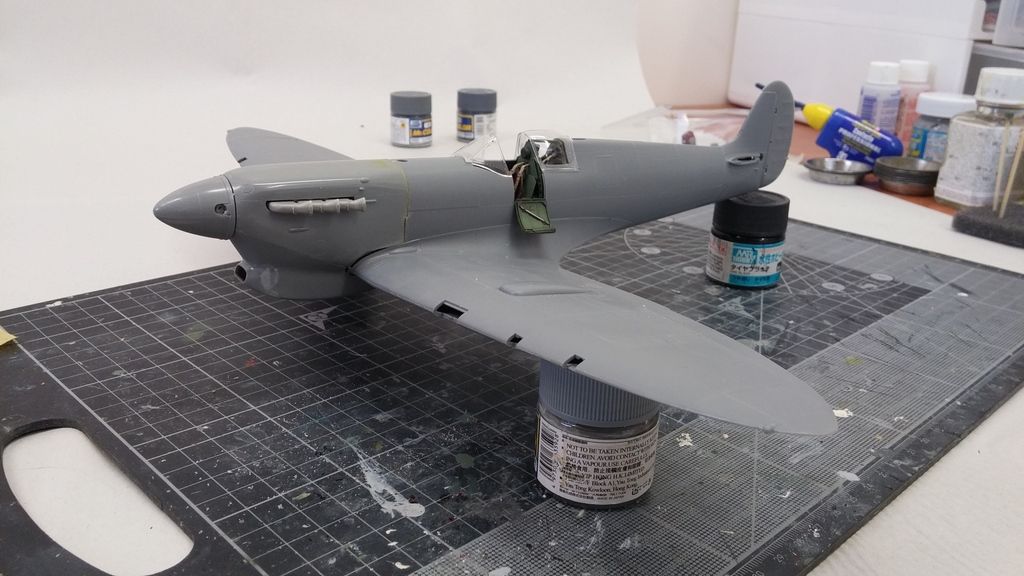 The Quickboost fishtail exhausts (for Hasegawa not Hobbybosss) arrived in the mail - these look great:
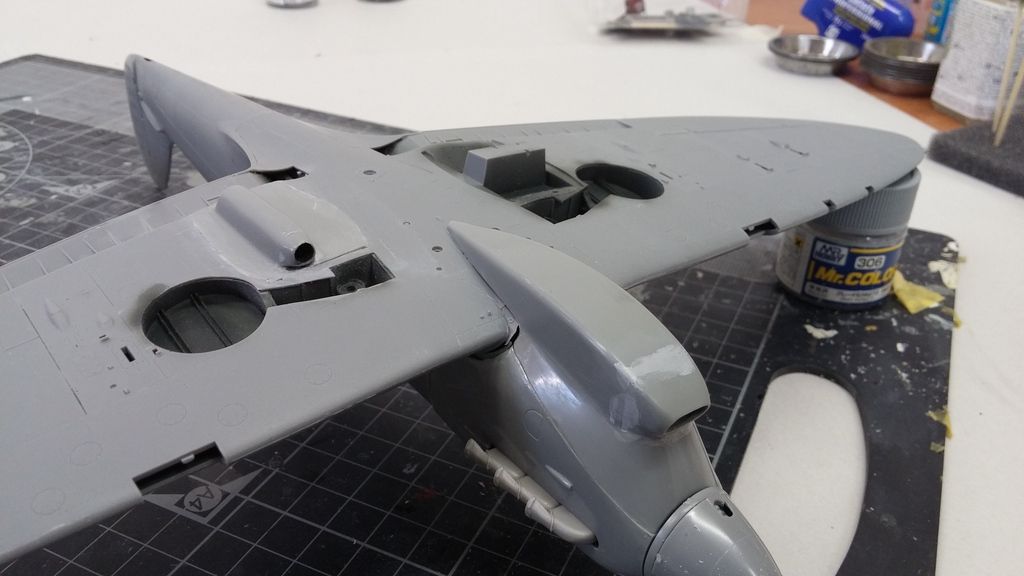
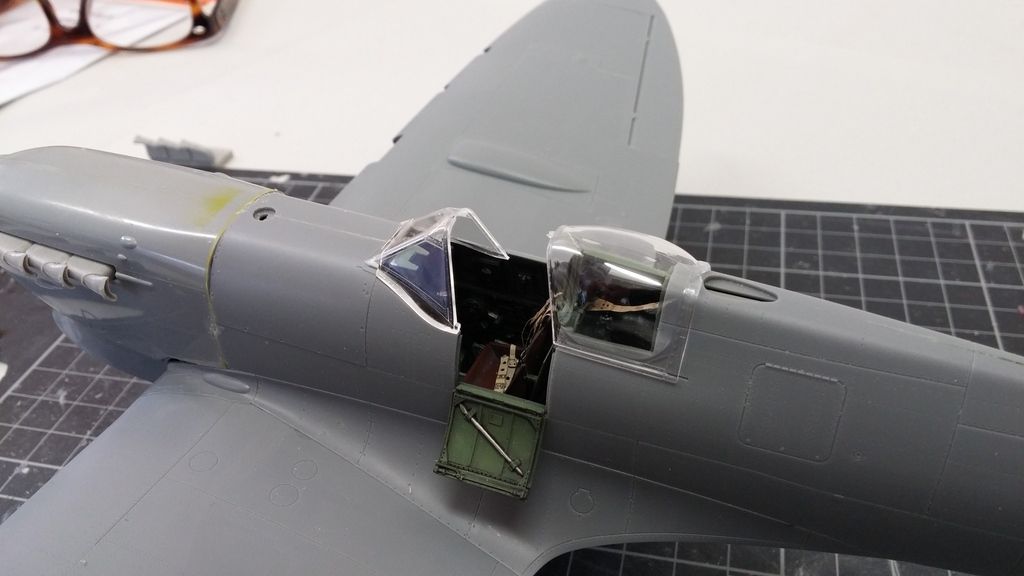 The fit was pretty good - the biggest issue was the join of the upper cowling to the fuel tank cover - you can see the different curvature of Hasegawa and Tamiya parts. Some minor reshaping will be necessary.
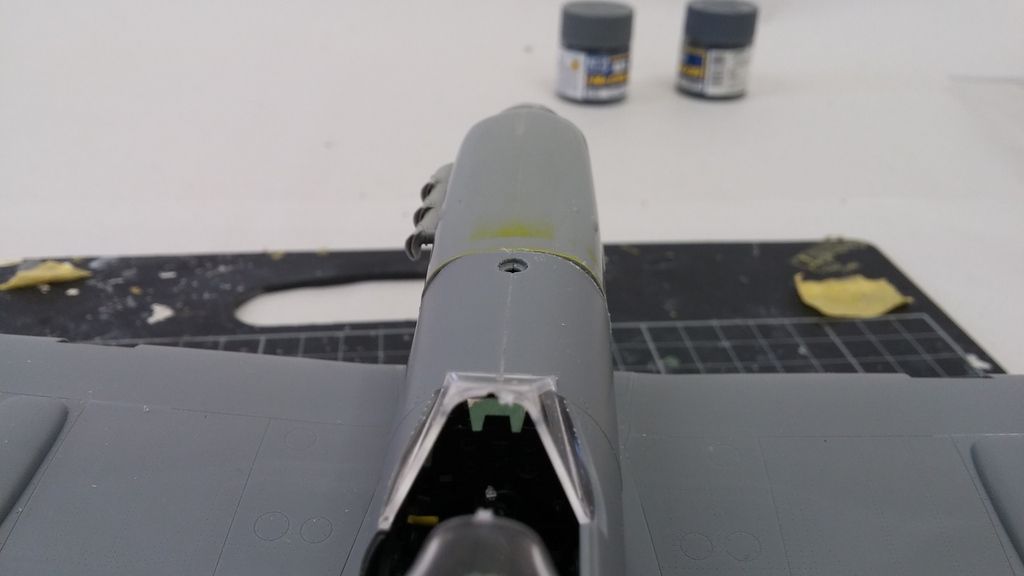 I've also need to thin the Hasegawa nose slightly at the wing root join.
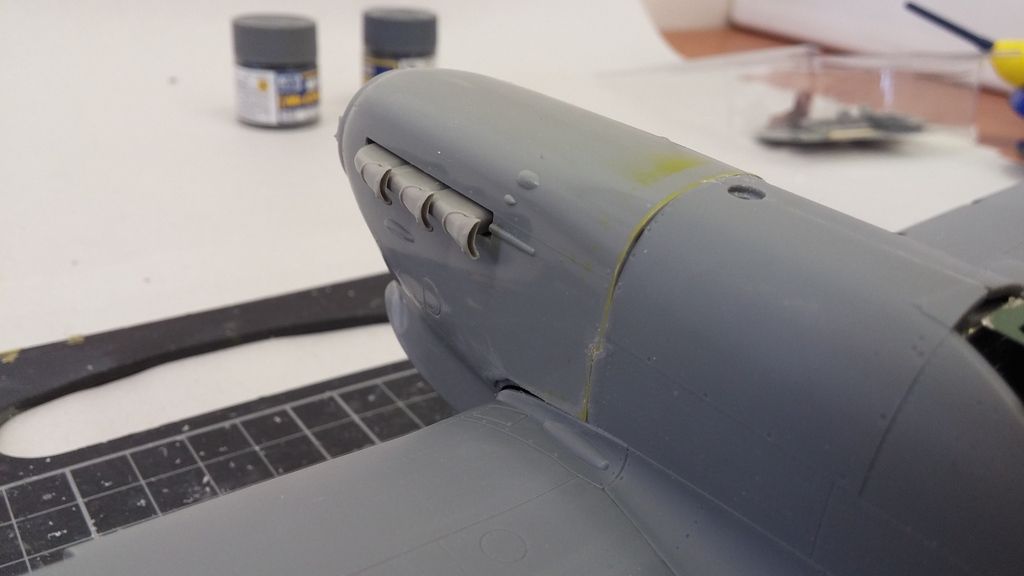 Here's the starboard view, and, in a childhood flashback - an ugly glue fingerprint!!
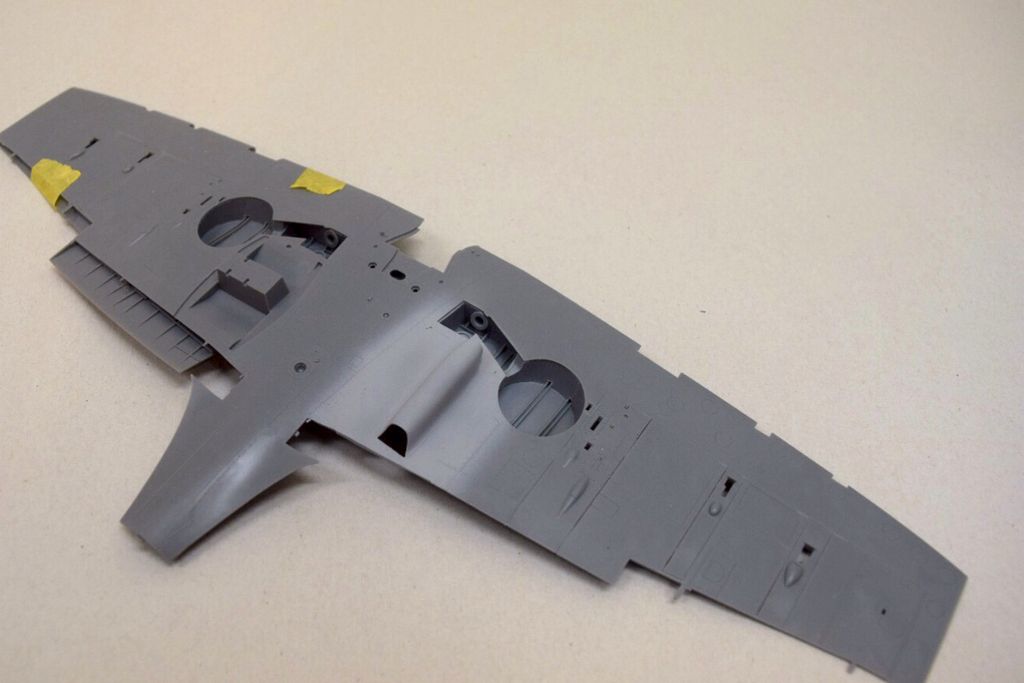
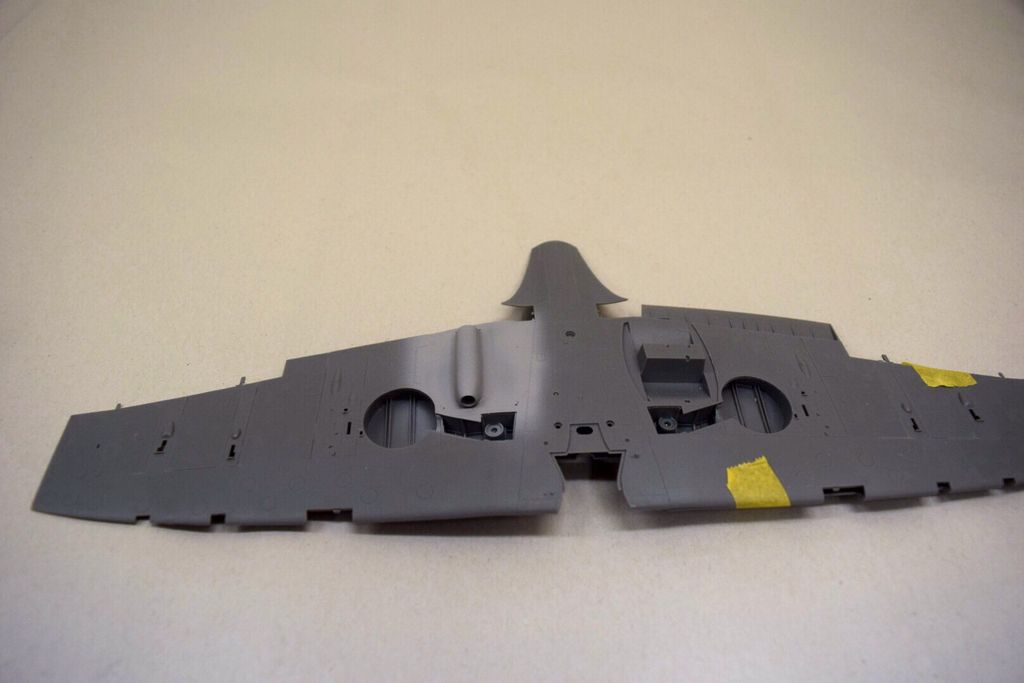
 Underside fit is not too bad at all - the trop filter fits very nicely indeed - again, the wing root join needs work (due to my dodgy cutting)
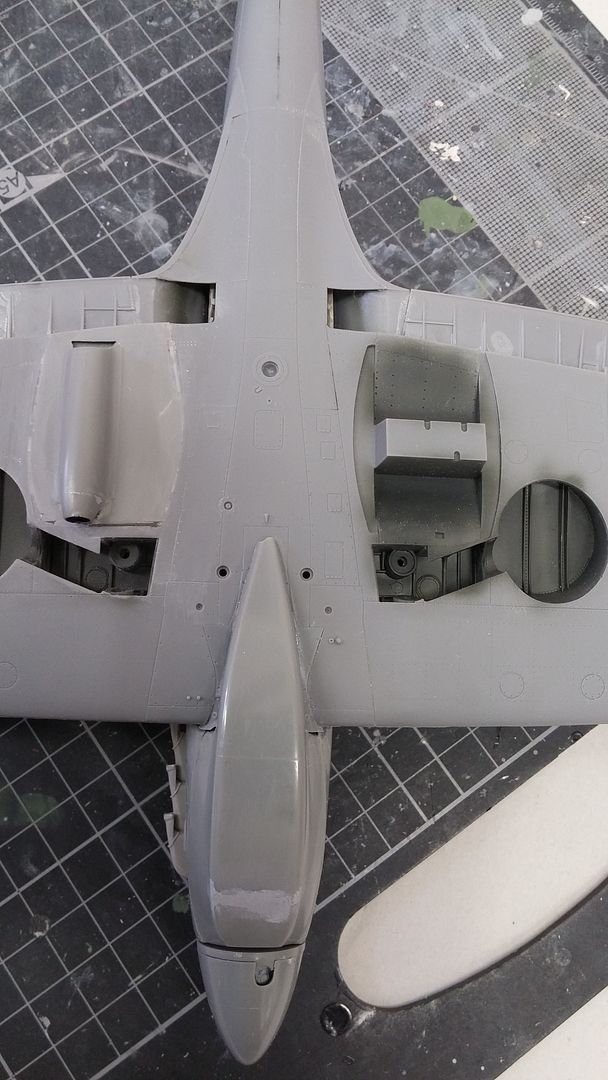
 All comments, criticism is welcome.Next is lots of filling, sanding, etc.Thanks for watching.Tim
-
3
-
-
Super neat. Very sharp. Gotta be happy with that.
About the HSS.. I'm not sure.. maybe as simple as Tamiya X-19 smoke over the top !? Or even Mr Color silver (8) ?? I've seen that on a similar build, with good result.
Tim.
-
1
-
-
Very sharp detail Laurent. So much detail to study in those pics.
Thanks for sharing.
-
1
-
-
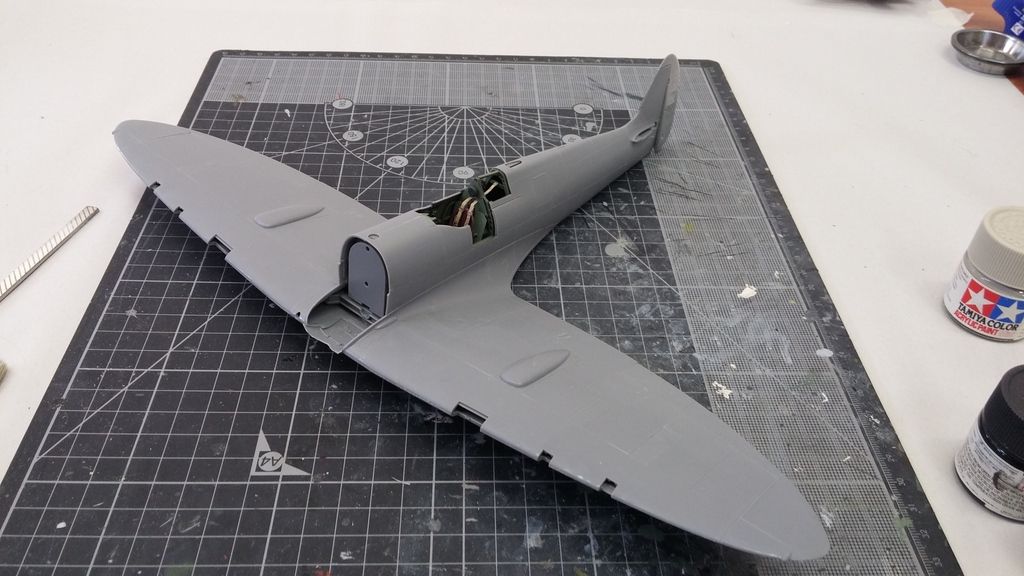
I'll calling the cockpit done for now.. here it is, ready for the fuselage to be buttoned up.
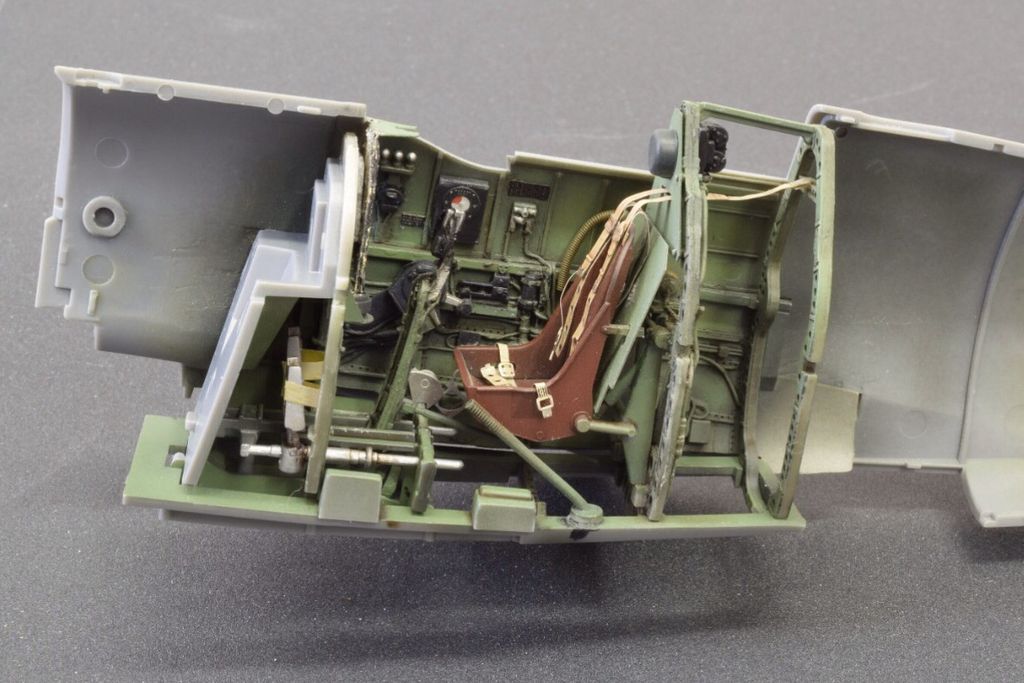
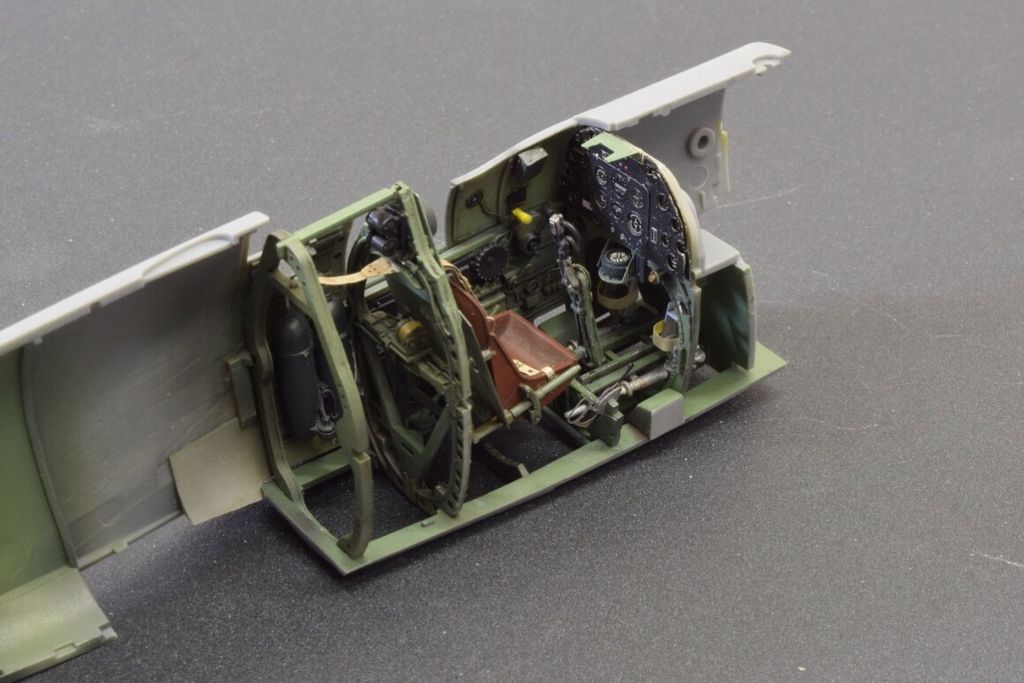
Thanks for watching..!
Tim
-
1
-
-
Trusty ol' Tamiya tape
It's looking great Kent.
-
1
-
-
Skipping ahead now, most of the work is done.Cockpit - general notes
- painting: Tamiya XF-71 was painted over a Mr Color tyre black basecoat
- gloss coat applied (Mr Color GX)
- oil wash of brown & dark grey mix
- some oil dot filtering (mainly white, yellow)
- some highlights added with base XF-71
- flat coat
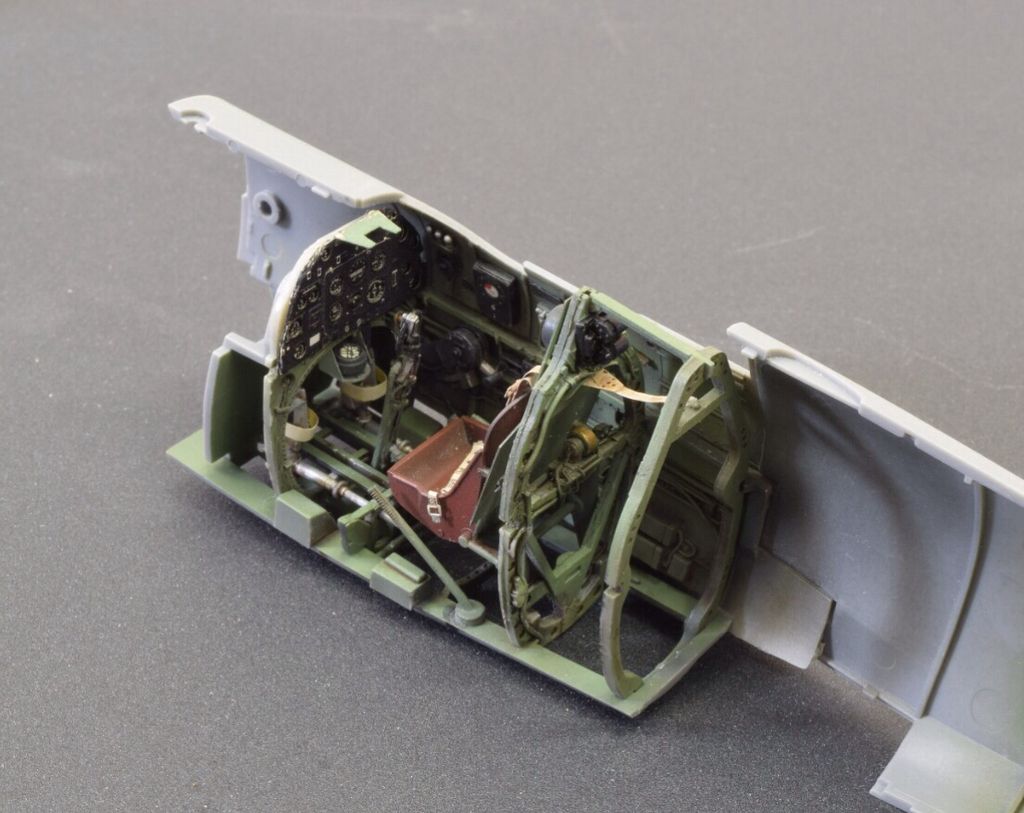
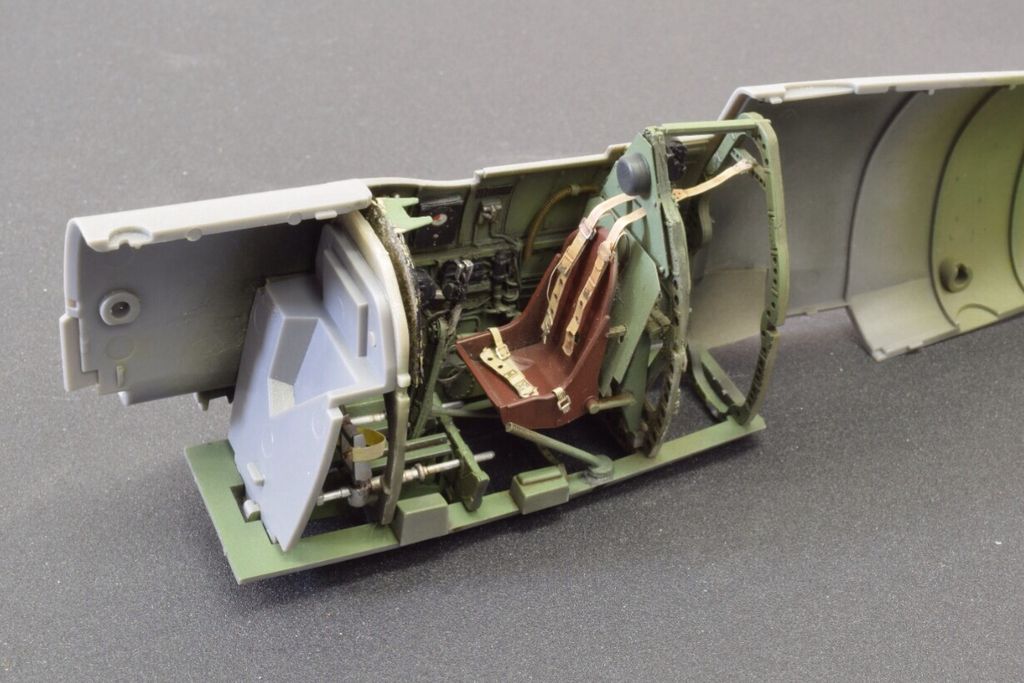
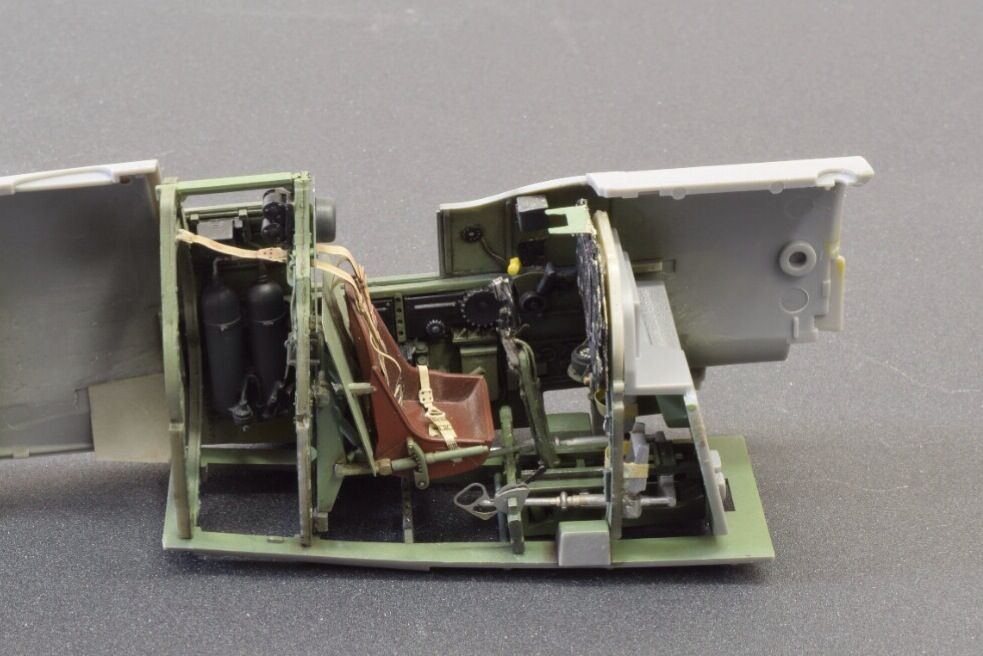
Instrument panel - the Tamiya IP looked fine, but I decided the Eduard PE could be salvaged. The edges needed some trimming but it was otherwise fine. The compass is the Tamiya piece (not supplied in the Aires set). Framing is Aires. Rudder pedal straps are Tamiya masking tape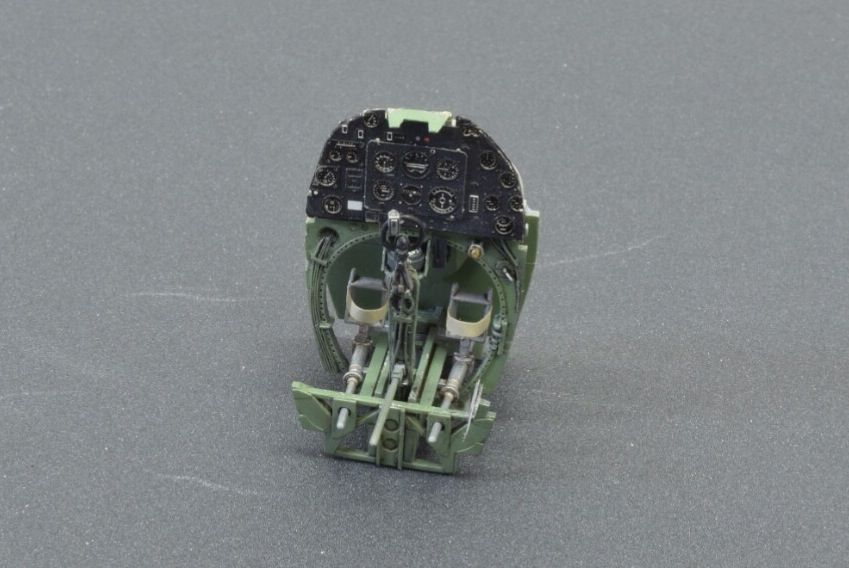 This again is the Eduard PE, recycled - it’s not perfect but usable. The seat is the Tamiya kit. I’ve added the headrest to represent a Mk V, but have subsequently read that Mk Vc’s didn’t use !? Damn..! If this is true I may need to remove this.
 Starboard sidewall - Aires, kit parts, Eduard IFF transmitter and placards, and some scratch building. For simplicity the oxygen hose was cut but this won’t be visible when the cockpit is assembled
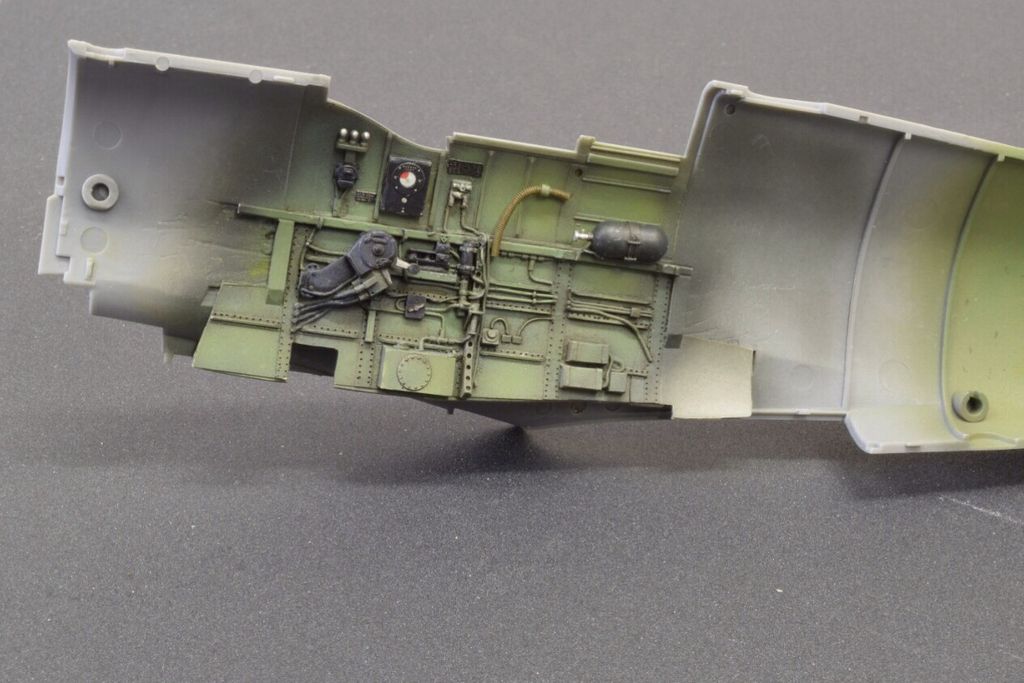 Port sidewall - Aires, kit parts, Eduard and some wiring added.
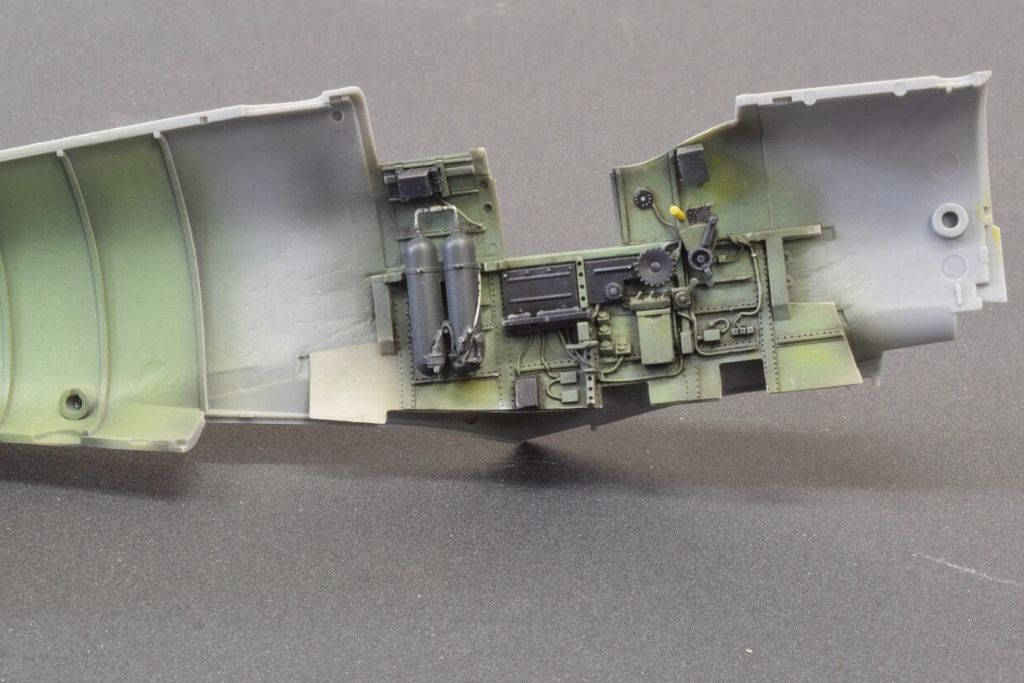
-
3
-
Thanks Jonathan, hopefully it turns out ok!
I'll park the bodywork for a while. Next up is the cockpit. Although the Mk V cockpit is fundamentally the same as the Mk IX, there are some noticeable differences to address. For reference I’m using spitfiresite.com amongst others (and probably some creative license where necessary)I’m adding the Aires Mk IXc cockpit resin - which contains superb detail but was designed for a late Mk IX. This is my first attempt at a full resin cockpit - fingers crossed! Here are the bits and pieces ready to go: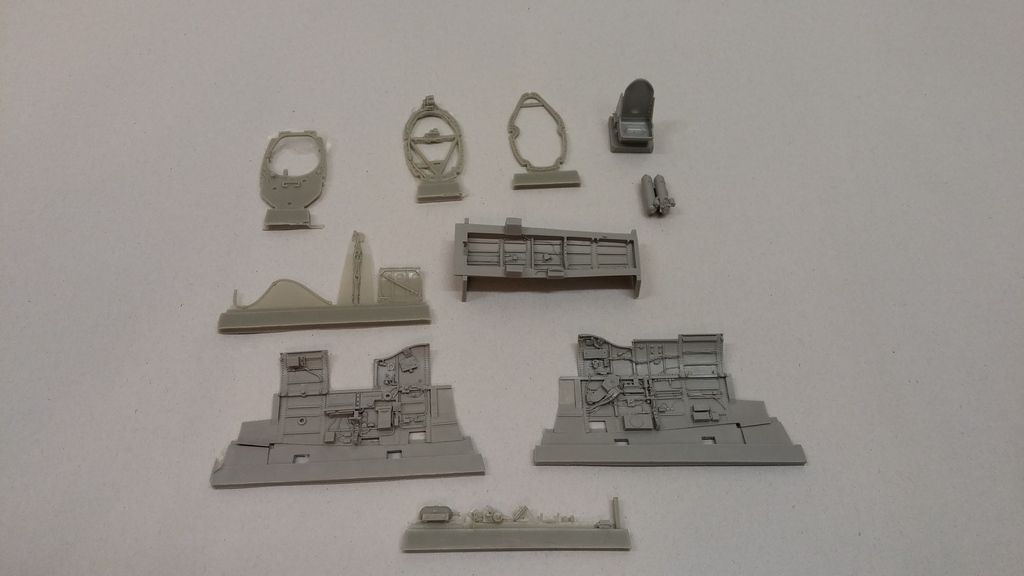 I also have the Hasegawa Mk. Vb cockpit, with Eduard PE - I should be able to recycle some of this (eg. placards, IFF transmitter)
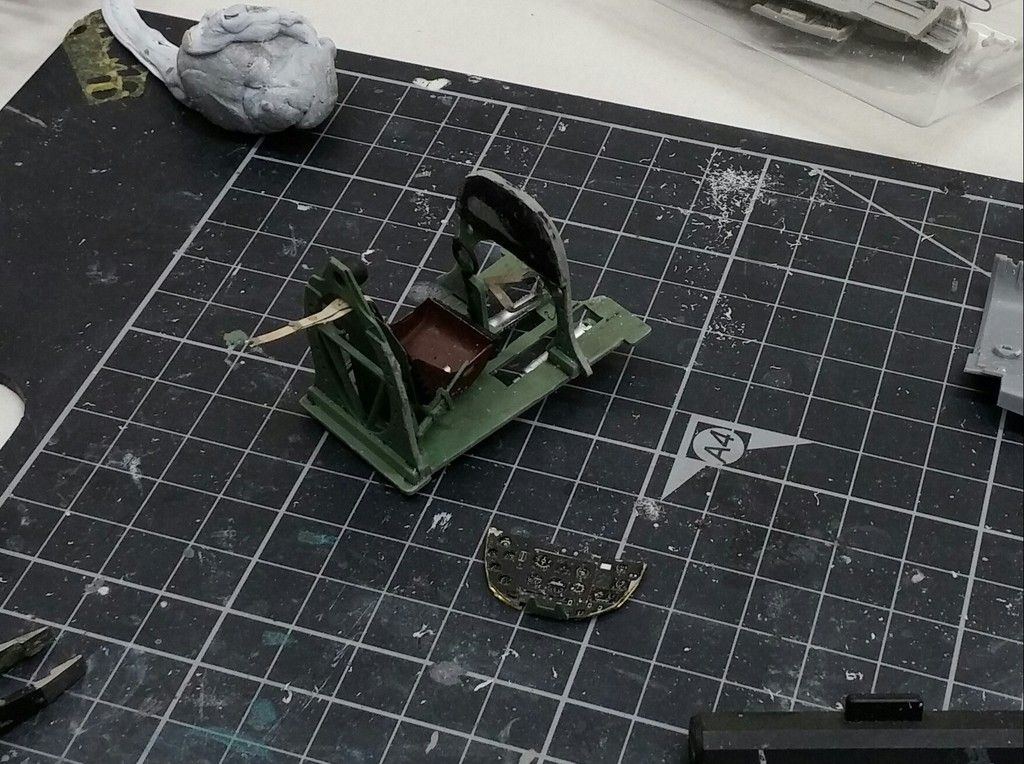 For the port sidewall, I’ve decided to use the lower part of the Aires sidewall so some cutting is required
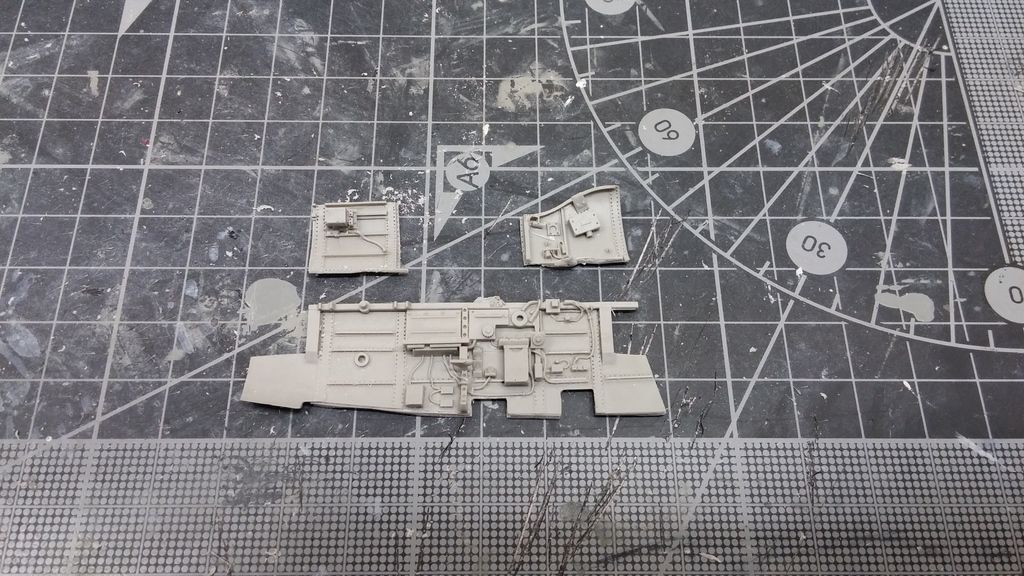 Same for the starboard side
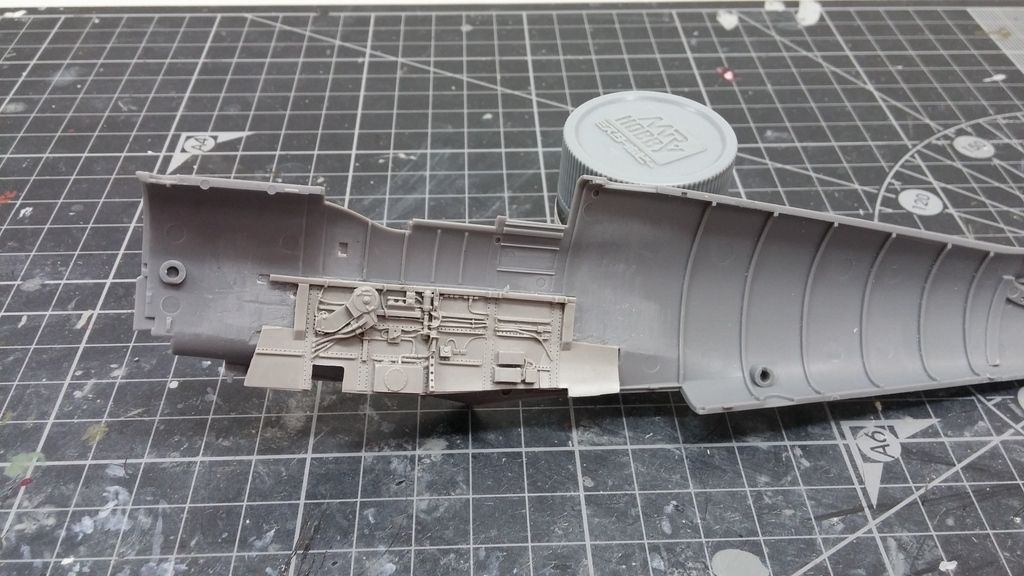 The aires ‘floorpan’ (?) has some superb detail but there’s no way I can get it to fit, so I’ll use the Tamiya part. Test fitting below:
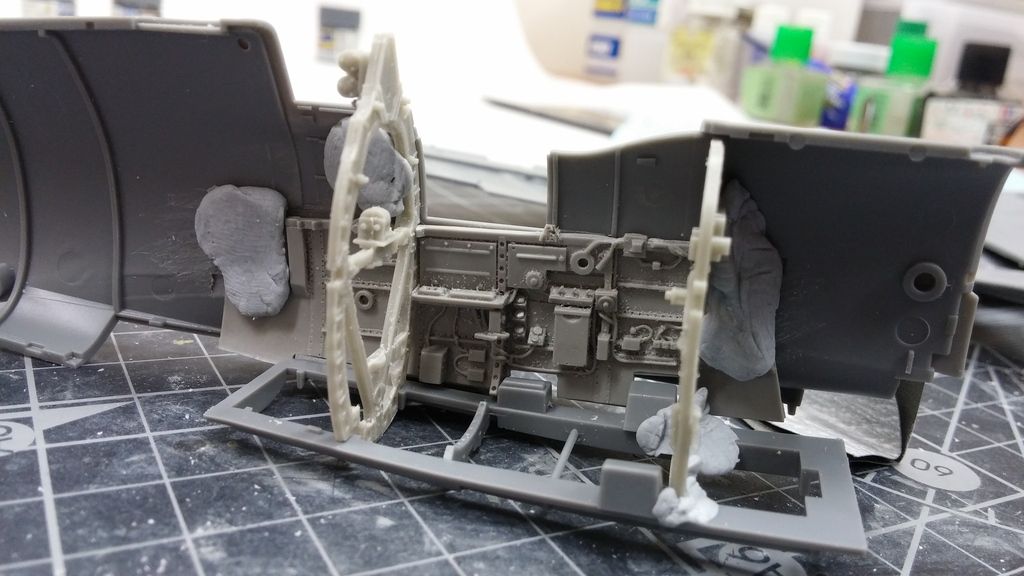 More to come.. !Tim
-
2
-
-
Great review. Gorgeous kit.
-
All the work is paying off - engine bay, wiring etc looks great - definitely worth the effort. How does the engine look in the cradle?
-
Thanks Laurent.
I've made good progress with the Aires cockpit install and backdate, also using kit parts and bits and pieces from the Hasegawa kit and Eduard.
I'll post a detailed update with pics in the next few days.
cheers, Tim
-
1
-
-
Wow Laurent, great skills there.
Tim.
-
1
-
-
Welcome to LSM!
Definitely a golden age.
Tim
-
Thanks all for the comments and feedback
Dave yeh so far it's been fairly simple... I'm waiting for something to go wrong !?
-
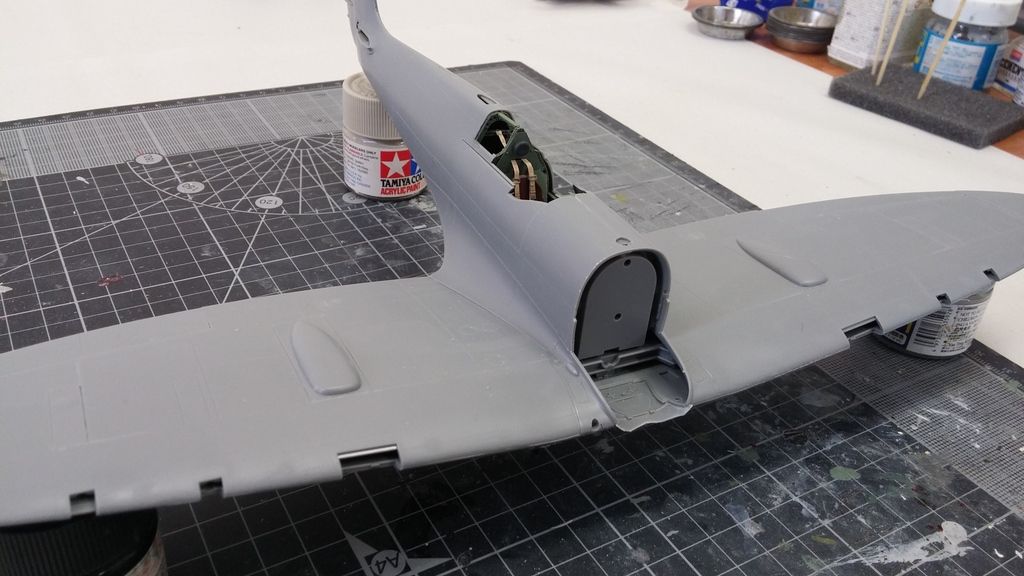
I'll put the nose aside until the fuselage is buttoned up, which means getting the cockpit sorted.
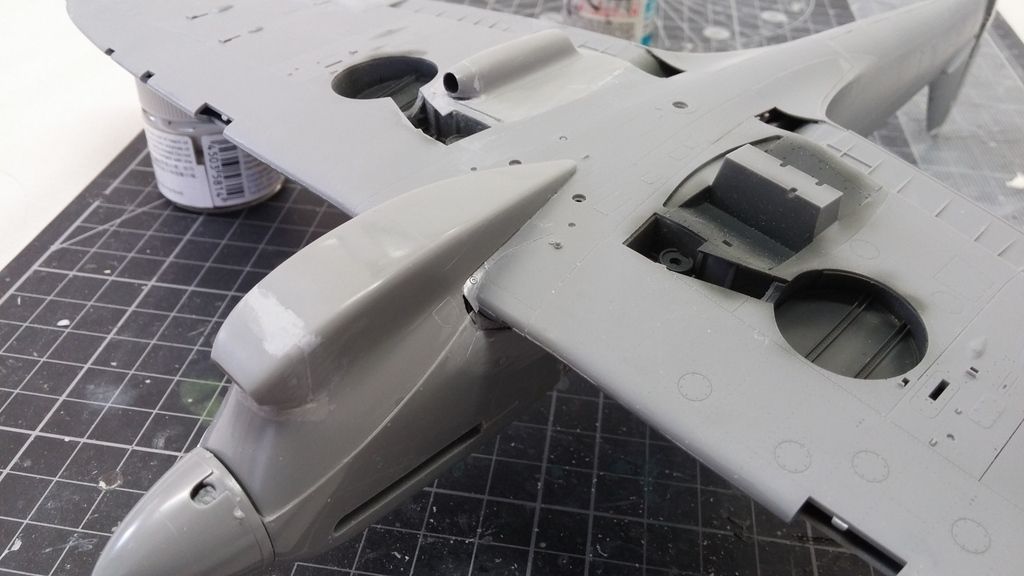
In the meantime I'll tackle the oil cooler conversion - I'll graft the Hasegawa Mk. V oil cooler onto the Tamiya wing. A fairly simple approach as per below.
Firstly removing the Mk. IX part
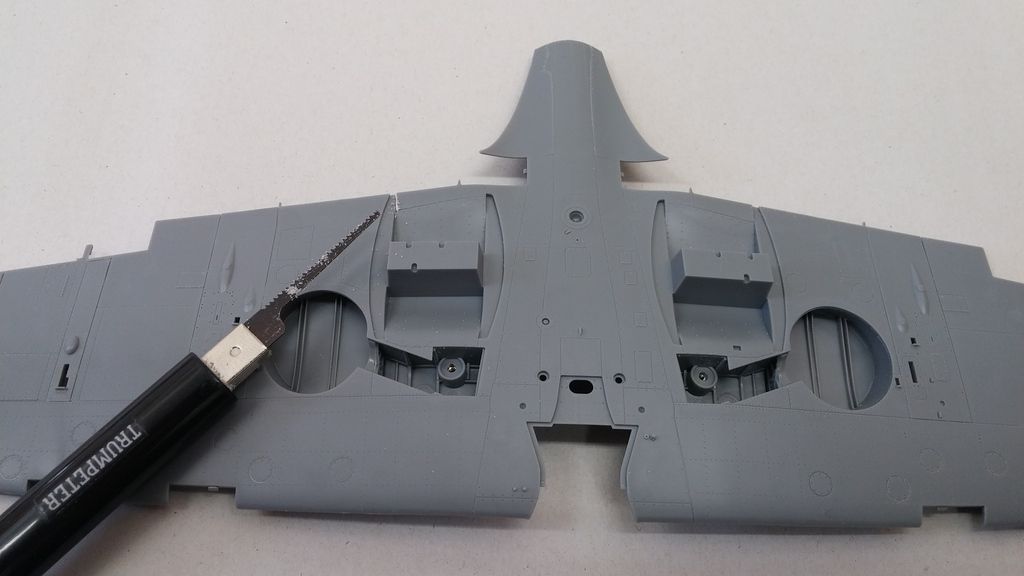
Removed with a saw.
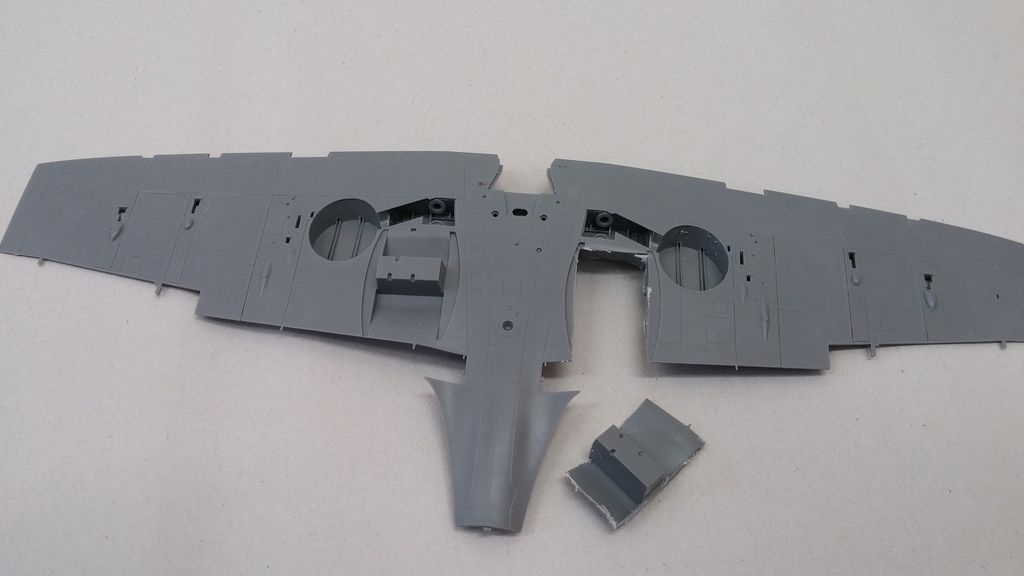
I cut the oil cooler and surrounding wing section from the Hasegawa kit and attached to the Tamiya wing. I started removing the oil cooler but realised part way through the process I should also use the surrounding wing so it was a very rough job! Filling/sanding is required.
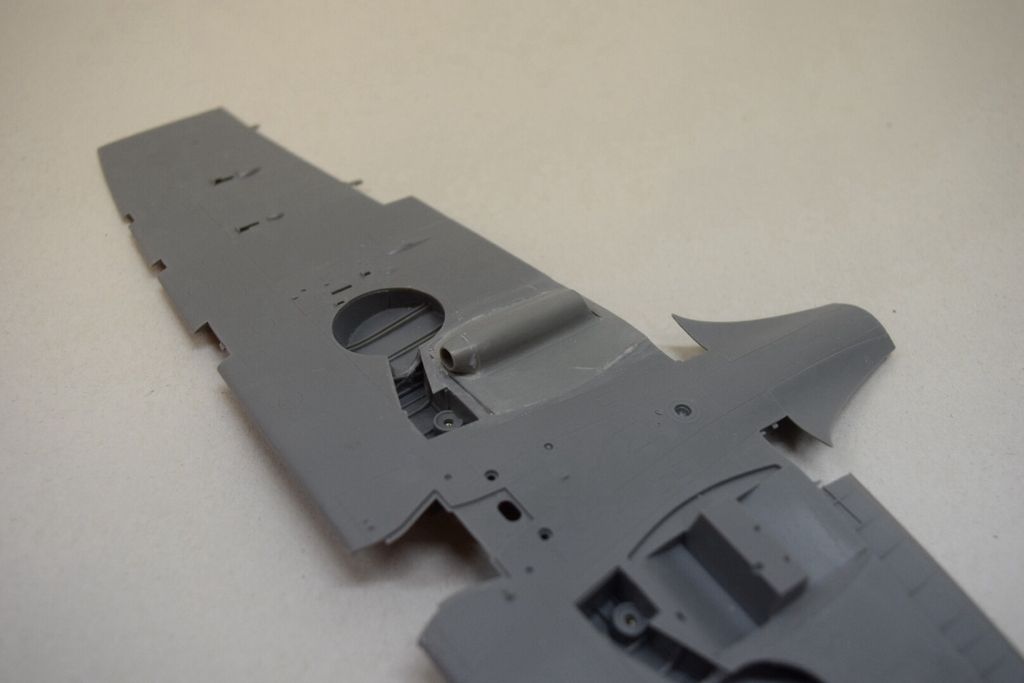
Next a coat of Mr. Surfacer 1200 was airbrushed to check for seams. You can see a few touchups are required.
Now please don't tell me the Hasegawa Mk V oil cooler is innacurate! The shape seems ok but I couldn't find good pictures of the rear! If anyone has any pics/links please share.
Rescribing/rivetting will also be required down the track.
Comments/feedback/criticism is welcome.
Cheers, Tim
-
1
-


The Peshwari Nine; Afghan WNW DH9 in Pheon decals.
in LSM 1/32 and Larger Aircraft Ready for Inspection
Posted
Spectacular. Beautiful work complimented by photography to match.