slash1953
-
Posts
18 -
Joined
-
Last visited
Content Type
Profiles
Forums
Events
Gallery
Everything posted by slash1953
-
Pocher 1932 Rolls Royce
slash1953 replied to slash1953's topic in LSM 1/35 and Larger Work In Progress
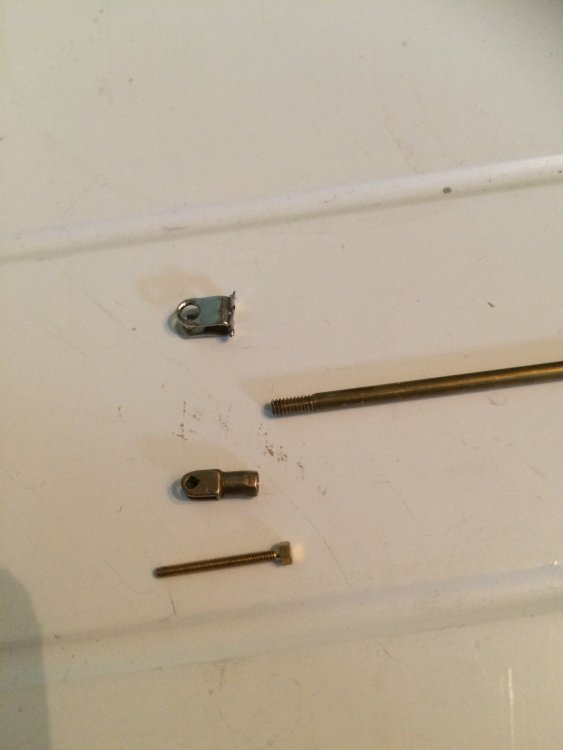
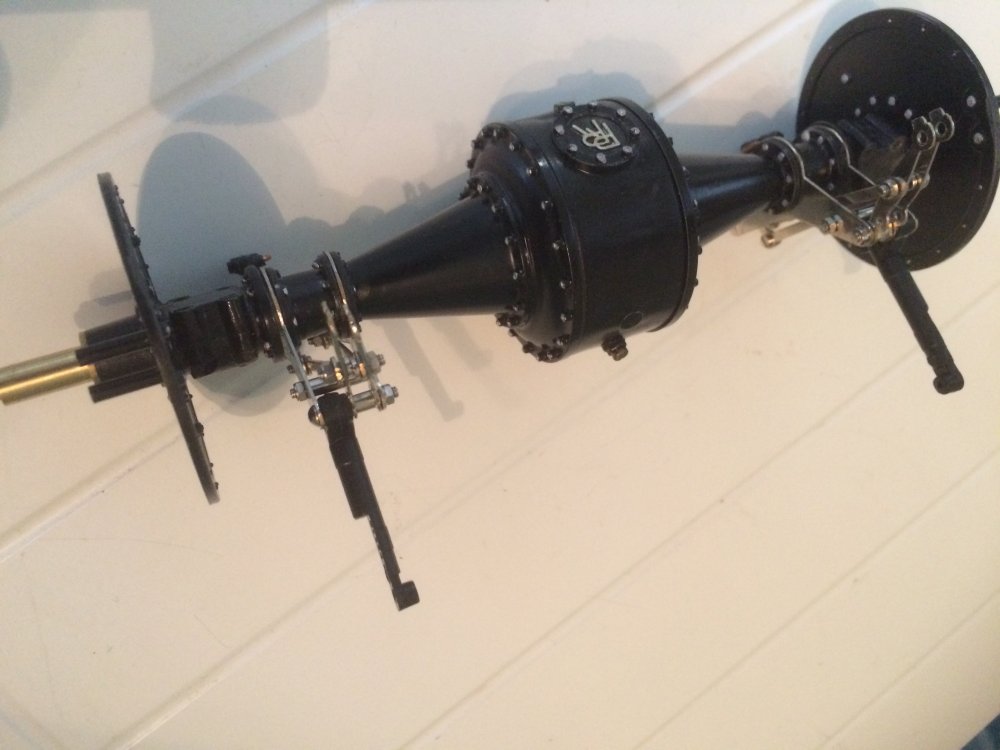
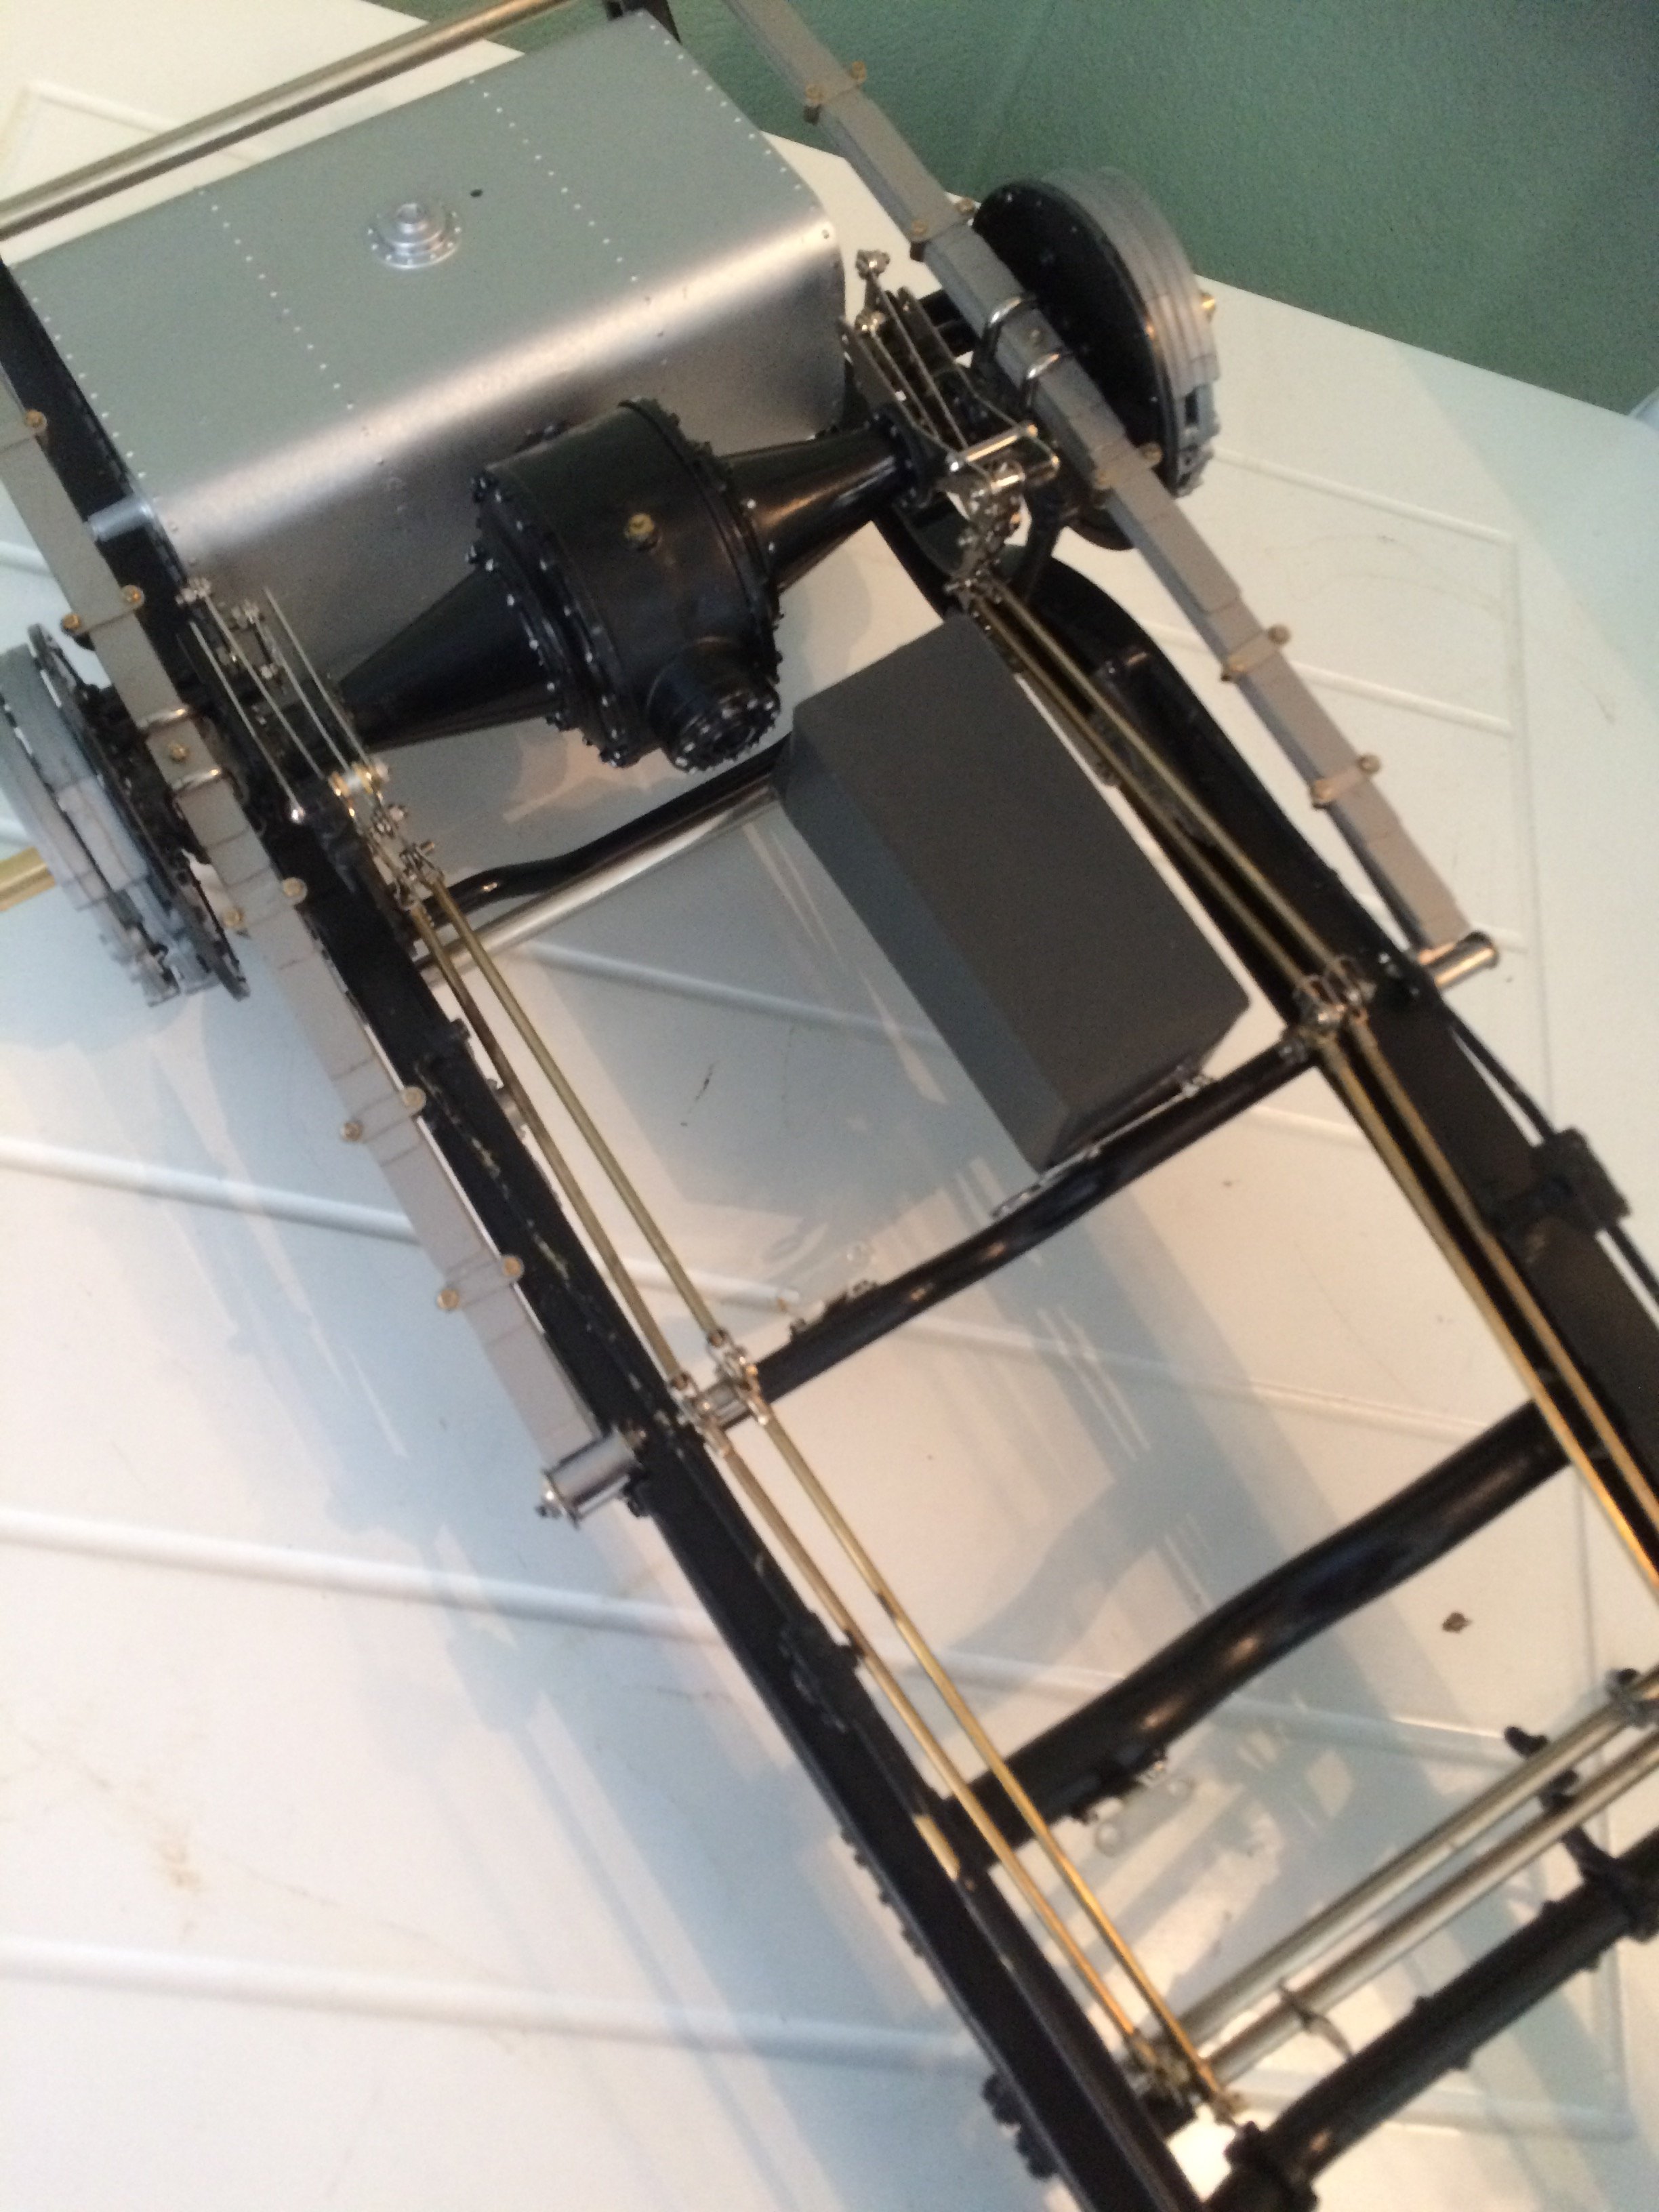
Will do bud..... A bit more done. I didnt like the chrome linkages on the brakes to toned them down with a bit of etching fluid. Ive swapped out the 'clunky' links for these cast bronze replacement,much better. The rear axle is fitted together with all the brake rods etc...
.thumb.JPG.c7018e85c2944badd29e1459f82237d9.JPG)
-
Pocher 1932 Rolls Royce
slash1953 replied to slash1953's topic in LSM 1/35 and Larger Work In Progress
Will do bud..... -
Pocher 1932 Rolls Royce
slash1953 replied to slash1953's topic in LSM 1/35 and Larger Work In Progress
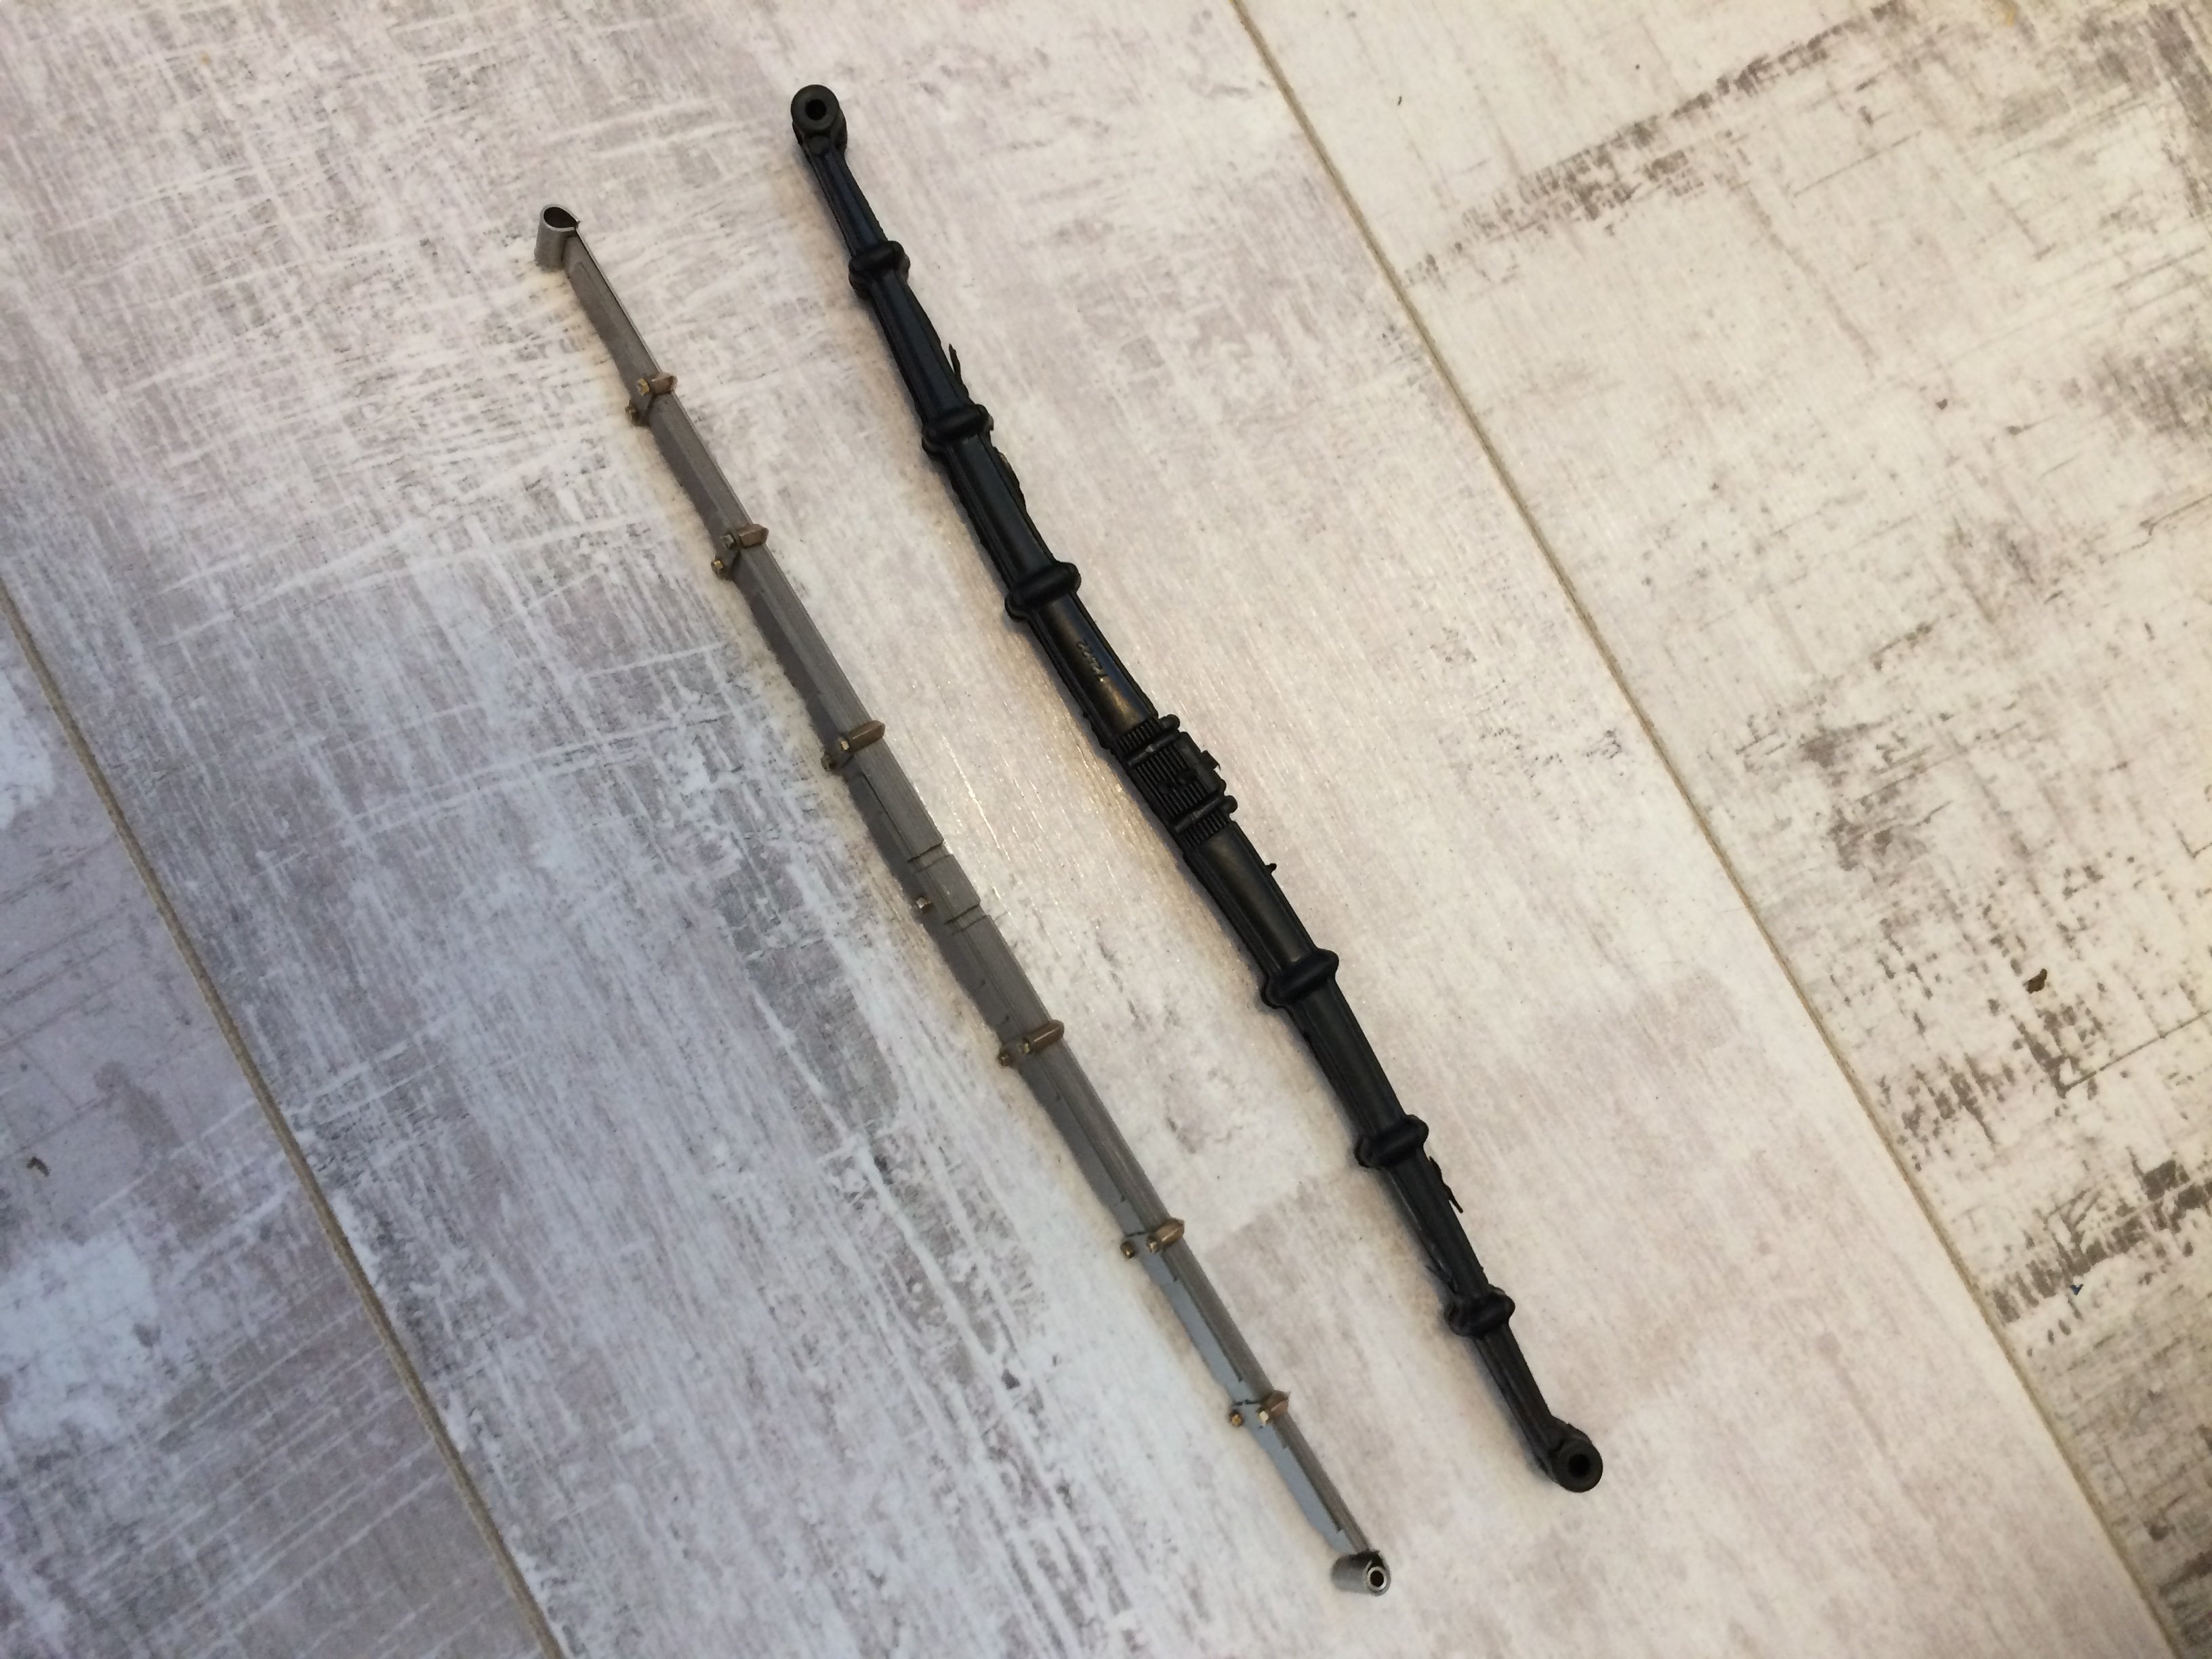
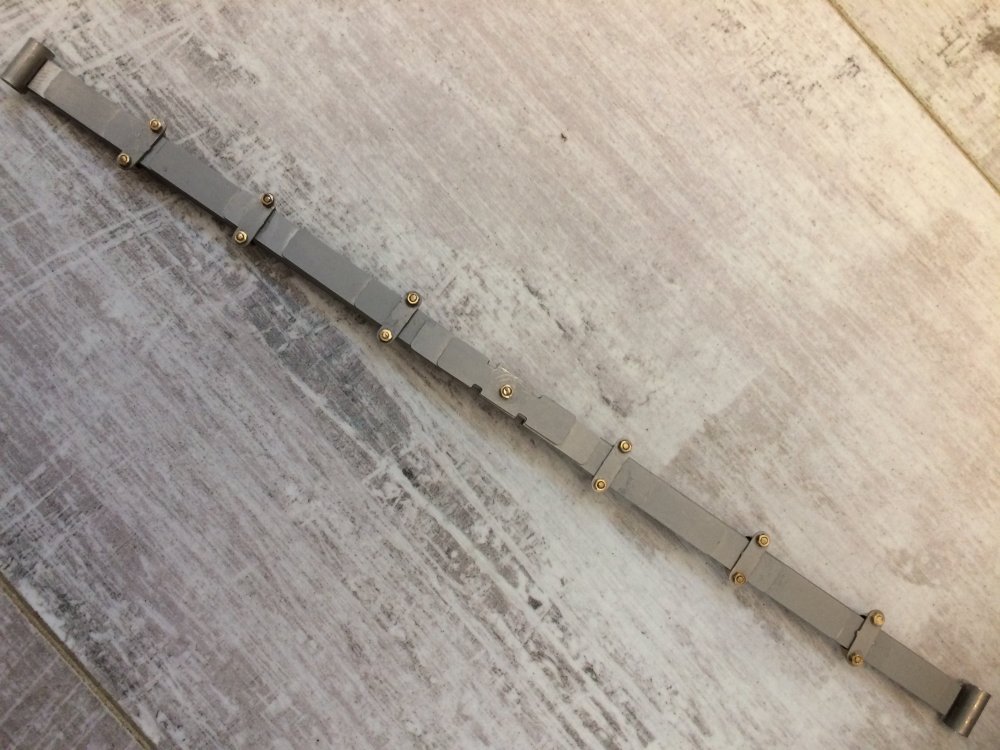
Have to agree mate. Broken parts,some moulding not complete as you may have seen in and earlier picture I put up? Those springs were $240 + £45 customs!!! -
Pocher 1932 Rolls Royce
slash1953 replied to slash1953's topic in LSM 1/35 and Larger Work In Progress
Thanks Peter, starting on the brakes now........ -
Pocher 1932 Rolls Royce
slash1953 replied to slash1953's topic in LSM 1/35 and Larger Work In Progress
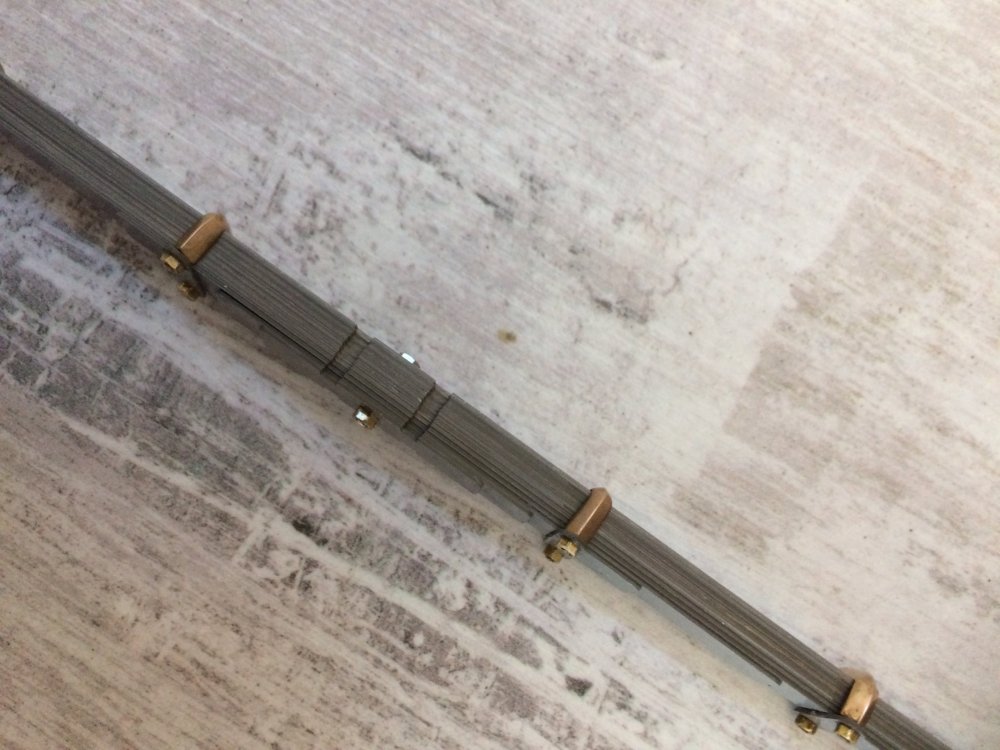
Hi Peter,been out of action recently due to ill health but Im good to go now? Finally got the replacement springs and they really look good! At least this model wont 'sag' over time? Some pics to show how nice they look compared to the Pocher rubbish?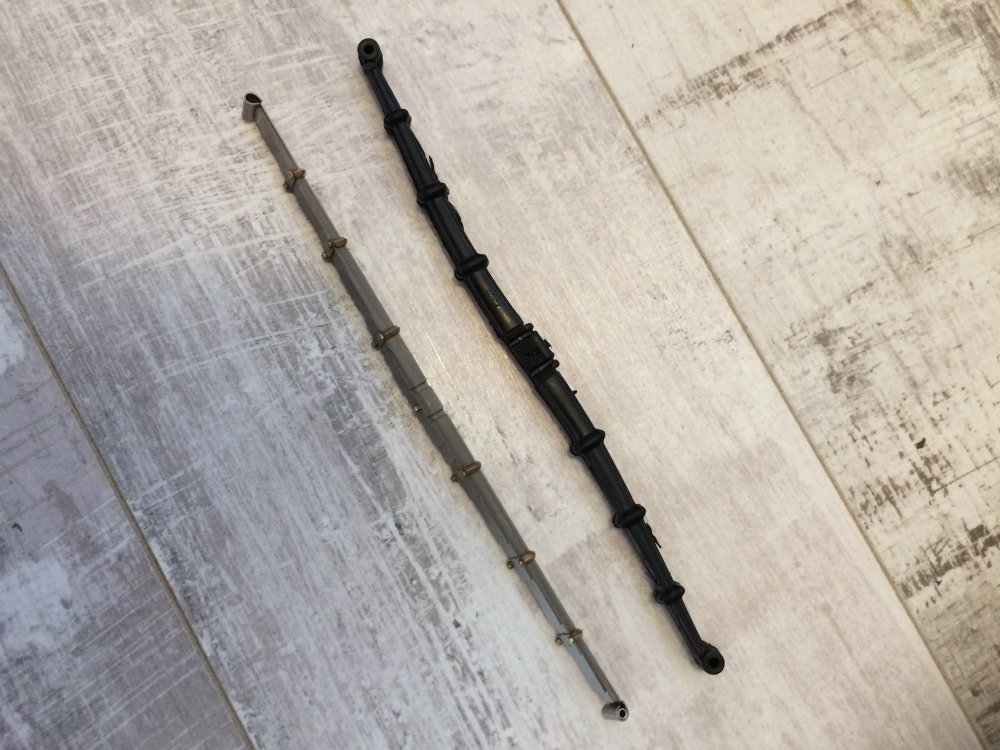
-
Pocher 1932 Rolls Royce
slash1953 replied to slash1953's topic in LSM 1/35 and Larger Work In Progress
Thats true bud, They say if you can build a Pocher you can build anything lol!!! -
Pocher 1932 Rolls Royce
slash1953 replied to slash1953's topic in LSM 1/35 and Larger Work In Progress
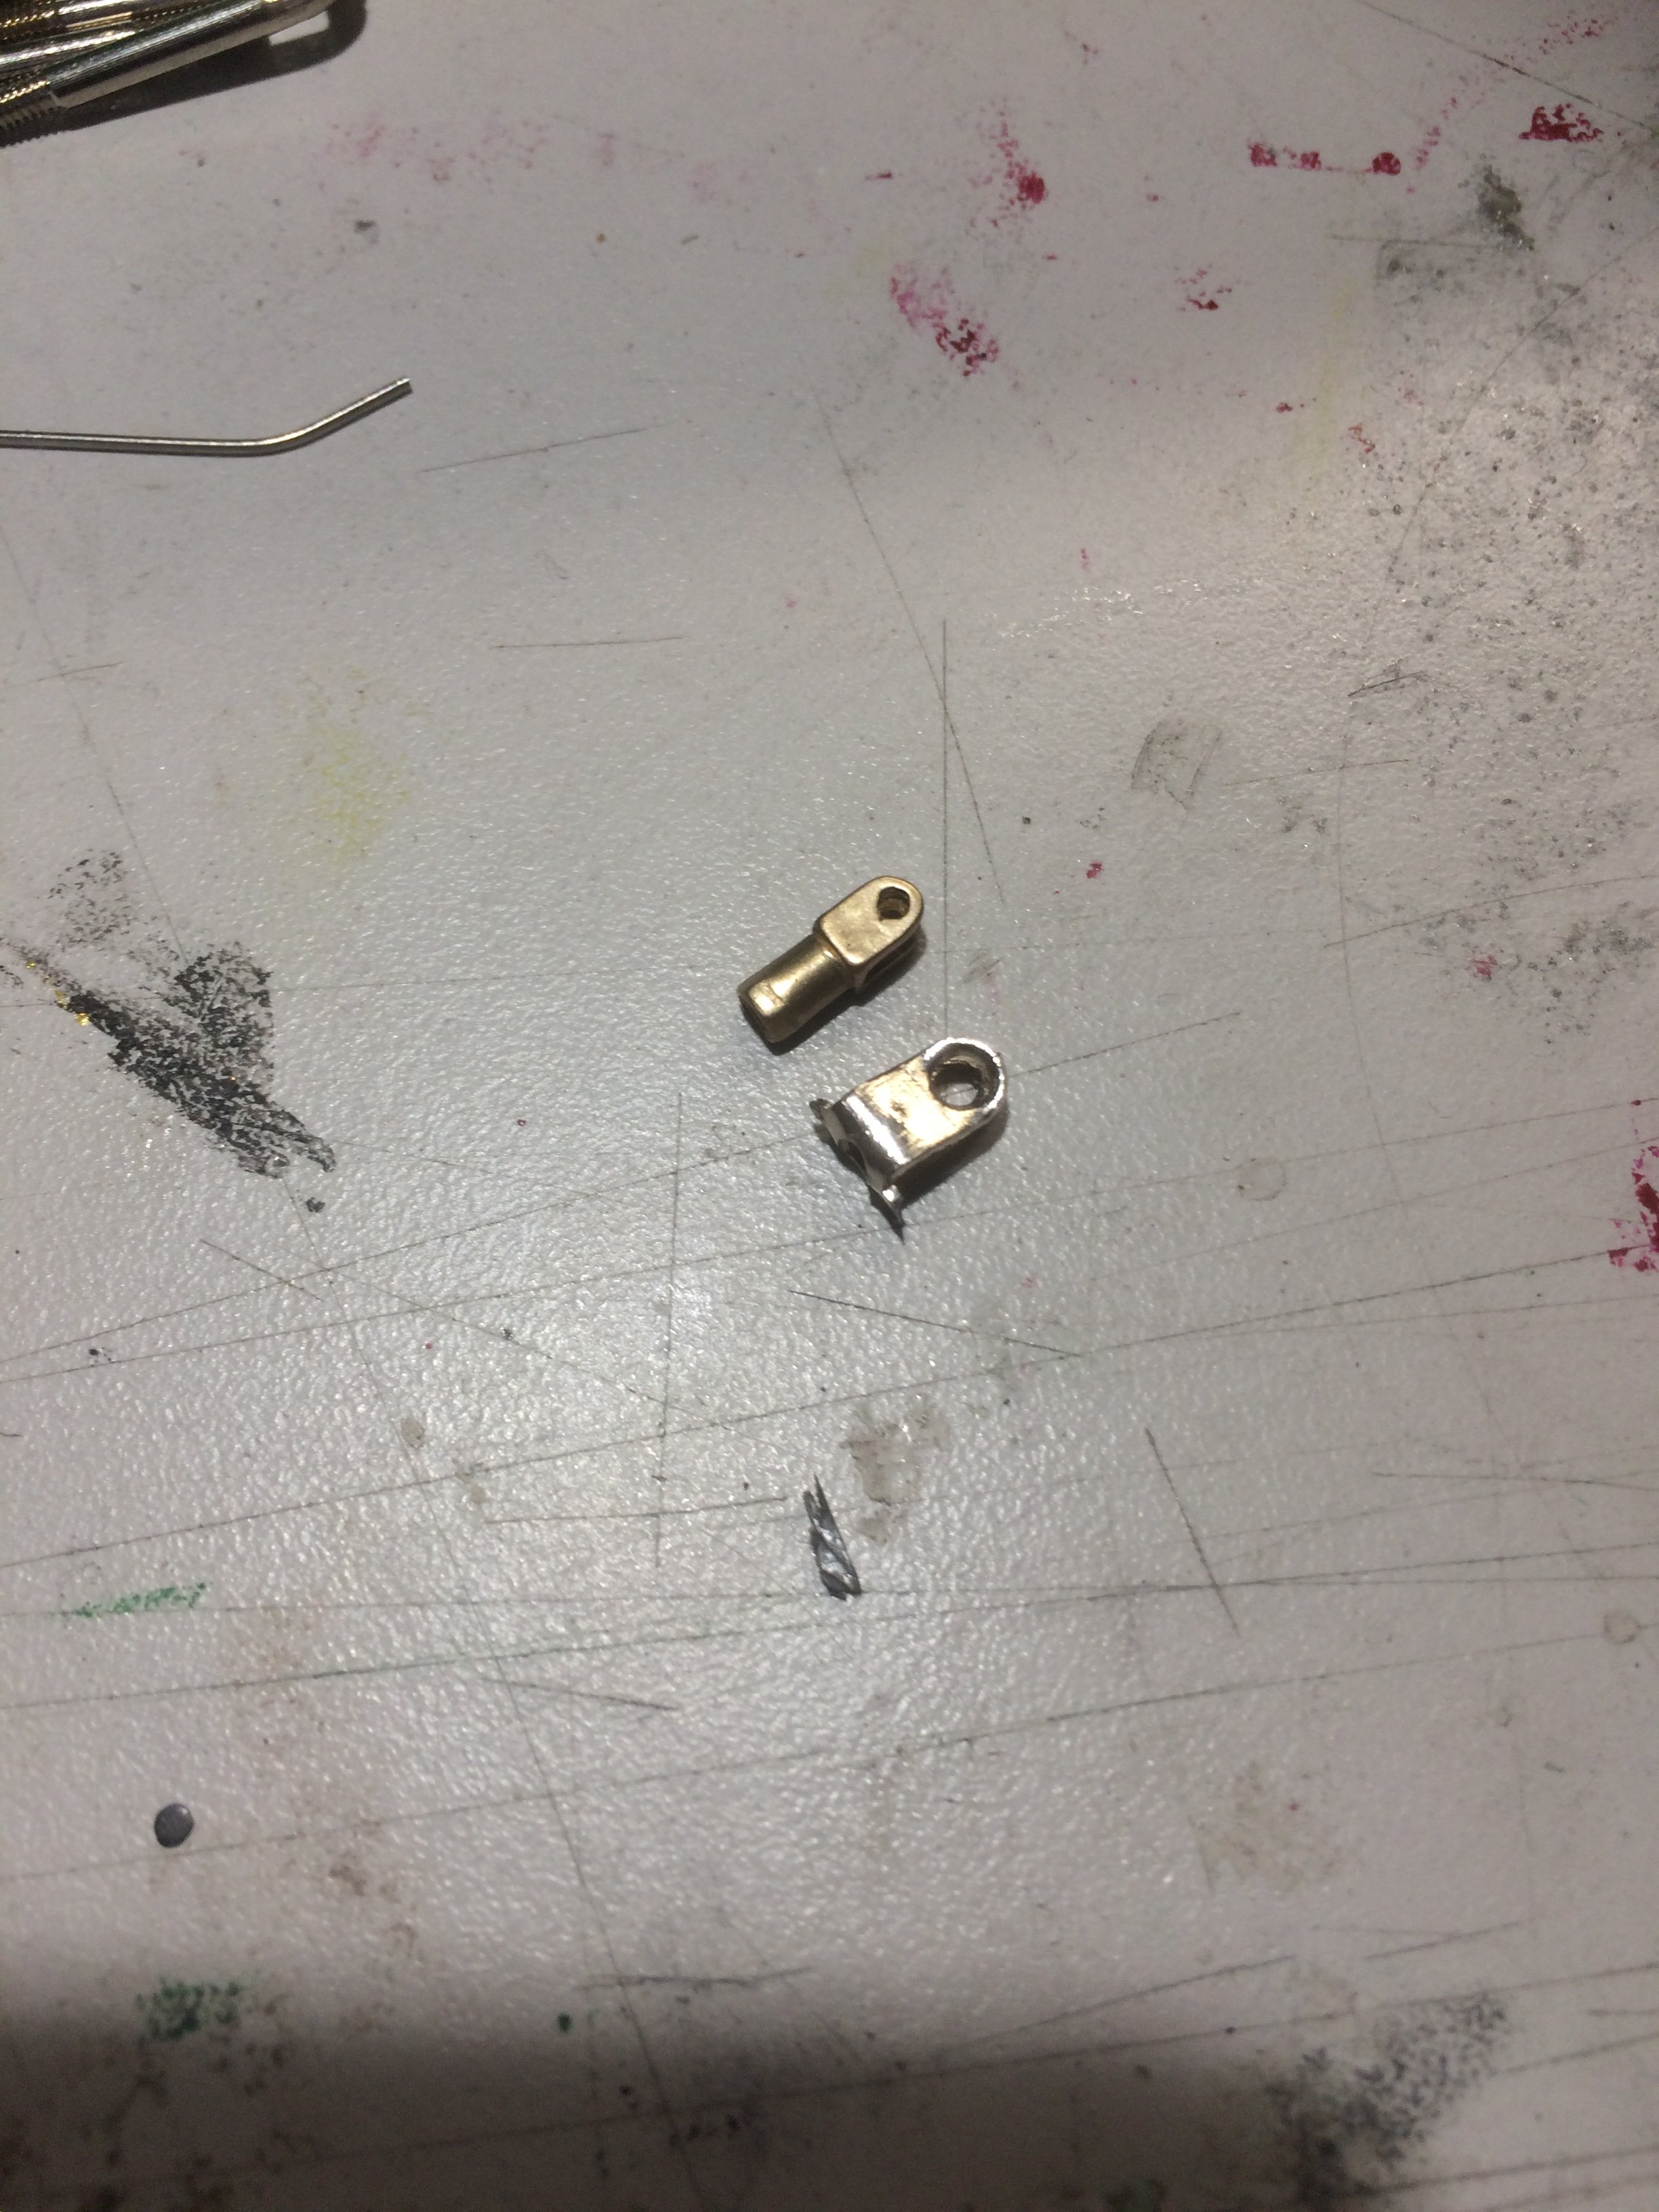
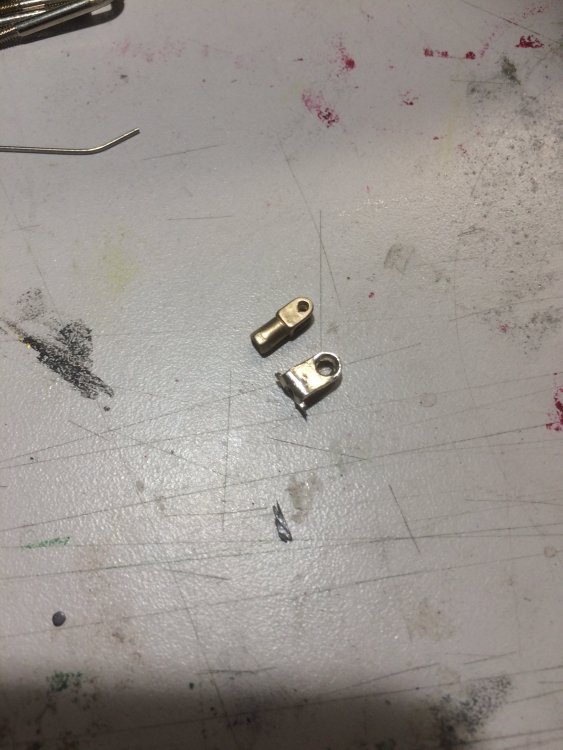
Havnt done much lately as Ive been indulging myself in my other hobby,live steam!! I built the fuel tank filling in the seam setc and the fuel lines. These were made from a guitar string. Brake linkages fitted to the chassis. The rear axle ready to be fitted to the springs but they cant be used. Bent to a completely different shape (pic) than whats required!! Im going to buy some stainless spring kits from Model Motorcars in the USA. Ive thrown the clunky old links supplied and bought replacements from this company and you can see they are cast in bronze and look superb and will fit with the minimum of play?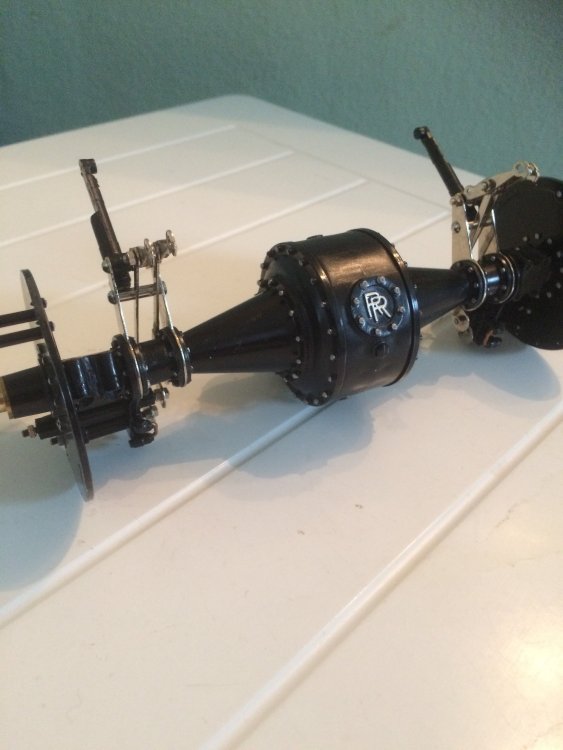

-
Pocher 1932 Rolls Royce
slash1953 replied to slash1953's topic in LSM 1/35 and Larger Work In Progress
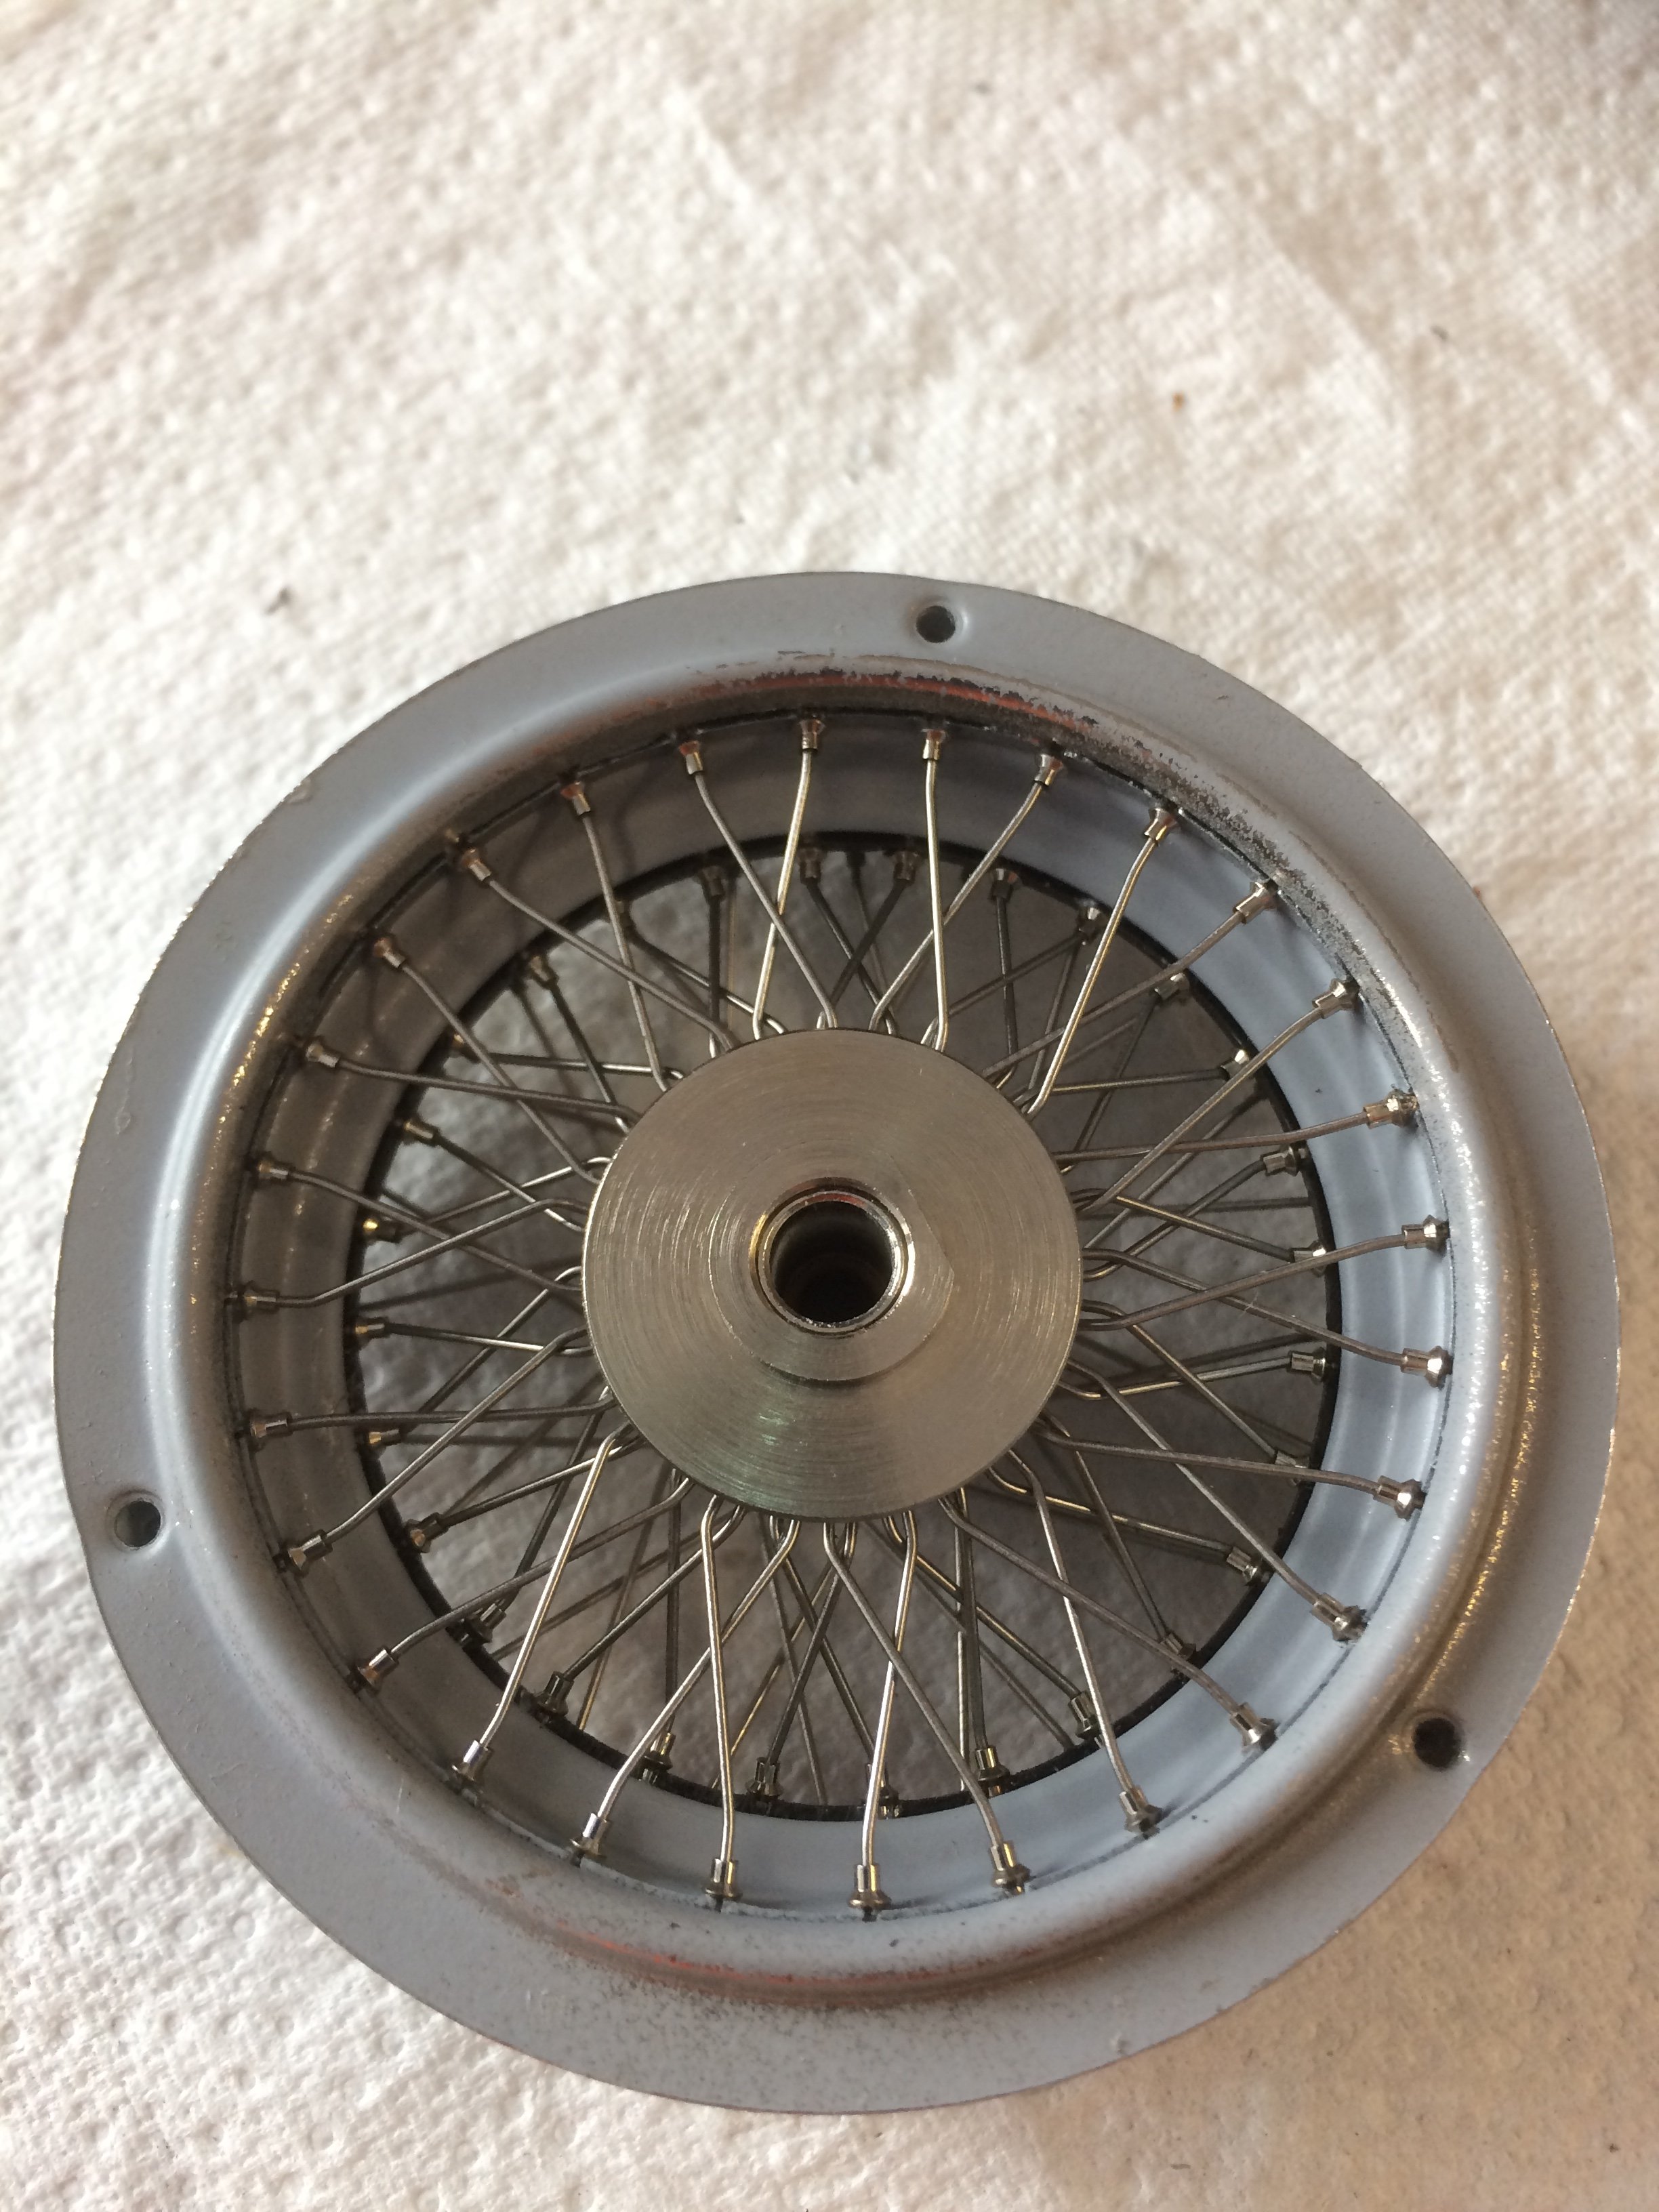
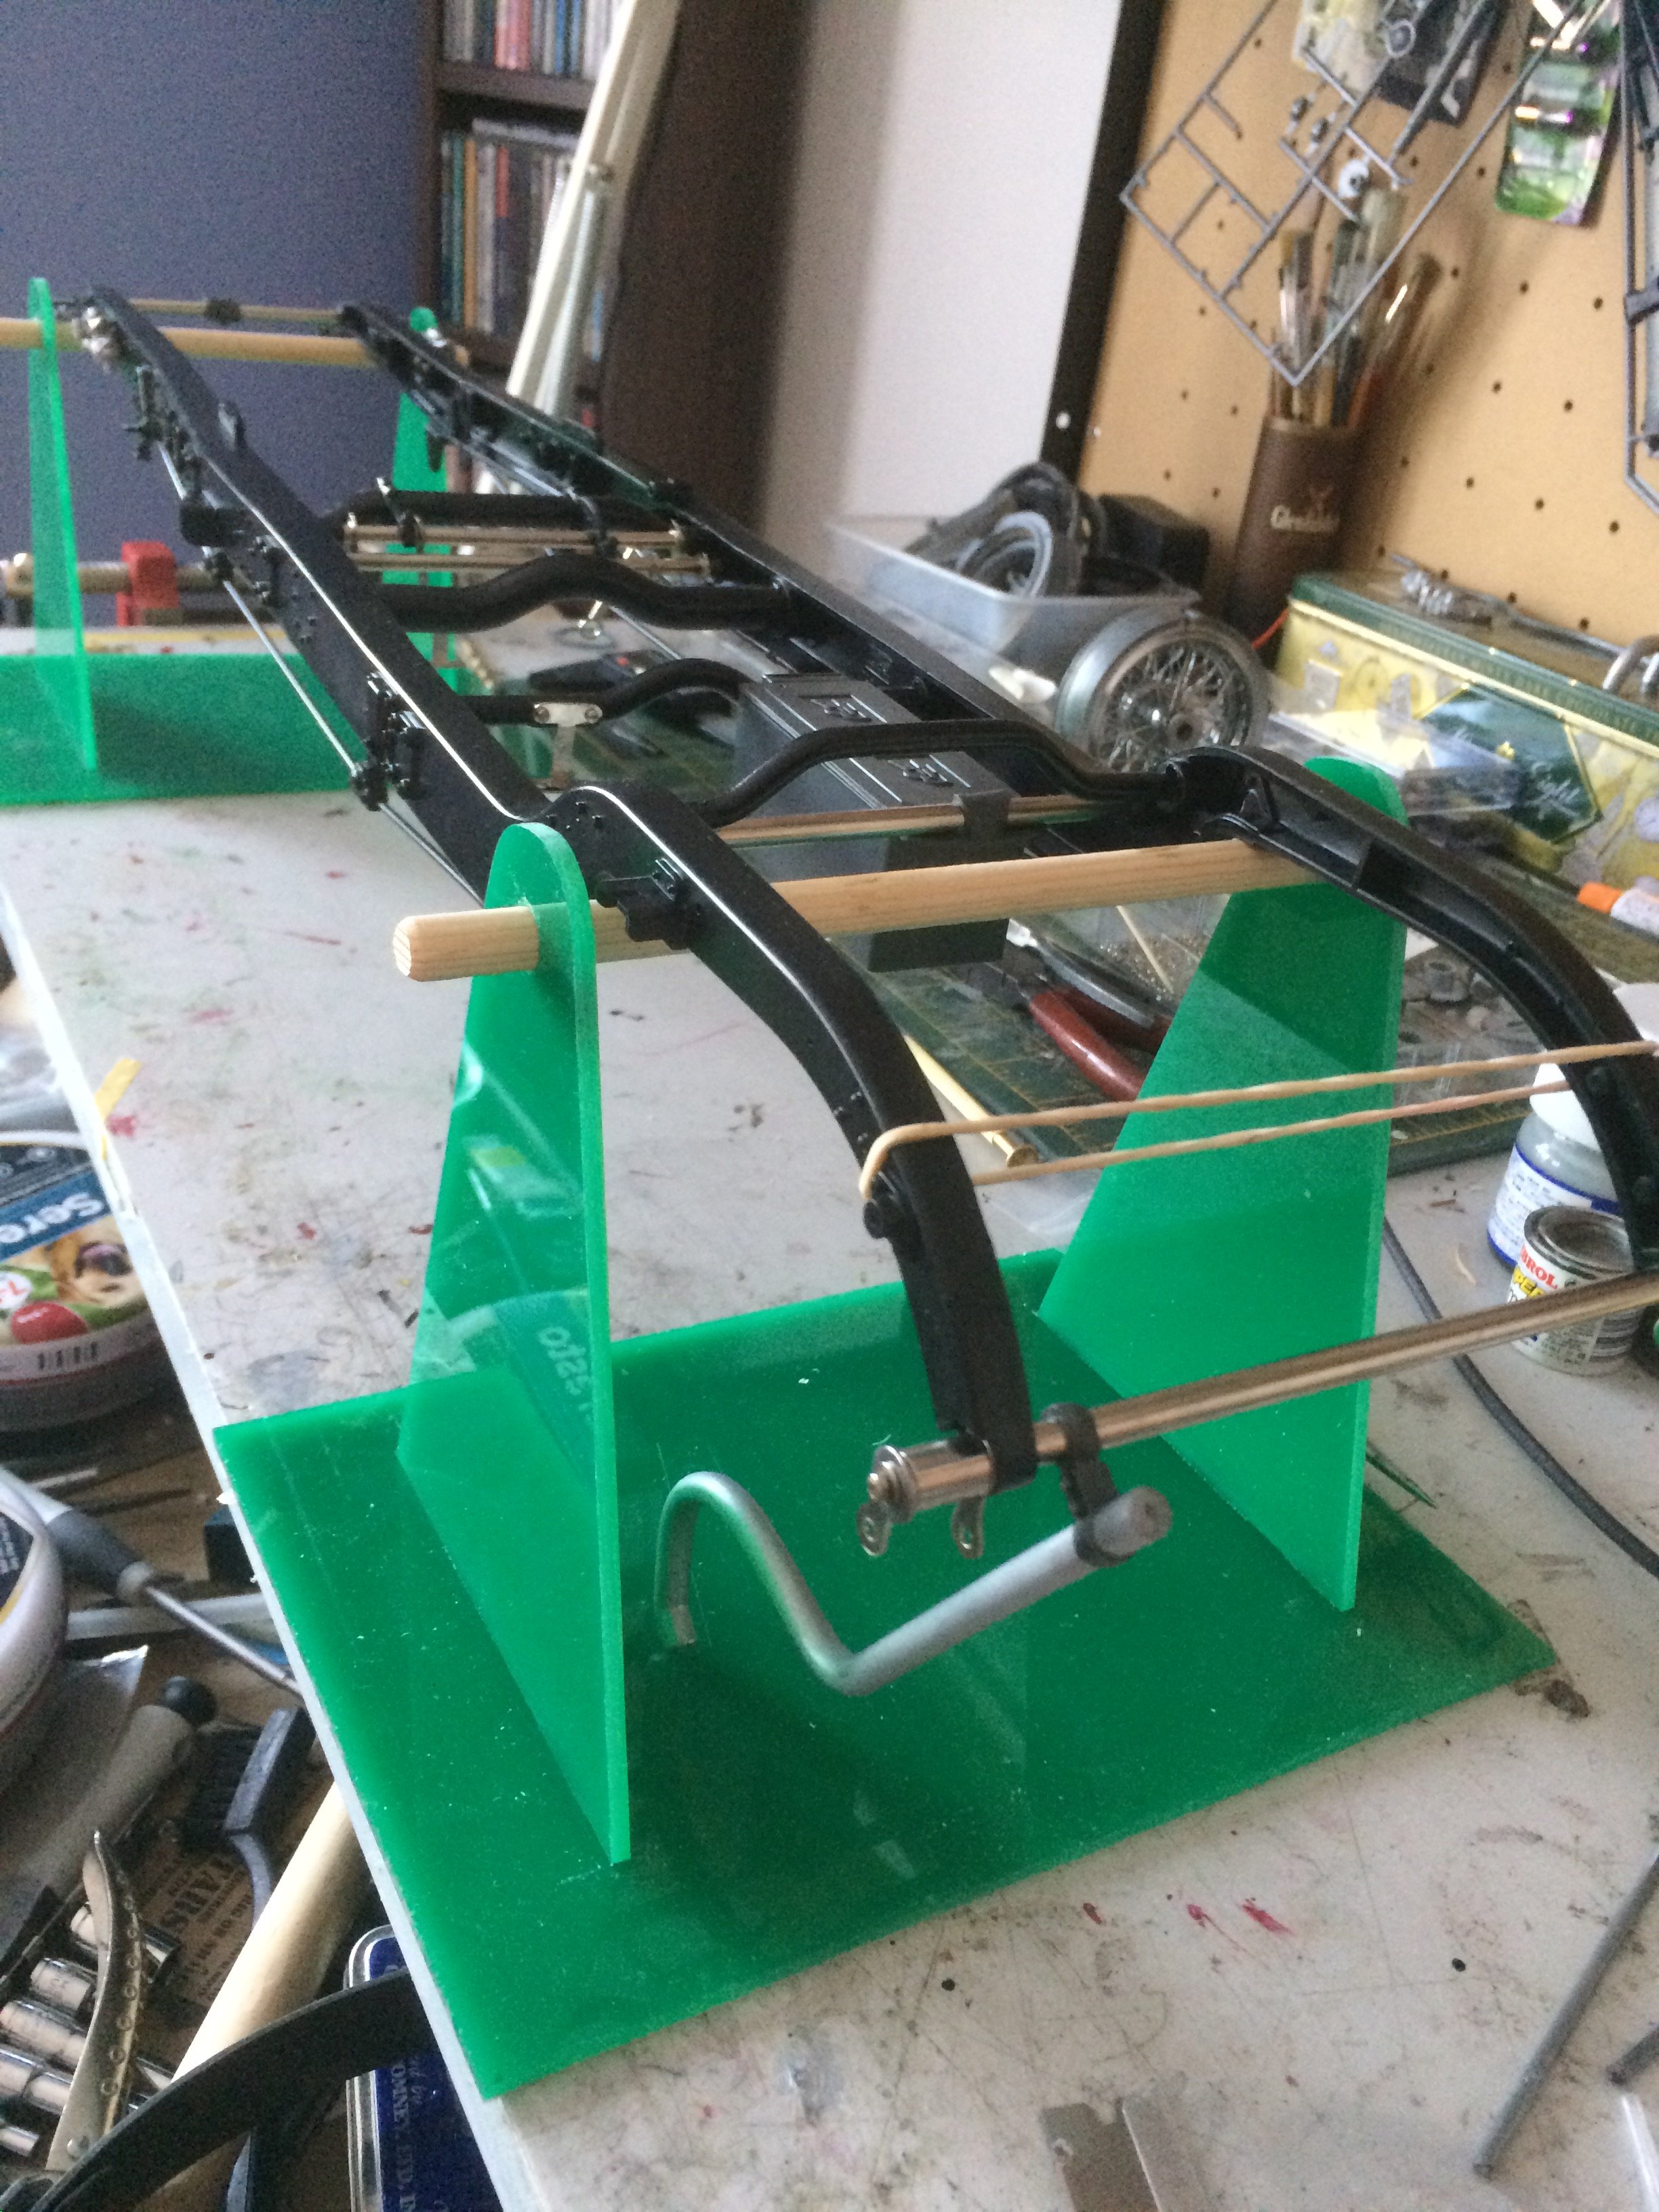
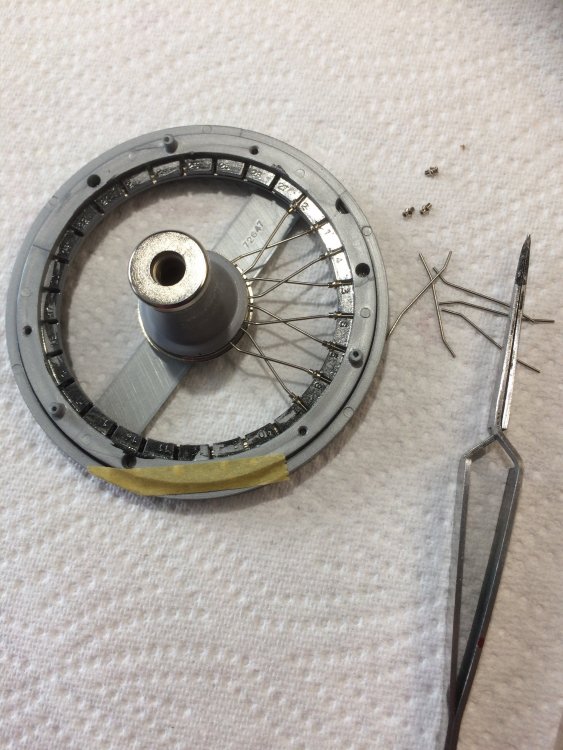
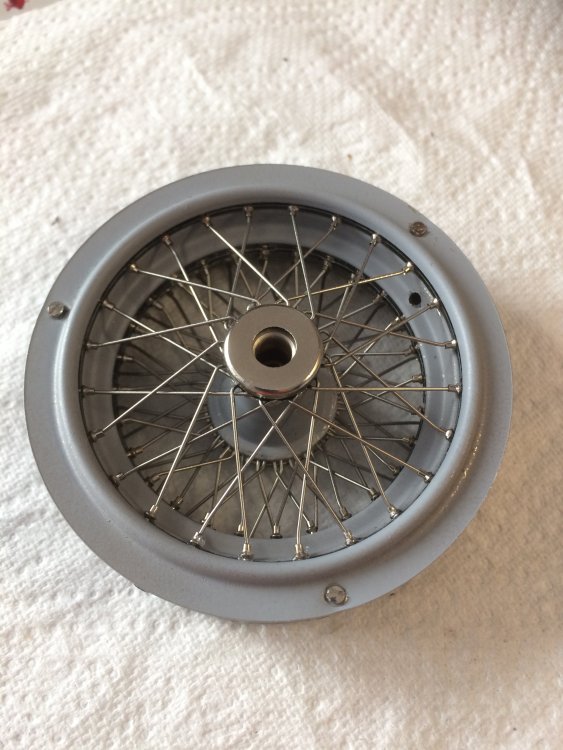
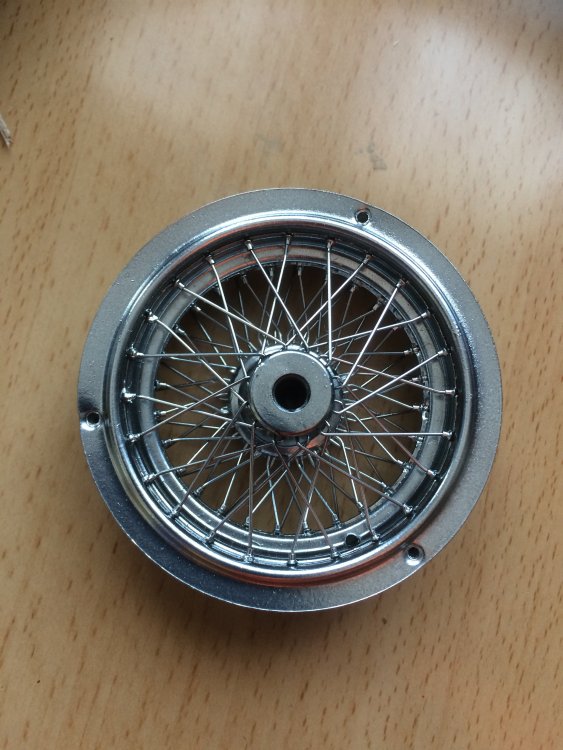
Built a wheel,ten hrs work!! Only four more to go?? Ive also built a jig to support the chassis whilst building.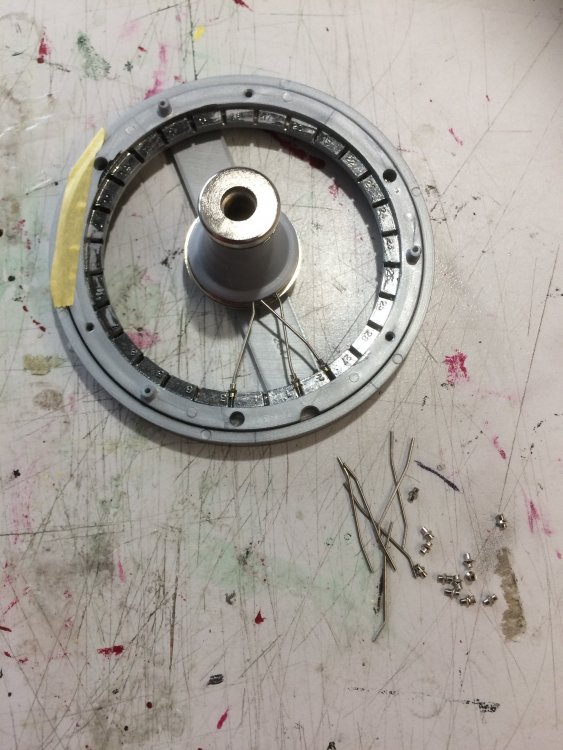


-
Hi,does anyone know if Model Motorcars are still trading? Ive sent 4-5 emails with no response. Thanks Terry
-
- 1
-

-
Pocher 1932 Rolls Royce
slash1953 replied to slash1953's topic in LSM 1/35 and Larger Work In Progress
Thanks bud,glad you like it? I'll be fitting a throttle linkage when I can find some pics.... -
Pocher 1932 Rolls Royce
slash1953 replied to slash1953's topic in LSM 1/35 and Larger Work In Progress
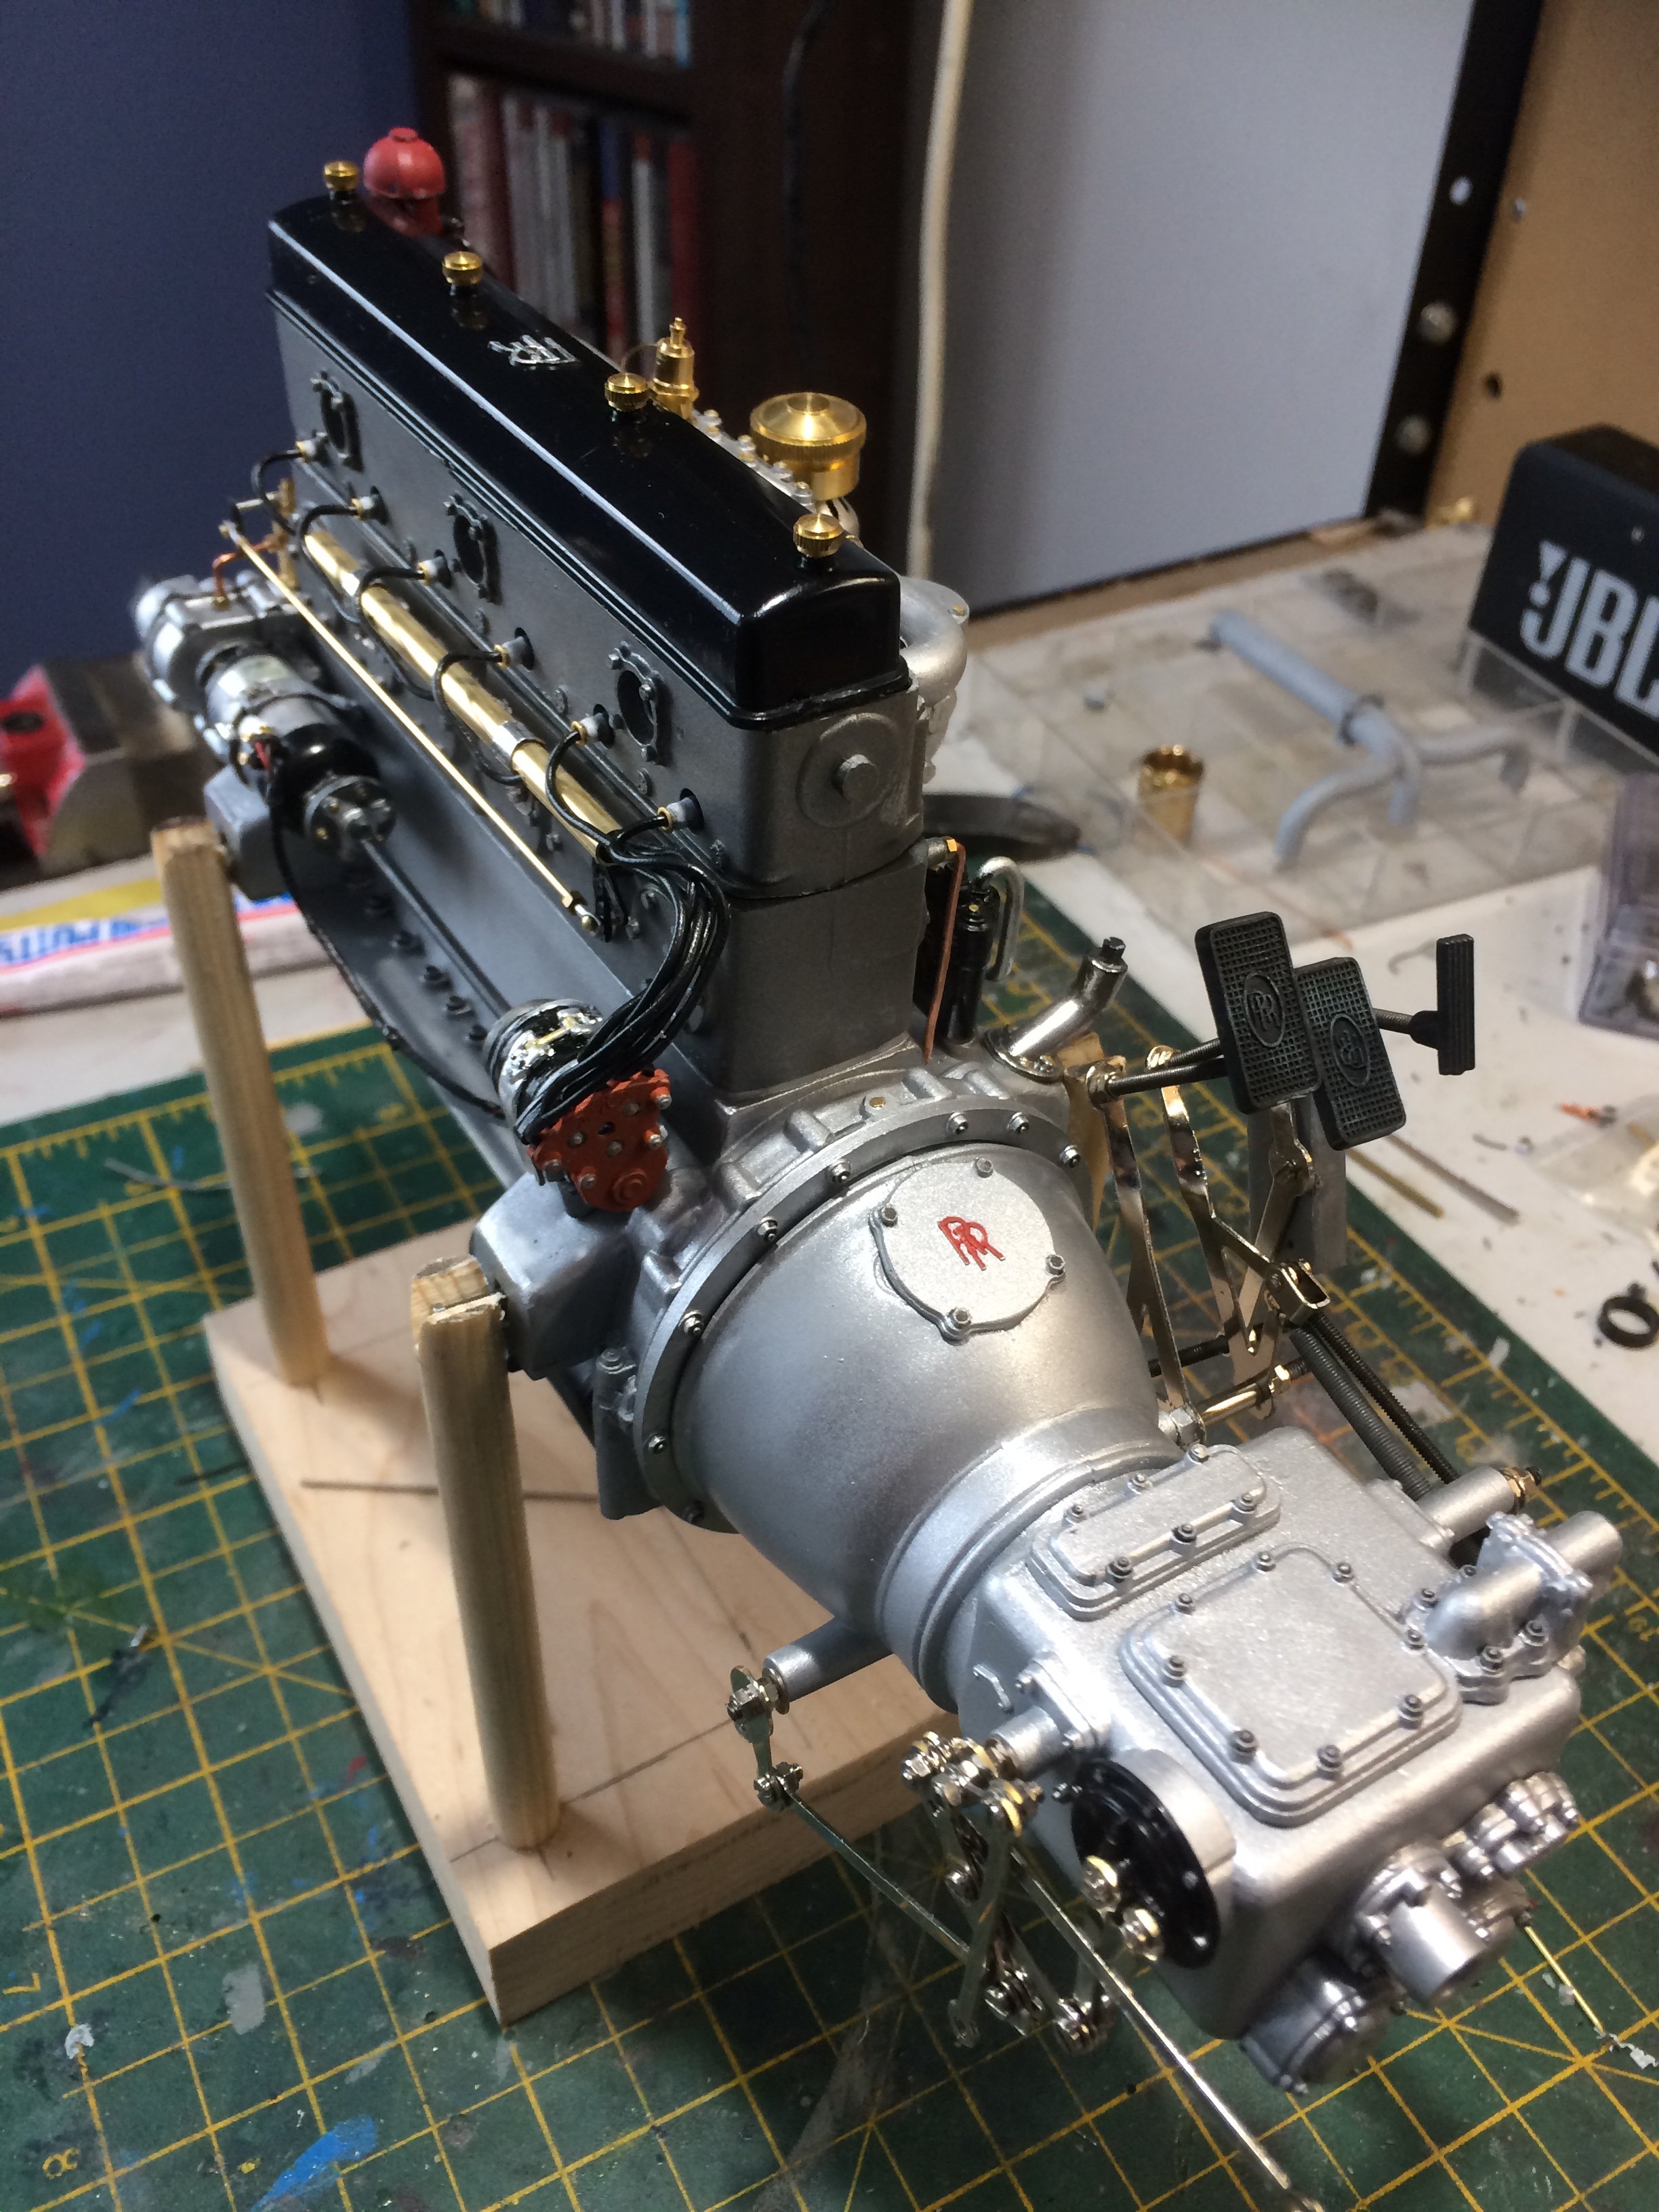
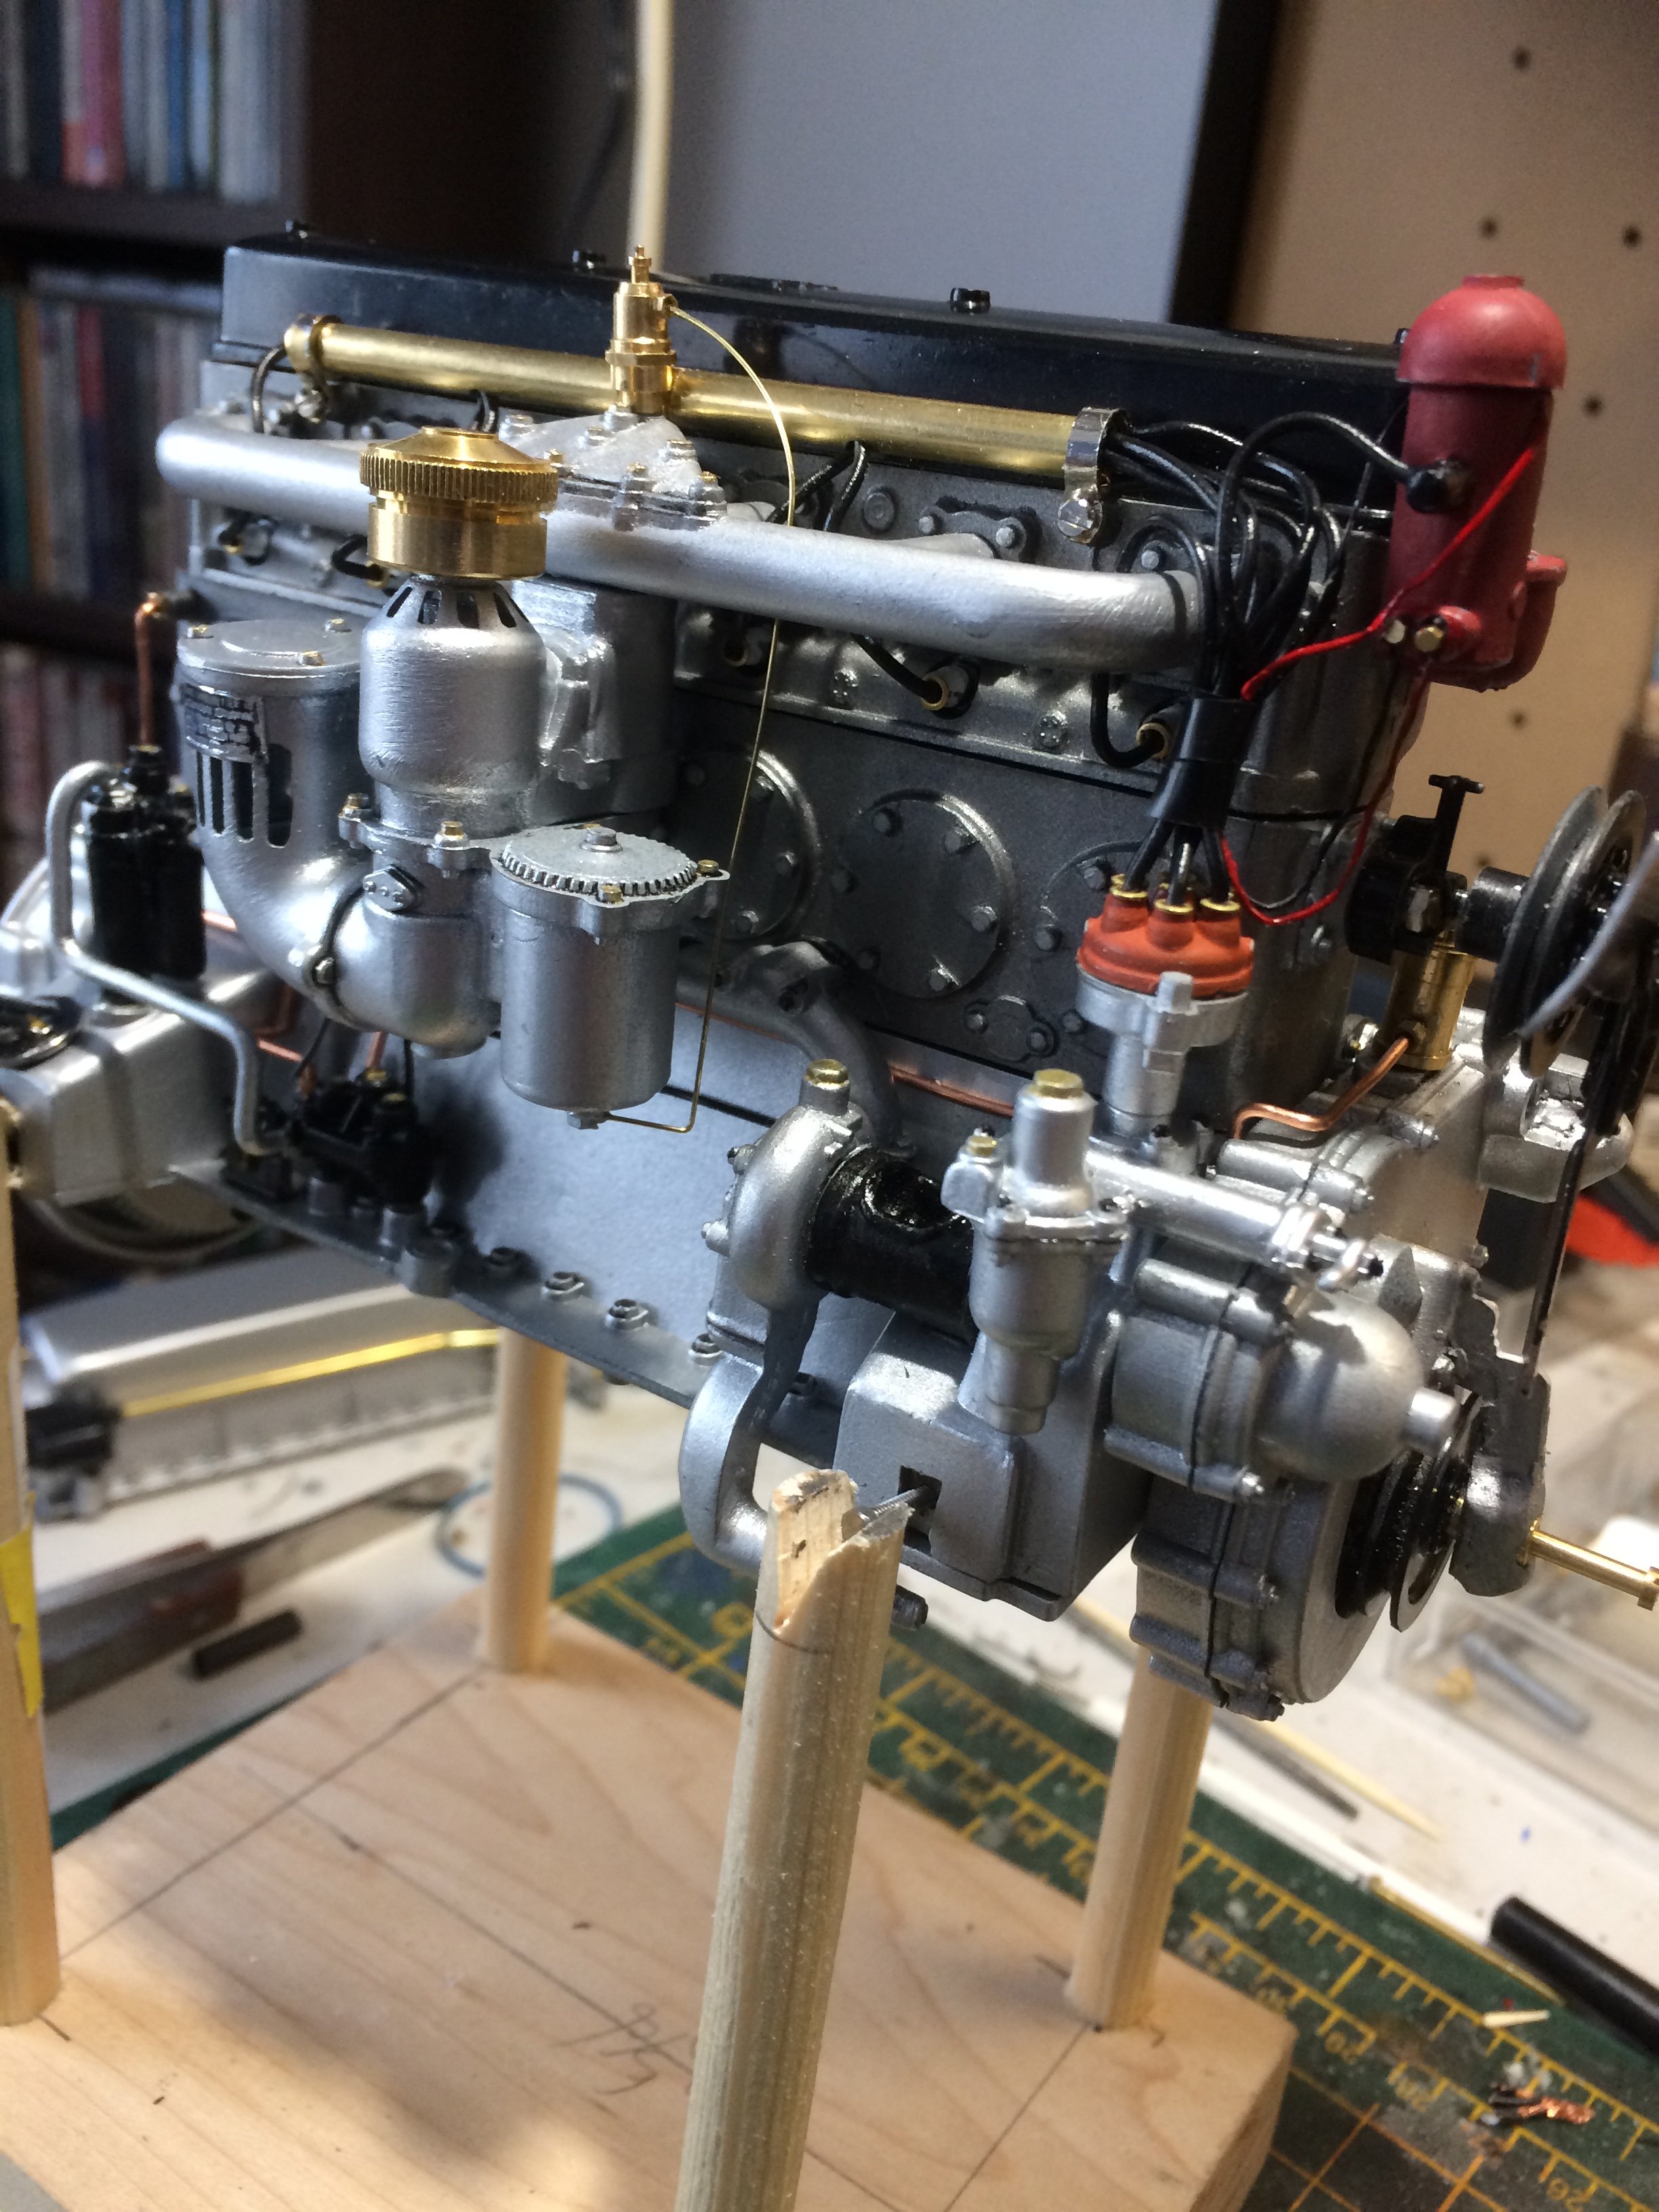
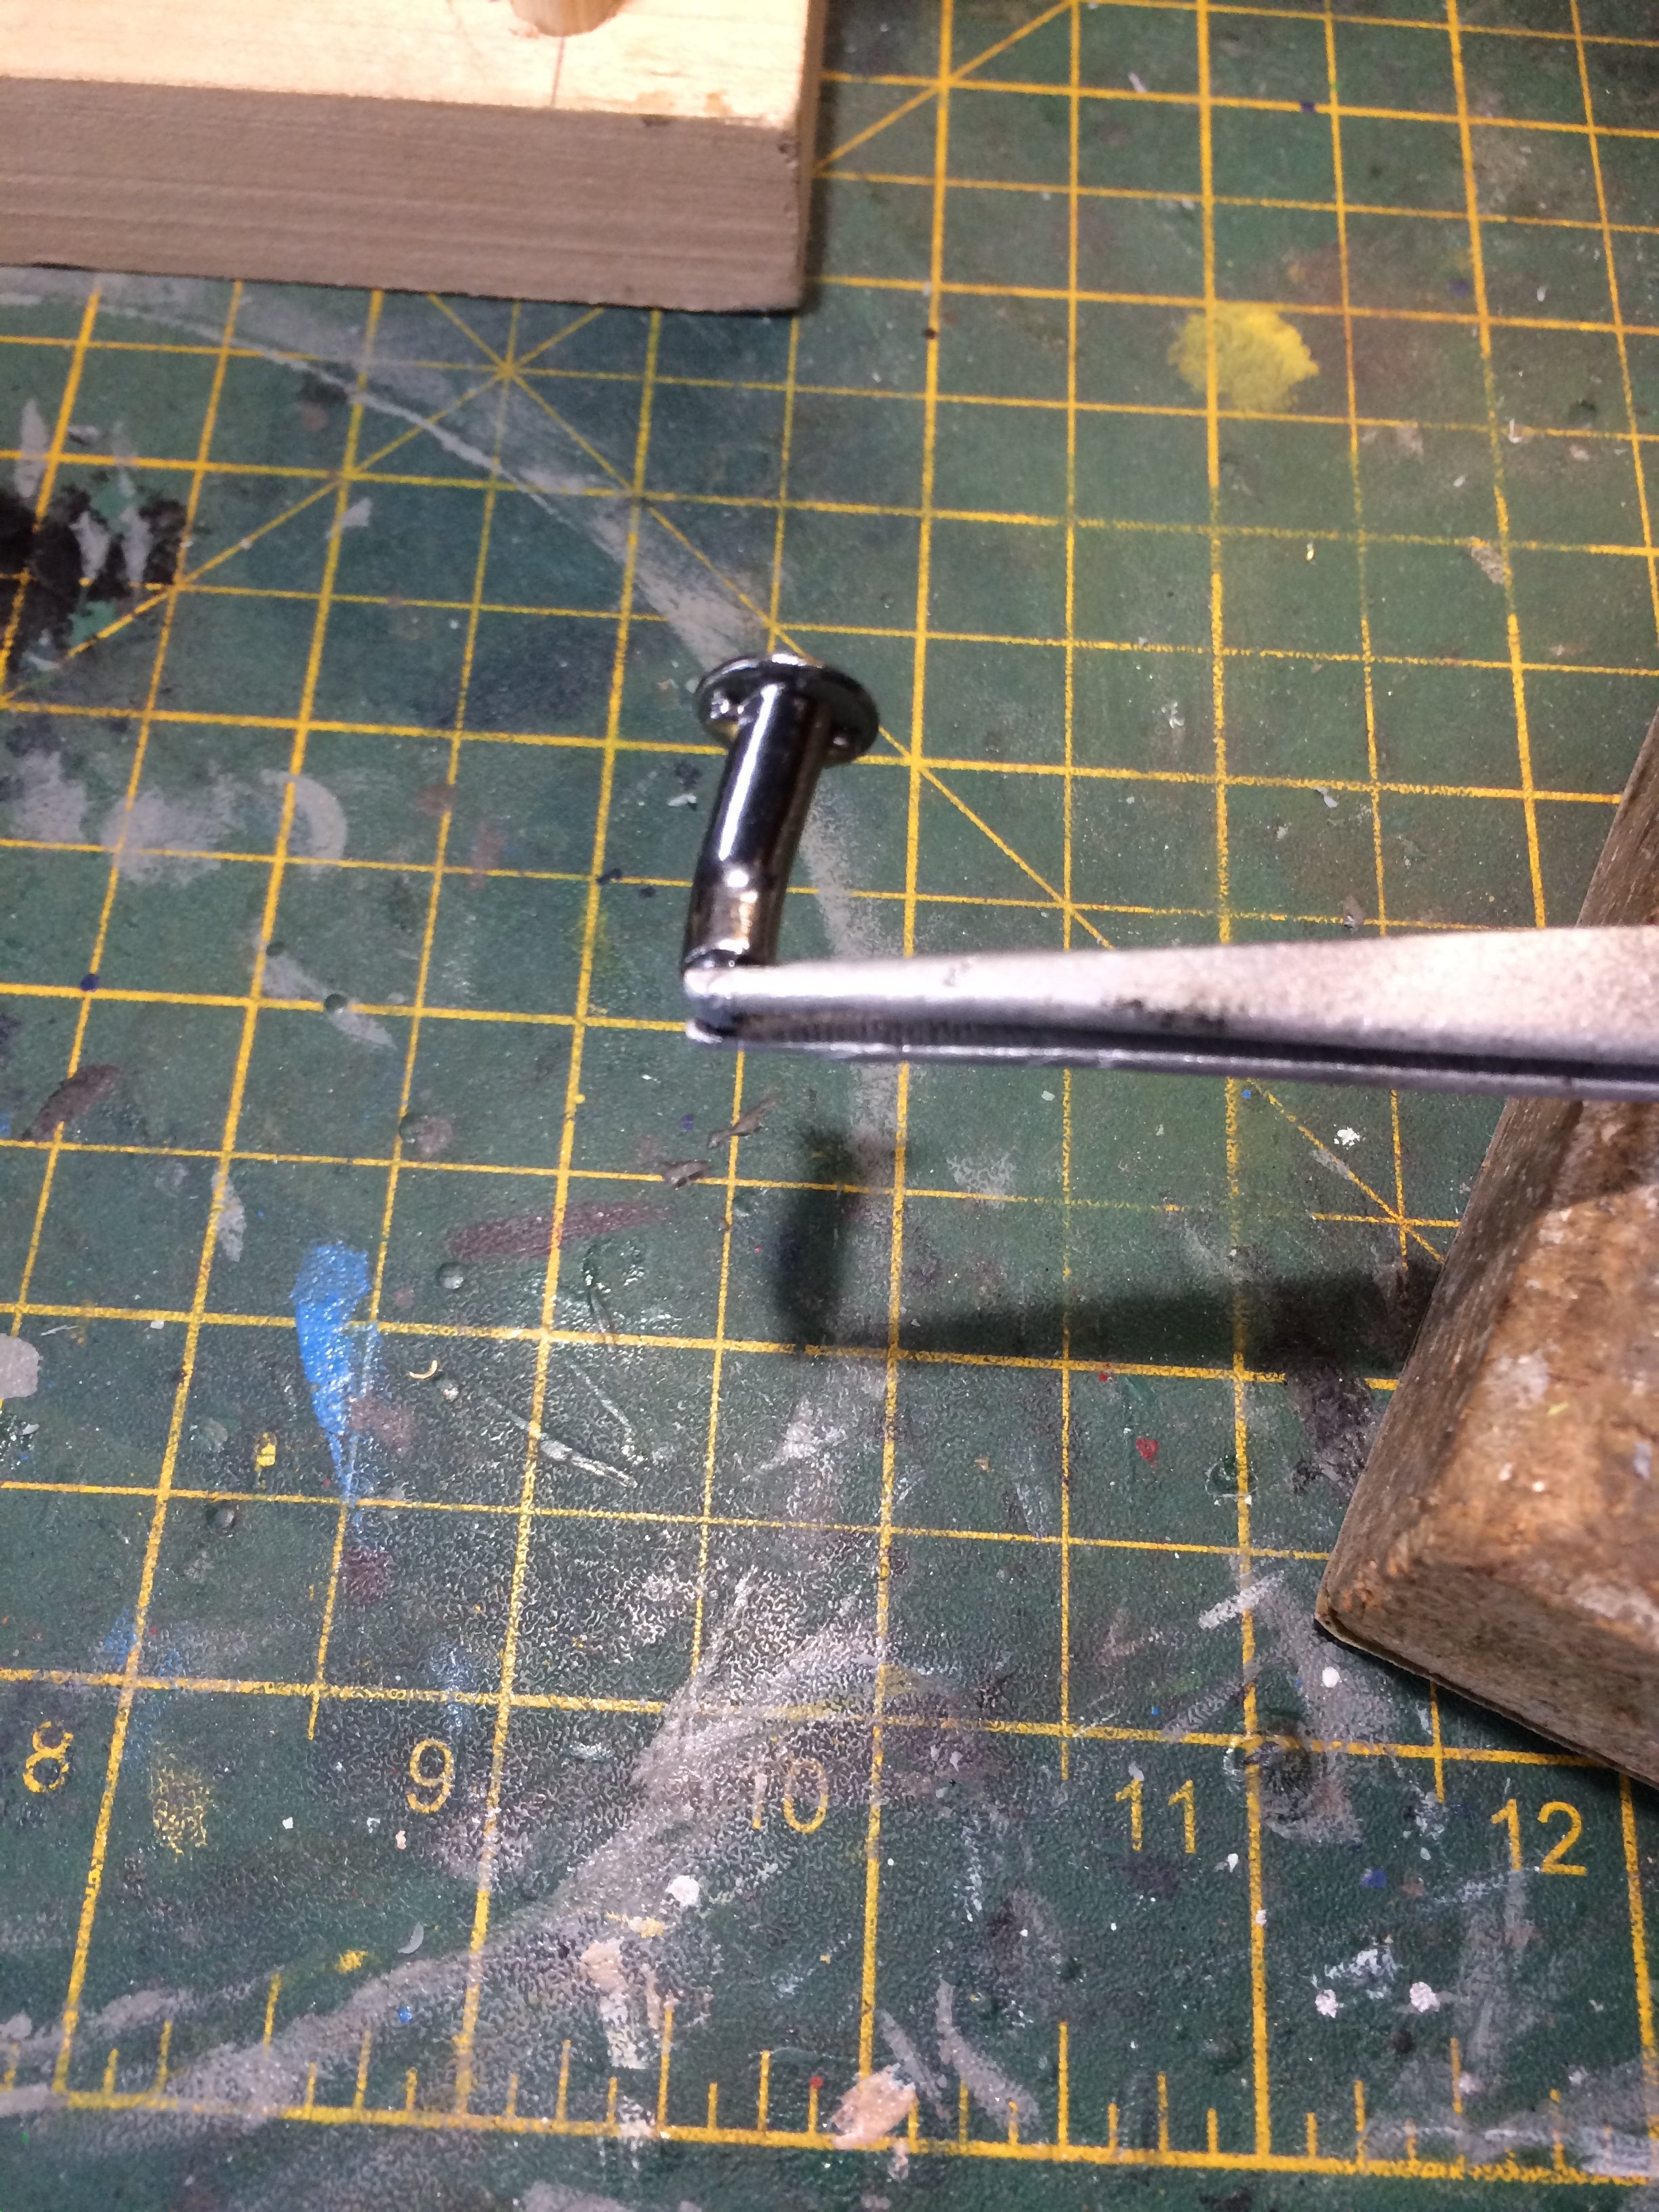
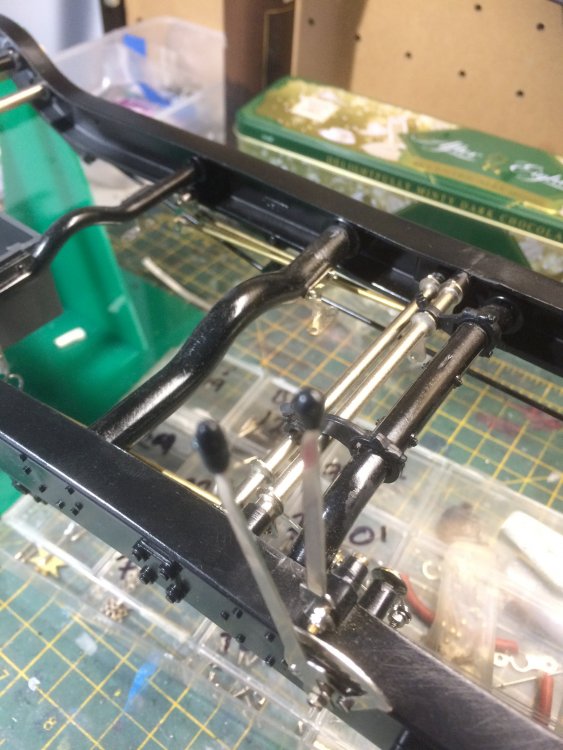
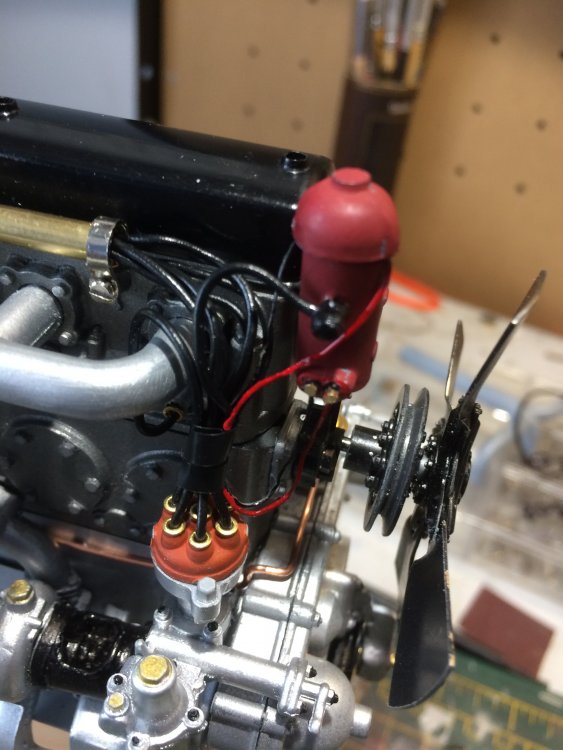
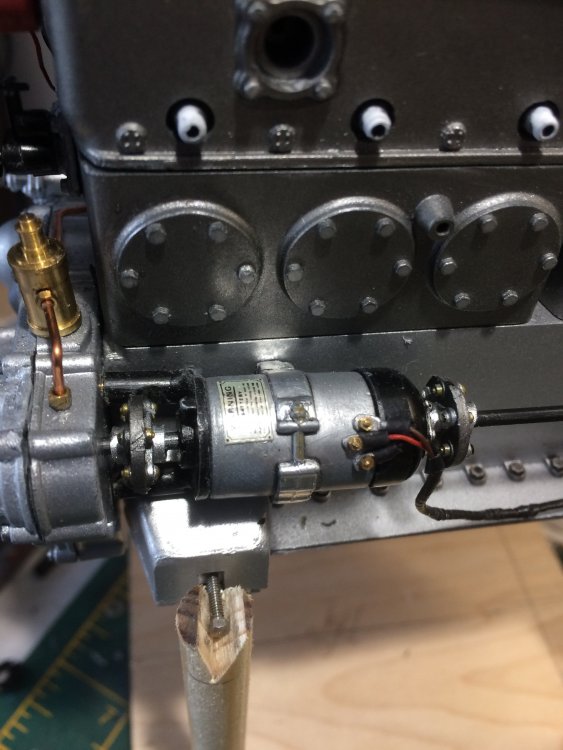
Fitted the gearbox and pedals etc. I wanted to put an advance/retard linkage so made it from scratch inc spring from fusewire. Also made the tube and brackets for the HT leads from magneto that was missing from the kit.All good fun! Chassis next......


-
Pocher 1932 Rolls Royce
slash1953 replied to slash1953's topic in LSM 1/35 and Larger Work In Progress
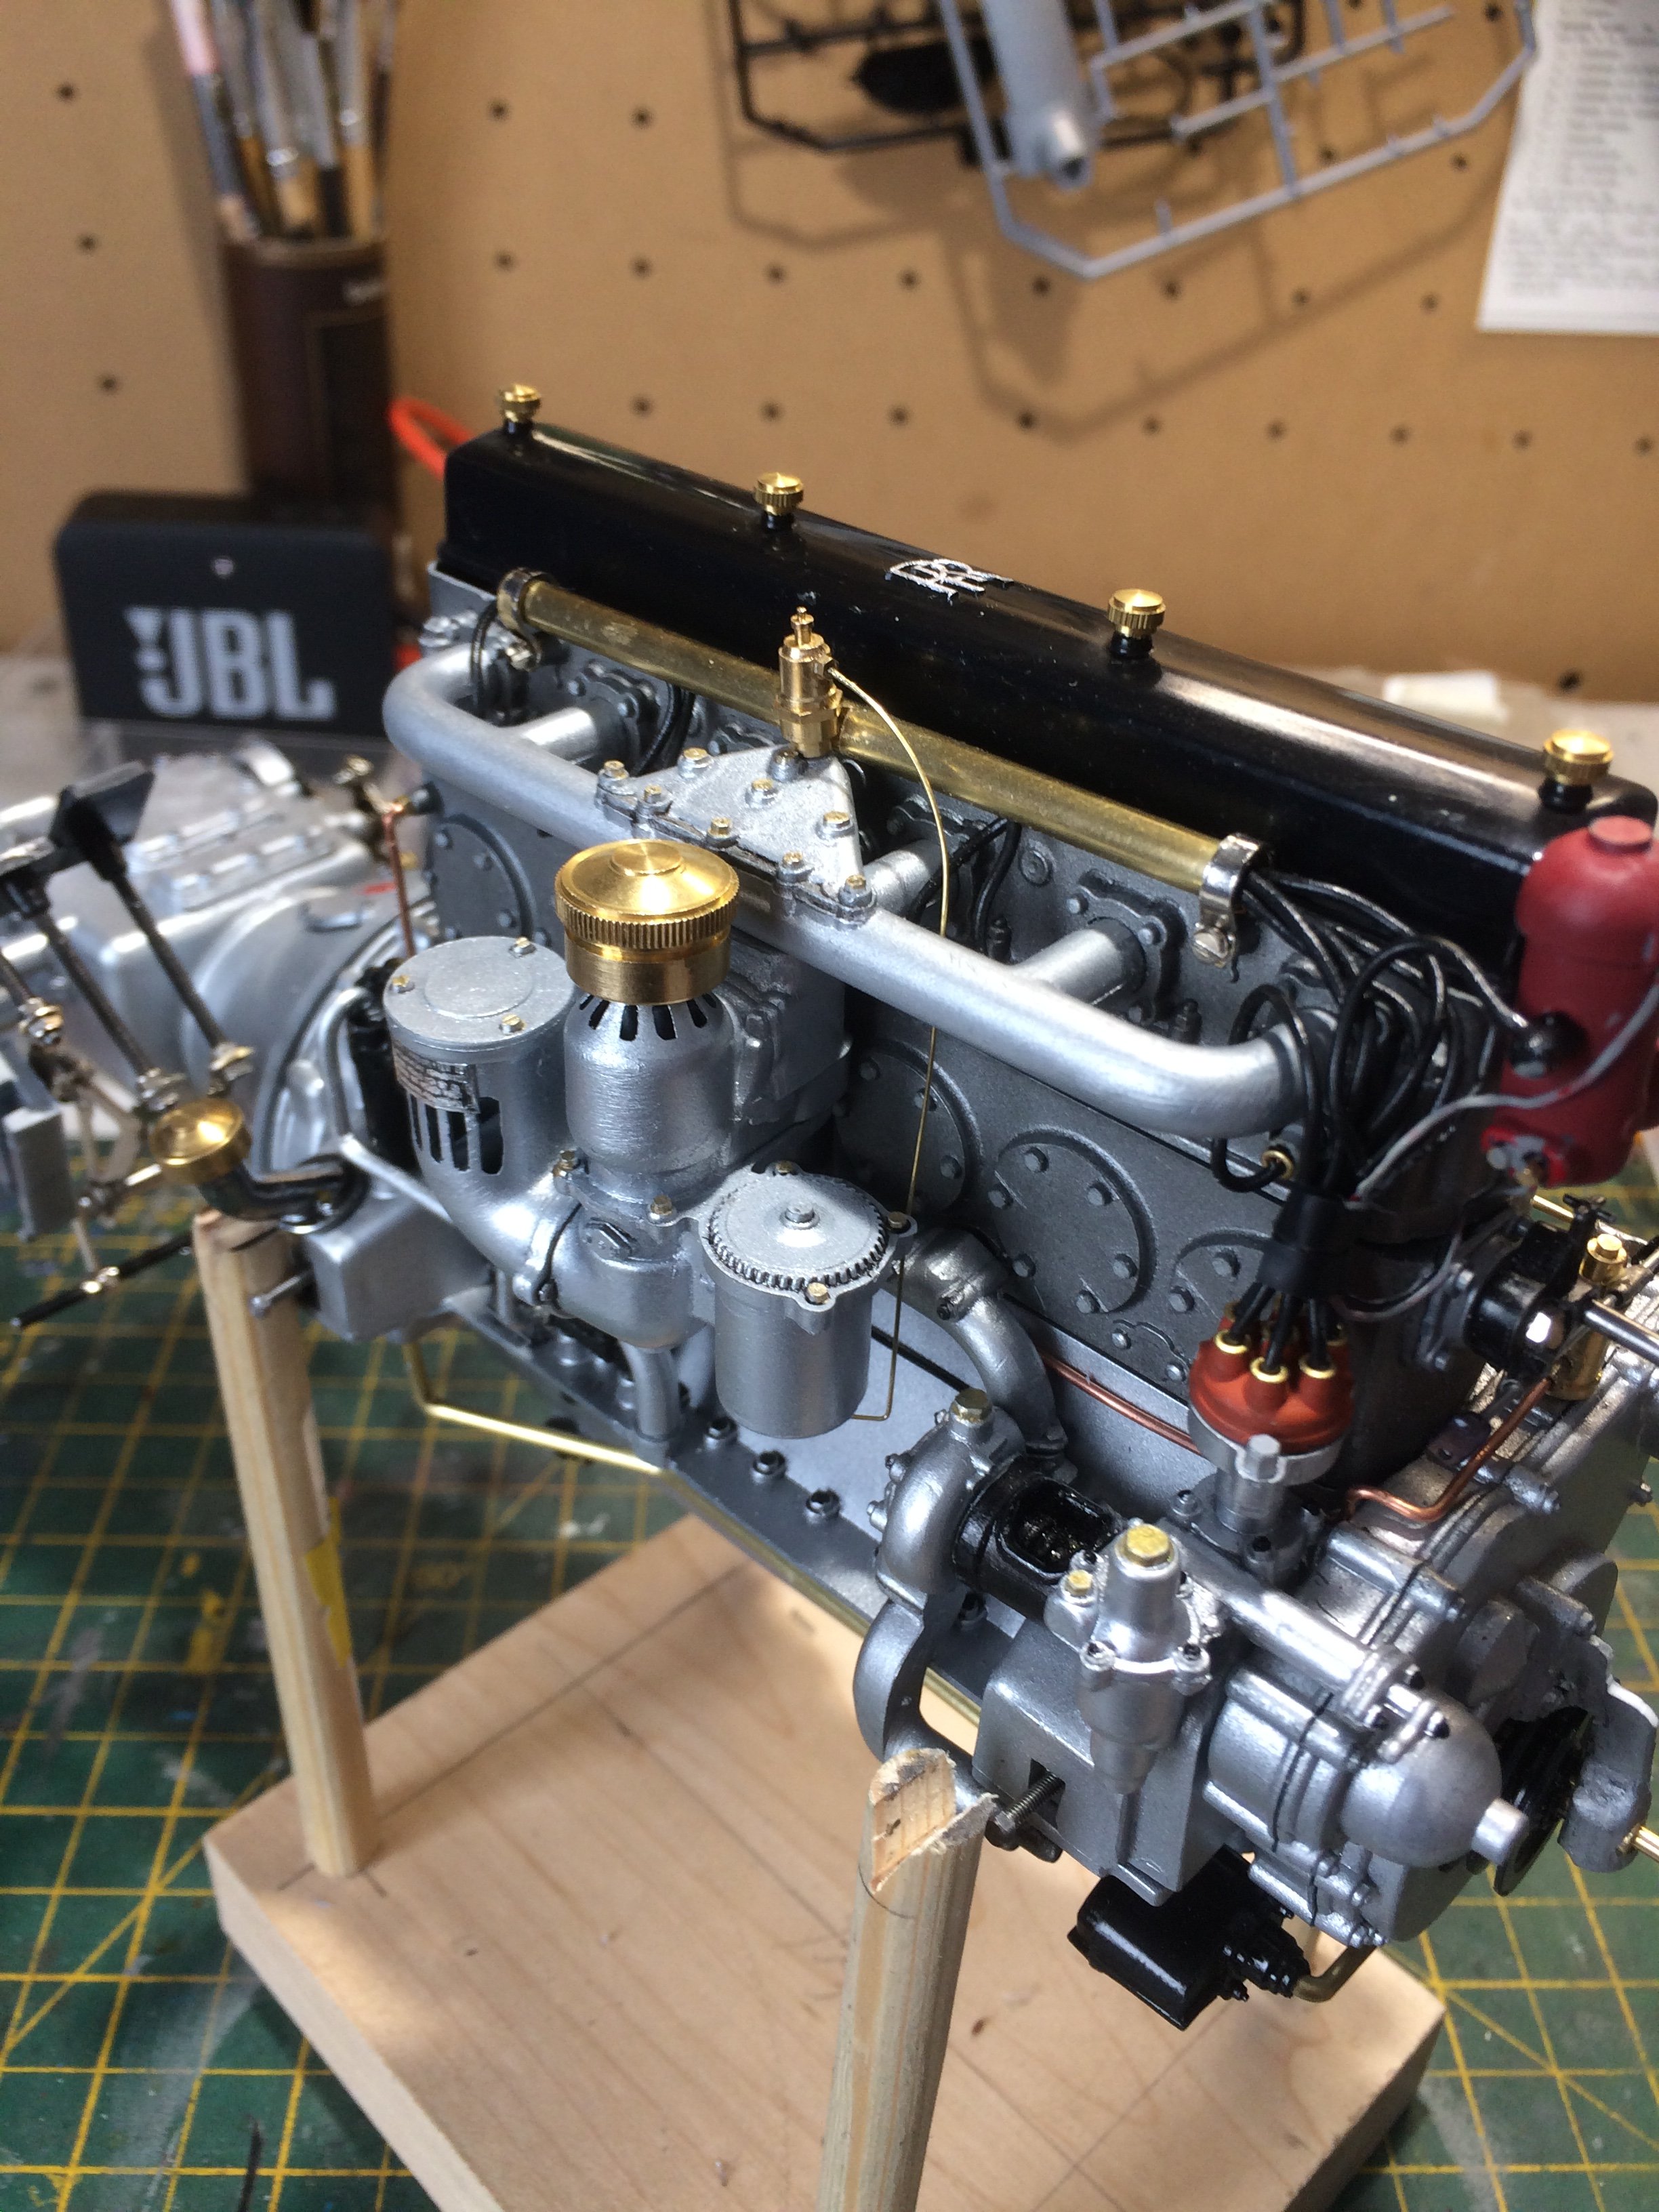
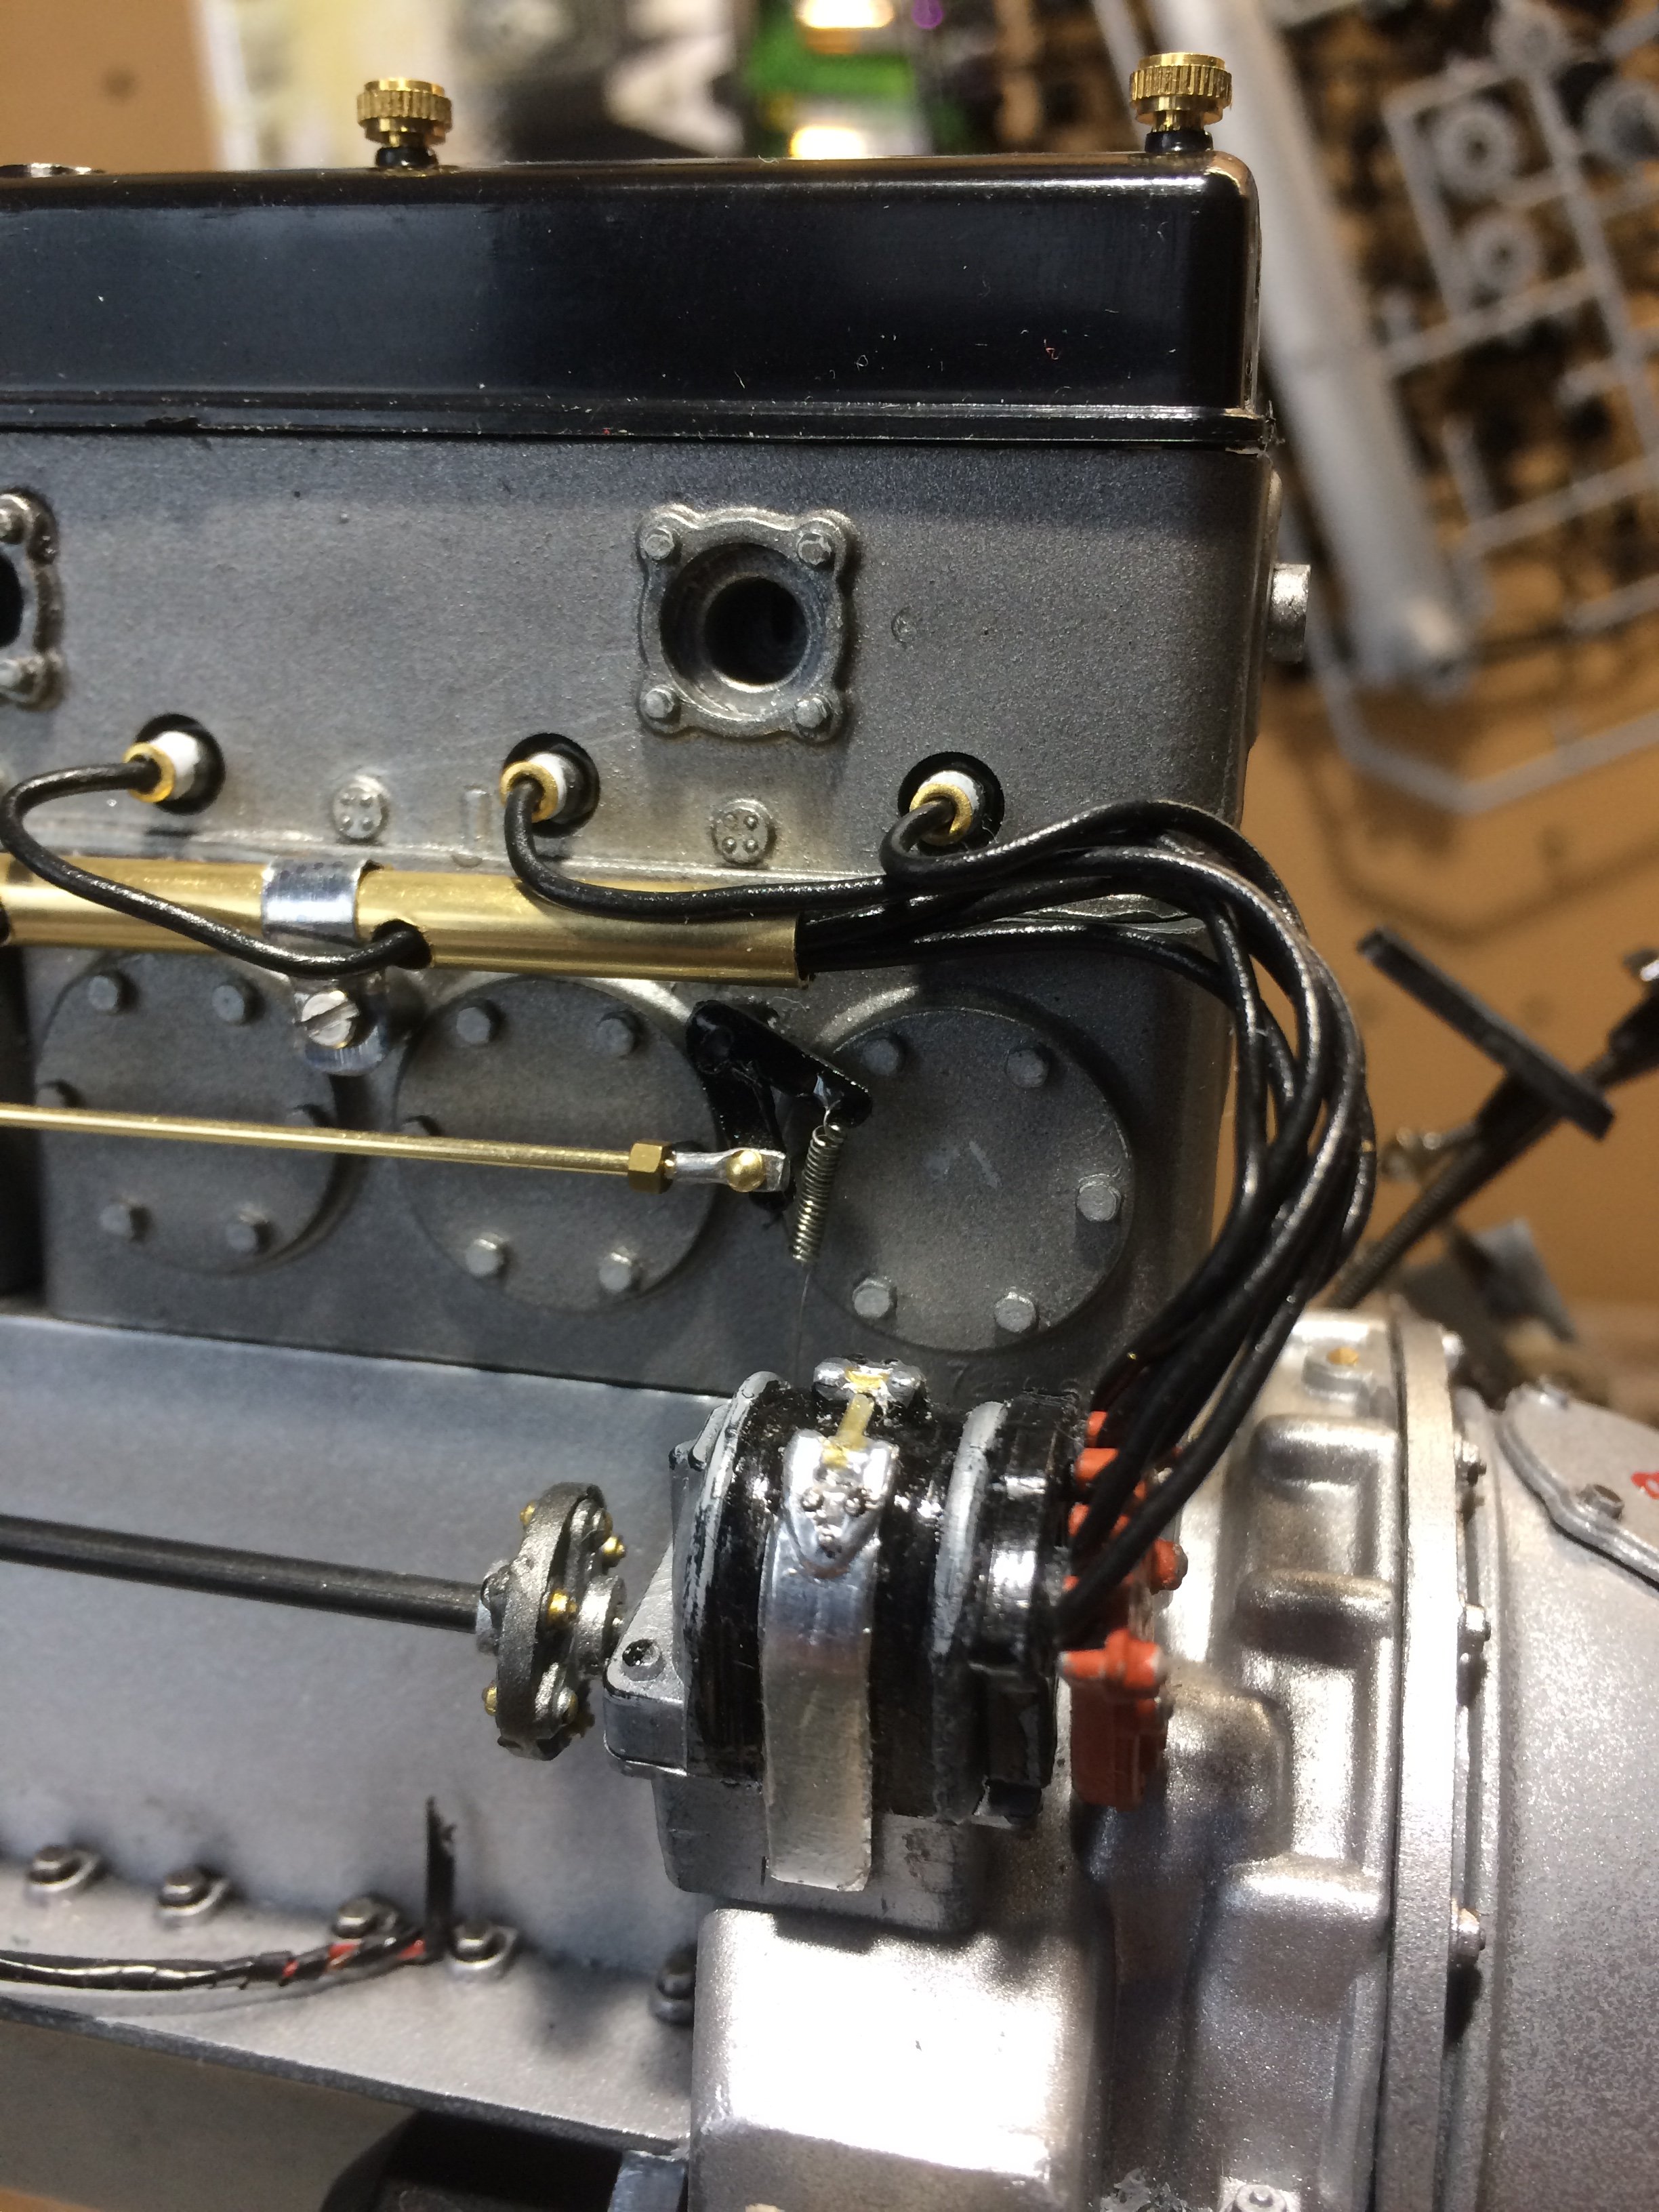
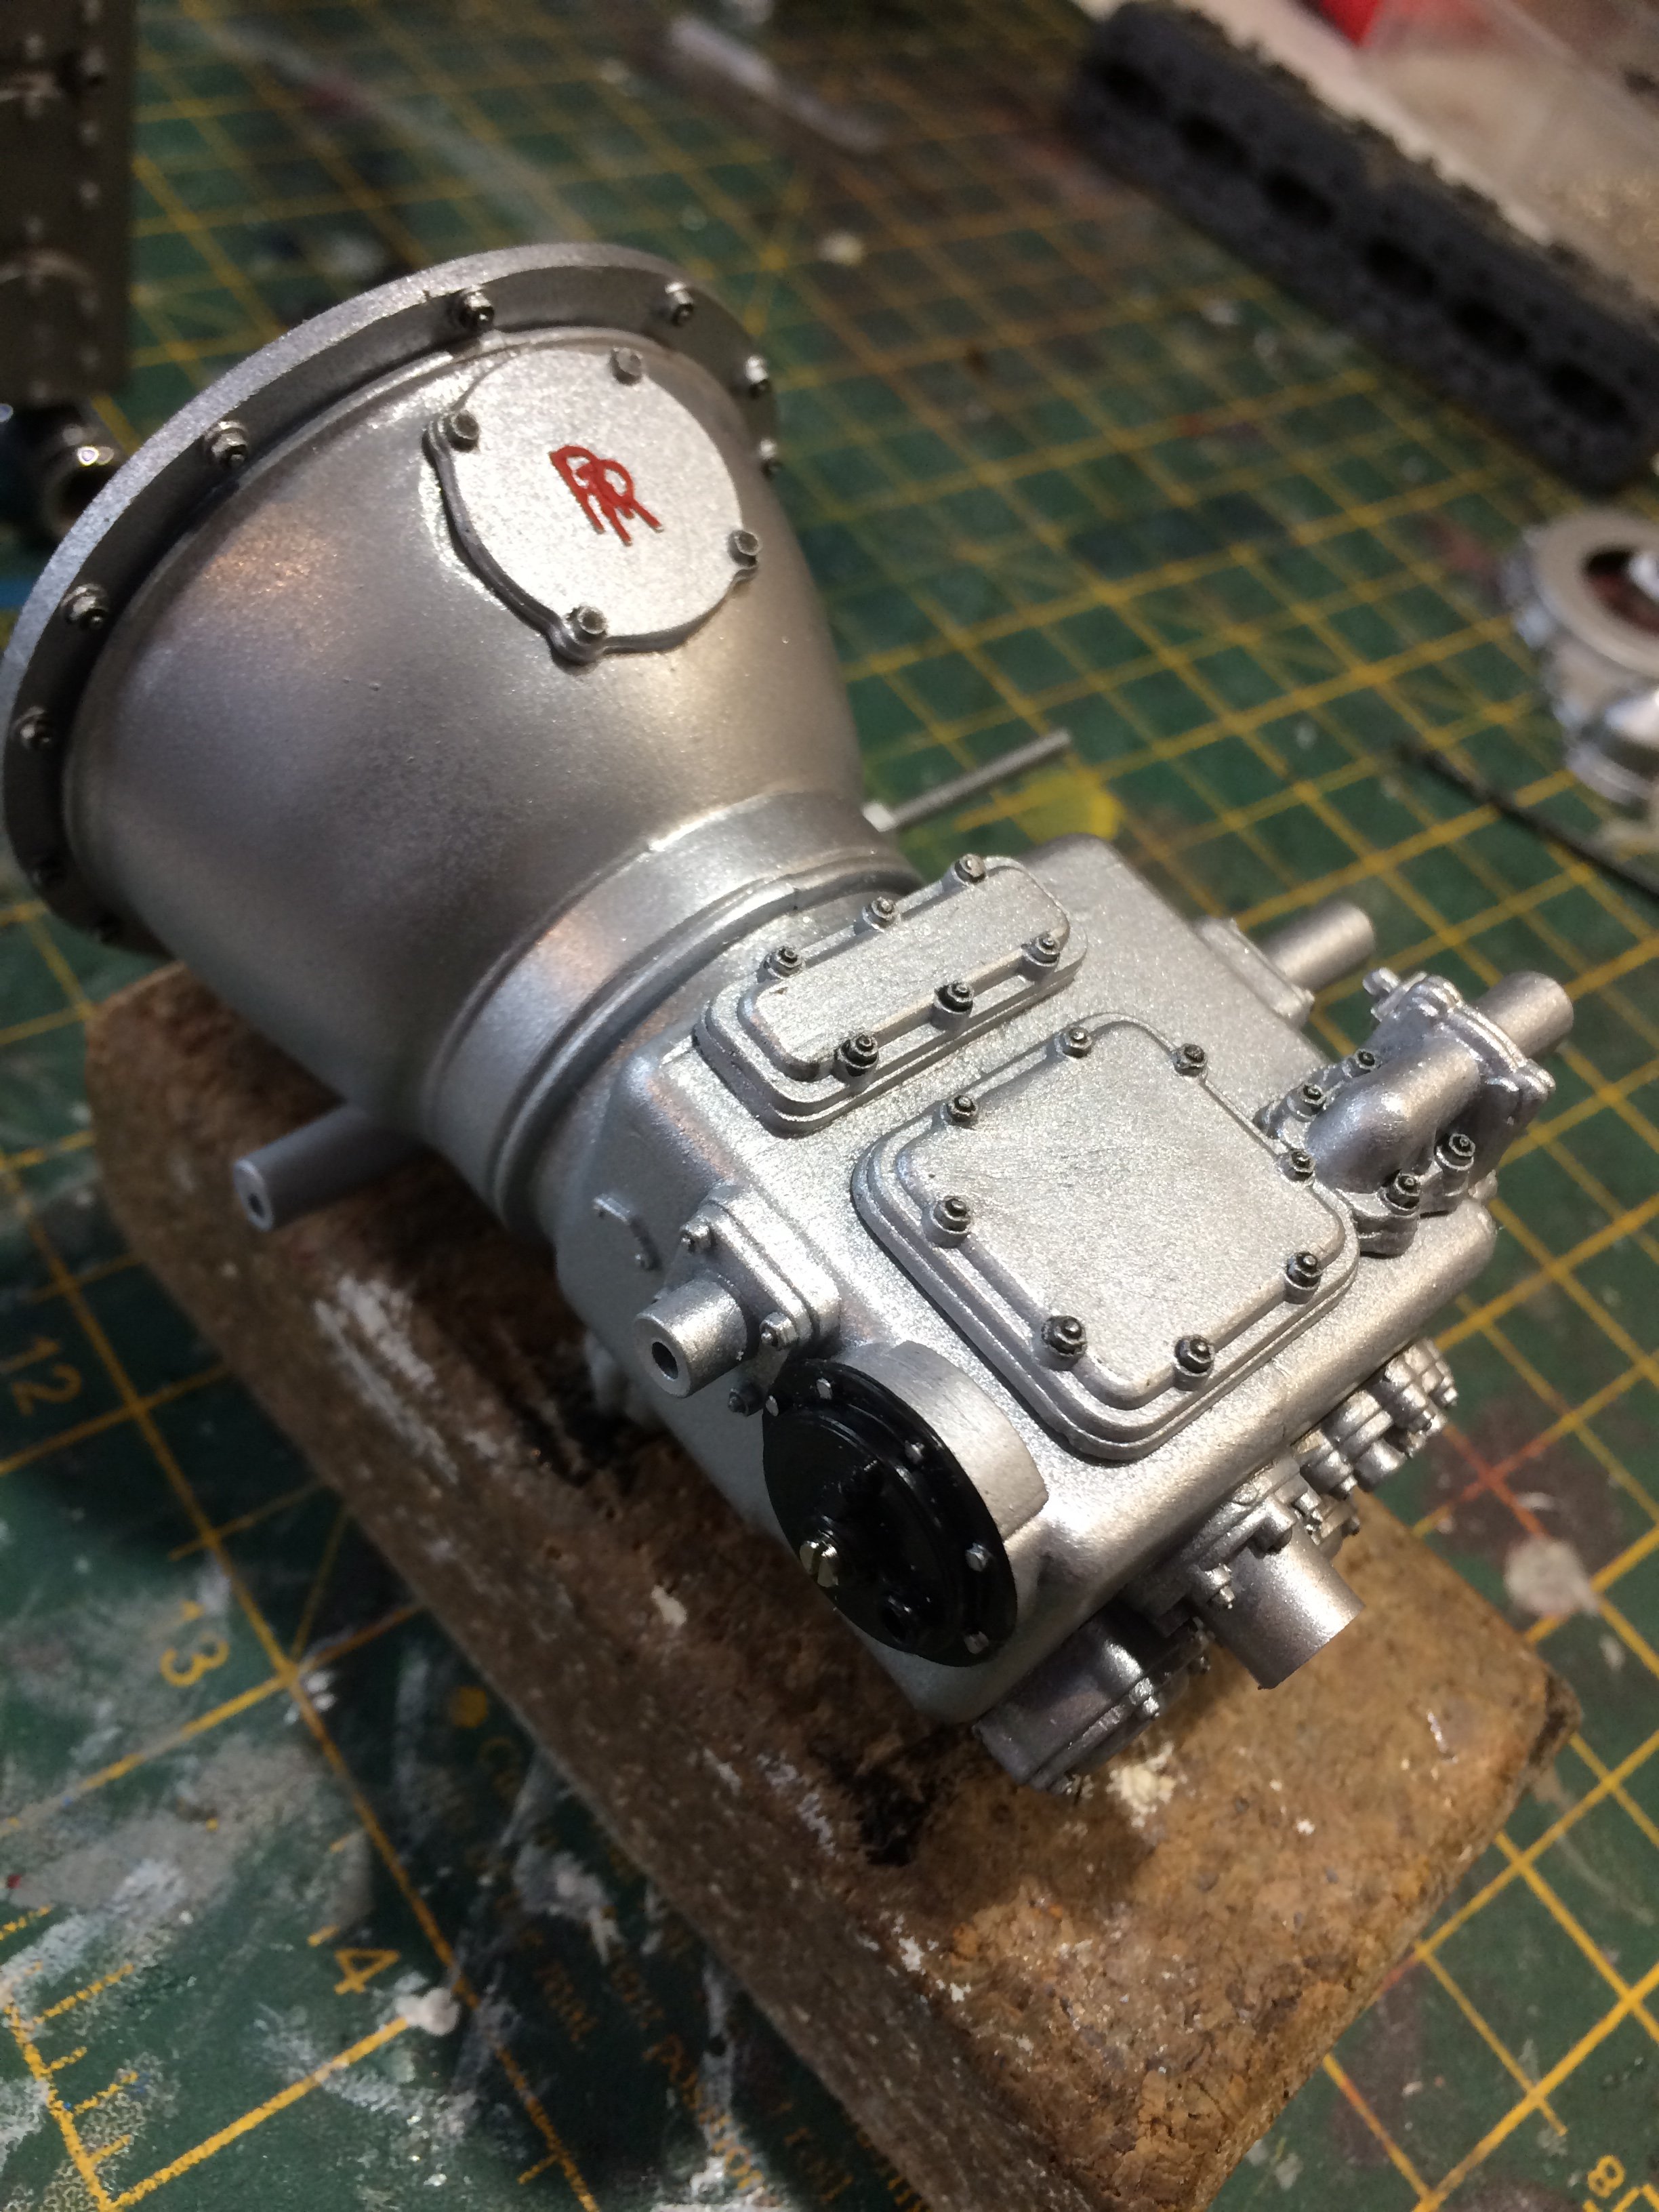
A few more pics... one set of HT leads sorted and connected the LT circuit etc.

-
Pocher 1932 Rolls Royce
slash1953 replied to slash1953's topic in LSM 1/35 and Larger Work In Progress
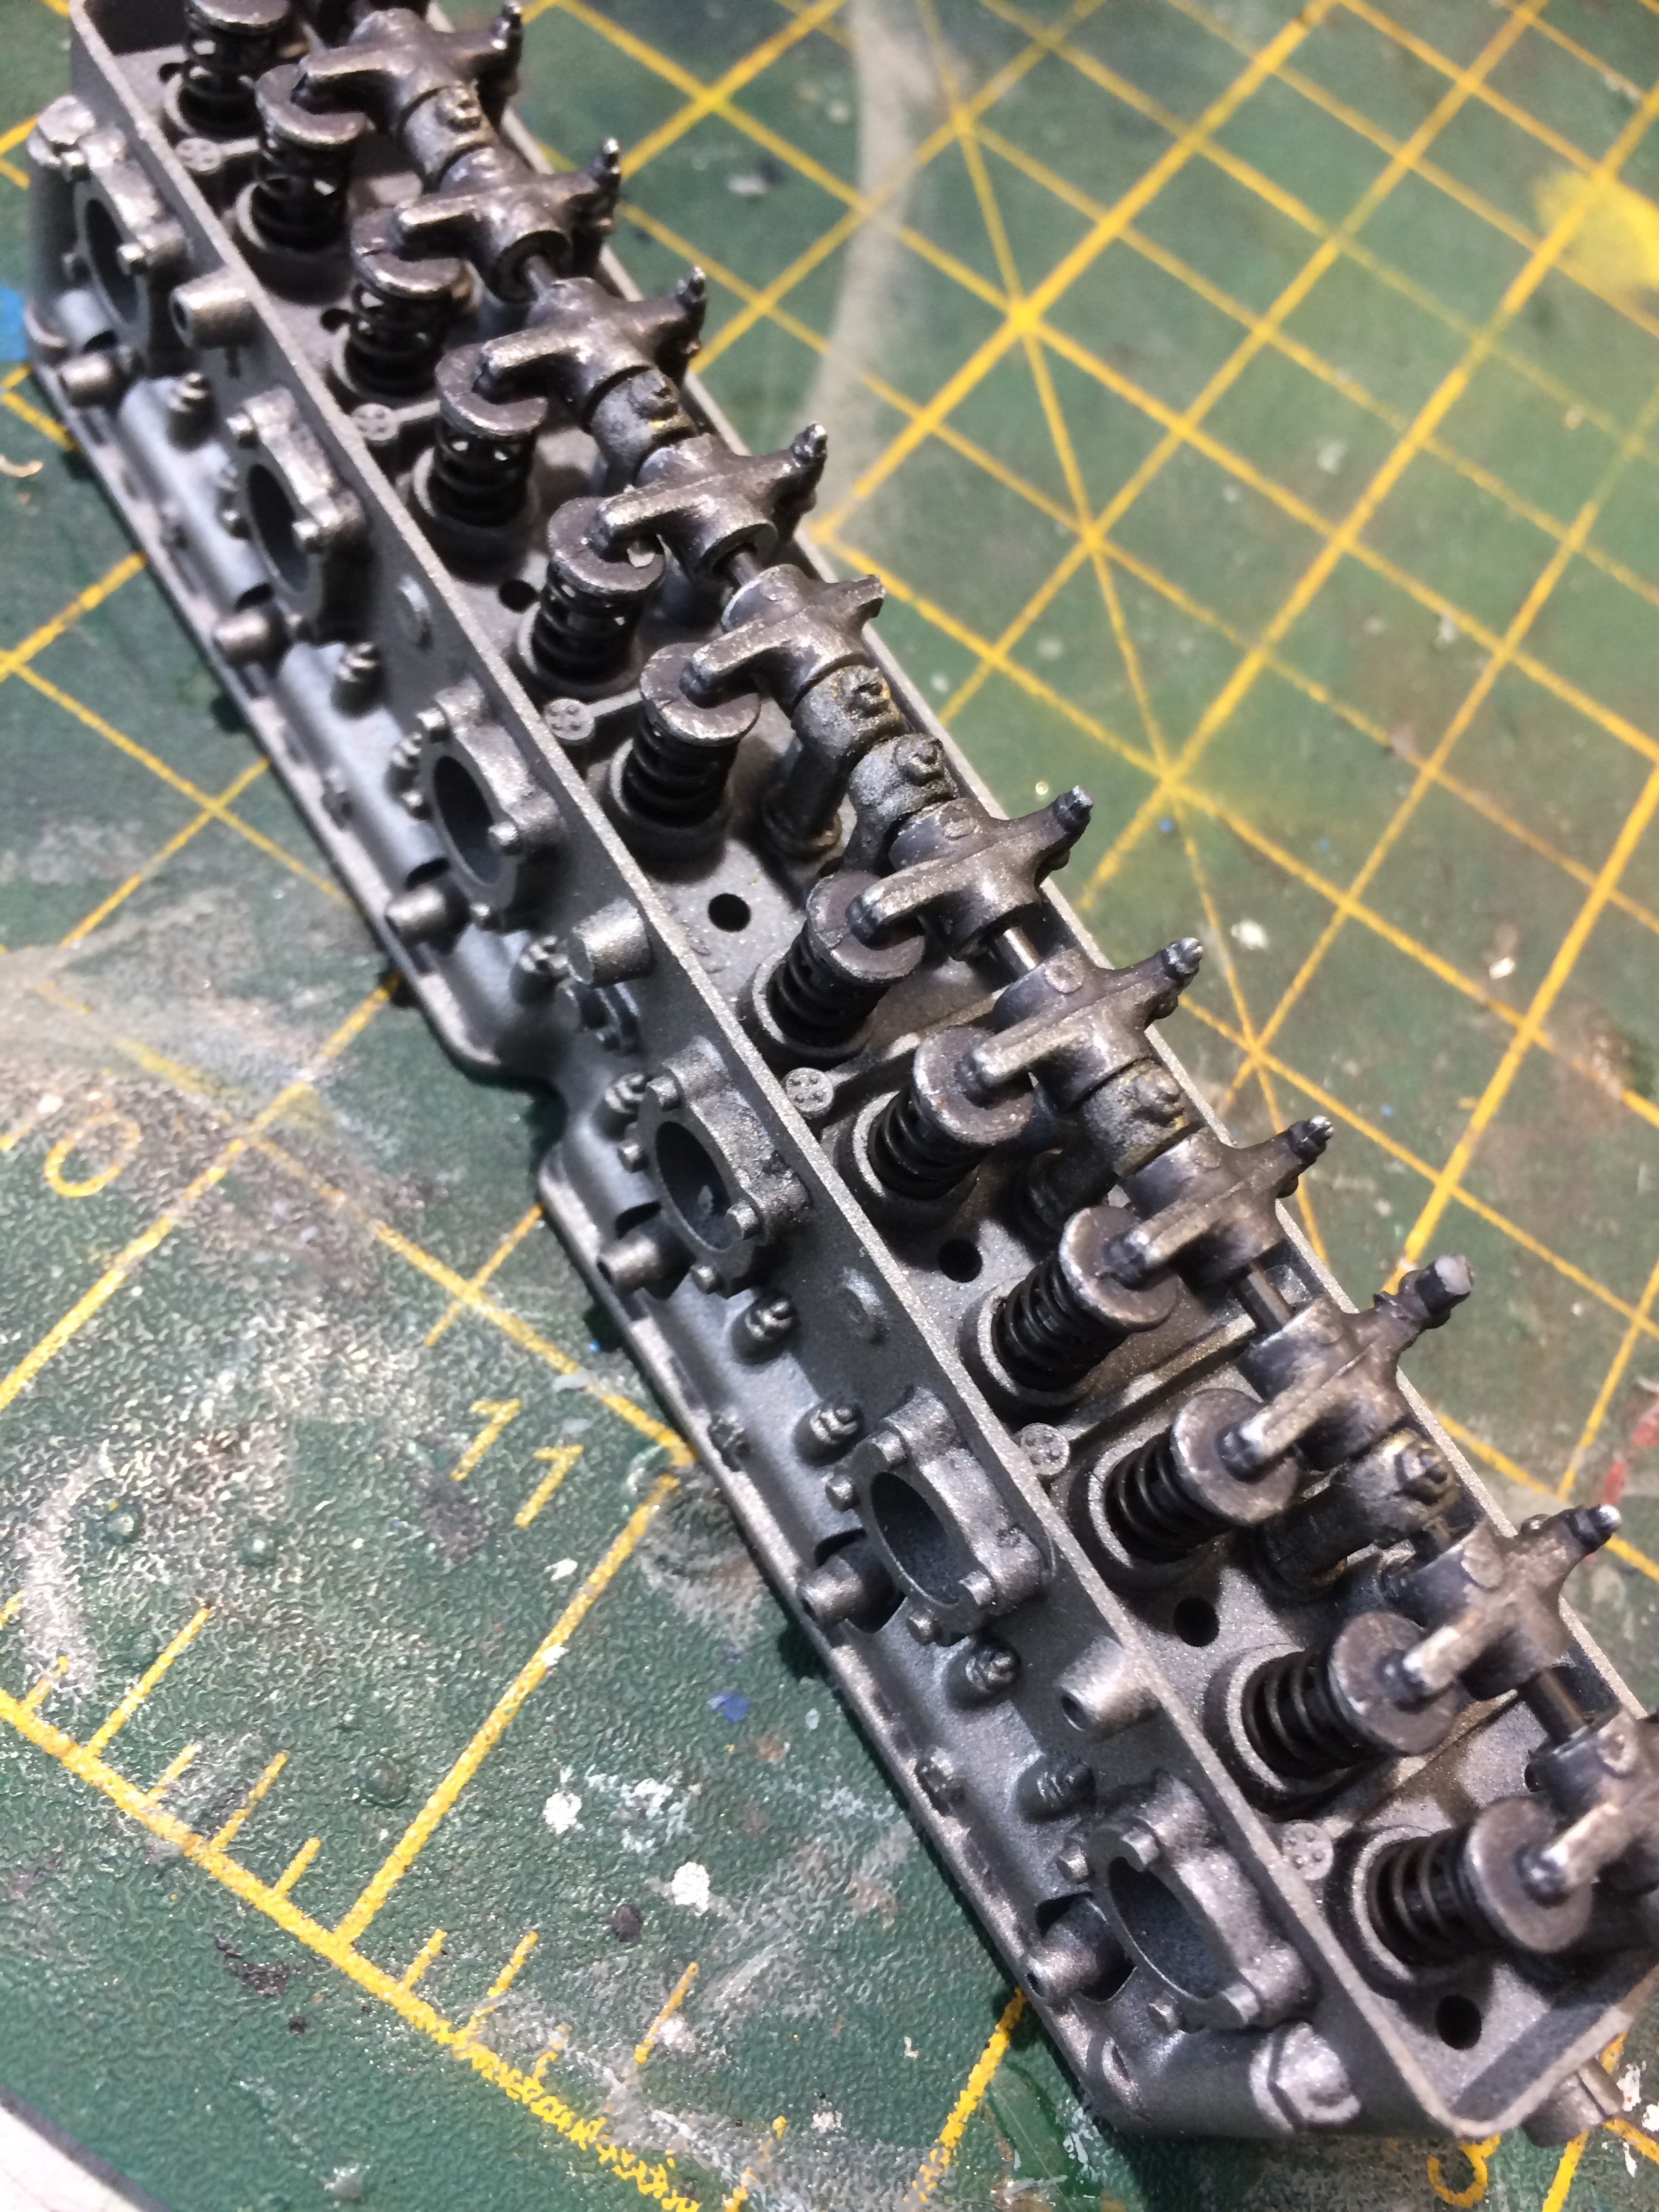
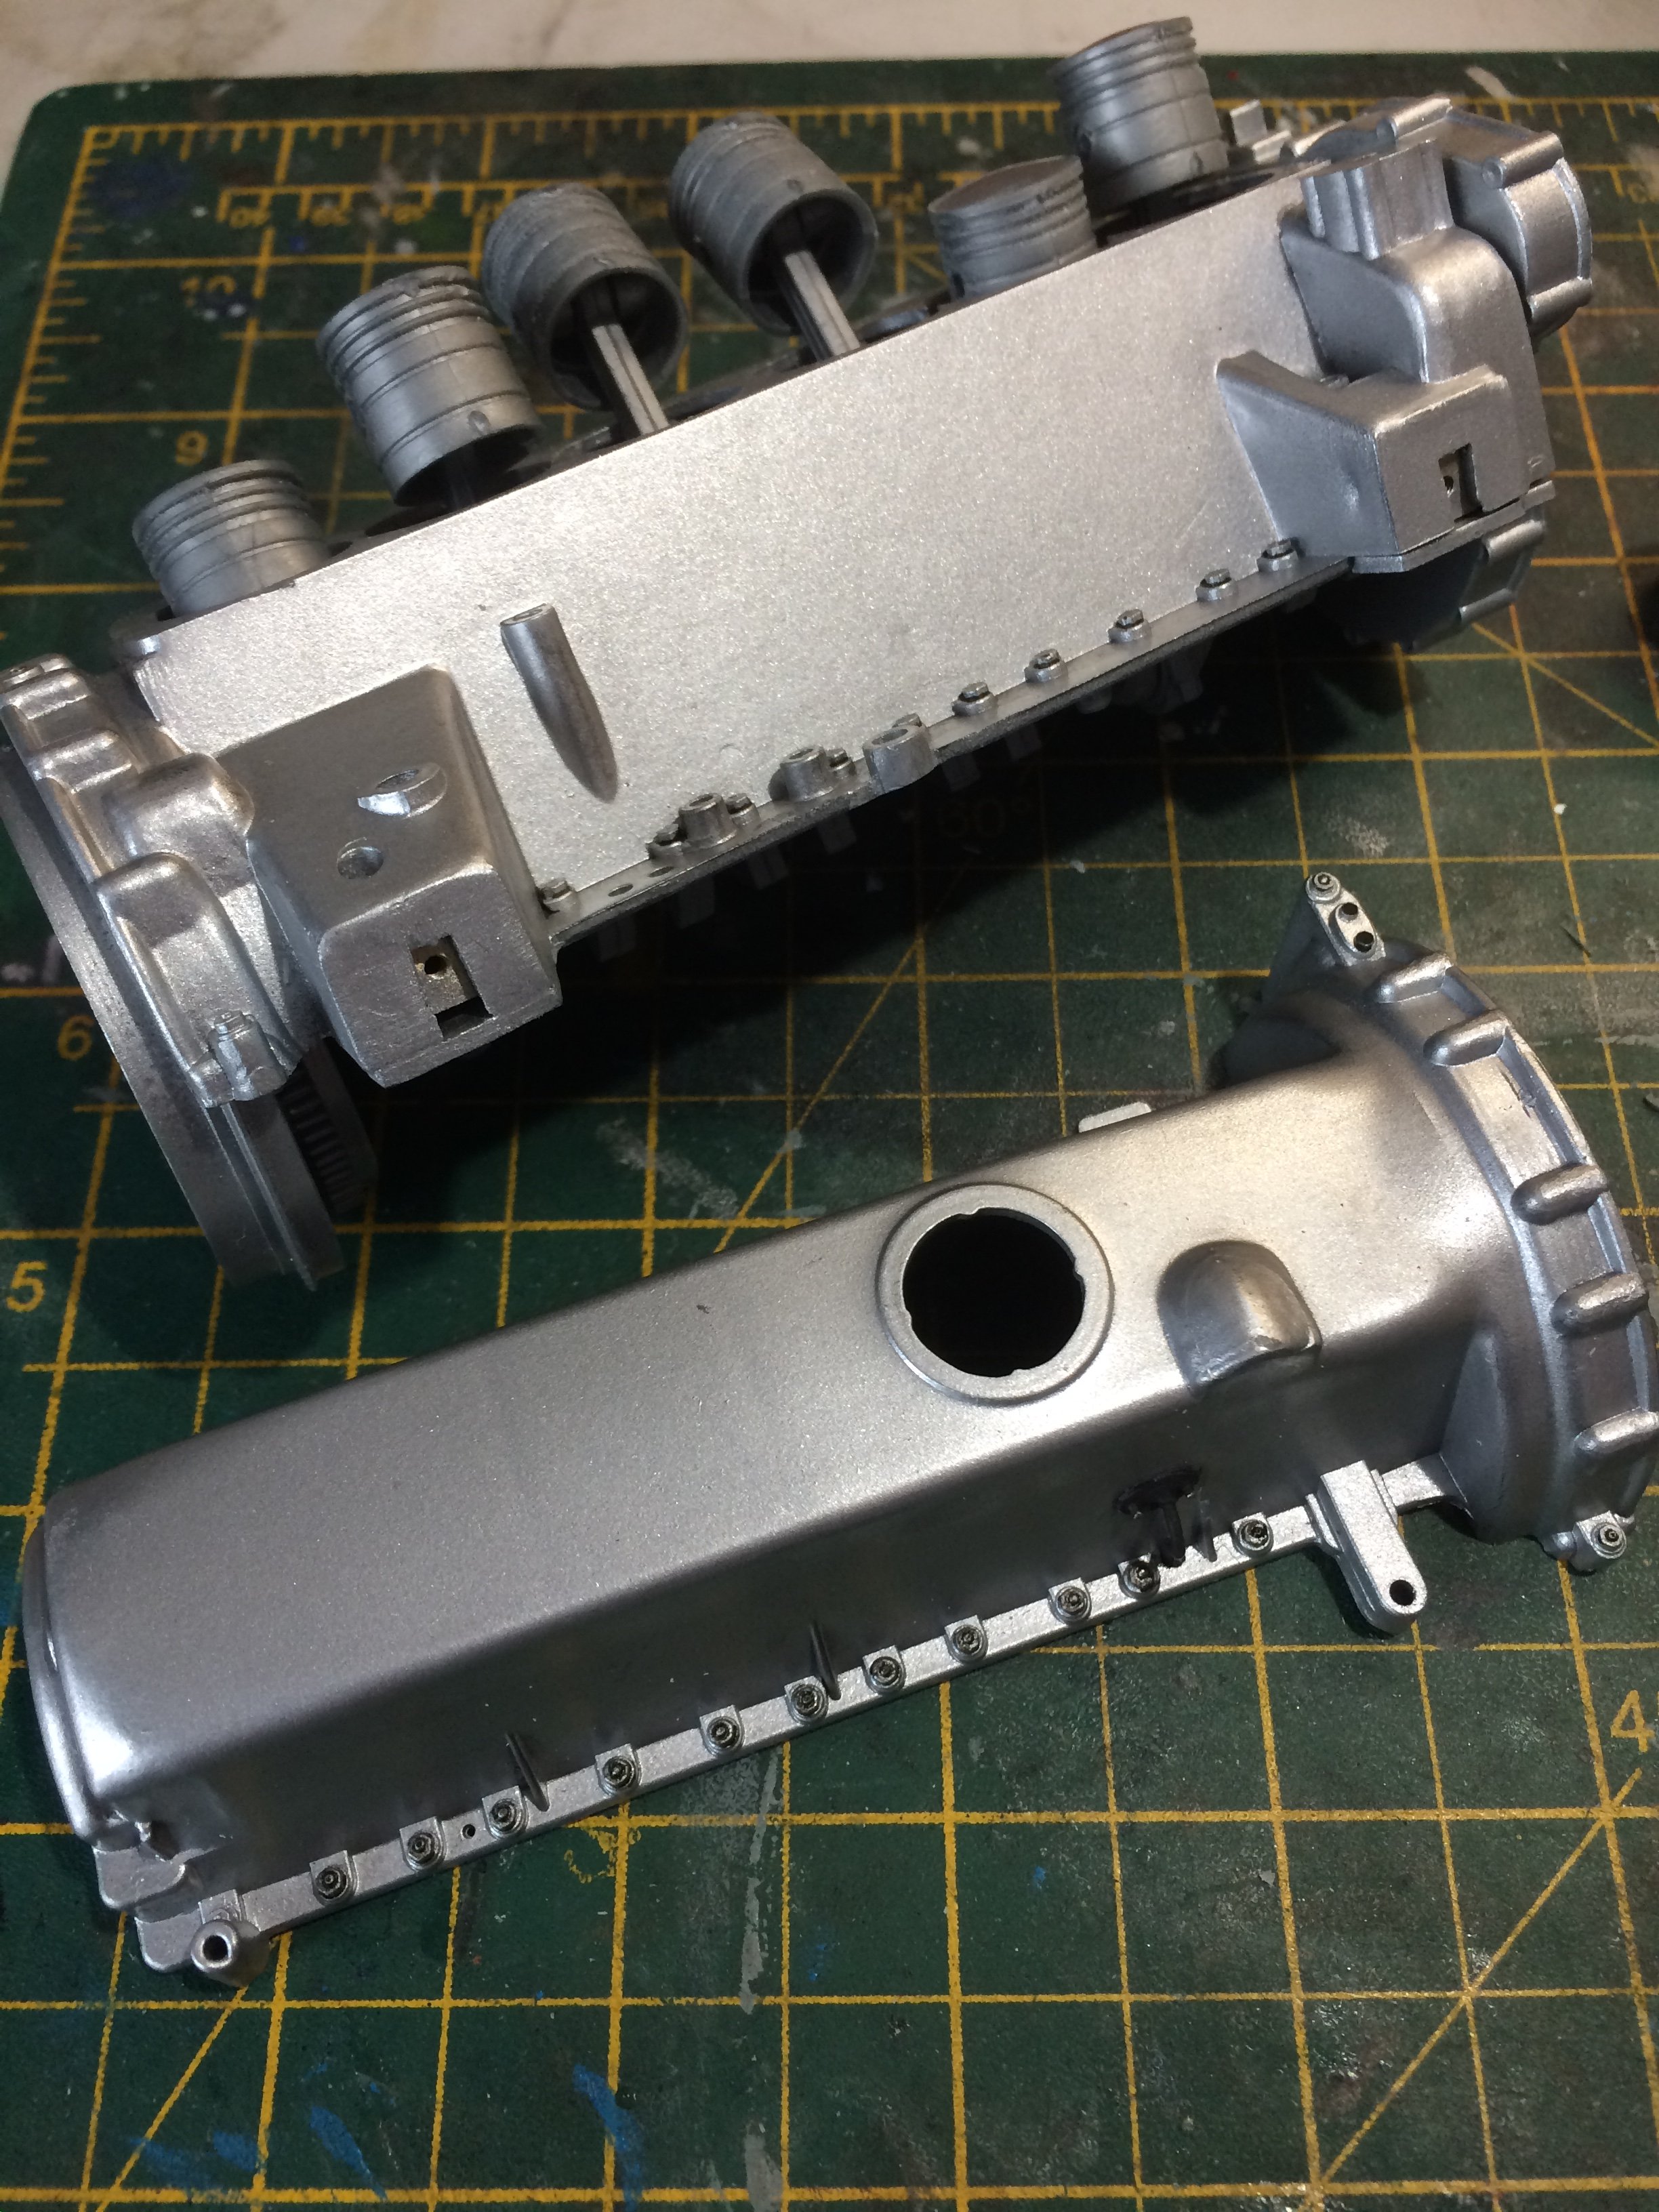
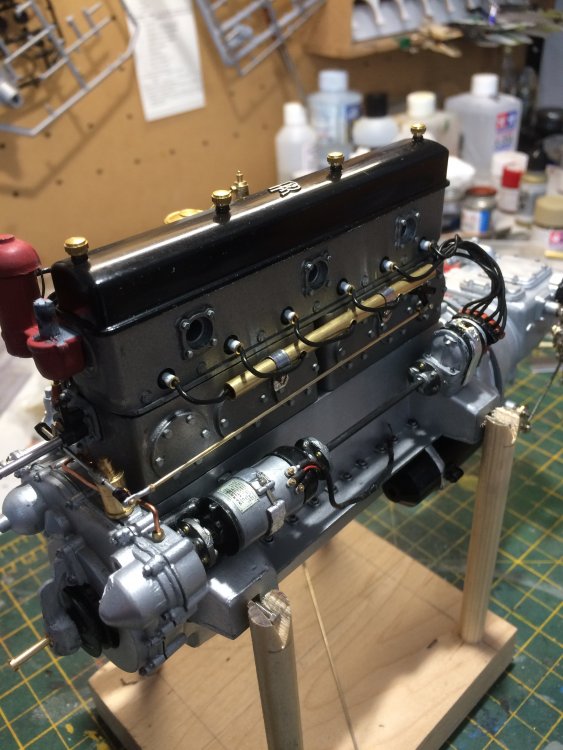
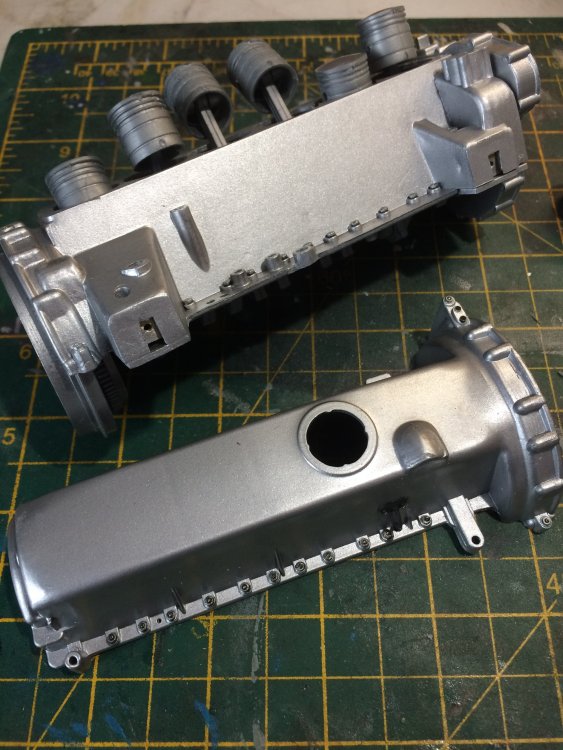
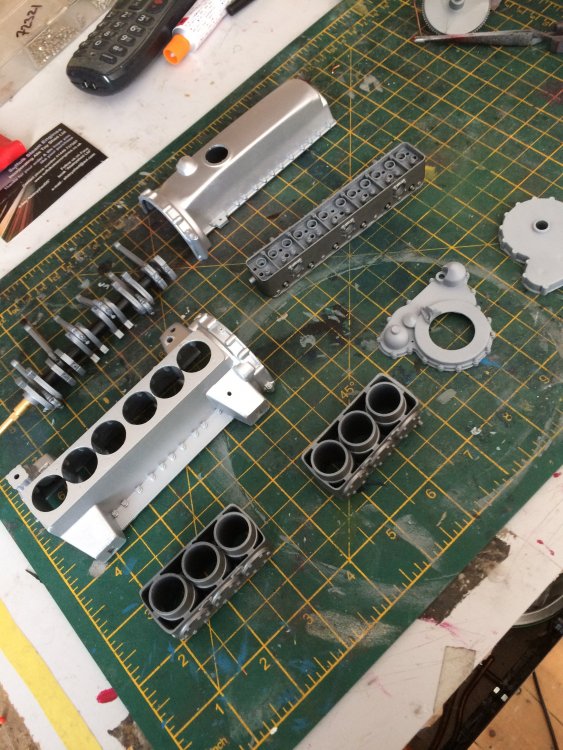
A bit more done. Lots of filling,filing and sanding to get parts right. I was thing of putting the valves in the correct positions as per firing order but thought better of it!! I finished the oil filler in Allclad chrome,I like using this stuff and always looks 'right' not to 'wet'?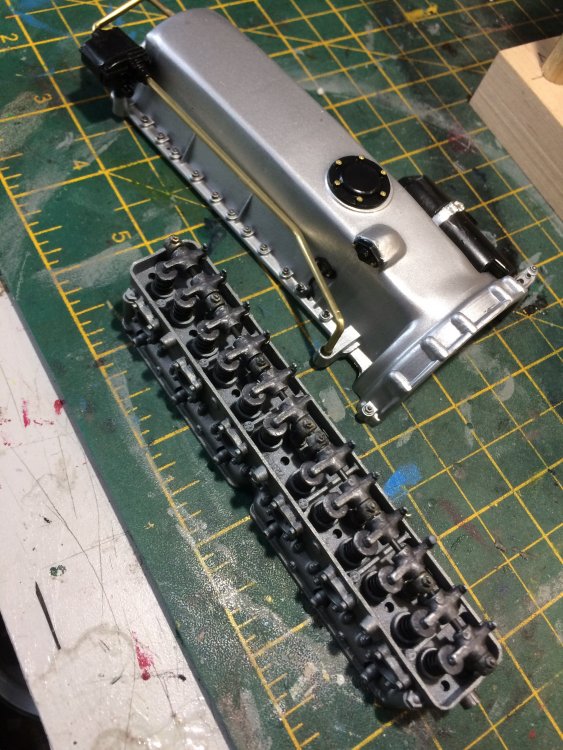


-
Pocher 1932 Rolls Royce
slash1953 replied to slash1953's topic in LSM 1/35 and Larger Work In Progress
cheers bud -
Pocher 1932 Rolls Royce
slash1953 replied to slash1953's topic in LSM 1/35 and Larger Work In Progress
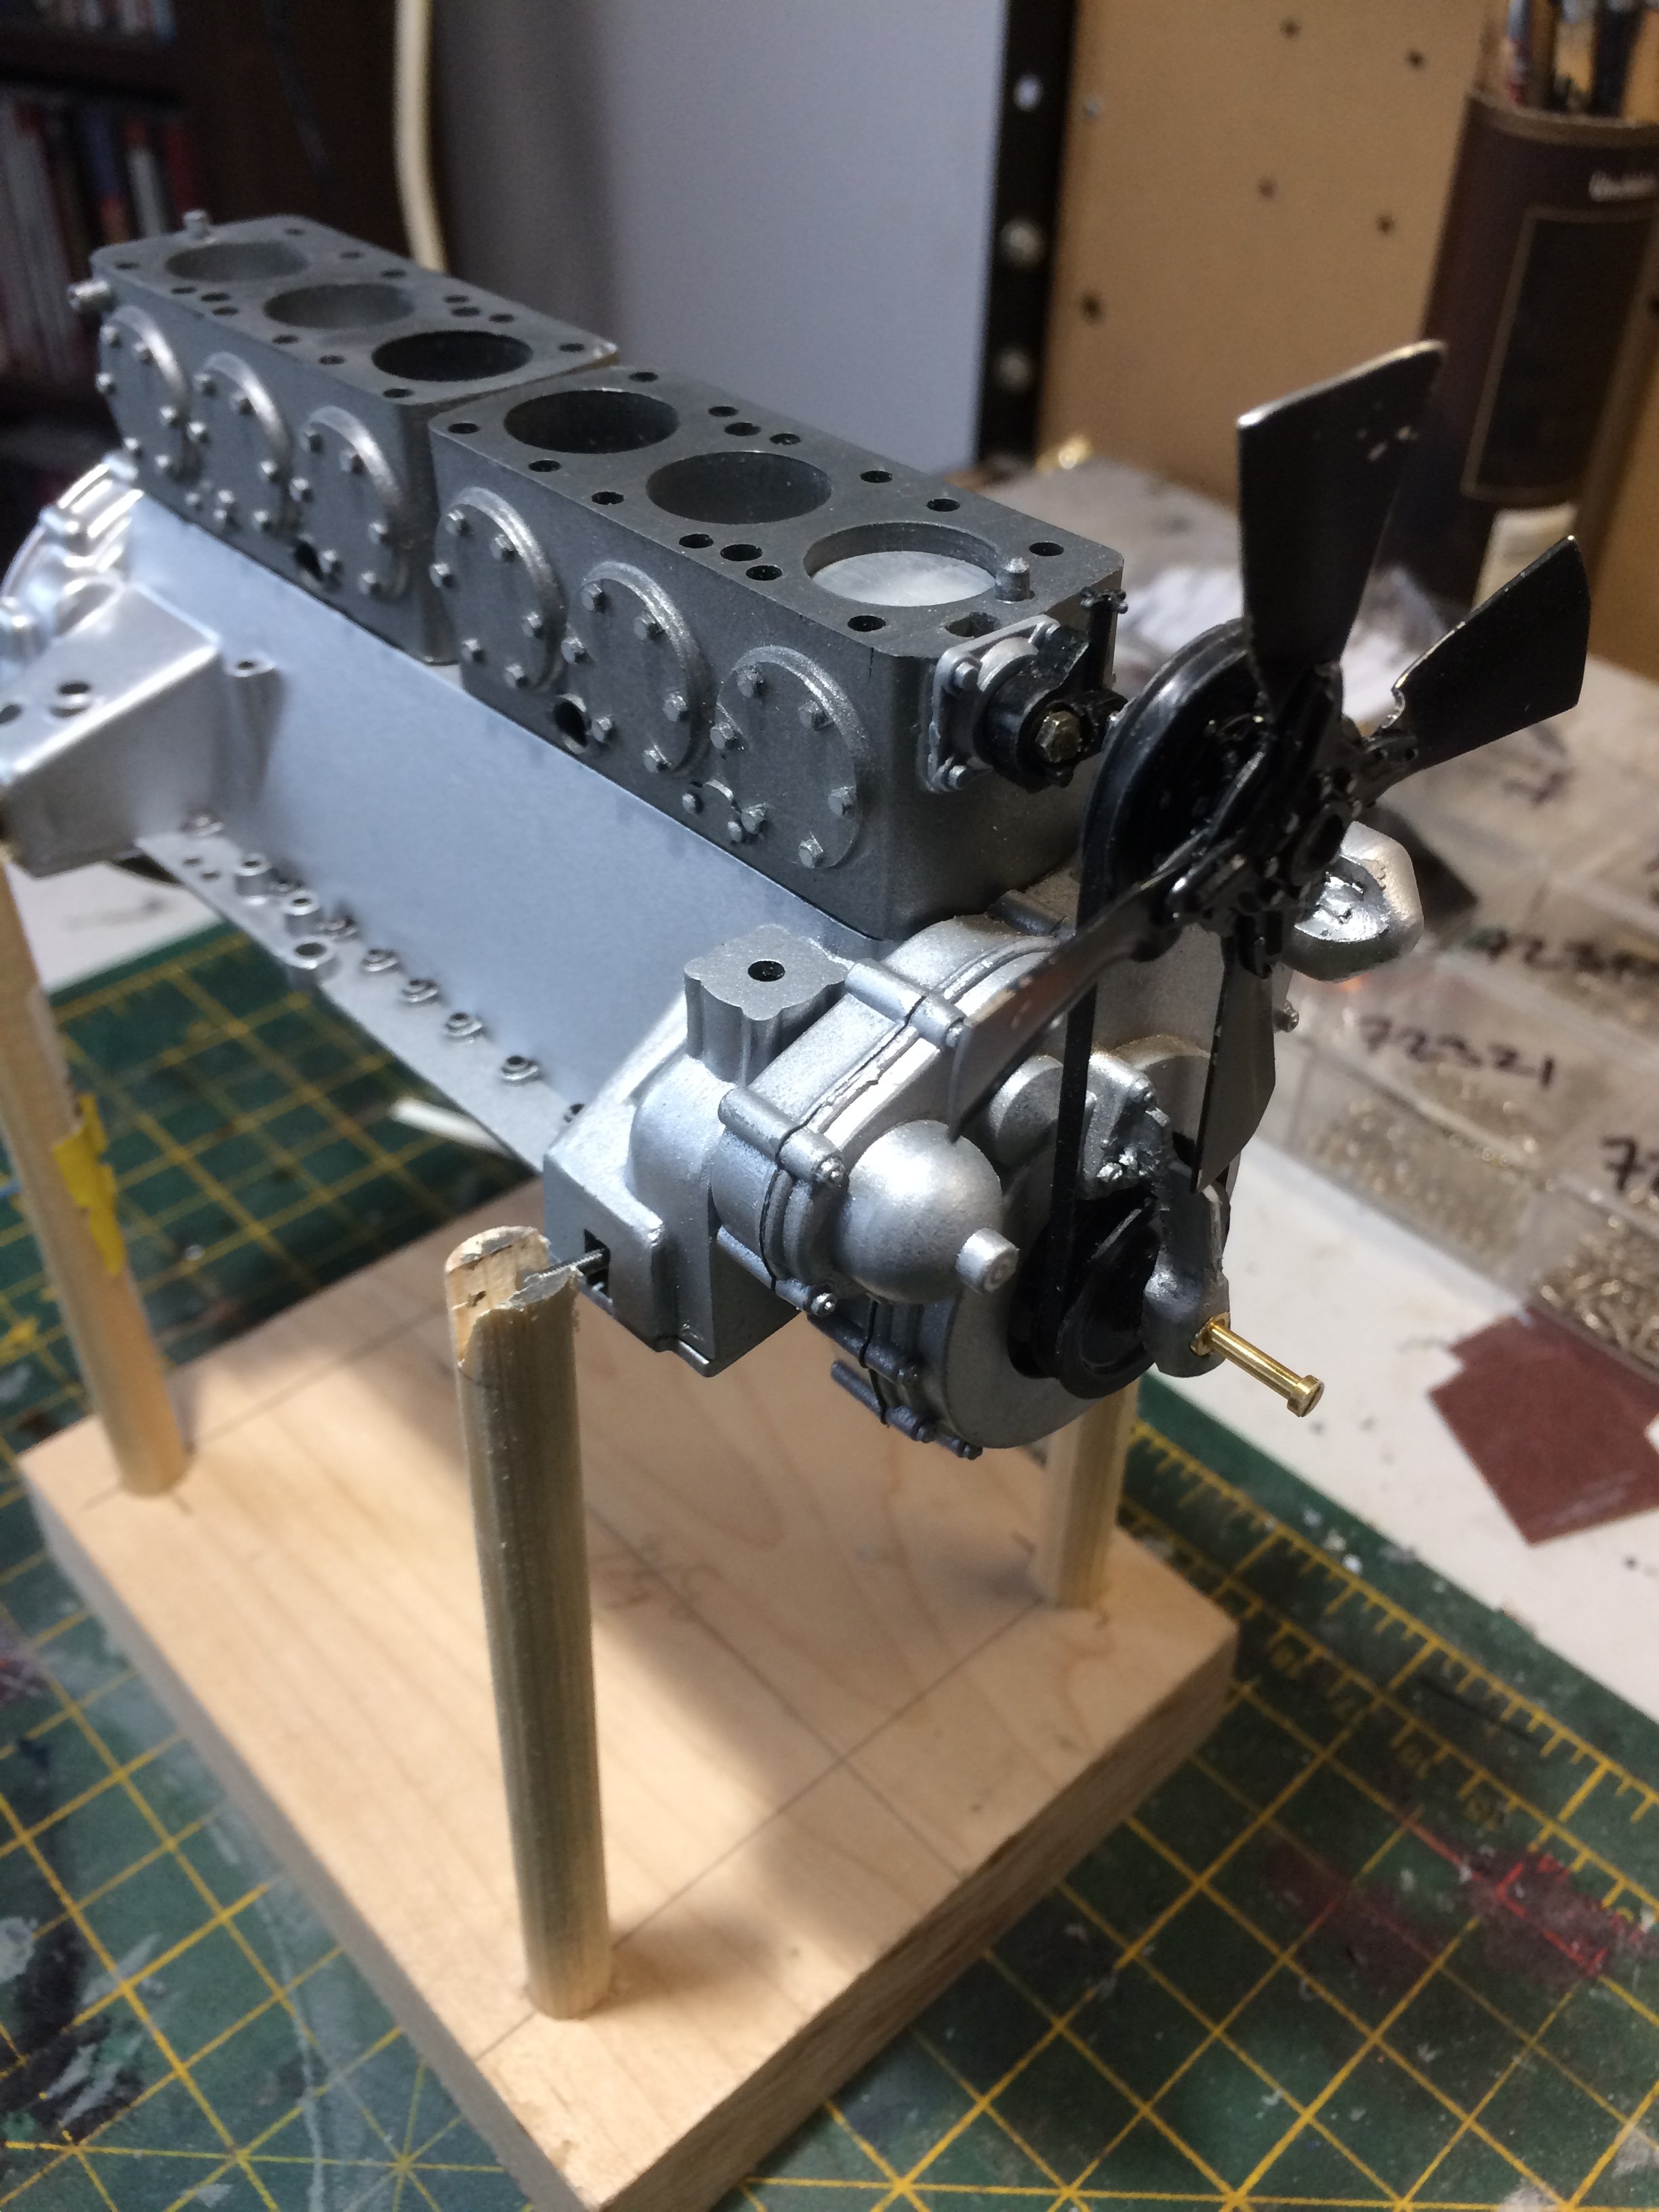
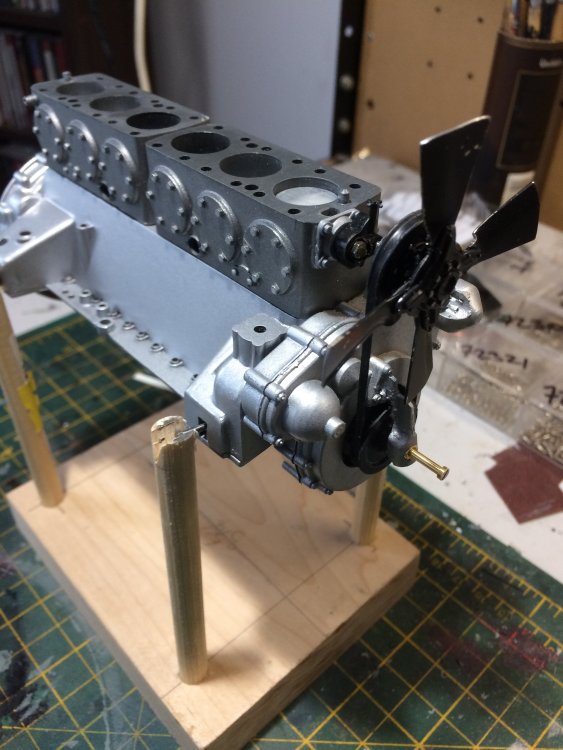
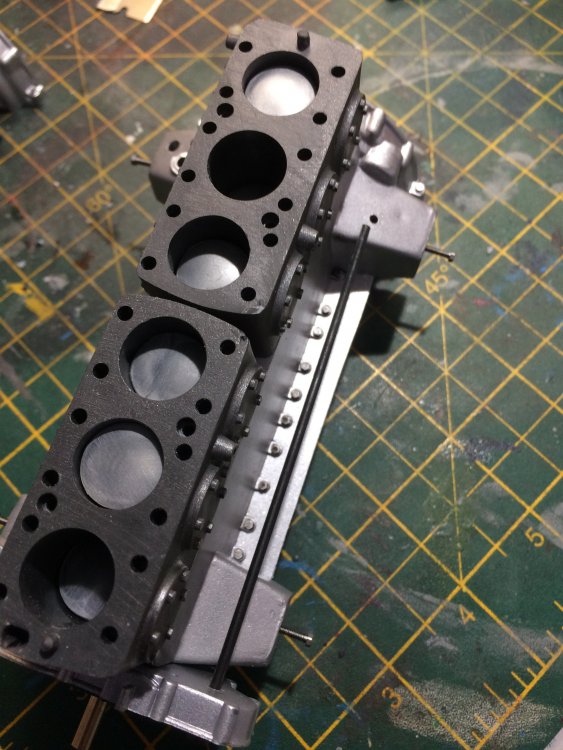
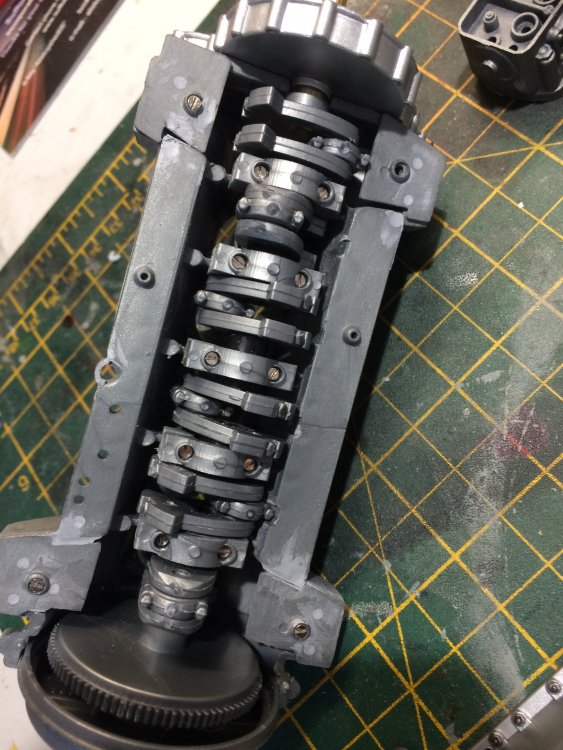
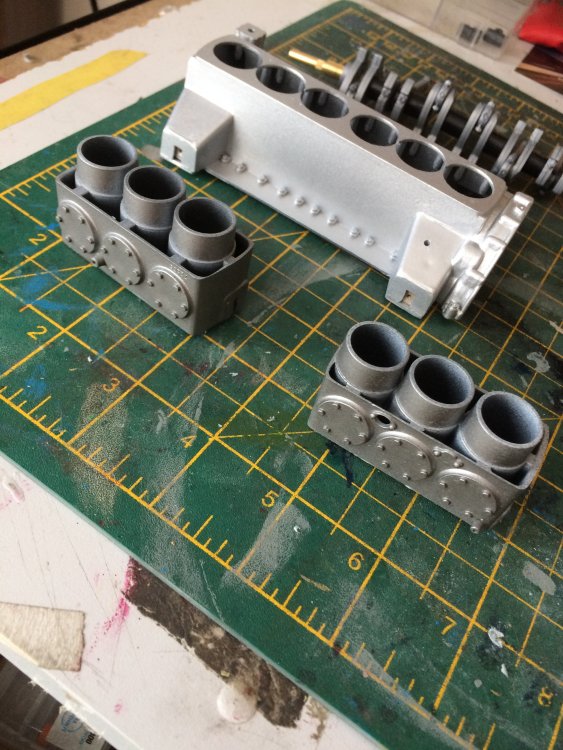
Gears fitted,the mounting post were way out so a bit of fiddling with a round file soon sorted that!! Cylinders went on just fine butI decided to glue rather than screw? Gearbox is ready to be mated to the engine but before I do that Im making a stand so I can work on the engine and gearbox without handling it.

-
Pocher 1932 Rolls Royce
slash1953 replied to slash1953's topic in LSM 1/35 and Larger Work In Progress
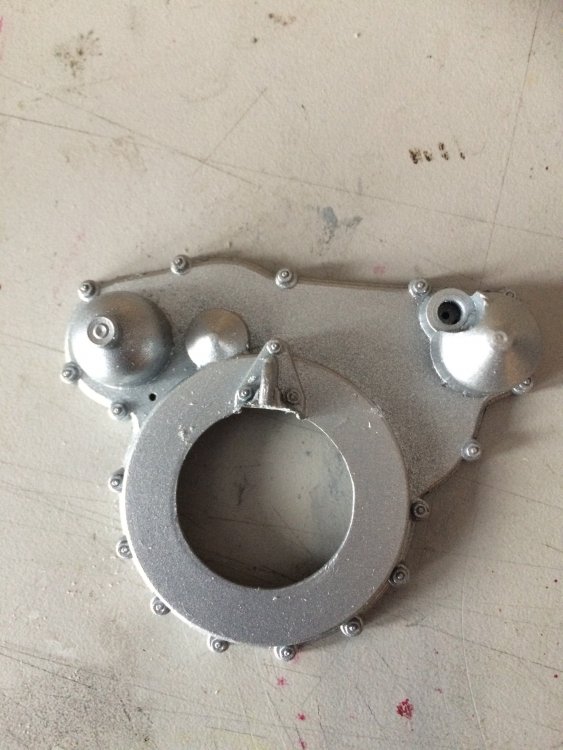
The front timing cover should look like this but picture two is how I got it. Centre section missing. I used a bit of sprue to make another,not exact but better than nothing? Crank and pistons fitted.The cylinder bores had lots of depressions that needed filling,rather fiddly? Im glad that I bought the DVD as there are a lot of pictures warning of potential downfalls. IE to get the flywheel retaining screw down,the crank etc would have to be removed. Koo shows how to fit it first!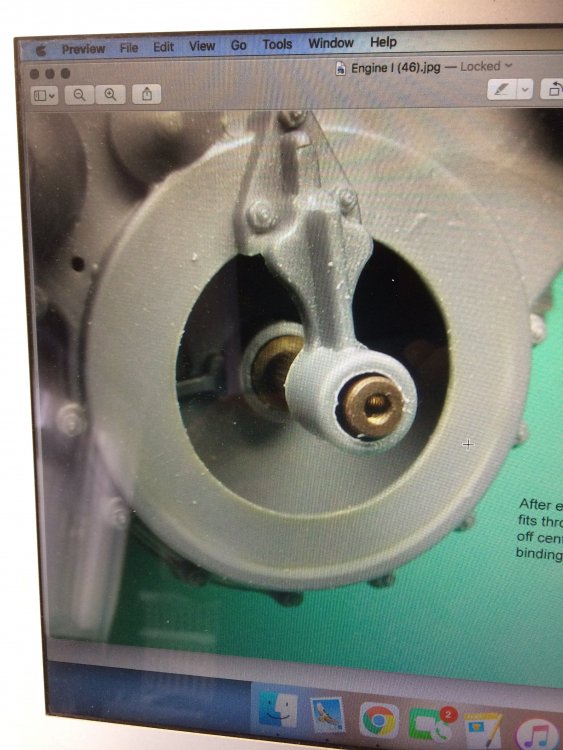

-
Pocher 1932 Rolls Royce
slash1953 replied to slash1953's topic in LSM 1/35 and Larger Work In Progress
Many thanks bud. I keep it posted. -
Hi all, Just making a start on the Roller. Spent time filling the dips in the plastic. I removed the guide pins from the top of the engine block as they were a hindrance rather than a help?? Ive removed the moulded oil pipe from the block and will make another from copper wire.Lots of saning to get things to fit but its getting there. I have to say,Im glad I bought Pau Koo's dvd on building this kit. Many pitfalls without it? Painting has come to a halt as my airbrush packed up!!
- 42 replies
-
- 11
-
-

.JPG.bb8a12f2cefb9a810384ce61619e5e39.JPG)