


Fran
-
Posts
2,227 -
Joined
-
Last visited
Content Type
Profiles
Forums
Events
Gallery
Posts posted by Fran
-
-
Welcome back my friend!!!
-
 1
1
-
-
That`s a great start my friend!! Cant wait to see more!!
-
3
-
 1
1
-
-
Great review! Thanks!
-
1
-
-
1:48
Conquerors of
Europe`s Sky
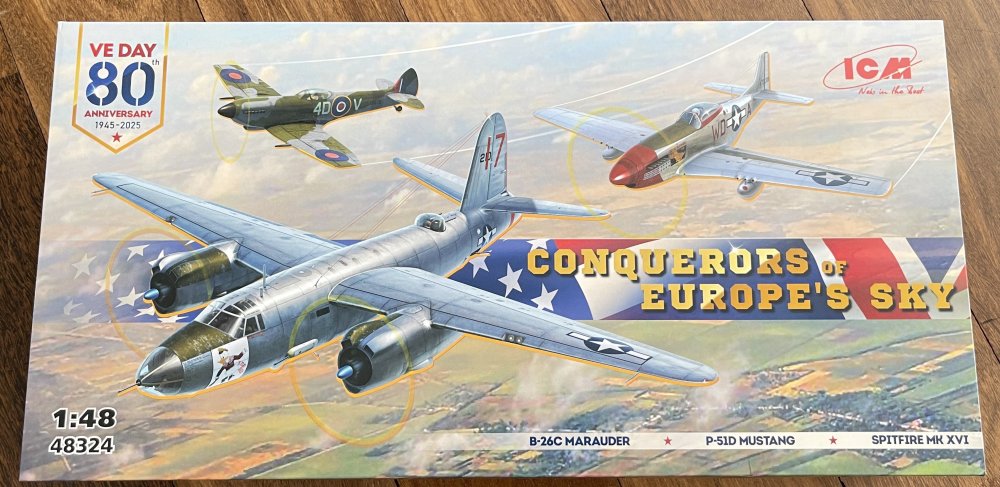
ICM
Catalogue number 48324
Price: around 81,95€
ICM continues to launch combo kit set that are a very good option to the modeler.
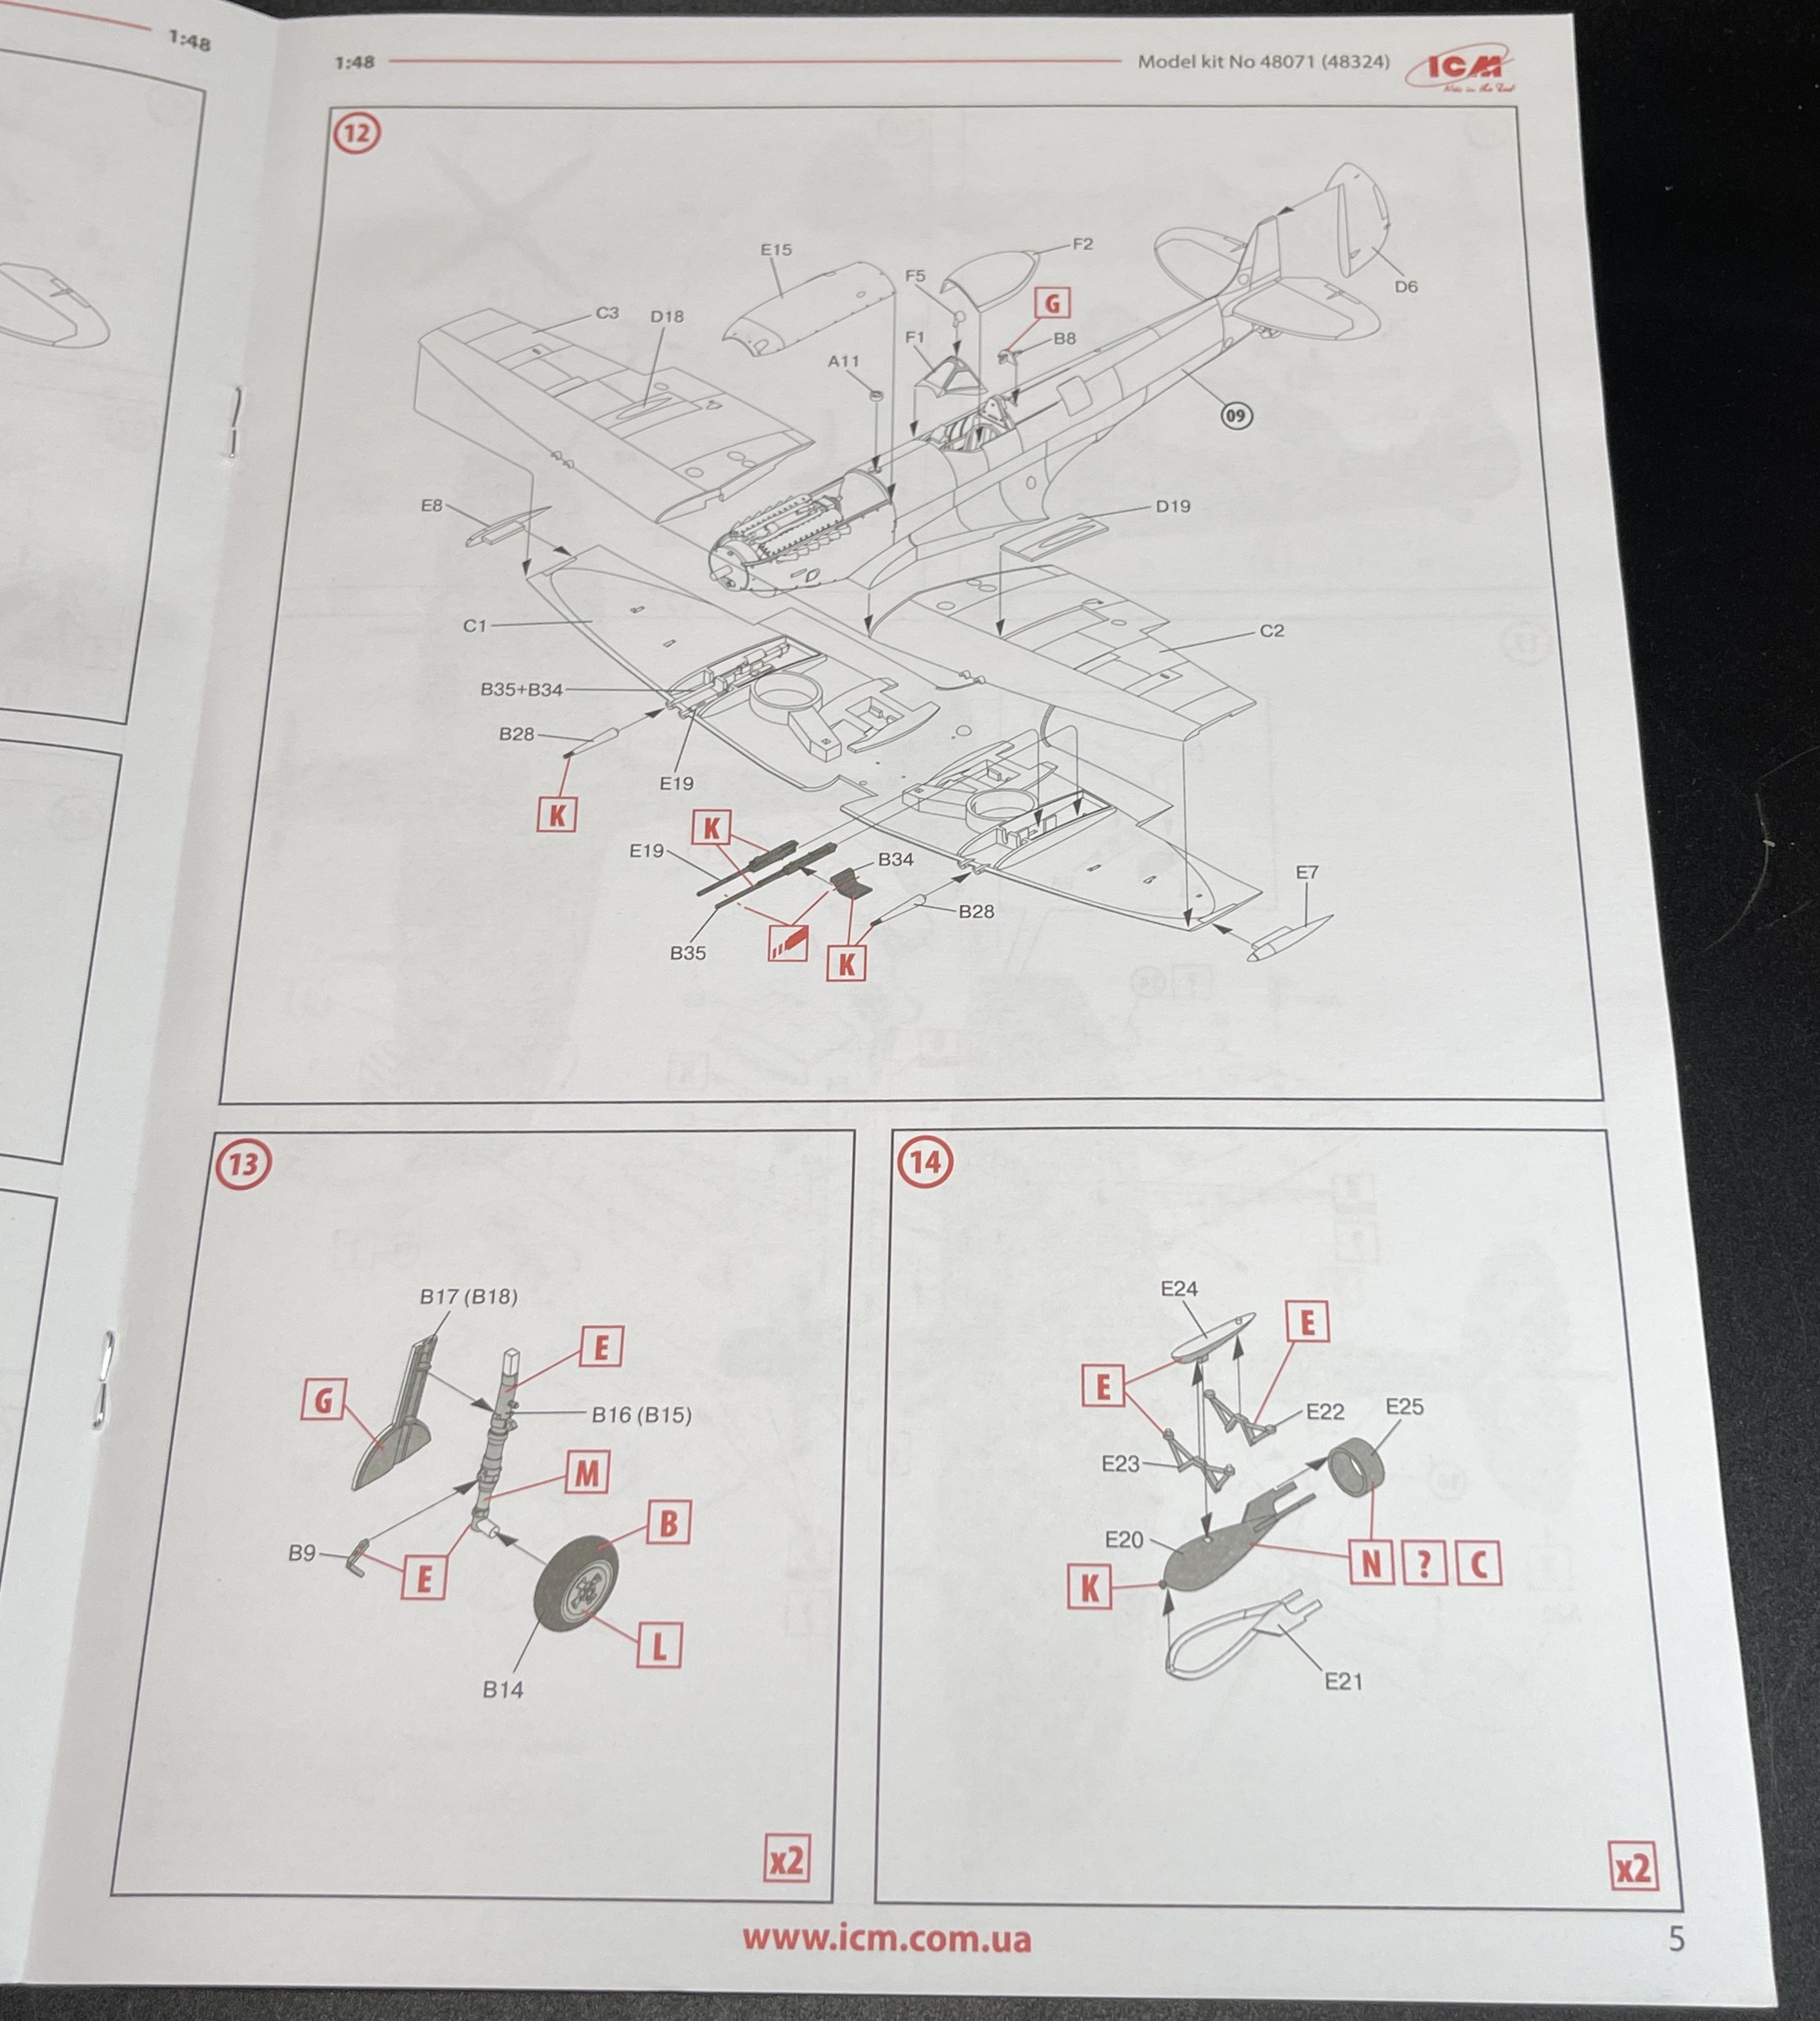
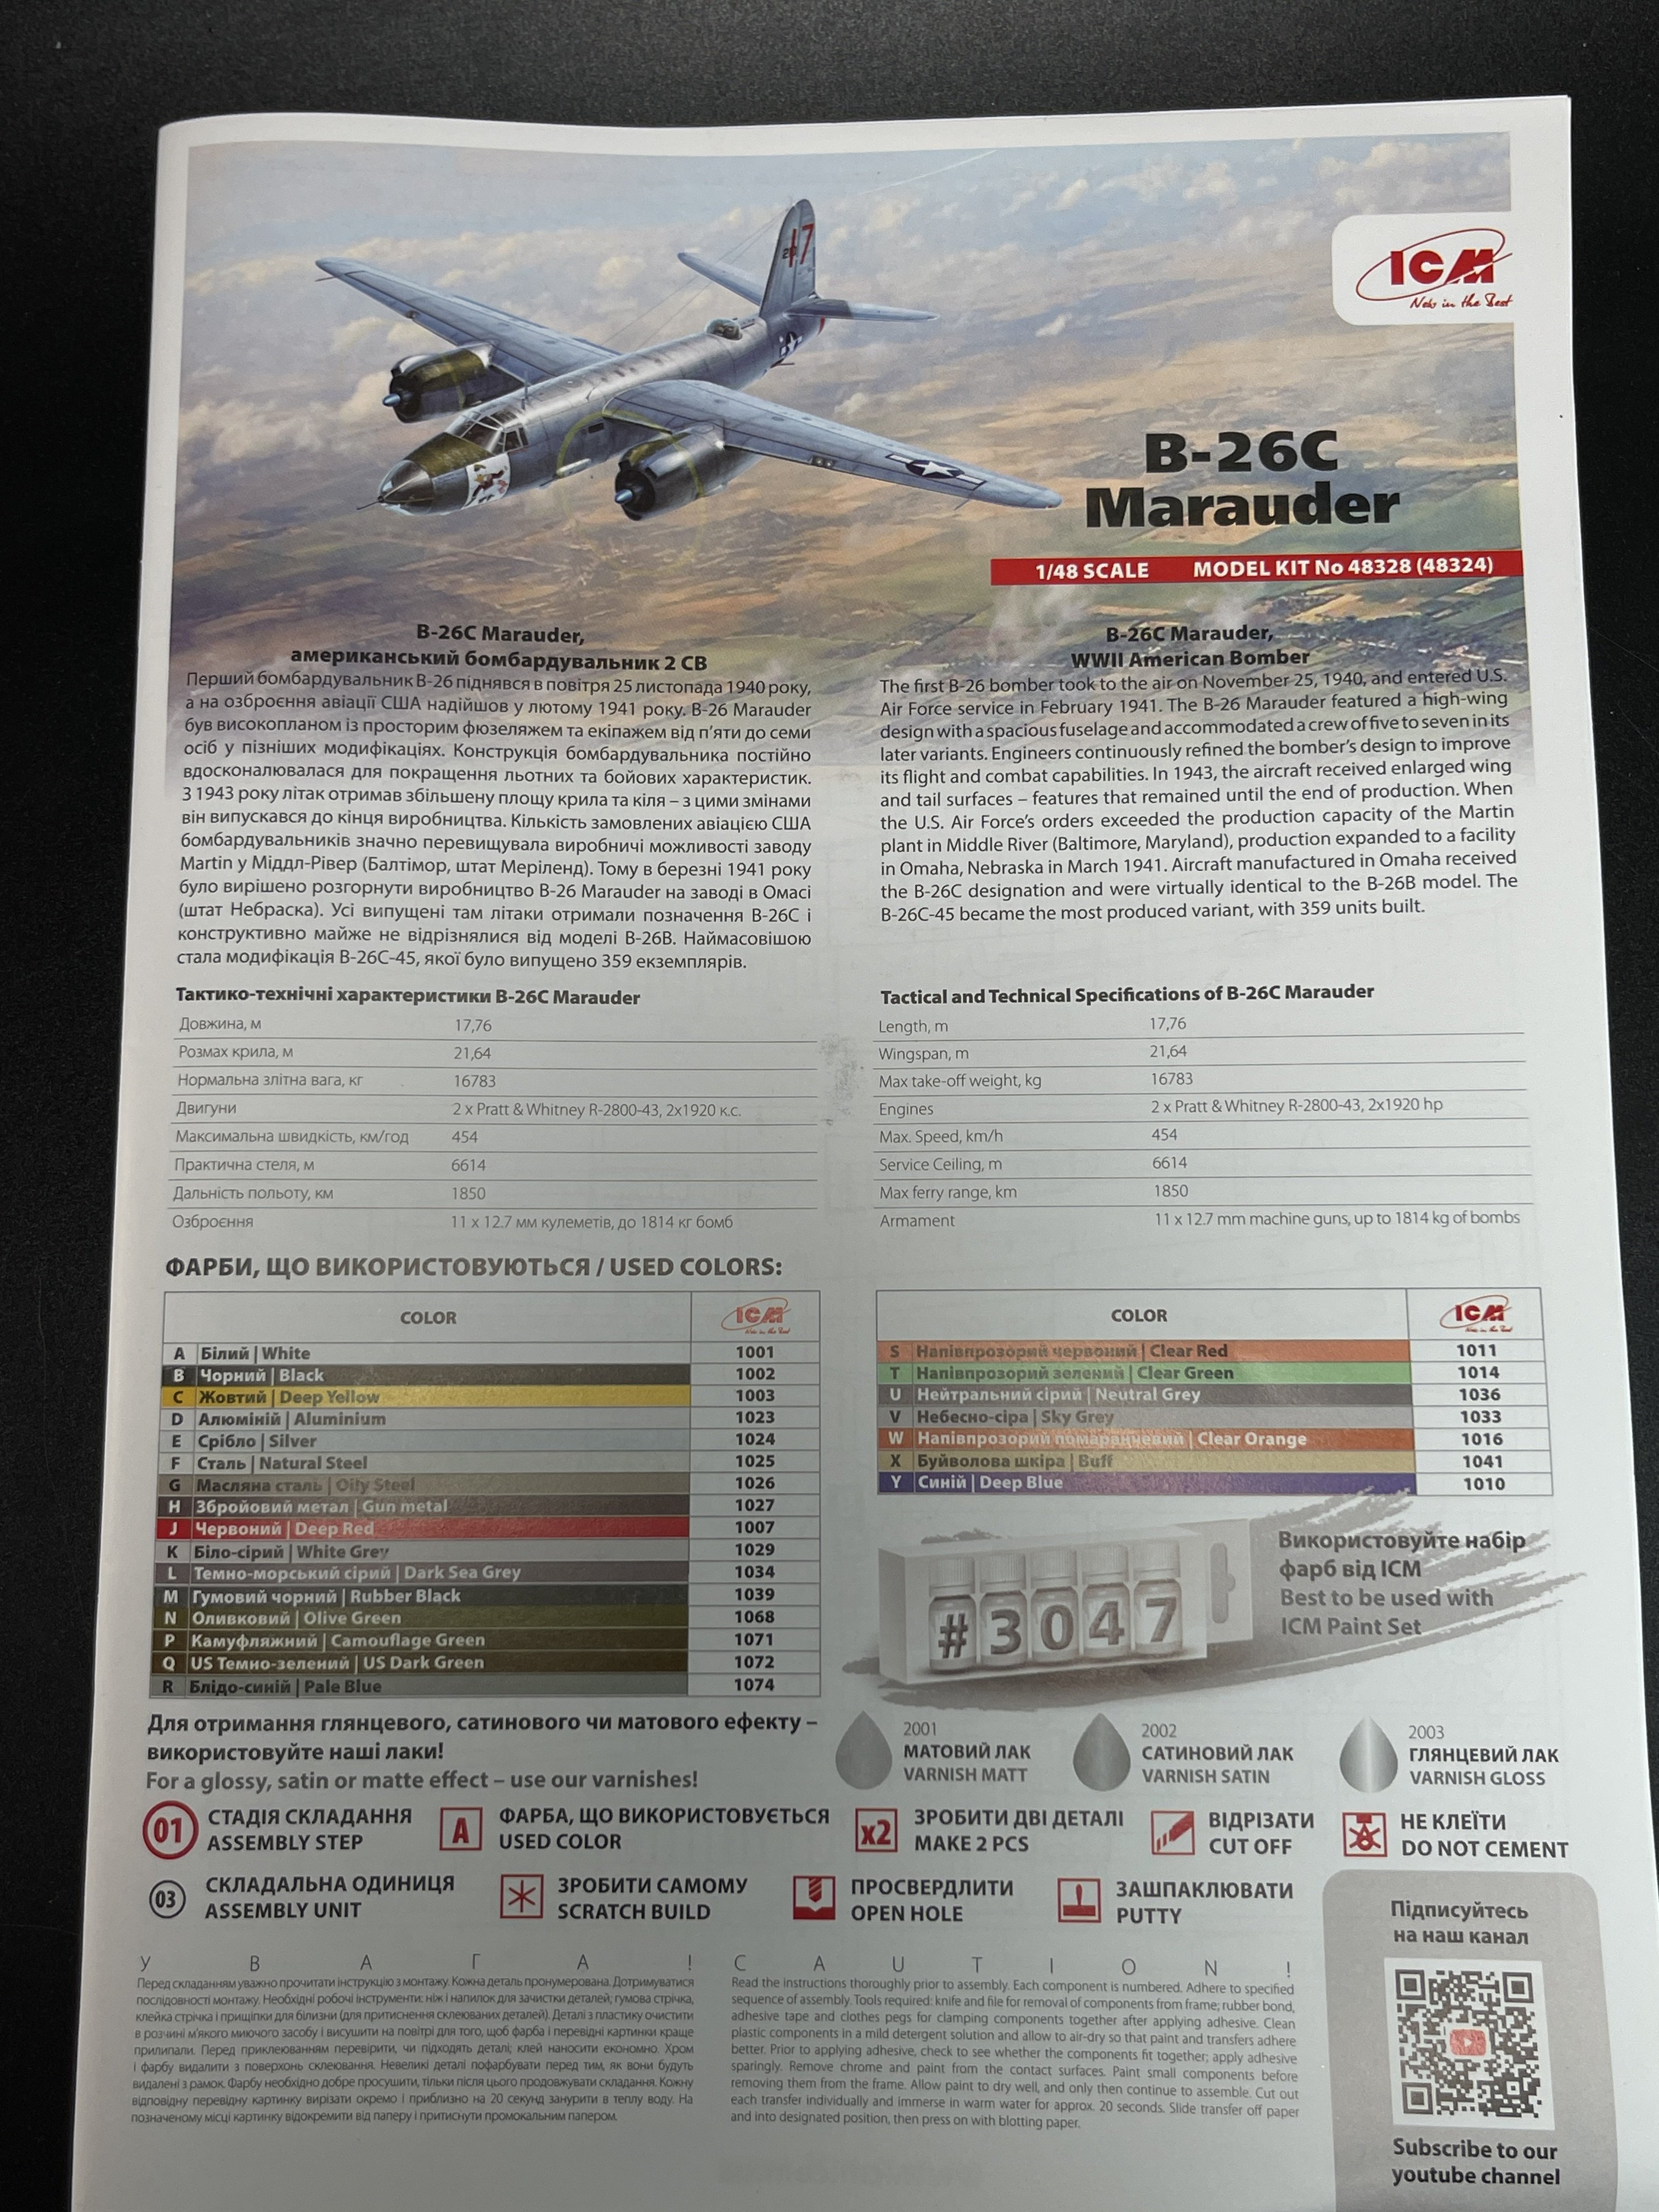
Today we are checking the 1/48 “Conquerors of Europe’s Sky” combo set (catalog number 48324) that includes three iconic World War II aircraft: the B-26C Marauder, P-51D Mustang, and Spitfire Mk.XVI.
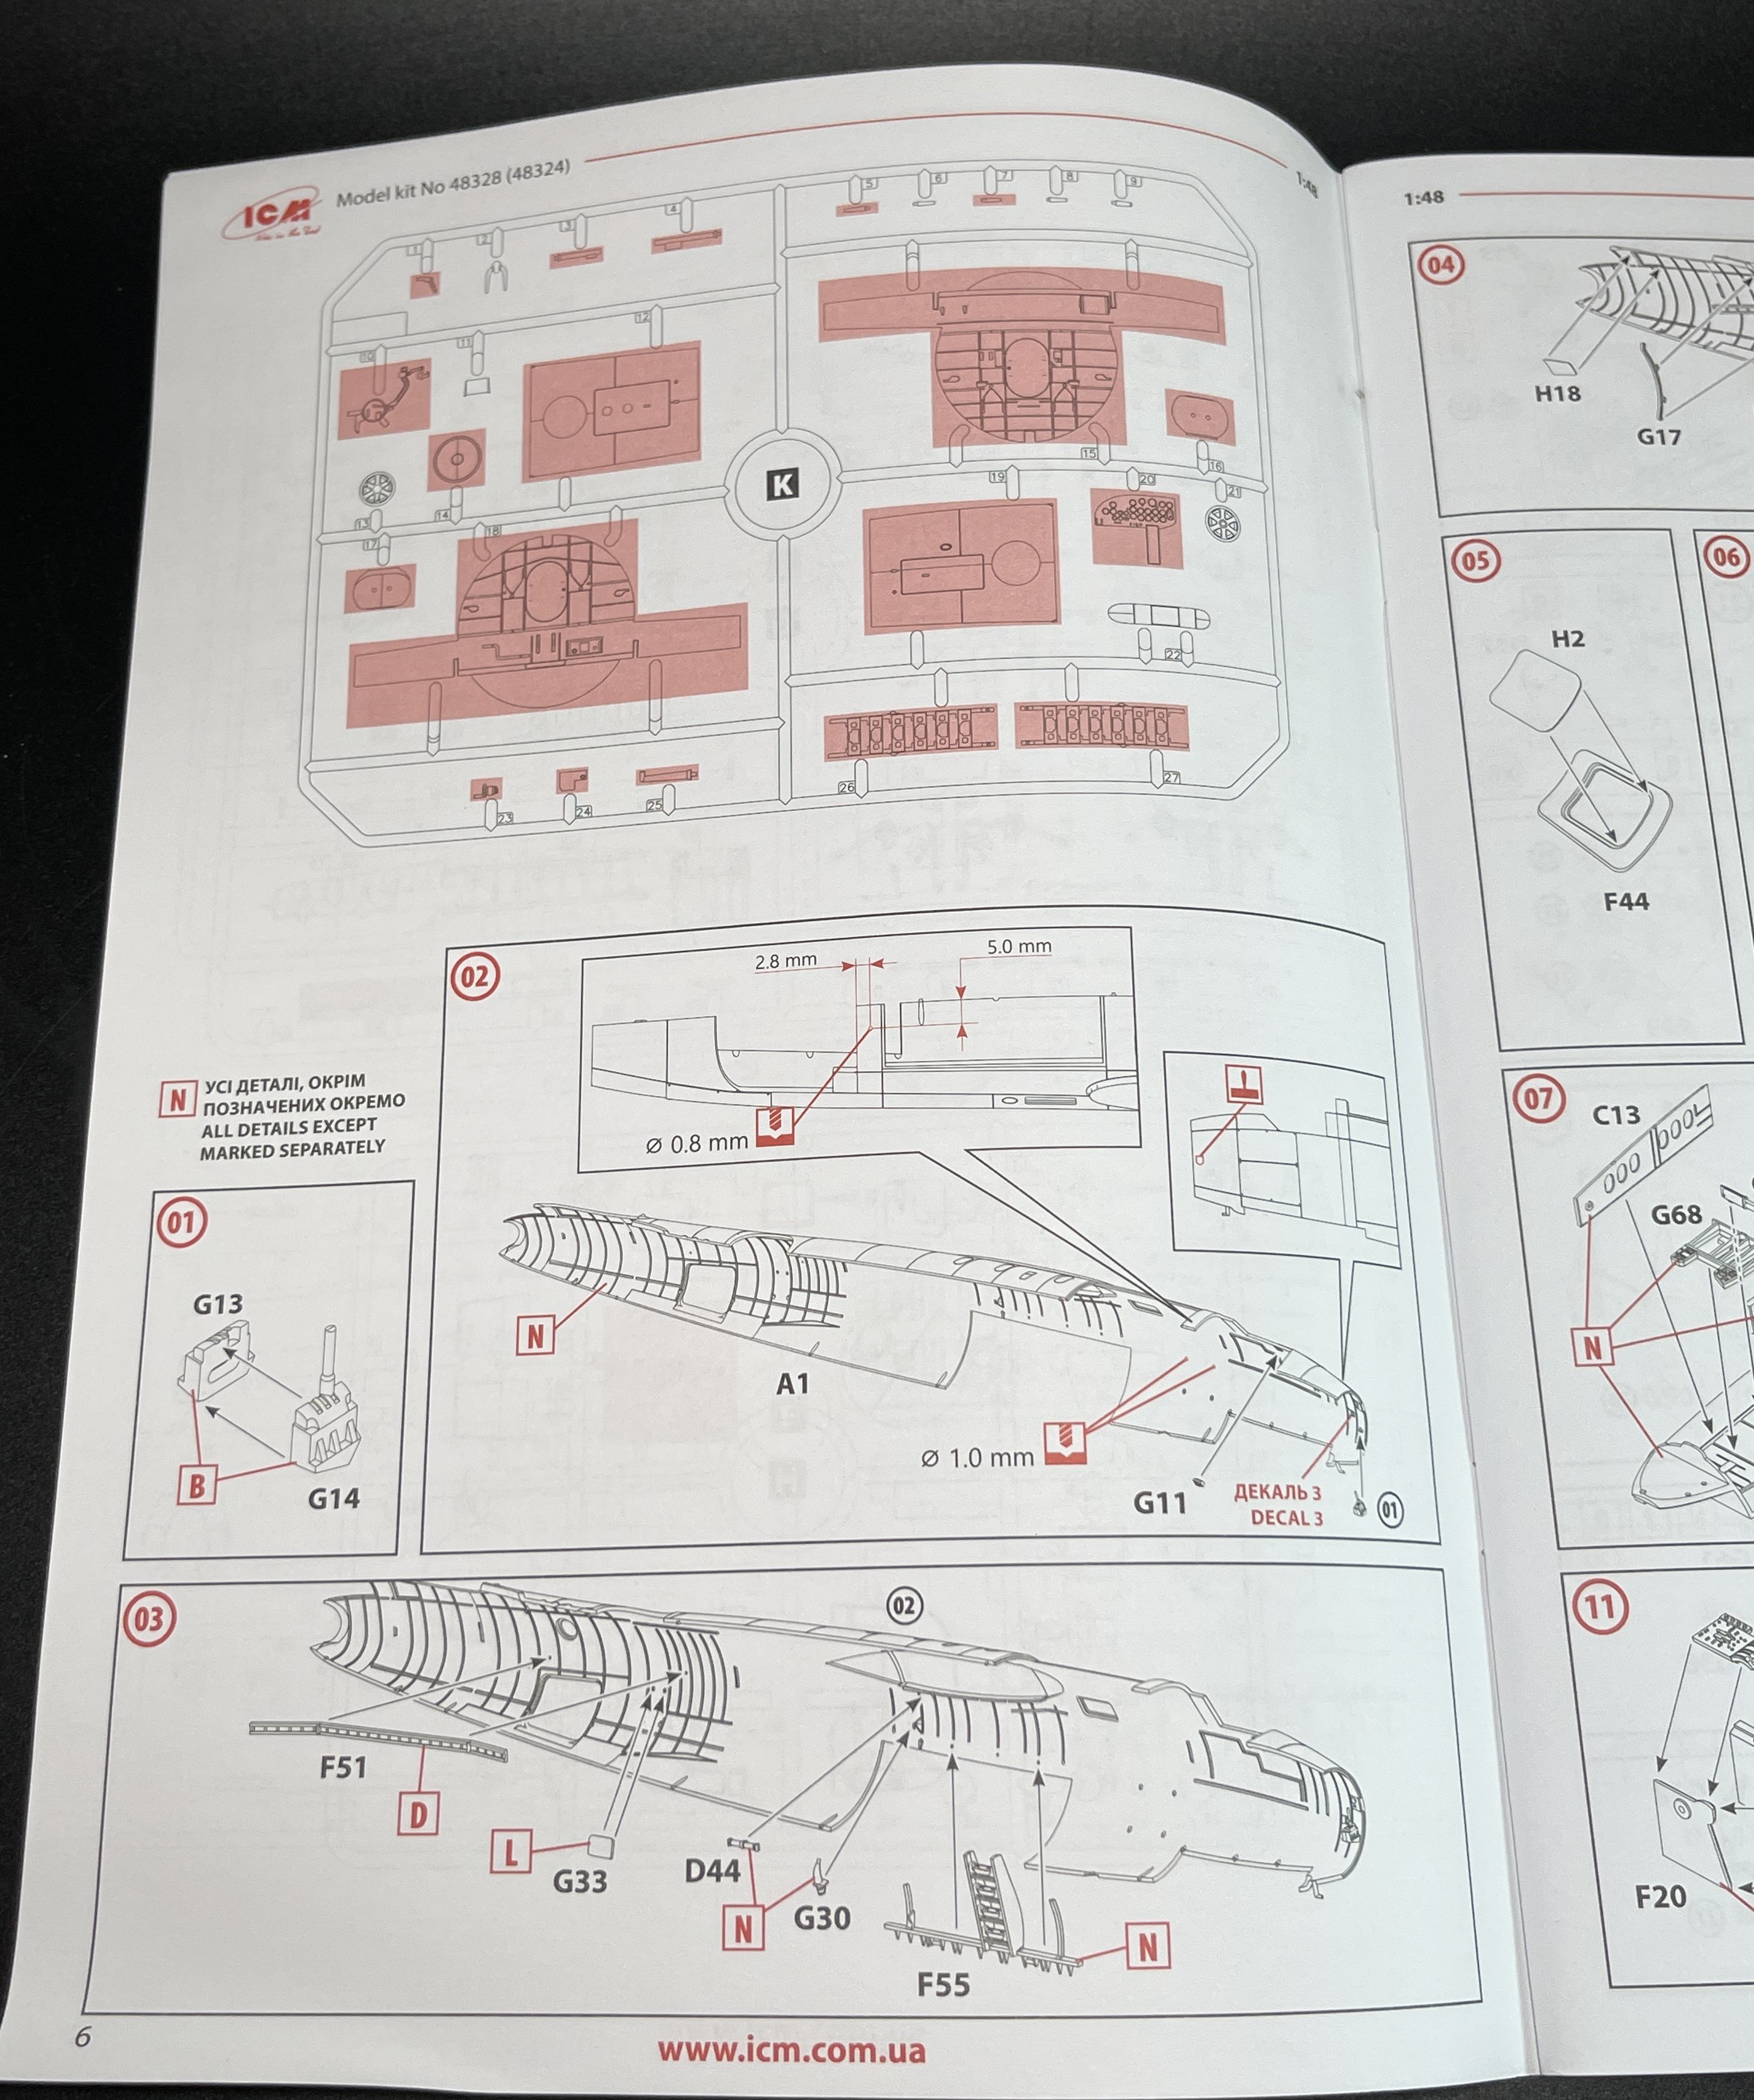
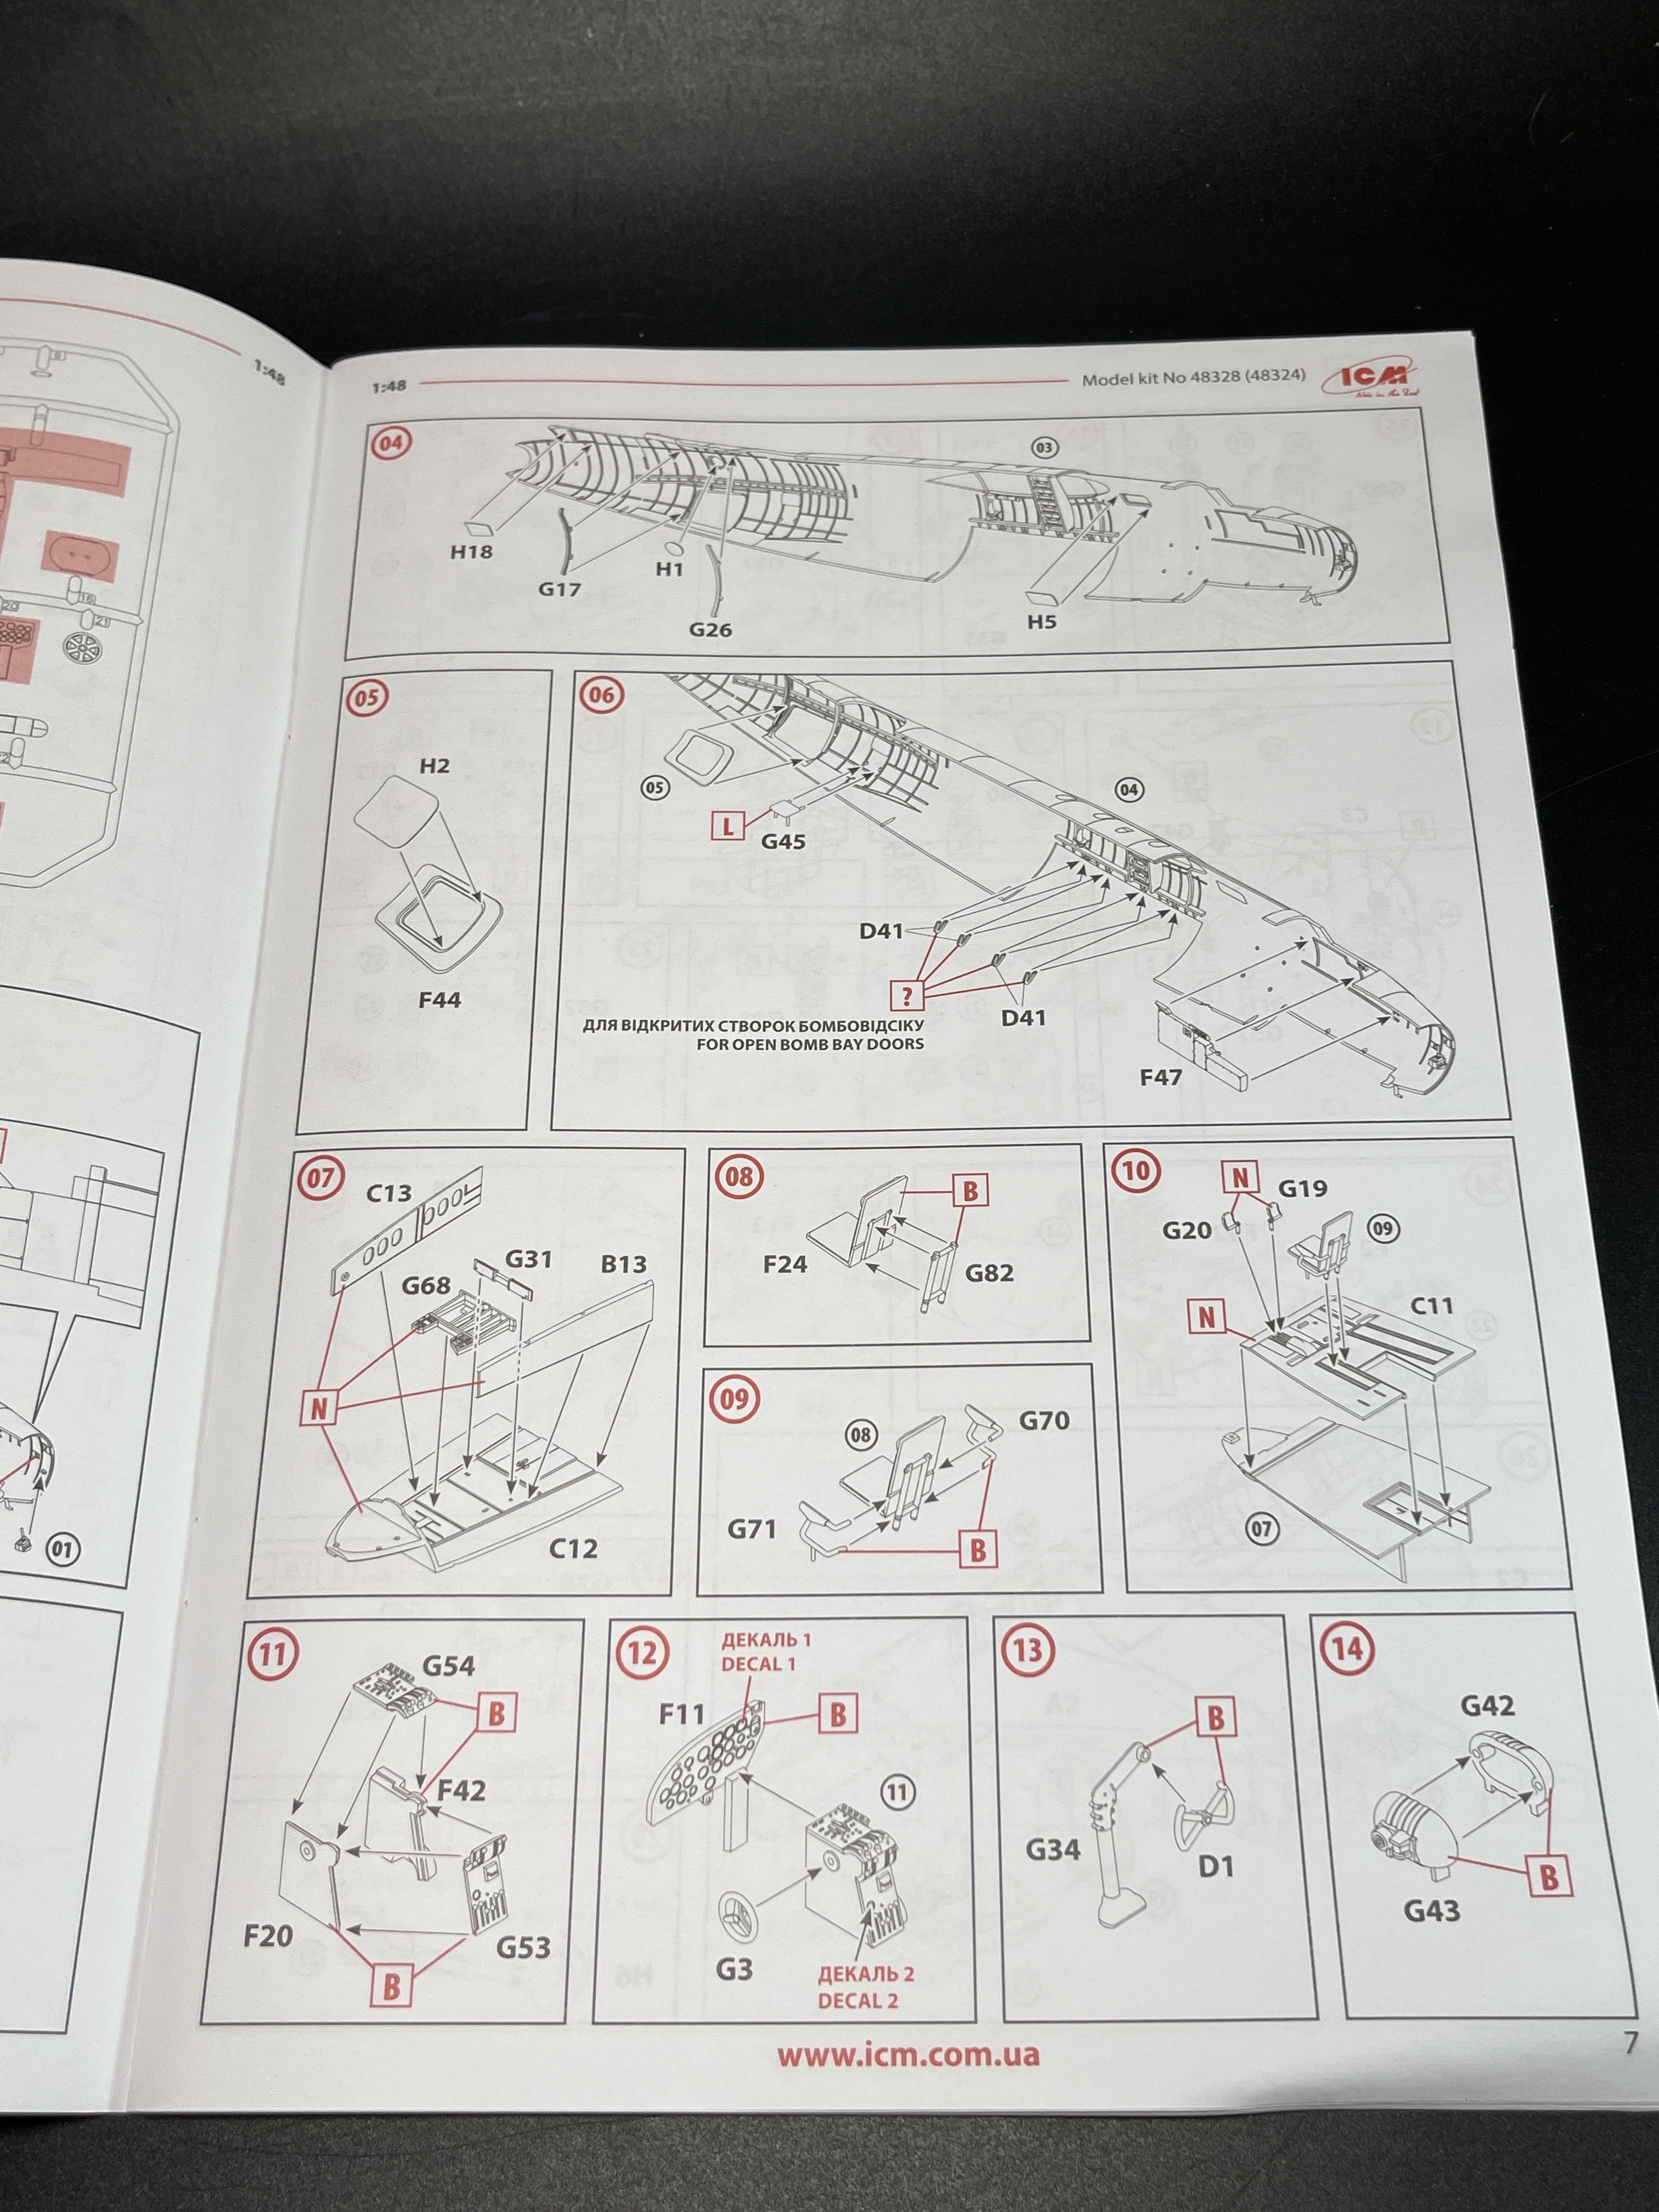
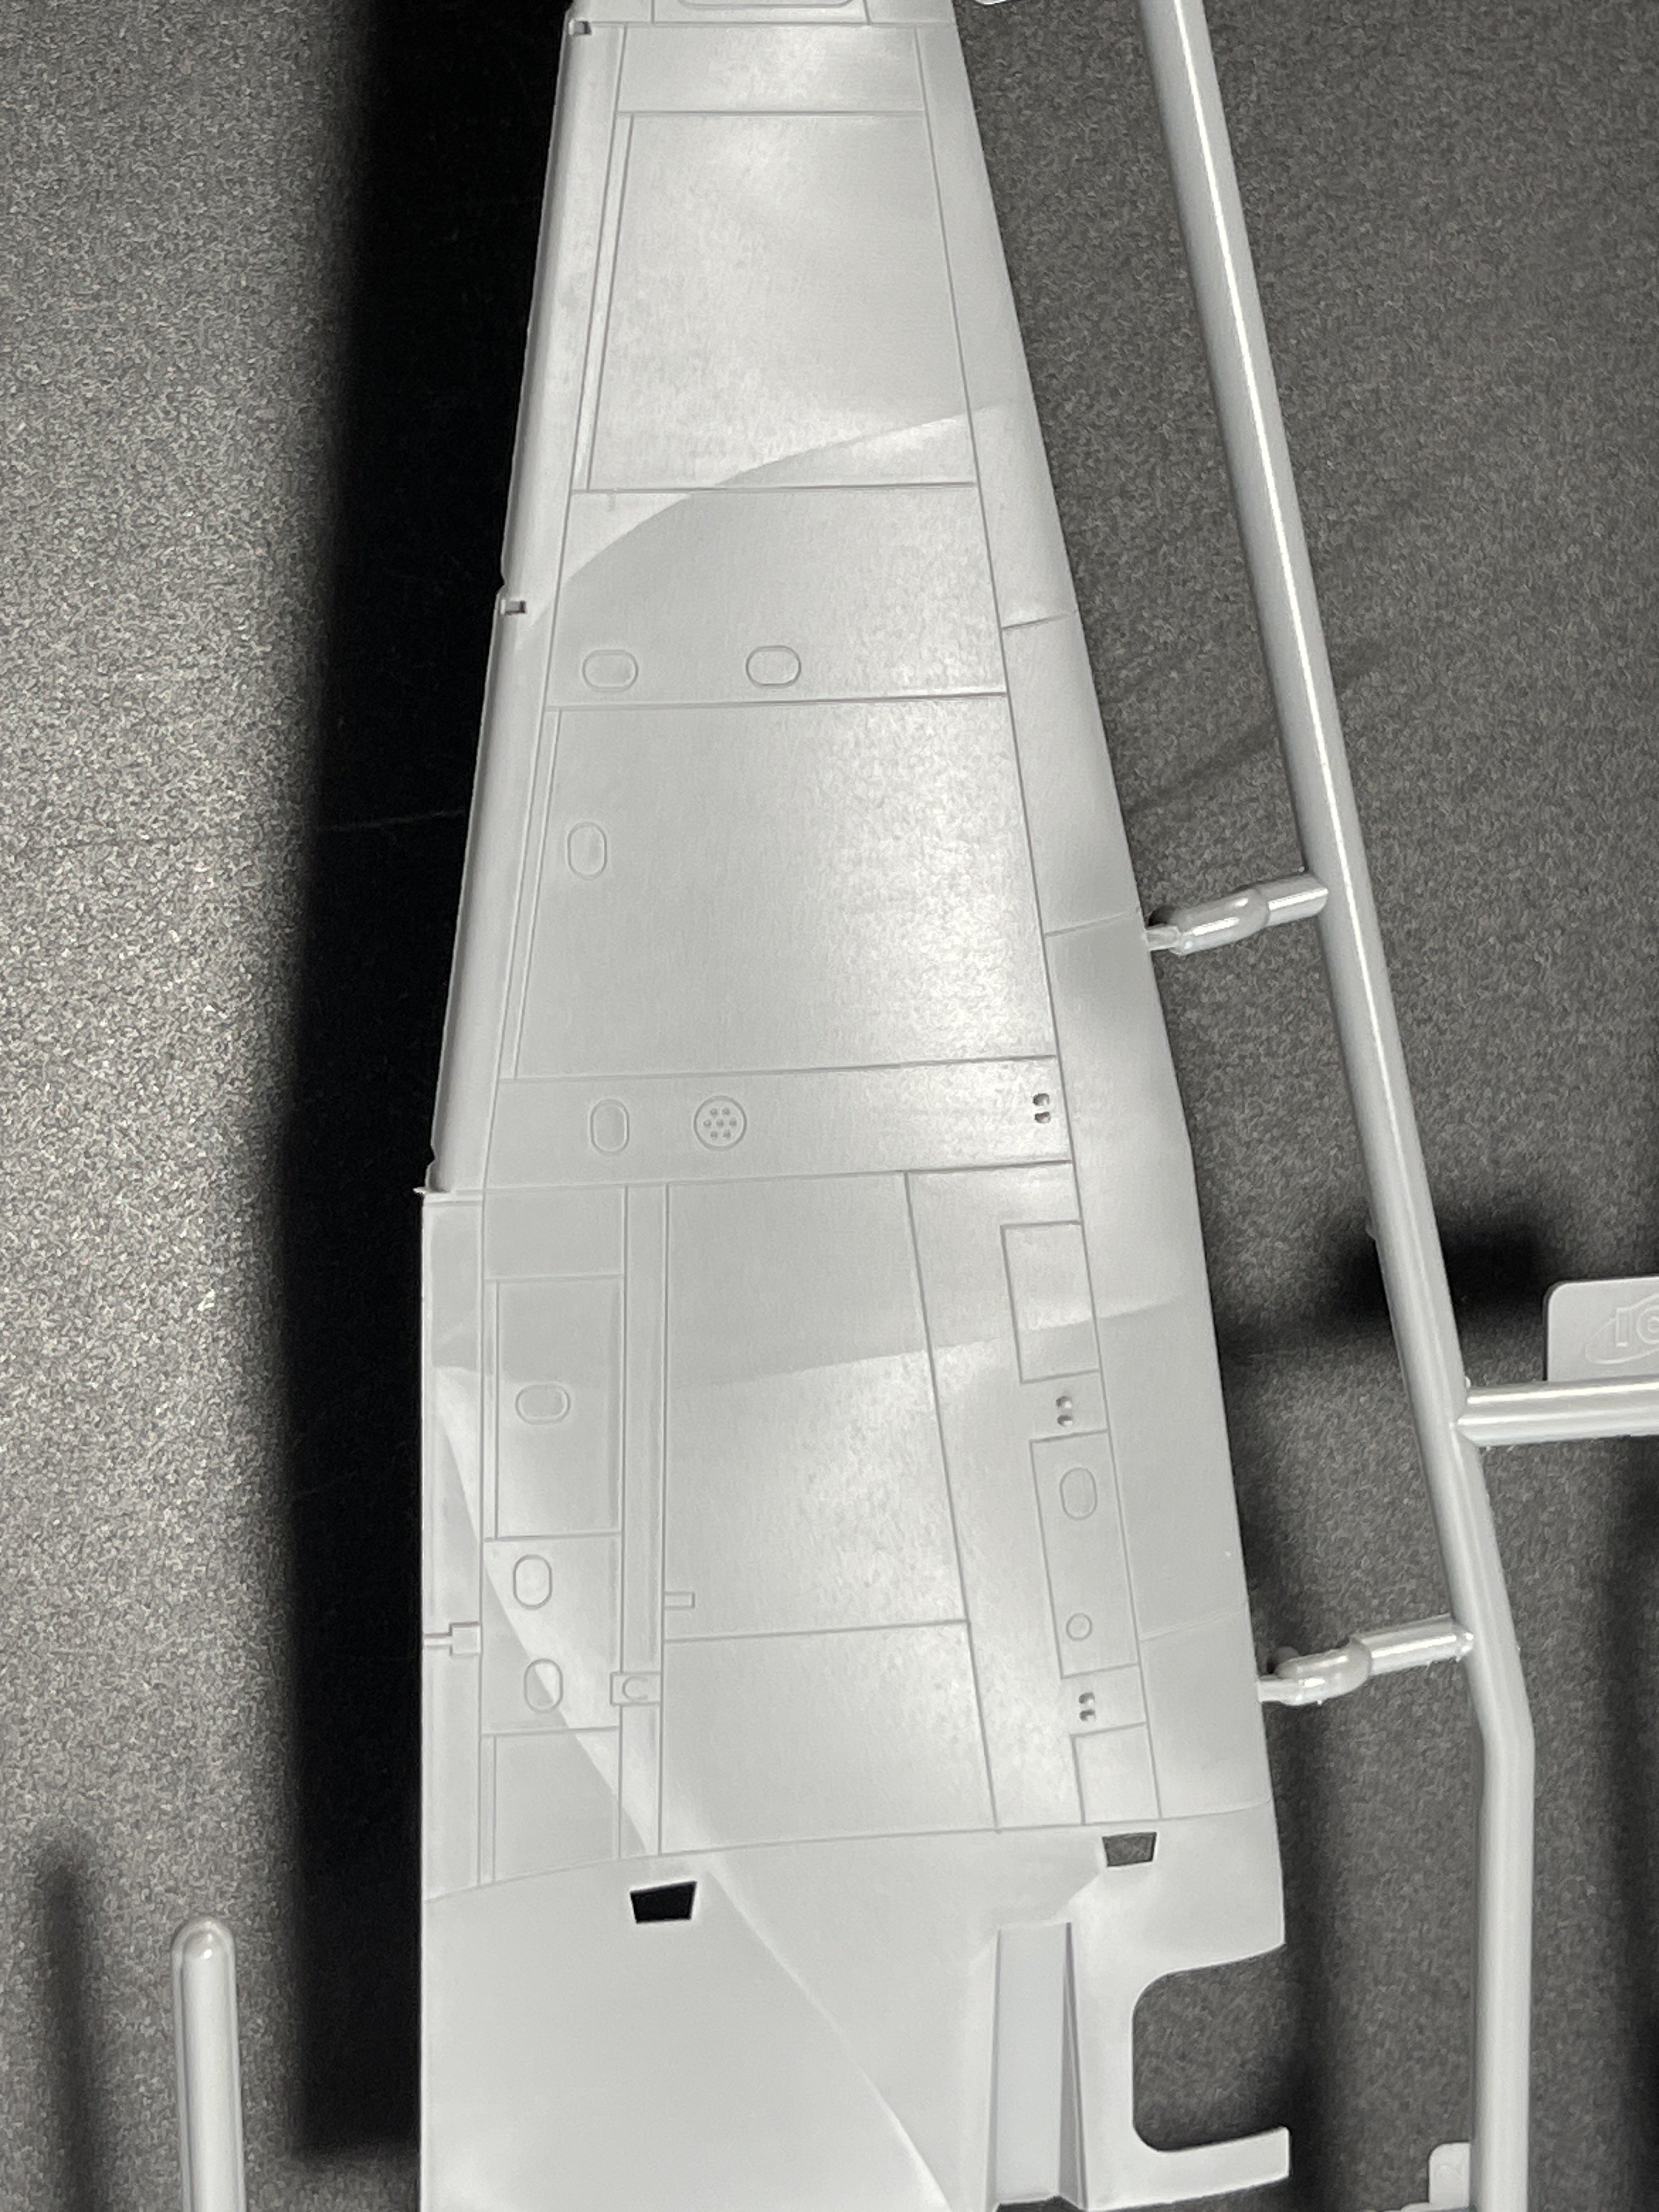
So, three models in one box and its quite bix box. Packaging is typical ICM latest, each kit is served in the separate plastic bag. There are 454mm and 362 parts for big twin-engine B-26C Marauder, 207mm wingspan and 136 parts for Sptifire Mk.XVI and 235mm wingspan with 80 parts for P-51D Mustang.
Let's crack the box!!
One thing curious about this set…. It’s the first time that ICM release a C version…
This B-26 contains an extra sprue that doesn`t exist in the B version.
As for the Spitfire and the Mustang, these are older kits. ICM has made significant strides in improving the quality of their kits and as we going to show the new release feature crisp molding.
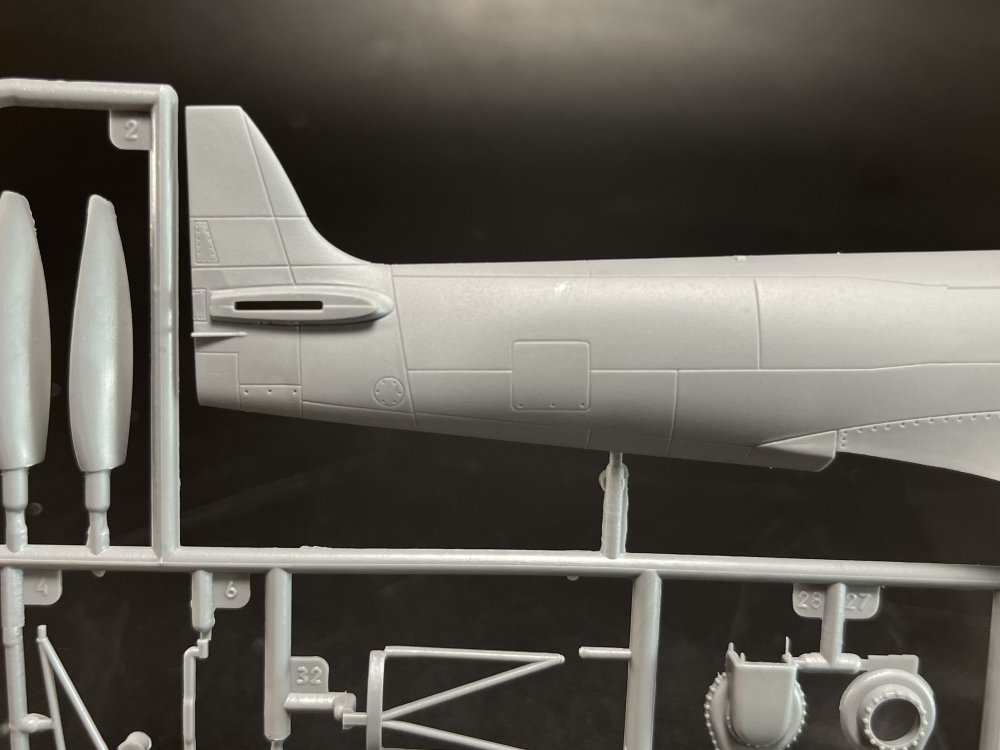
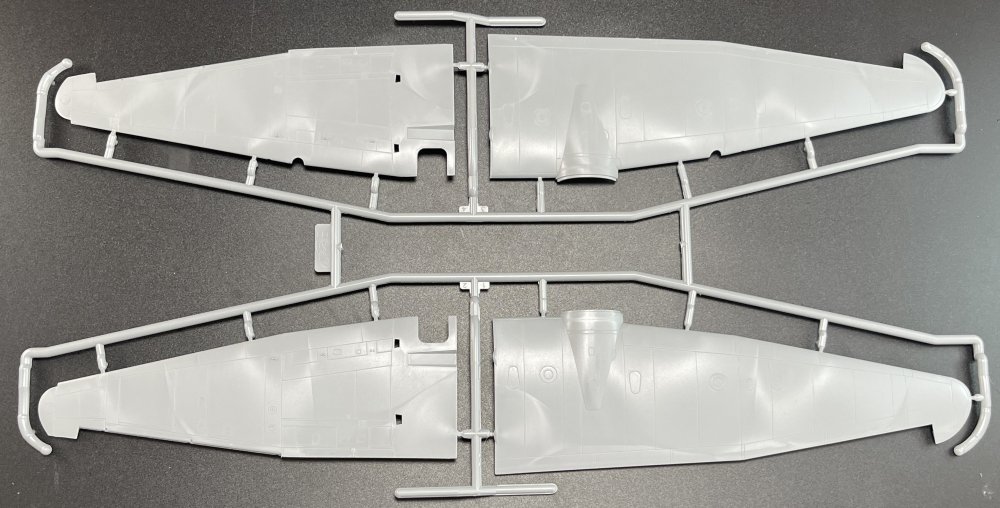
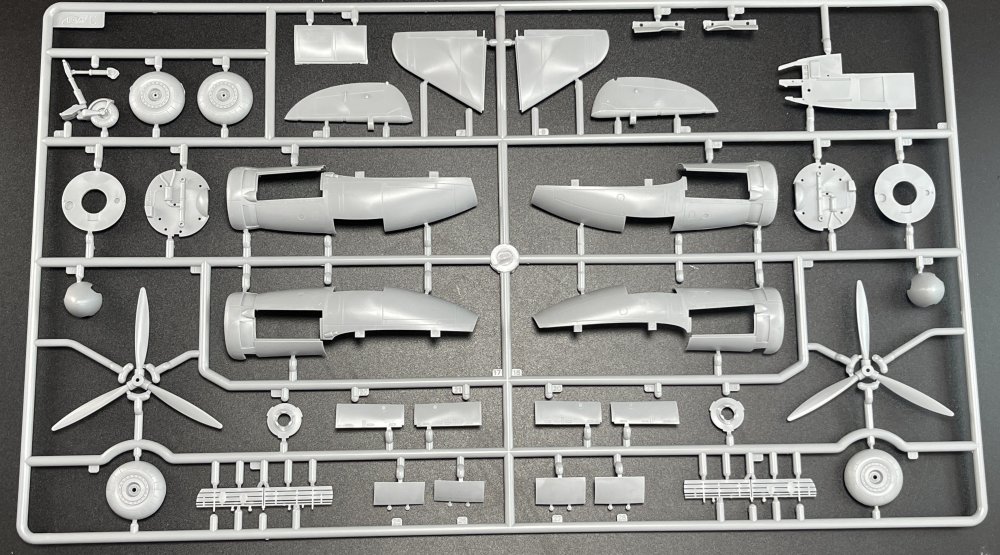
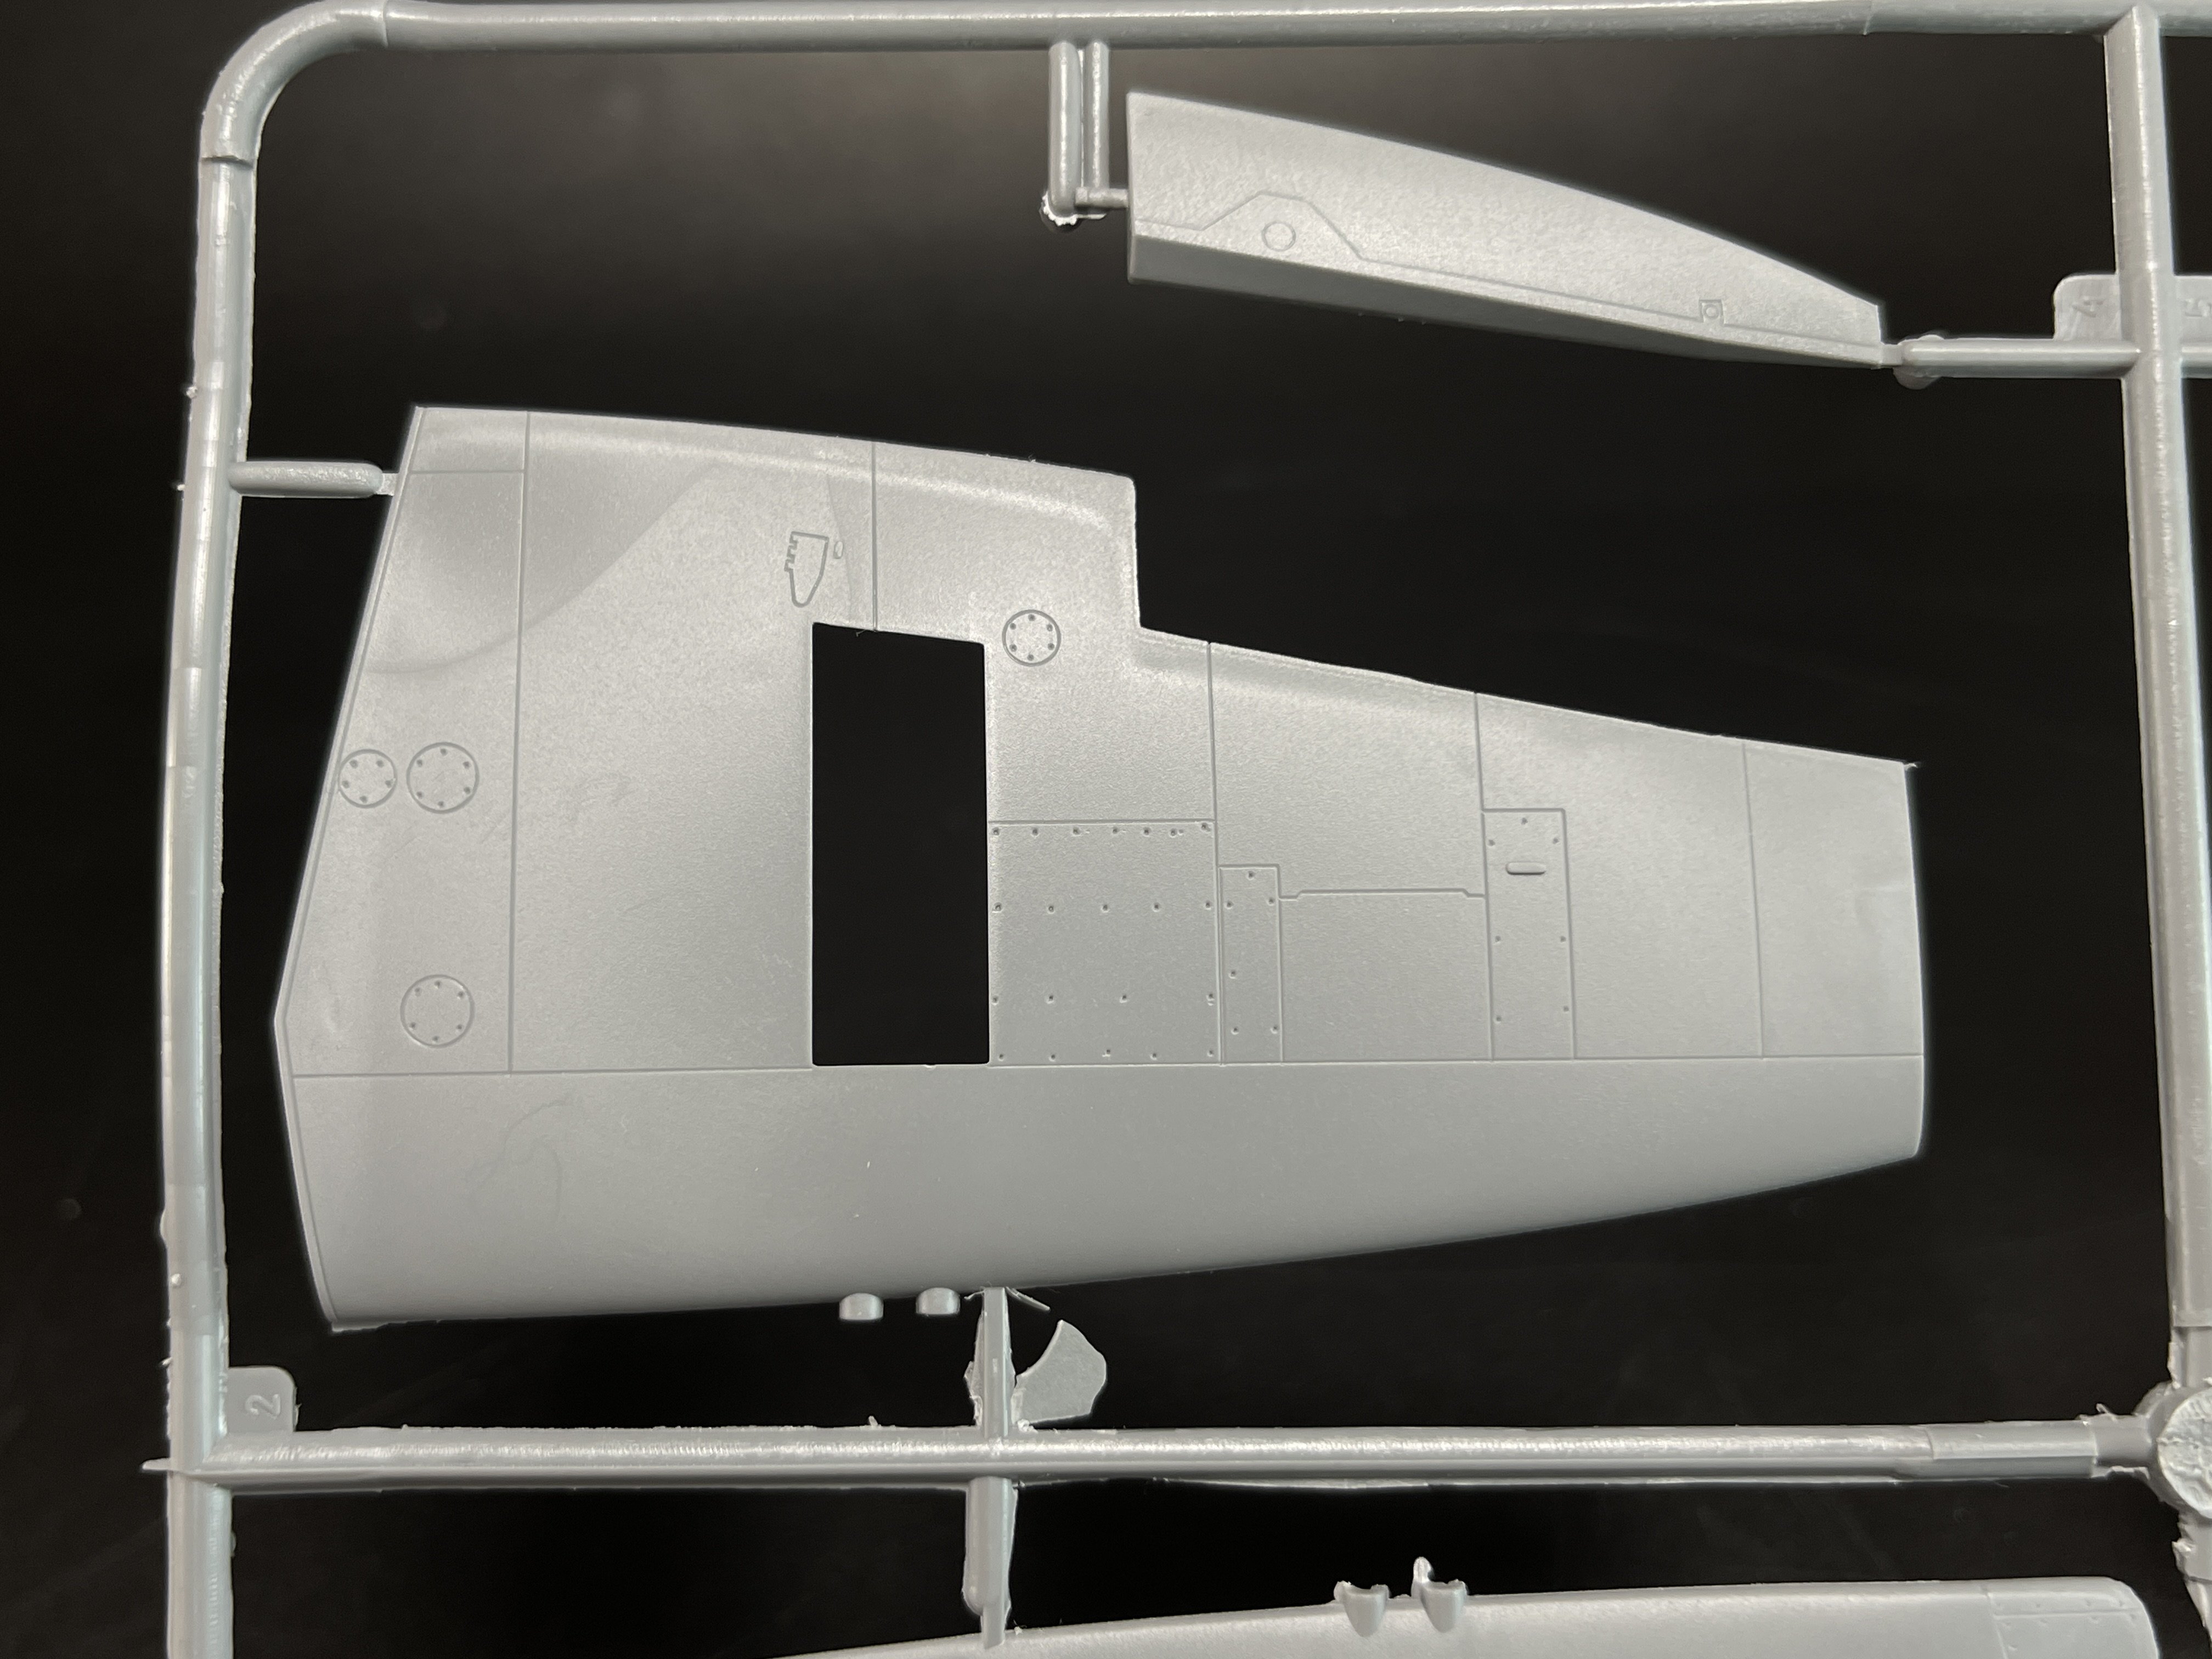
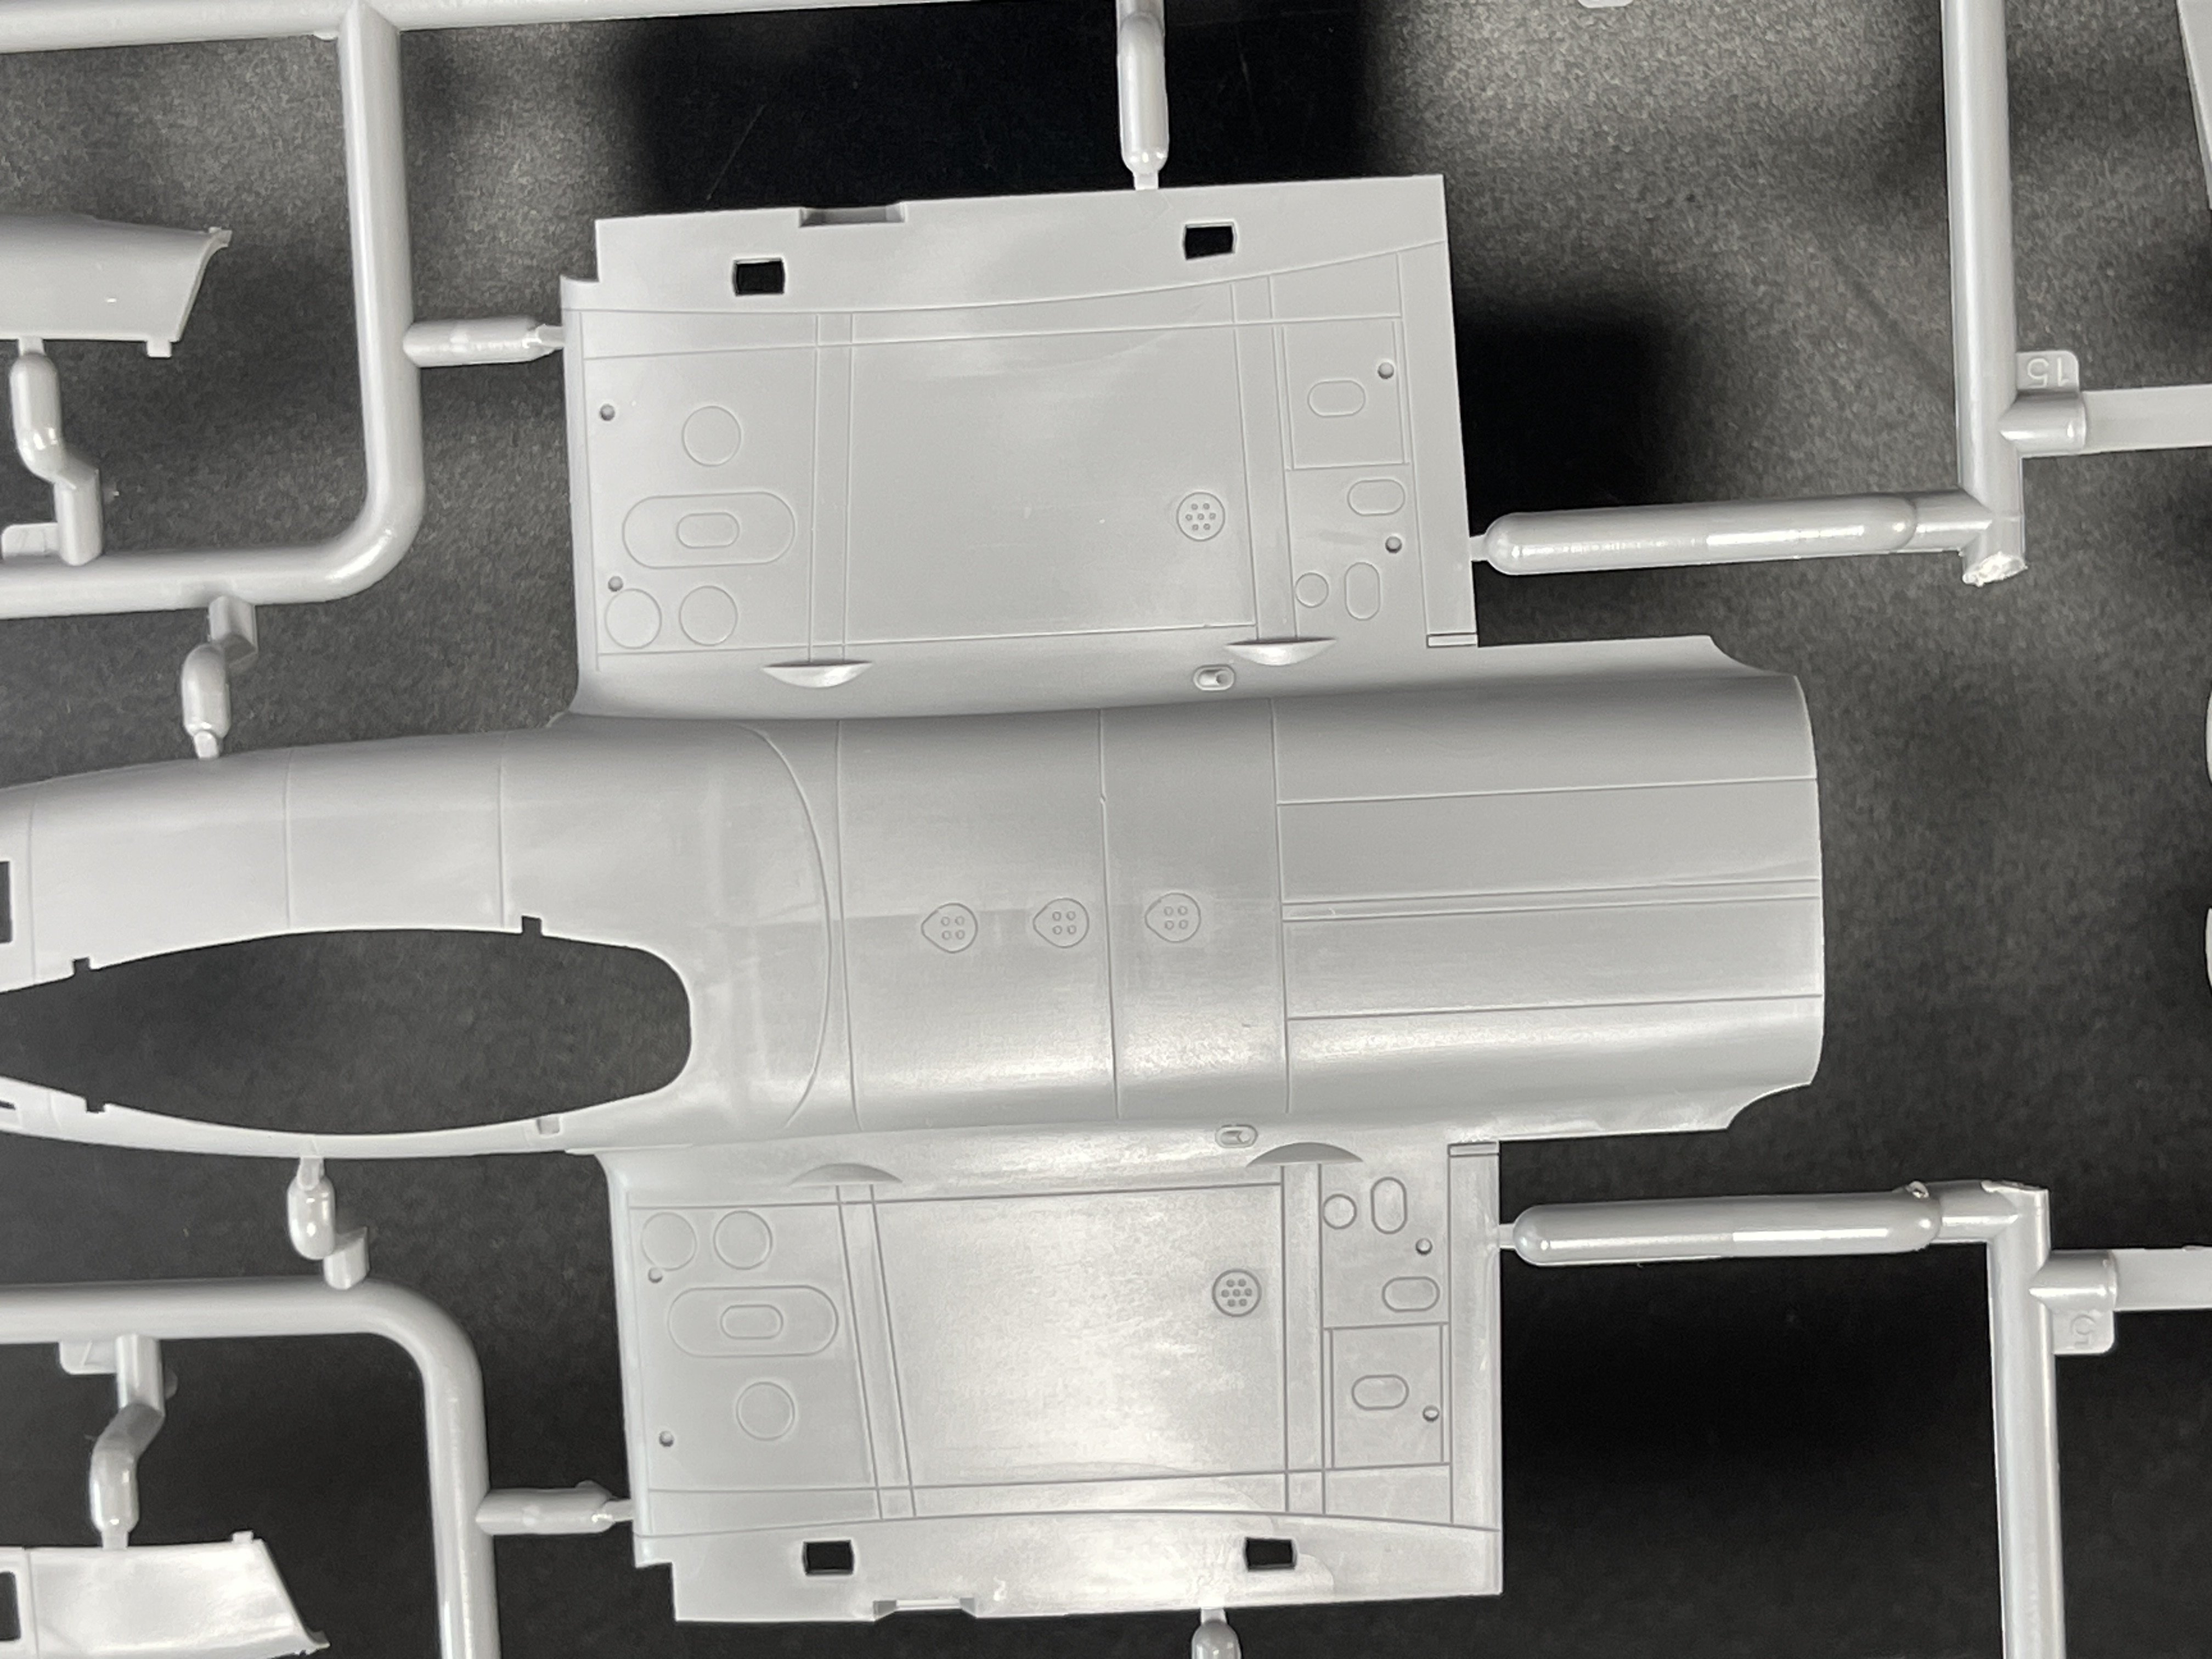
The ICM 1/48 scale B-26B and B-26C model kits are very closely related, as they represent variants of the same aircraft family — the Martin B-26 Marauder — with minor but important differences. In real life, the B-26B and B-26C were mechanically and structurally identical, with the only real-world difference being the location of manufacture:
· B-26B: Built at Baltimore, Maryland
· B-26C: Built at Omaha, Nebraska
As for the B-26 B click here
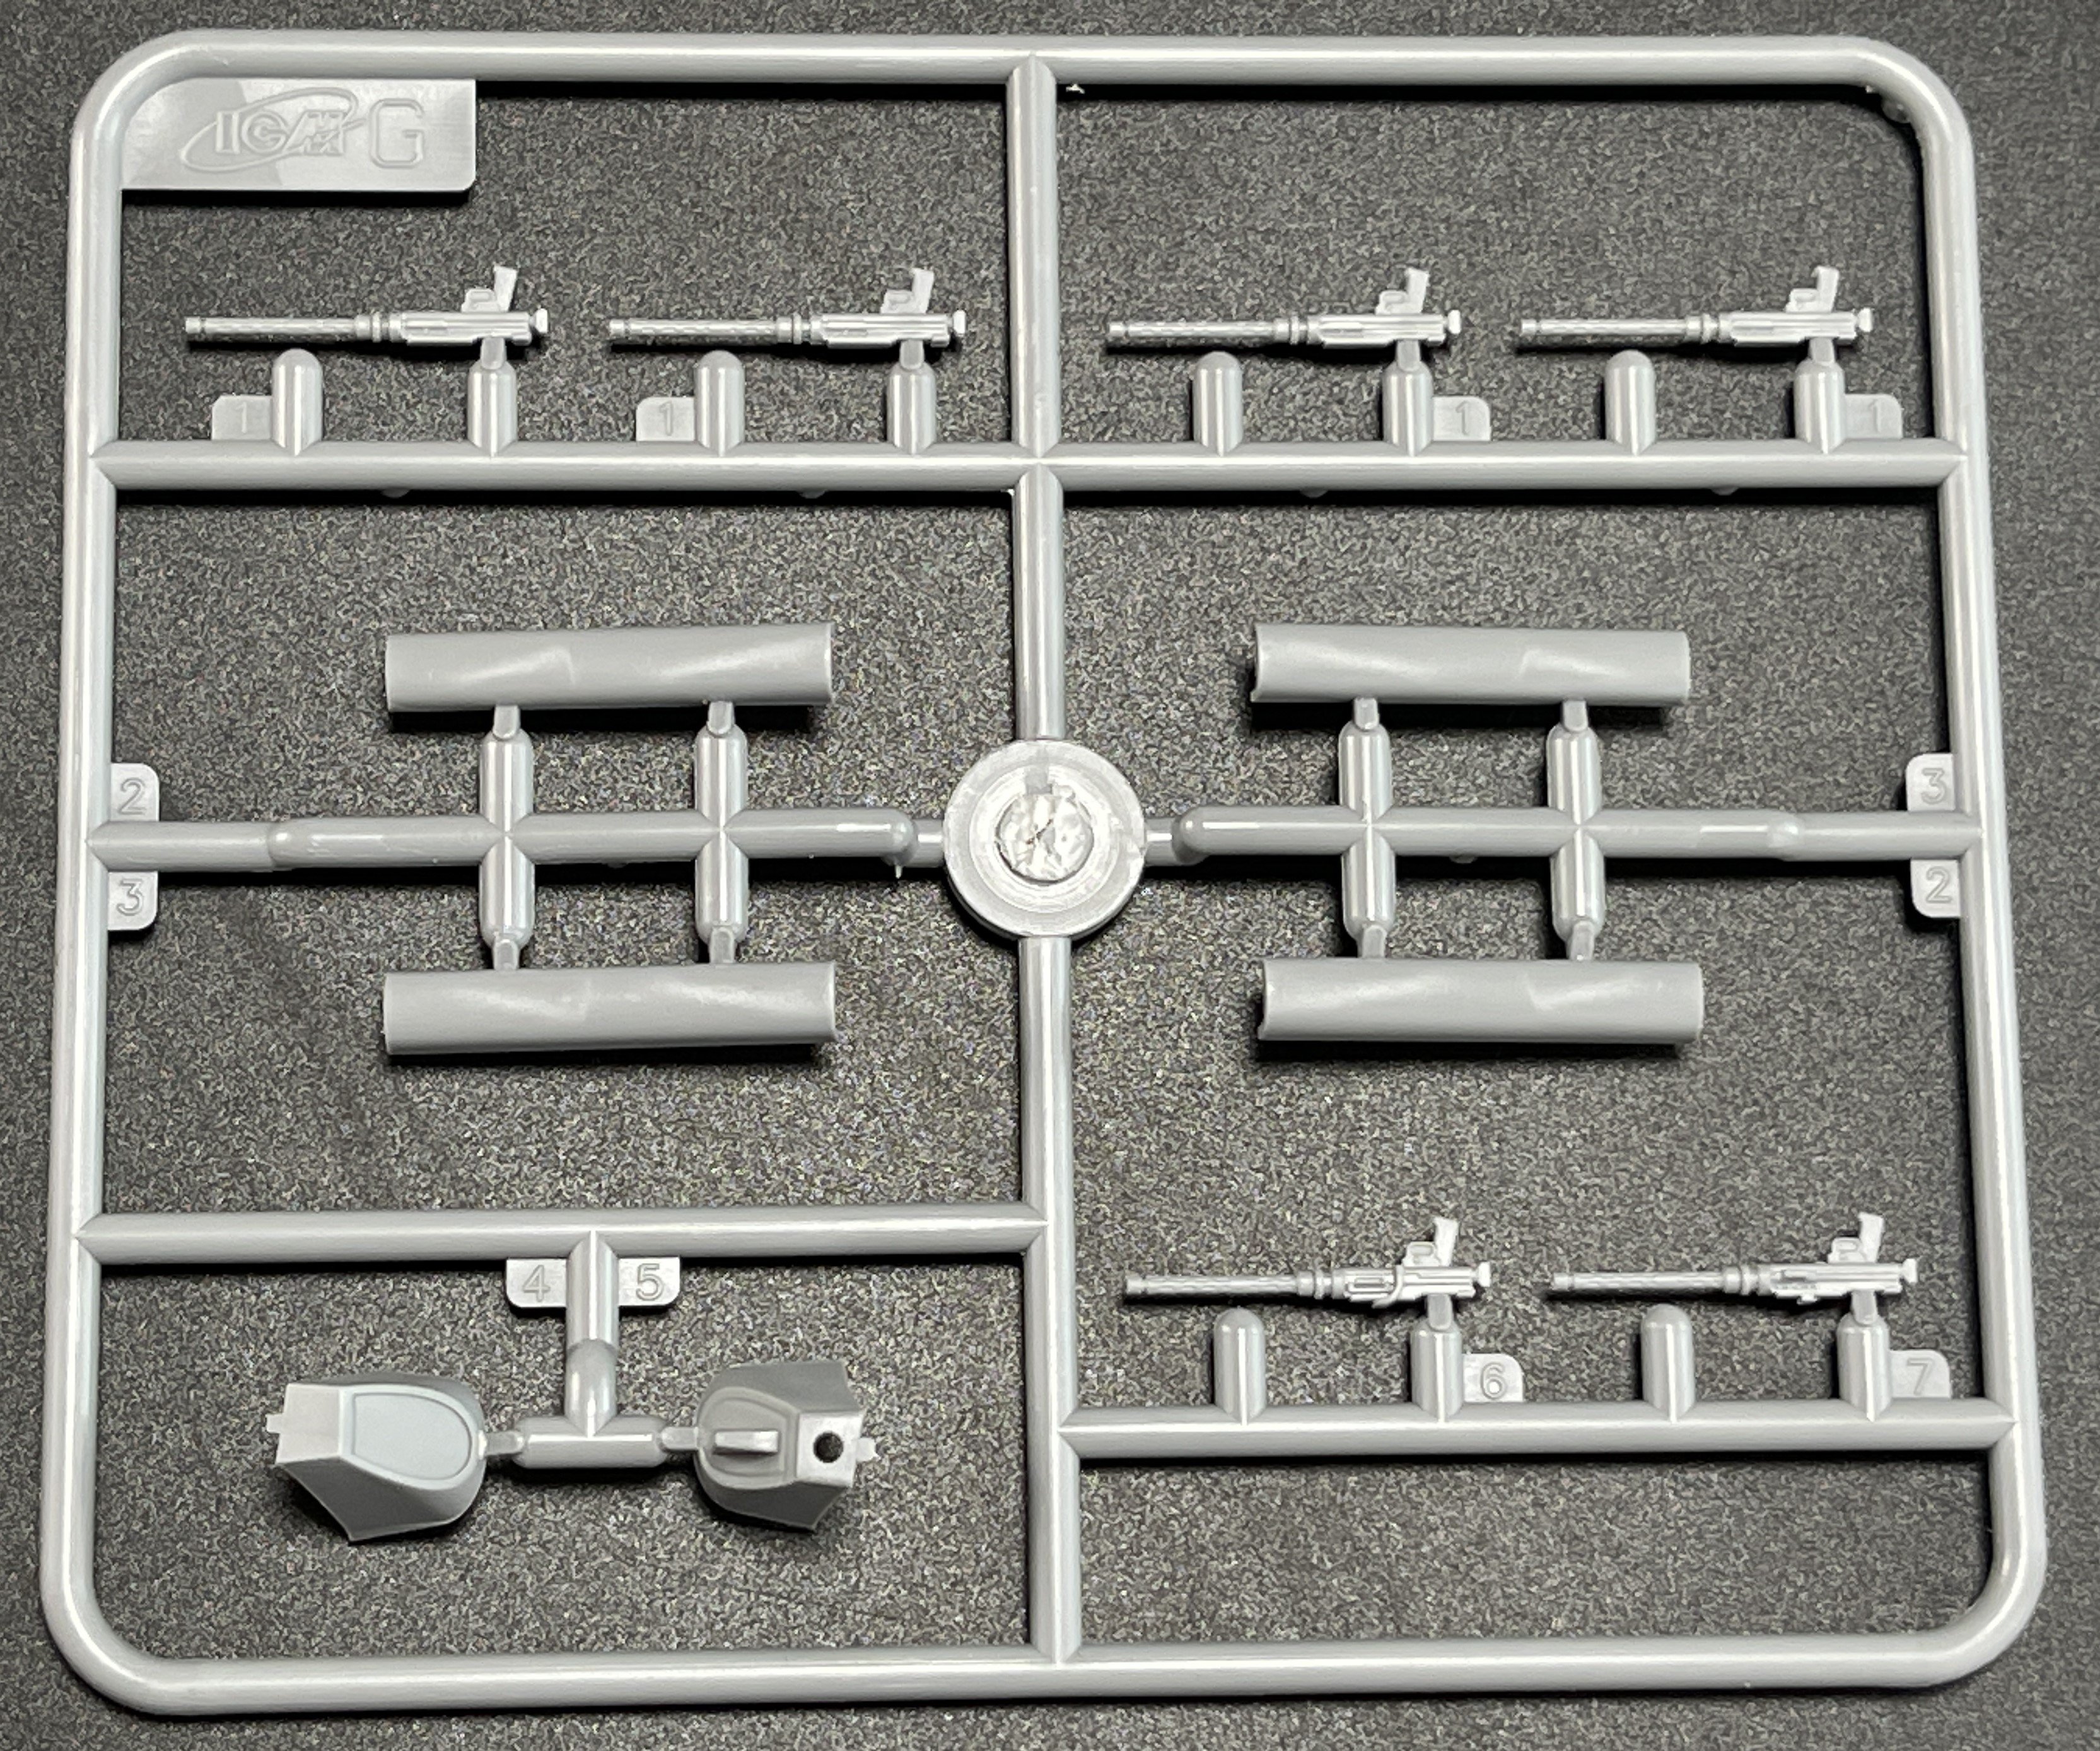
For the G version click here
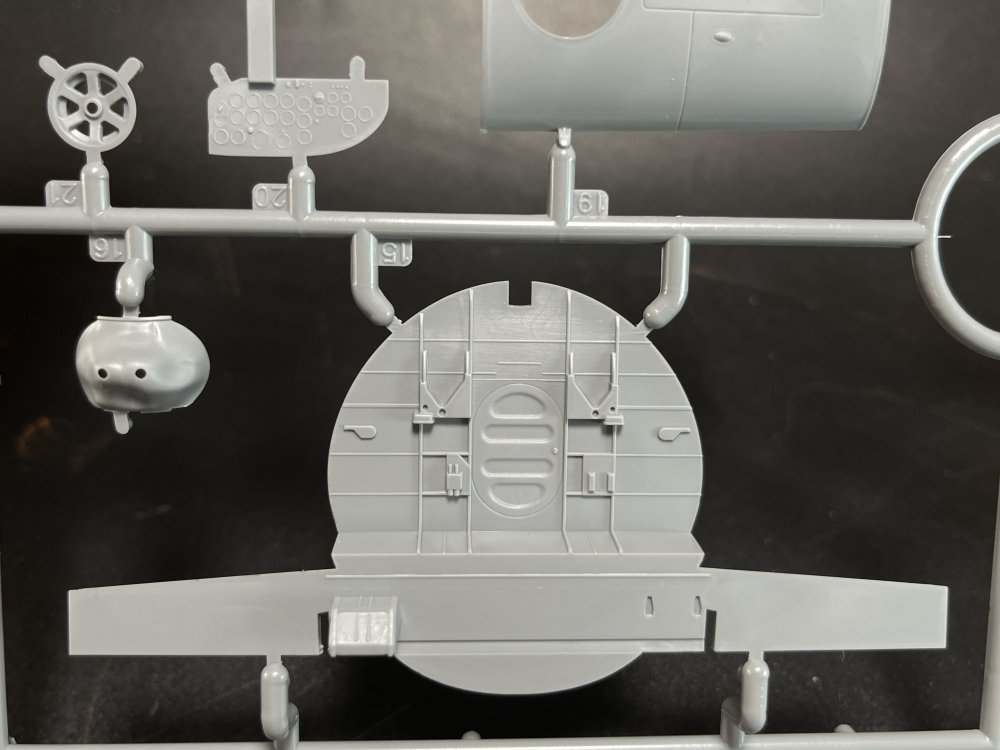
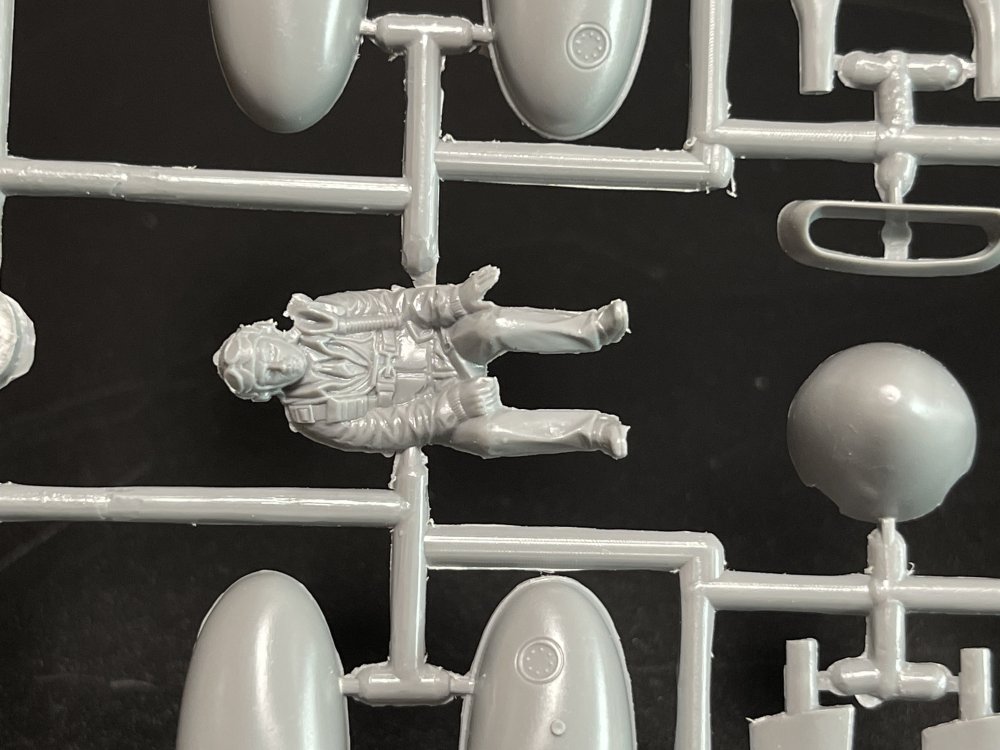
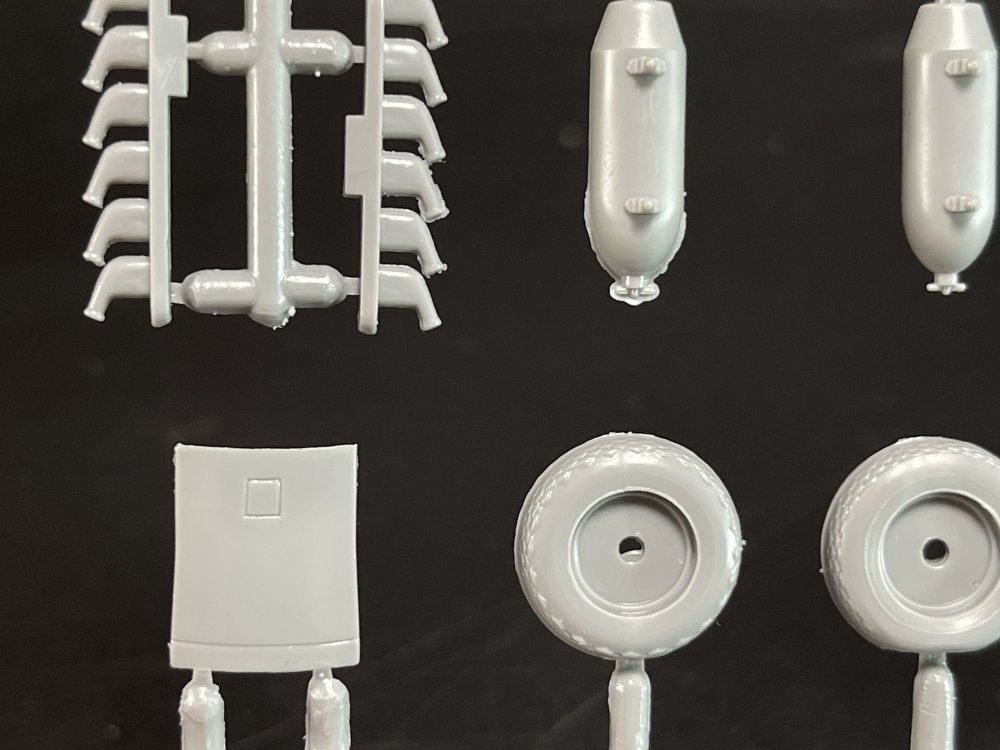
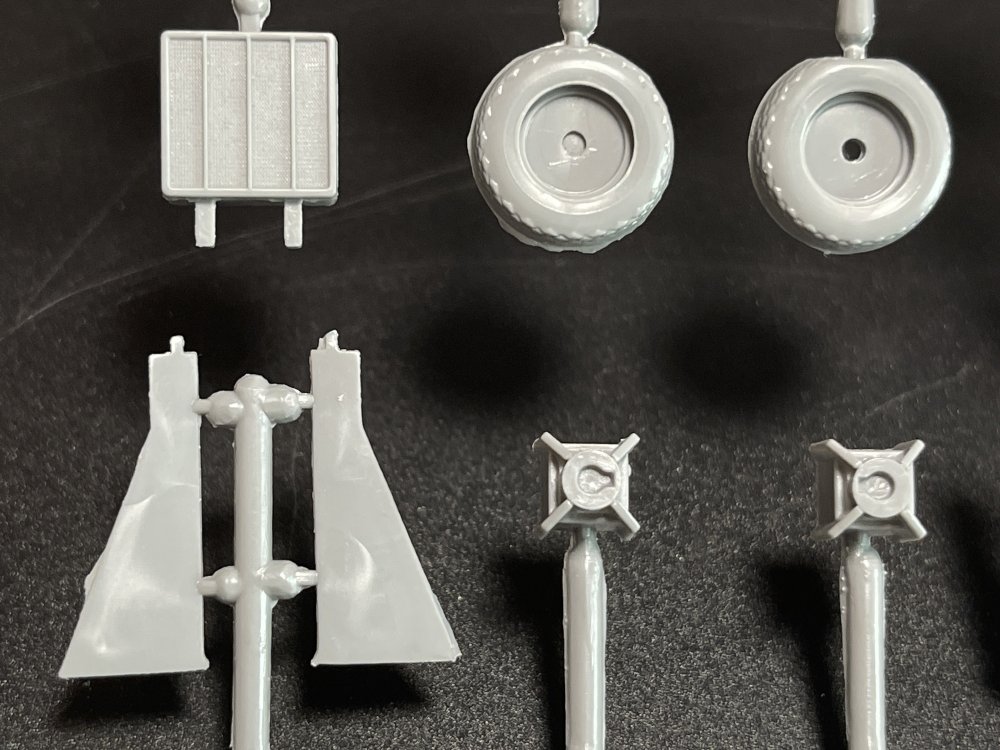
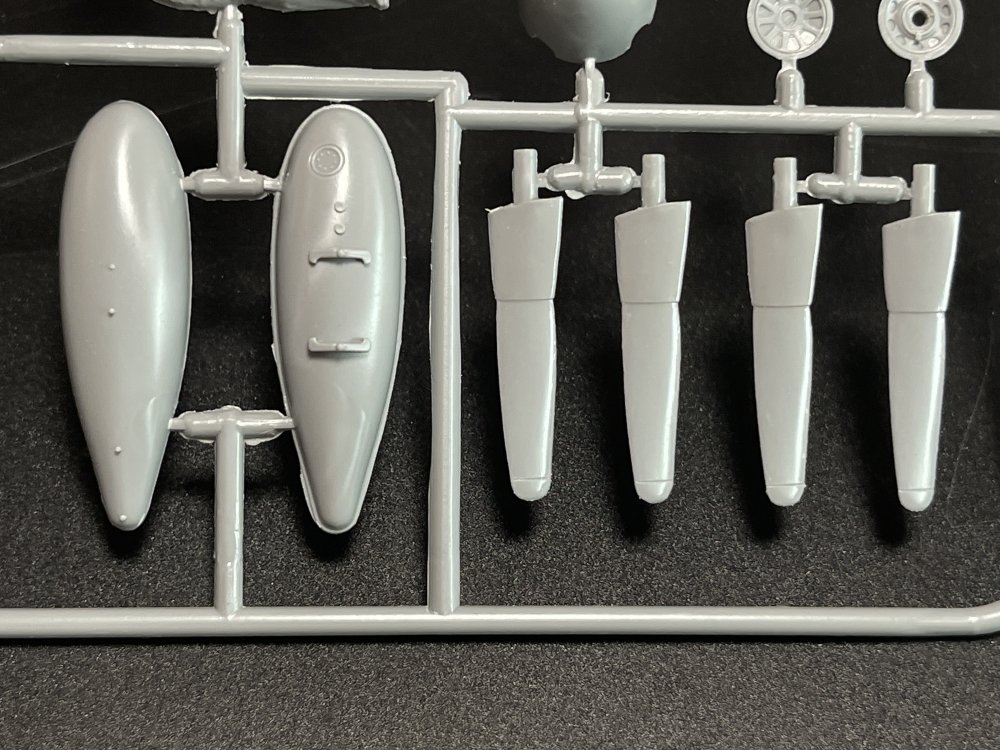
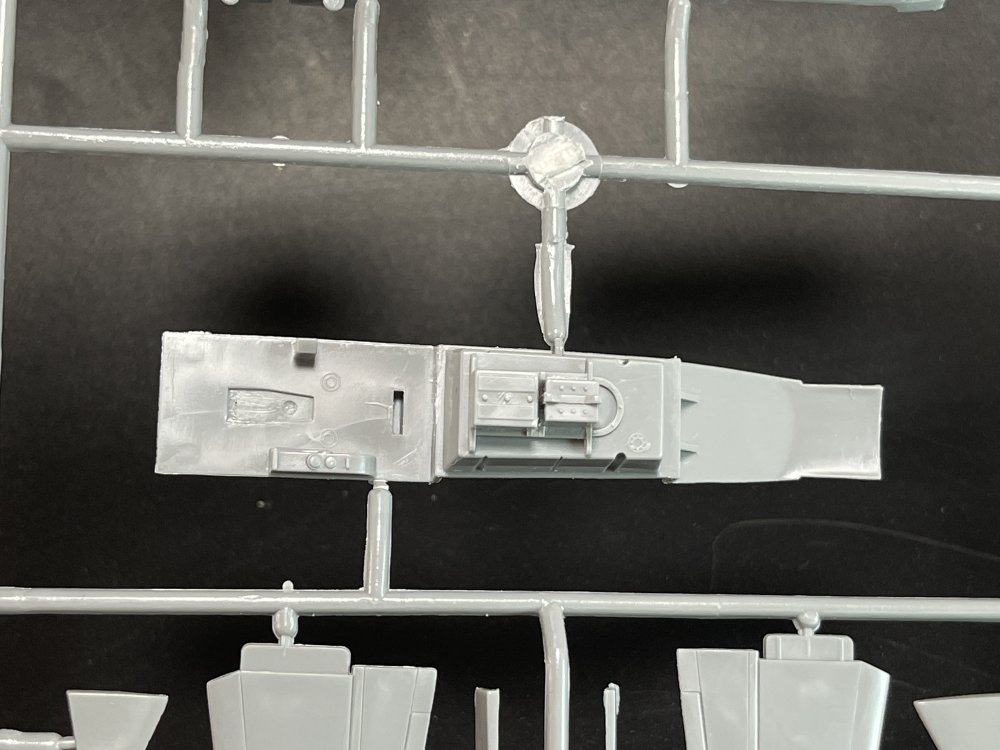
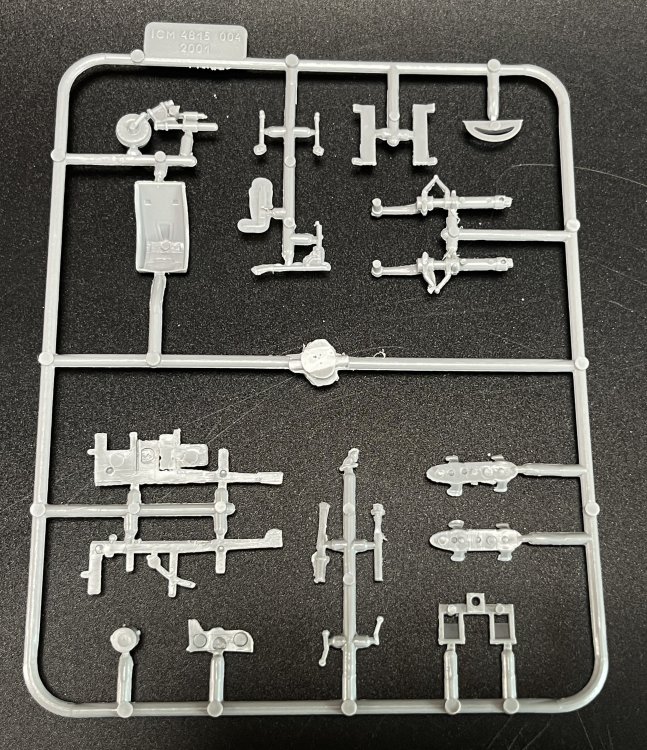
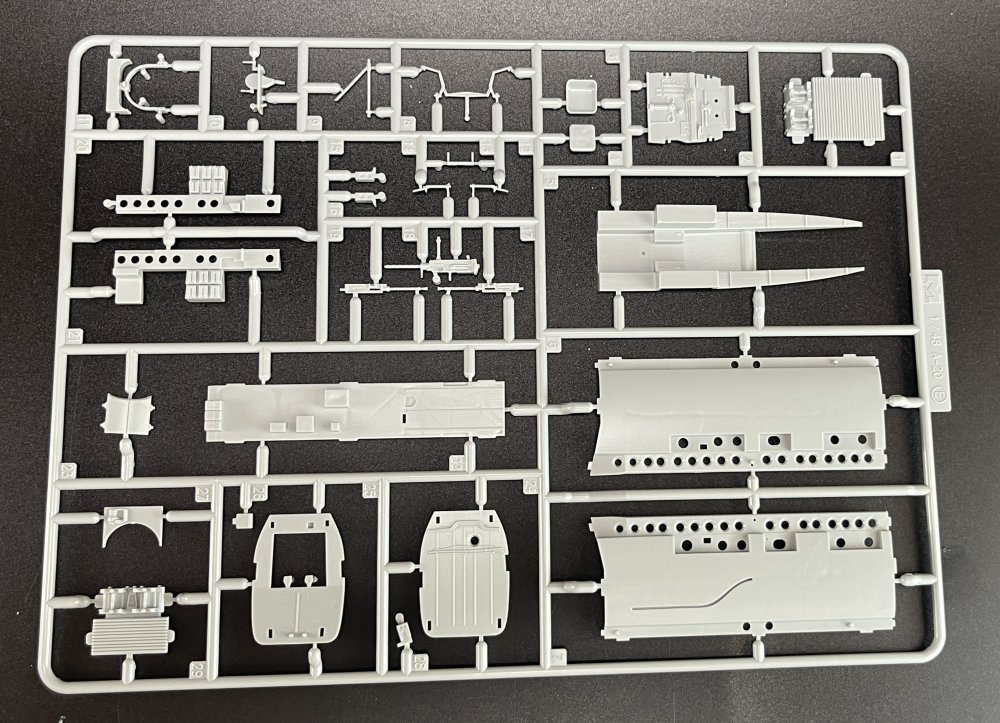
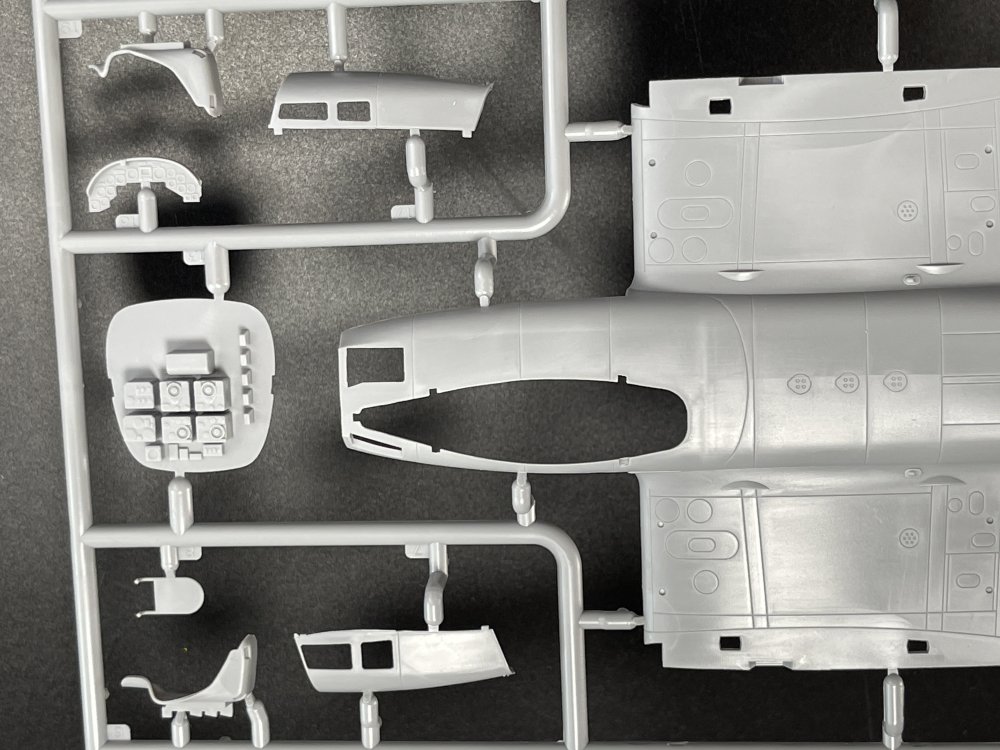
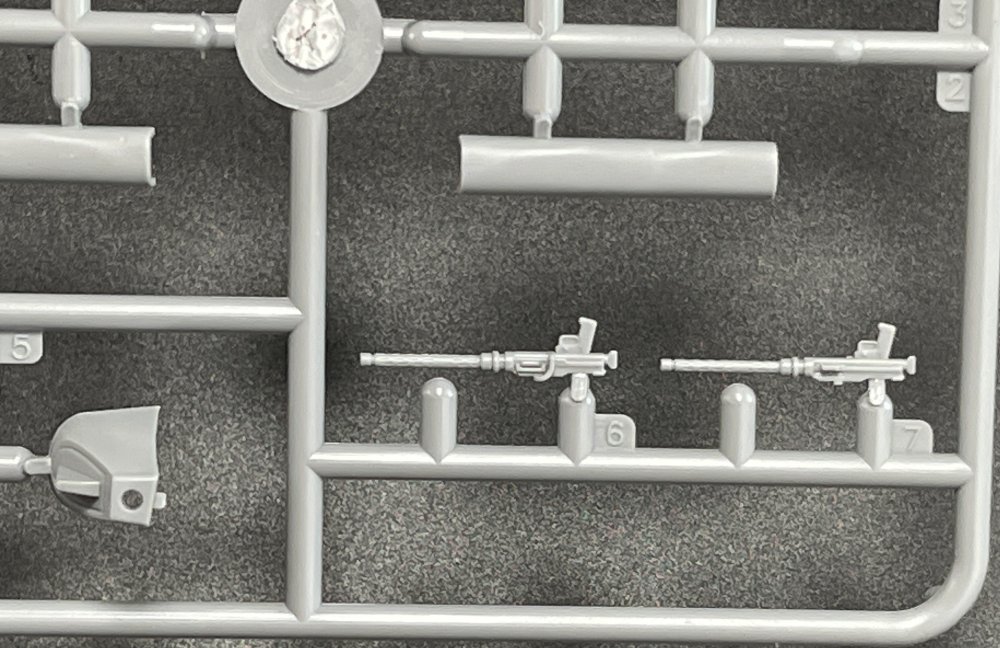
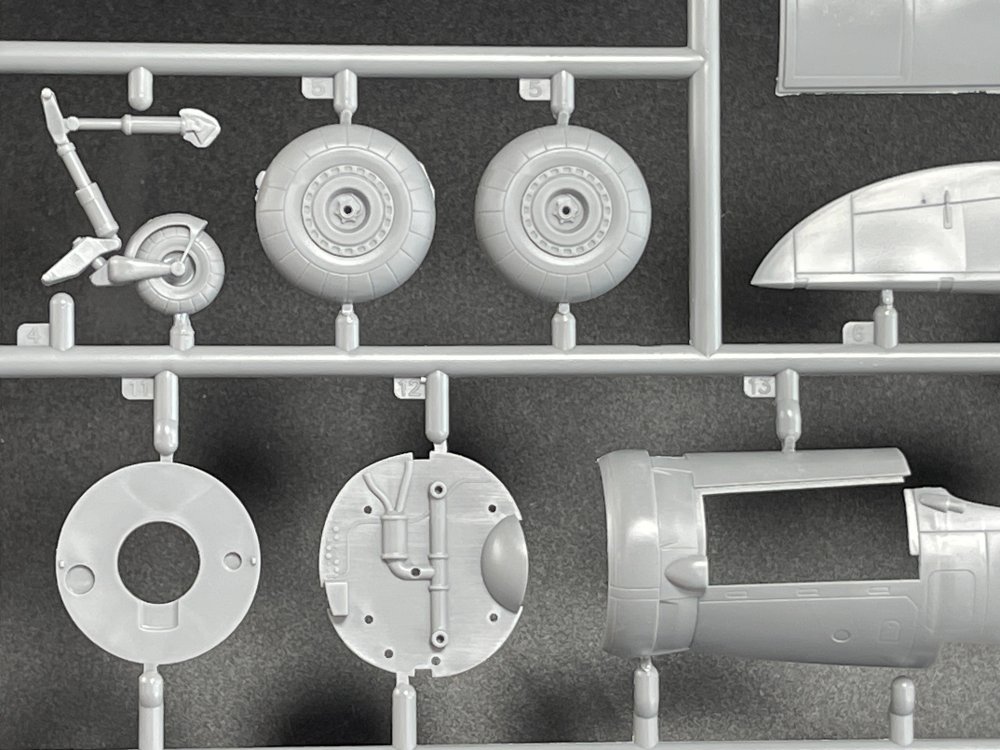
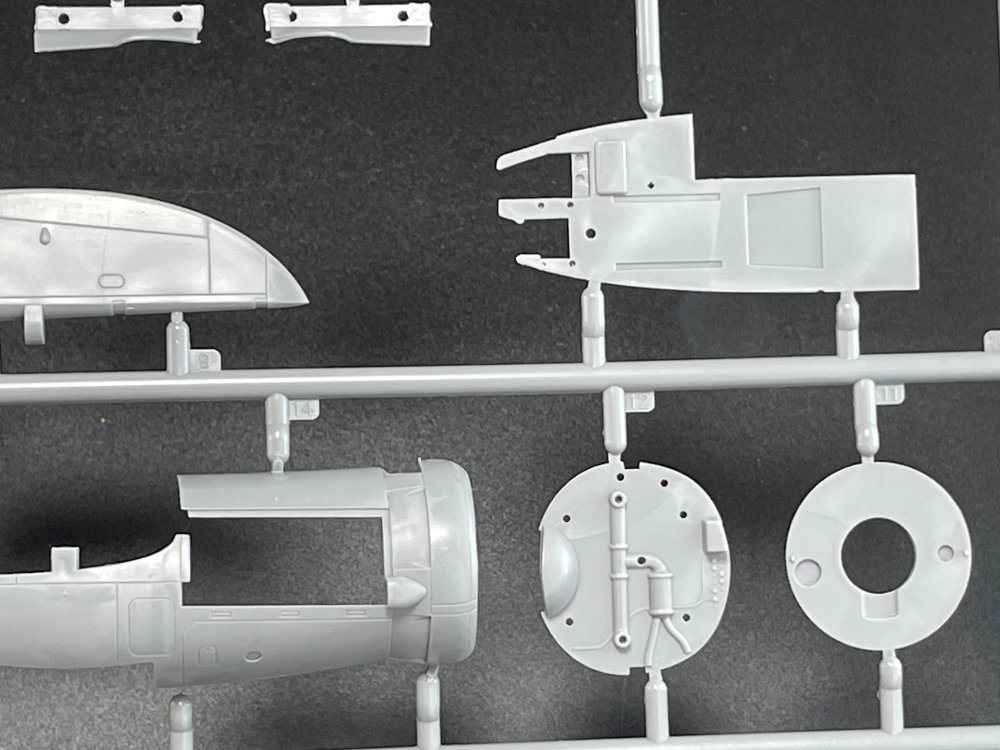
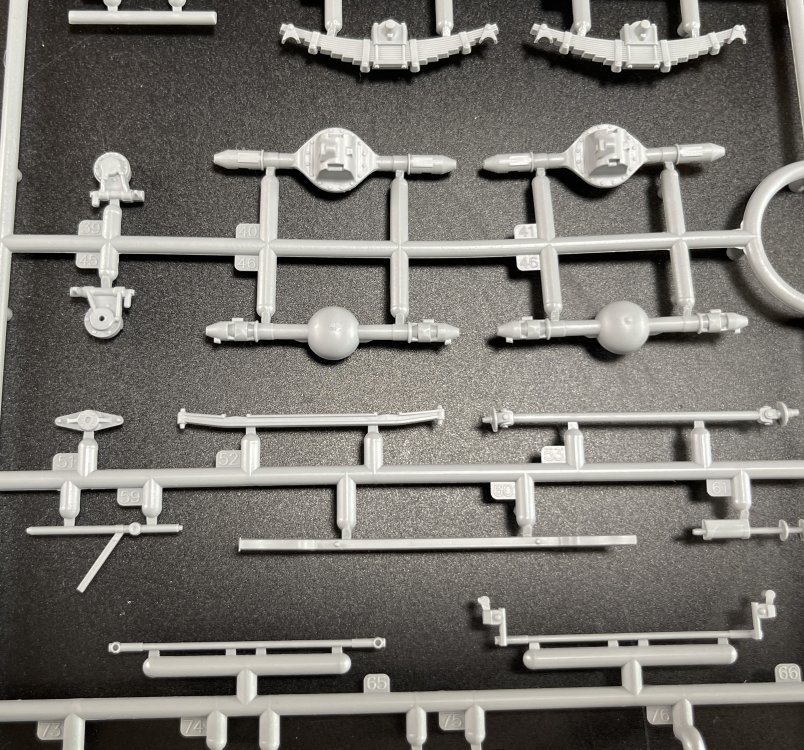
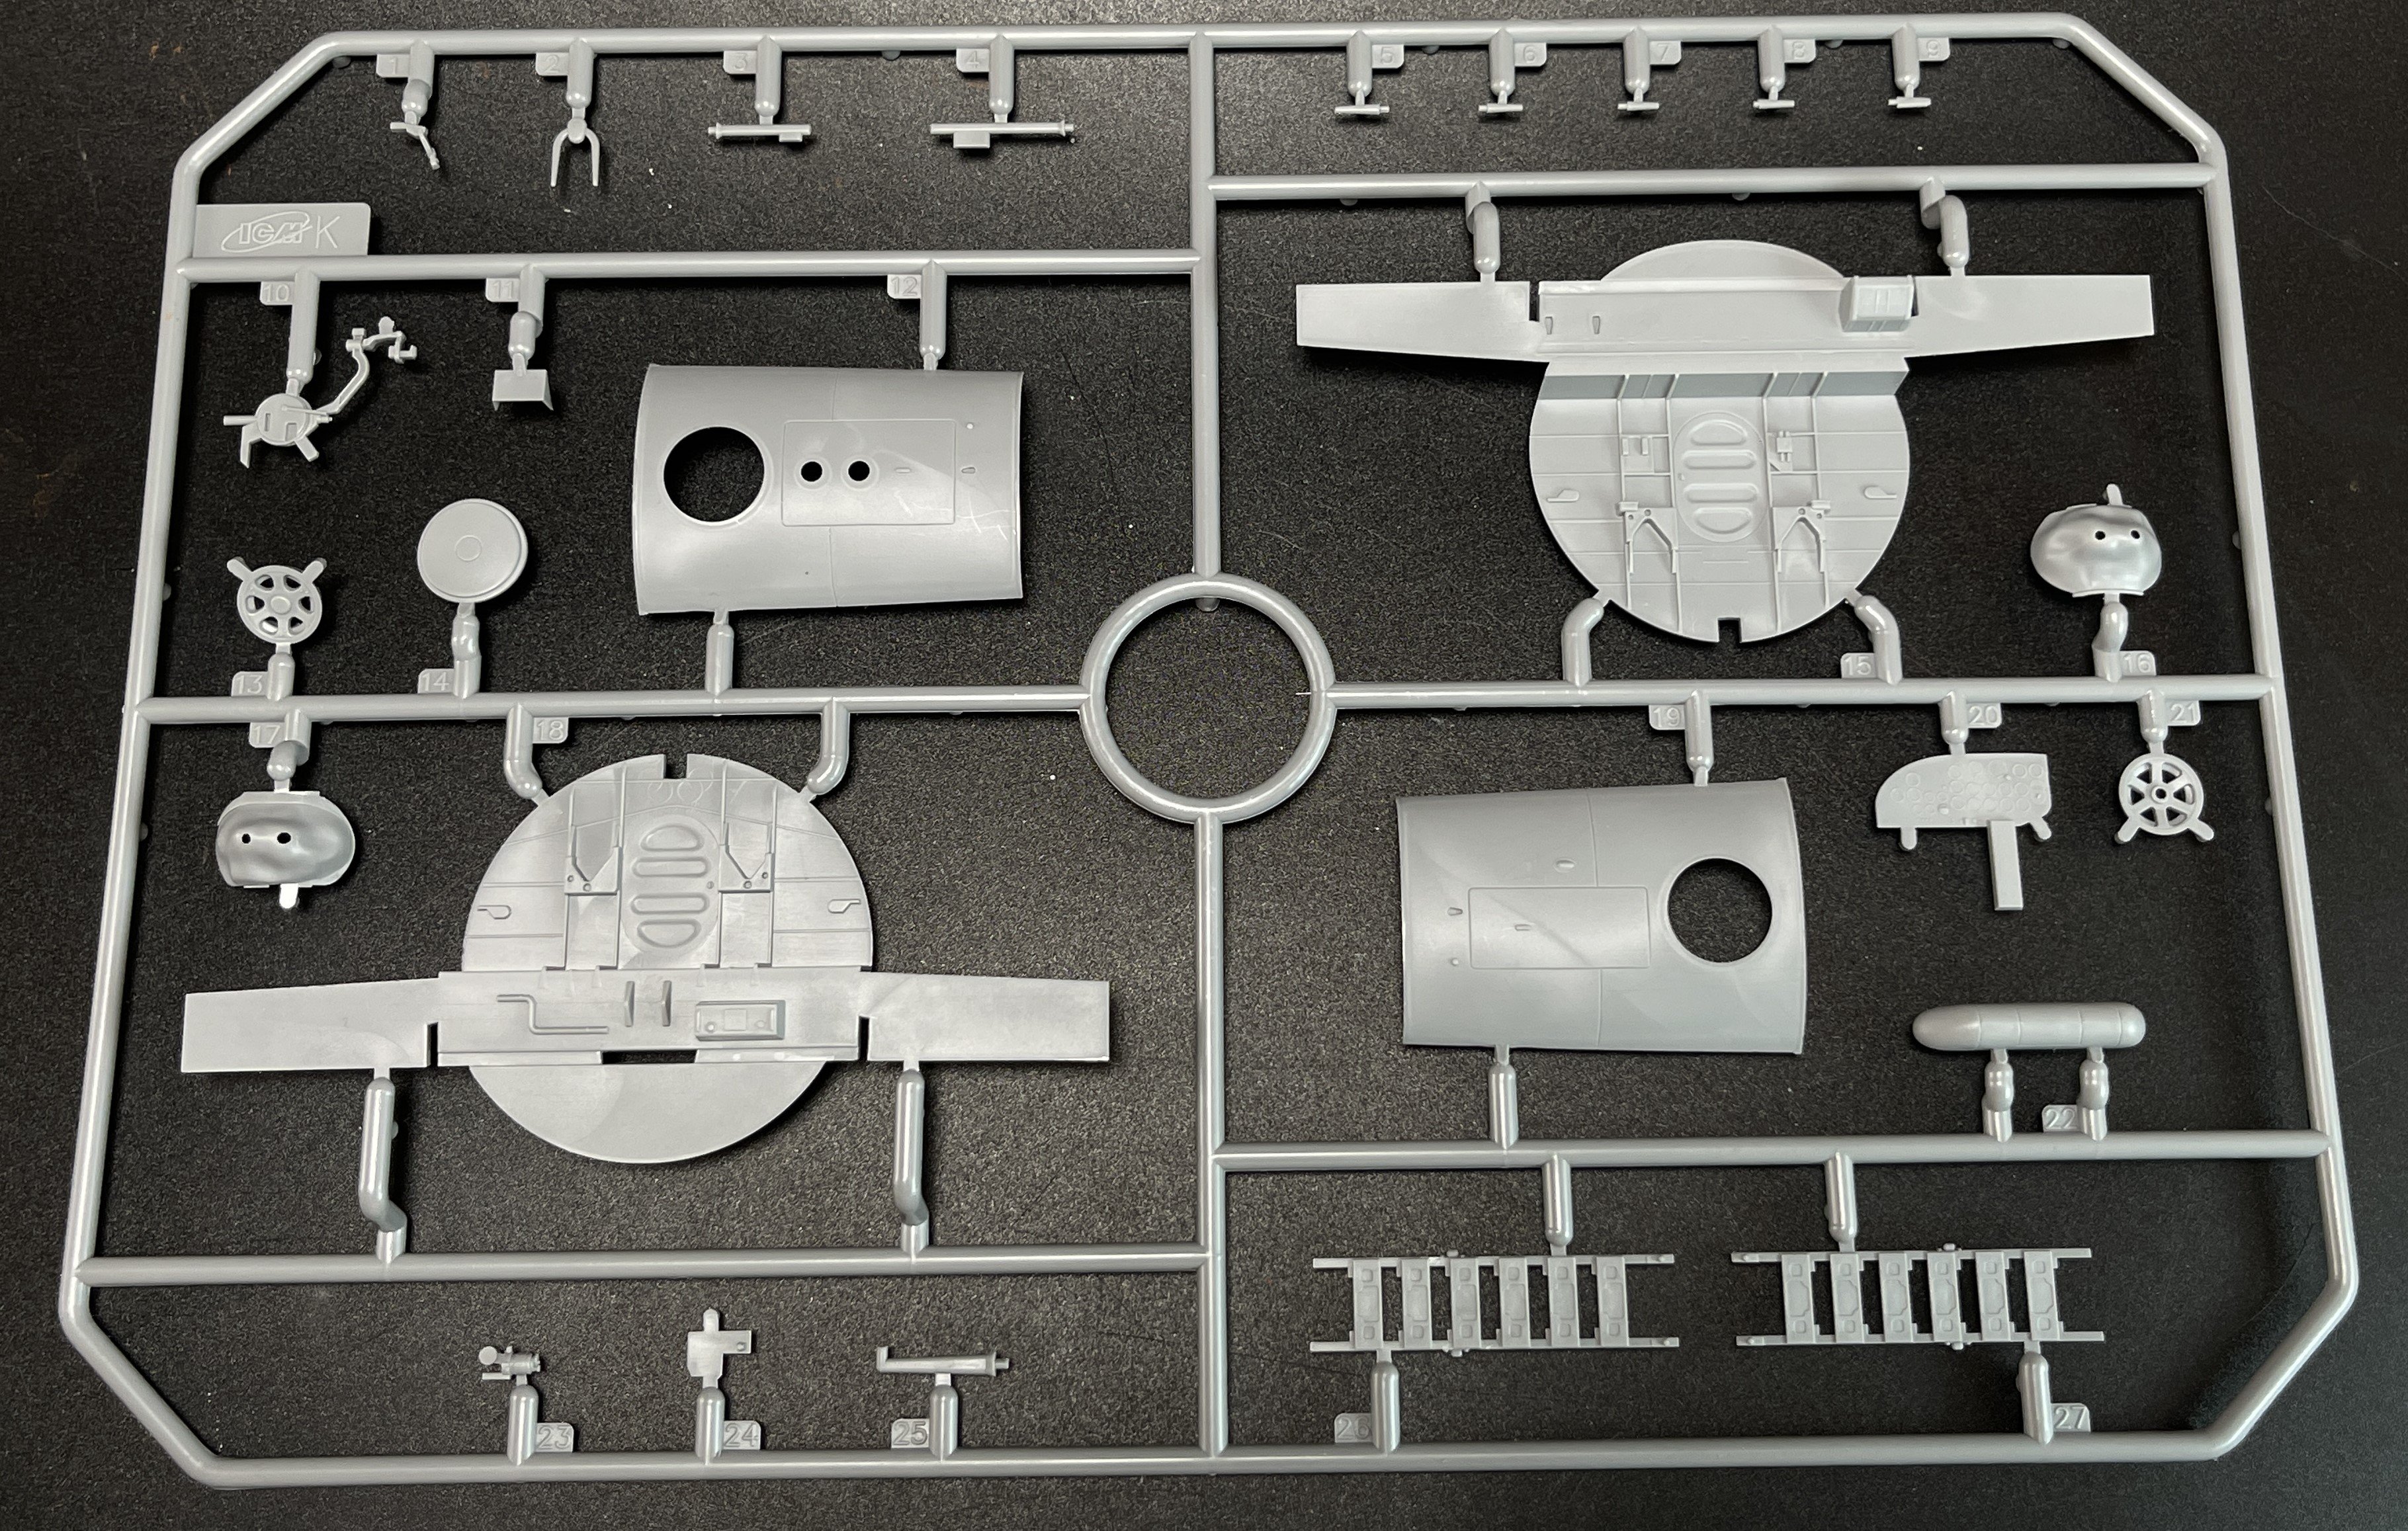
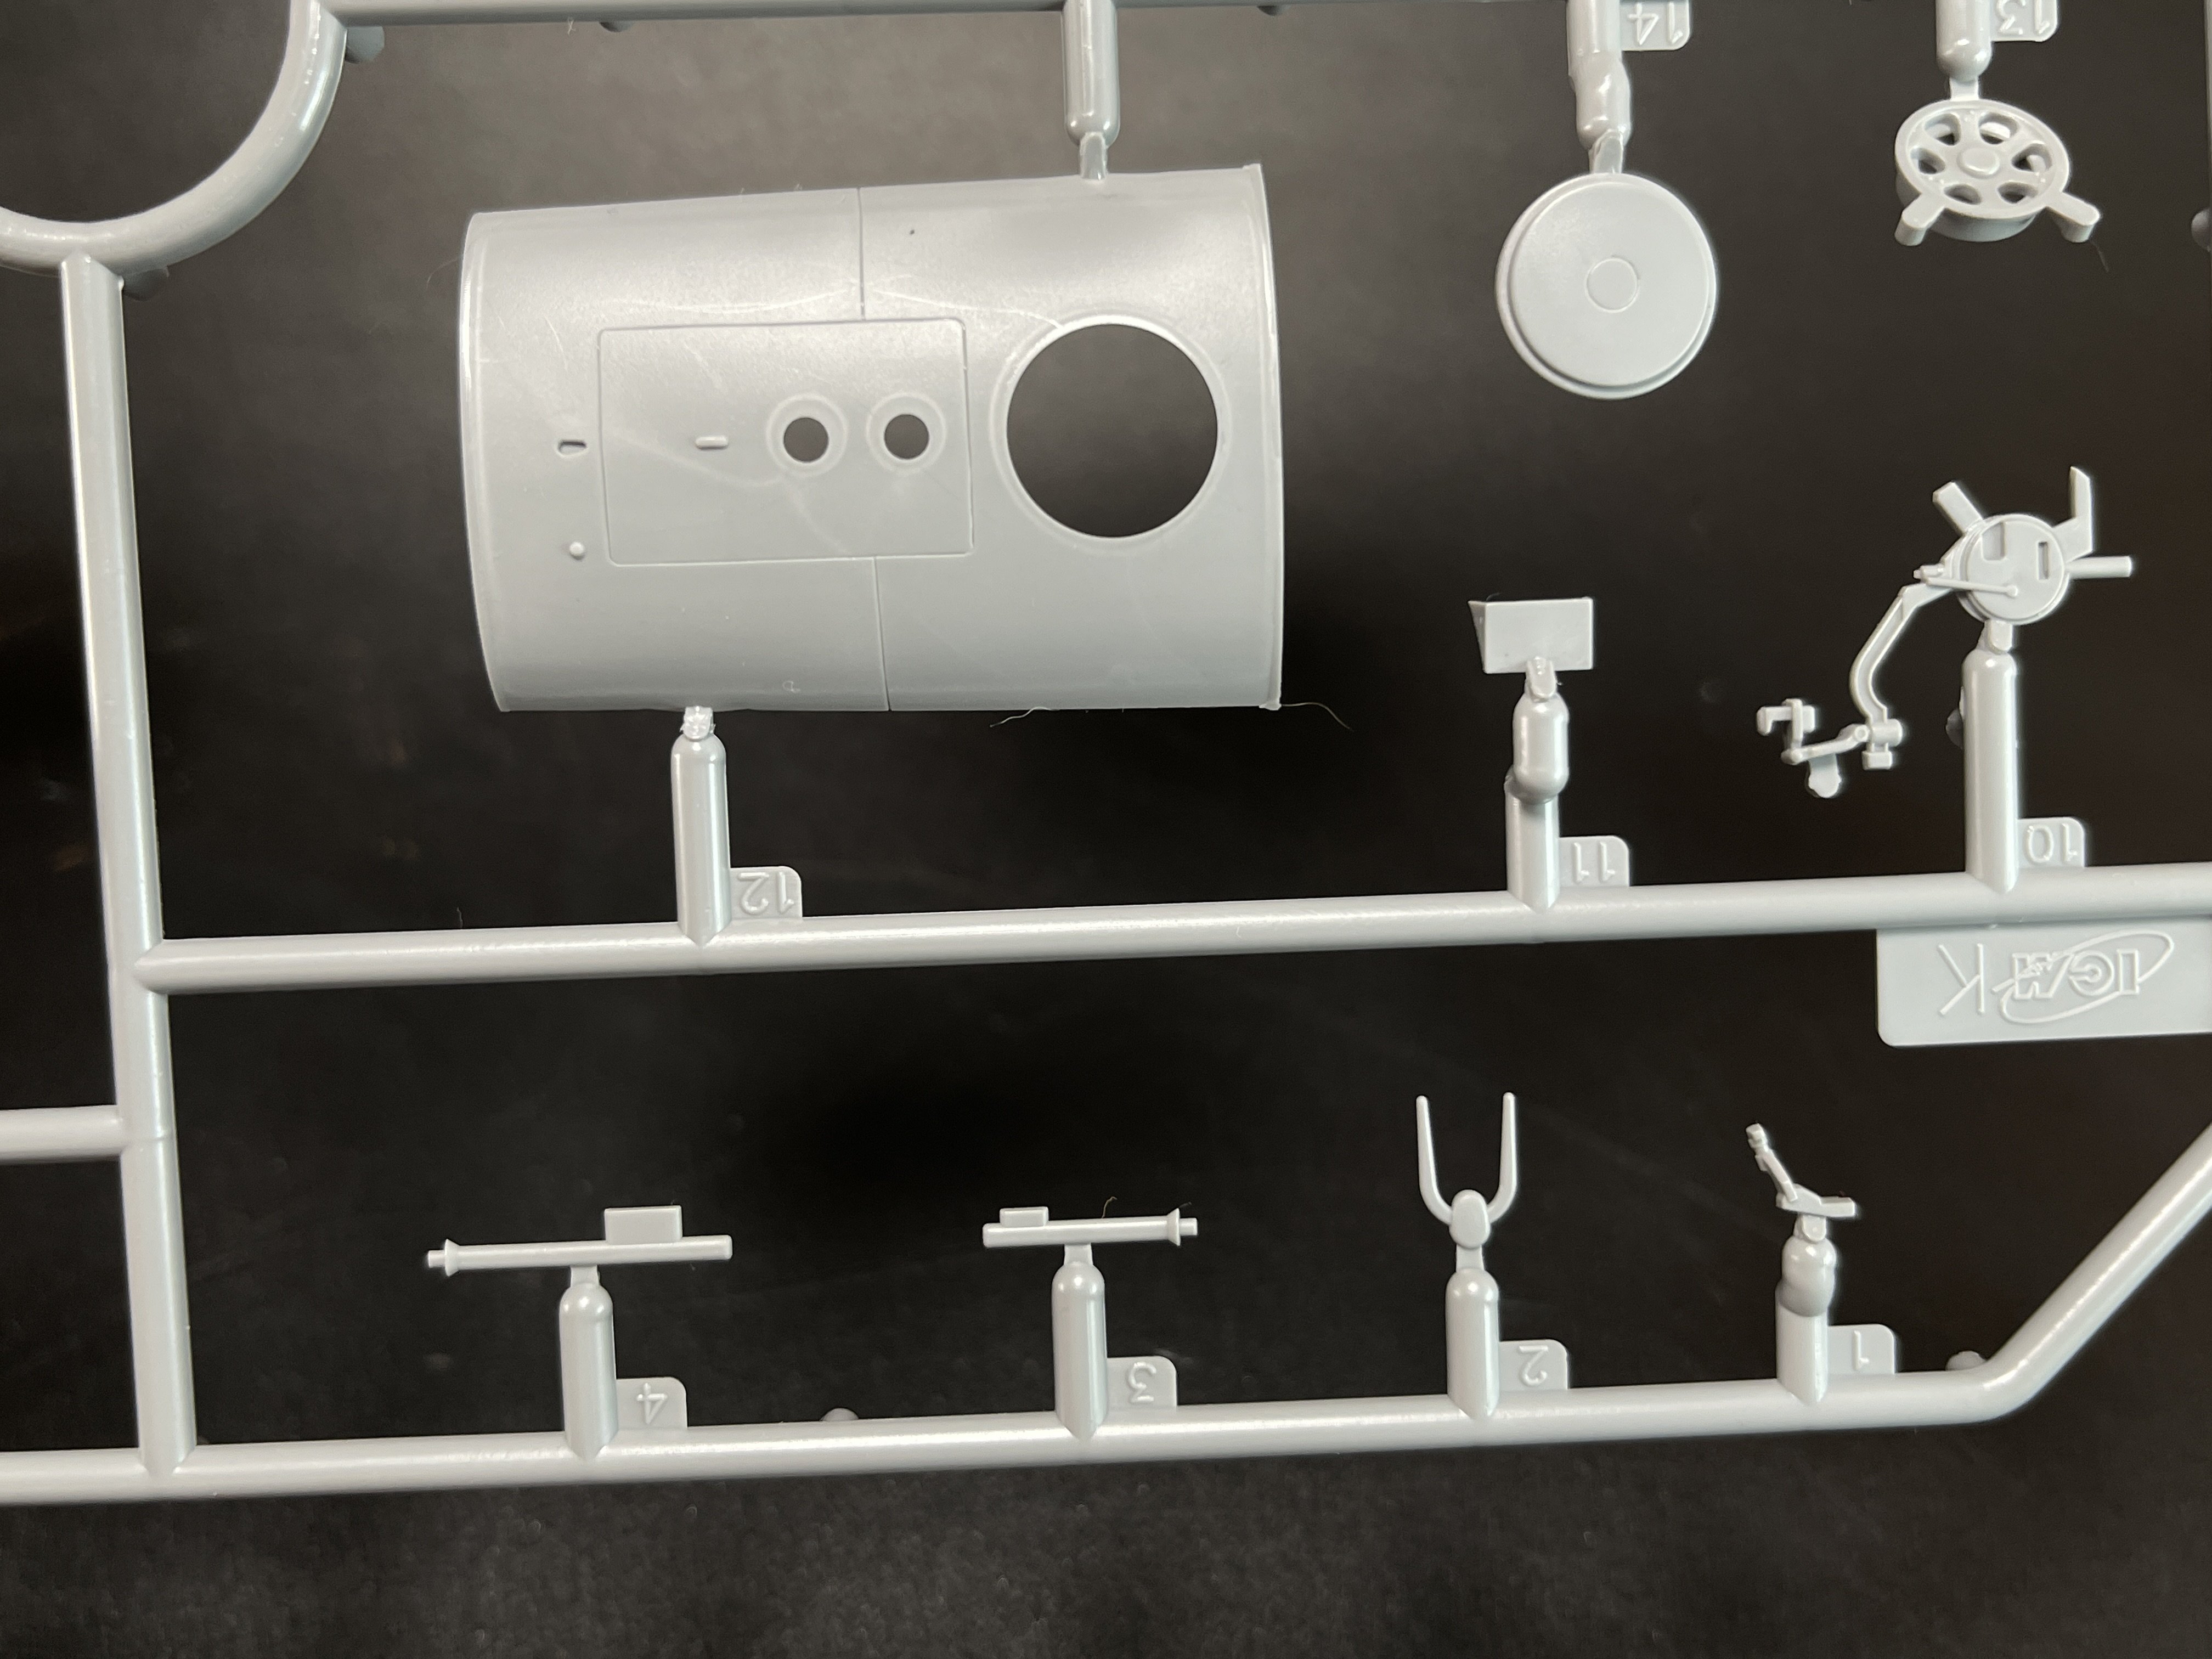
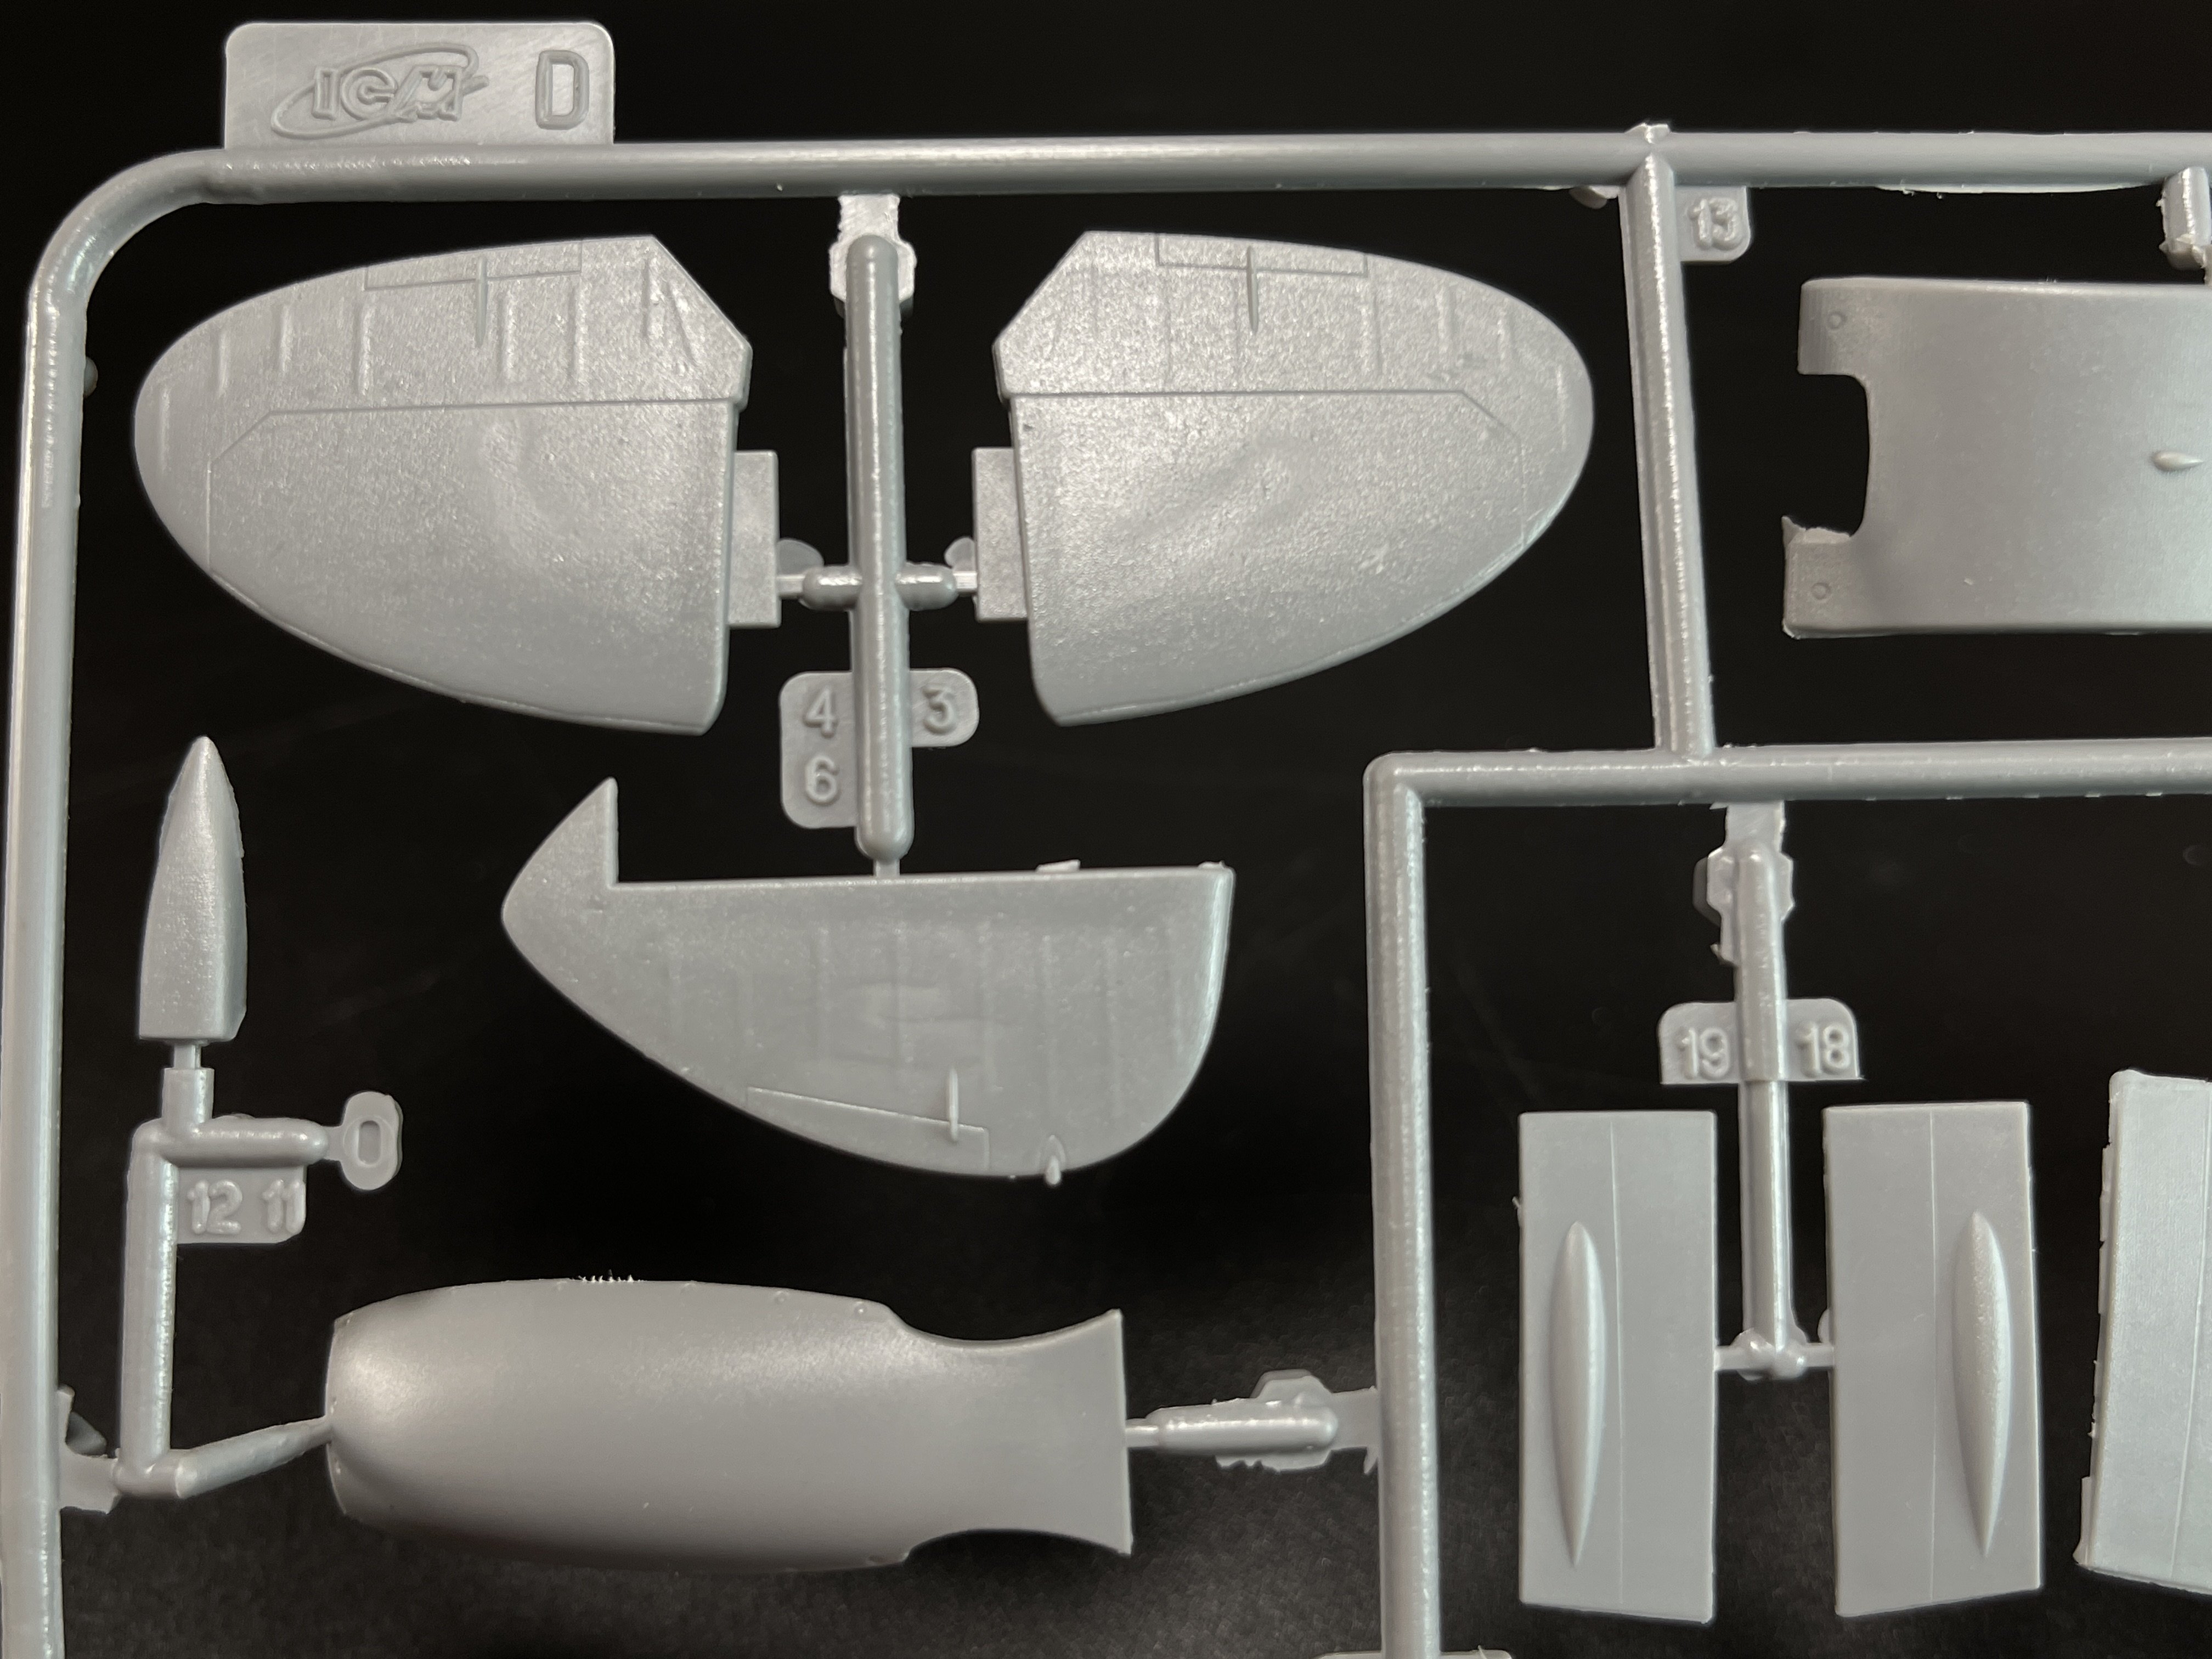
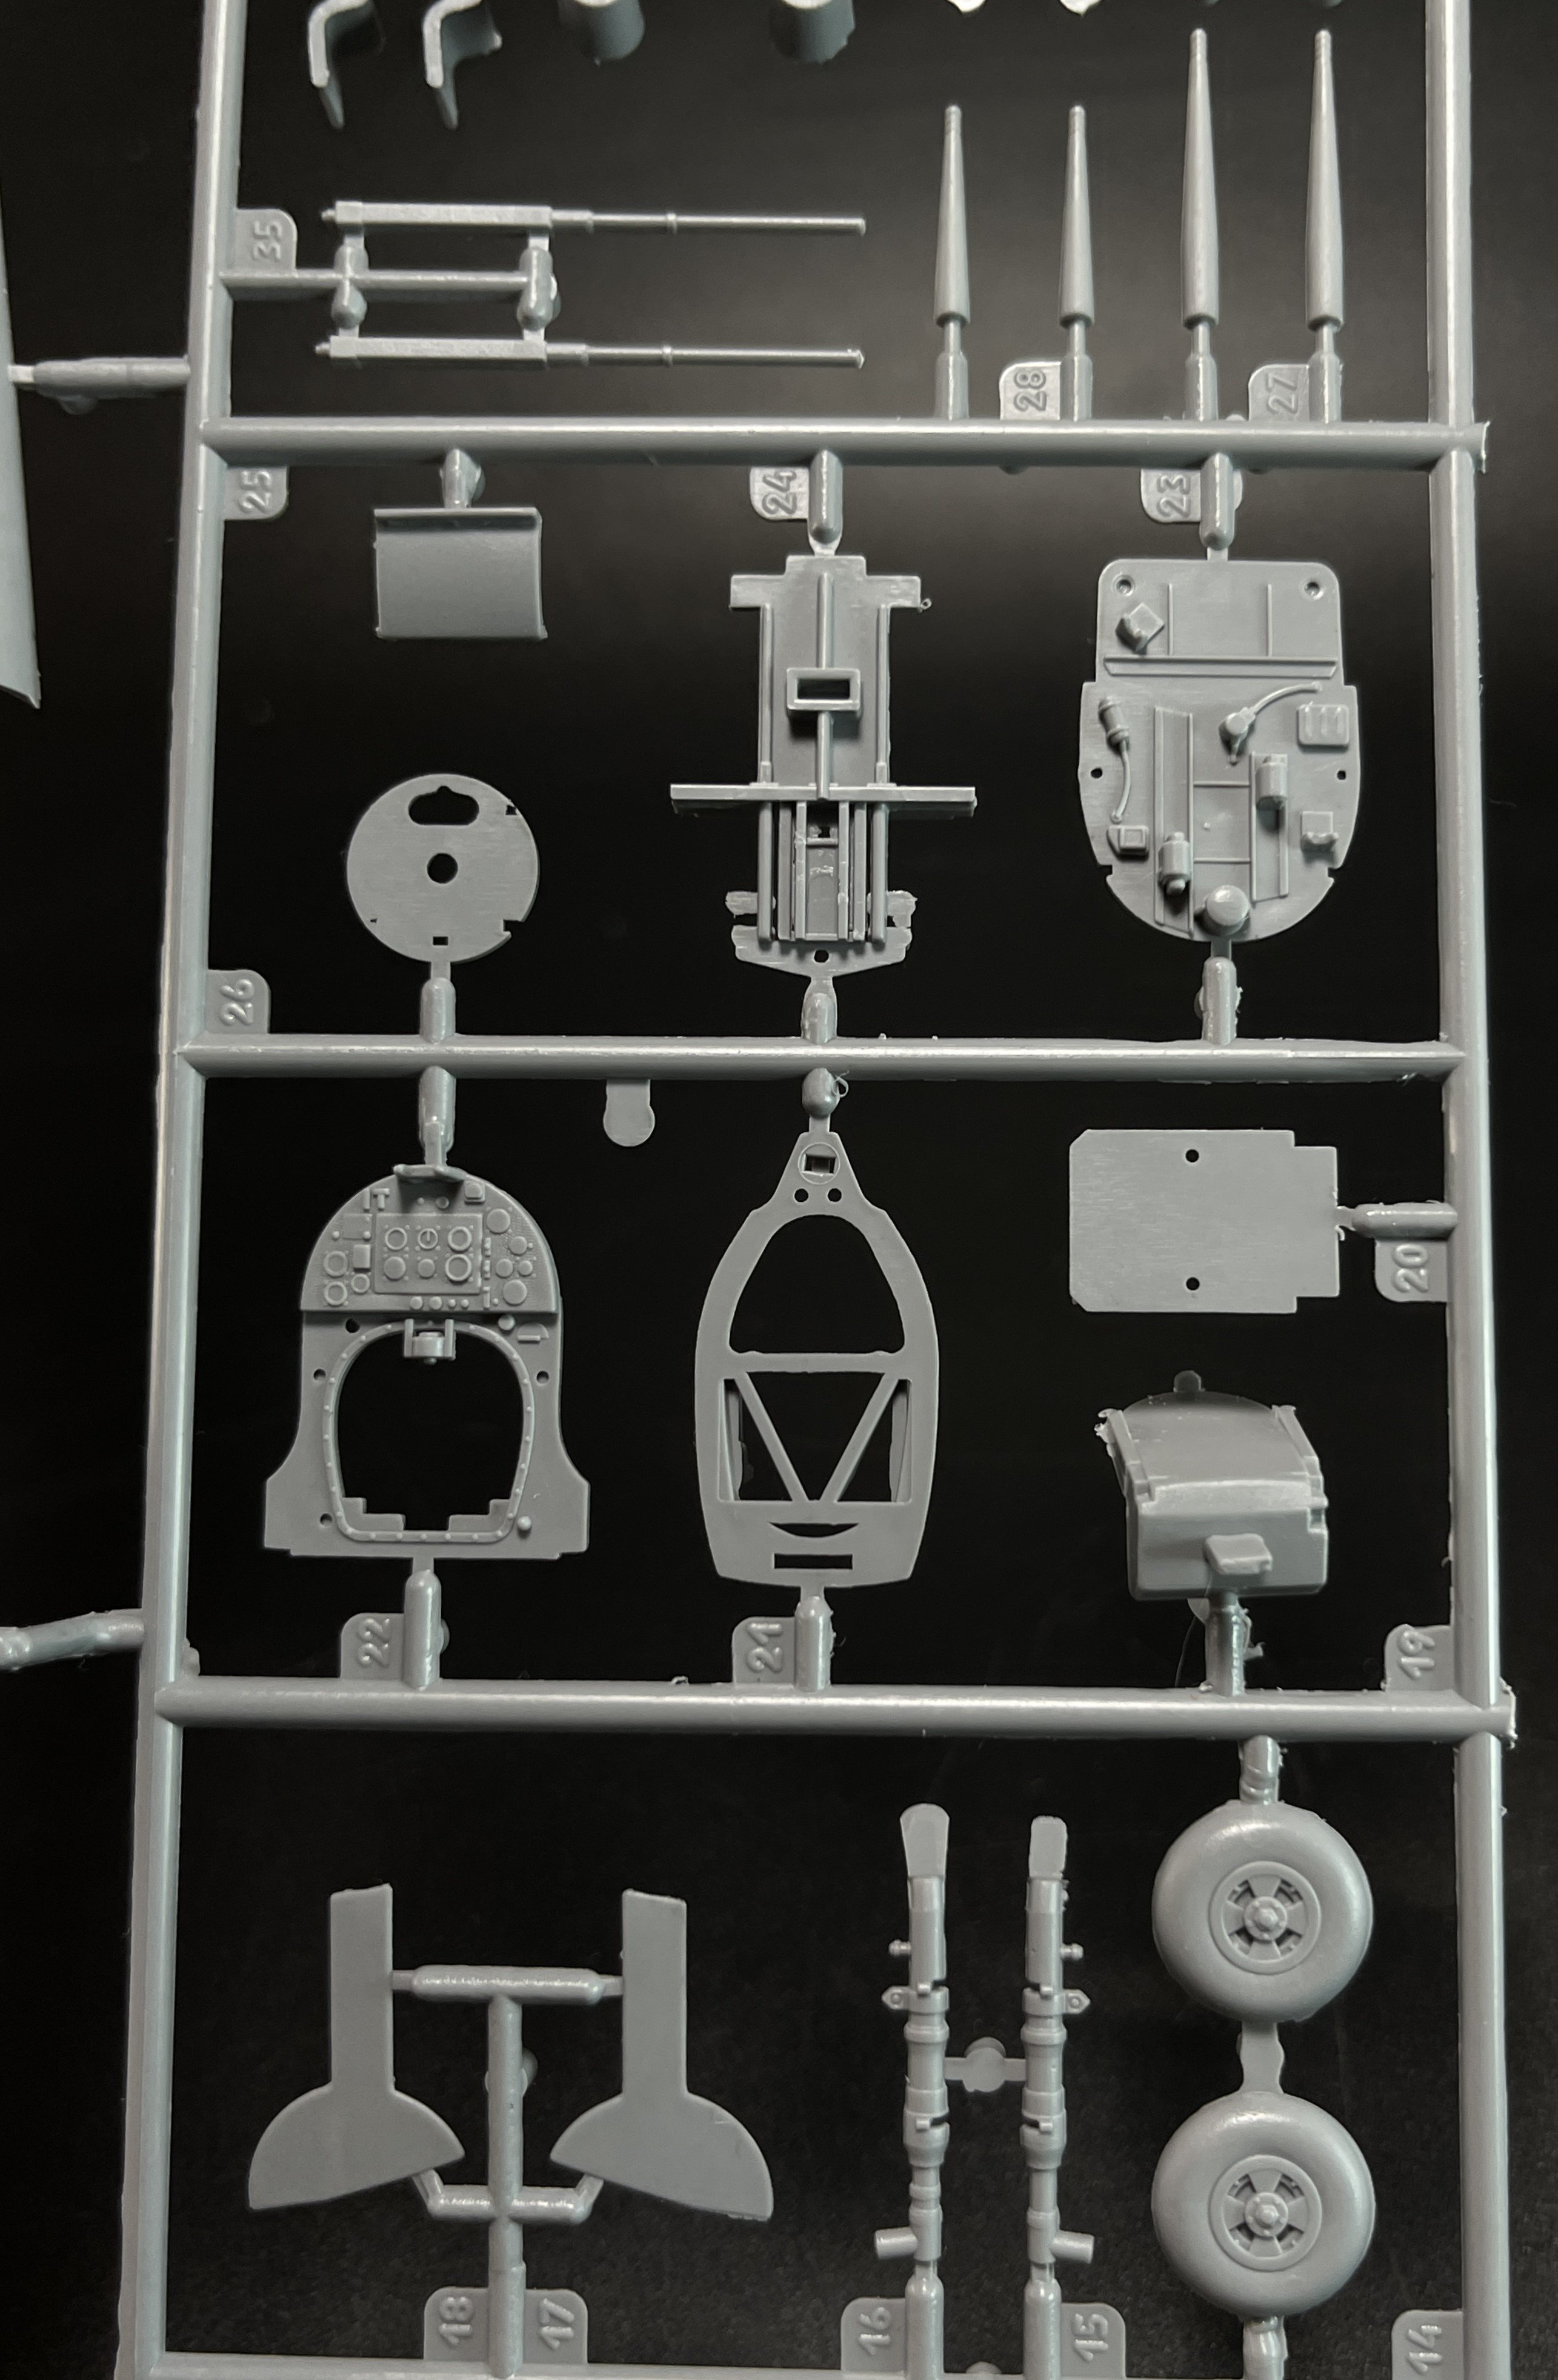
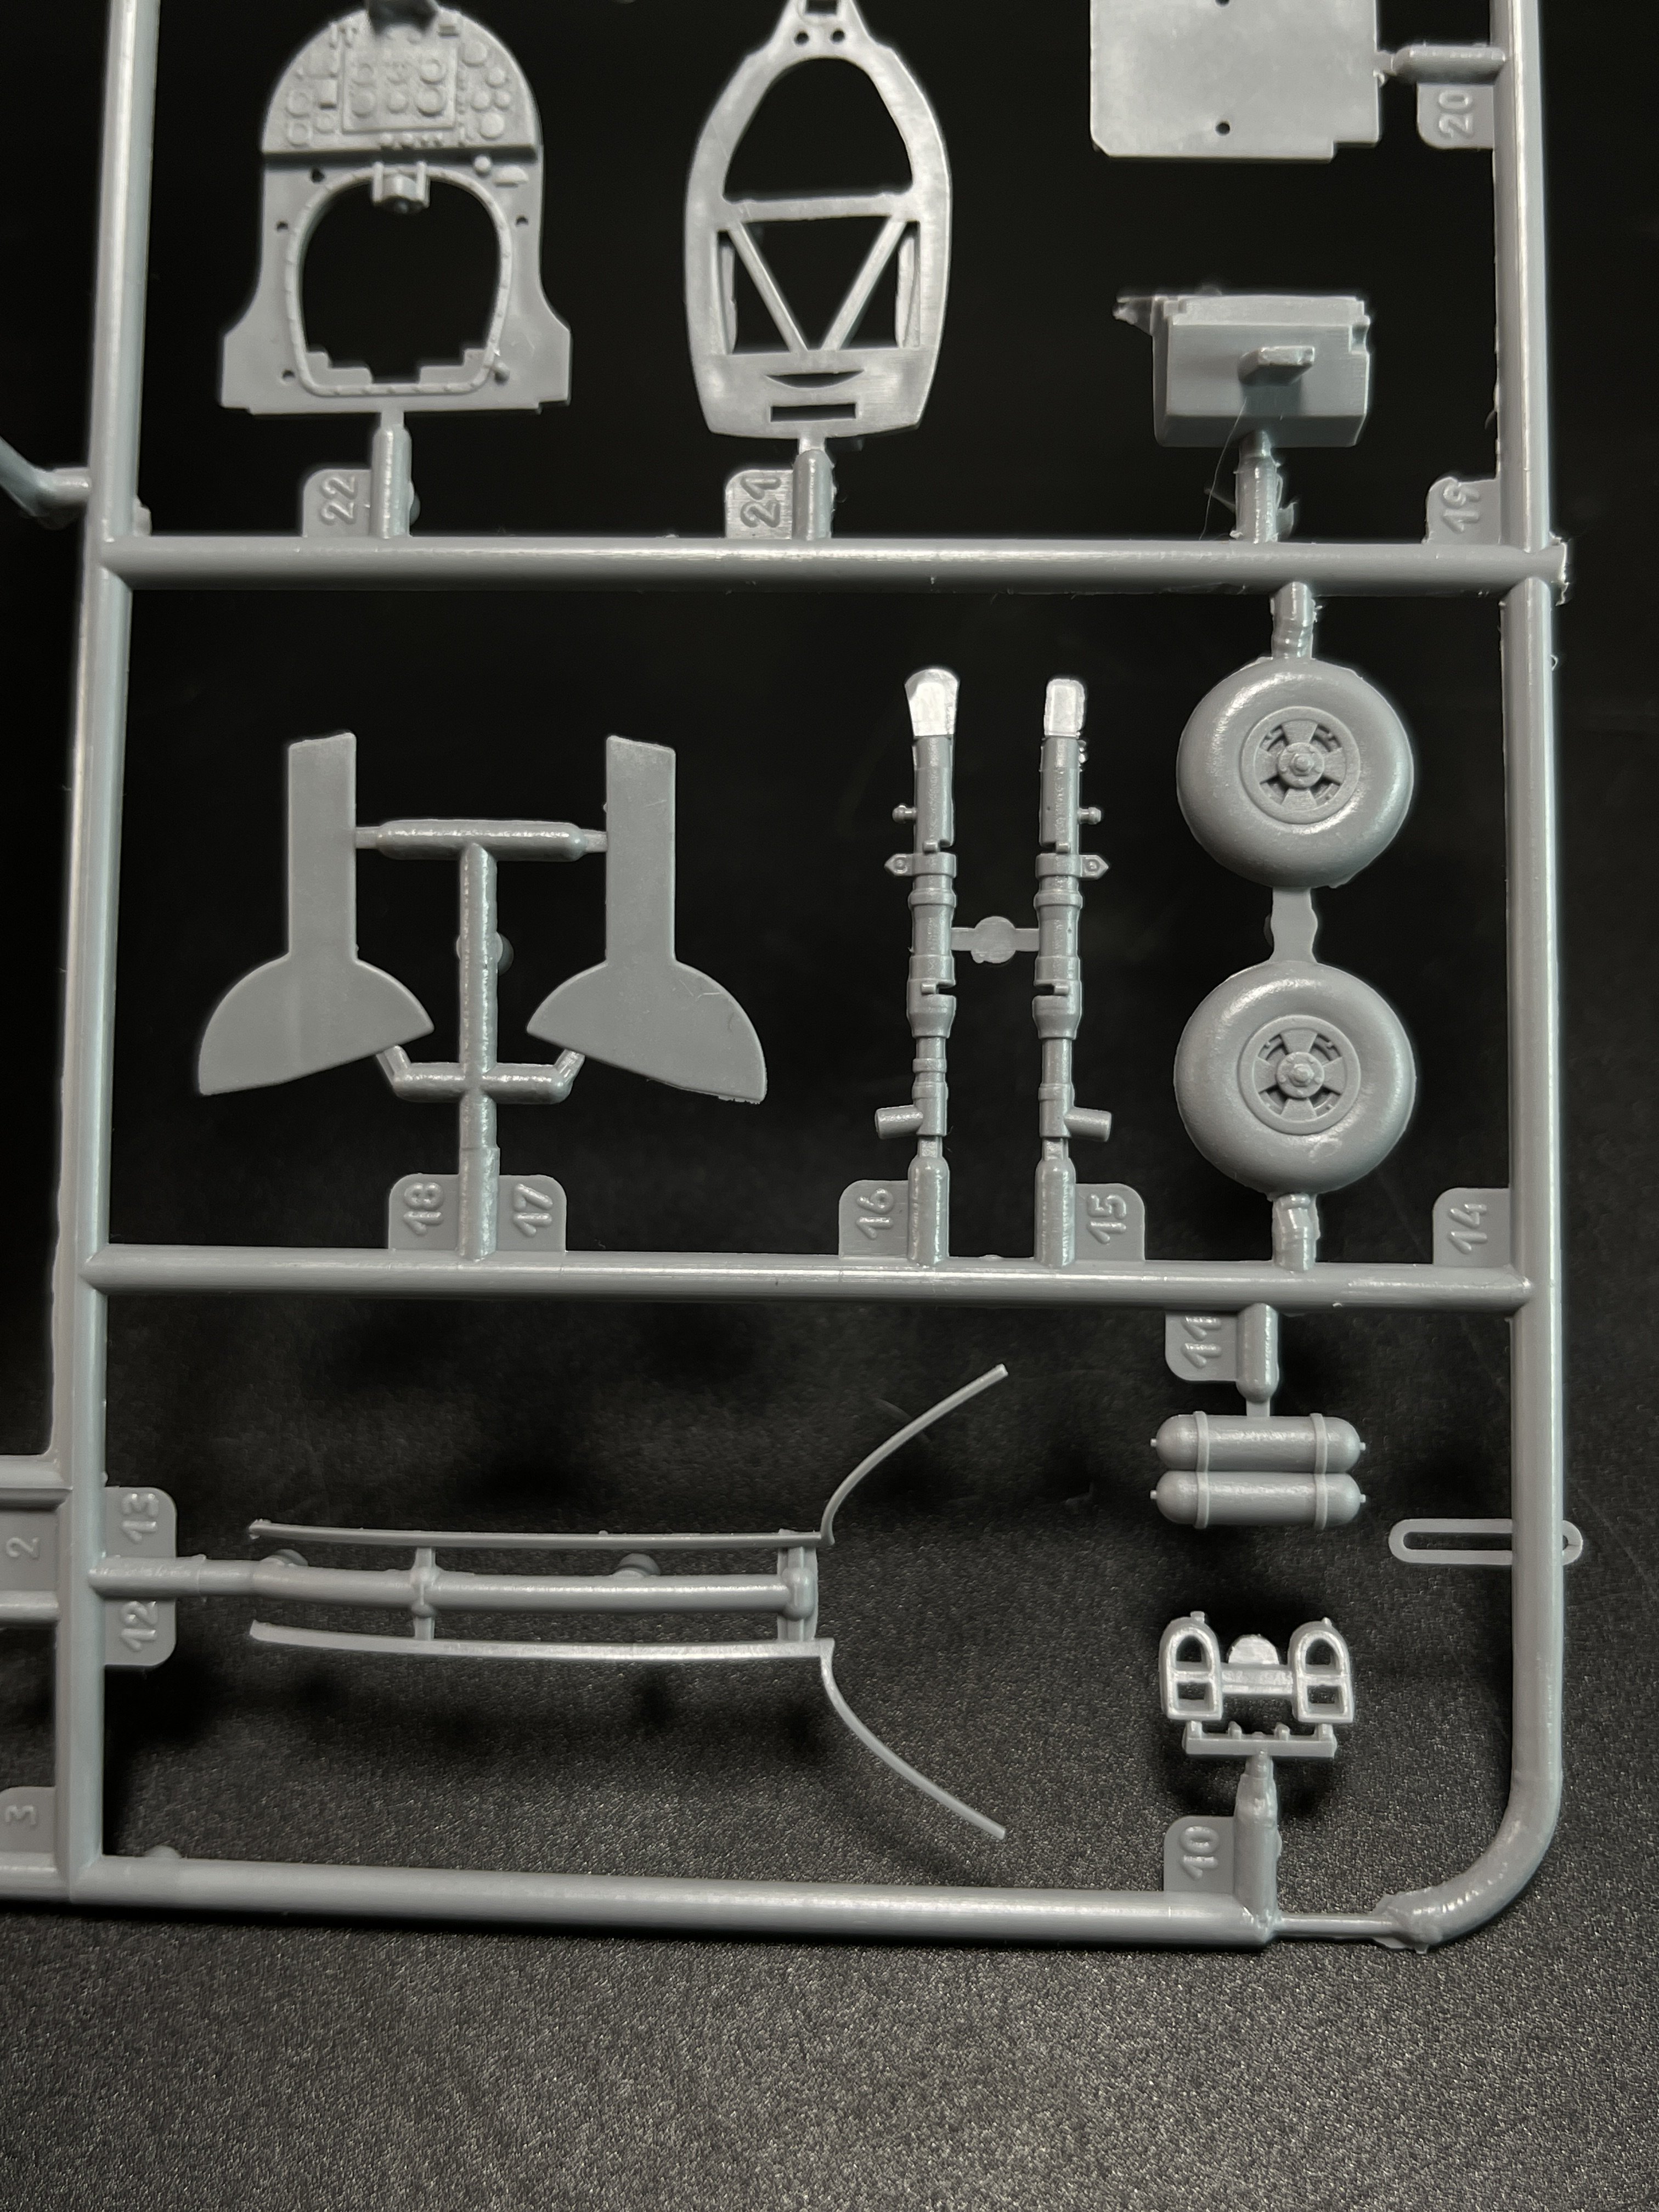
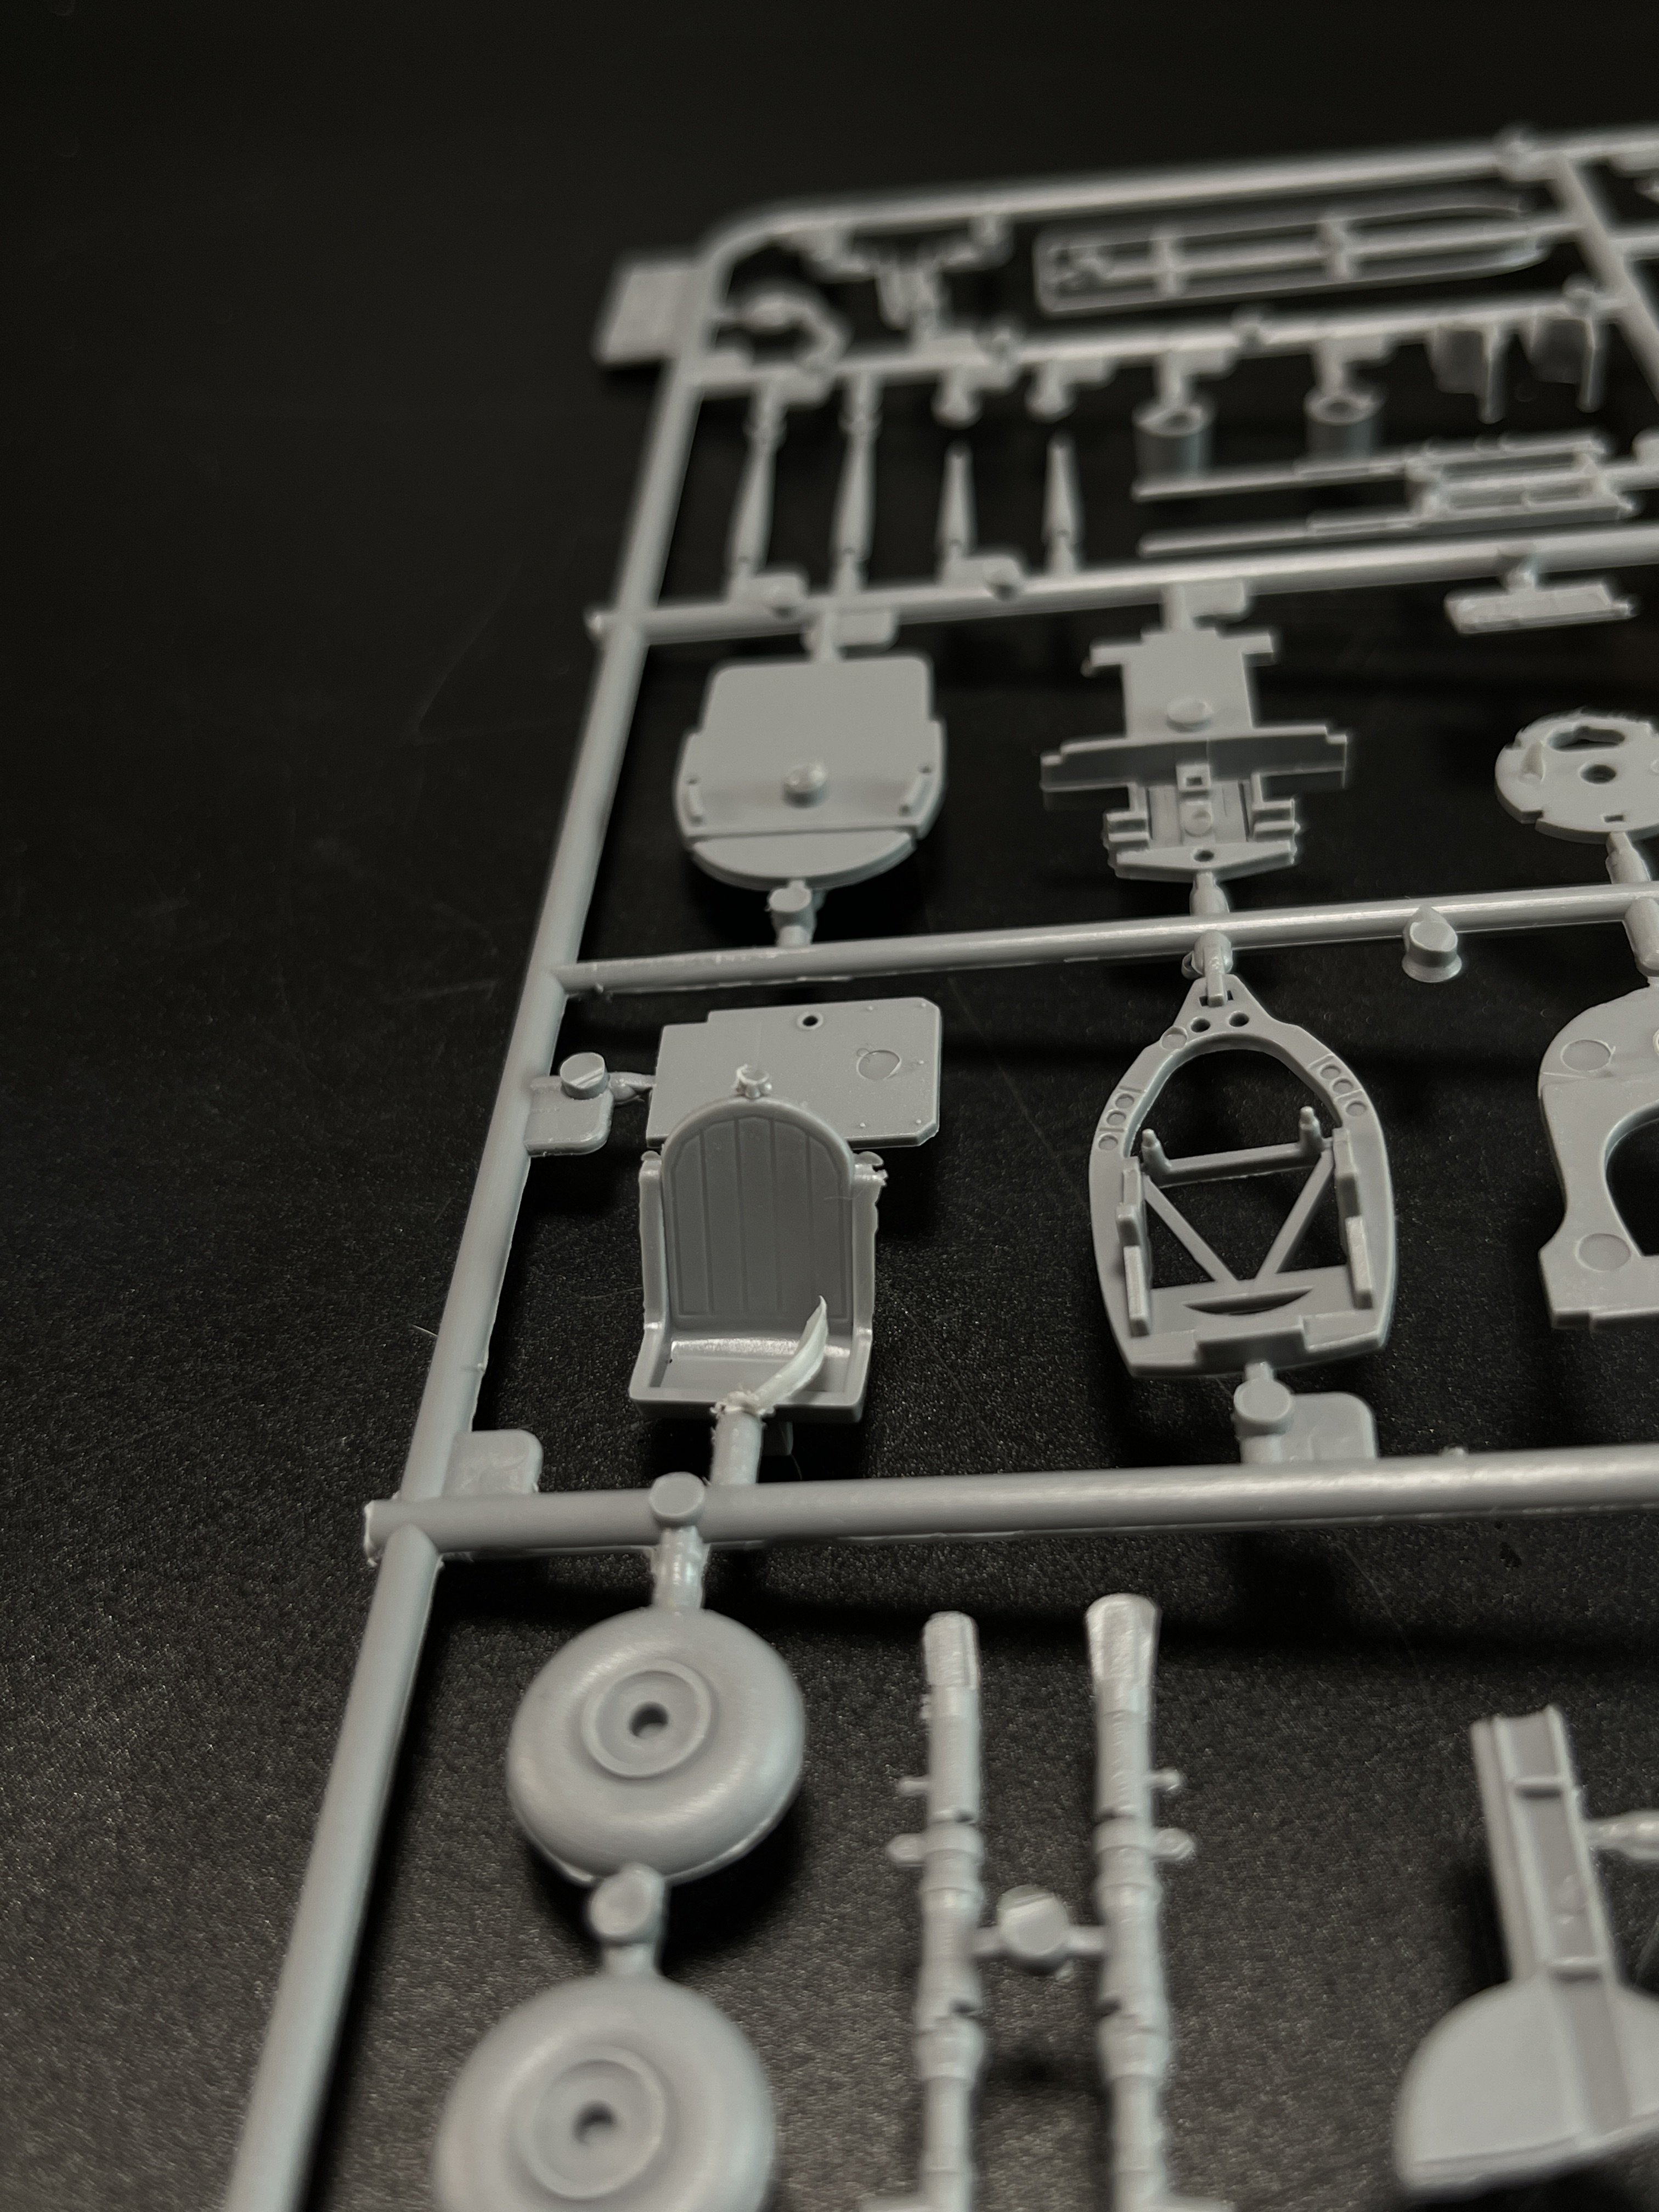
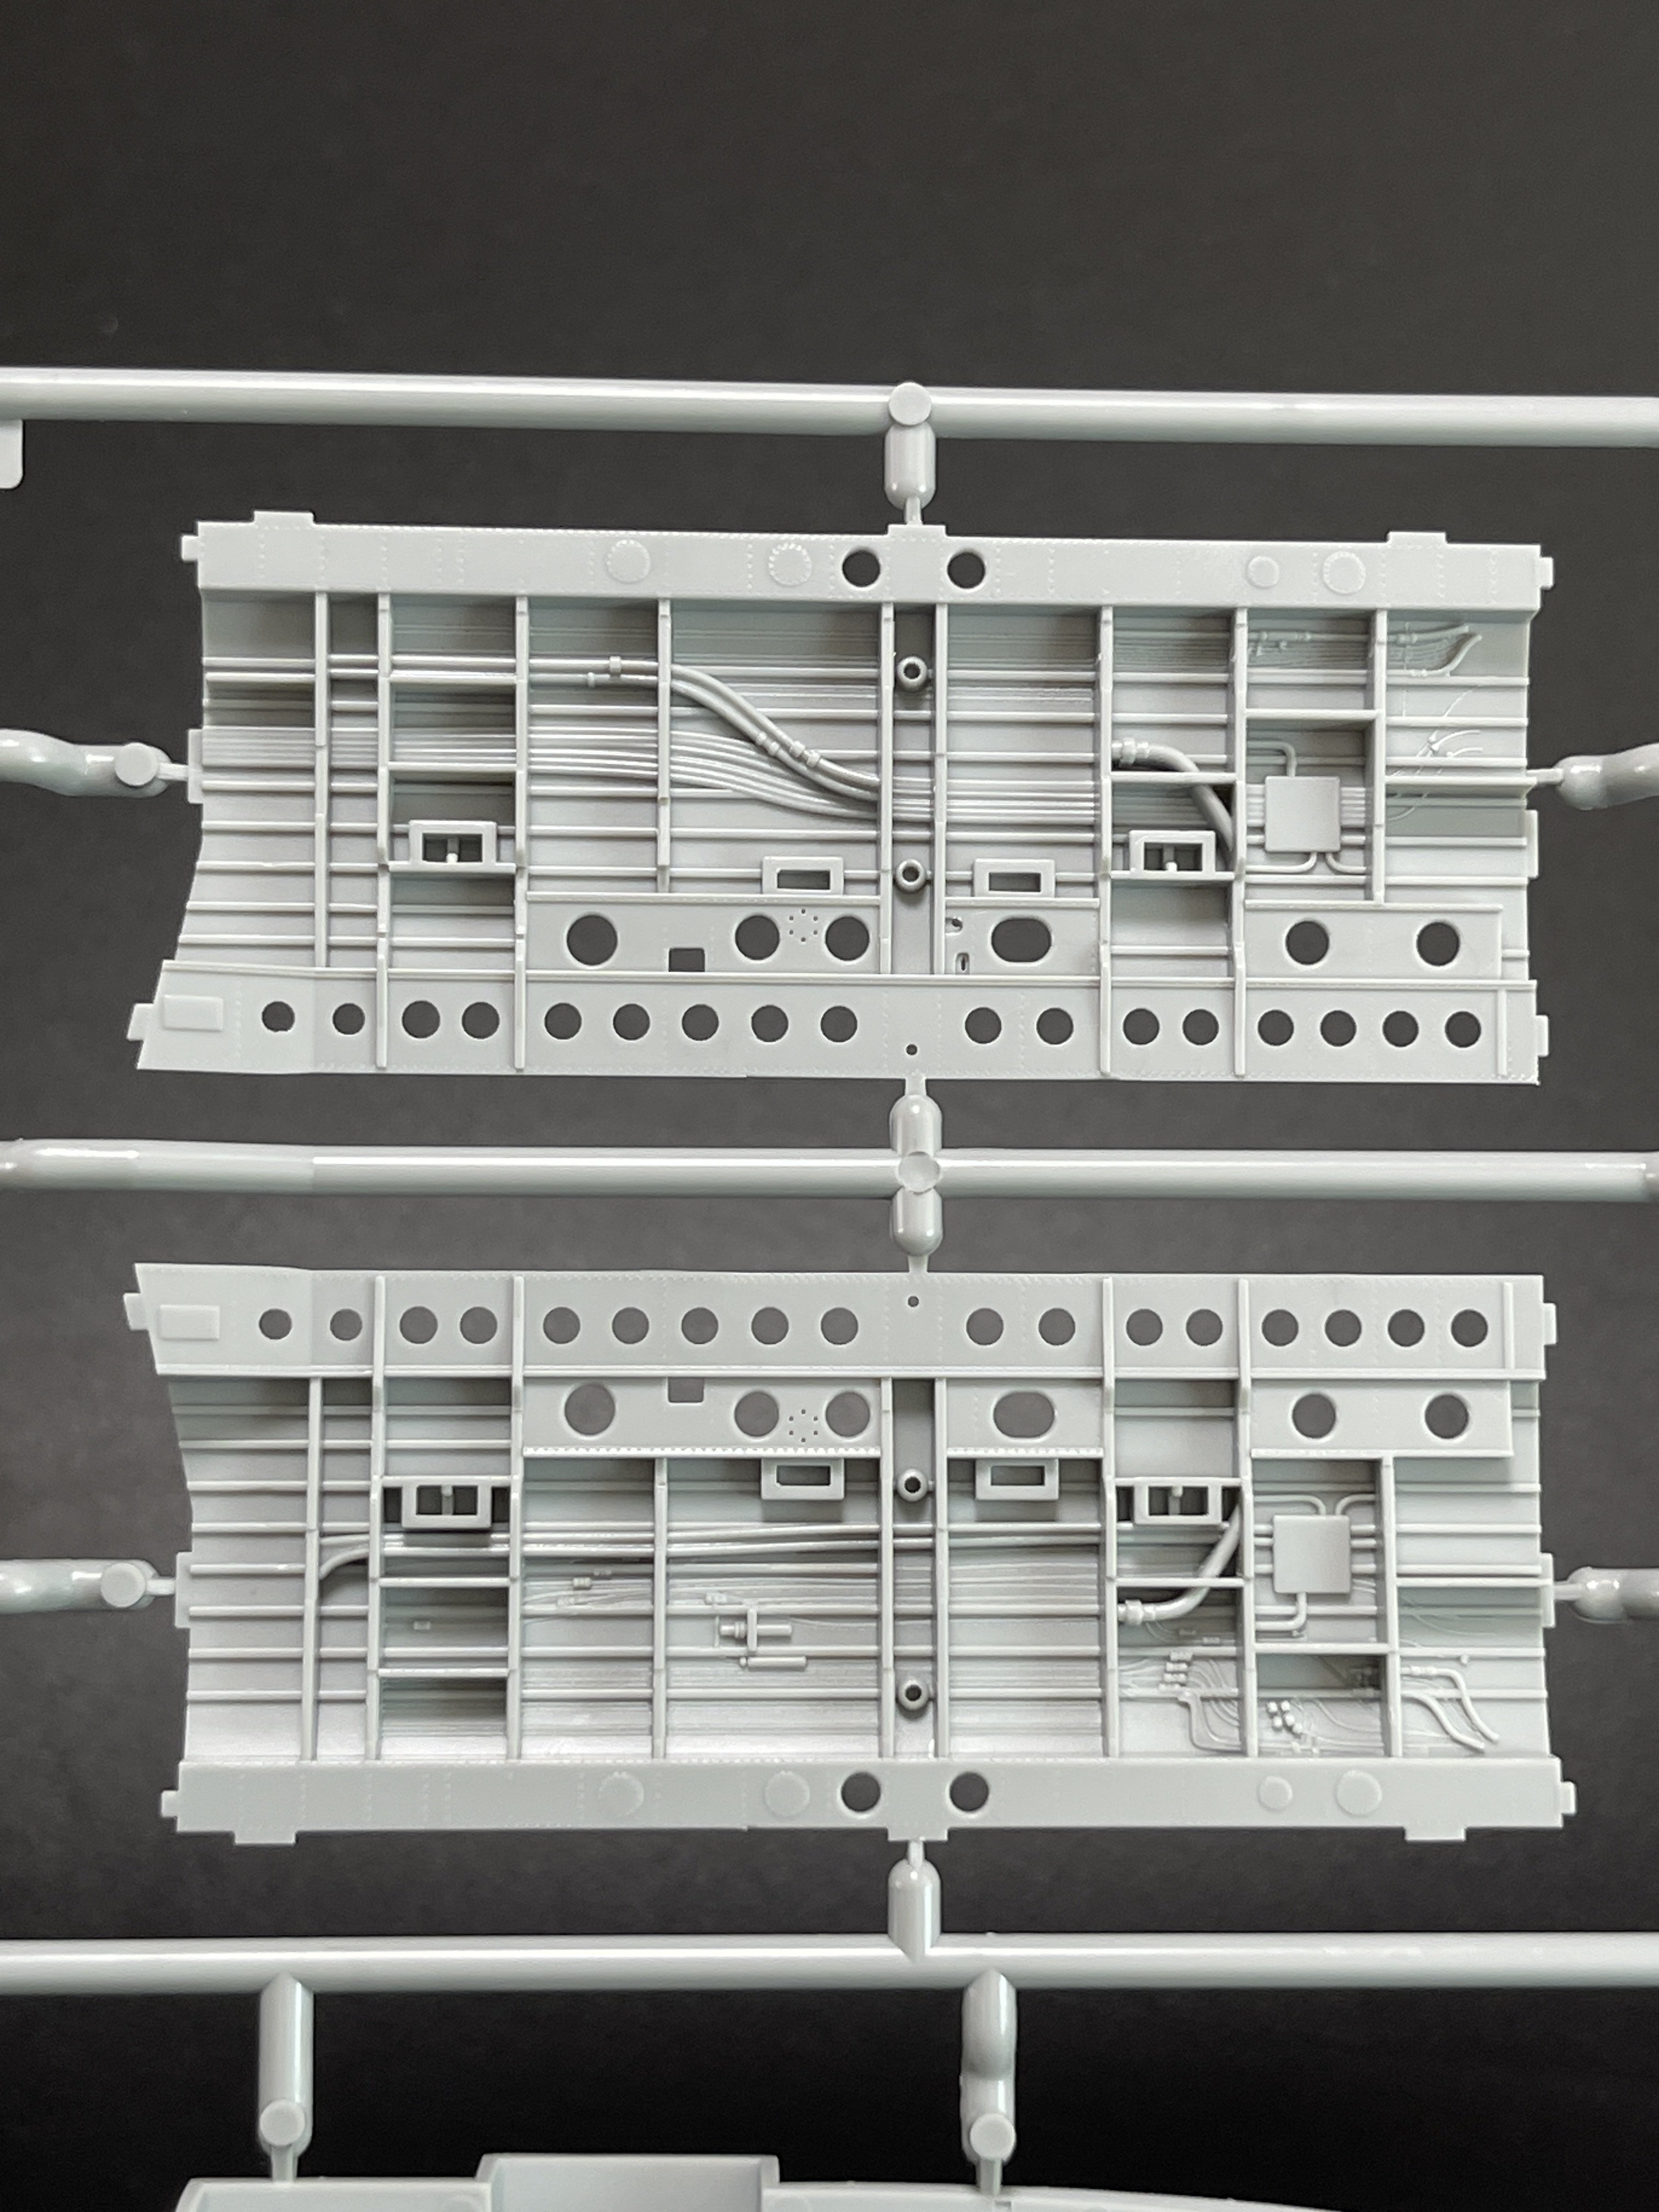
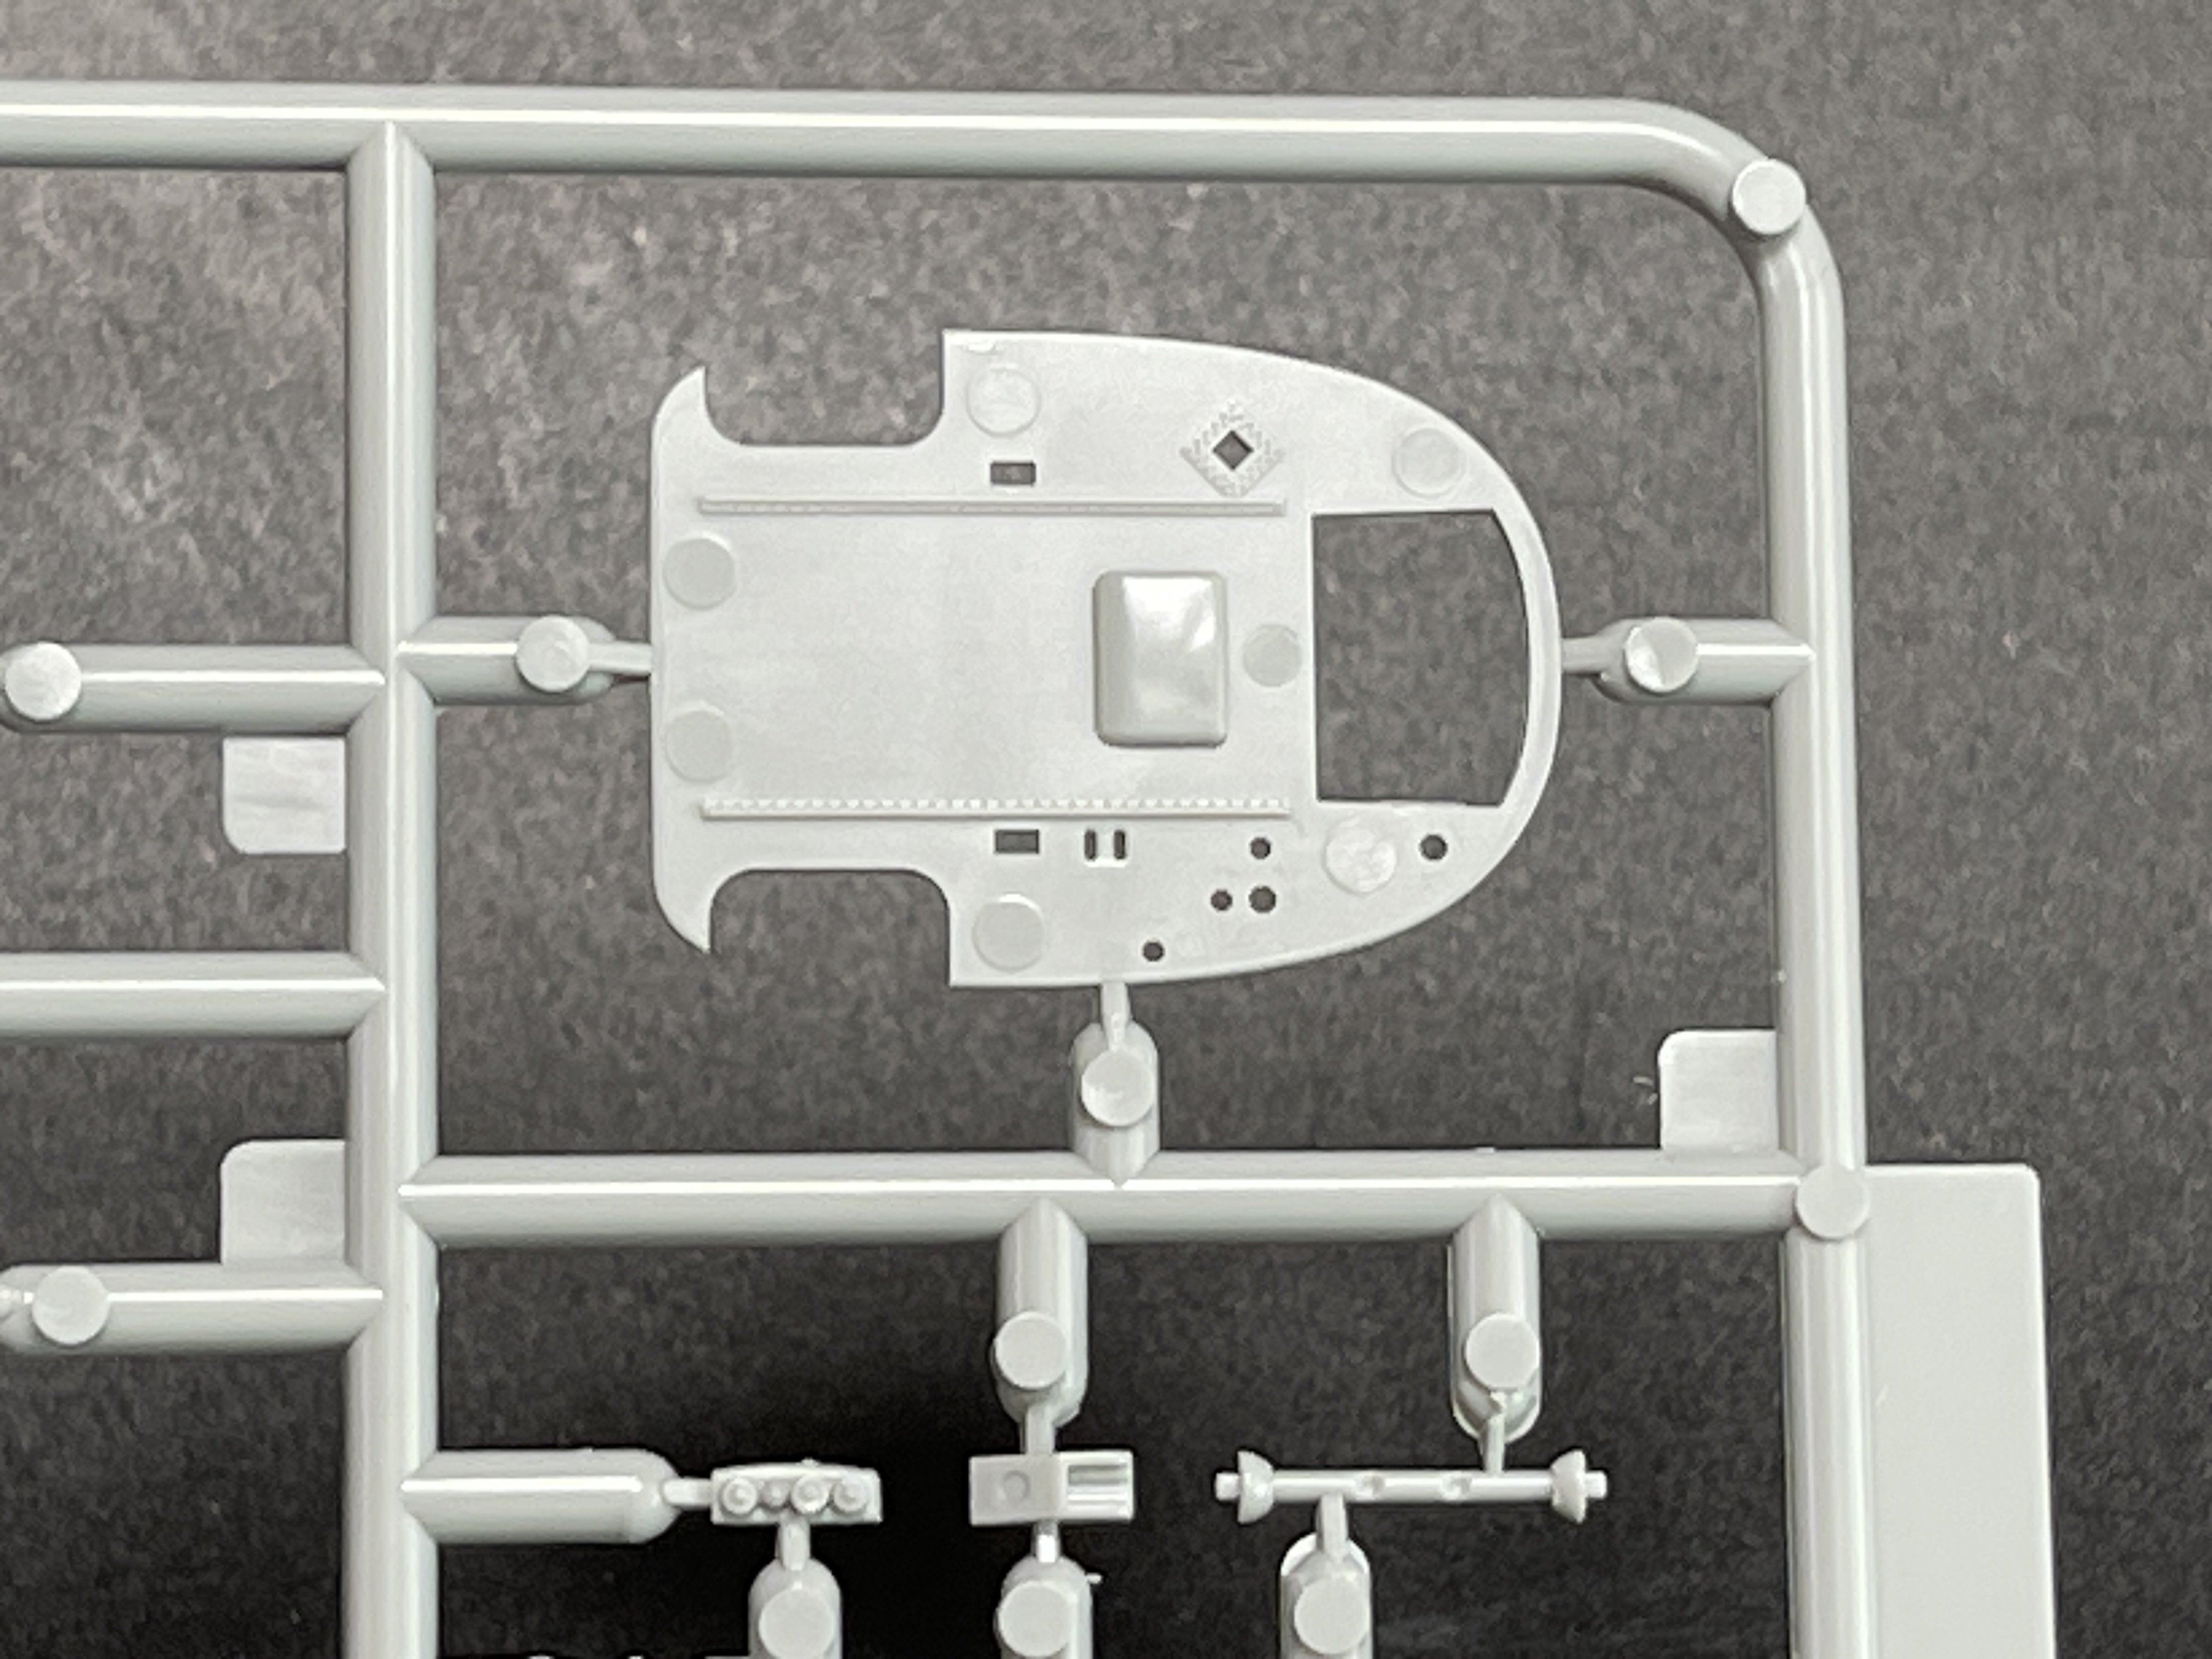
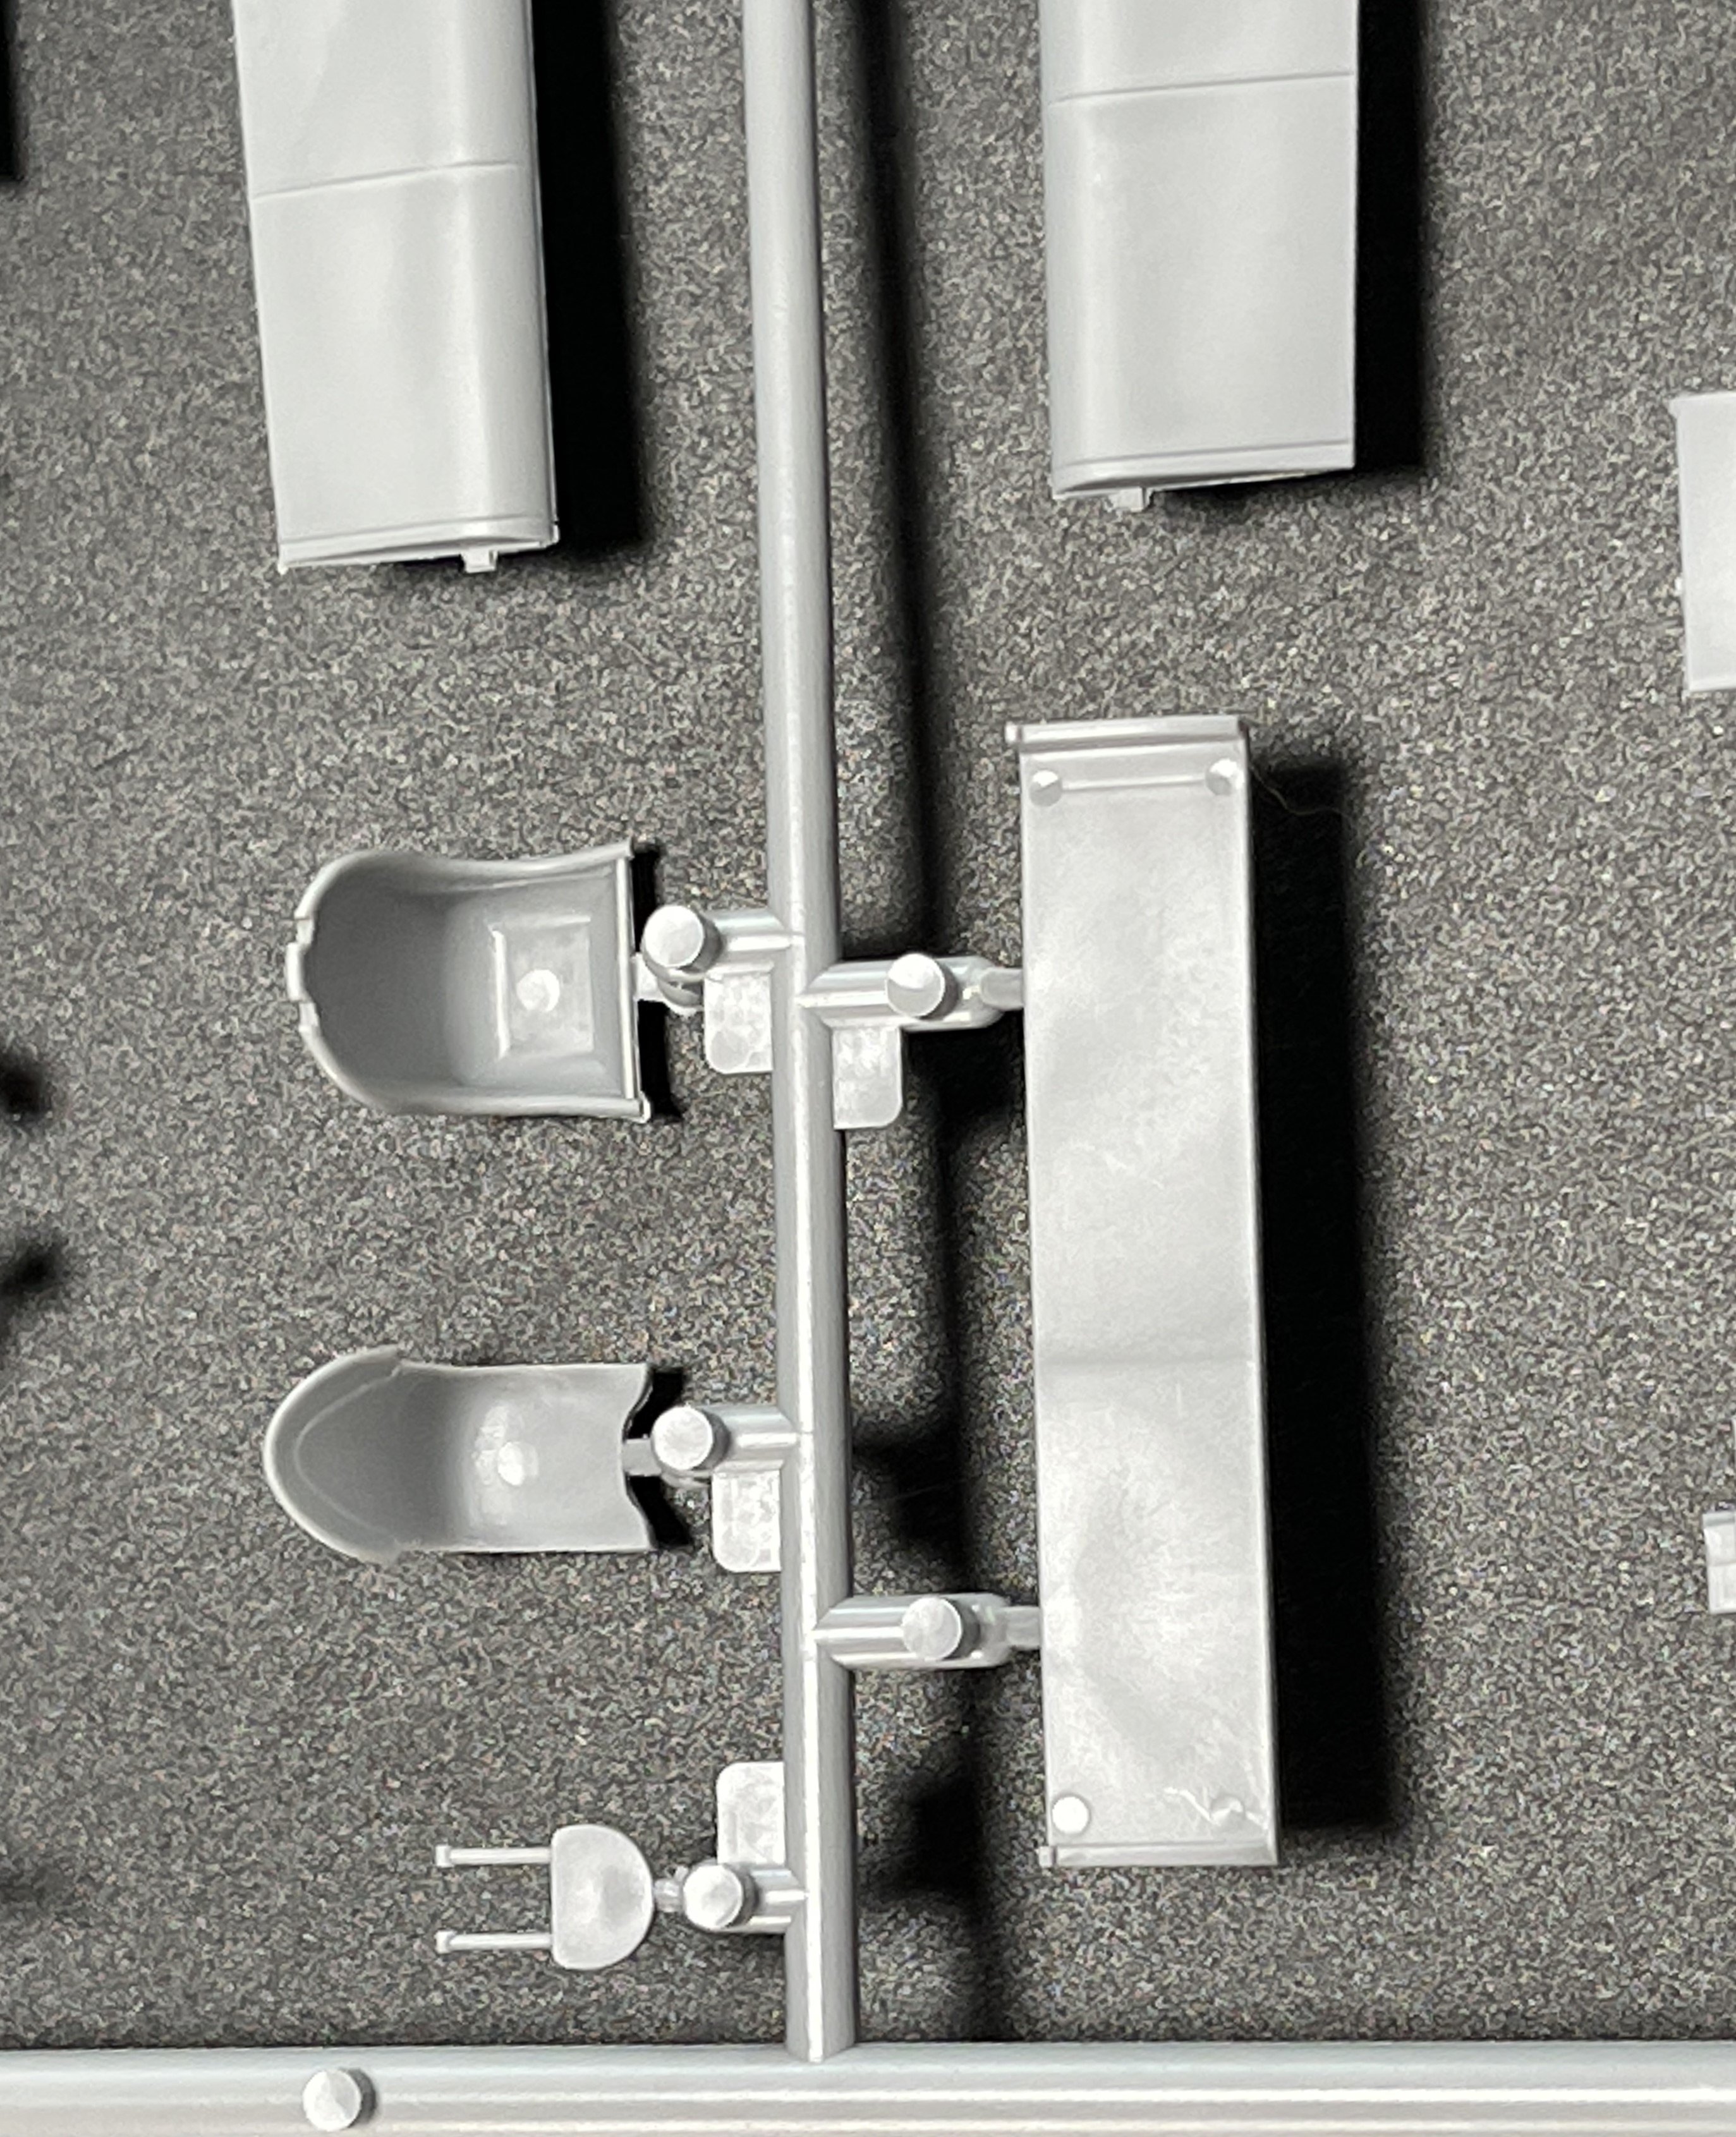
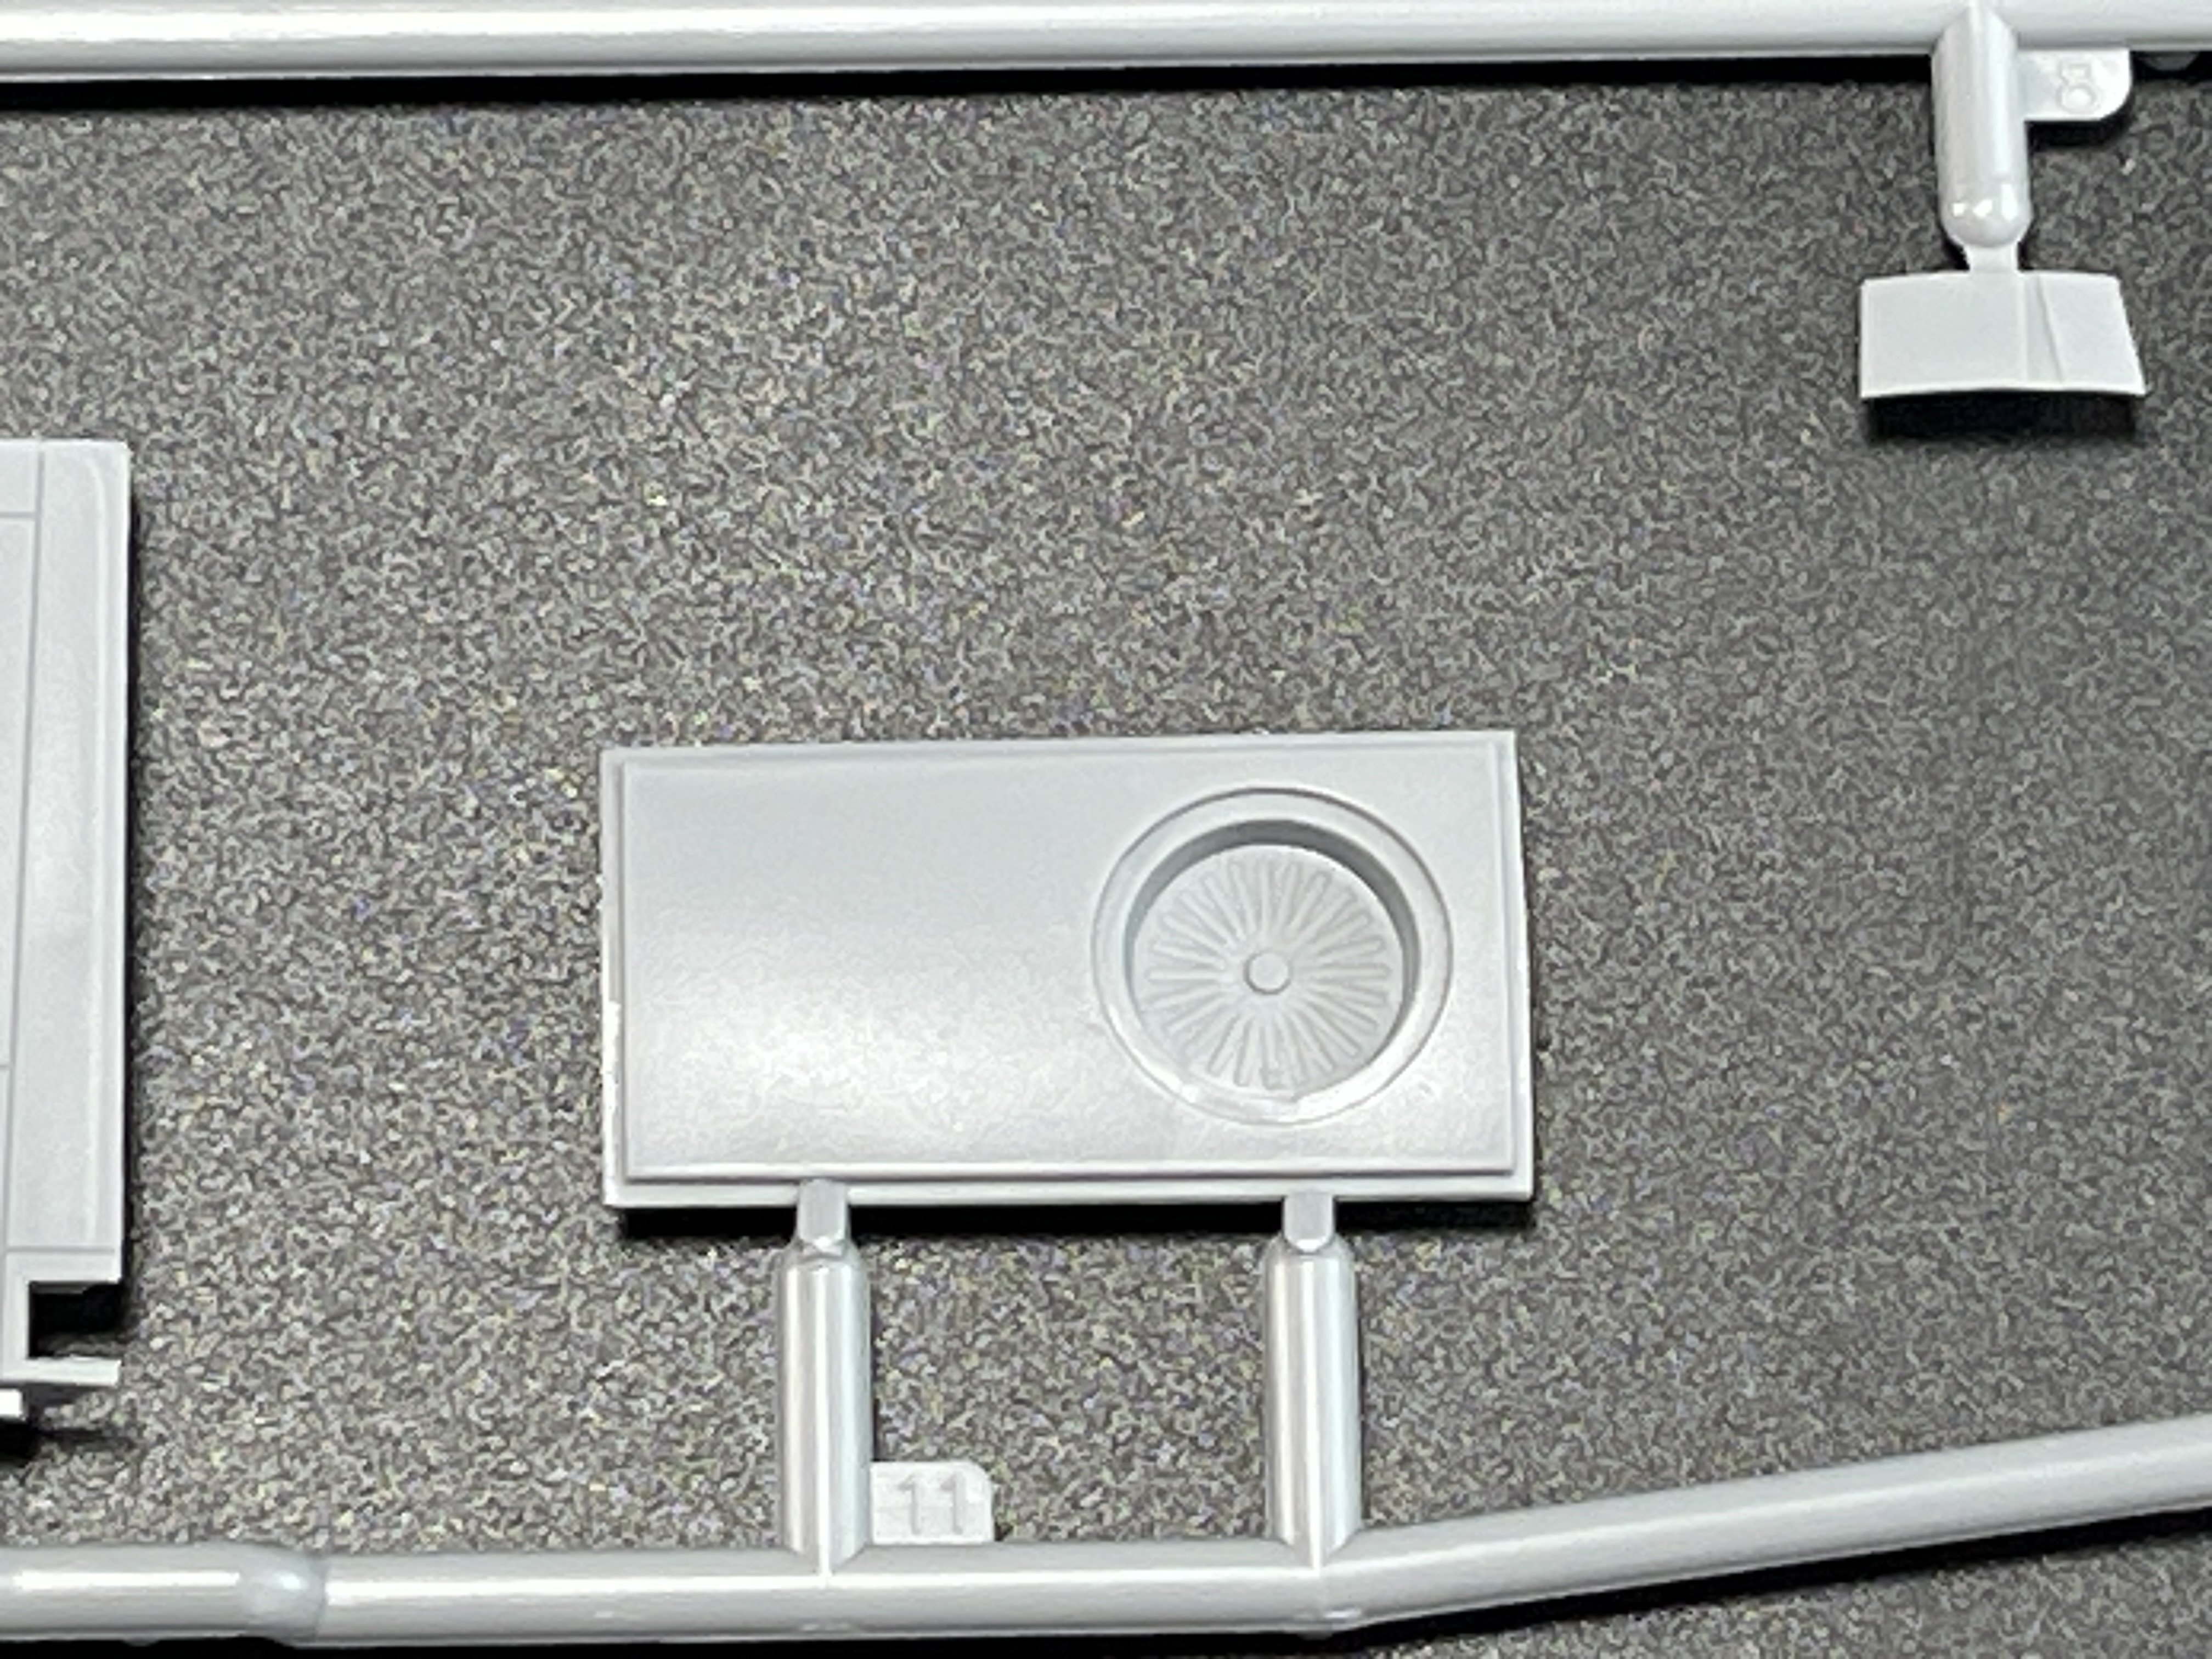
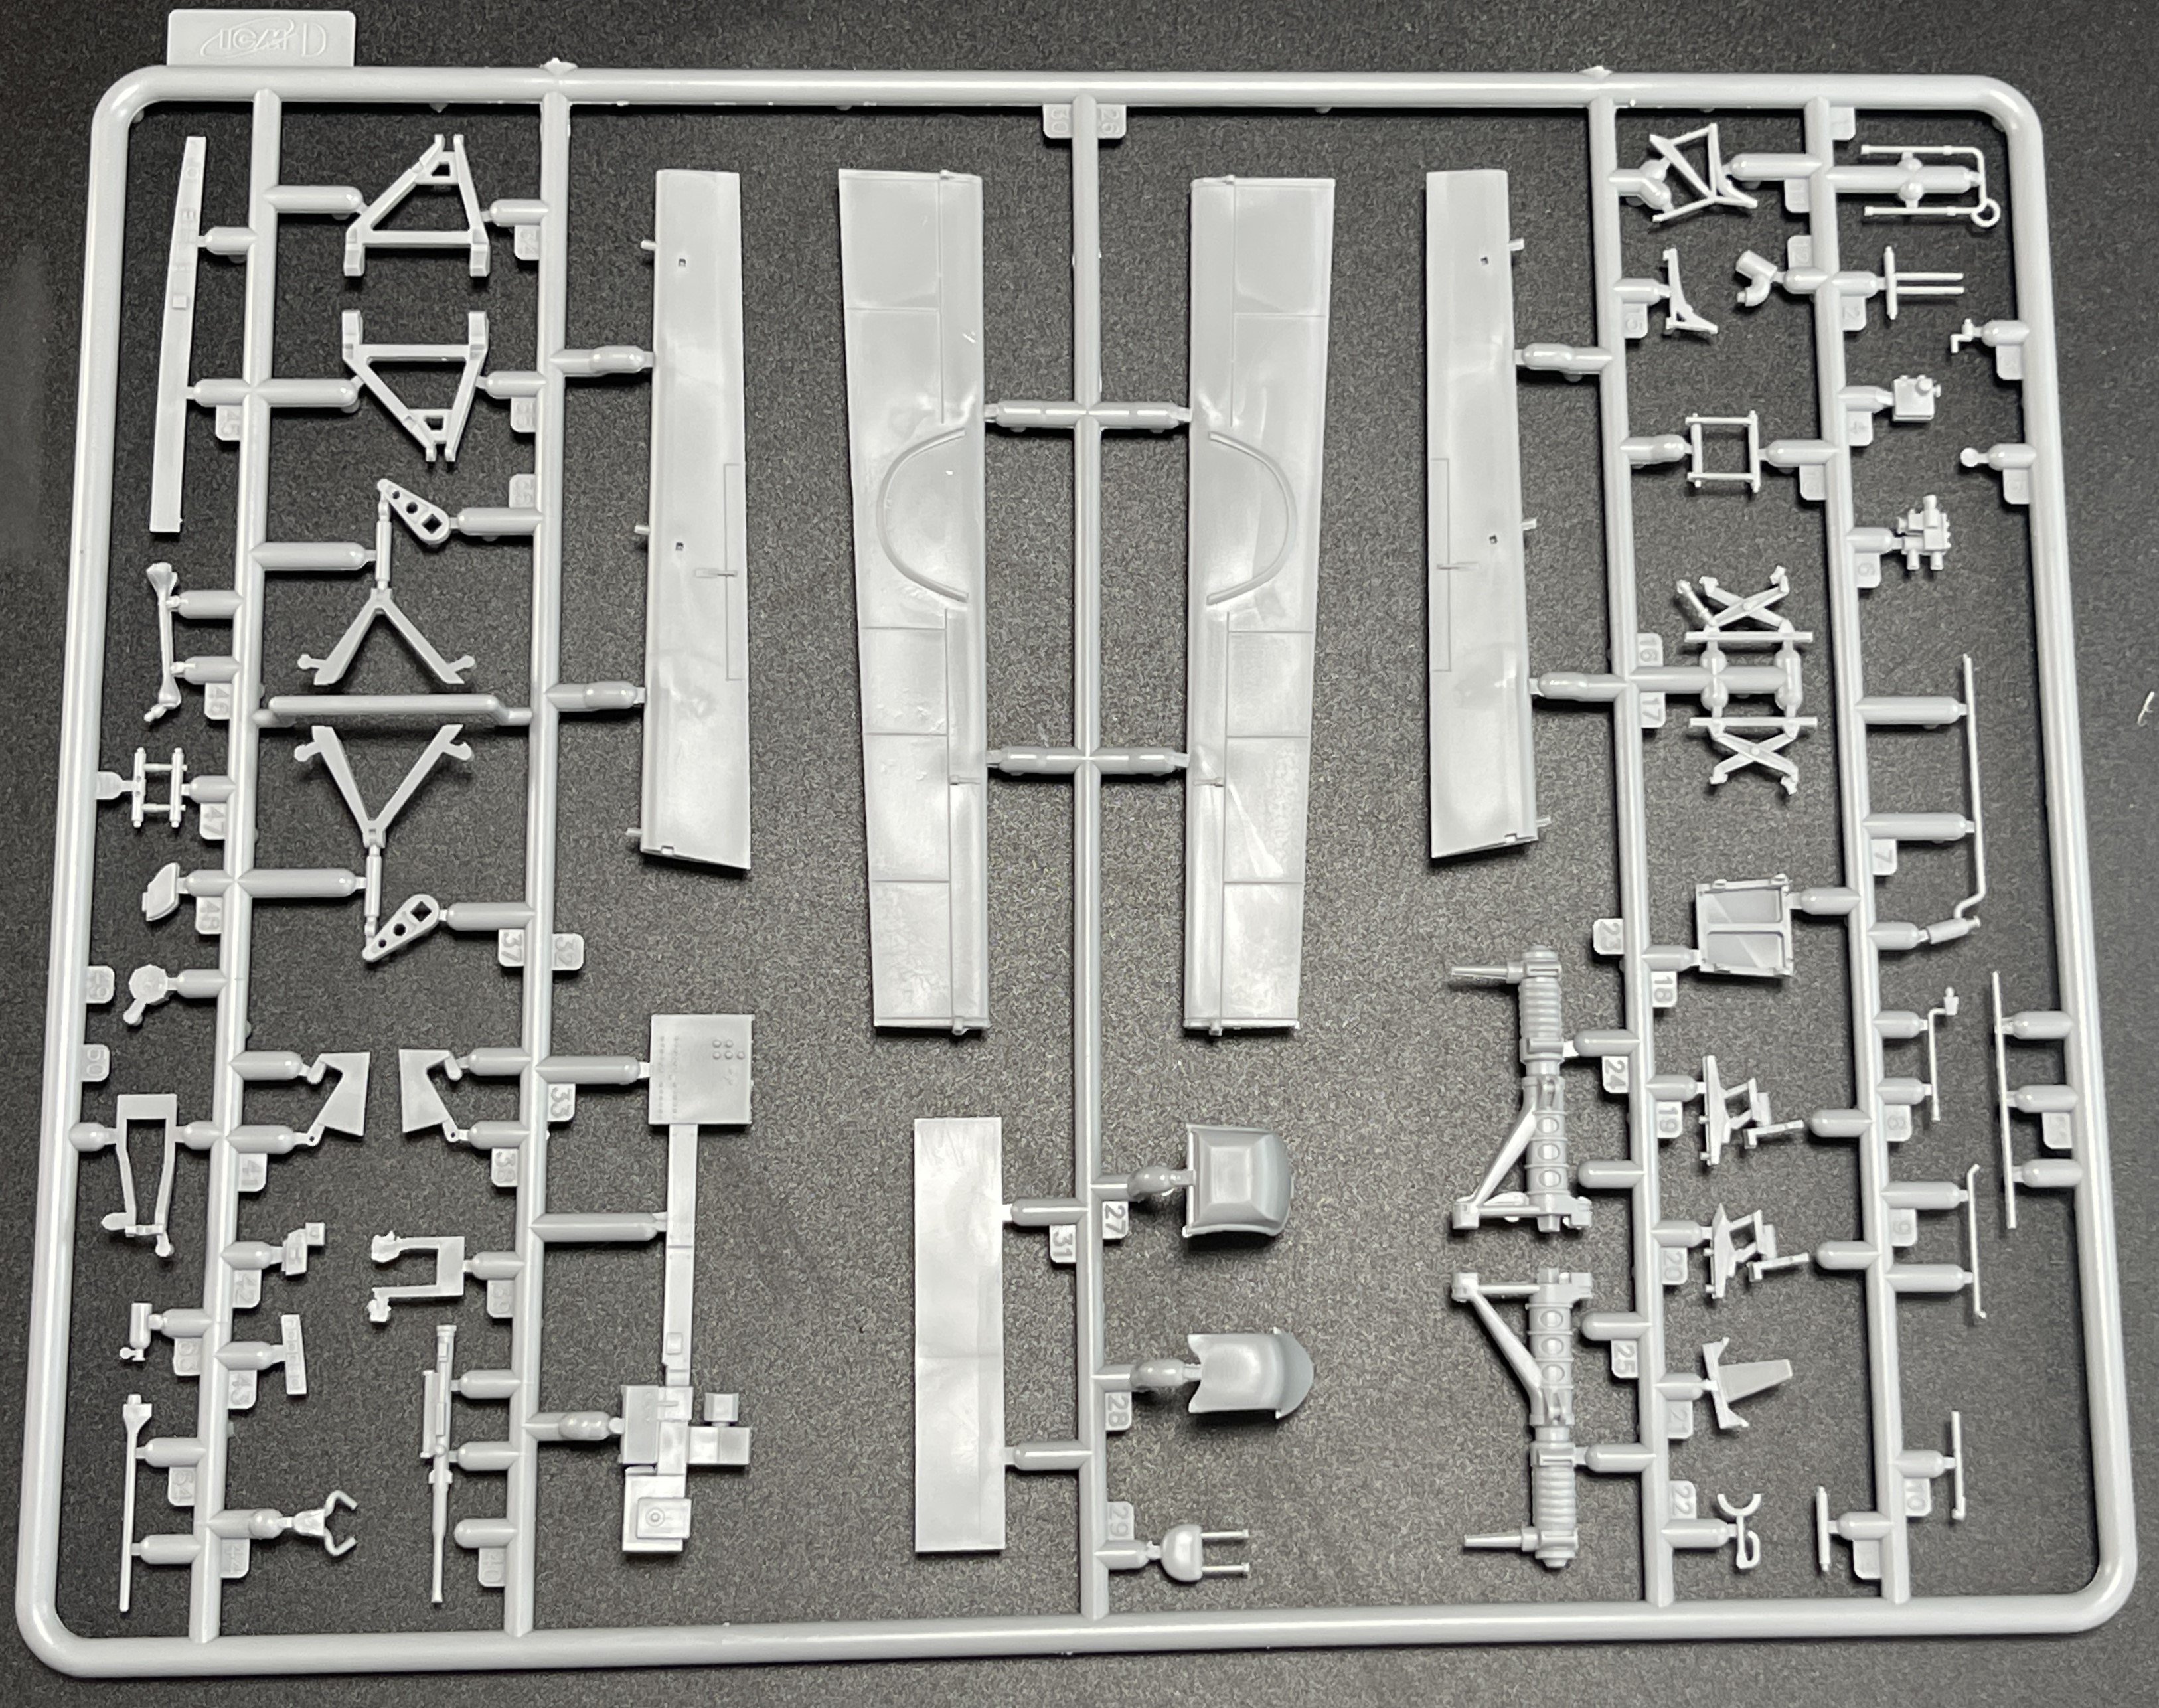
Now as for the C version, a new sprue. The K sprue.
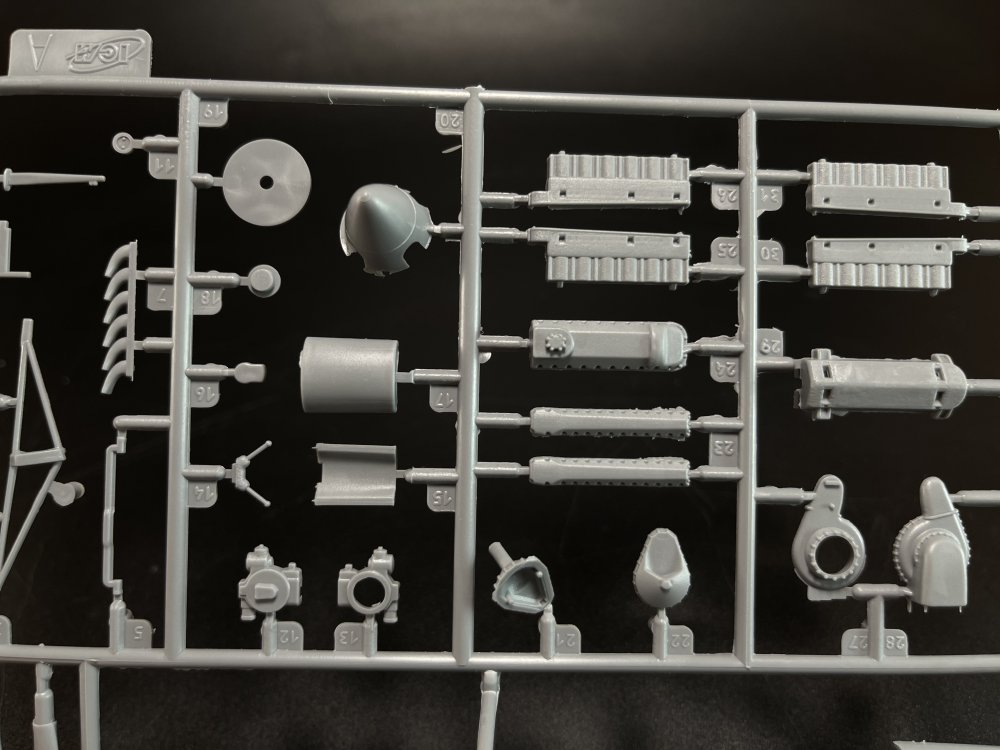
The sprue K provides the specific parts for this version, featuring spars for attaching the wing root, a new instrument panel, and the wheels' rims for the landing gear. This sprue is also available in the G version but not on the B version box. But for this sprue to make the C version you only need the wheels hubs a vent, a small gondola and boomerang antenna.


There`s a different between these two and the B-26C as they are from older moldes when ICM was still growing to the actual quality and finesse.
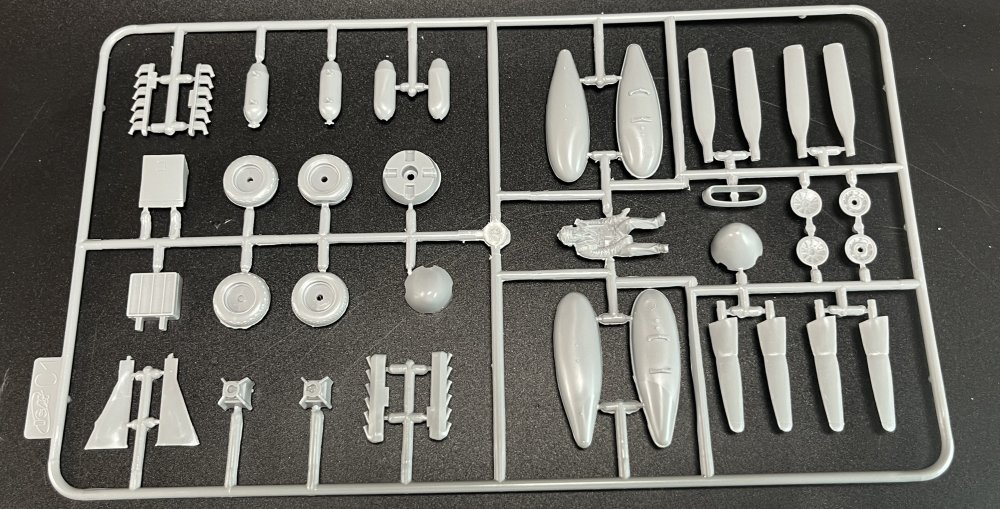
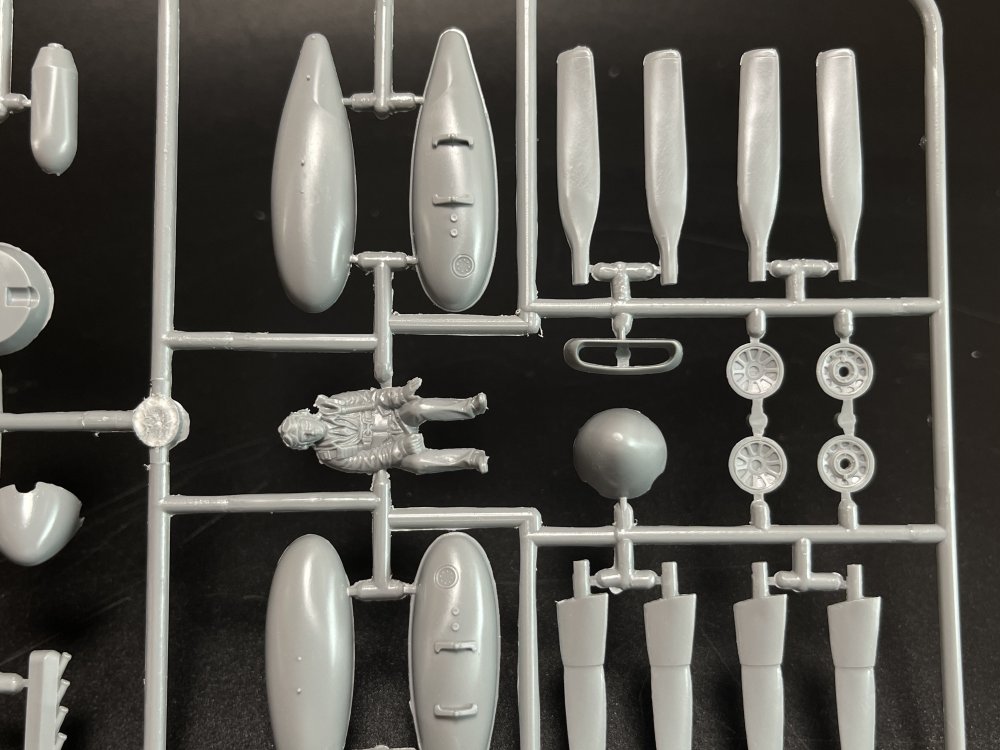
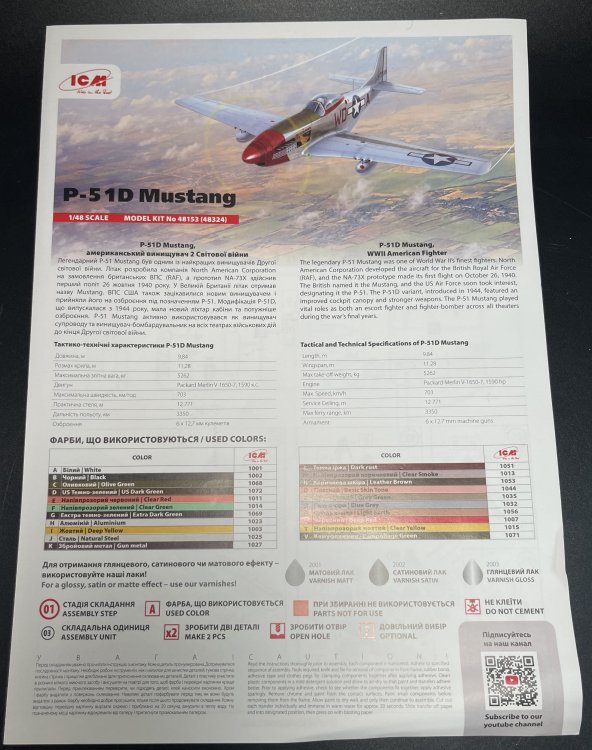
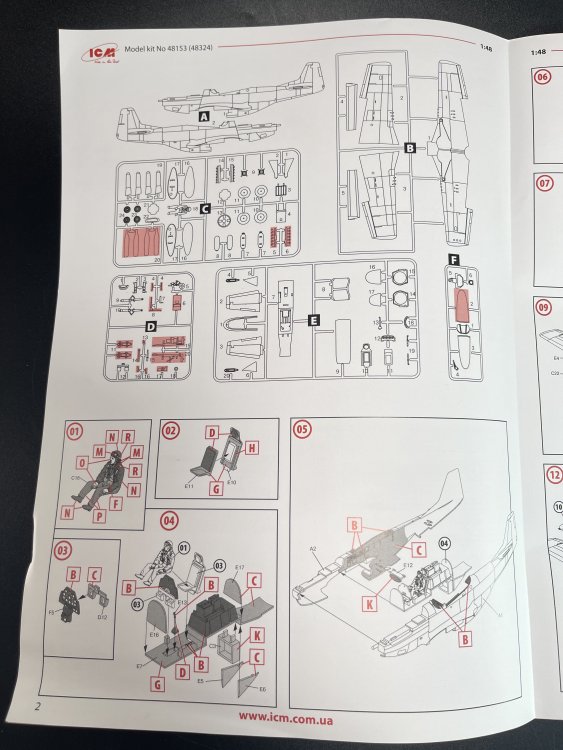
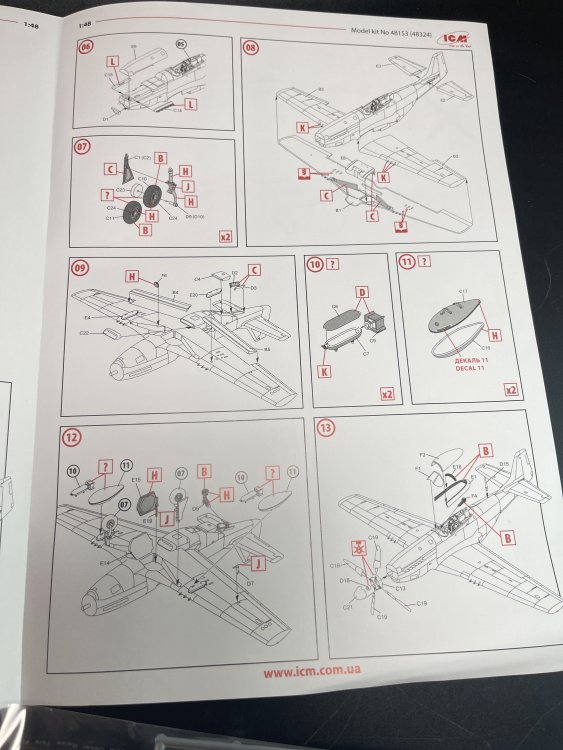
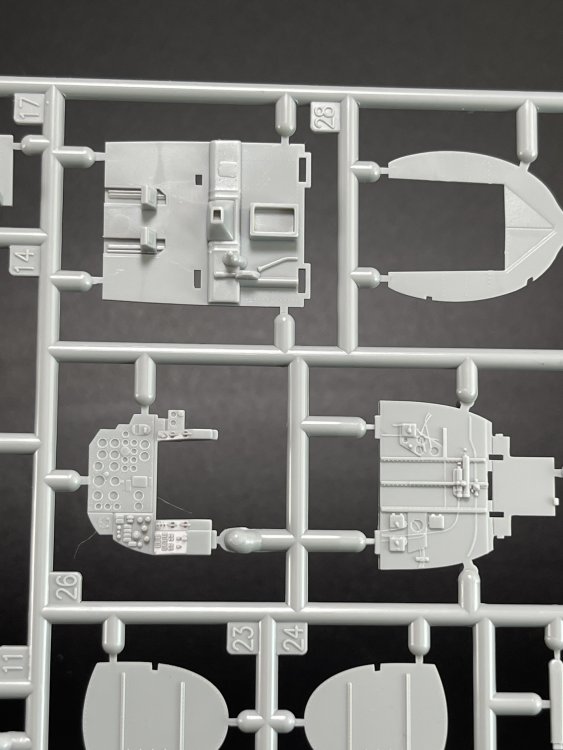
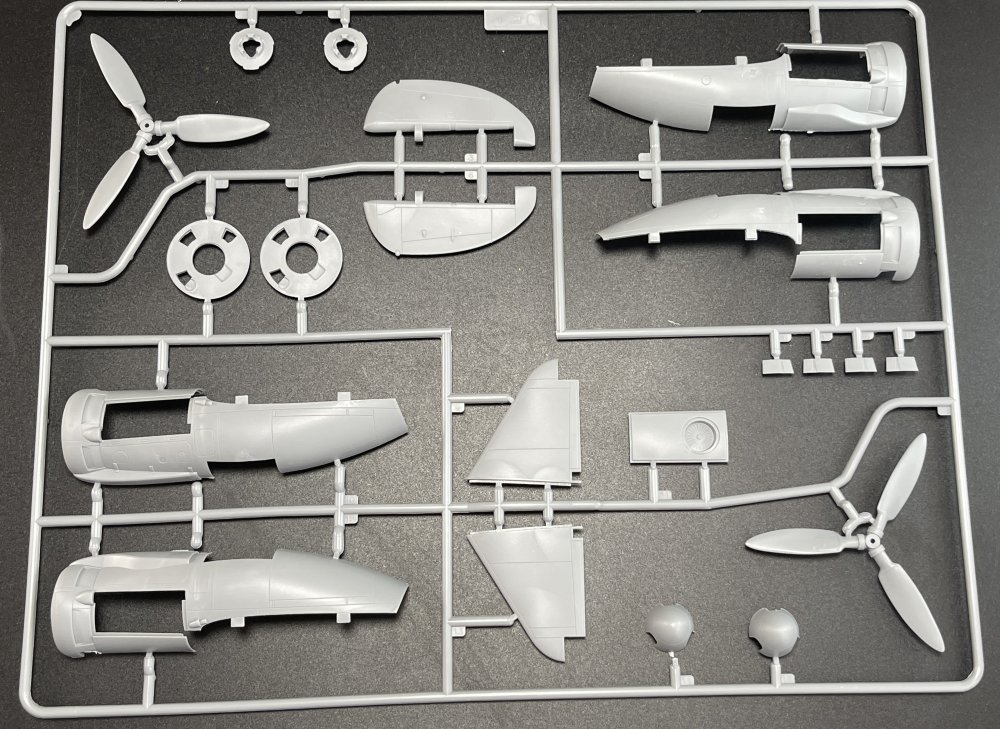
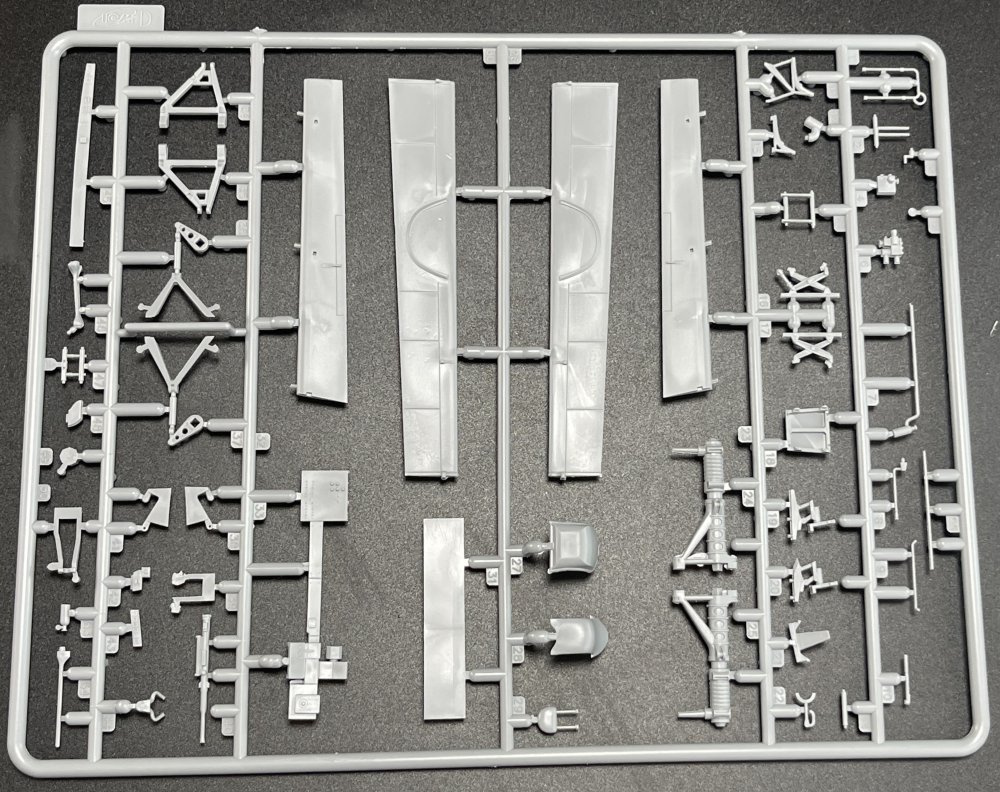
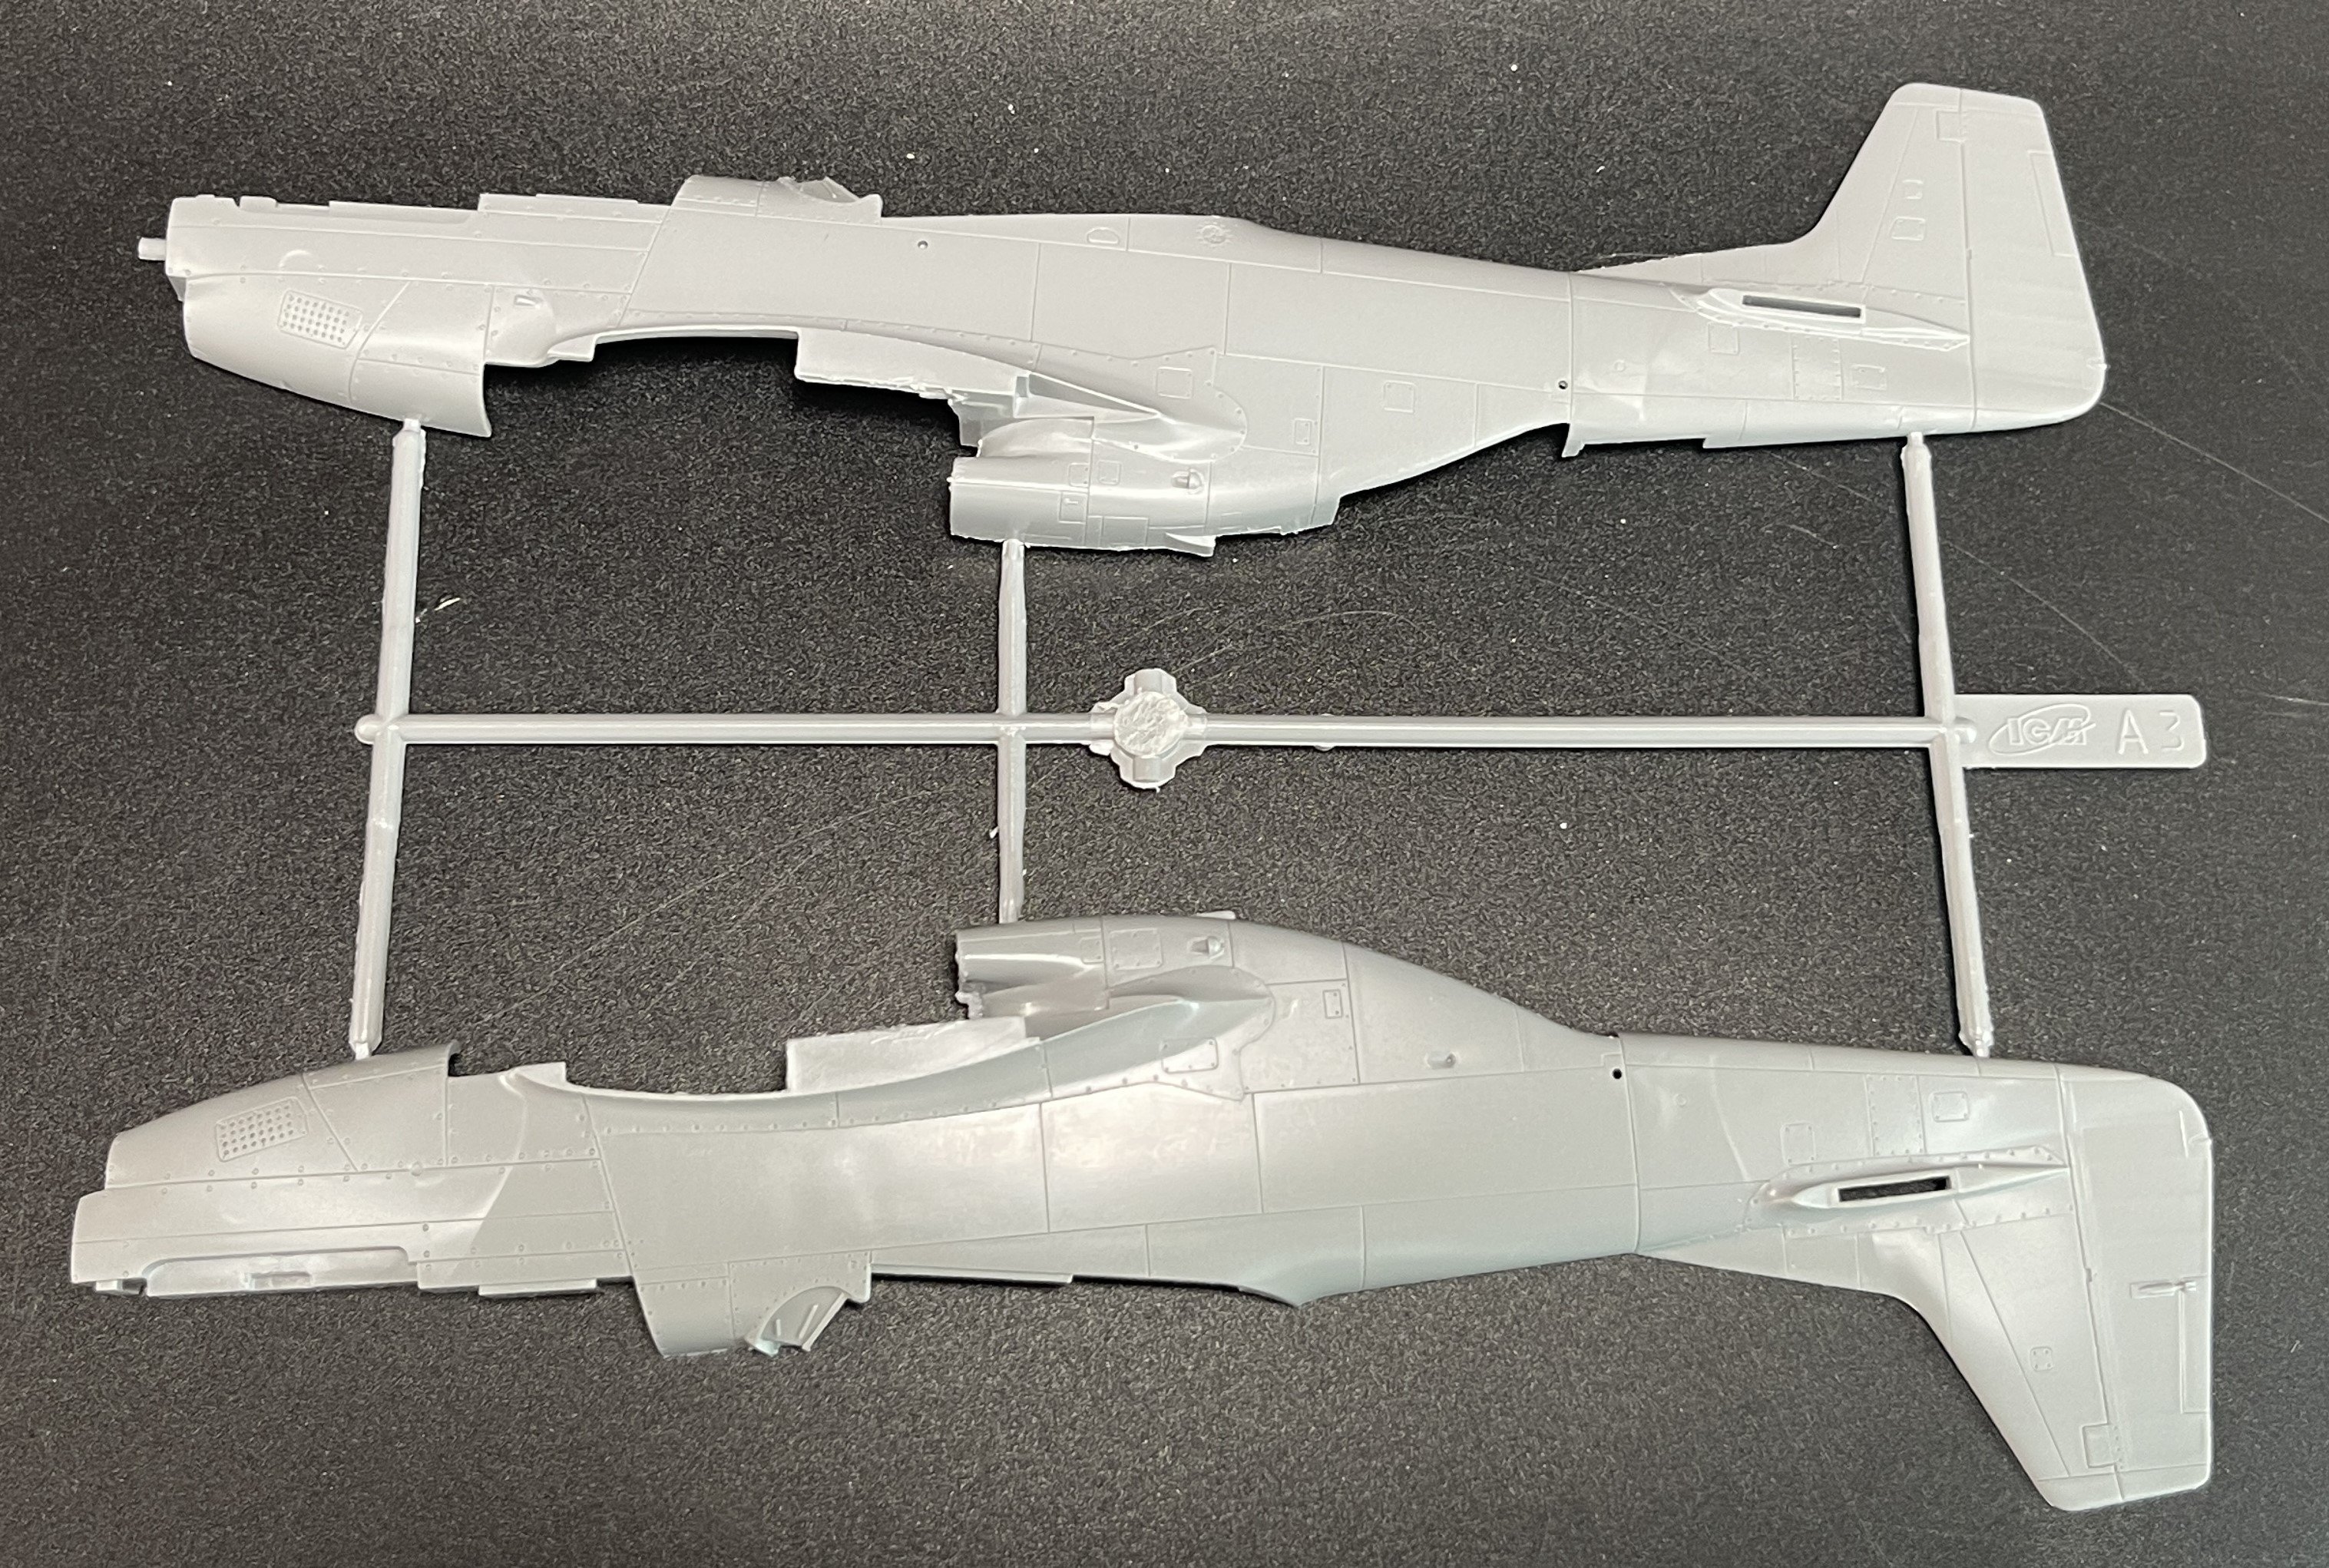
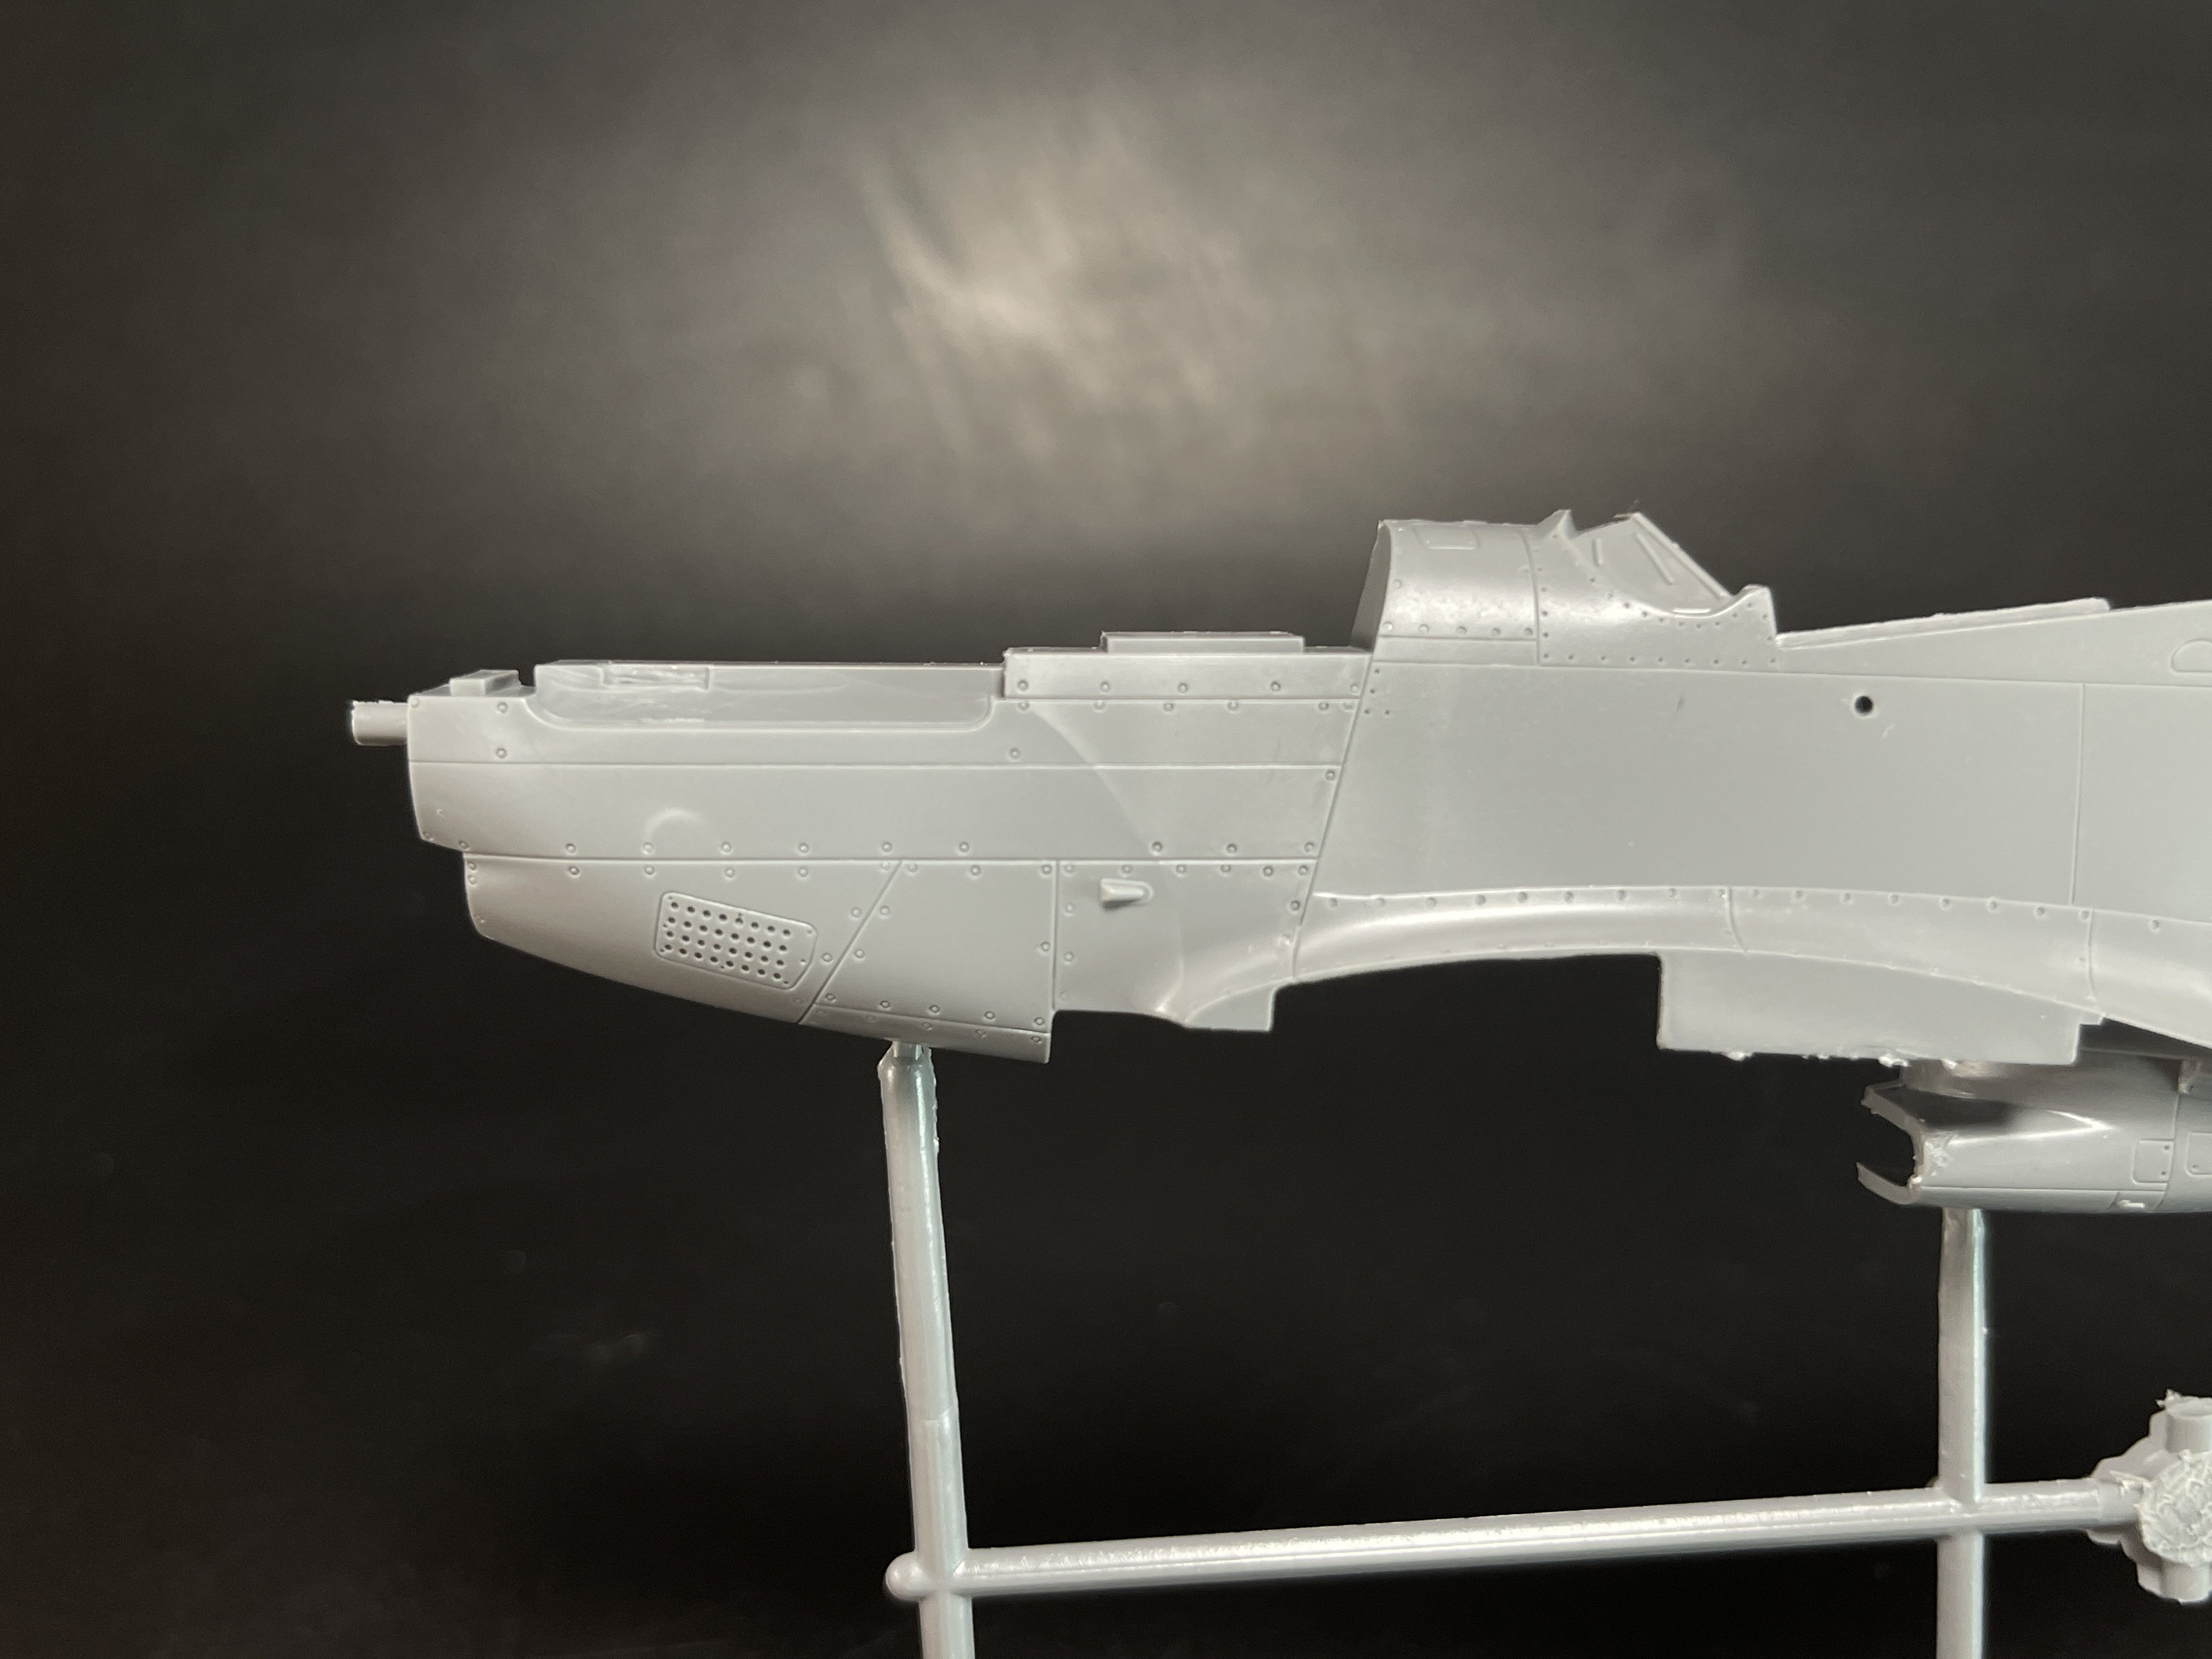
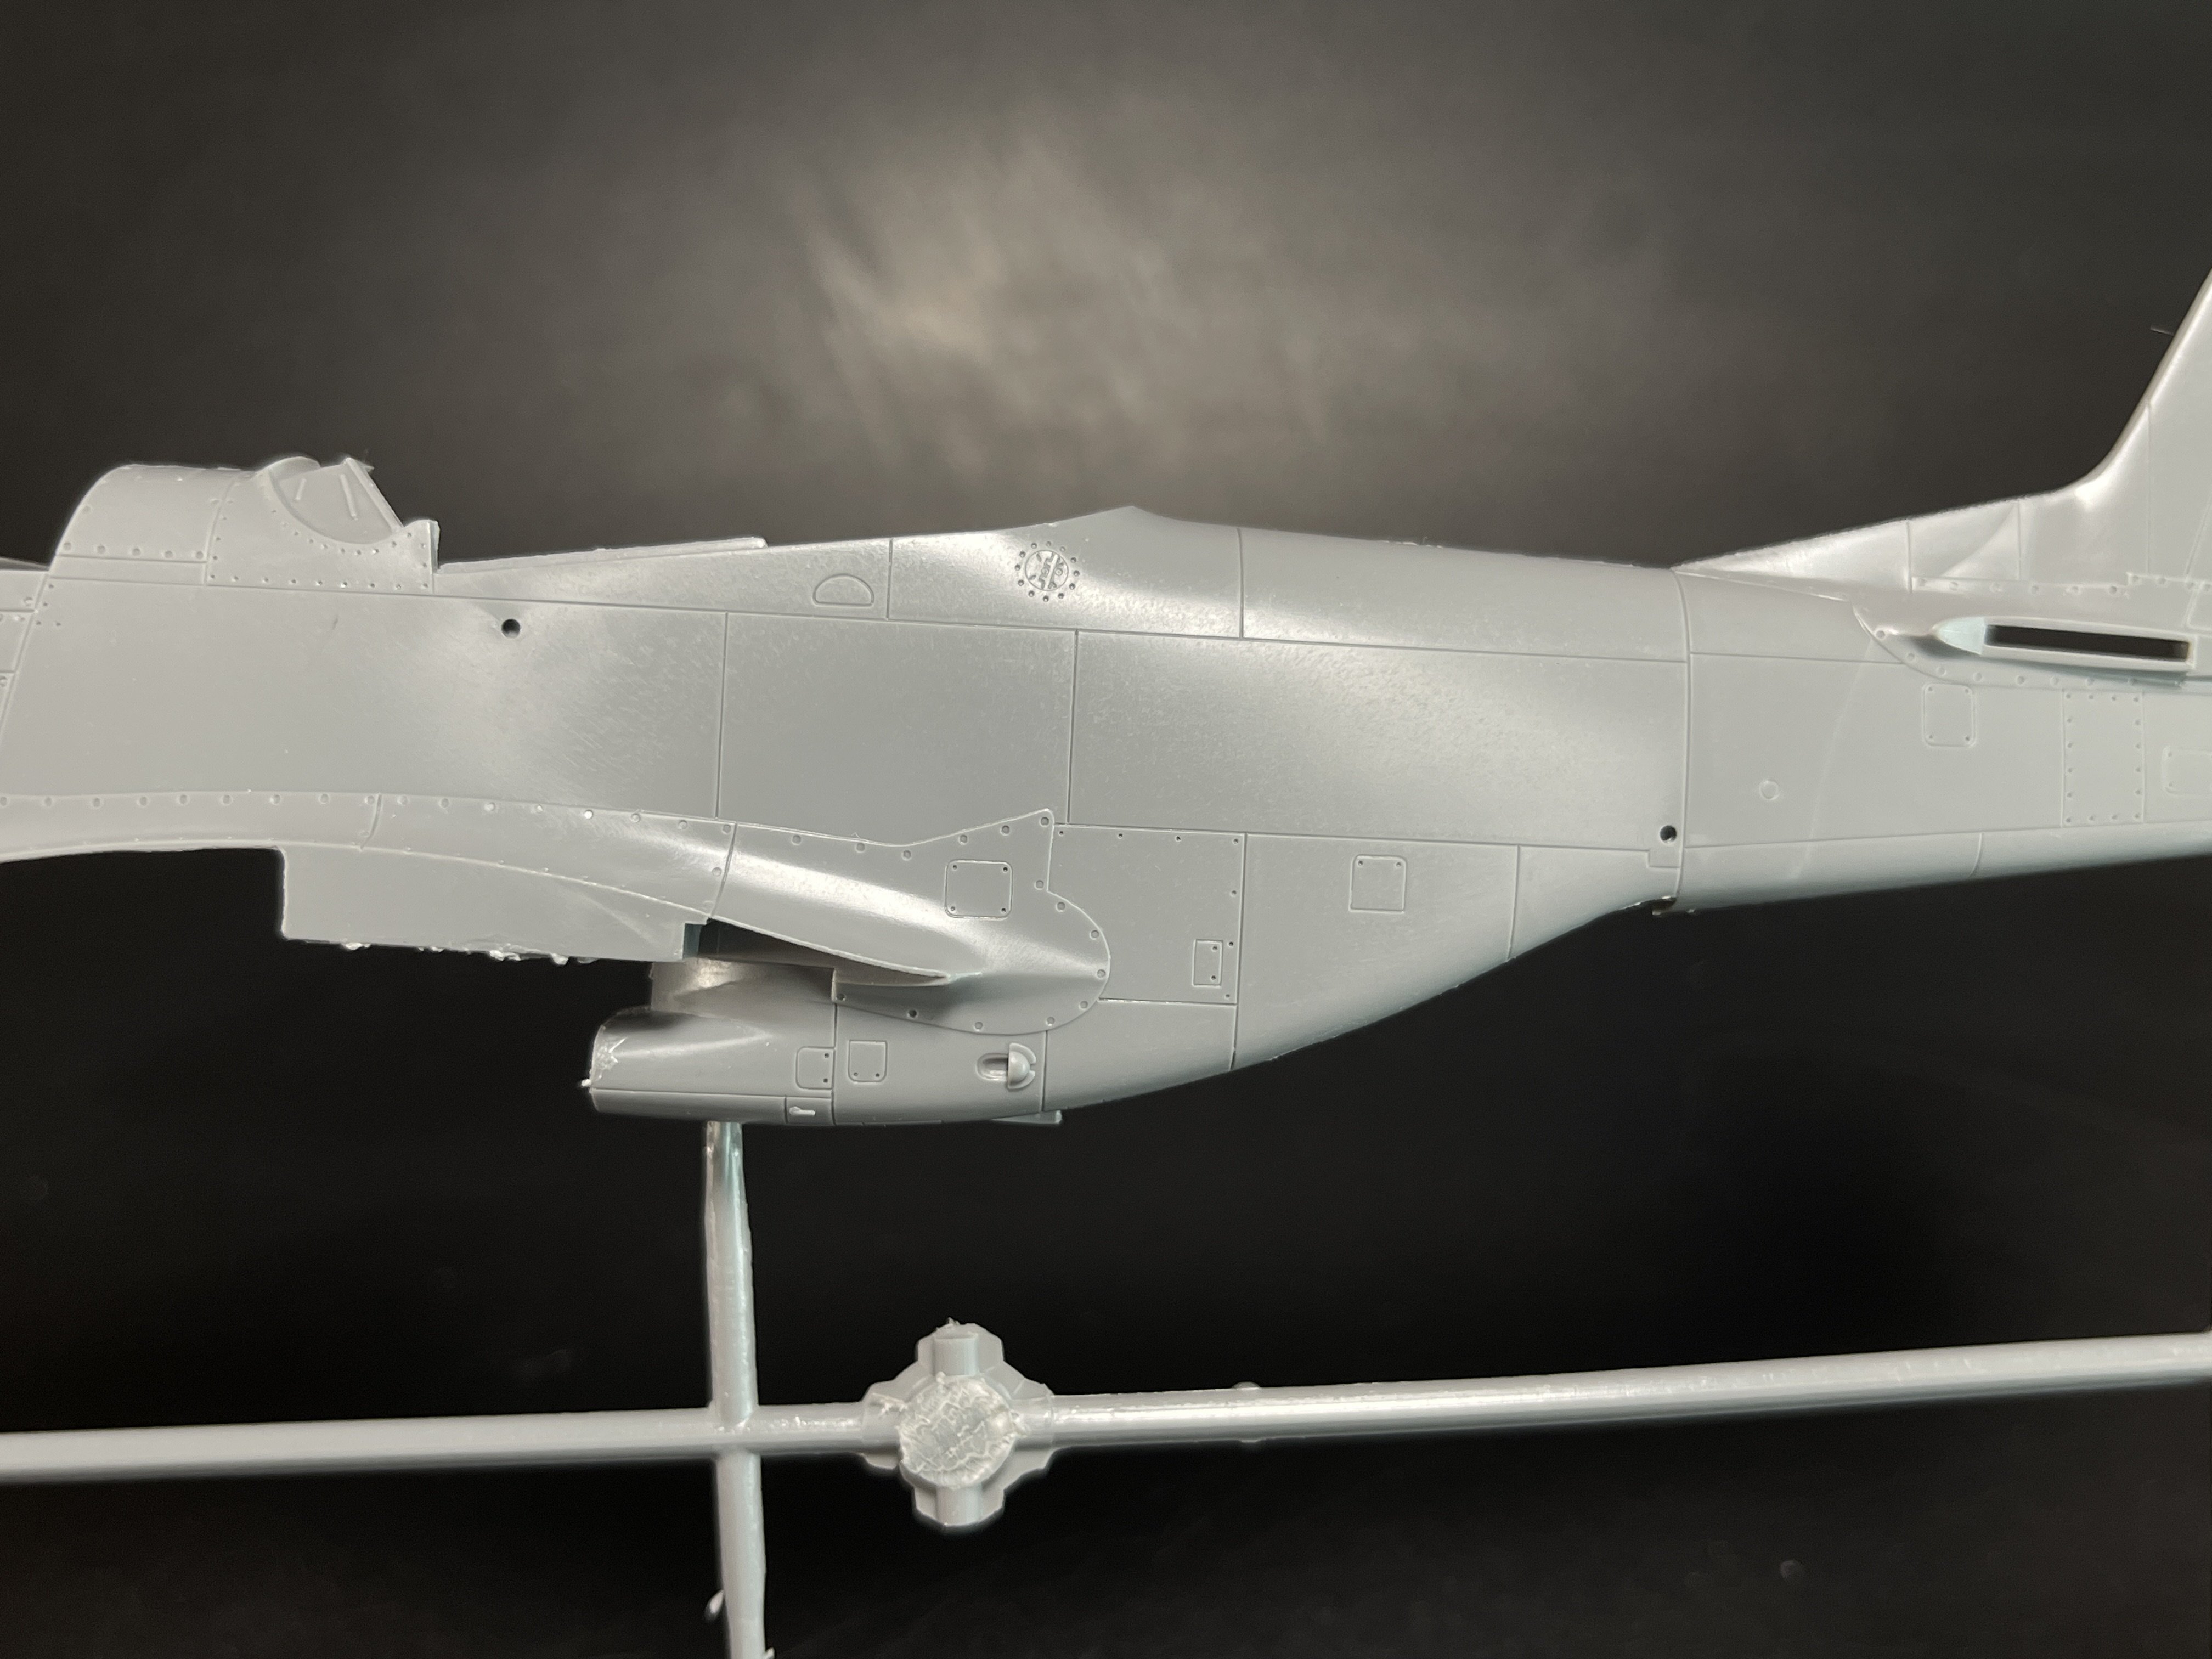
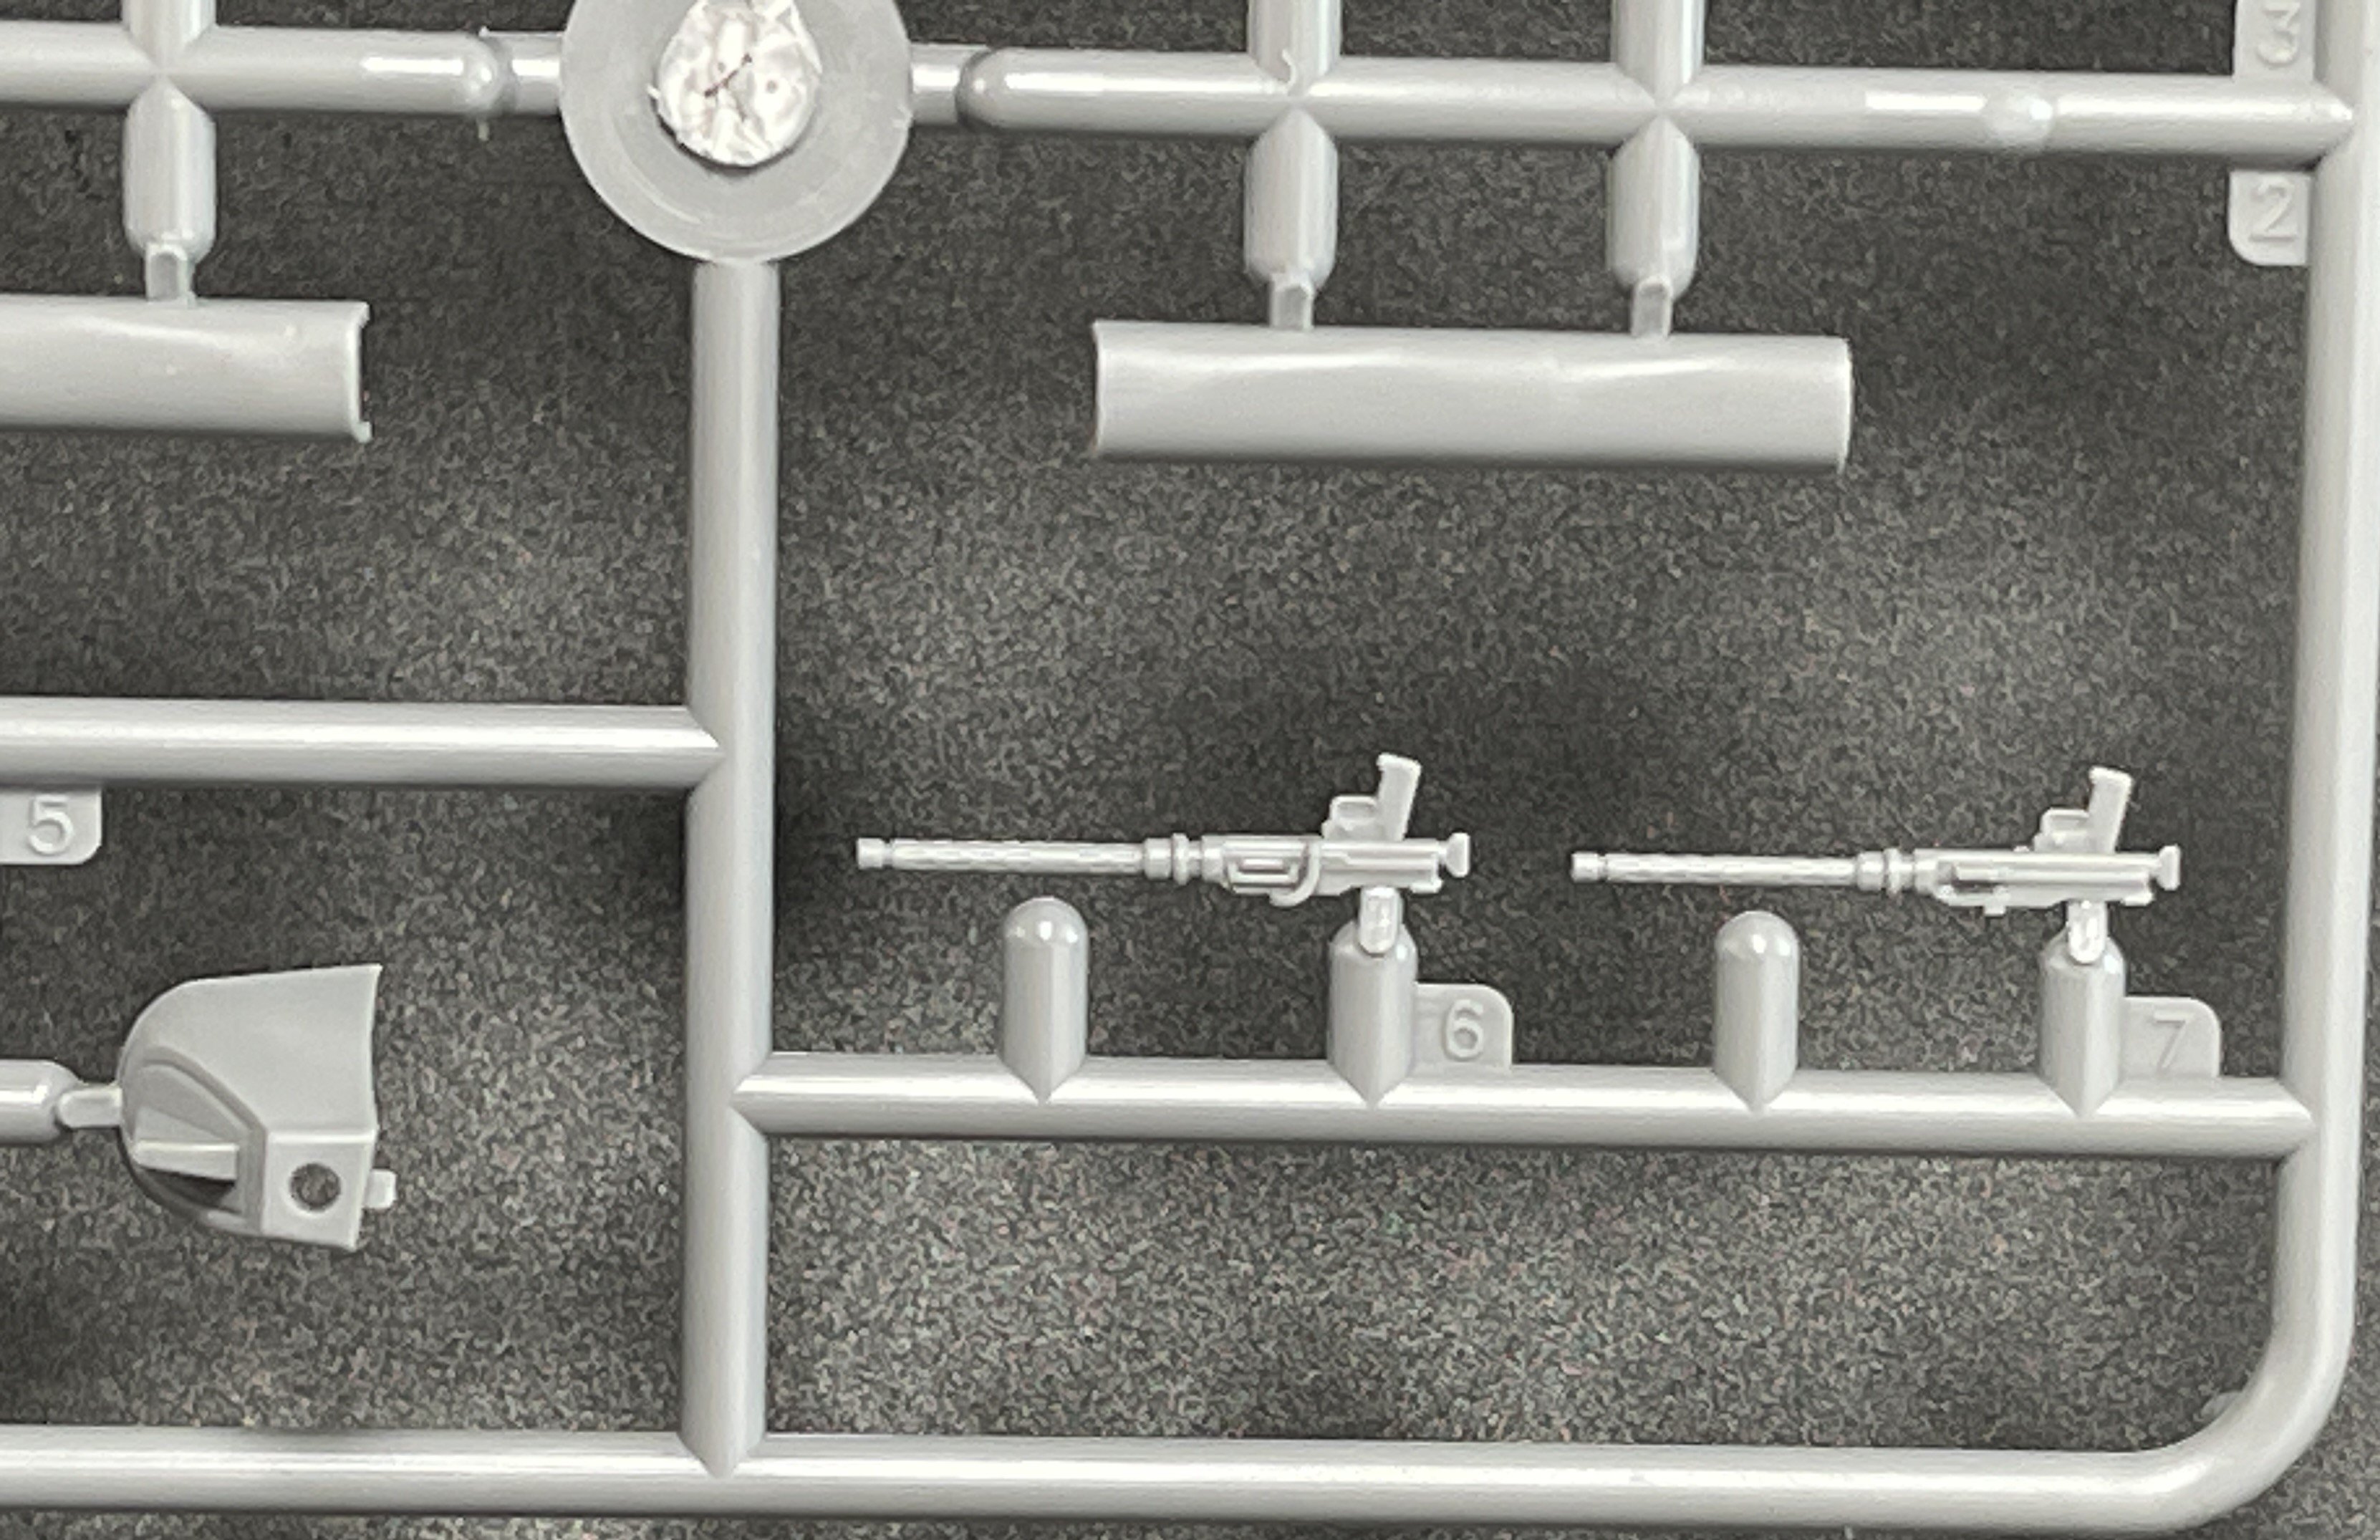
First up is the P-51D Mustang
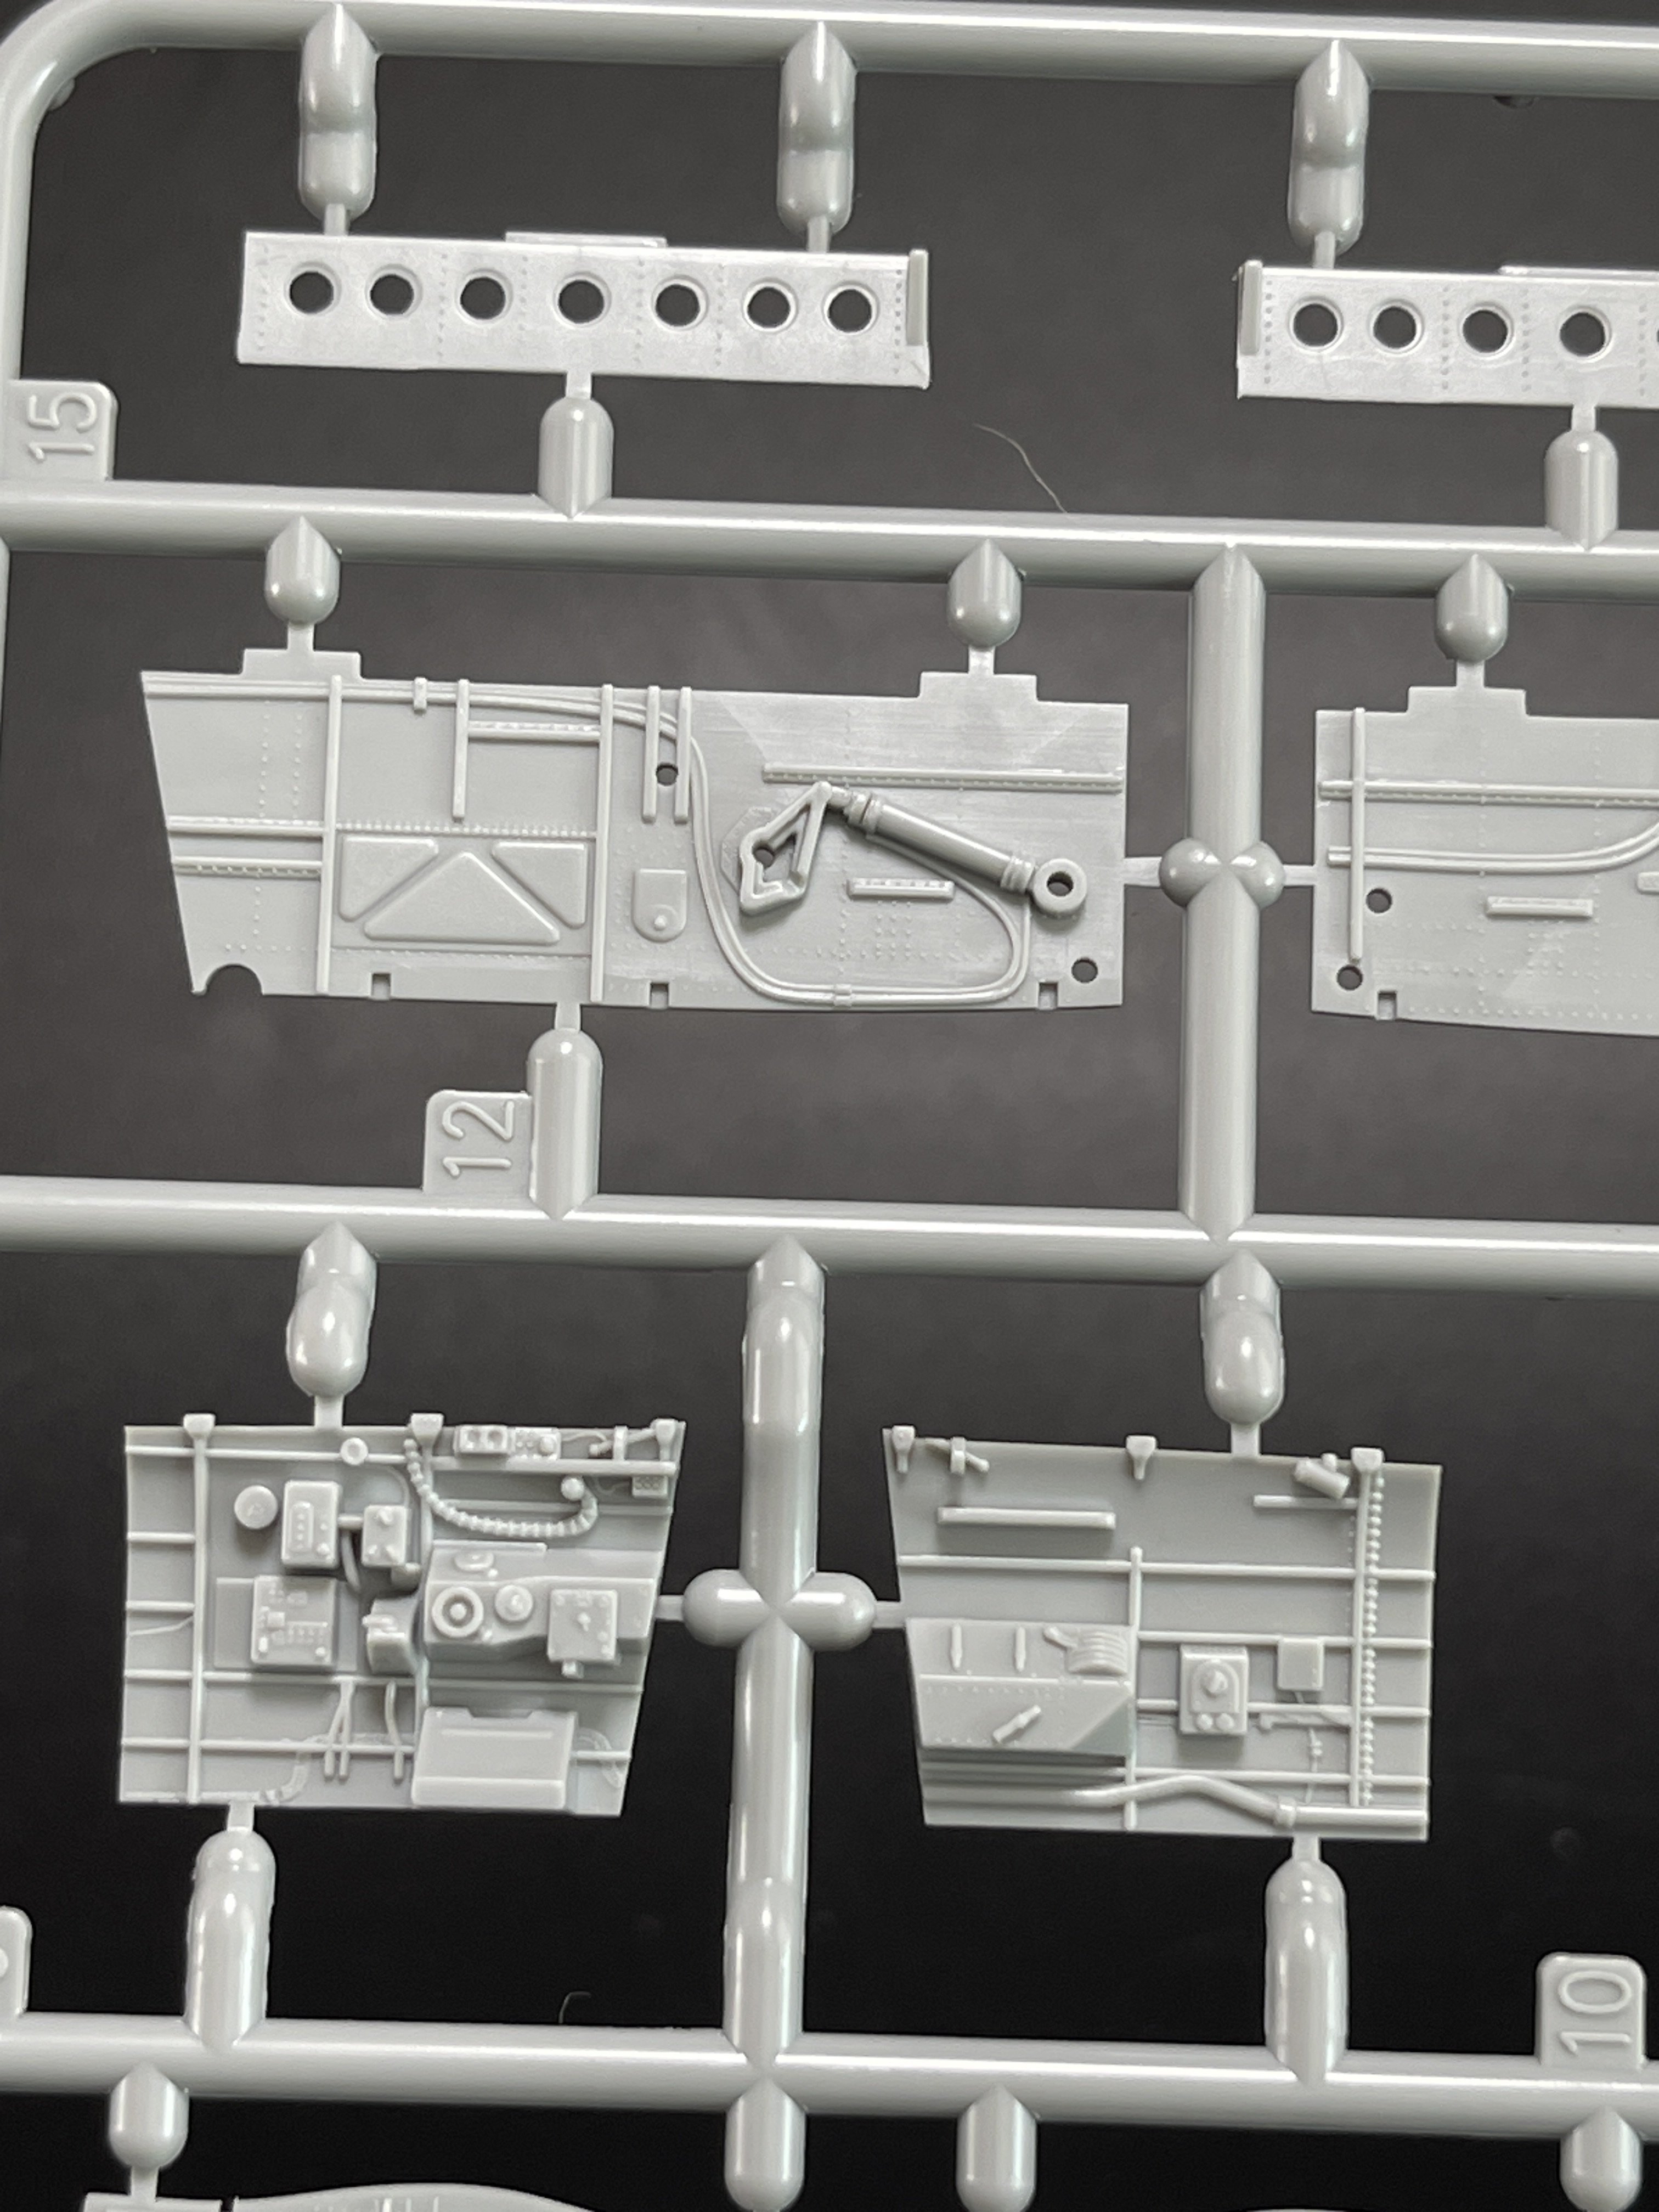
It comprising around 80 parts, this model is more straightforward to assemble of all three. It offers a detailed cockpit and well-molded surfaces, making it a favorable choice for those looking to enhance their modeling skills.
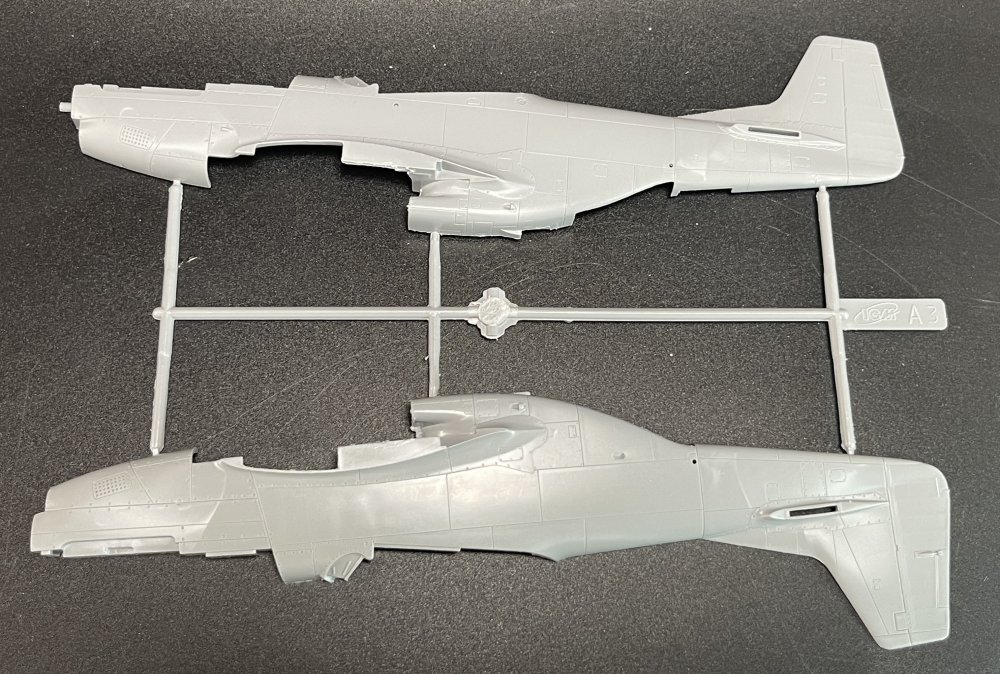

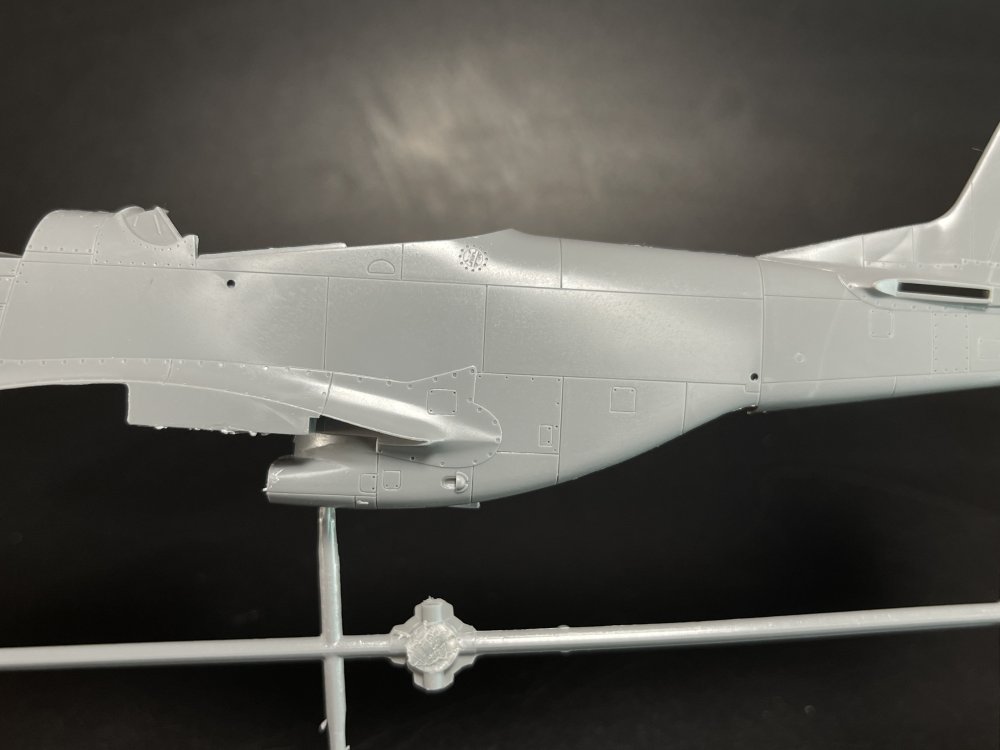
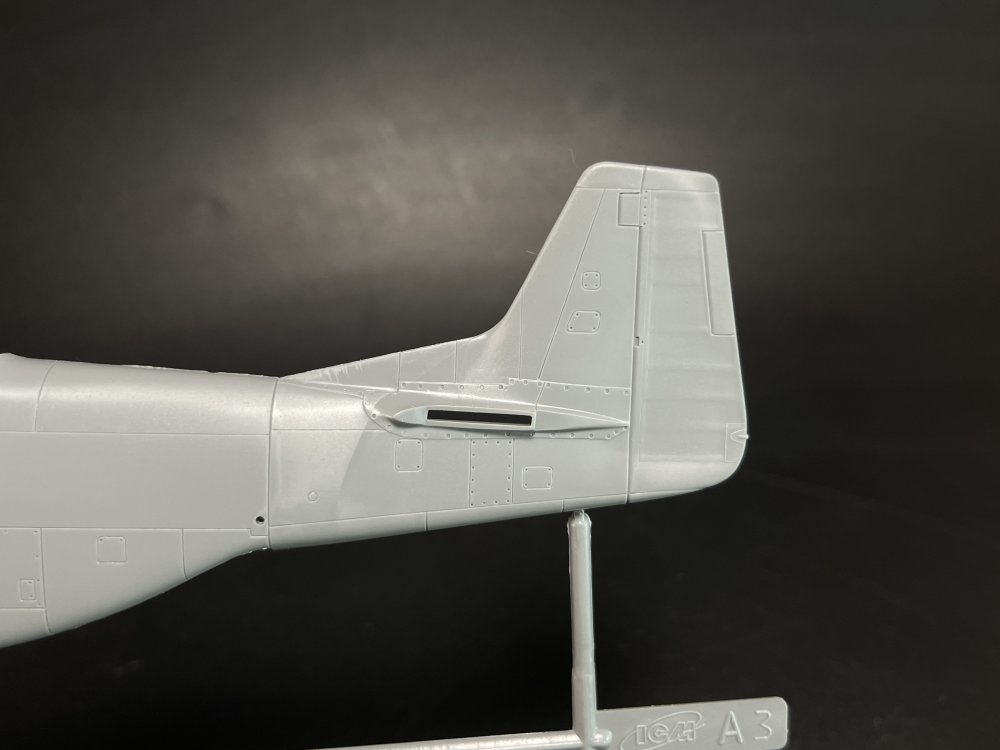


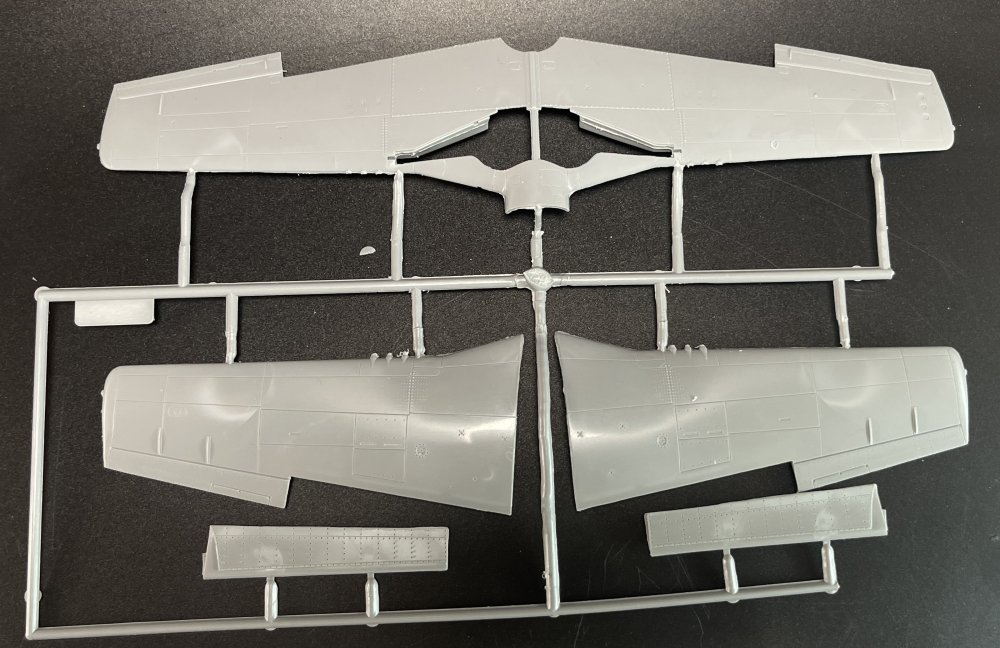

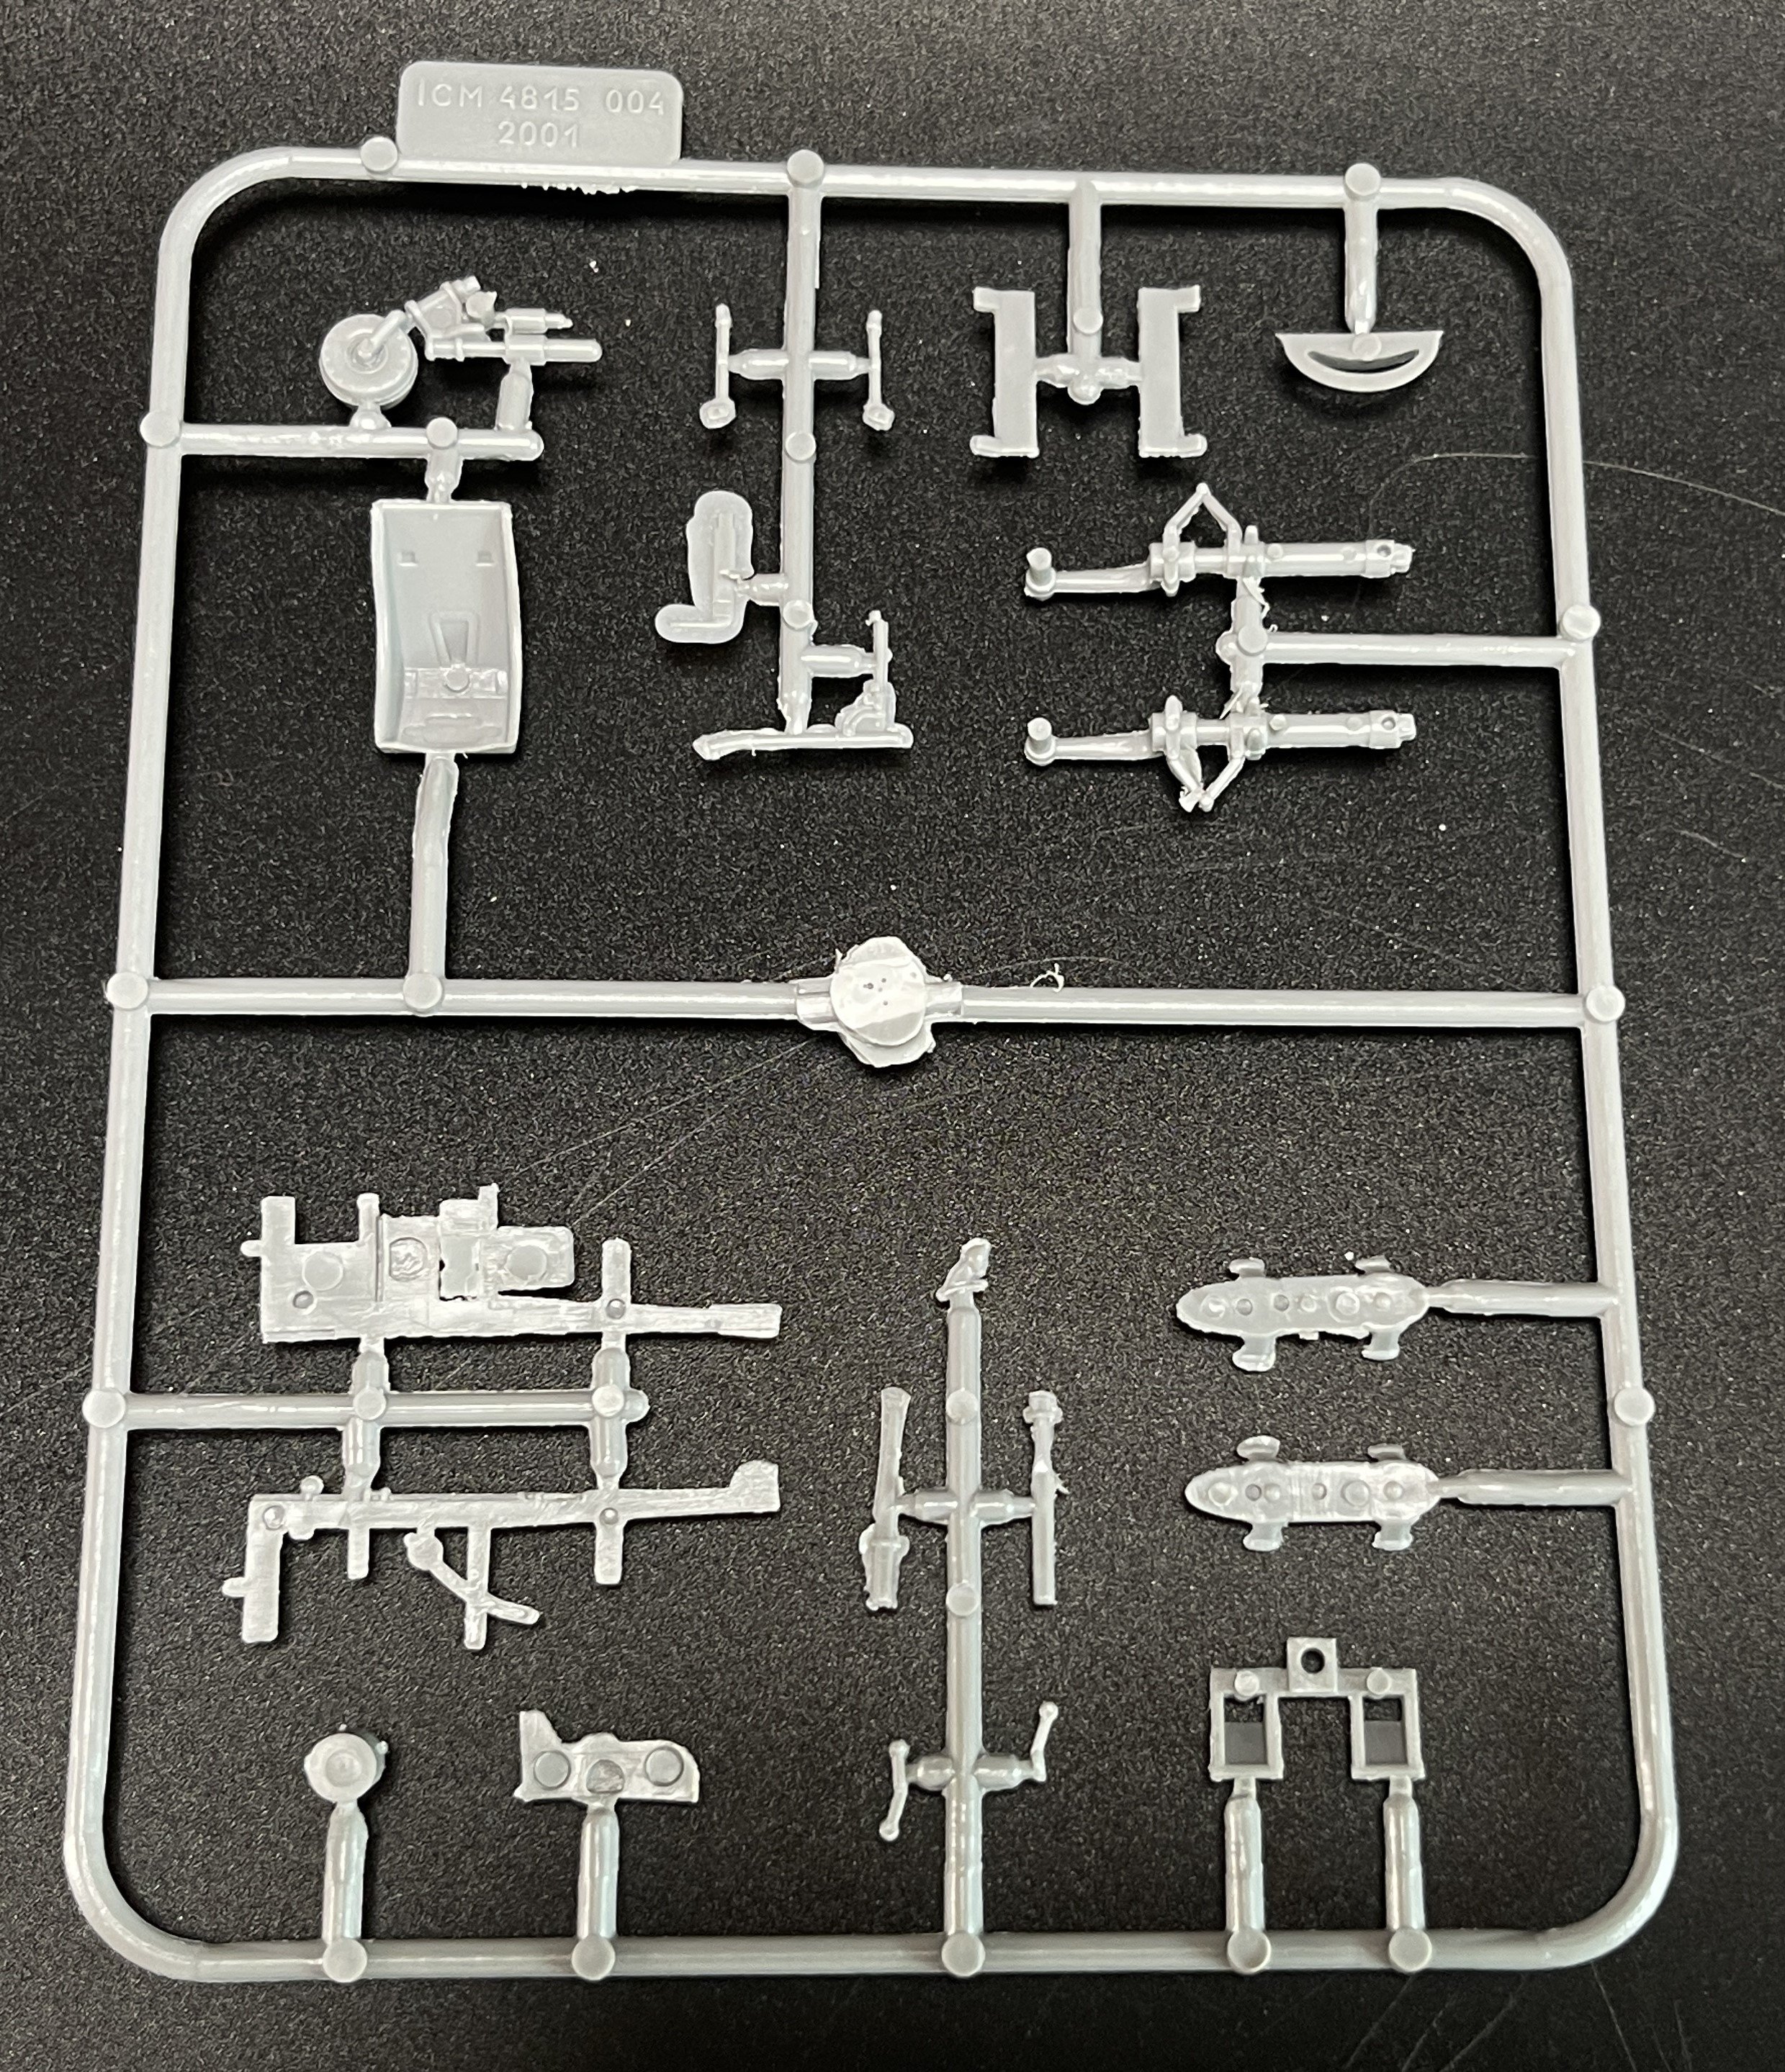
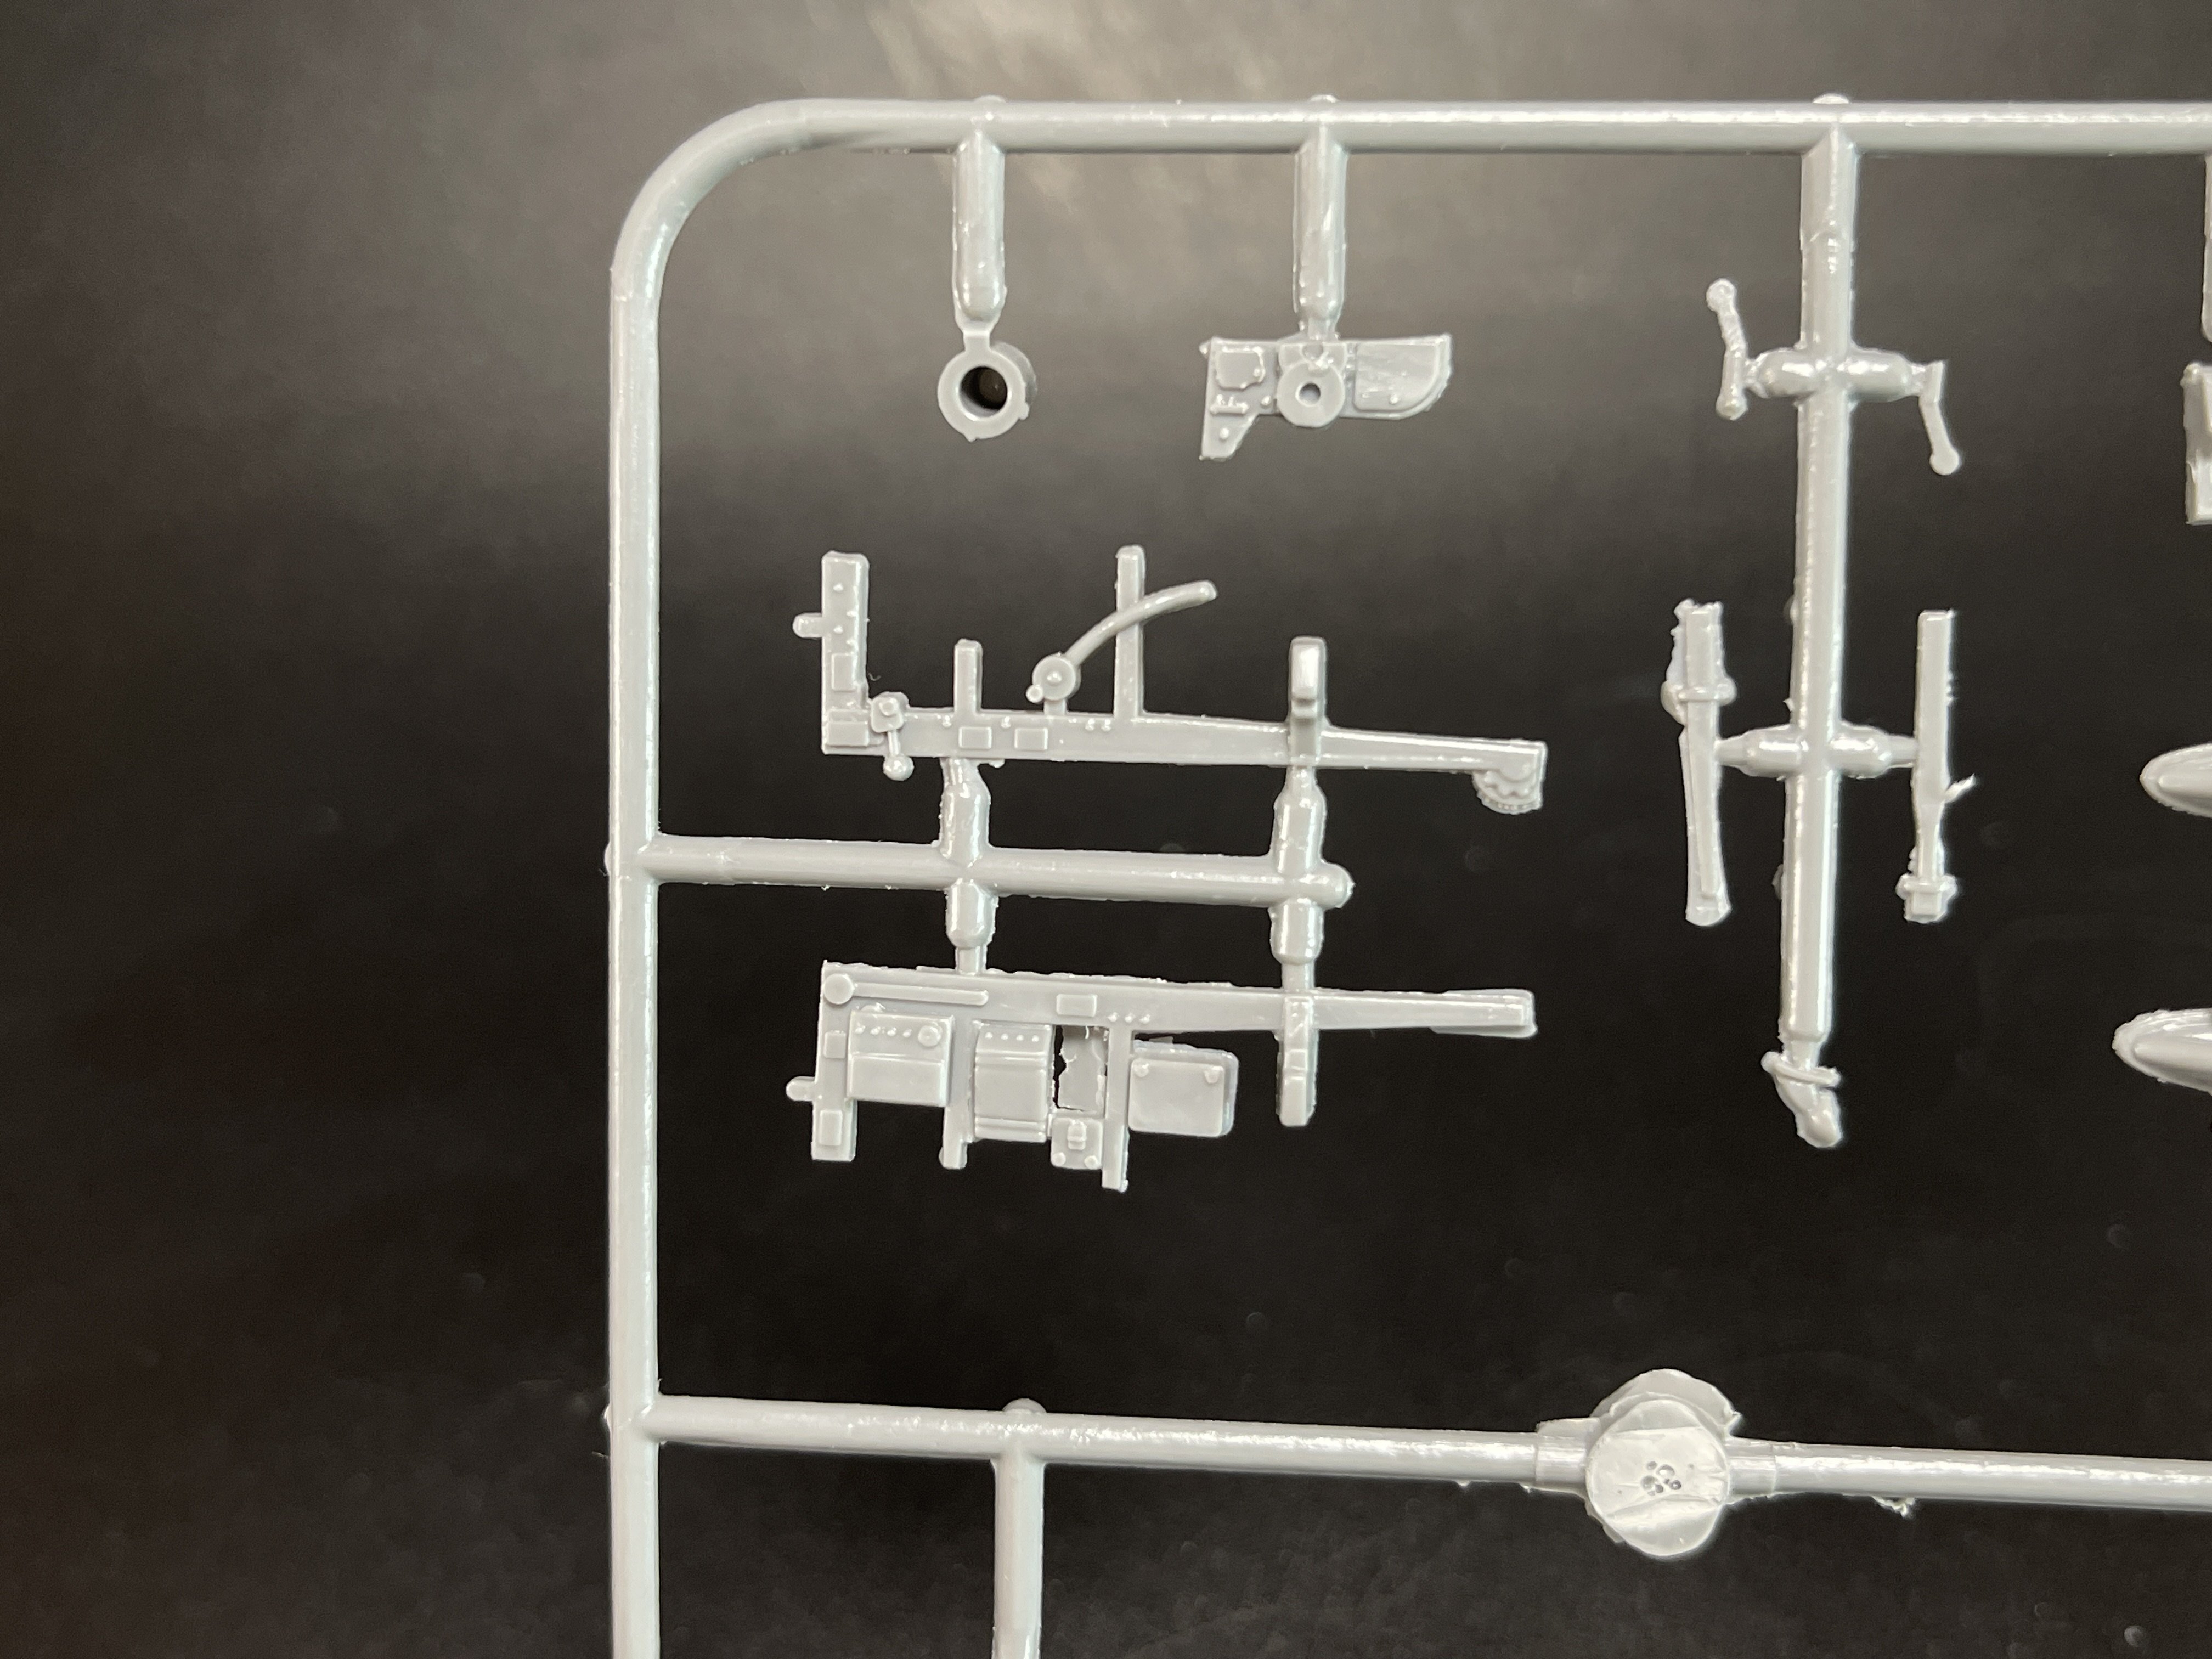
Considering that the kit was released in 2001 as the P-51C and in 2003 https://www.scalemates.com/kits/icm-48153-north-american-p-51d-15--1080729 with parts for the D variant, the kit has held up surprisingly well and is very easy to build. Of course, the kit can't compete with newer Czech kits in terms of detail, but it can be assembled quickly:
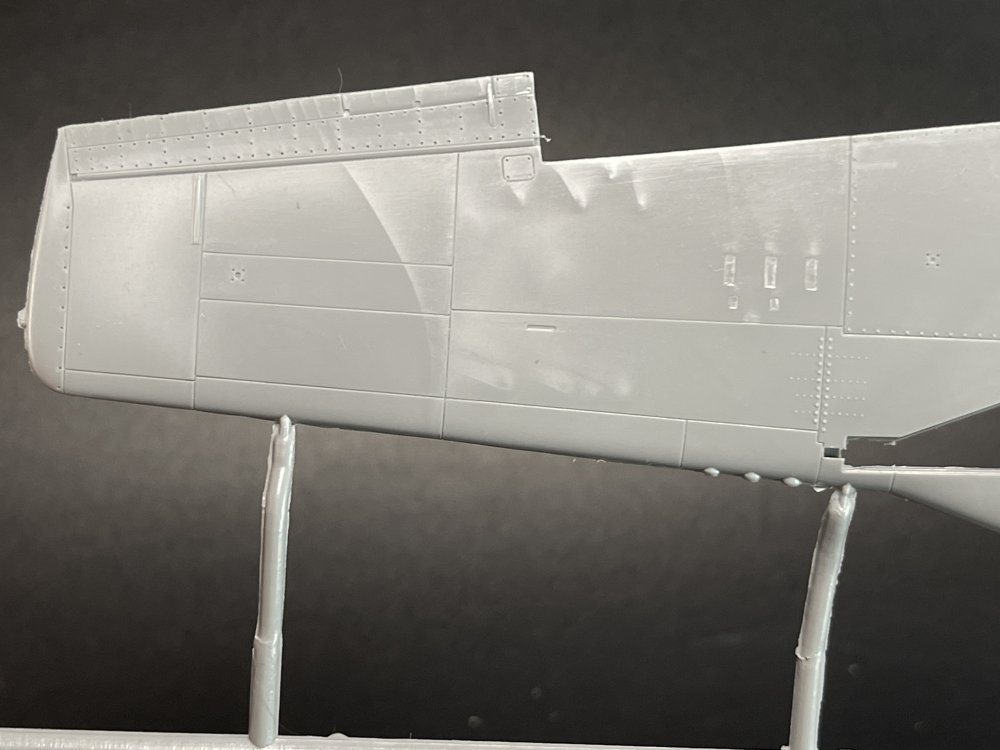
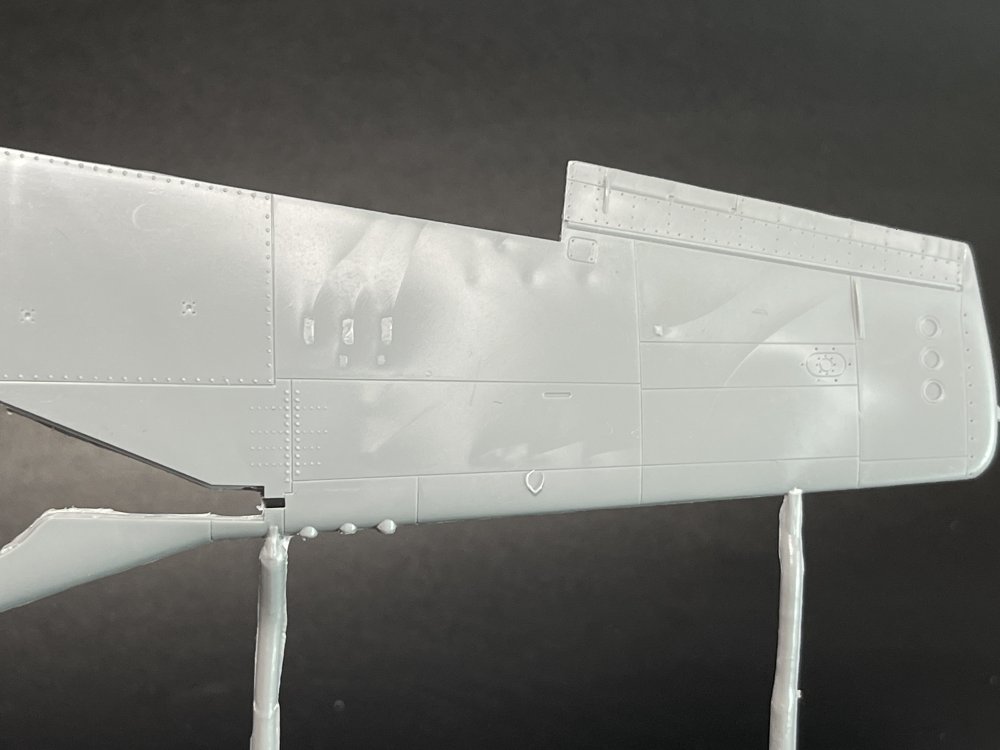
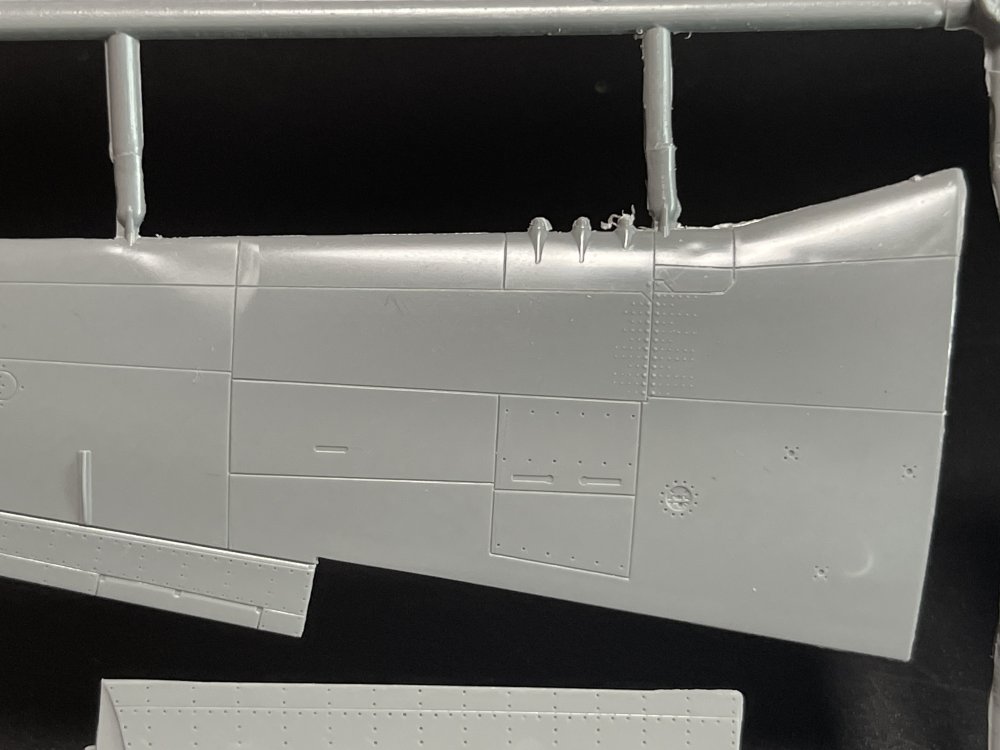
So The P-51D the parts have good surface detail but not as good as the B-26C. Also the sprues have a few flash that will take a bit more time to clean up.
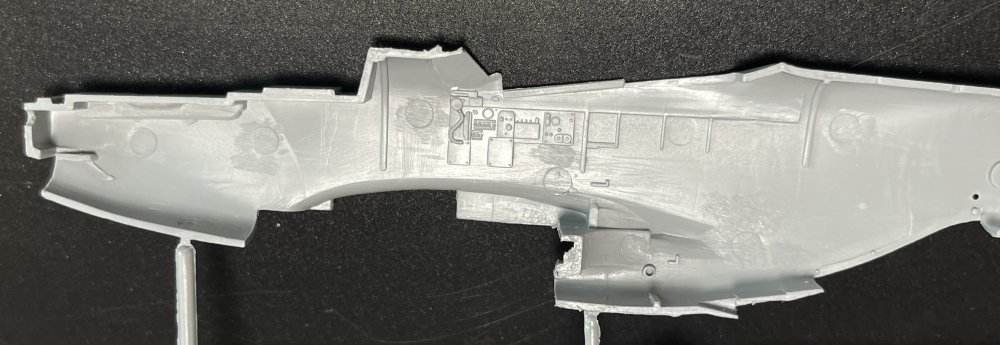
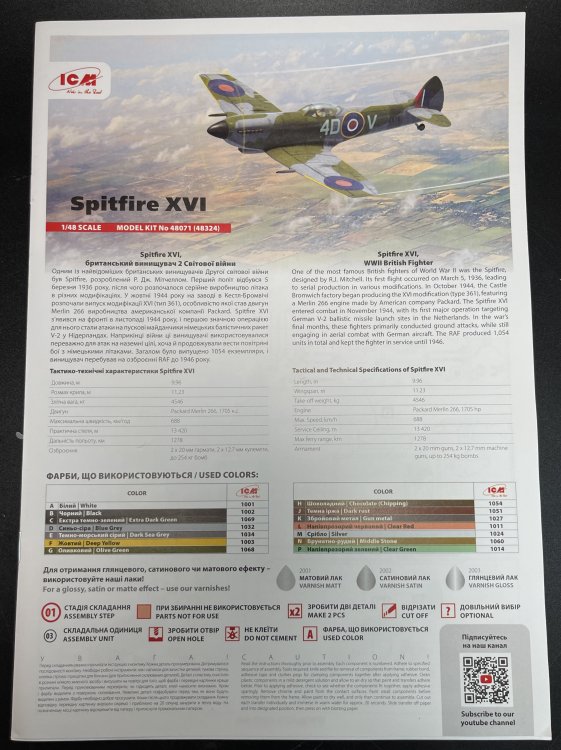
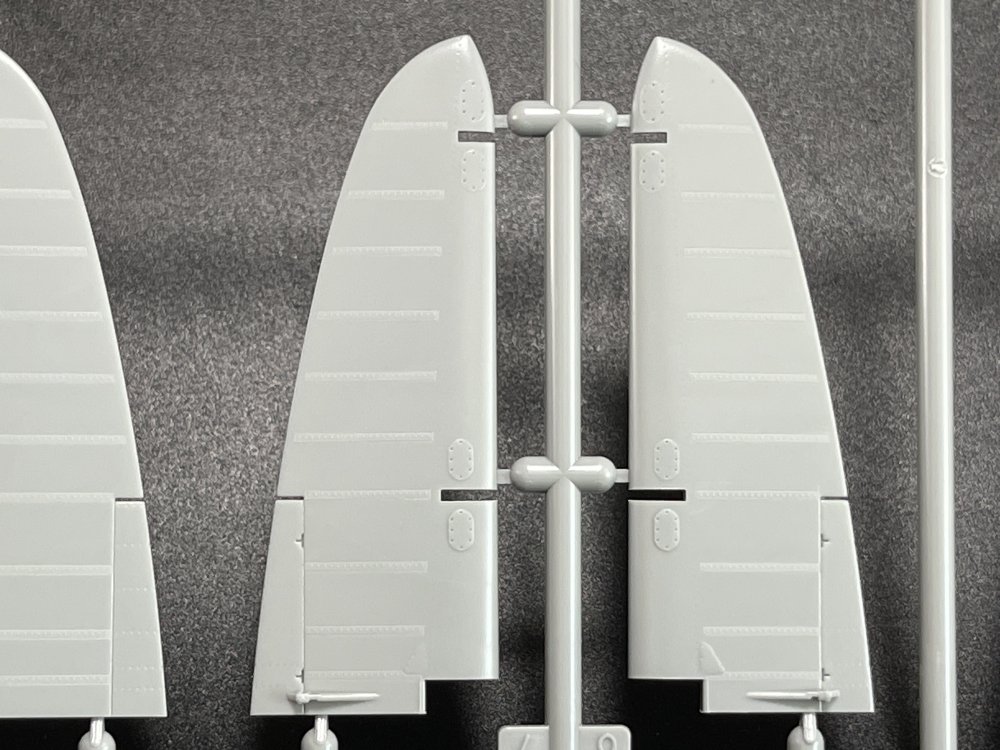
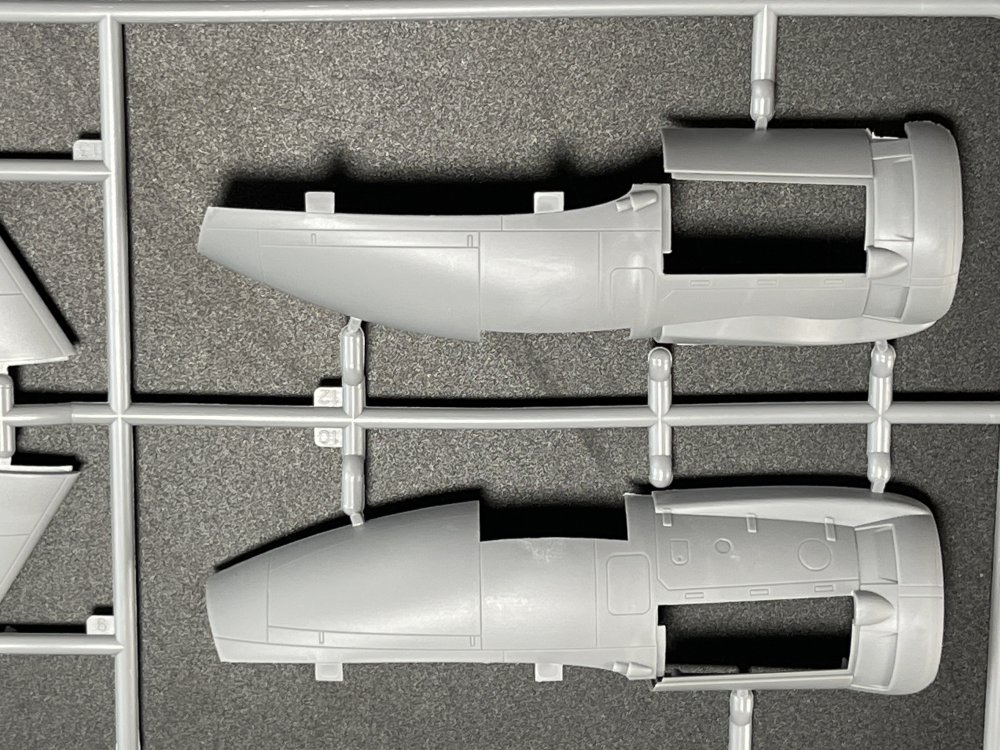
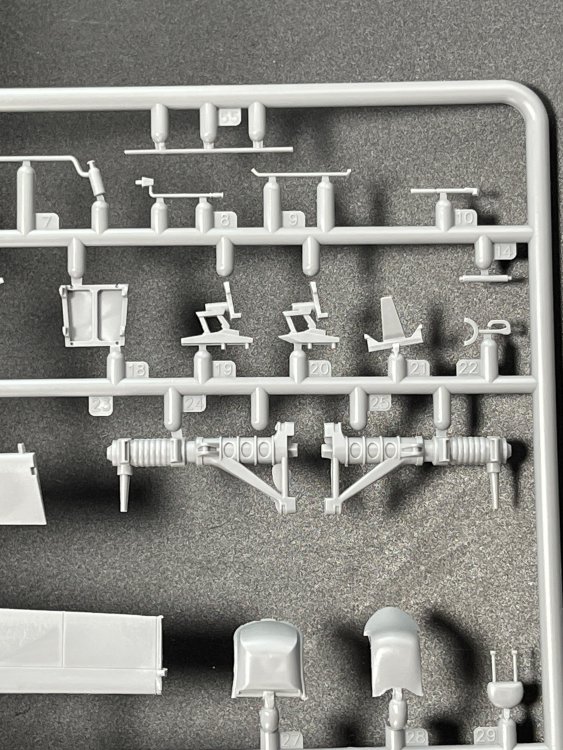
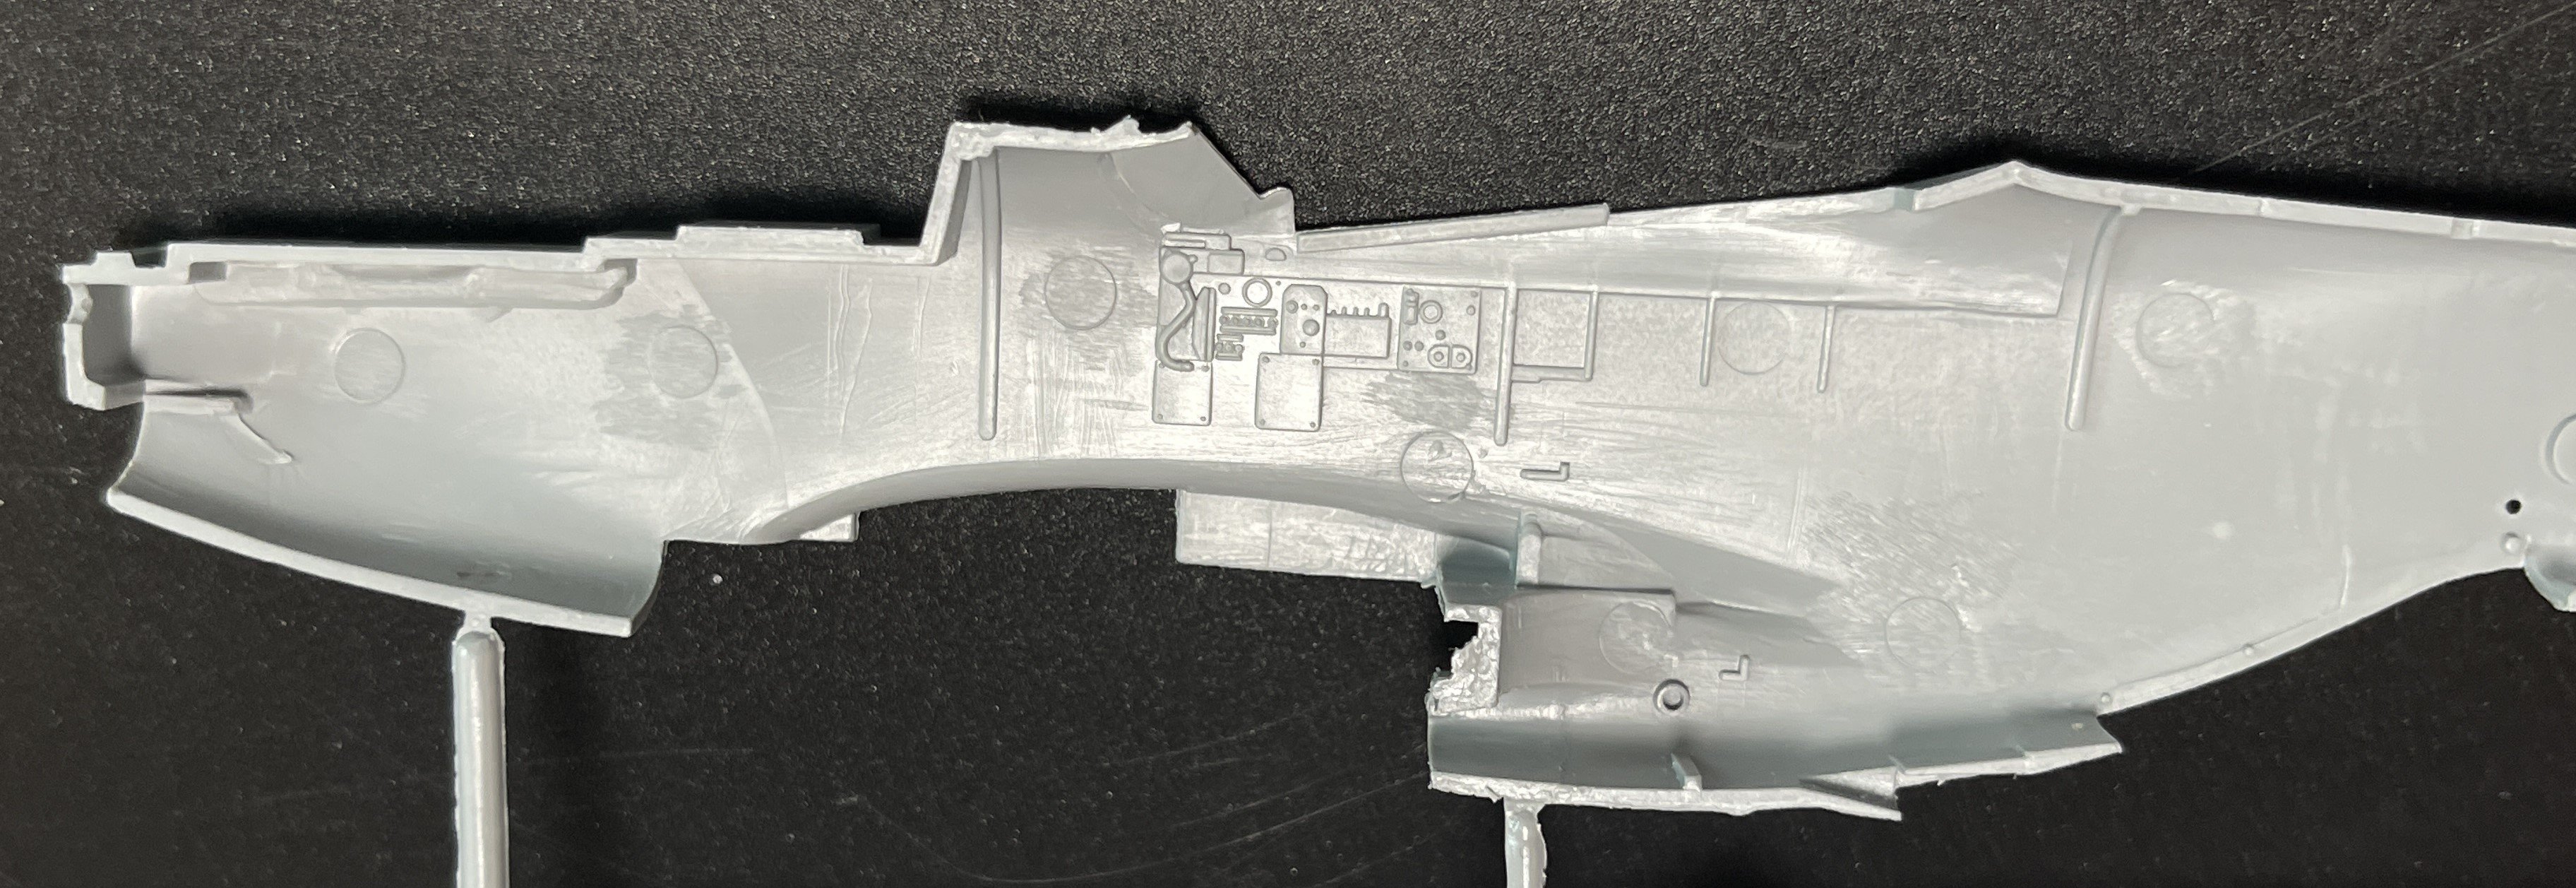
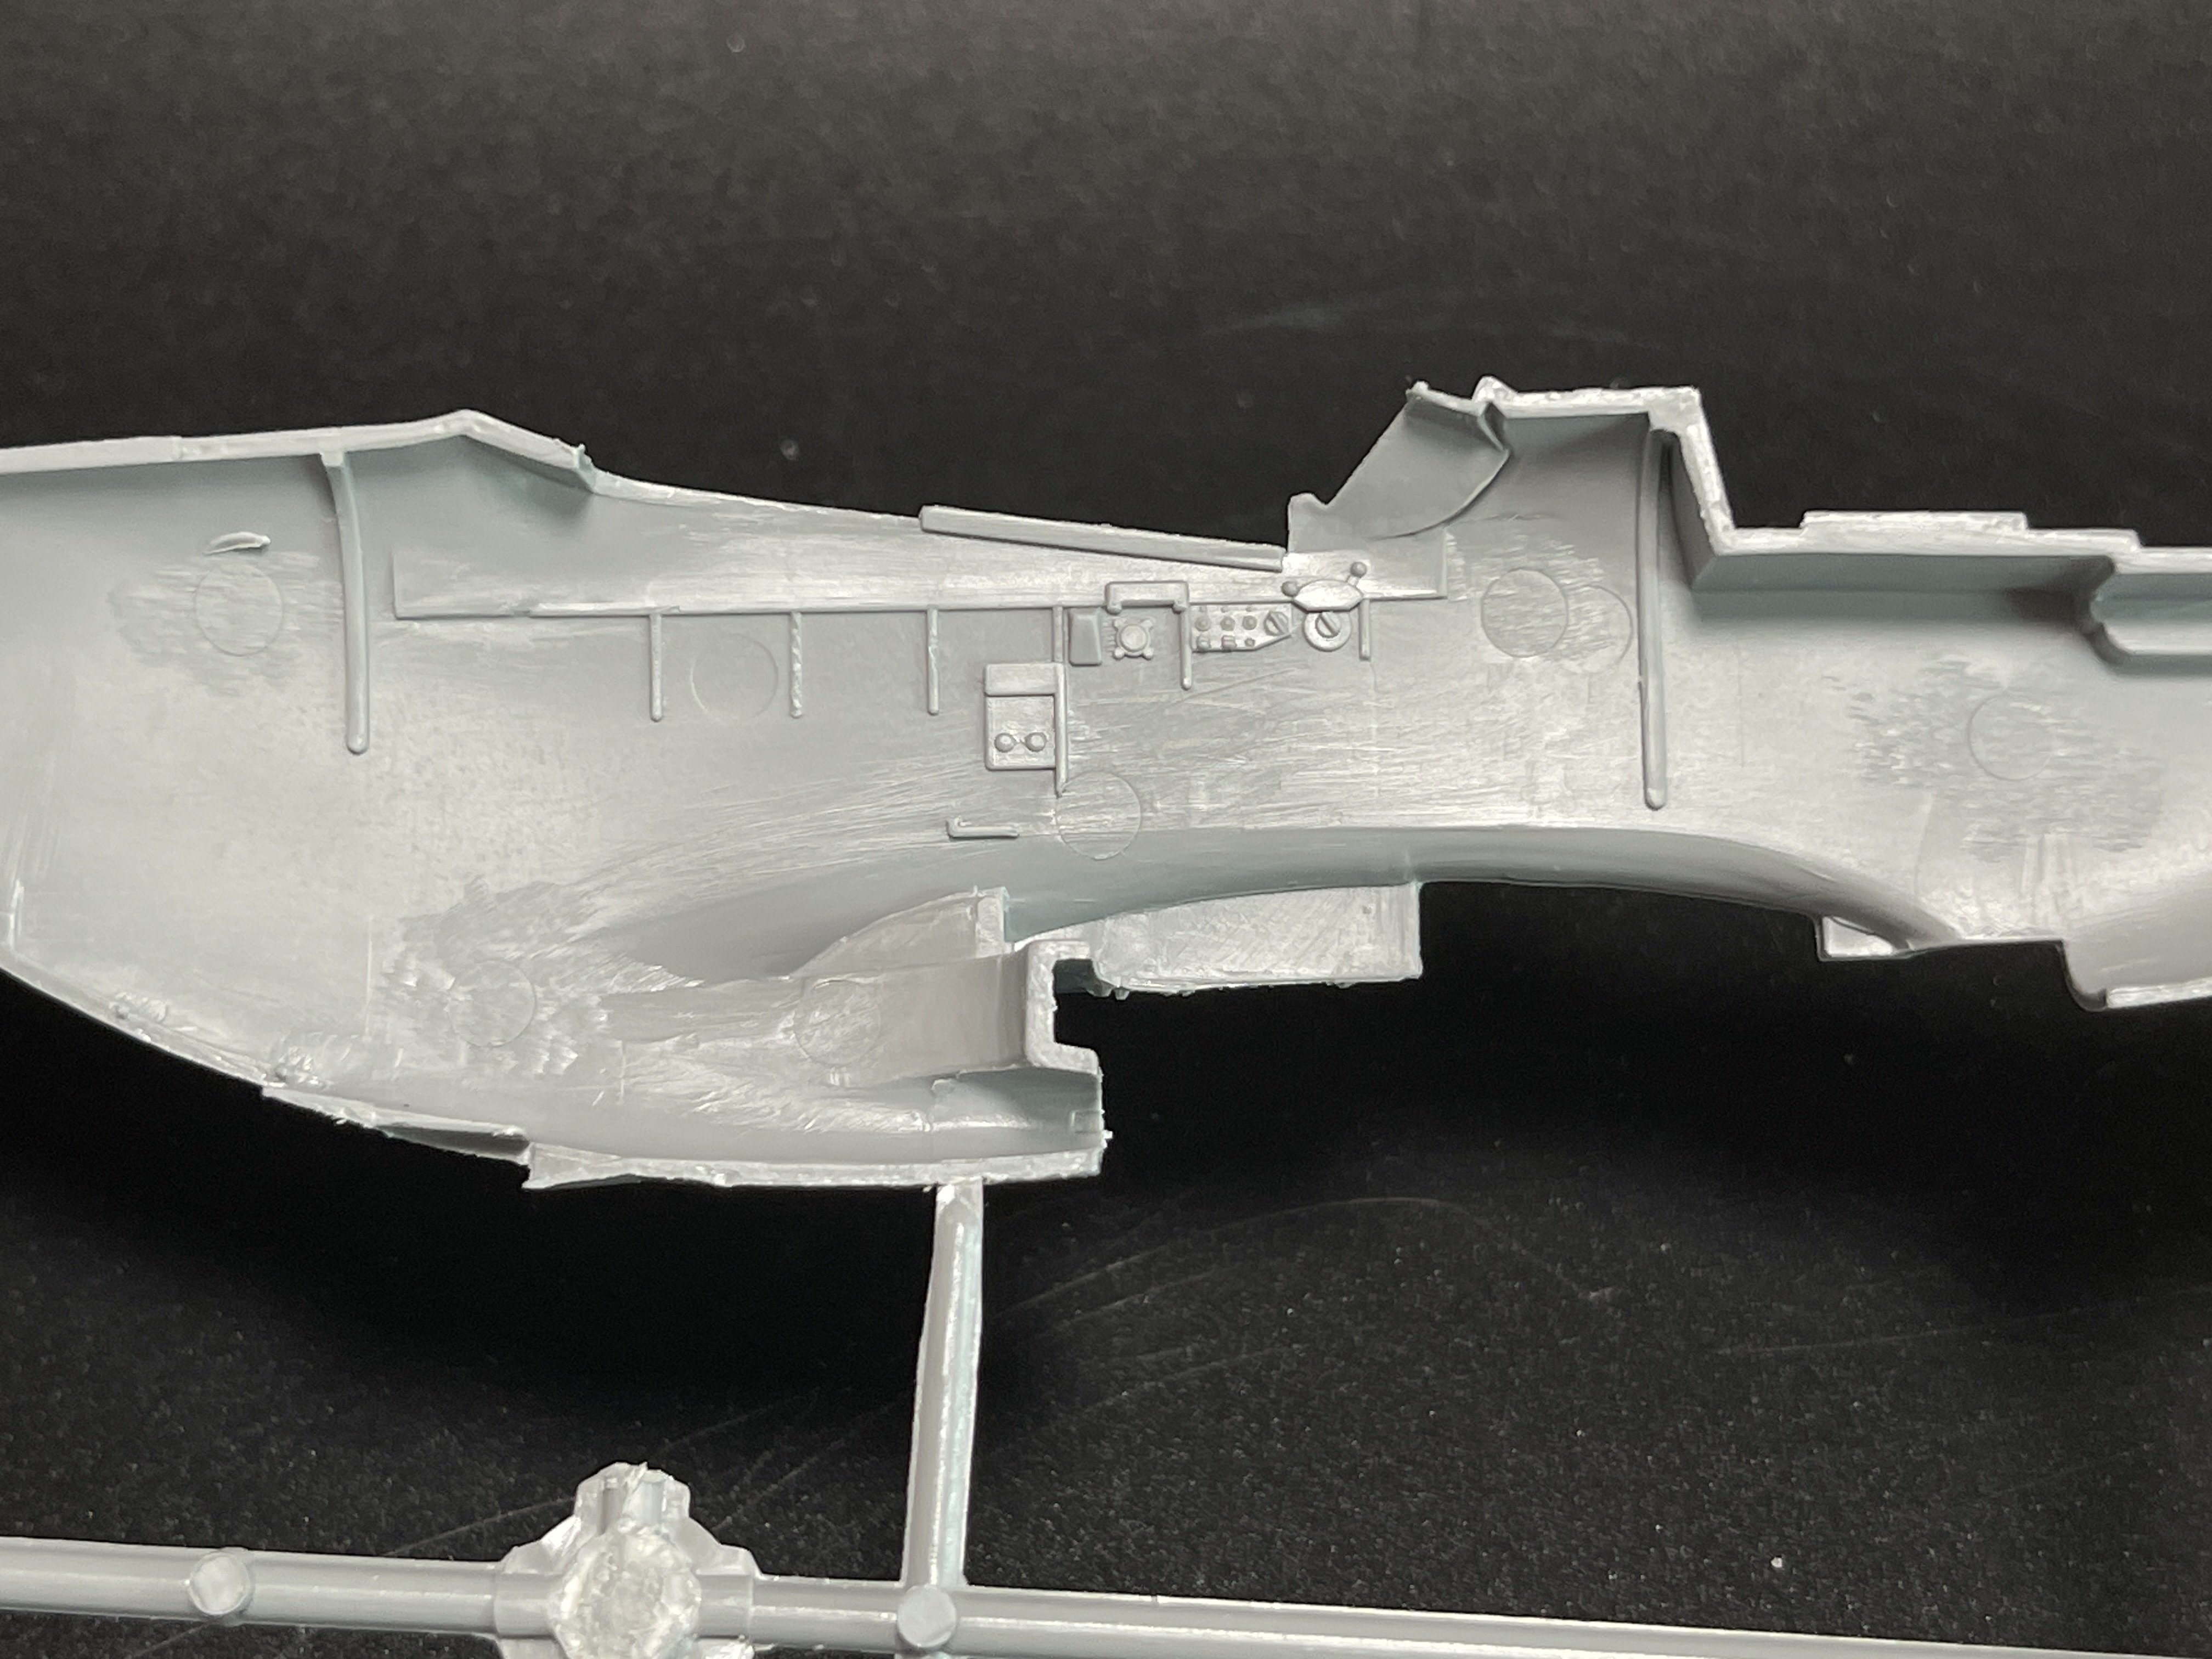
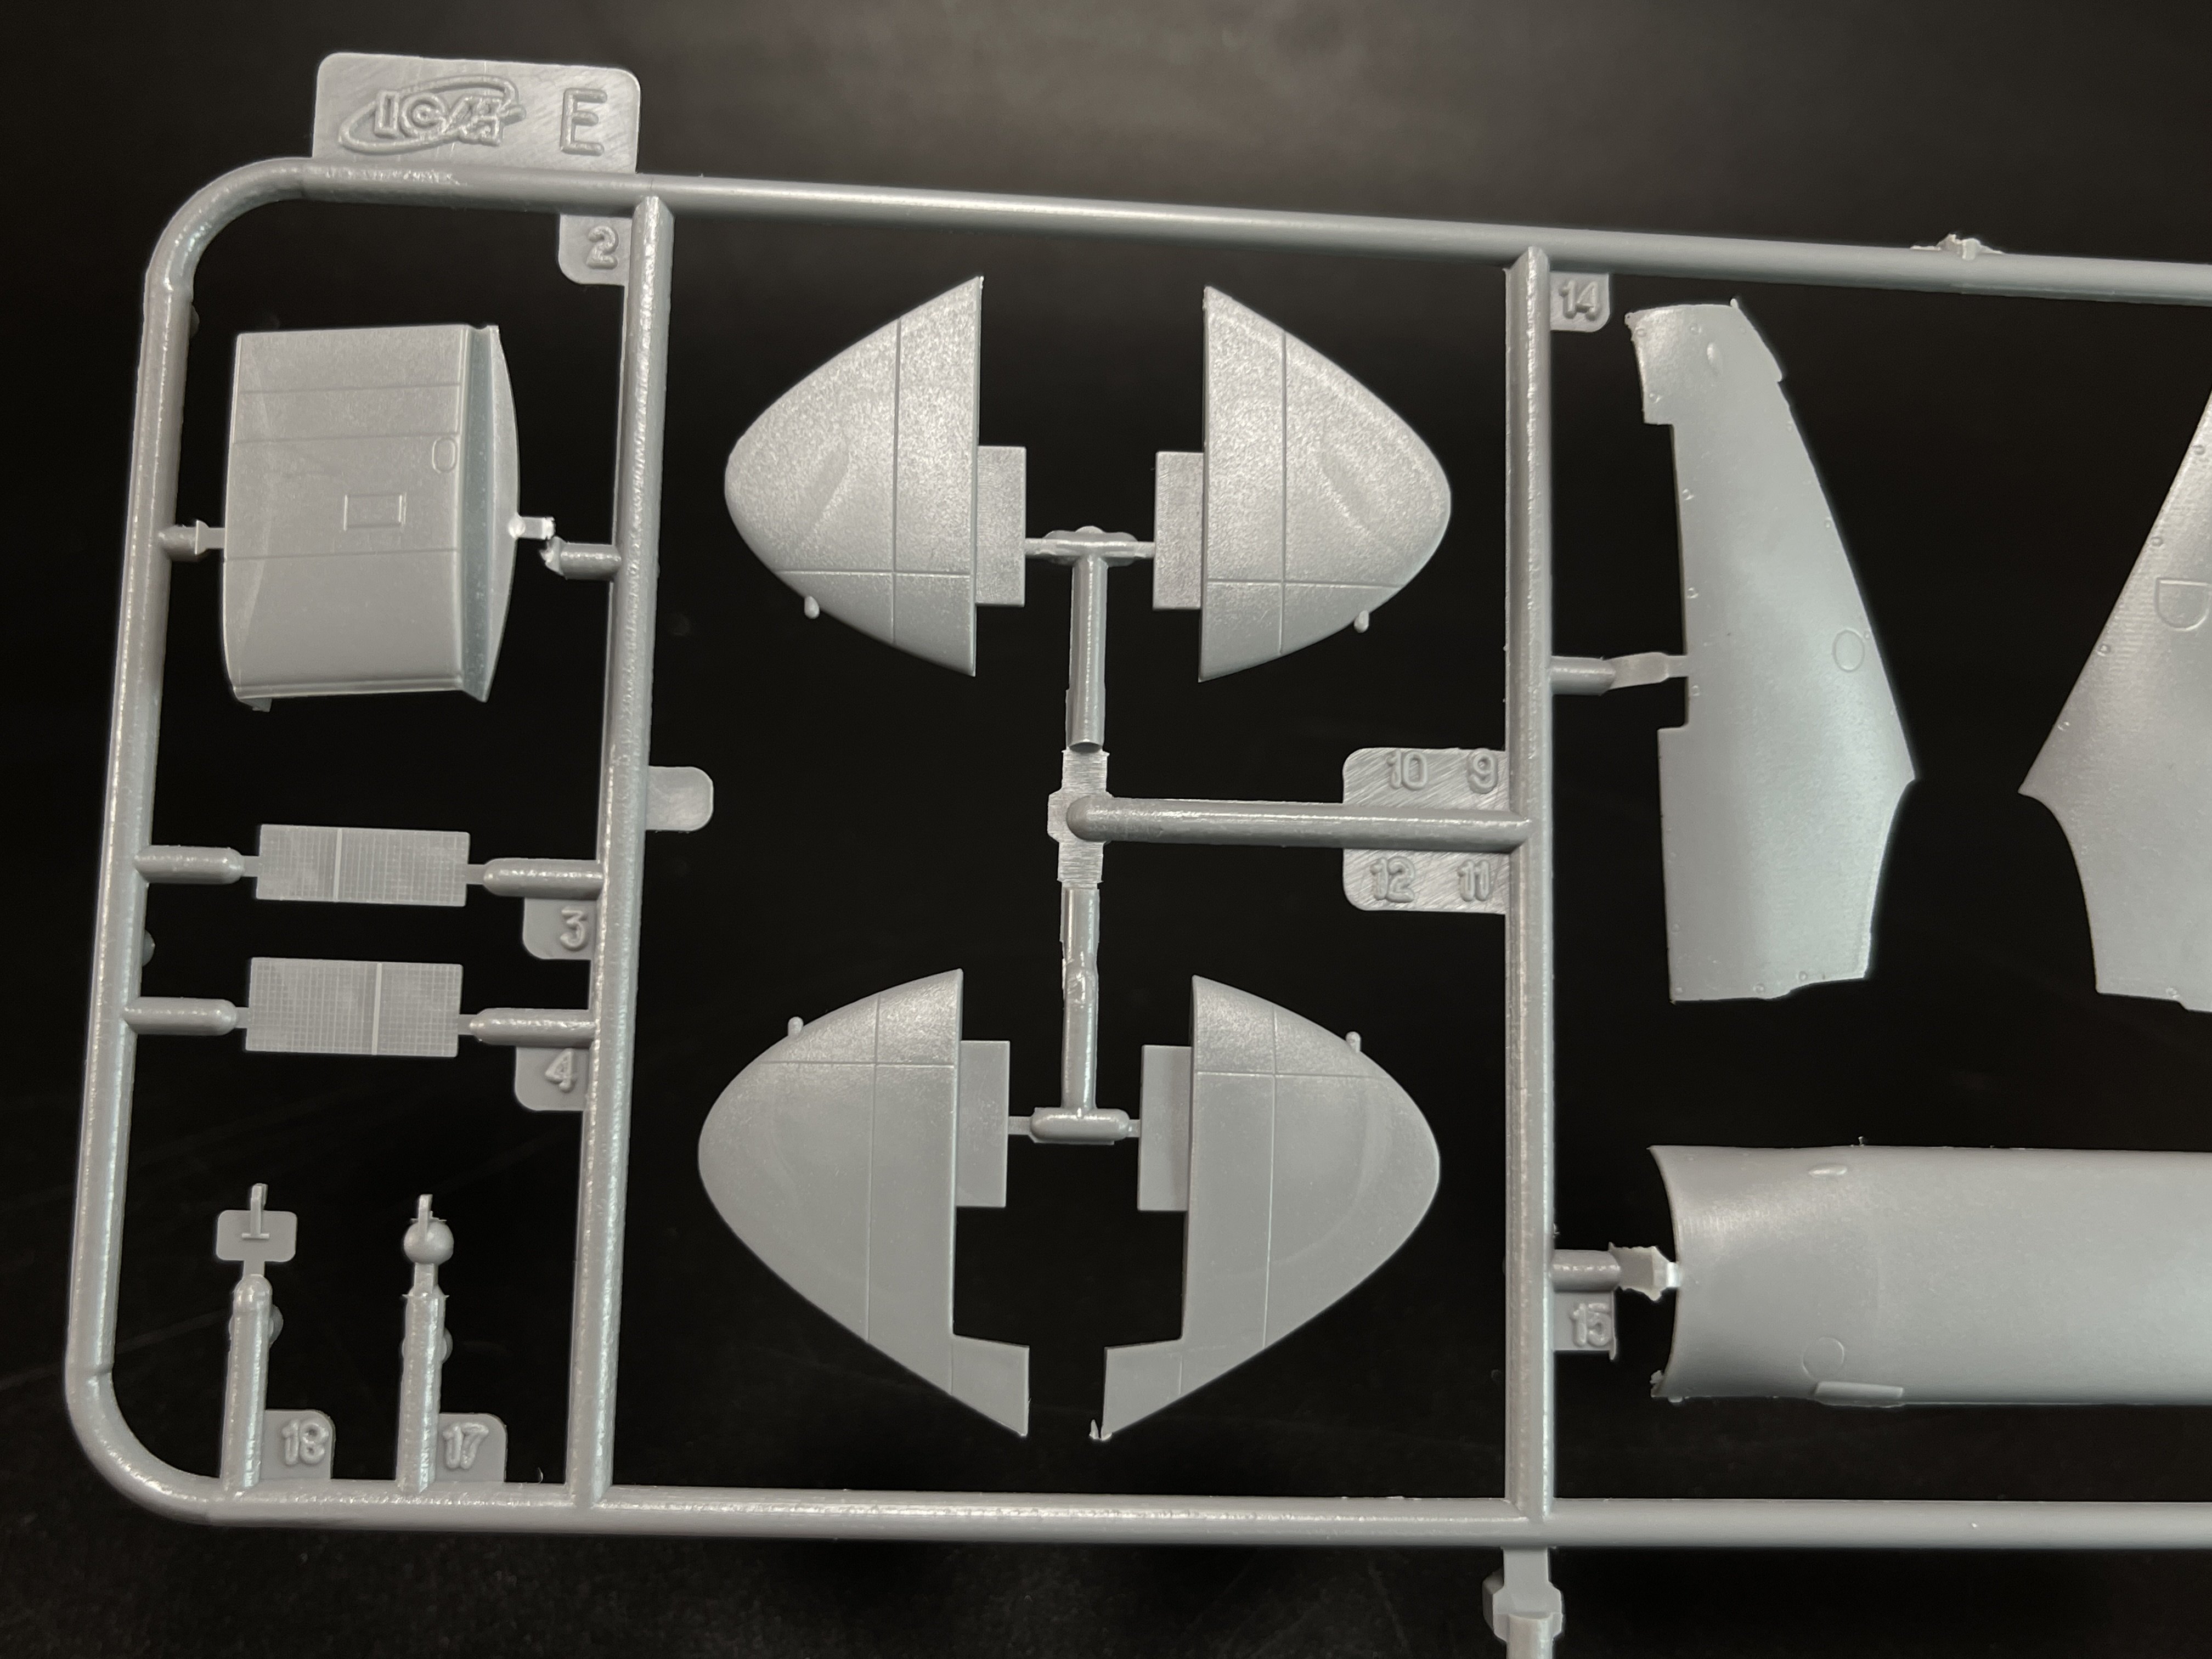
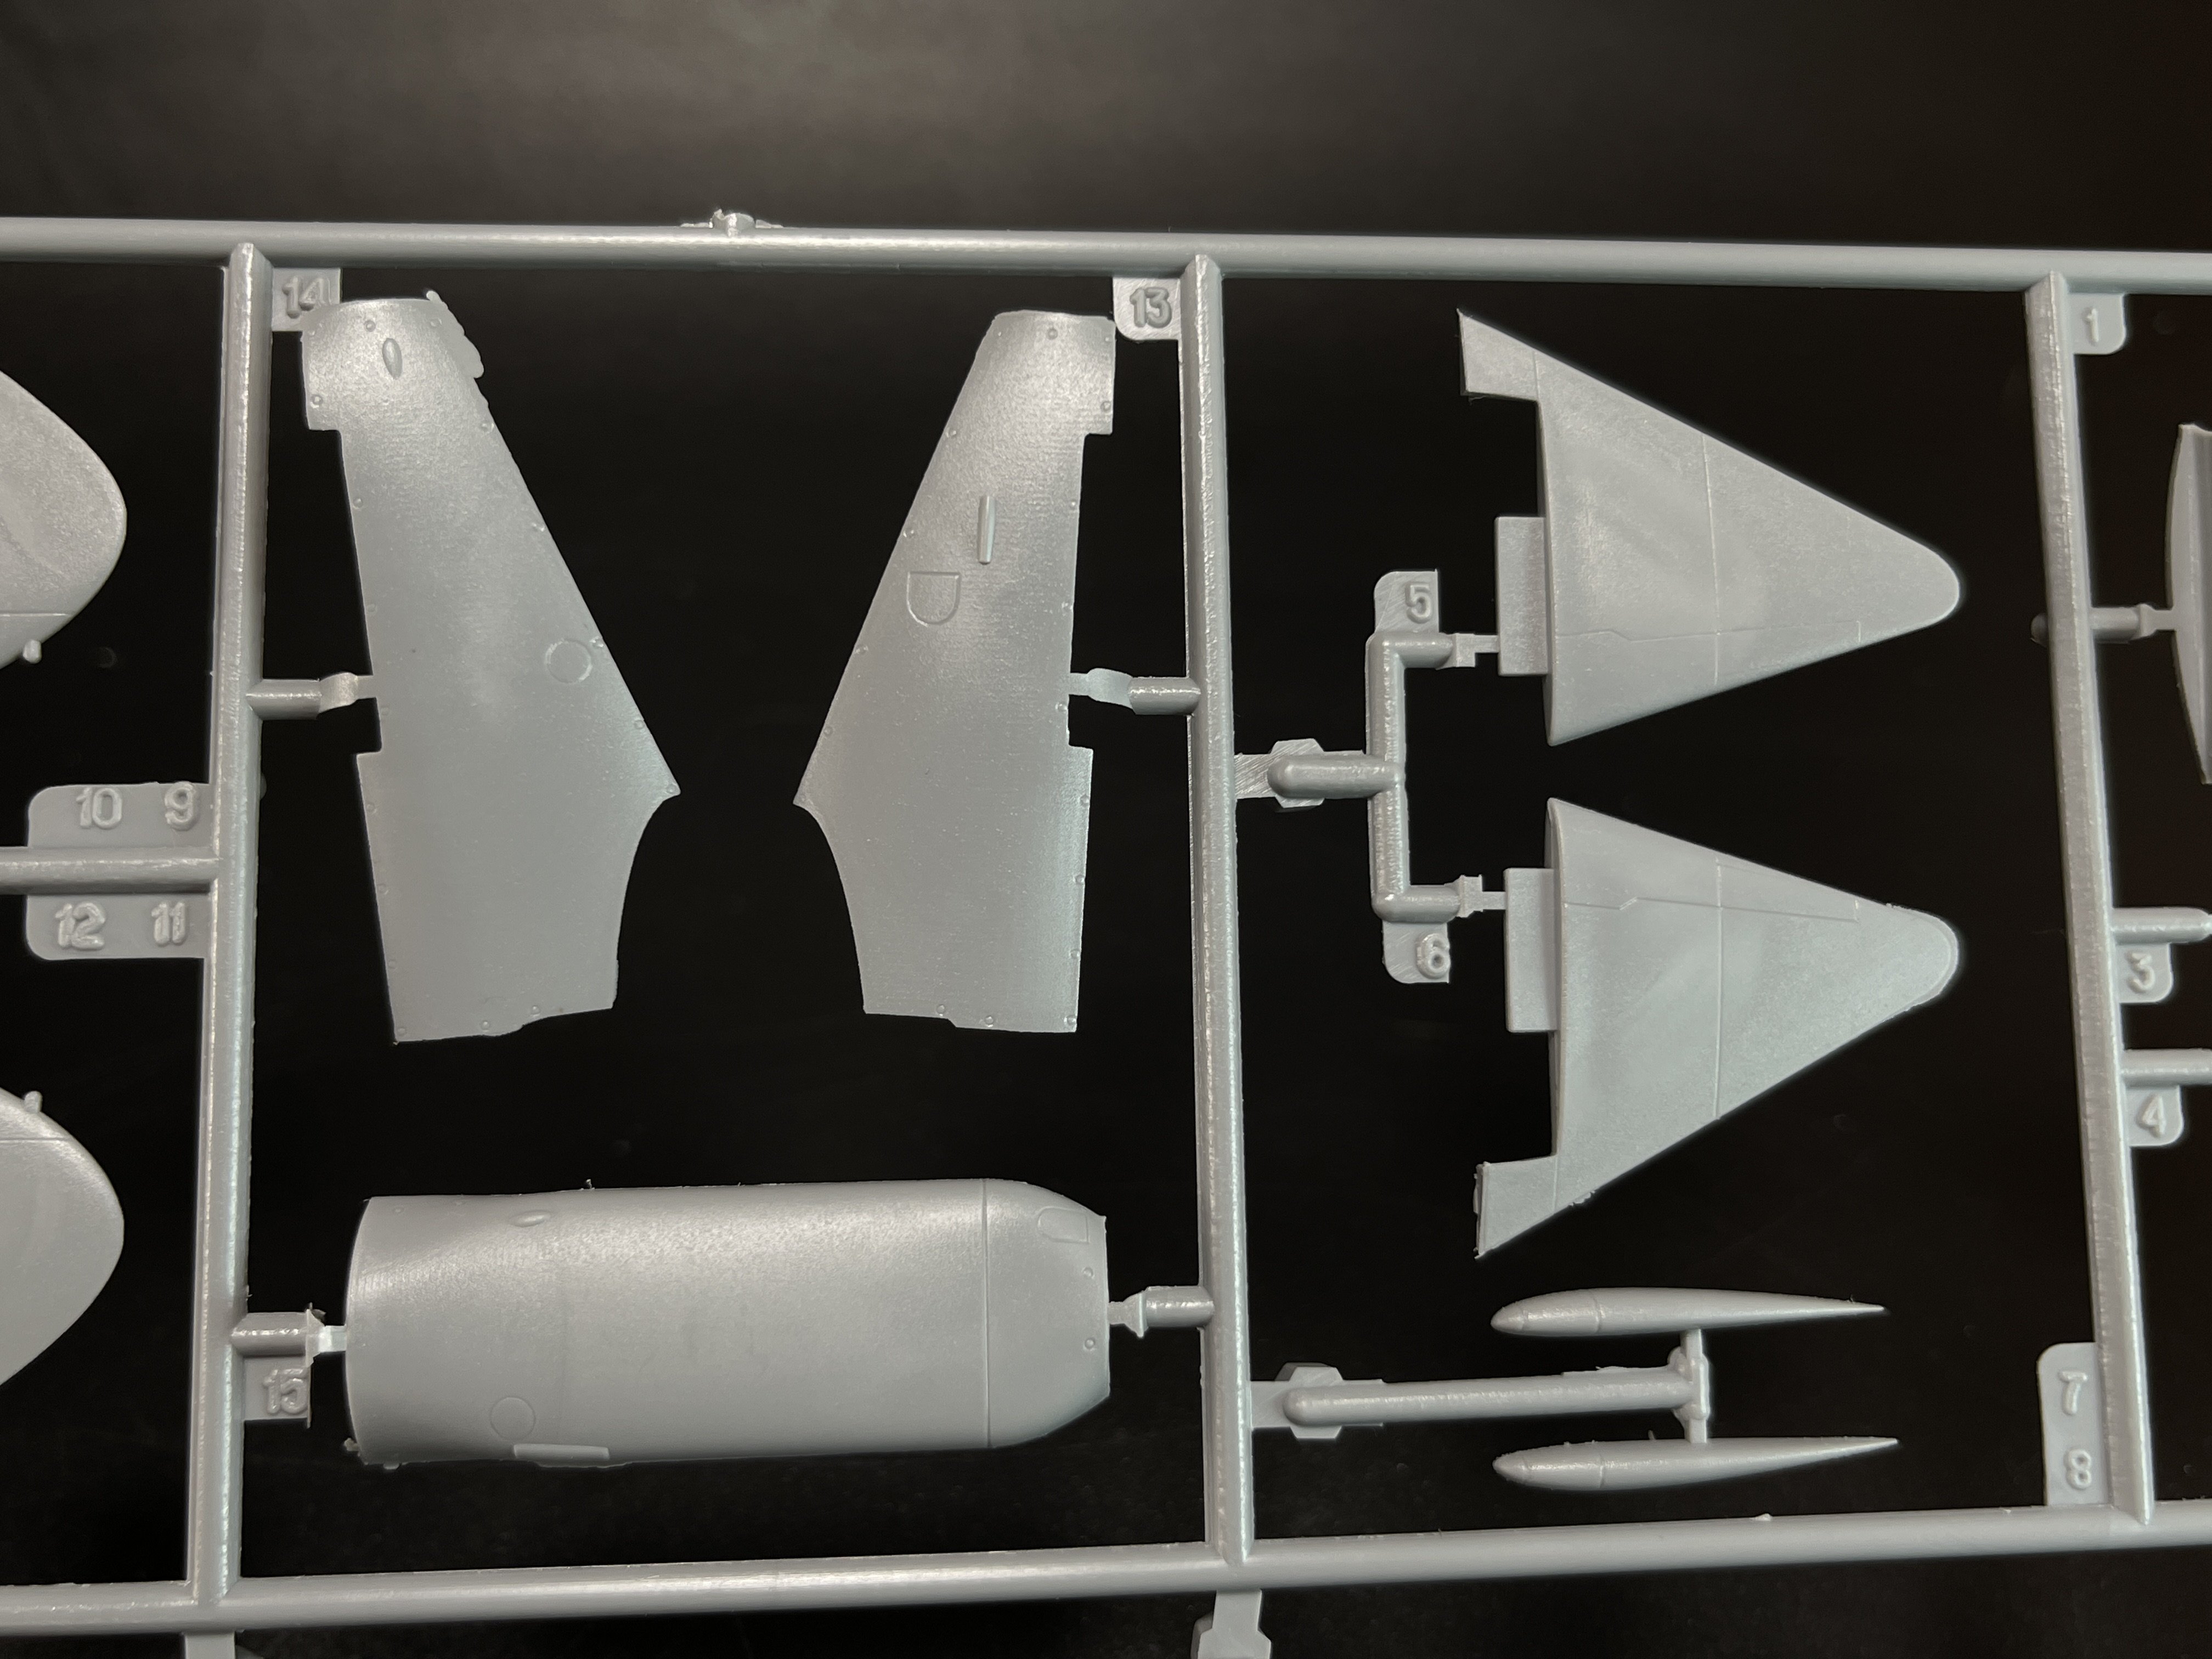
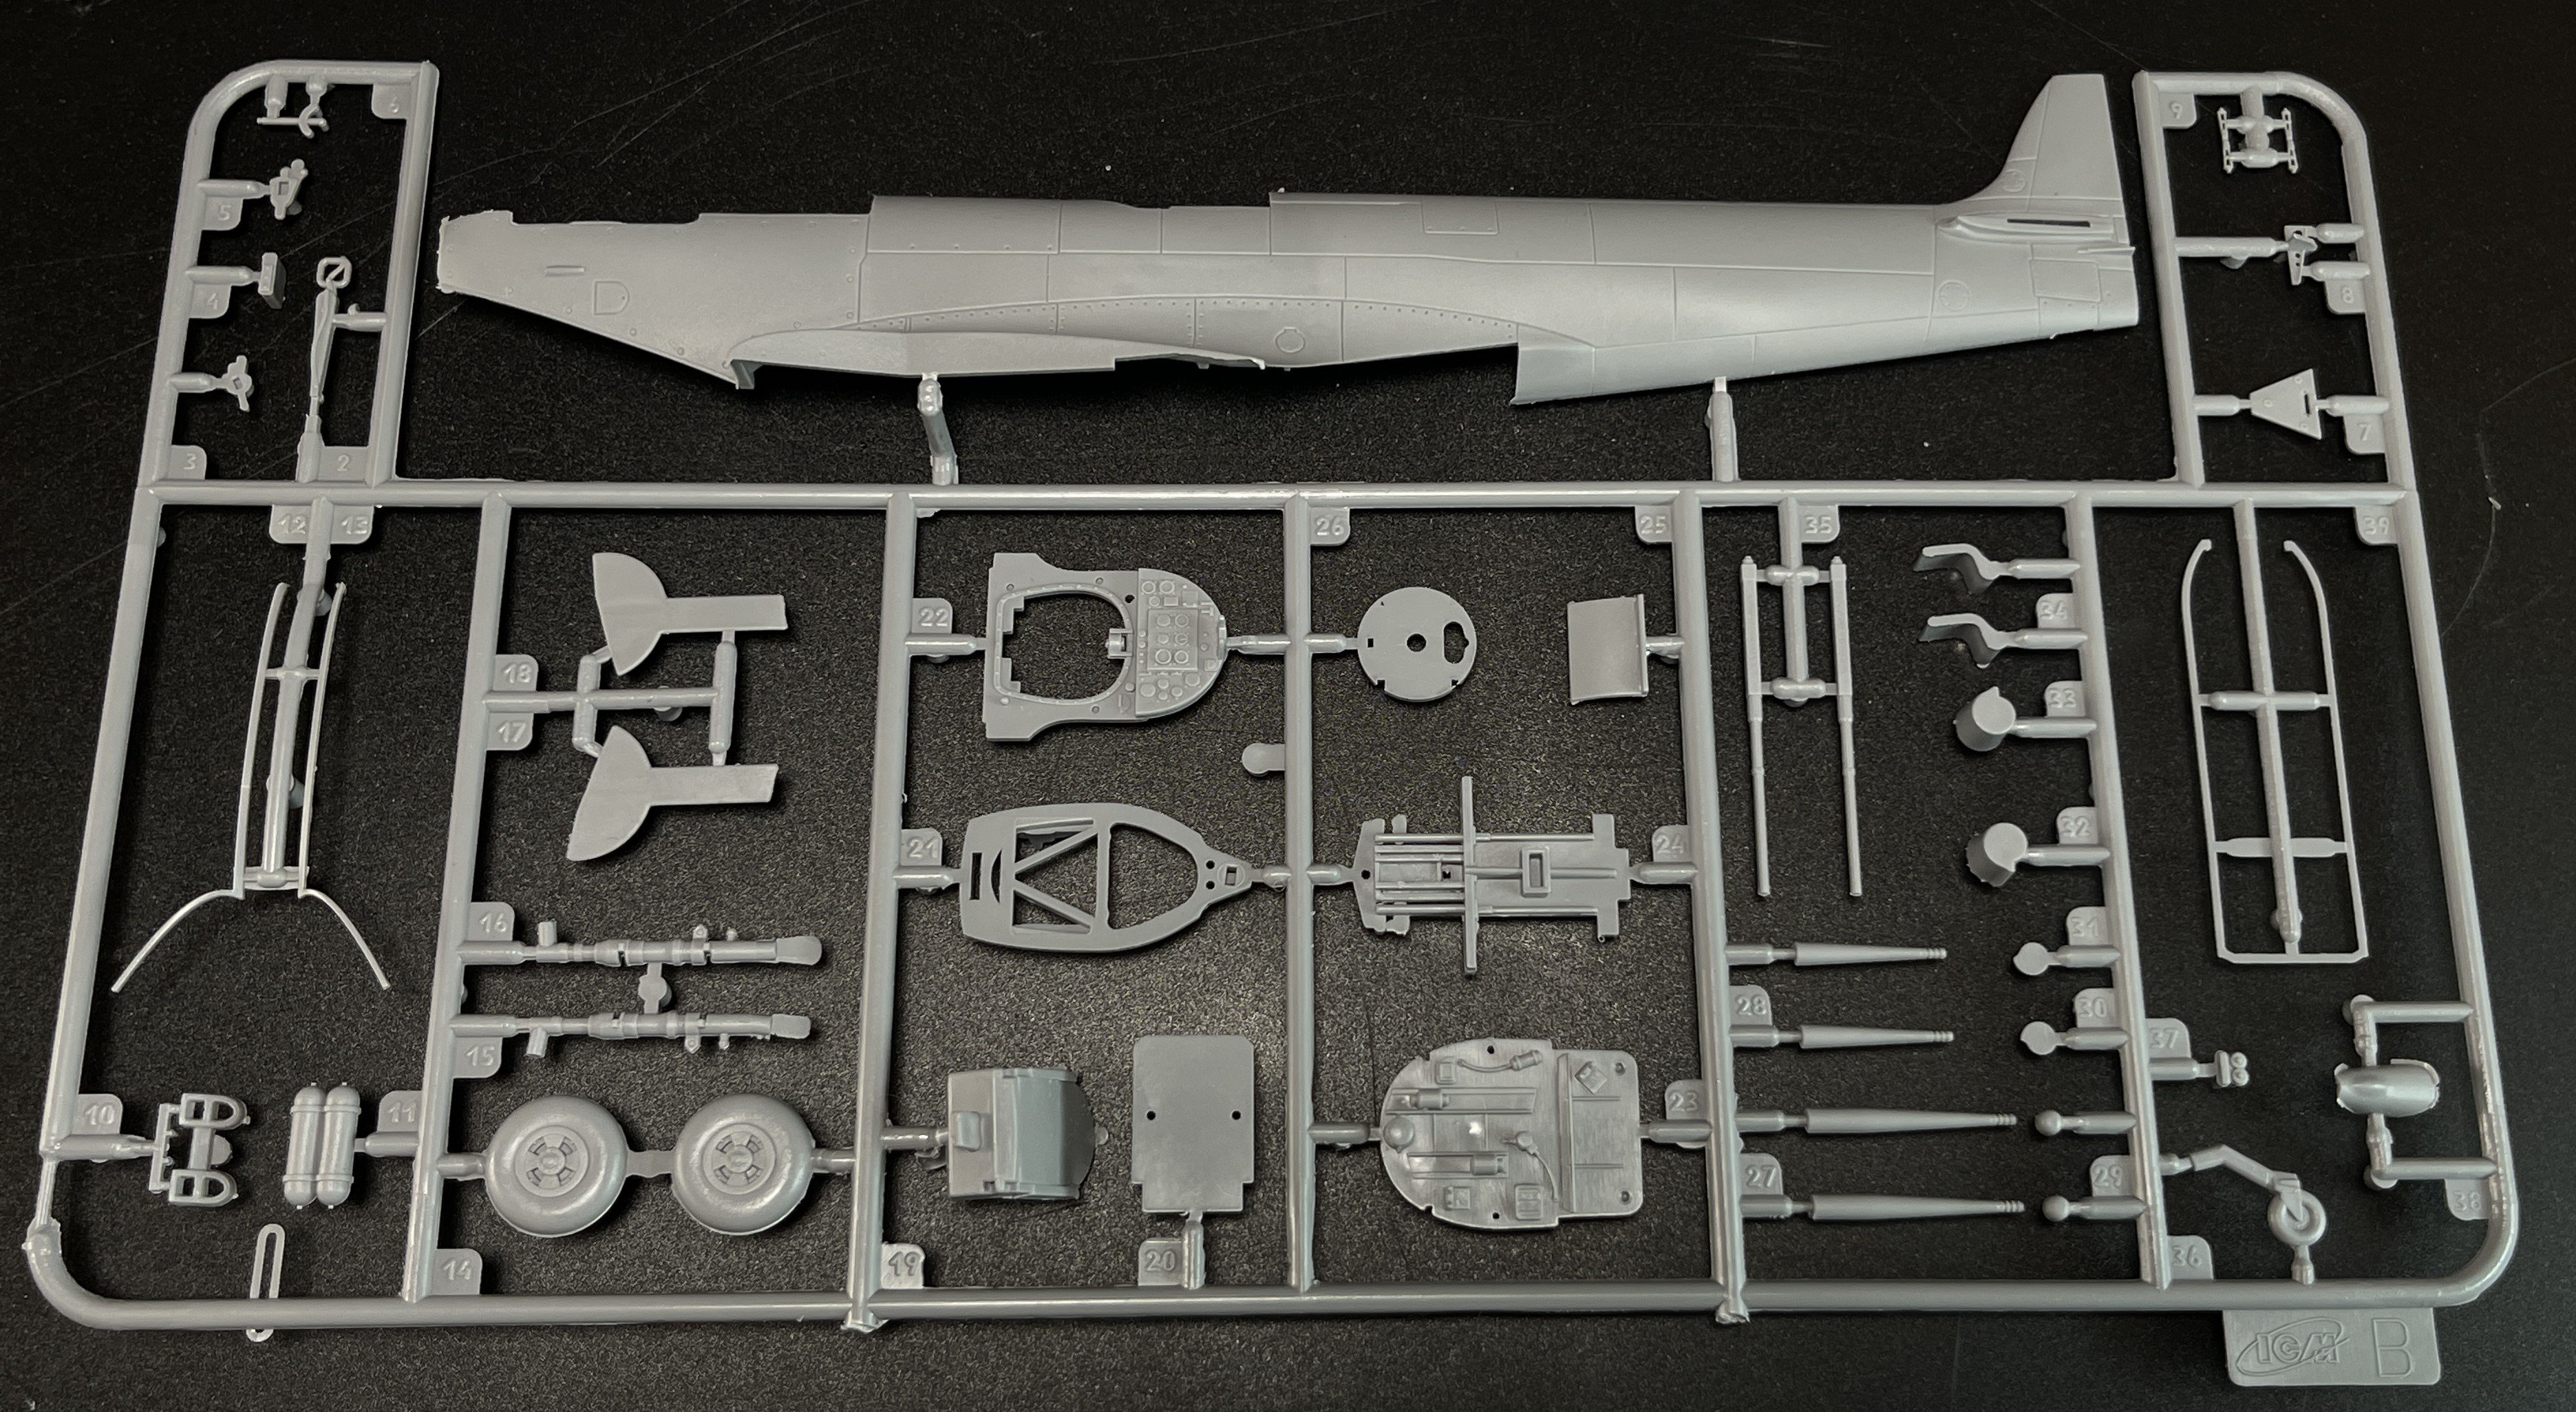
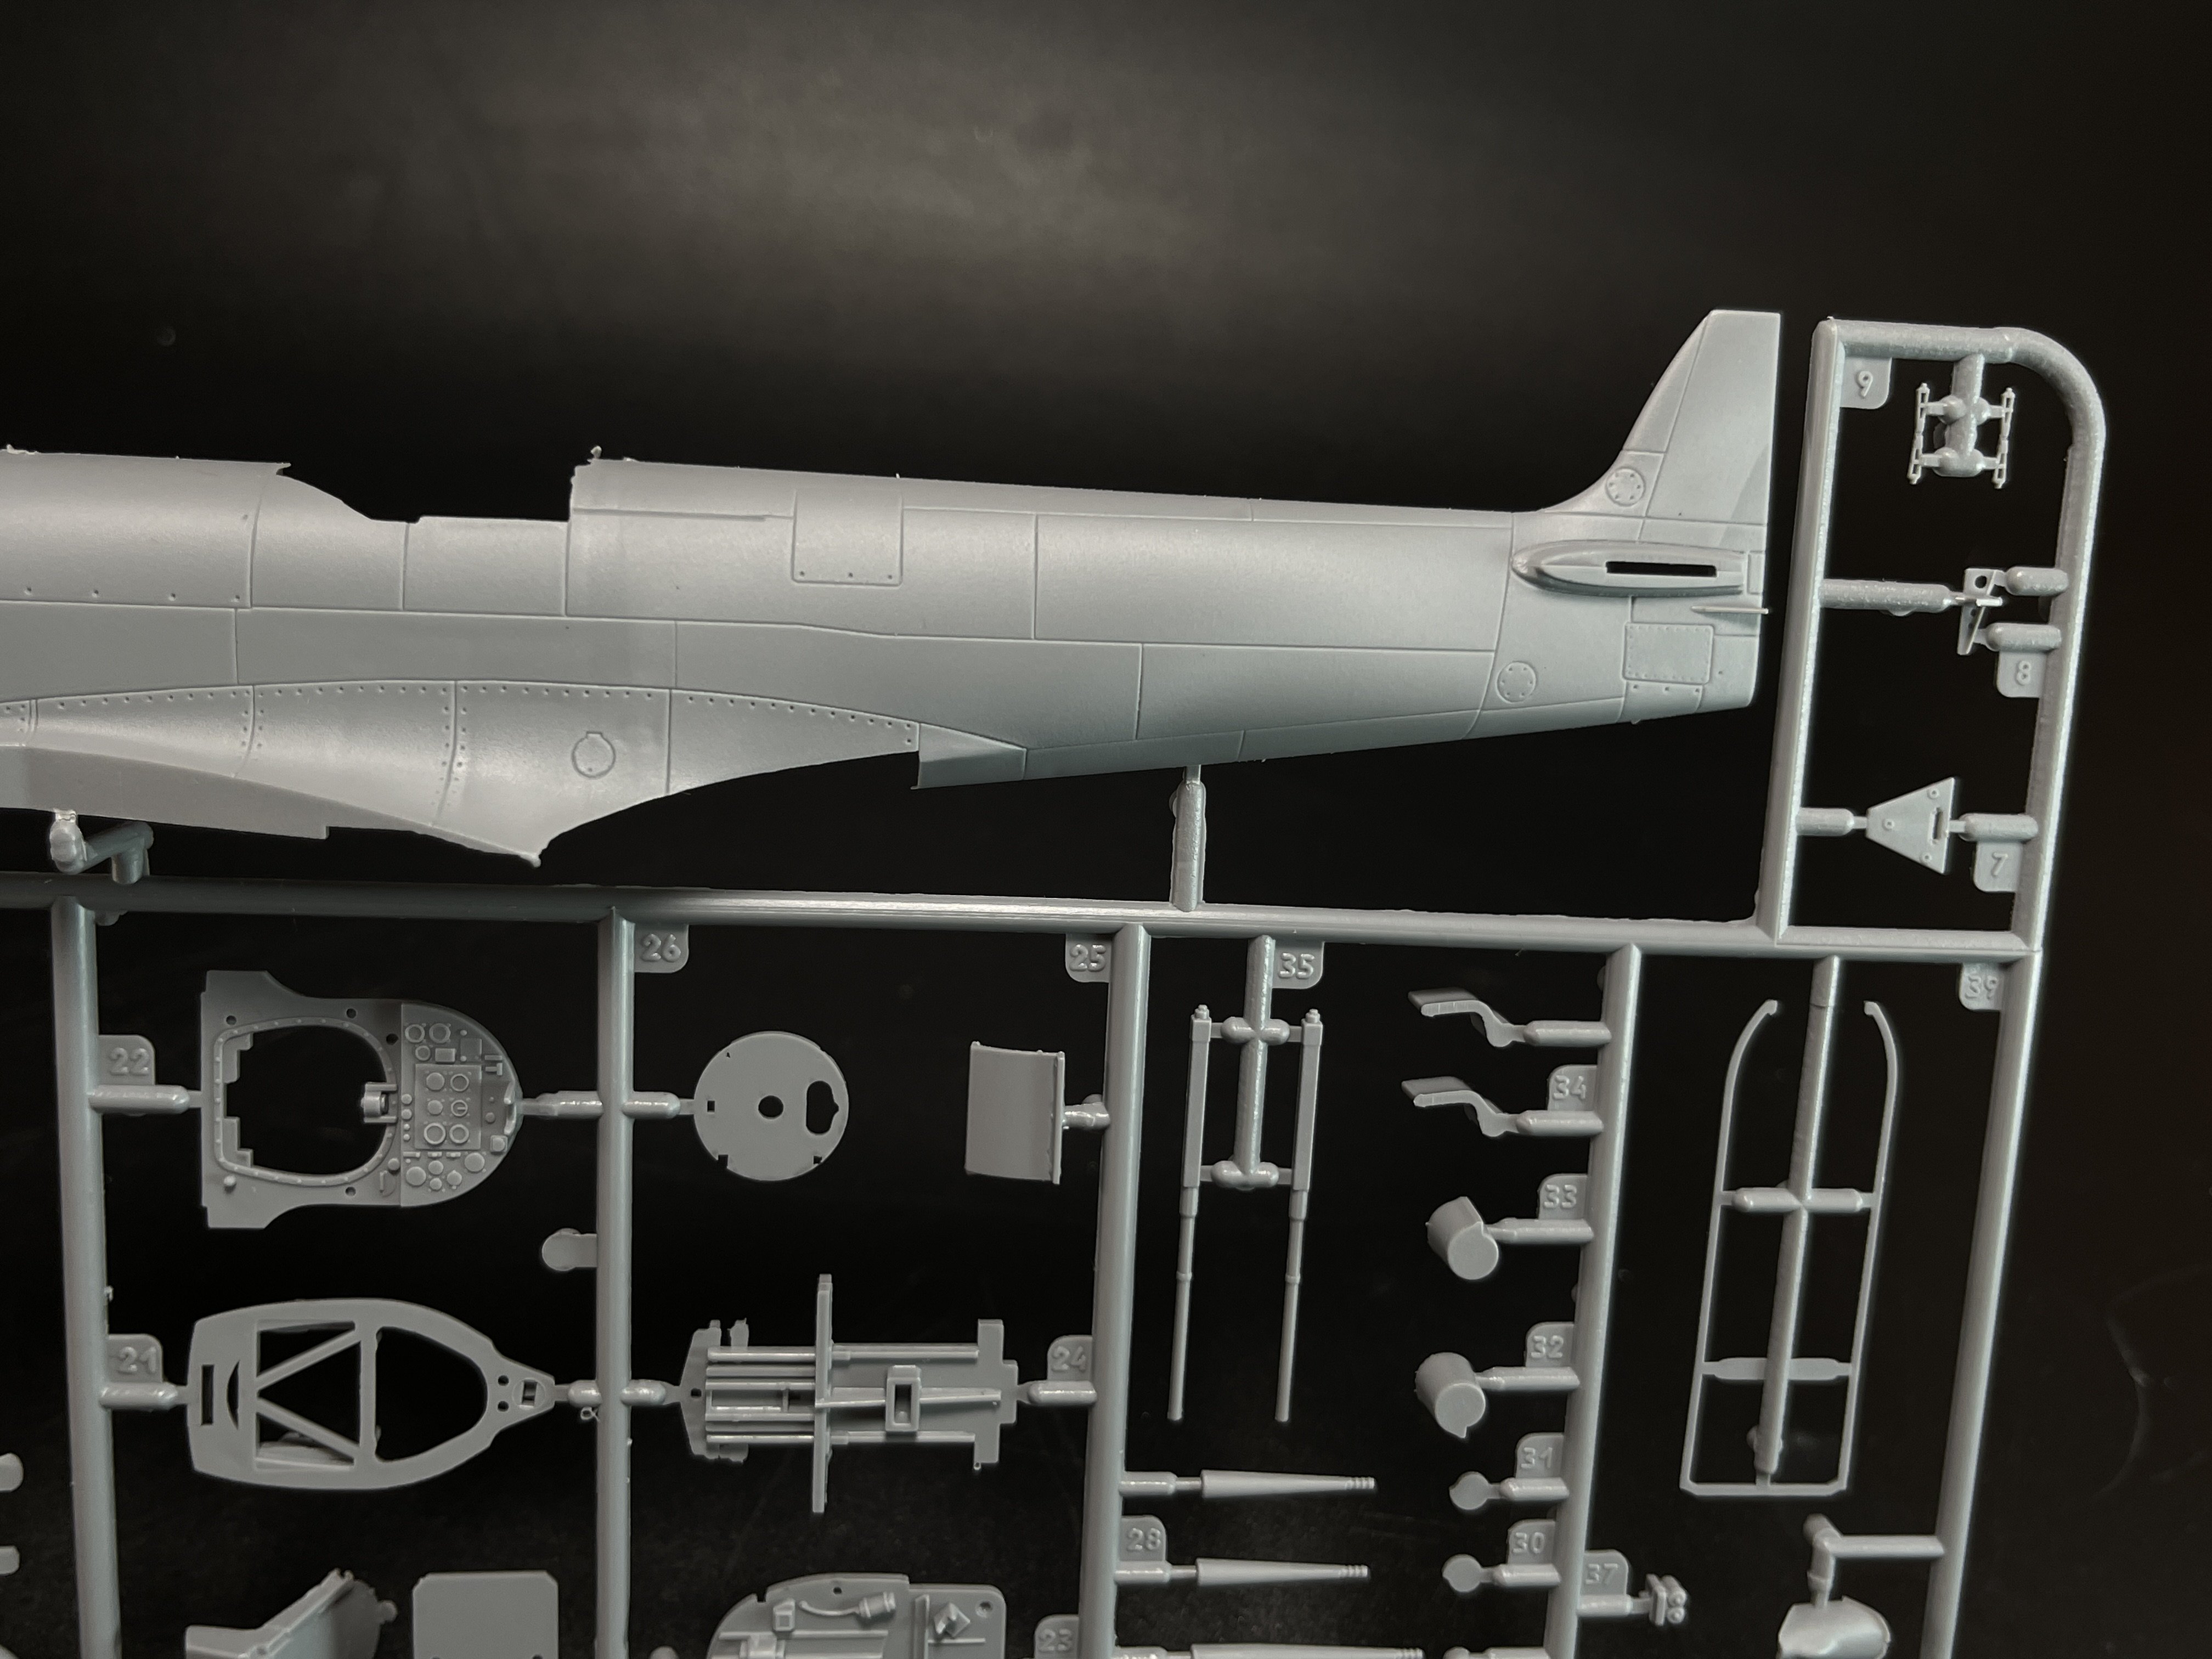
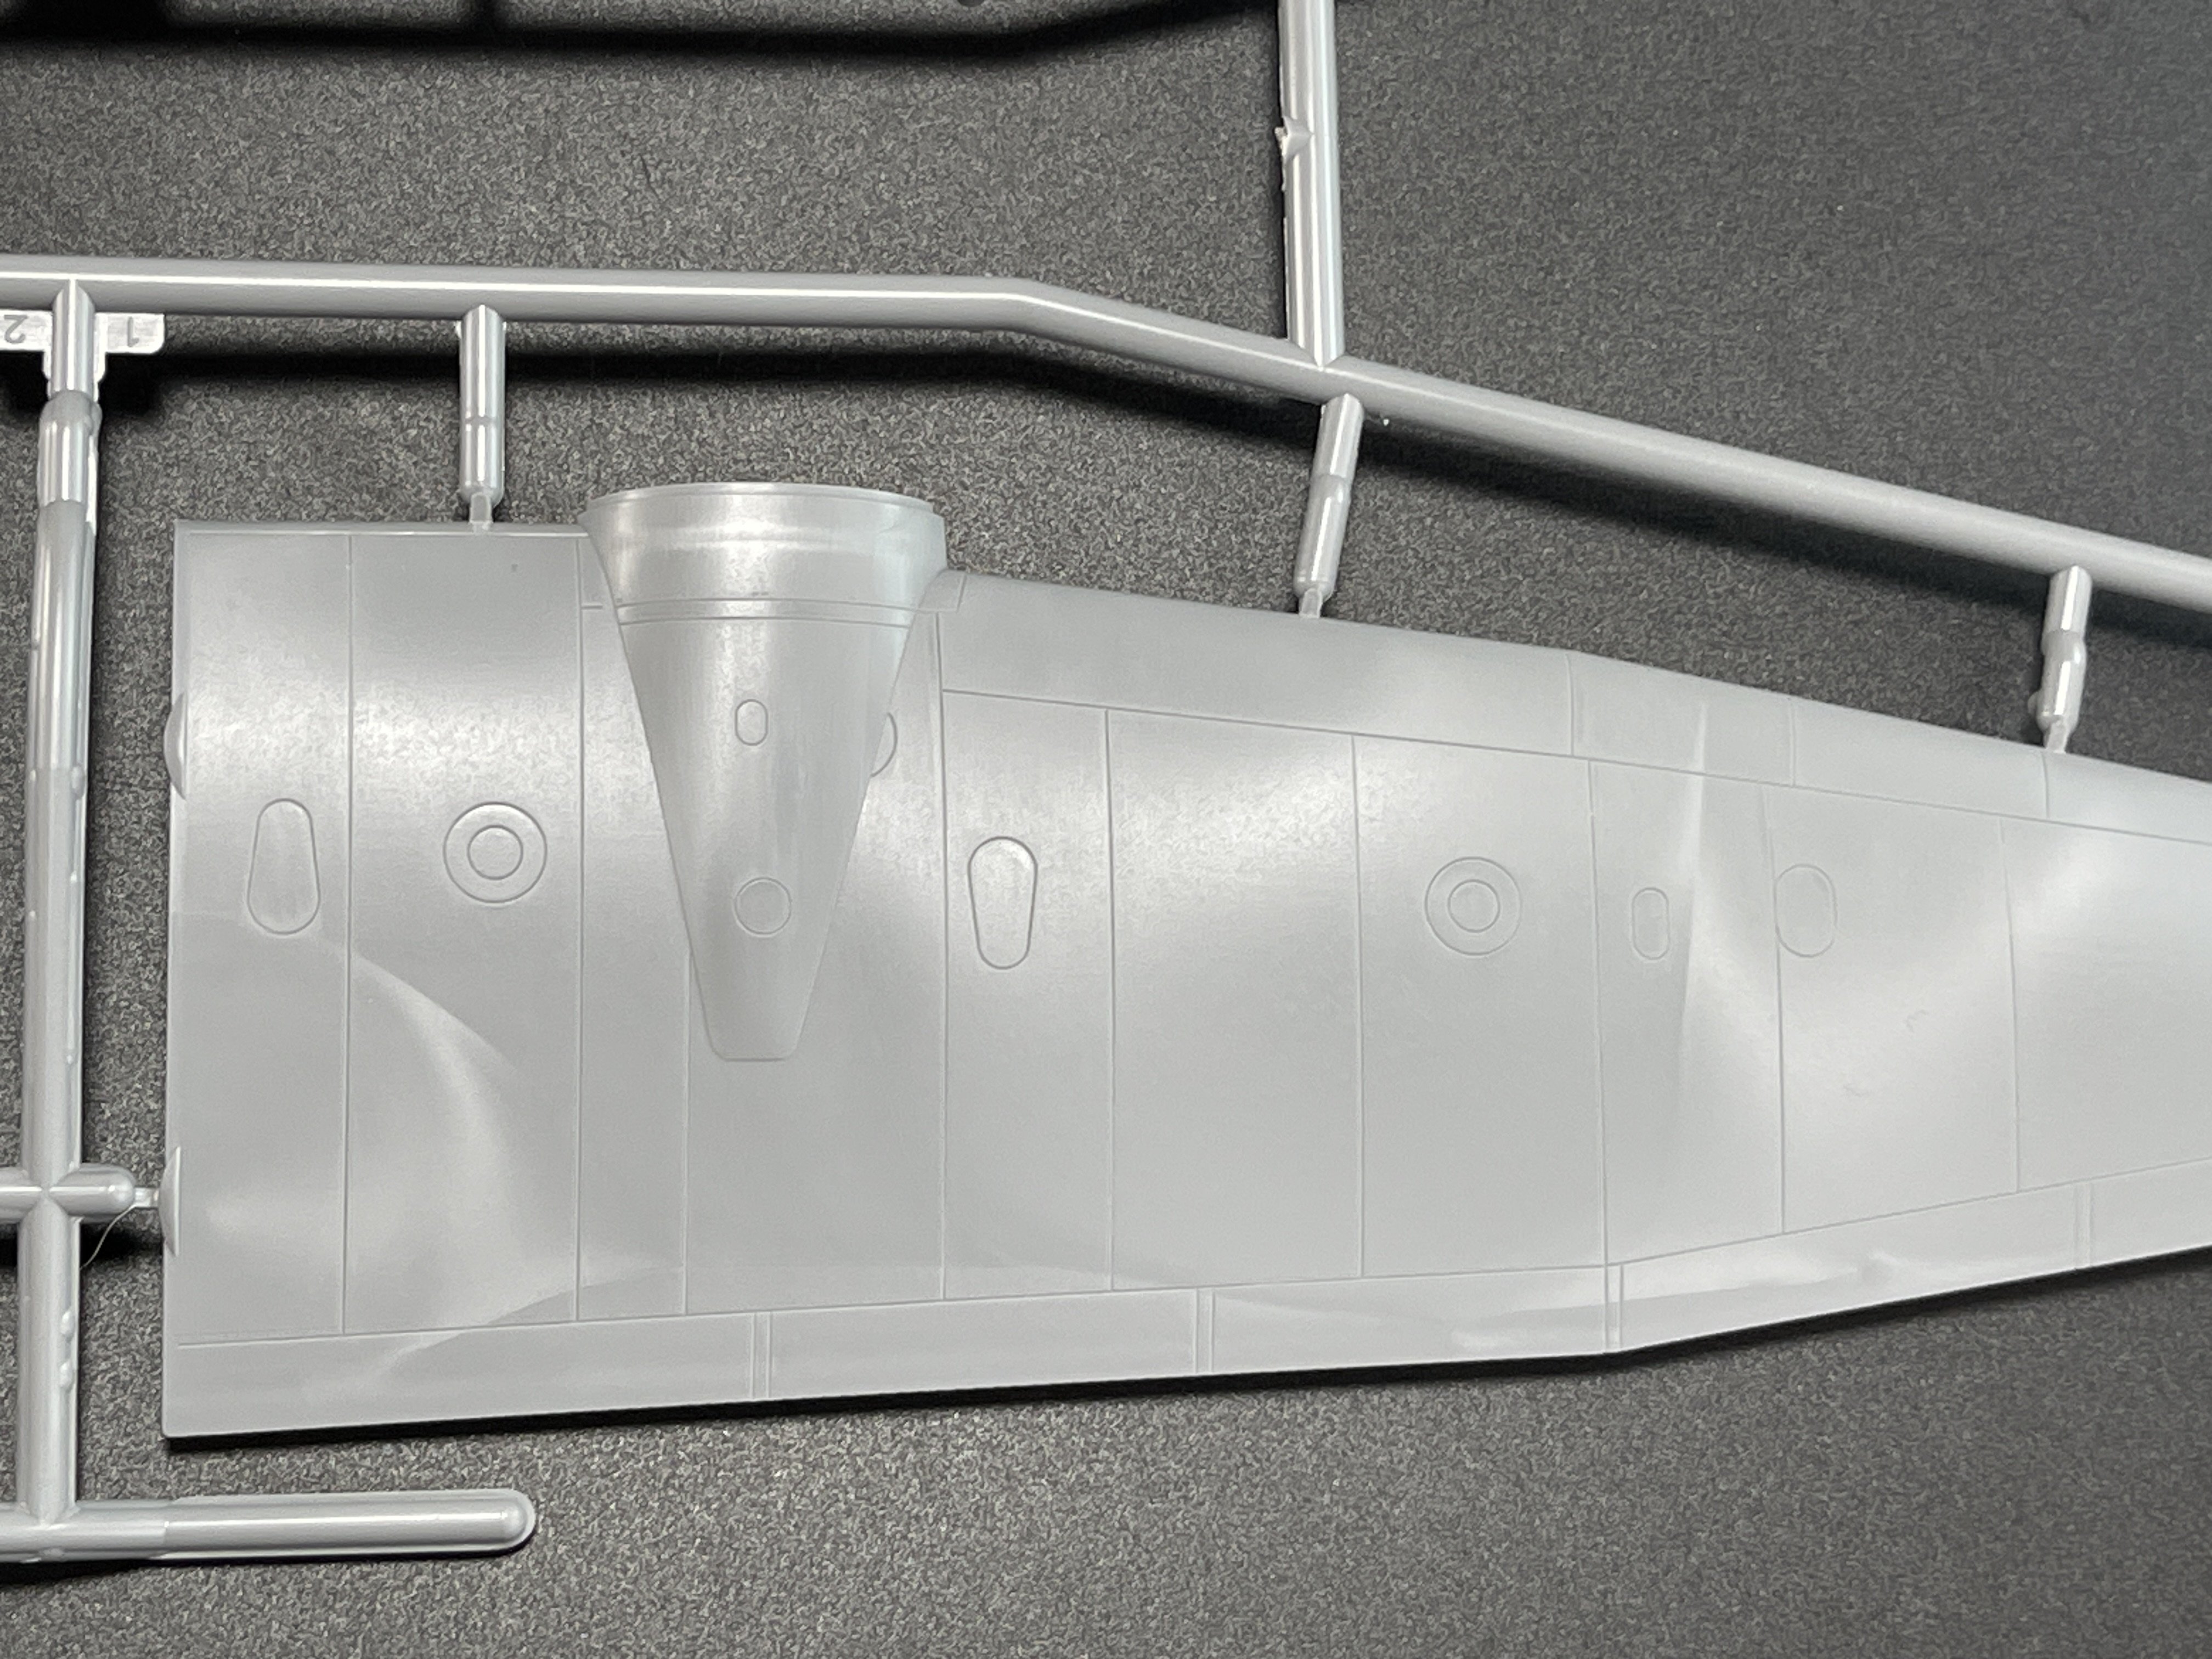
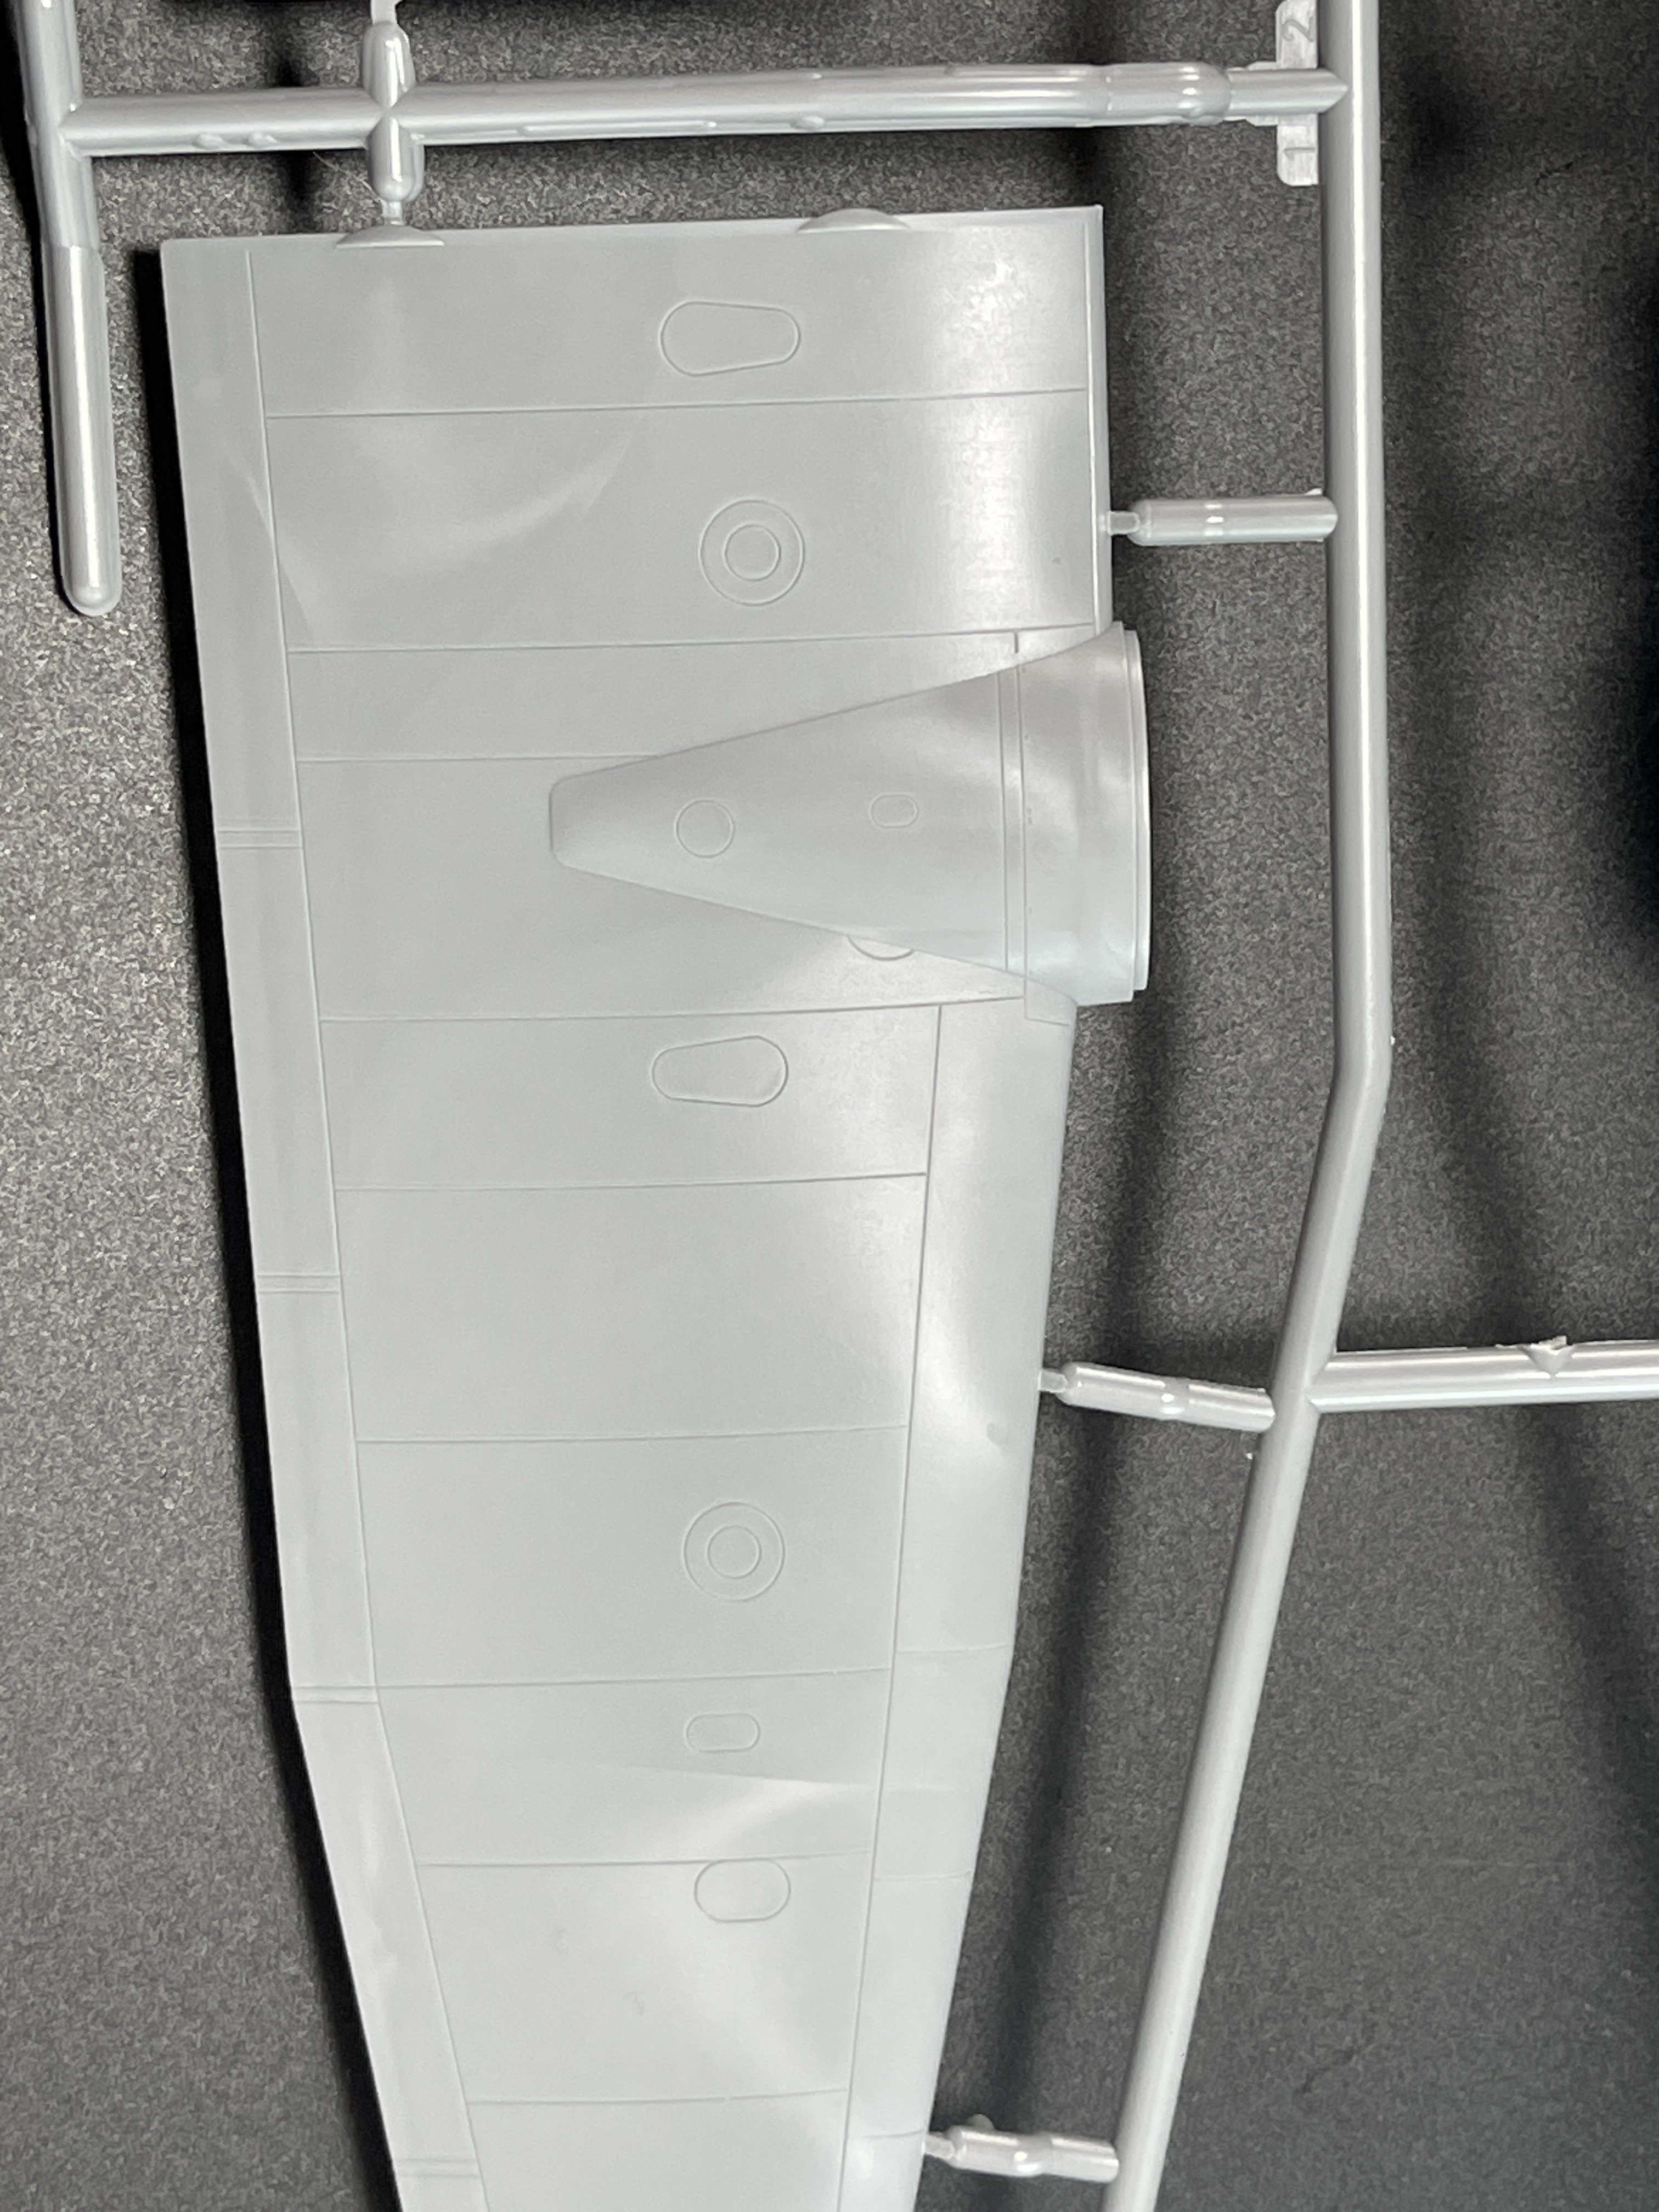
Now the Spitfire.
The kit dates back to 2001 and has held up relatively well for its age - https://www.scalemates.com/kits/icm-48061-spitfire-mkix--211640
The spitfire has more in-box detail with a full engine.
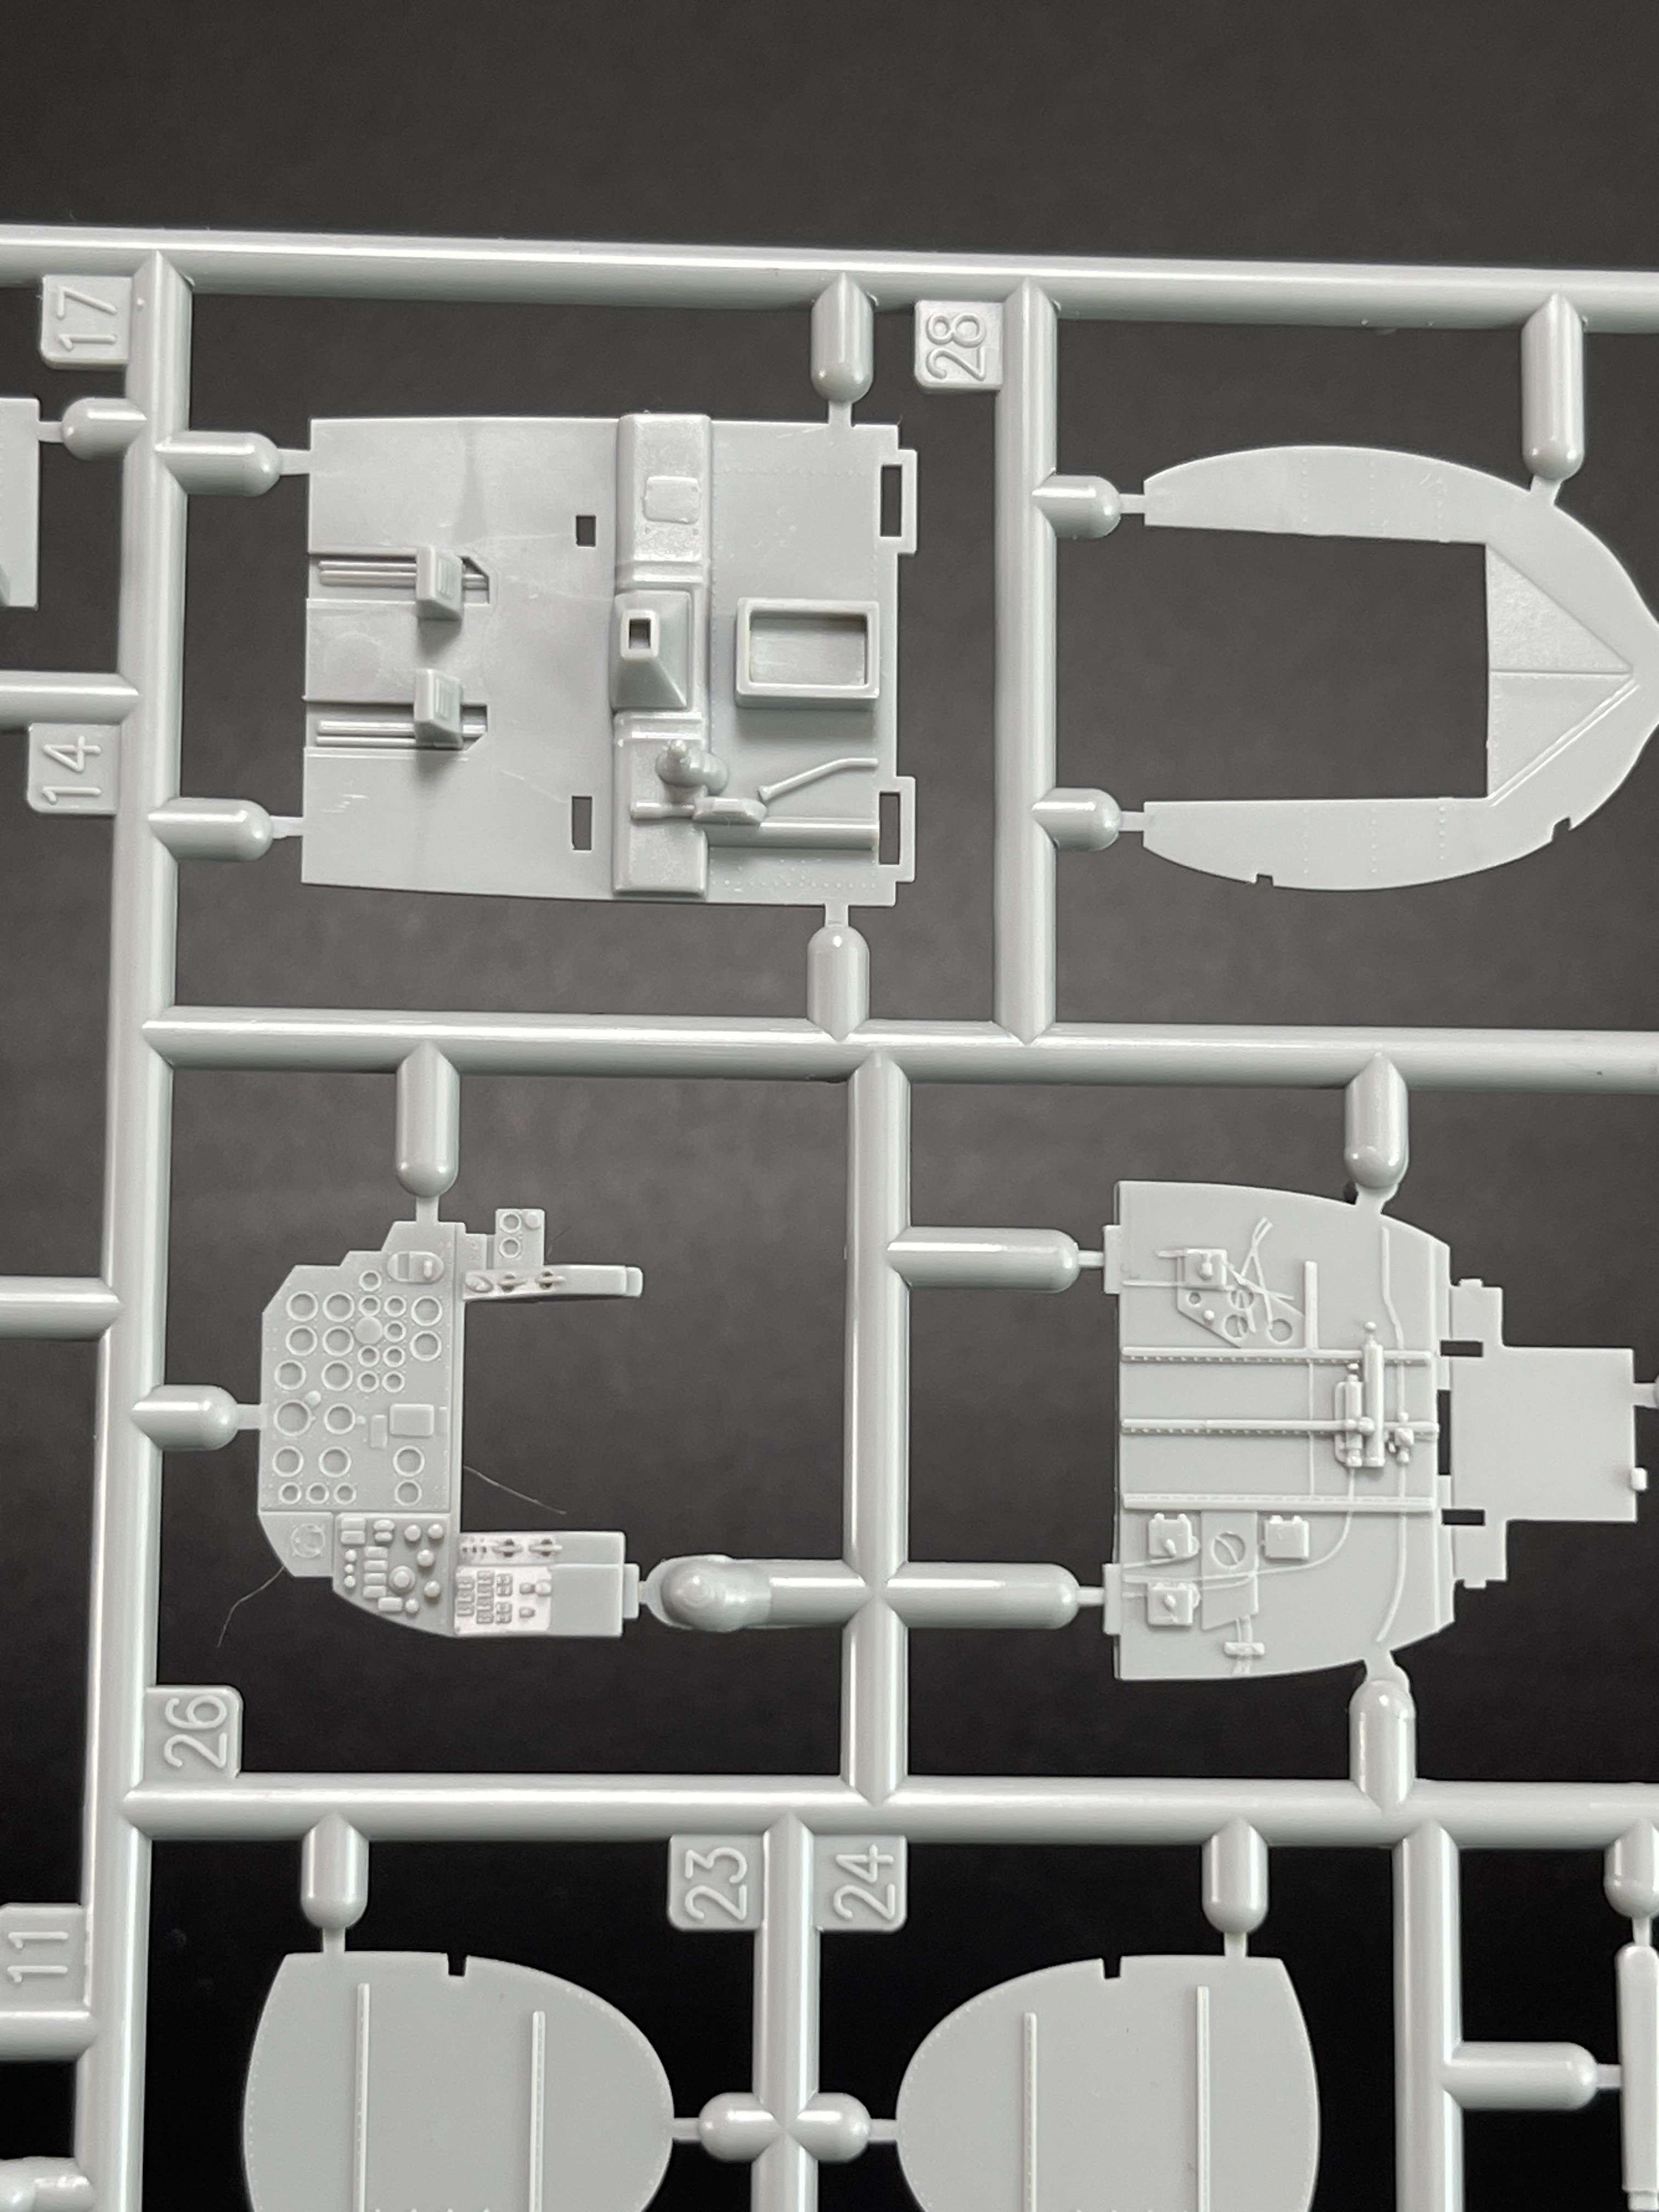
The cockpit detail is quite good from the box.
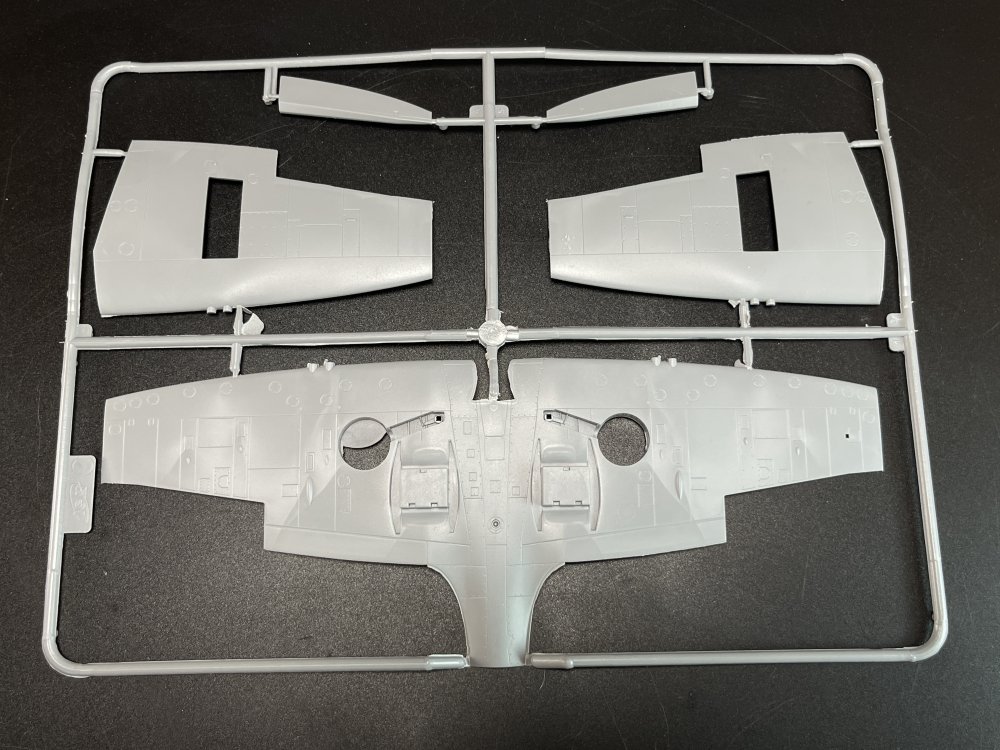
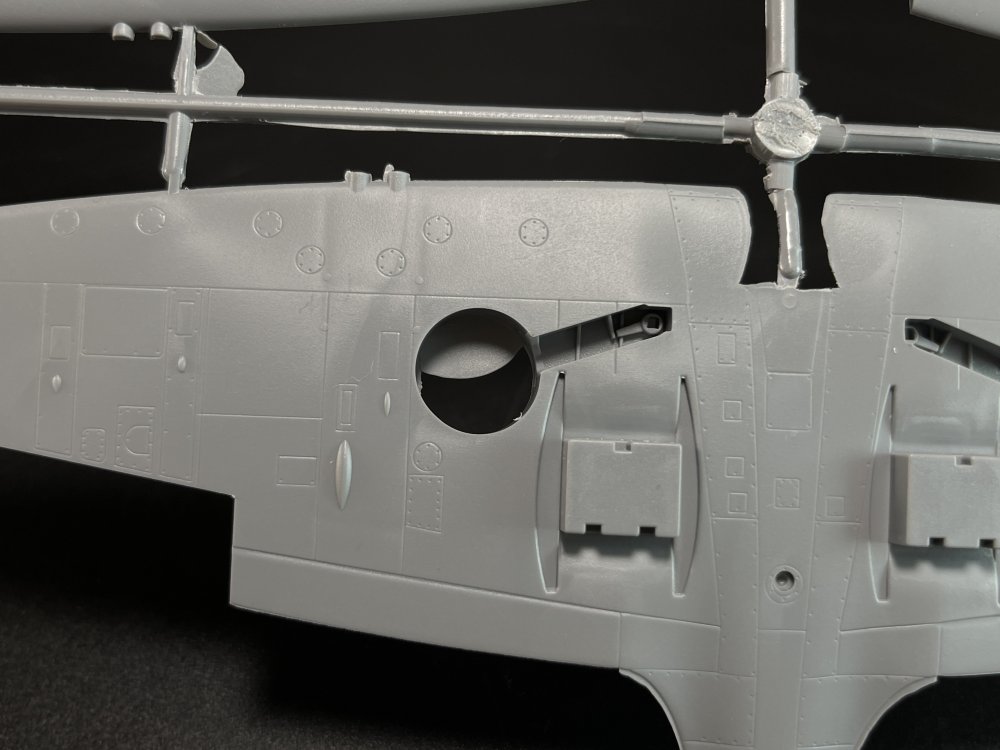
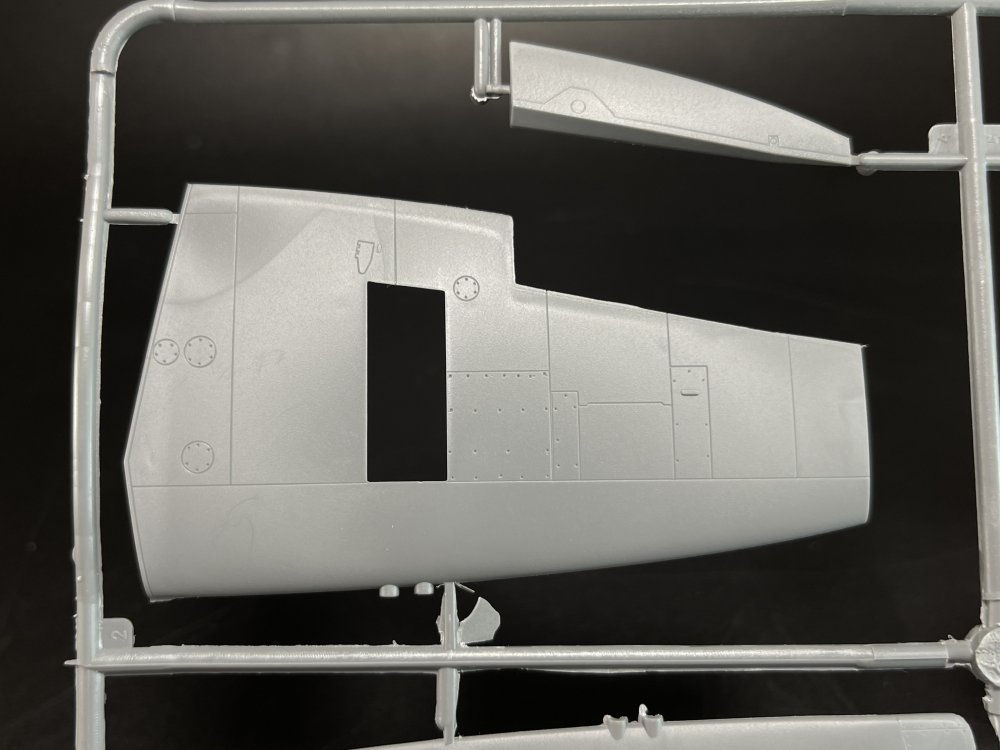
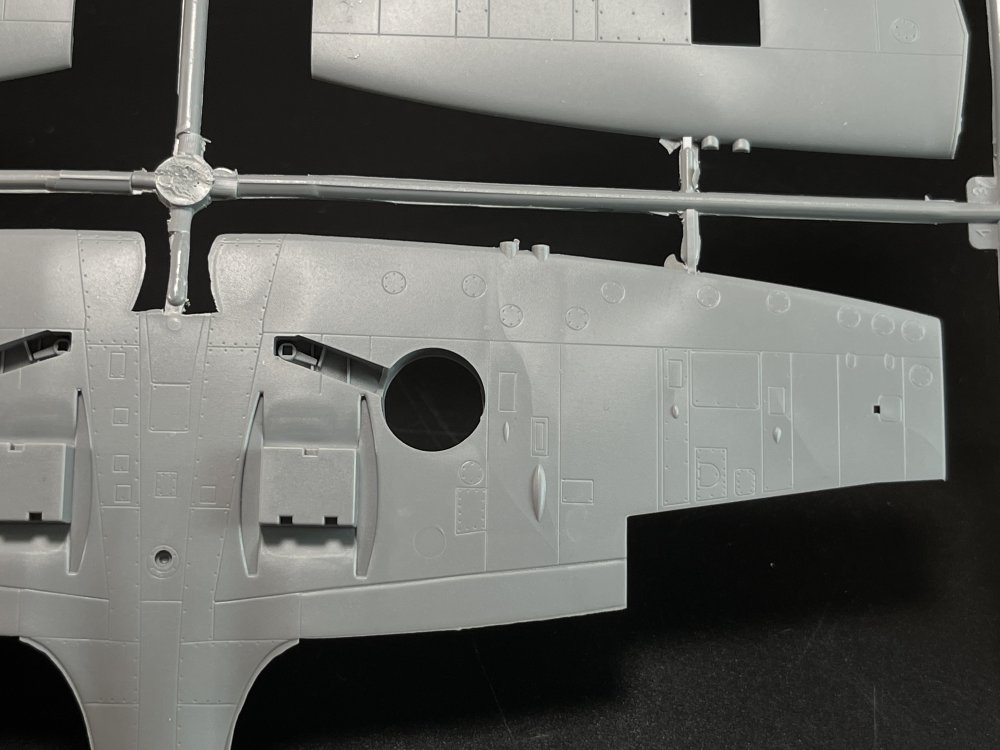
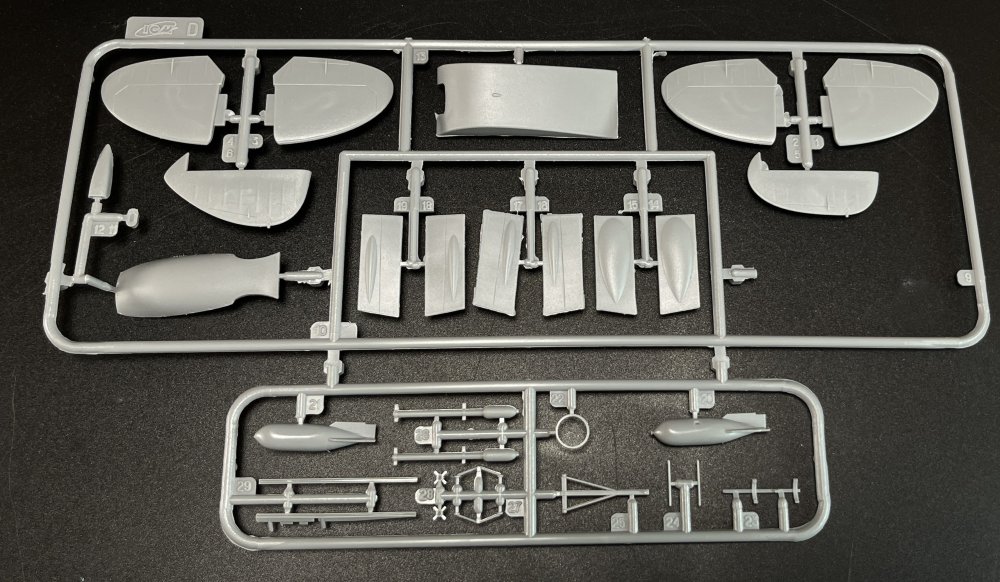

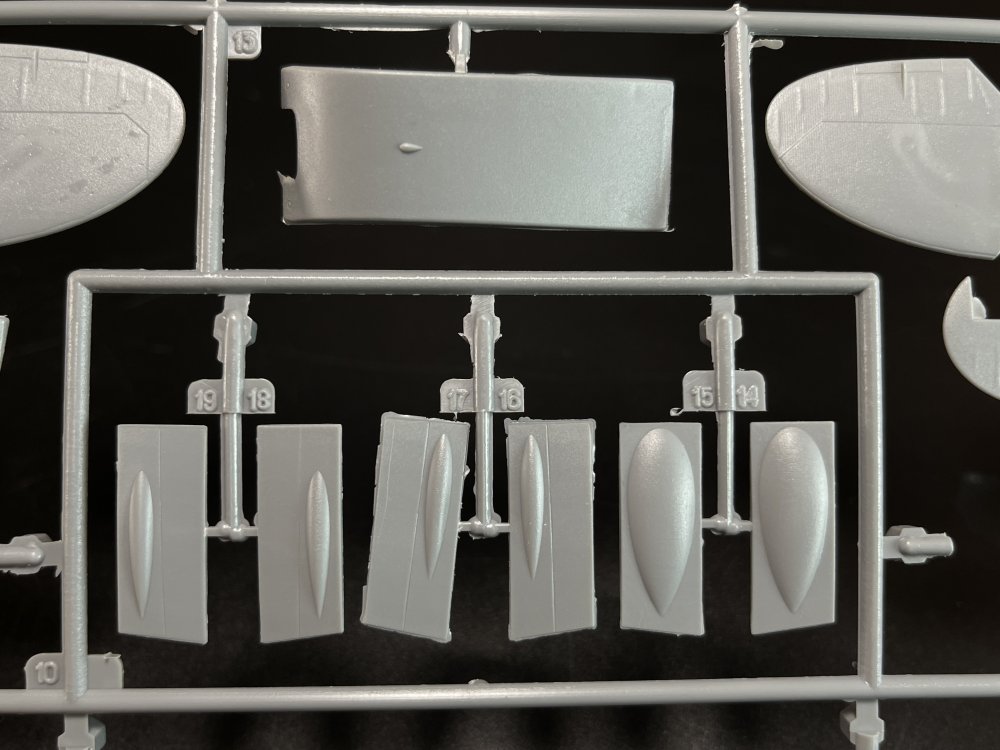


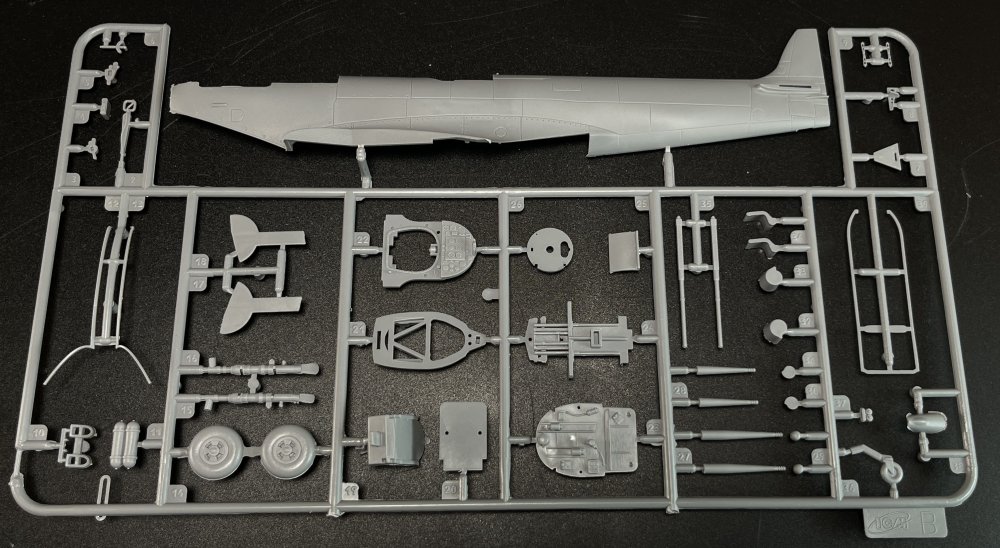
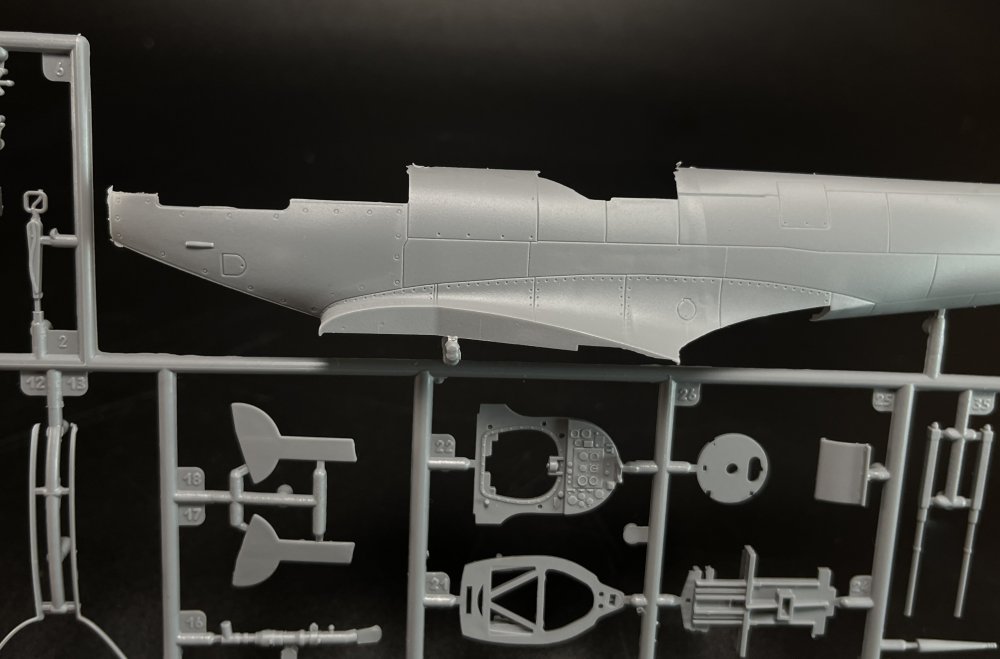
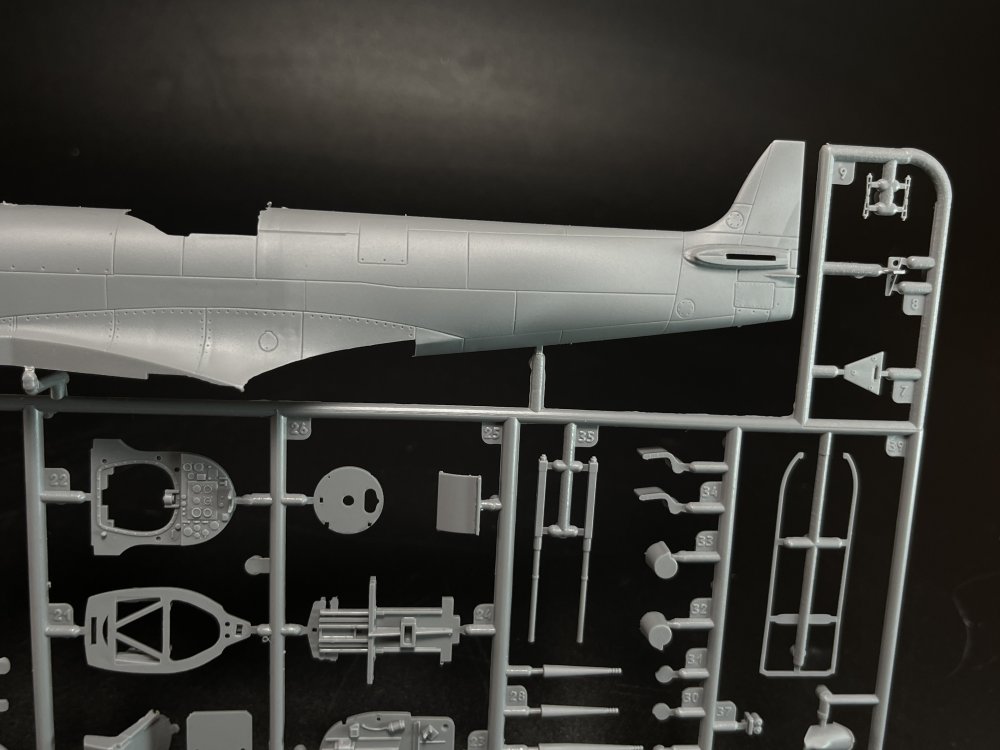
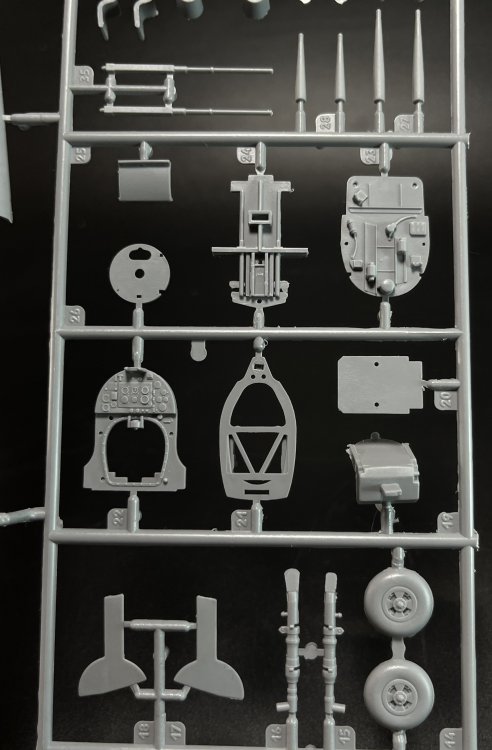
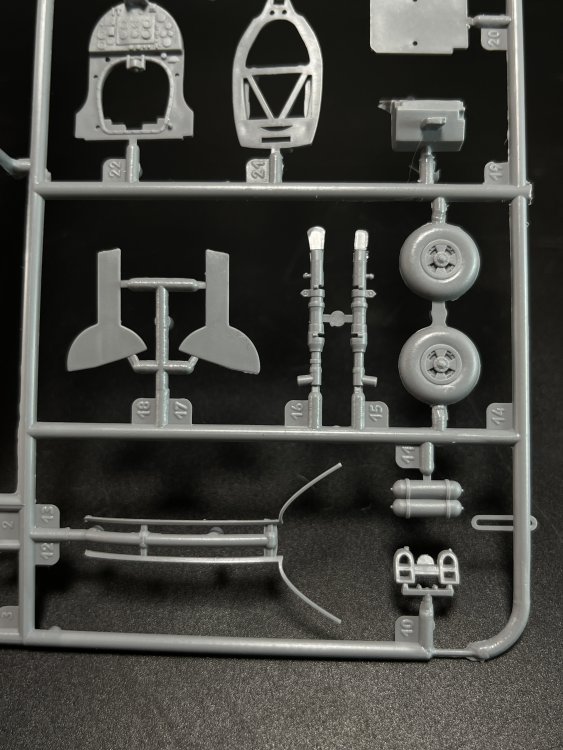
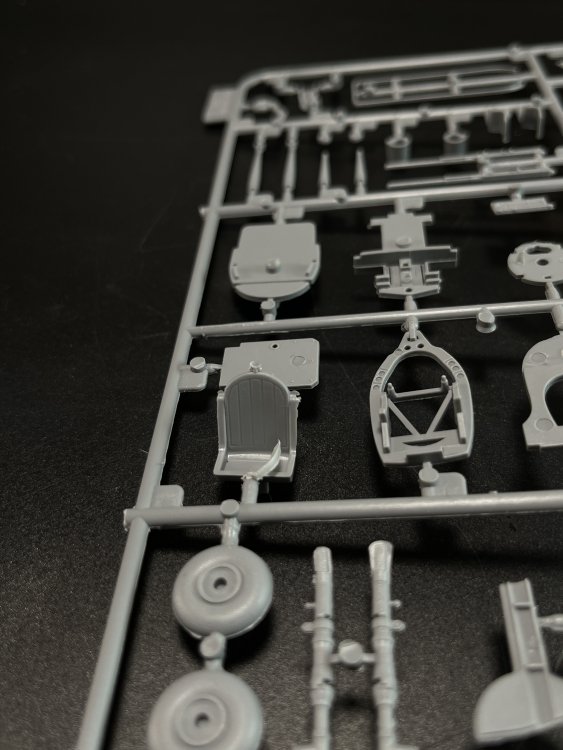

As I said with the P-51, the Spitfire is much older than the B26C, Its not the new ICM detail level.
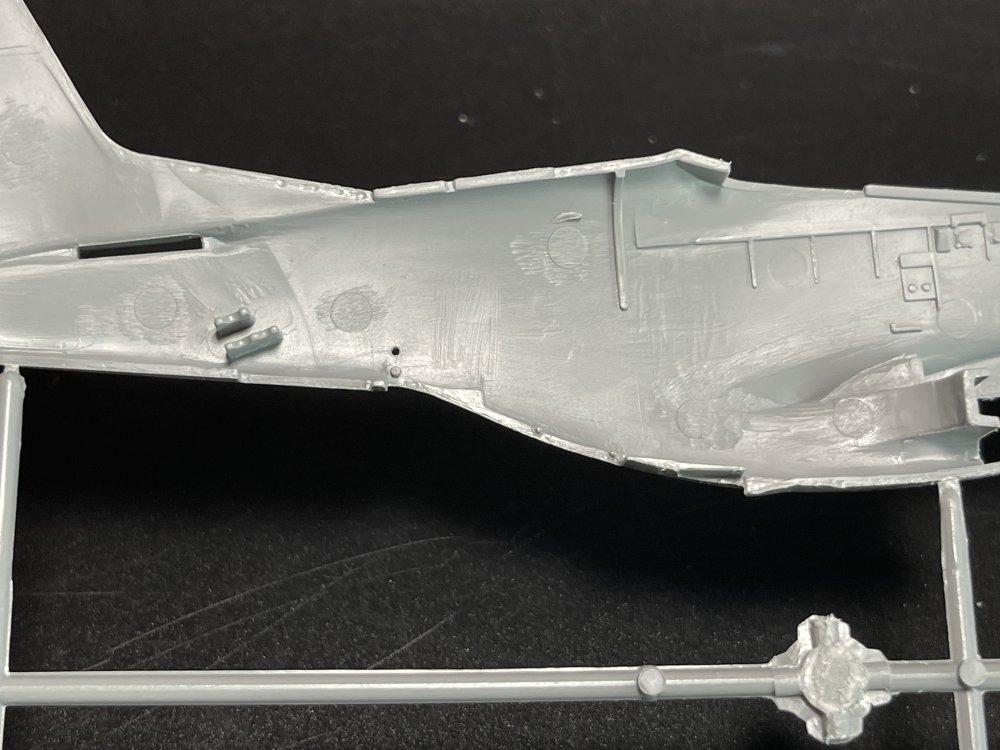
Although it comprising around 136 parts, the build is quite straight forward and building the engine will take some time and I suspect that if you put the engine you will not close down the engine panels.
You can see the age on the molds as you have some flash to clean. And there’s no location tip, as it’s a limited run mold, back when ICM use them
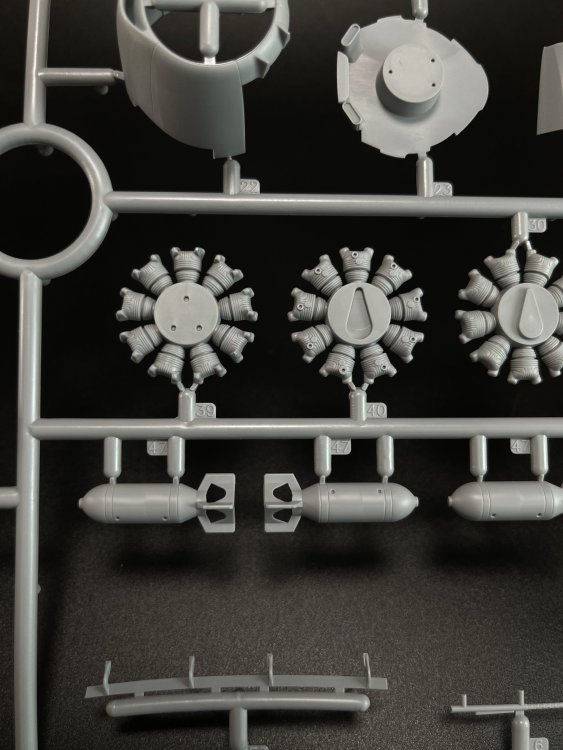
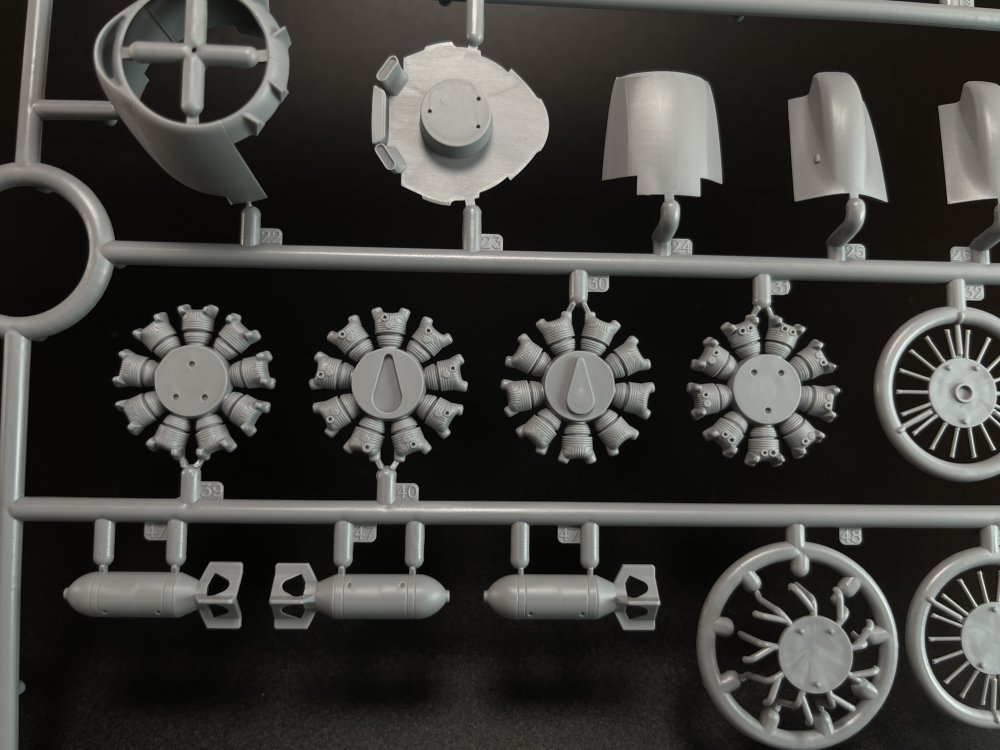
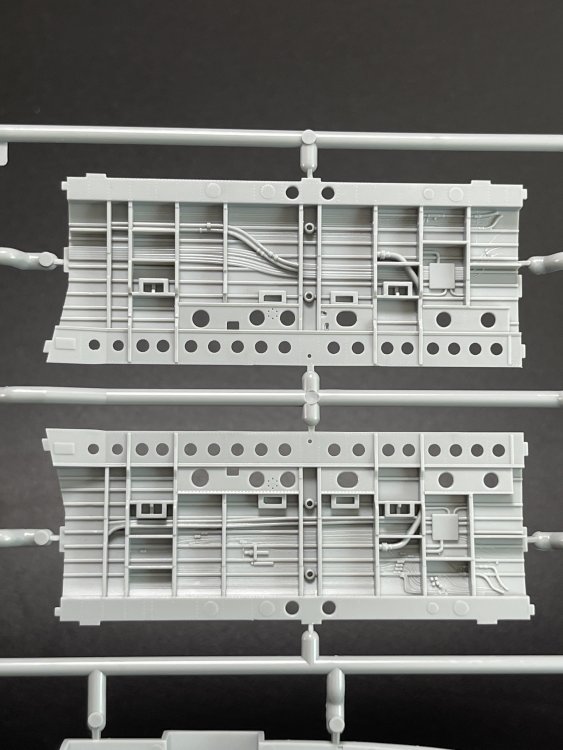
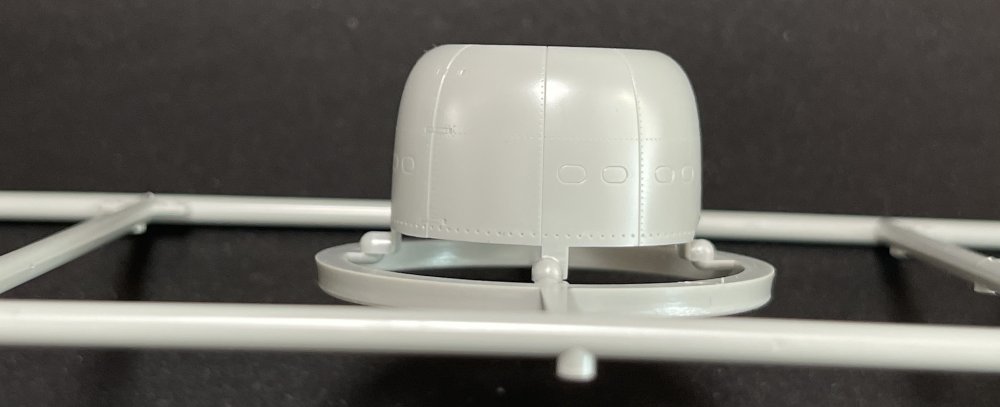
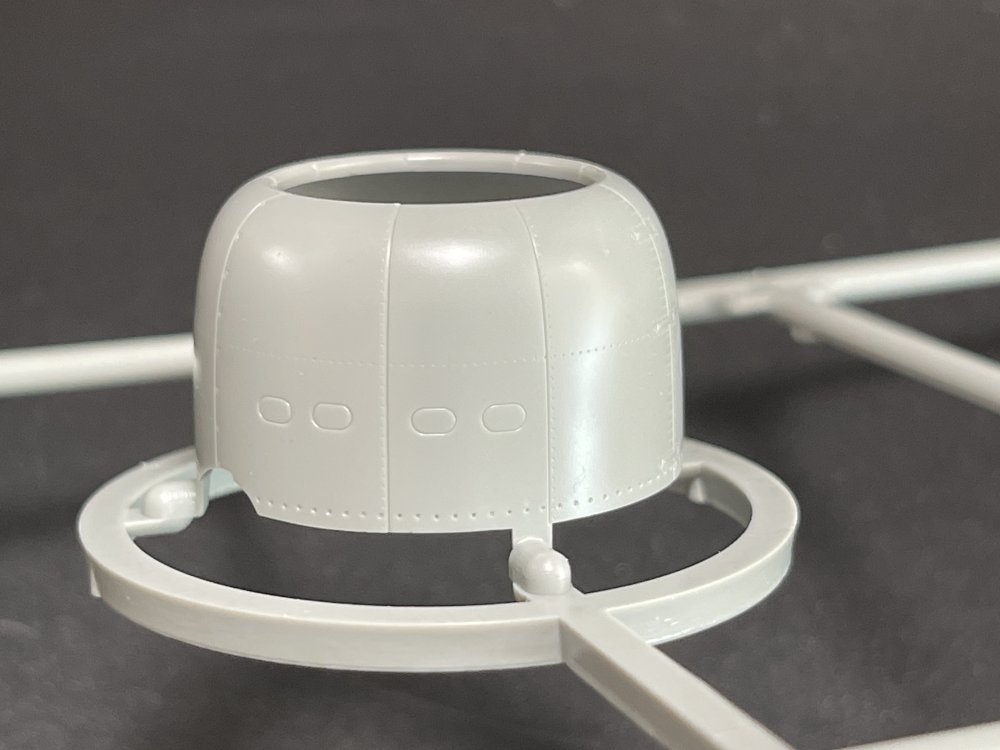
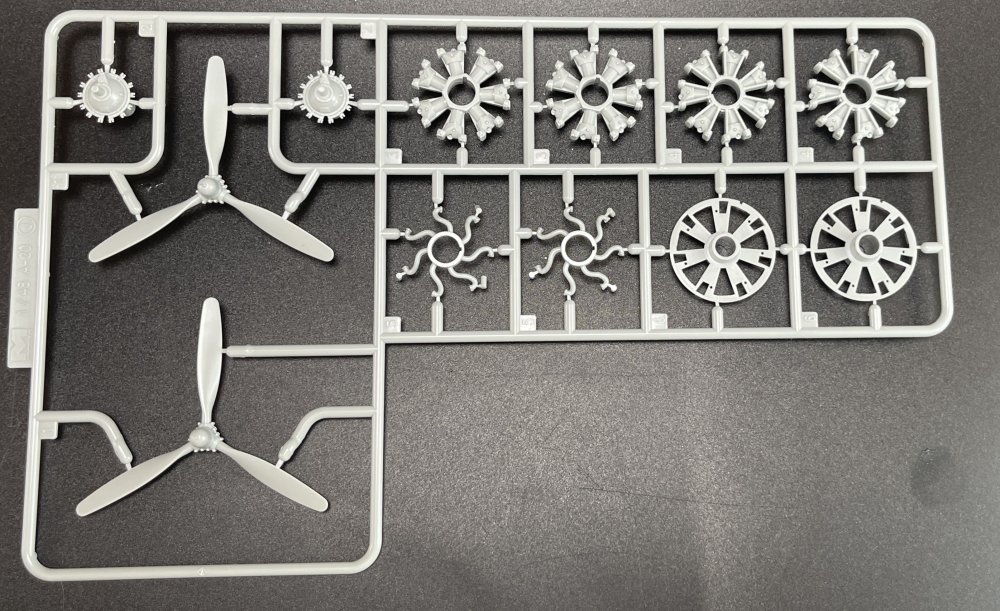
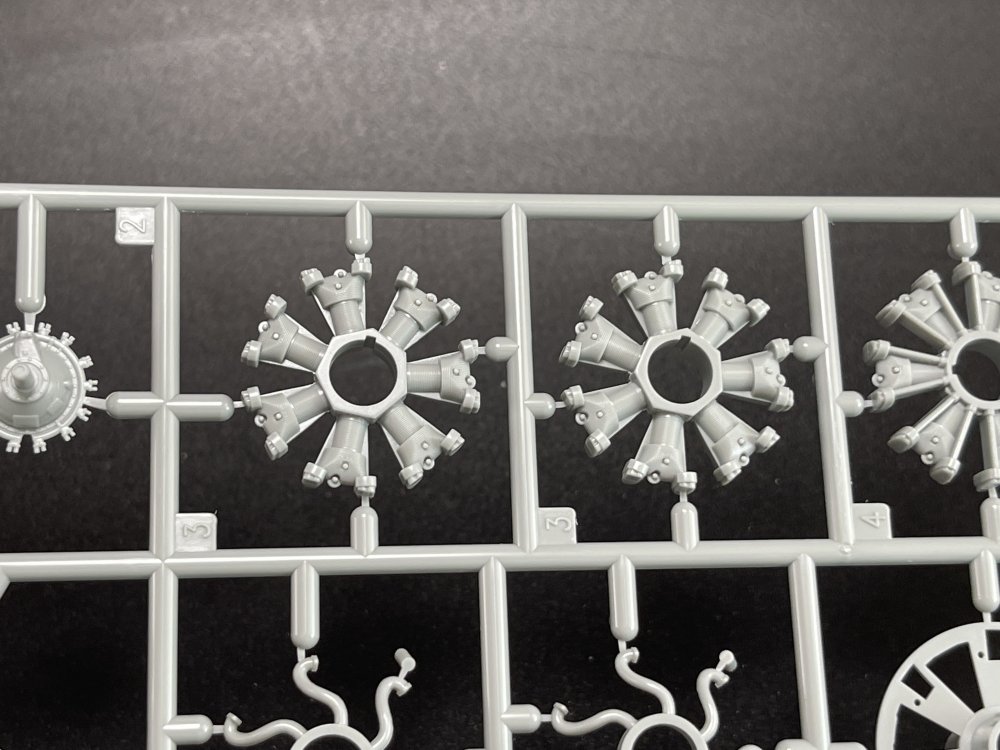
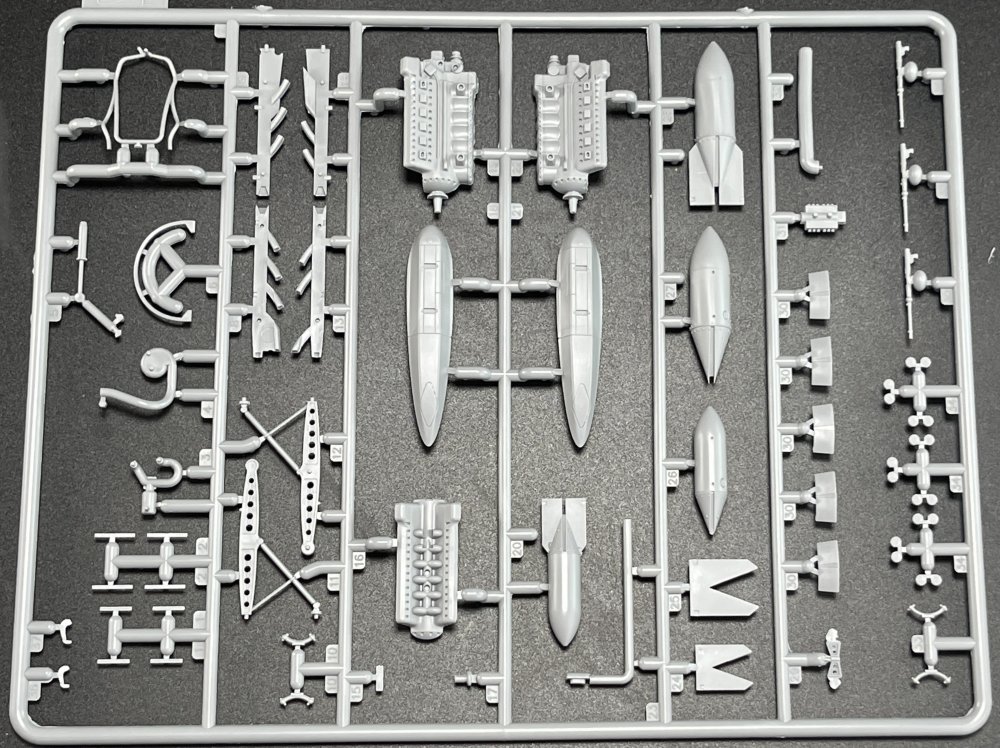
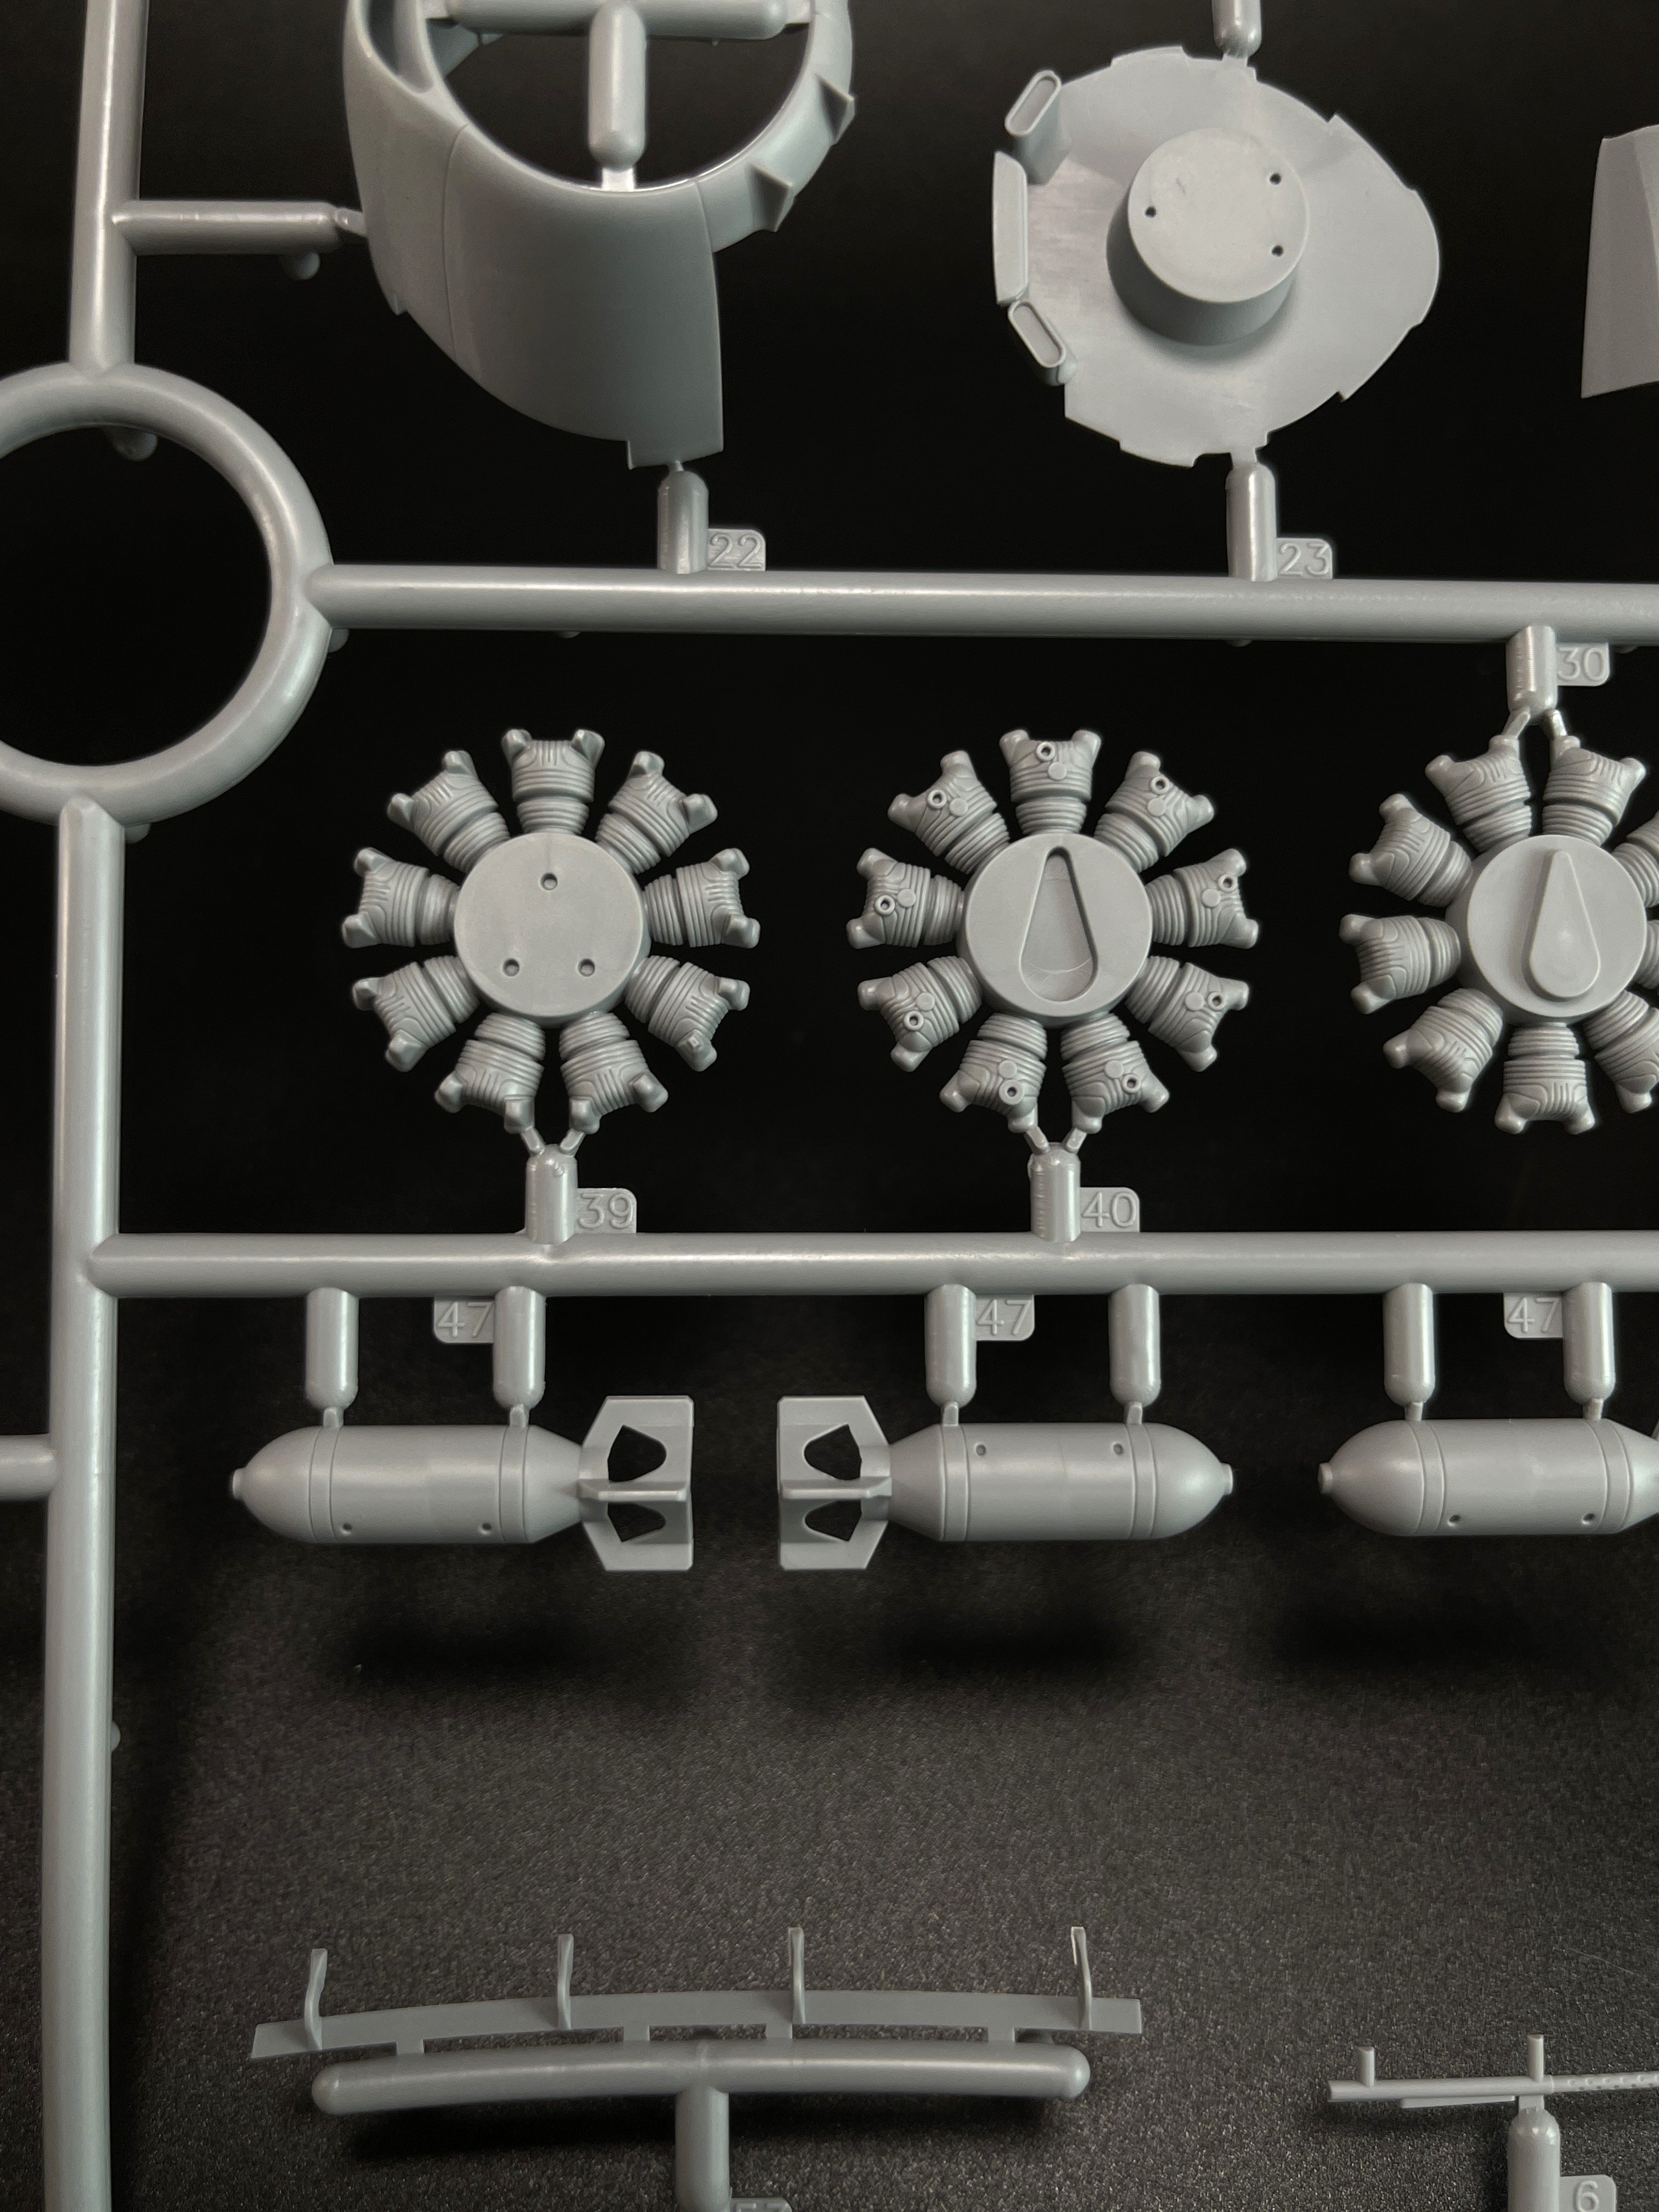
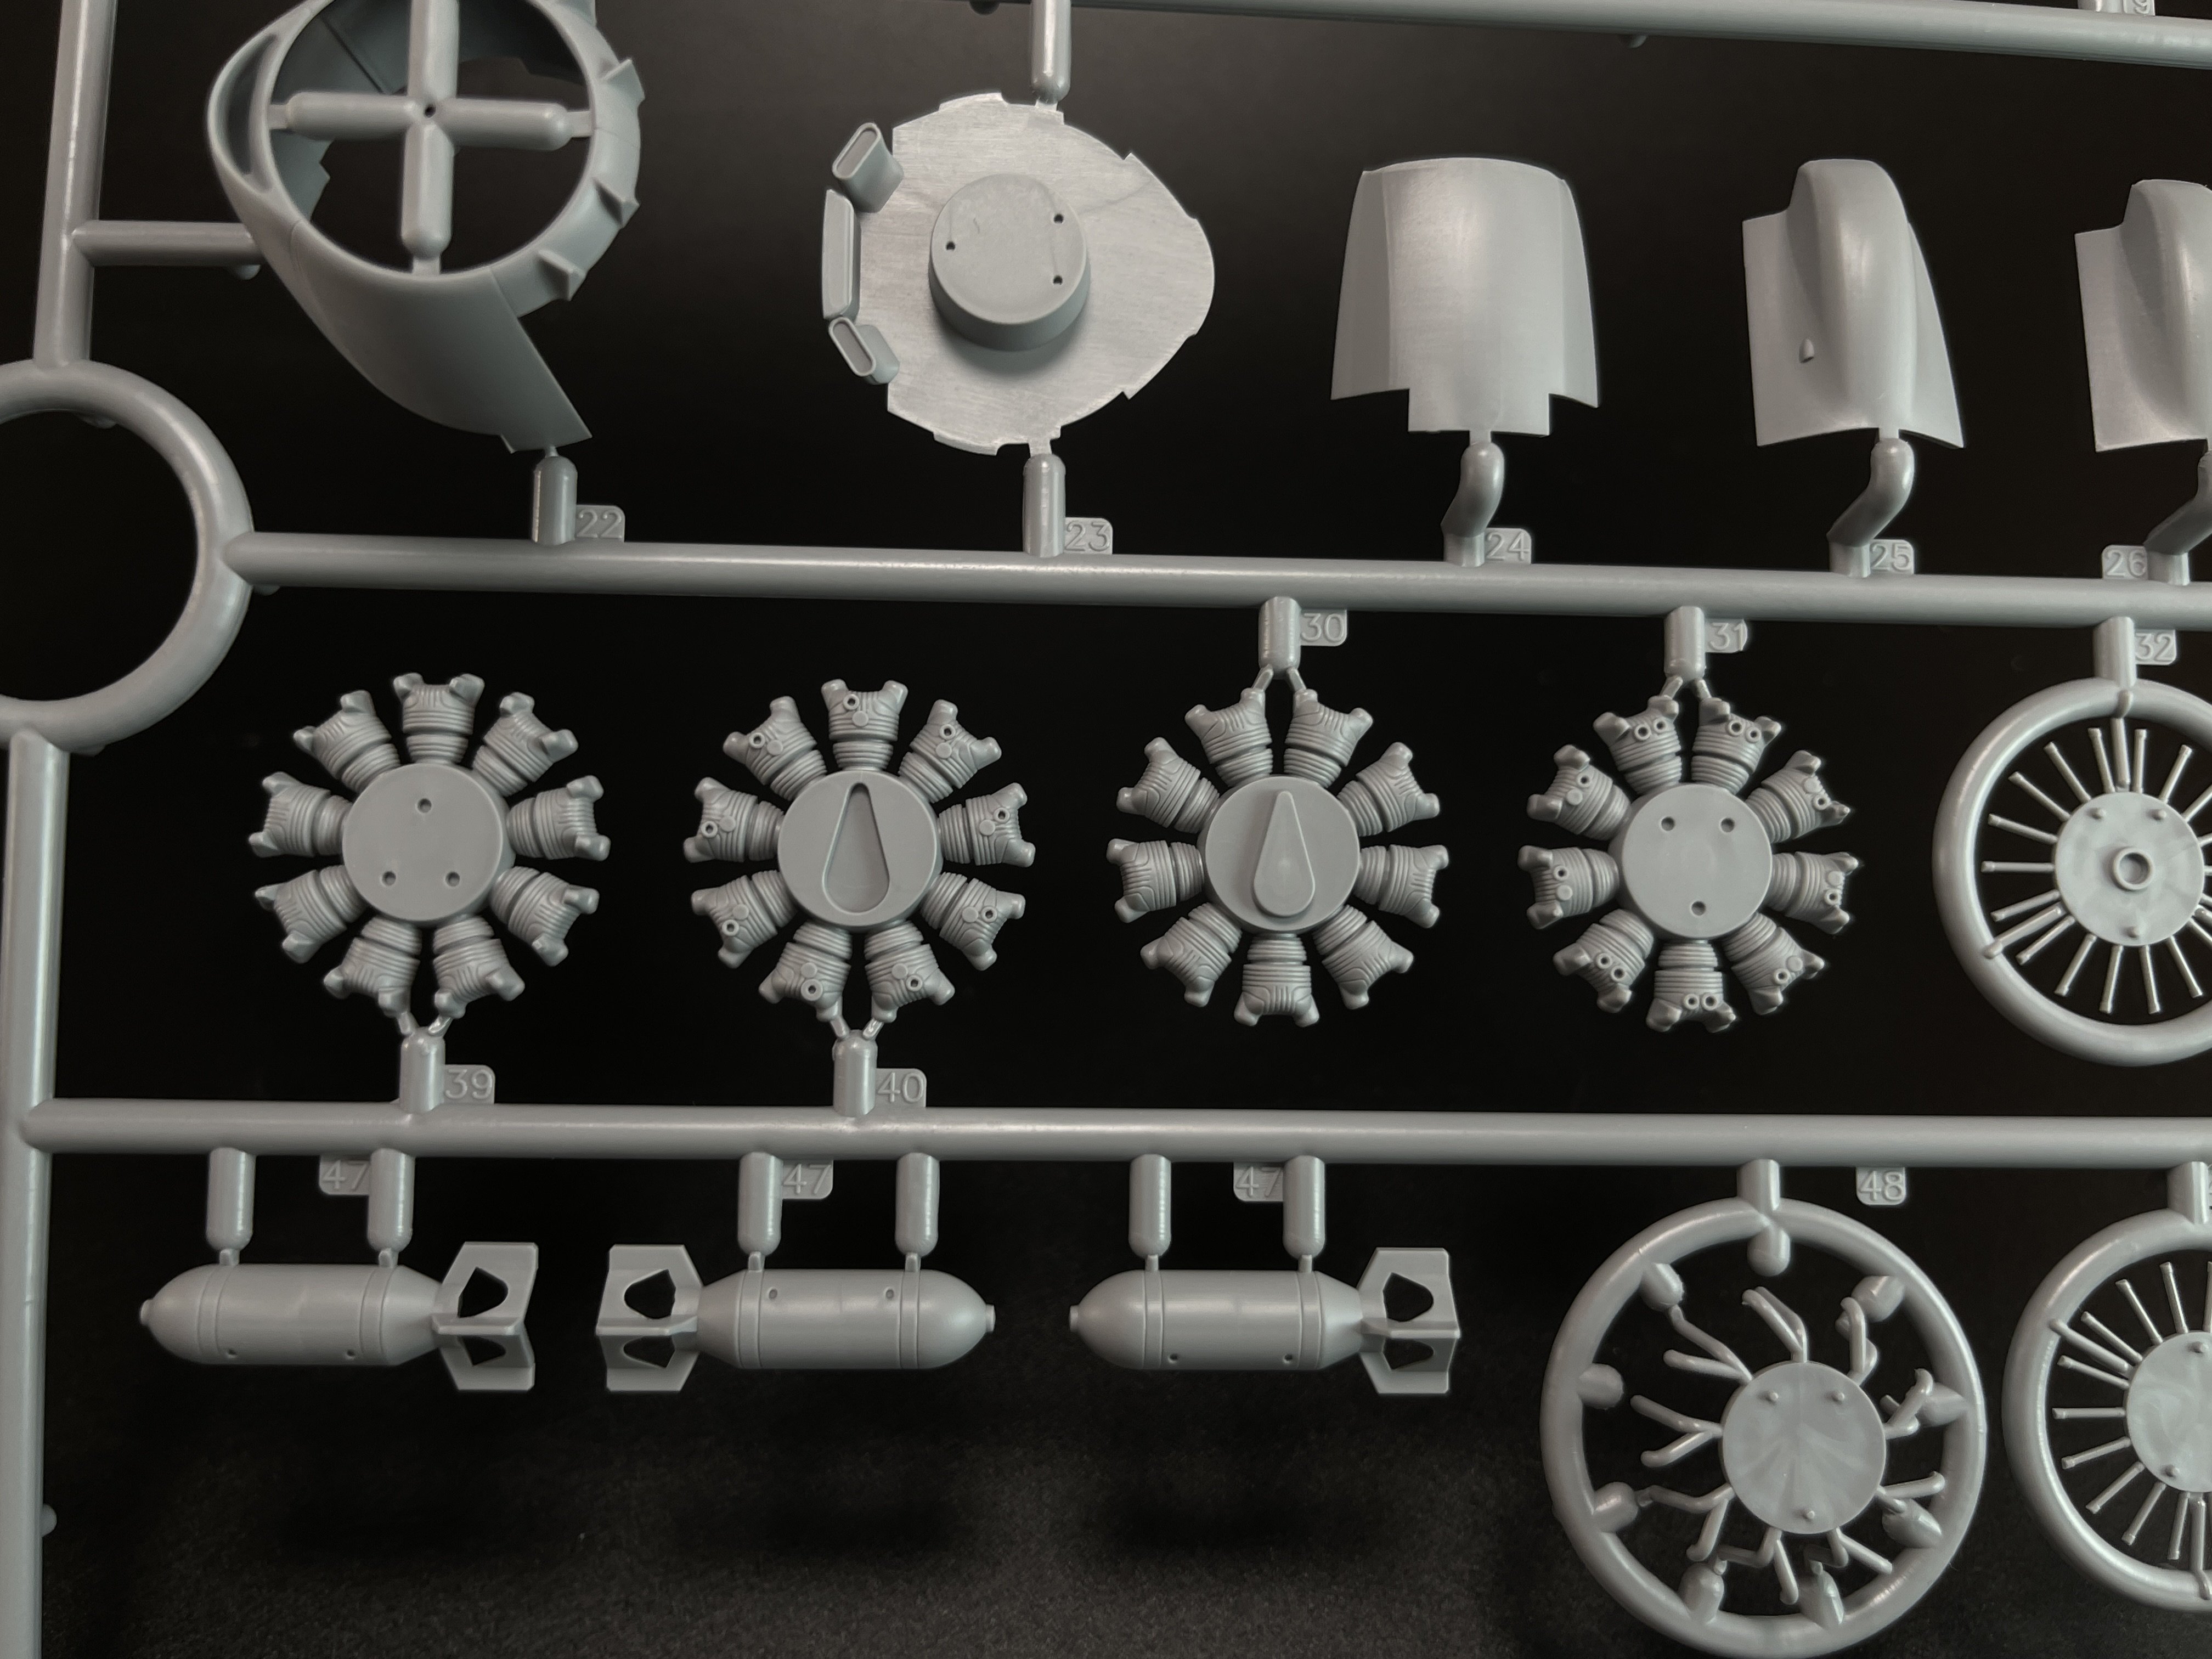
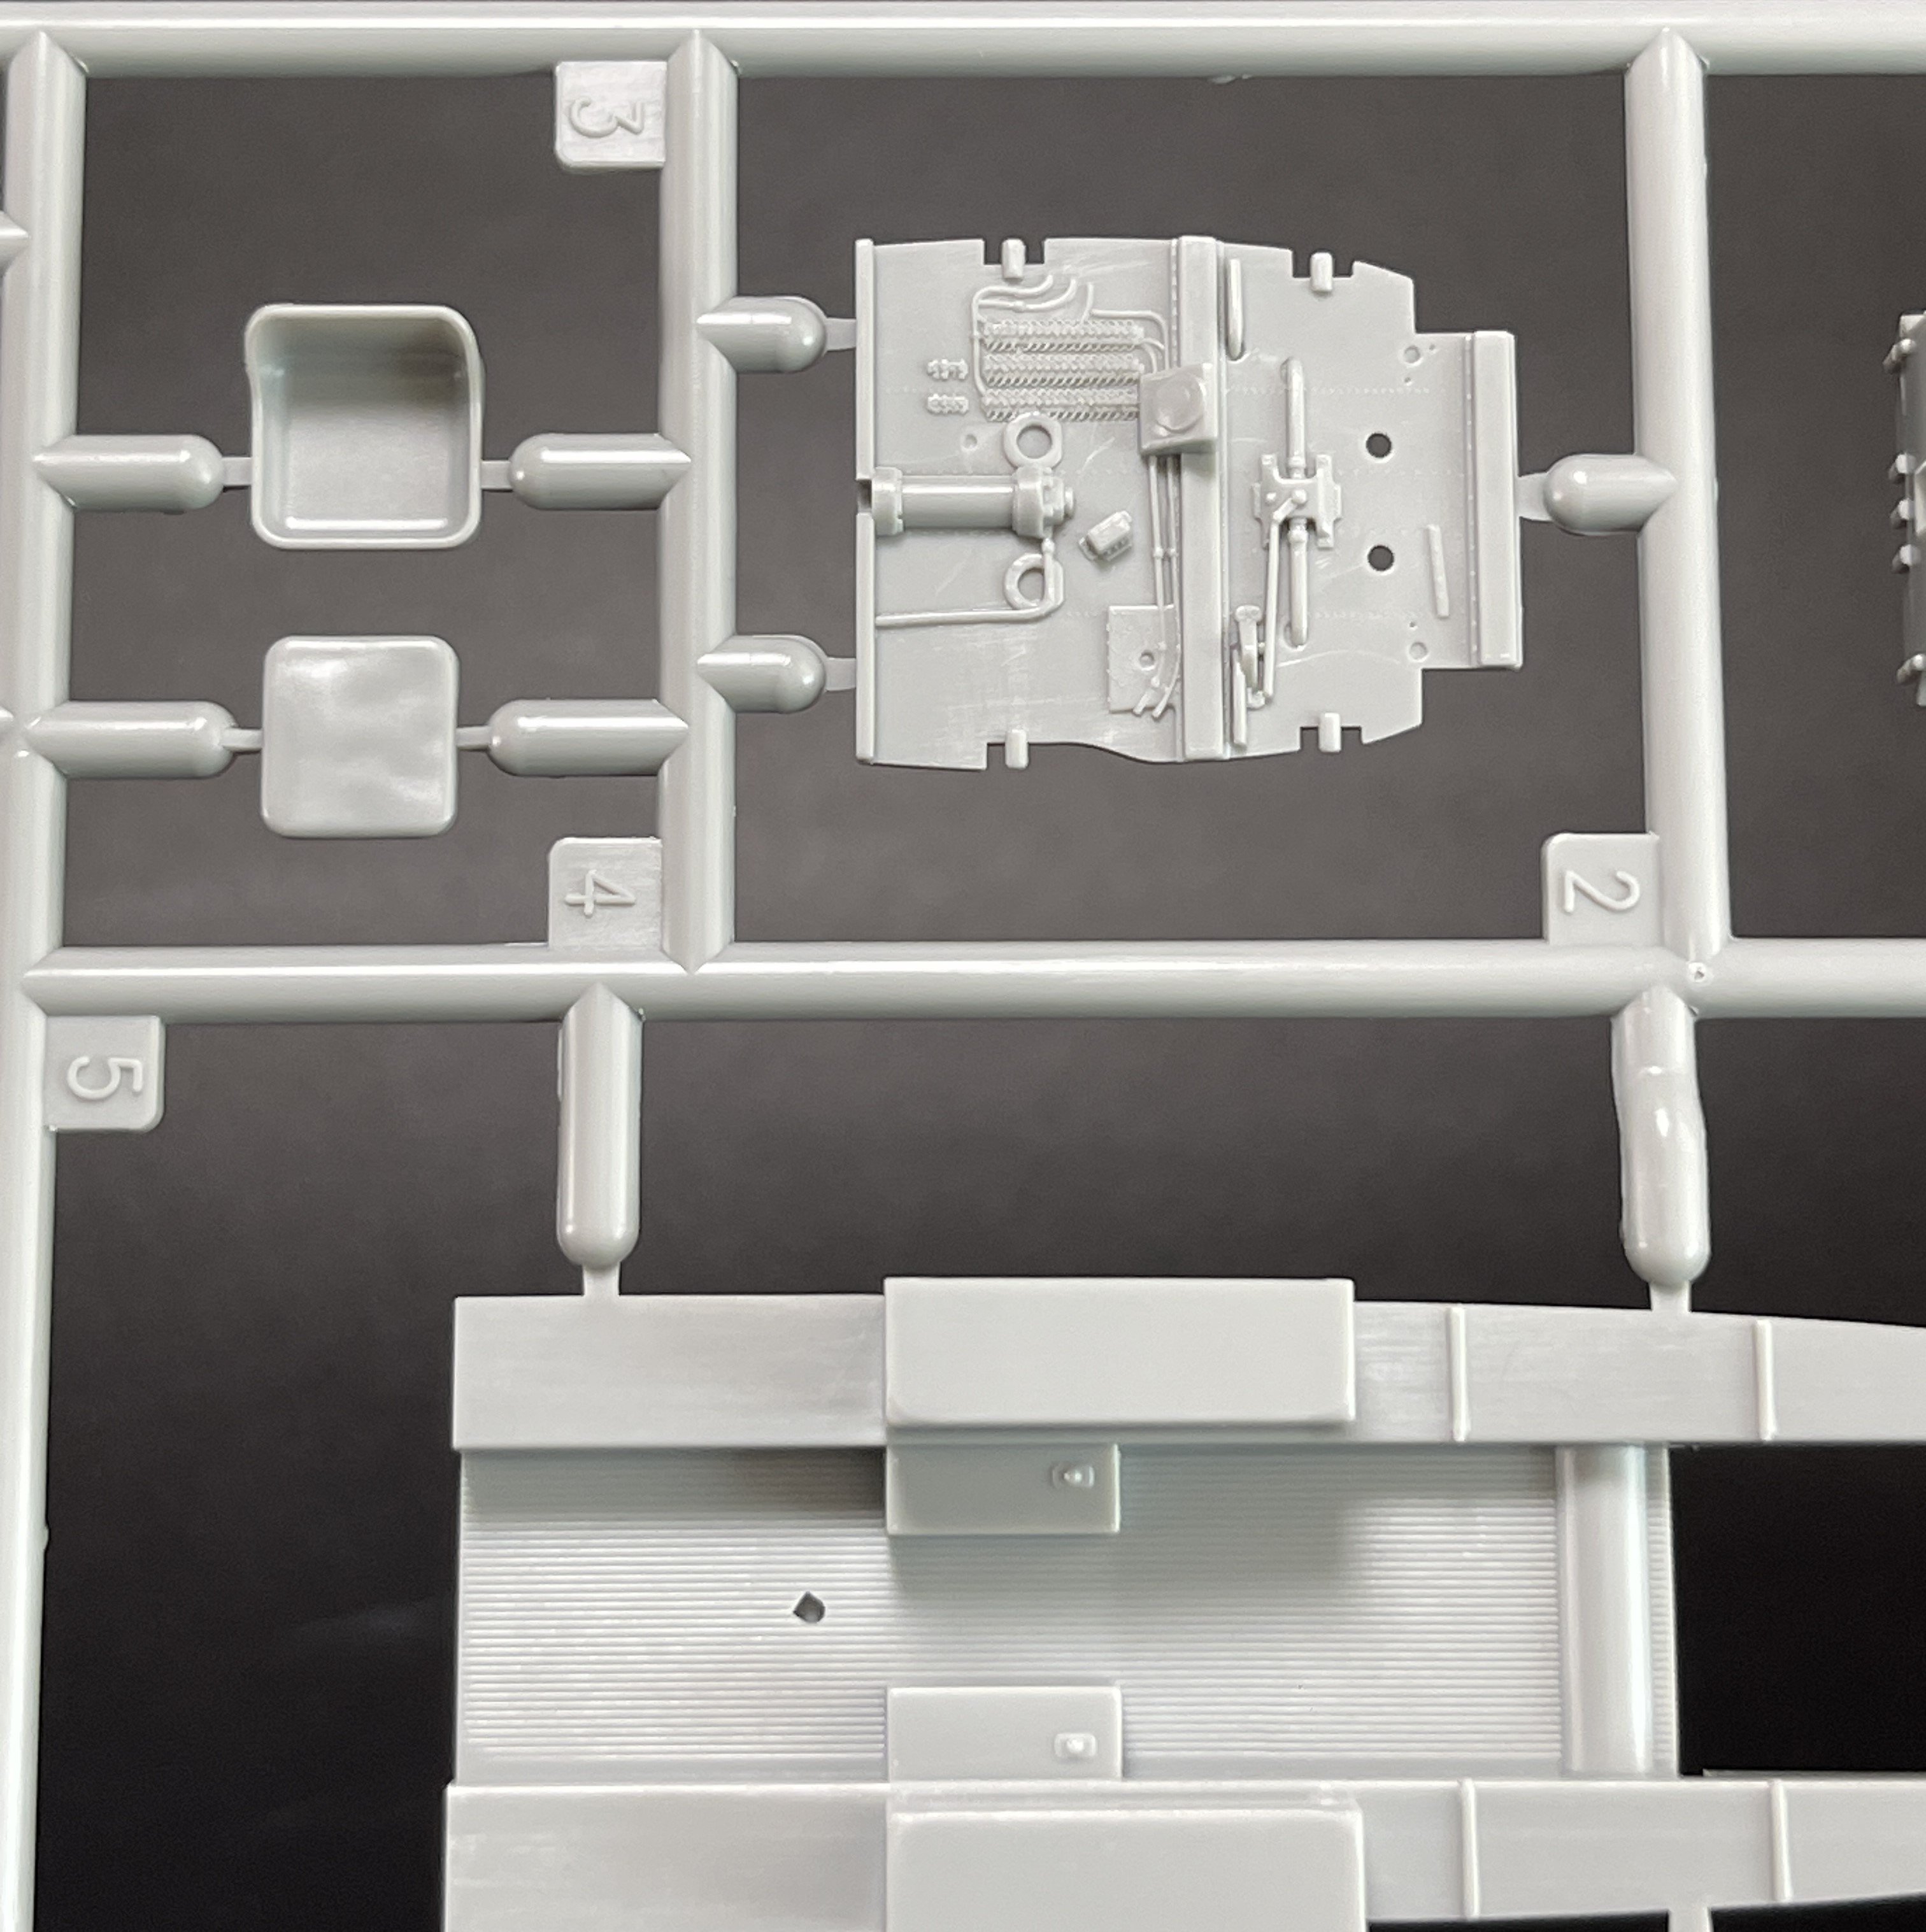
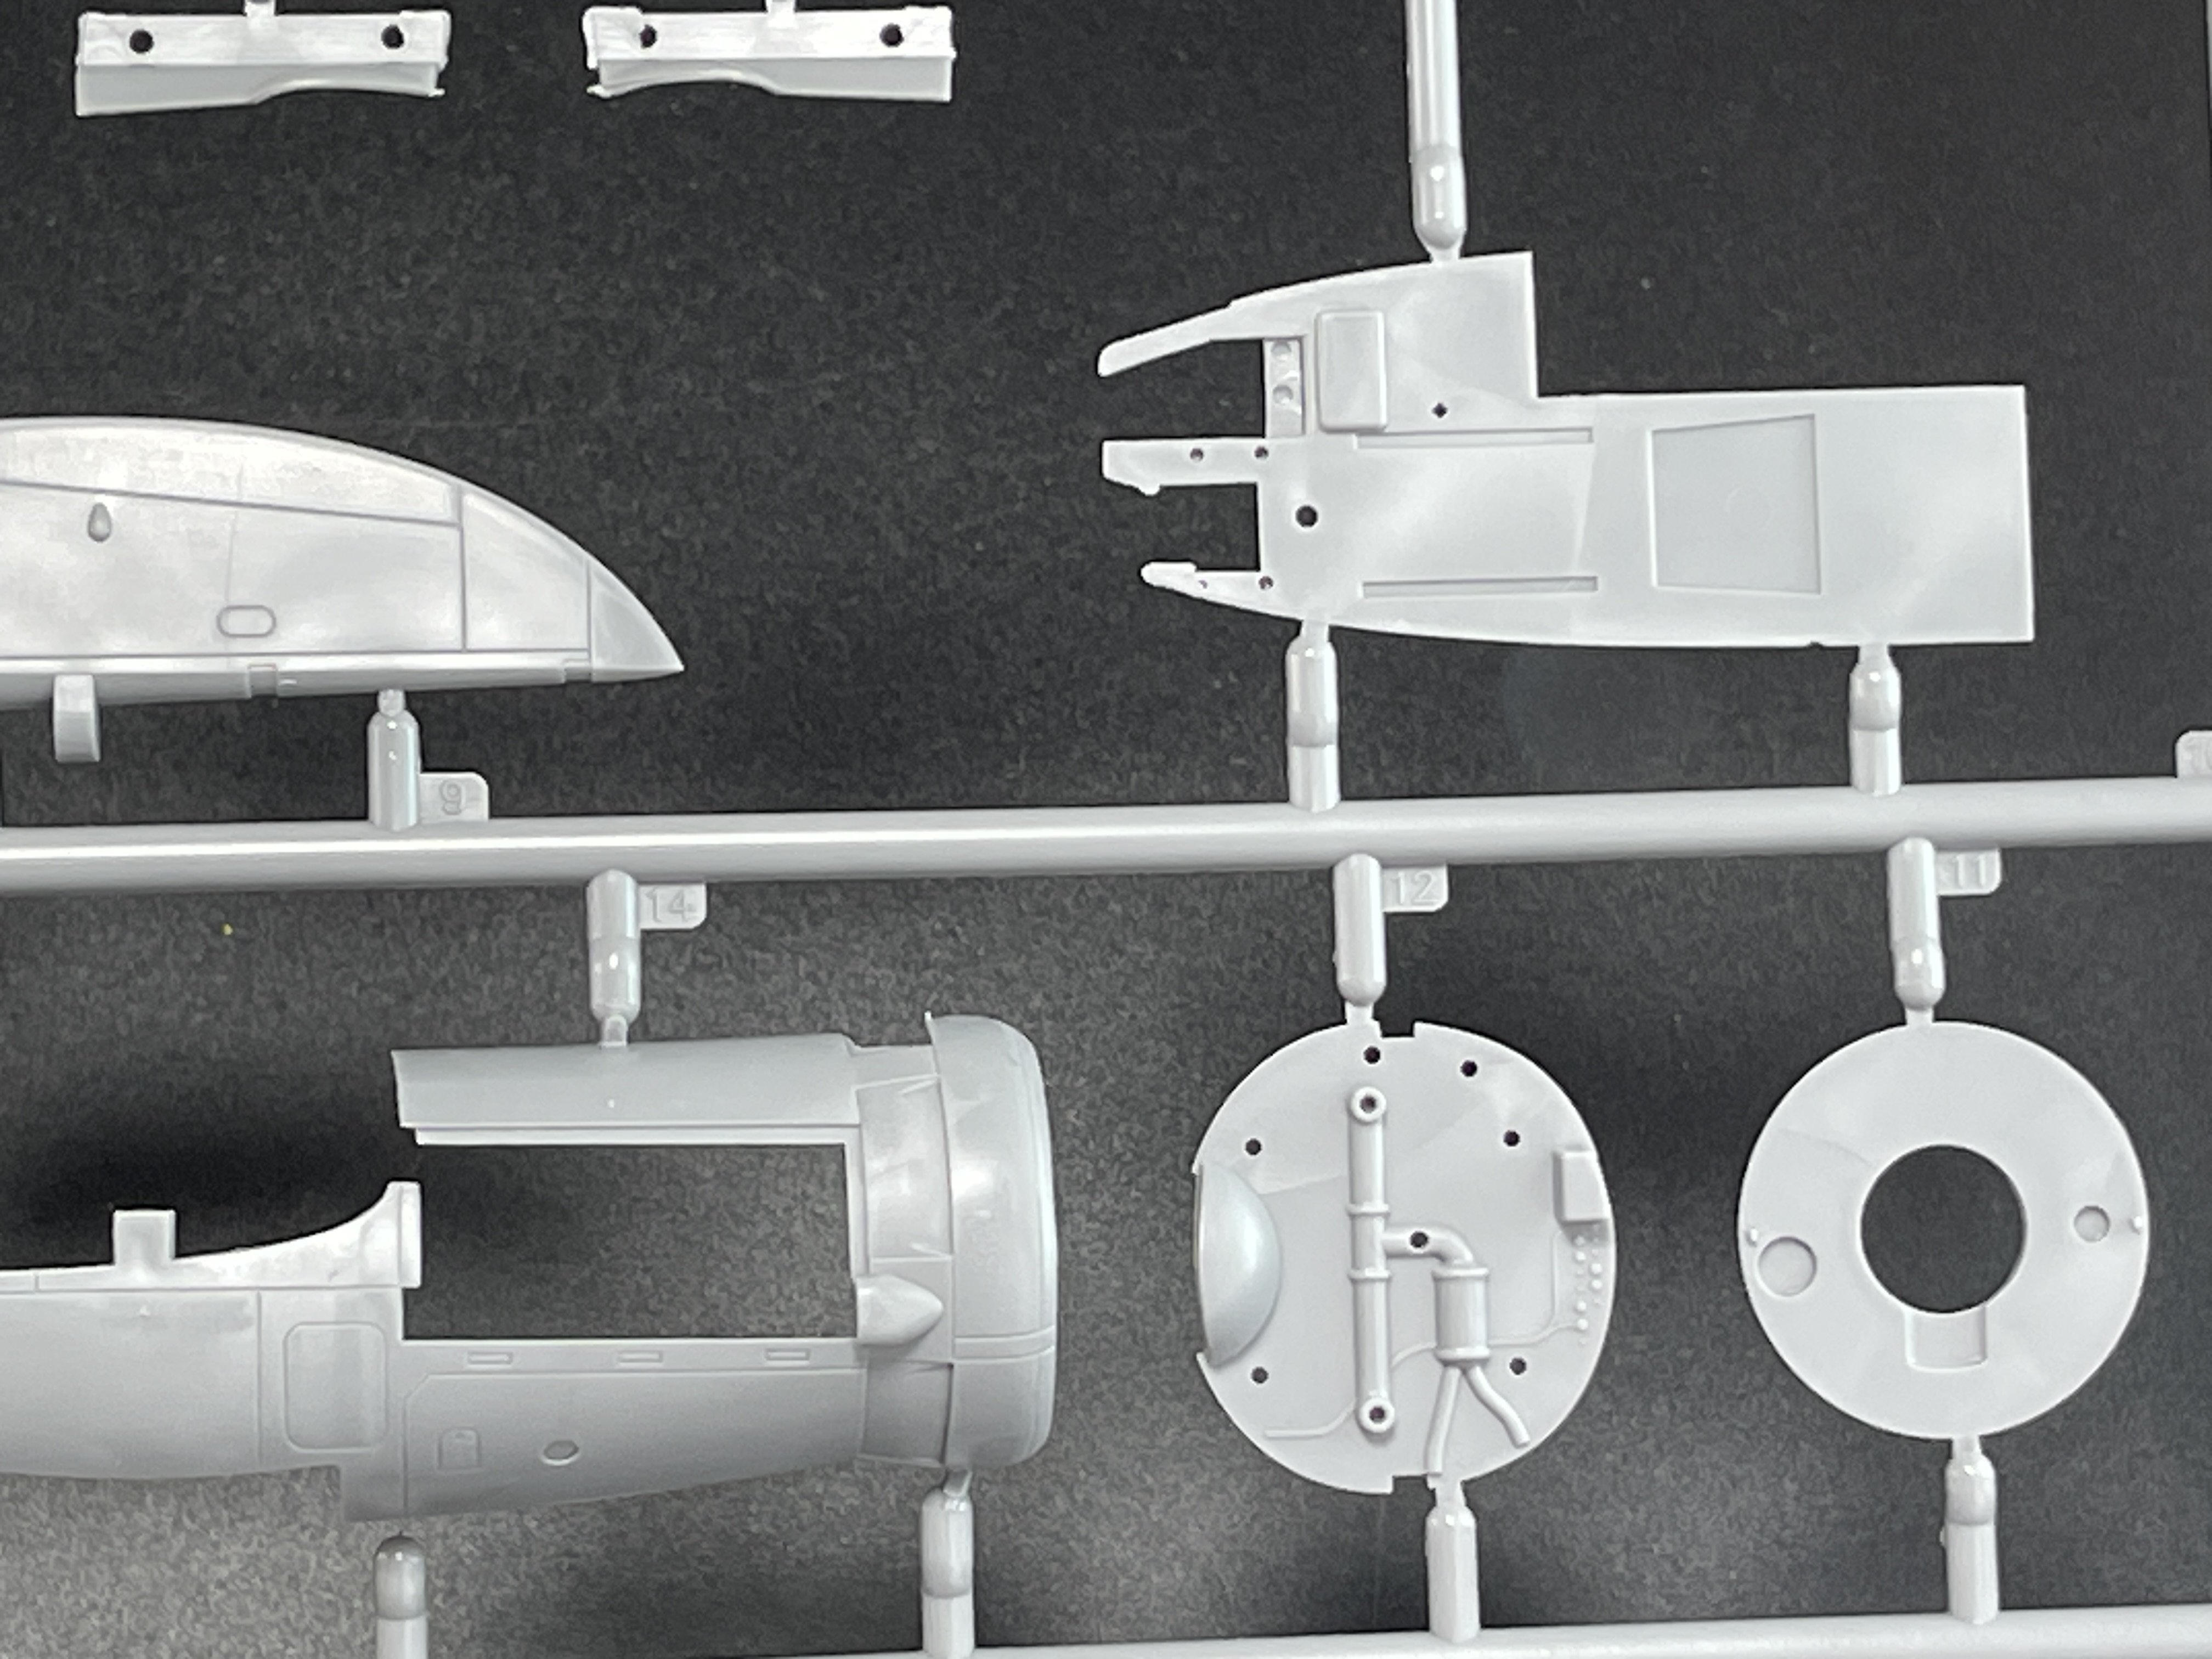
So the B-26 C comes with Two Pratt & Whitney R‑2800 engines (27 parts each), offering impressive realism comparable to high-end kits. However the engine gondola panels are not removal. )
In the Spitfire you can put the Merlin full exposed.
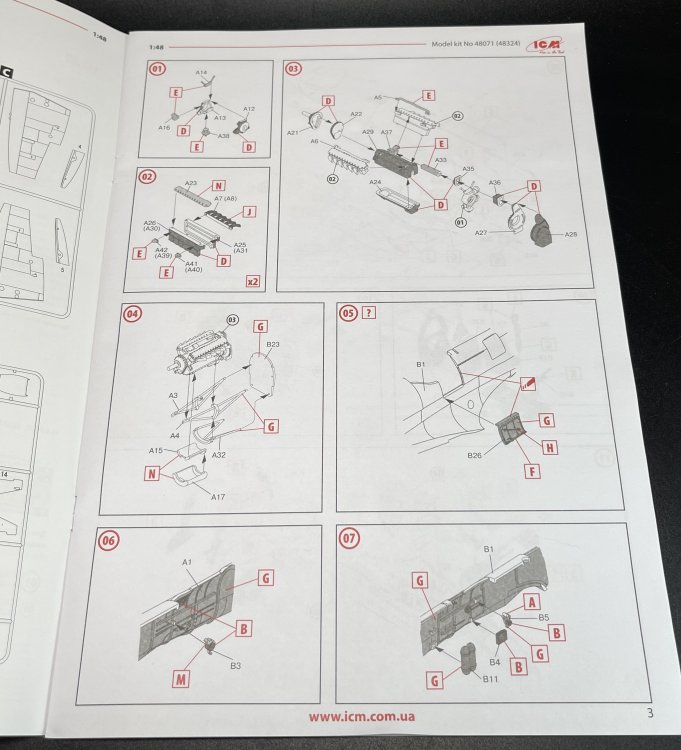
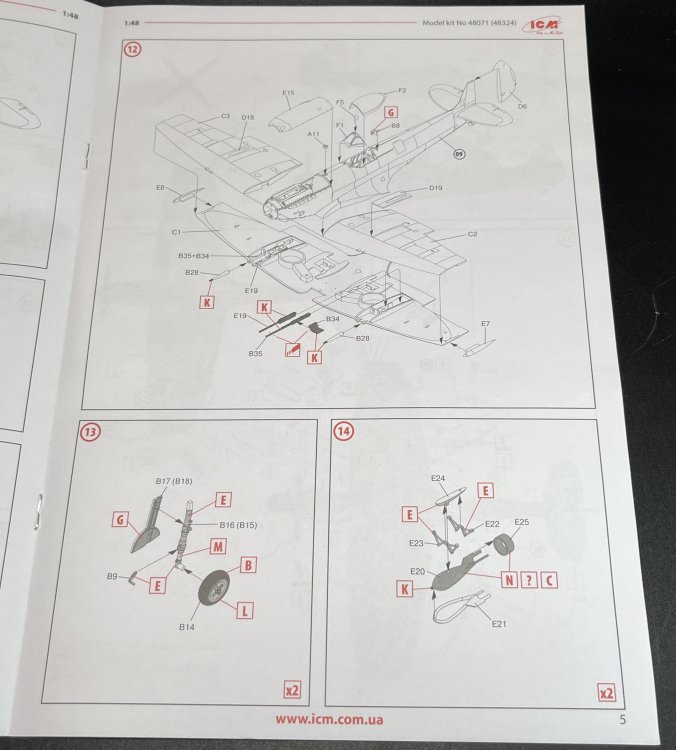
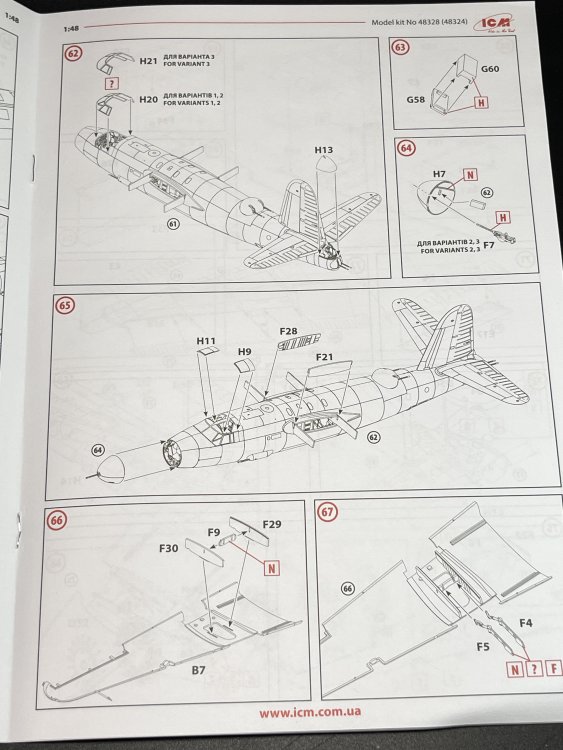
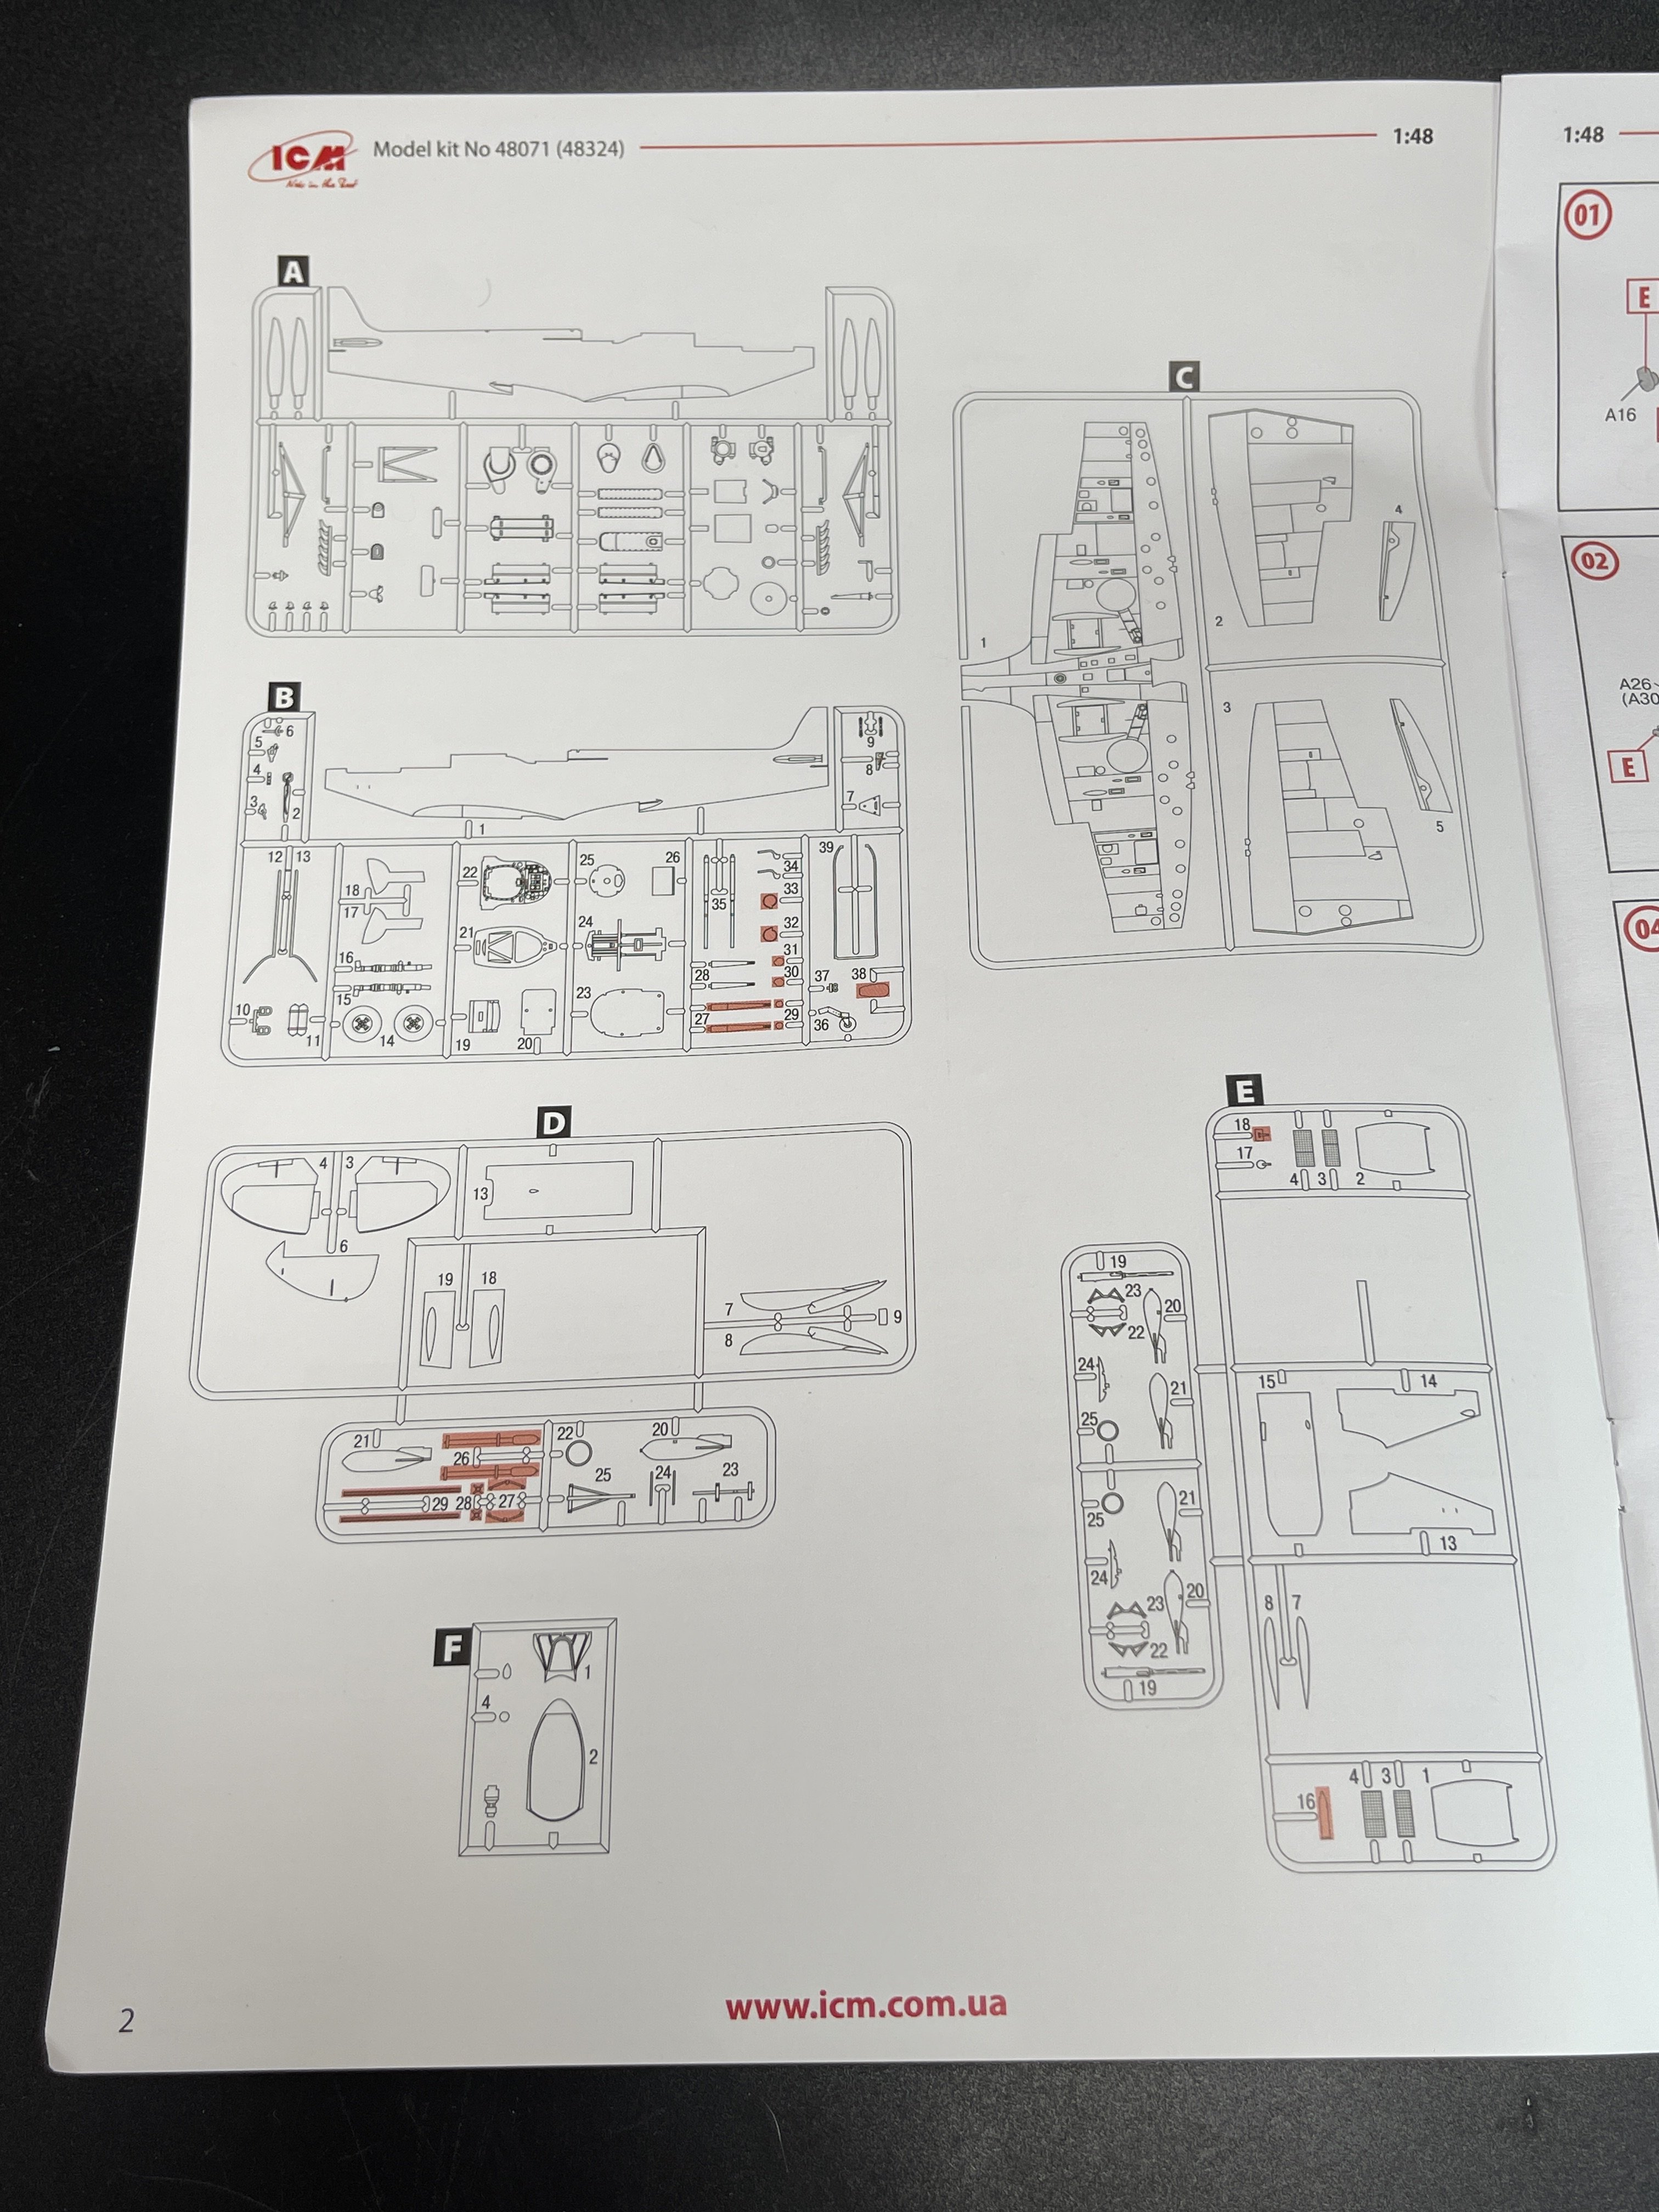
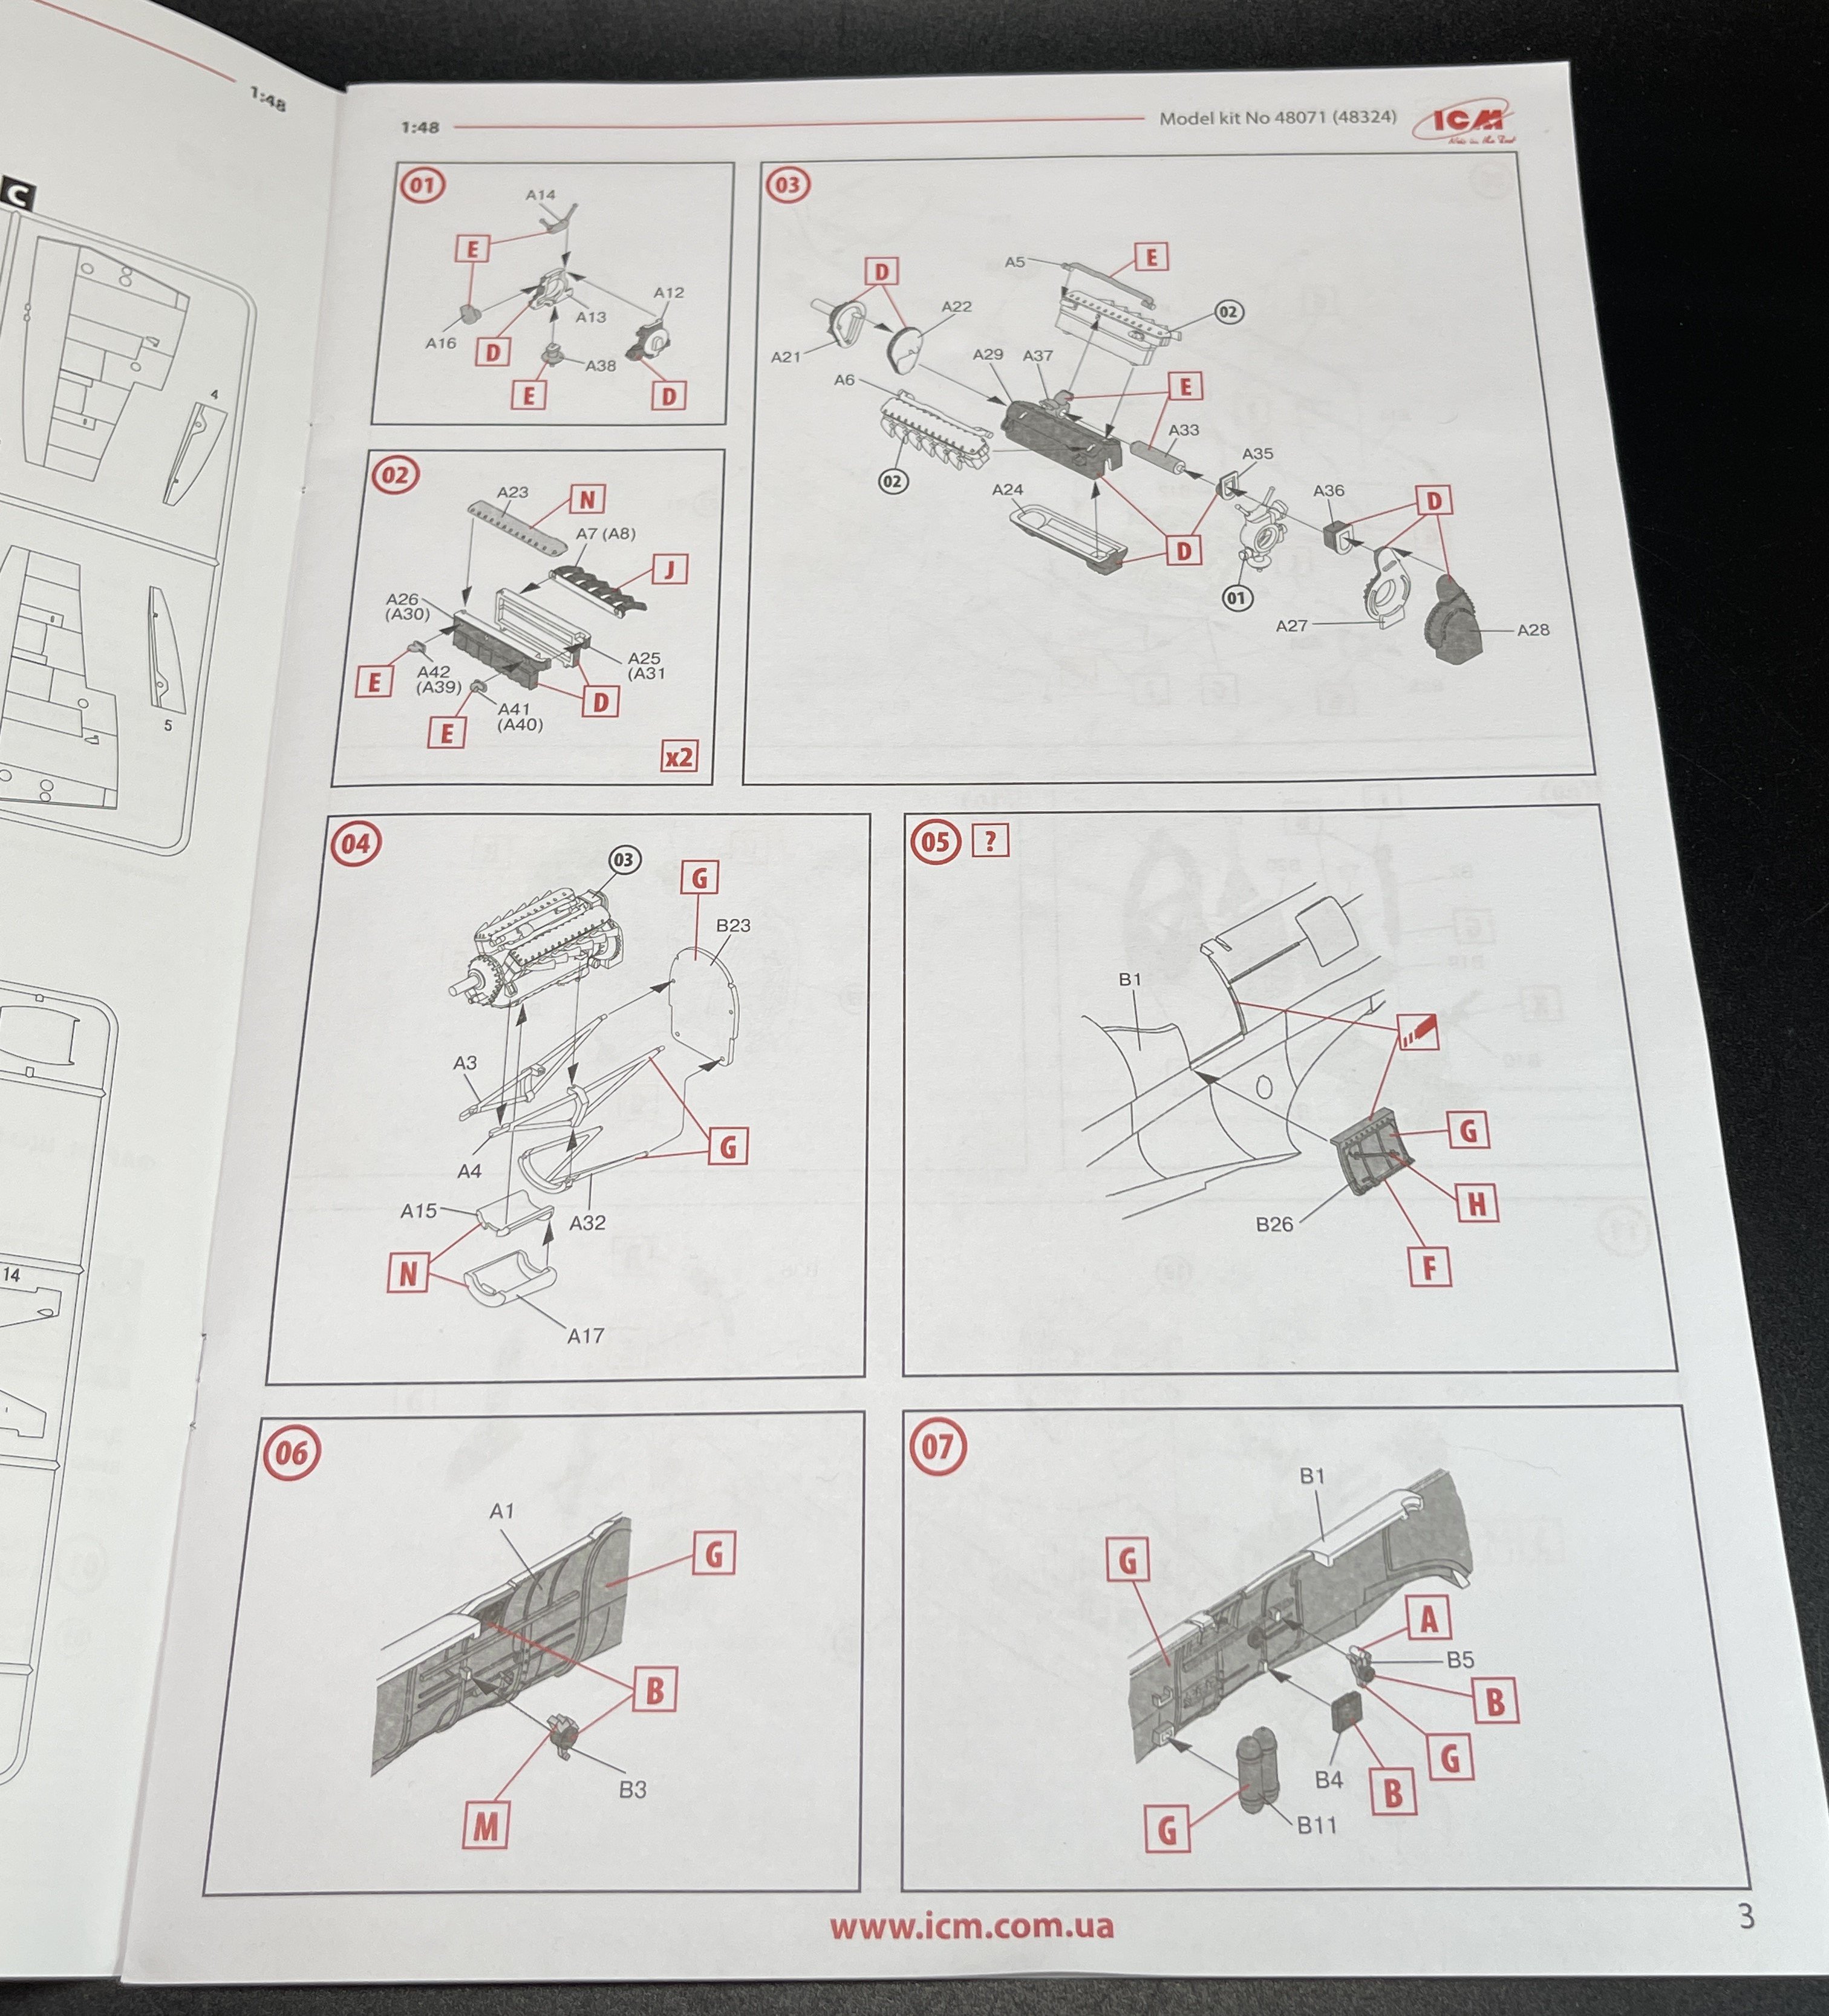
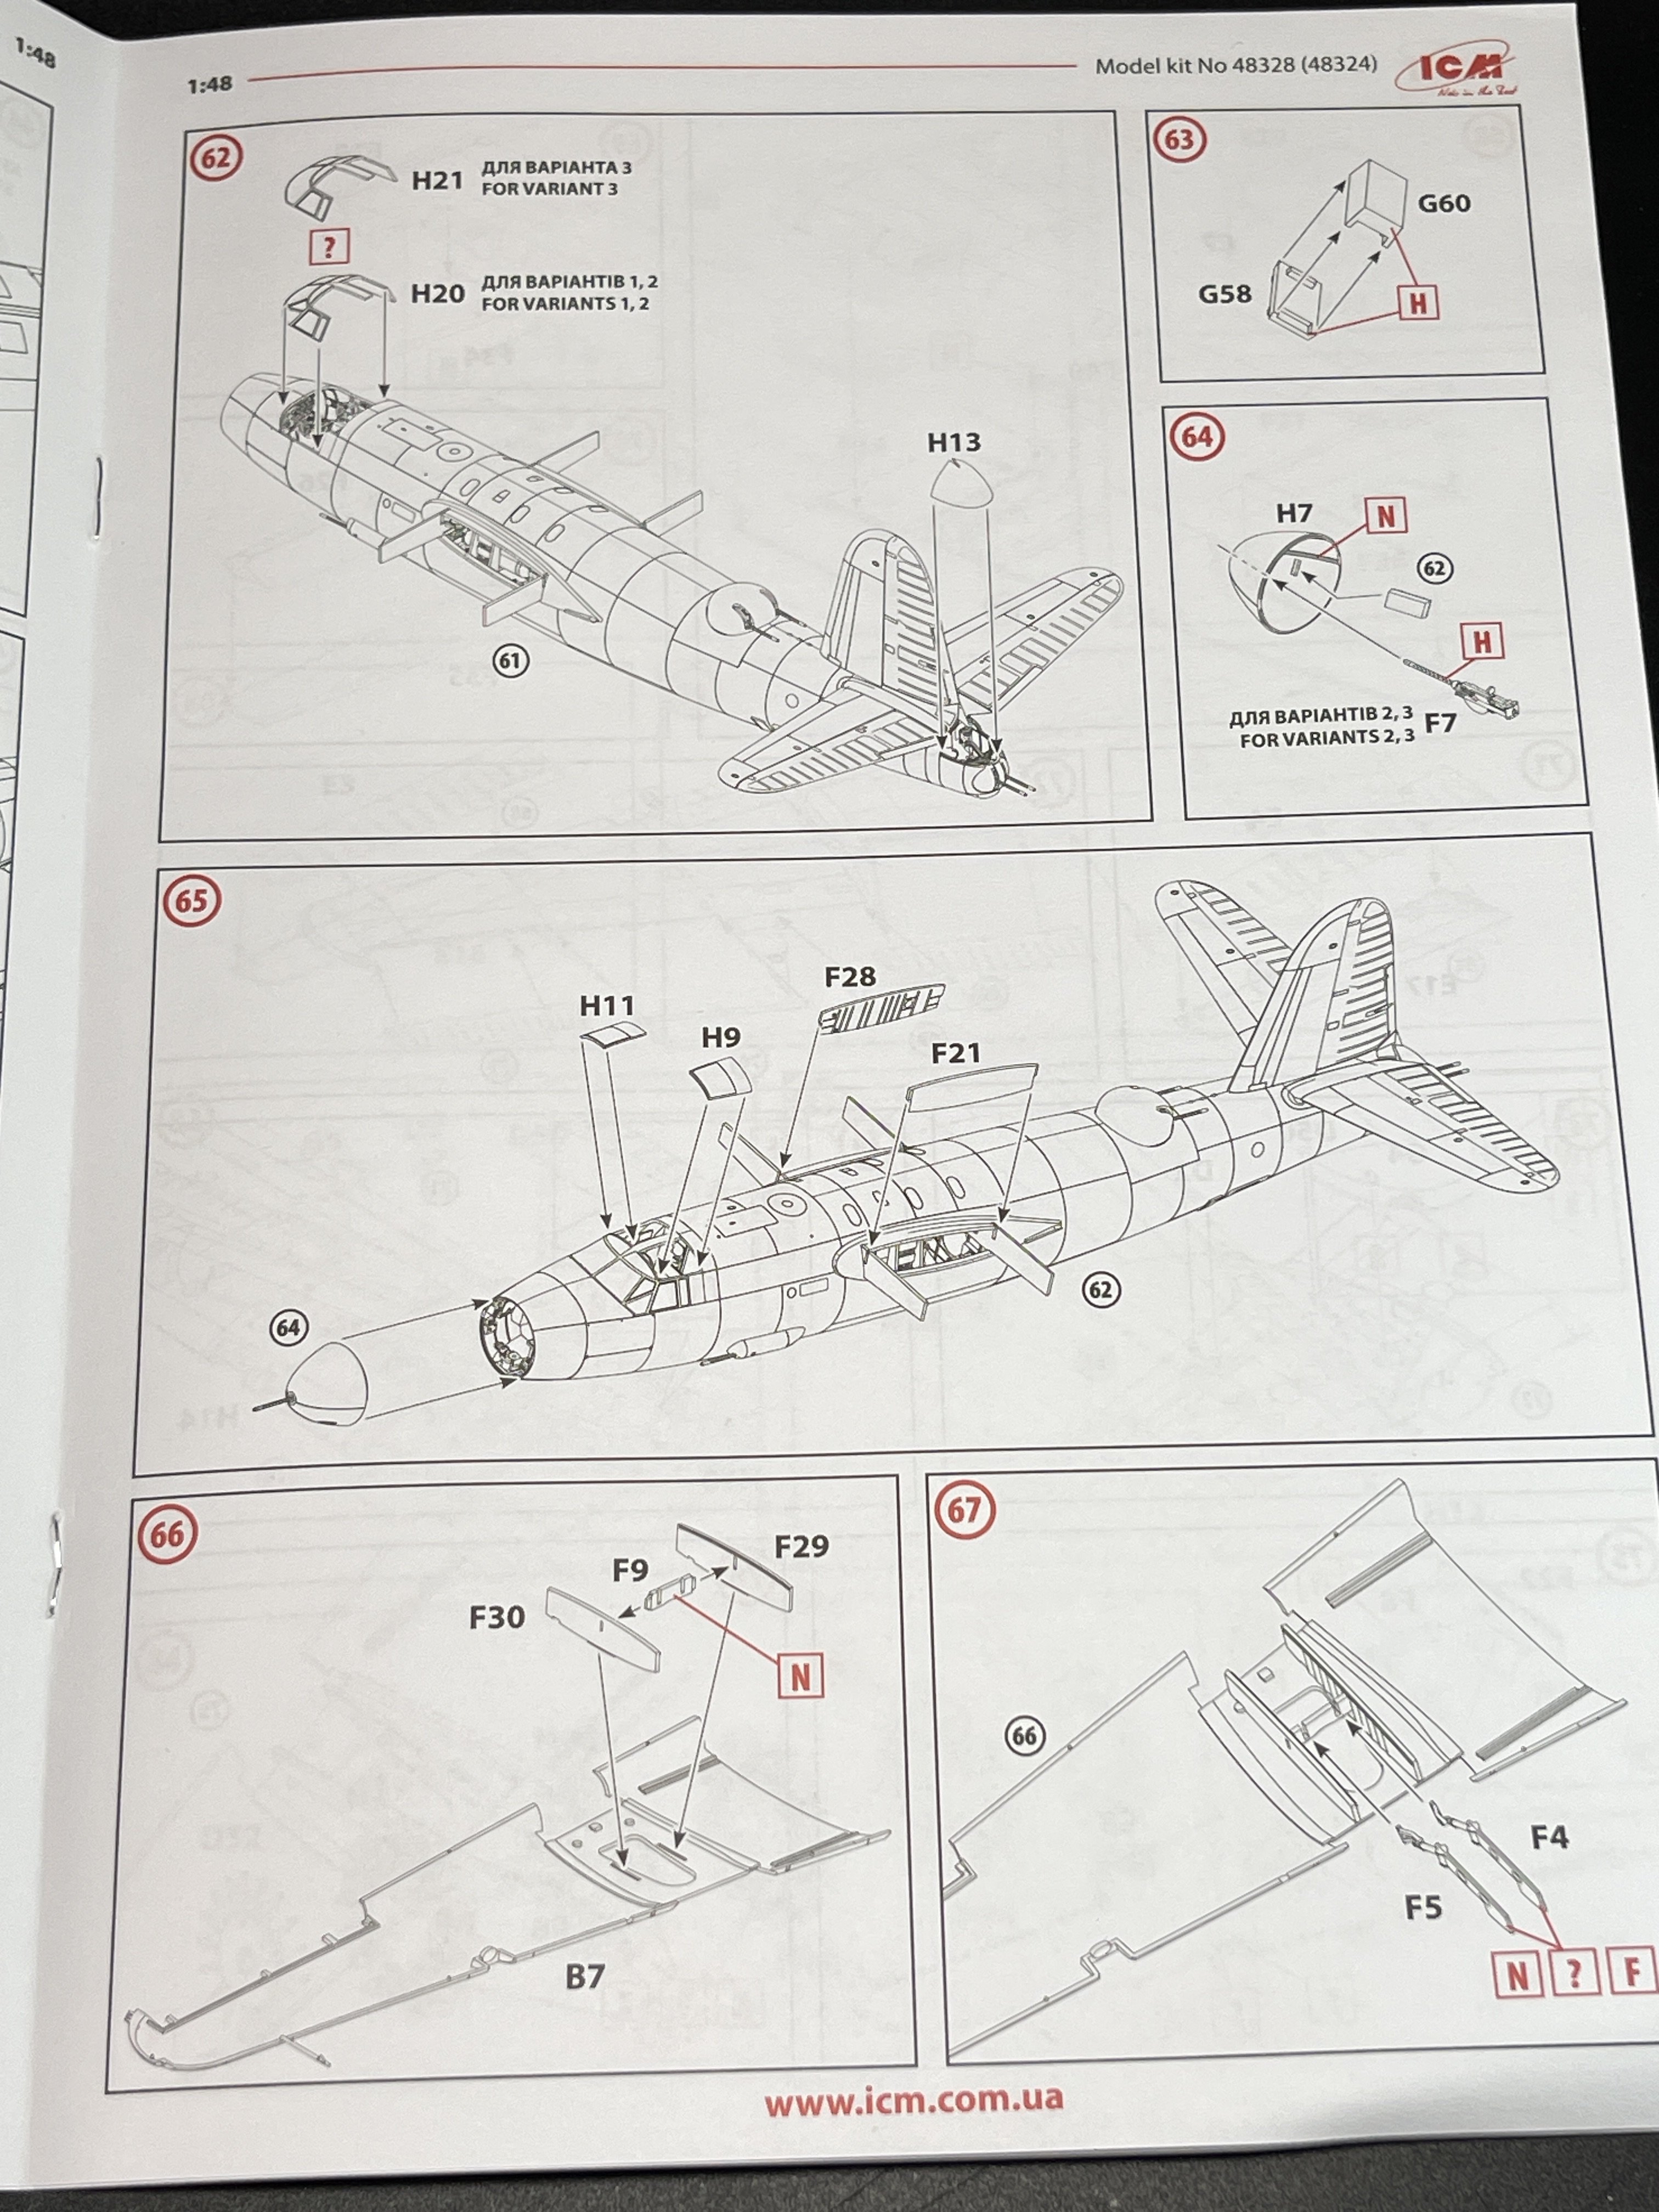
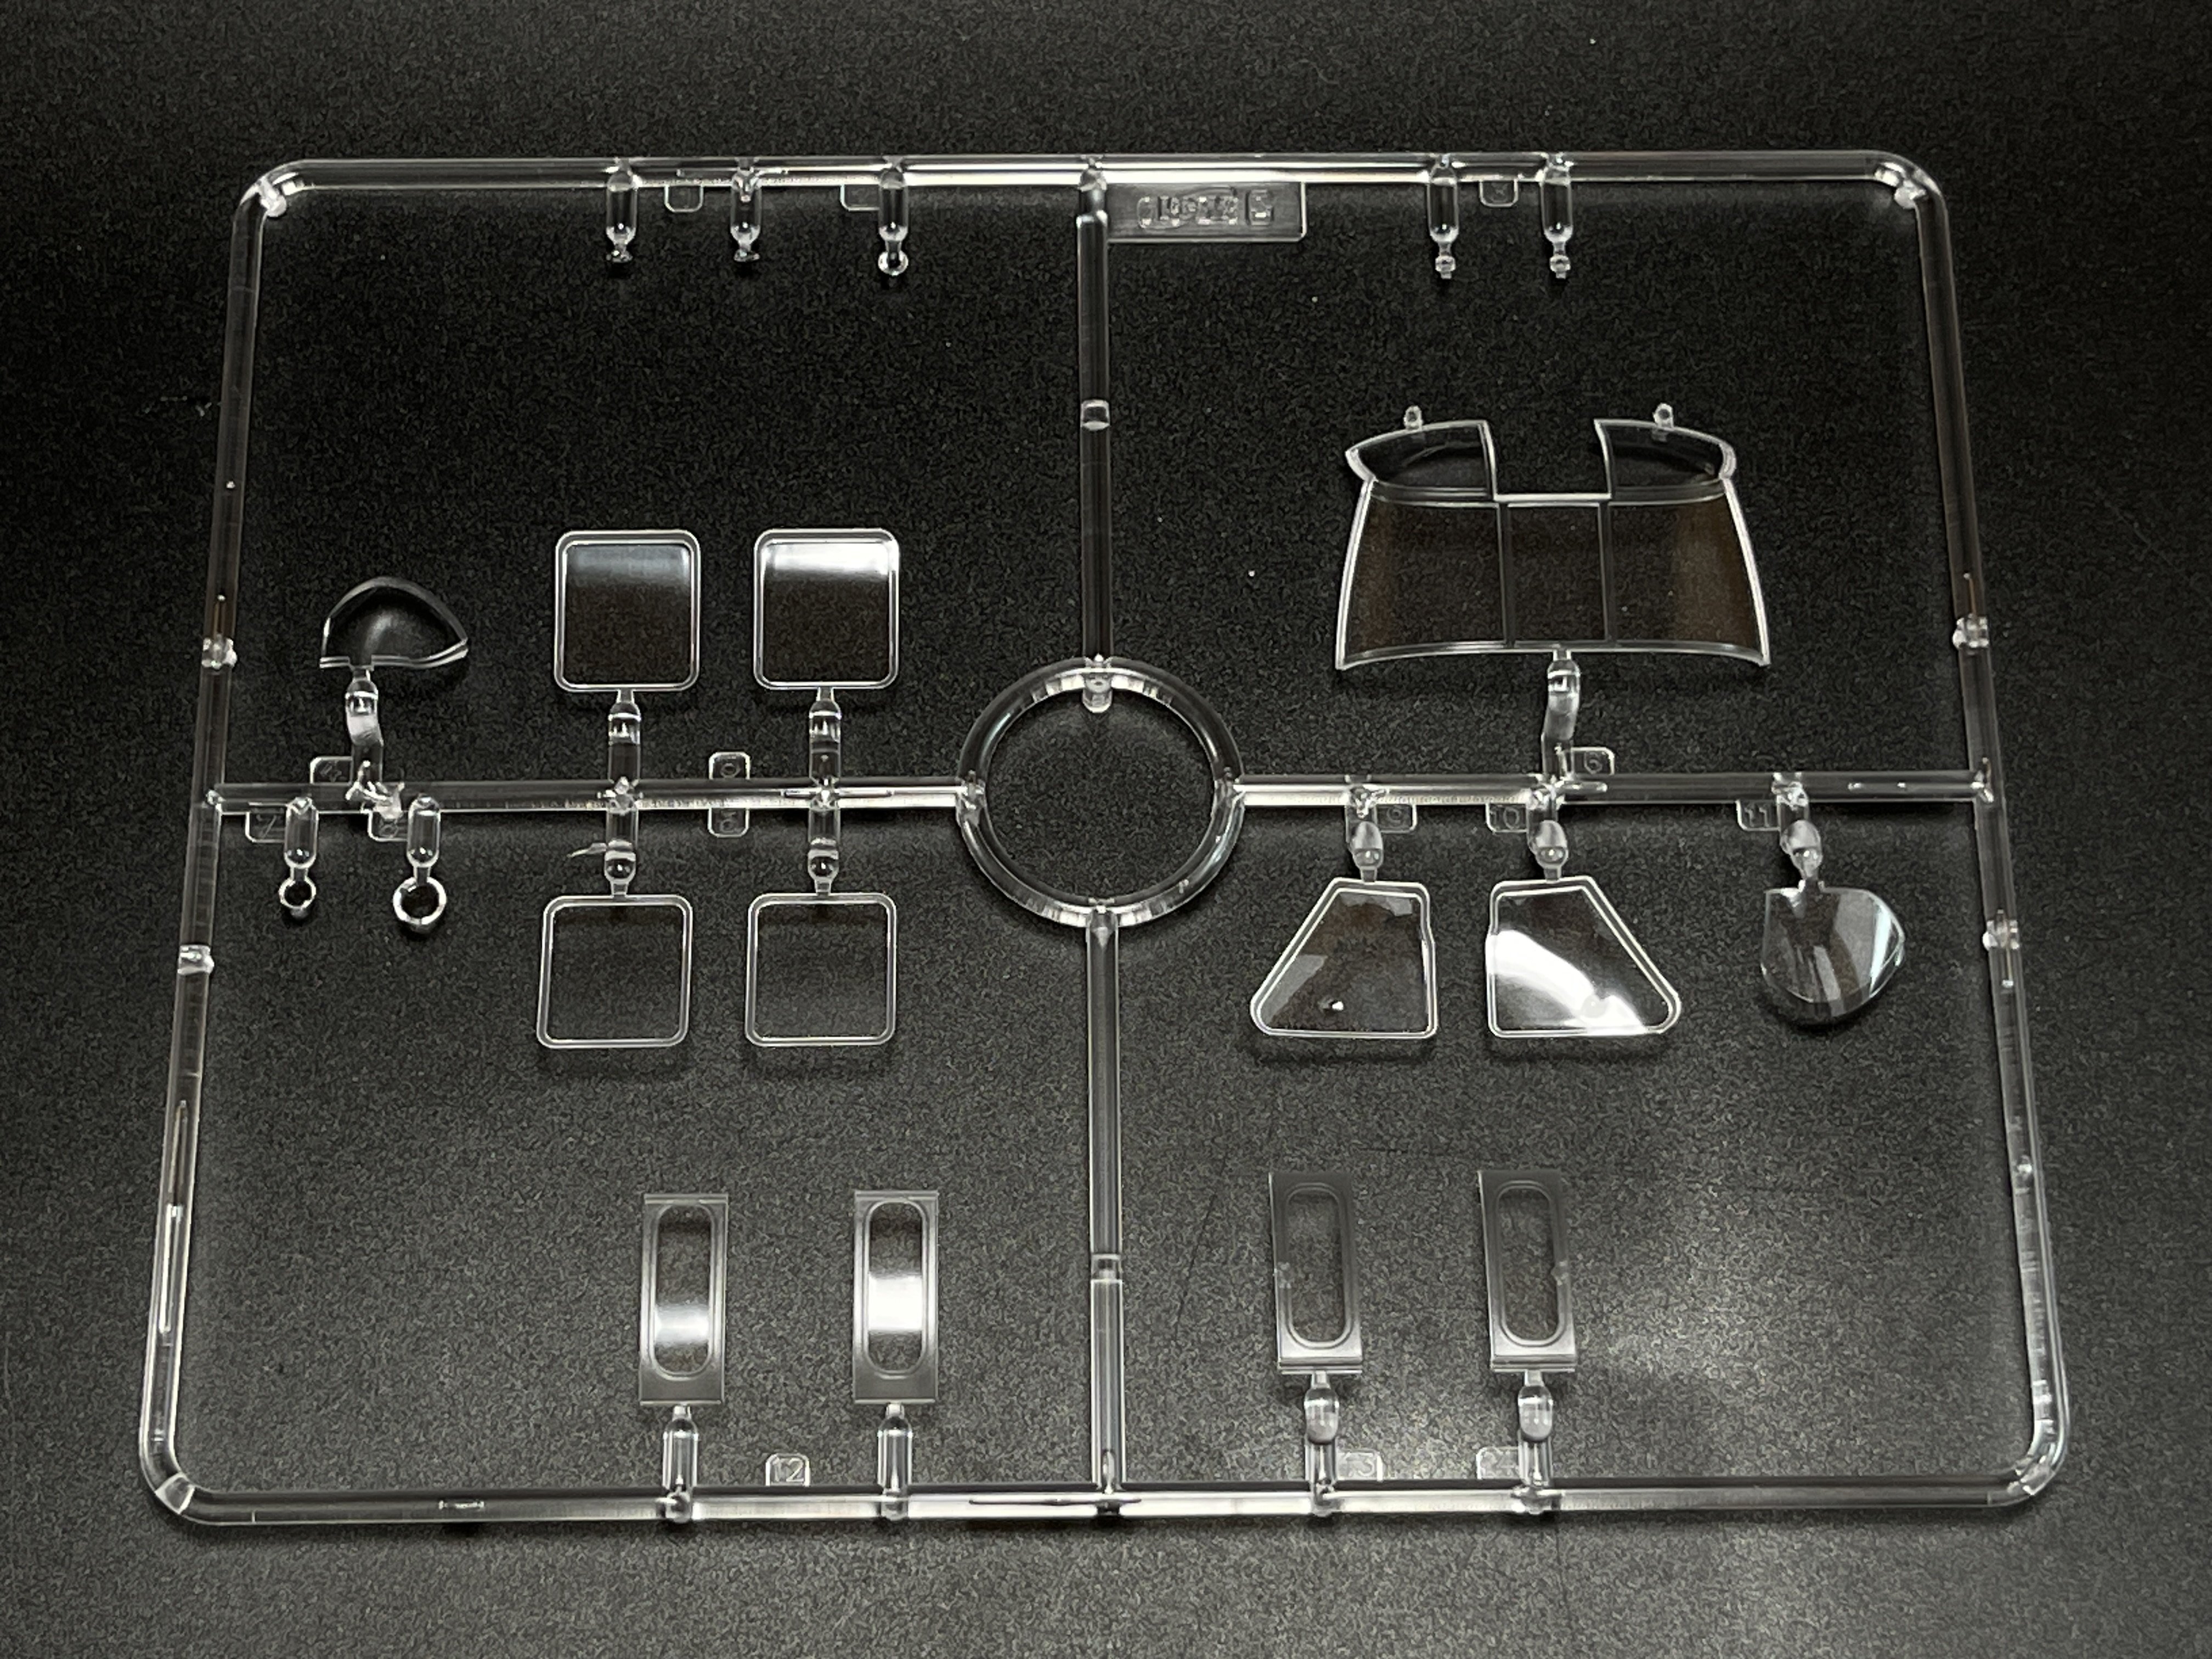
As for the instructions of all models despite Spitfire and Mustang are older models kits, the instrucions are in the ICM modern state with only ICM color chart and clear parts indication.


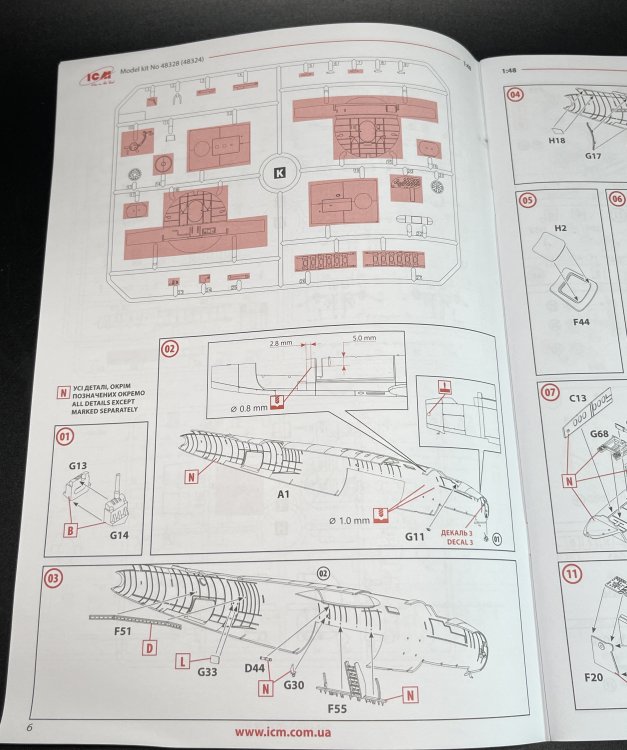
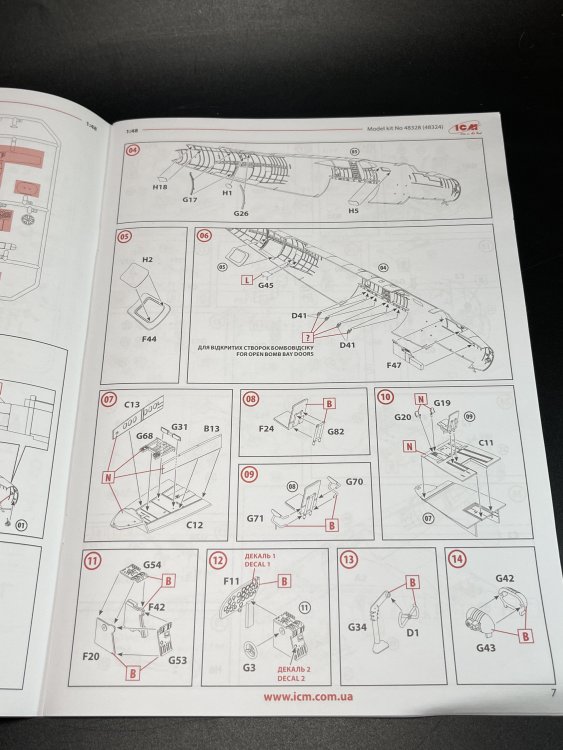
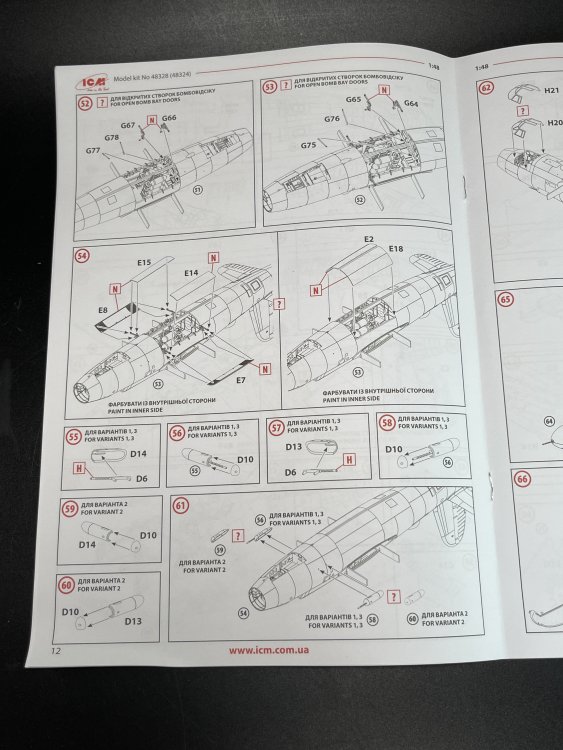

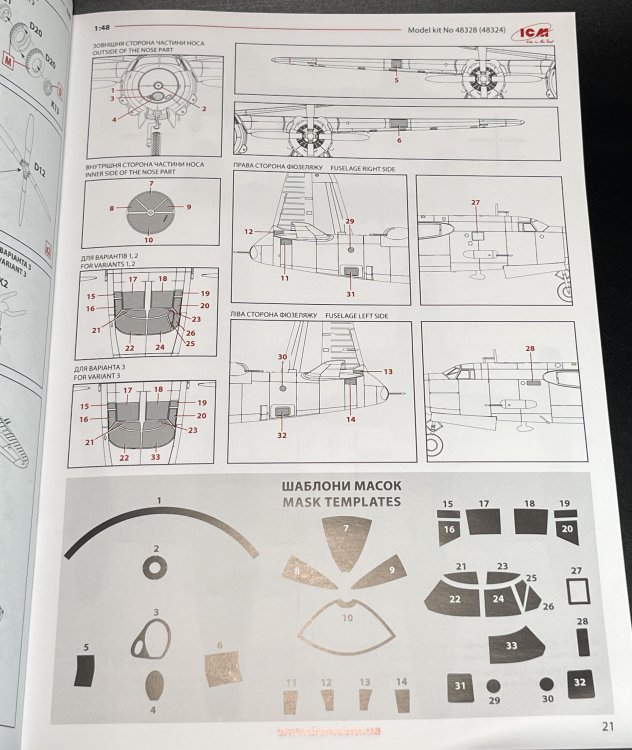
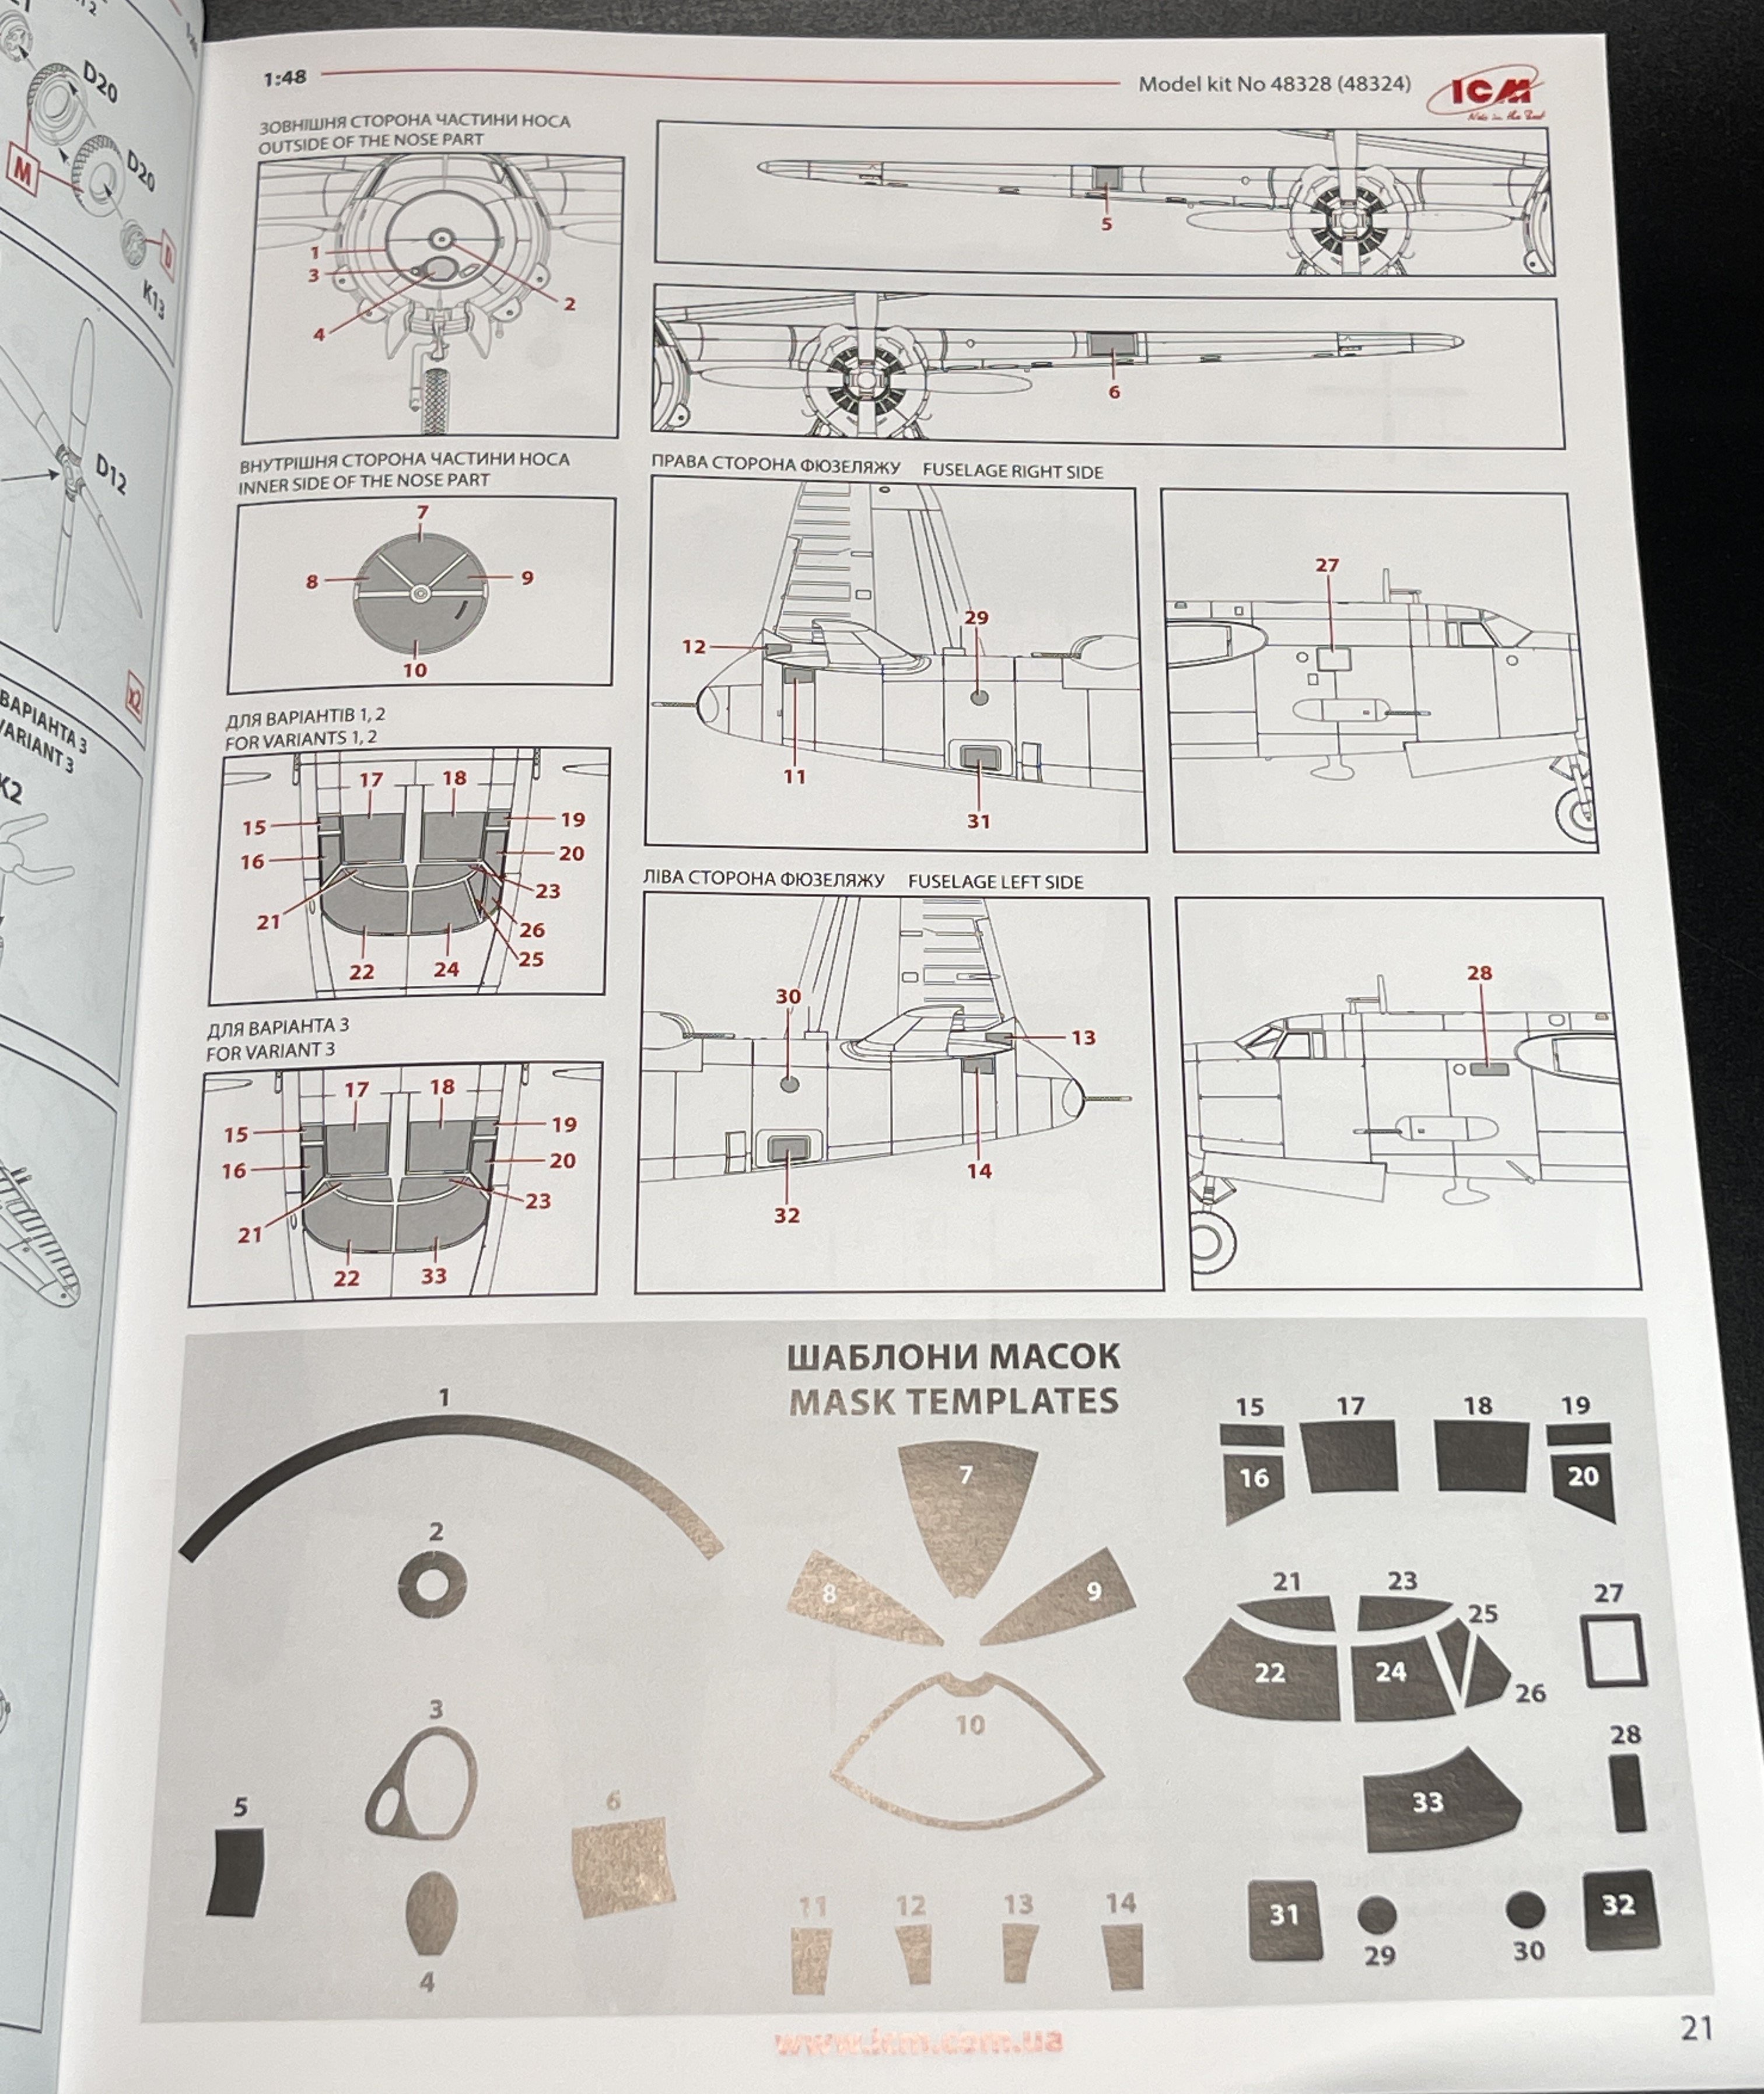
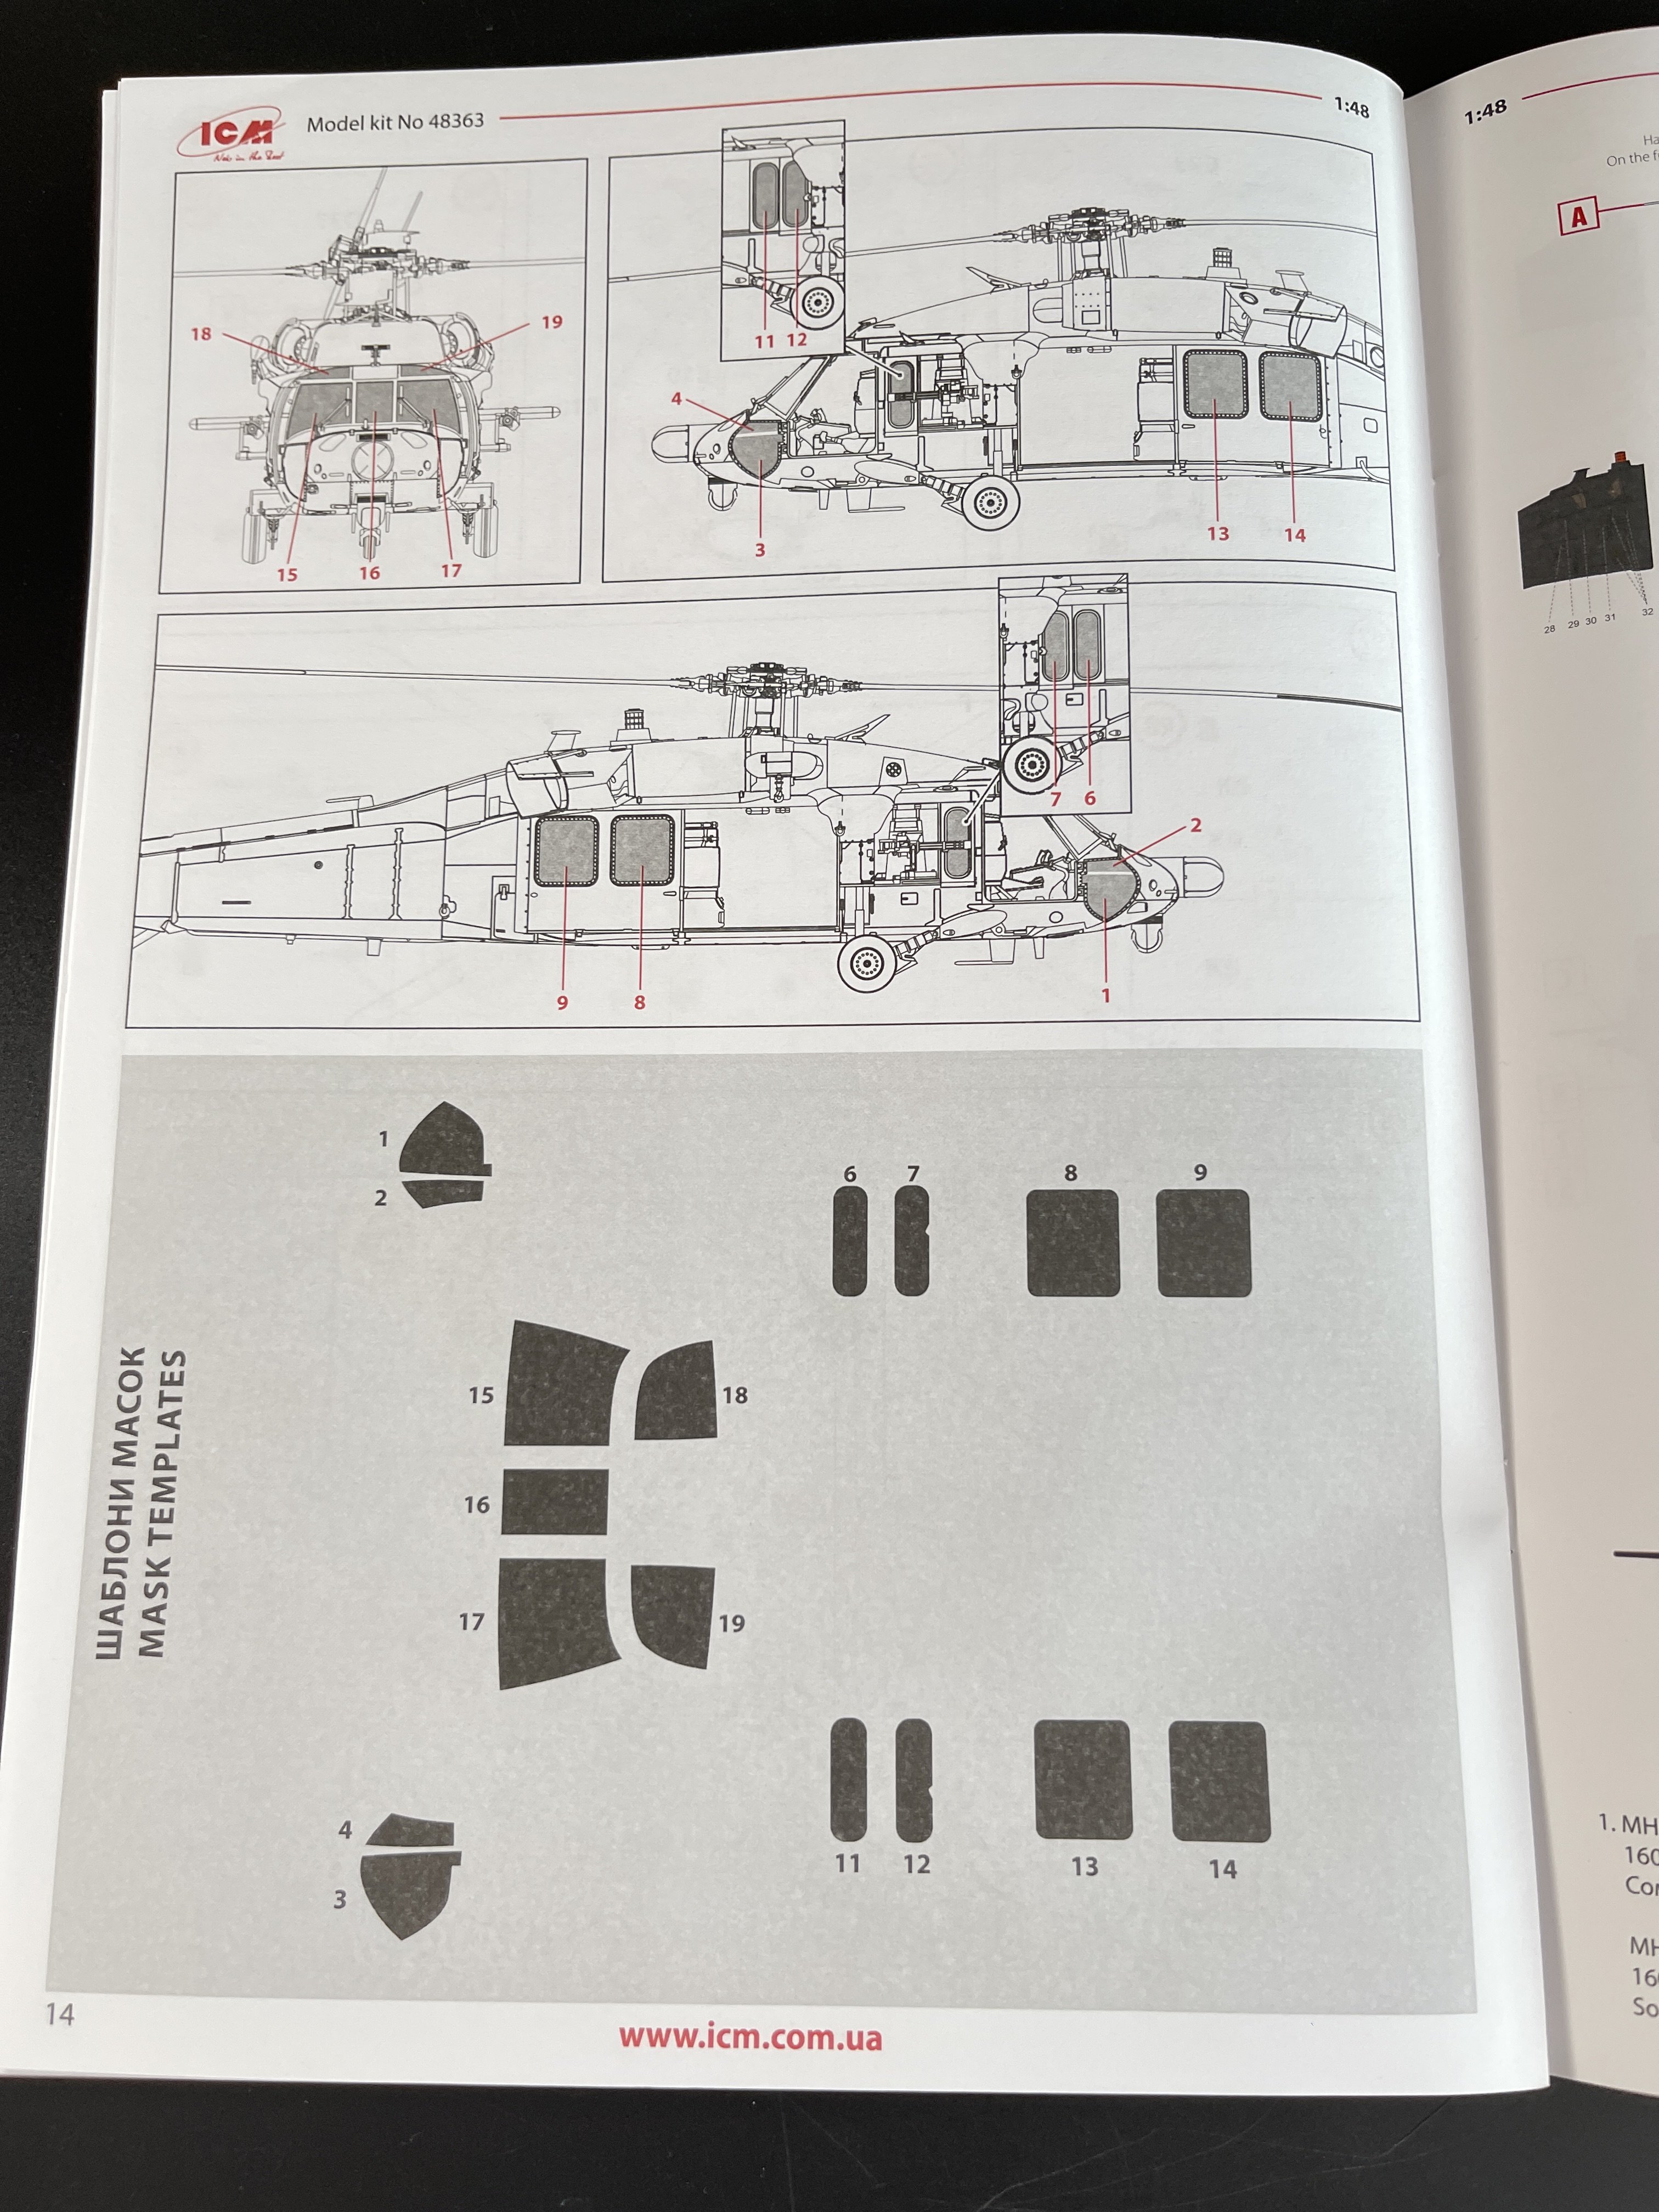
On the B-26 instruction is provide a canopy mask templates.
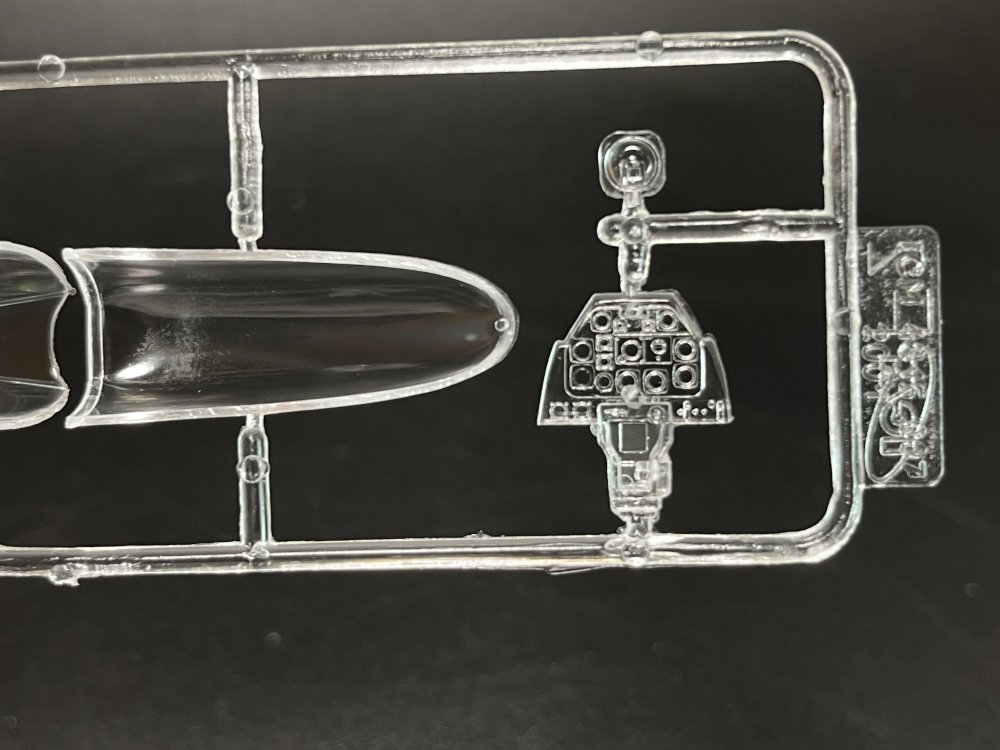
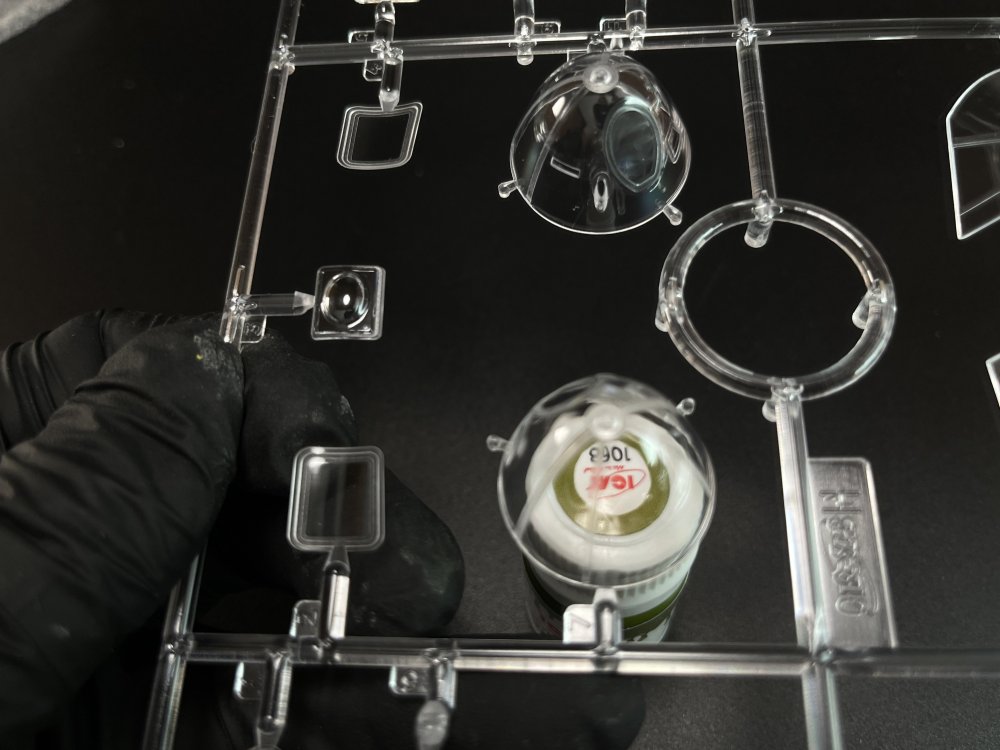
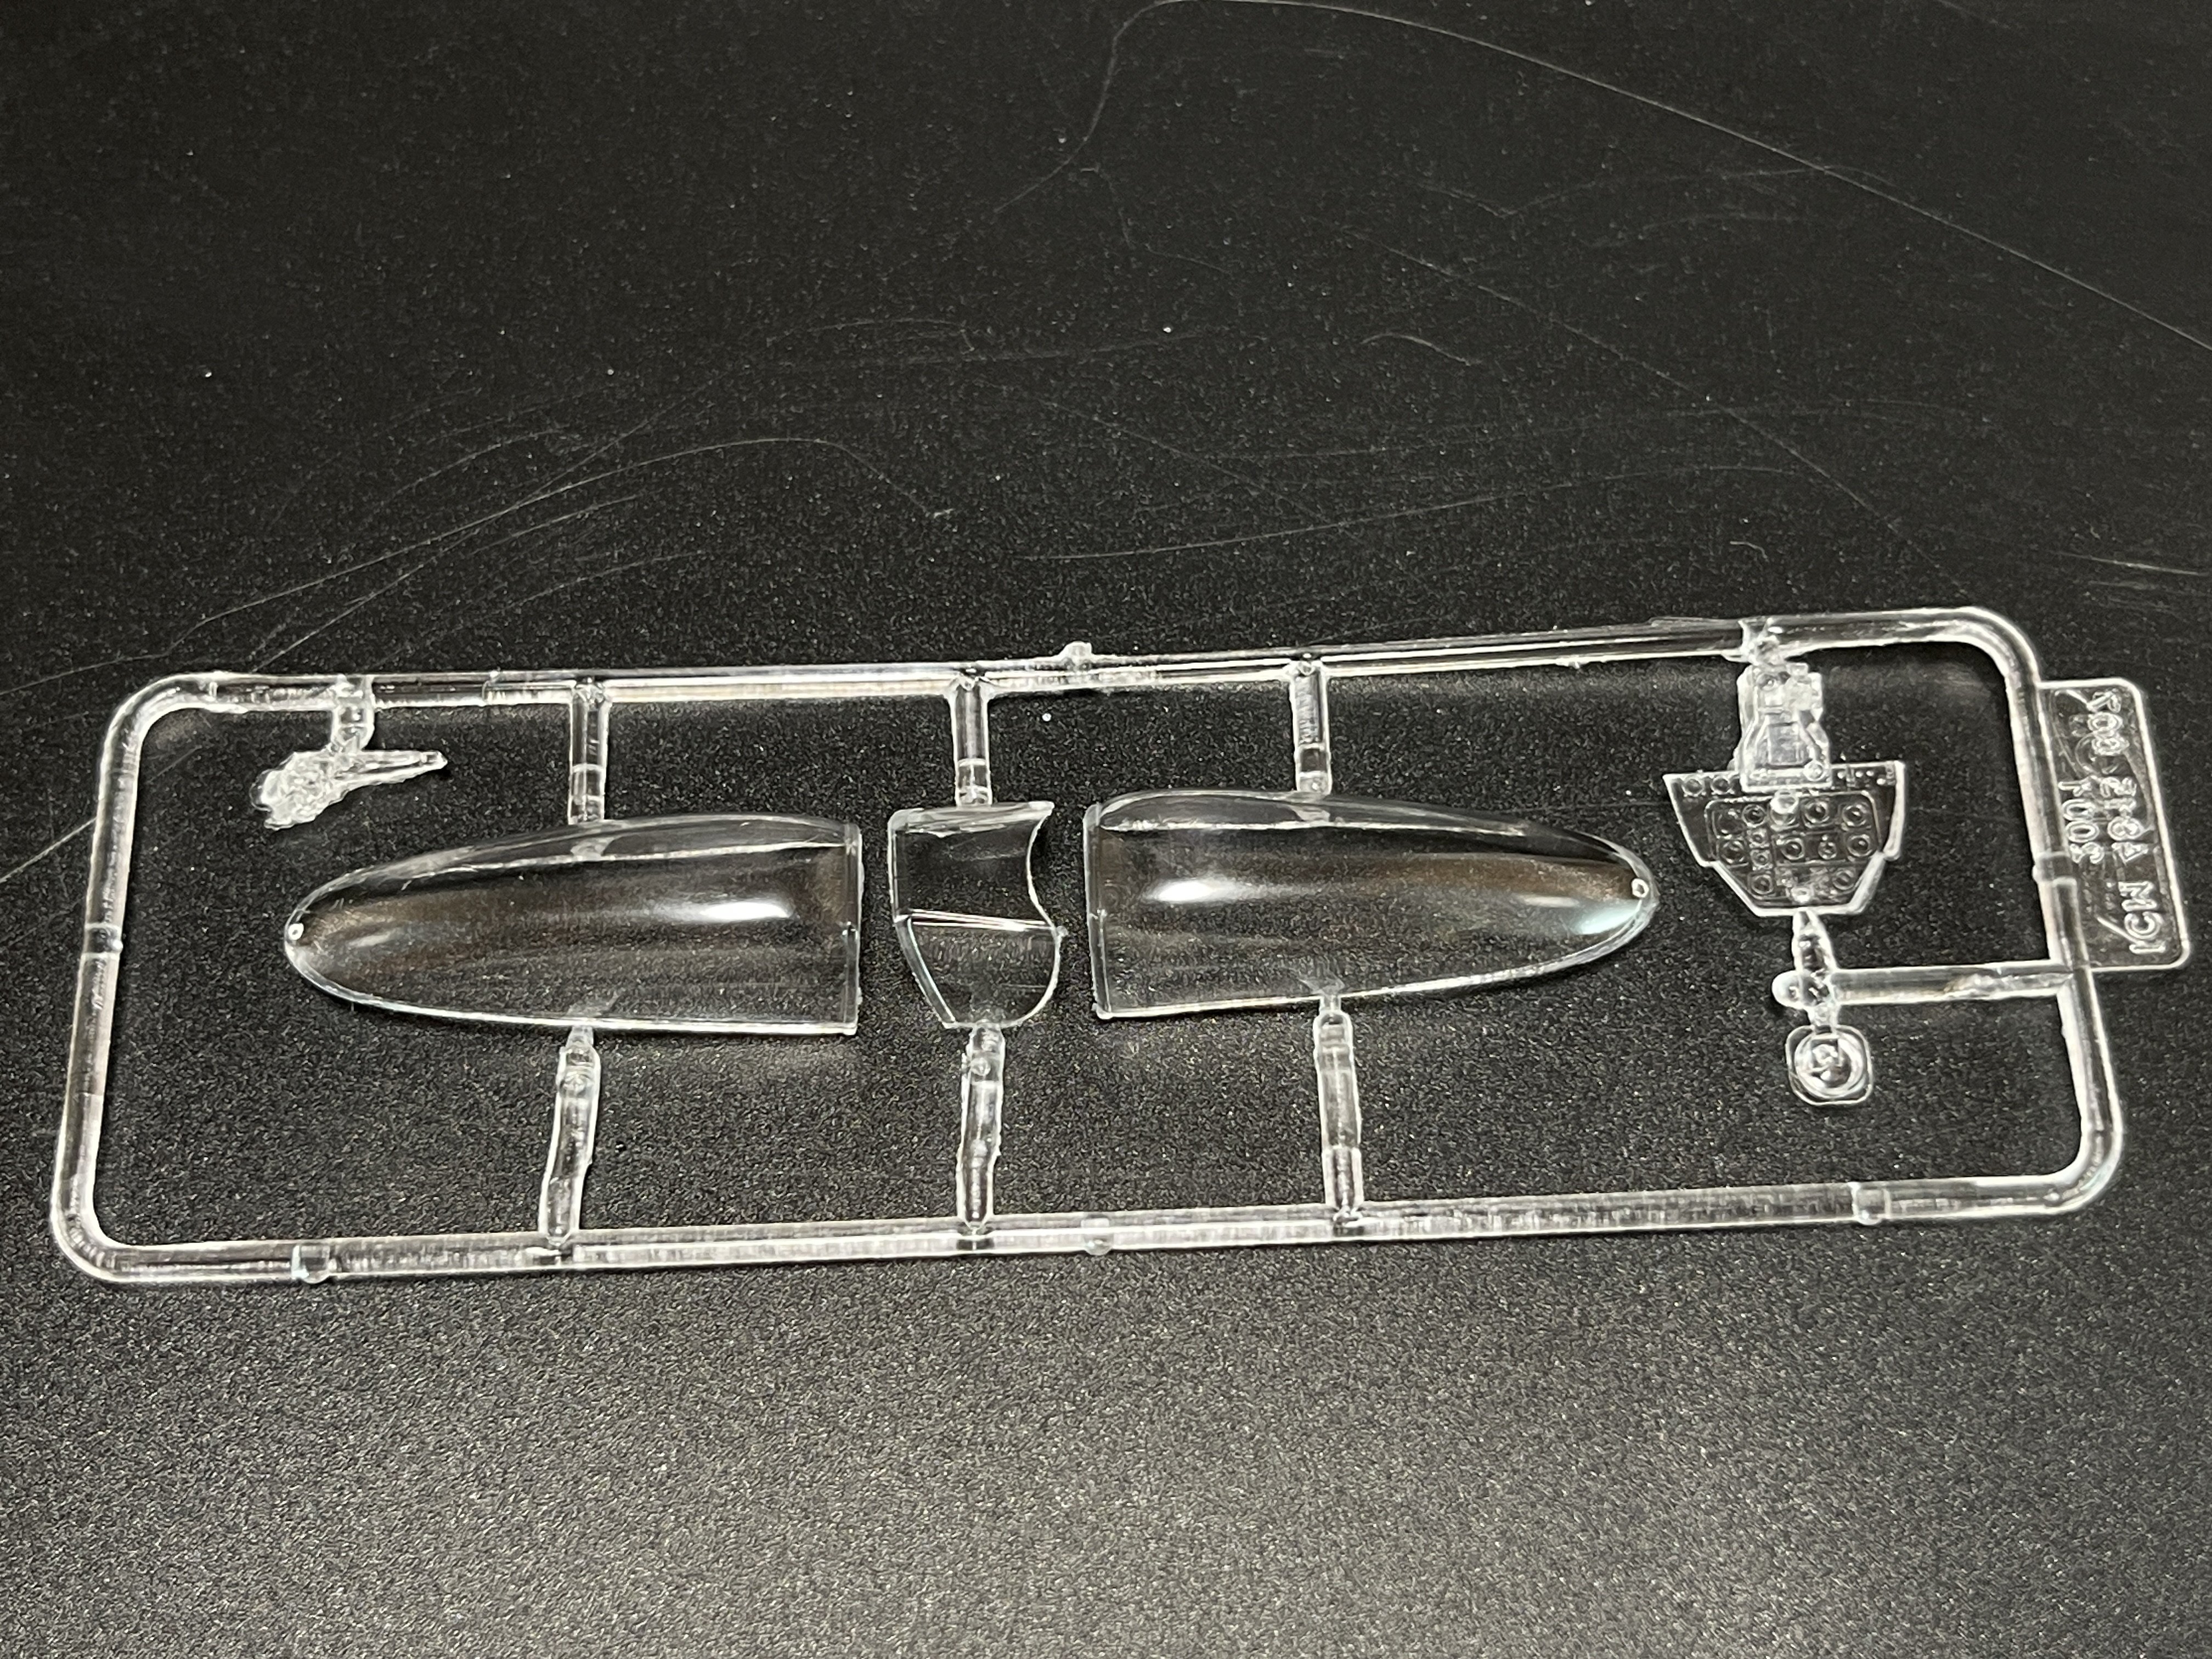
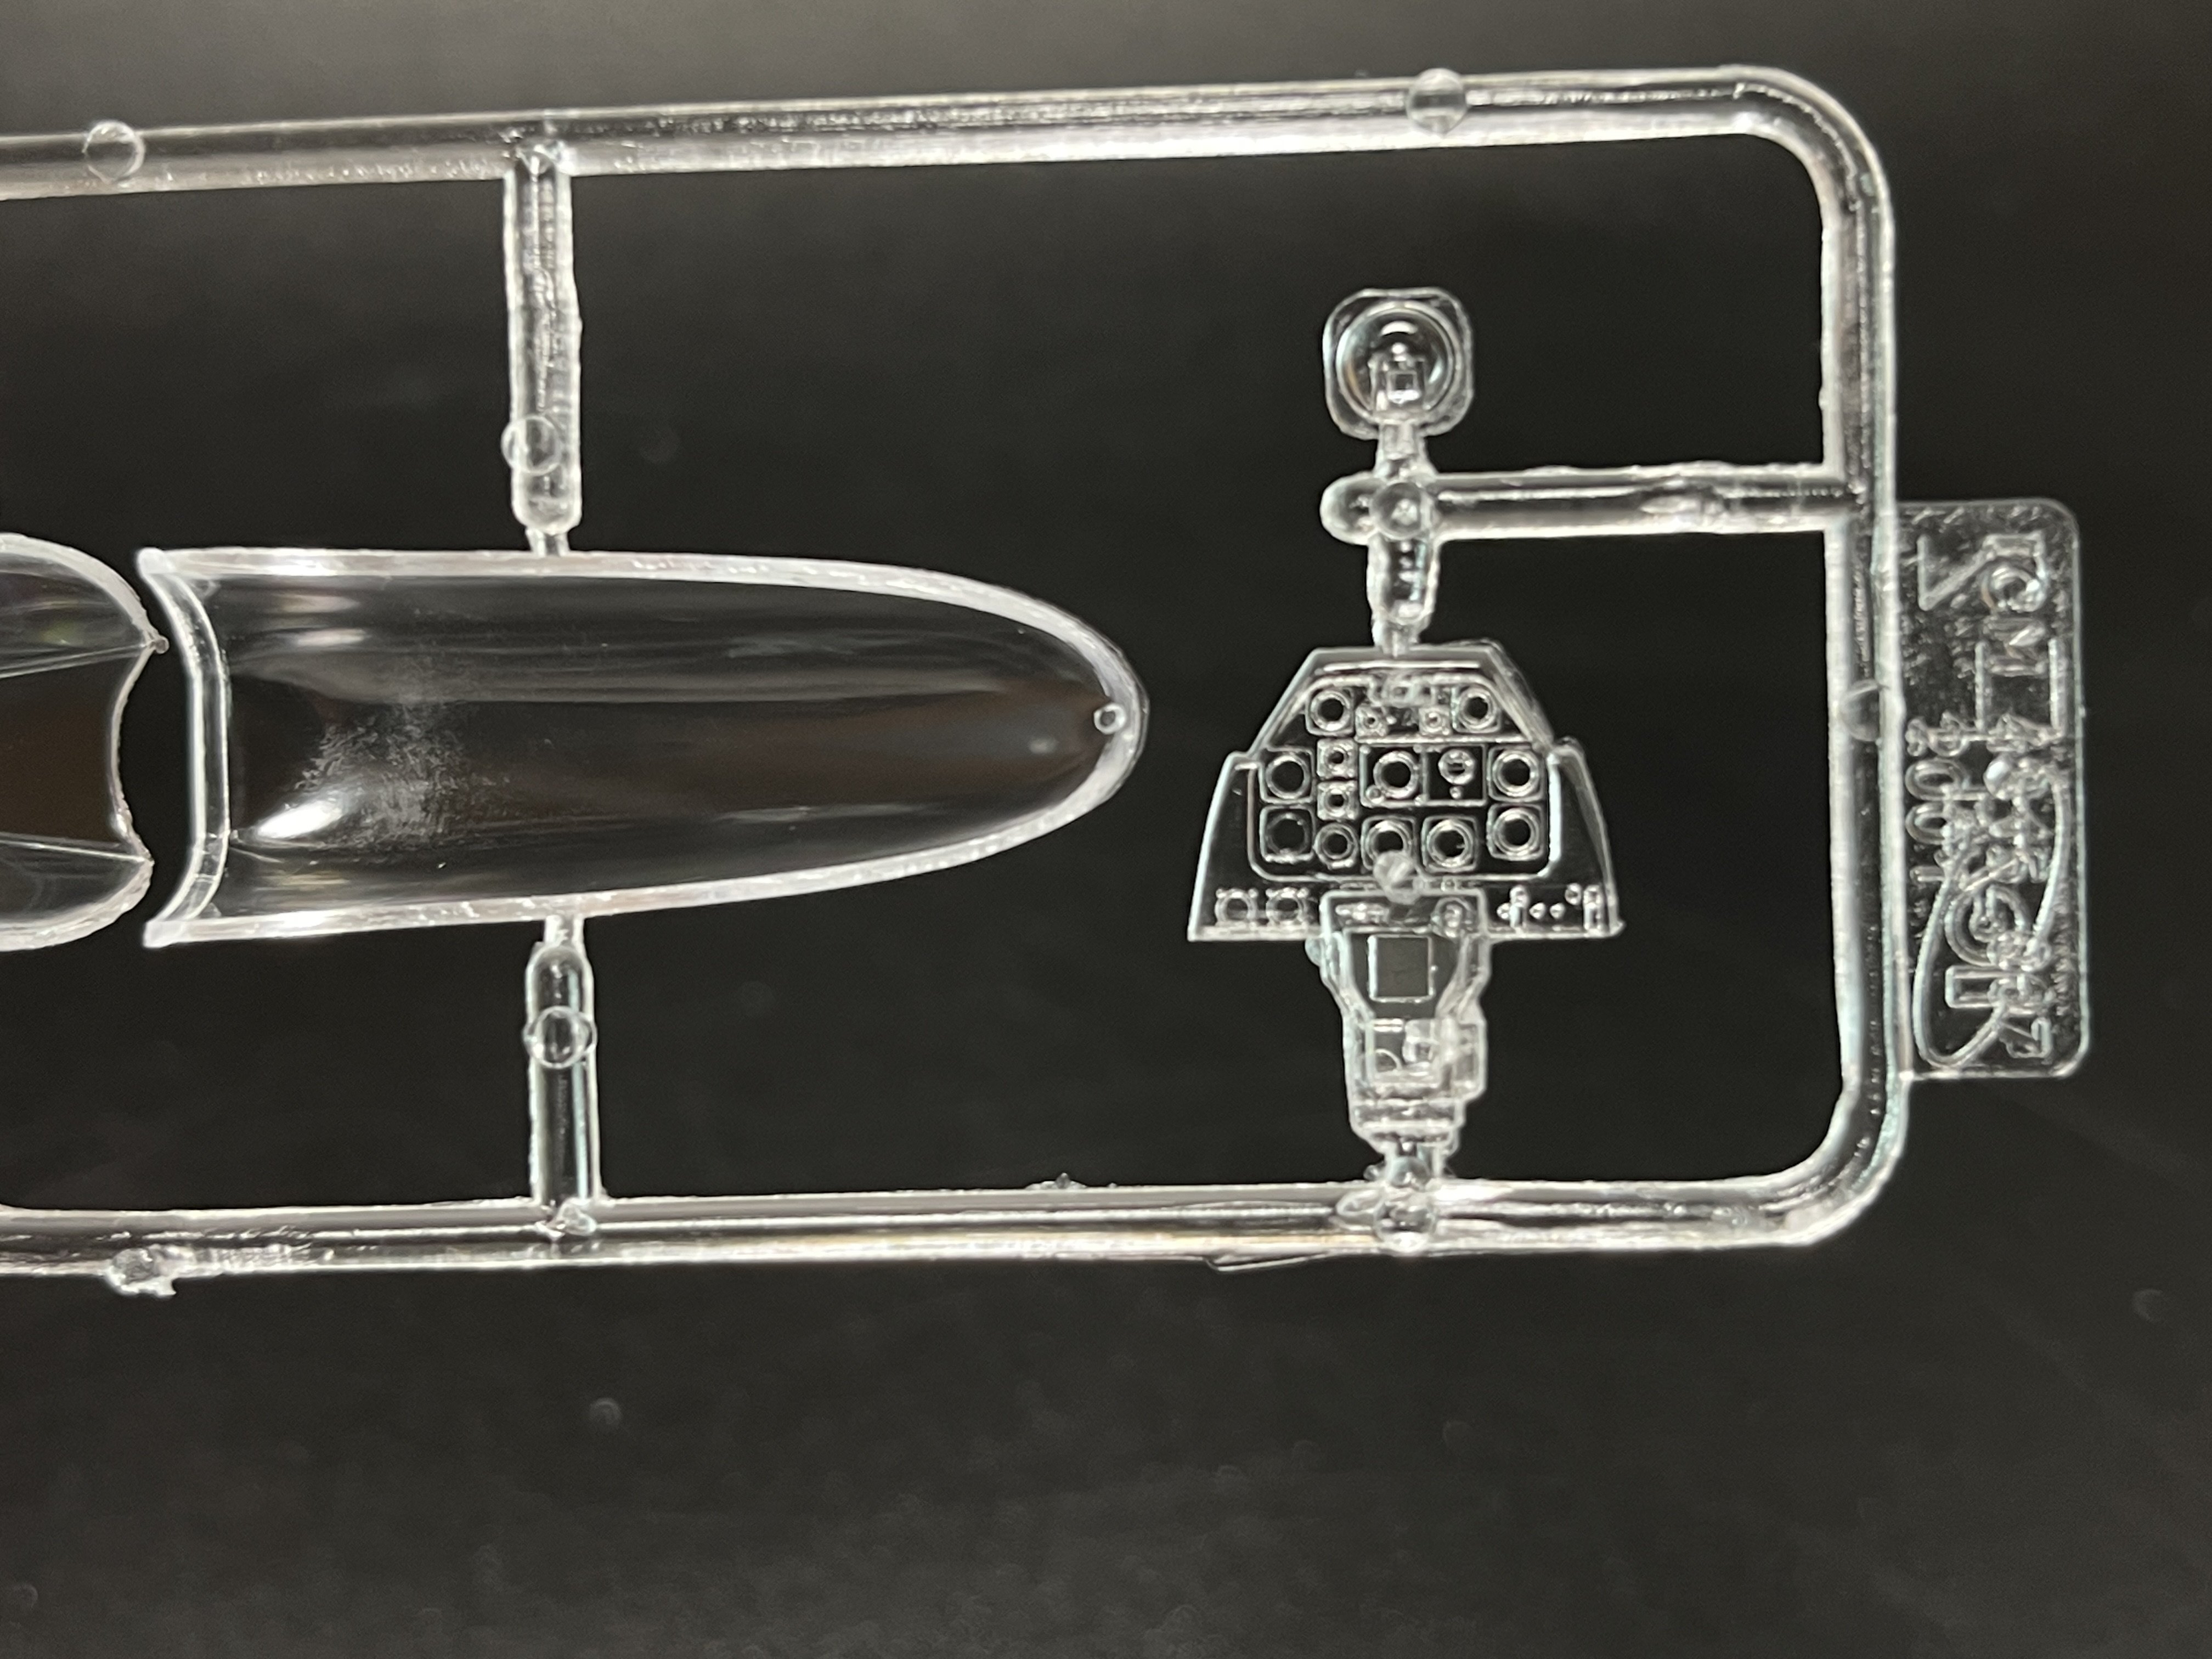
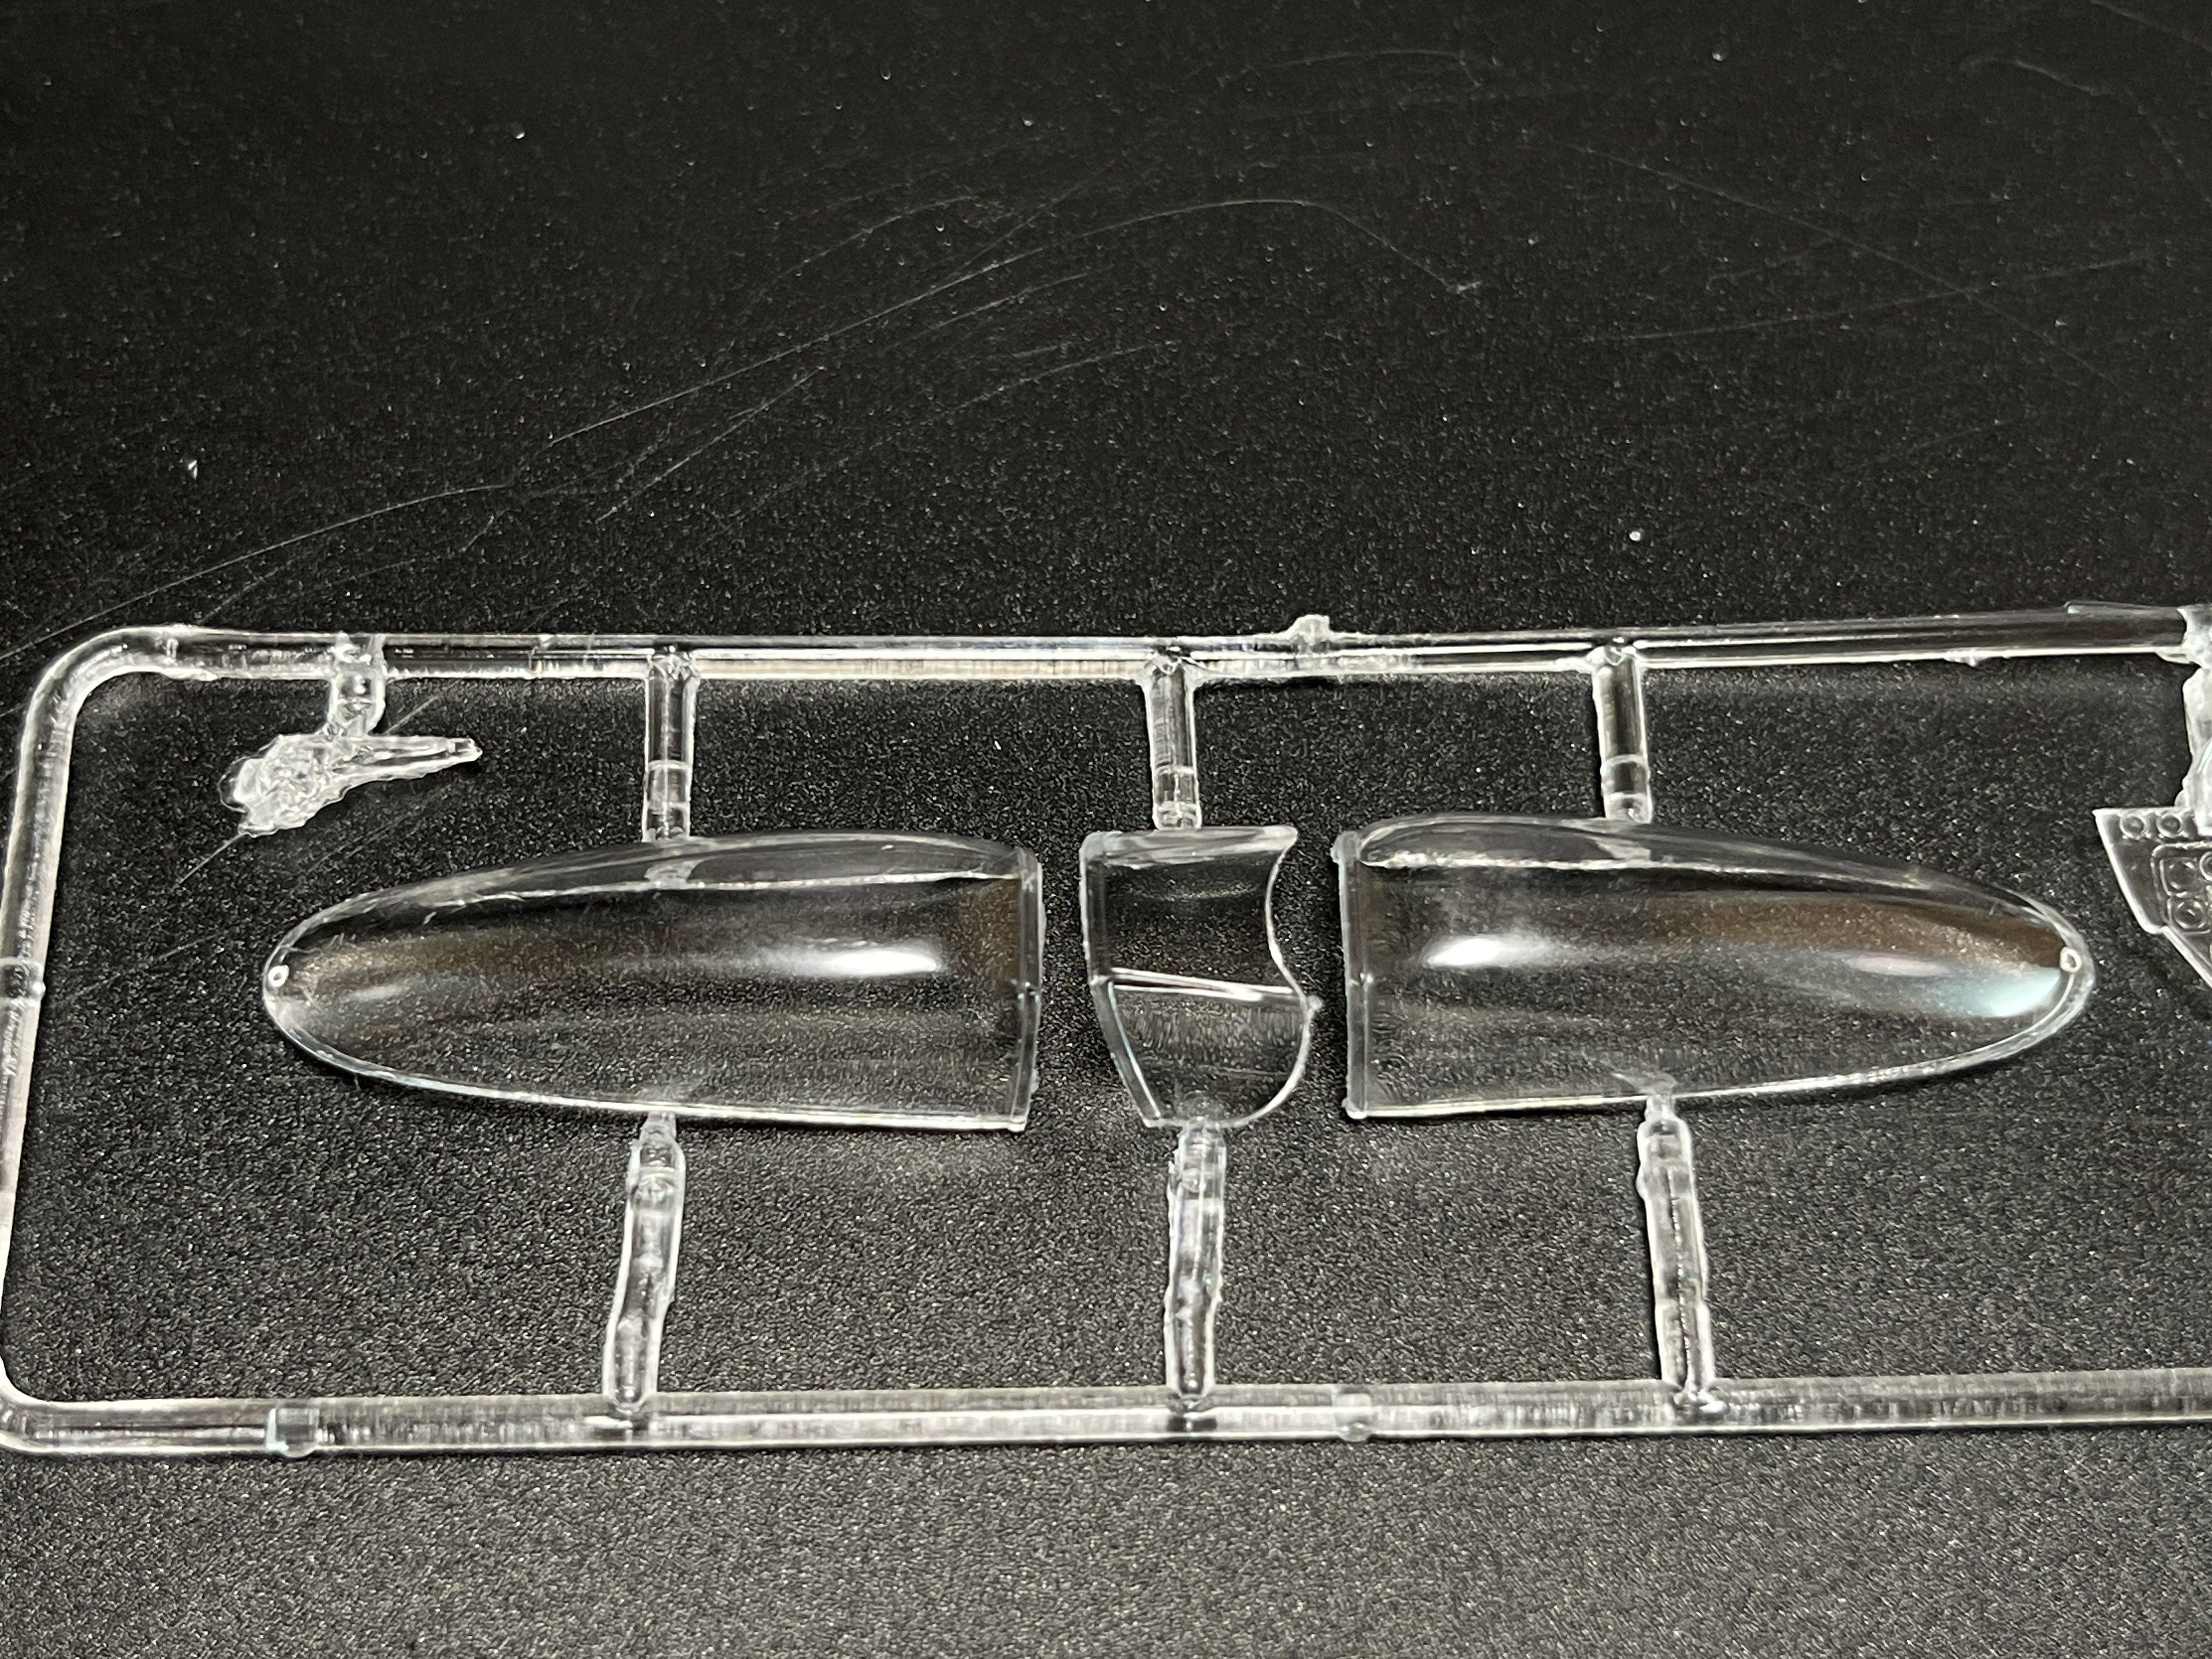
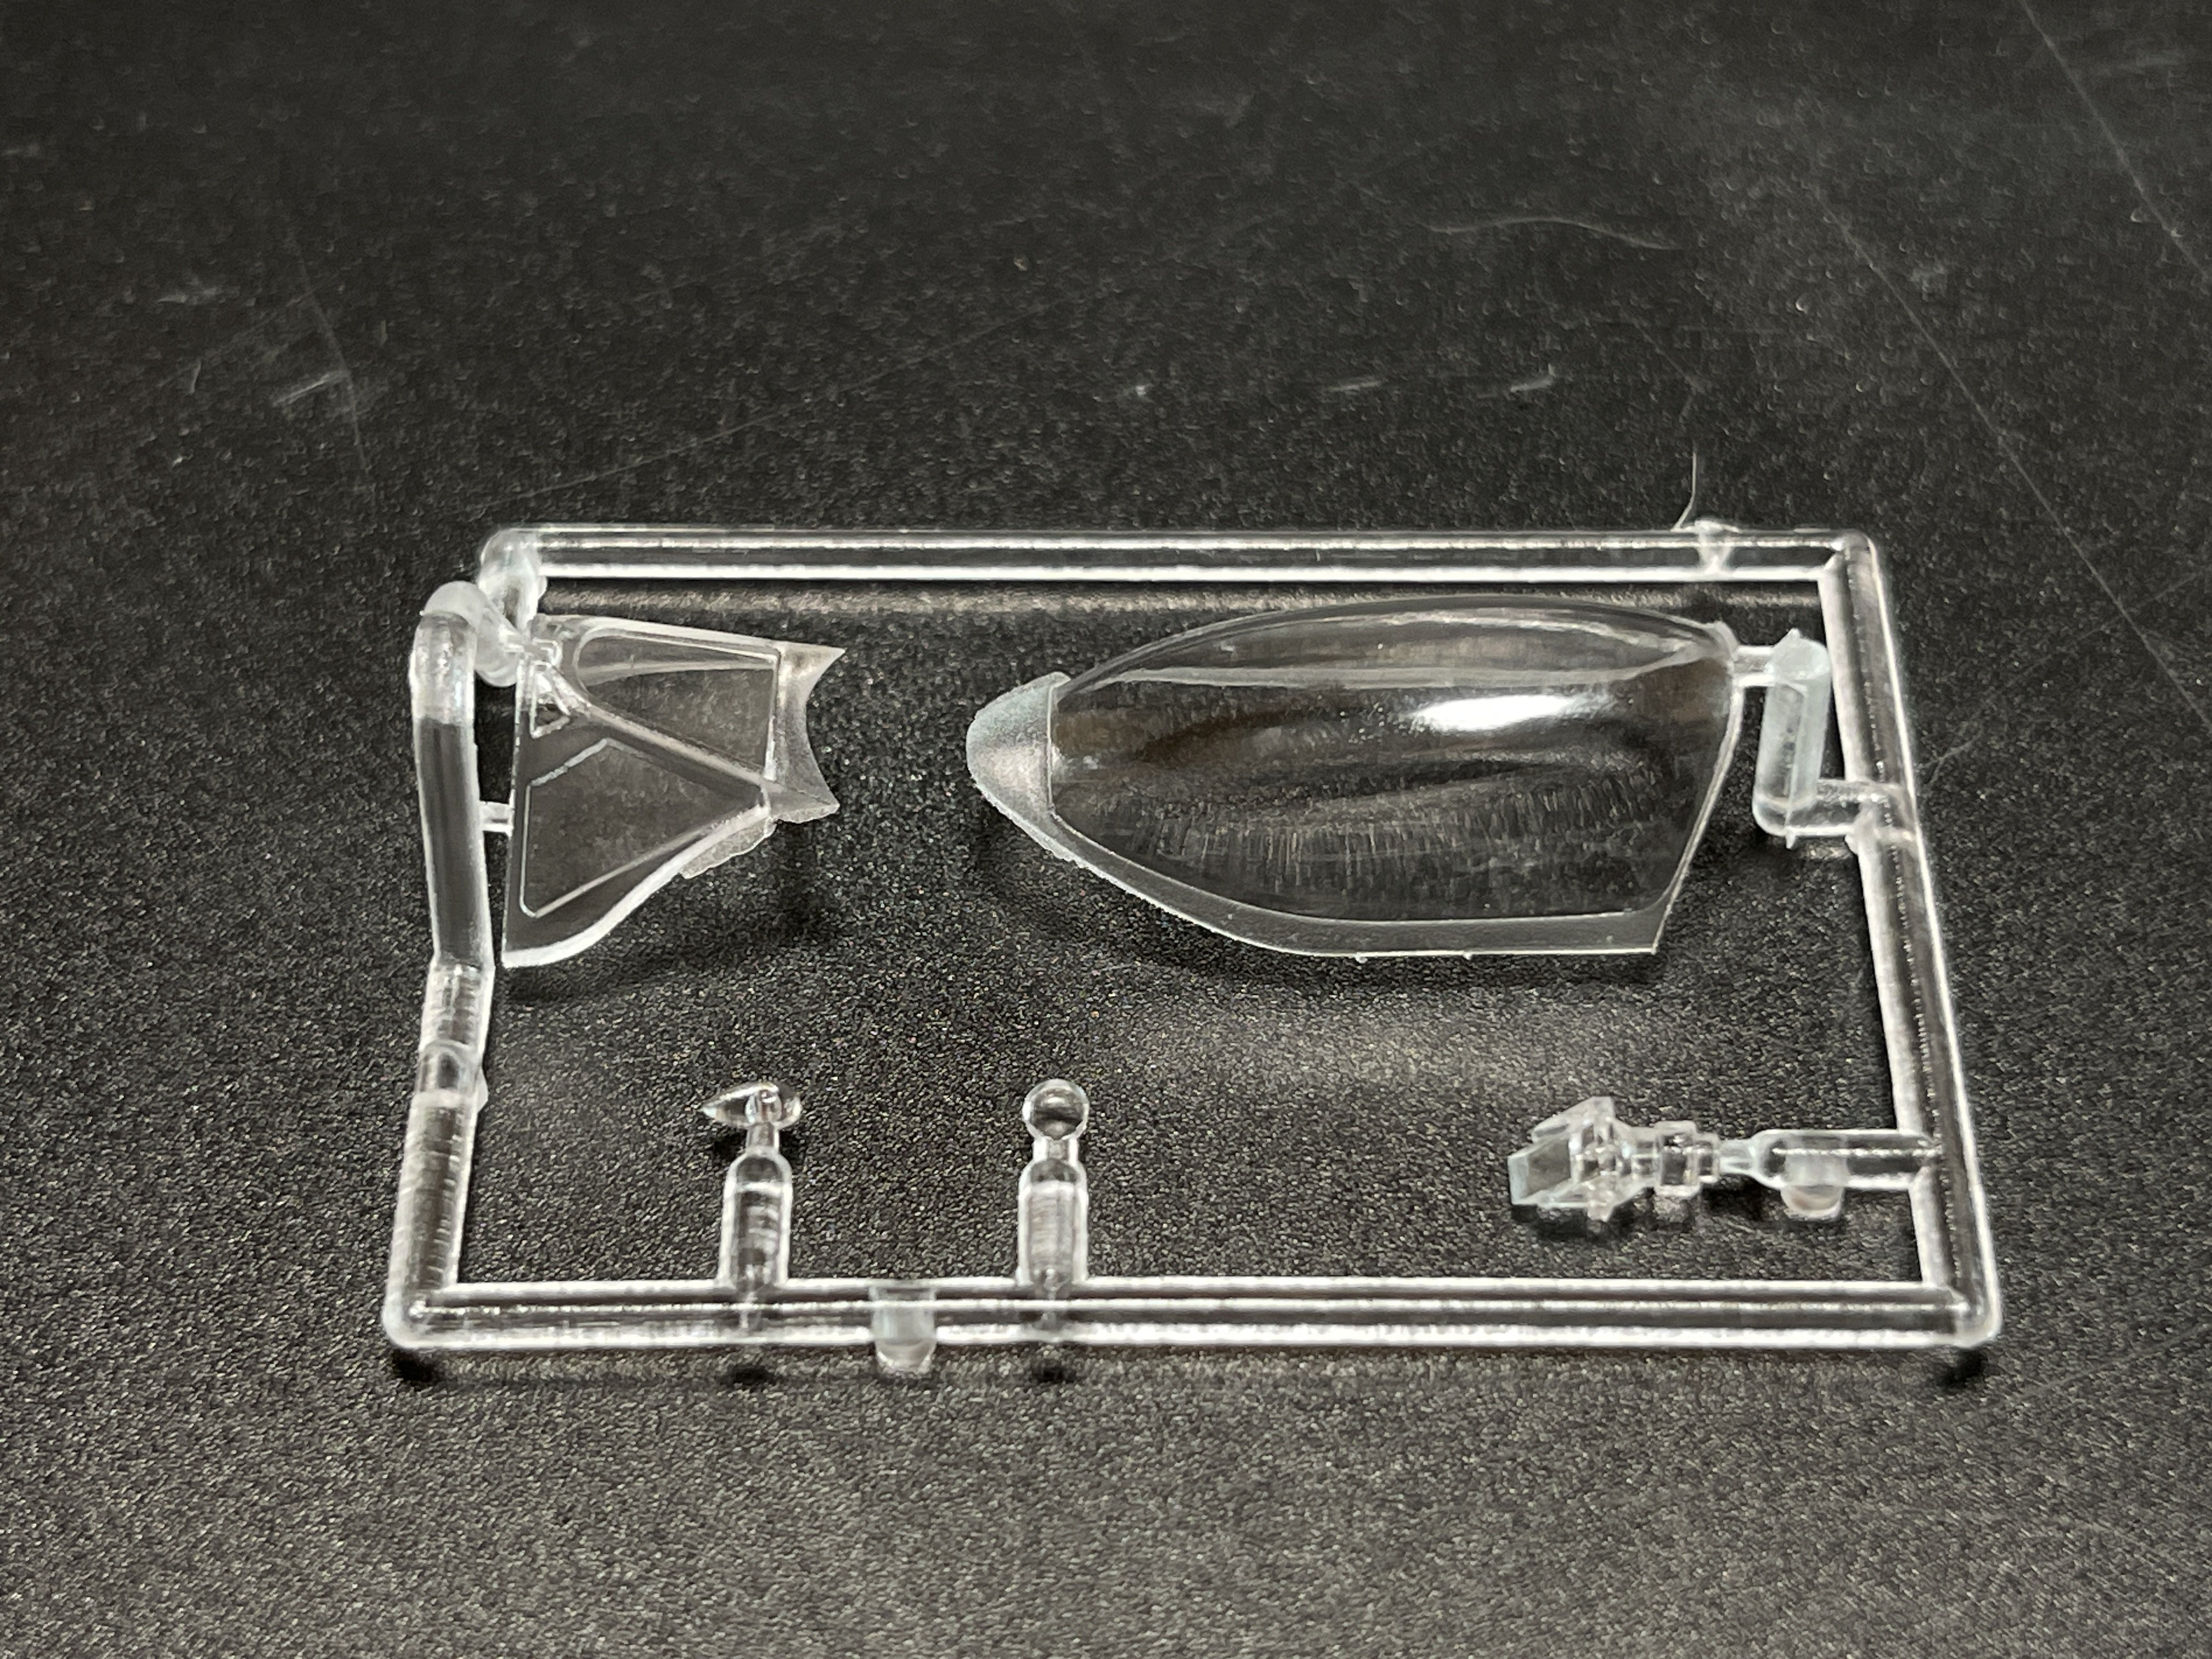
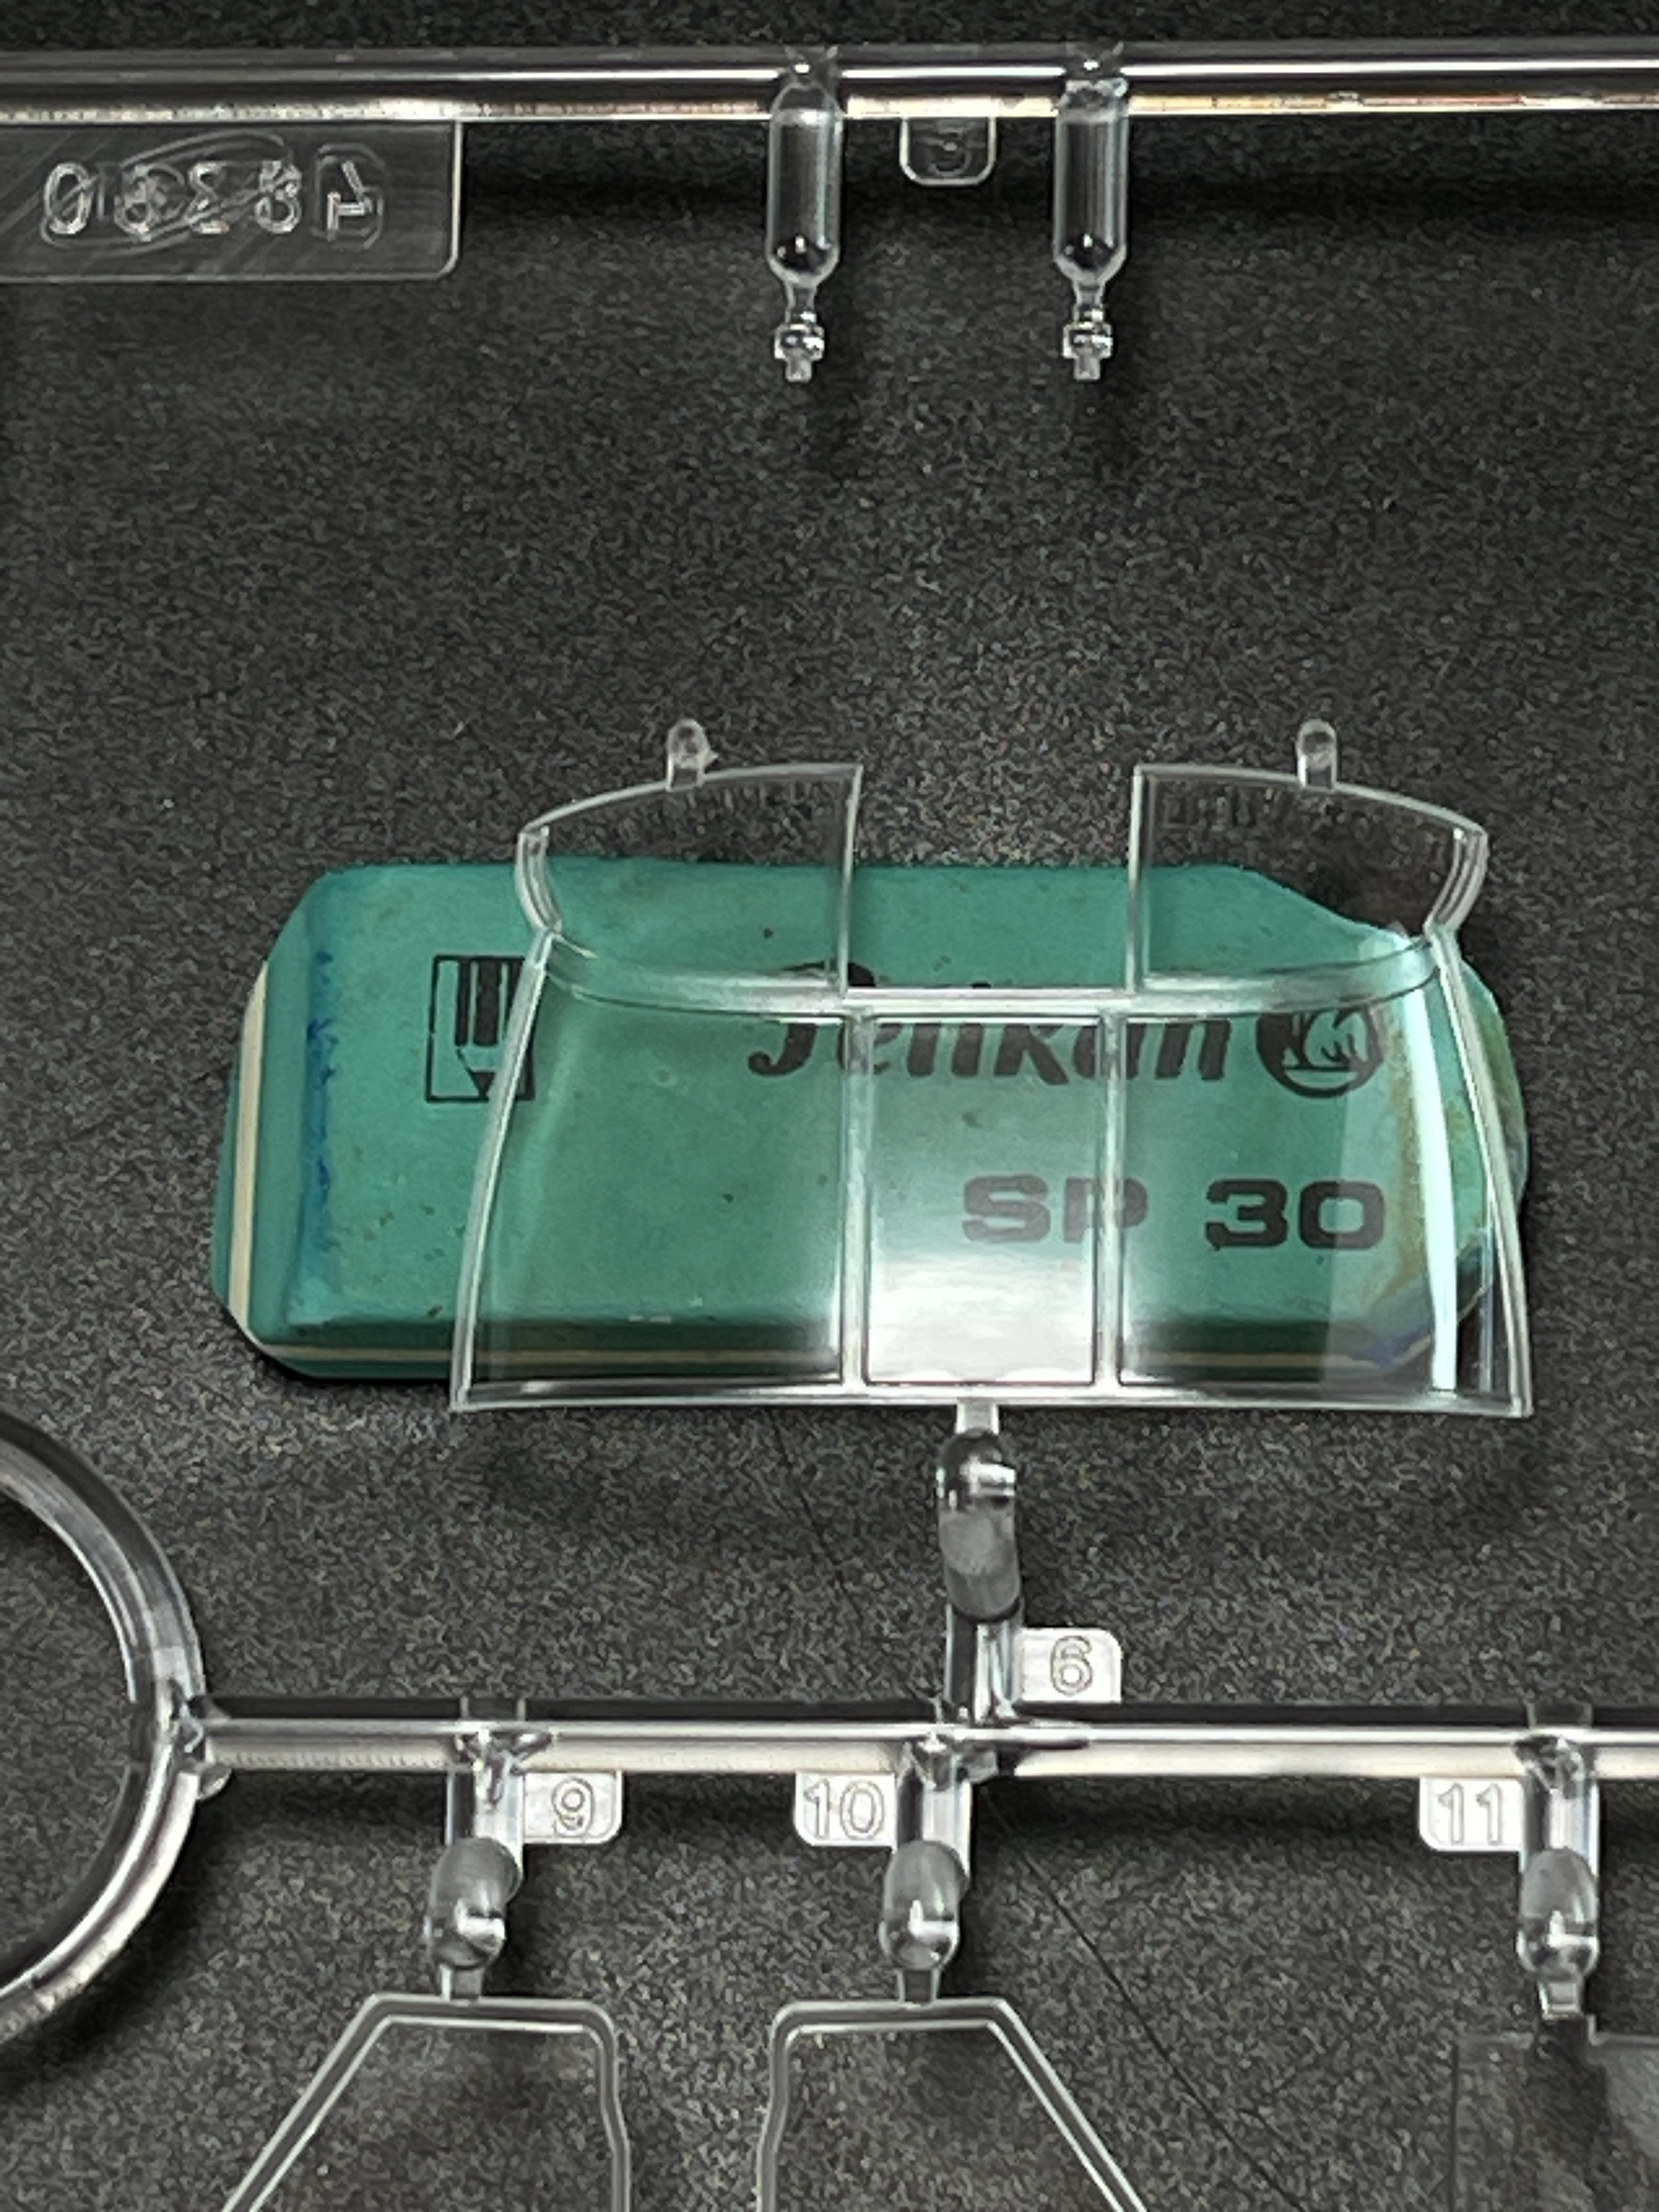
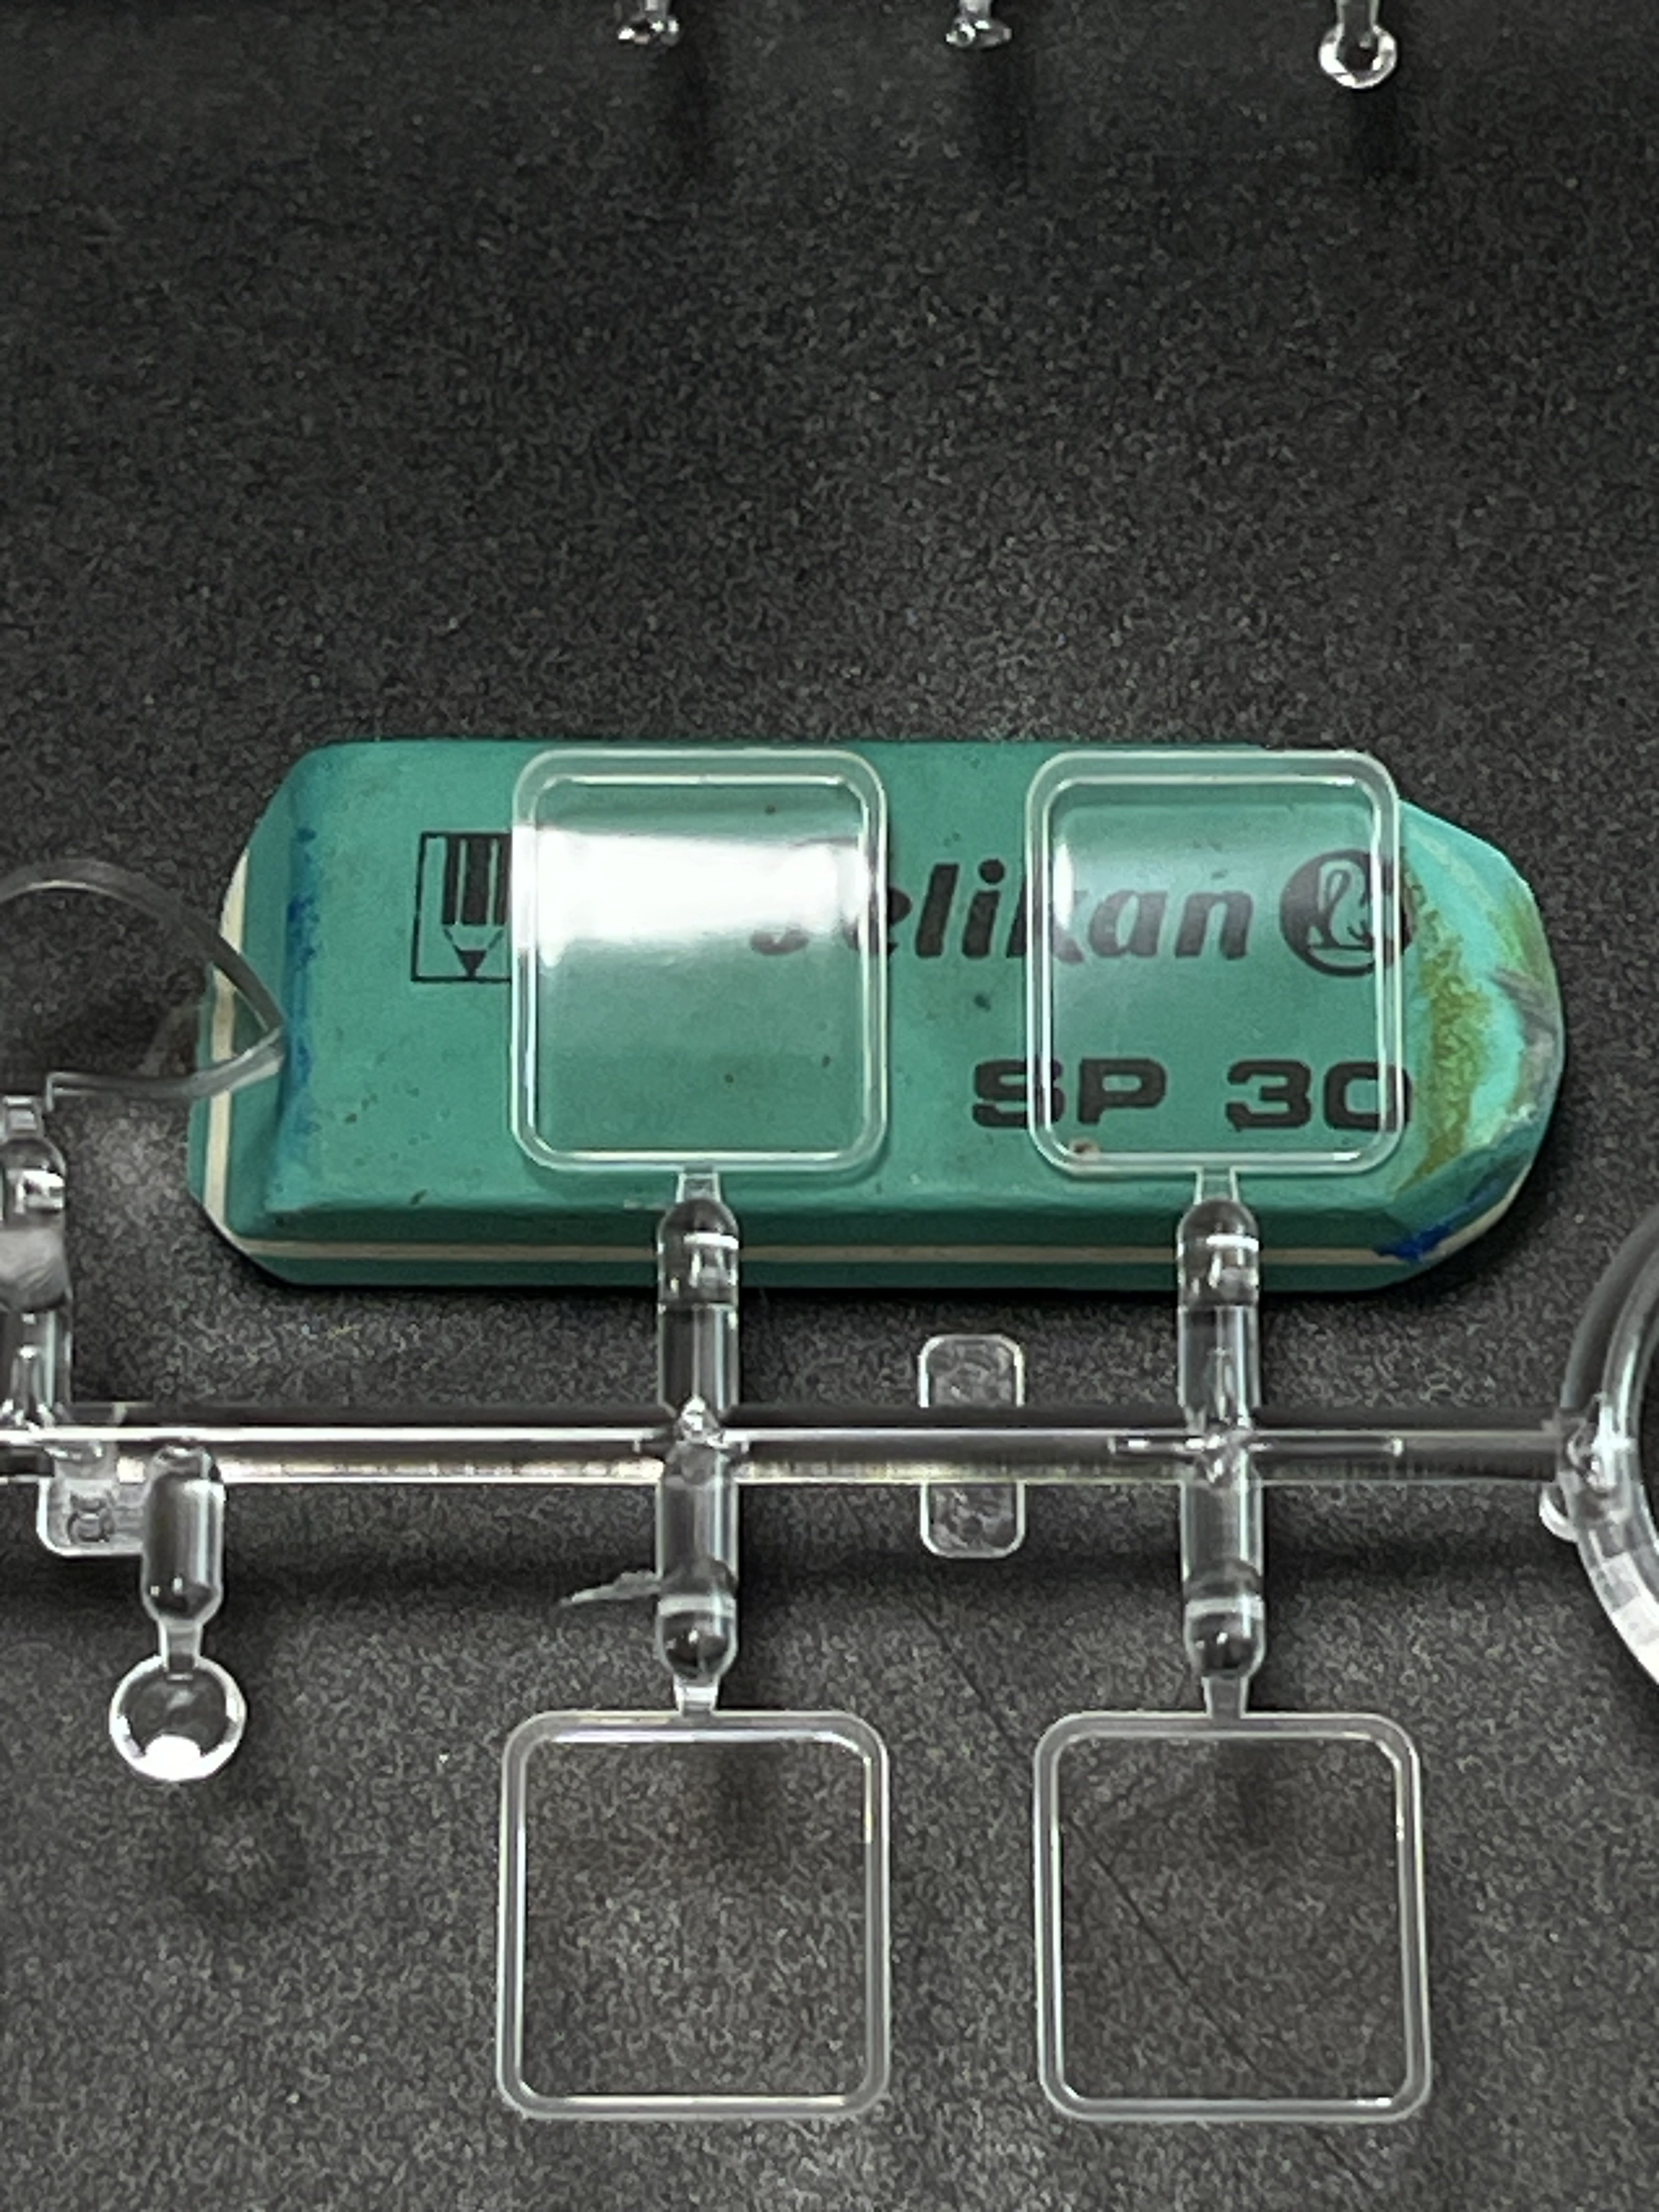
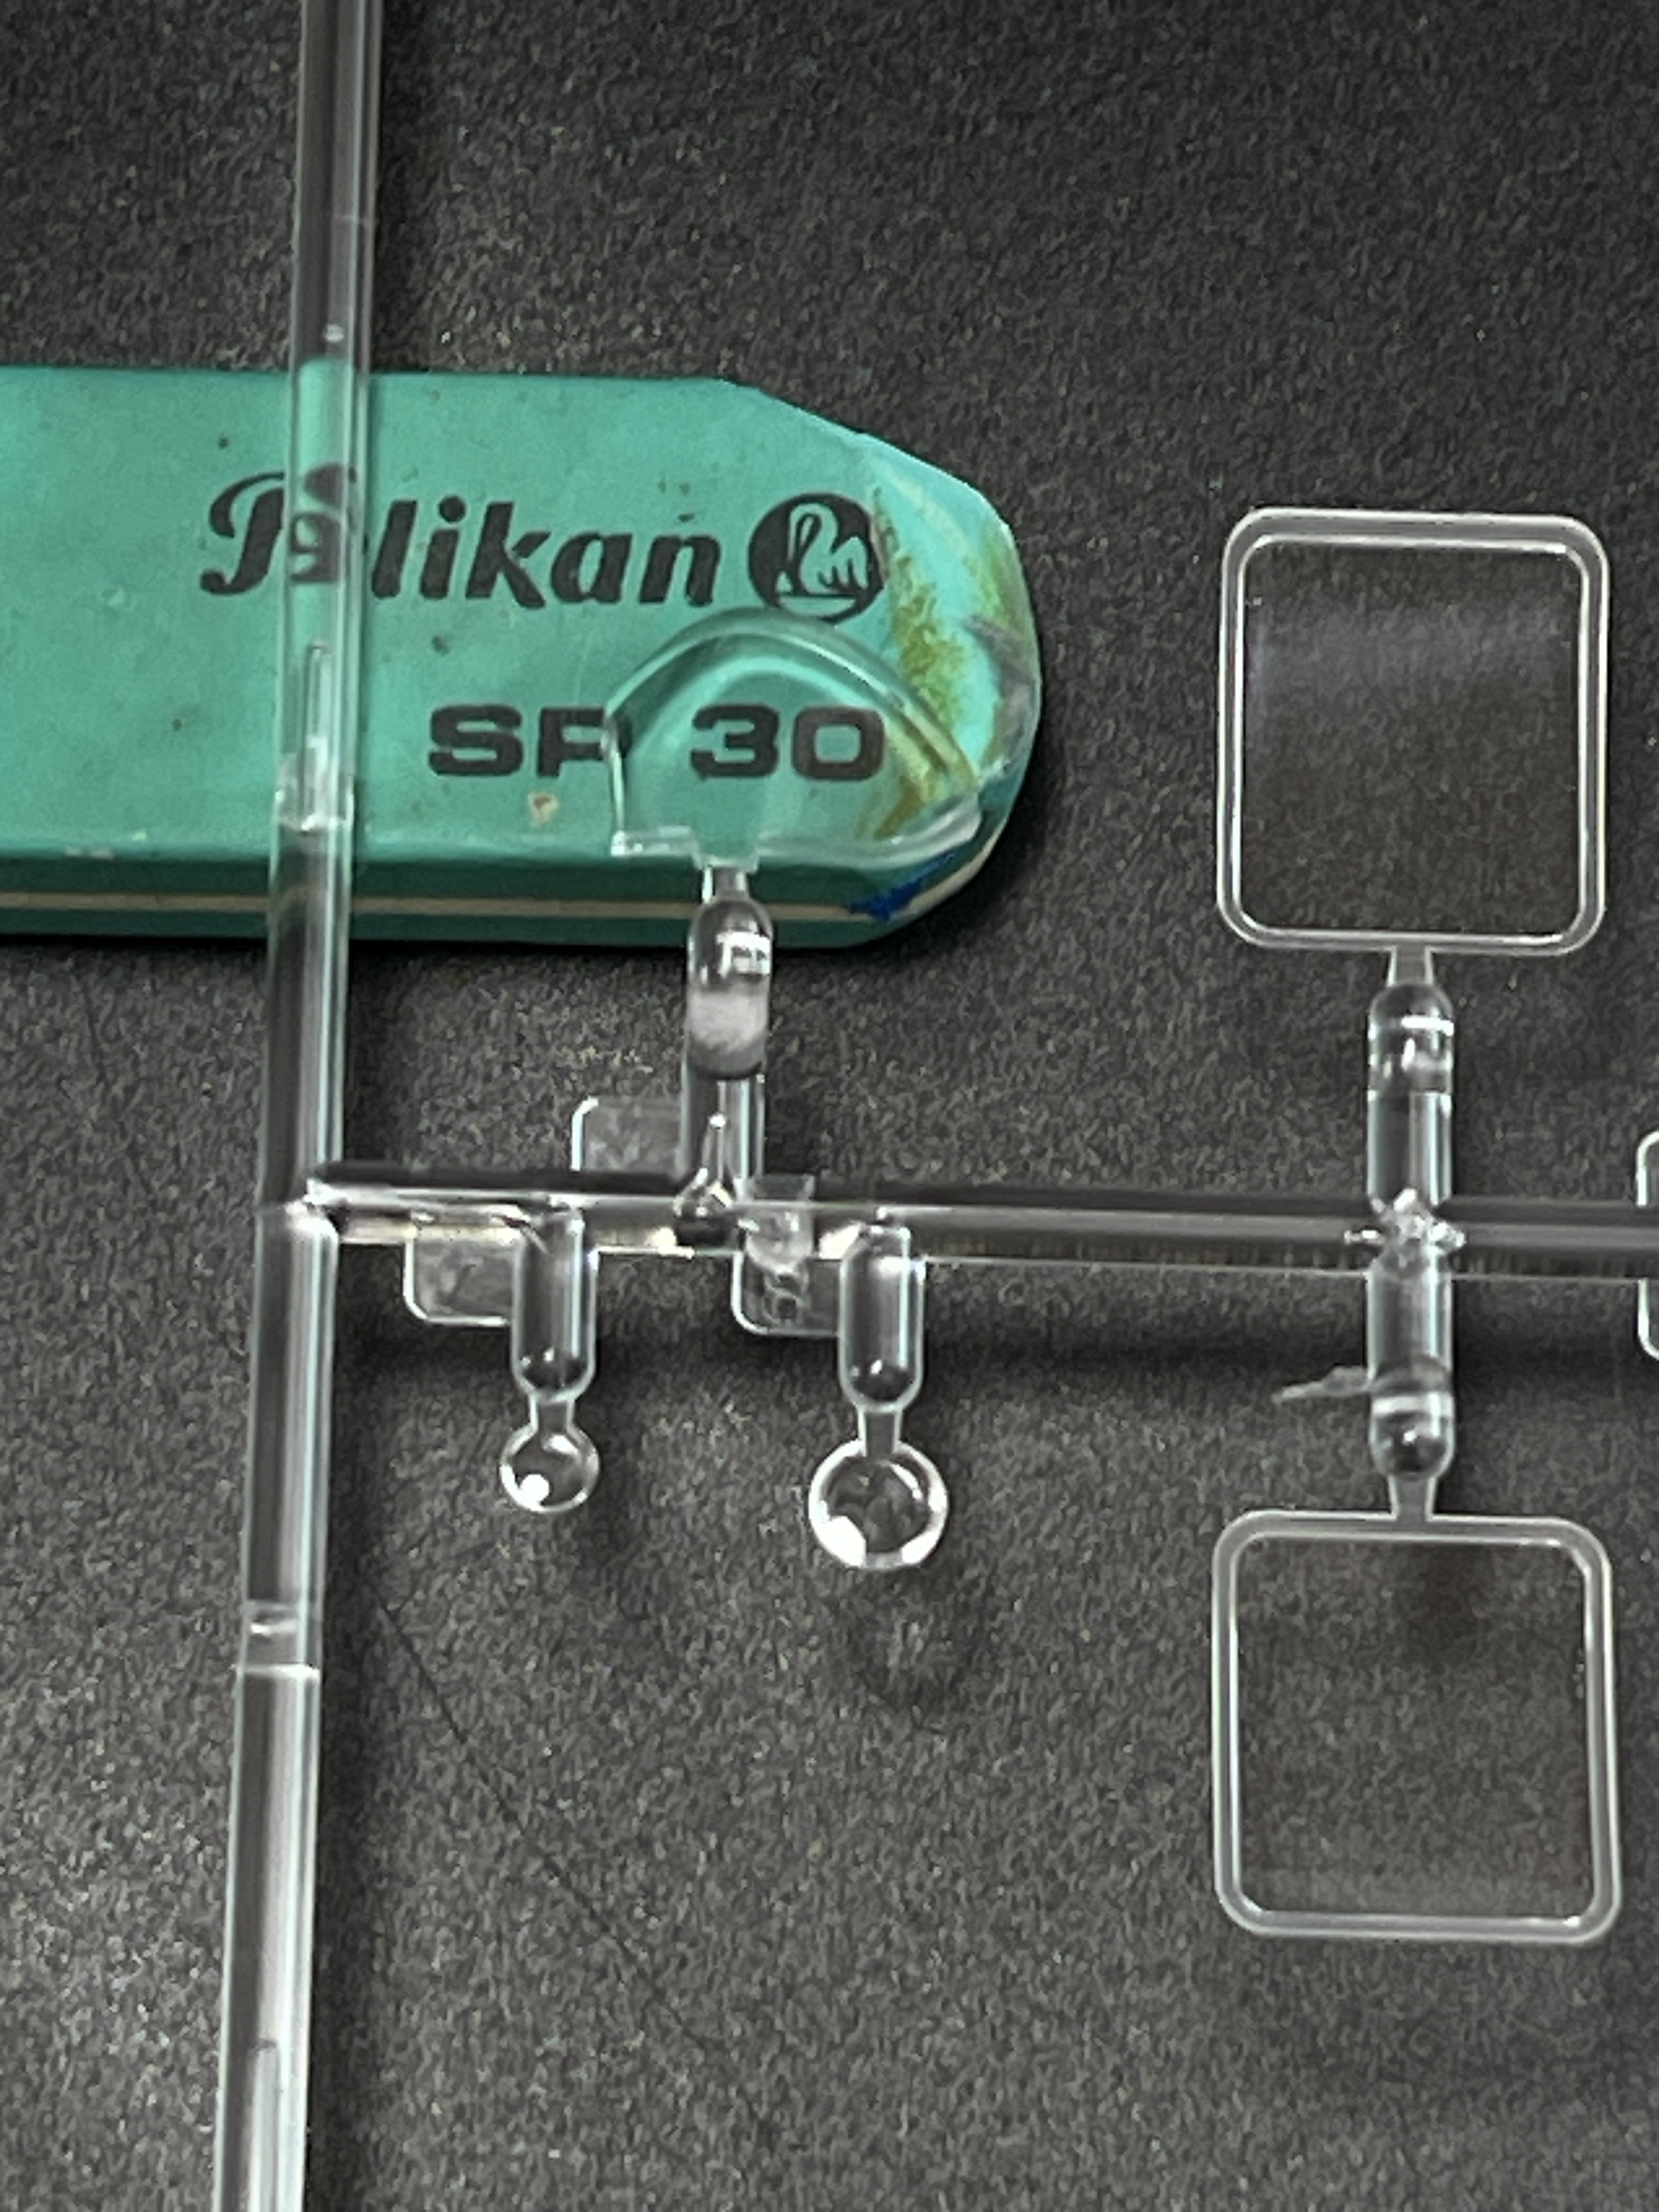
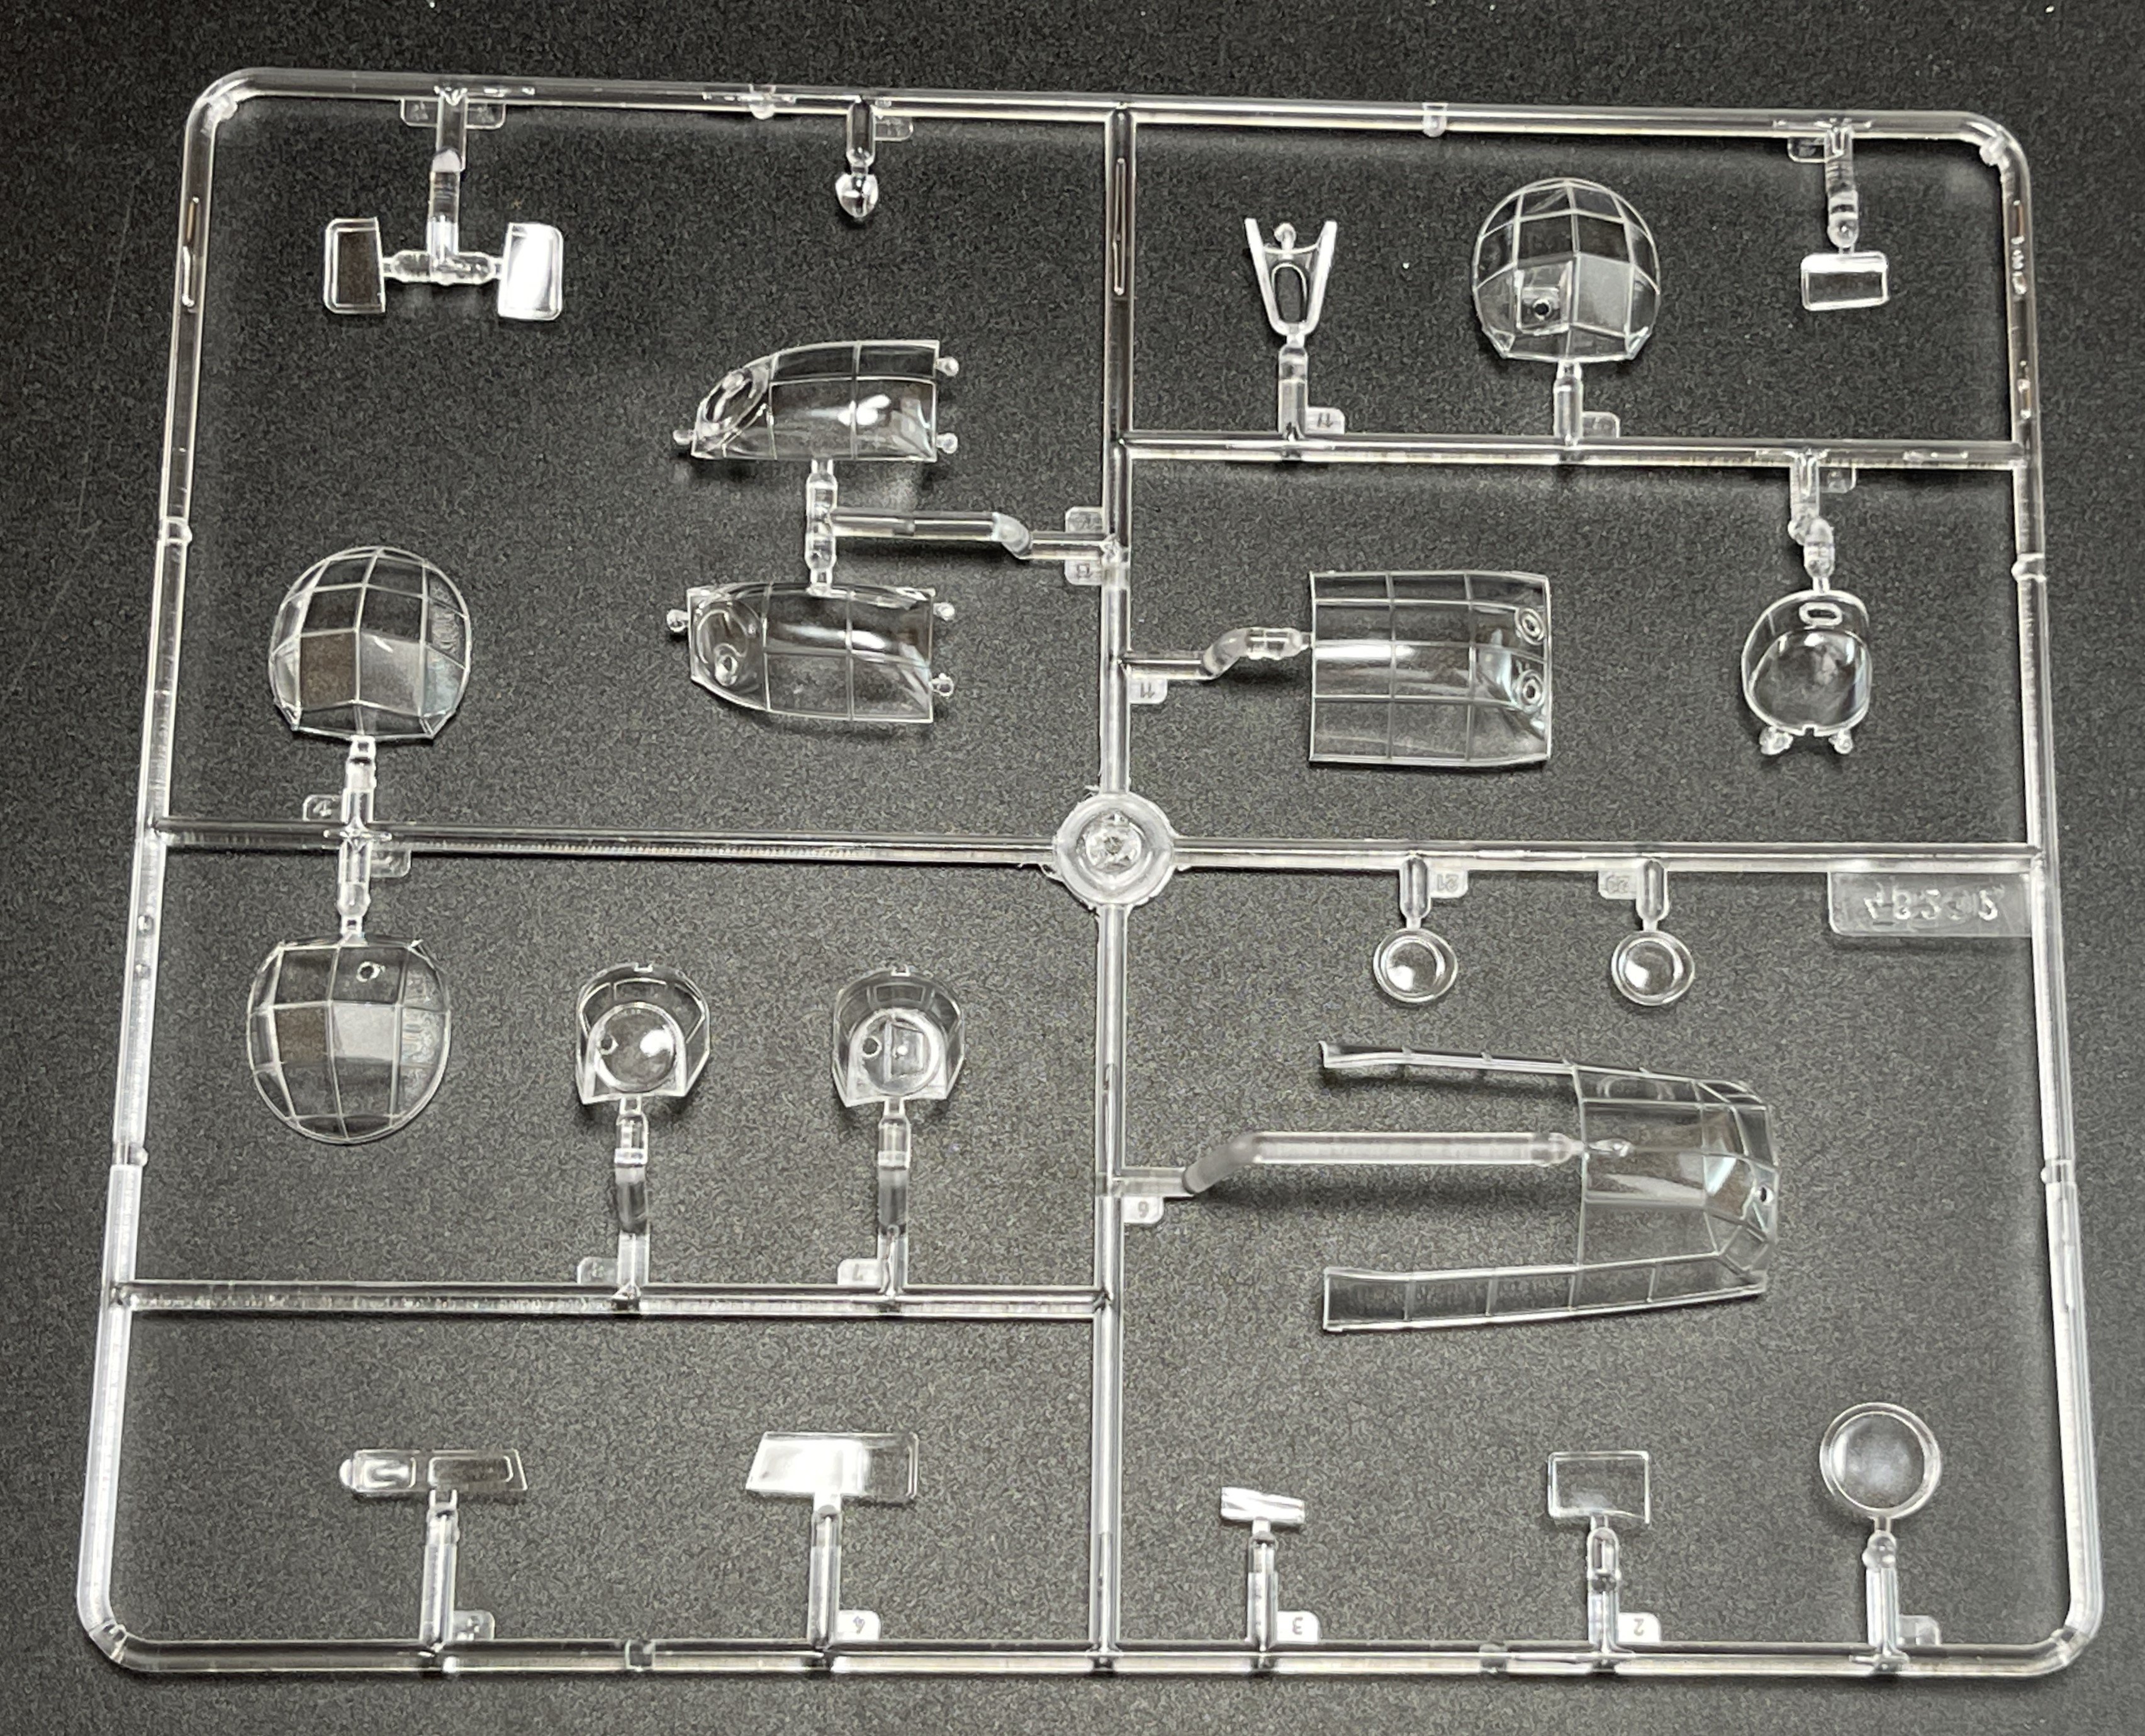
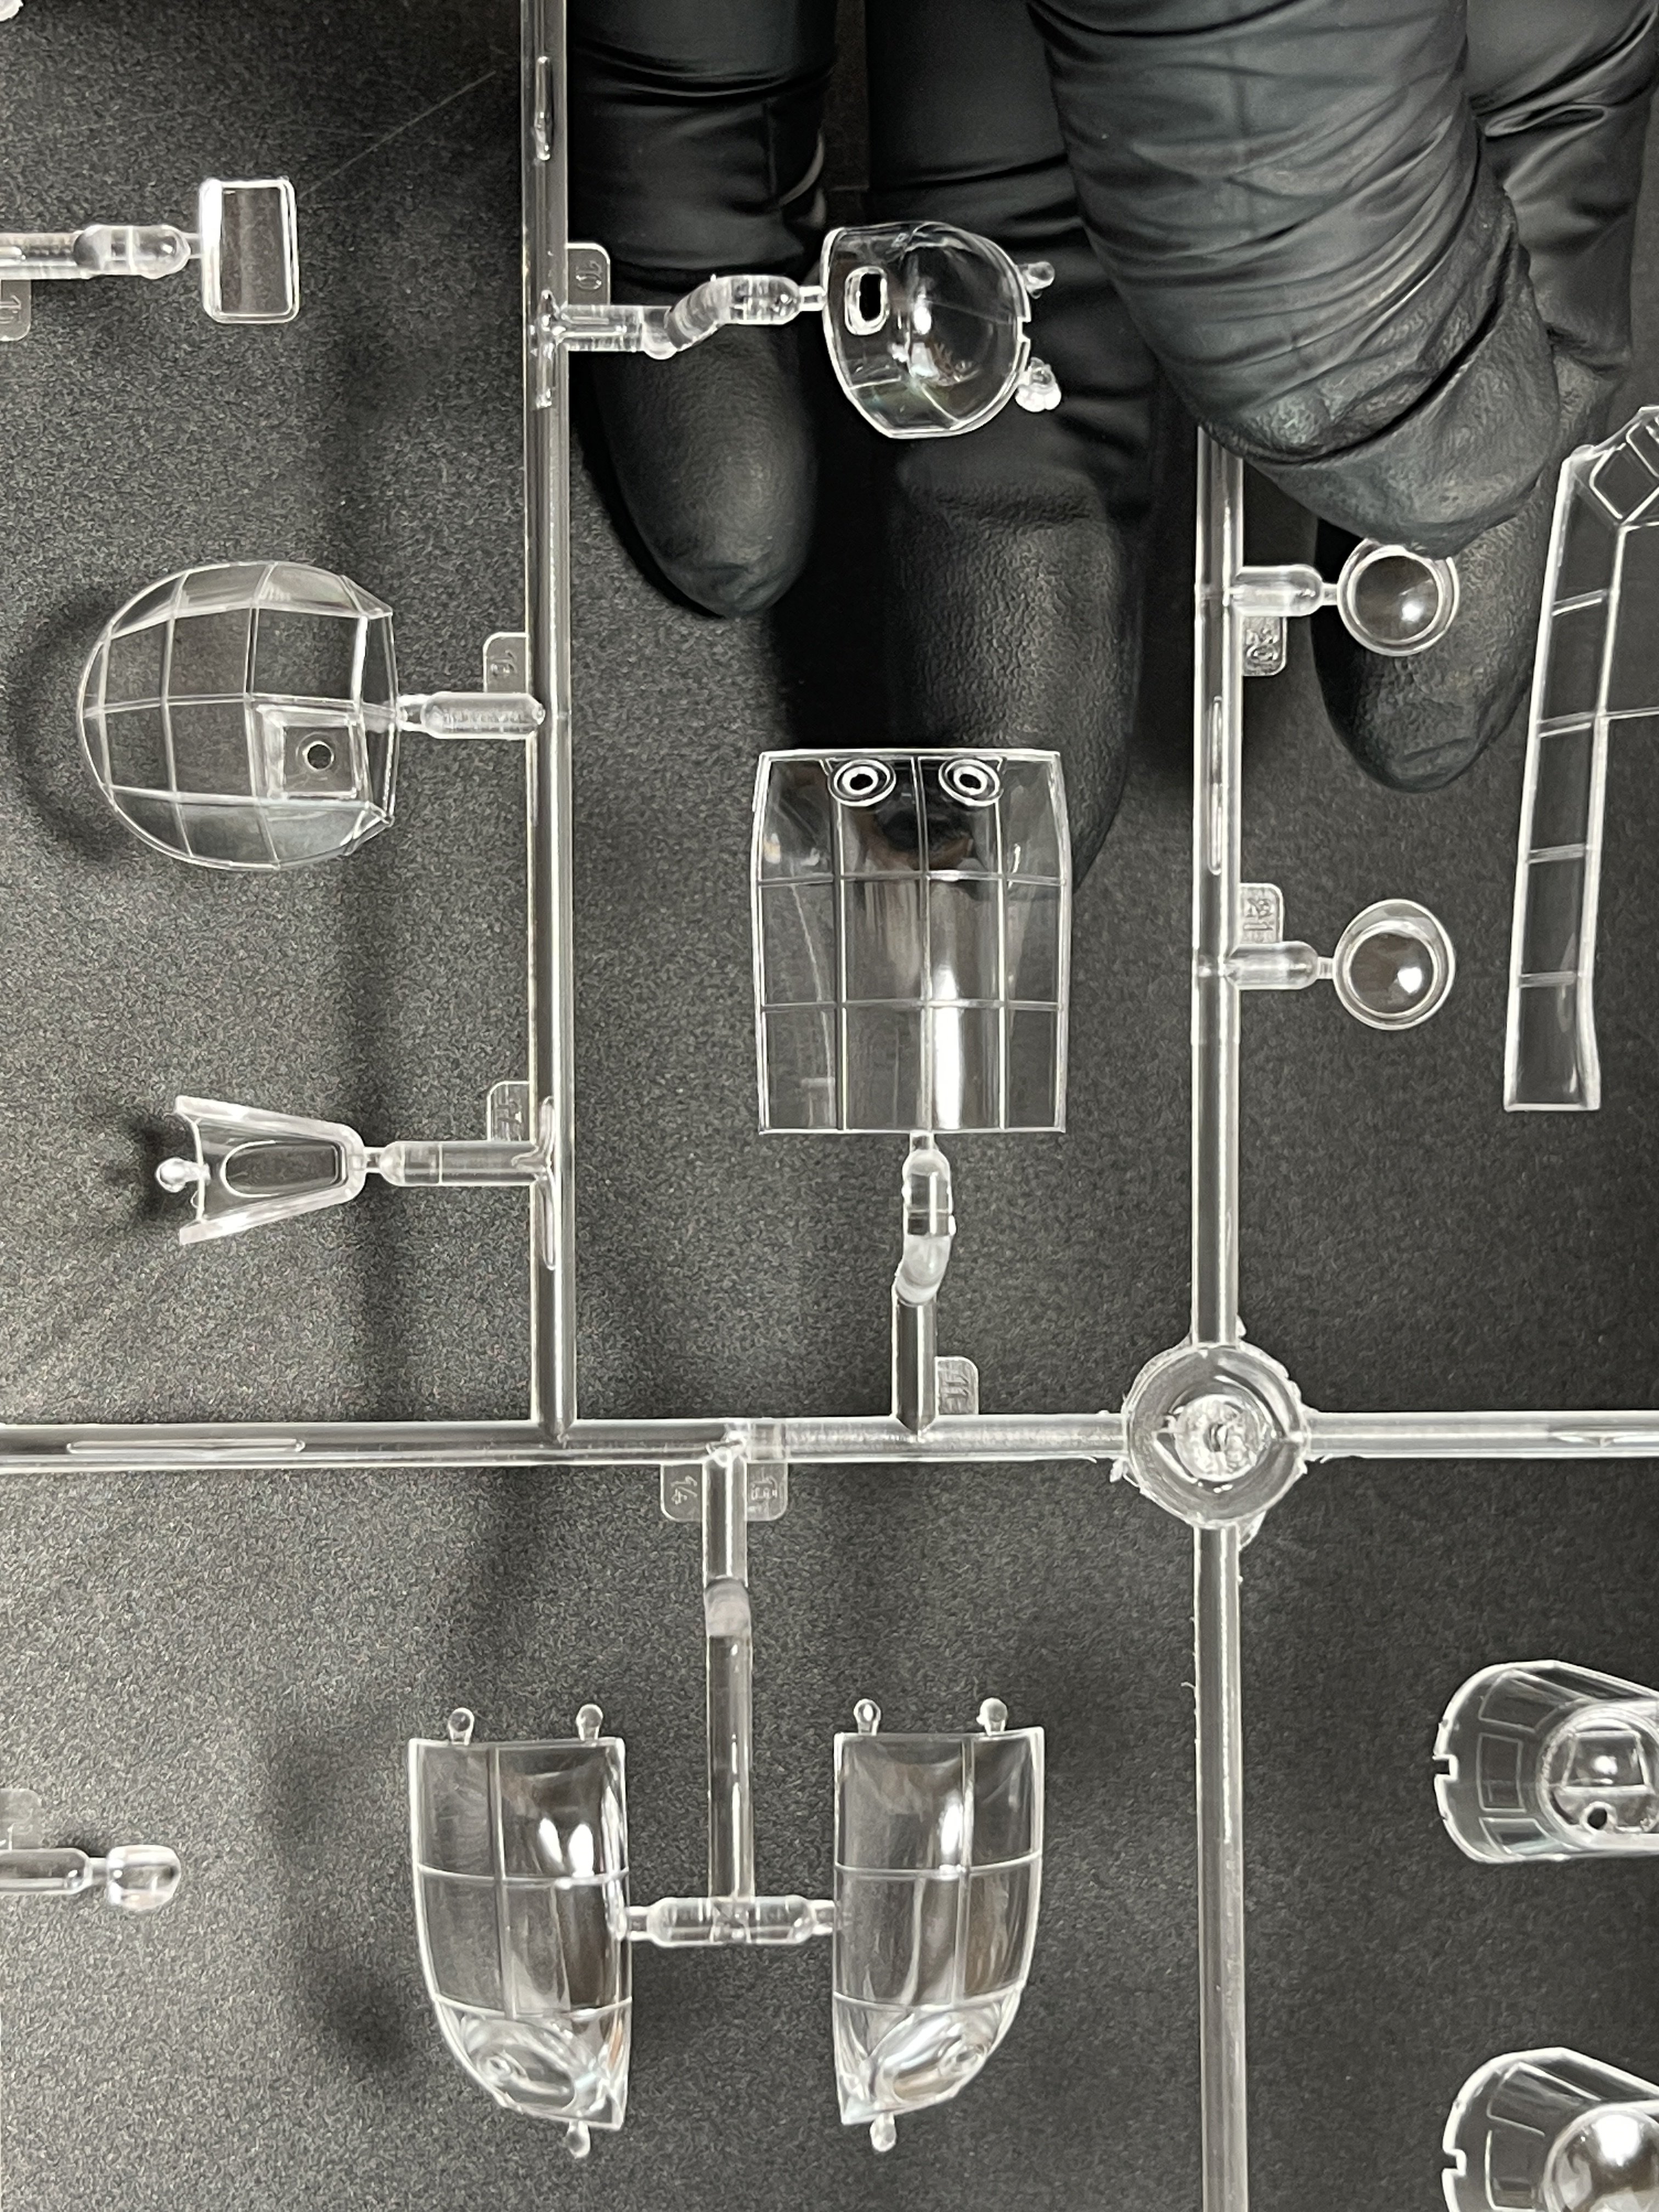
The clear parts, are much better in the B-26 than thety are in the Spitfire and the Mustang, so you can see ICM evolution along the years also in the clear parts. However, all the clear parts have no distortion or bubble but the B-26 ones are more refine and clear.


While the P-51 model kit does not bring any engine, the Spitfire and the B-26 C gives the modeler that option, but only the spit you can put it in sight.
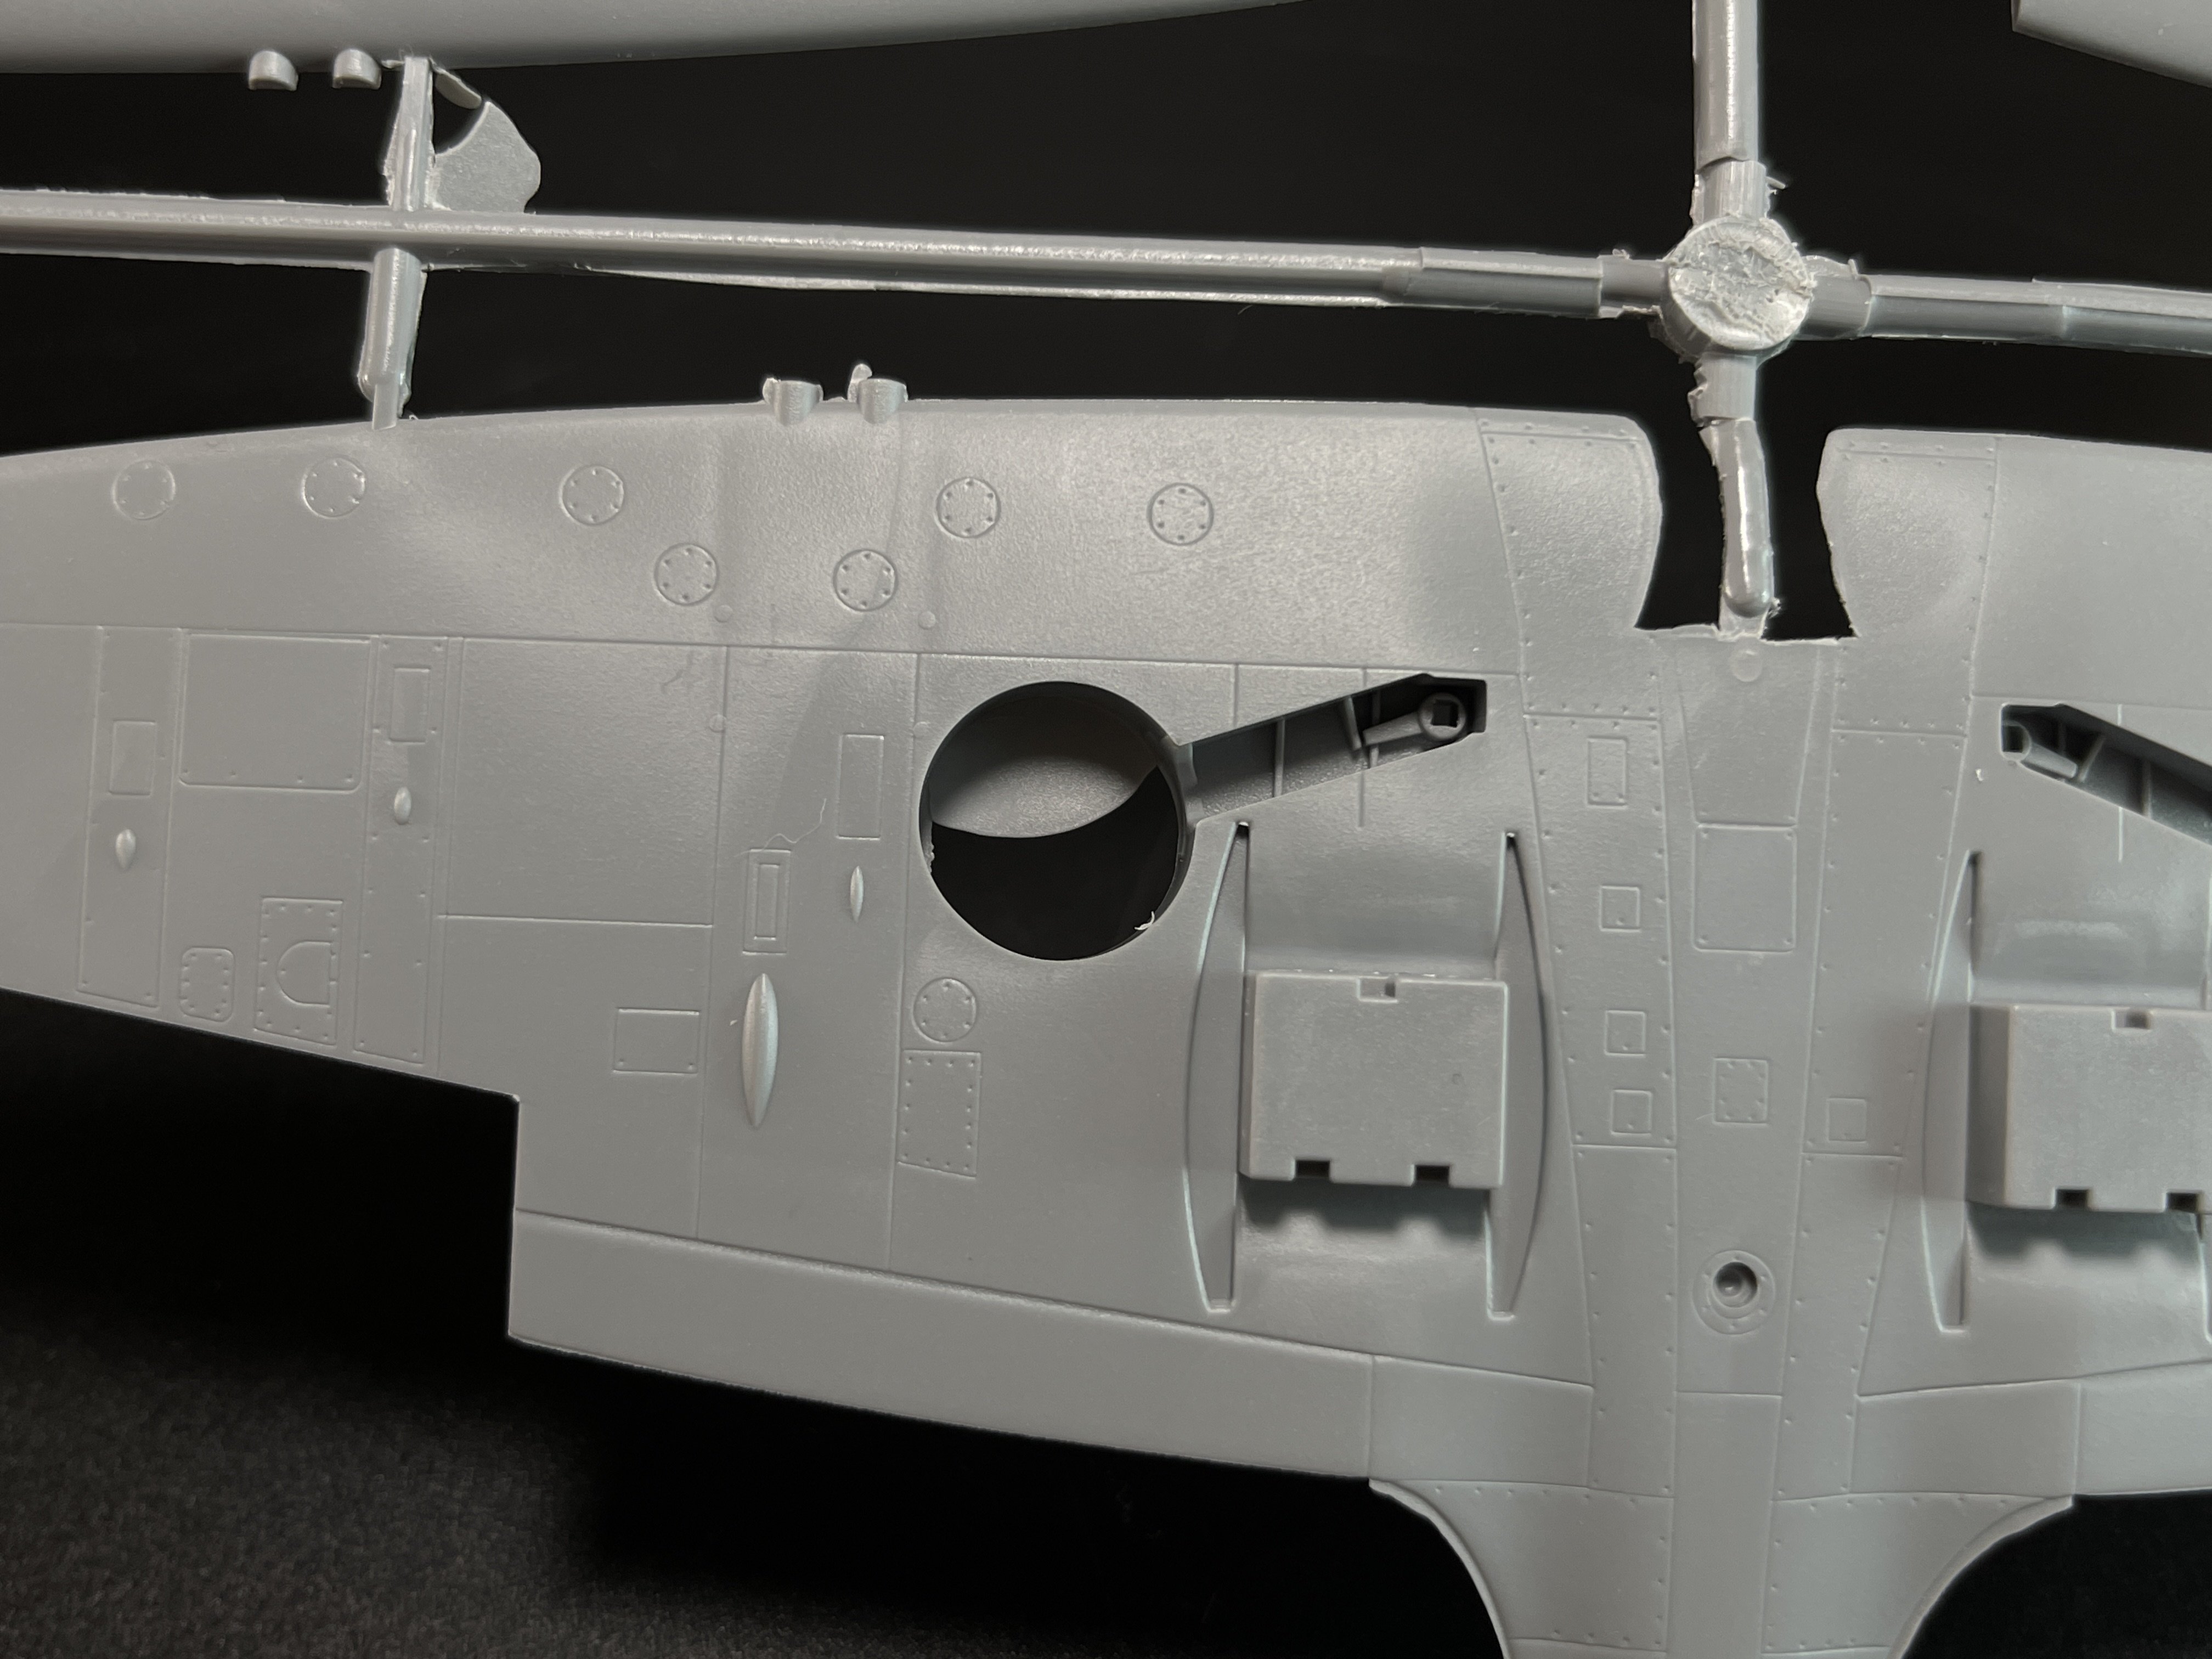
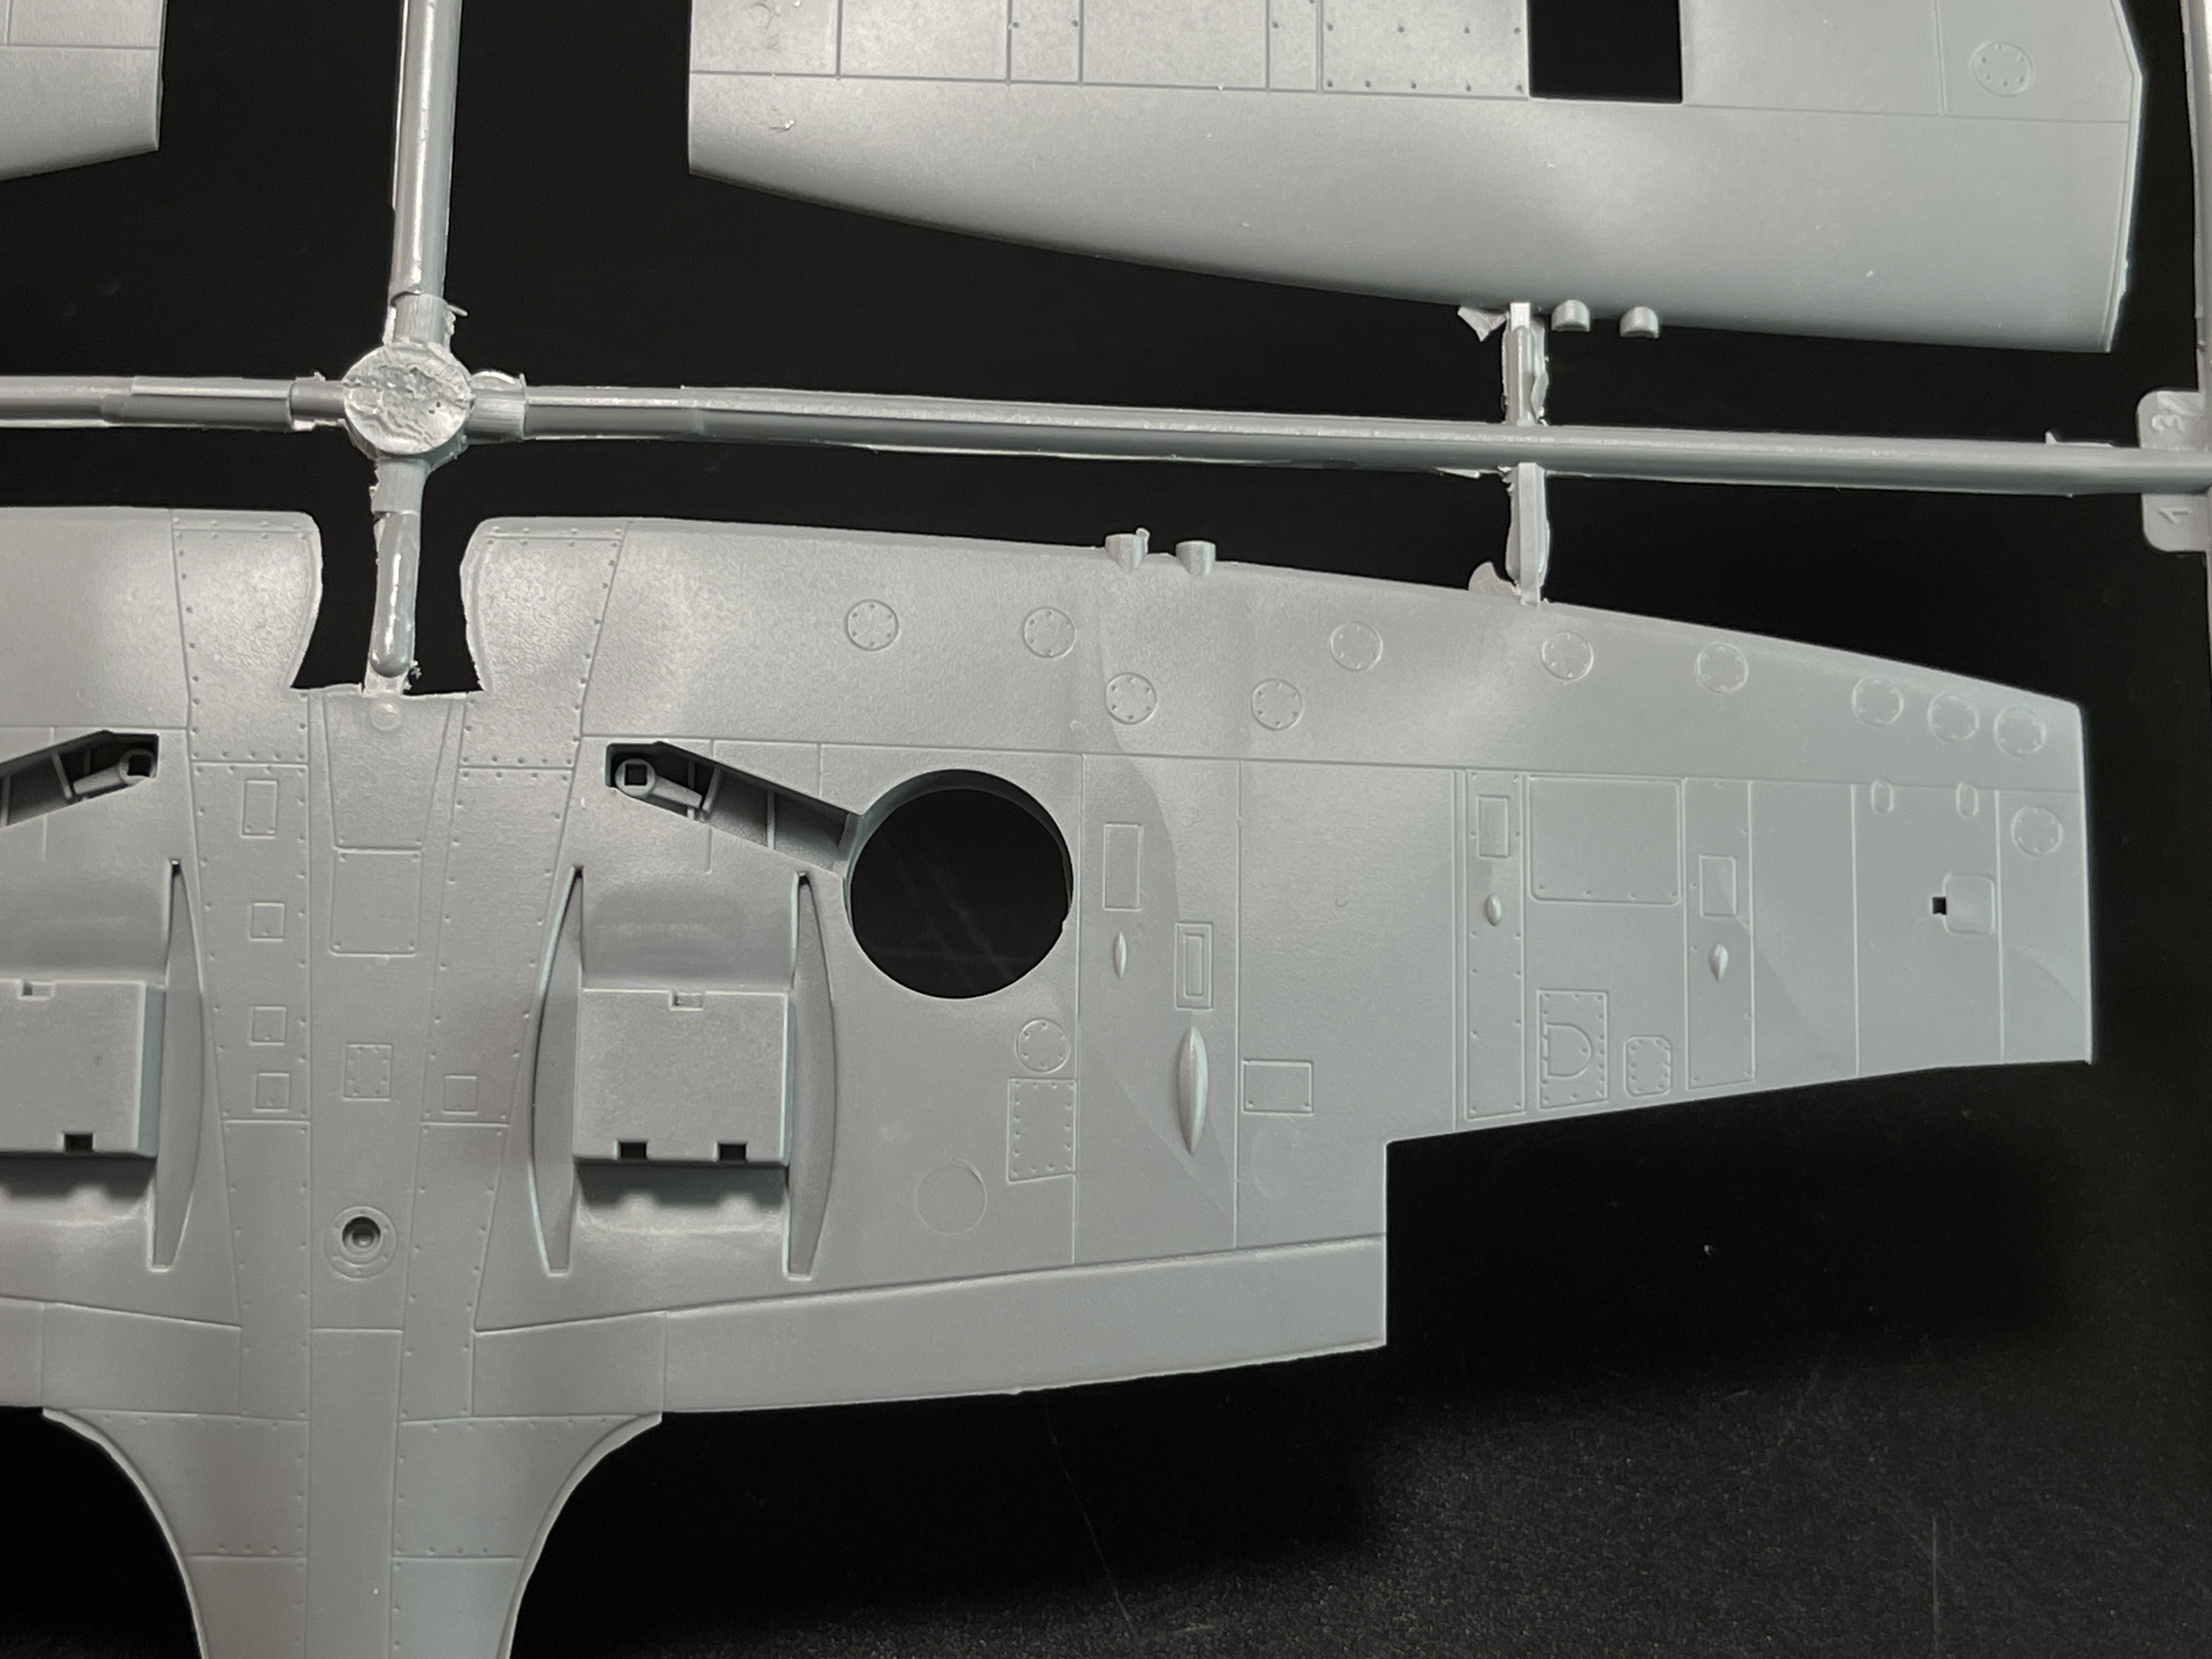
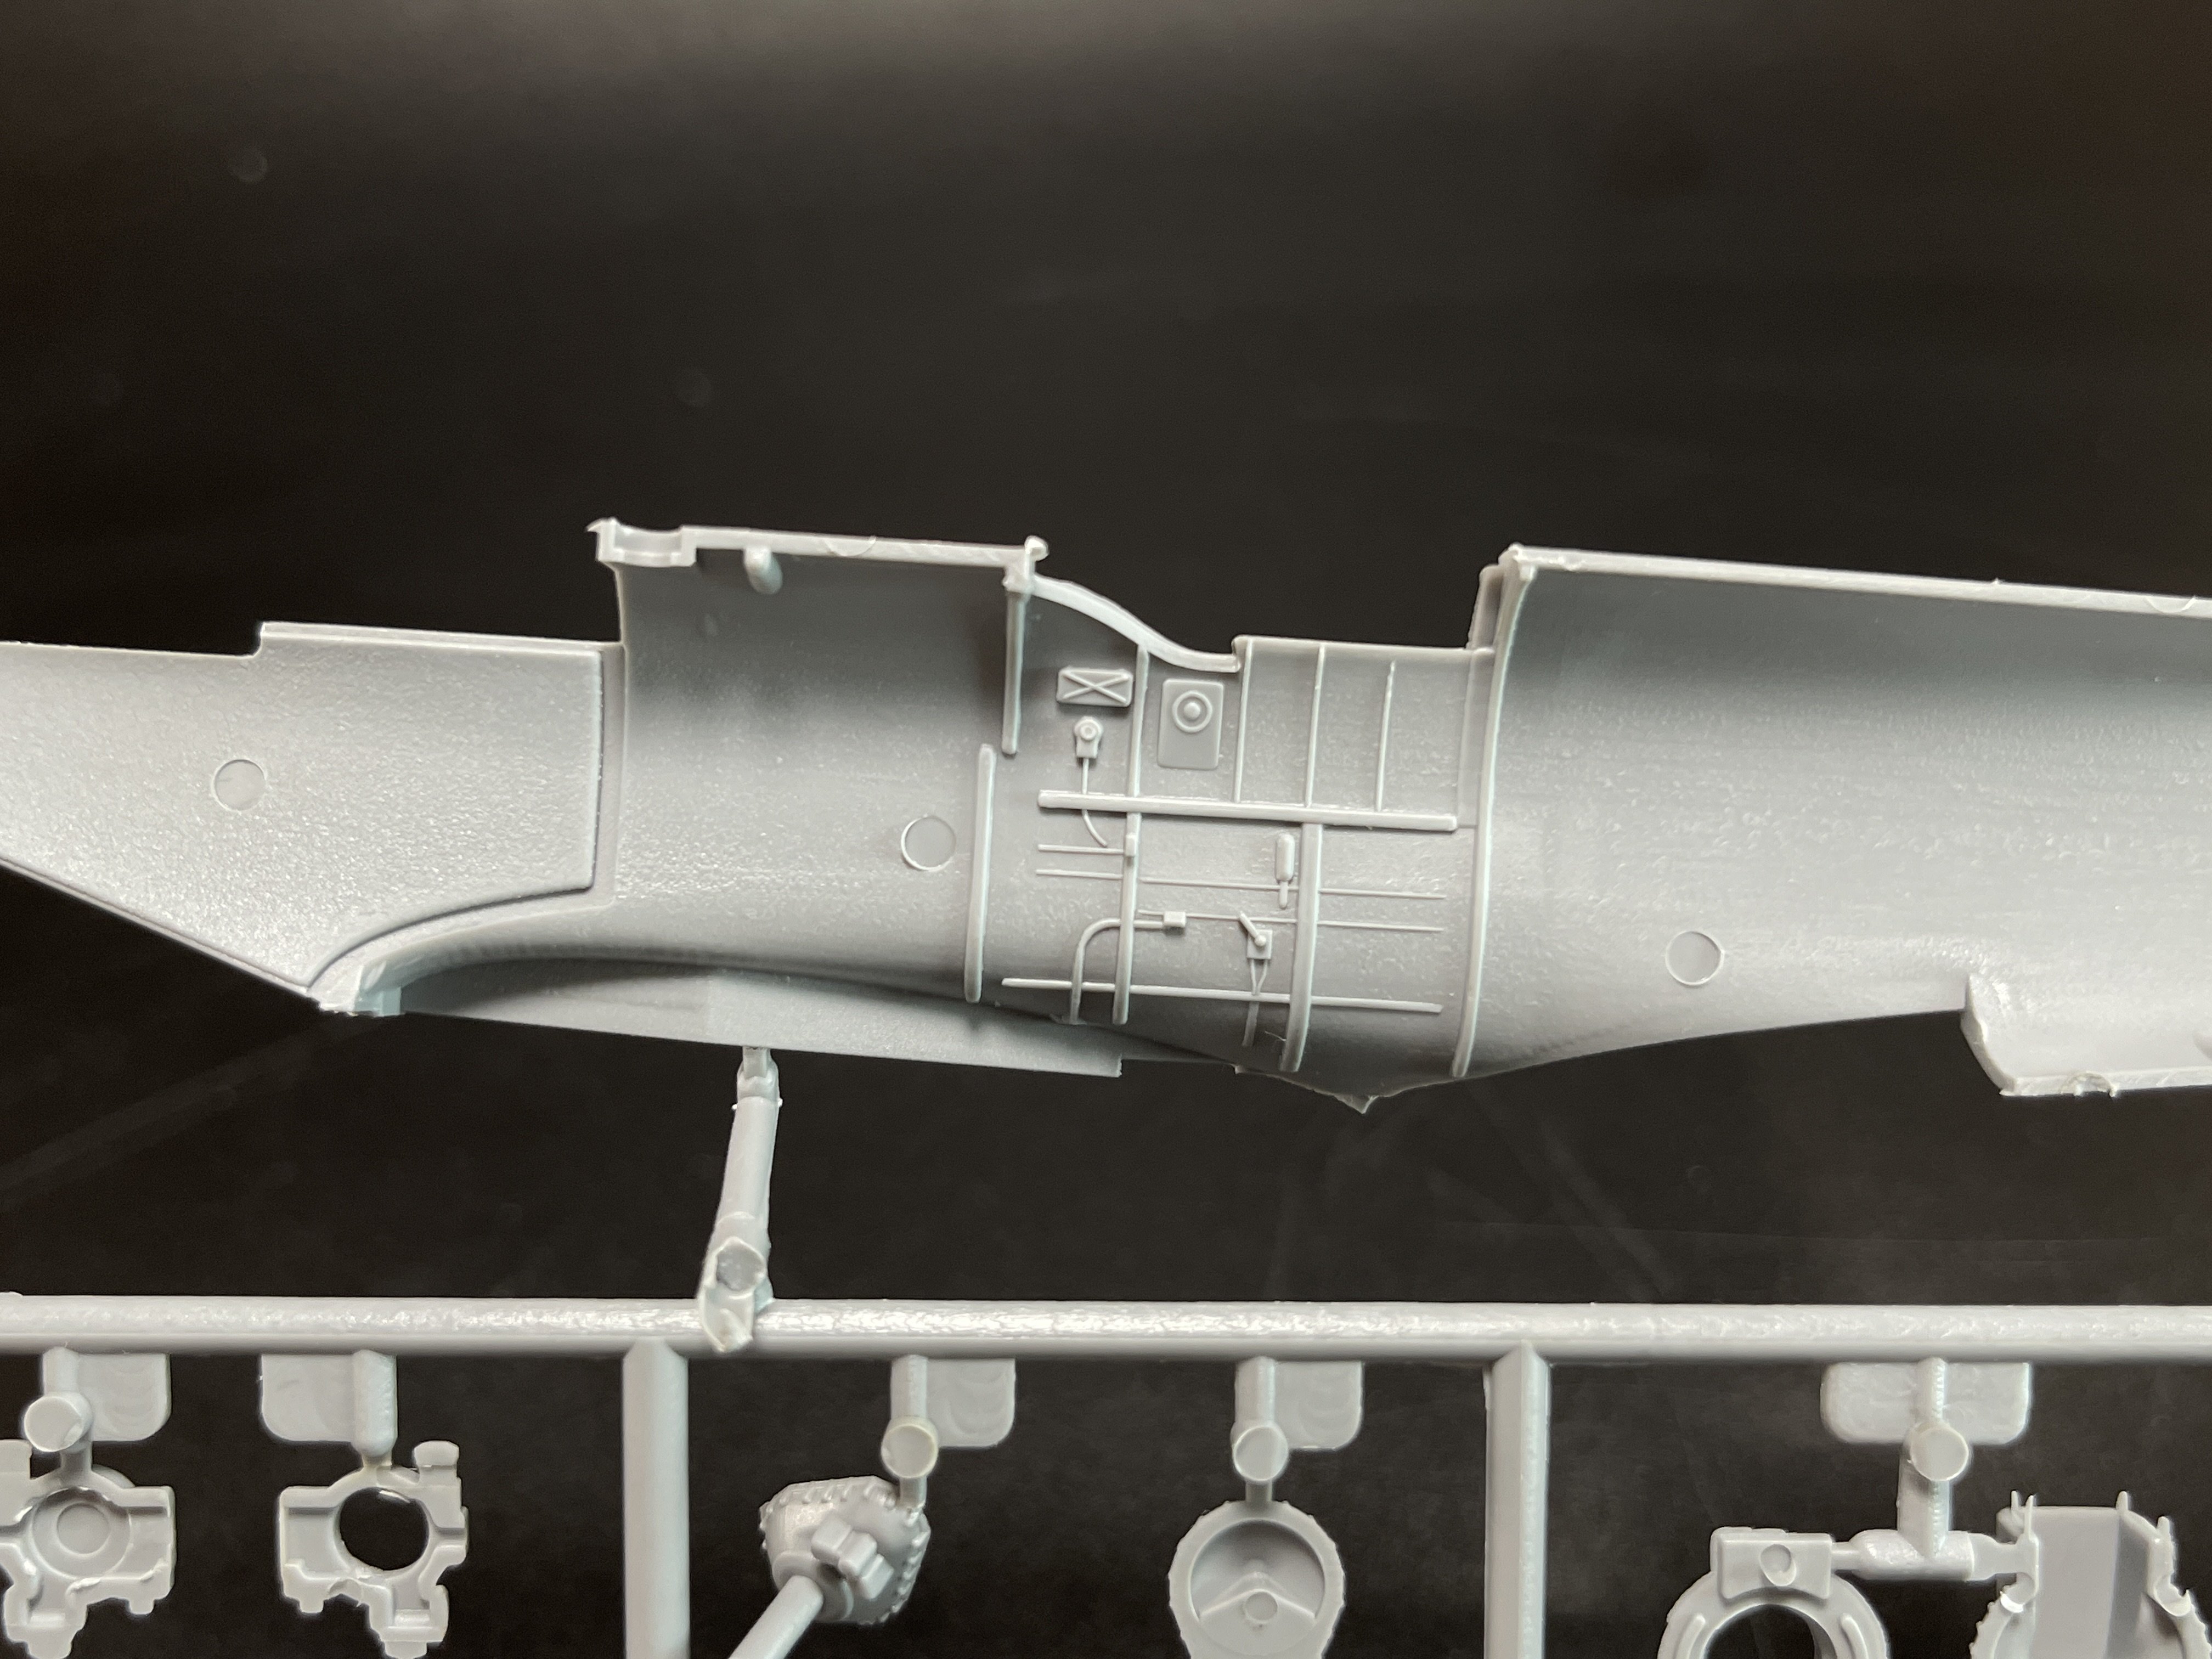
The B-26 C also have a pitot issue on the wing and fuselage, that I mention before when I review the B-26B.
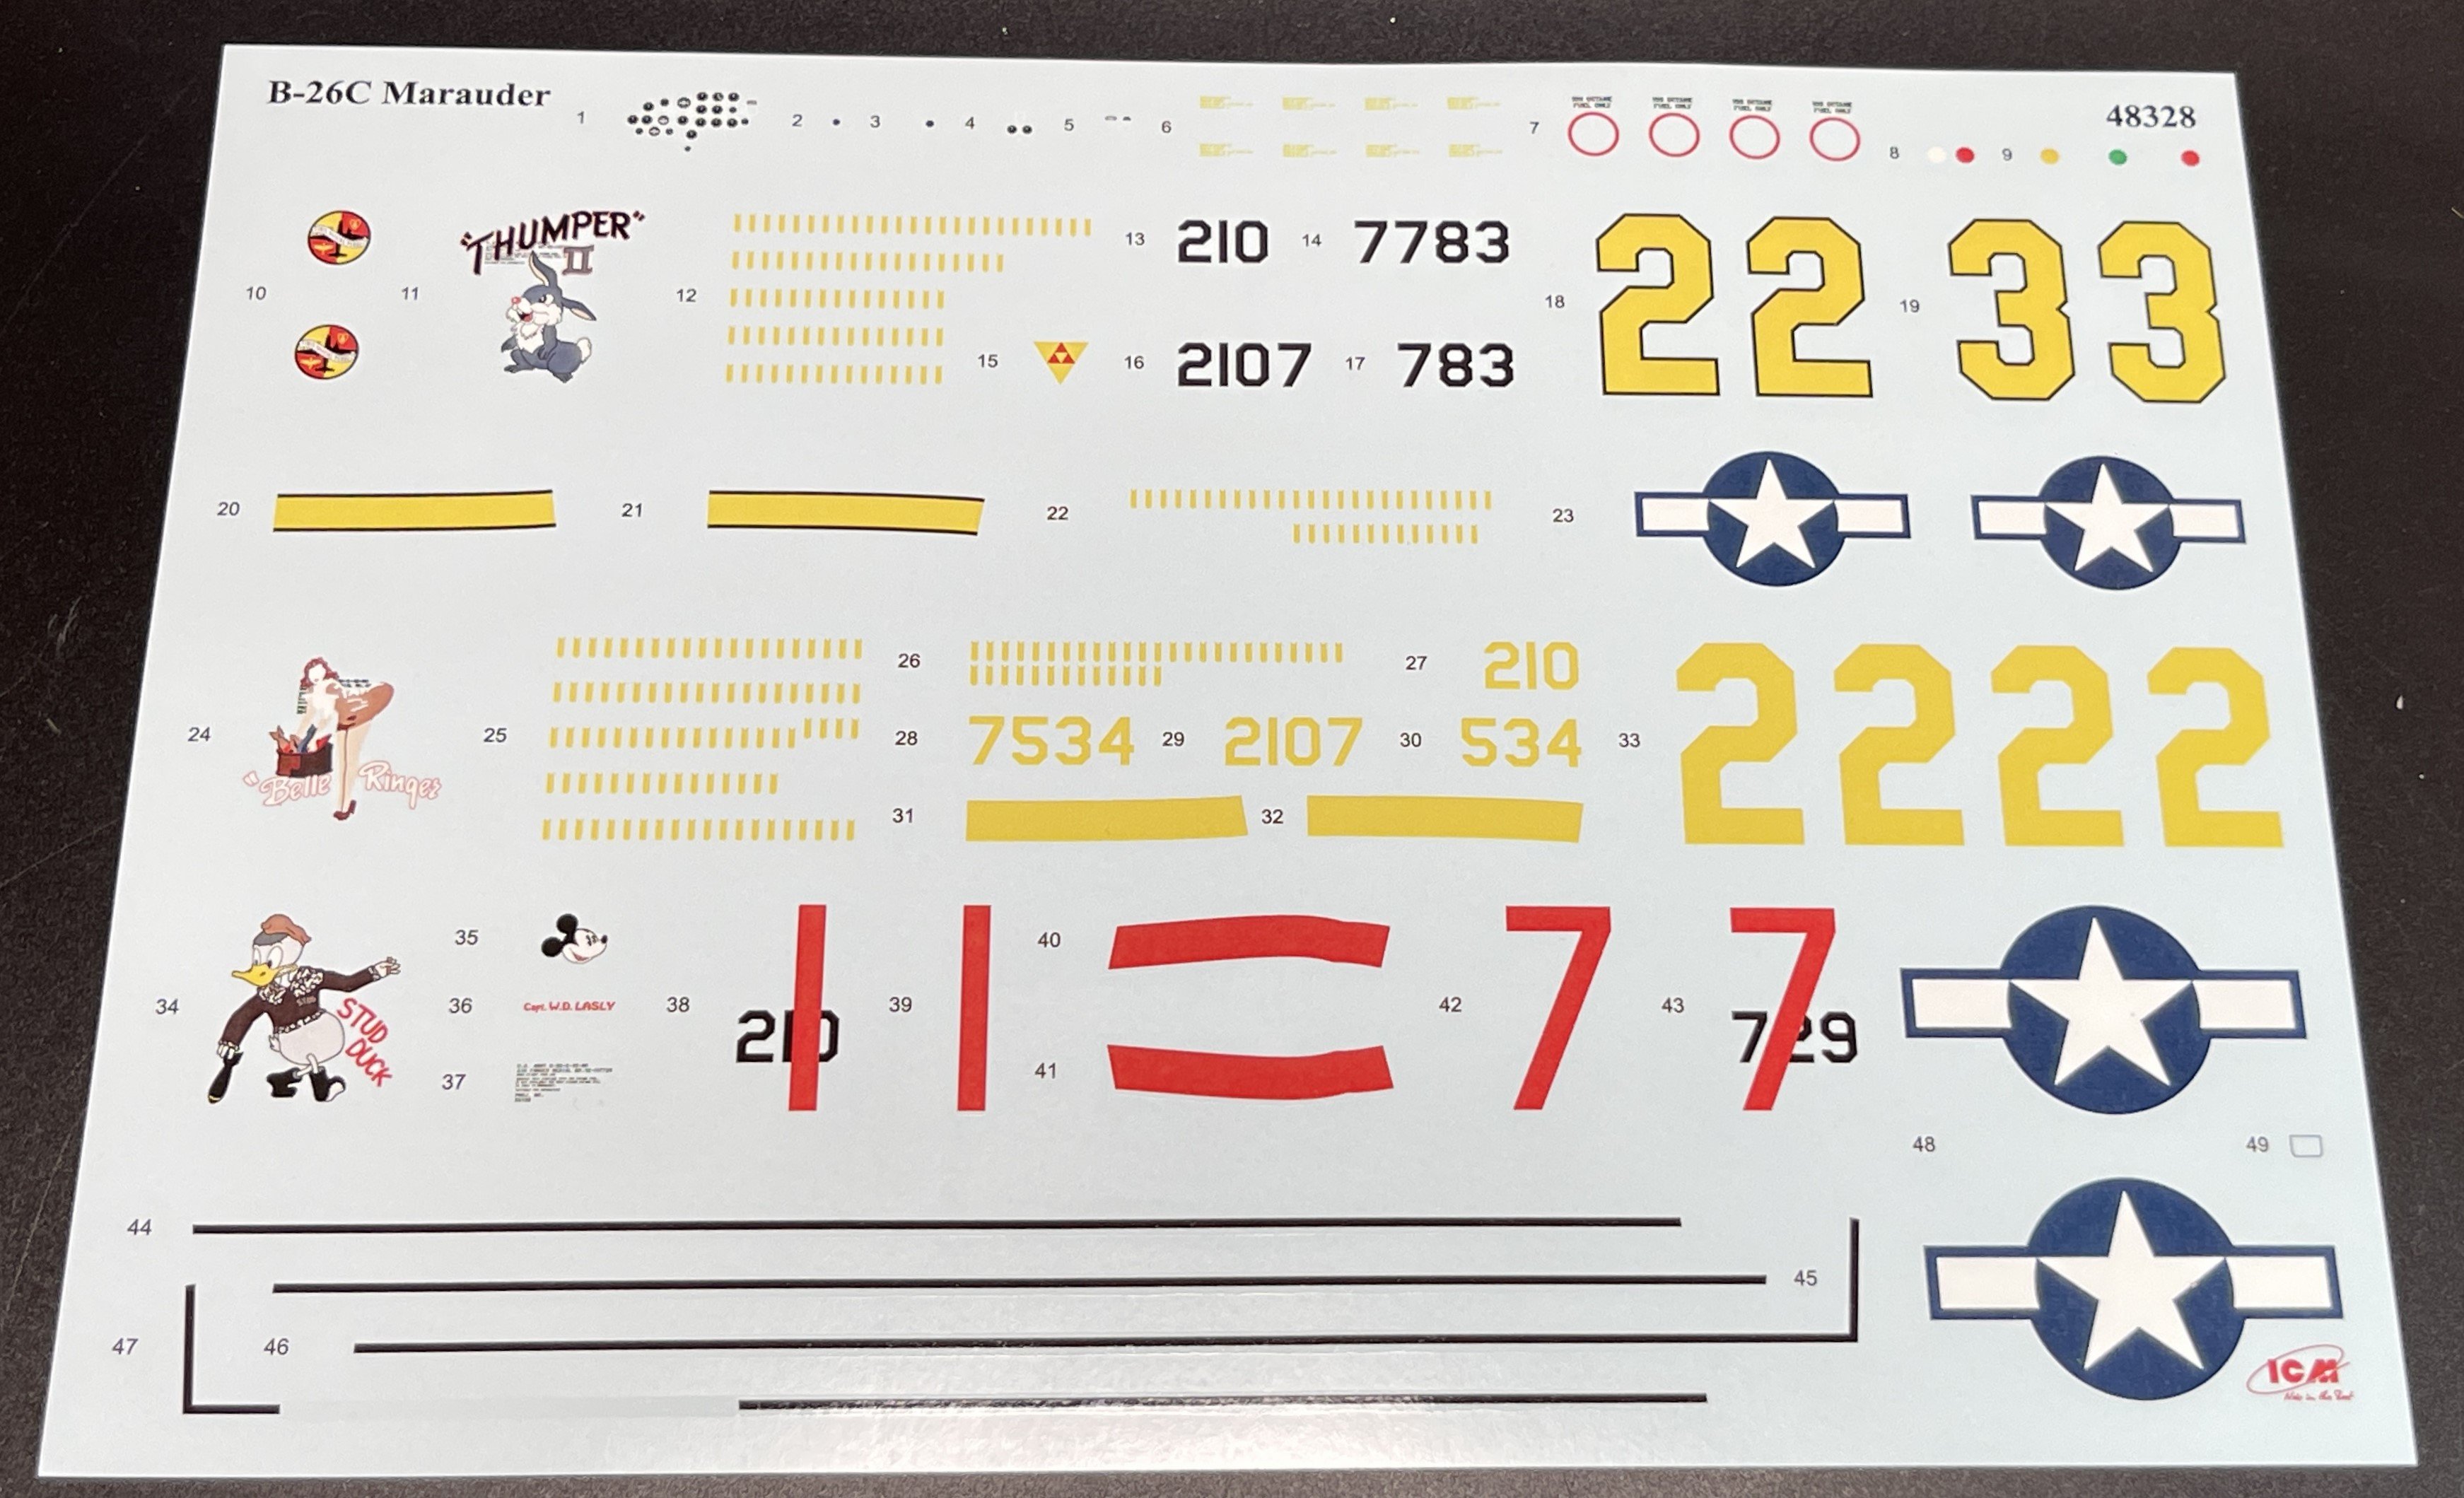
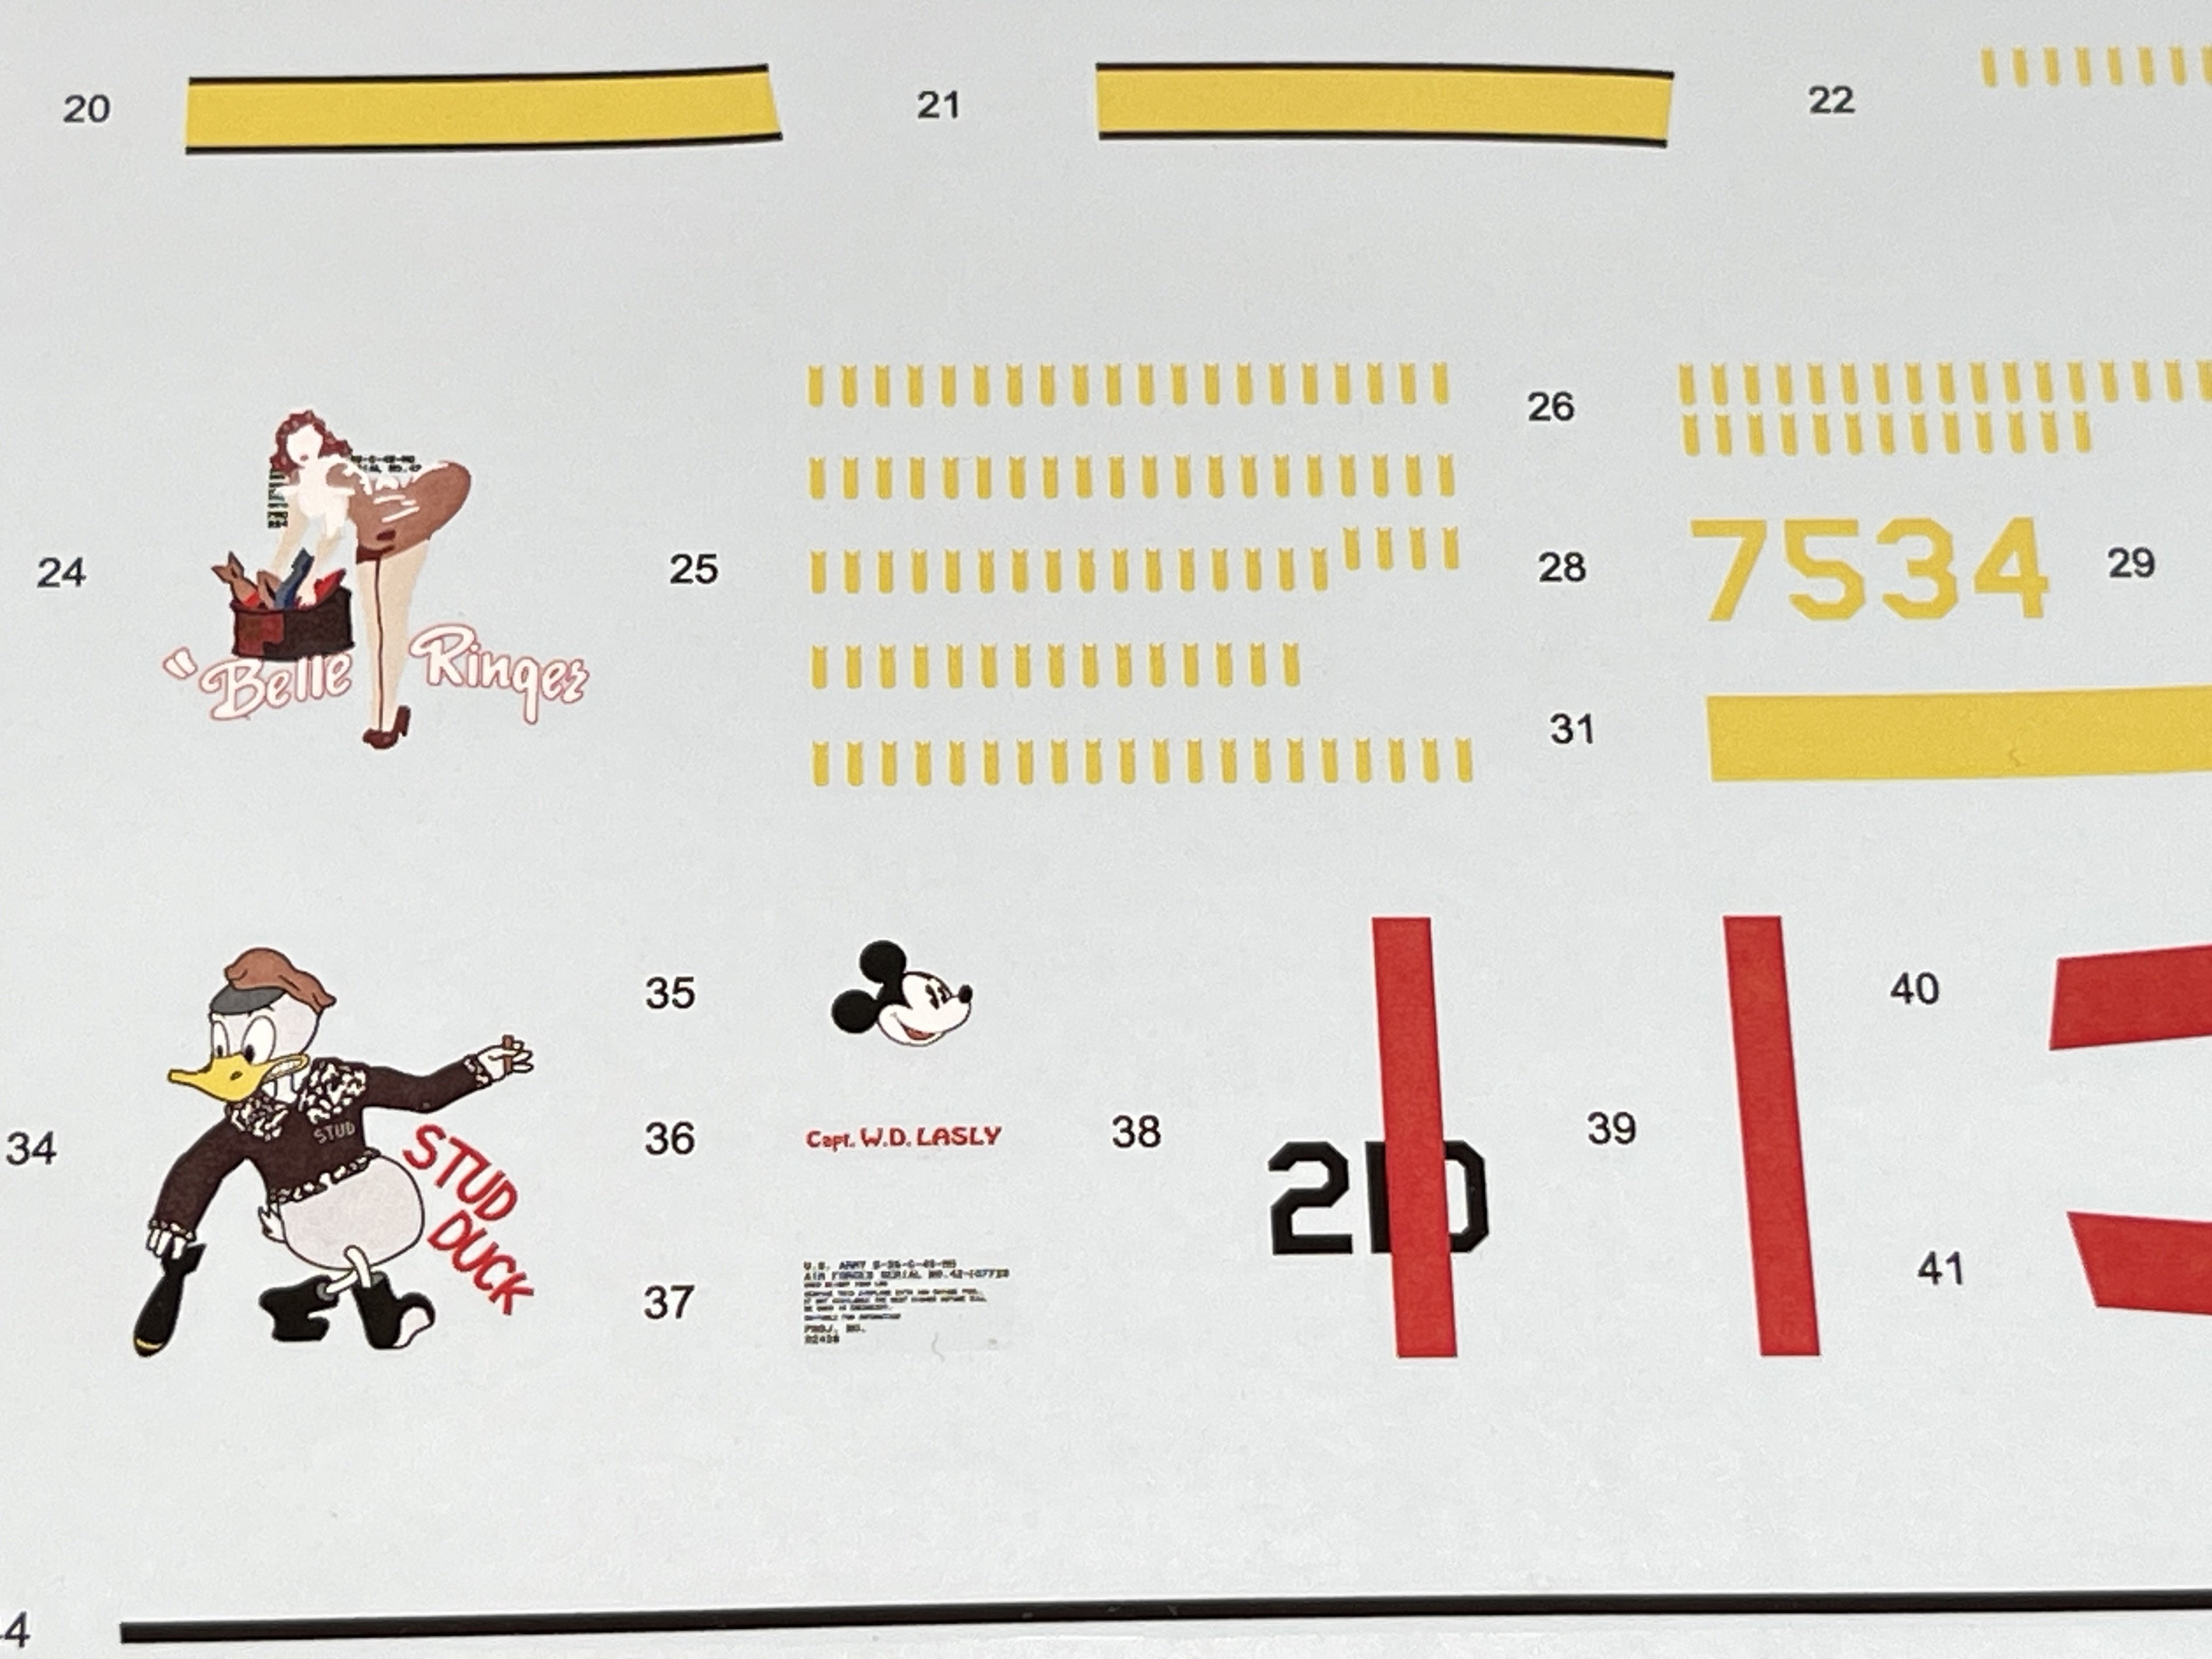
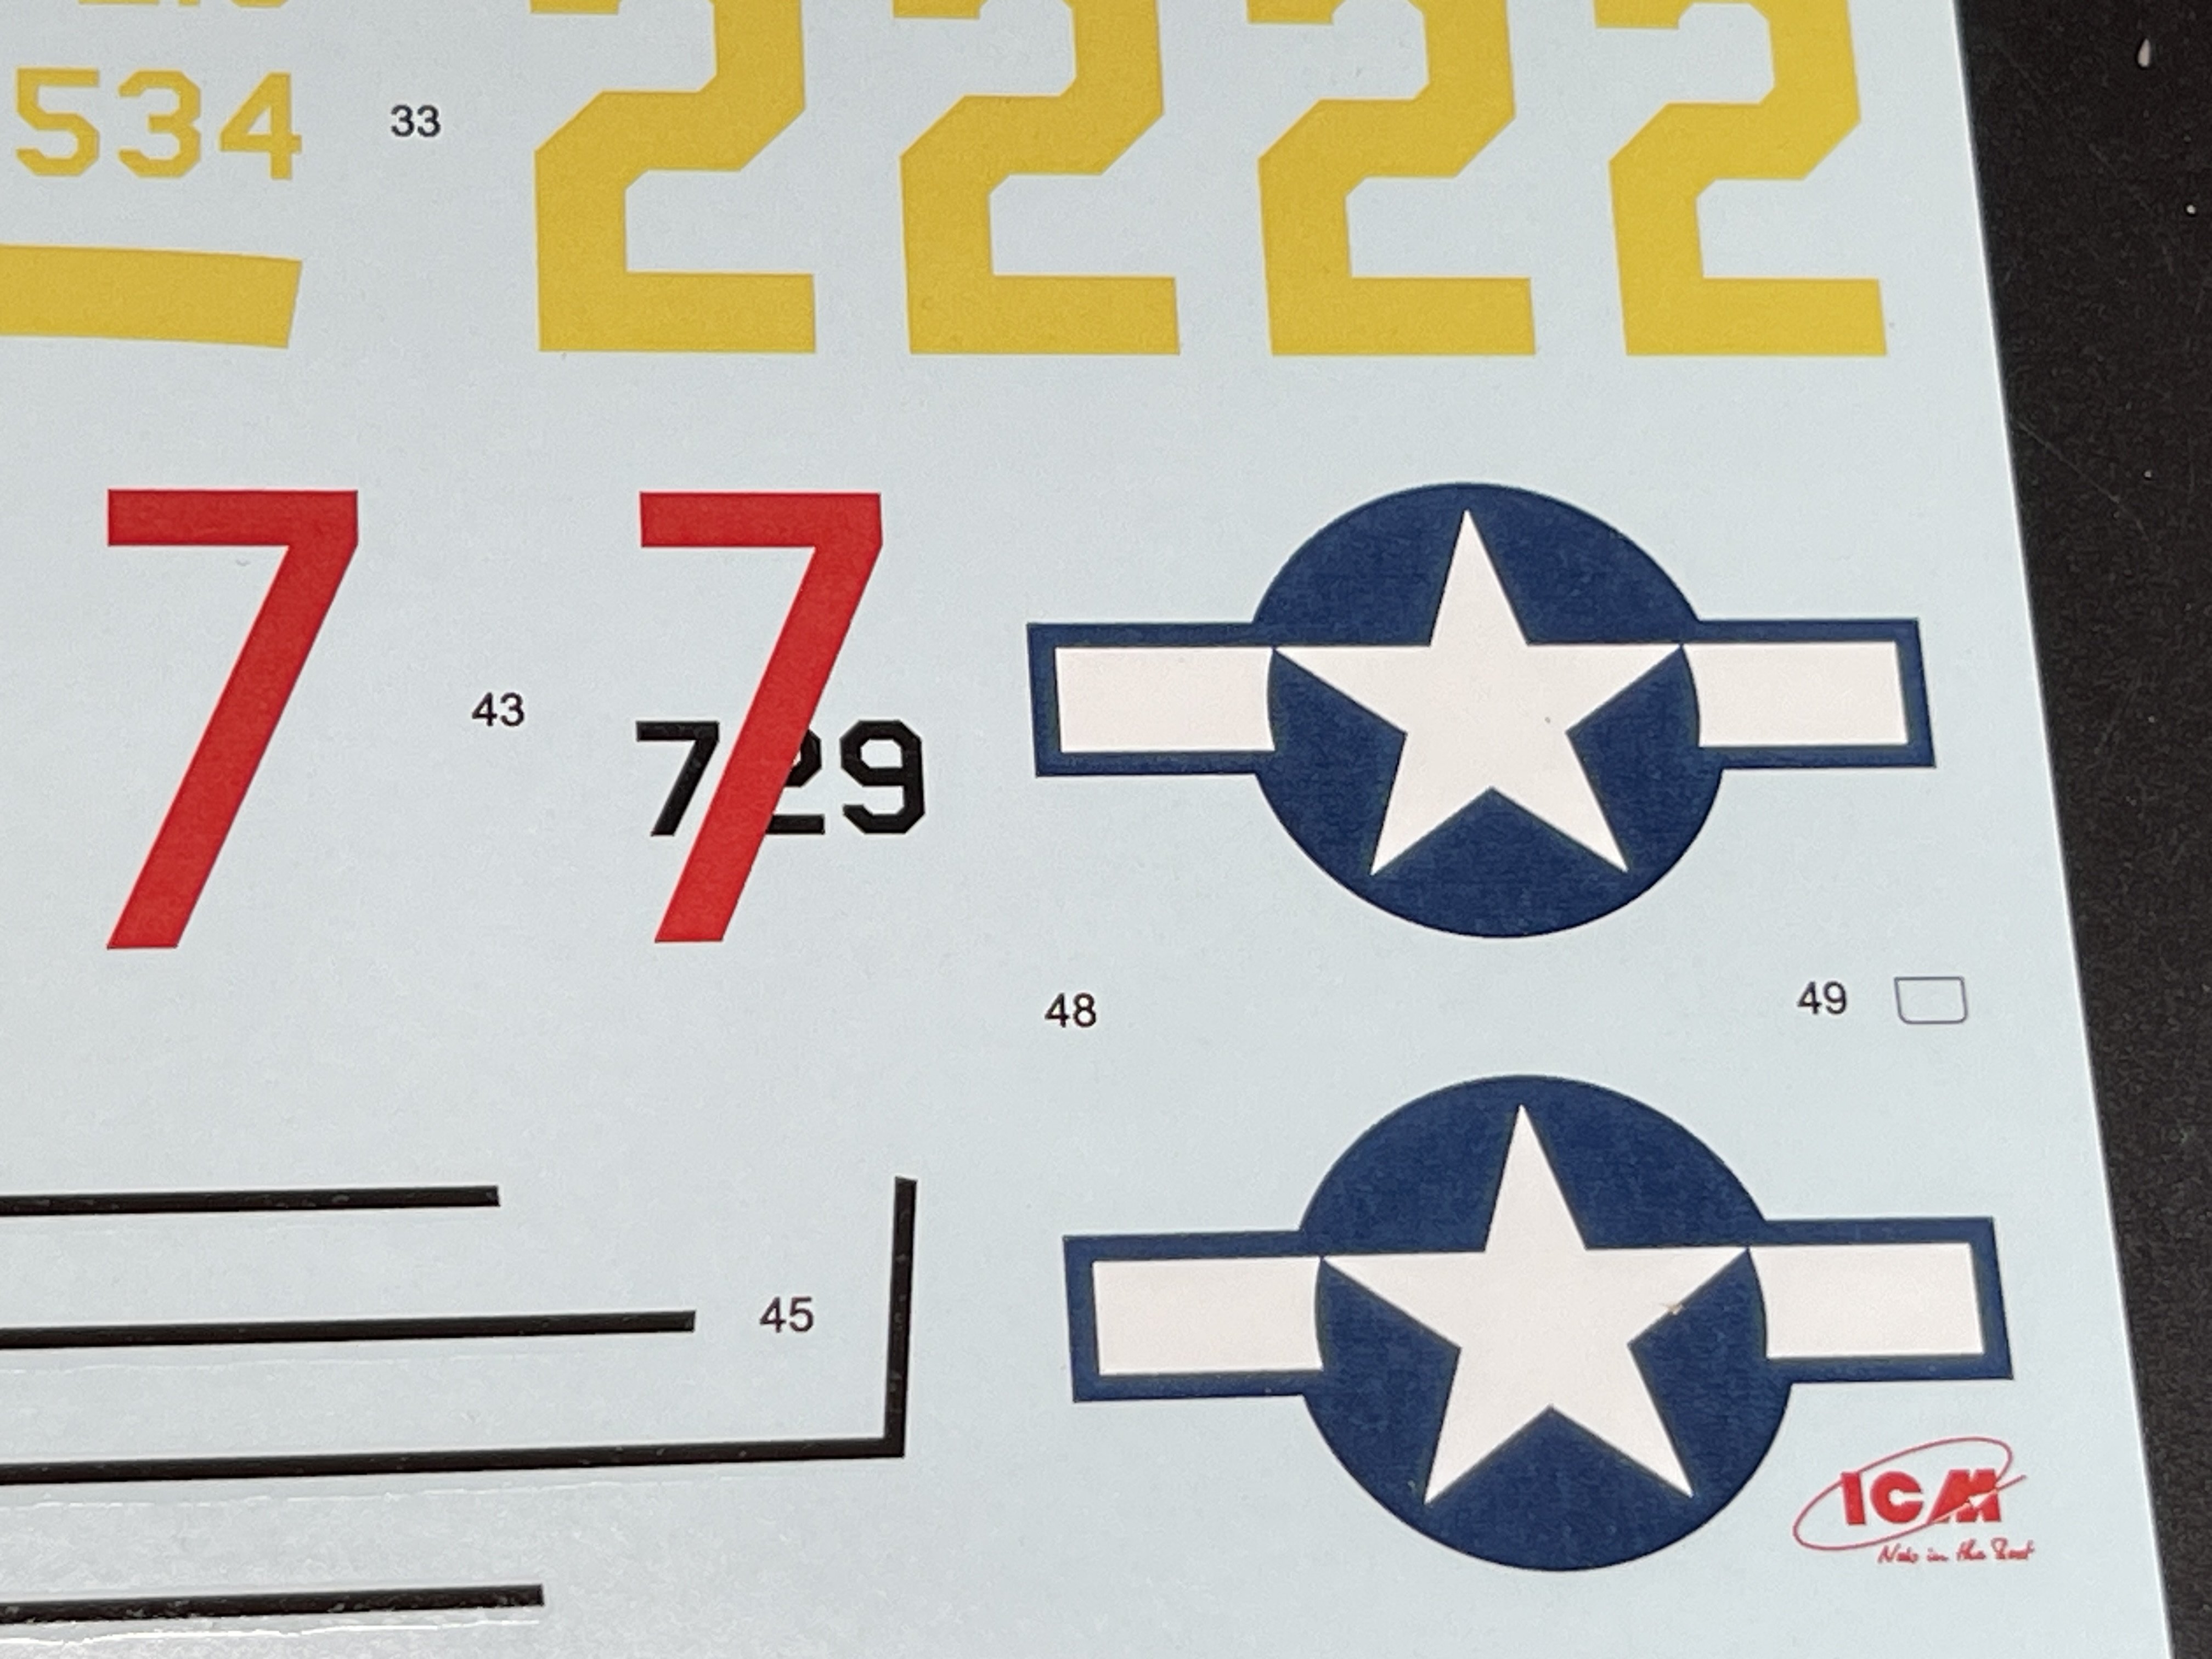
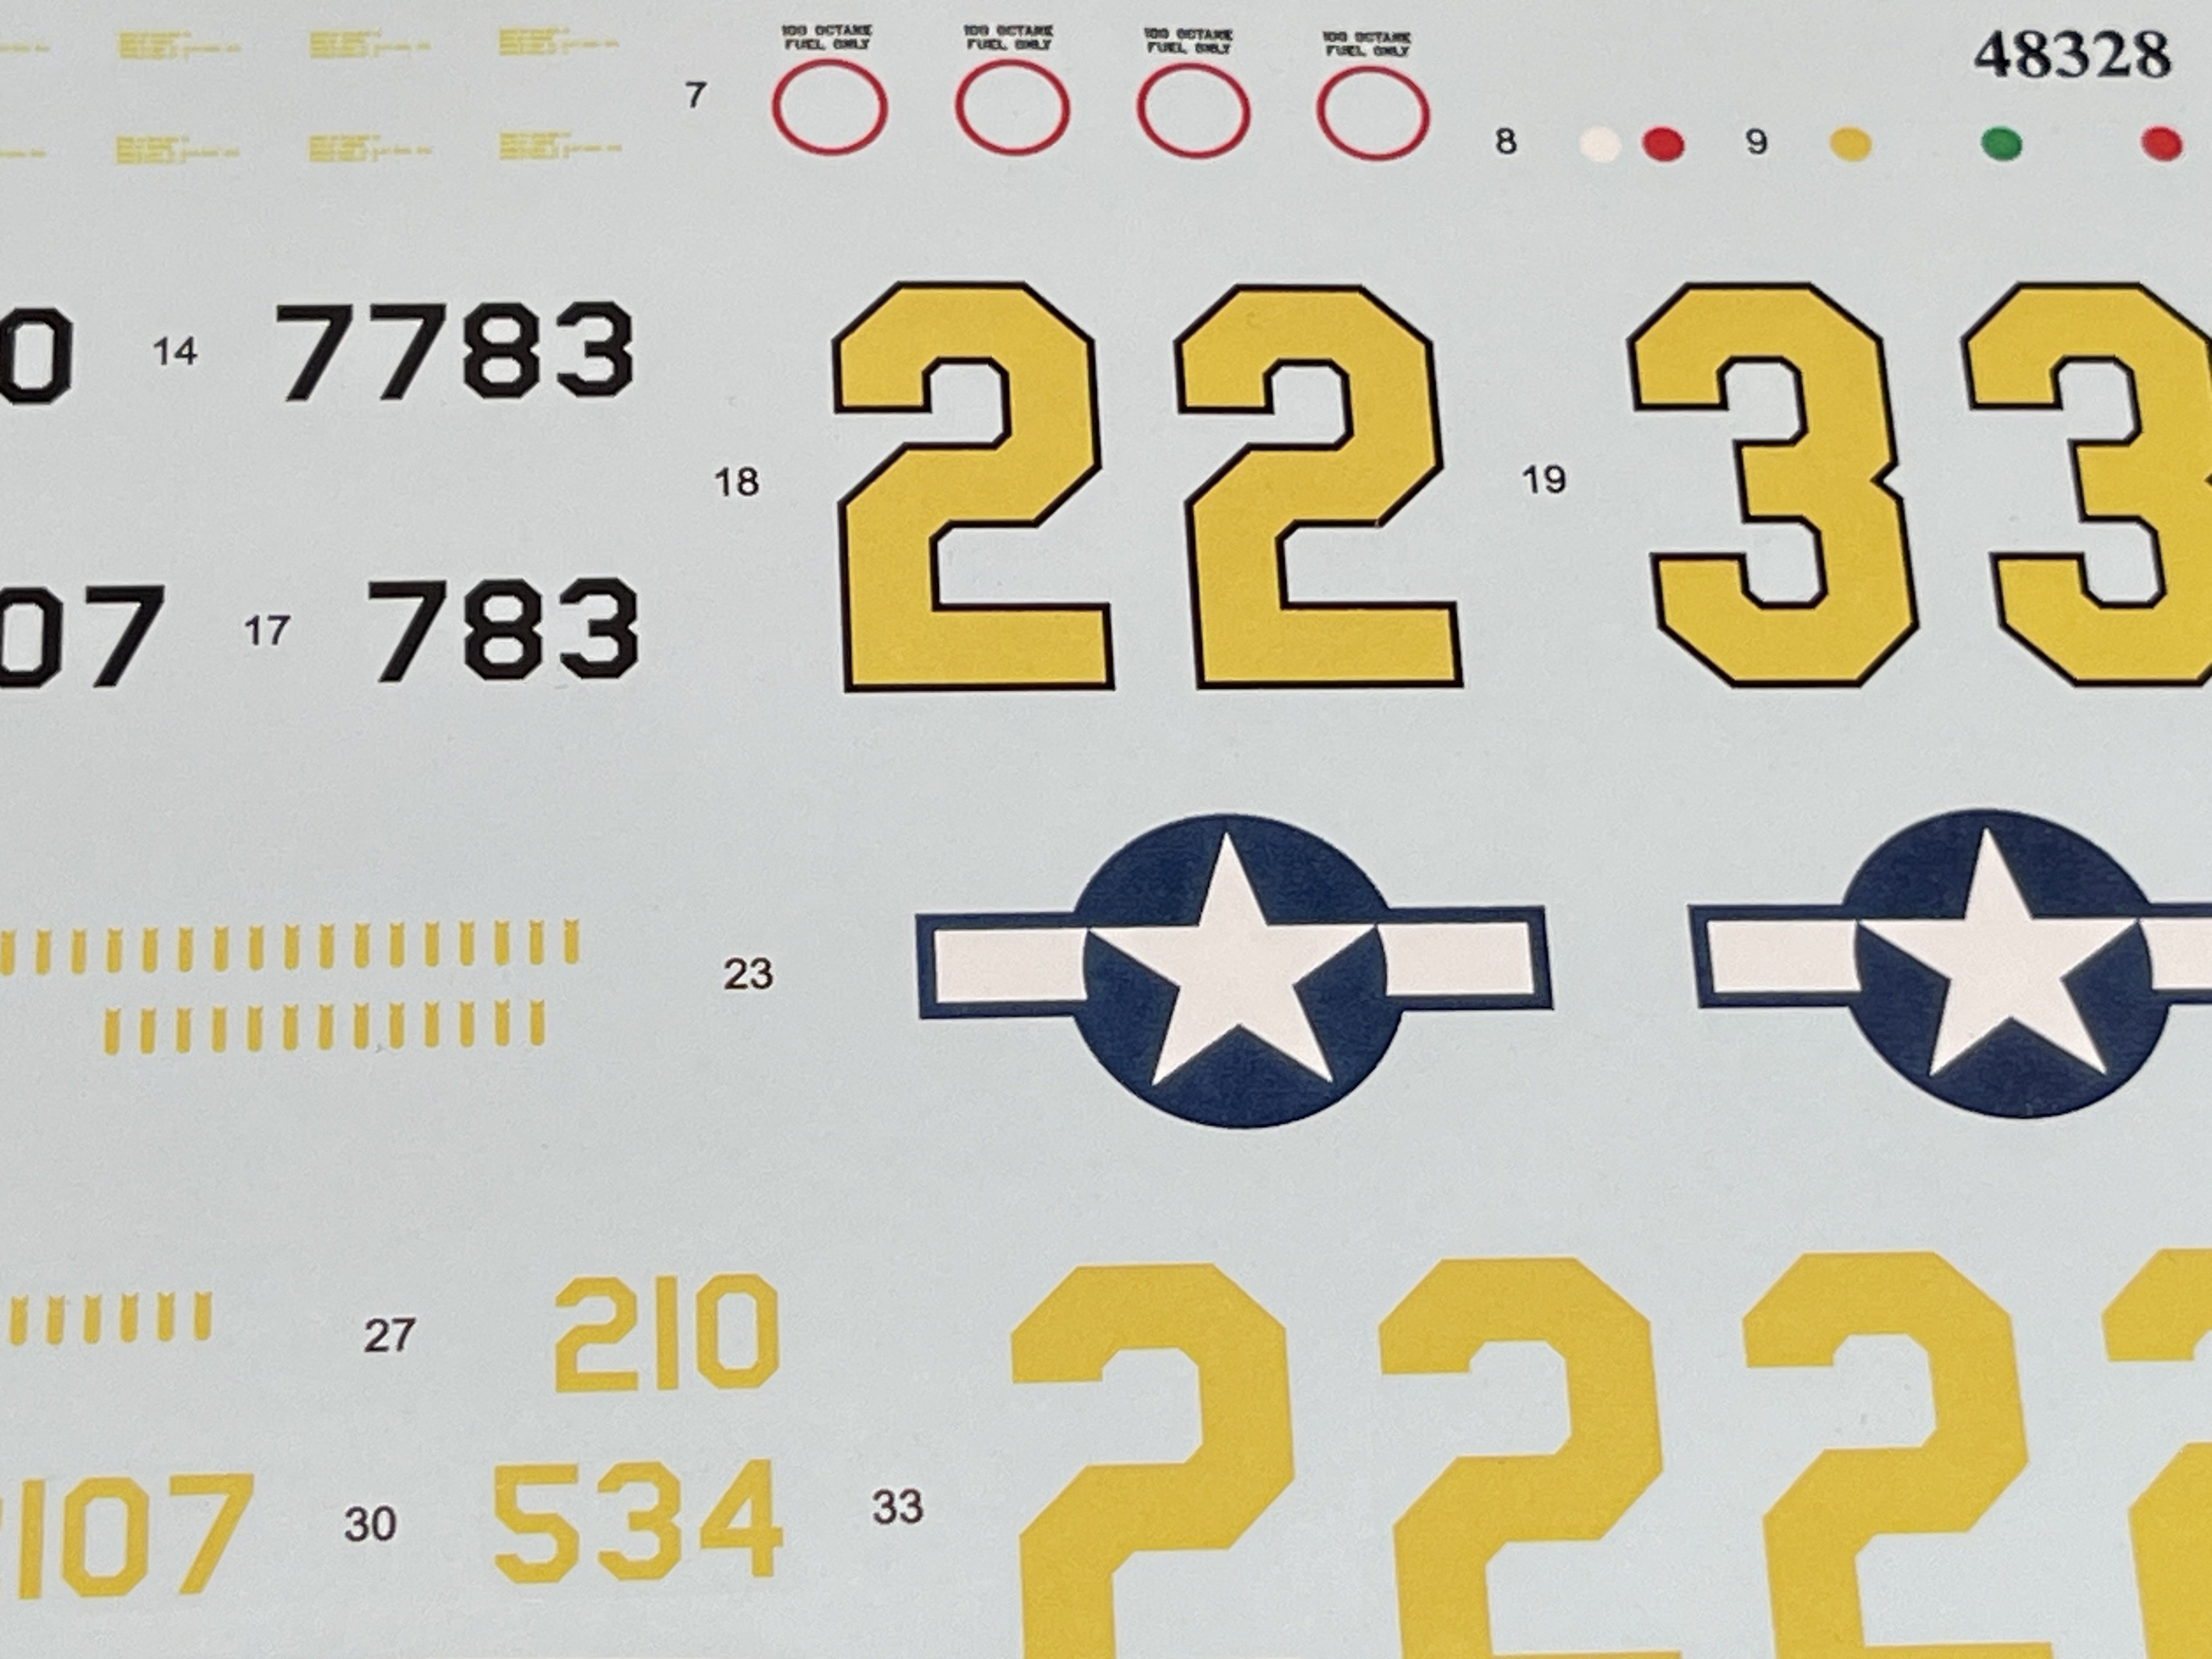
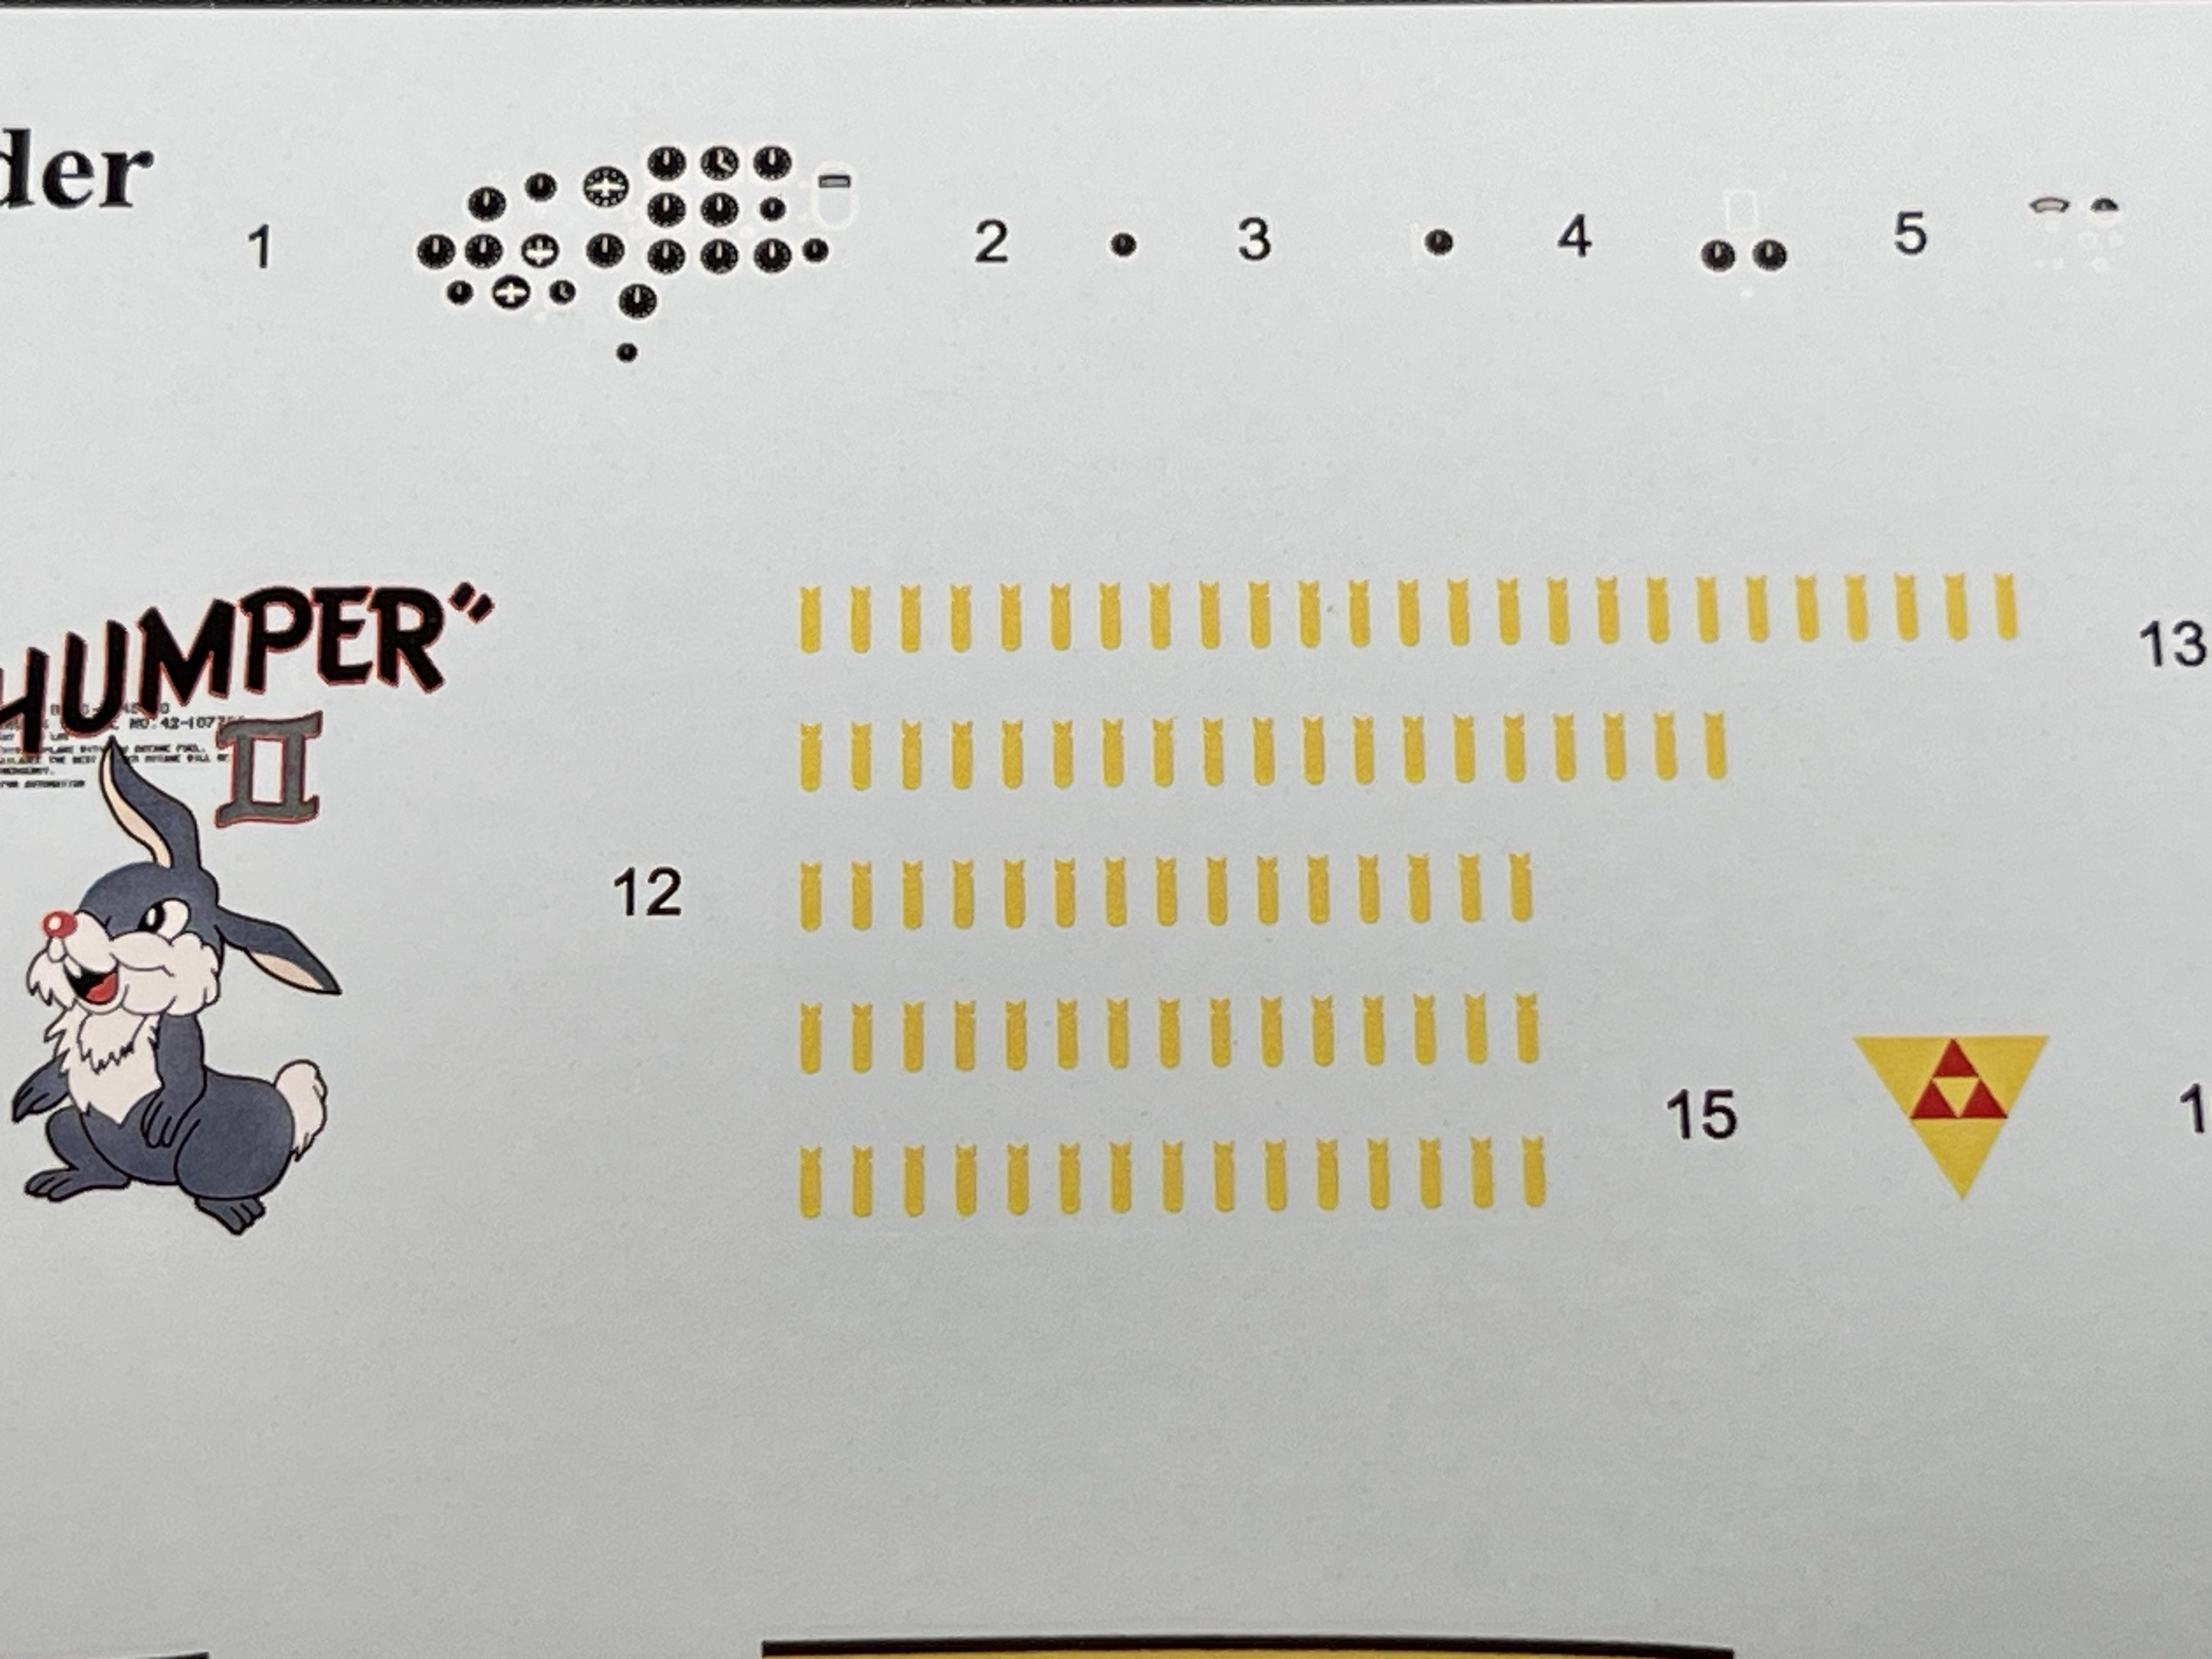
For the B-26 C, you got a large decal sheet with very good color and definition.


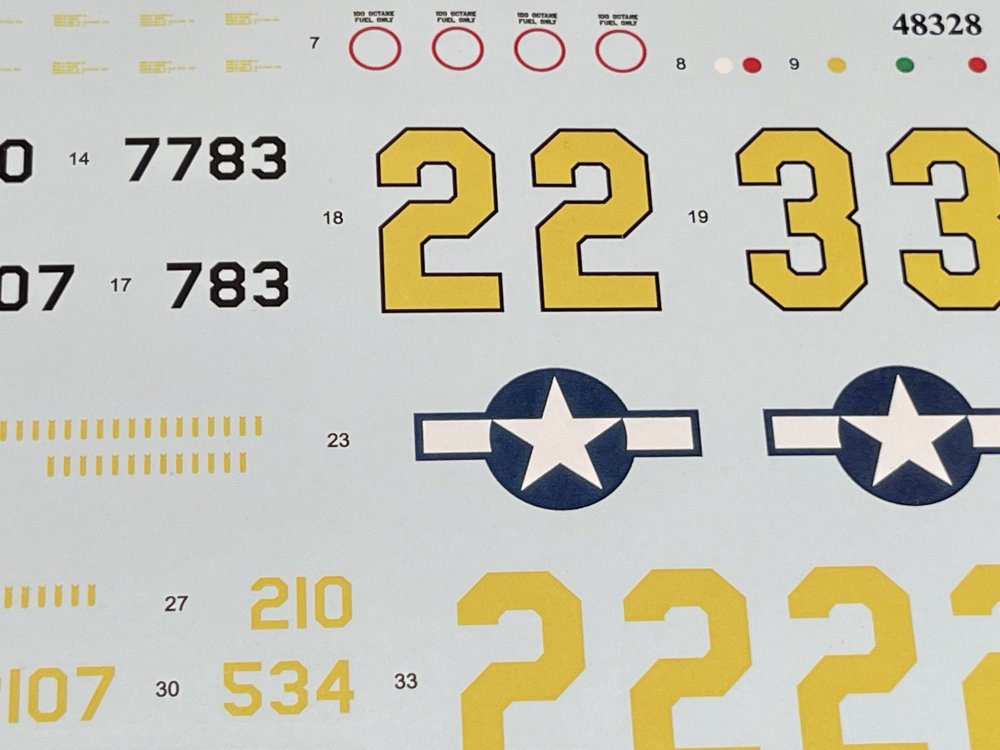
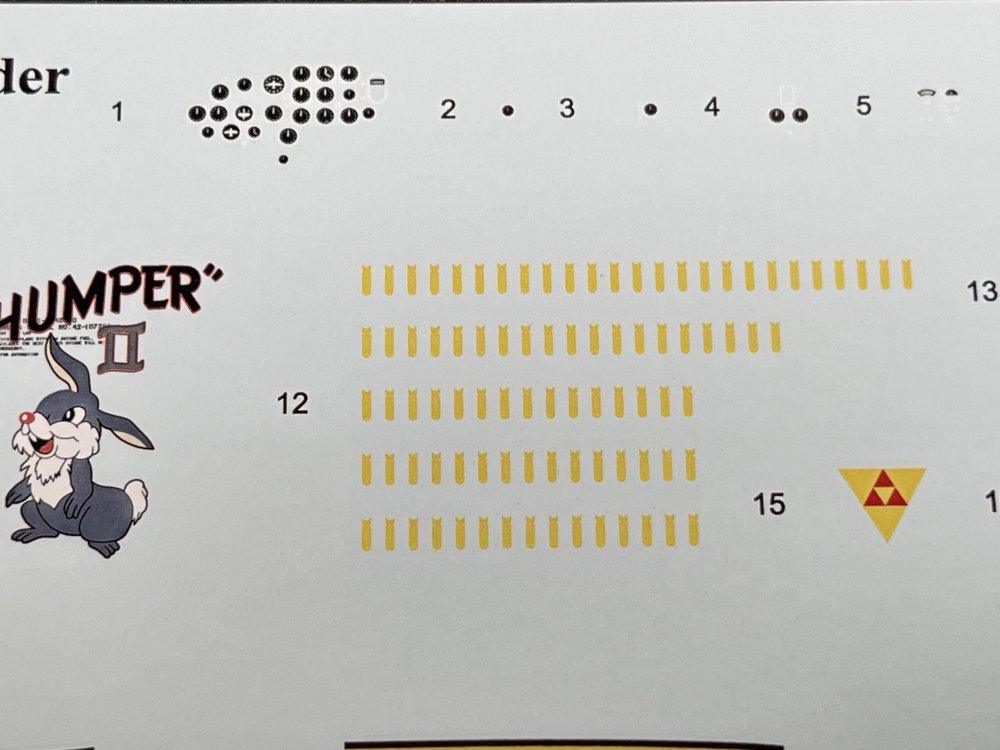
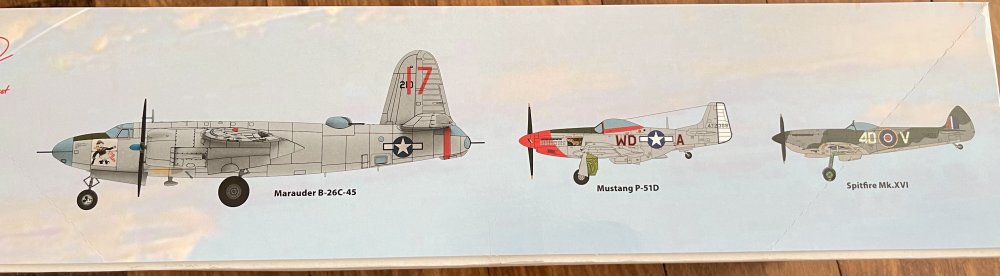
Despite being a combo box, ICM don’t leave the modeler with a single option in the B-26 C but all 3 options:
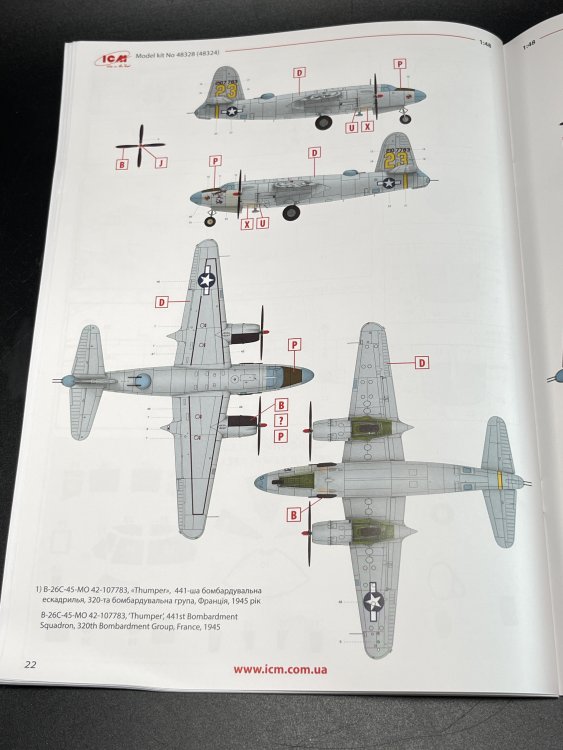
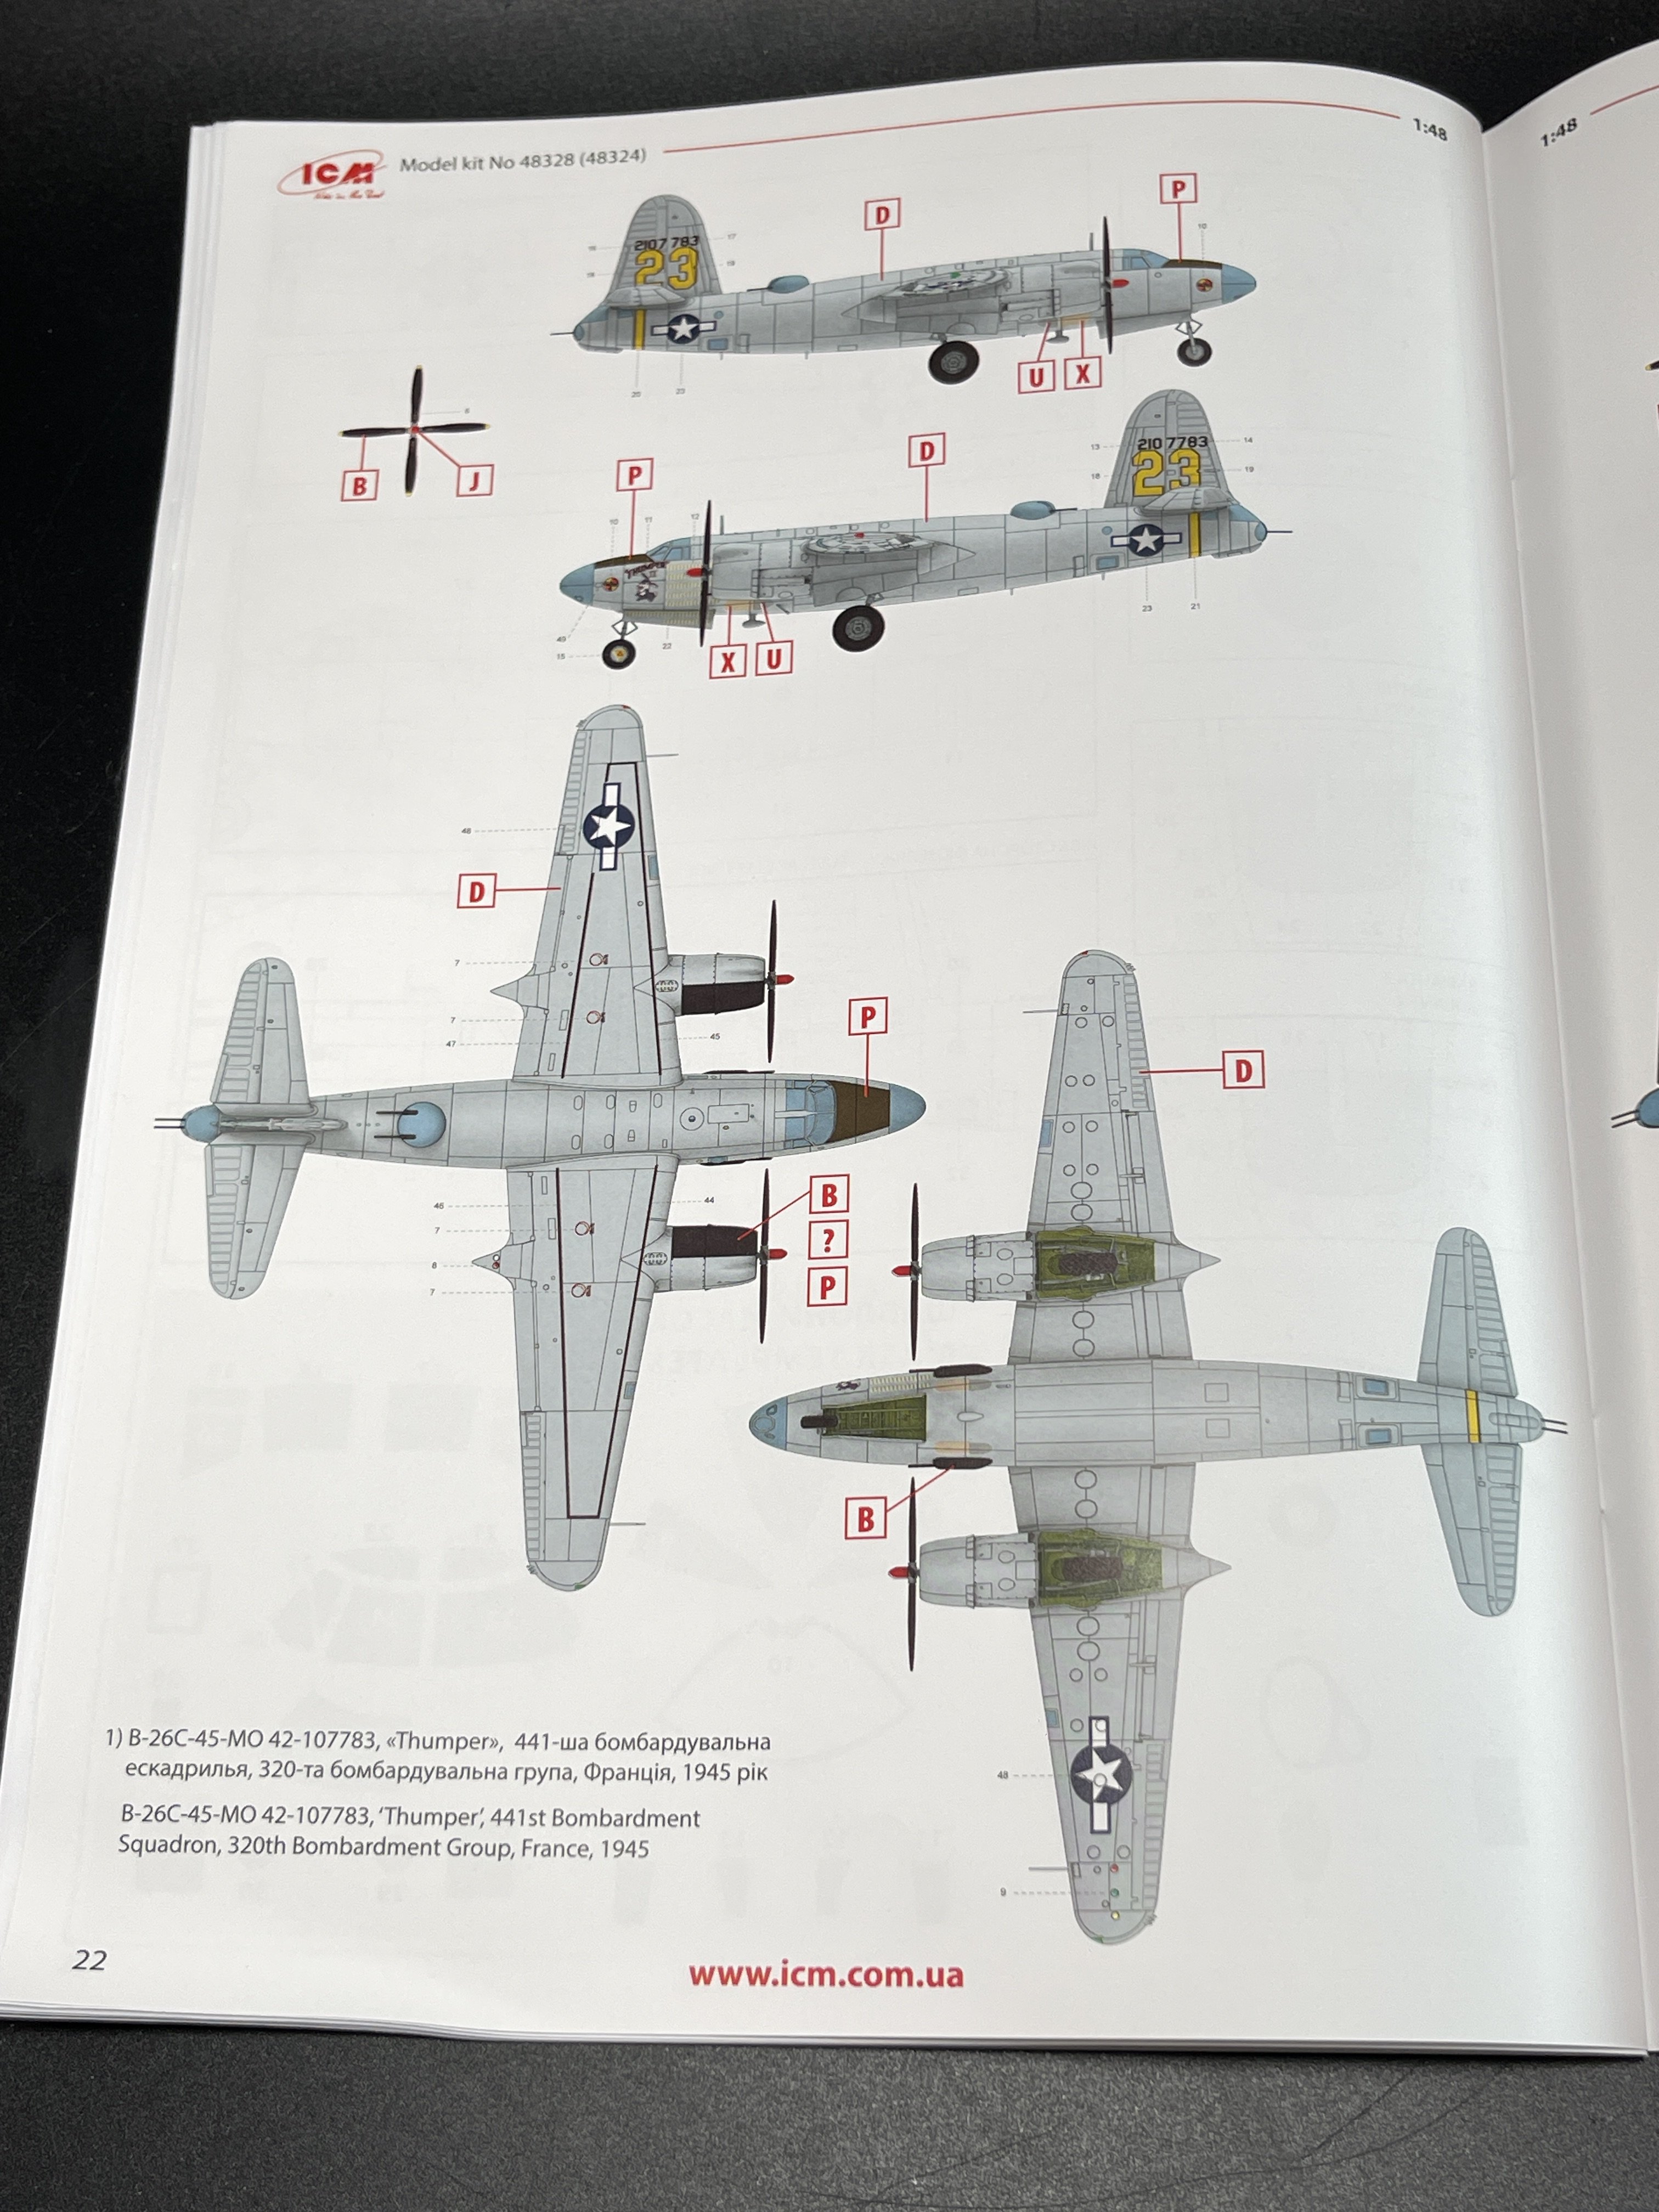
1. B-26 C-45-MO 42-107783 “Thumper”, 441st Bombardment Squadron, 320th Bombardment Group, France, 1945;
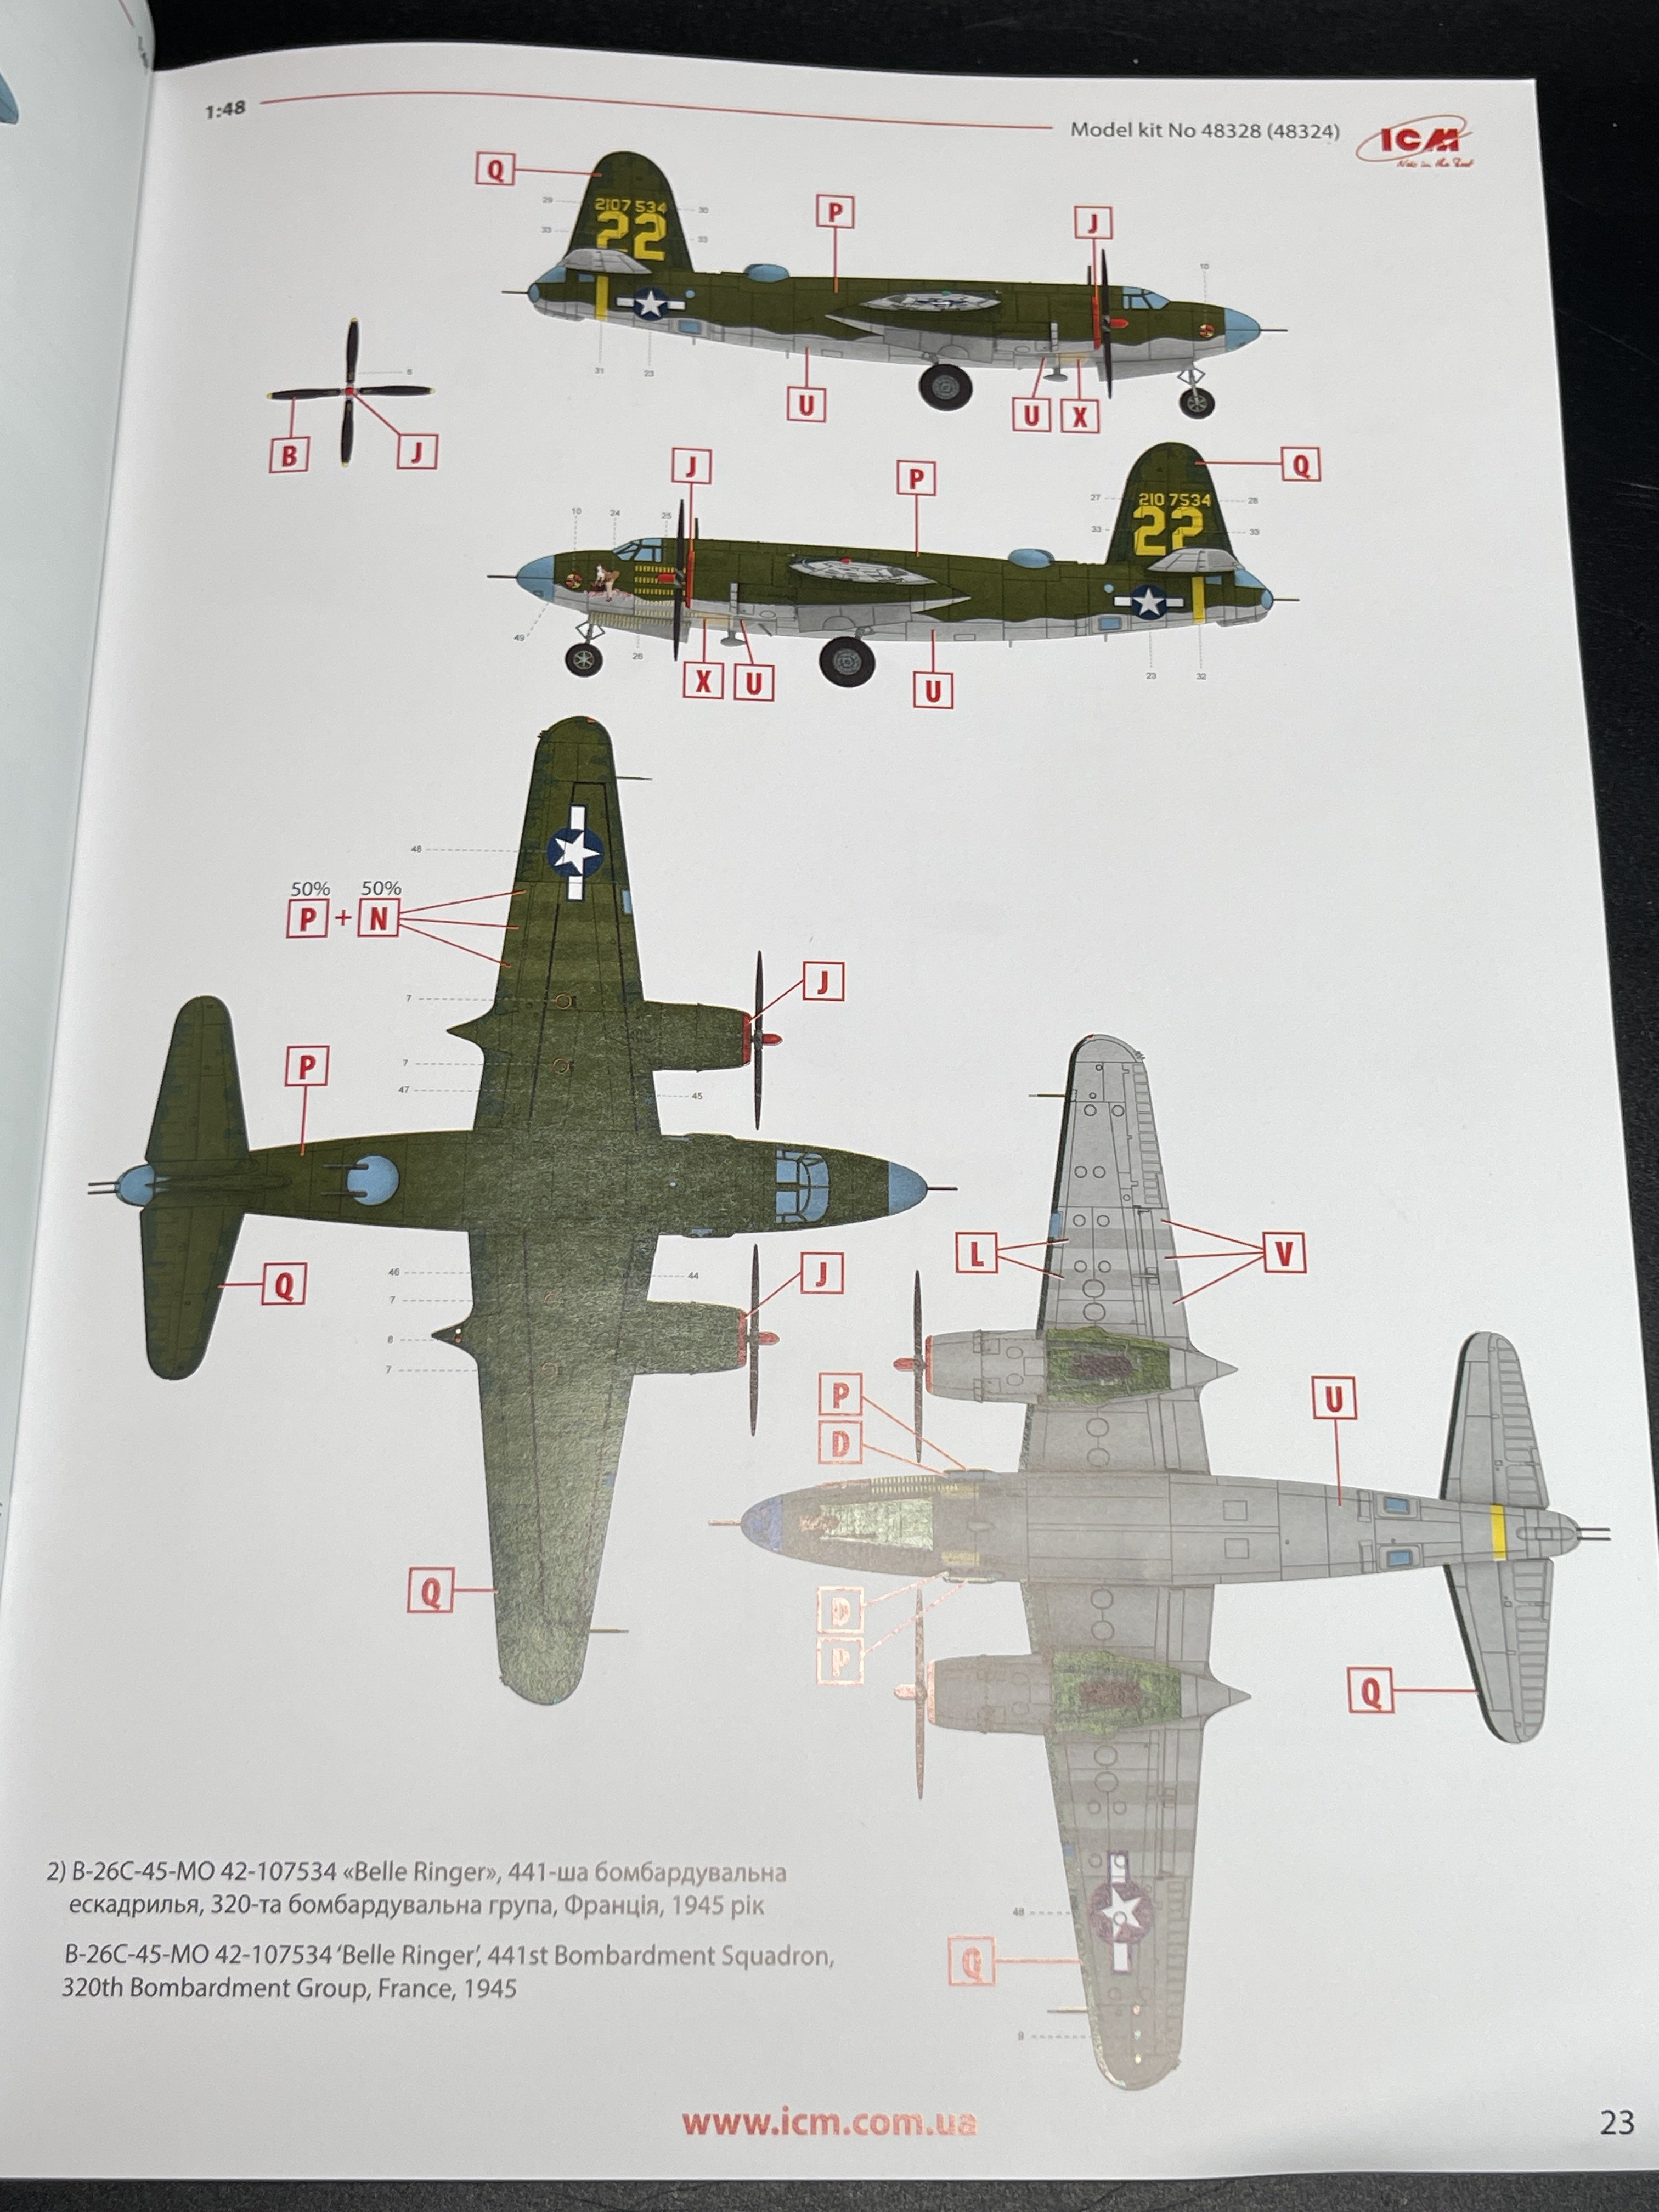
2. B-26 C-45-MO 42-17534 “Belle Ringer”, 441st Bombardment Squadron, 320th Bombardment Group, France, 1945;
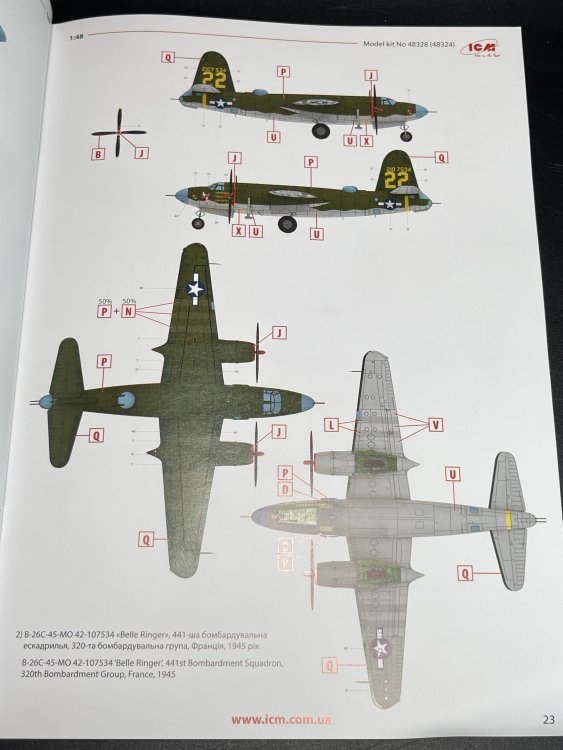
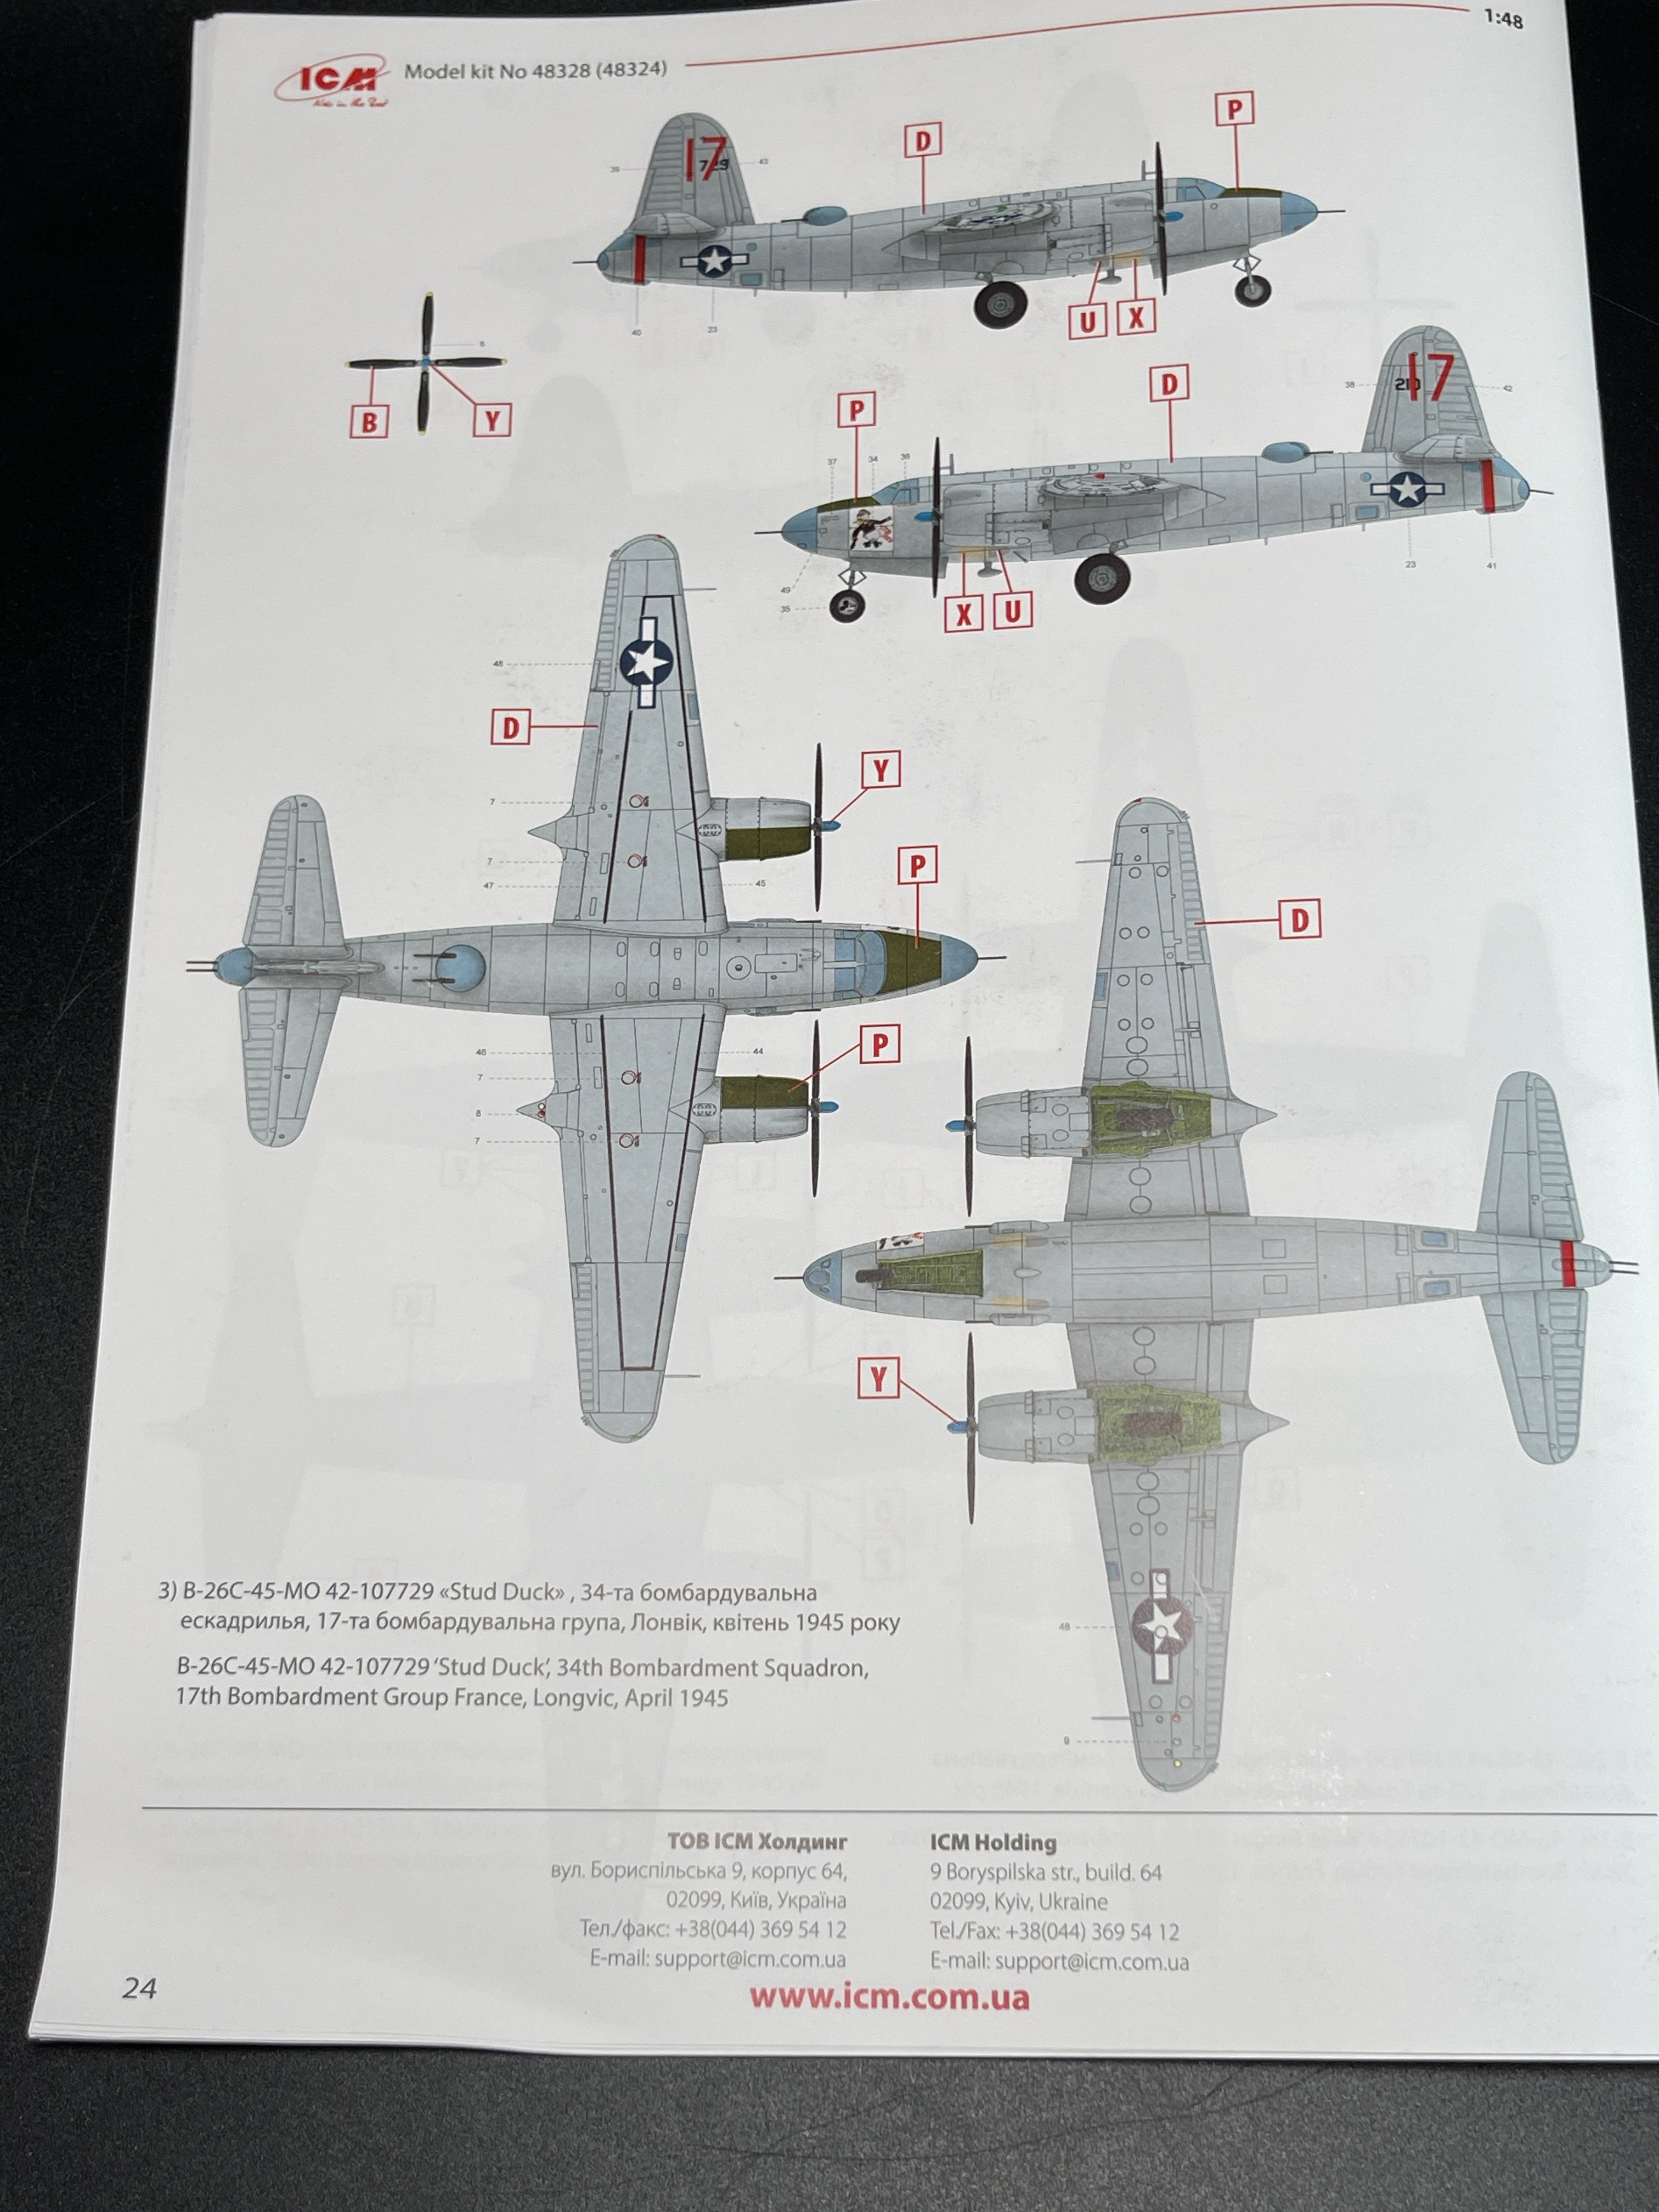
3. B-26 C-45-Mo 42-107729 “Stud Duck”, 34th Bombardment Squadron, 17th Bombardment Group, France, Longvic, April 1945;
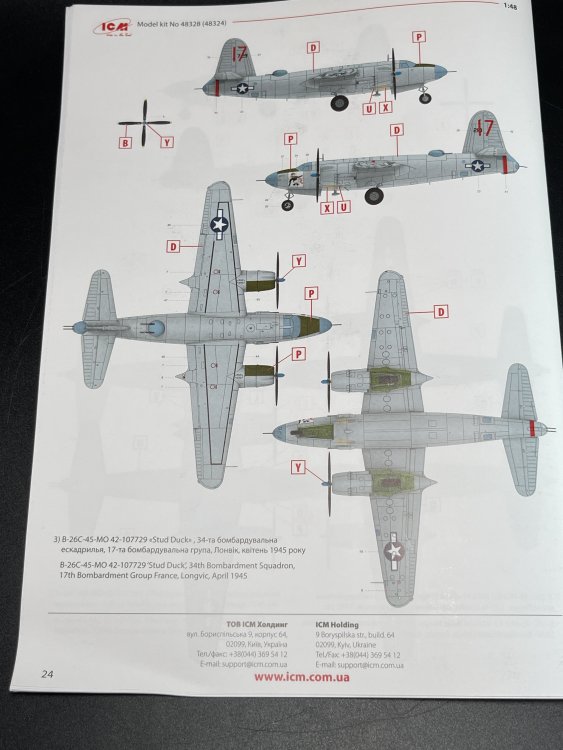
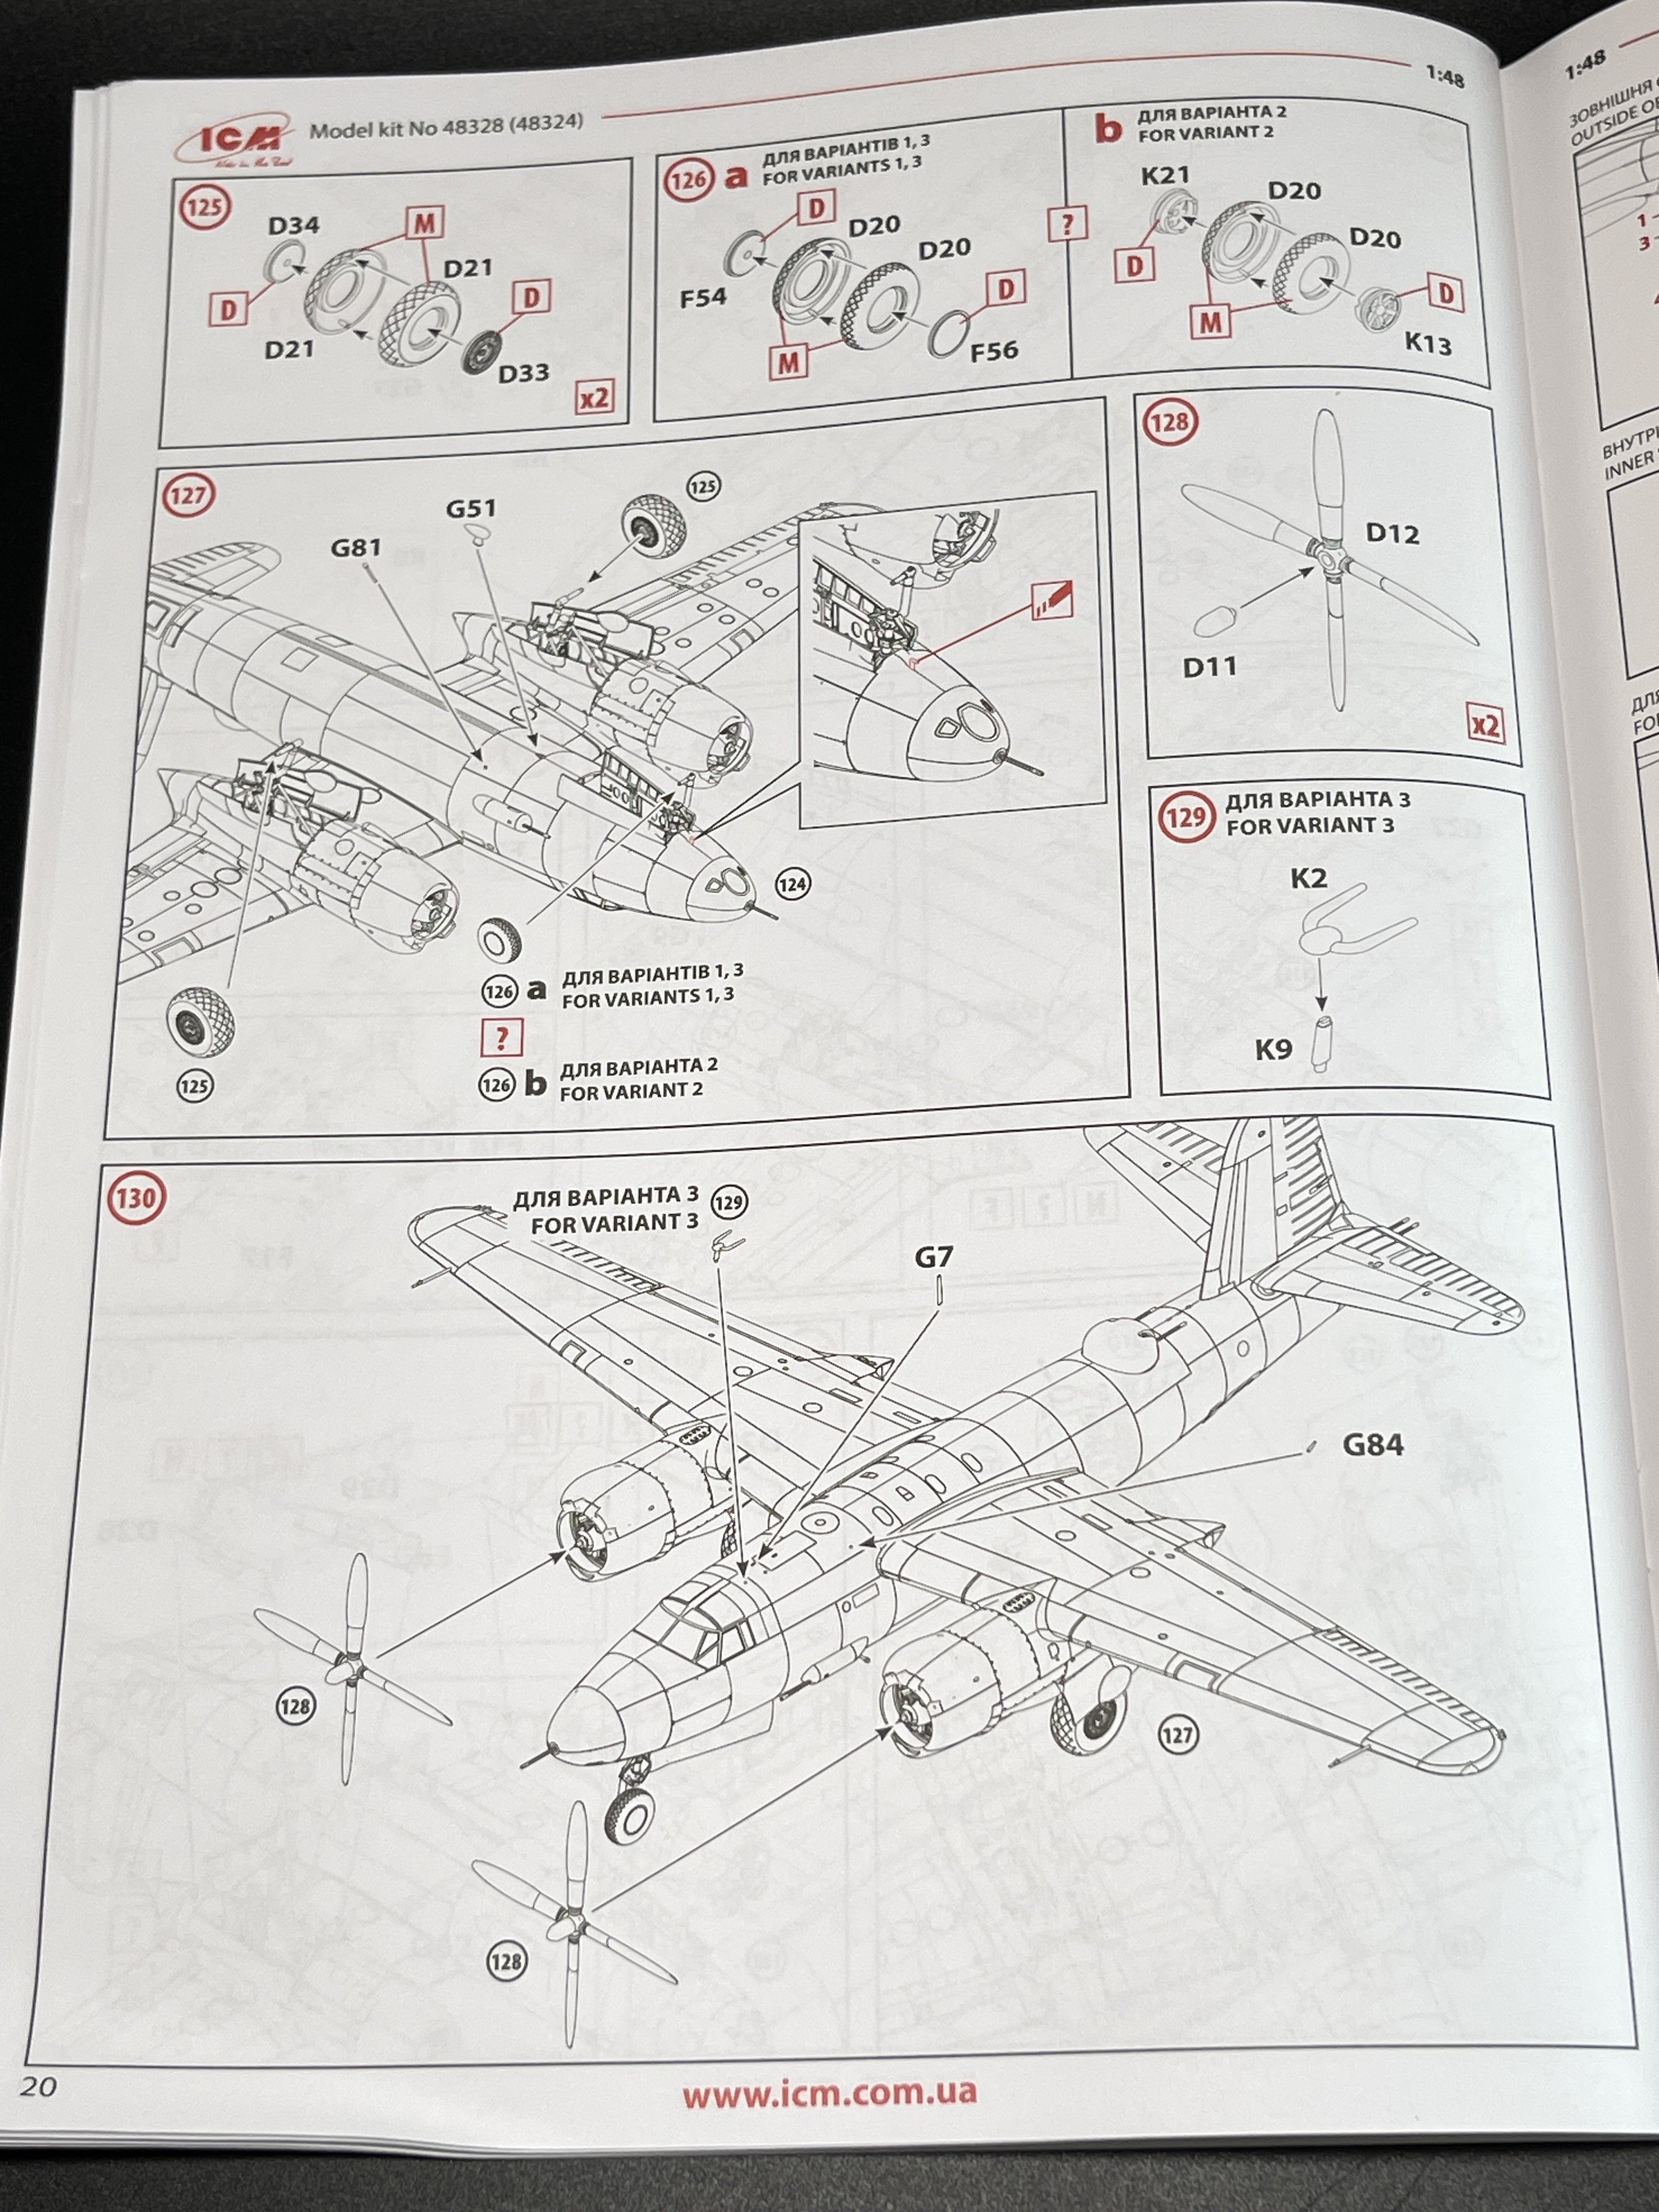
As for the instructions, typical modern ones from ICM with good location parts indication and color references only by ICM colors.
Moving for the little friends, The P-51D and the Spitfire Mk XIV.
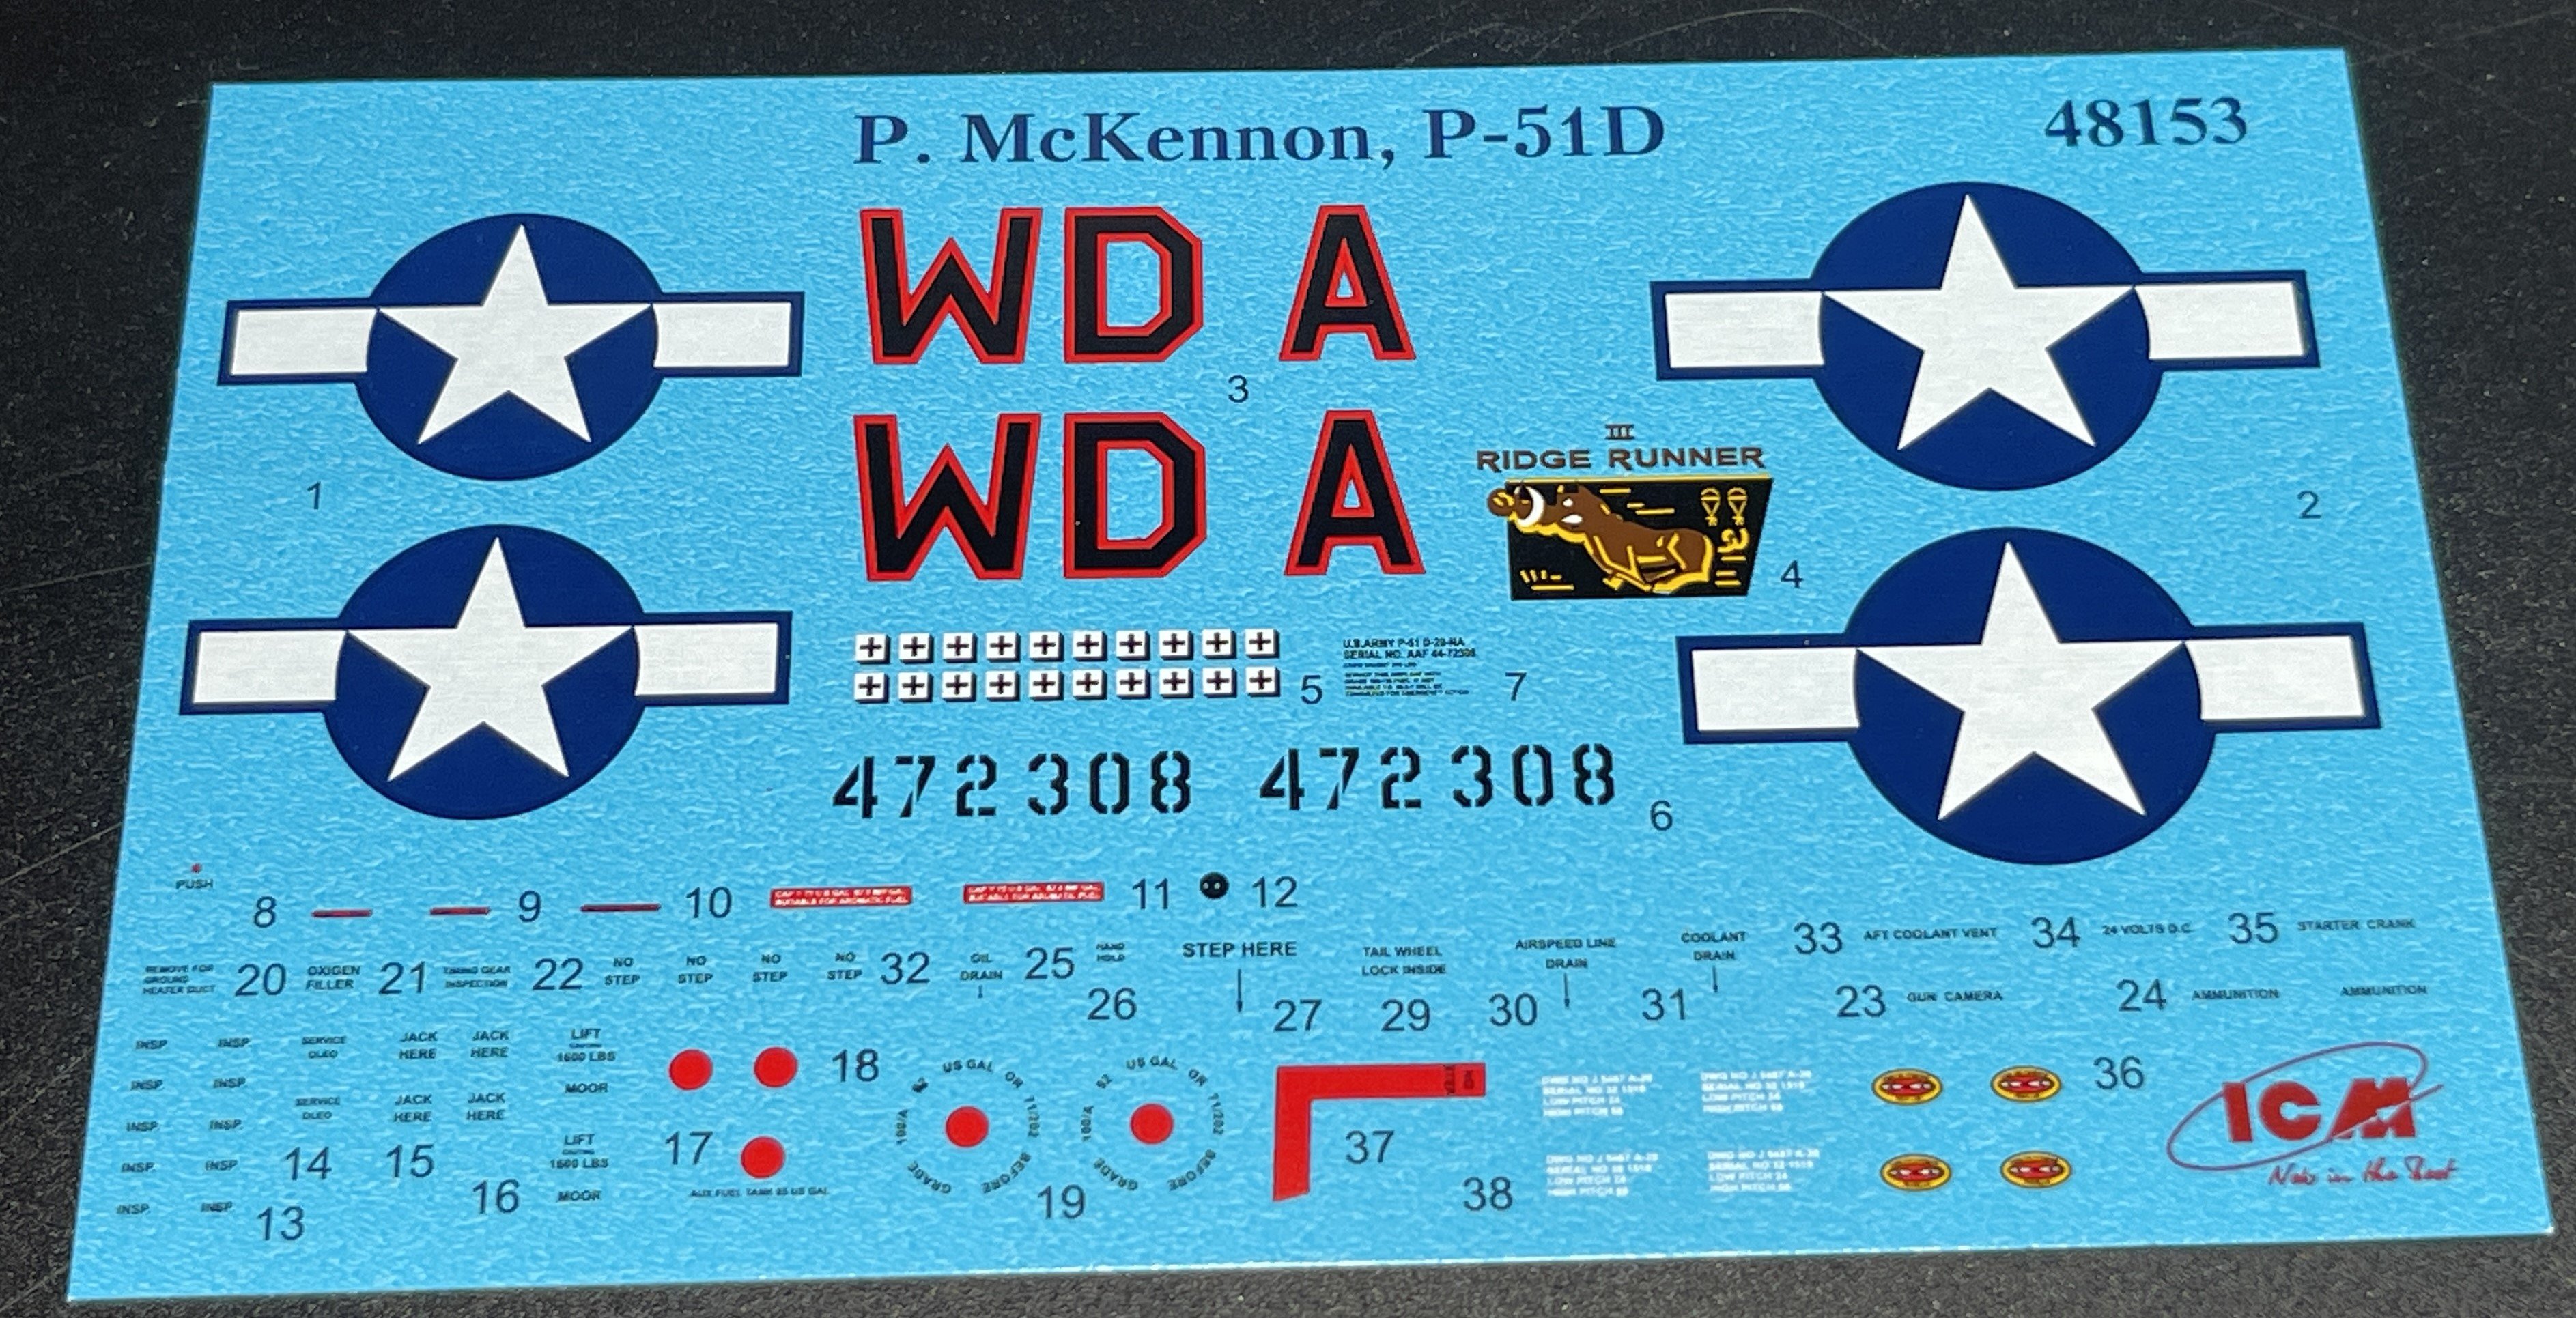
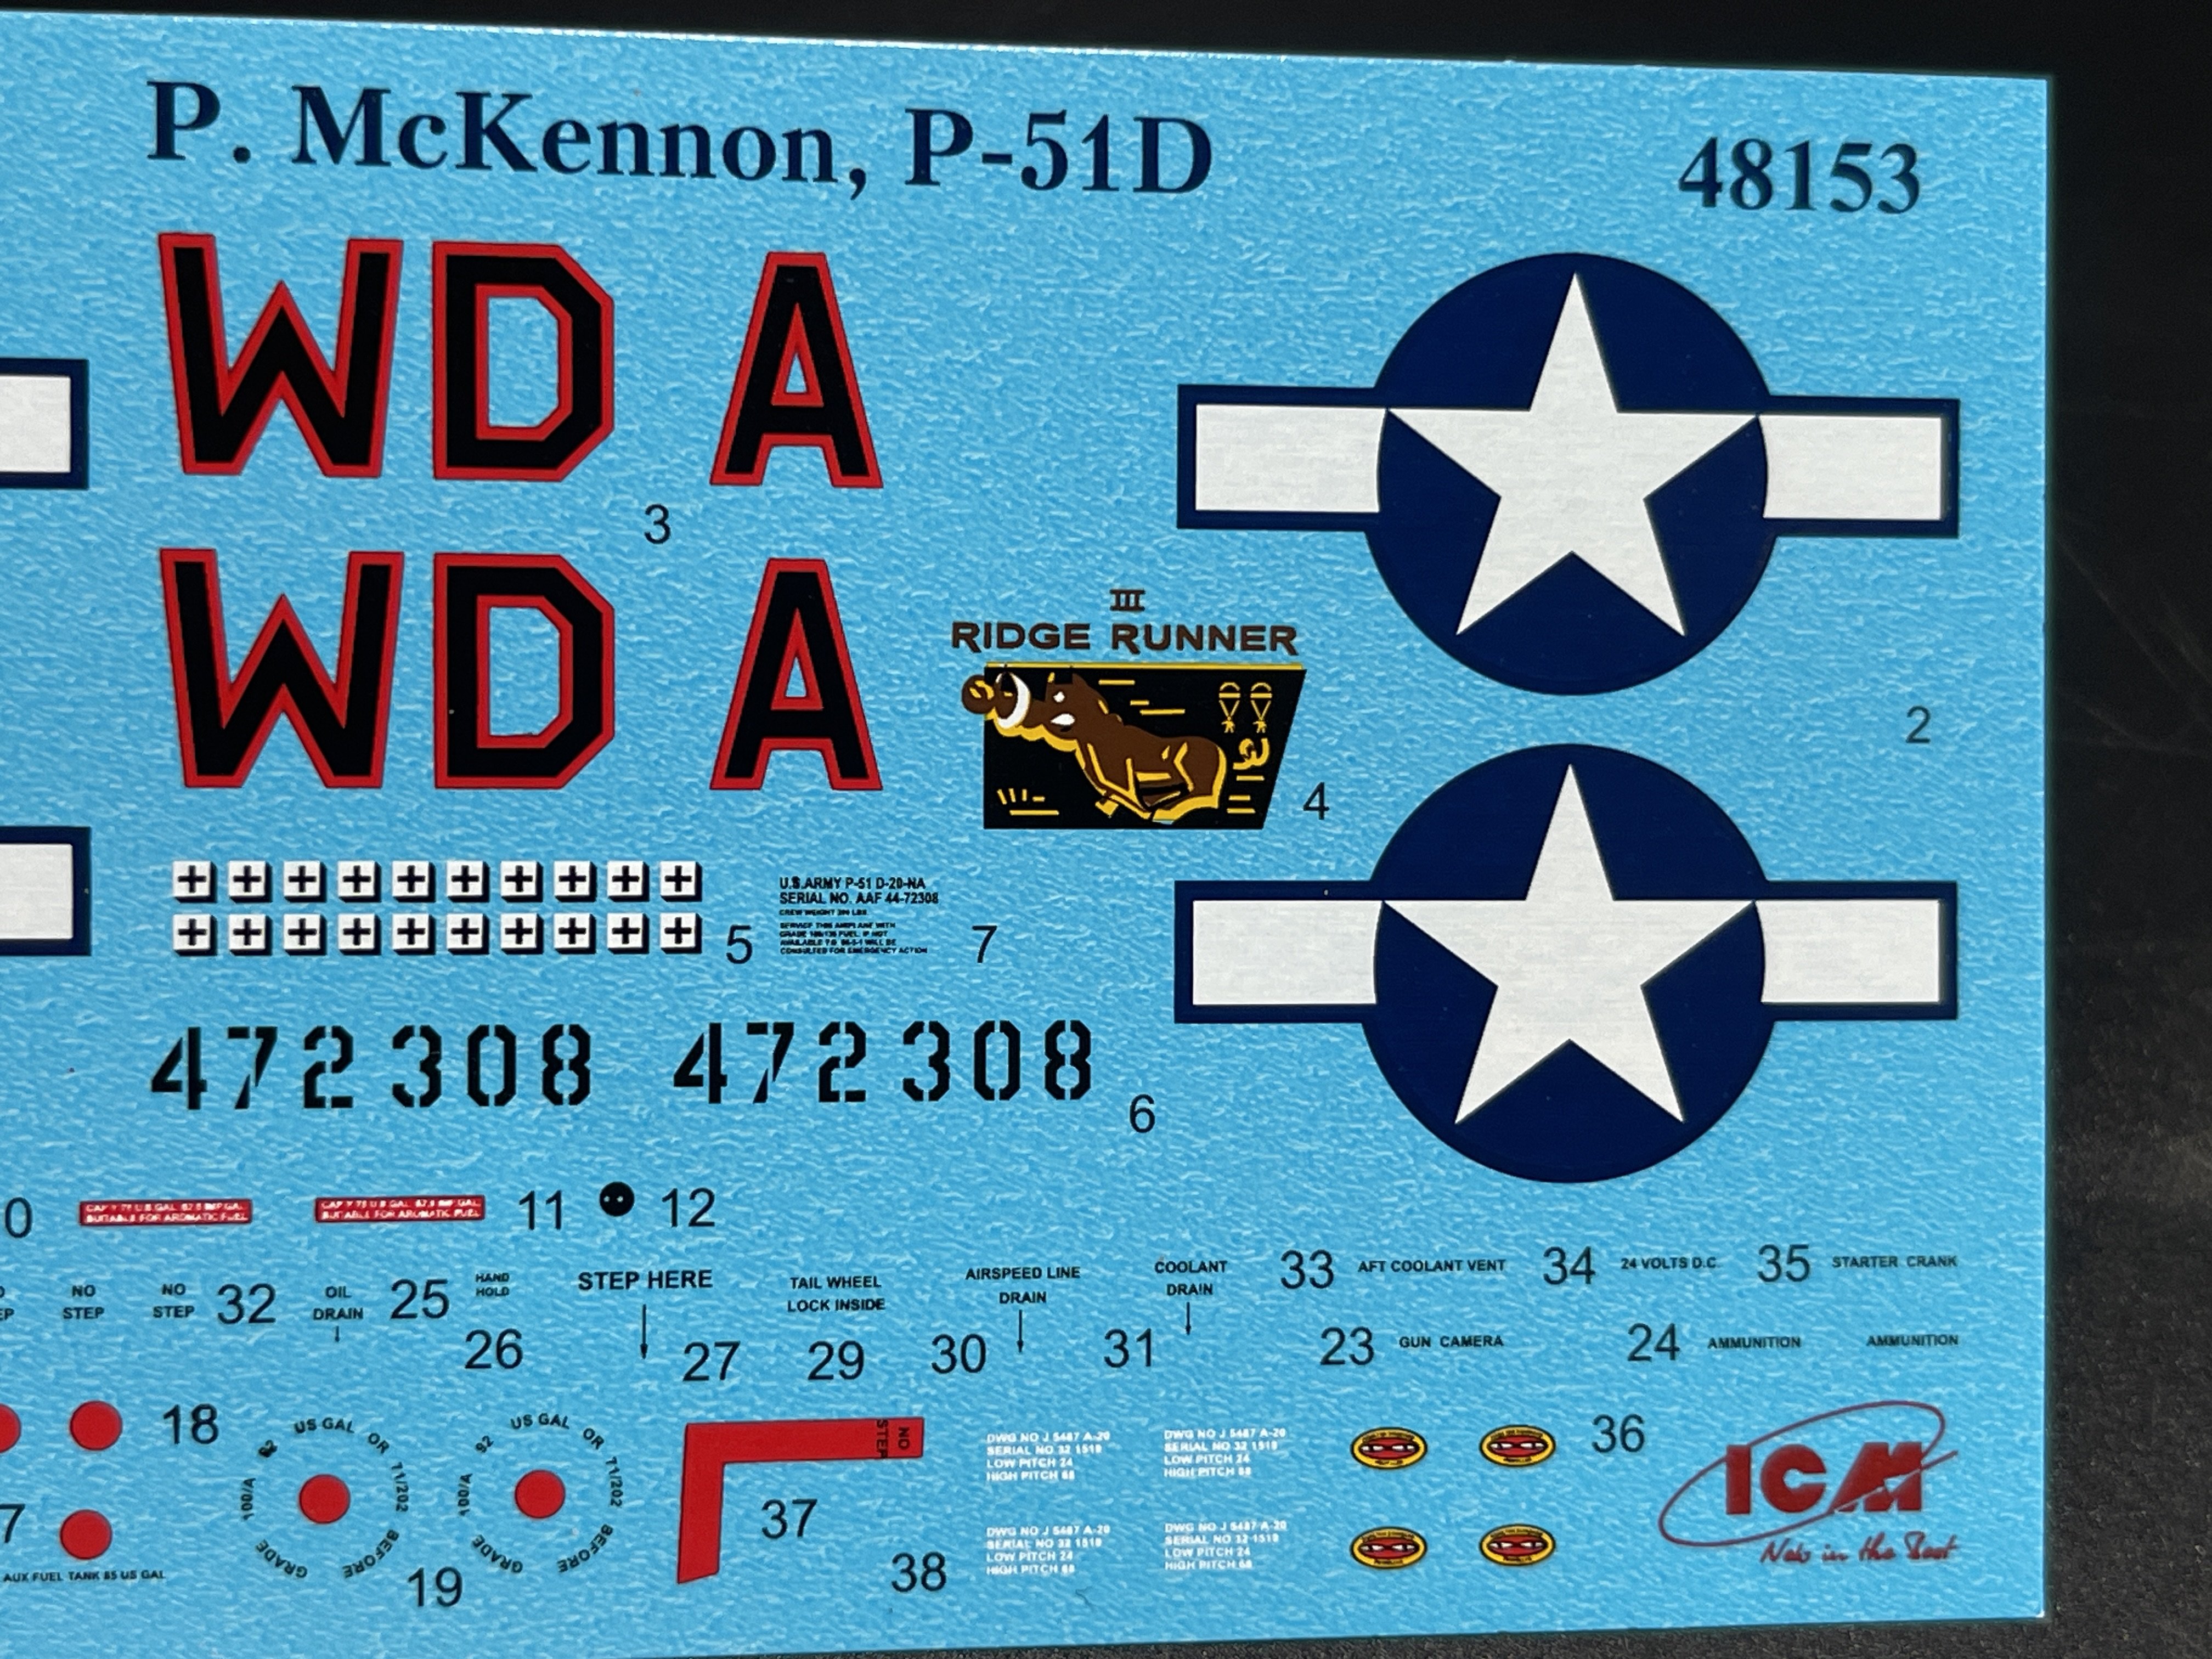
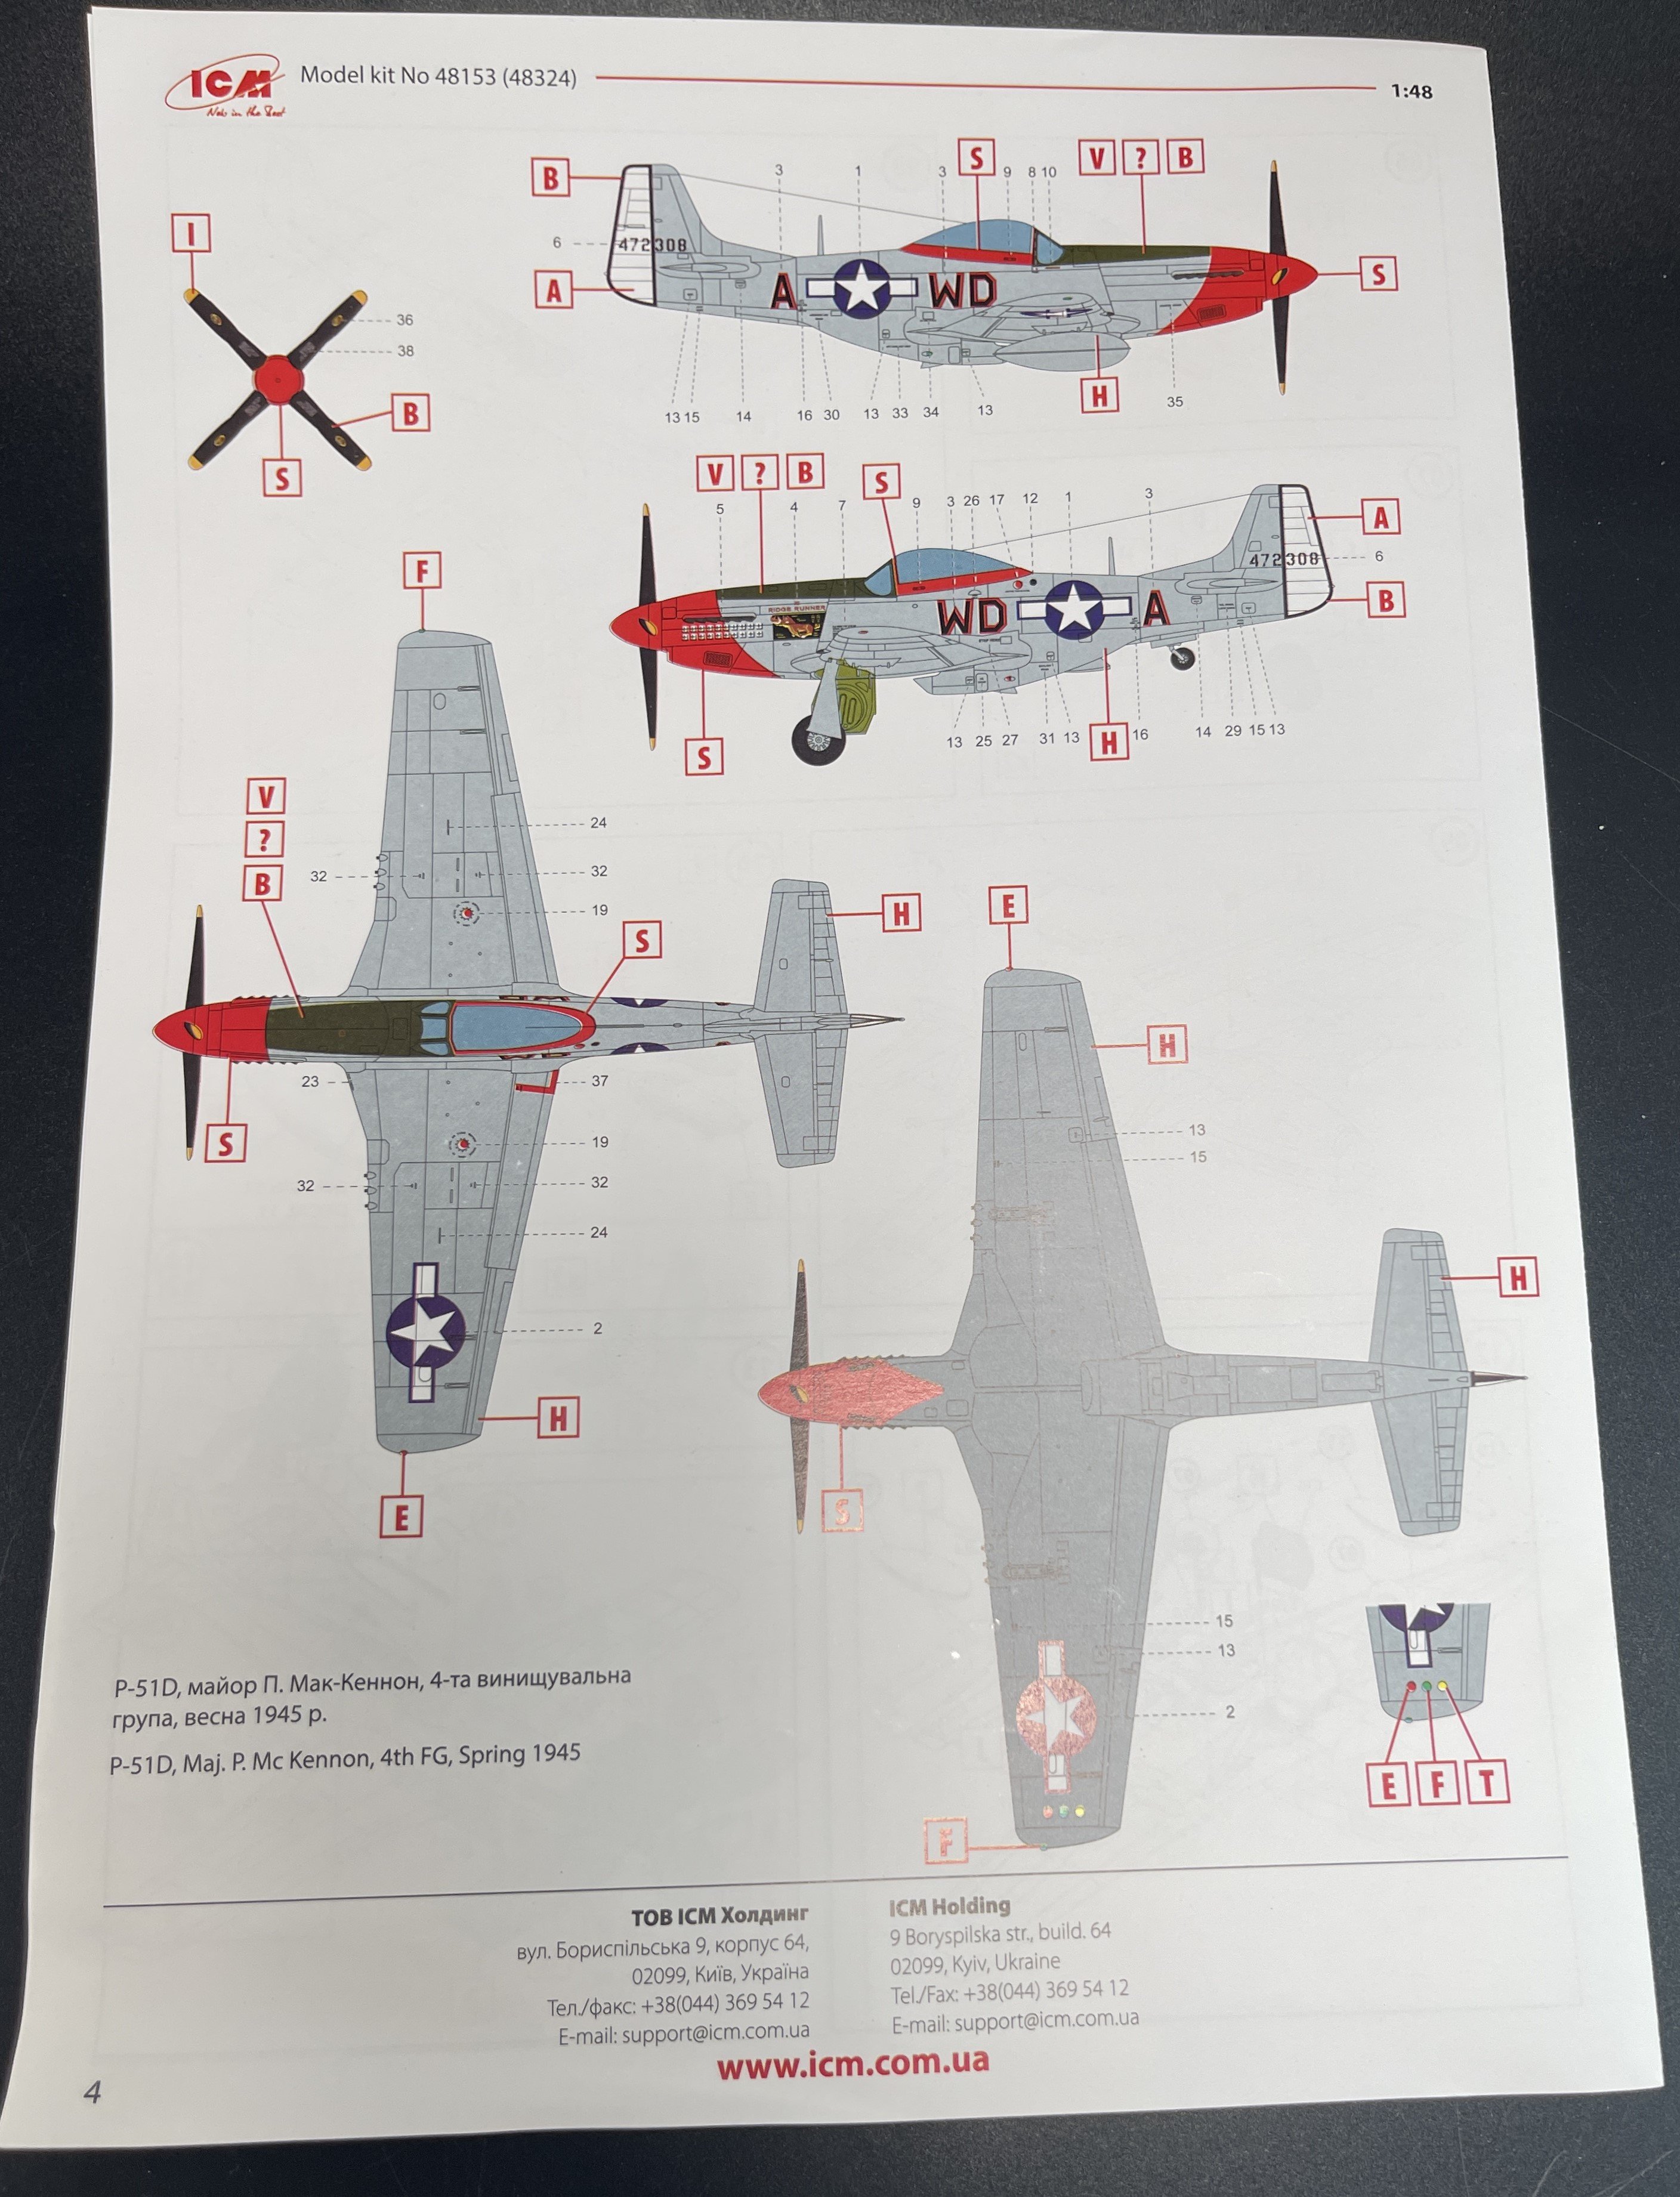
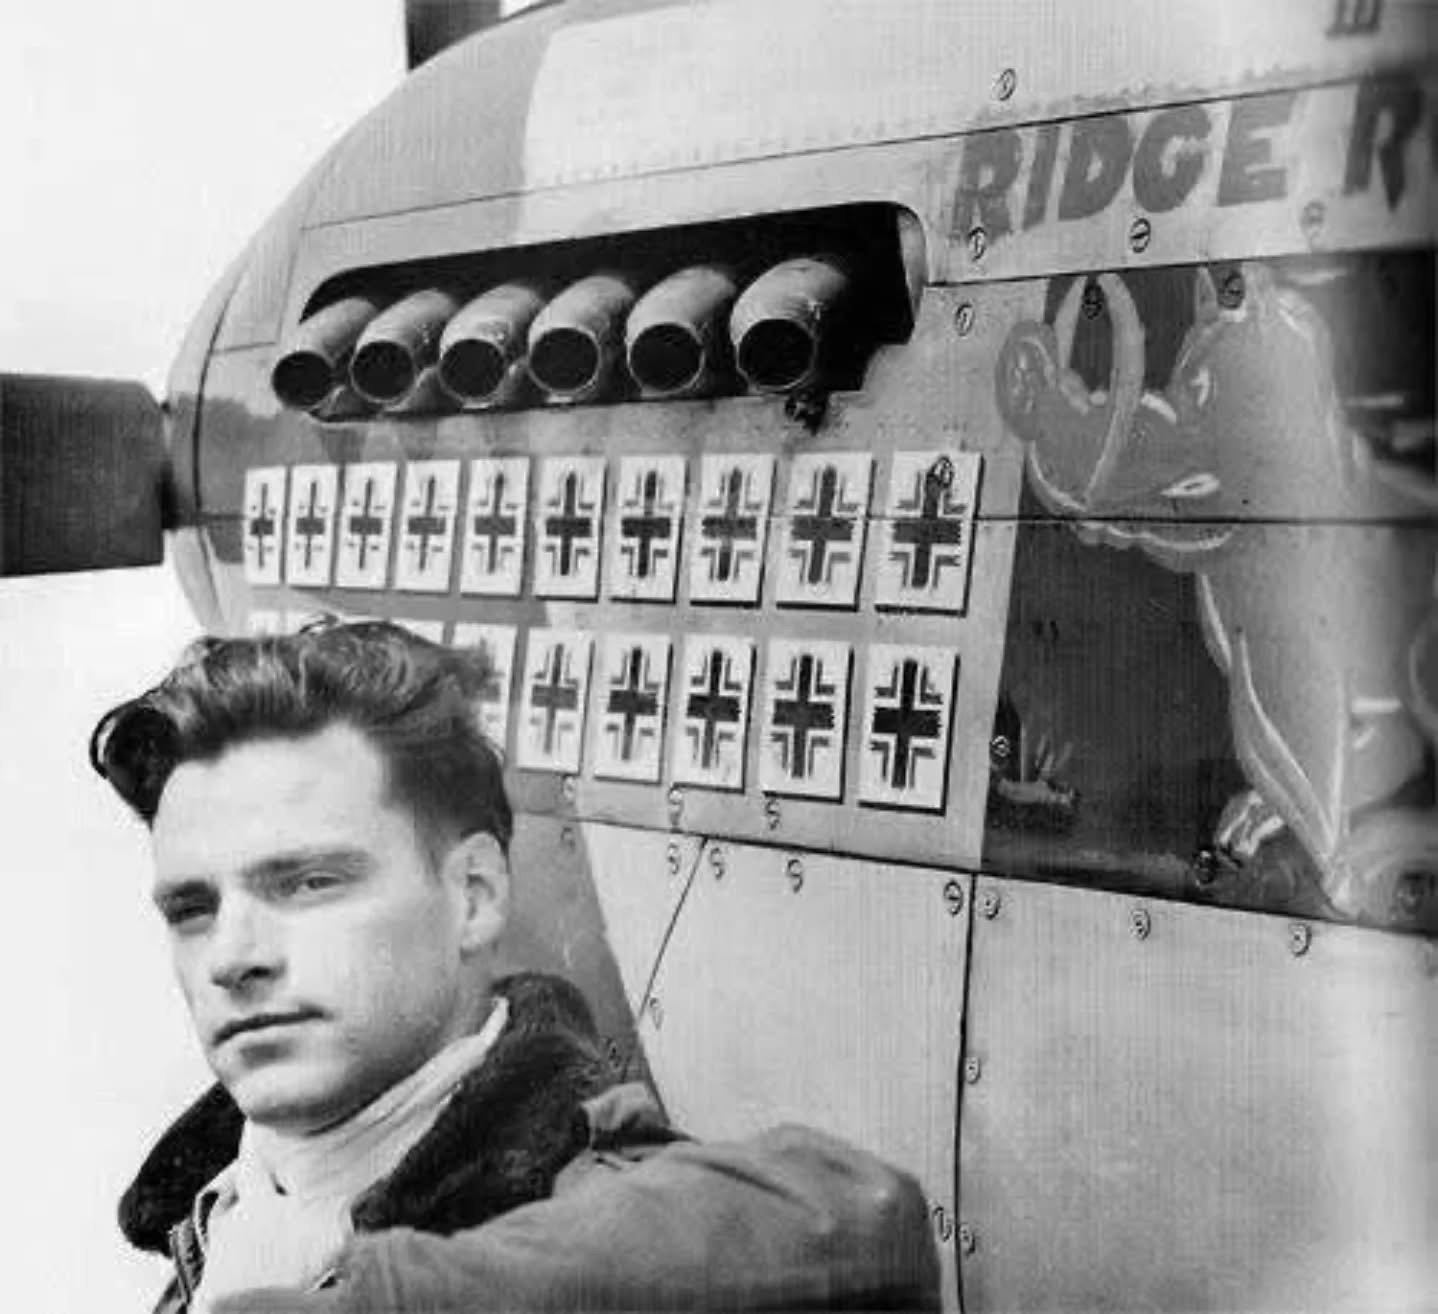
The P-51 only have a small decal sheet with a single scheme. P. McKennon famous “Ridge Runner”
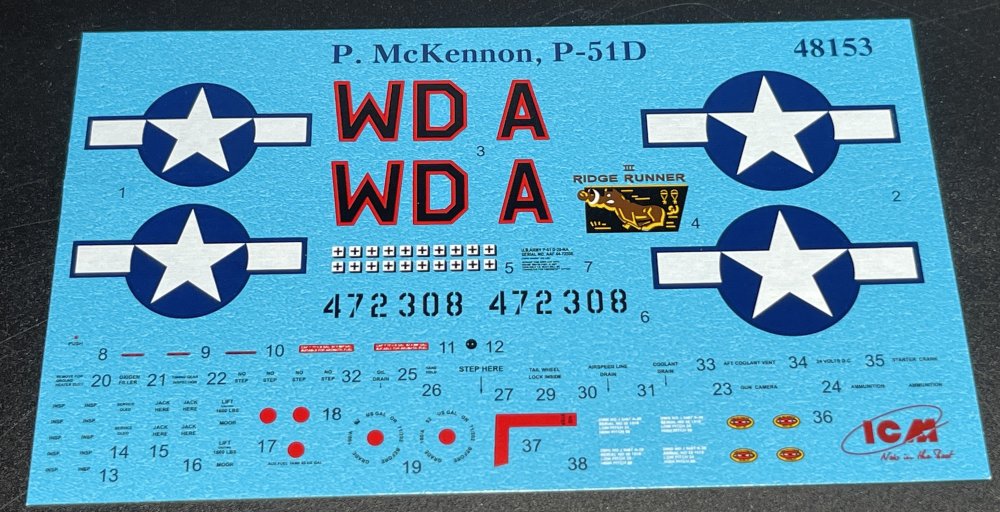


P-51 D , Maj. P. McKennon, 4th FG, Spring 1945

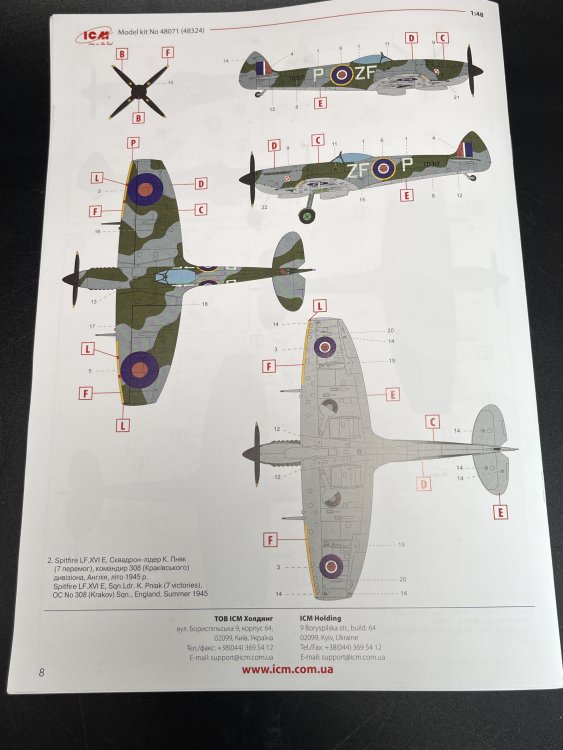
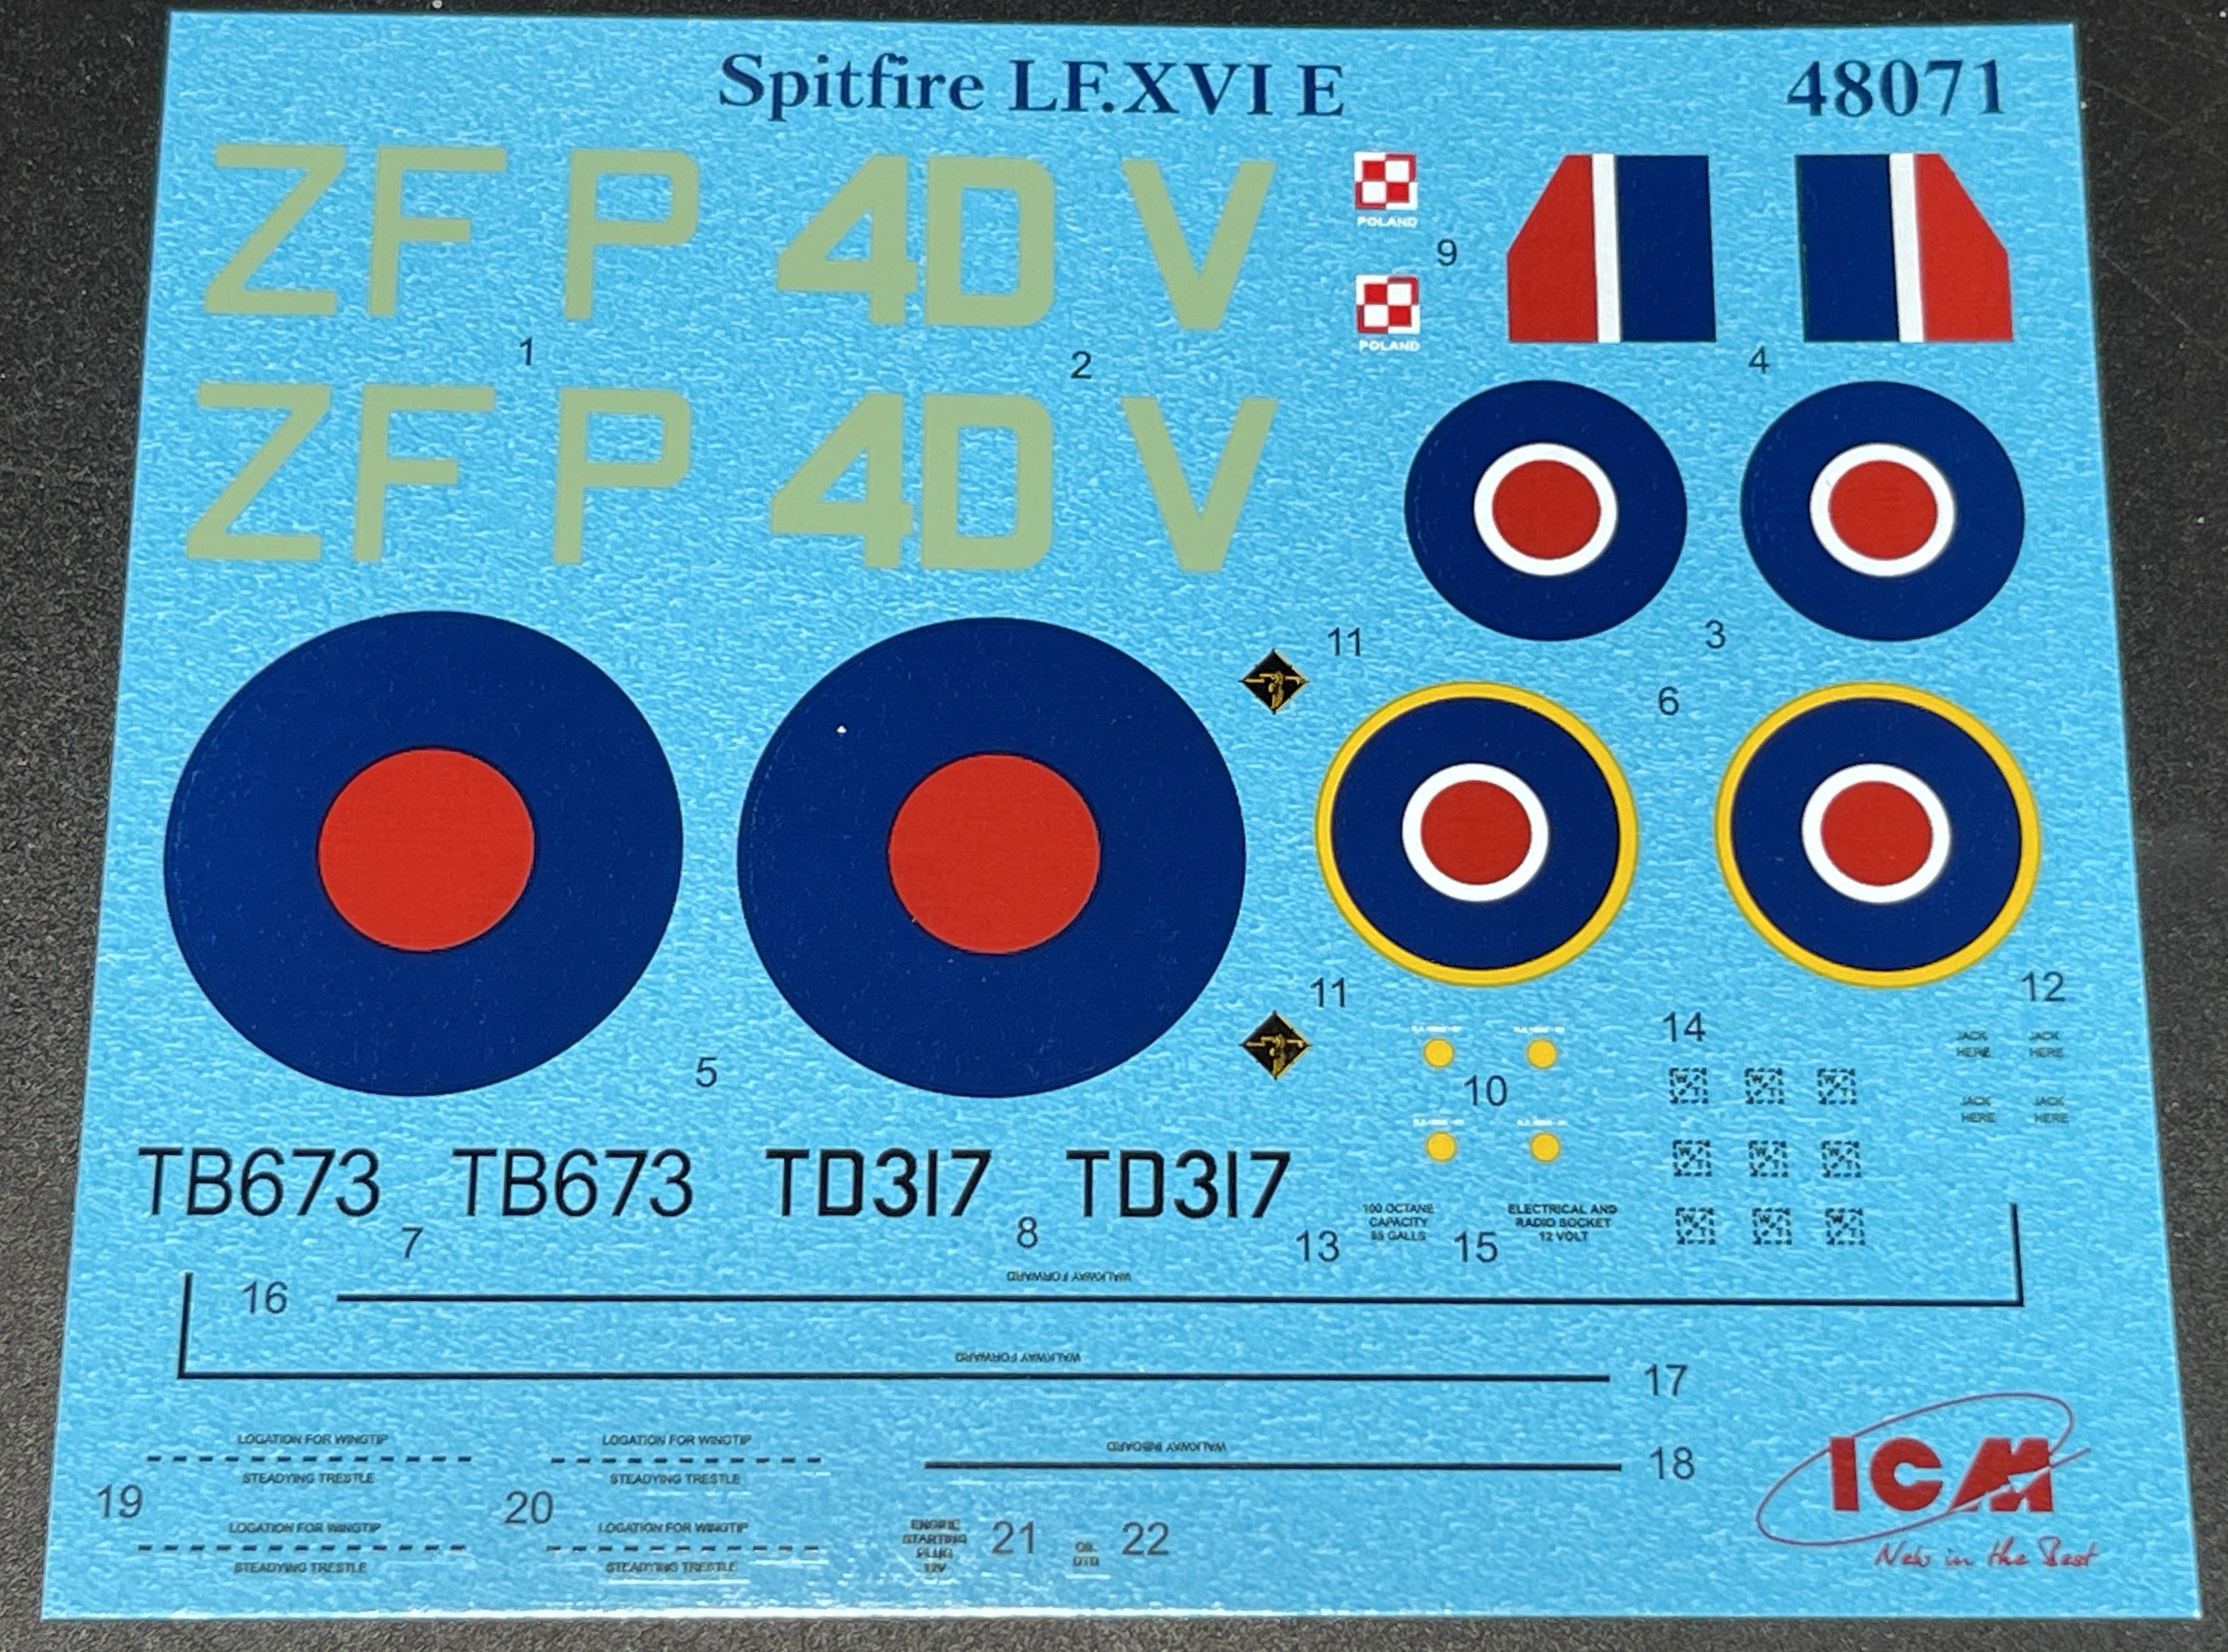
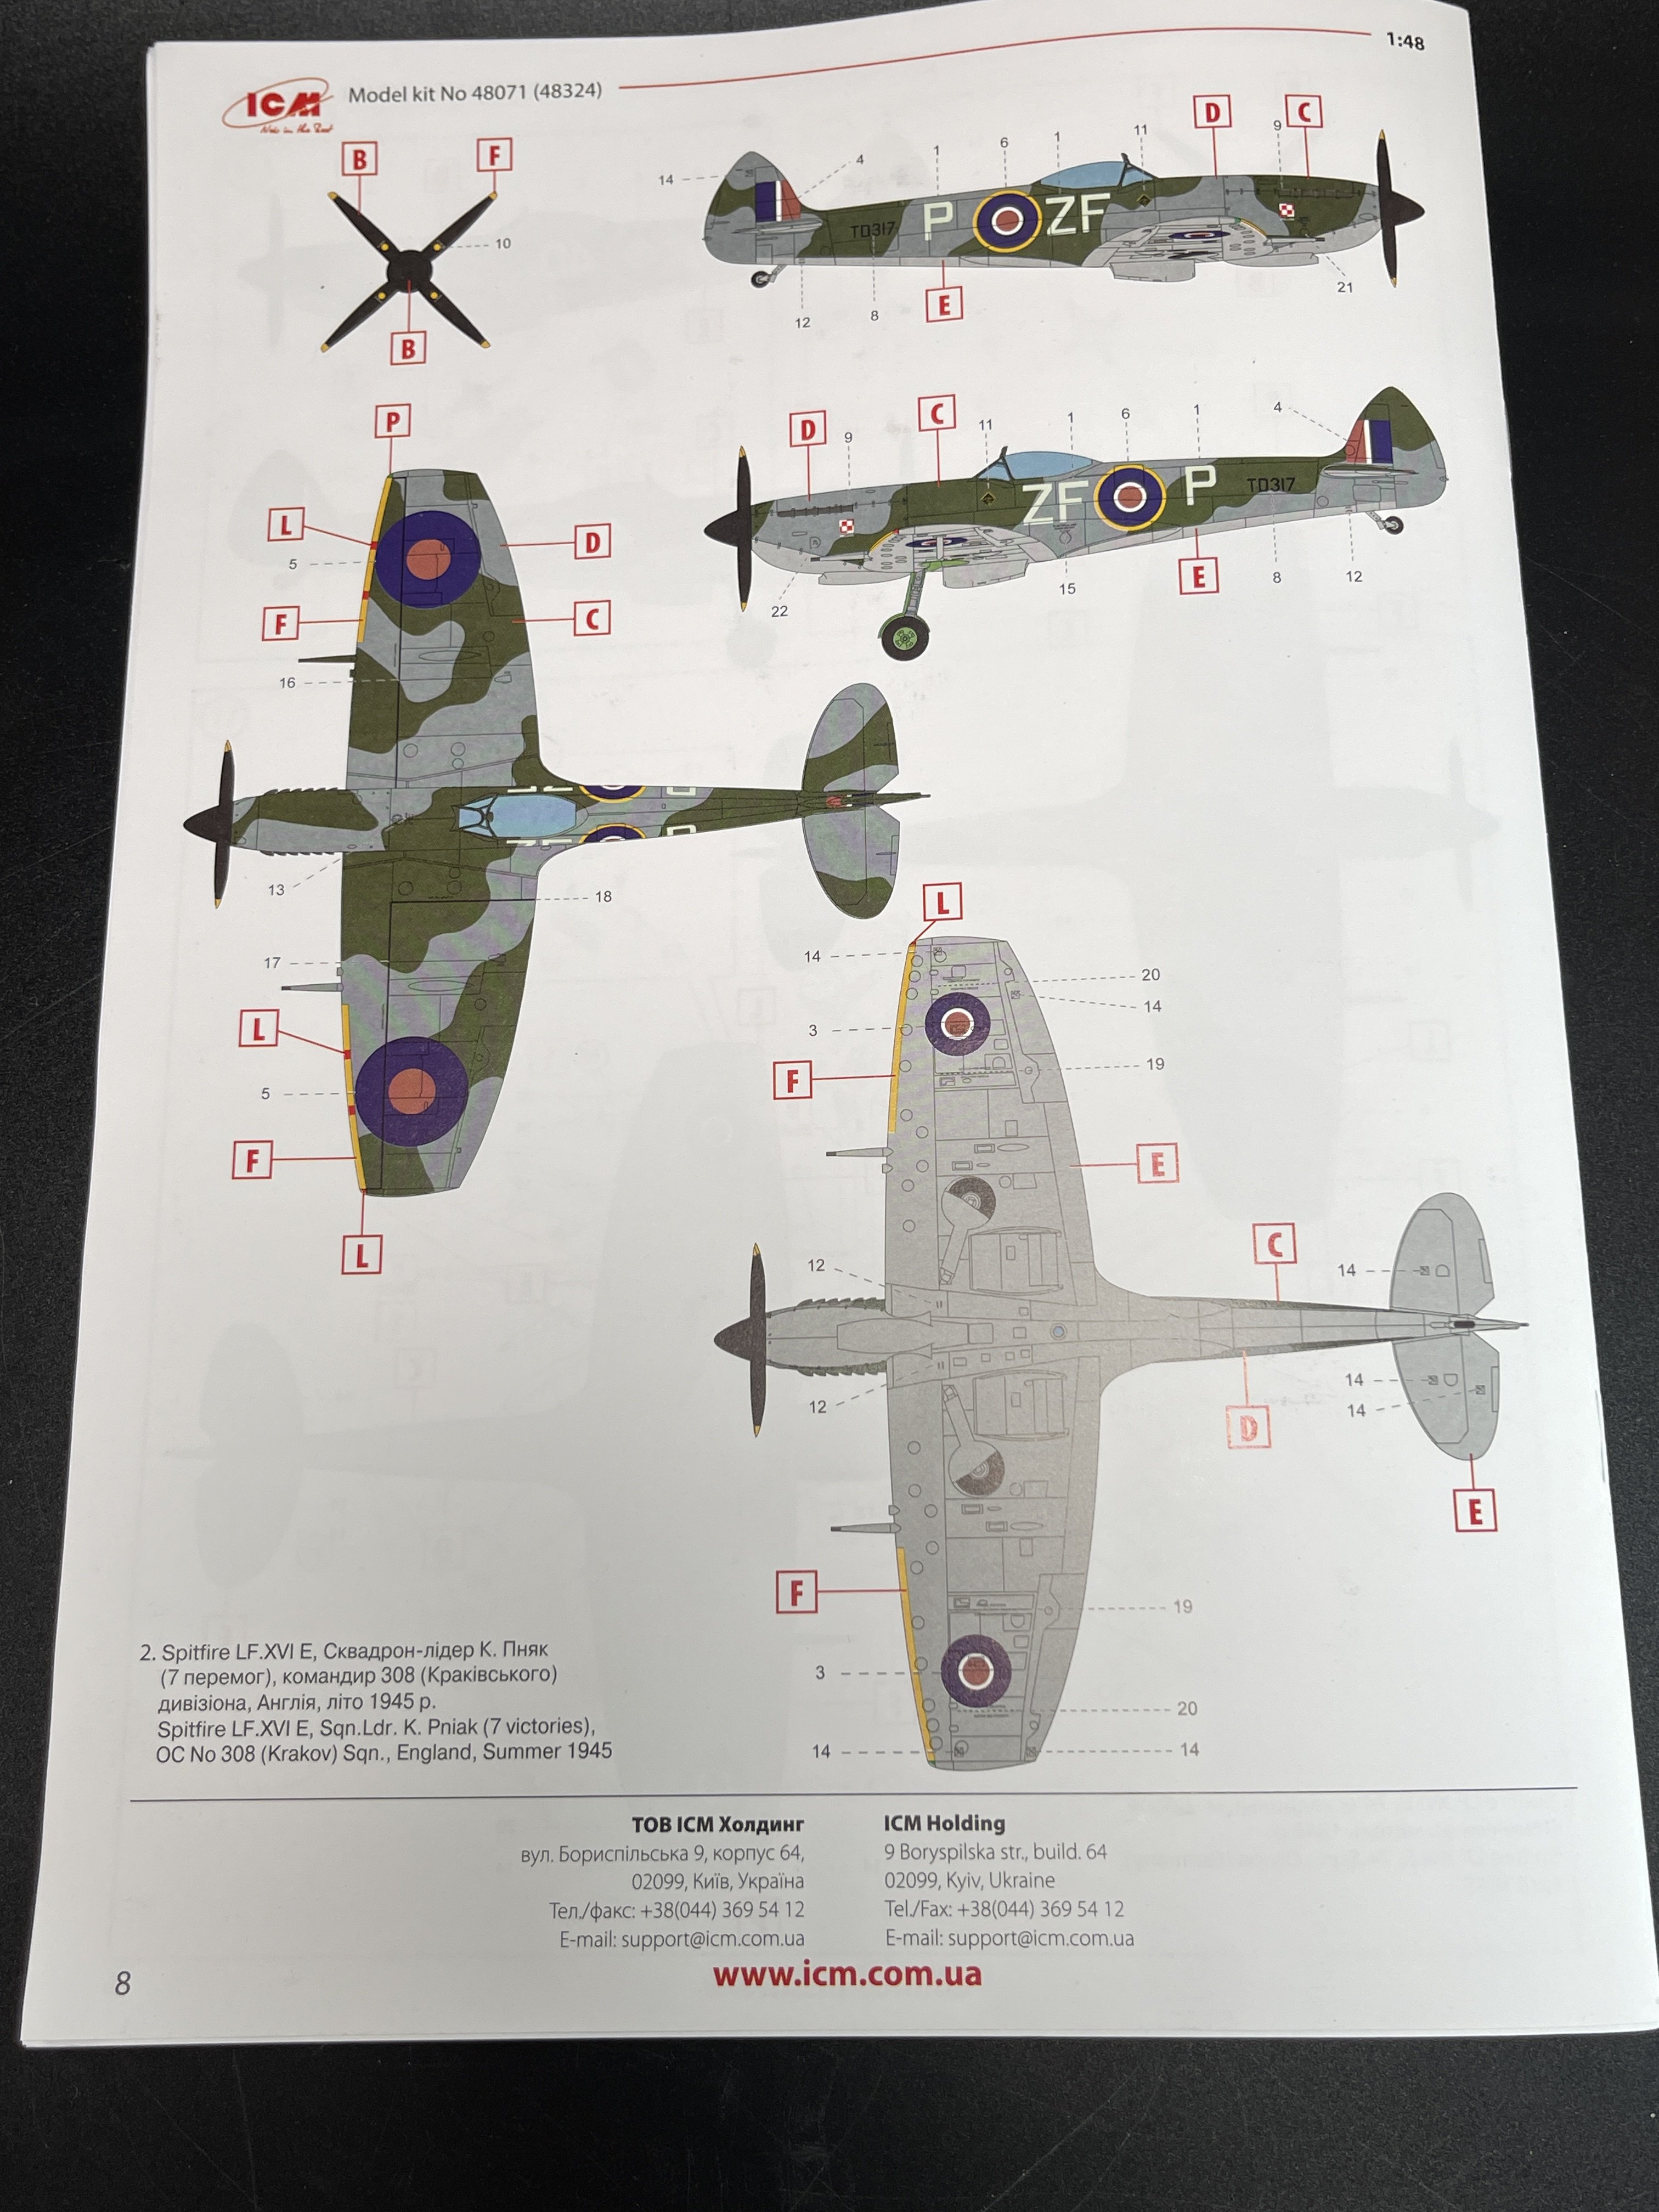
As for the Spitfire, a bigger decal sheet means that you have two schemes:

- Spitfire LF. XVI E, 74 Sqn., Drope, Germany, April 1945.
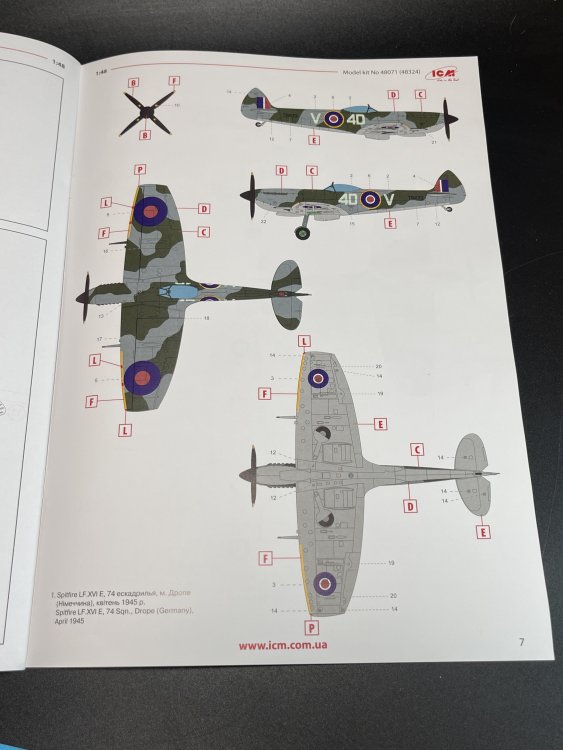
- Spitfire LF. XVI E, Sqn. Ldr, K. Pniak (7 victories) OC n.º 308 (Krakov) Sqn. England, Summer 1945
Conclusion
Priced around €80–€90, the “Conquerors of Europe’s Sky” set offers a substantial value, especially considering the inclusion of three aircraft models being the new B-26 with 3 decals options. A single B-26 cost almost the same thing.
This set, consisting of two older models (Spitfire/Mustang) and a brand-new kit (Marauder), is a beautiful tribute to all those pilots who risked their lives in WWII. Lest we forget!
Highly recommend
My truly thanks to ICM for making this combo box!!!

-
2
-
-
On 6/19/2025 at 12:59 PM, RalphSarc said:
Fran I had forgotten you lived in Porto Portugal! We were there last September on a river cruise. Absolutely loved the city and it’s people!!
Ohhhh, we could have some beer or lunch!!!
But Its very good to know that you loved my home city!!!
-
2
-
-
Great review and well explain the differences between the B and G version.
-
1
-
-
For me, the best! I have mine a few years now, and its the only airbrush I have for all work and works like charm!
-
2
-
-
Woooow... fantastic build and display.
-
1
-
-
-
Lovely work!!!
Pelase keep posting!!
-
2
-
-
Nice to see you back!!
-
1
-
-
Some time as passed... Any news on this big bird?
-
1
-
-
Yes.... probably lets goes my chance of getting one Fw-189!!!

-
2
-
-
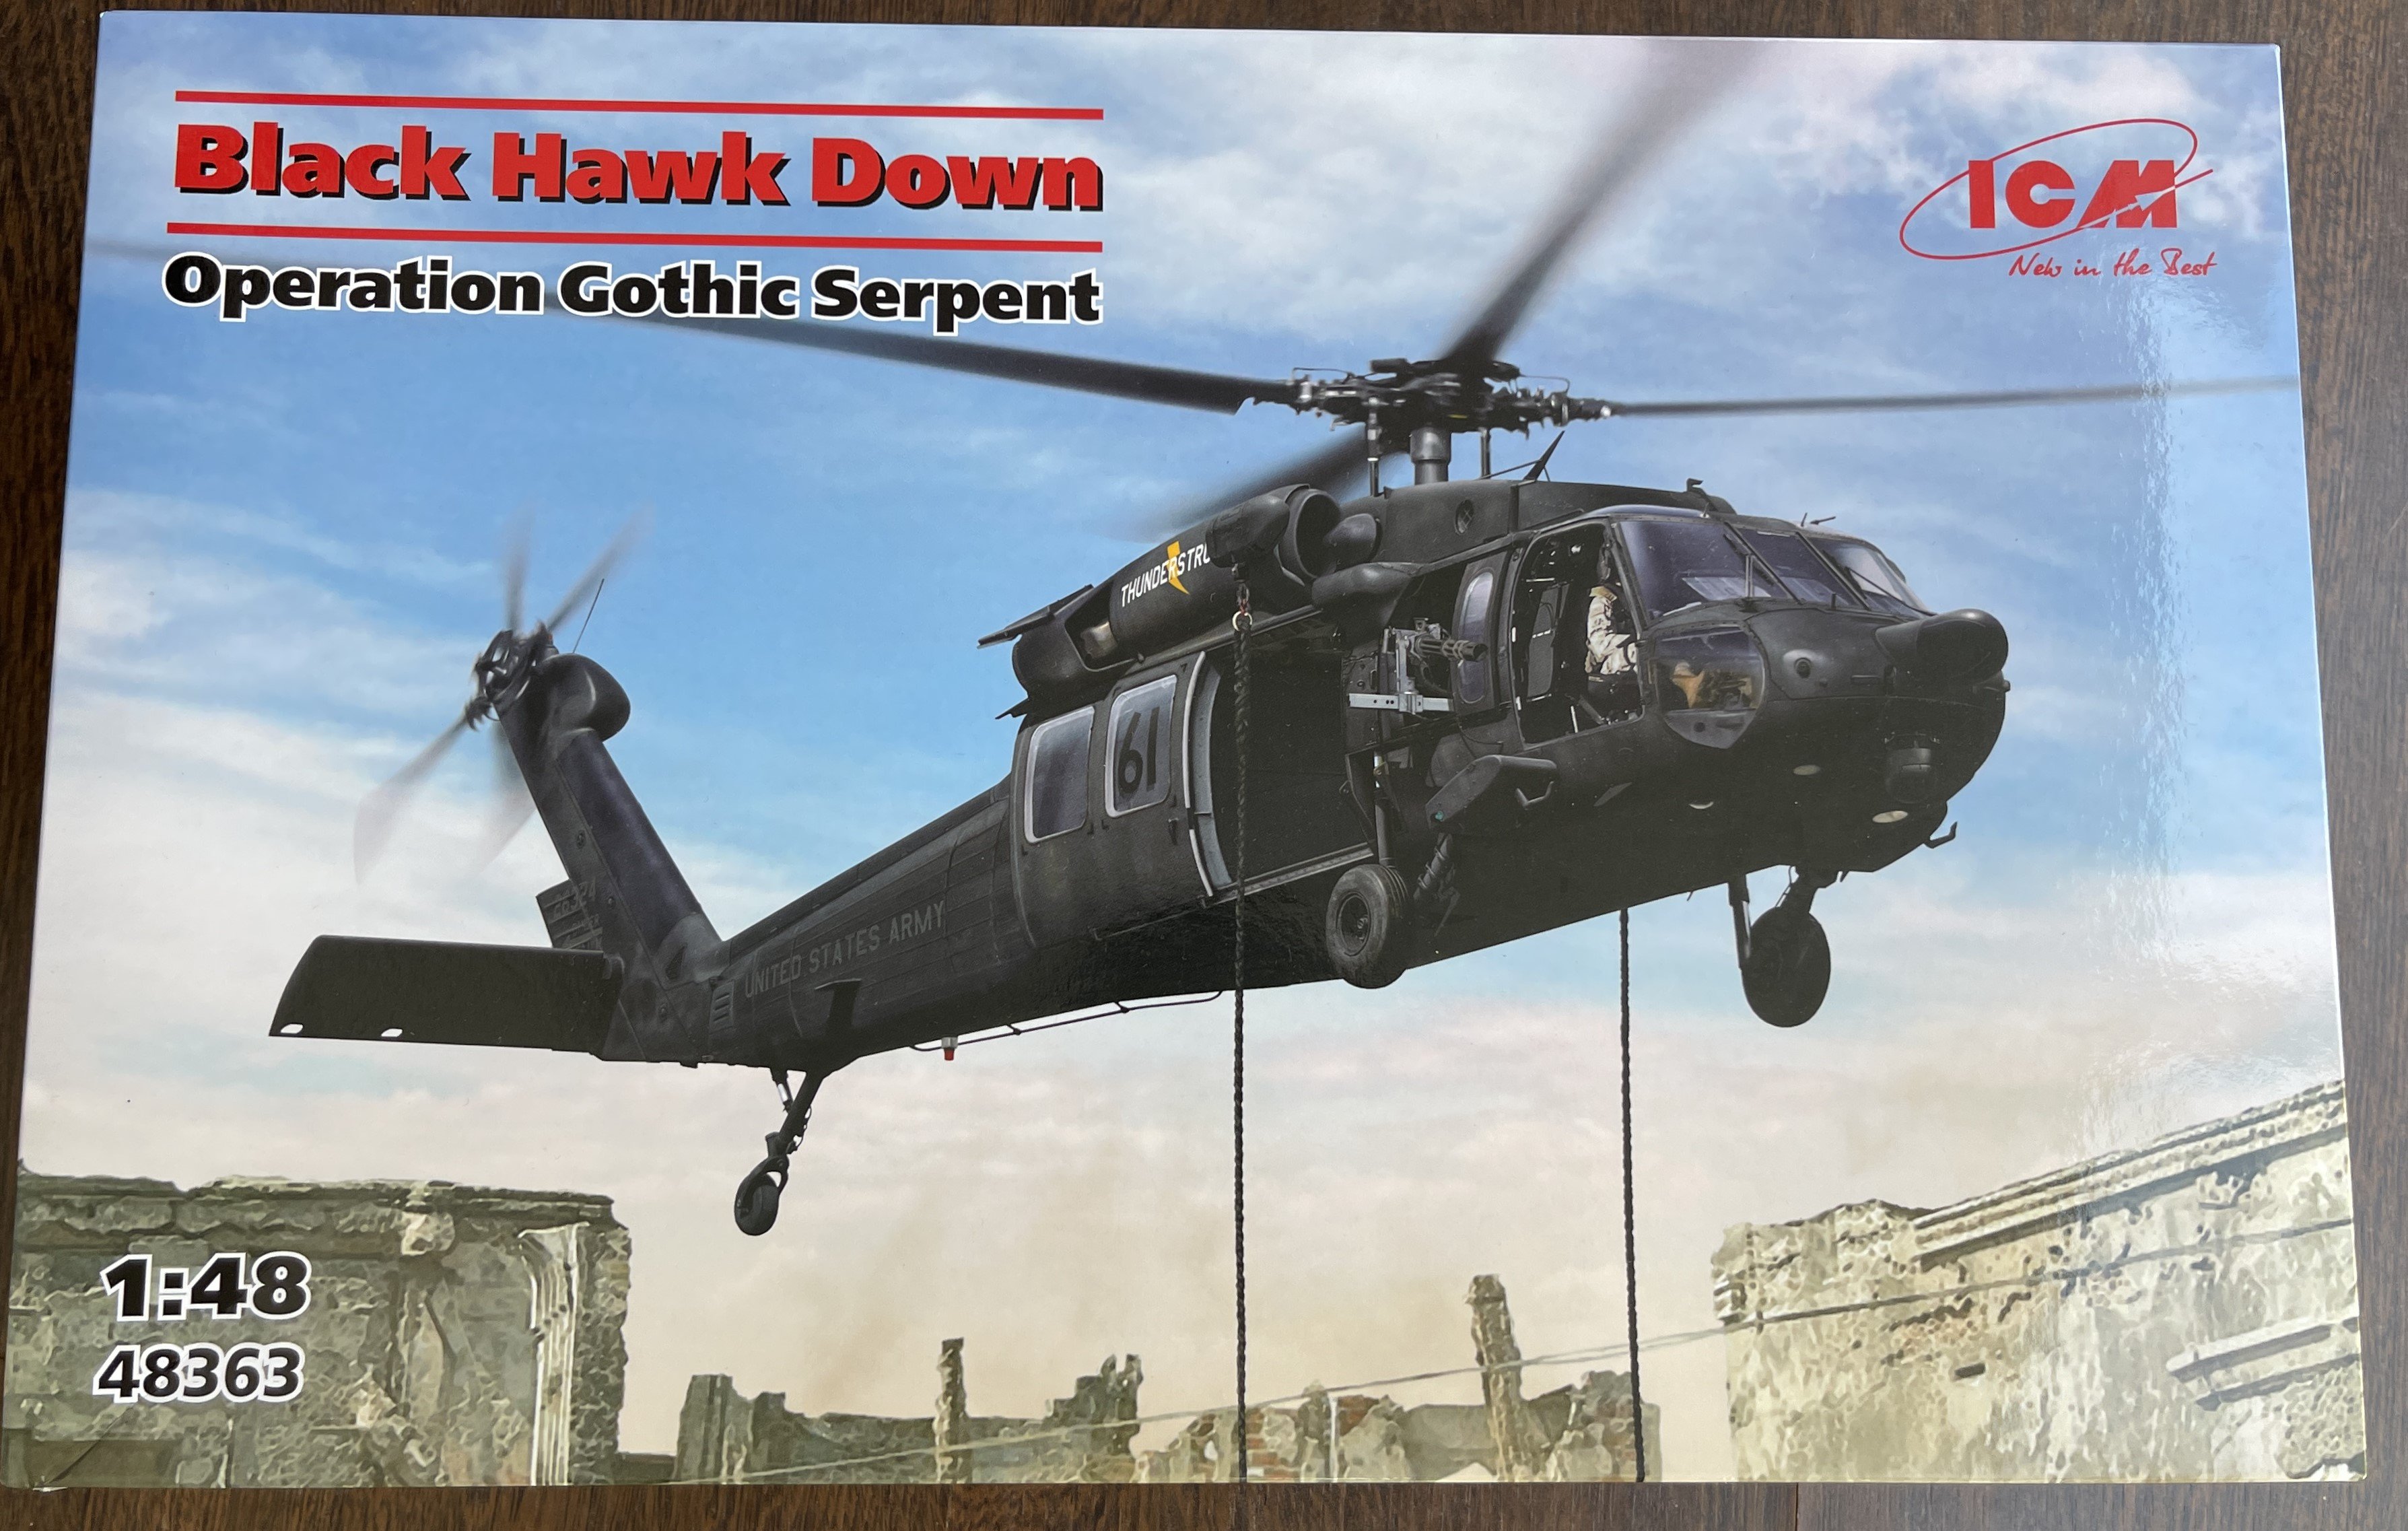
1:48
MH-60L Black Hawk

ICM
Catalogue n.º No. 48363
Available around 50€ at Art Scale.
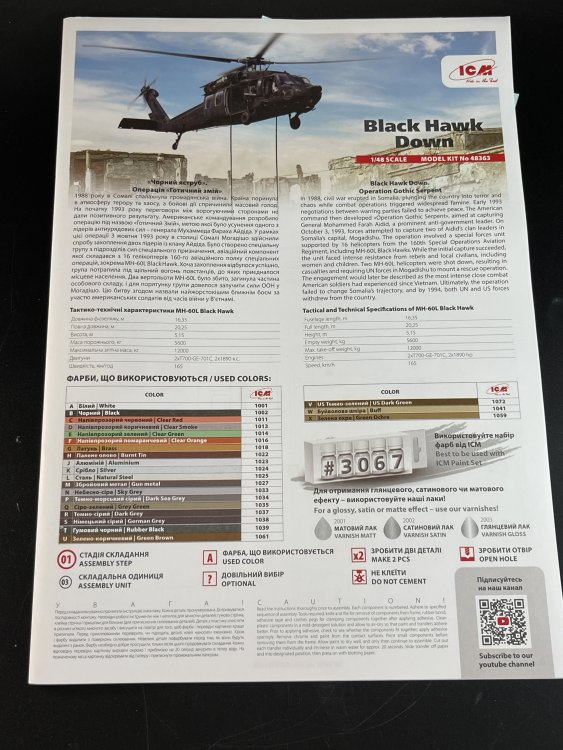
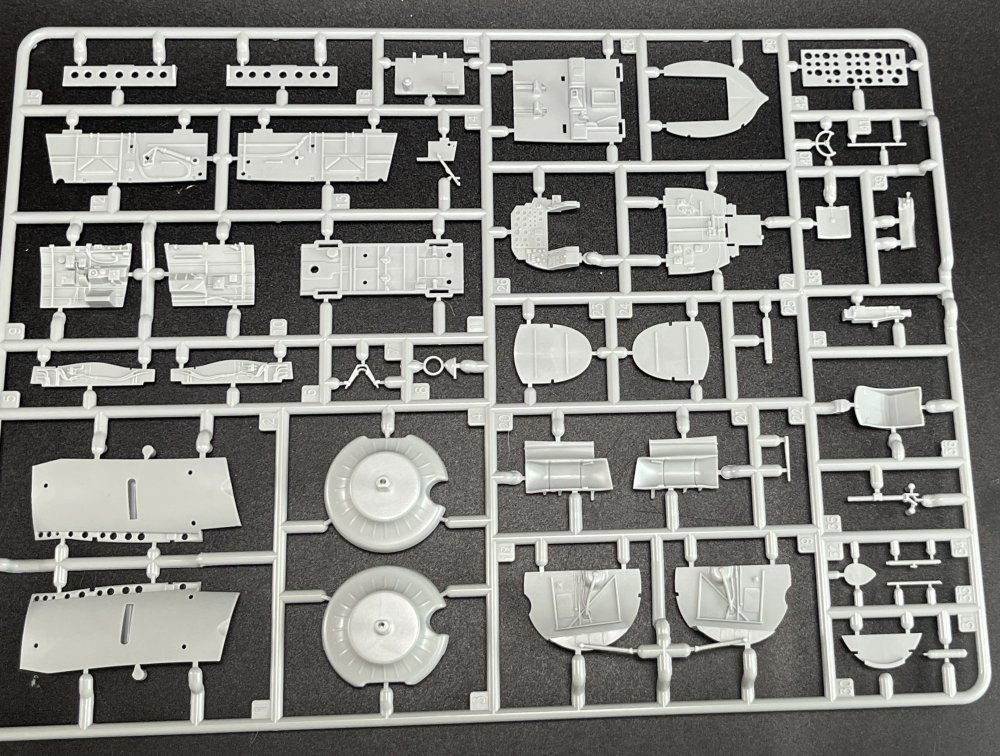
The ICM 1:48 MH-60L Black Hawk (No. 48360) and the ICM 1:48 Black Hawk Down, Operation Gothic Serpent are two model kits representing the iconic Sikorsky MH-60L Black Hawk helicopter used by U.S. Special Forces.
Today we will be looking ICM 1:48 Black Hawk Down, Operation Gothic Serpent
As happens before, this release is a is a rebox of the earlier MH-60L Black Hawk kit (No. 48360) with specific additions tailored to represent the helicopters involved in the 1993 Battle of Mogadishu.
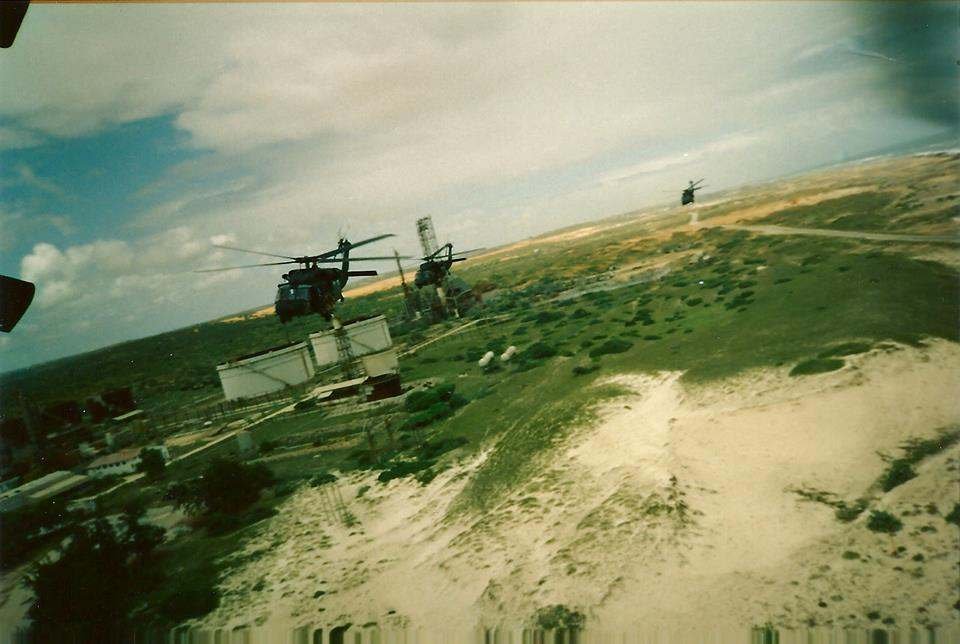
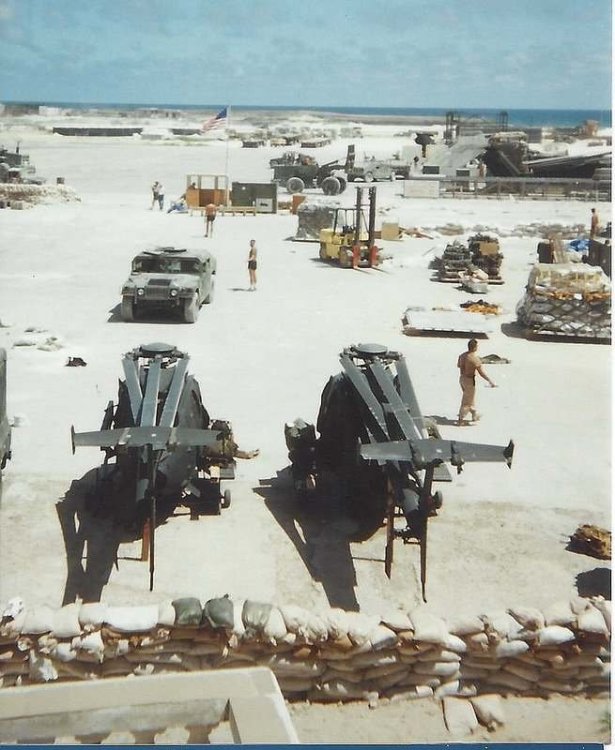
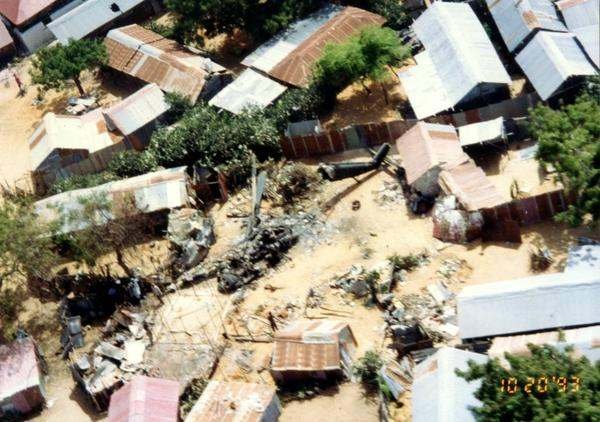
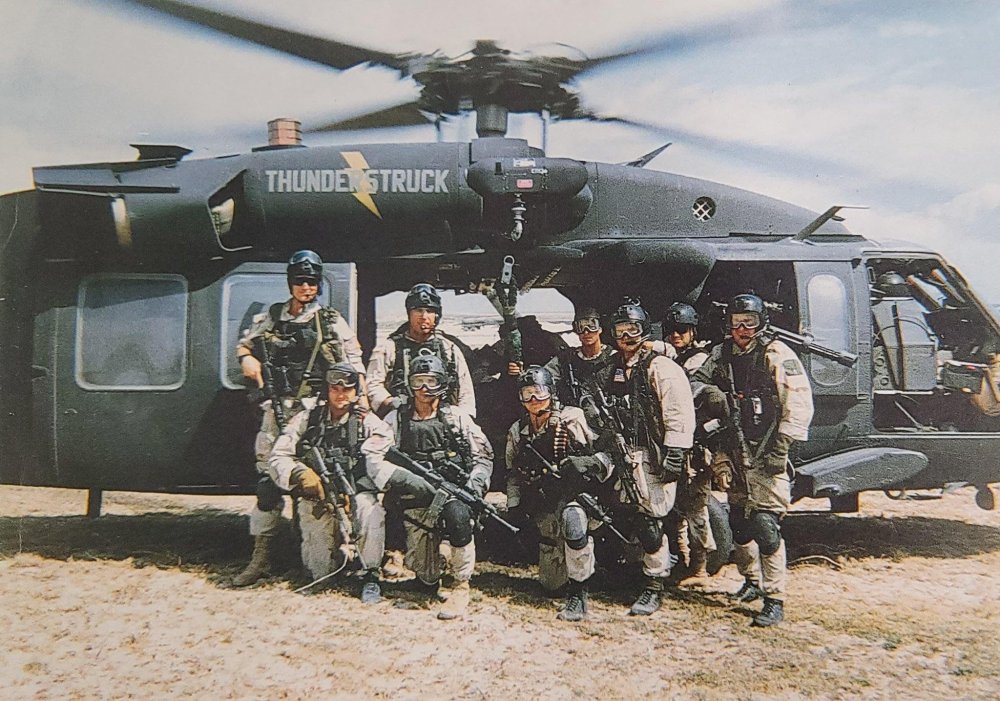
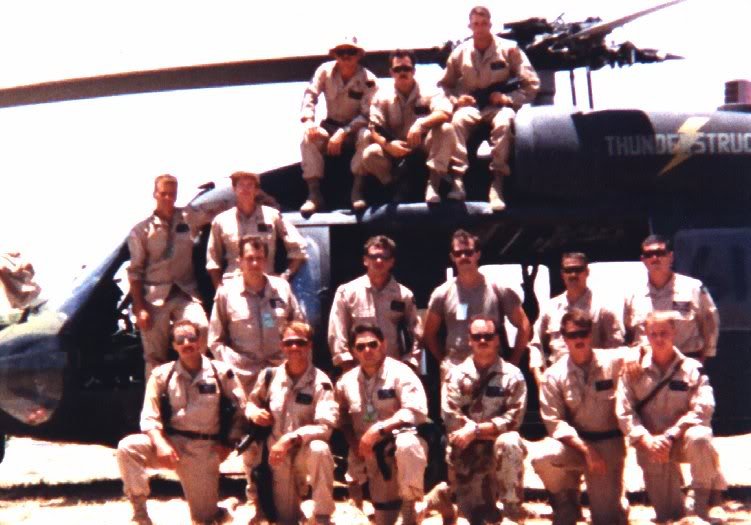
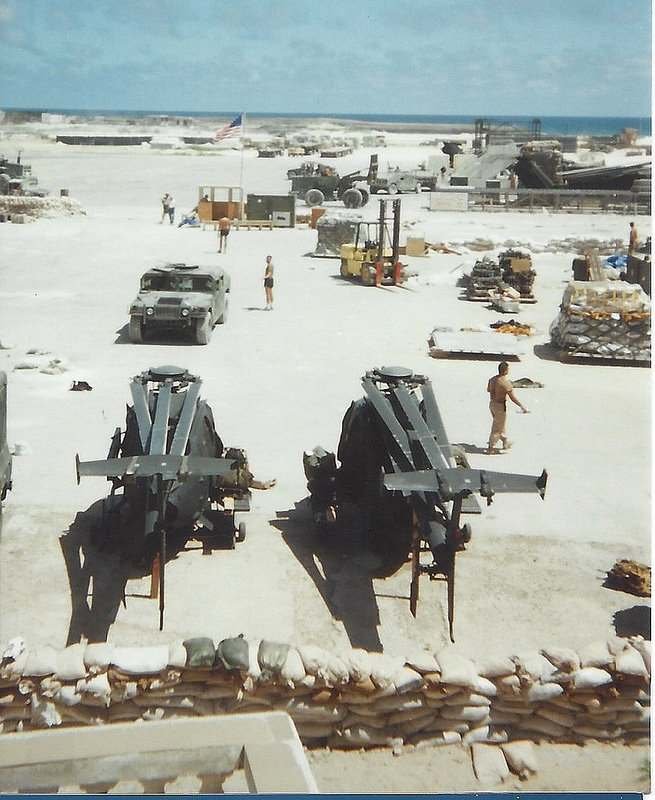
This release is invoking the Battle of Mogadishu (that has happen as US Special forces undertake the “Operation Gothic Serpent” that took place in 3th October of 1993.
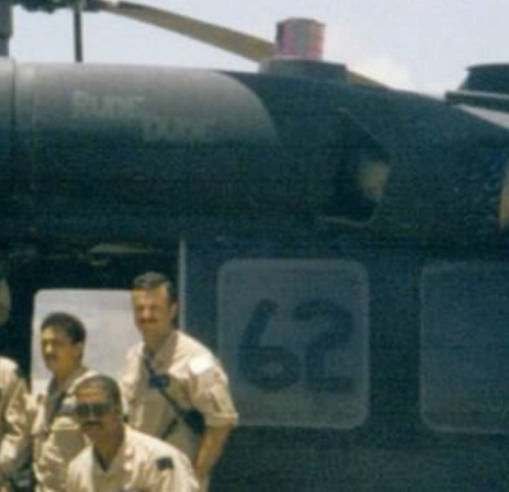
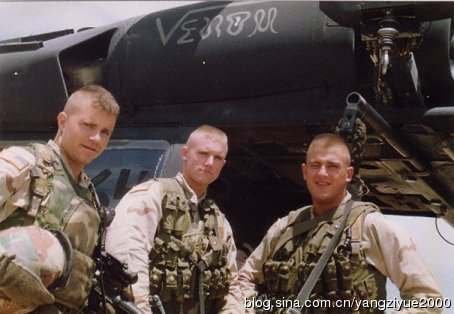
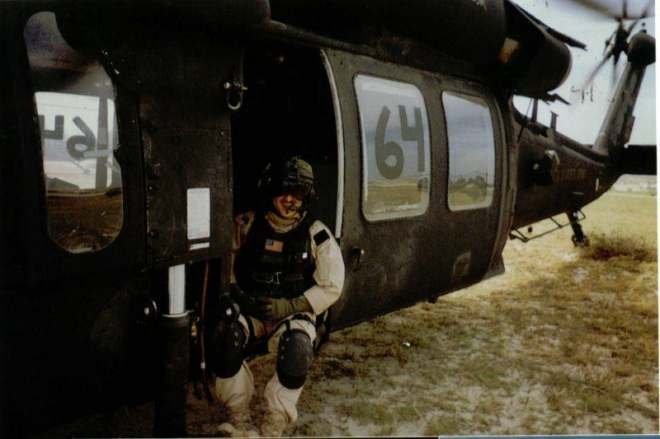
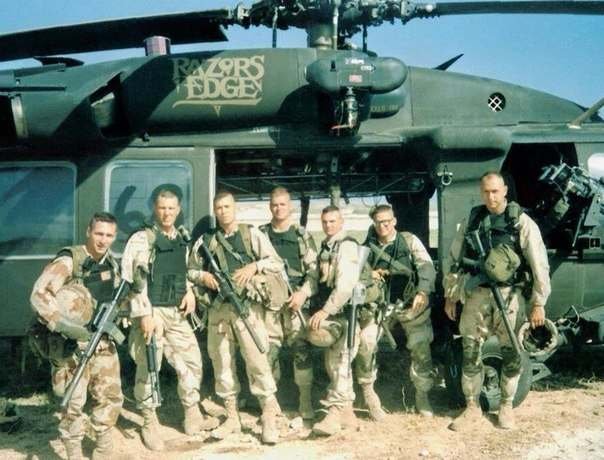
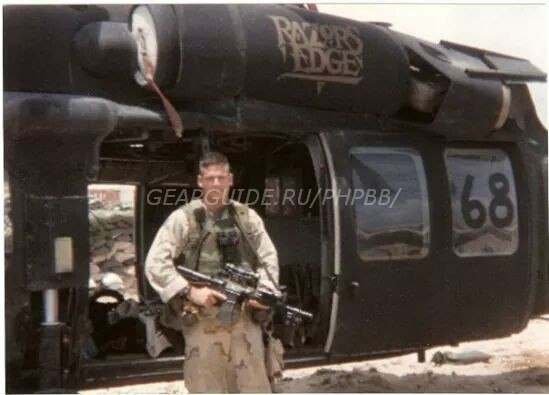
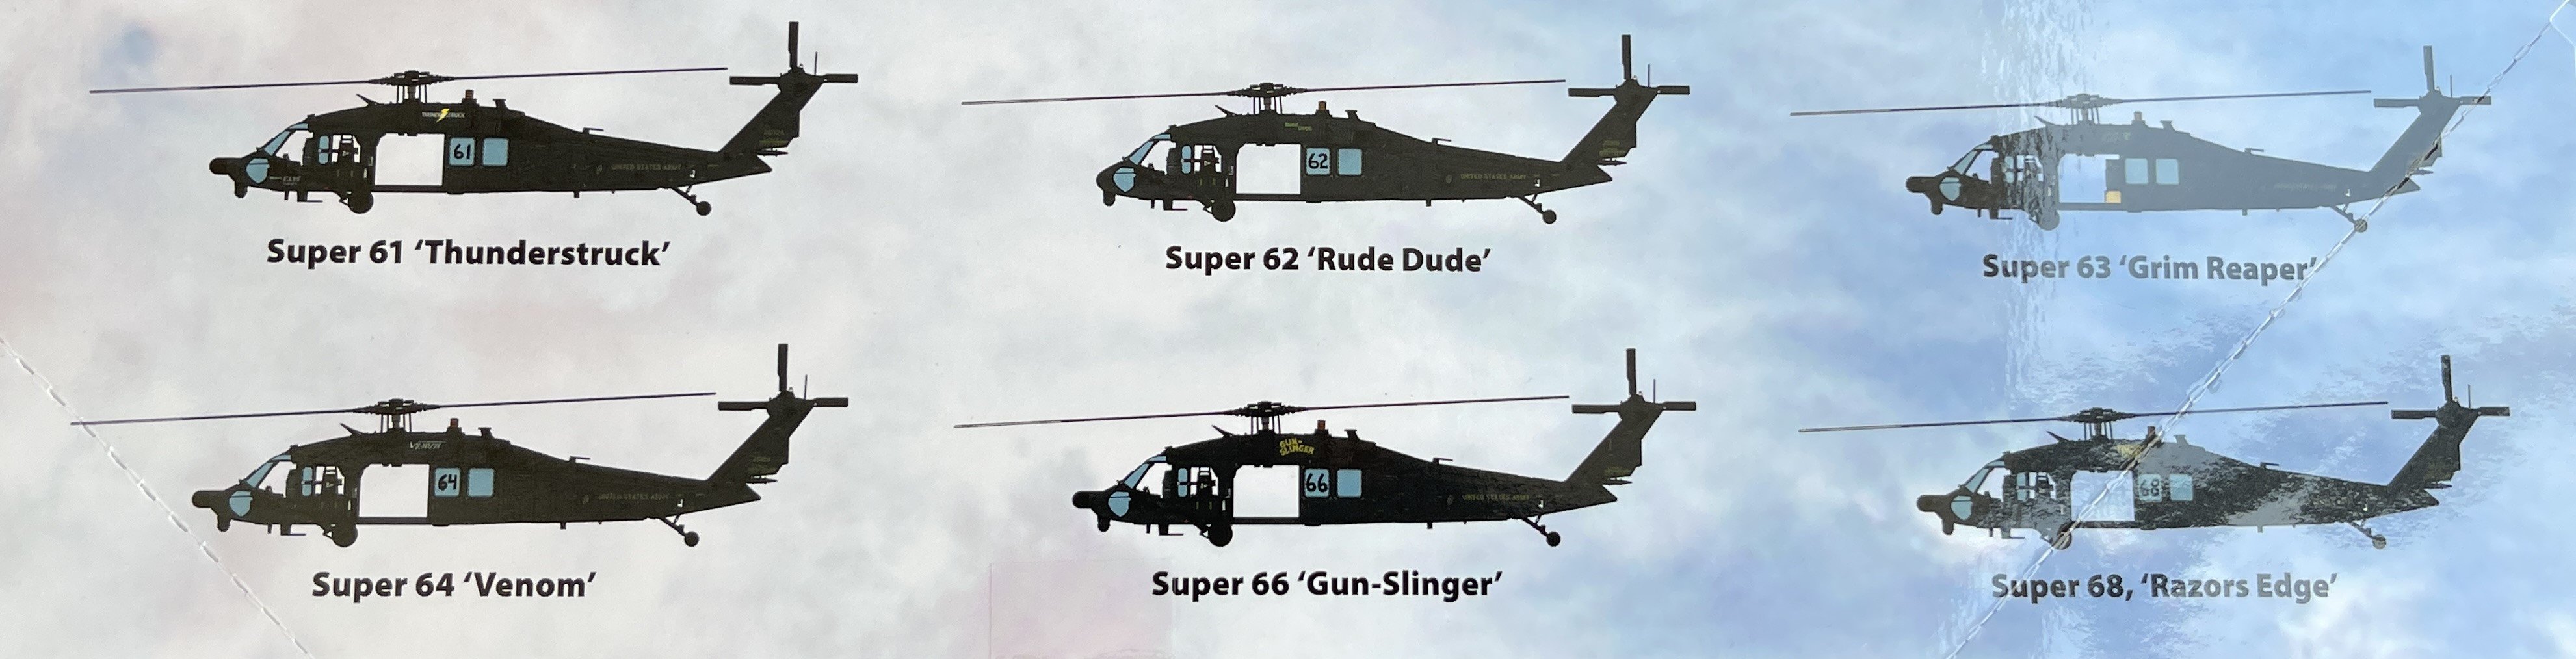
In the Battle of Mogadishu, US Special Forces lost two Black Hawks, One was hit at 16:20 and the other at 16:40. Specifically, Black Hawk Super 61 (Thunderstruck) and Super 64 (Venom) were shot down, and Super 62 (Rude dude) and Super 68 (Razors Edge) were also hit with RPGs, though they survived the initial impact.
The violence of the Battle caused several casualties in both side with 18 KIA for in Ranger and Deltas forces and more than 80 injuries.
This battle was represented by Hollywood, as in 2001, its was release the movie *Black Hawk Down*.
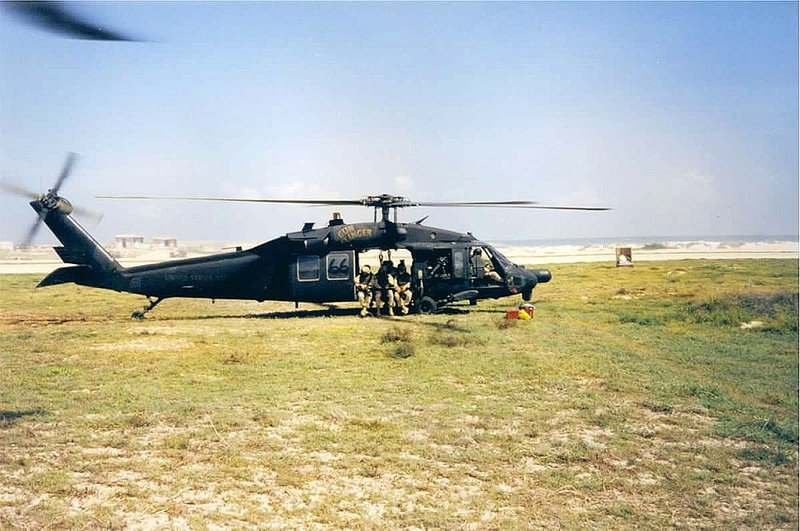
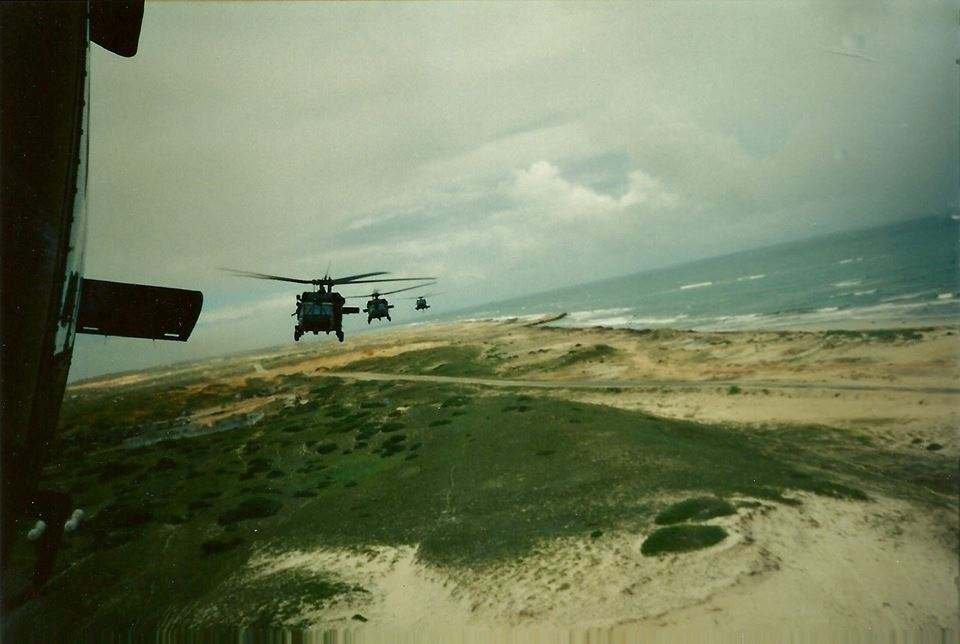
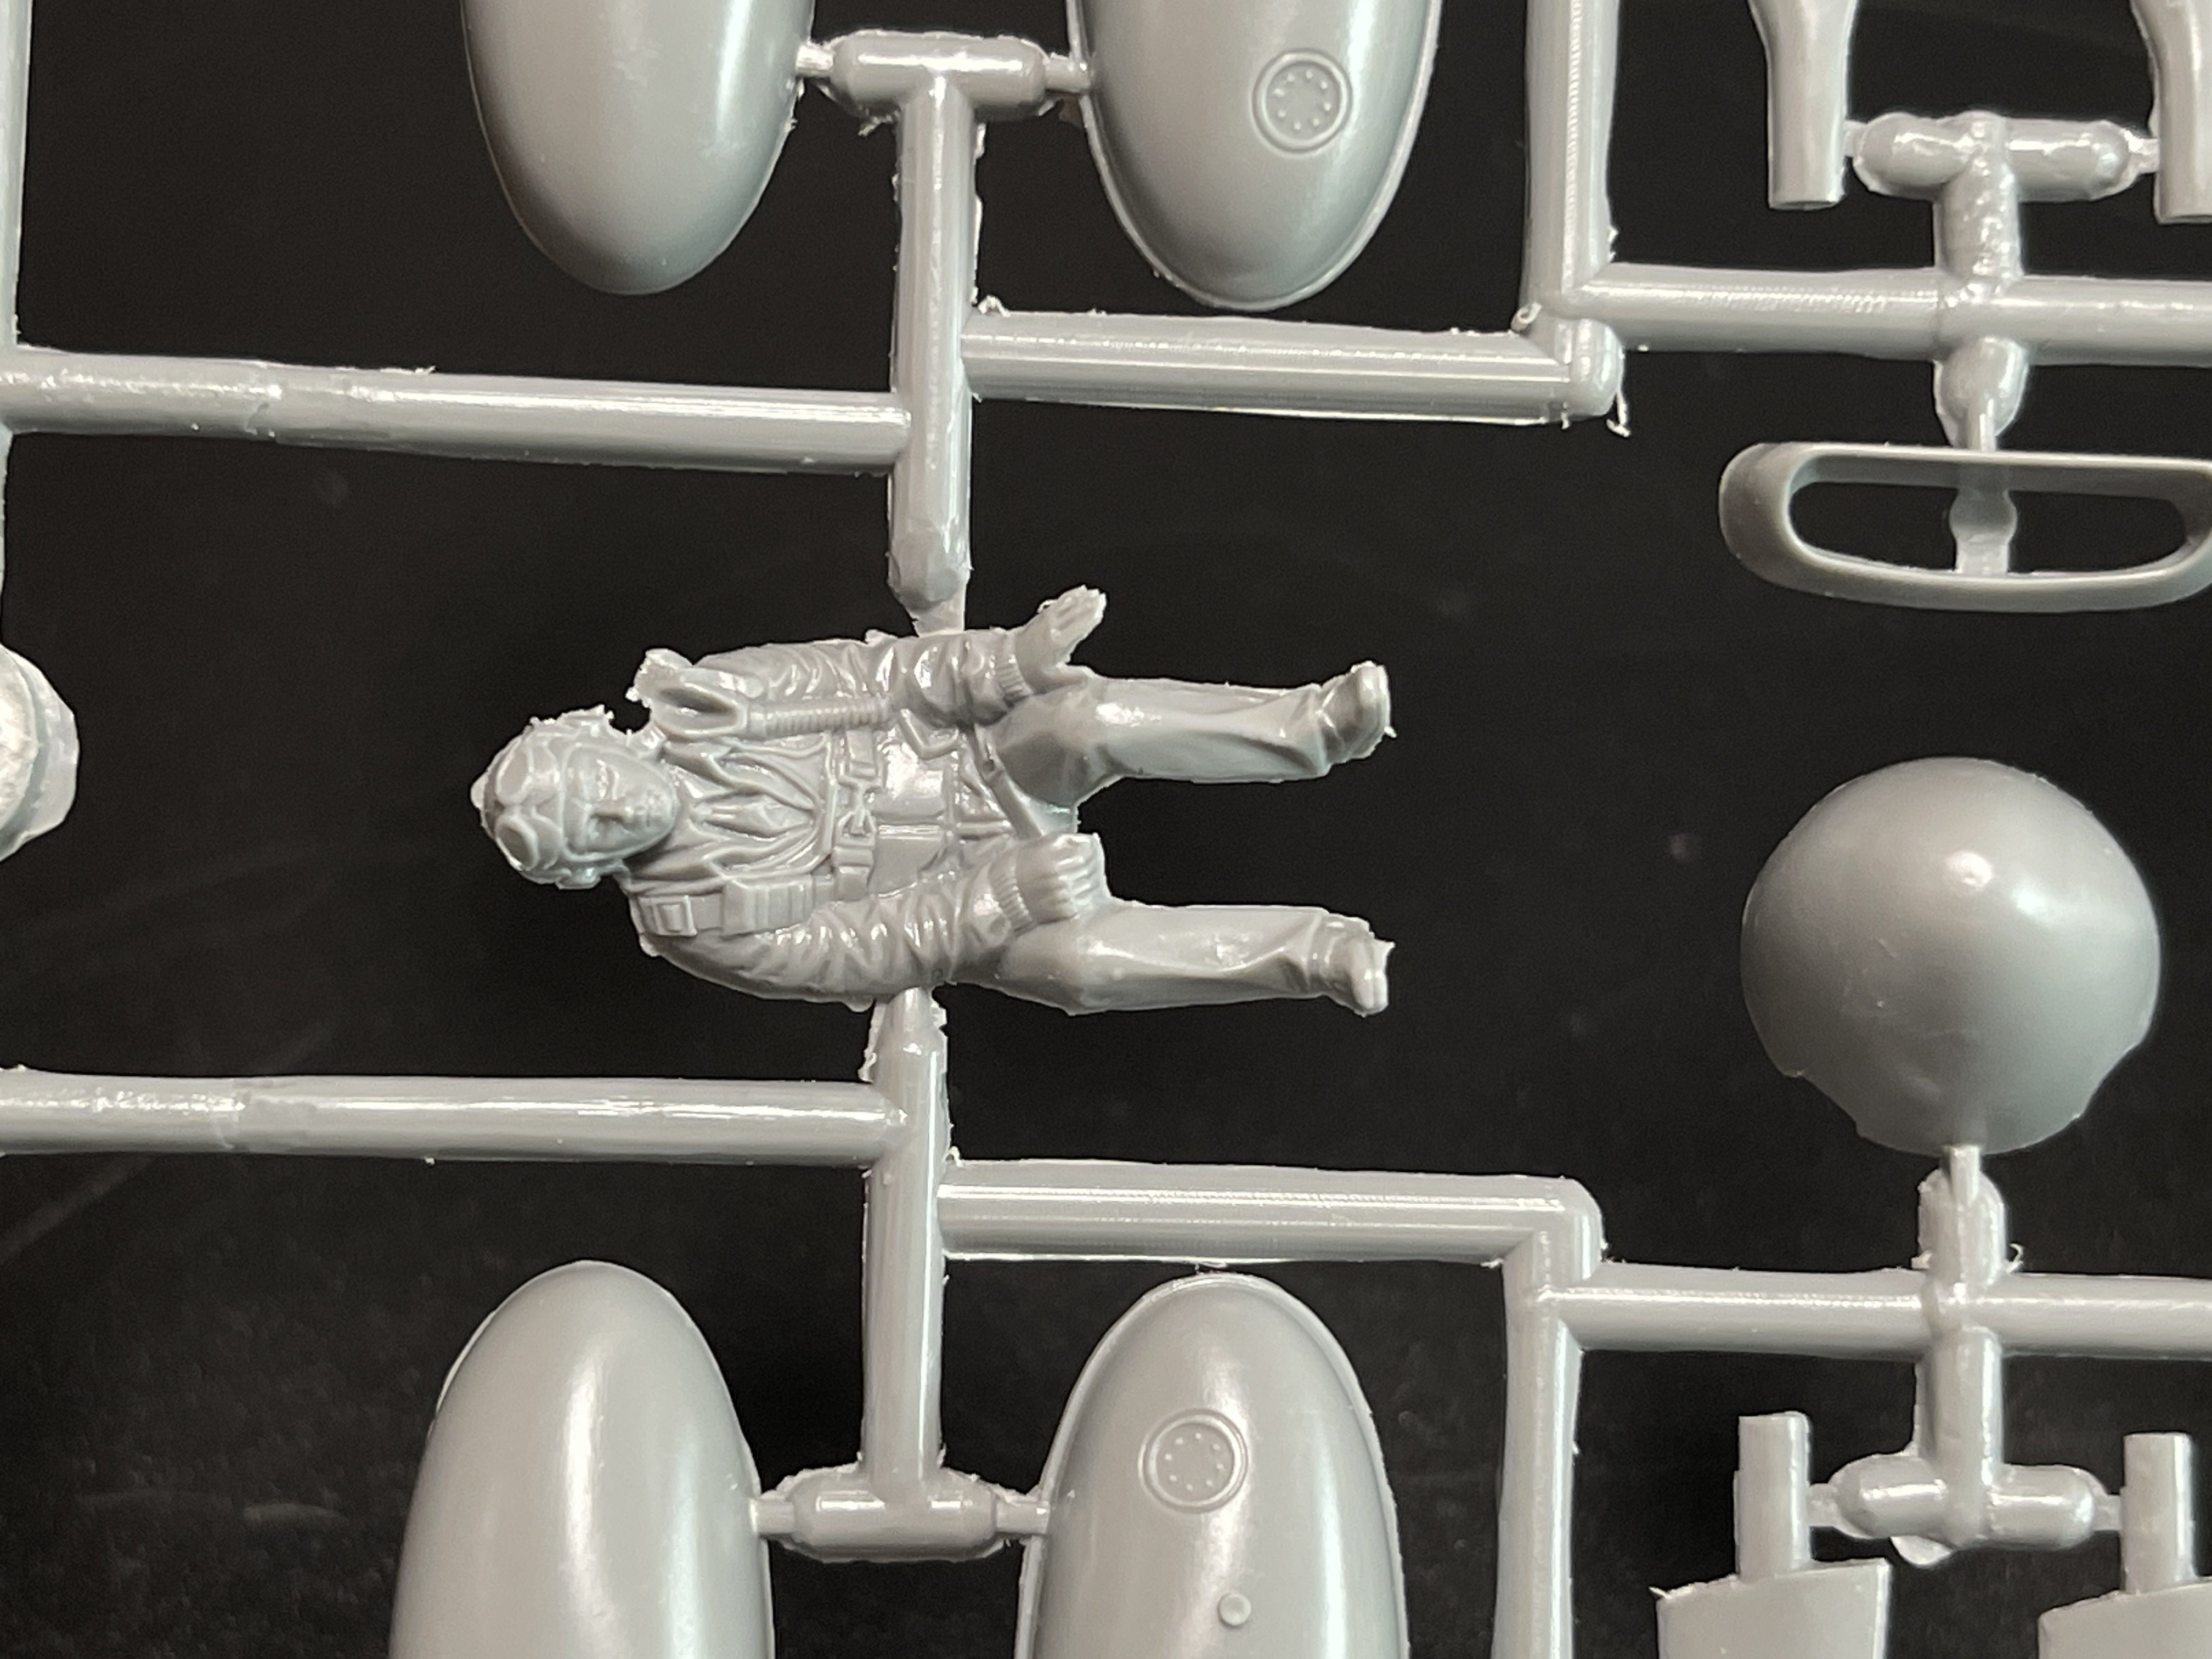
So this release is designed to capture the MH-60L Black Hawk used by the 160th Special Operations Aviation Regiment (SOAR), also known as the "Night Stalkers," during Operation Gothic Serpent in Somalia.
For that, ICM includes new parts and decals to reflect the specific configurations and markings of that historic mission.
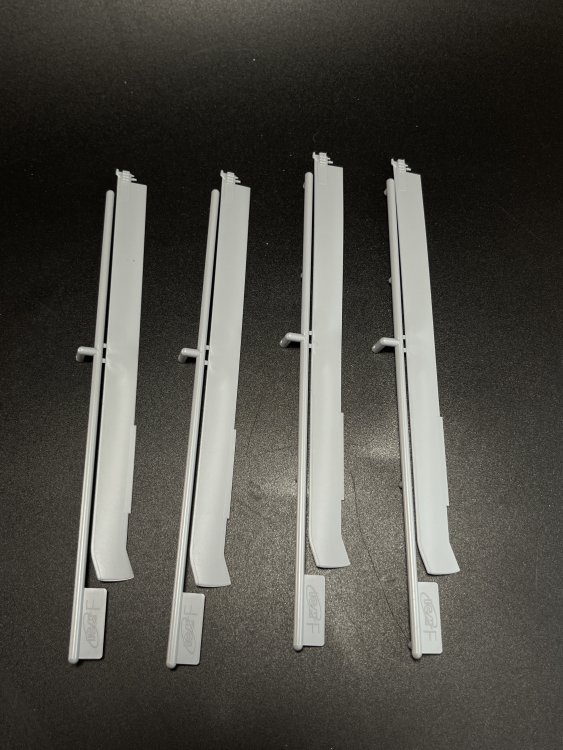
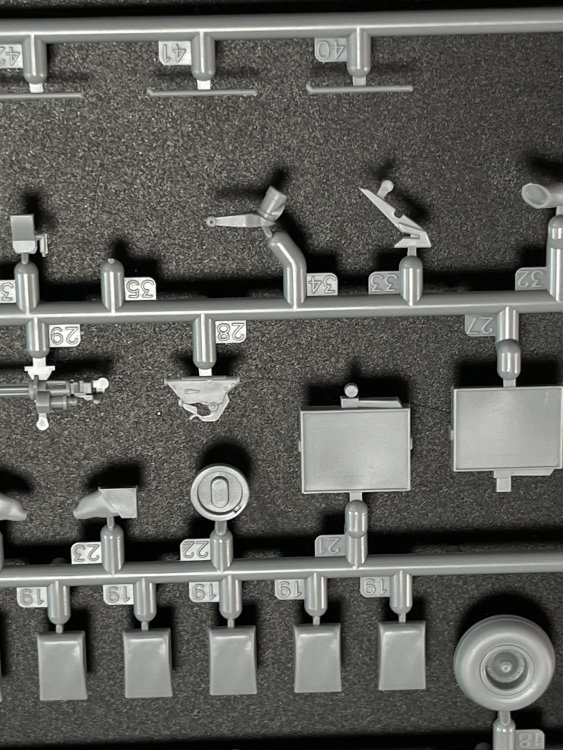
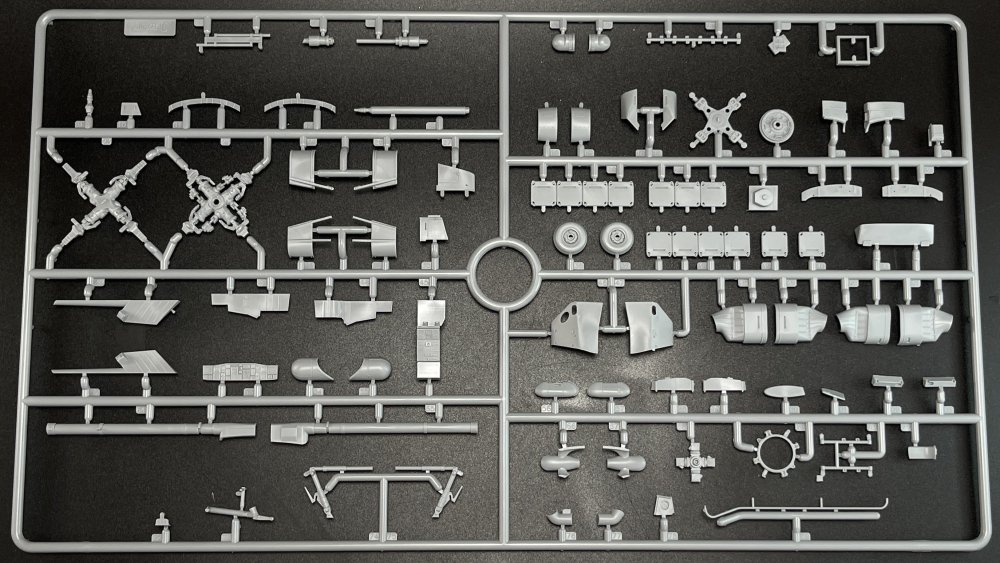
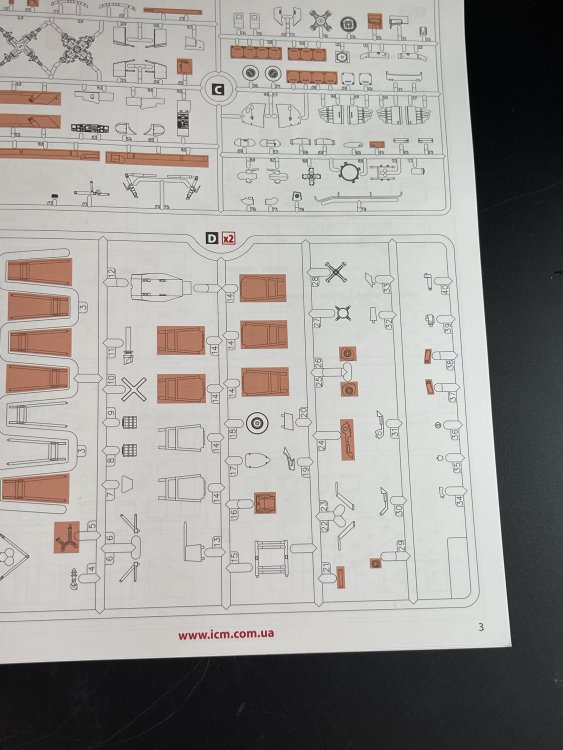
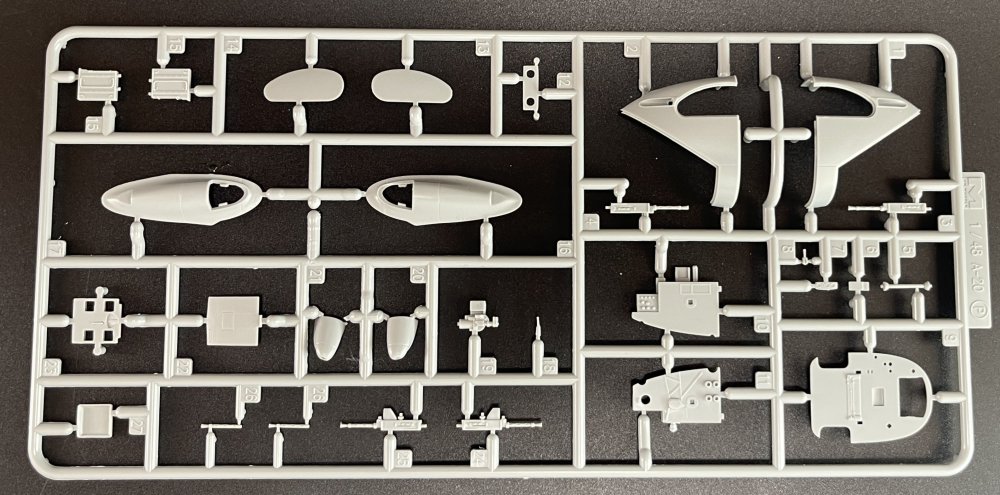
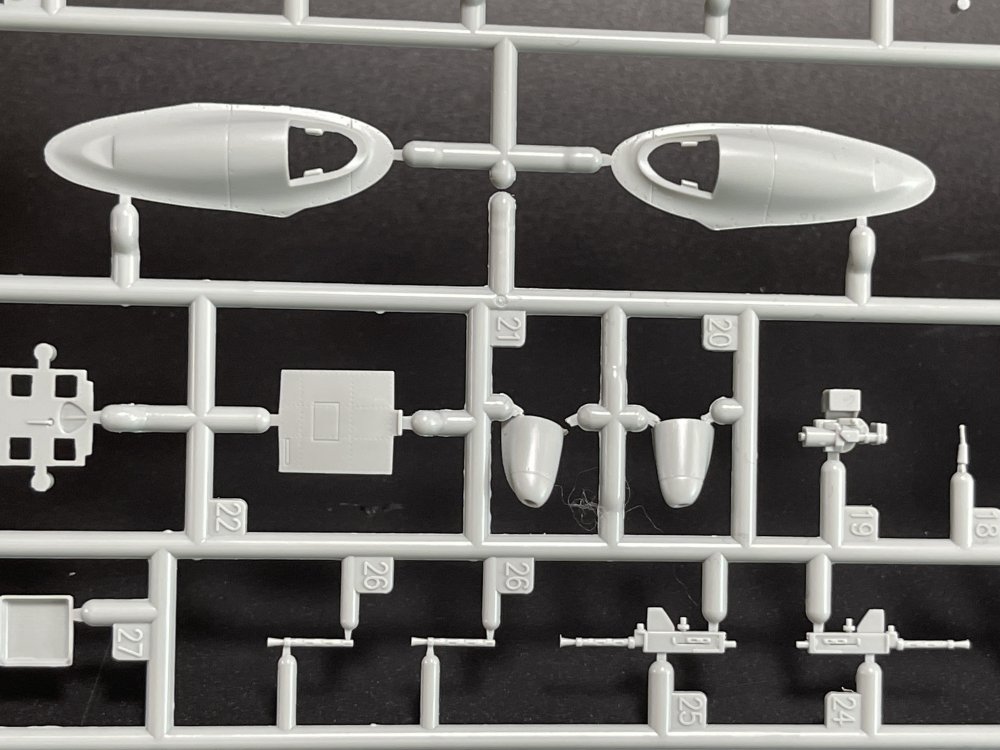
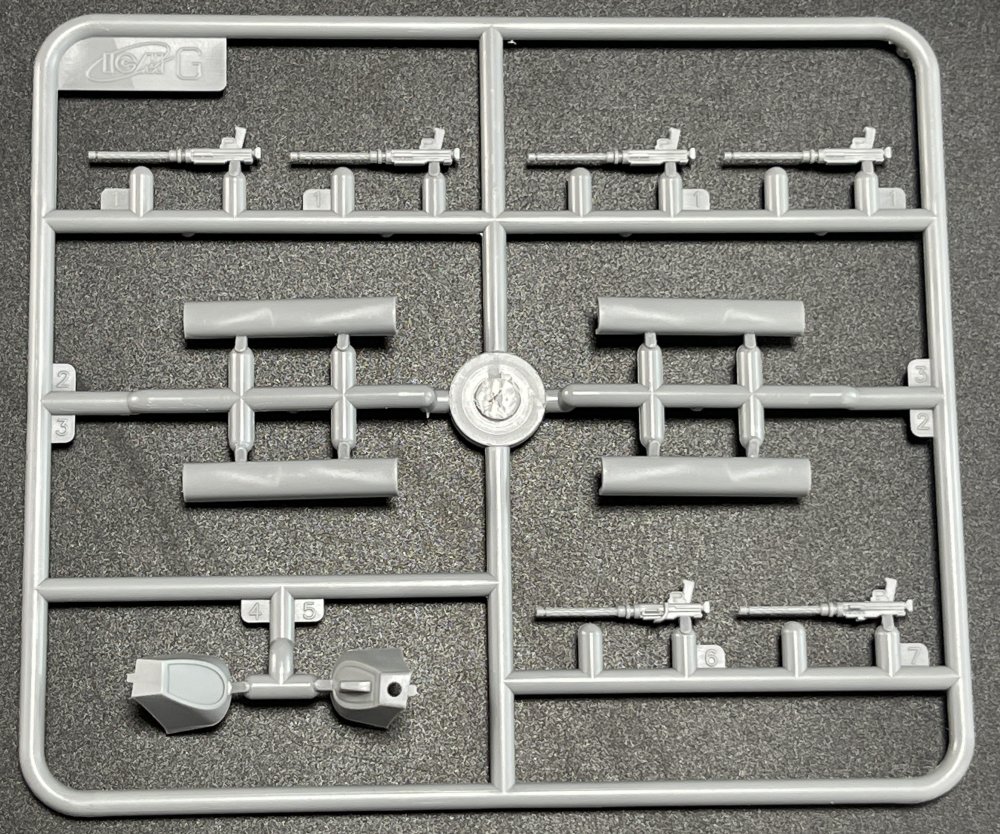
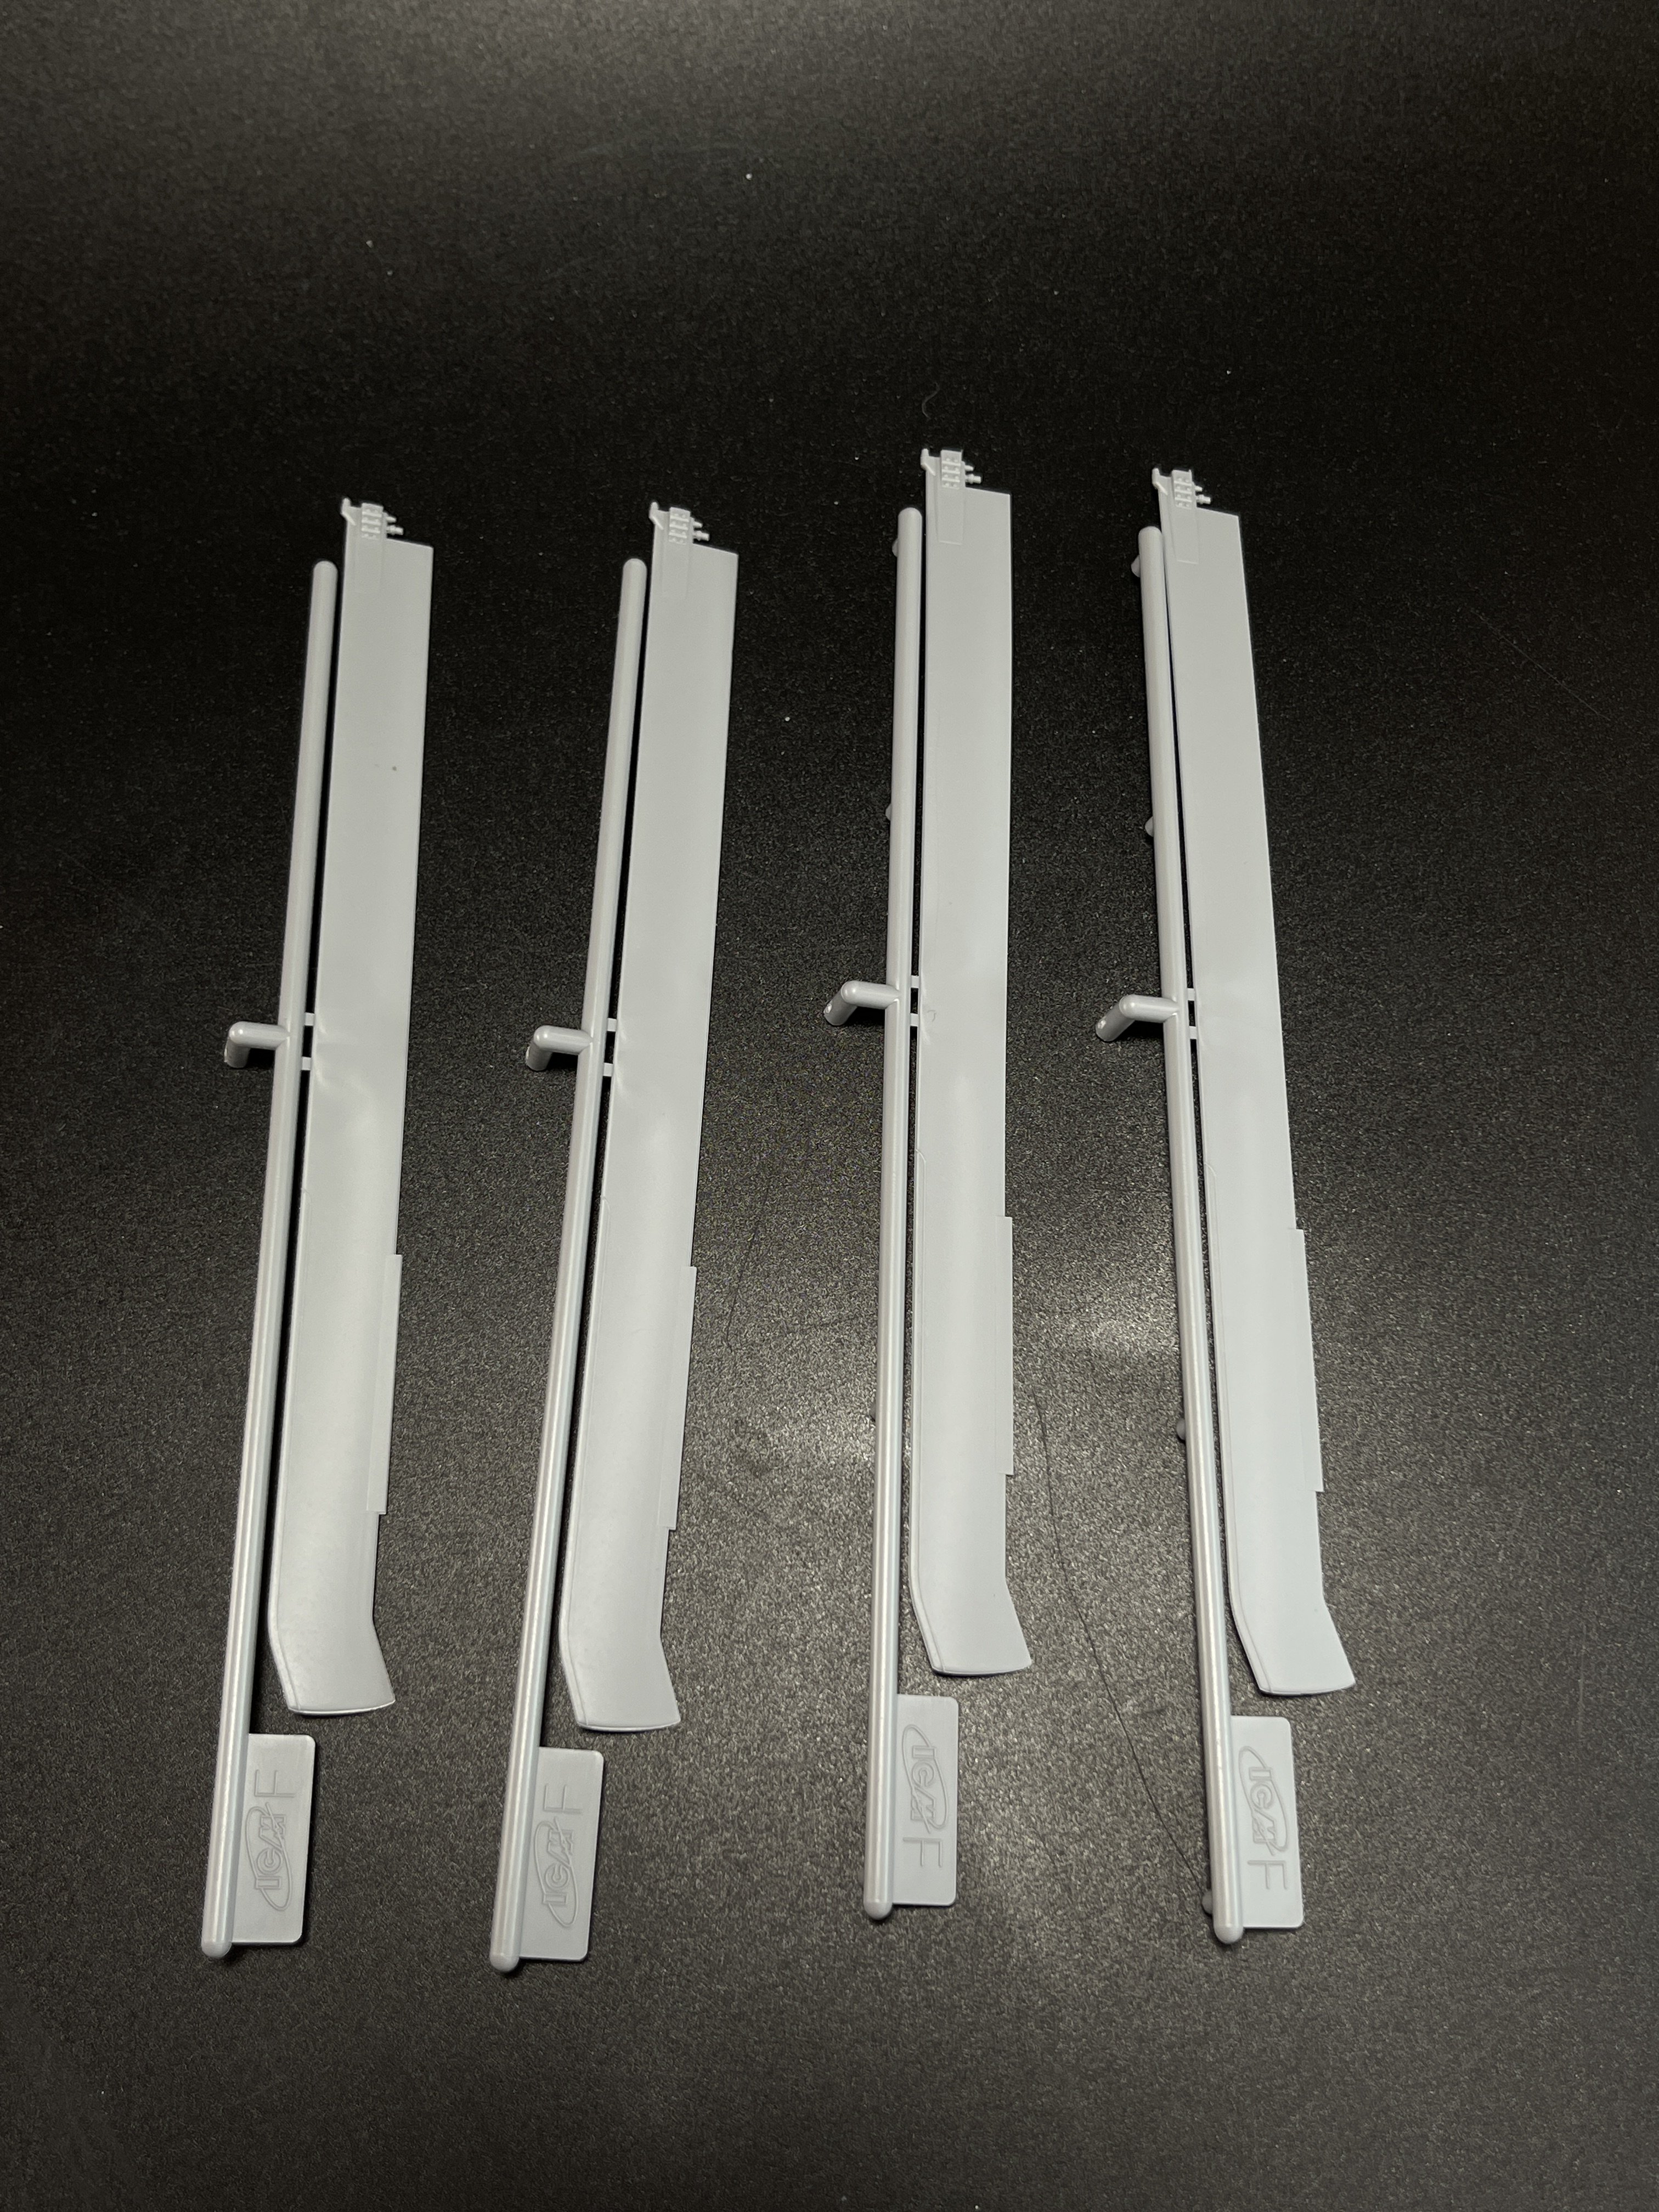
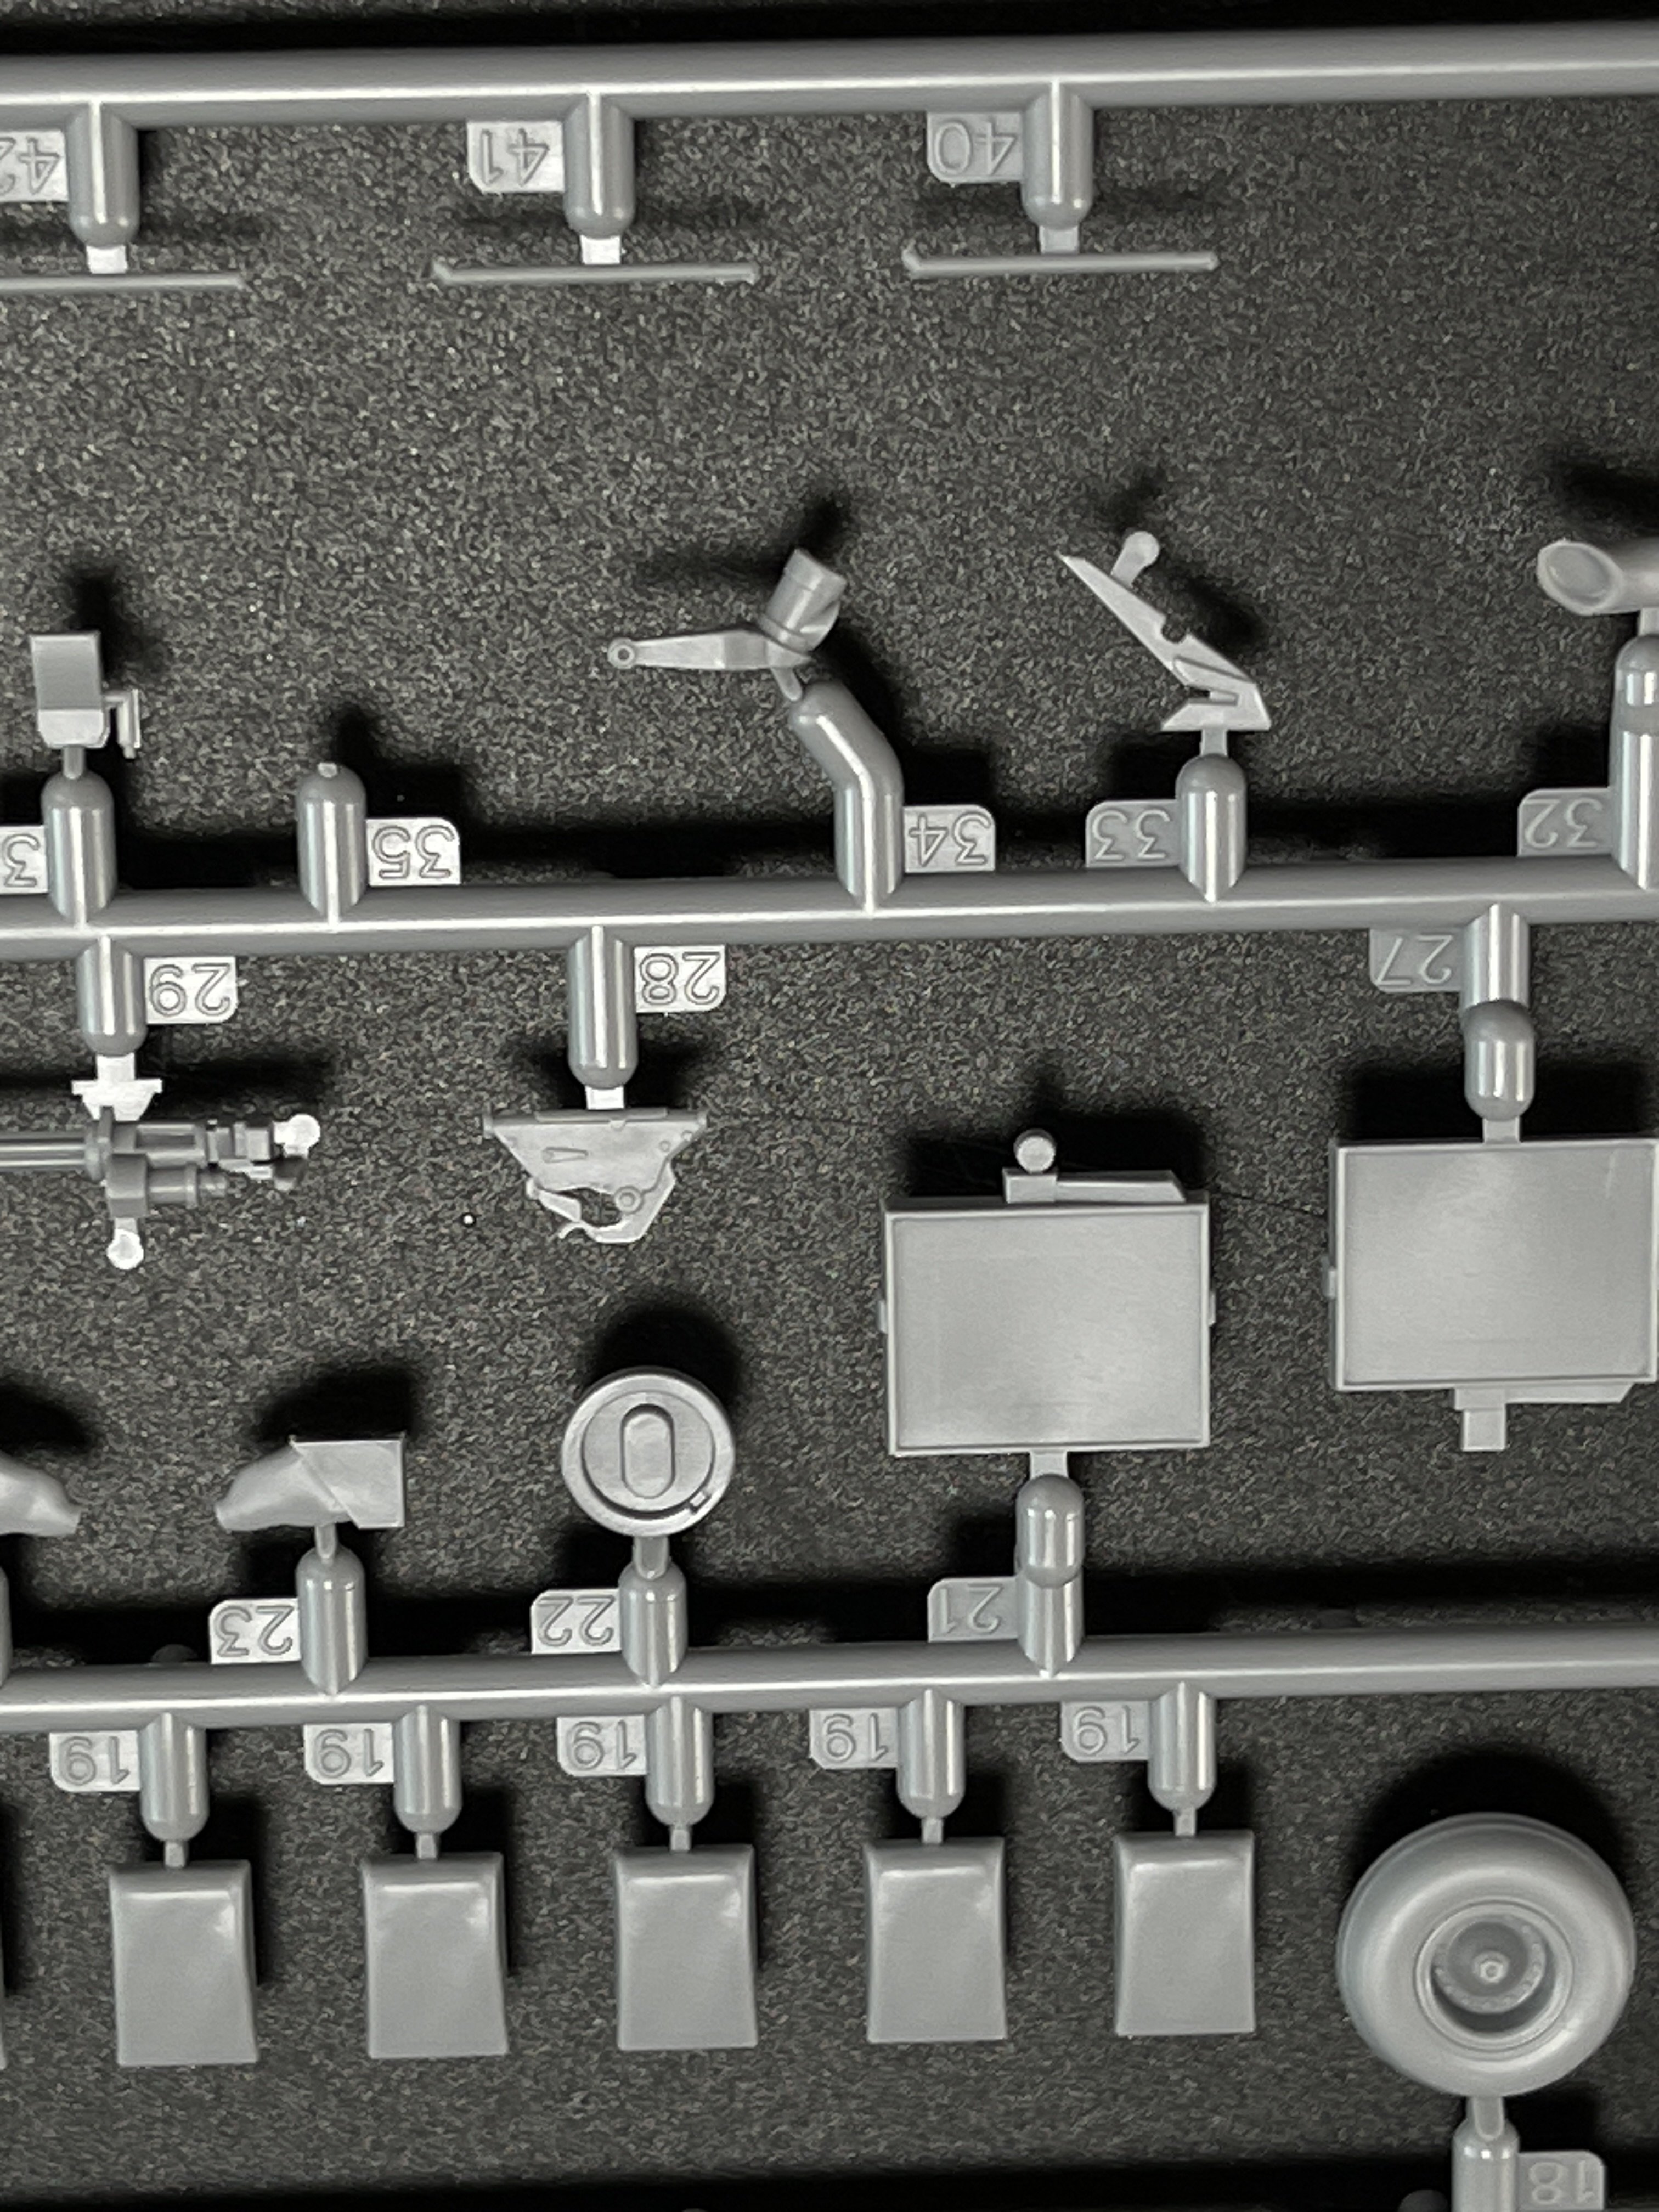
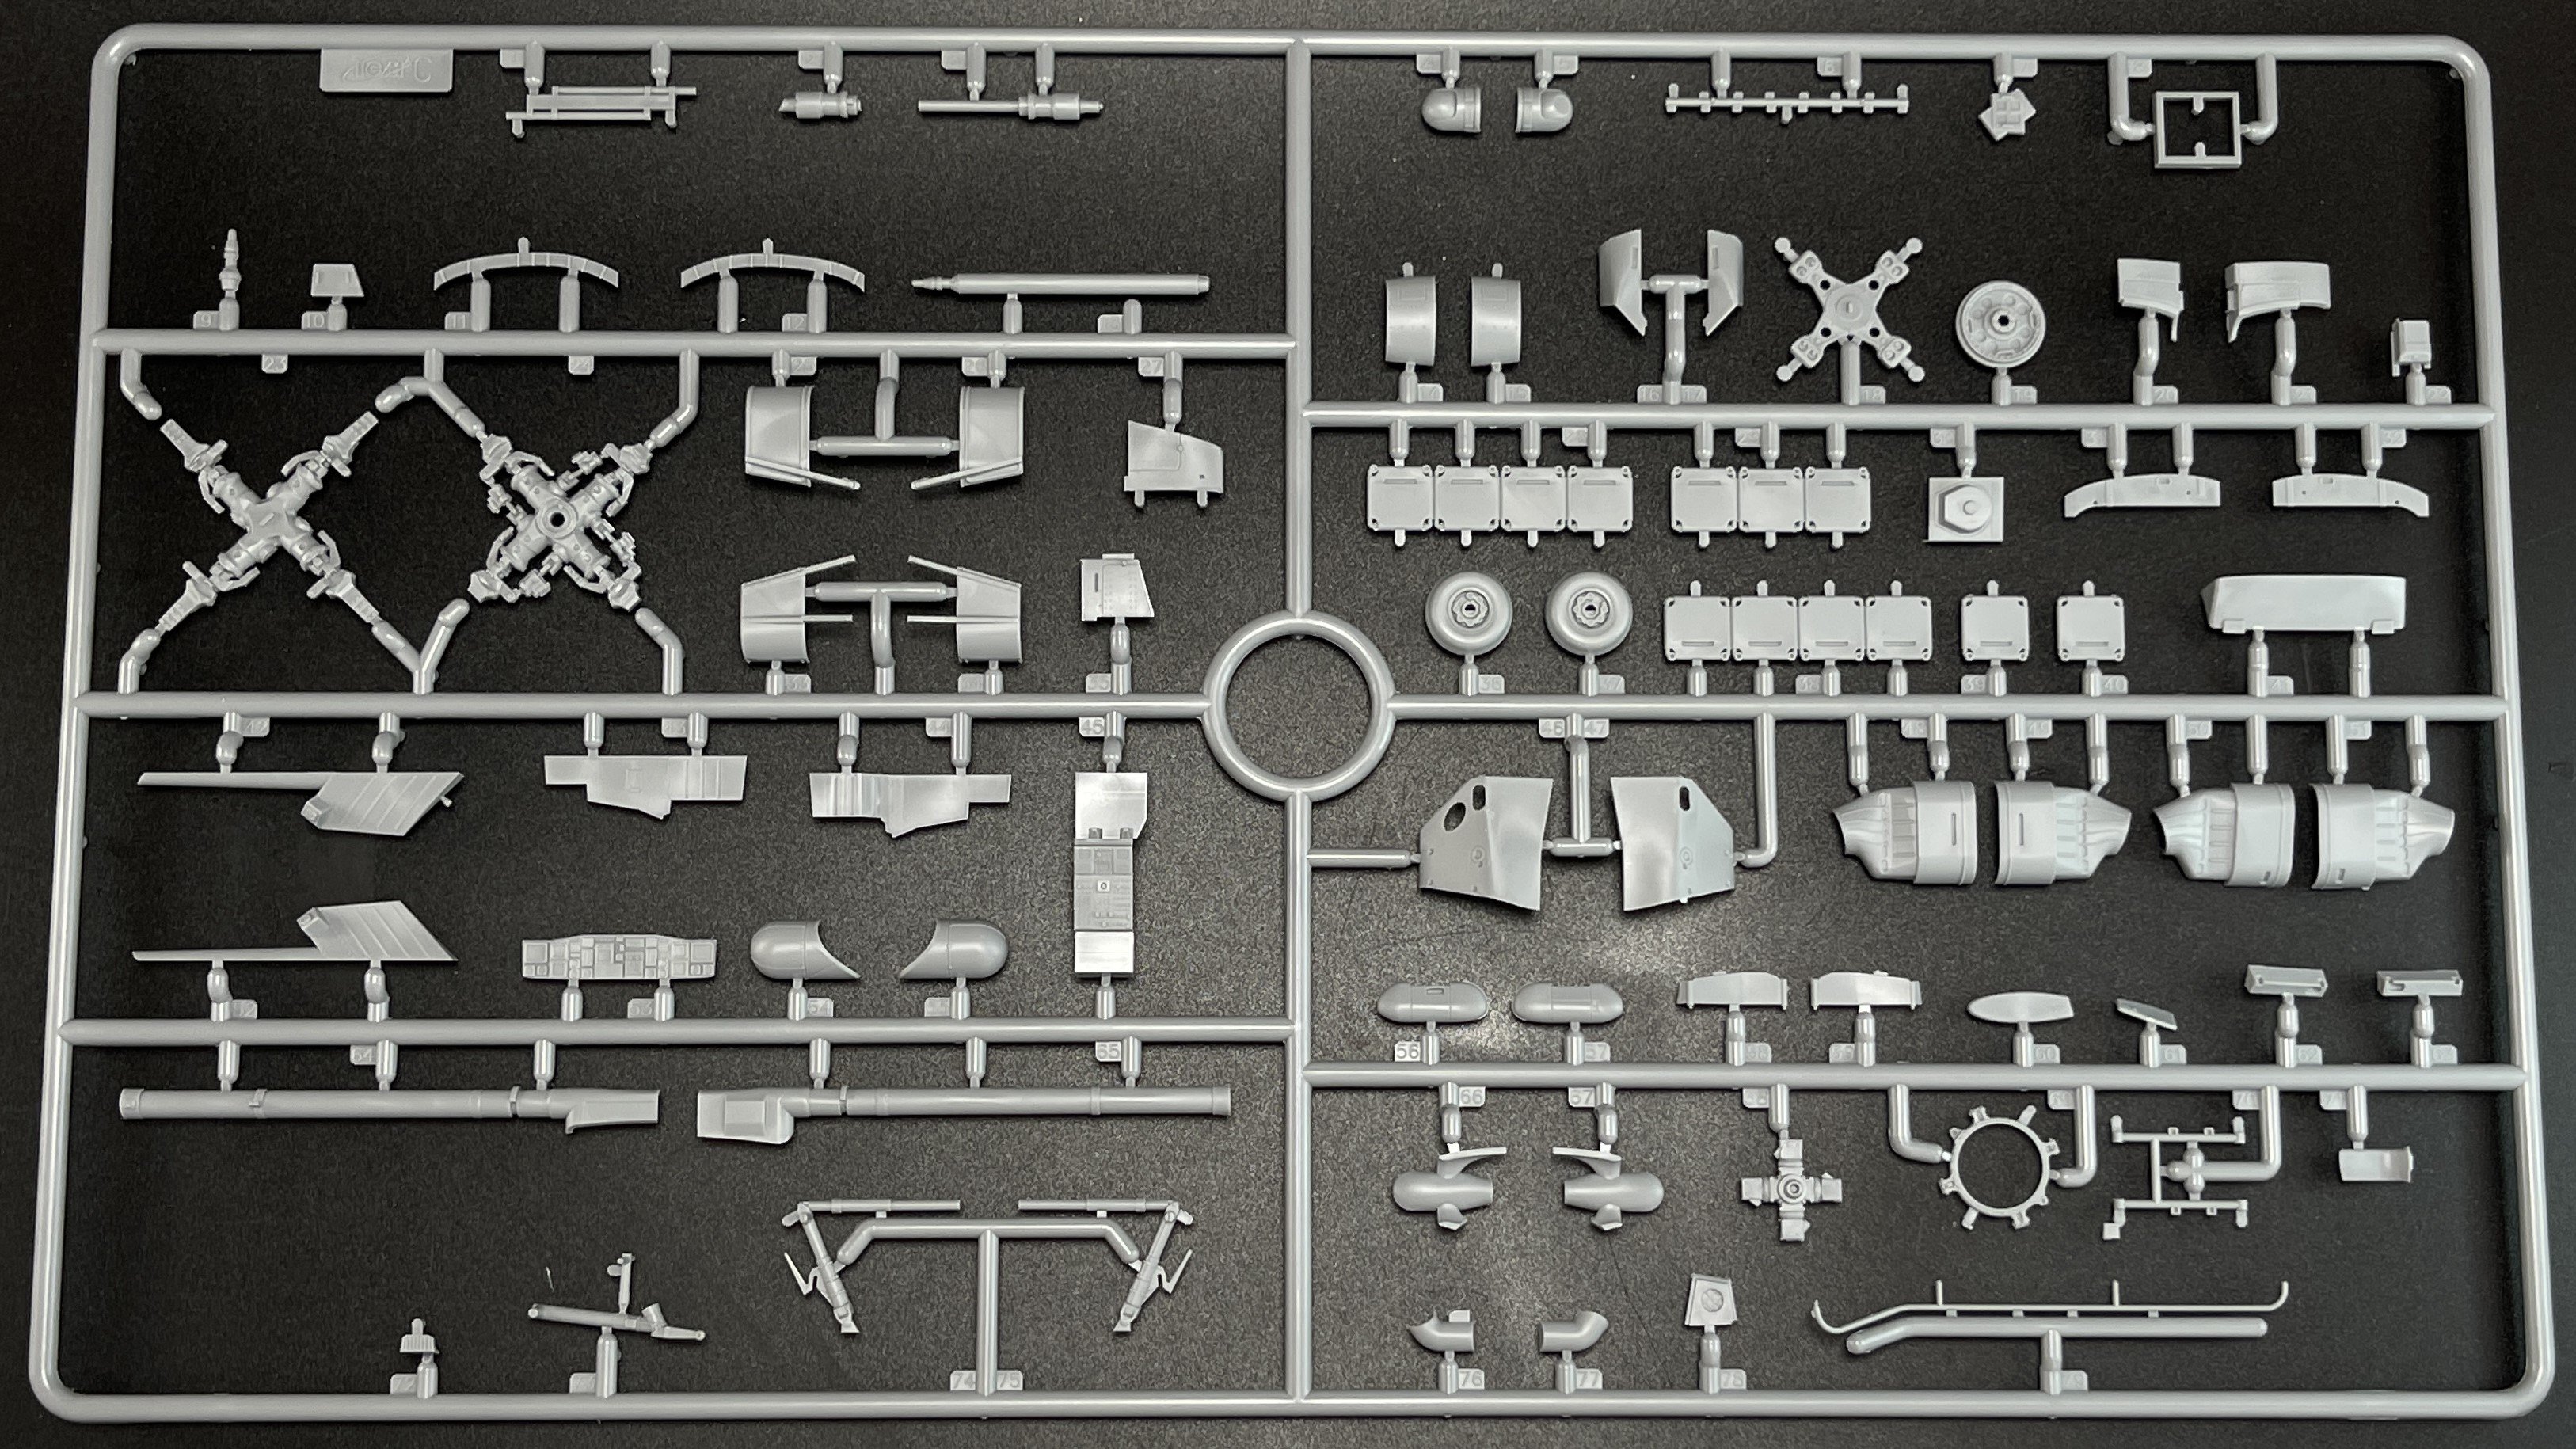
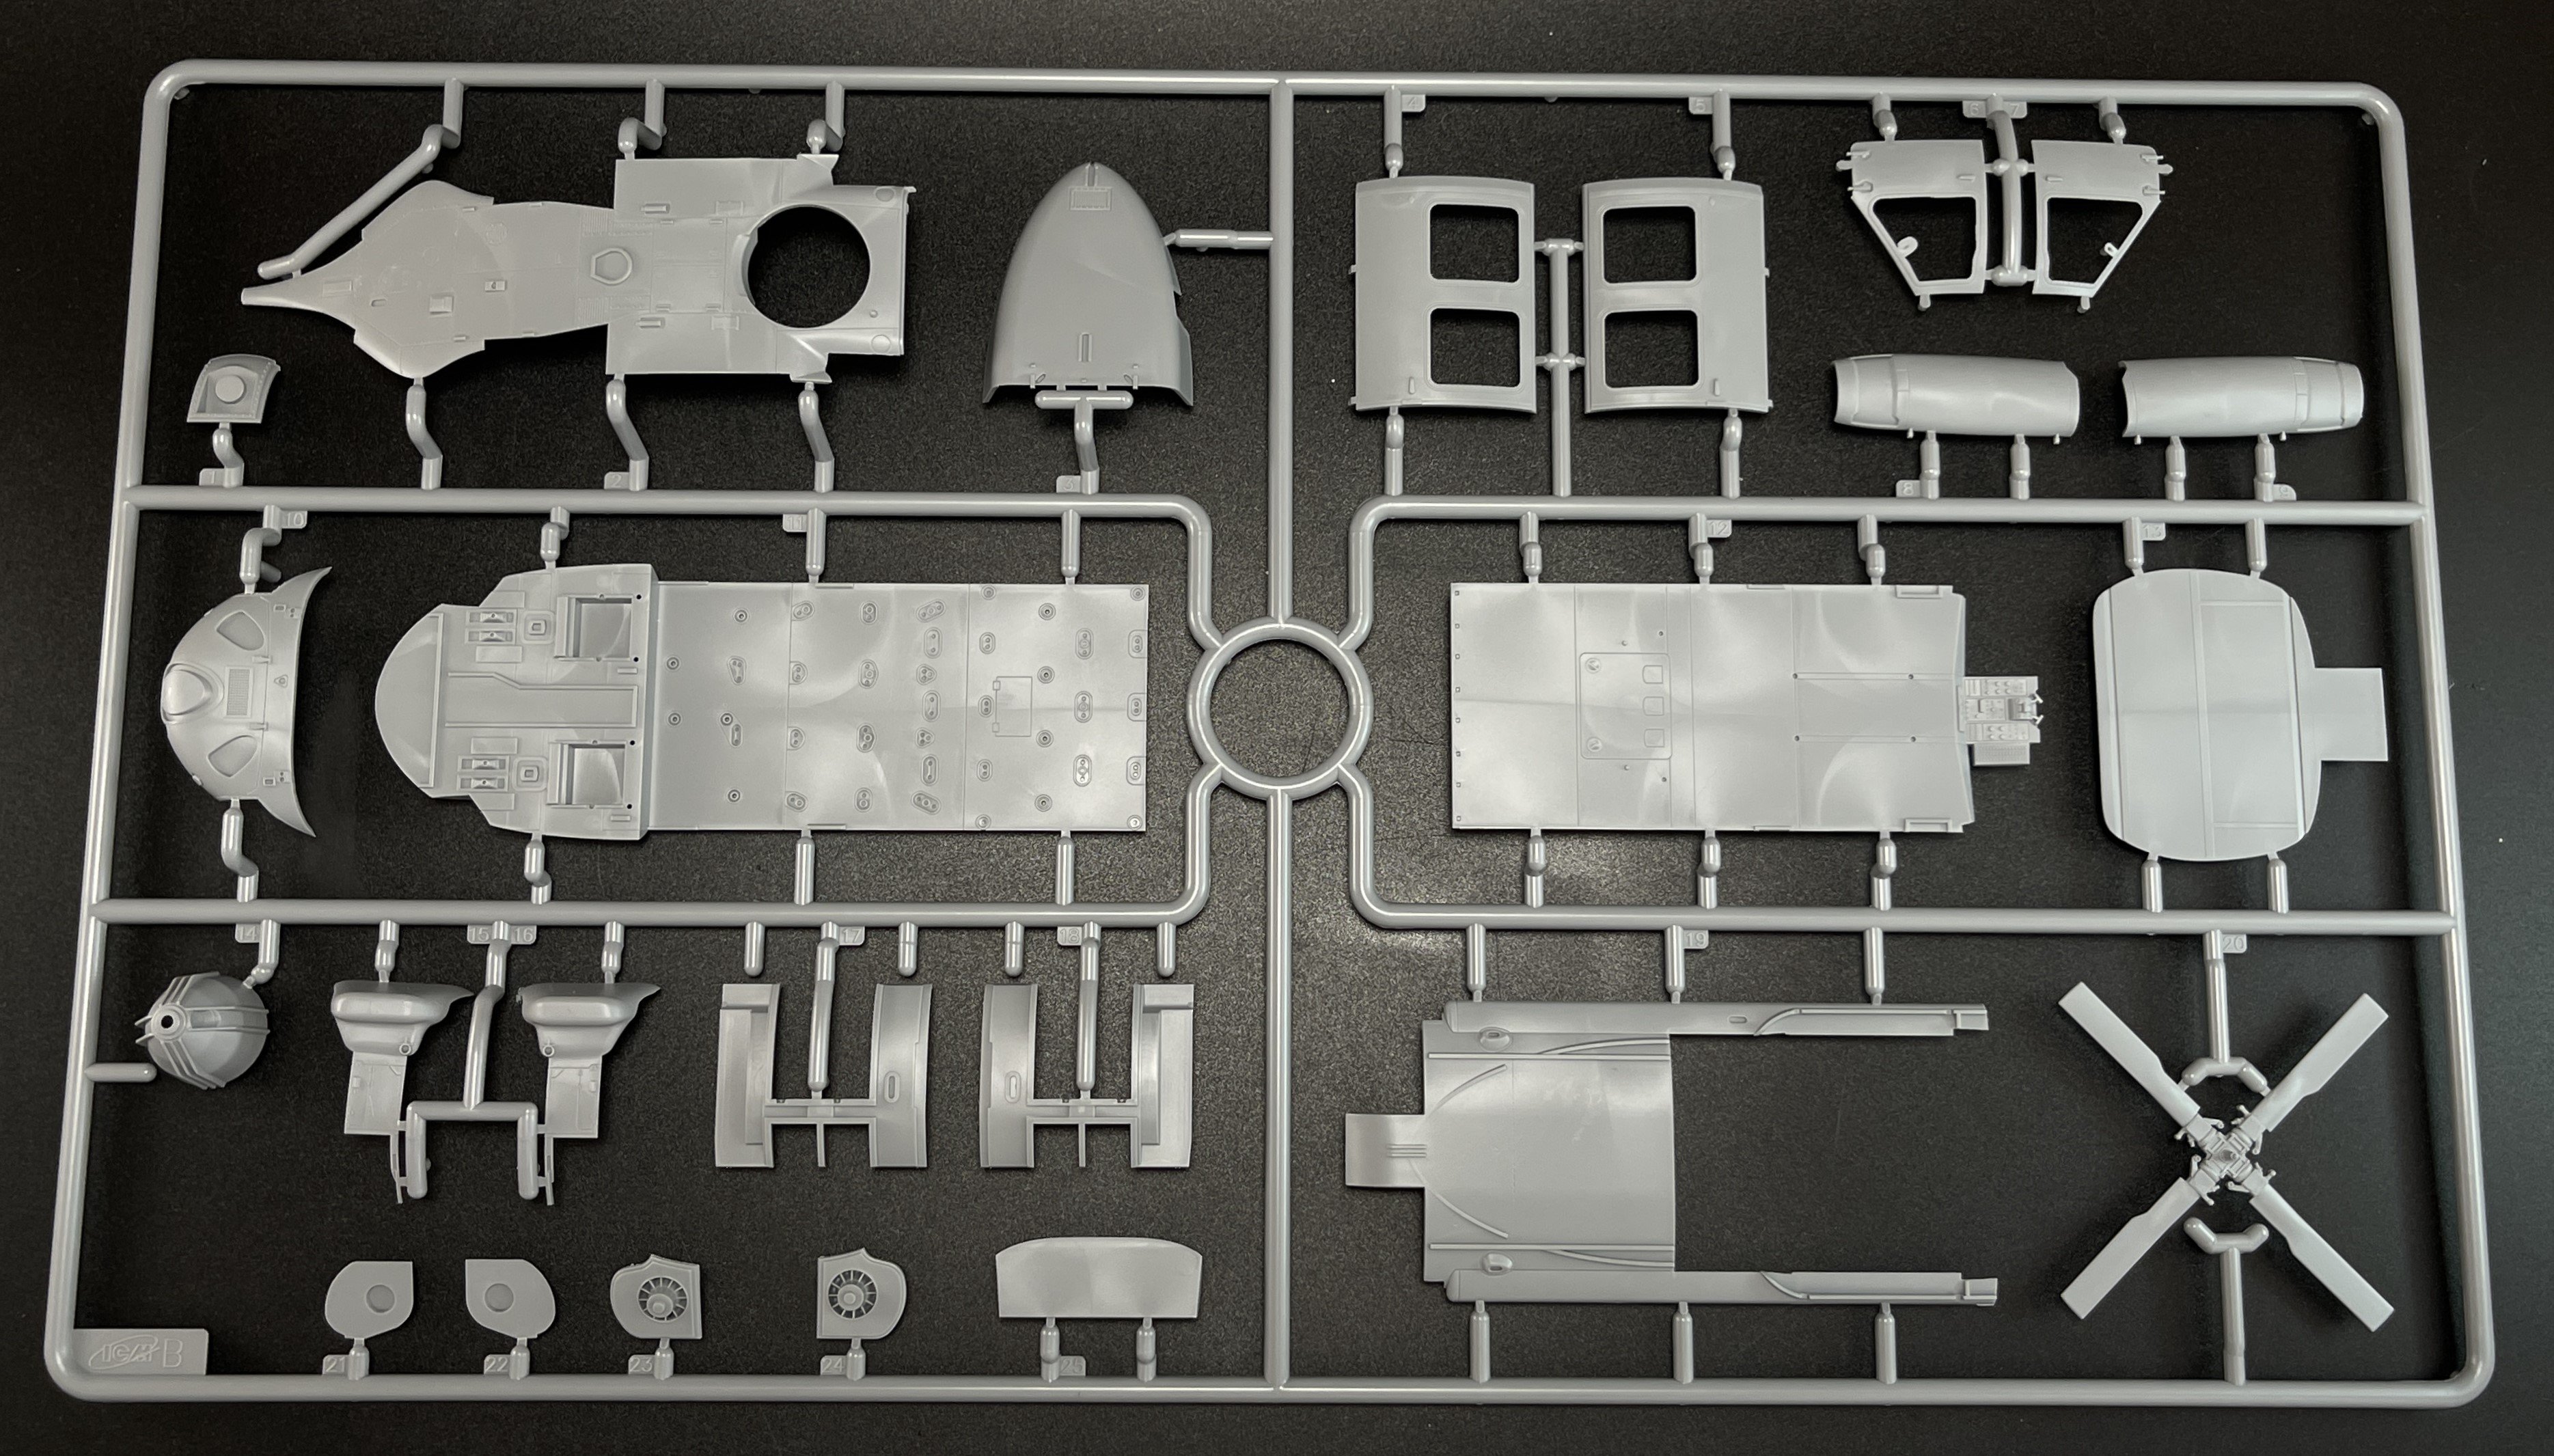
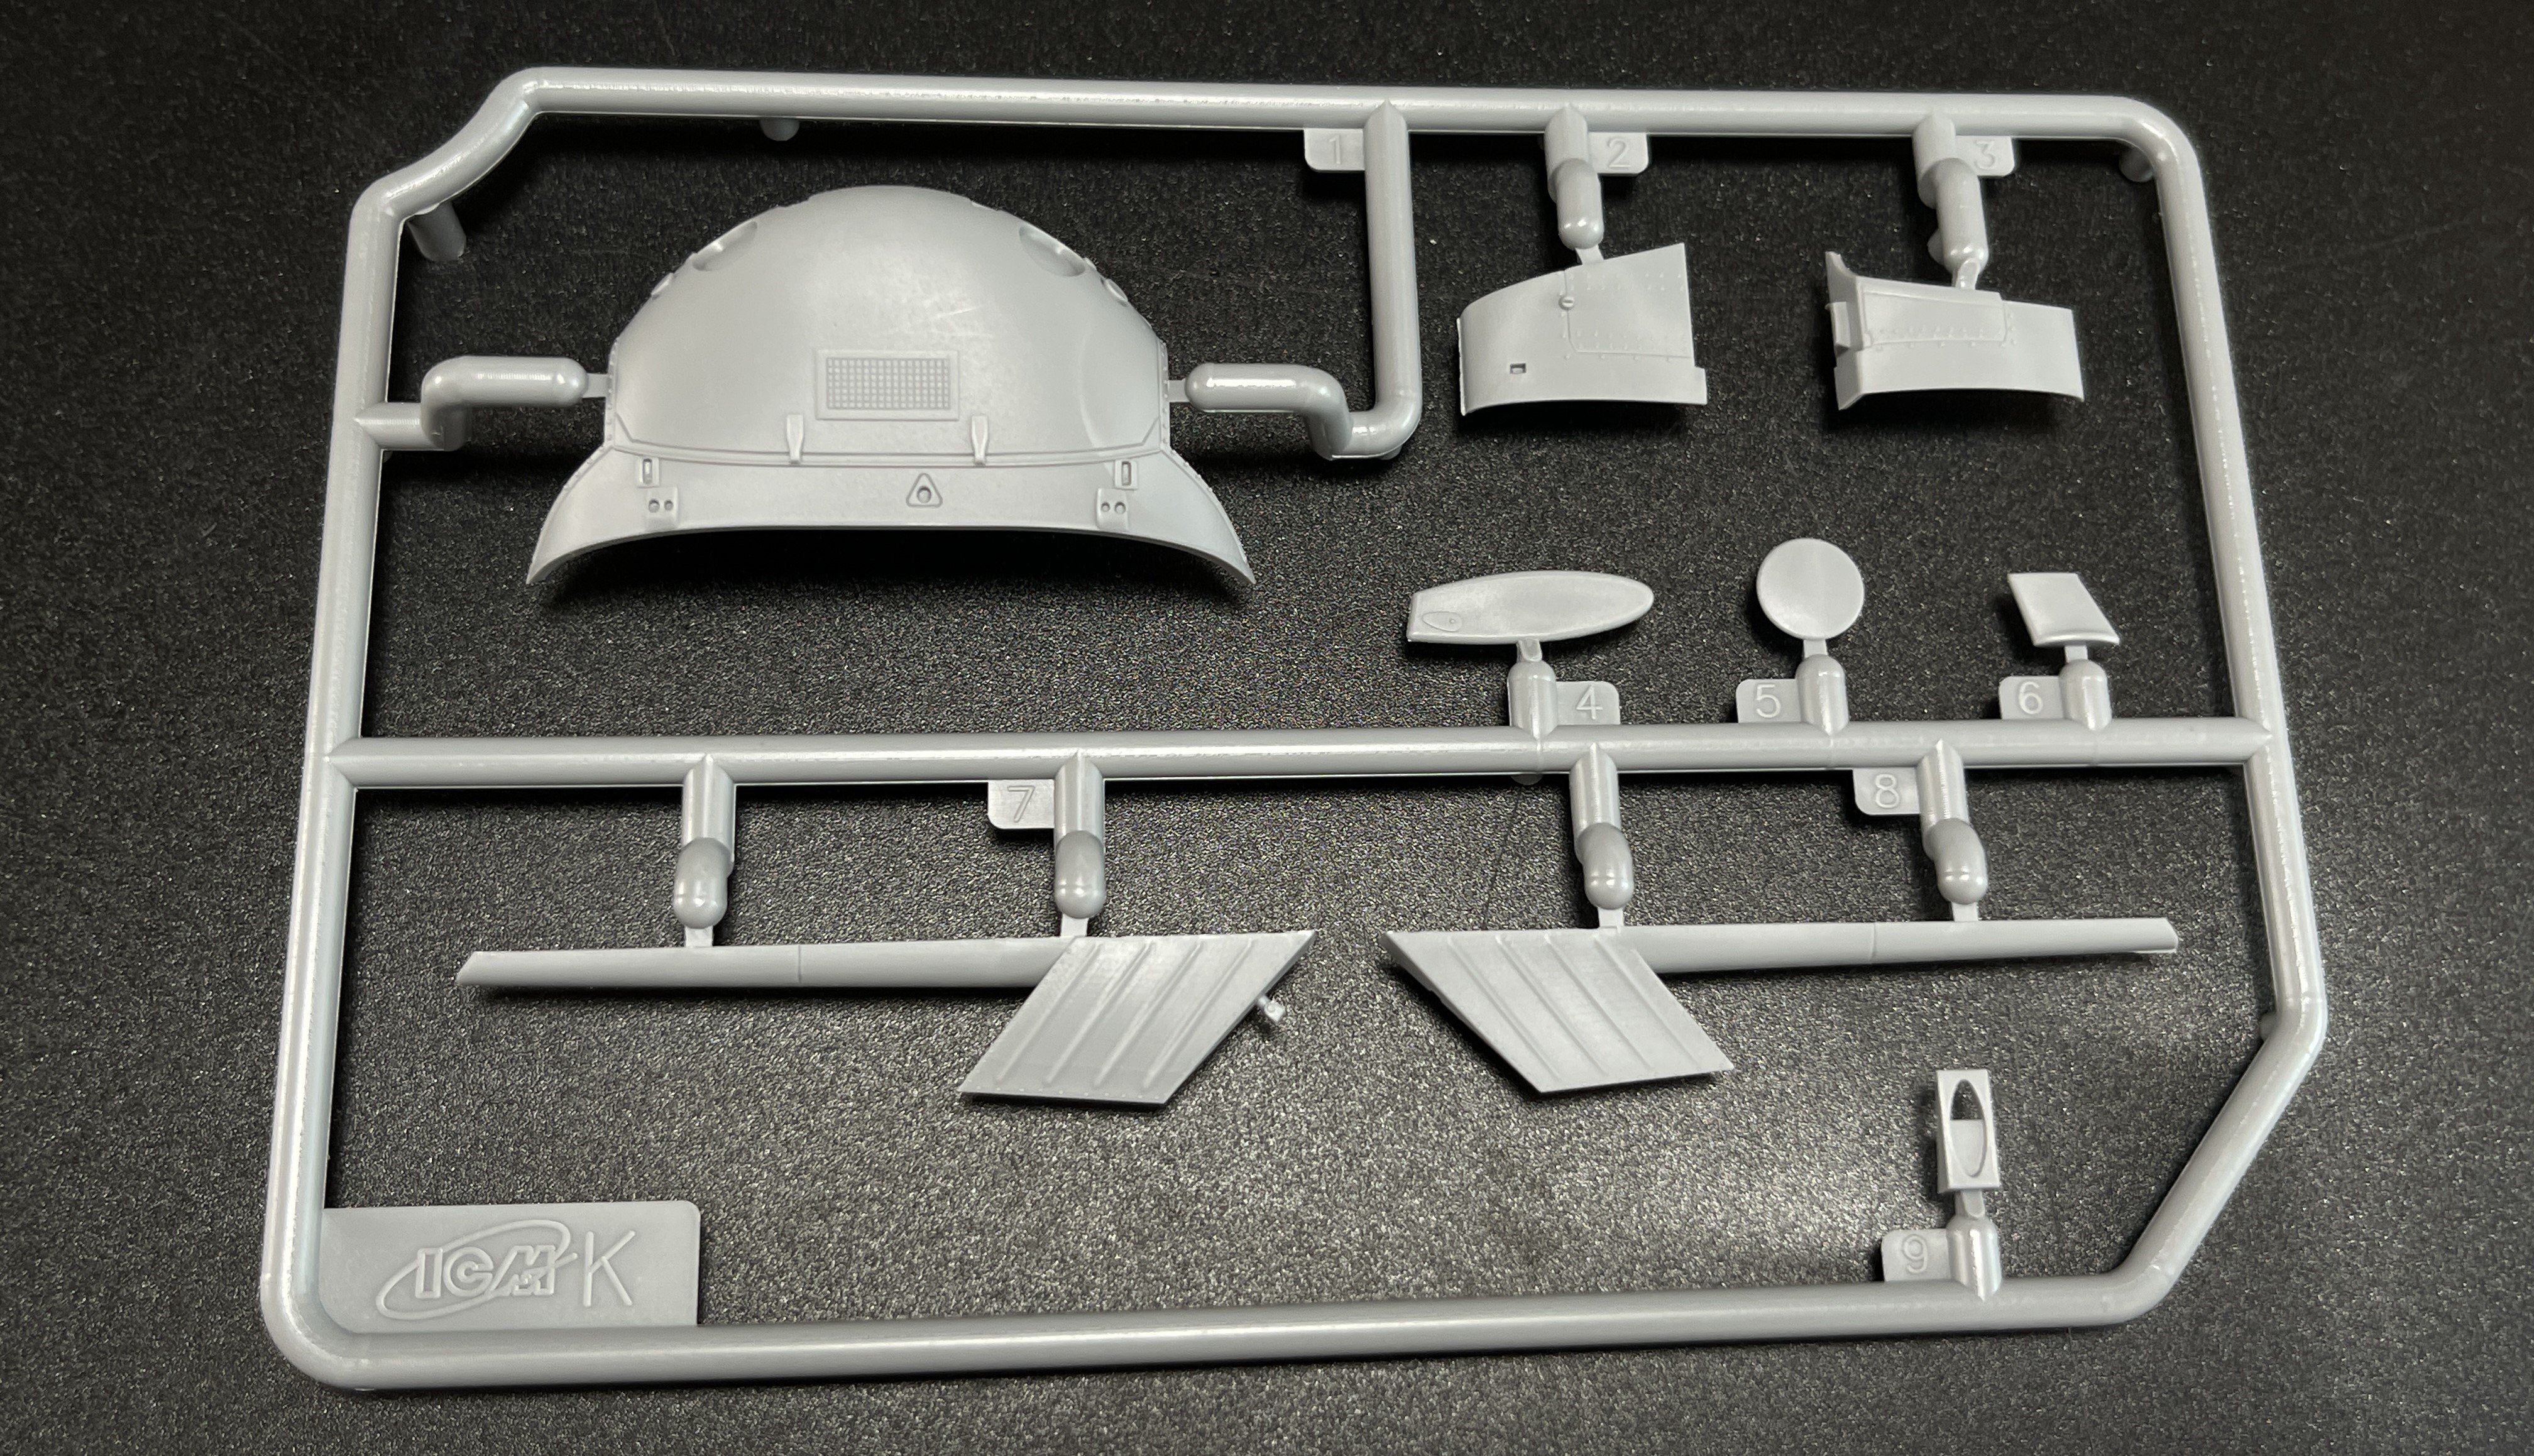
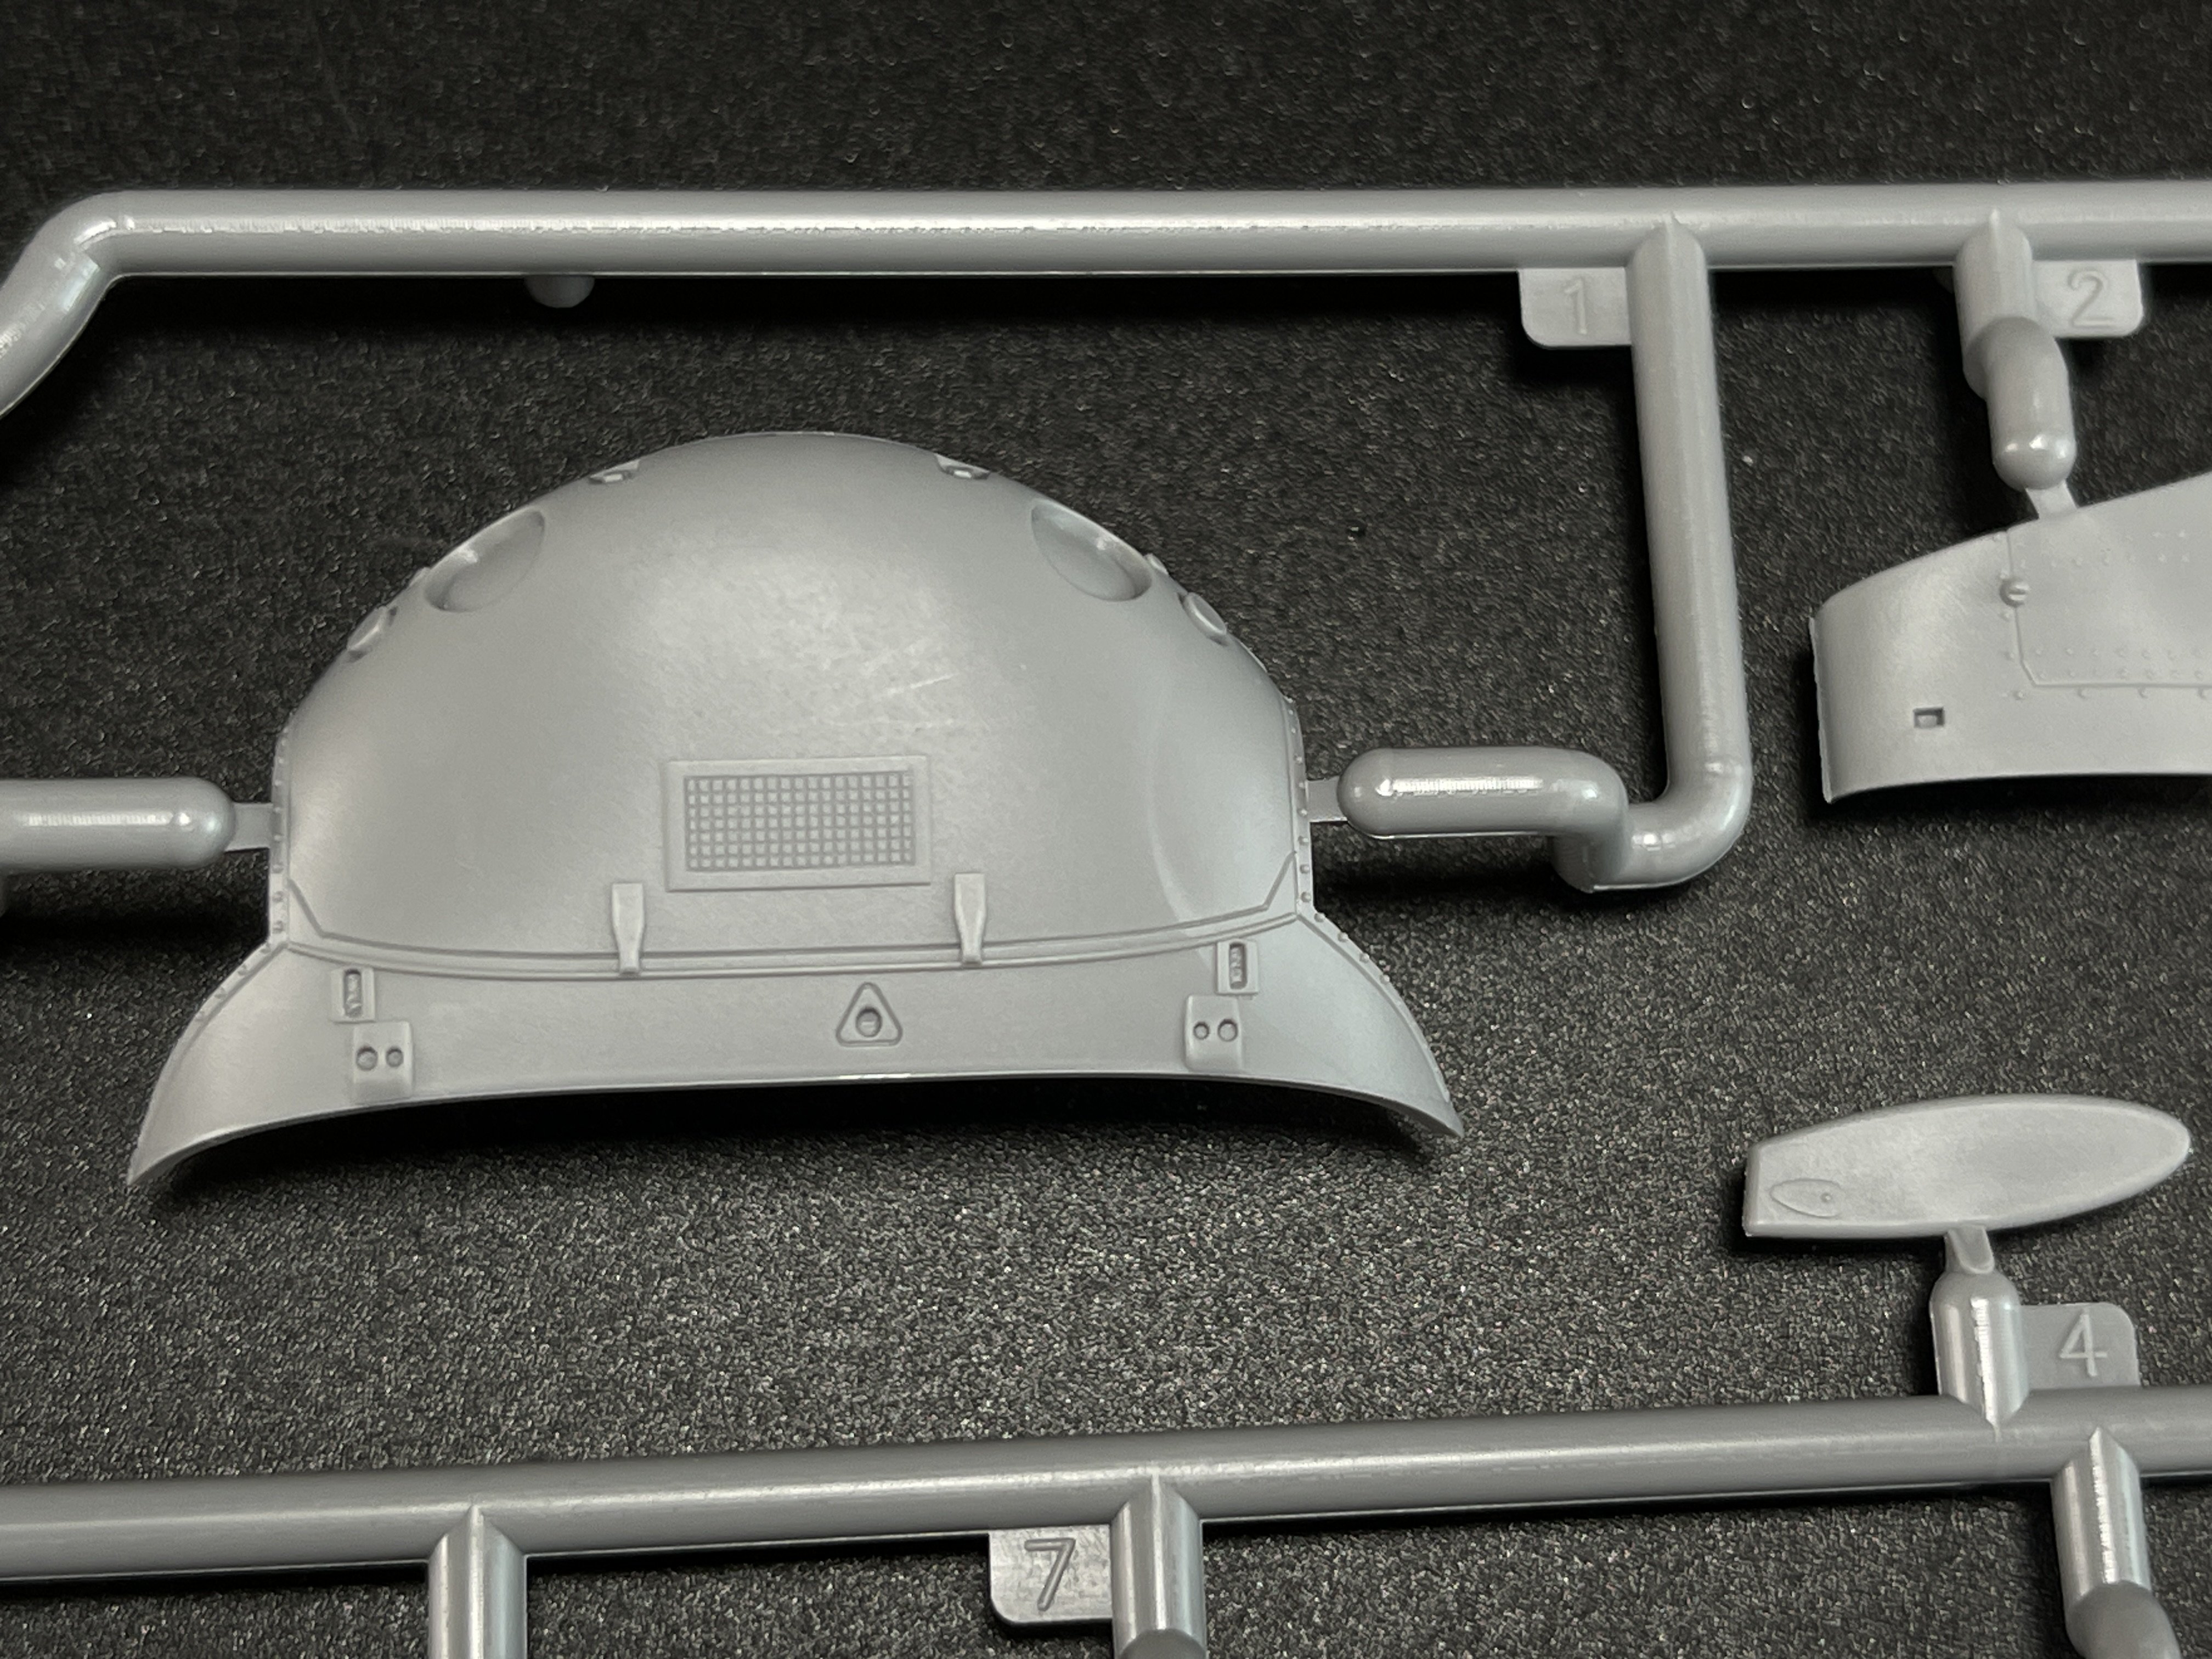
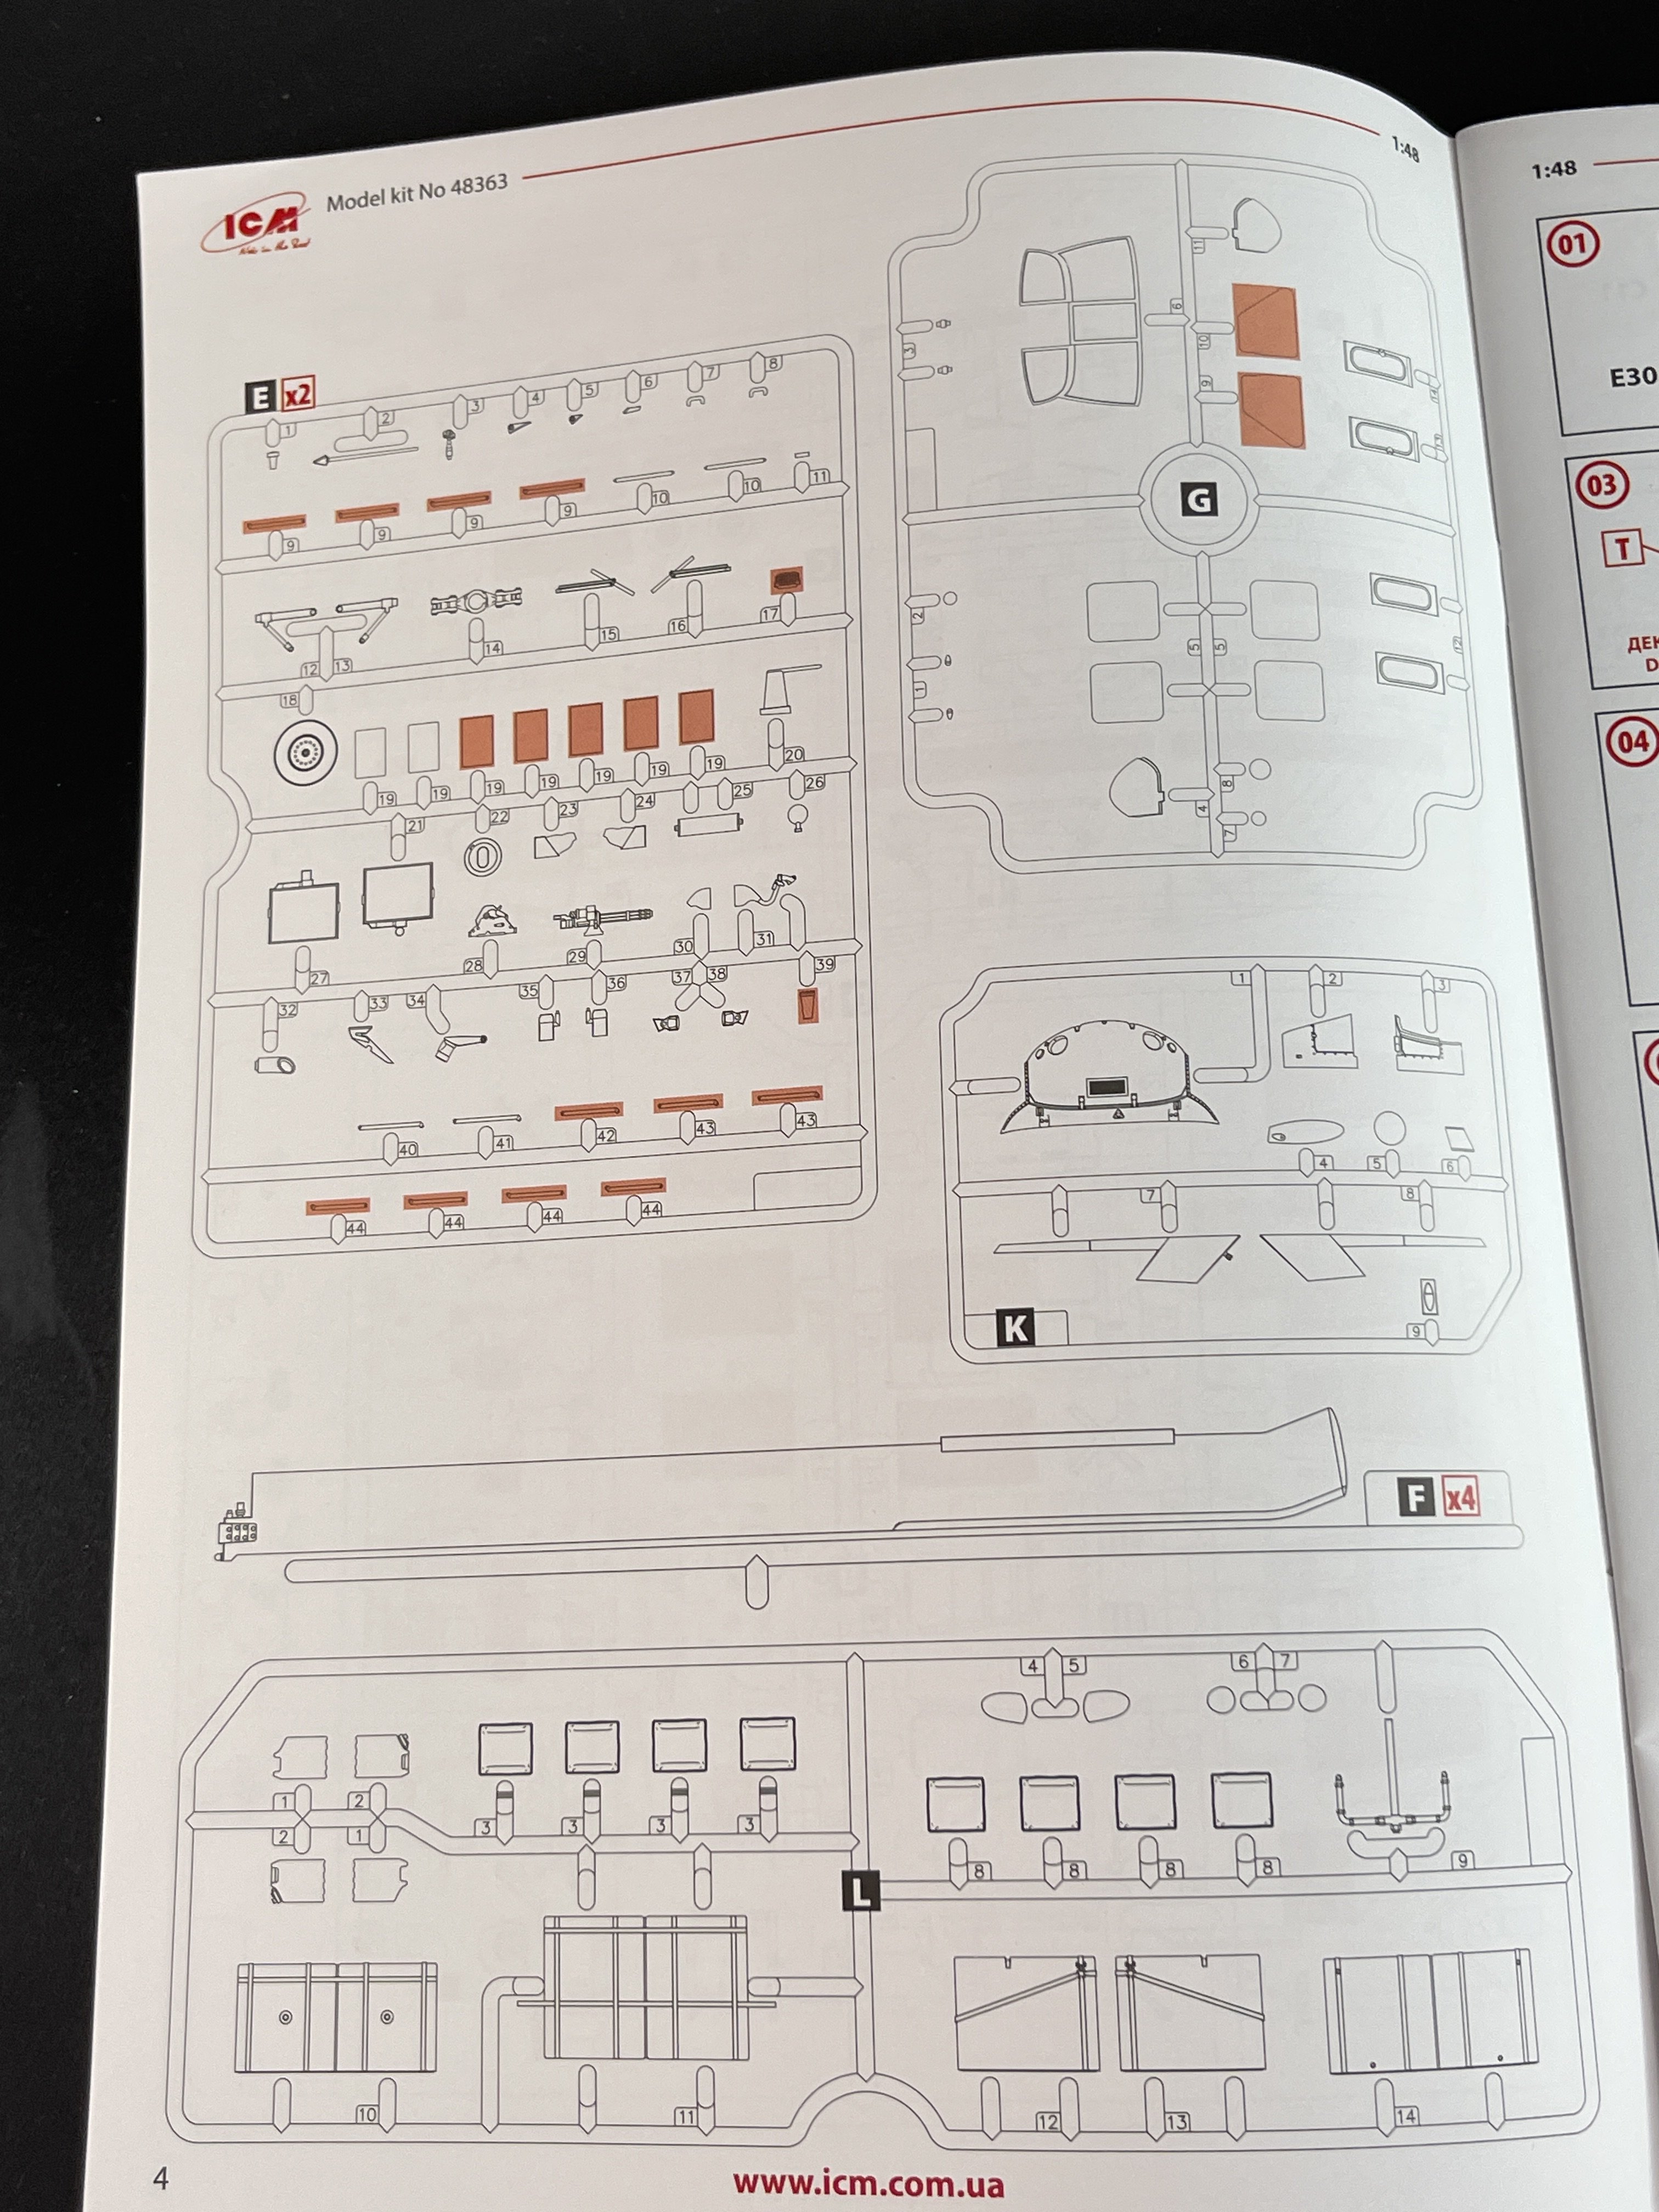
This release gives the modeler two new sprues: K and L.
Also will give you a lots of spares parts comparing with the original release where all parts were used in construction, on this box, a lot of parts are not to be use, starting for all the chairs on the compartment and other specific details or the absence of that detail.
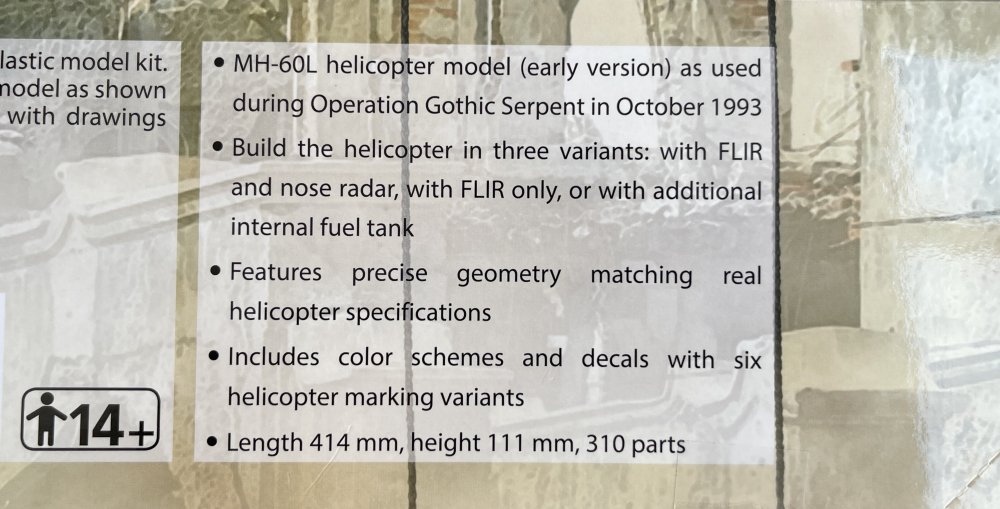
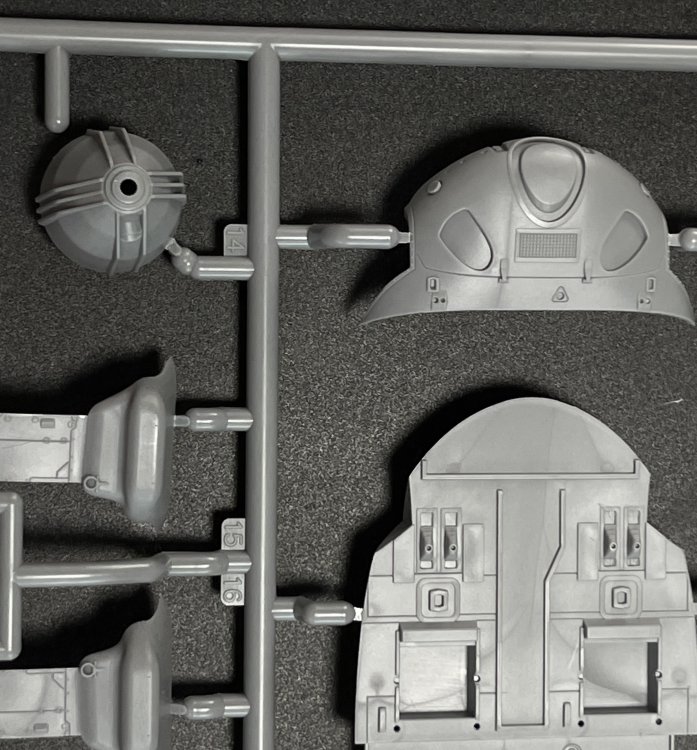
So in the end you get approximately 302 parts that is based on the base MH-60L kit, with additional parts for the Operation Gothic Serpent configuration, like FLIR, nose radar and internal fuel tank.
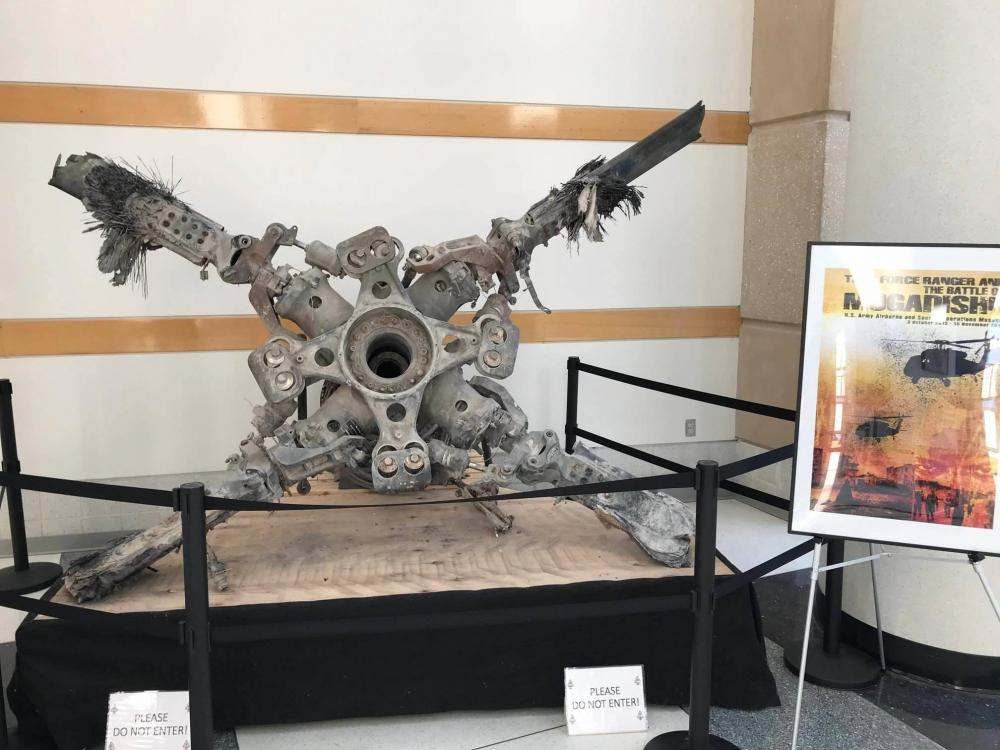
The kit is designed to represent the MH-60L Black Hawk as used in the 1993 Battle of Mogadishu, a pivotal event where the helicopter’s versatility and resilience were showcased. The decals and additional parts aim to replicate the specific helicopters involved, including their weathered appearance and mission-specific modifications.
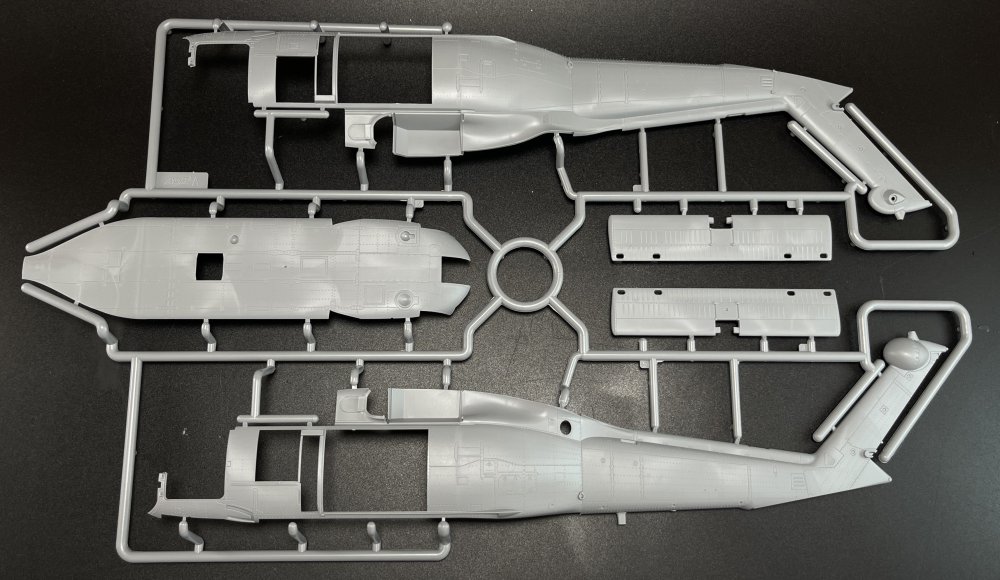
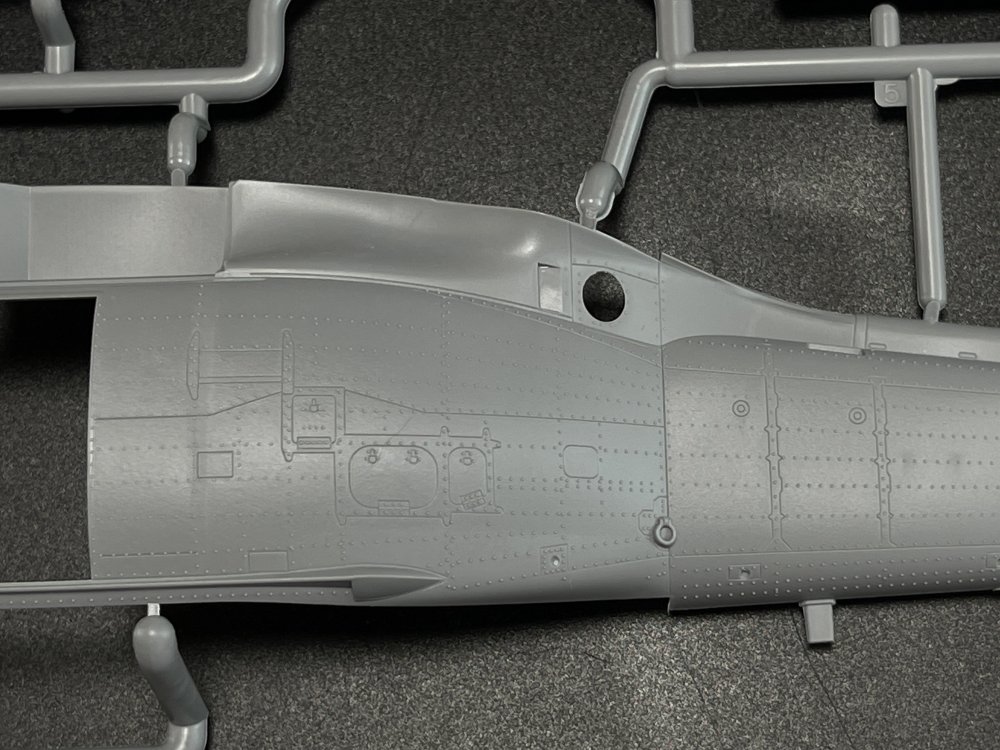
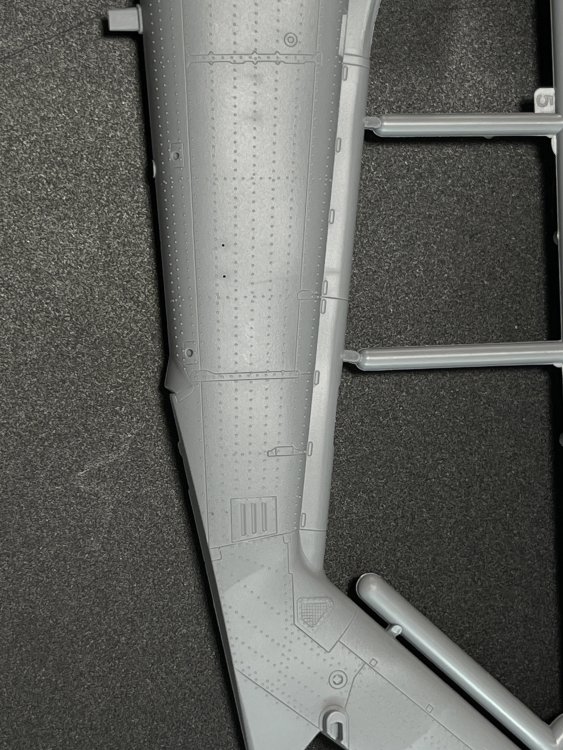
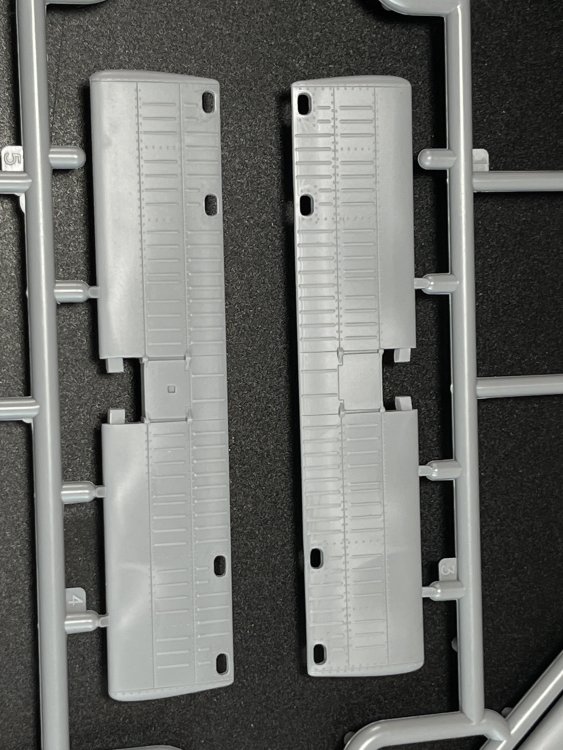
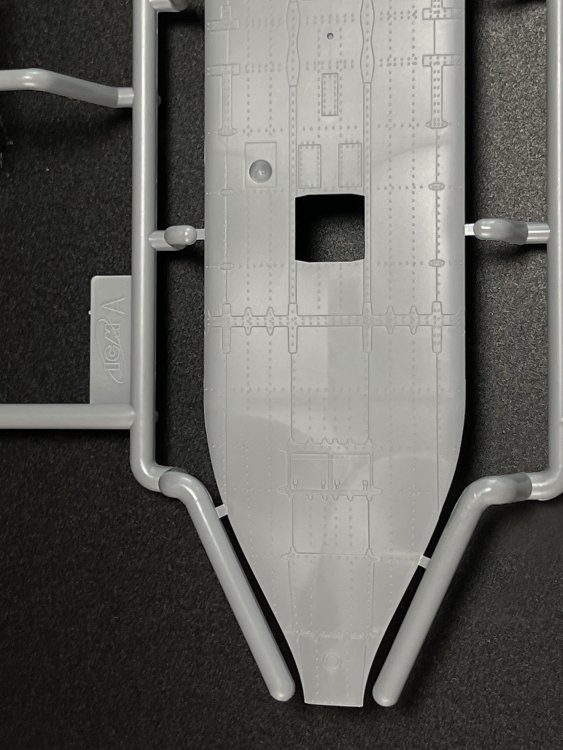
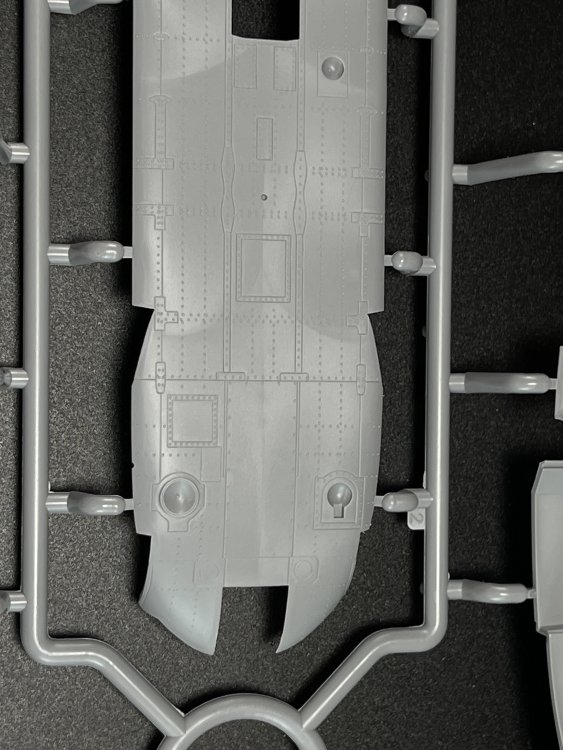
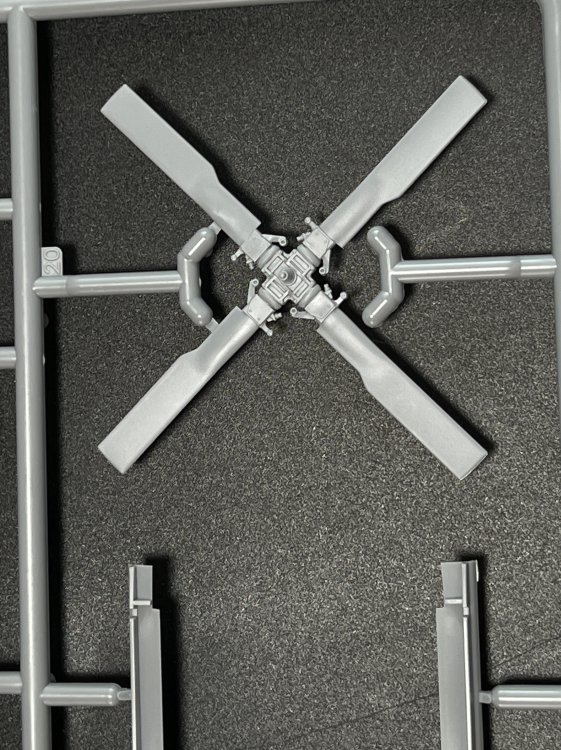
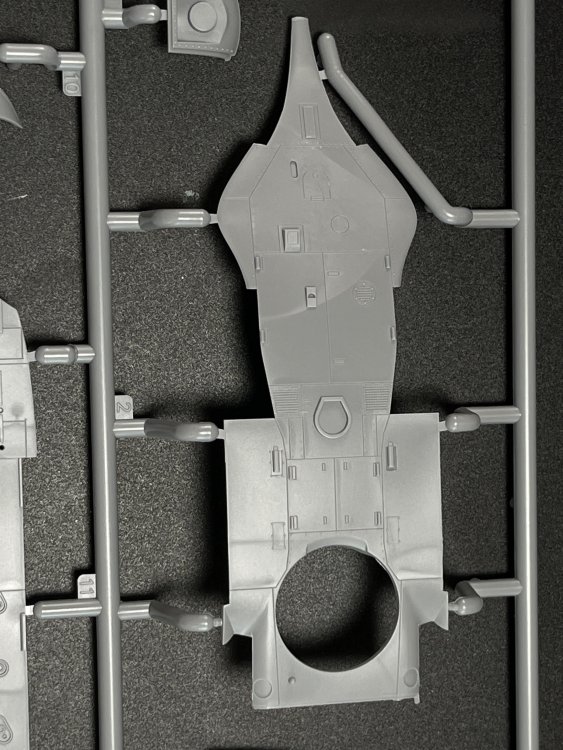
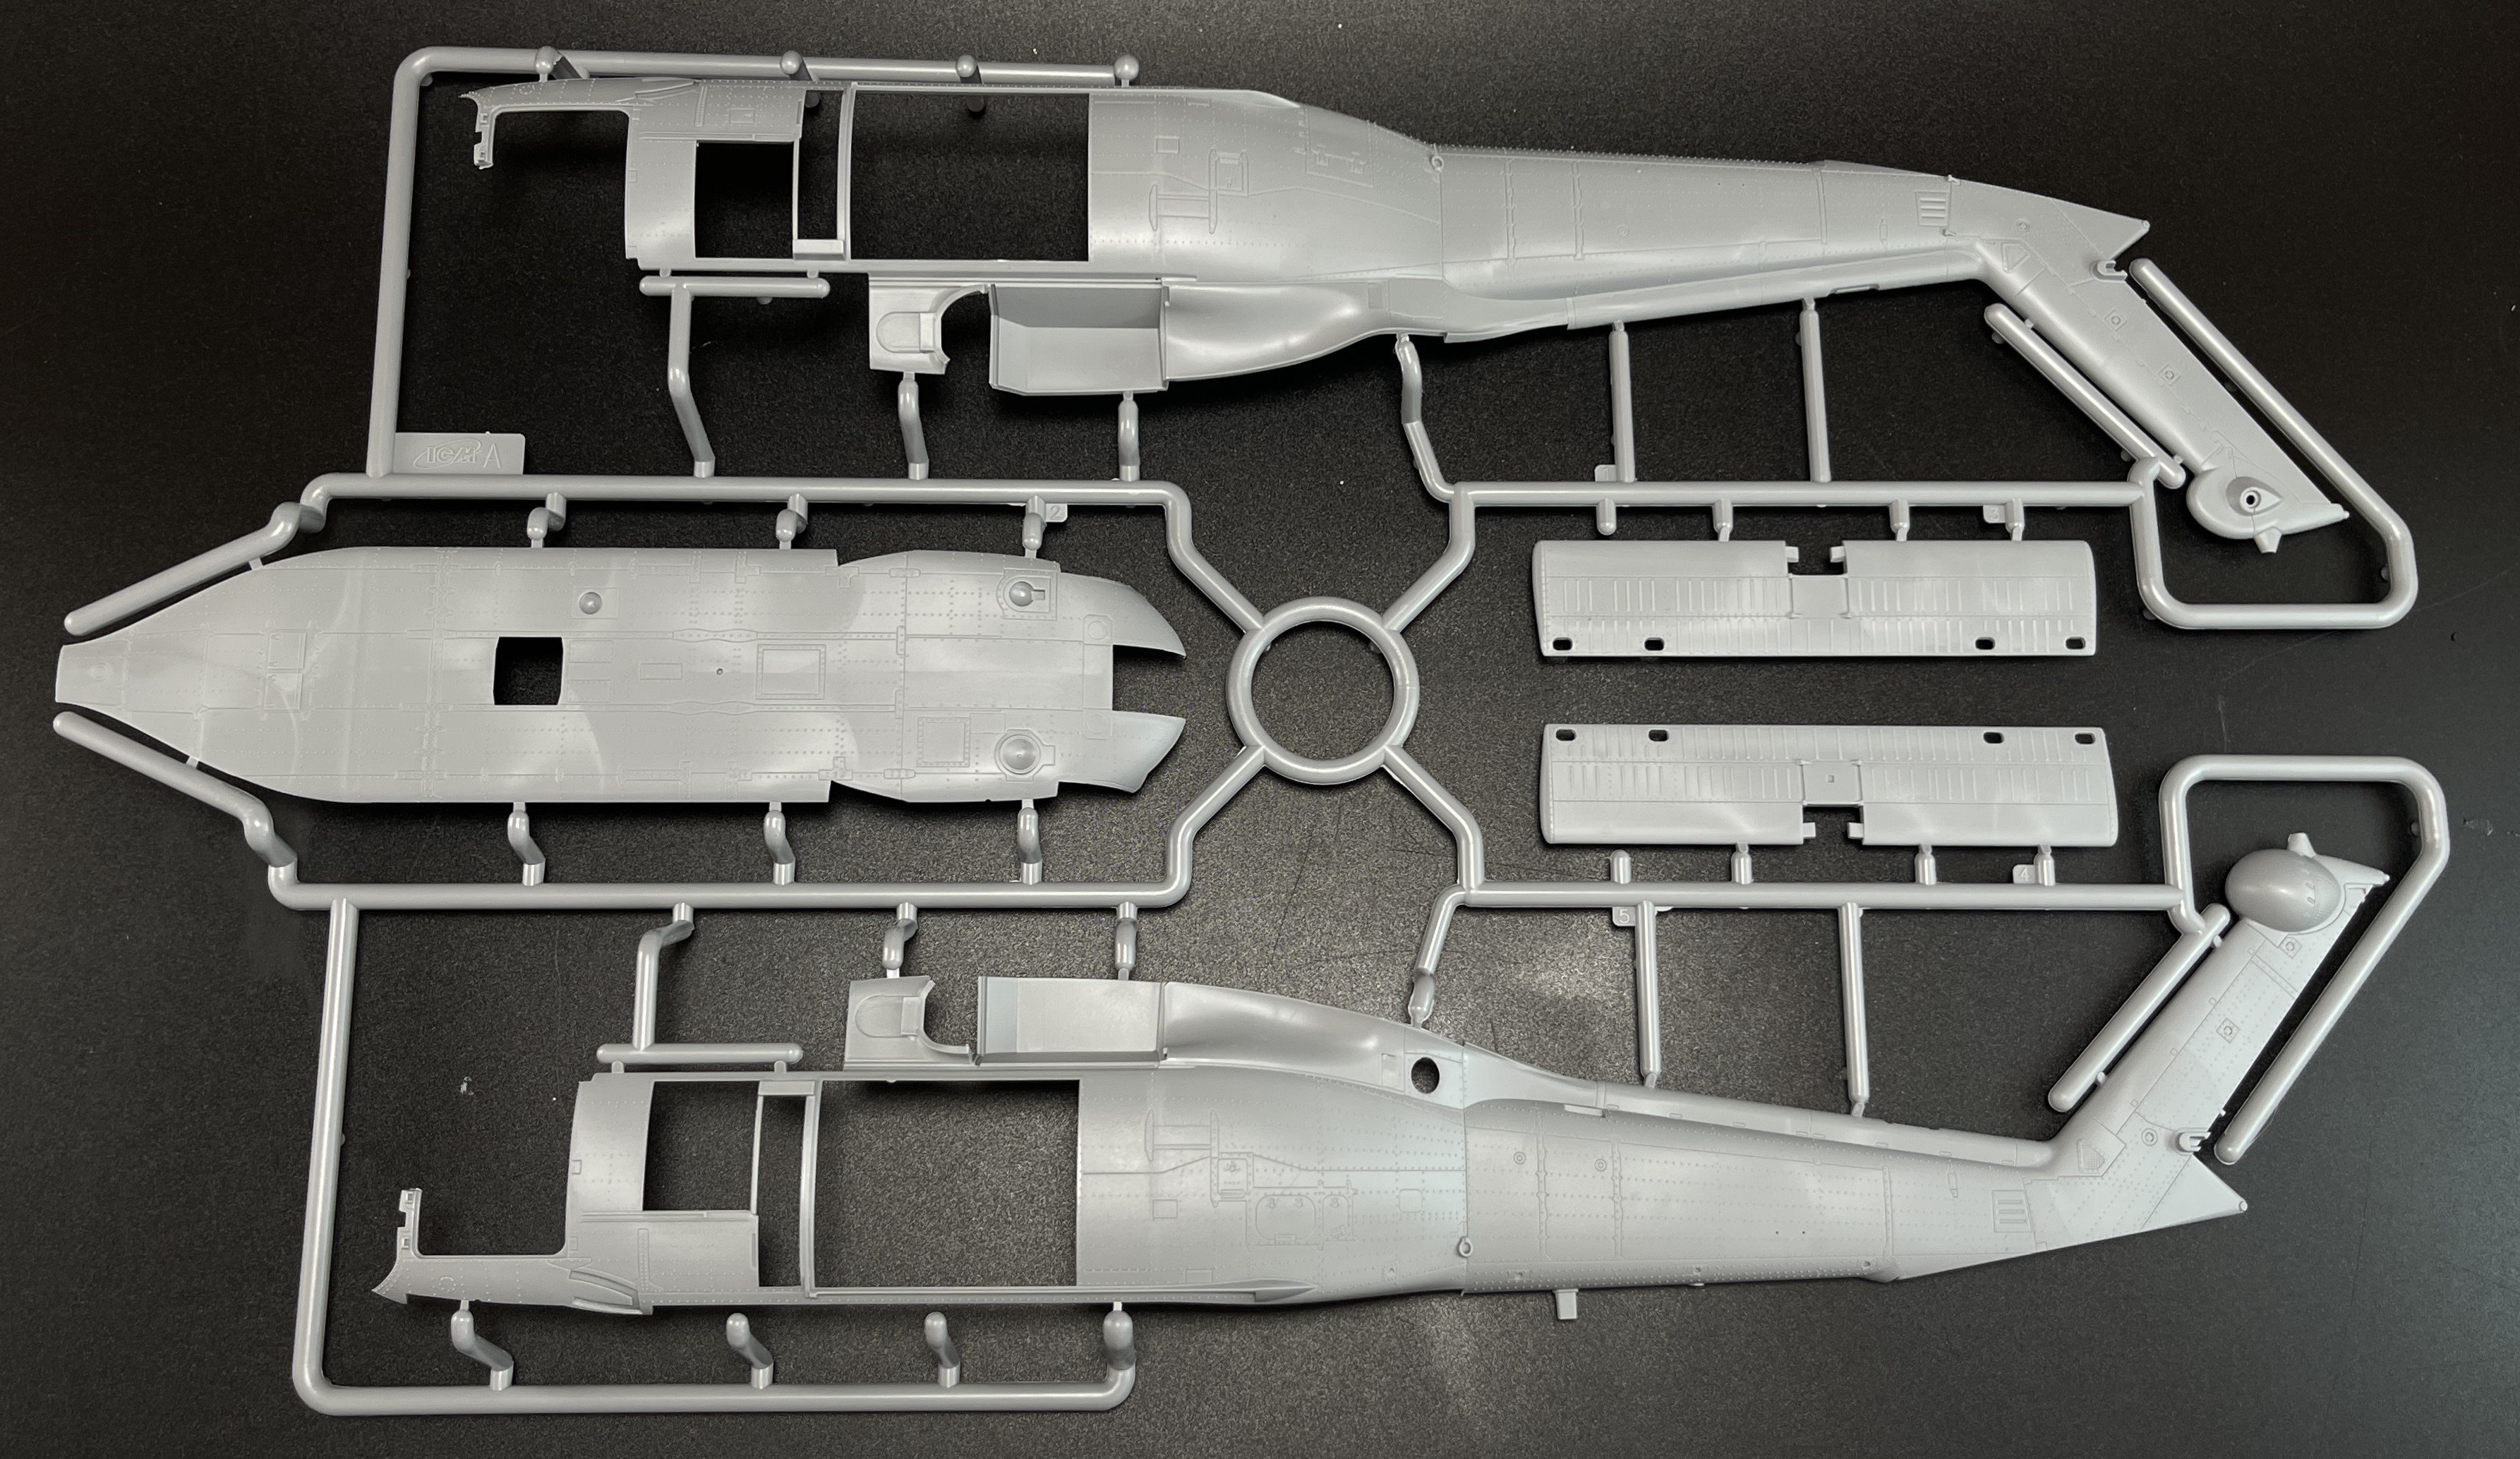
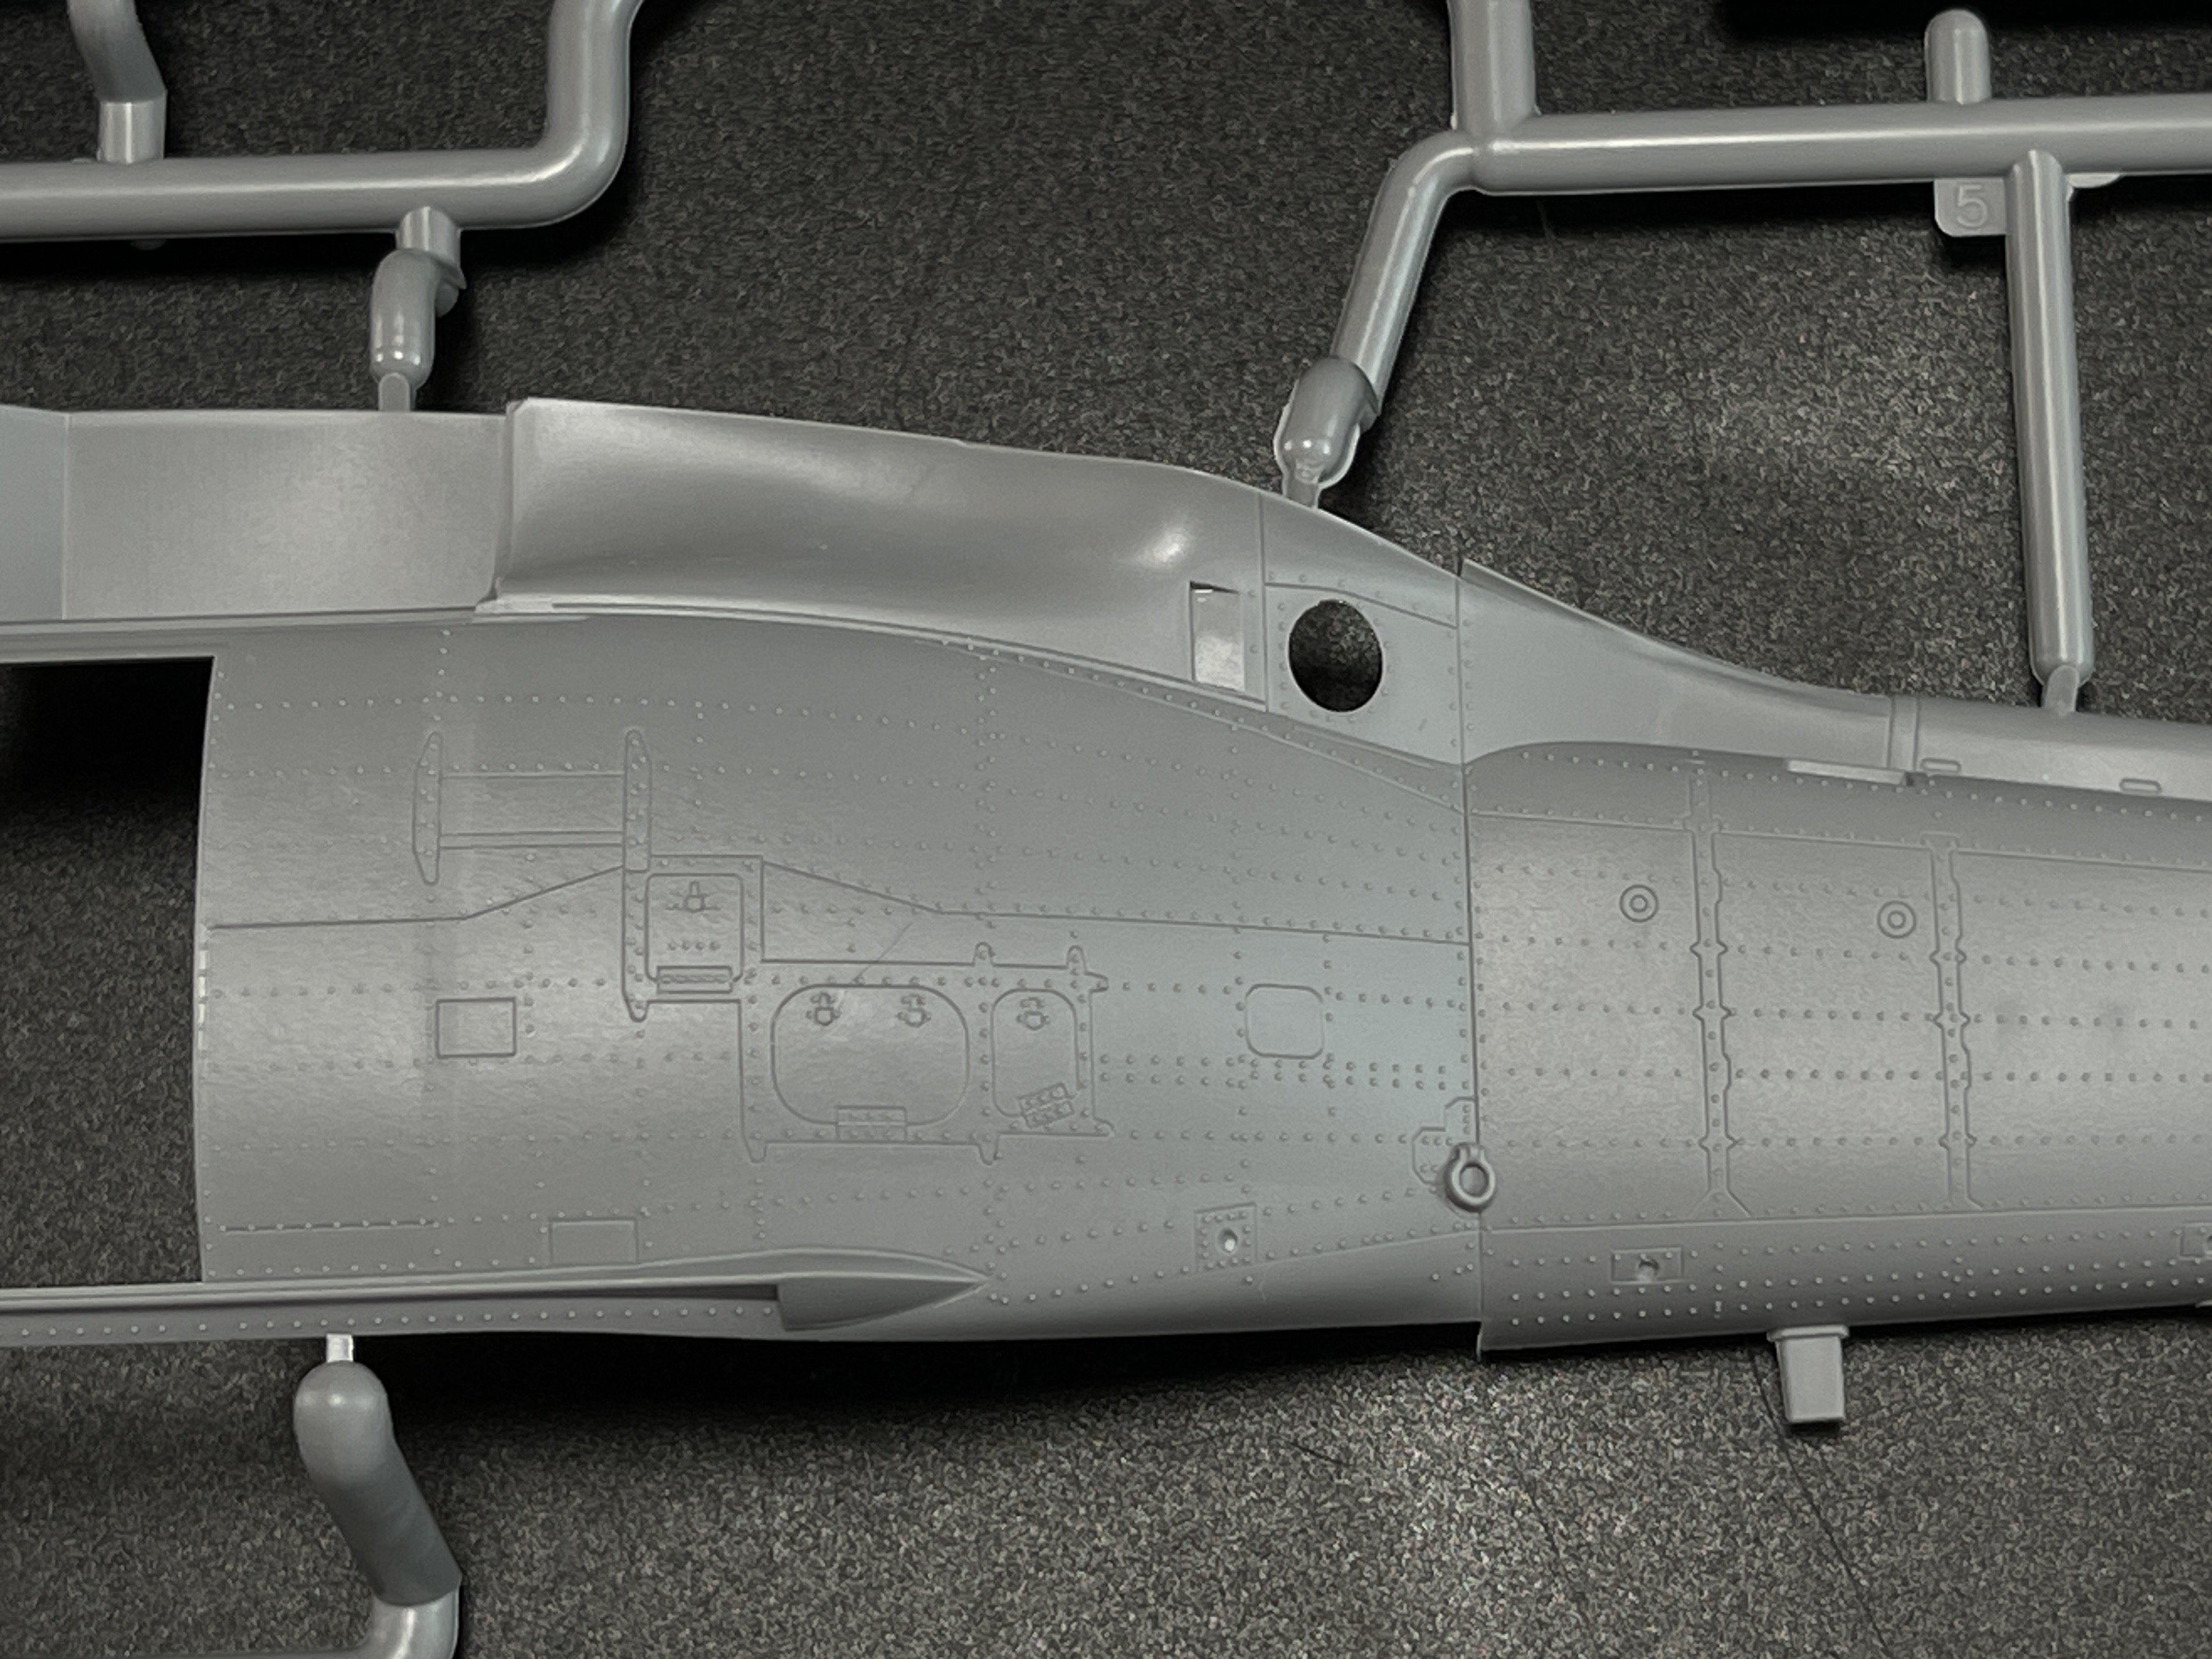
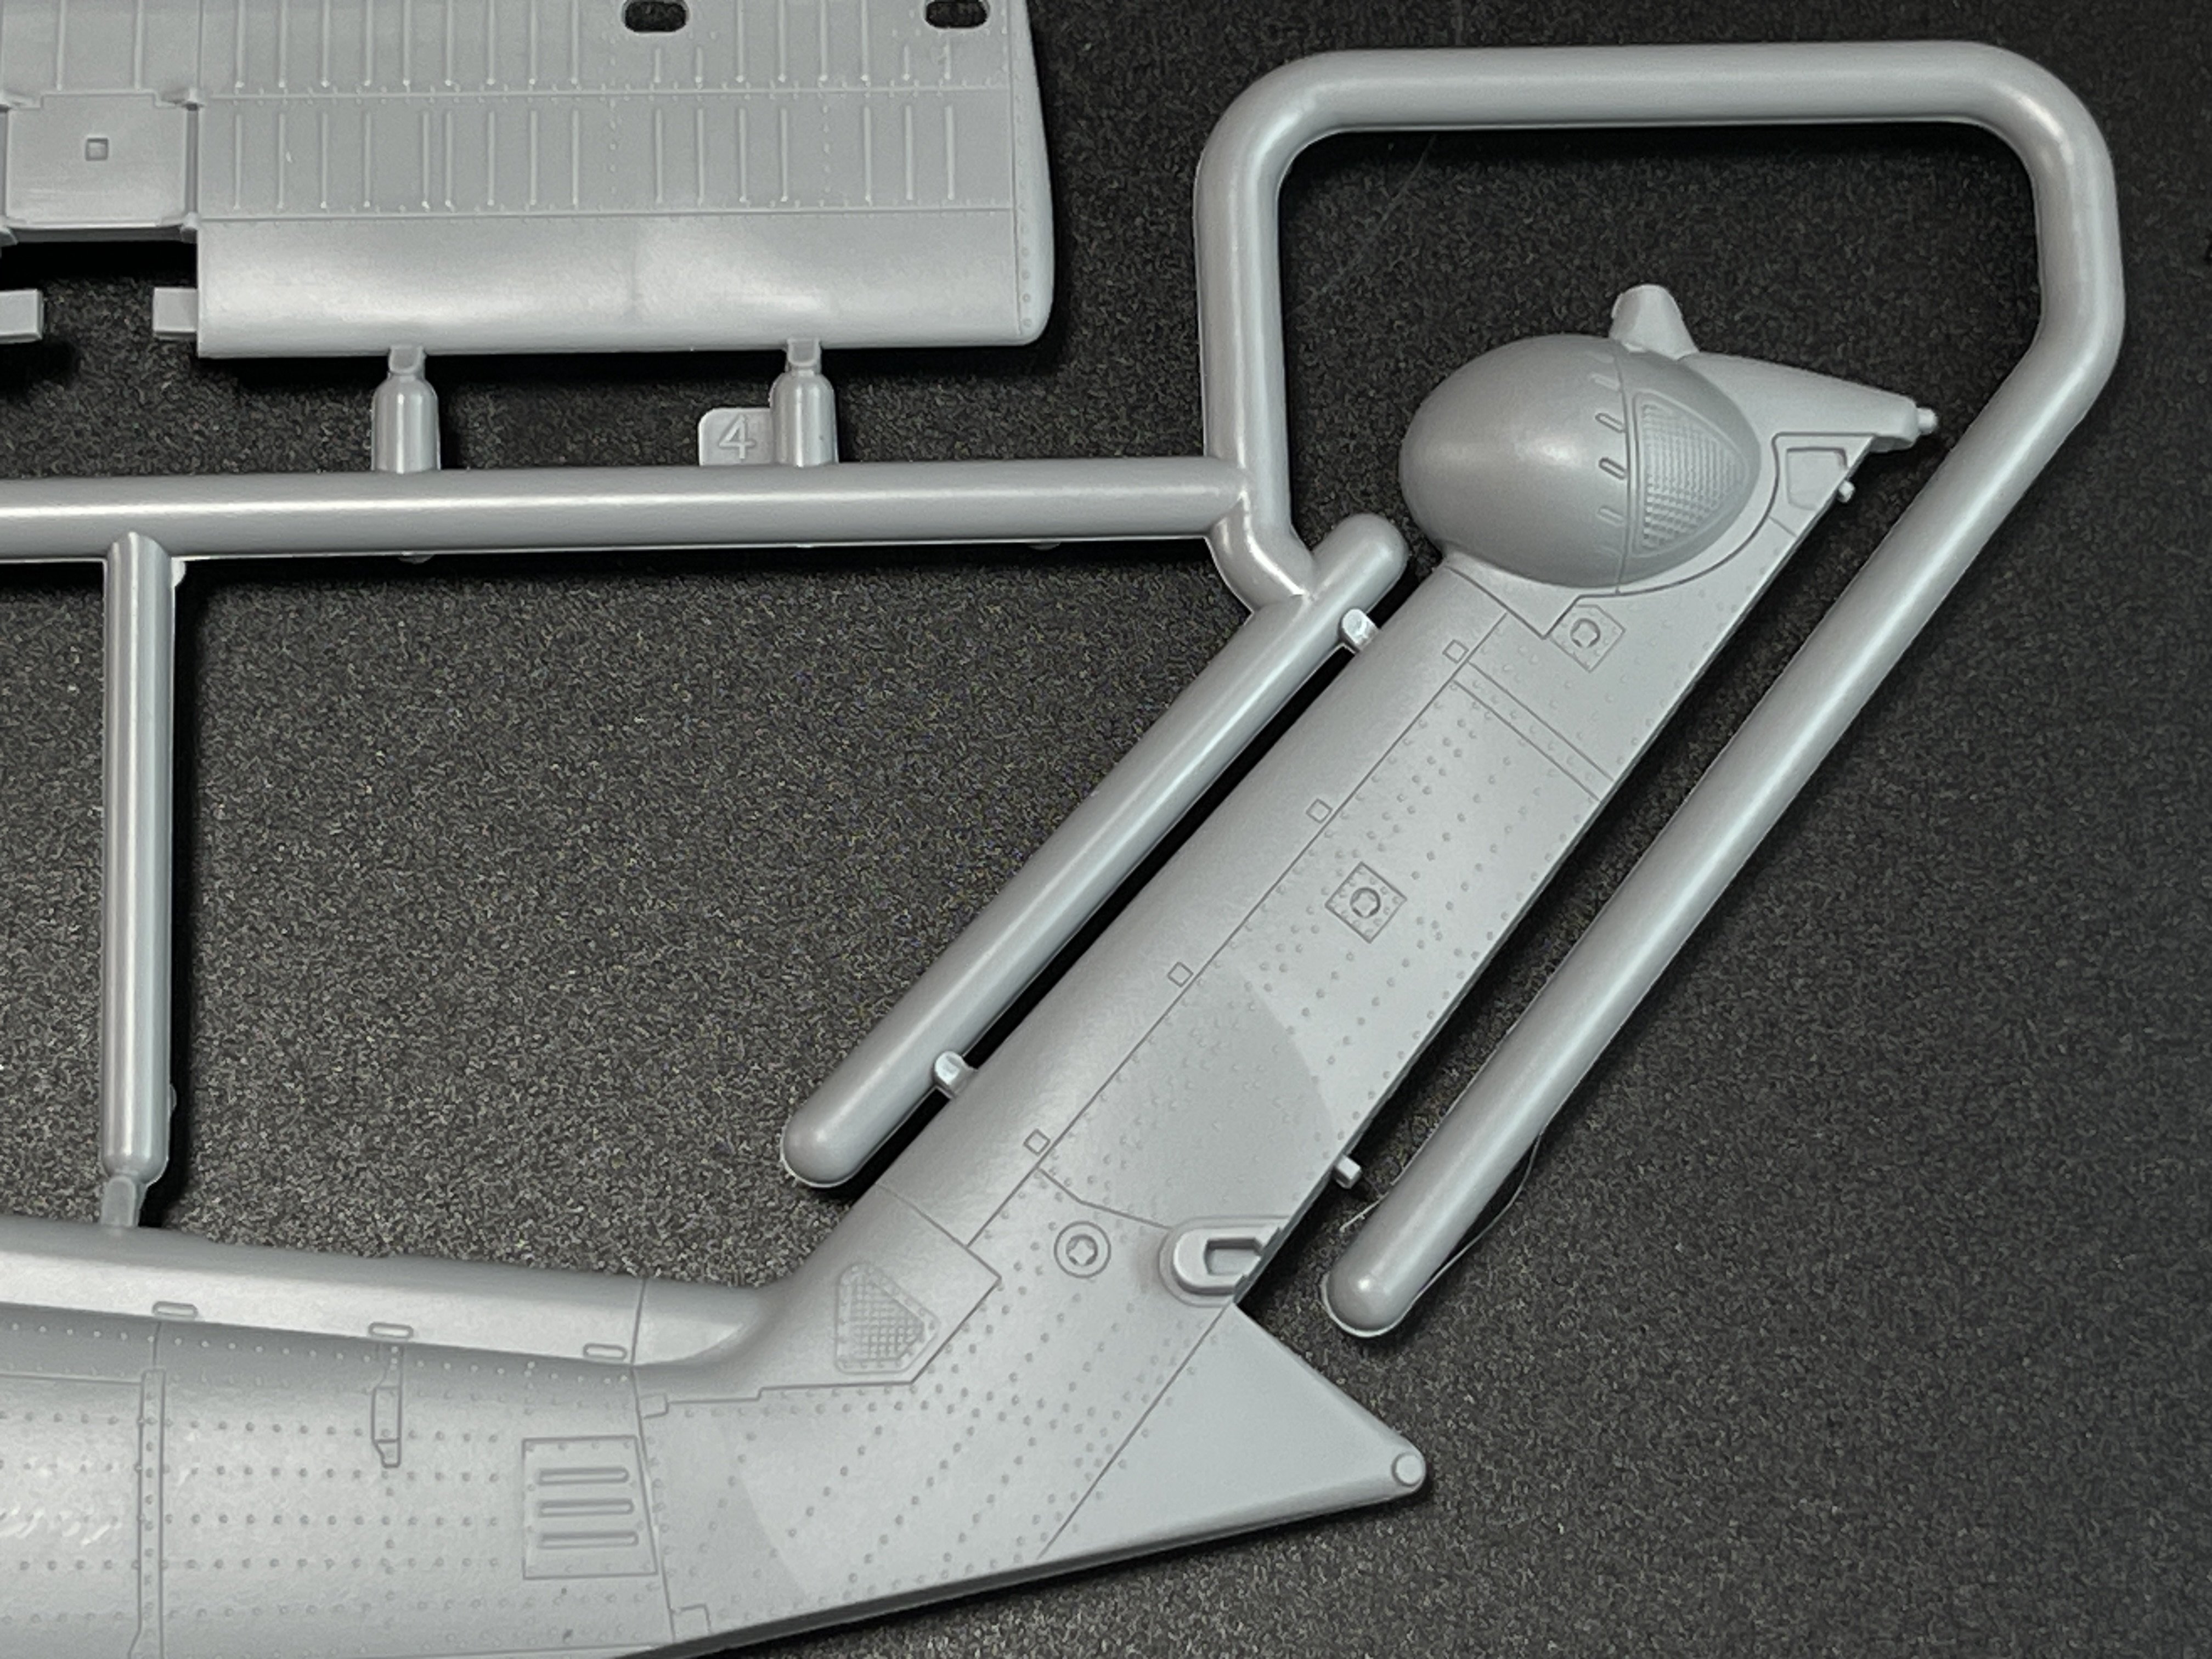
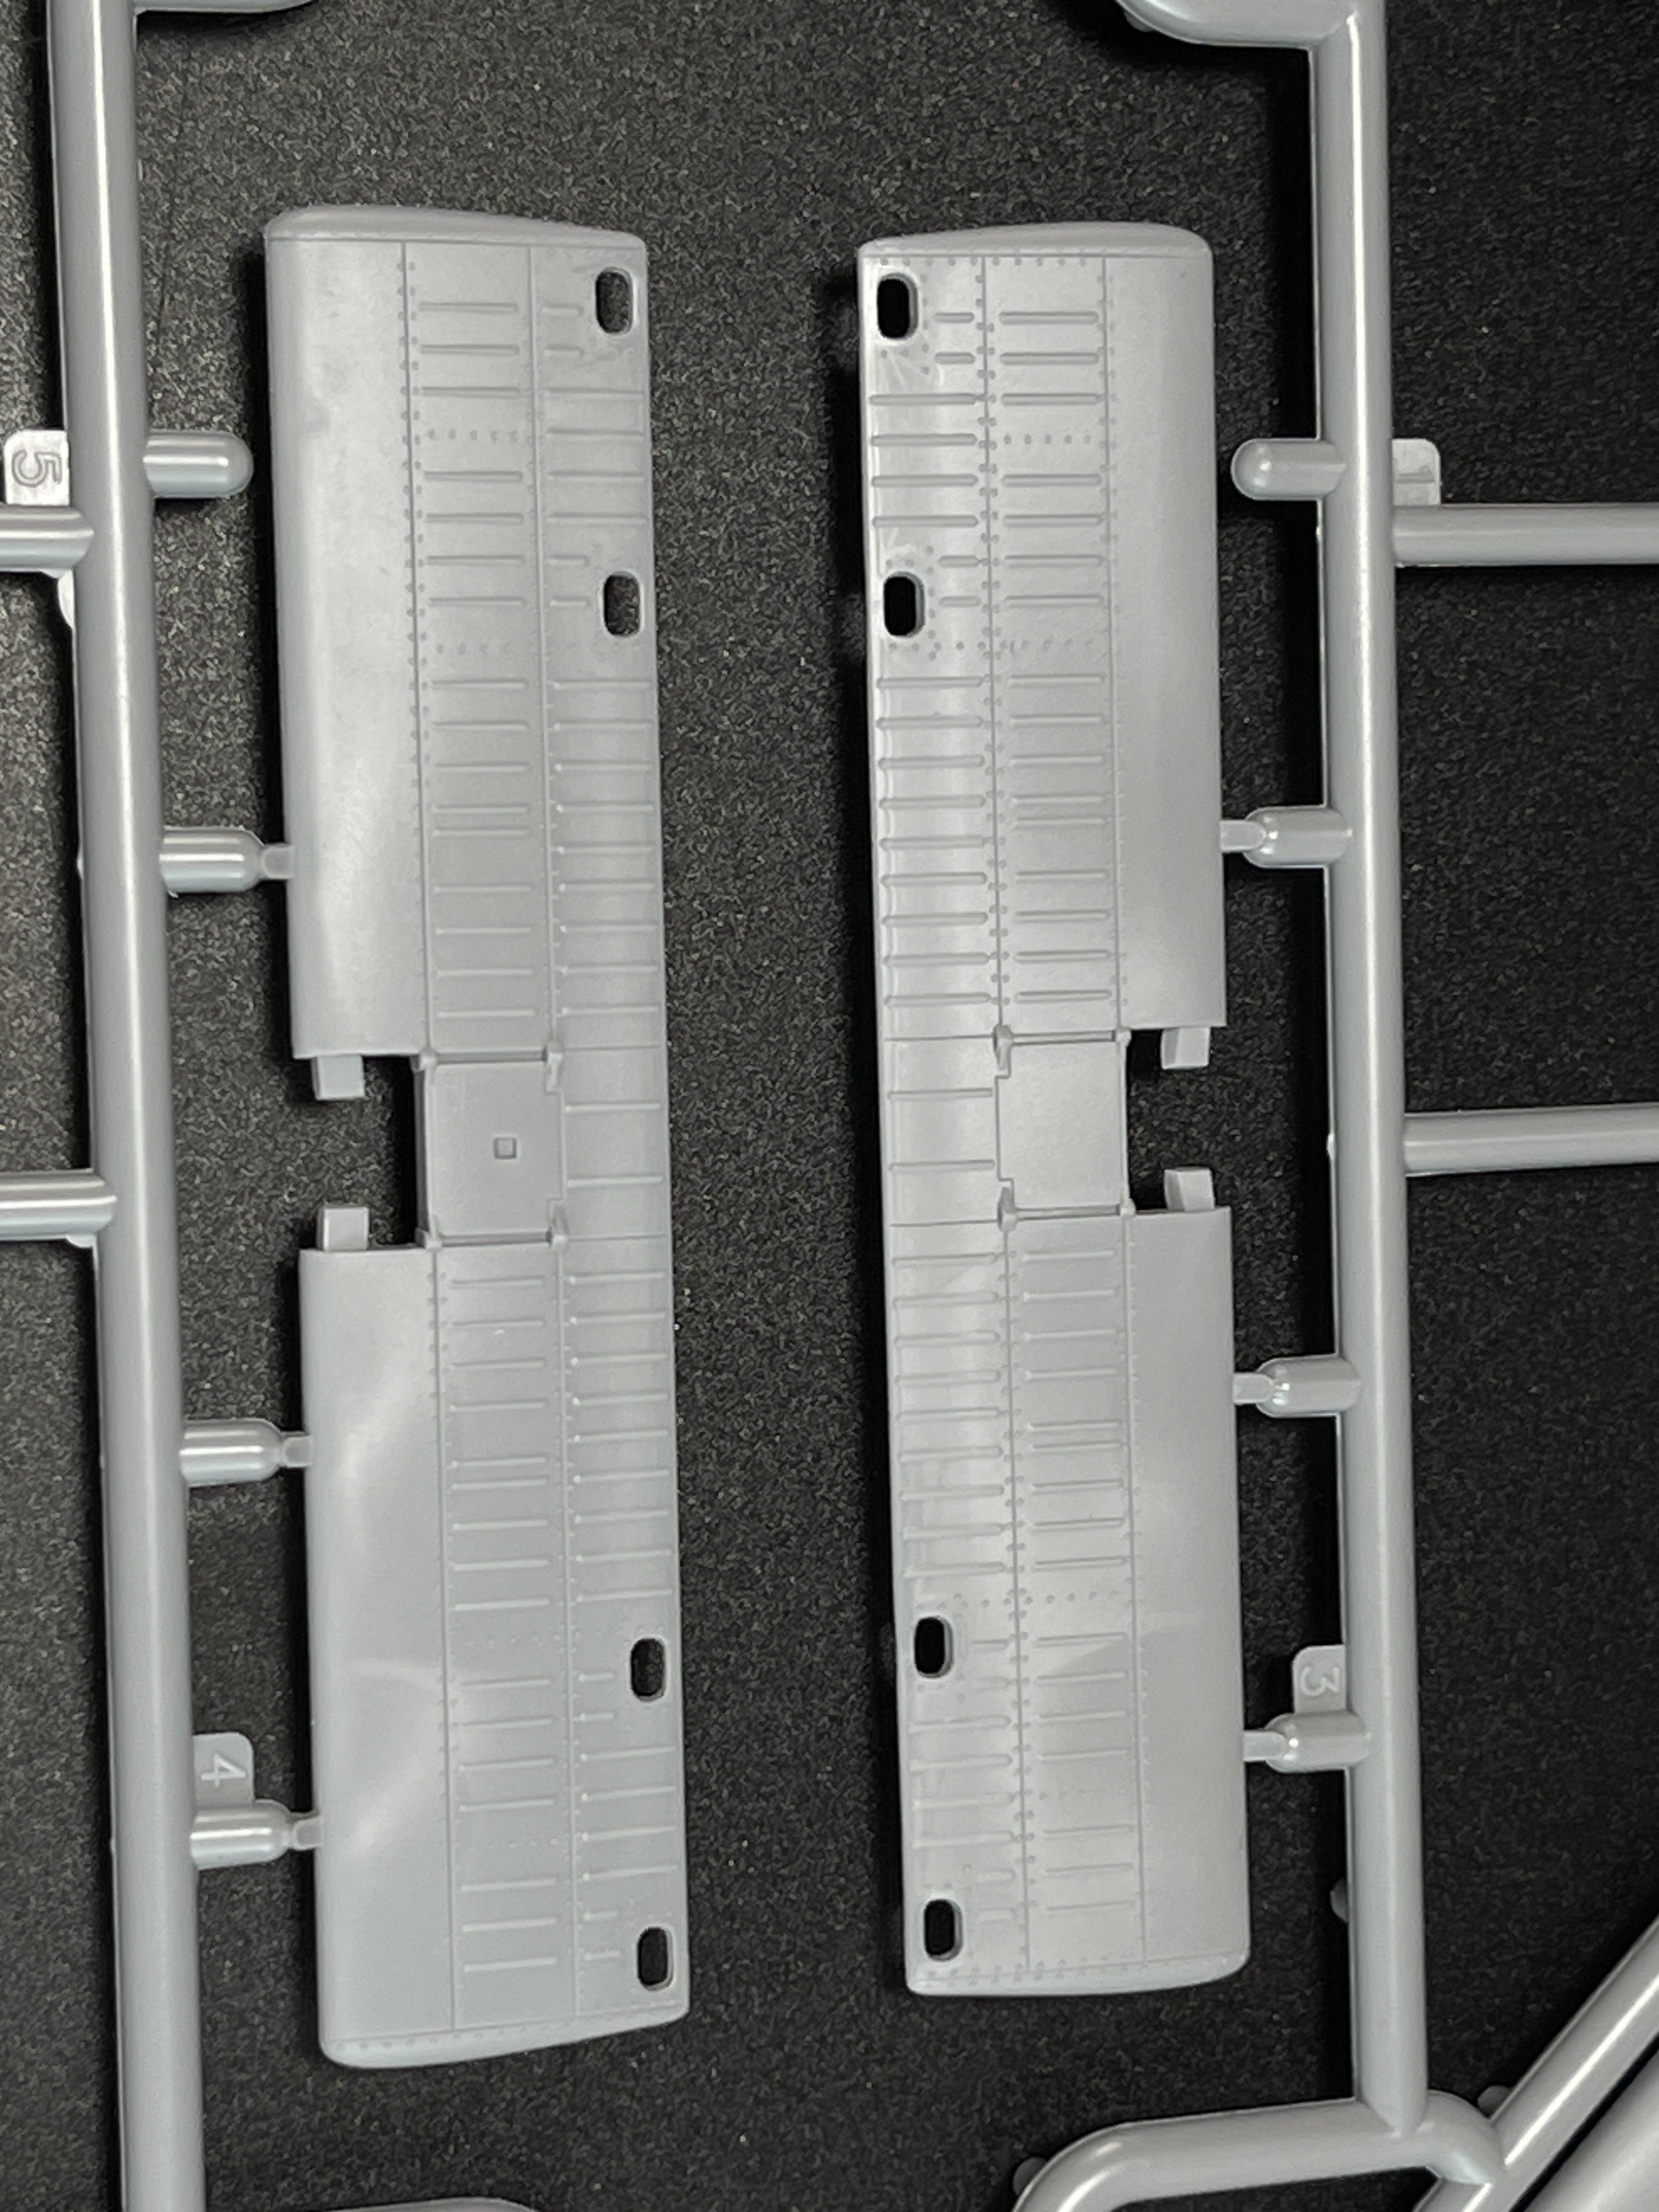
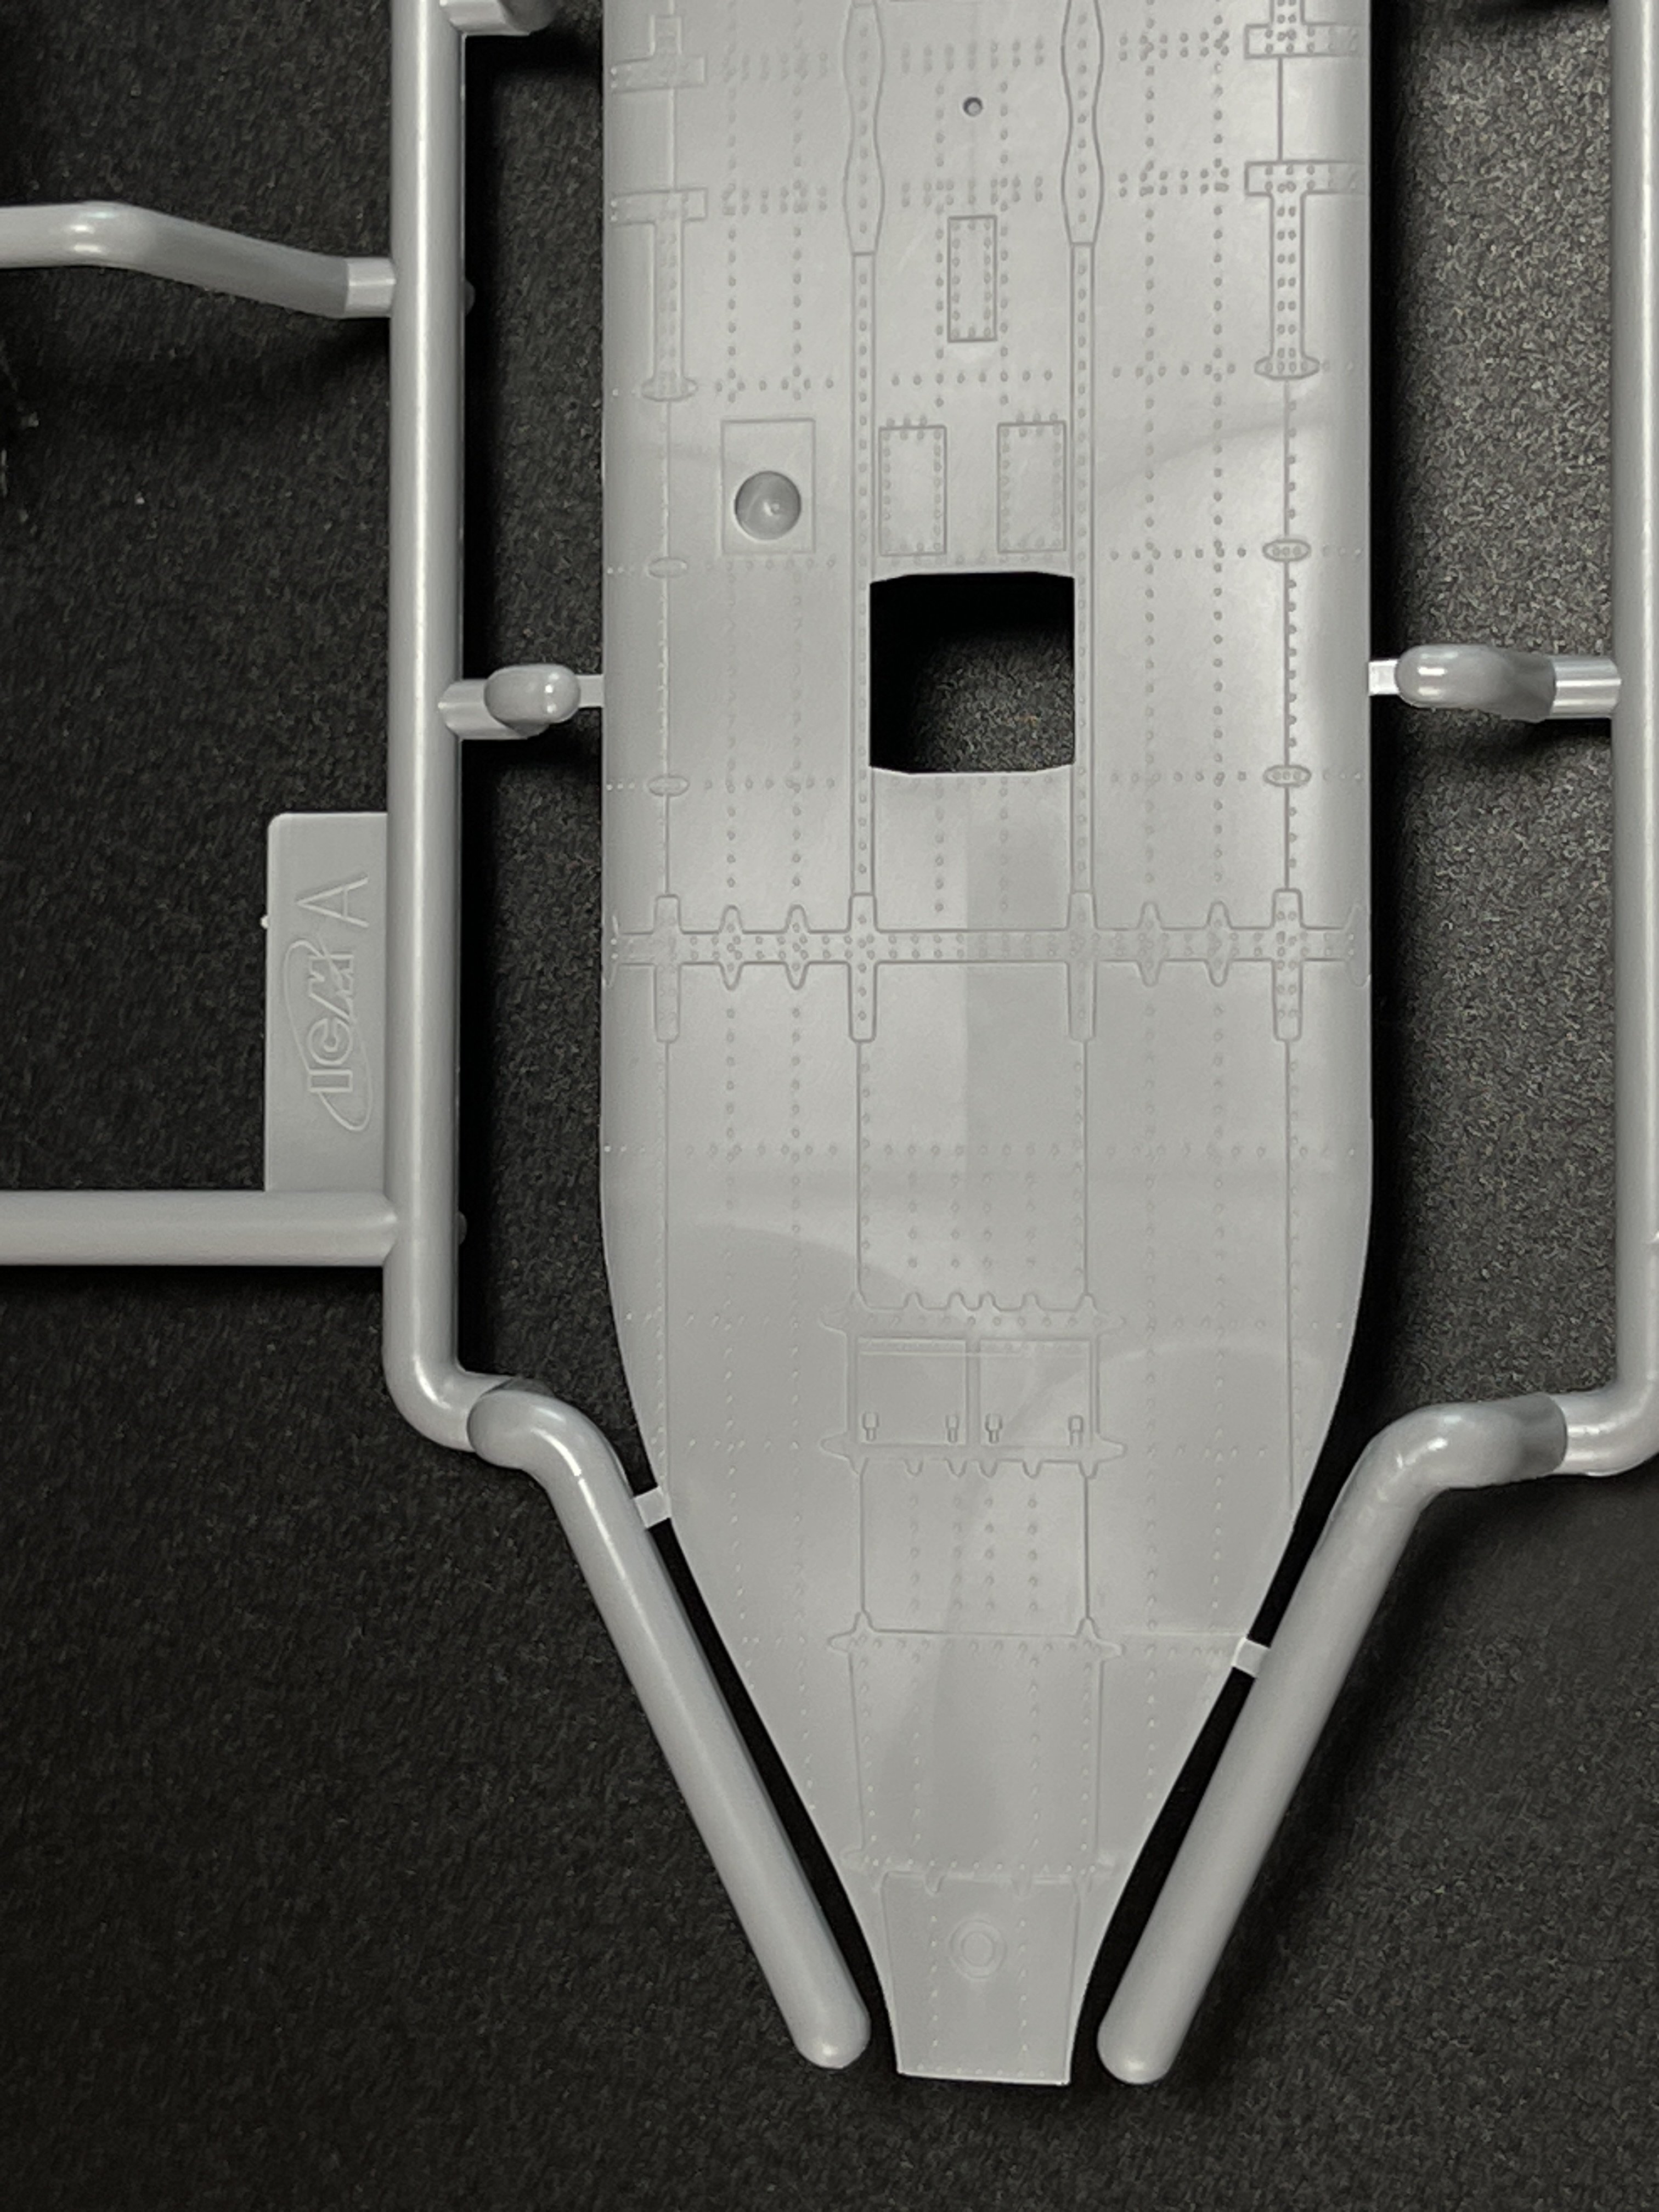
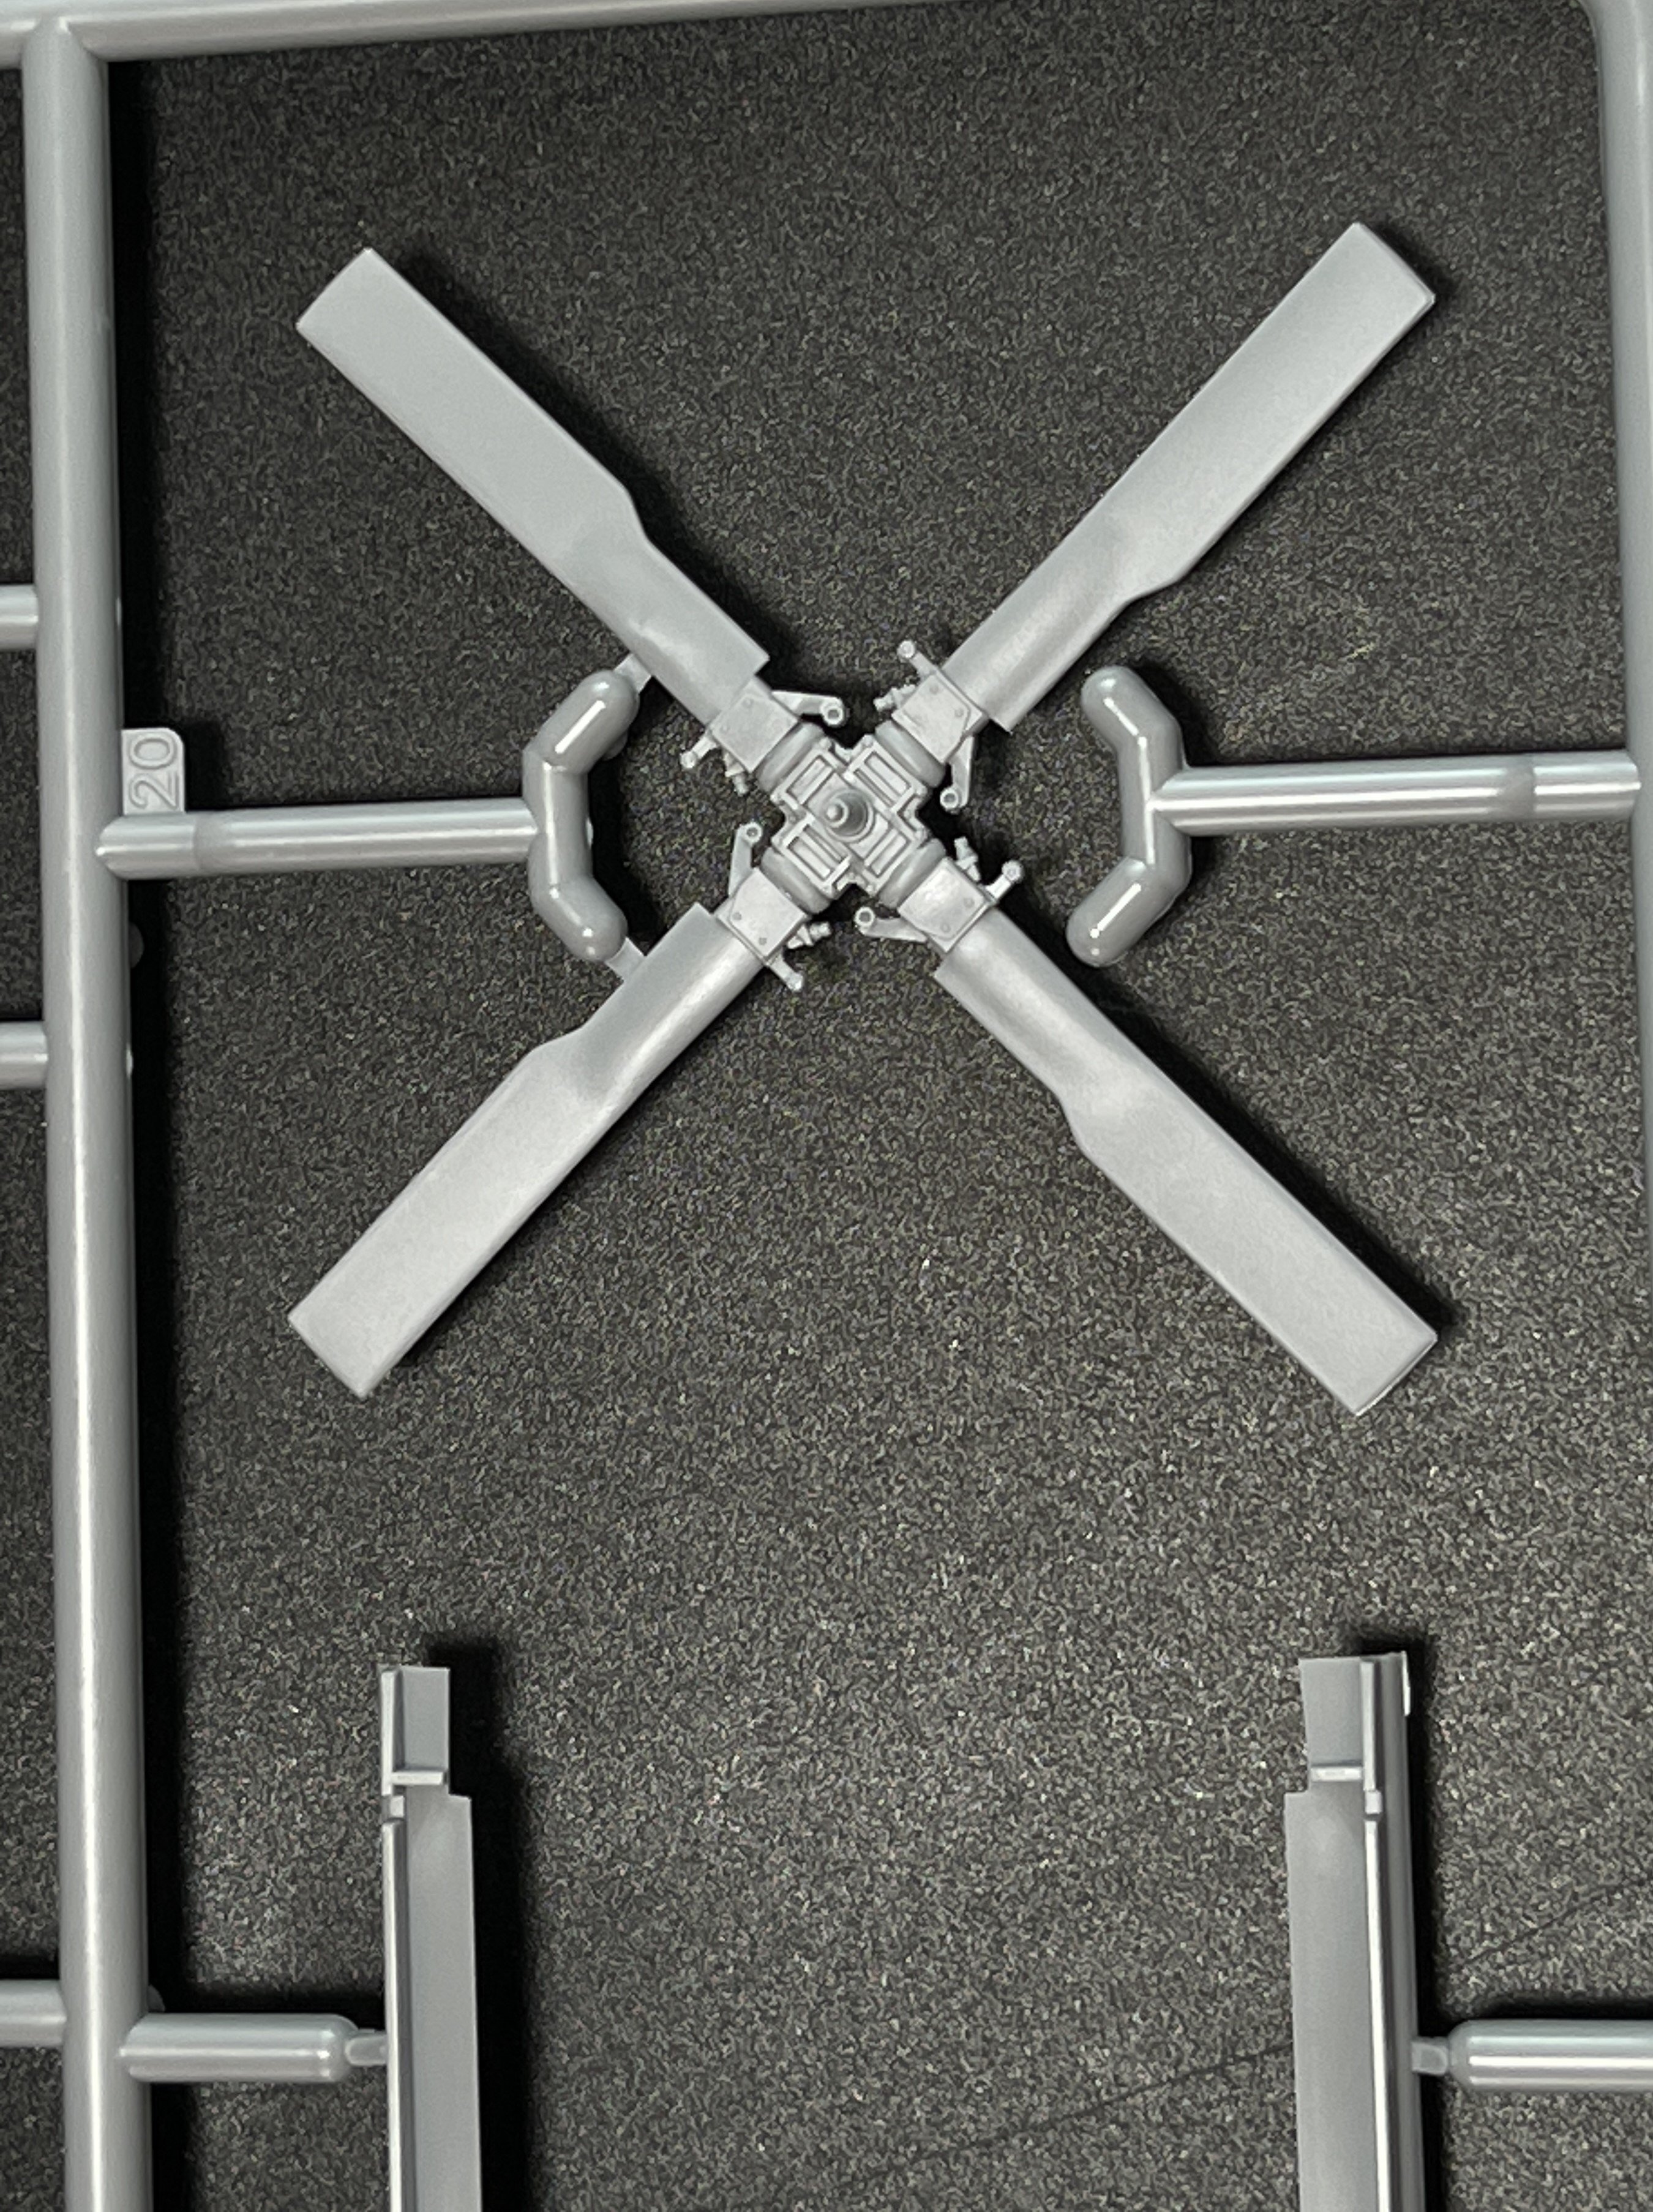
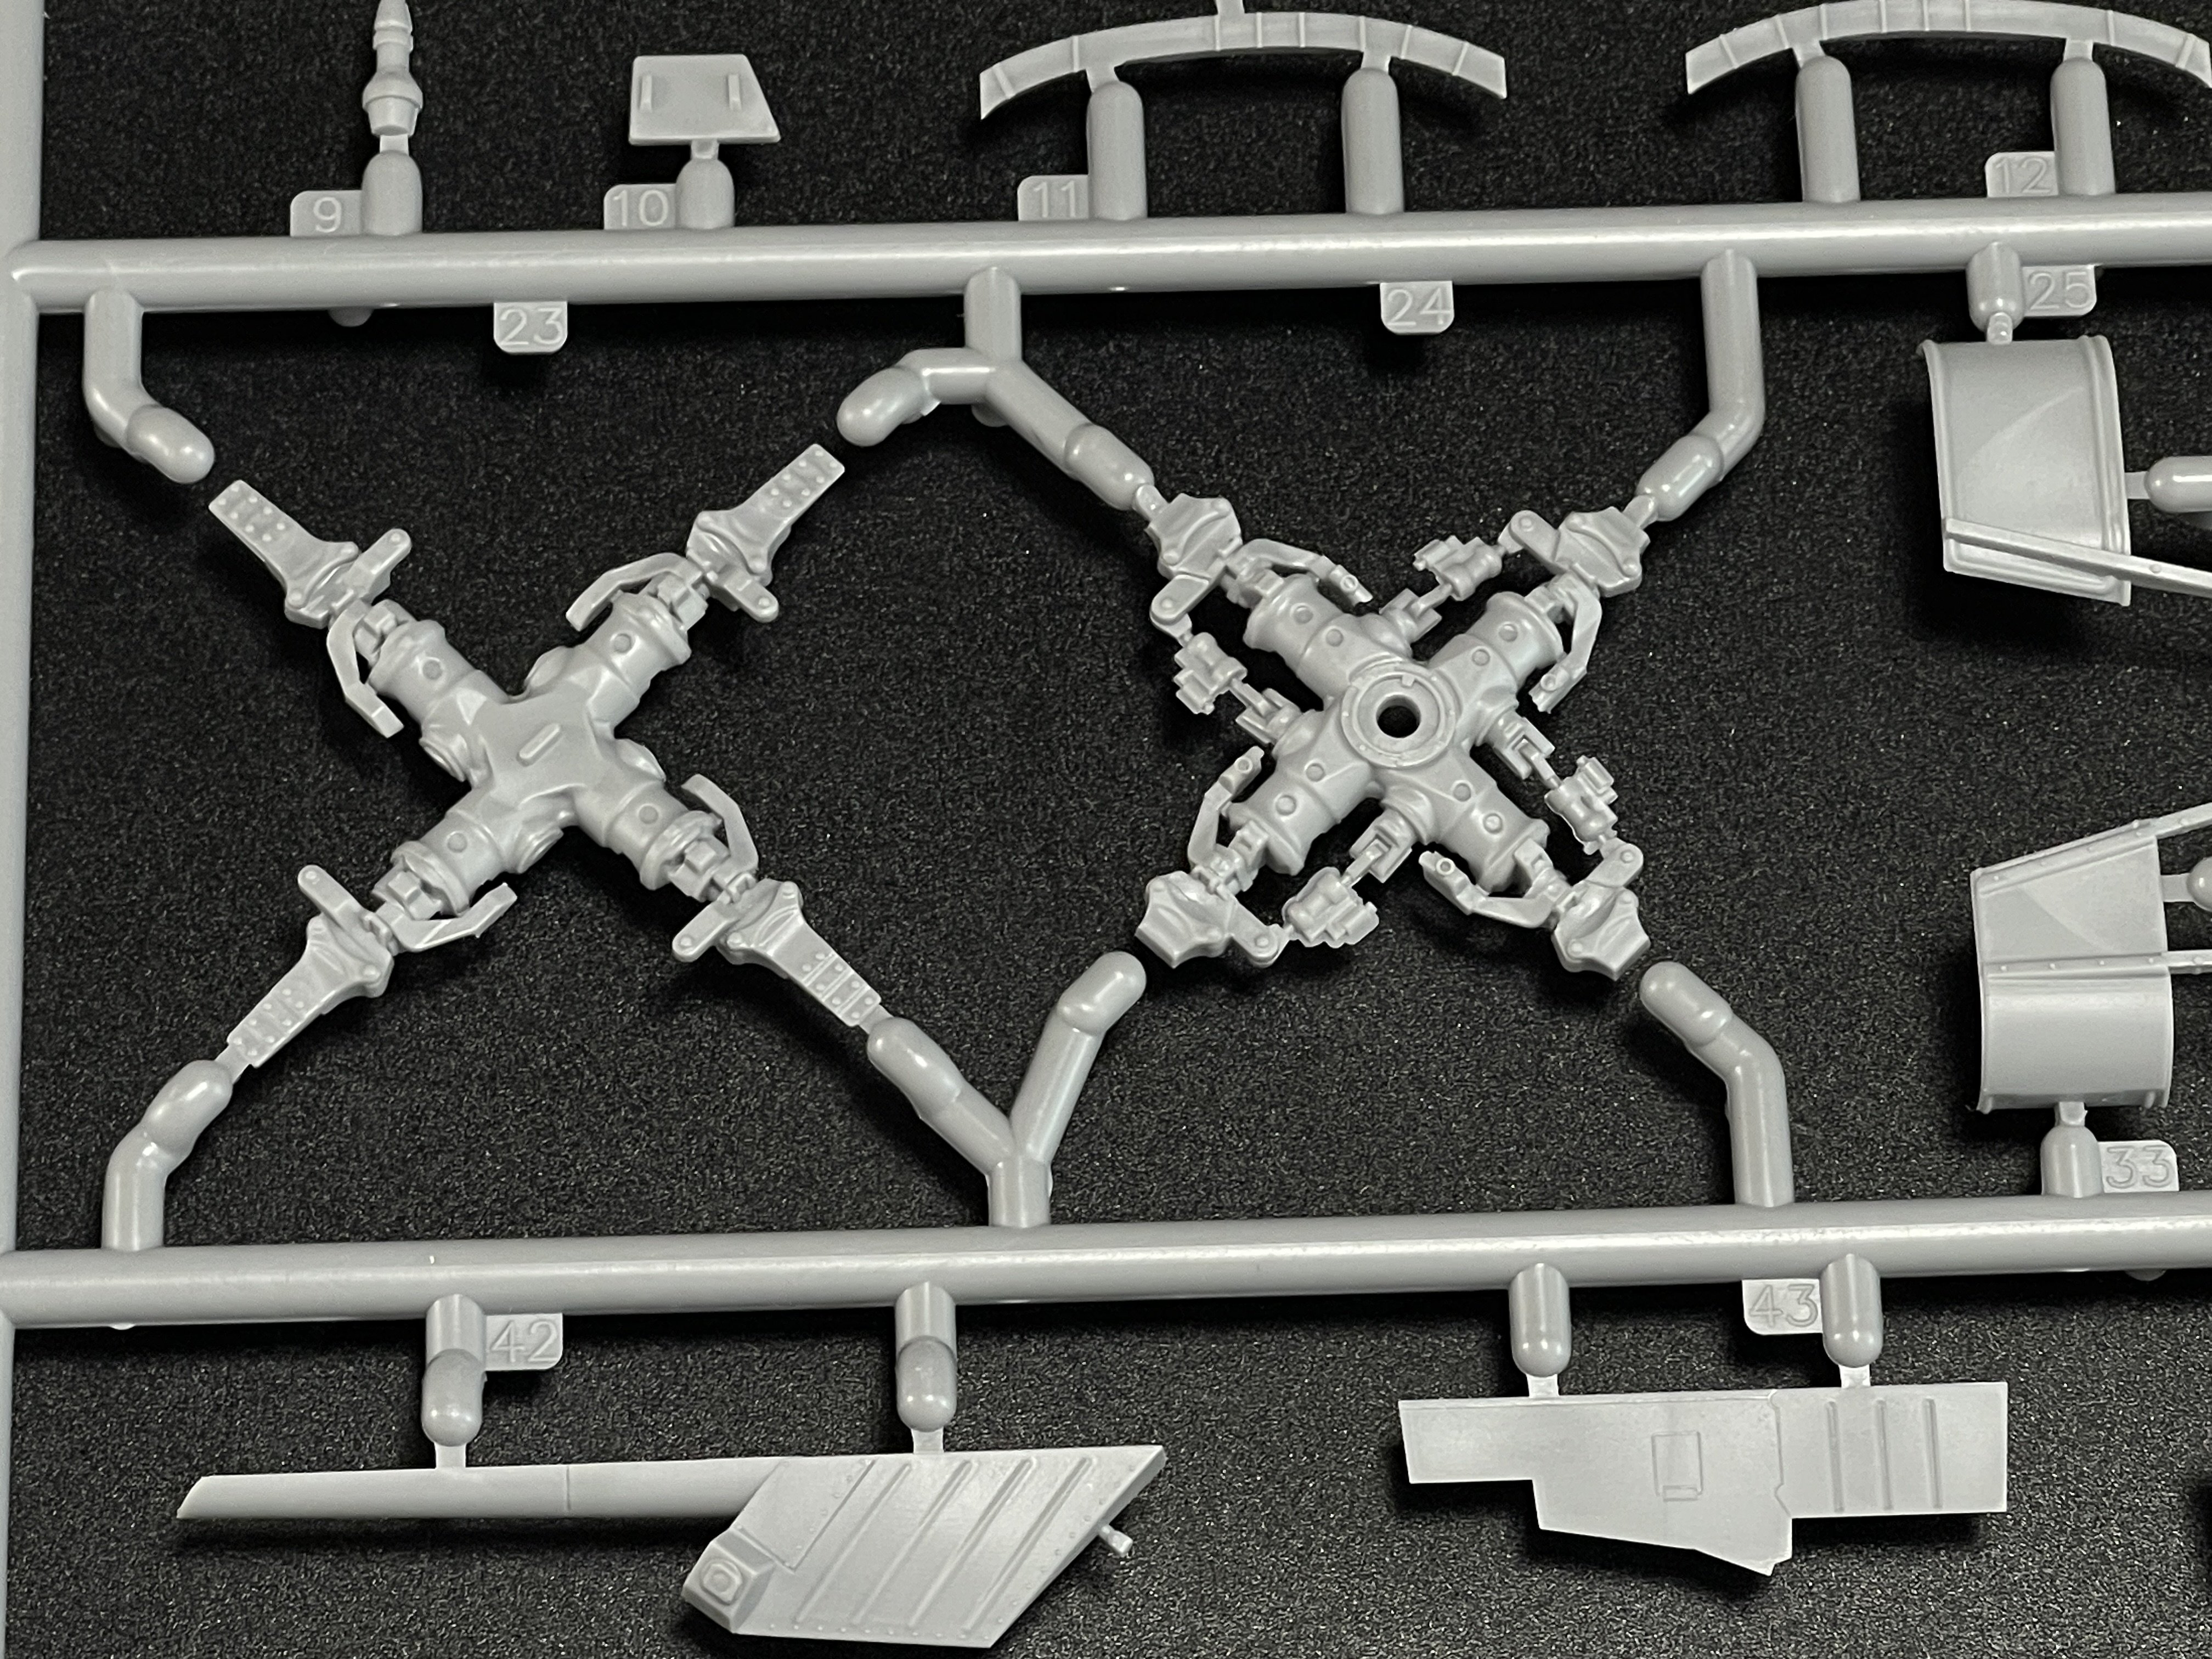
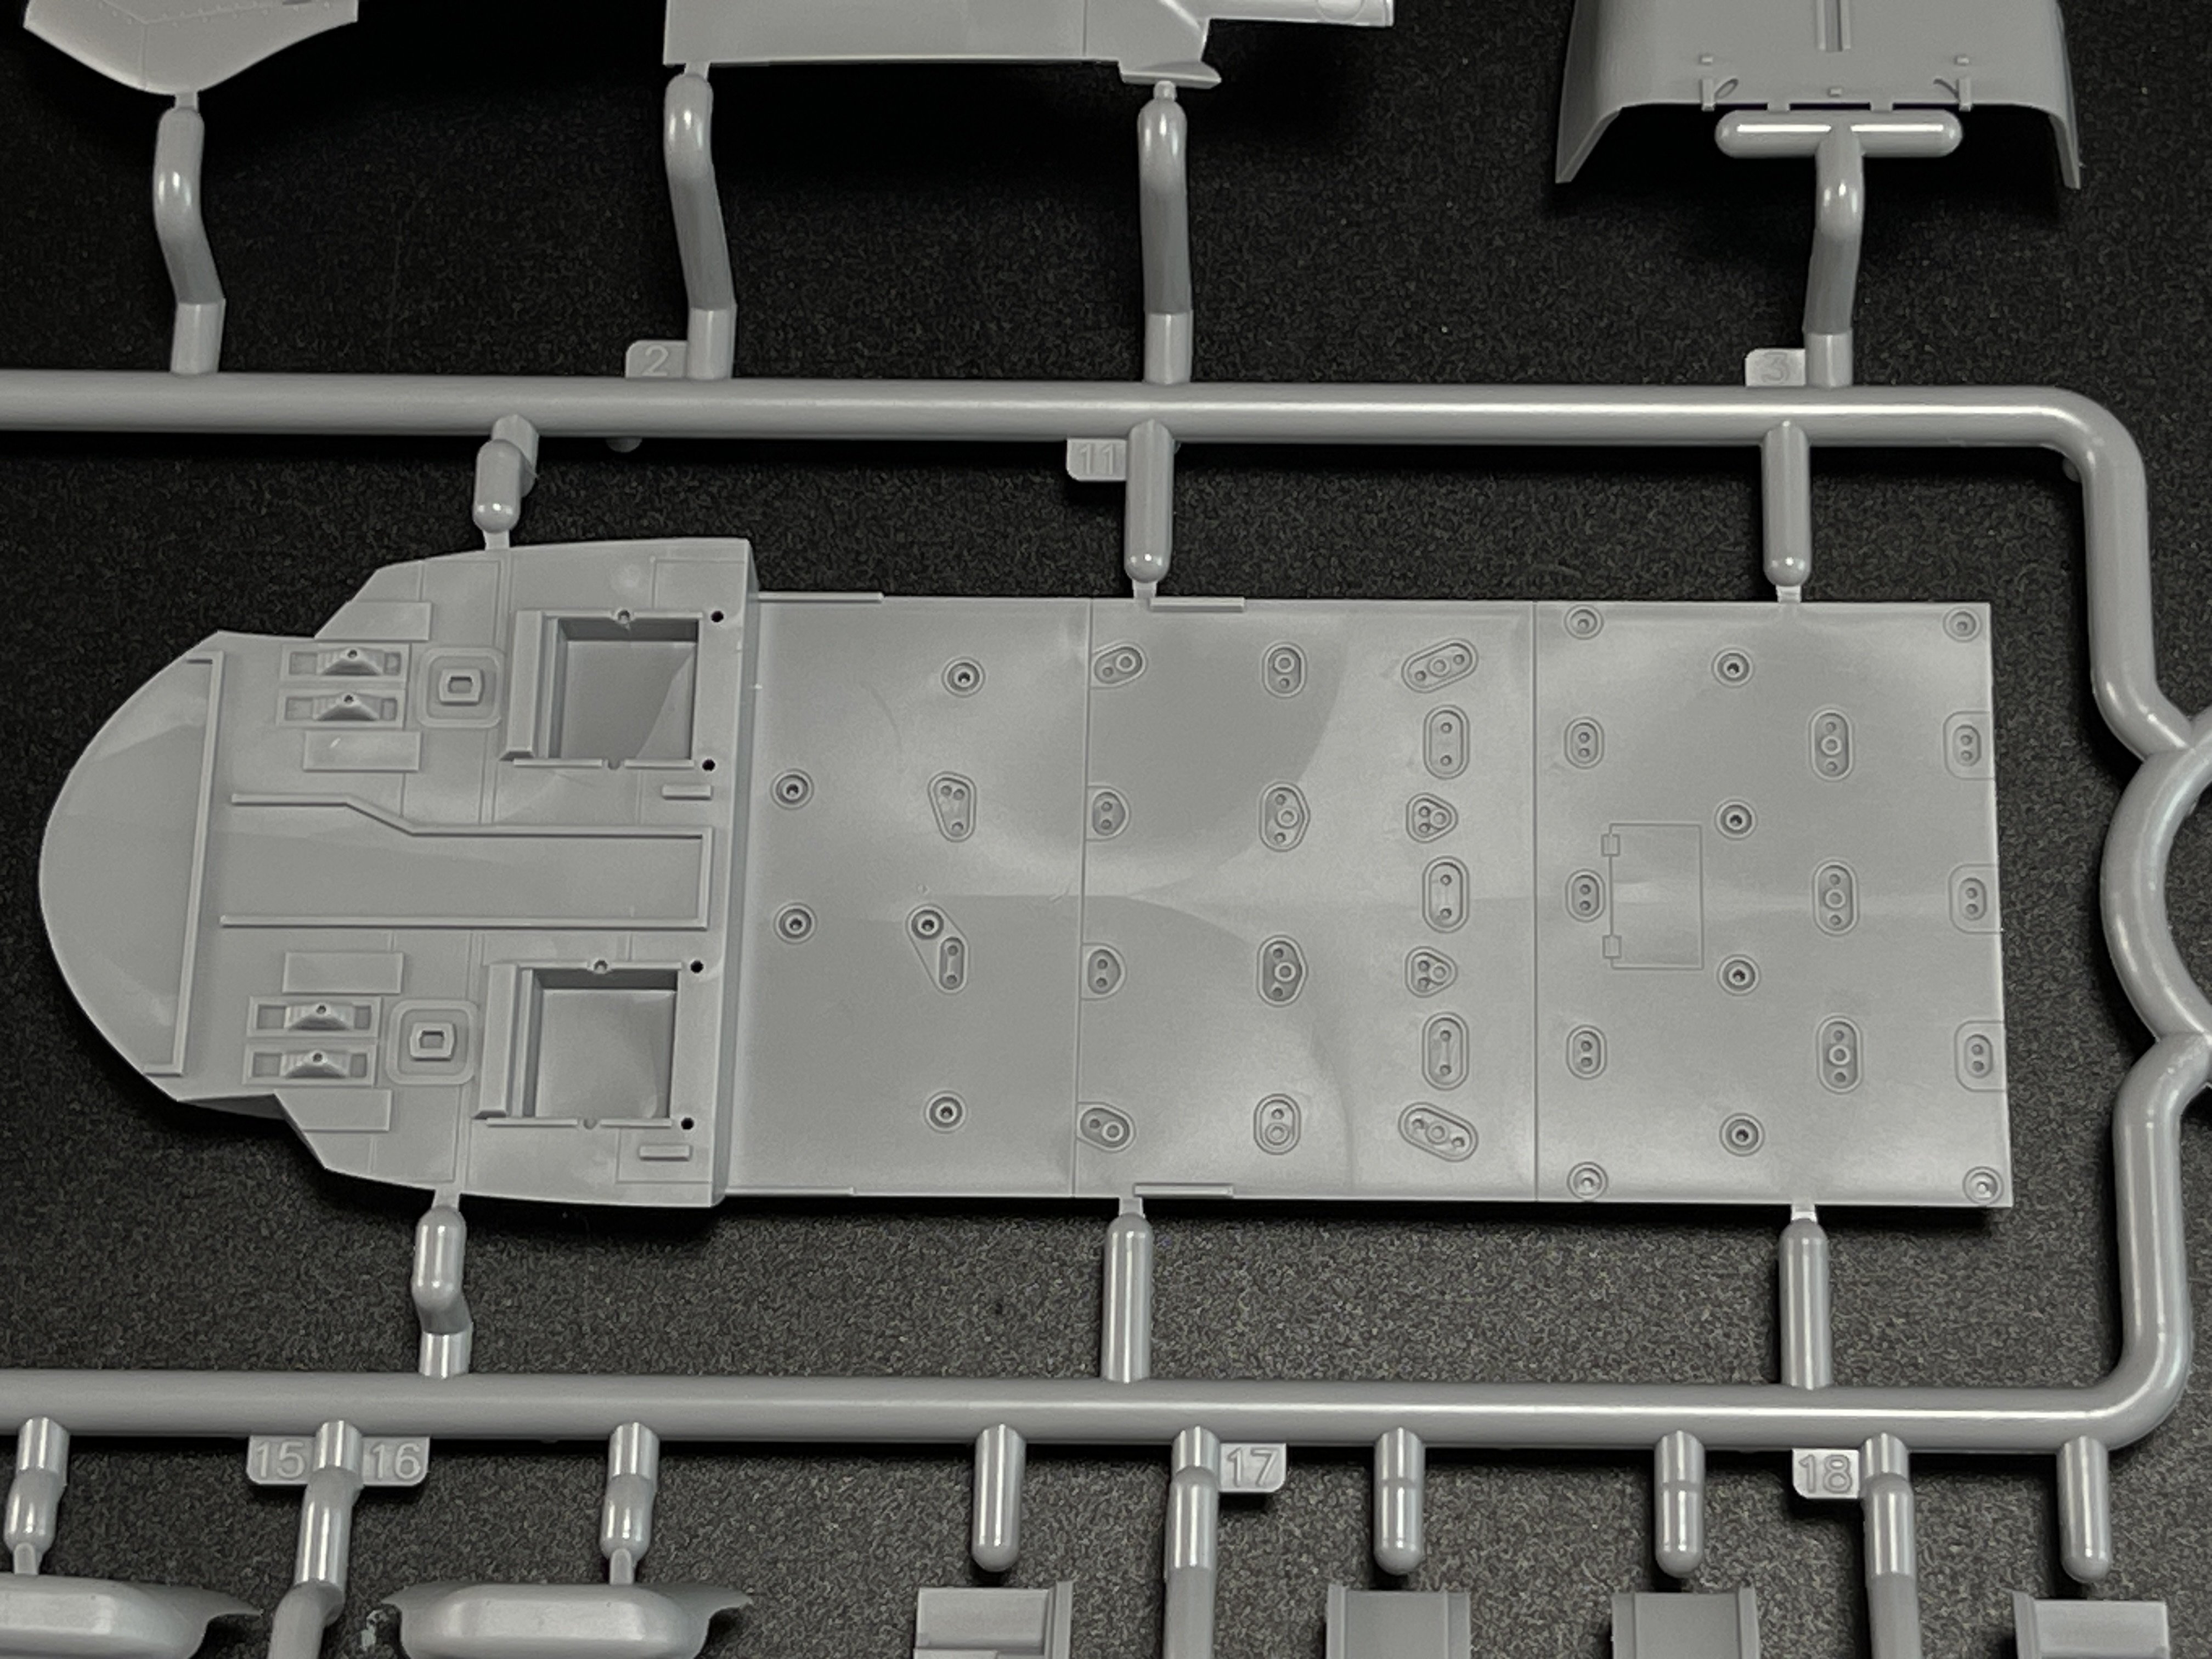
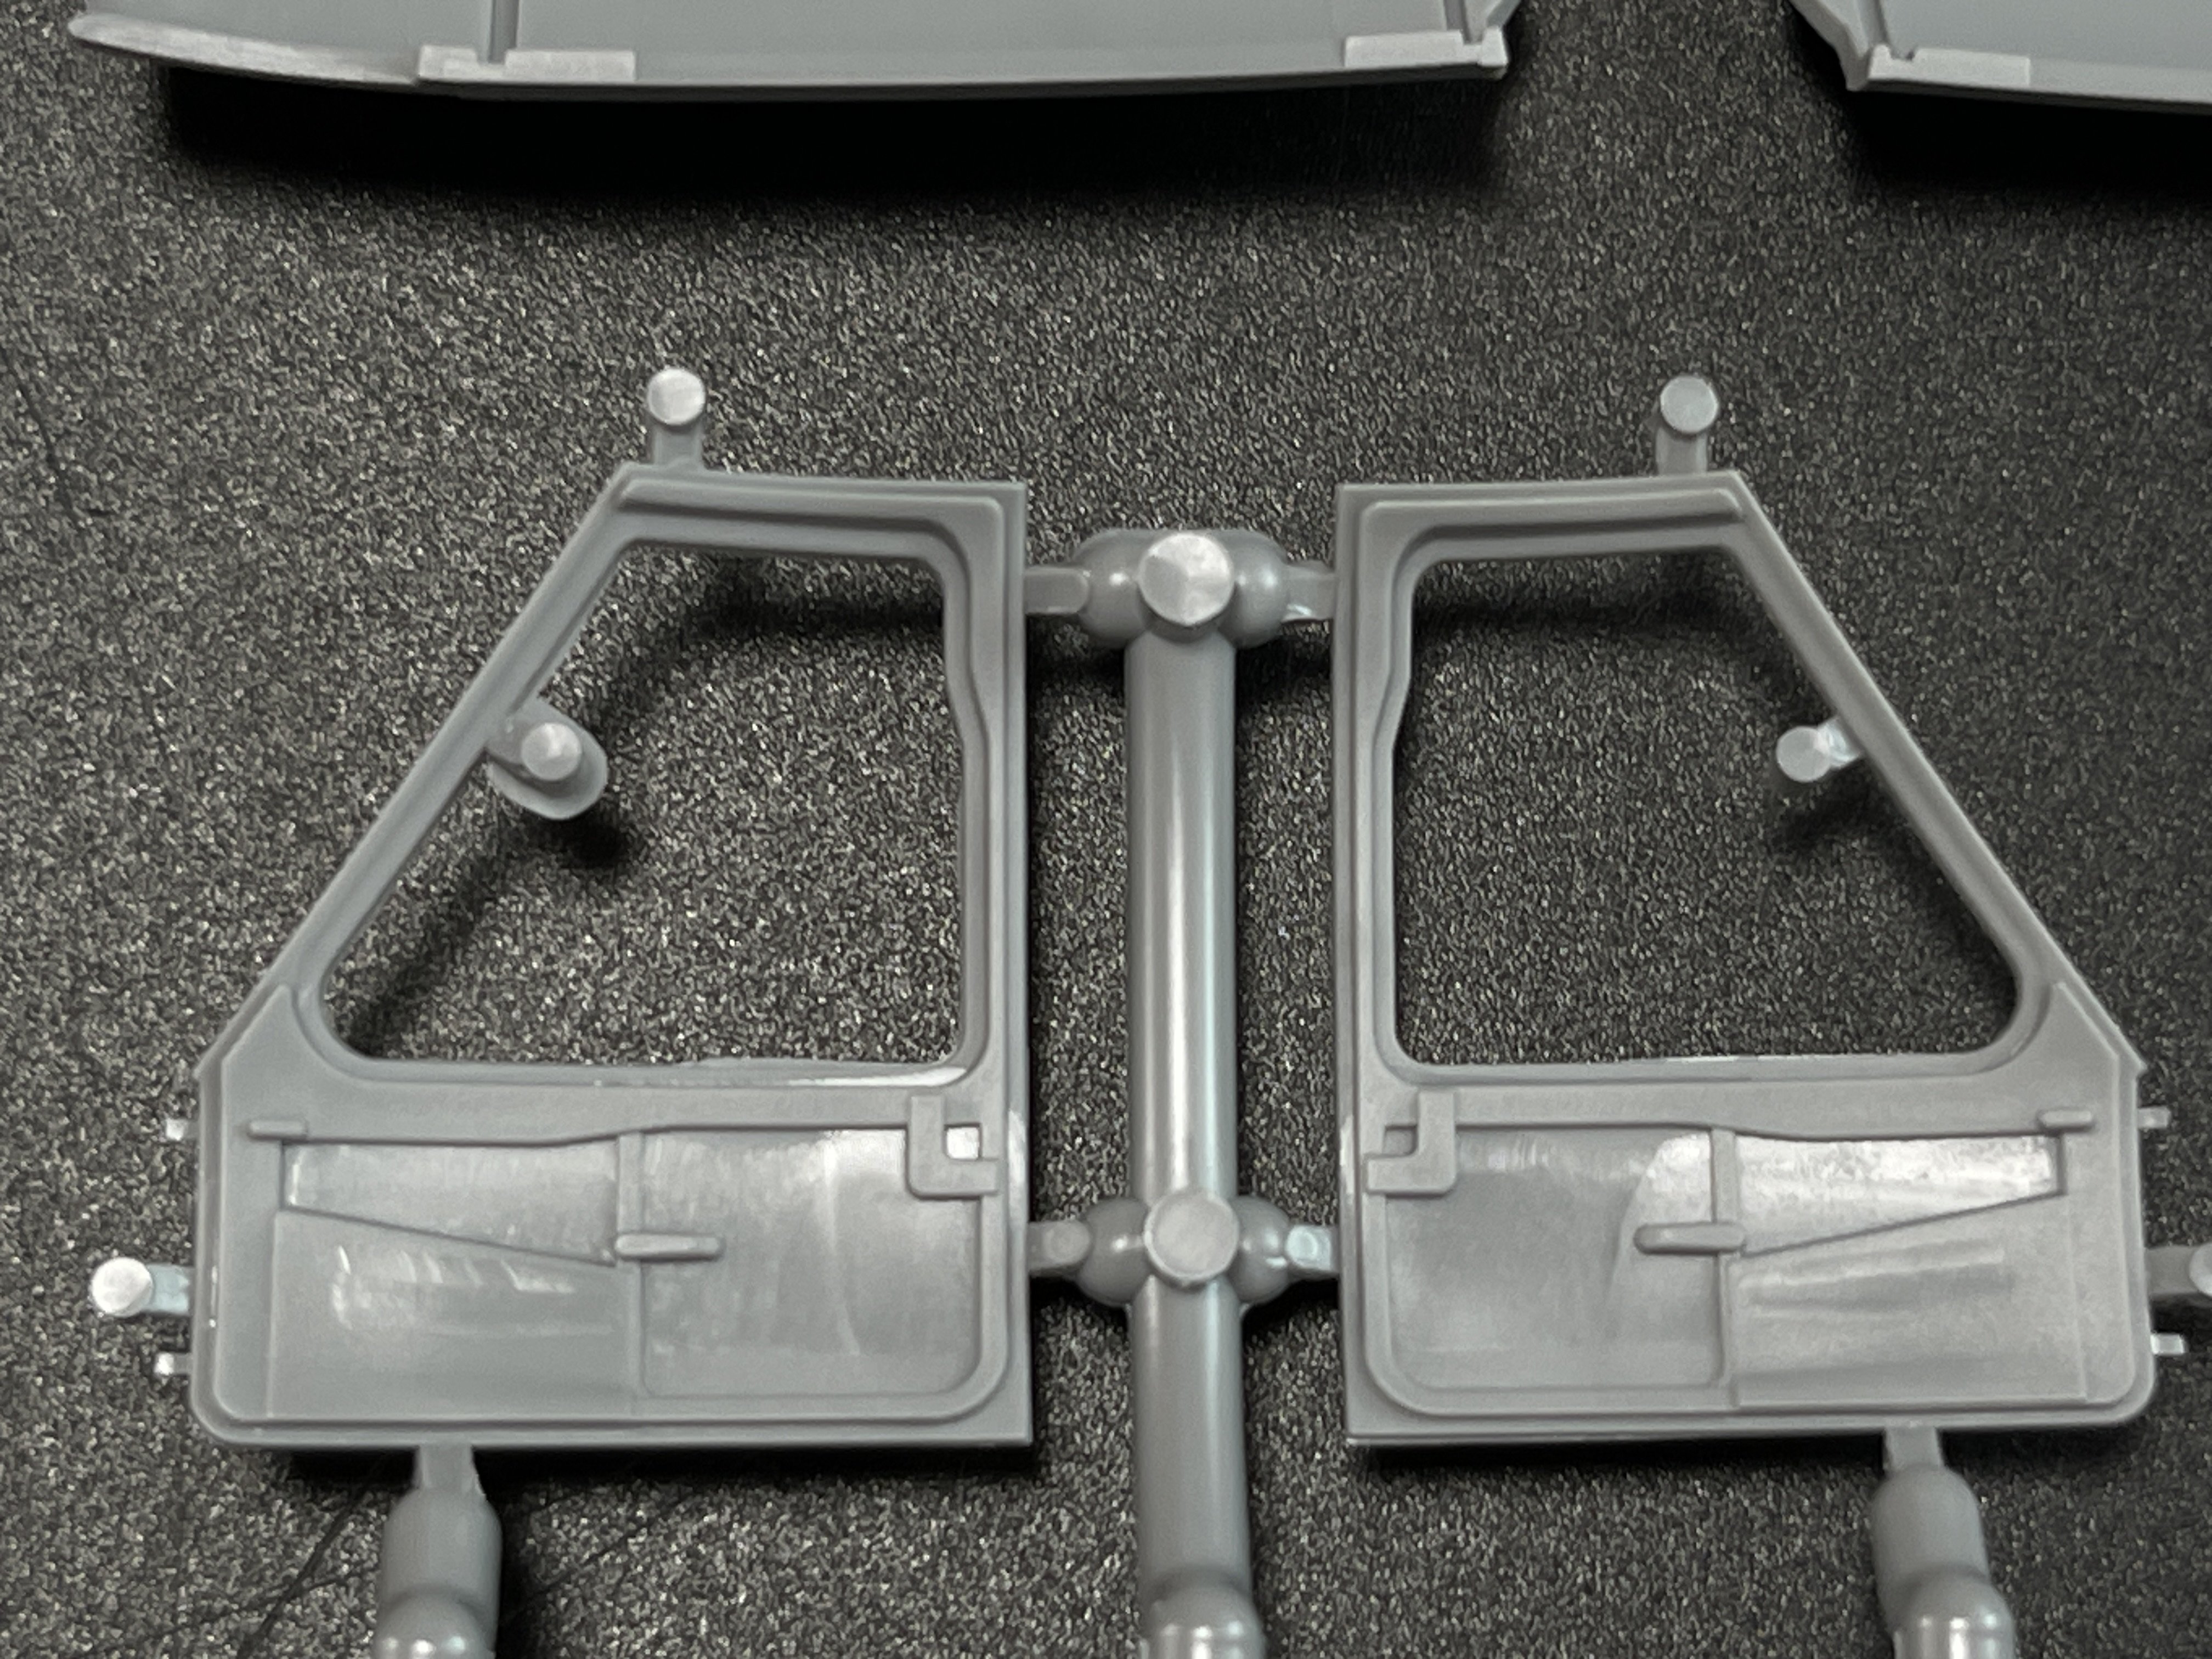
No much to say more about the gray plastic recessed and raised detail, the kit features accurate panel lines, rivet details, and surface textures that replicate the MH-60L’s rugged design. The rotor blades are well-molded and the landing gear is qute detail directly from the box, which is quite good.


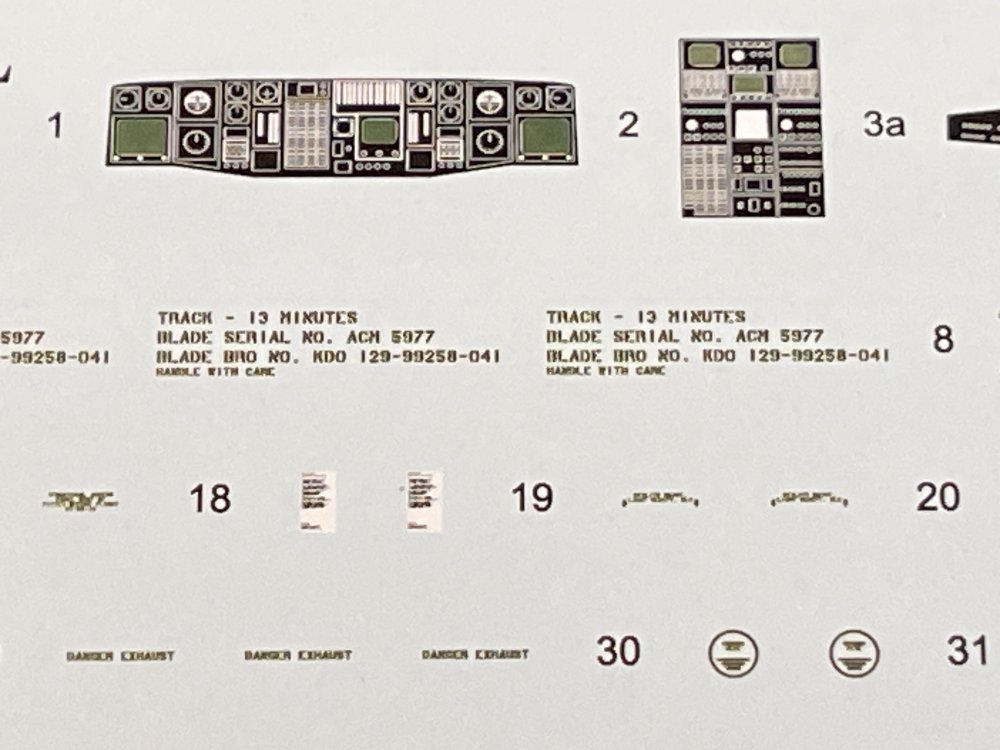
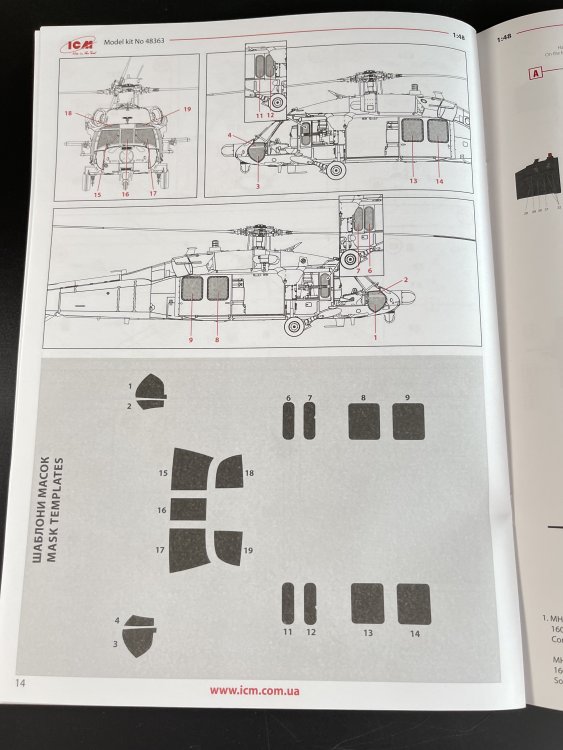
As for the interior, straight from the box, this model kit, as actual usual in ICM model kits are very good with instrument panels, control sticks, aand others small details. As for the instruments, also decals are given. The only negative parts is no seatbelts.


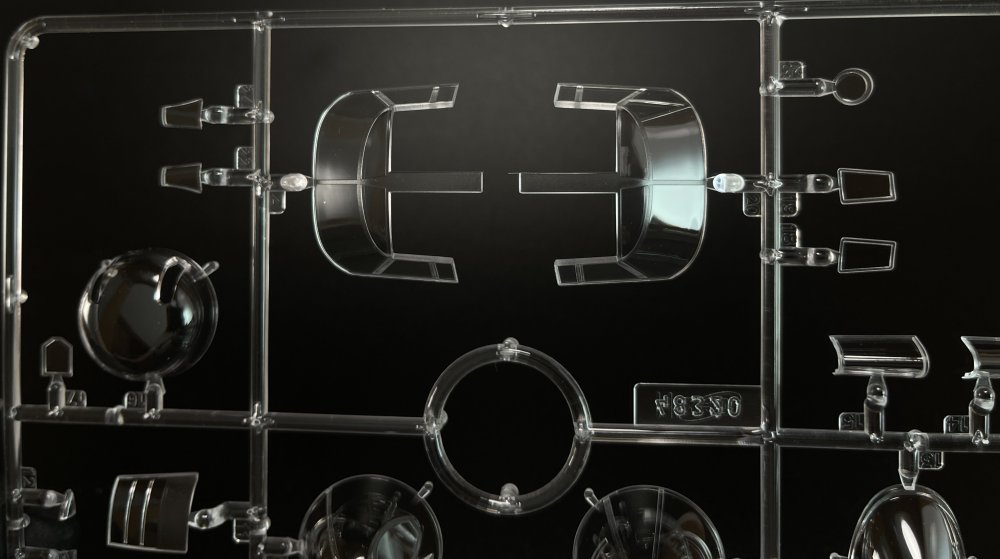
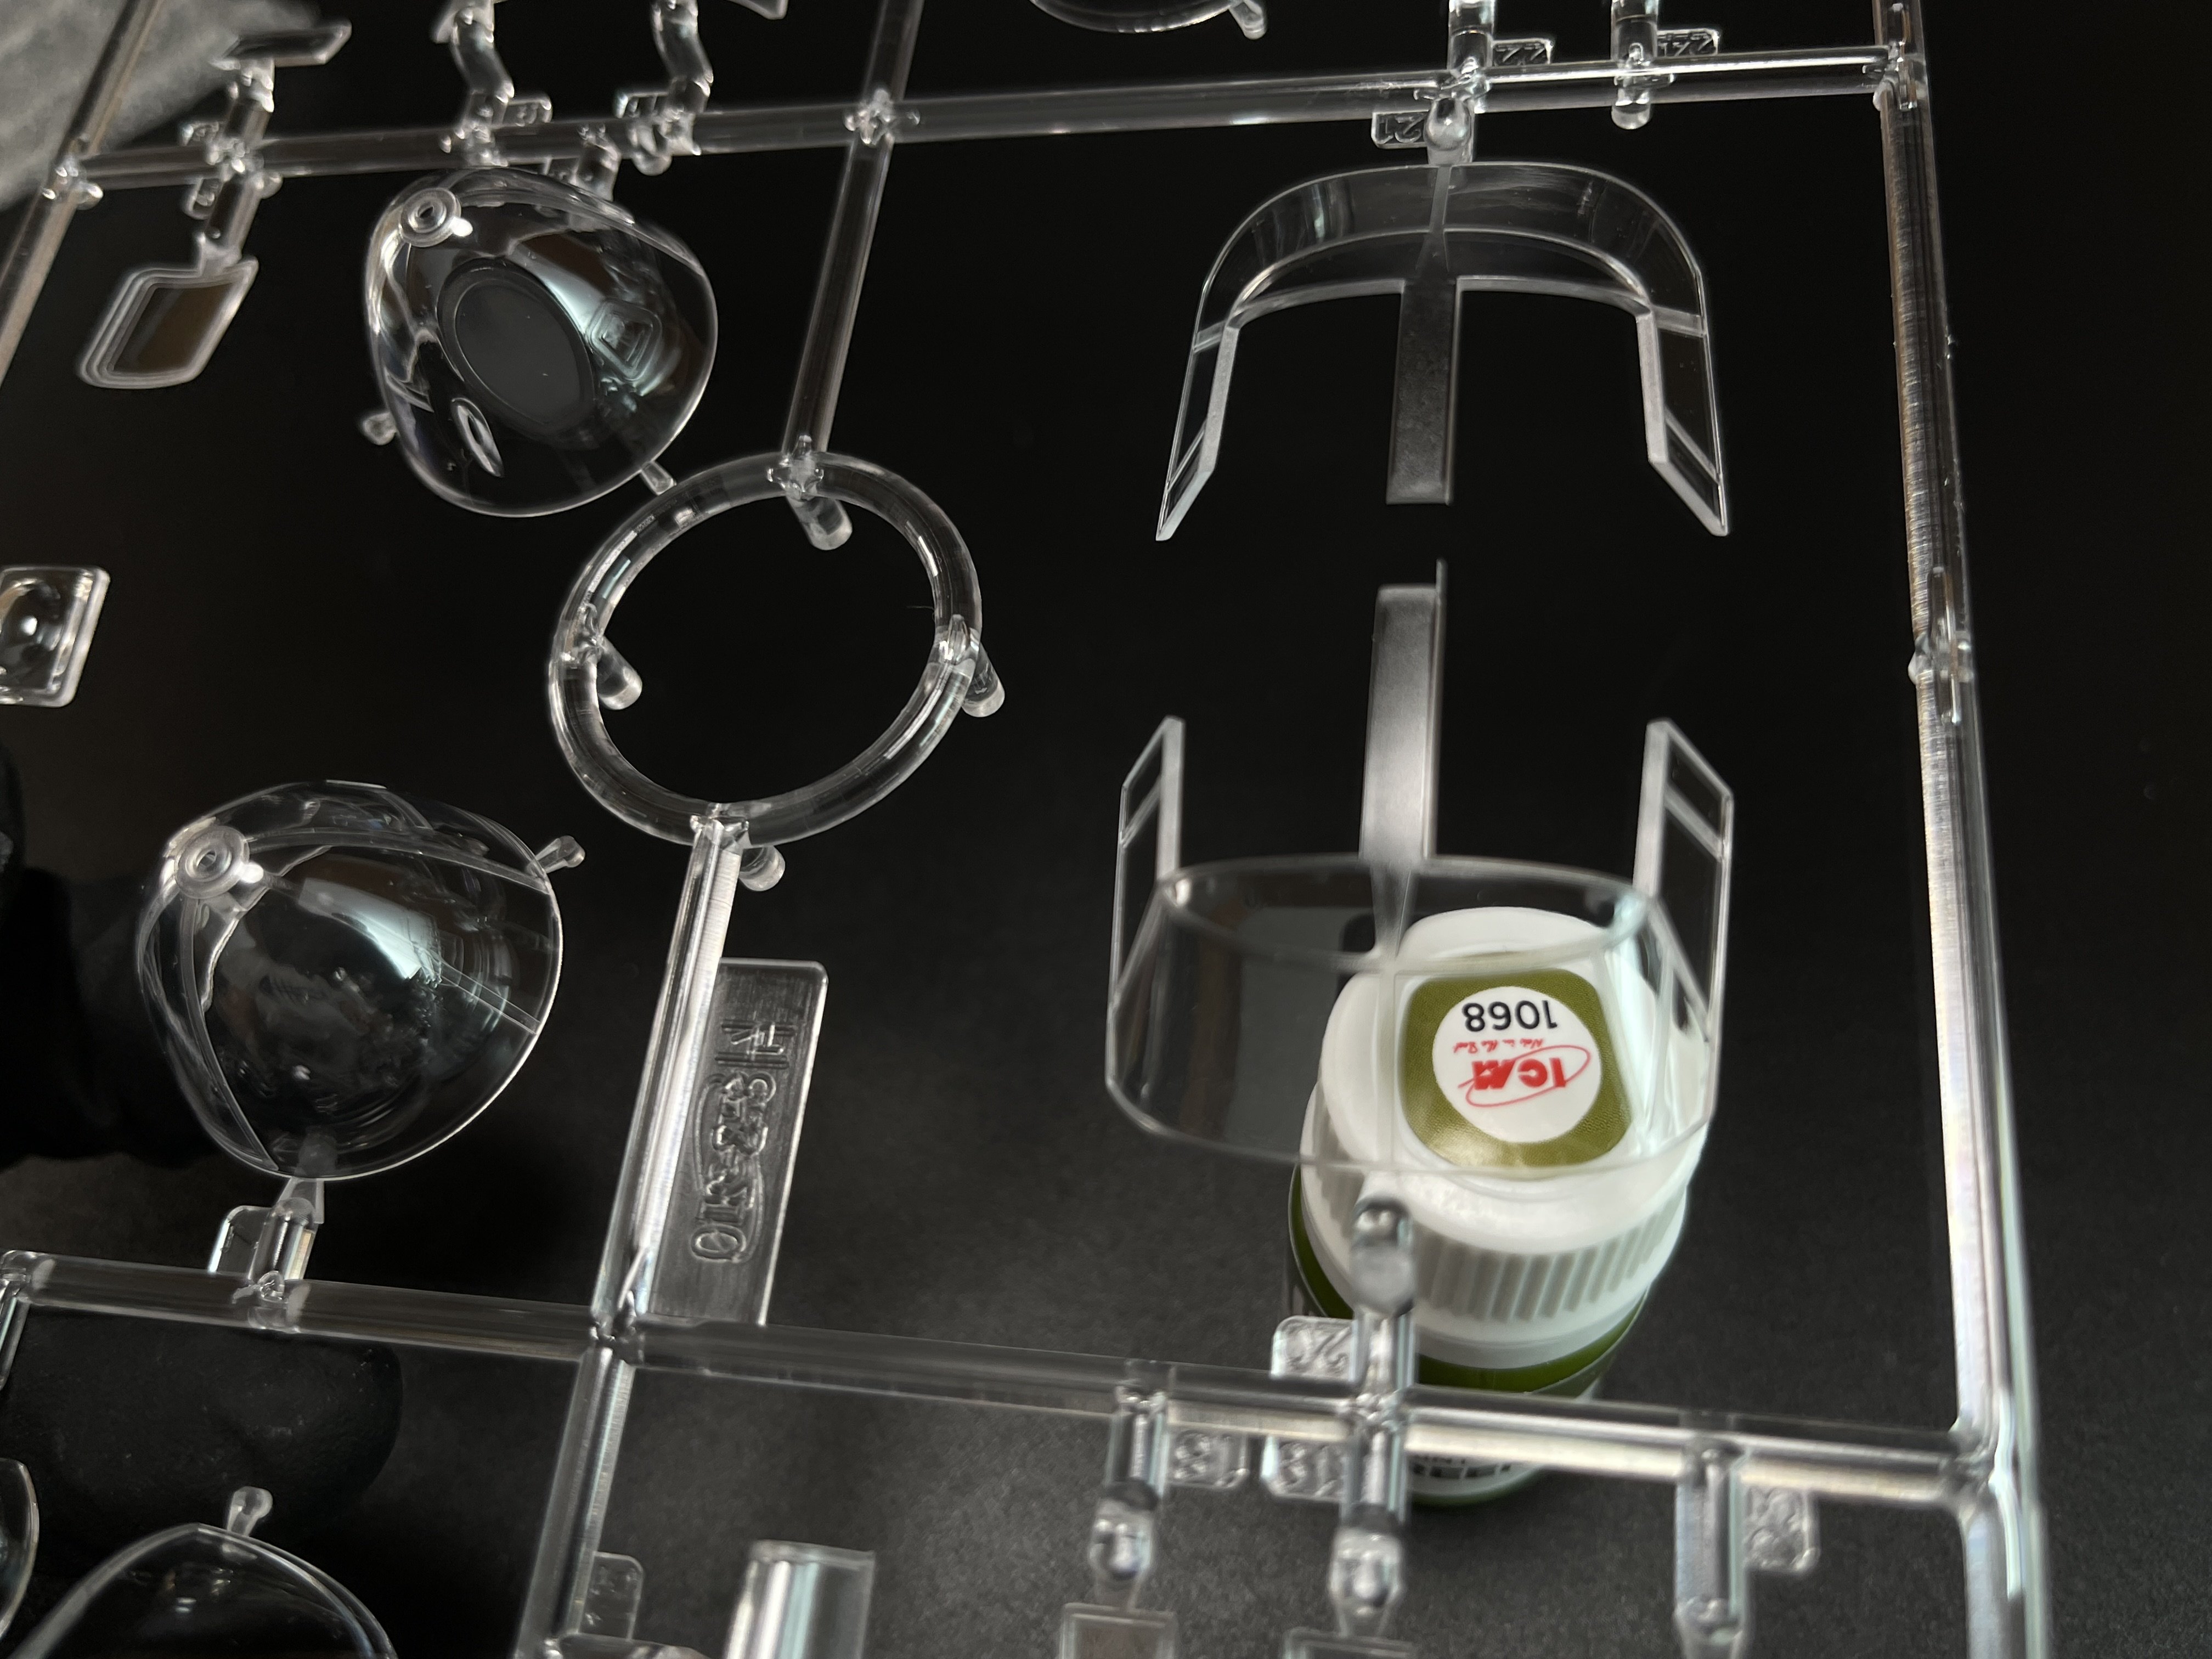
AS for the clear parts, these are just perfect as all clear parts I have seen from Miniart.

You also can be see here, in our review of the first ICM release of the MH-60L.
https://forum.largescalemodeller.com/topic/20566-148-icm-mh-60l-black-hawk/
And also this one:
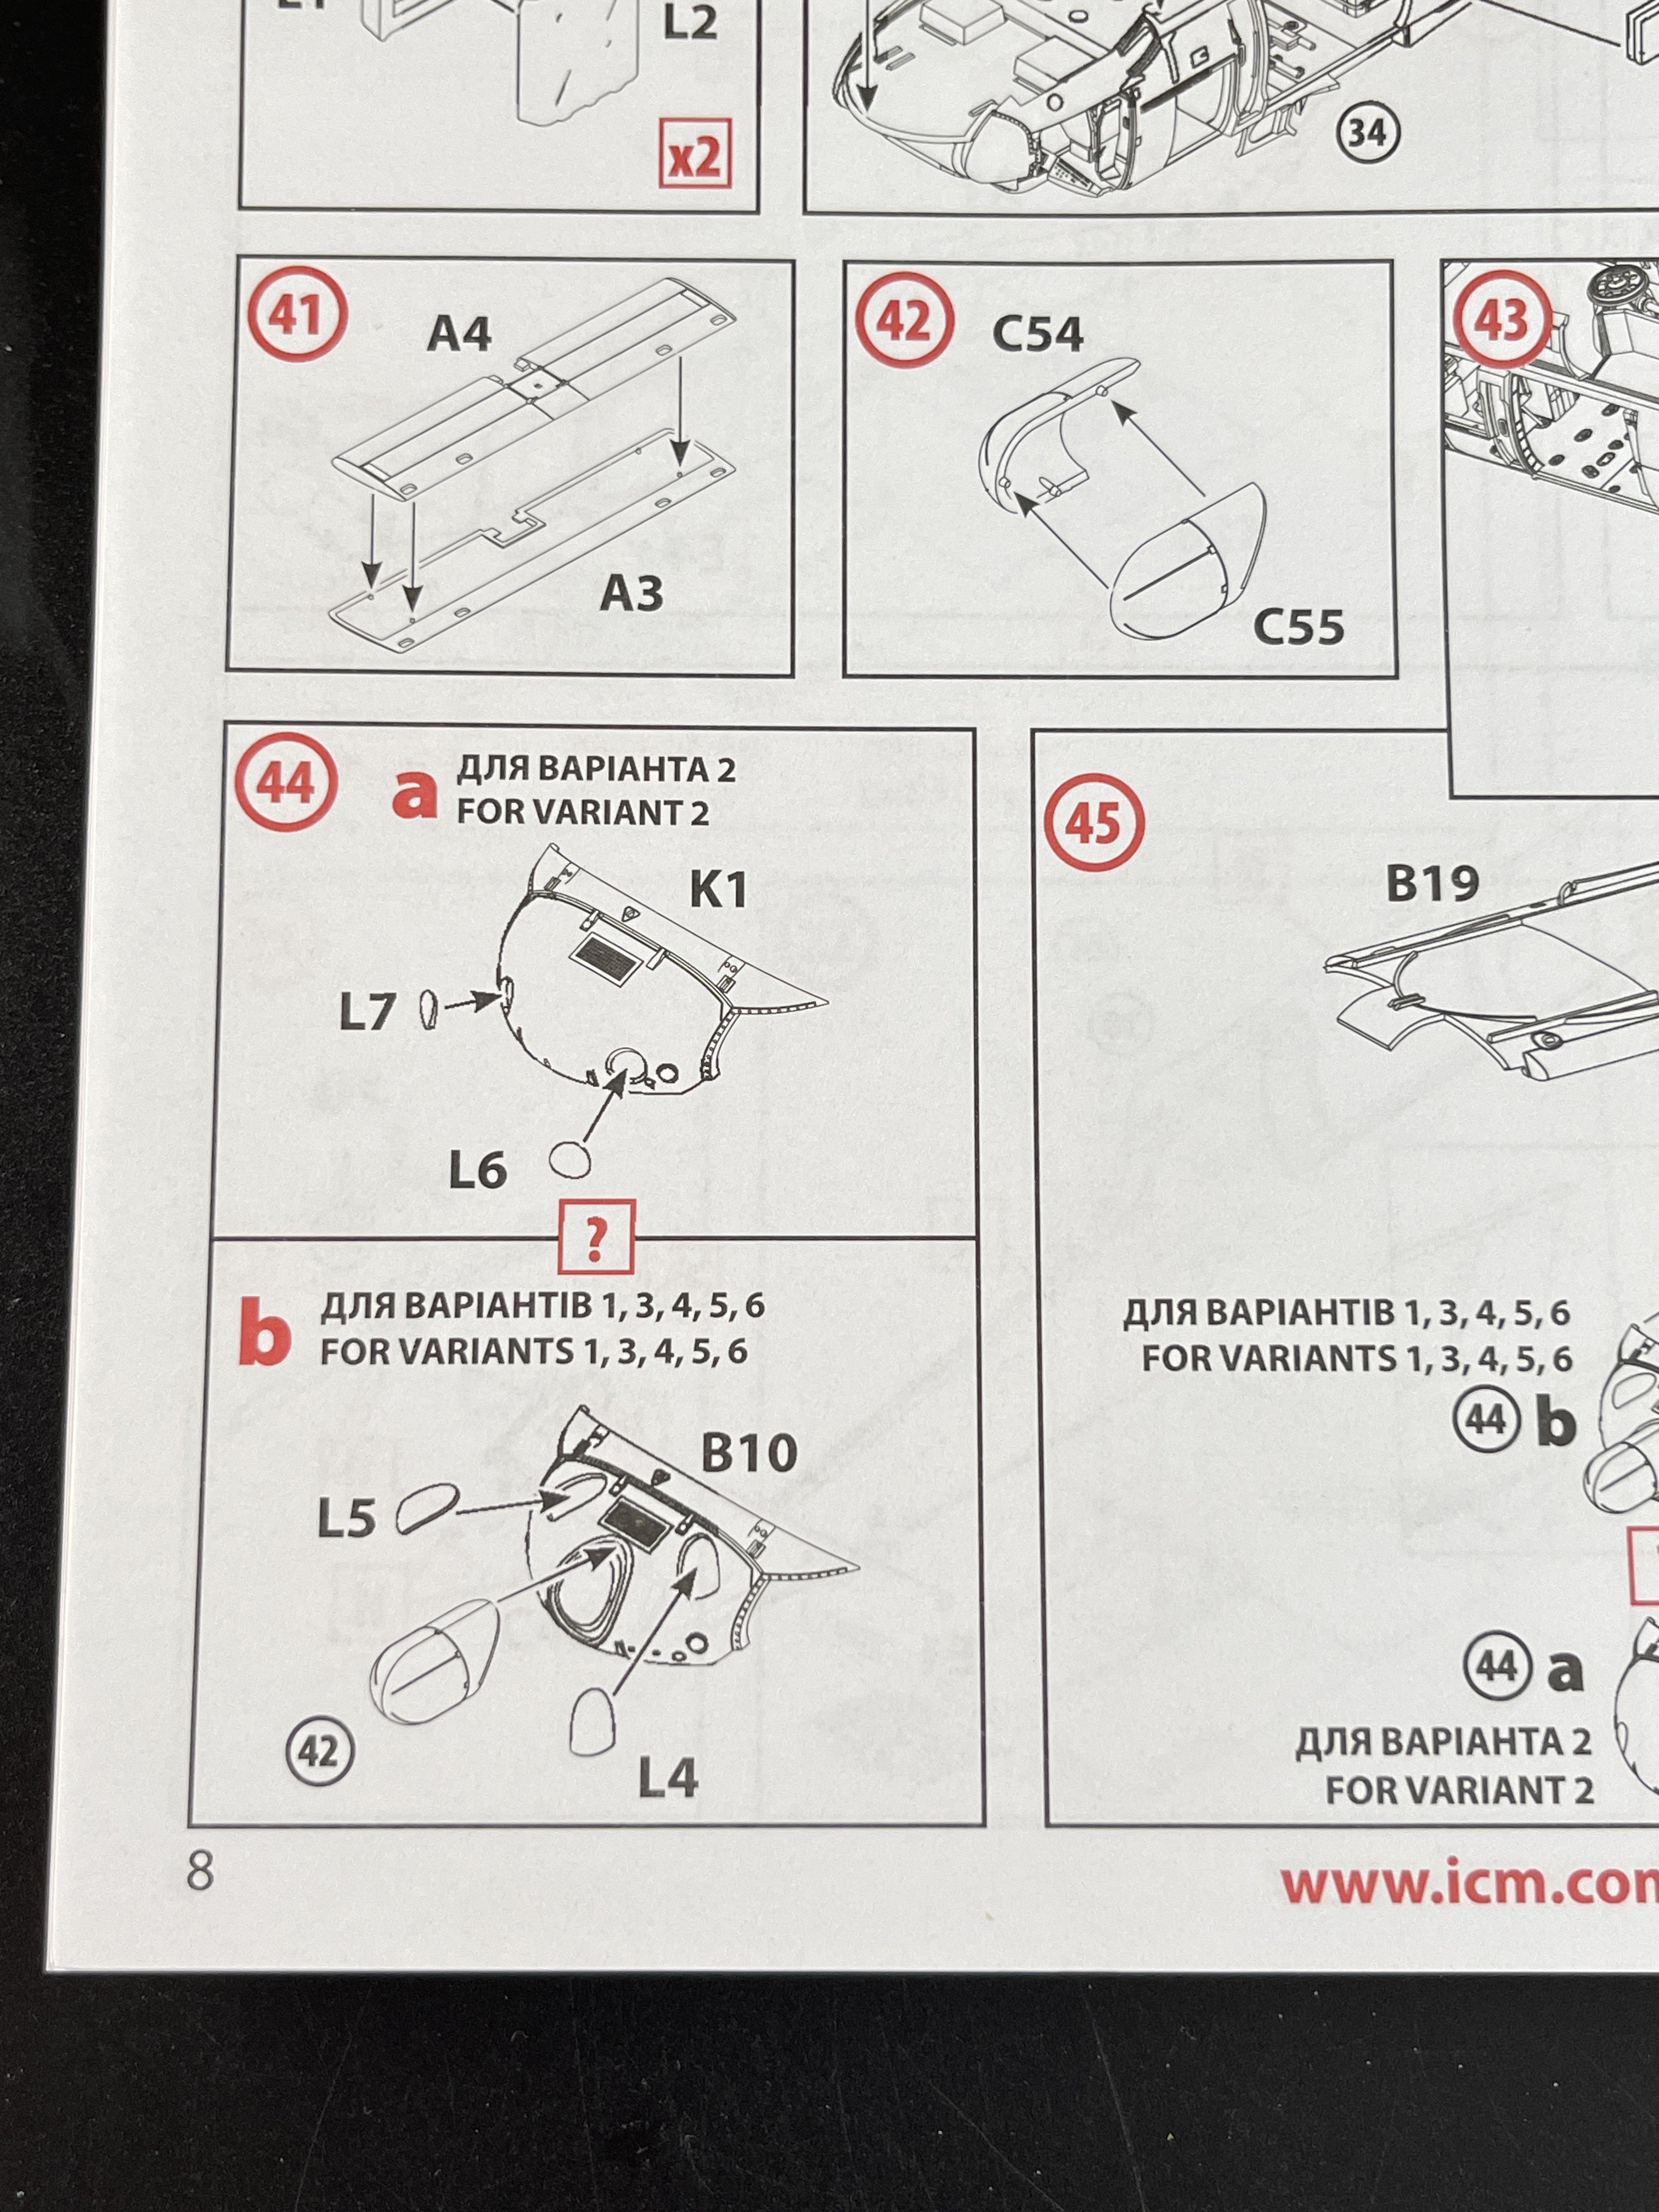
So lets check the two new sprues.
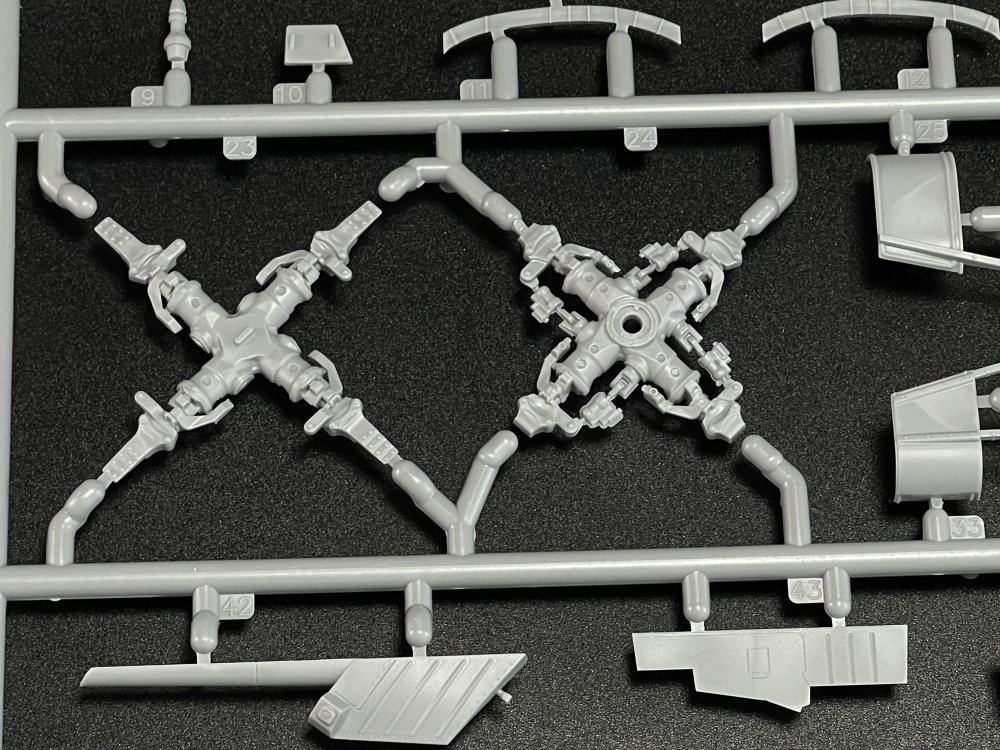
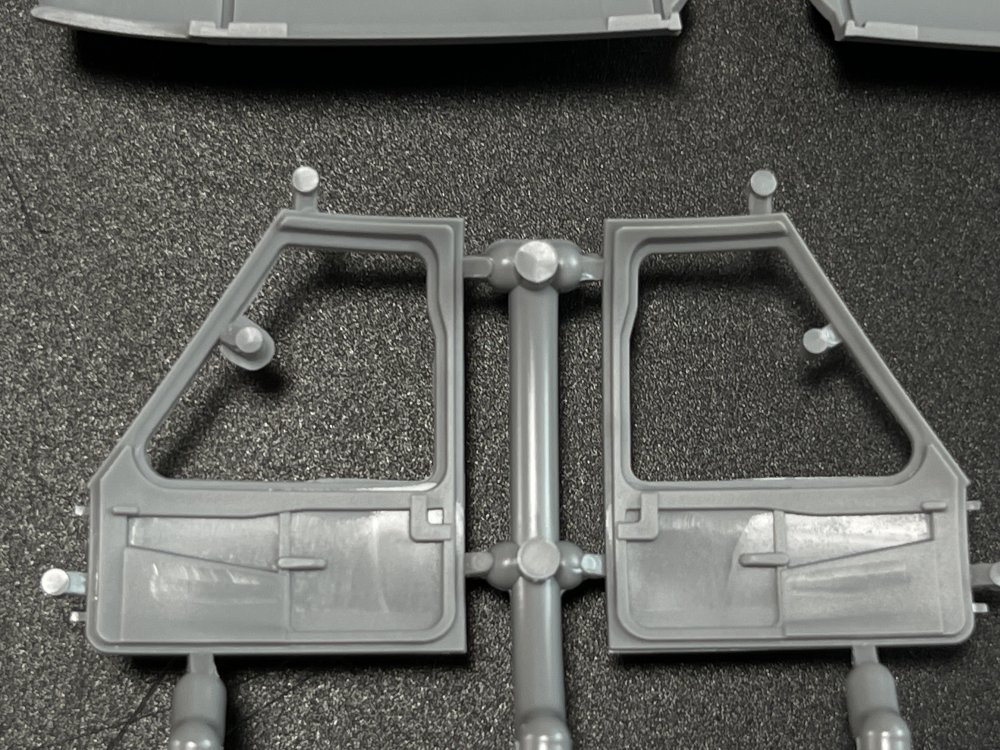
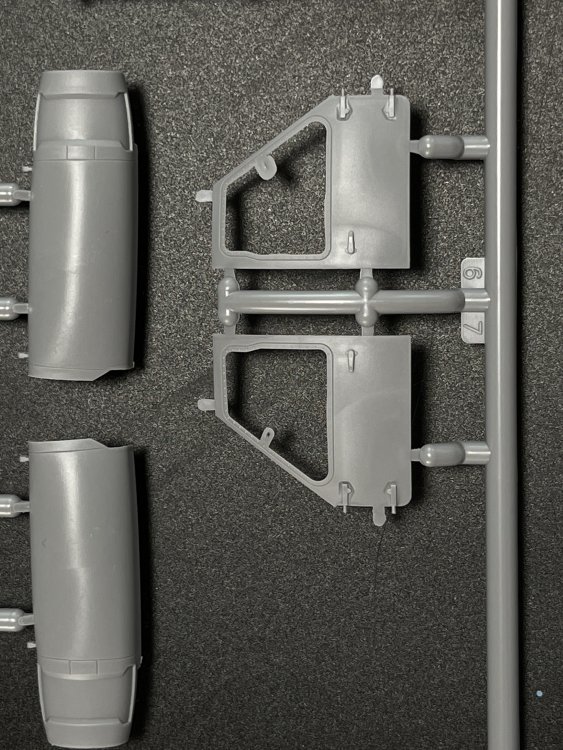
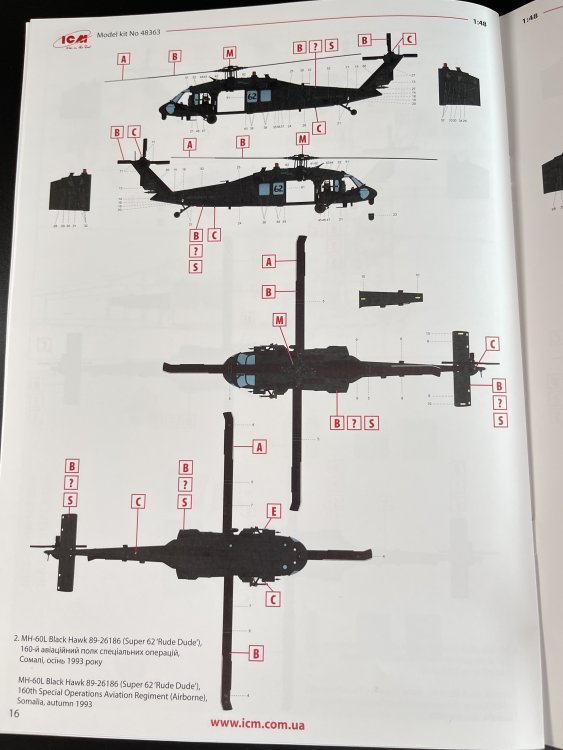
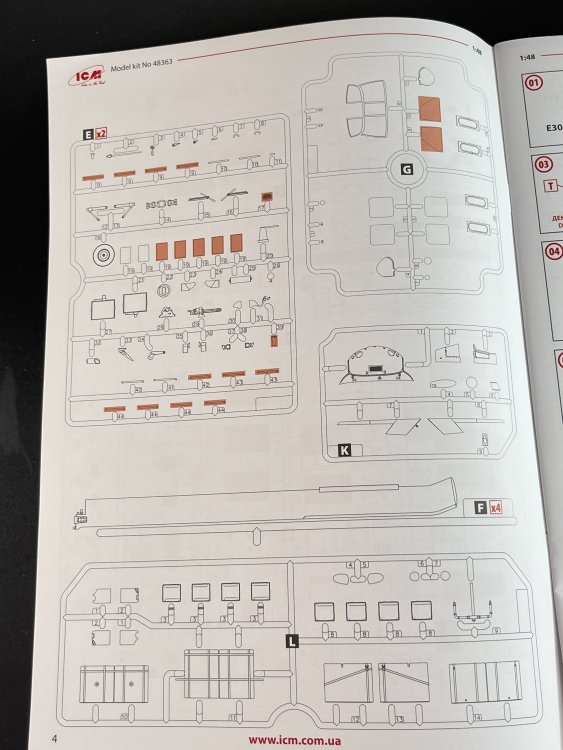
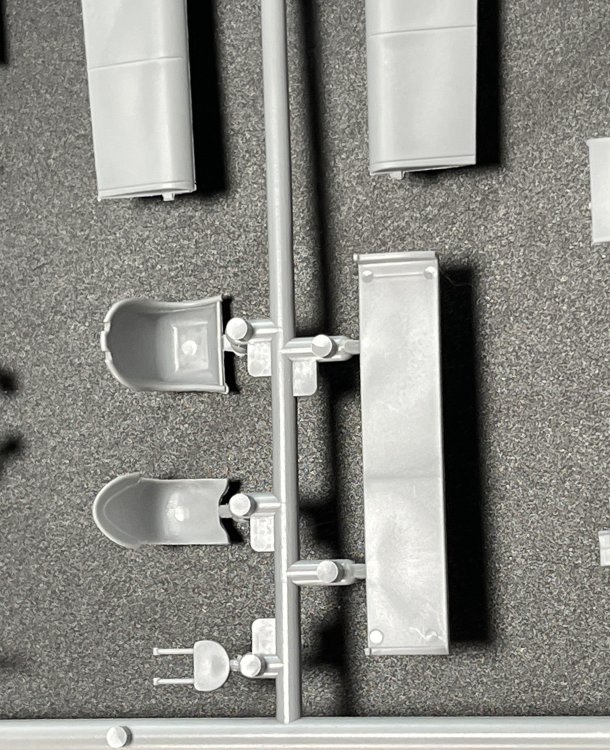
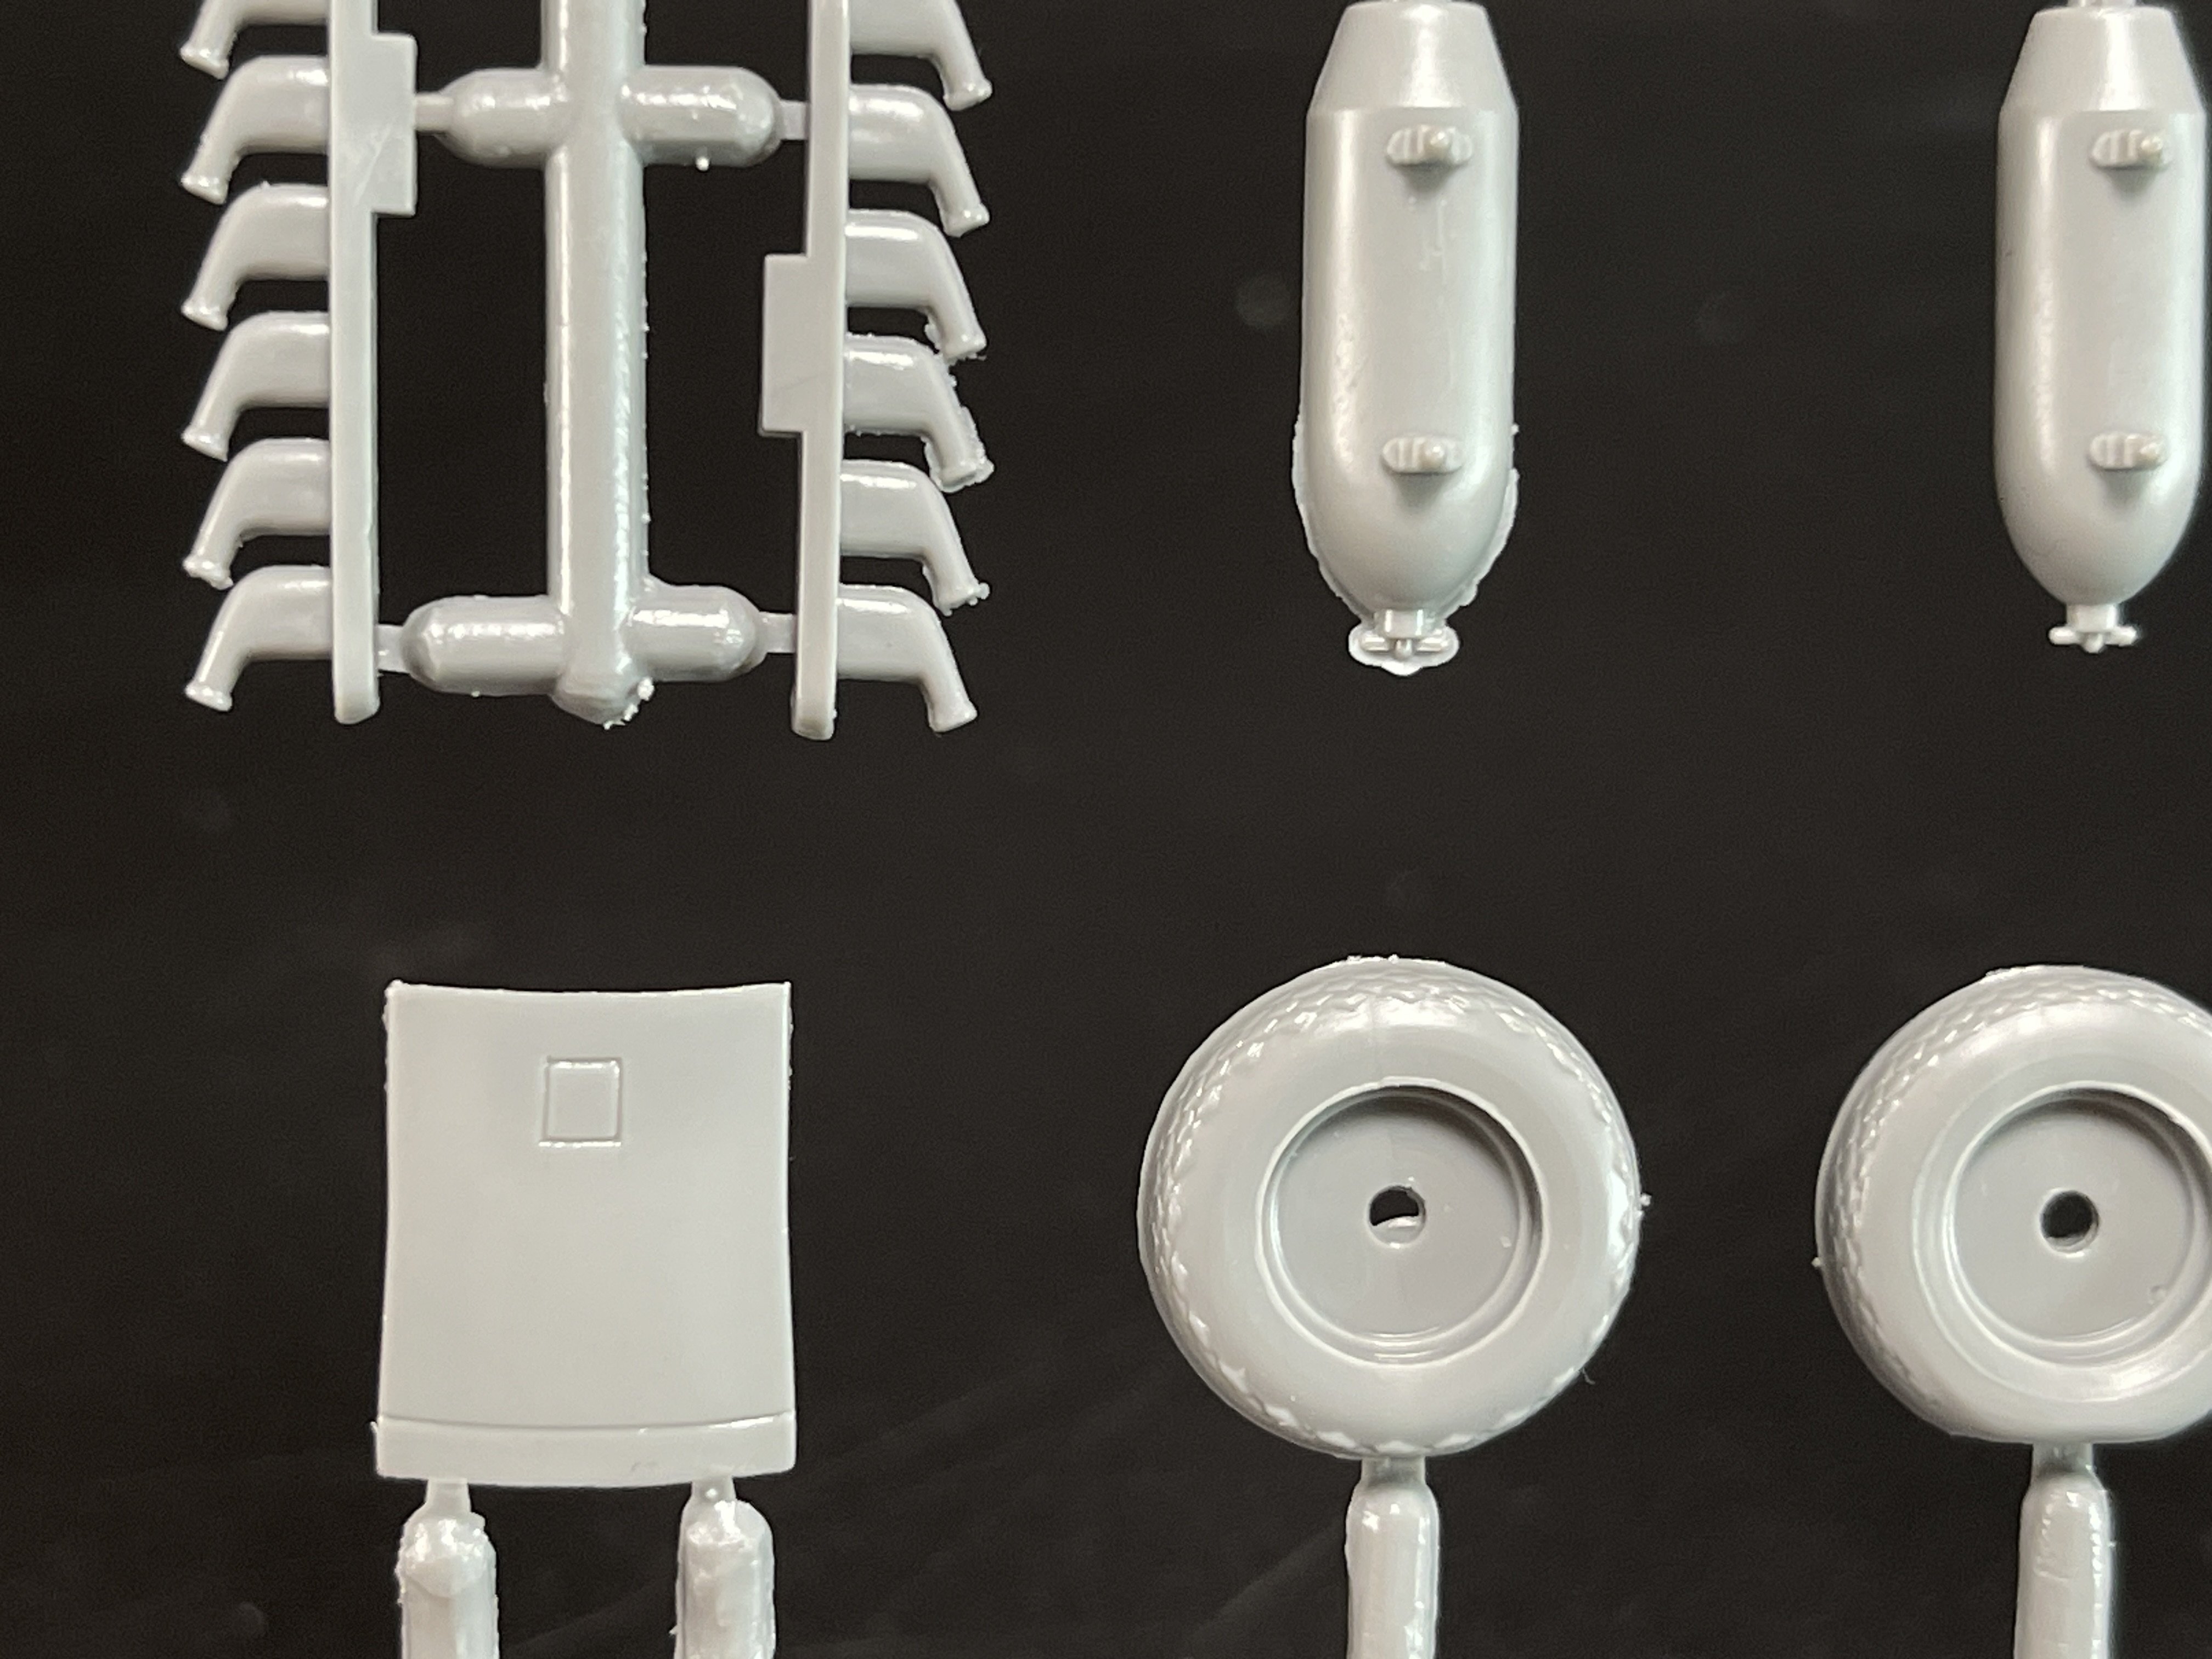
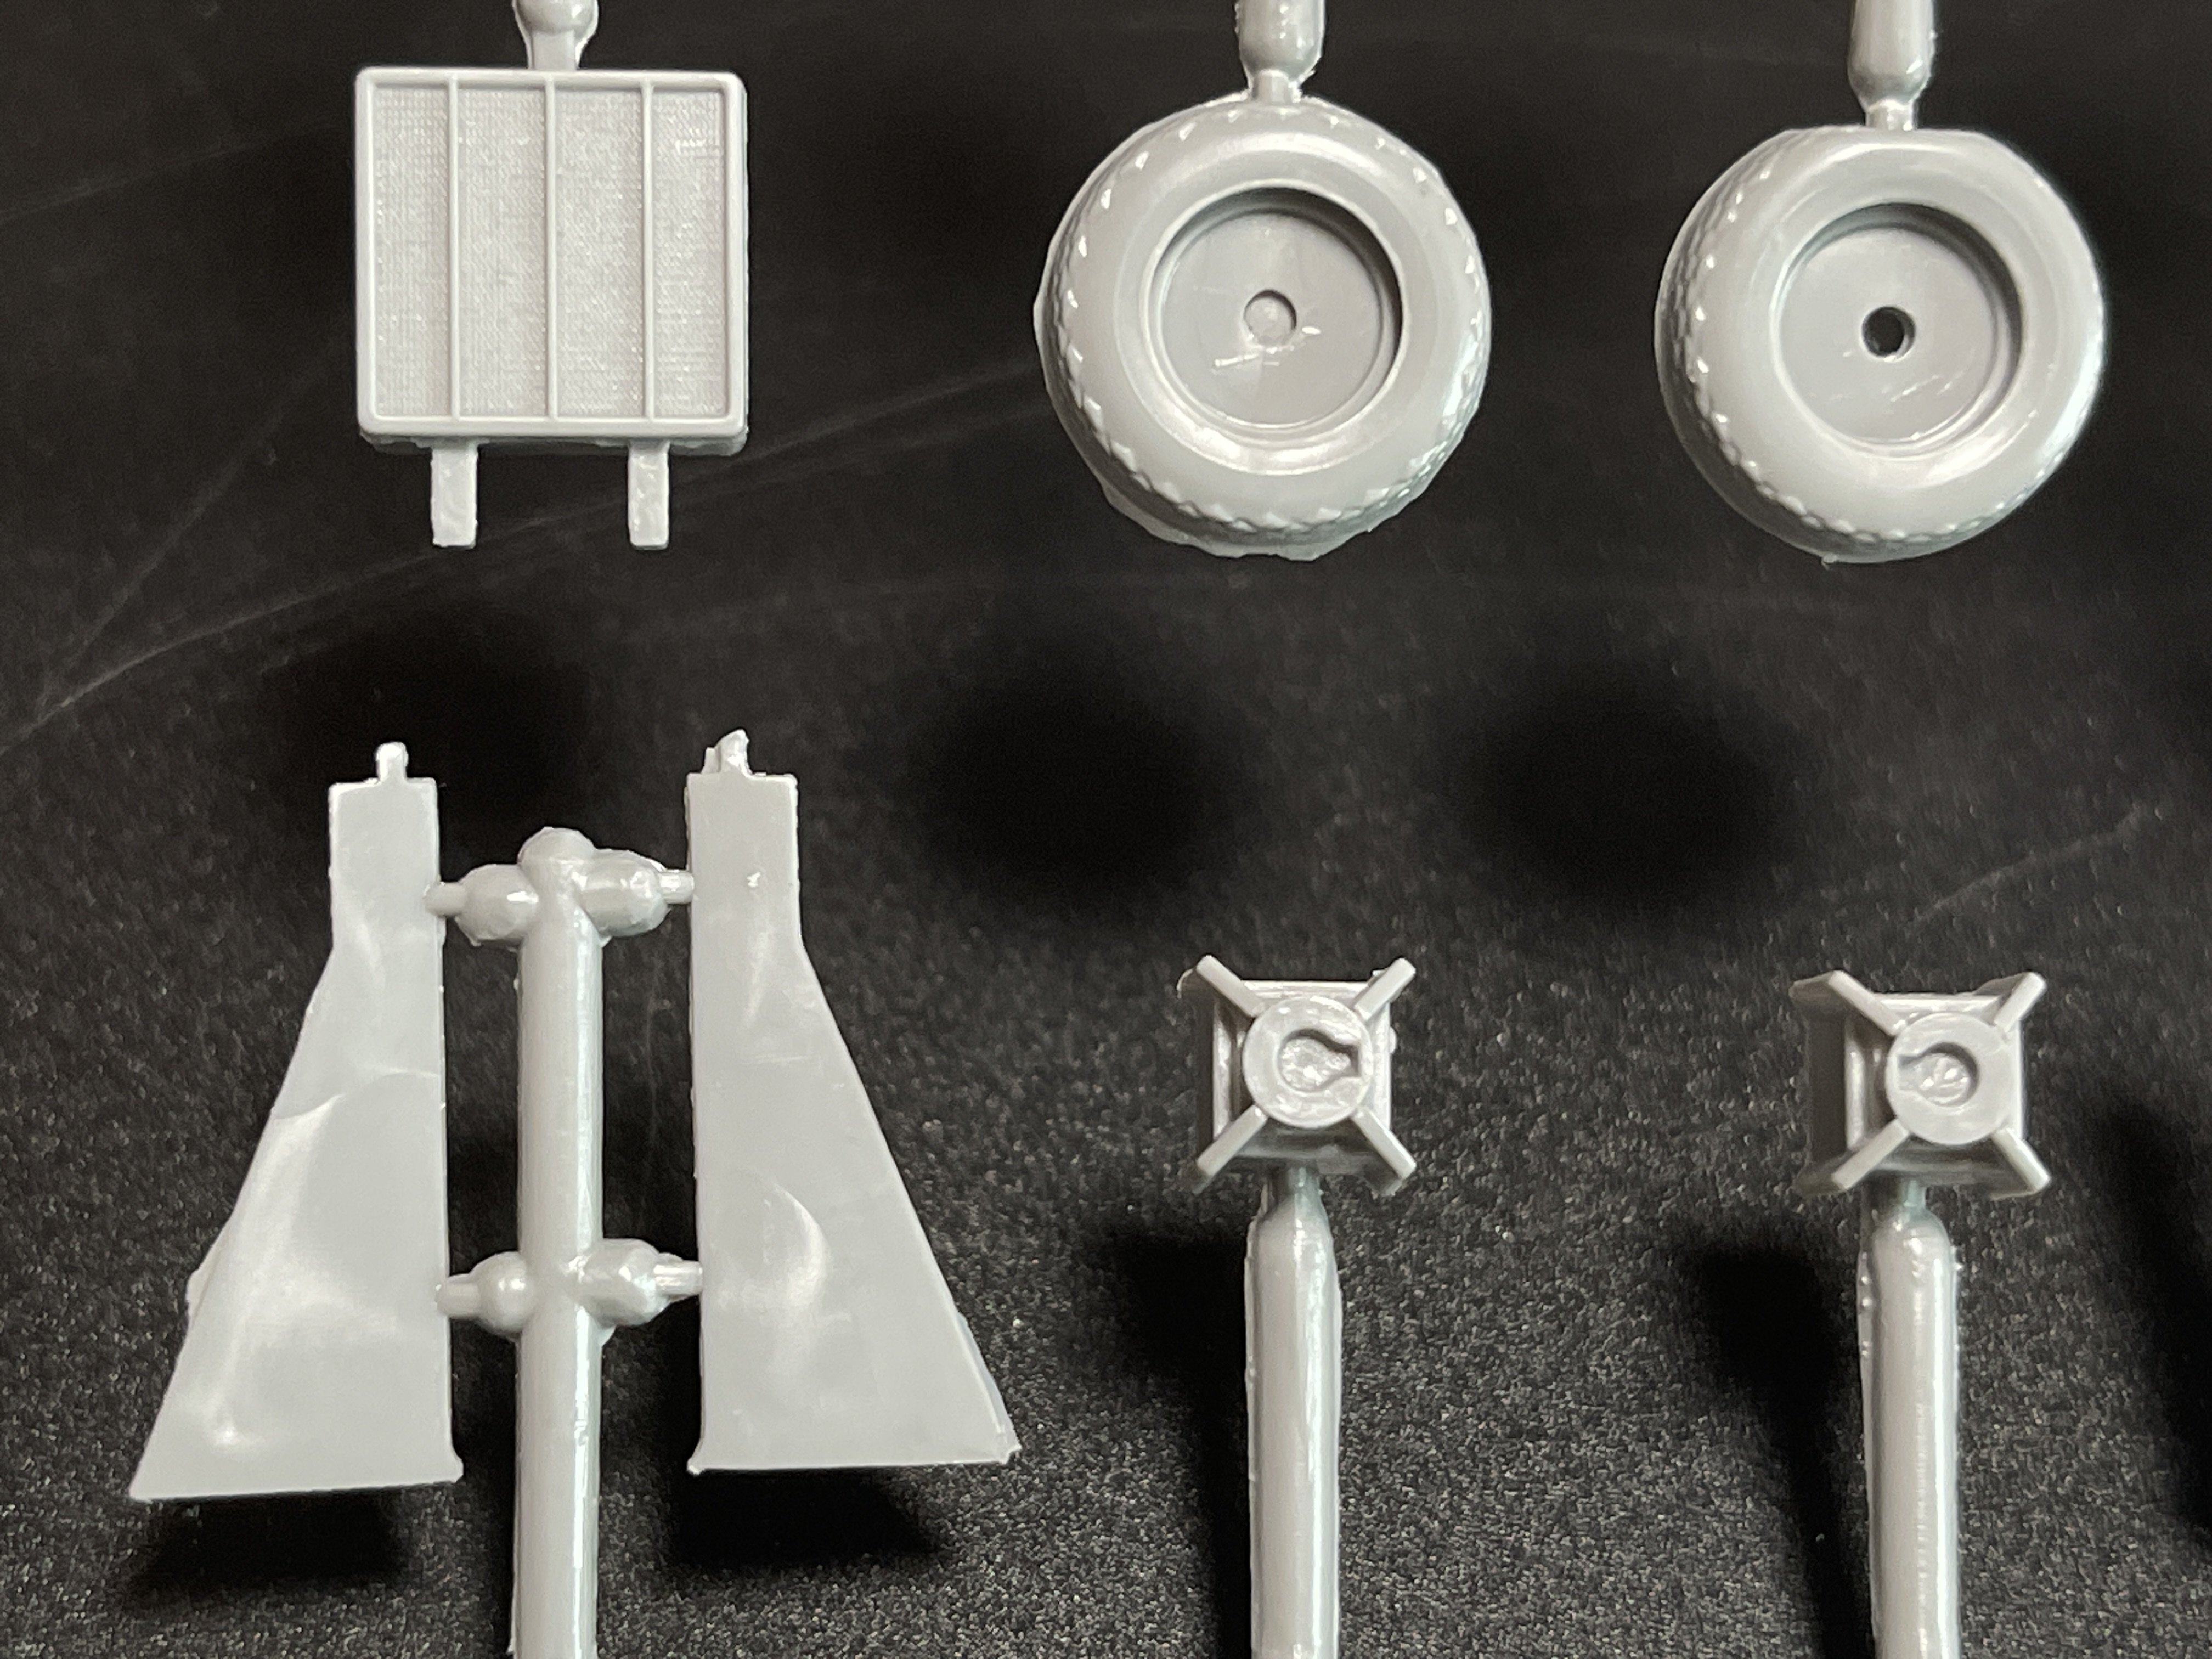
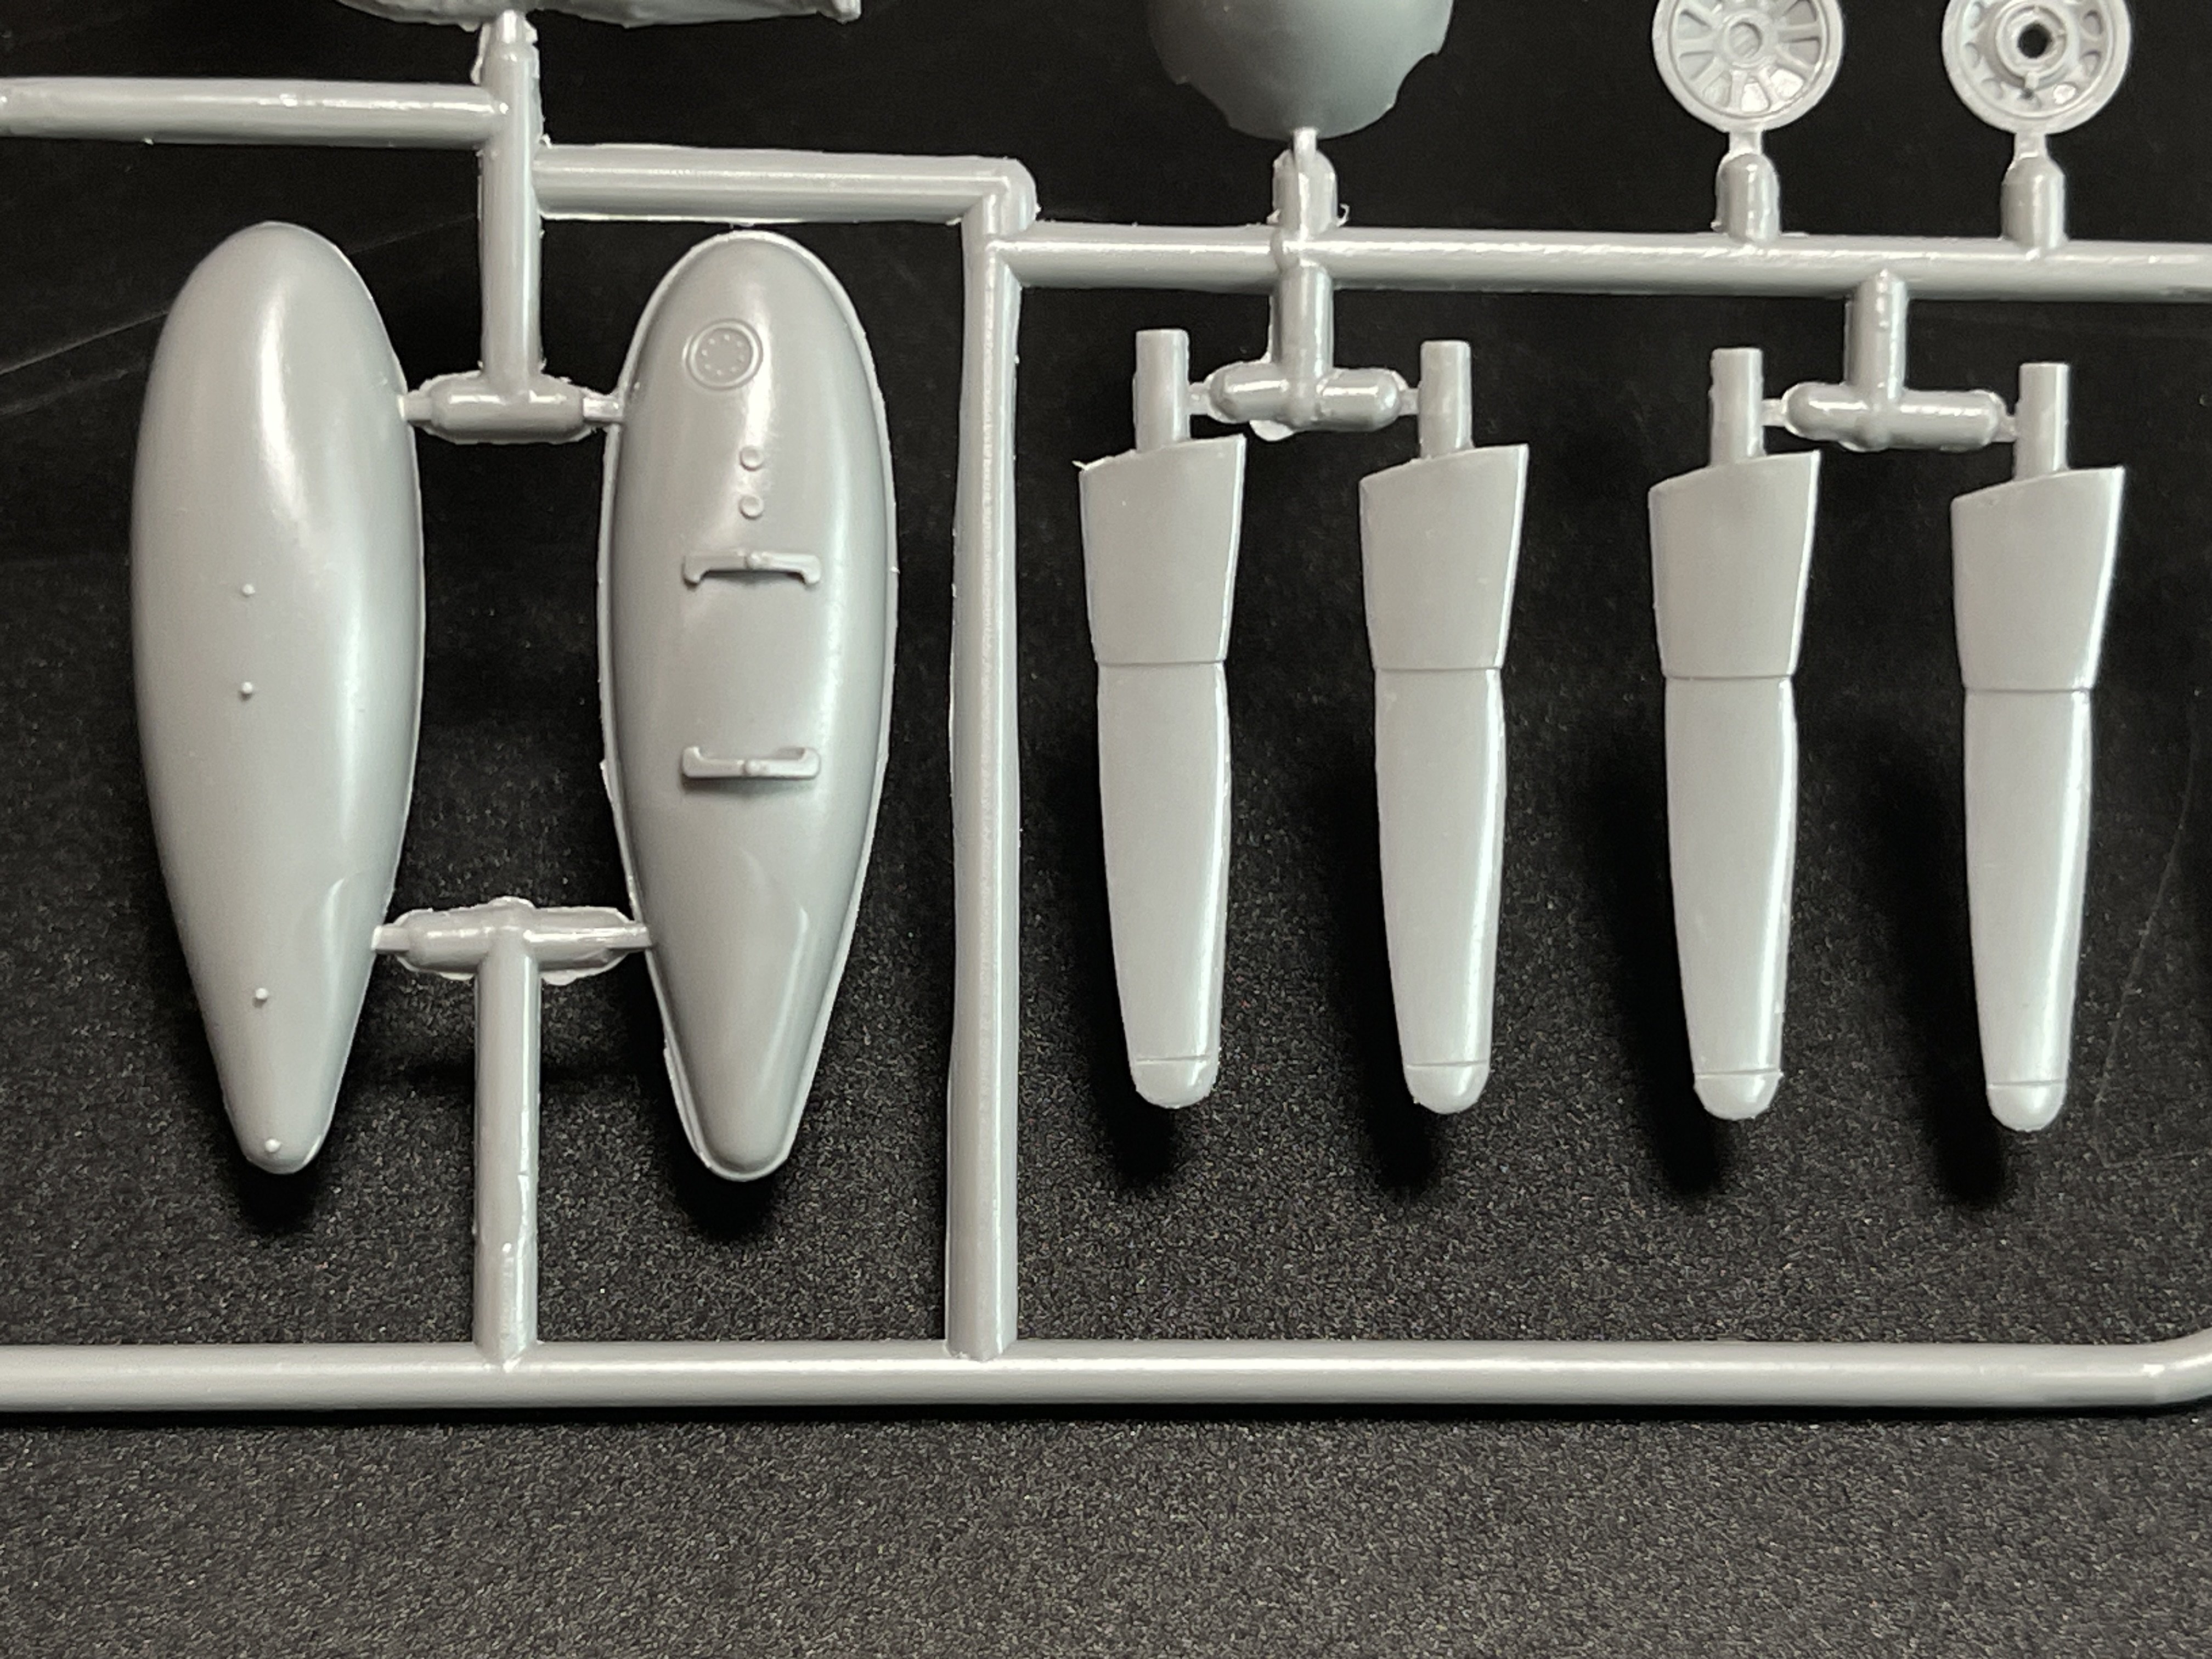
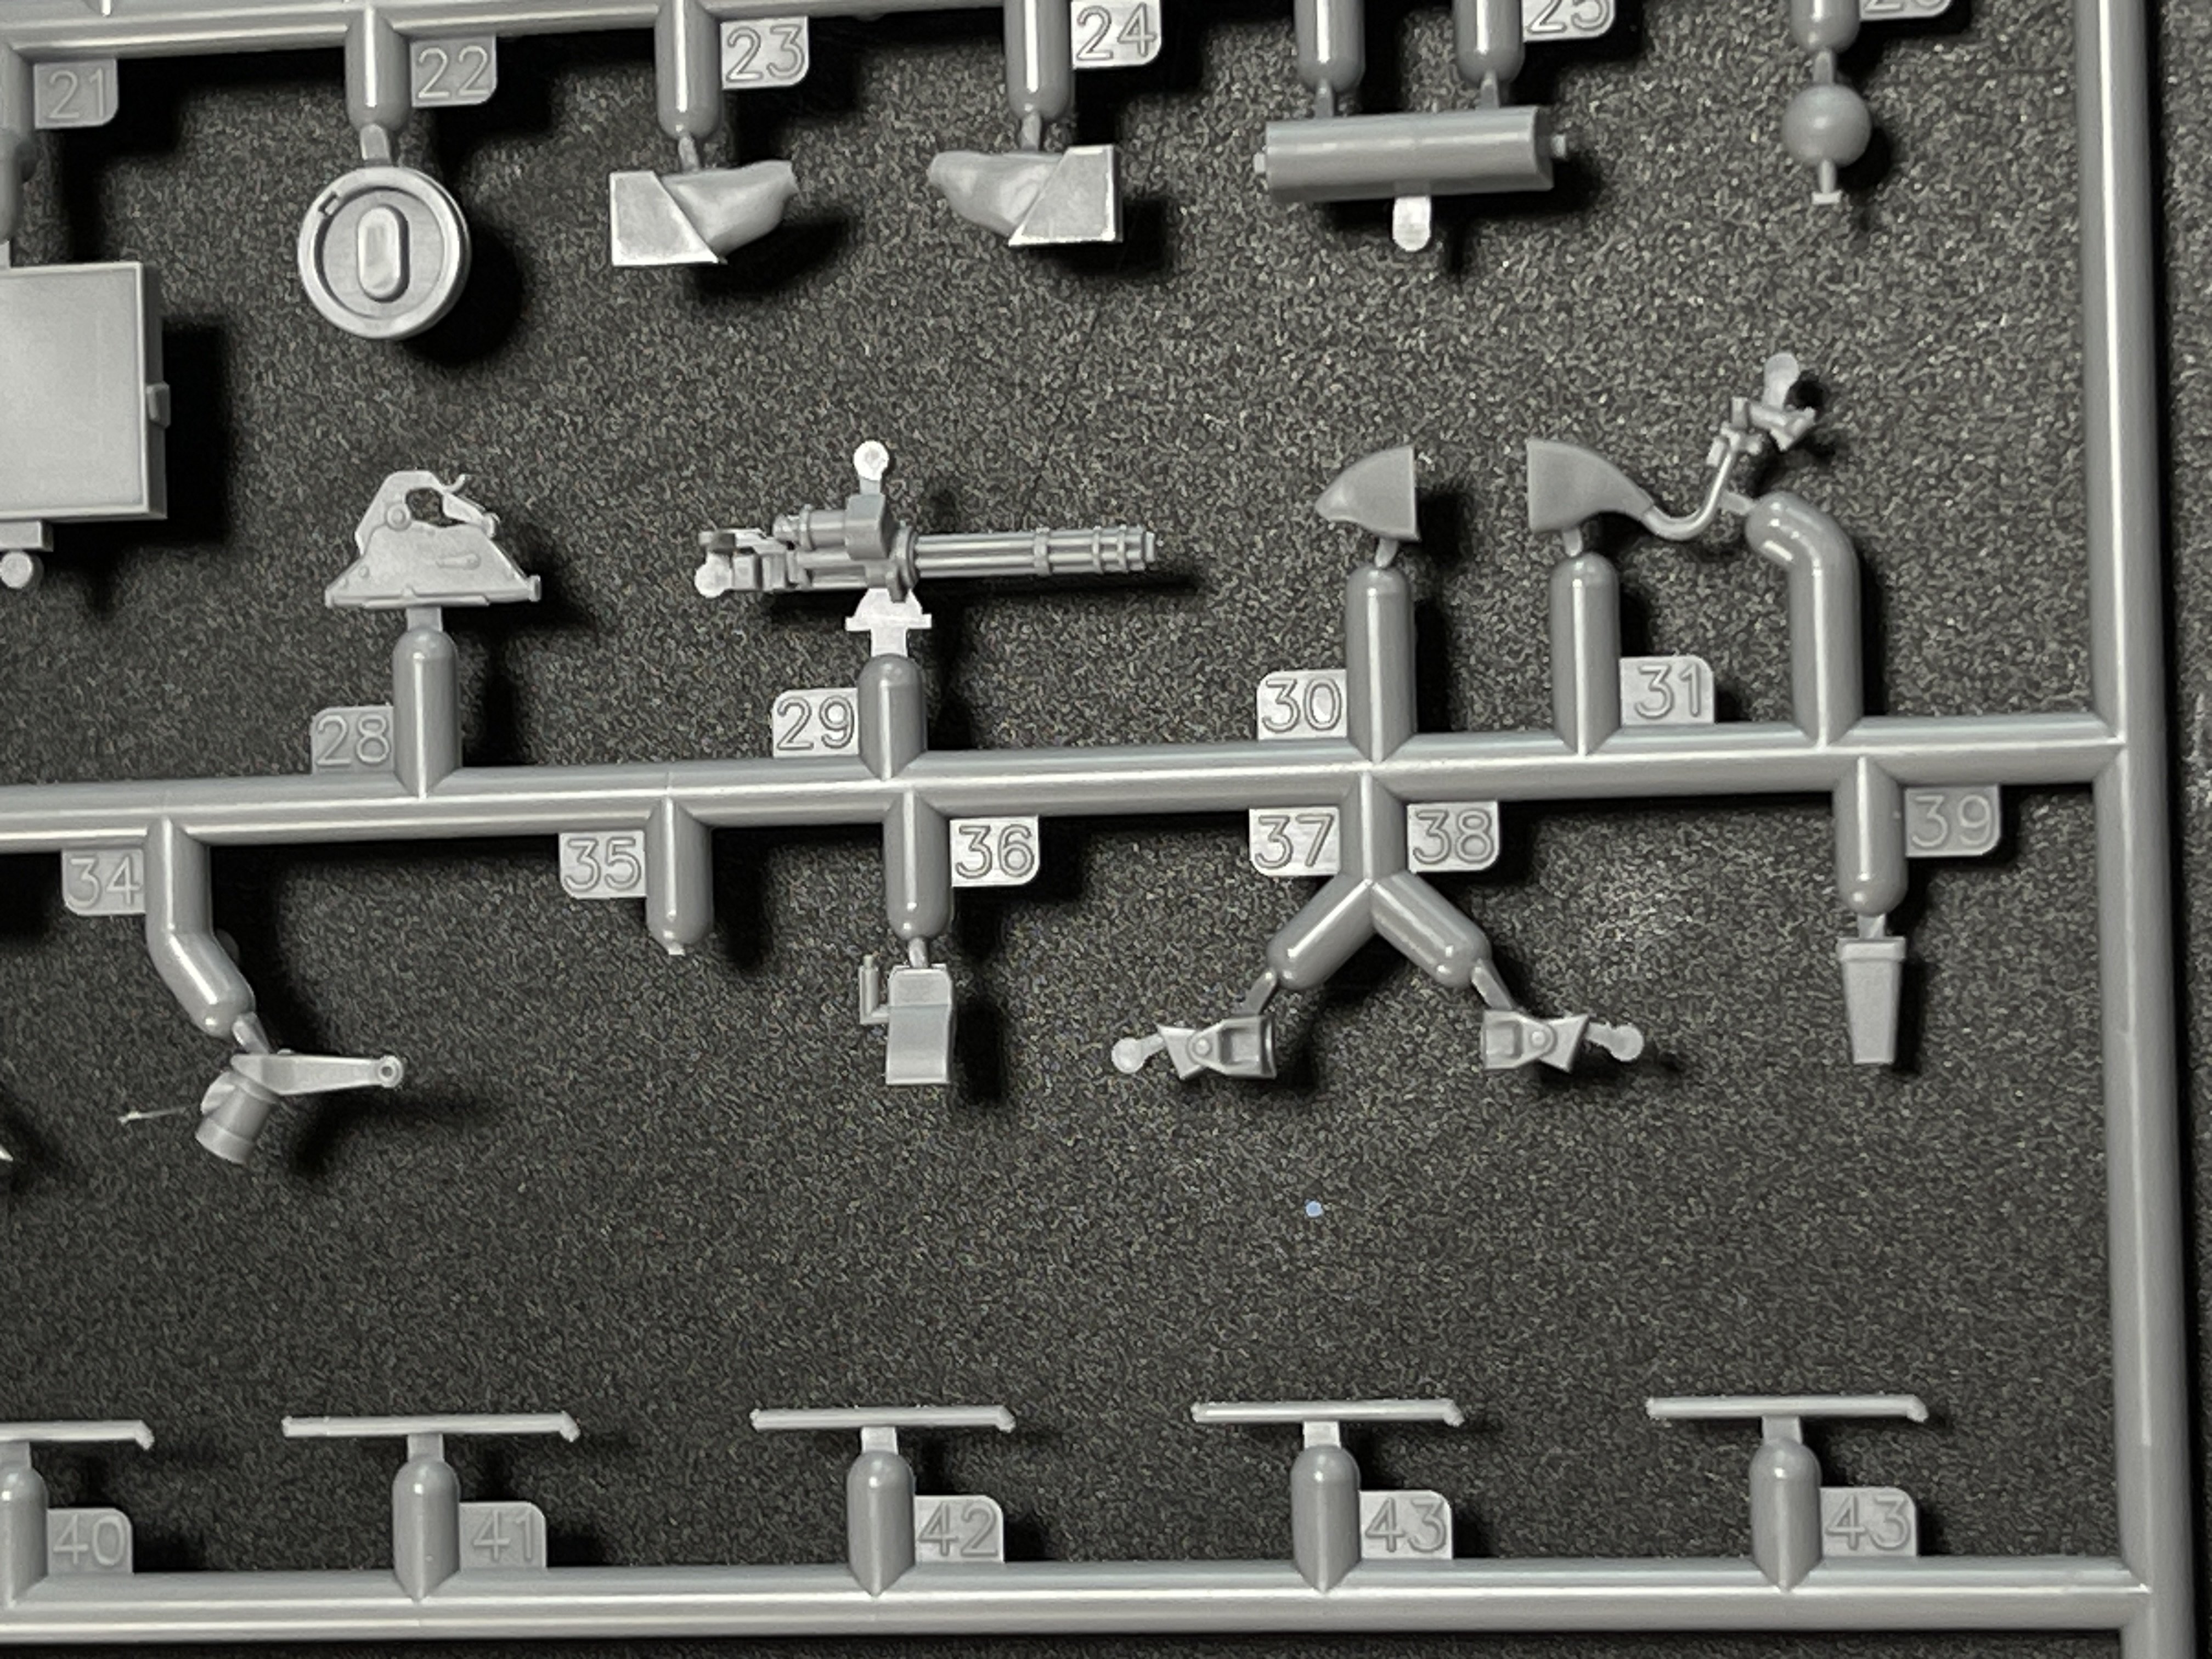
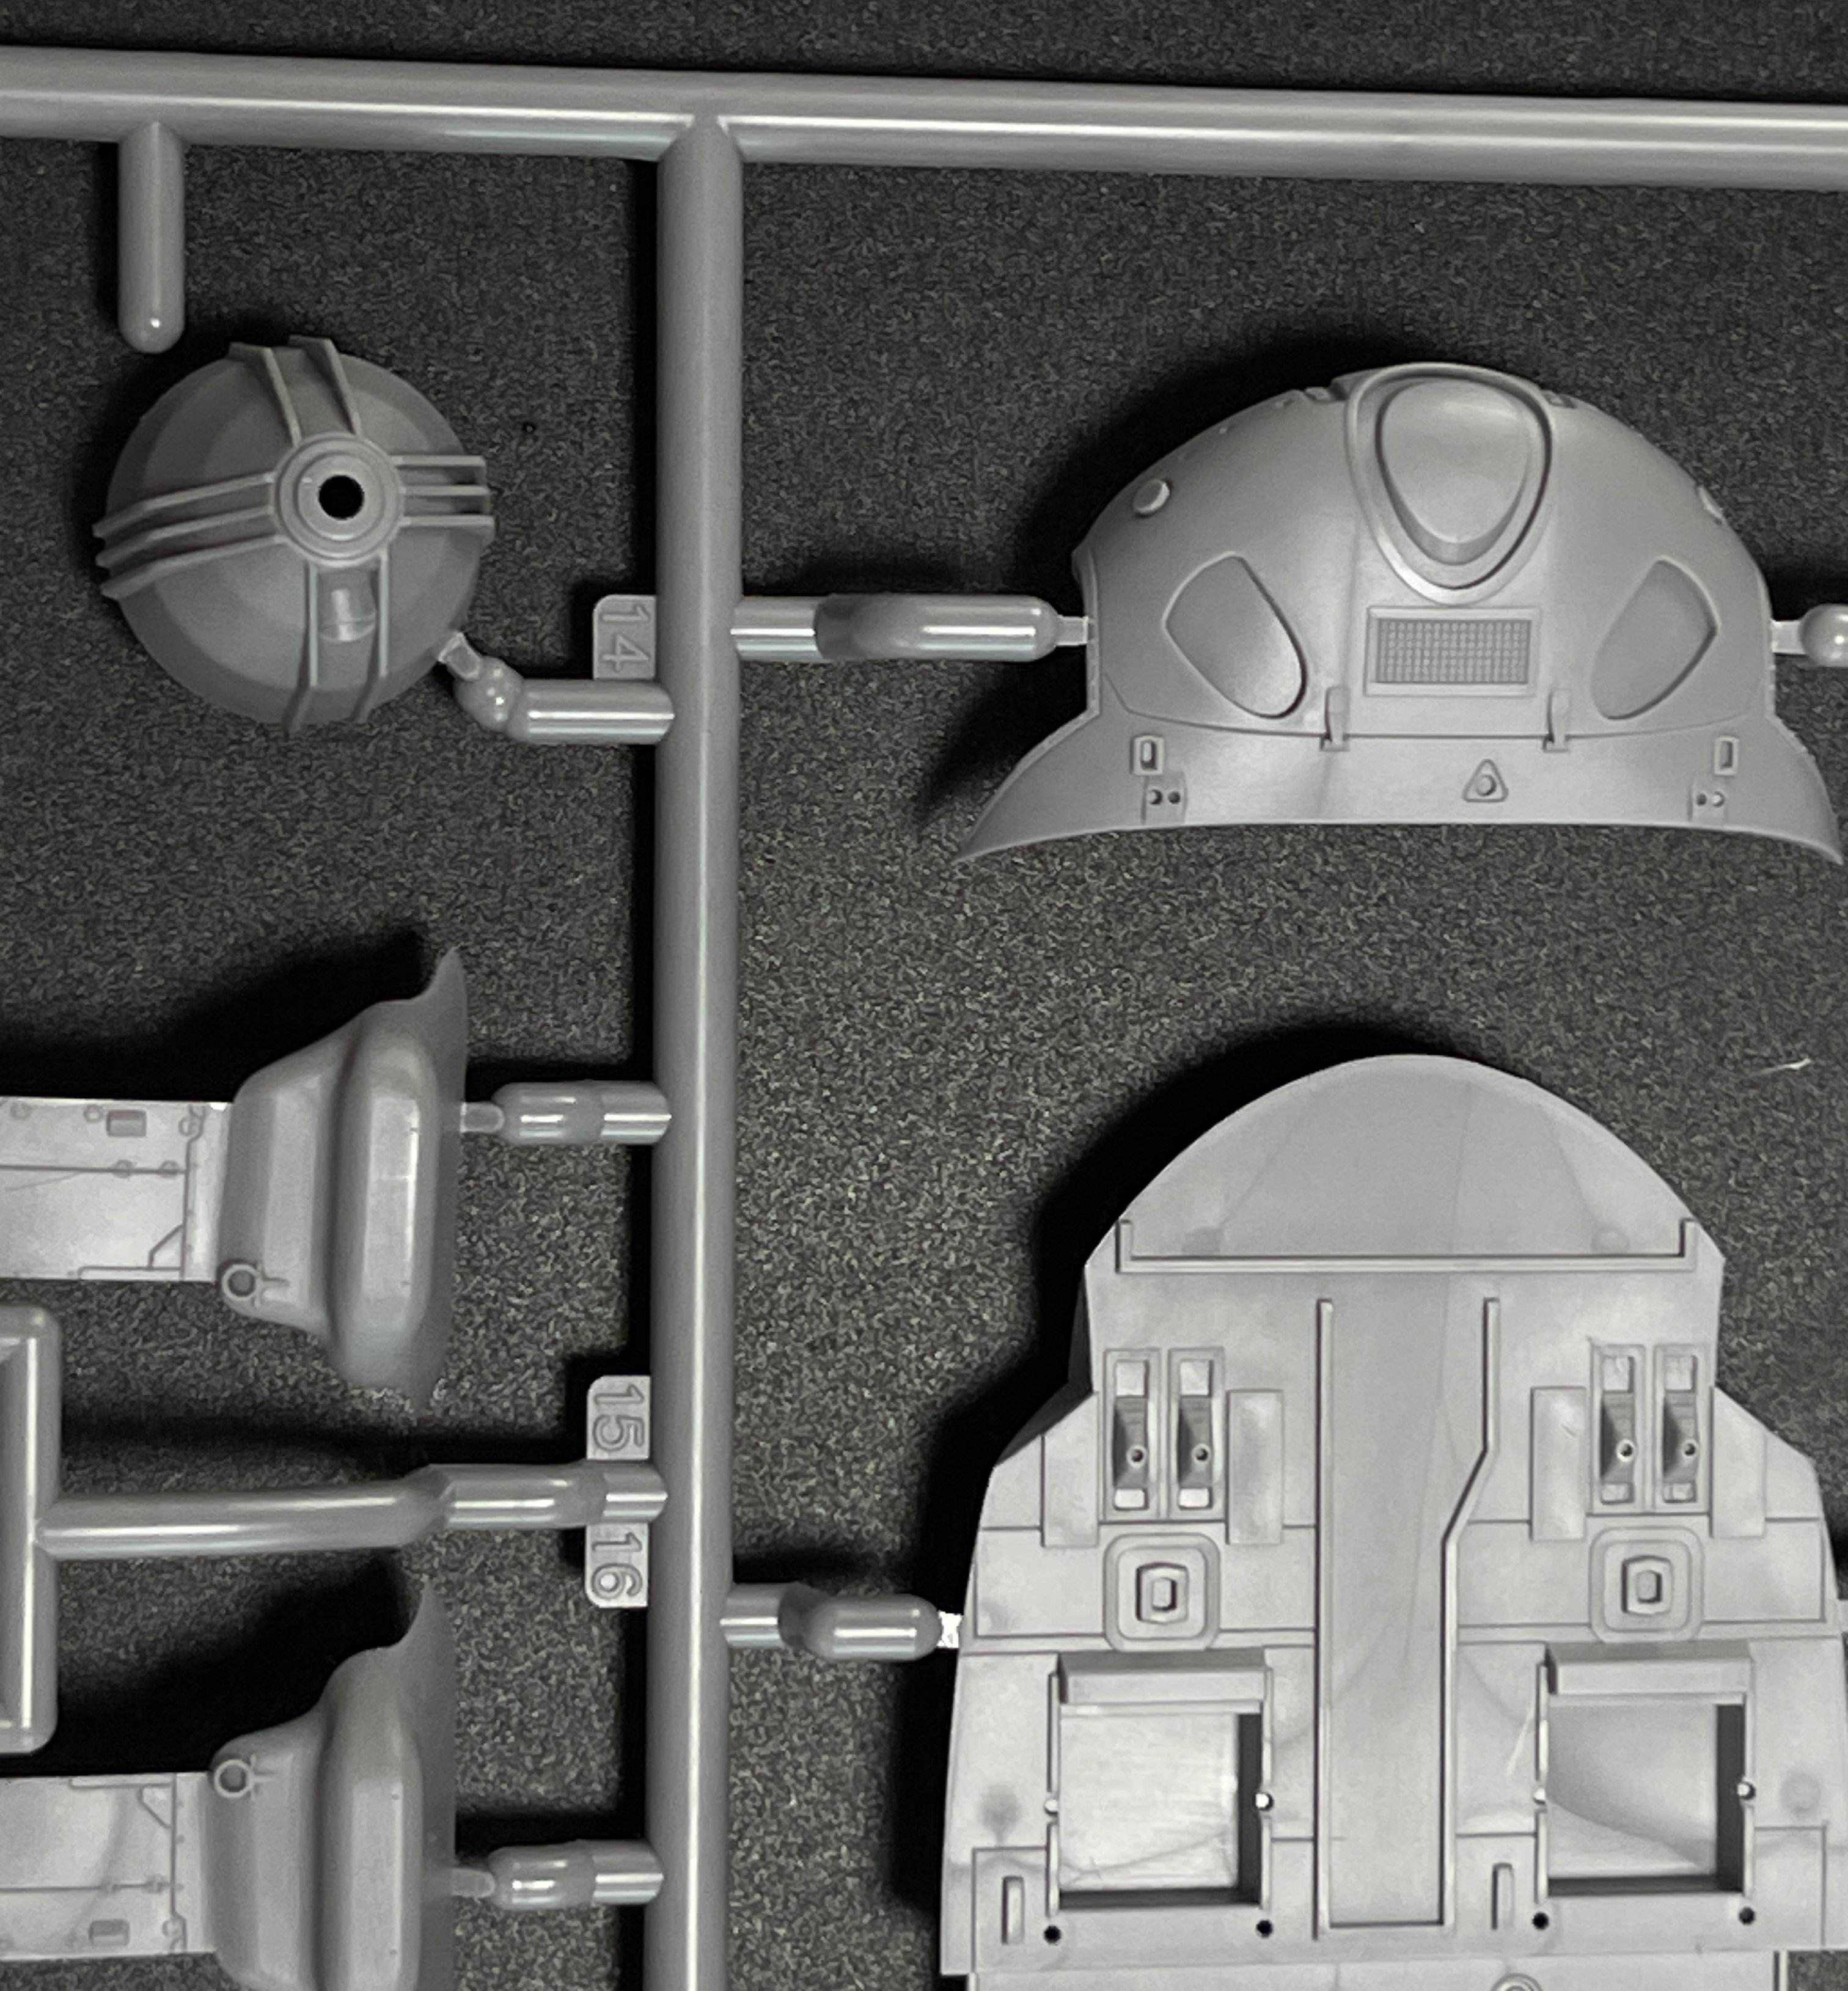
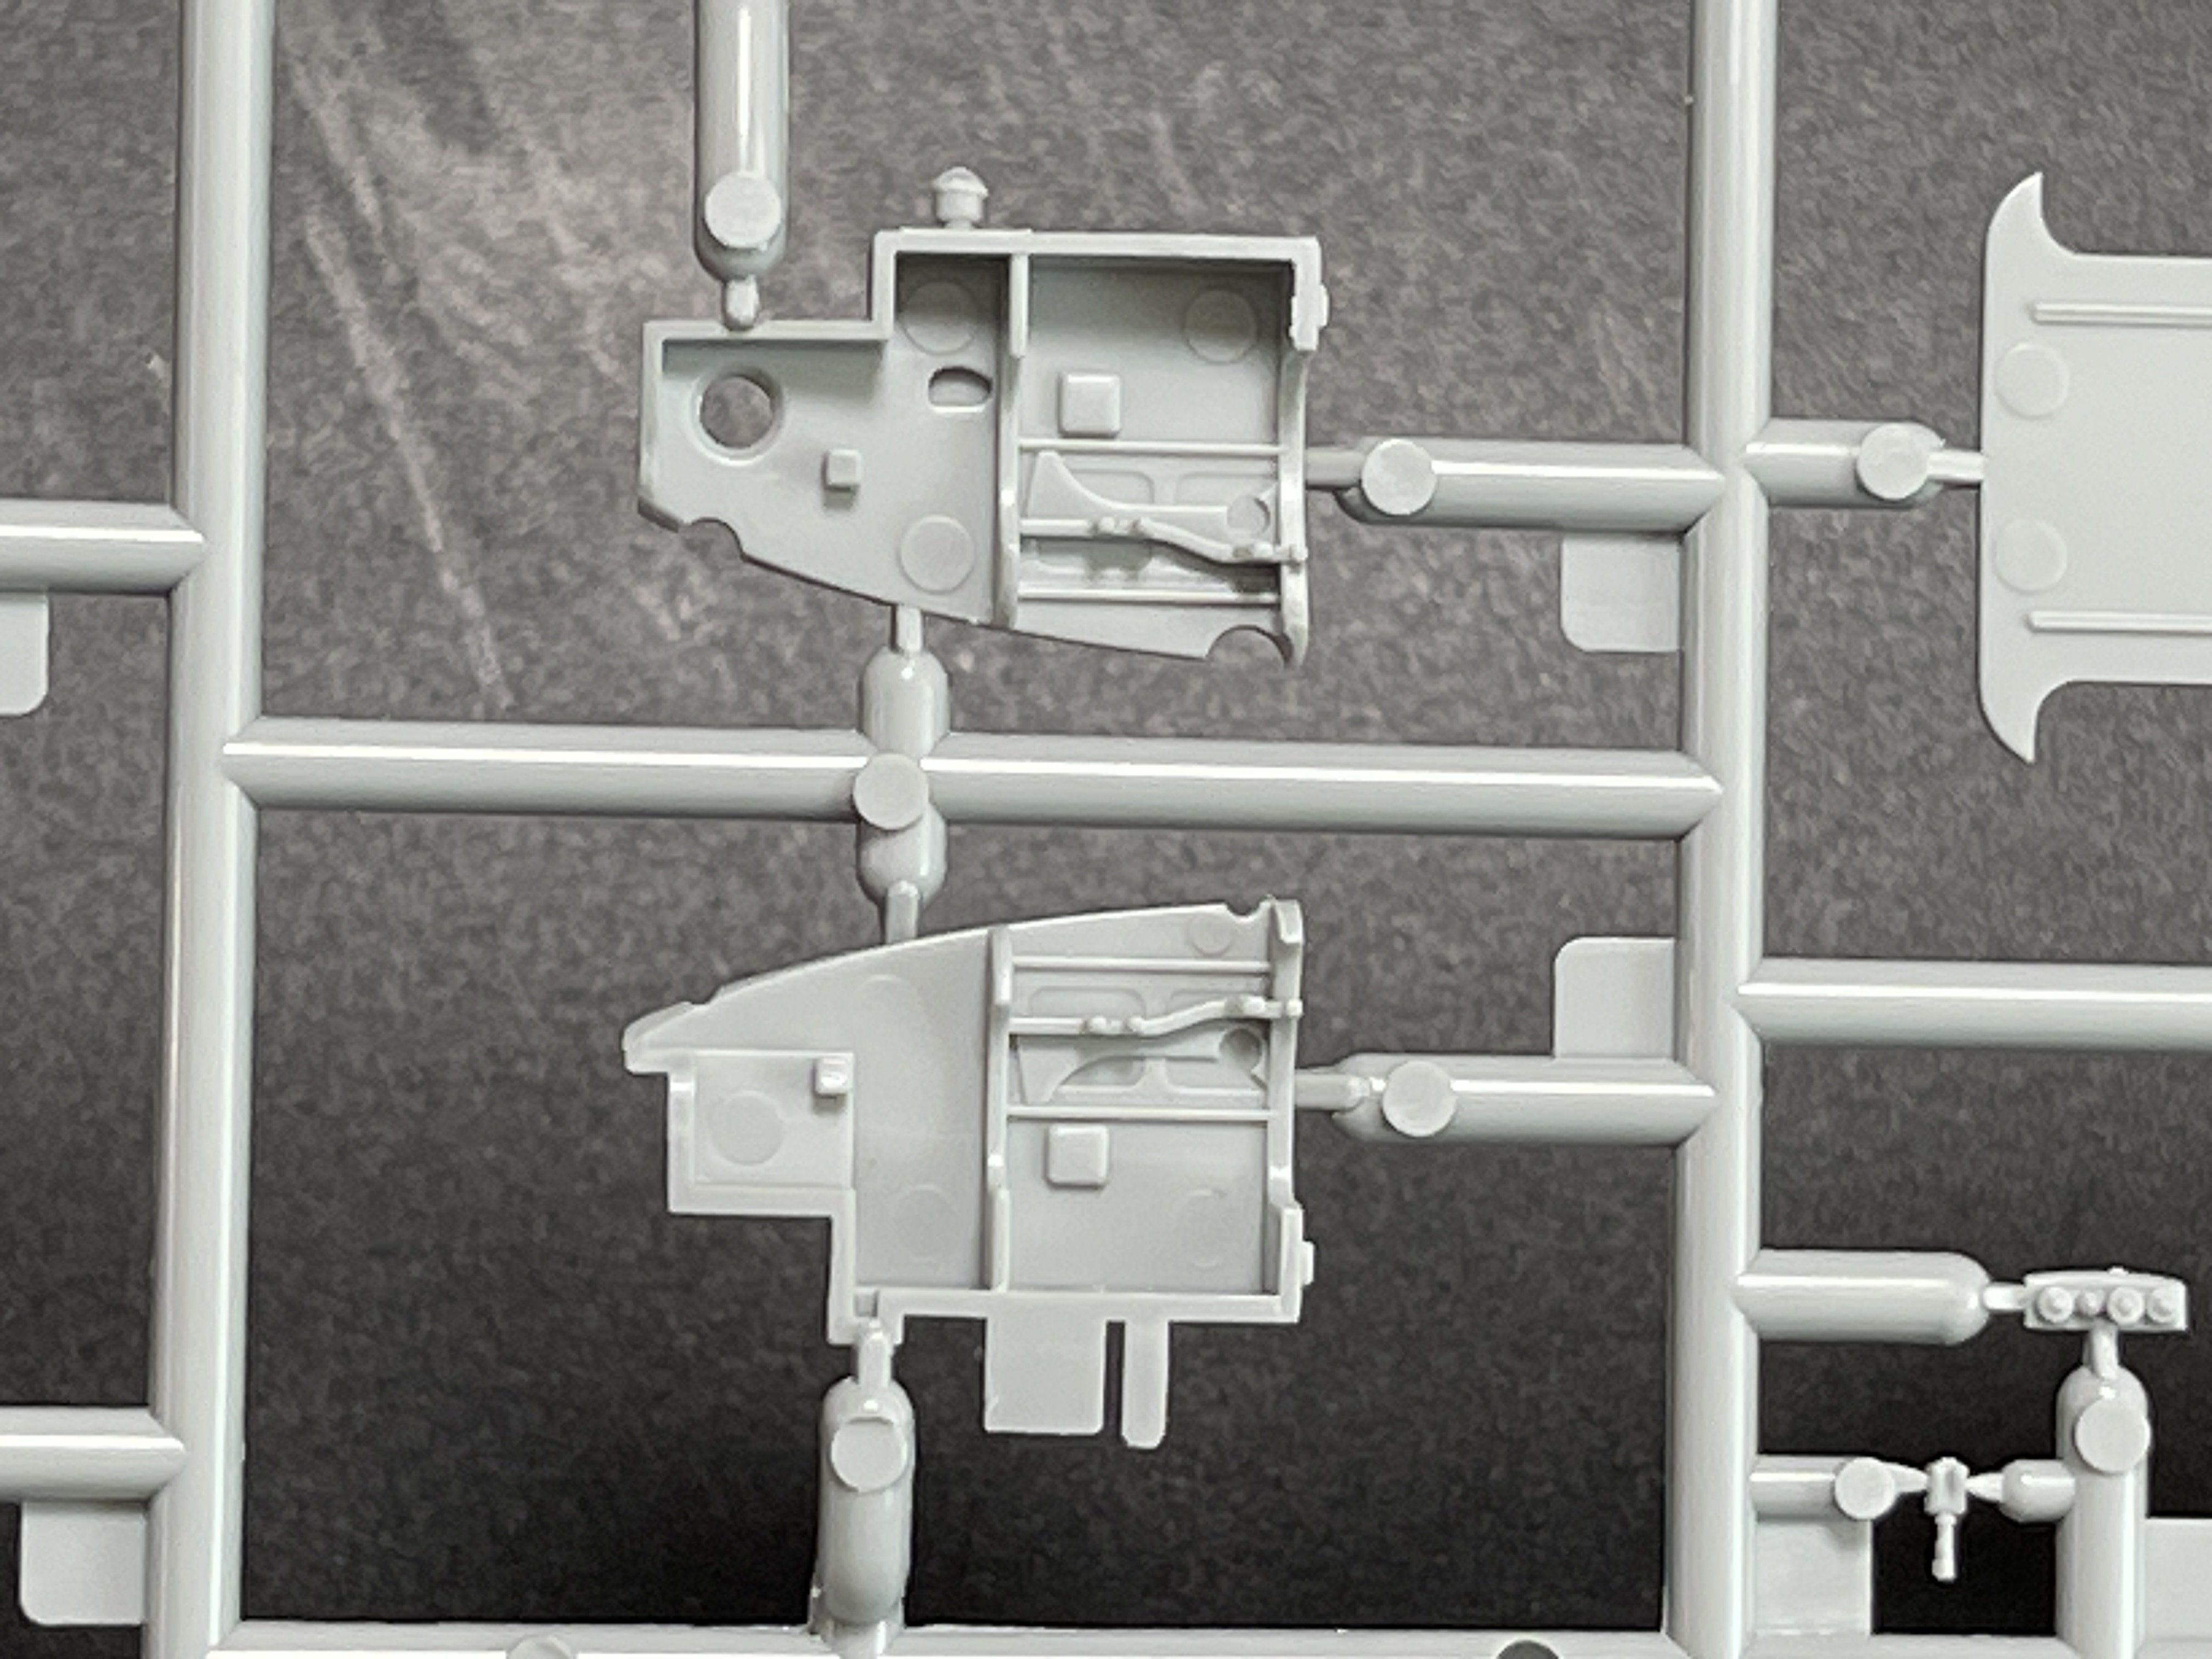
So the sprue K brings a new lower nose cone for marking option B (without nose radar, but with the FLIR turret), that meaning thati s for the Super 62 “Rude Dude”.
Here on this sprue also have a modified left suspension for the landing gear, narrow parts for the early tail, and finally a different antenna for the roof behind the "disco light".
So if you want a black Hawk from Mogadishu 1993, you neeed to pick up this release not only for the decals but also for the small and essencial details.
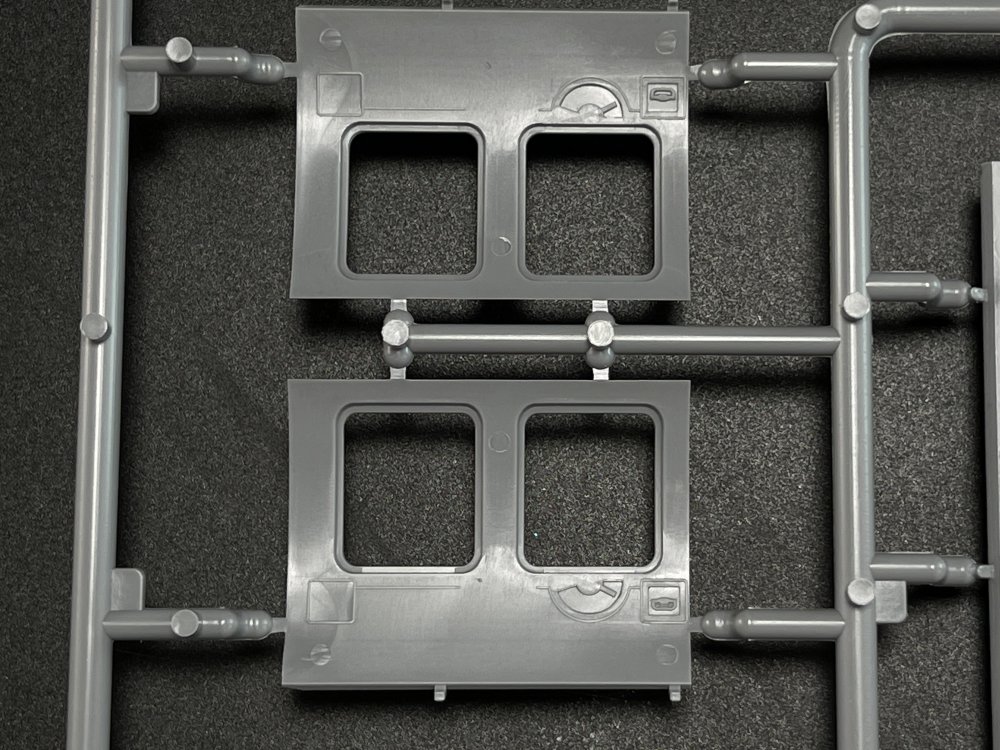
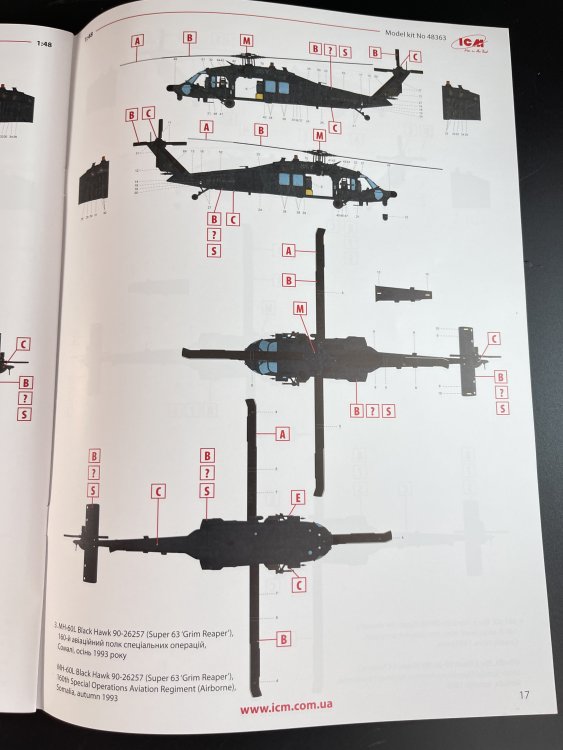
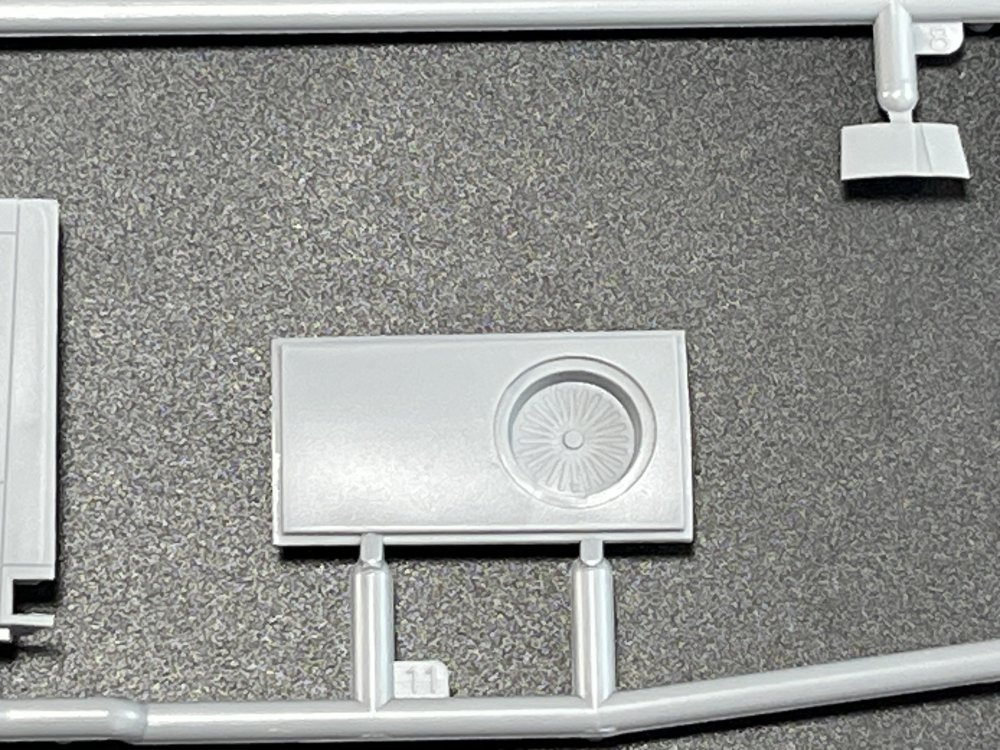
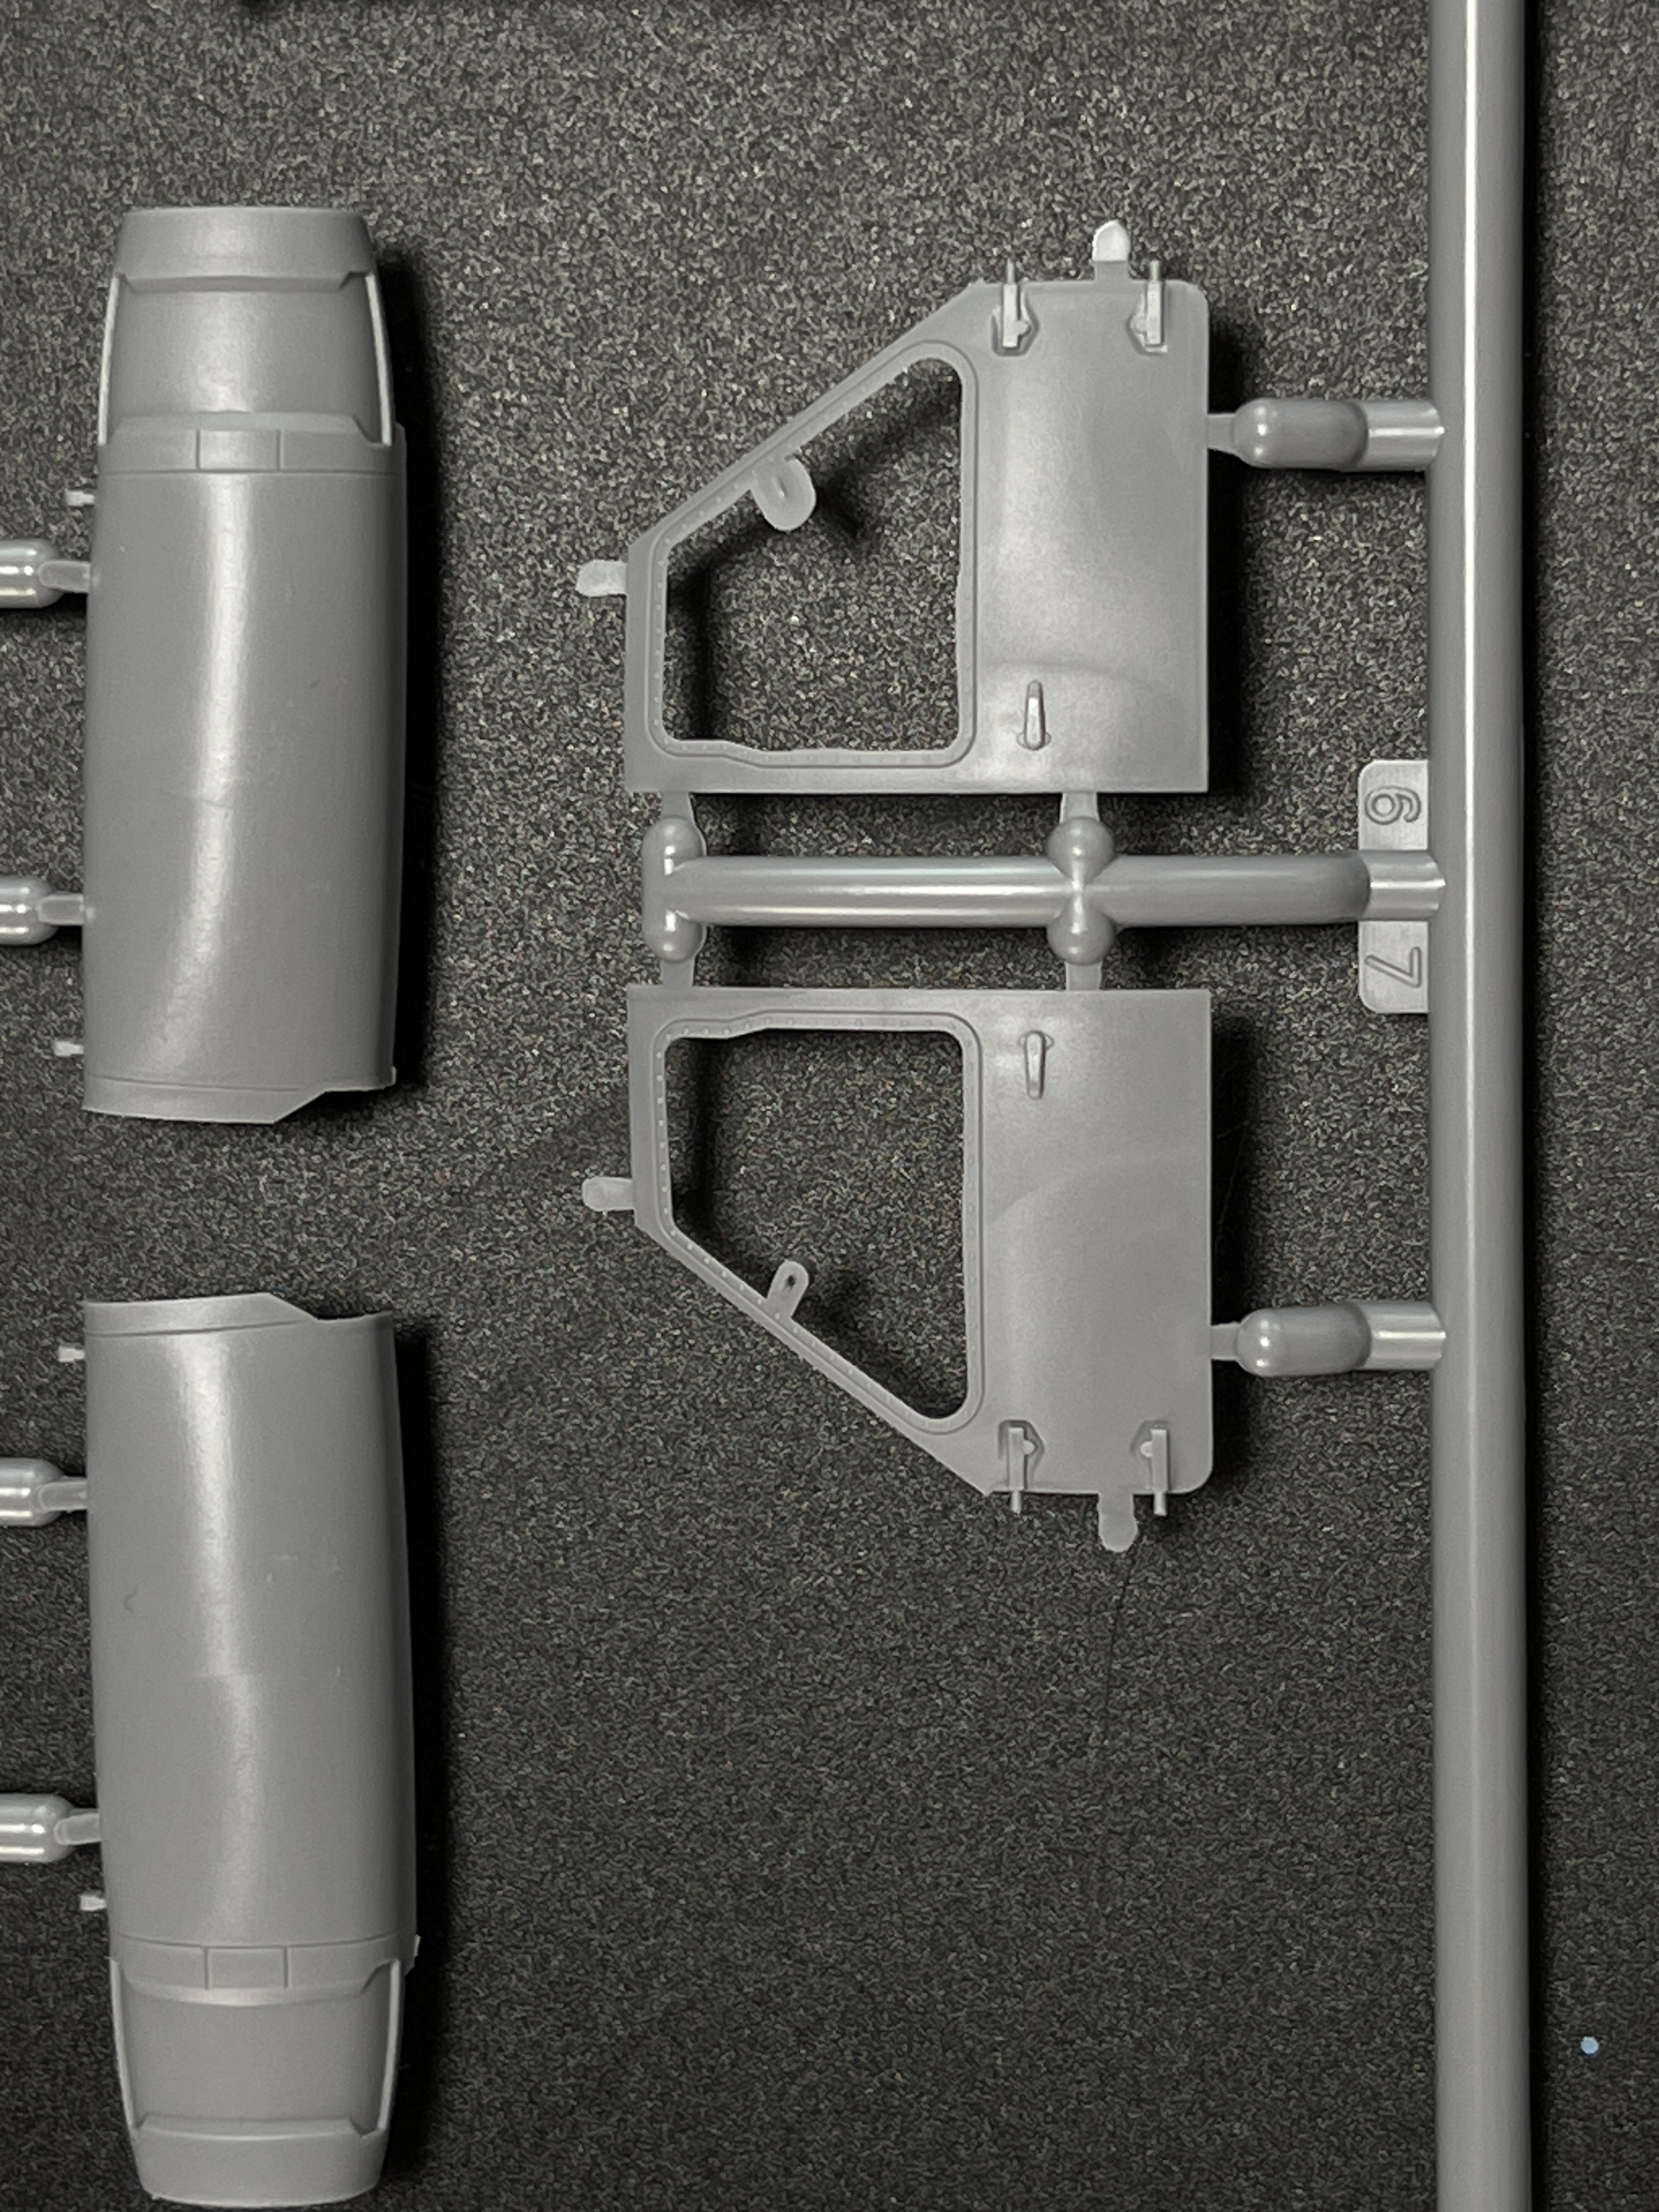
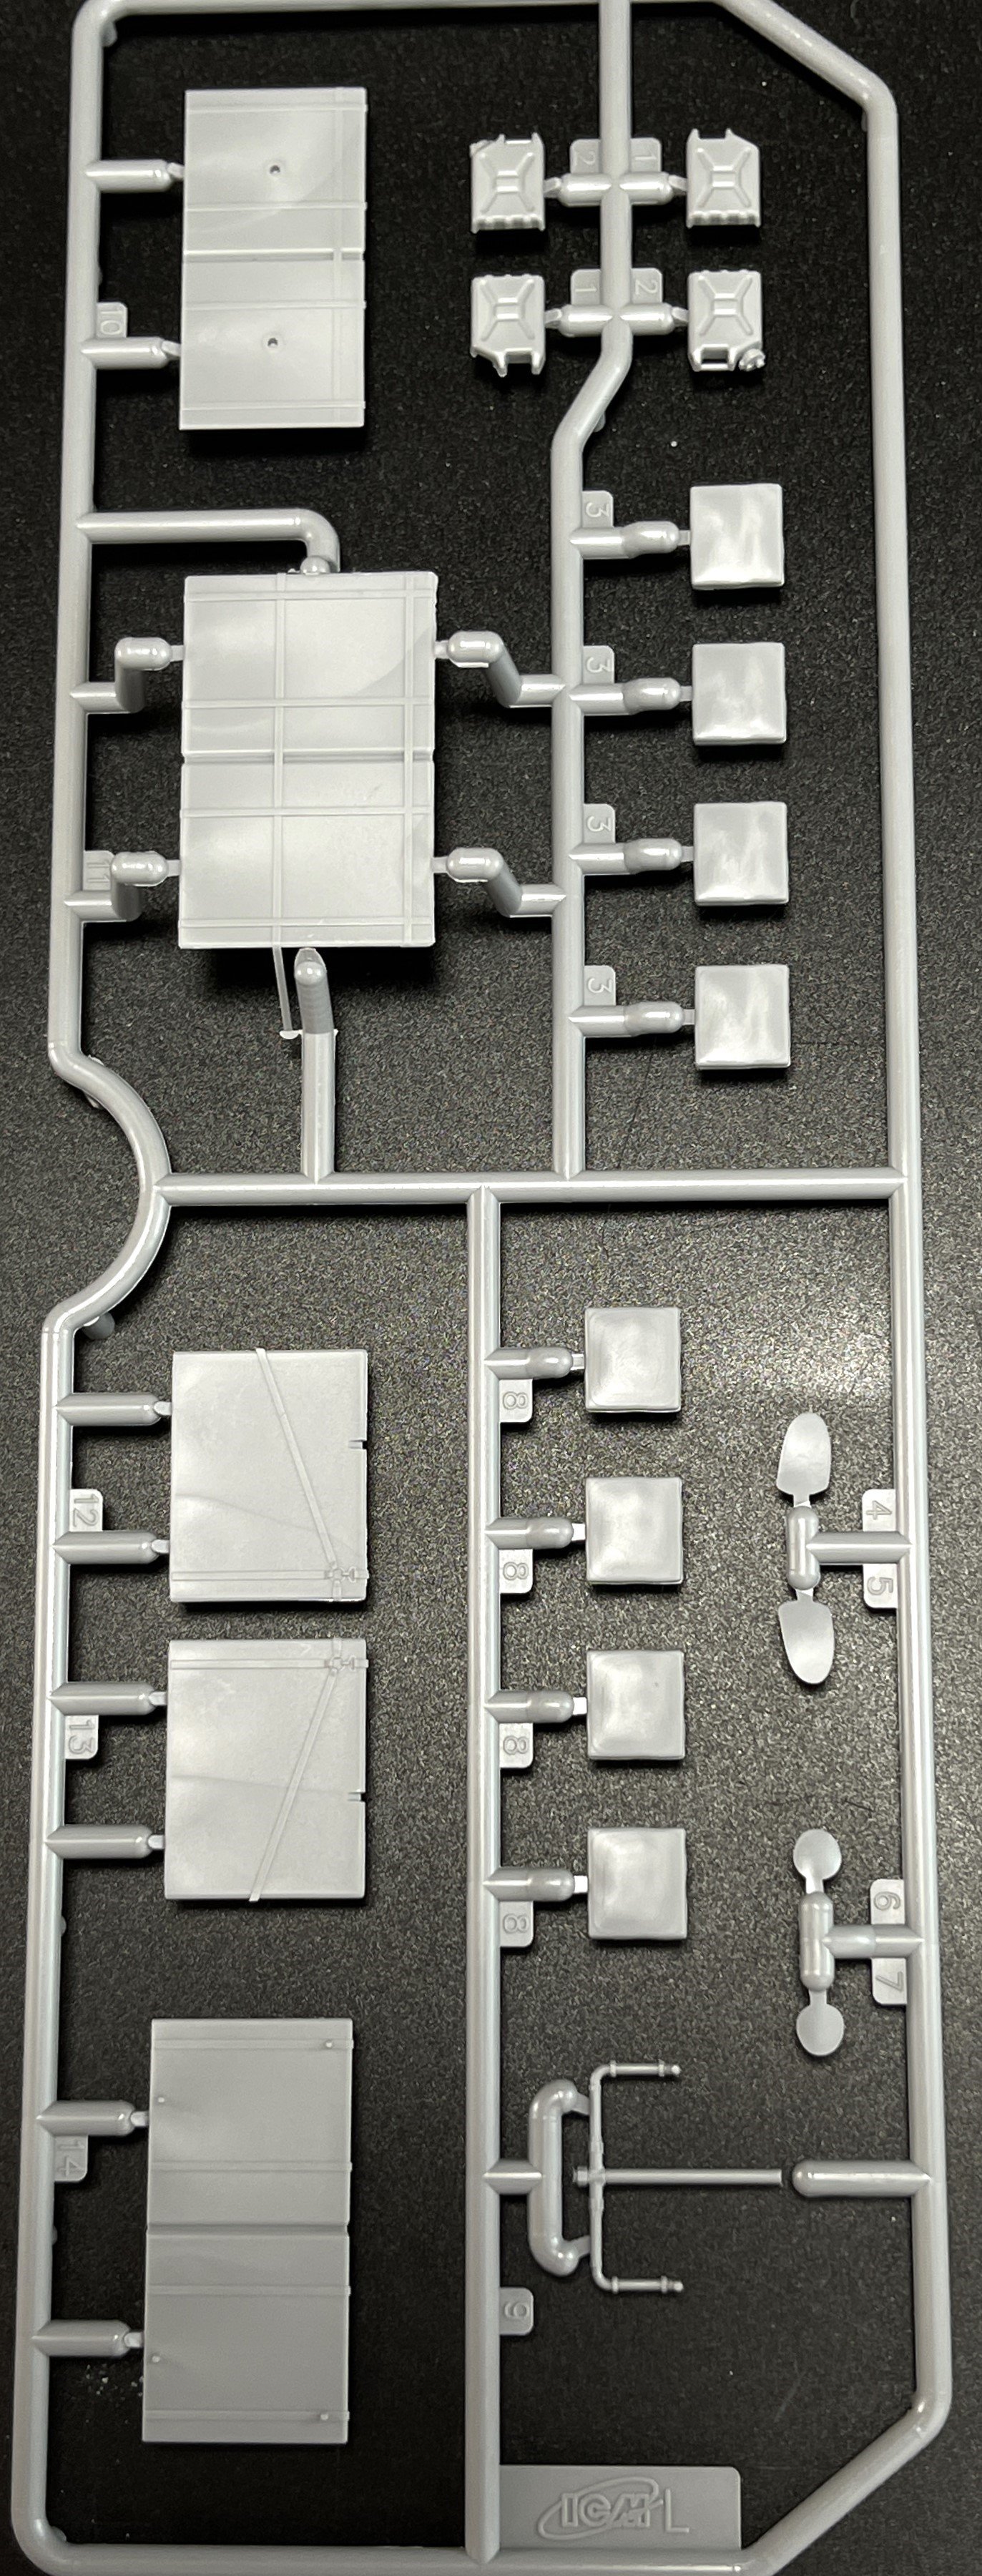
As for the sprue L and checking the instructions, it´s some canisters and bags and also an additional internal fuel tank placed in the compartiment (which is only intended for Super 63 “Grim Reaper”).

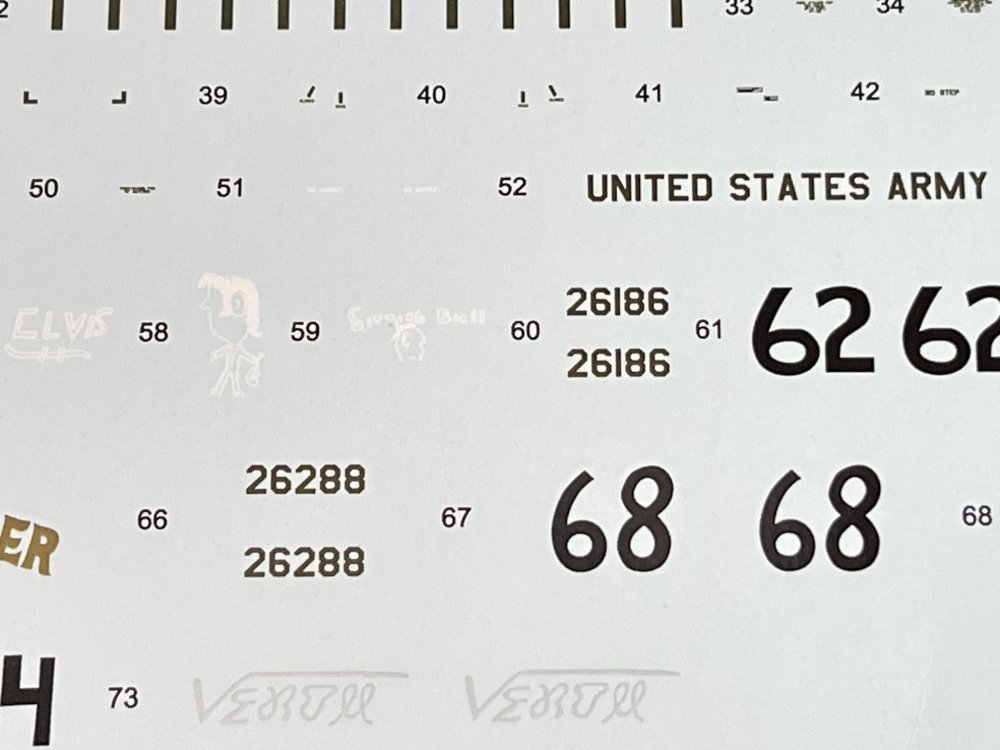
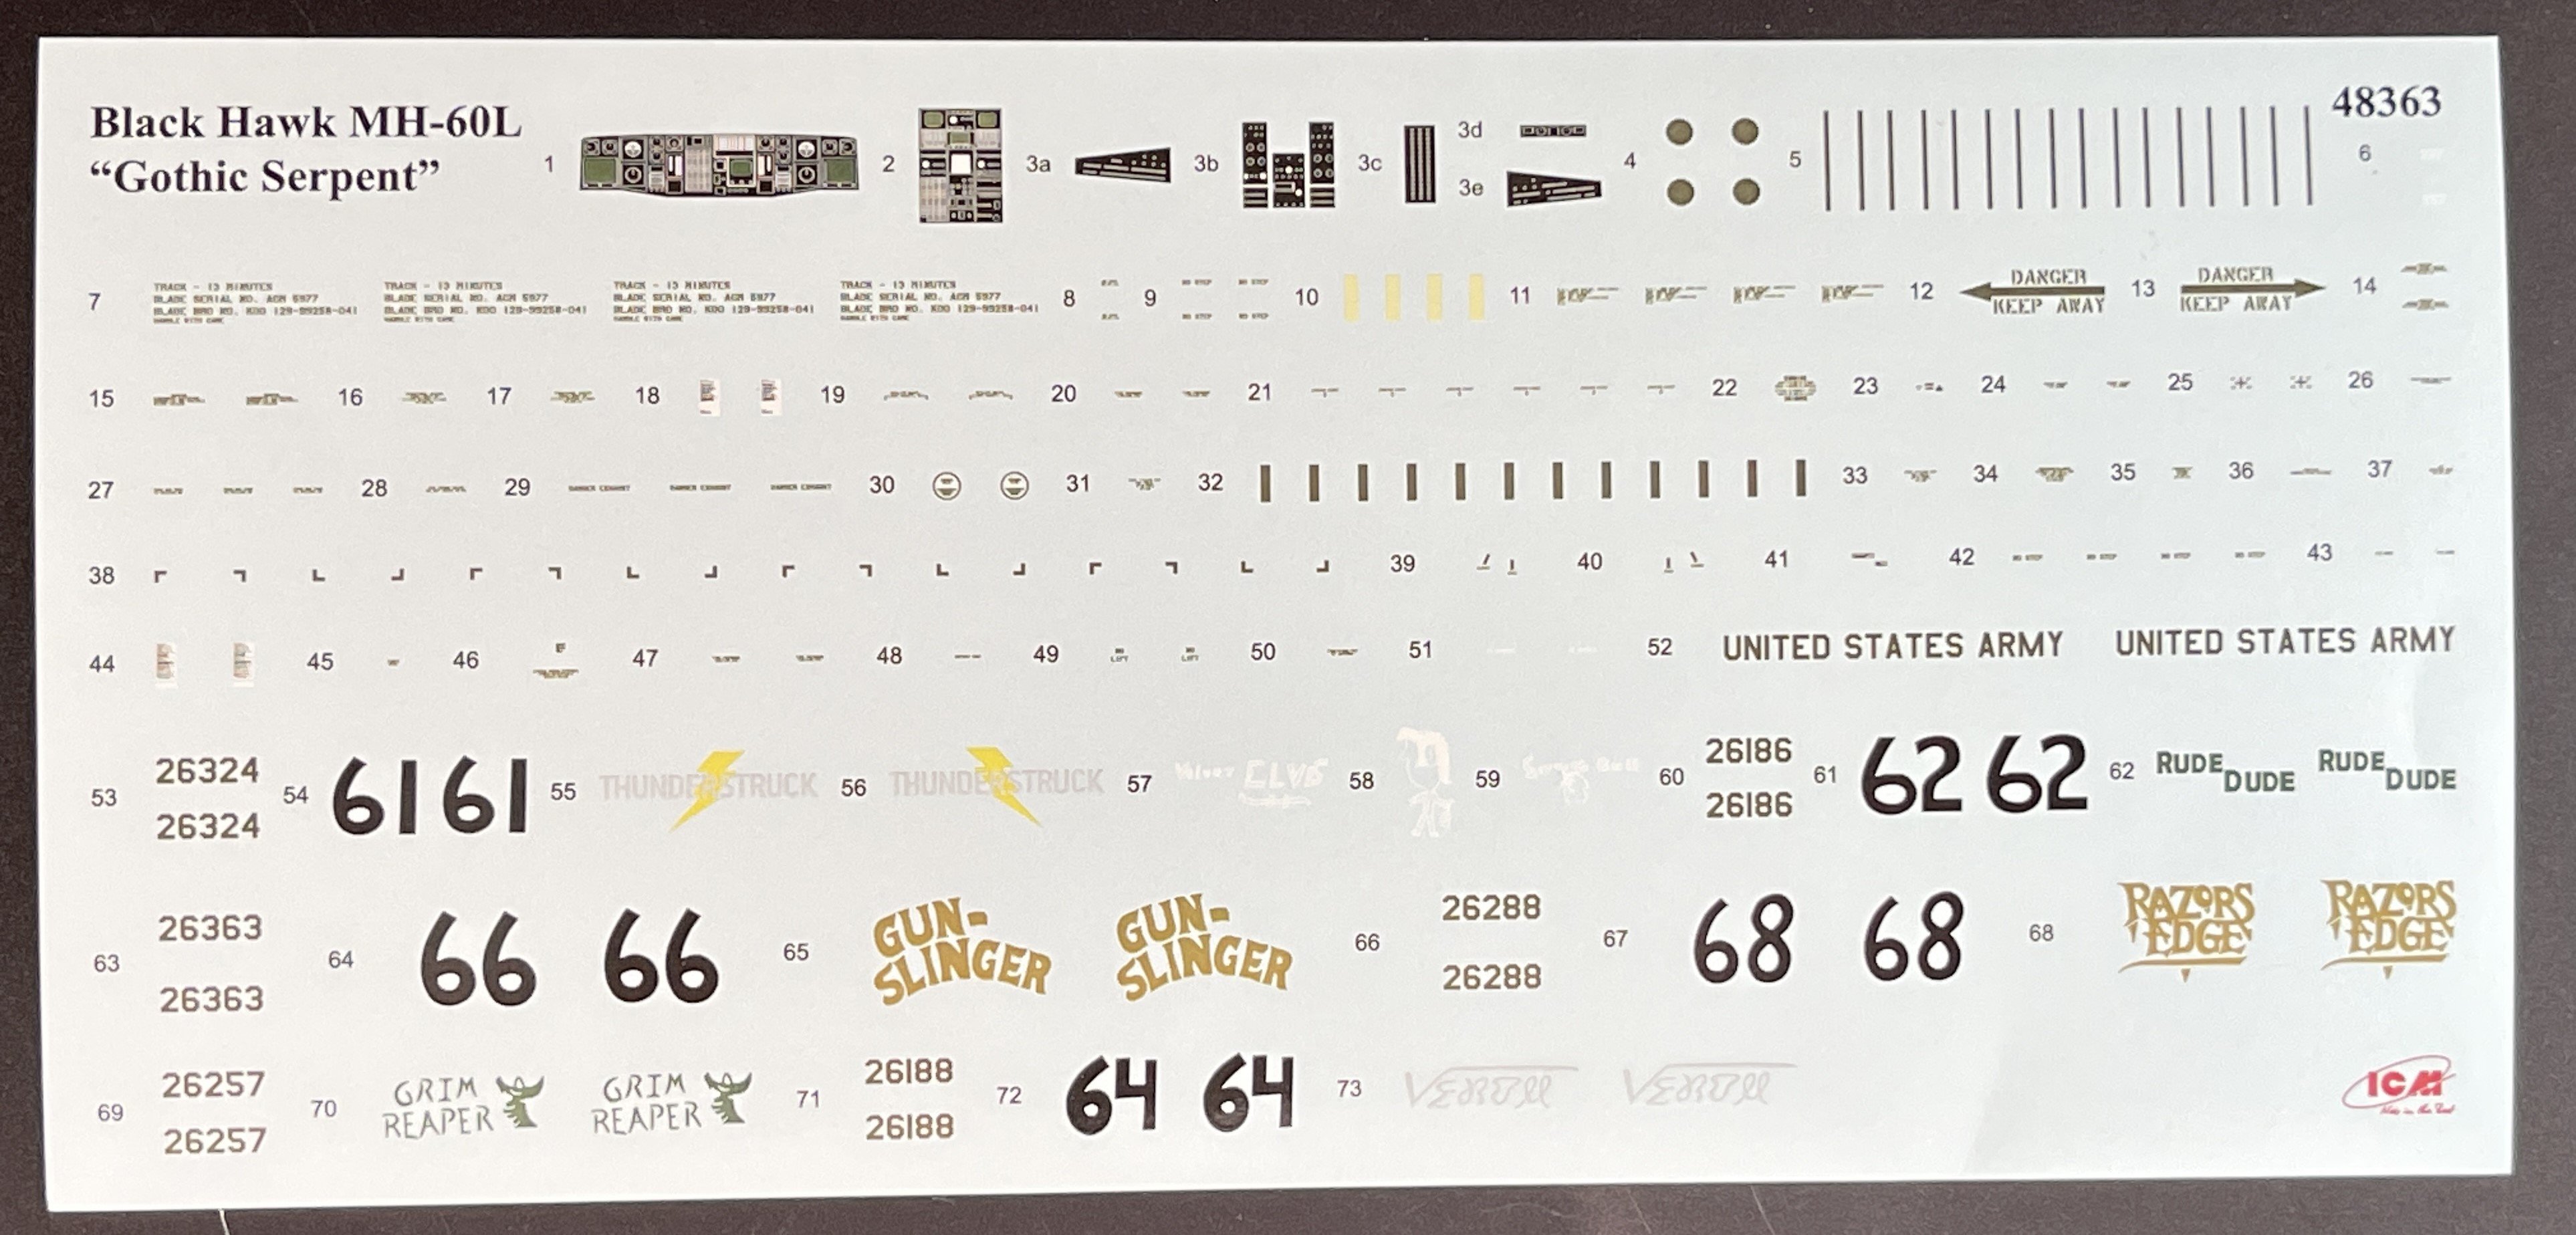
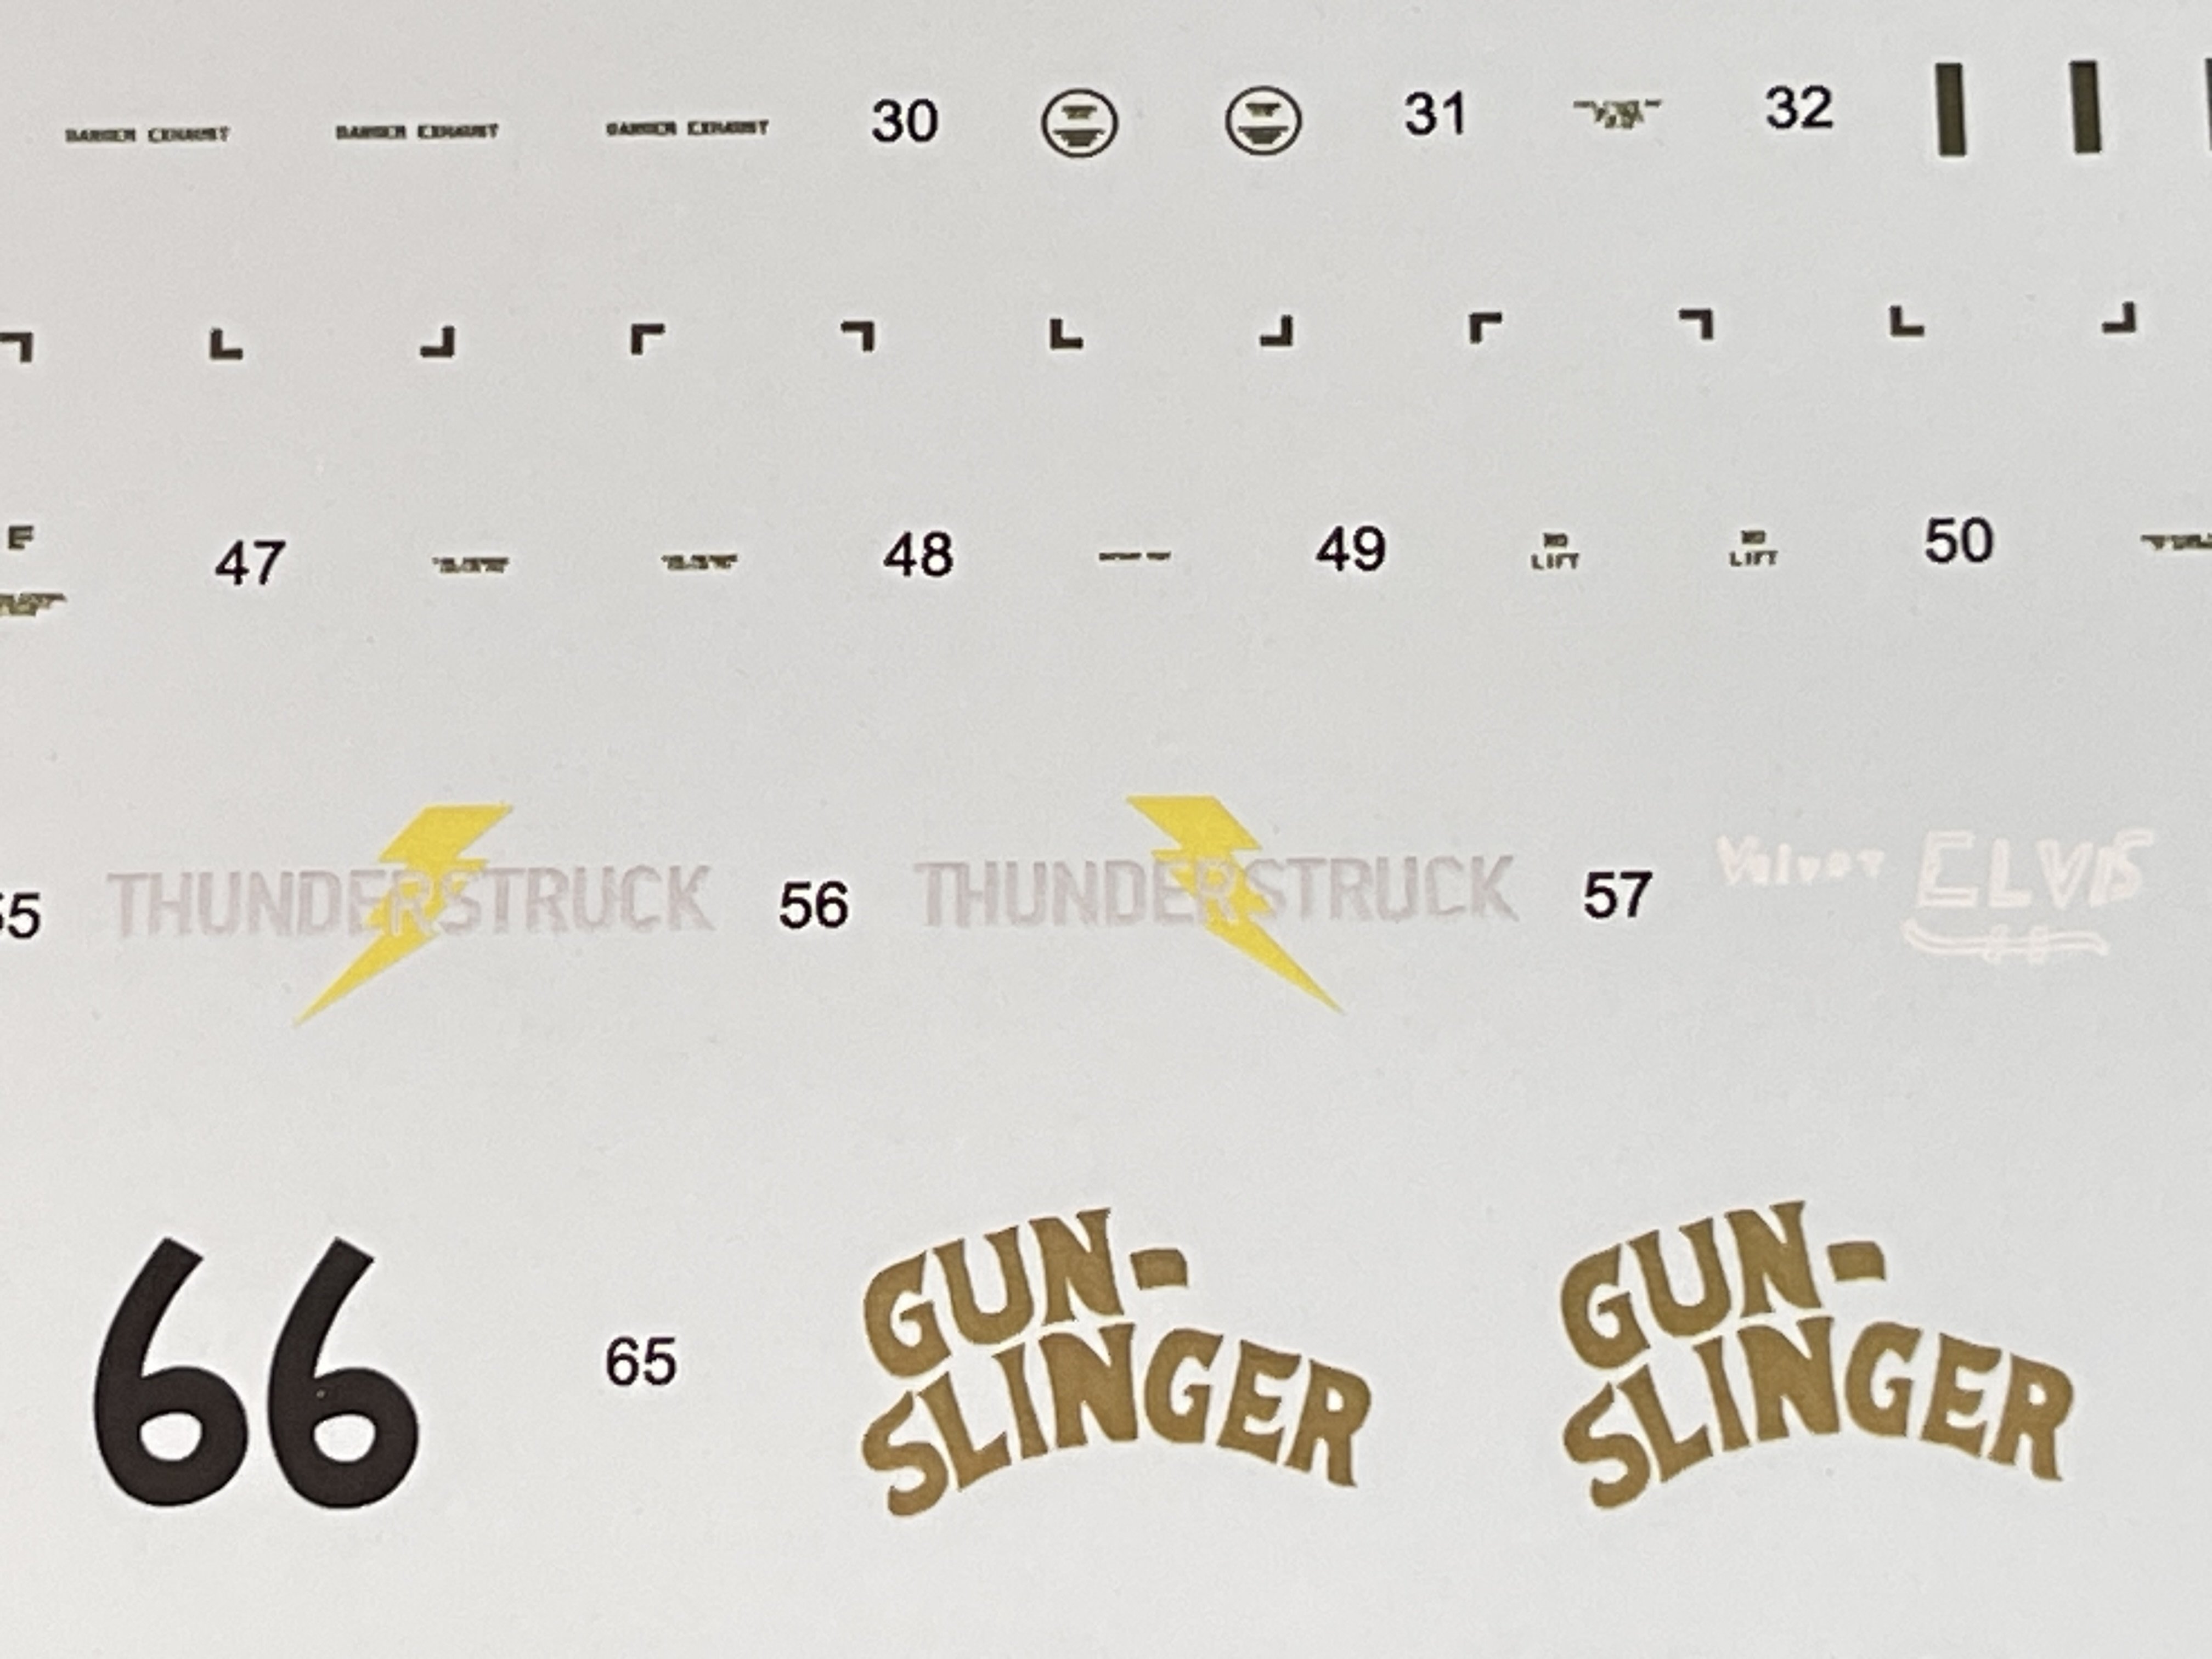
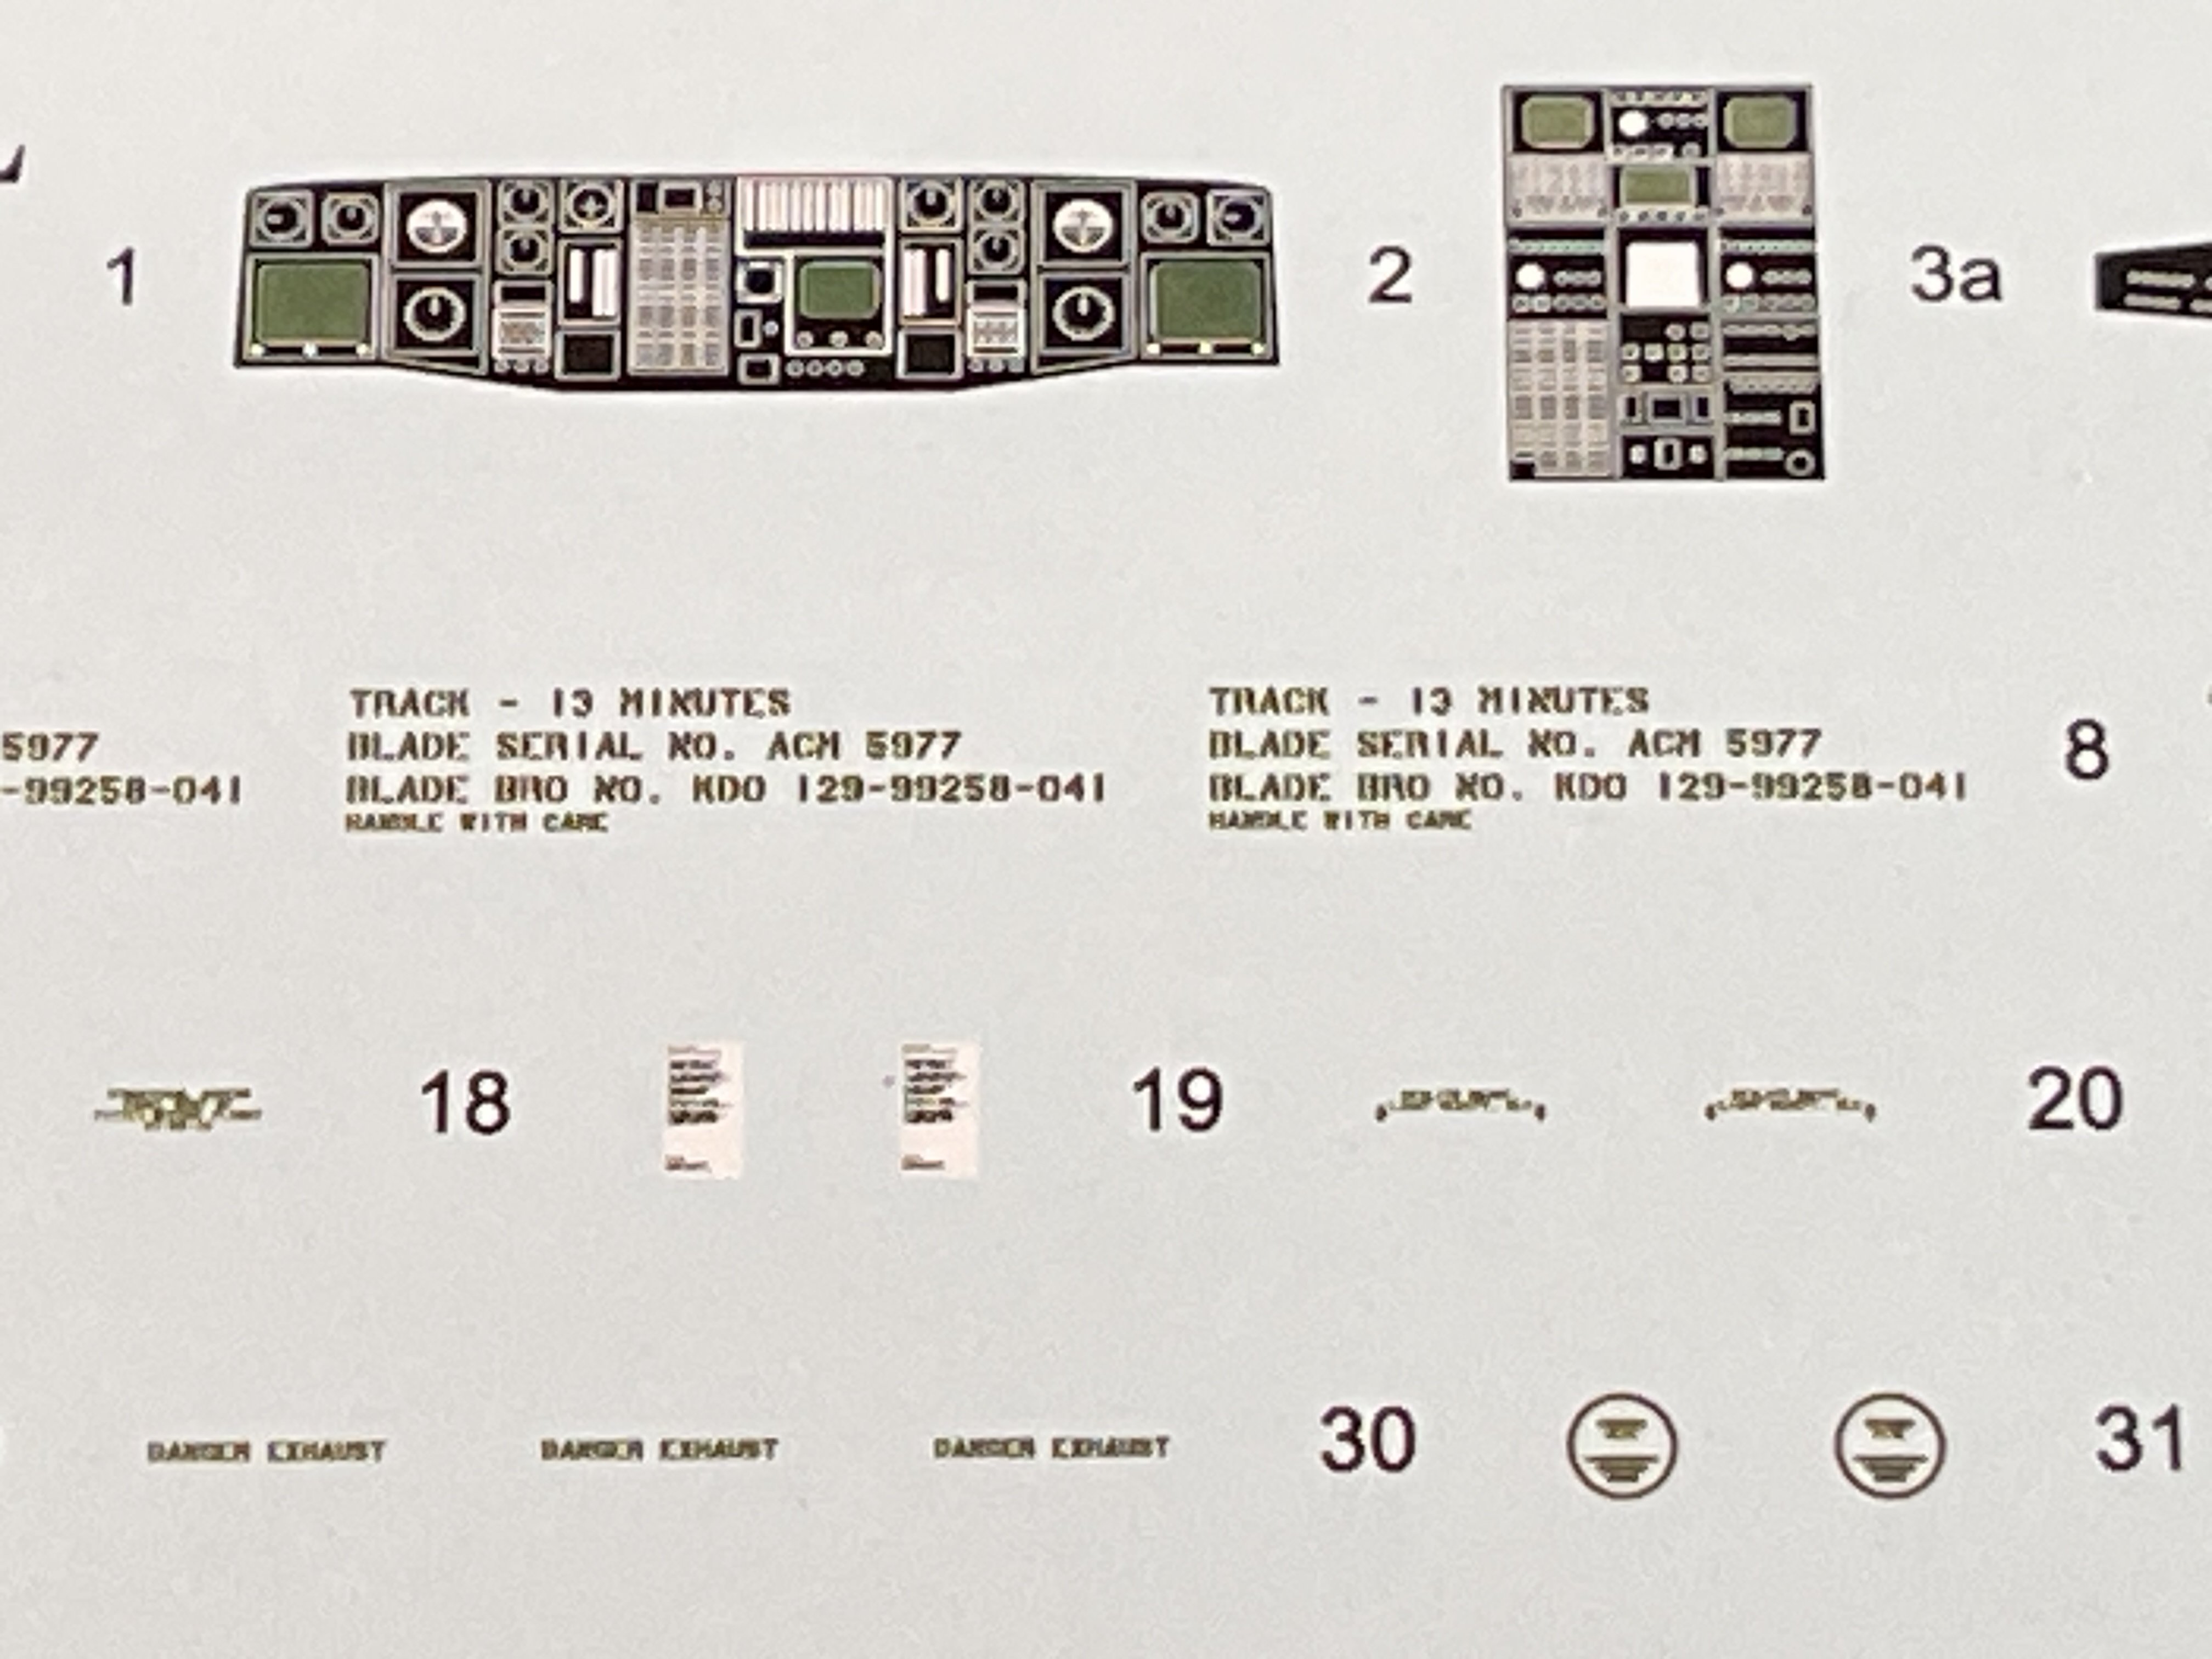
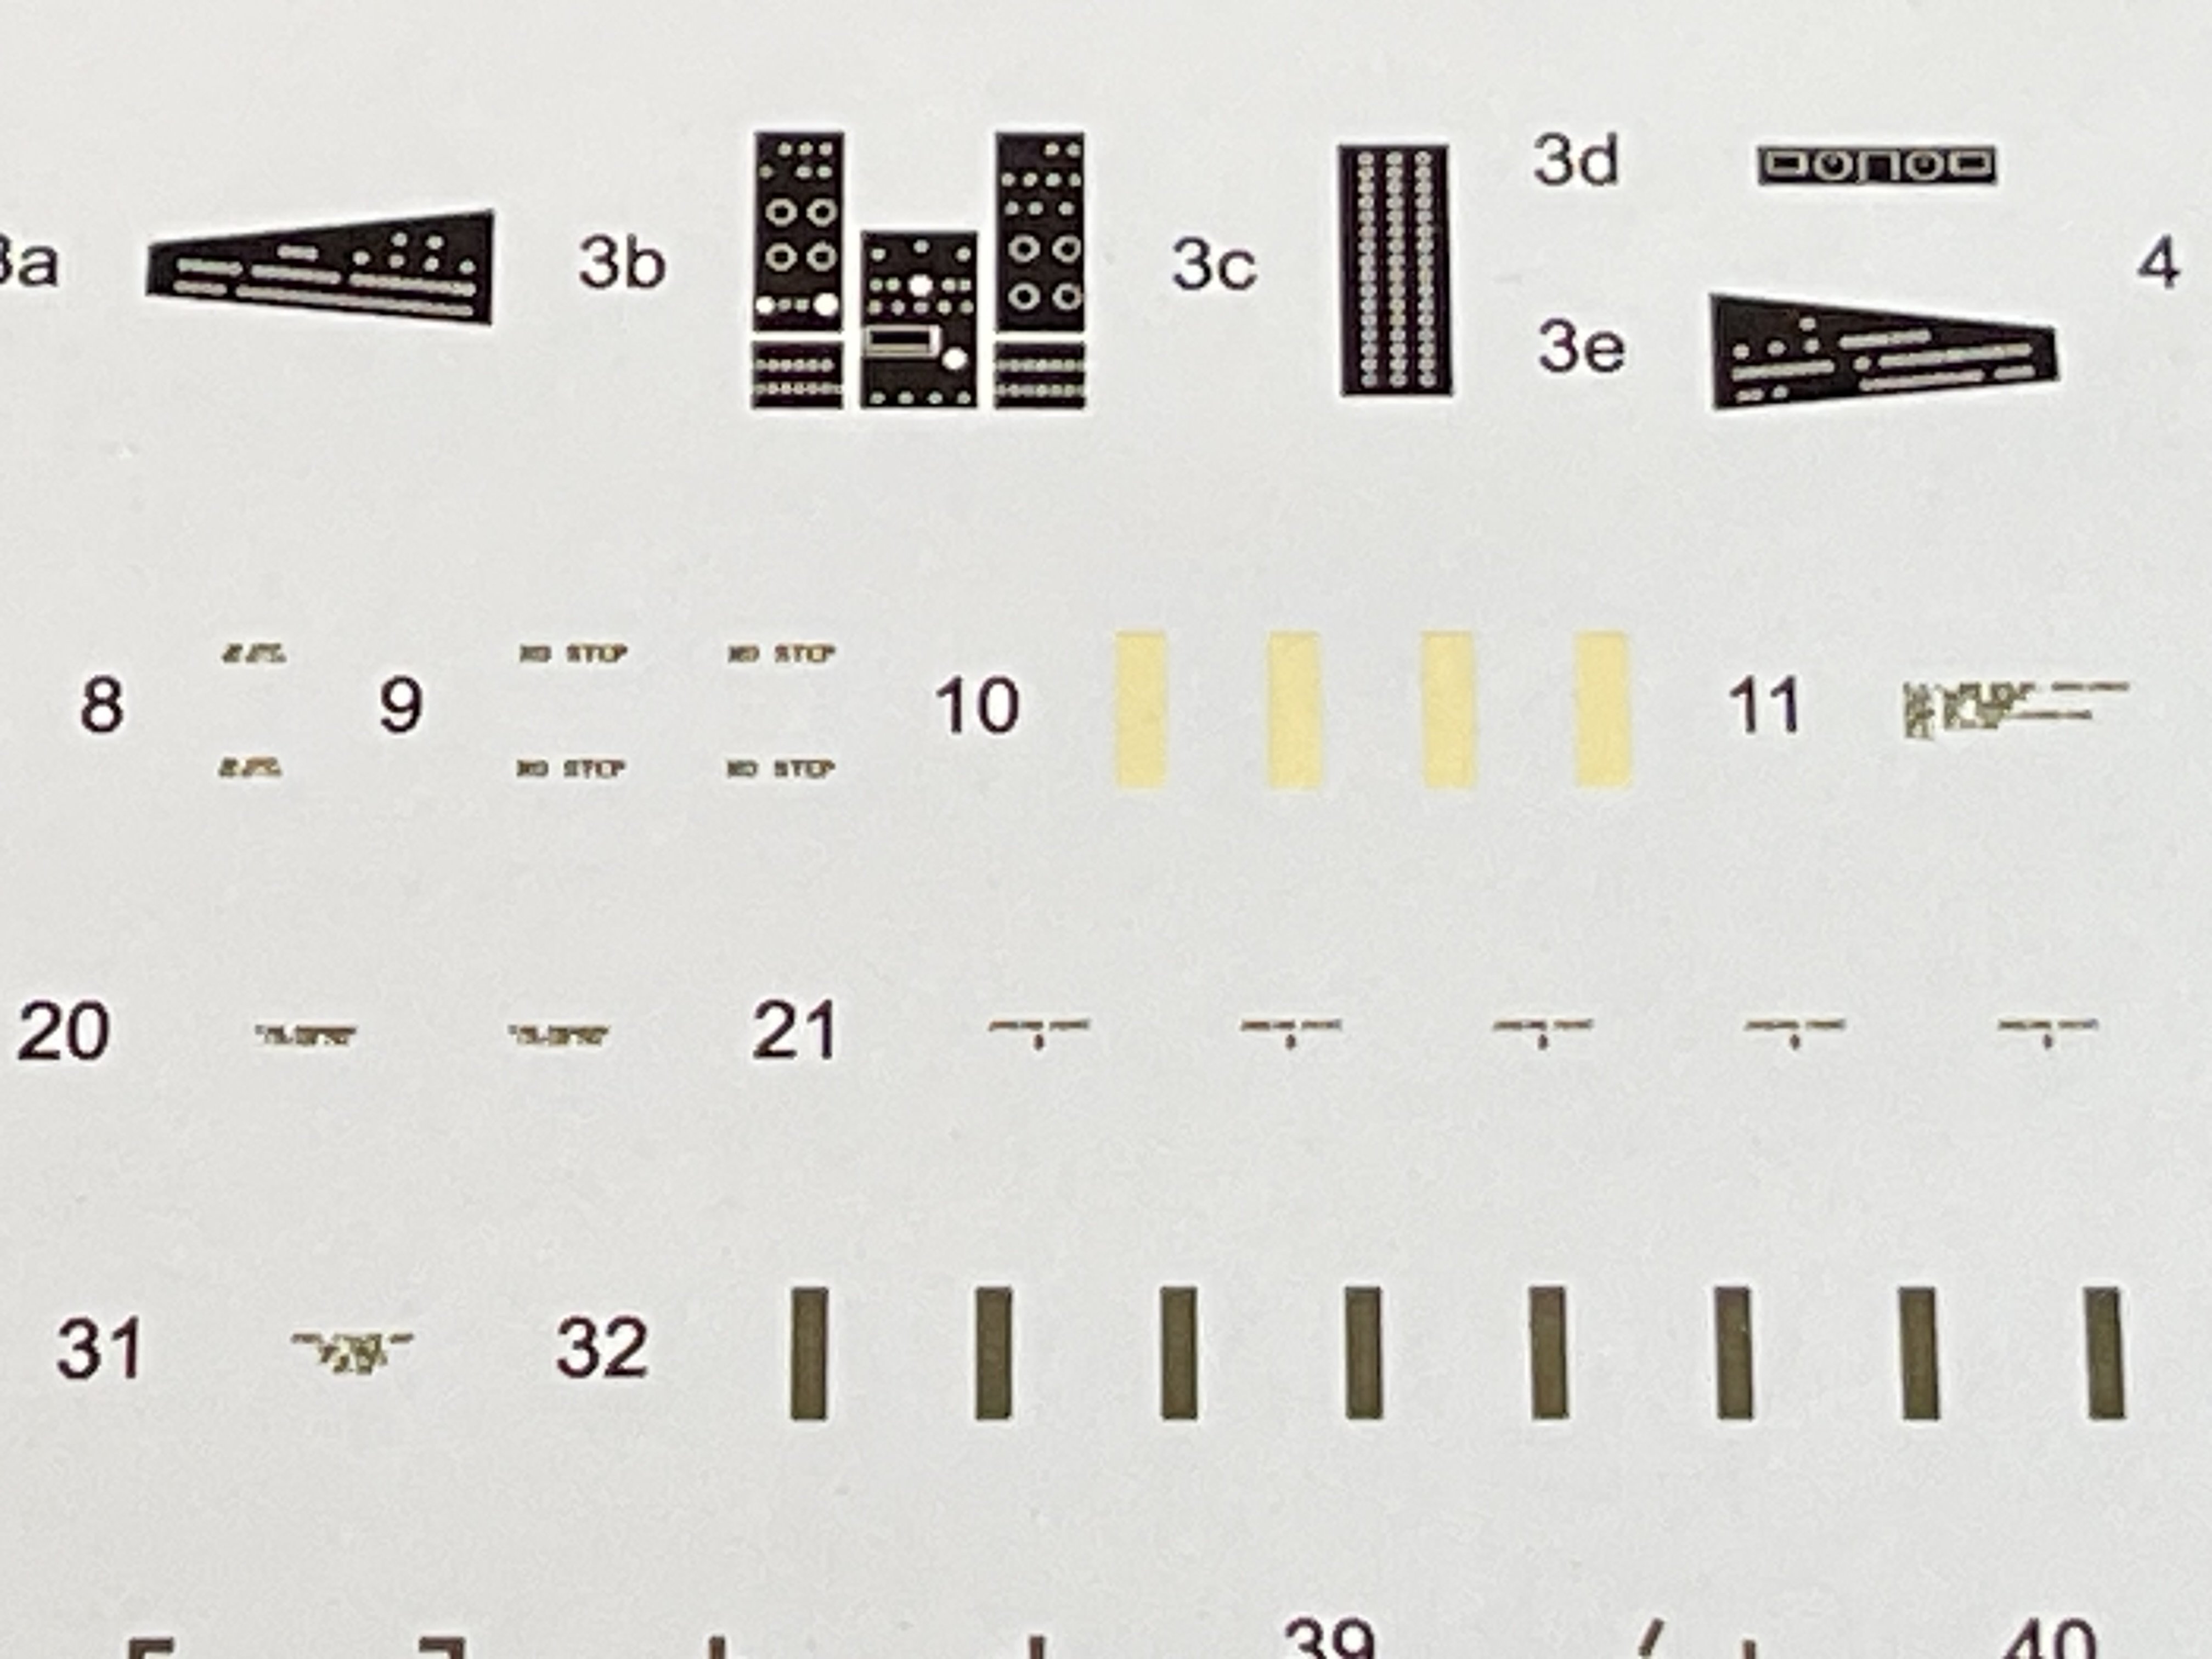
The decal sheet on this one is big one, with markings only for MH-60L Black Hawks involved in the 1993 Battle of Mogadishu featuring accurate unit insignias and numbers relevant to the operation.
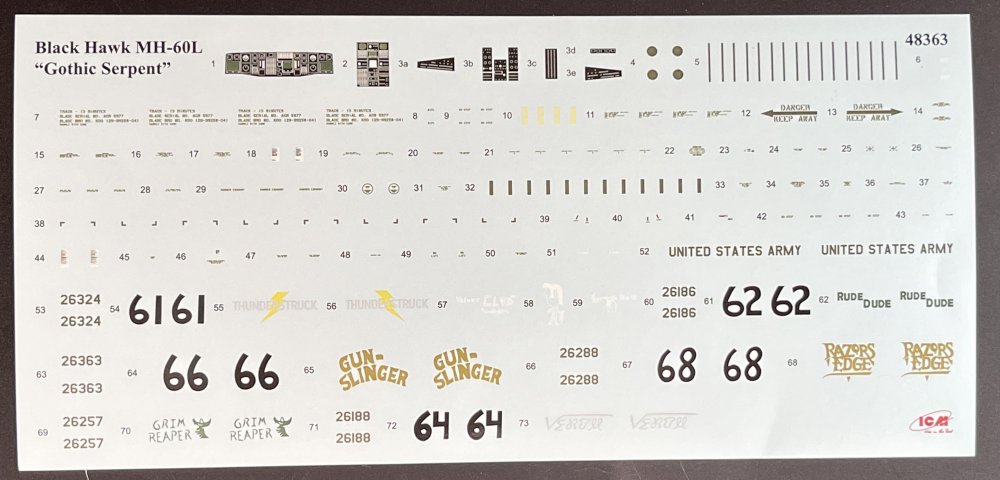
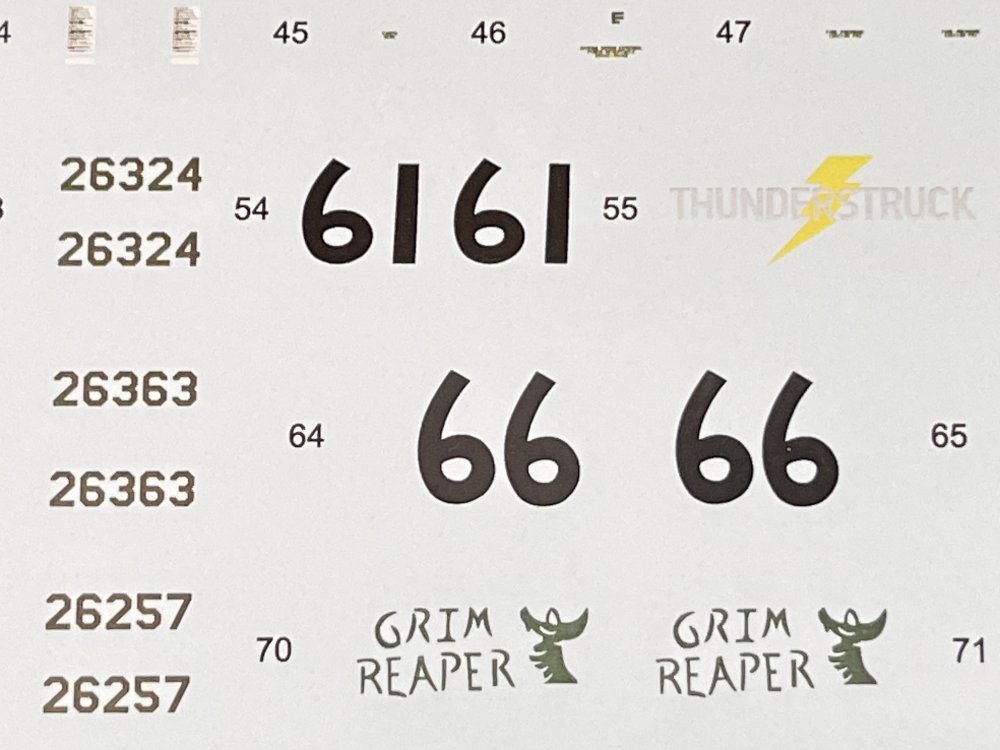

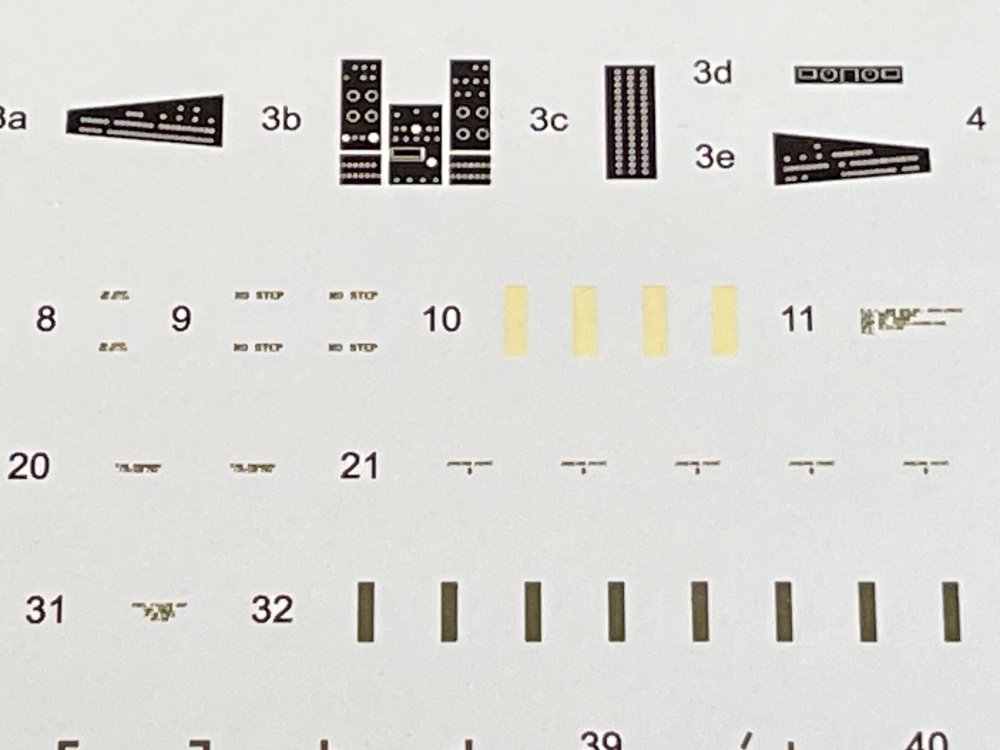
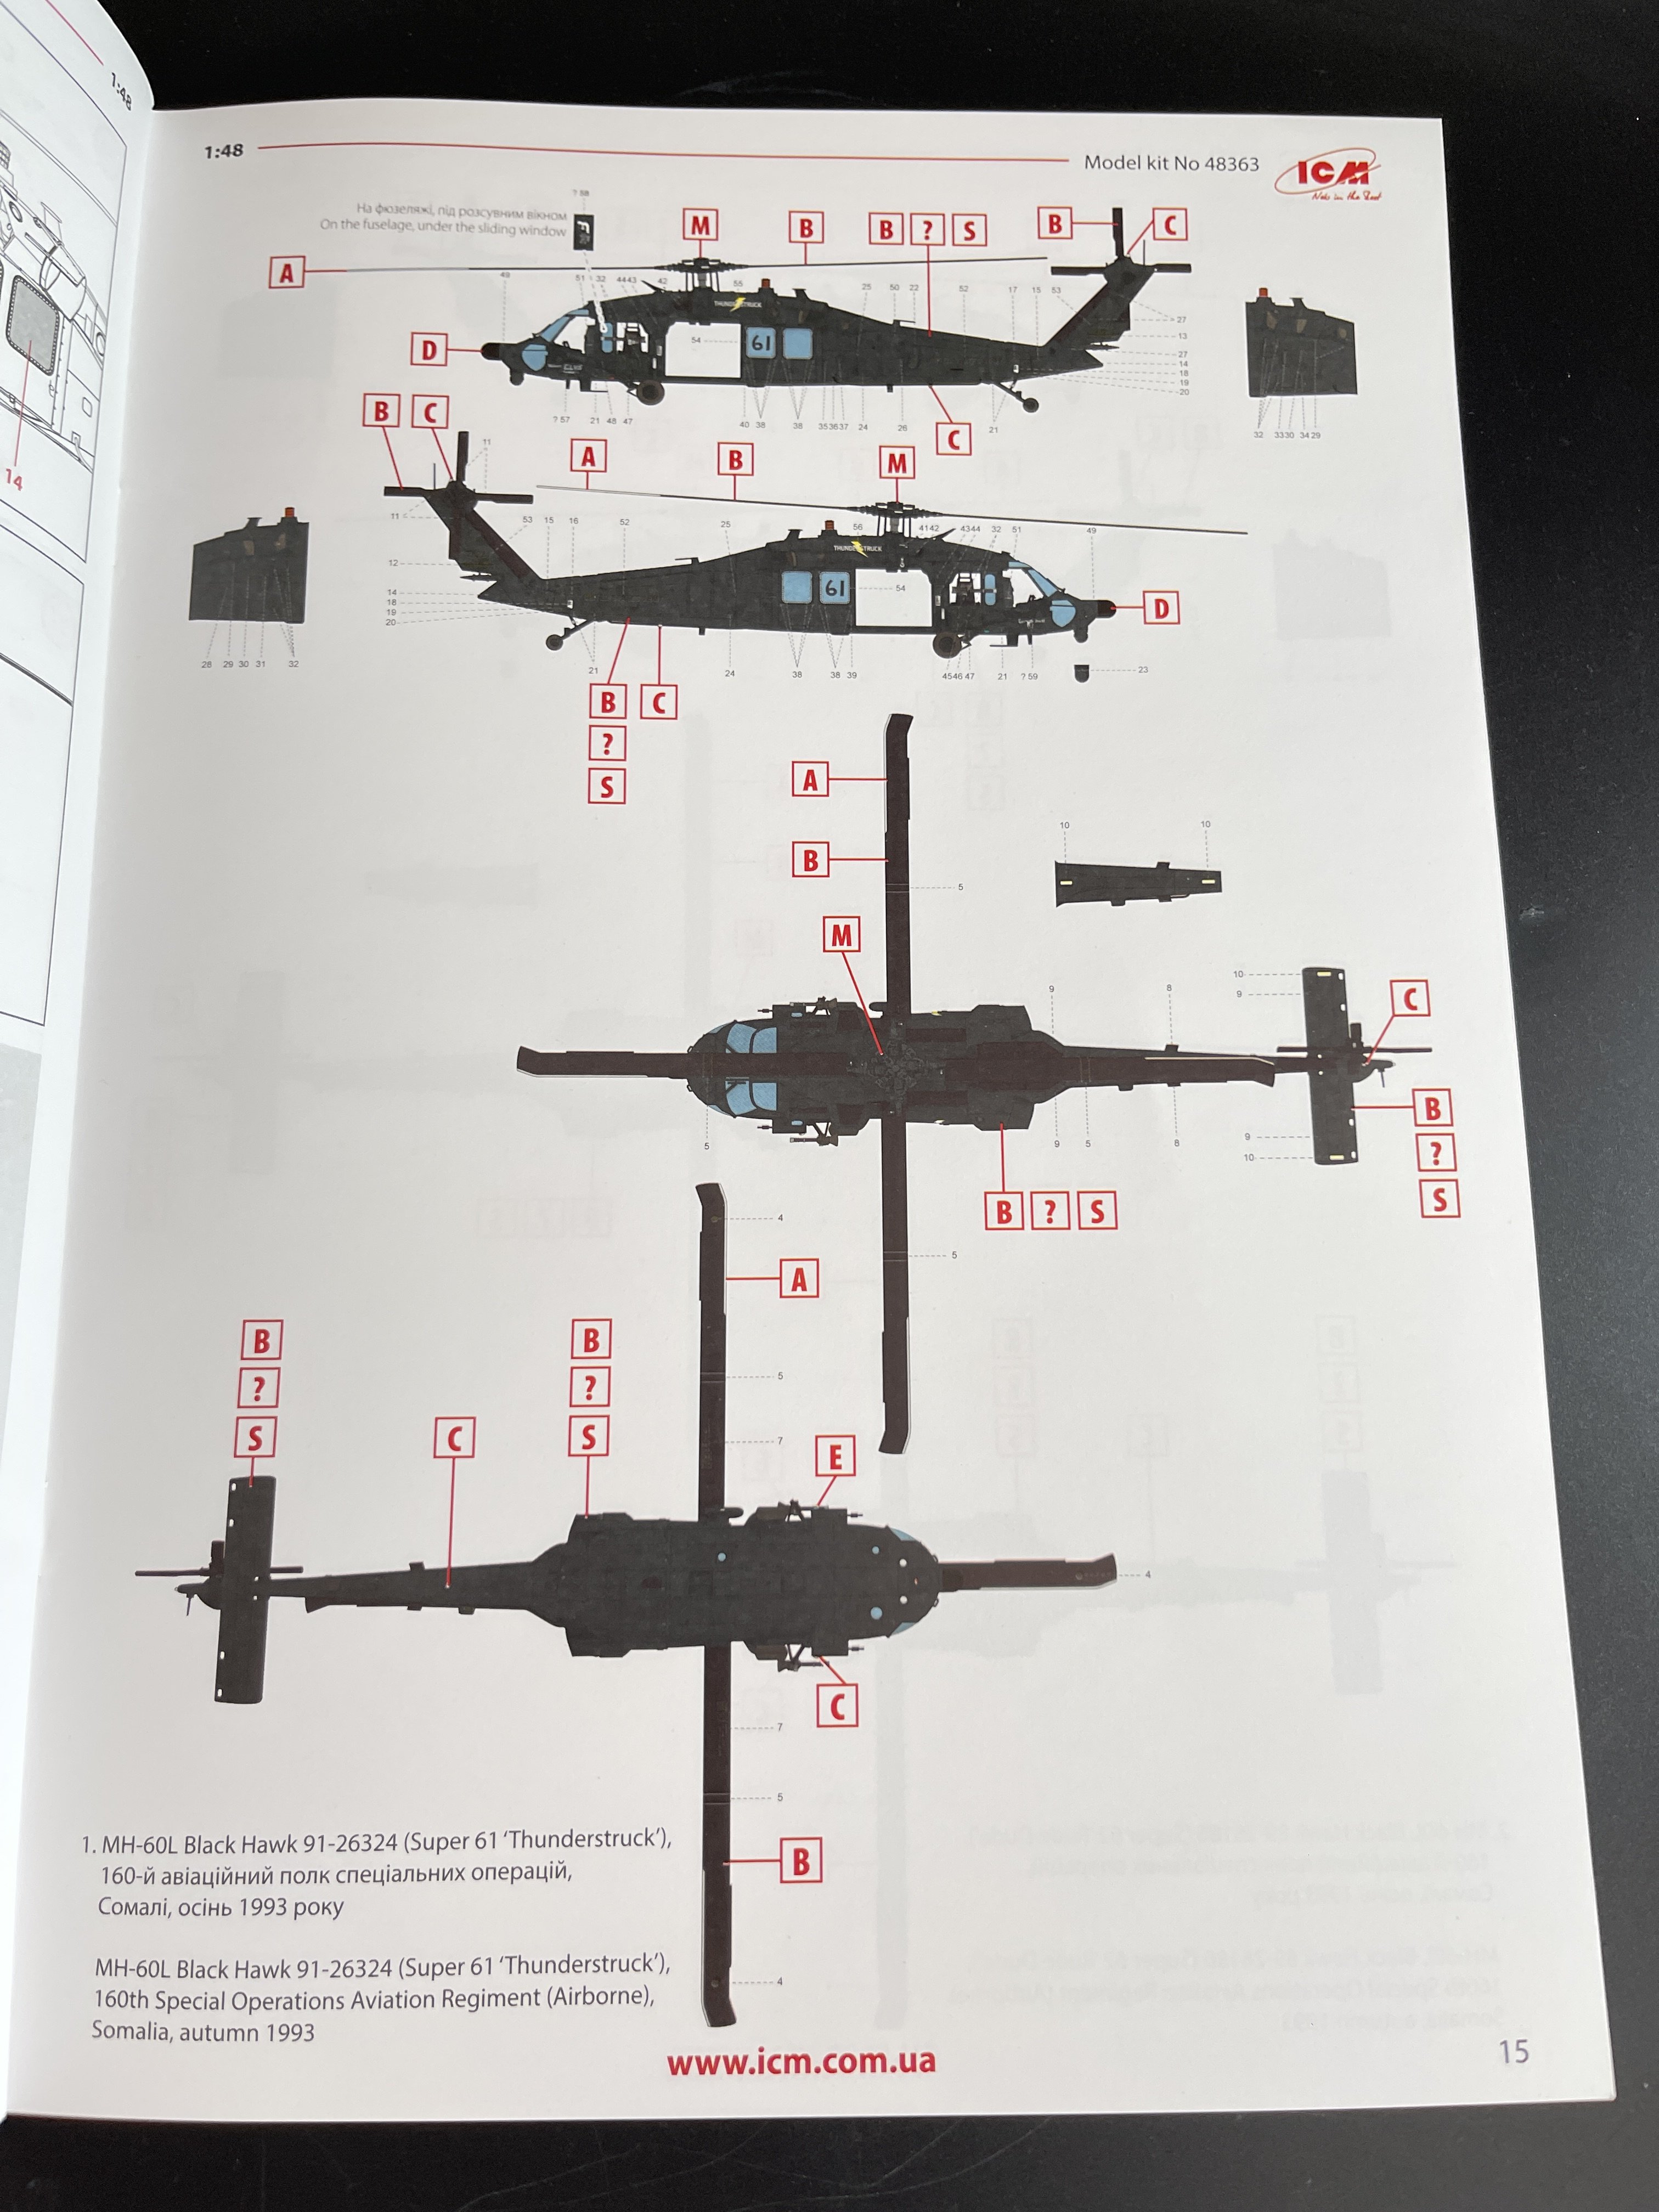
So, this first one is MH-60L Black Hawk 91-26324 (Super 61 “Thunderstruck”) – 160th Special Operations Aviation Regiment (Airborne), Somalia, autumn 1993.

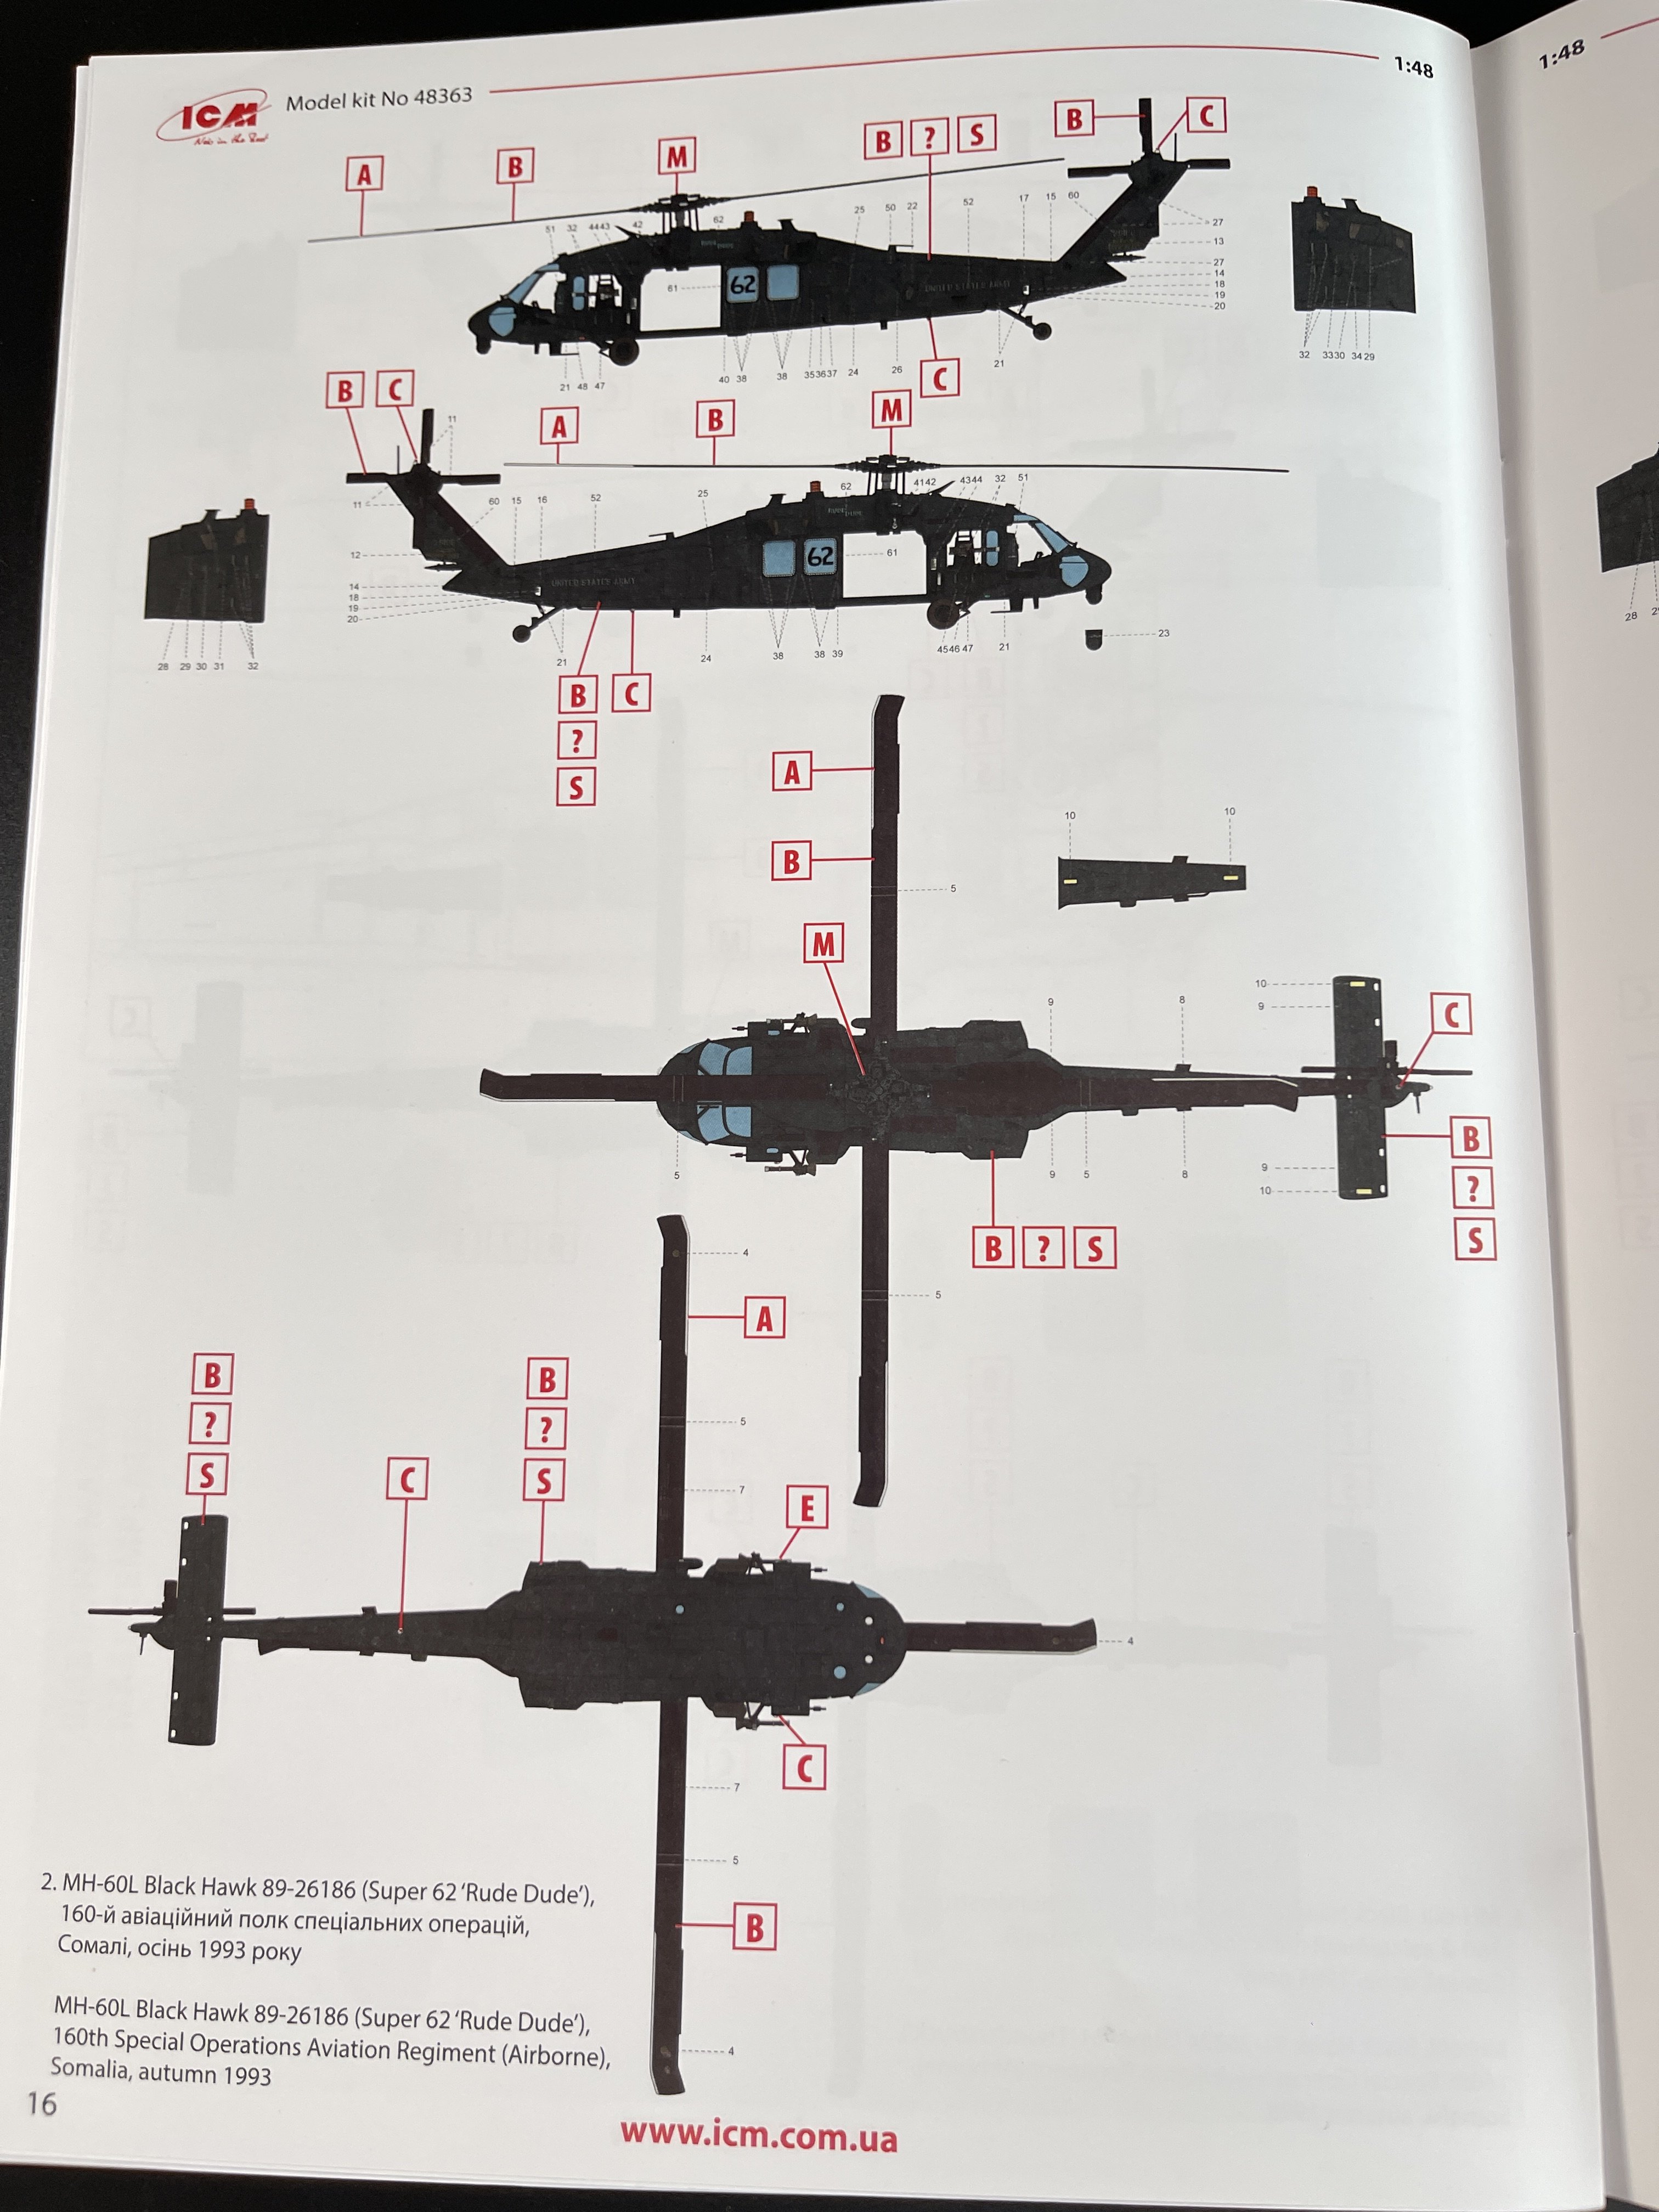
The second one is MH-60L Black Hawk 89-26186 (Super 62 “Rude Dude”) – 160th Special Operations Aviation Regiment (Airborne), Somalia, autumn 1993.
The third is the MH-60L Black Hawk 90-26257 (Super 63 “Grim Reaper”) – 160th Special Operations Aviation Regiment (Airborne), Somalia, autumn 1993.

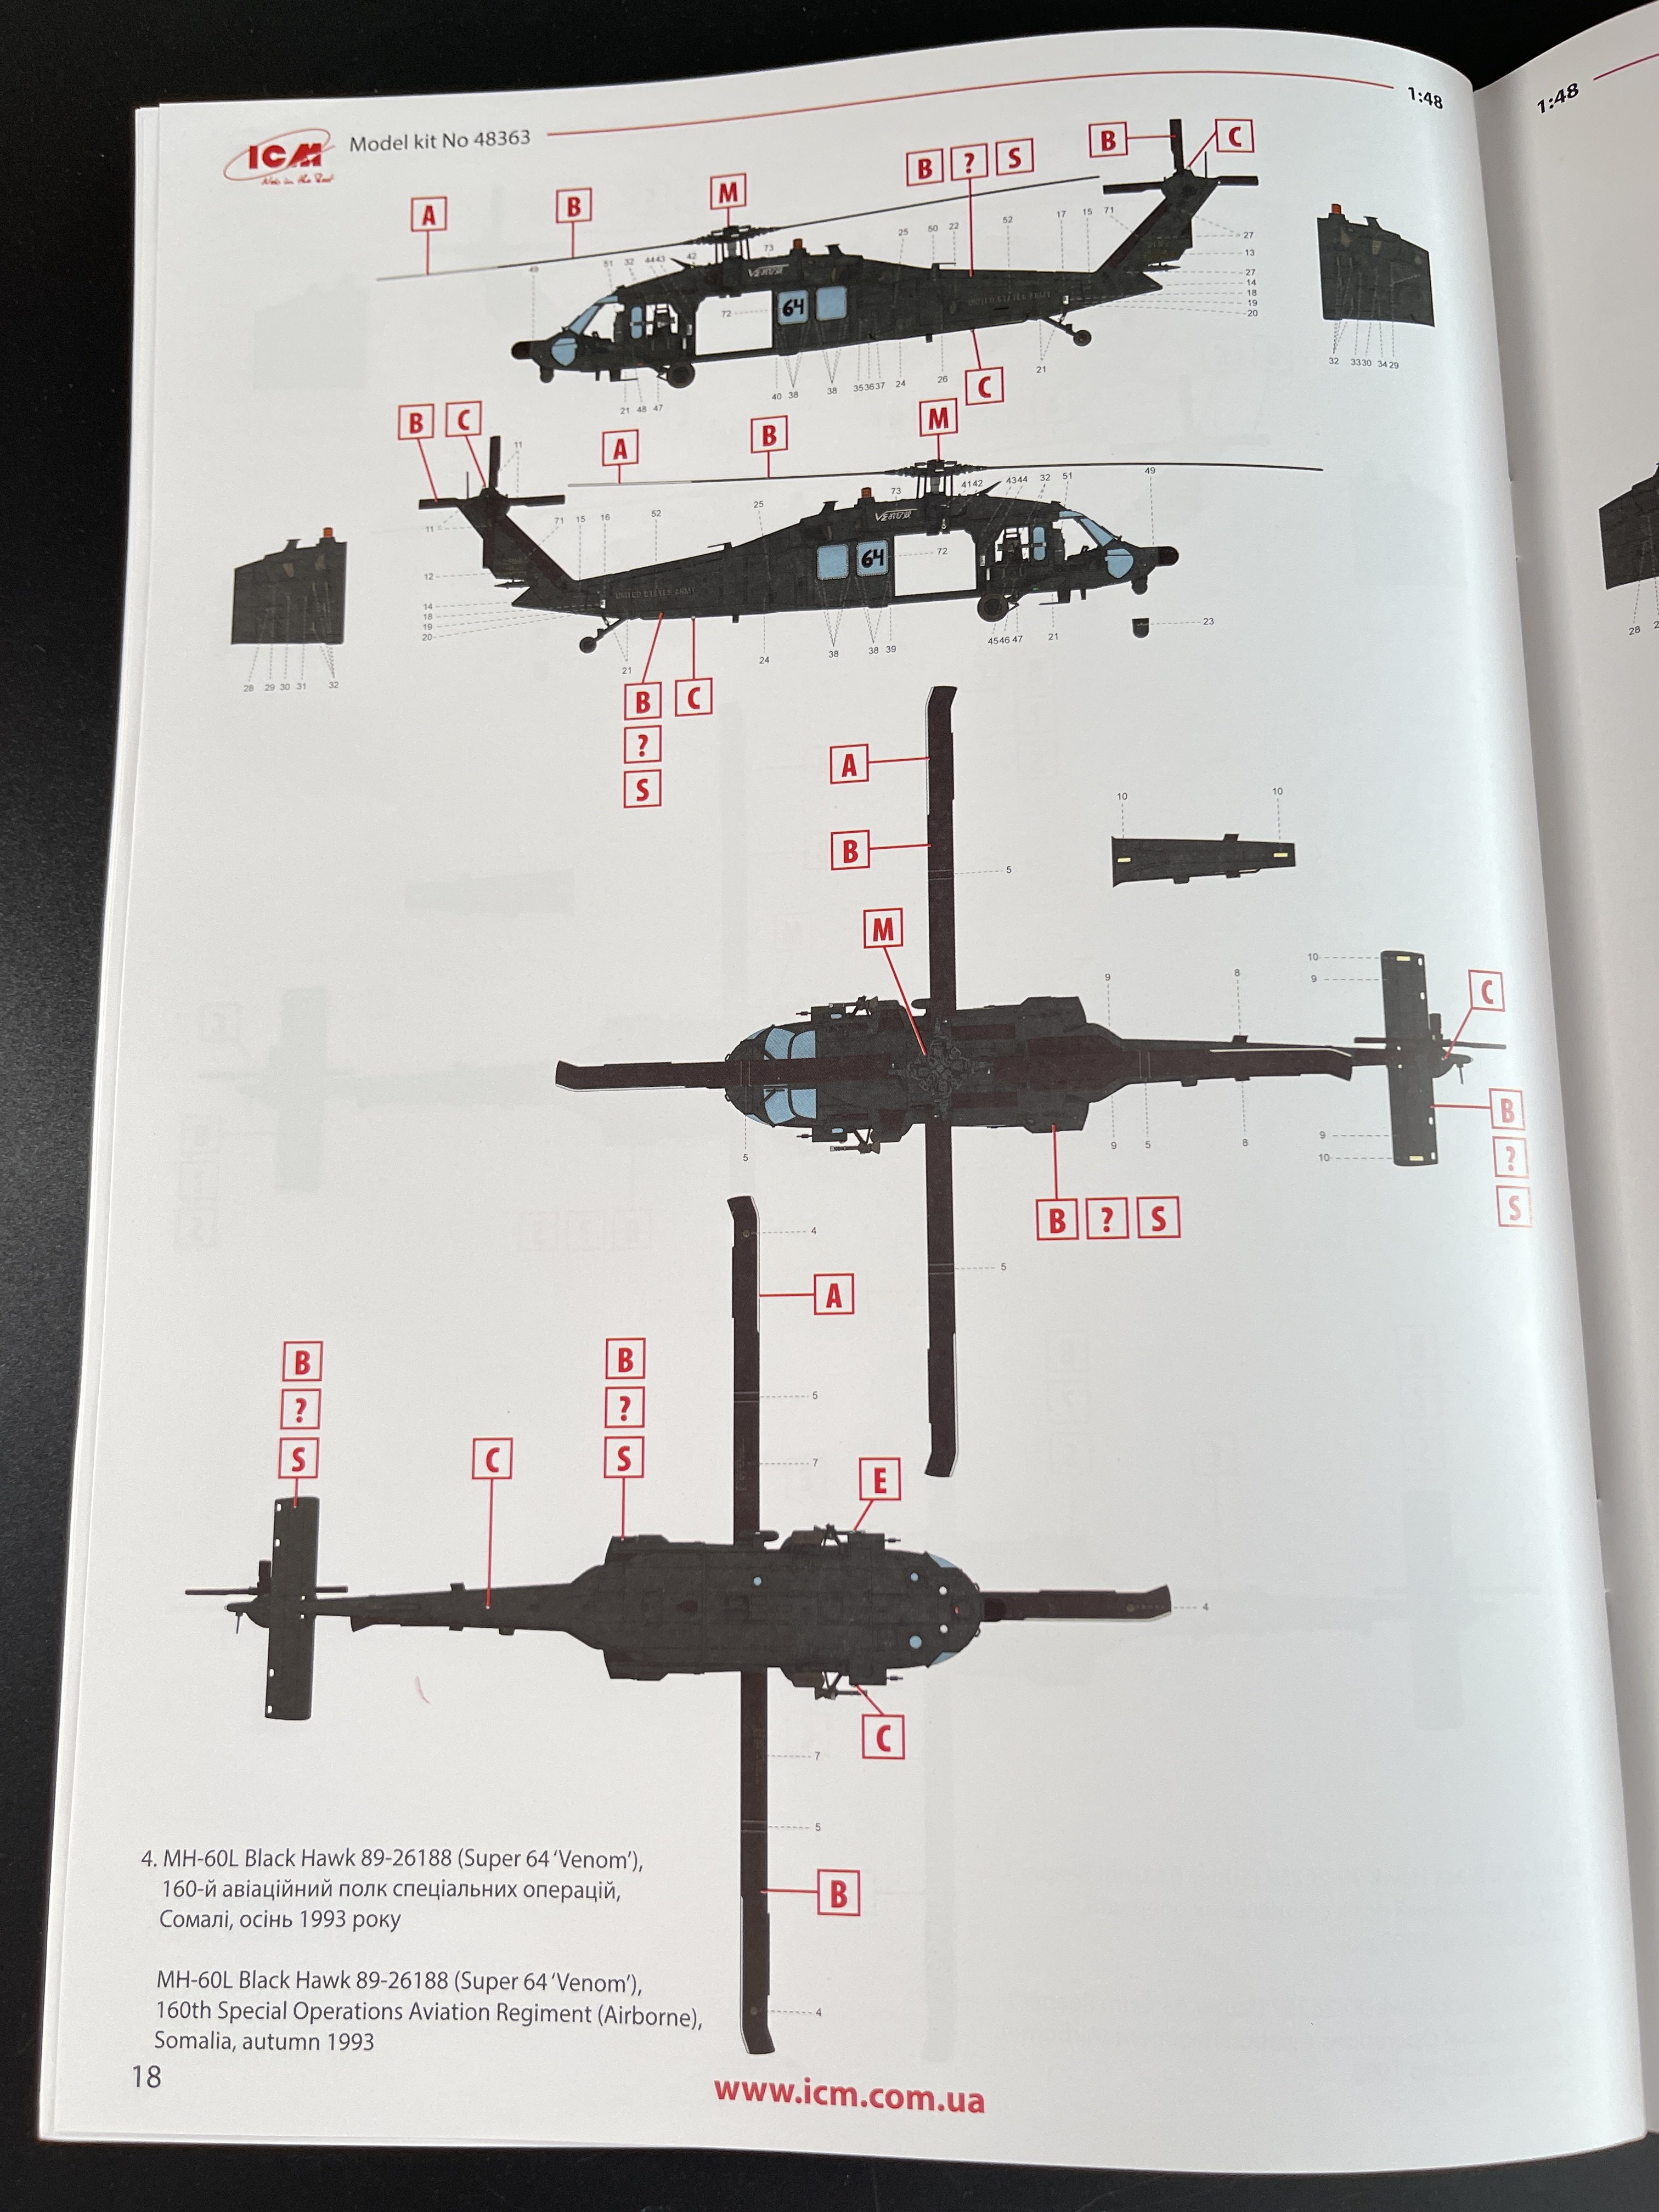
The fourth is the MH-60L Black Hawk 89-26188 (Super 64 “Venom”) – 160th Special Operations Aviation Regiment (Airborne), Somalia, autumn 1993.

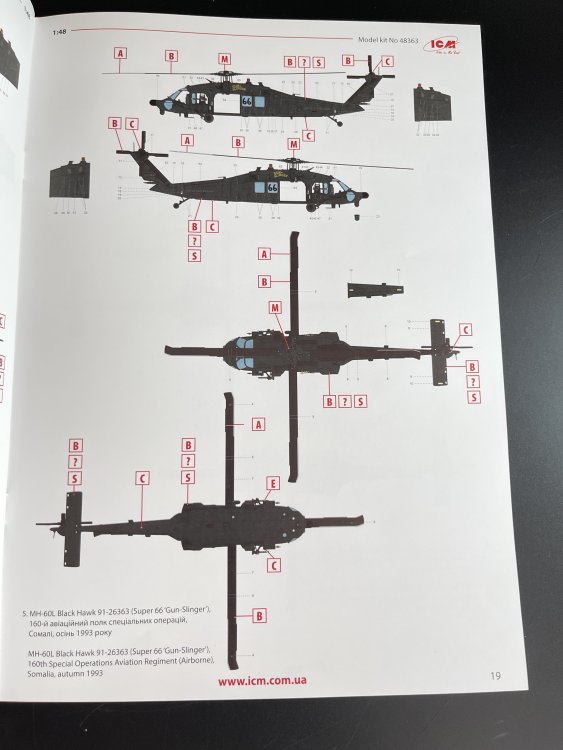
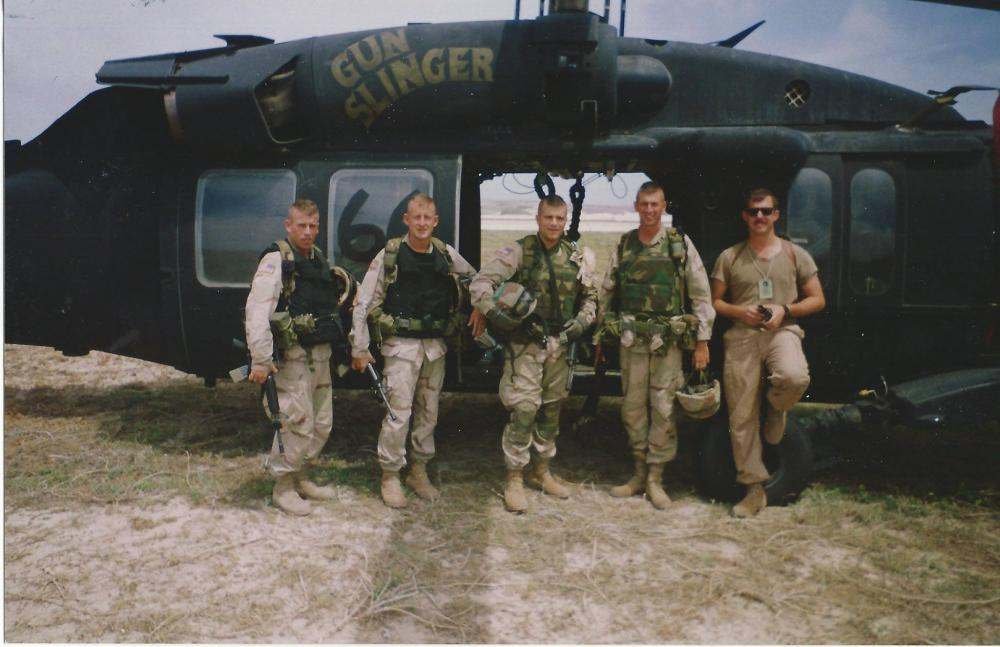
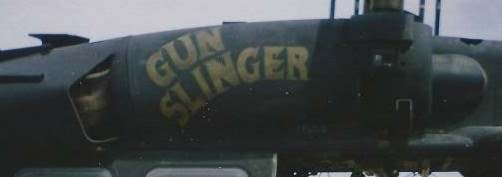
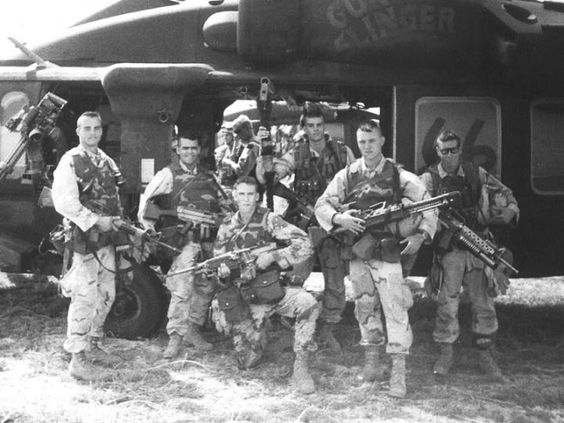
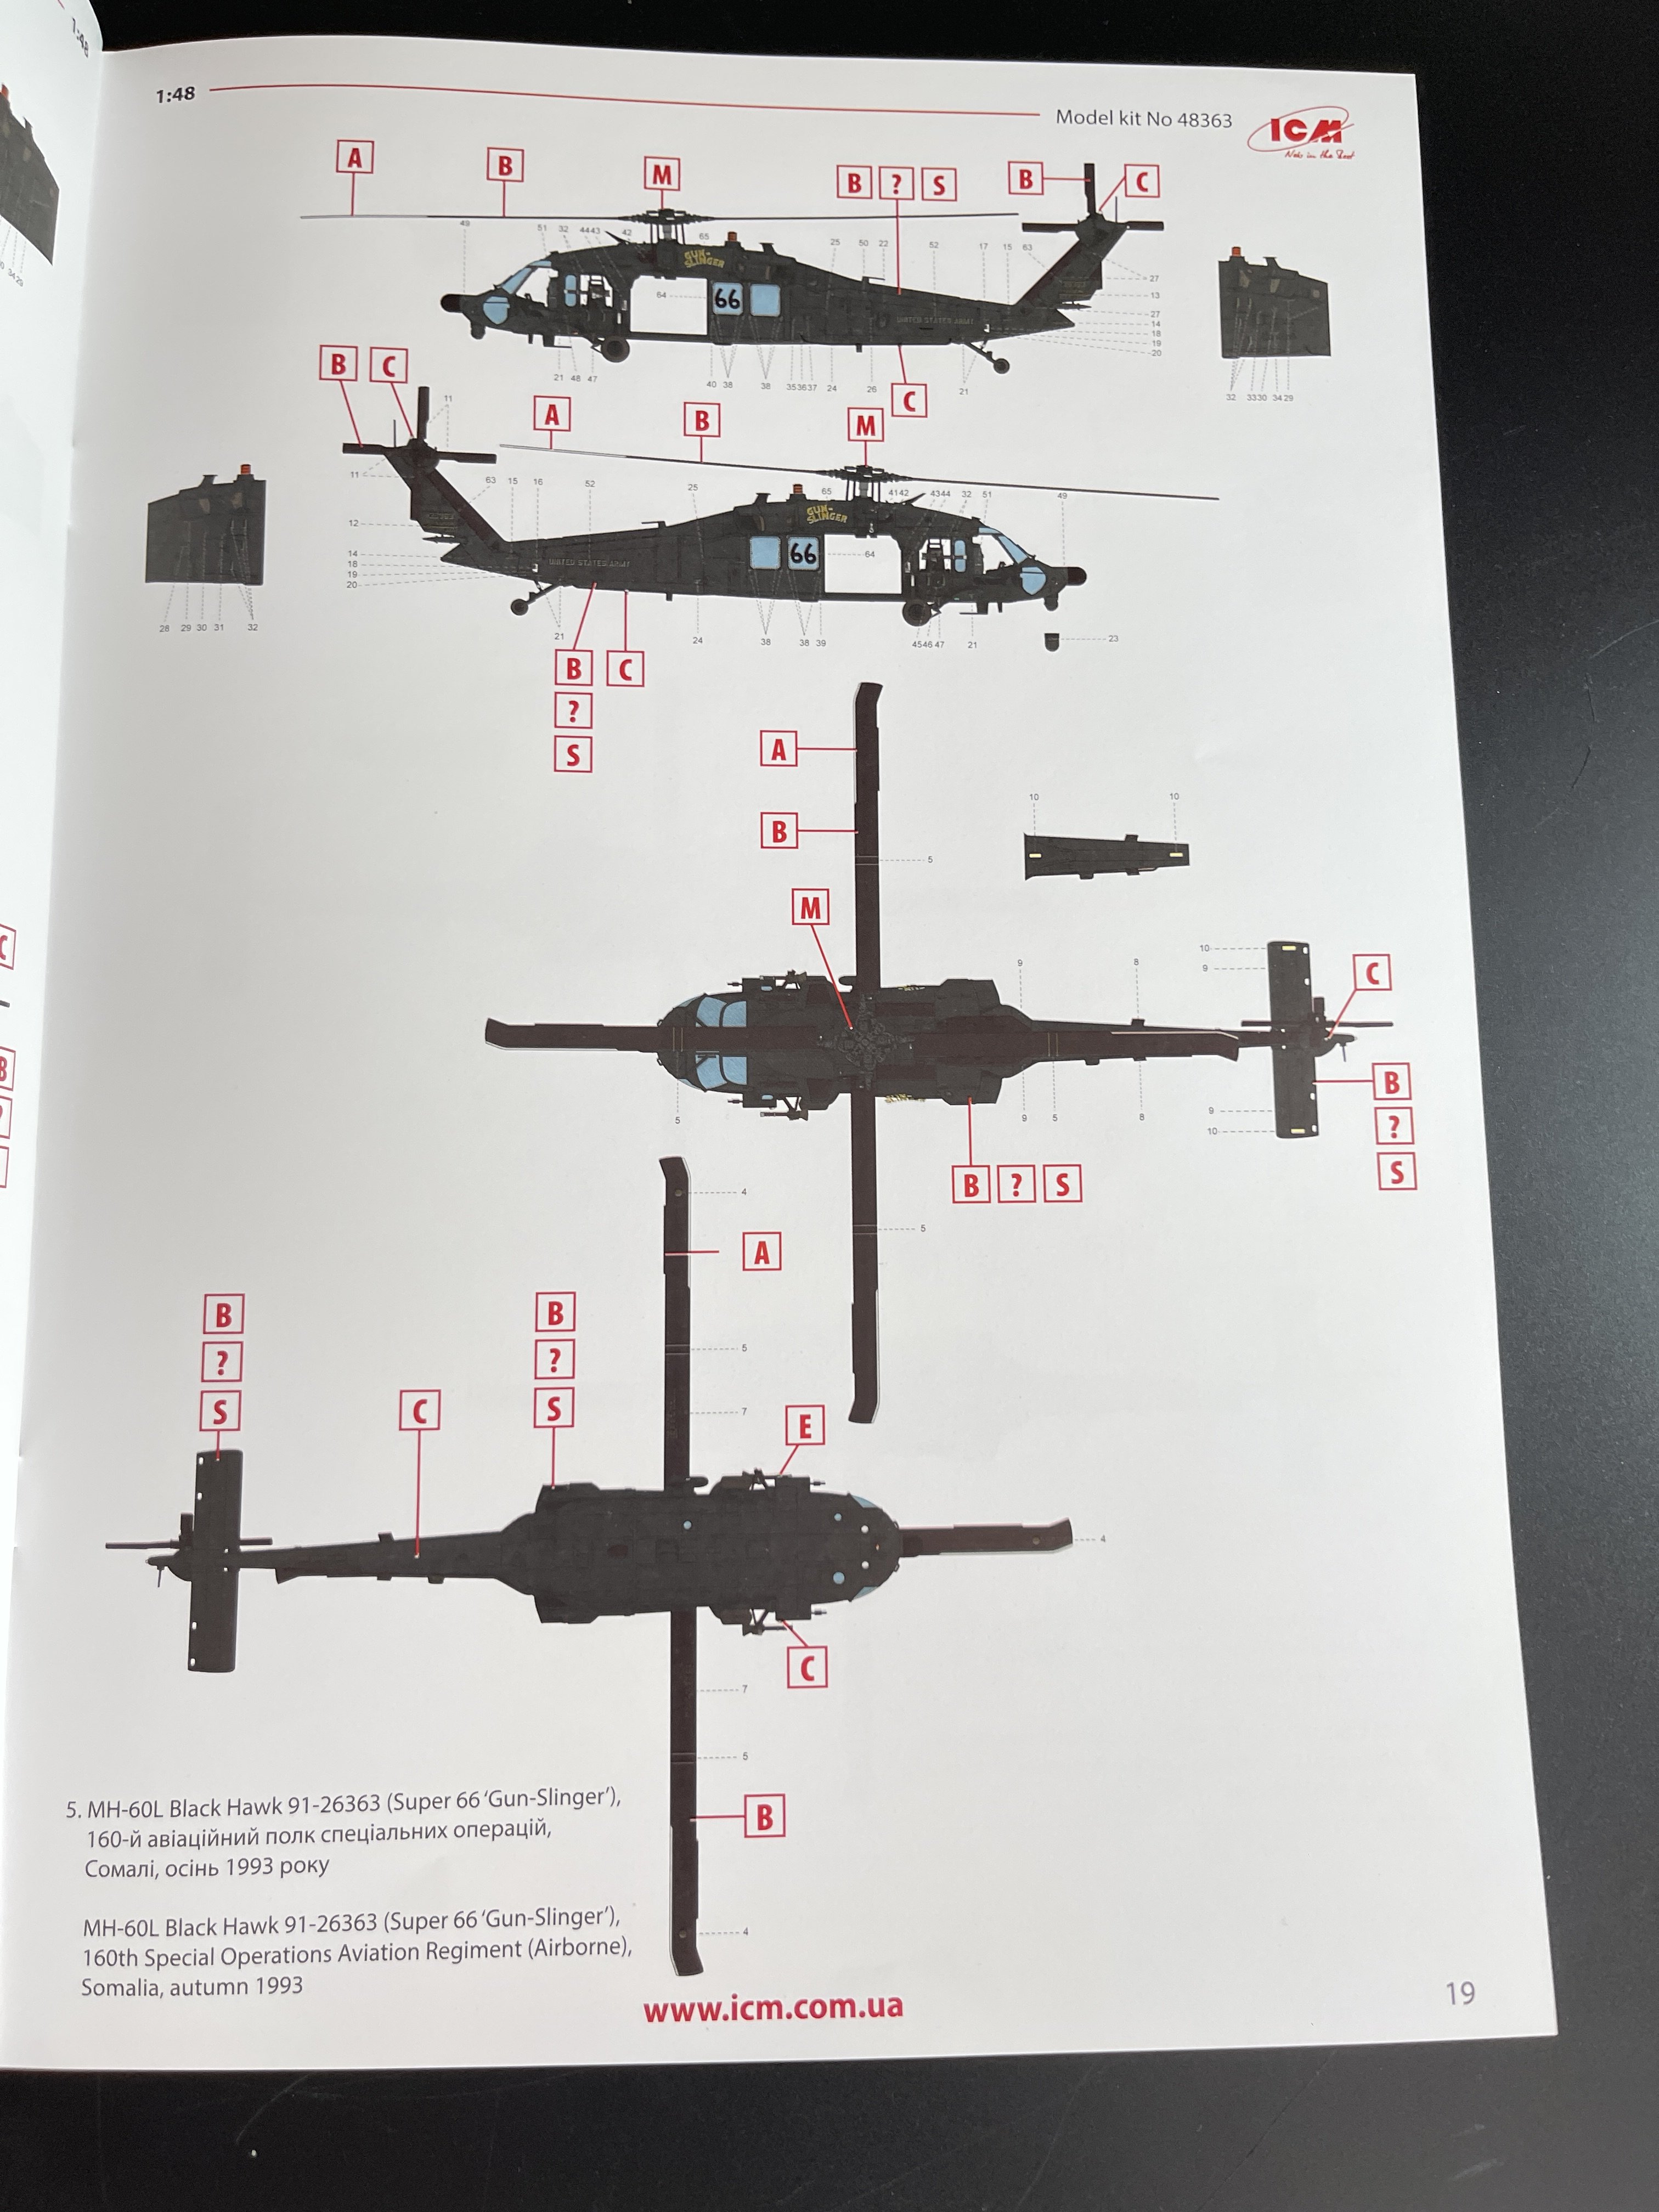
The fifth option is the MH-60L Black Hawk 91-26363 (Super 66 “Gun-Slinger”) – 160th Special Operations Aviation Regiment (Airborne), Somalia, autumn 1993.
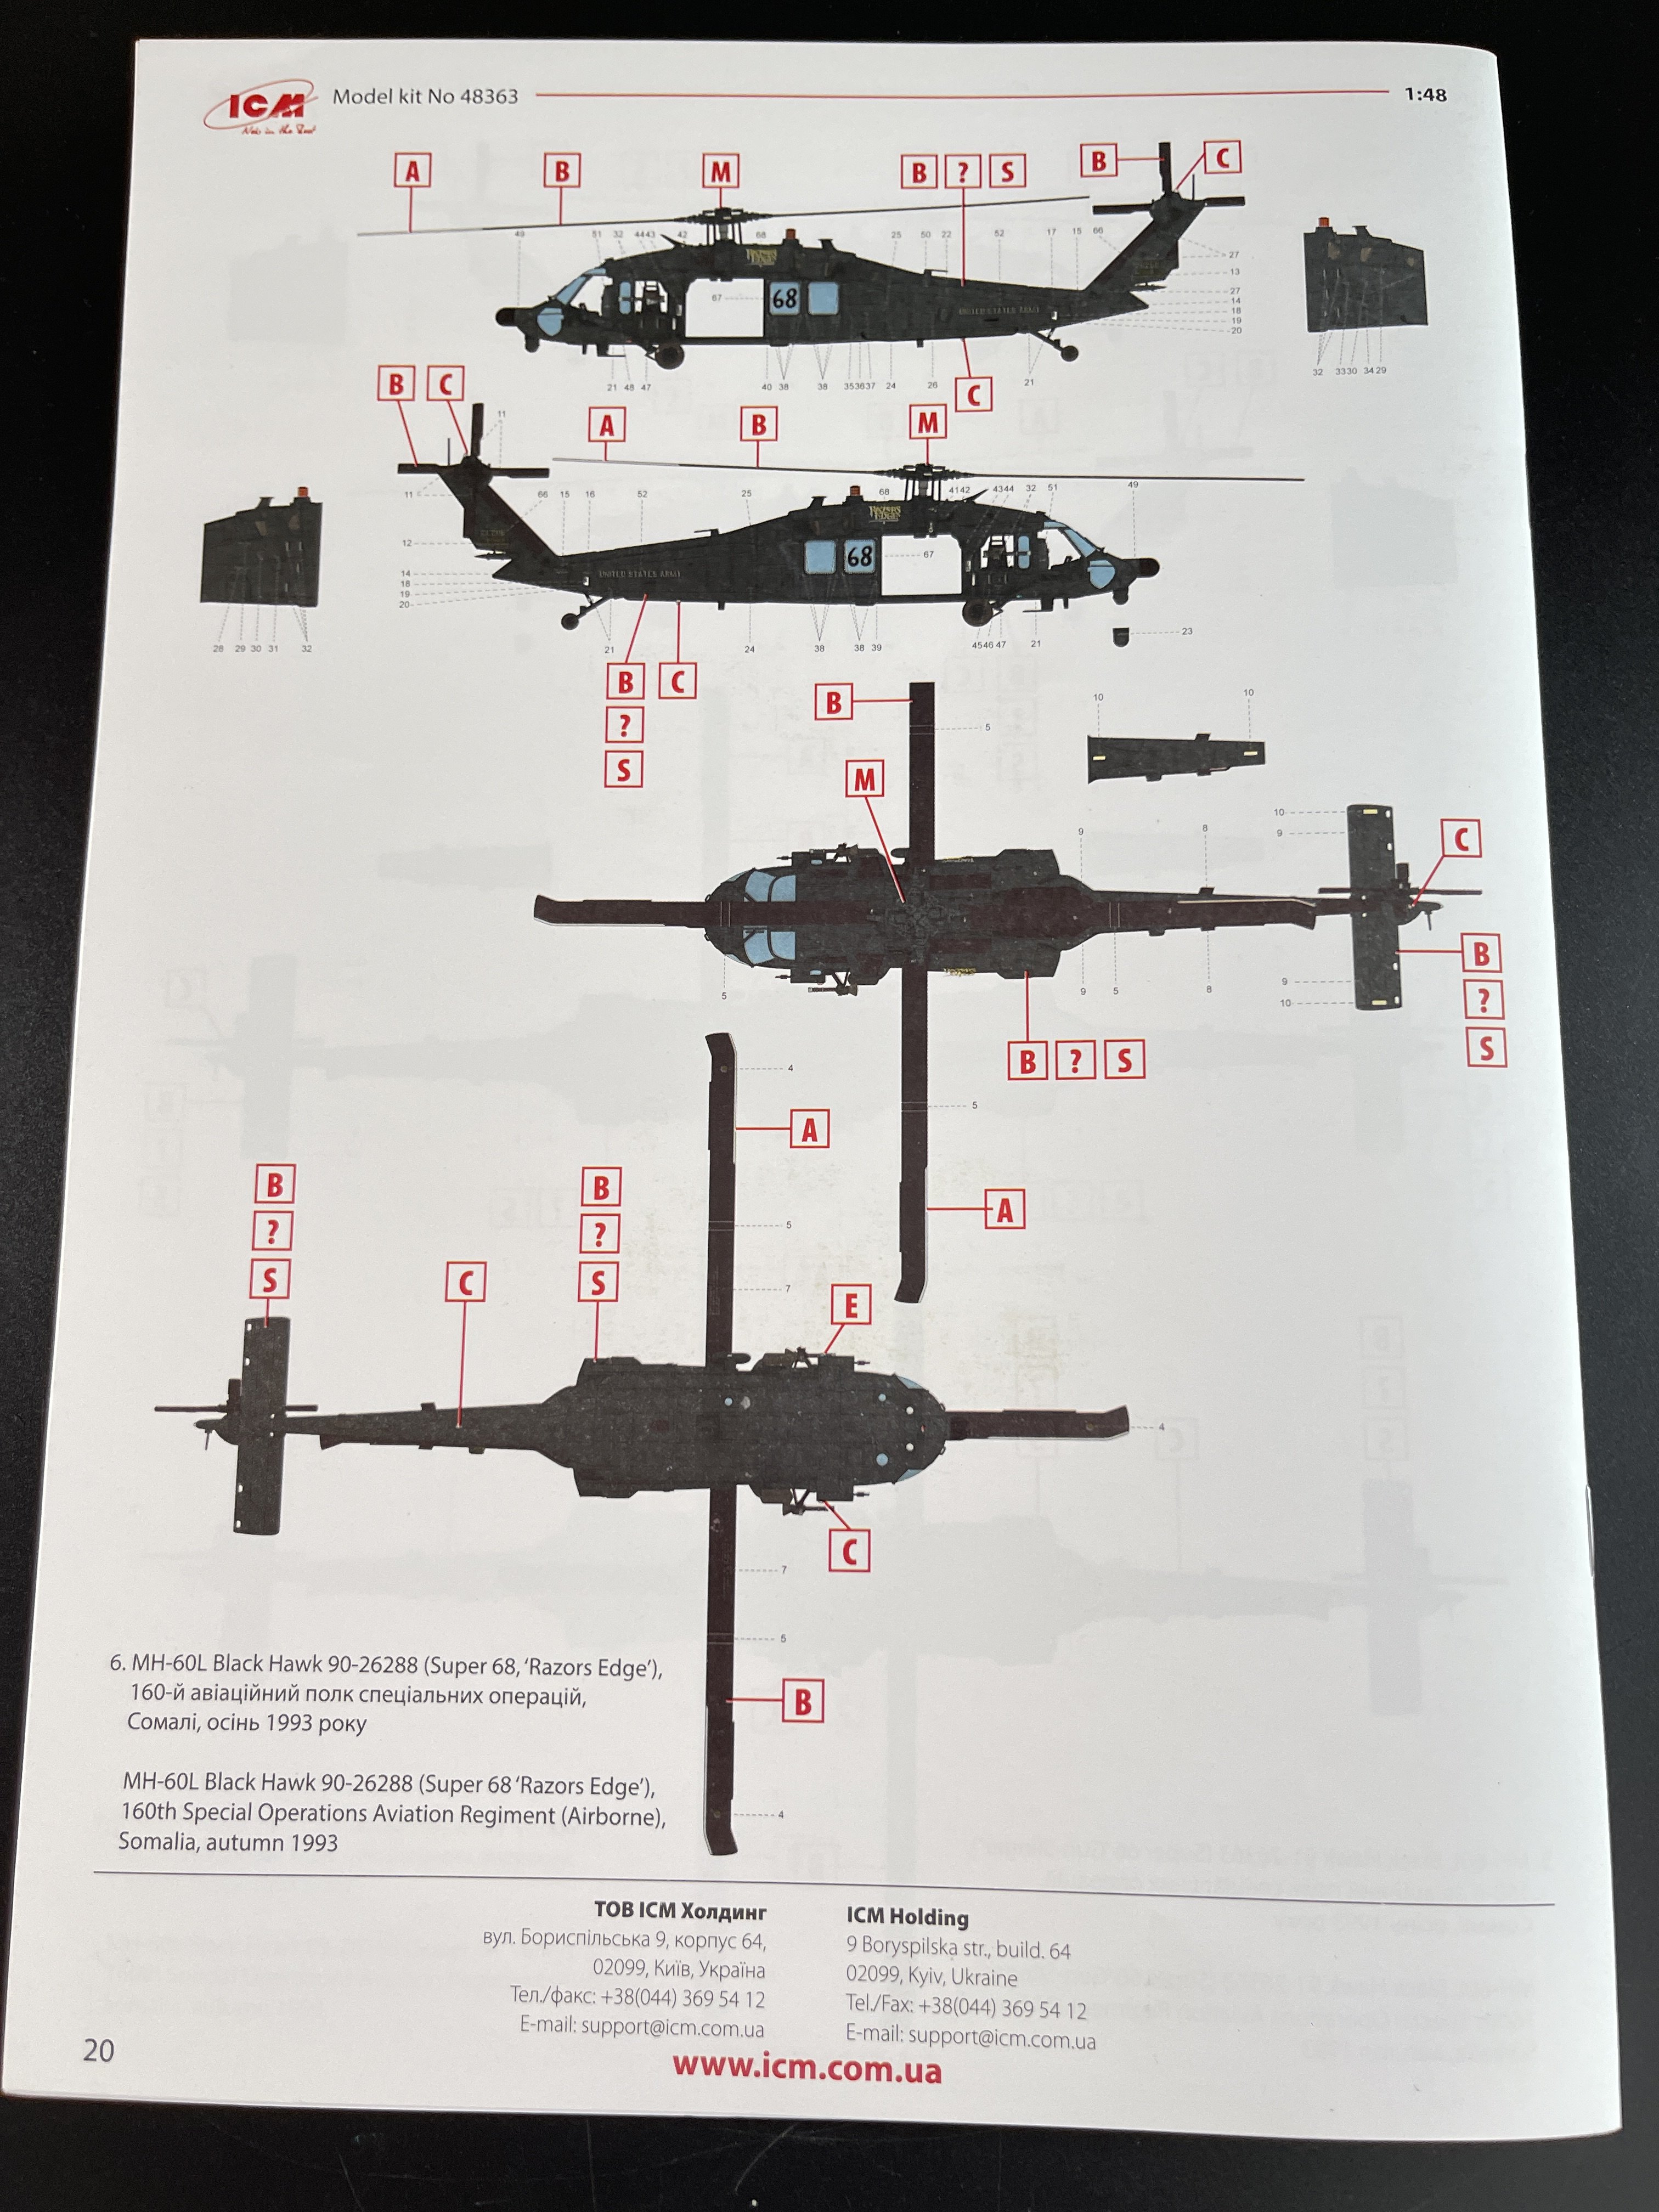
The last but not the least, the MH-60L Black Hawk 90-26288 (Super 68 “Razor Edge”) – 160th Special Operations Aviation Regiment (Airborne), Somalia, autumn 1993.

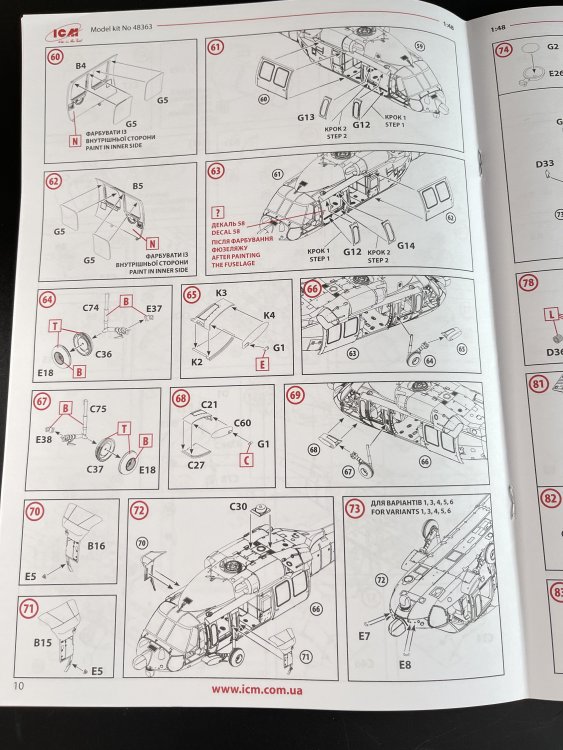
The manual isntructions is a booklet of 20 pages with a small history about the Gothic Serpent operation on Mogadishu and step by step constructions with good locations parts and color indications.
QR code is always a nice touch.

CONCLUSION:
Well, making this review made me watch the “Black Hawk Down” movie again. And also a great documentary on Netflix about Mogadishu battle that I strongly recommend to all even if this model is not for you.
The model itself is fantastic in all terms (just seatbelts in PE, please ICM) to be build straight from the box. If you are a bit of suckers fro aftermarkets they are showing up several new goodies to make this beauty in a total showstopper.
I confess I really love this one, and I going to dive to it asap to make a homage to the fallen in Mogadishu, Somália, in 1993.
Thanks so much ICM for the piece of History.
TOTALLY RECOMMEND!!!!!


-
1
-
1
-
-
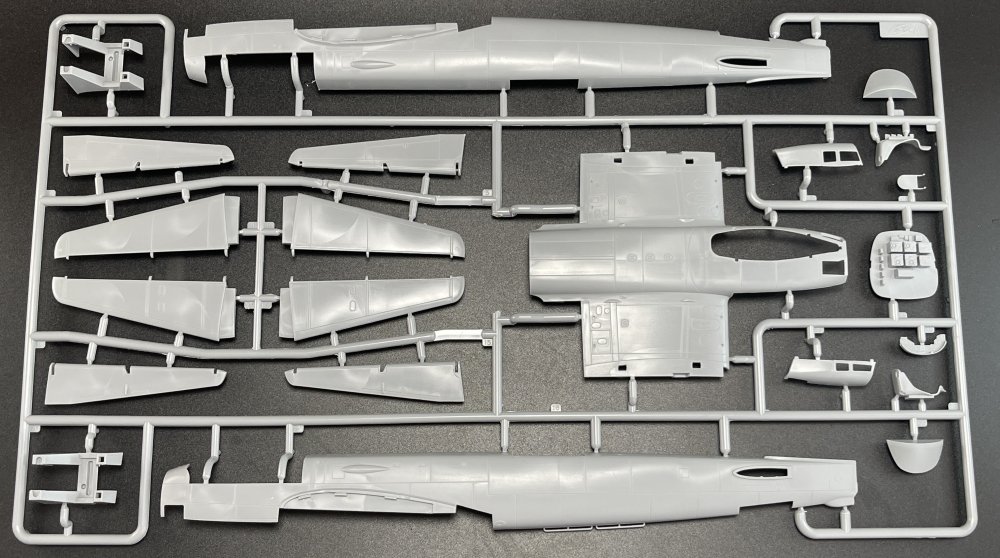
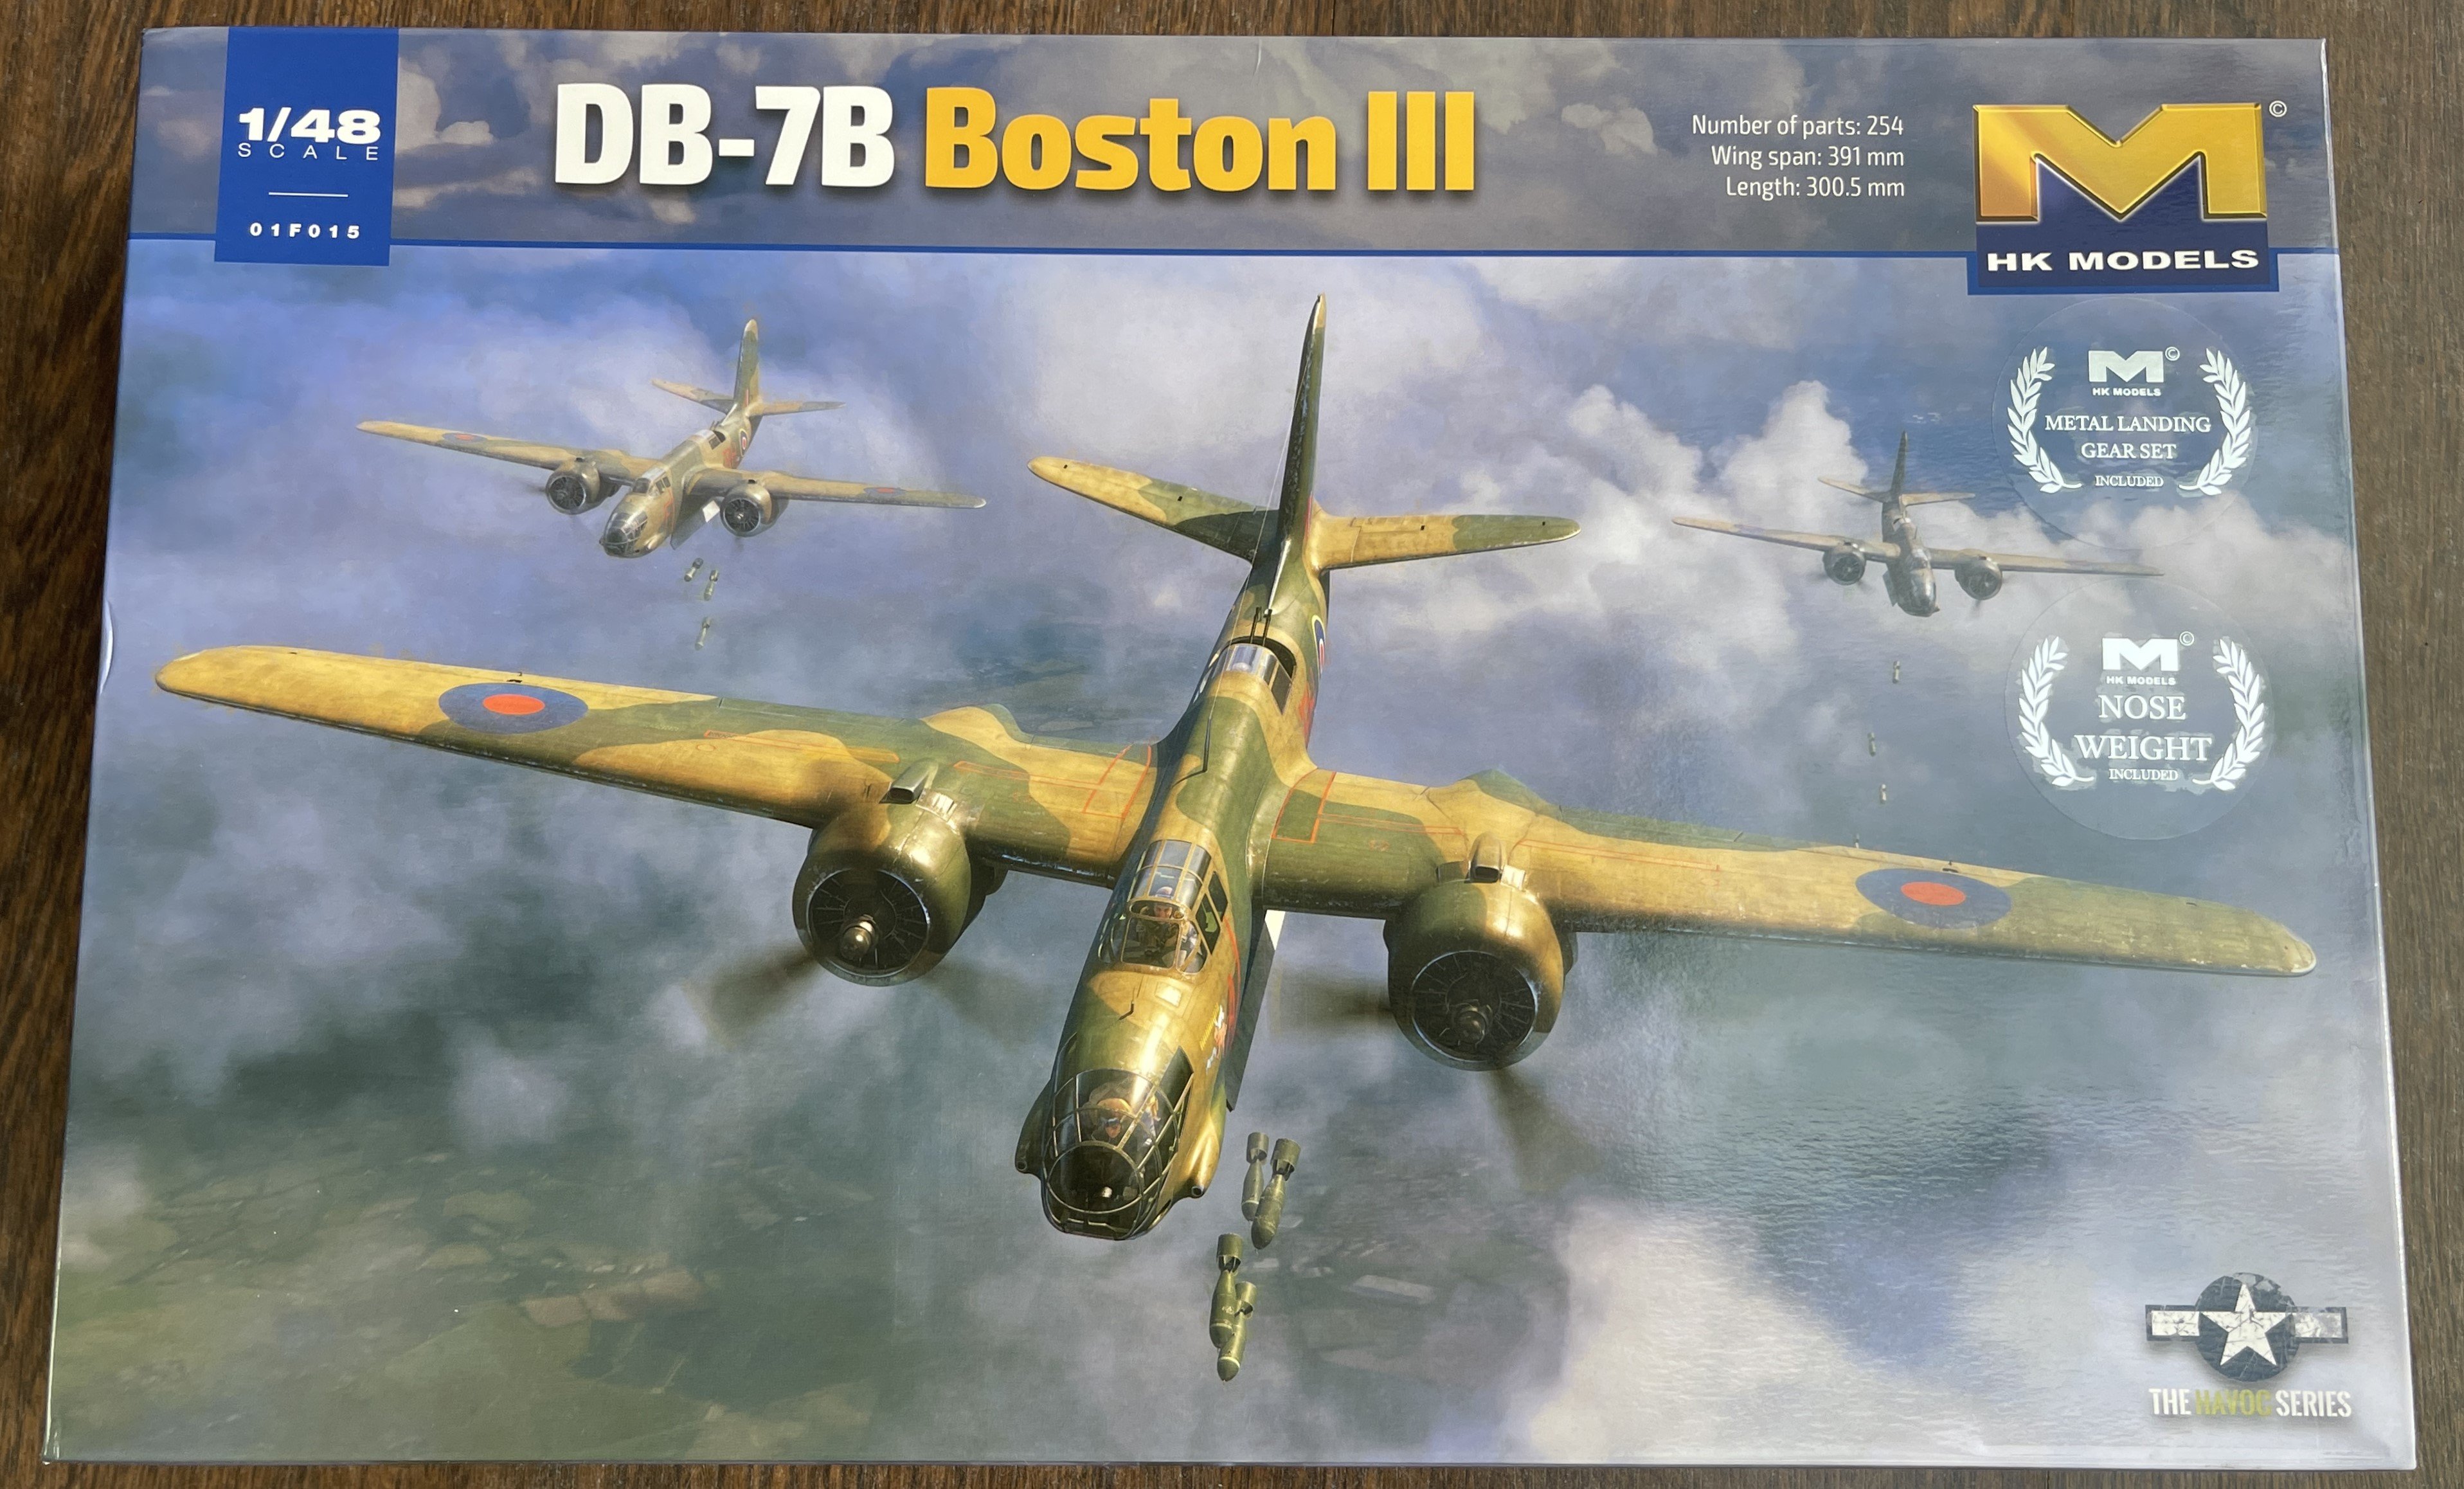
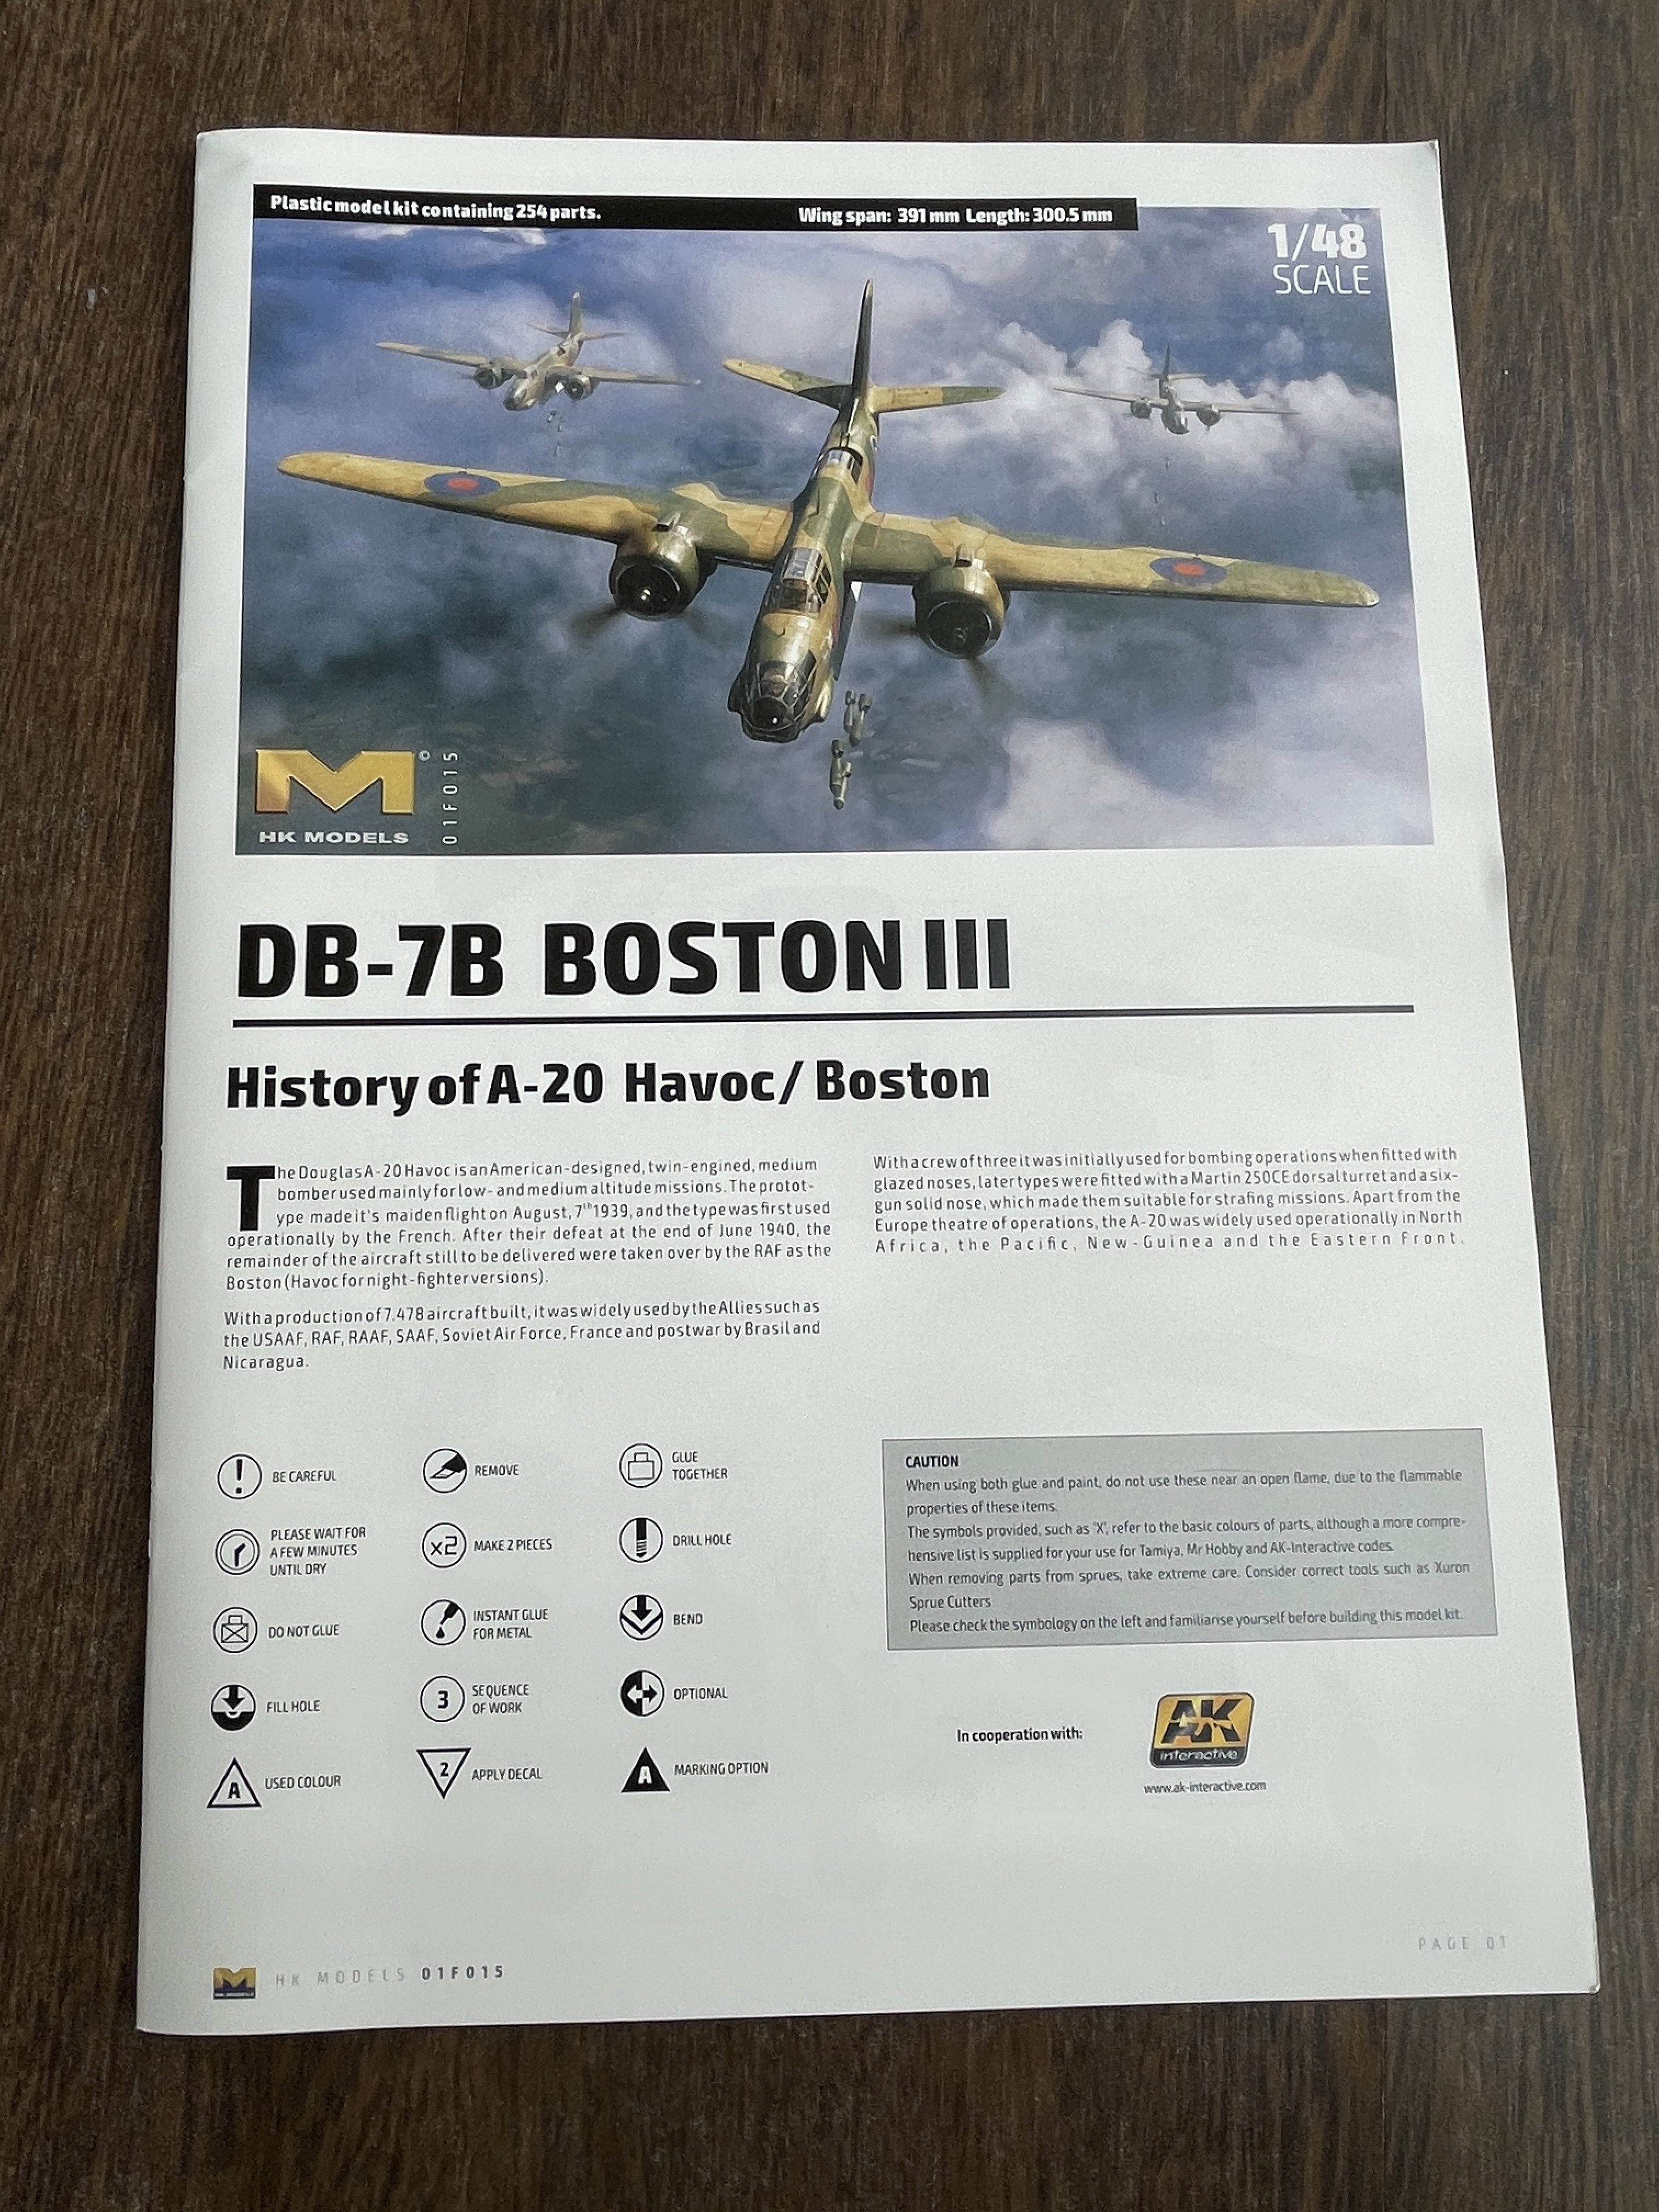
1:48
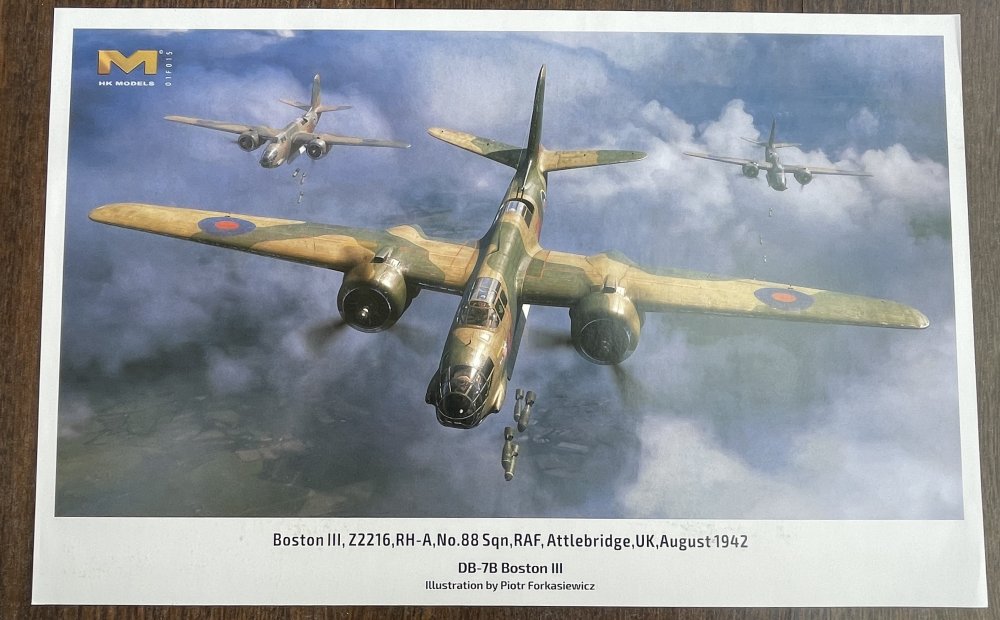
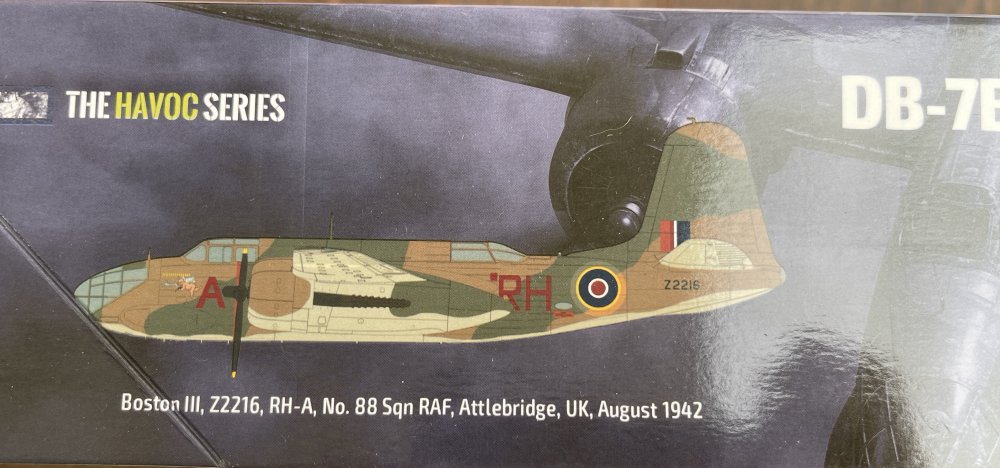
DB-7B
Boston III

Hong Kong Models
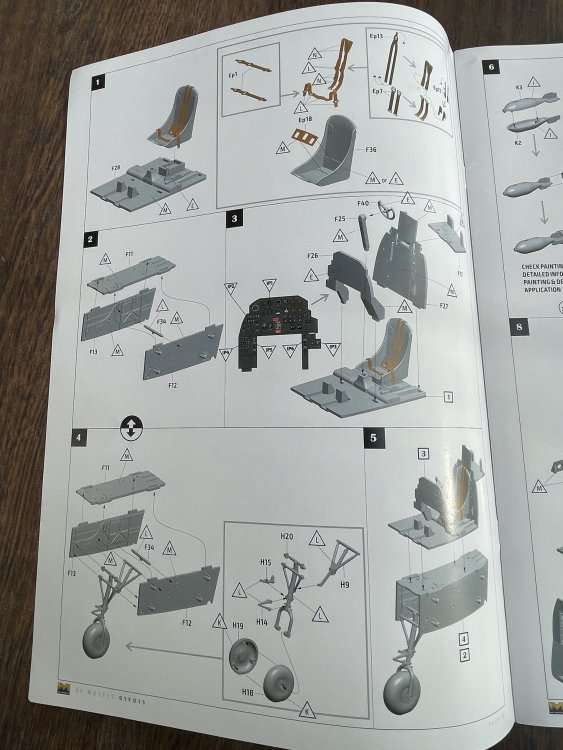
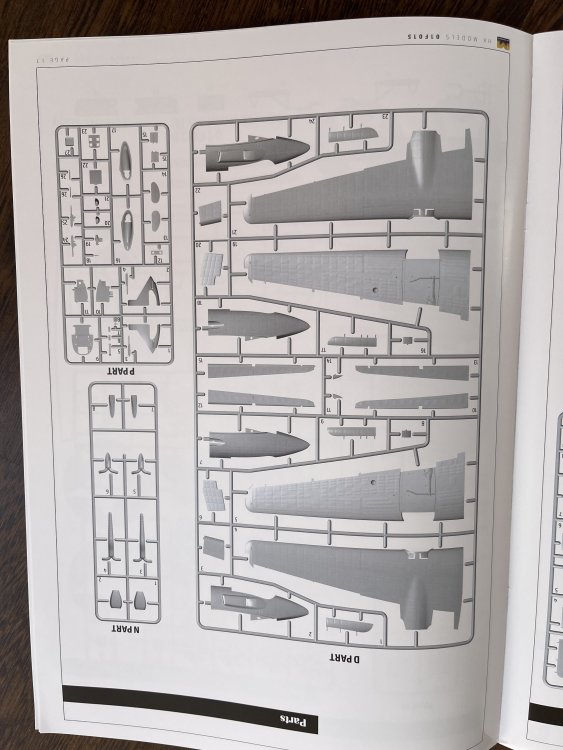
Catalogue number 01F015
Price: around 106€
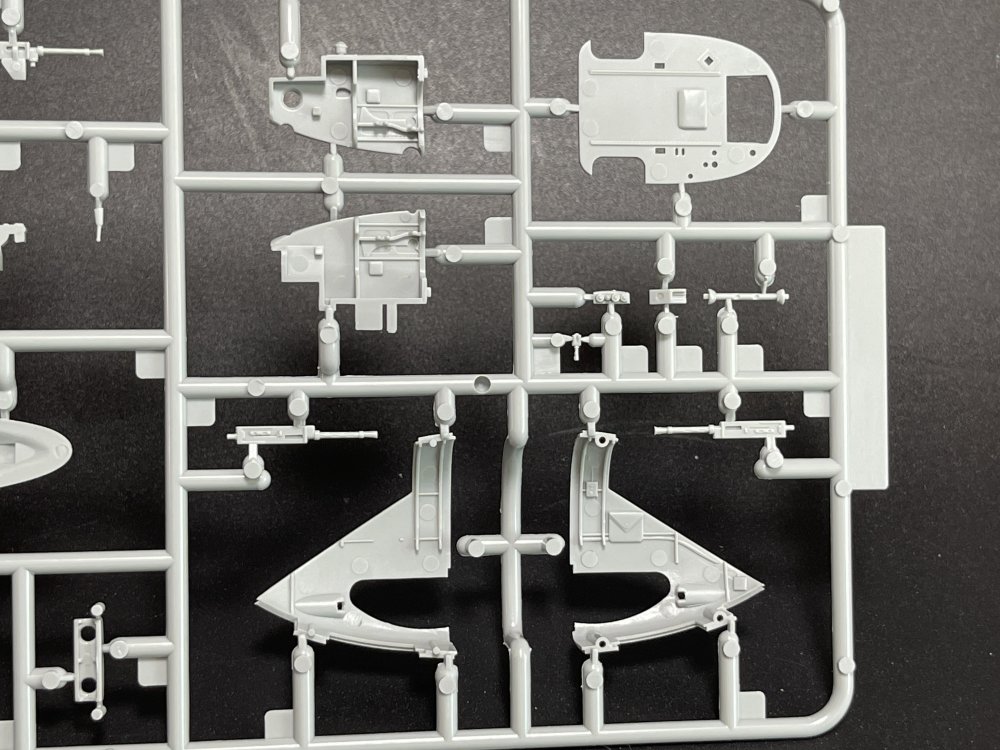
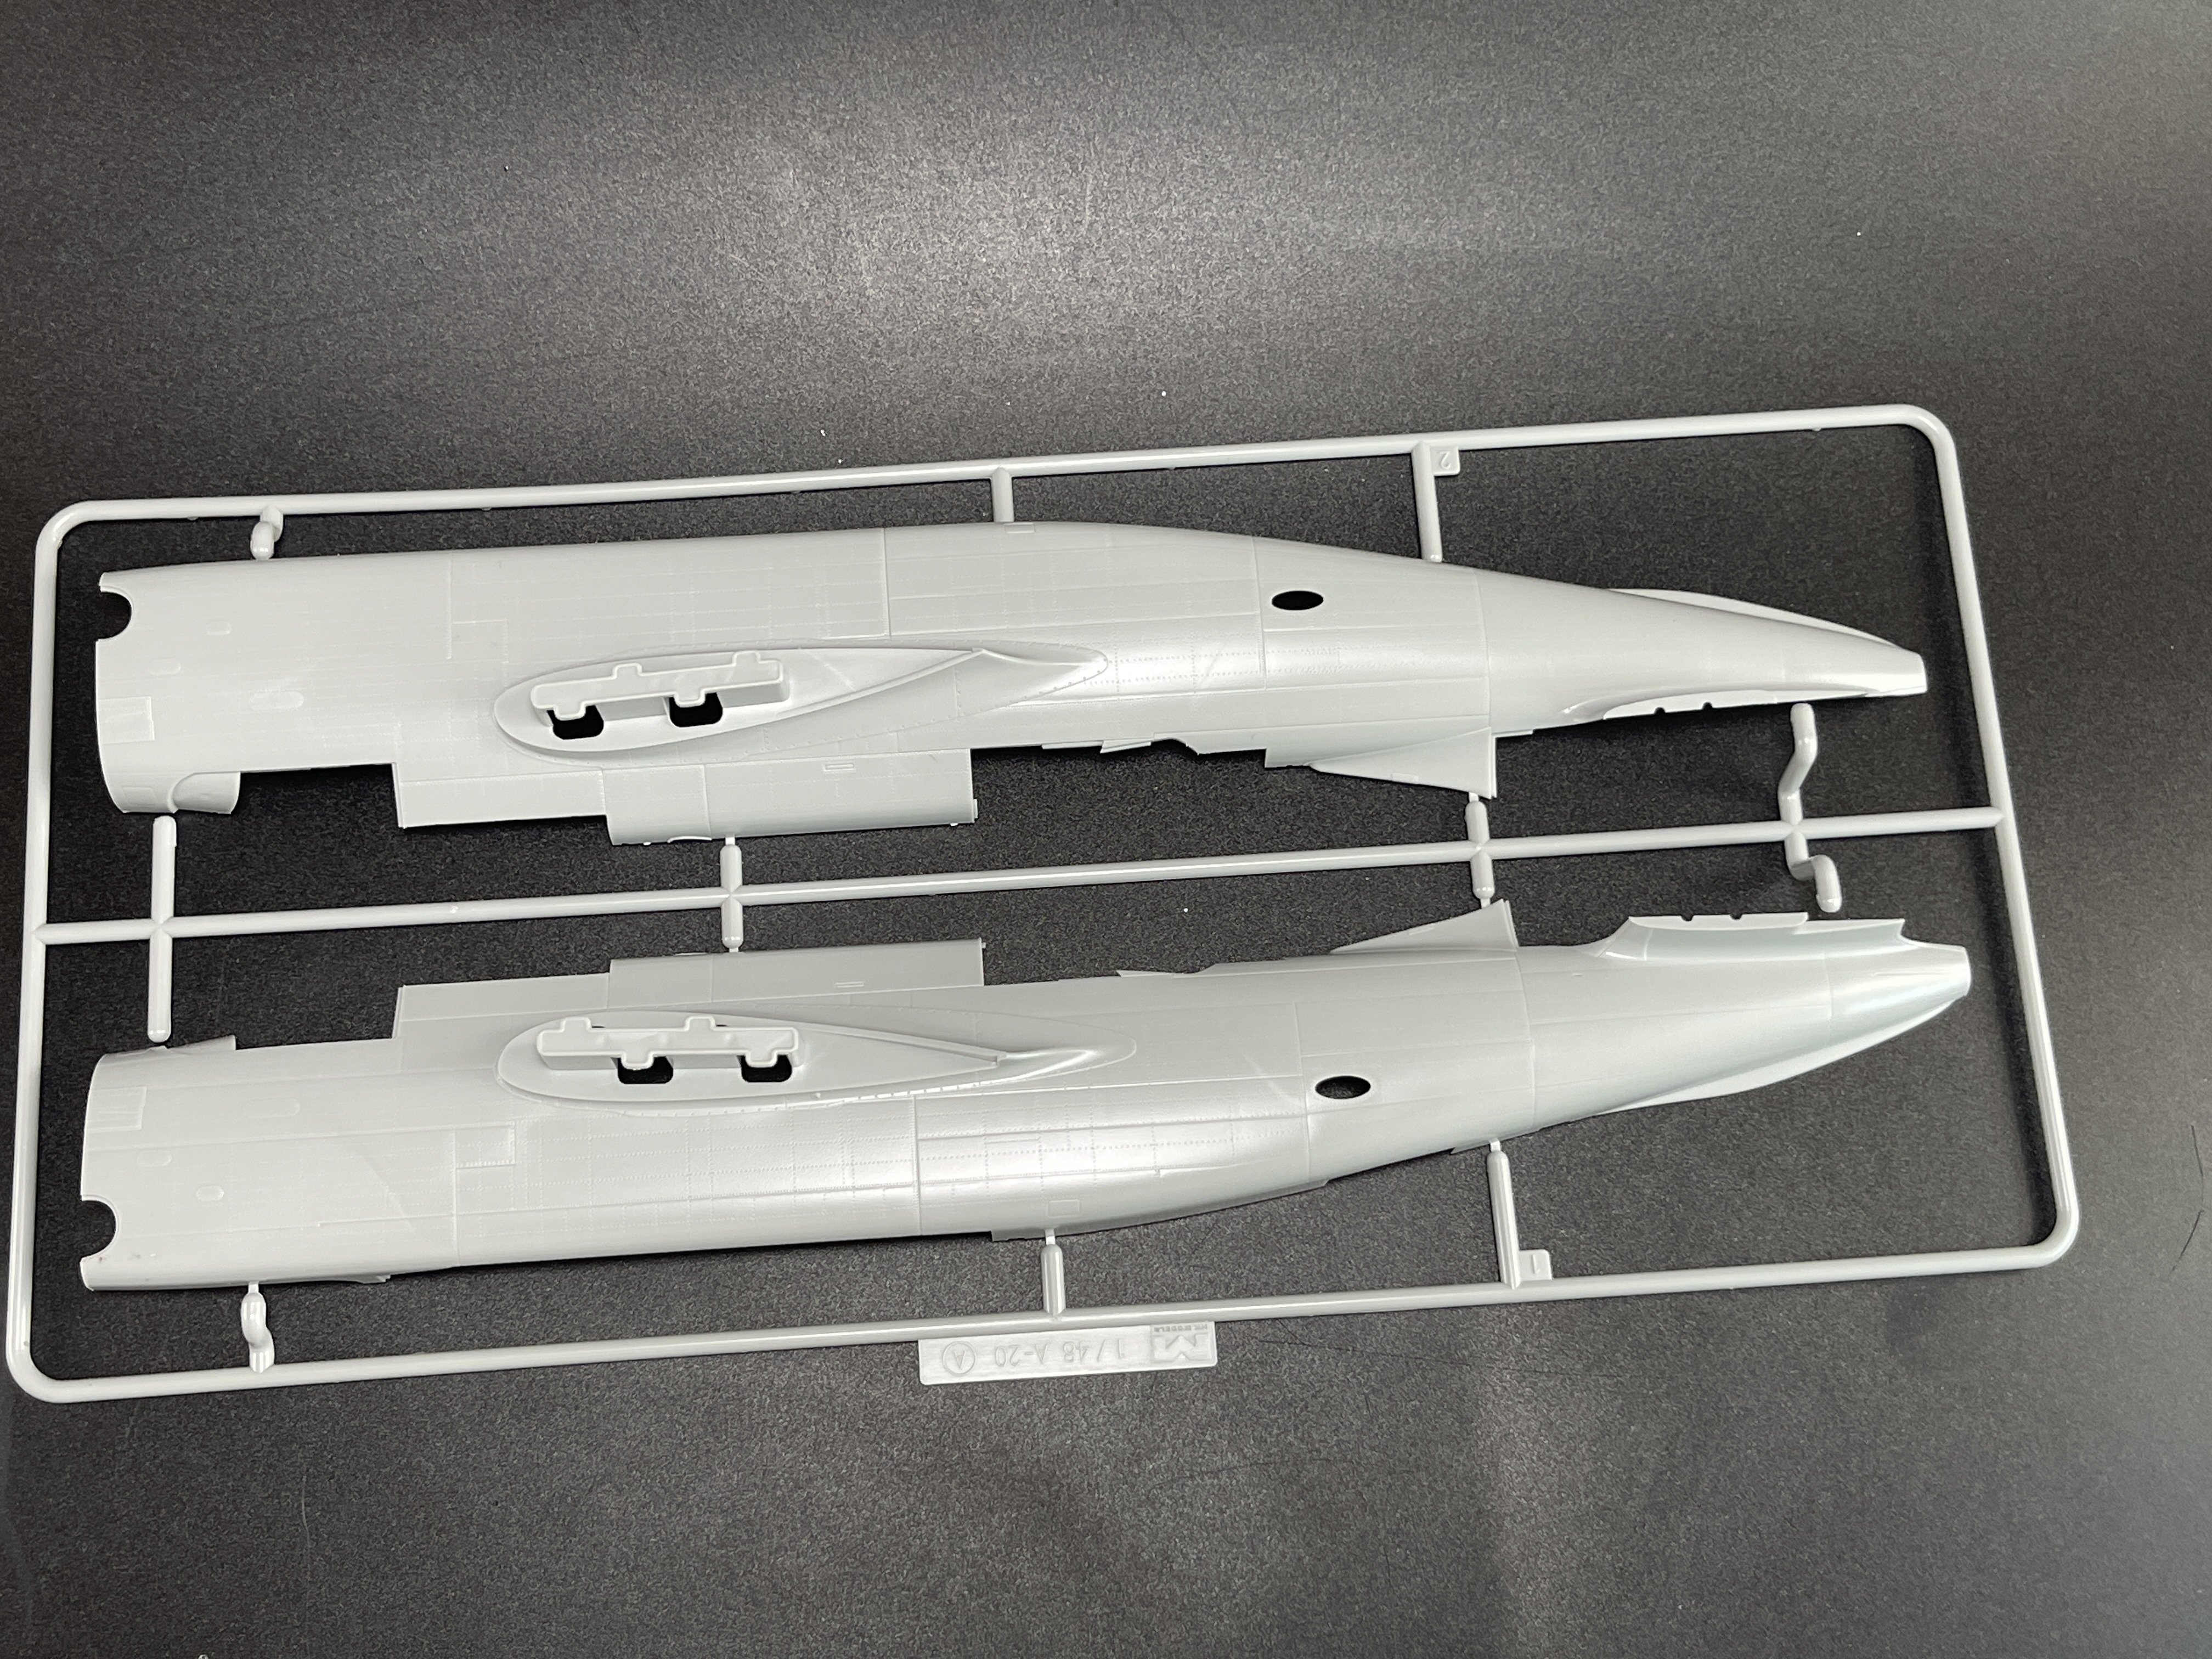
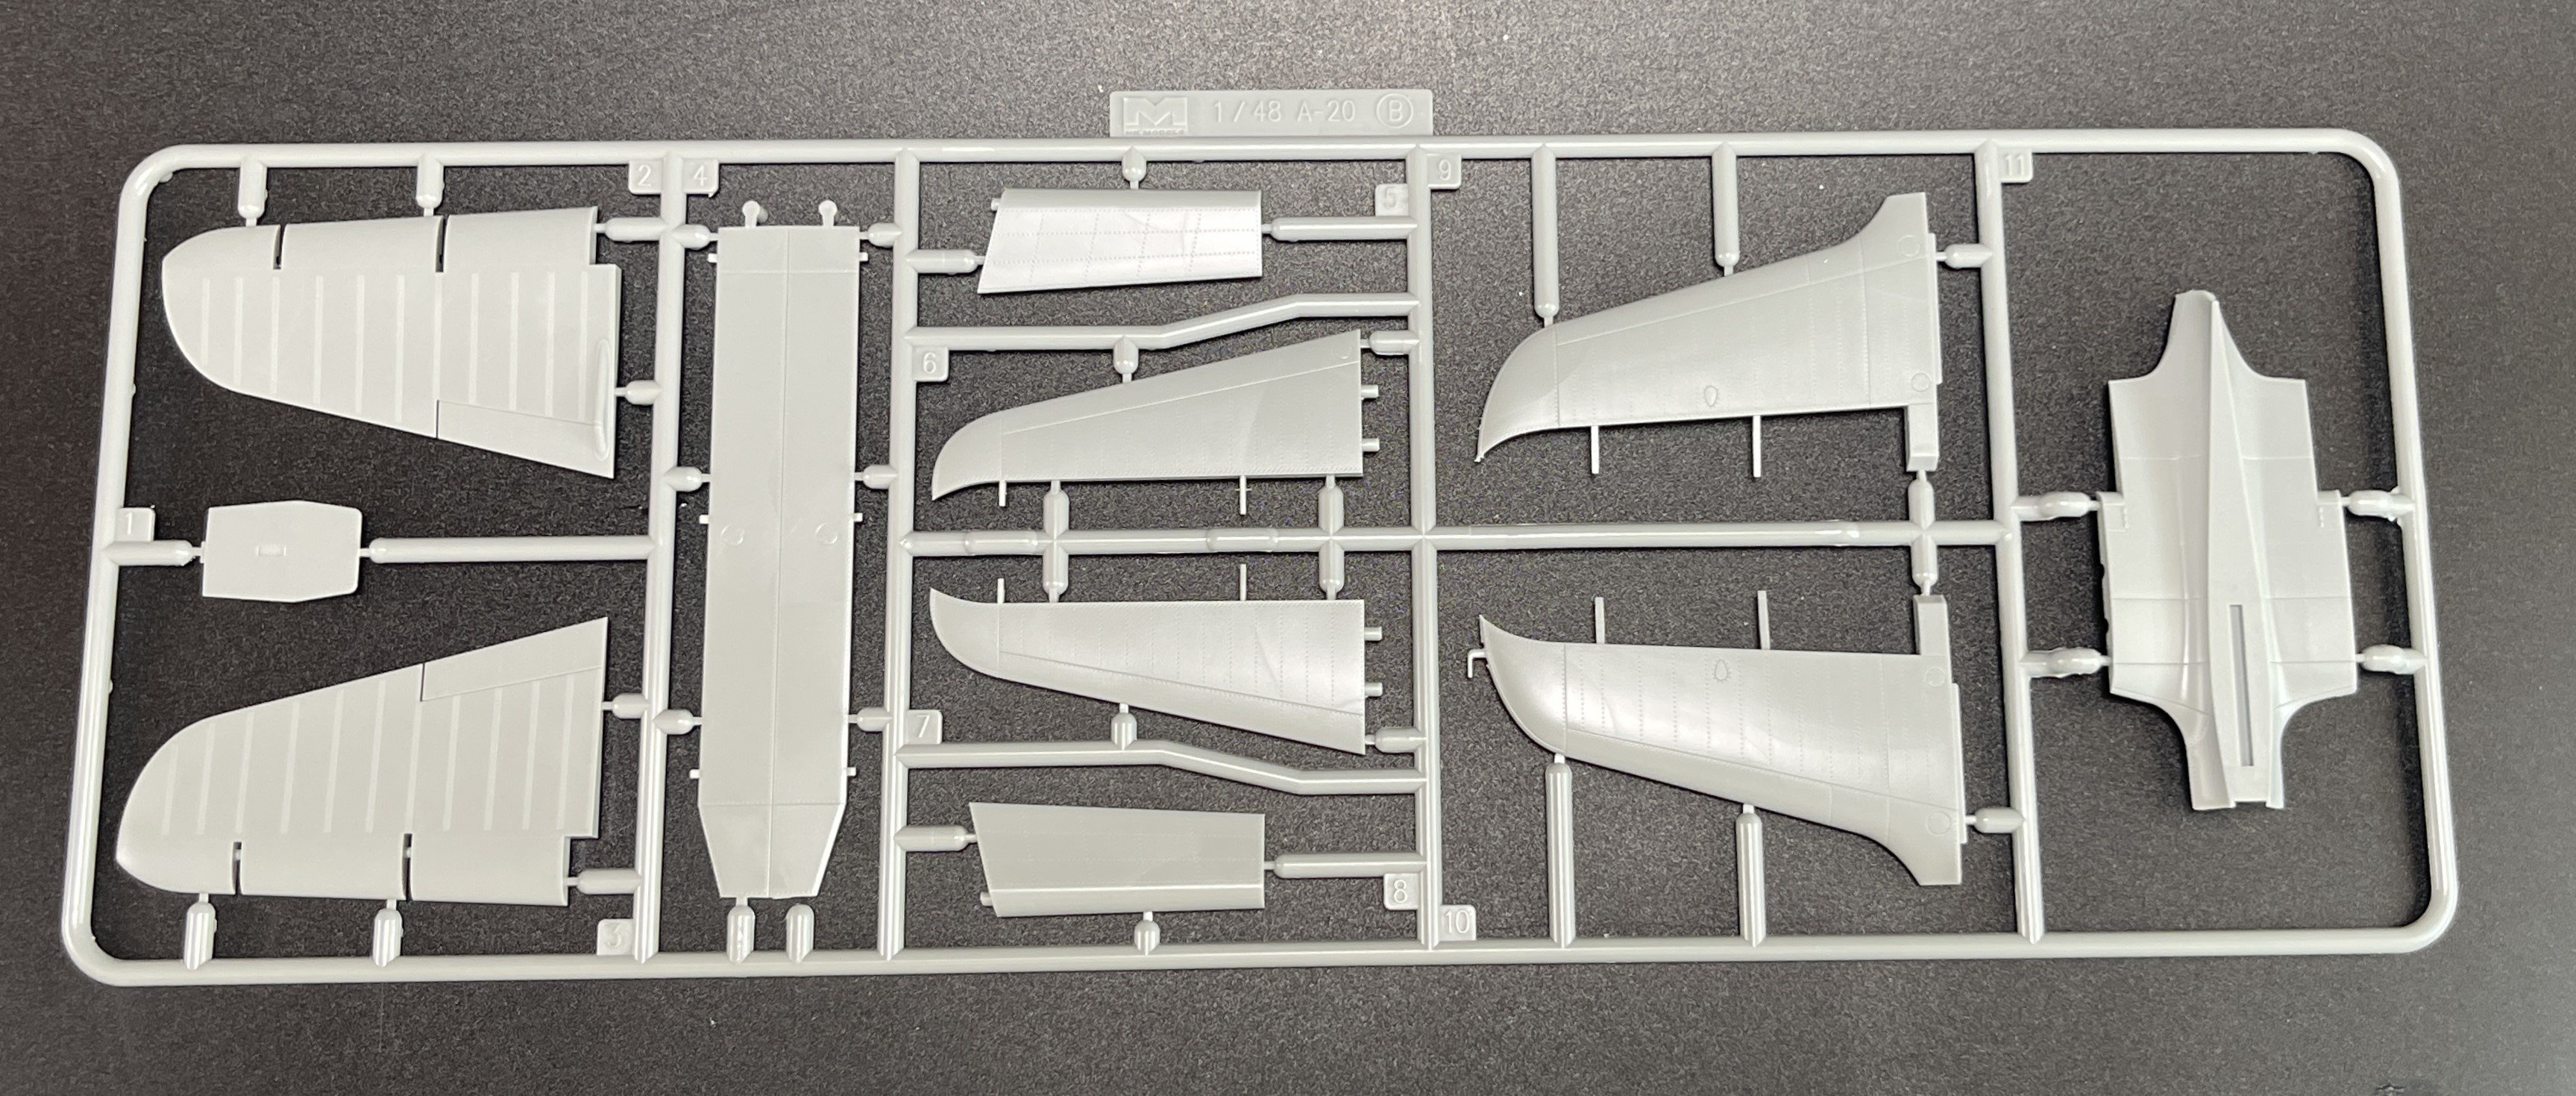
I was very curious about this release from Hong Kong Models as I had the chance to build one of the first test shot of the 1:32 A-20 solid nose
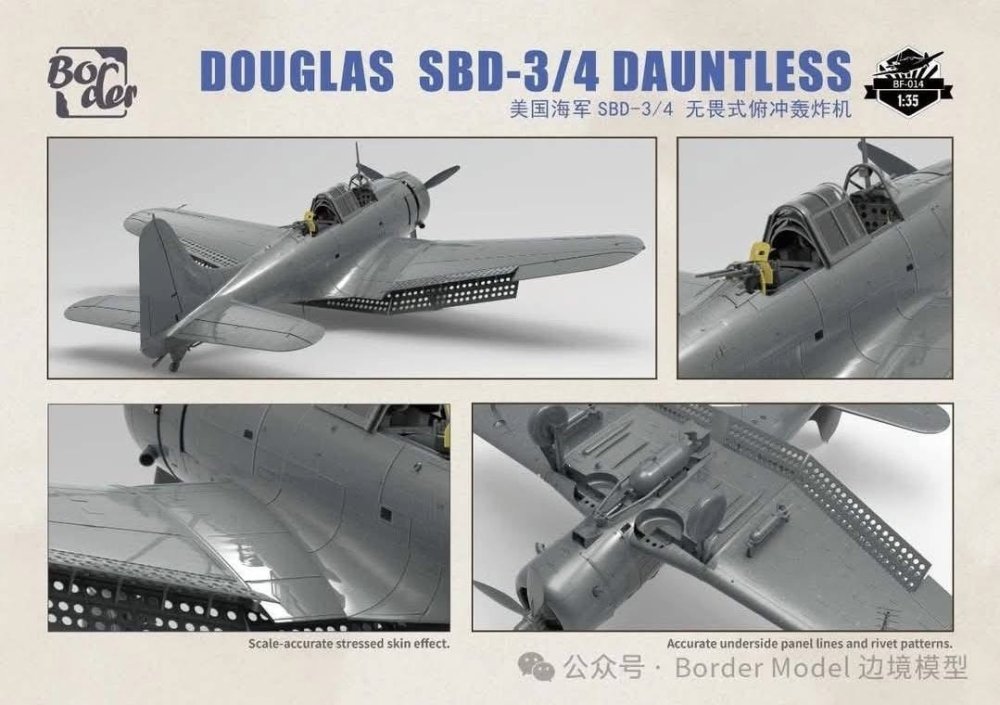
For me the A-20 is the best 1:32 model from Hong Kong with their surface detail and stressed fuselage so I was eager to see the little bother in 1:48.
I didn`t saw live the 1:#2 HK Models A-20J but for sure the all the surface detail and stressed fuselage effect are present.
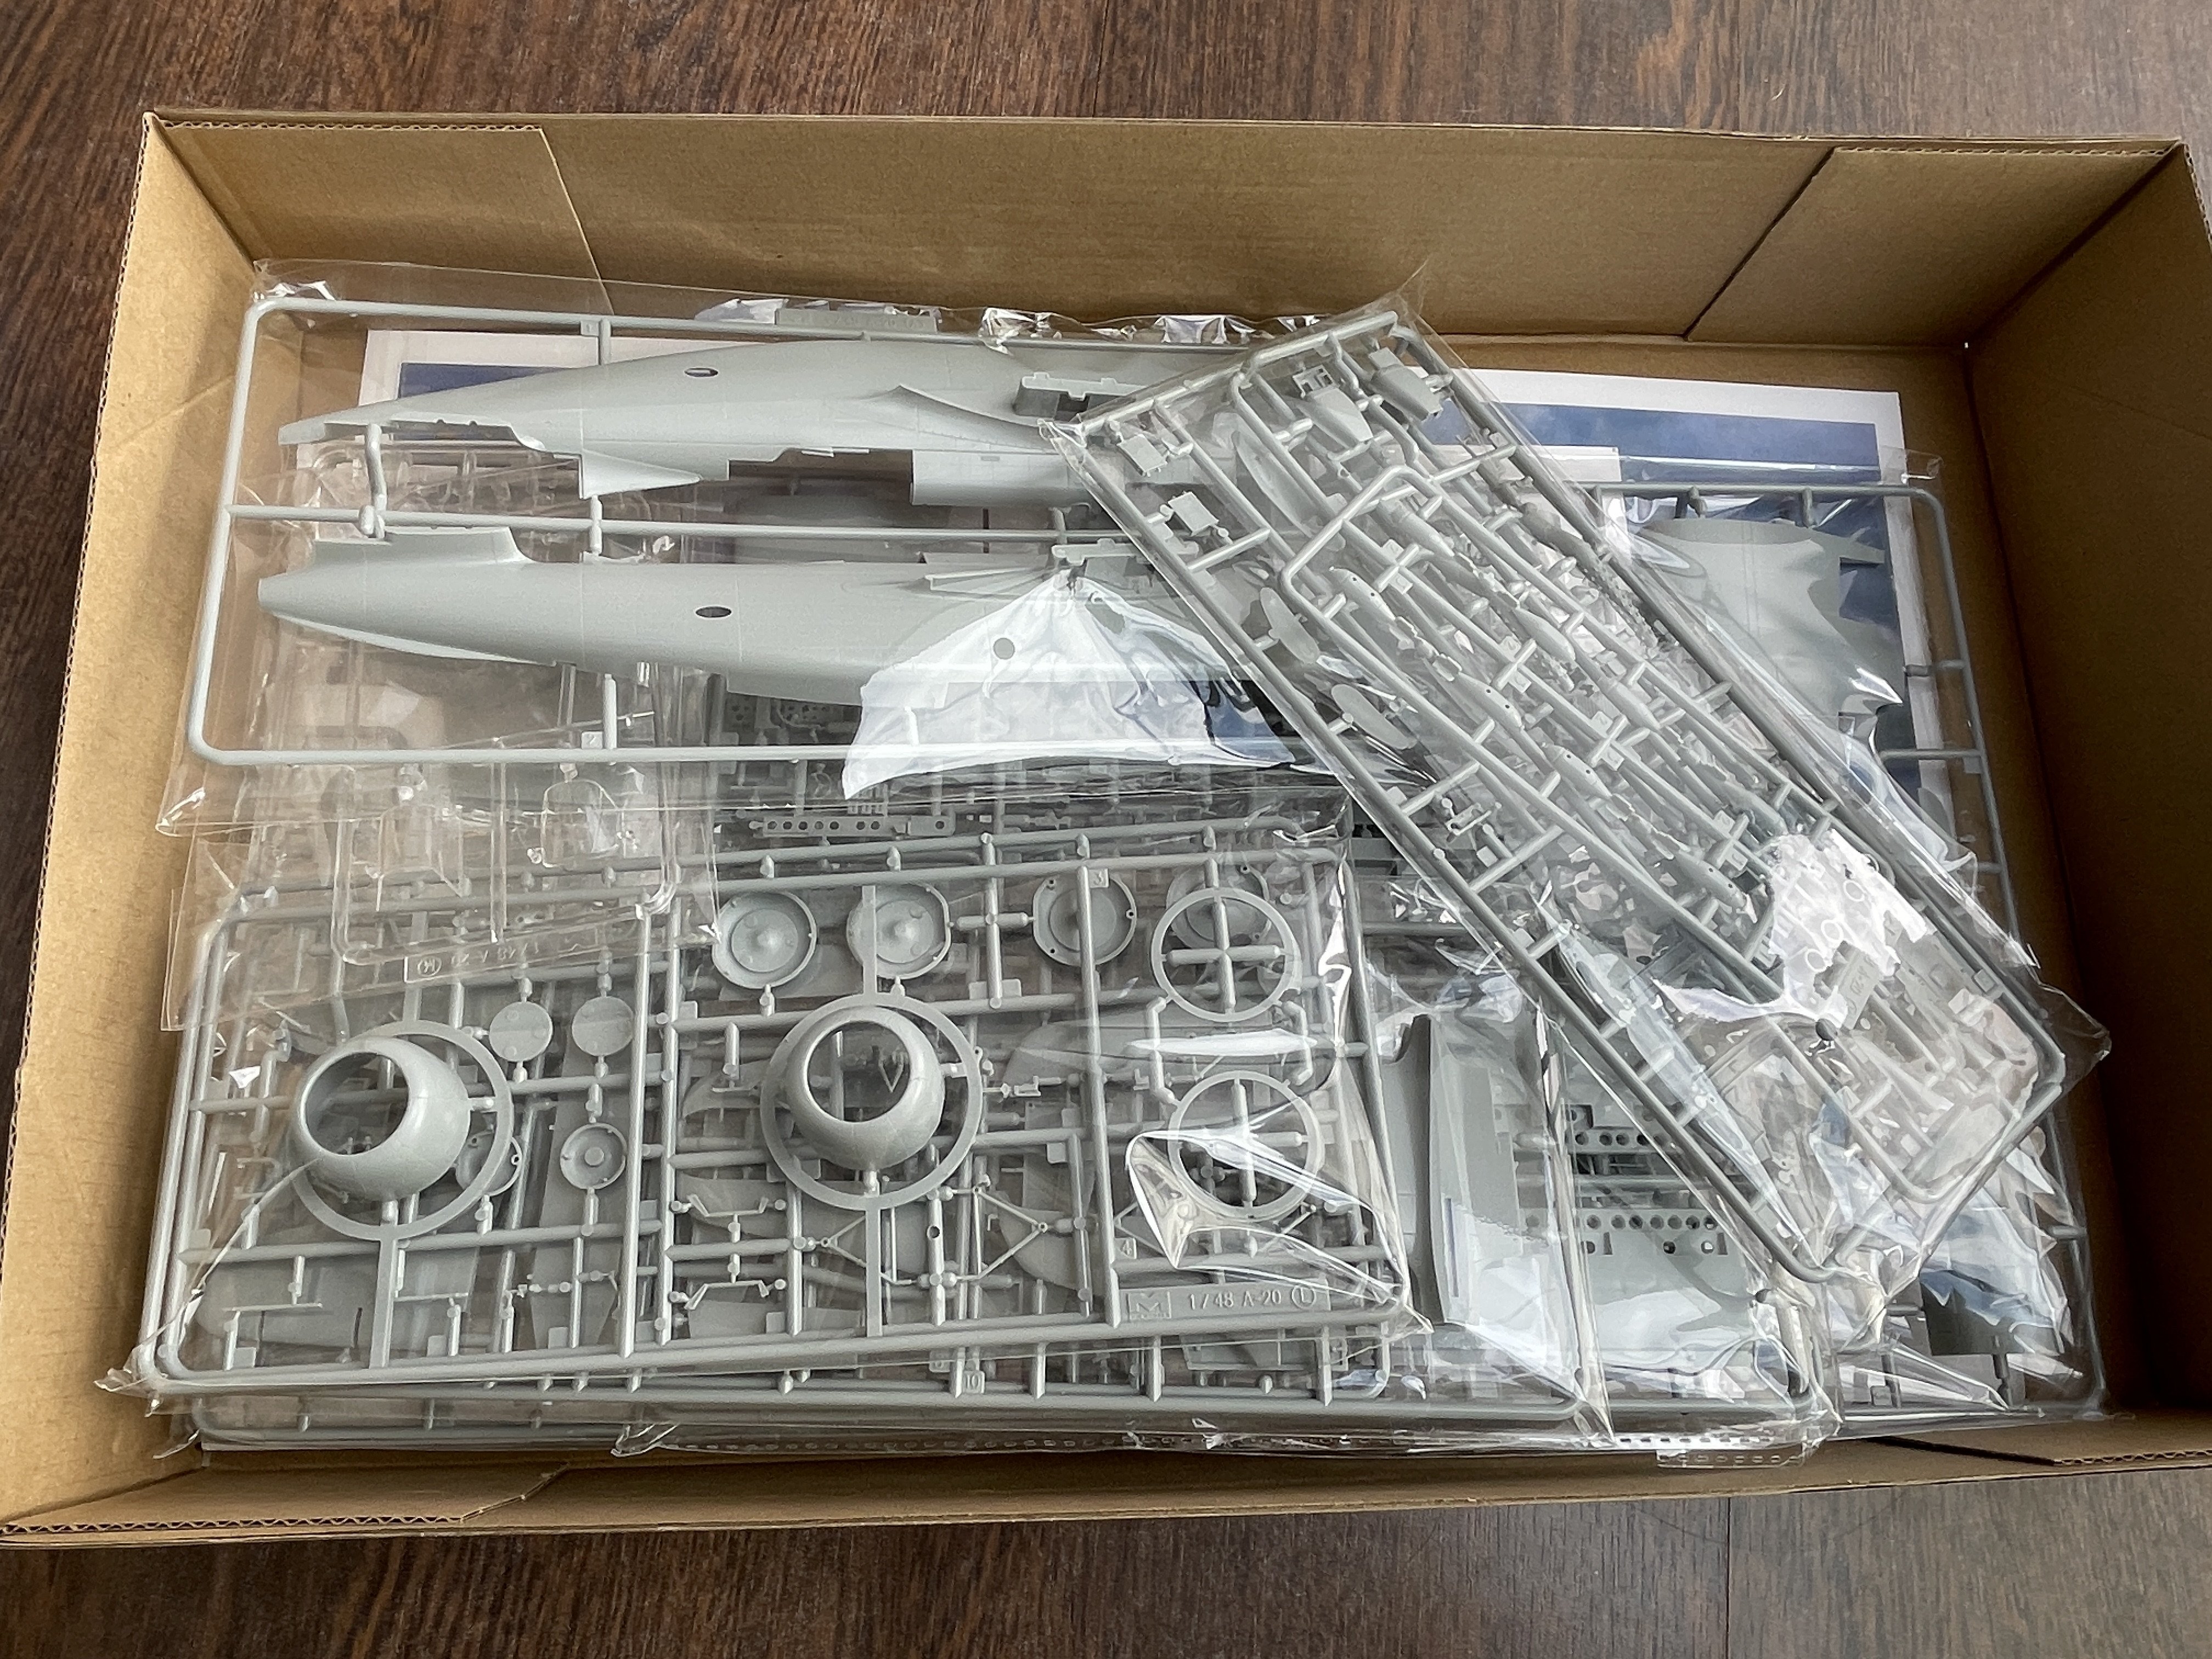
Lets check out the box.

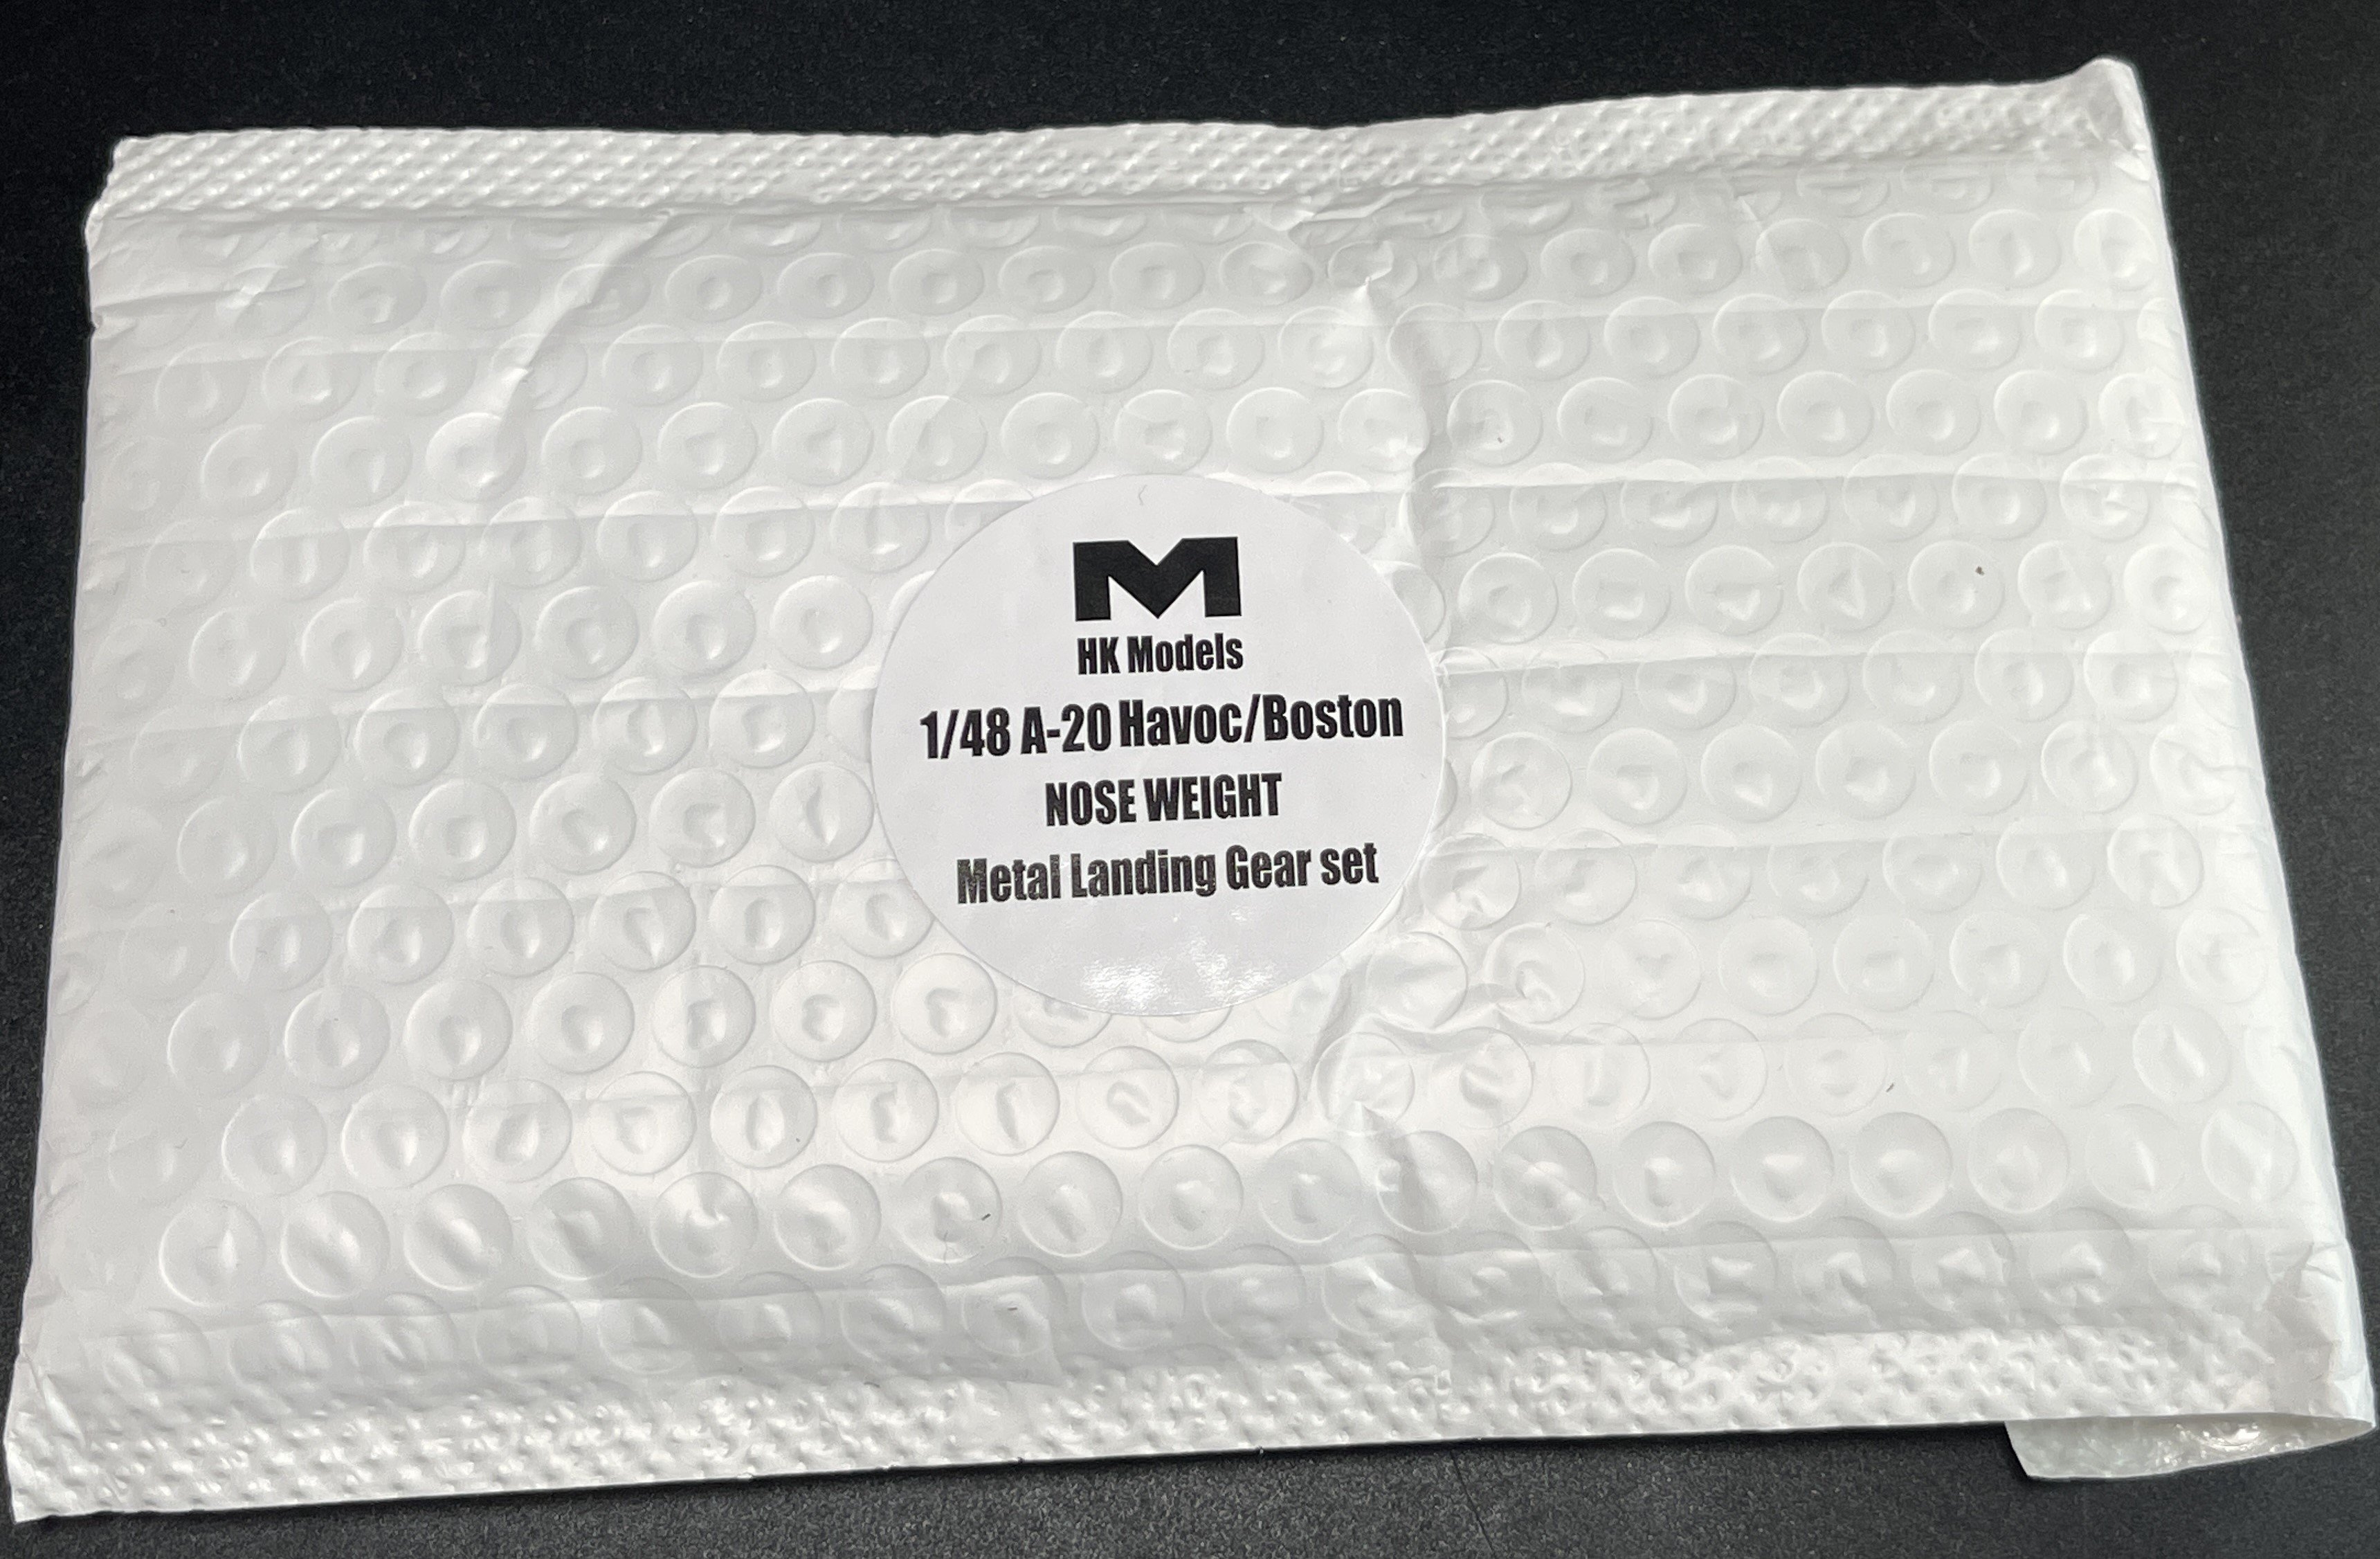
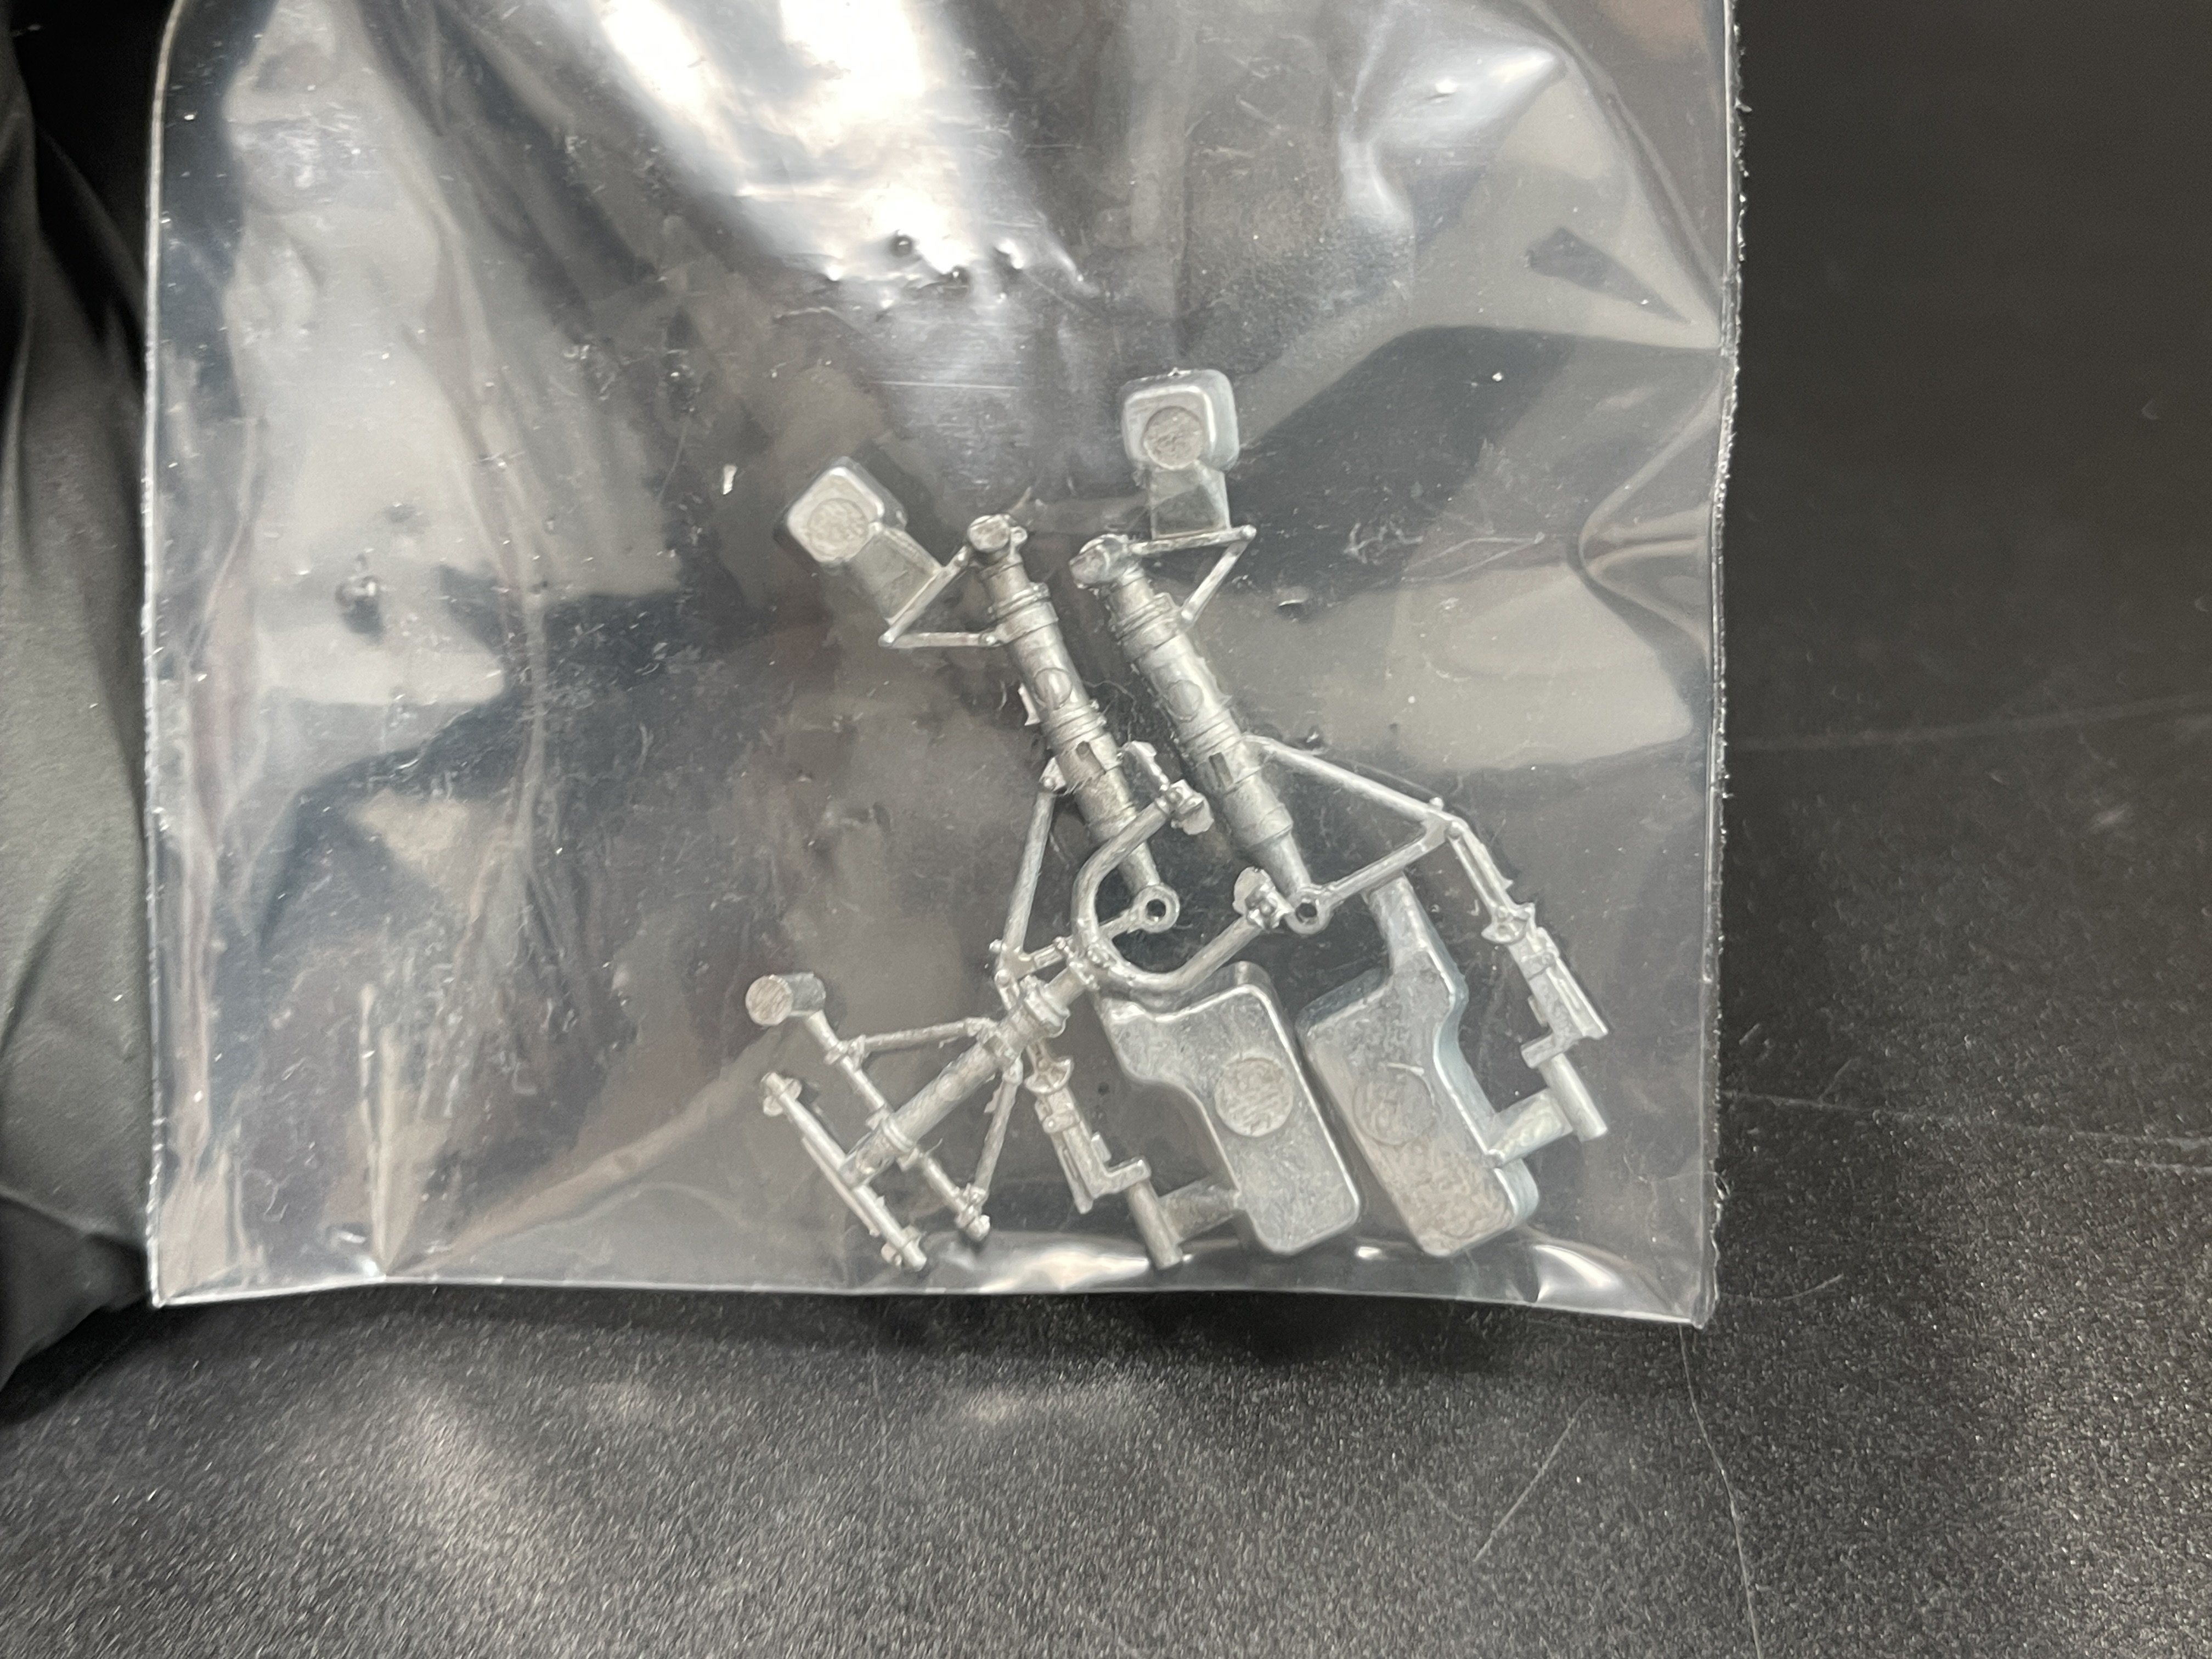
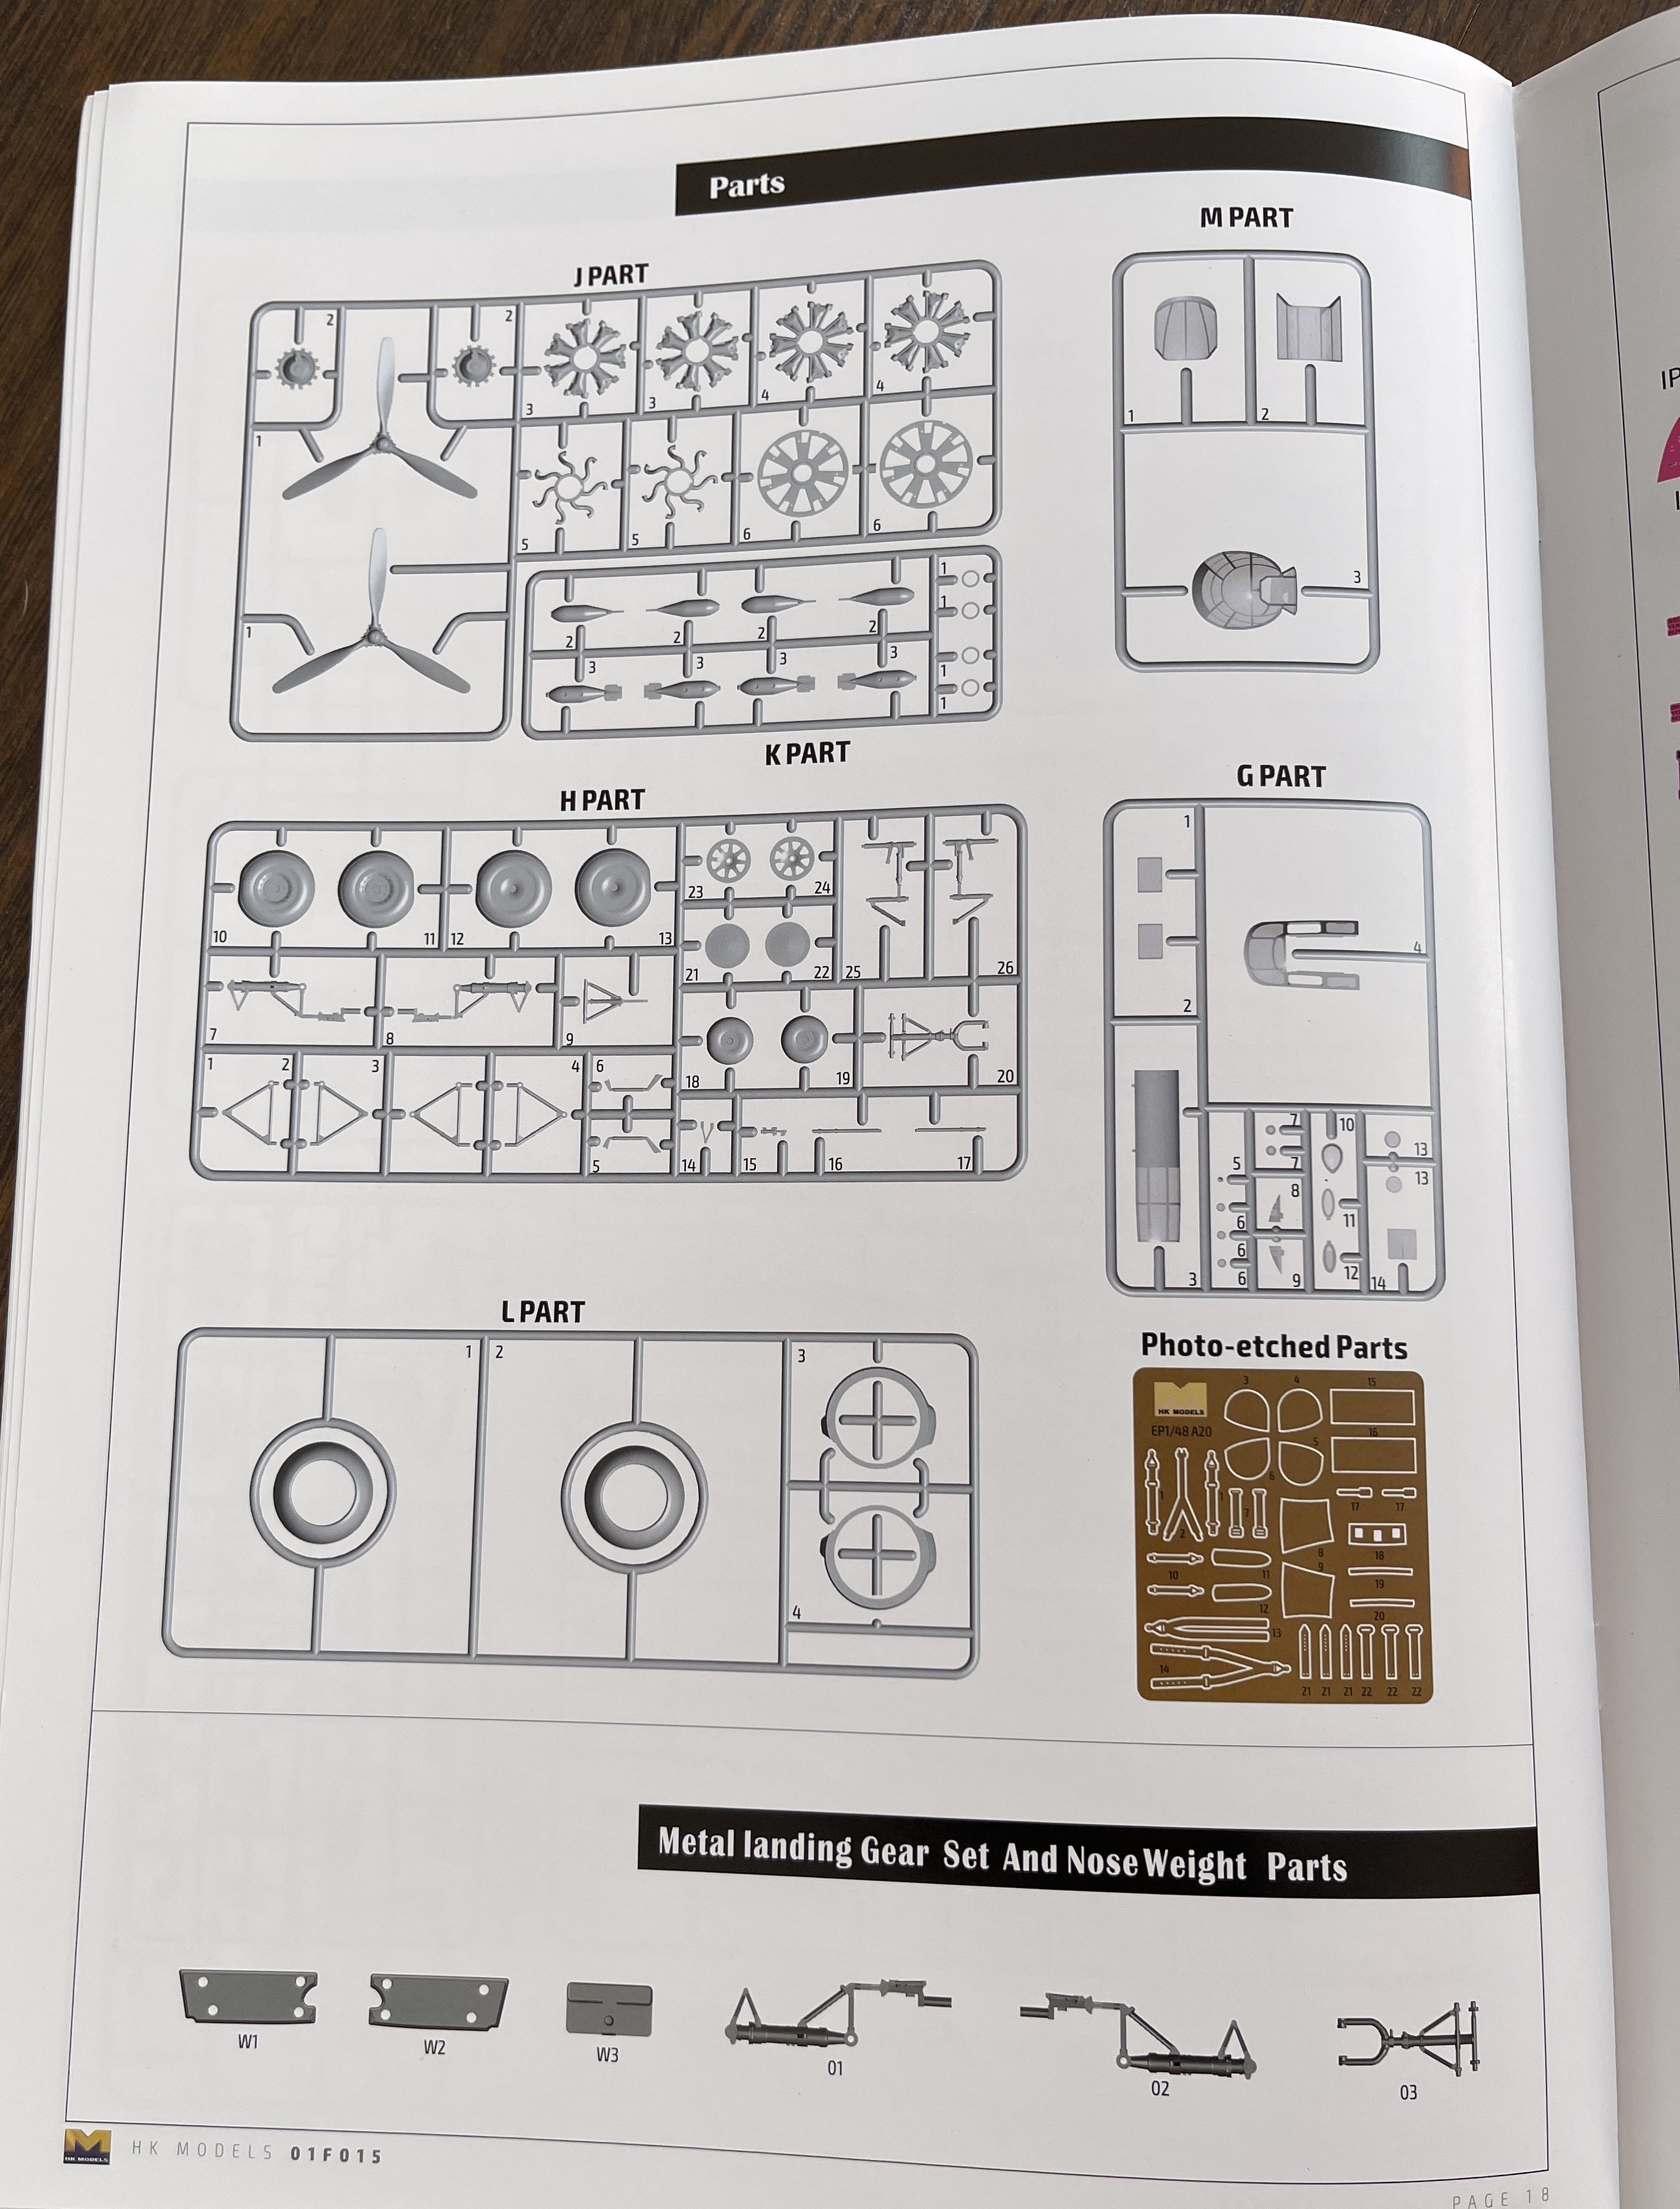
My review sample is the special edition with the weight nose and metal landing gear.
These two items are well worth it so you can have no problem with the tail sitter syndrome and also no problems in handling the plane with the landing gear on and be afraid in breaking it.
And a fantastic paintjob in a A4 sheets
This release is most welcome to all 1:48 modeller aircraft and to the modelling aircraft world in general because finally we have a state of art and modern technologic A-20 Boston.
There`s a lot of sites with hundreds of histories of the A-20 Boston/Havoc so lets me skip that.
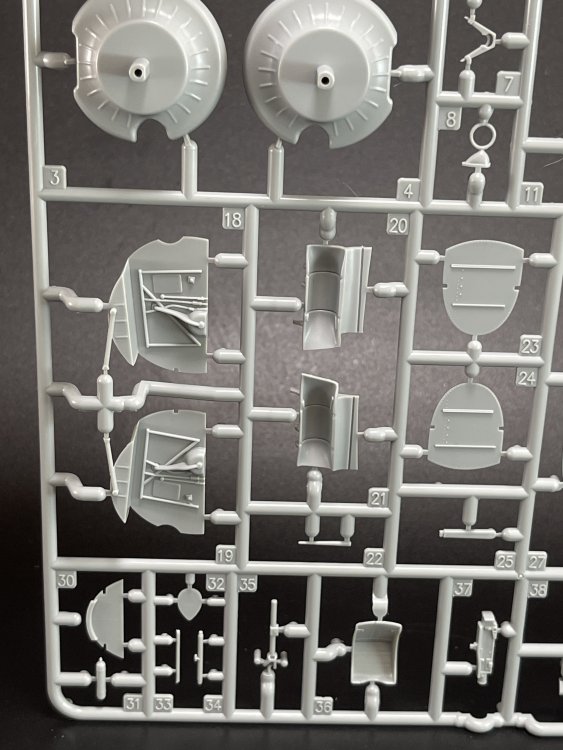
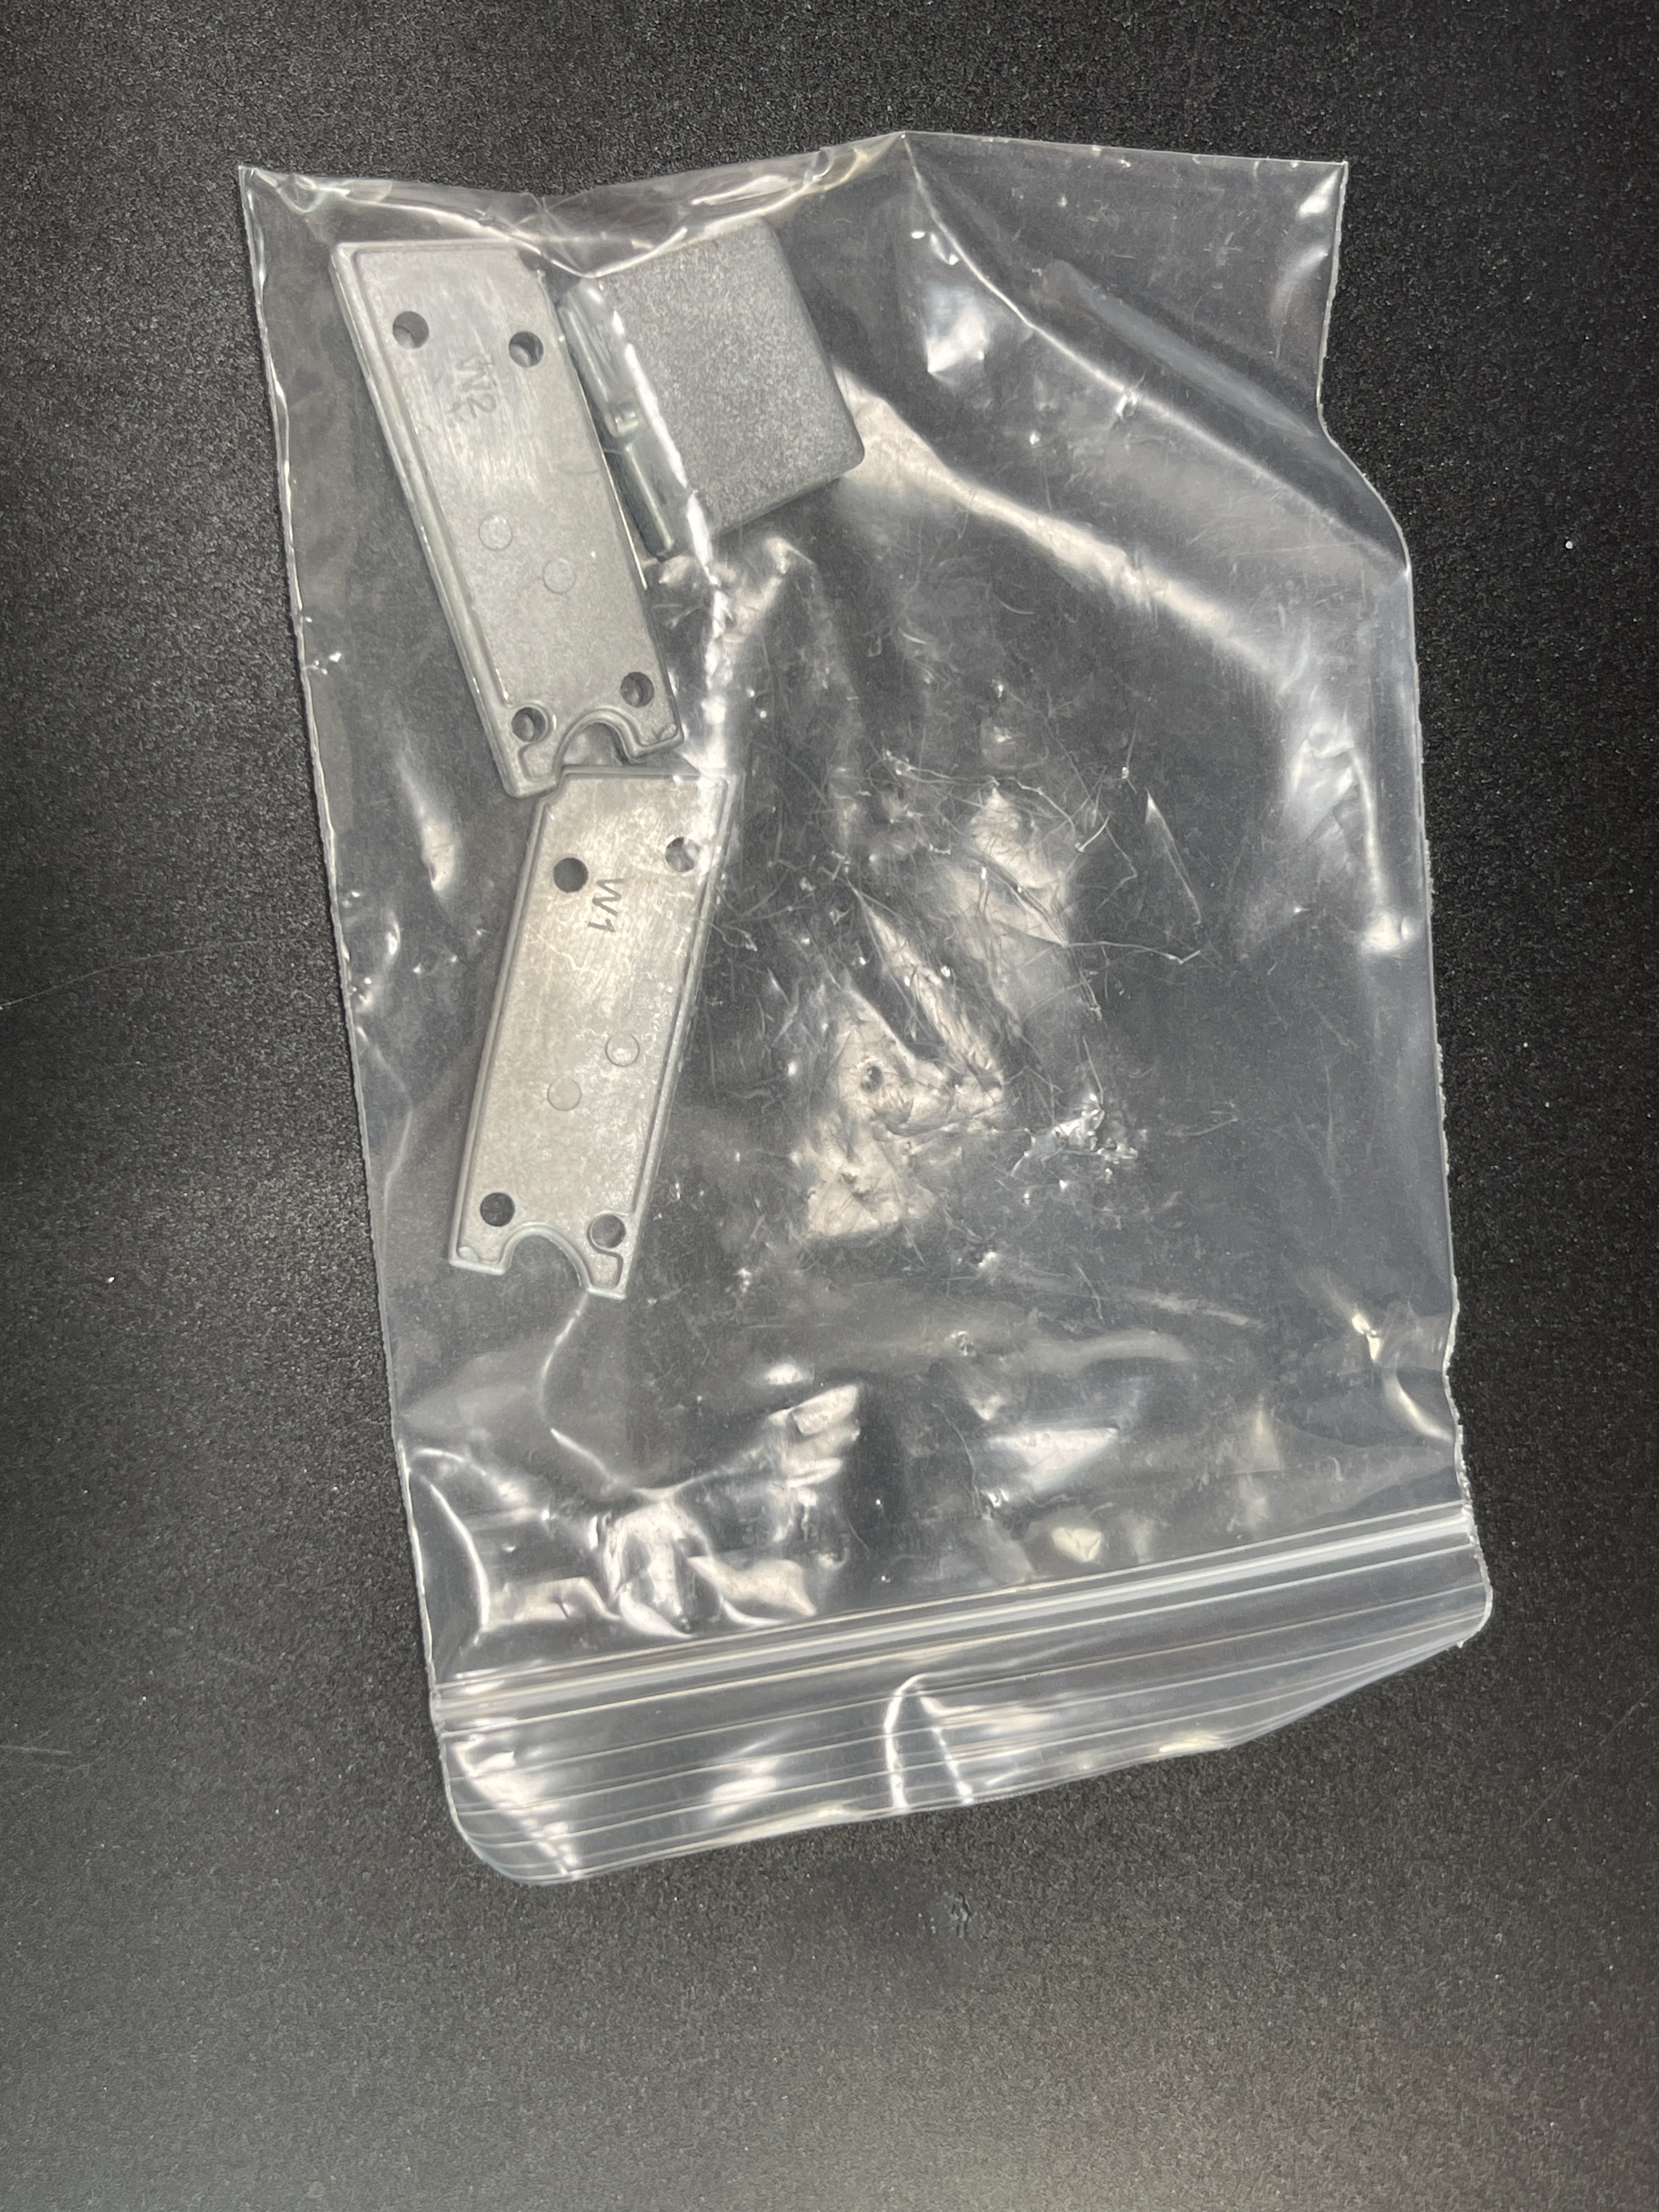
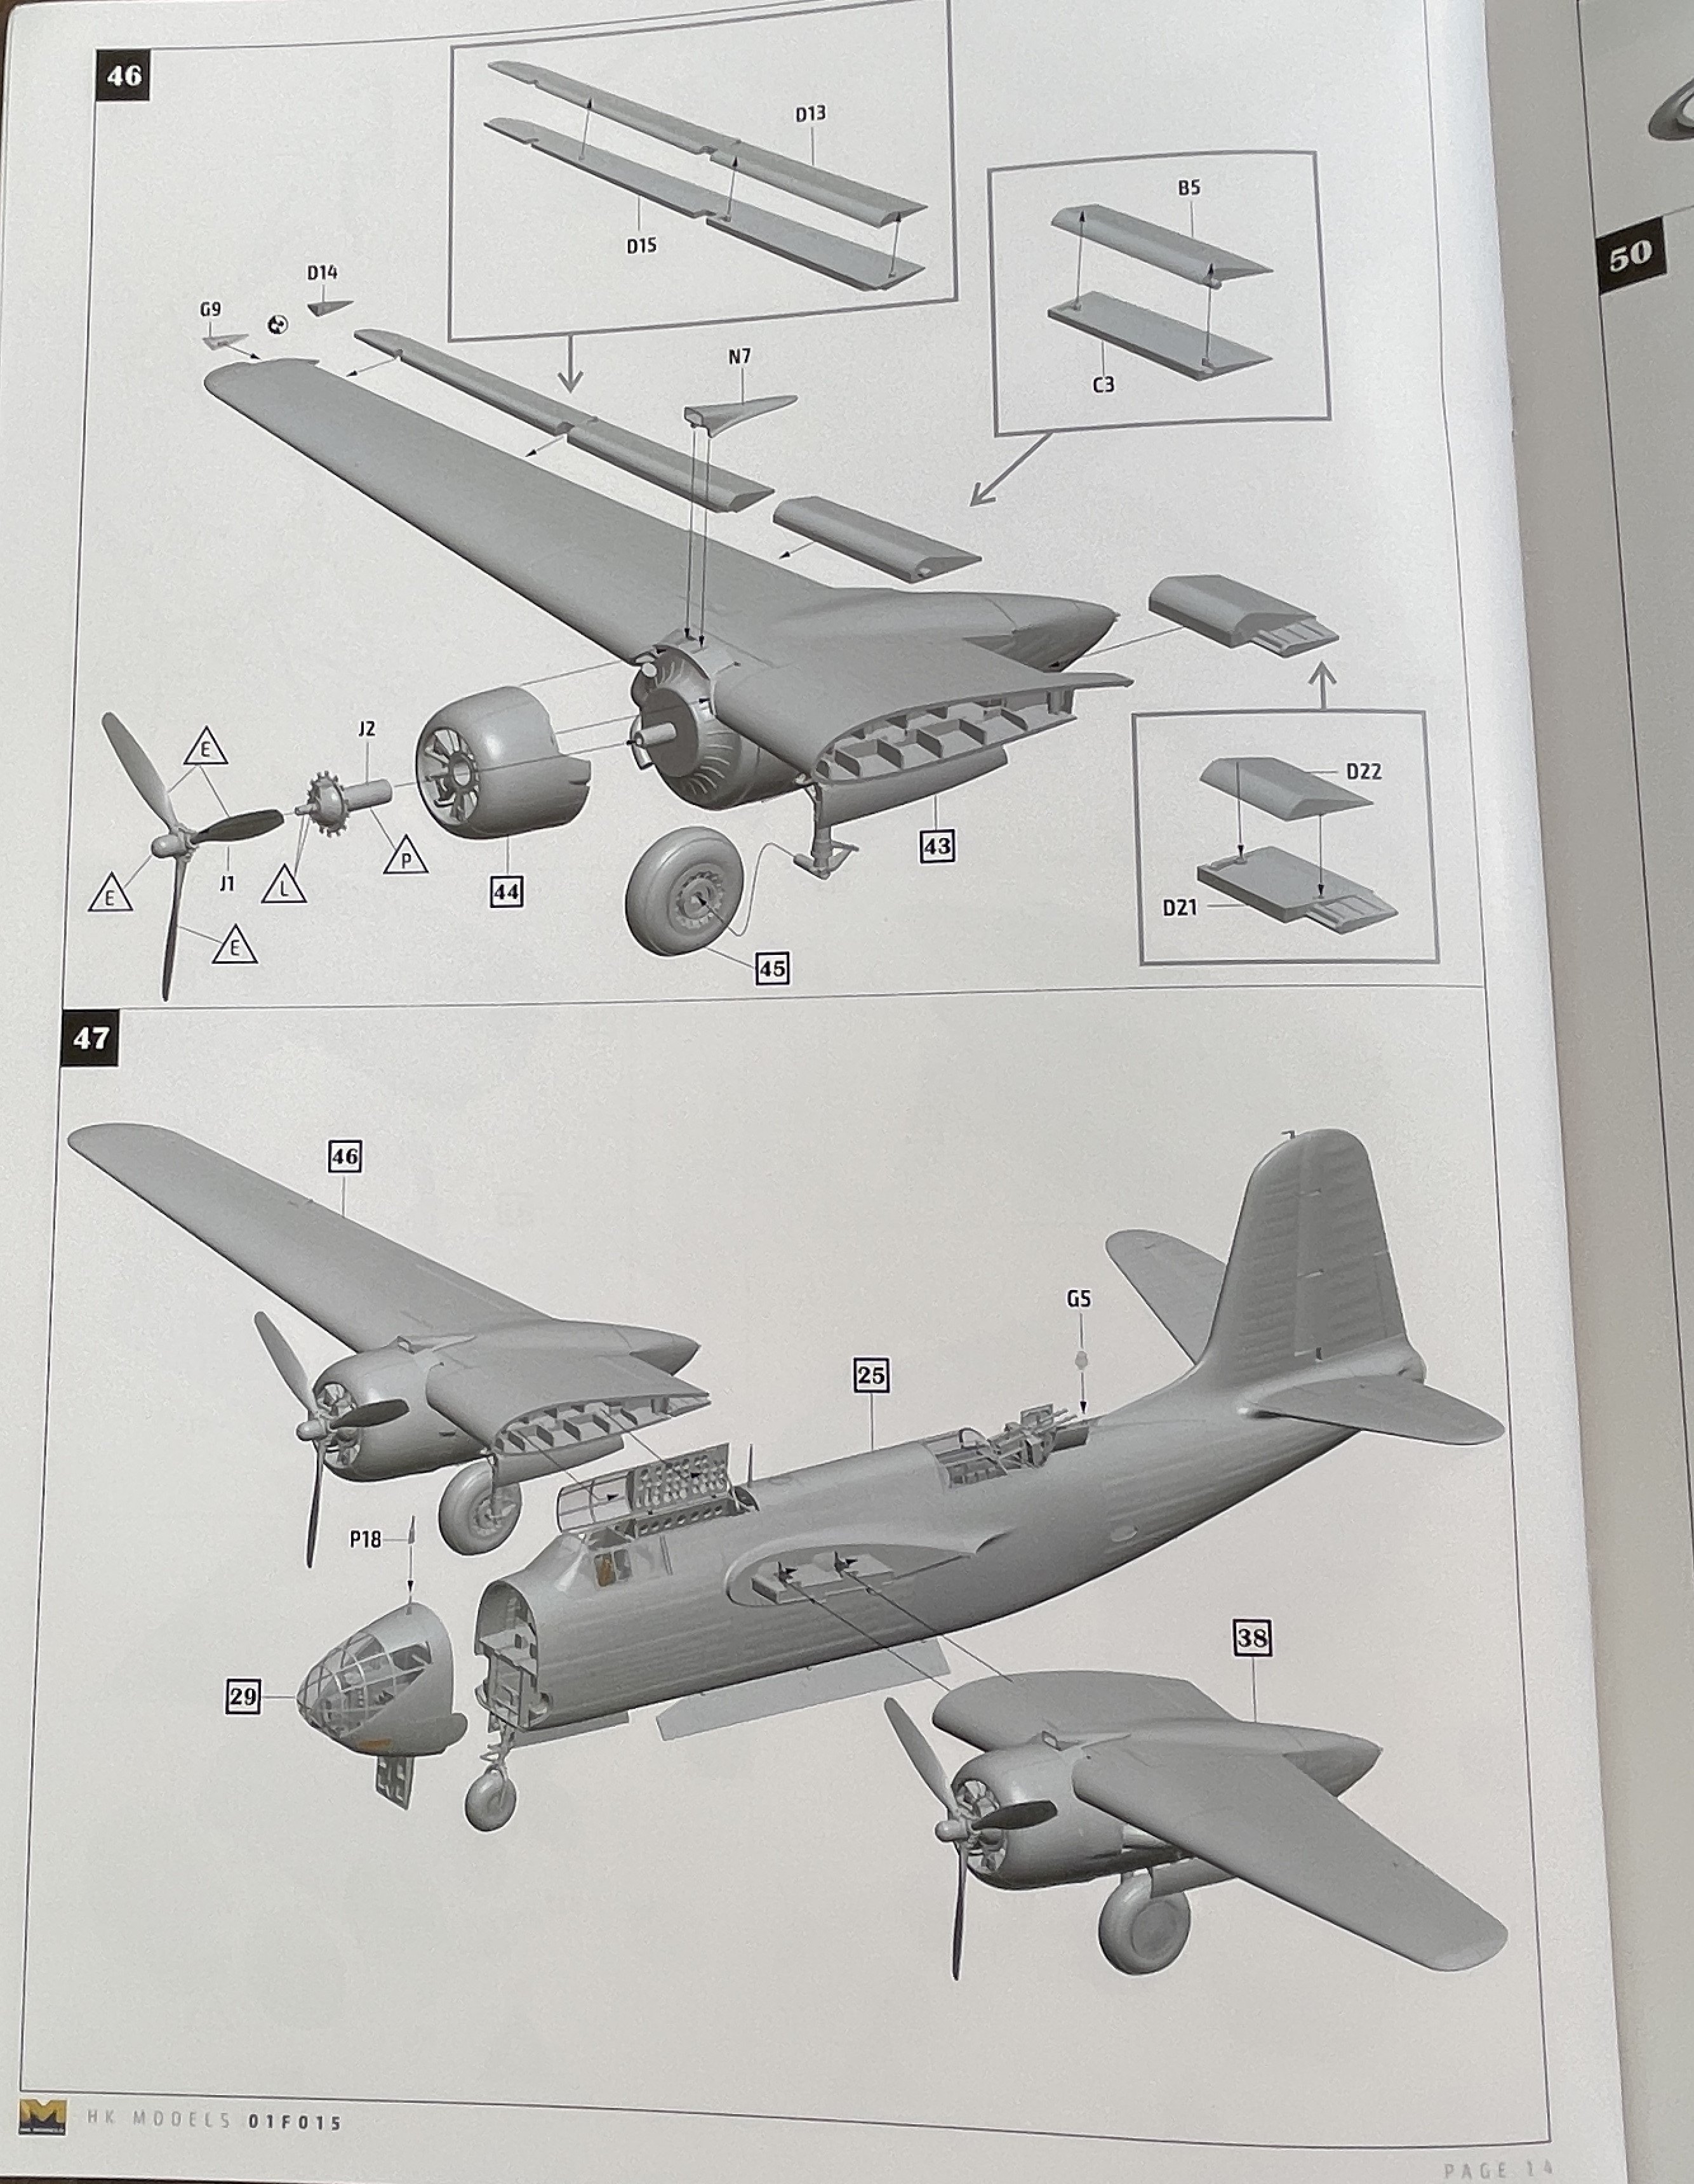
Starting for the extra metal parts.

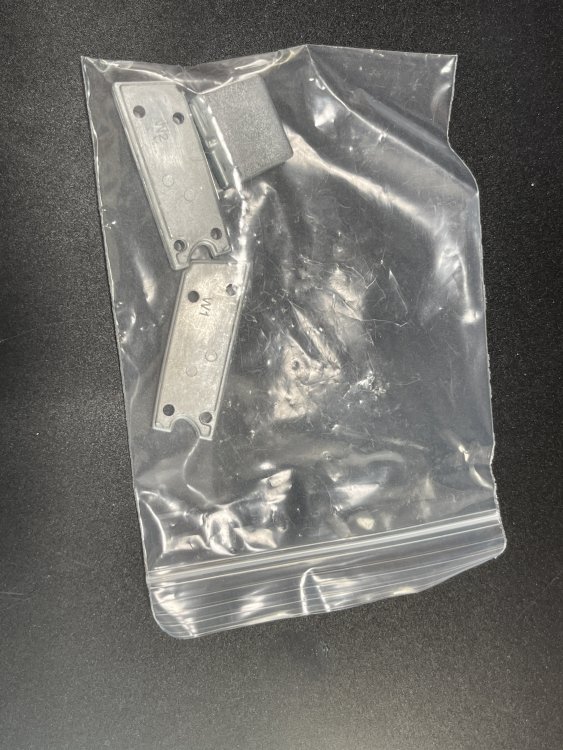

As I already said, get this version as the landing gear in metal is precious as the construction steps are quite dangerous to the integrity of the landing gear. As it made , the landing gear goes to his place before the painting so it’s quite hard no to break at some point (I know I did in 1:32).
The detail gear is quite complex in the construction and because of that it’s a bit fragile.
With this, you are safe.
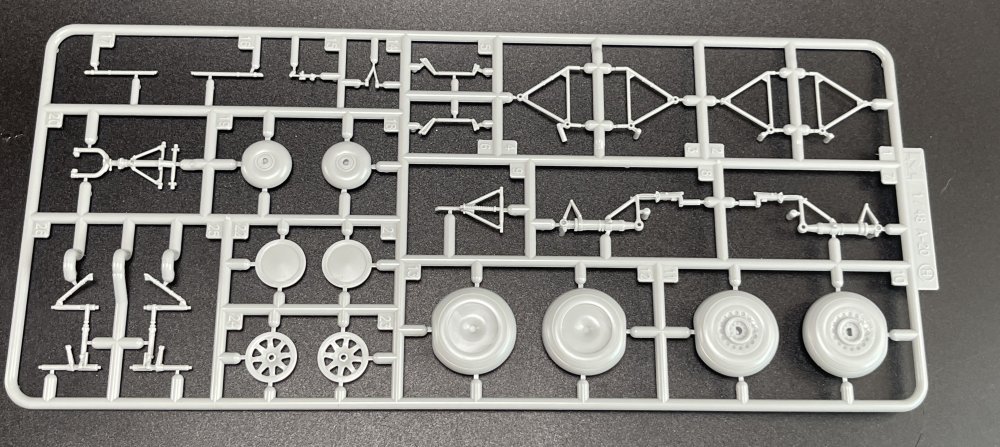
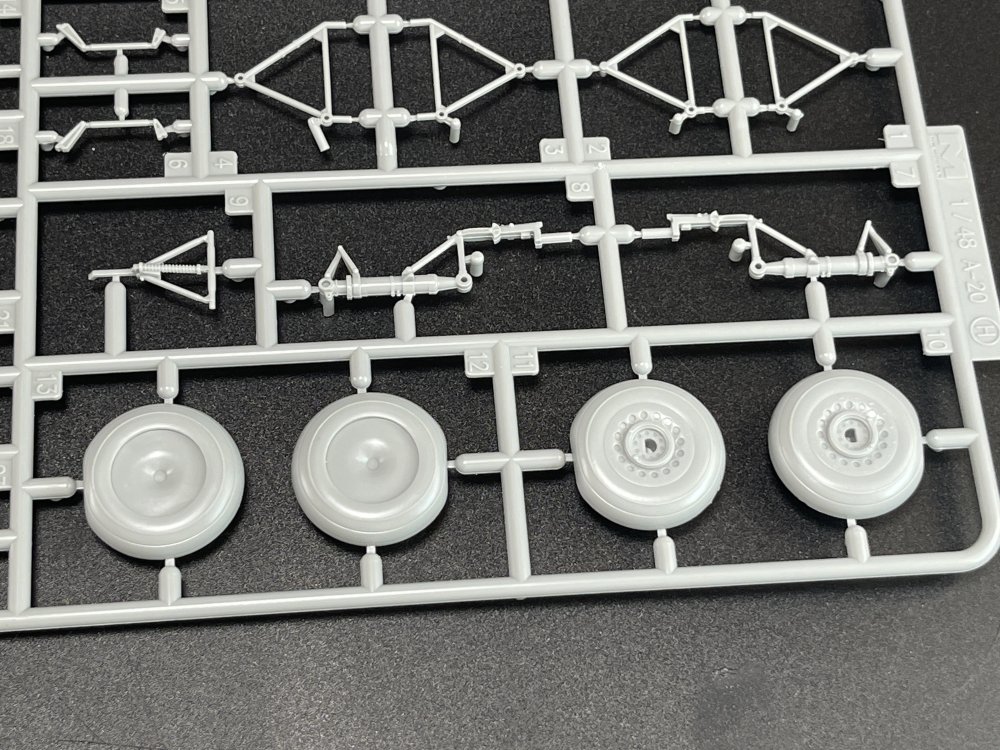


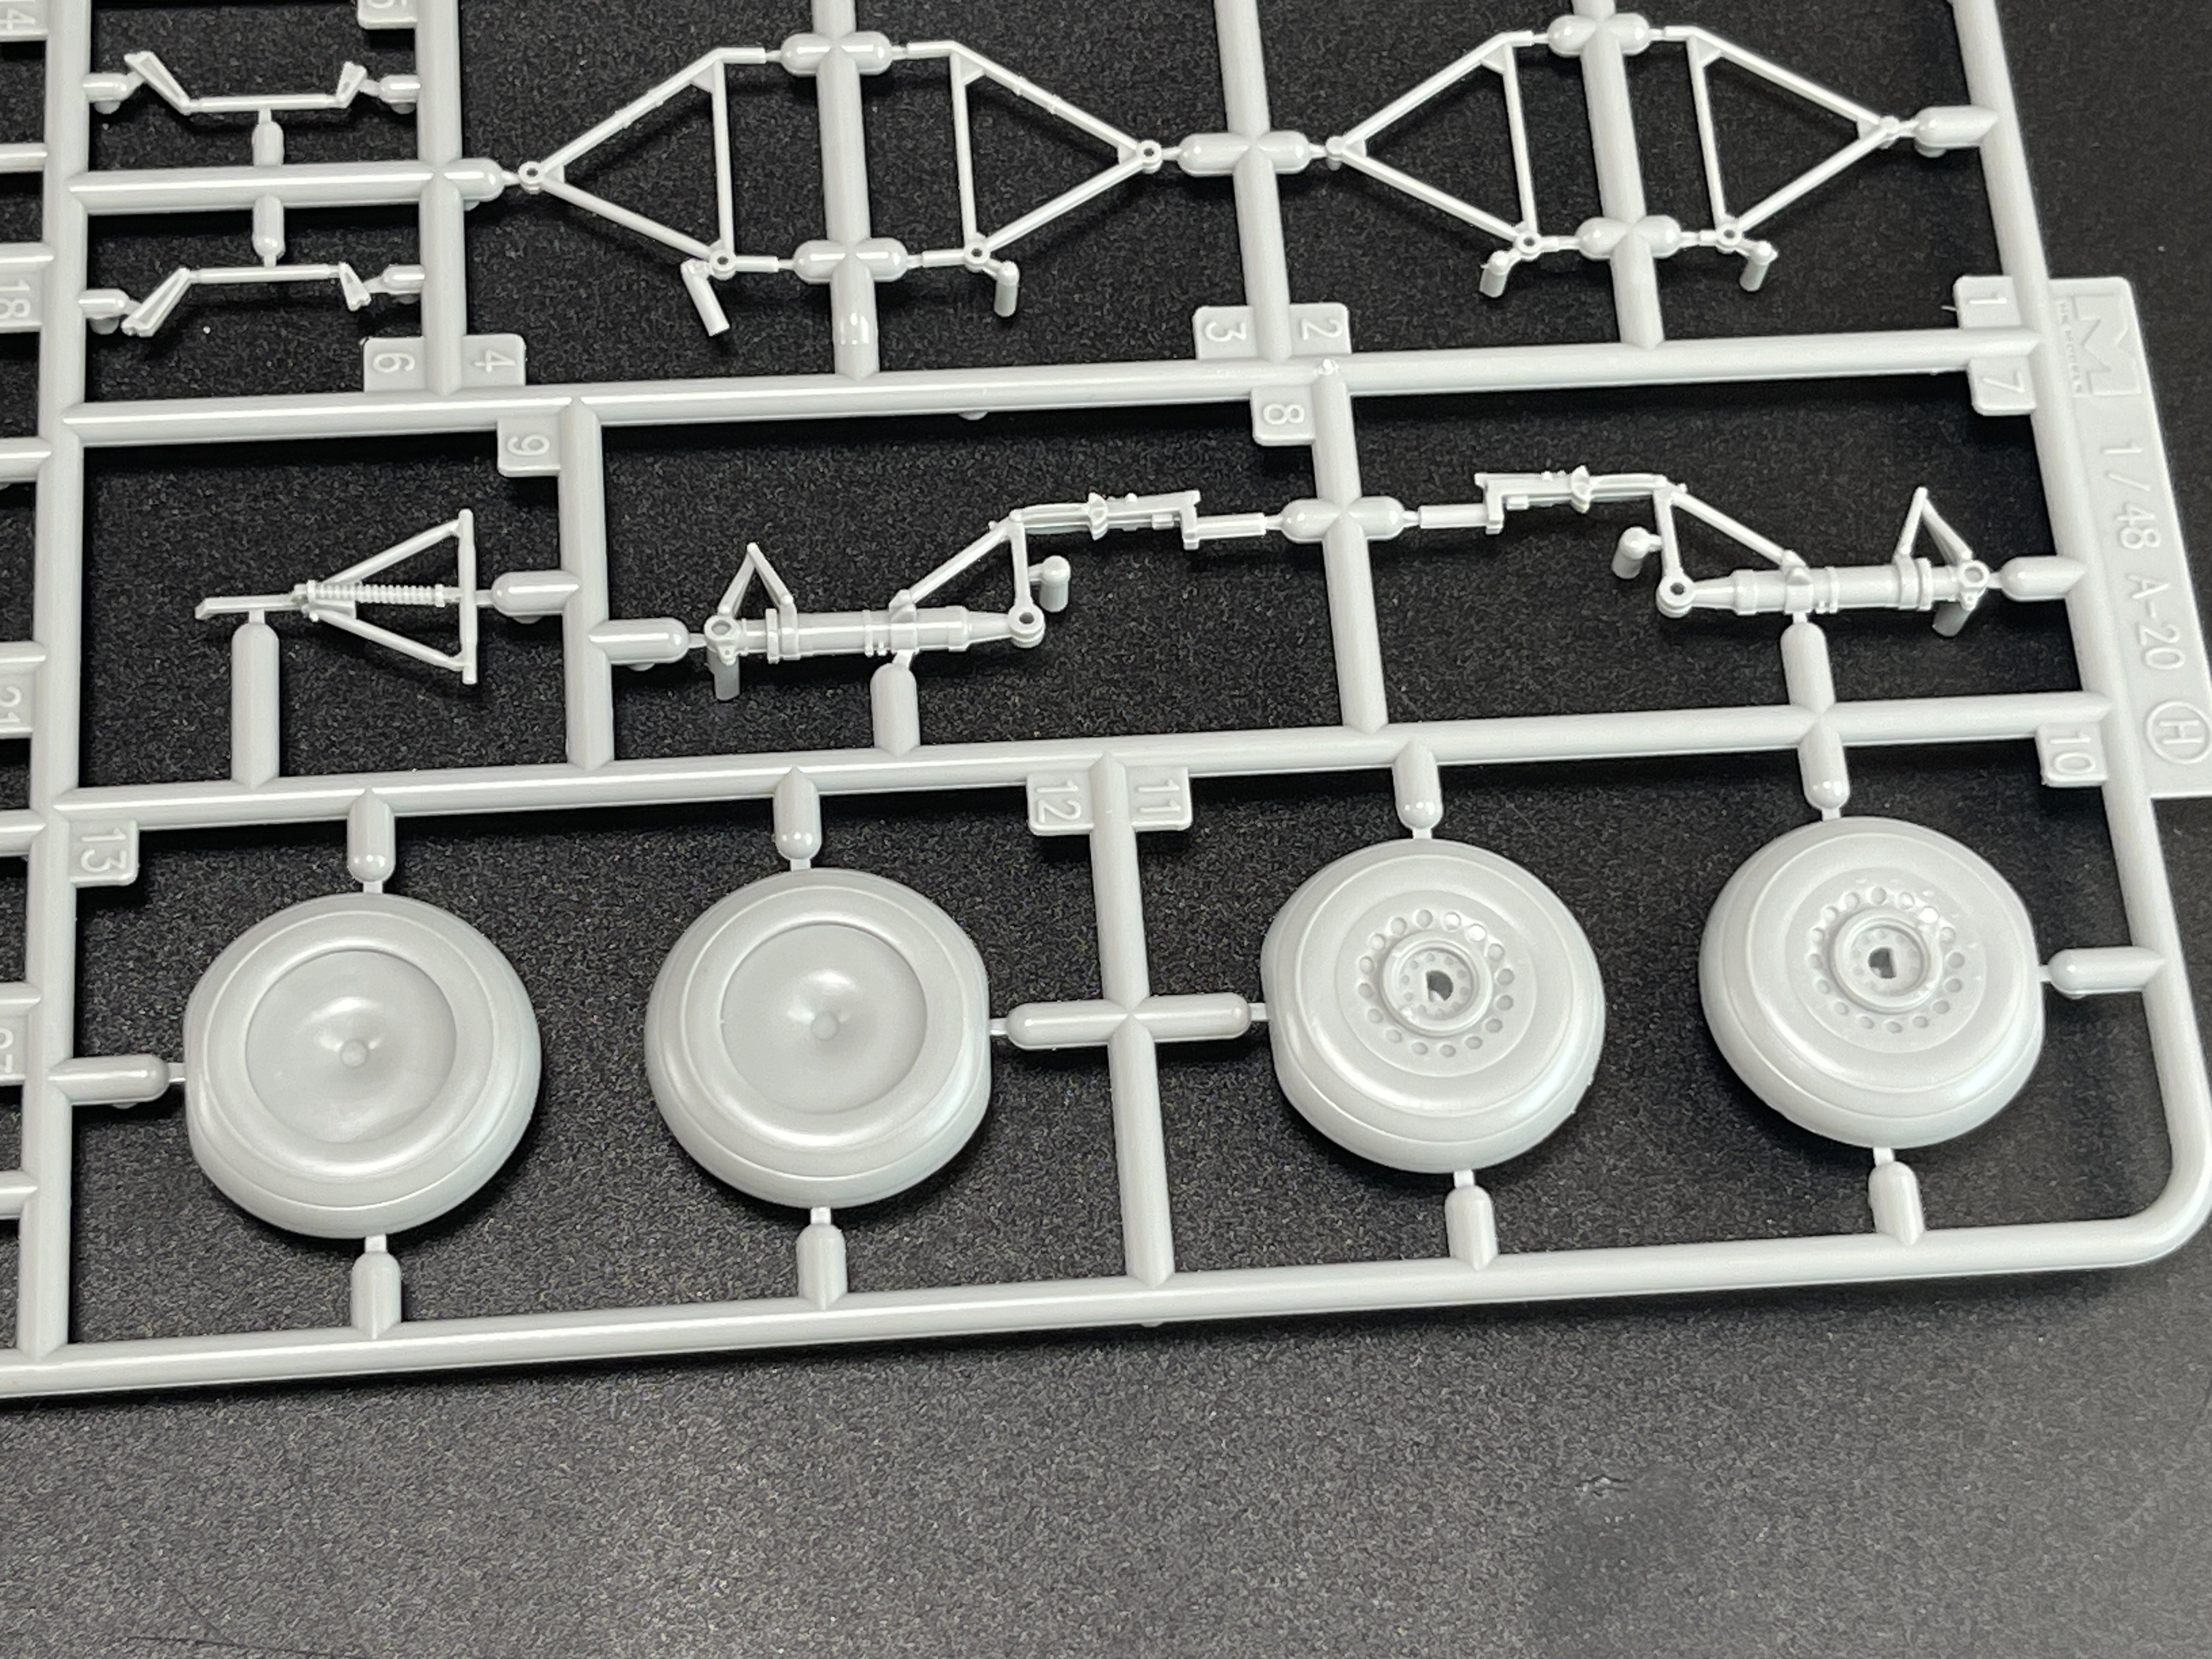
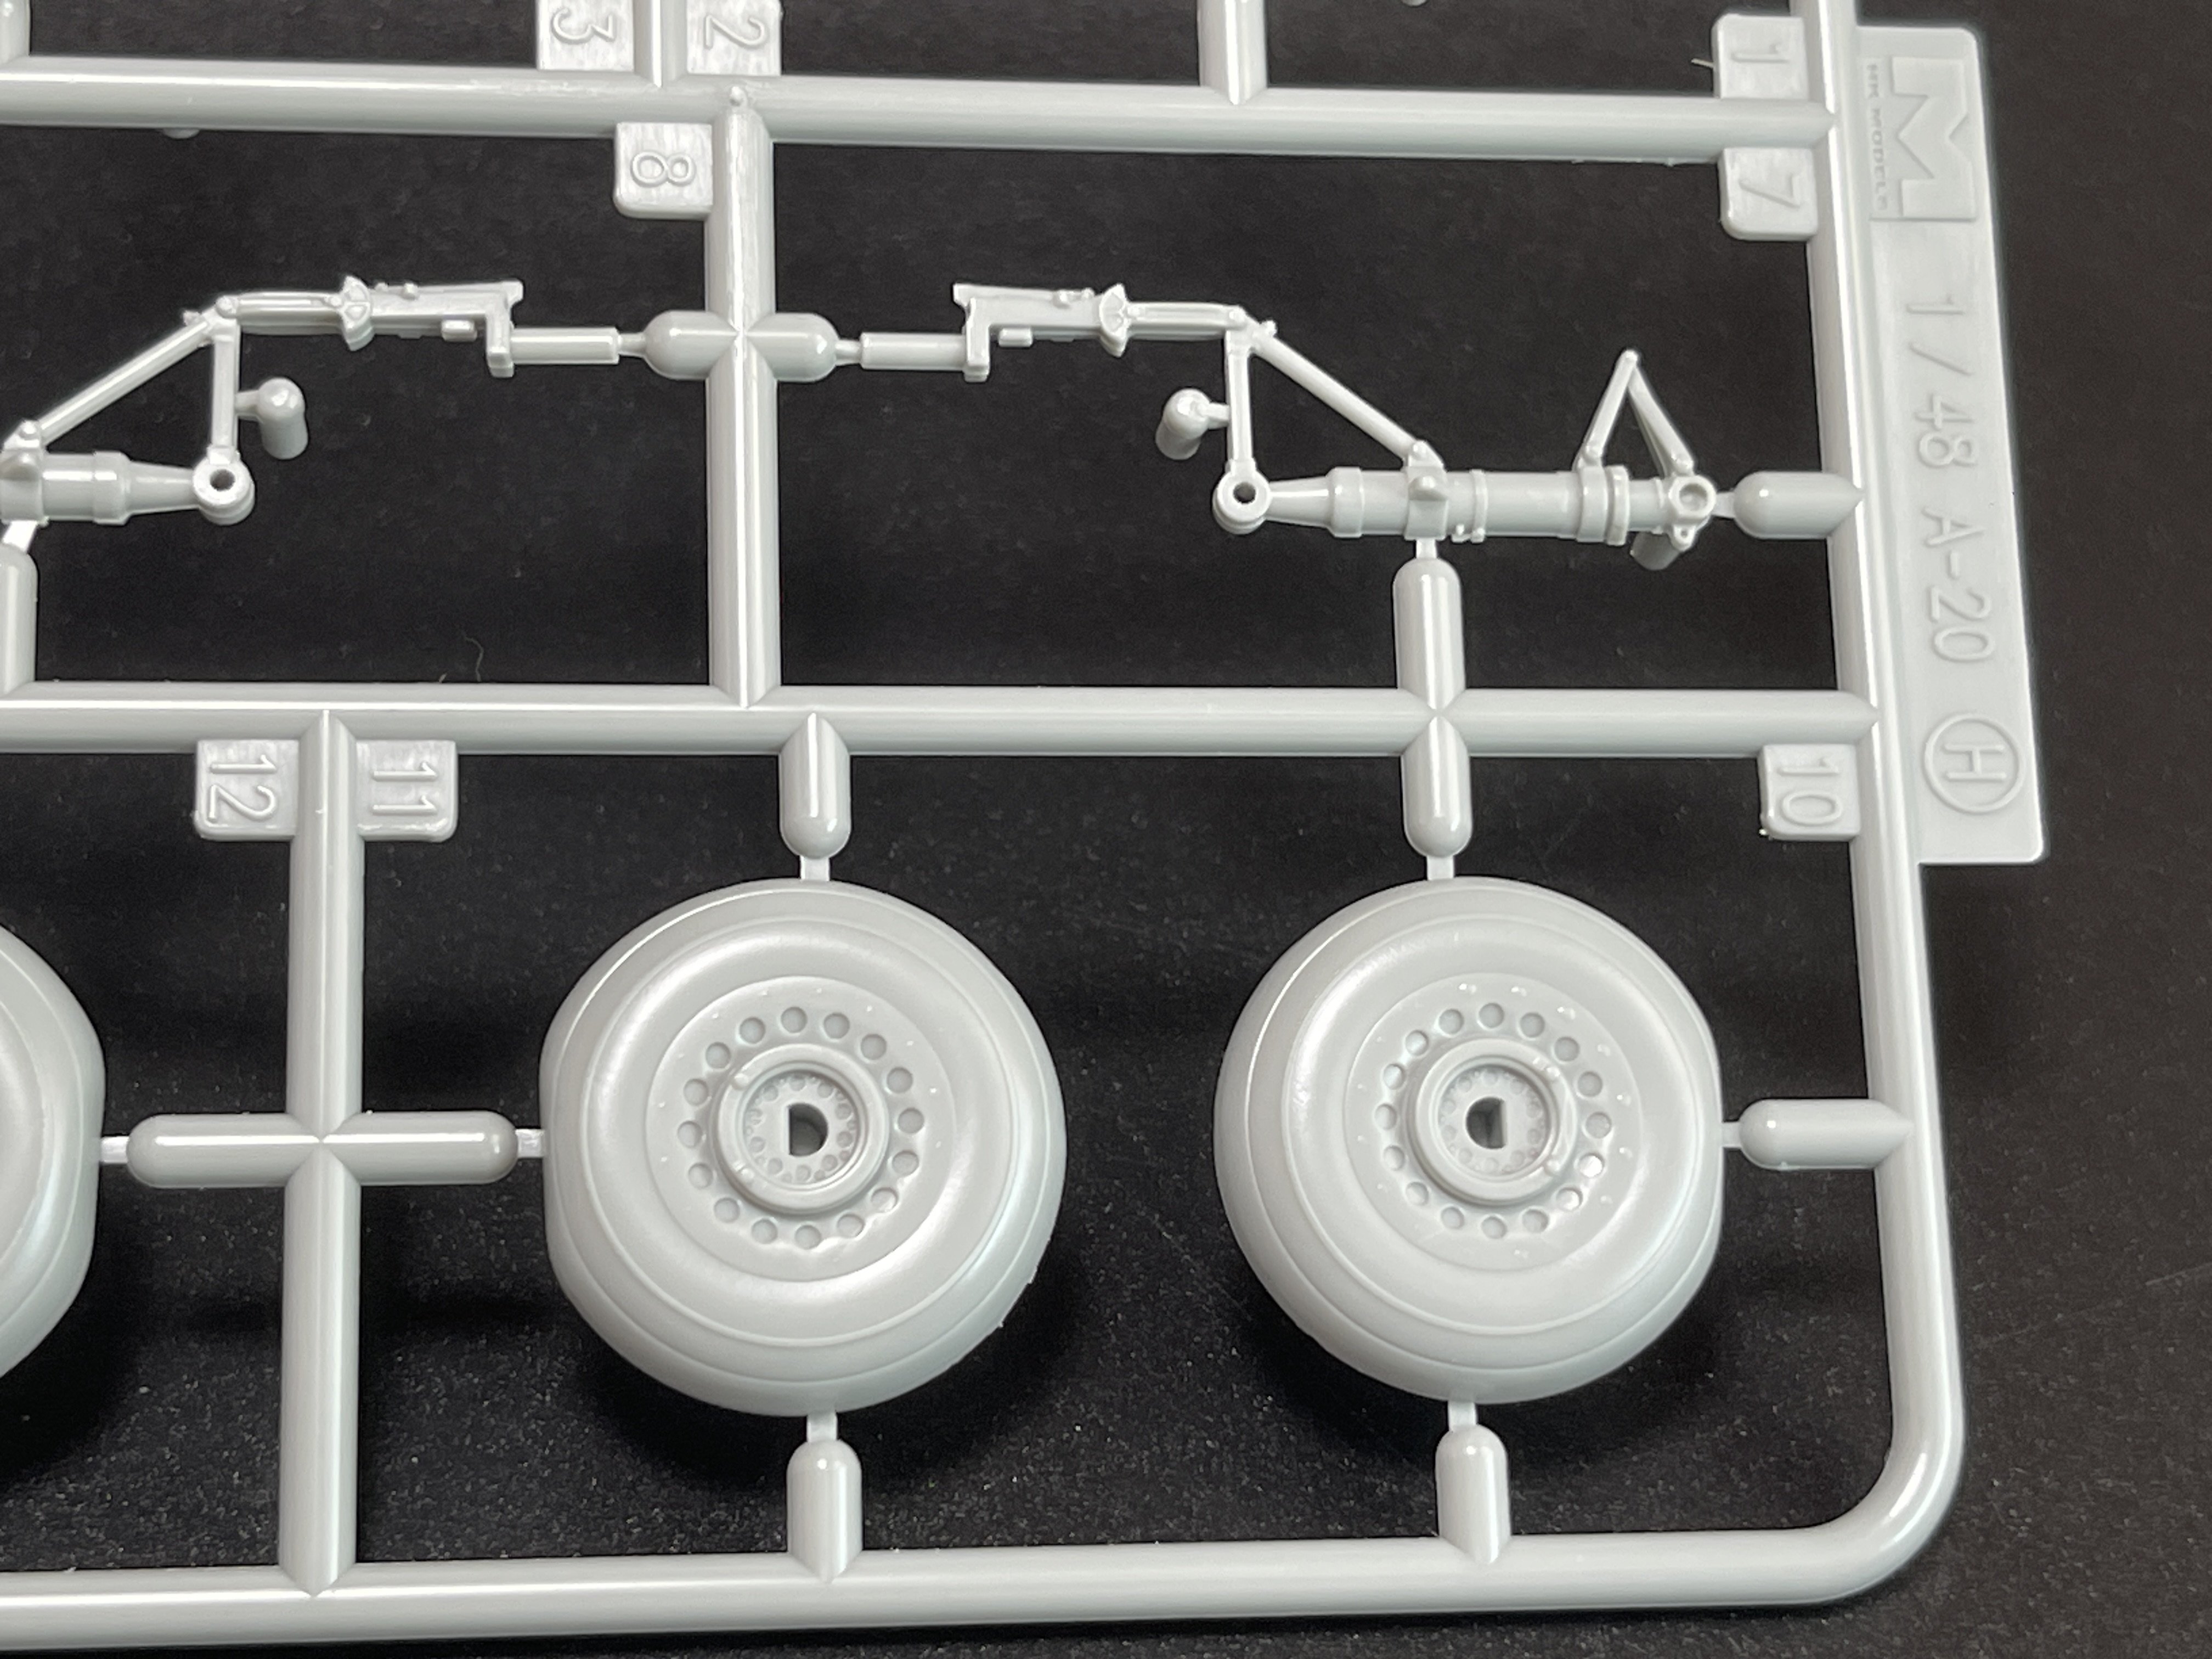
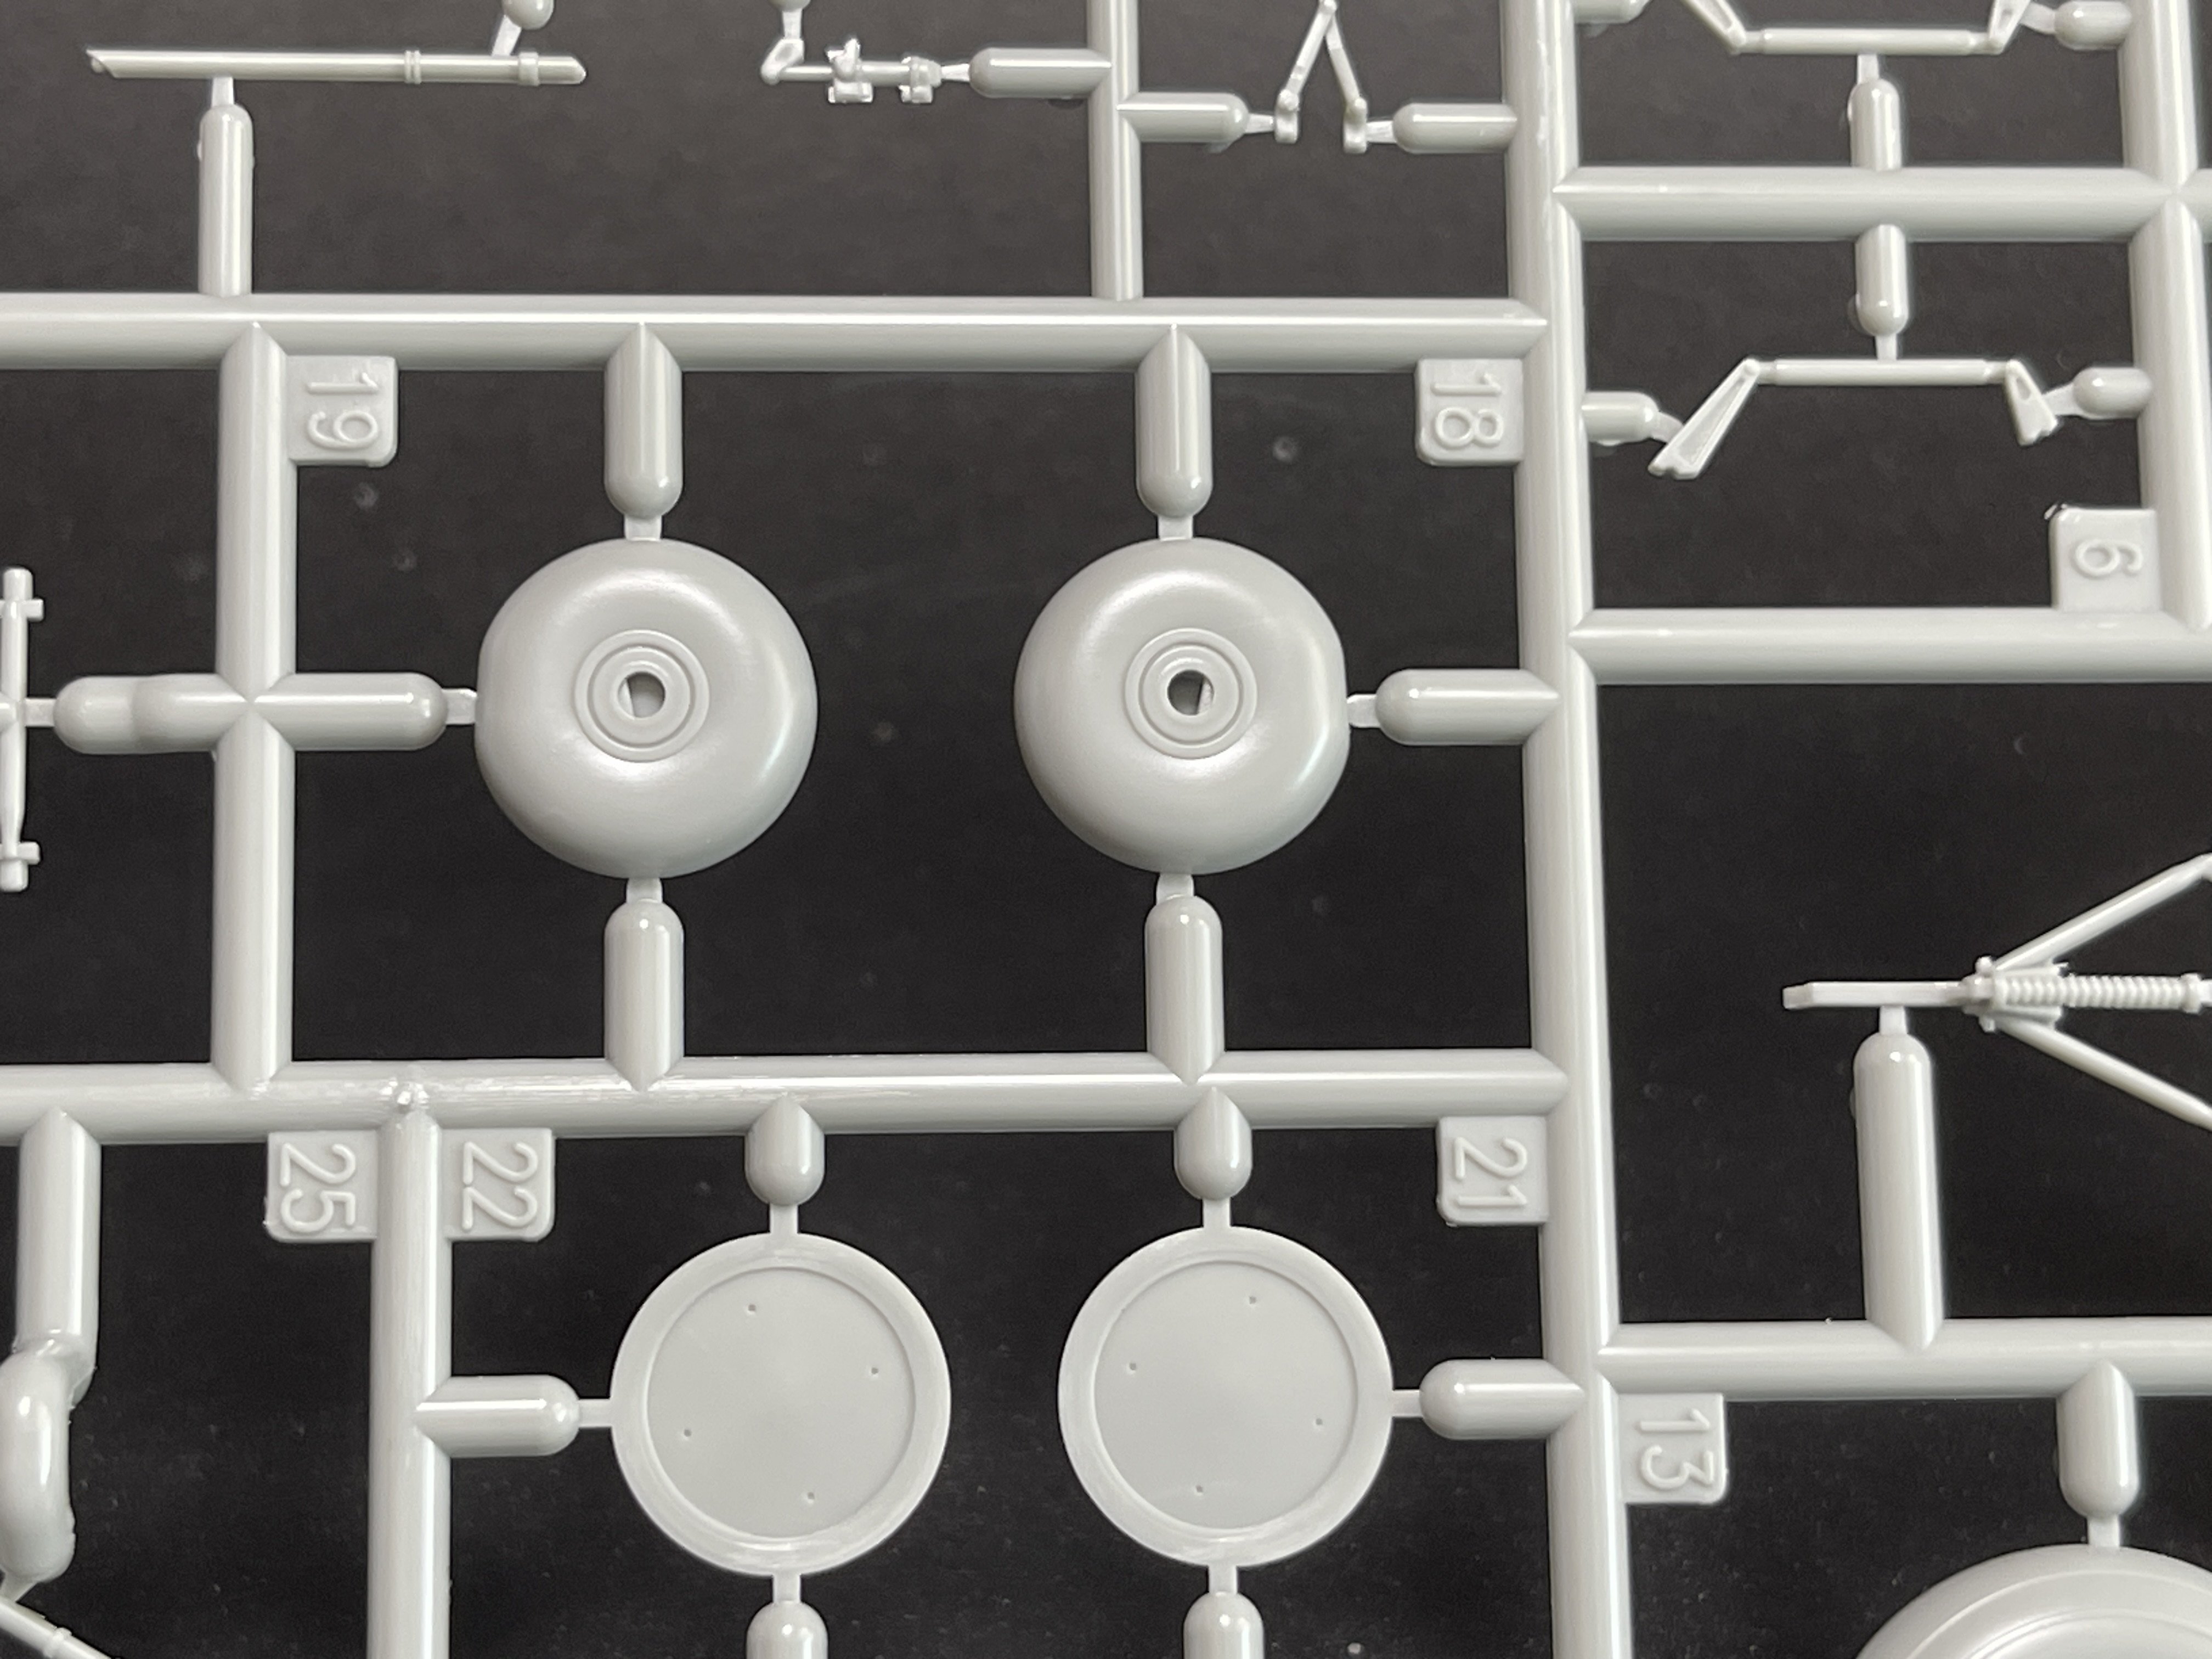
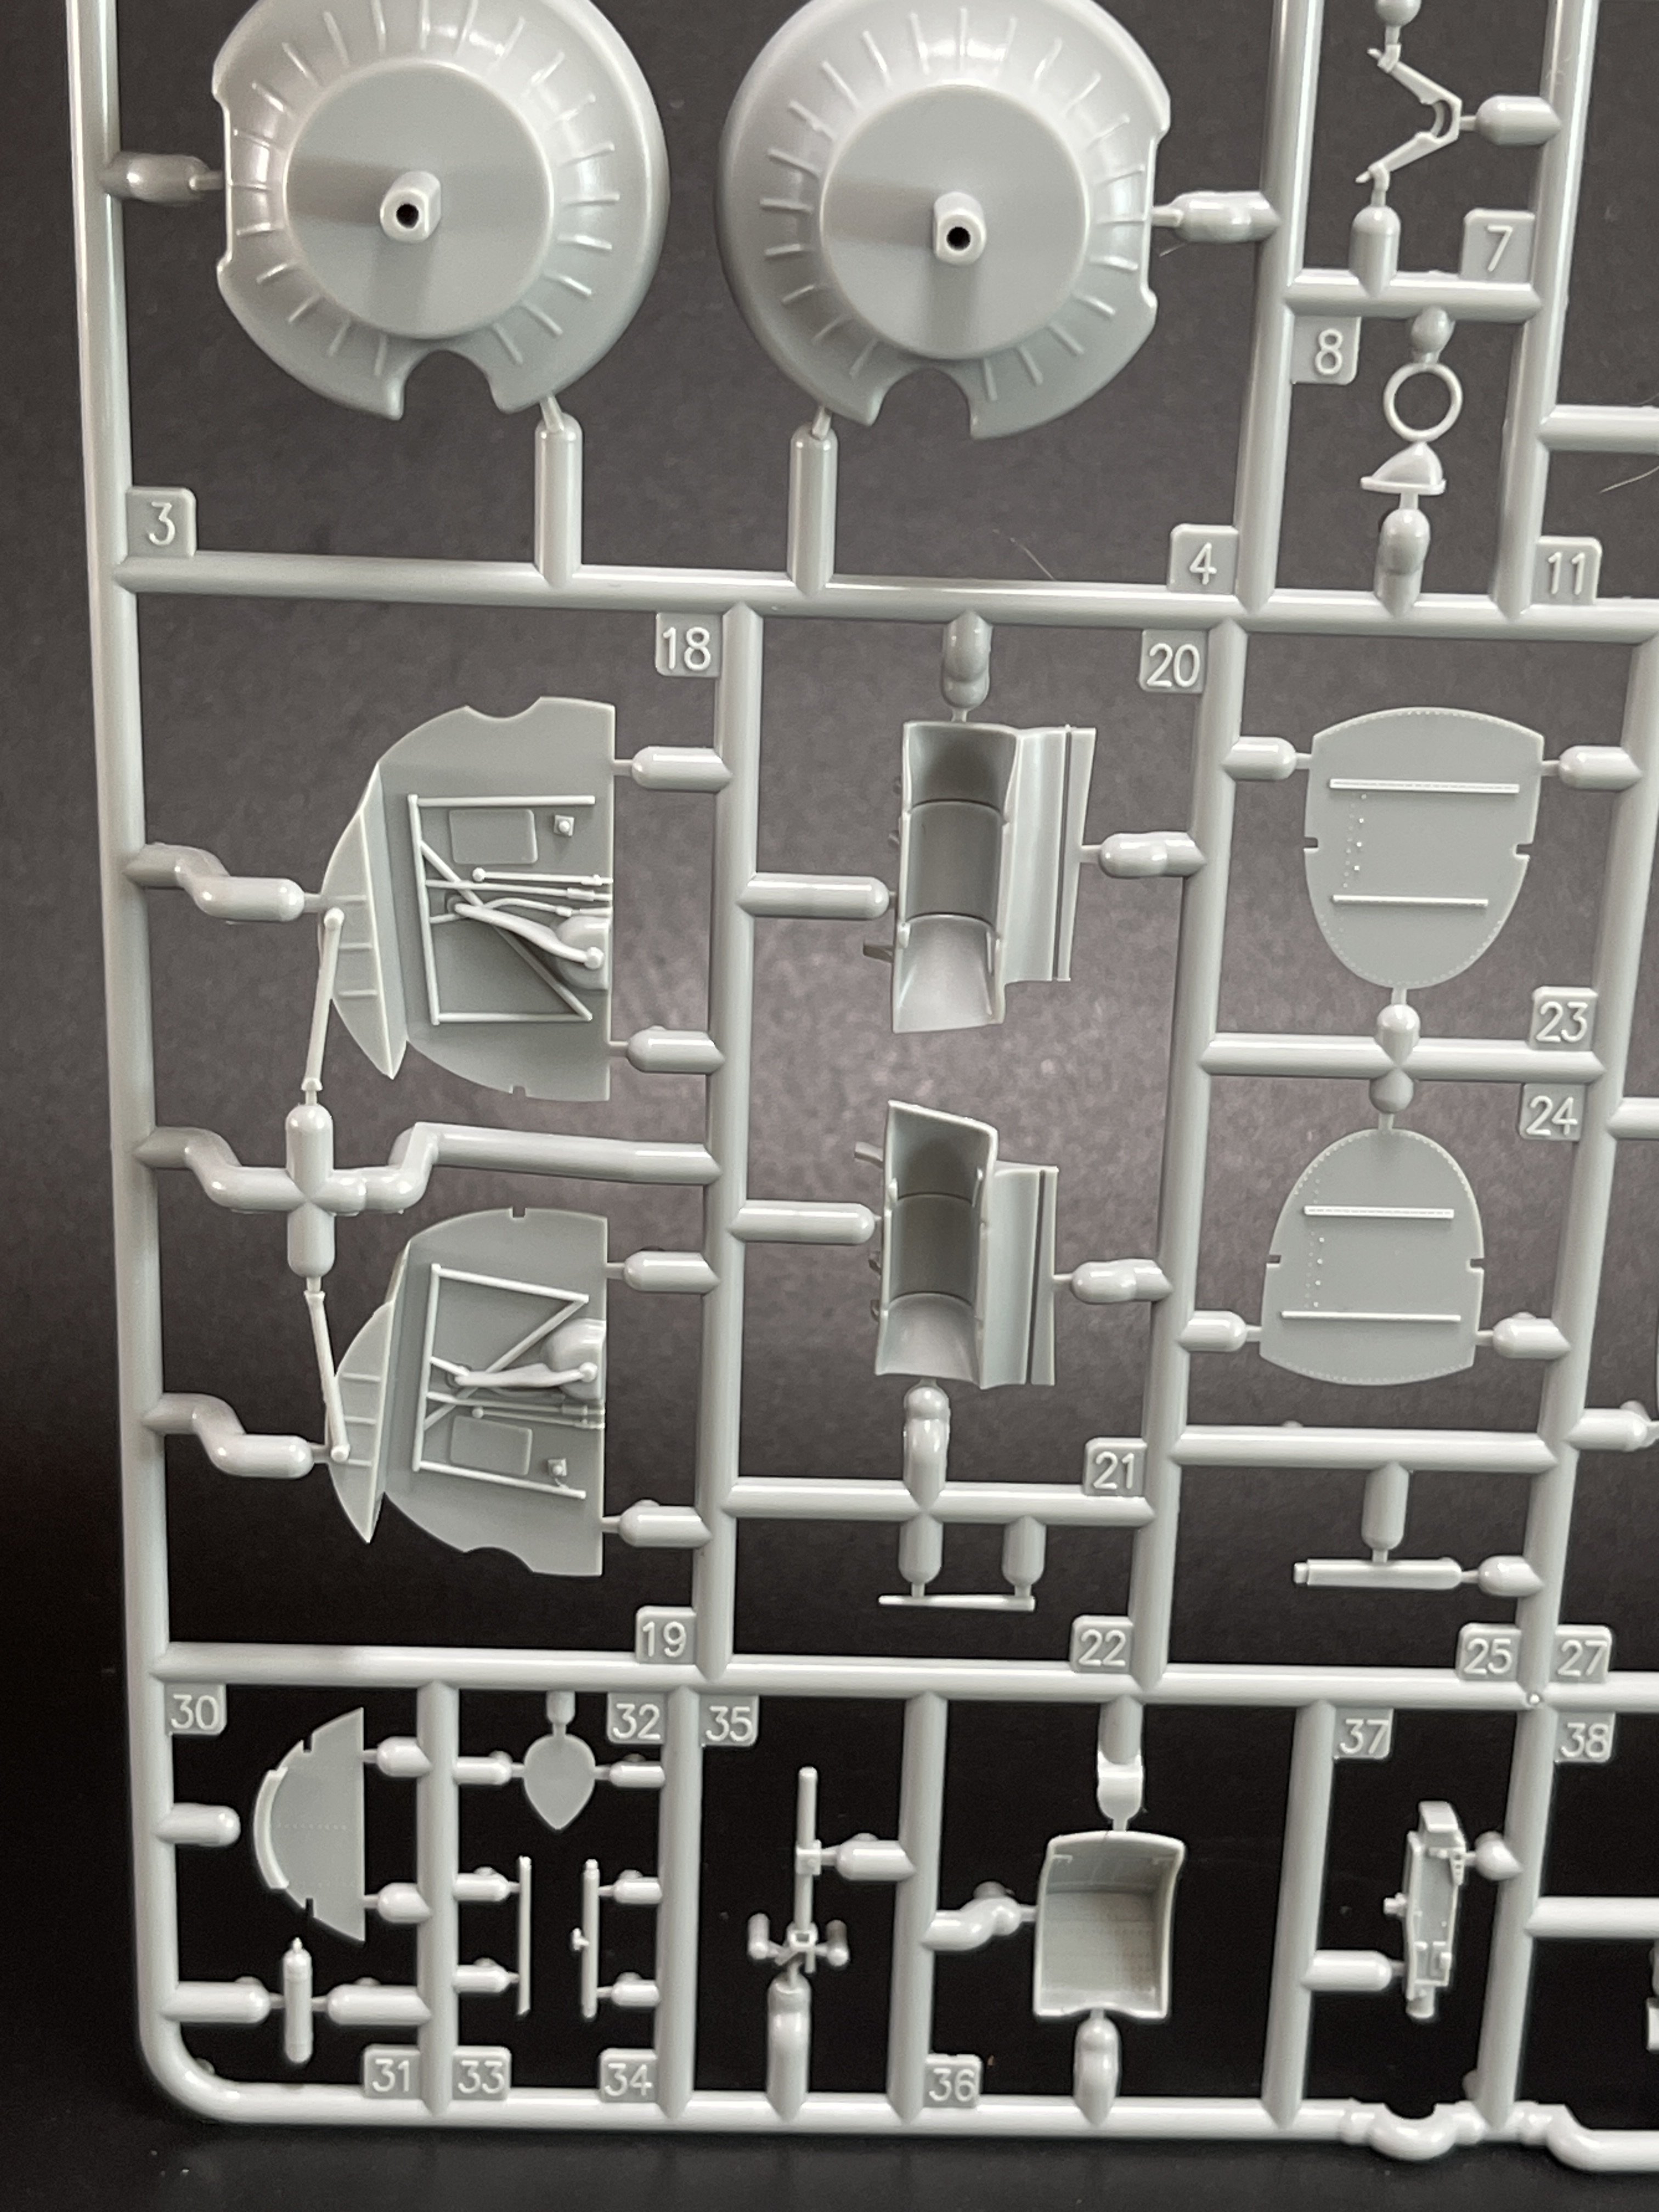
The rest of the landing gear detail is great straight from the box, even the wheels are quite good oob.
As for the metal weights, it’s a simply and effective solution without thinking too much to avoid a tail sitter.
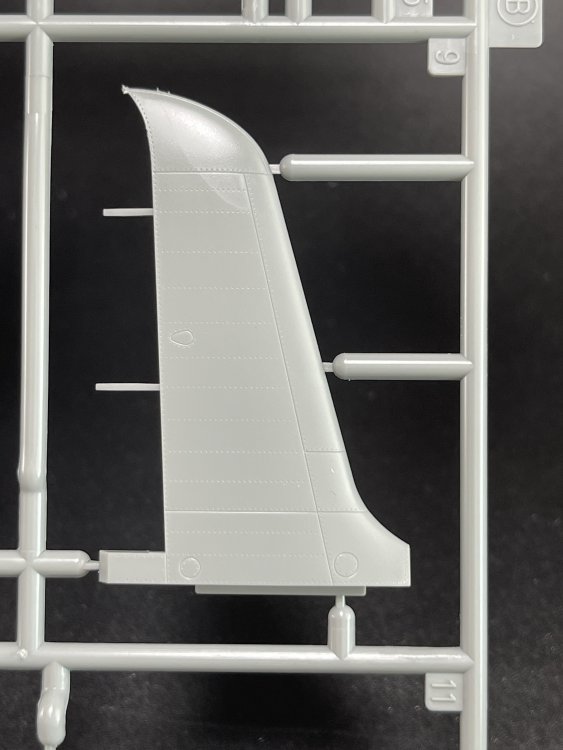
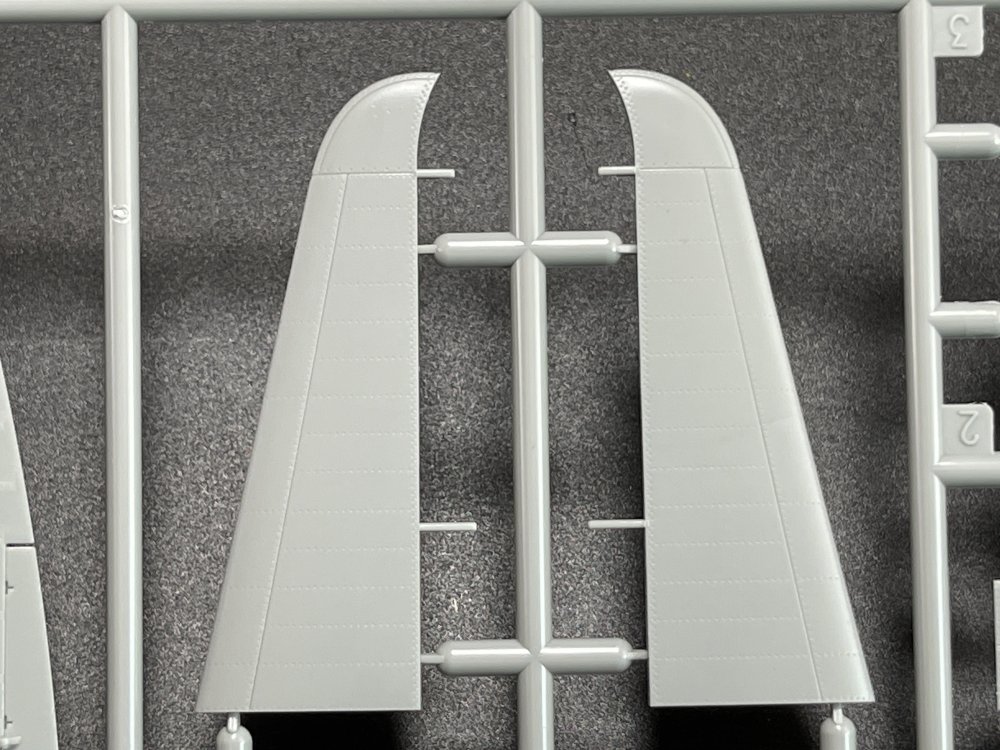
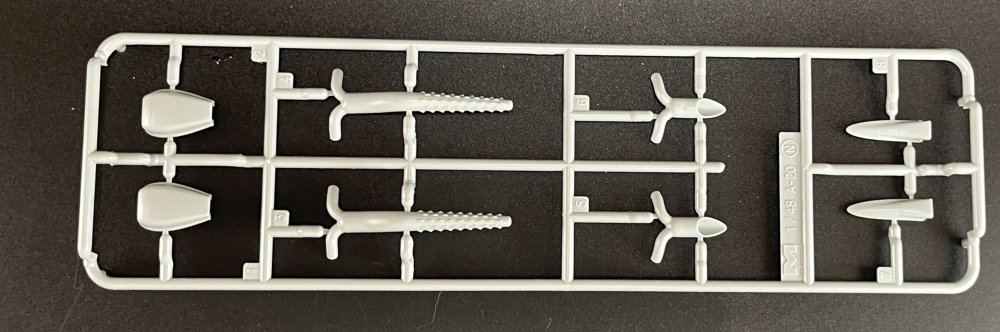
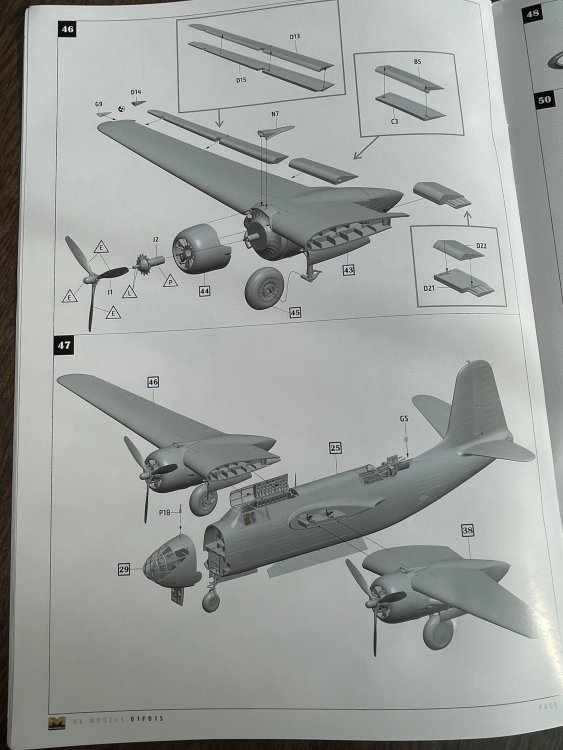
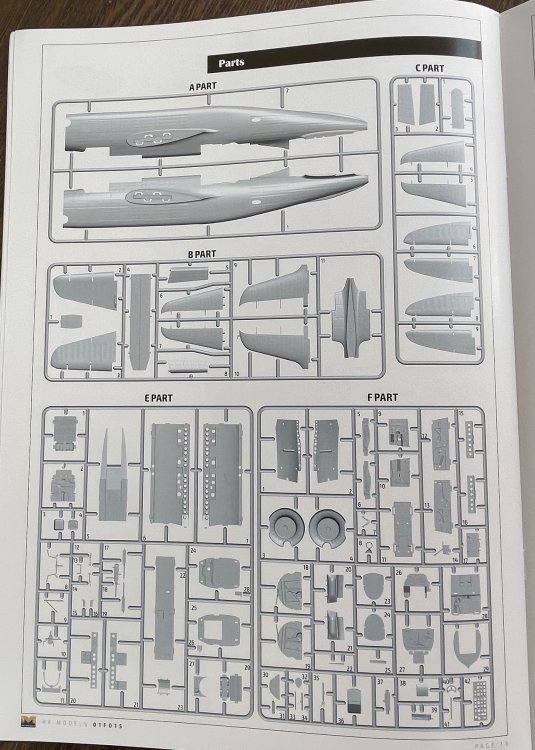
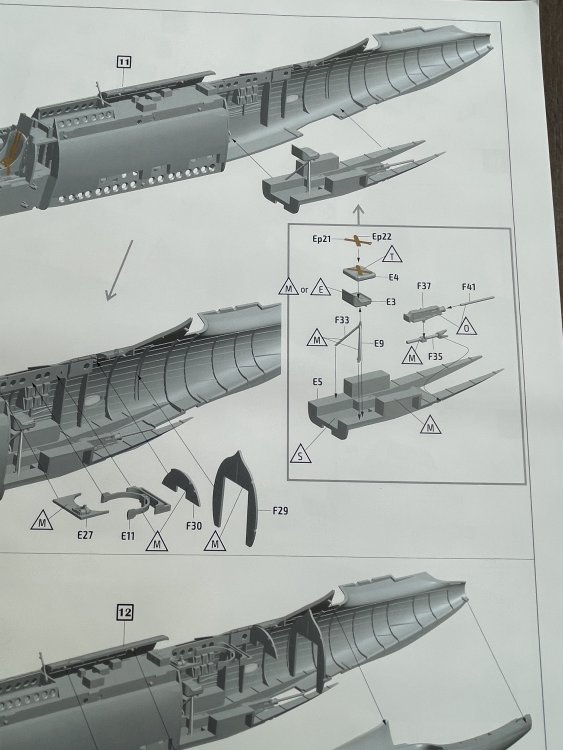
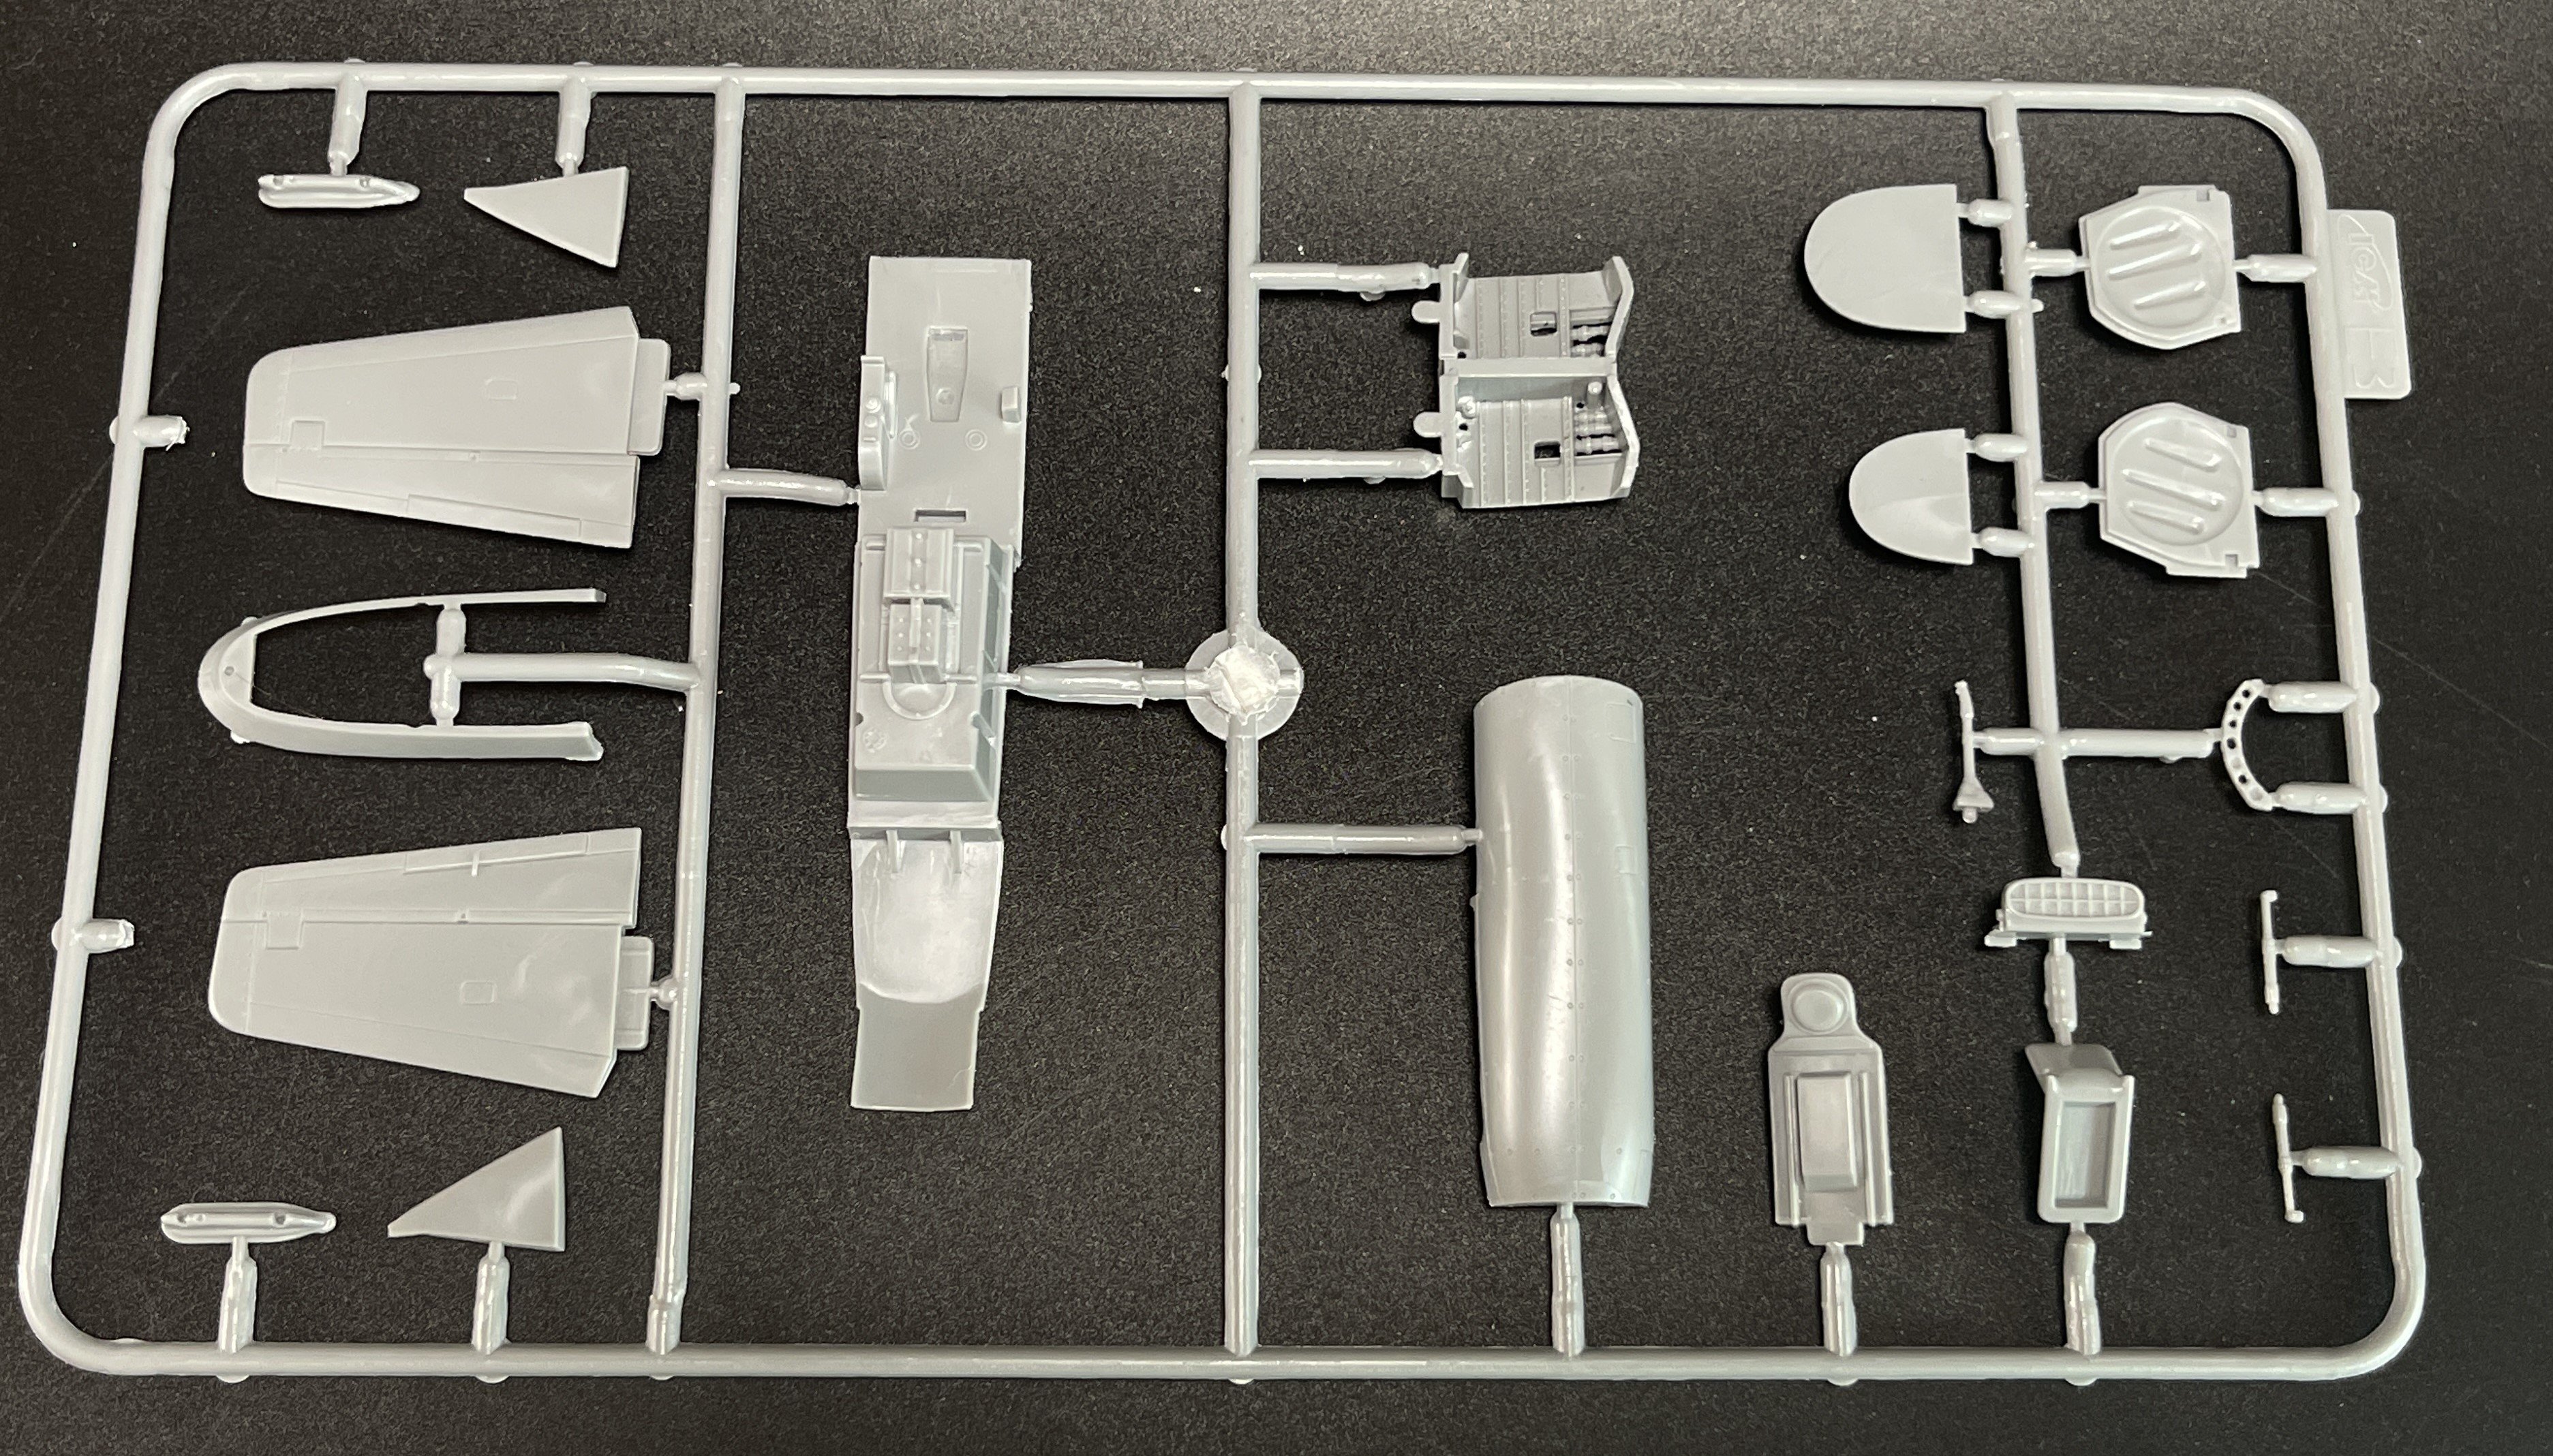
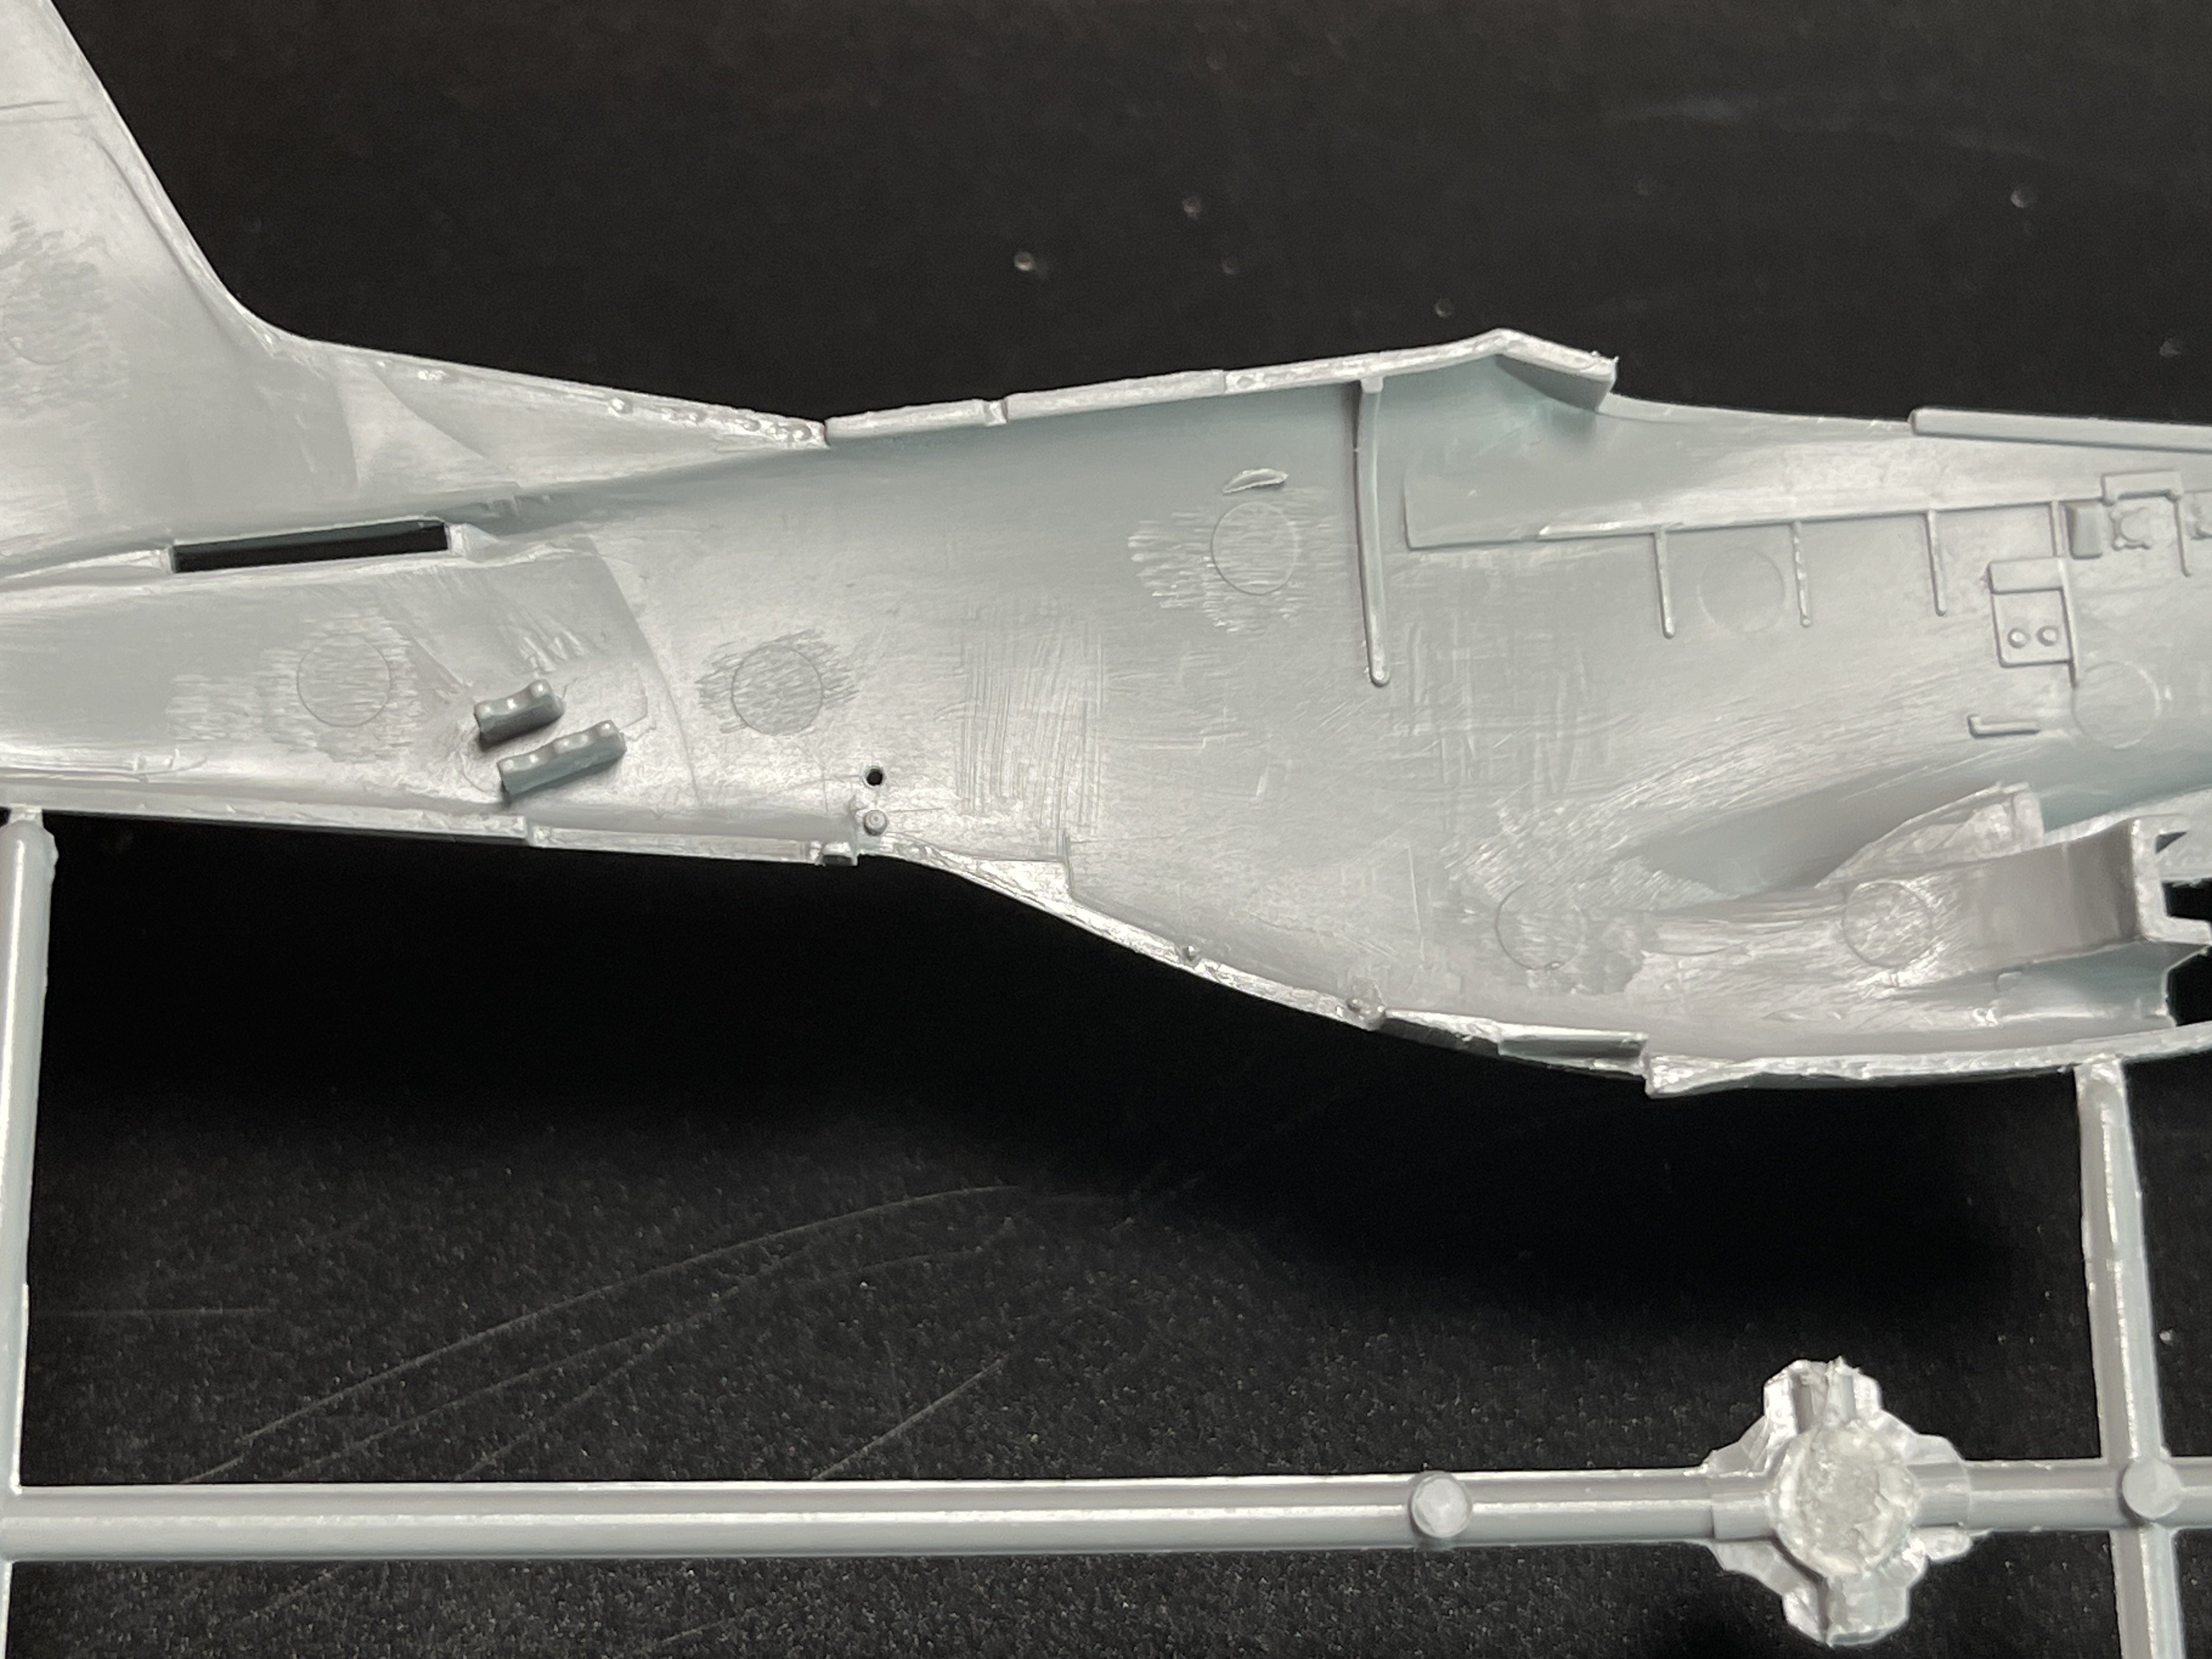
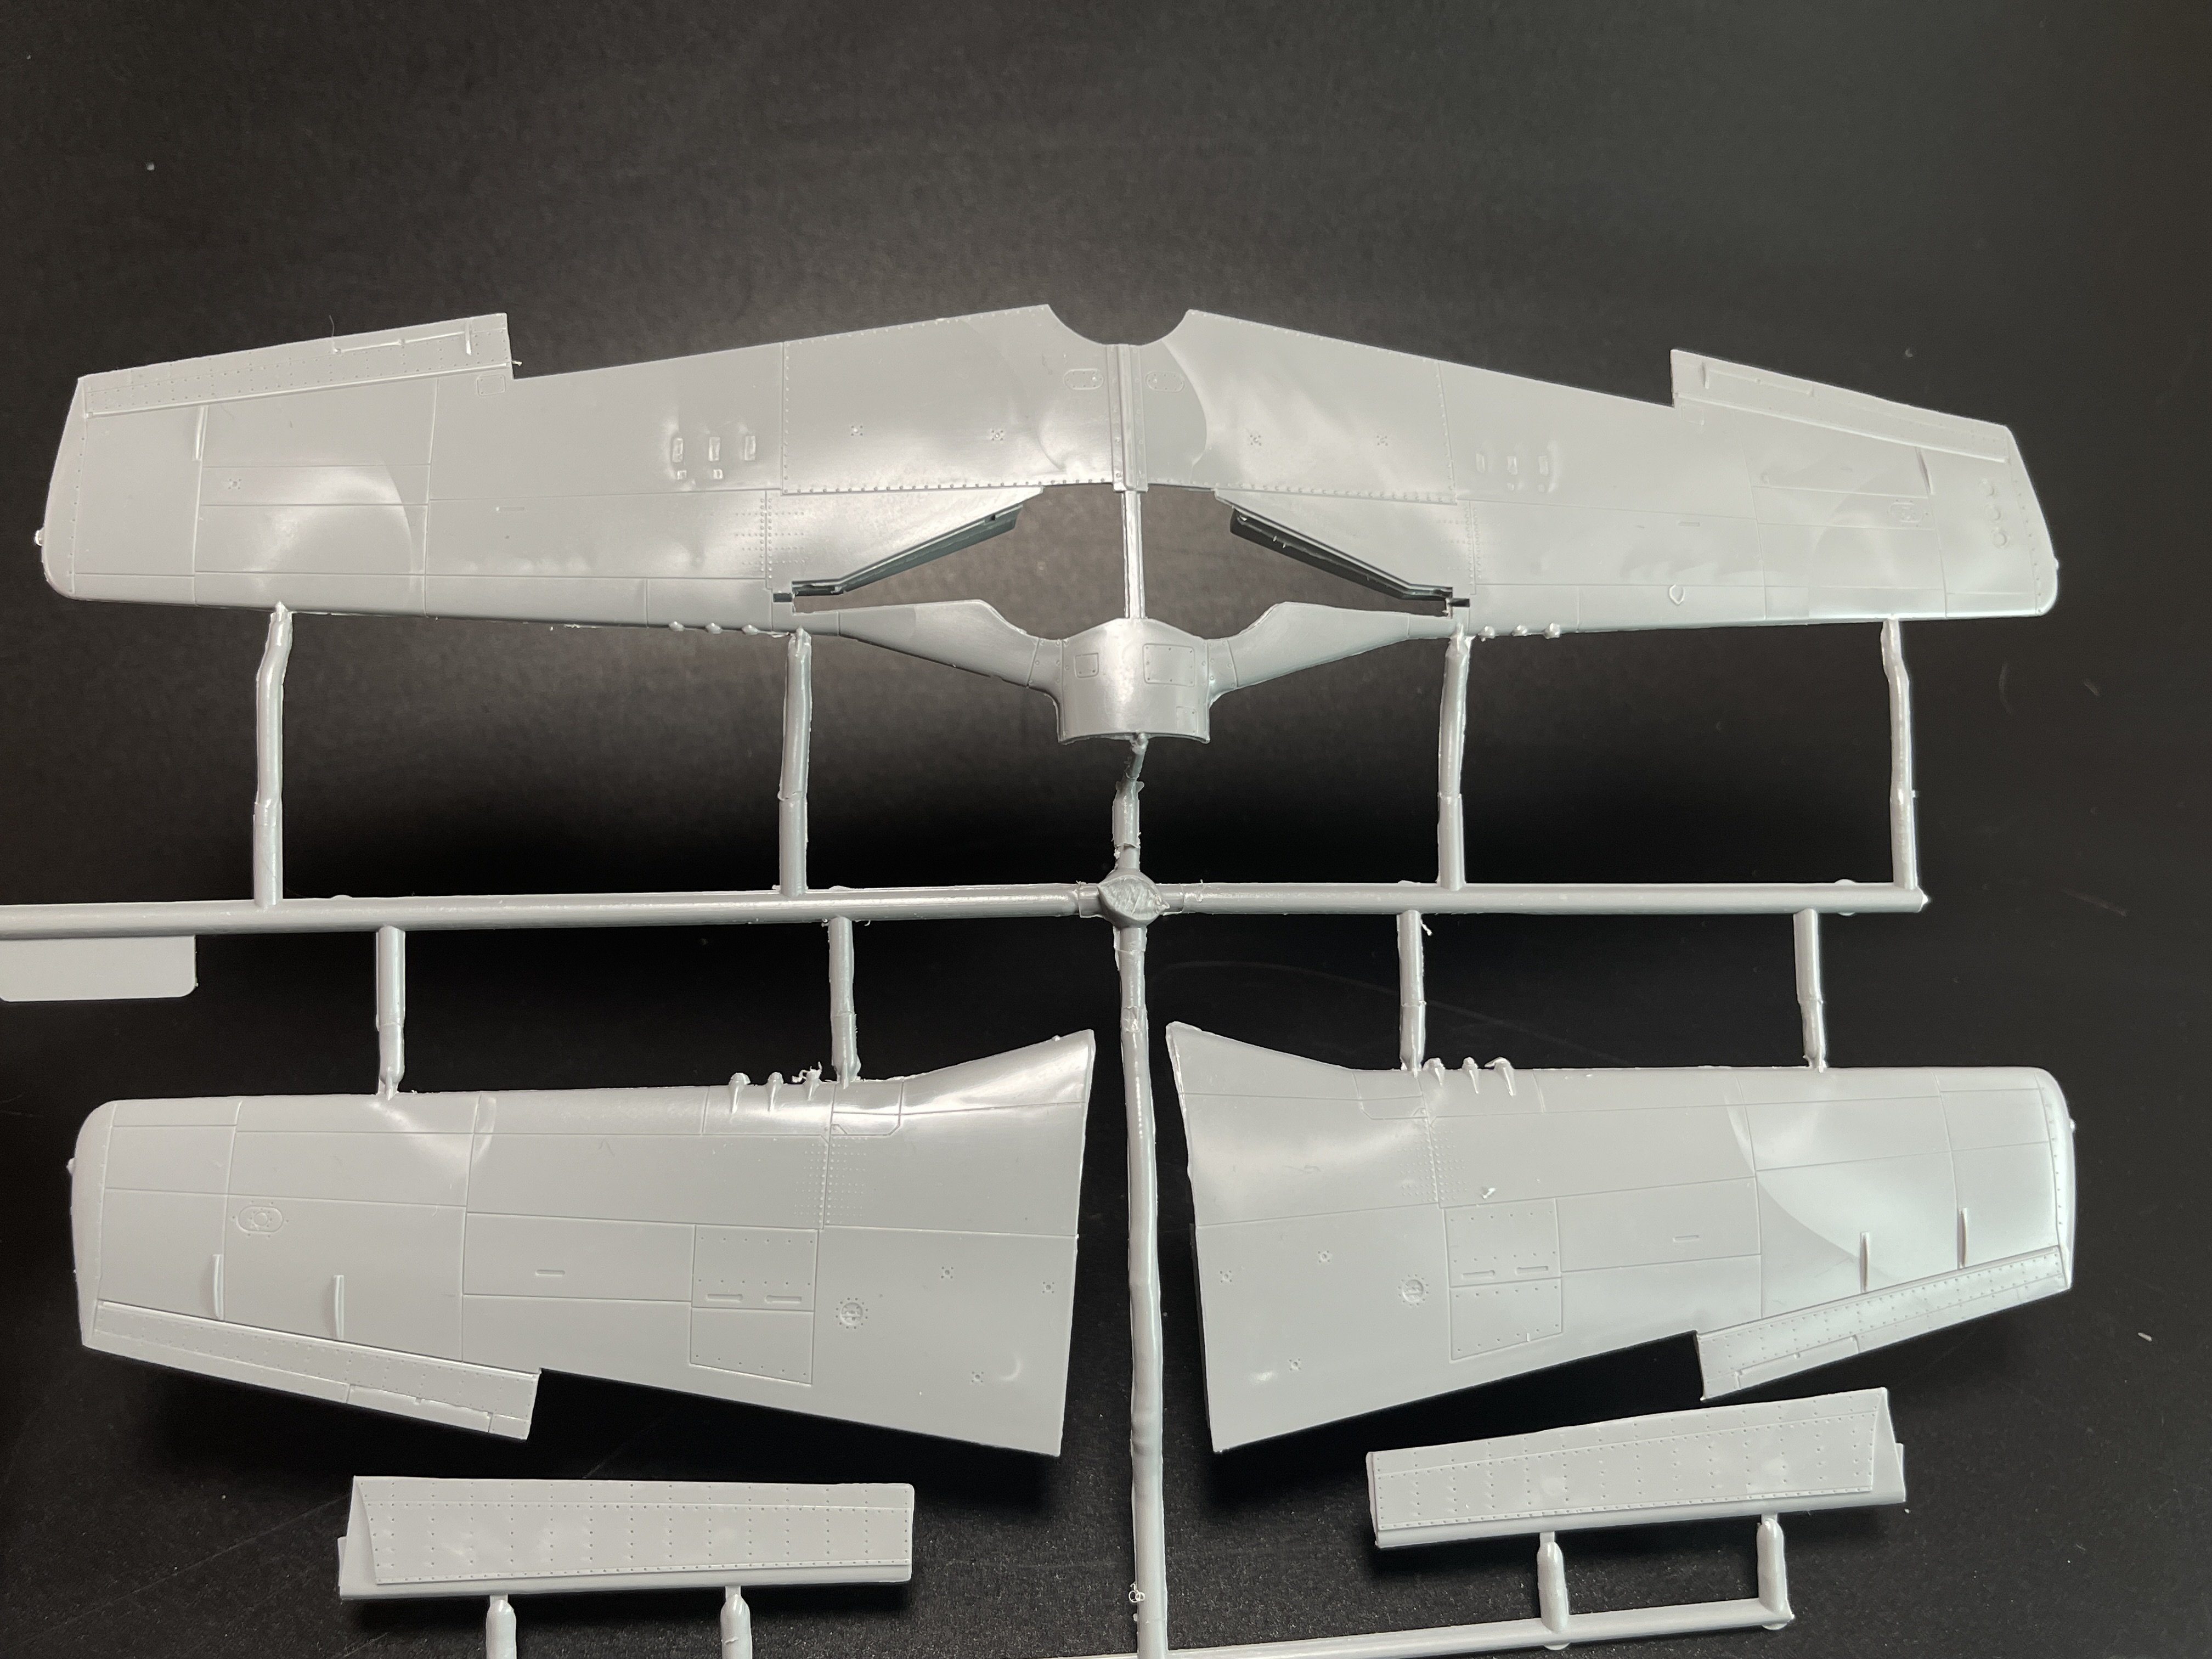
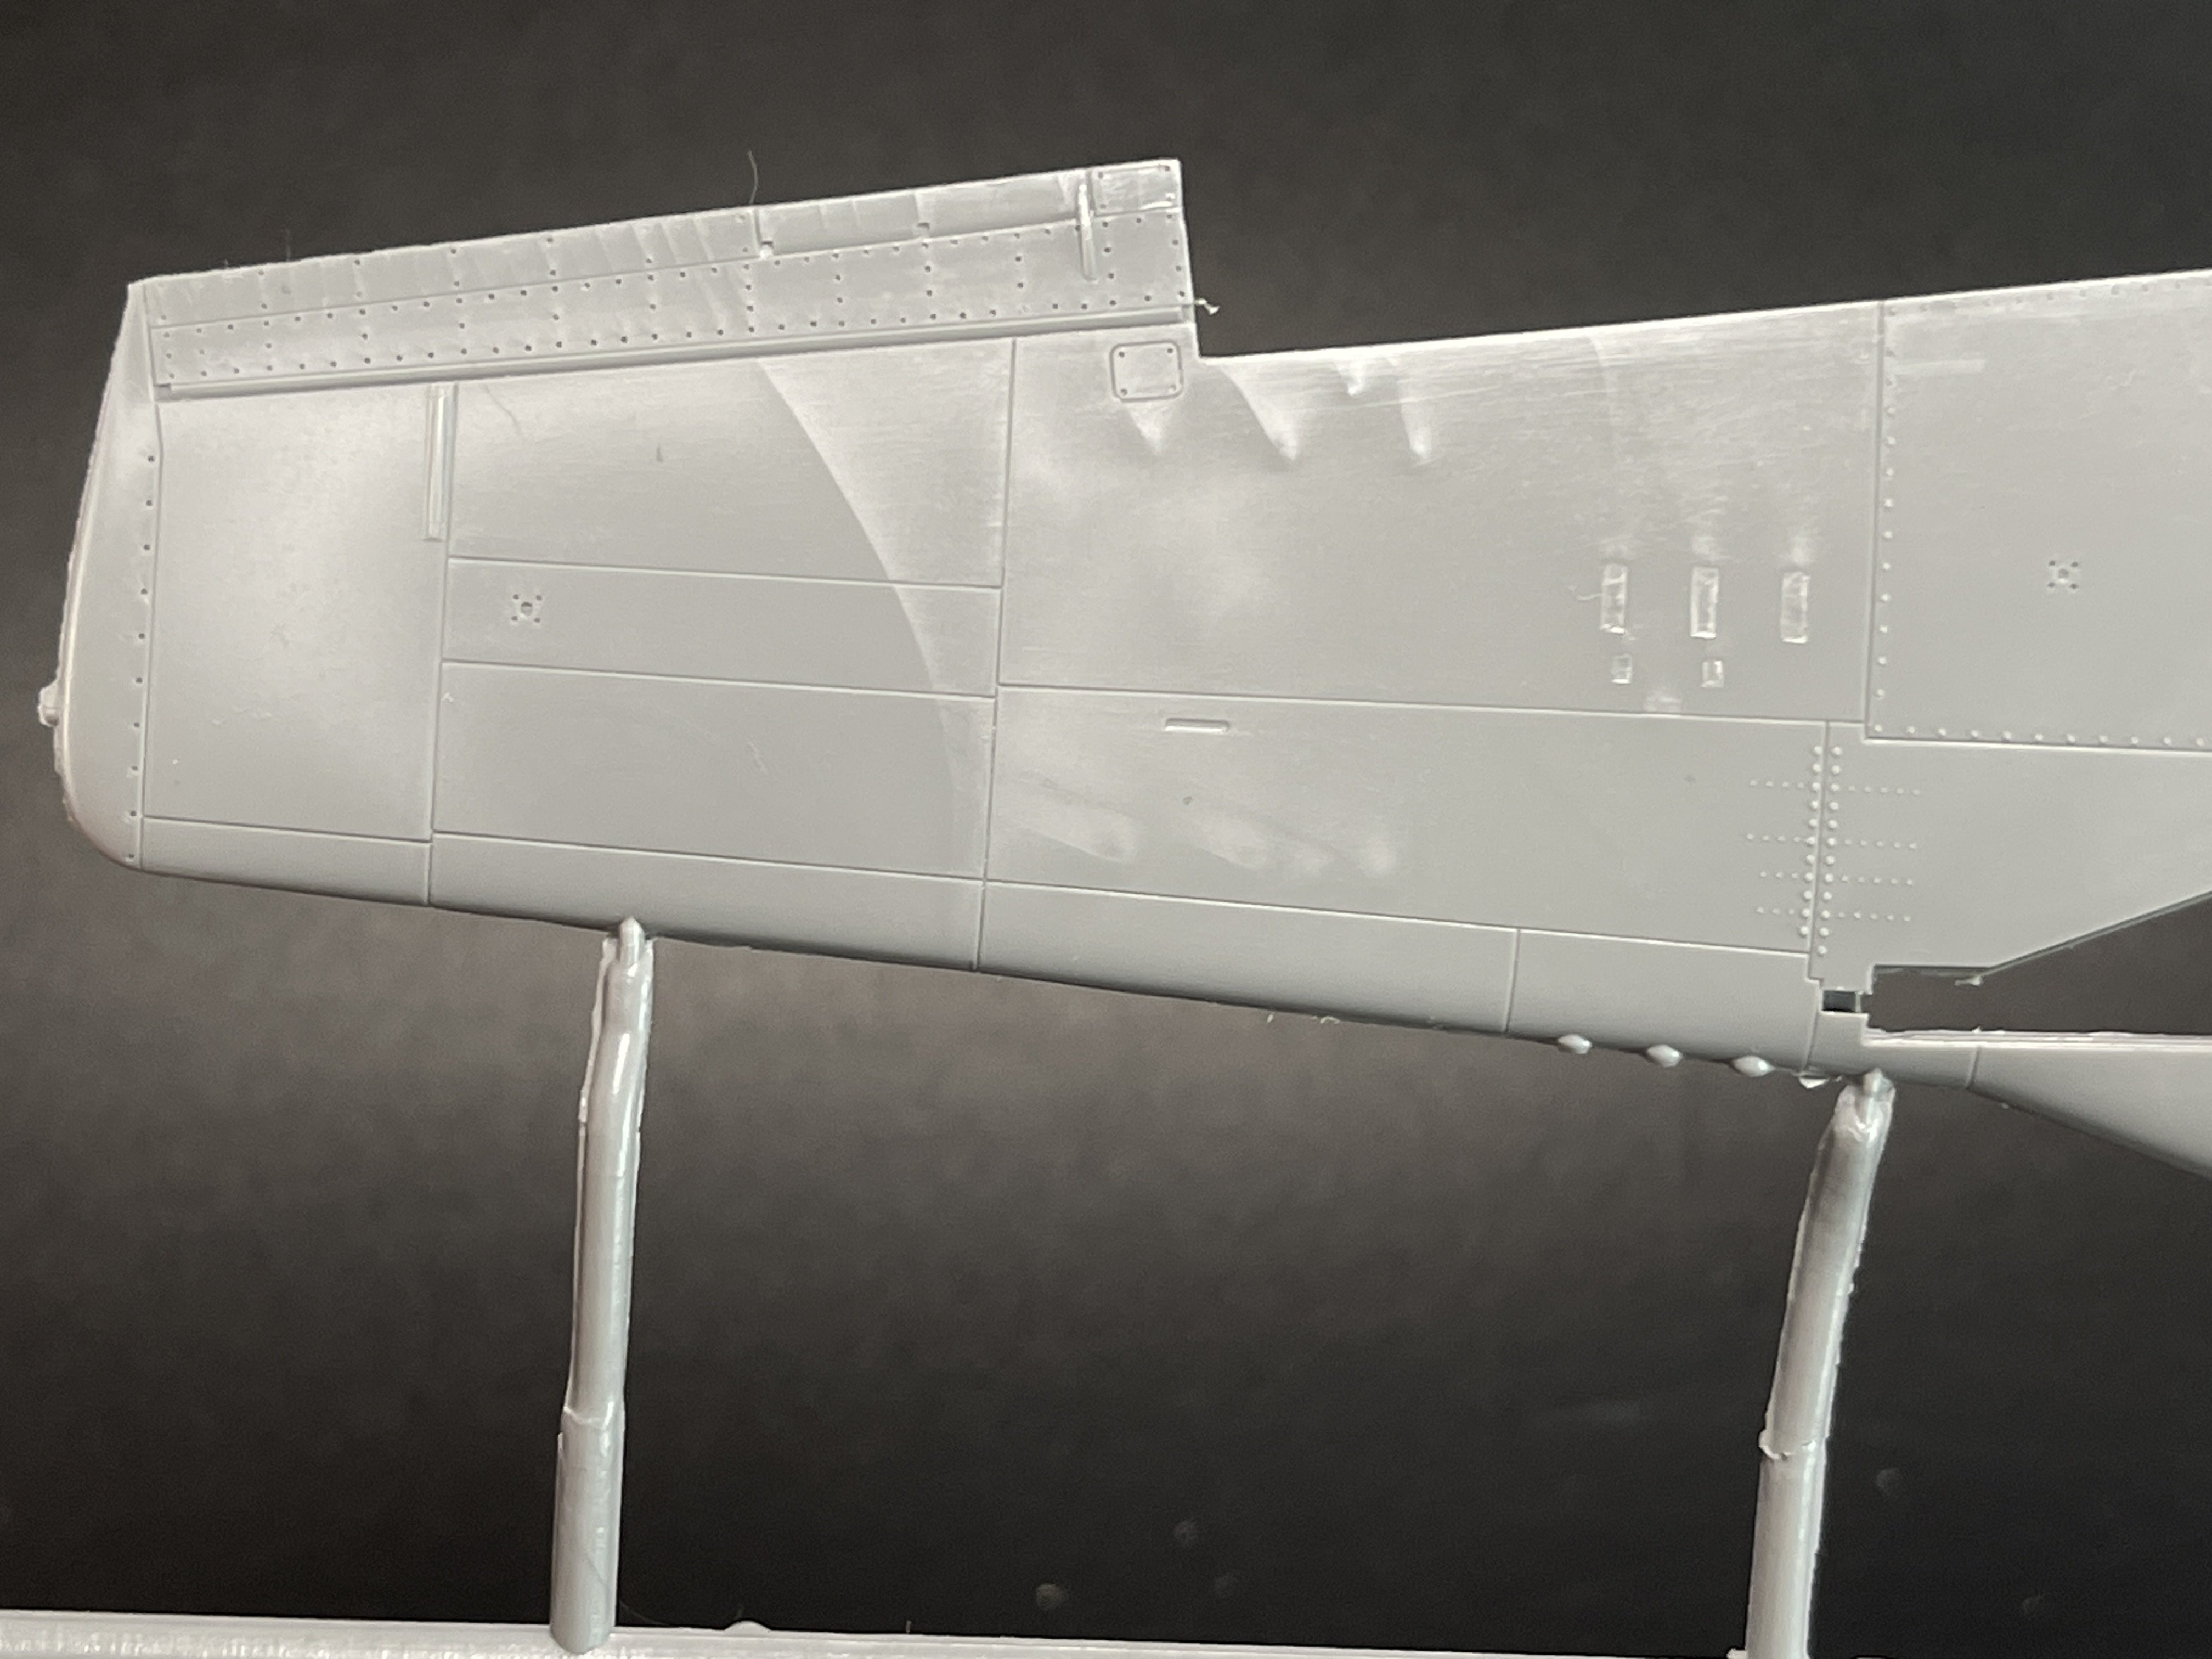
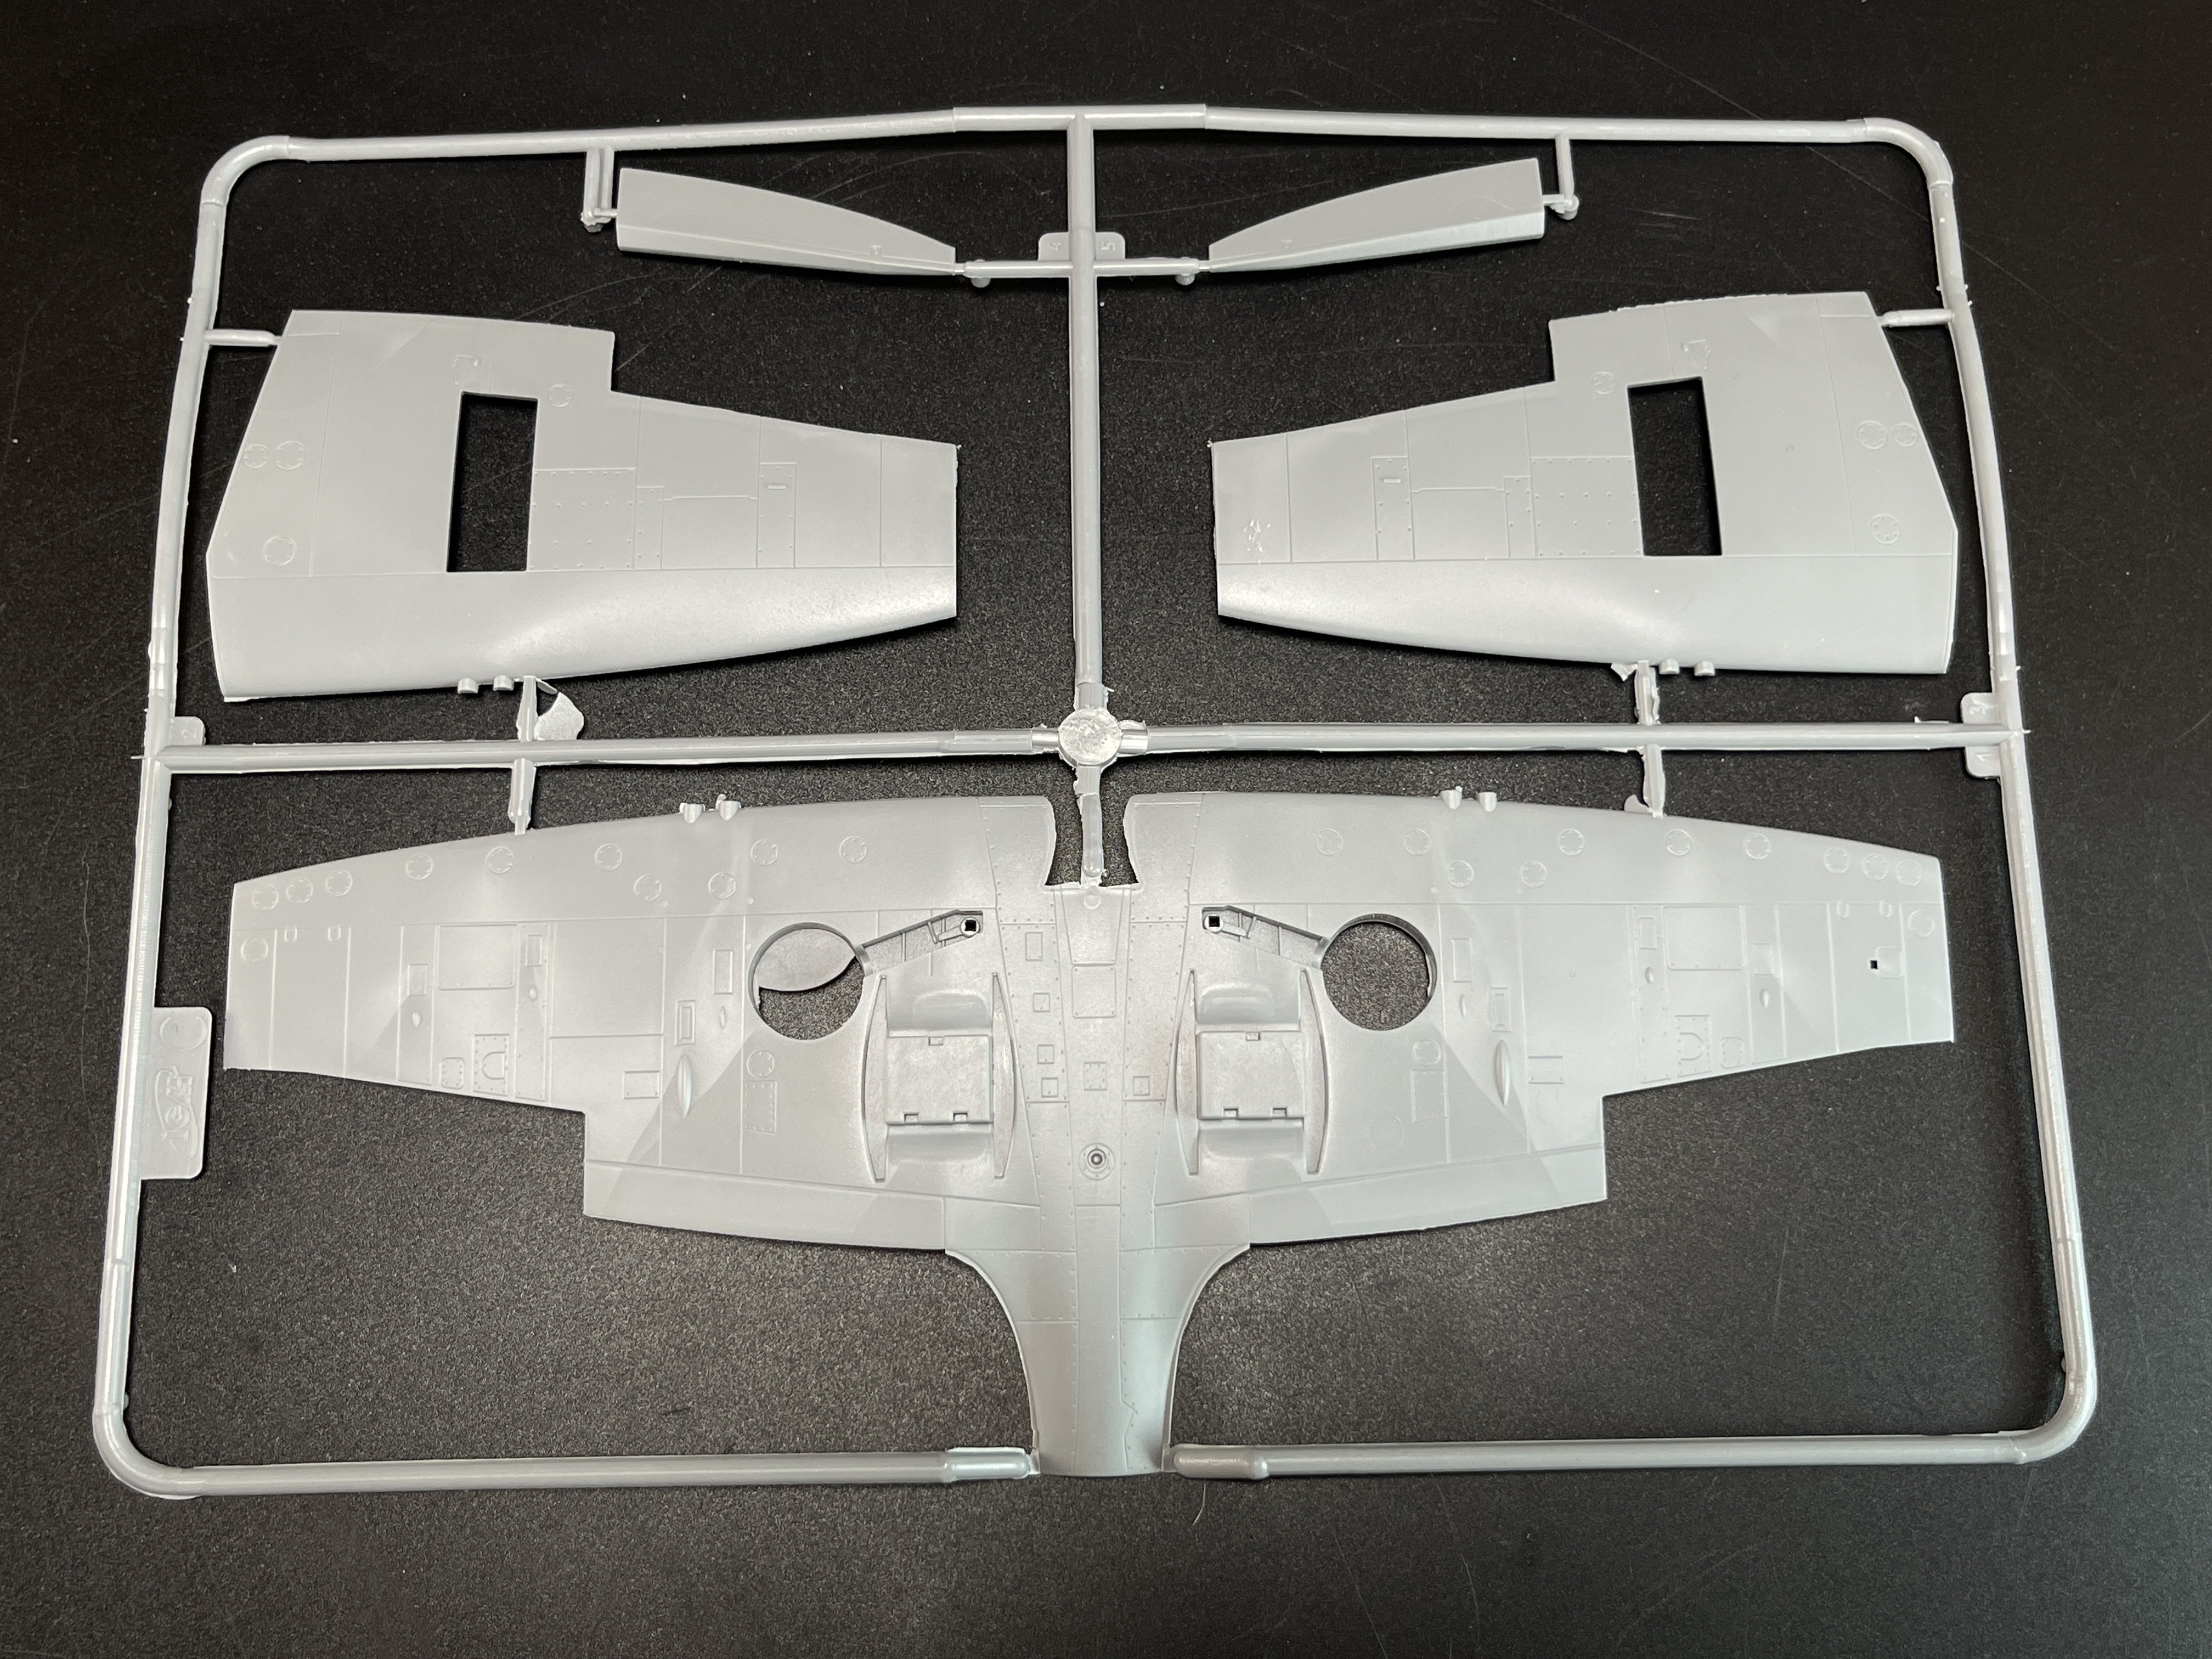
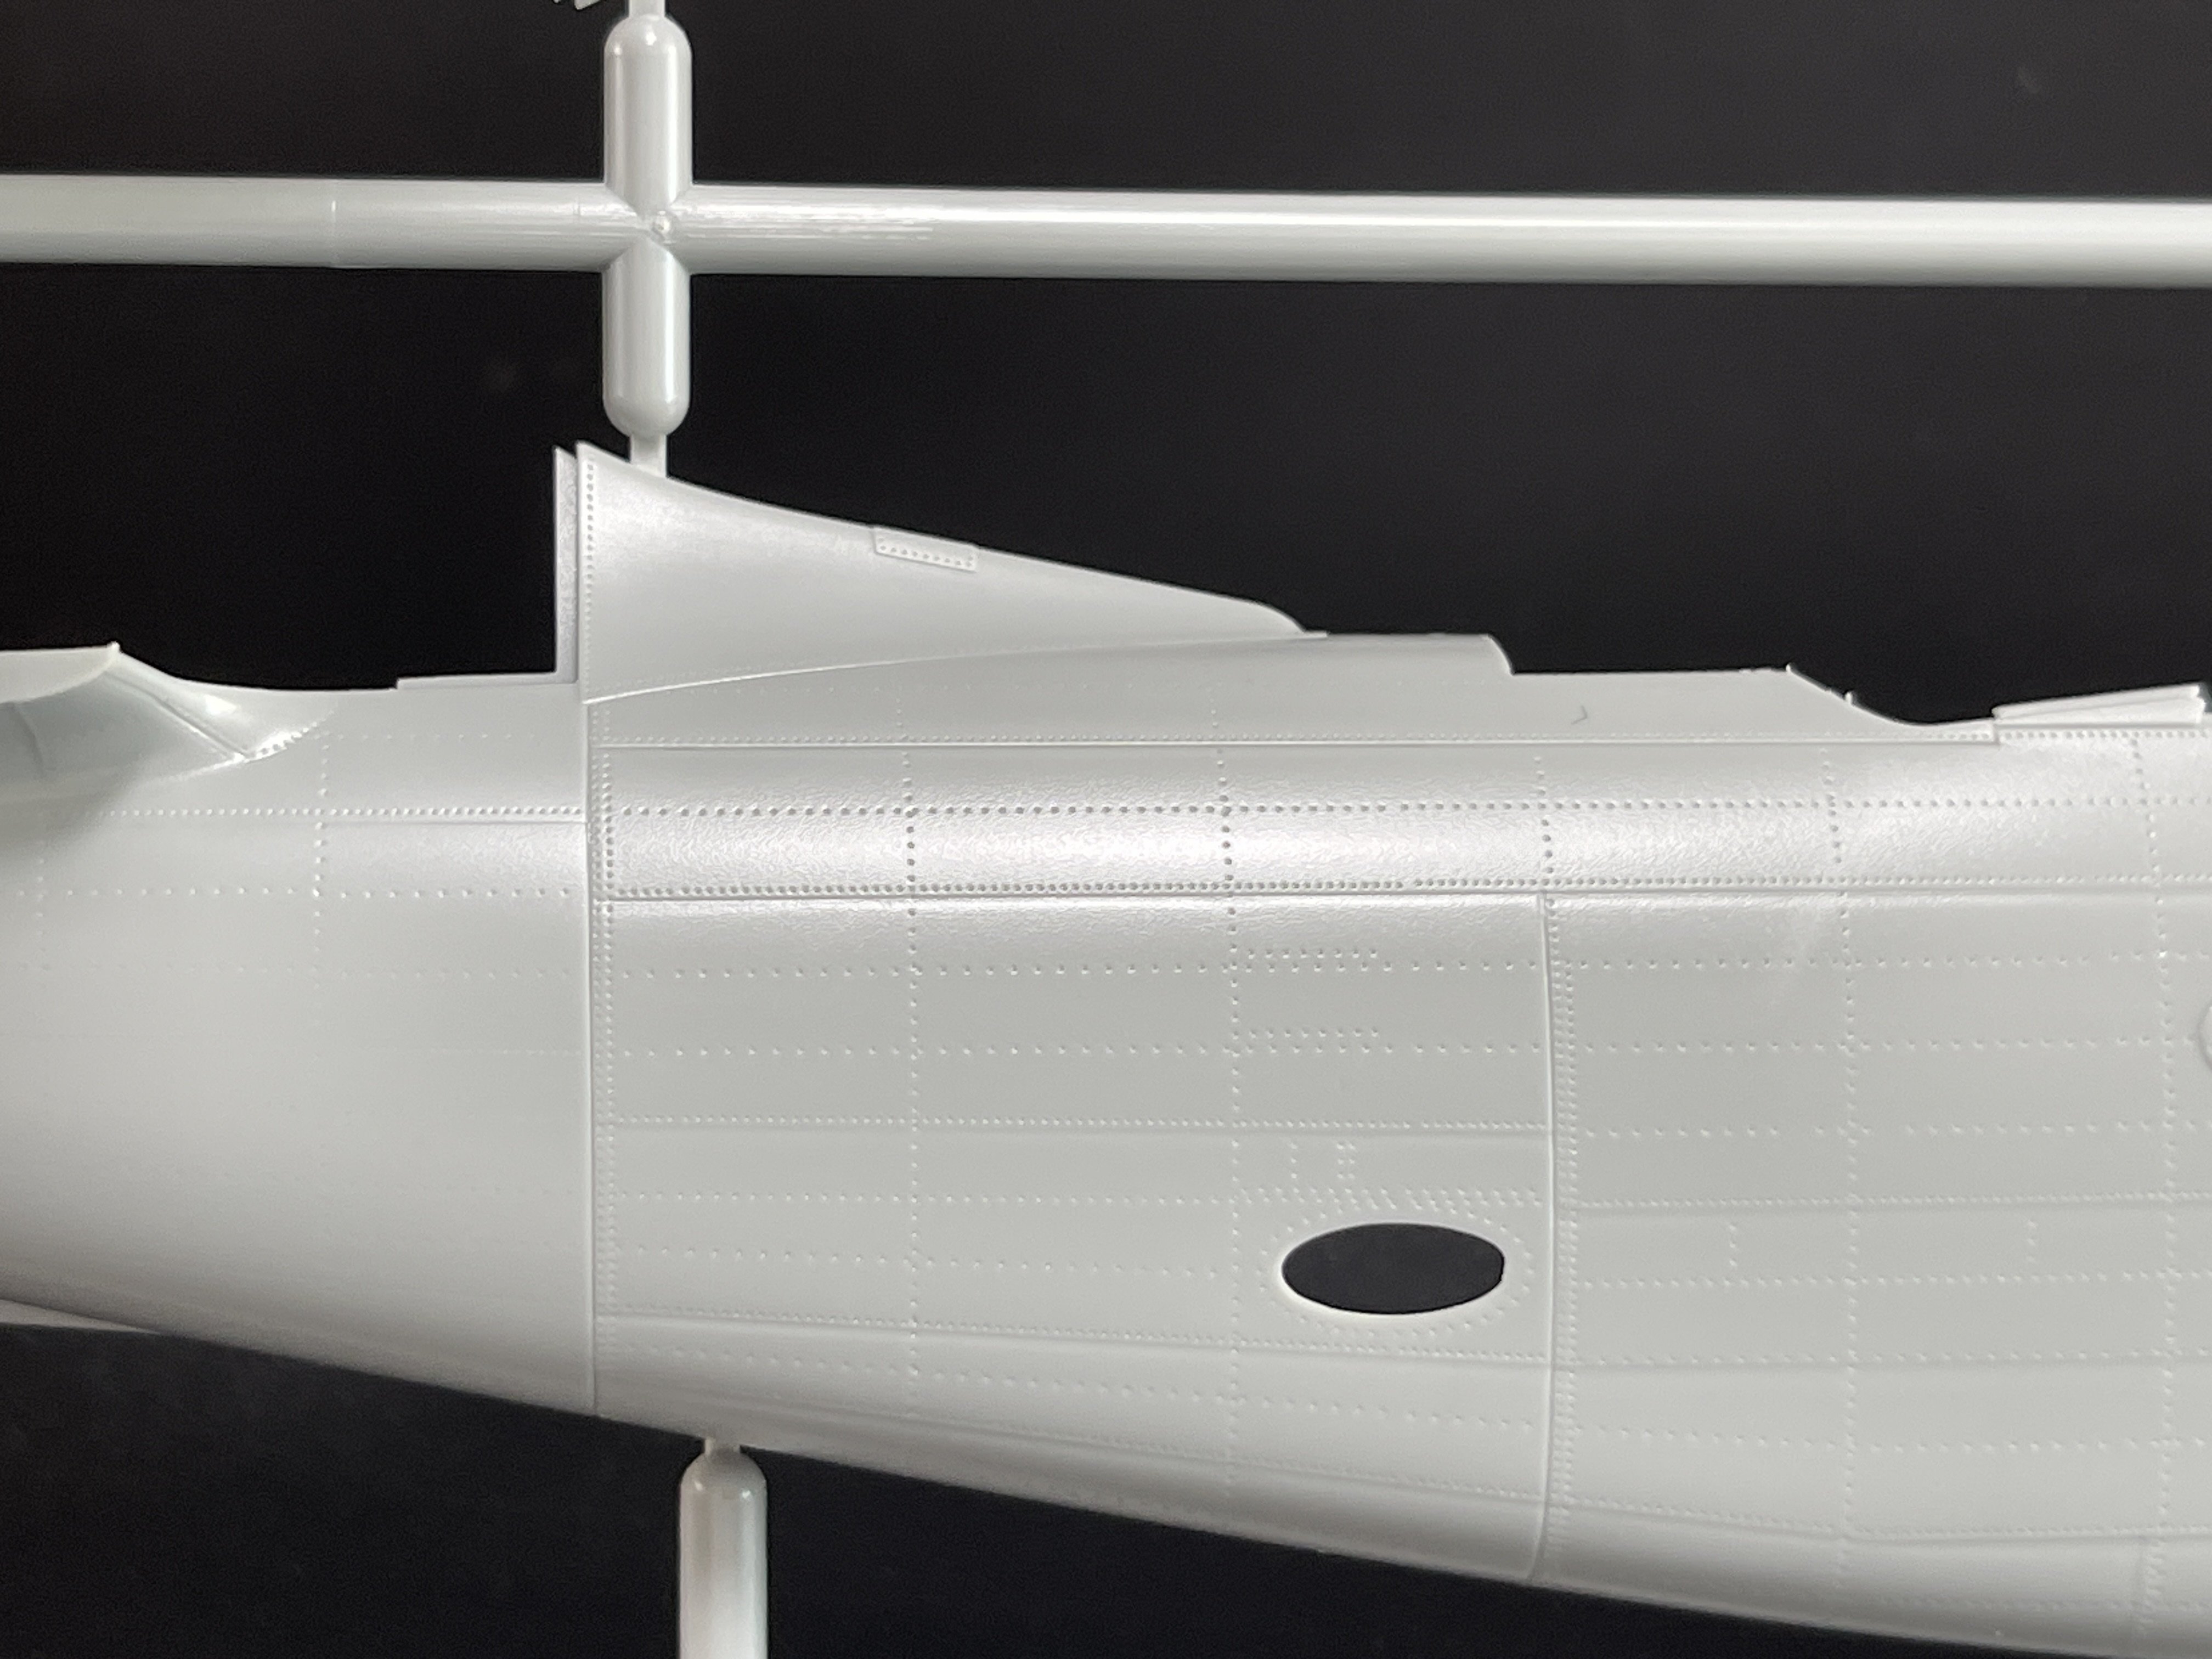
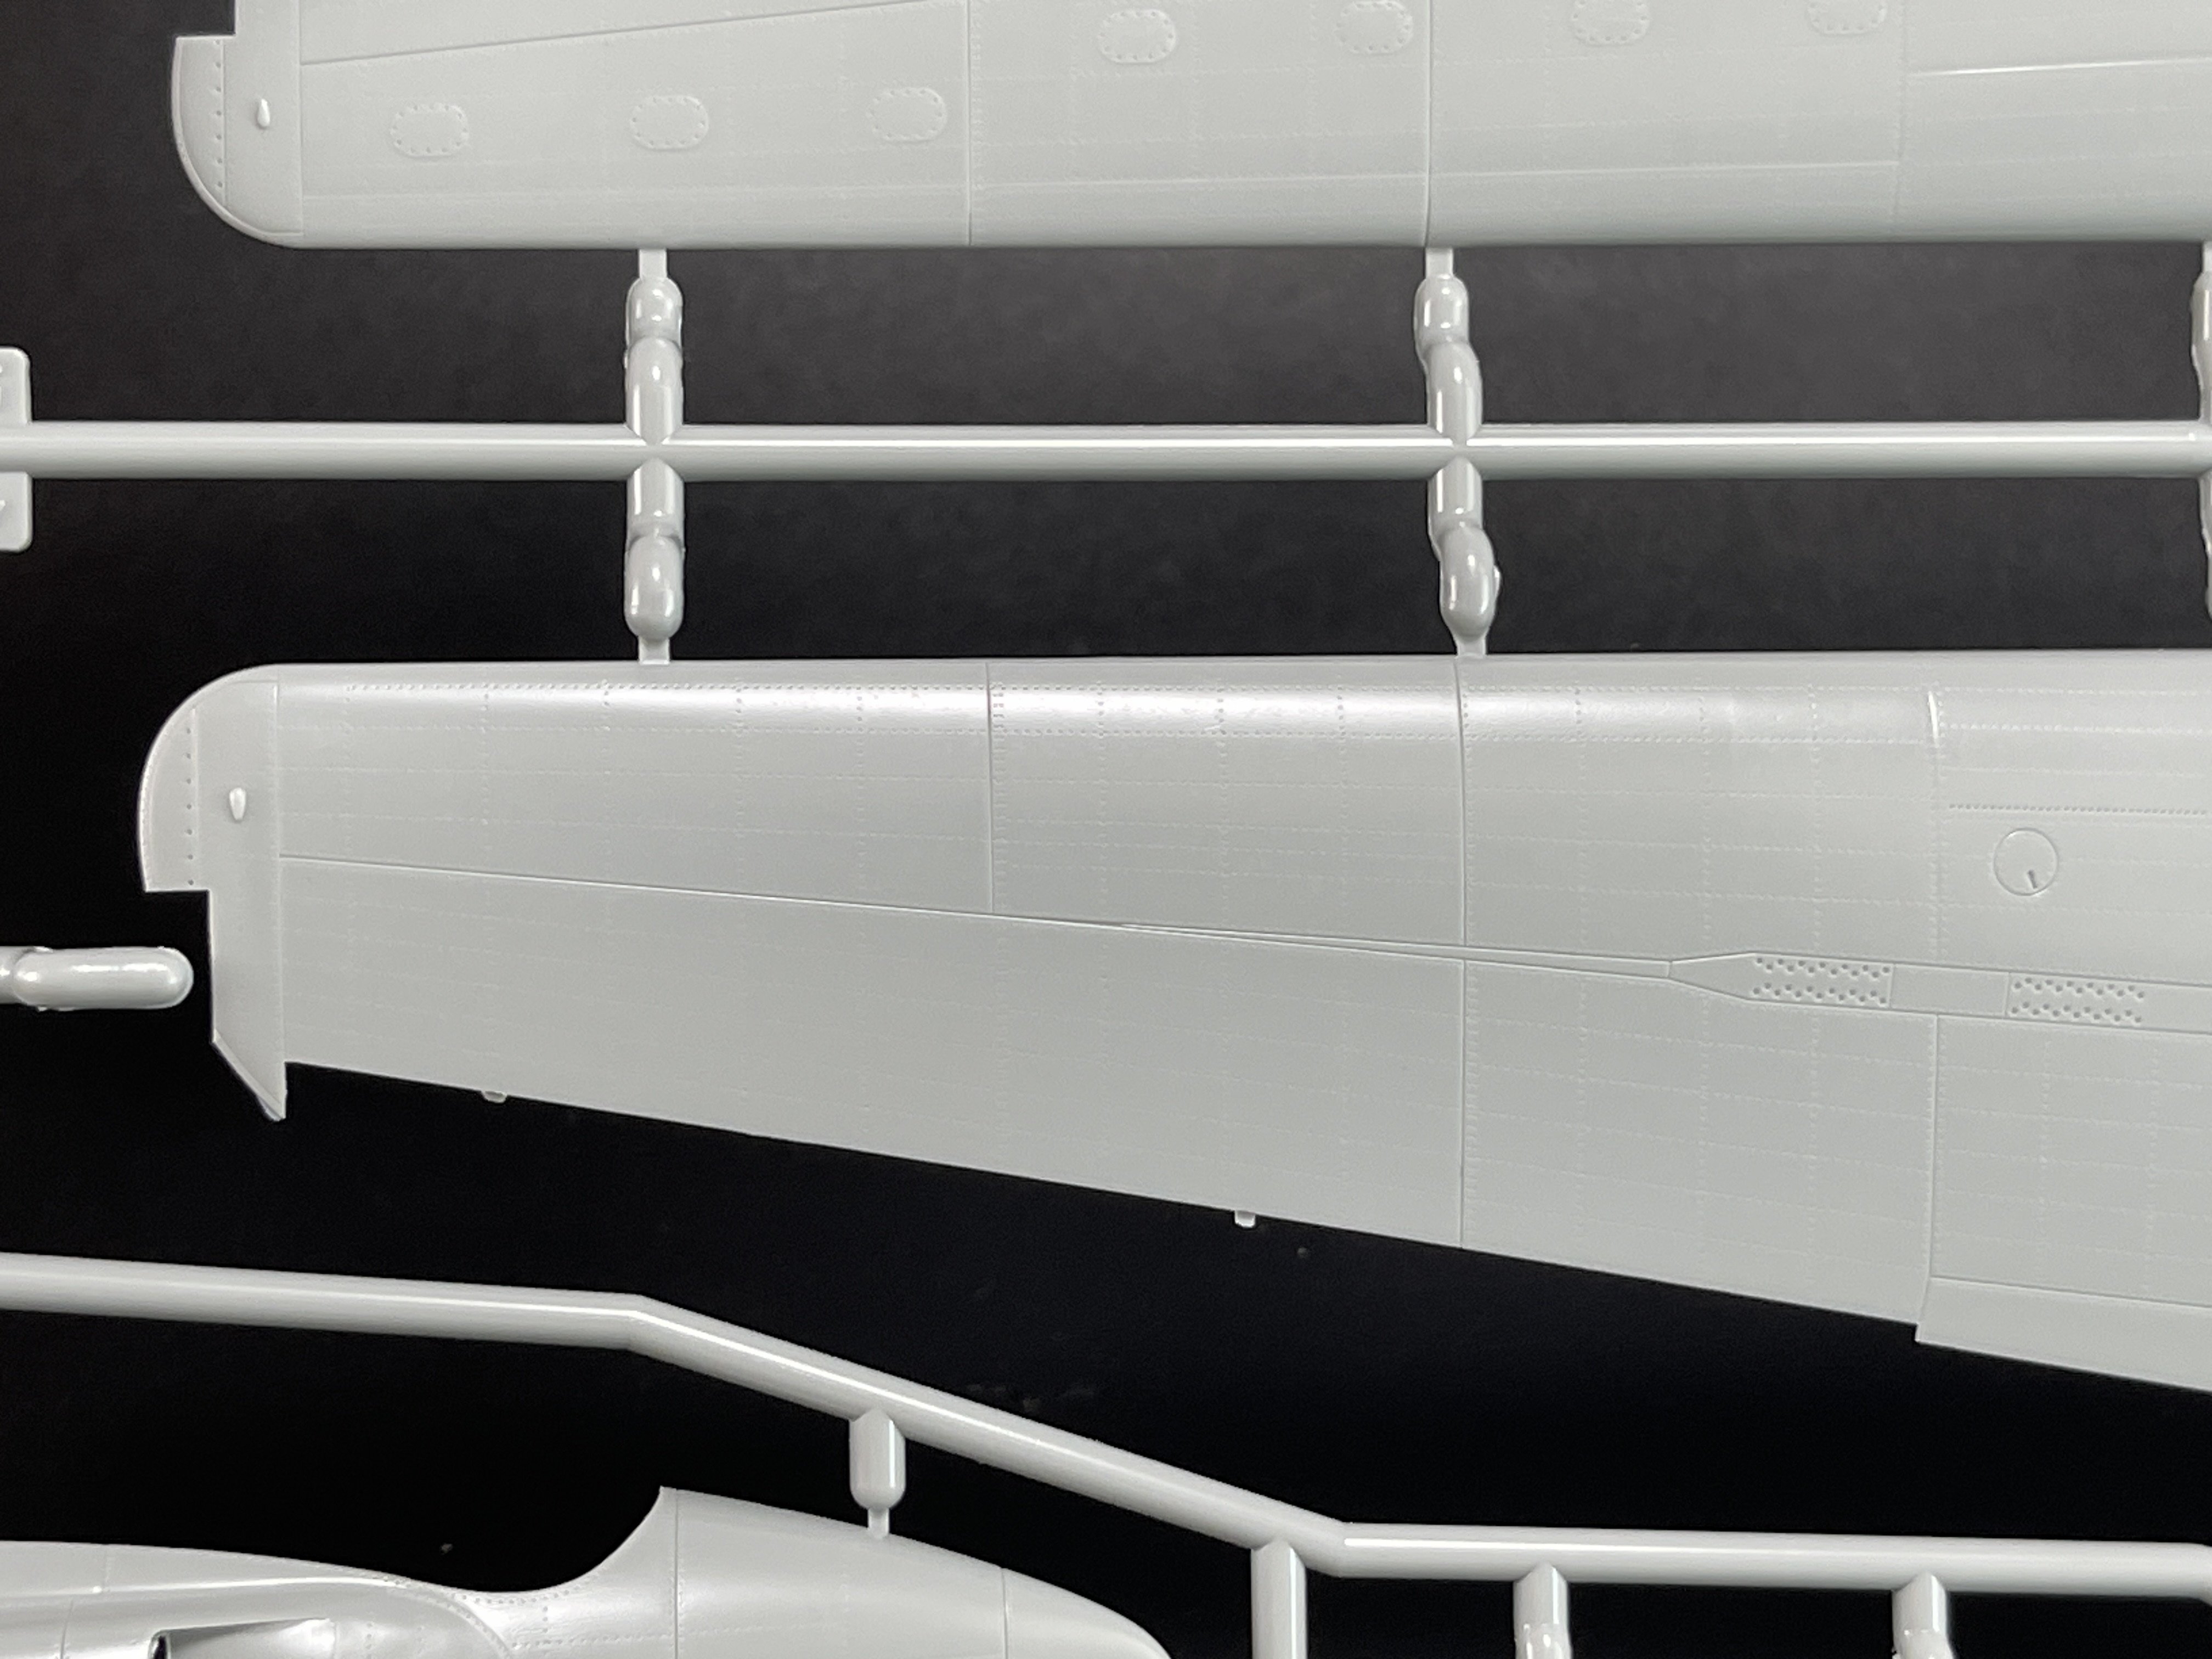
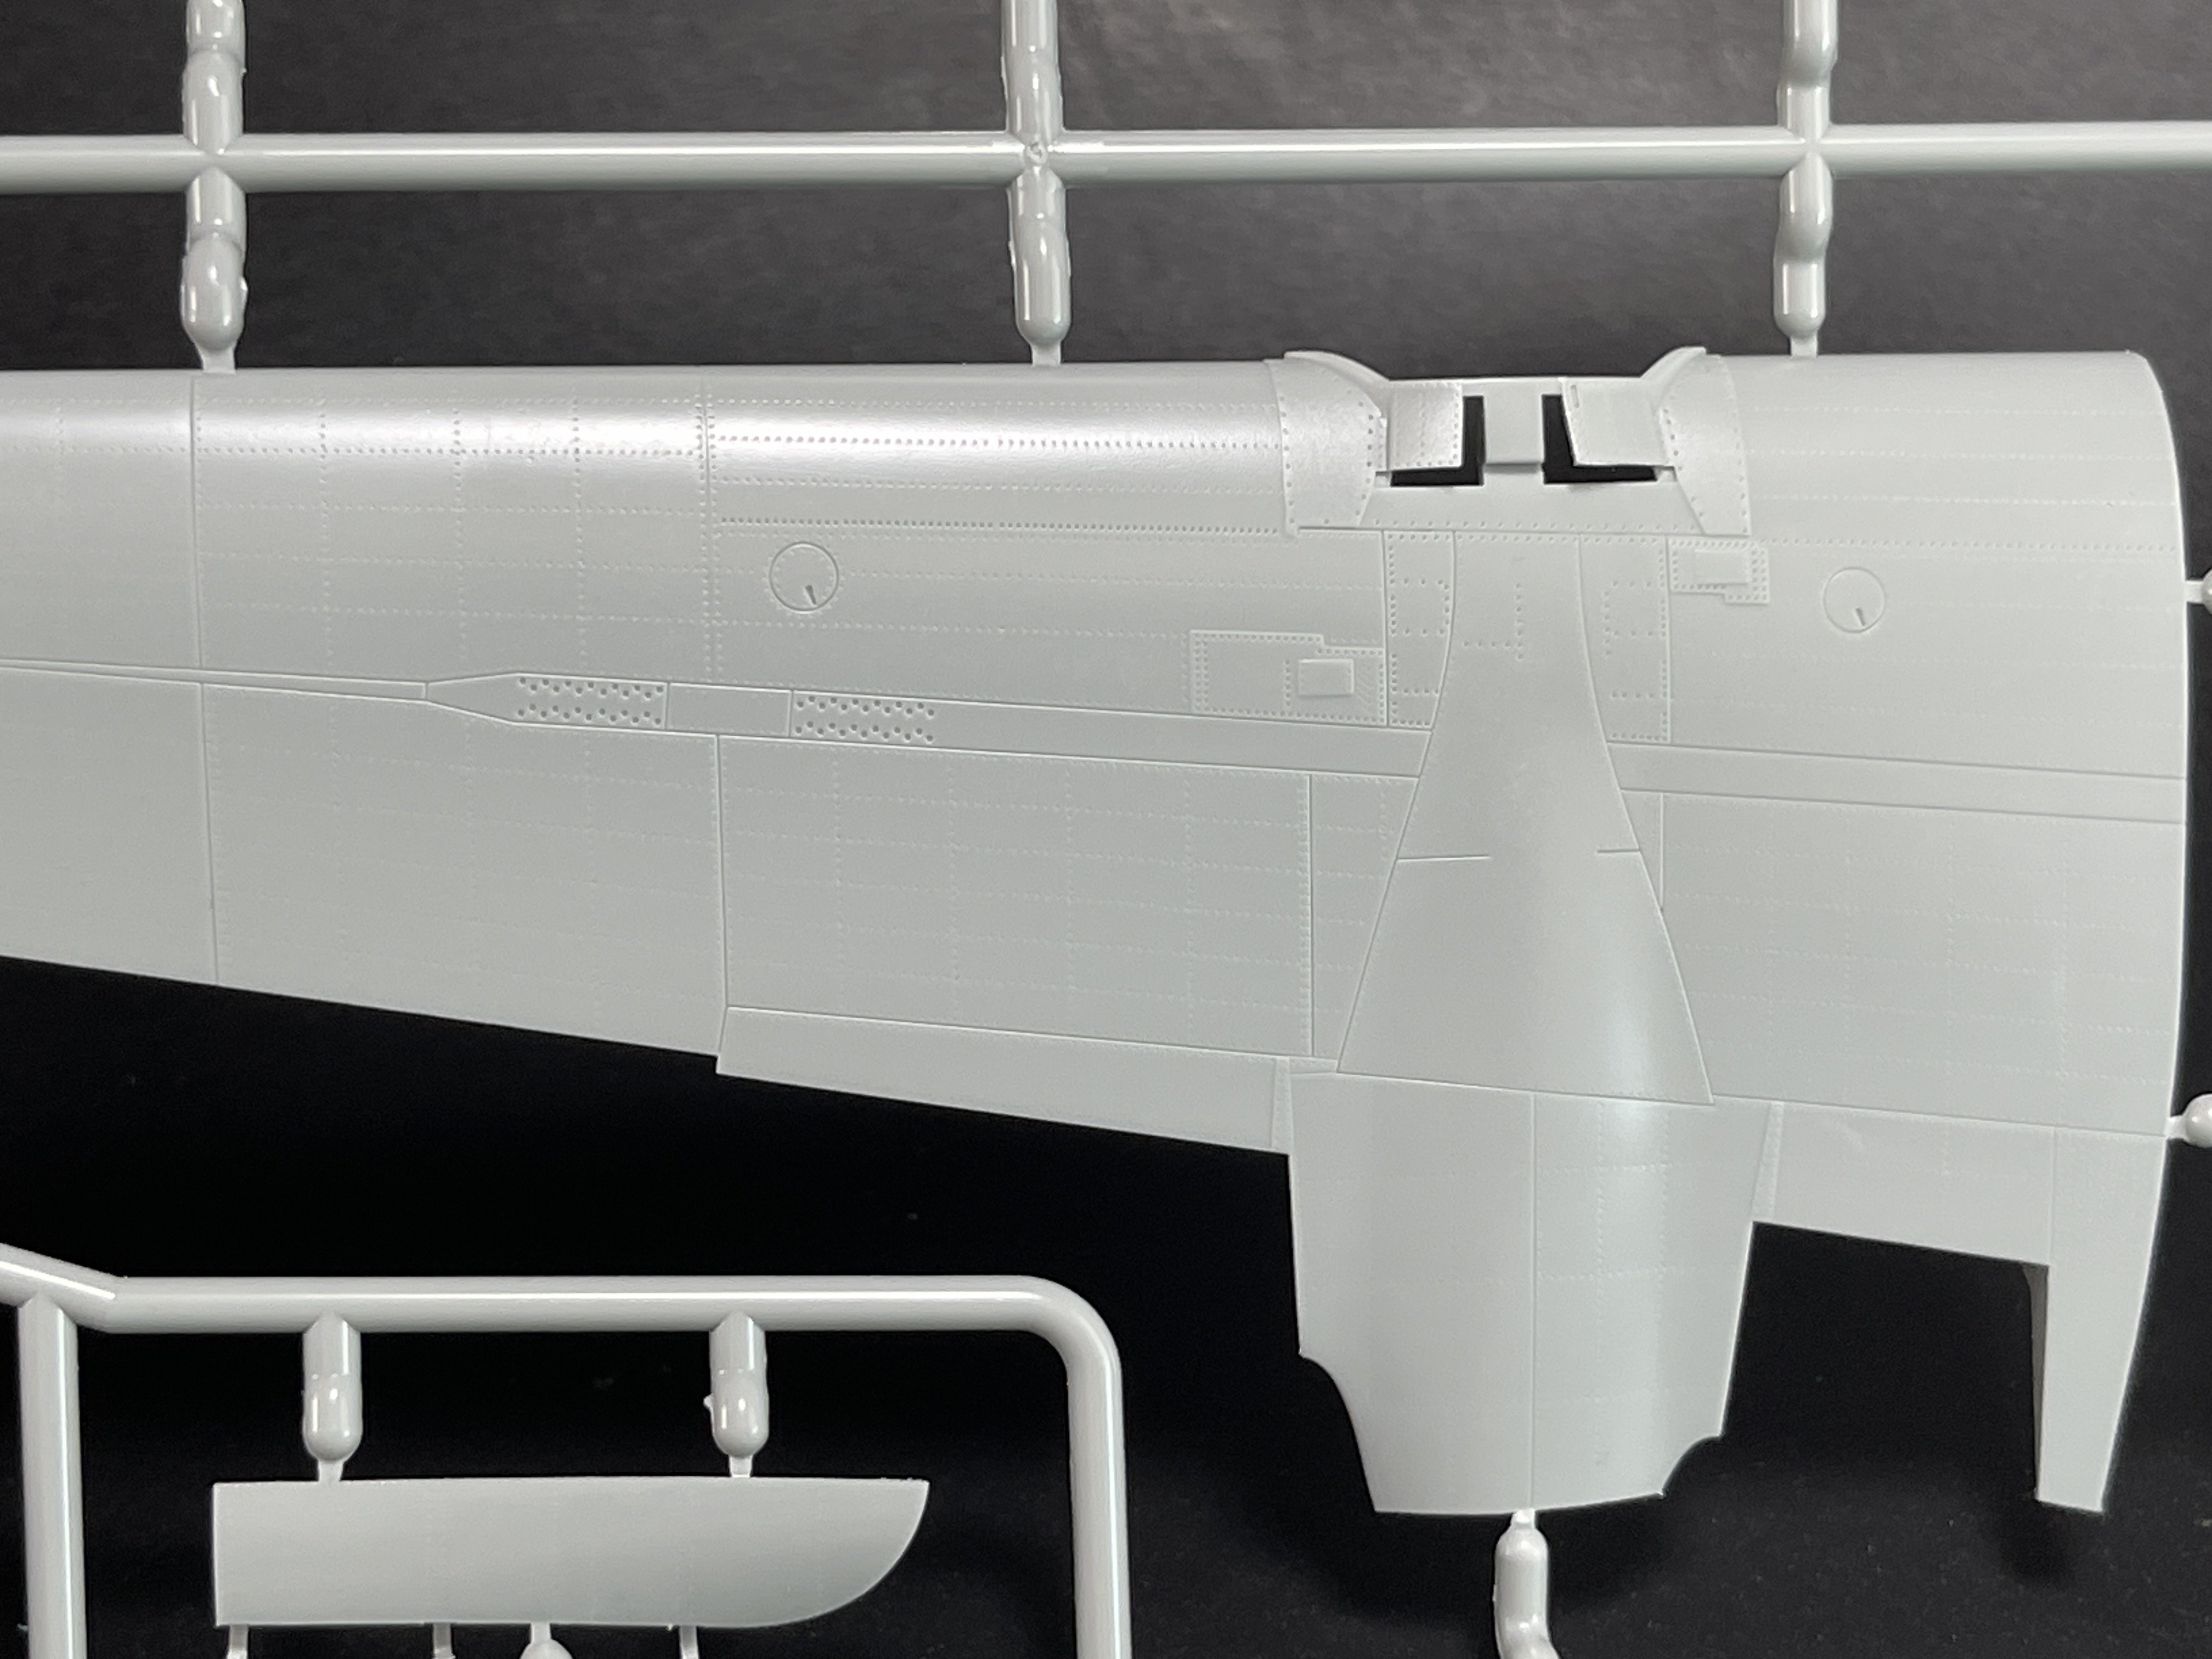
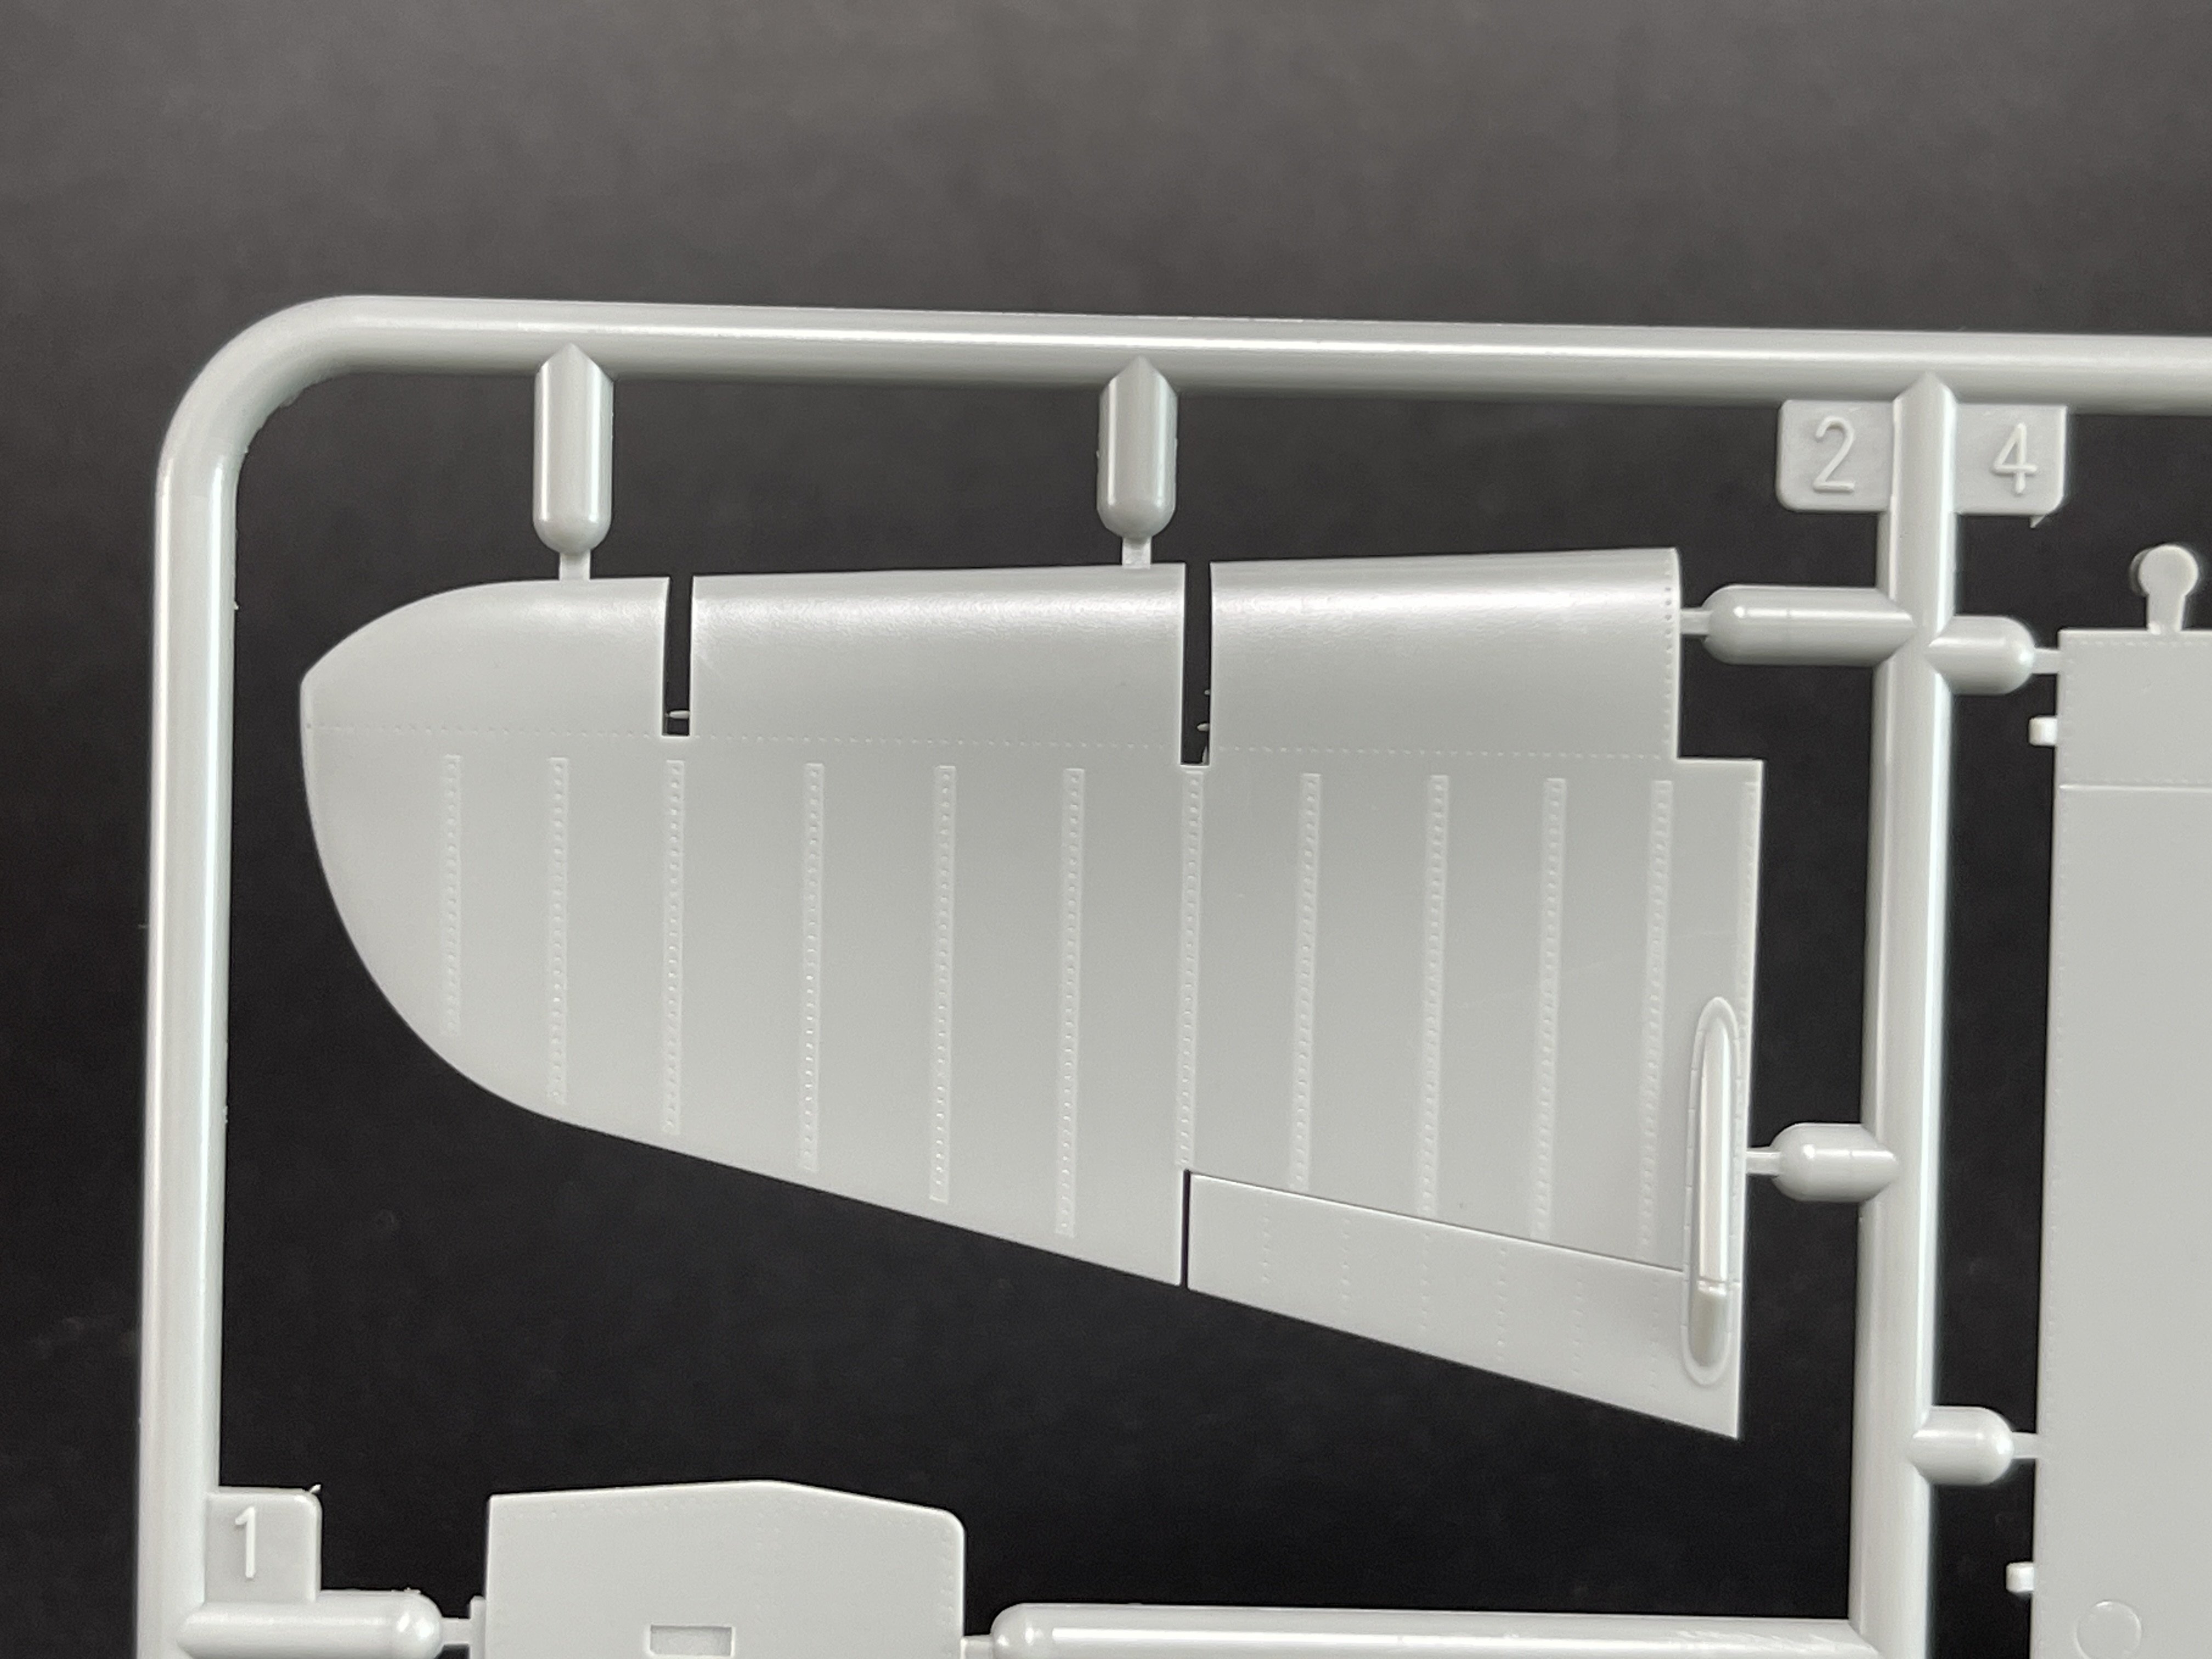
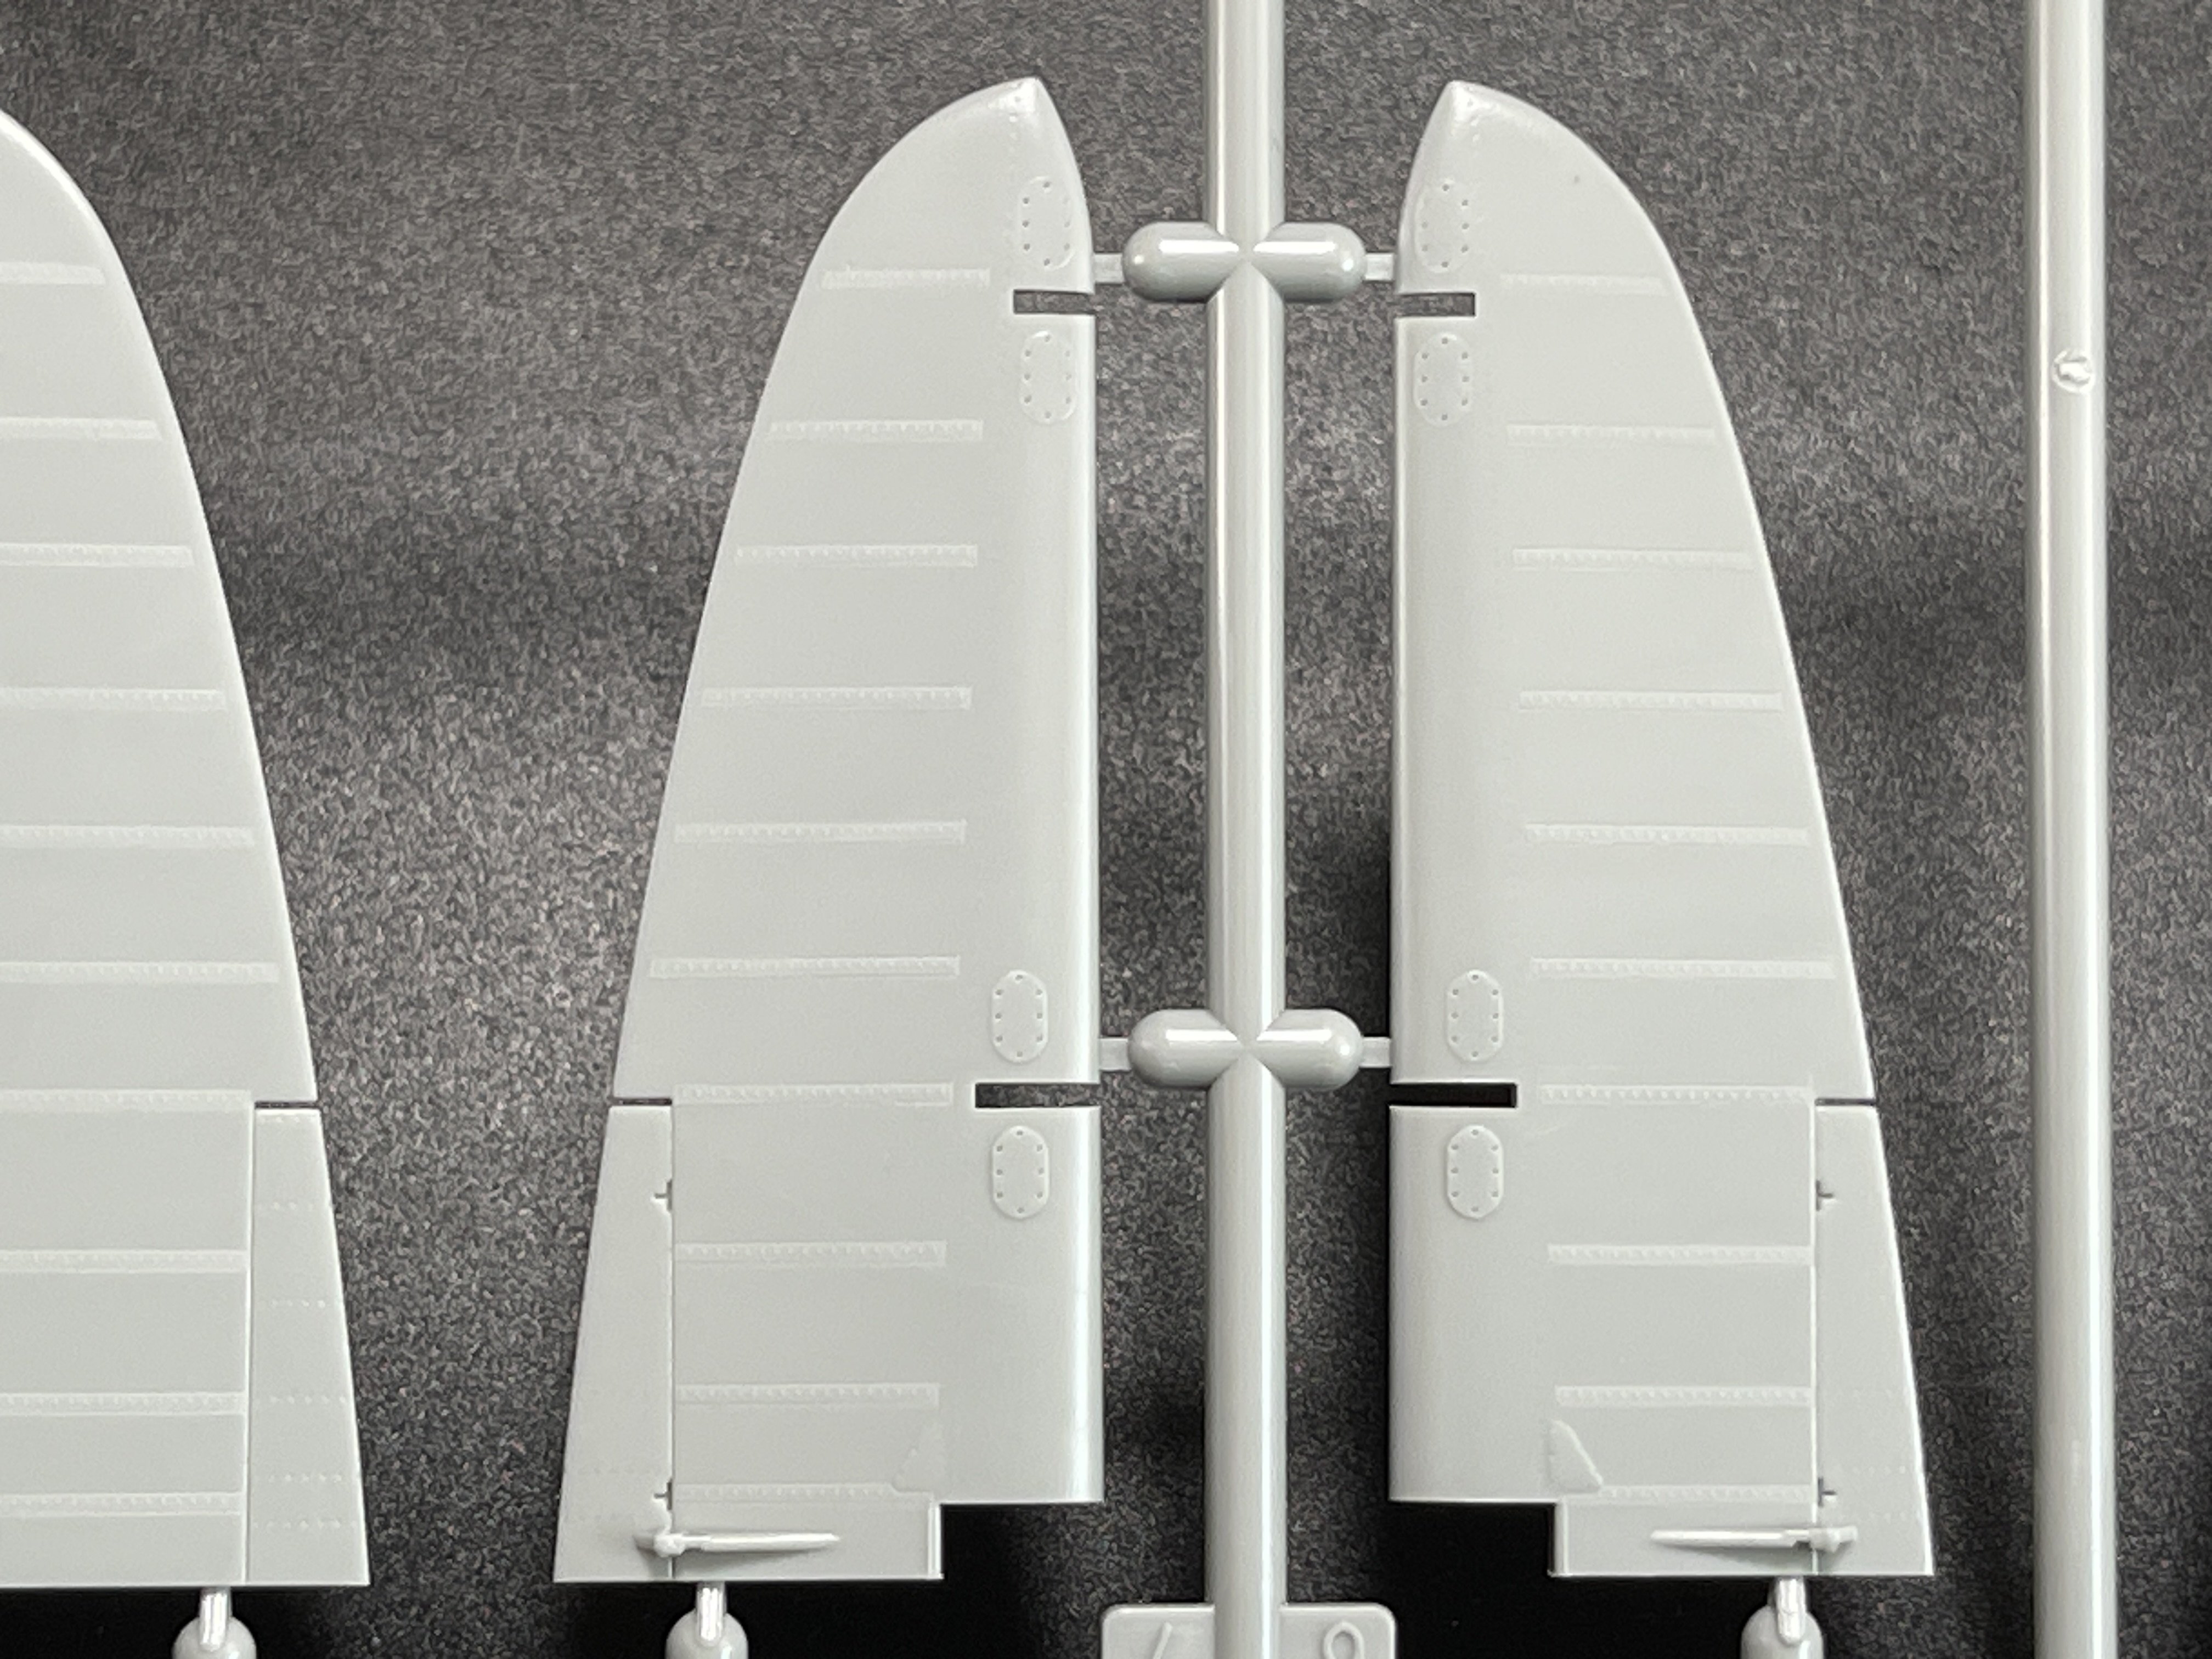
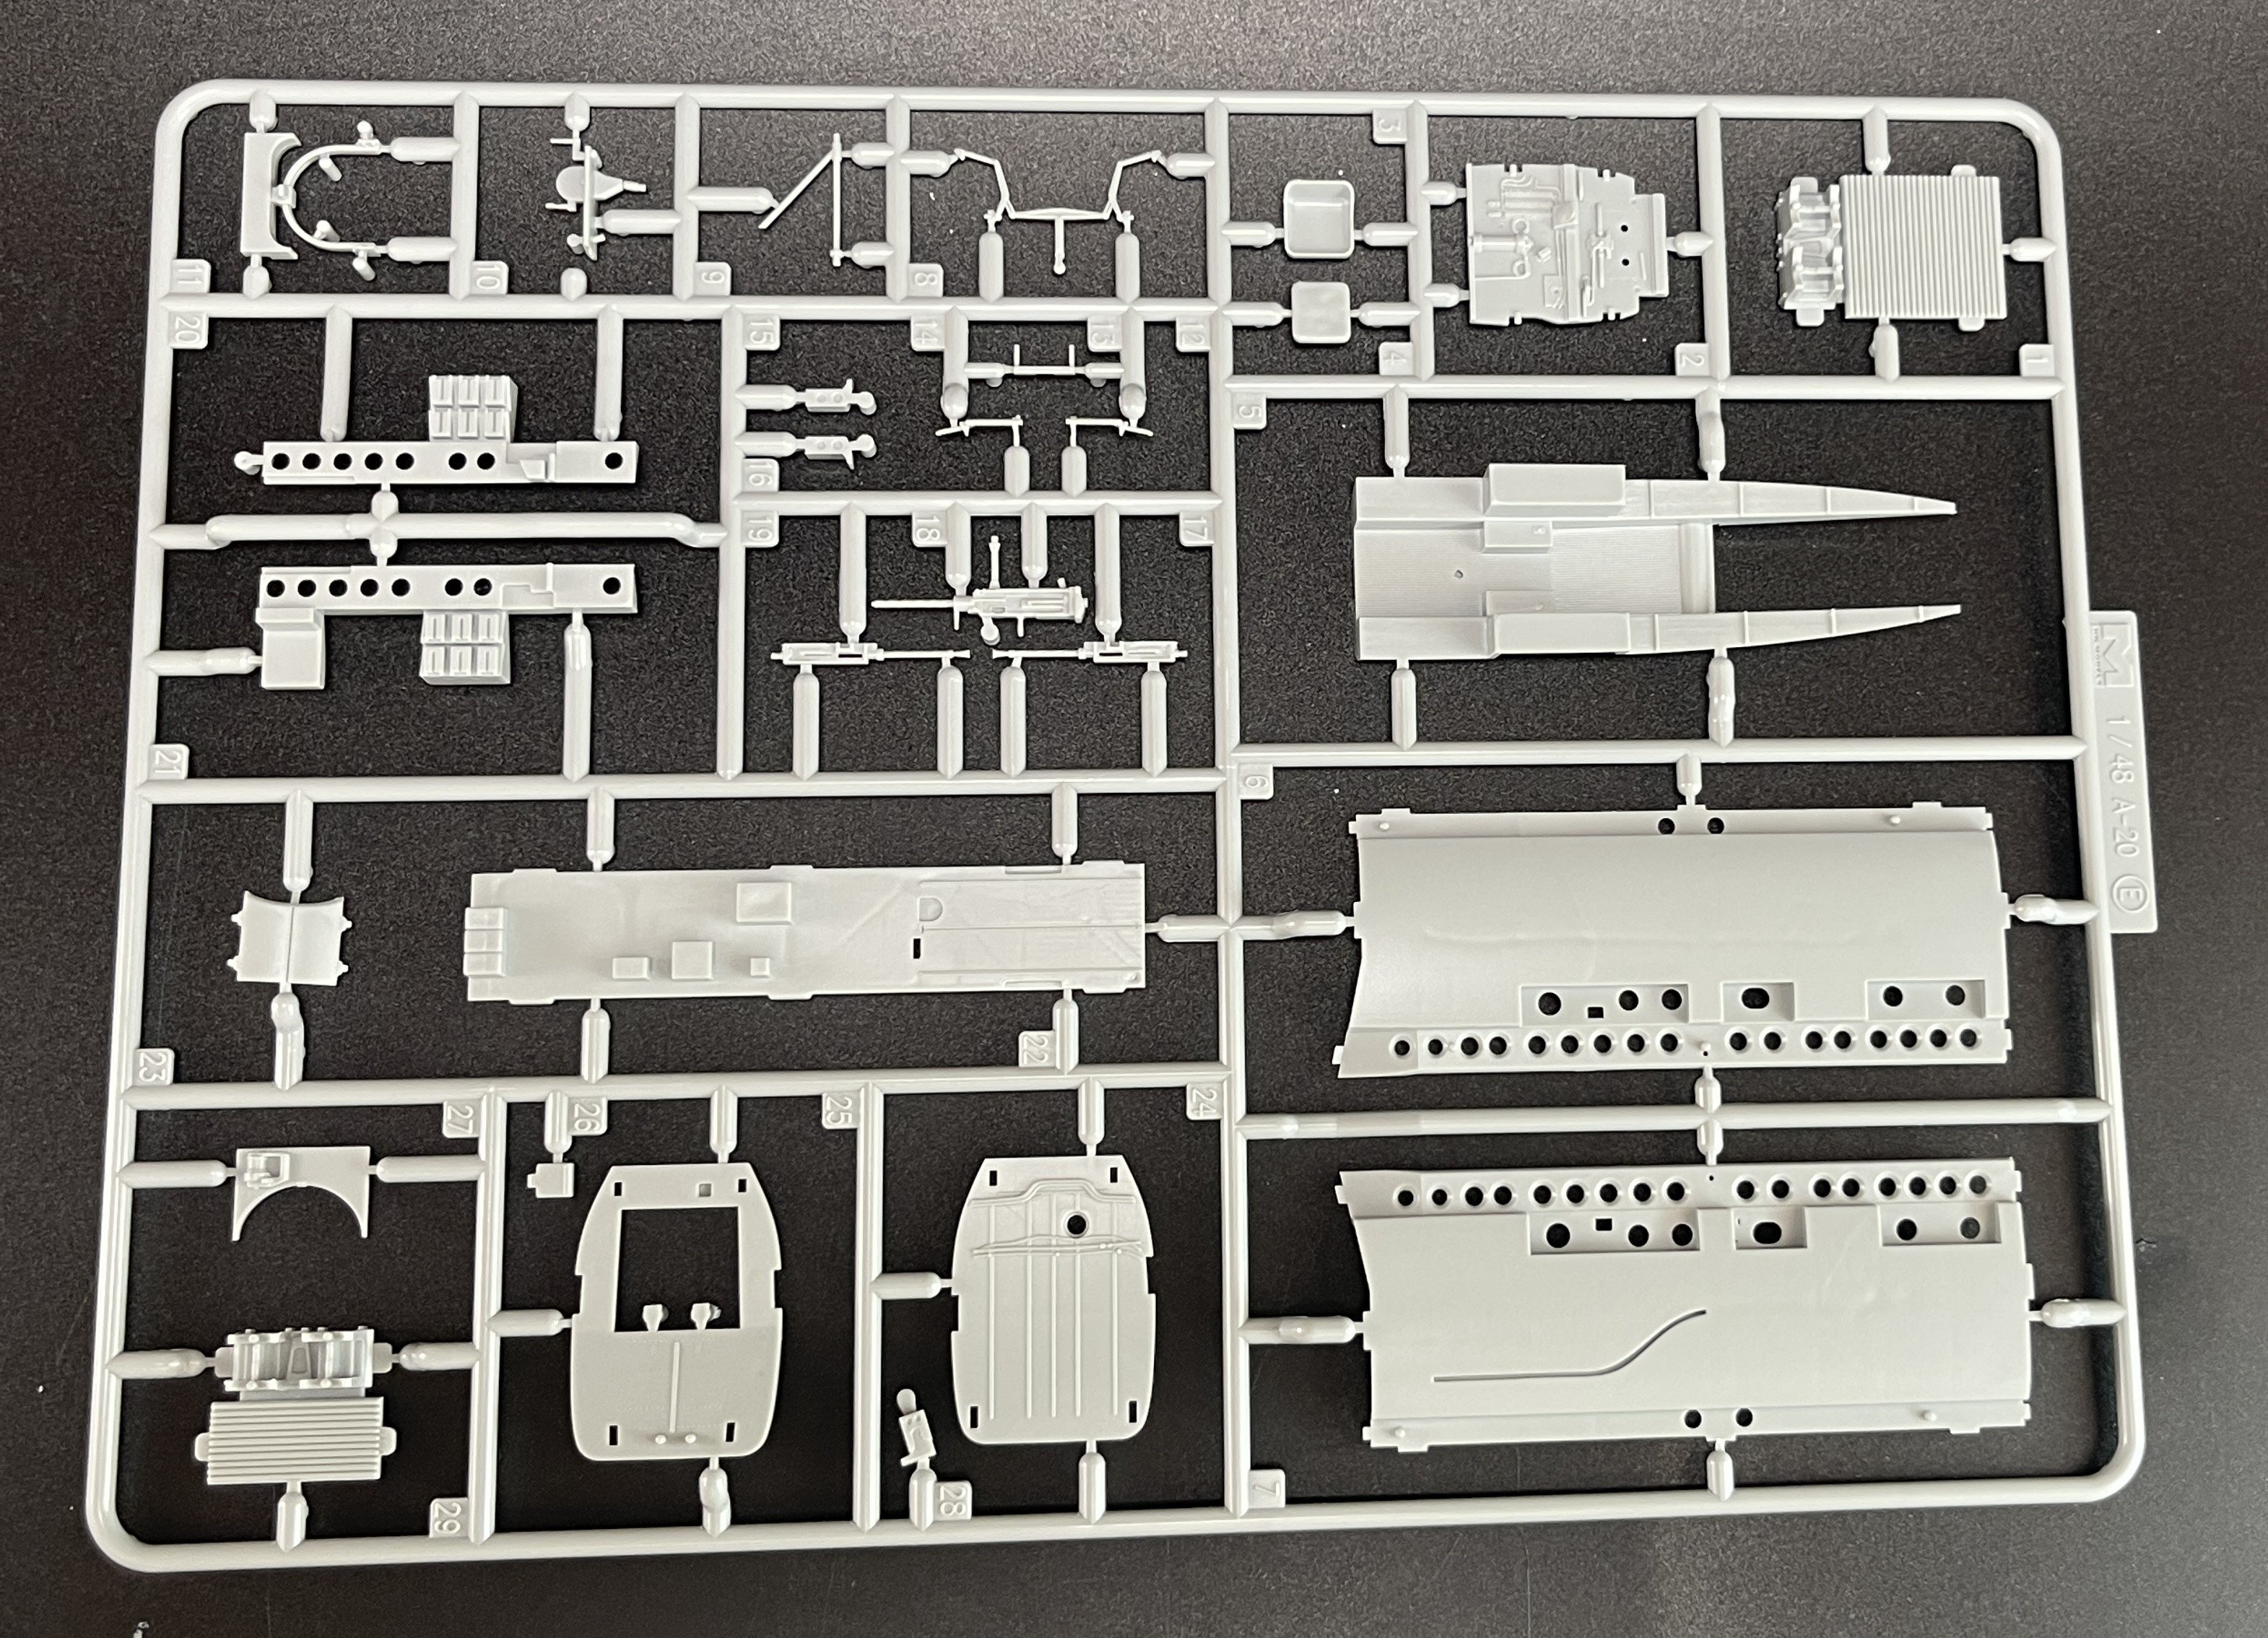
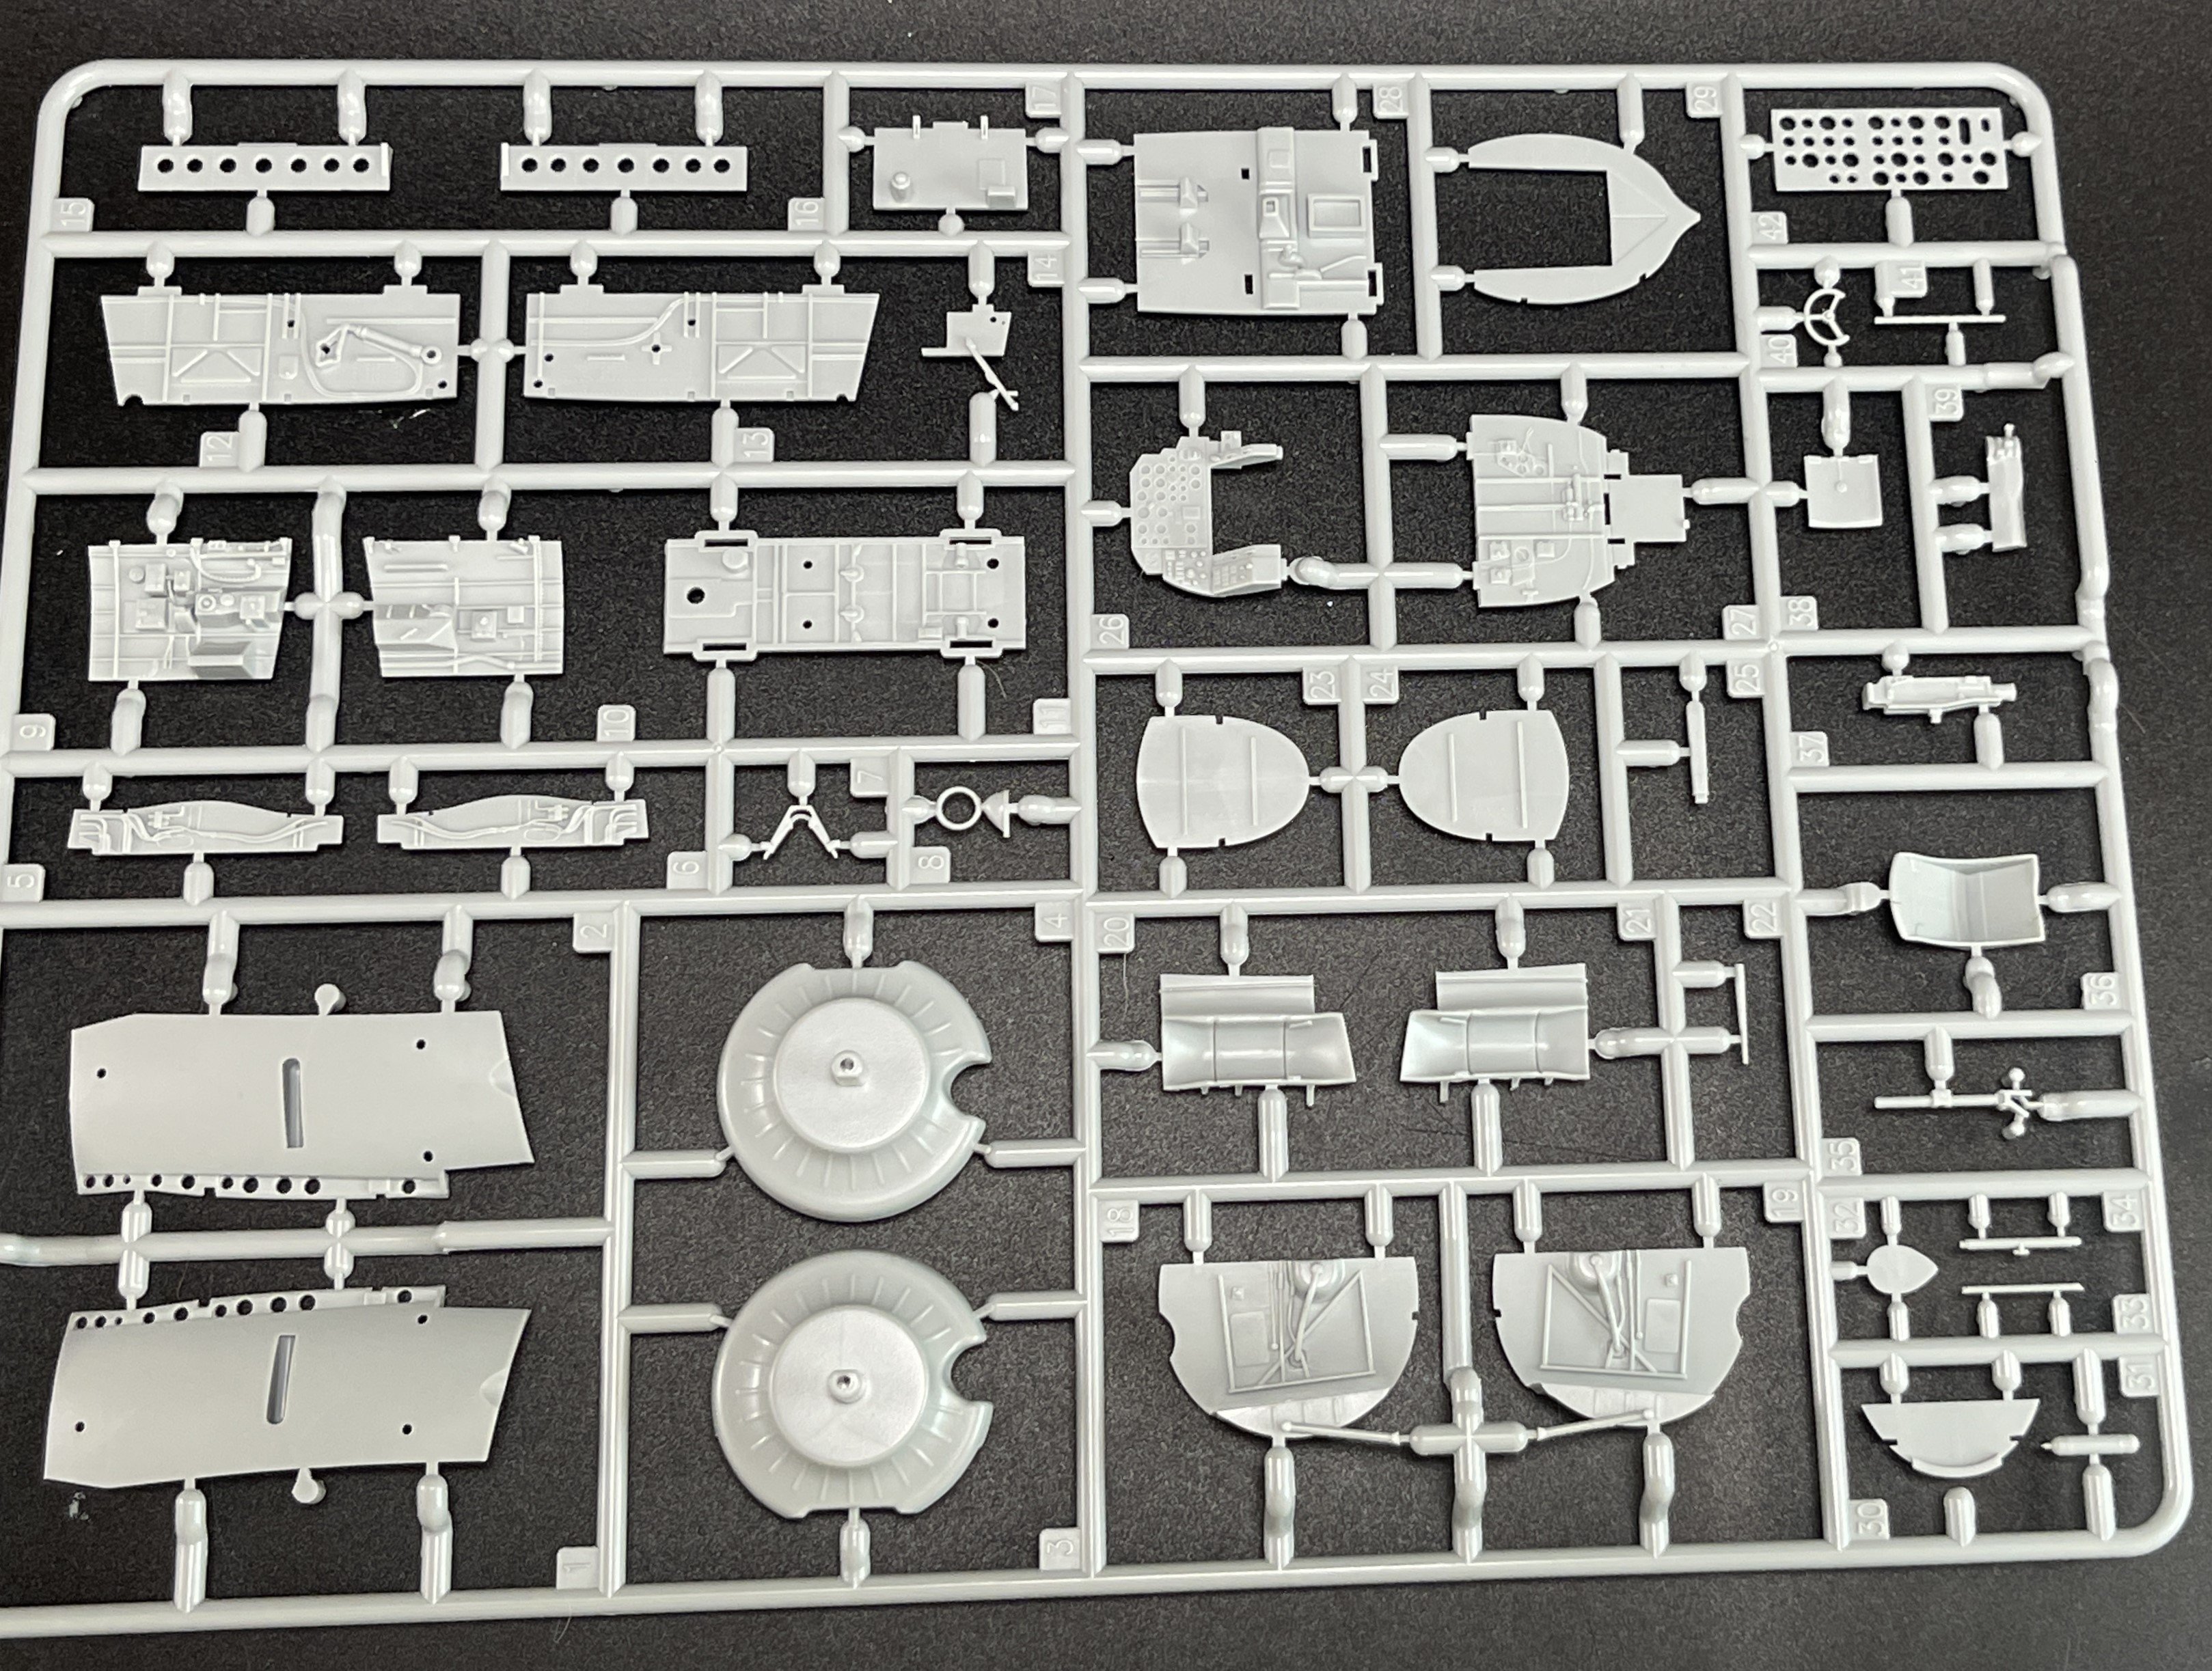
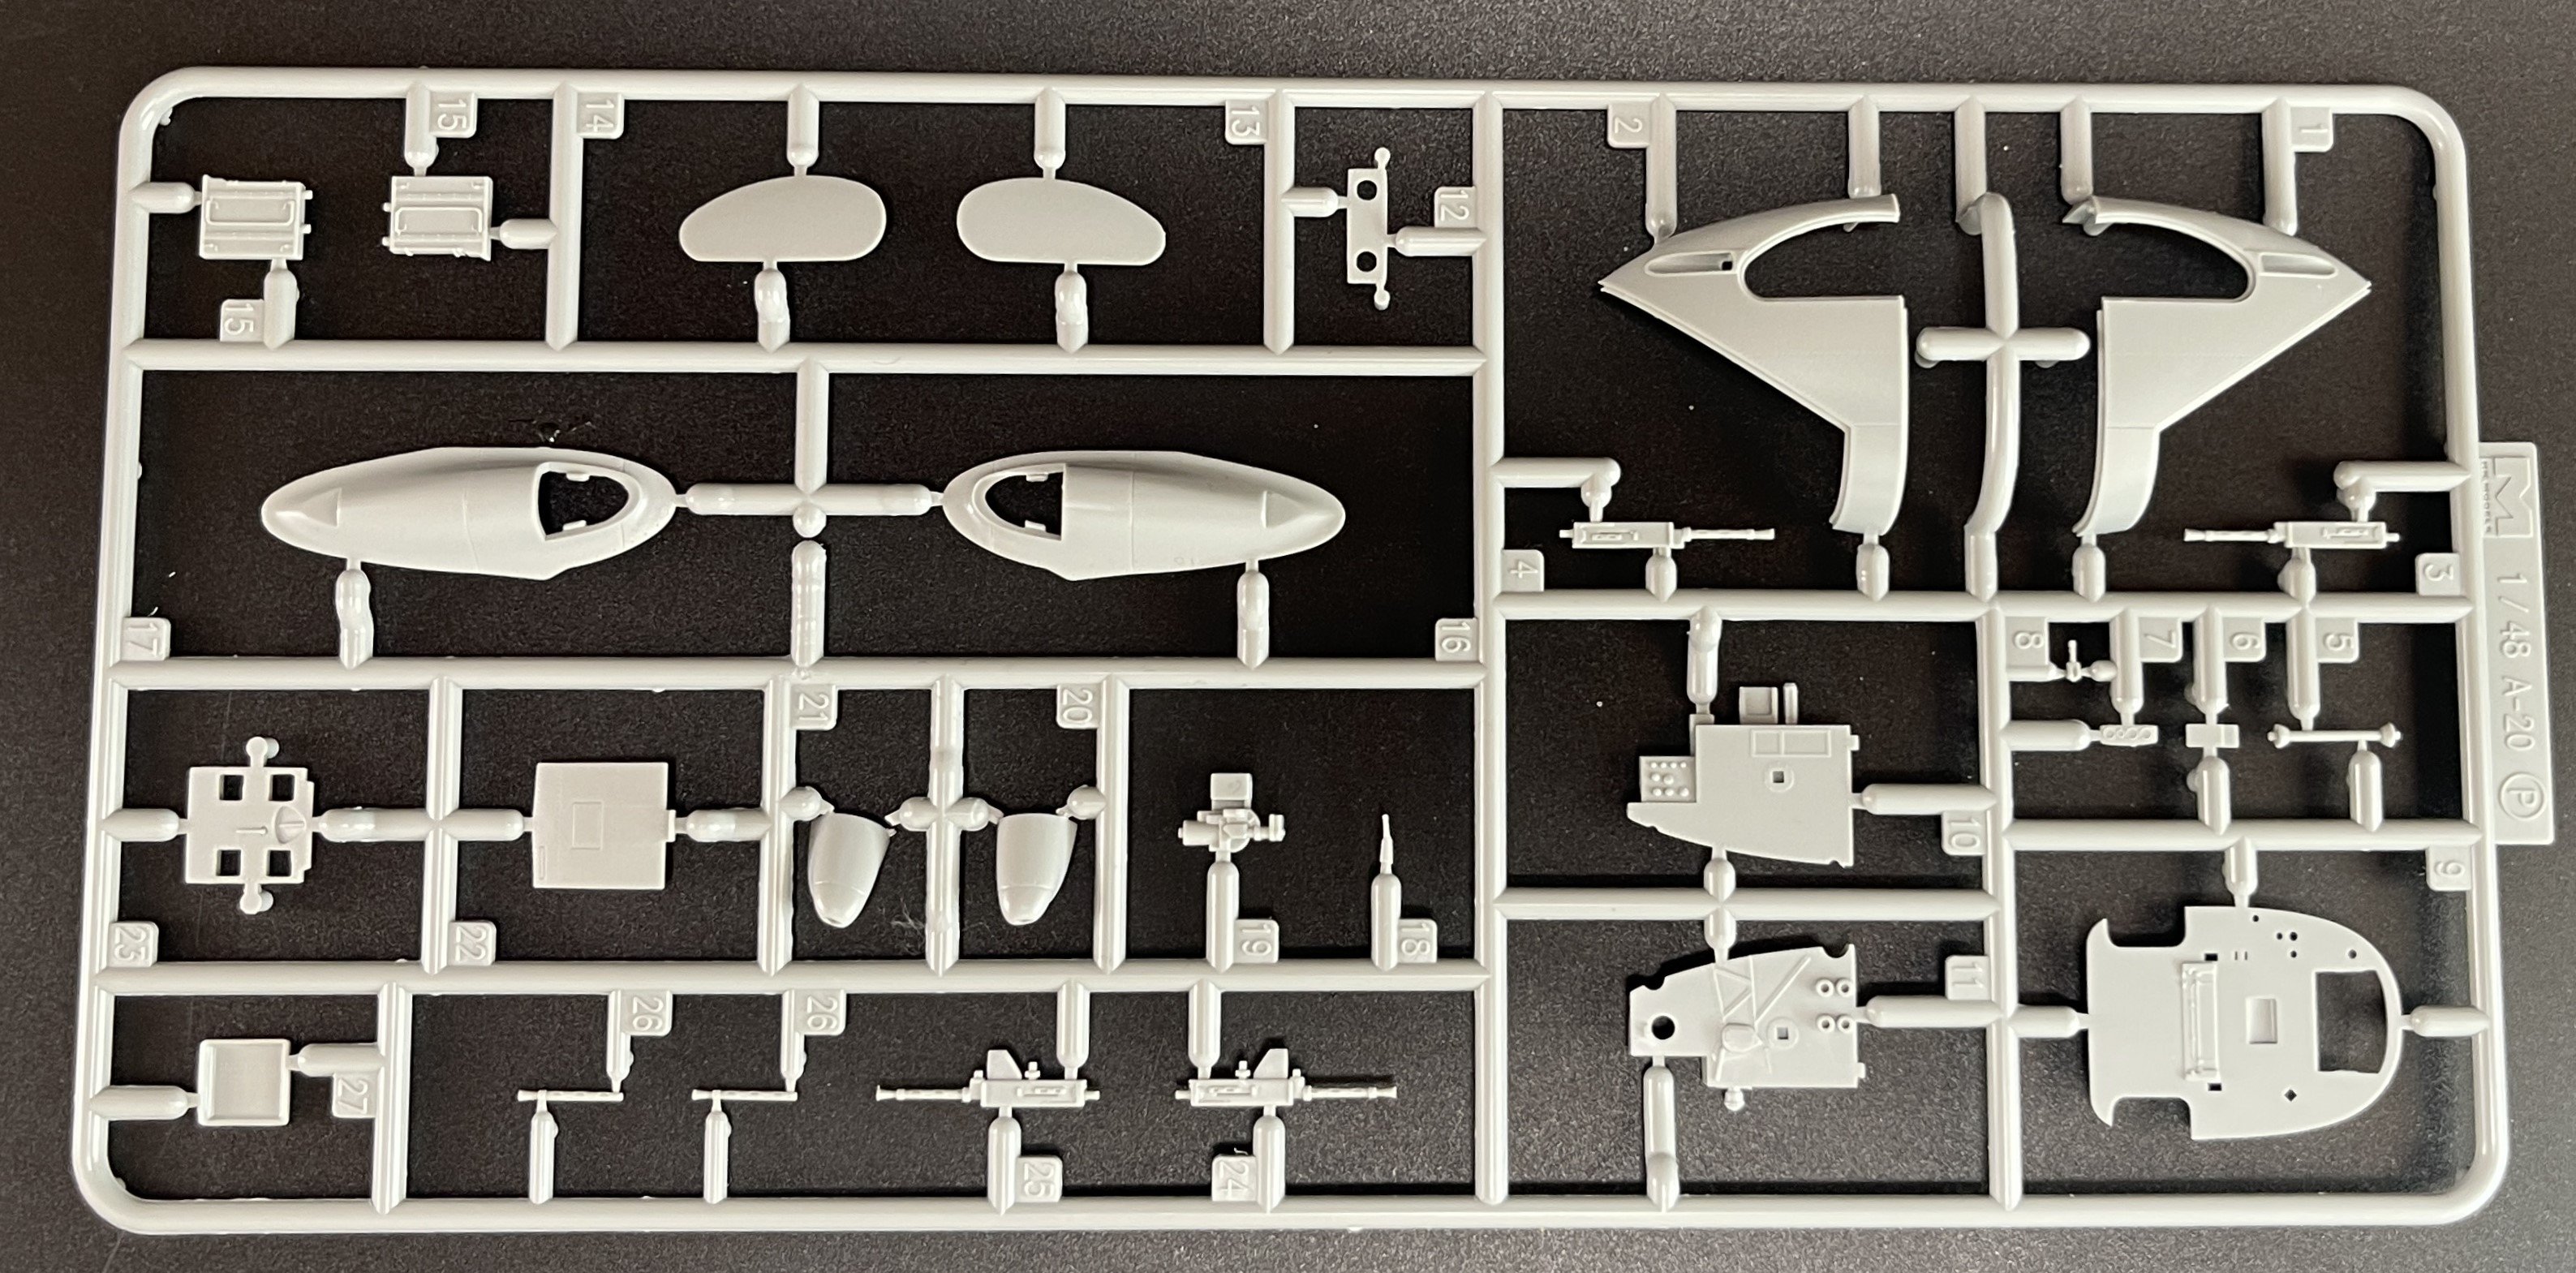
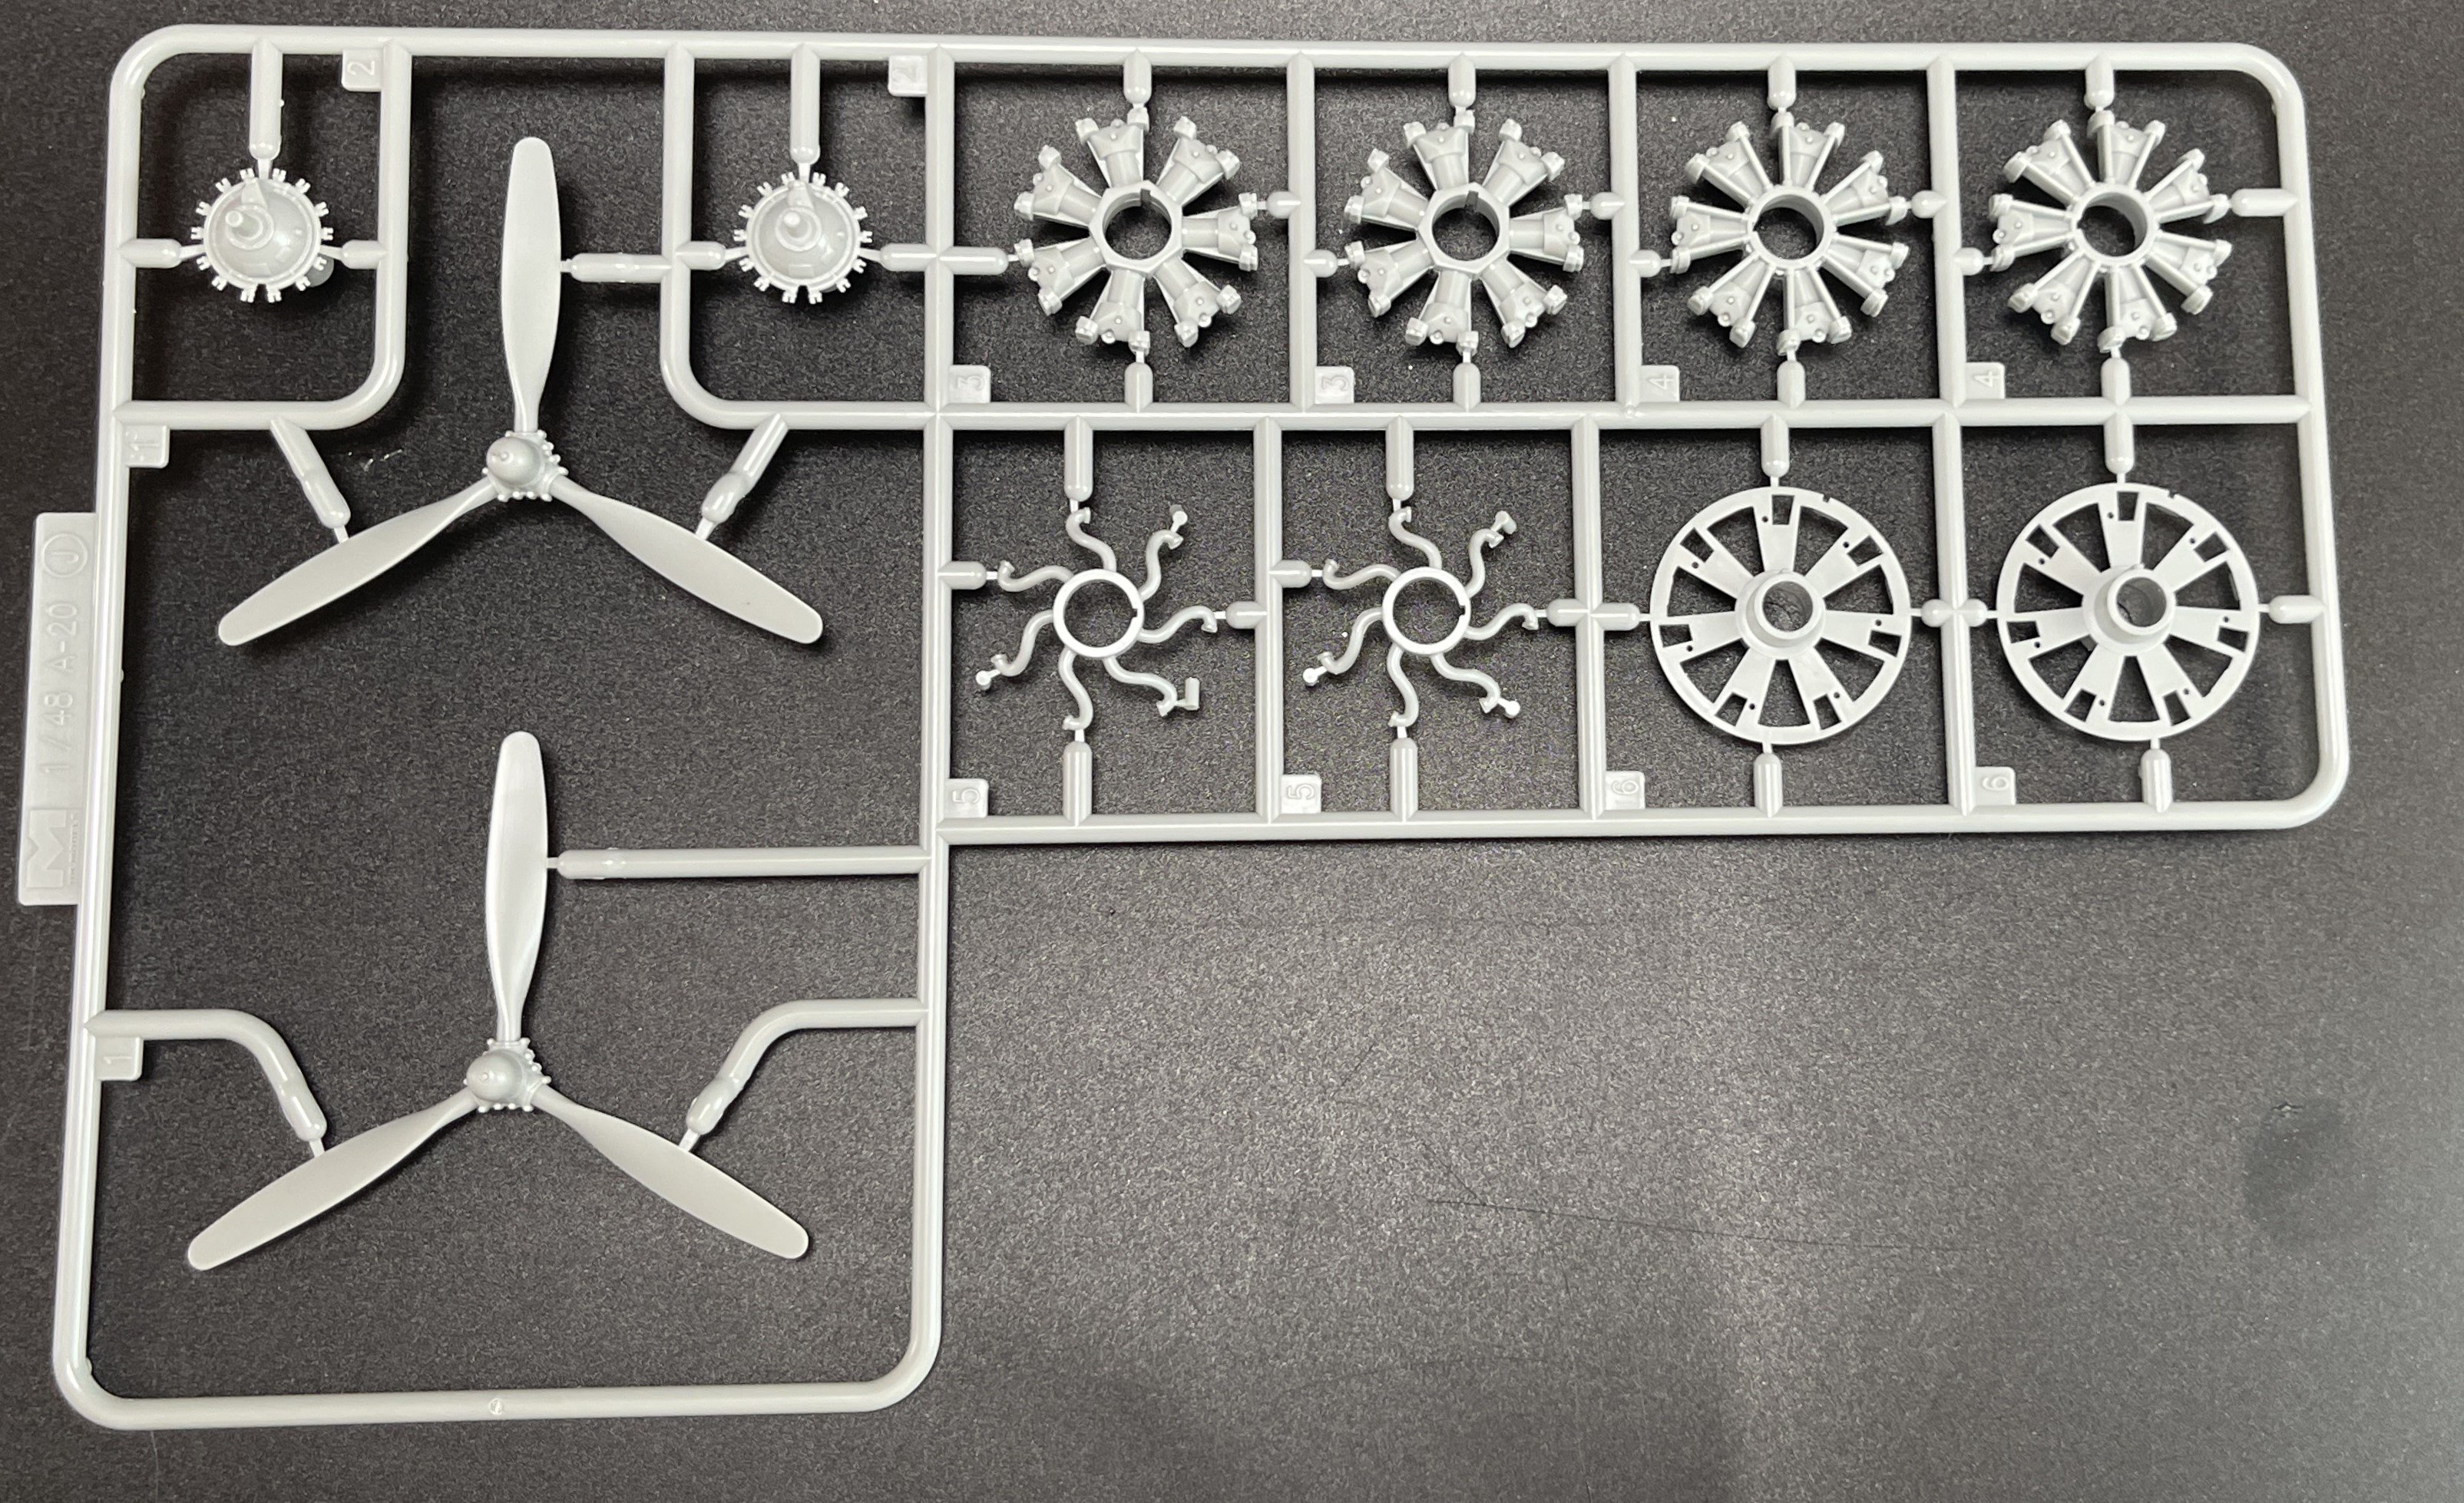
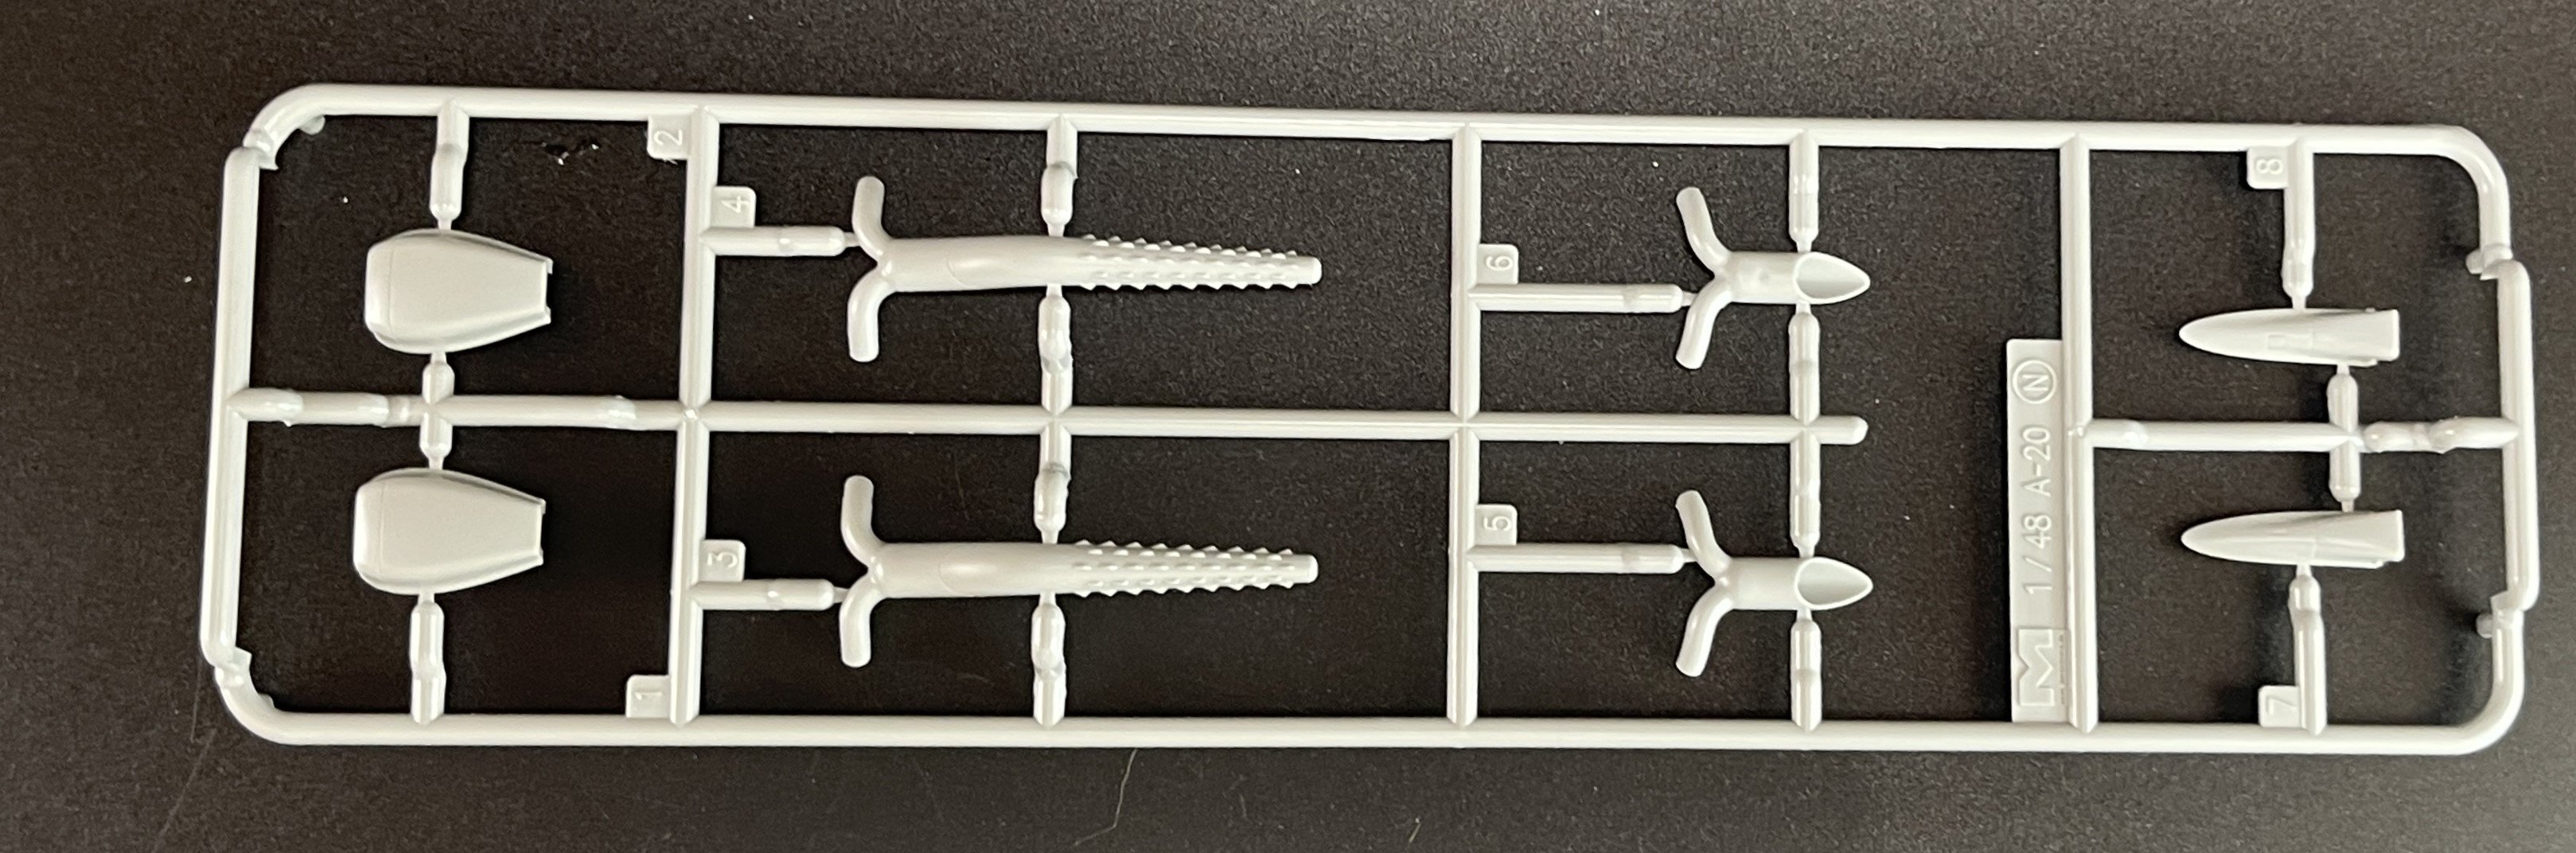
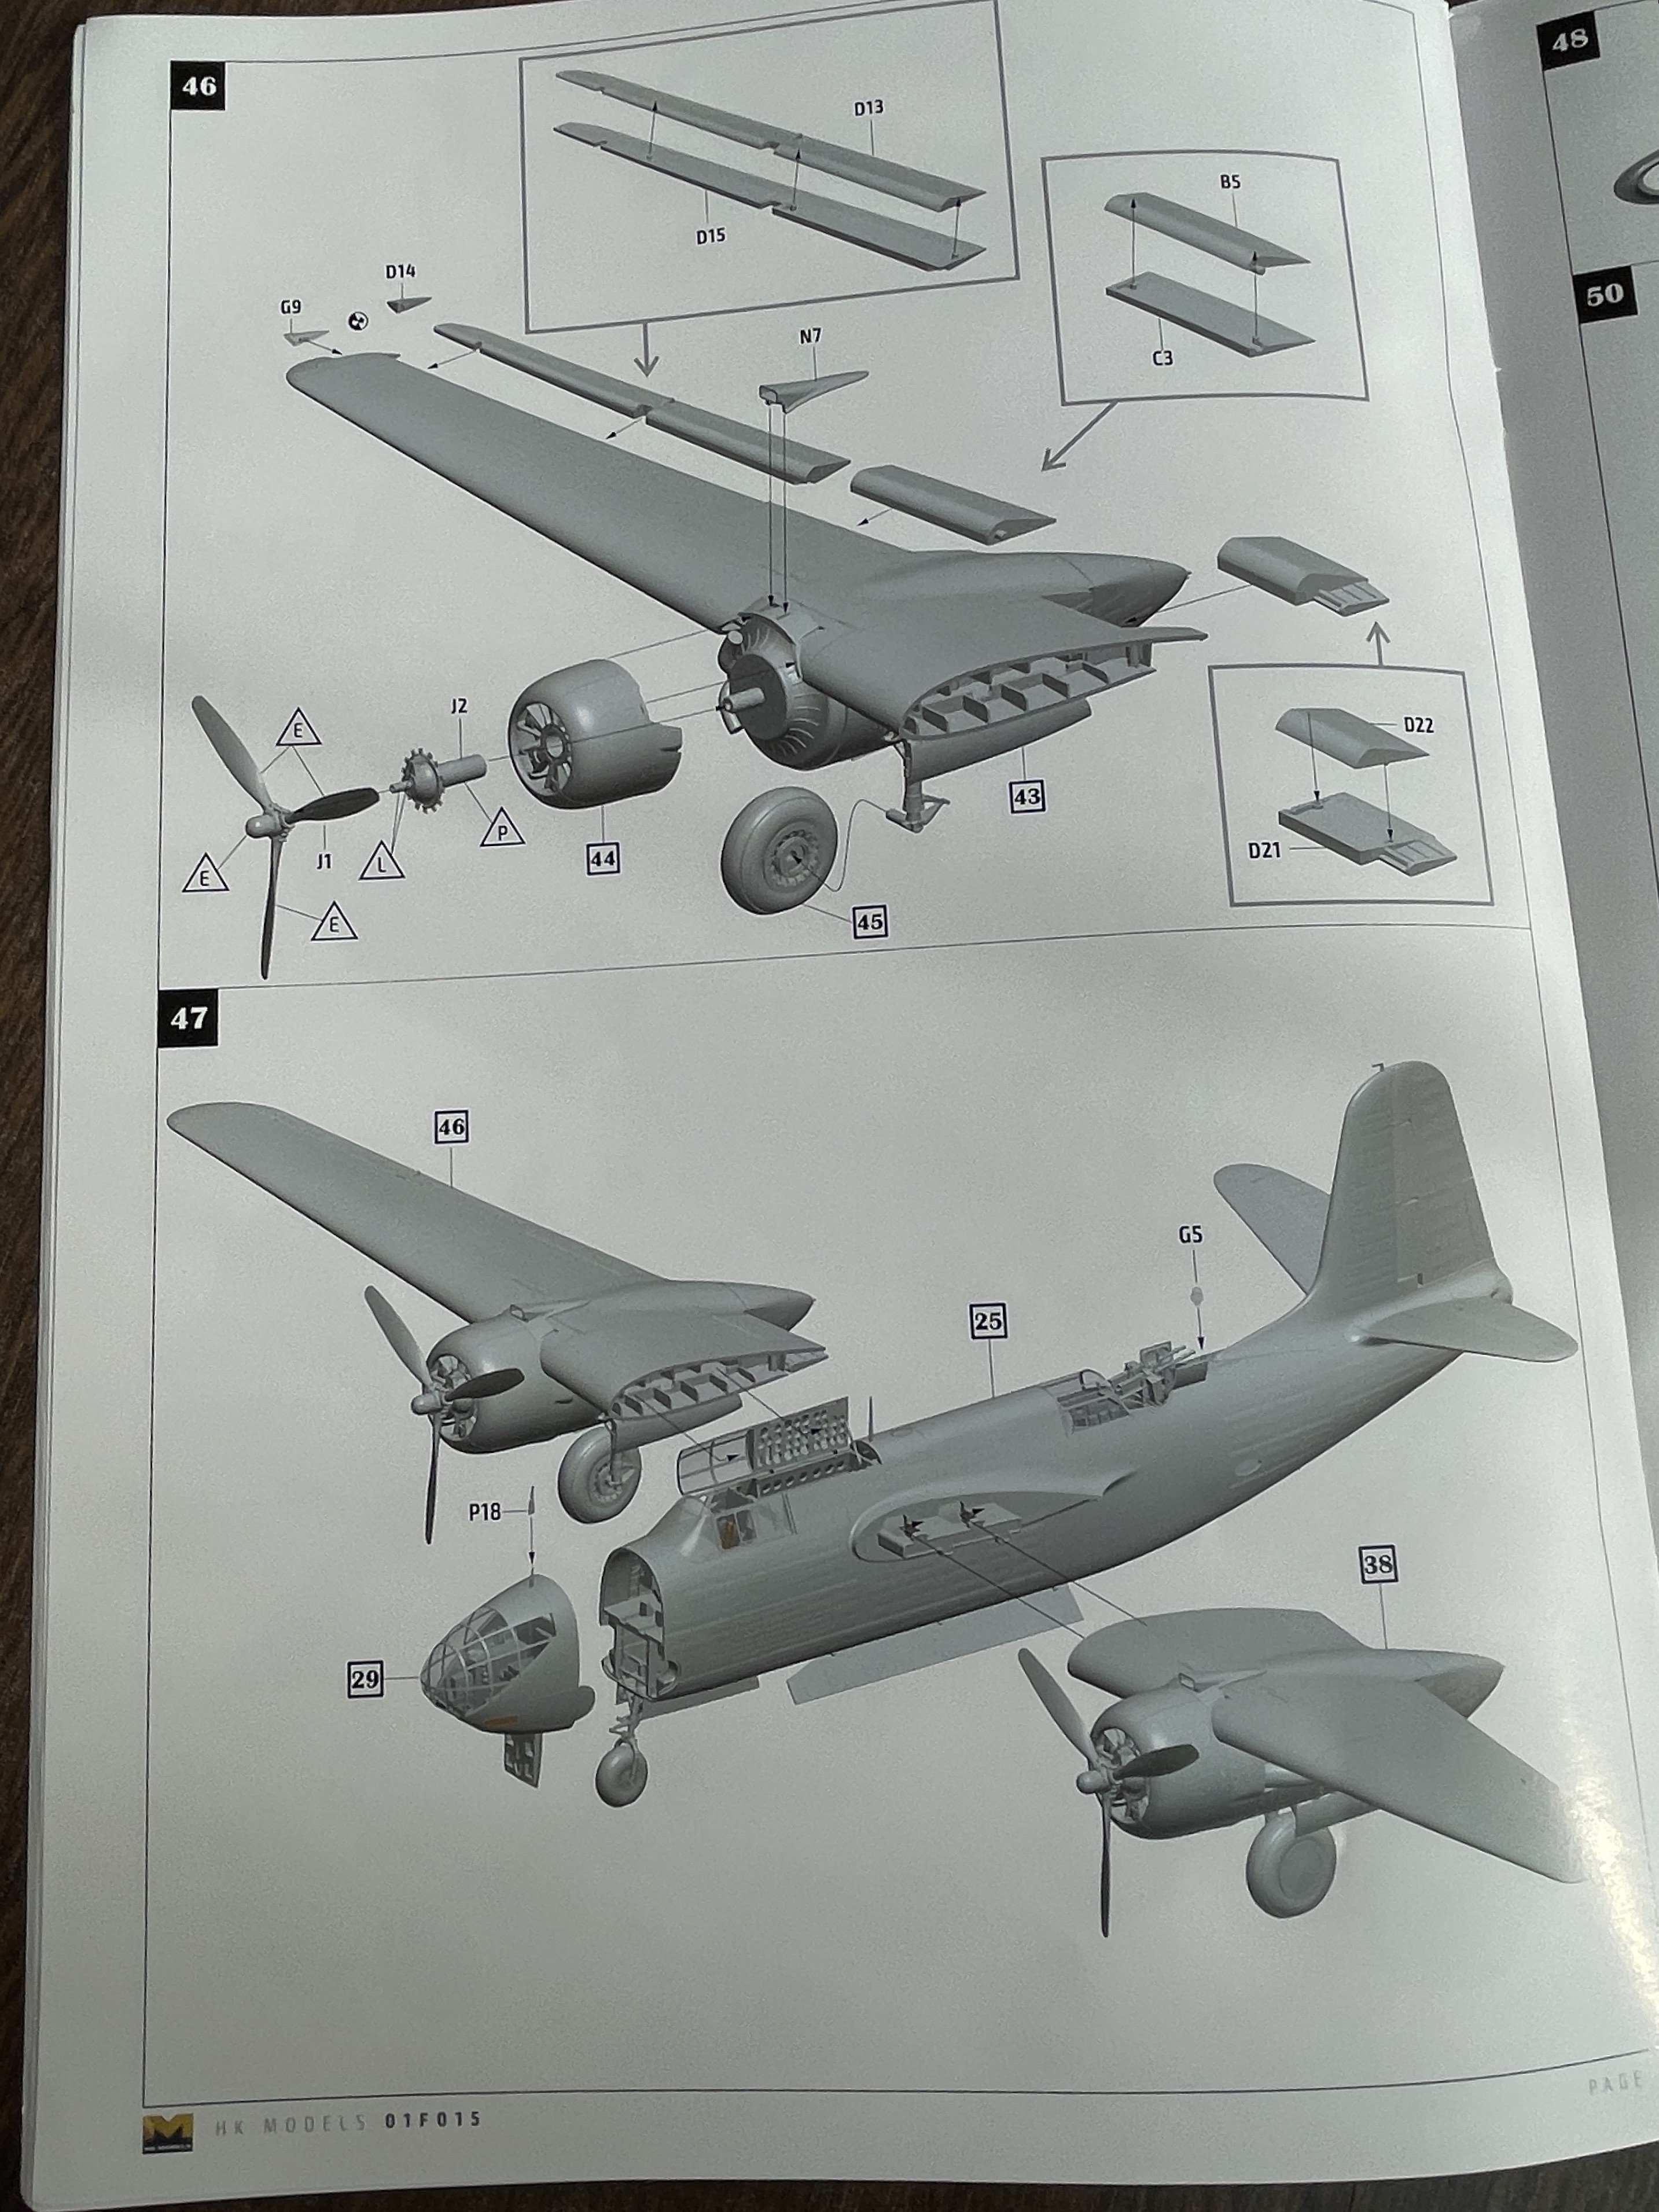
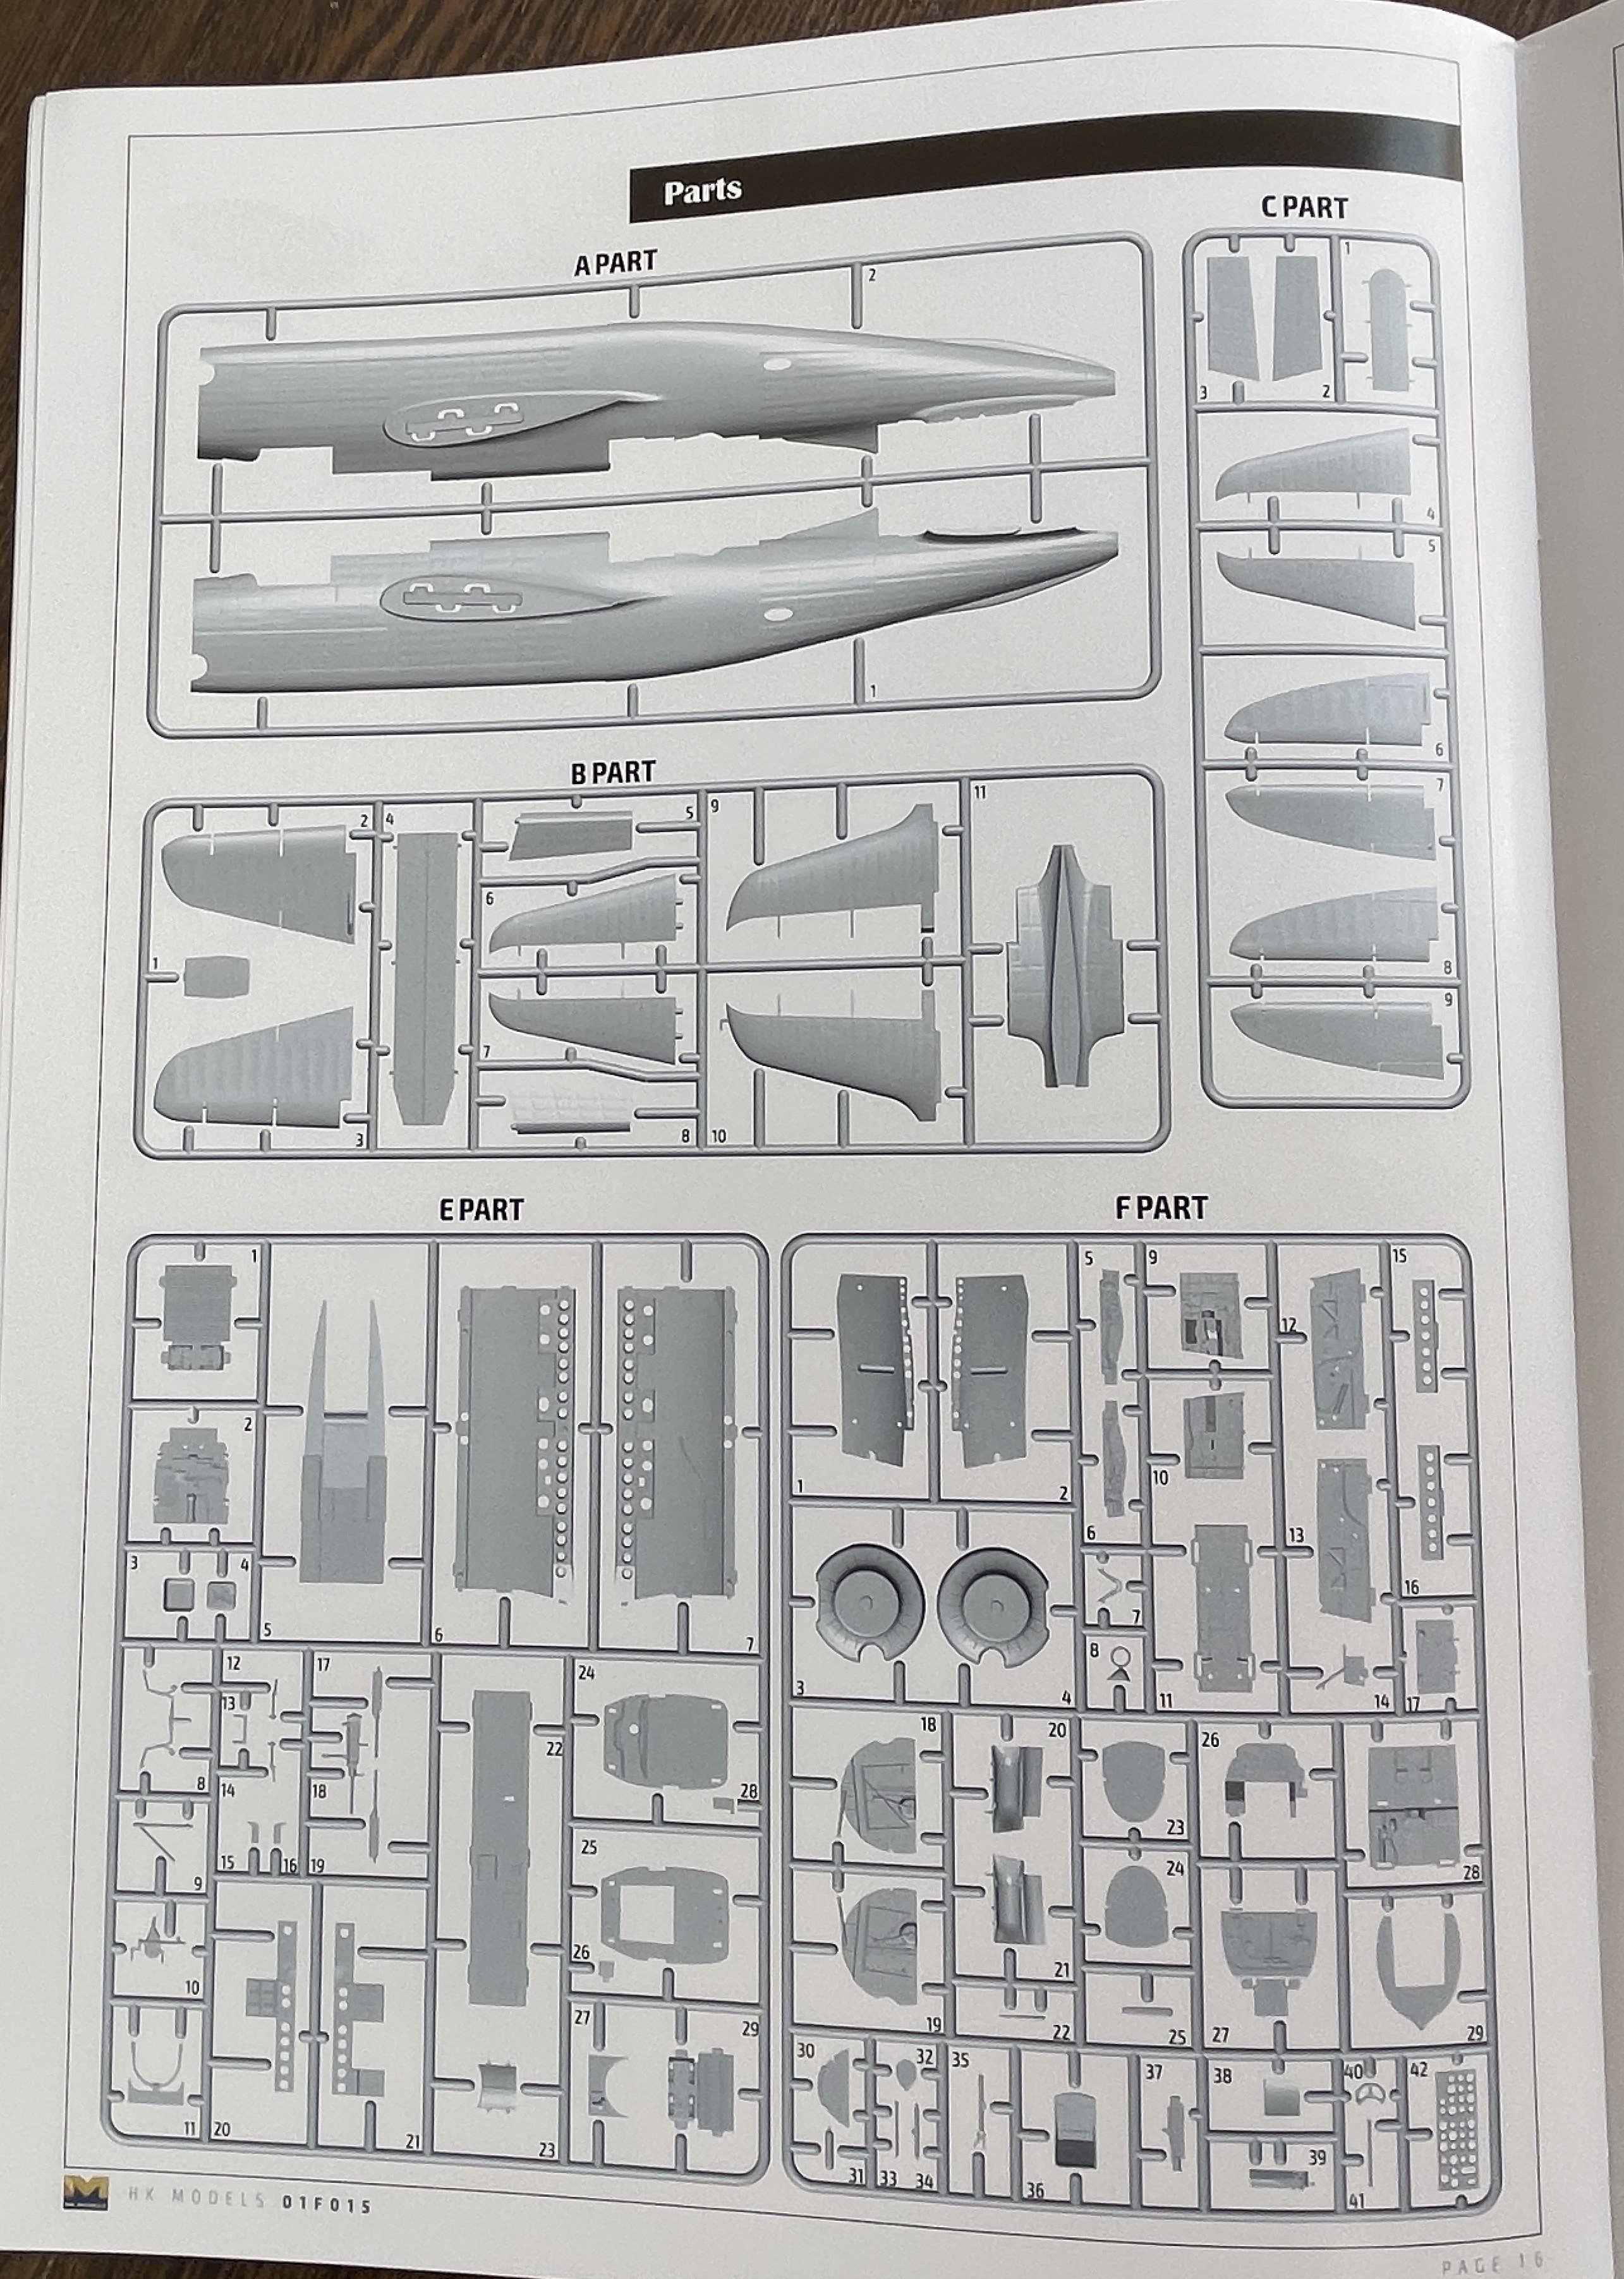
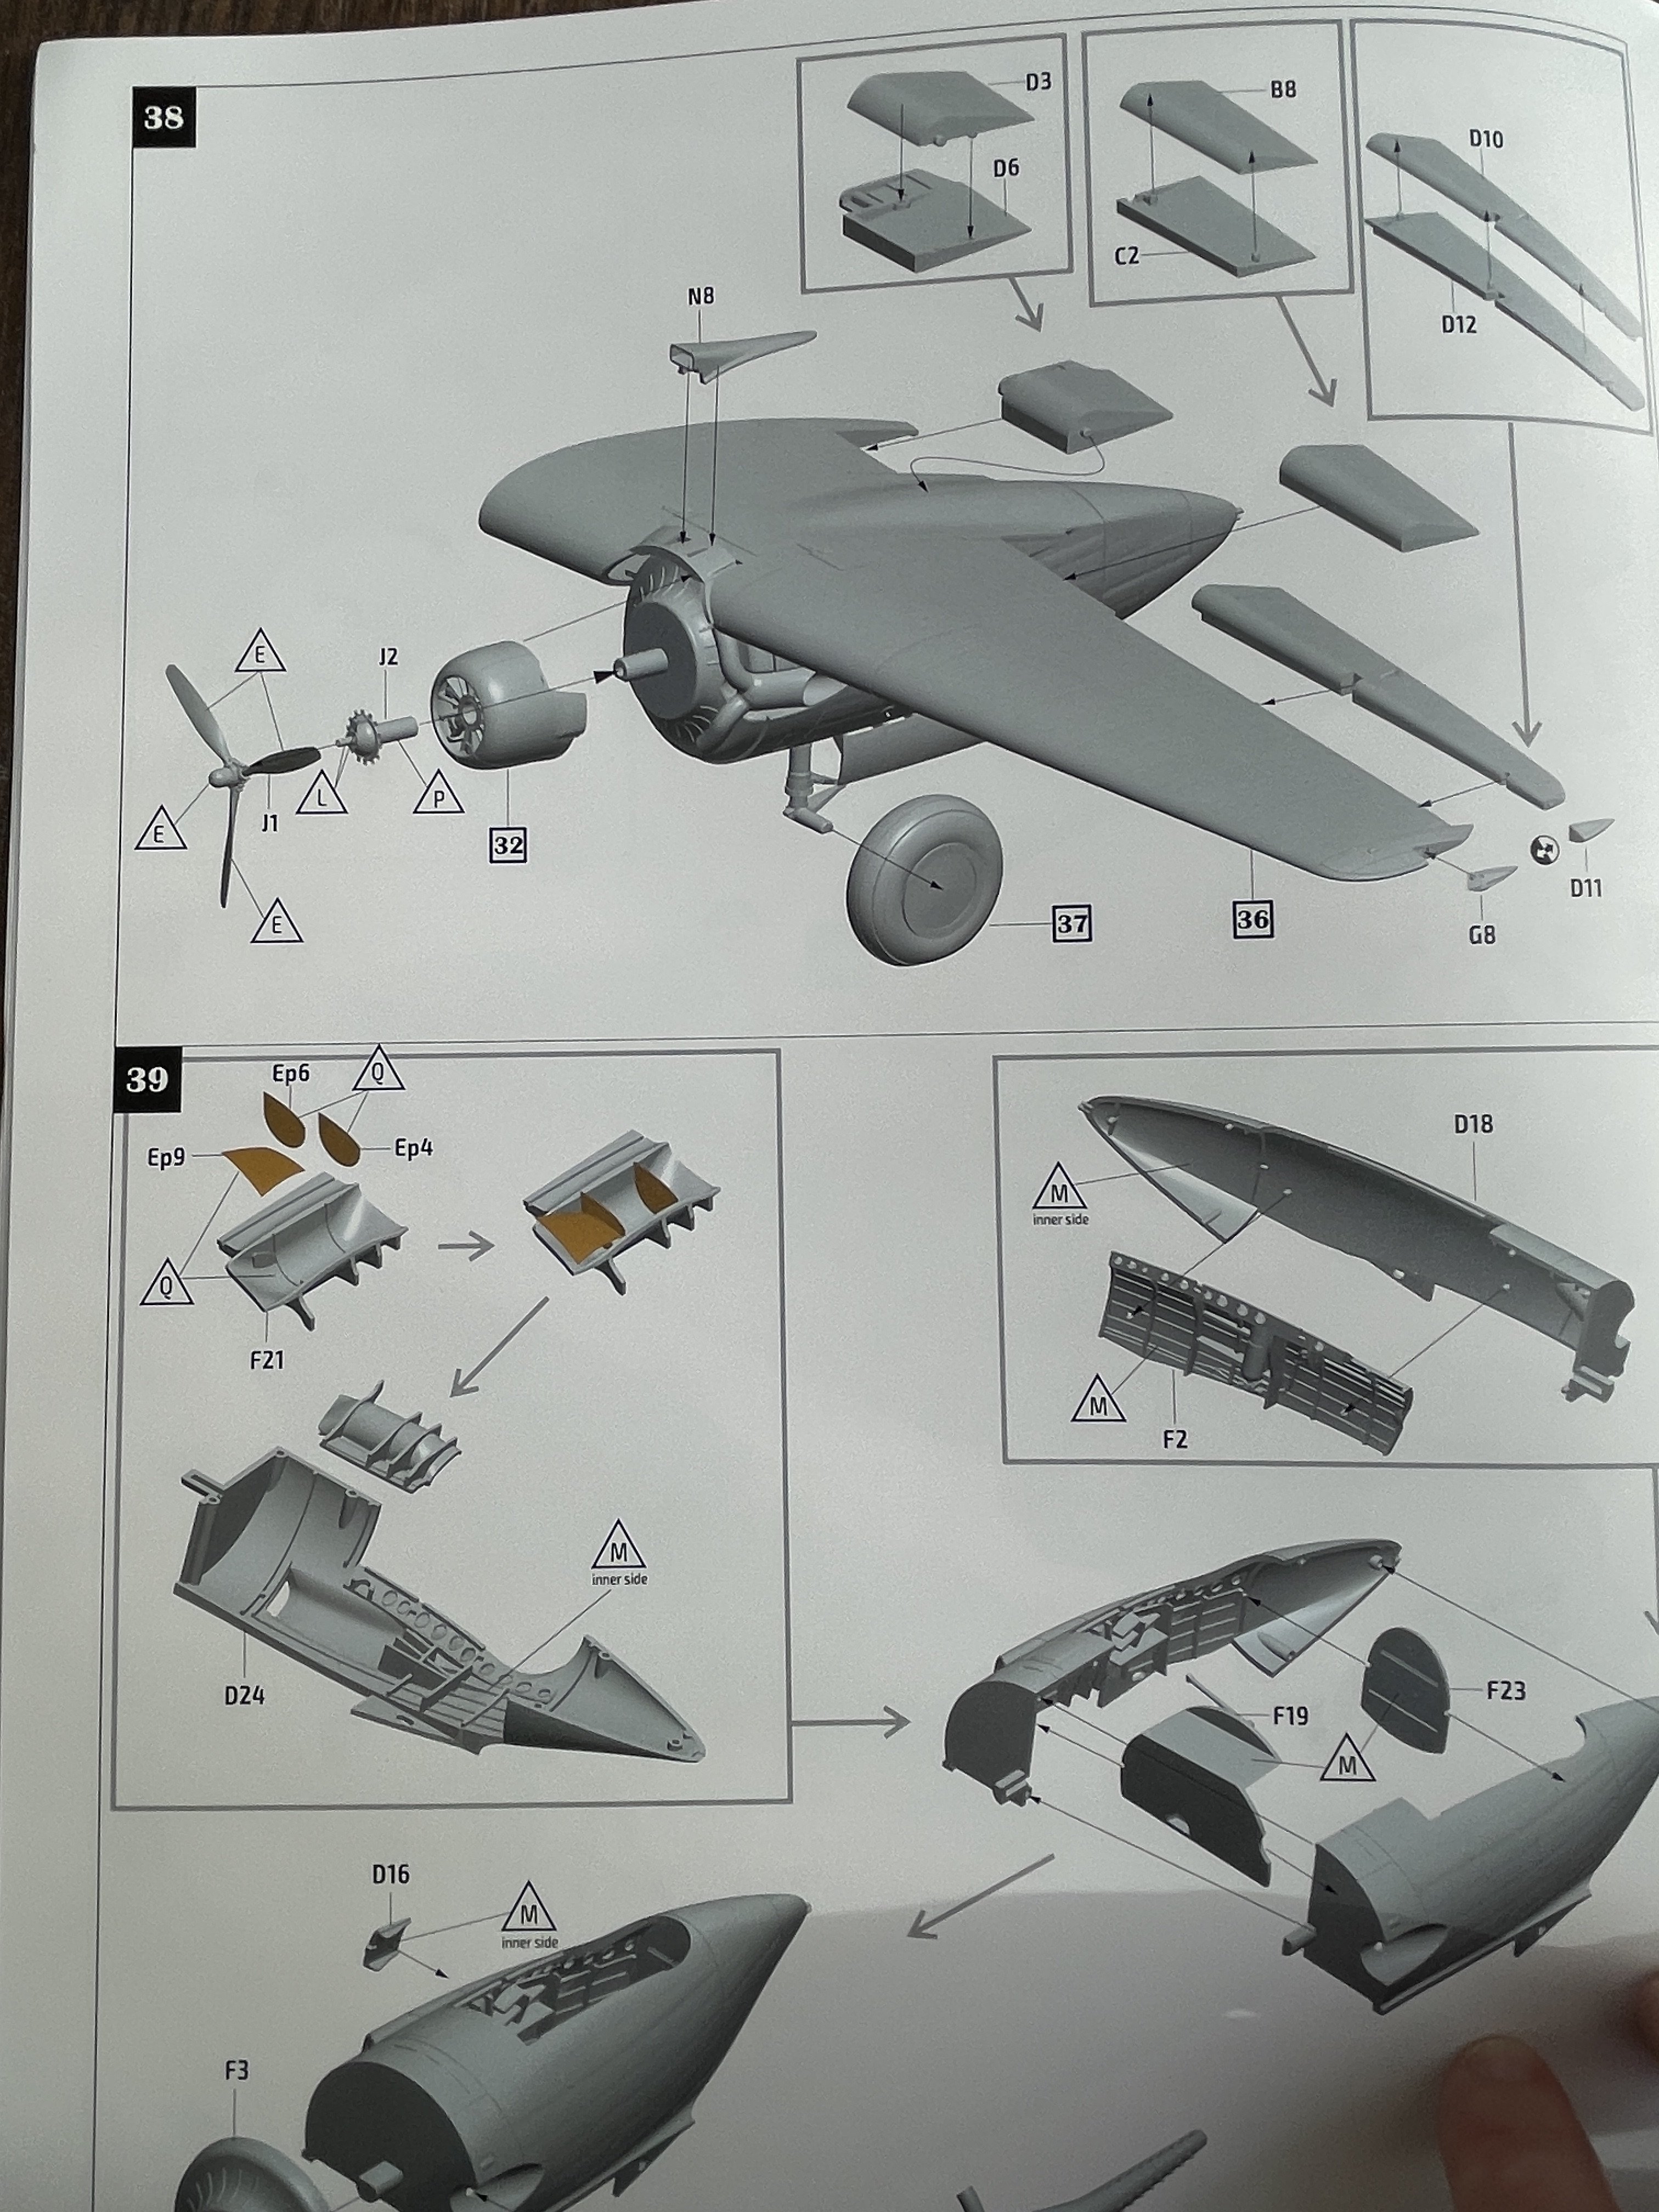
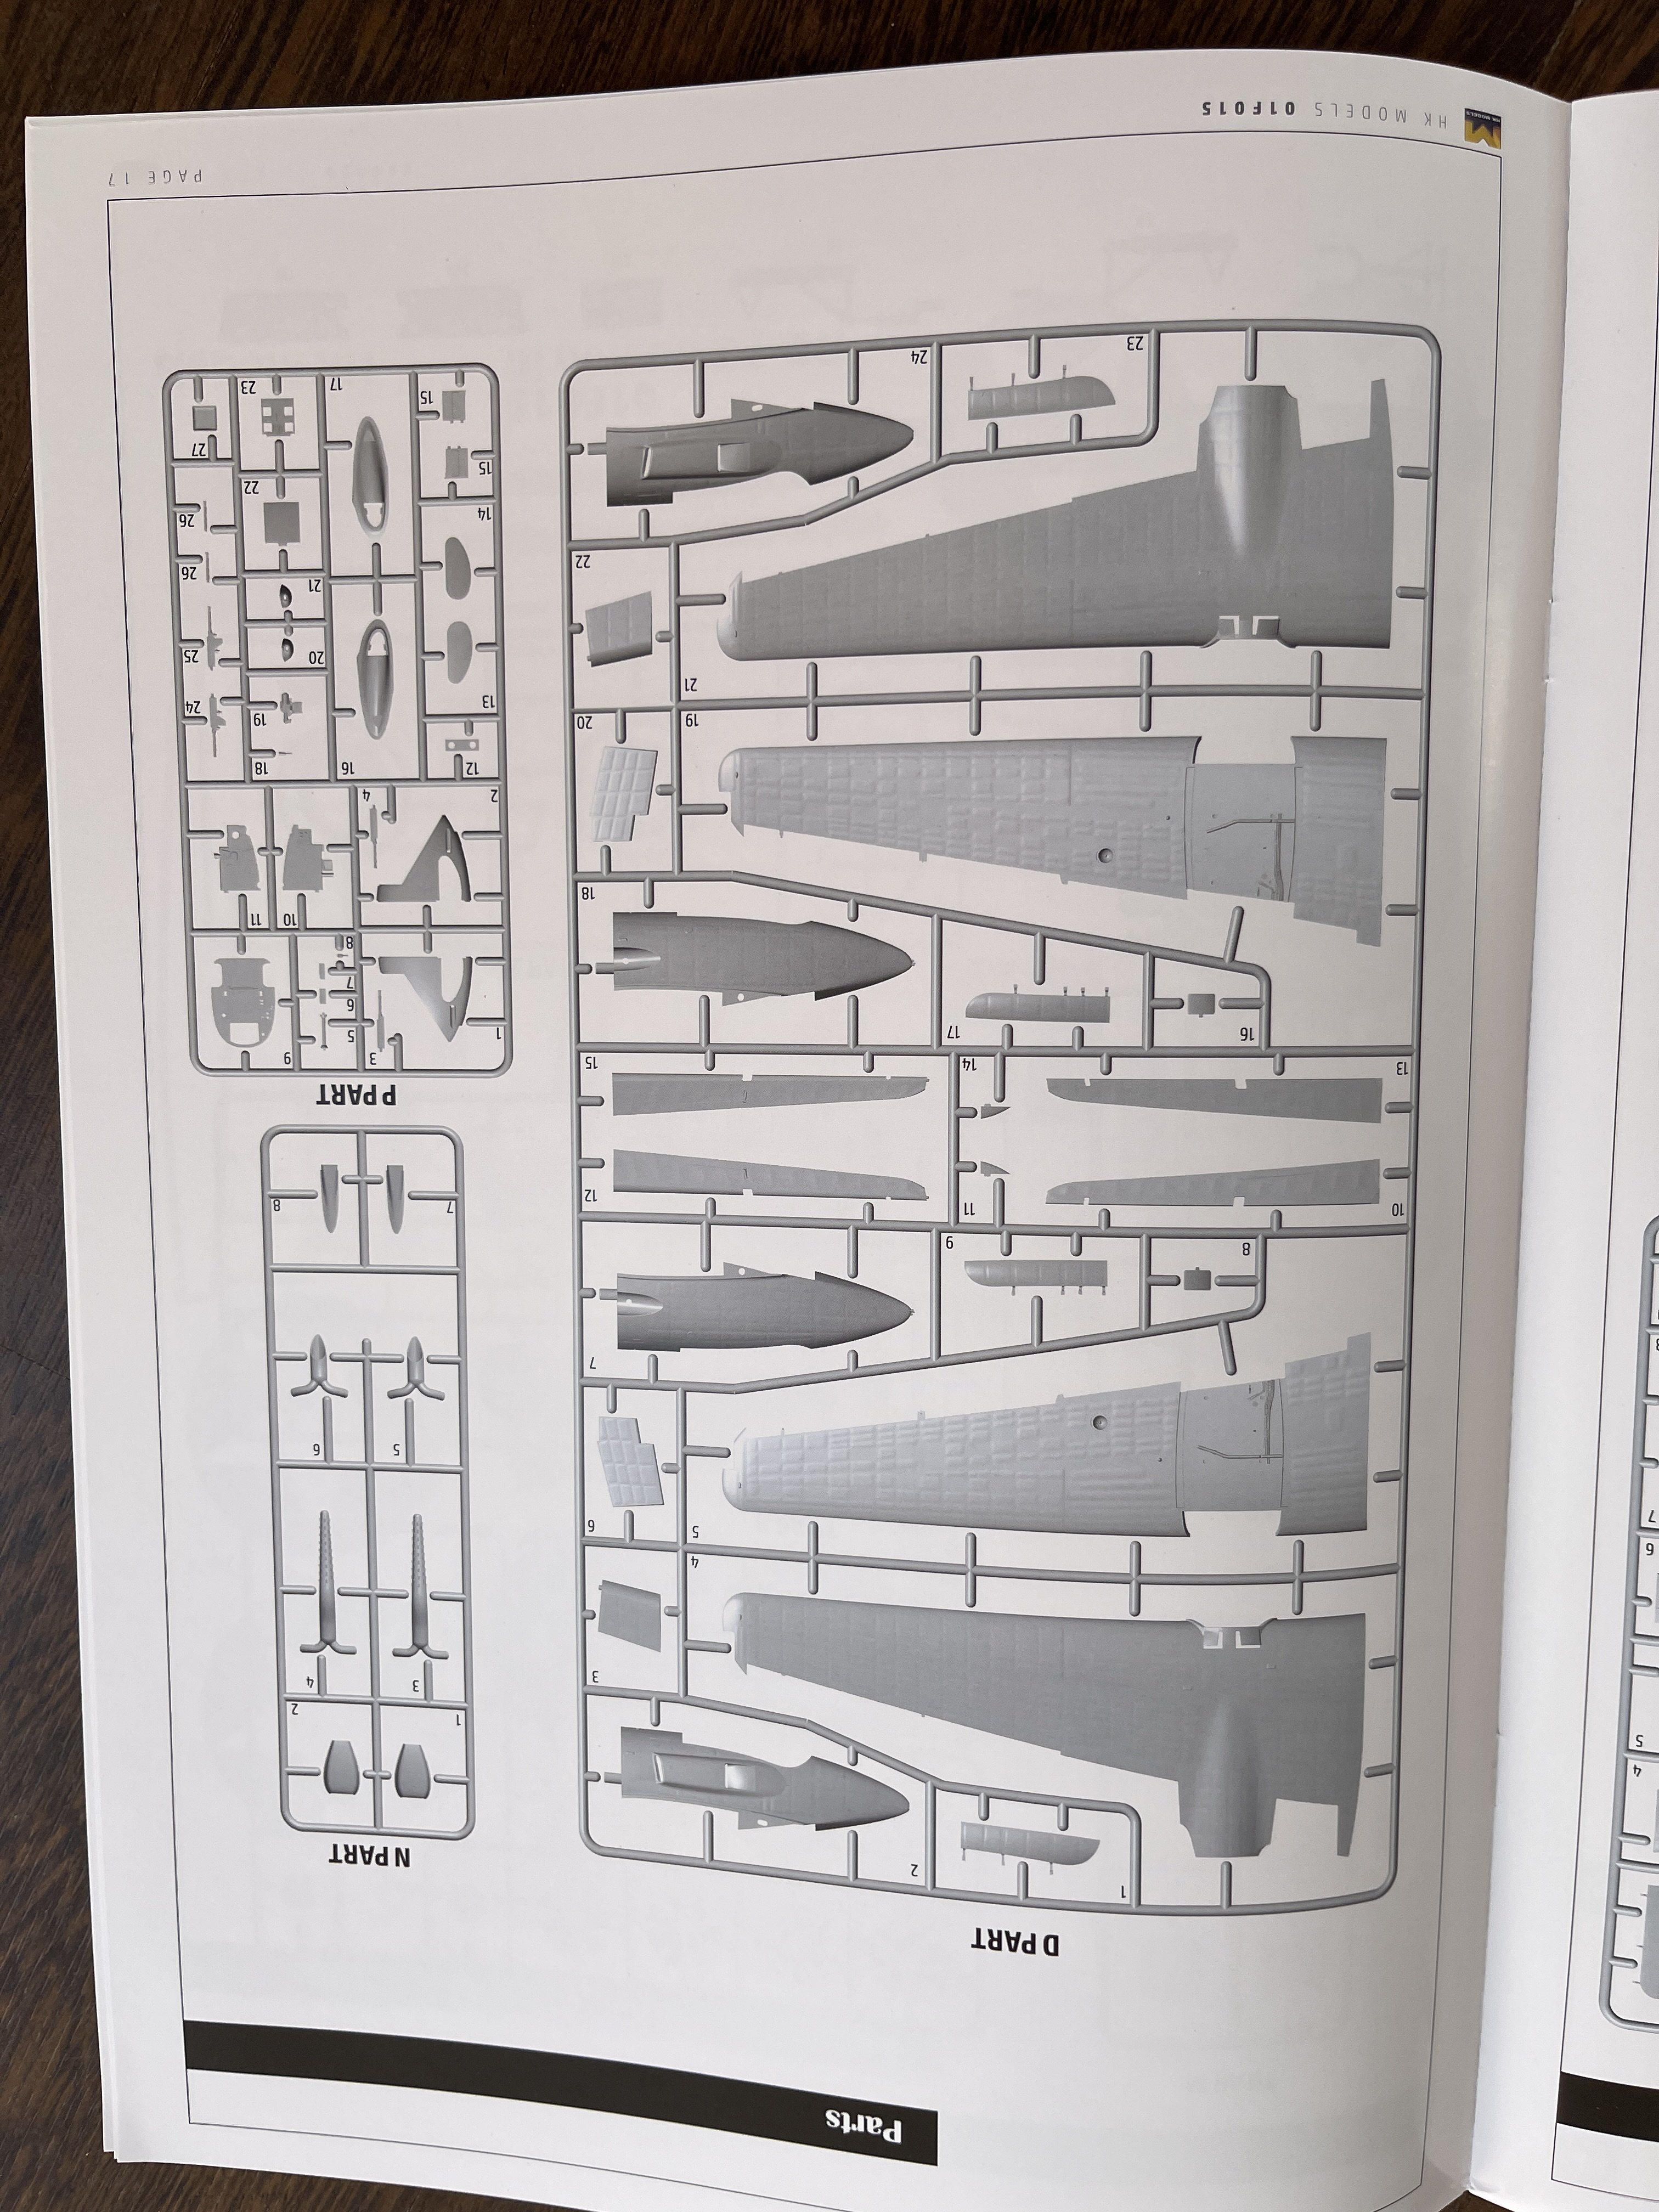
The kit comprises multiple sprues of mid-grey injection-molded plastic, featuring detailed surfaces with fine molded recessed panel lines and rivet details. In fuselage and wings.
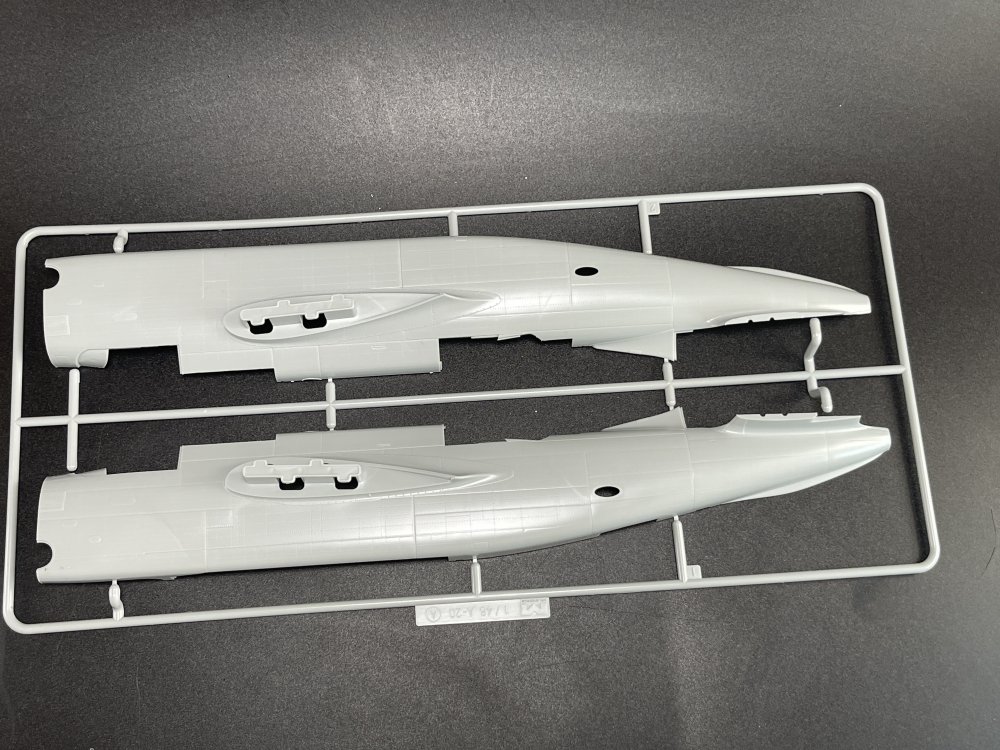
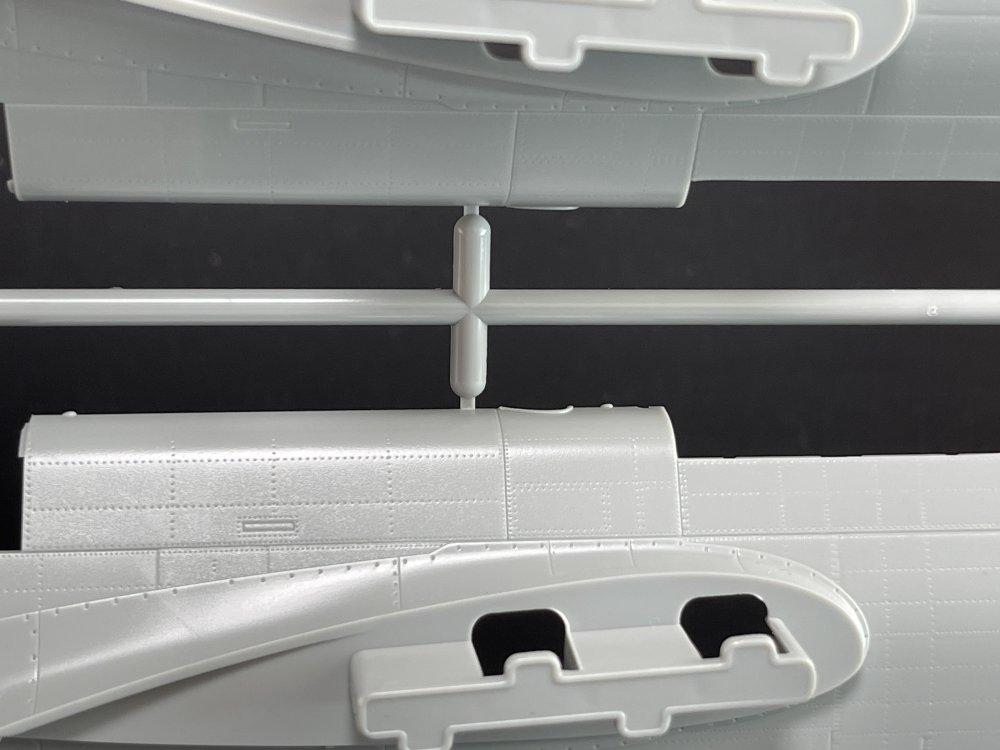


While the surface details are very good and the best one in any A-20 in 1:48, are not as good as in 1:32…
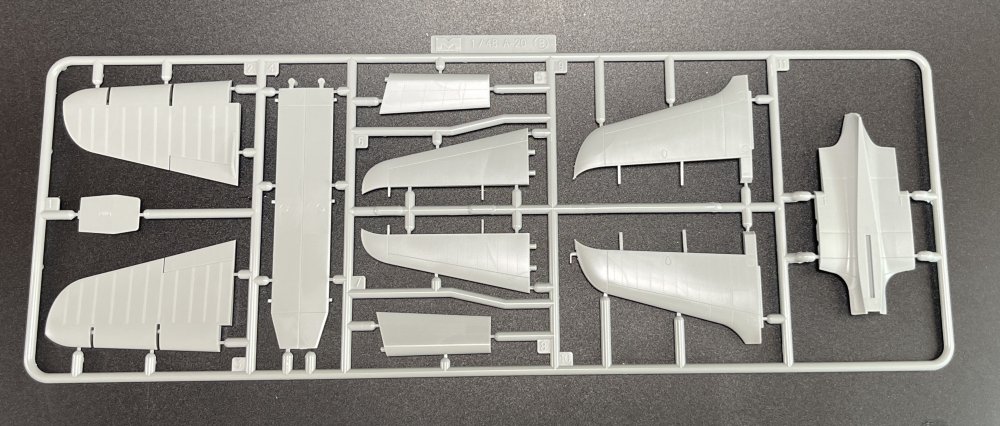

Naturally I shall say because making stressed skin fuselage in 1:48 is probably, nowadays, not possible.
That said, by all mean, the surface wings and fuselage detail are bad. Not at all.
As I already said, are the best in 1:48 for any A-20
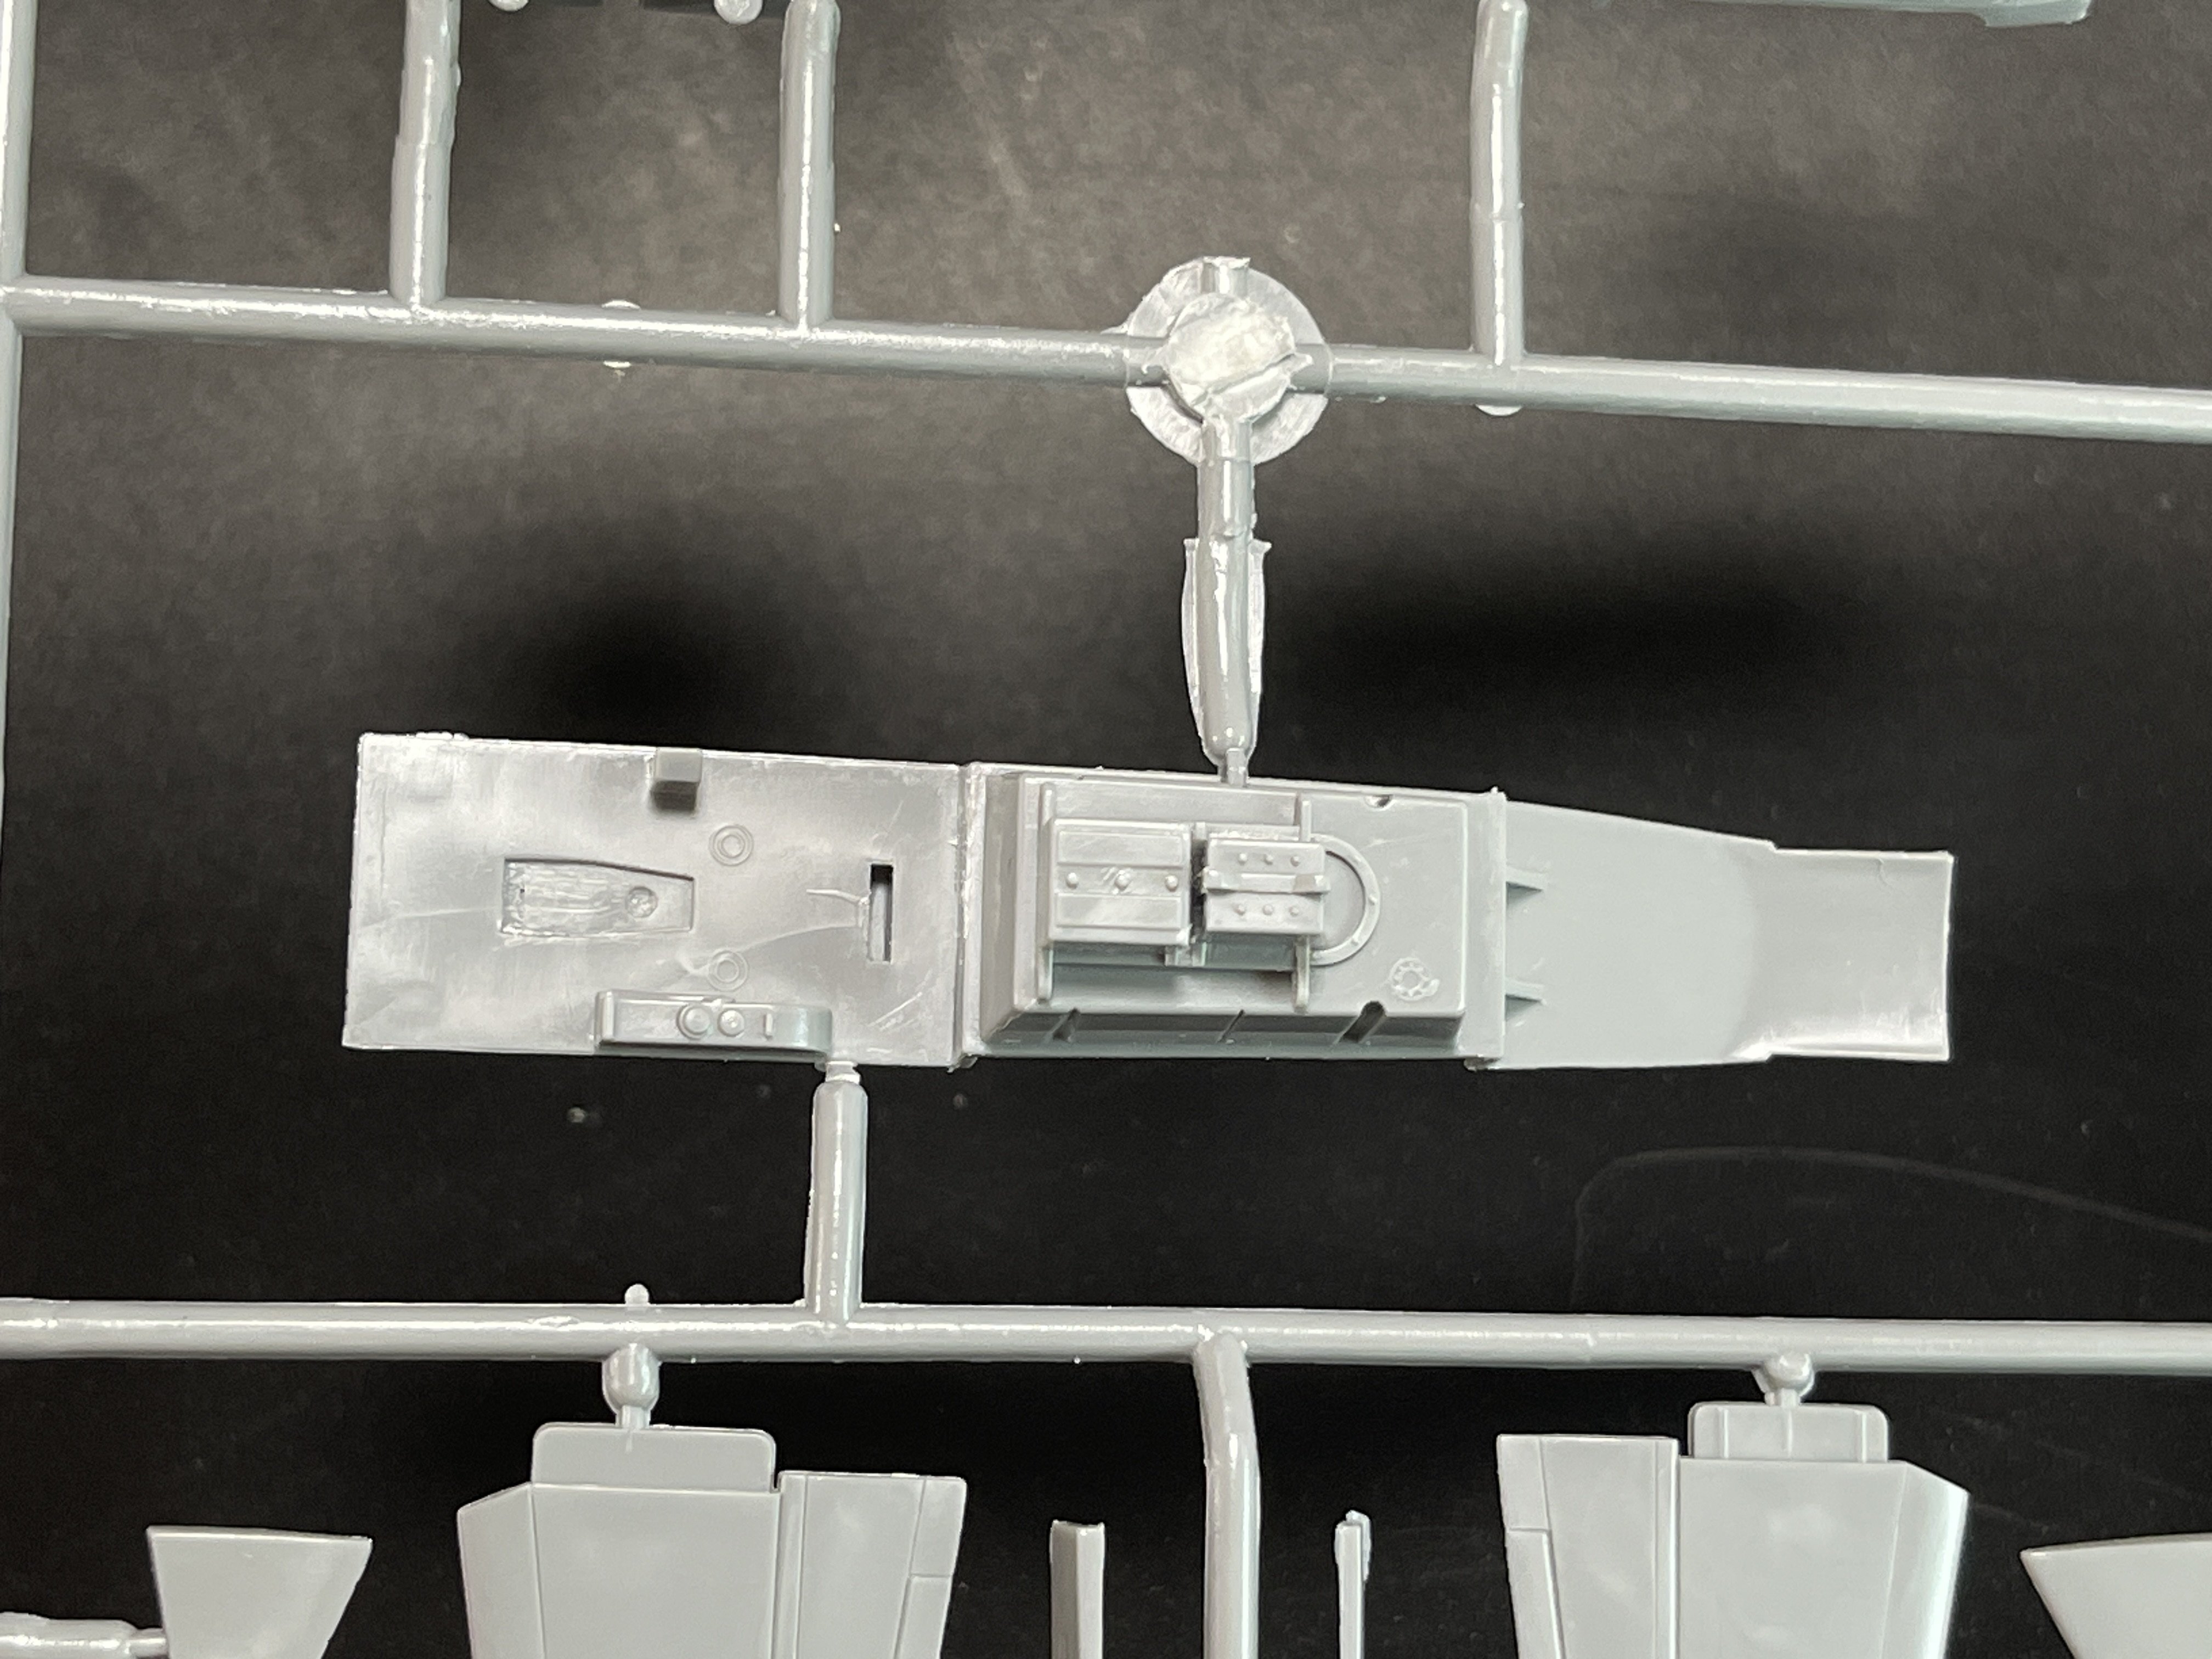
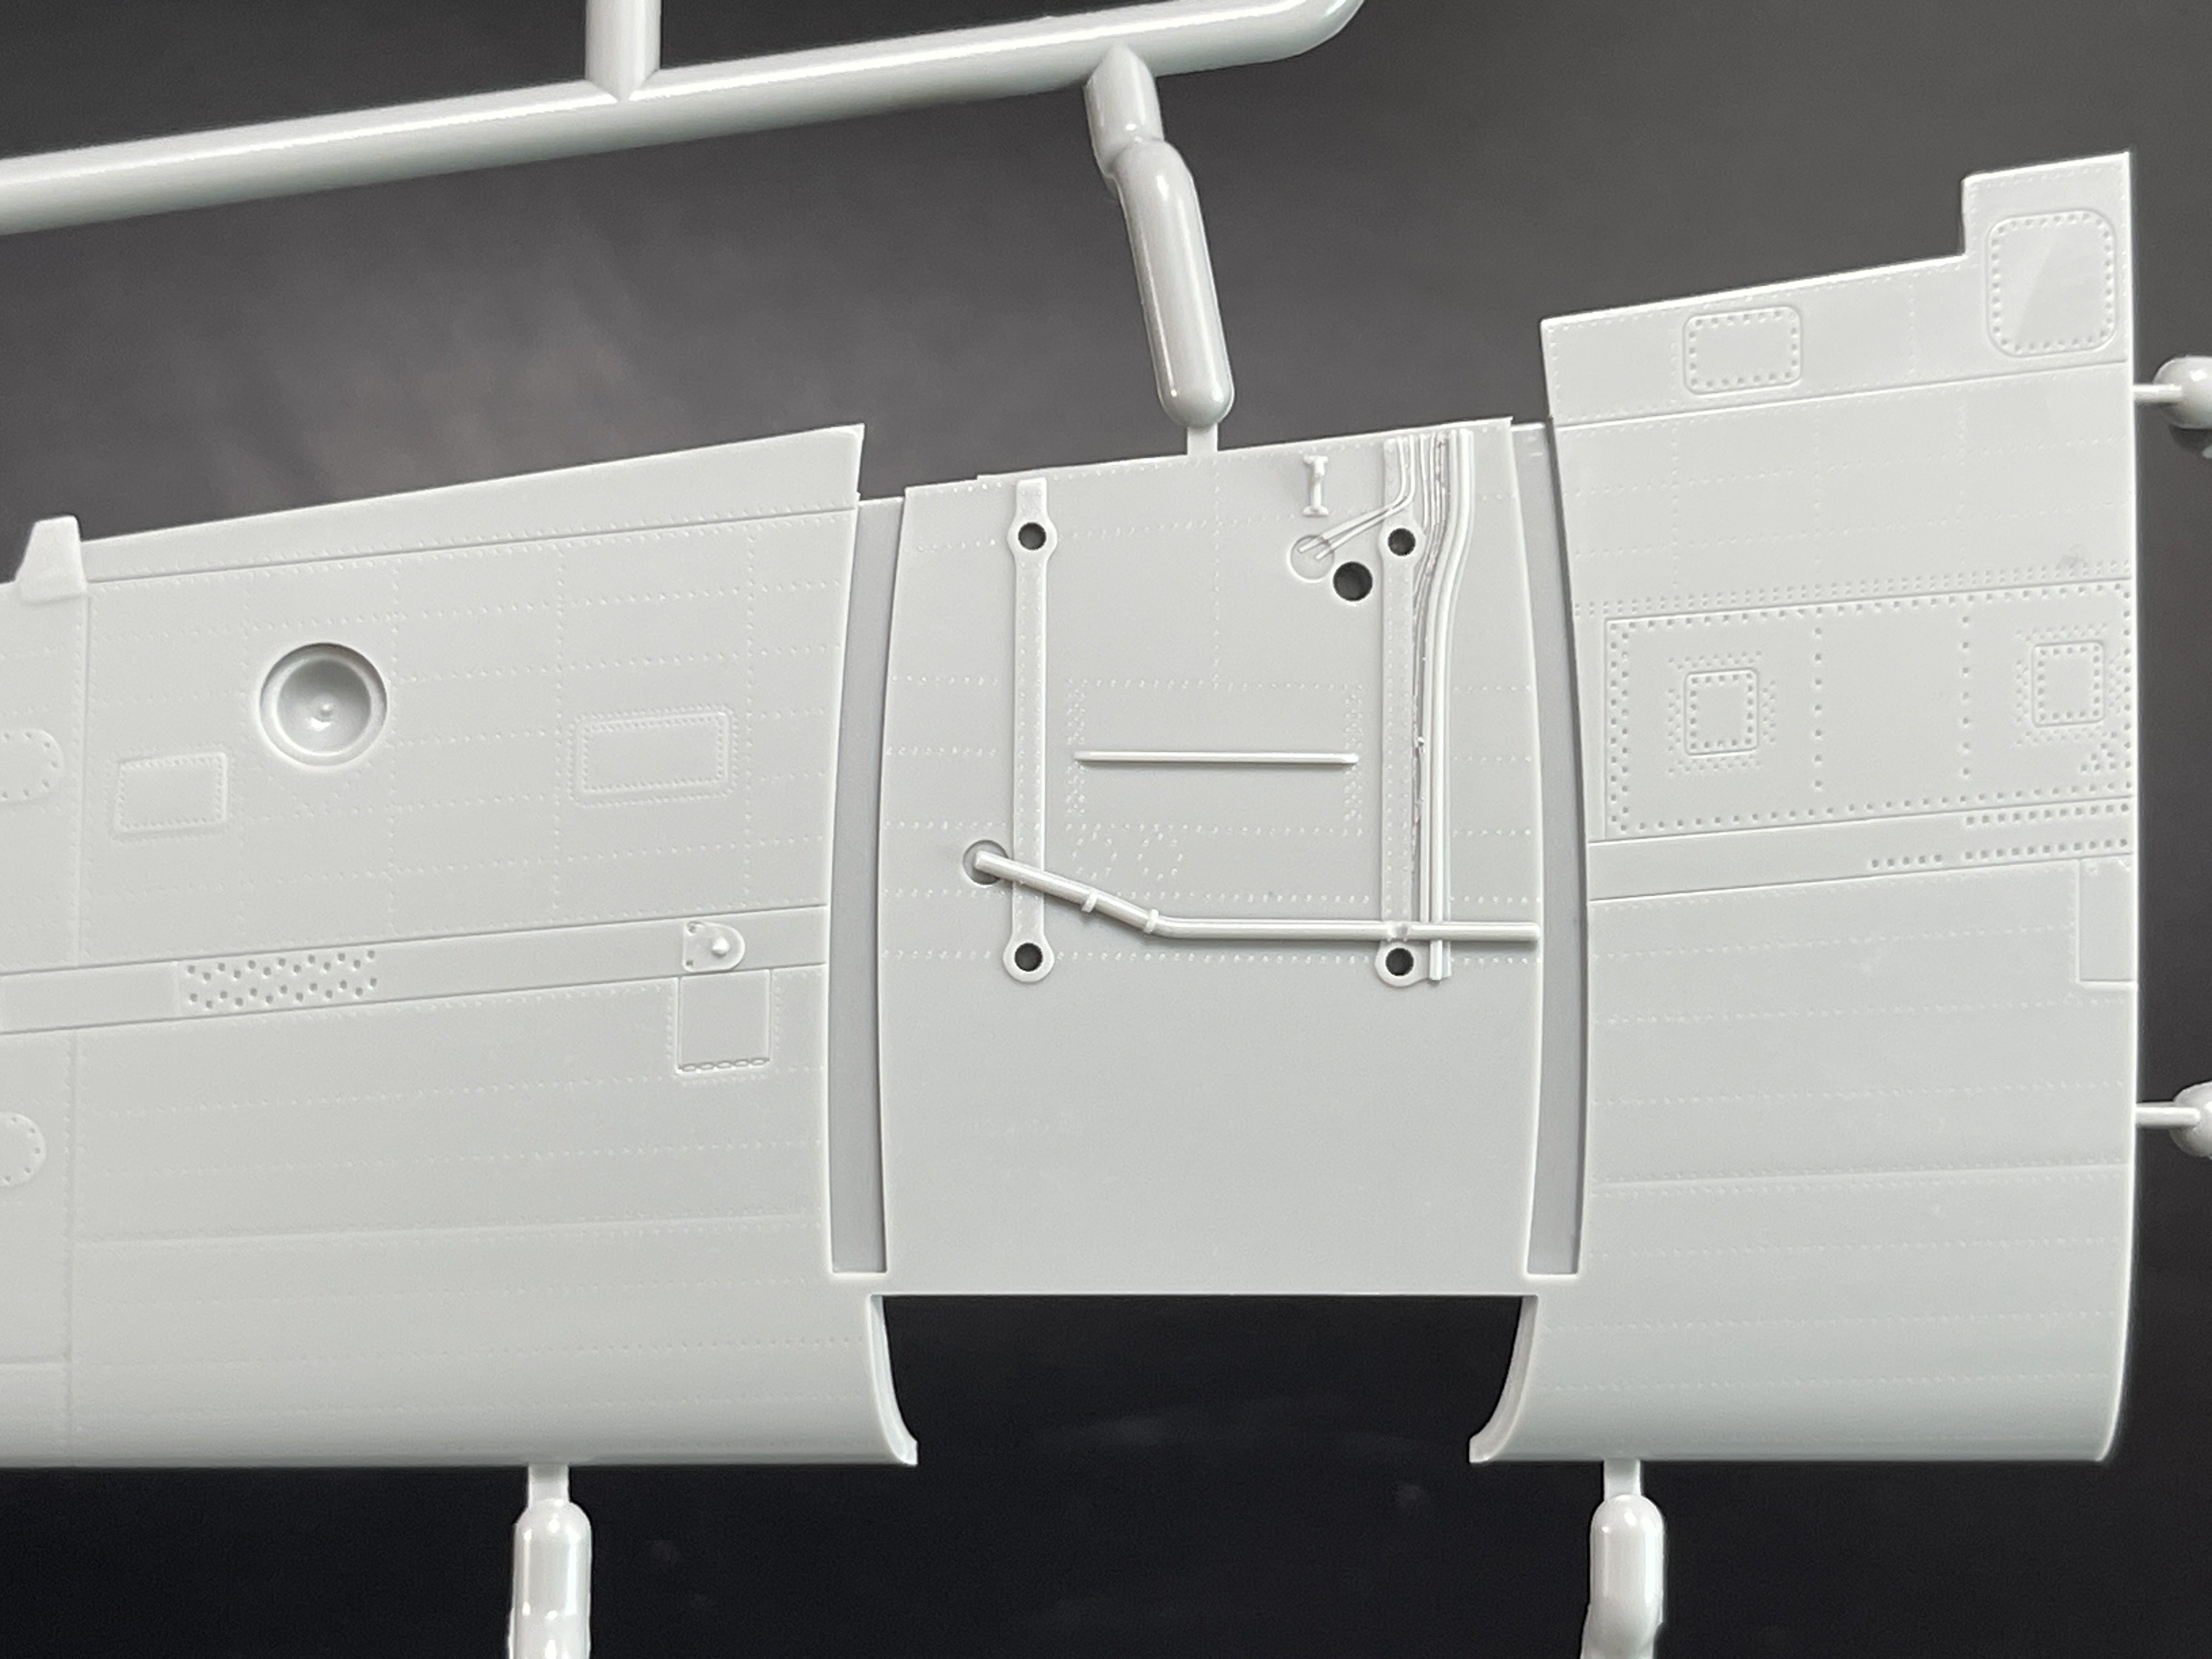
As for the bombay, if in 1:32 was the best bombay I ever saw stright from the box, in 1:48 is no different.
The only problem: it´s a too narrow view of all the beautifull detail.
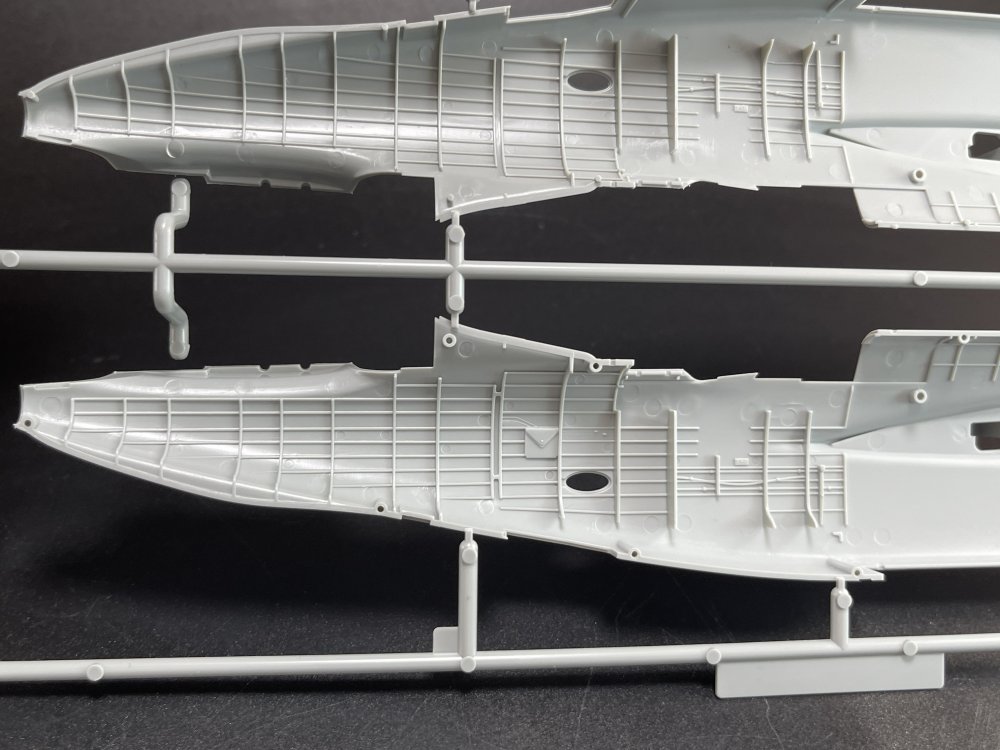
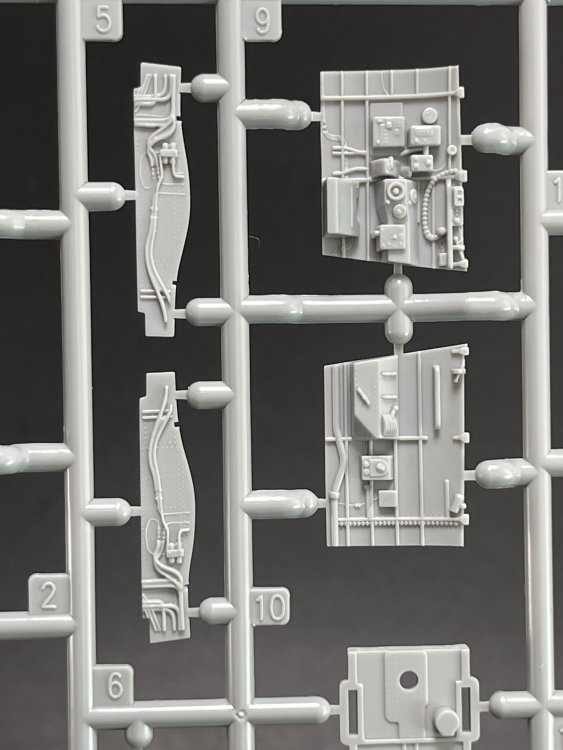
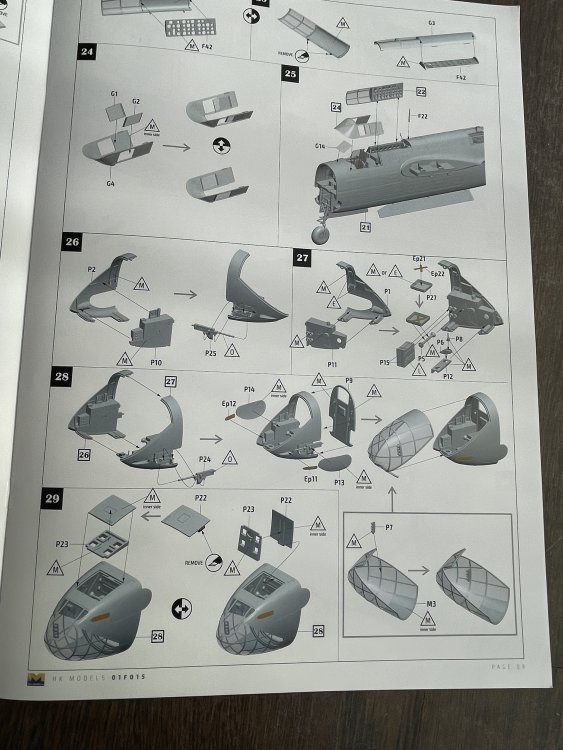
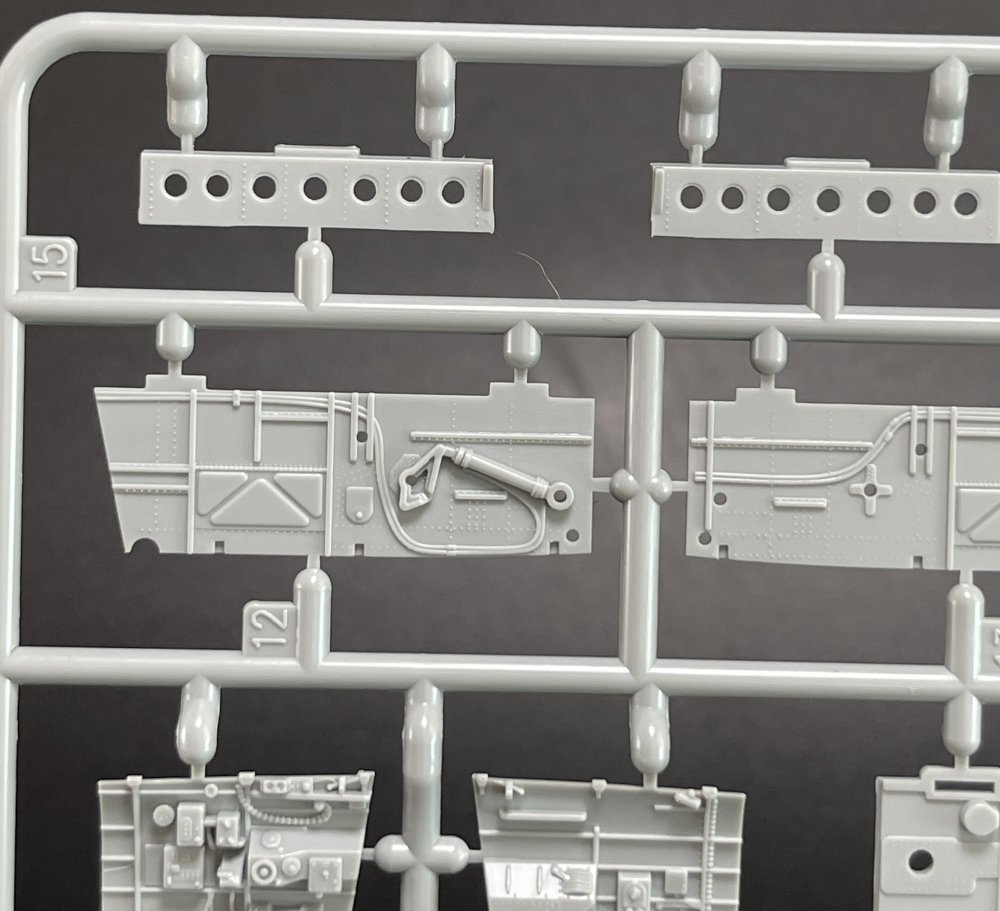
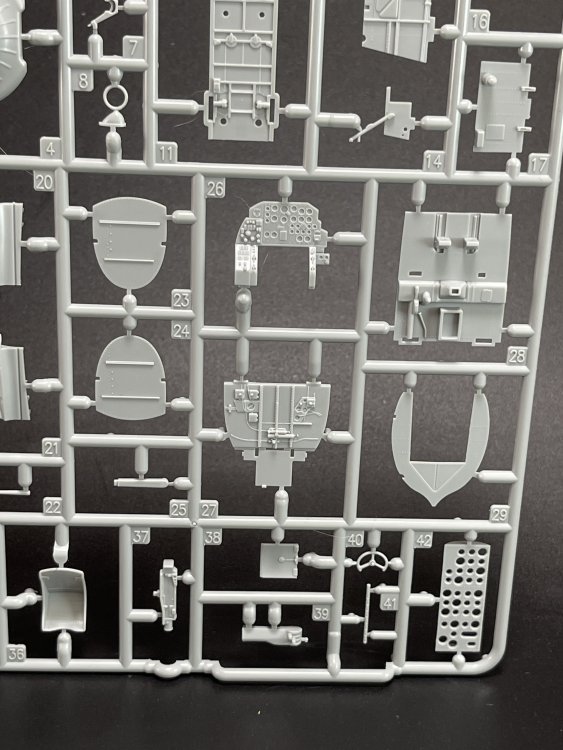
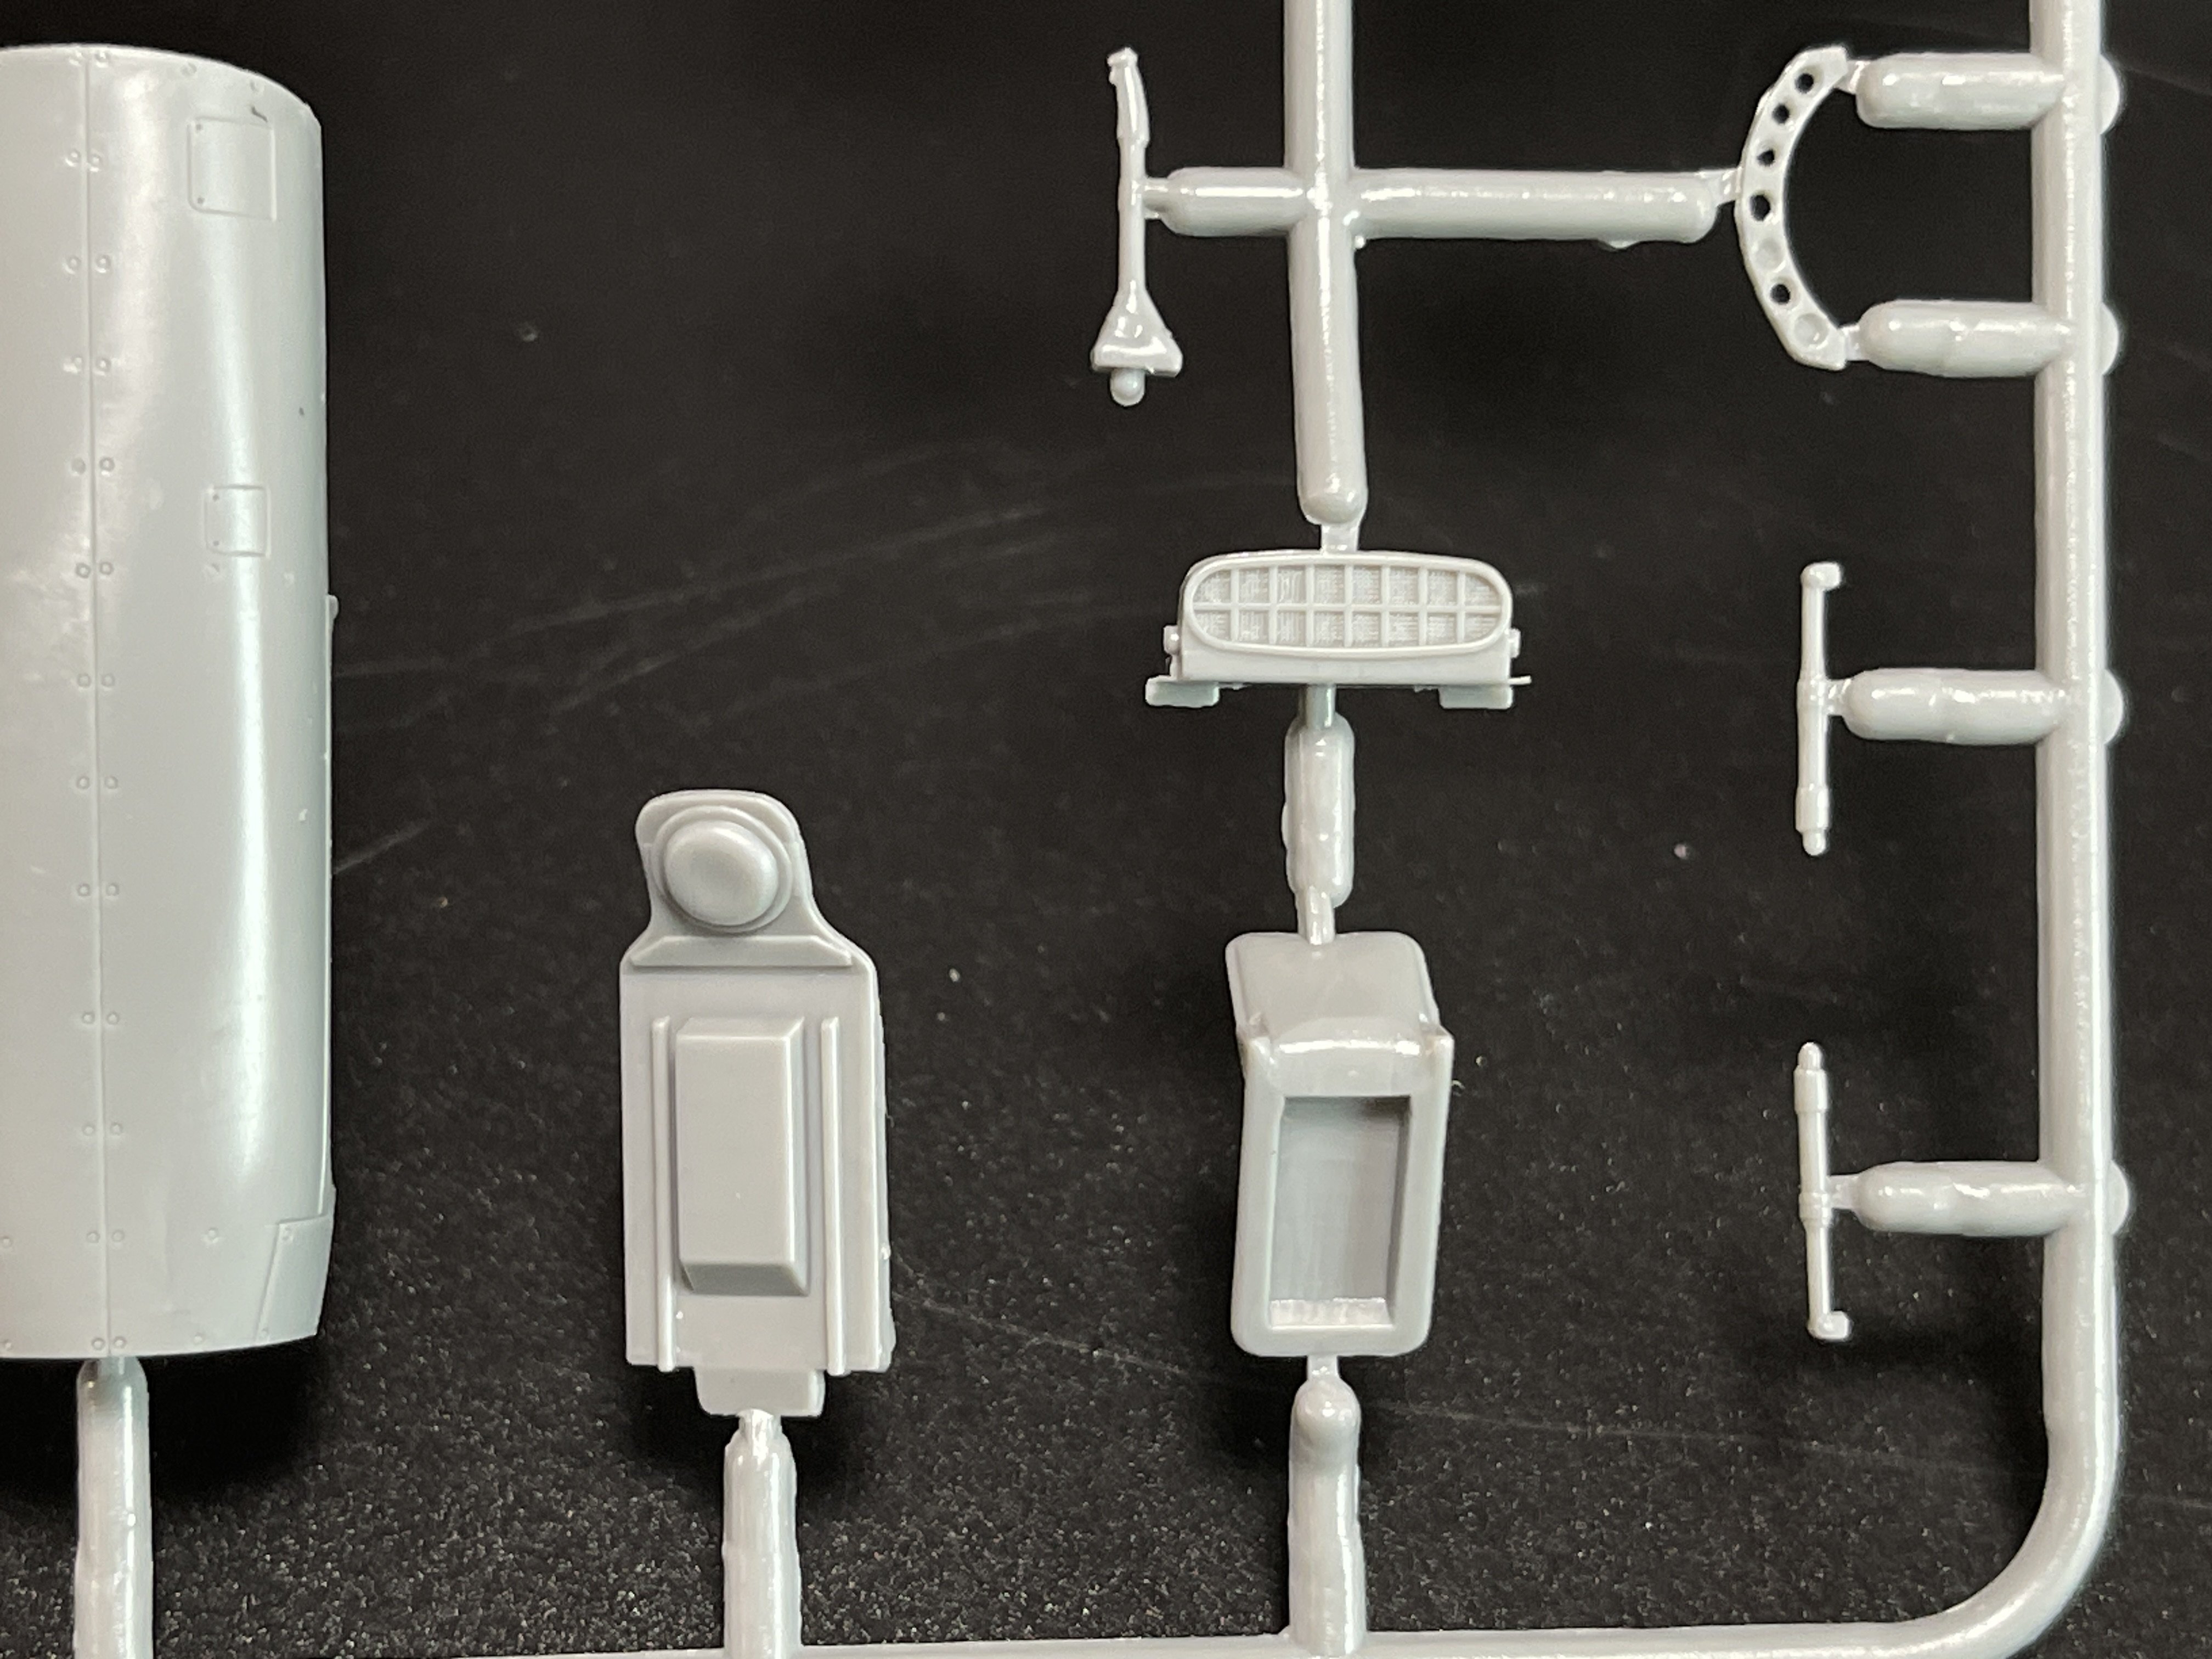
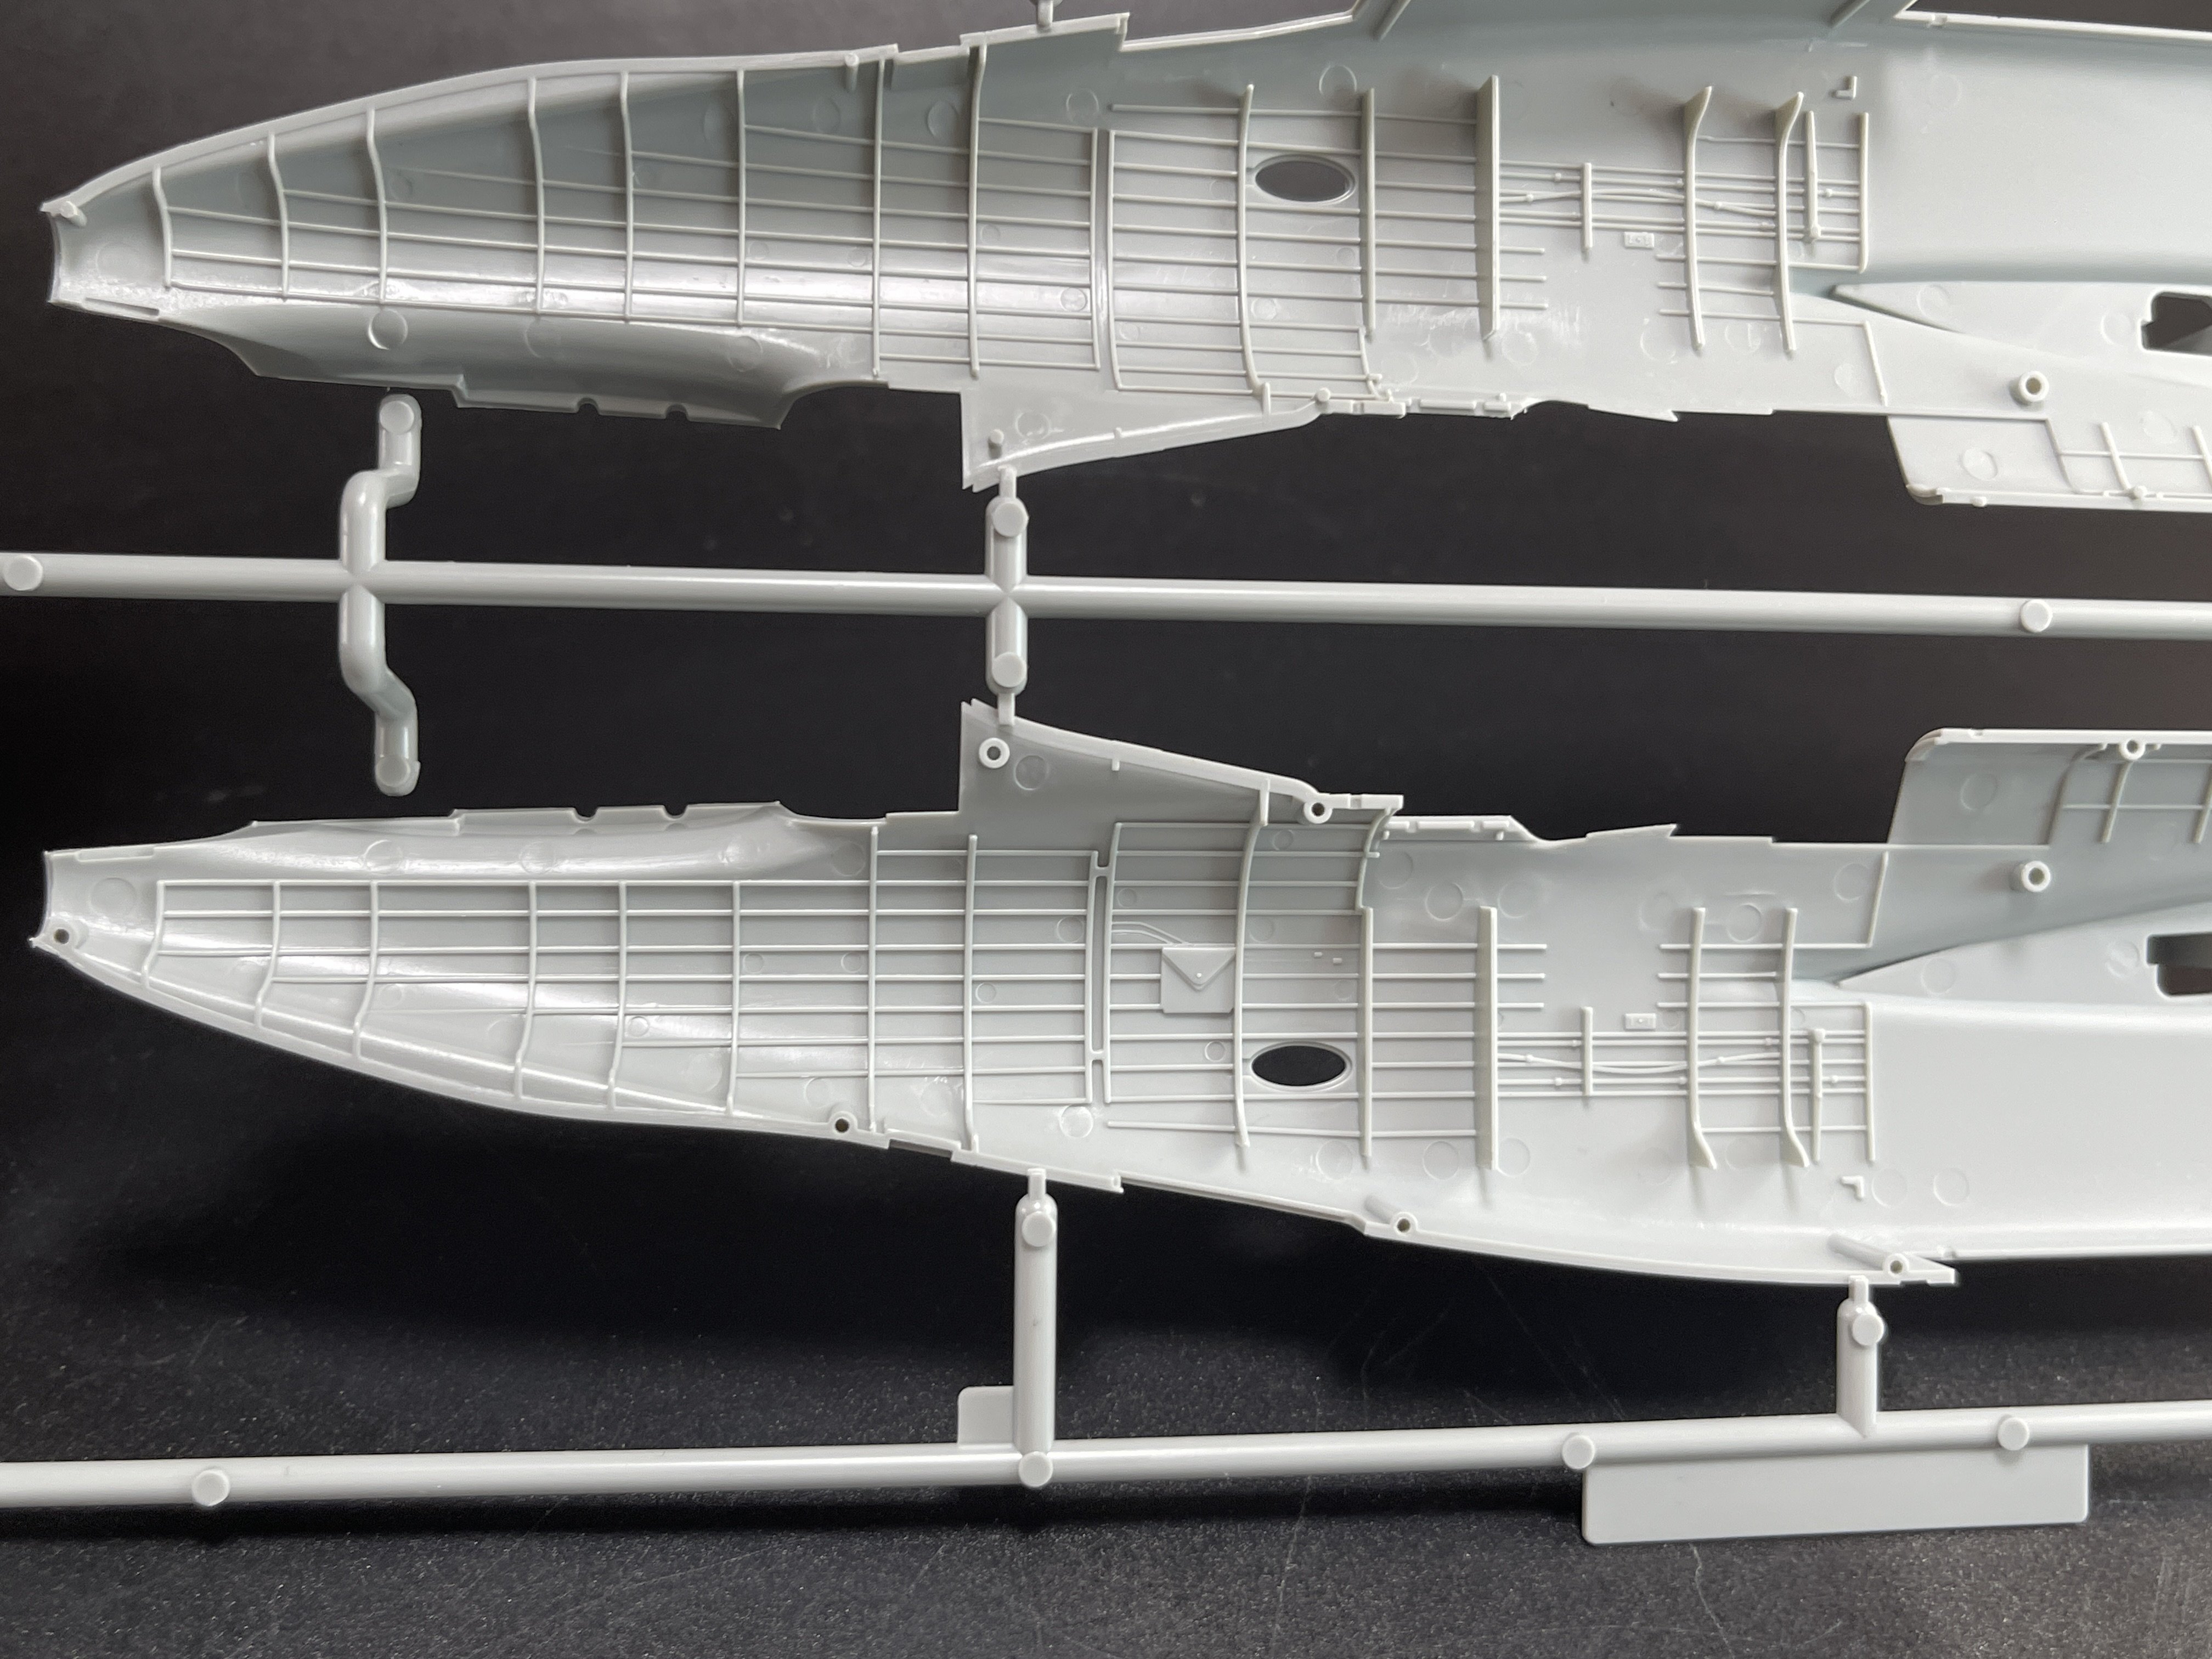
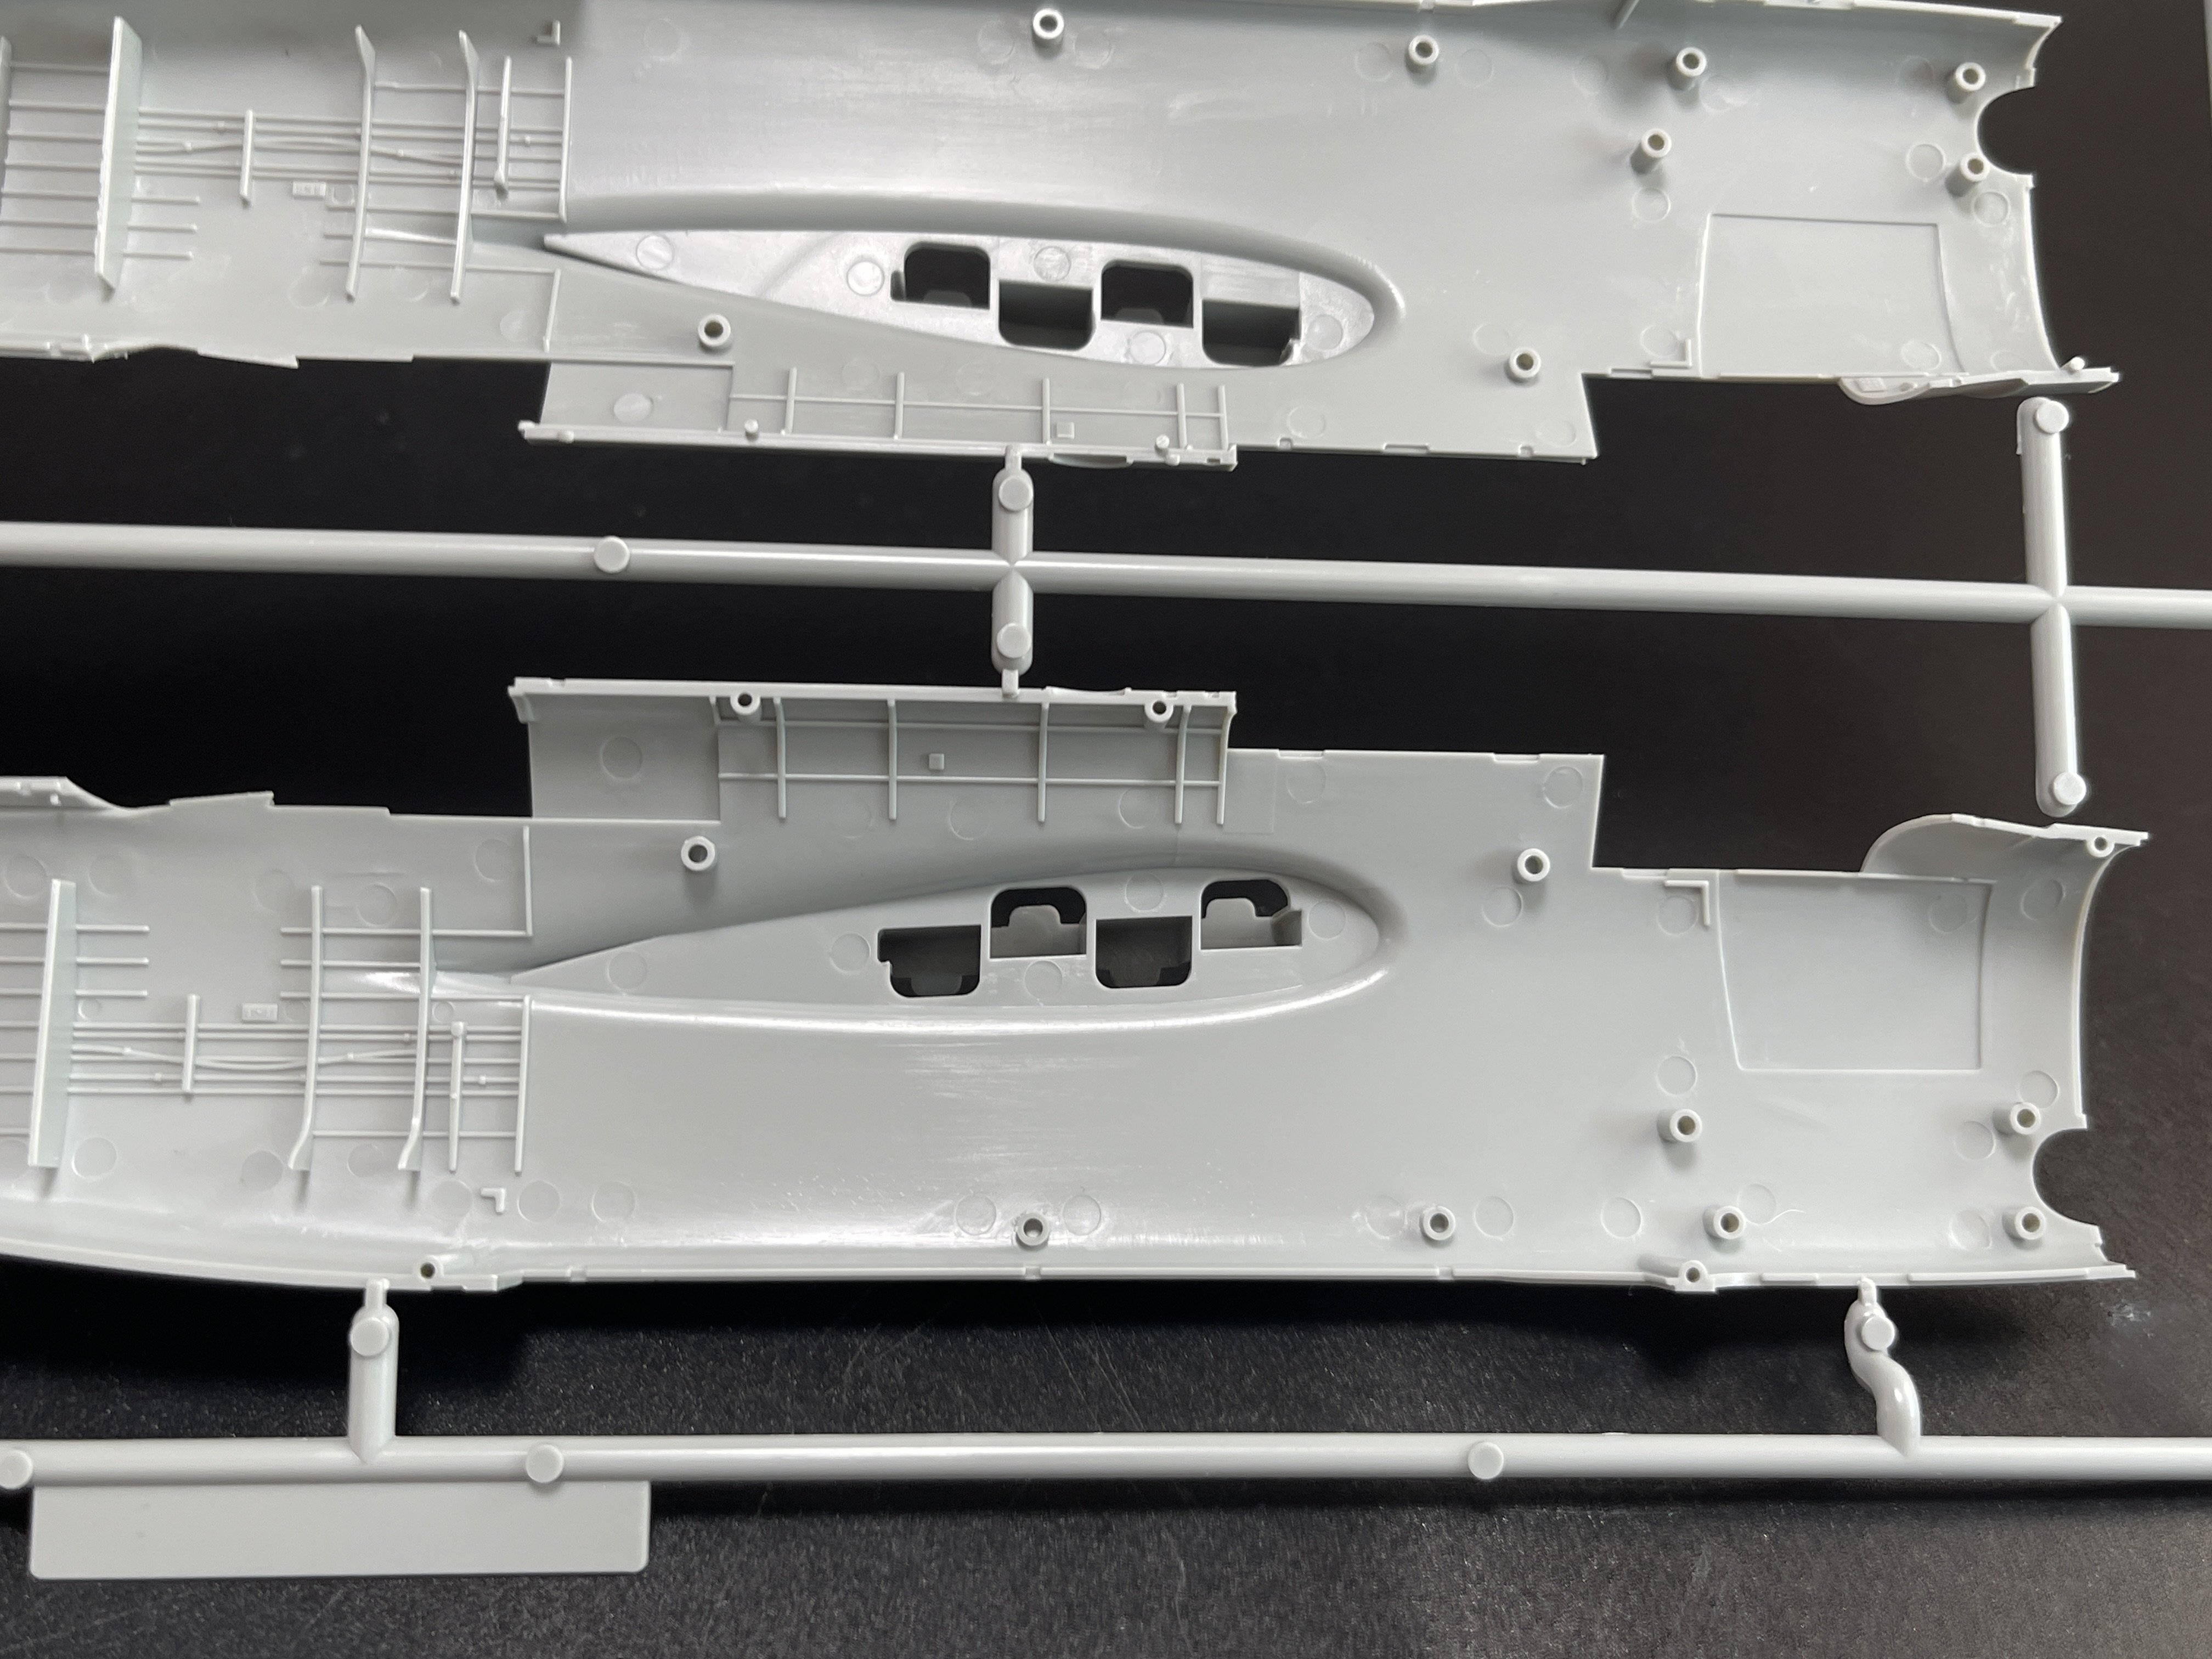
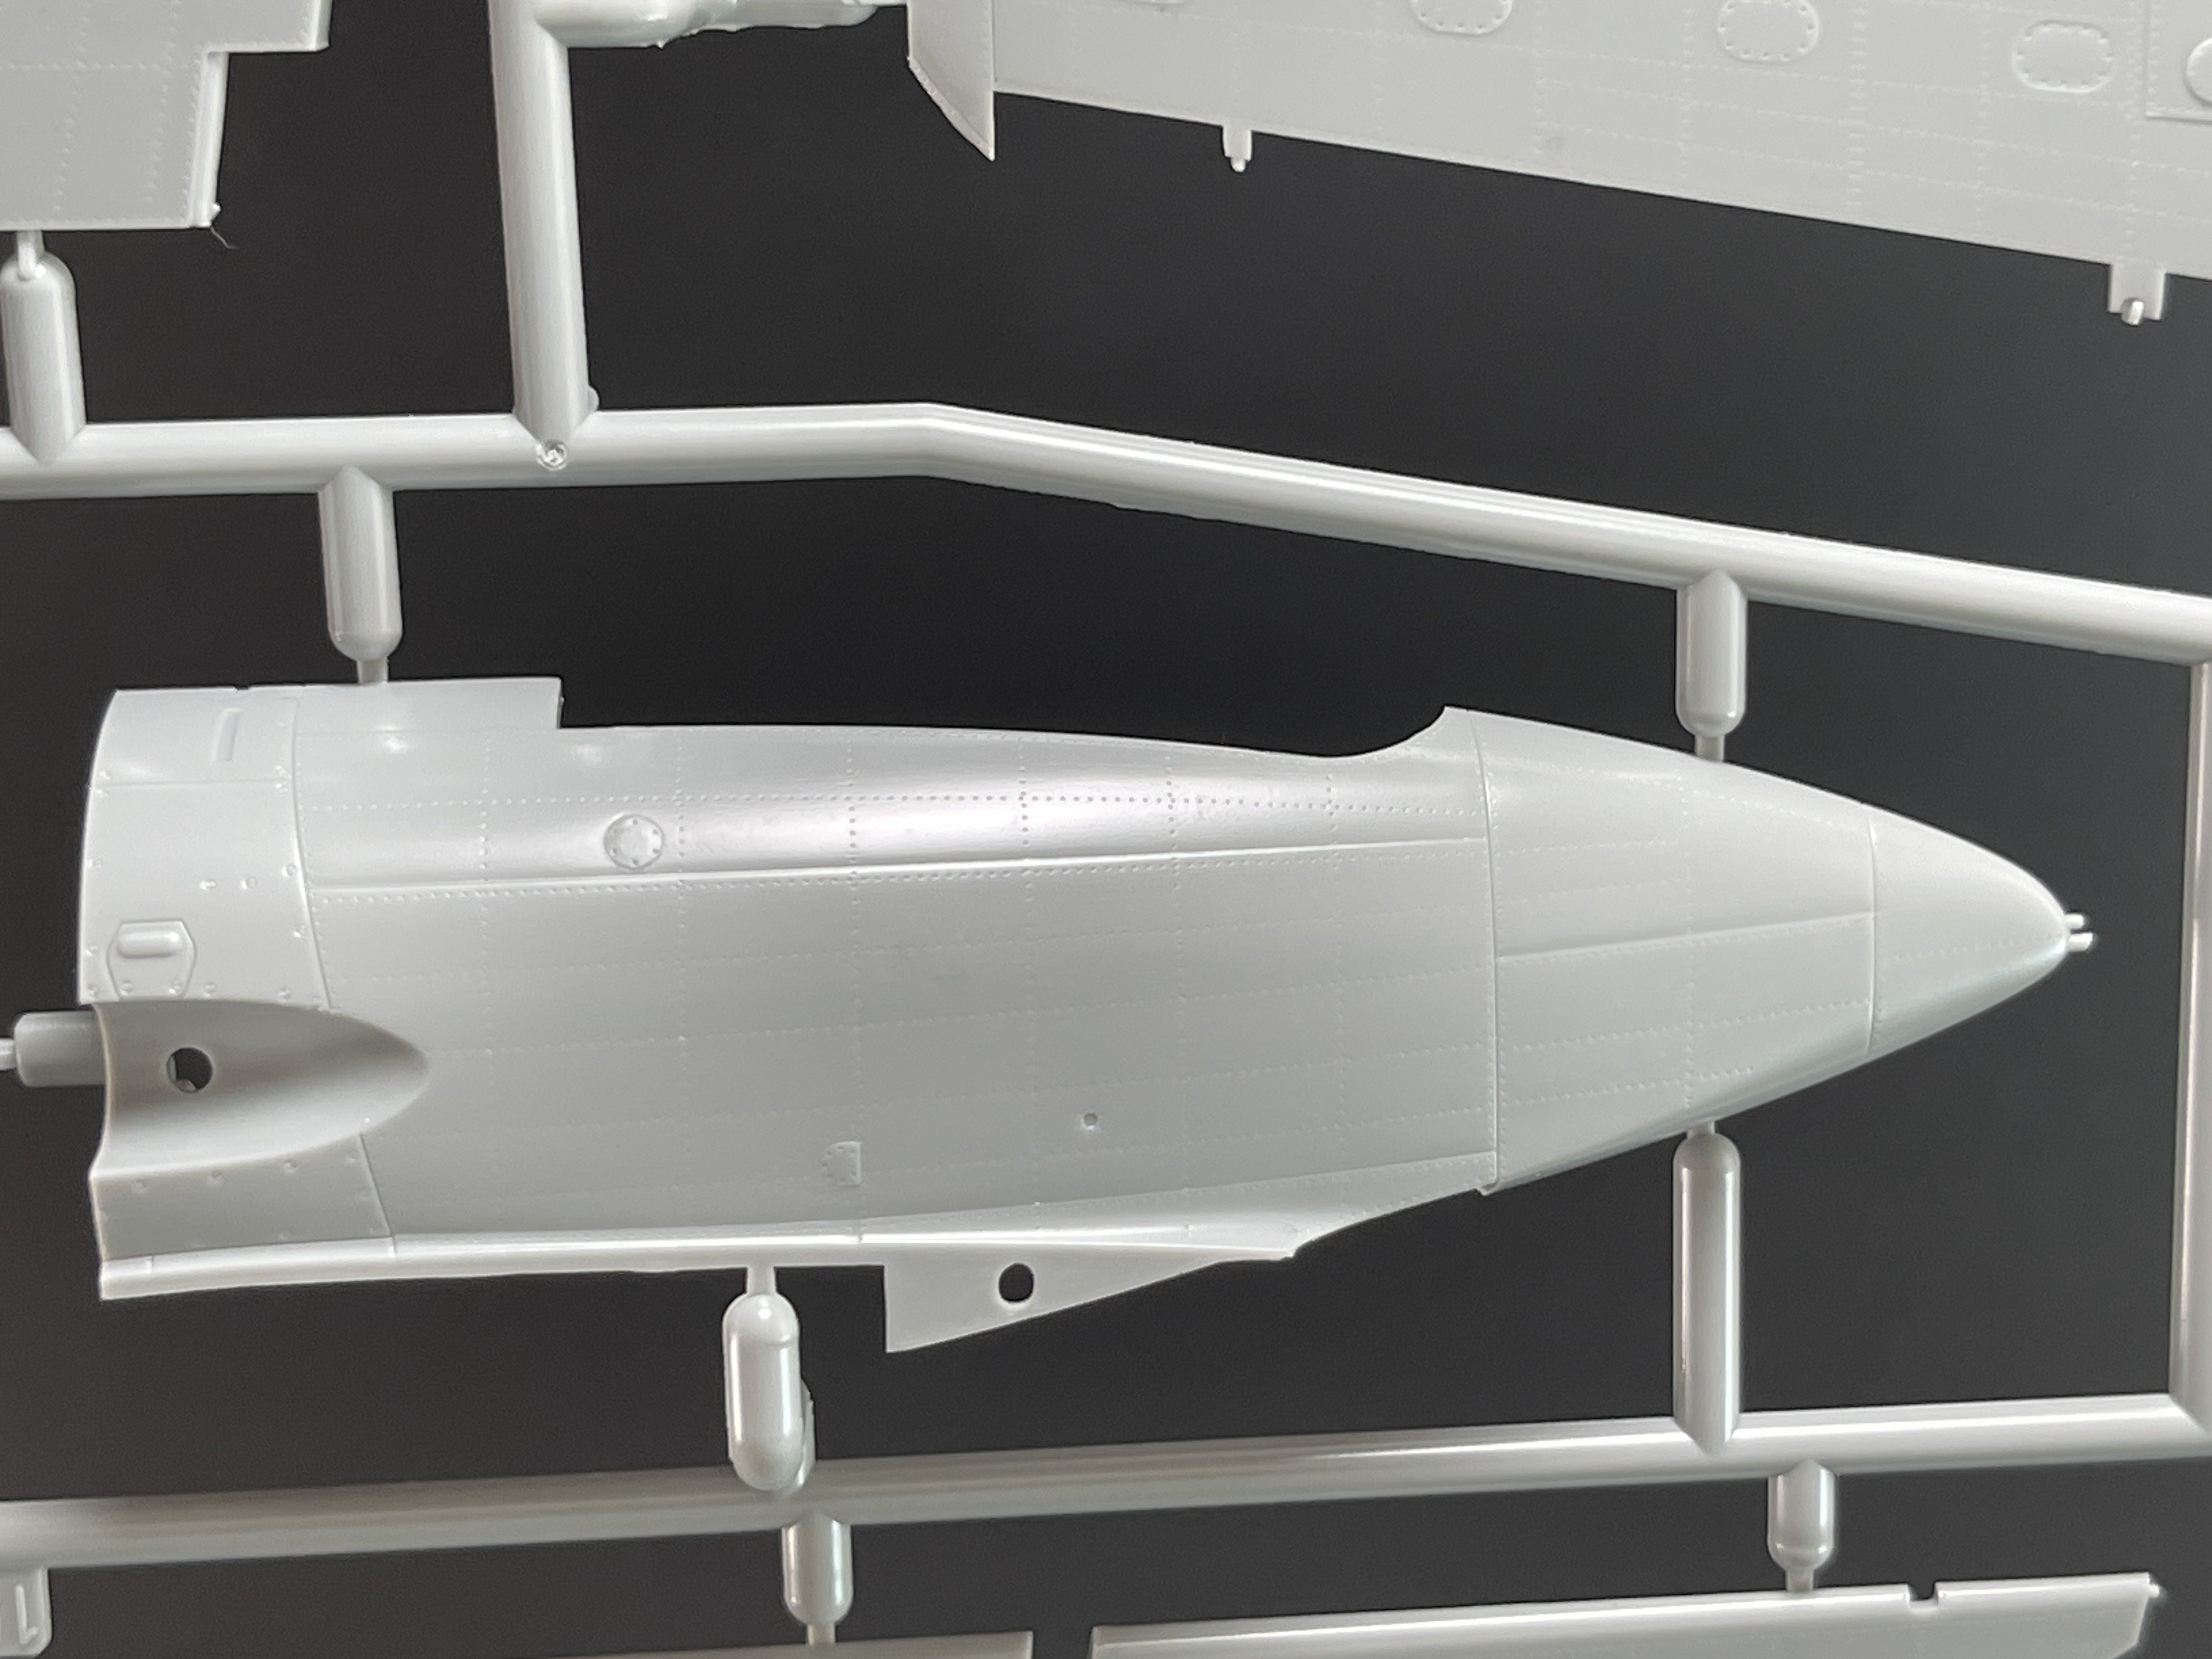
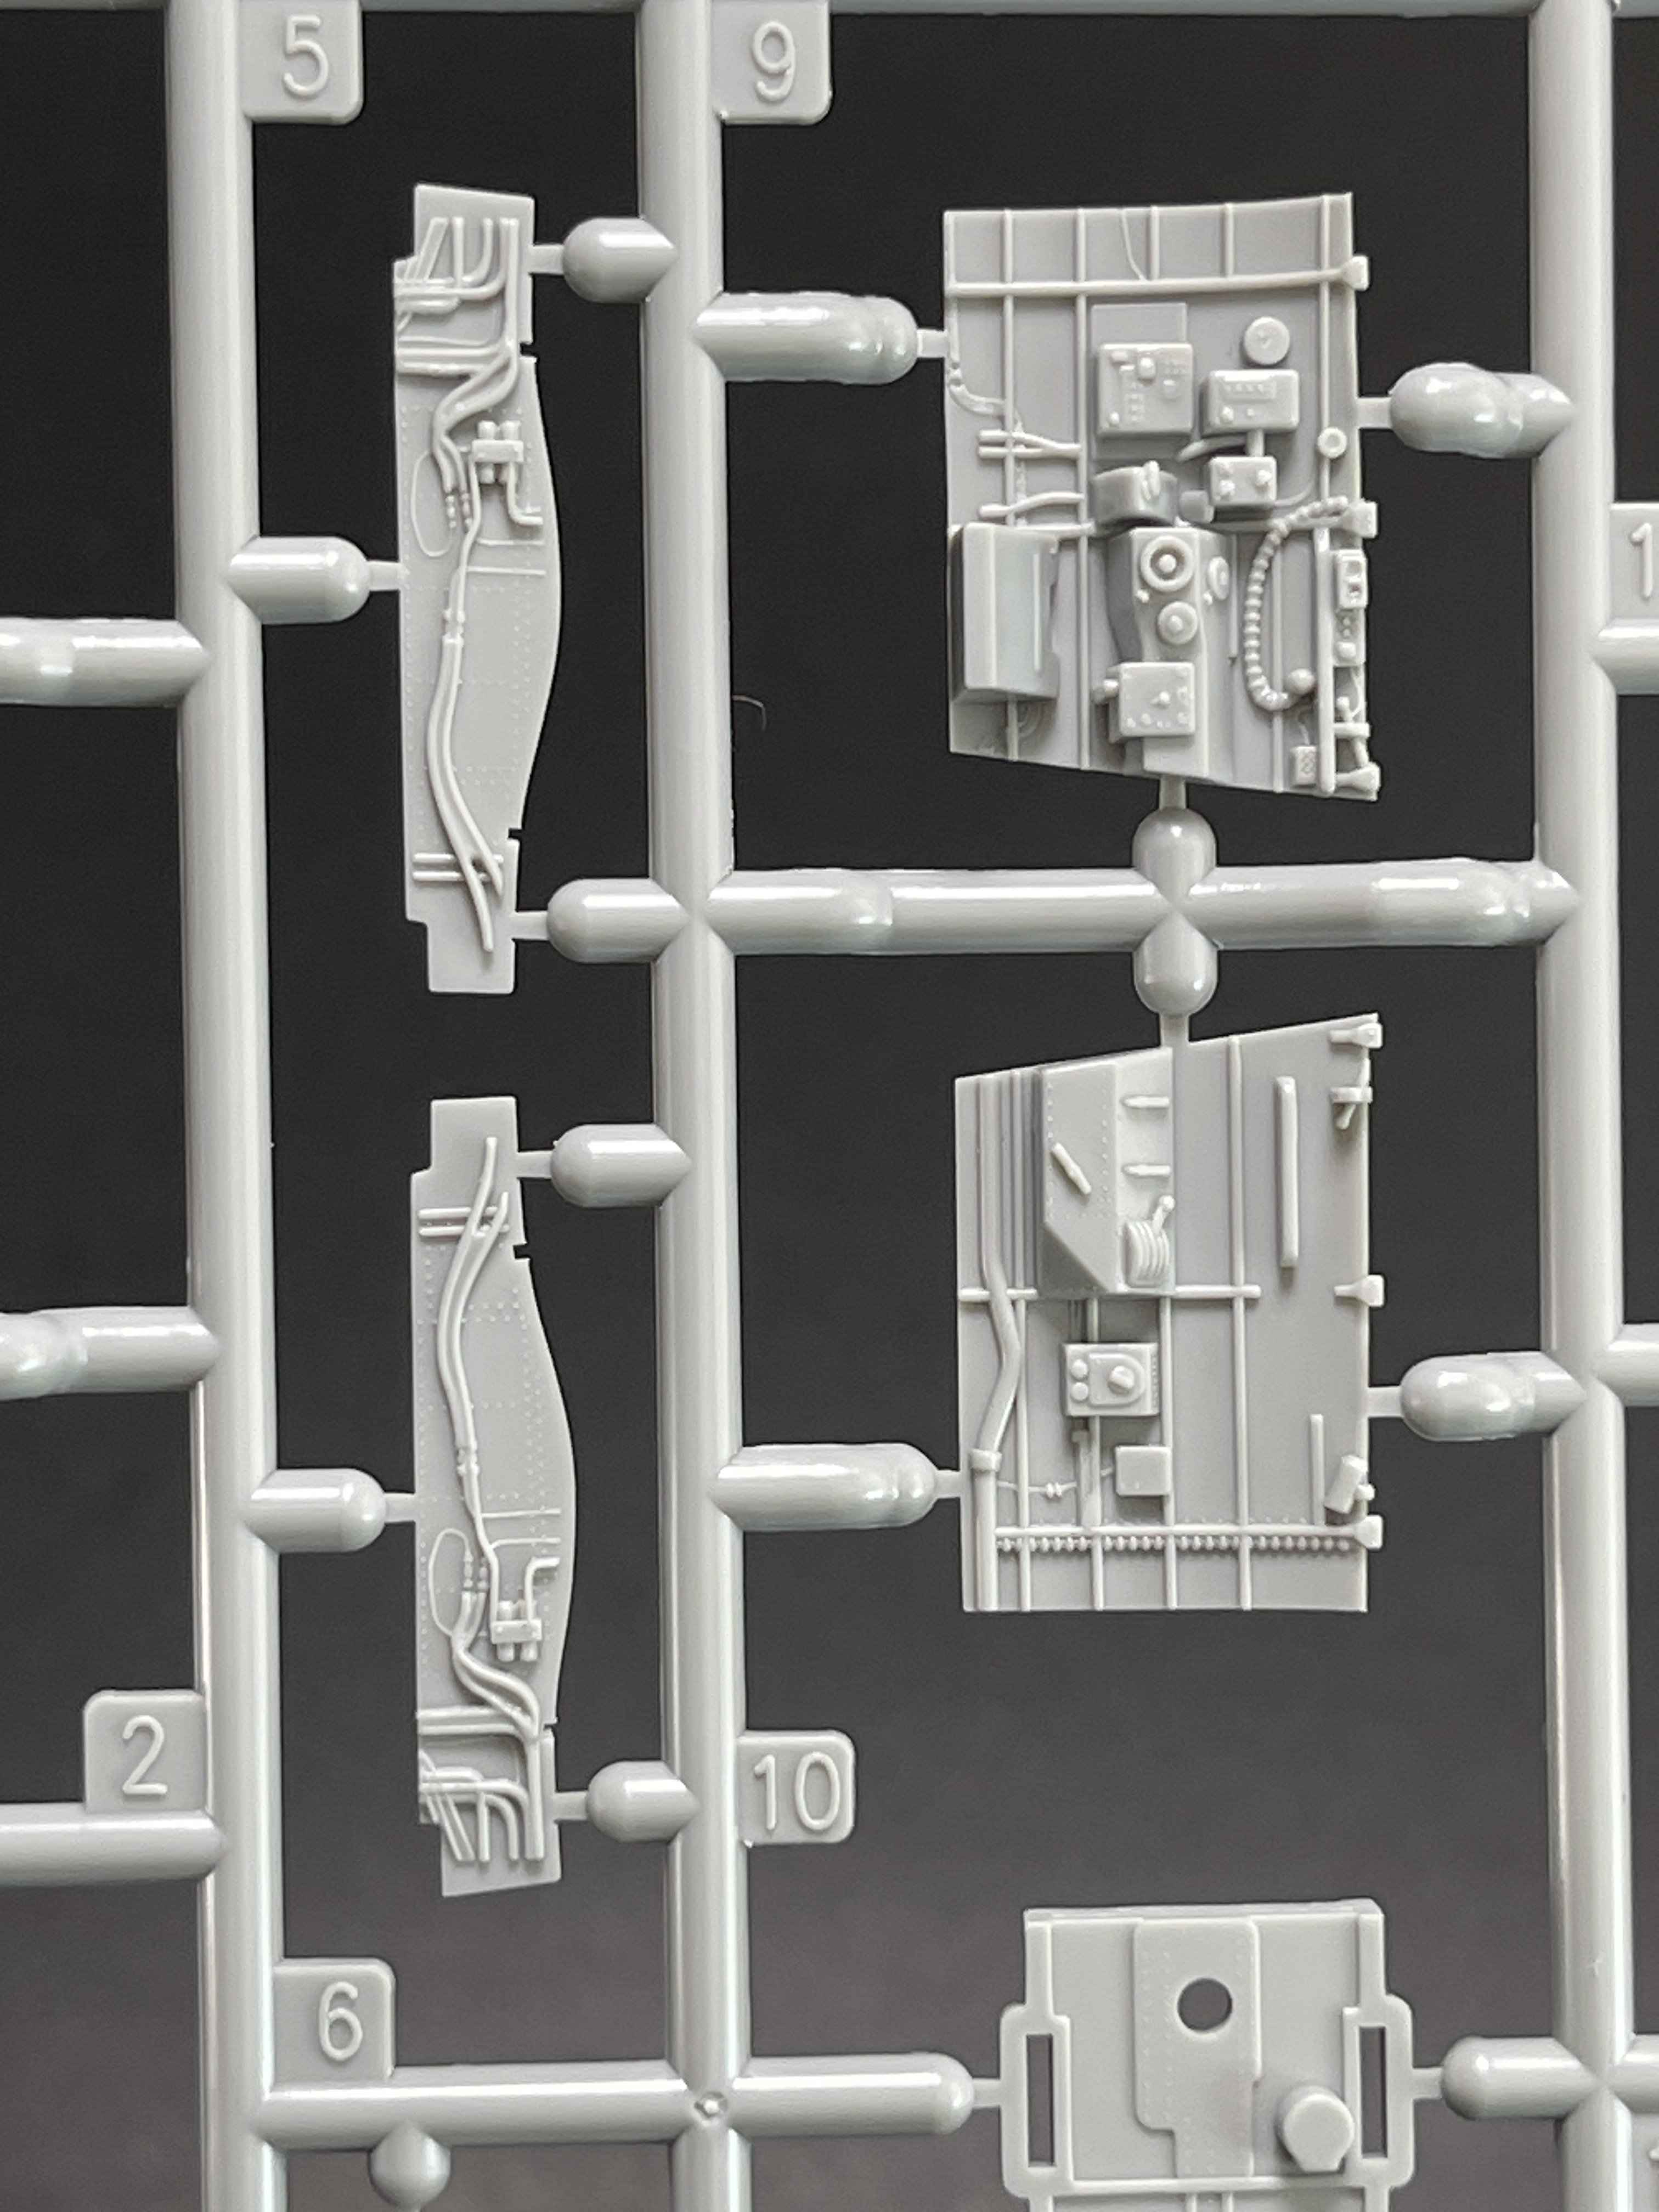
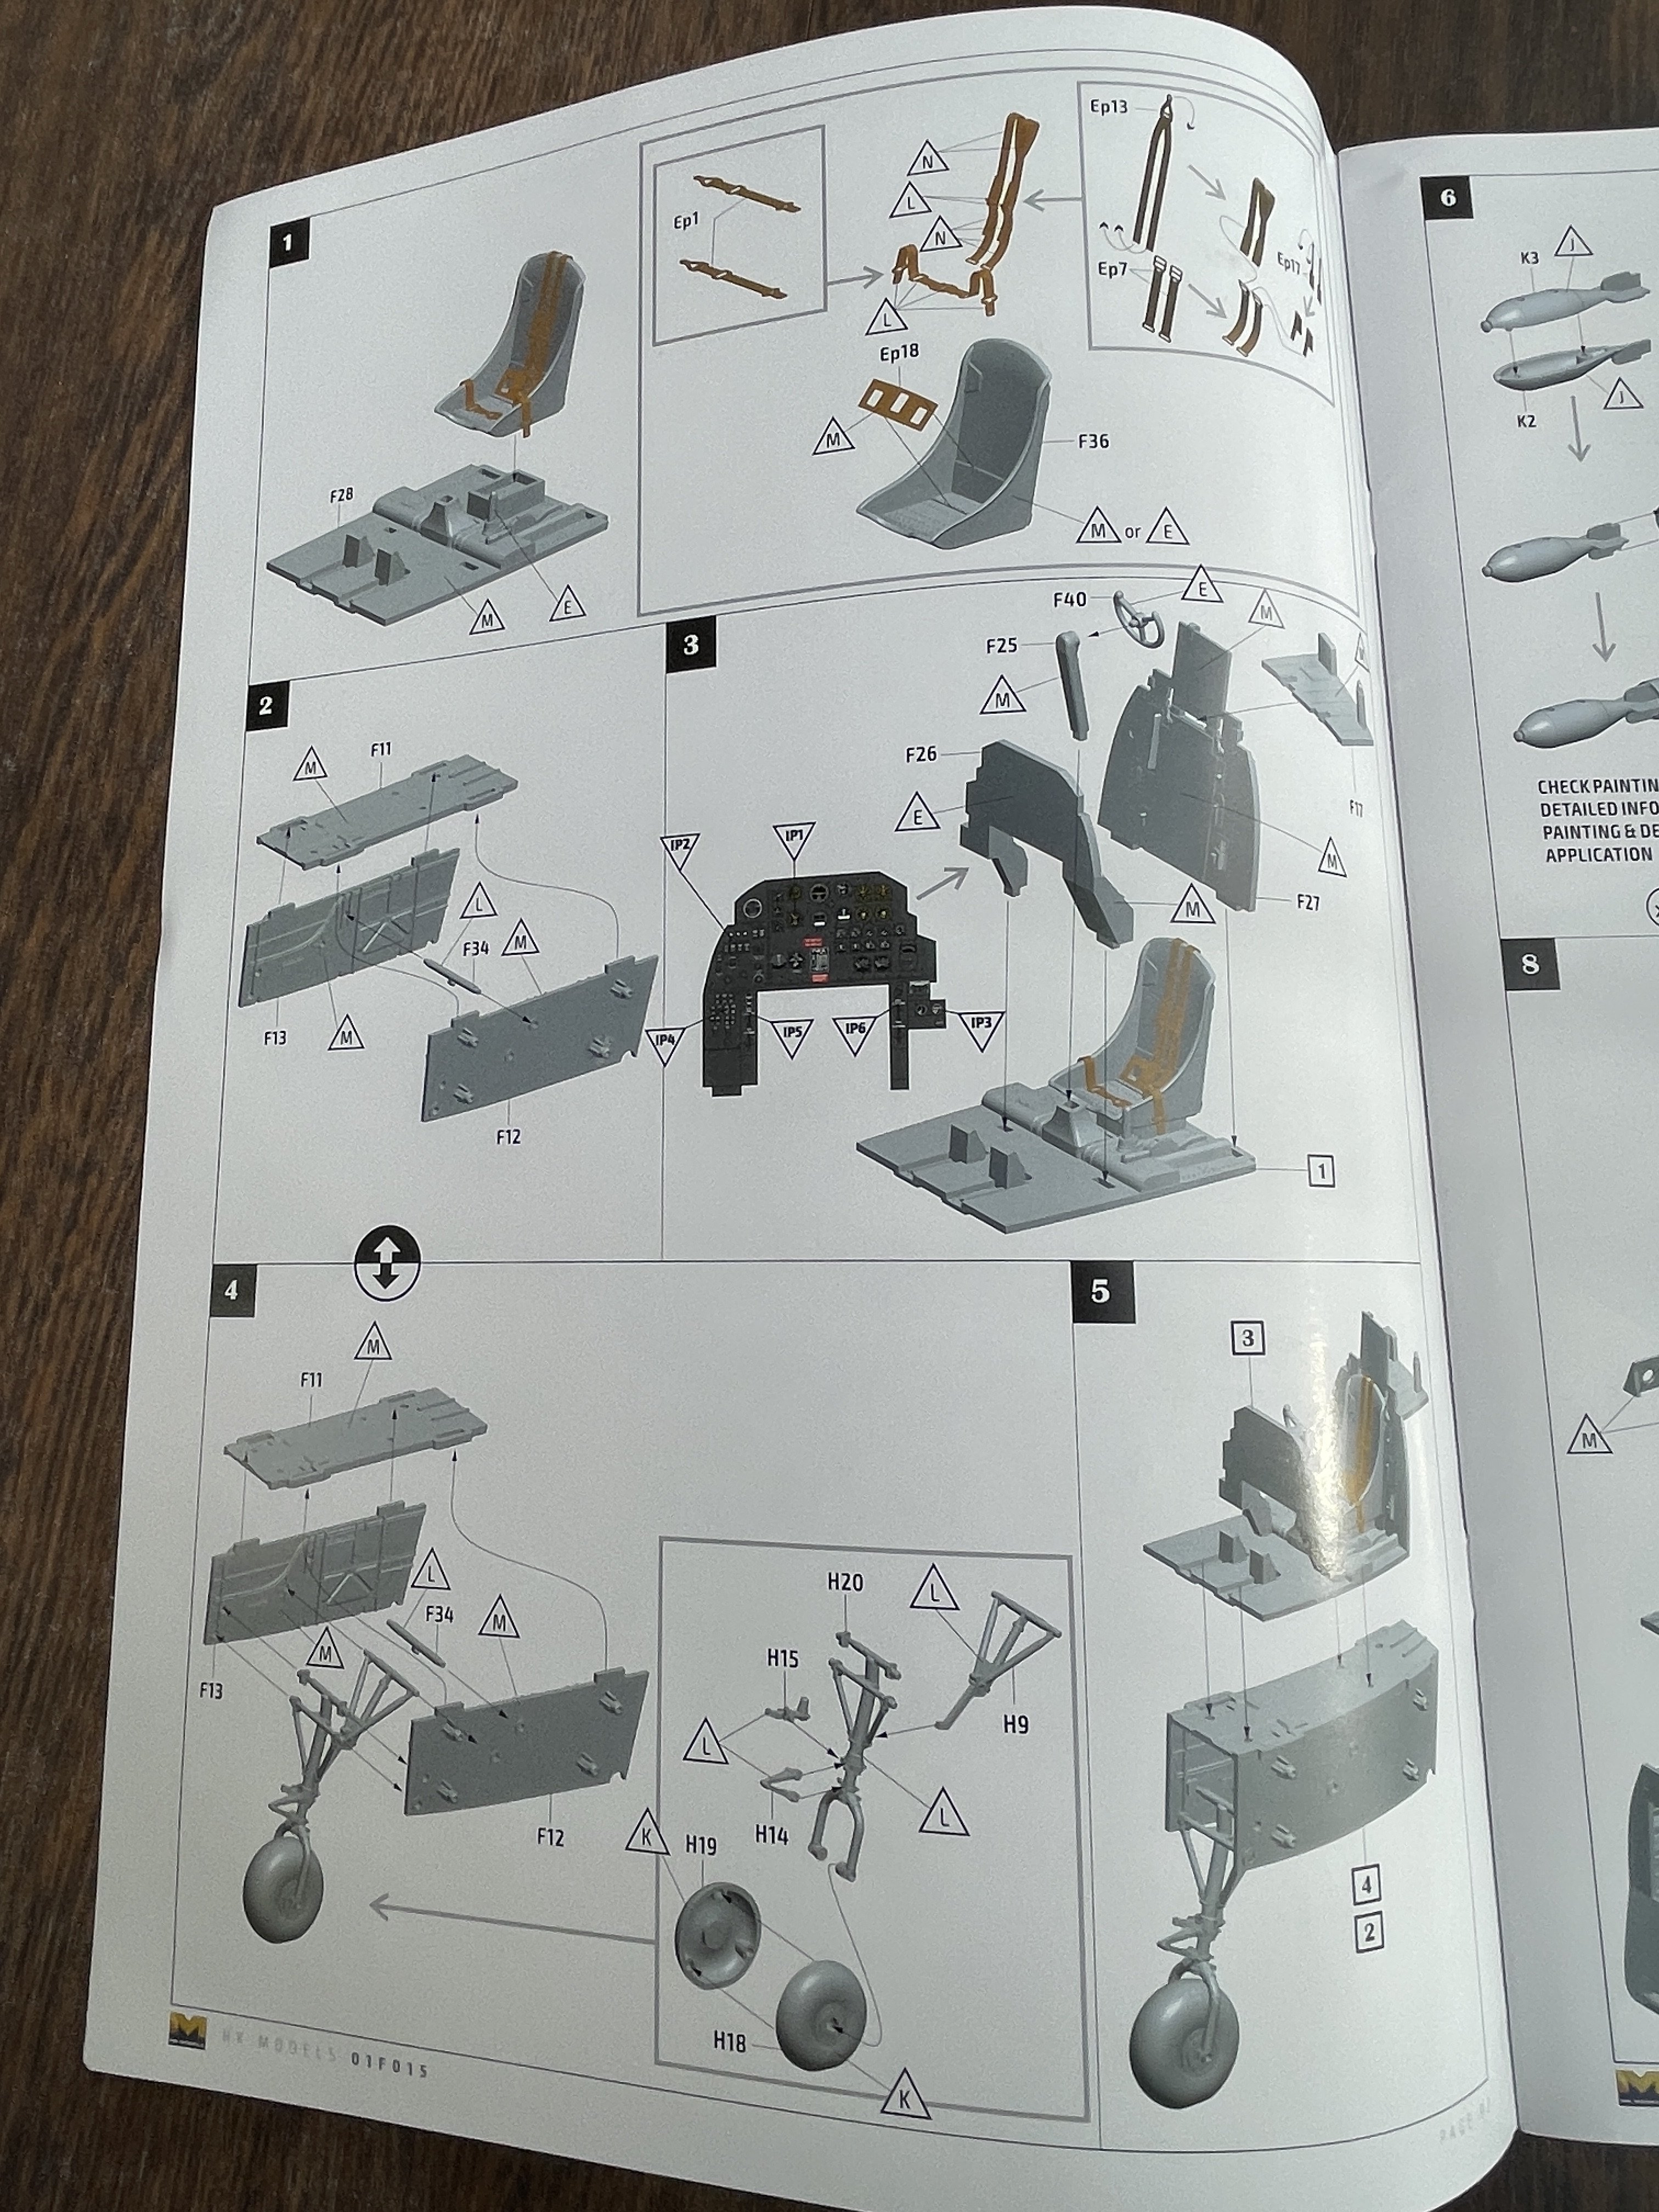
The cockpit details are quite good straight from the box as for the bombardier compartment in the front of the nose.

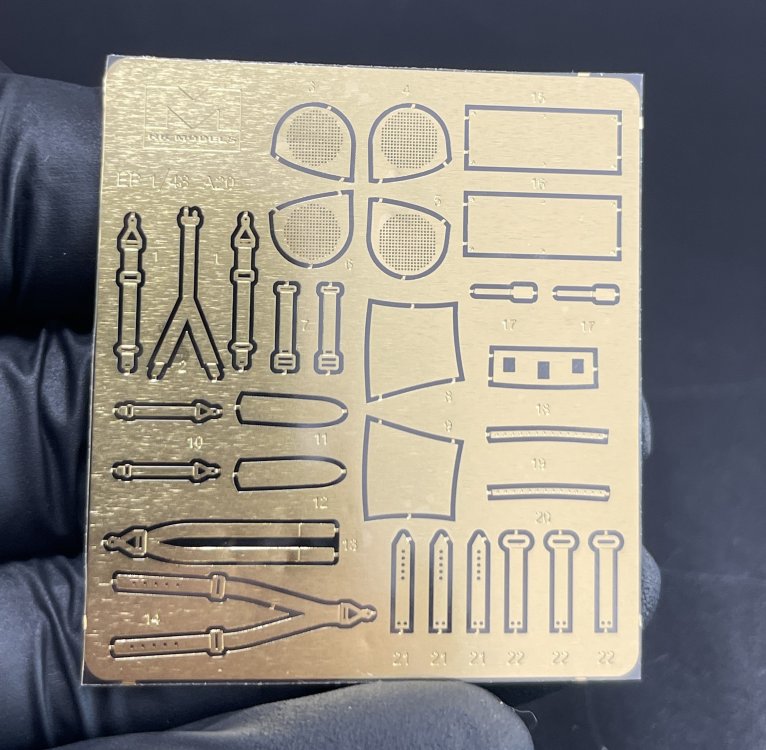
The cockpit and bombardier’s compartment are well-detailed, with accurate representations of the pilot’s controls, seats, and instrumentation. The inclusion of photo-etched seat belts enhances realism, though some modelers may opt for aftermarket or some scratch for super-detailing.

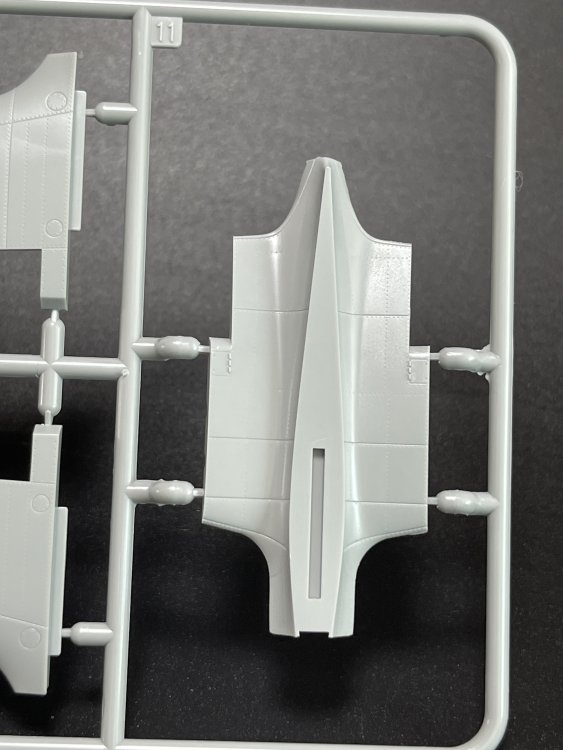
One thing that will give modeler some work is removing all the injection pin marks.


They are quite a few (probably I think HK models could have done a little more to void these ones) but they are simple to remove as there are all raised injections marks (much better to remove than the recessed ones)
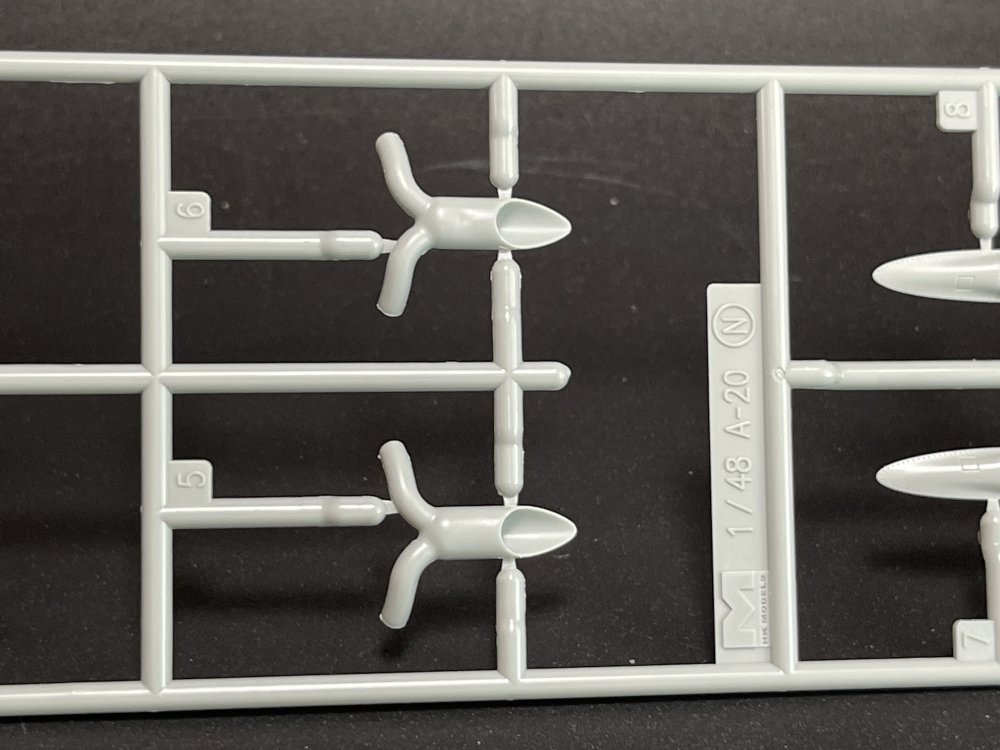
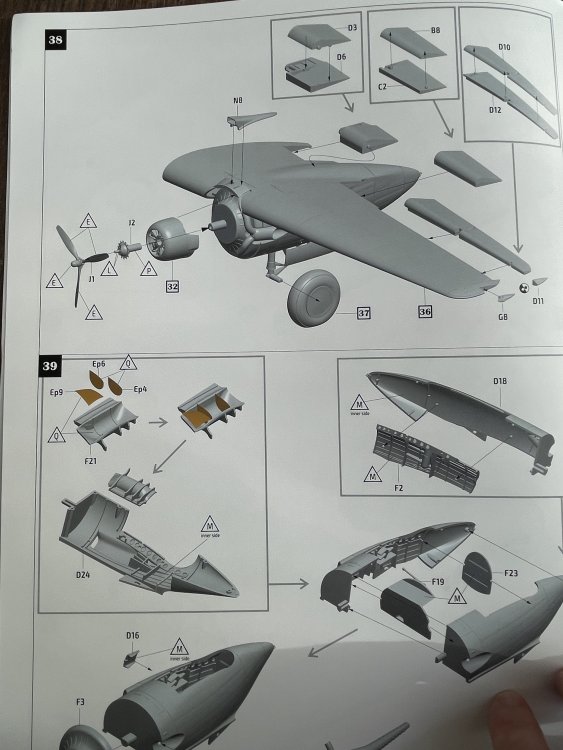
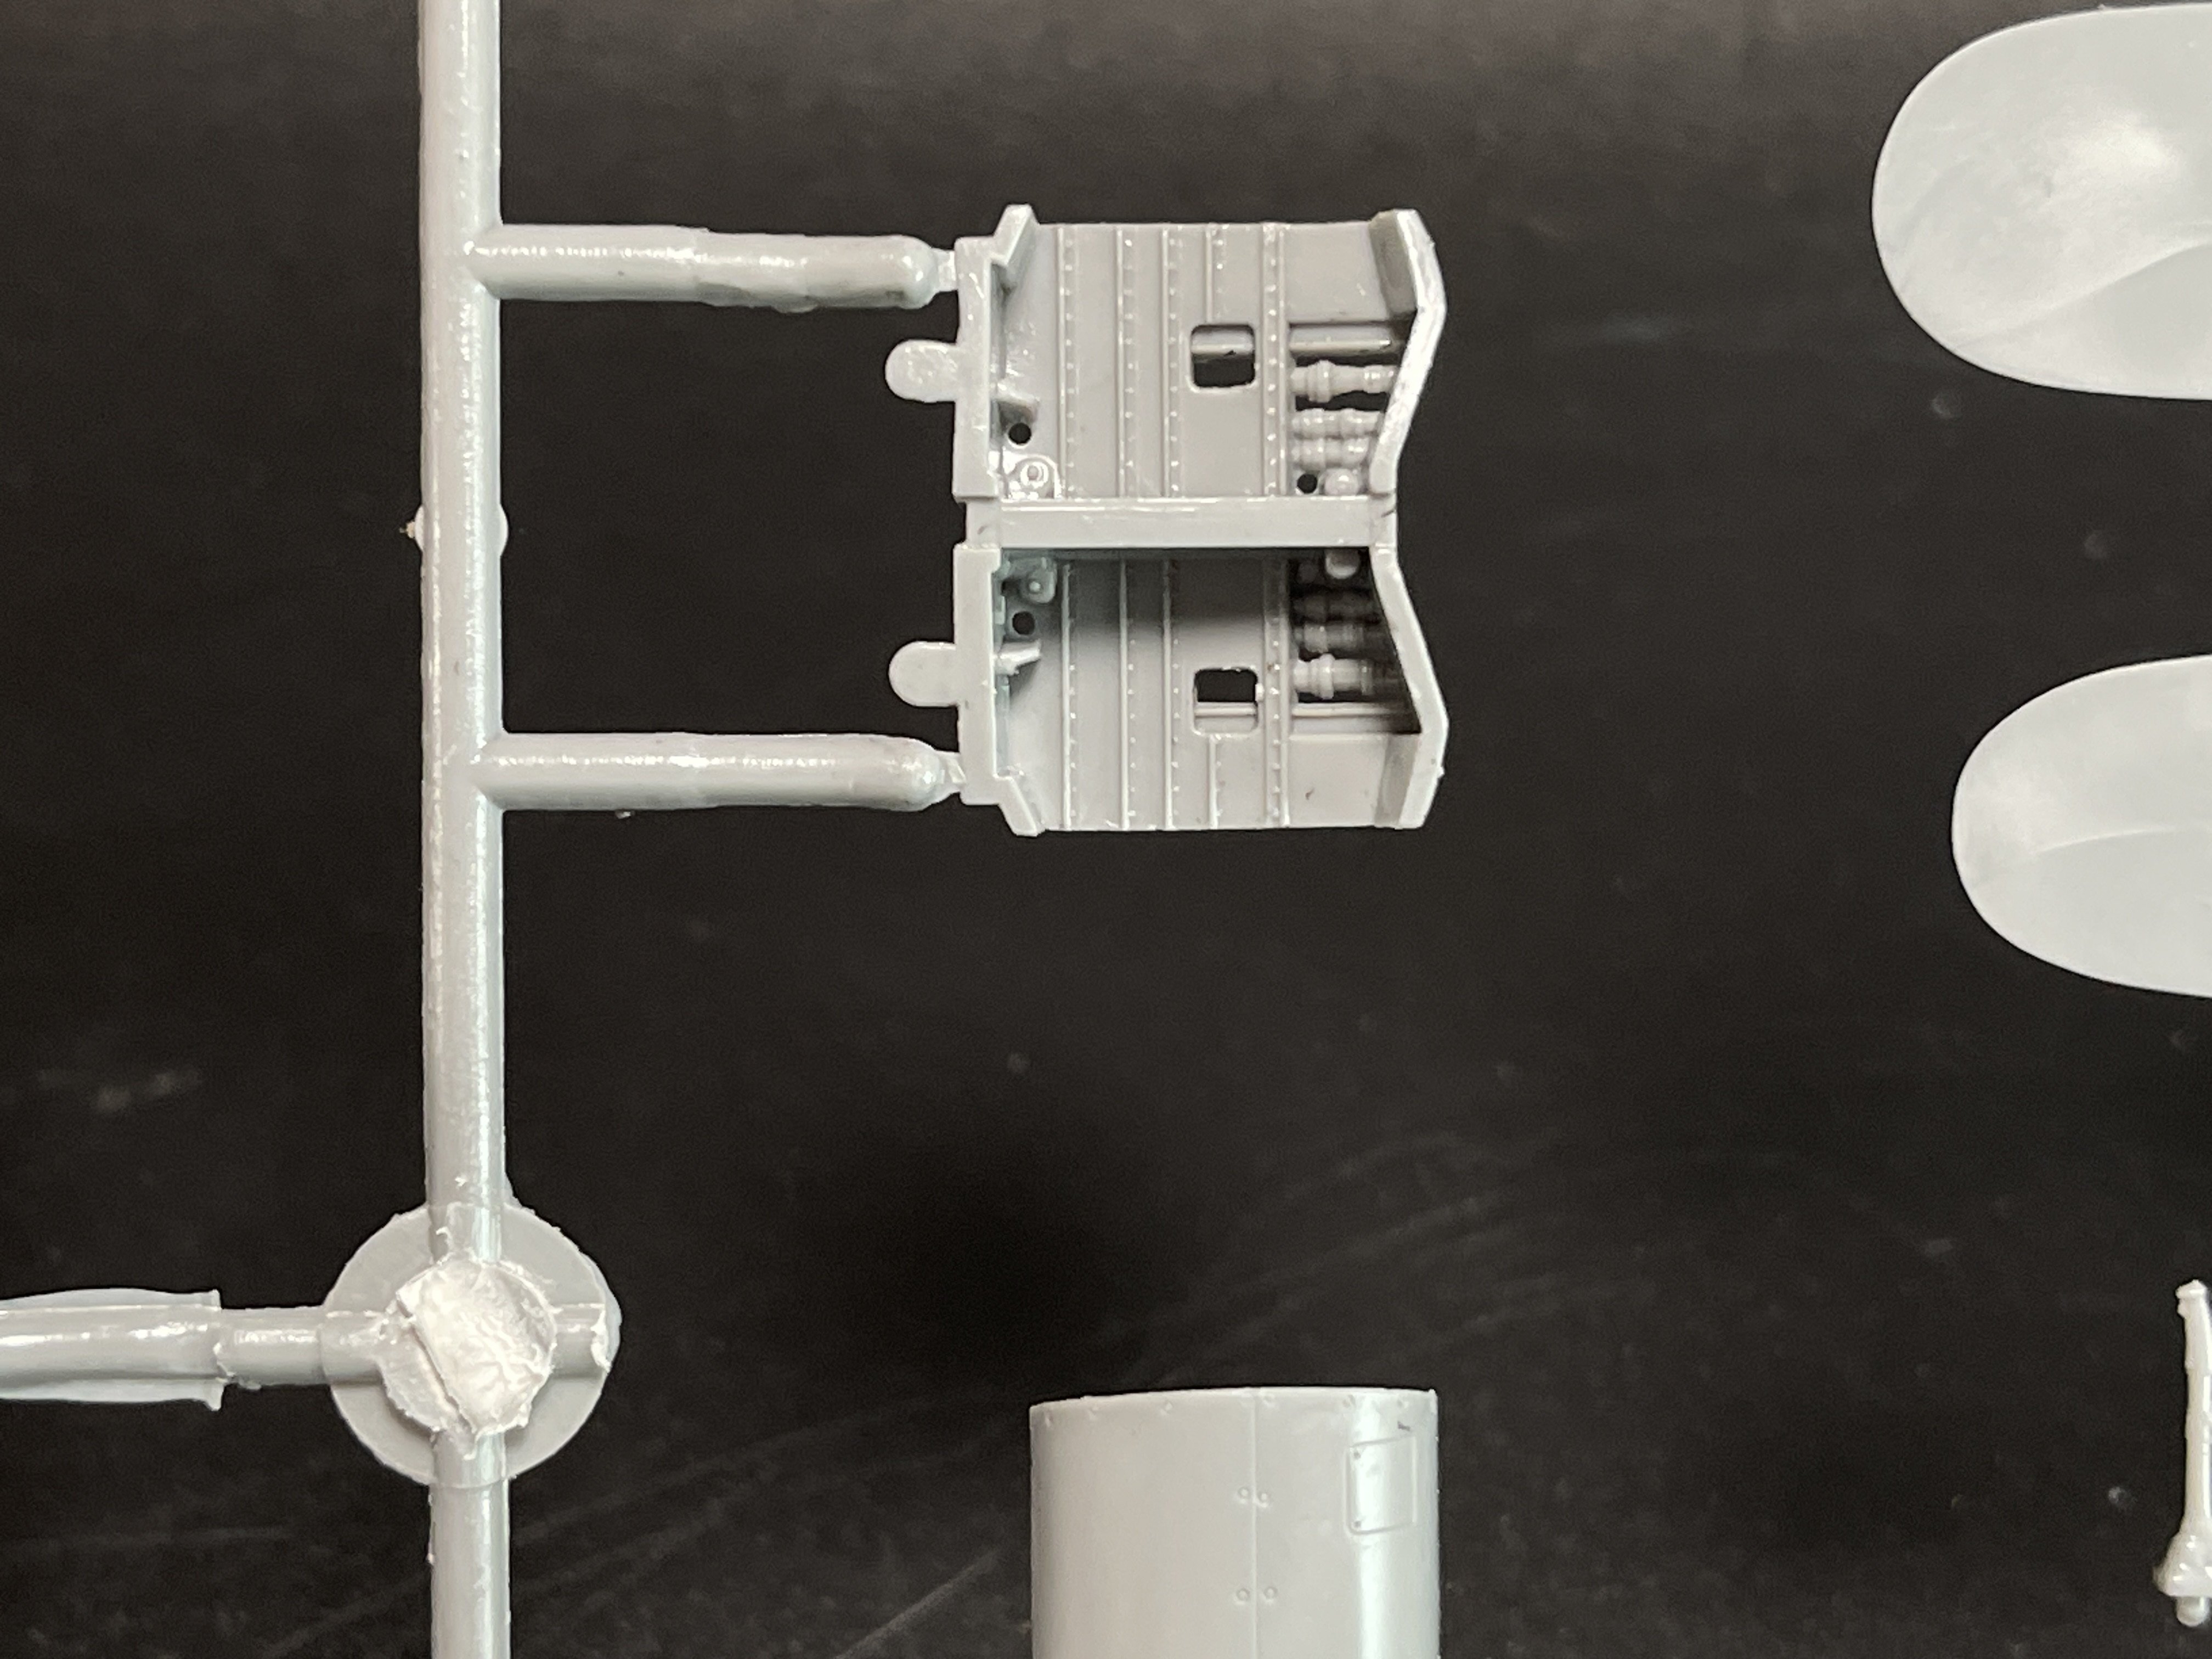
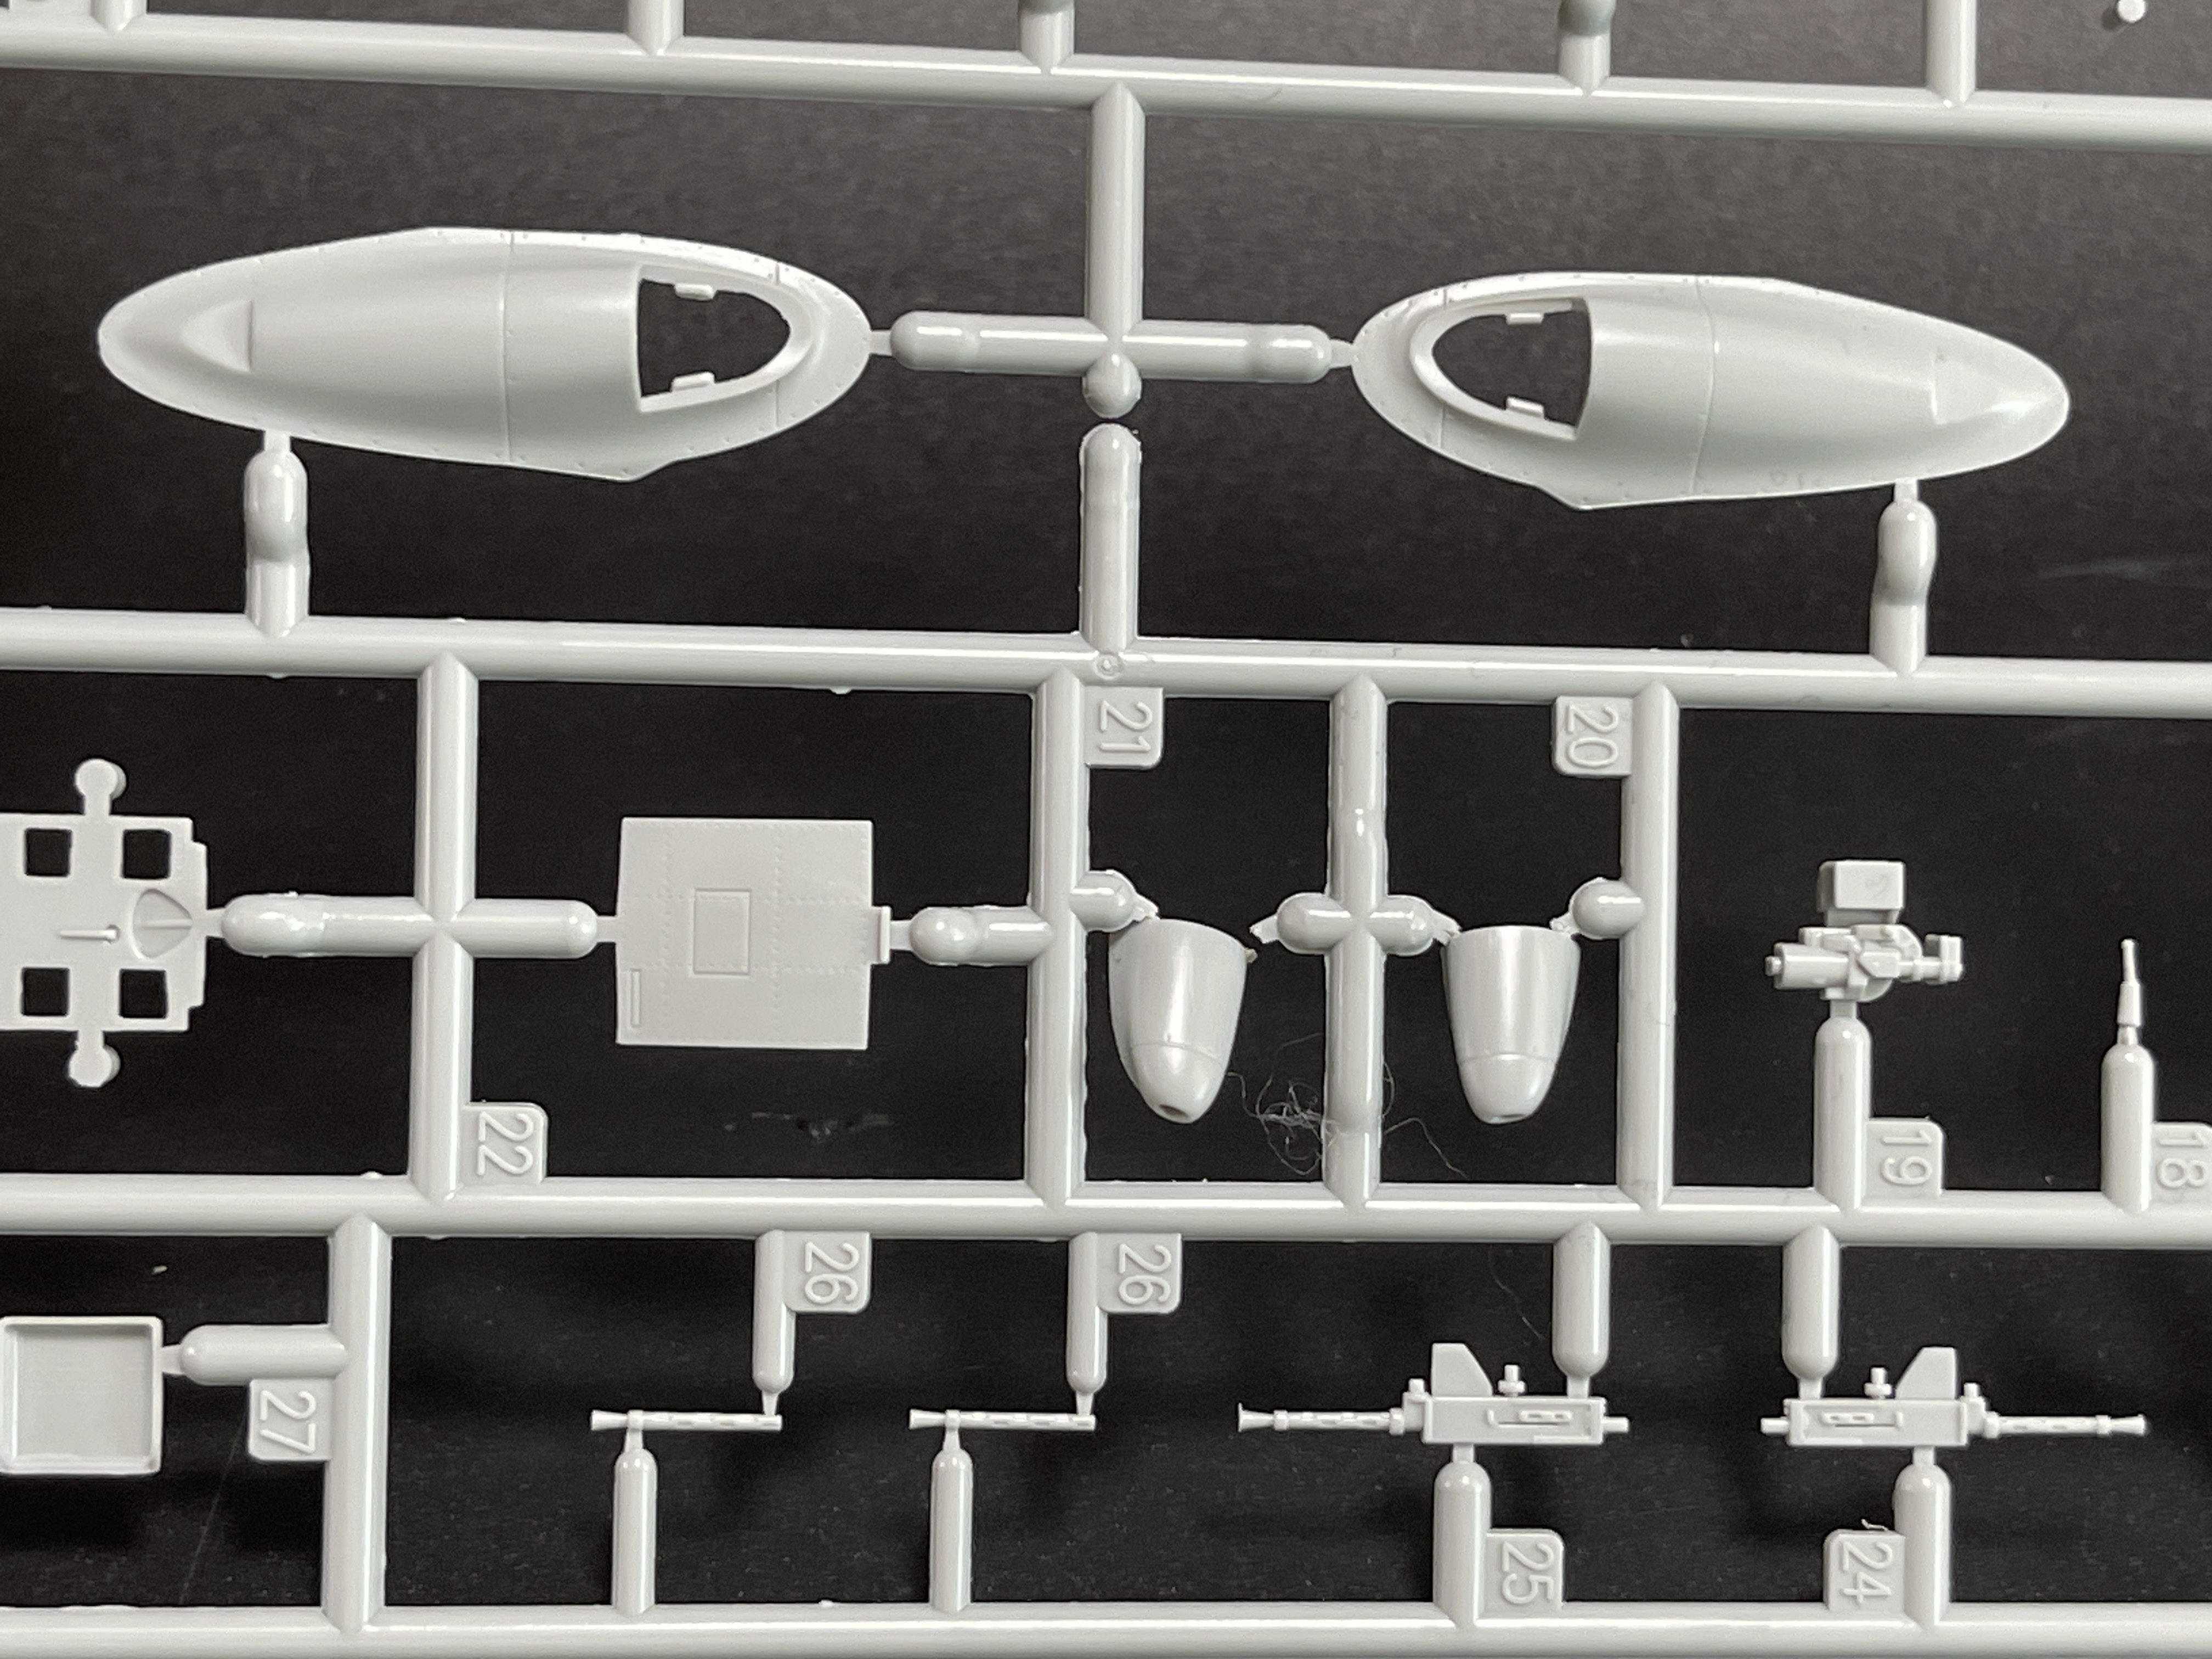
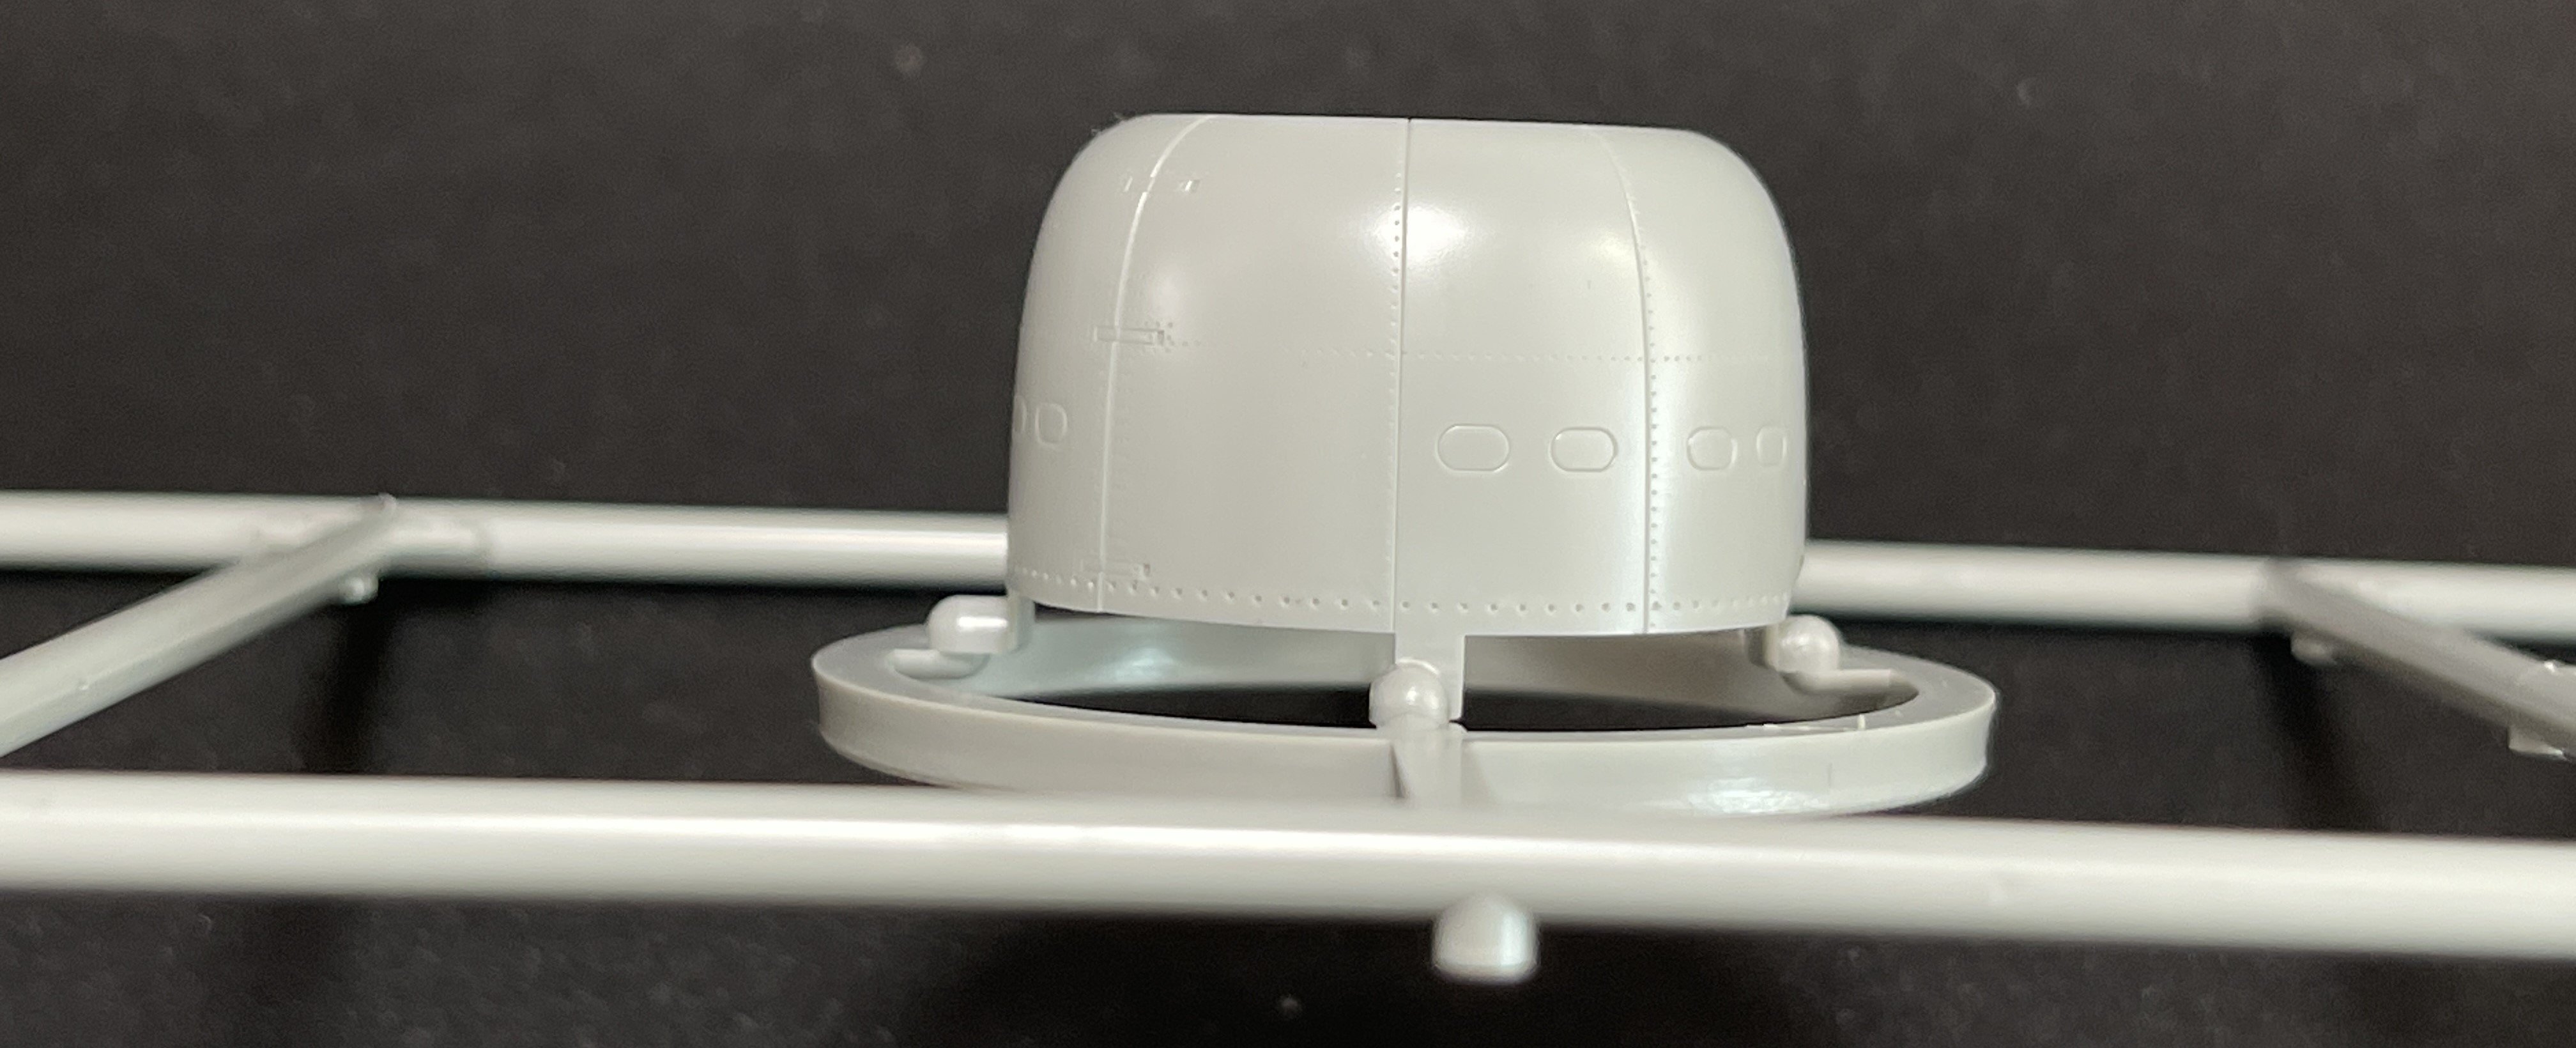
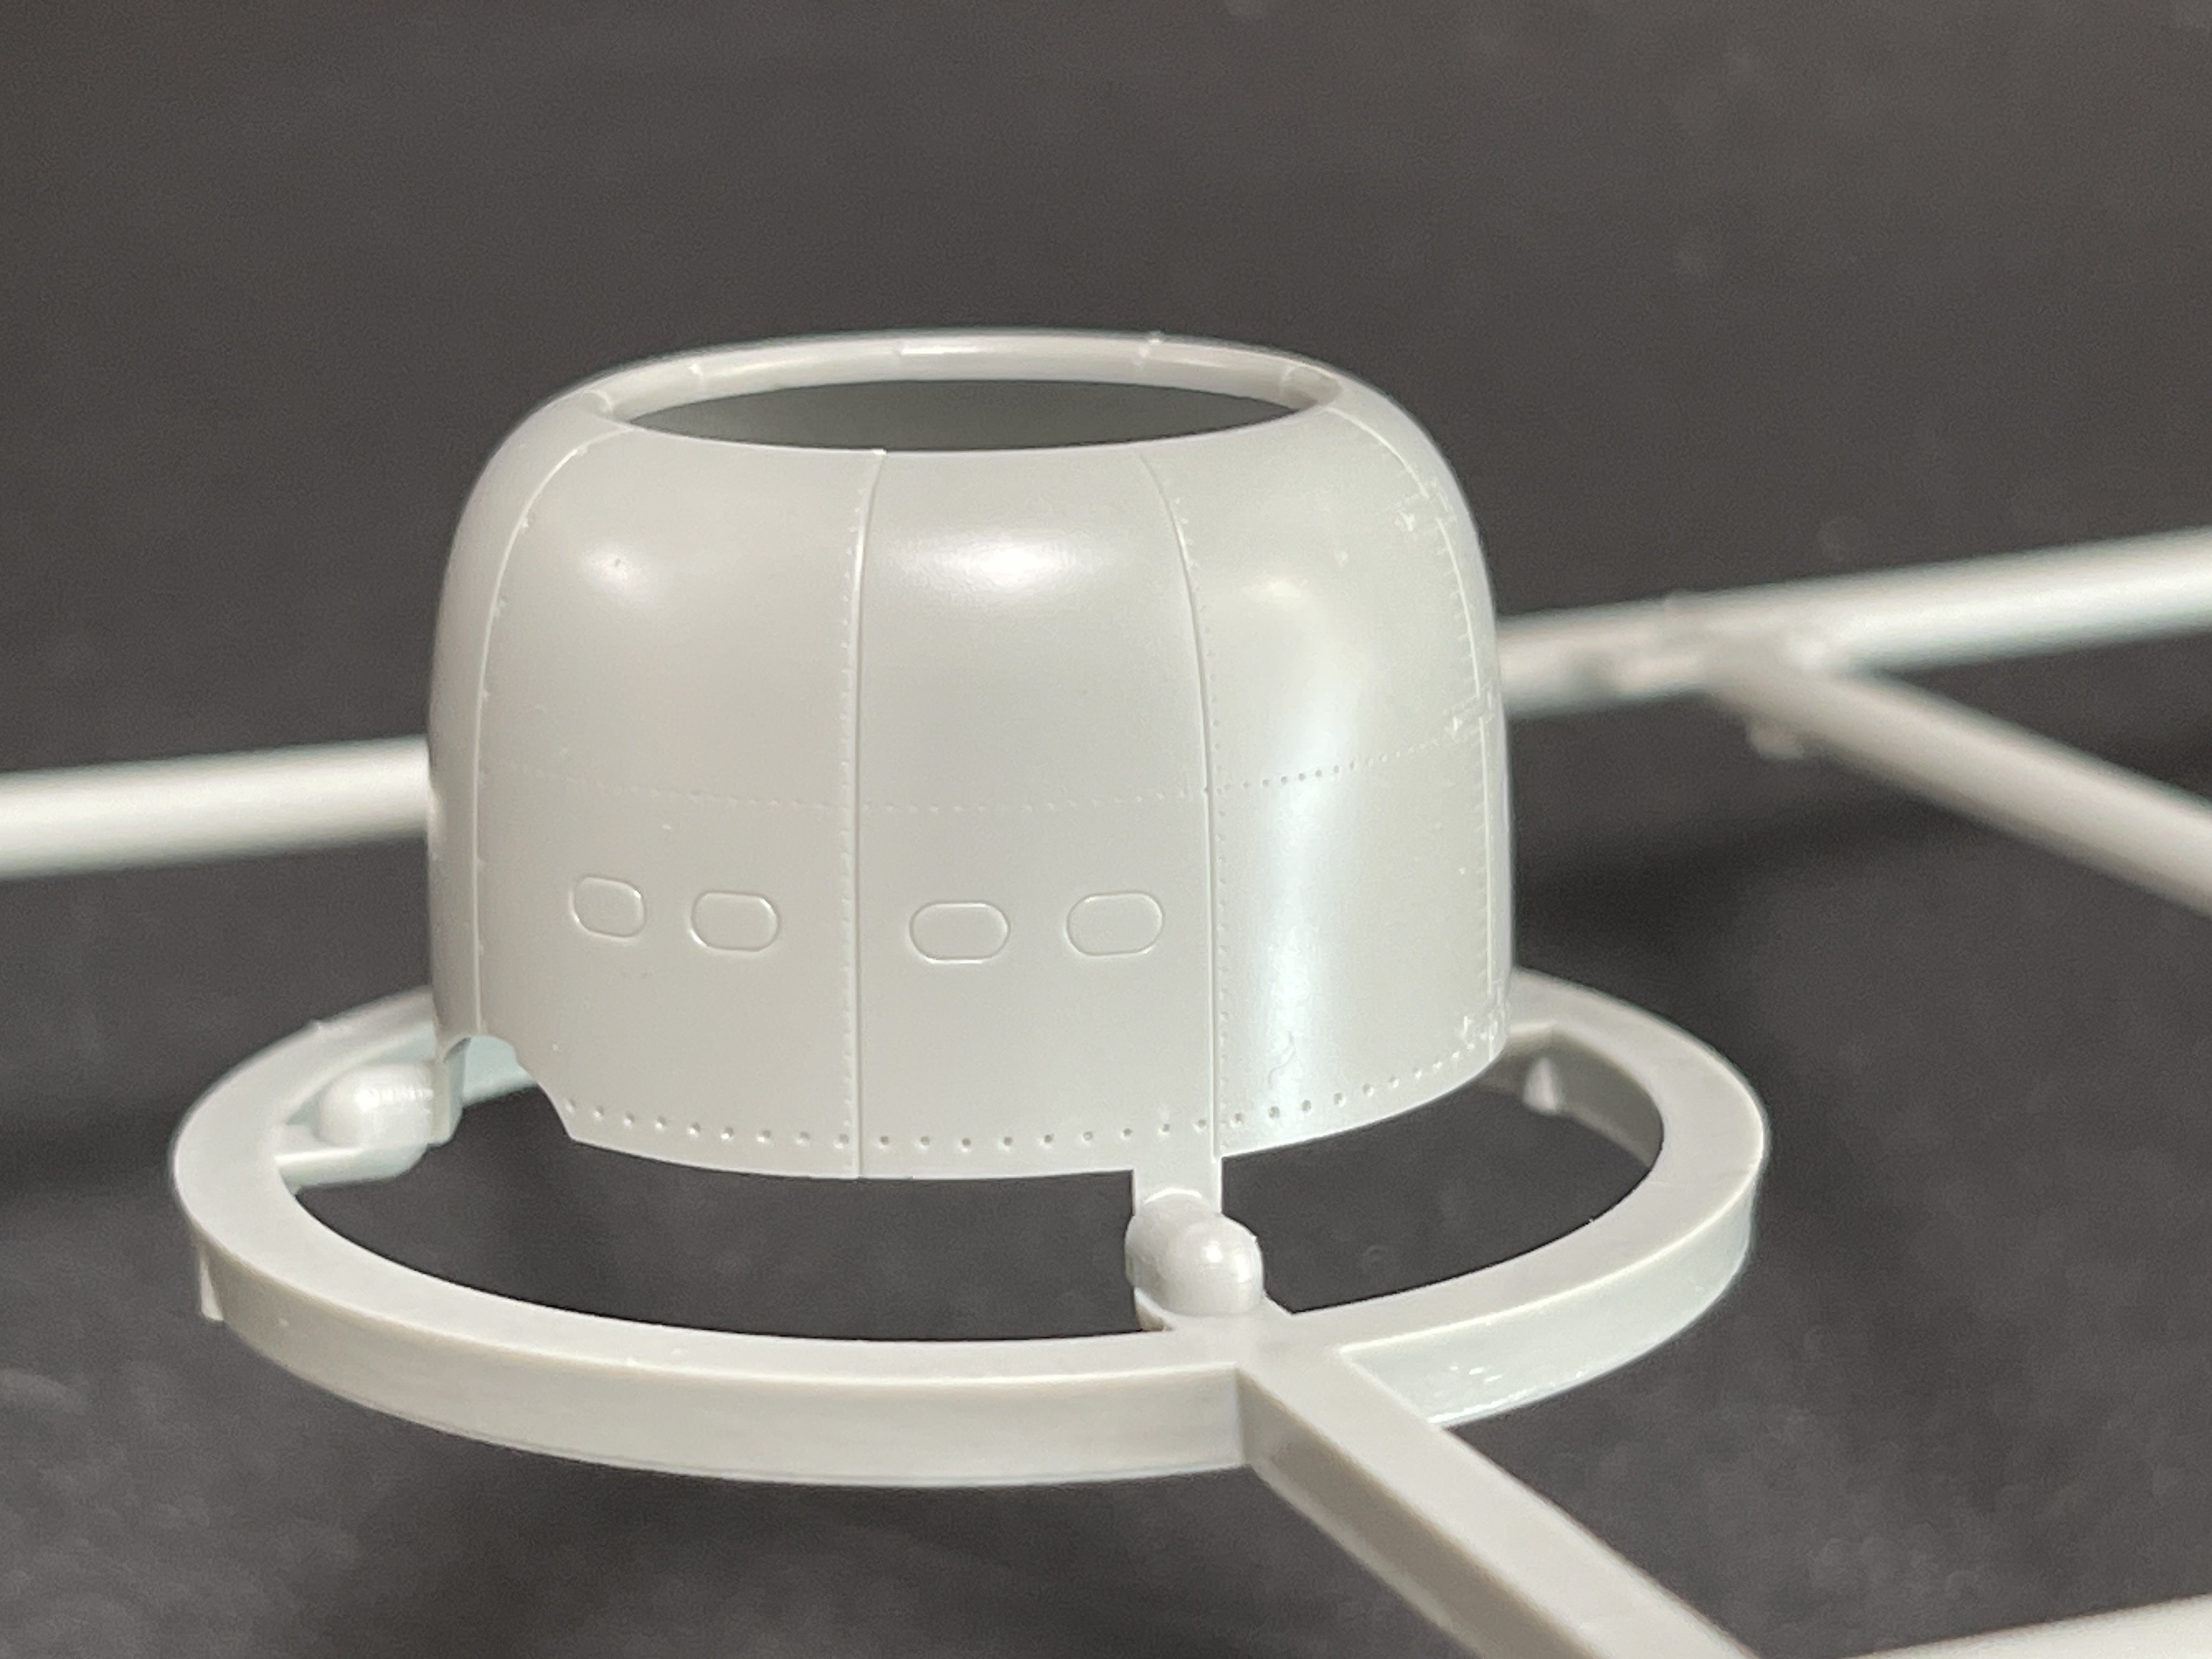
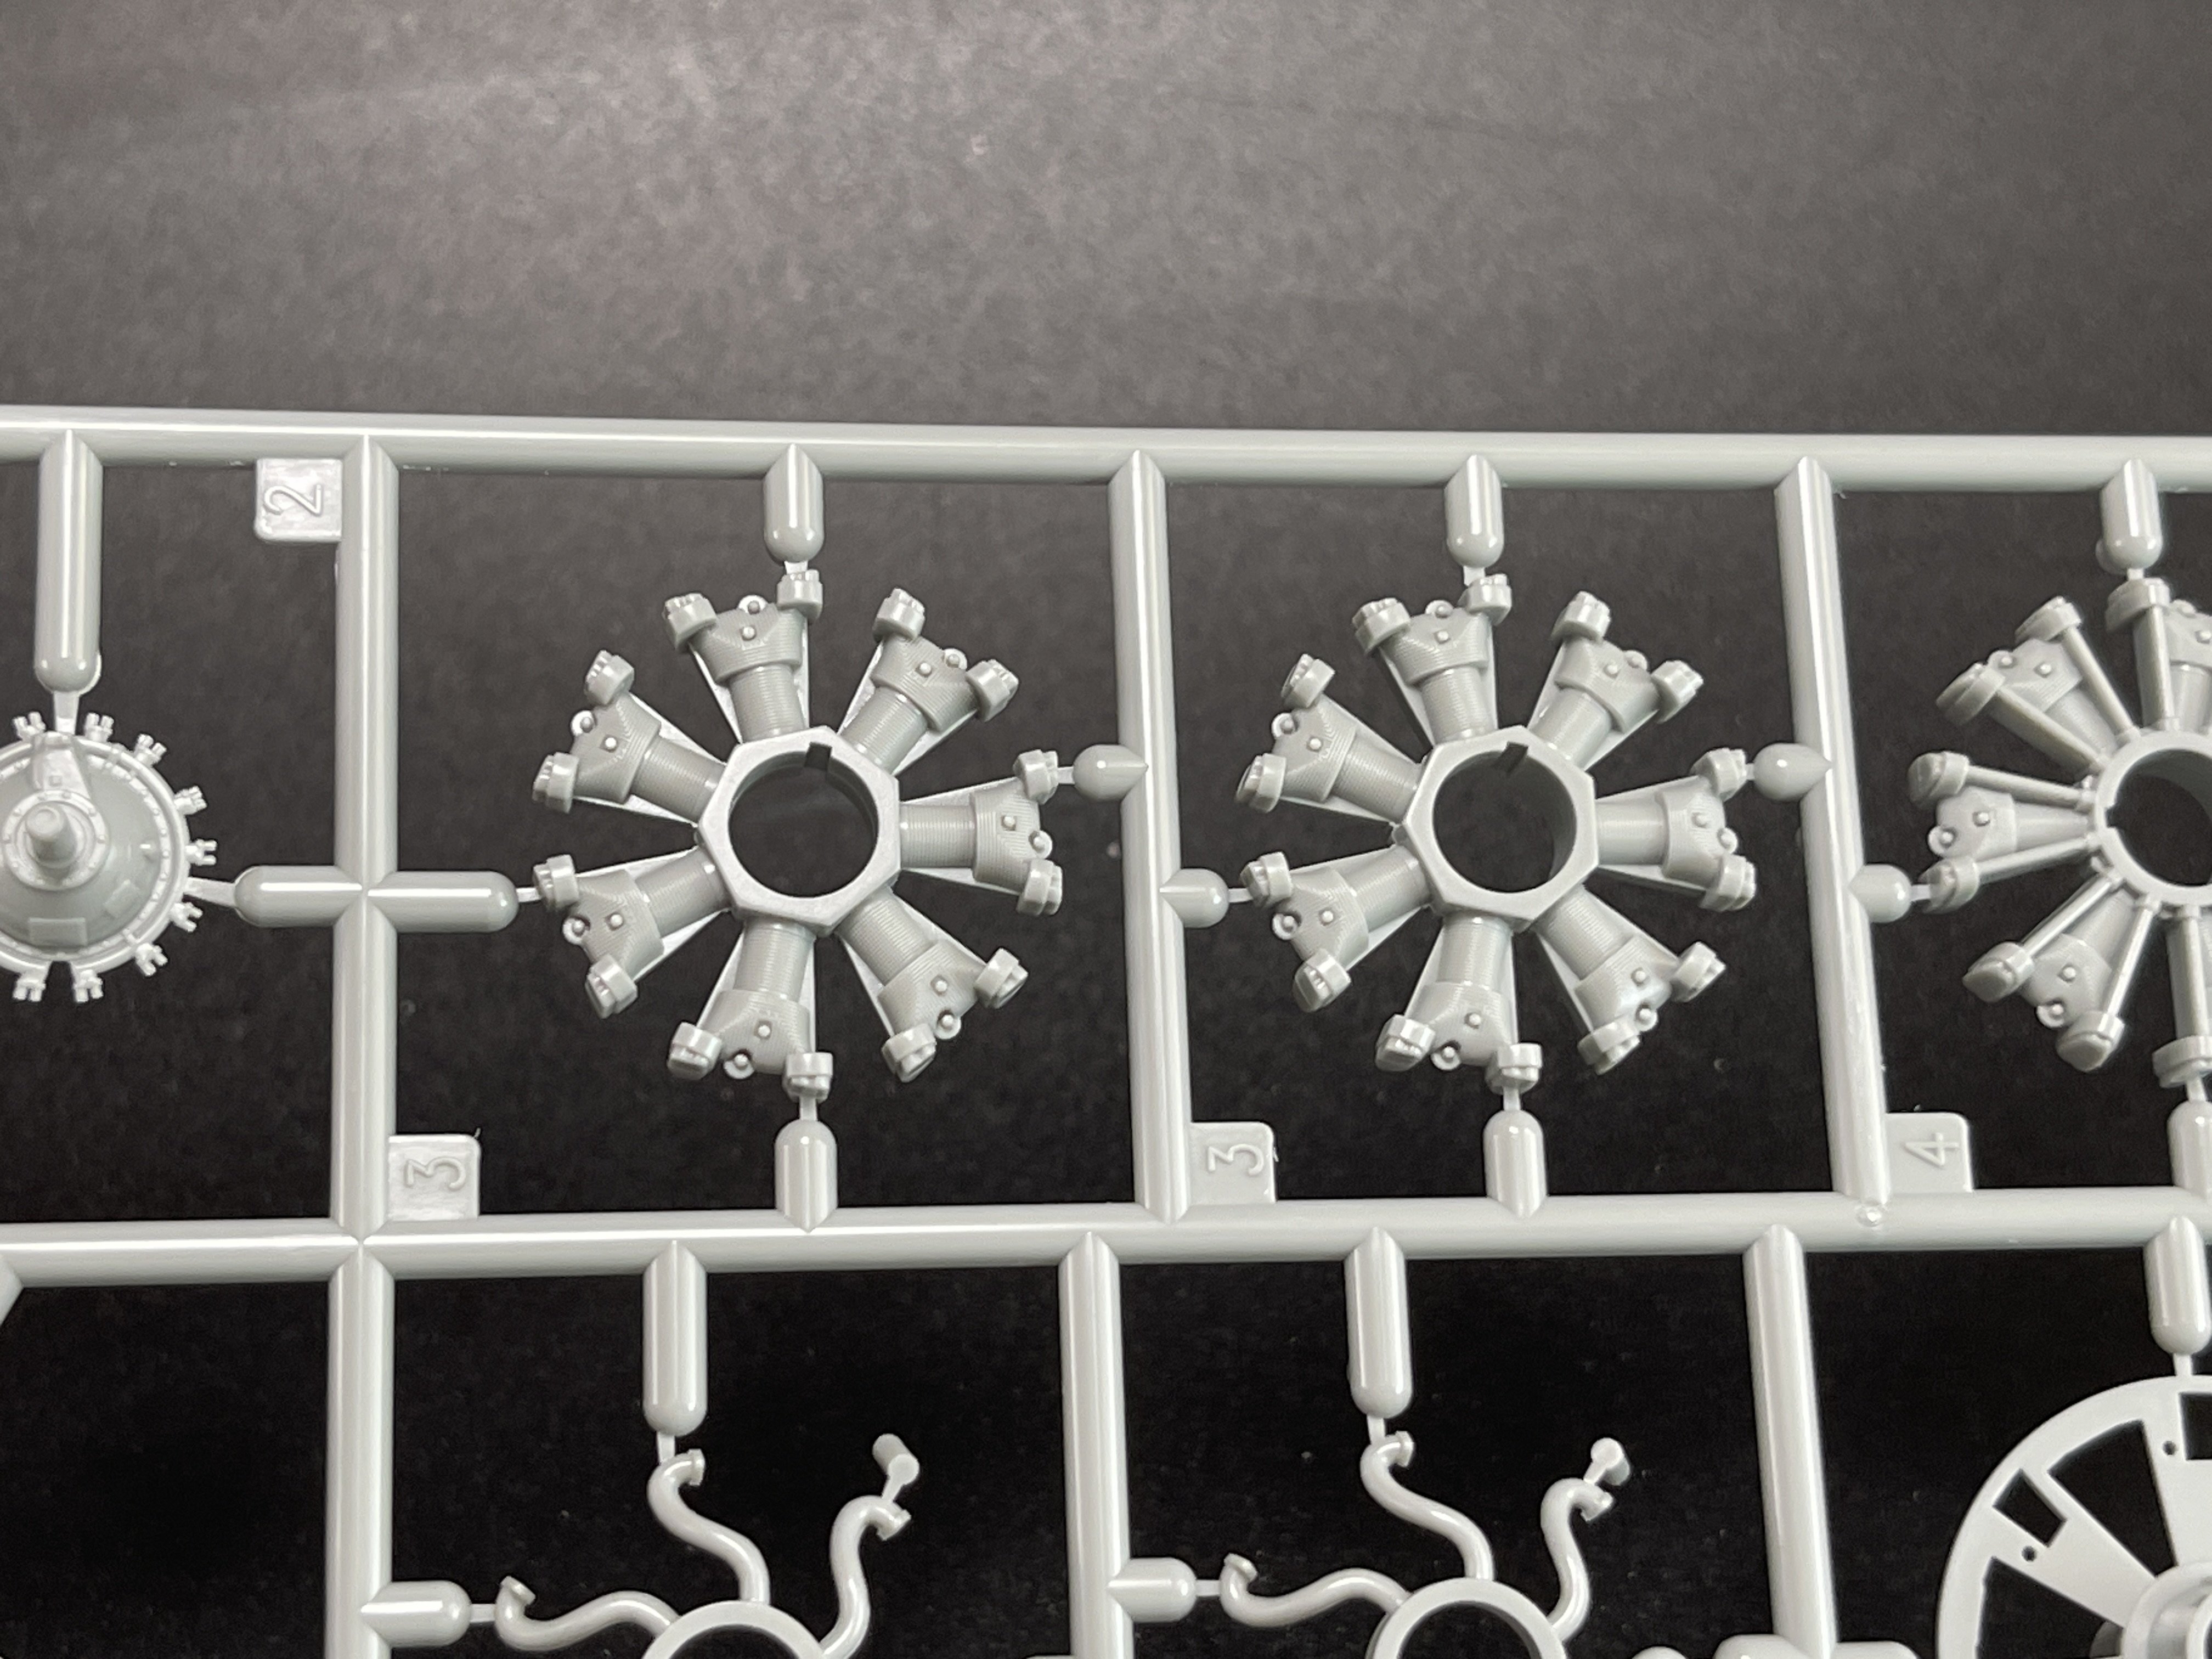
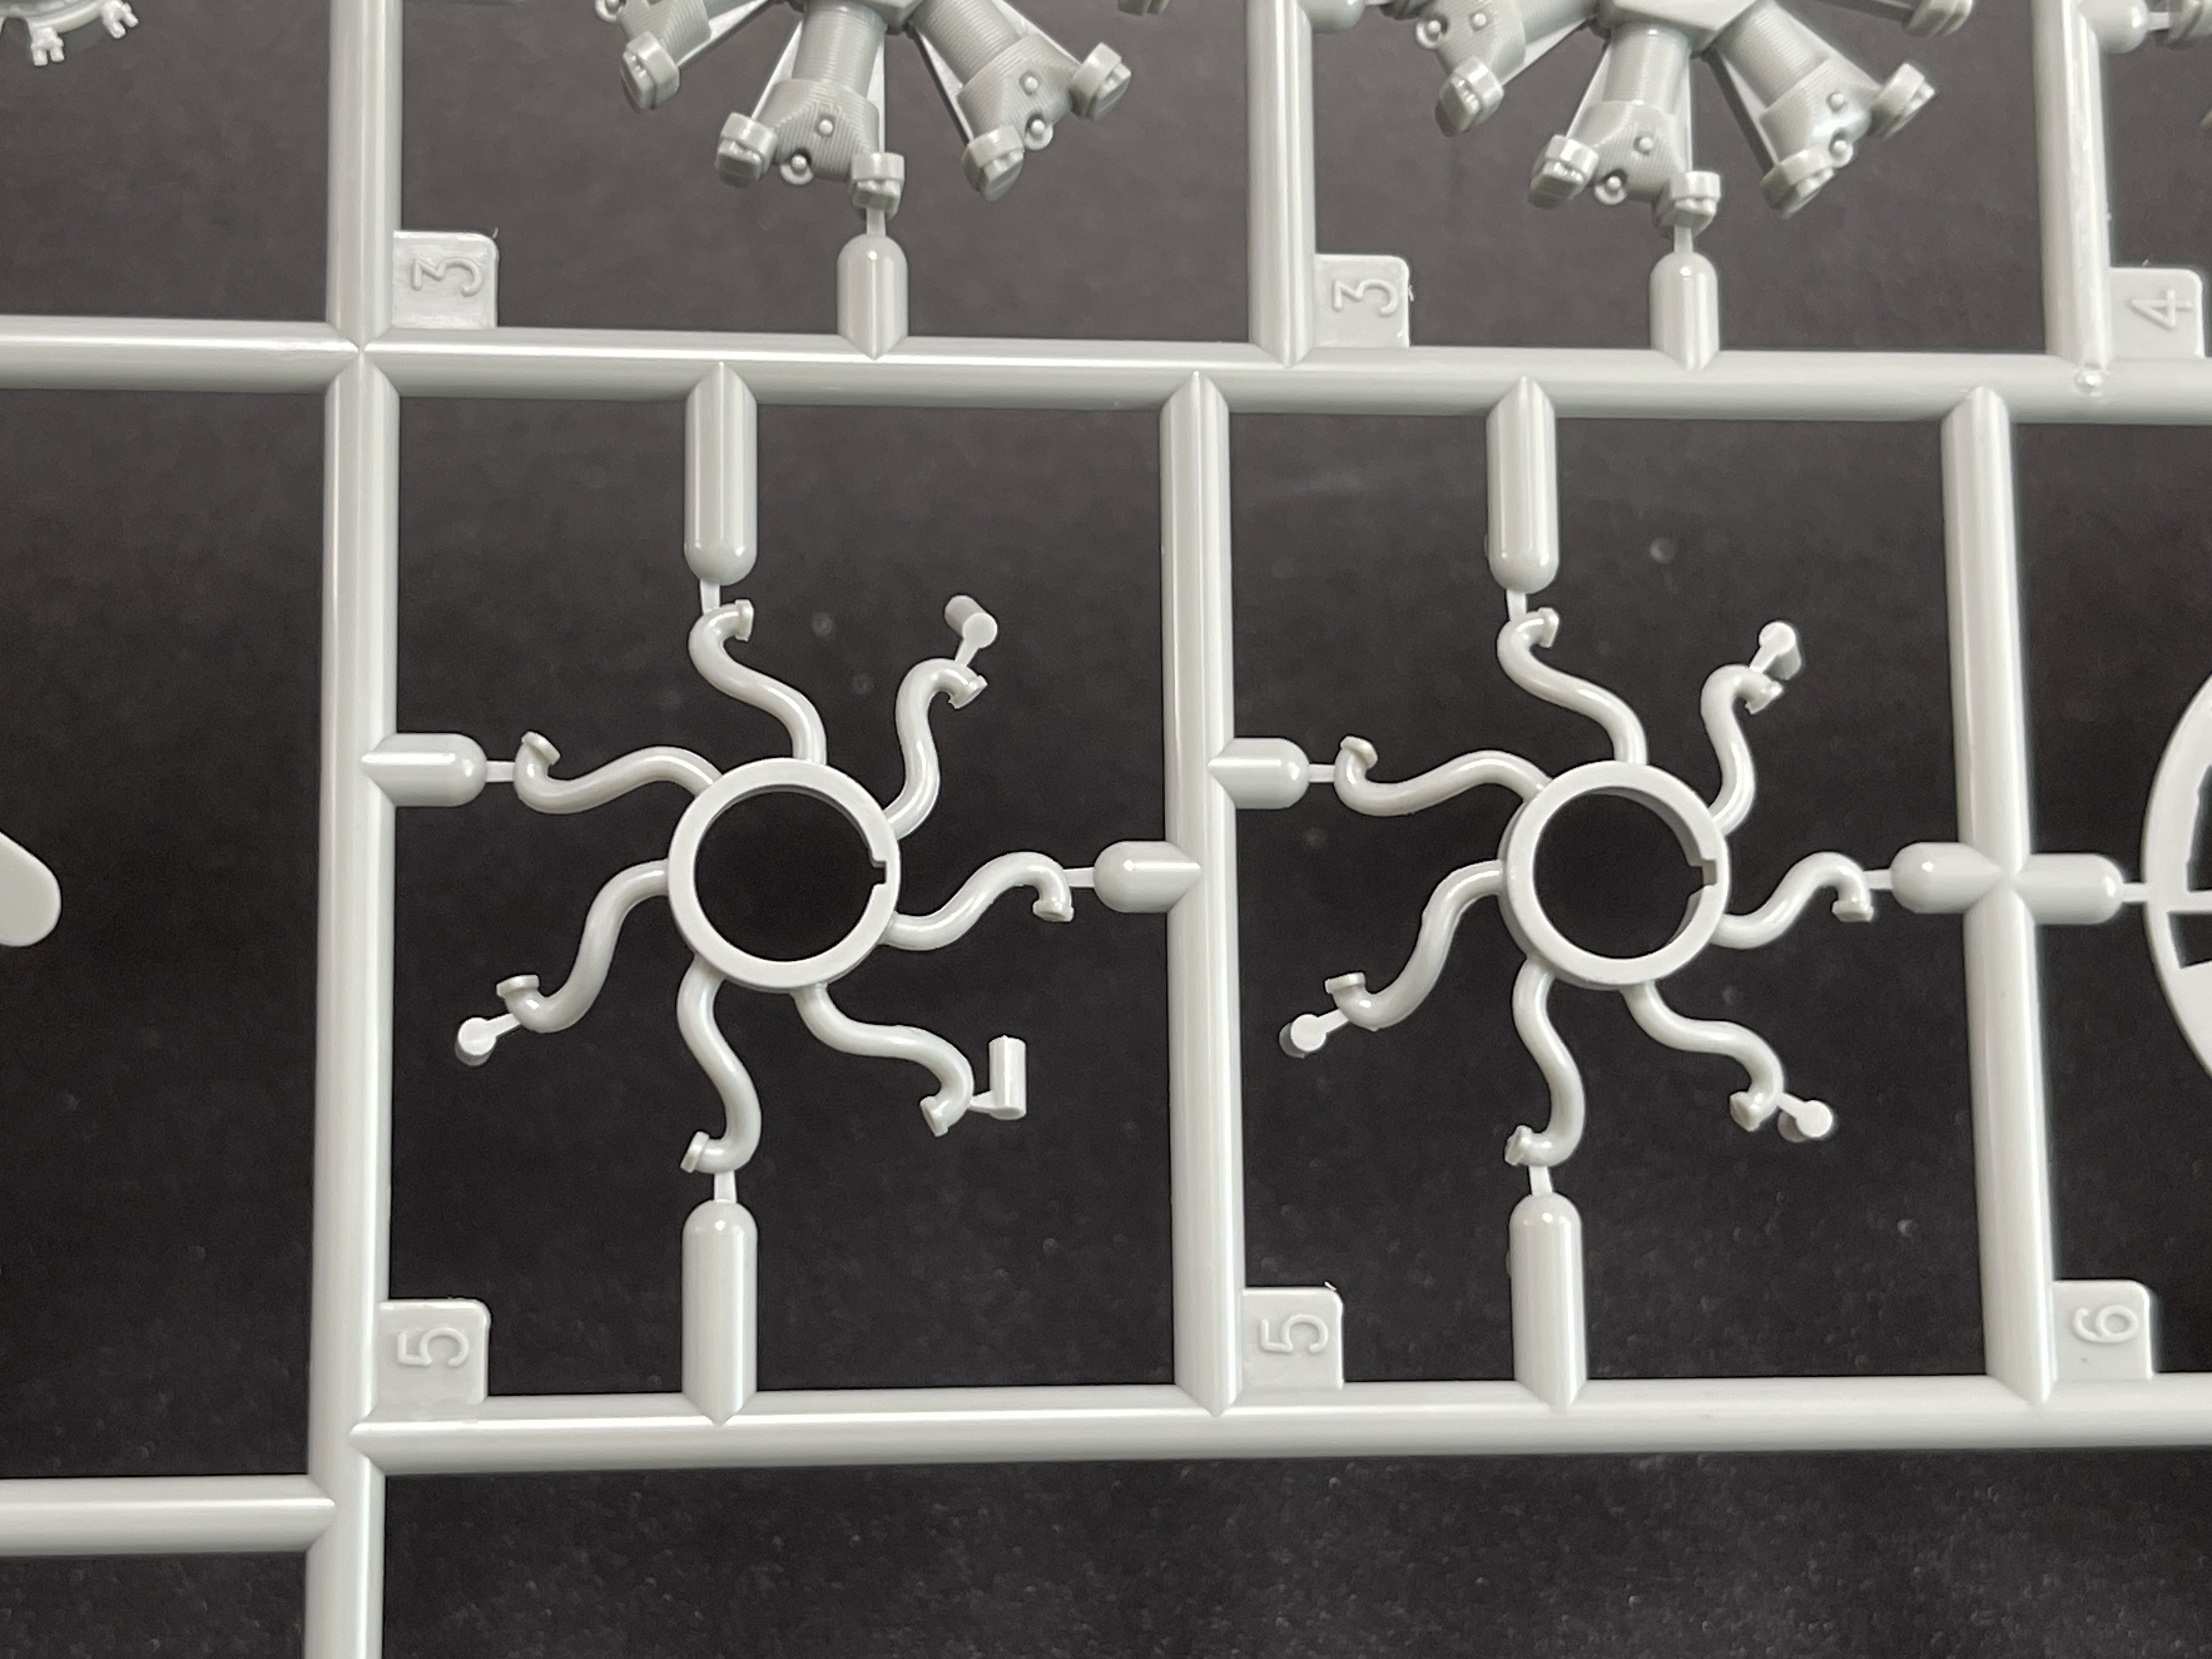
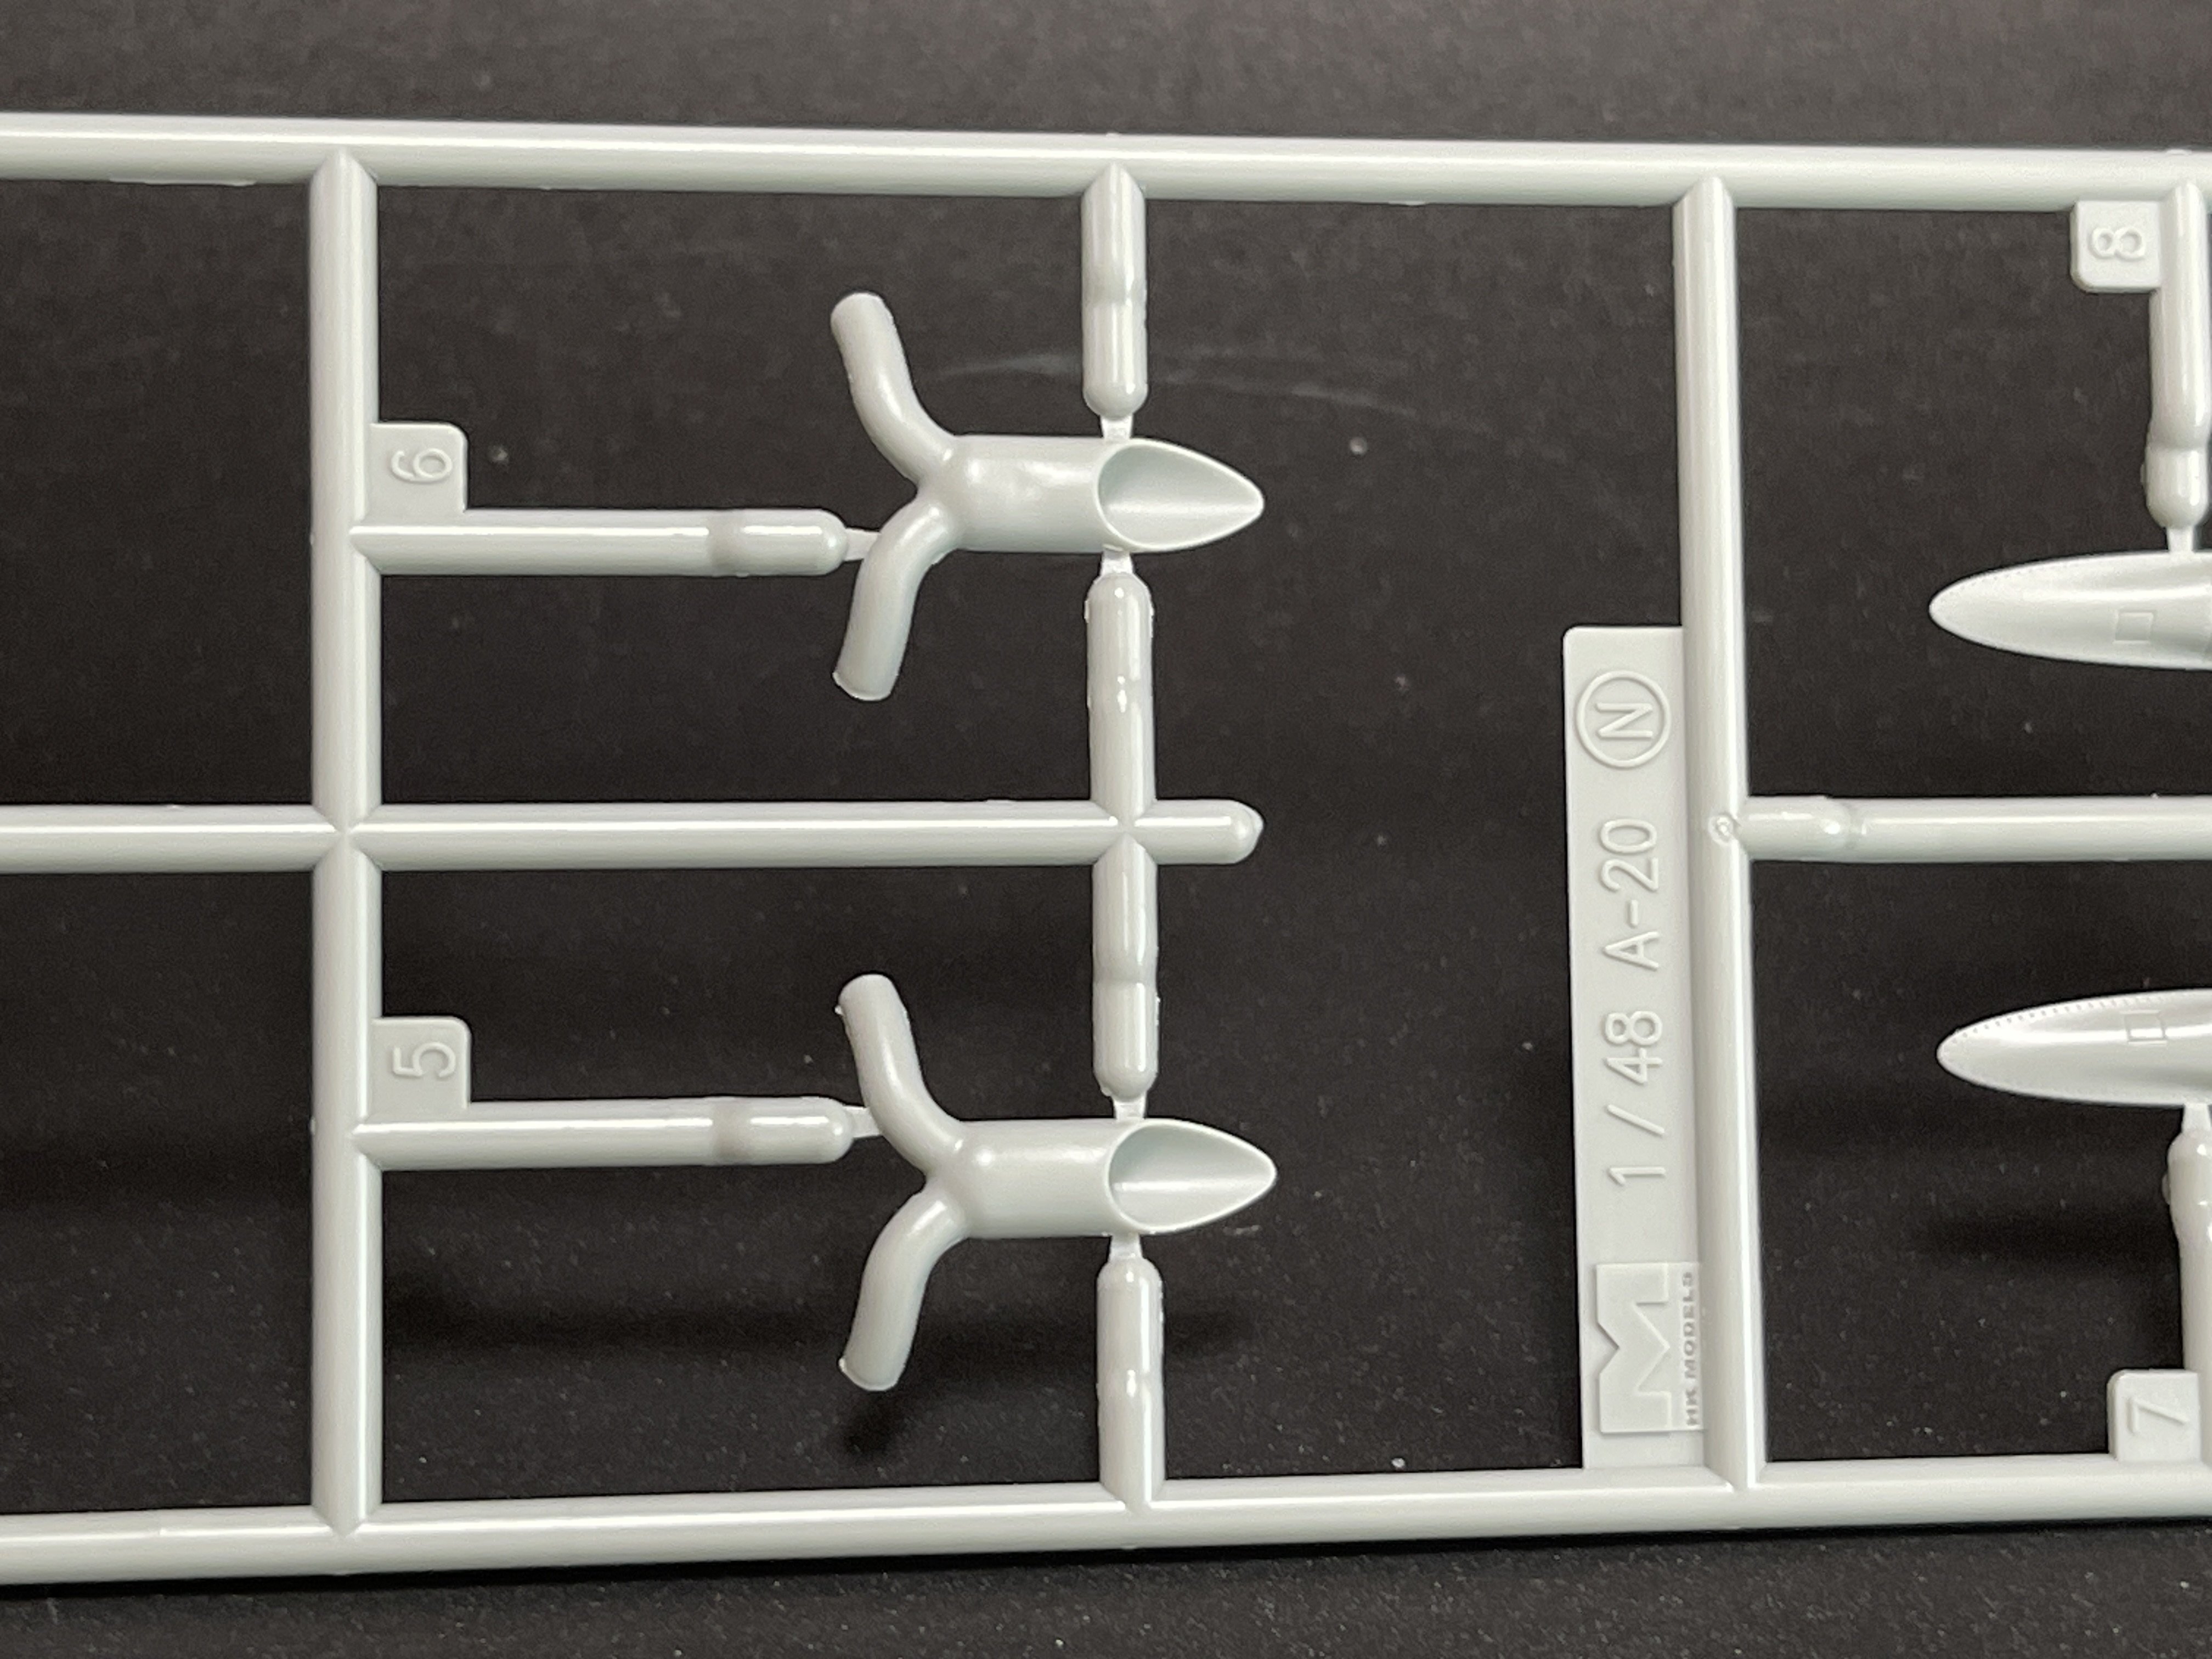
The engines… The exhausts system in 1:32 was a difficult and tedious task to complete… I was curious to see if HK Model would keep the same system in 1:48… and the answer is …. No.
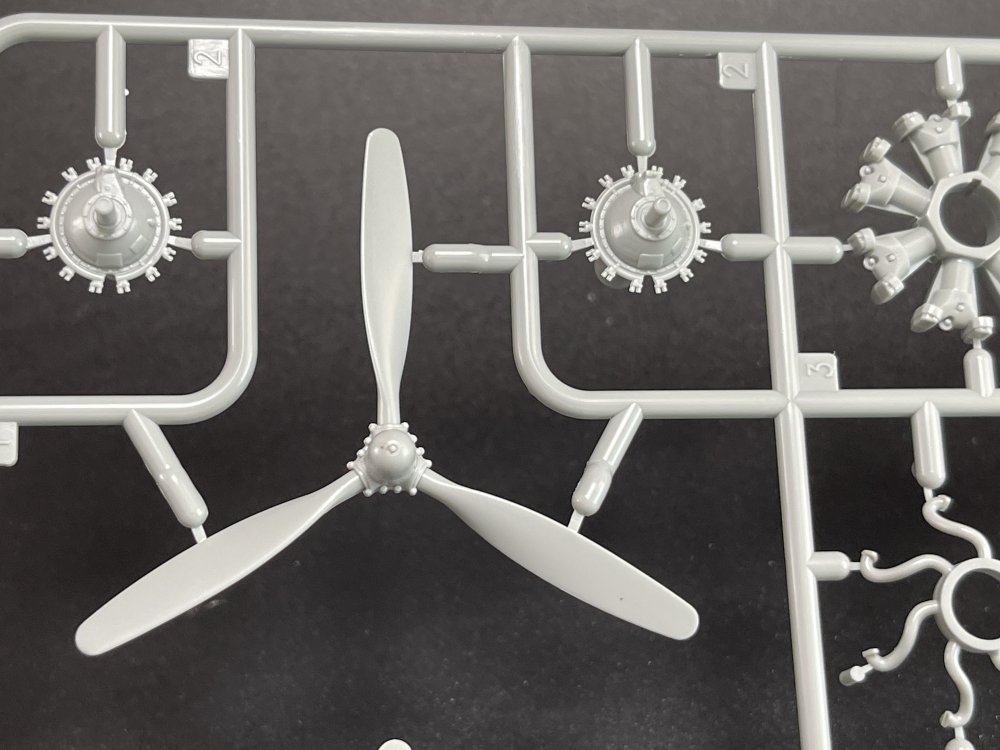

HK models simplified a lot, making into a single part! Thank you!
I personally grateful for that as it was the most non rewards task in the 1:32 model
And the exhauts on this release are also great
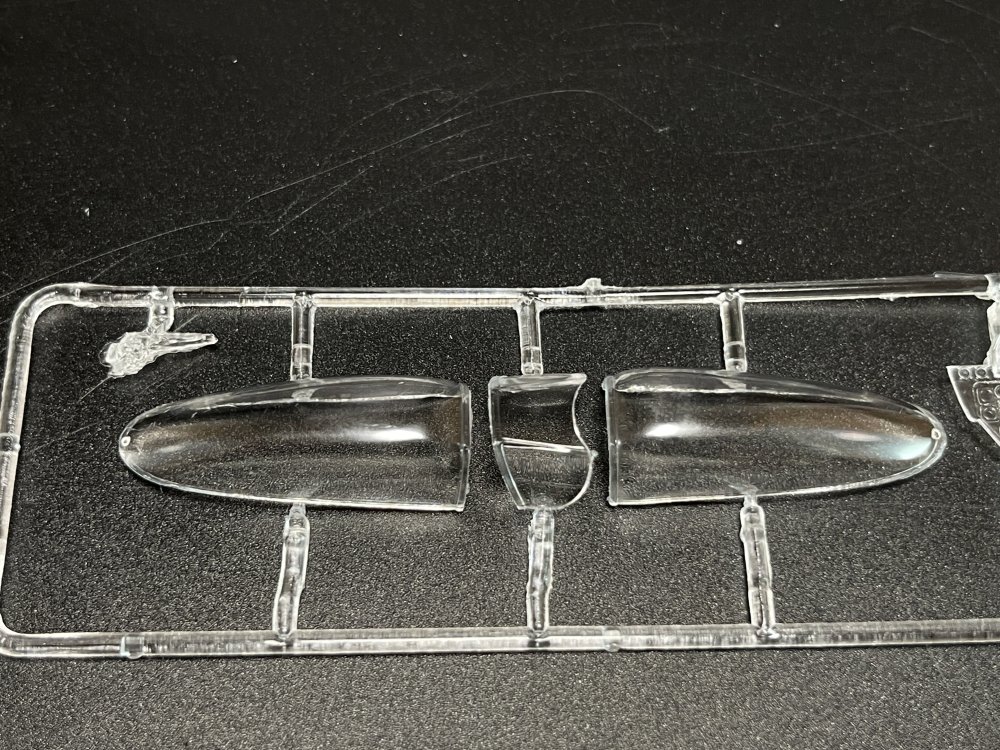
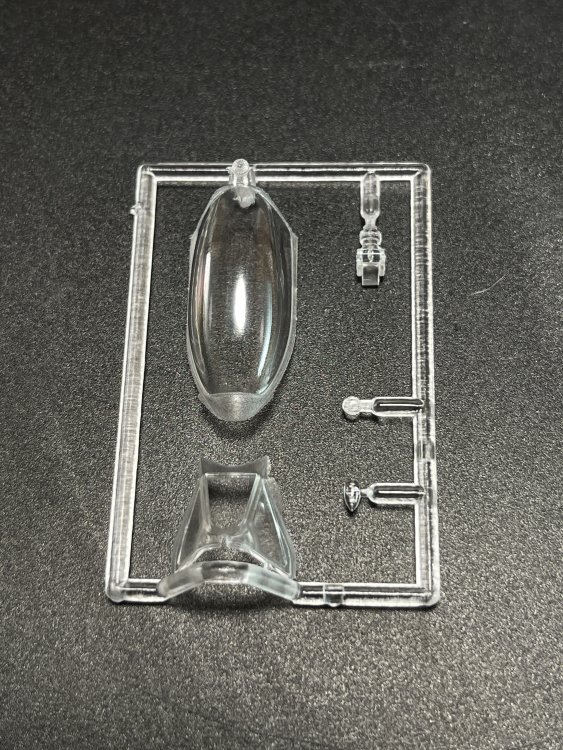
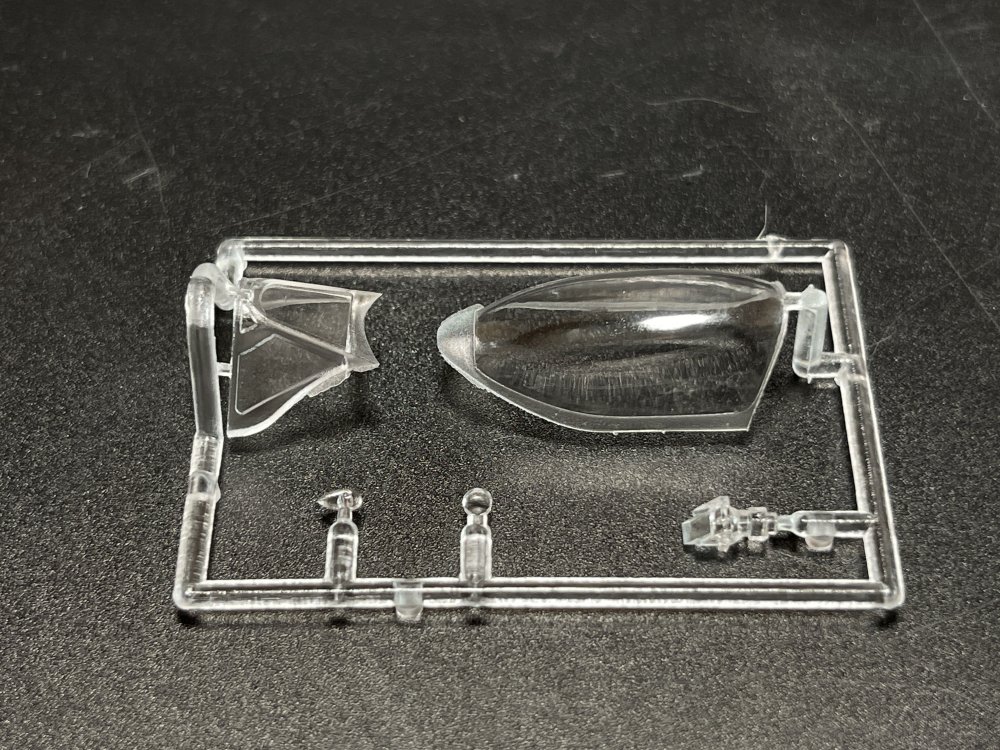
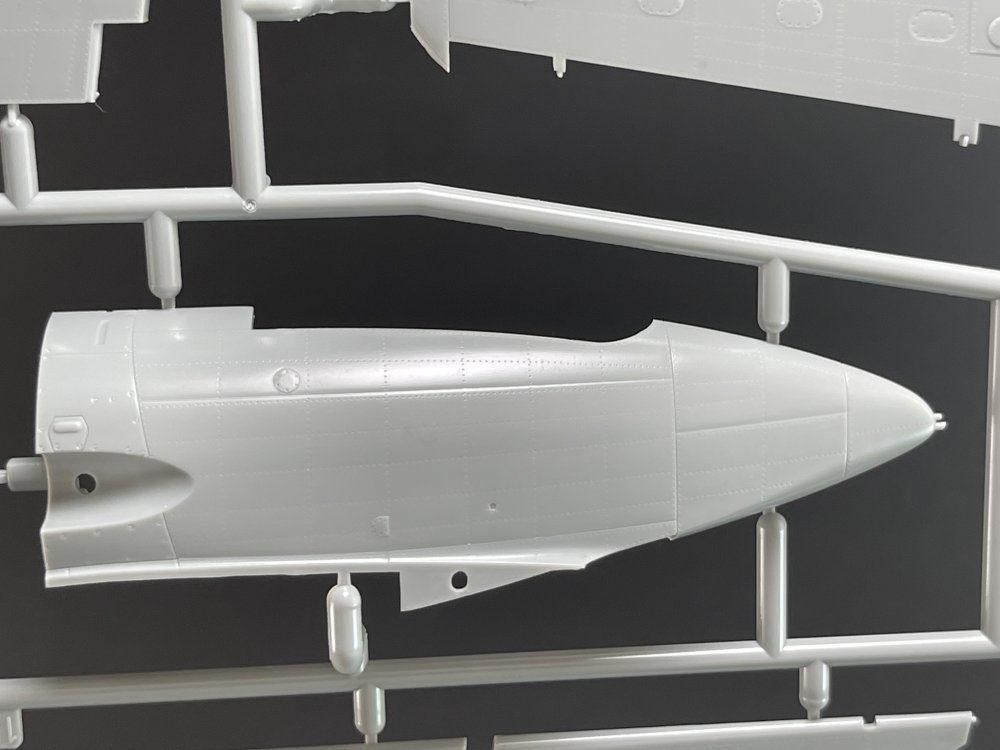
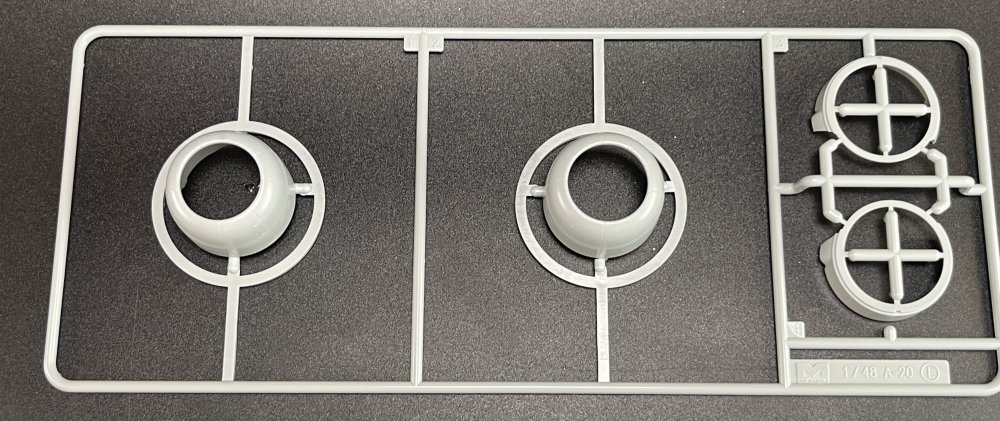
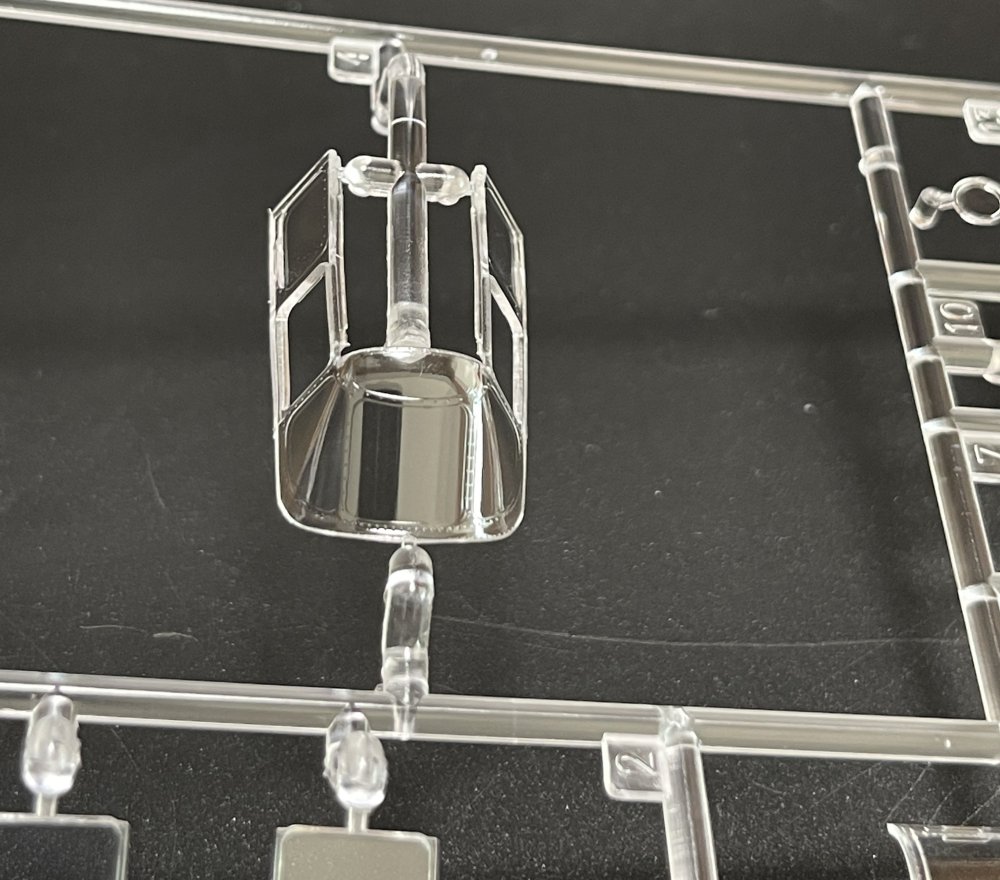
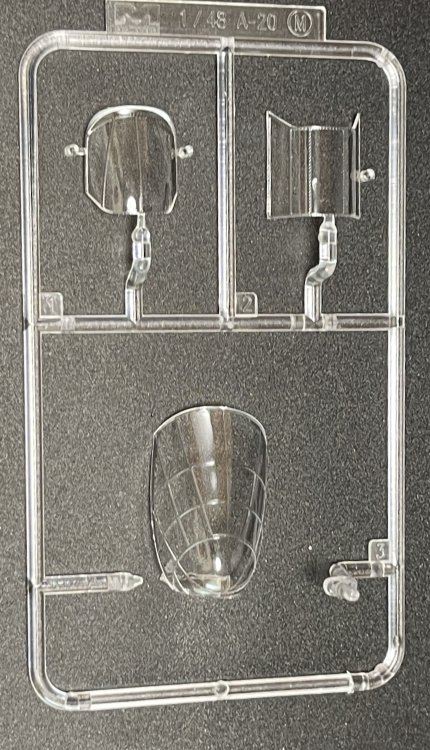
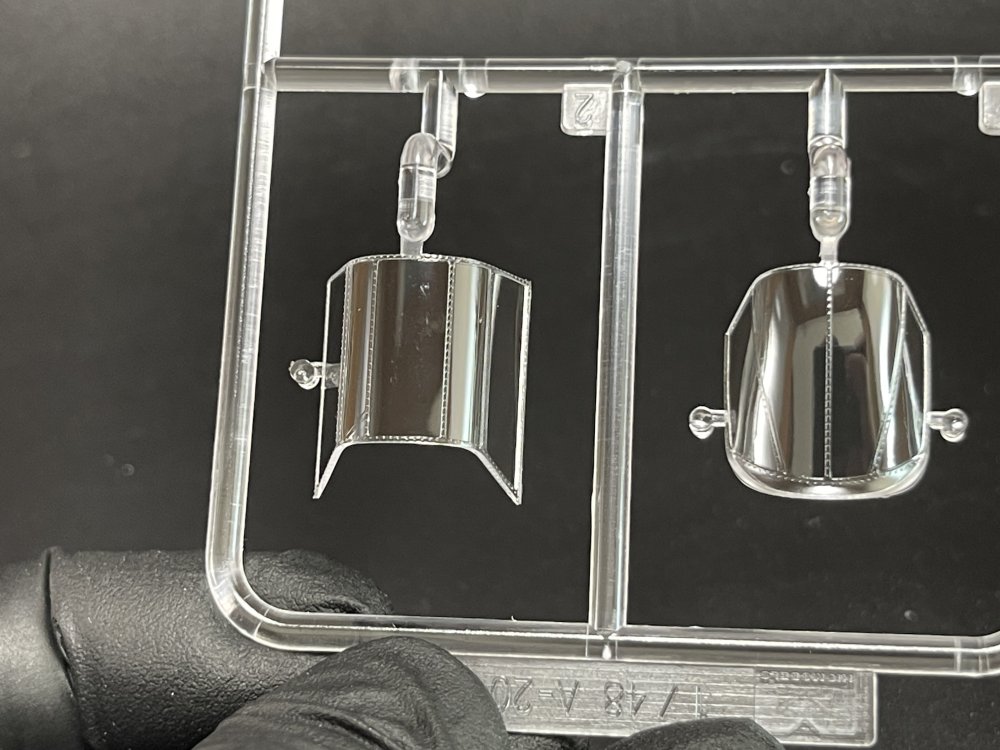
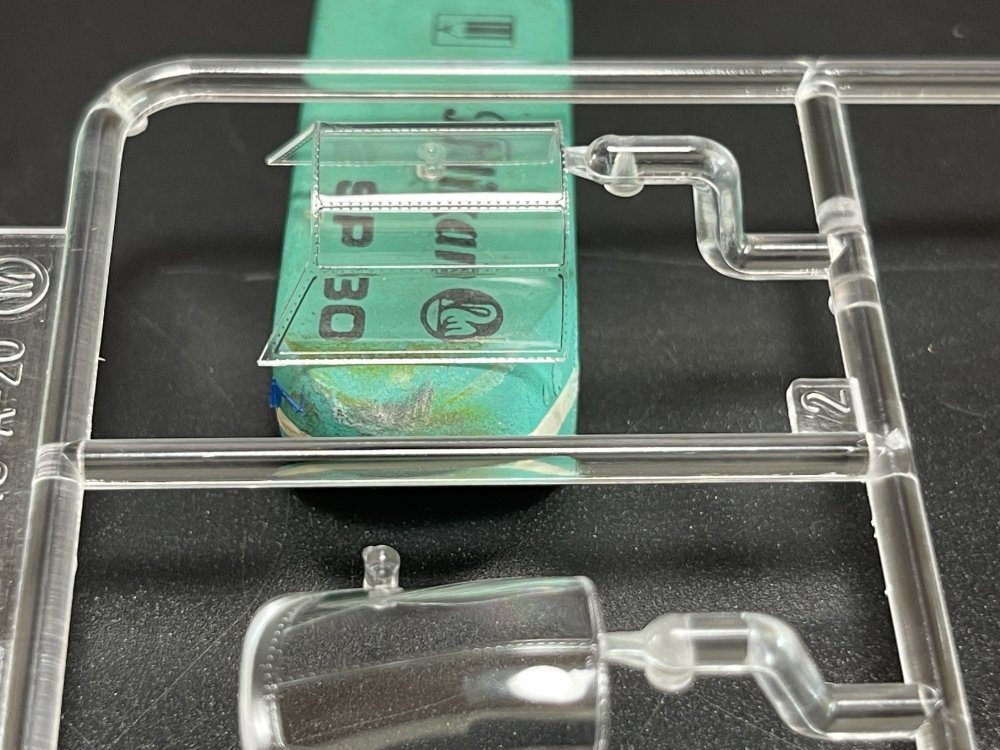
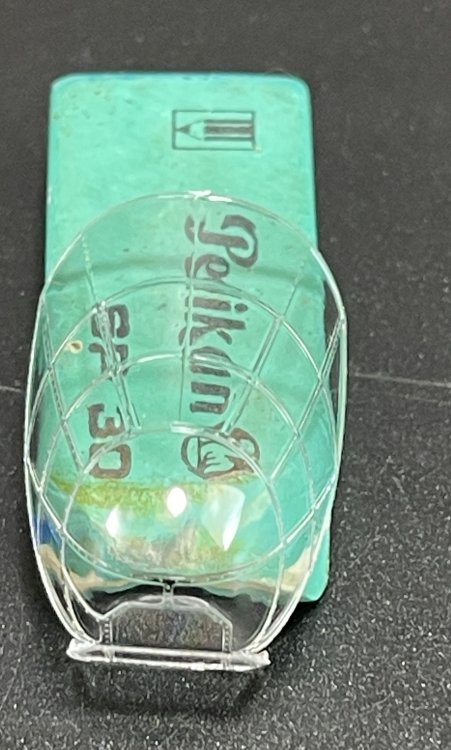
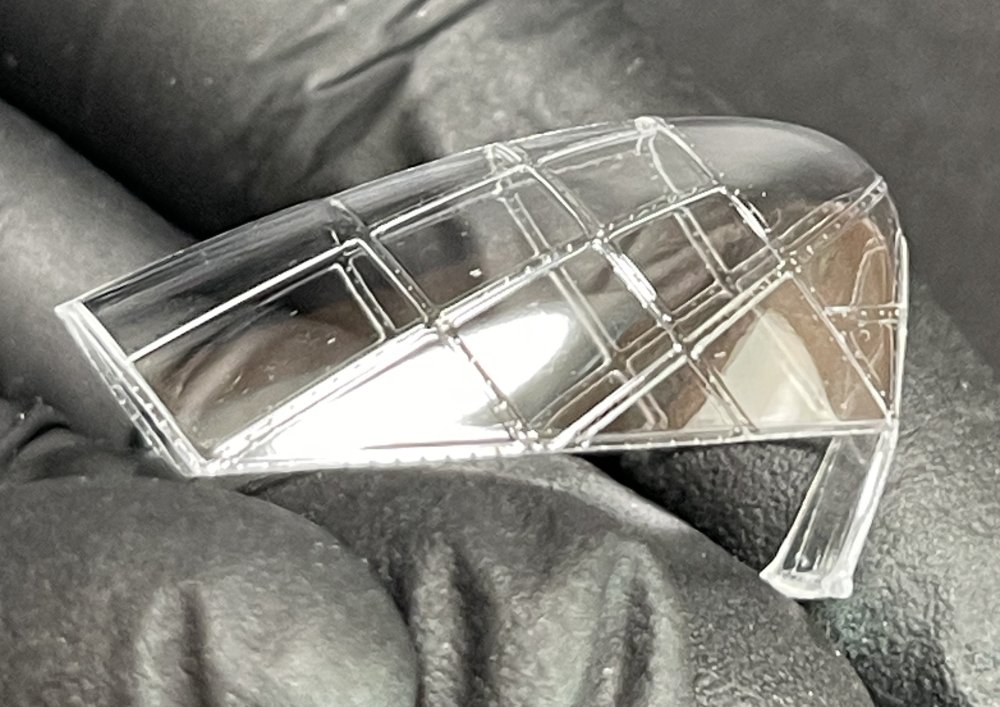
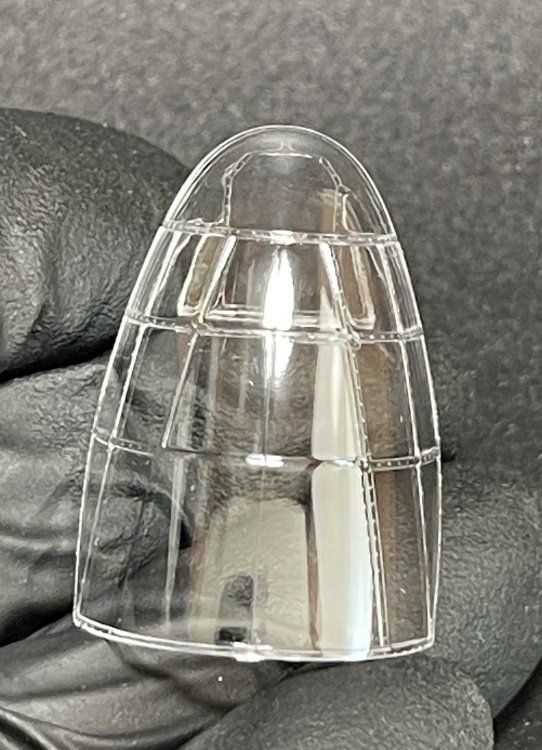
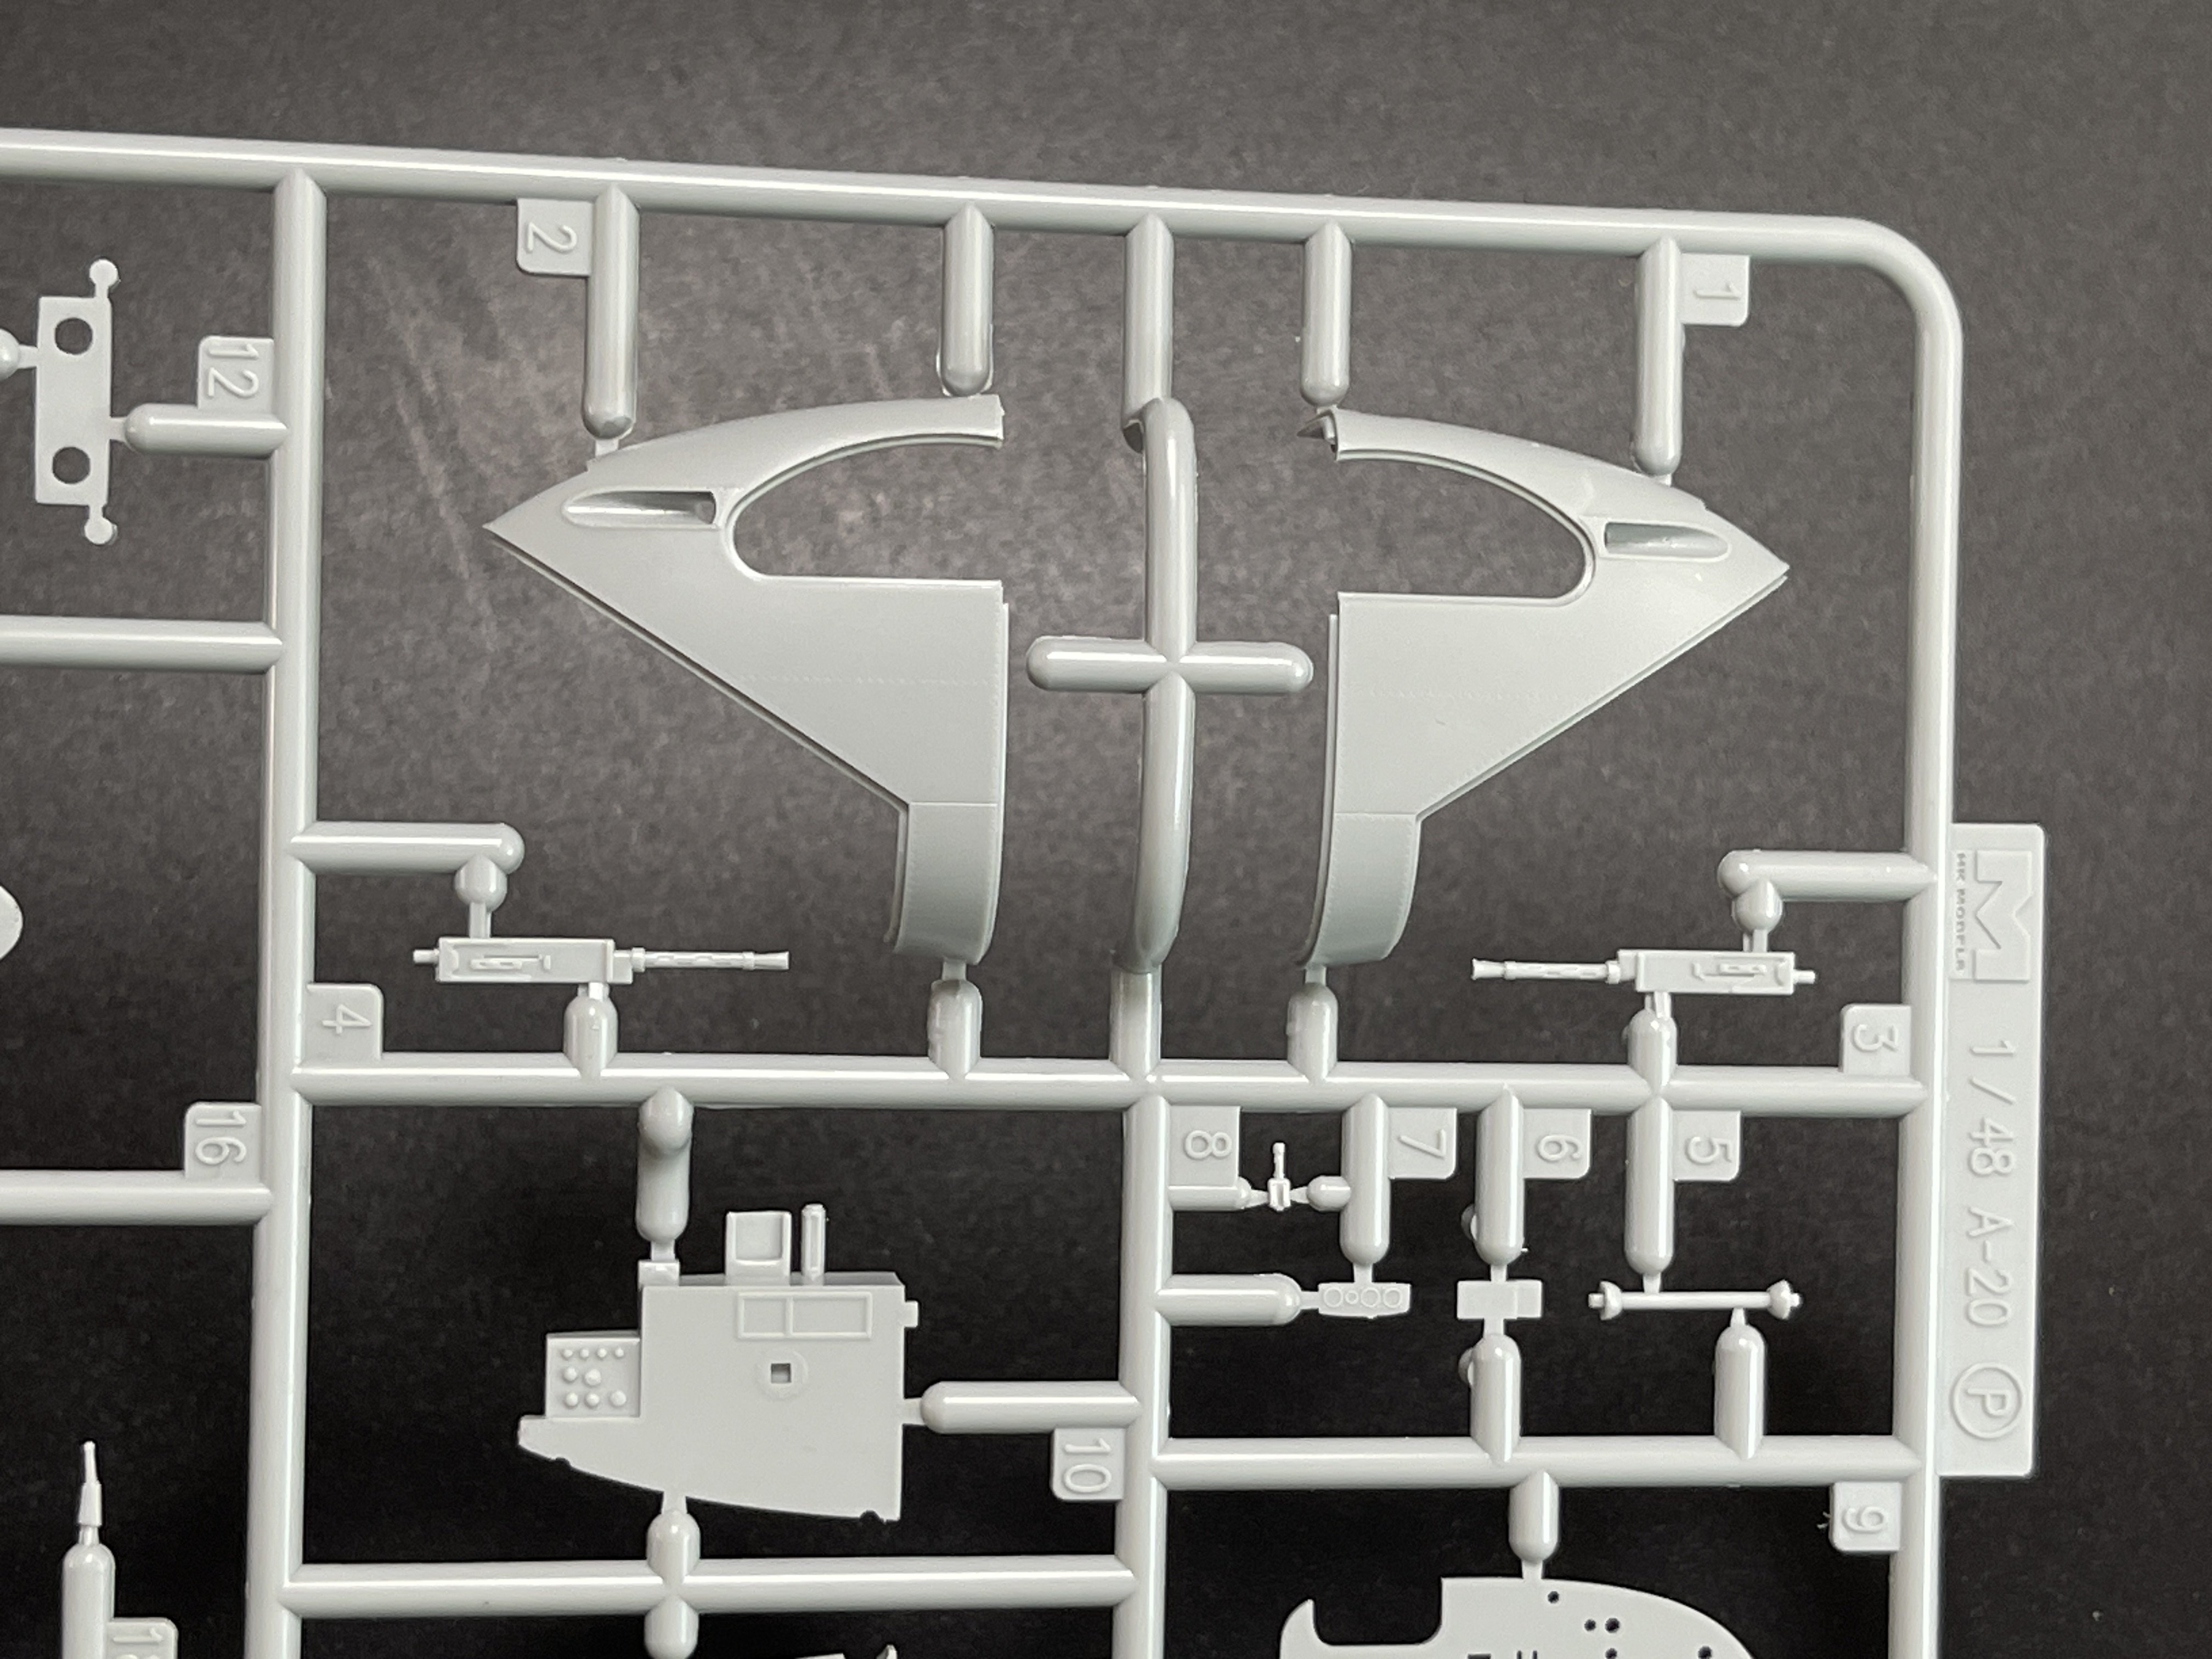
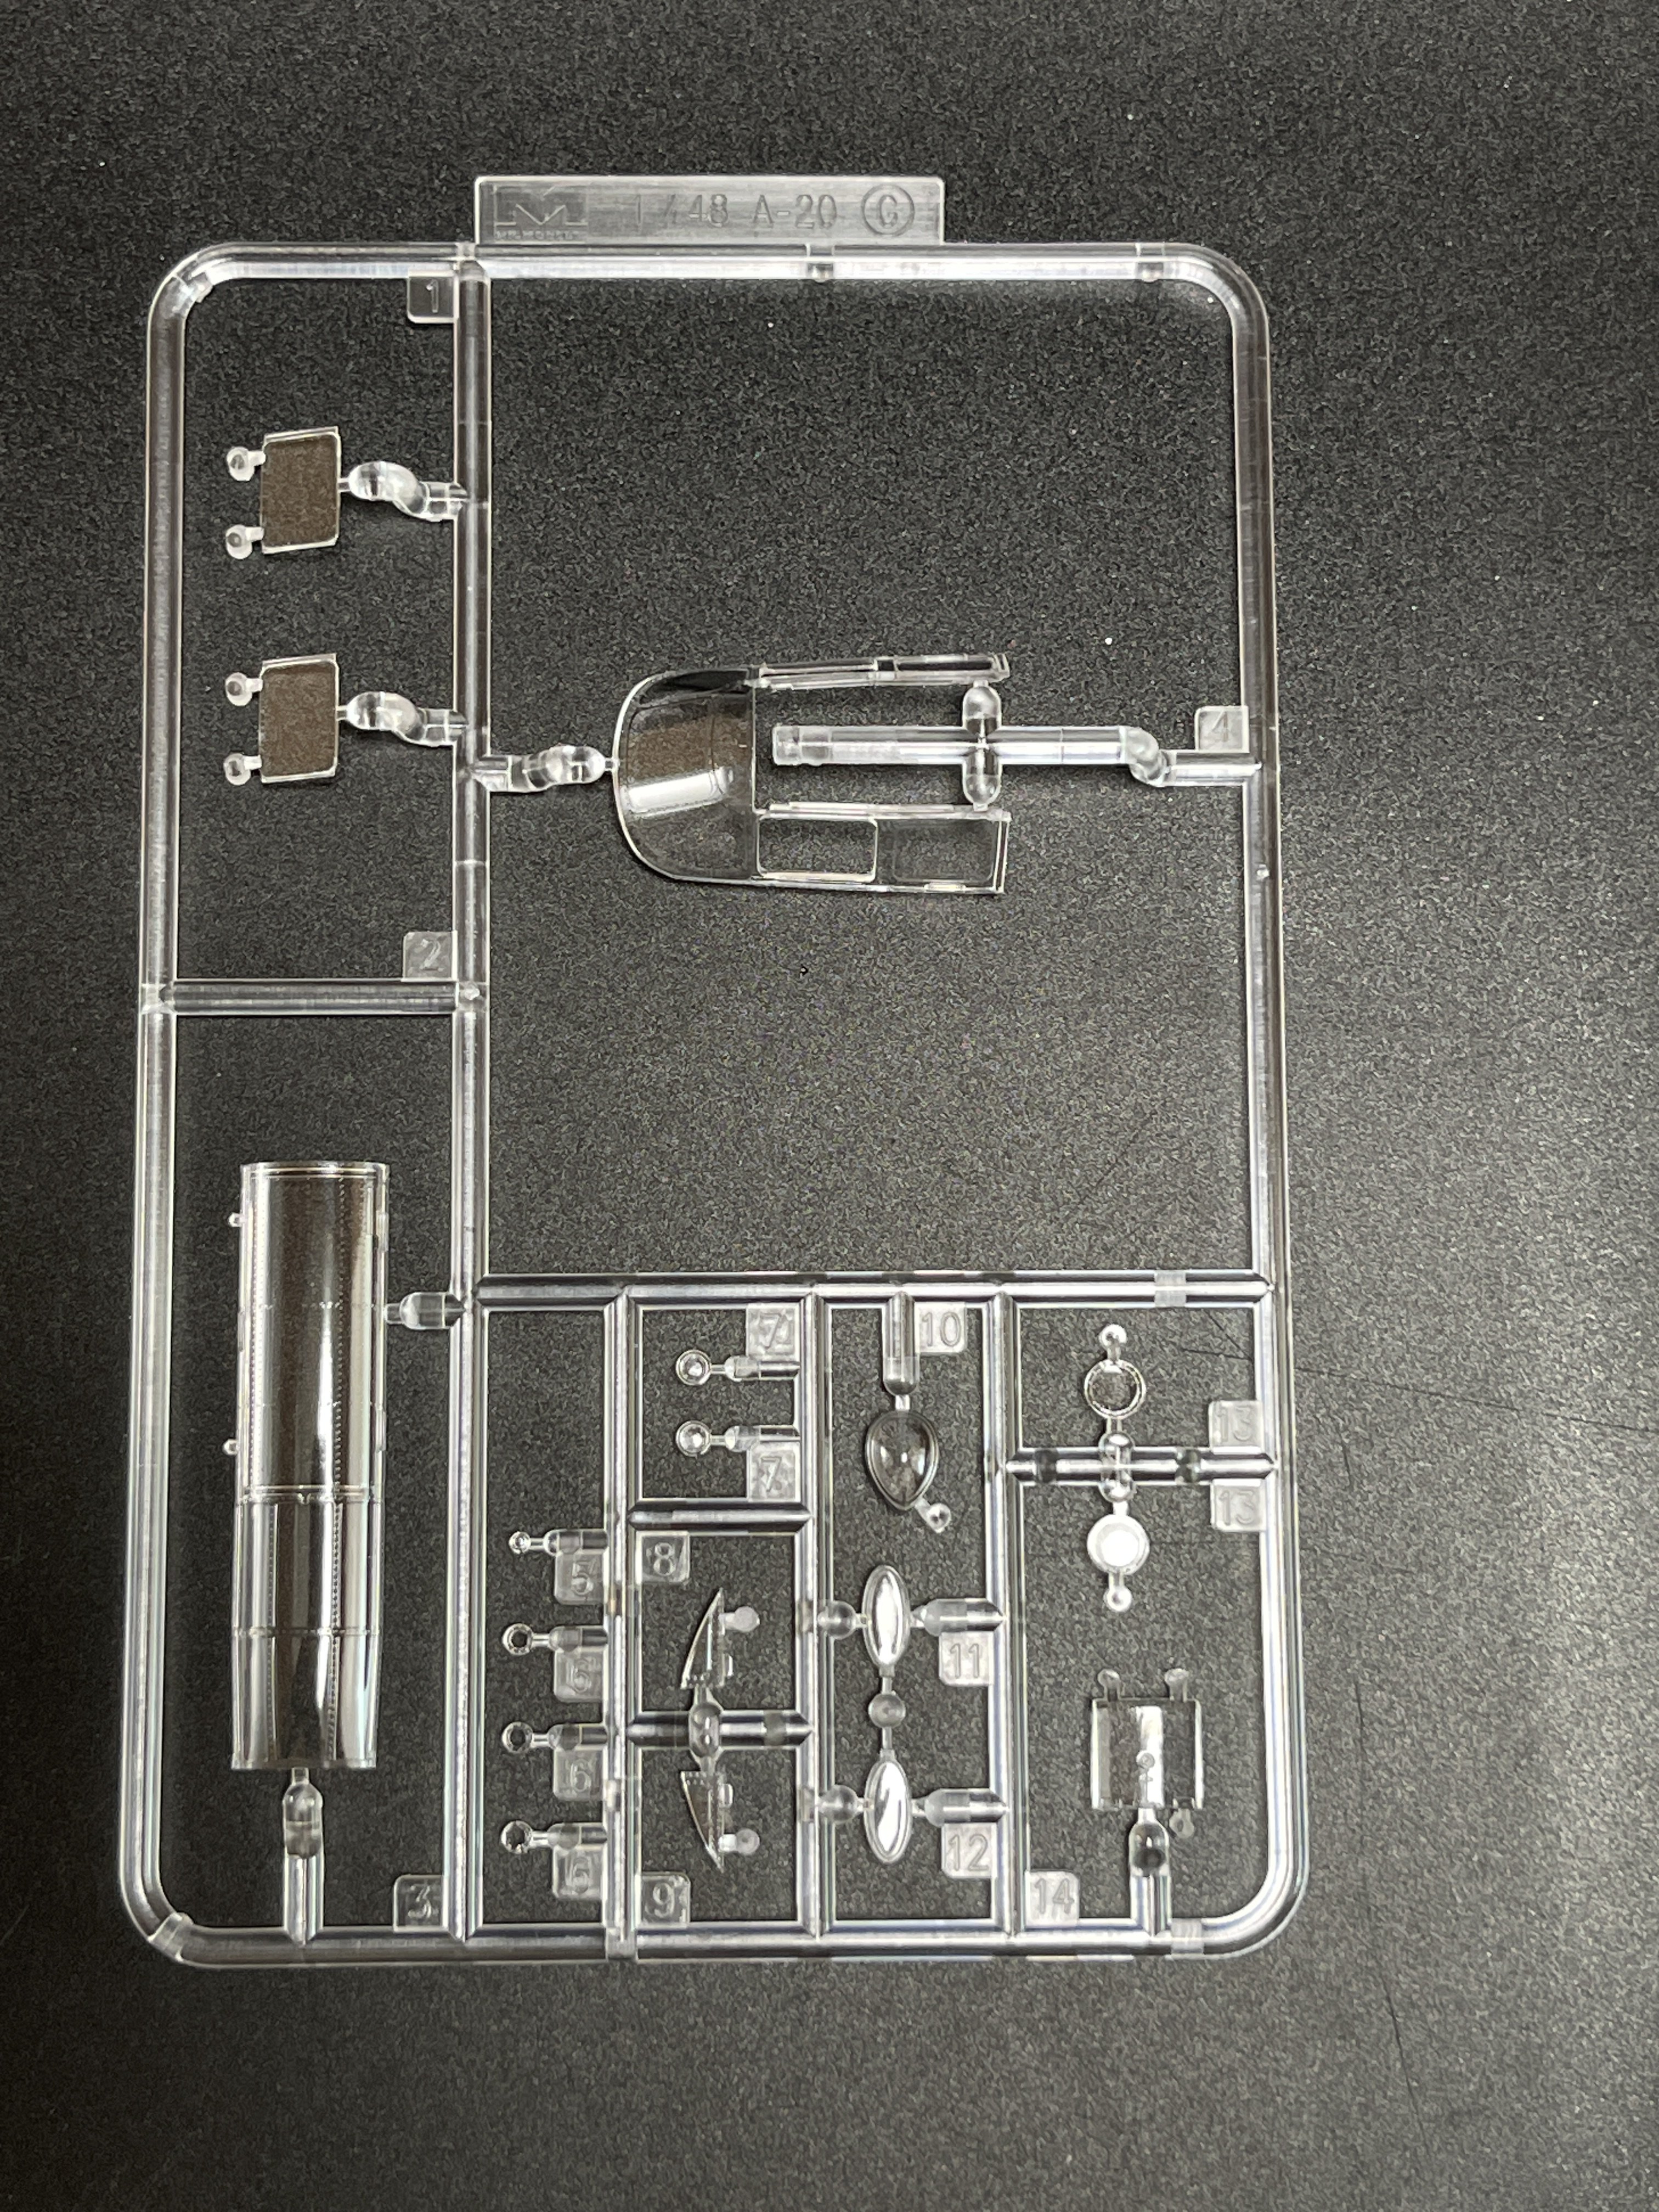
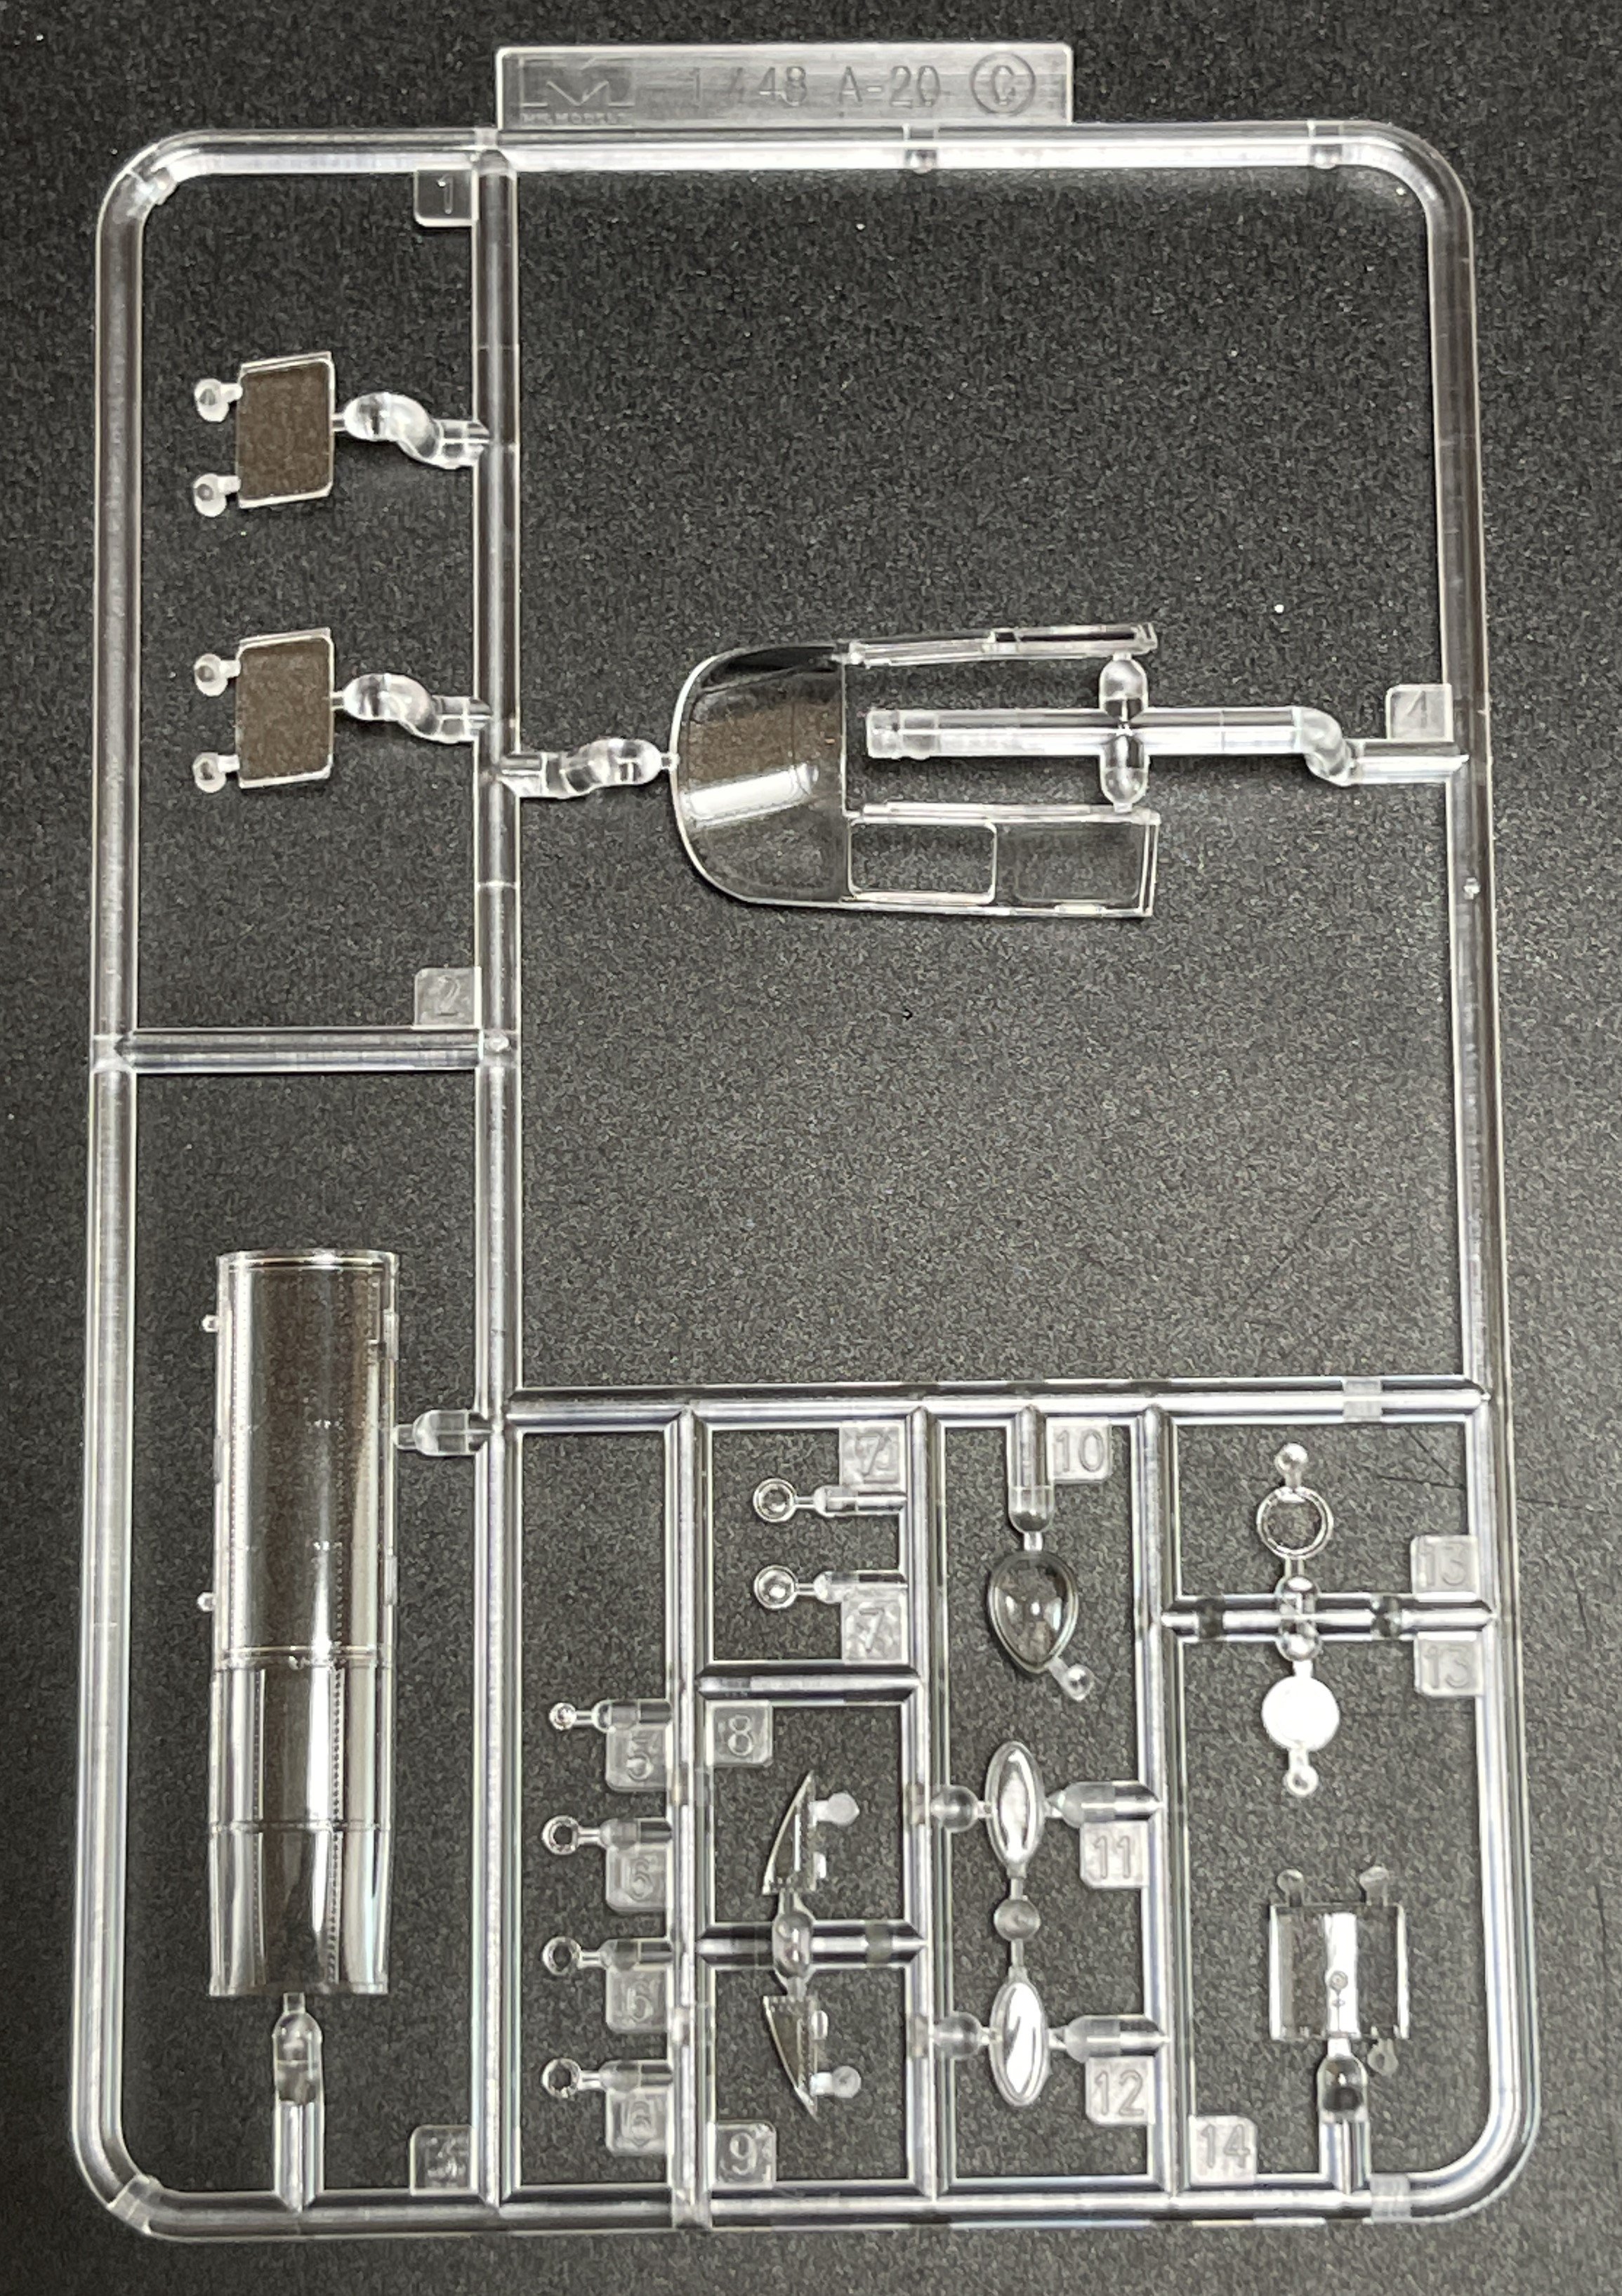
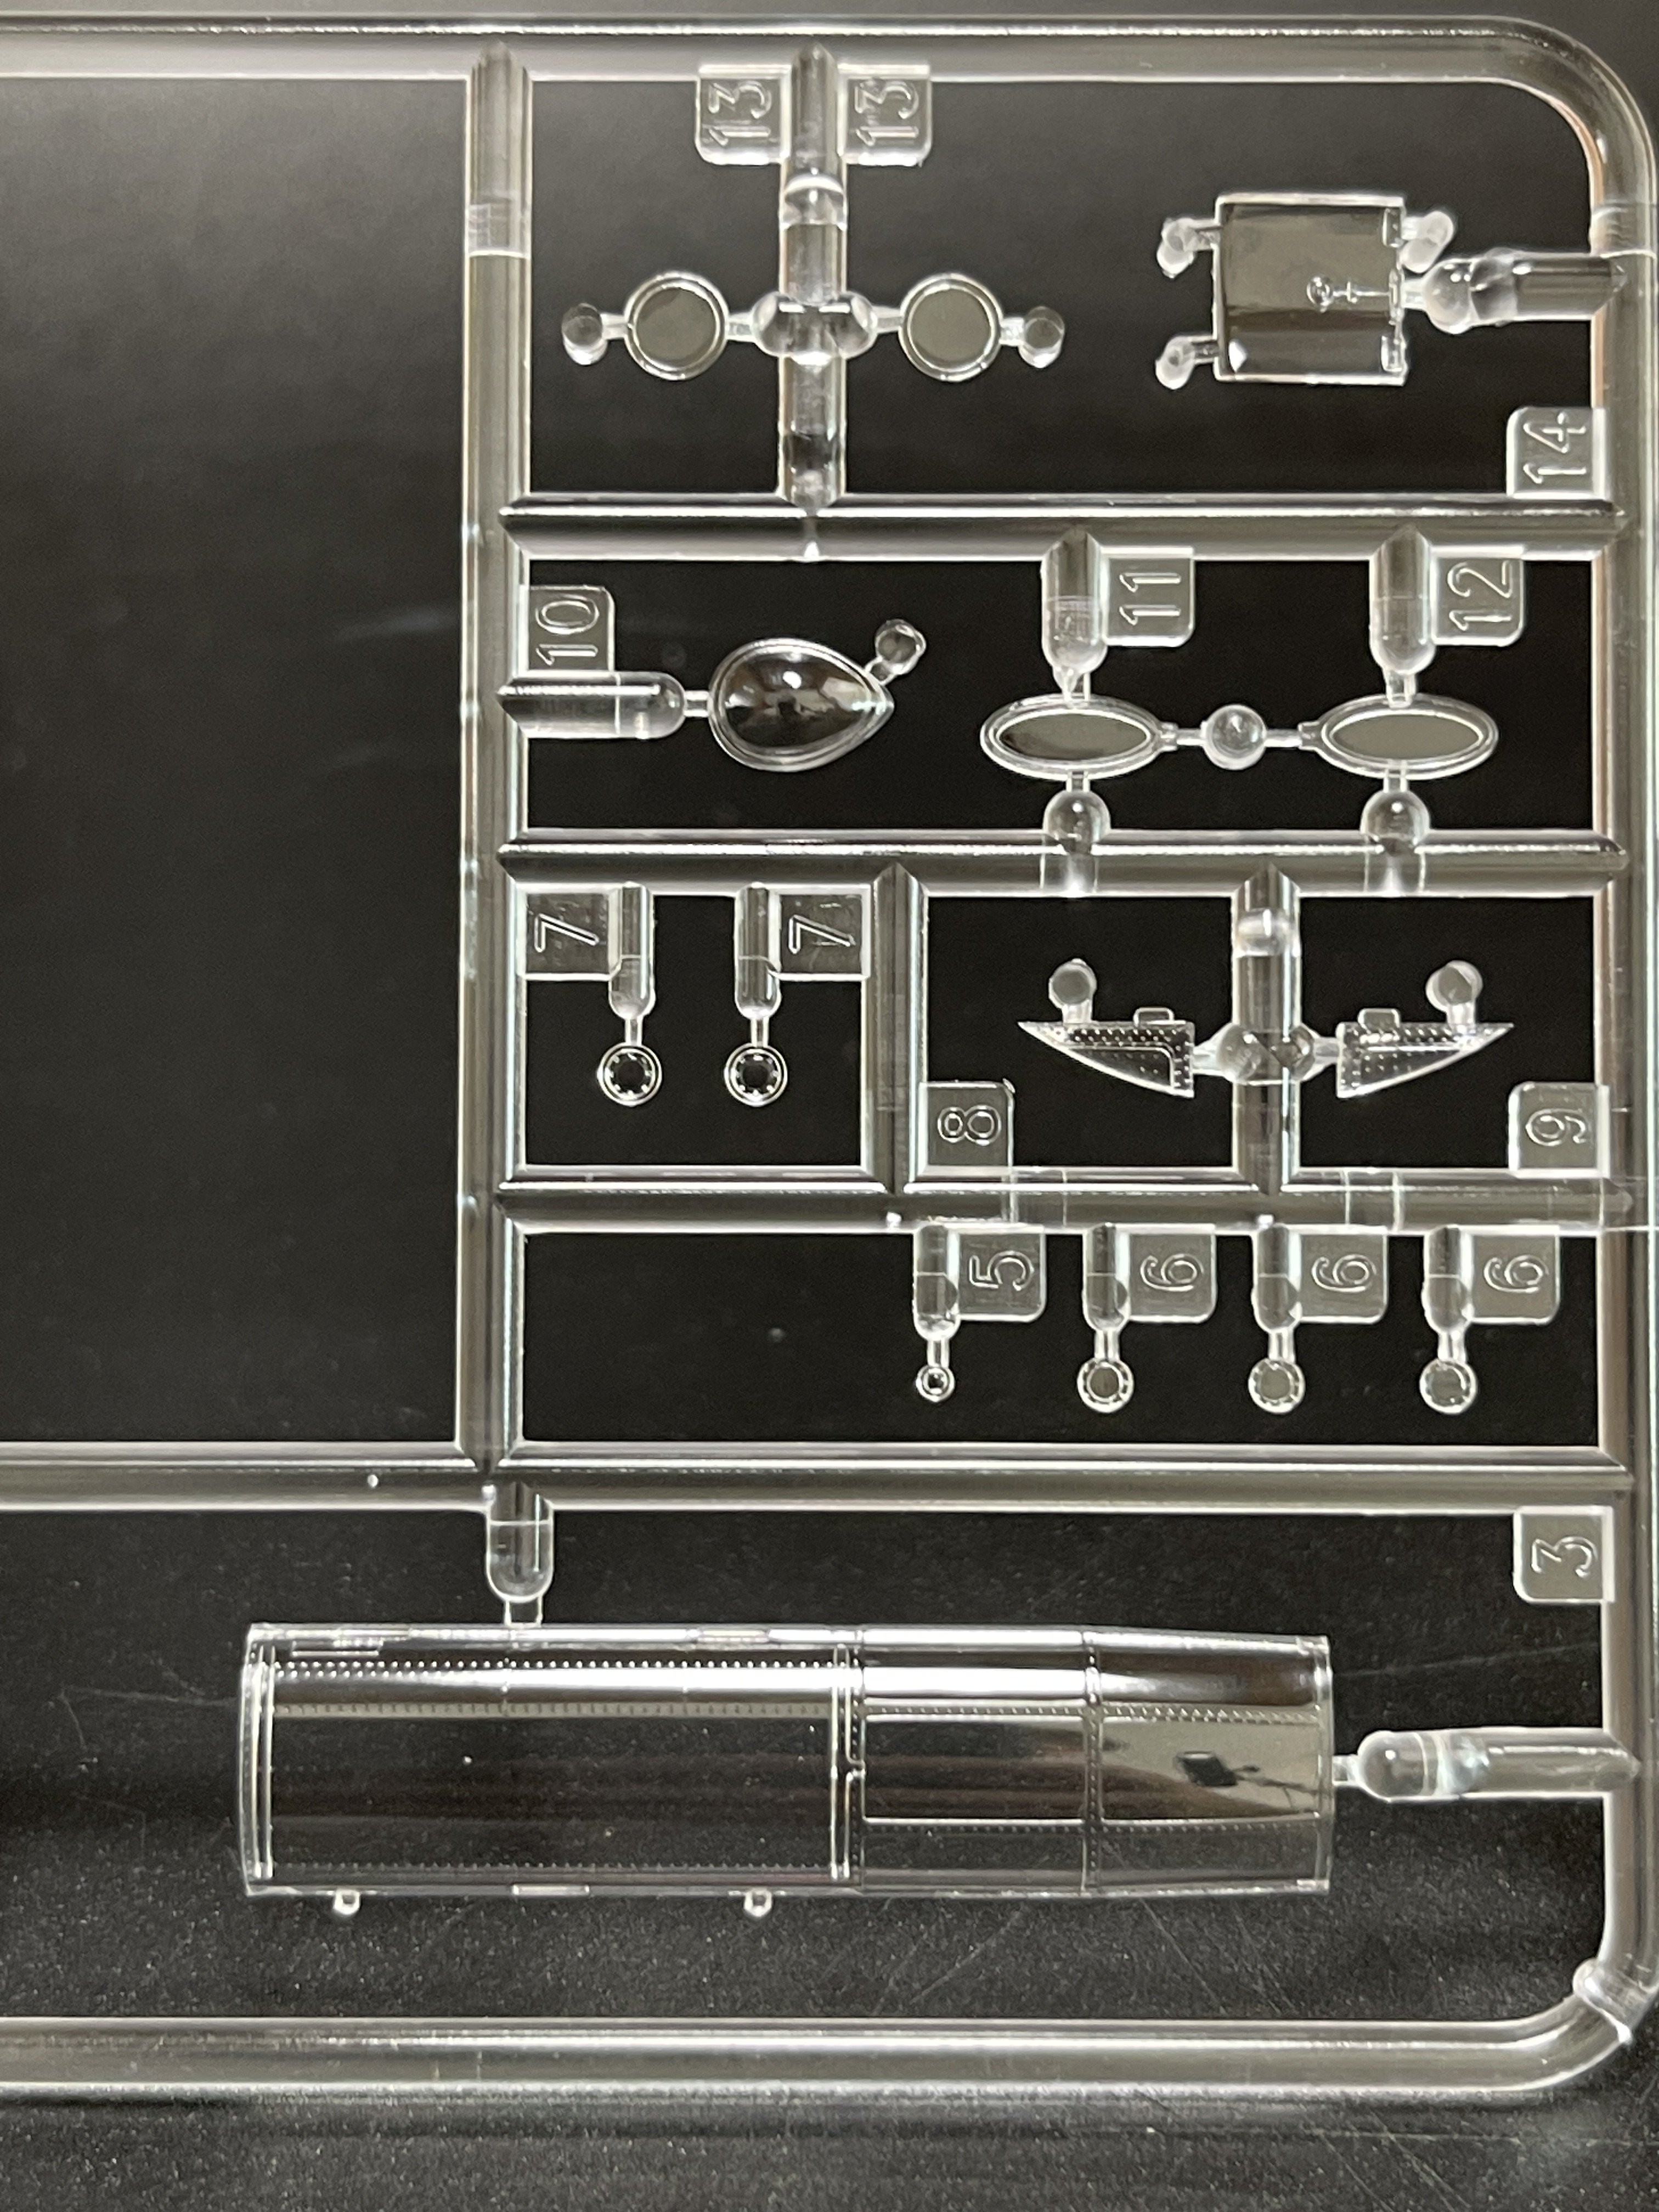
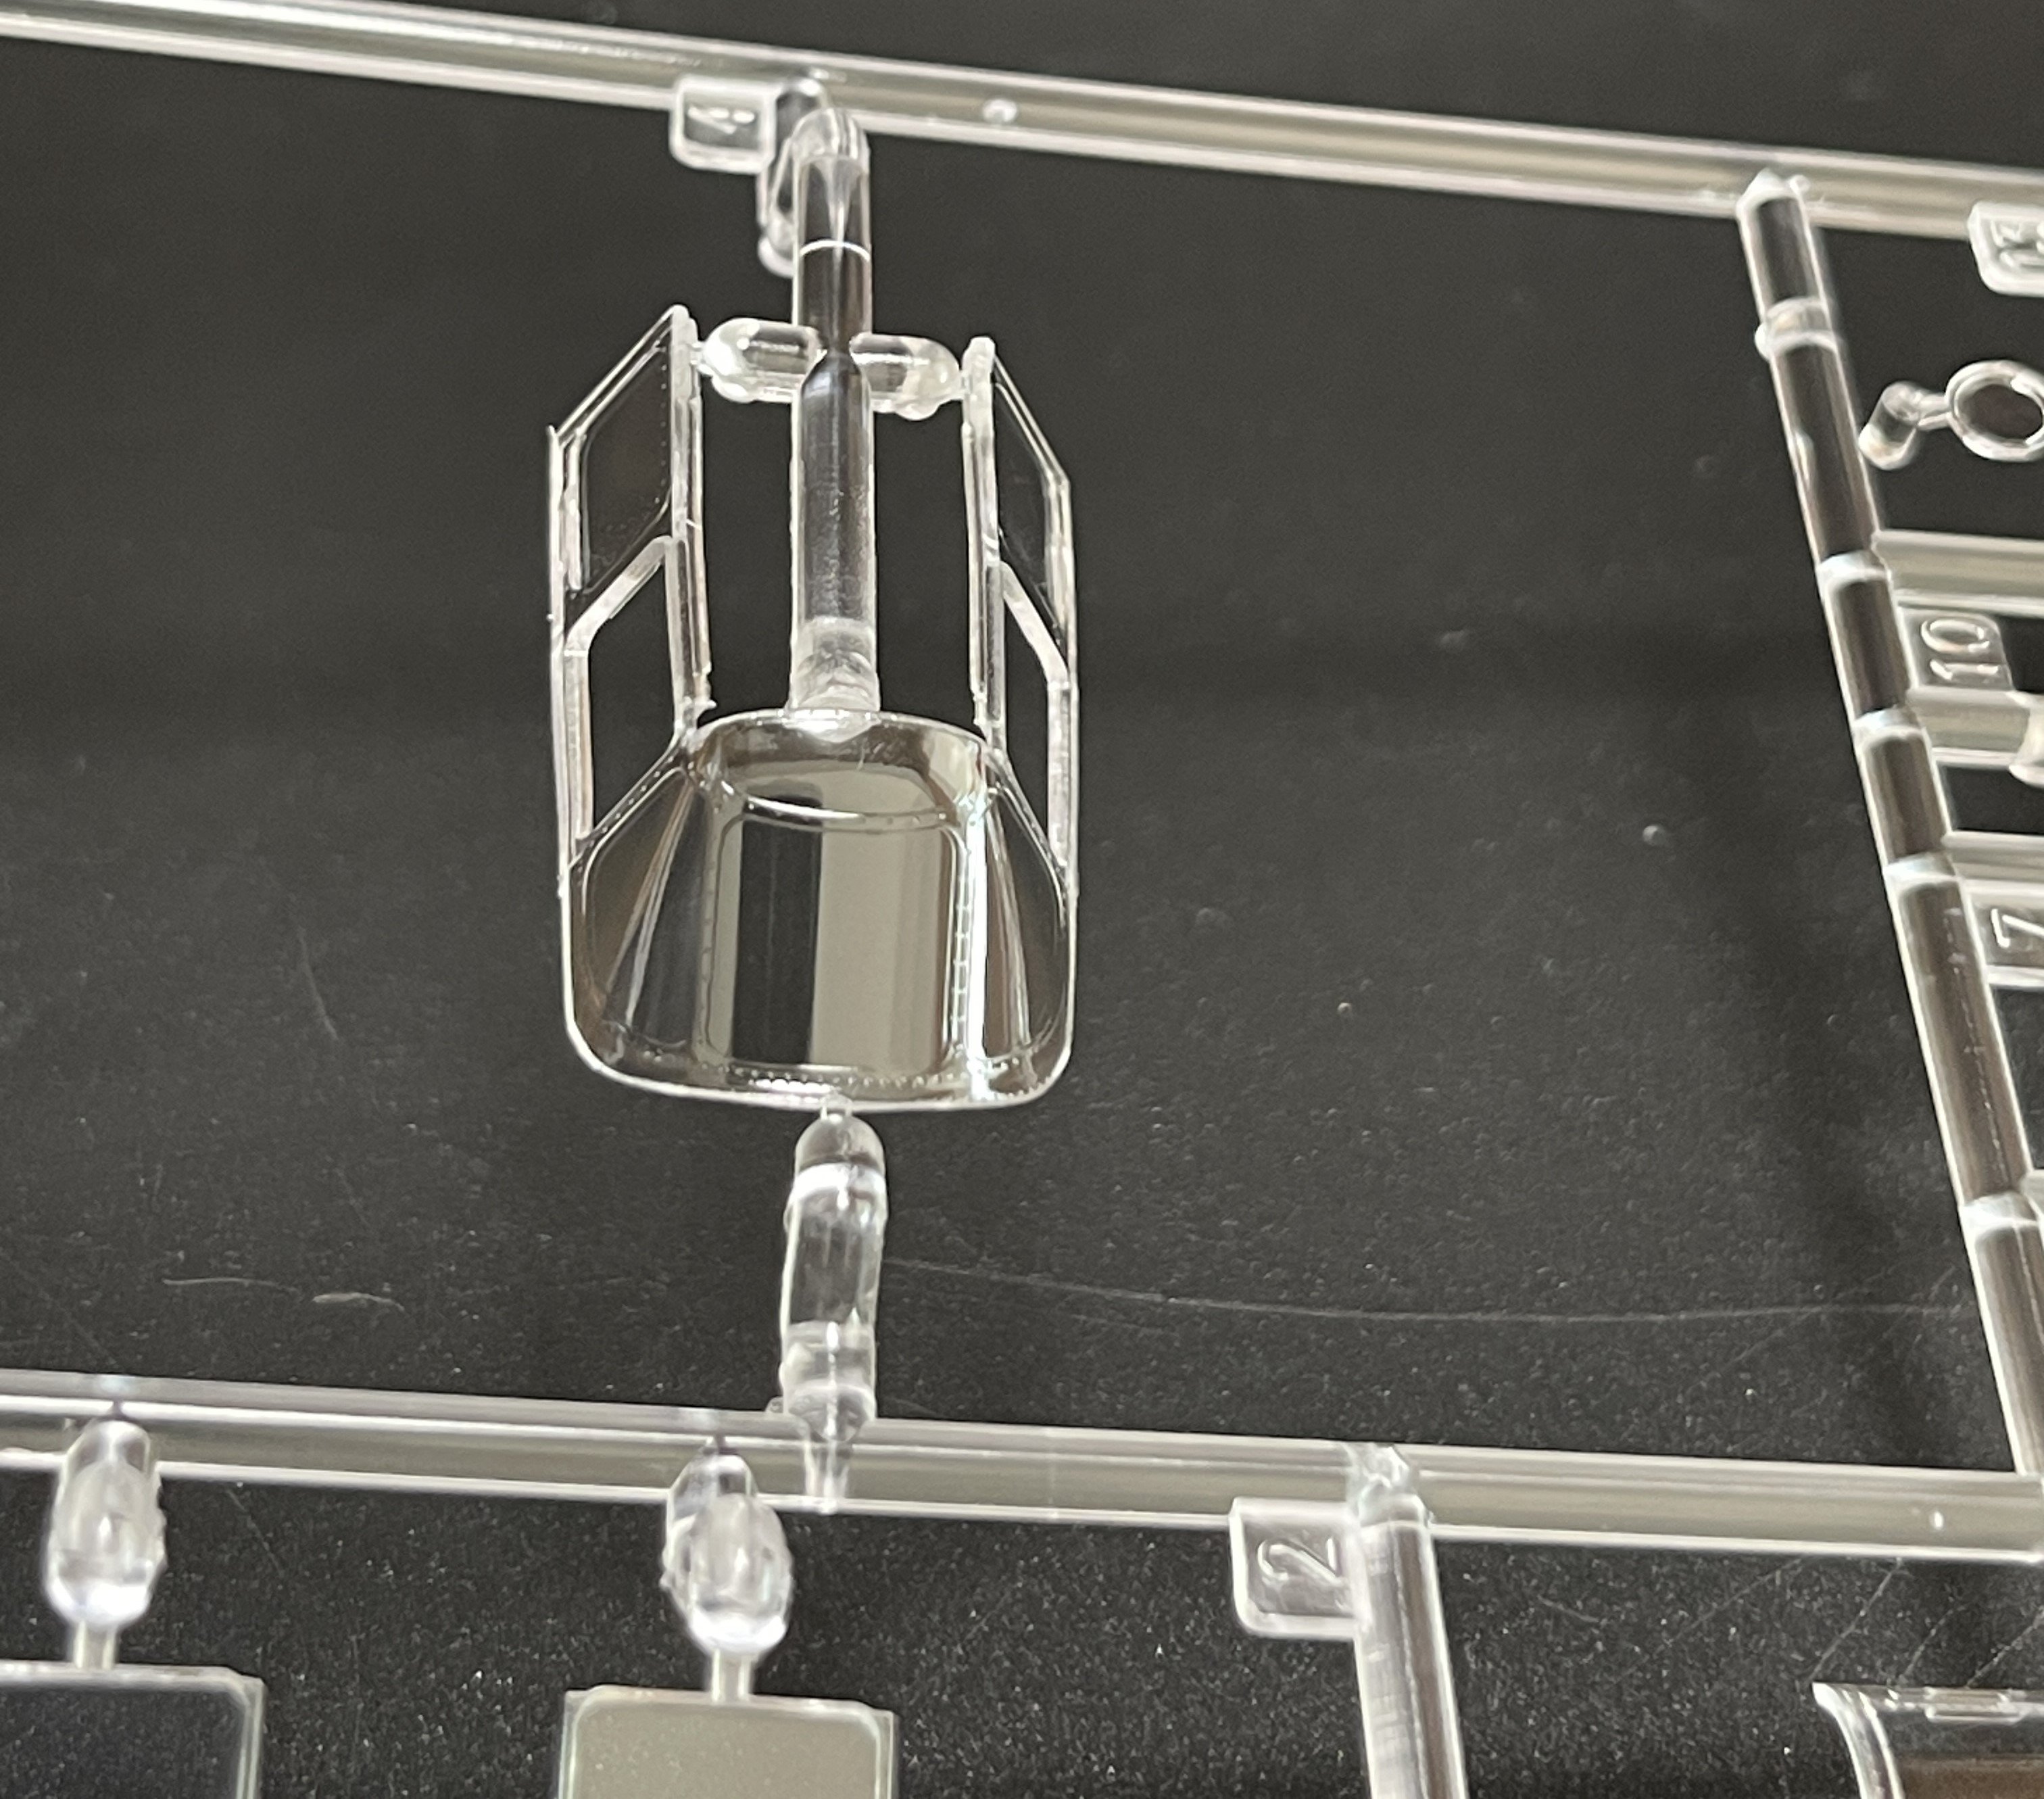
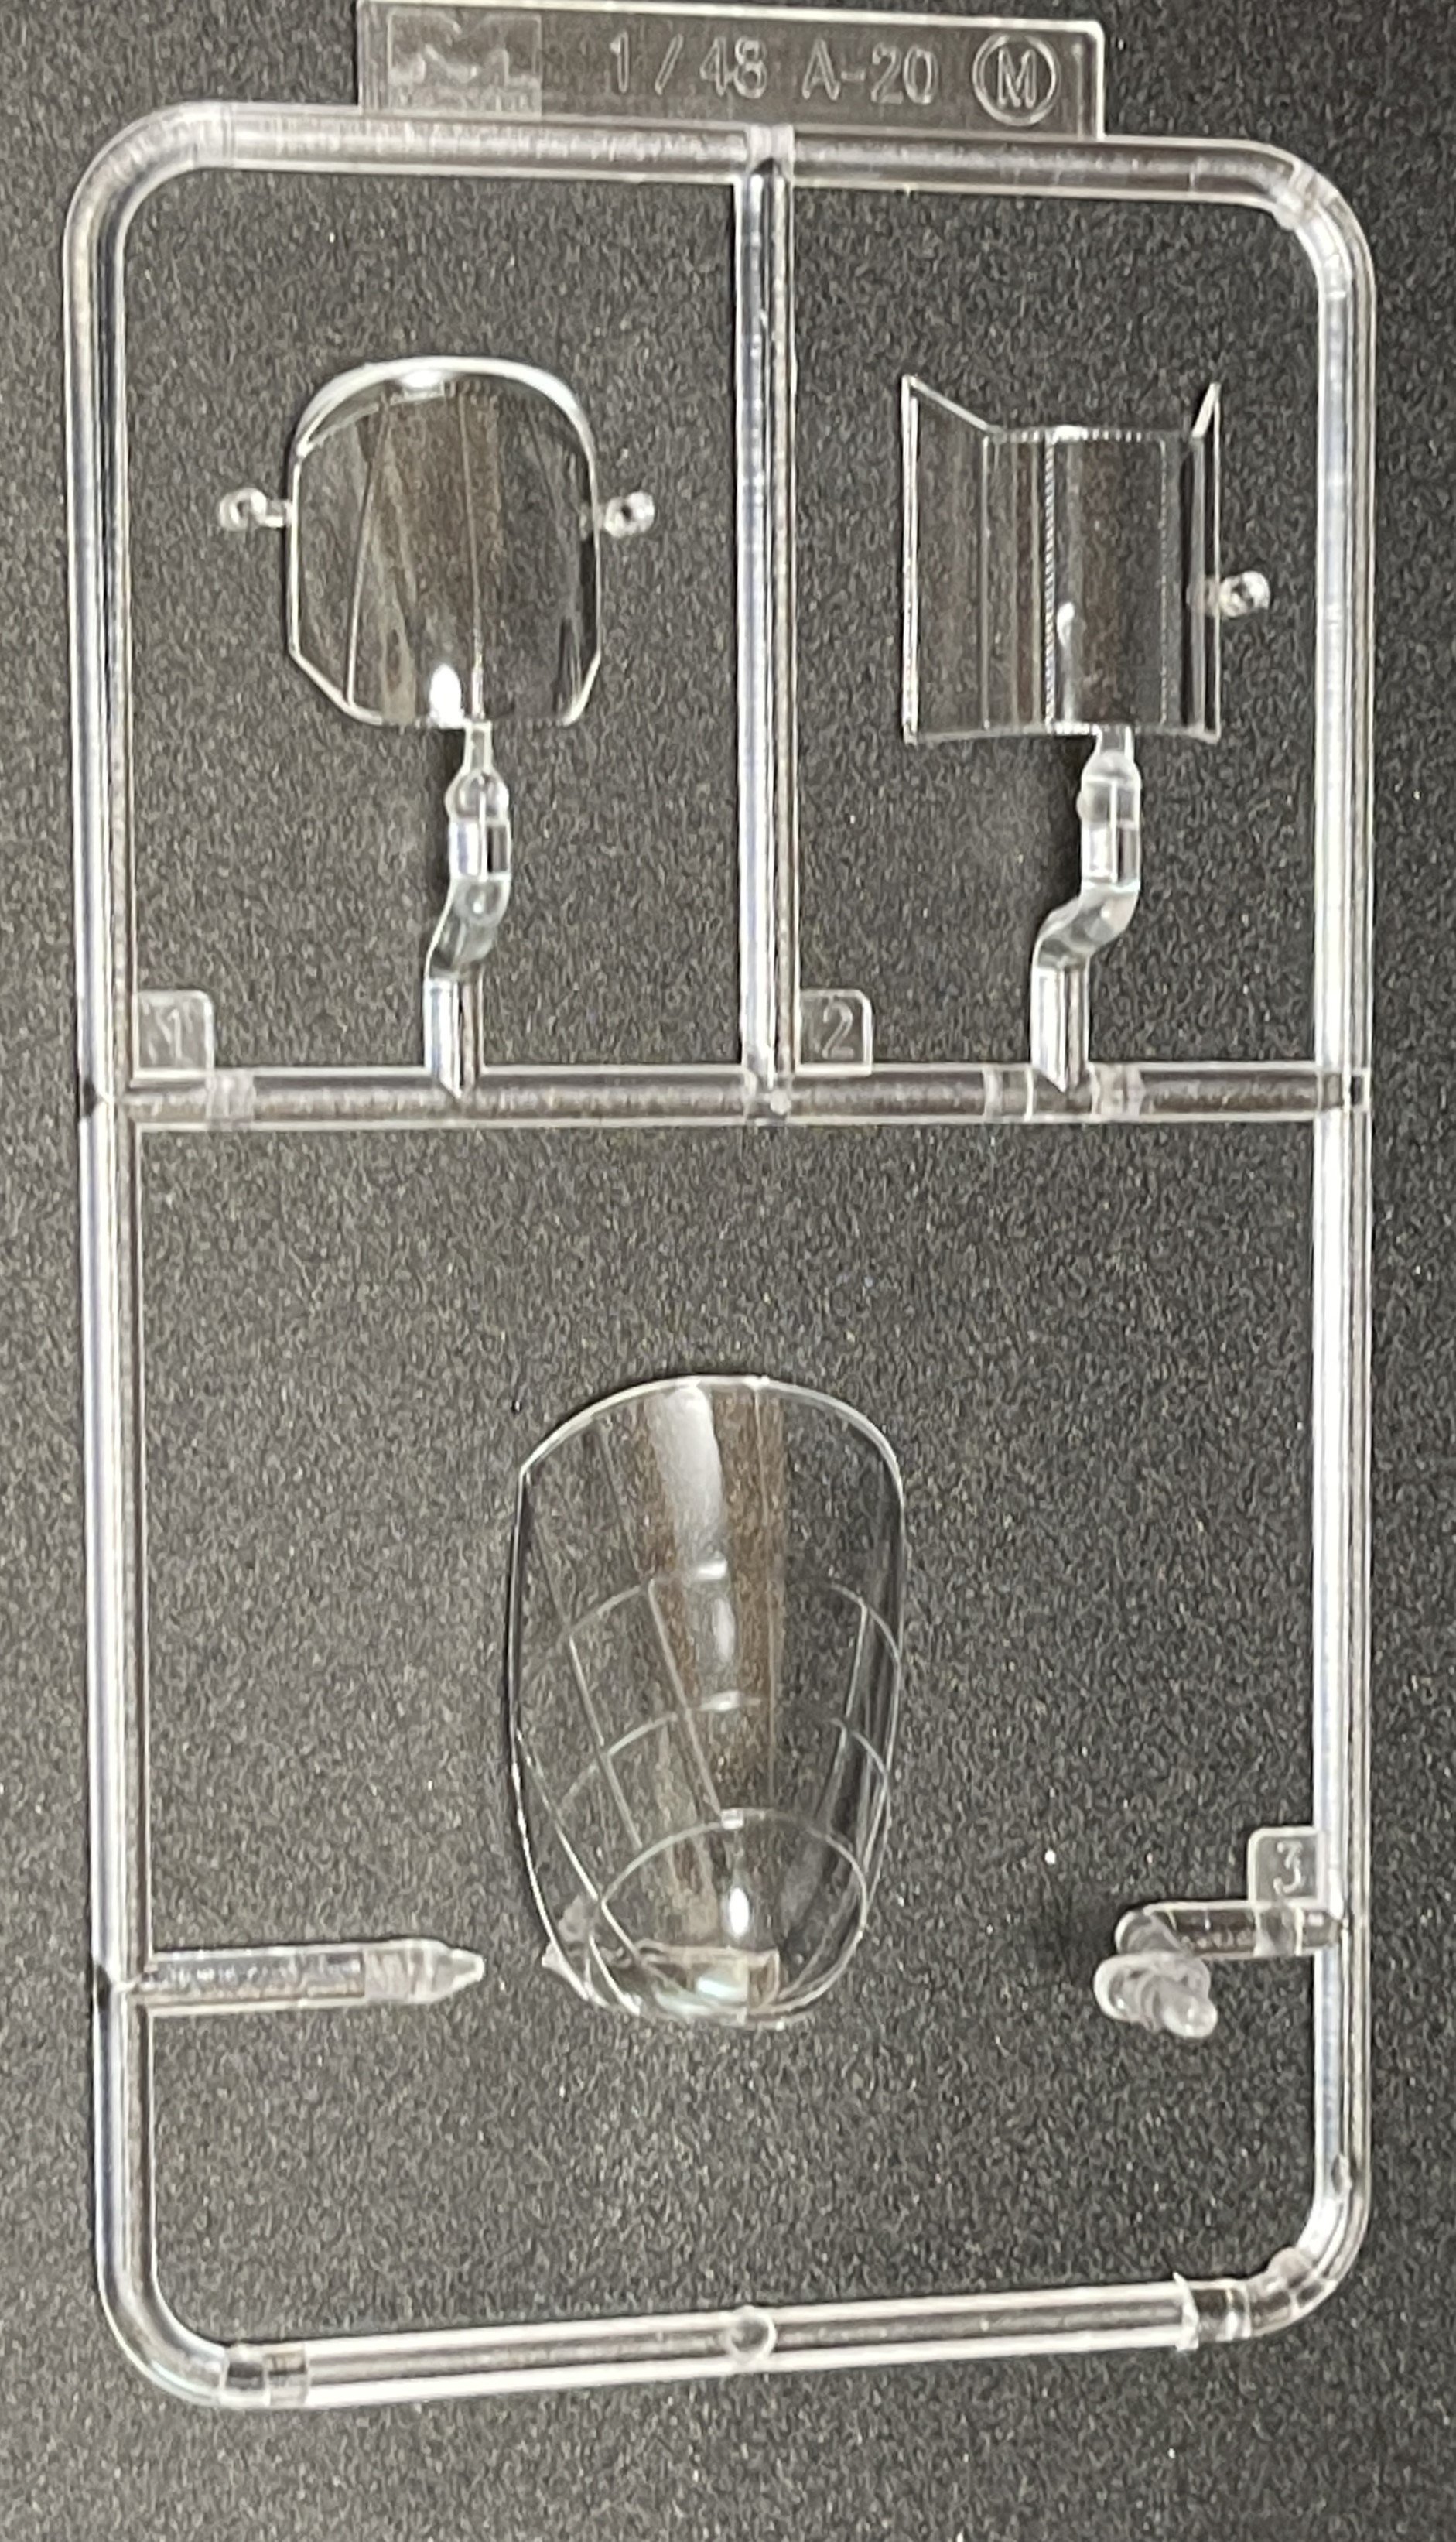
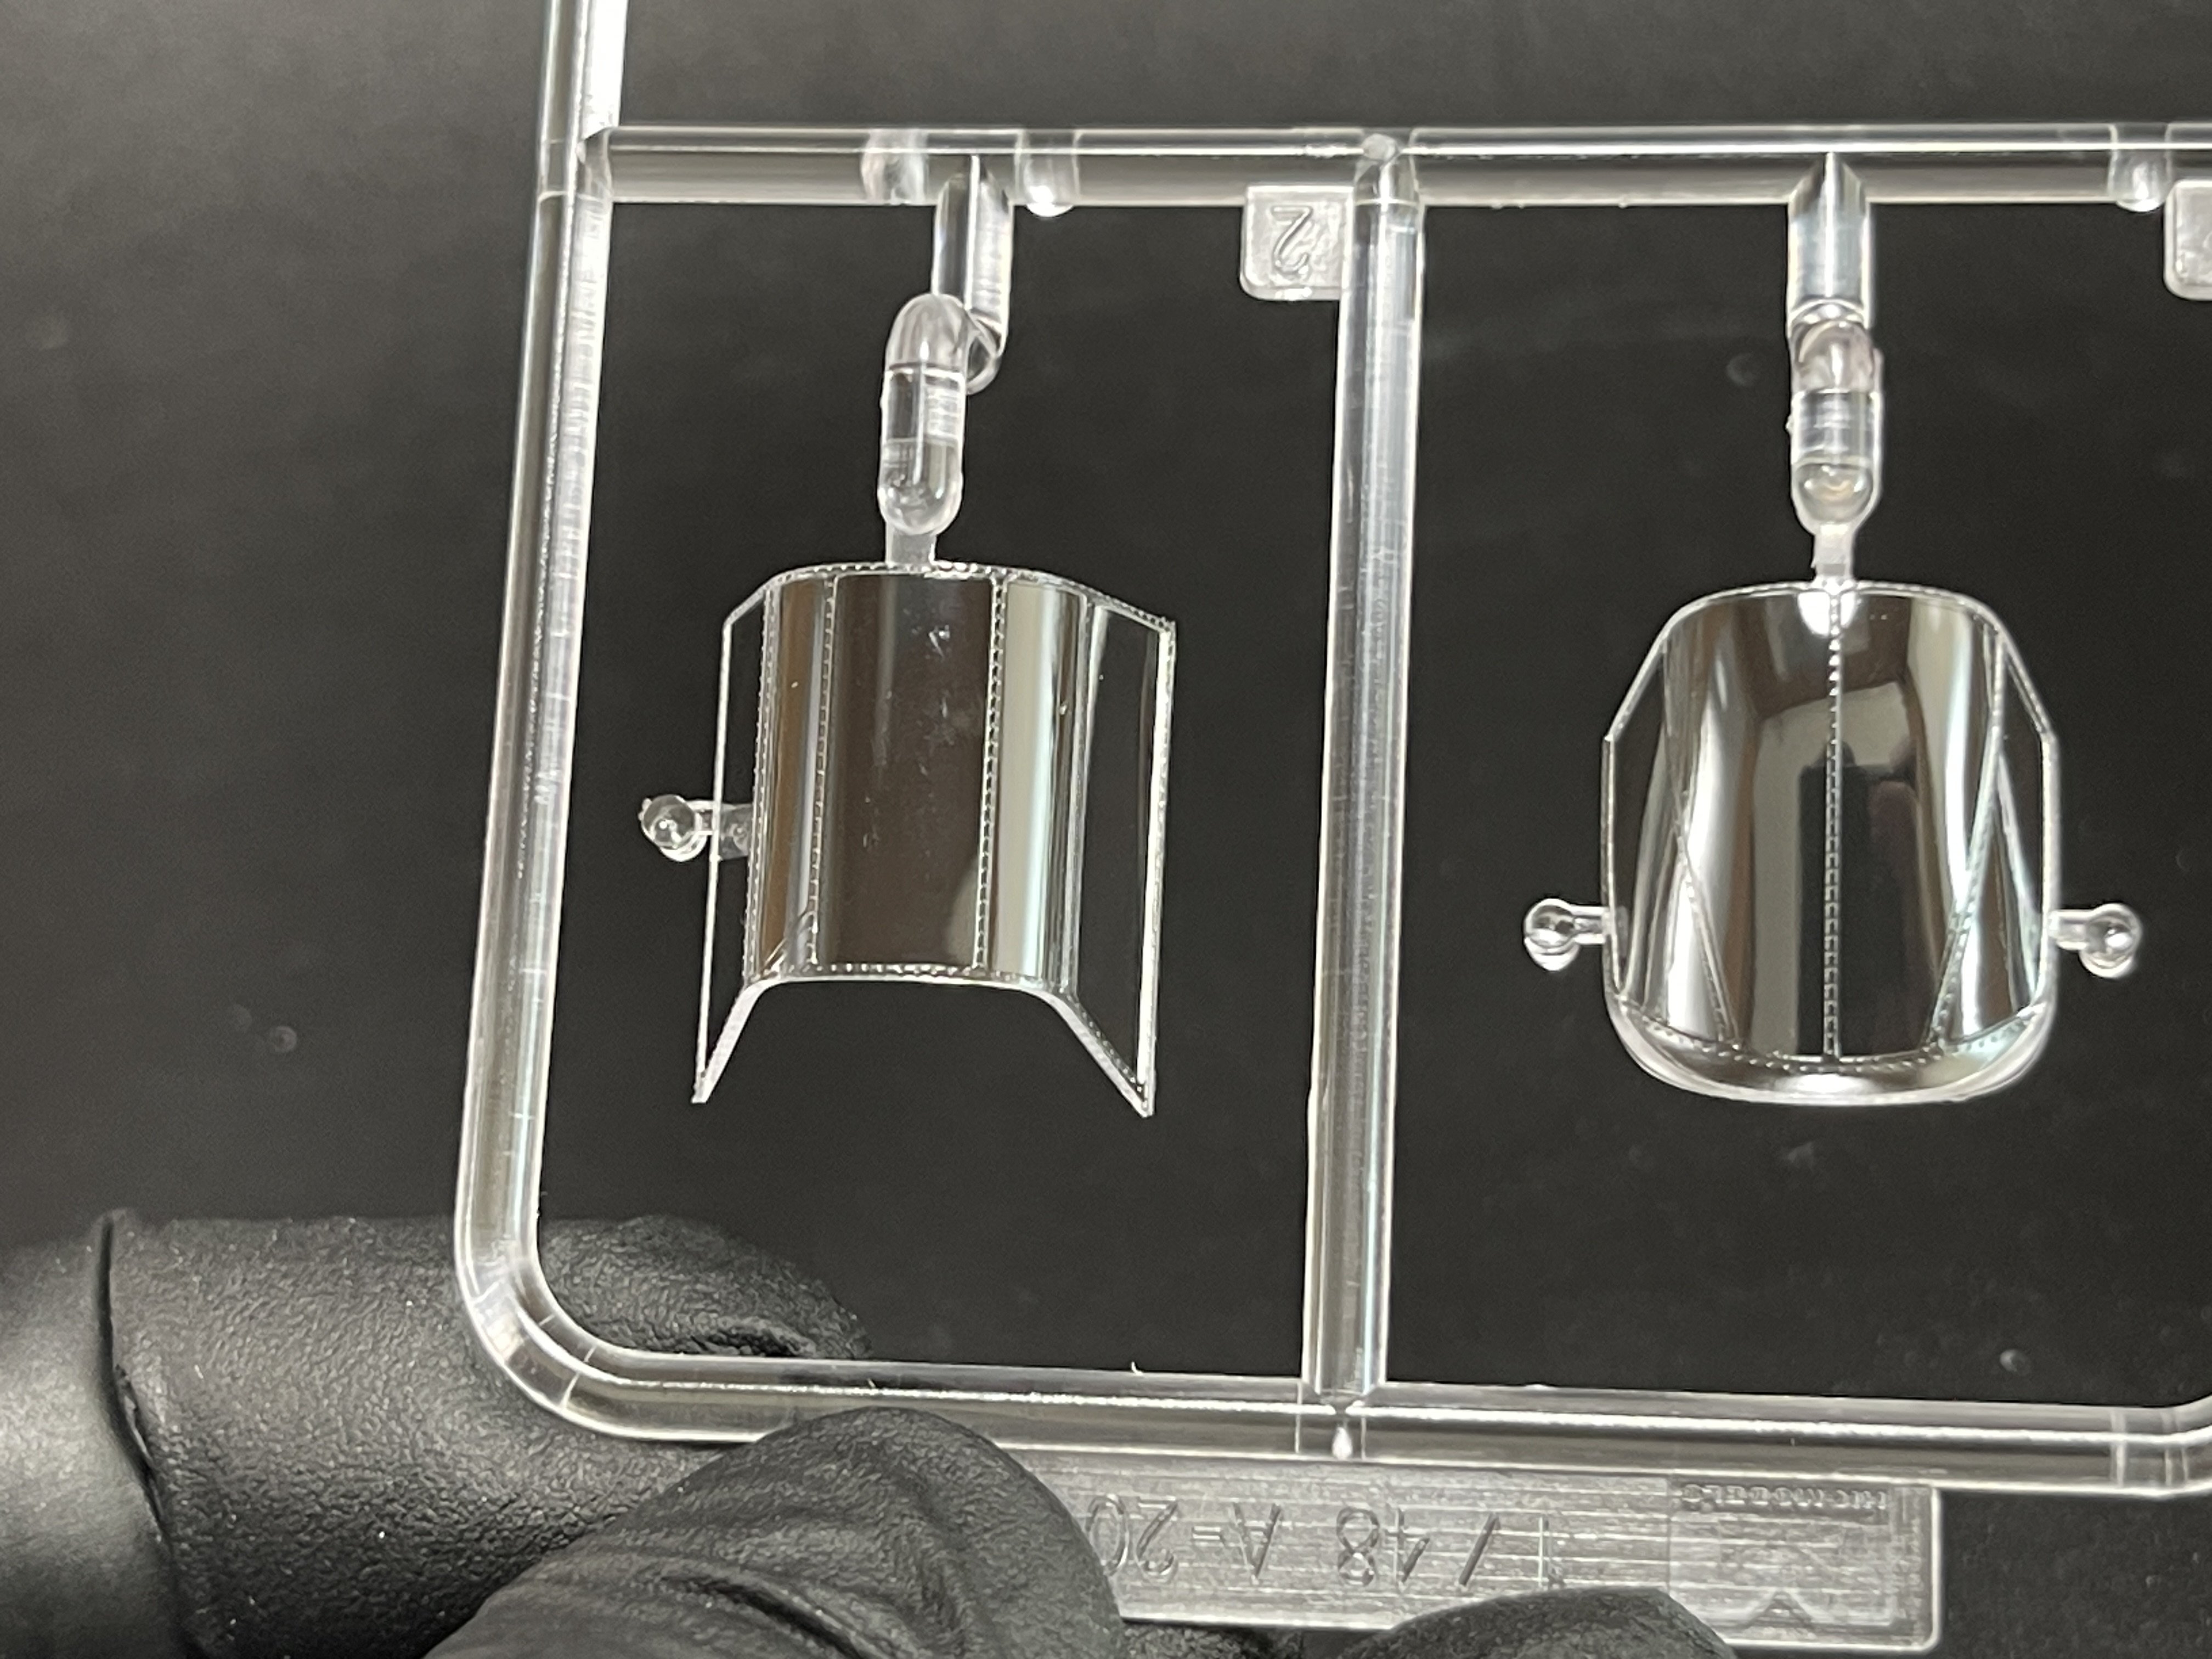
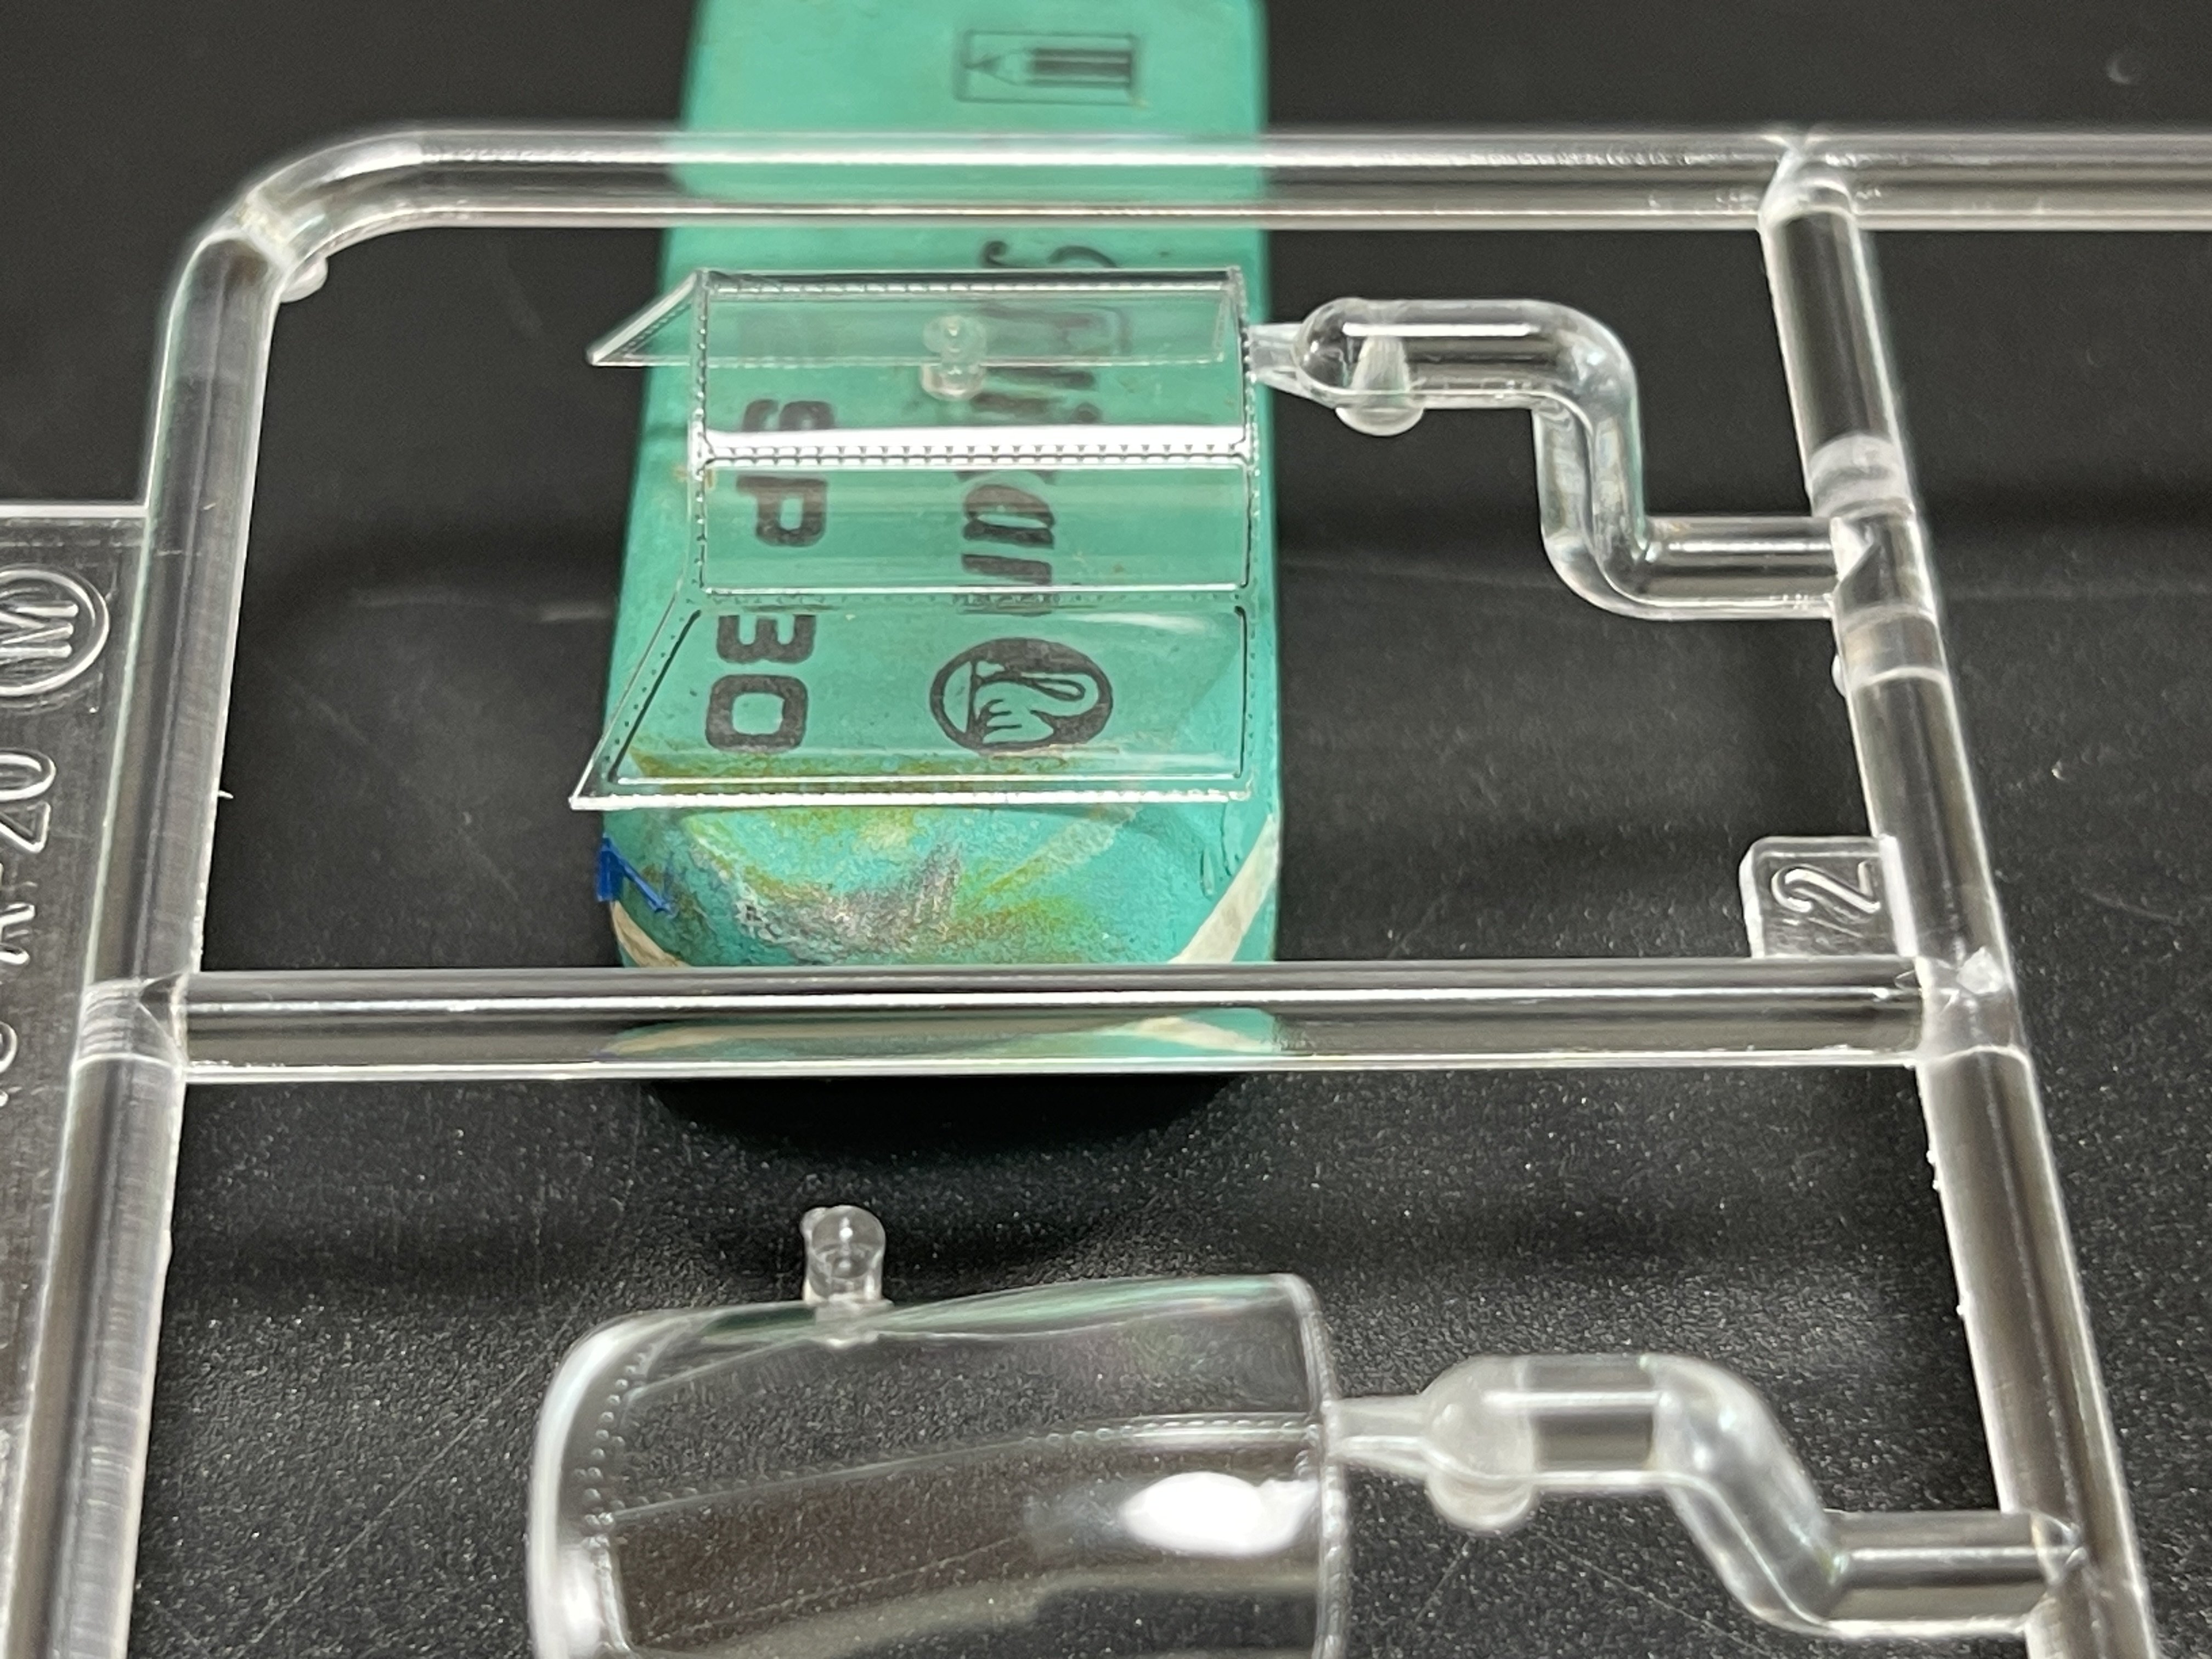
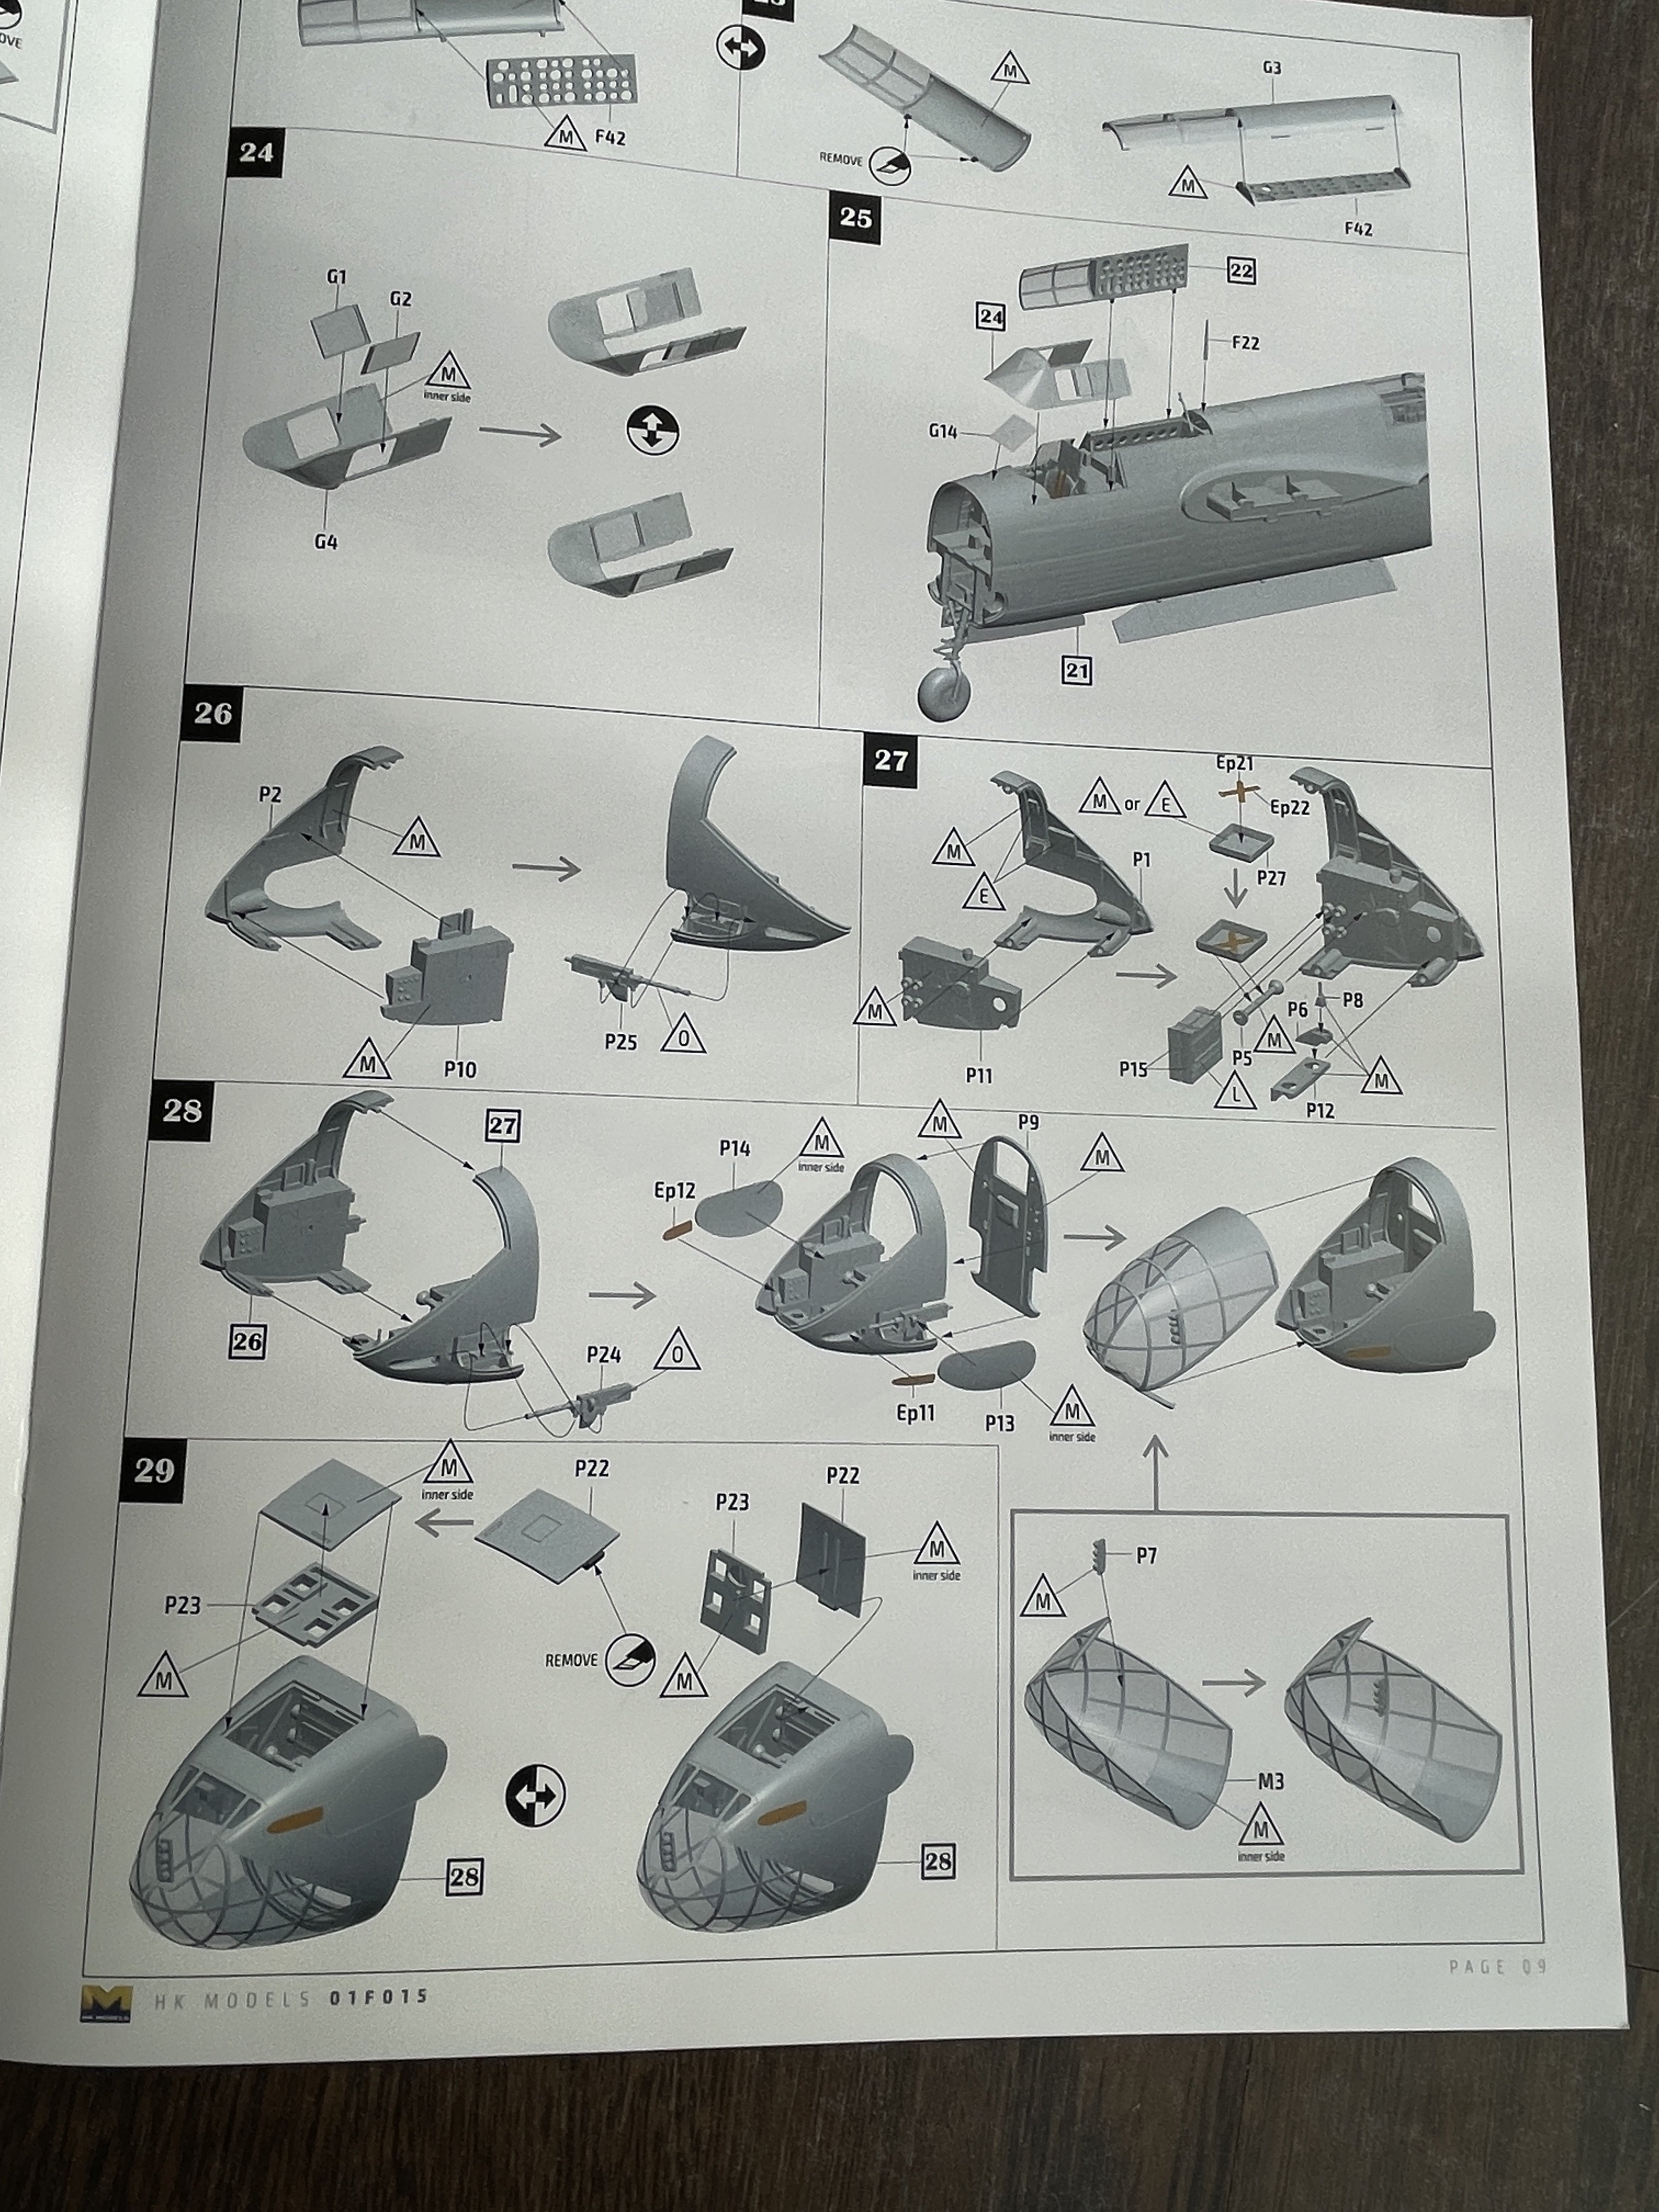
The clear parts have no distortion and quite clear in fact. Specially in this release as the all nose is in glass.

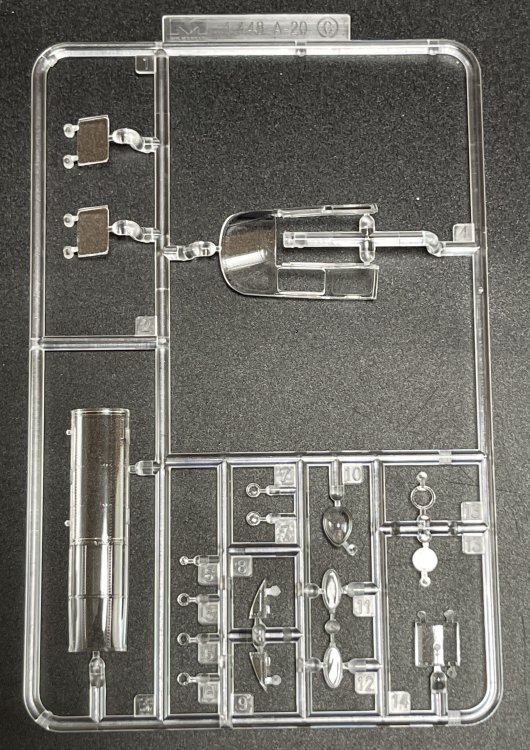
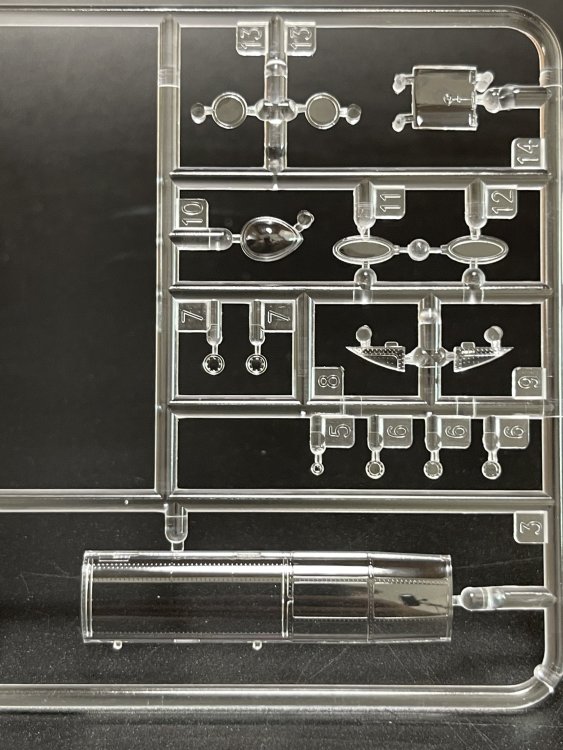
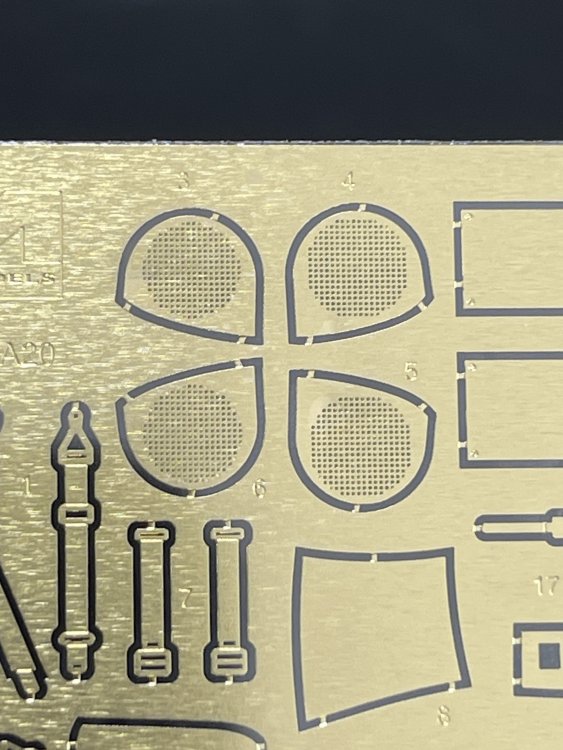
Also is given a small photo-etched fret that provides seat belts and internal structural components like a mesh to the engines gondolas.
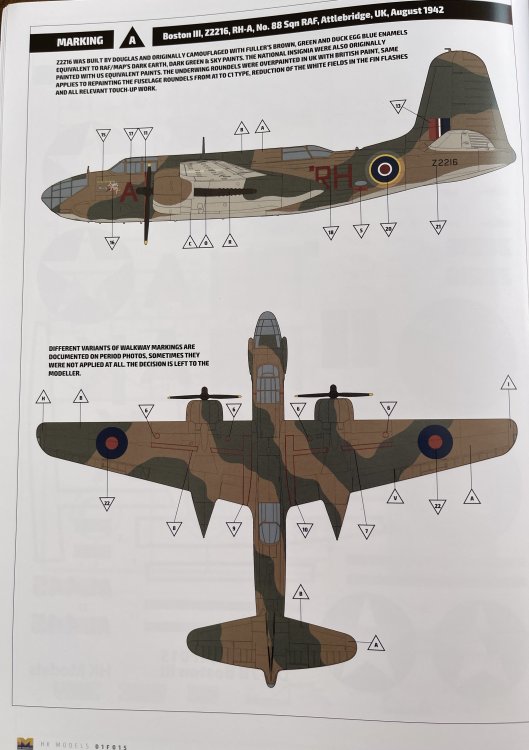
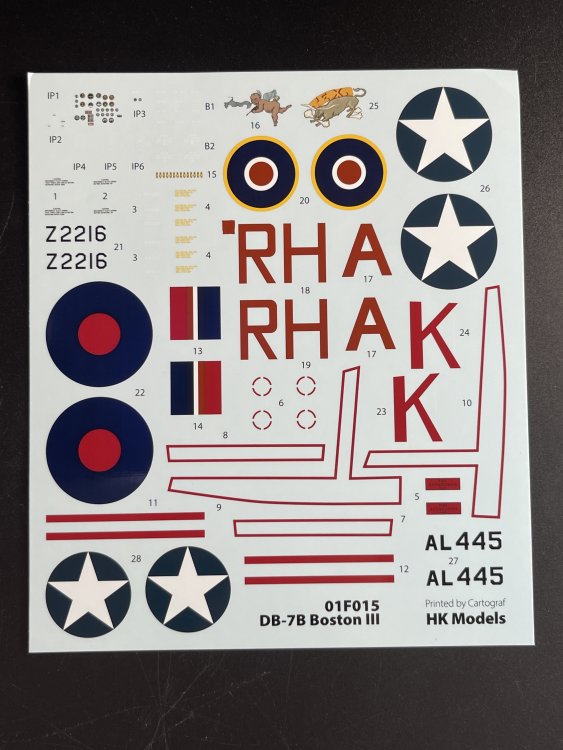
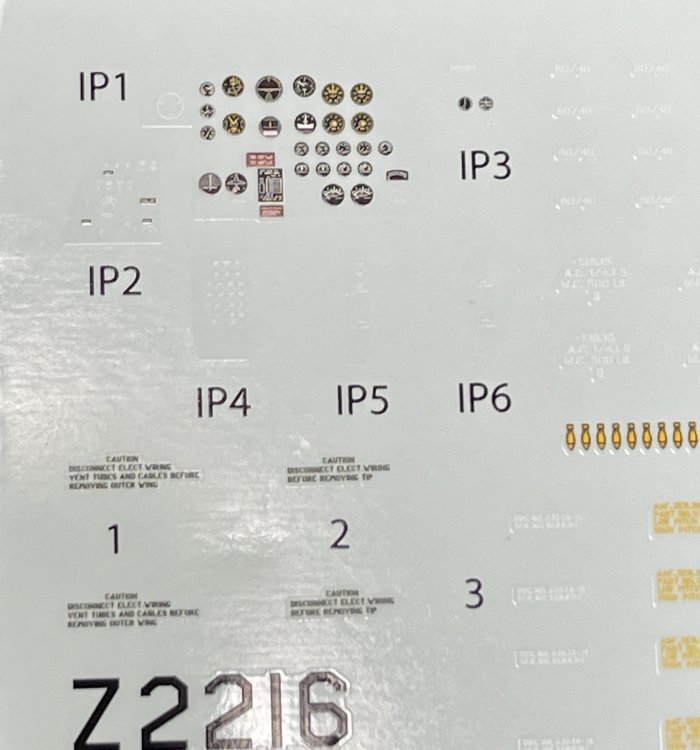
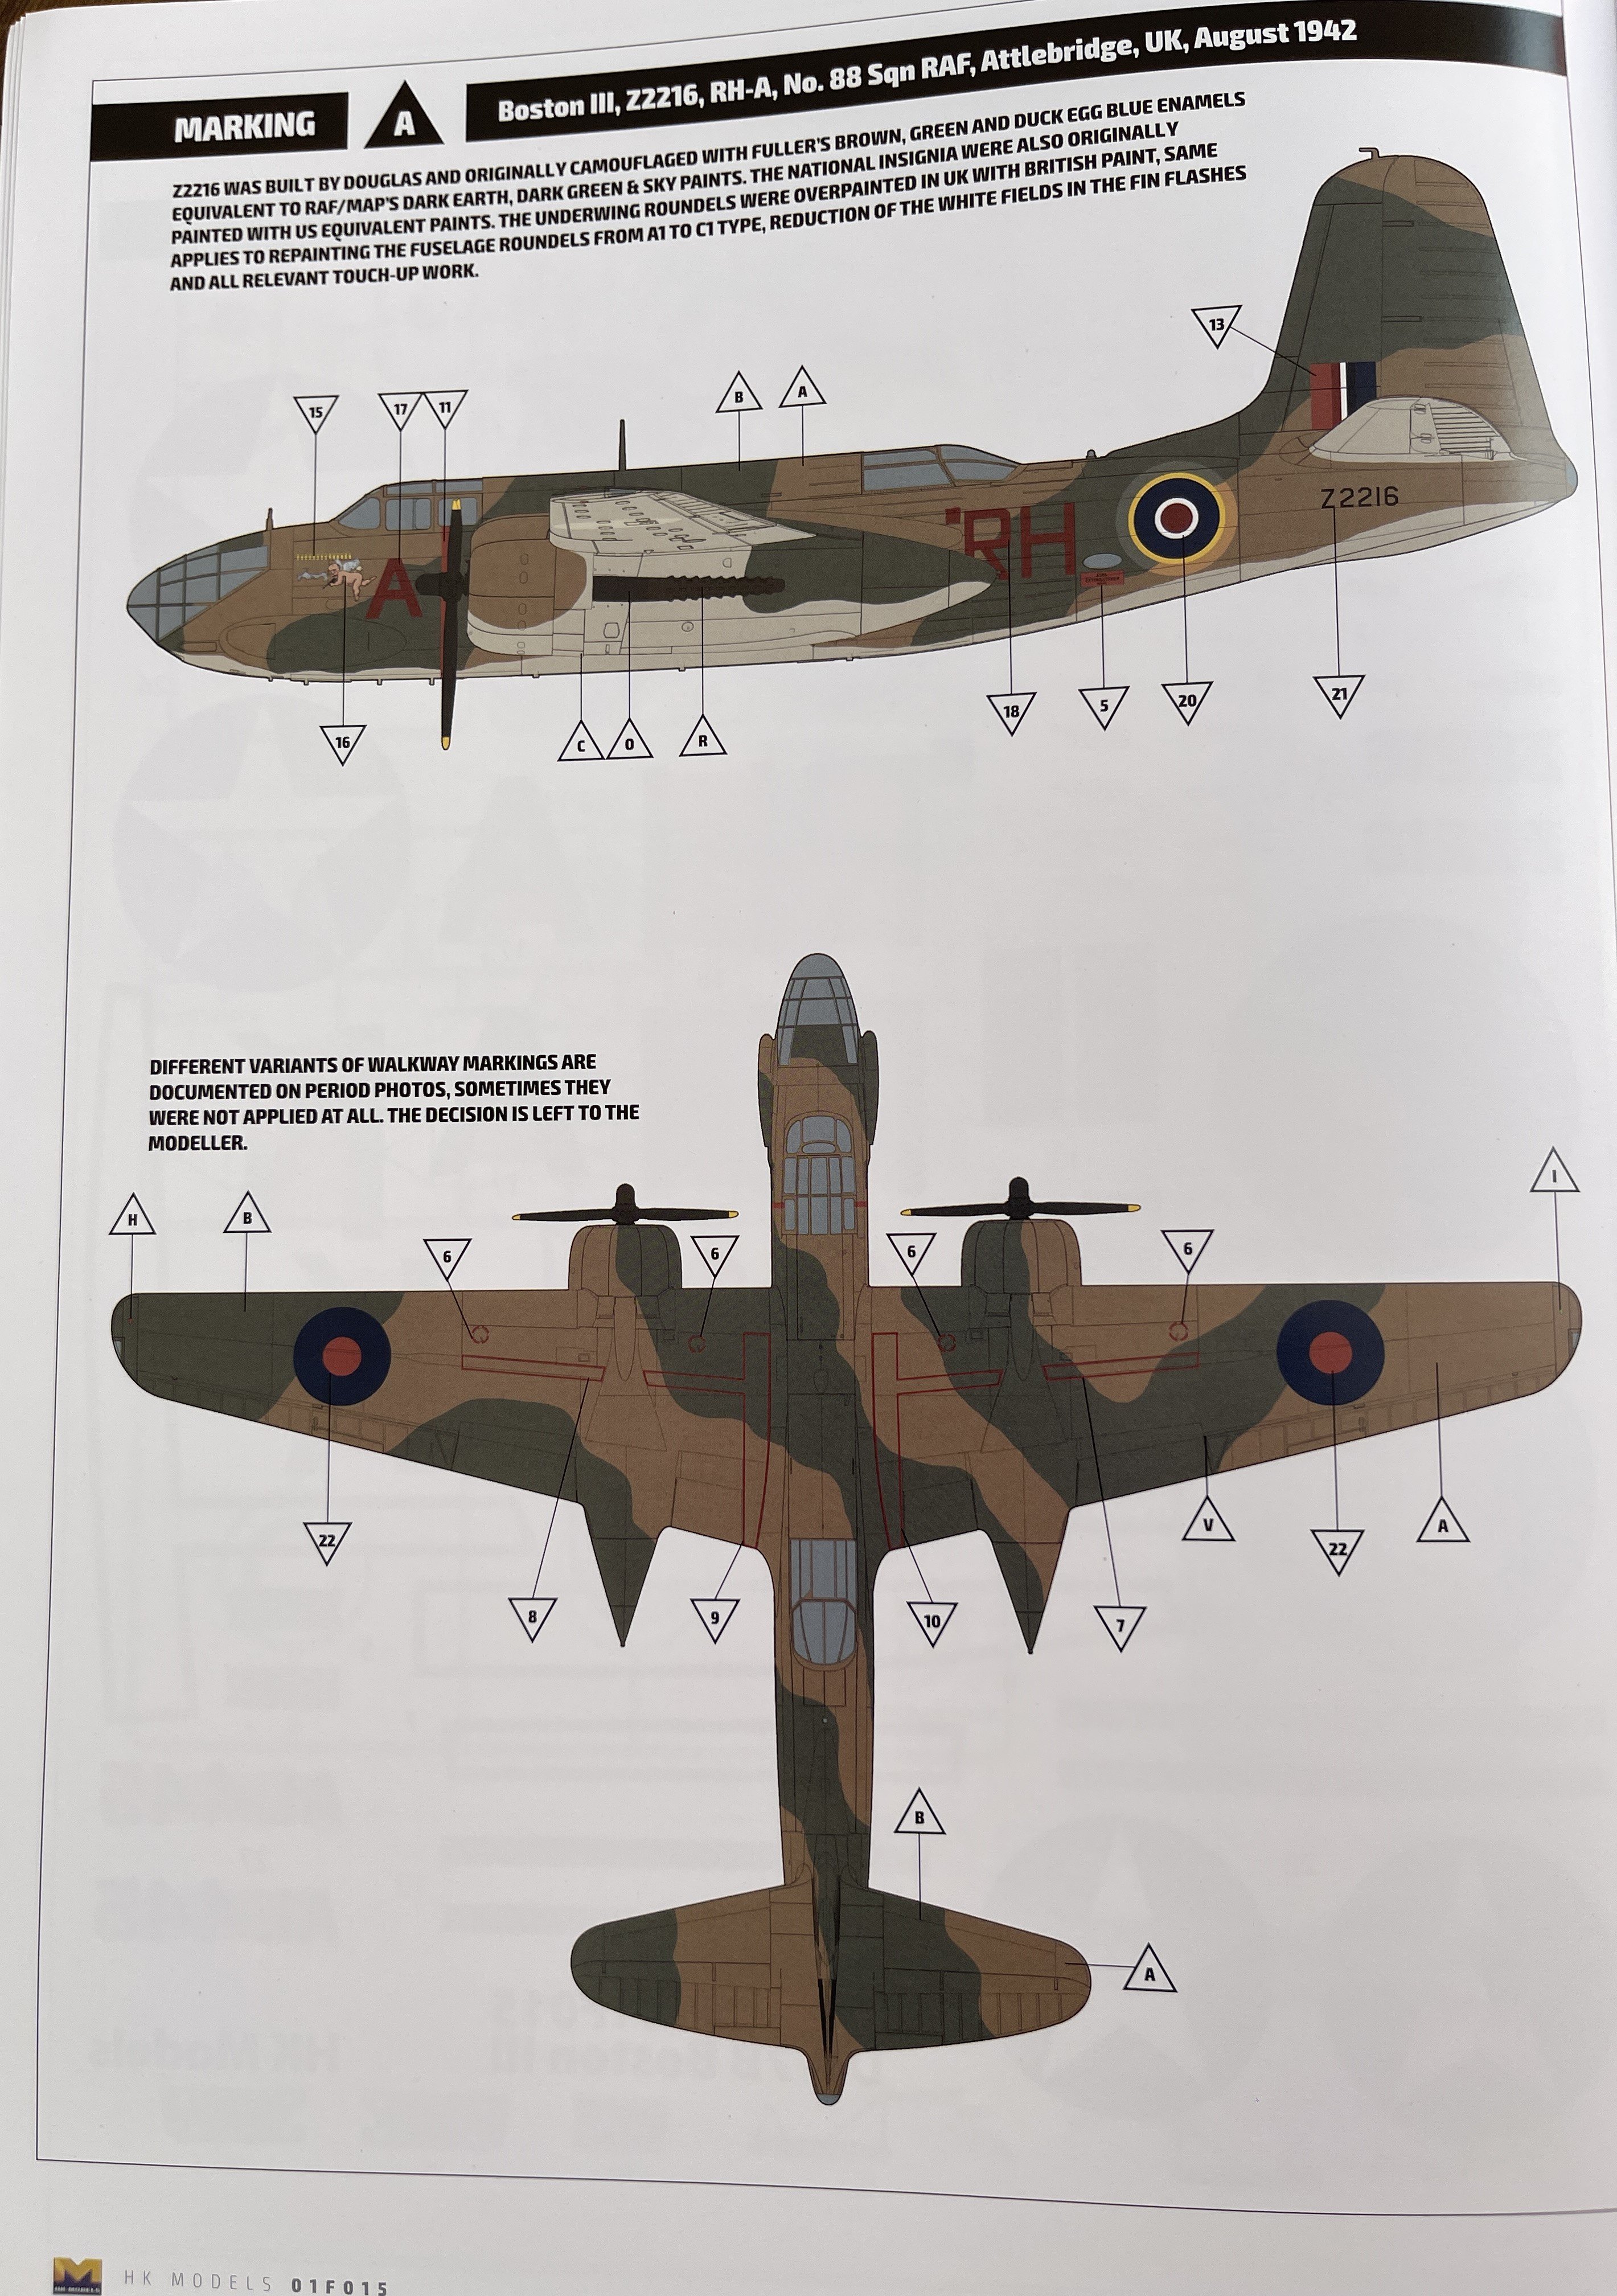
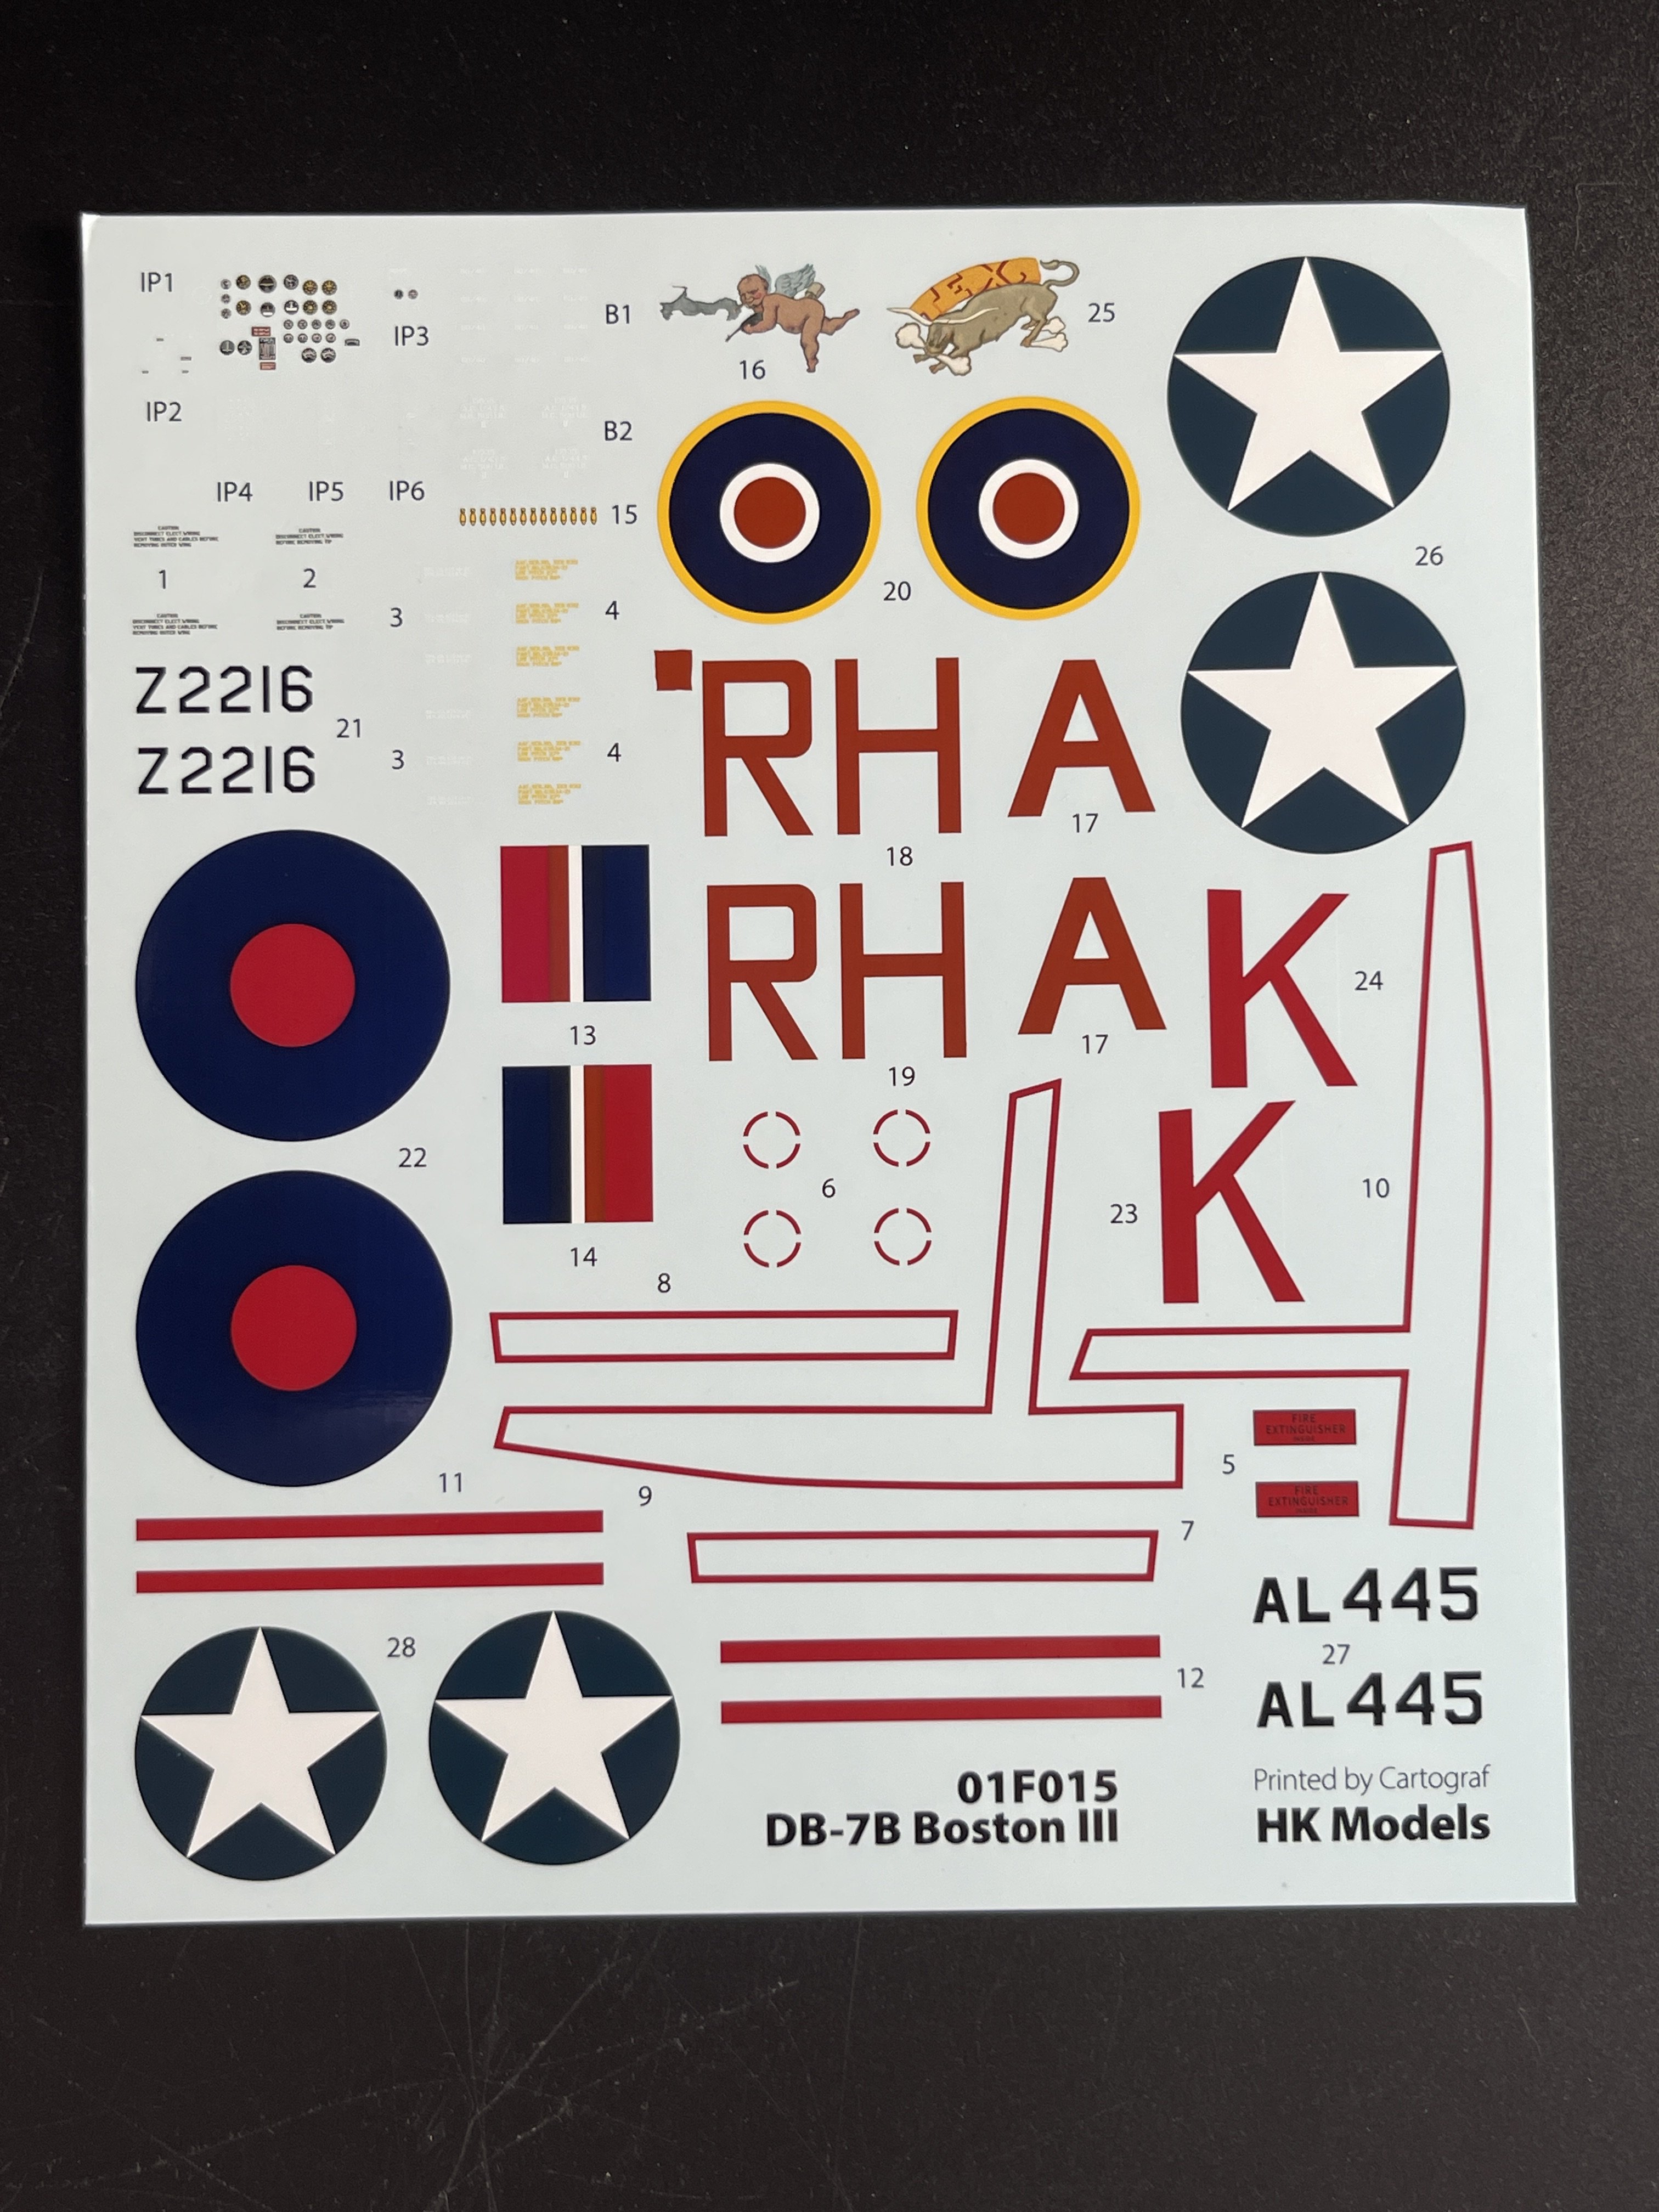
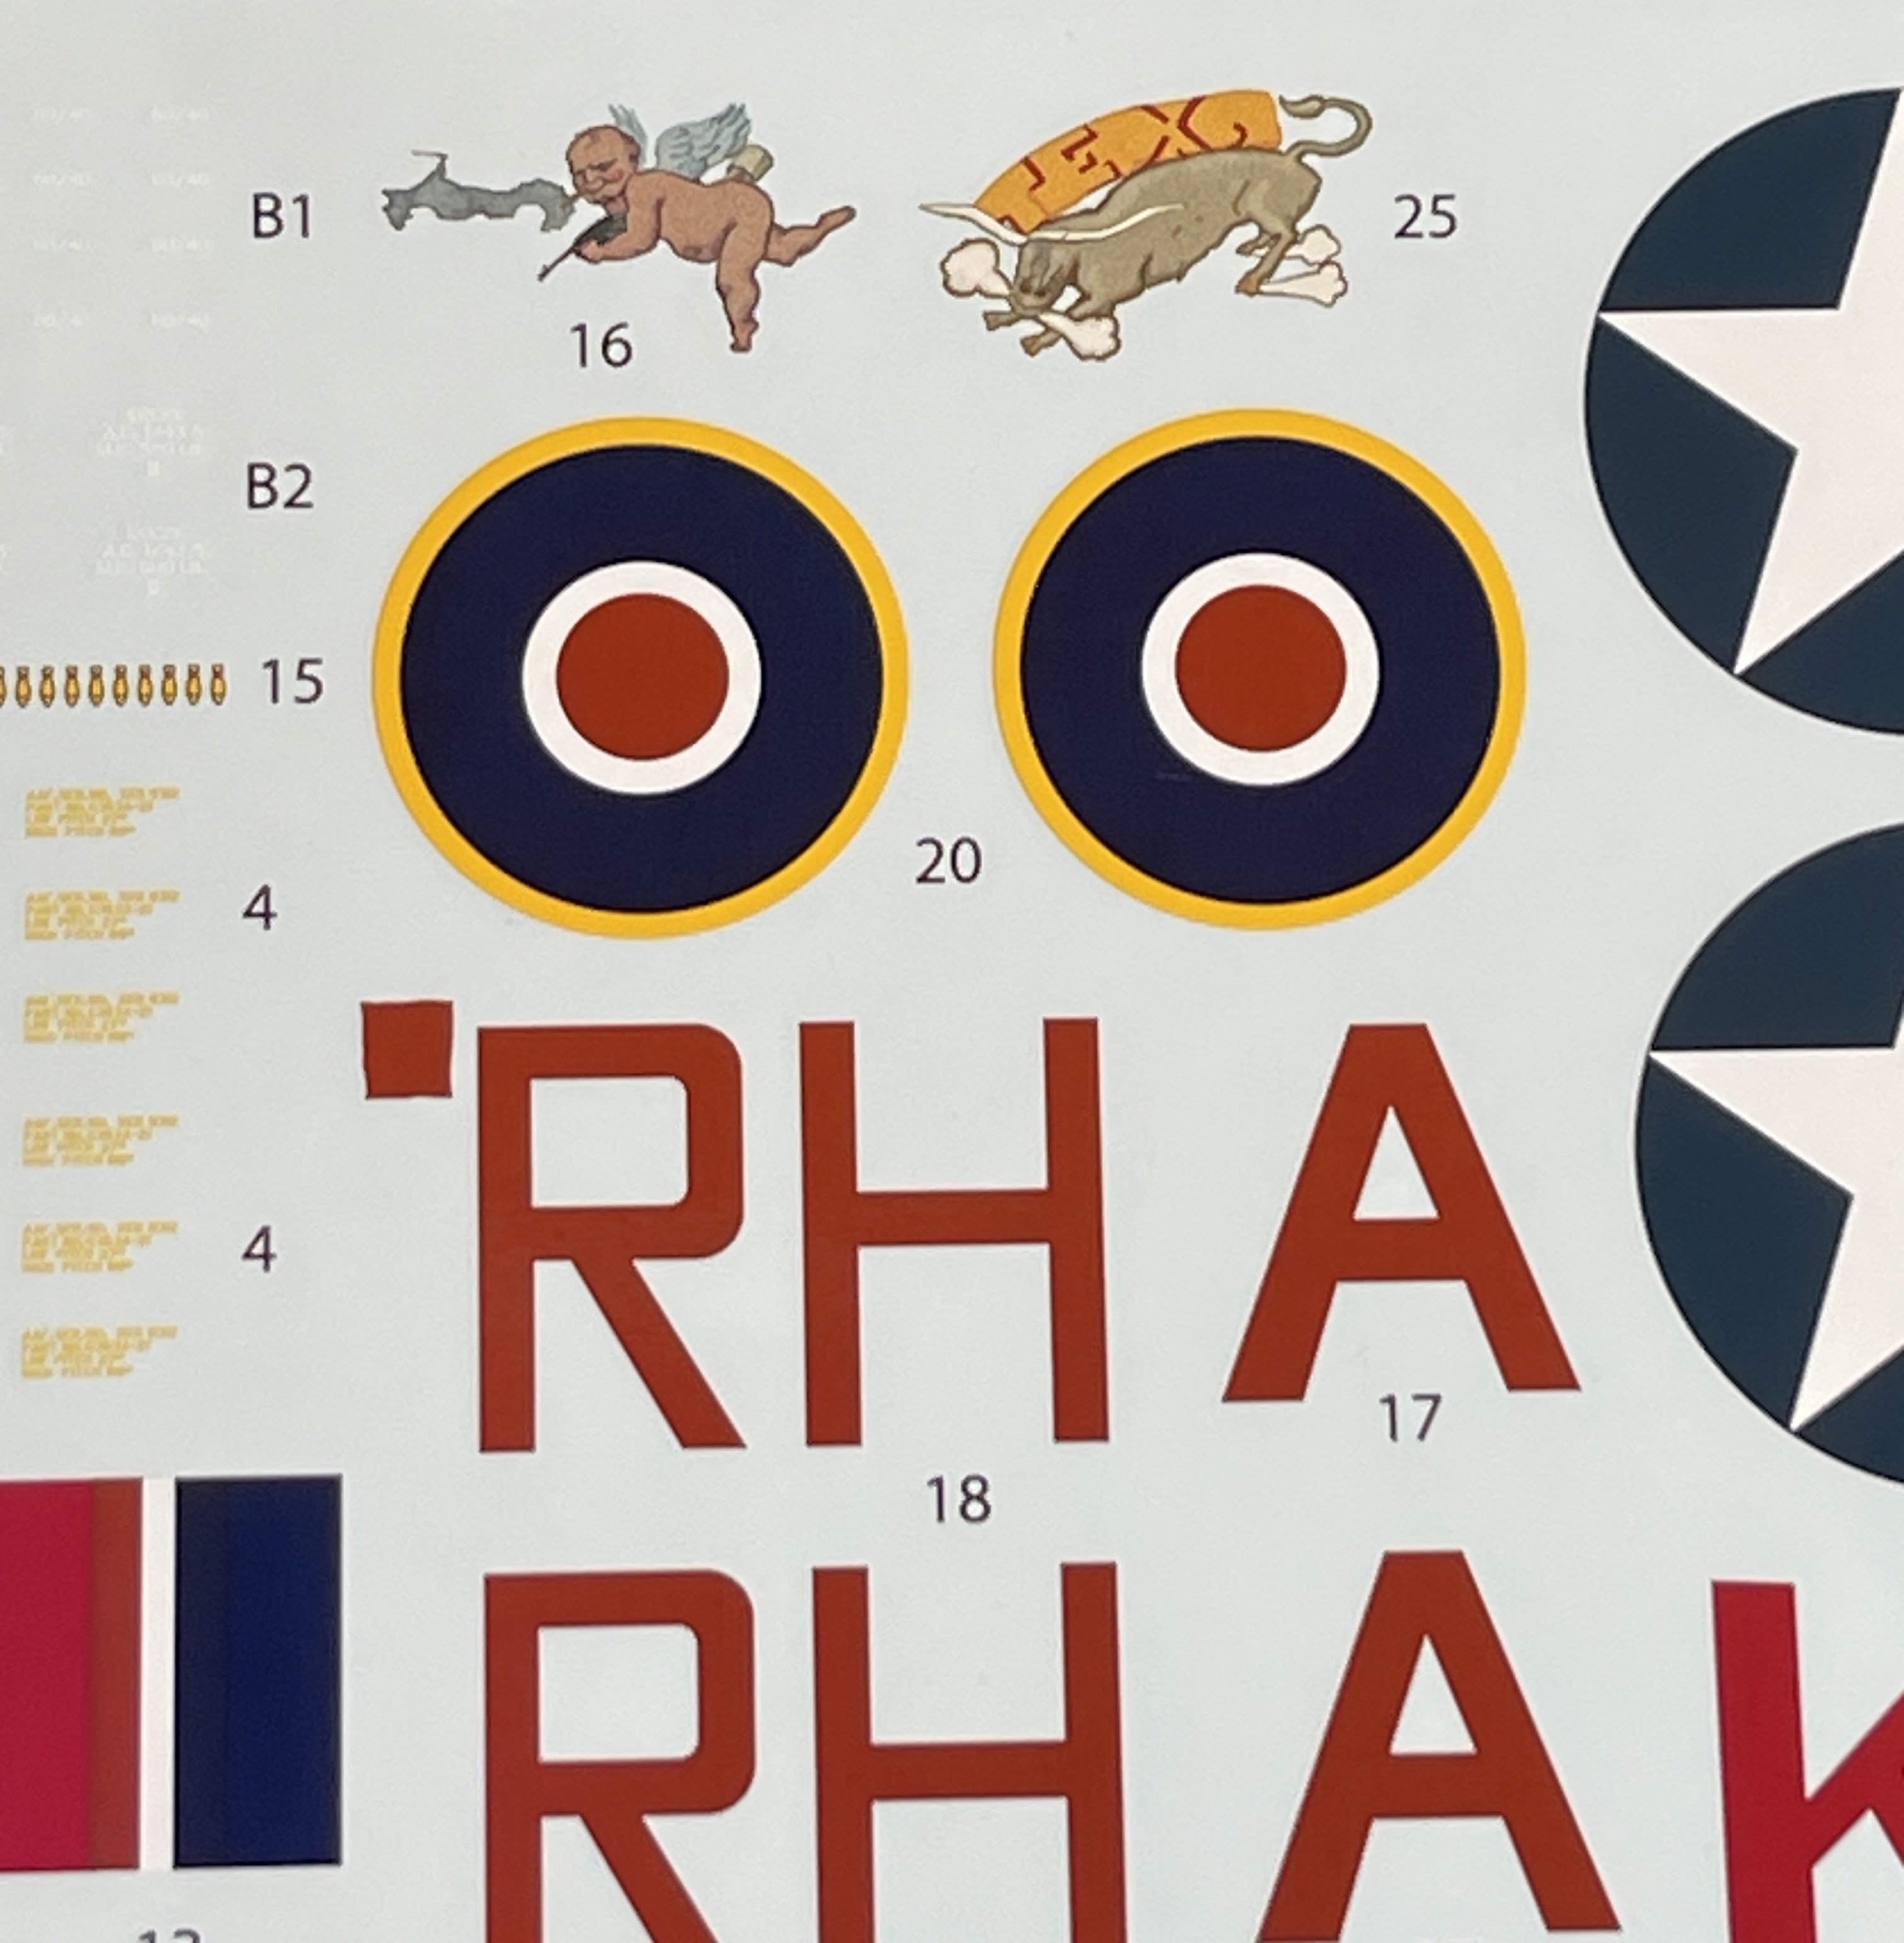
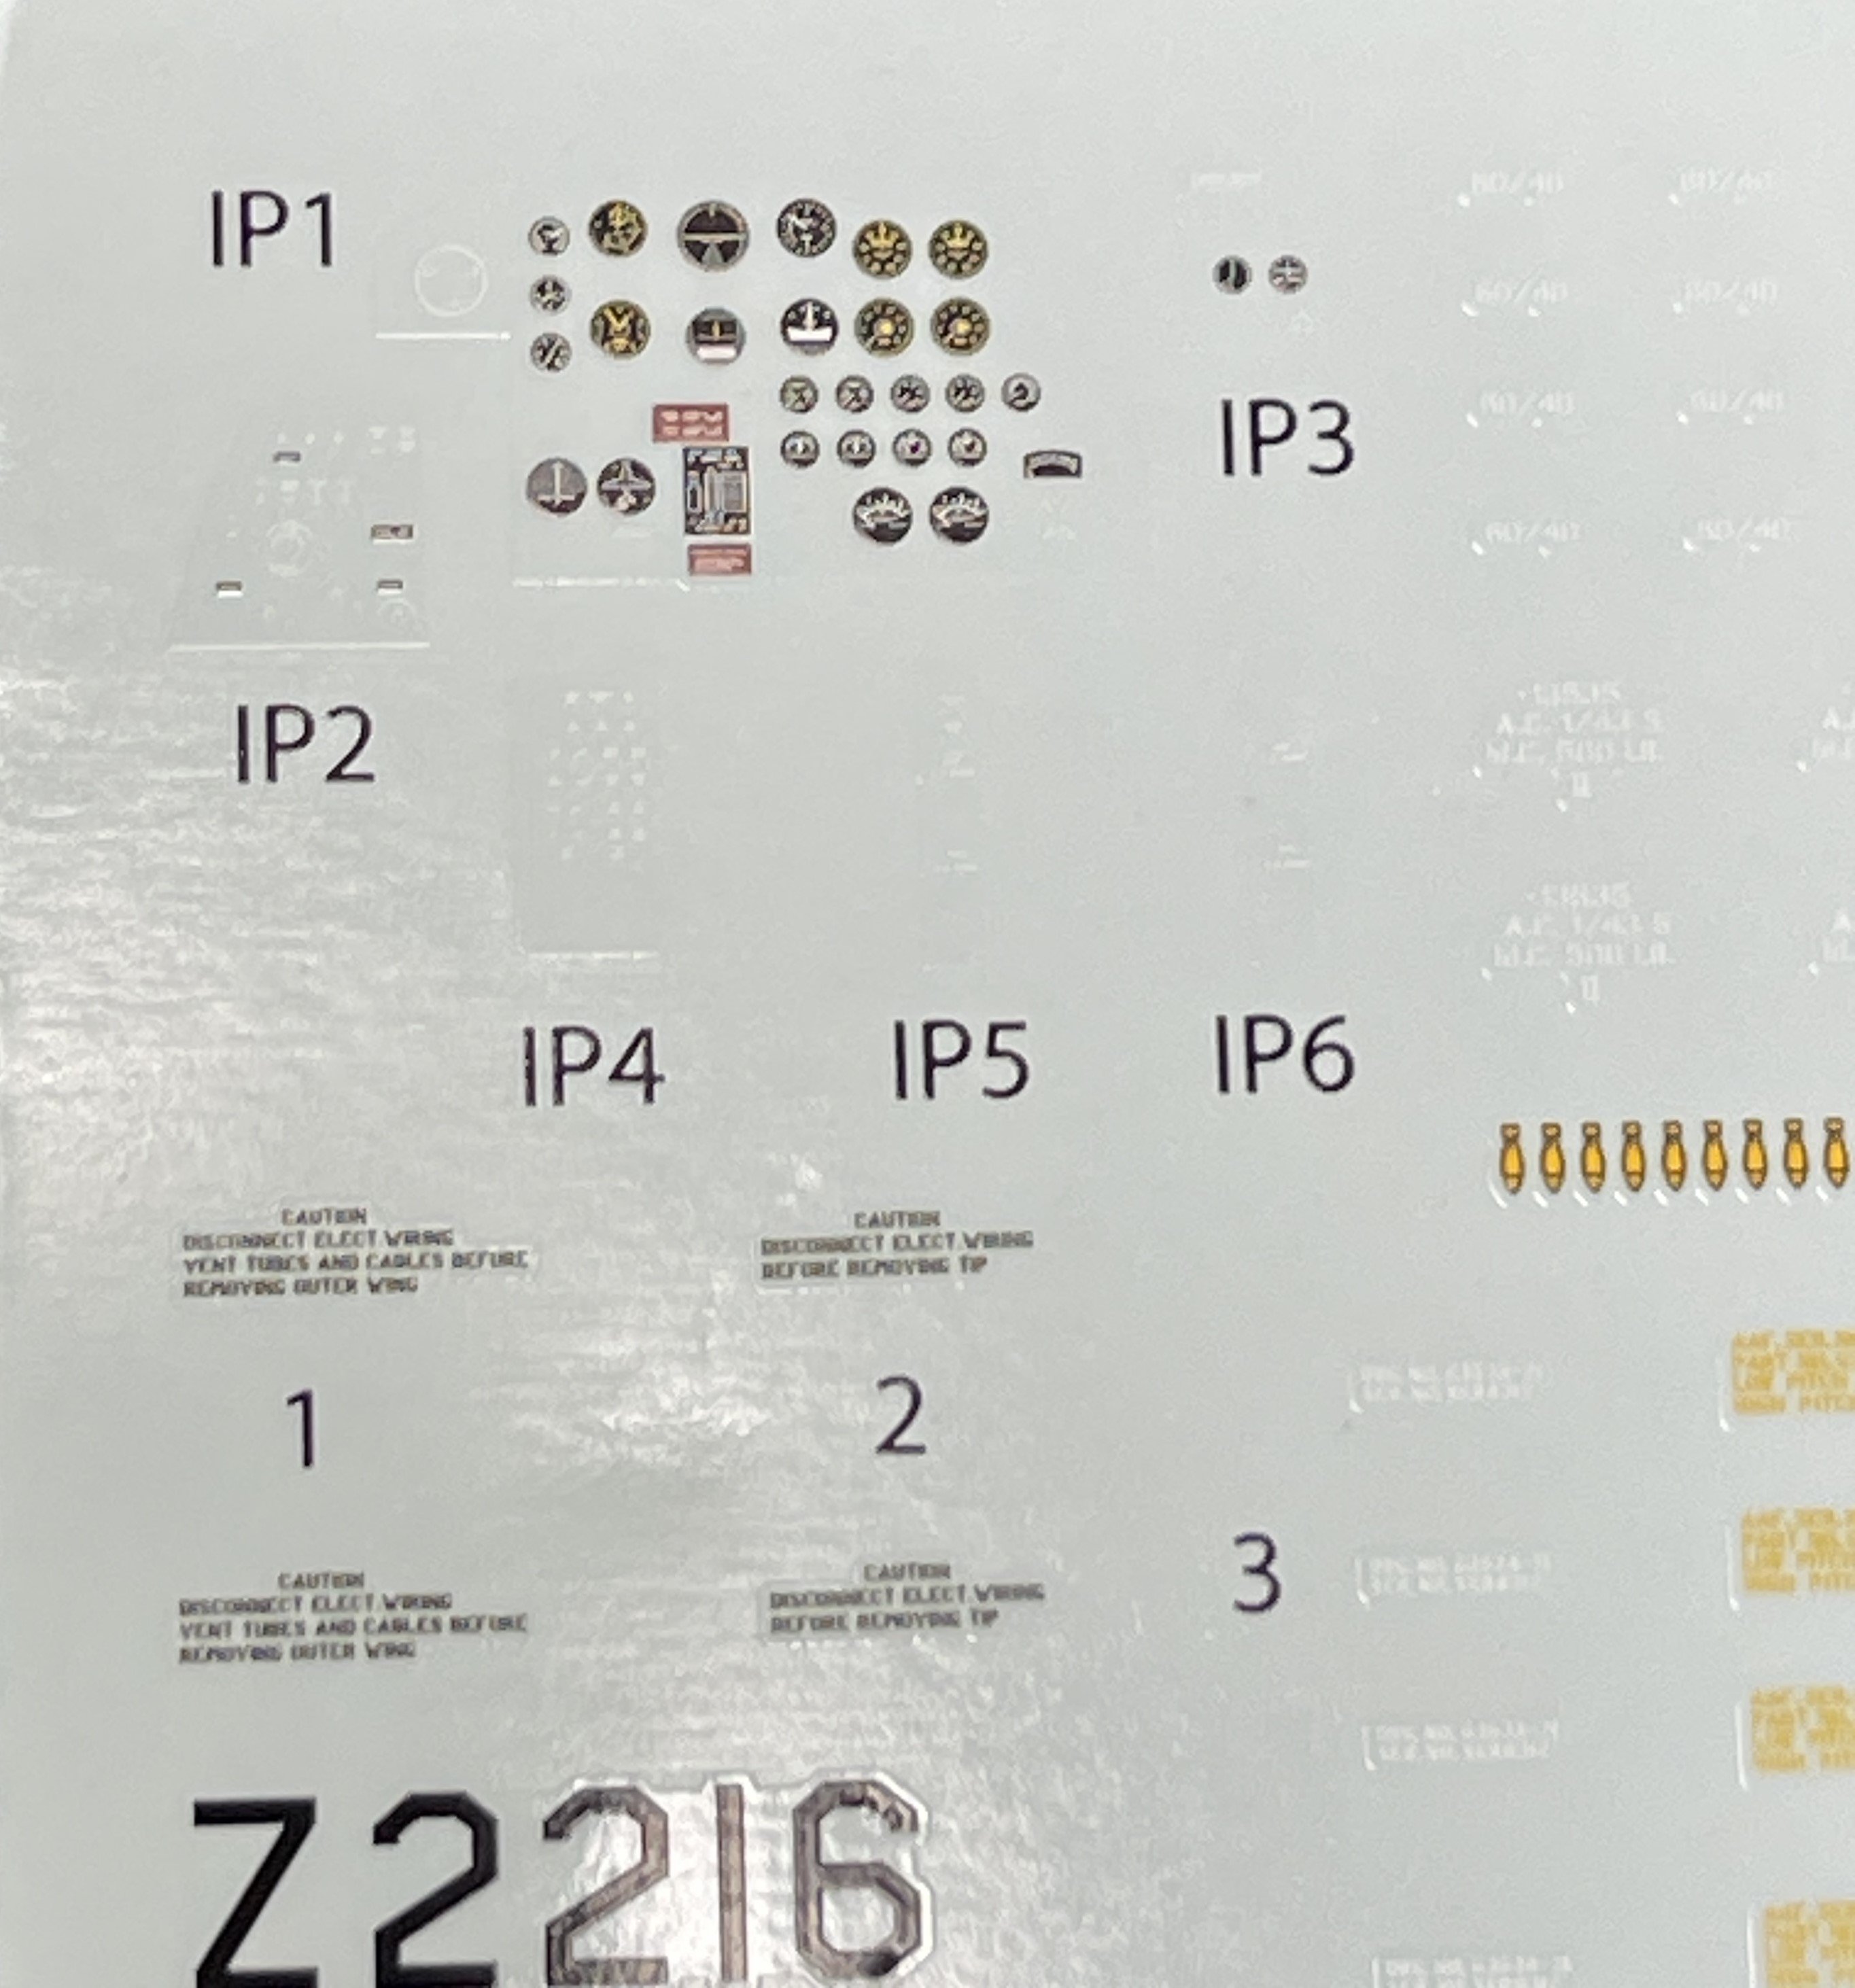
As for schemes options, a decal sheets if given with to option and a few stencils:
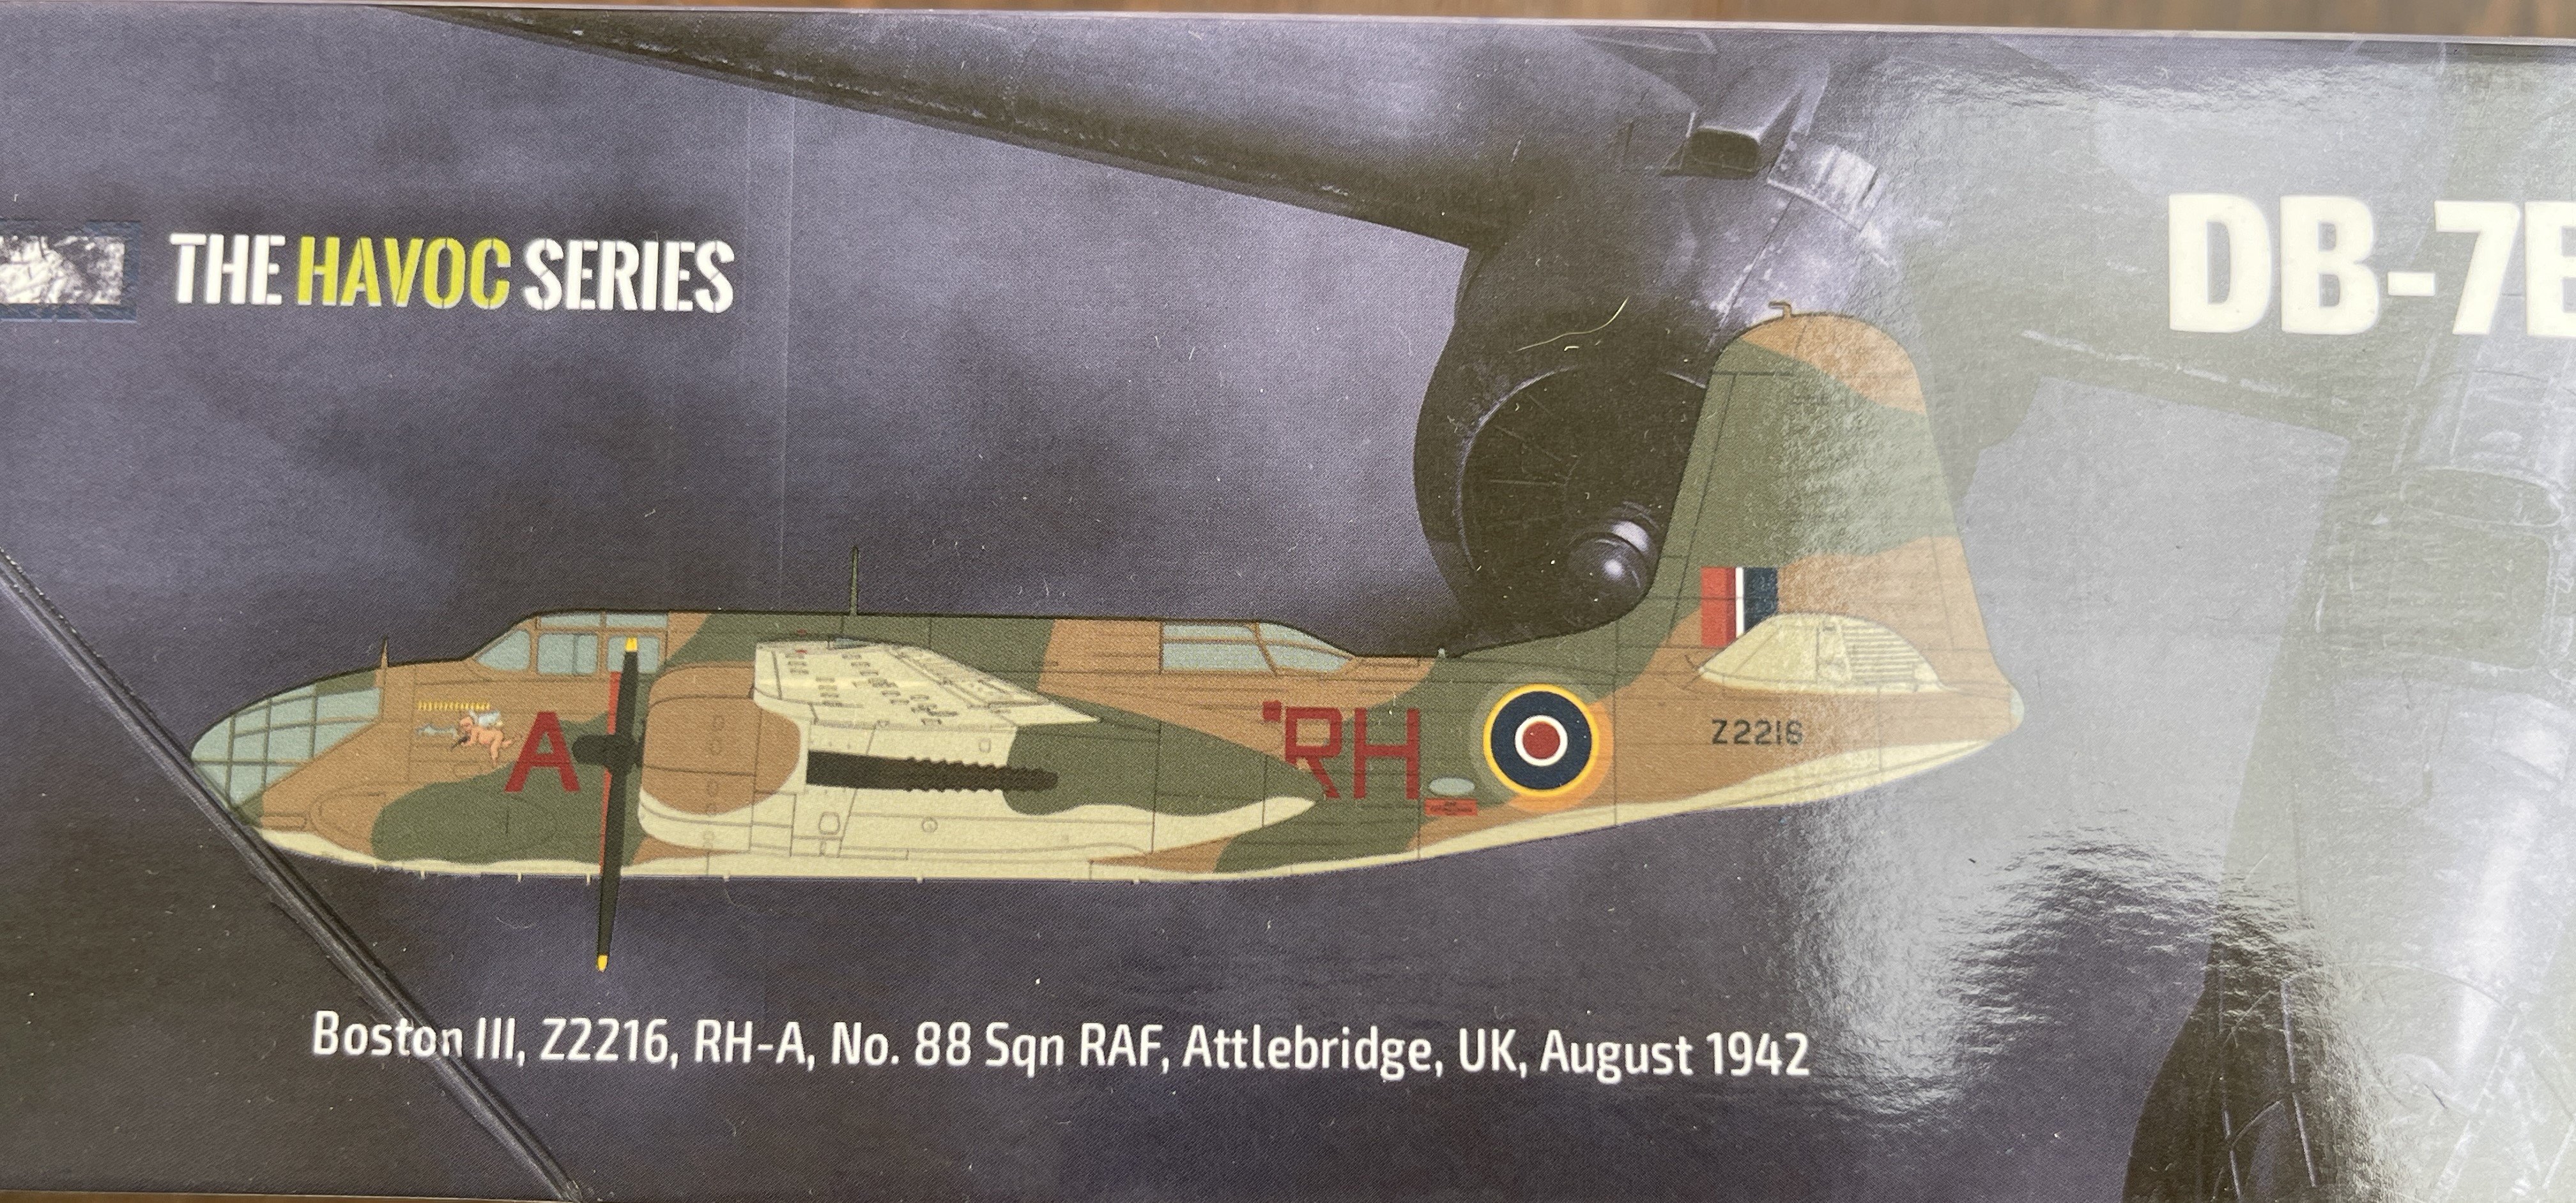
1. Boston III Z2216 RH-A, 88 Squadron, RAF Attlebridge, Norfolk, UK, August 1942.
2. DB-7B AL445 K, 15th Bomb Squadron, USAAF, RAF Molesworth, Cambridgeshire, UK, Summer 1942.


The decals are printed with good color density and registration with two lovely nose arts. Decals are made by Cartograf so quality is guaranteed.

,
As for the instruction, and already made three Hong Kong Models, they are quite comprehensive with references color chart with Mr. Color, Tamiya paints.


Conclusion
Compared to HK Models’ own 1:32 A-20 Havoc that I already made, the 1:48 Boston III is smaller and less complex but retains similar attention to surface detail and engineering. No the same detail specialty concerning the stressed skin on the fuselage and wings, so the surface details is very good but no as good as in 1:32.
Still is a fantastic kit with all the details in box is more than enough to be build a fantastic replica.
It is the best Boston in 1:48, hands down… but also the most expensive one, hands down.
This model is going to the top of to do pile!
The detail out of the box is very good and it will make a very good replica.
Highly recommend this to intermediate/expert modeler
-
1
-
4
-
-
13 hours ago, belugawhaleman said:
Are they making the entire aircraft or just a cockpit upgrade?
I will keep you all informed.... But they don´t do aftermarket bits....
-
1
-
1
-
-
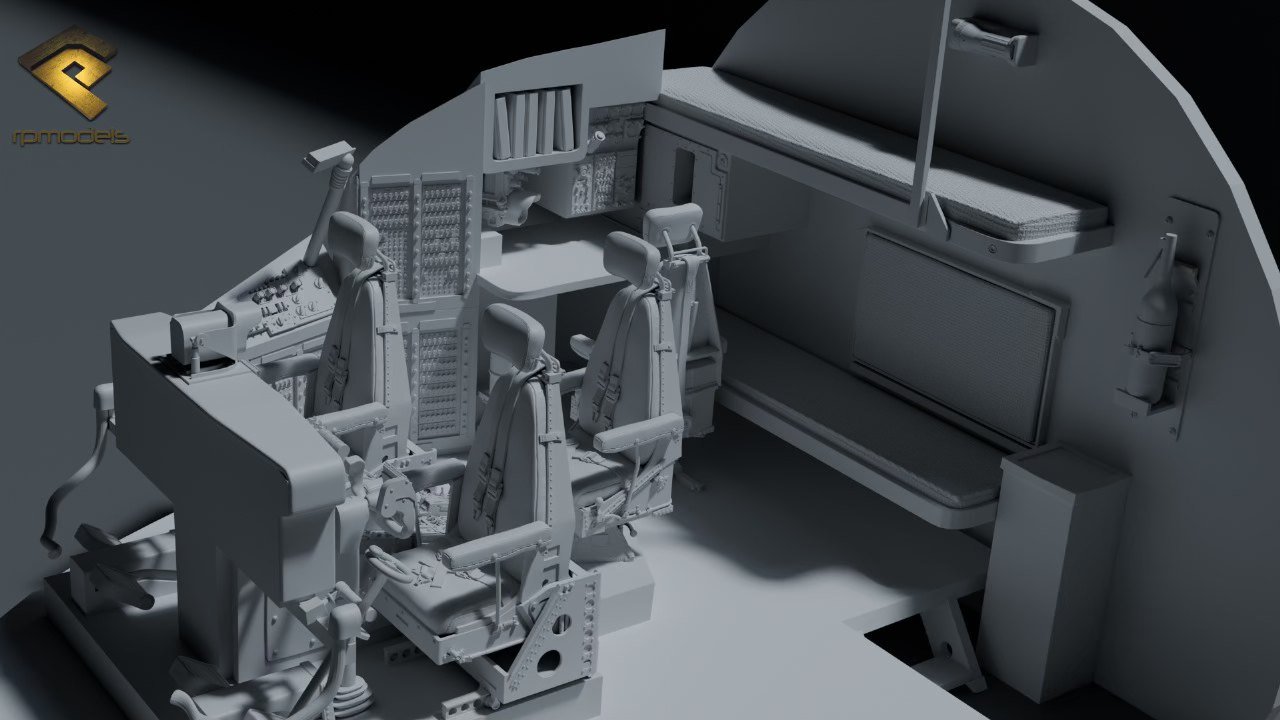
Well, the Portuguese figure manufacture RP Models is making something that its not historical figure...
Yes, is a C-130....
I`m folling this very closely and I will keep all LSM informed!
Stay close and following!
Fran


-
6
-
-
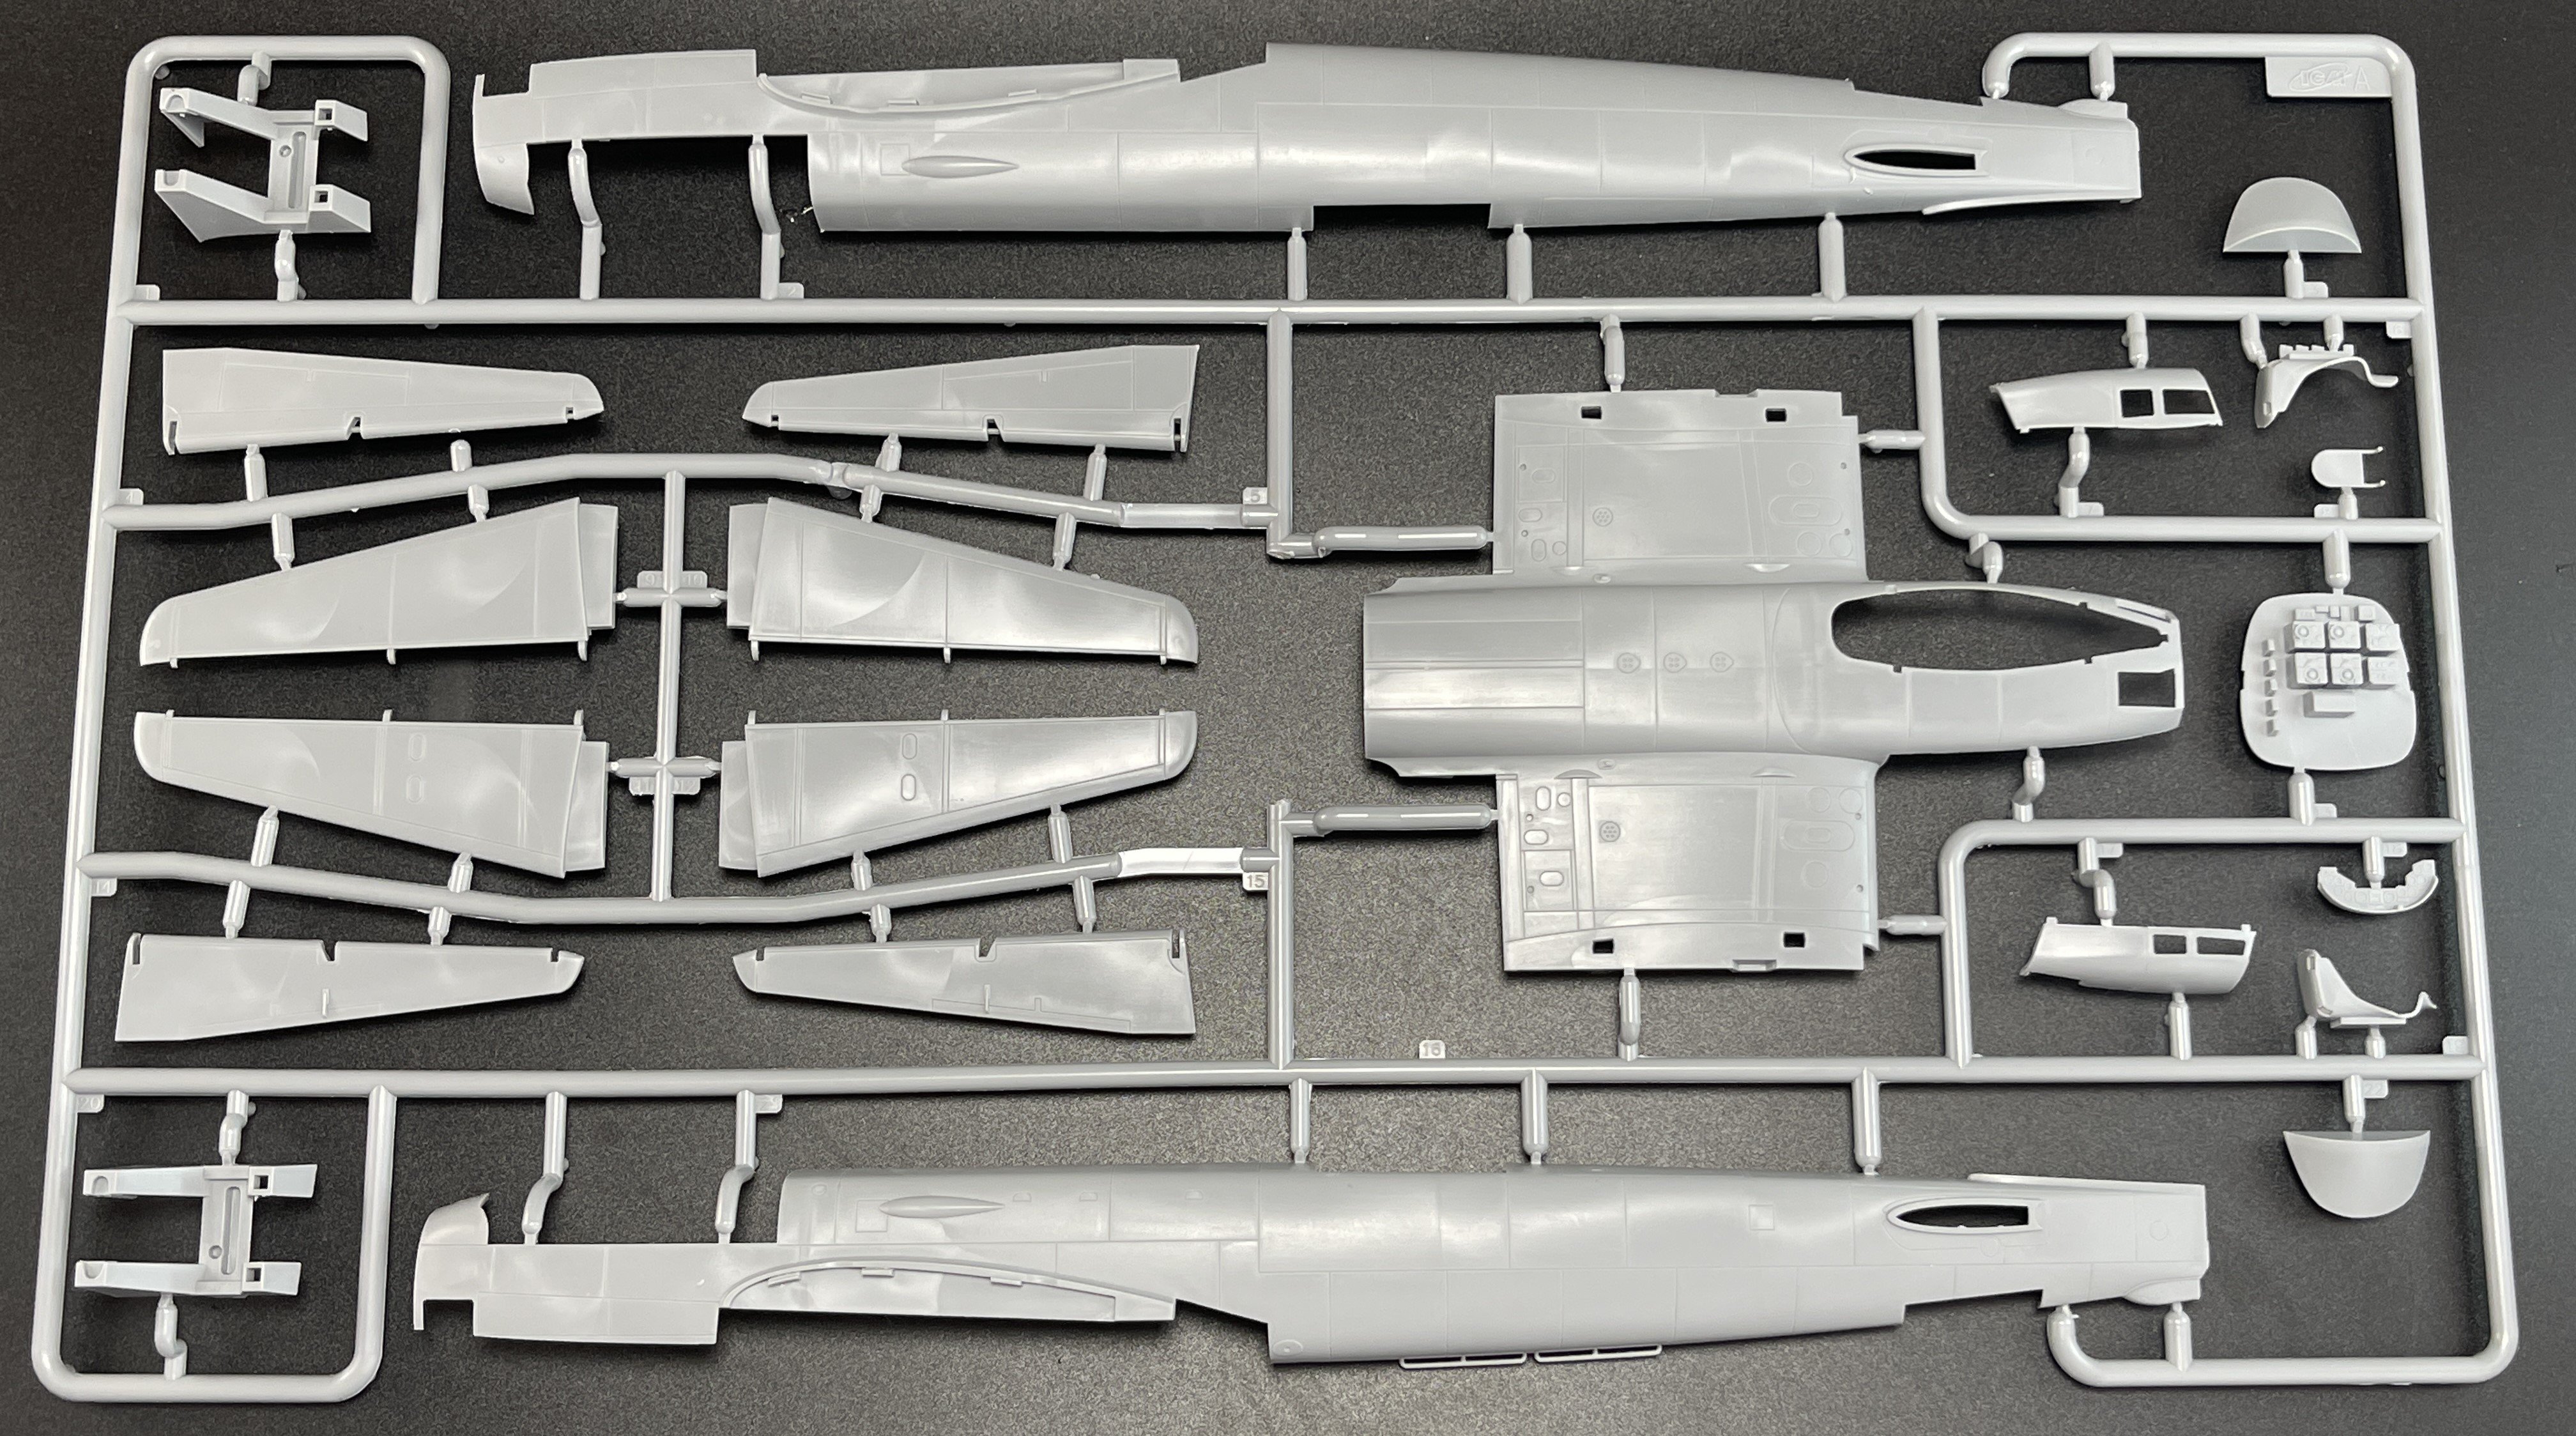
And a P-51!!
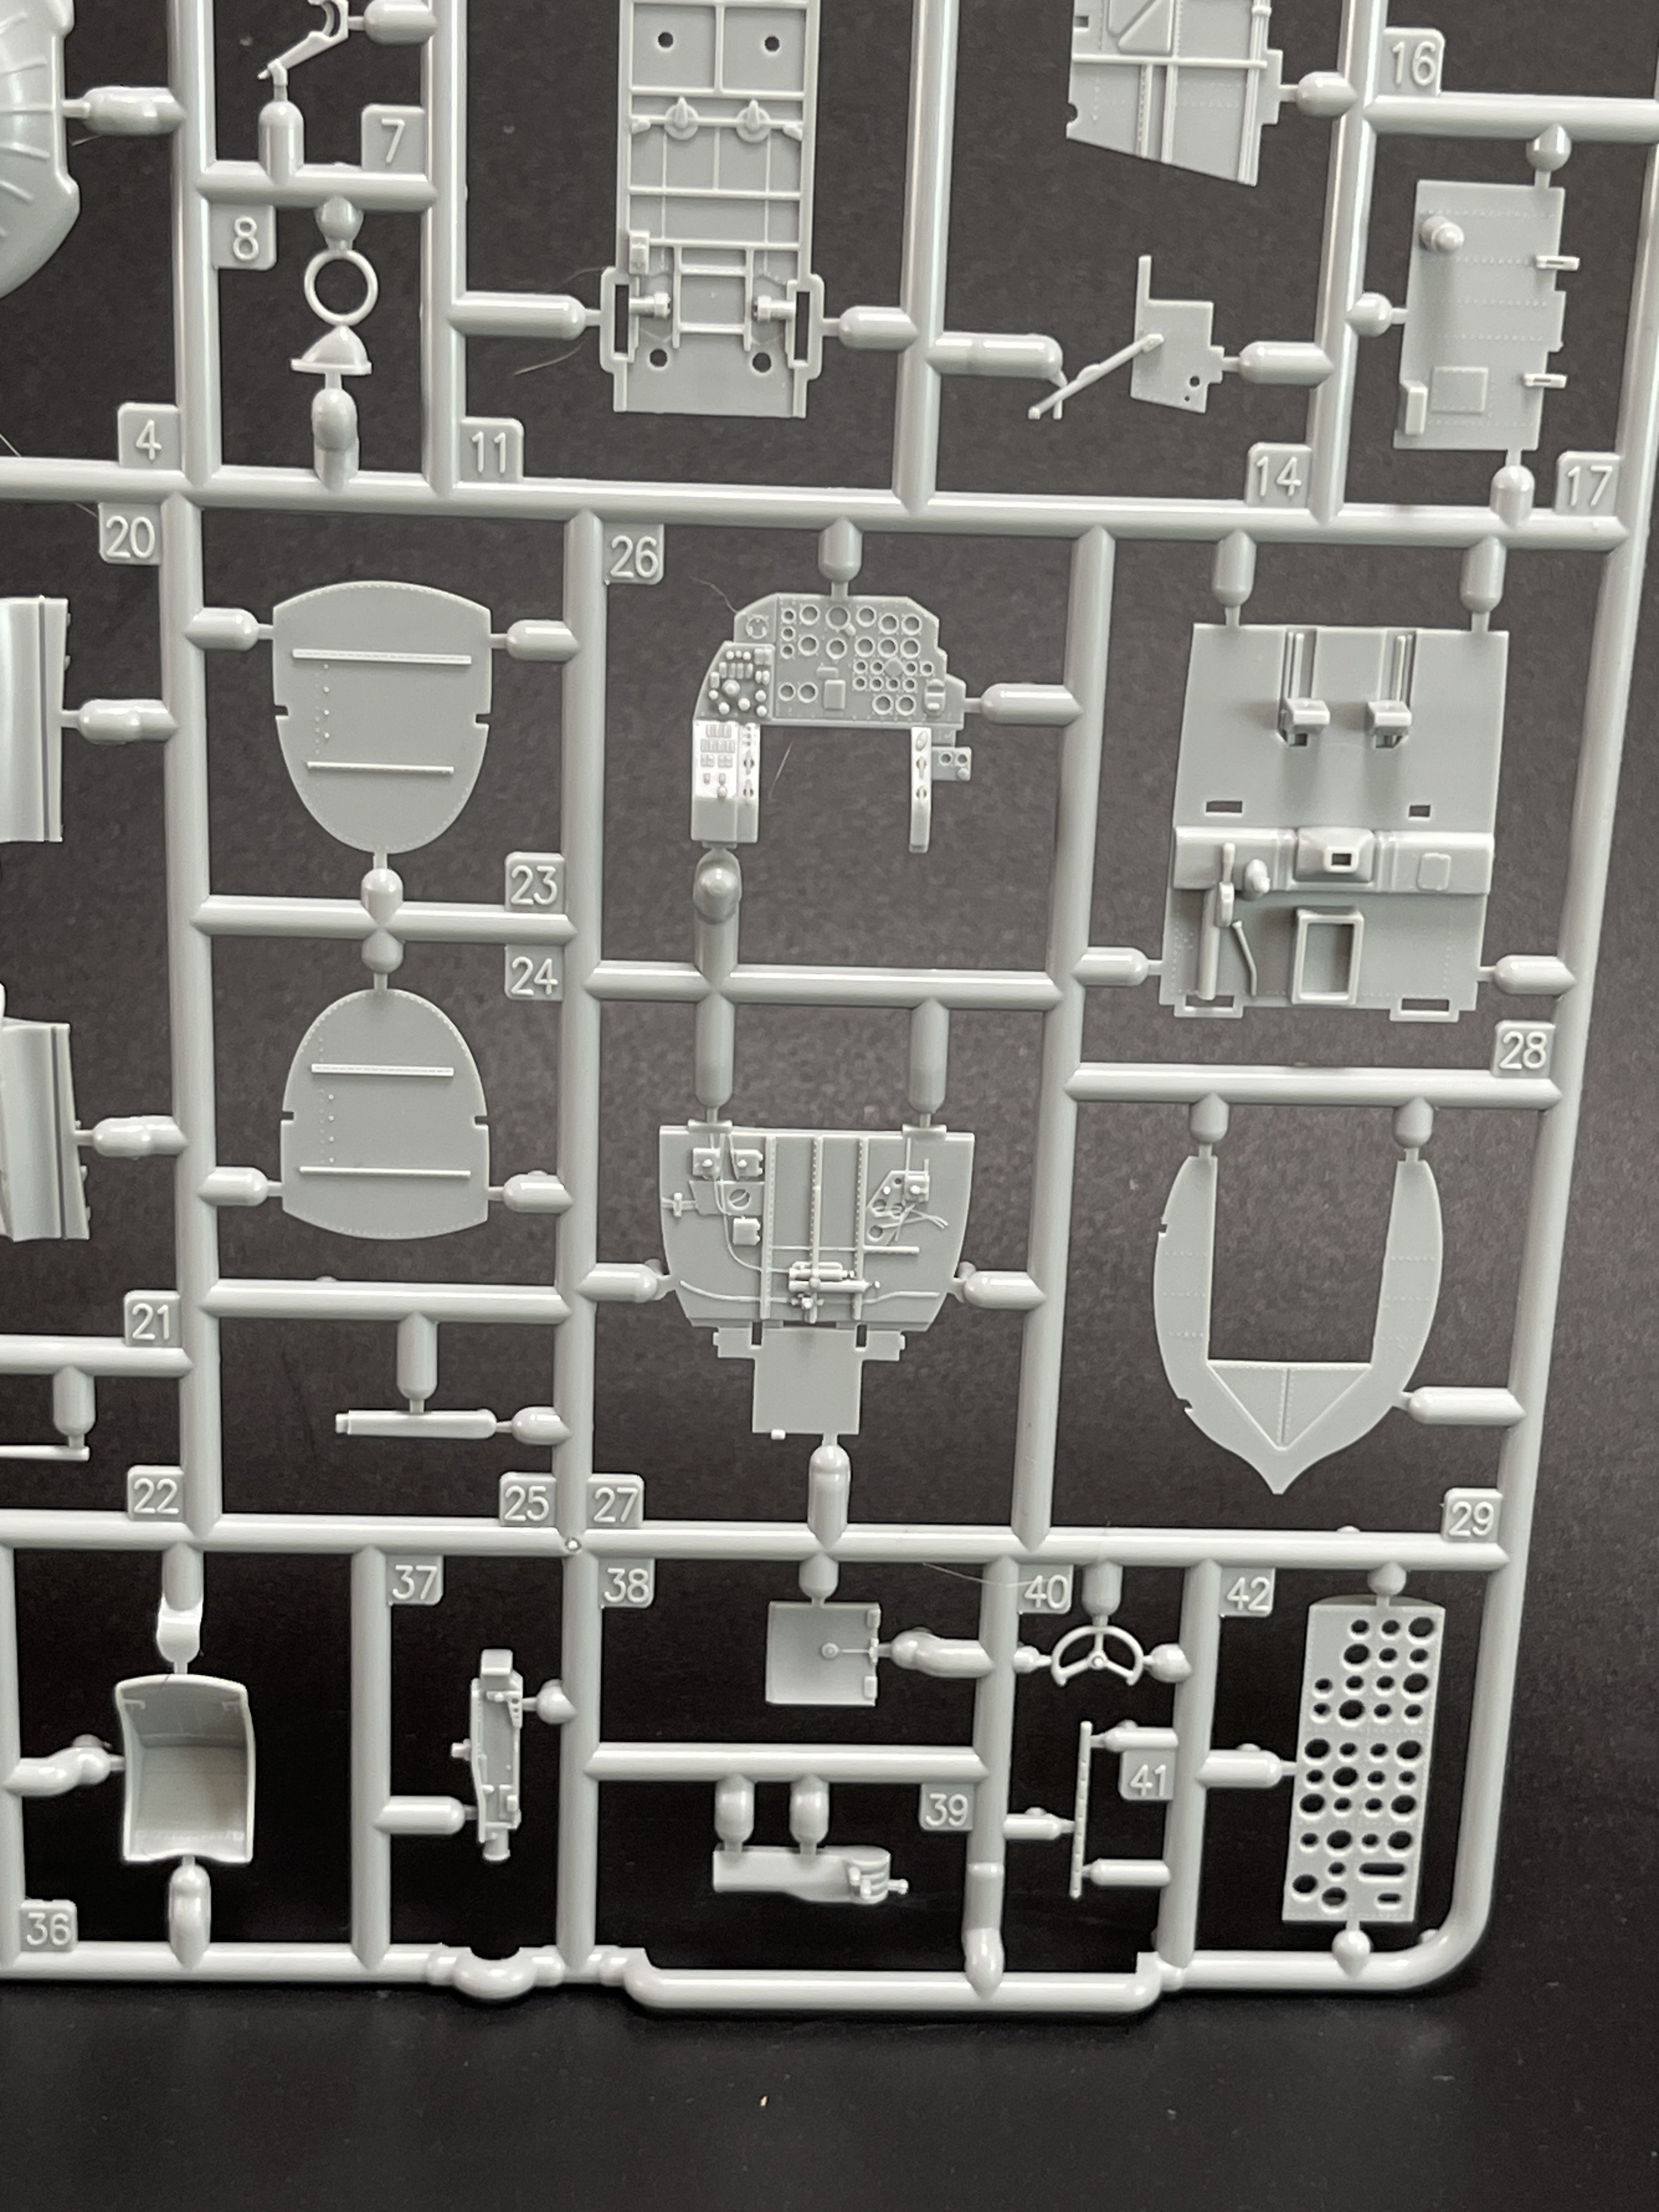
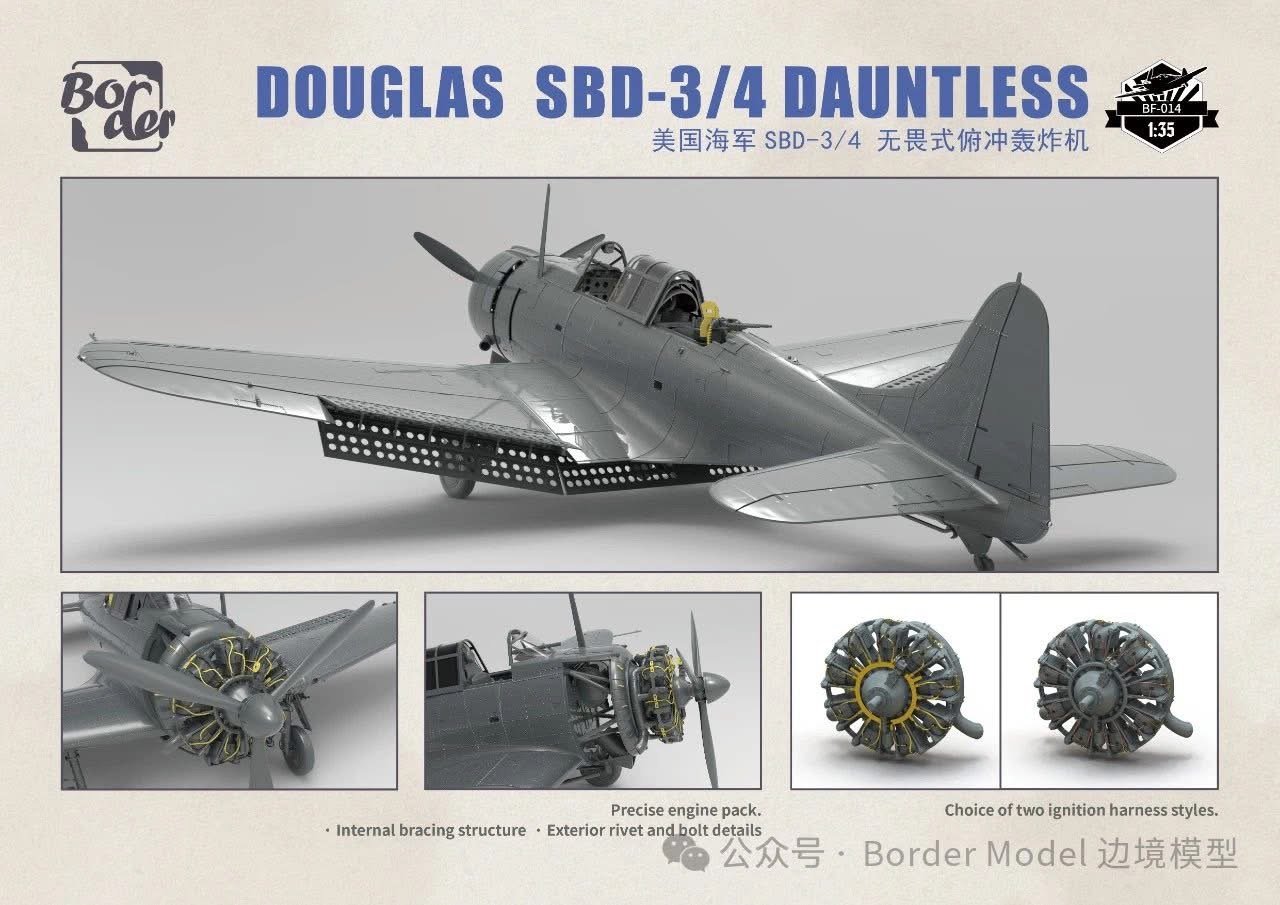
and a few more pics of the Dauntless


-
3
-
-
Wow mate!! Looking gourgeous!
-
2
-
1
-
-
I just came across this....
a brand new
1:32 F-4B Phantom II Model
from ..... Red Pill???
As Its better be good as it listed at the price tag of (pre-order price) - 340€....
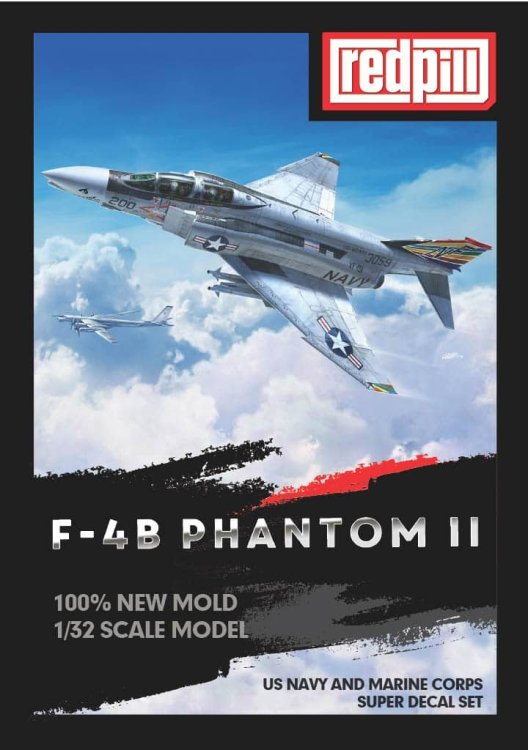
For more pics check here:
https://hobbyzero.com/news/red-pill-models-to-release-new-f-4b-phantom-ii-model/
I will try to get more info...
Fran
-
4
-
-
Thanks Mike.
Absolutely! THese Ju-88 are little gem that beg to be build! This one is going to my top to do pile!
-
2
-
-
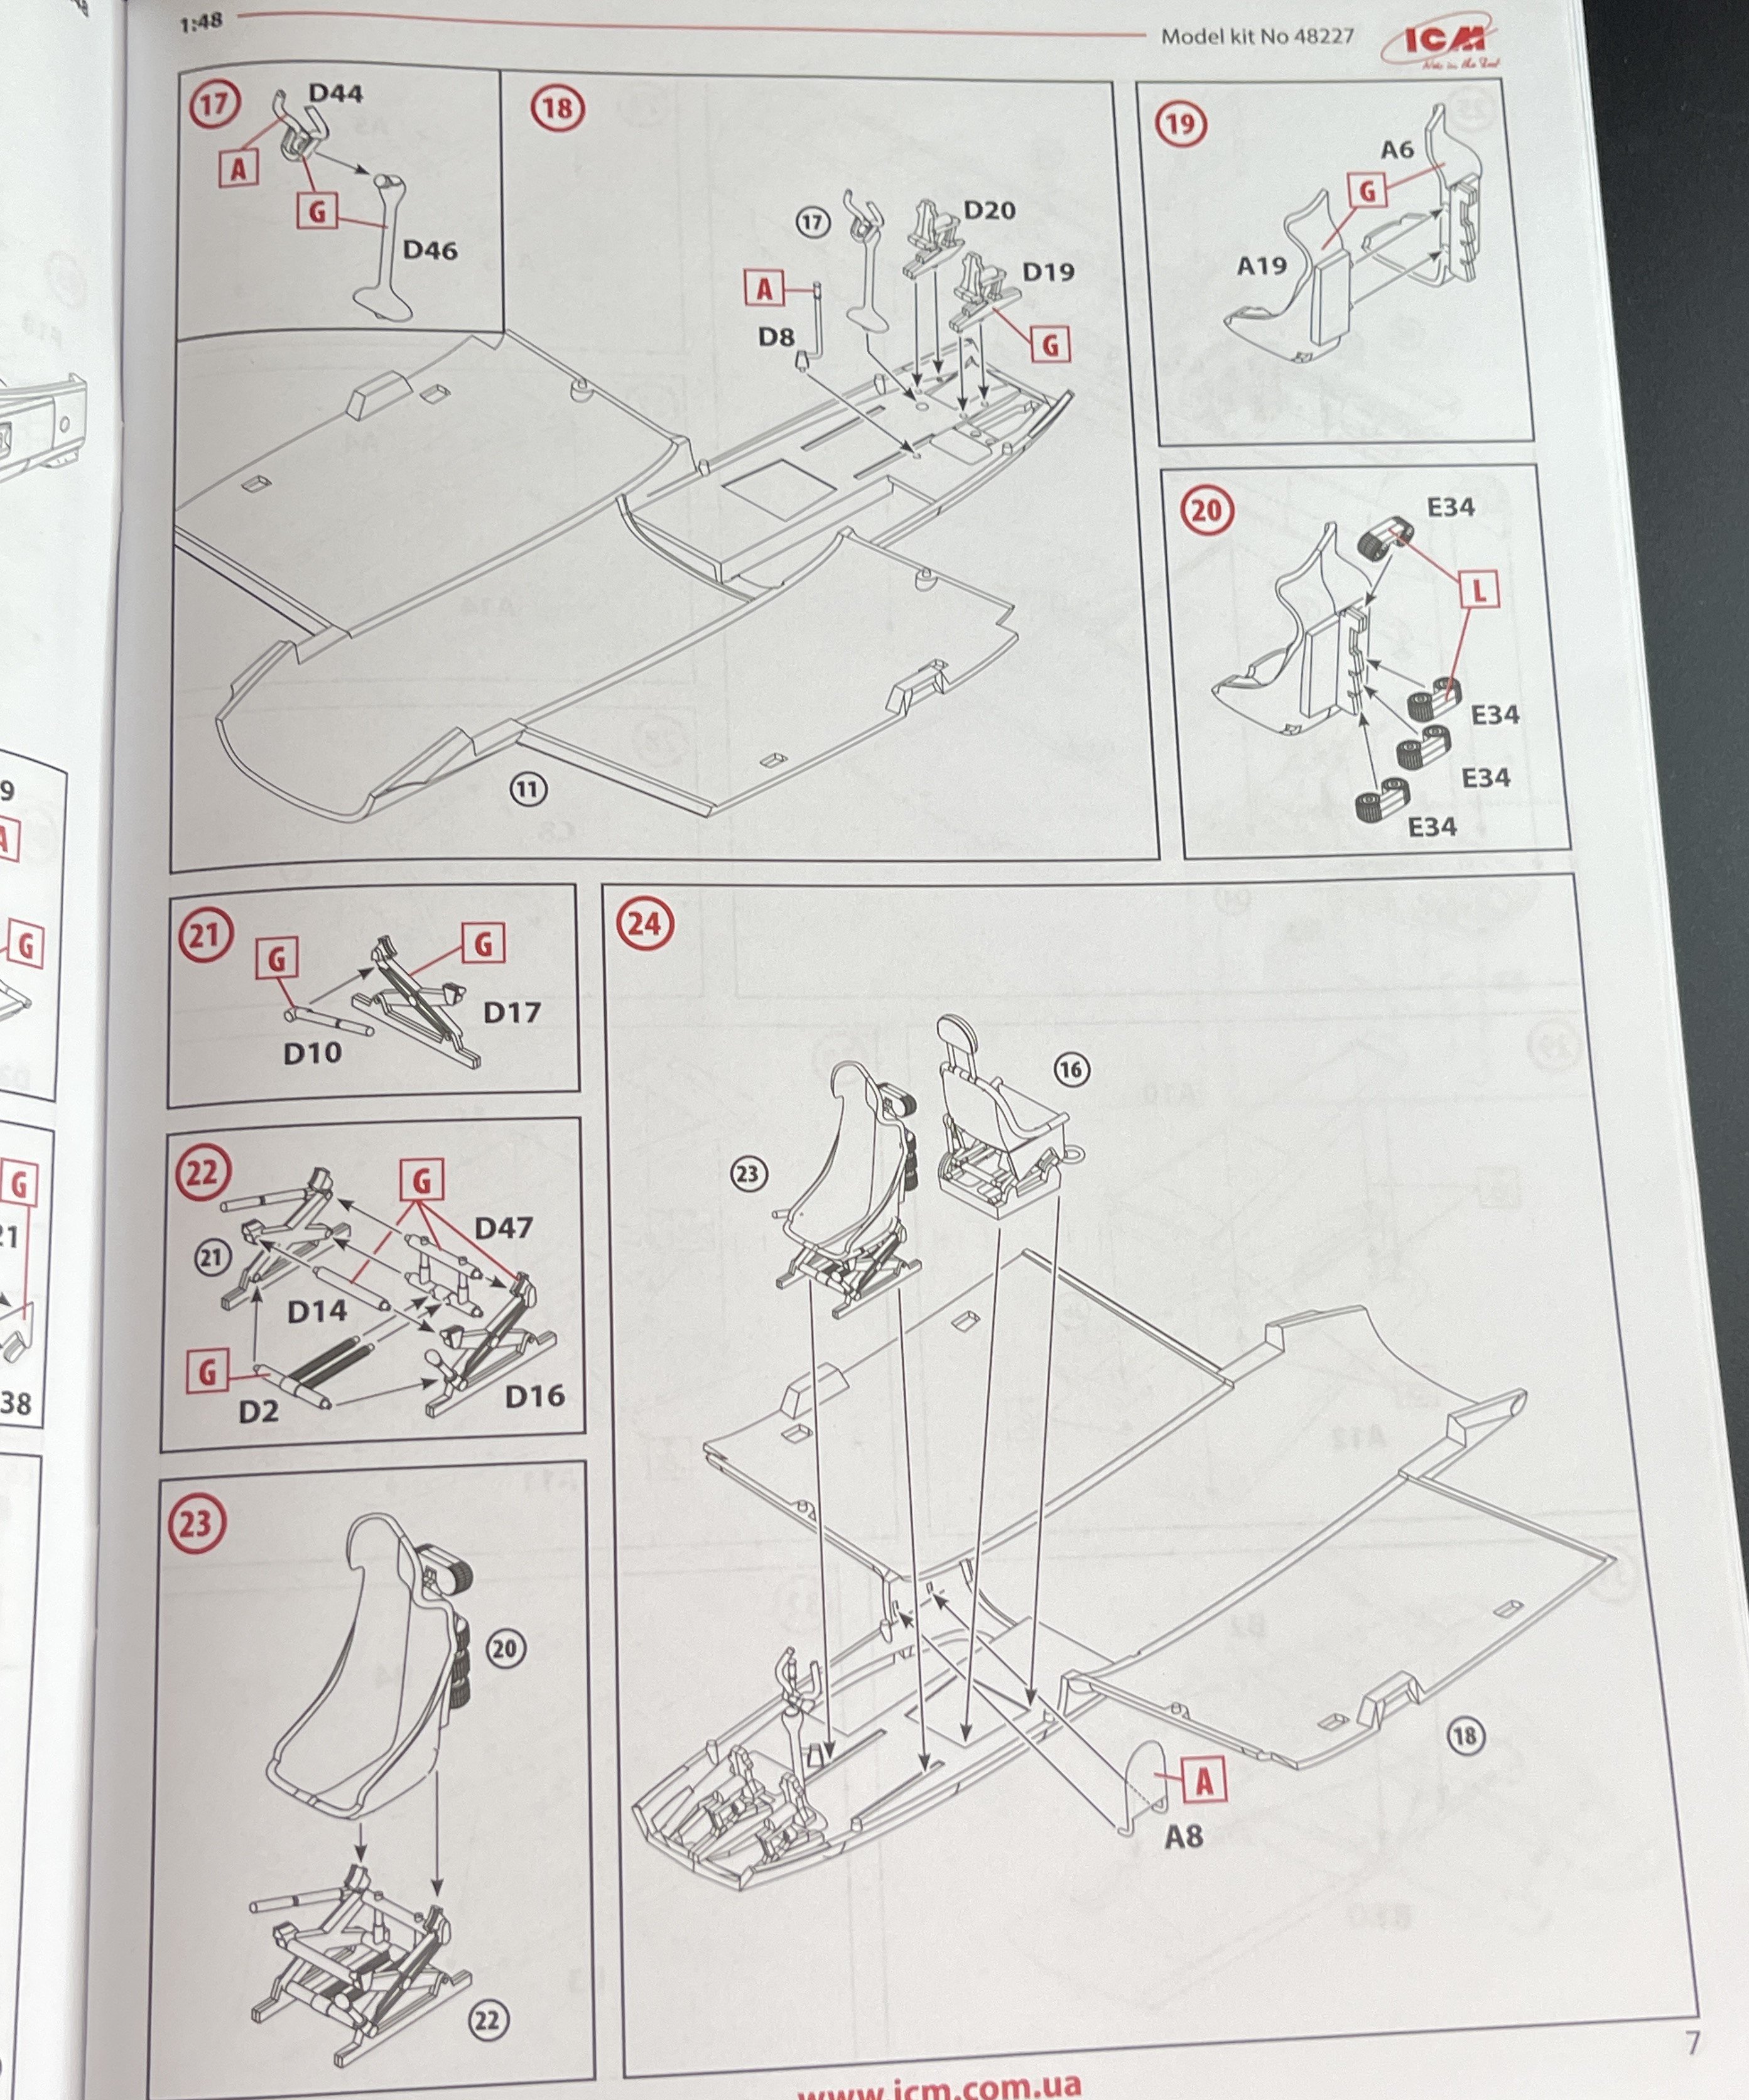
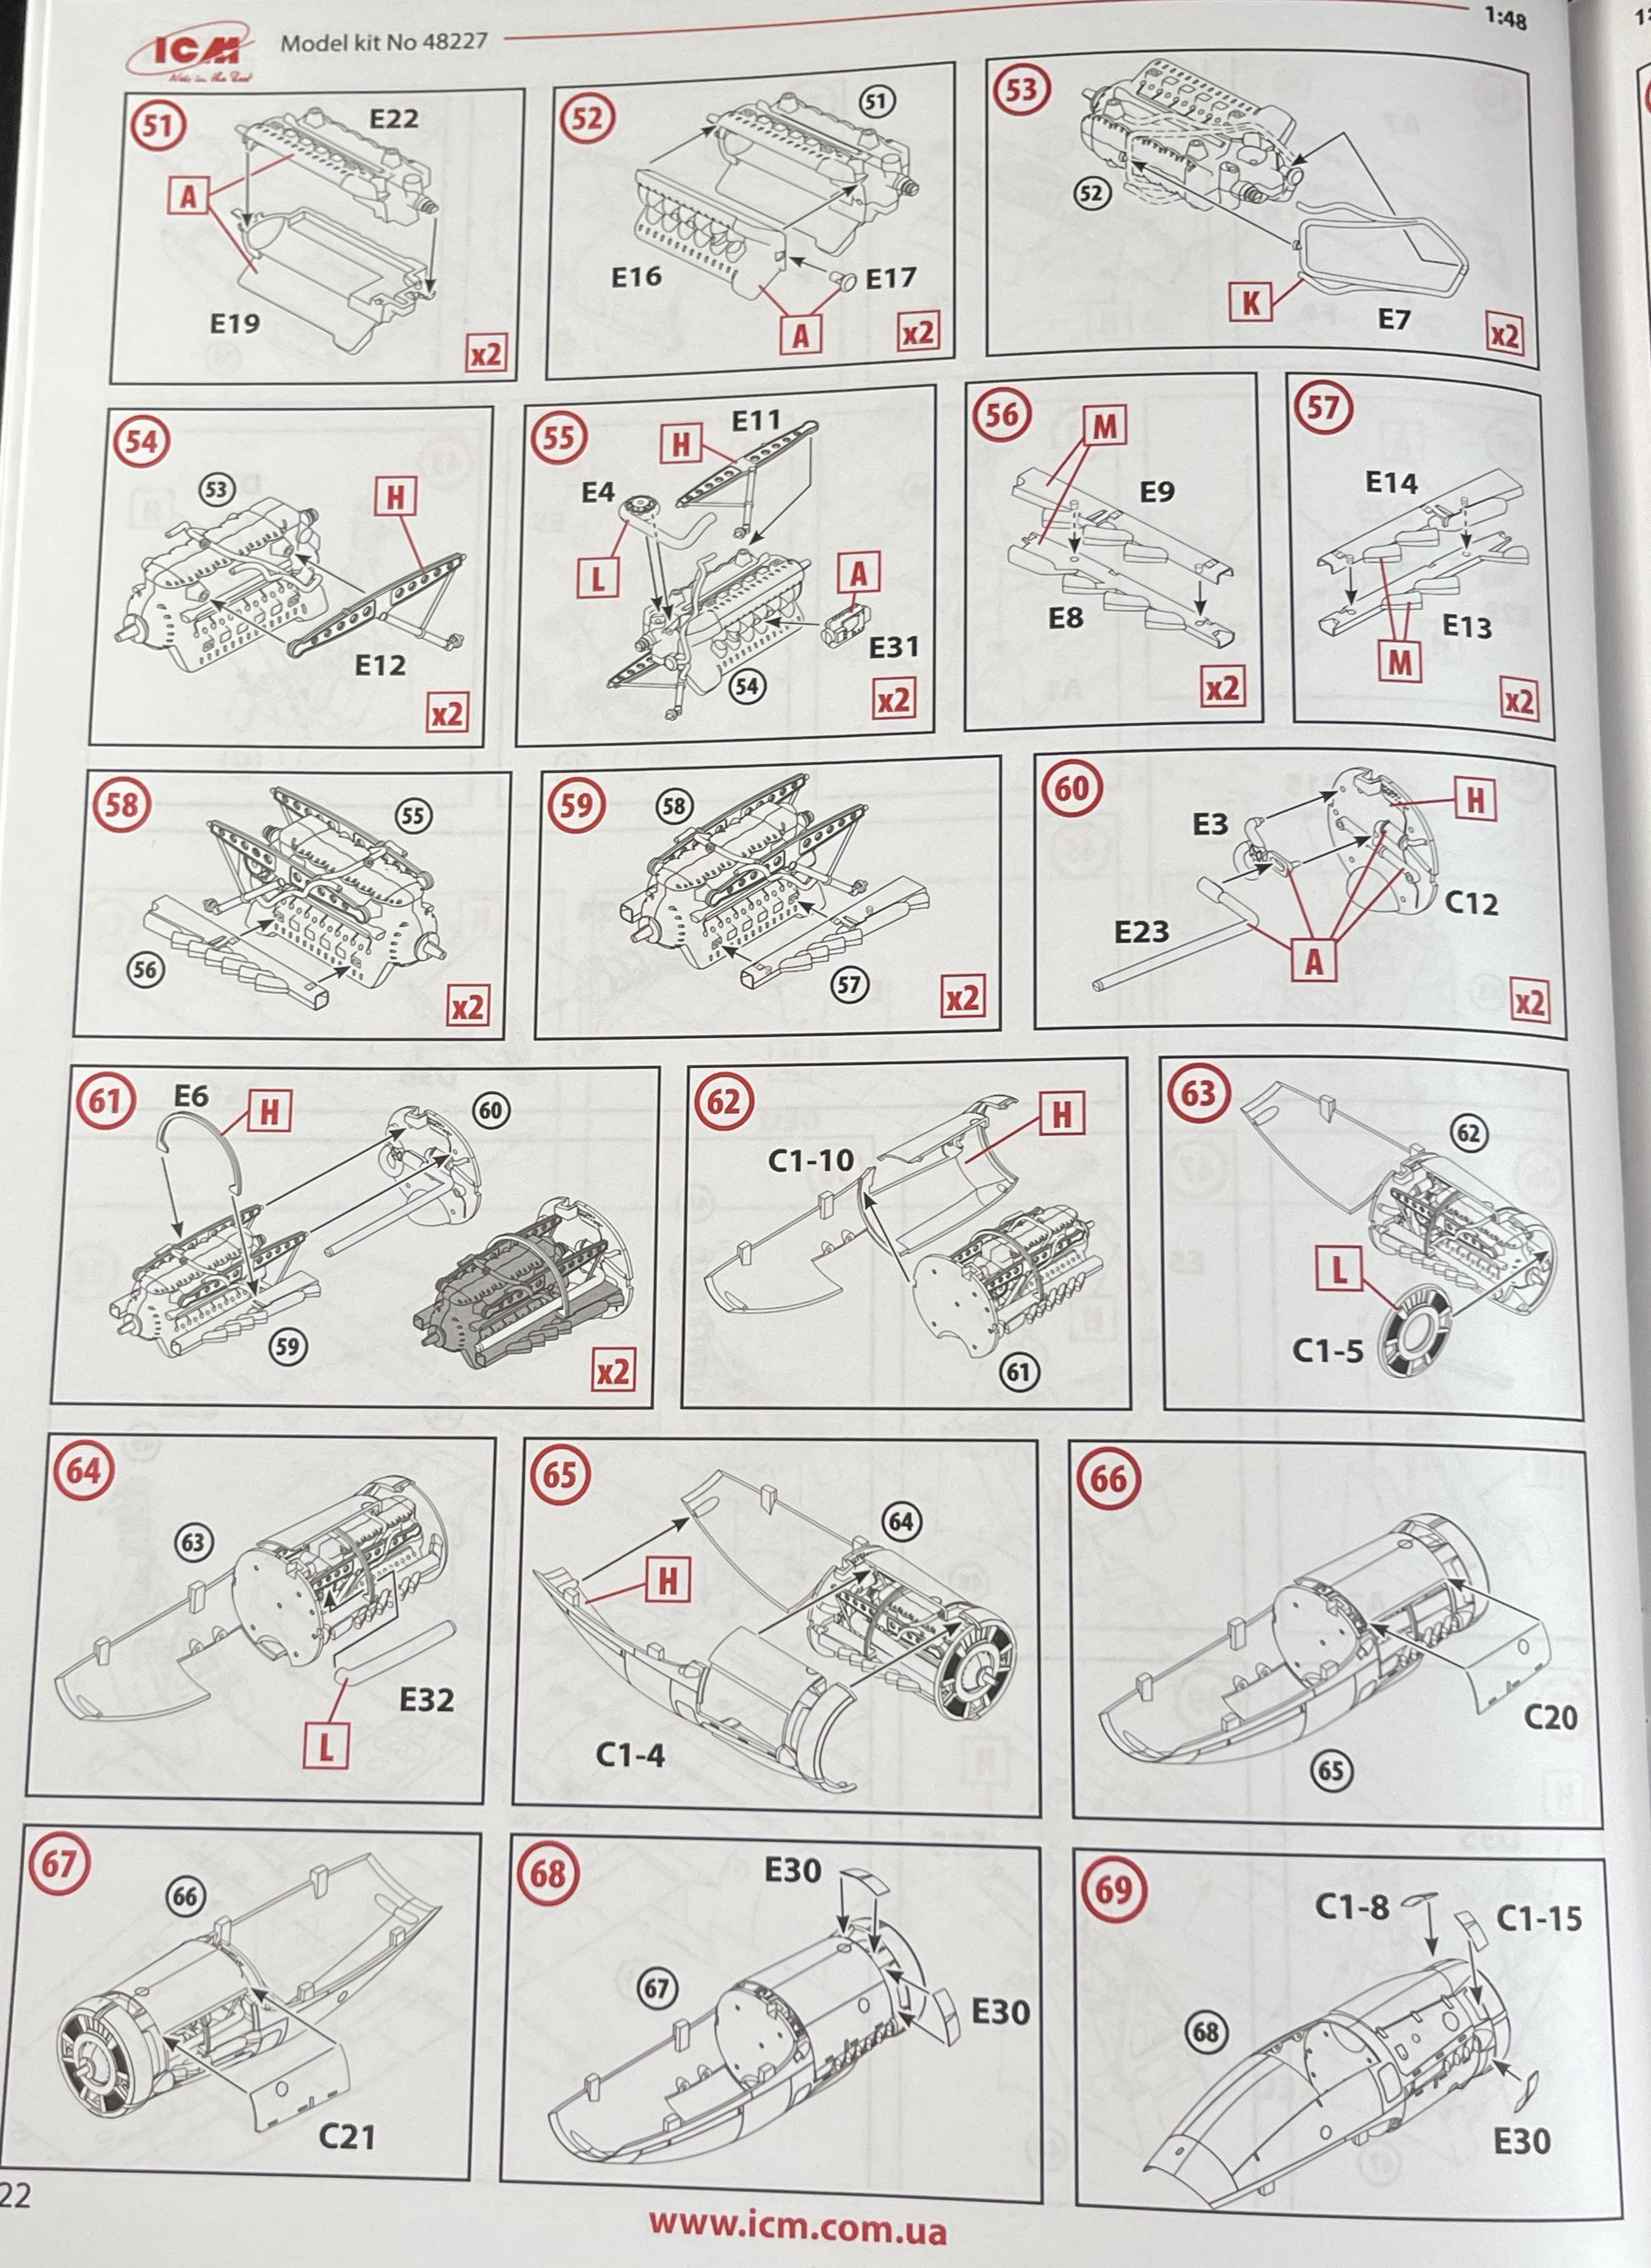
1:48
Junkers Ju-88
USAAF/RAF

ICM
Catalogue number 48227
Price: around 51€
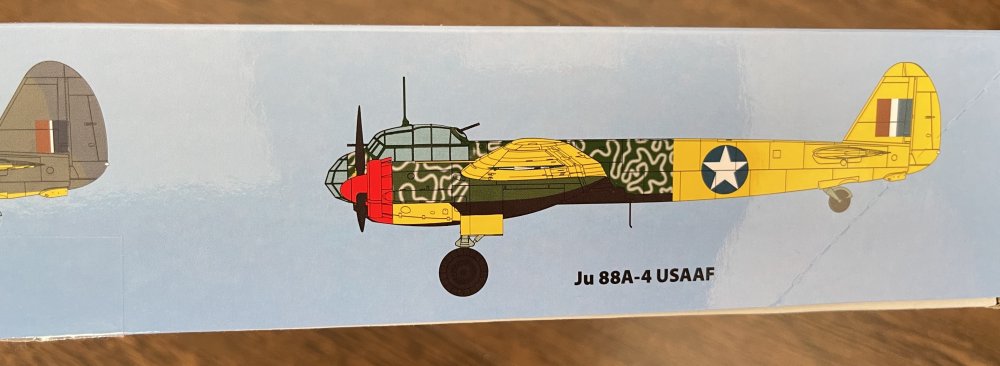
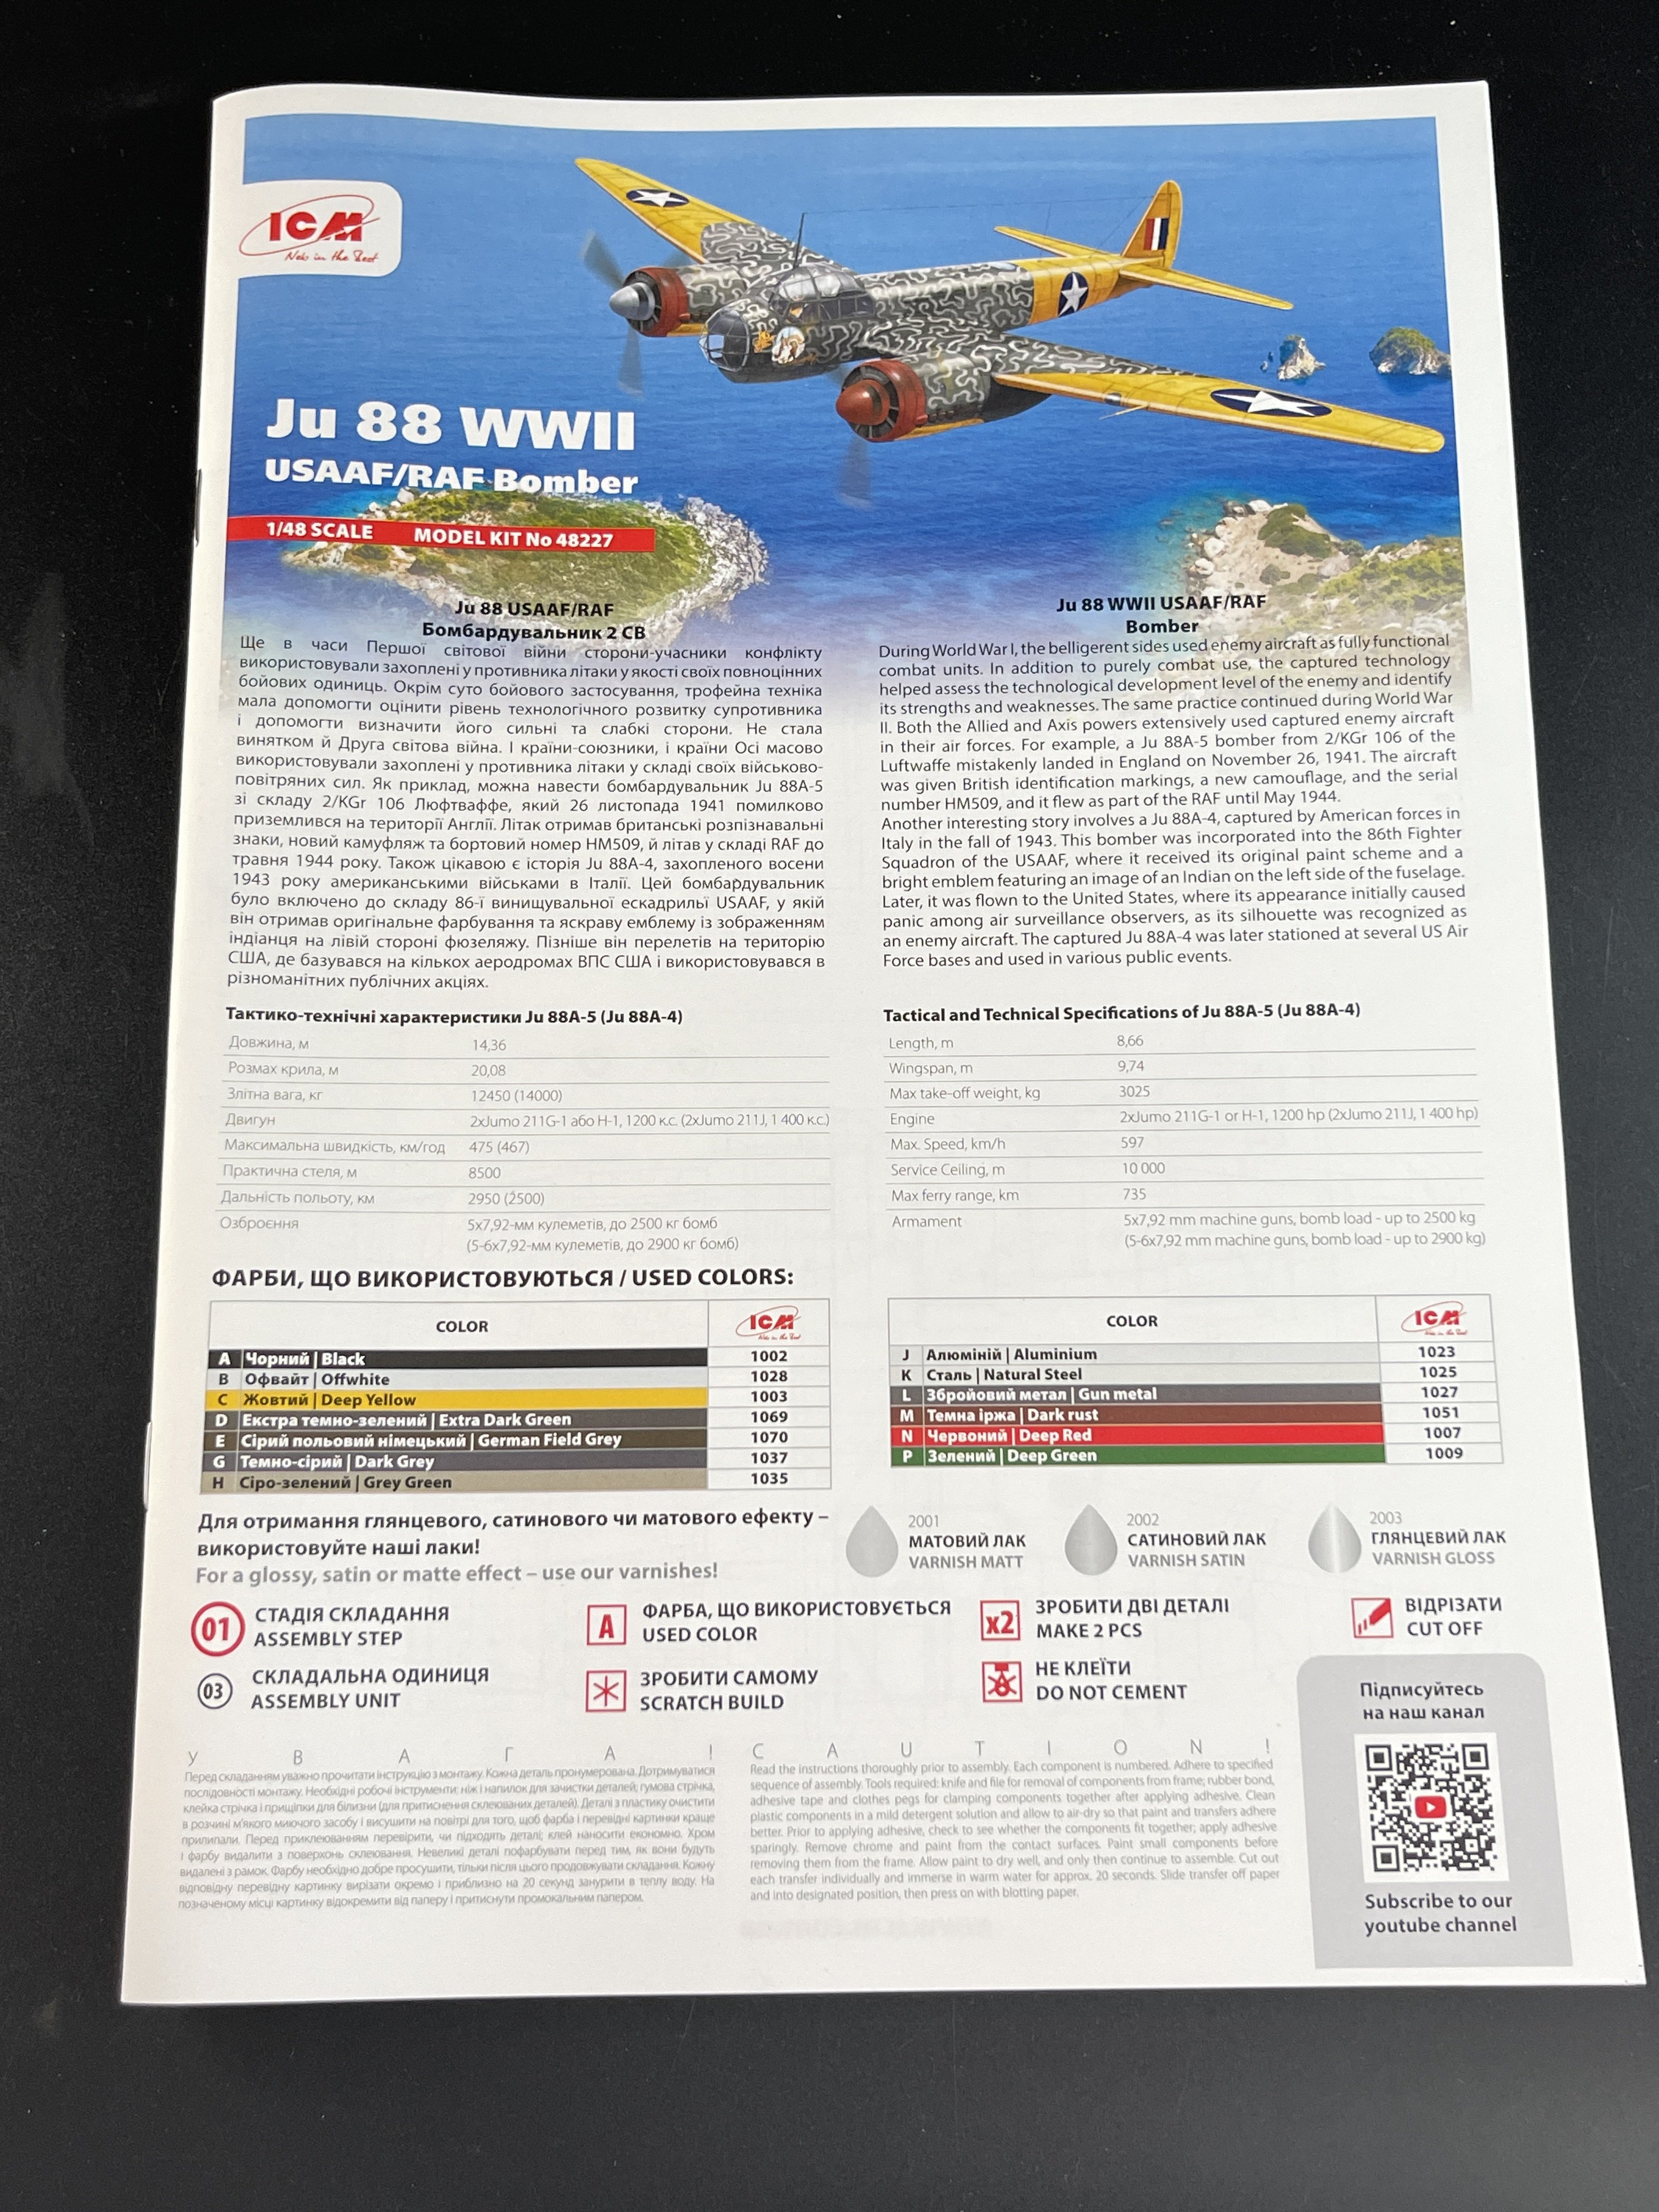
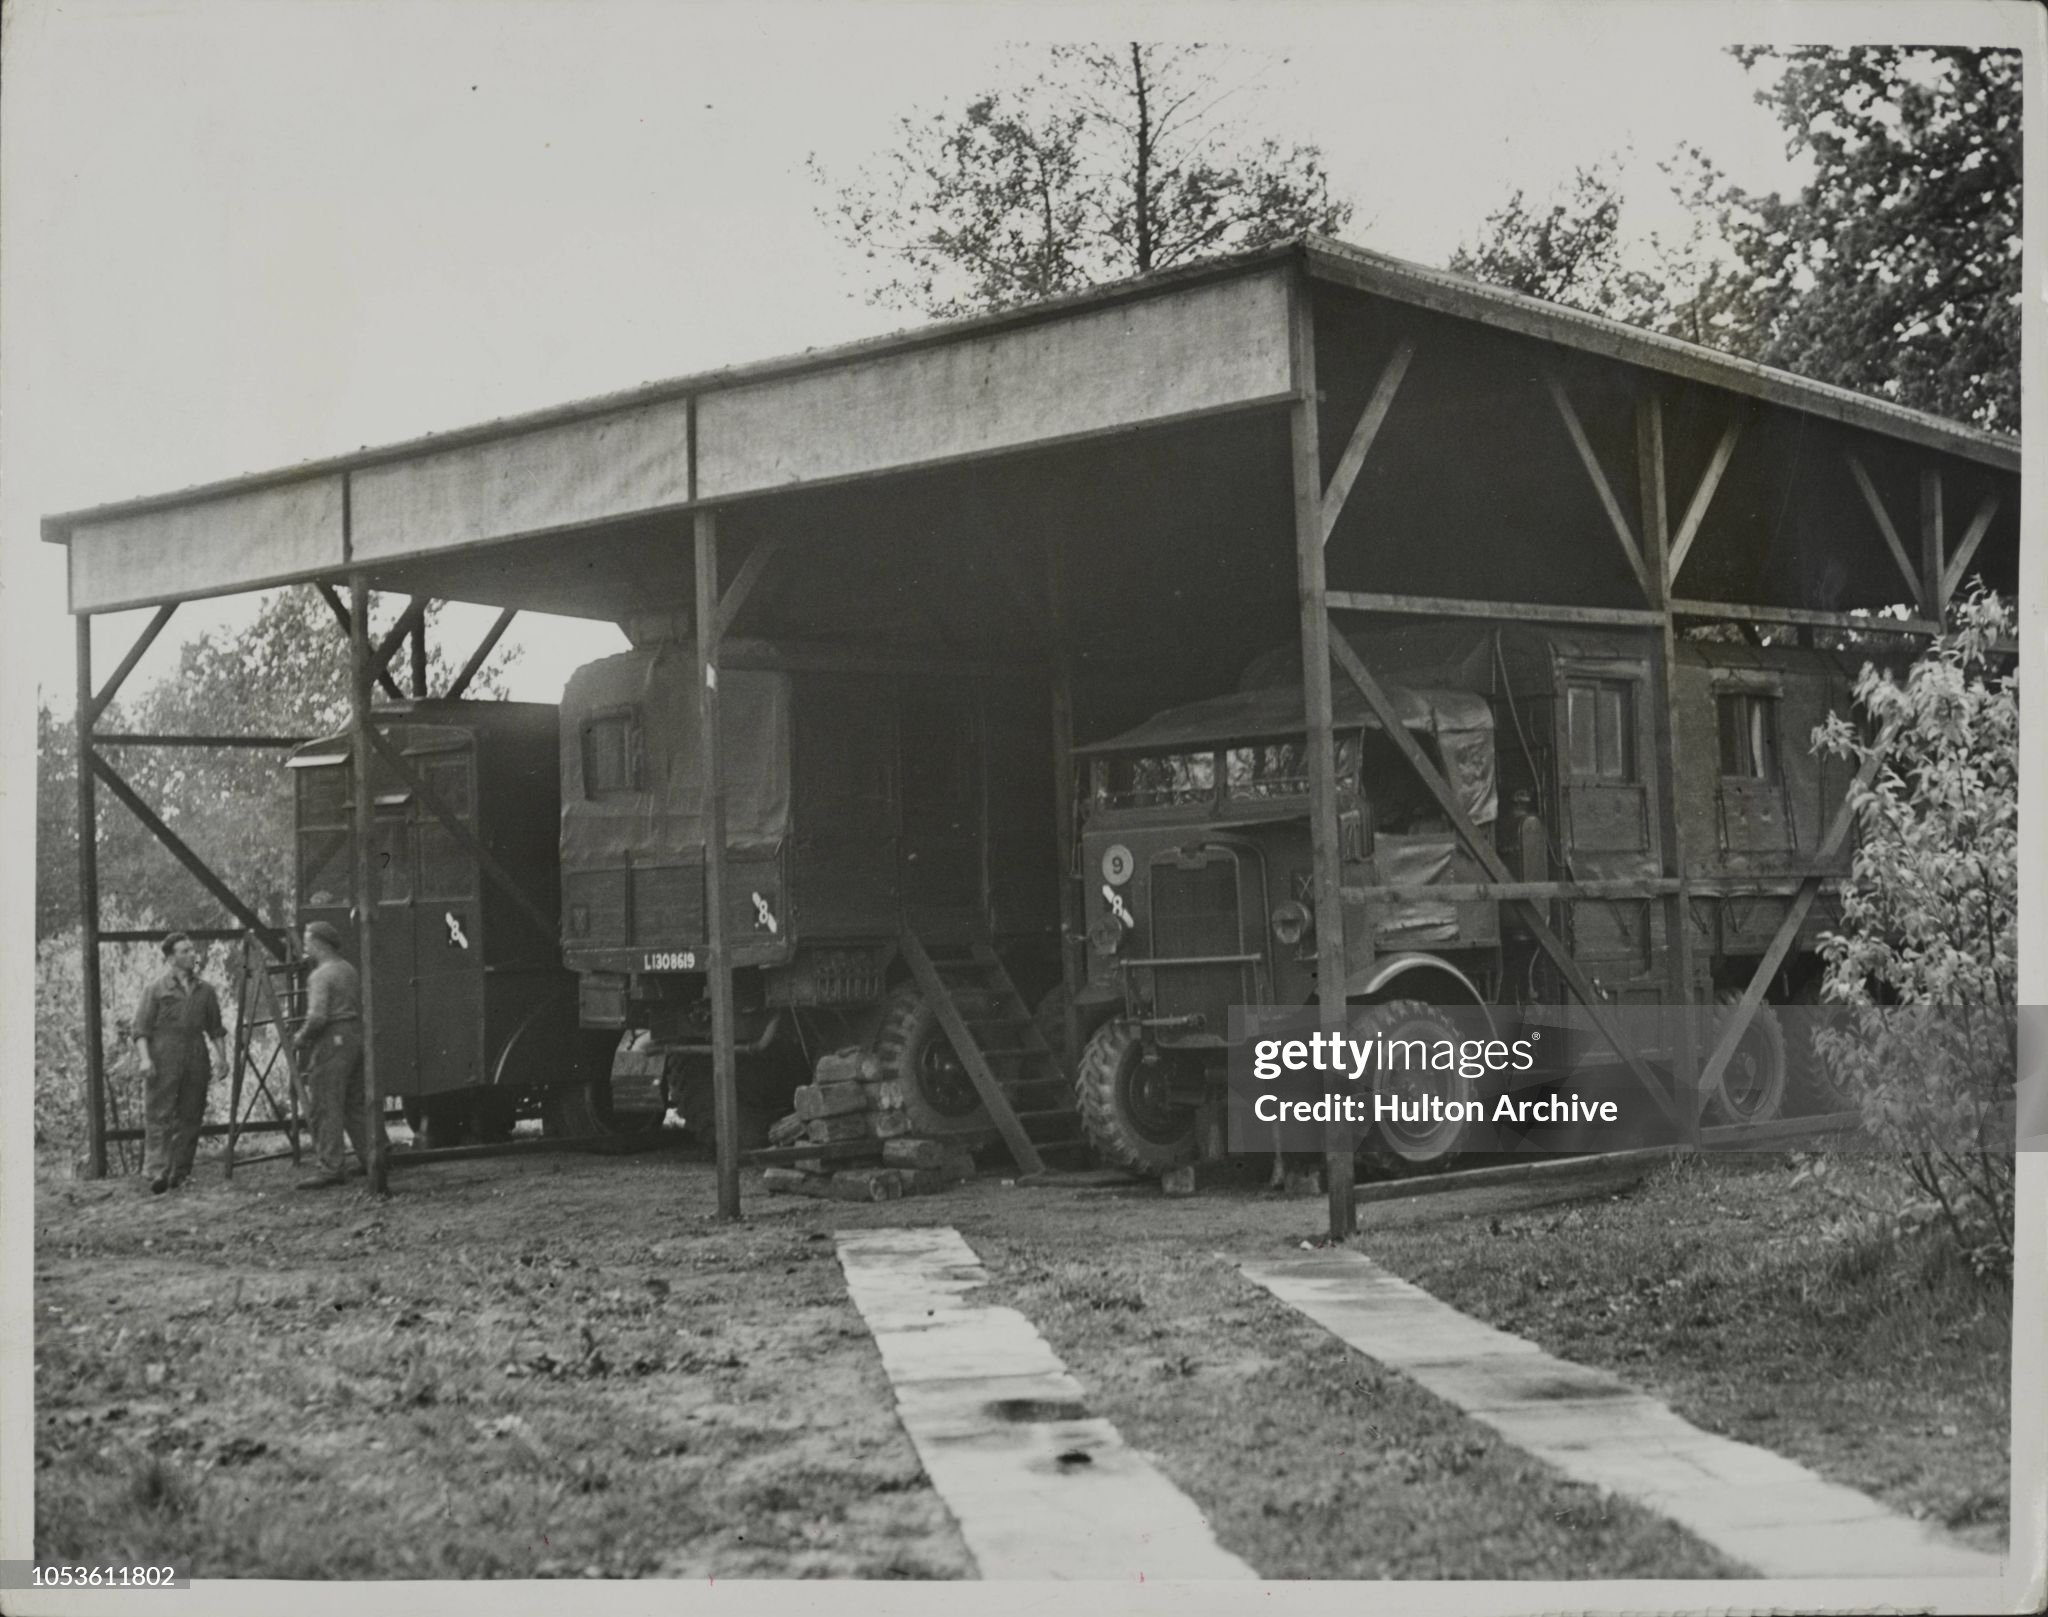
Junkers Ju-88 was one of the most versatile aircraft of World War II, serving in various roles for the Luftwaffe, including bomber, dive bomber, night fighter, and reconnaissance aircraft. The ICM 1:48 Ju-88 USAAF/RAF Bomber kit (catalogue number 48227) focuses on a unique aspect of the Ju-88’s history: captured aircraft operated by the United States Army Air Forces (USAAF) and Royal Air Force (RAF).
Now check this out that I found on the internet. Lovely diorama possibiliy.
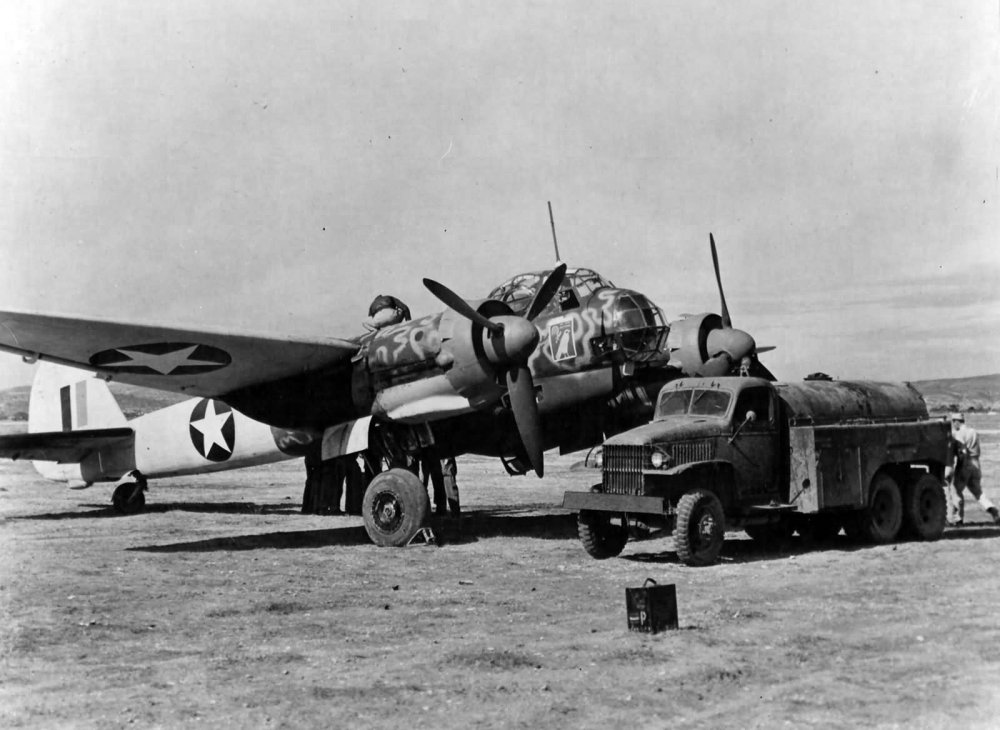
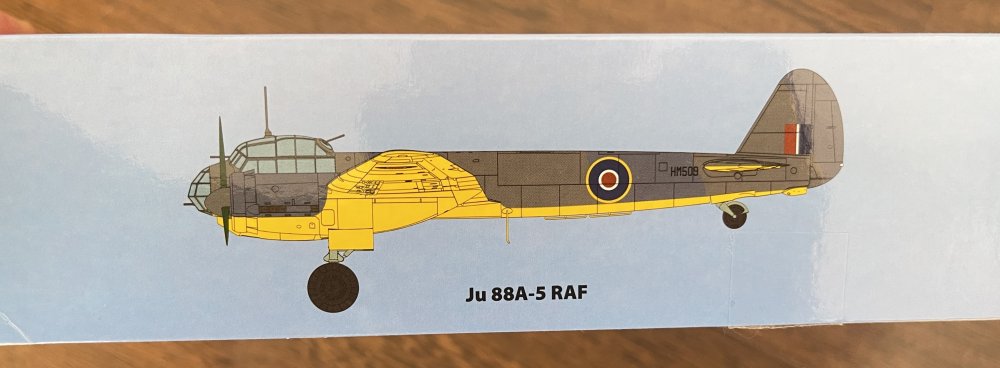
I was very curious about this release mainly because of the striking scheme that shows in the boxart and curious about these “different” schemes.
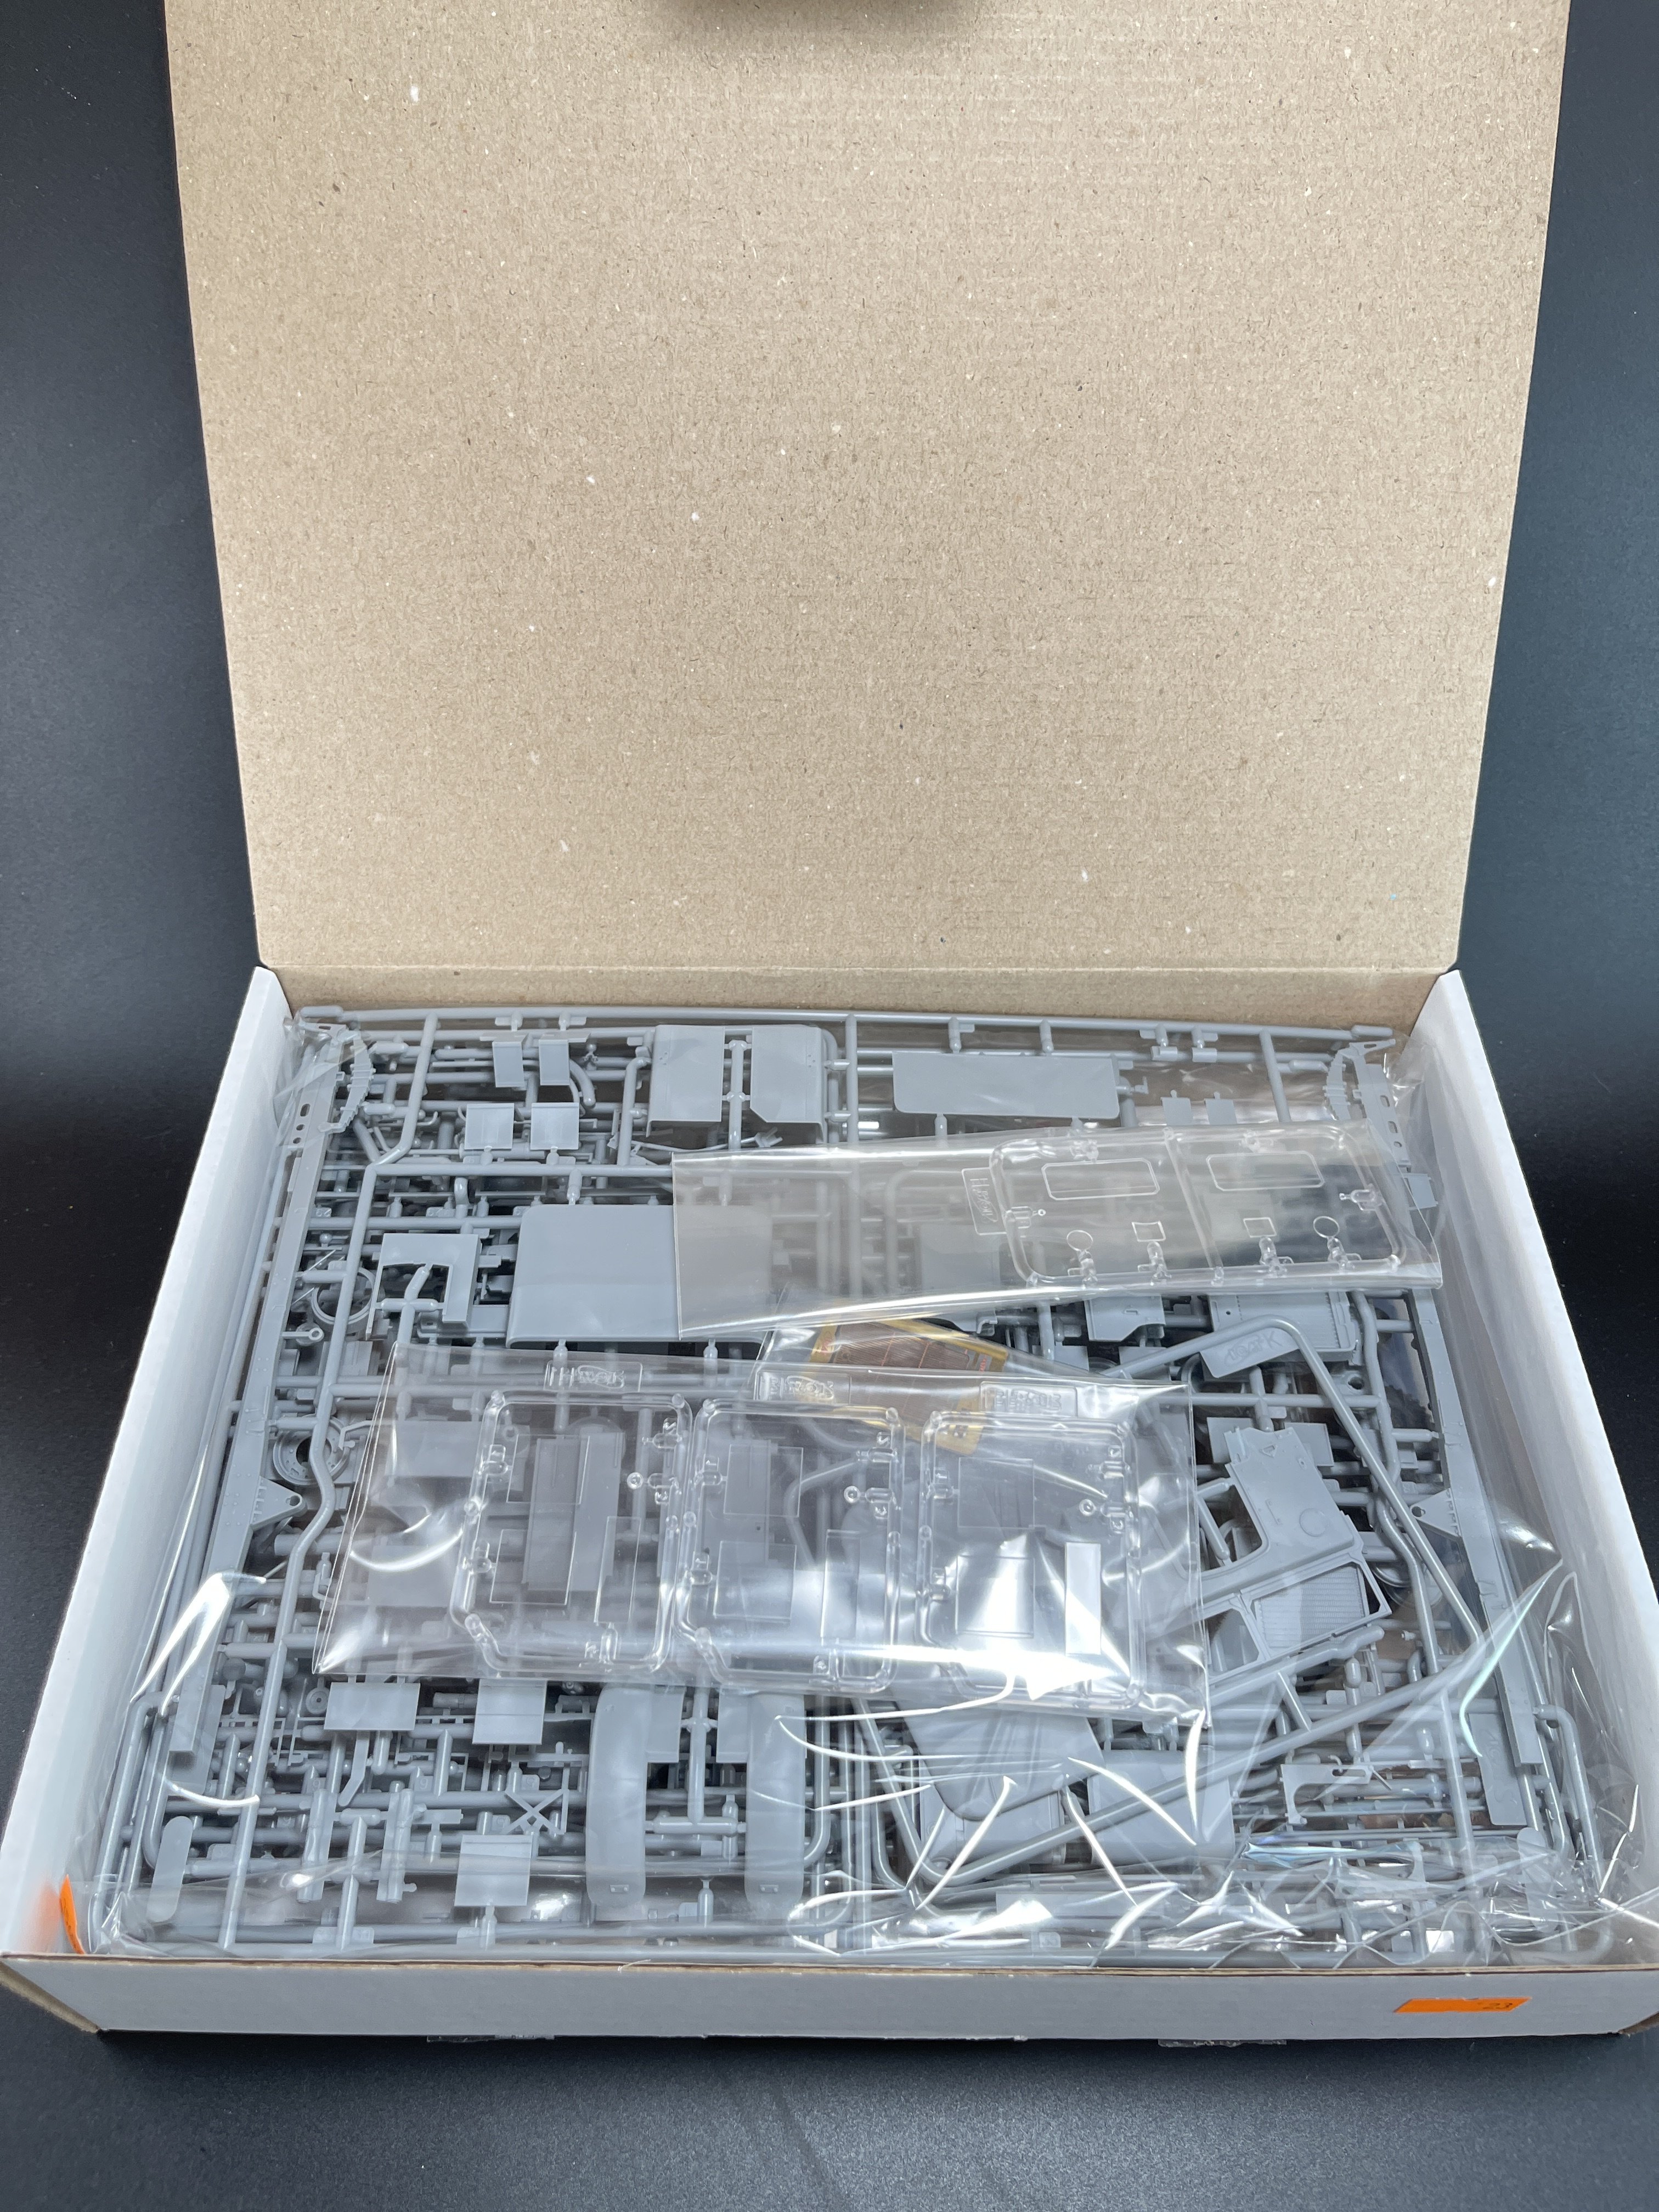
But first, let´s check the plastic.
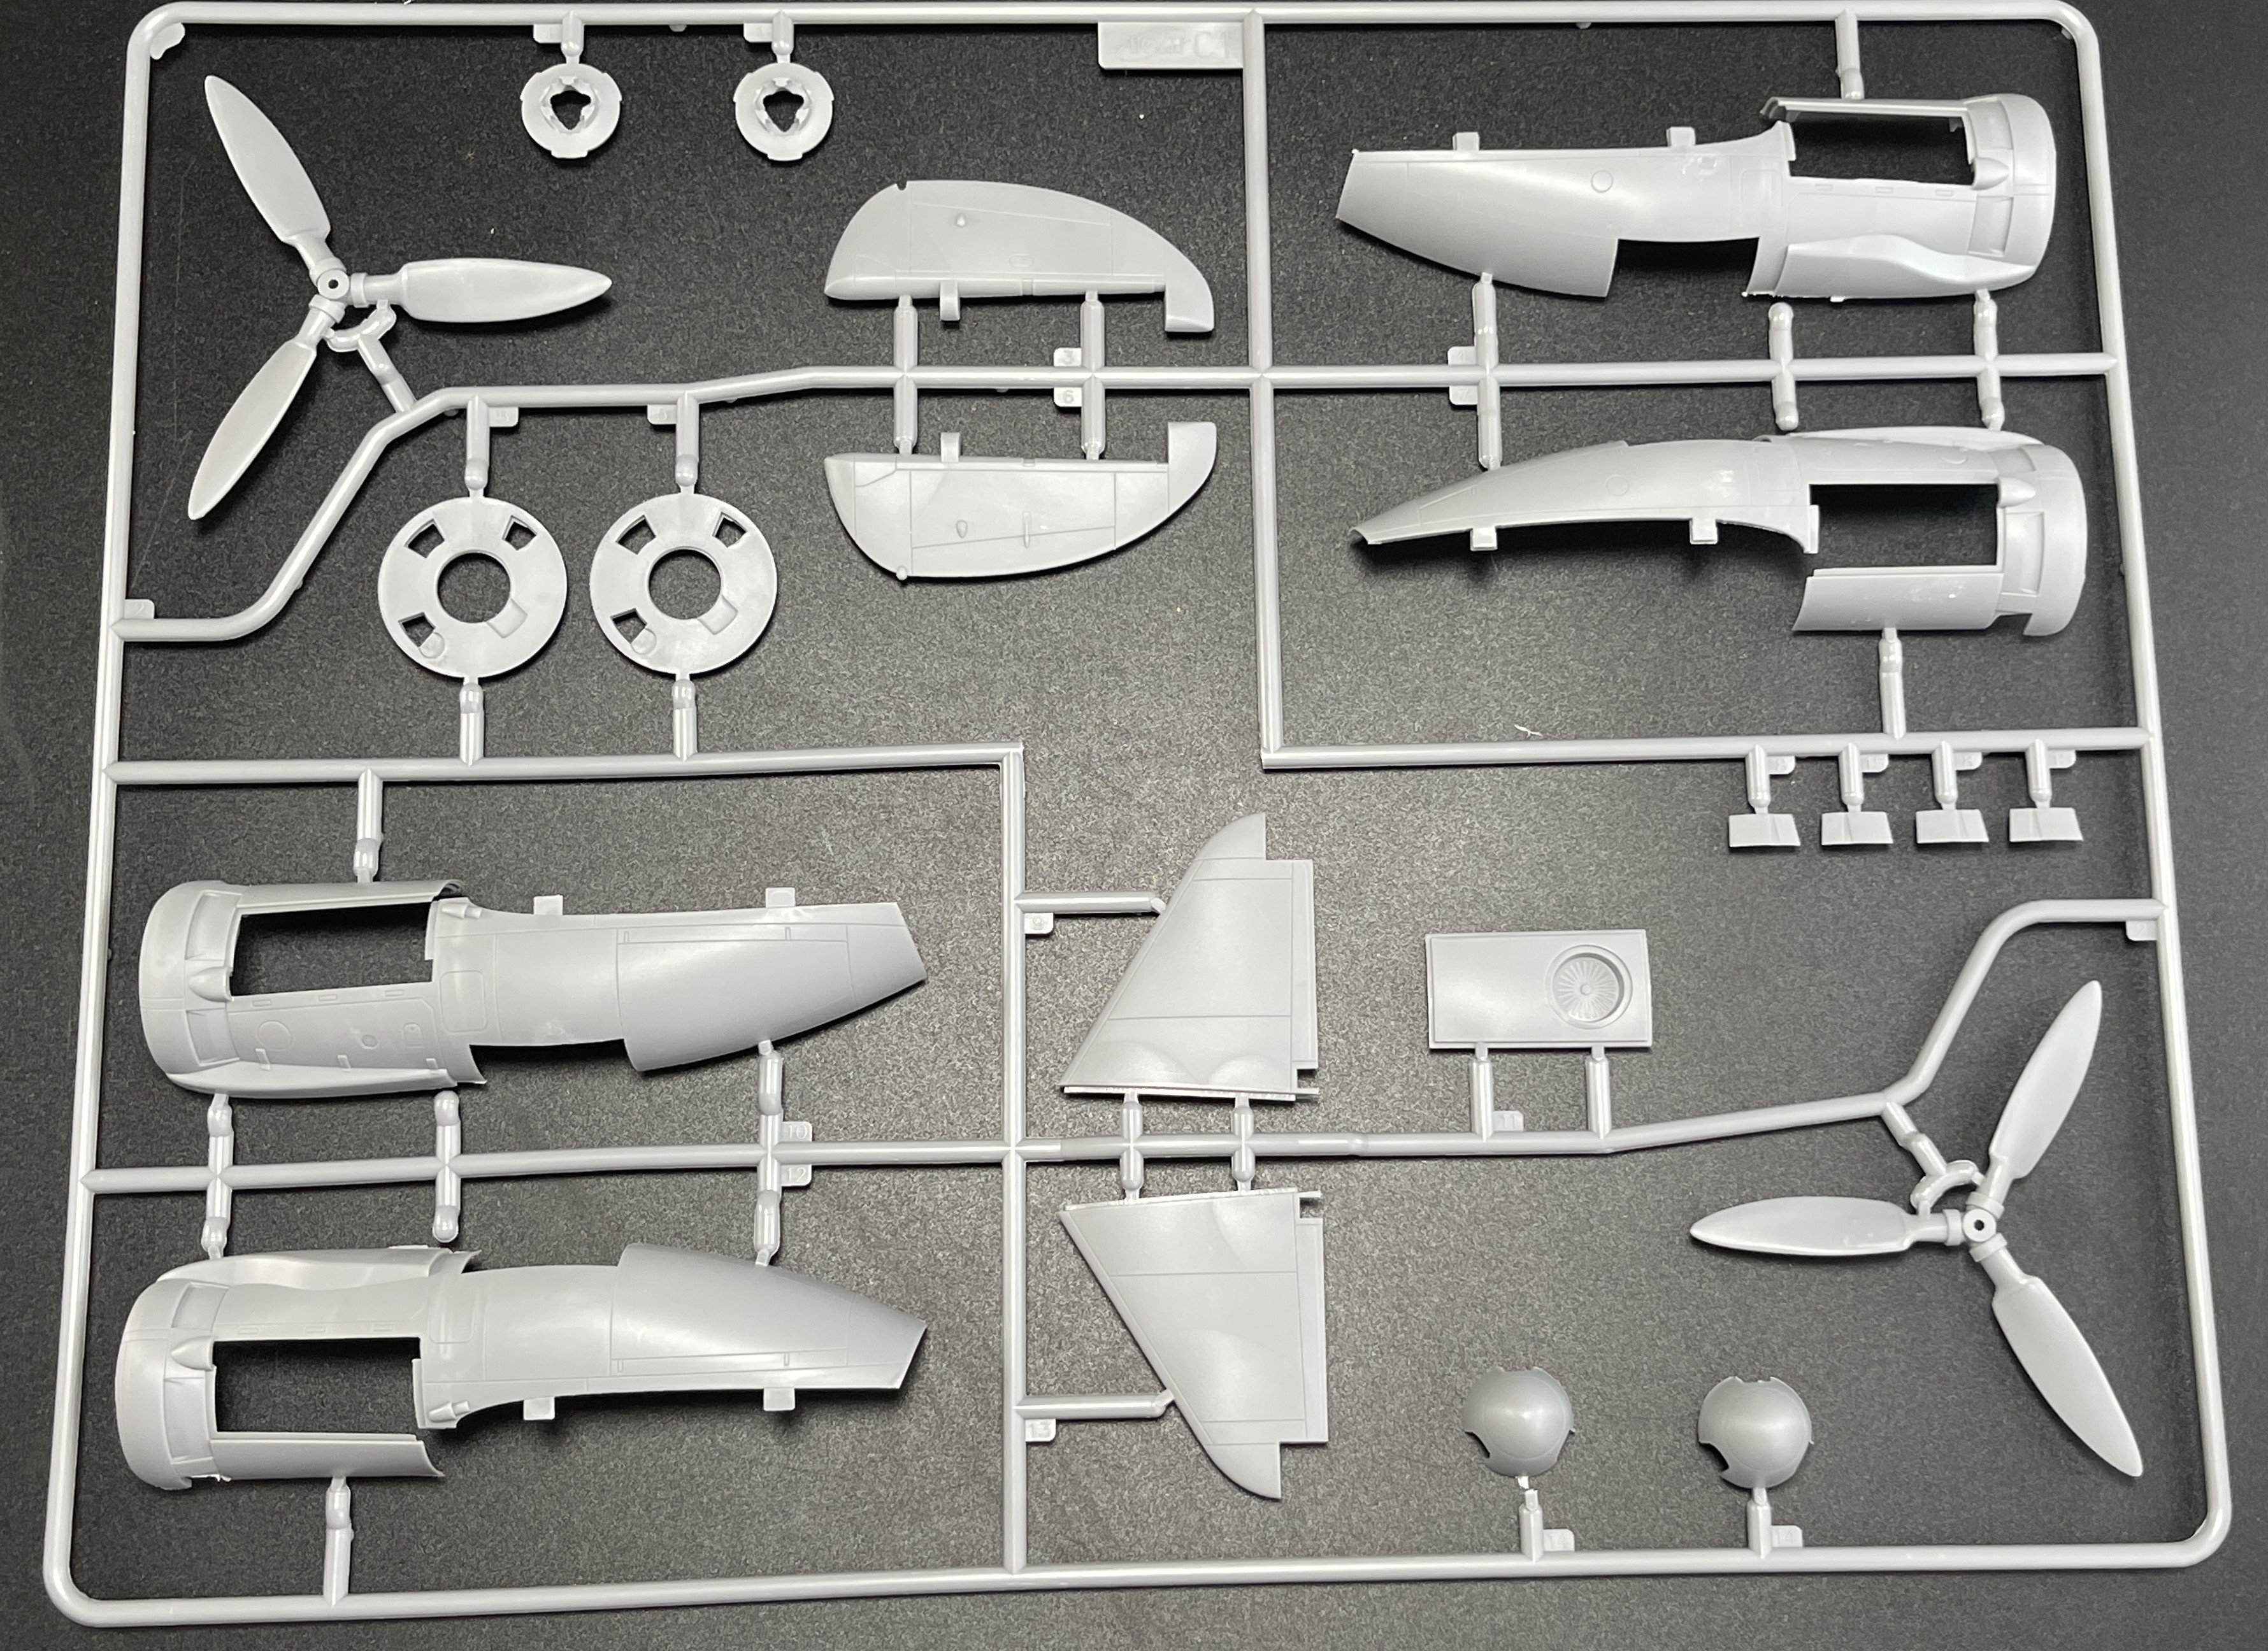
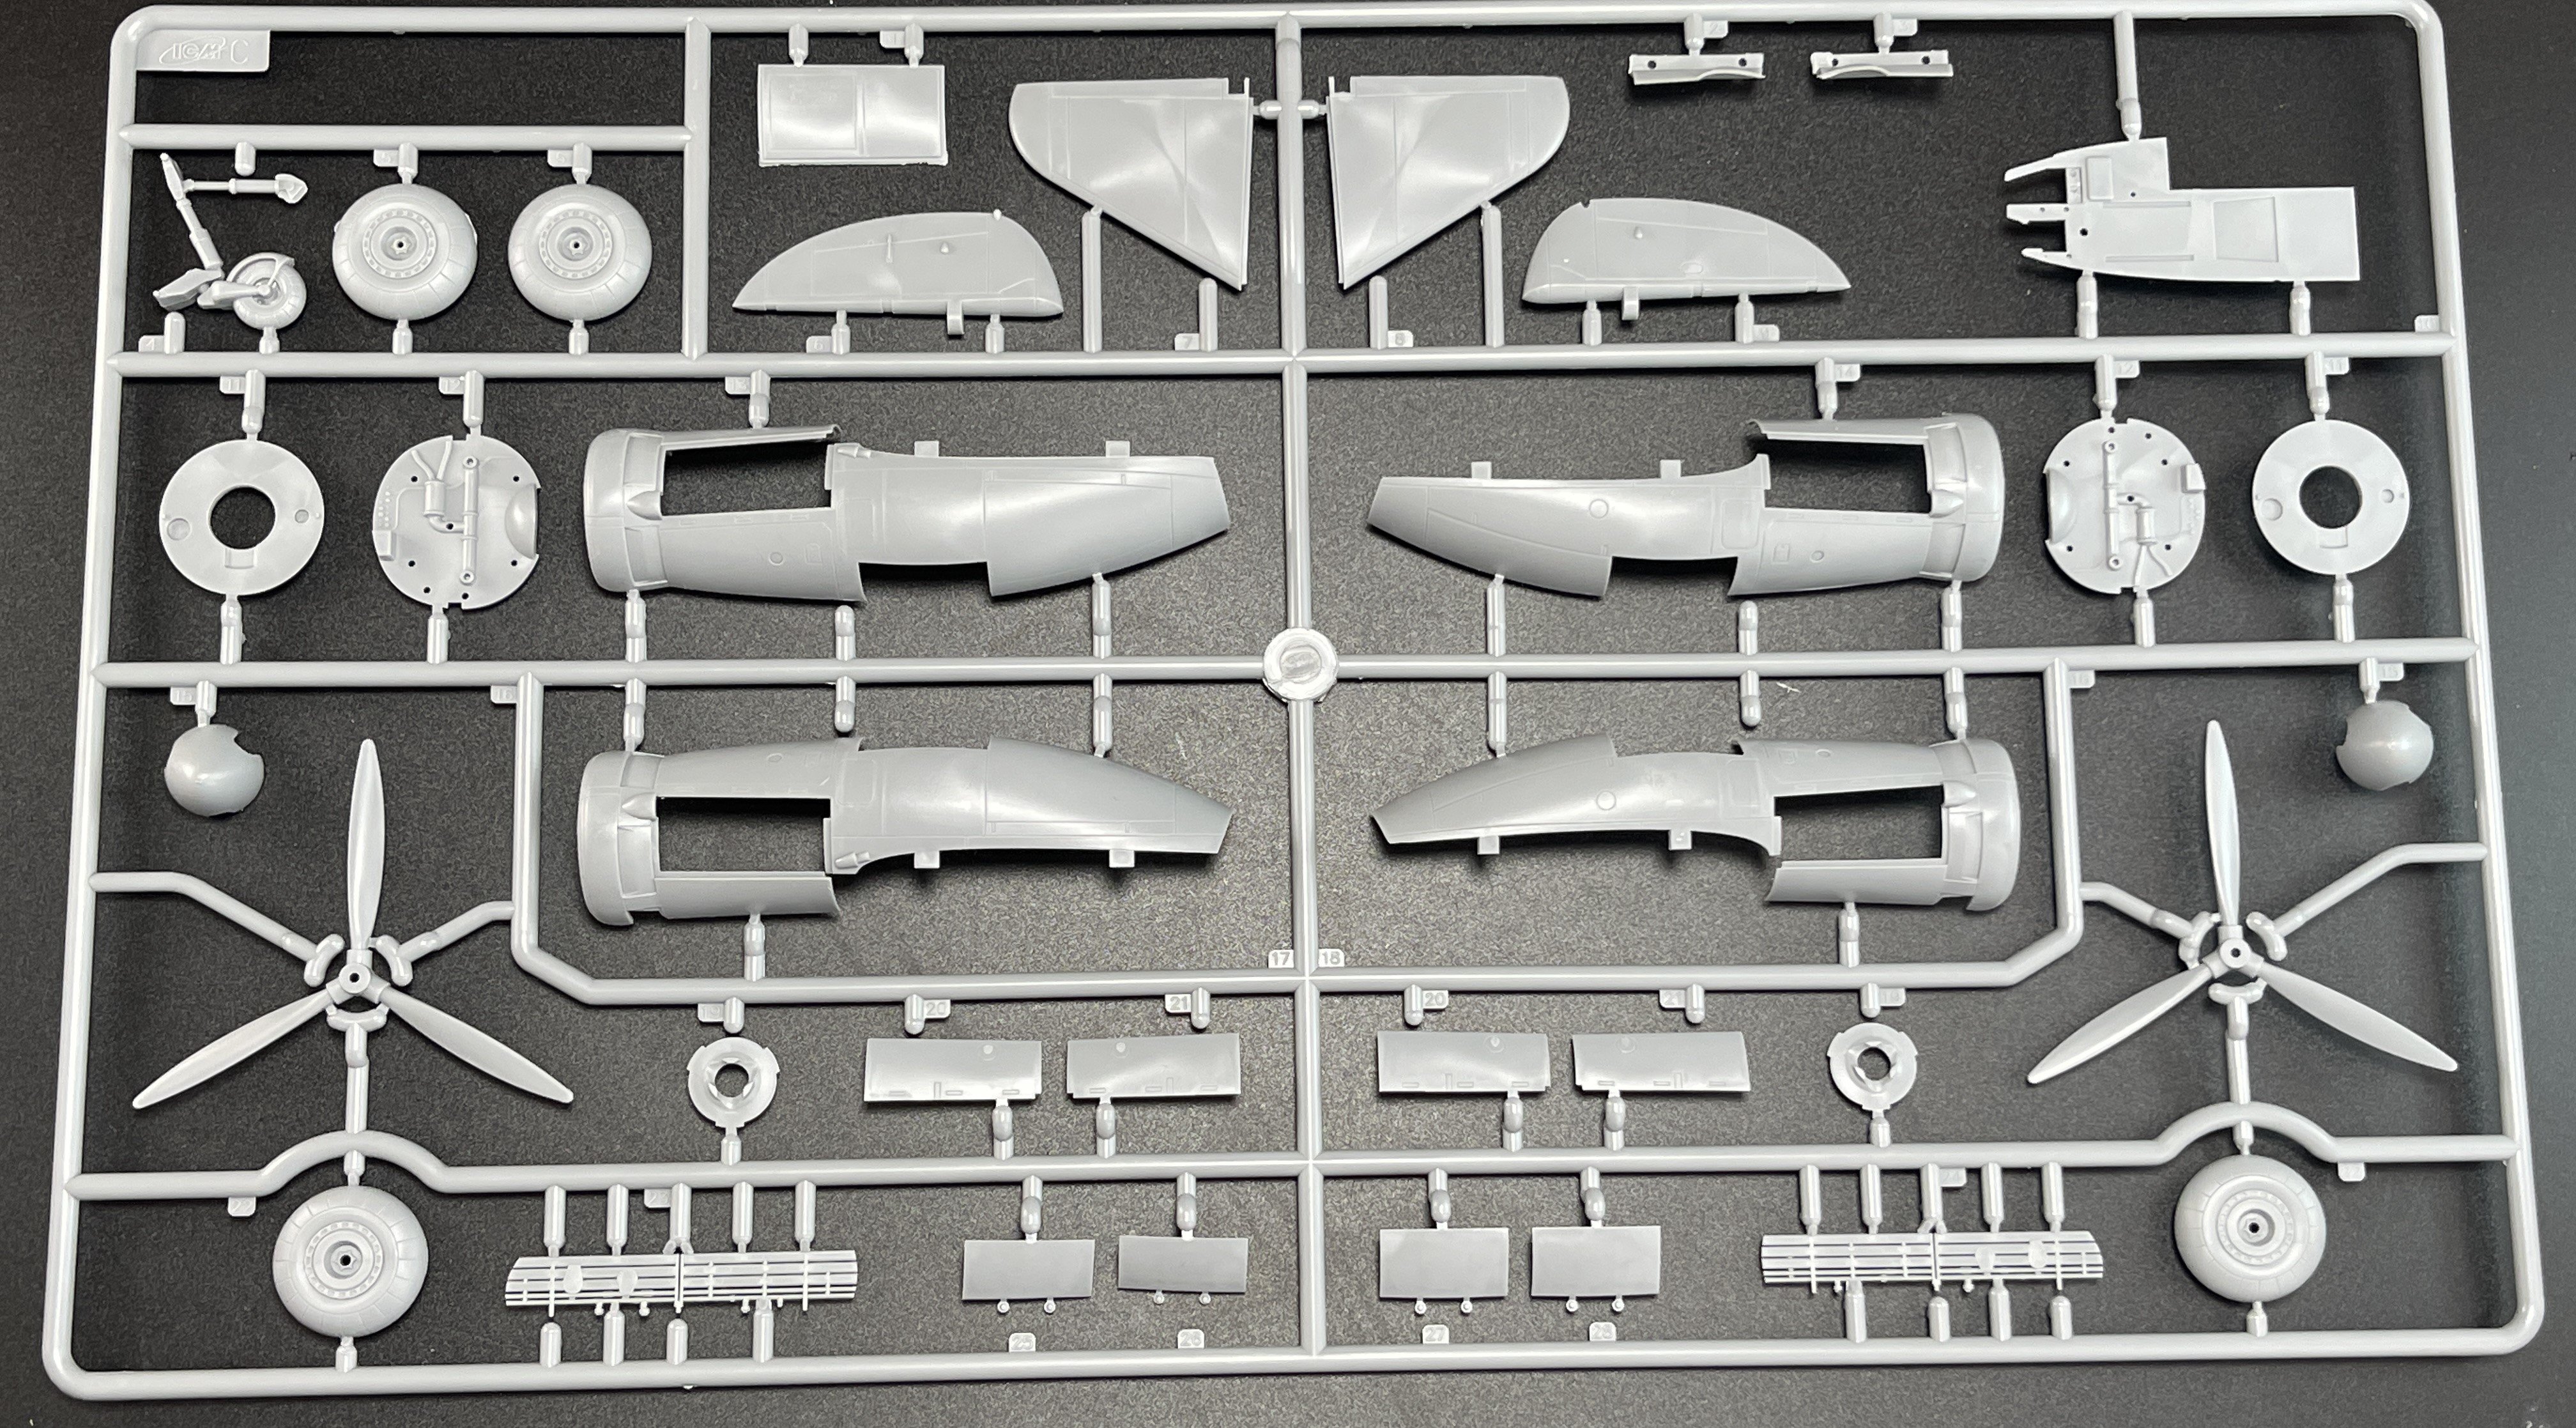
The plastic sprues are molded in grey plastic with minimal flash and clean mold lines.
The grey plastic is of excellent quality, with crisp details and minimal flash. Ejector pin marks are strategically placed to avoid visible areas after assembly.
Surface detail is finely engraved, with recessed detail subtle but well marked.

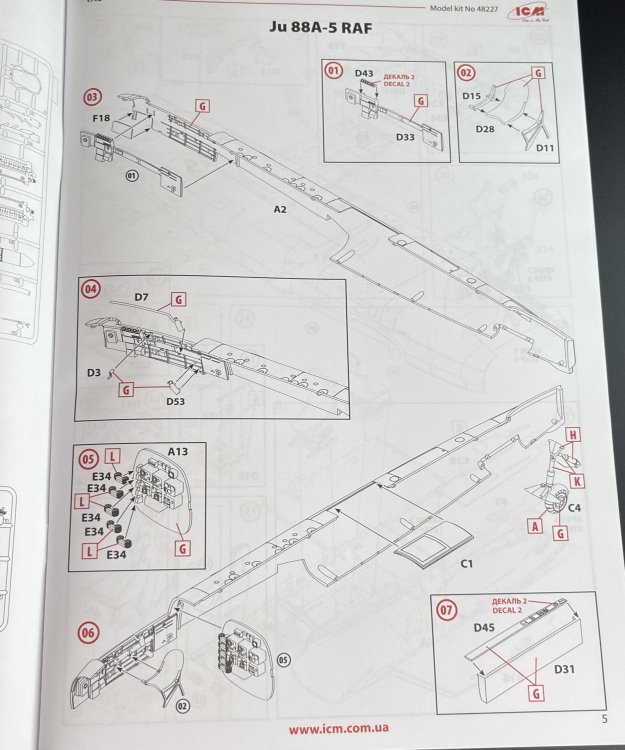
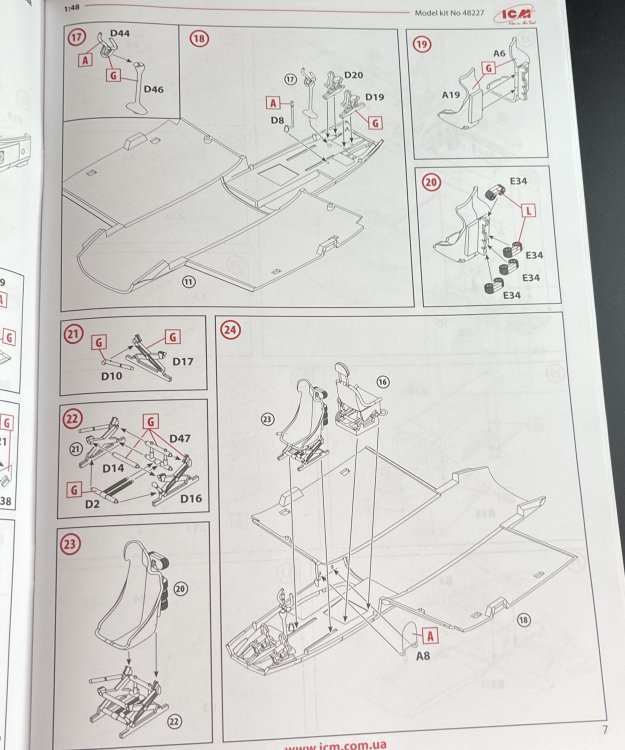
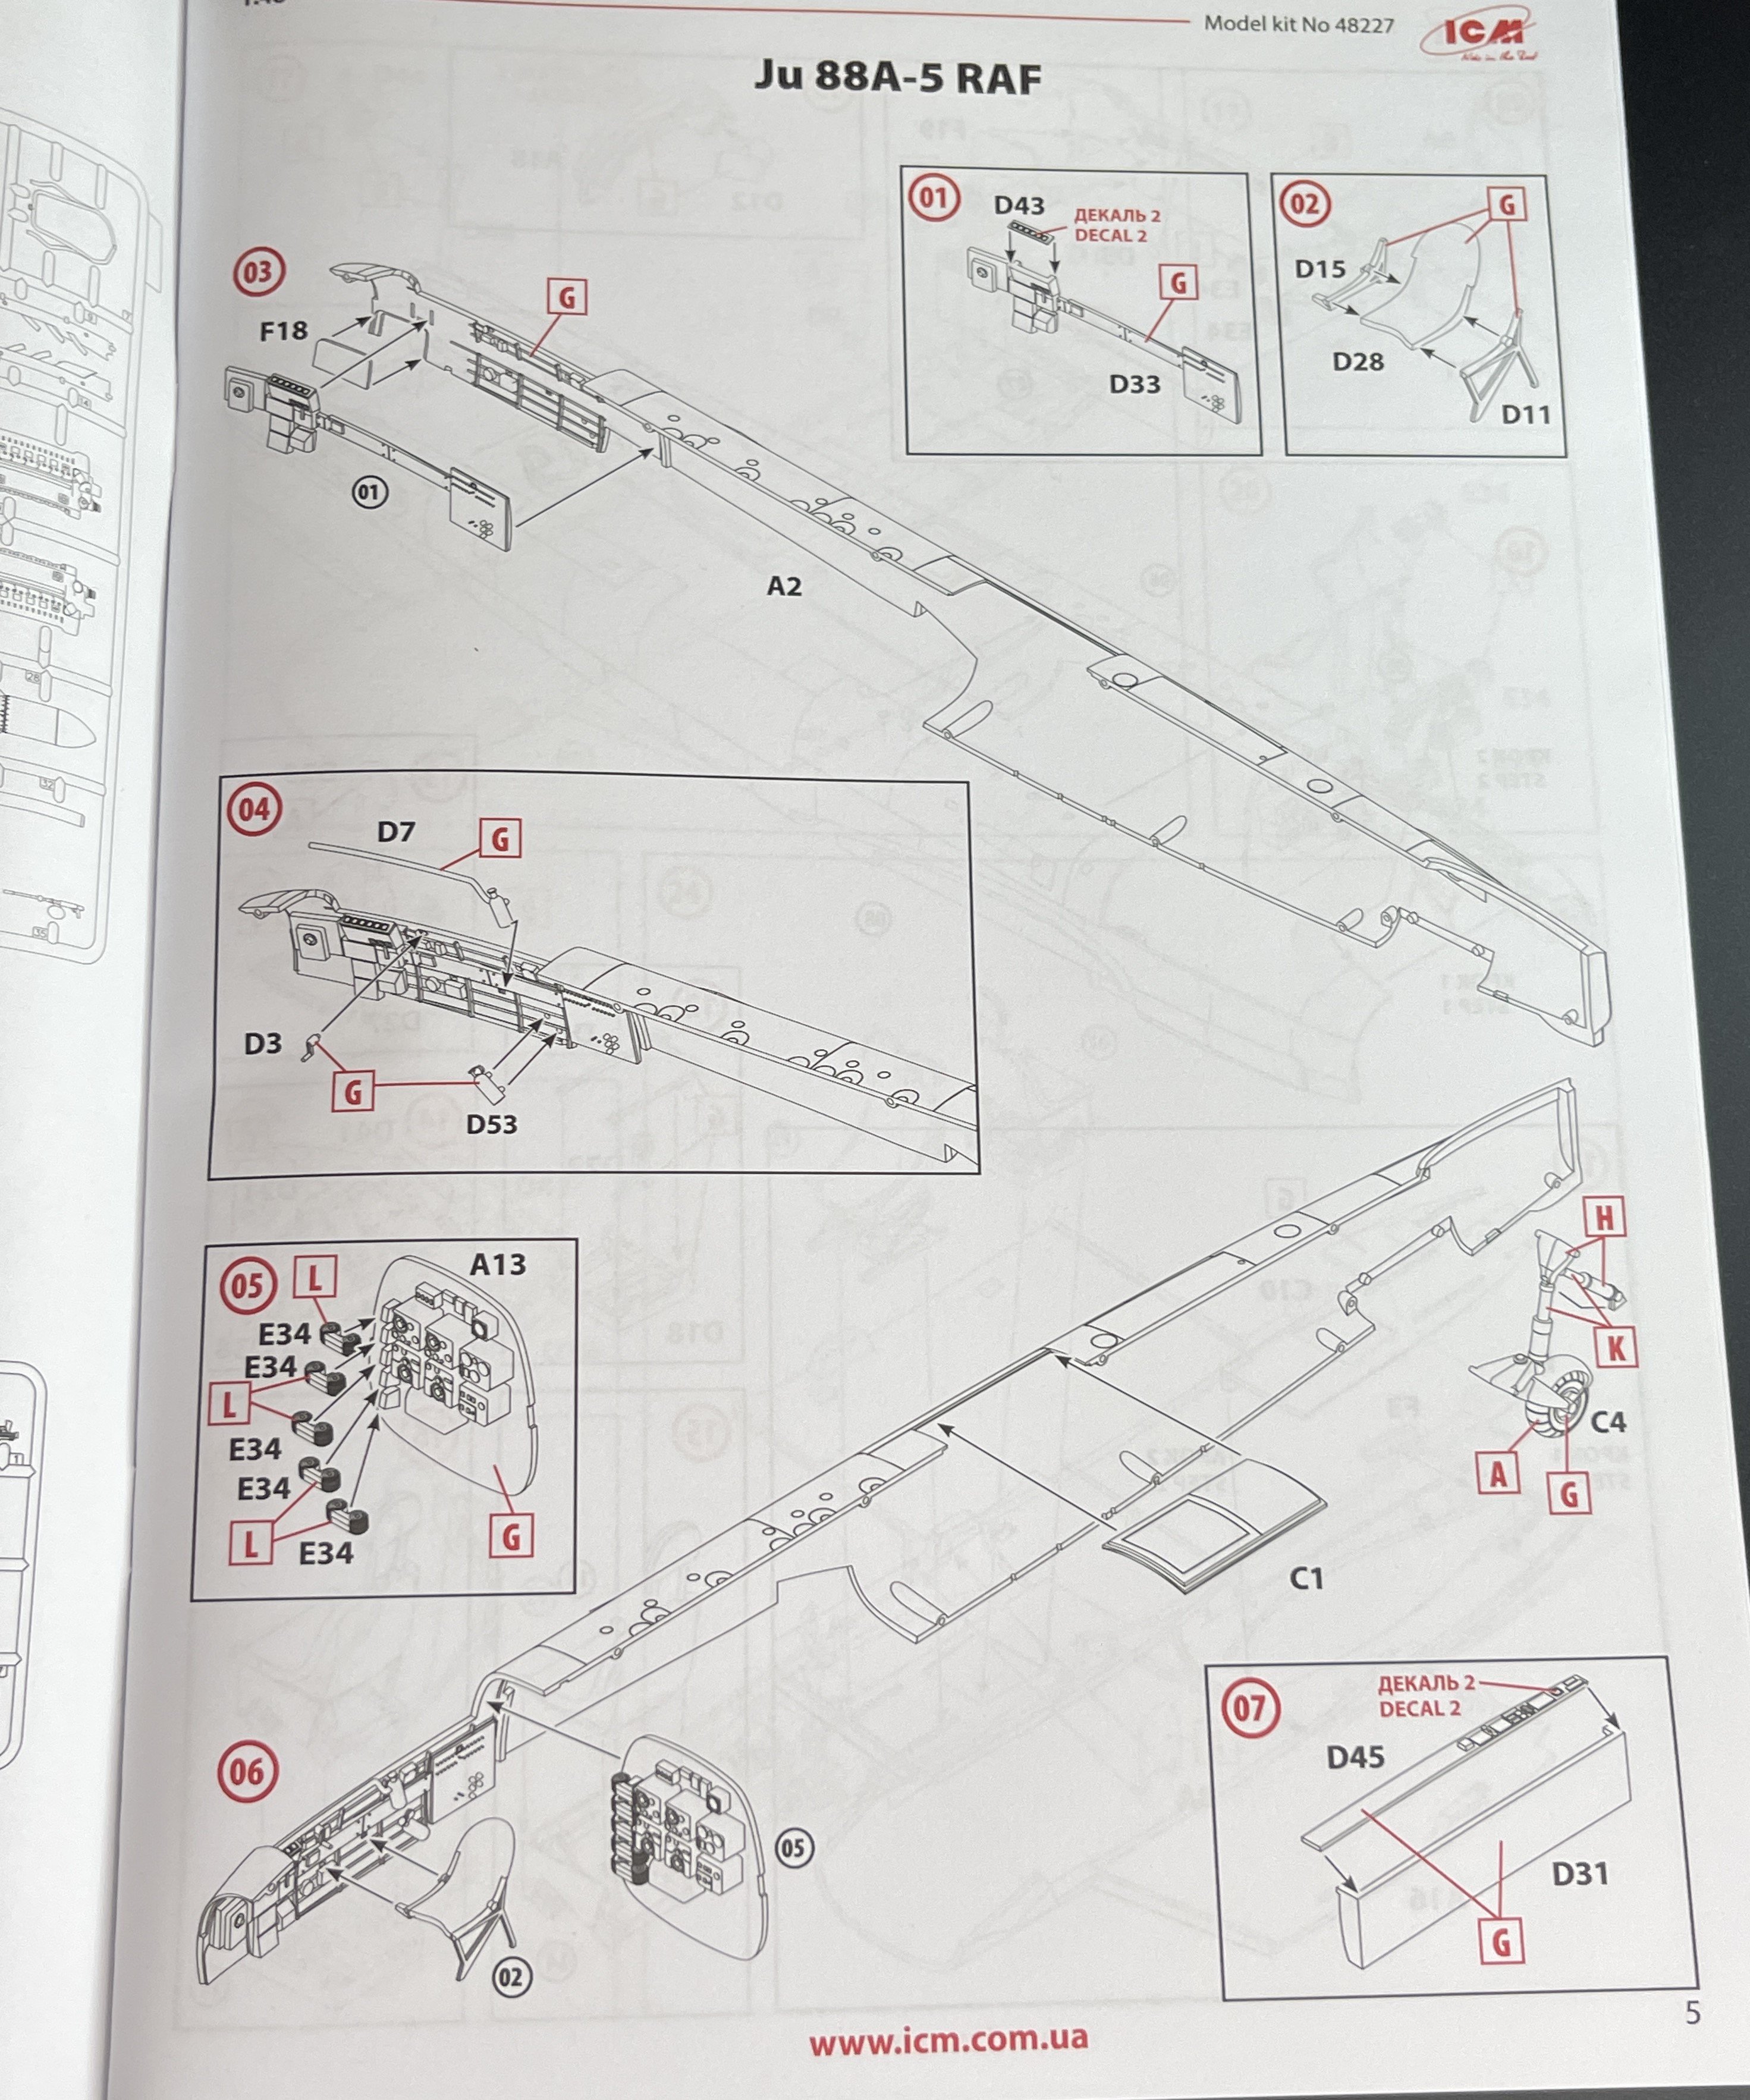
The cockpit is well-detailed, featuring molded instrument panels, control yokes, and seats. The sidewalls include structural details, adding realism to the interior.
The wings feature detailed wheel wells and accurate aileron/flap lines. The kit includes options for different underwing configurations, such as bomb racks or fuel tanks.

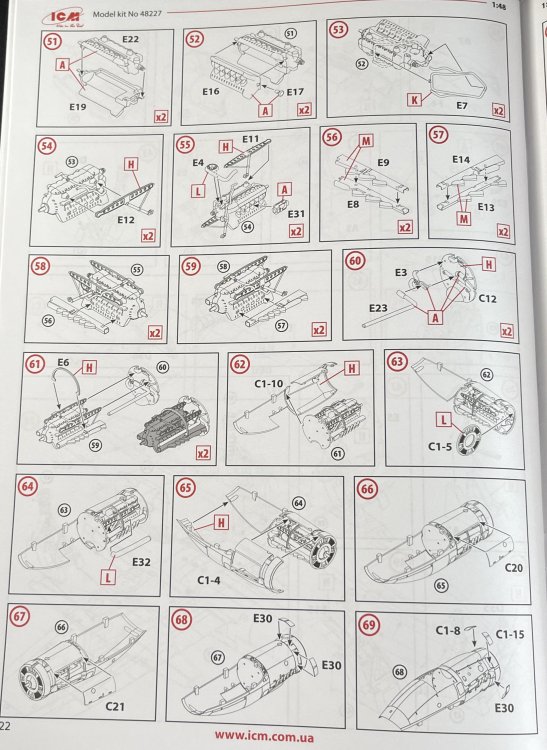
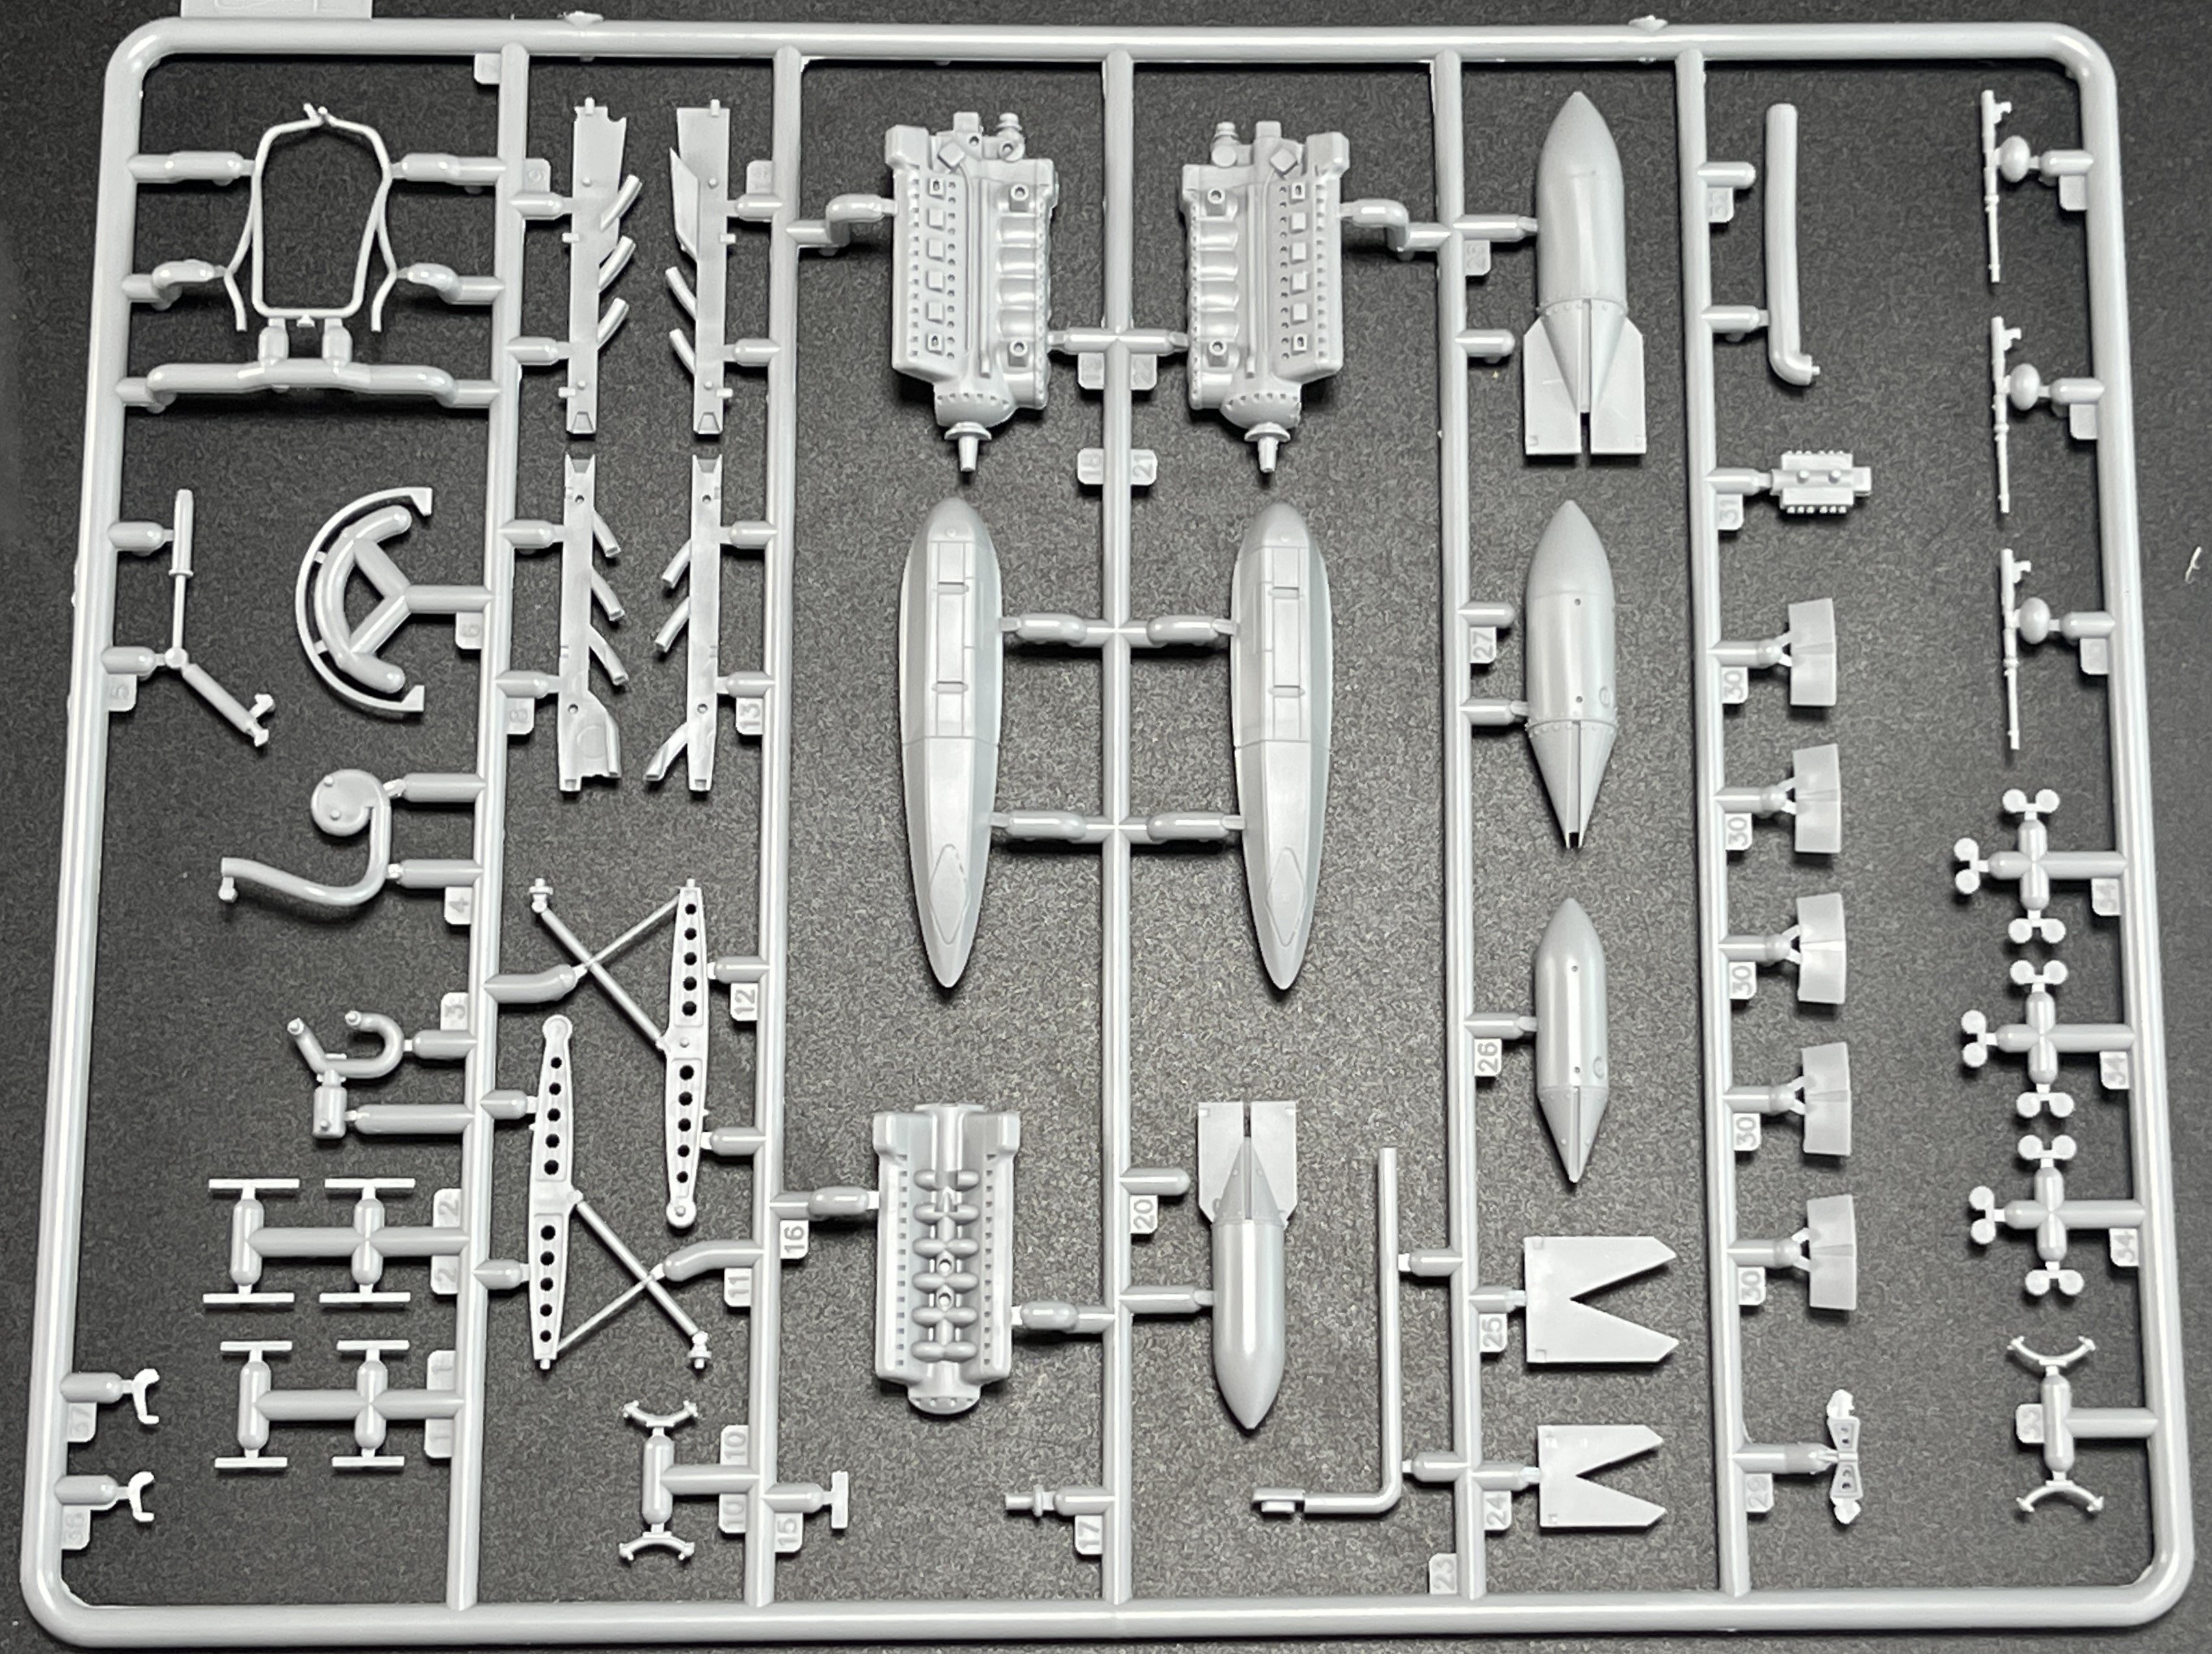
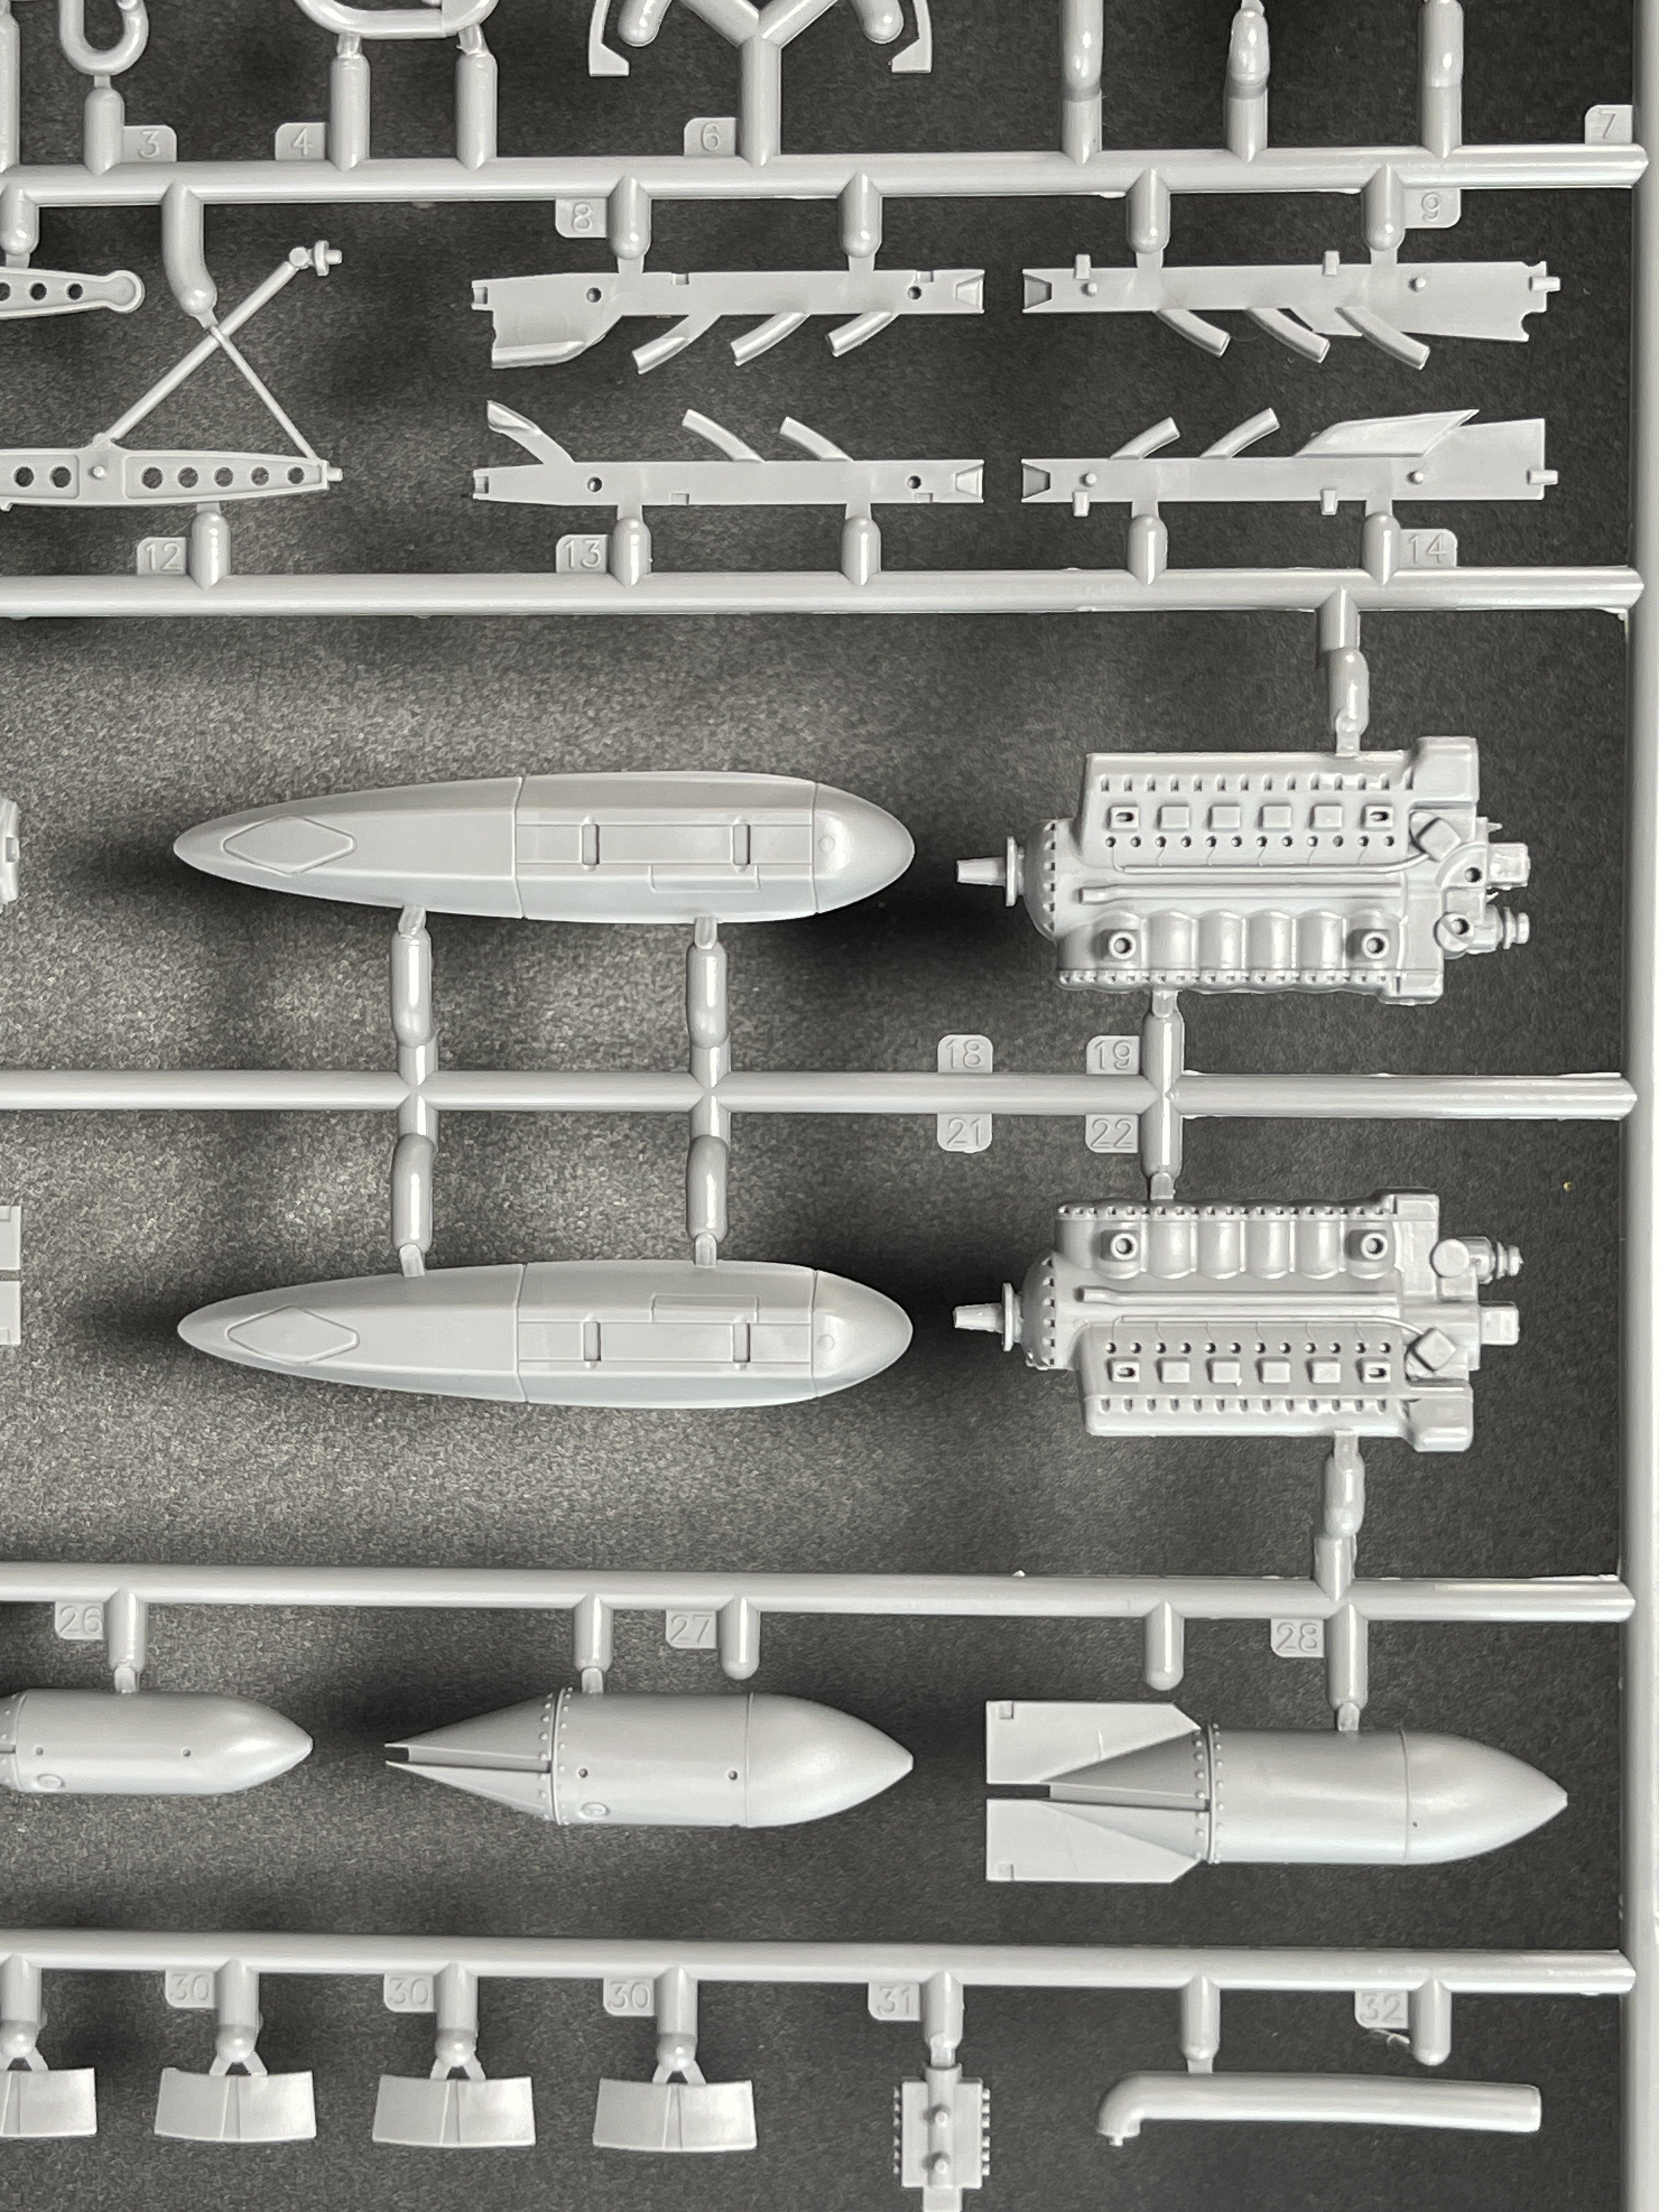
You will also get two detailed Jumo 211 engines, though they are not fully exposed unless the cowlings are left off. The engine nacelles are well-designed, with accurate cooling flaps and exhausts.

ICM doesn’t gives you the open options to see those beautiful engines in the instructions but with some references I think its possible to do it.
The landing gear constructions gives a very robust one with lots of details on structs.
Some pictures of airbrakes
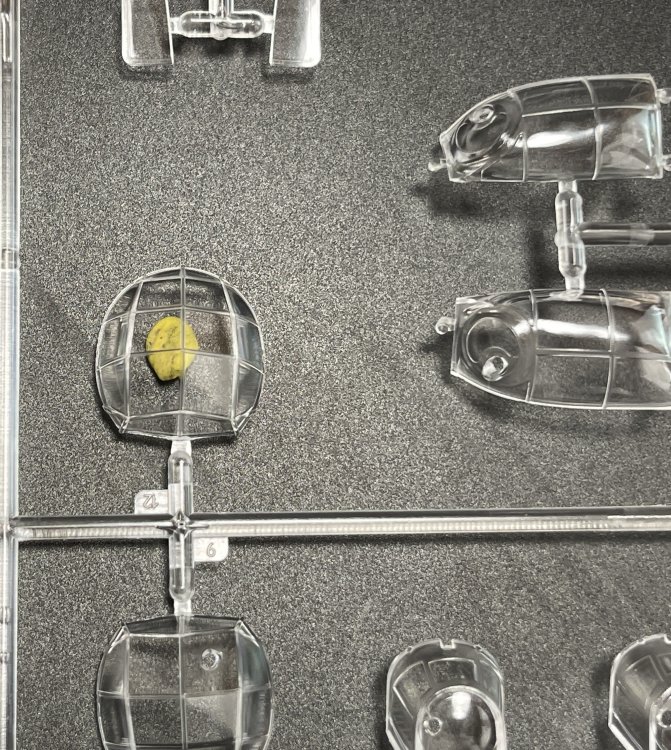
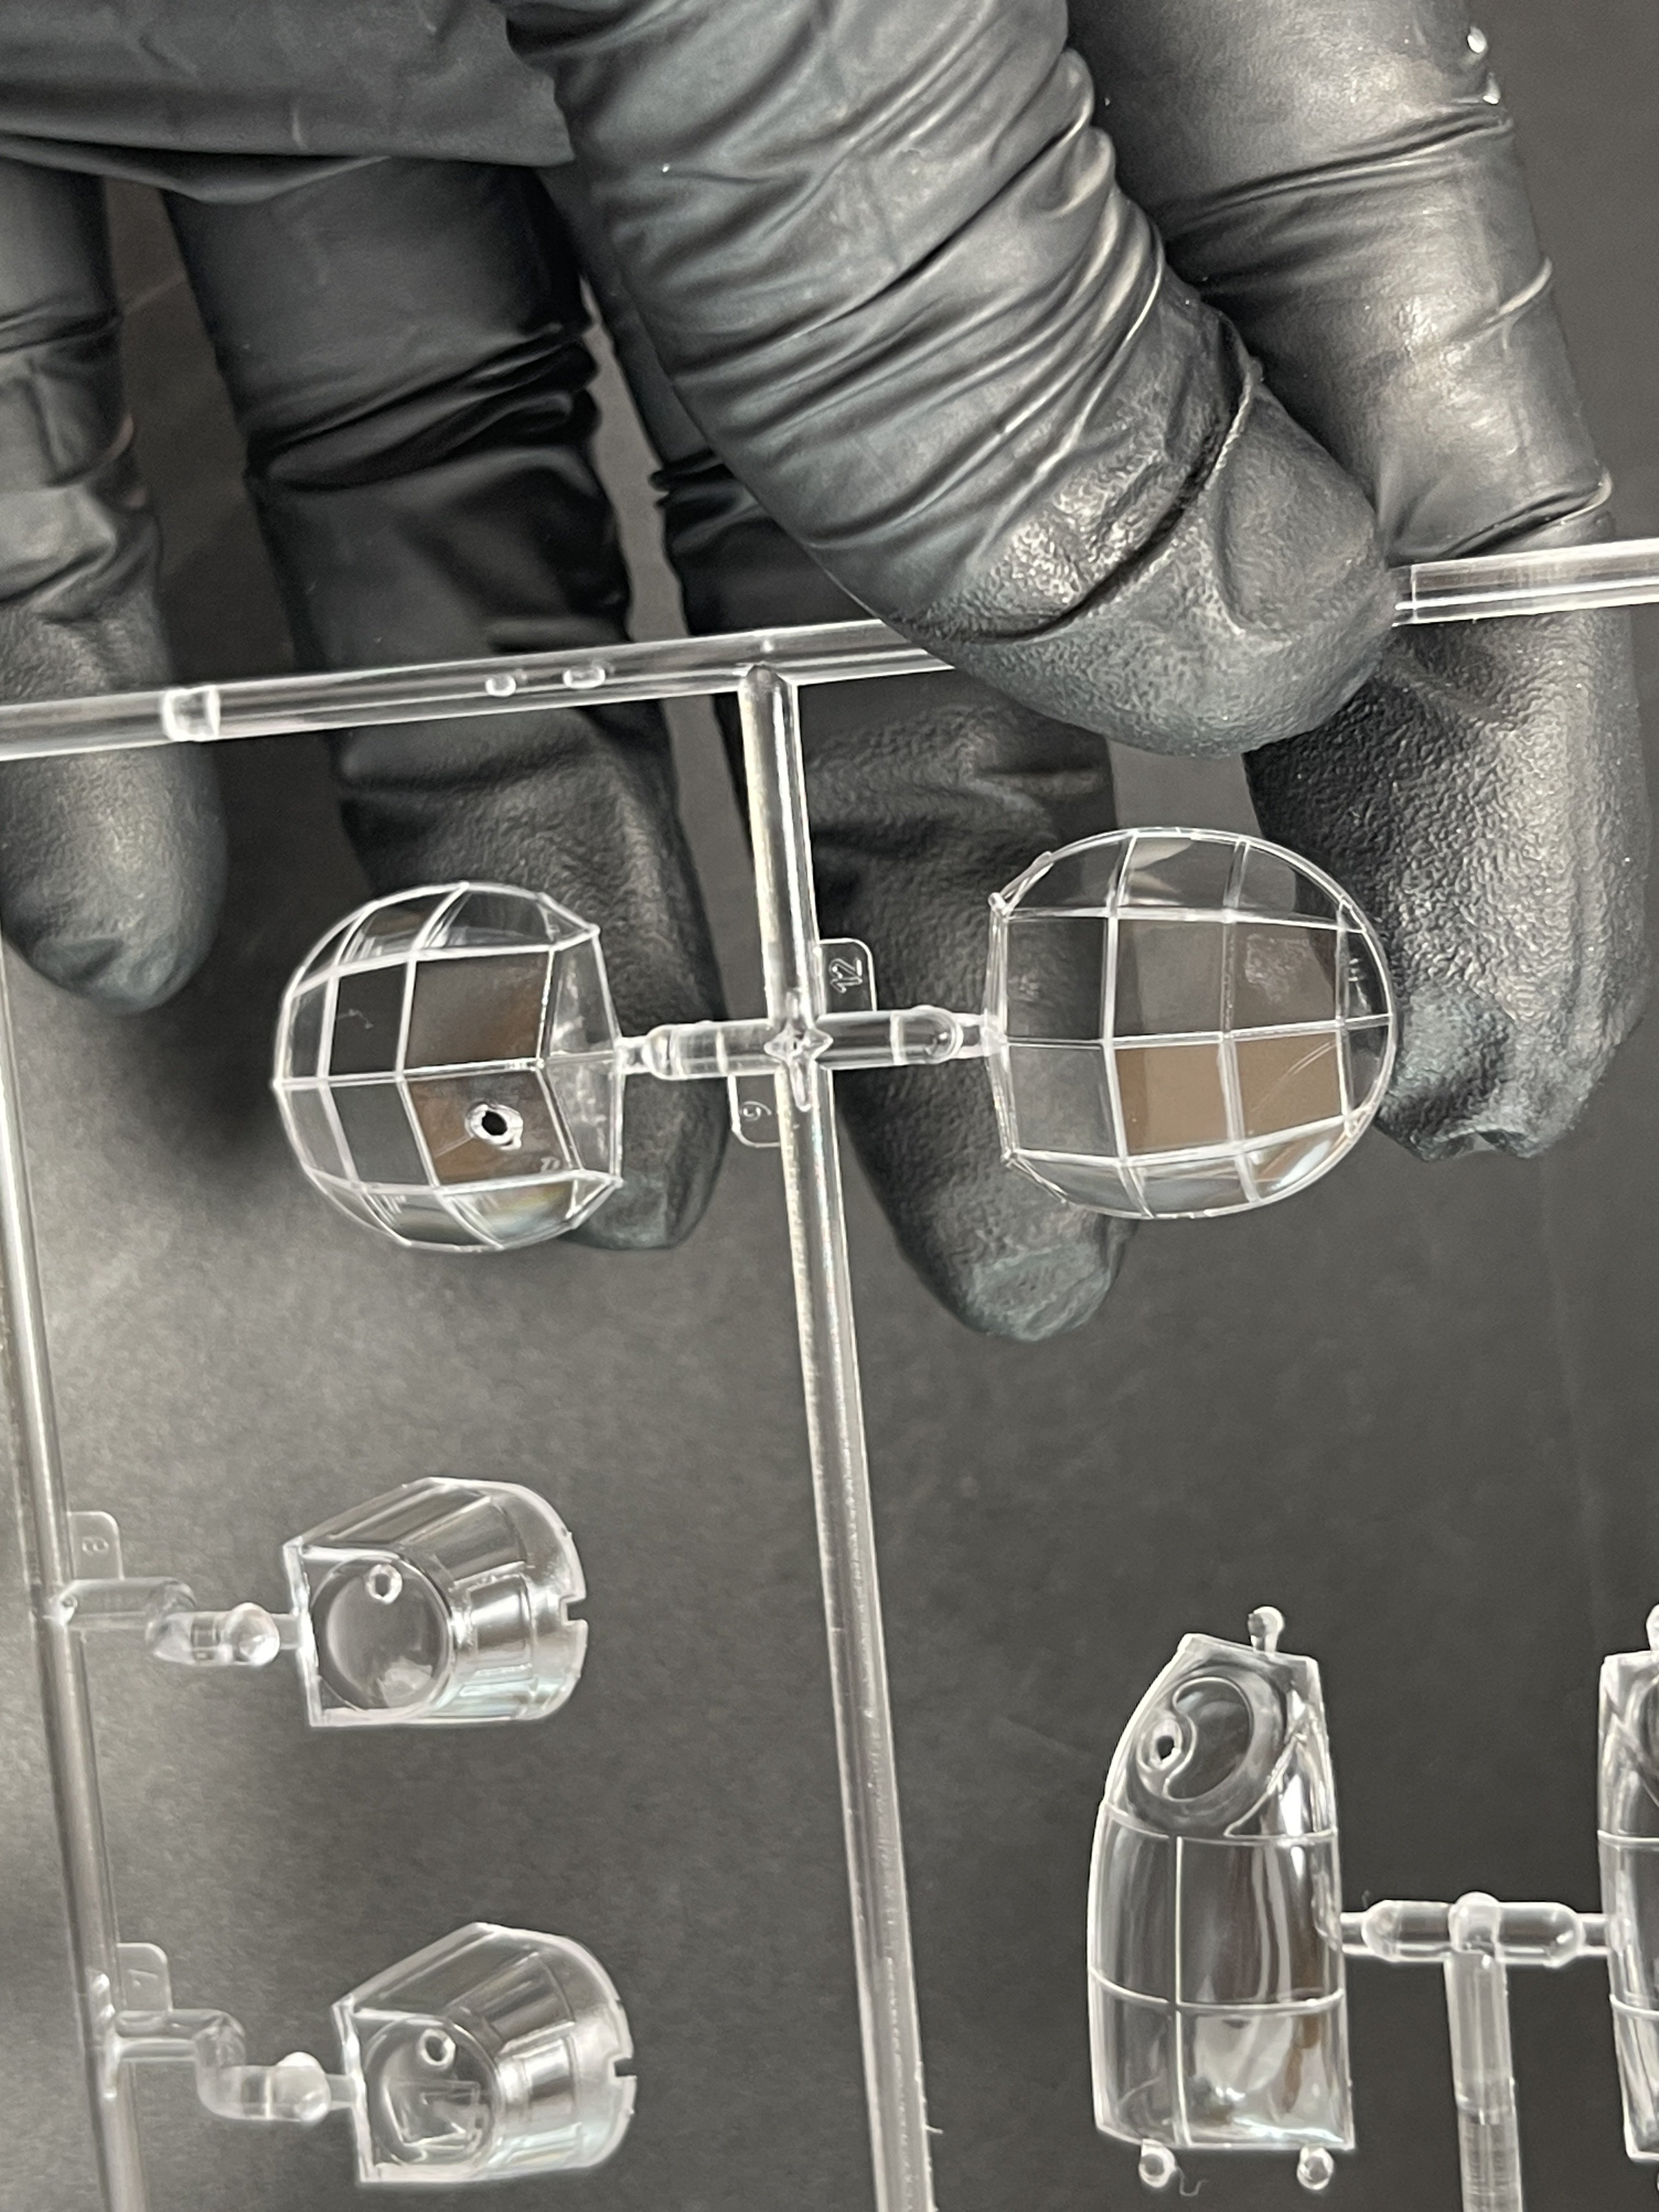
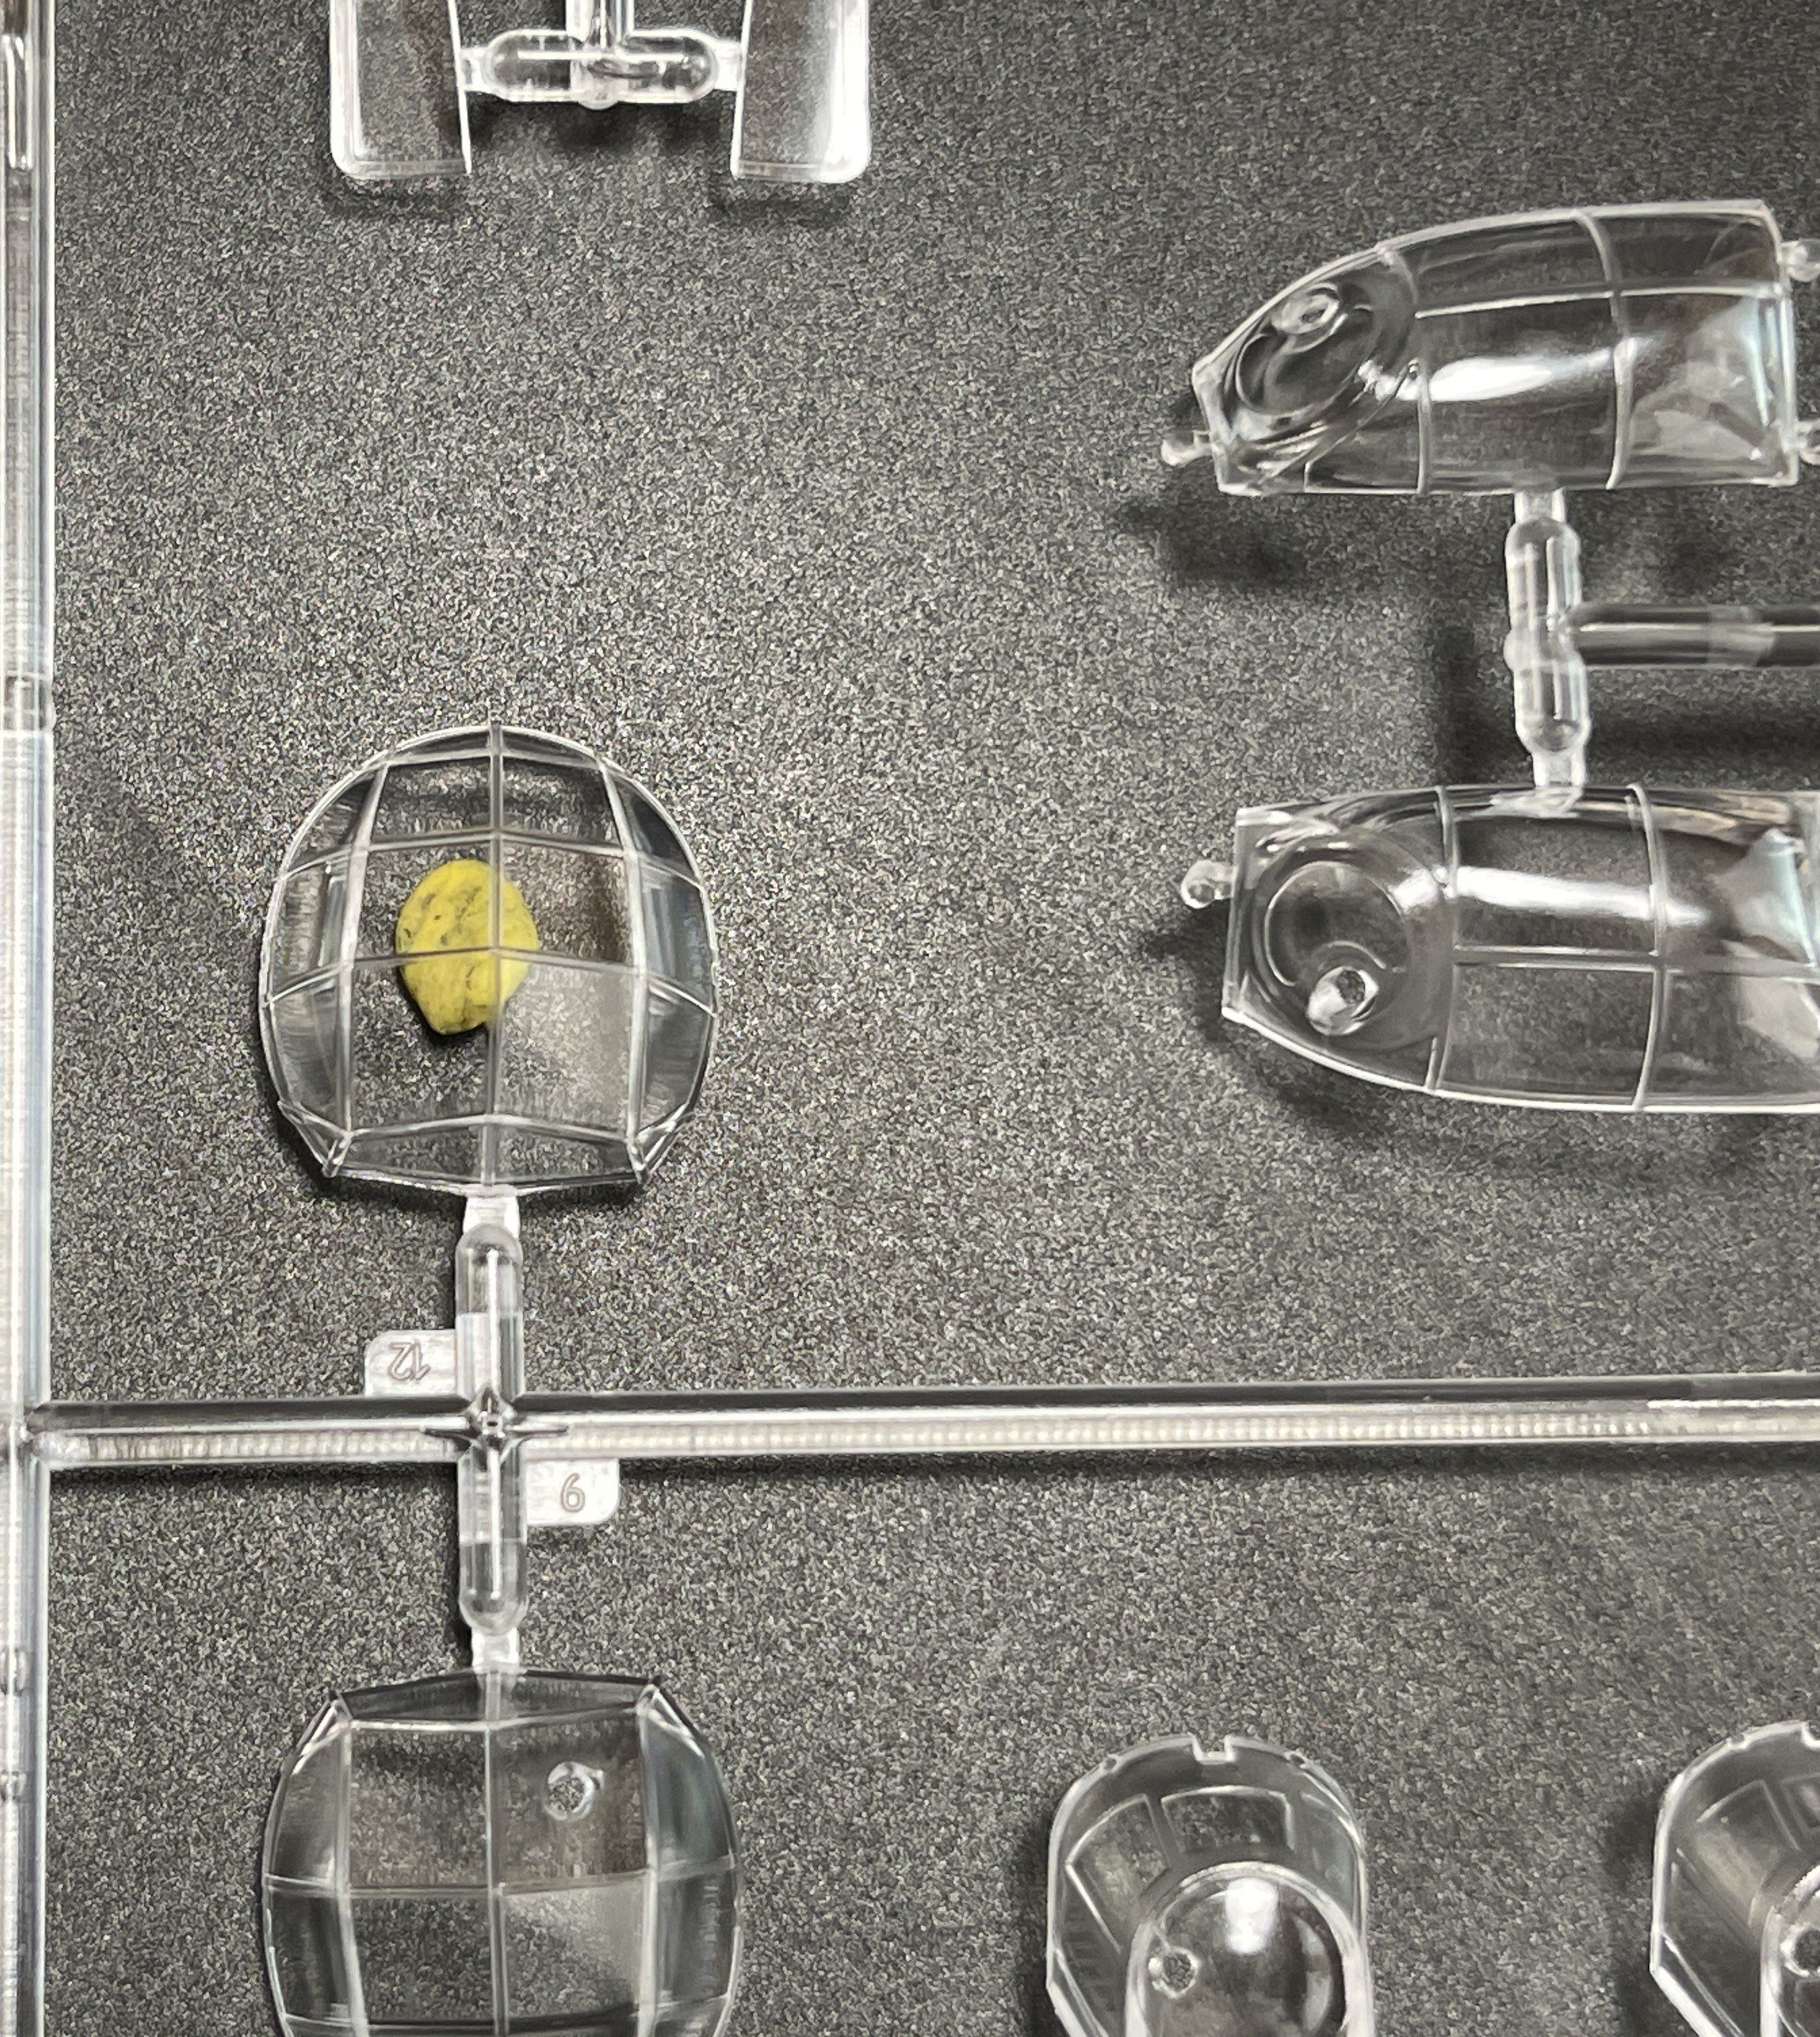
Clear parts, such as the canopy and nose glazing, are crystal clear and free of distortions, though careful handling is required specially when to glue into one another.

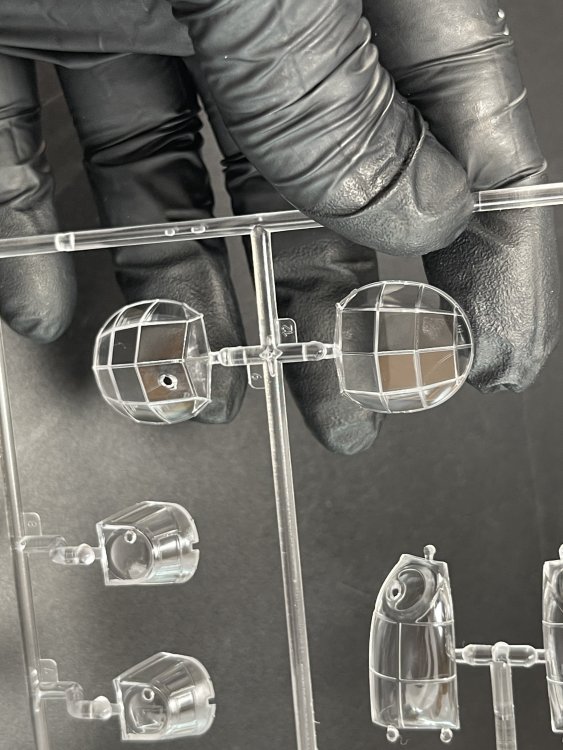
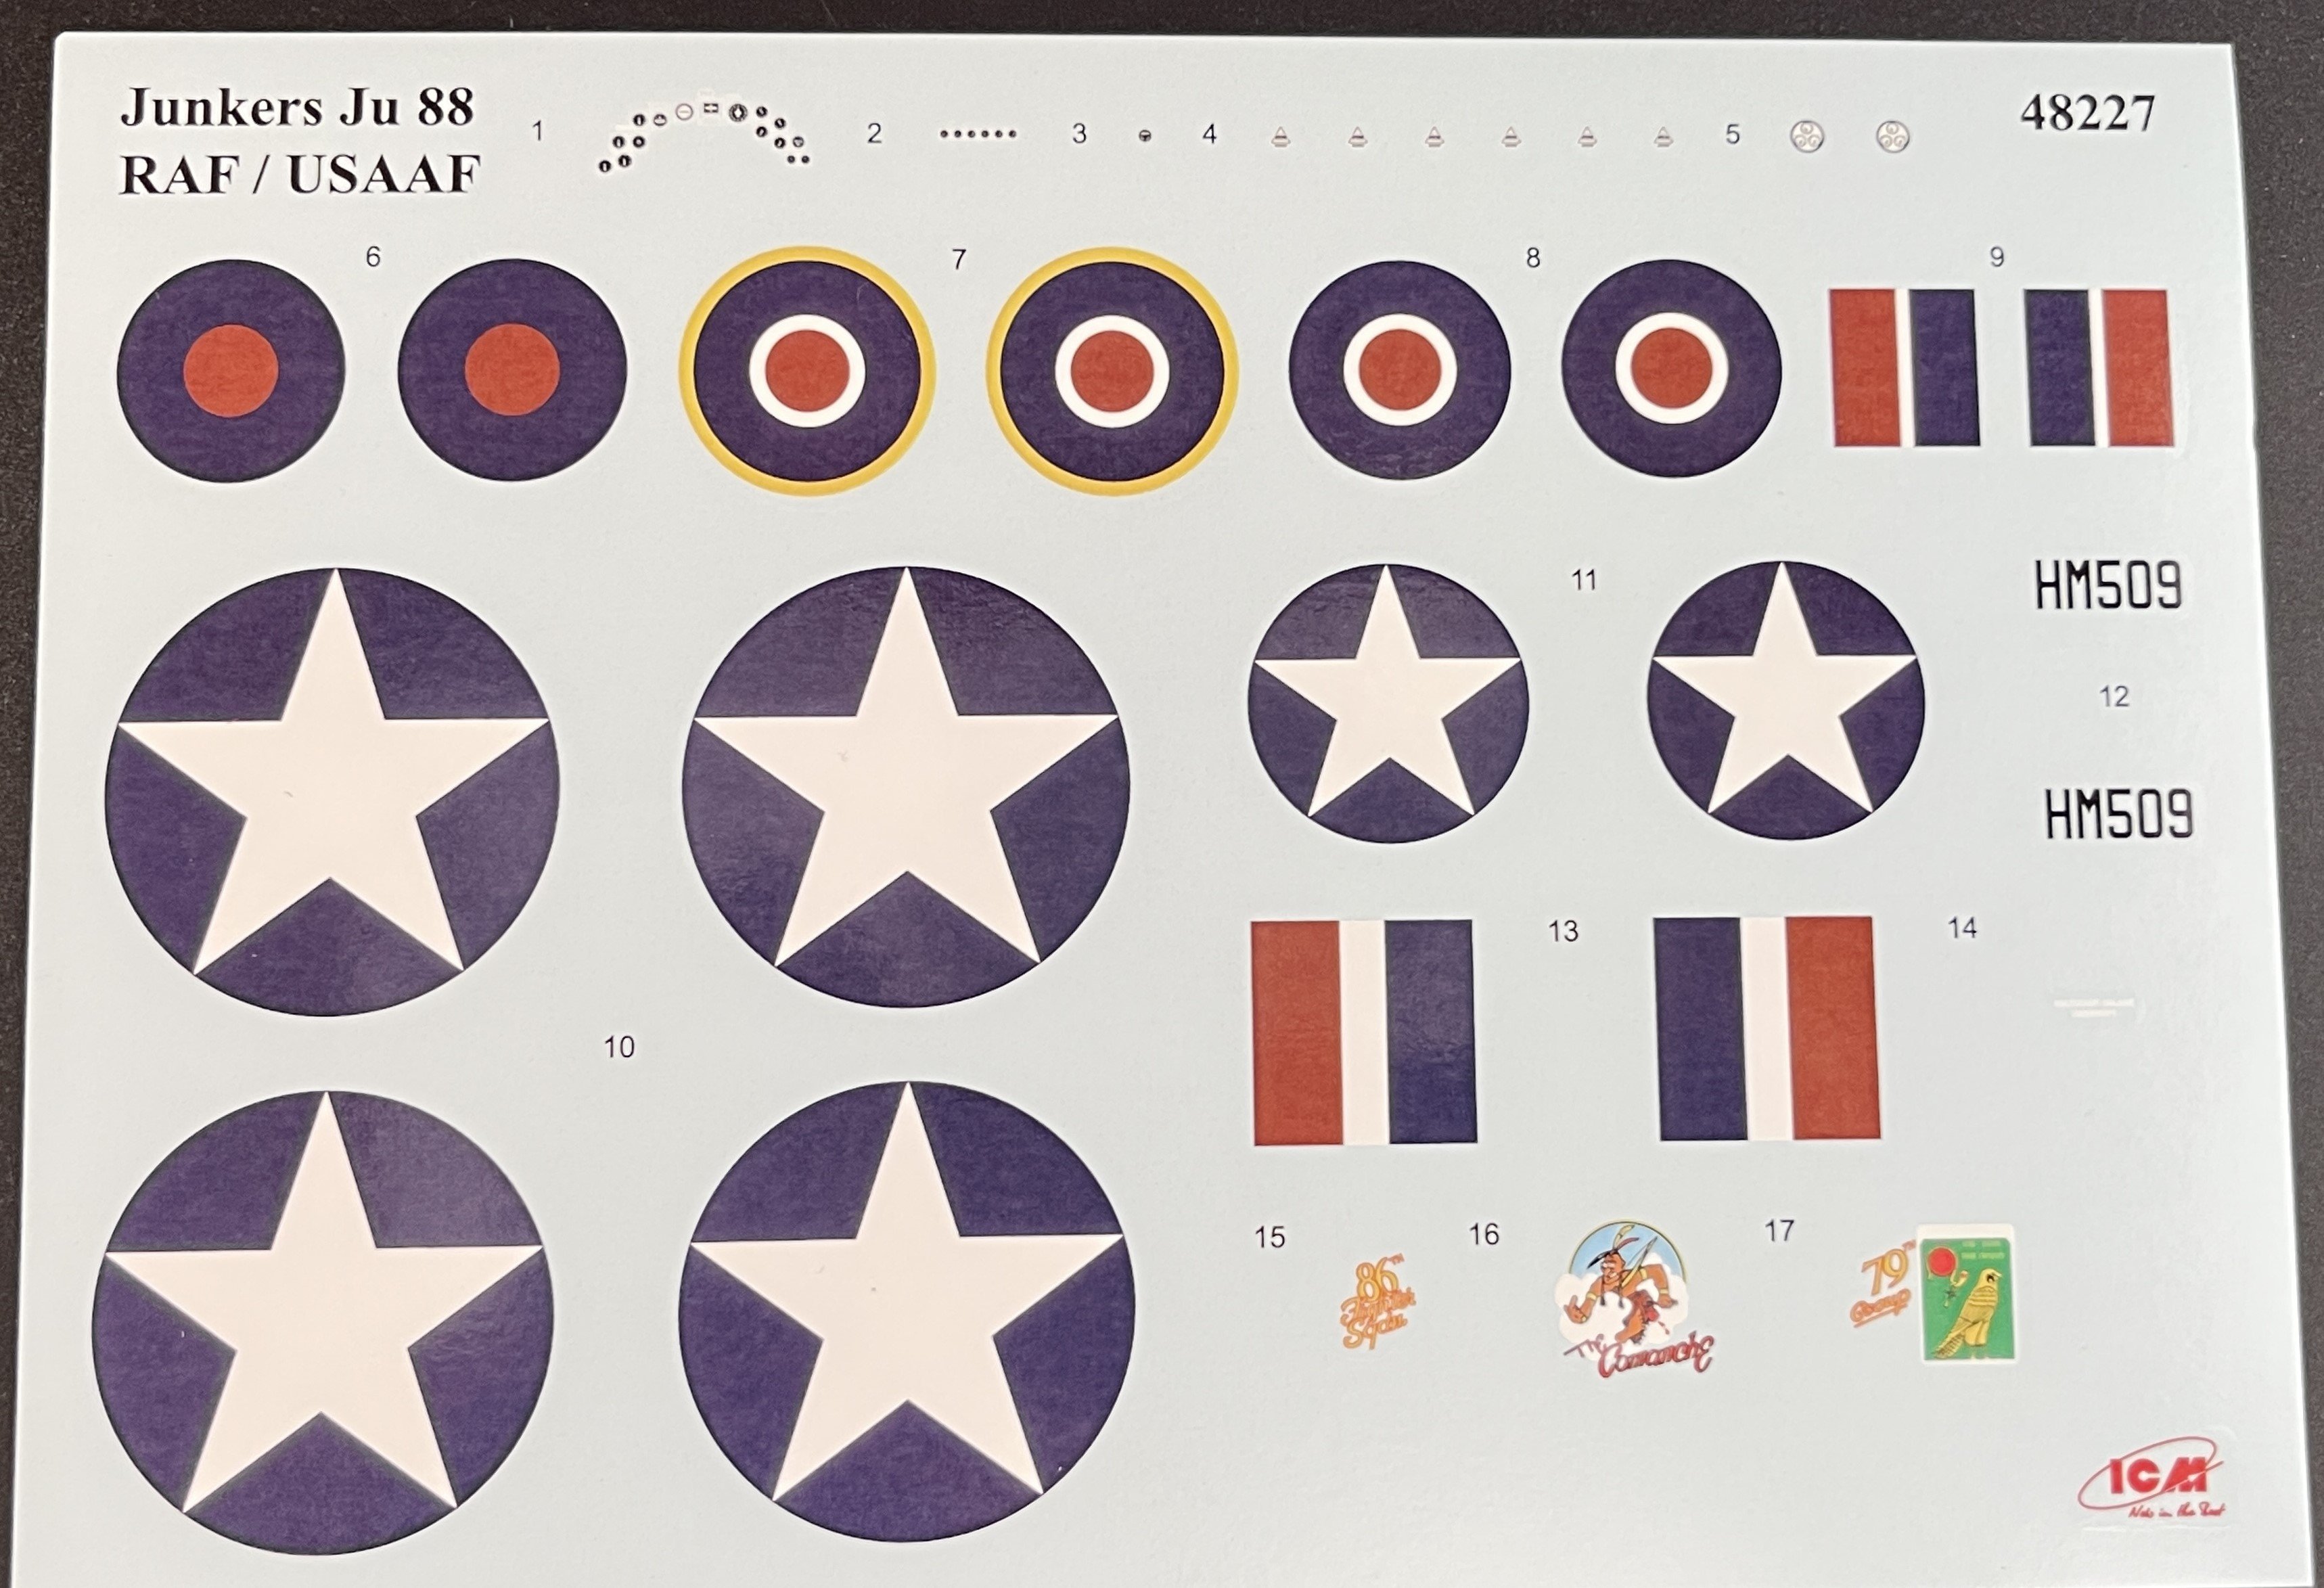
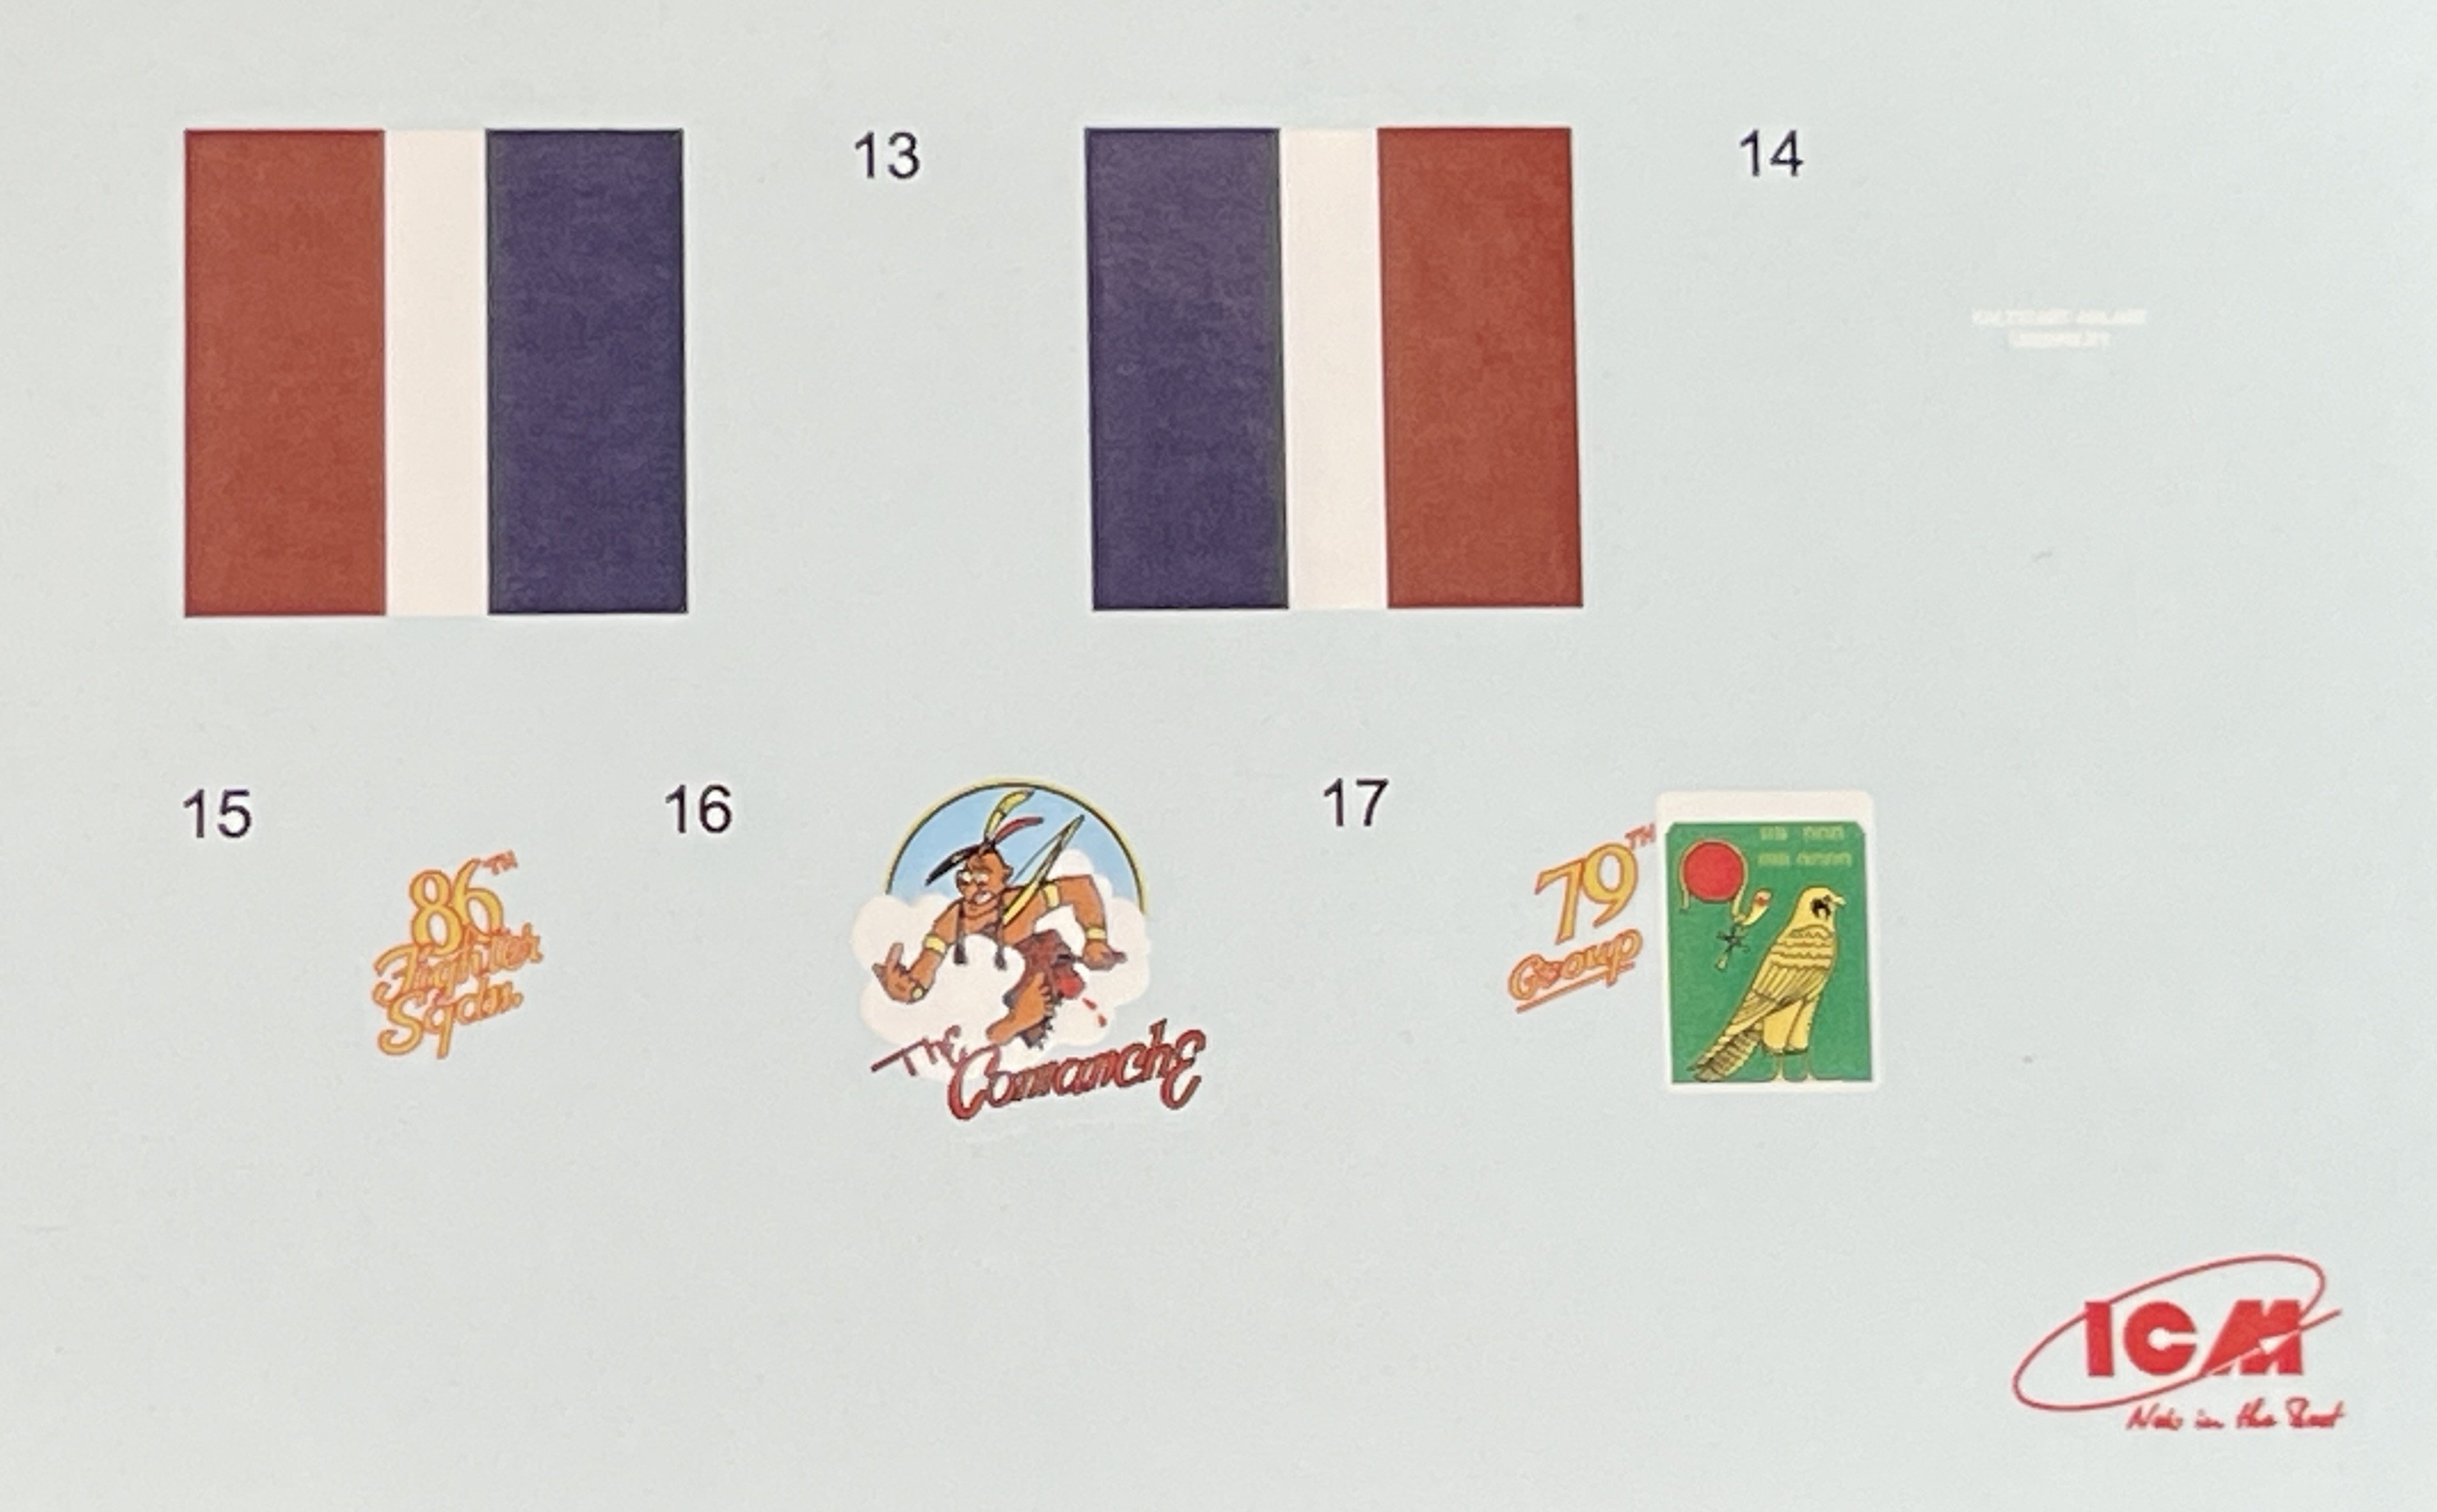
This release offer a two schemes in a single decals sheets, dcecals with good color registrations and density, and very good definition.


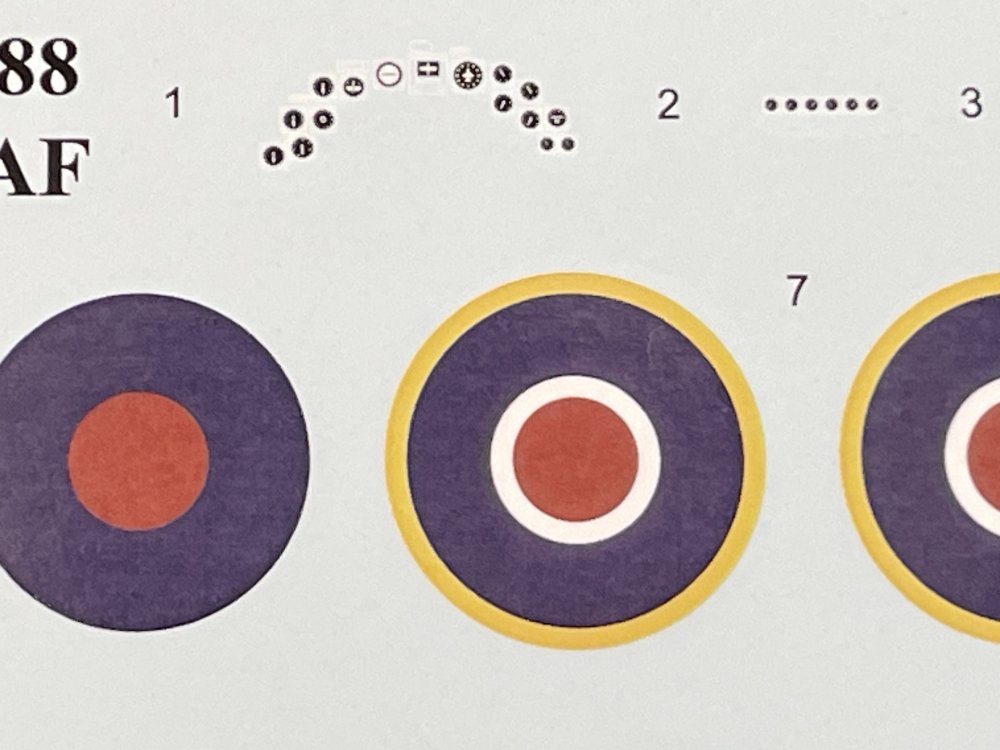
The schemes are:
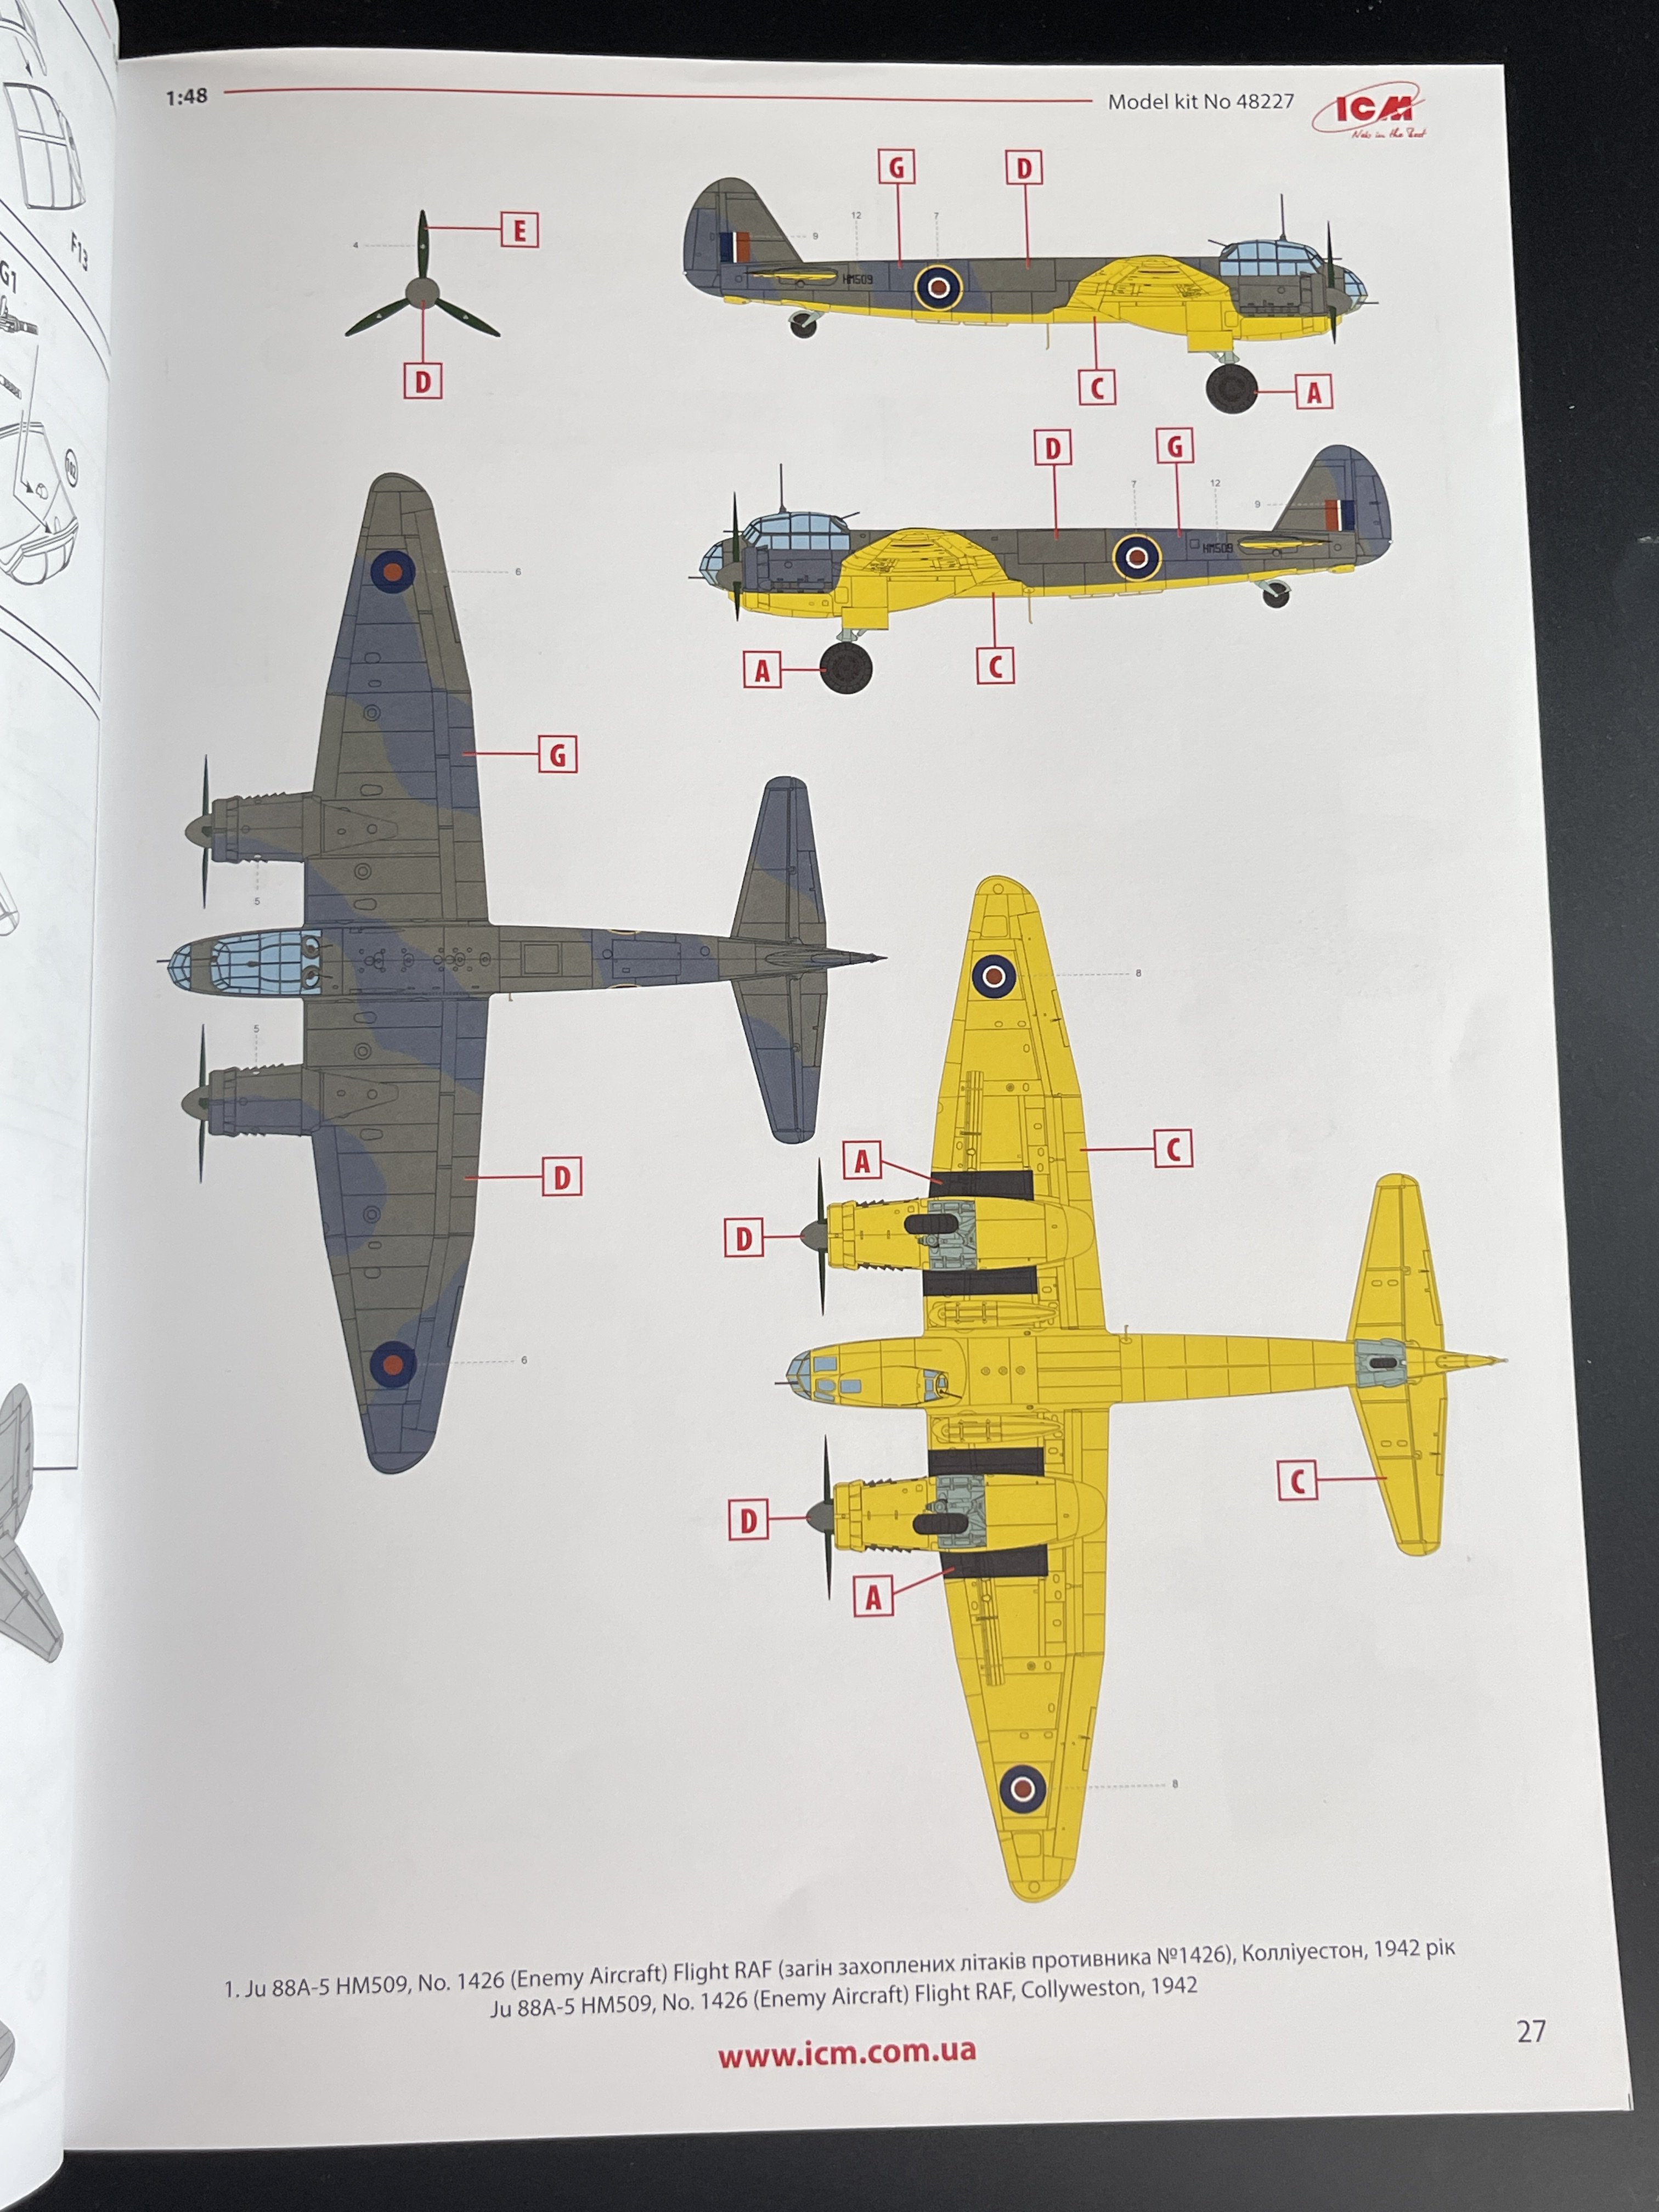
- Ju-88 A-5 HM509, n.º 1426 (enemy aircraft) Flight RAF, Collyweston, 1942

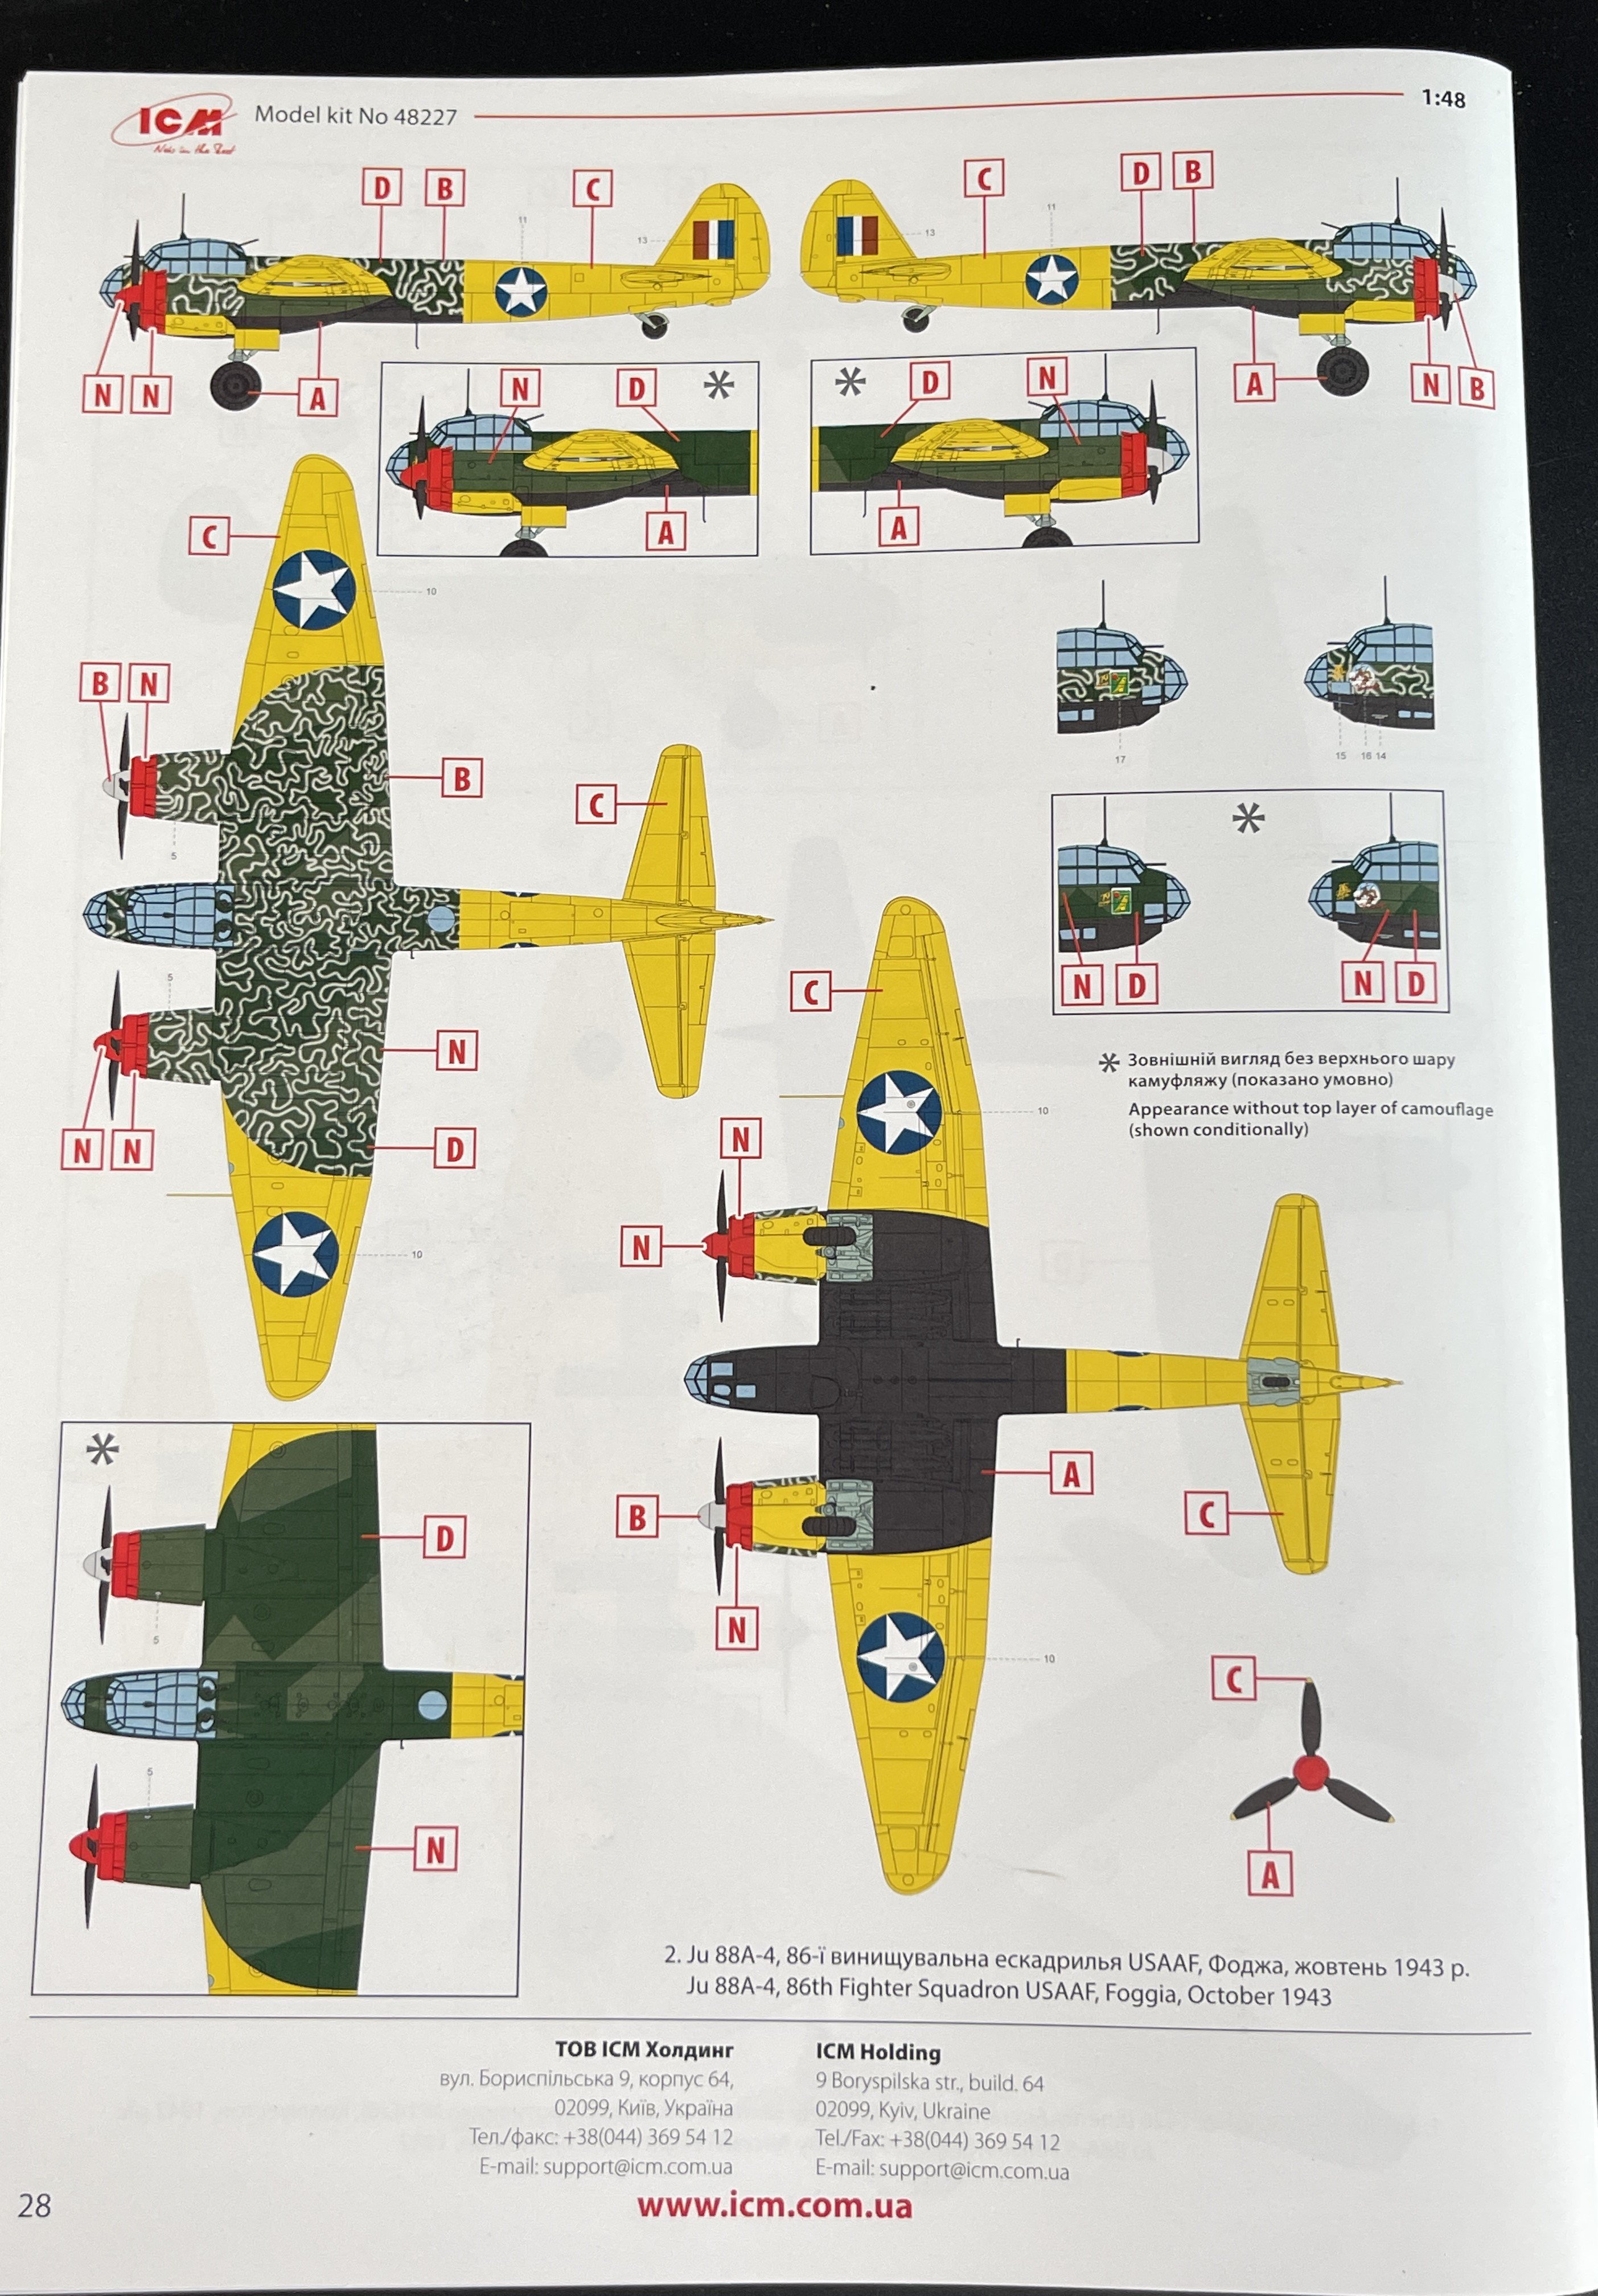
- Ju-88A-4 , 86th Fighter Squadron USAAF, Foggia, October 1943;

As for the instructions booklet, is a typical ICM offering with good drawings, good parts place indication, with clear assembly steps. detailed, multi-page instruction manual with clear assembly steps and good color callouts (only with ICM paints)


Conclusion
Another winner here from ICM as far I concern.
It’s a very striking Ju-88, different from all other and it will stand out in your collection.
And that picture is calling for a diorama, at least for me.
This model is going to the top of to do pile!
The detail out of the box is very good and it will make a very good replica. You can get full engine out straight from the box. For the expert and keen modeler some AM will make some extra detail to make this beauty into a masterpiece if you have a very stedy hand for that camouflage. That`s is a real challenge but a really good one!
Highly recommend this to intermediate/expert modeler
My deepest Thanks to ICM for bringing the subject into model kit form.

-
2
-
-
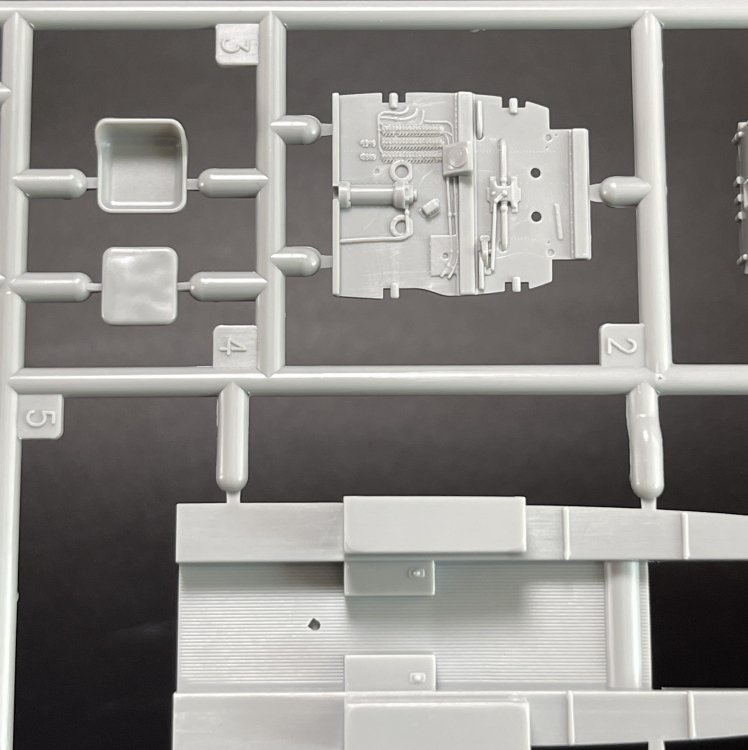
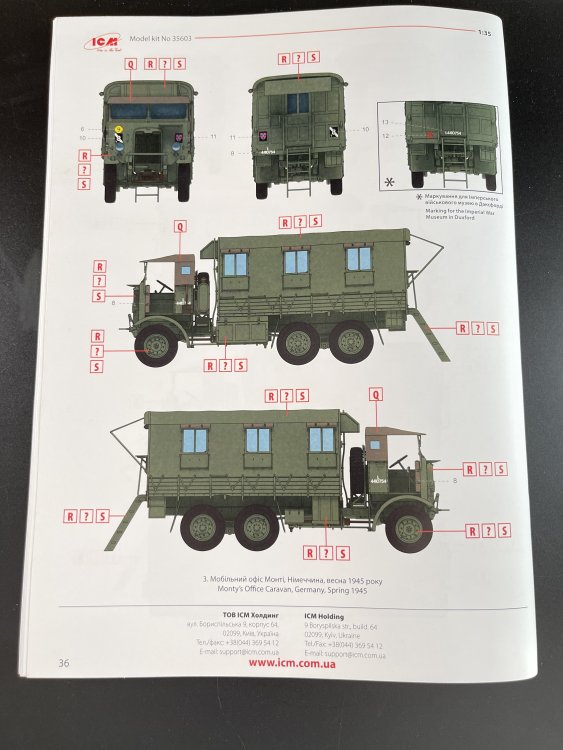
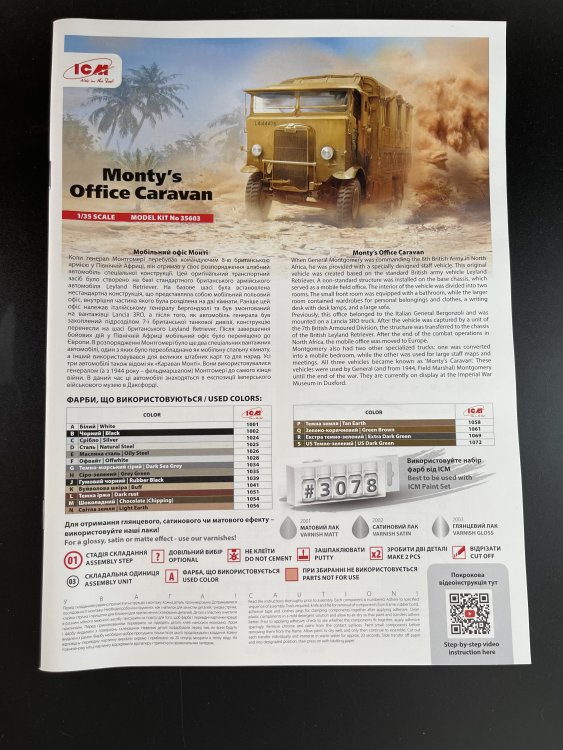
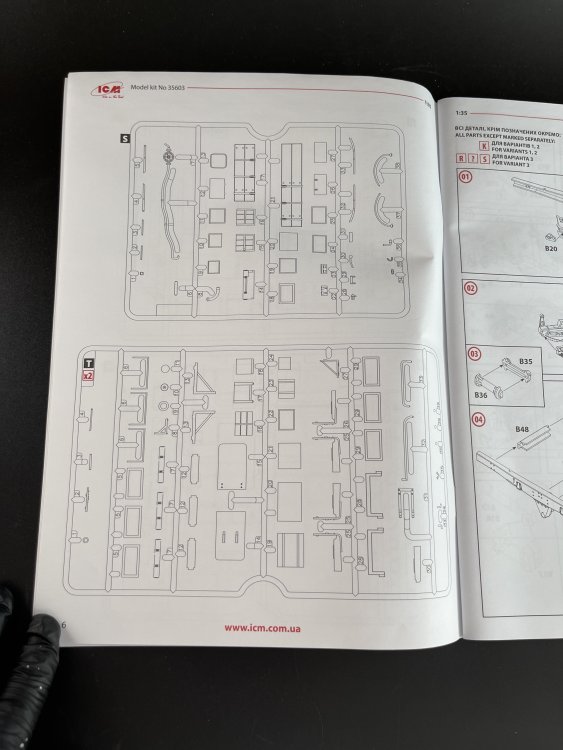
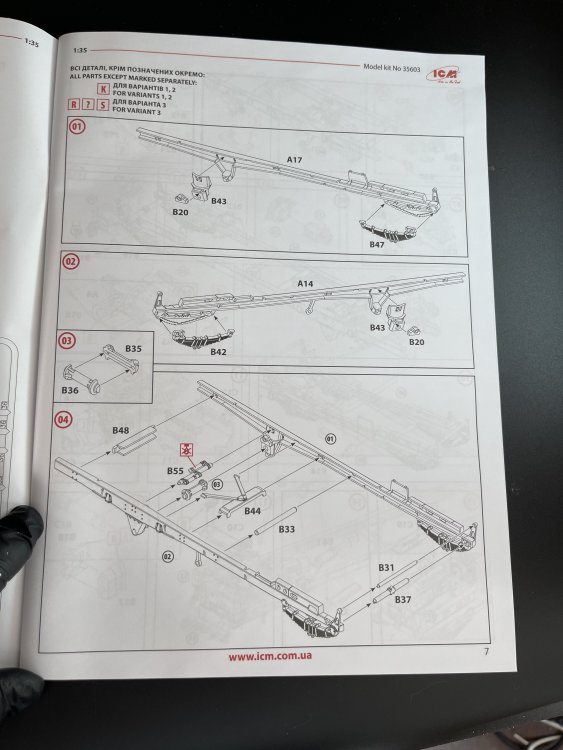
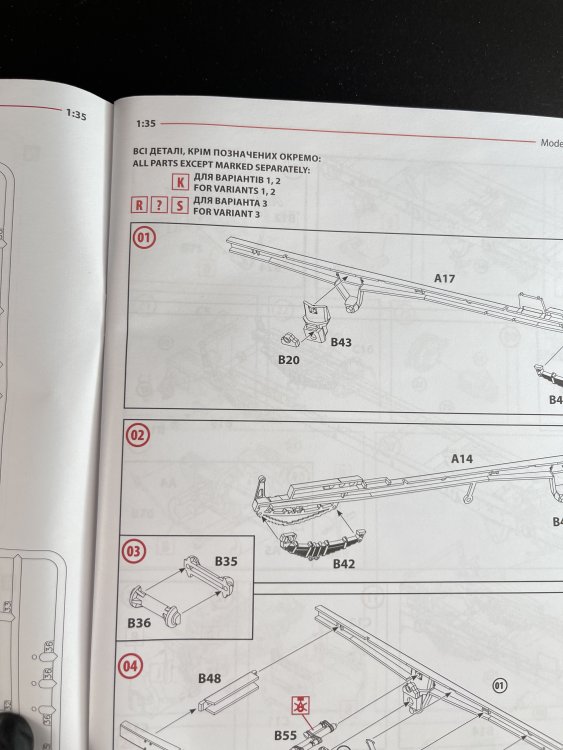
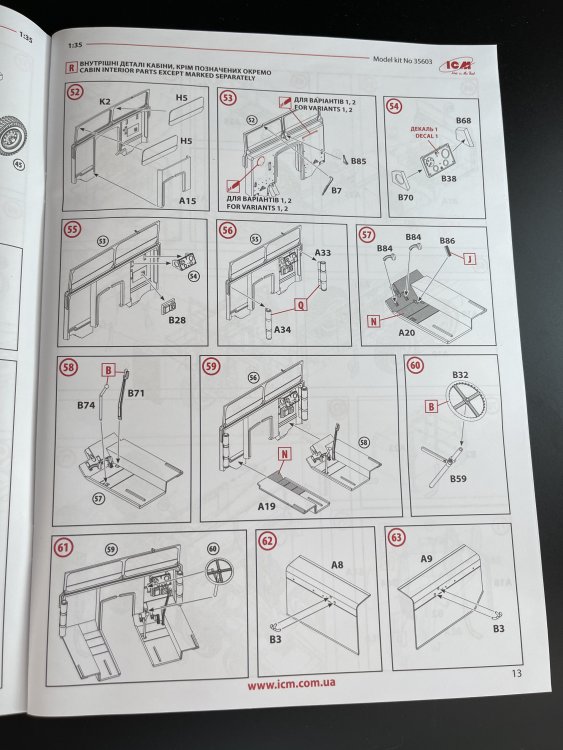
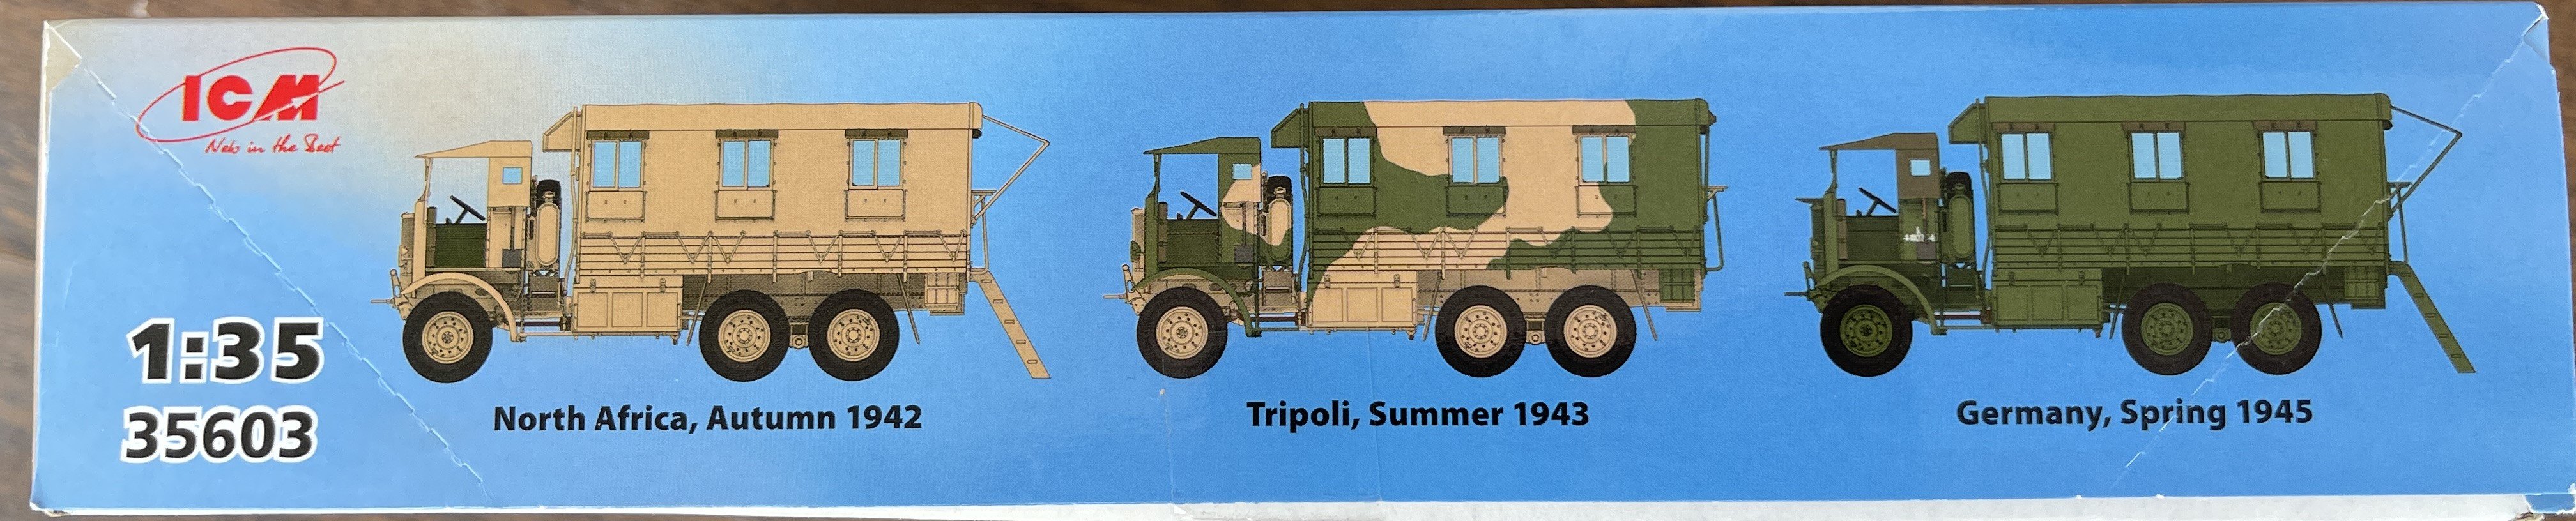
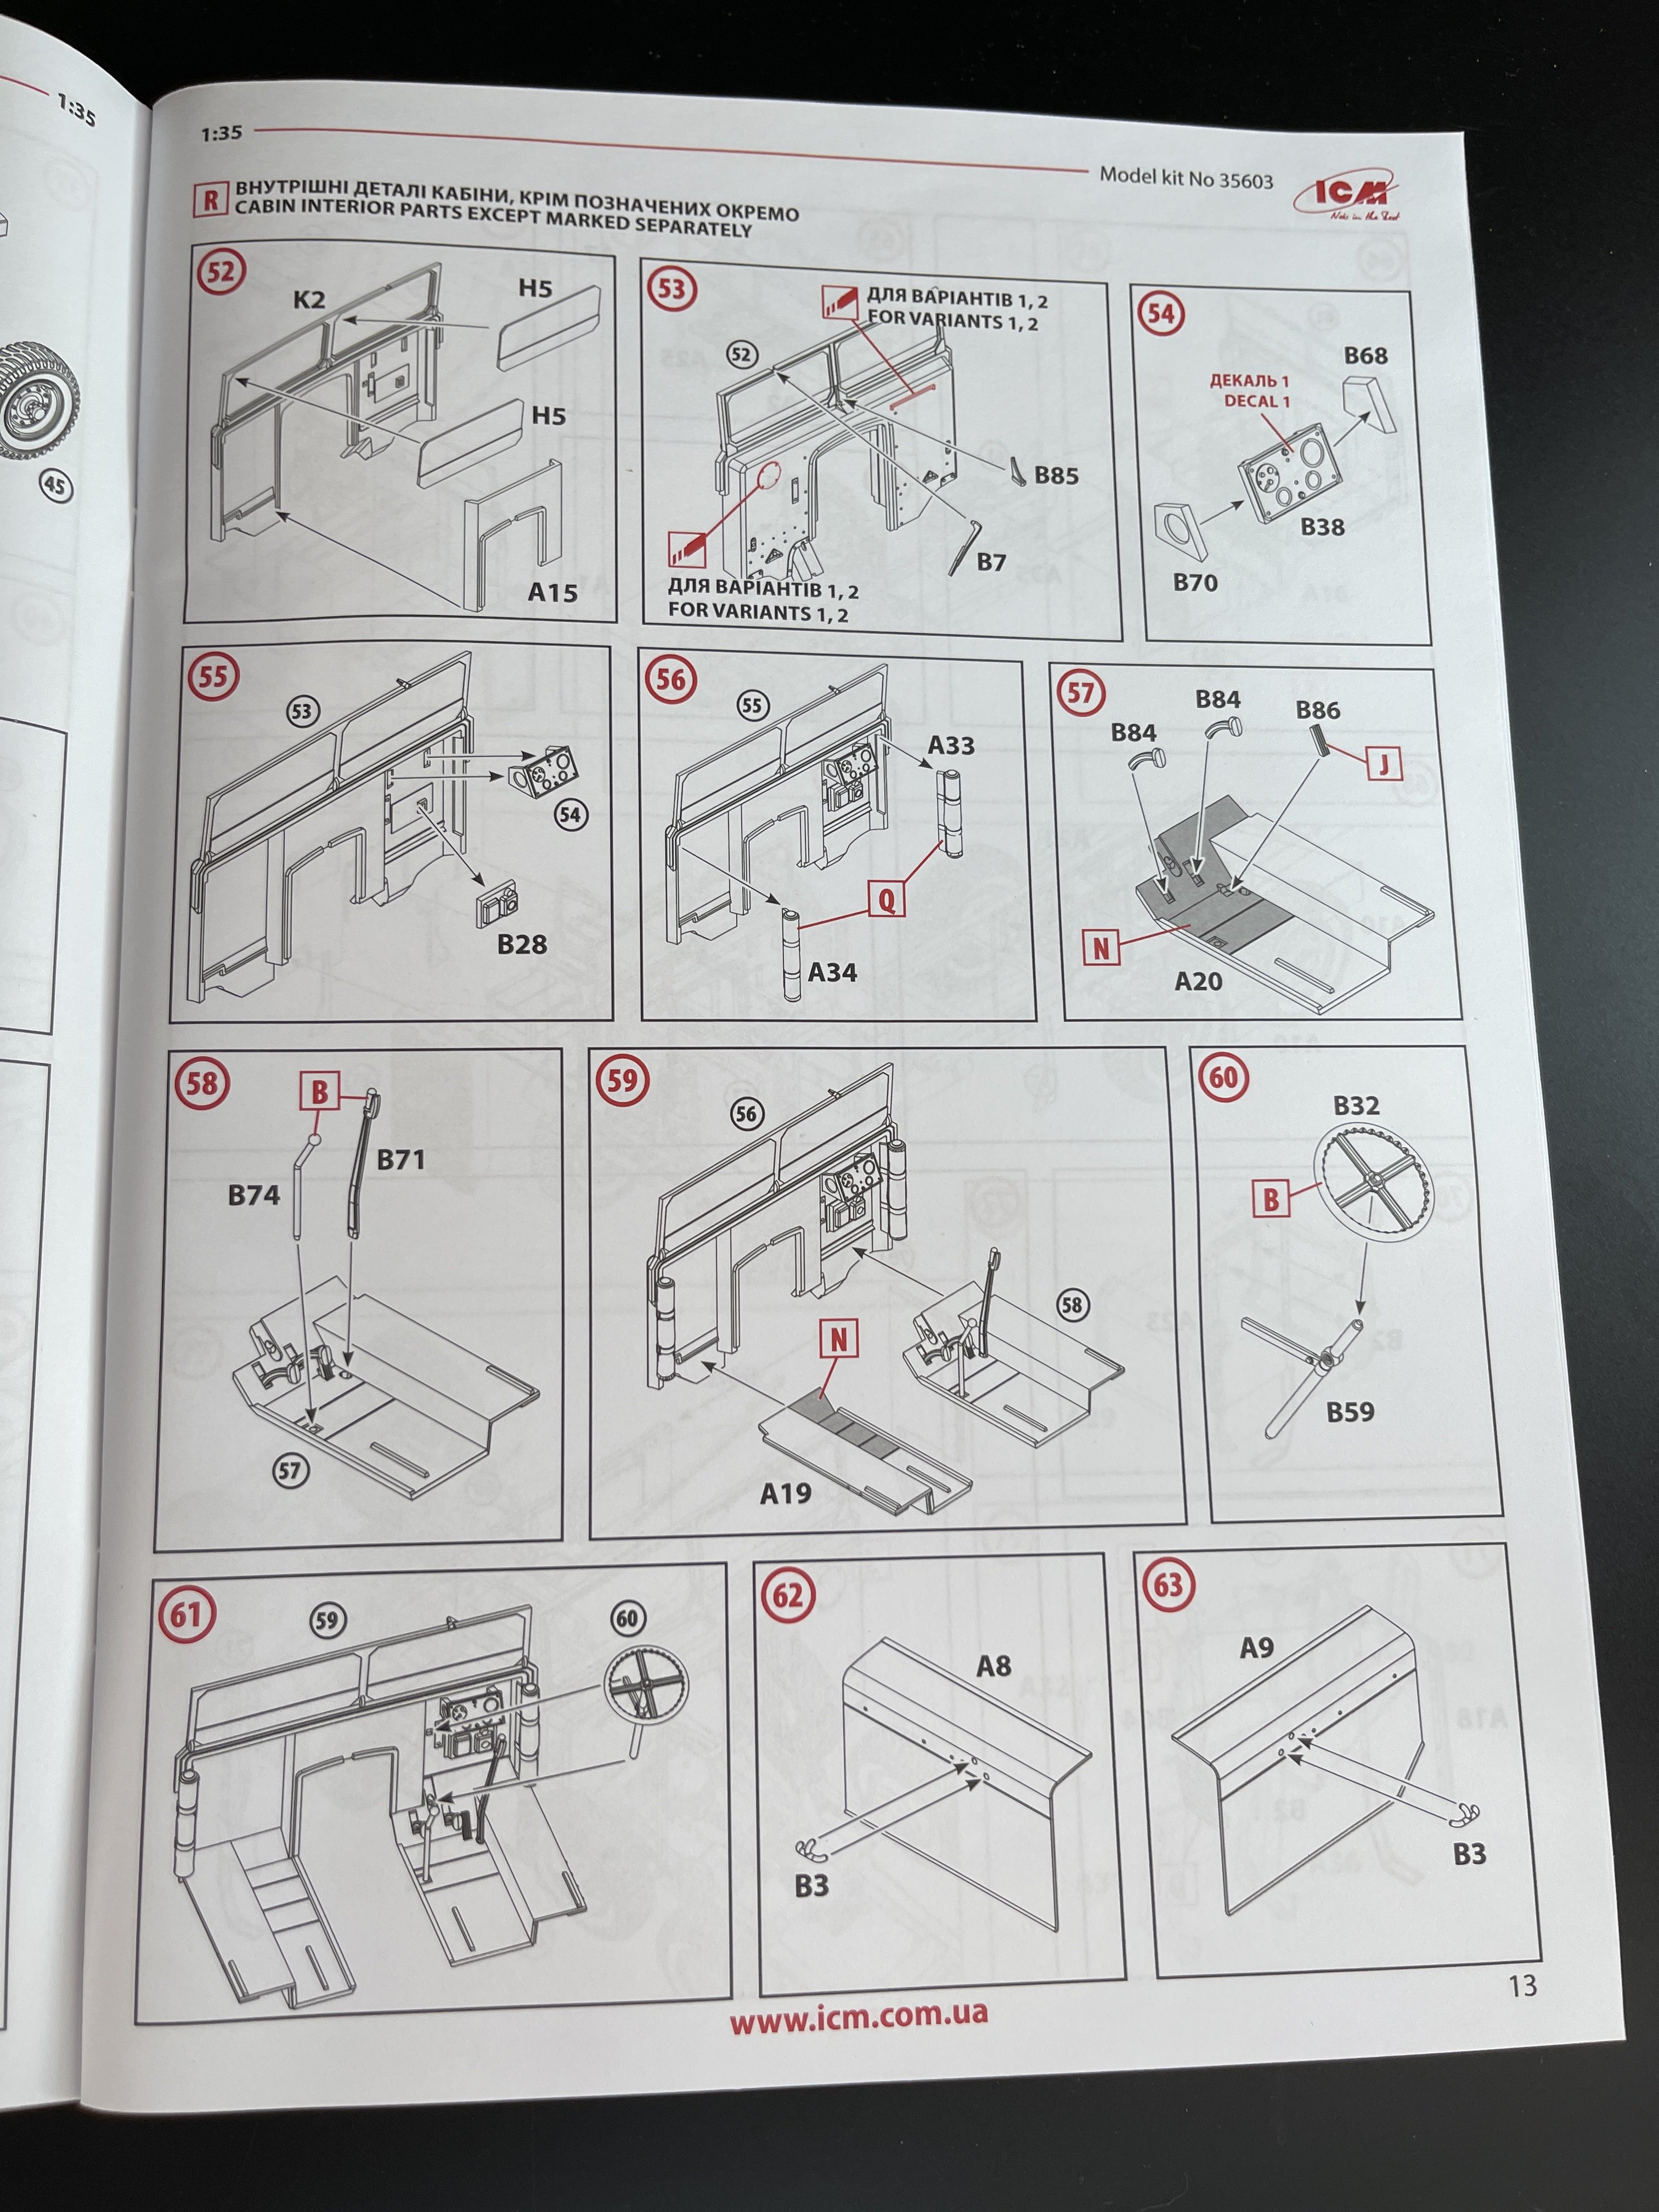
1:35
Monty's Office Caravan
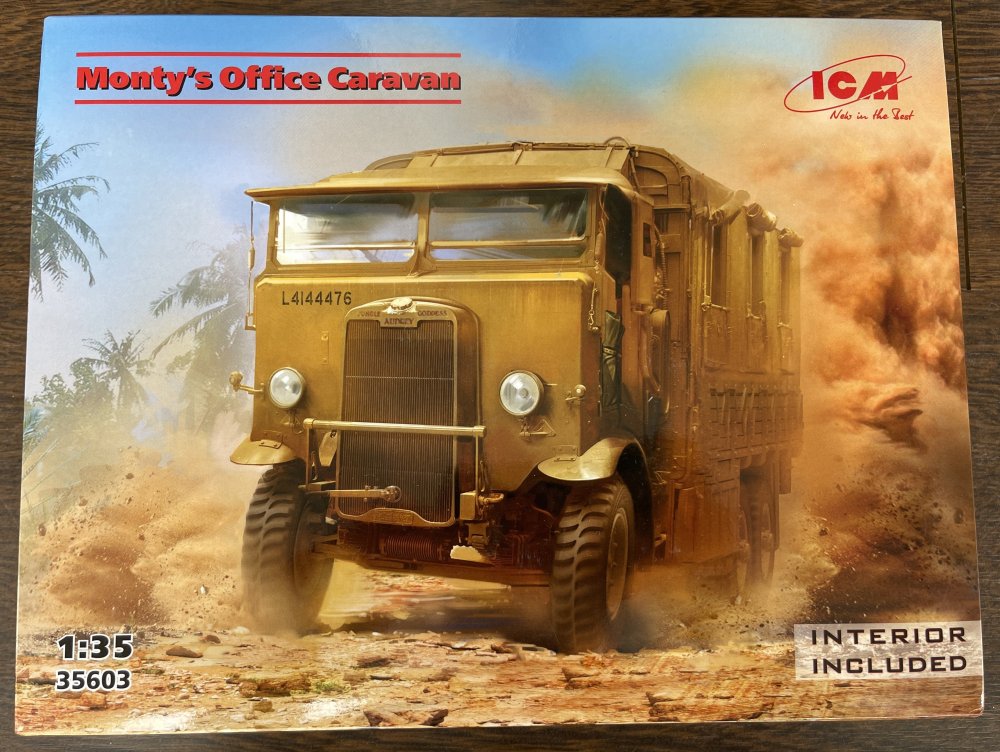
ICM
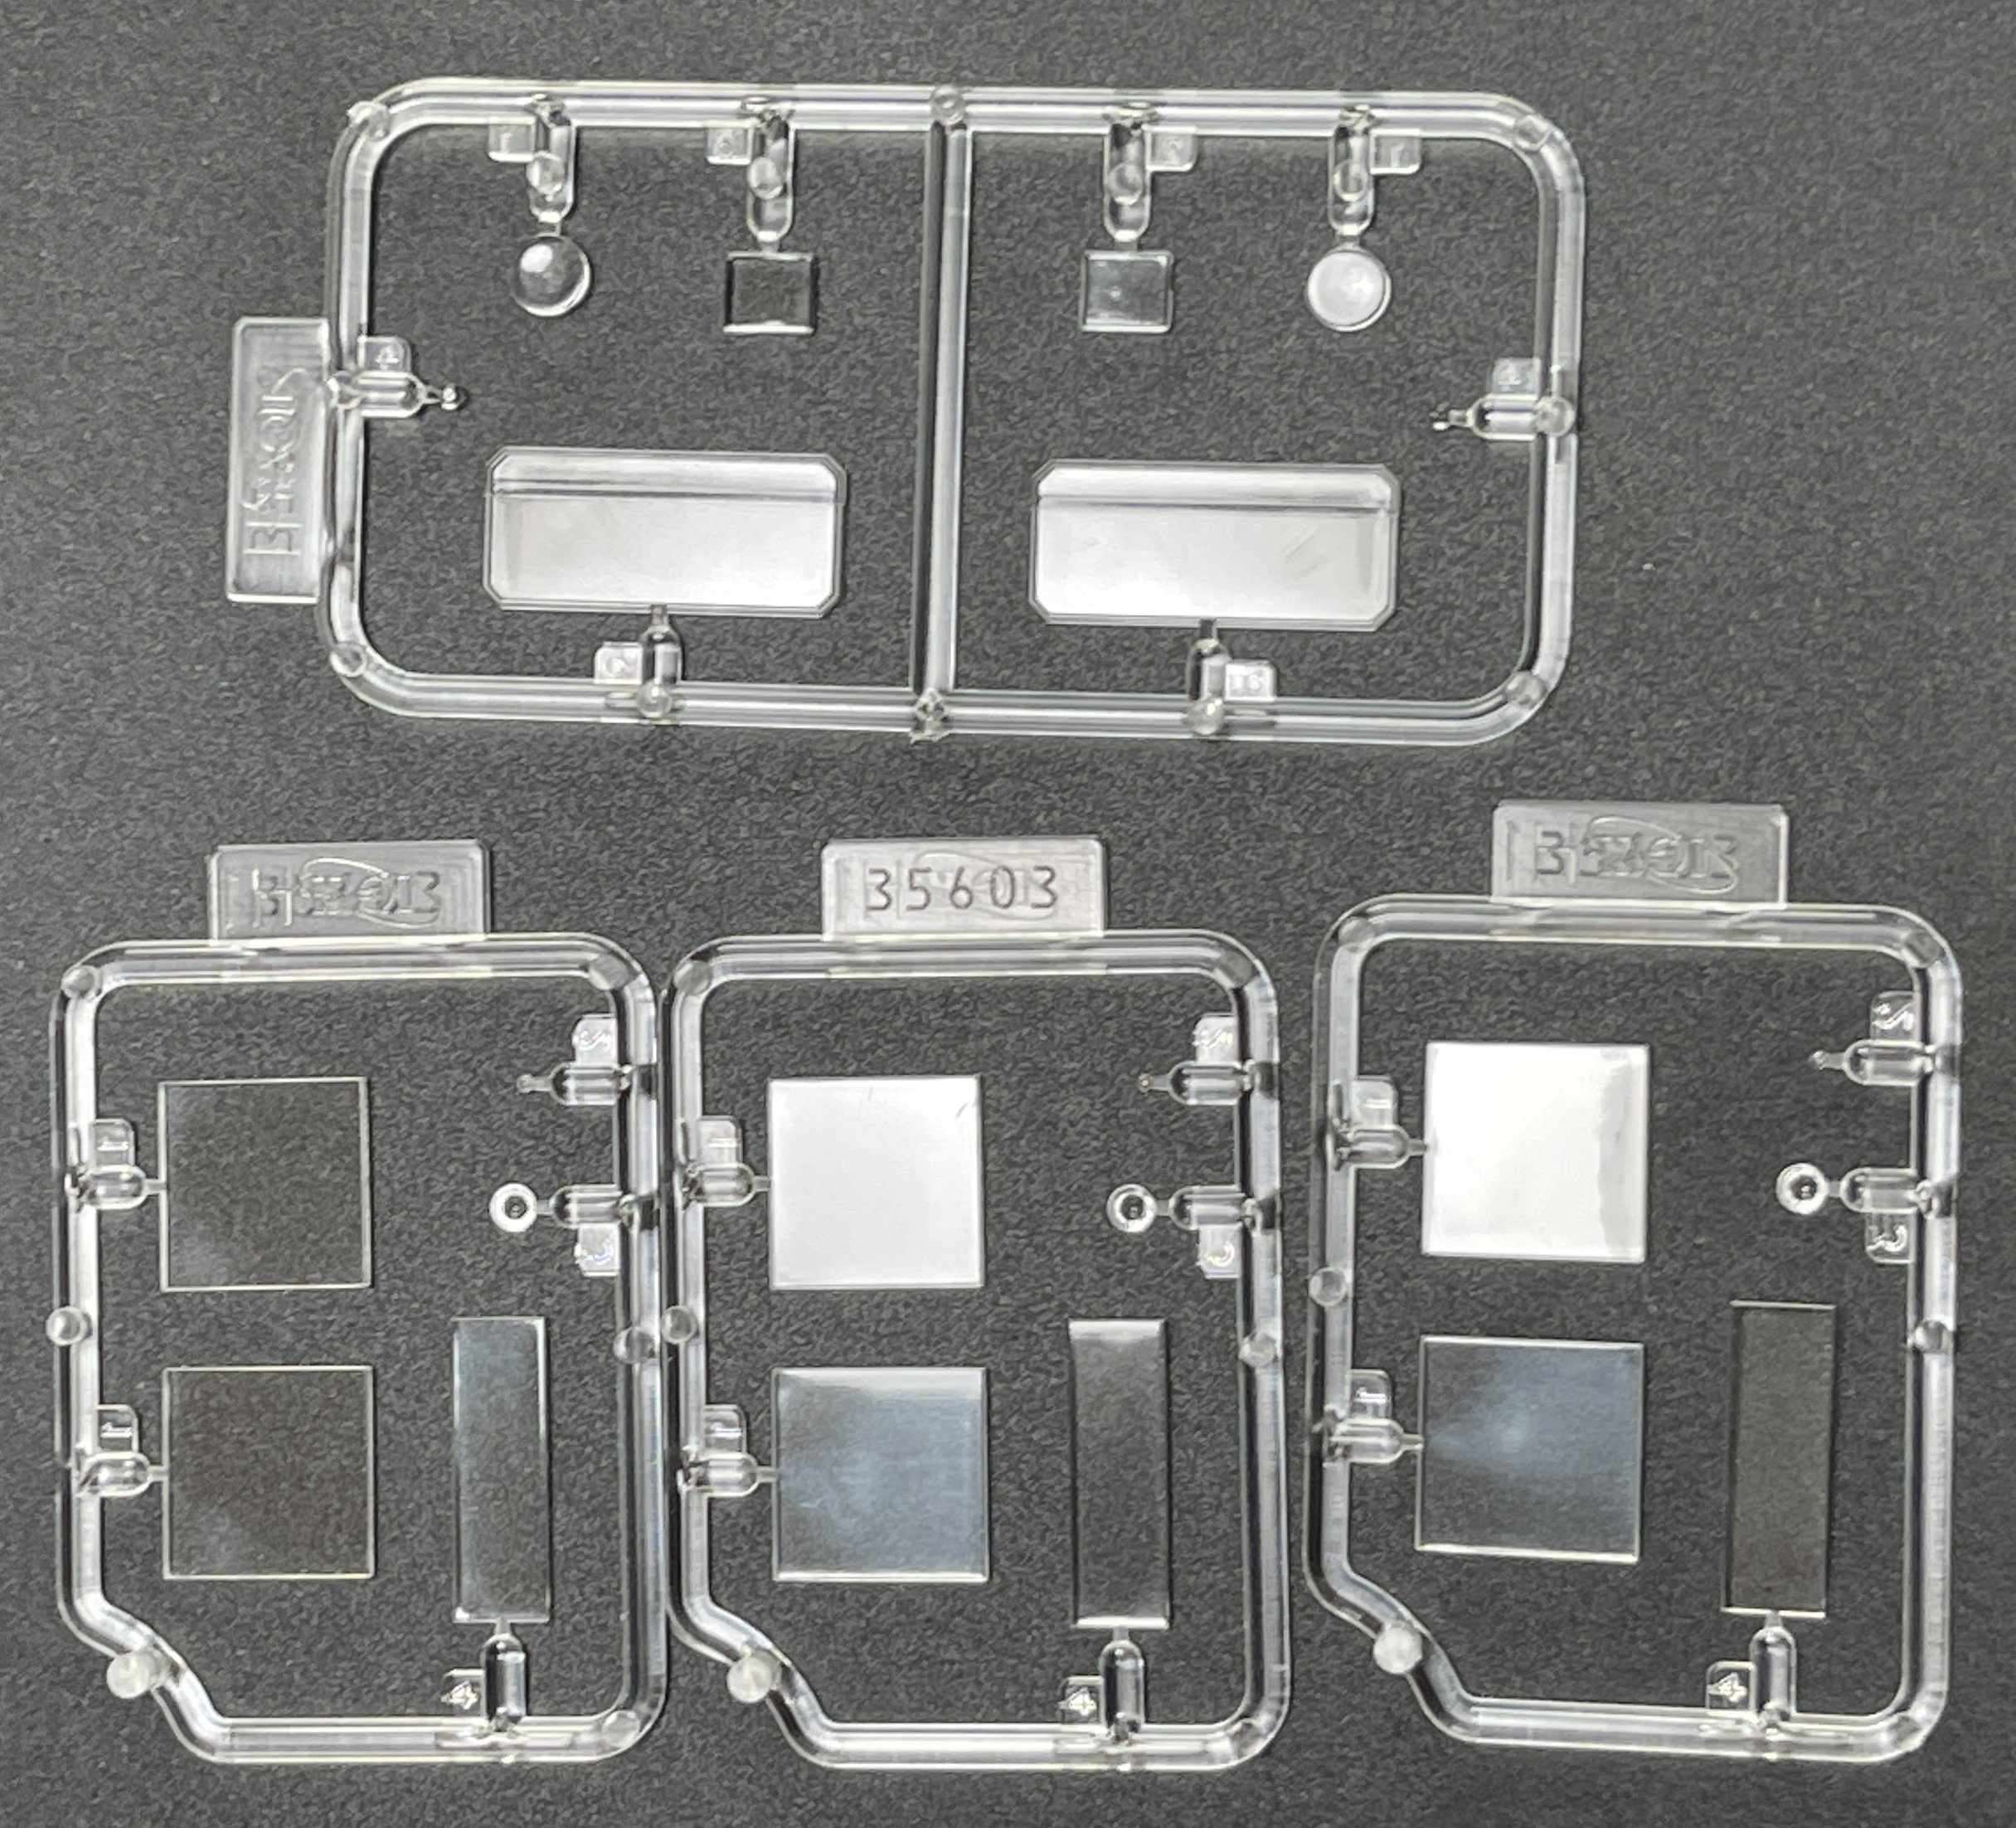
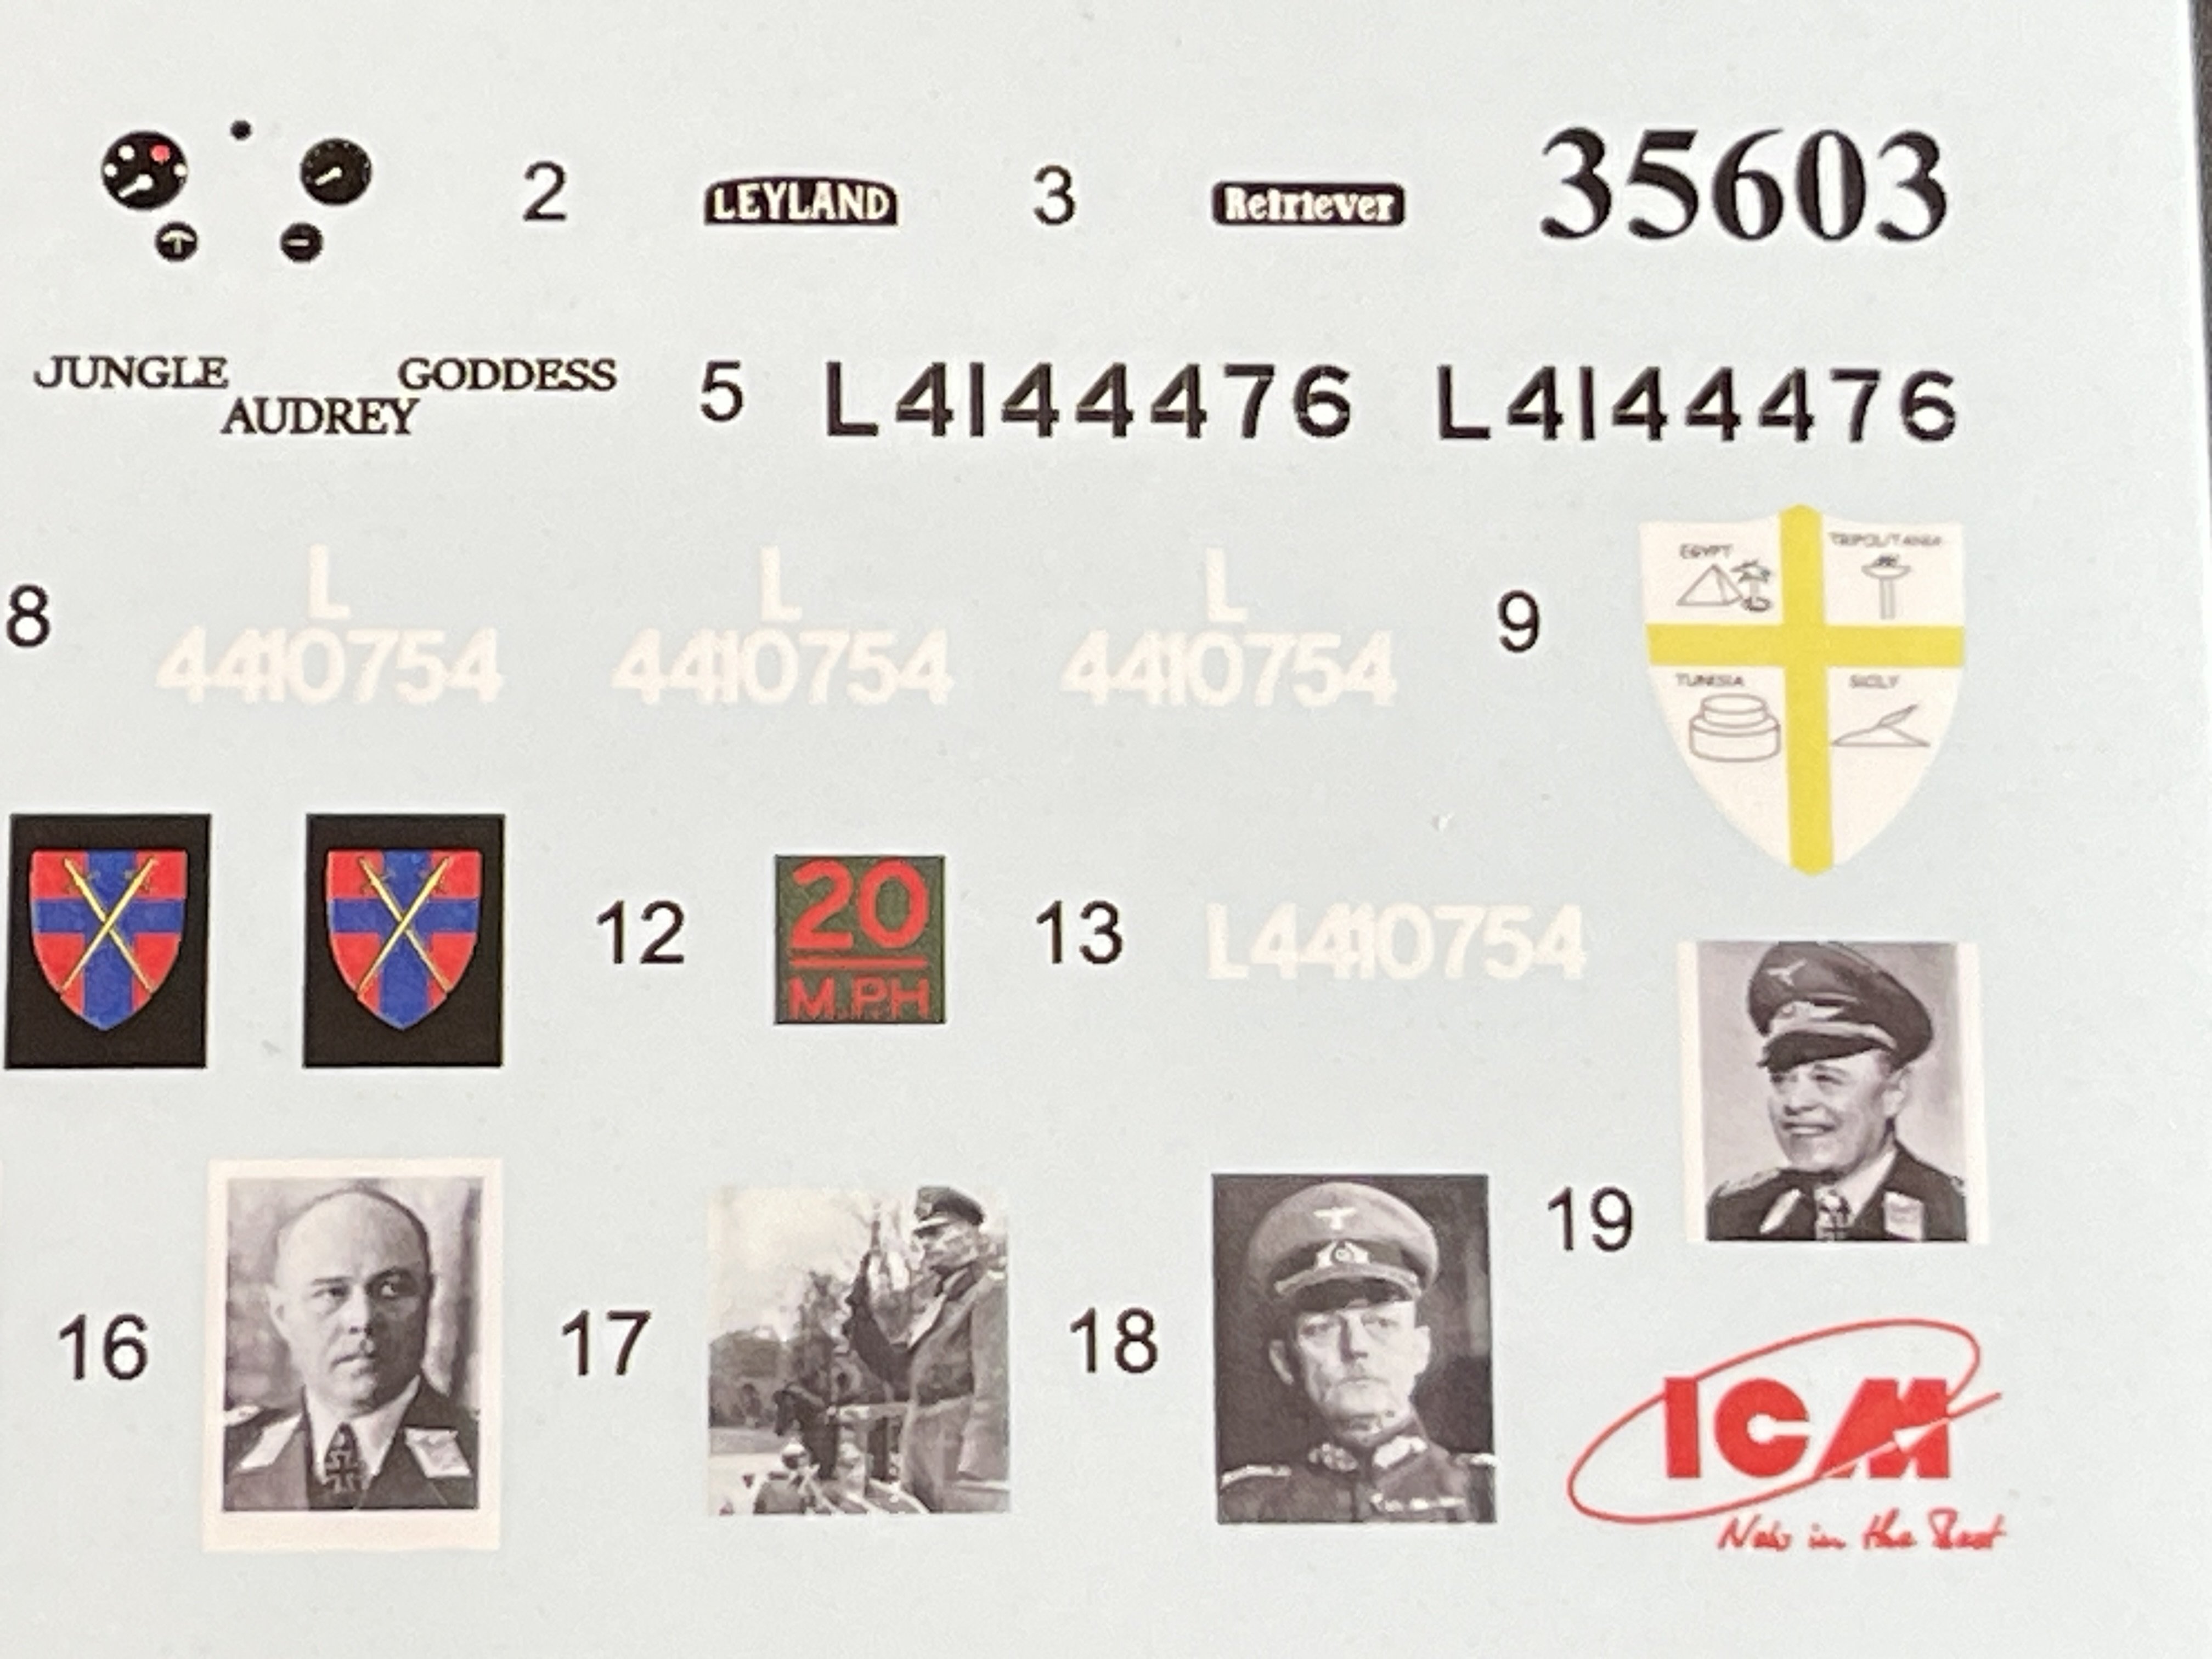
Catalogue number 35603
Price: around 63,70€
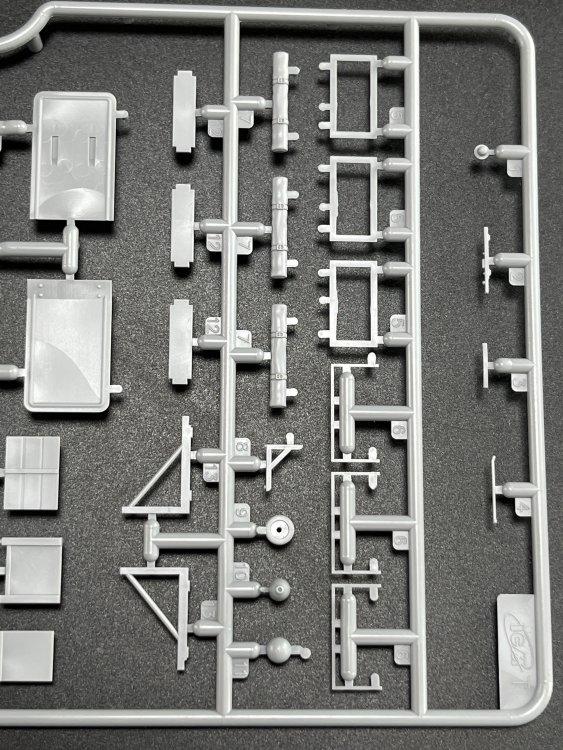
ICM keeps launching new kits every month, or new variants of their pre-existing kits but this one is a very special ones, and demands a lot of extra work from ICM.
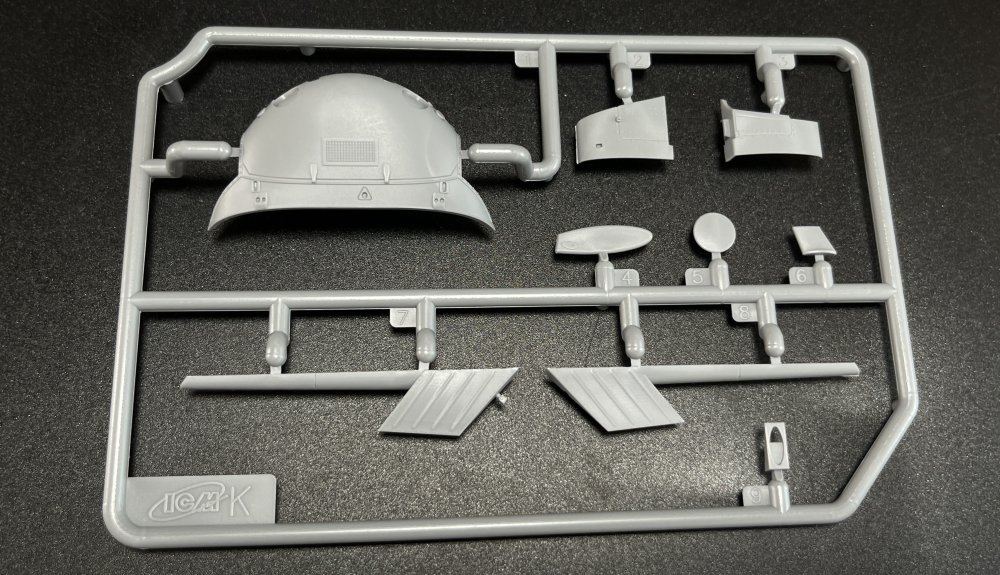
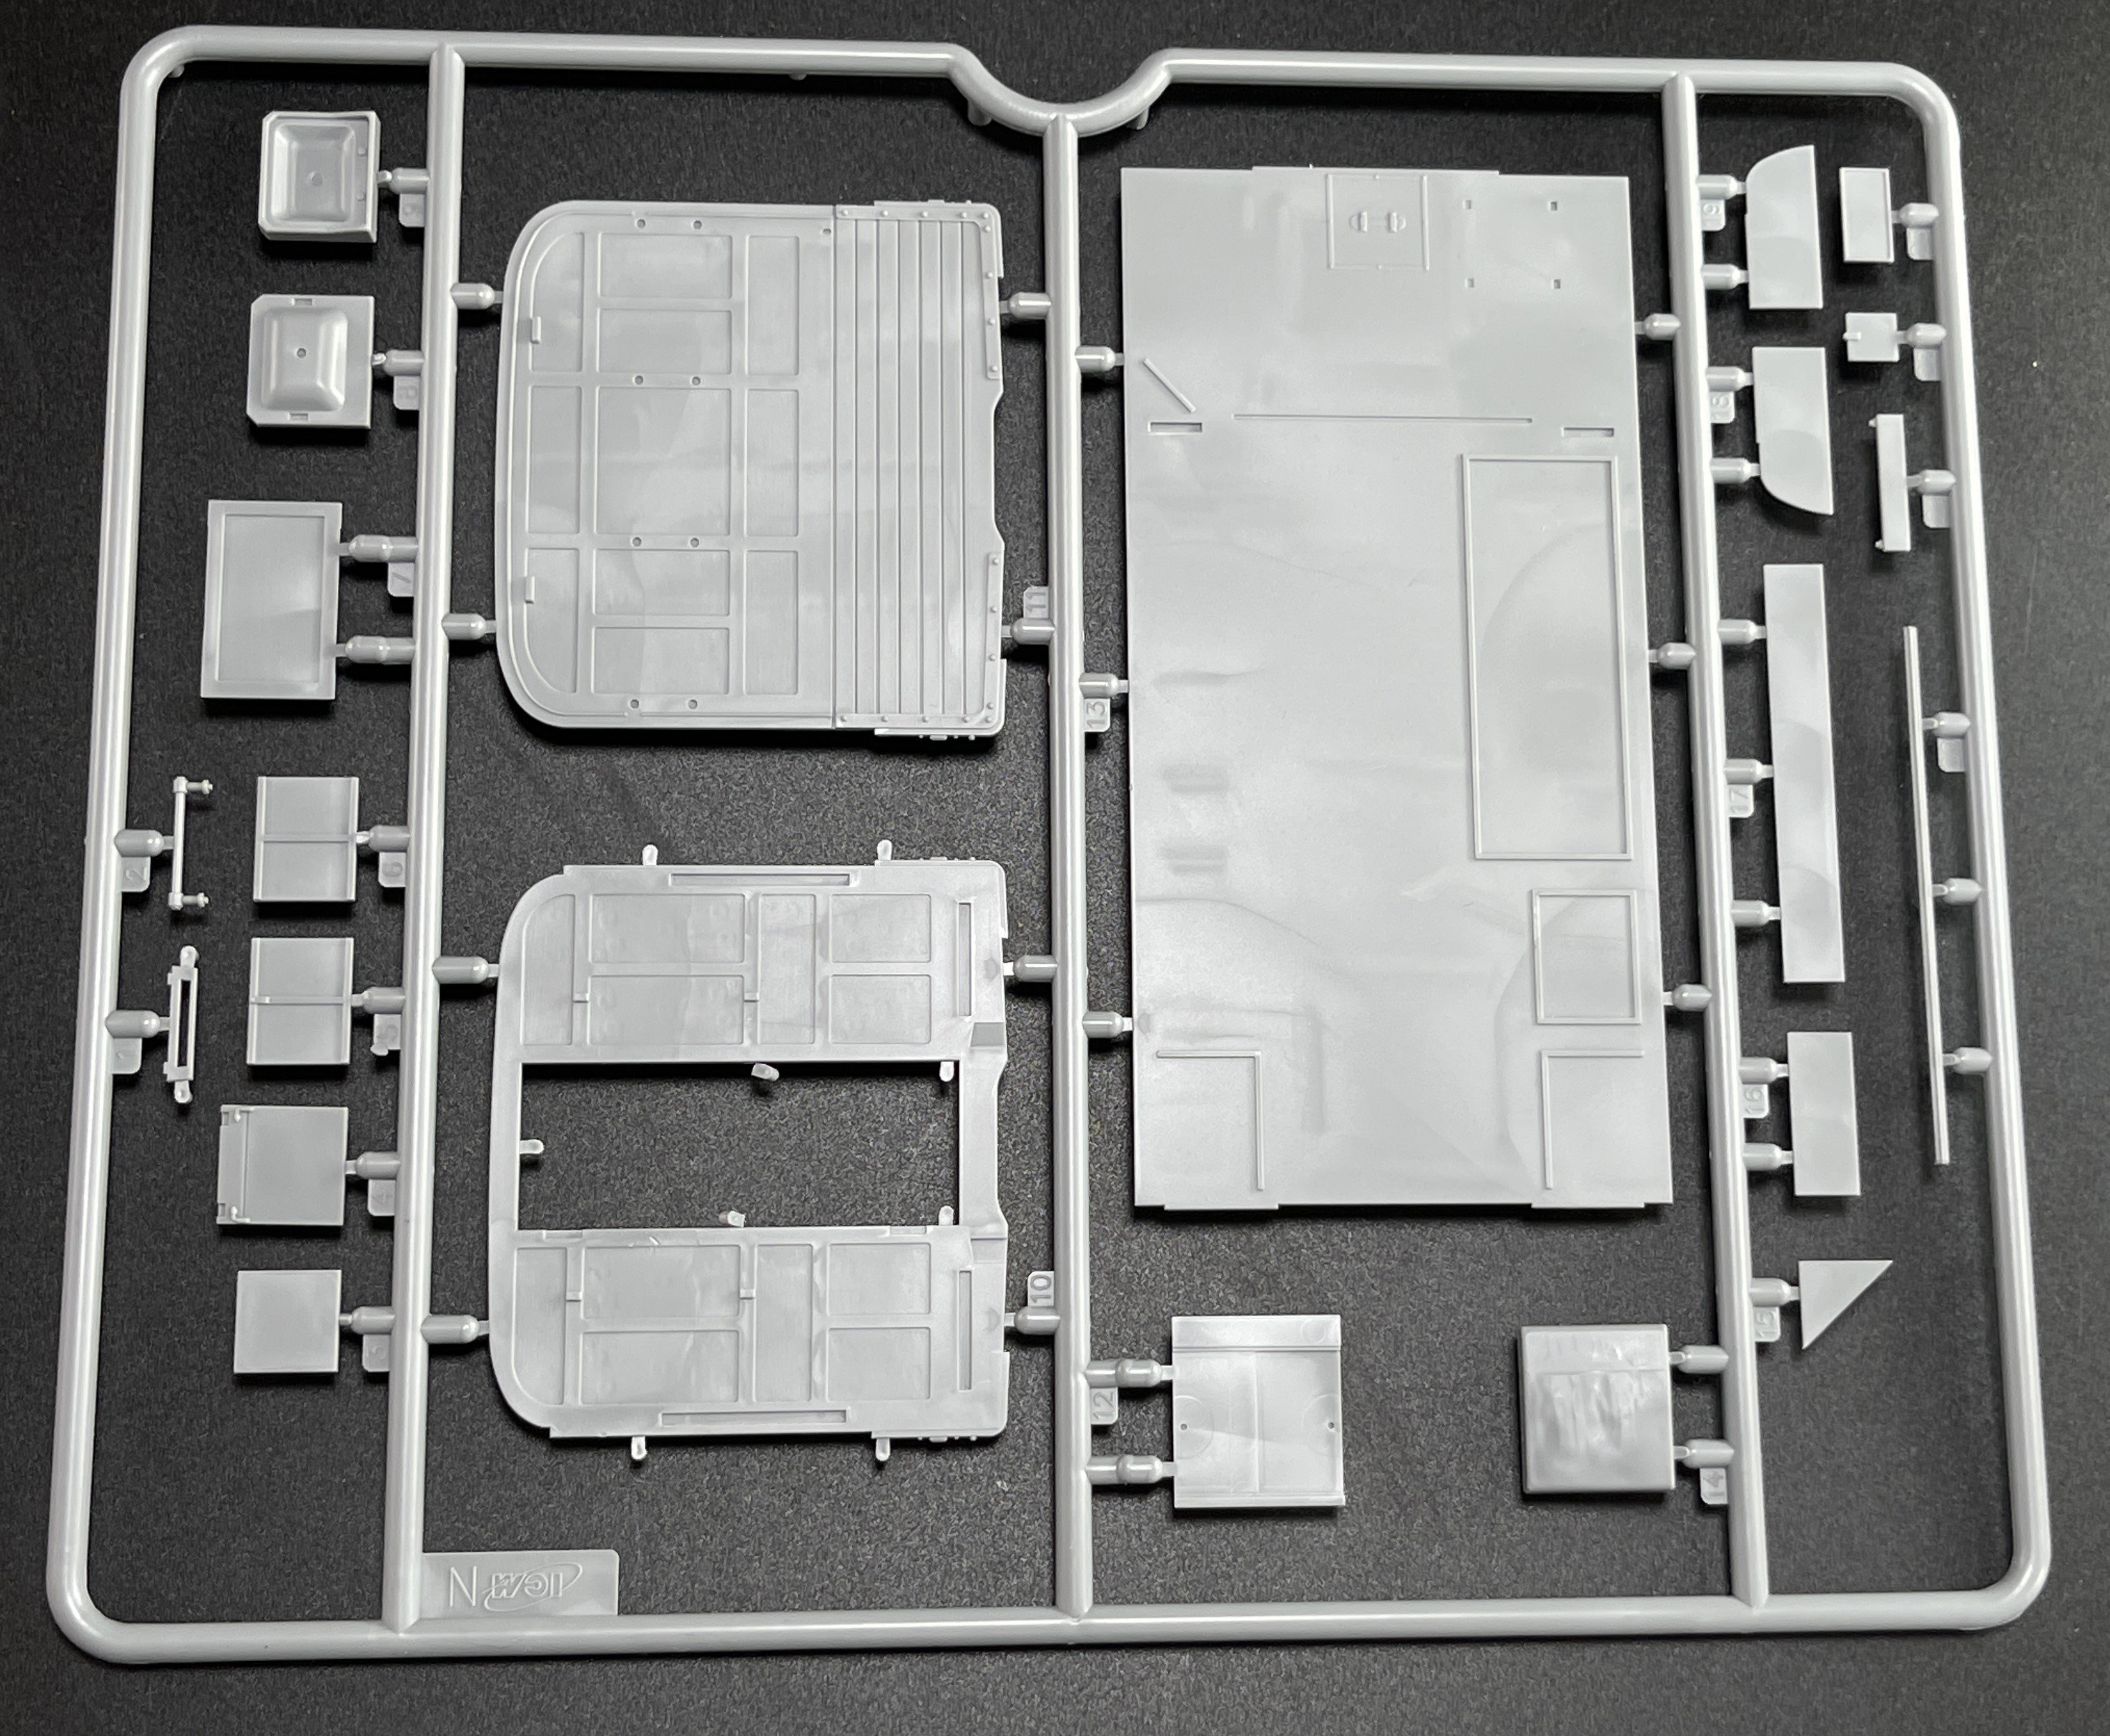
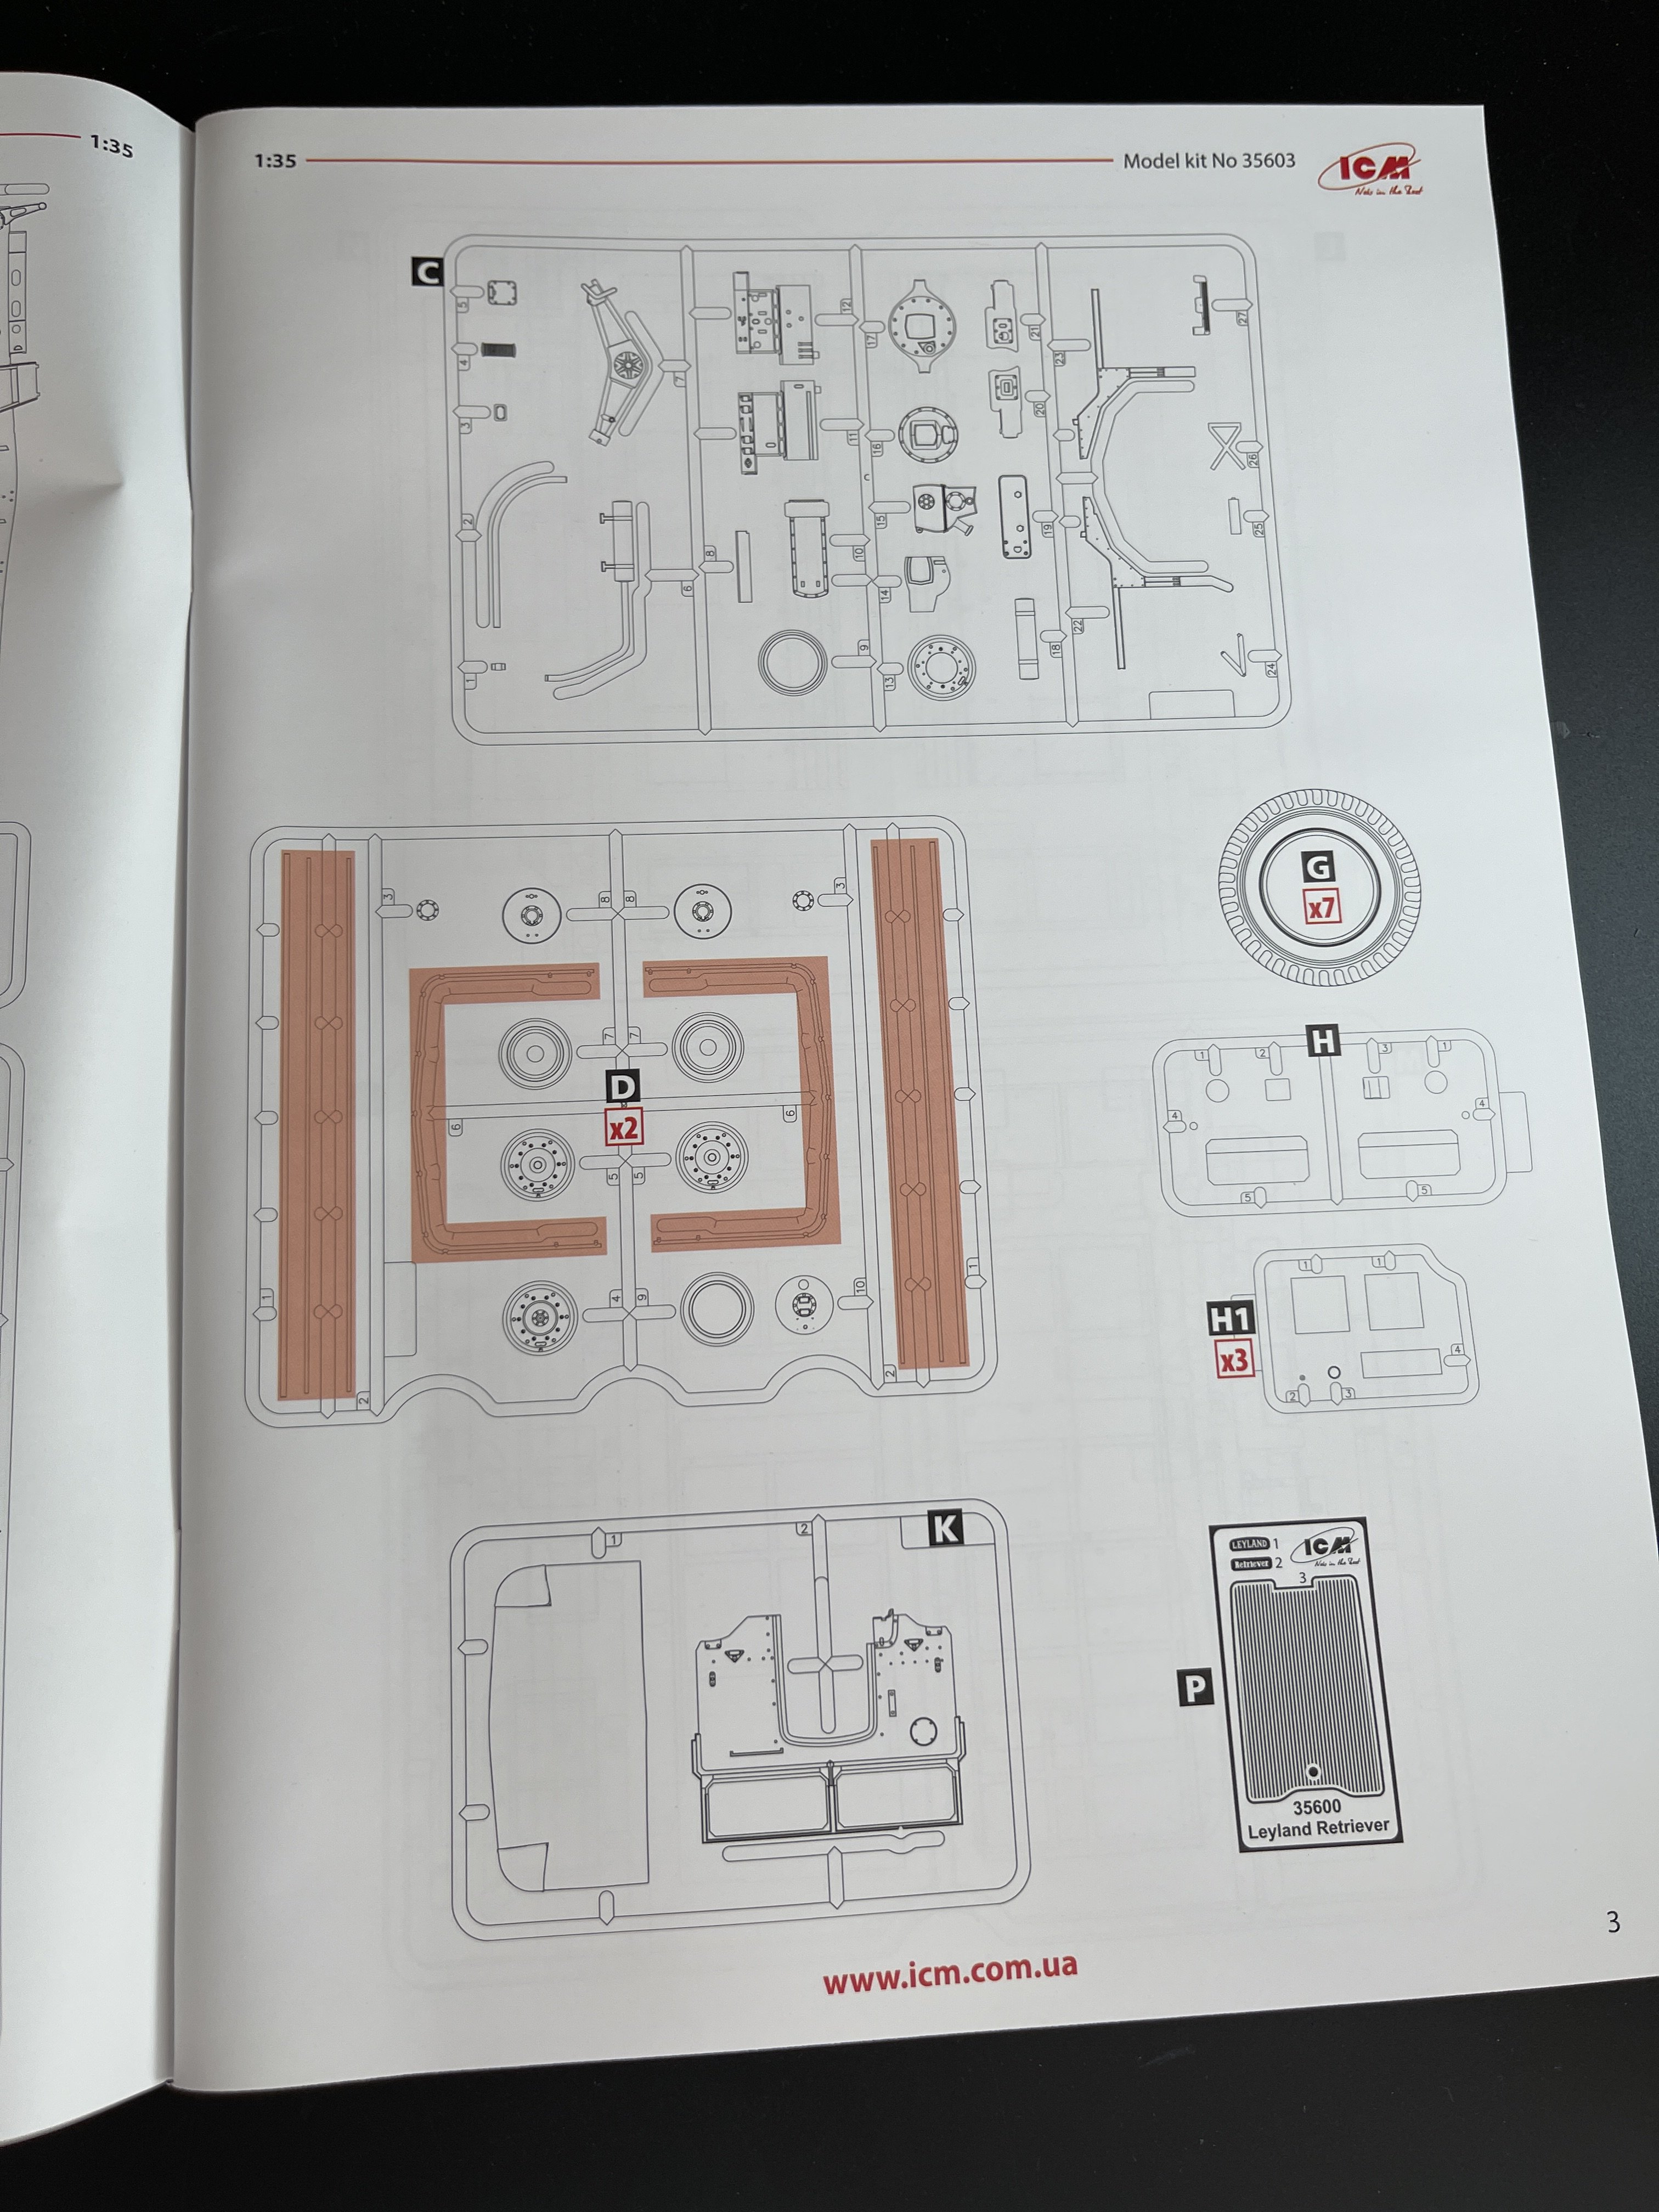
The kit is a new tool for 2025, featuring freshly designed parts to replicate the Leyland Retriever chassis and the unique caravan structure. It includes a highly detailed interior, assembly options for an extended canopy and additional steps, and multiple color schemes reflecting the vehicle’s paint variations throughout the war.
So, I consider this release an almost a brand new one, and not a true rebox.
The mythical and unique Monty`s caravan!
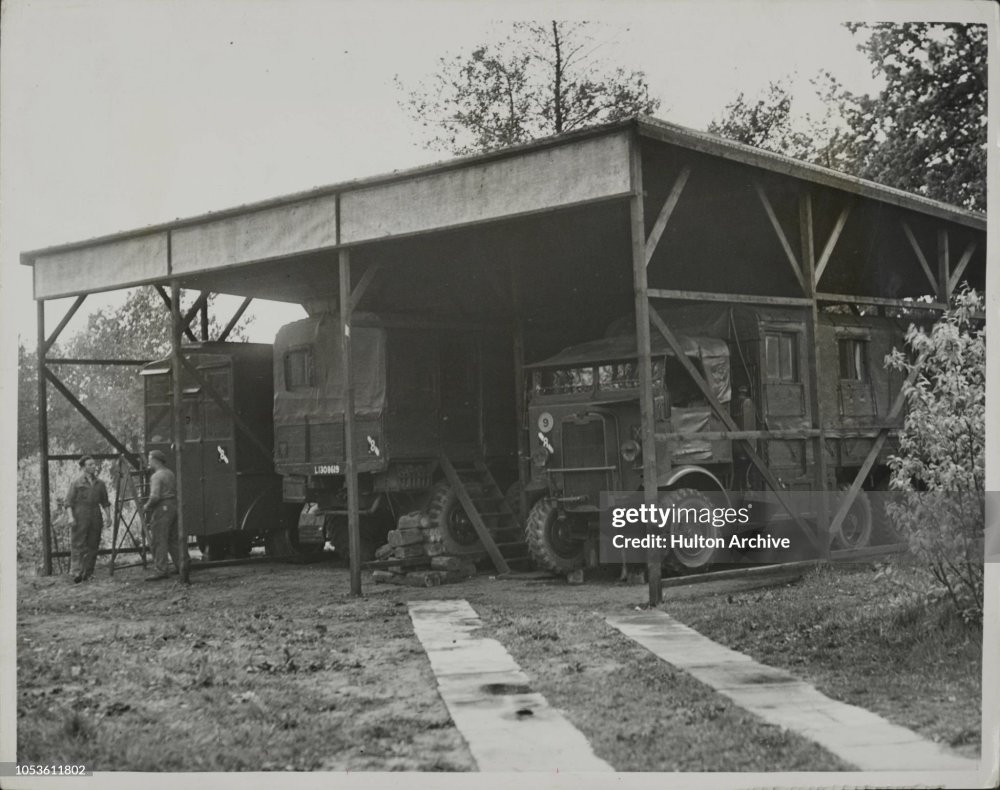
The caravan was originally an Italian mobile office captured from General Annibale Bergonzoli, mounted on a Lancia 3RO truck. After capture by the 7th British Armoured Division, it was transferred to a British Leyland Retriever 6x4 chassis. The vehicle served as Montgomery’s mobile field office, featuring a detailed interior with a bathroom and a main room equipped with a desk, sofa, wardrobes, and picture frames. The other two vehicles in the “Monty’s Caravan” trio included a mobile bedroom and a map/meeting room, though this kit focuses solely on the office caravan.
So, Field Marshal Bernard Montgomery had, during the war, three field caravans (Bed caravan, Office caravan and Map caravan), and ICM made the second one, the Office Caravan. Will we have all three caravan made by ICM?
So, as it said in the box, a full interior is given, unlike the other releases.
The package is the usual from ICM, with flip top cardboard with a separate card lid showing the artwork, a lovely artworks as usual.
I don’t know who makes the ICM box arts but I do like them.
Not my favorite but I do like them.
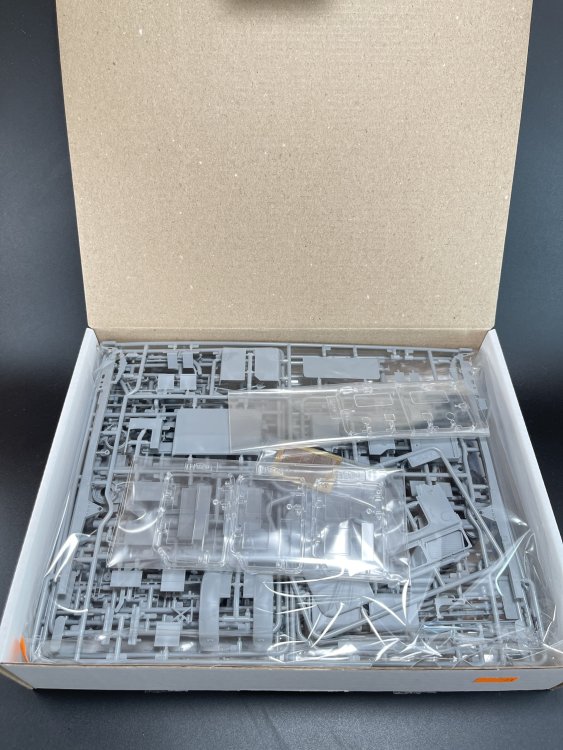
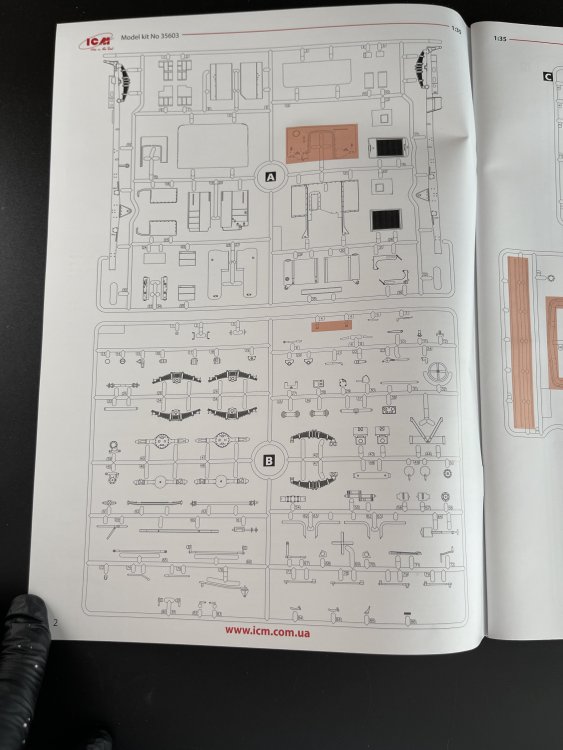
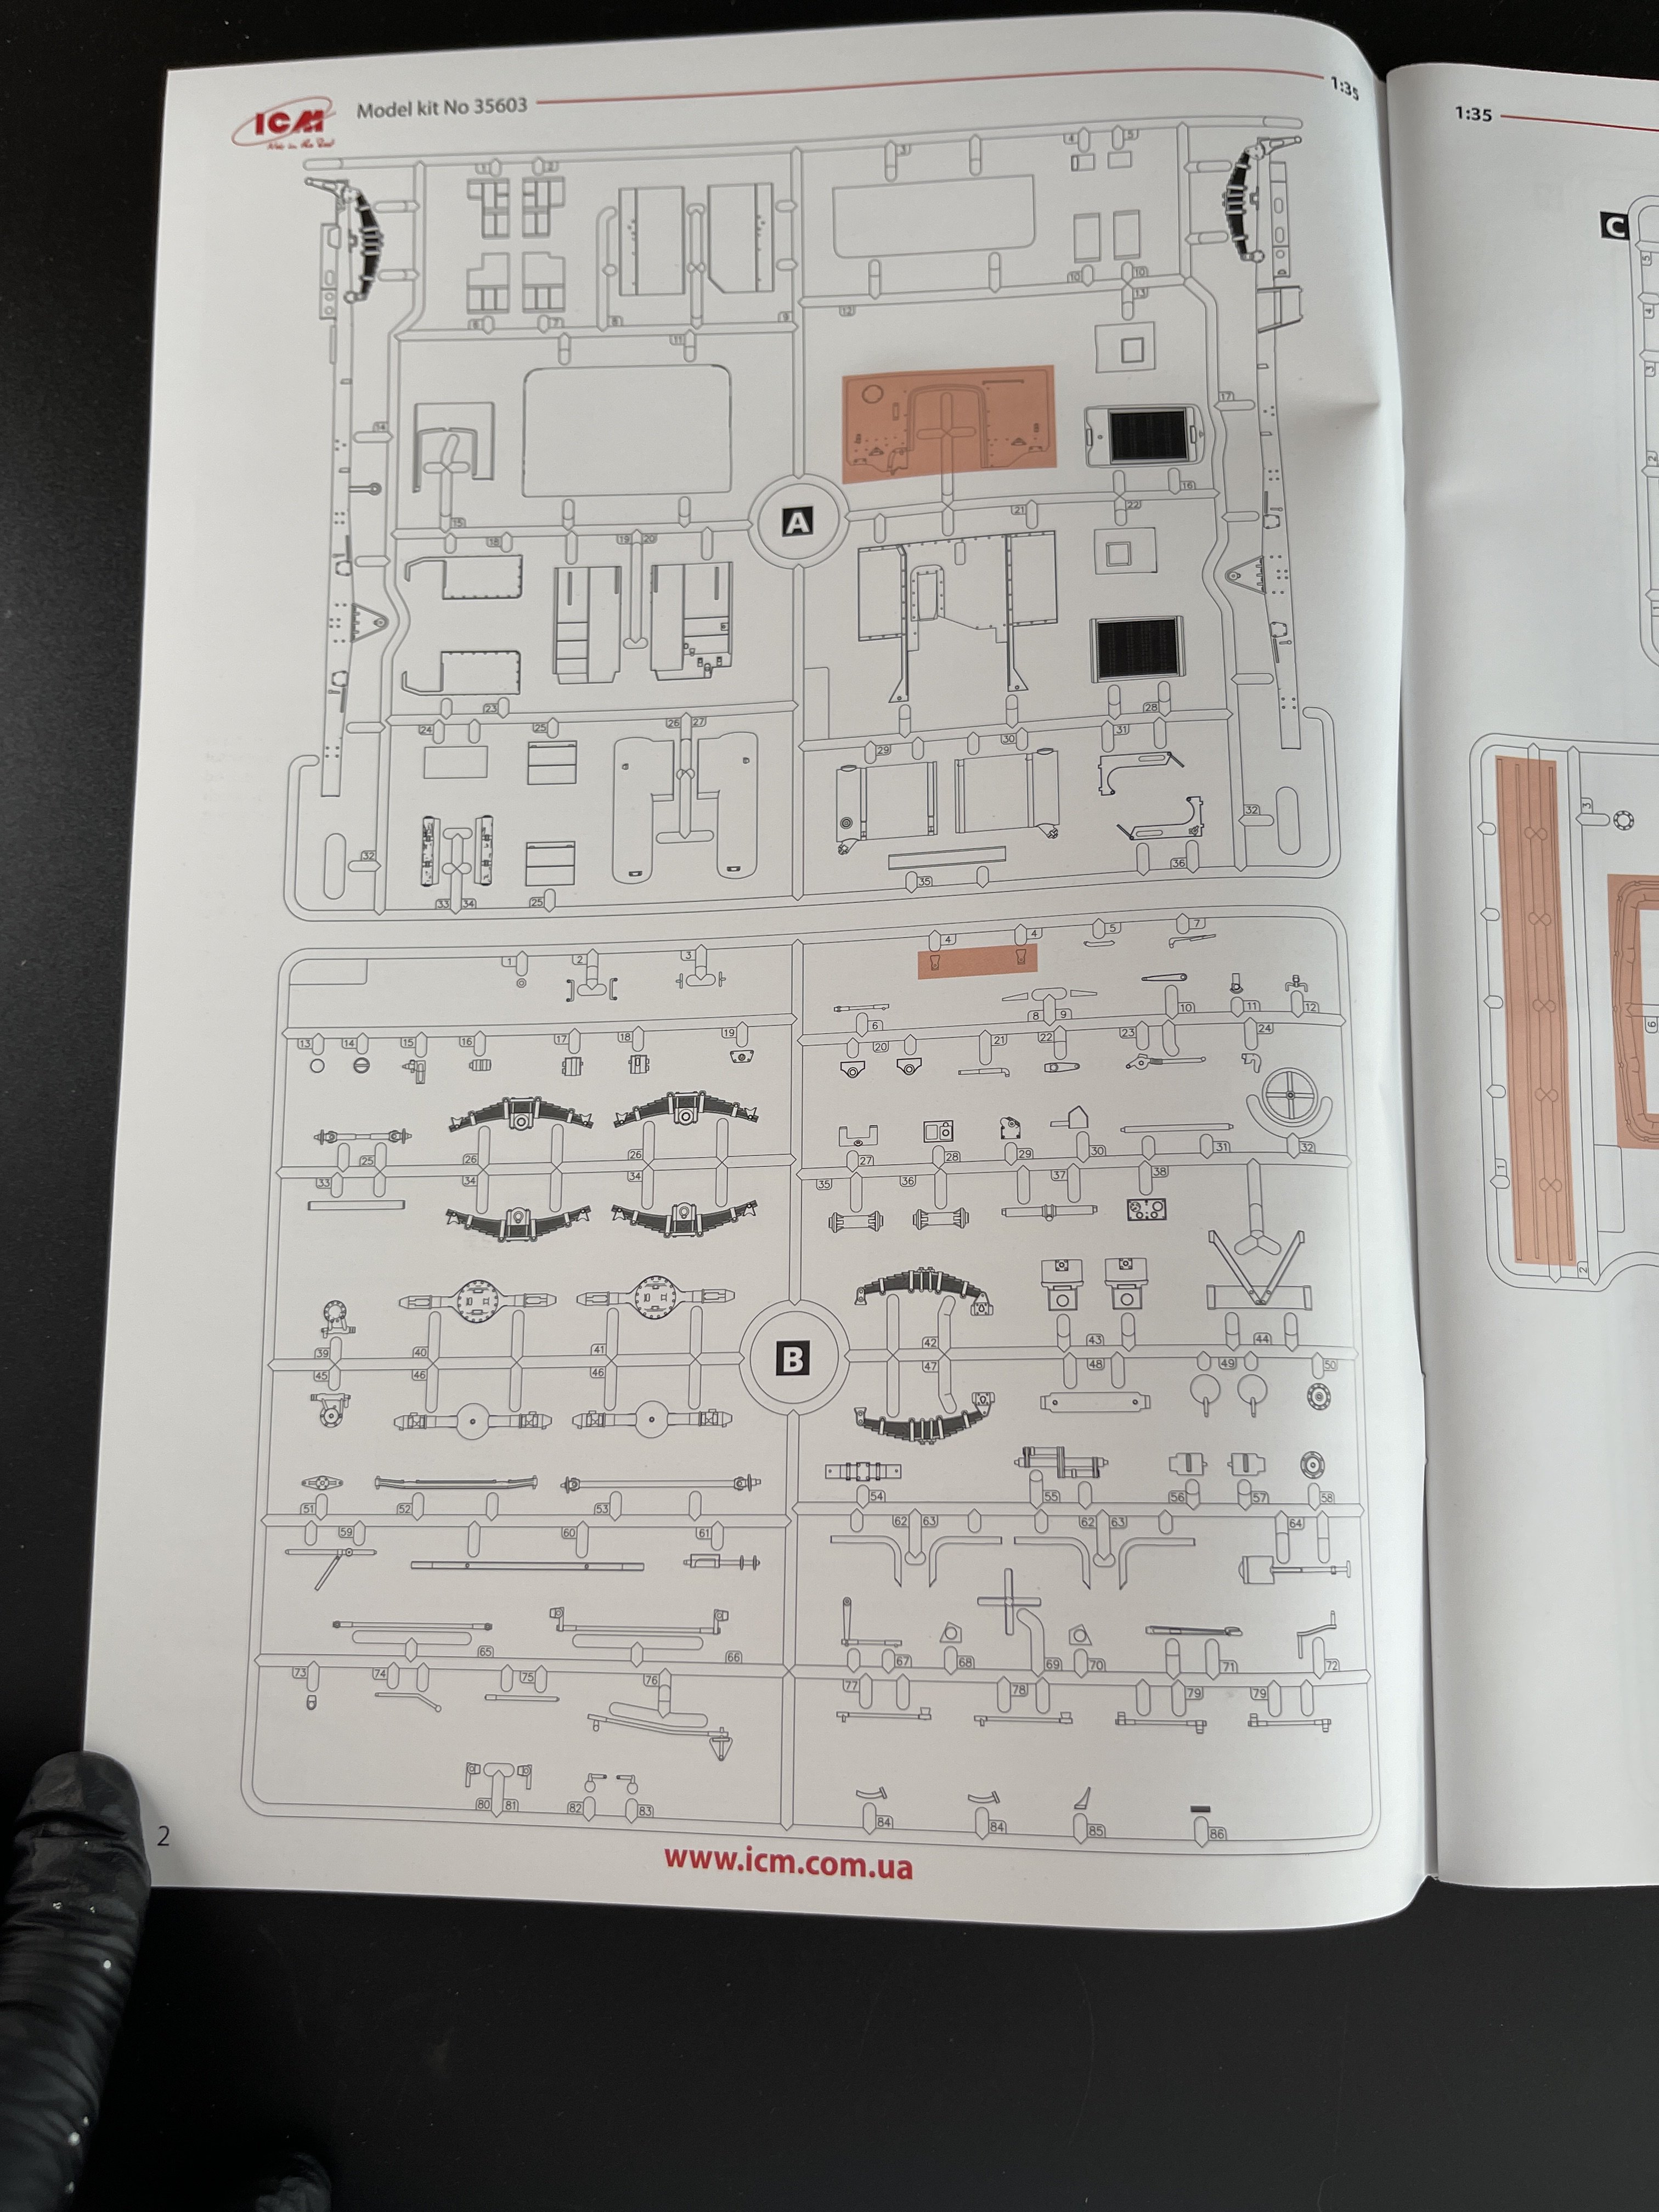
So this model has 436 parts, so it is not a weekend project
This box is full with plastic. So full, that after taking the pictures for this review I have had a hard time to put all the plastic inside the box
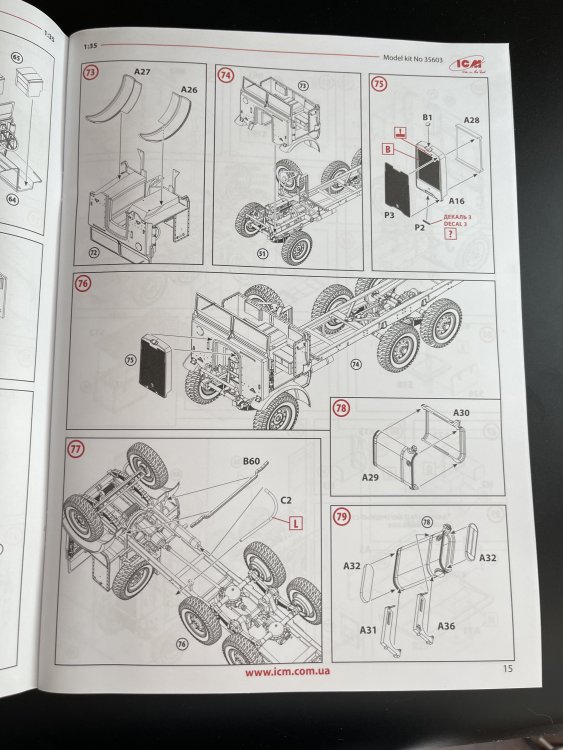
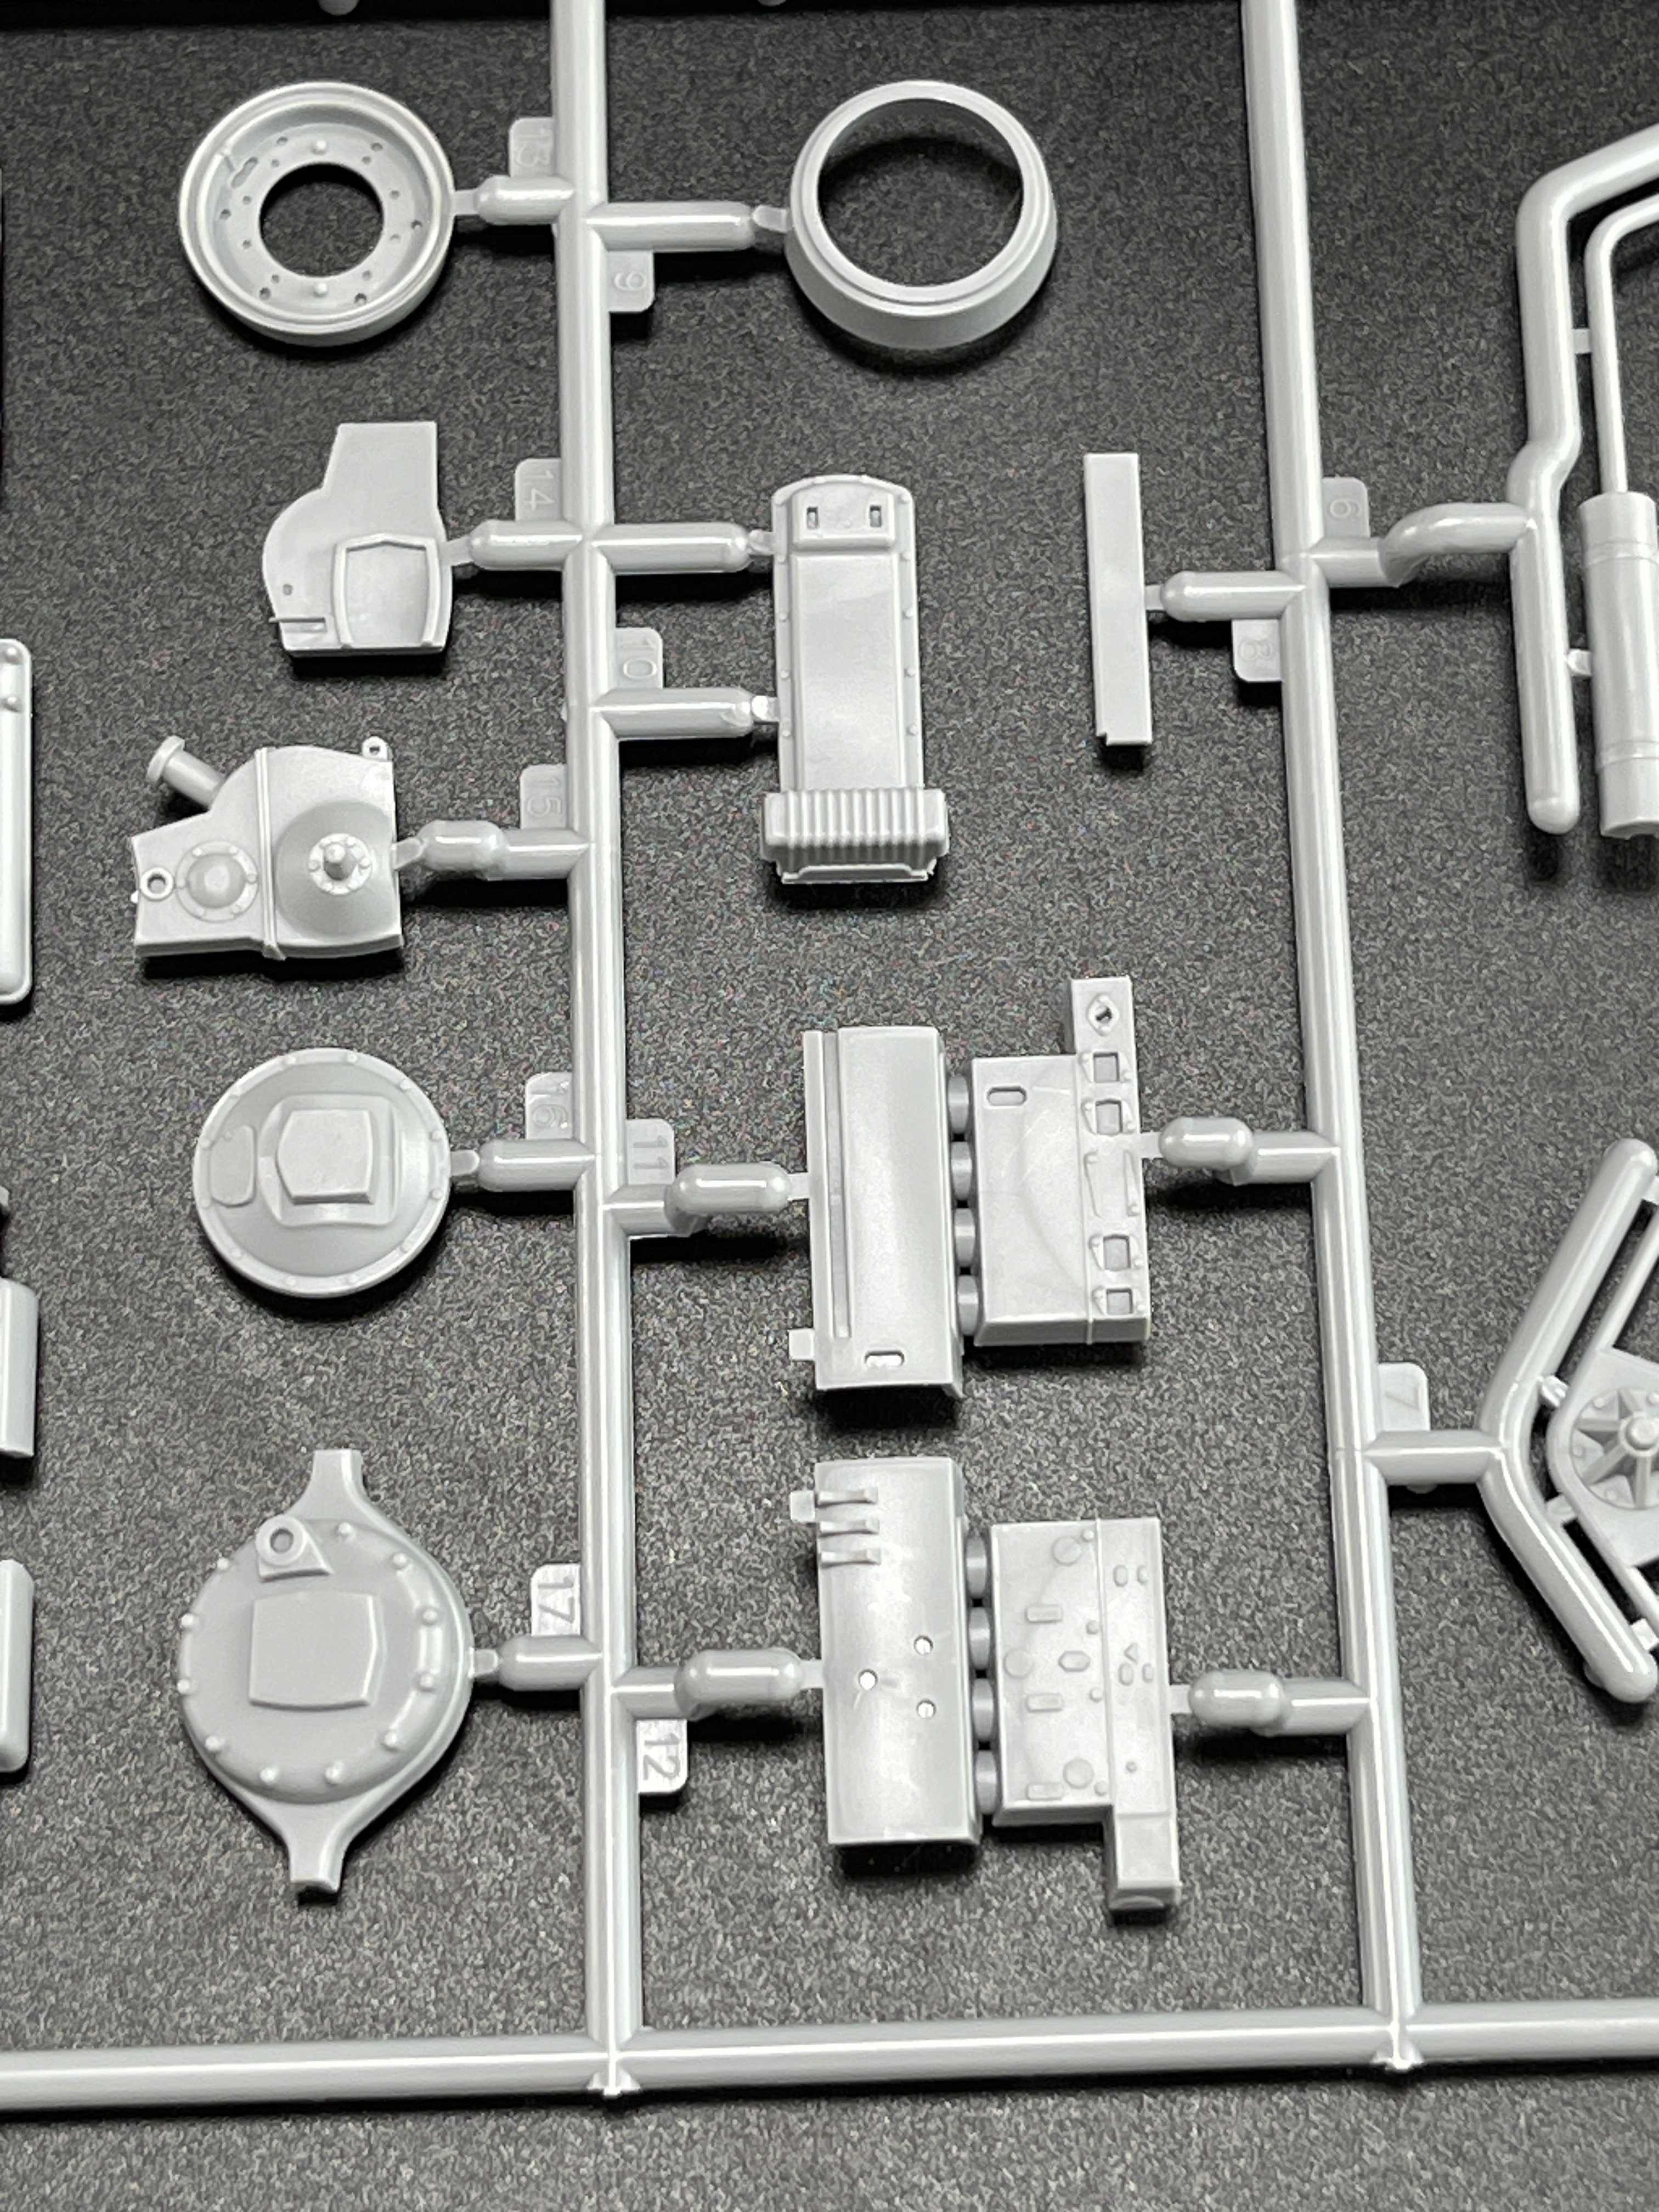
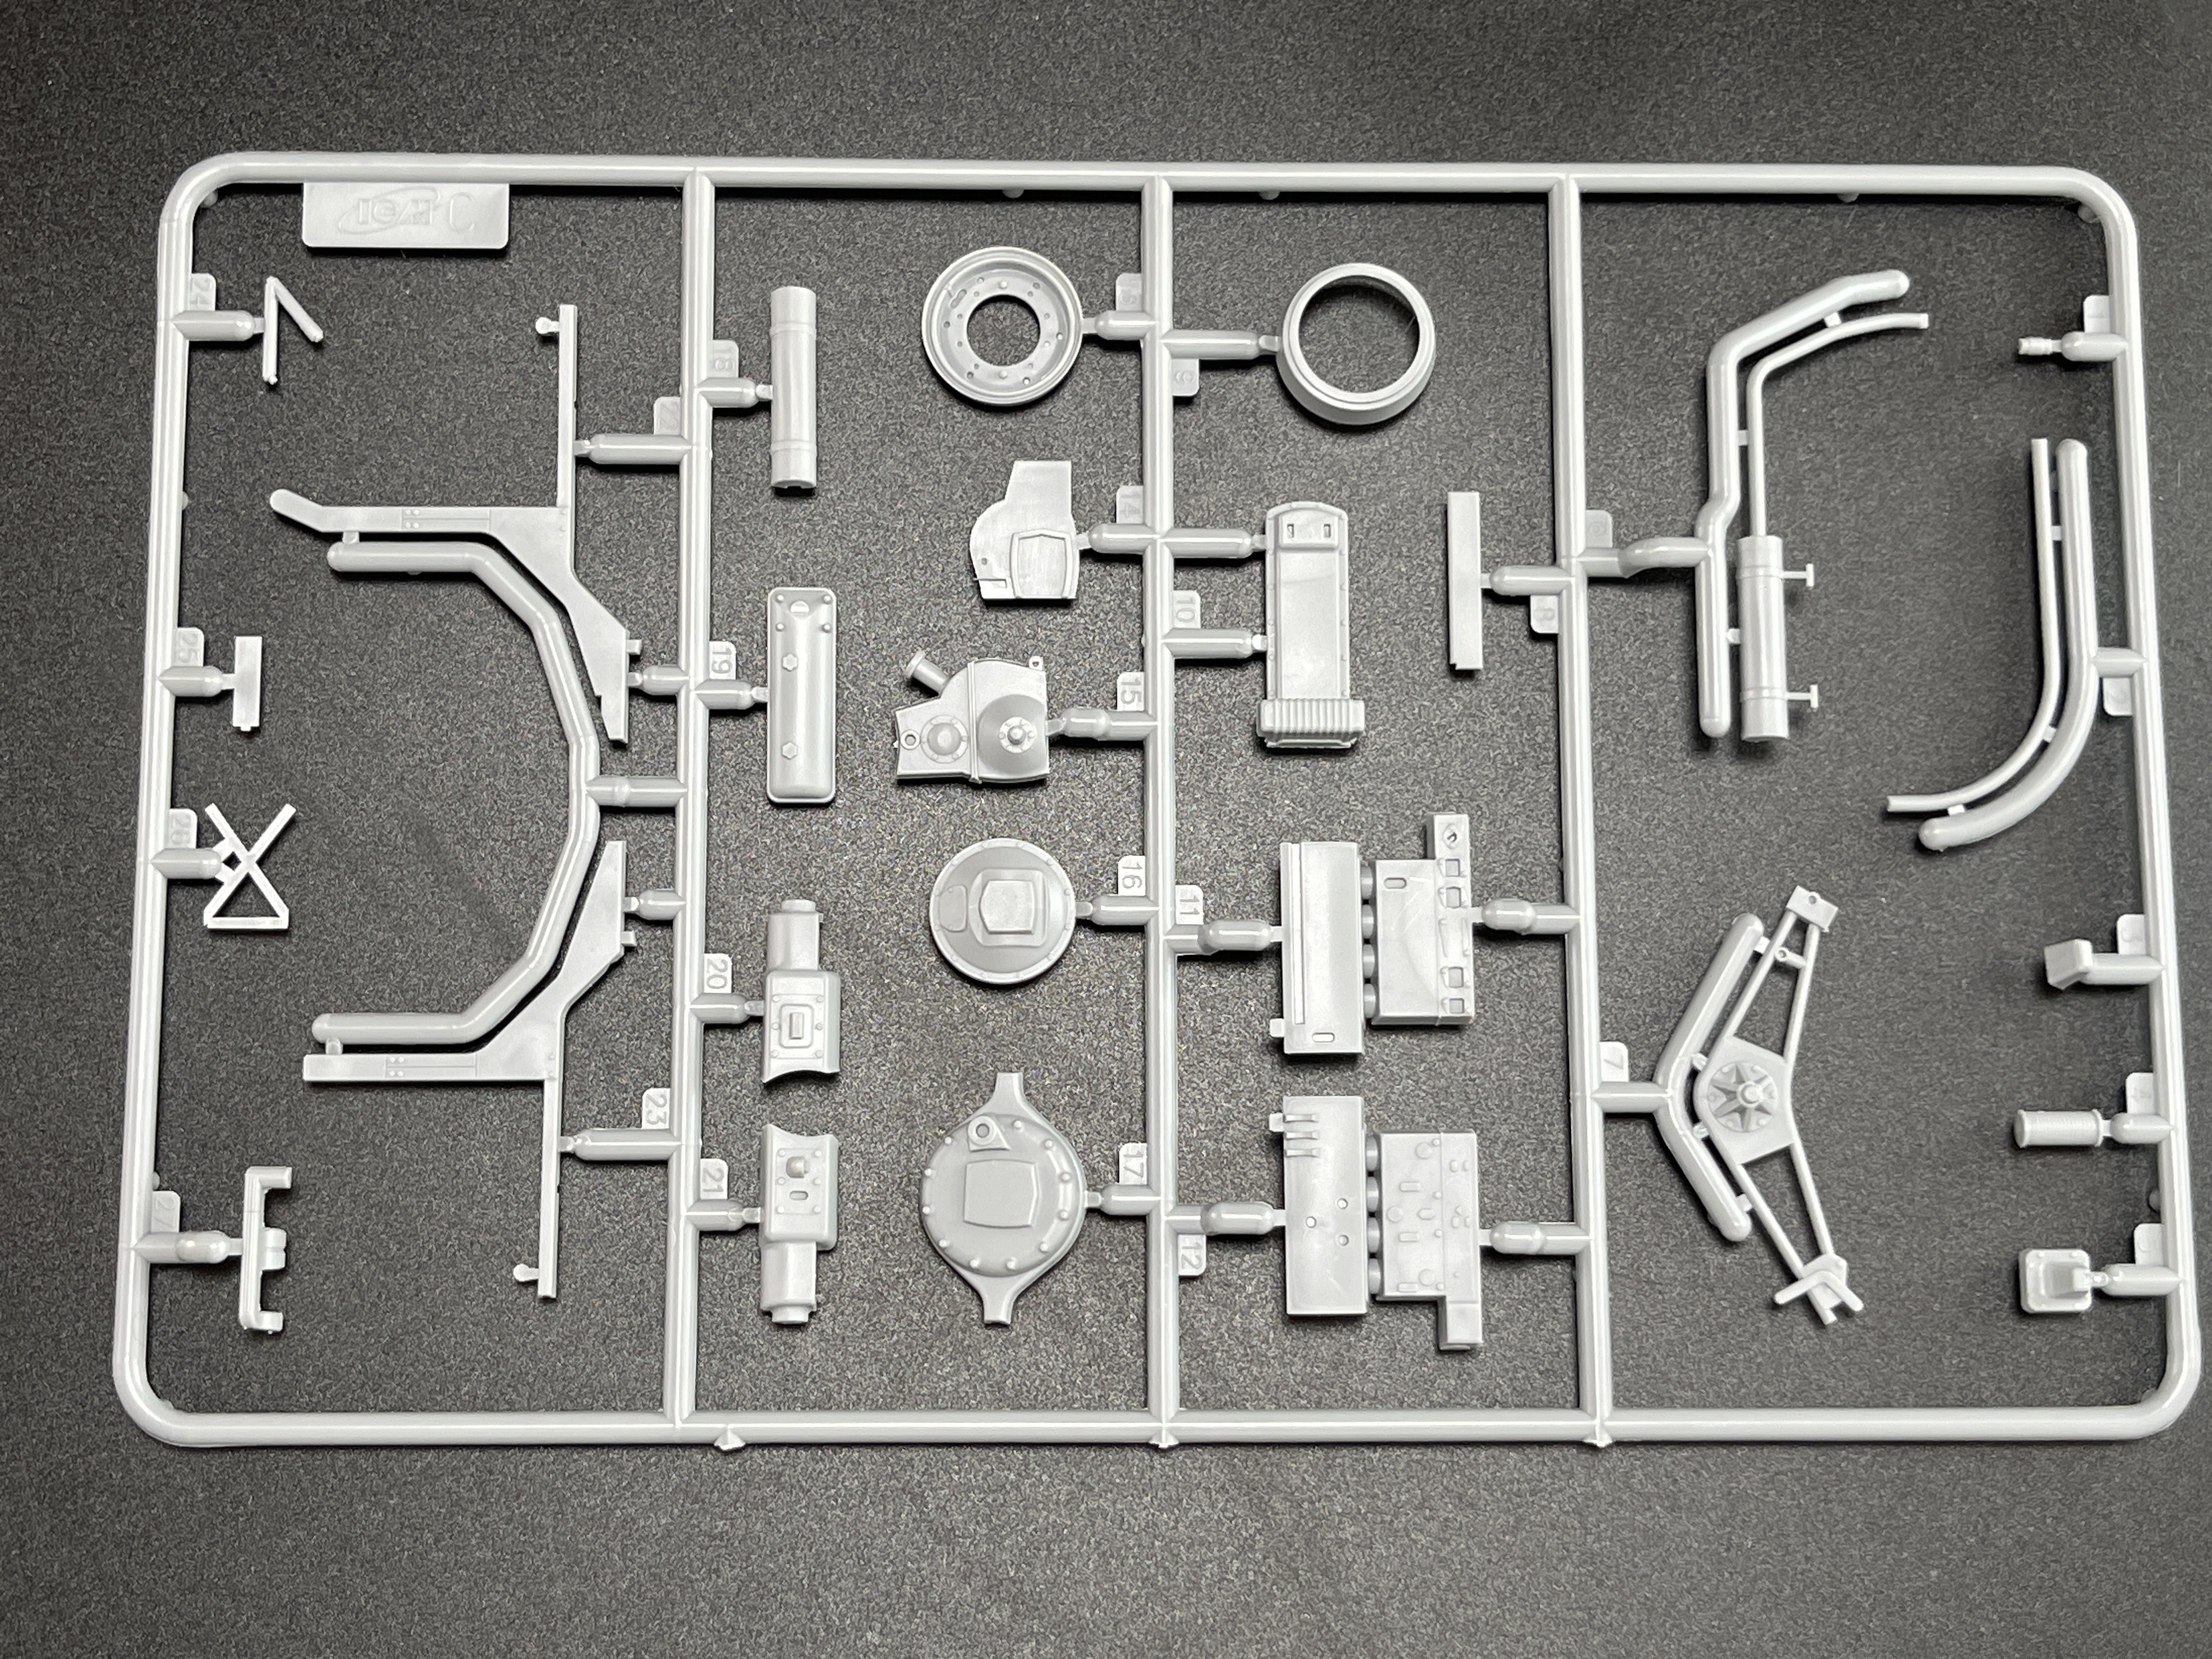
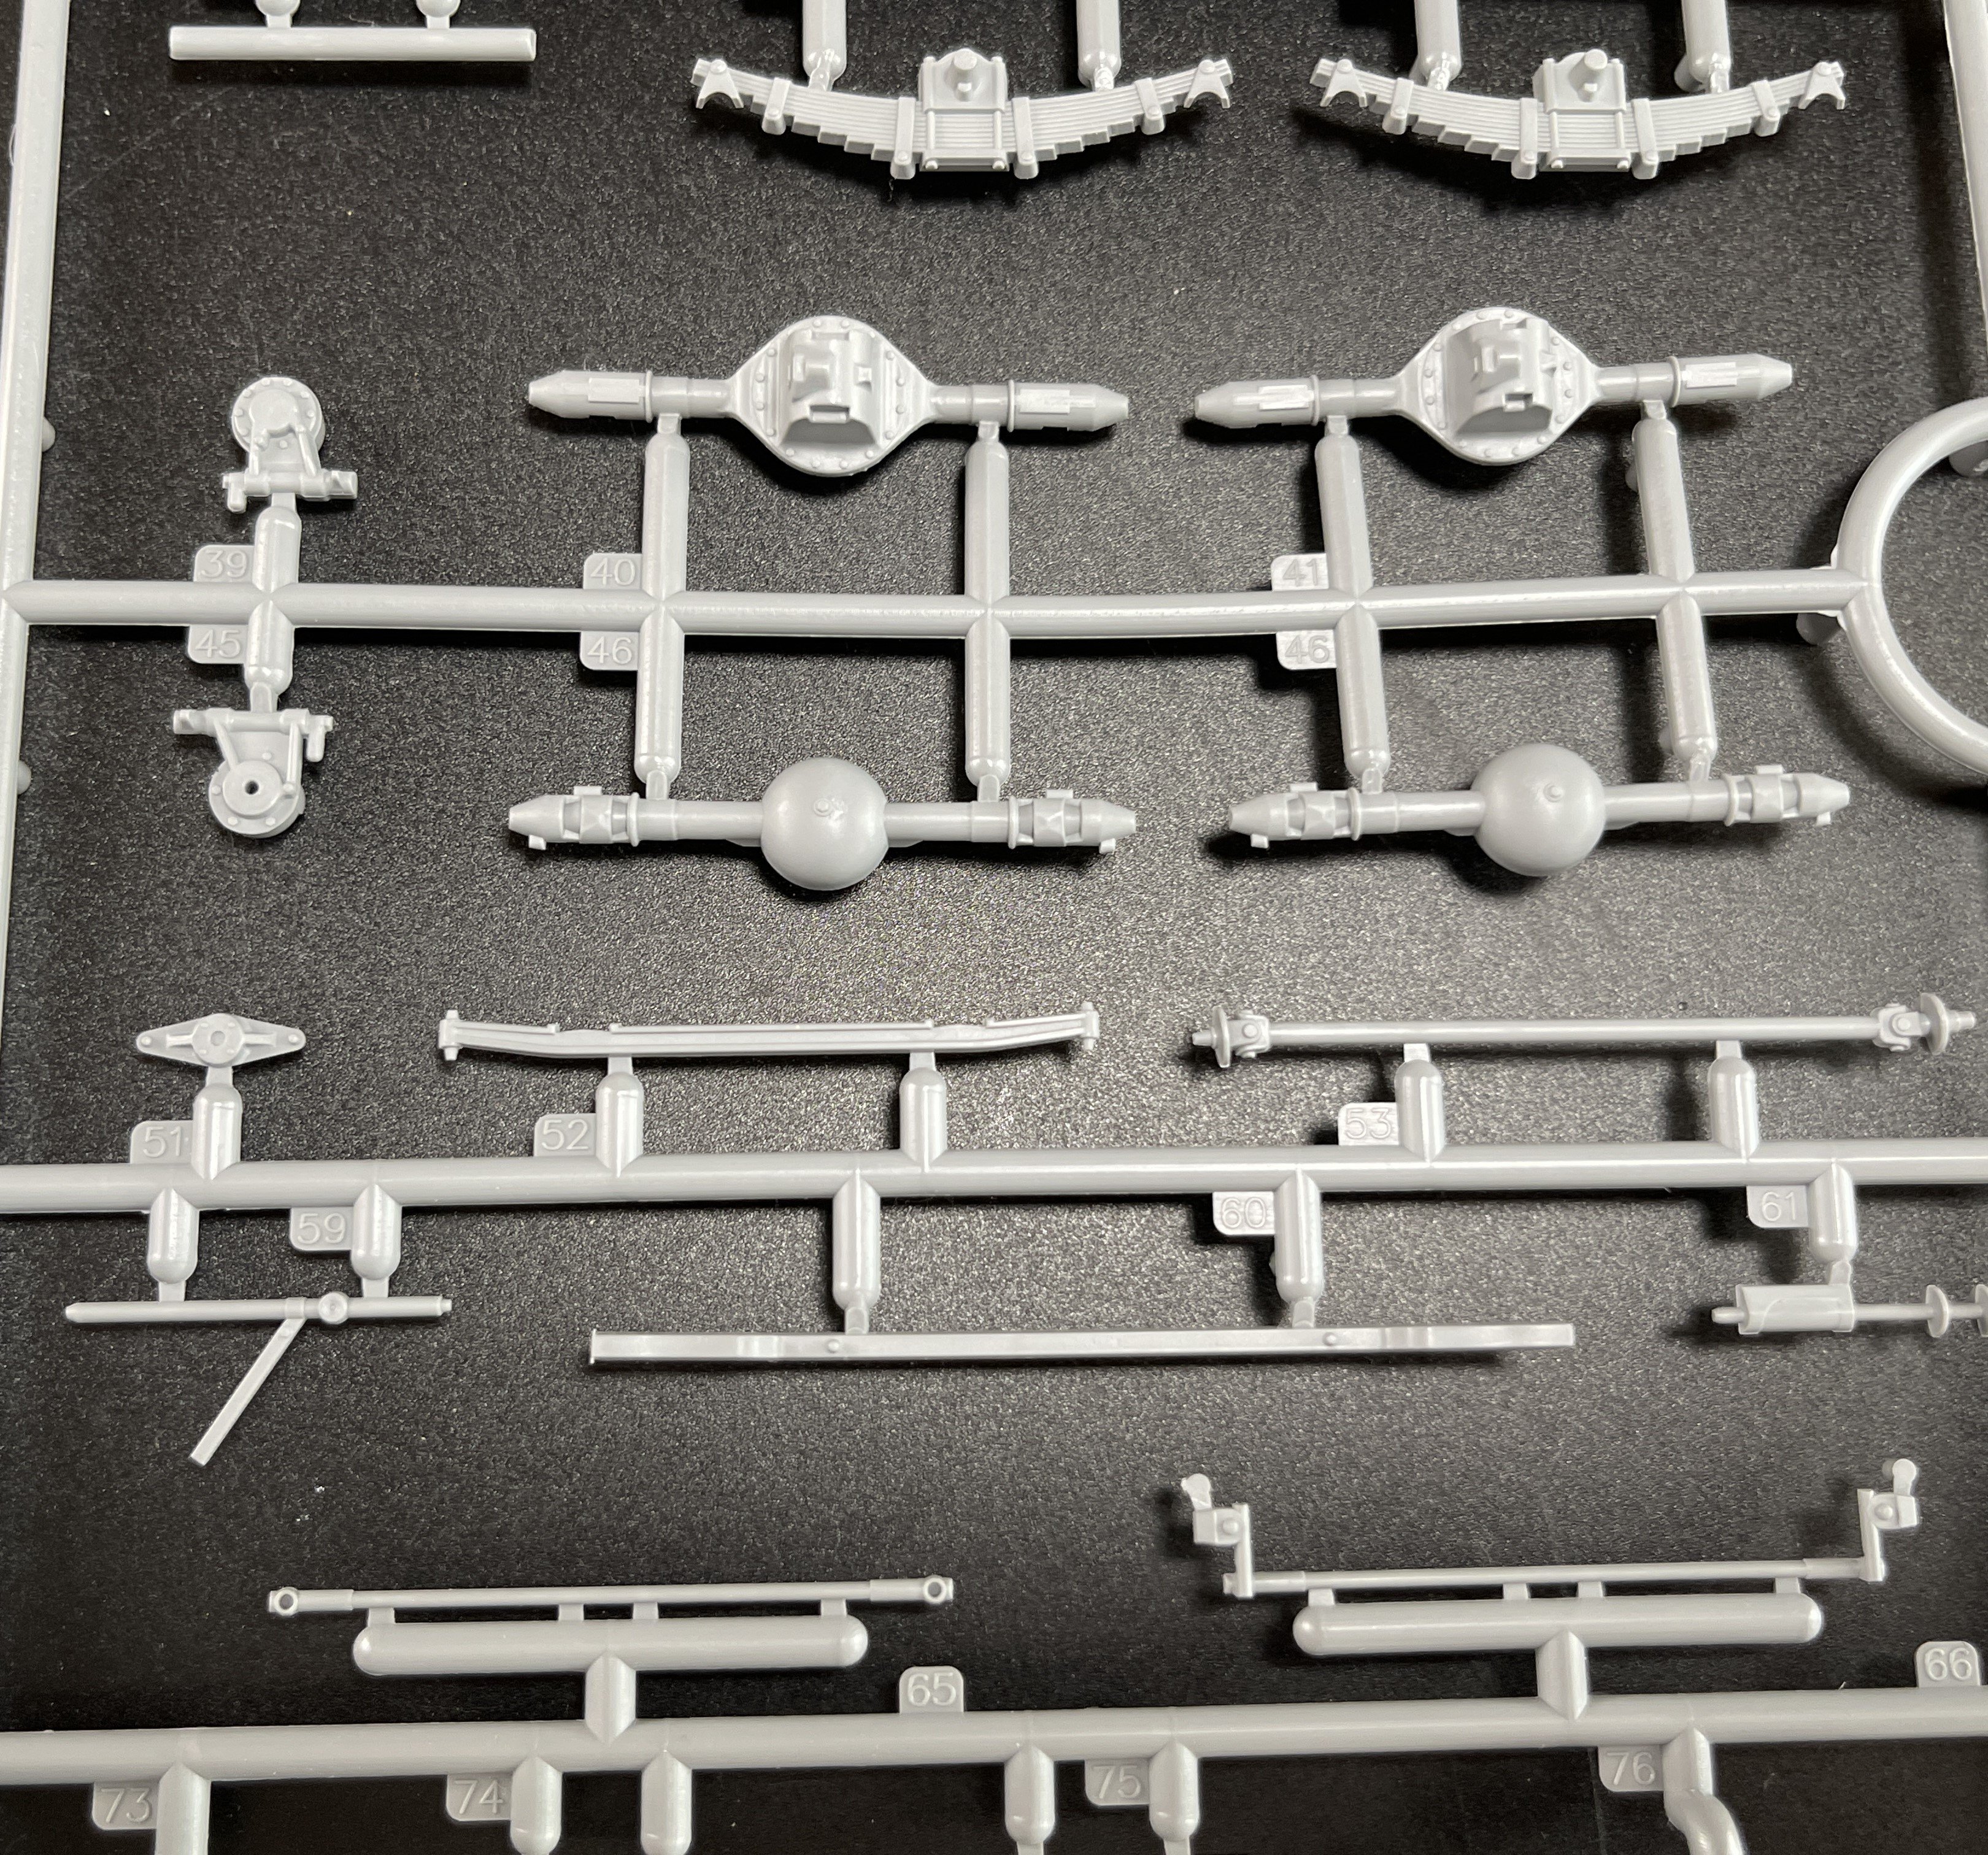
This model is based on the British Leyland Retriever truck chassis, modified to serve as a mobile office for Montgomery.
I will leave the office for the end.
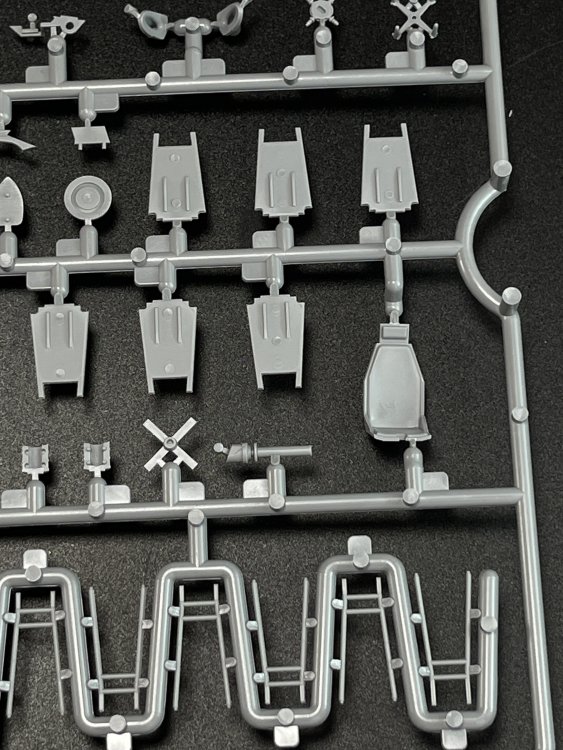
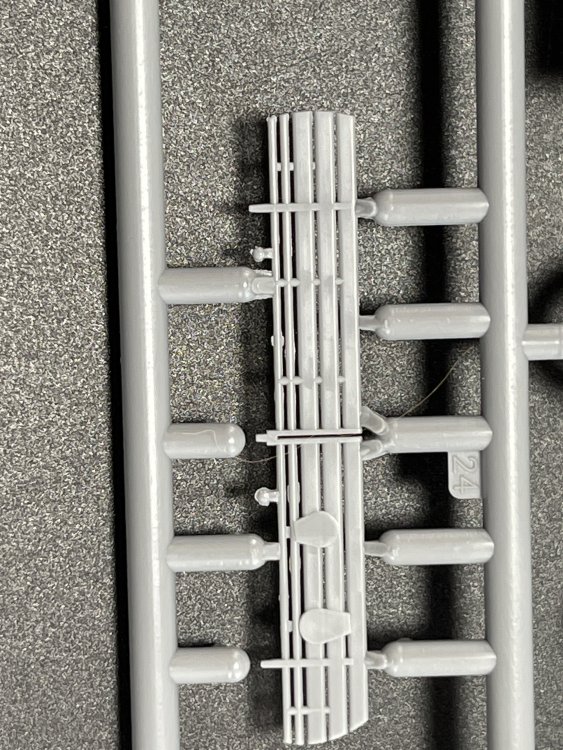
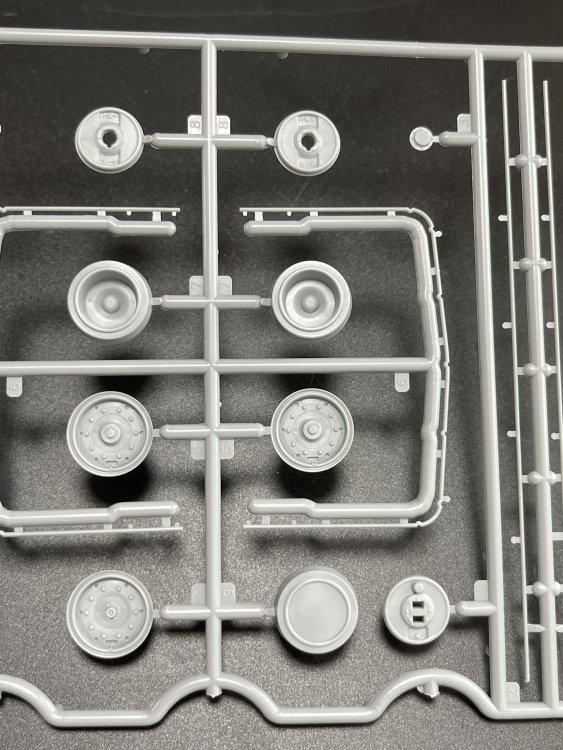
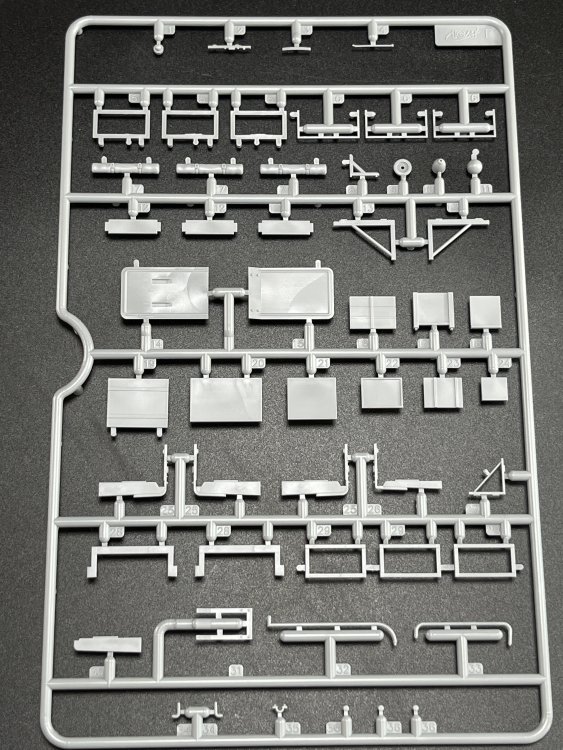
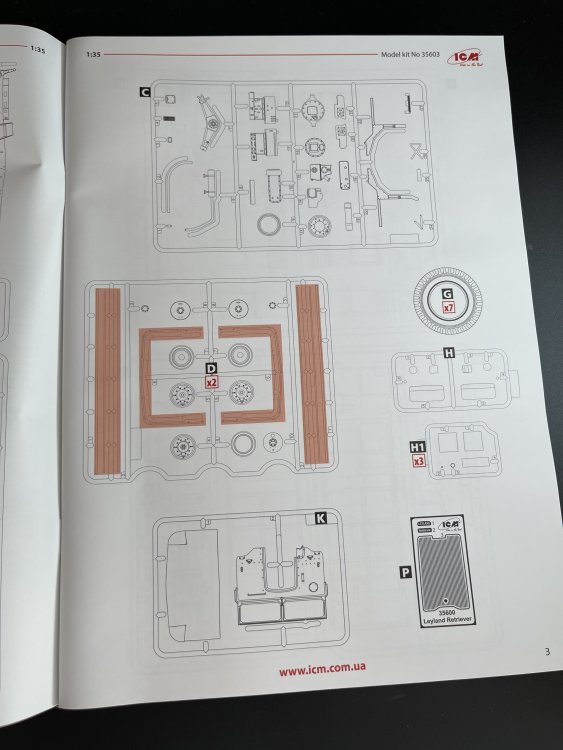
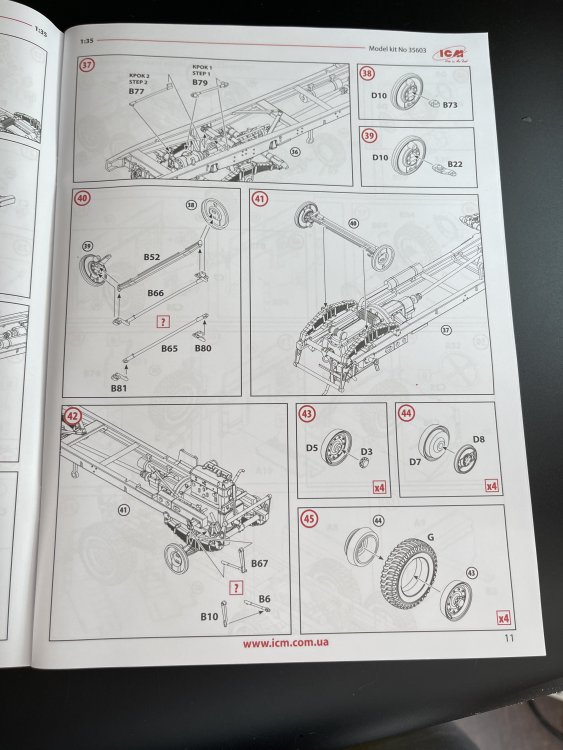
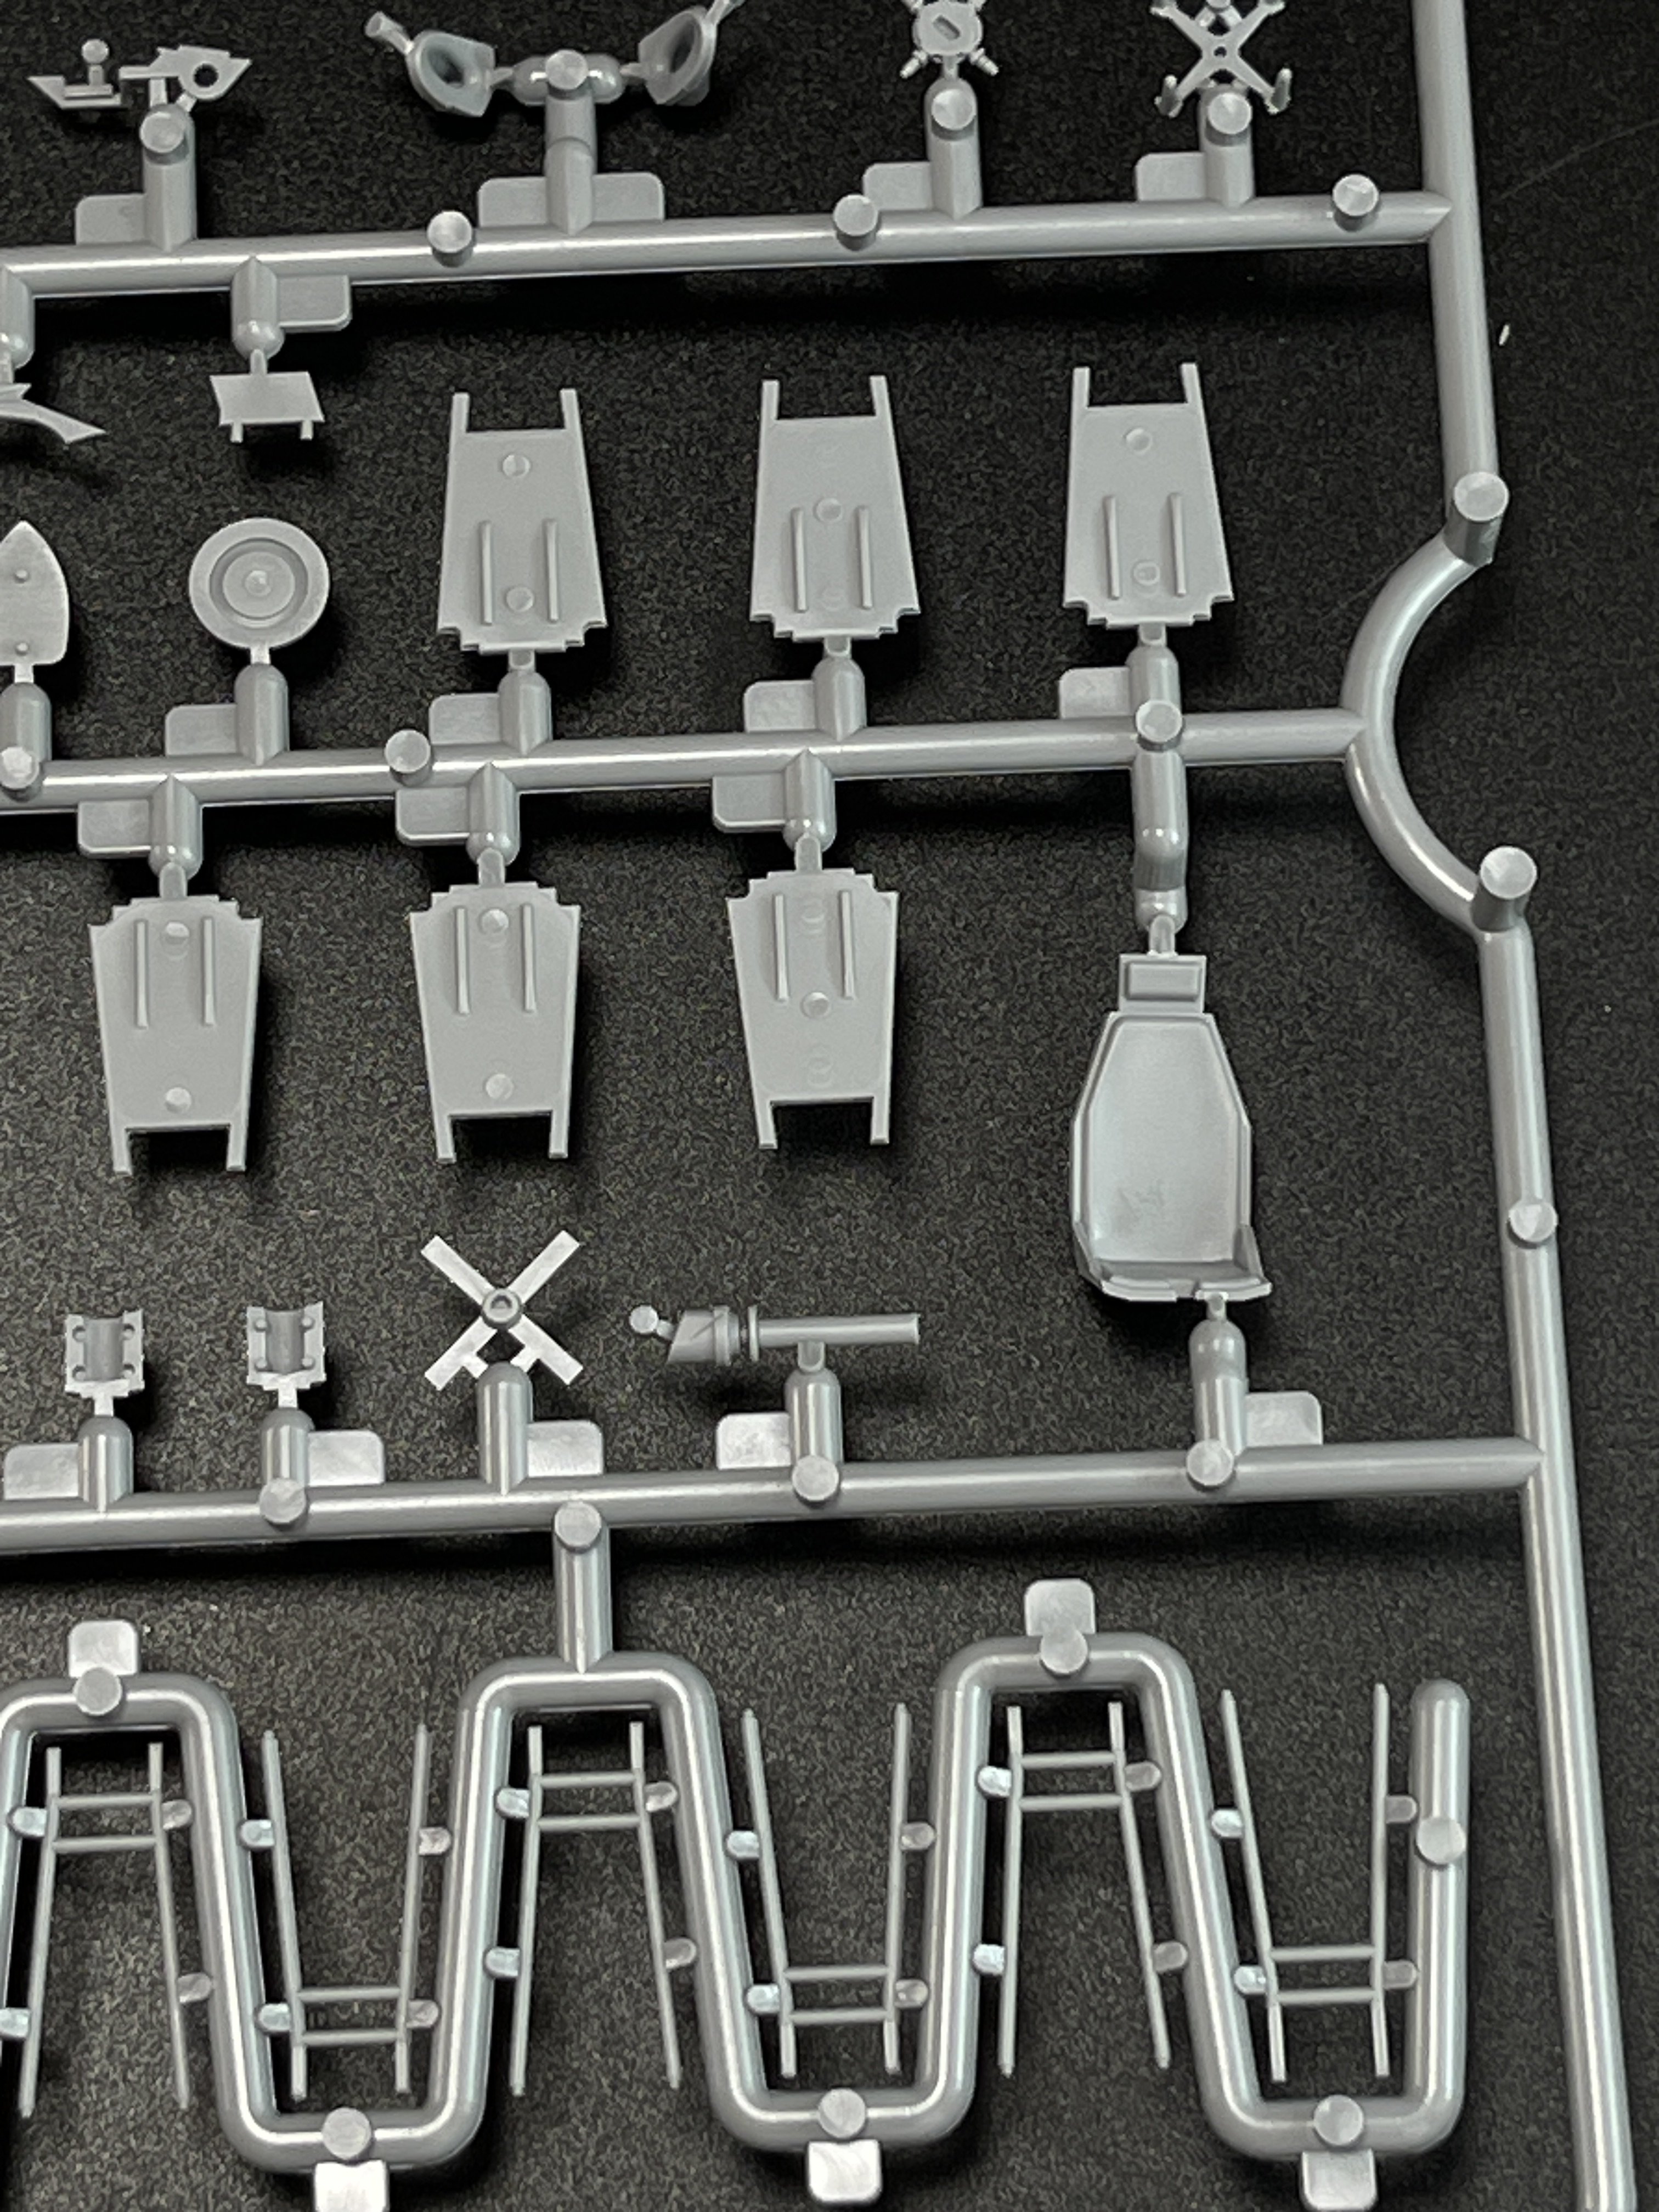
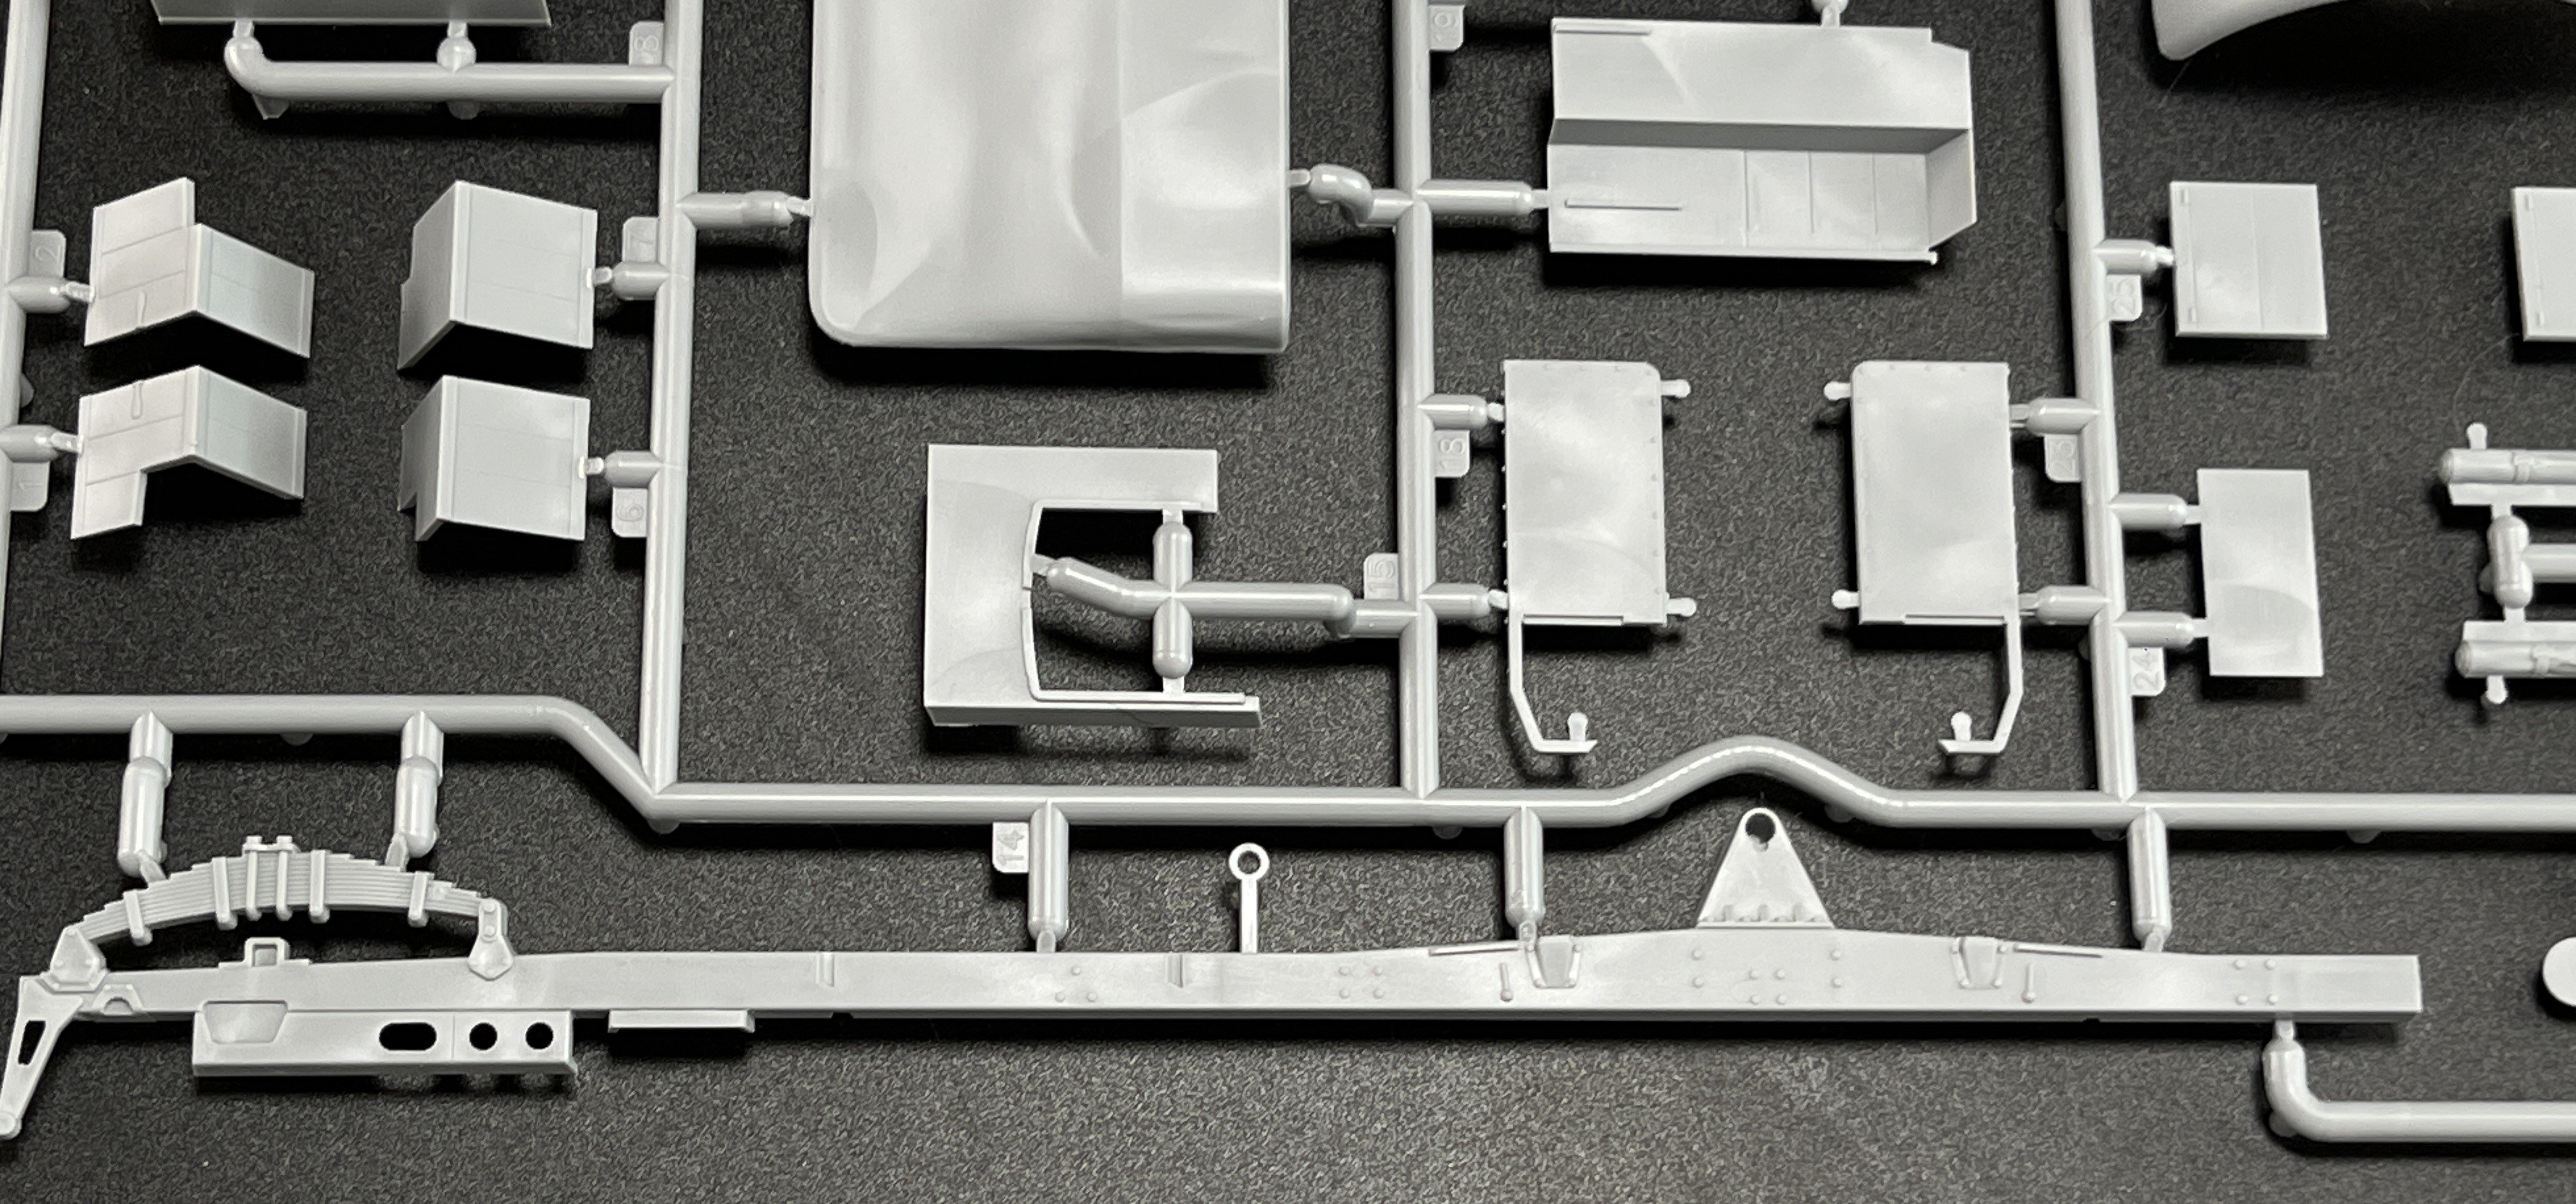
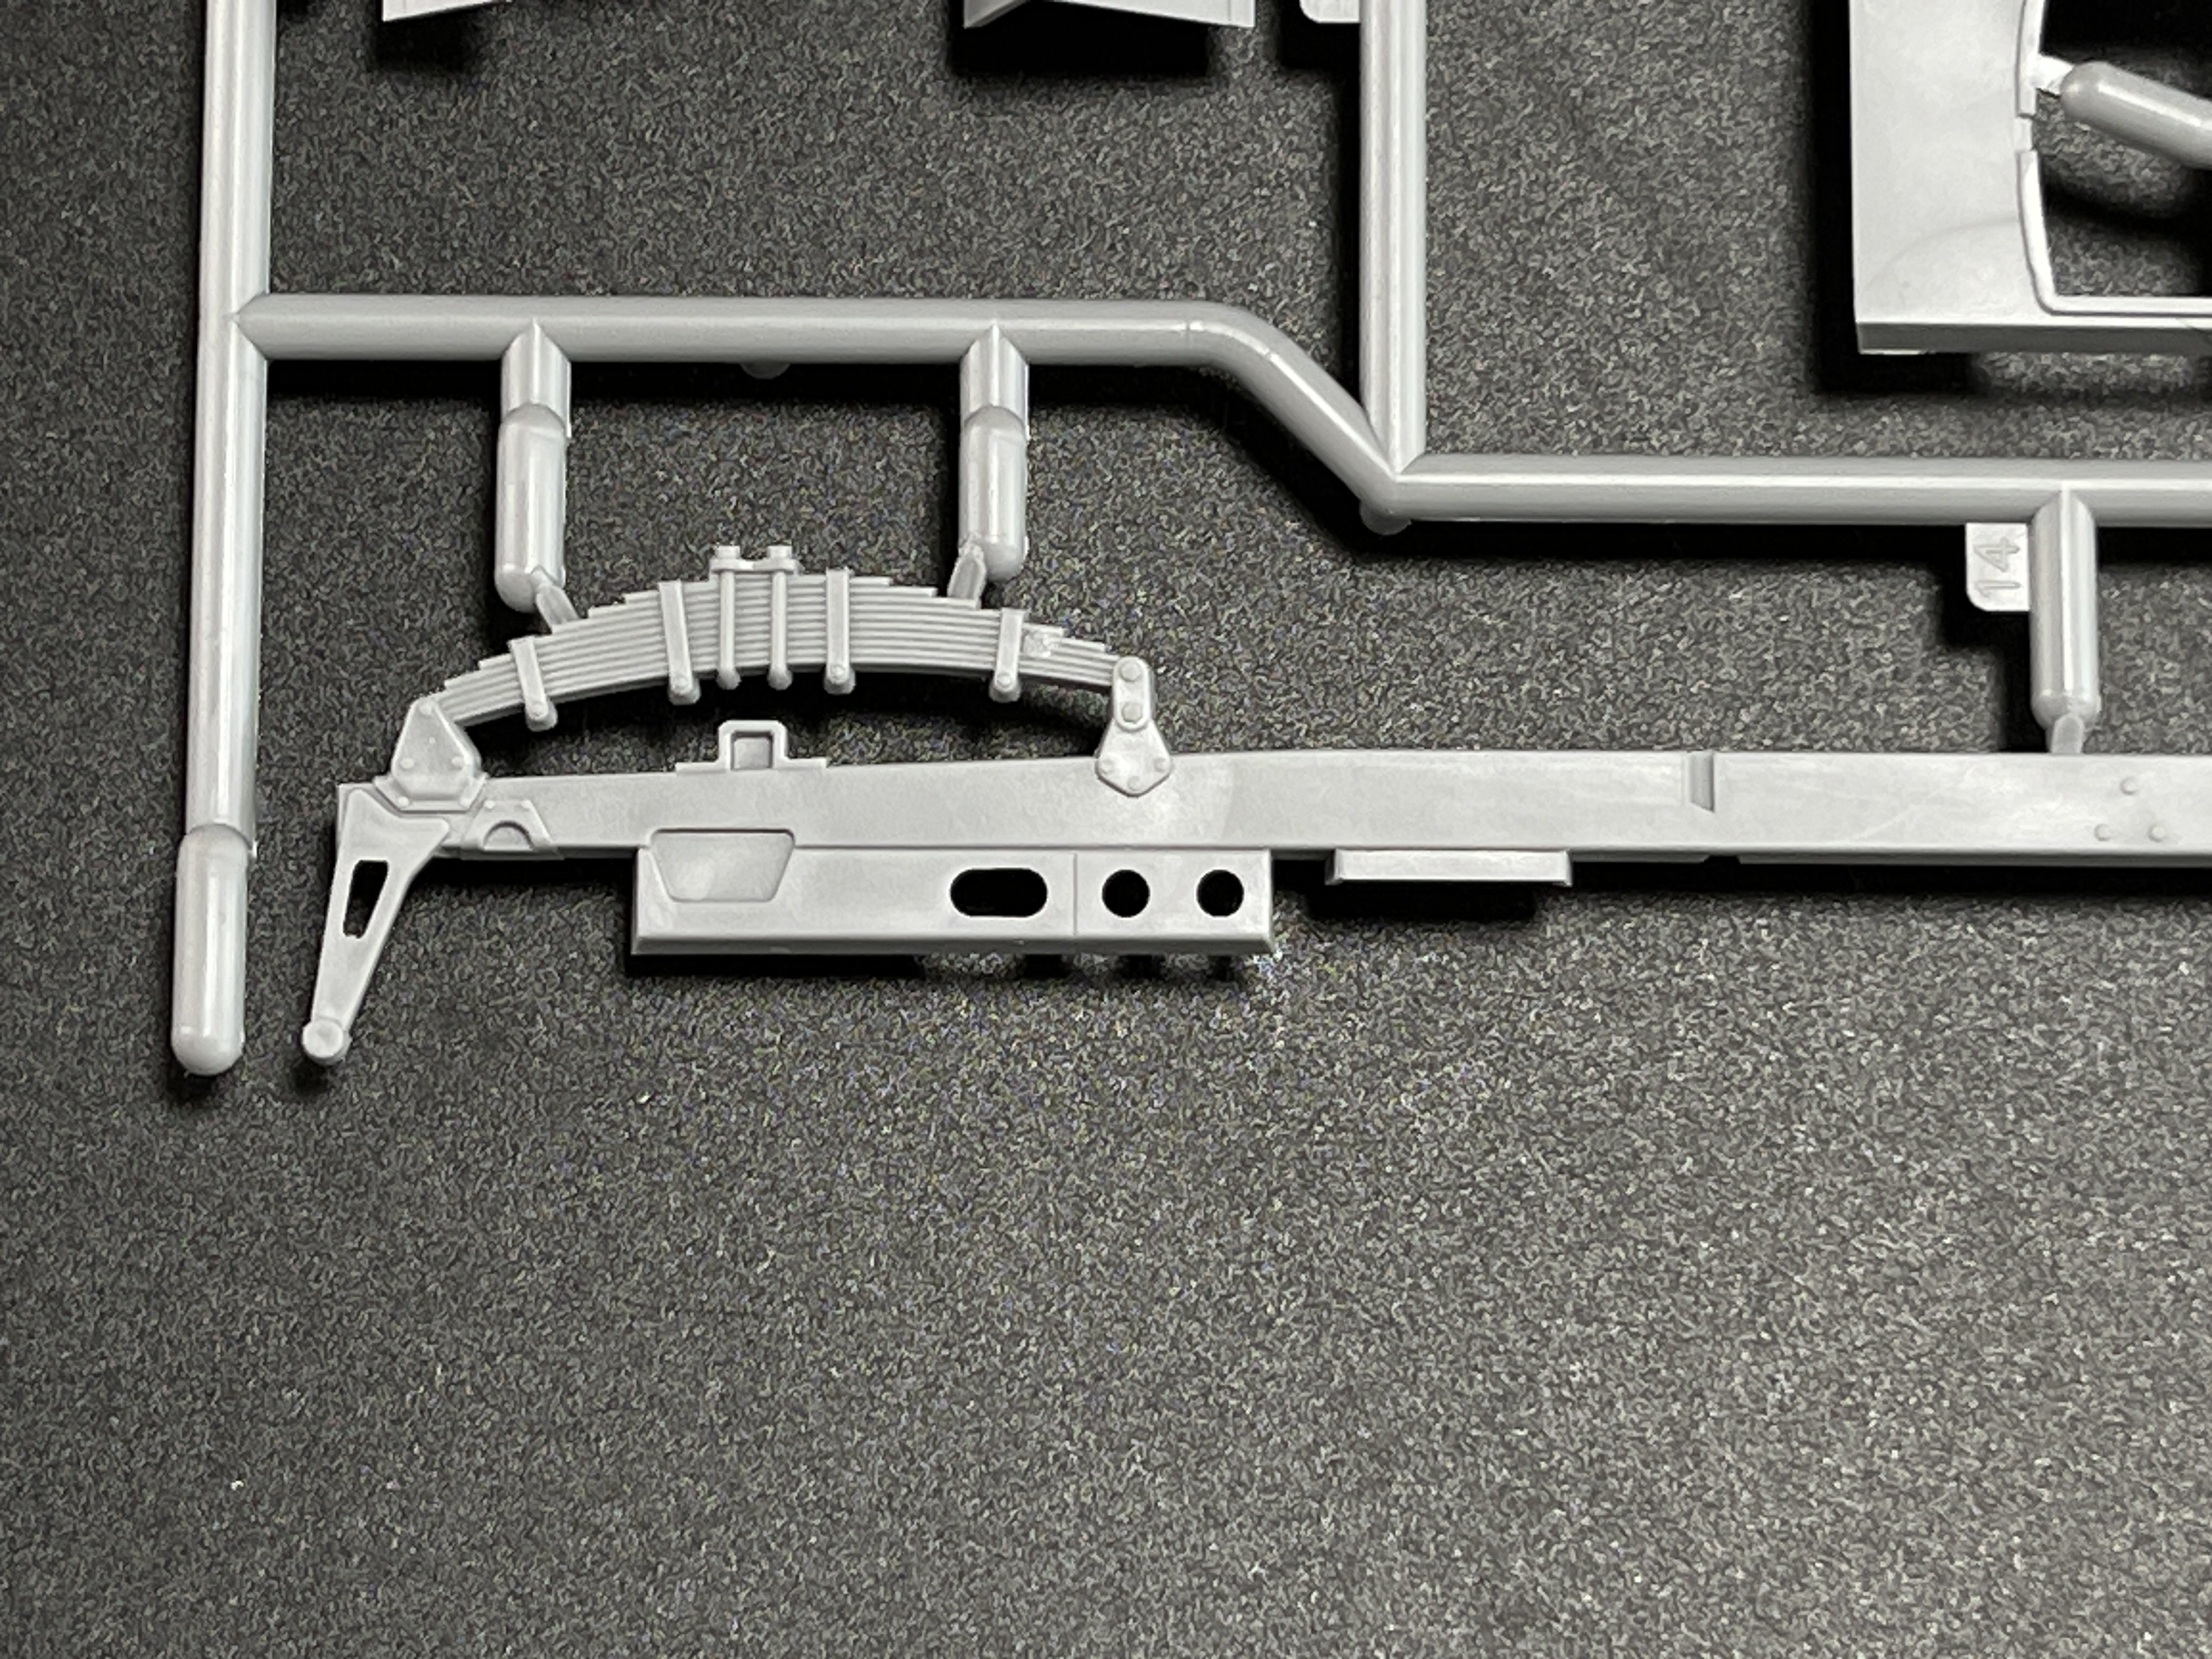
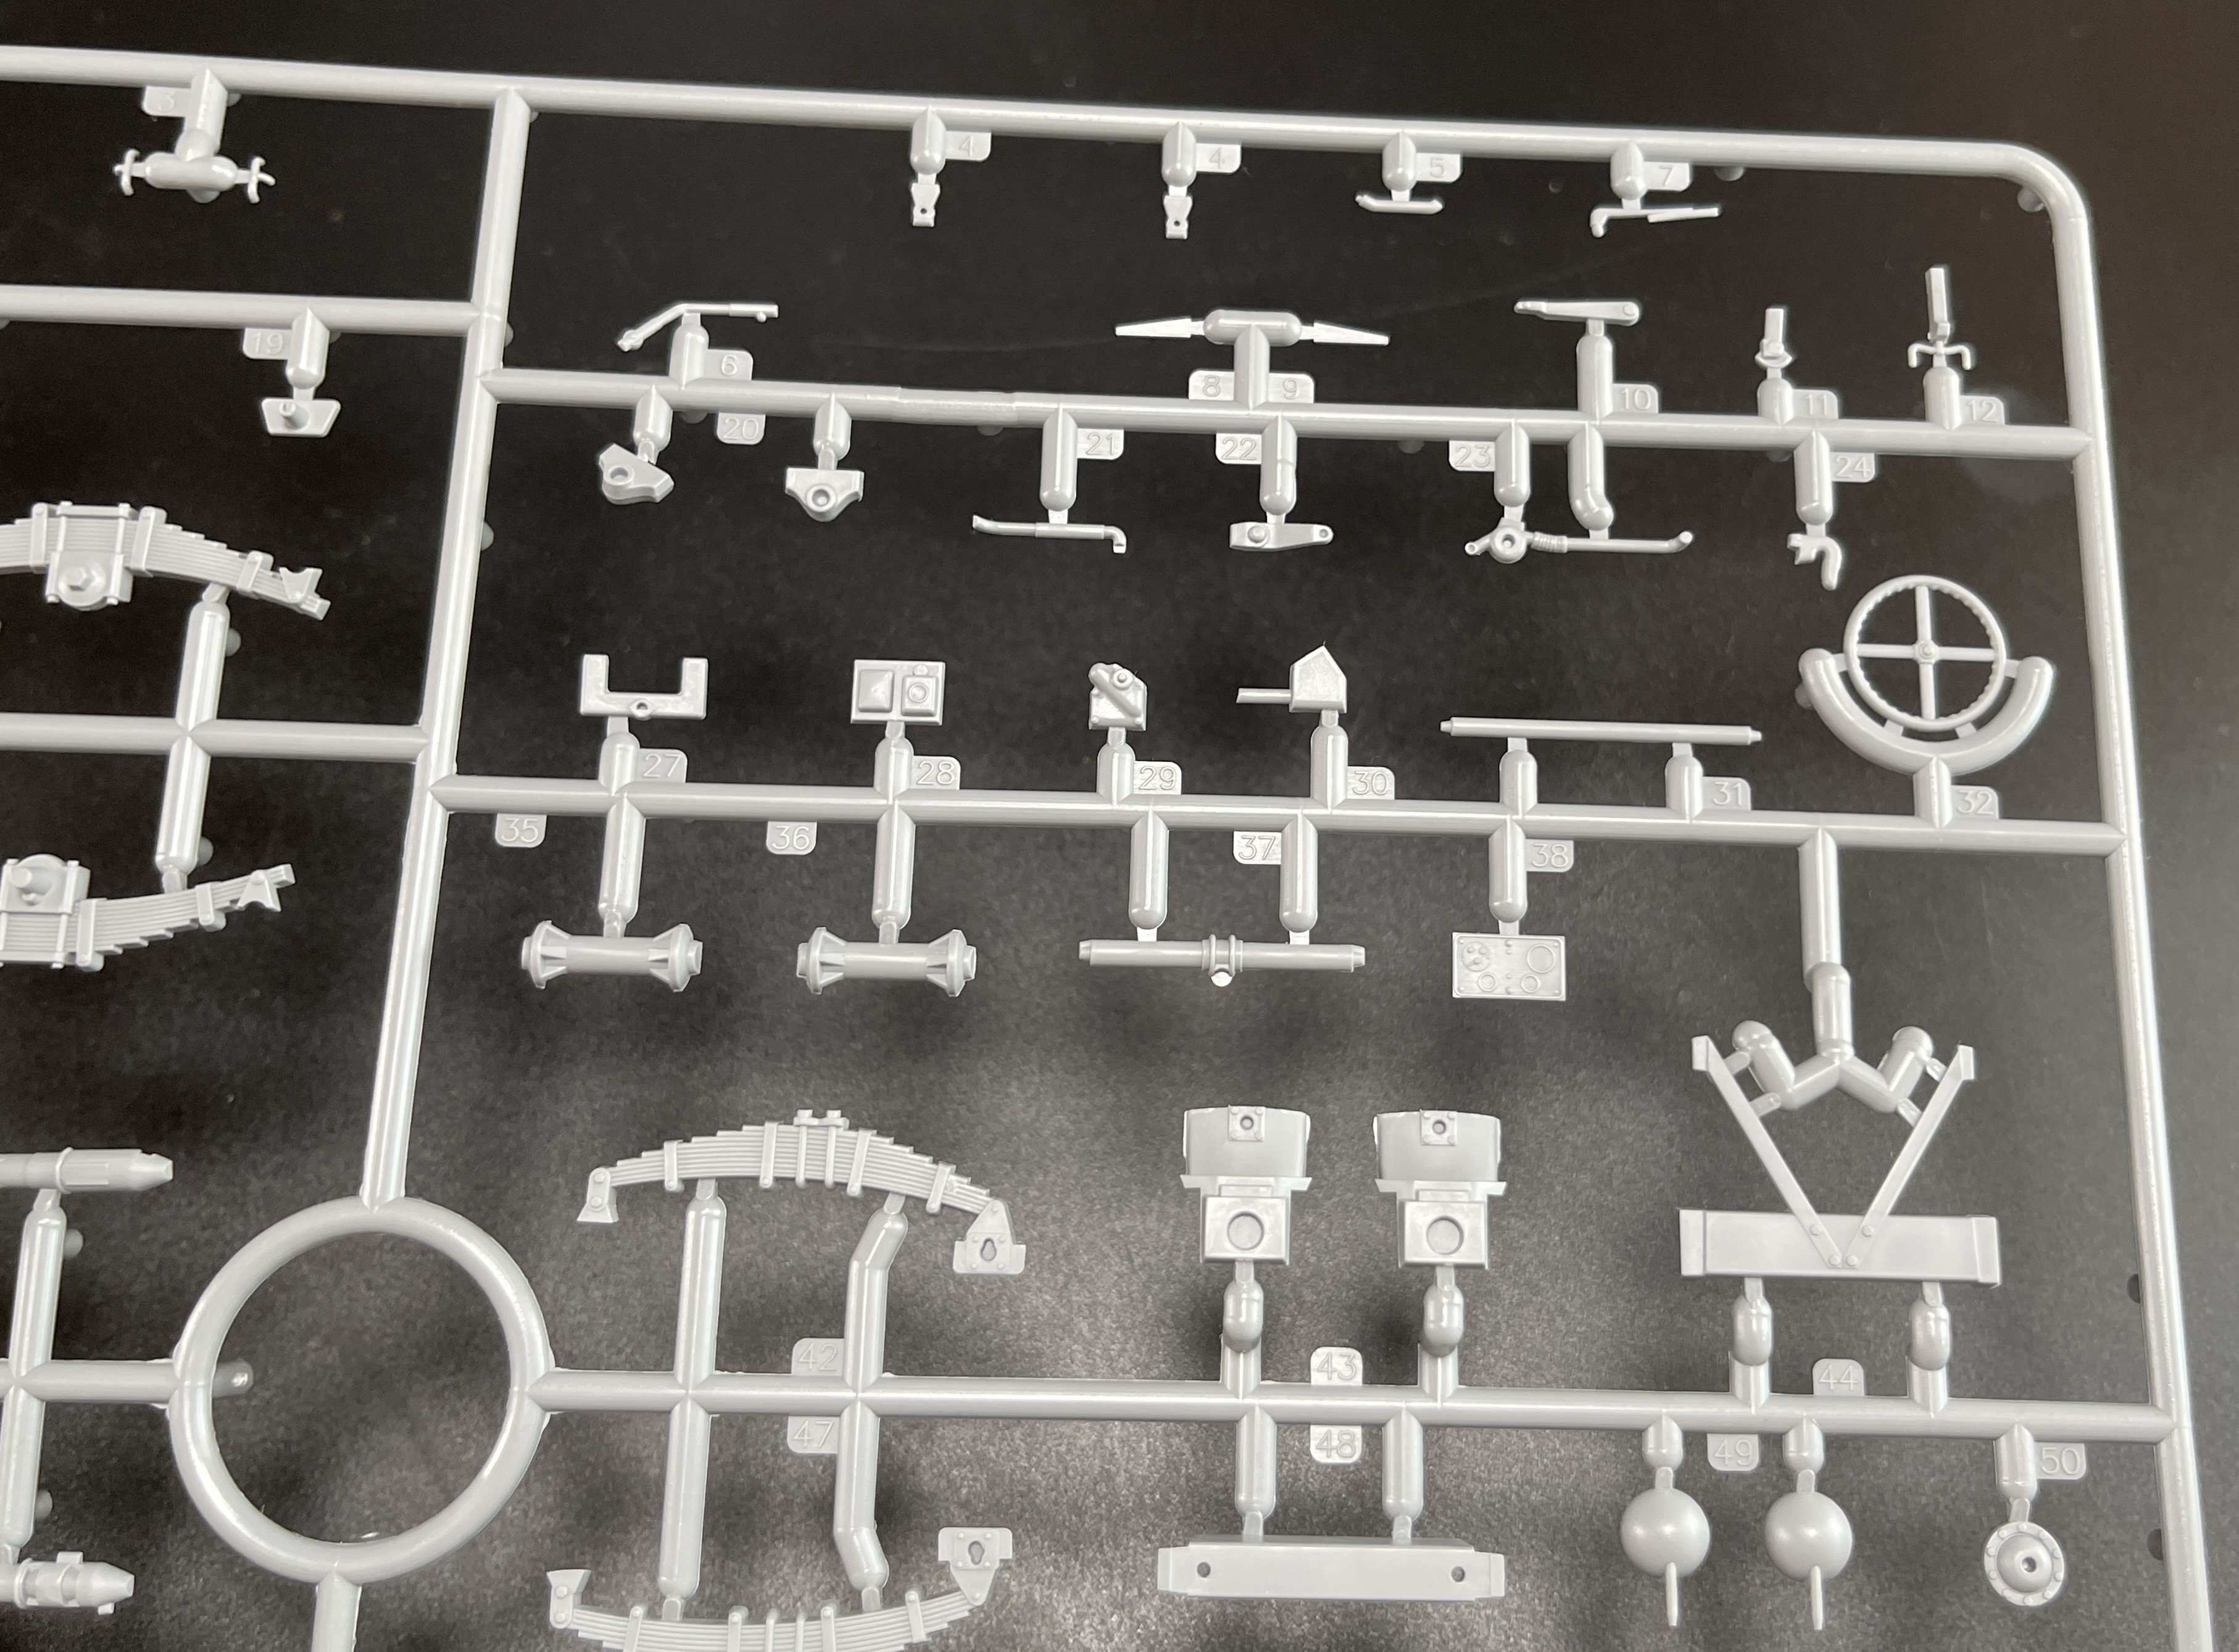
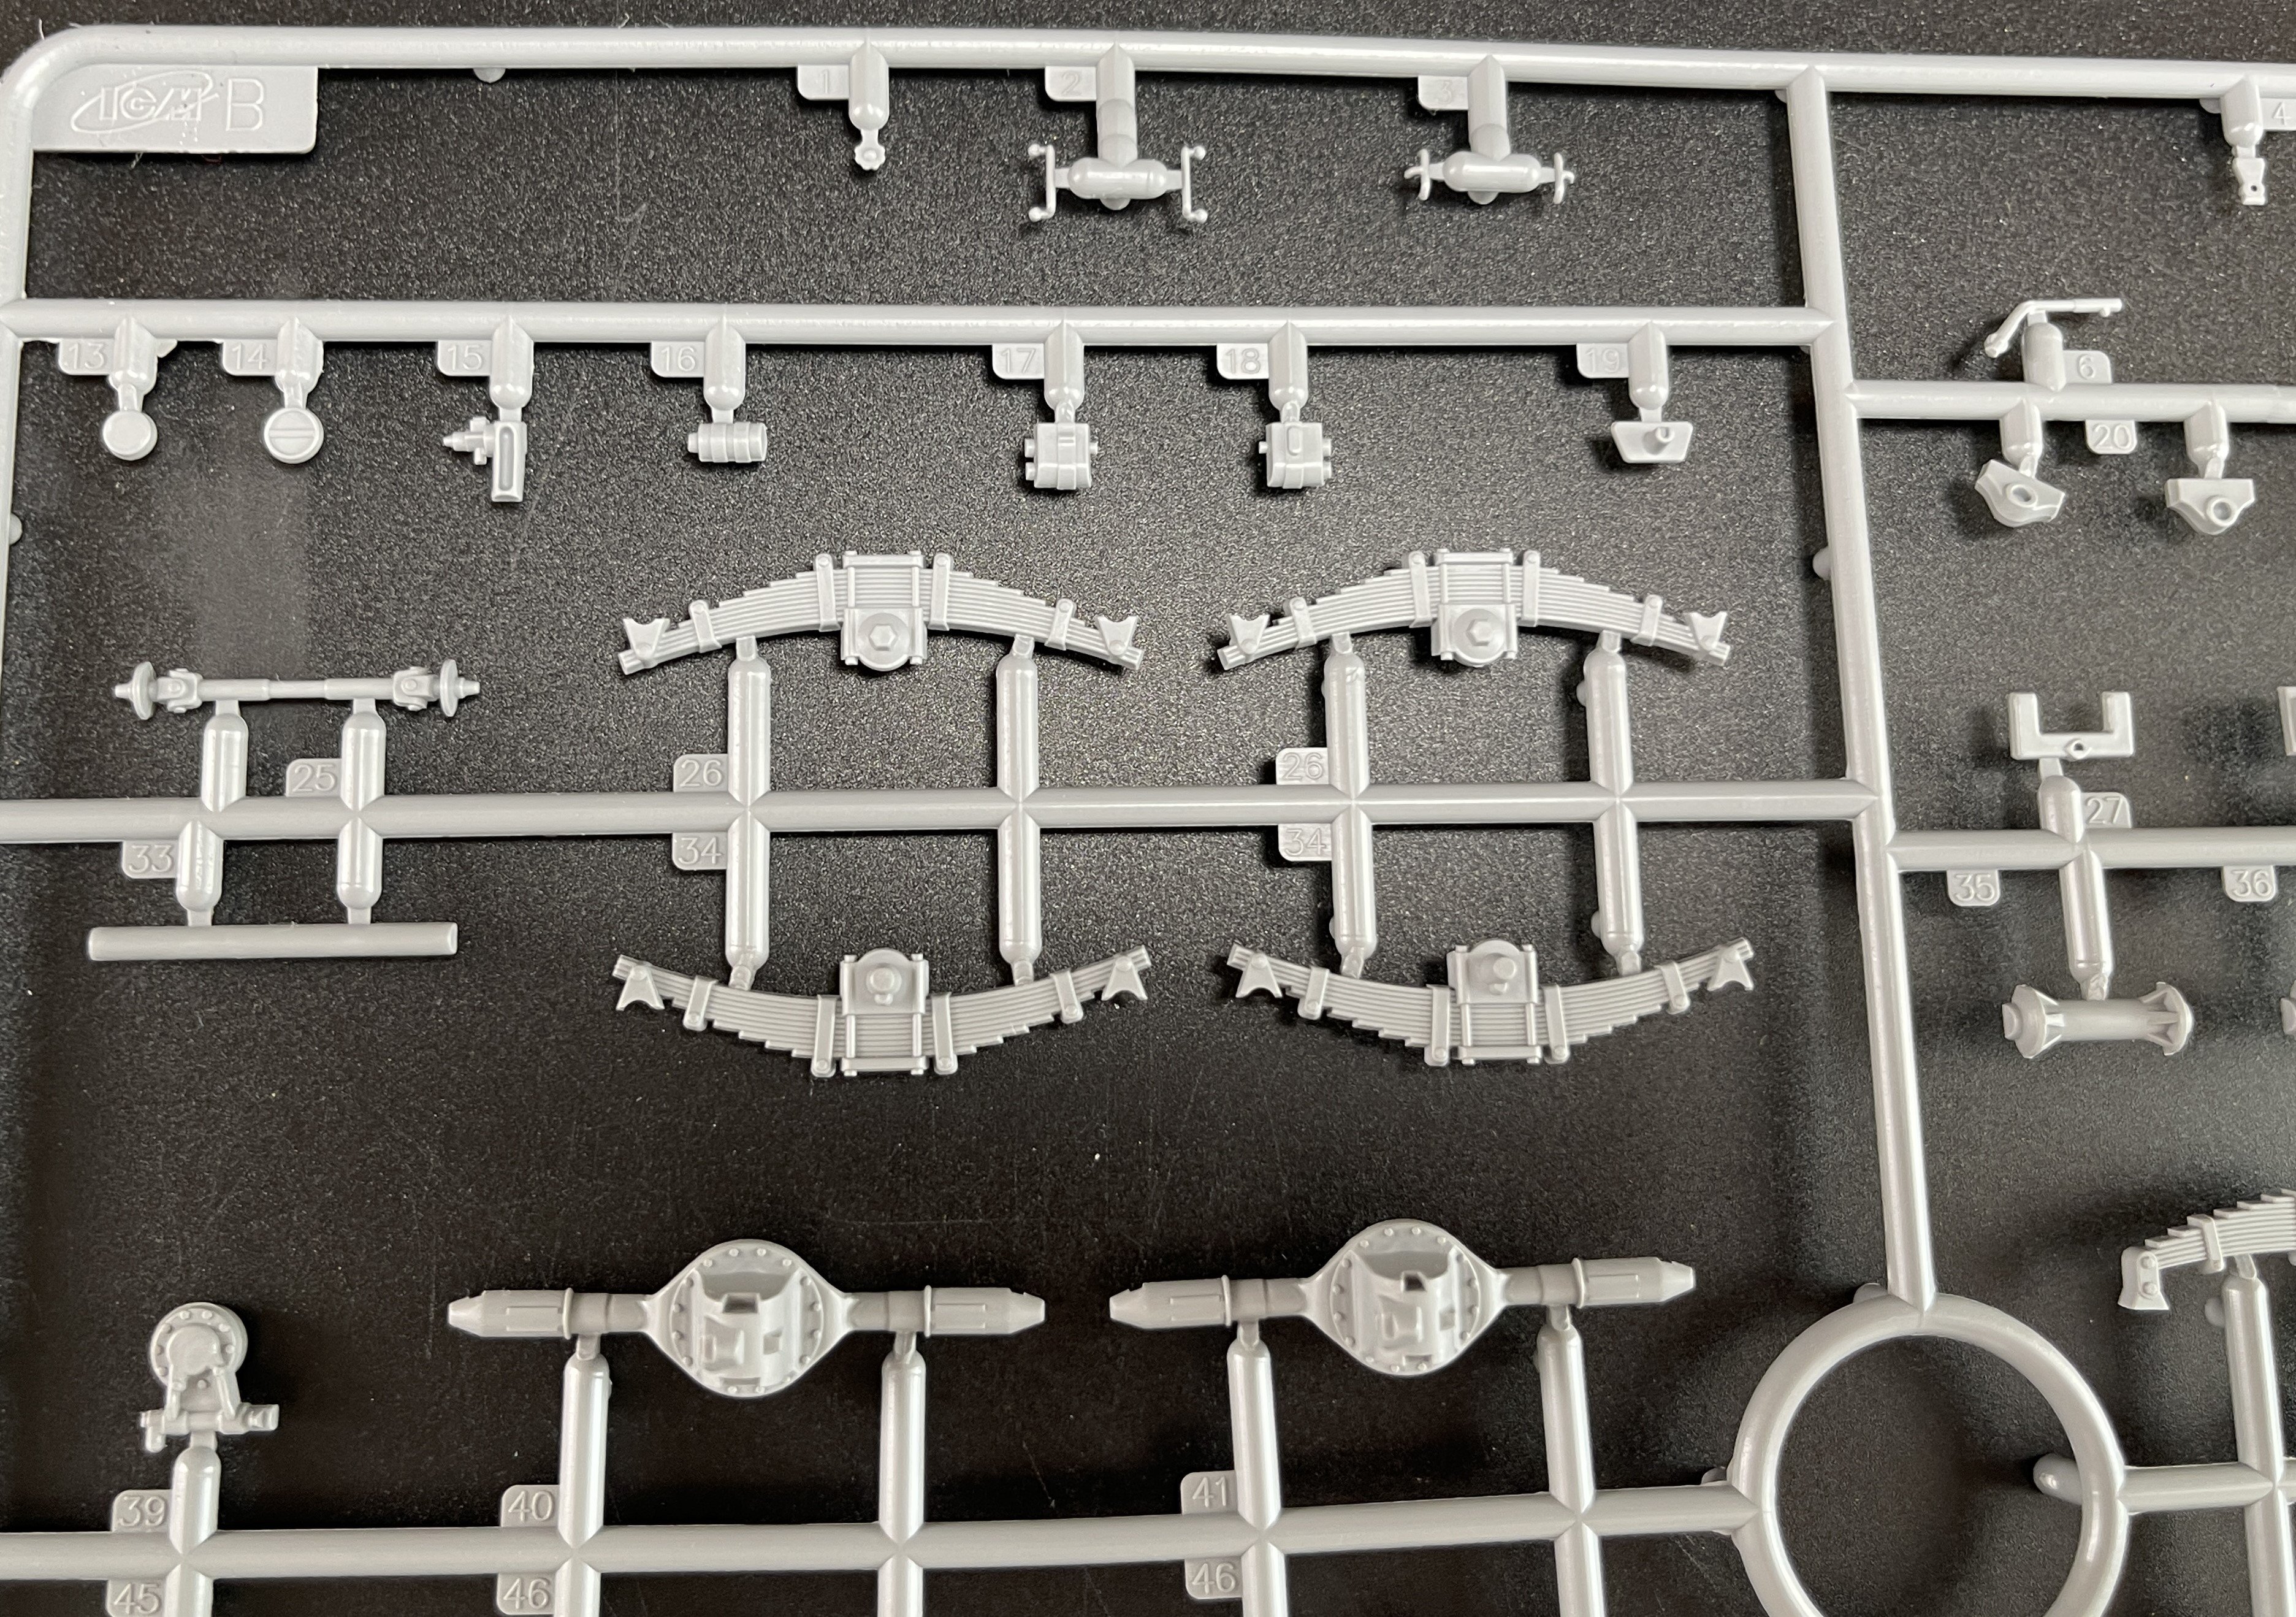
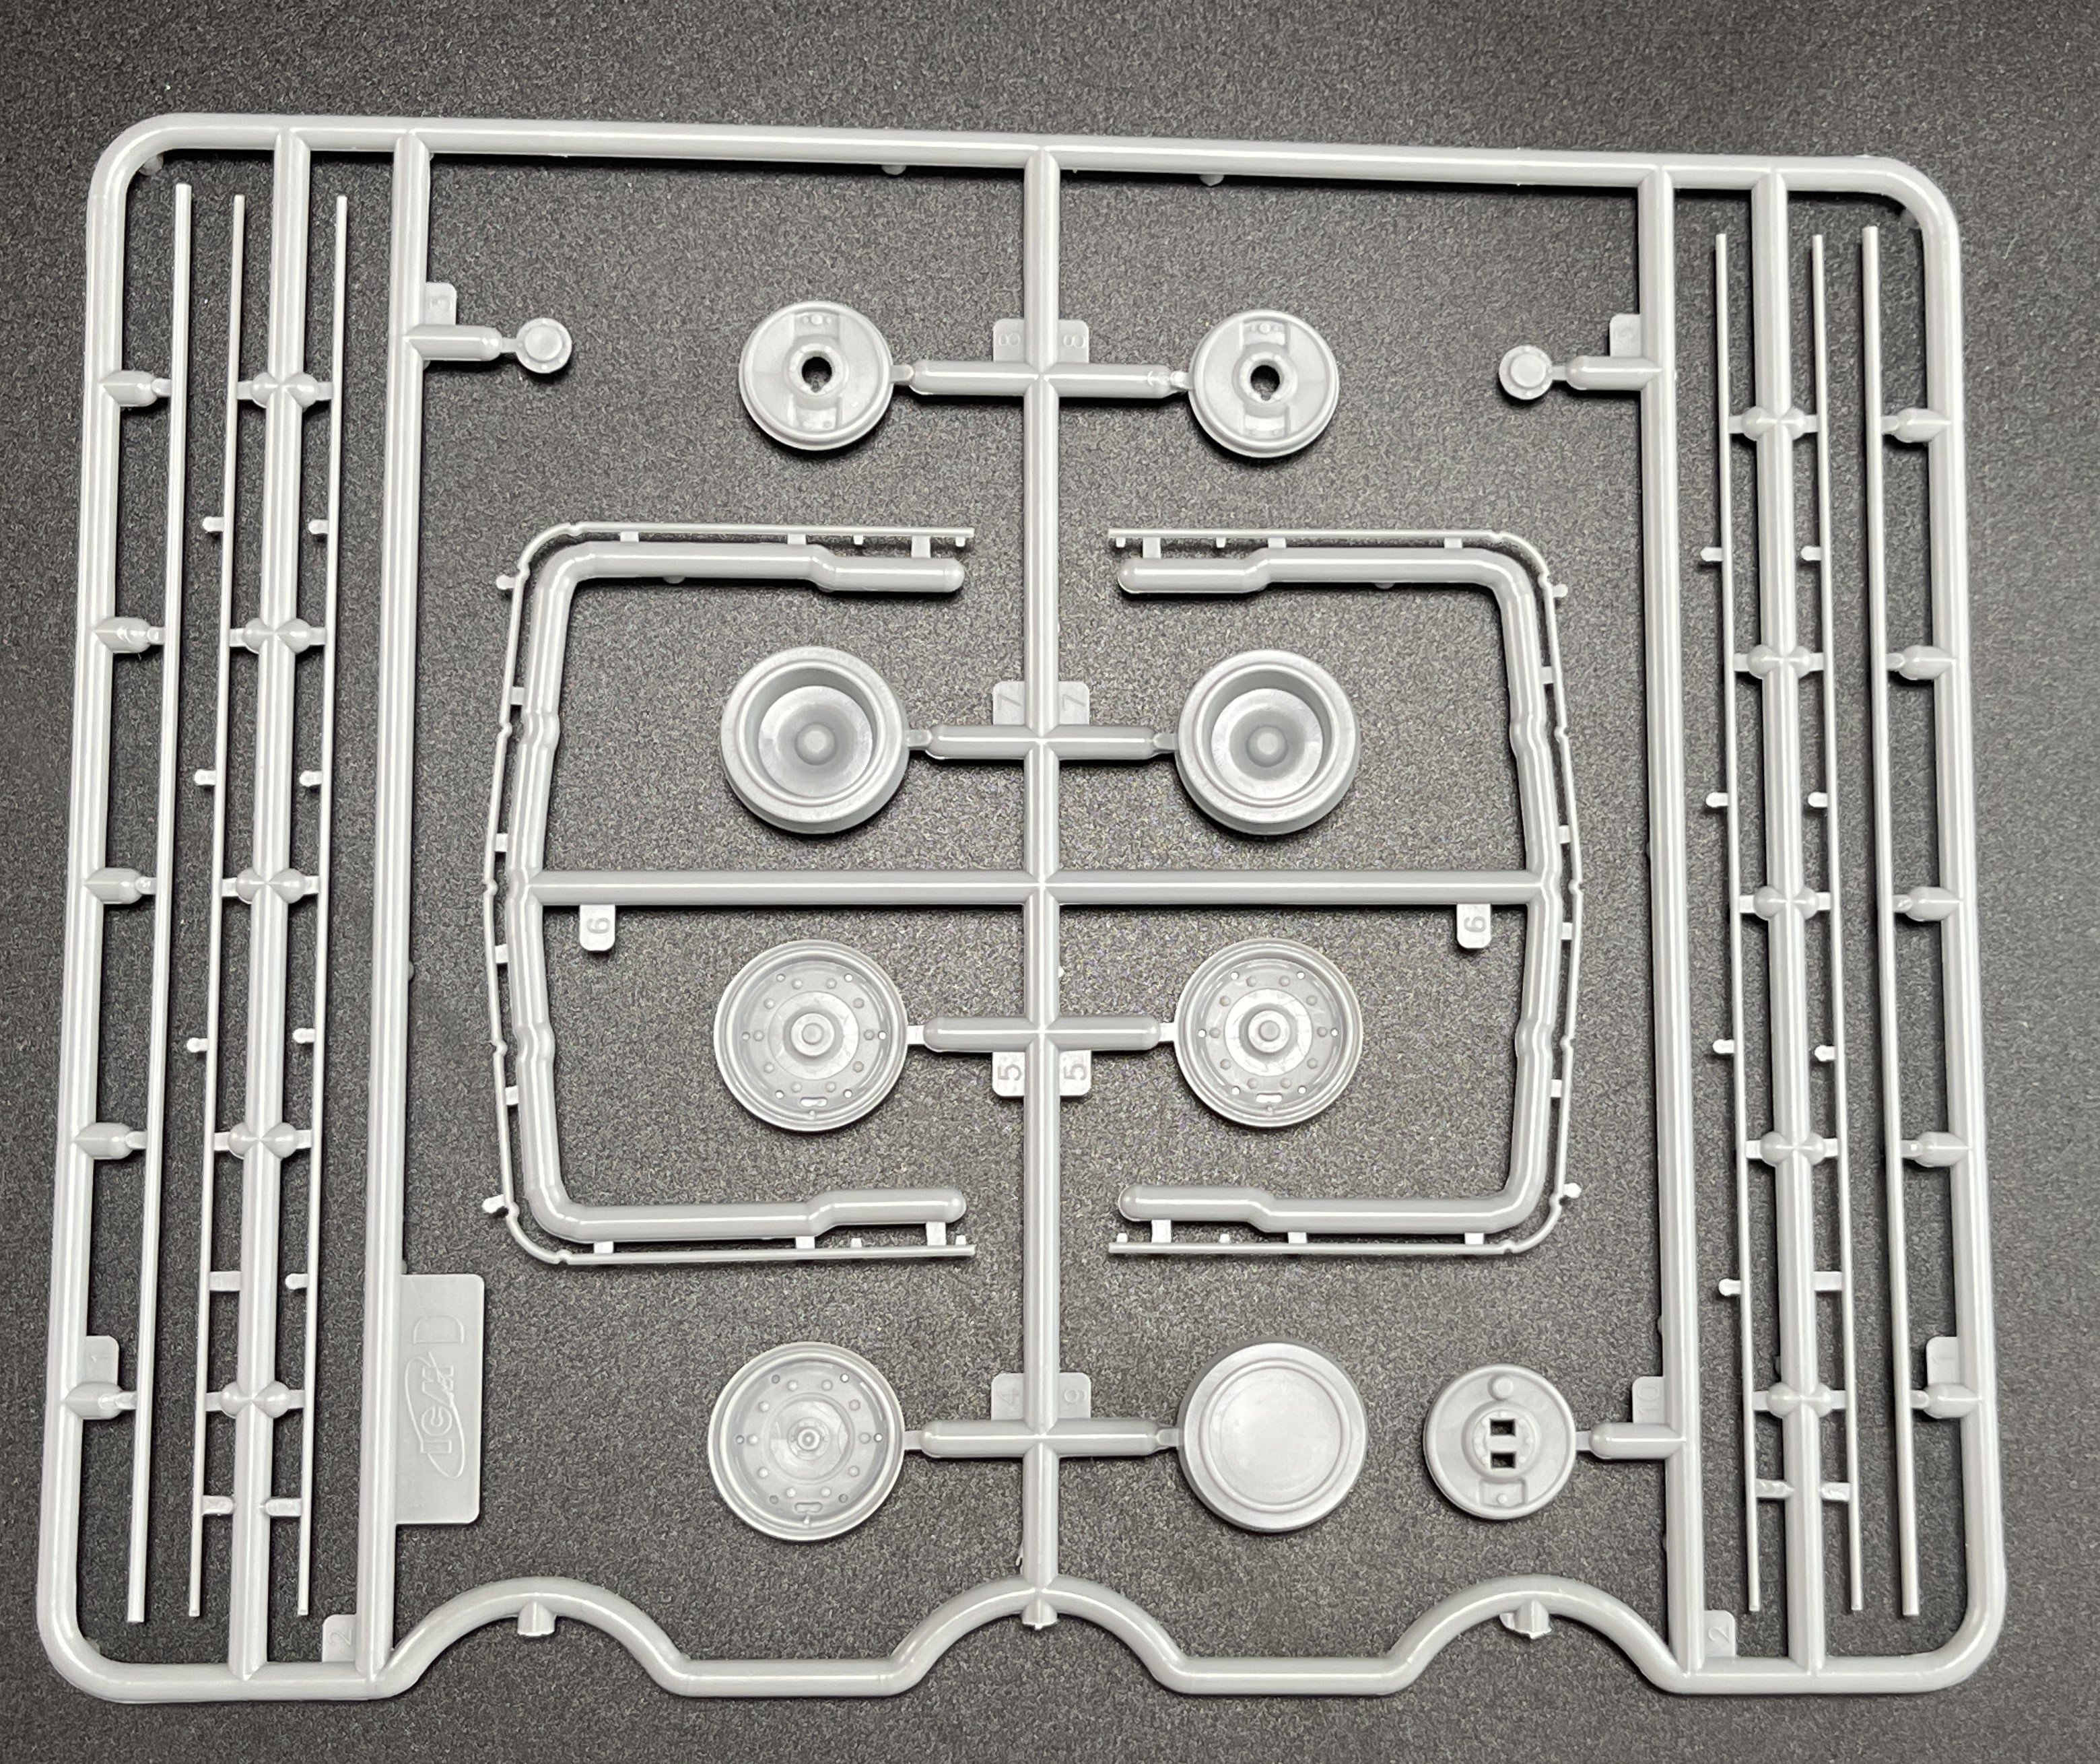
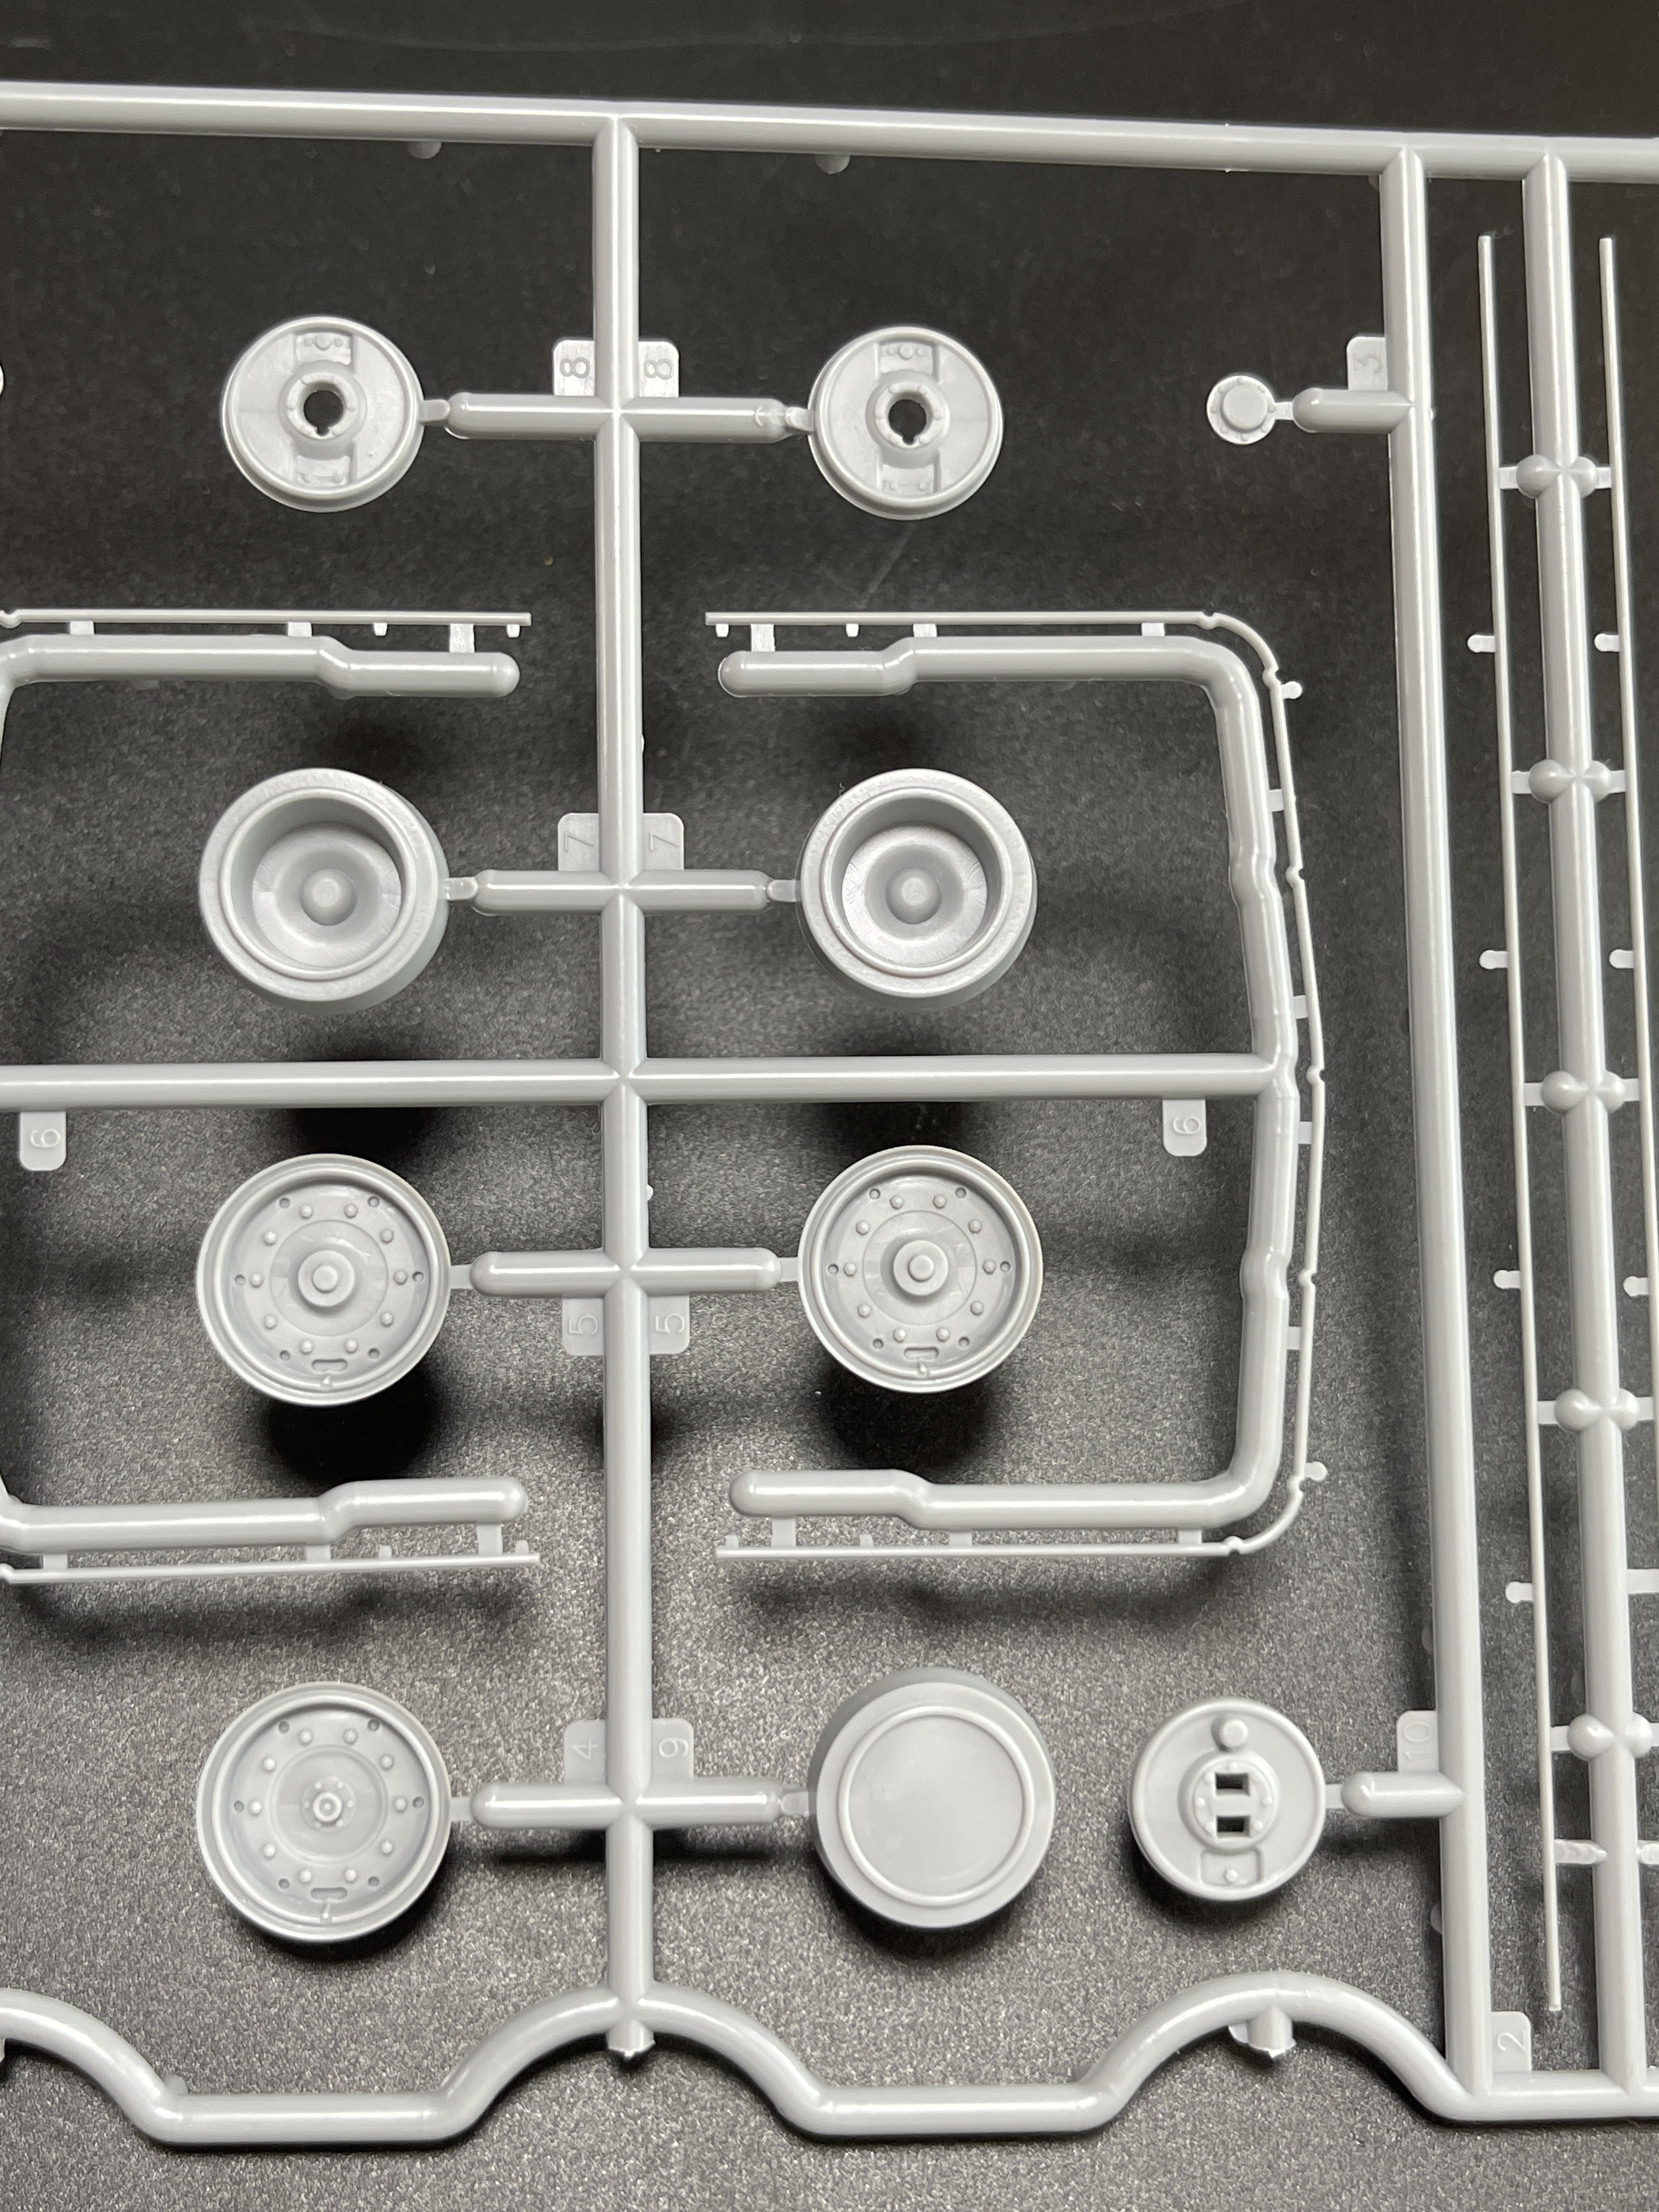
As for the Leyland Retriever, you can have a full chassis detail straight from the box.
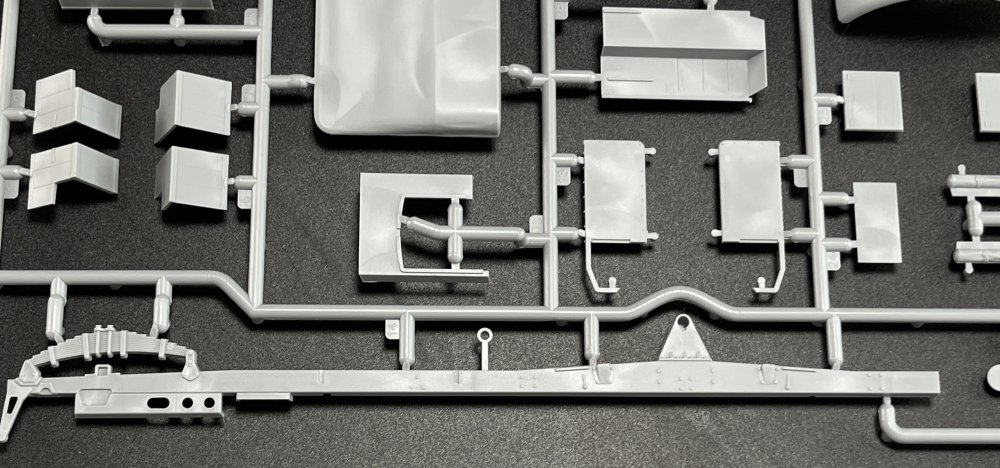
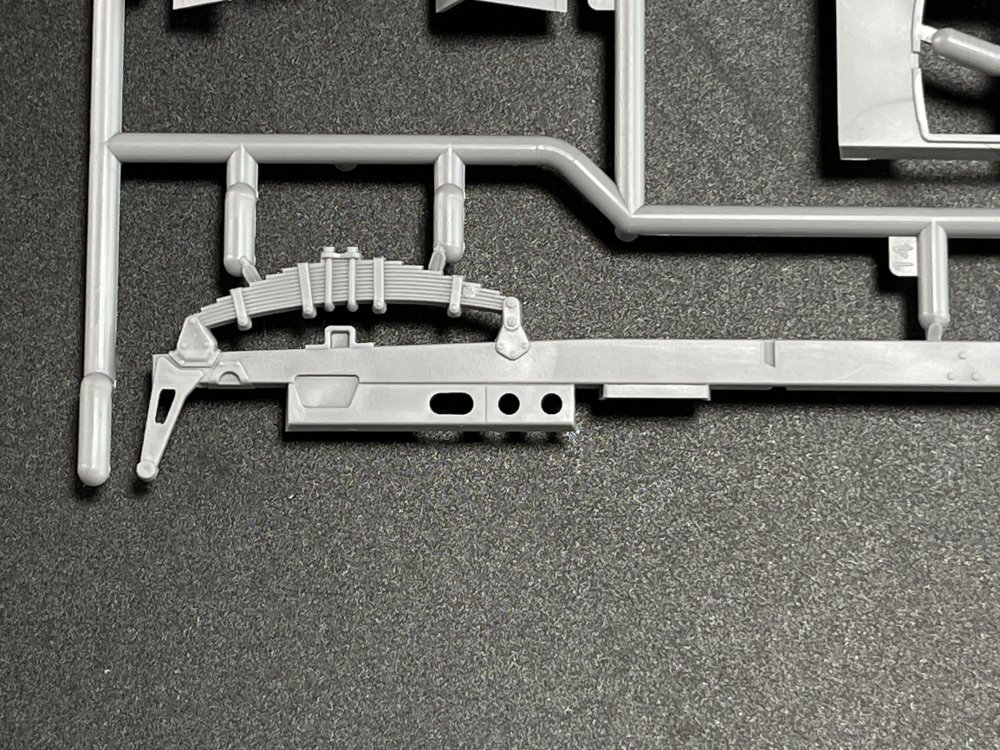
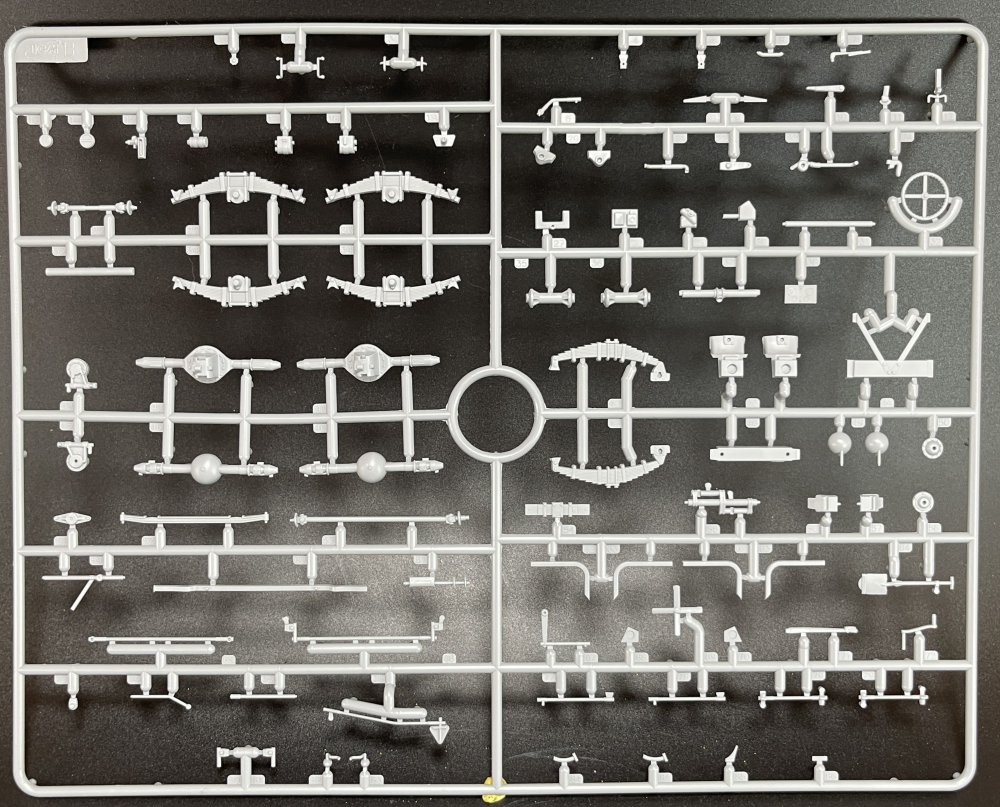


Also the engine is well detailed, out of the box. If you desire to show it up, a few wires could add a more realistic aspect.
There`s a lot of parts in chassis, suspension and engine.
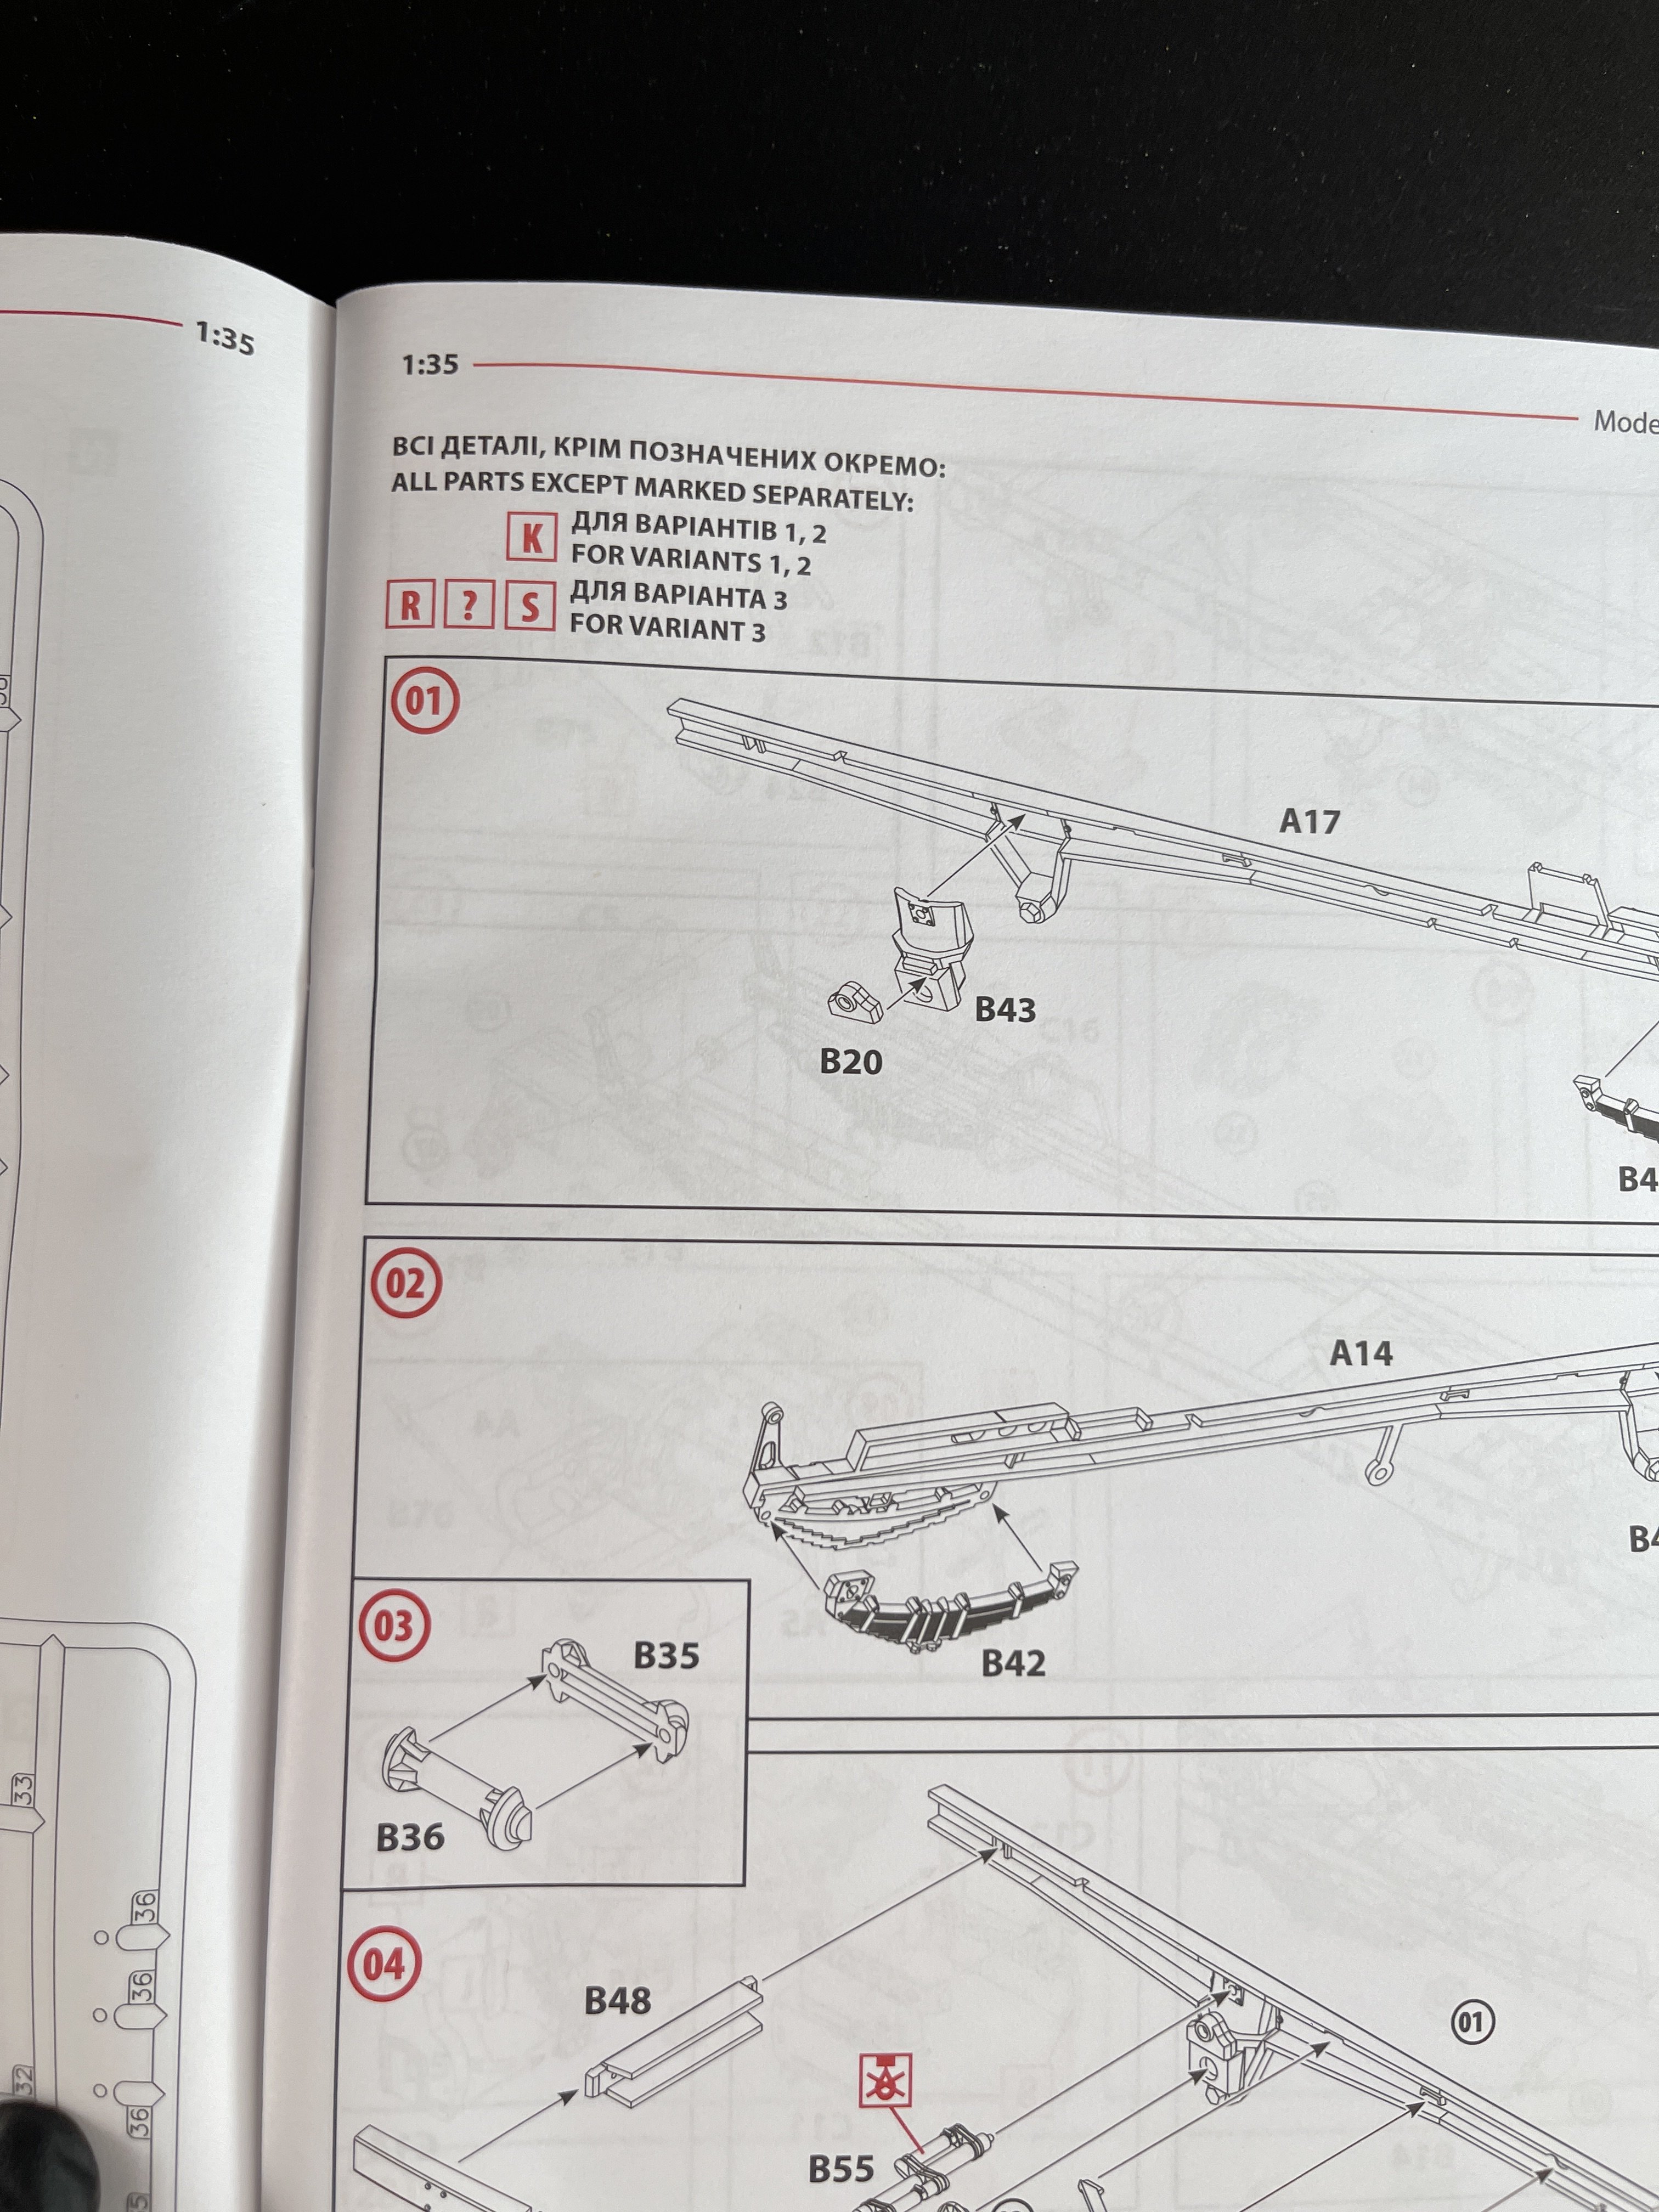
So please do check all the alignment to see if the truck sits properly or will might have a surprise at the end and it can be too late. To see the complexity of all this structure (chassis, wheels and engine) the constructions goes in the instruction until step 51 (in 181).
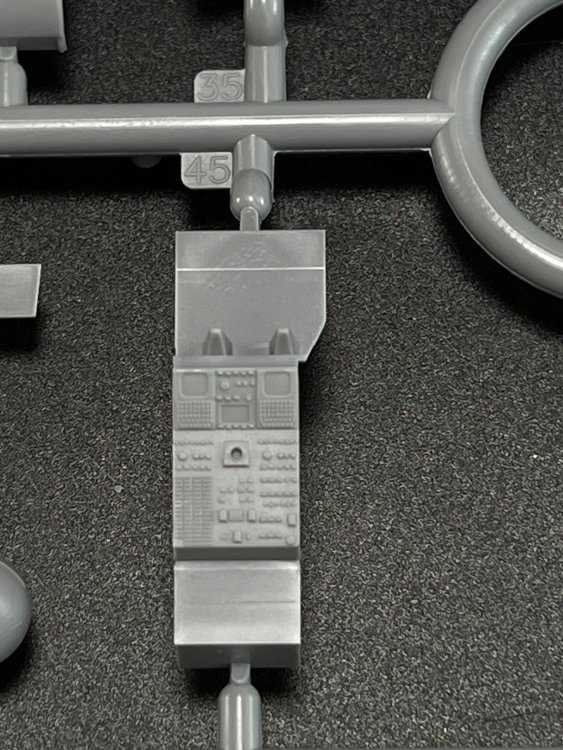
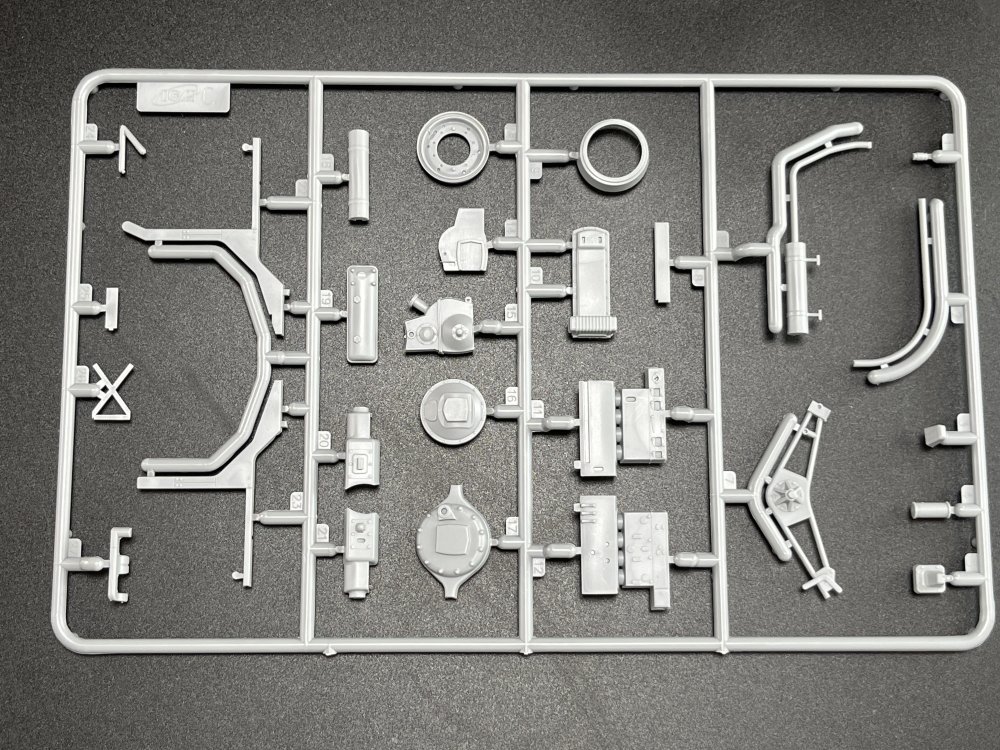
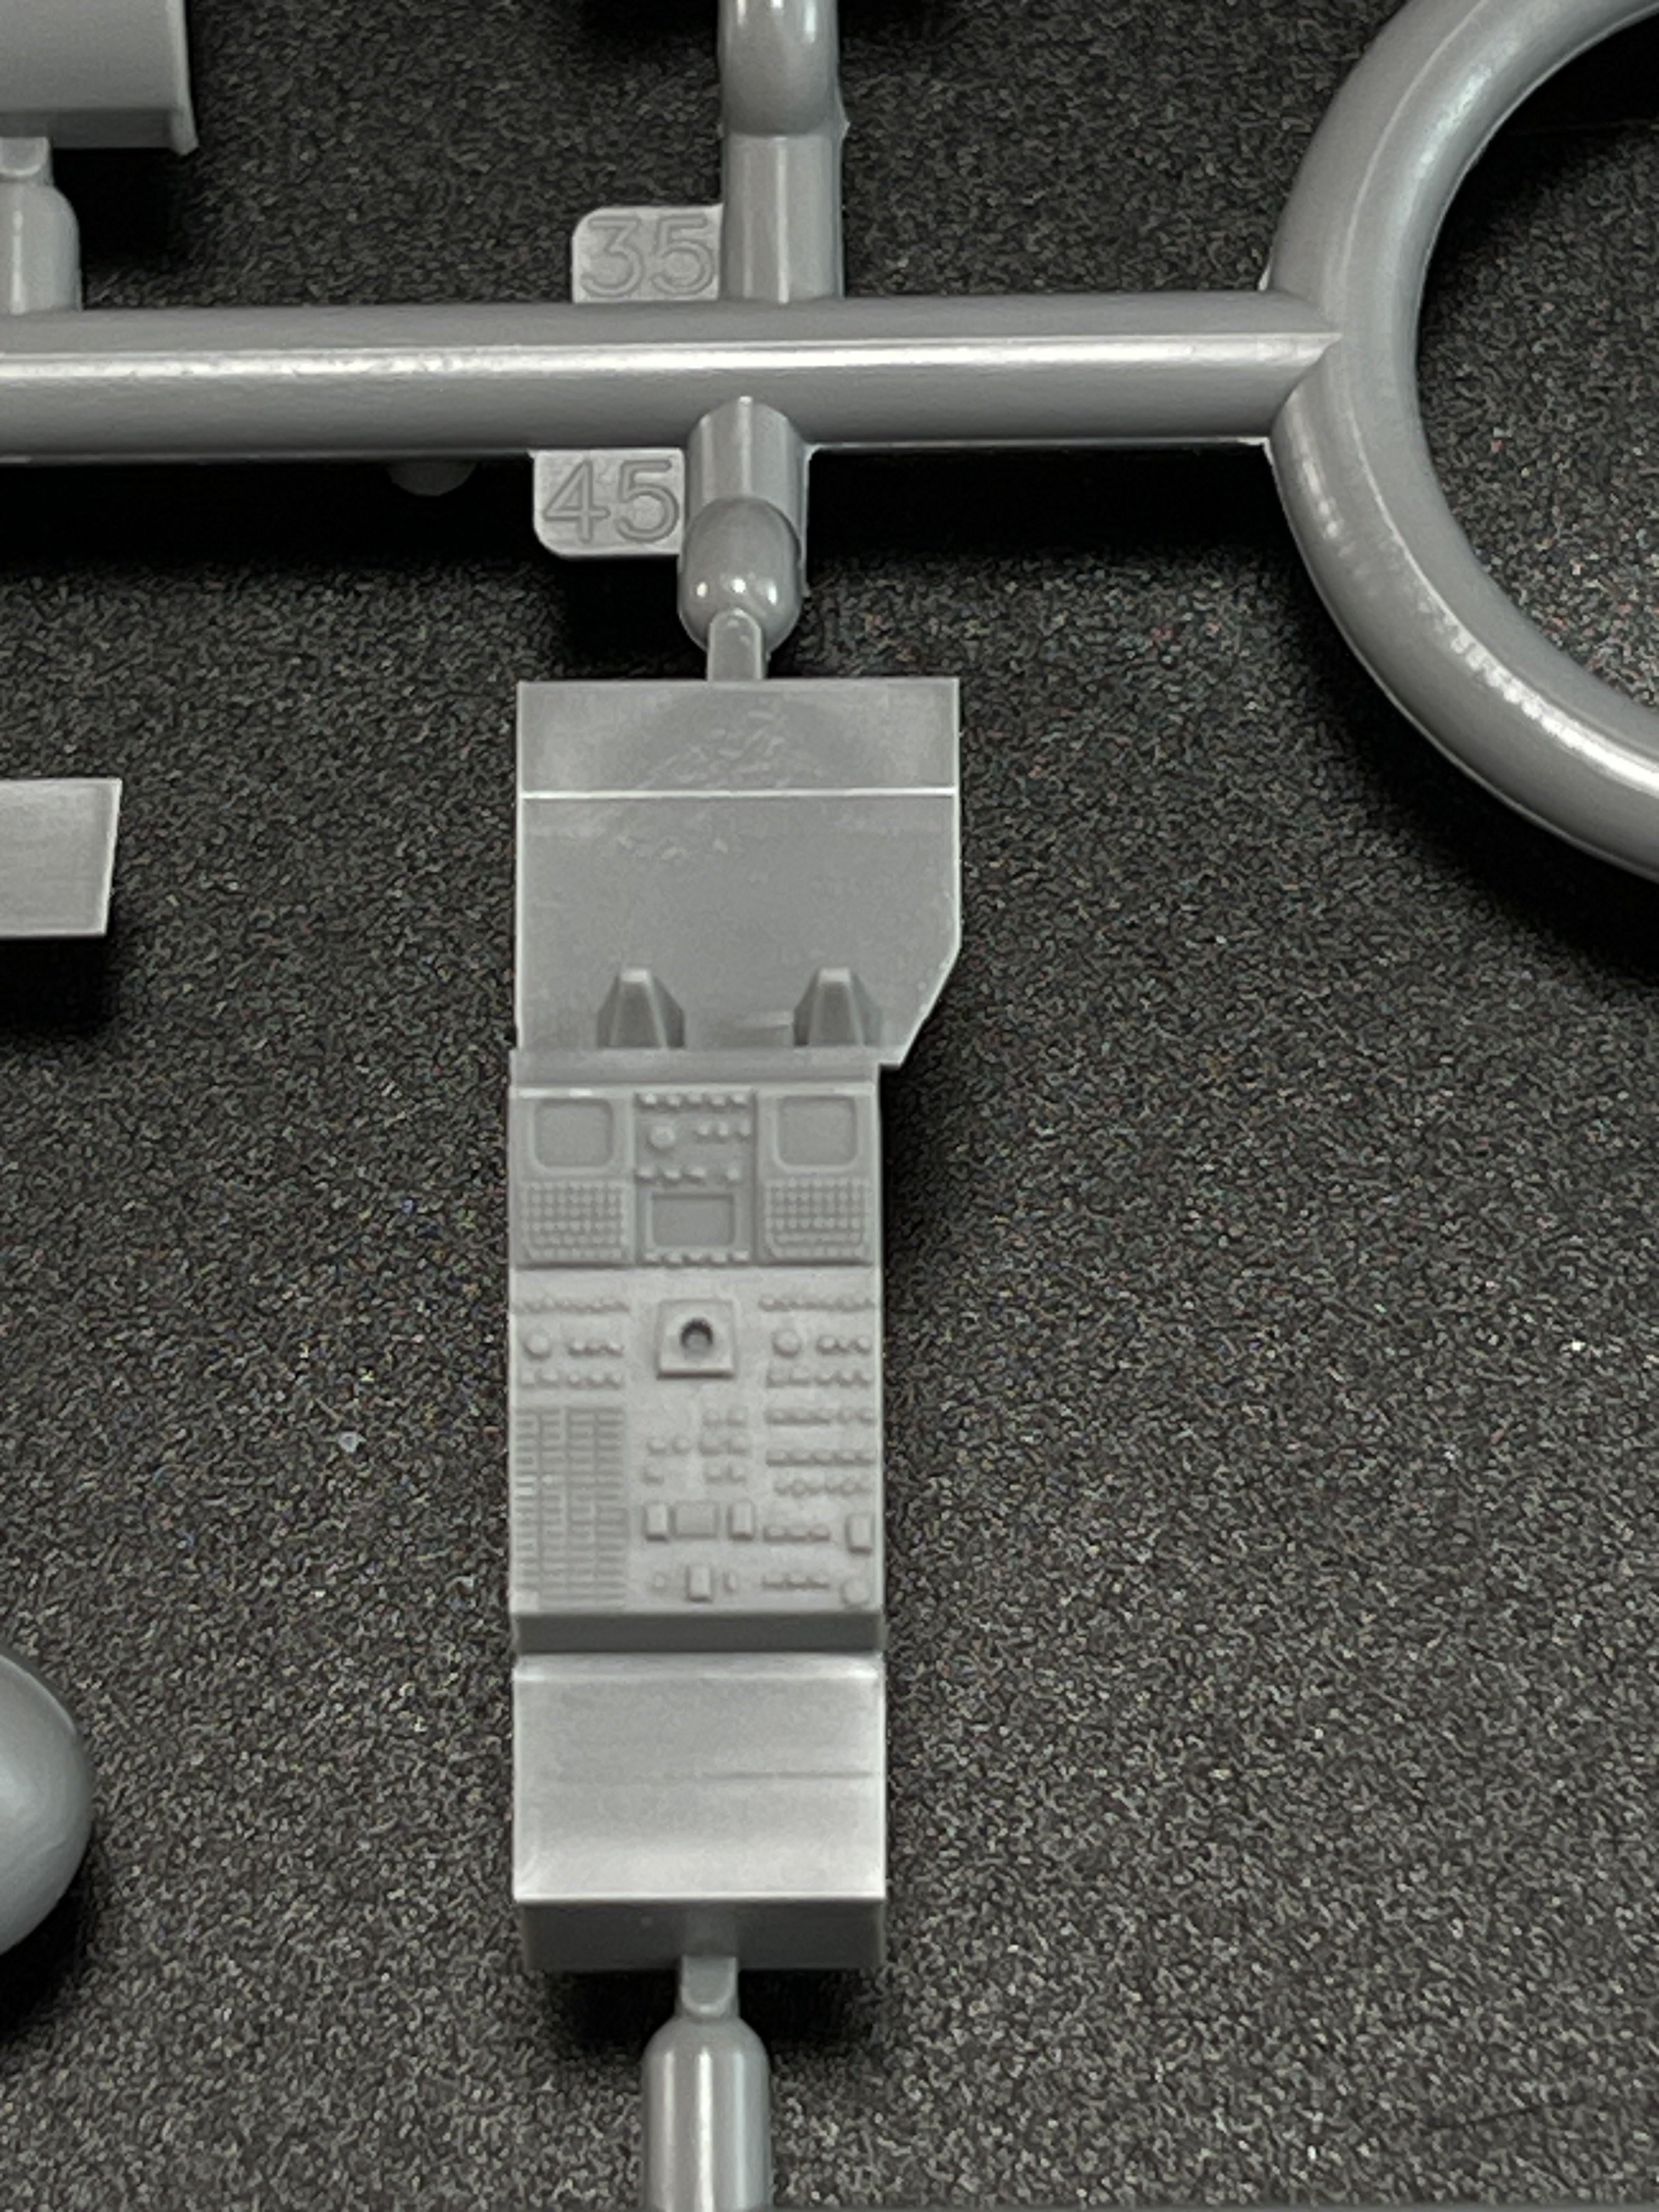
The truck cabin is next and is very detailed from the box.
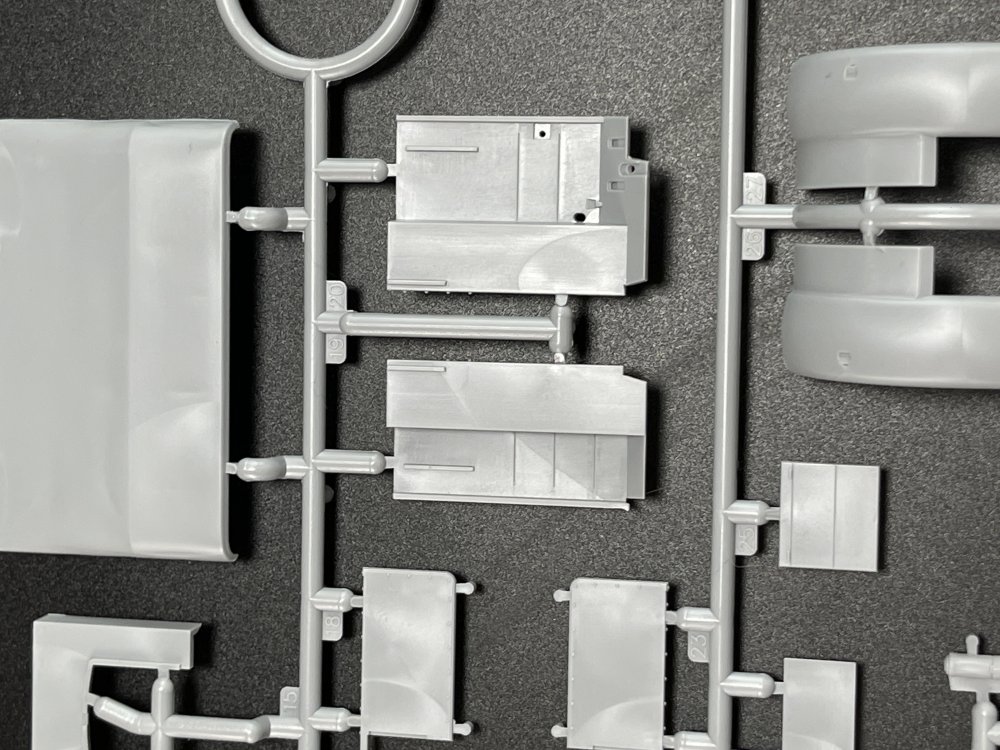

The parts comes with pin alignment making the construction more straightforward that you can imagine. The markings pins are hidden in strategy places that you can see… so kudos to ICM for thinking about it.
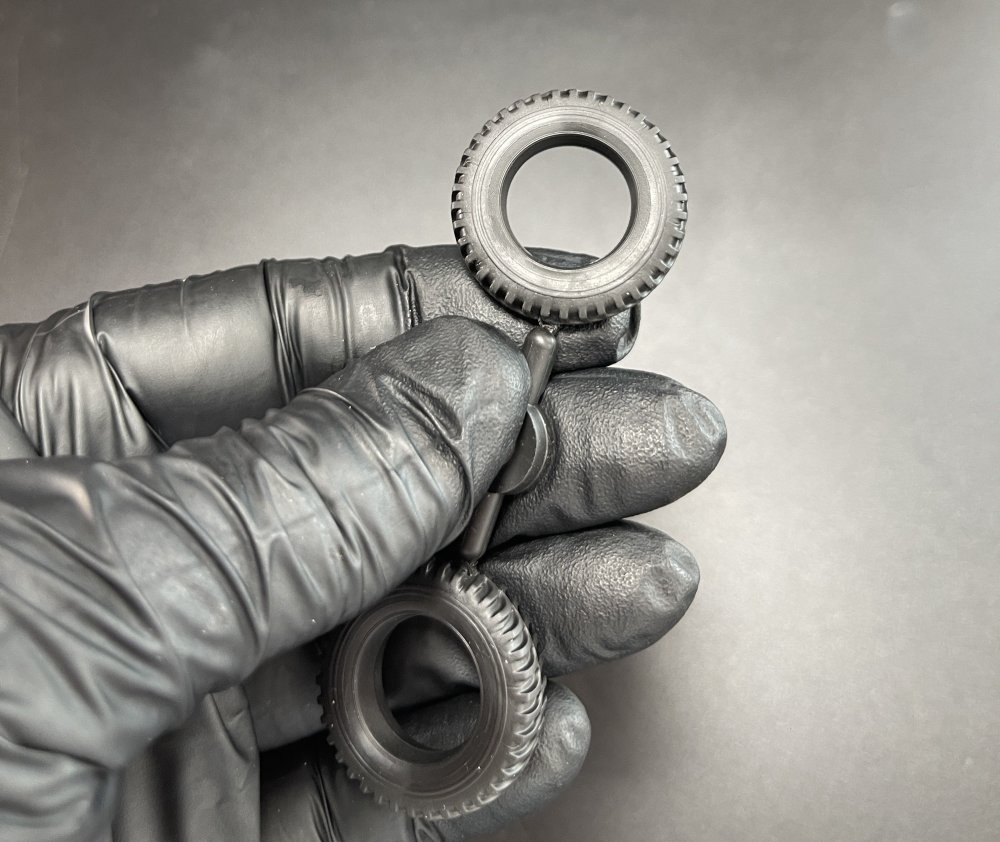
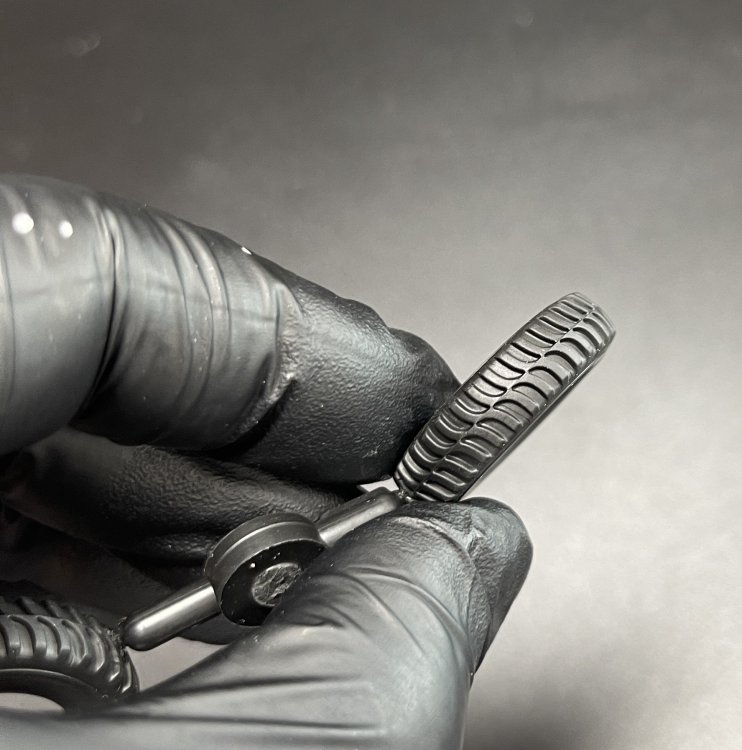
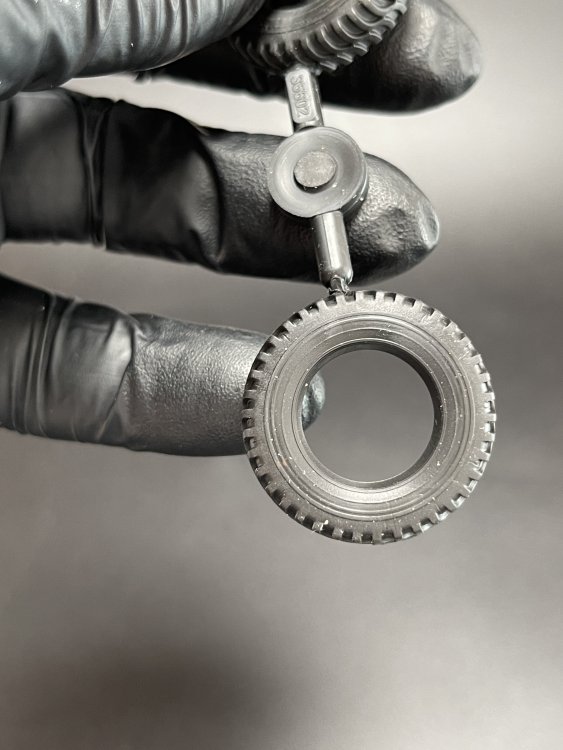
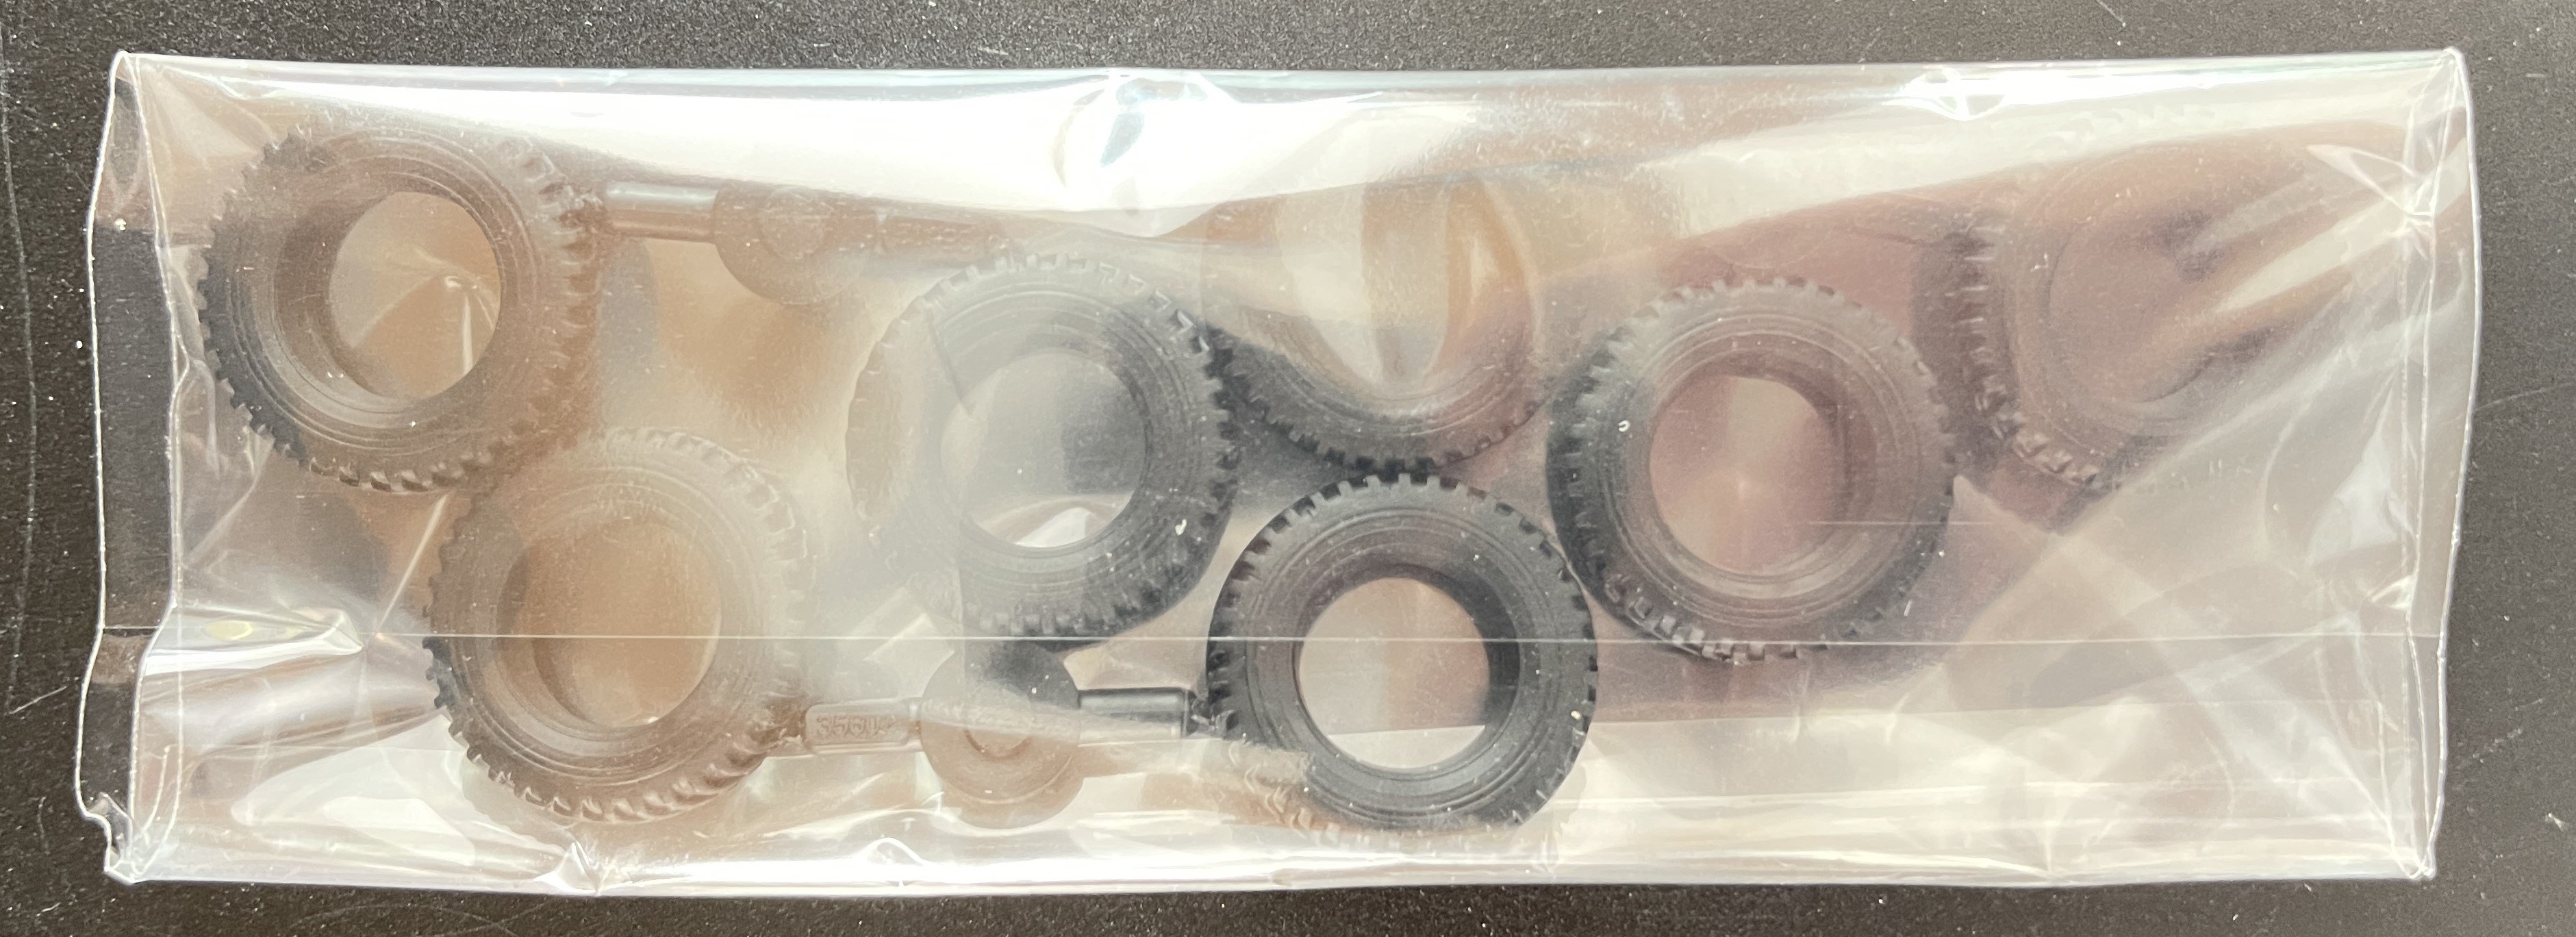
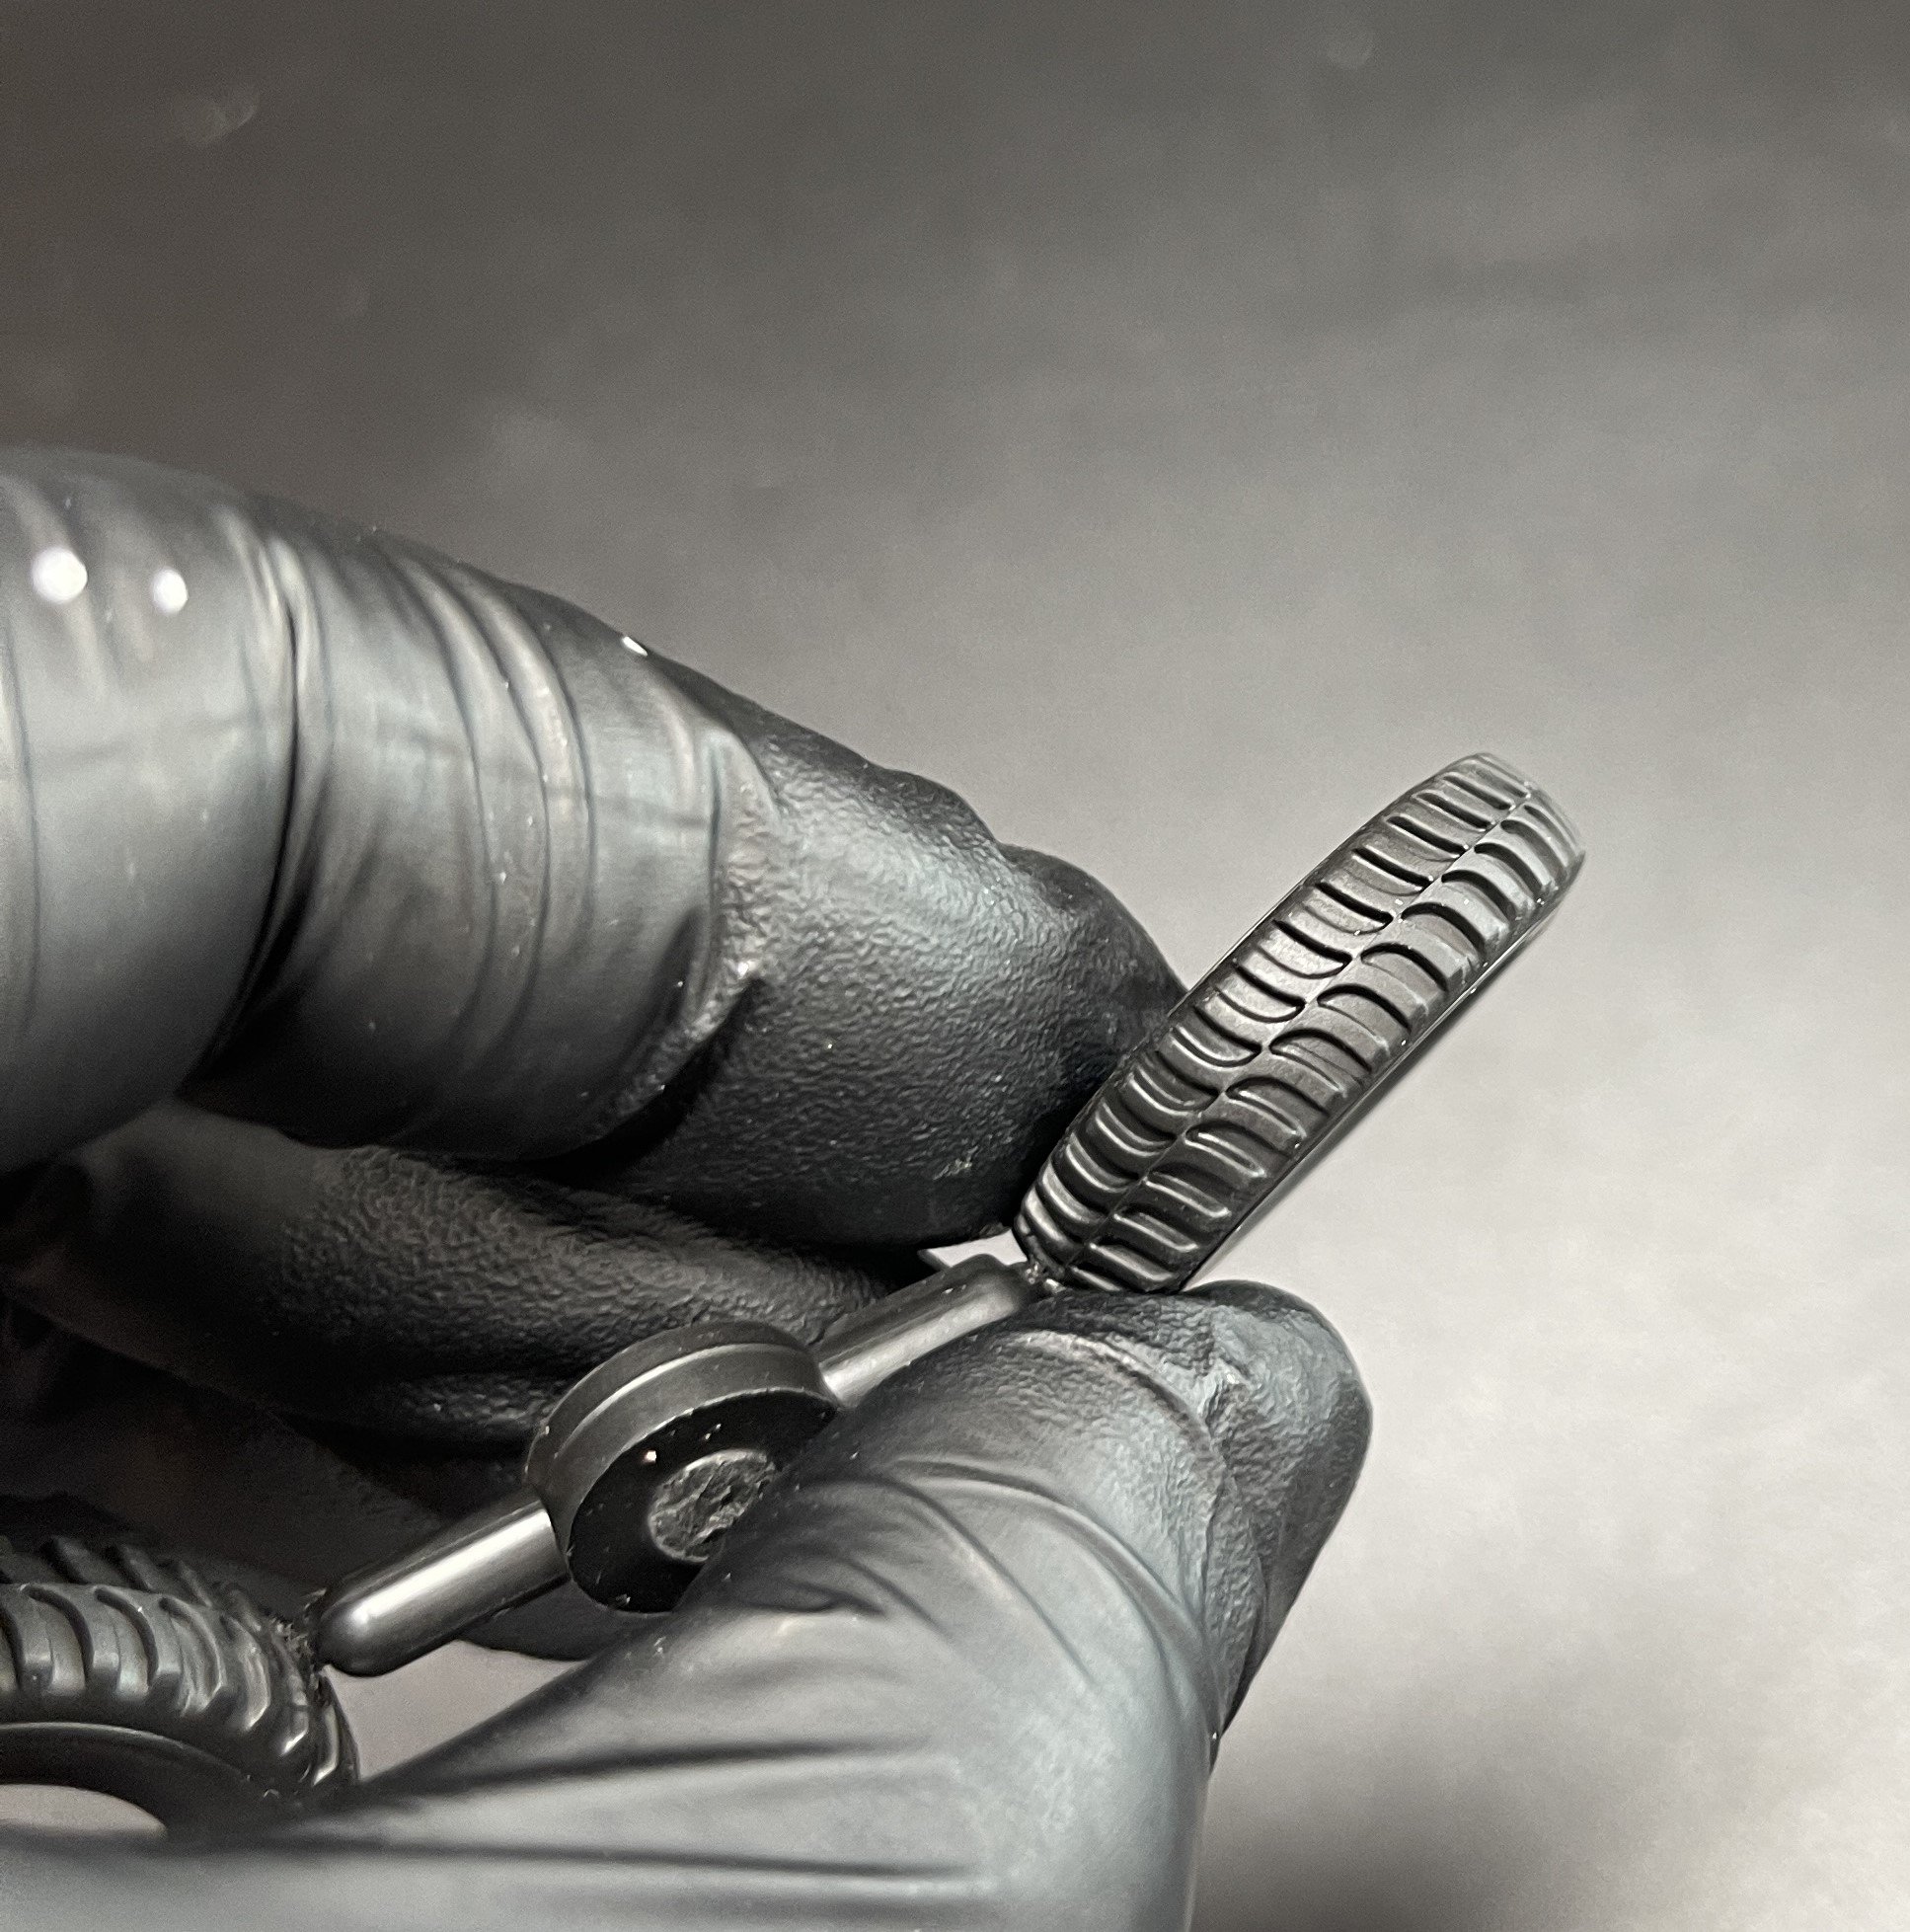
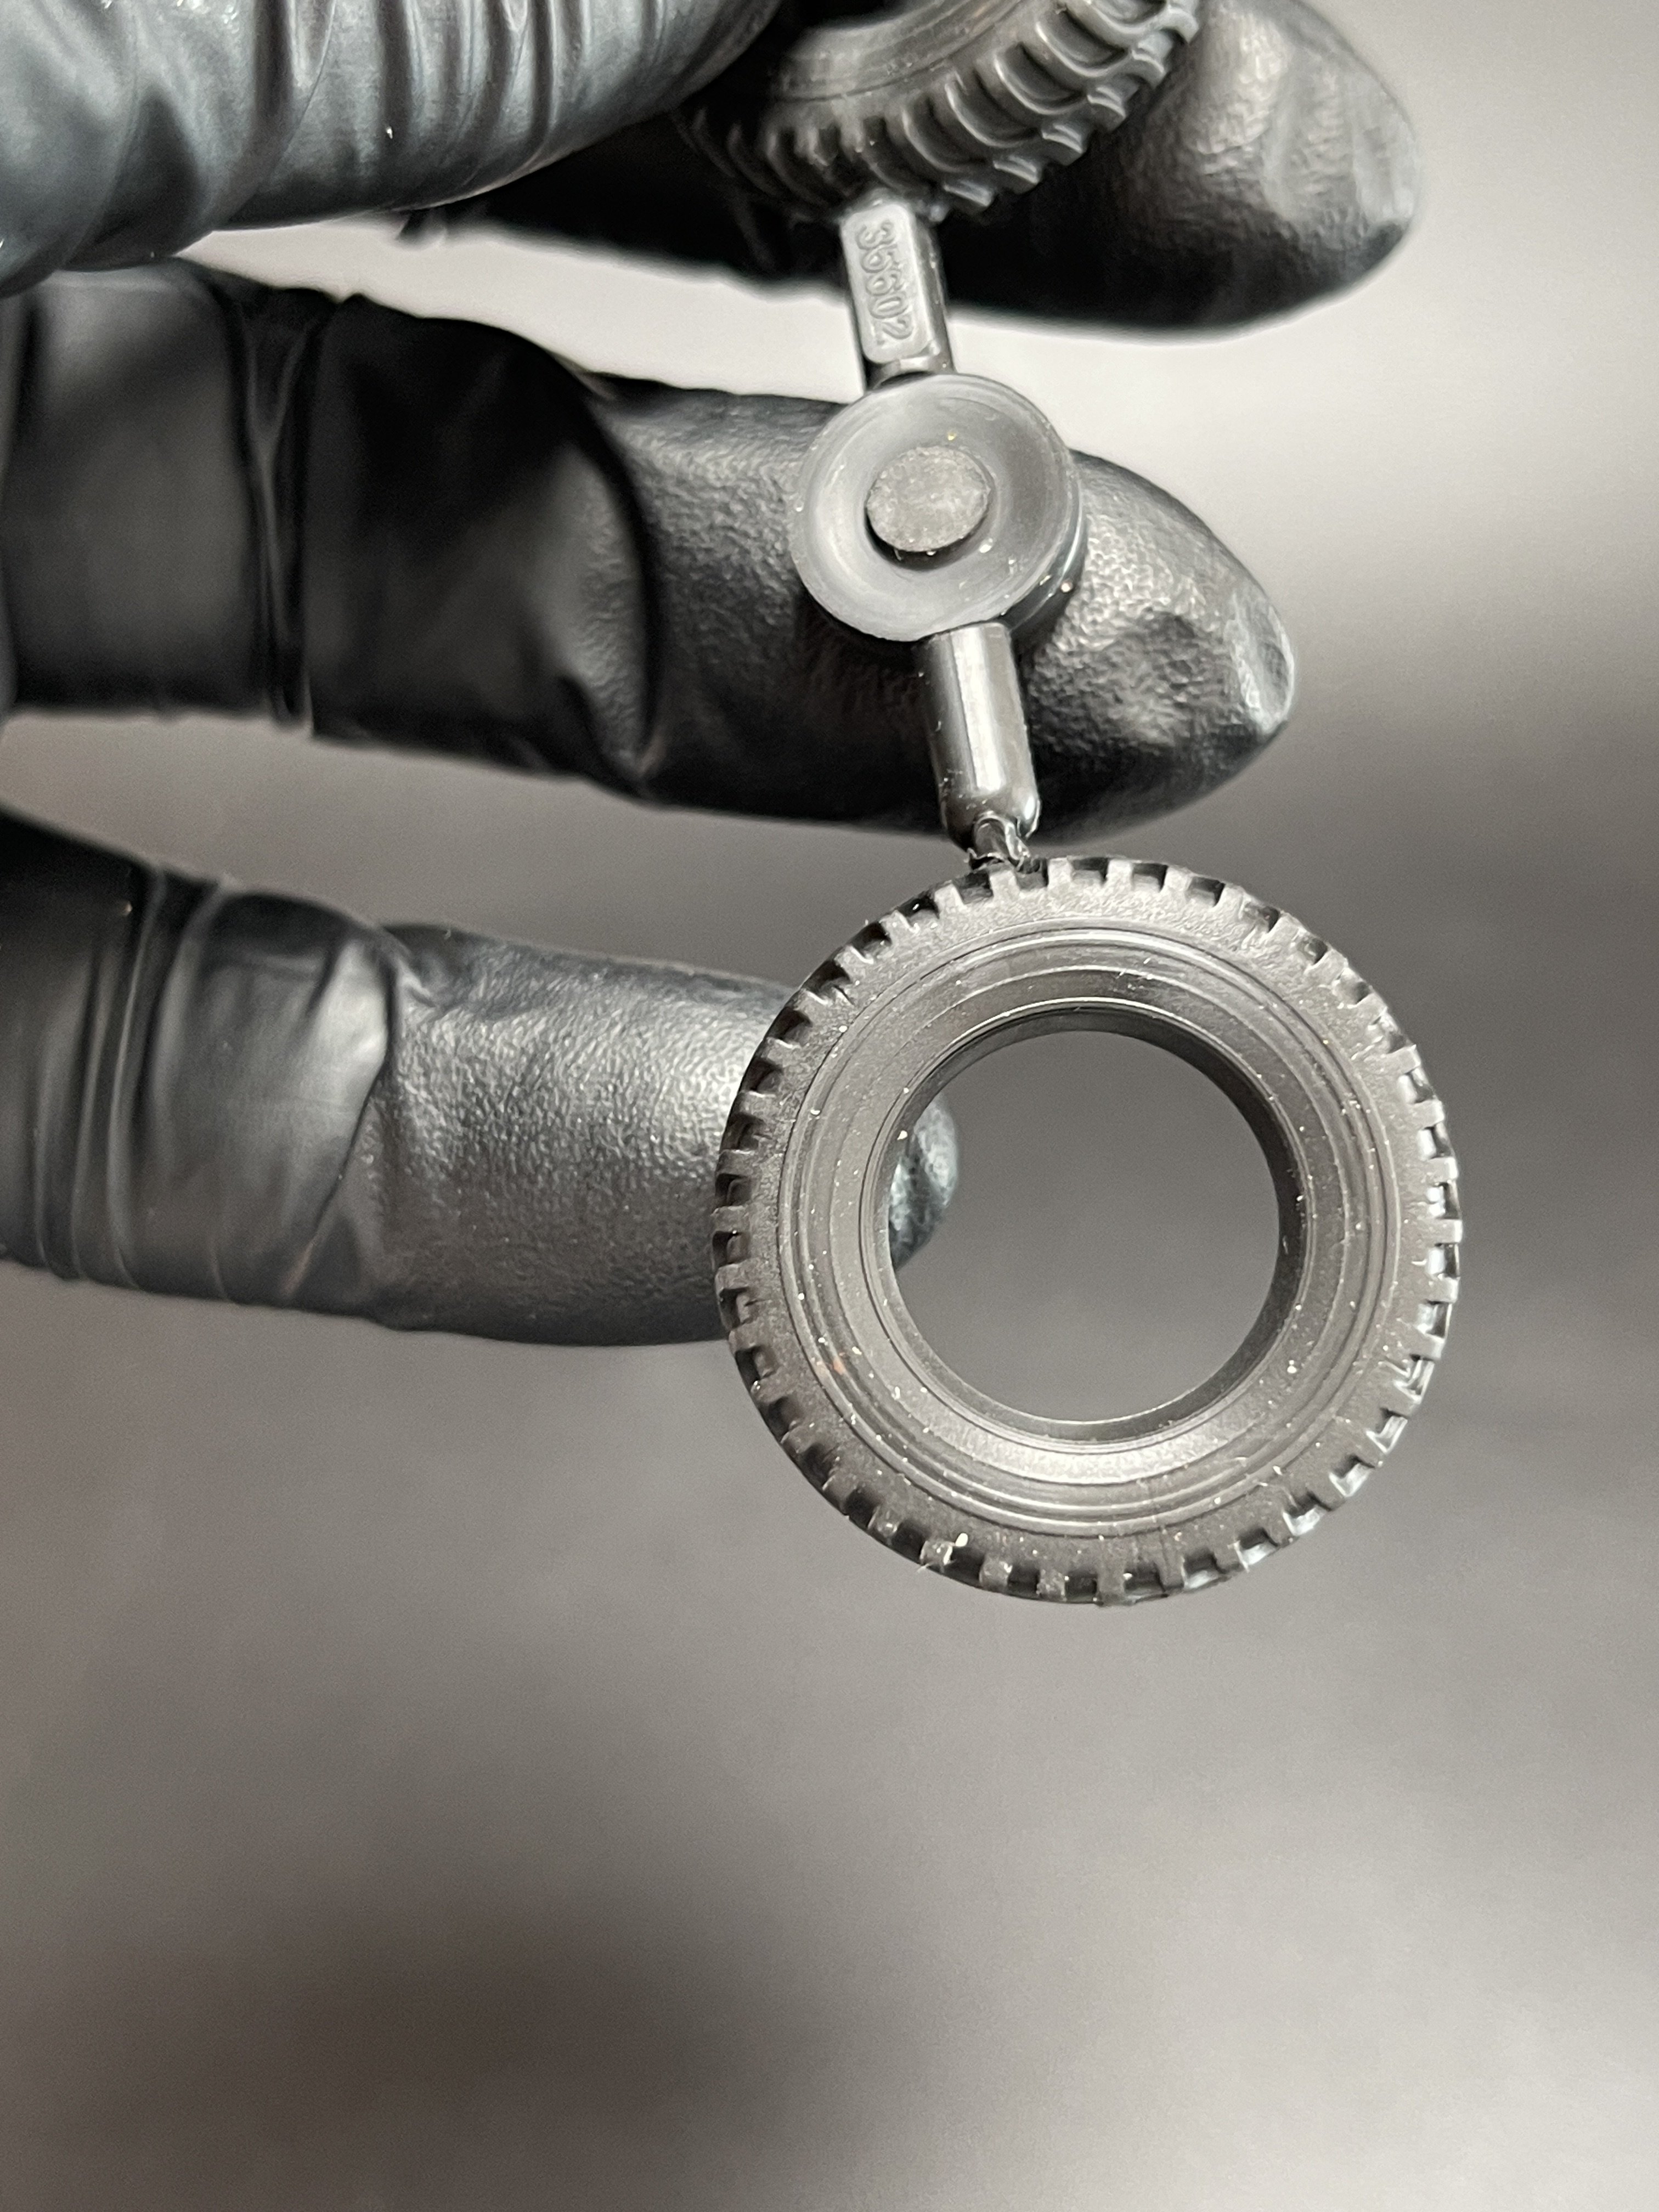
The wheels are in black vinyl. It`s not the first I said this, but I don’t like vinyl Wheels. The details in not as good as some aftermarkets ones and painting and weathering are much harder to do, but it`s me.


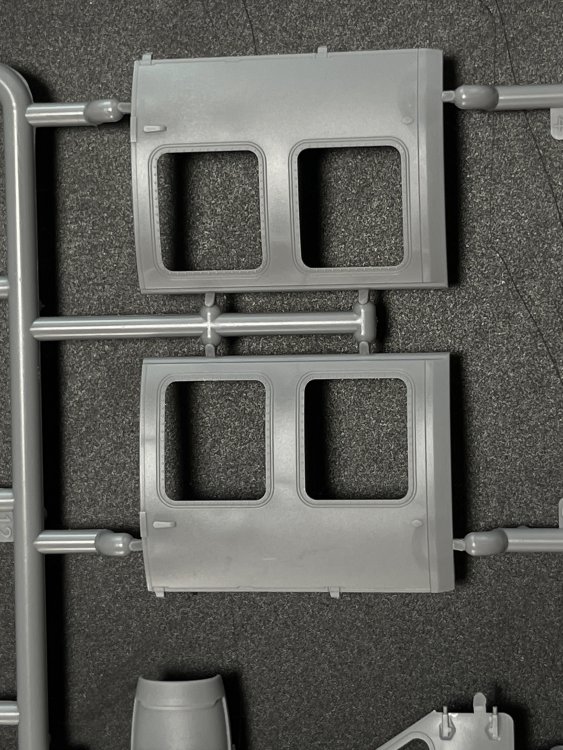
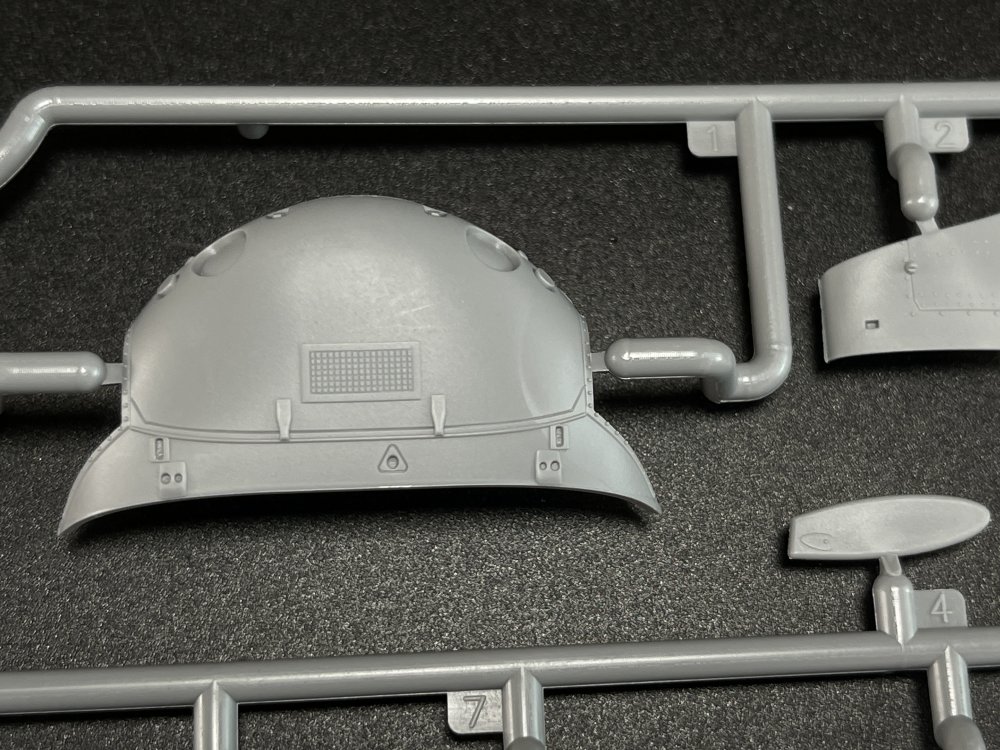
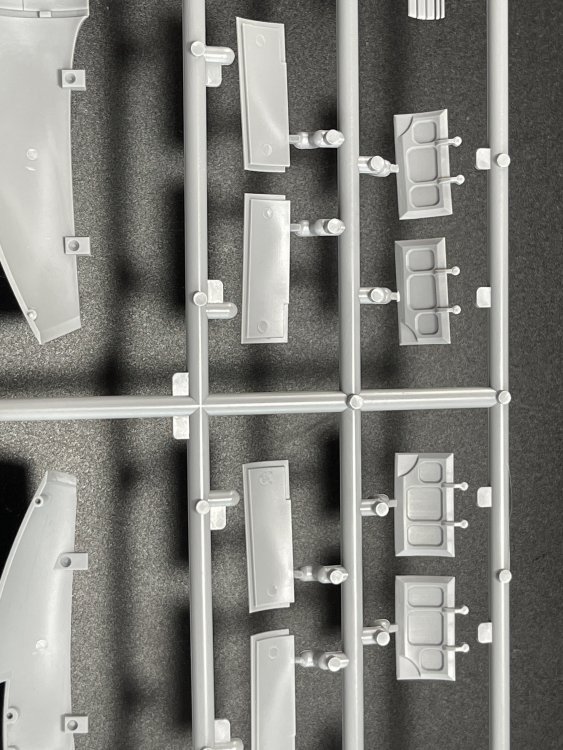
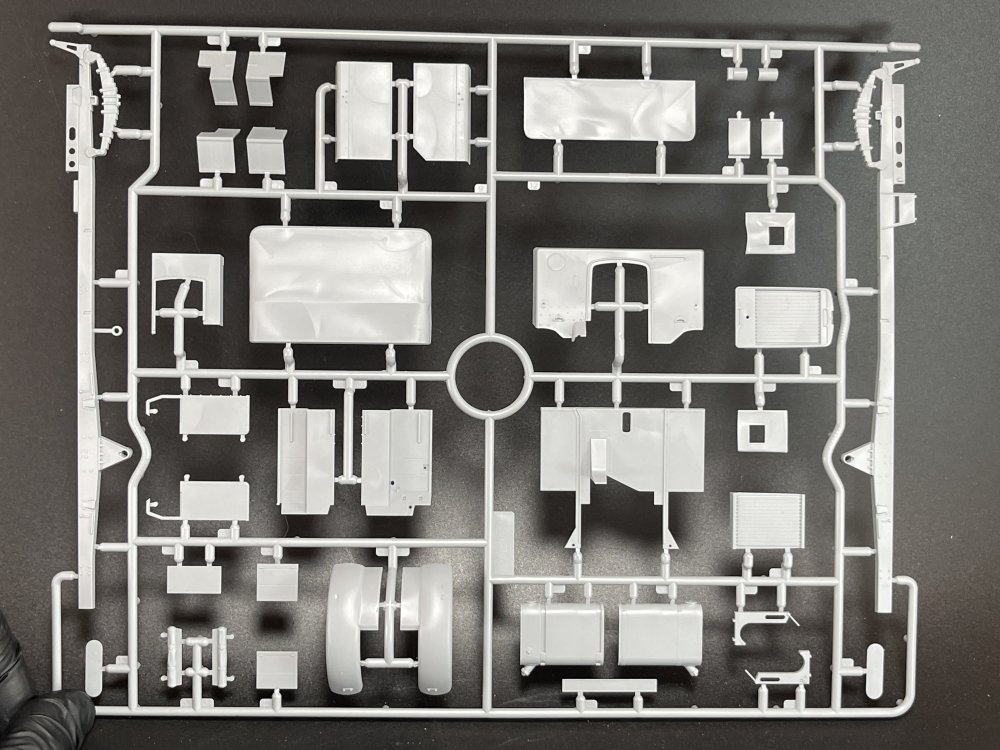
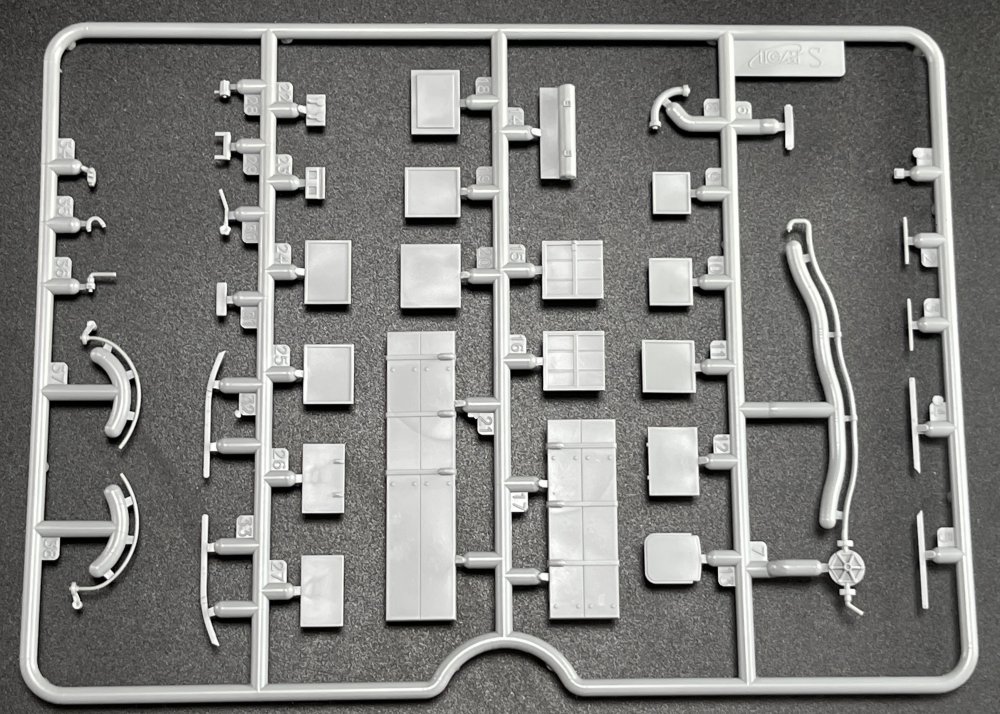
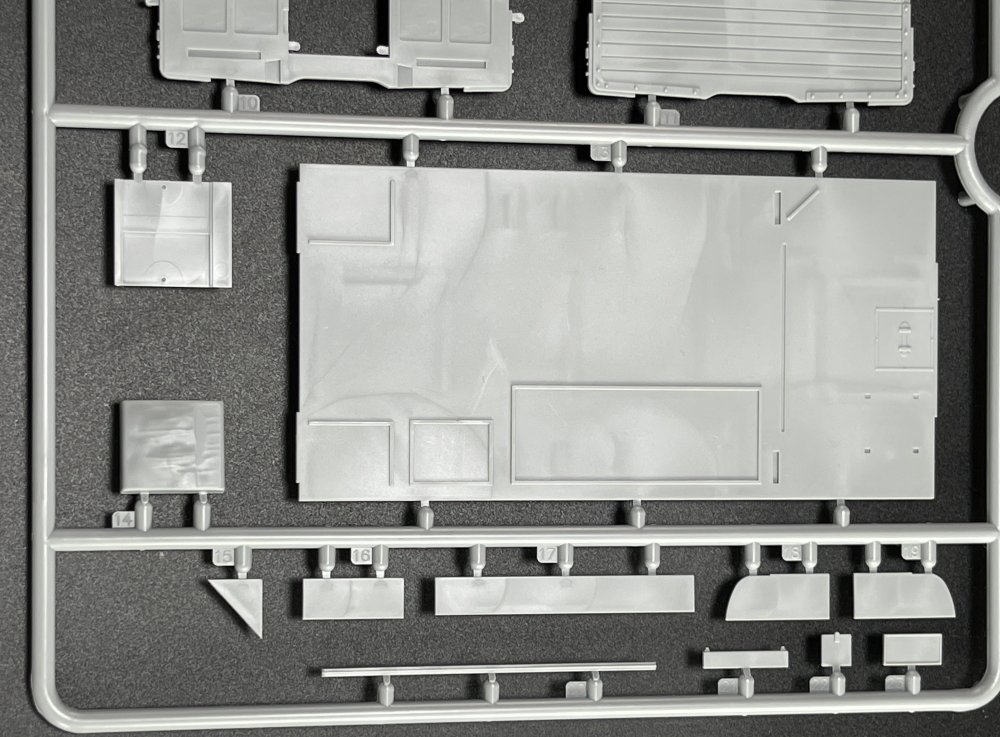
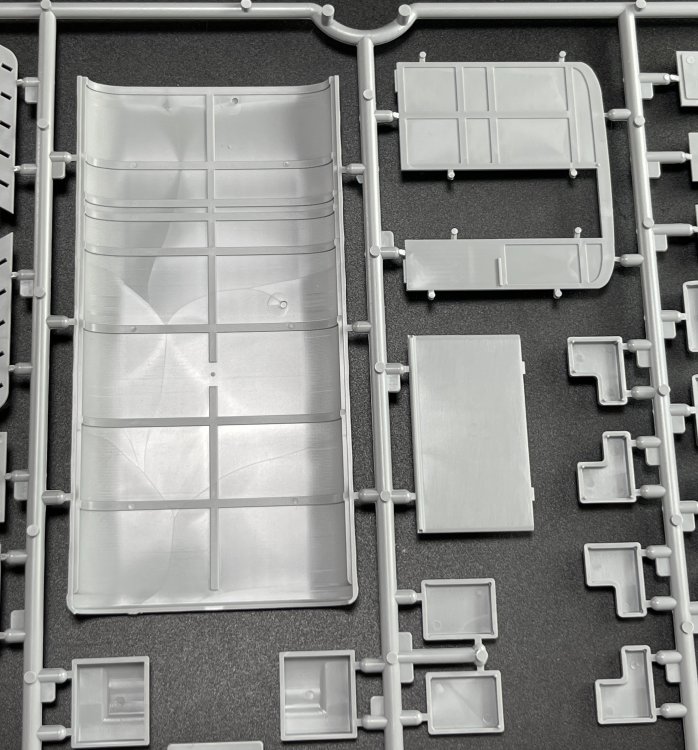
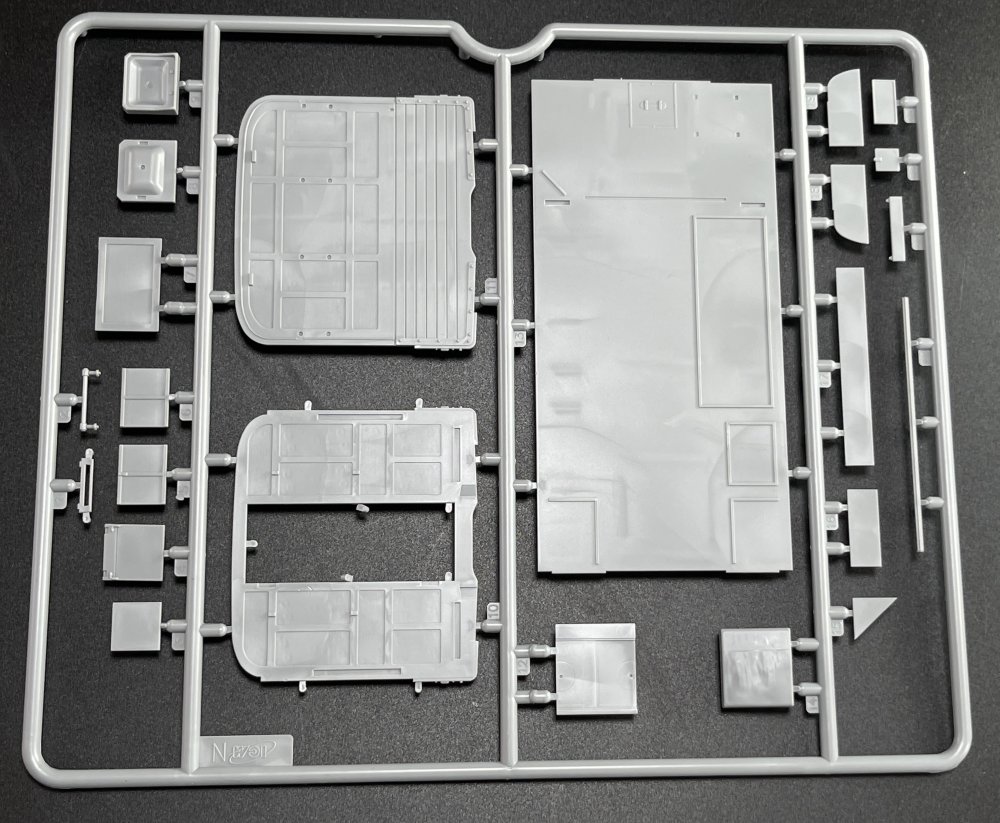
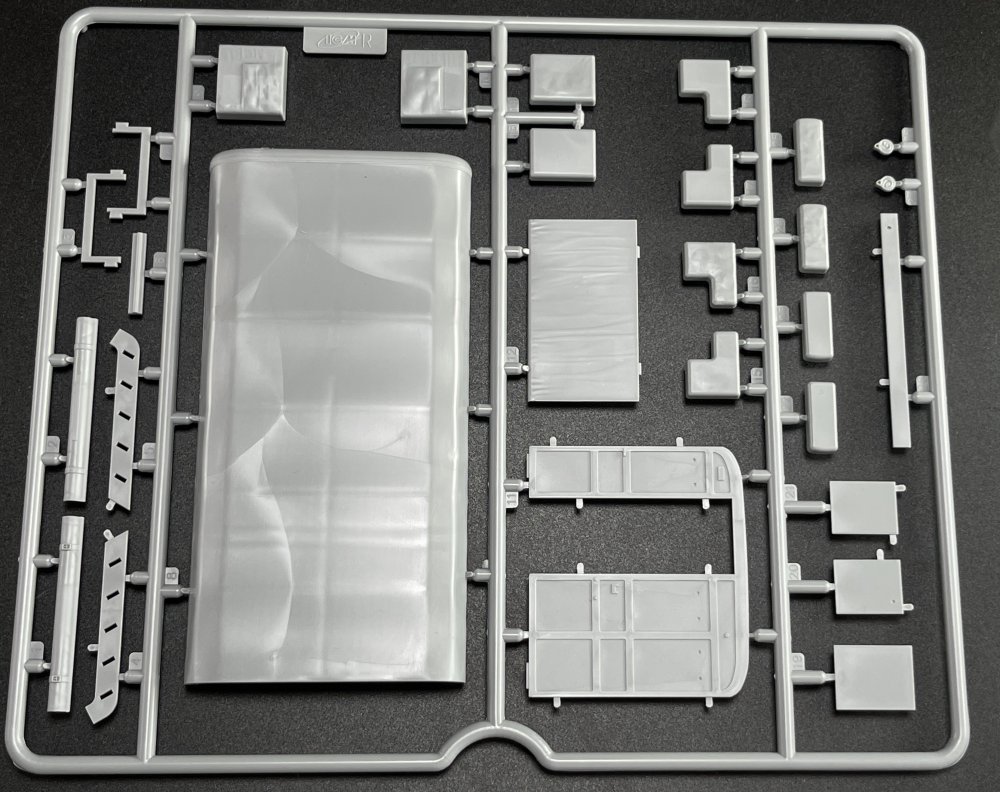
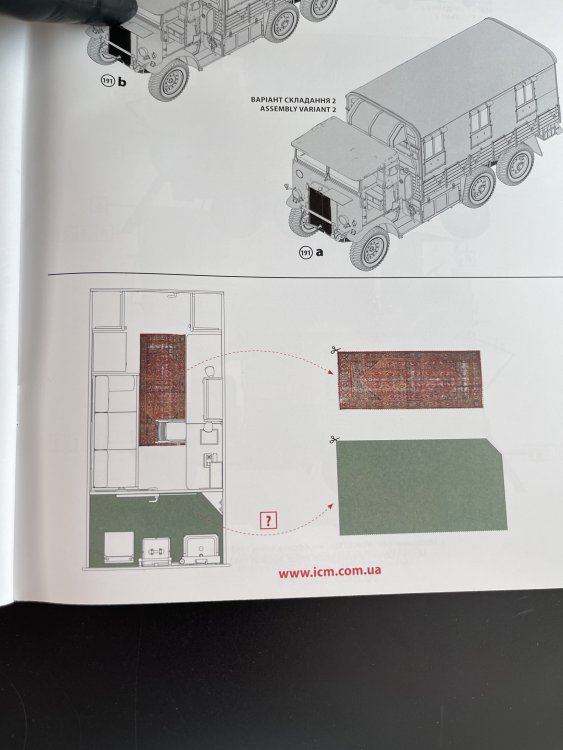
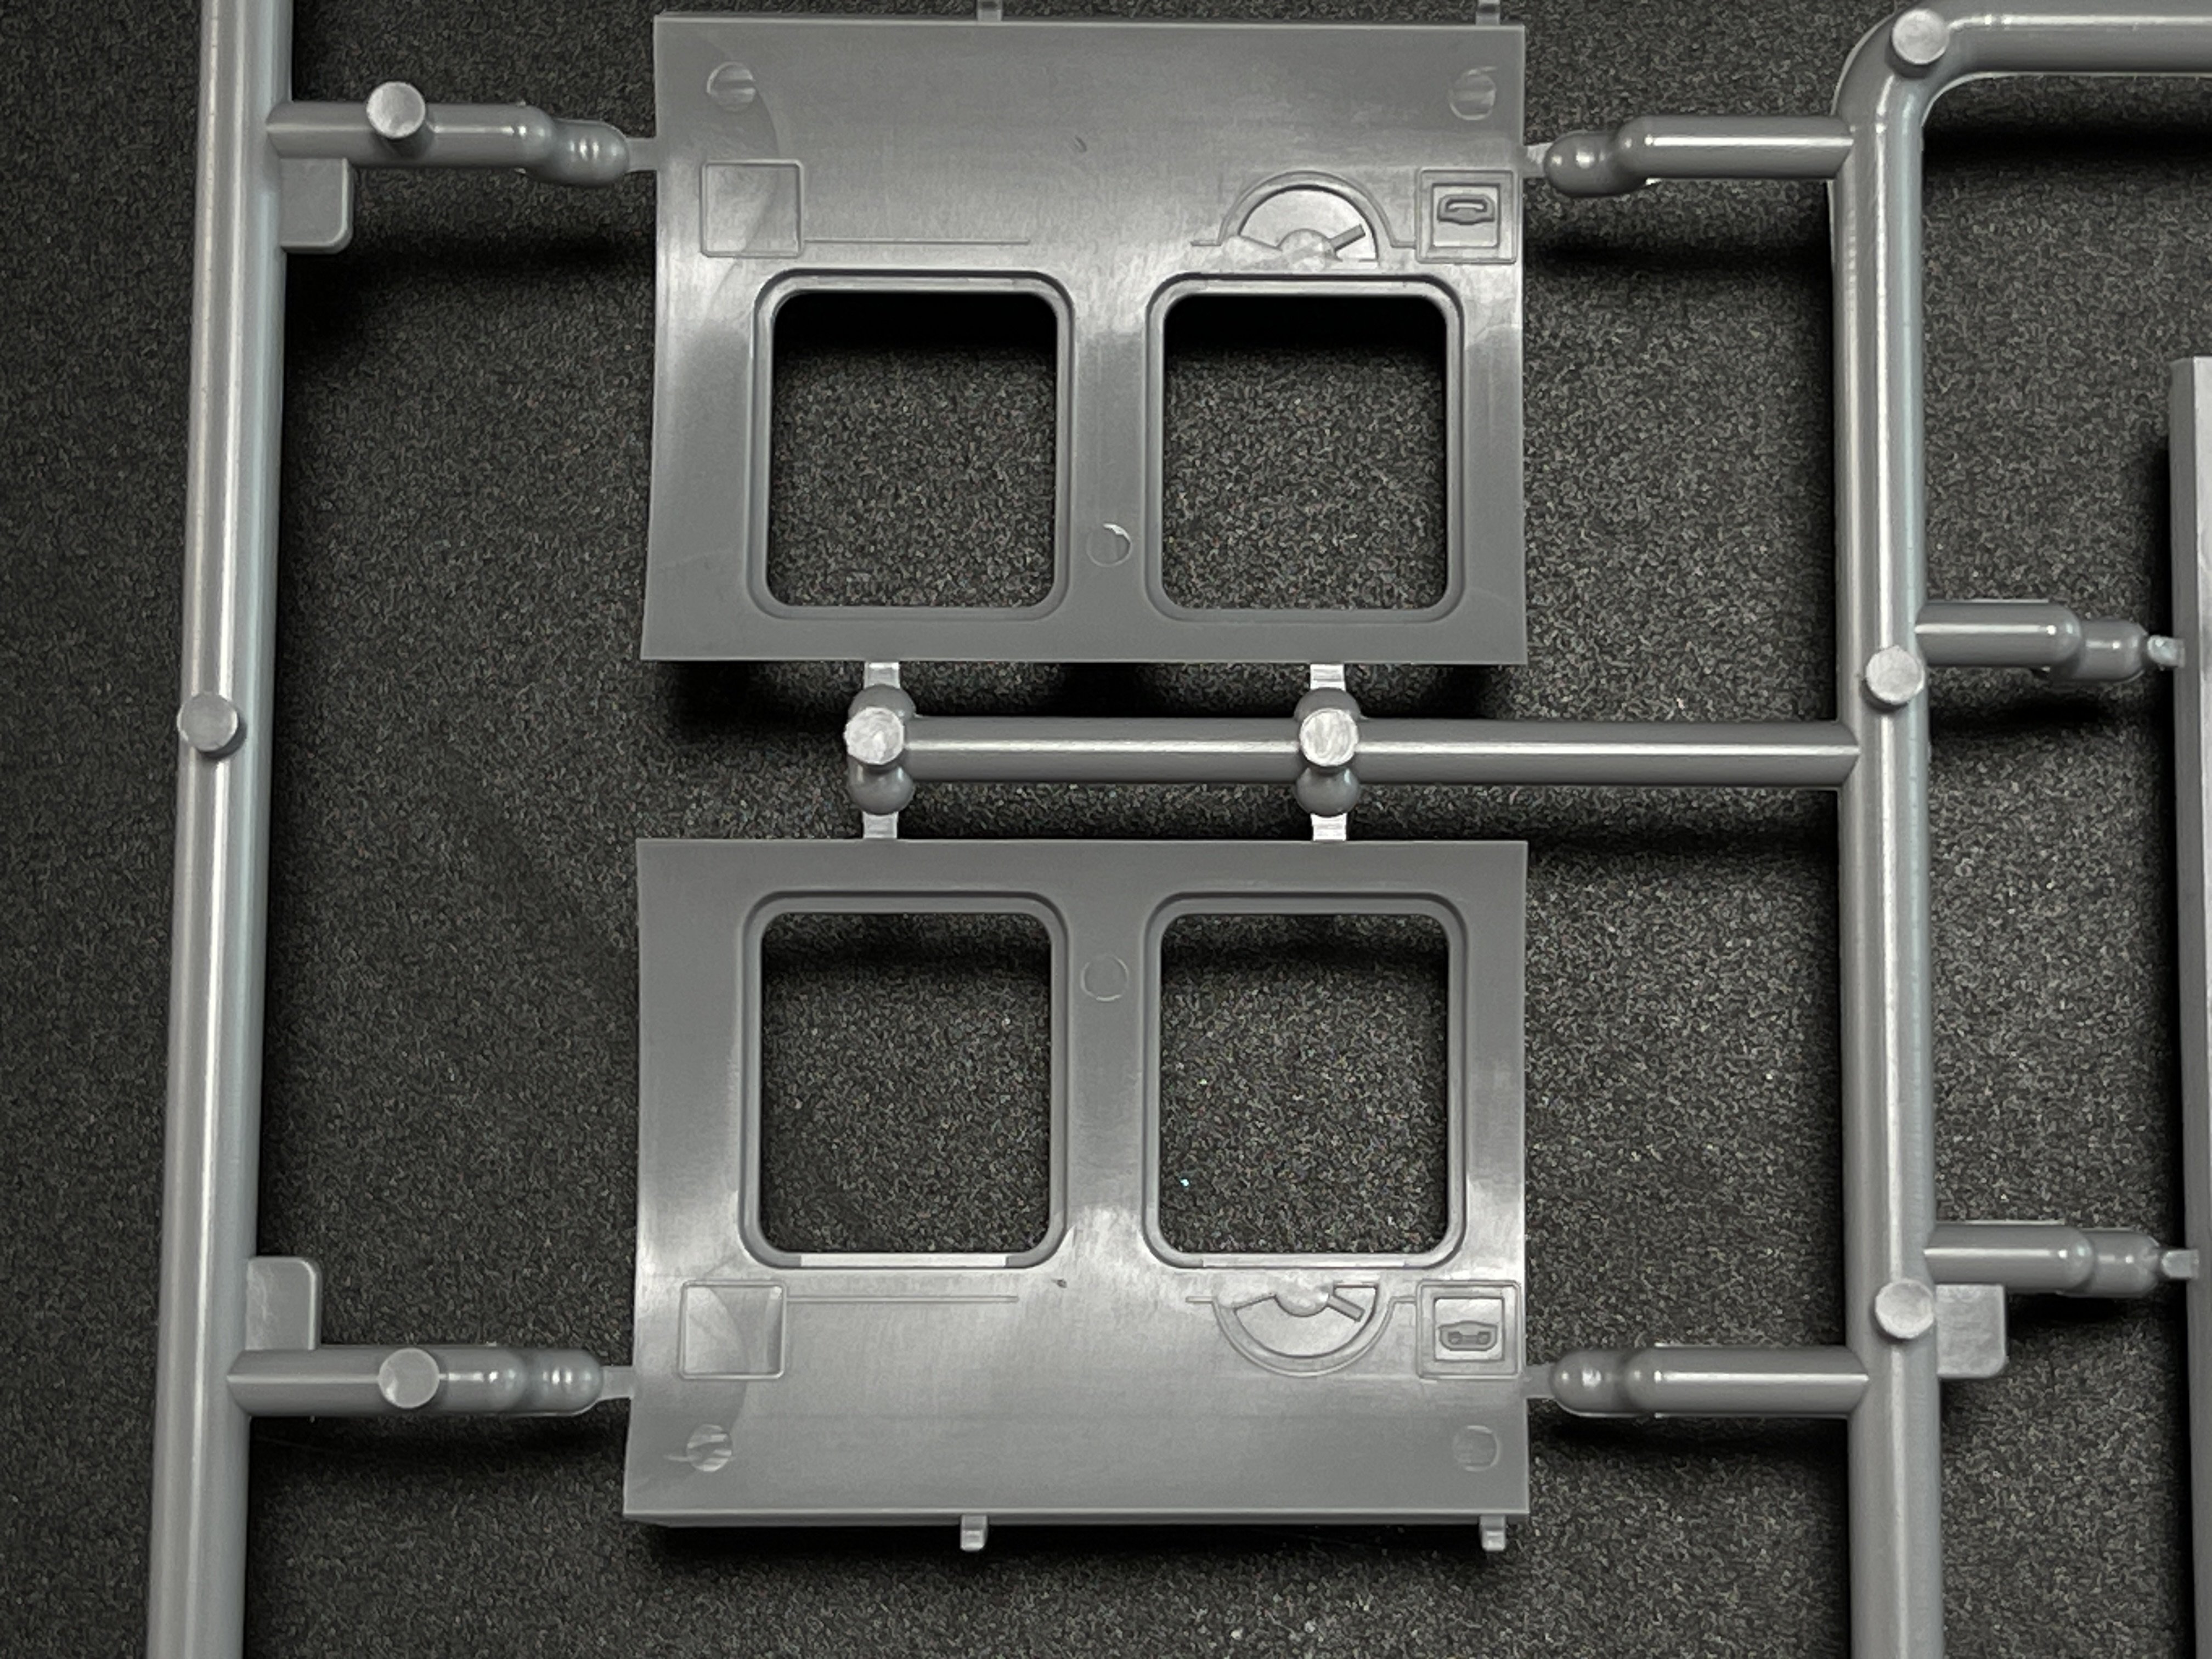
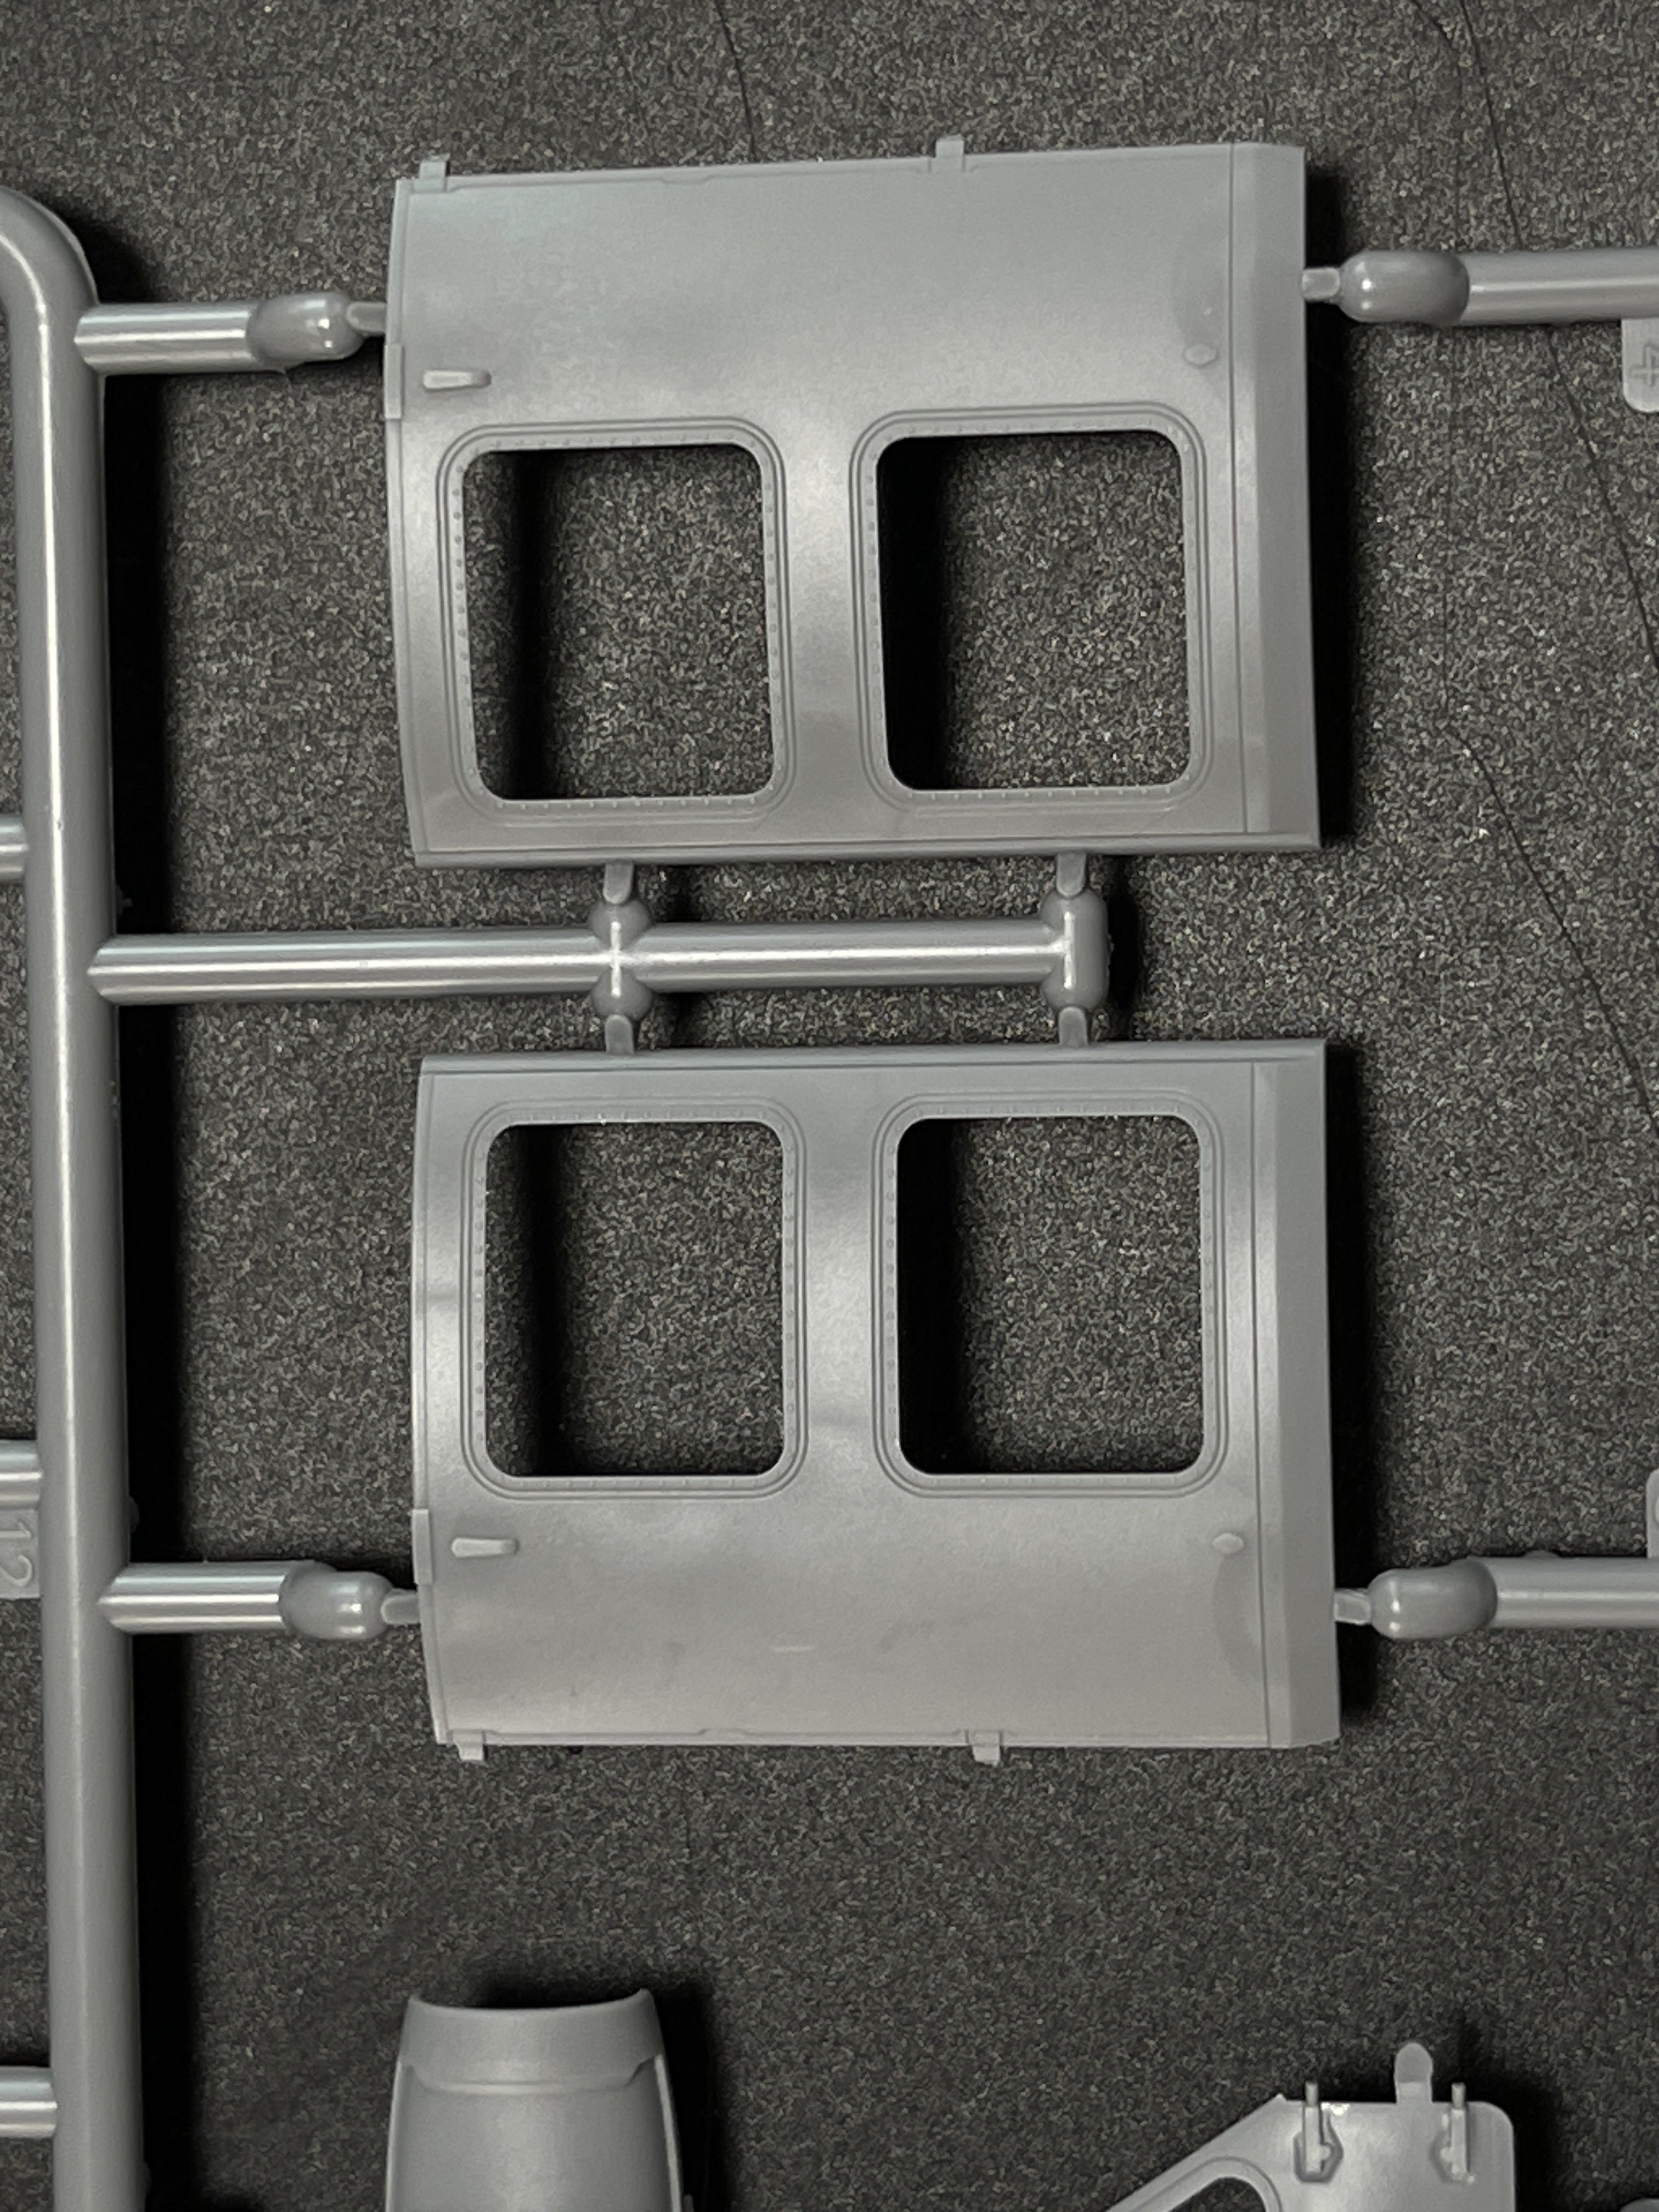
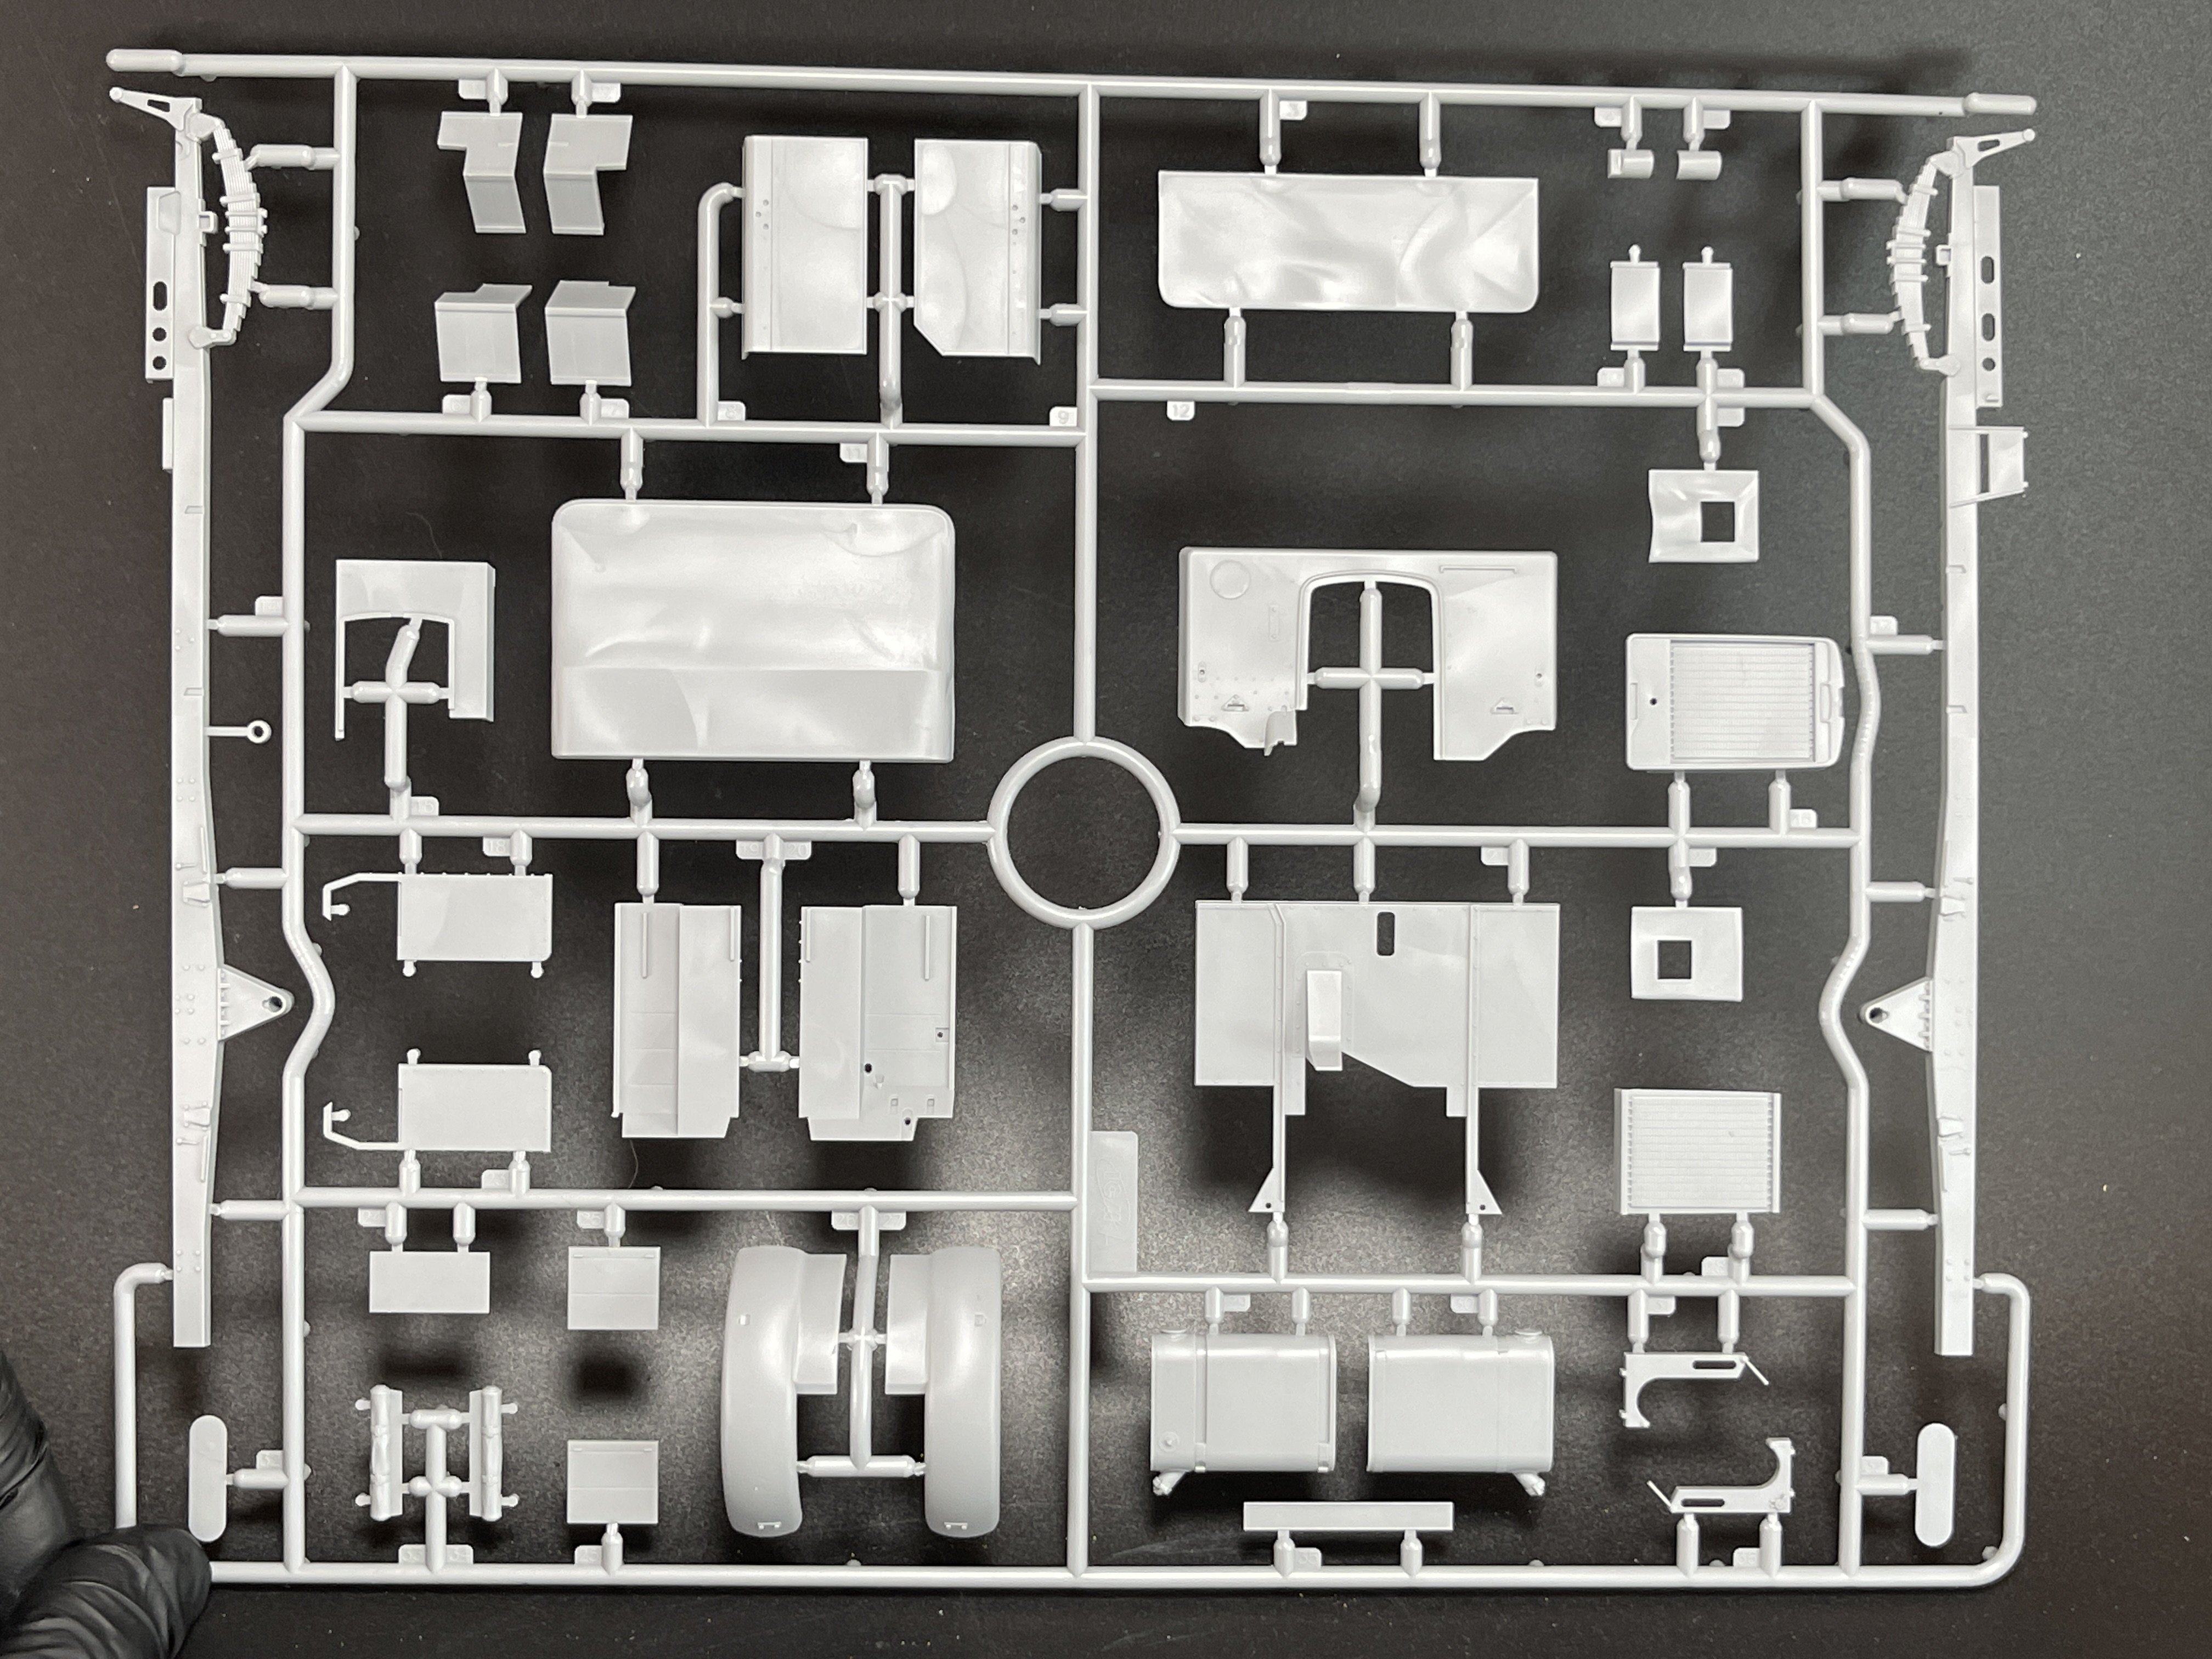
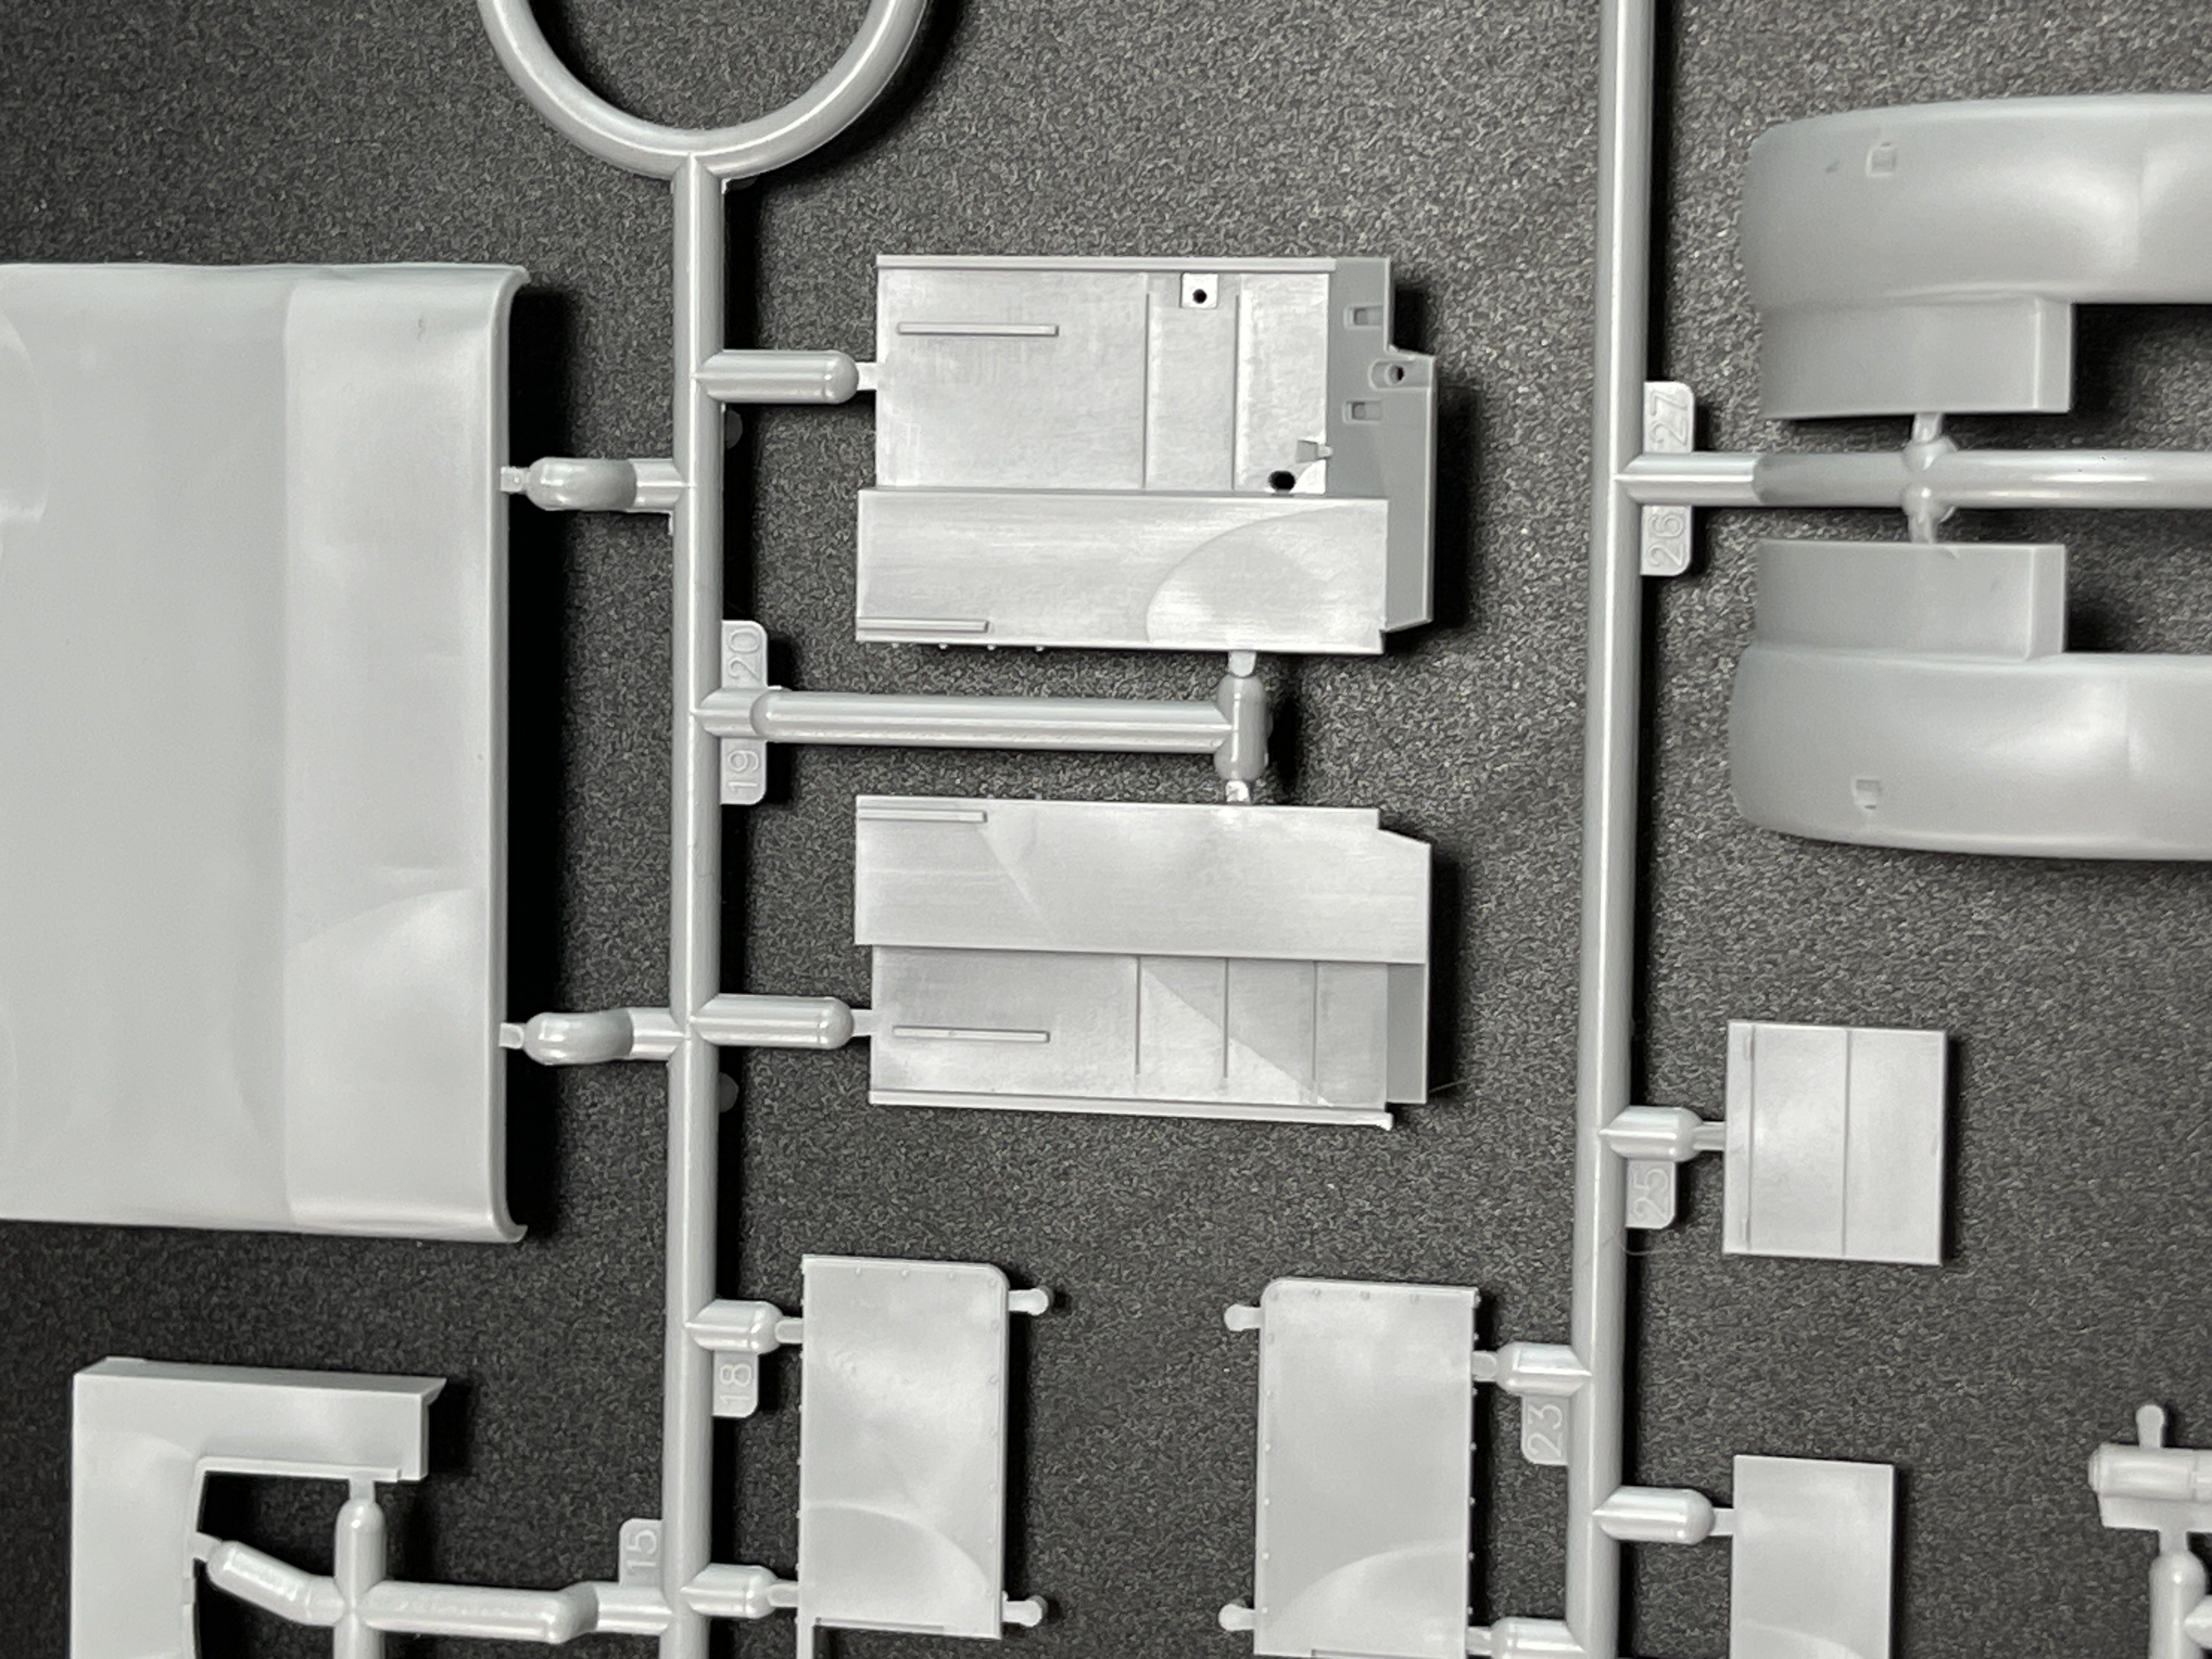
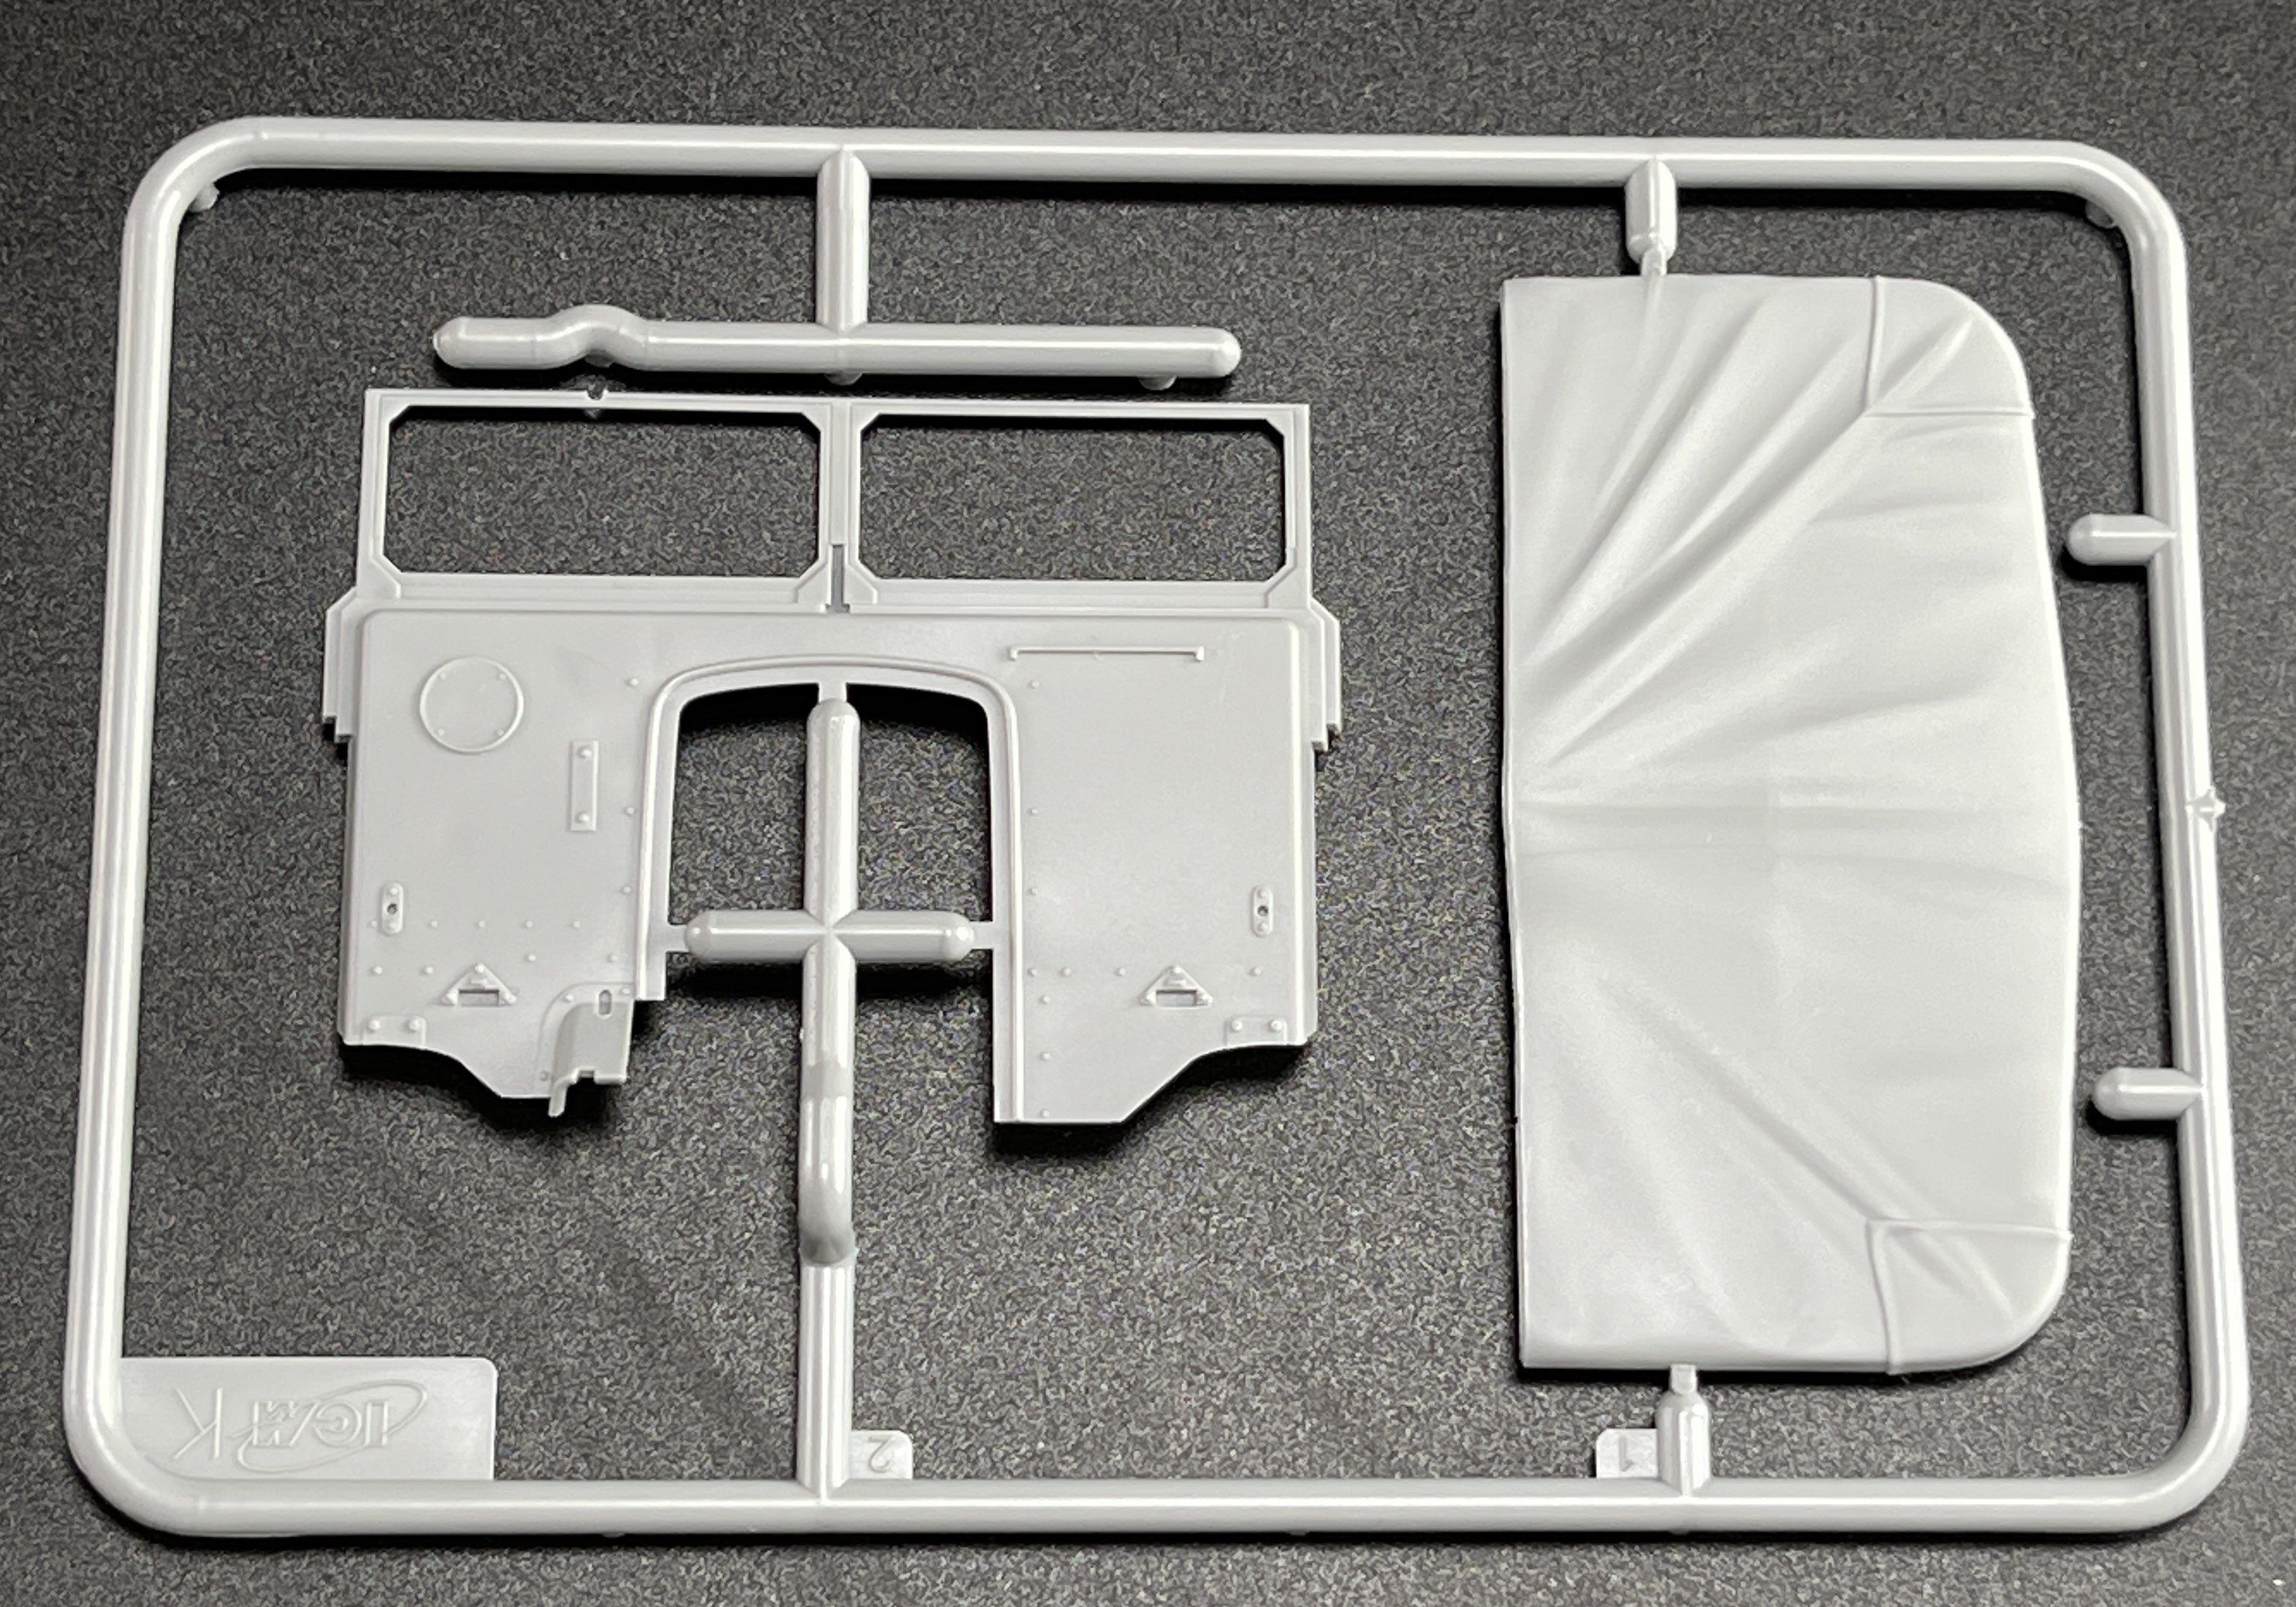
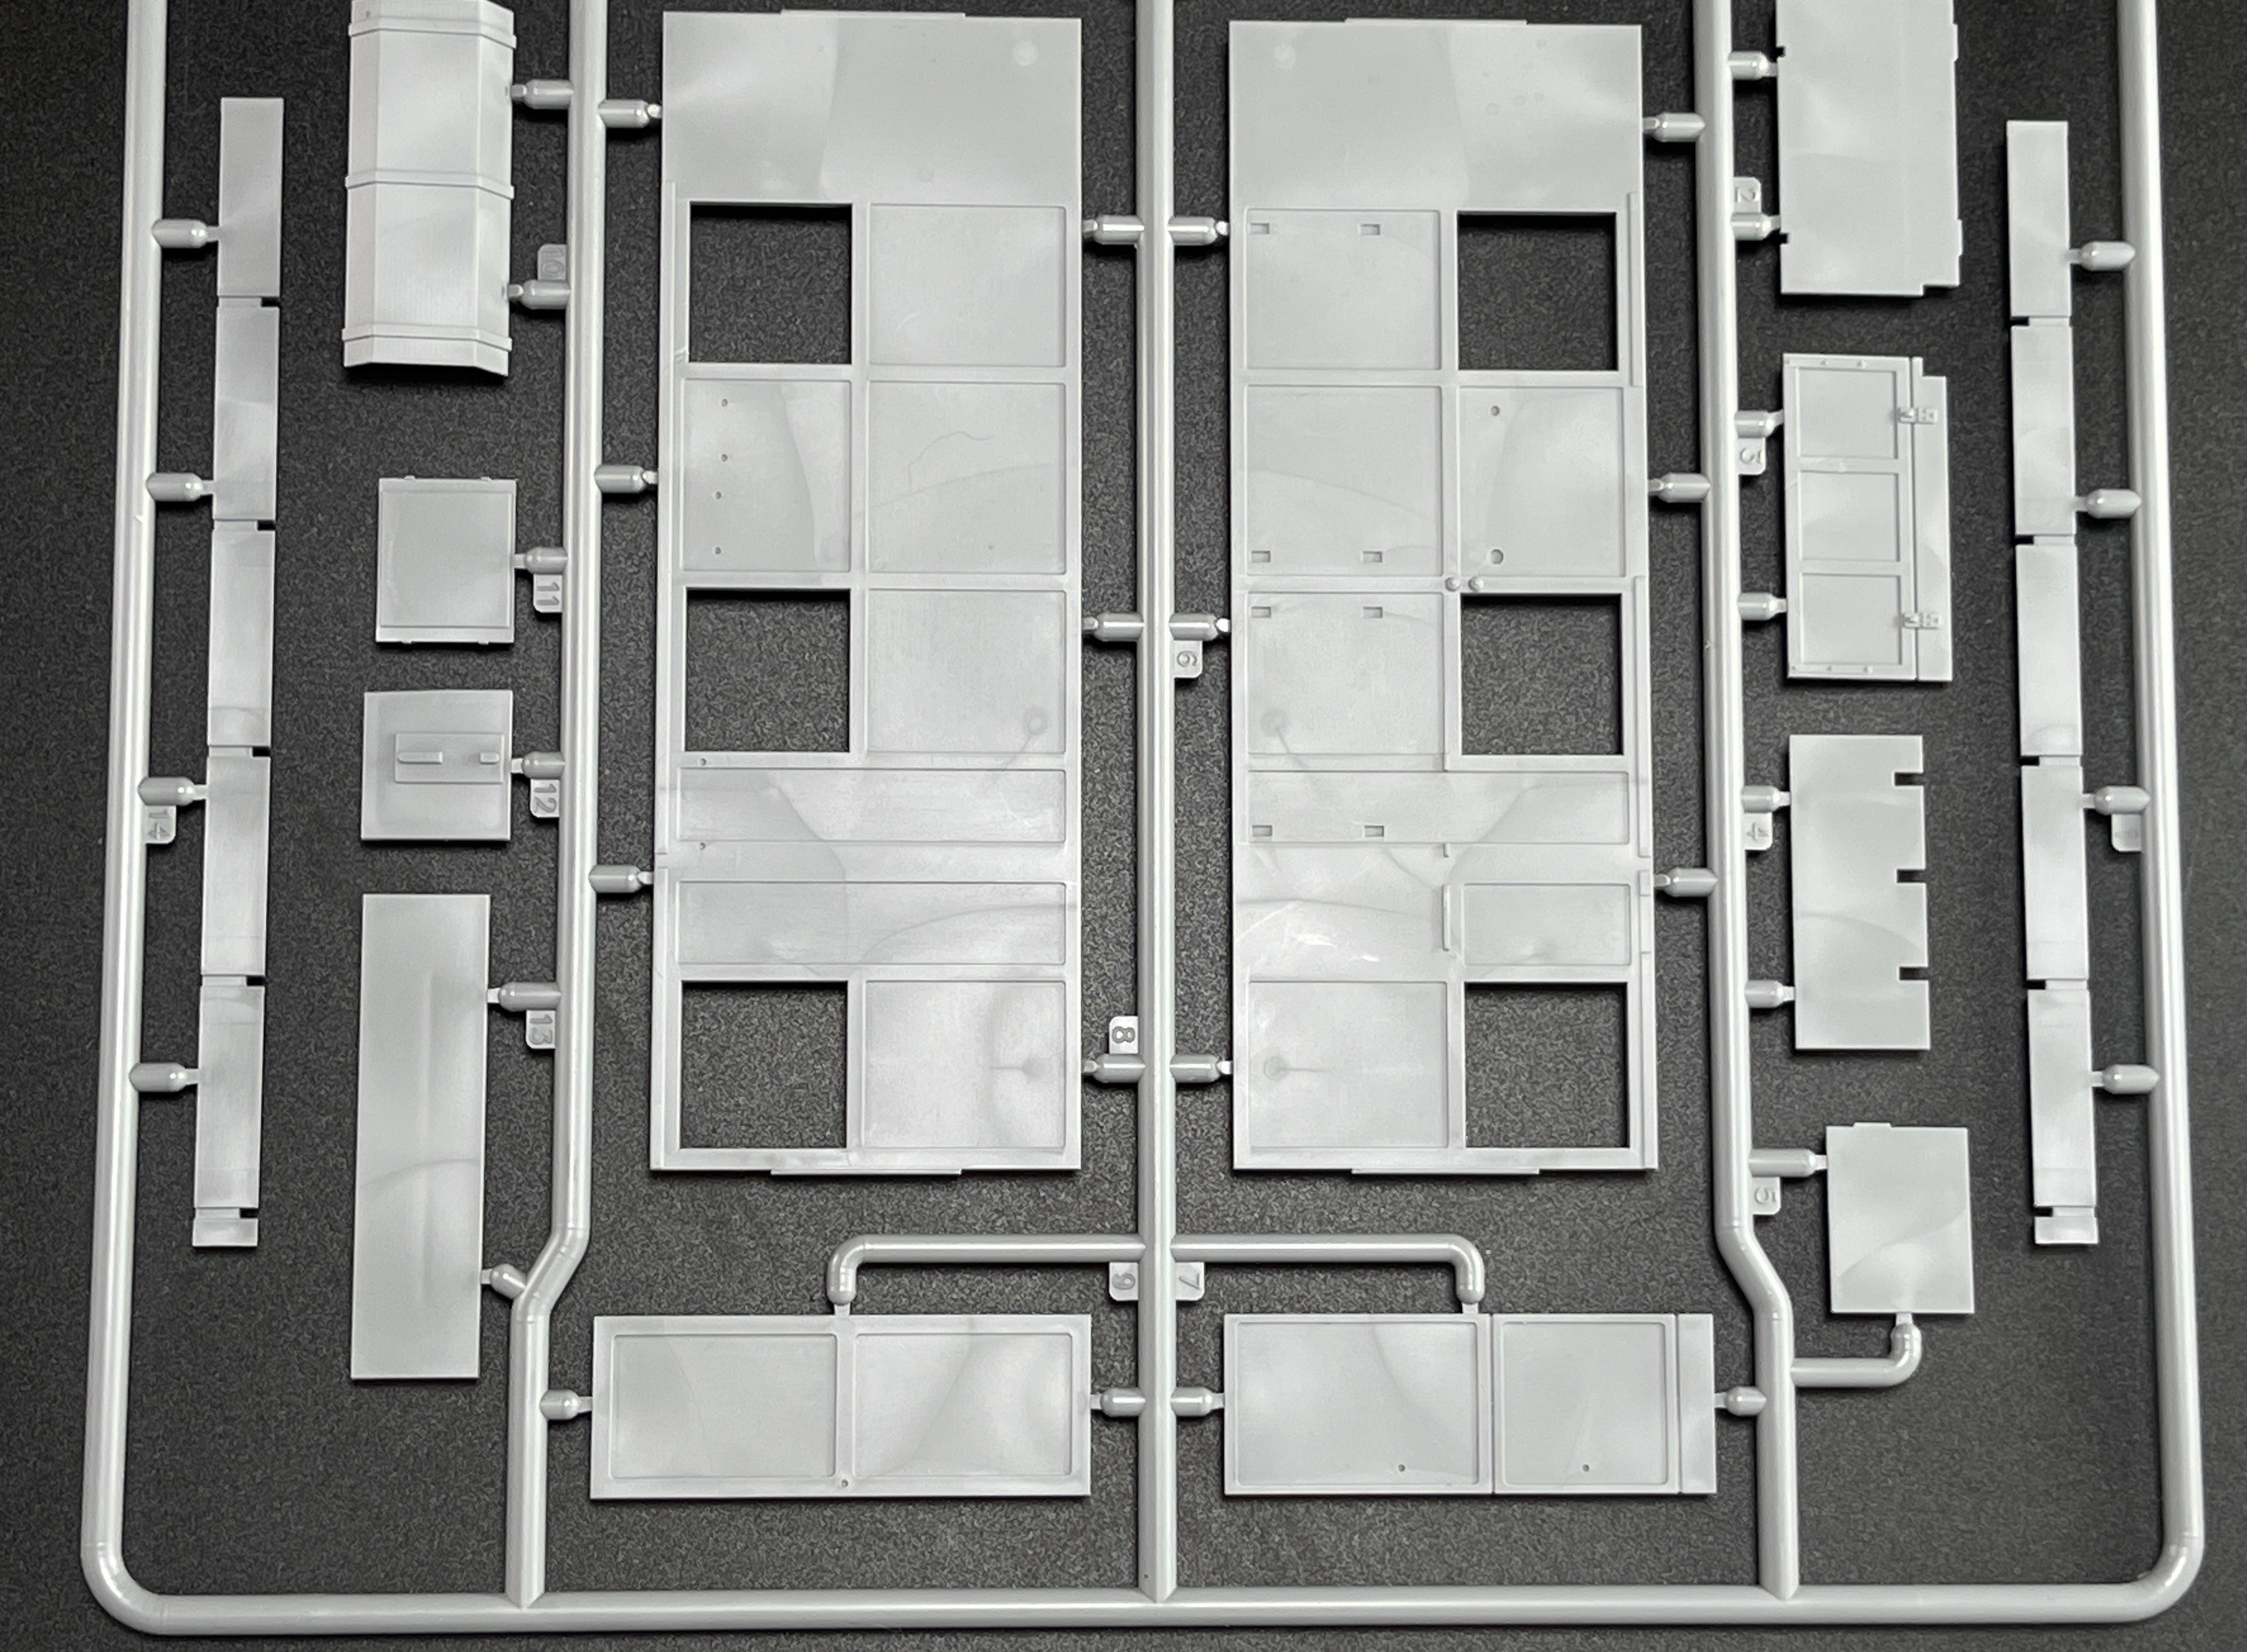
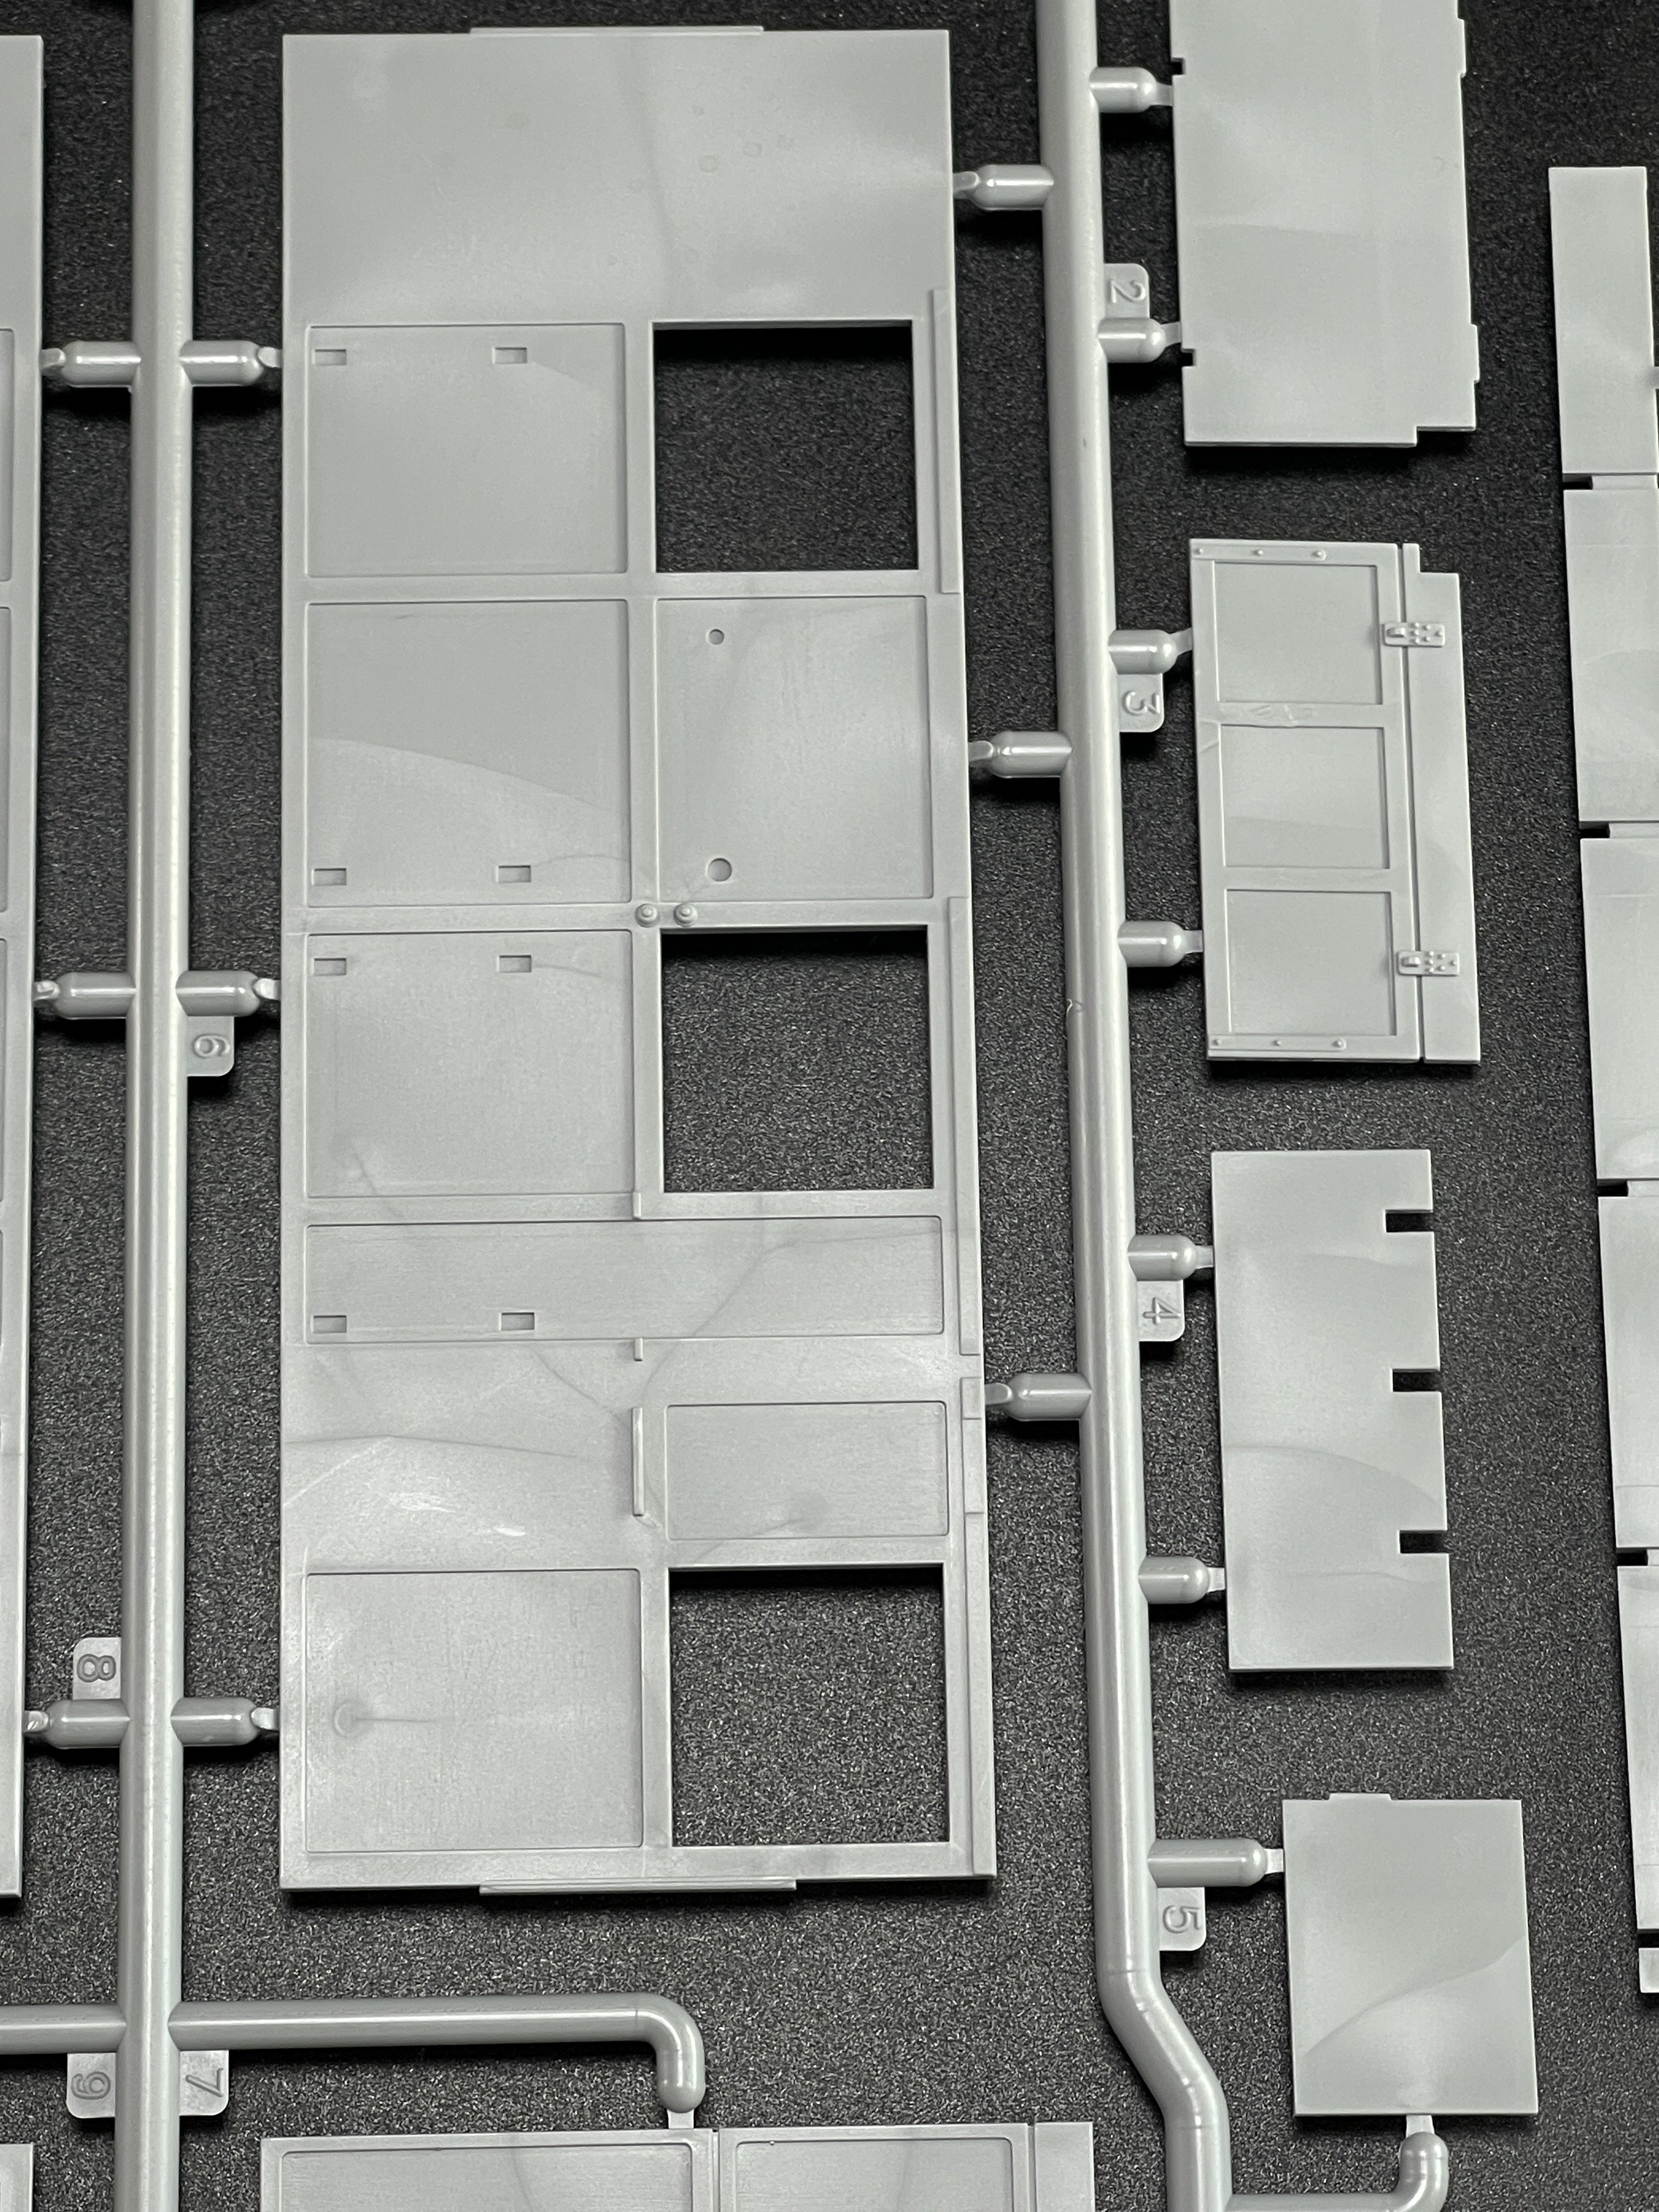
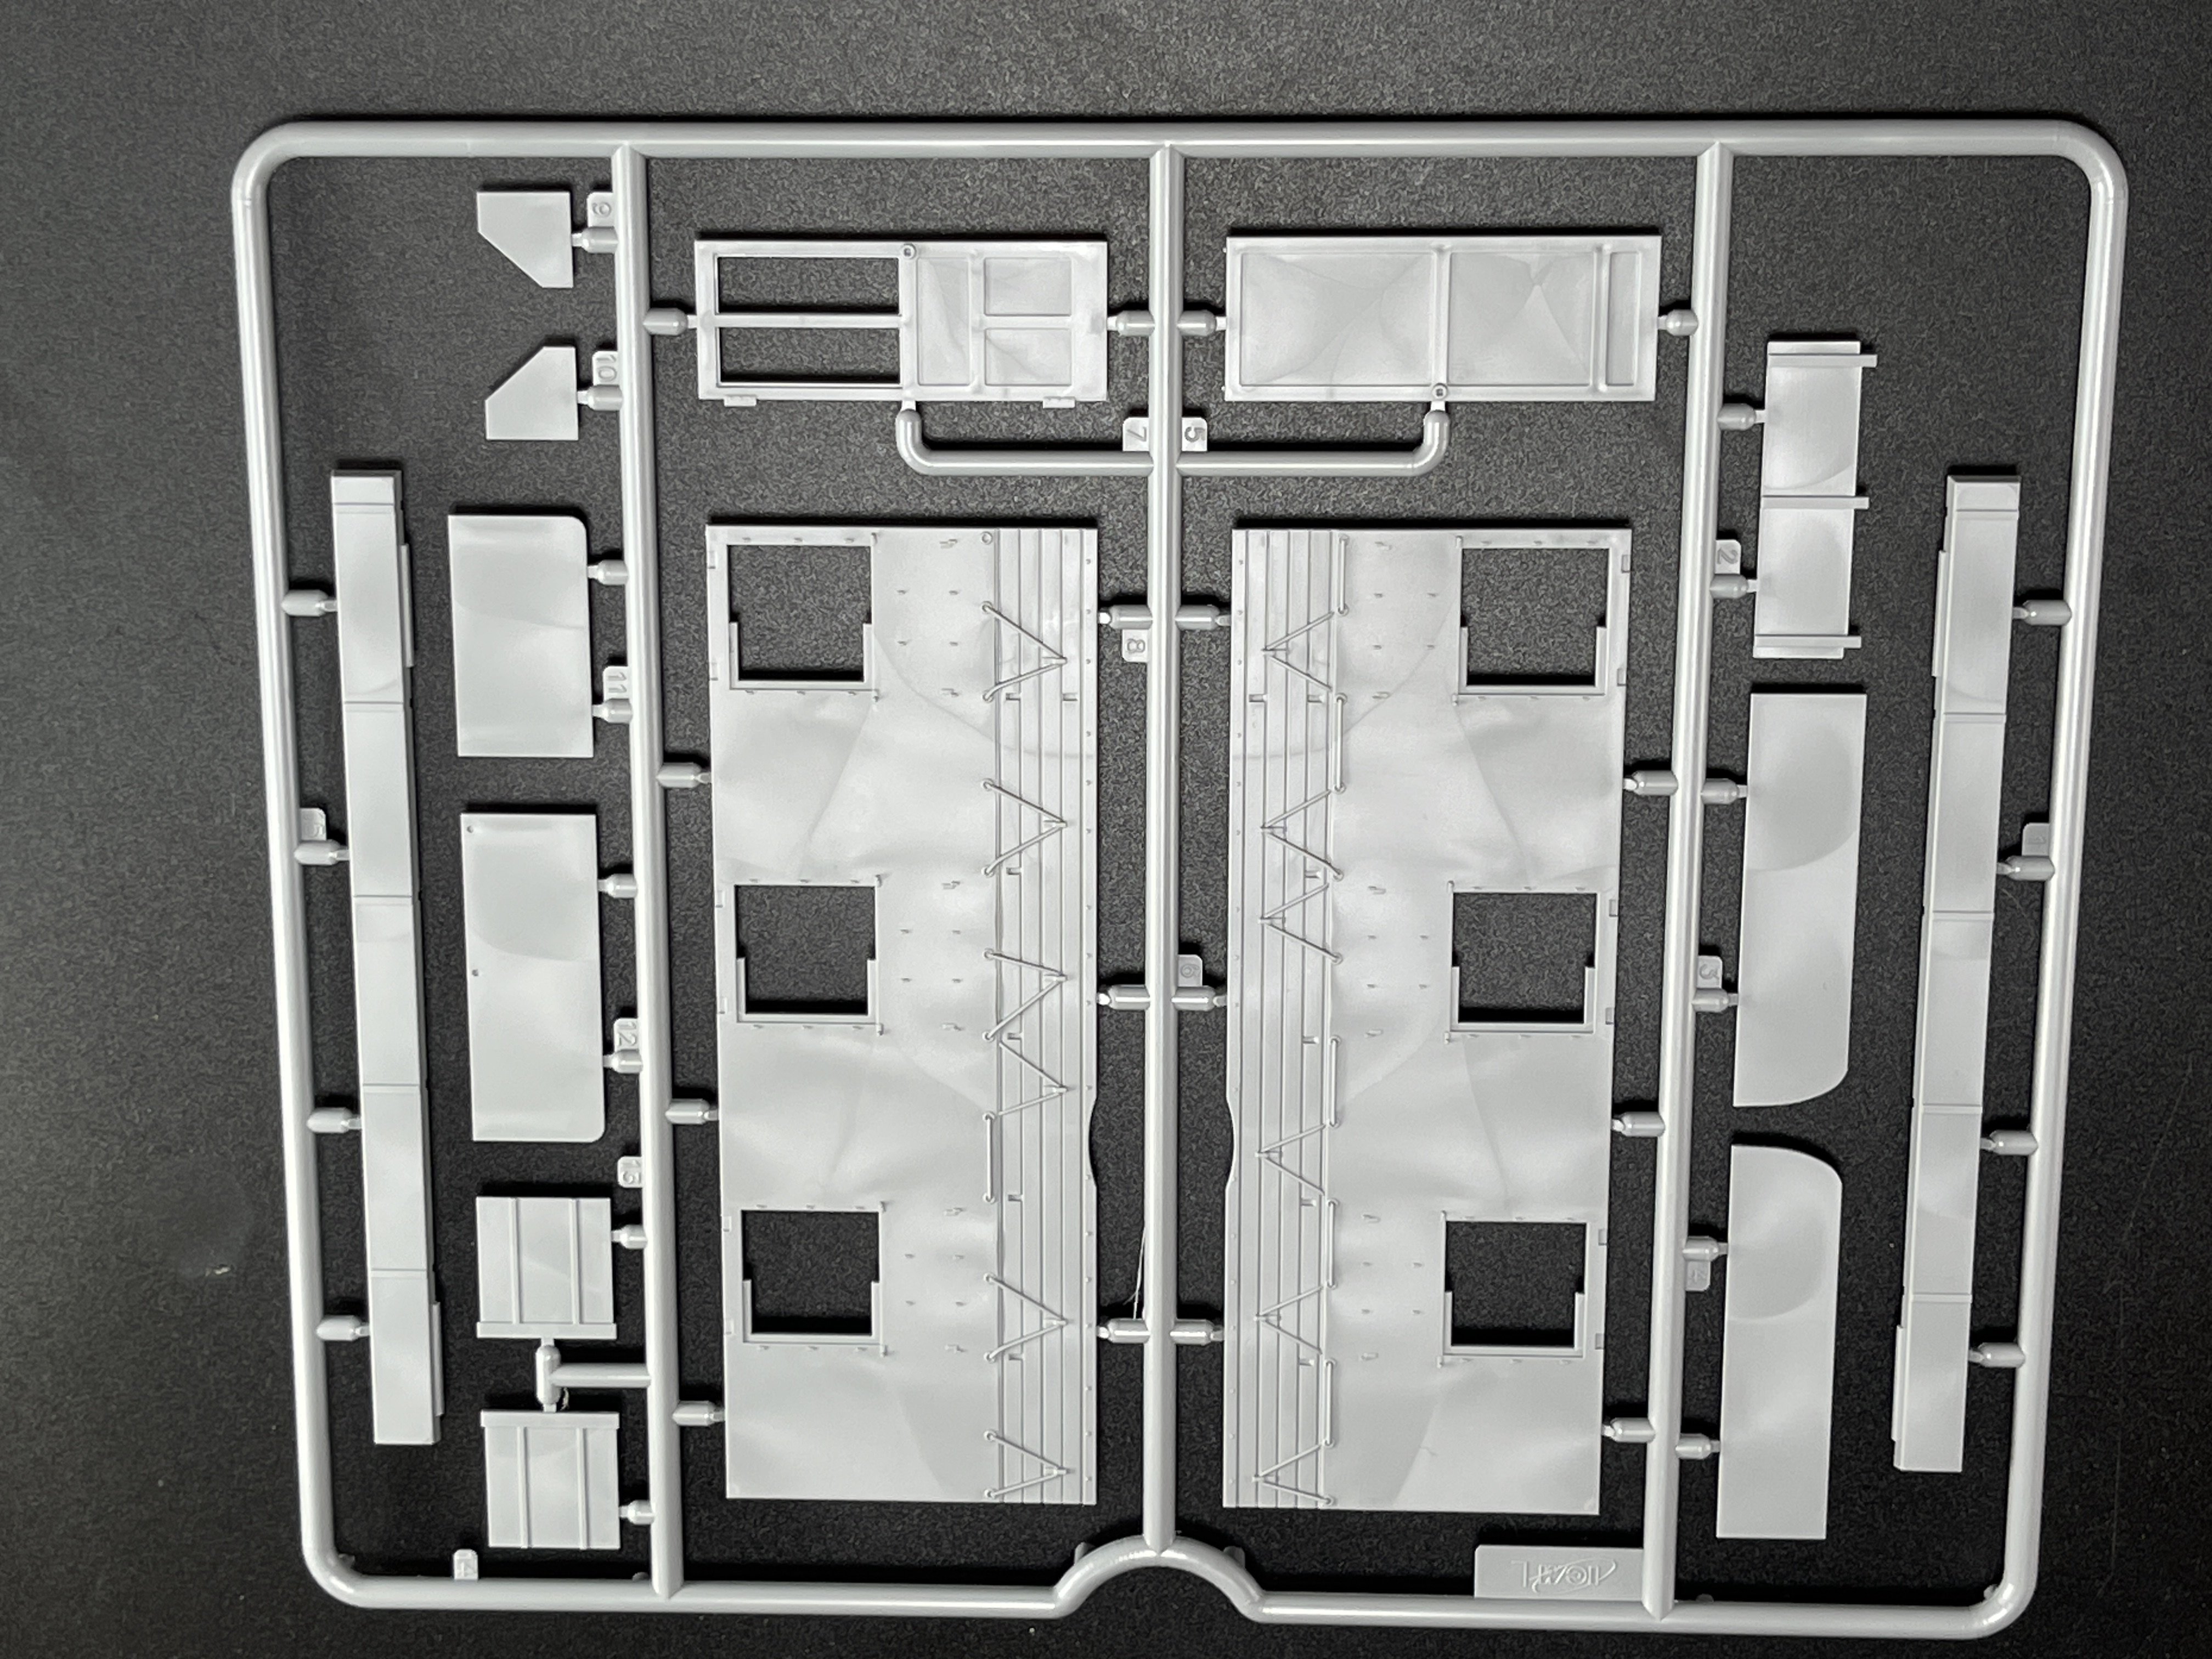
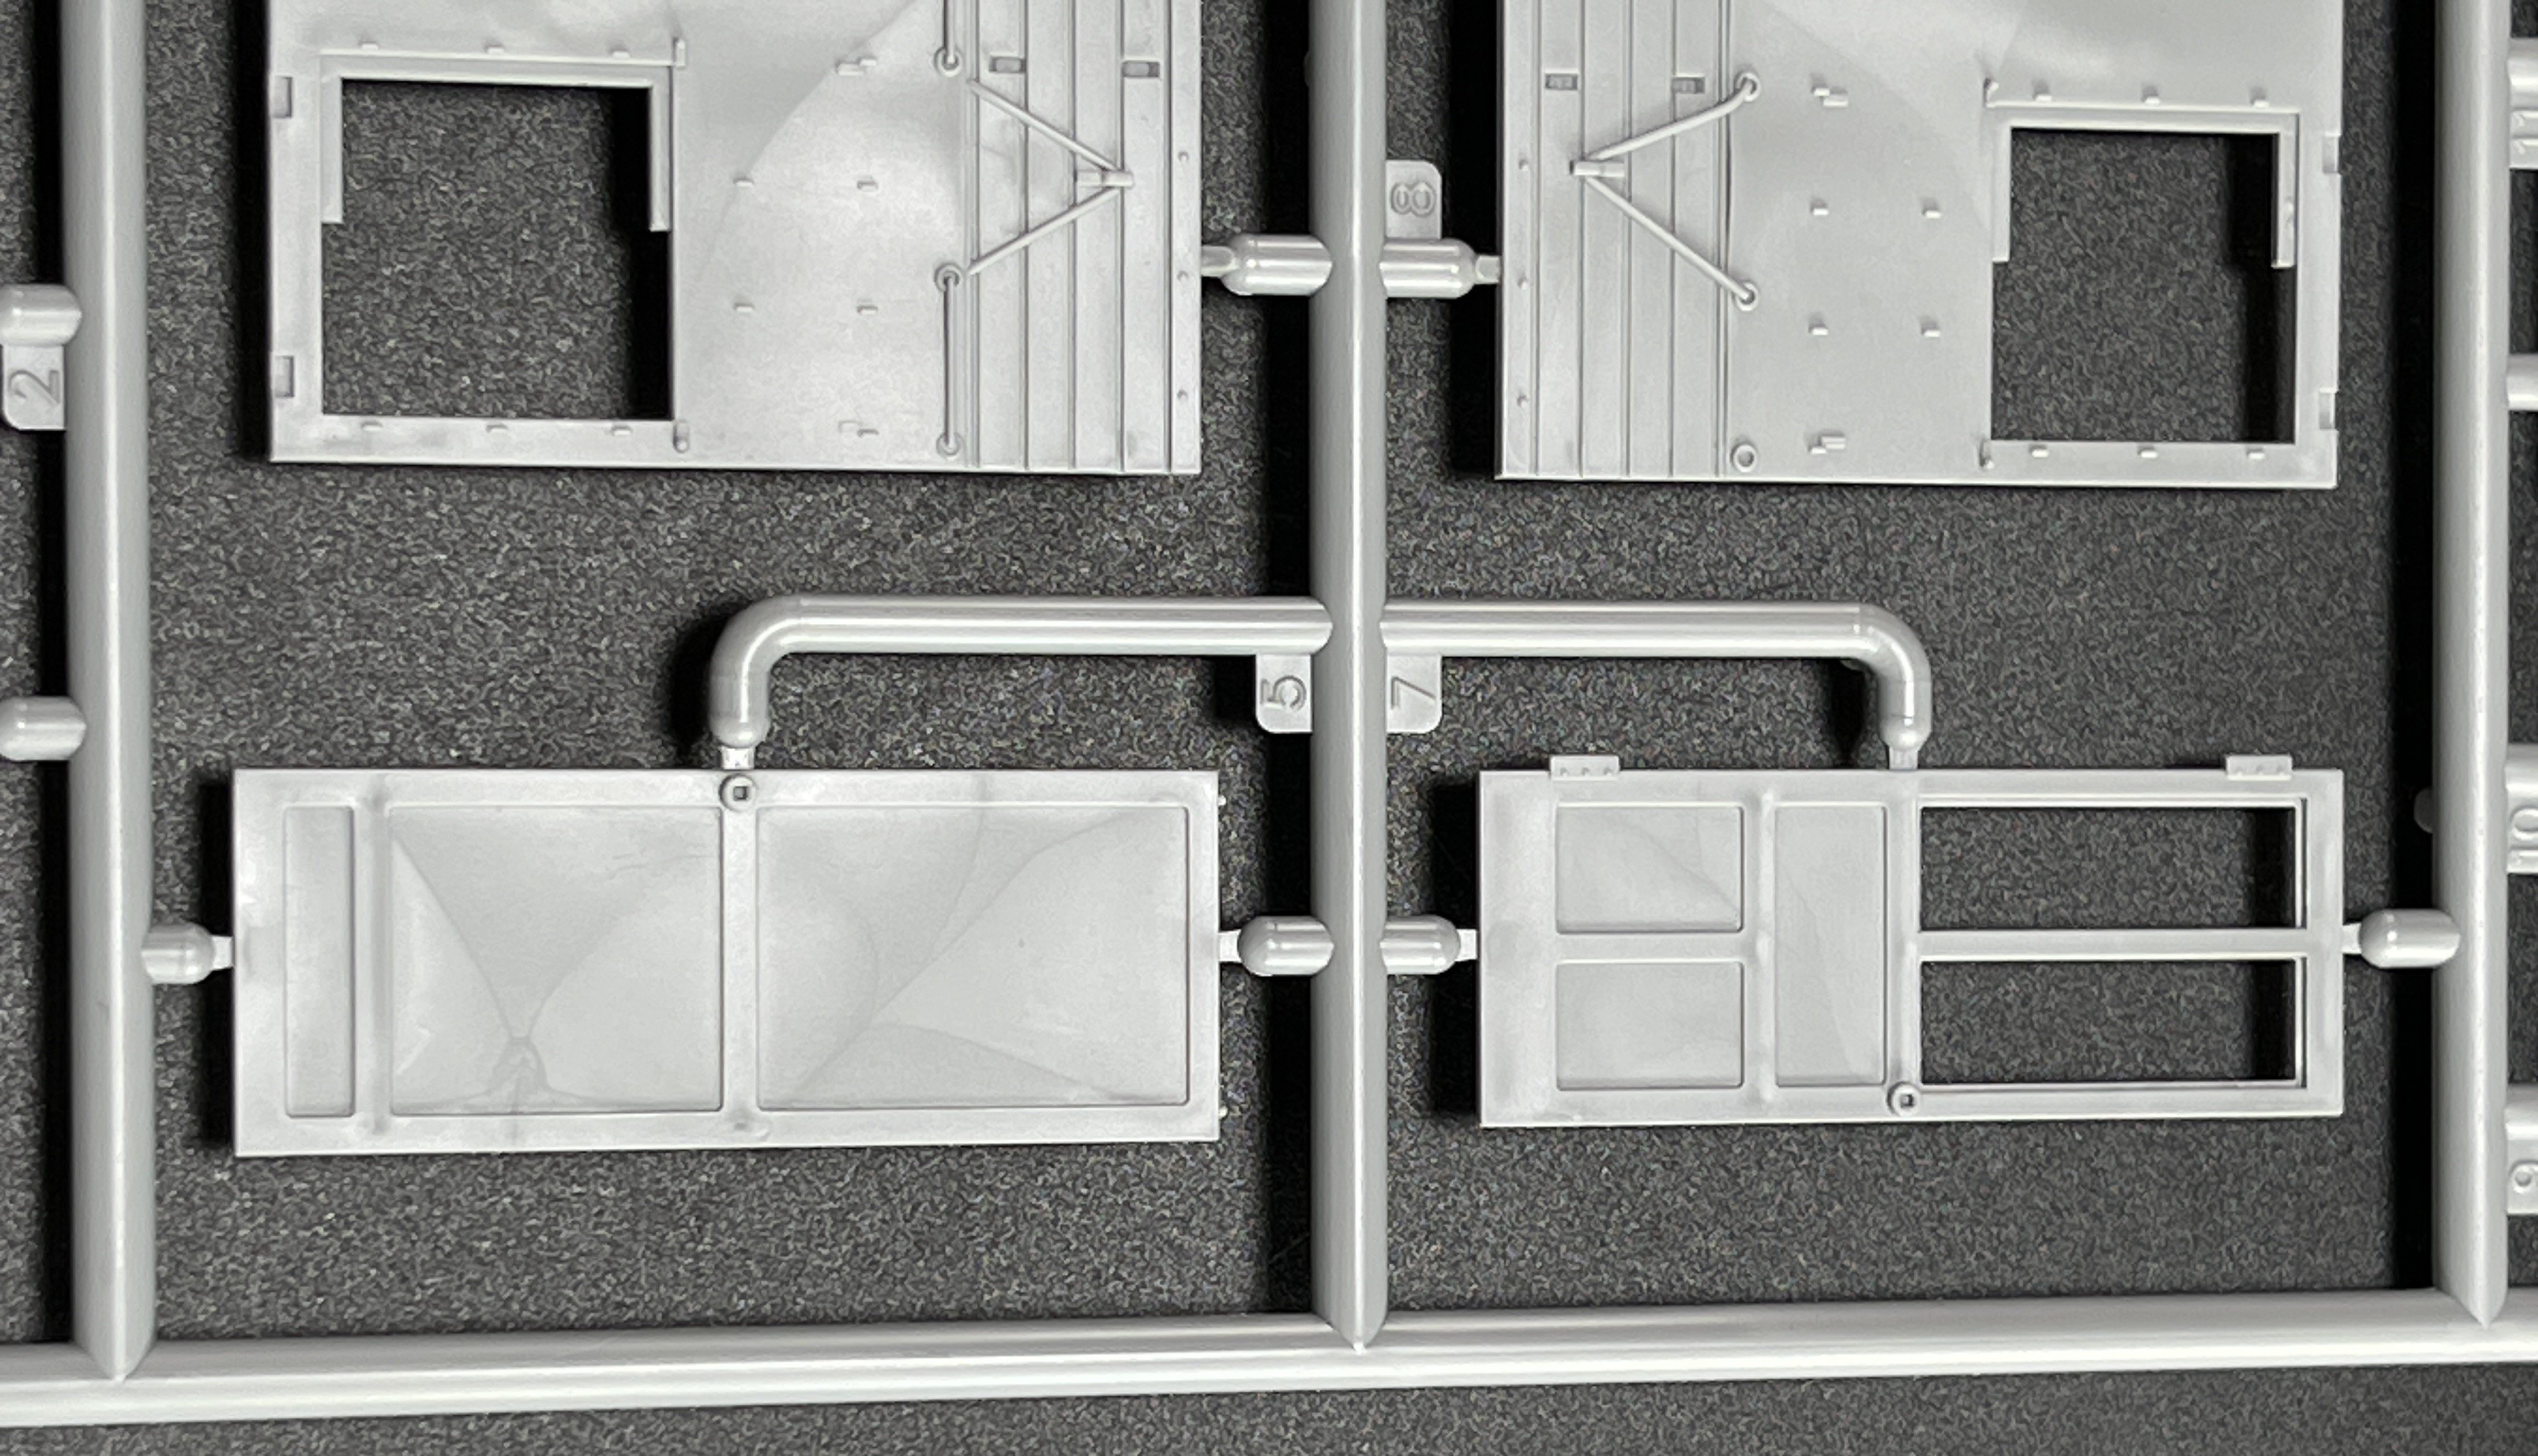
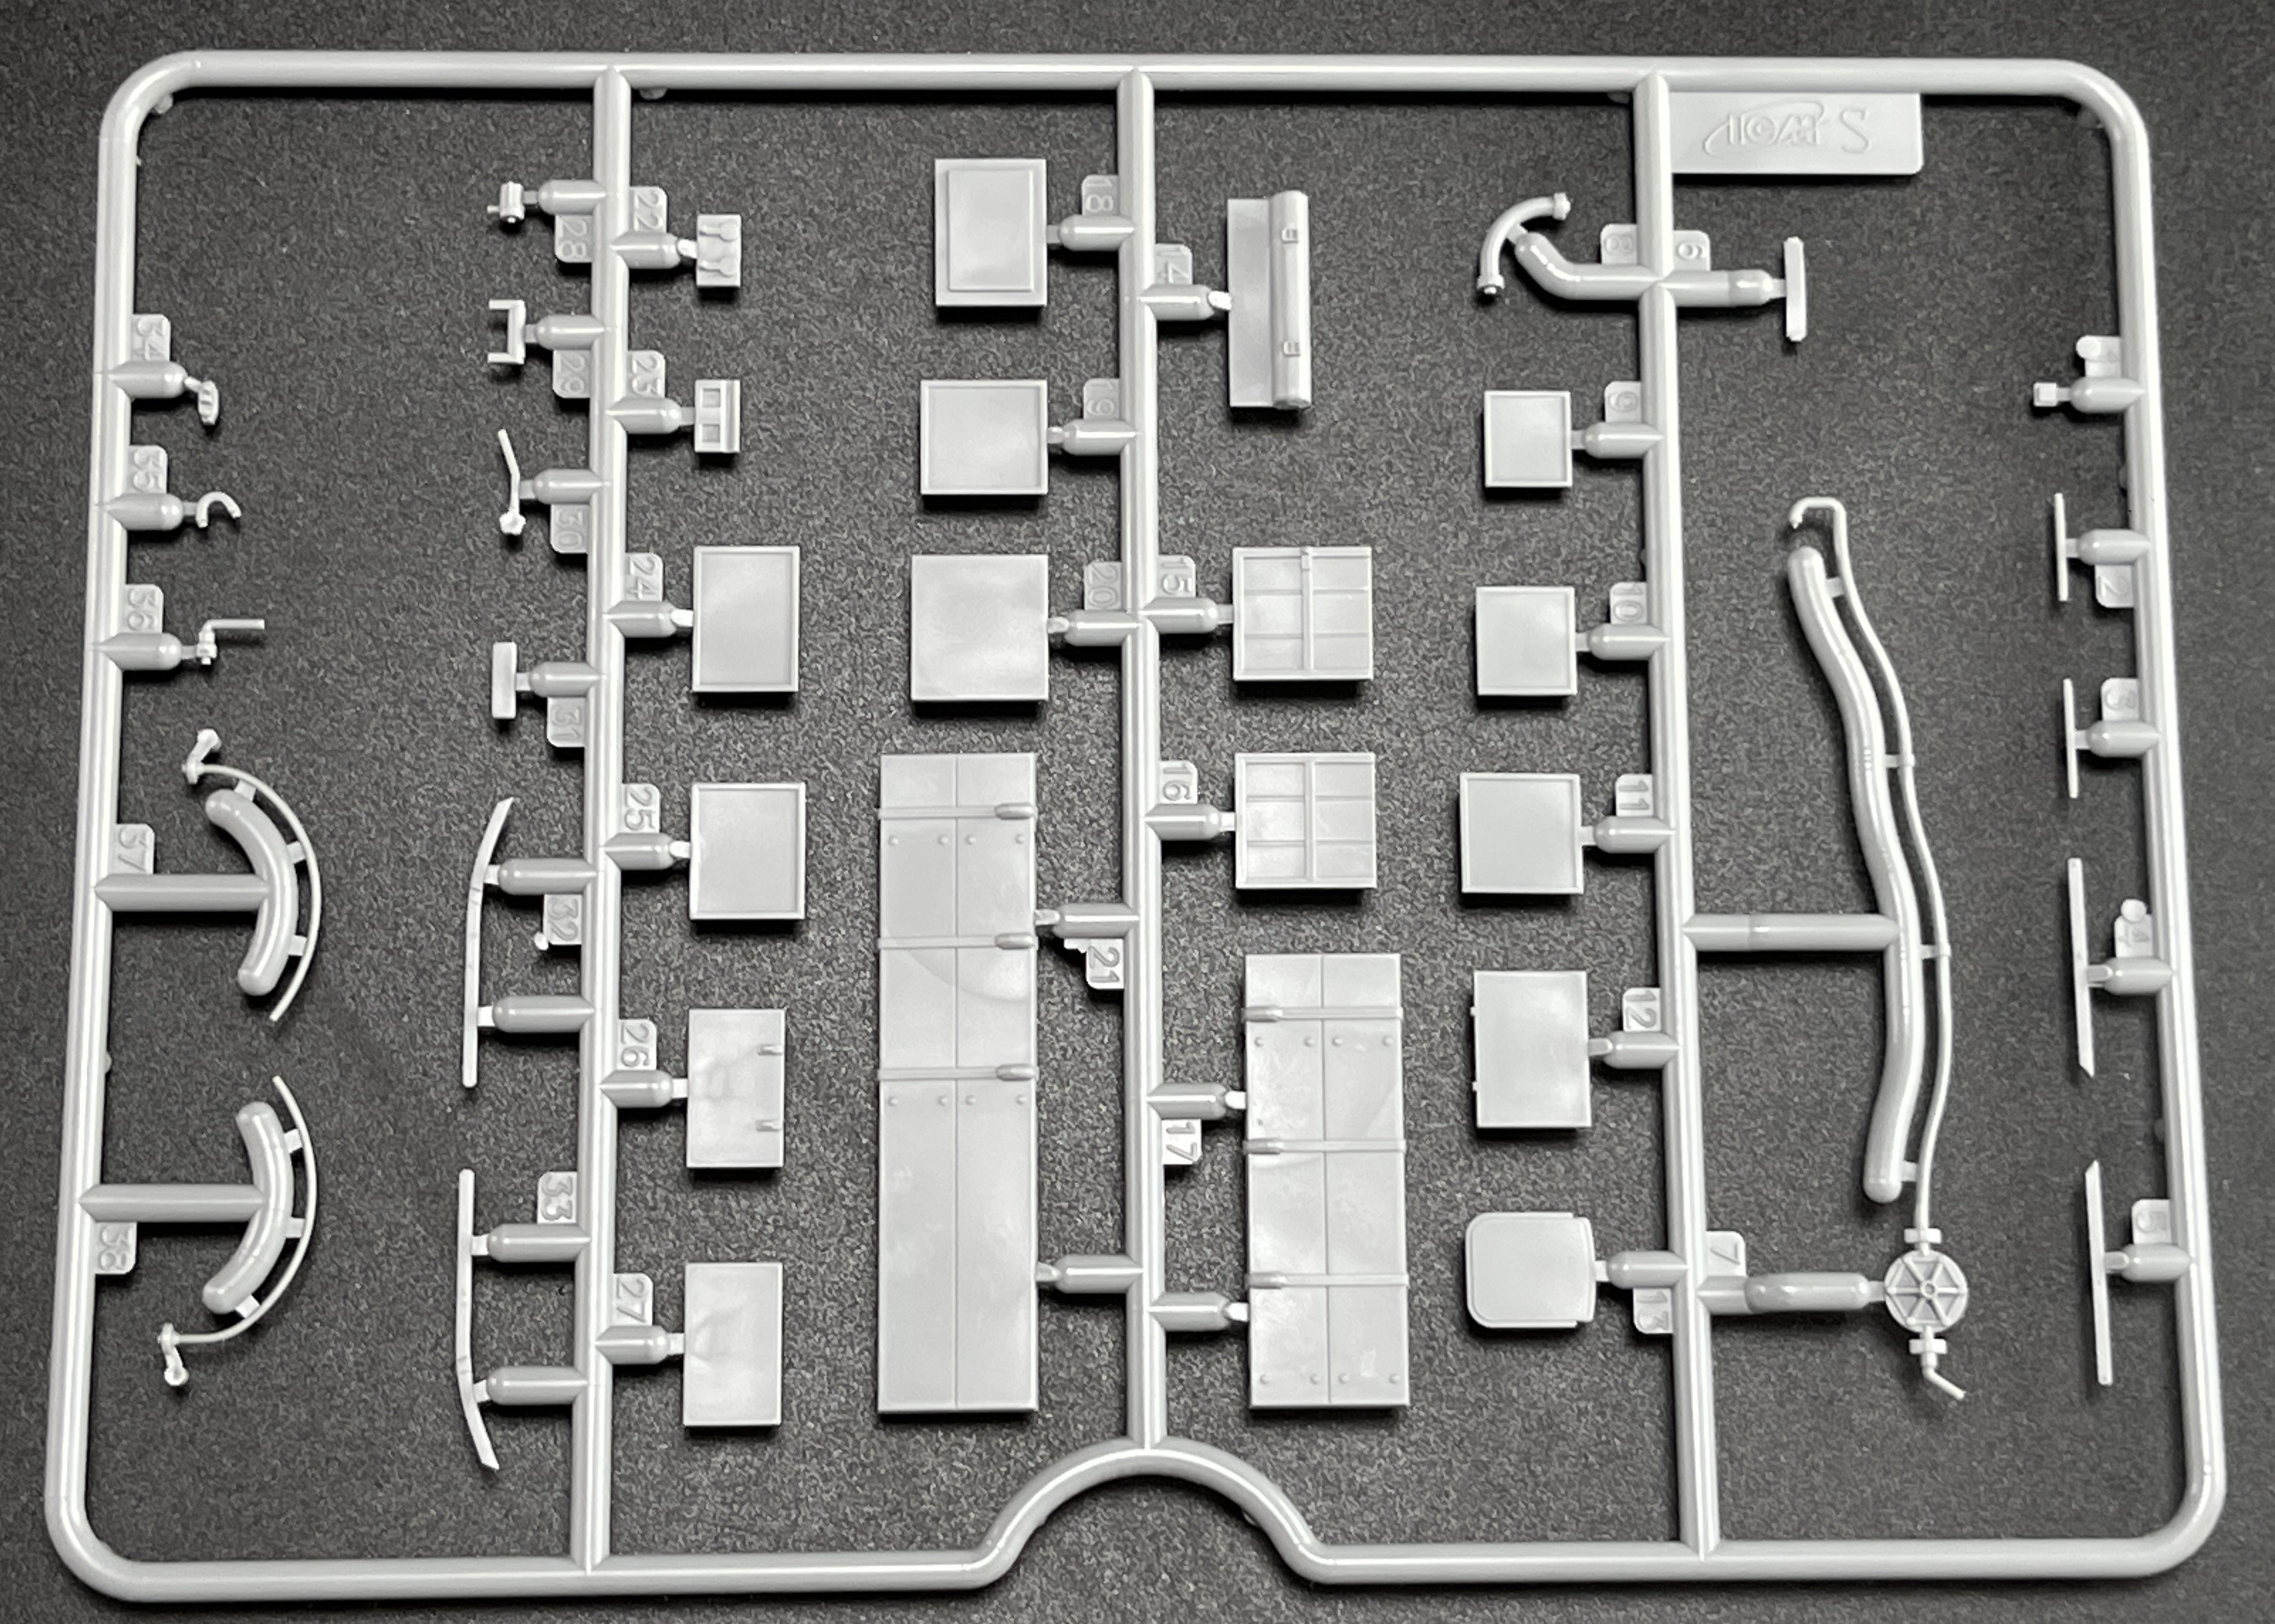
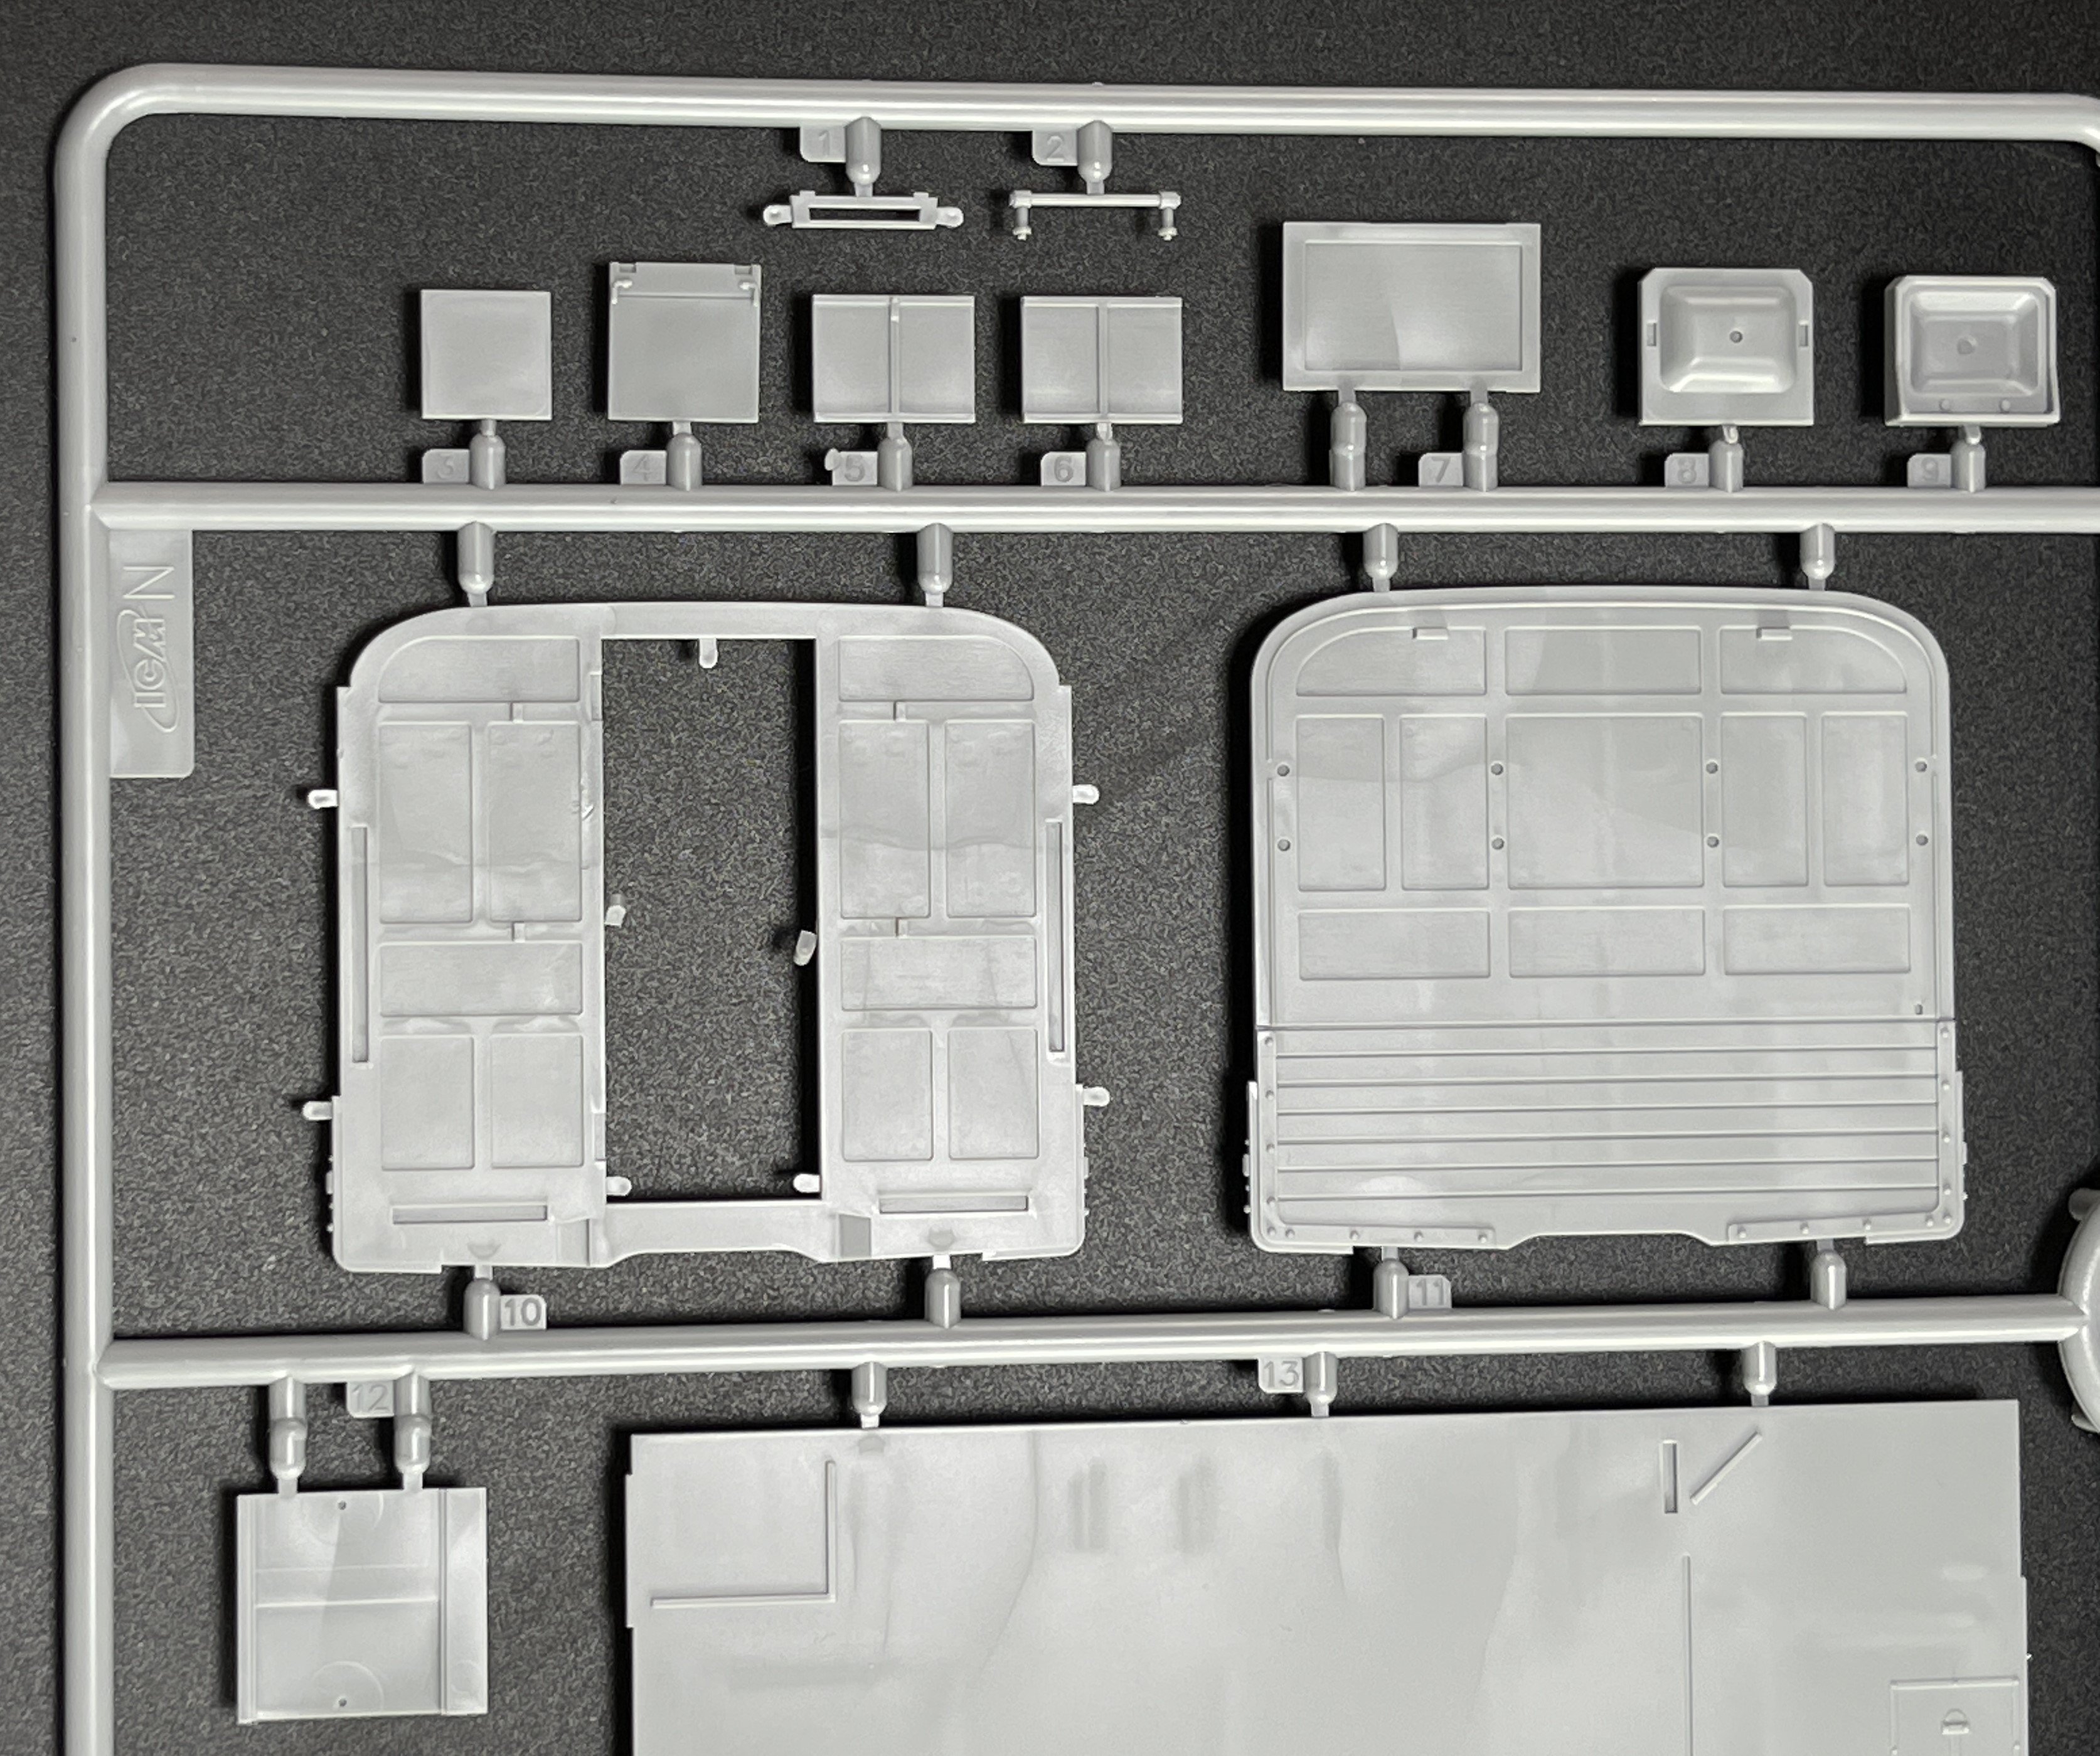
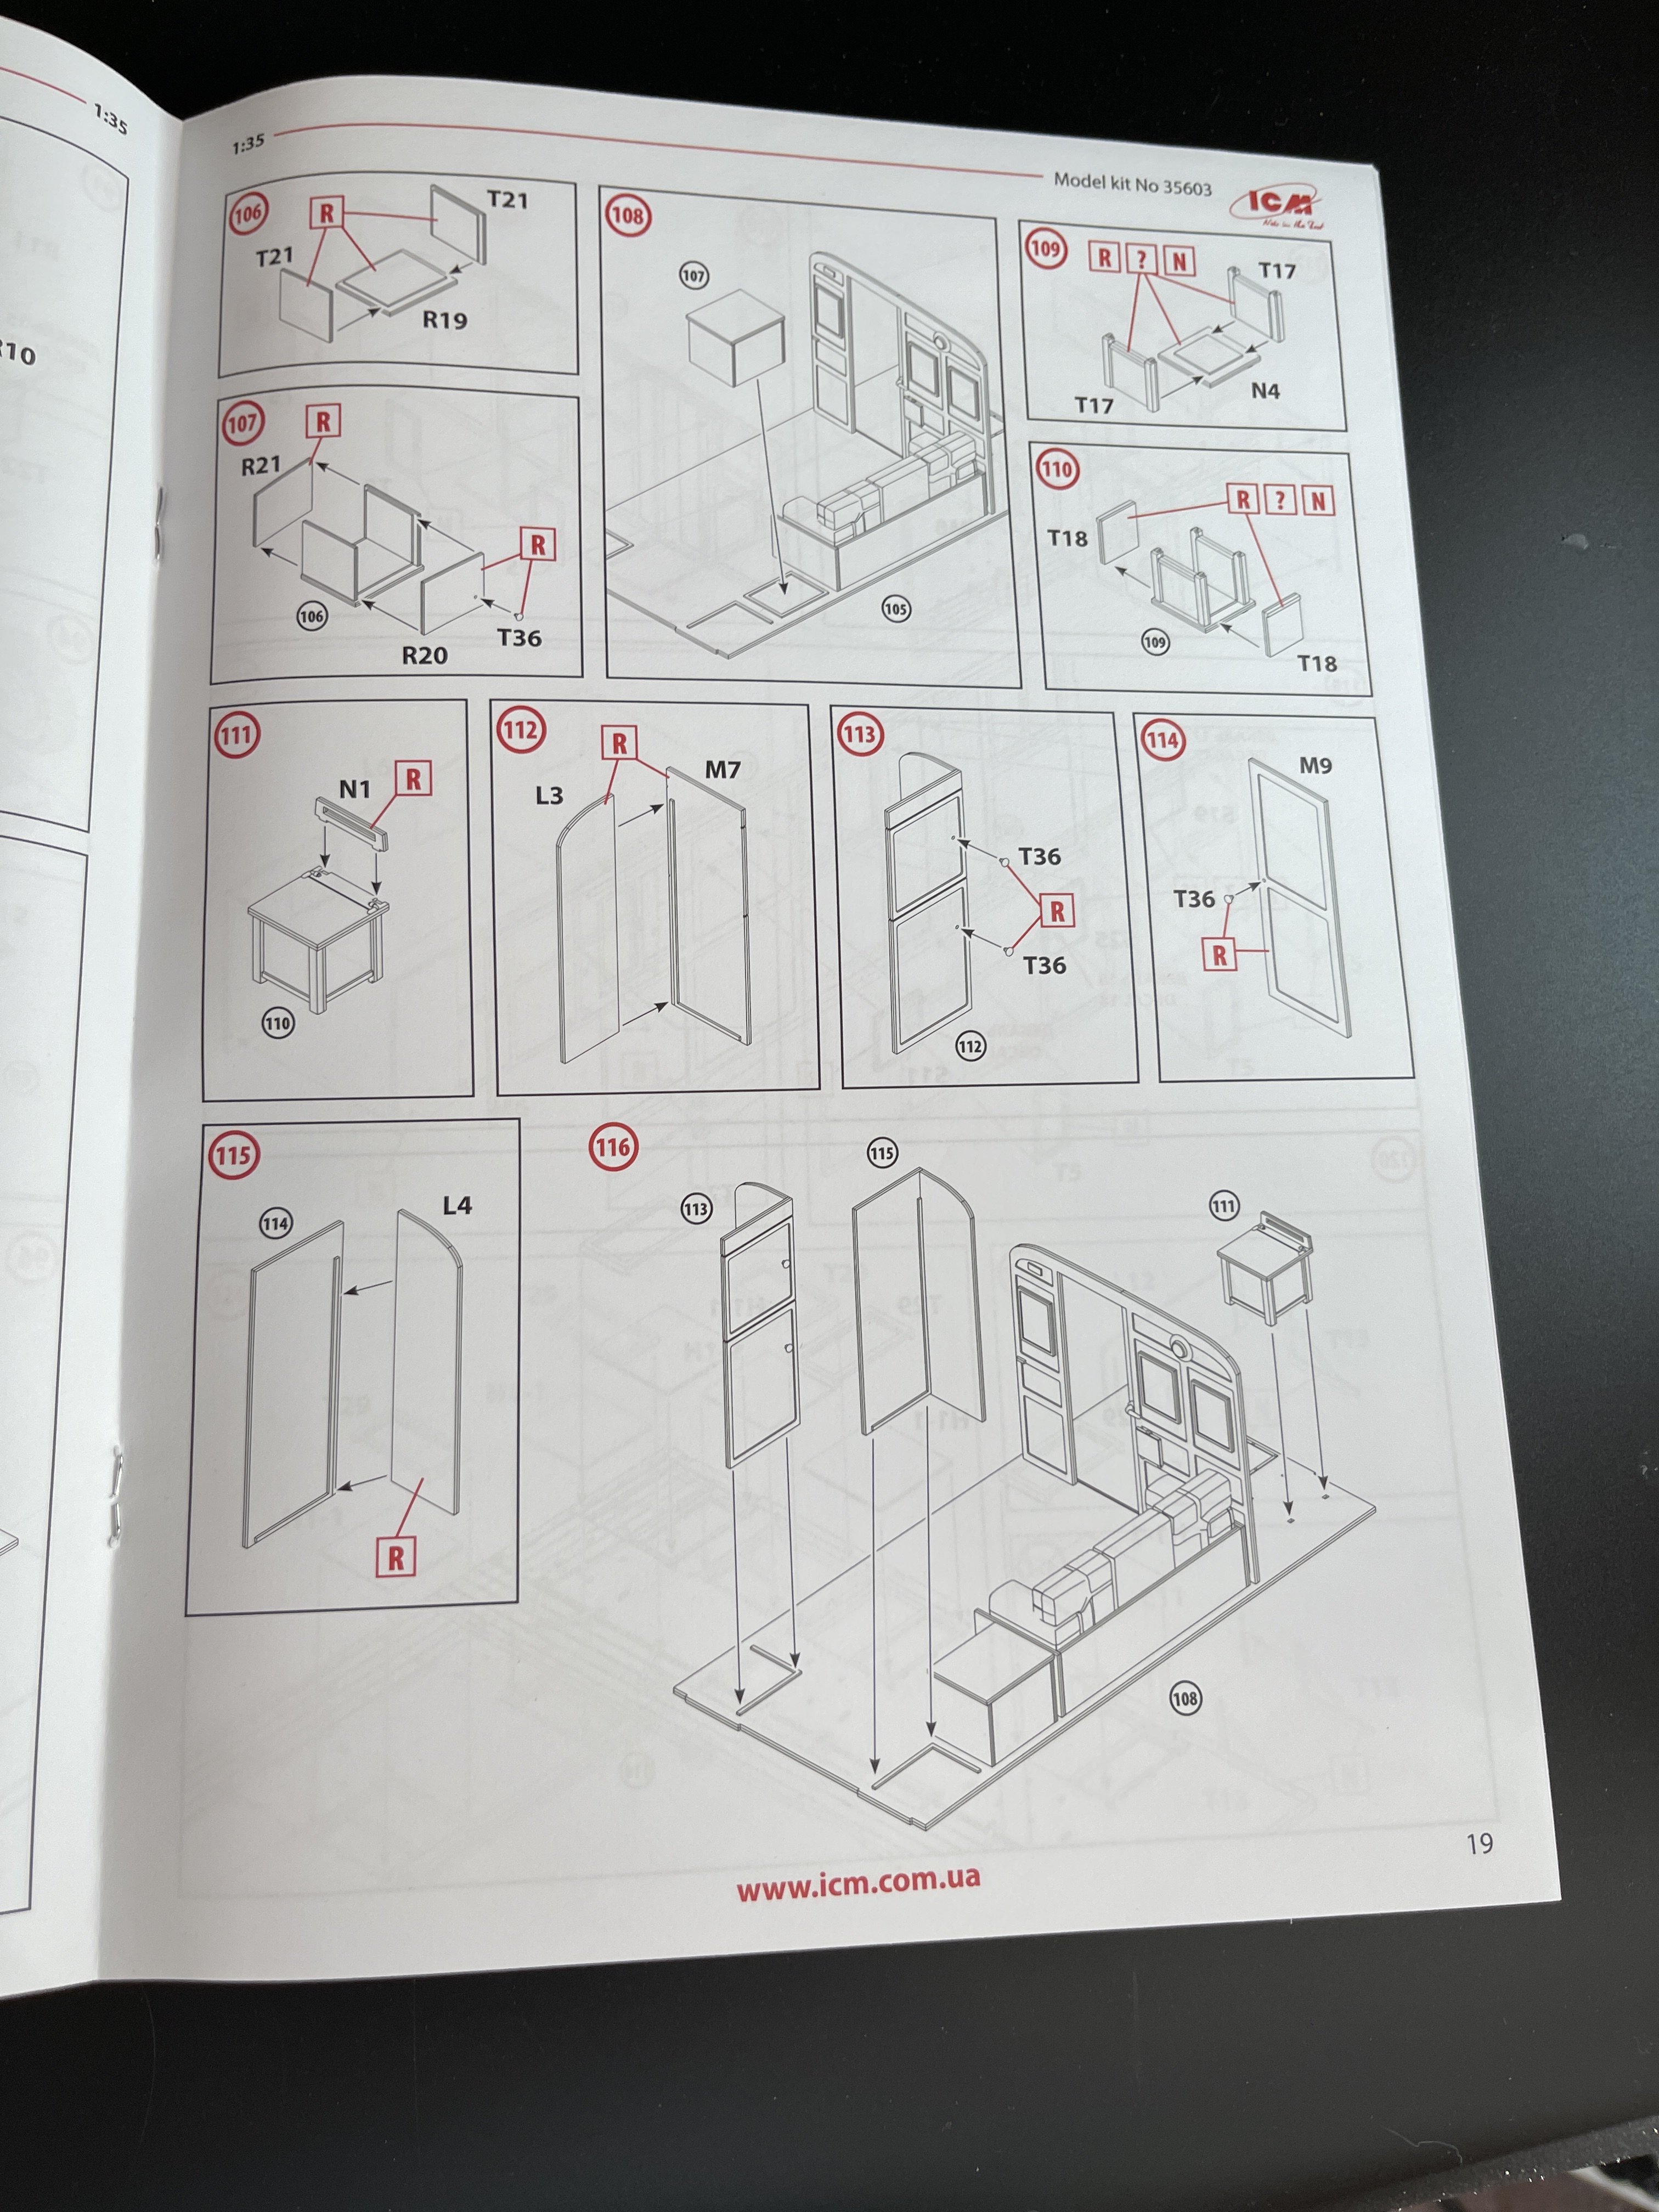
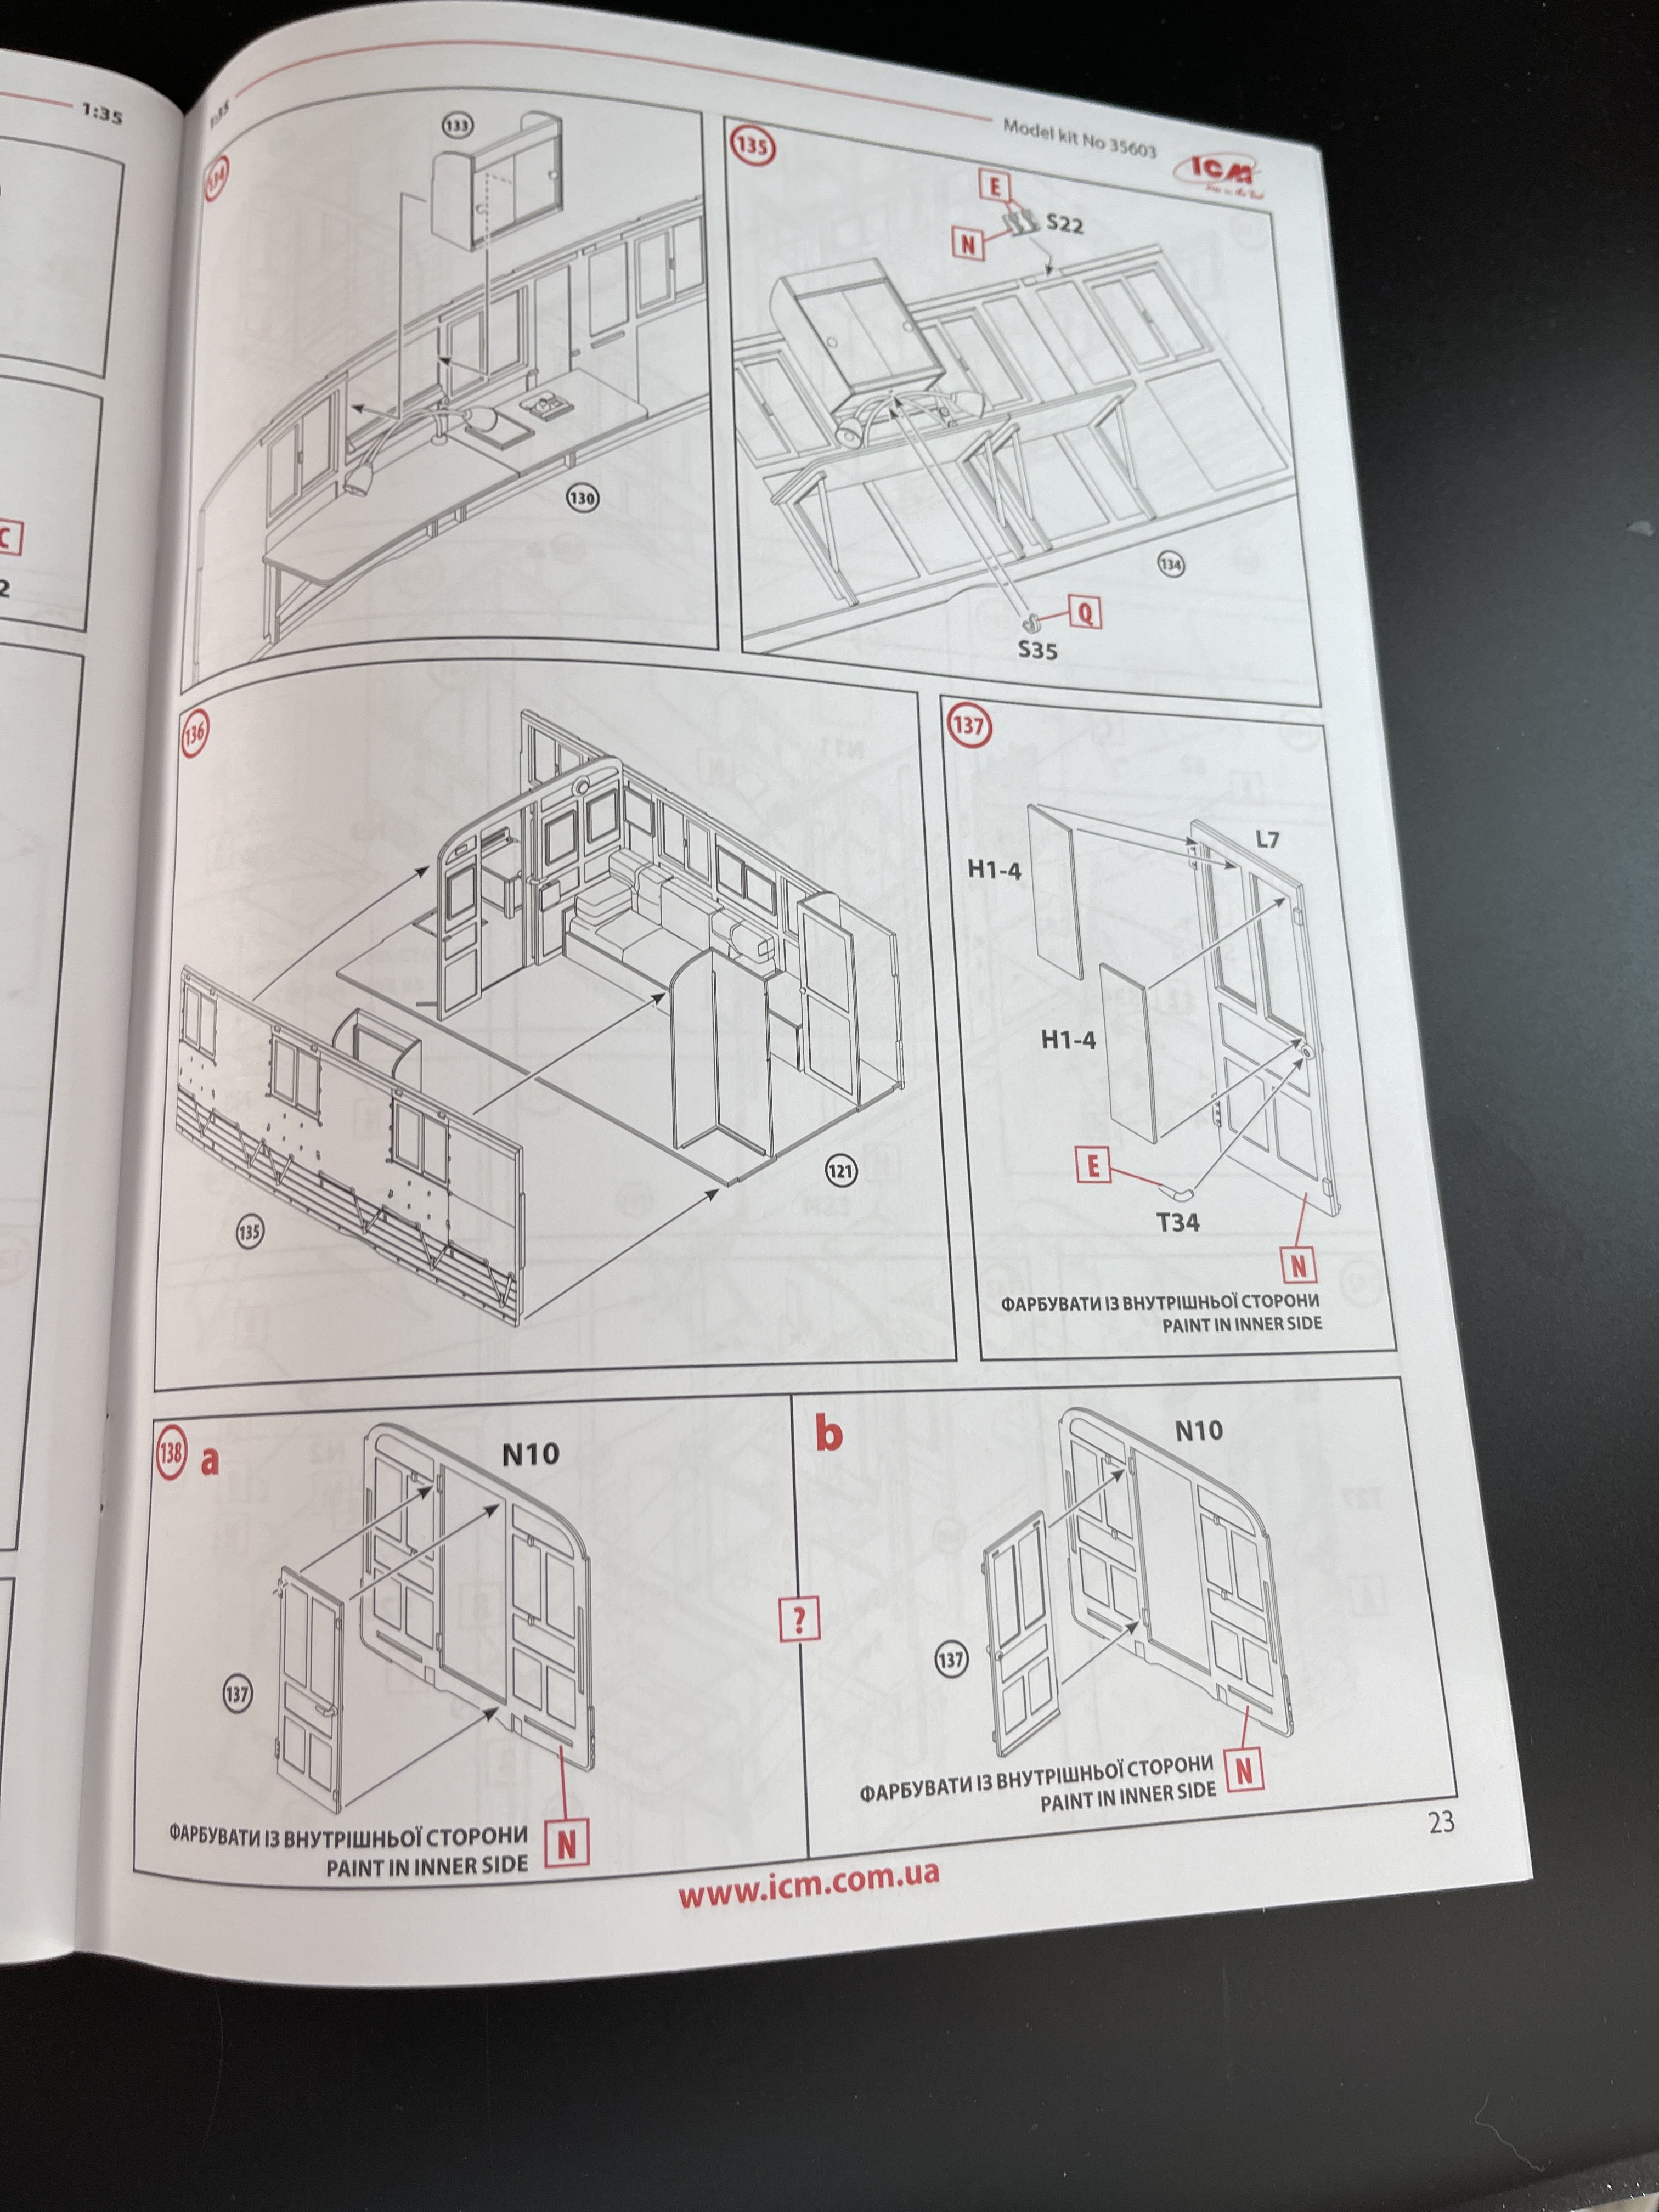
Now, the new part: the full office.
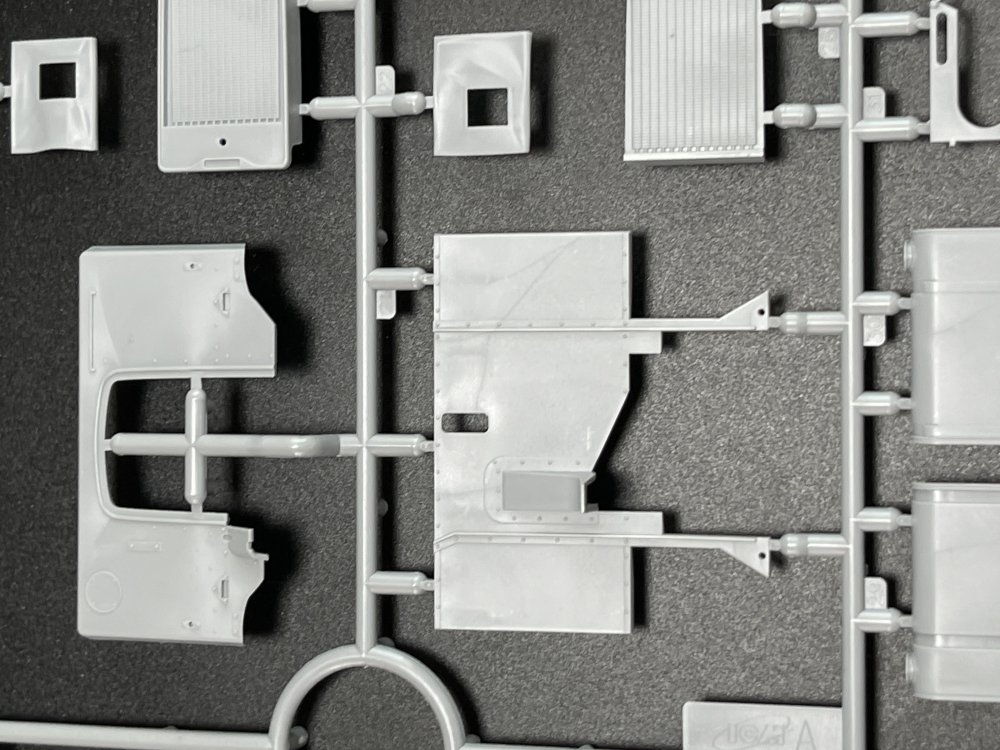
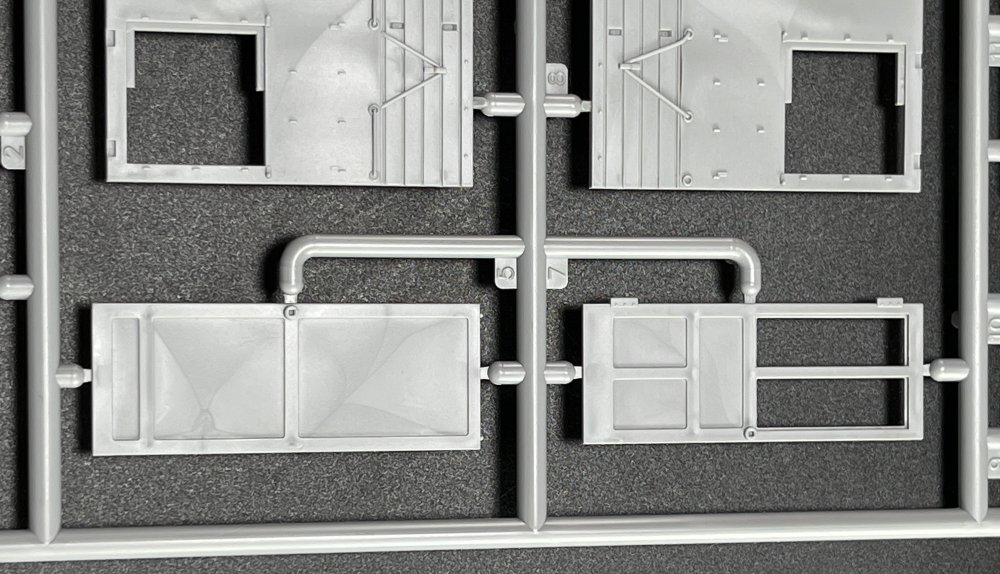
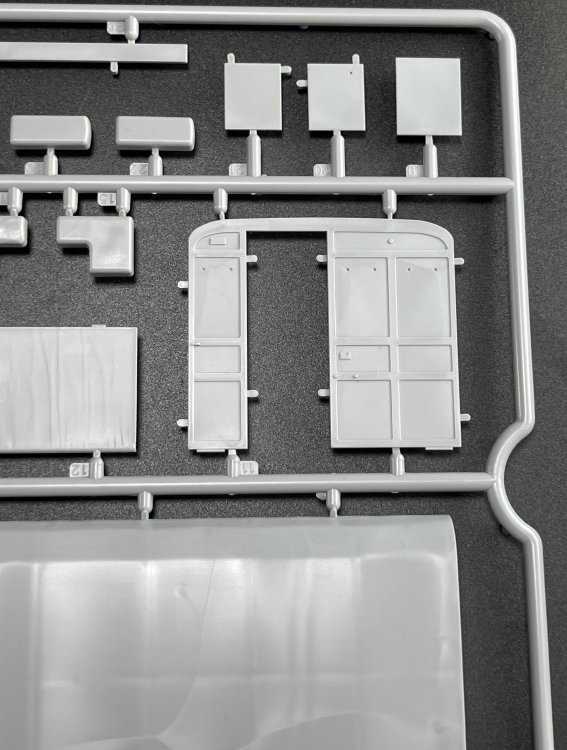
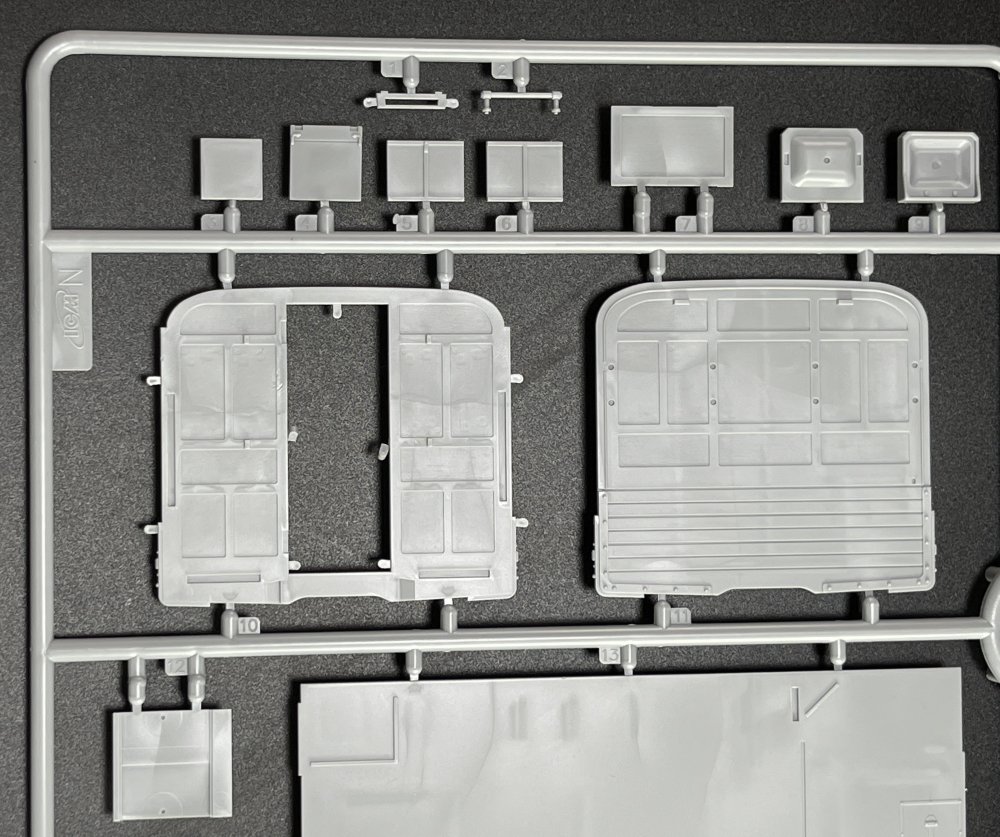
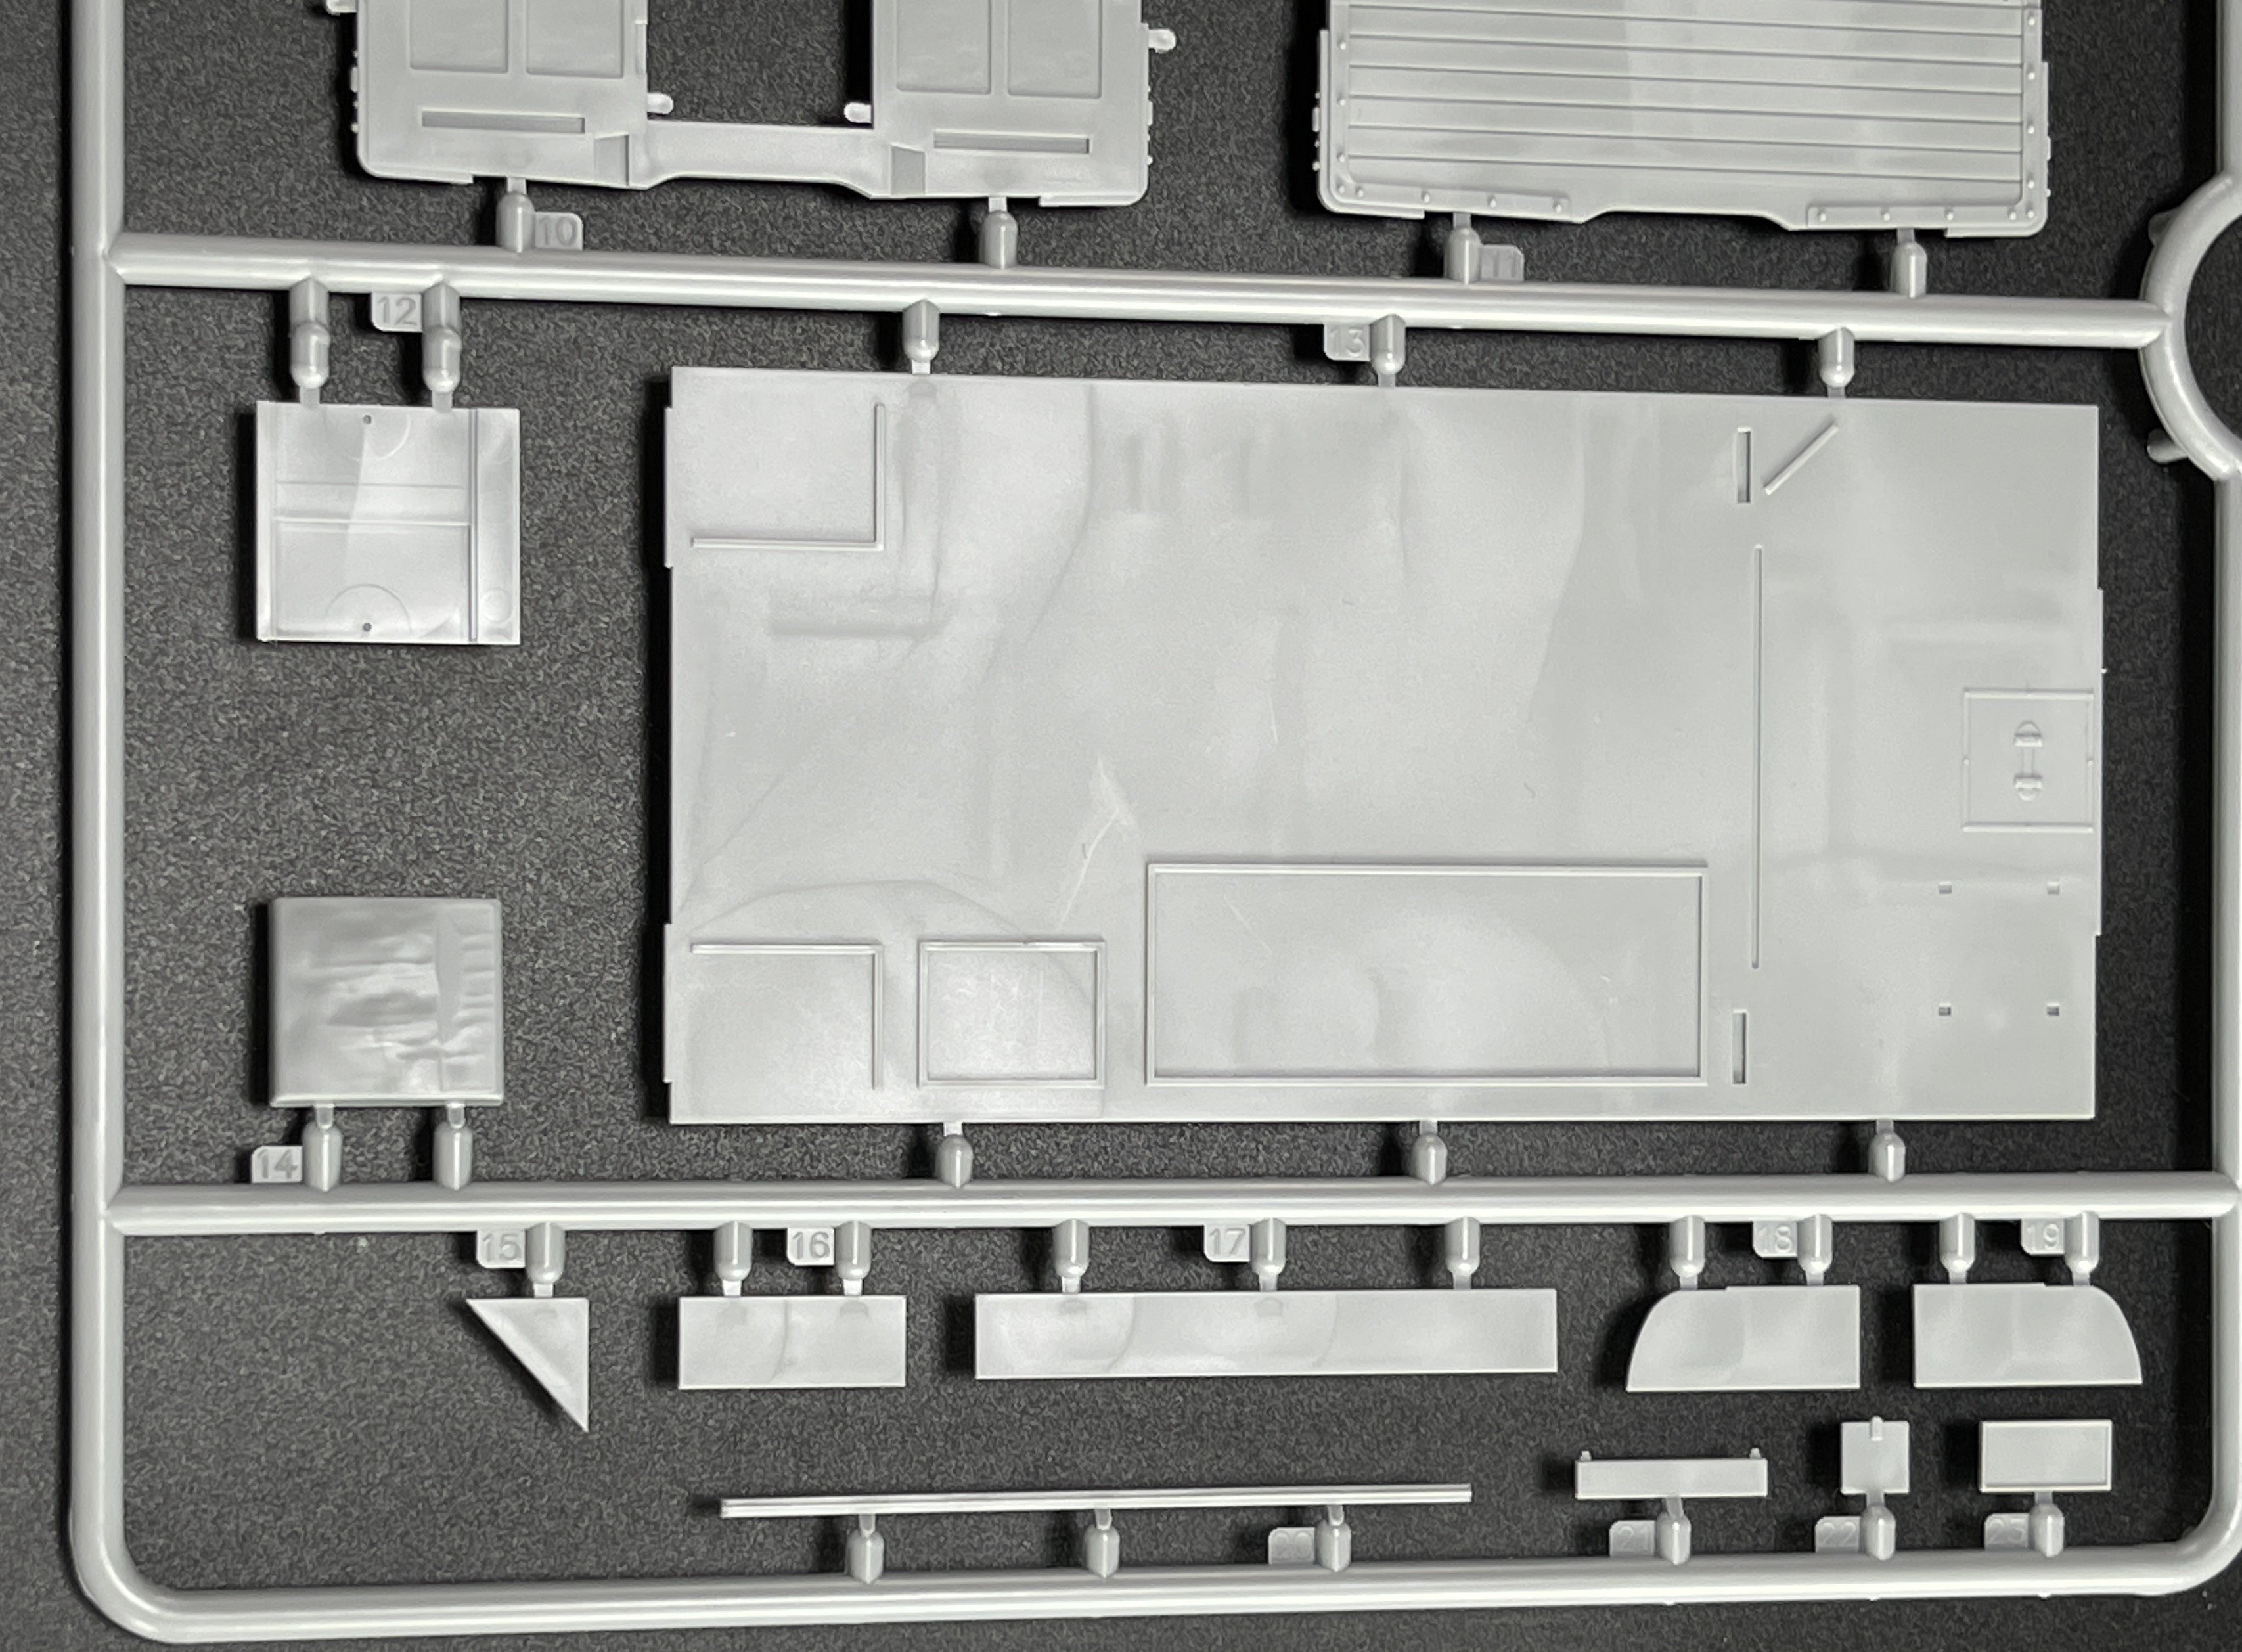
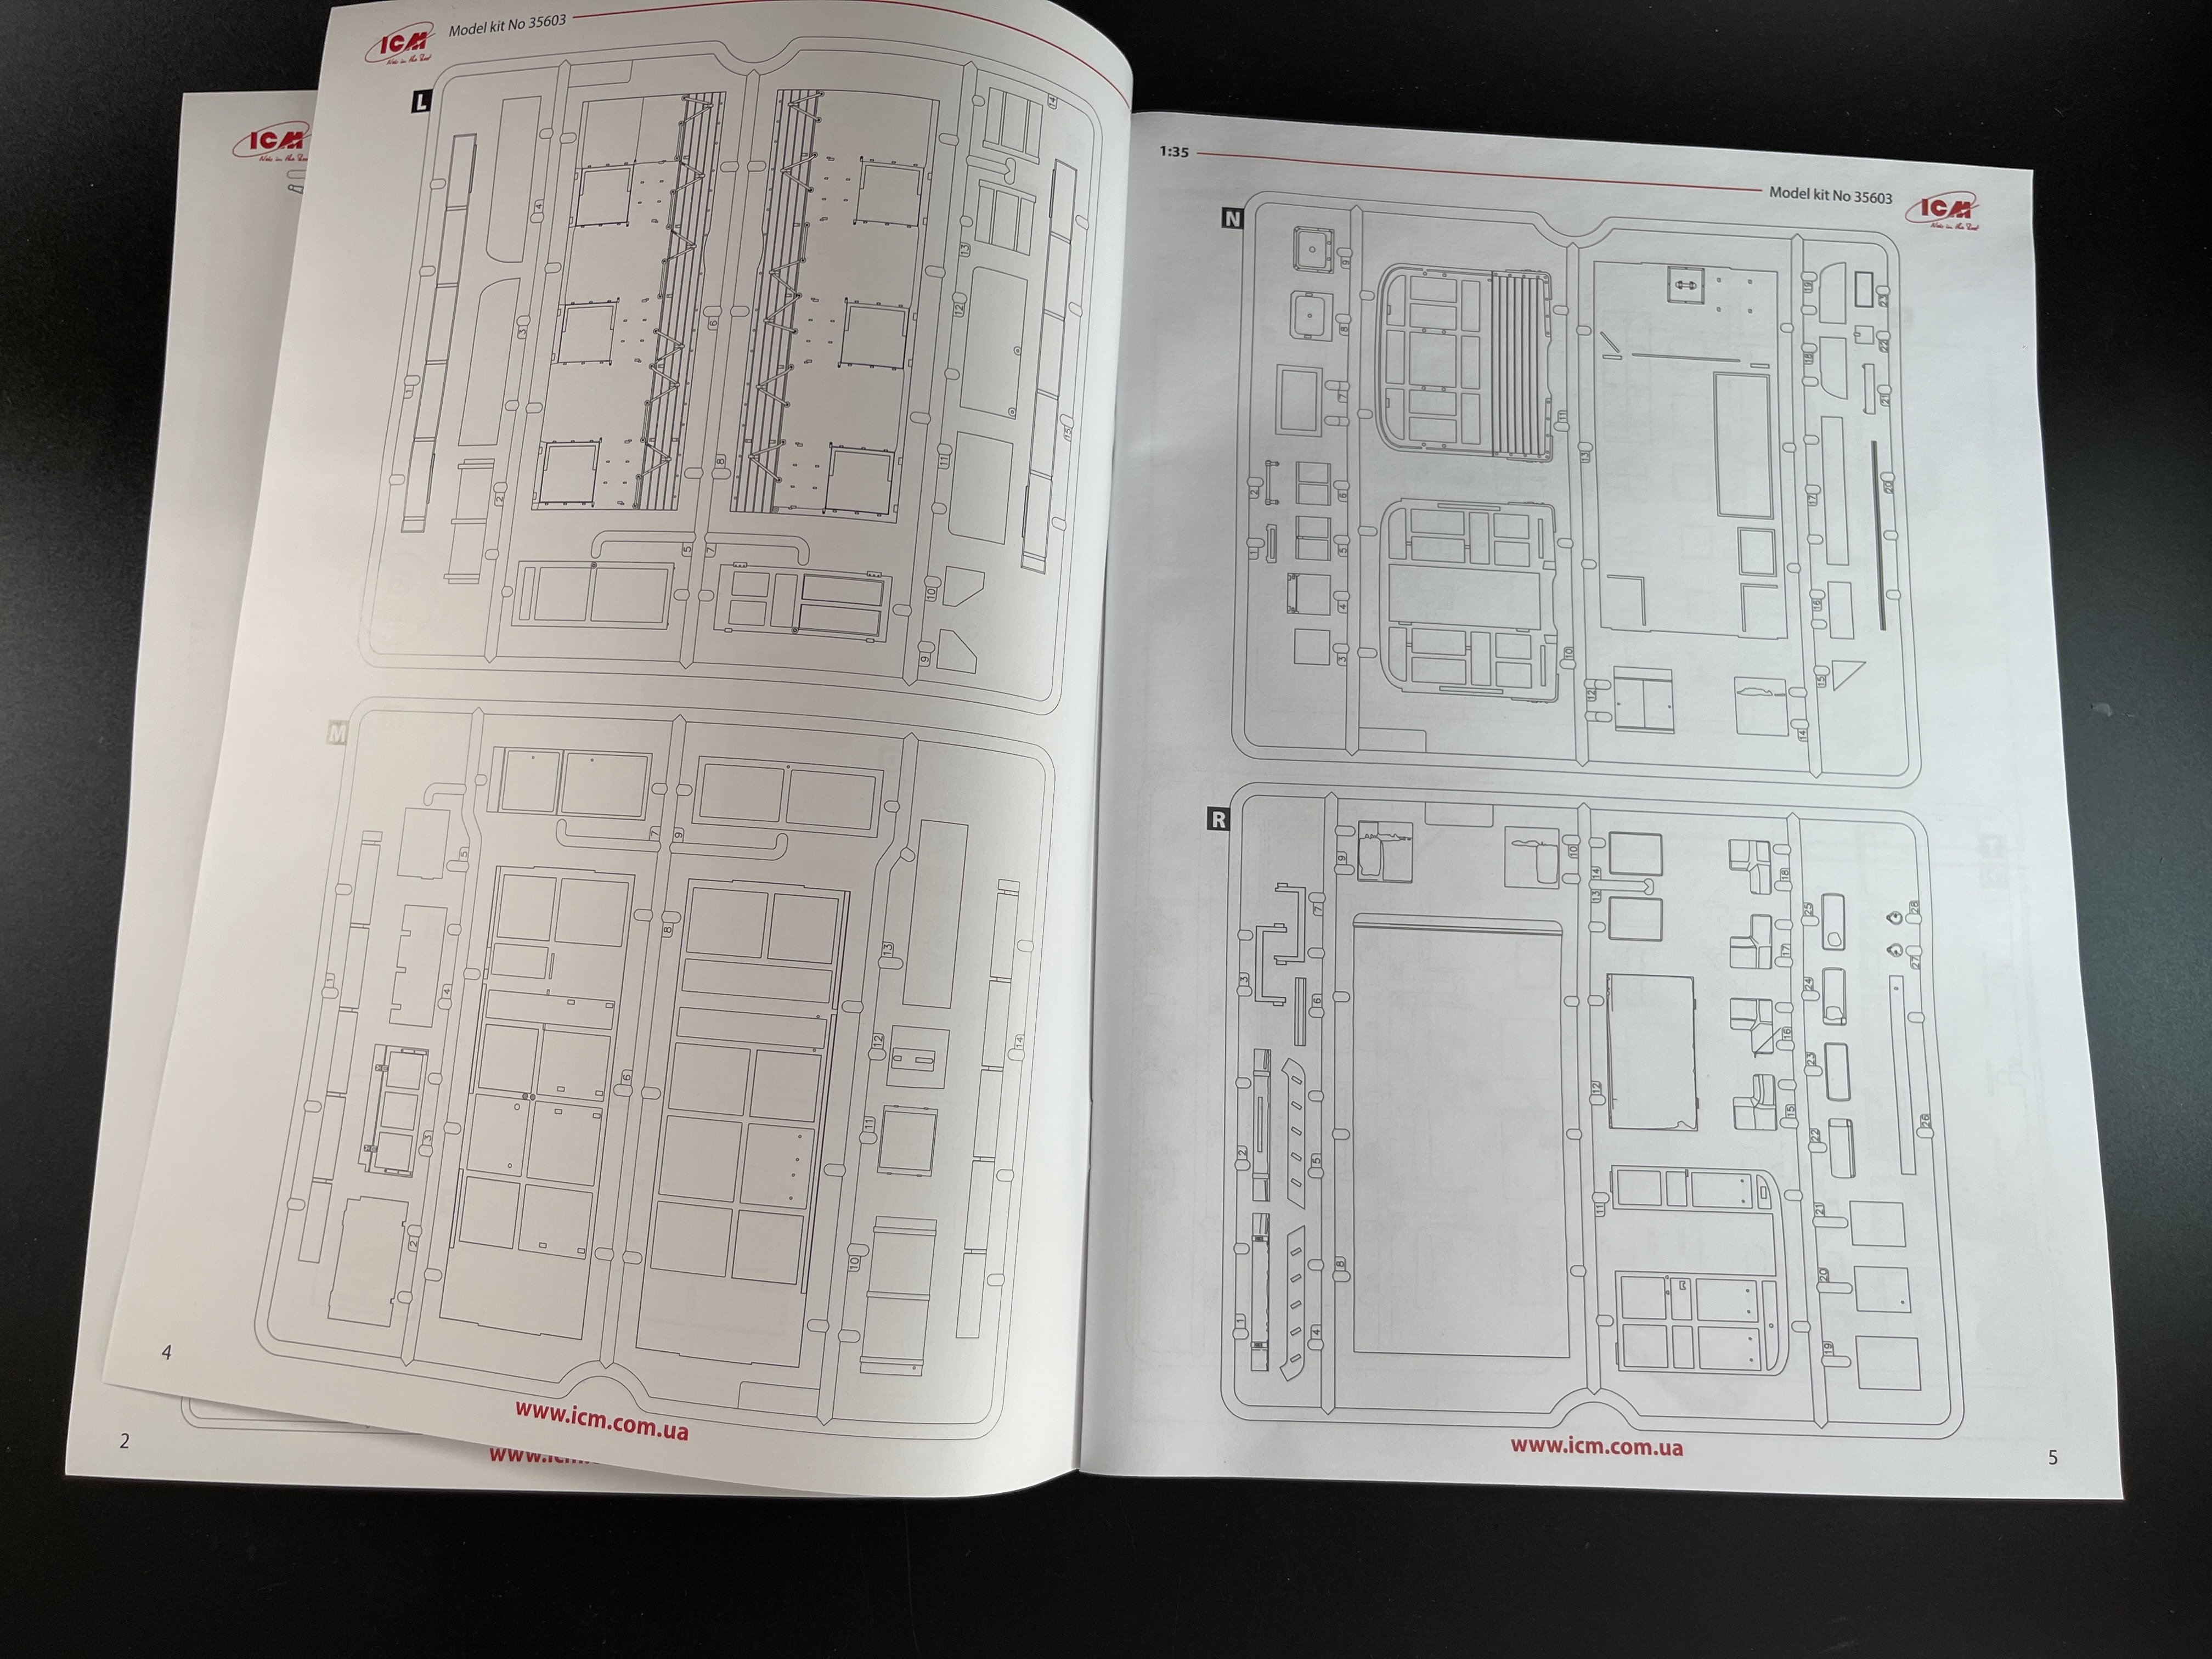
The office walls come in separate panels, so that is a clever way for ICM to have no worries about pin injections marks in full side caravan walls.
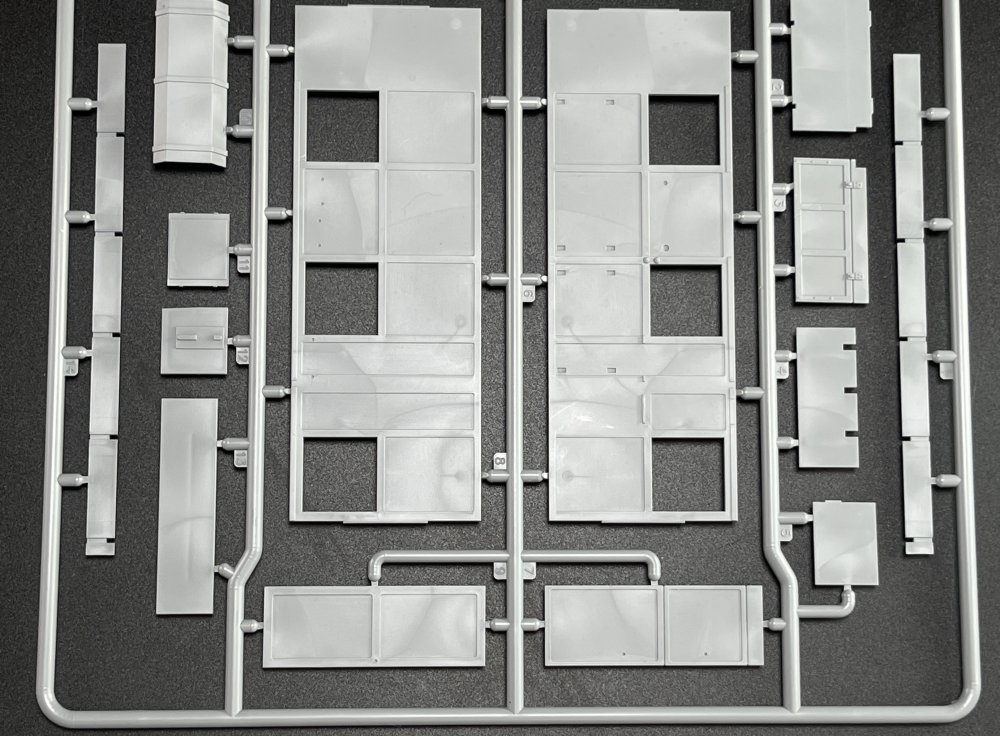
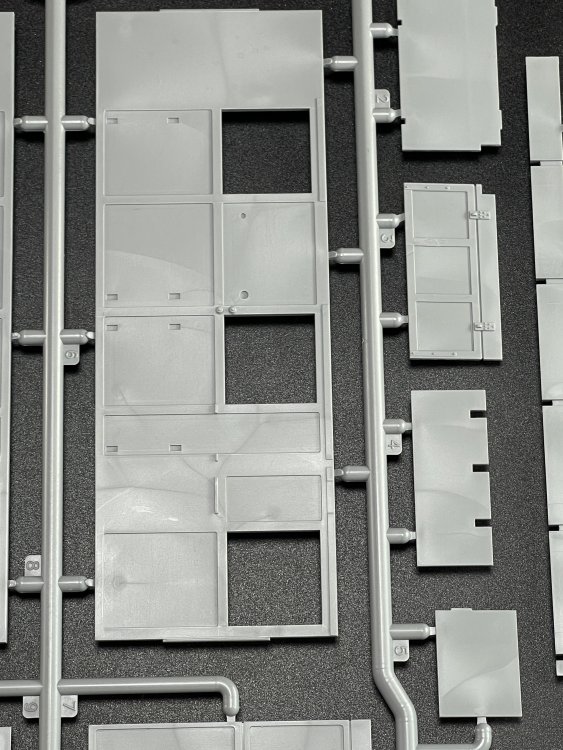
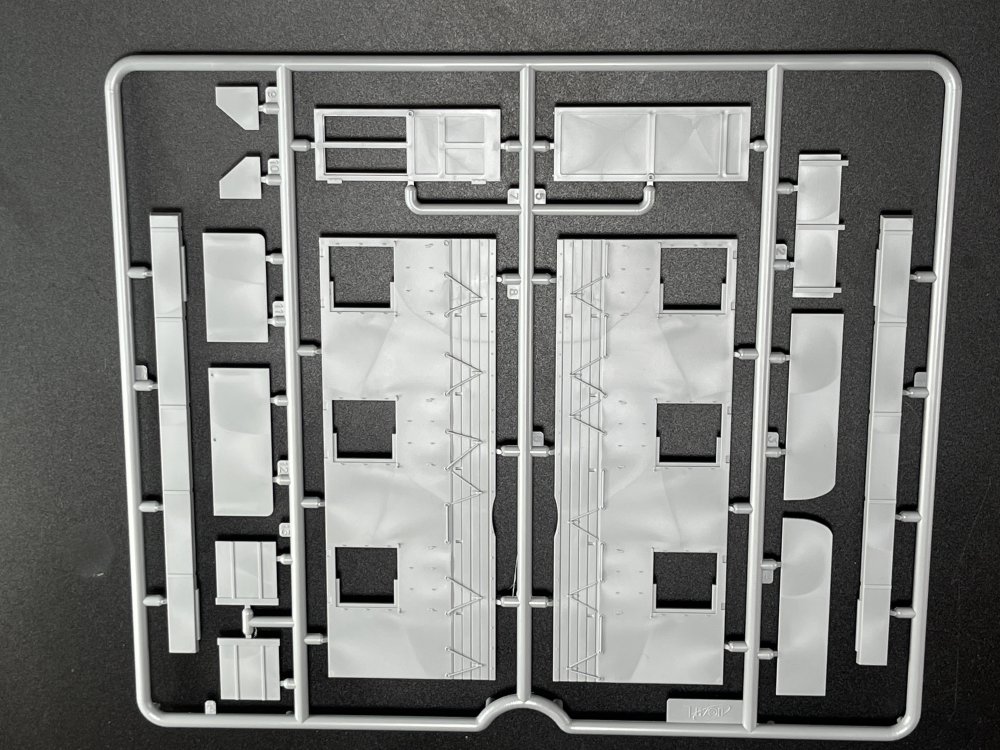
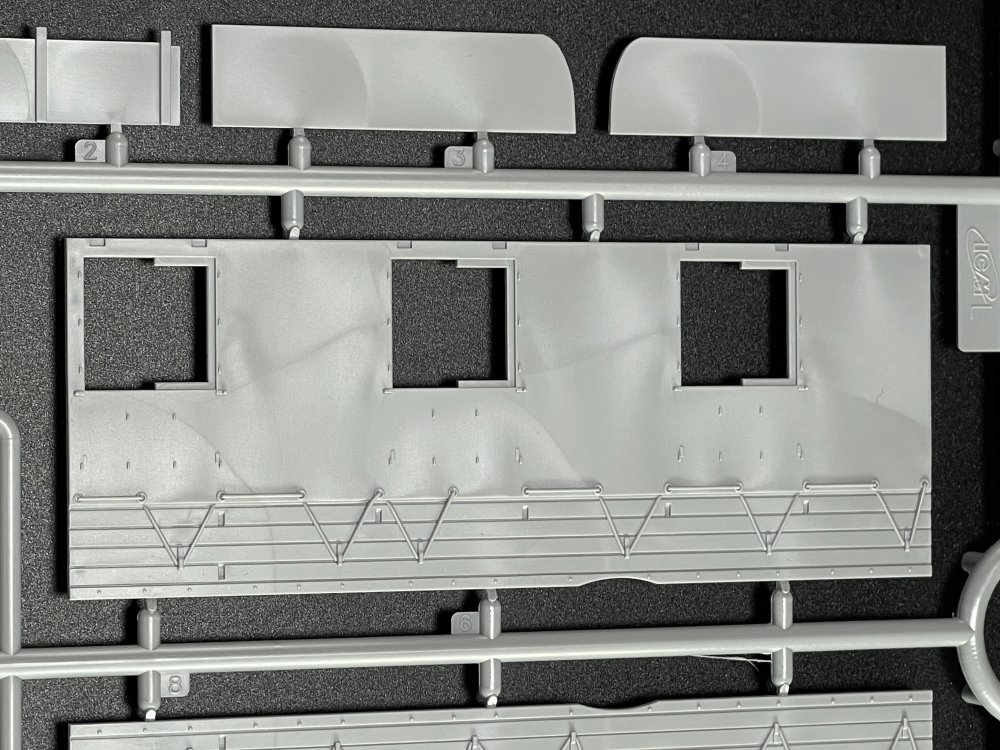
The interior is meticulously recreated, featuring a writing desk with lamps, a sofa, shelves, storage cabinets, and picture frames. The bathroom area is also faithfully represented, adding to the authenticity of the build.
The interior will be very busy. ICM also give a carpet. It’s a paper printer rectangular. You can easy find better option in the aftermarkets boys but still it’s a great add up from ICM
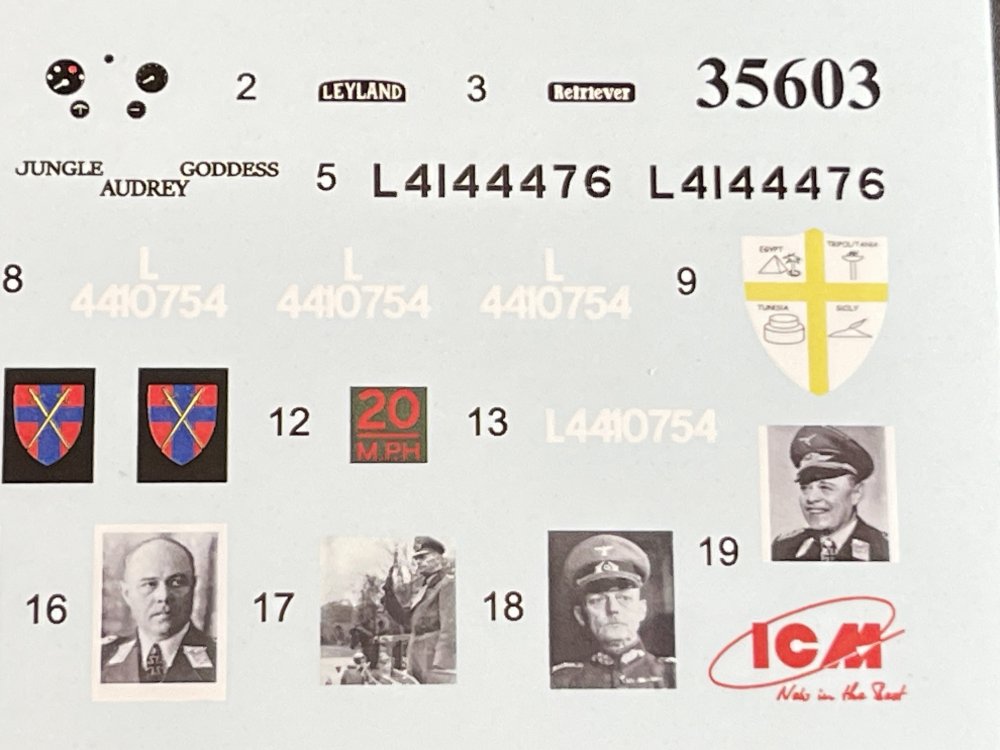
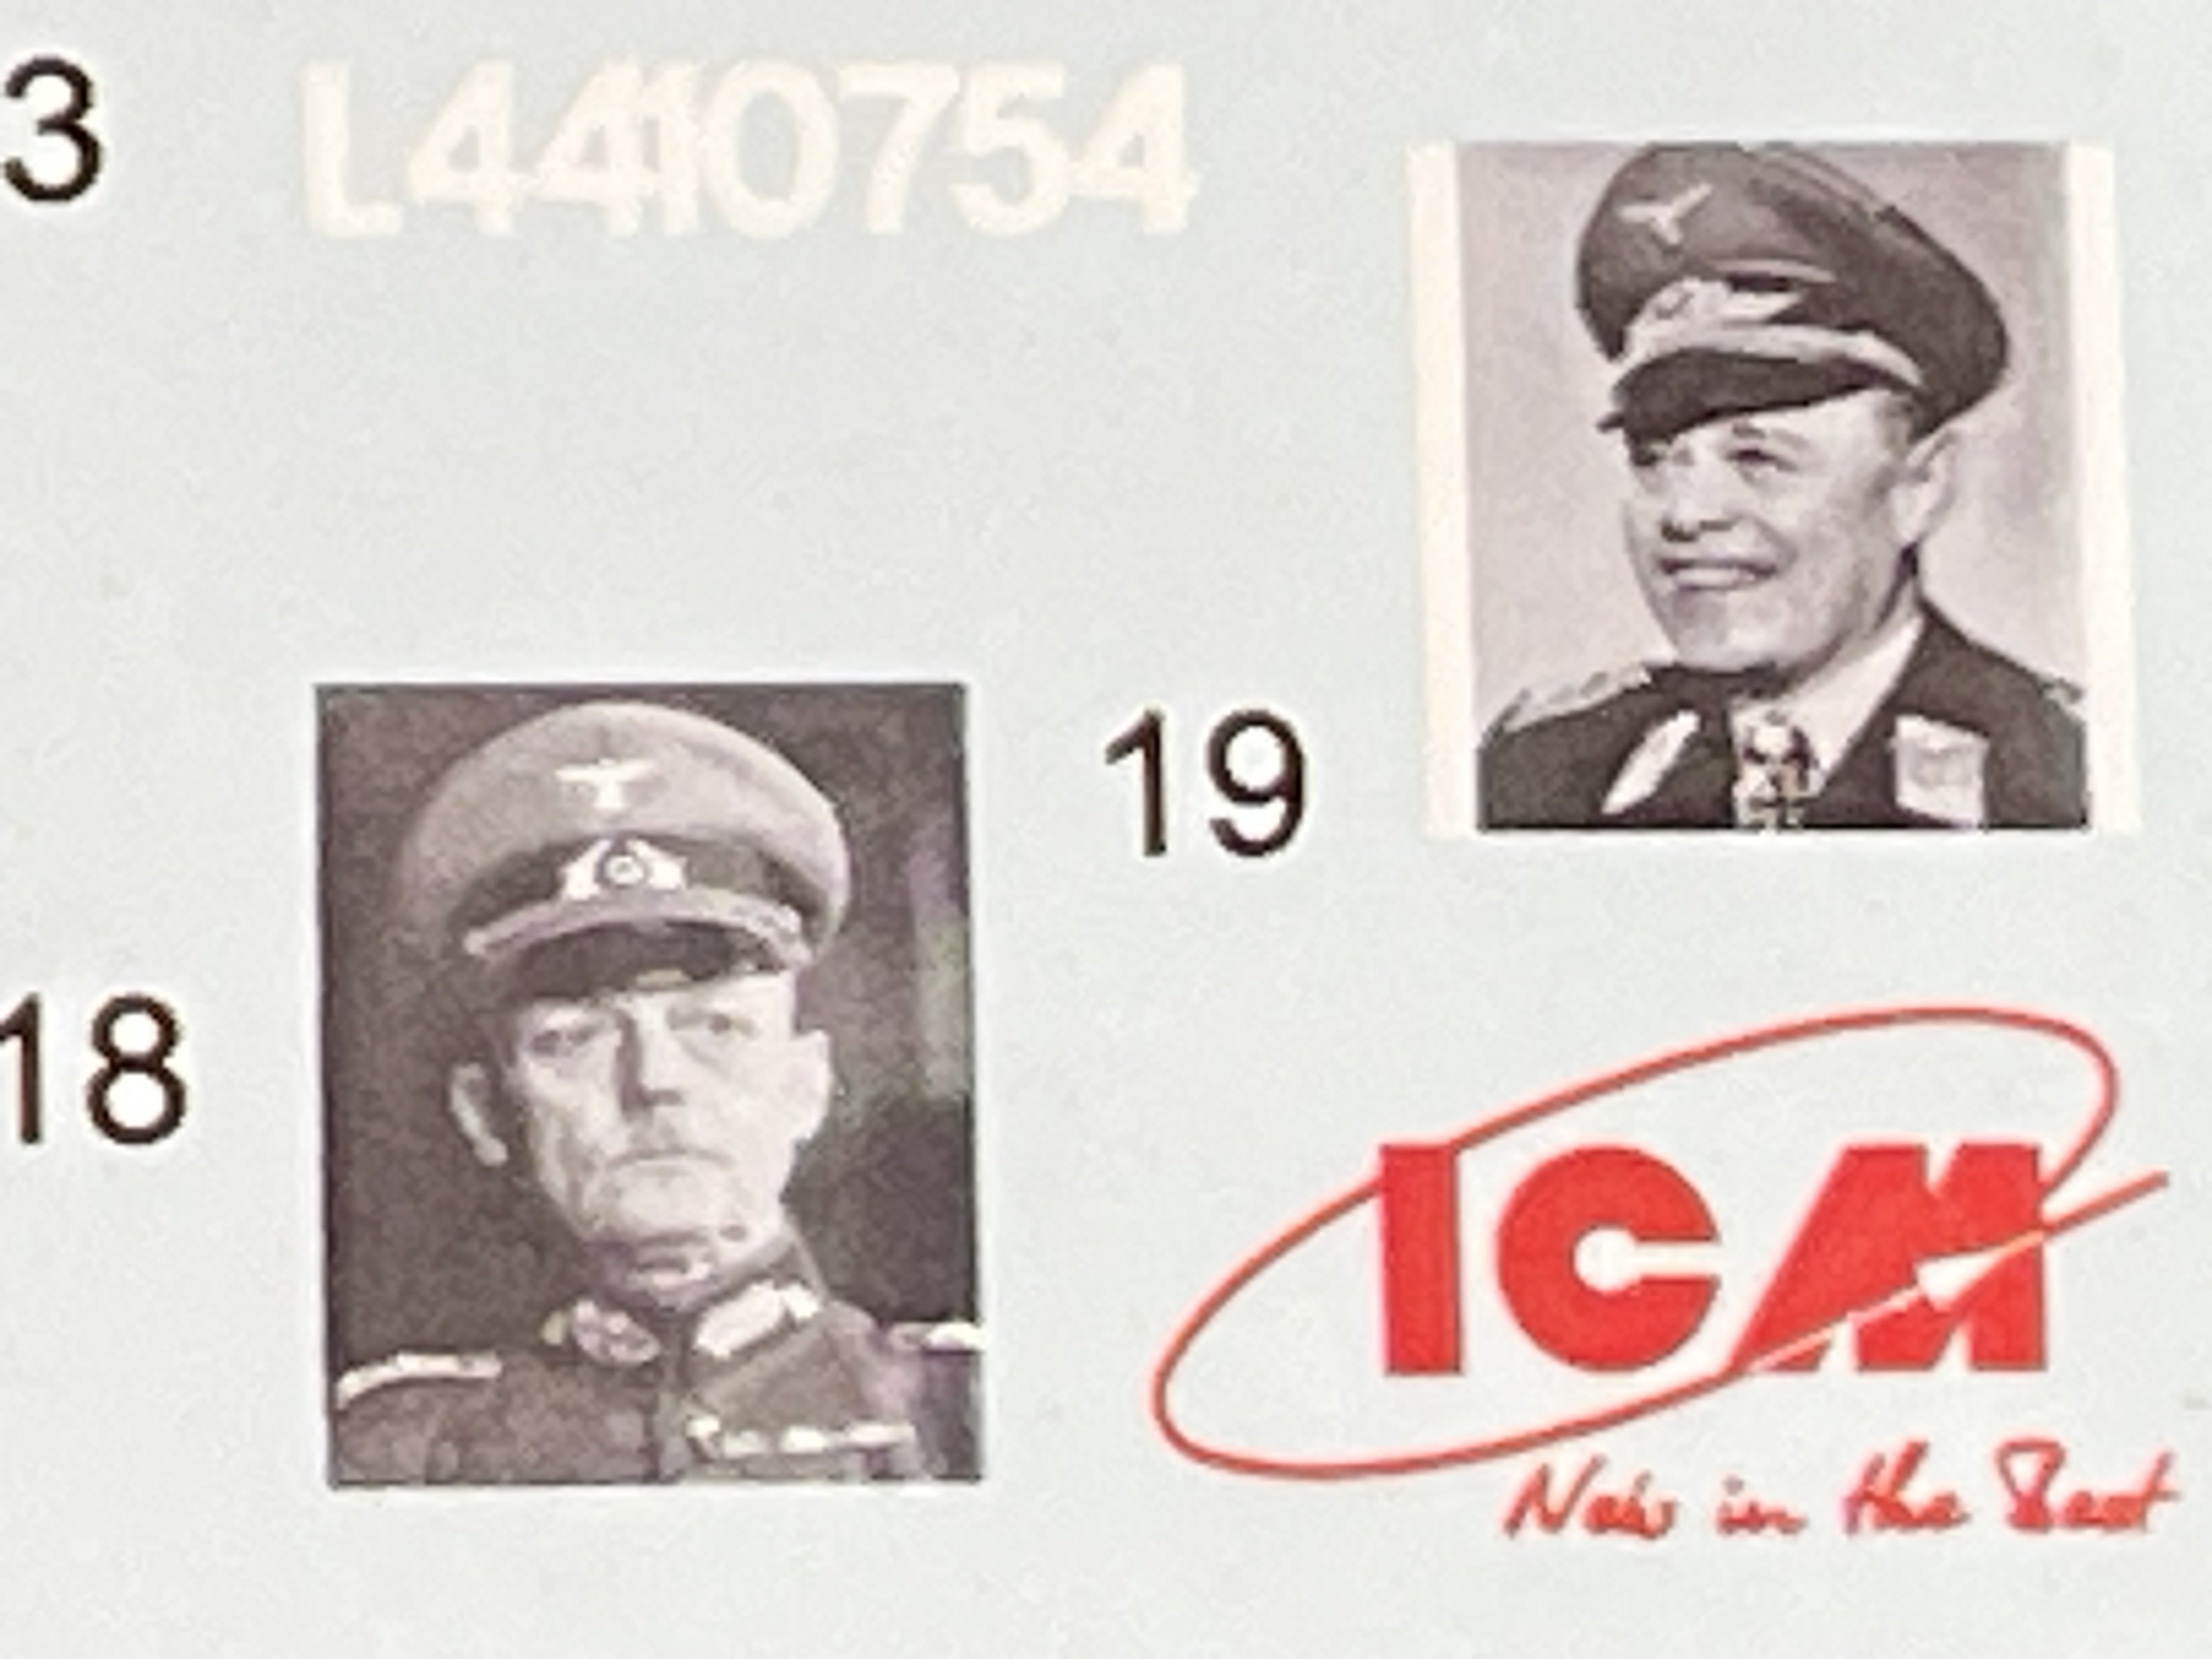
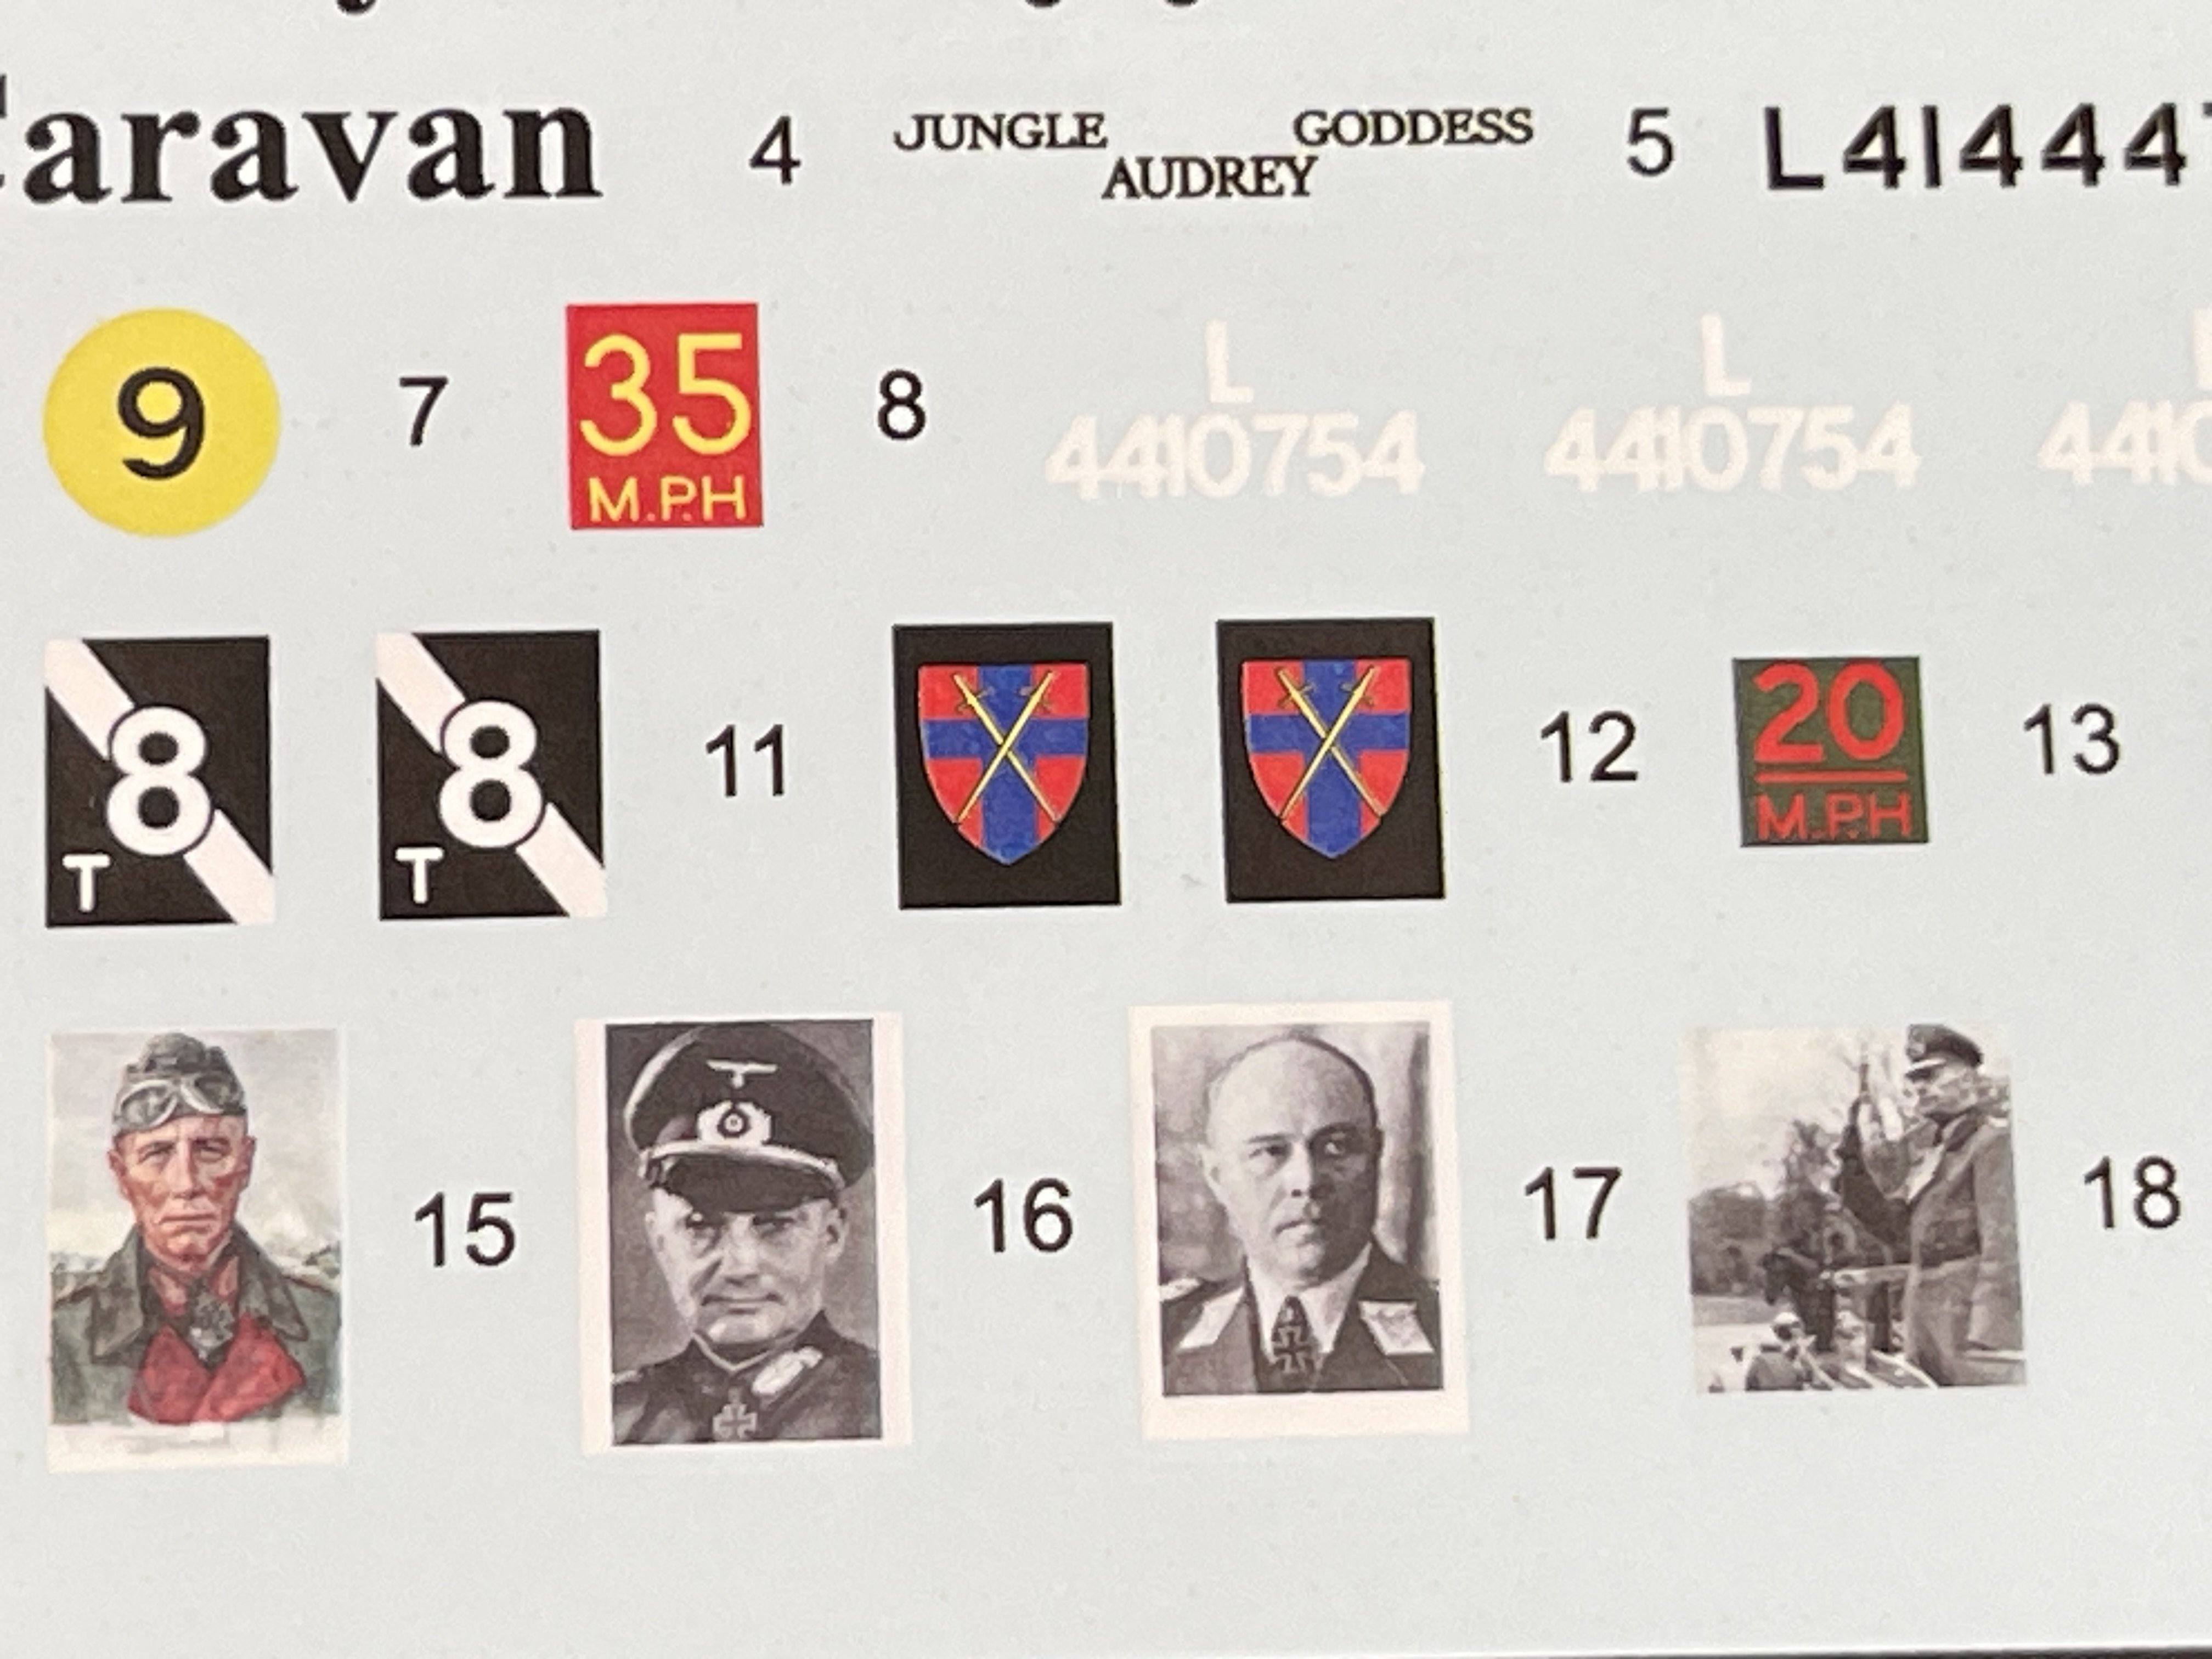
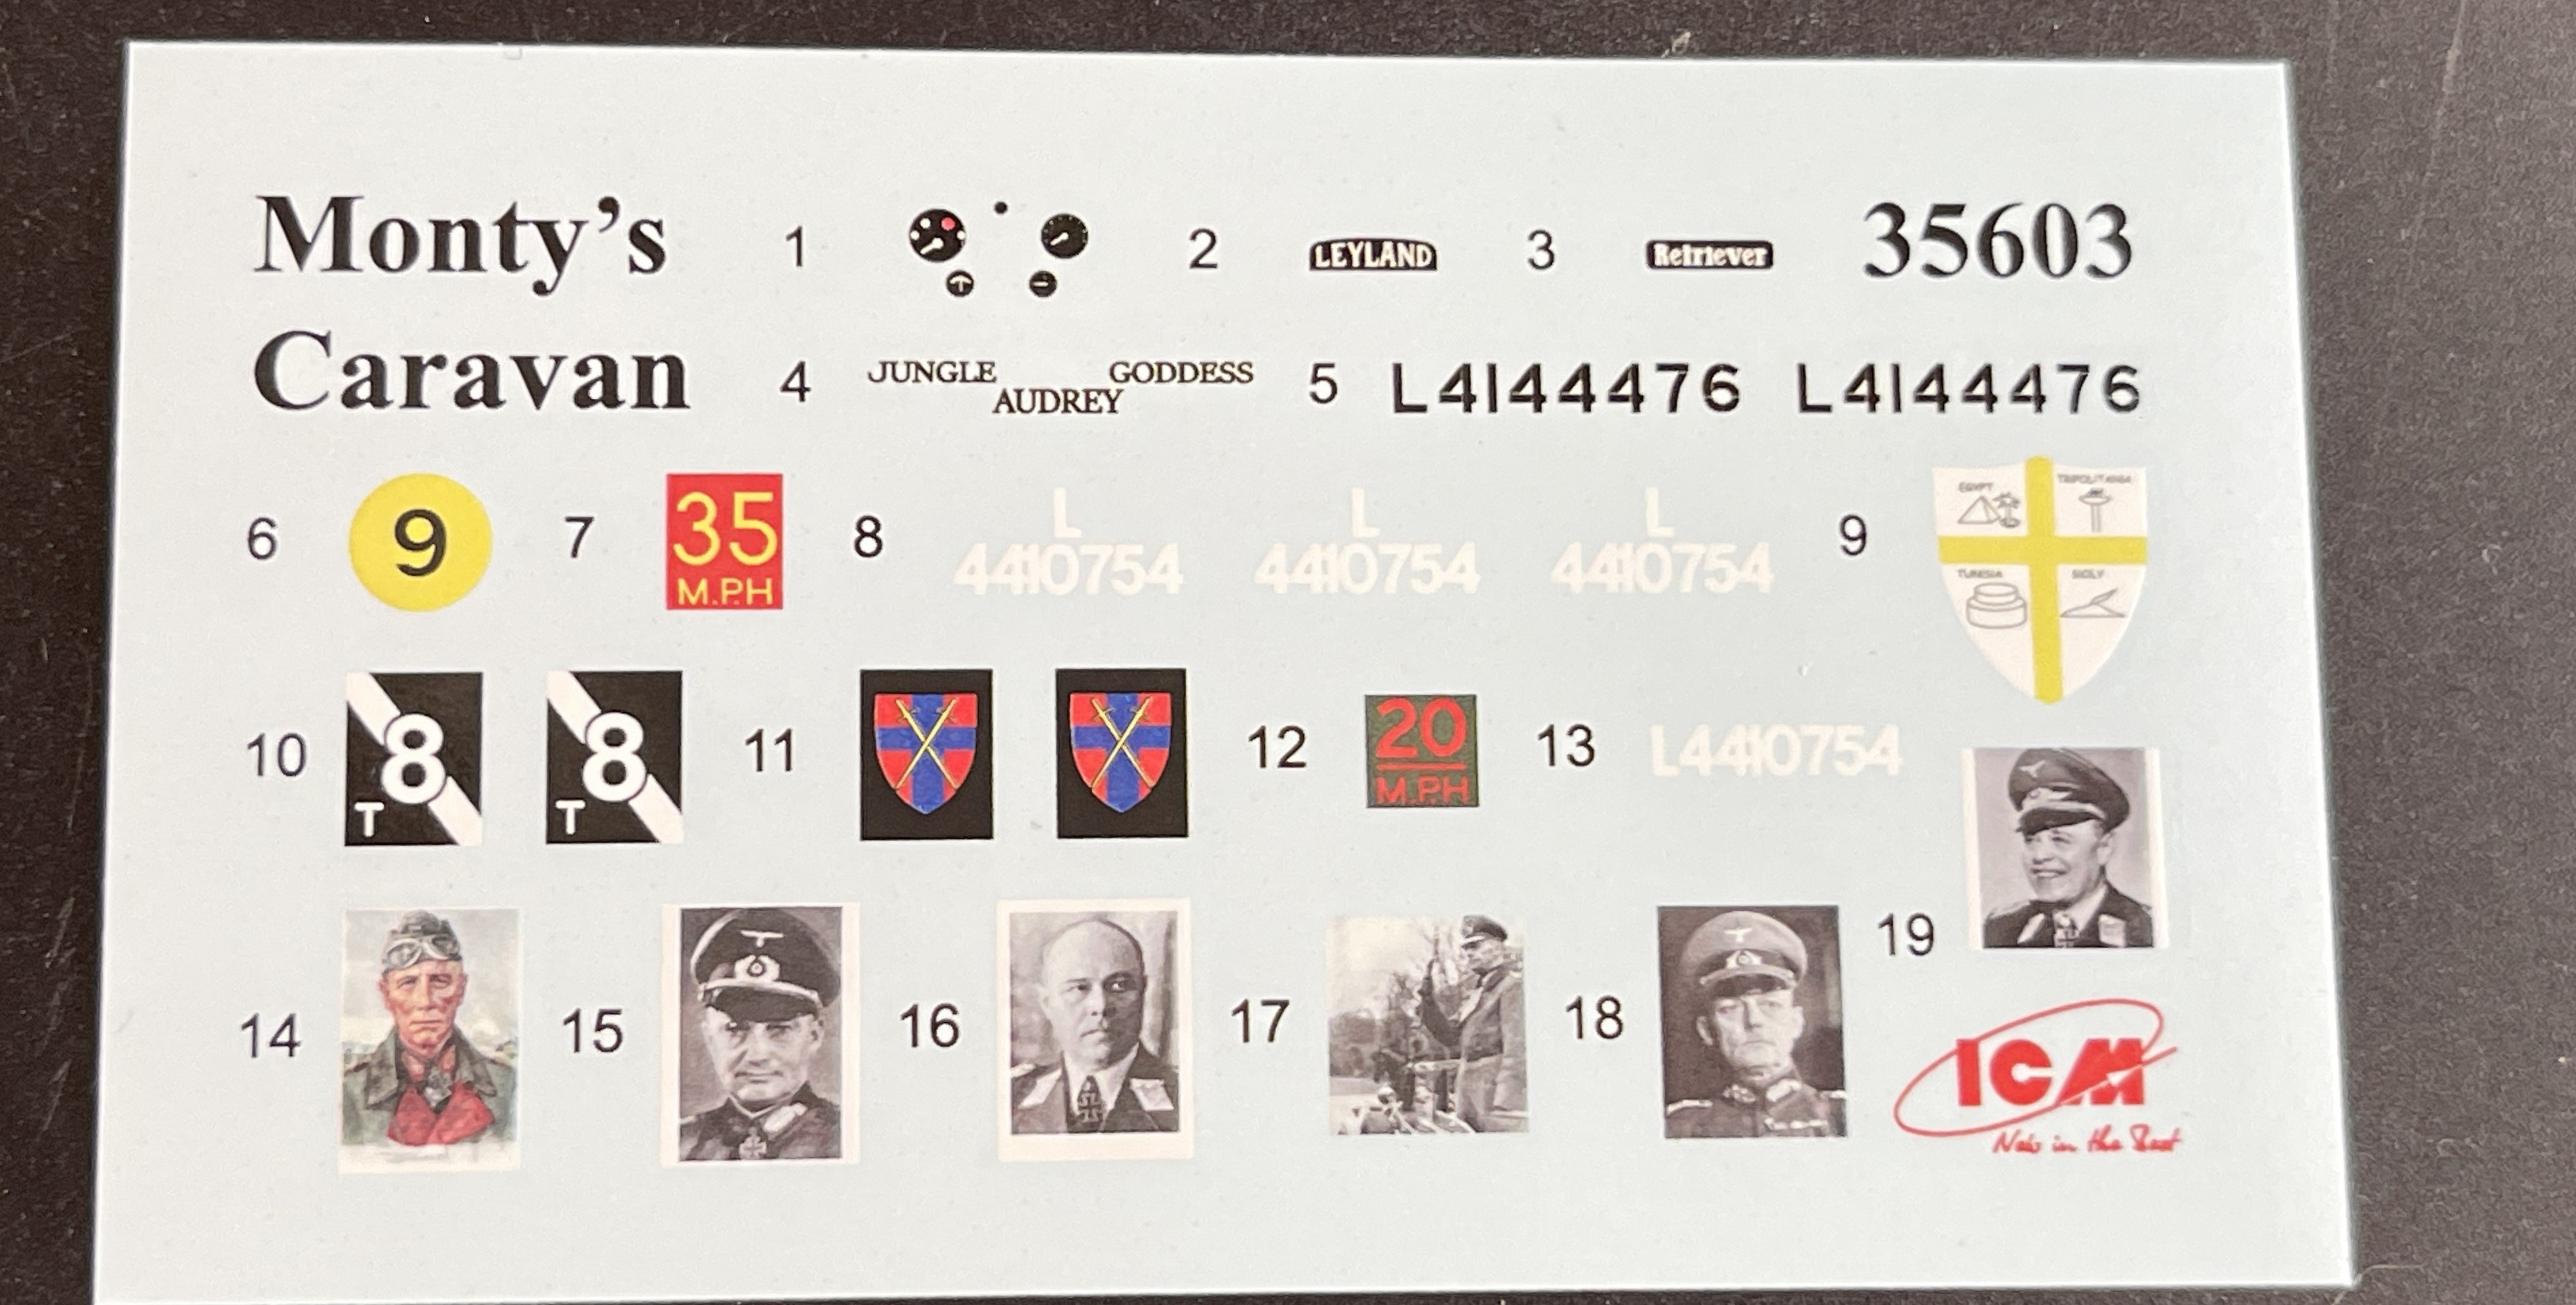
Decals are included for the interior are also given, depicting portraits of German military commanders that adorned the walls of Montgomery's actual mobile office.
Based on available information, the kit's decal sheet specifically features portraits of three German generals: Erwin Rommel, Heinz Guderian, and Ewald von Kleist.


Those were the German General that Montgomery won in battle being the most famous one Erwin Rommel, that Montgomery won in the second battle for Al Alamein in October 1942.
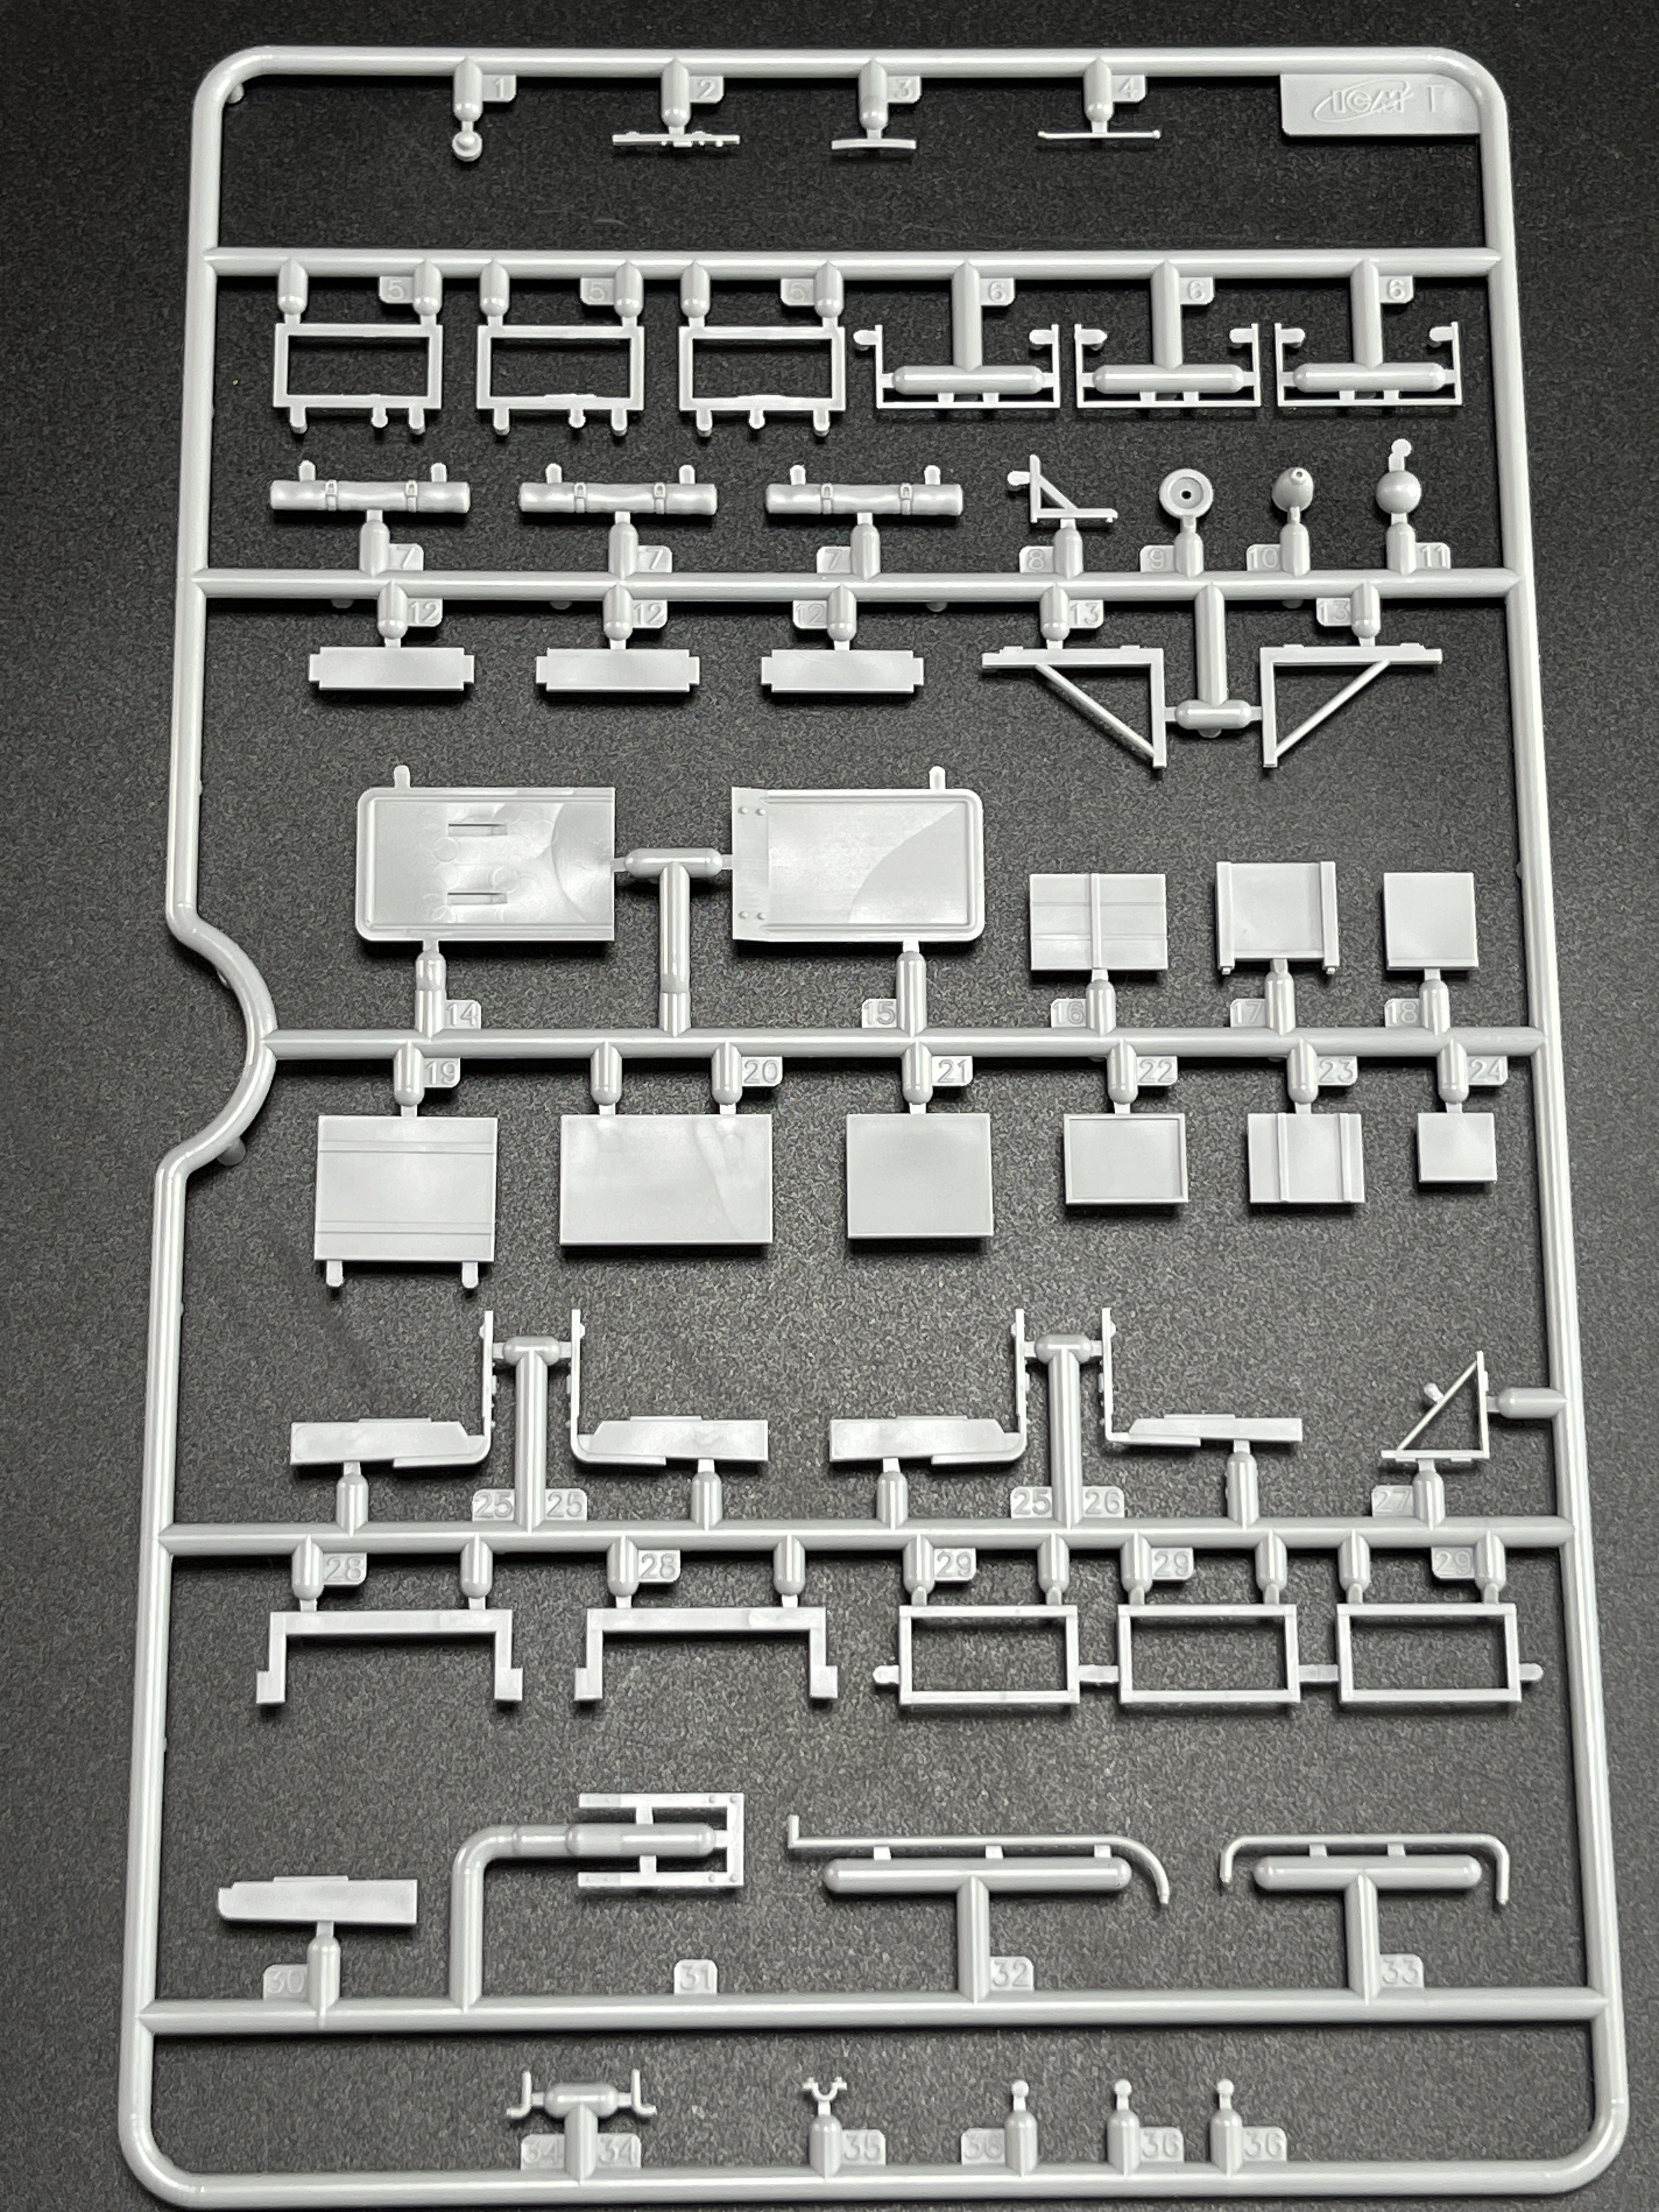
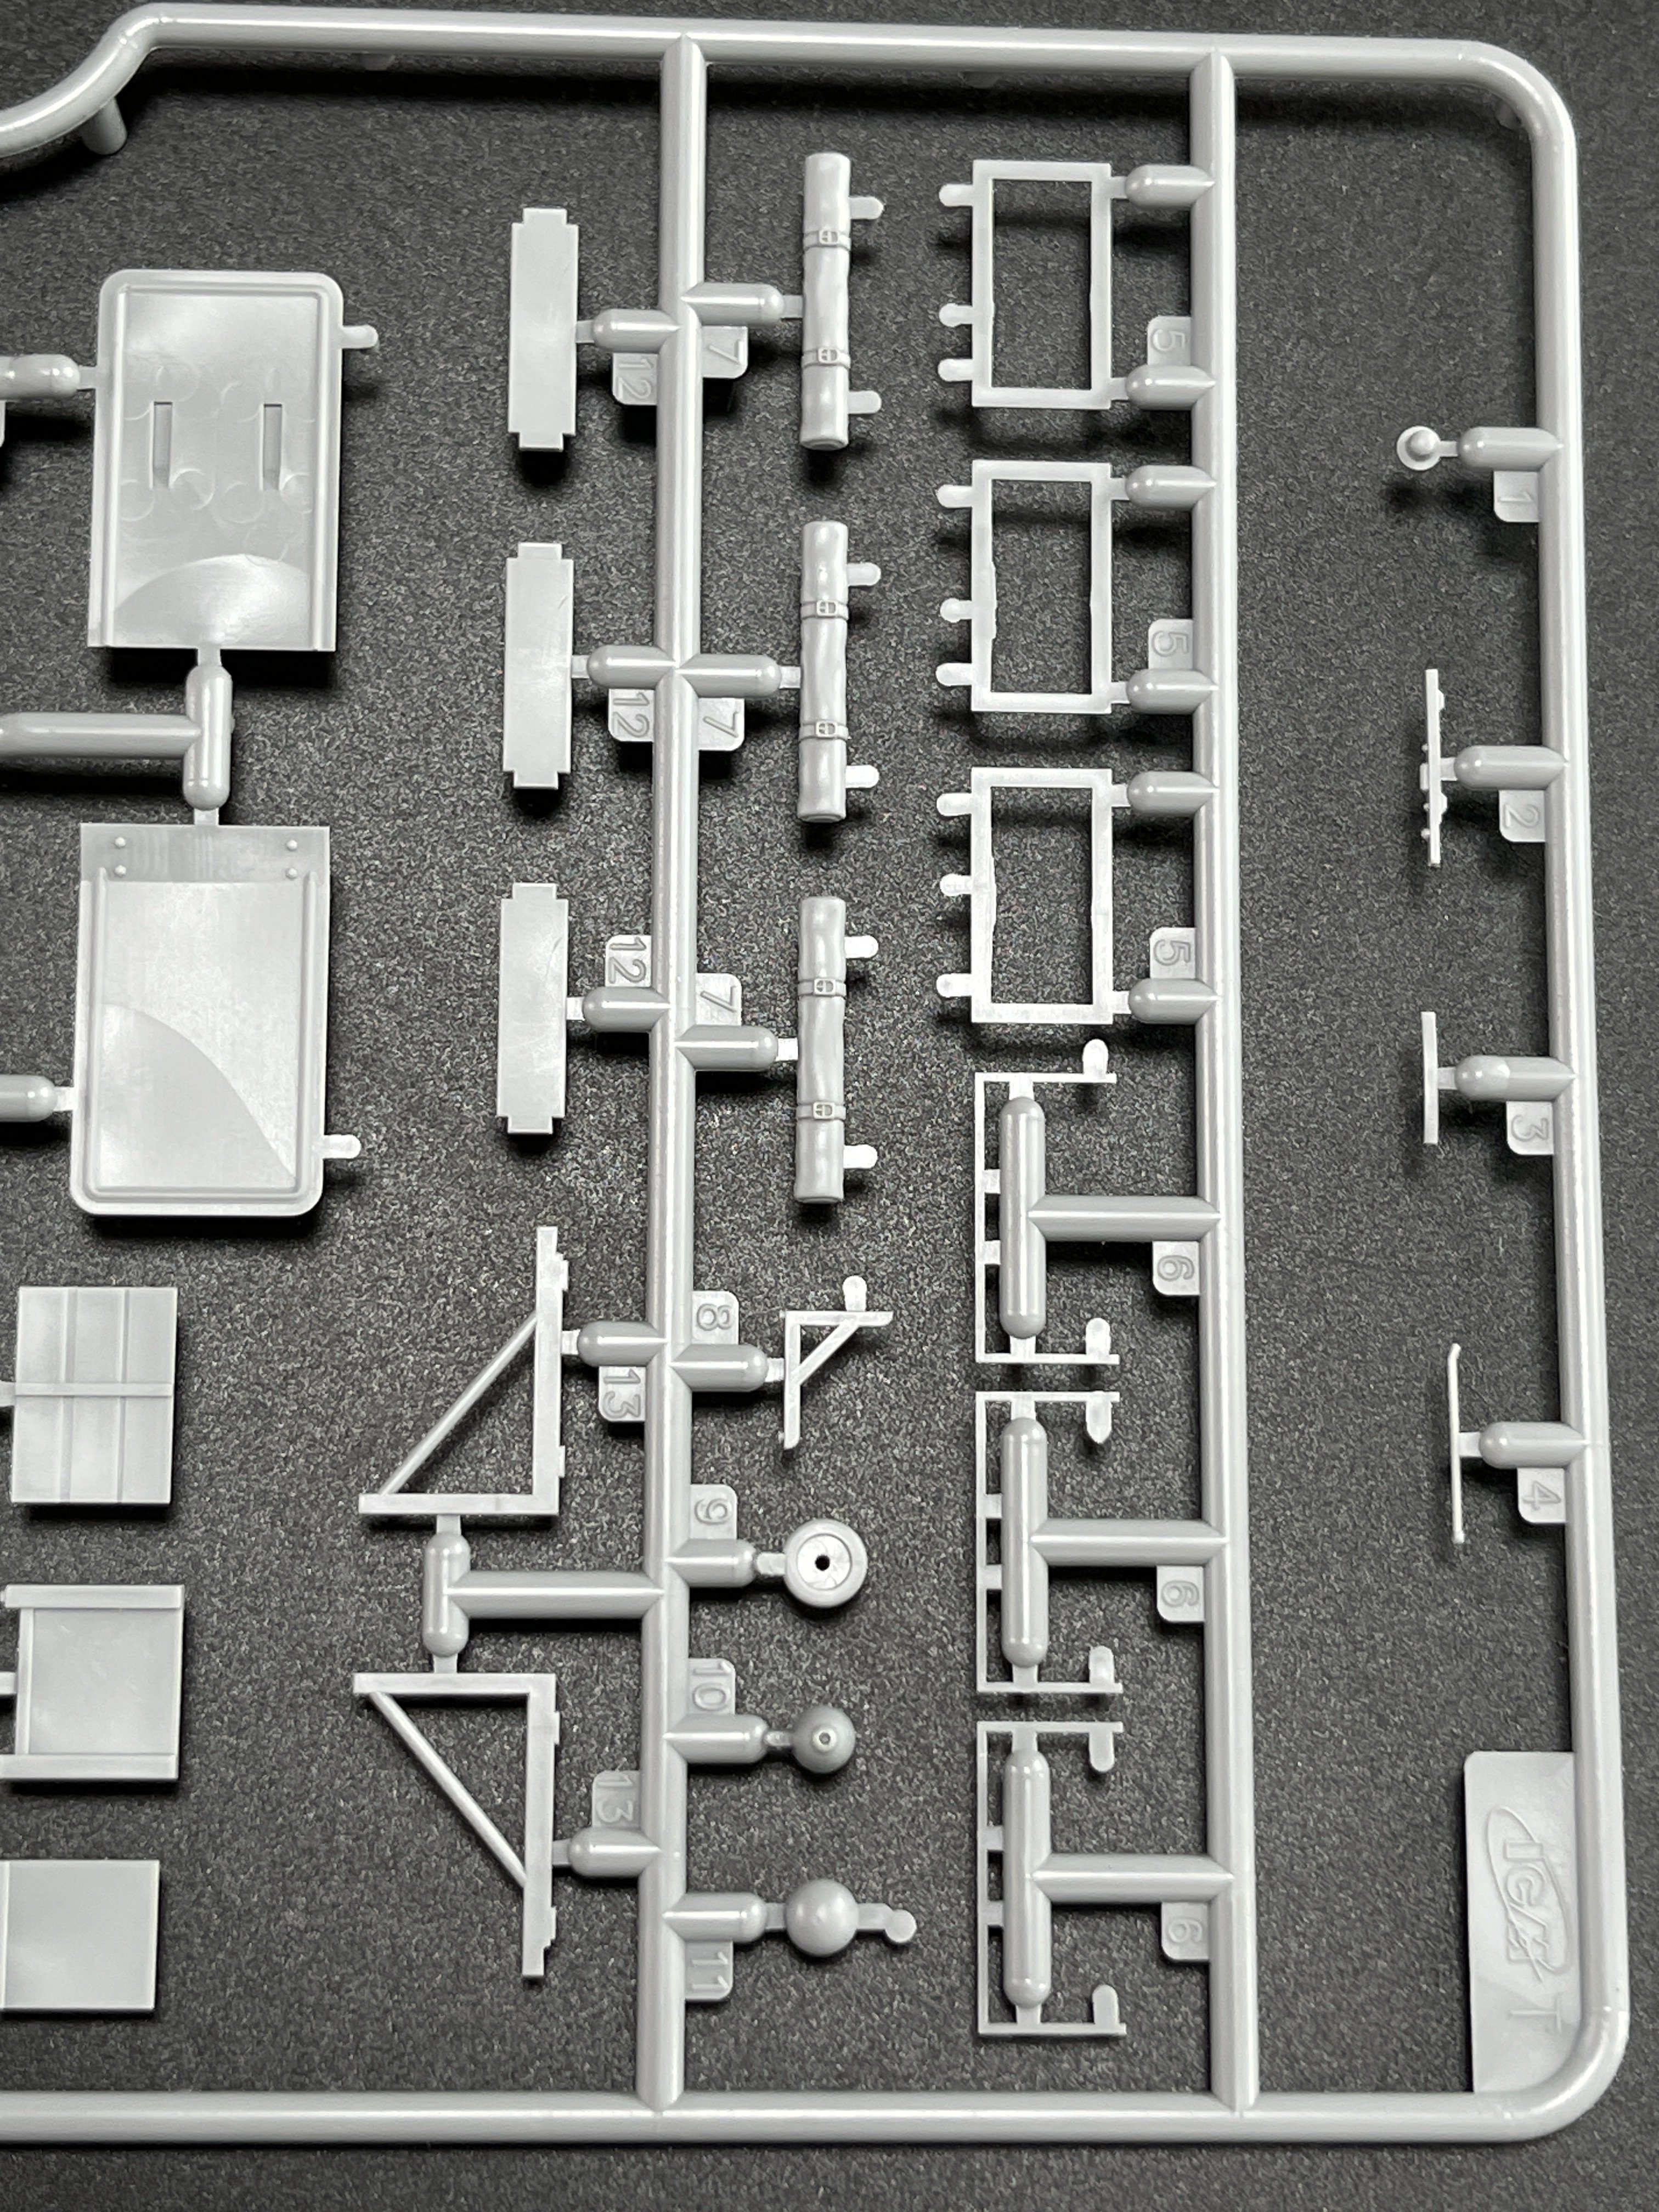
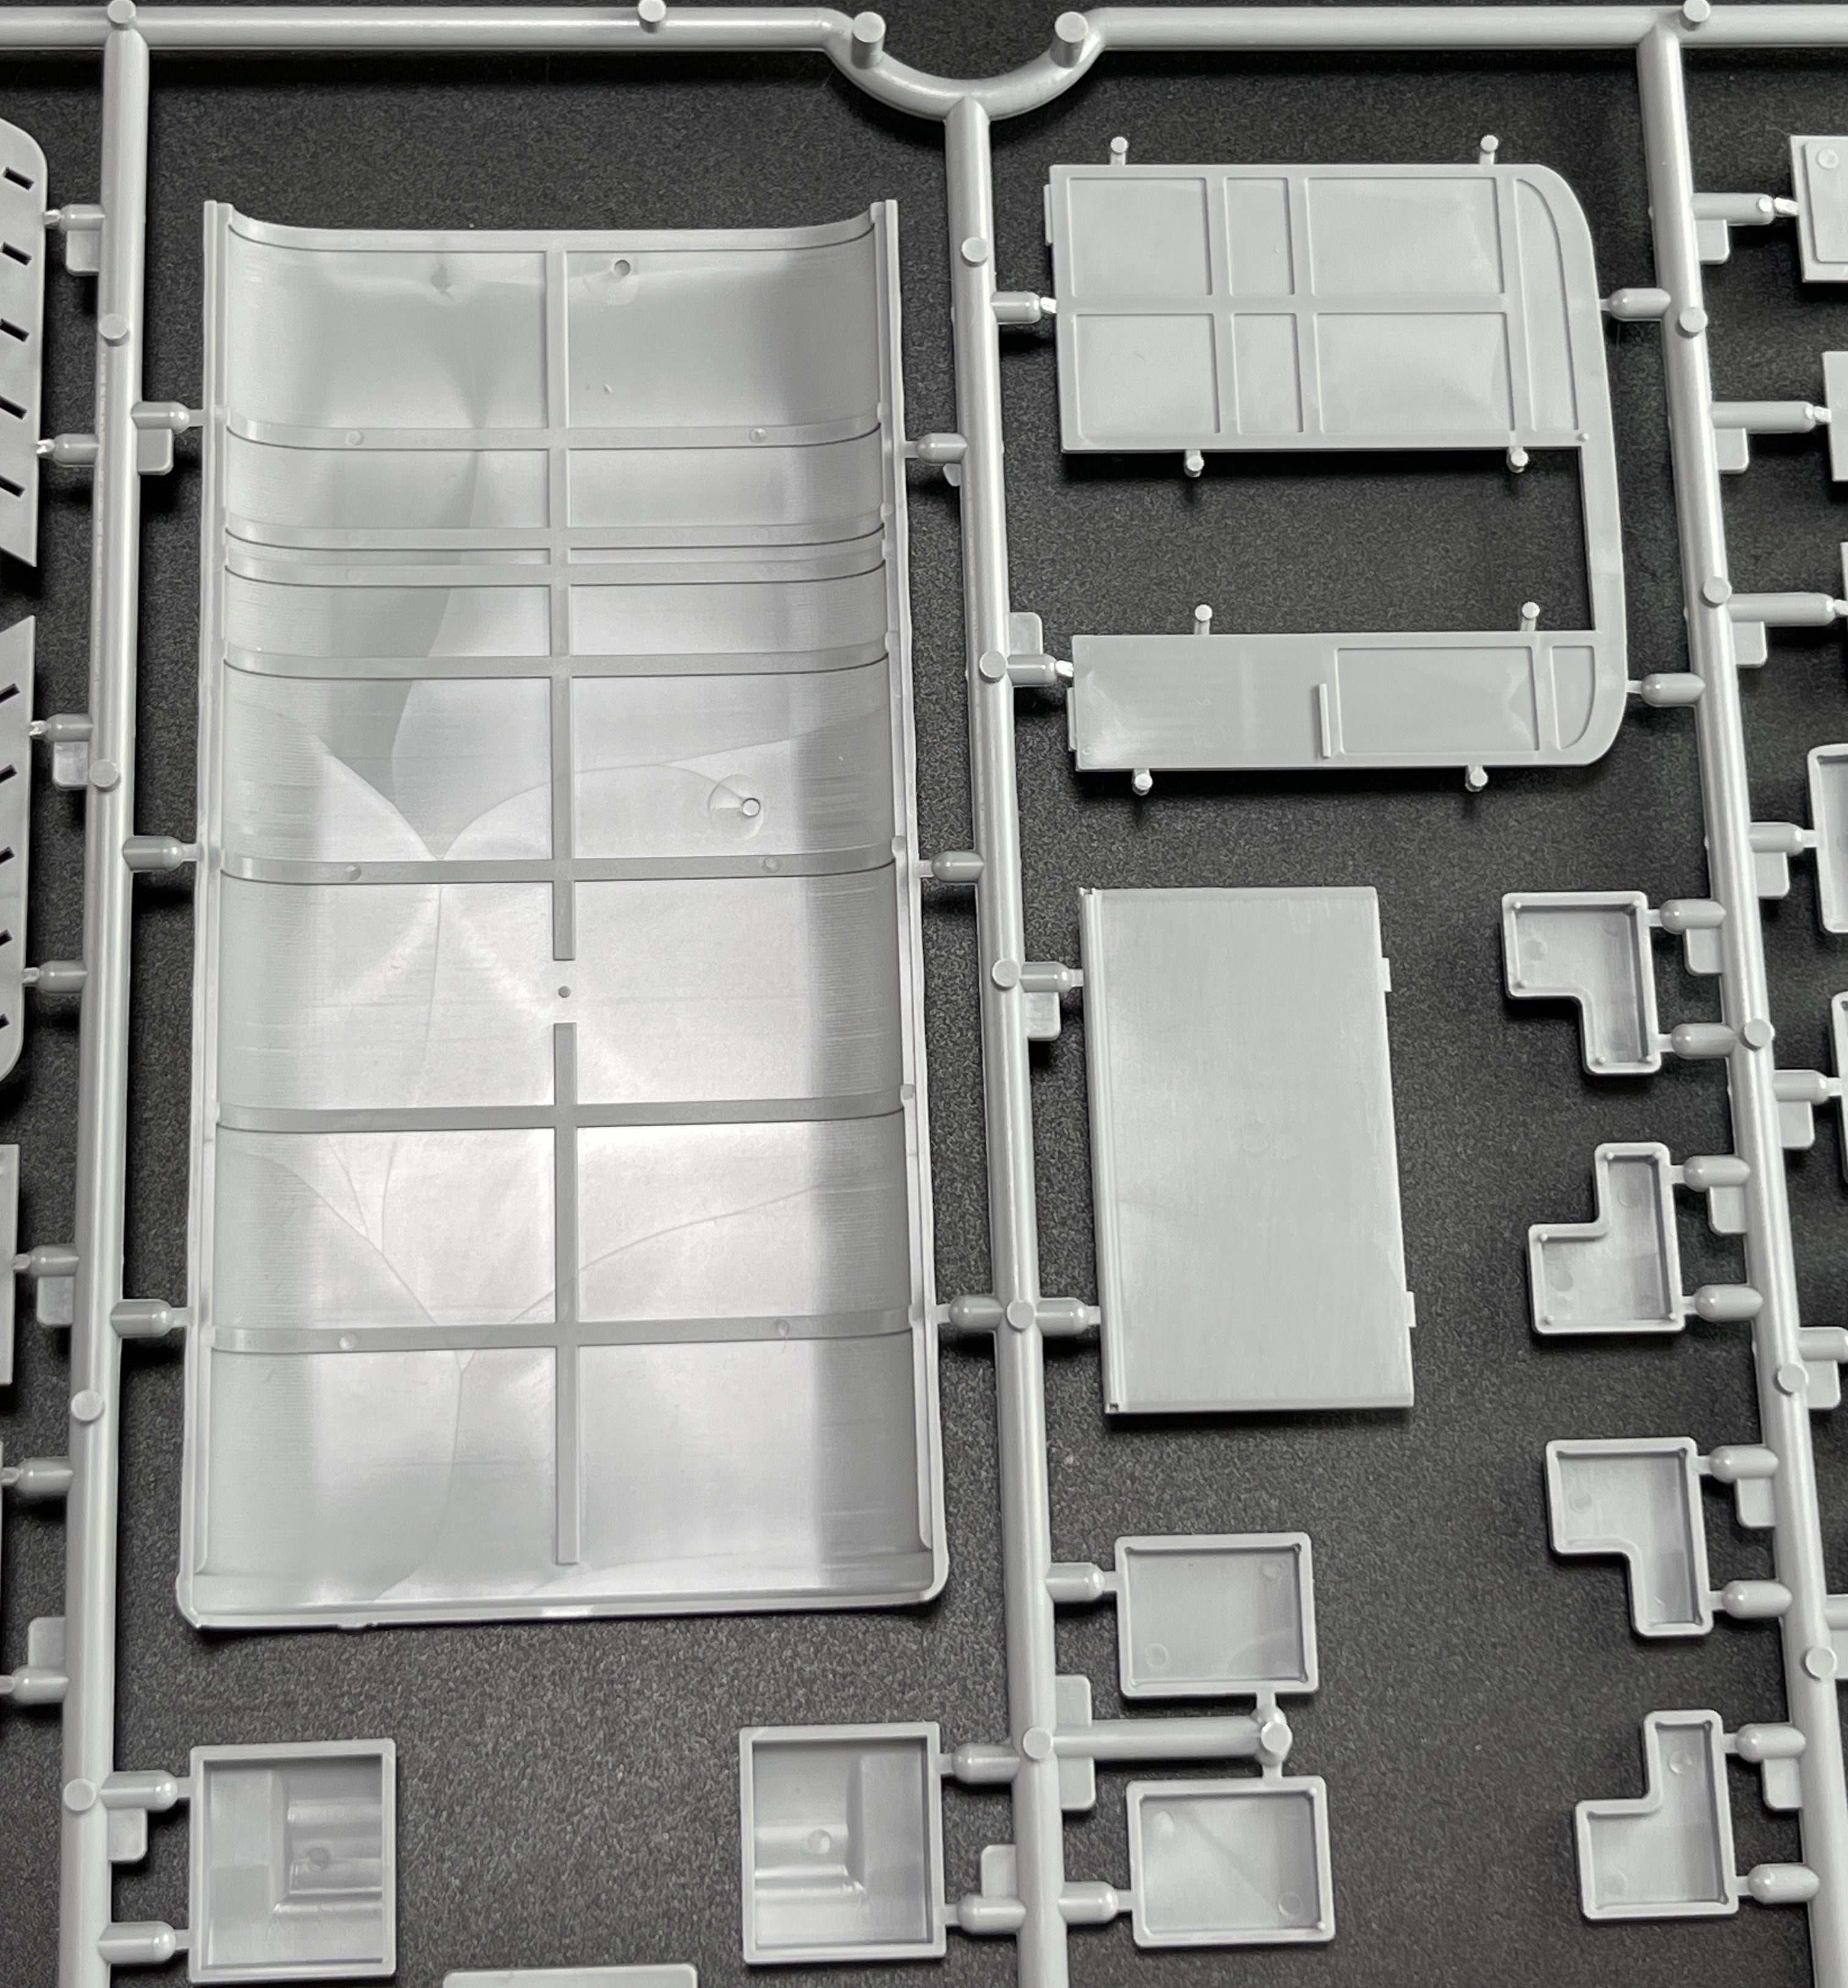
External features are also good, note here the ropes for tarpauline walls. Separate doors should come handy for showing what is inside.
As all the ICM kits, that constructions parts have guiding elements for the proper alignment of the things.
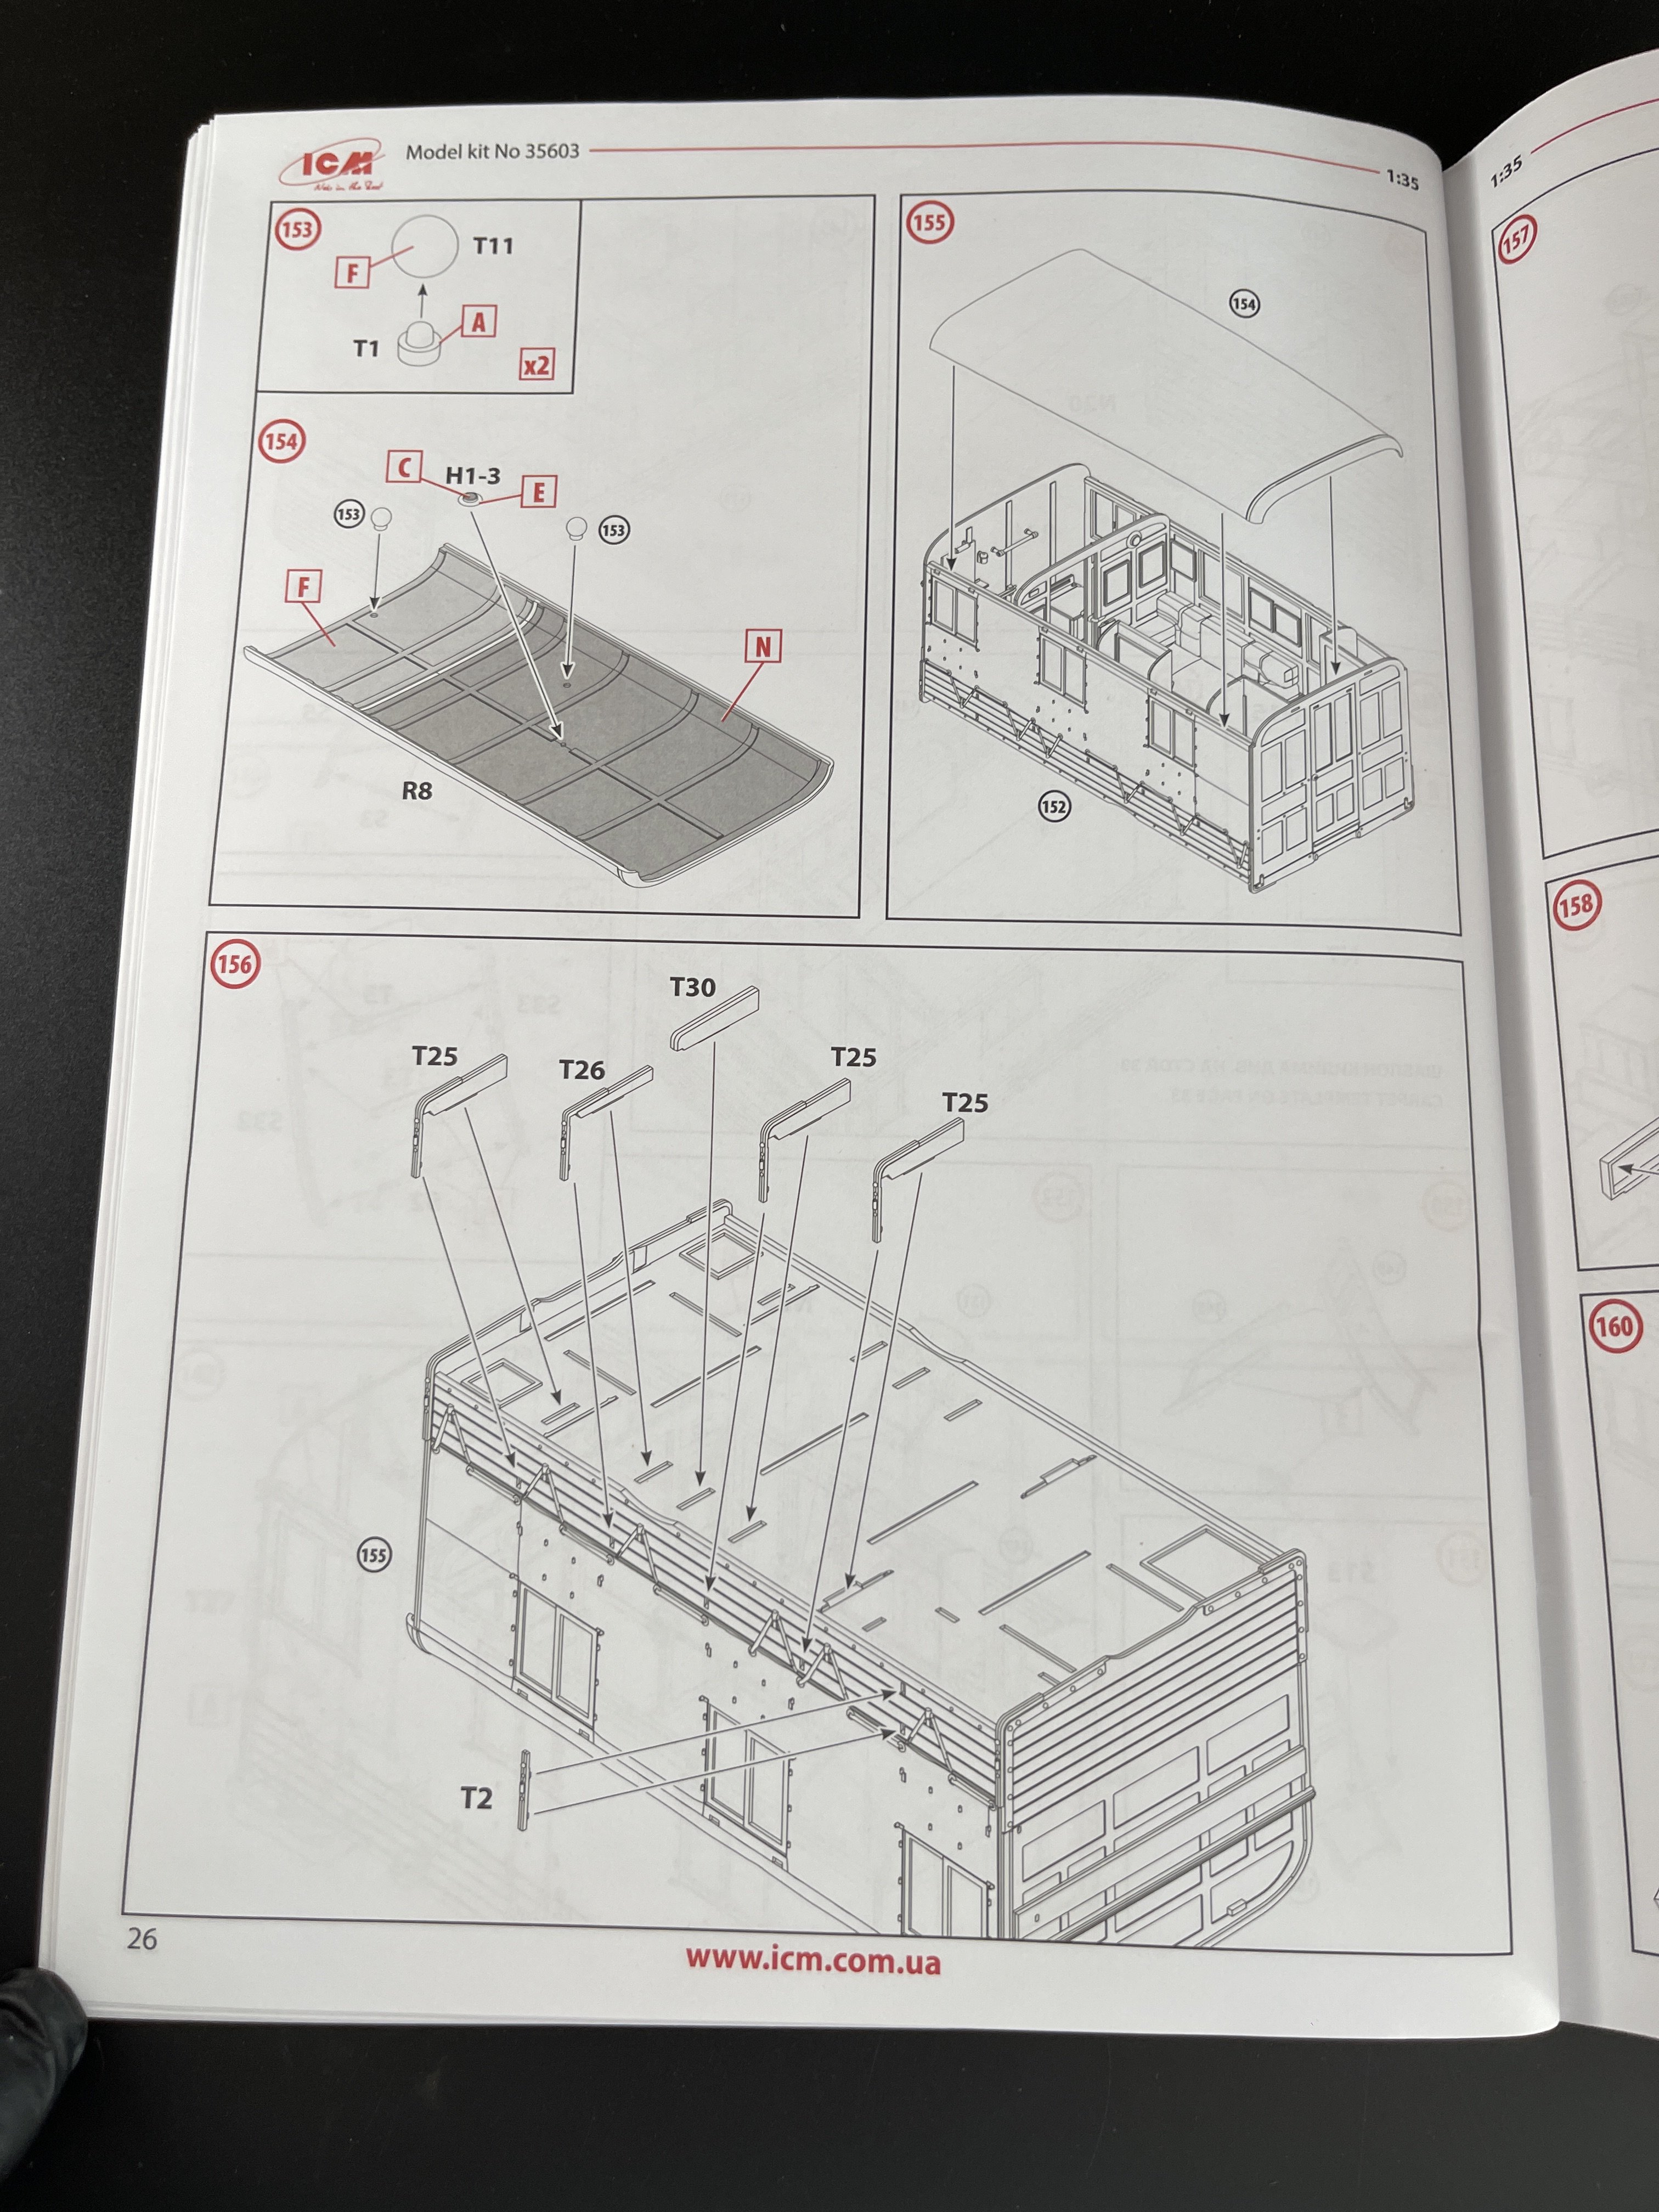
Roof is a single part so no worries about gapping or filling. The roof panel looks great and deserves a nice weathering work.
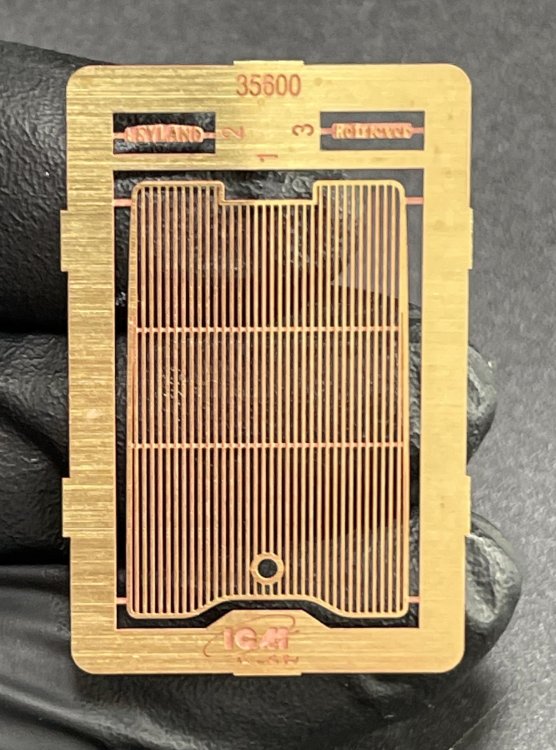
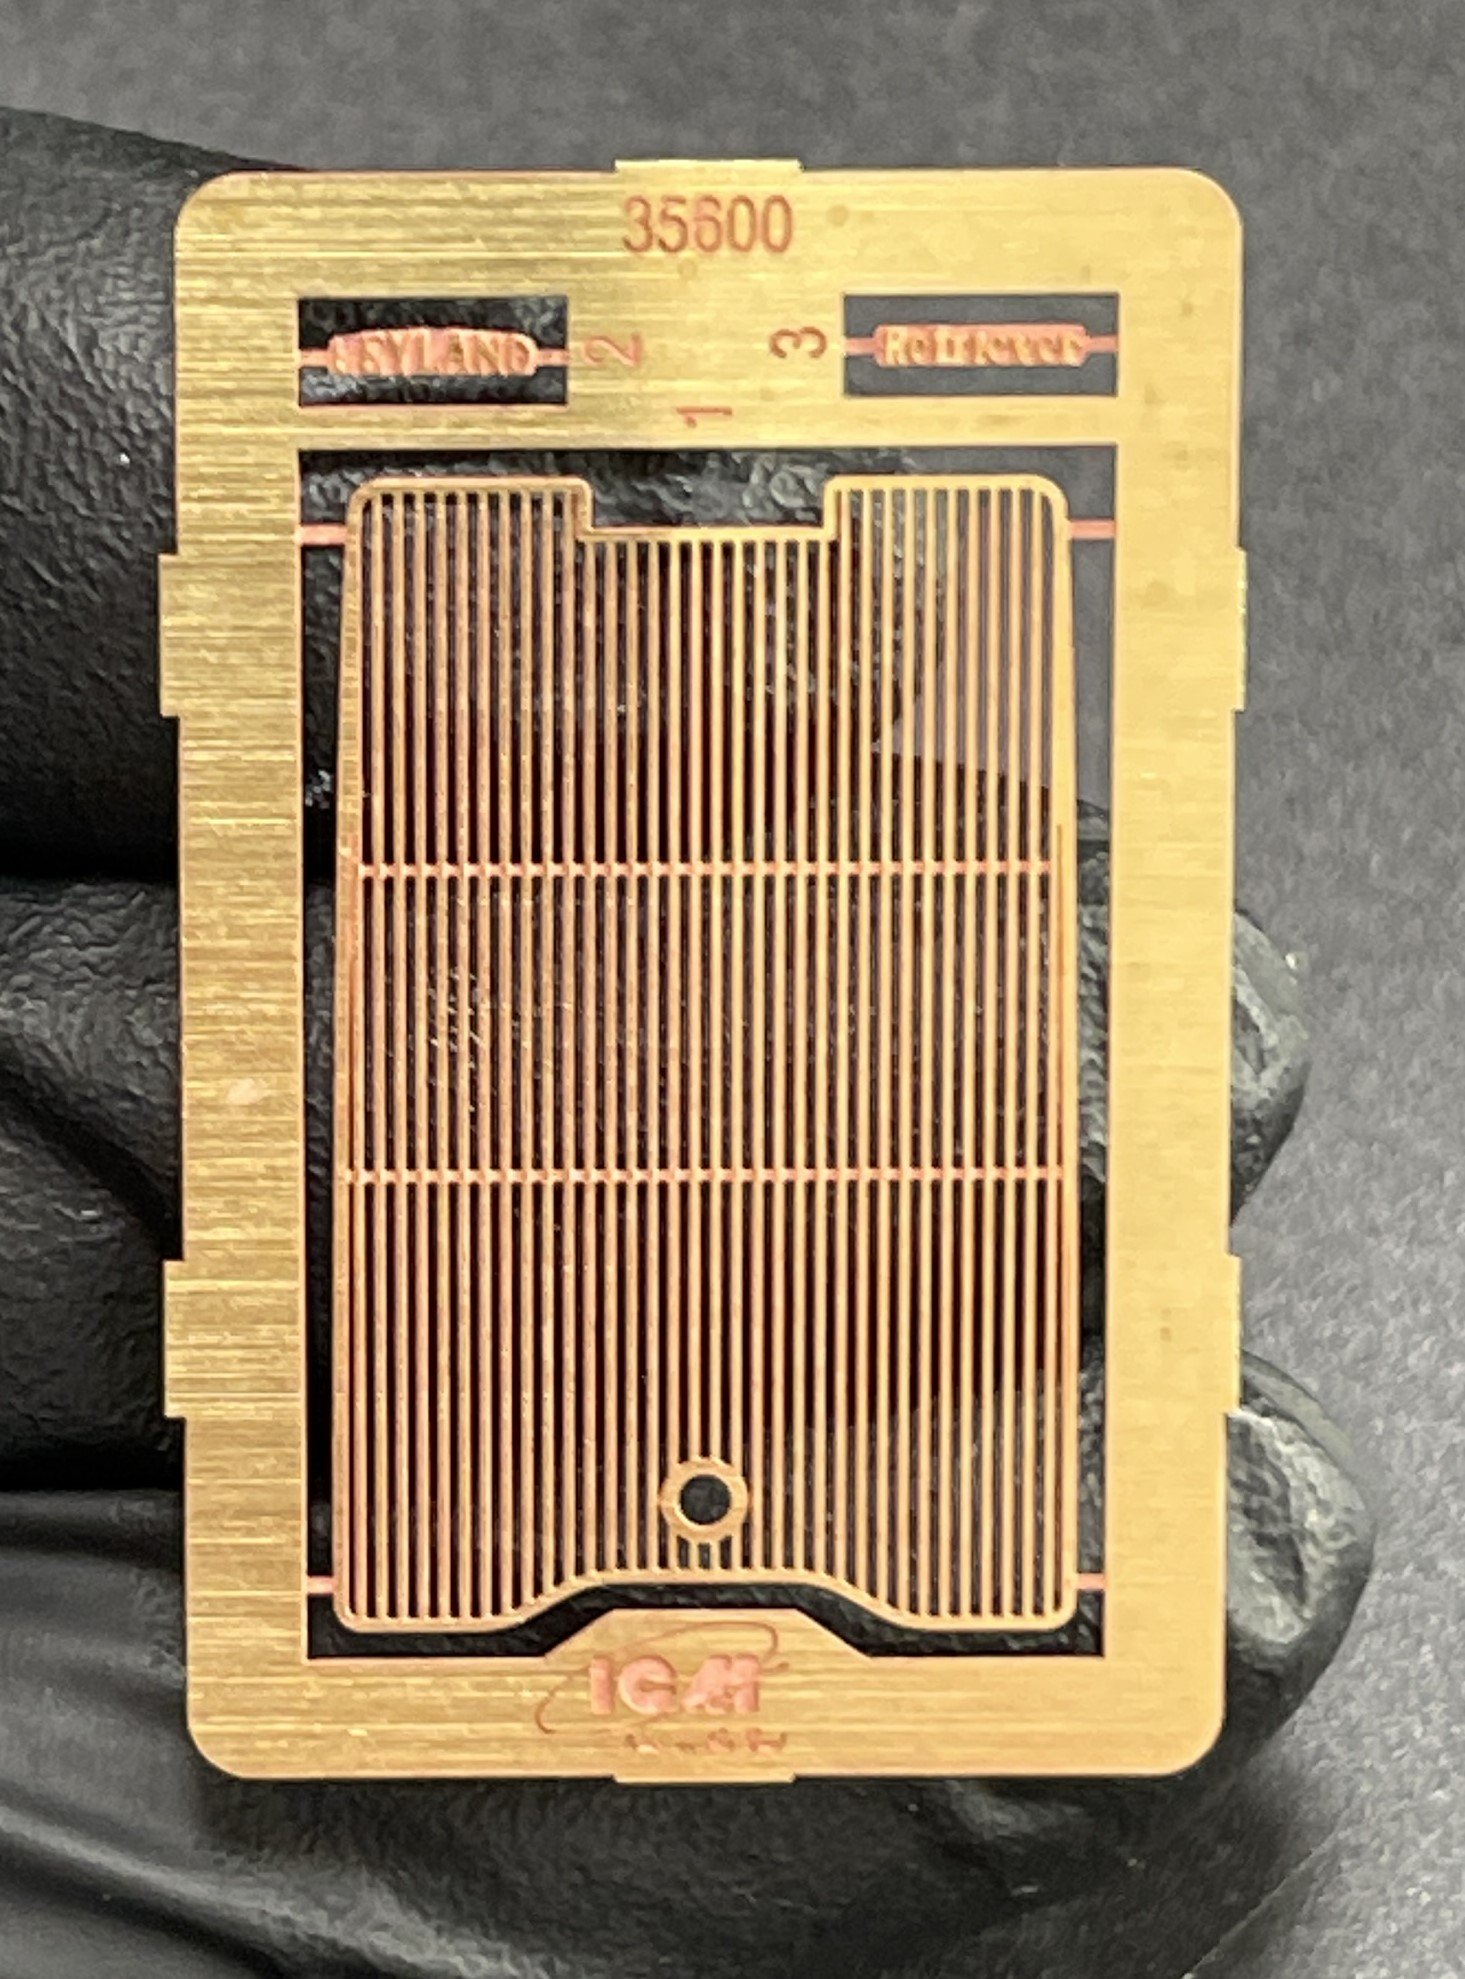
PE sheet!! Yes, it`s the first time I review an ICM model kit that has some PE inside. Yes, its`a quite small one still give us a front grille and two badges (naming: “Leyland” and “Retriever”).
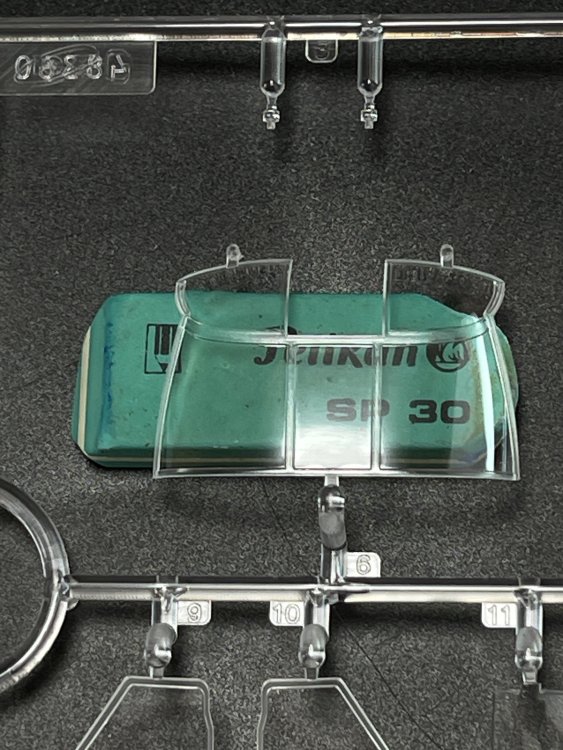
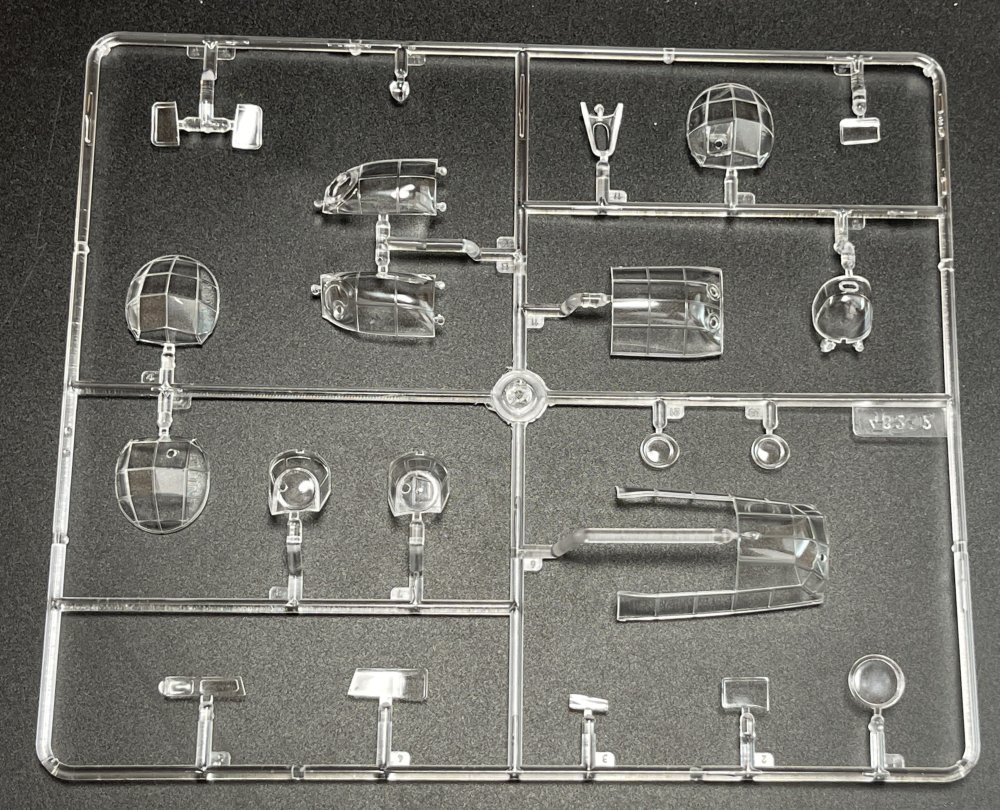
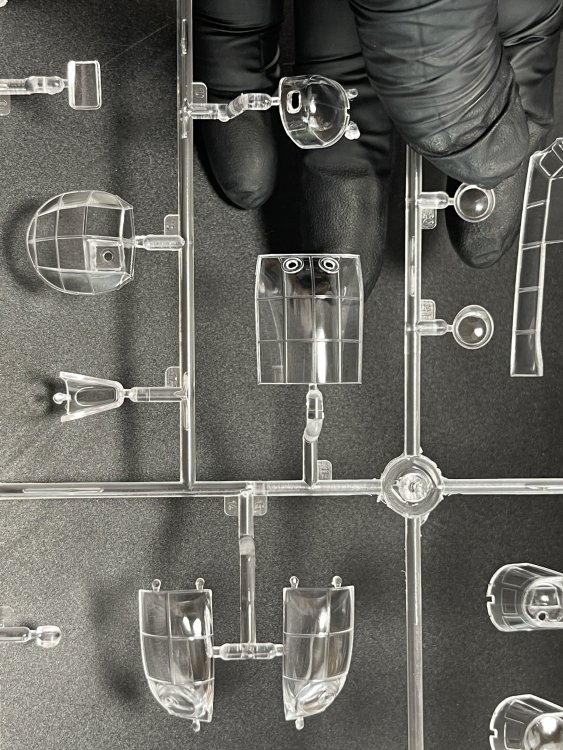
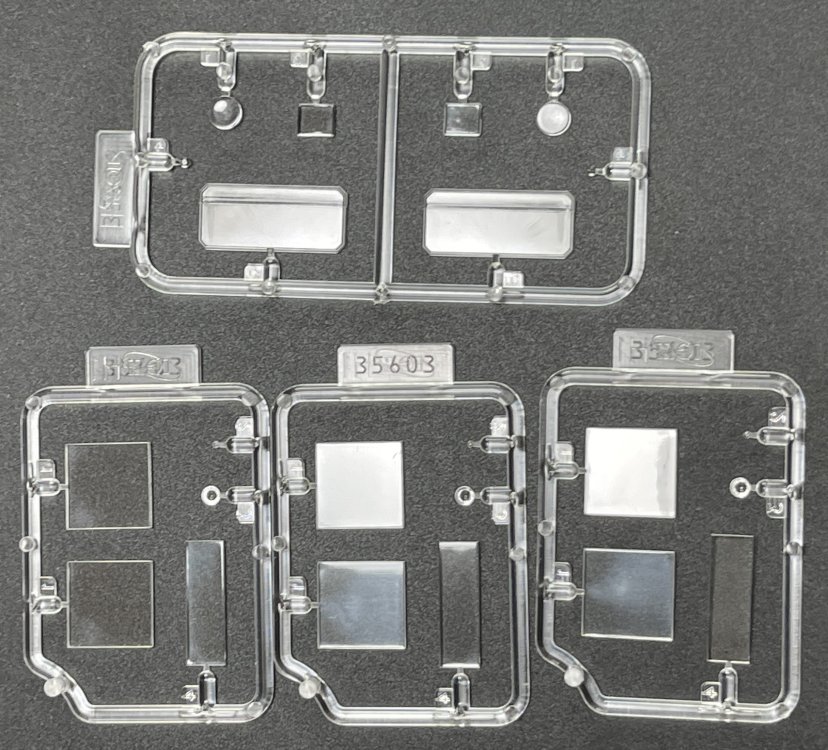
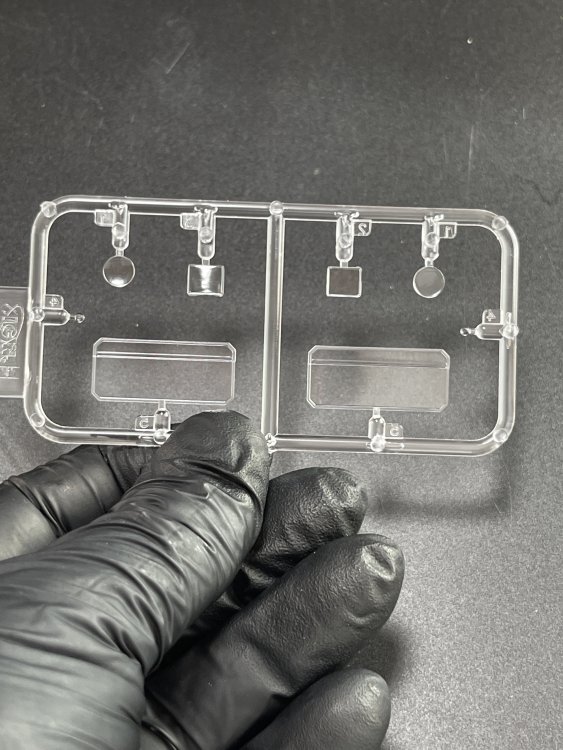
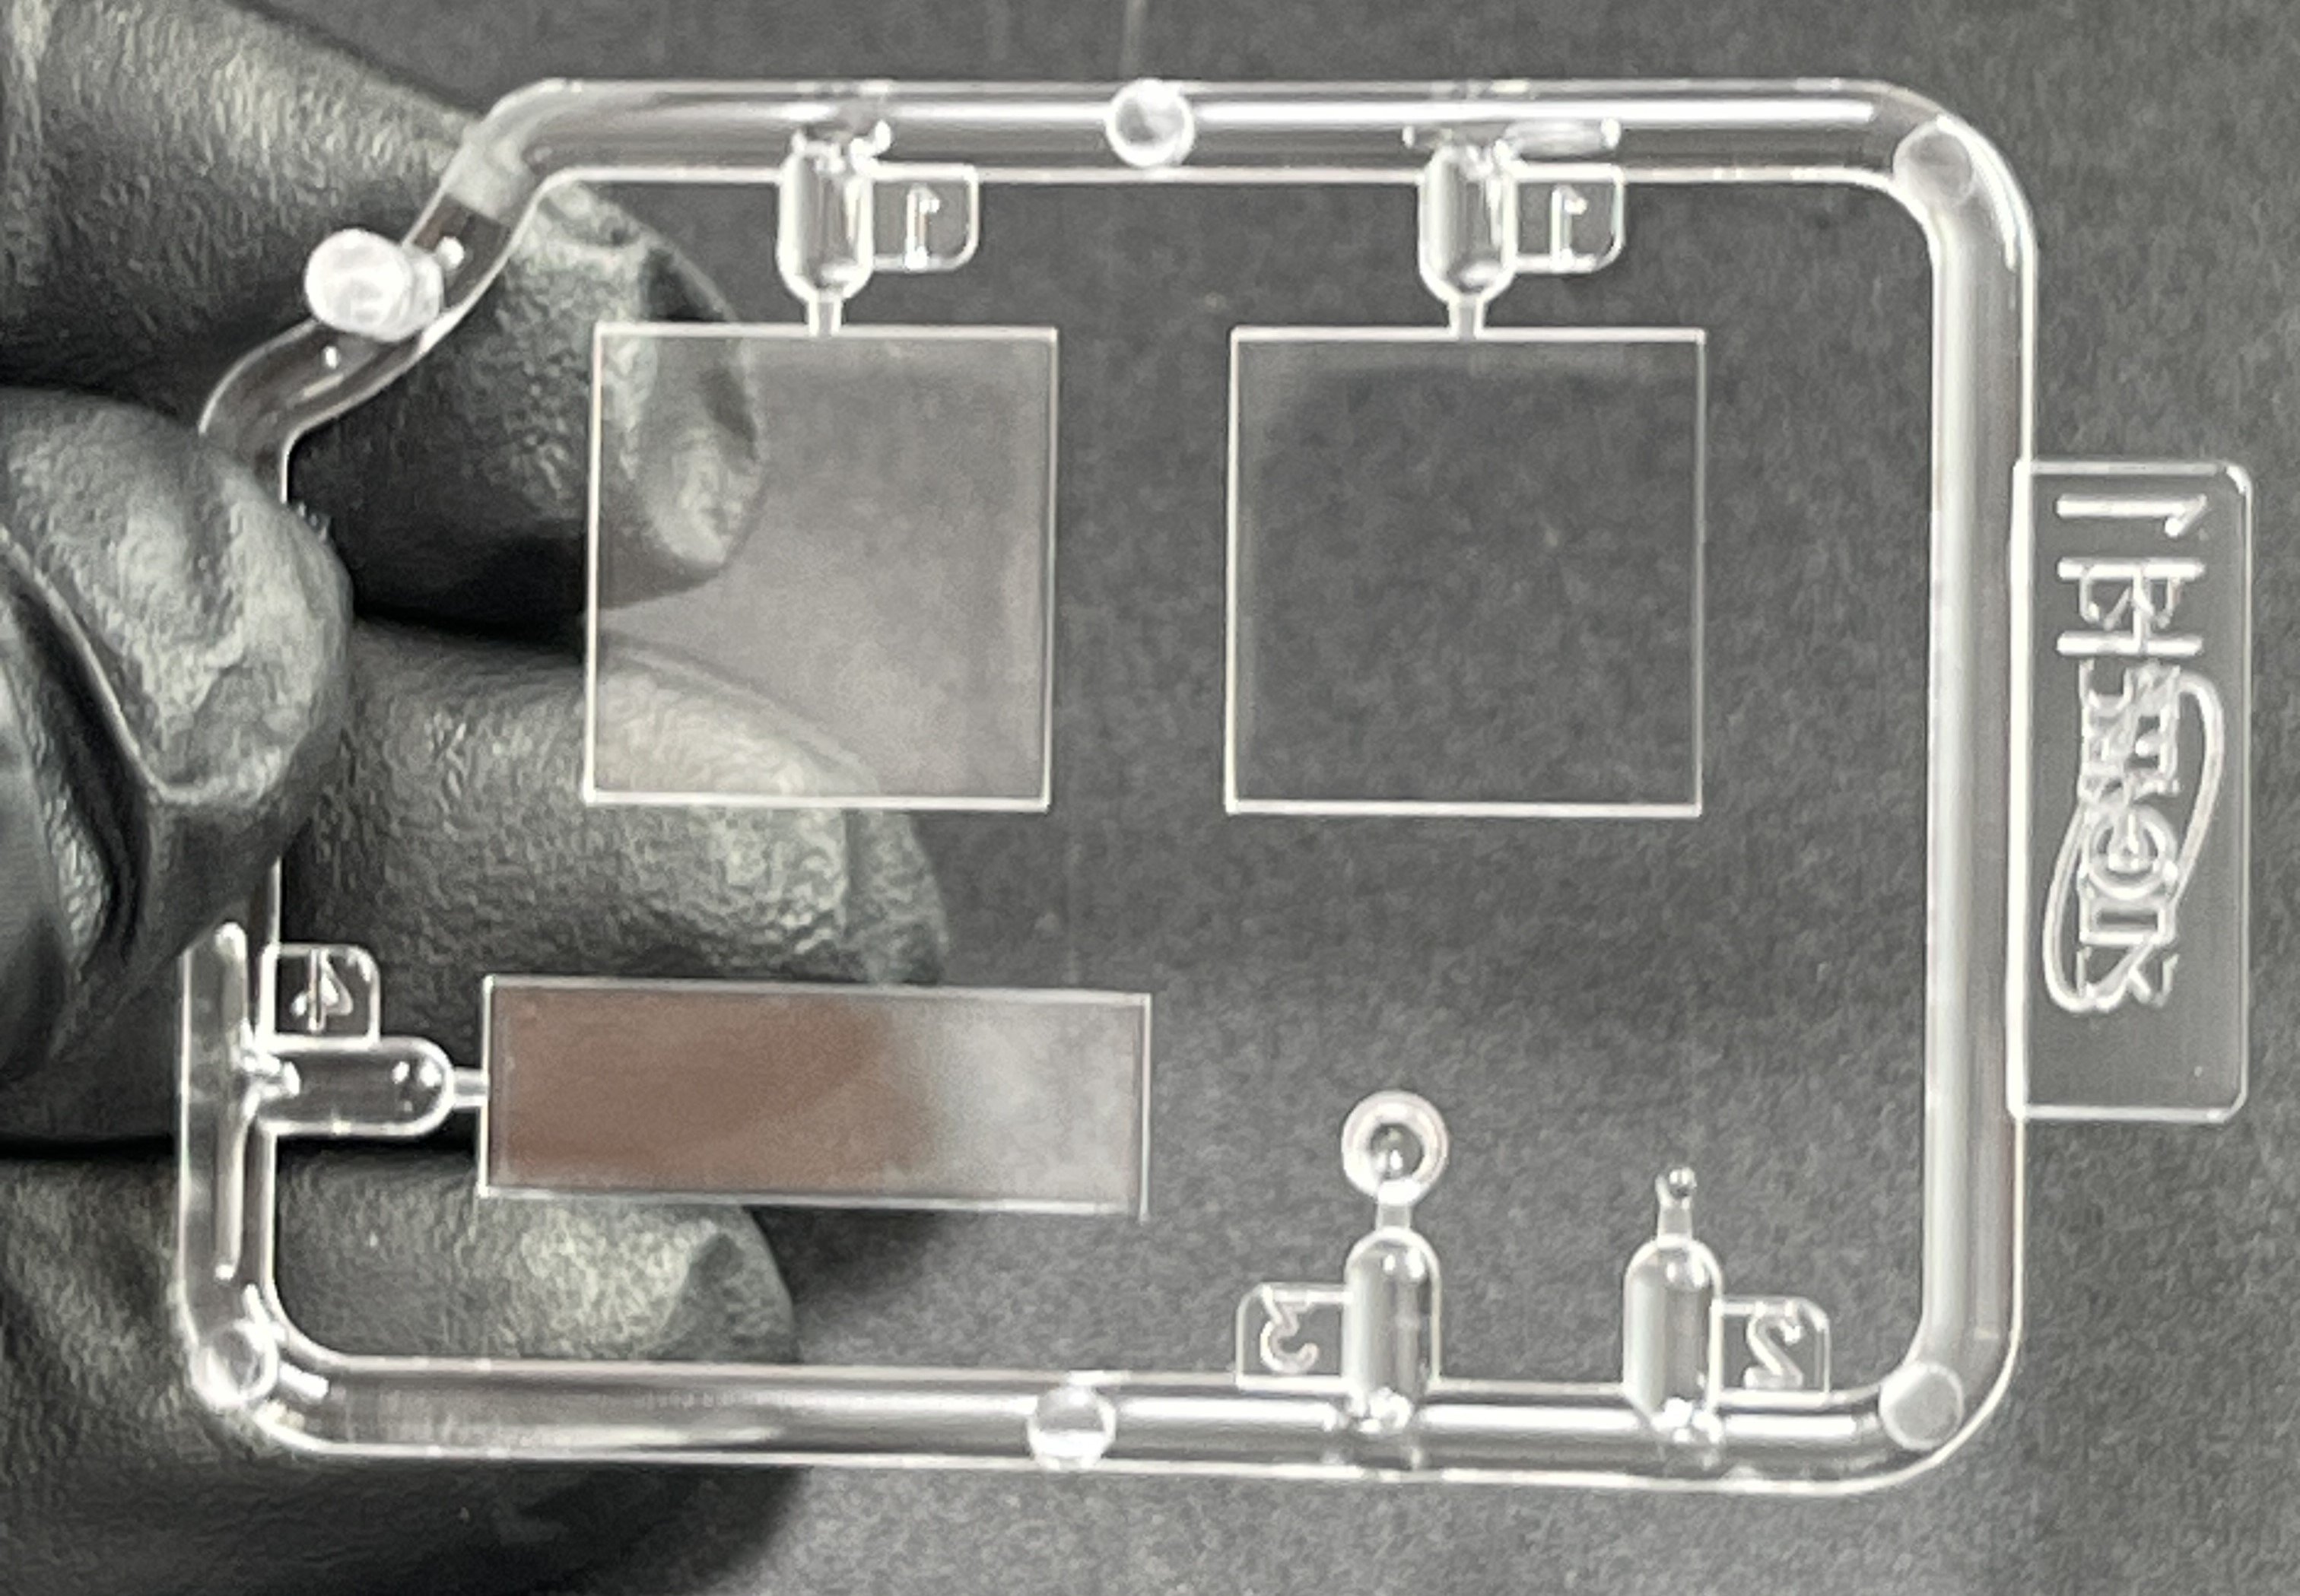
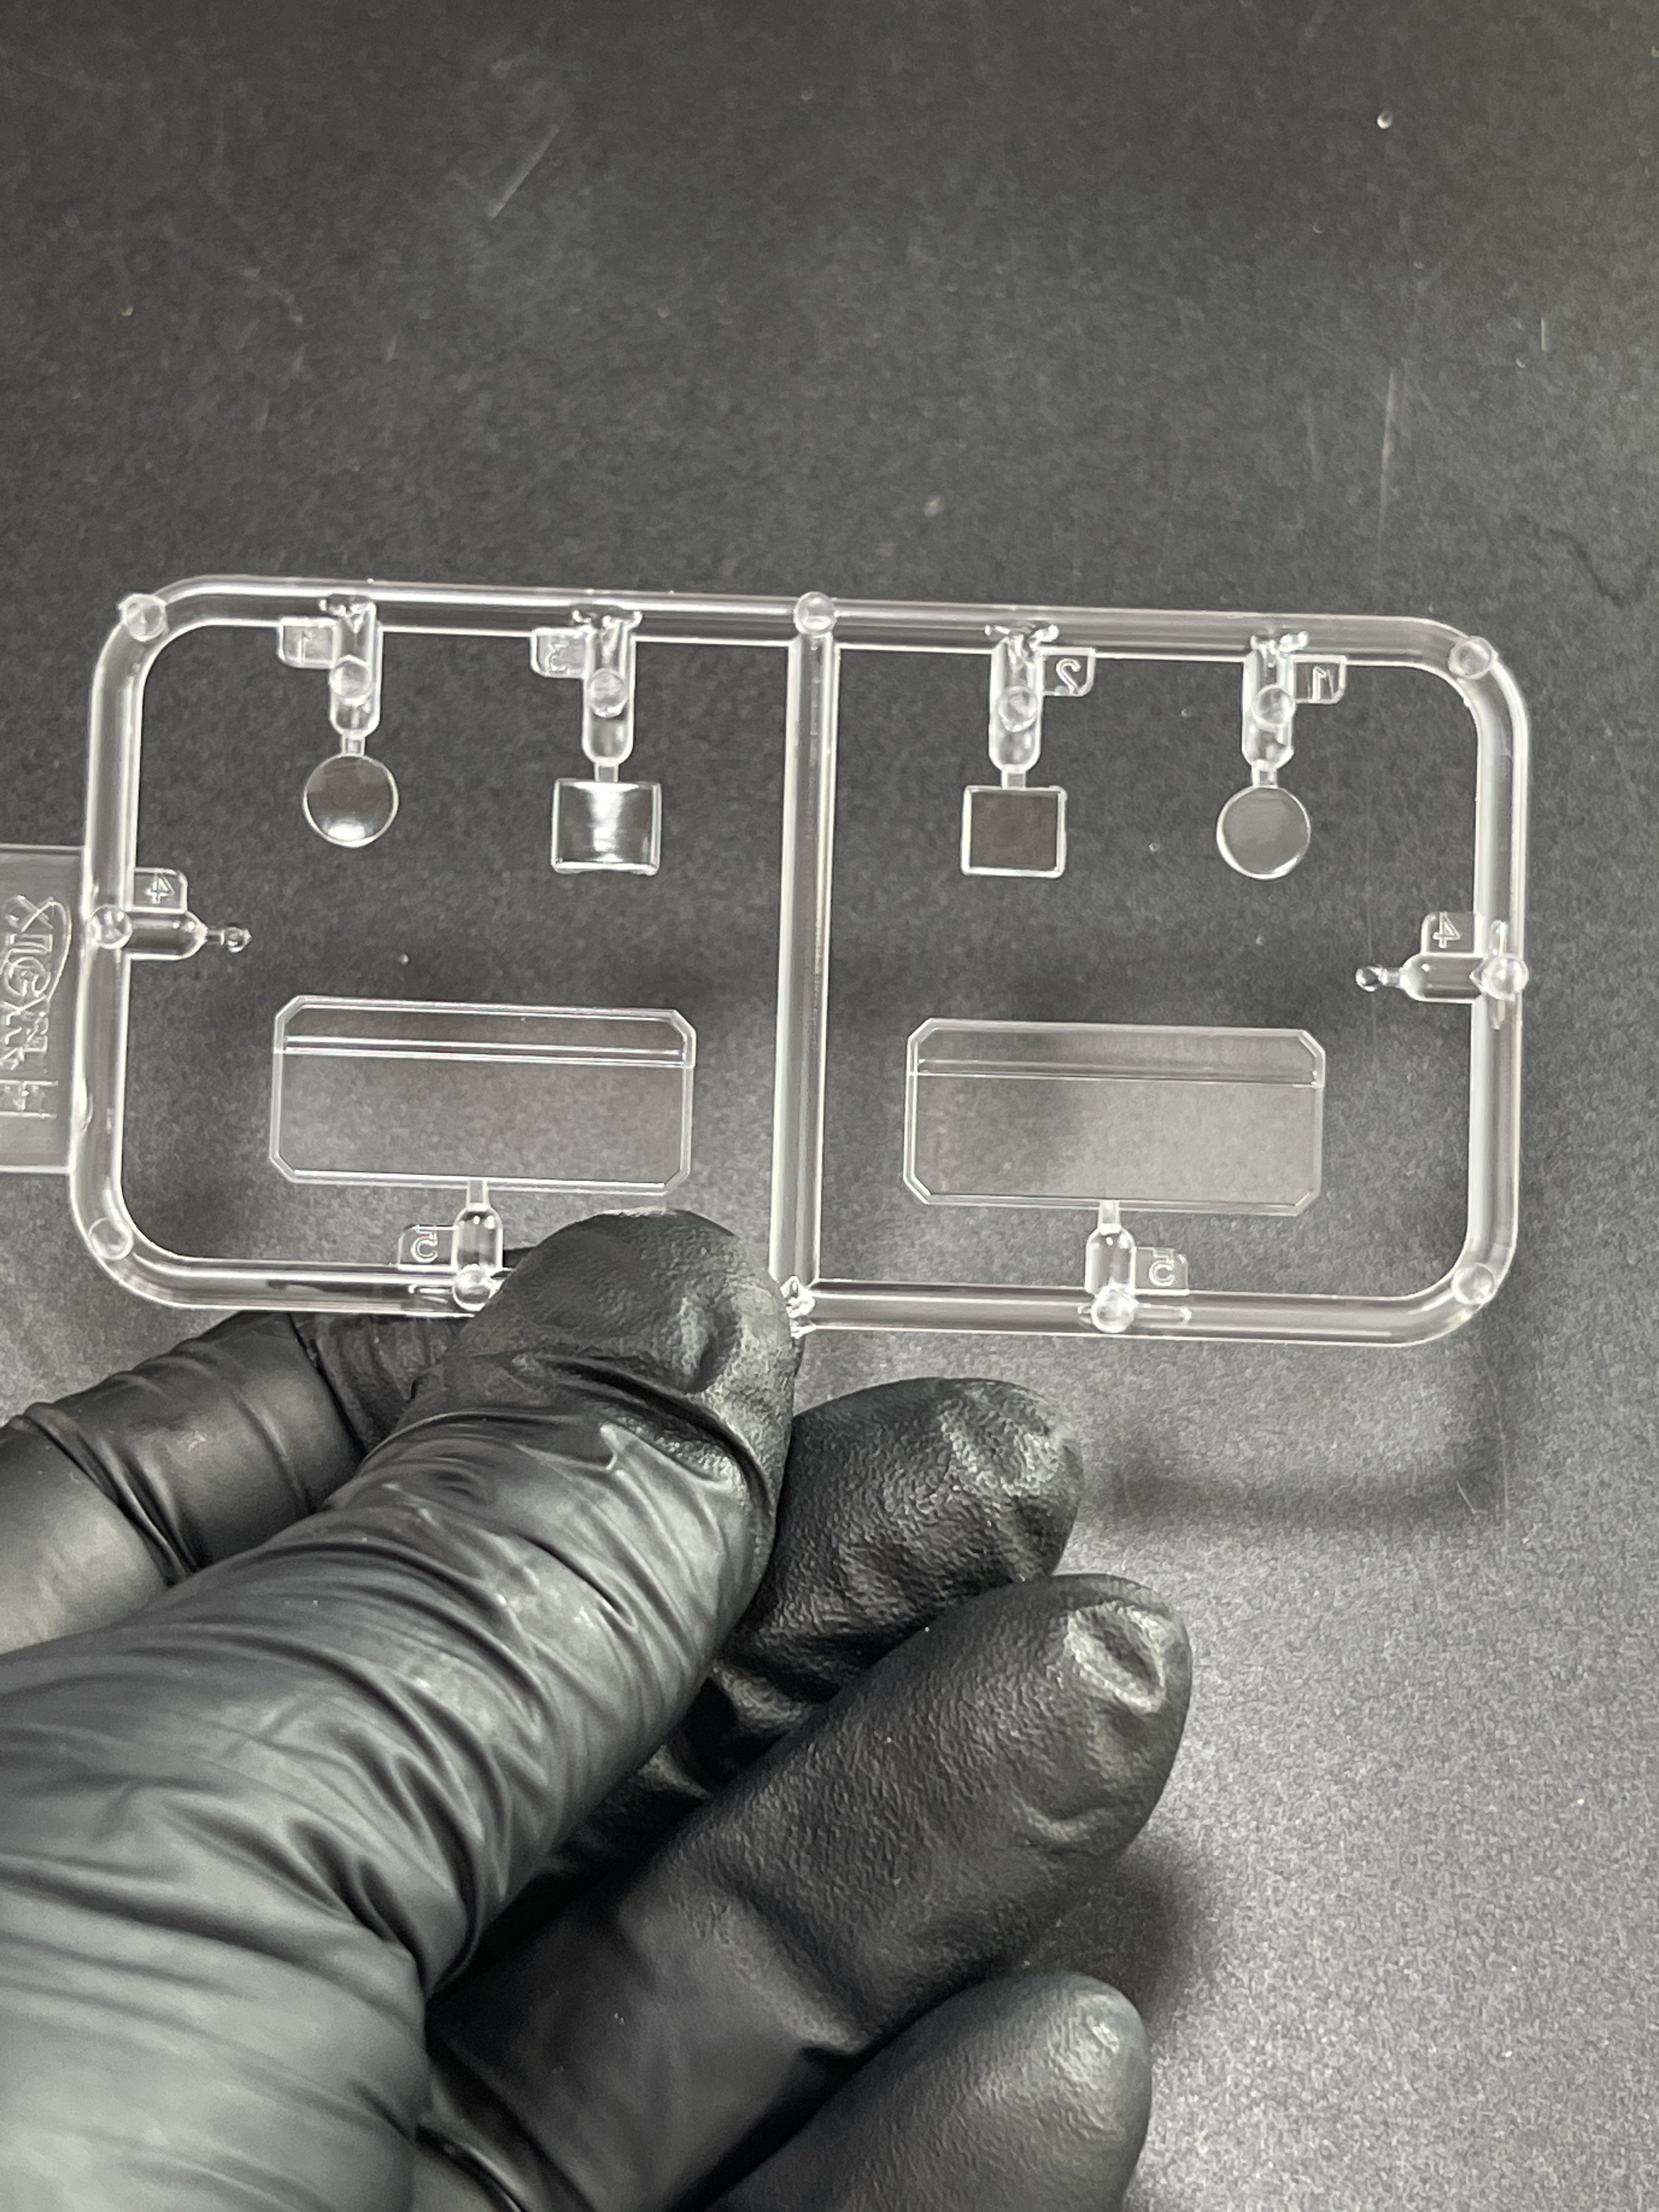
The clear parts.
As usual with ICM, these are real clear with not distortion.

The decals sheets has a very good definition and color registration. Beside the portraits, it give several markings options for all three schemes given.

So you can make three version:

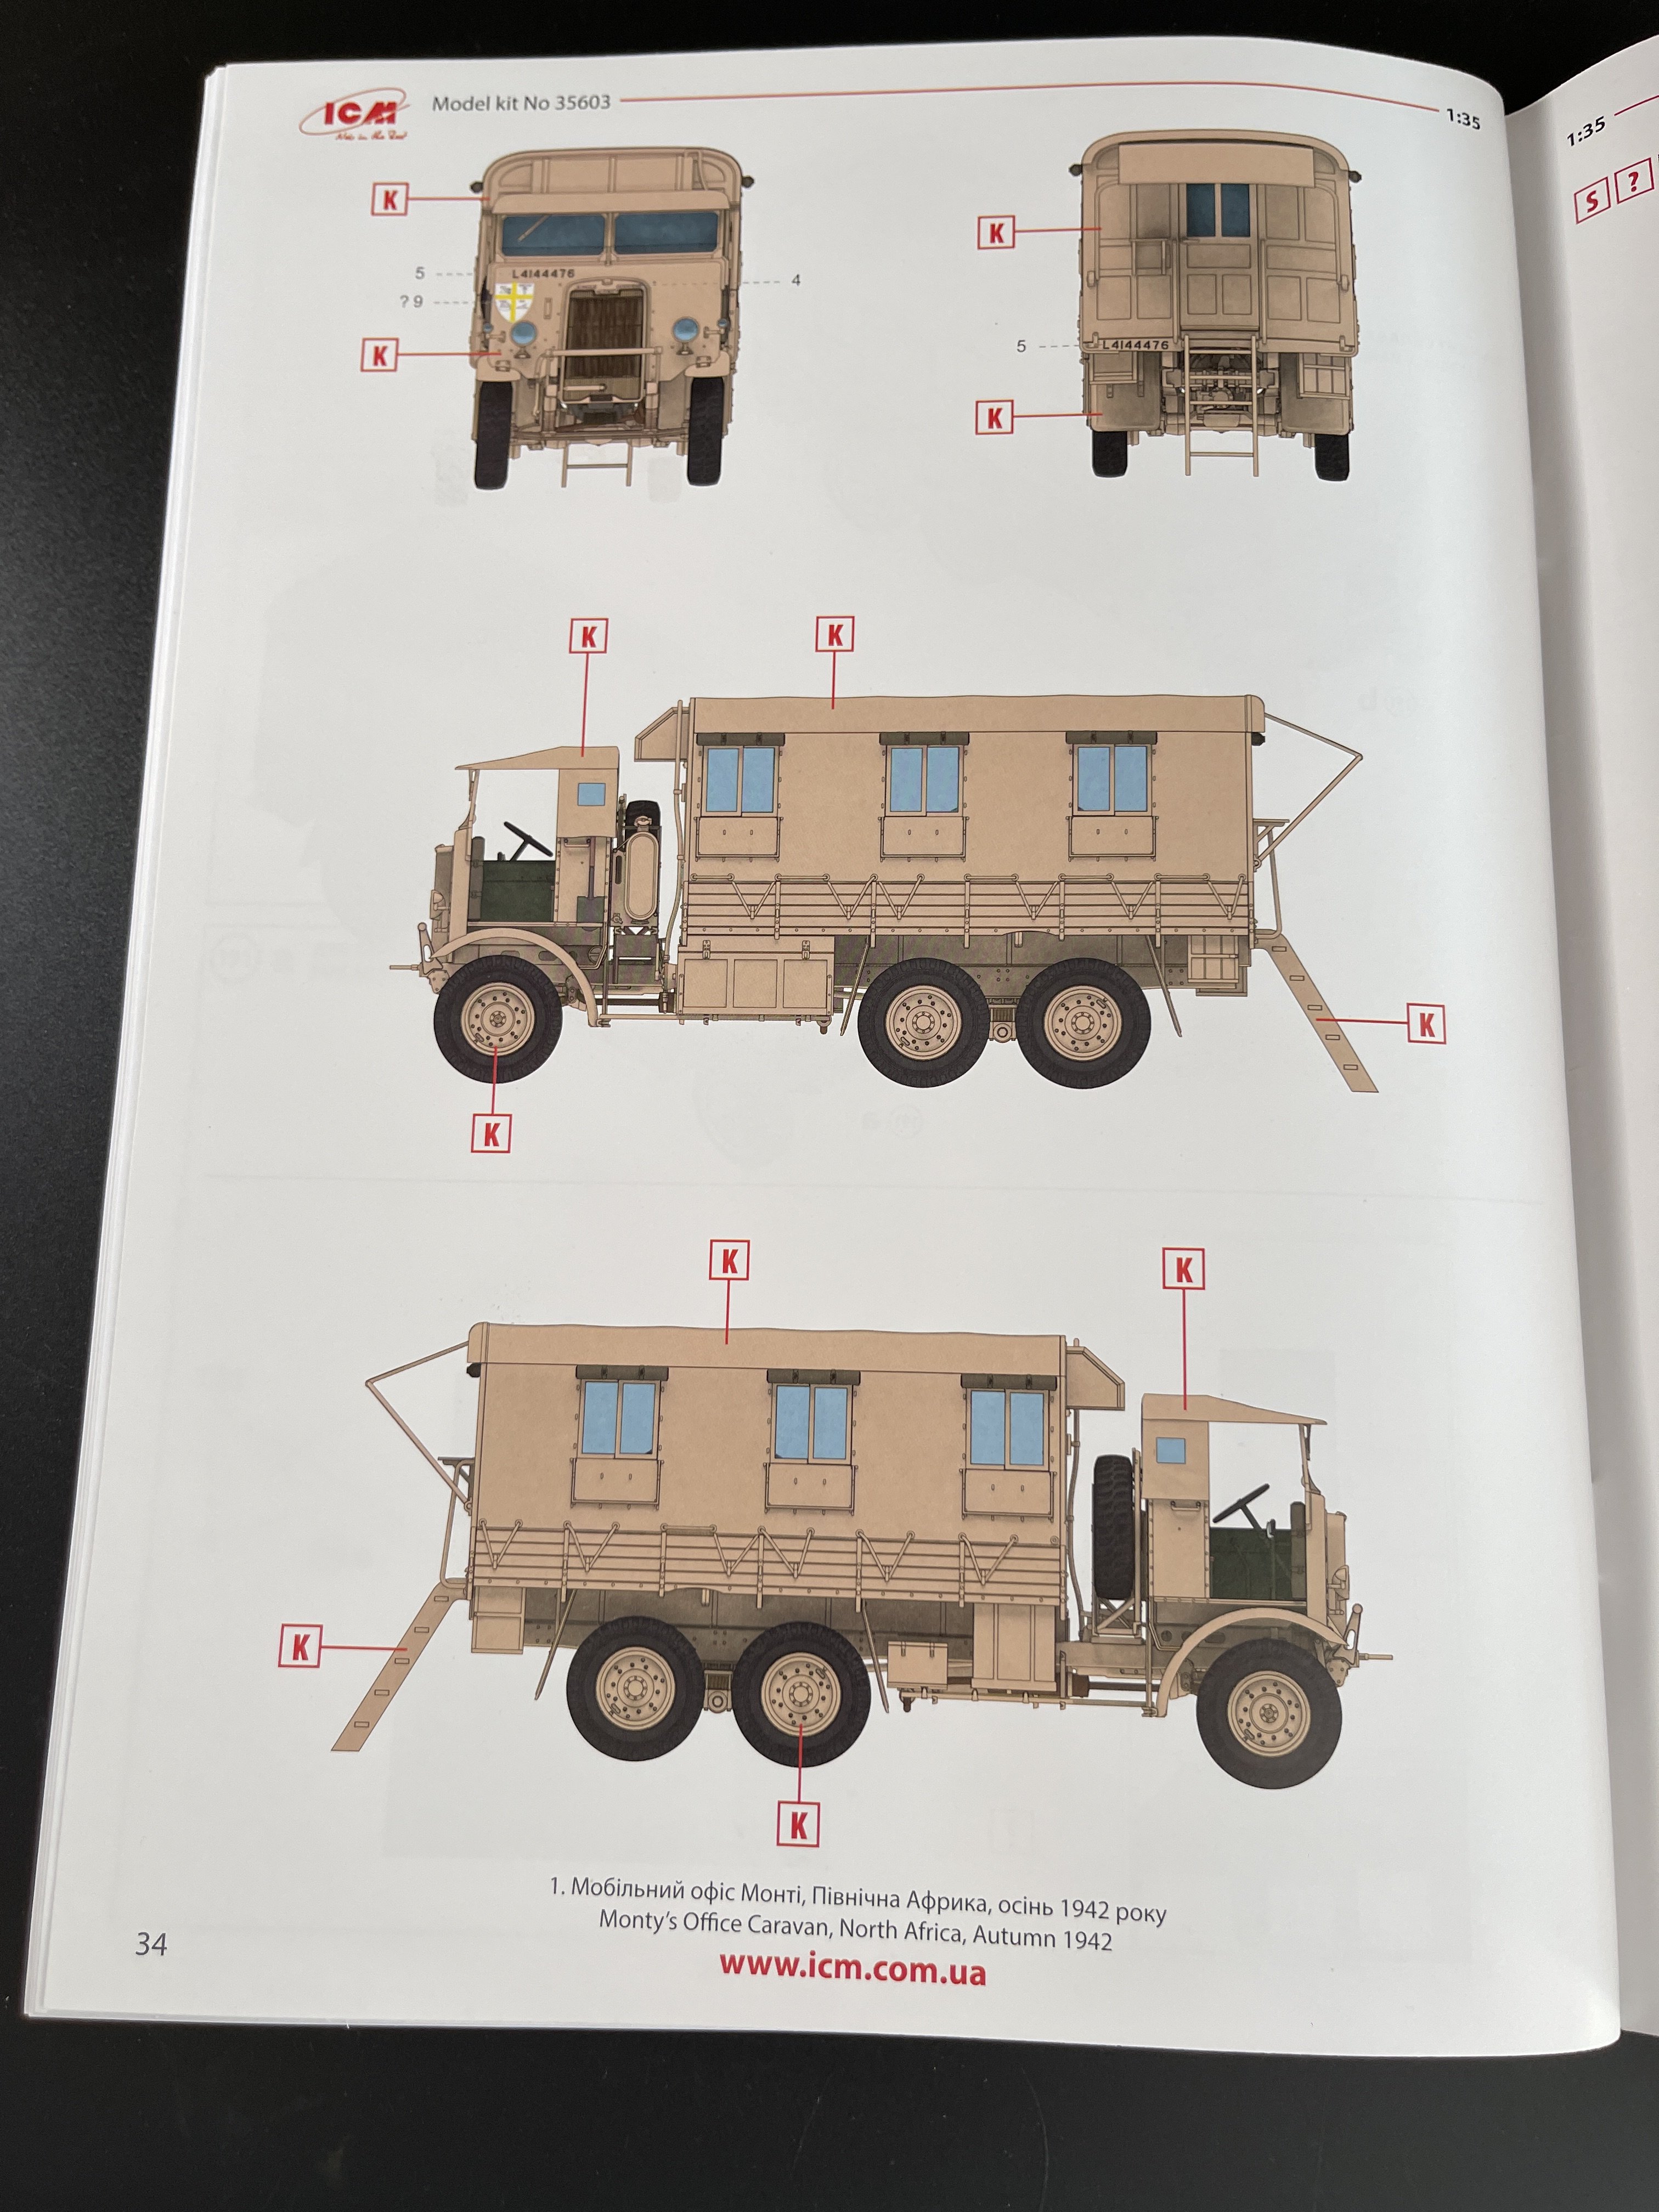
- Monty`s Office Caravan, North Africa, Autumn, 1942;
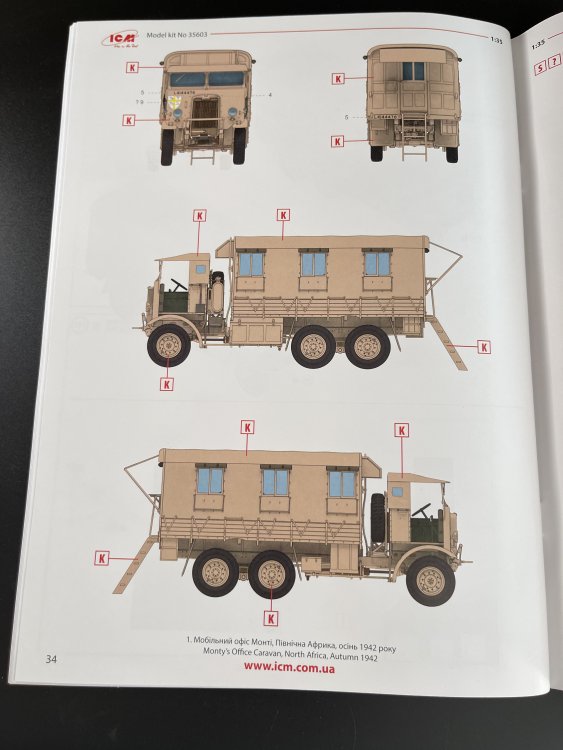
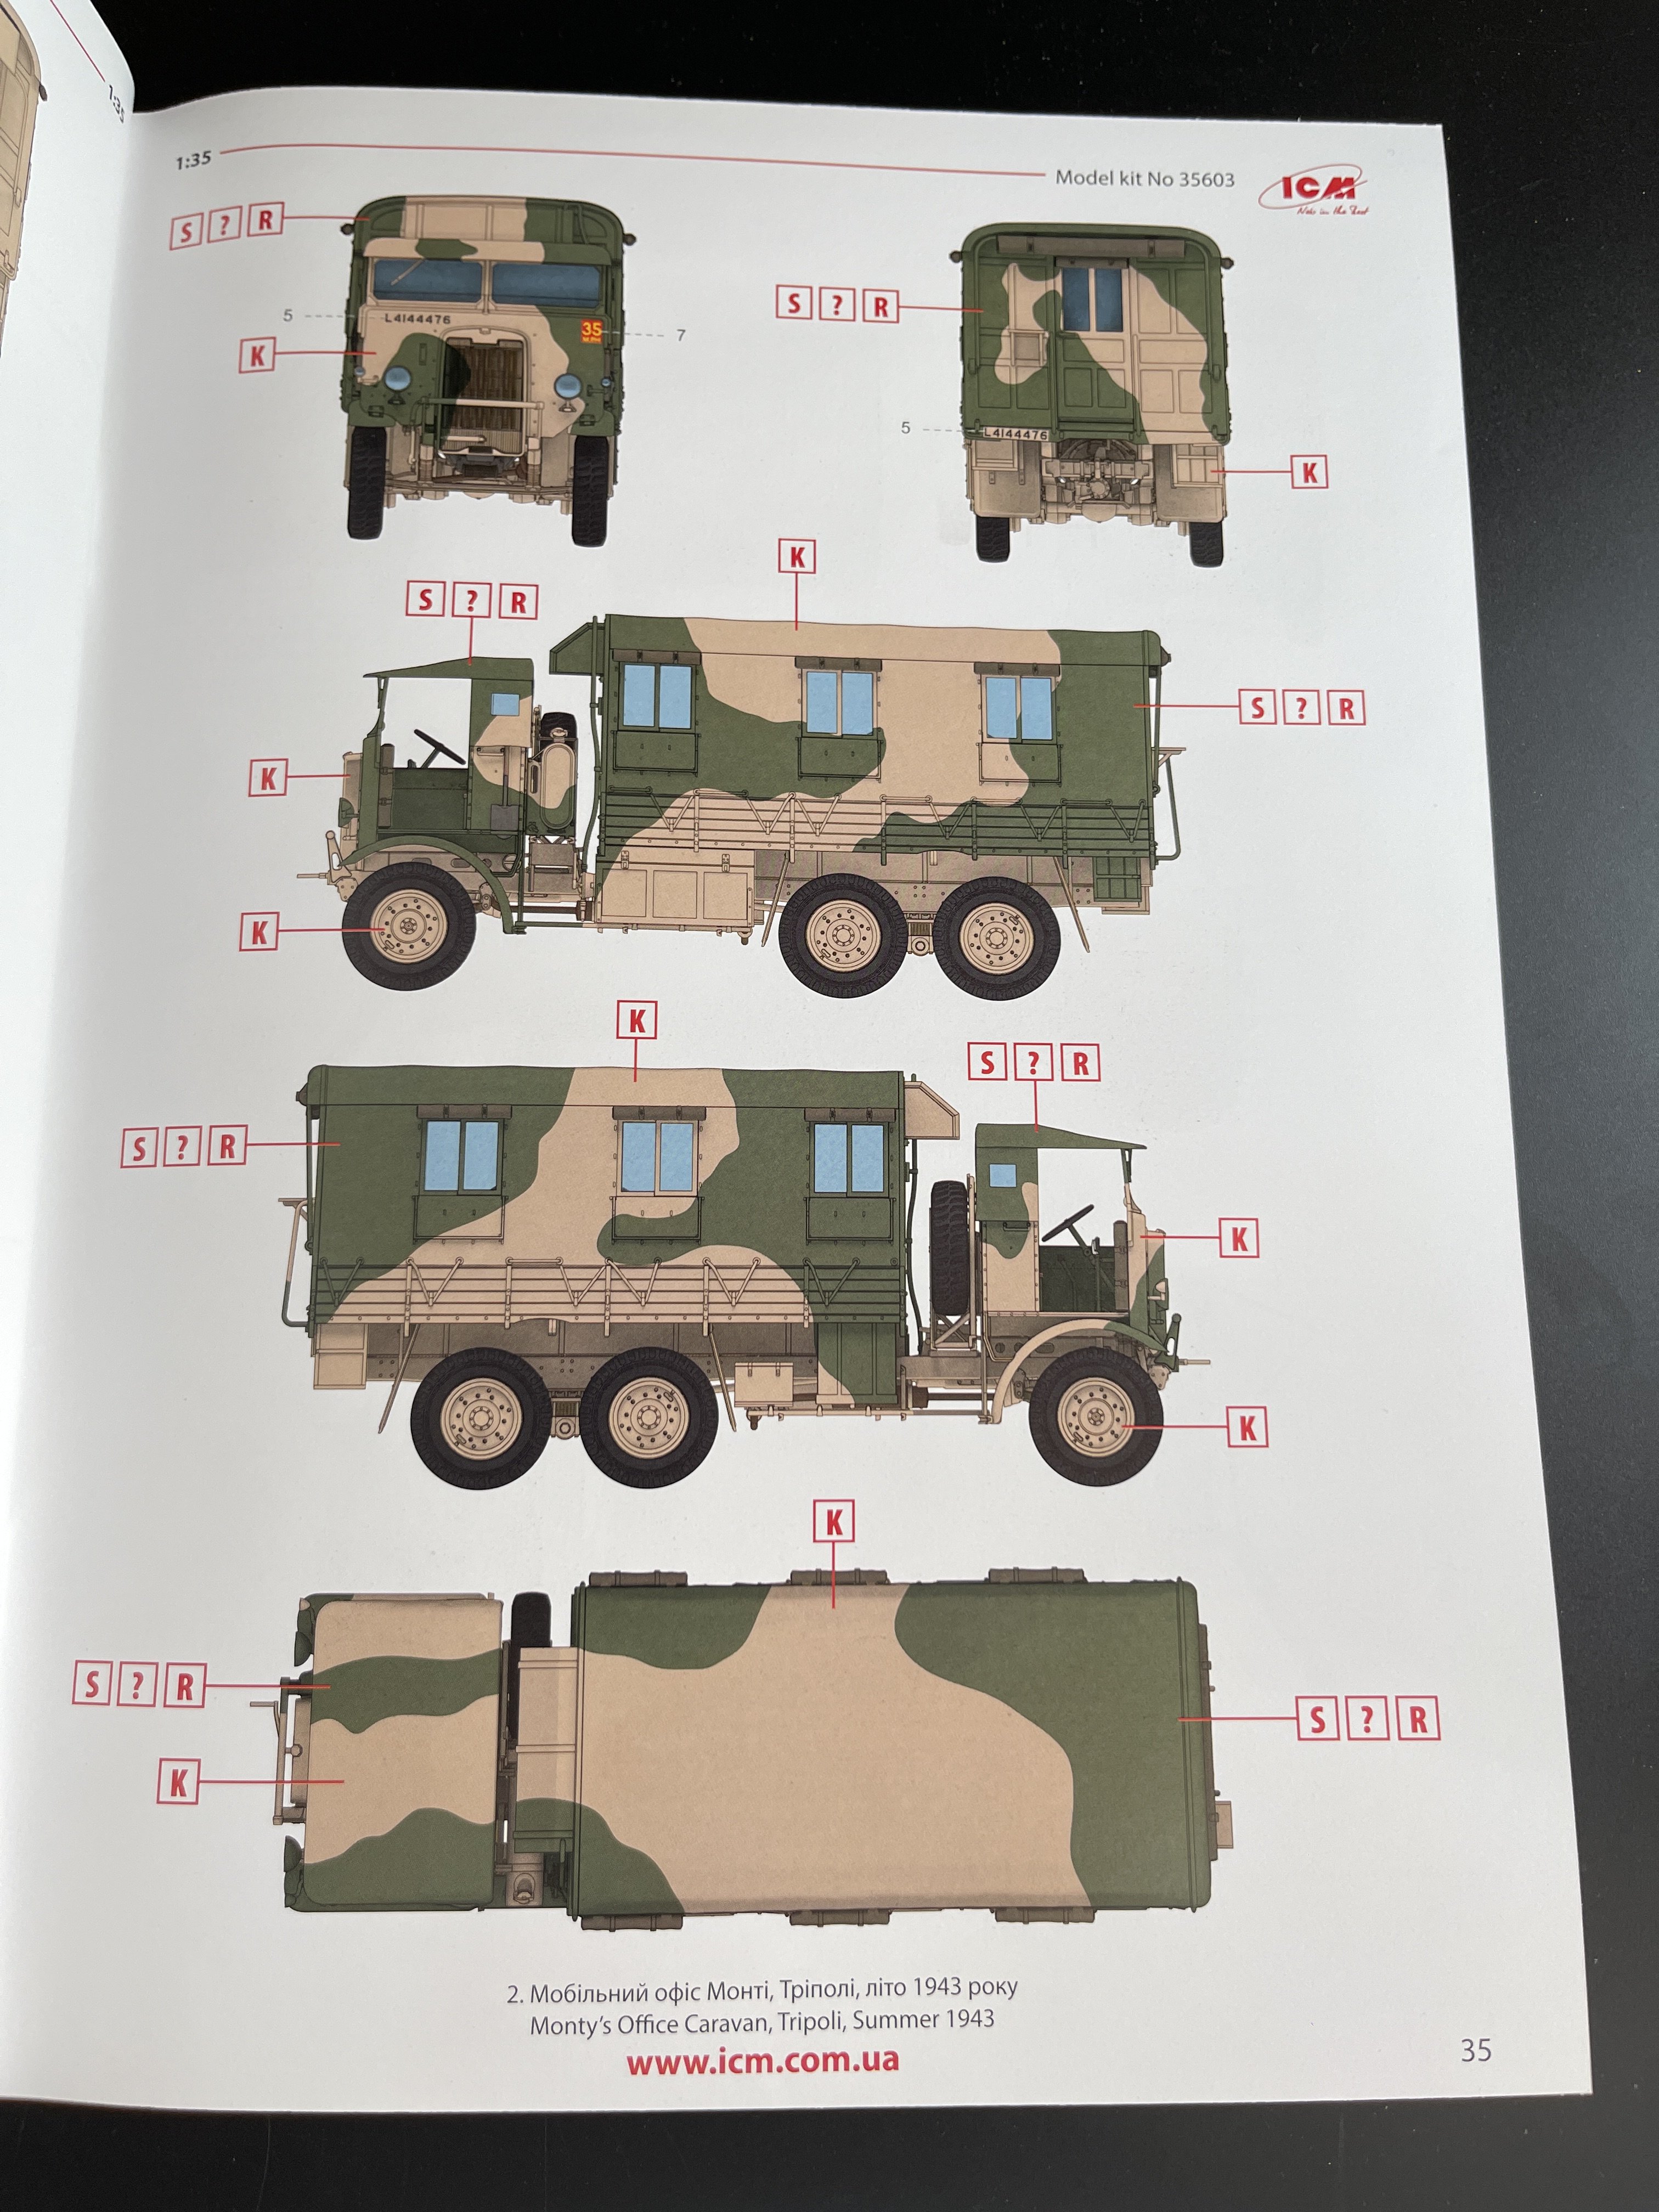
- Monty`s Office Caravan, Tripoli, Summer 1943;

- Monty`s Office Caravan, Germany, Spring, 1945
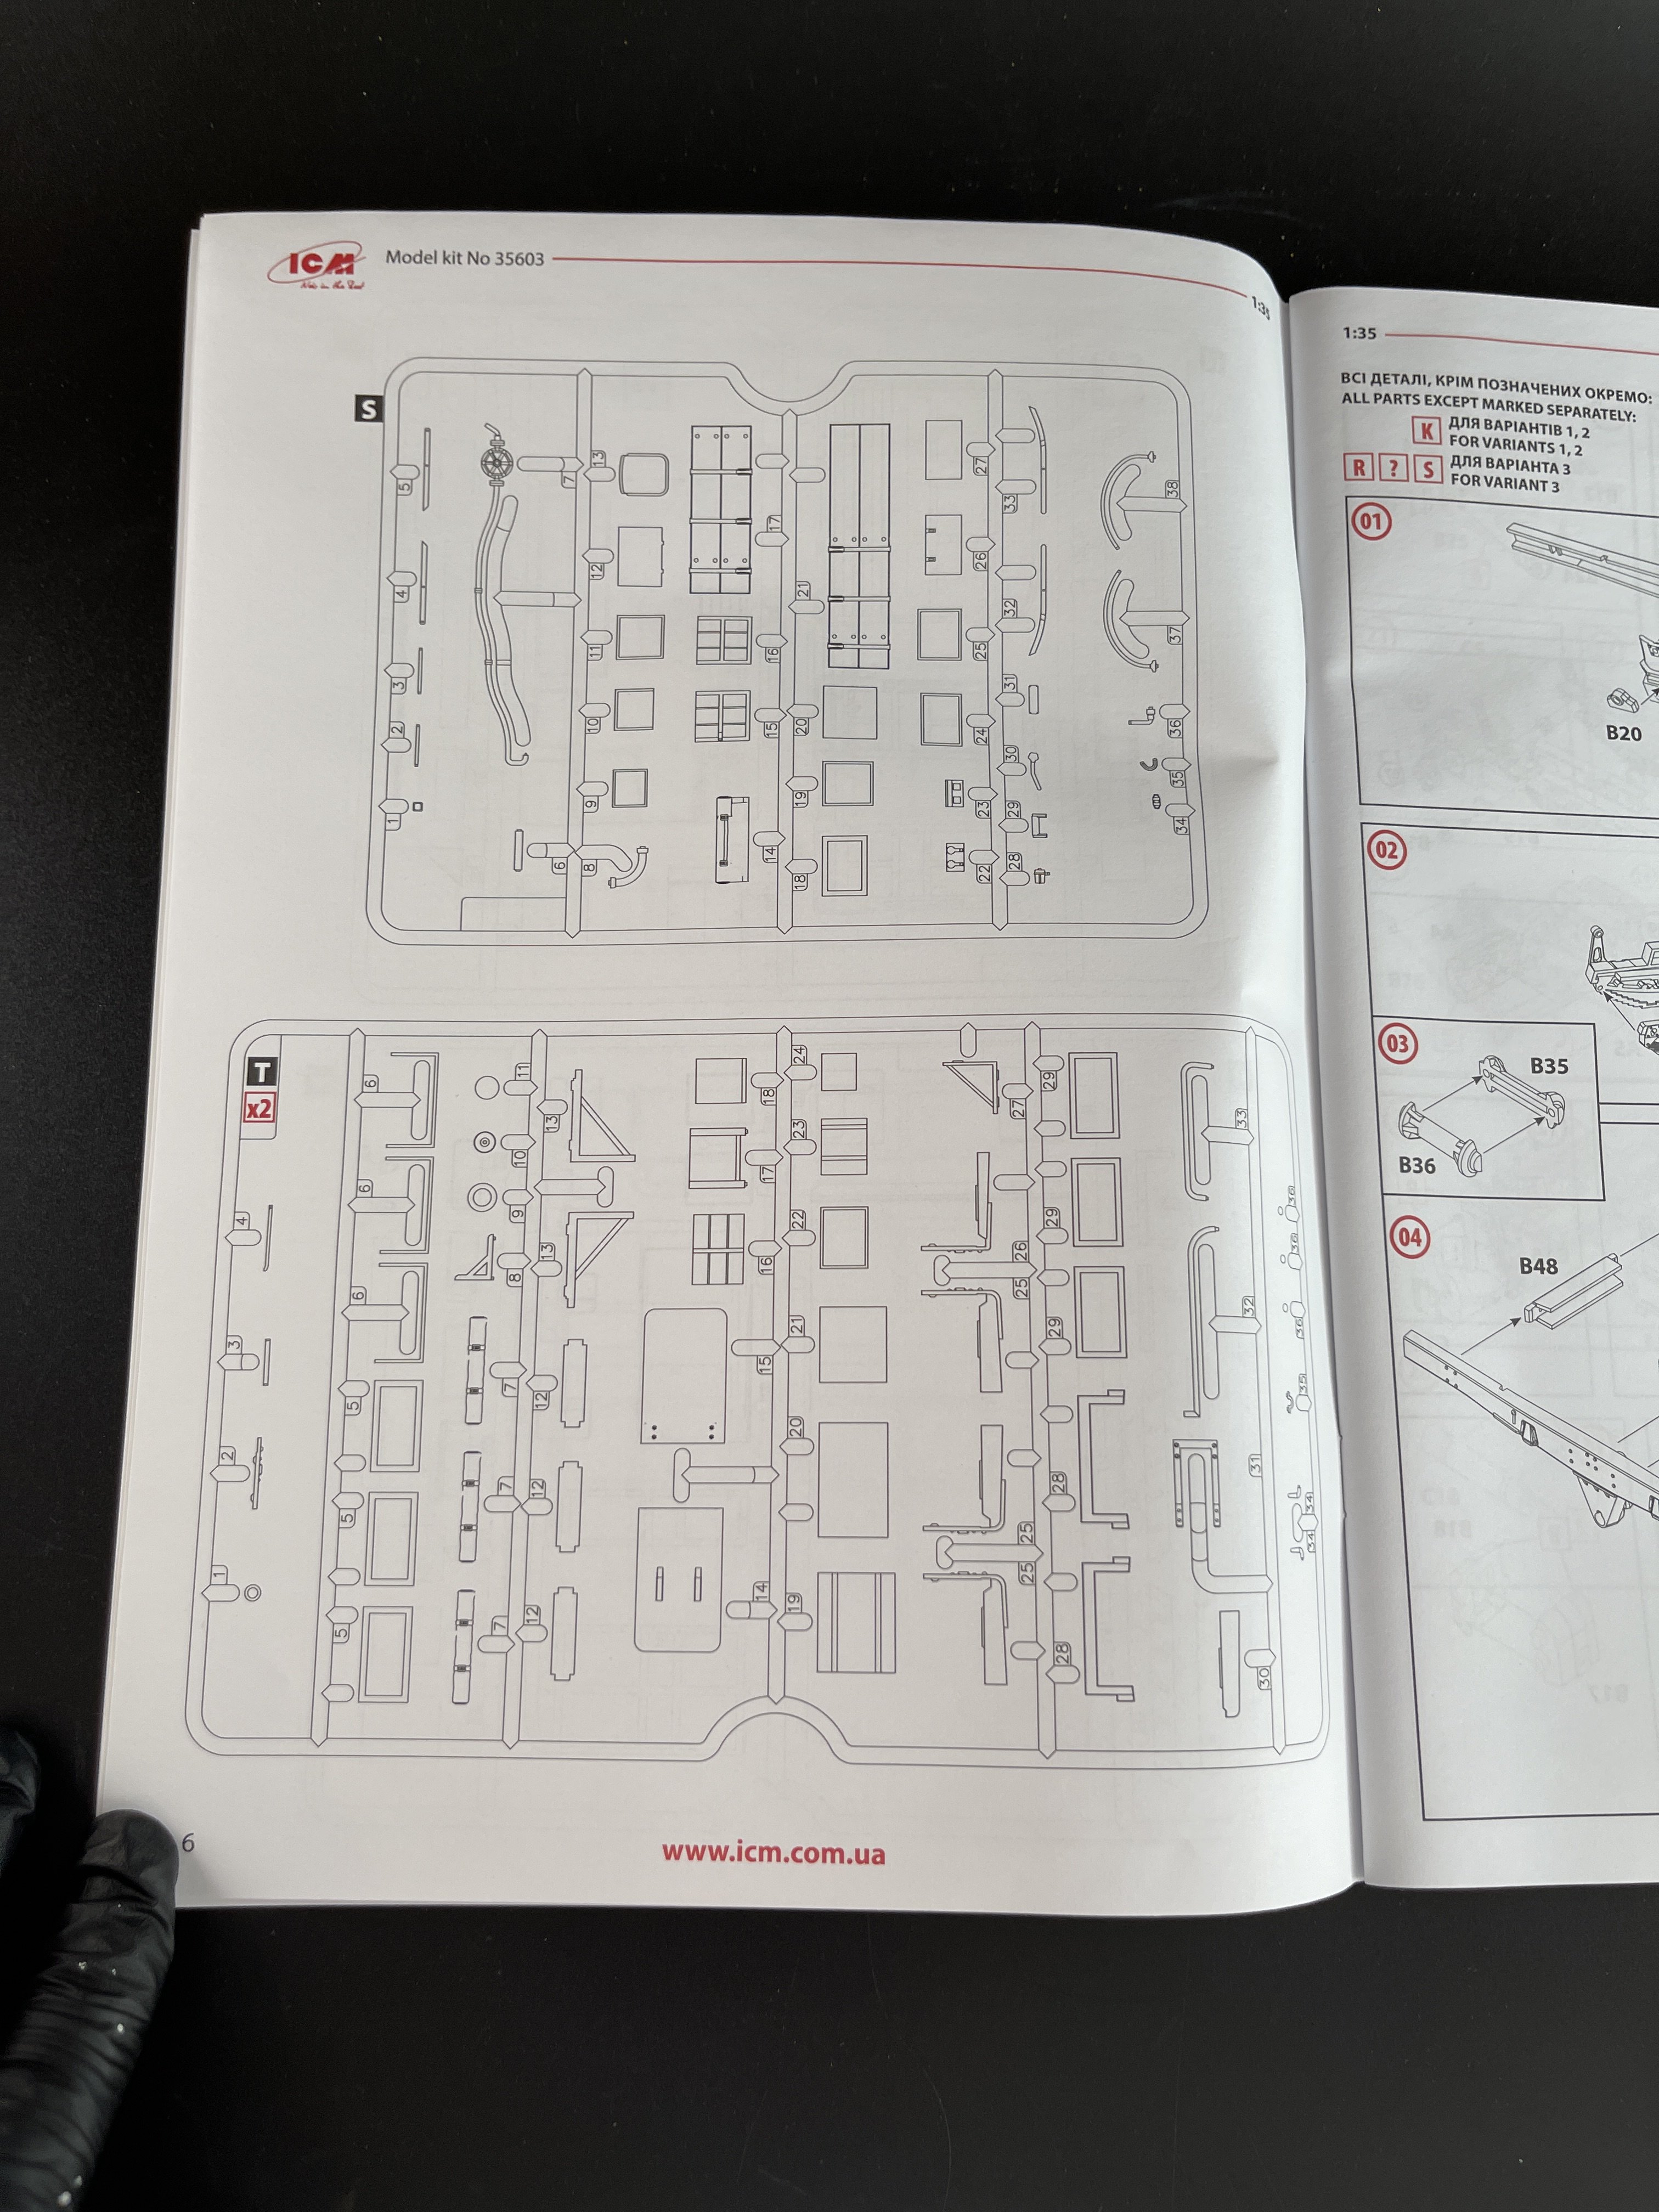
The instructions booklet with 36 pages, is typical ICM instructions, very clear.


Only ICM colour chart, but these paints are coming more available and I already try with a brush and airbrush and I was surprised with the pigmentation.
Conclusion:
Well, another great model kit from ICM!!
The ICM Monty’s Office Caravan (35603) is a superbly detailed 1:35 scale kit that brings a unique WWII vehicle to life.
For those ready to invest time and skill, this kit delivers a satisfying build and a striking centerpiece for any collection. To 8/10 for quality and detail, with minor deductions for complexity and cost.
It`s a superb kit! Probably the best kit in 1:35 that I saw from ICM.
Highly recommend
It`s 9,8 out of 10.
My sincere thanks to ICM for making this fantastic model kit.

-
3
-
2
-
-
Hi guys.
I will 15 days in Japan and 4 days in Tokyo where I will like to get some goodies!
")
I already been searching already the best places to go on web but I would like to hear directly from modeller that have been there.
So can anyone tell me the best modelling shops to visit in Tokyo?
Cheers
-
1
-


Trumpeter E-100 1/35
in LSM Armour Finished Work
Posted
wow!! love it! great paintjob and weathering!!