Jroen87
-
Posts
17 -
Joined
-
Last visited
Content Type
Profiles
Forums
Events
Gallery
Everything posted by Jroen87
-
Thank you all so much for the compliments. I'll be slowly working towards the finishline. It's a real beast, takes up quite some space and quite some time. 🤪
-
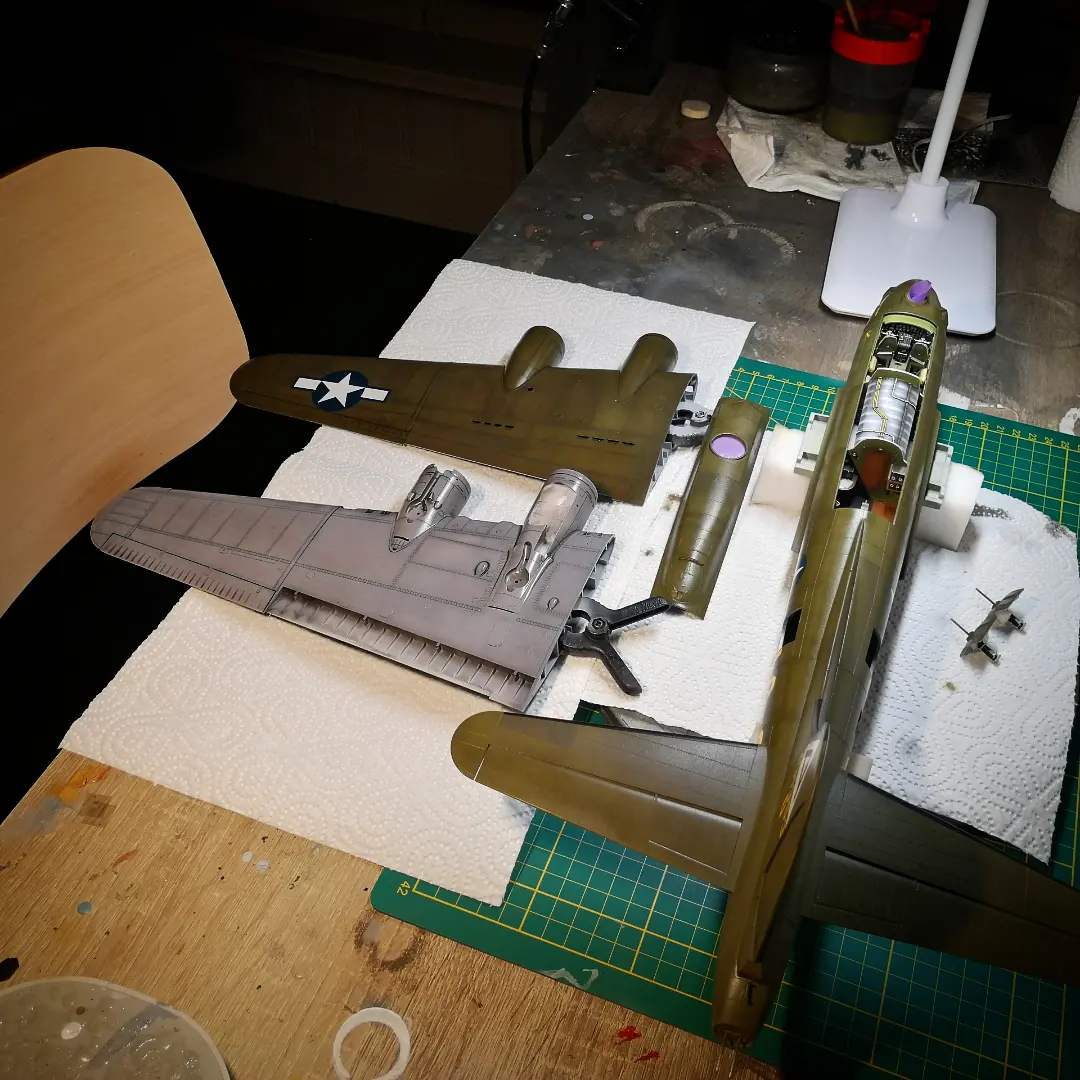
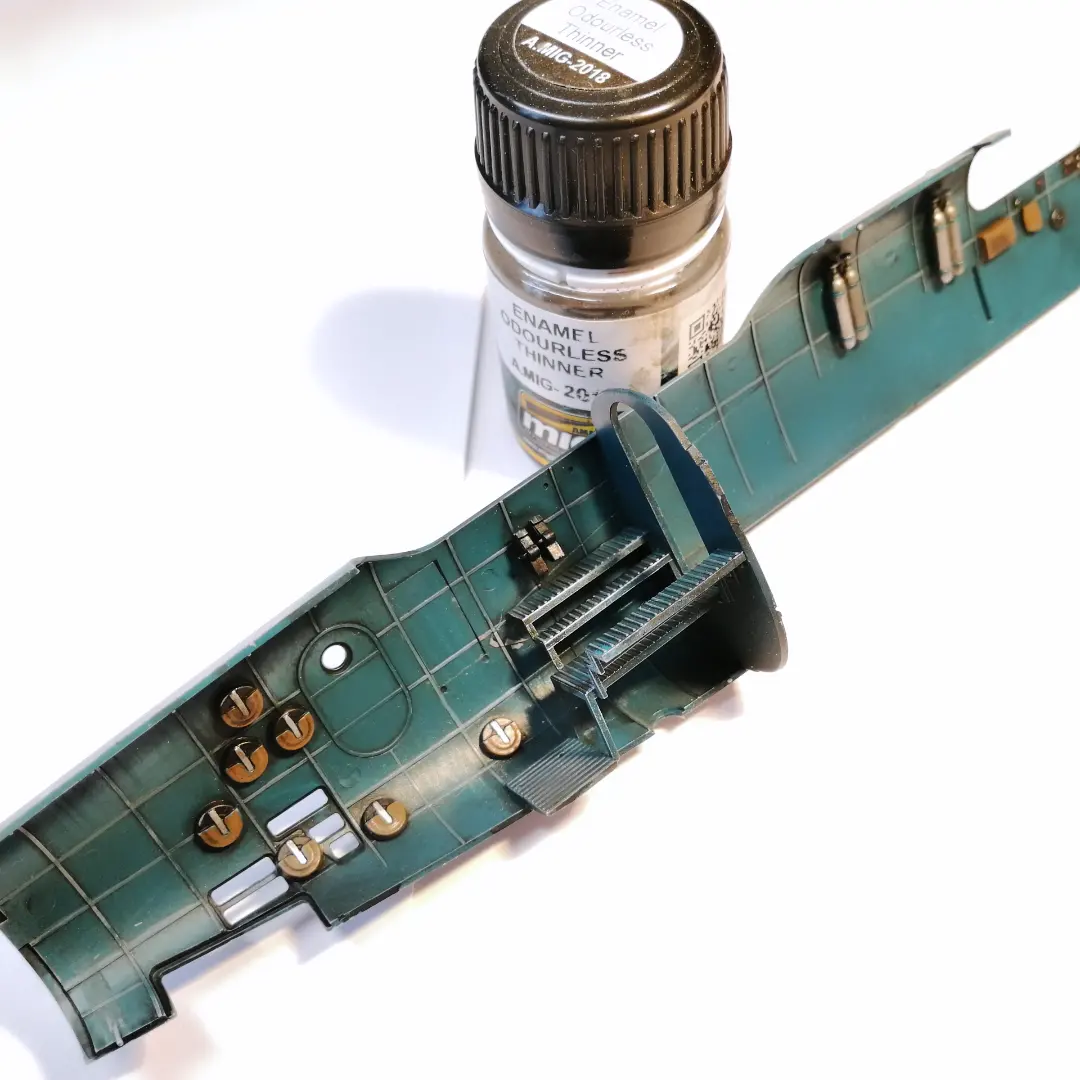
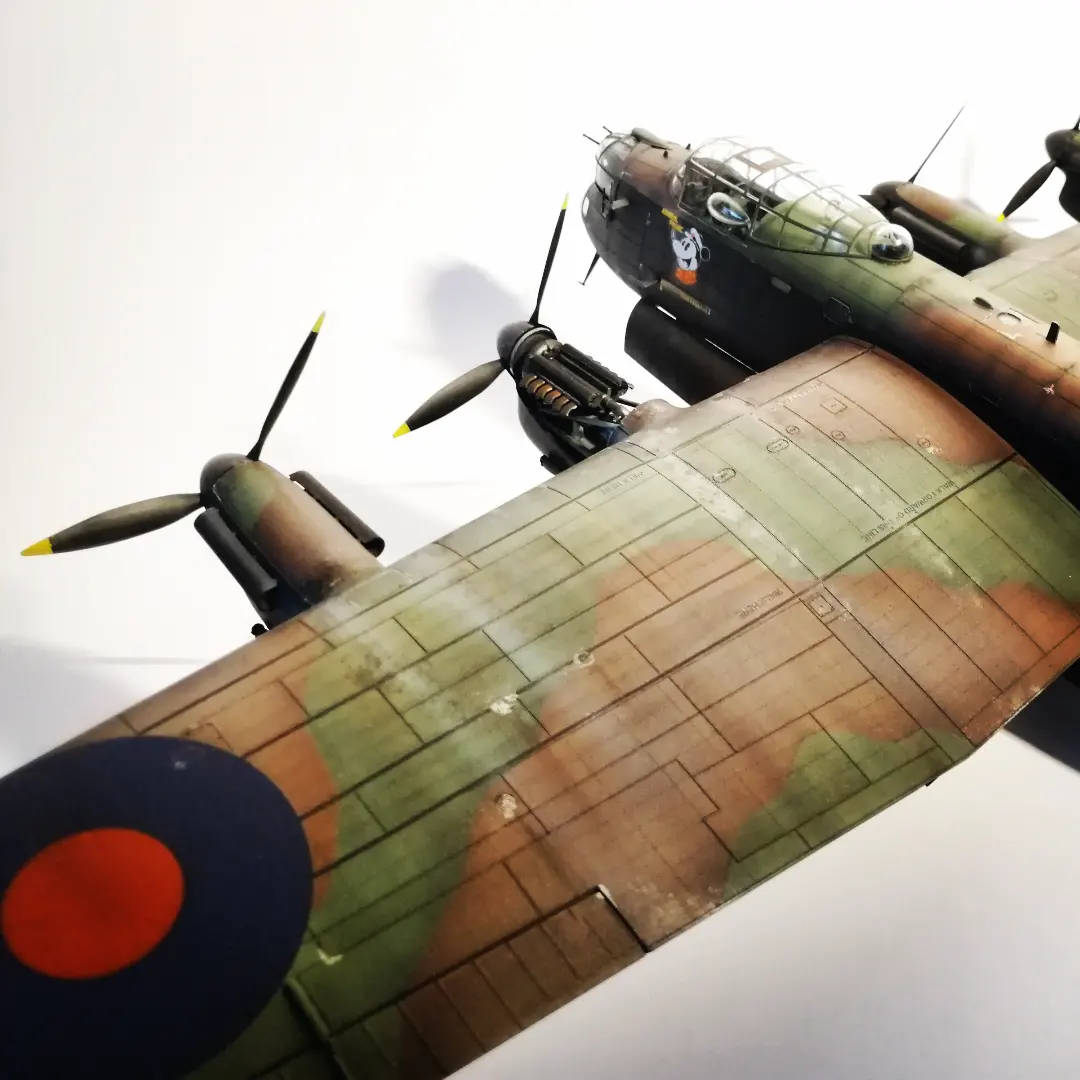
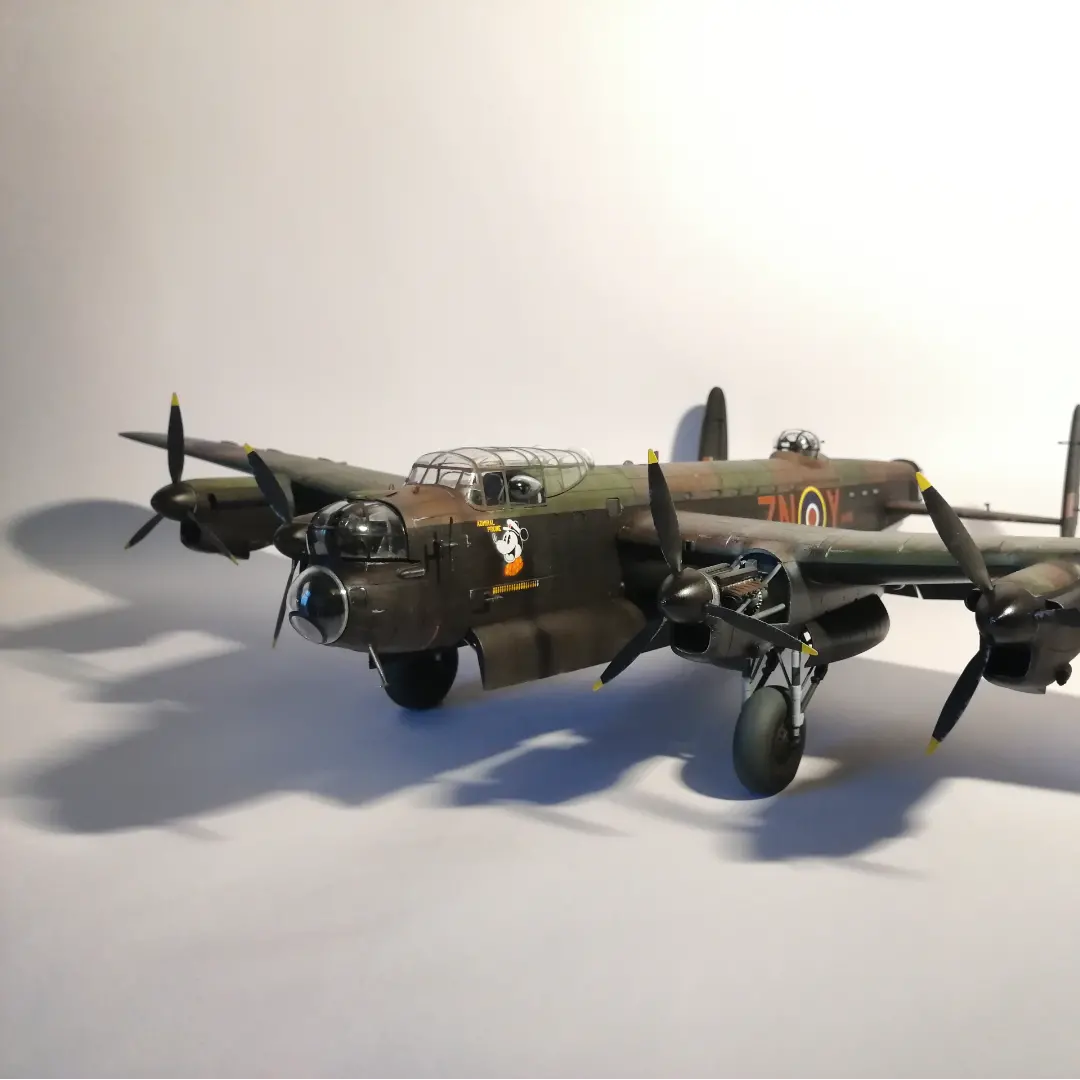
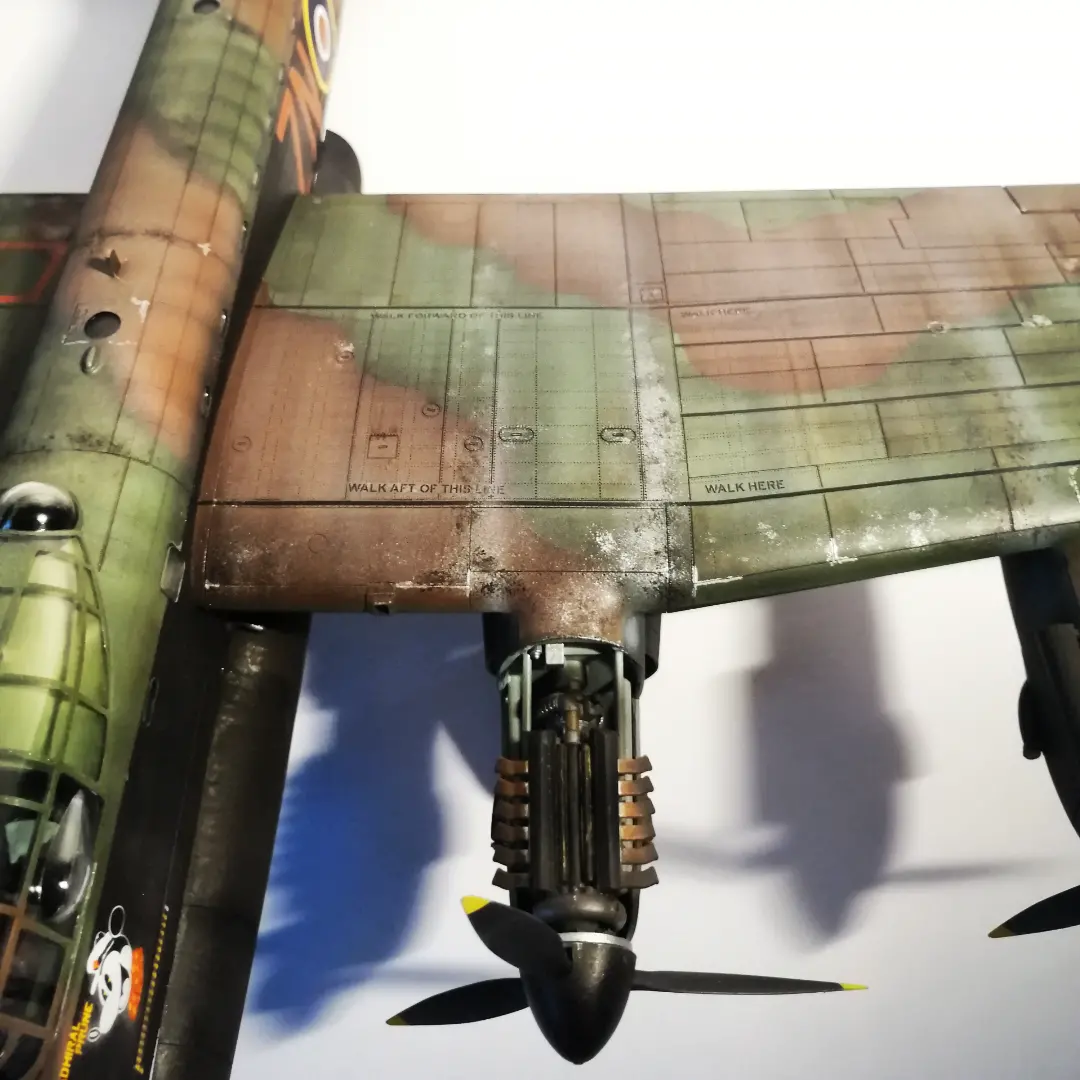
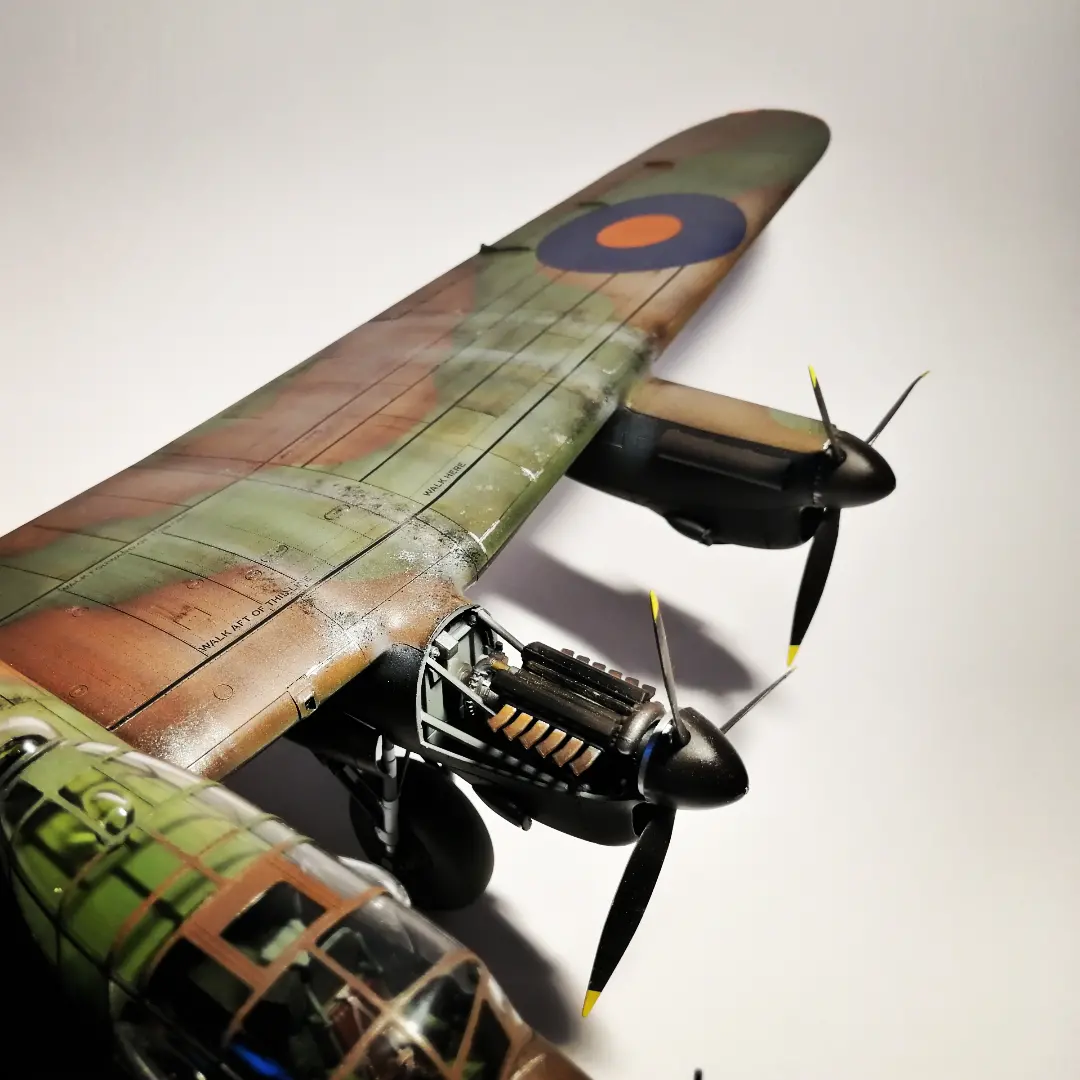
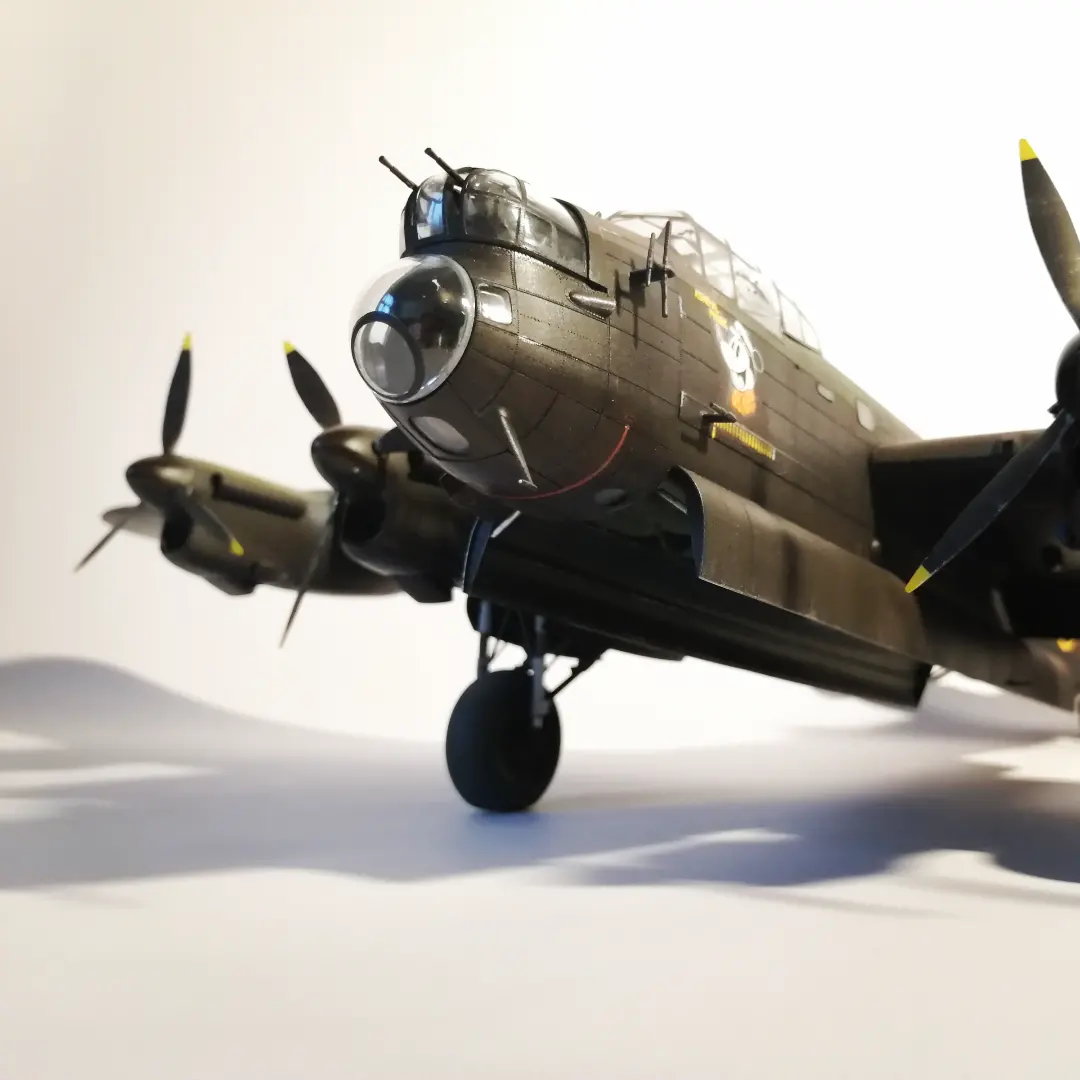
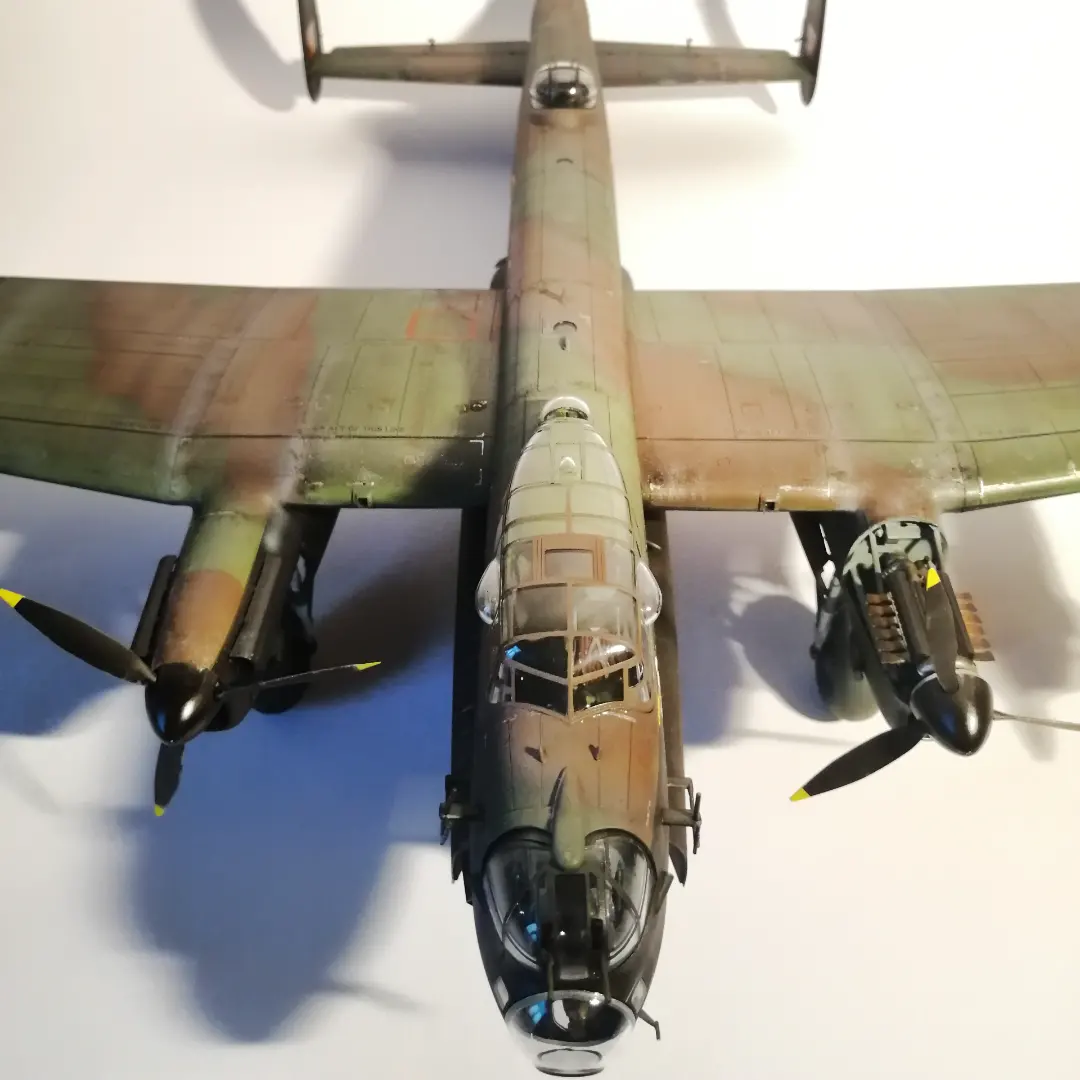
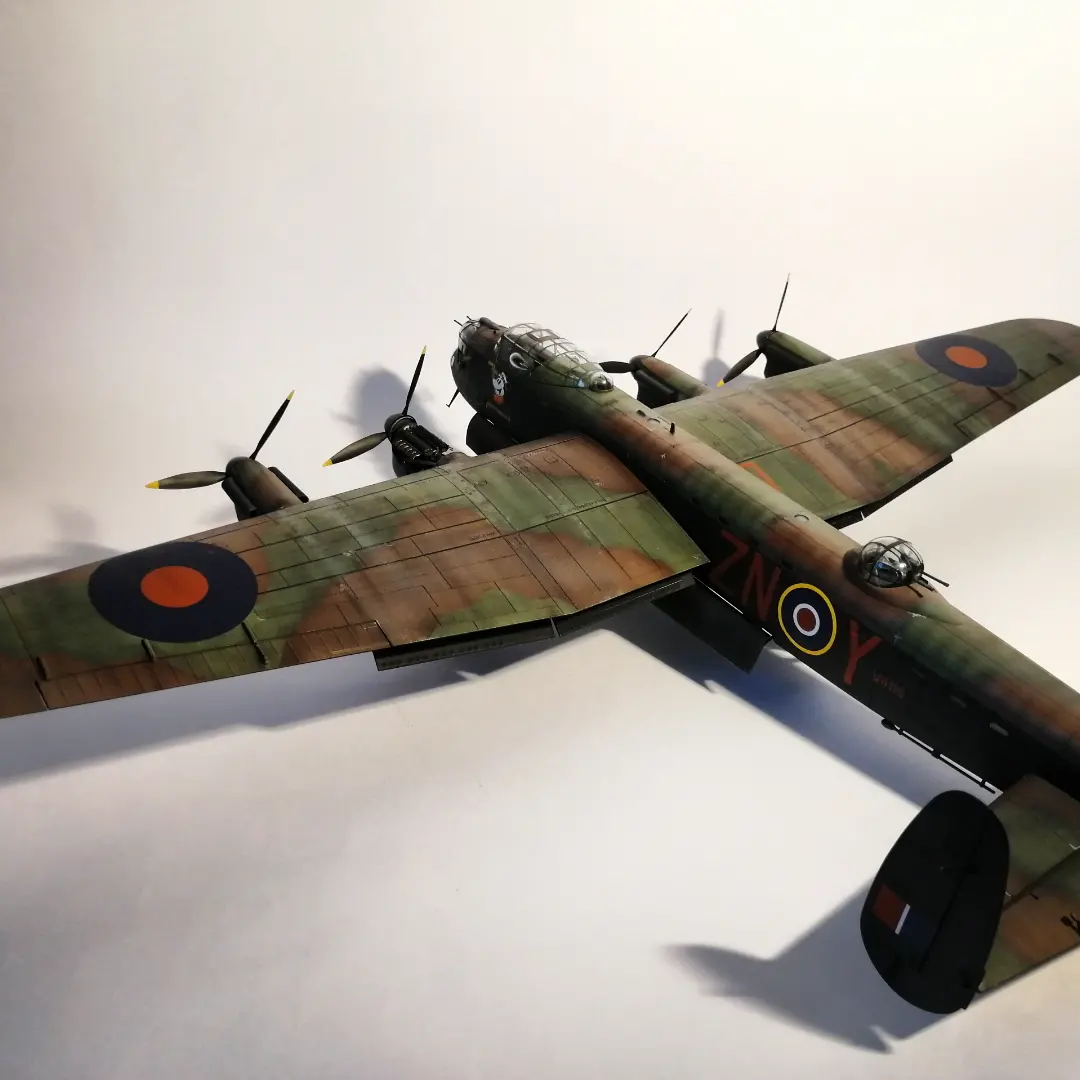
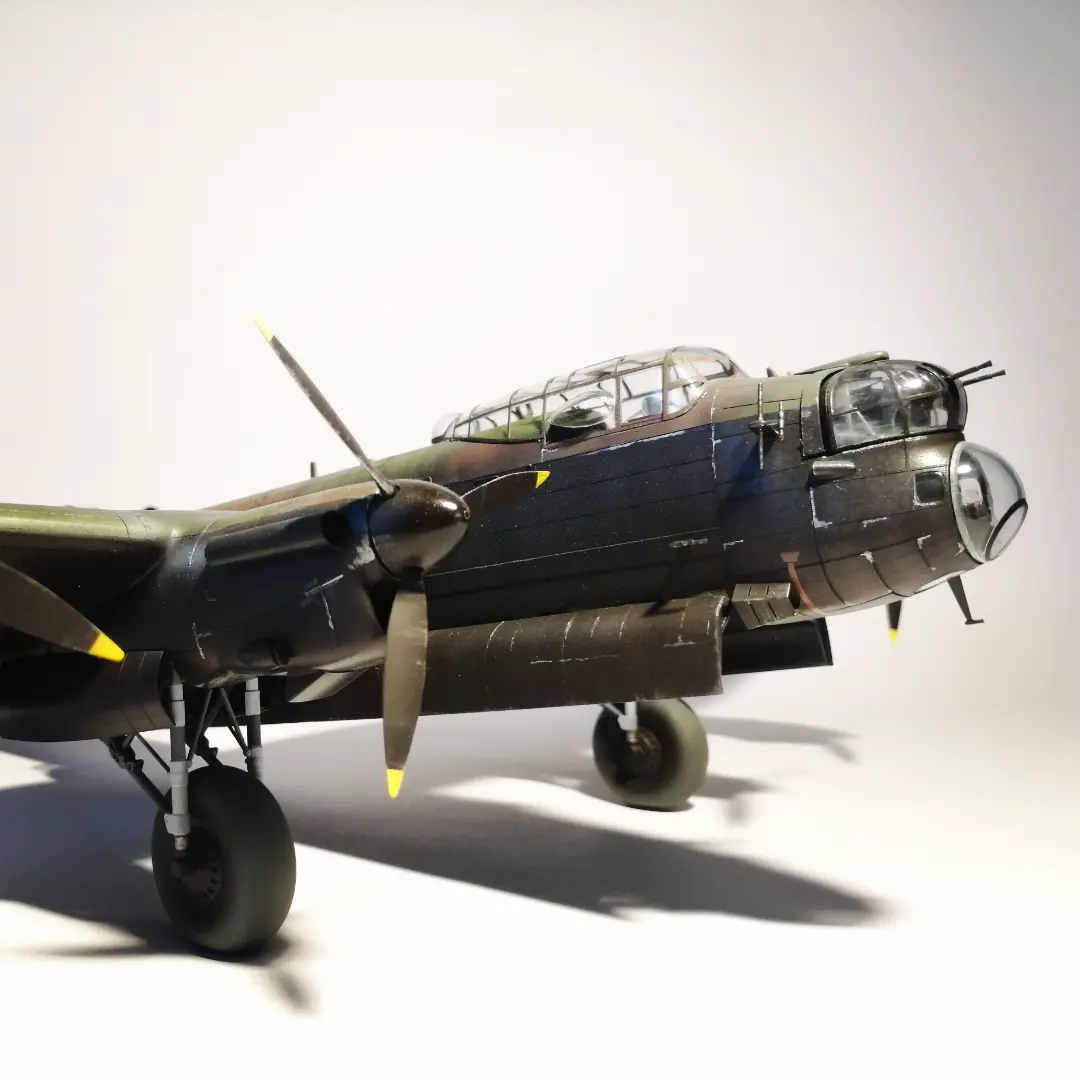
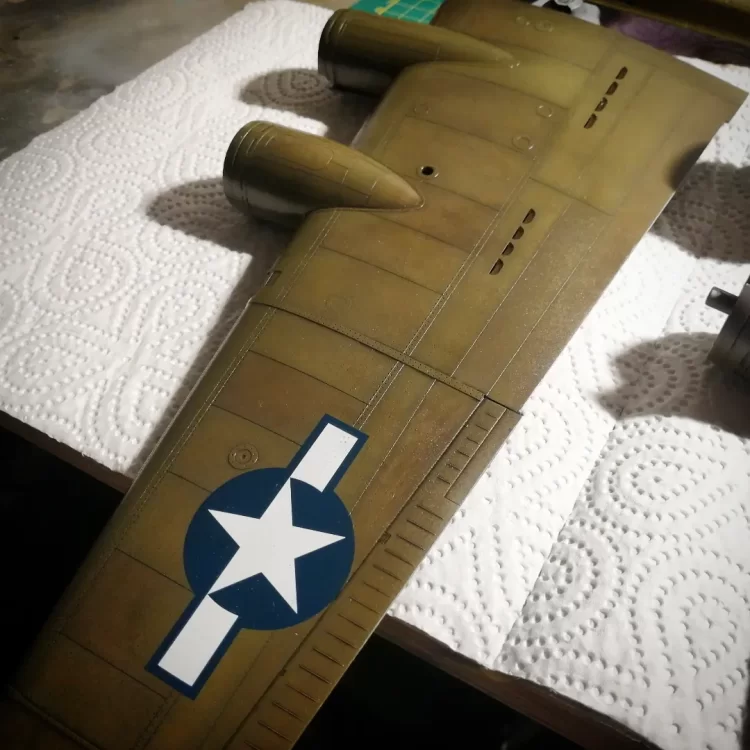
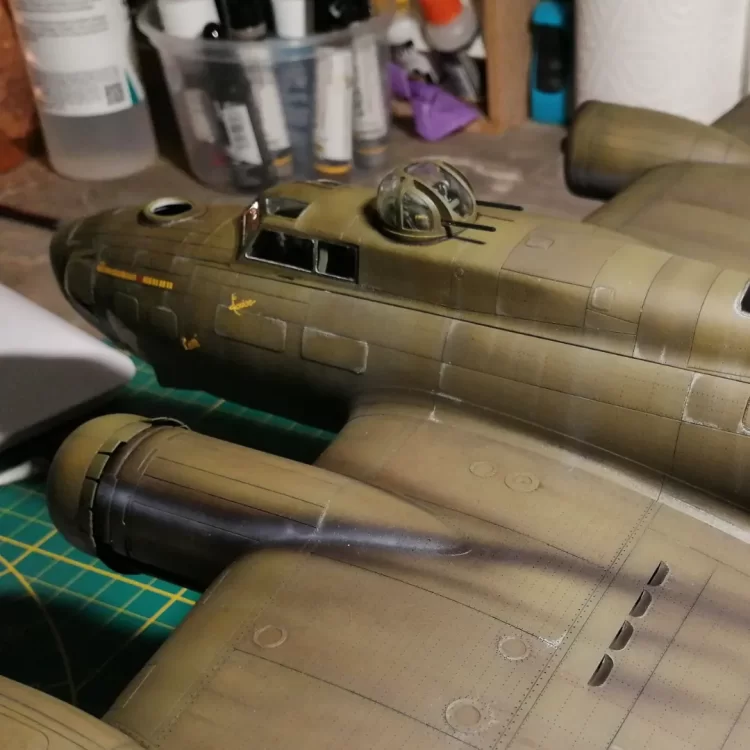
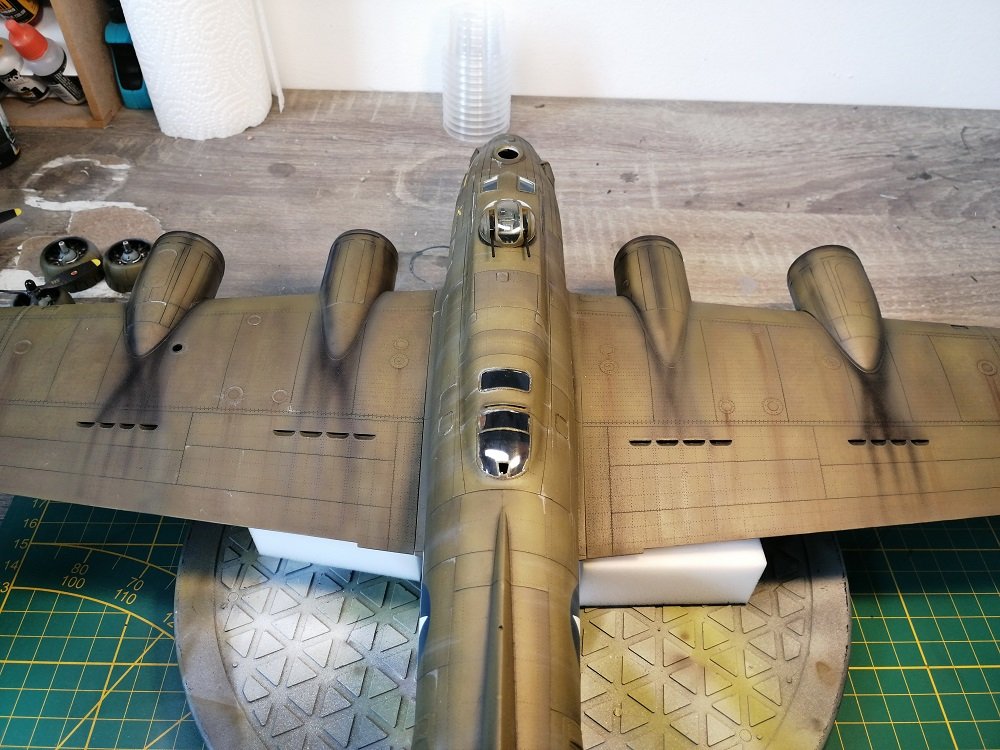
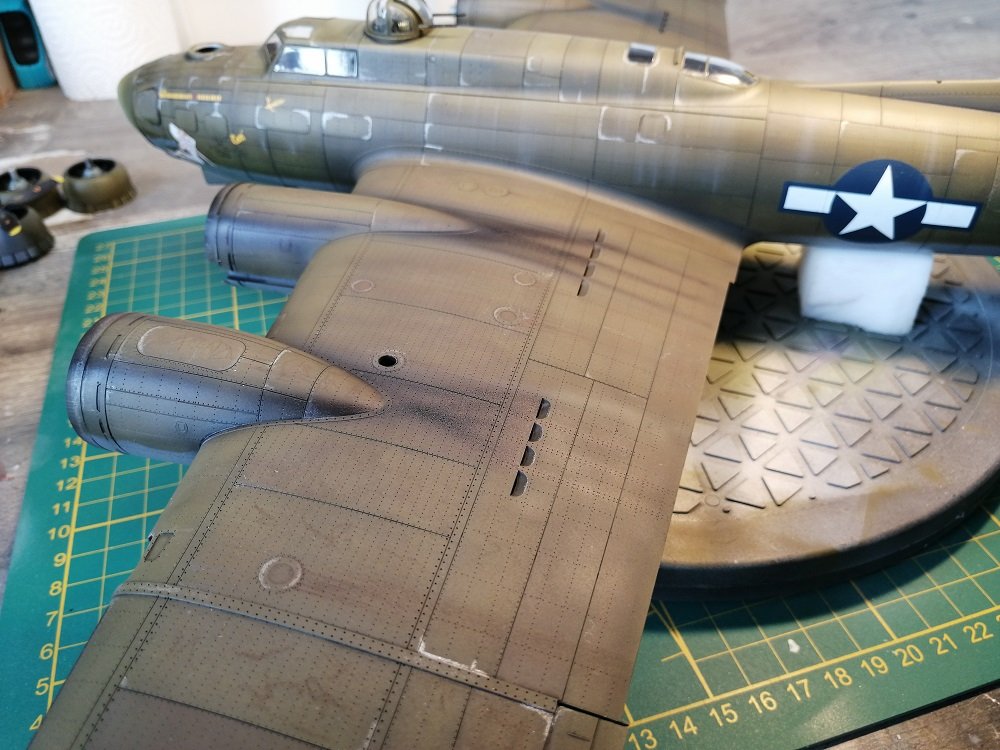
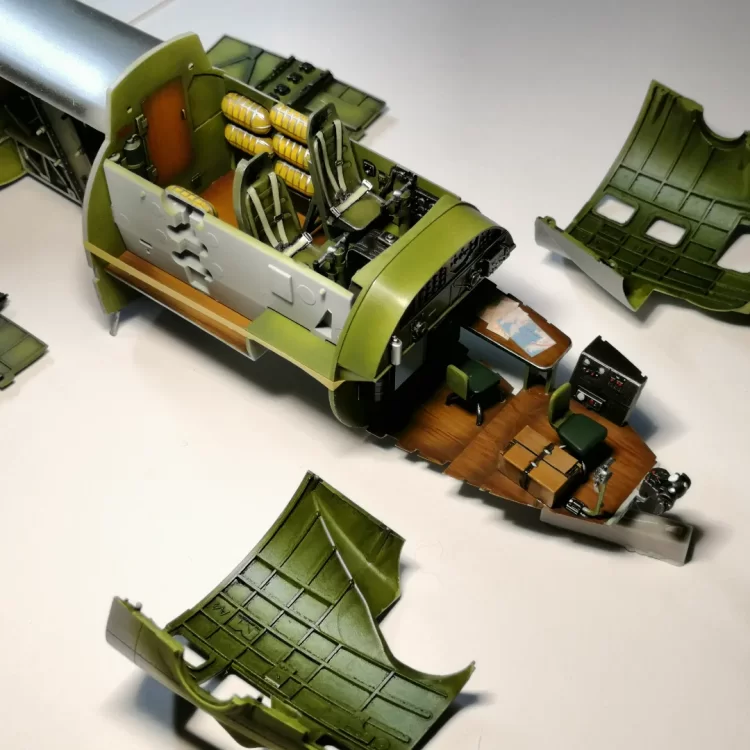
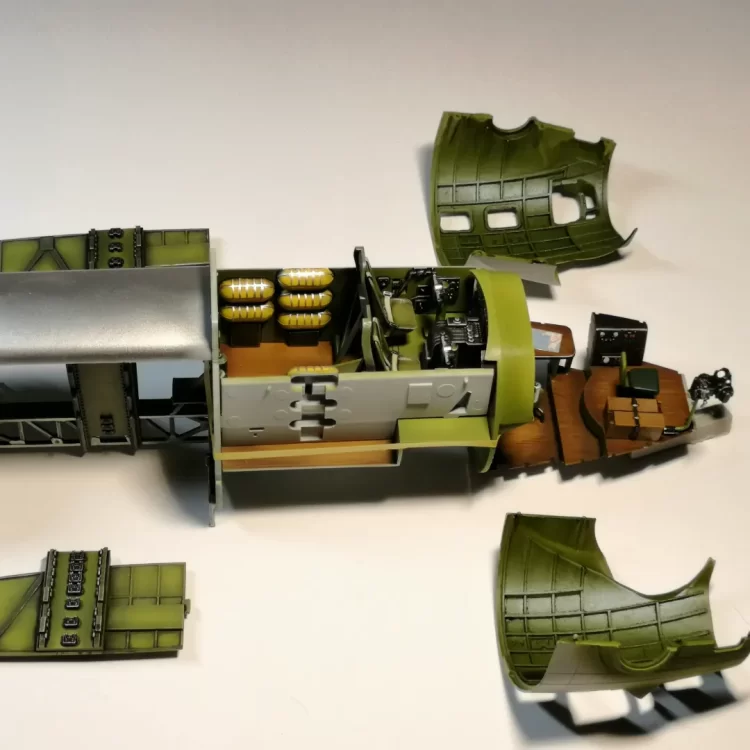
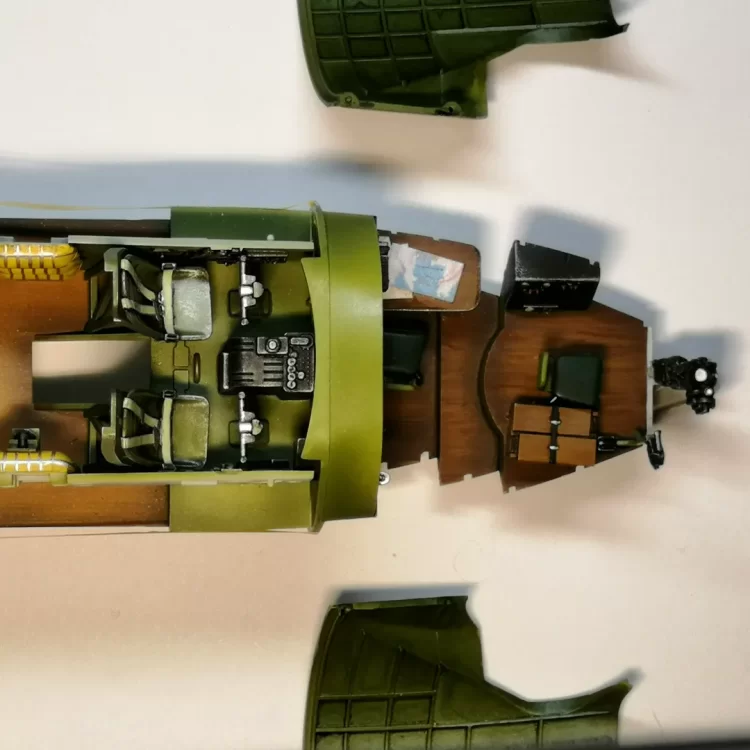
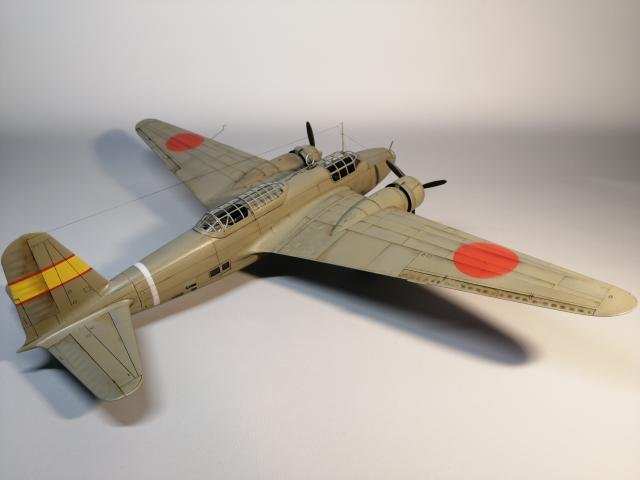
Hi all! Got some new updates; well into the painting and weathering process atm. Kit is coming together quite nicely. Some nasty fit-issues and had some additional seams that needed work. Used various shades of OD to achieve the final result on the paint: Started off with a base-coat of white primer. Made all area's that need to be shaded black. Made some area's lightned up with white/yellow/green. All panel-lines and dark-shaded area's black. Started off with different tones of OD- and the ANA-variant green/grey. Used washes, Neutral Brown and Dark Green on the various panels and area's. When glossed and decals added, the model was given a fine layer of Panel-liner, which was removed by using a damp cloth. Now all is coated in a matt-varnish. Glossy coating the behemoth. She's taking up some serious space on my desk. A clear depiction of the various shades, tones and color variations that appear. Quite happy with the result! A bit further in the progress, used my Weathering Pencils to add some scratches. Made a serious mistake with the oil/exhaust-staining, the vents are not to be showing any trails. Reset, and try again! Very satisfied with the result!

-
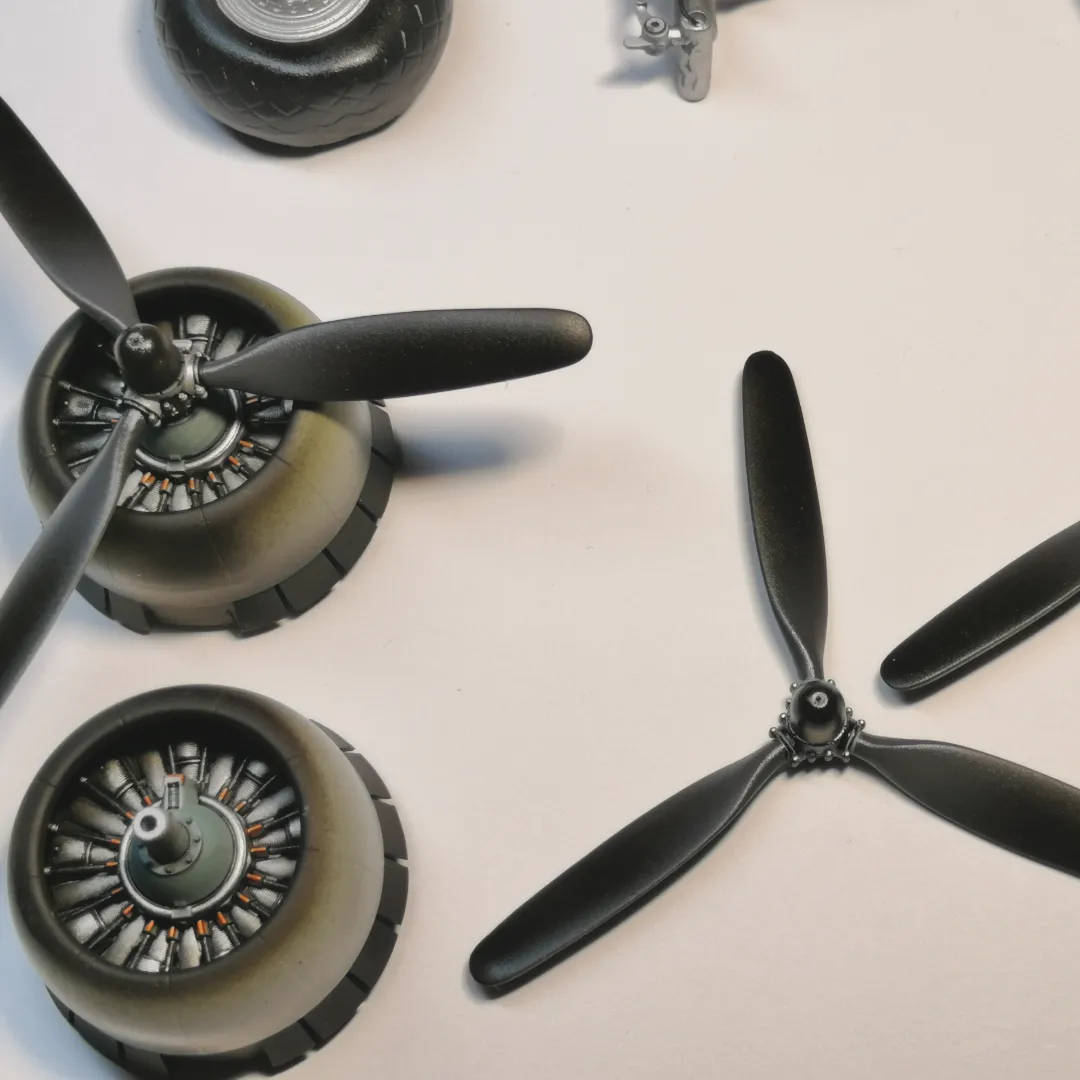
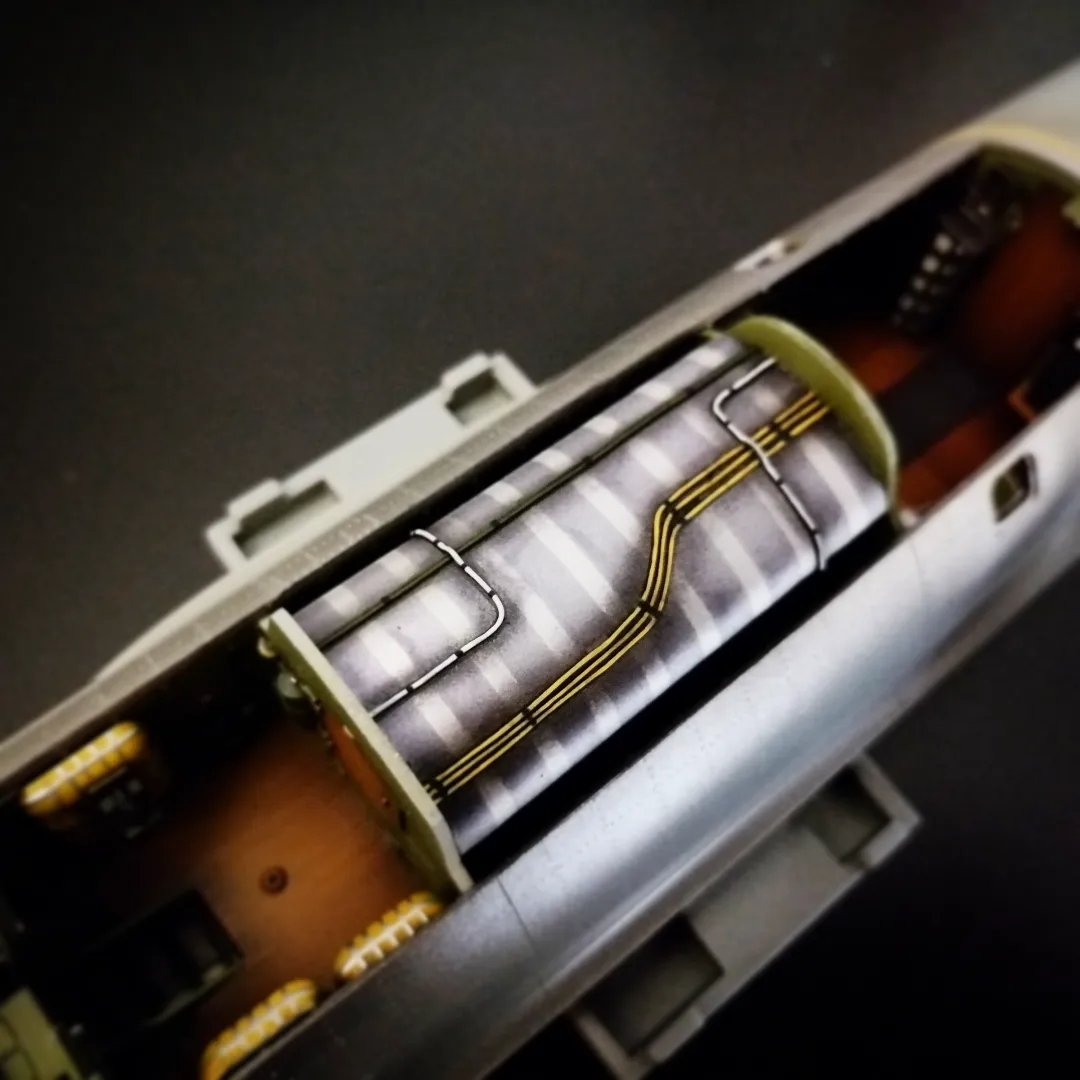
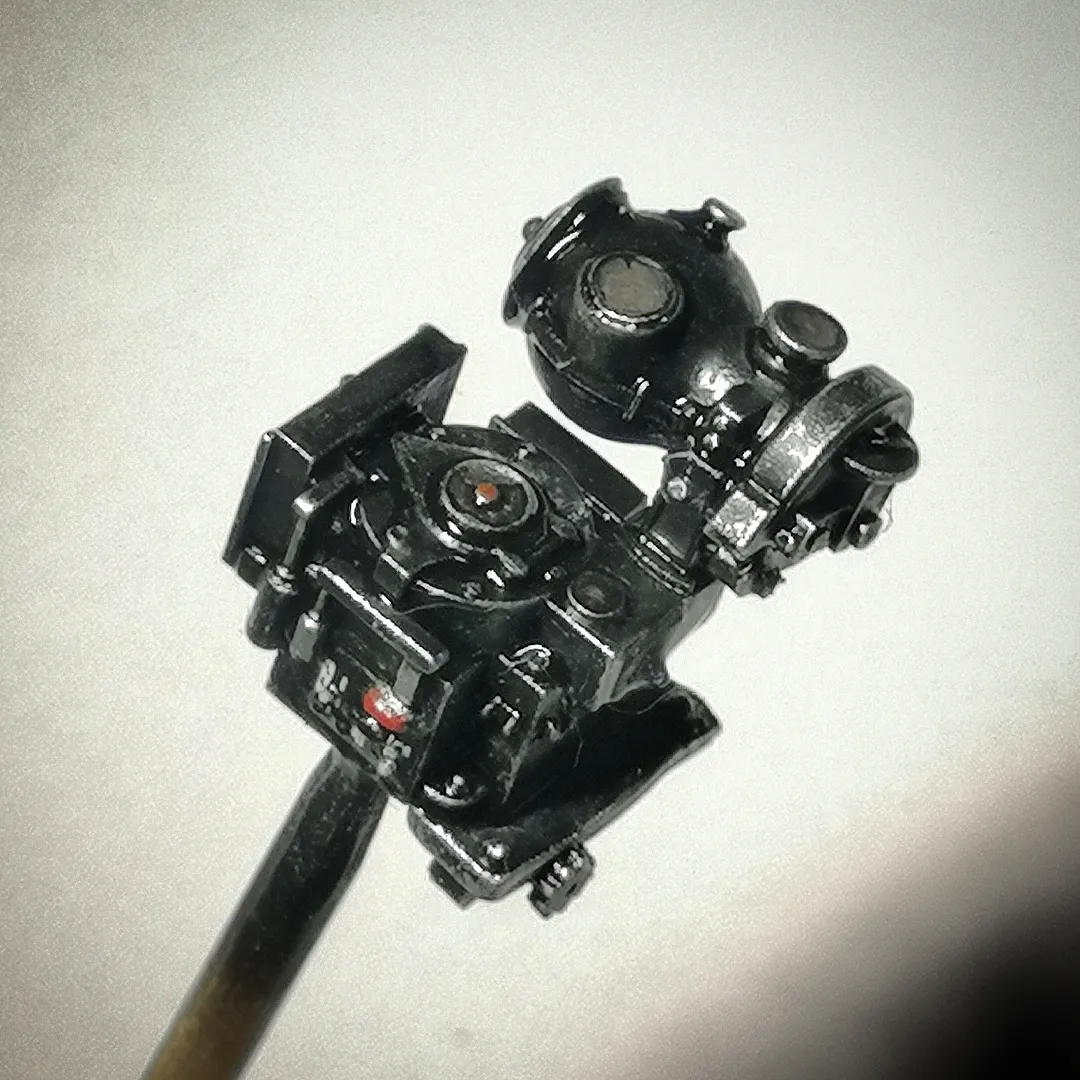
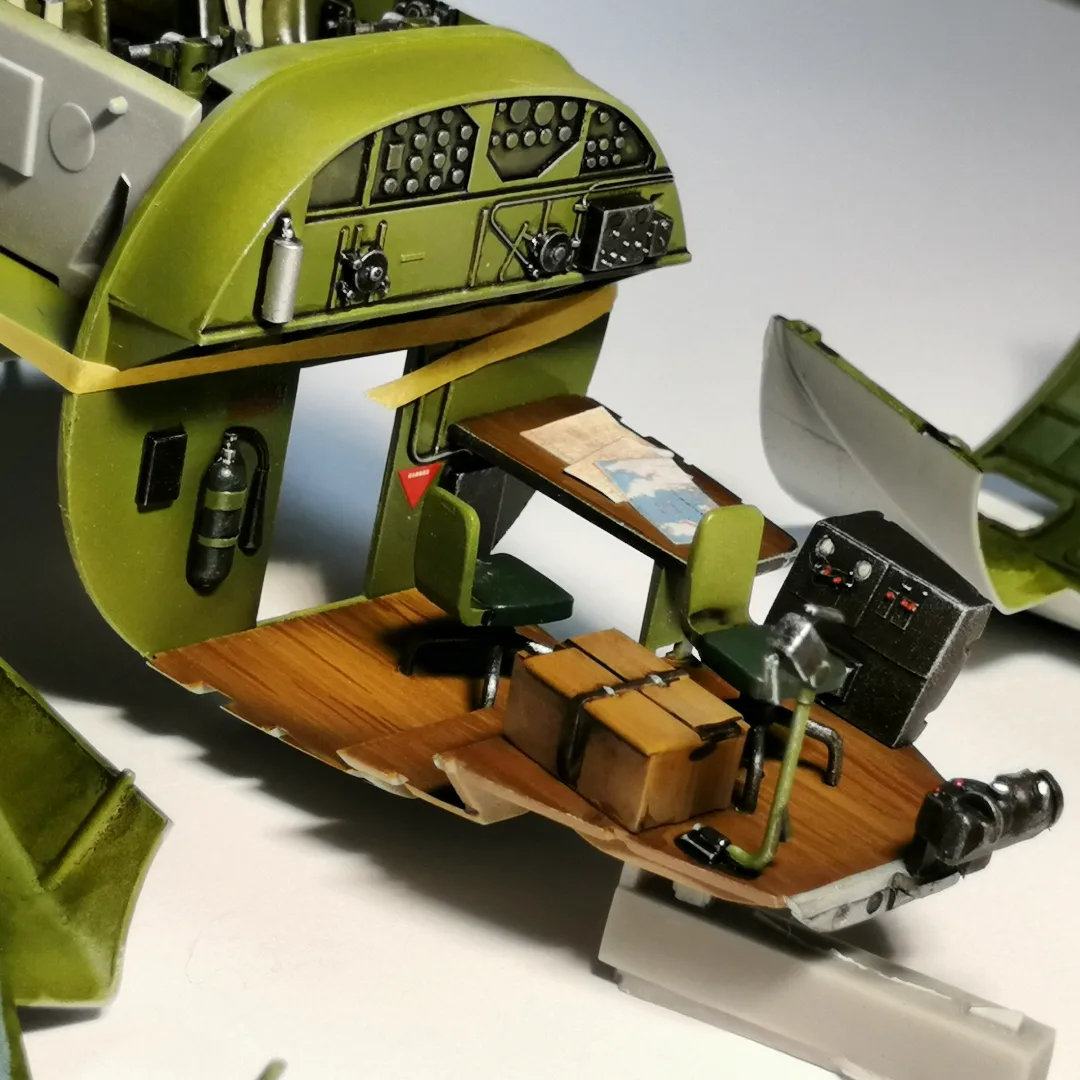
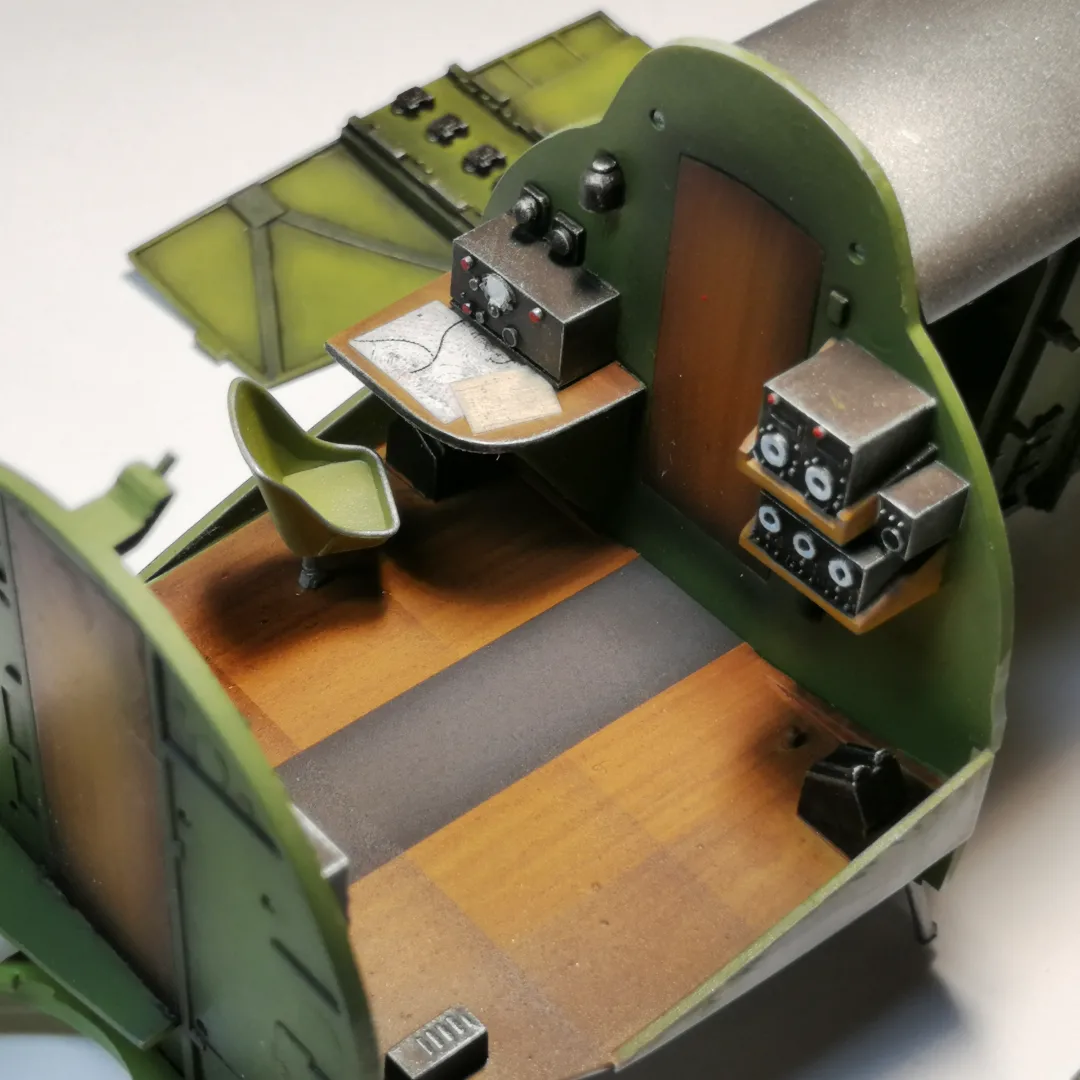
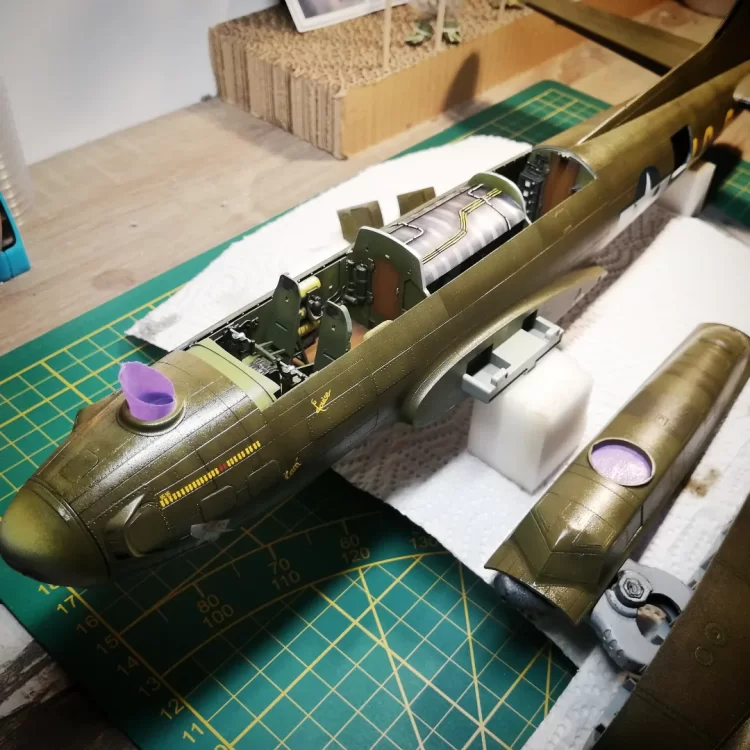
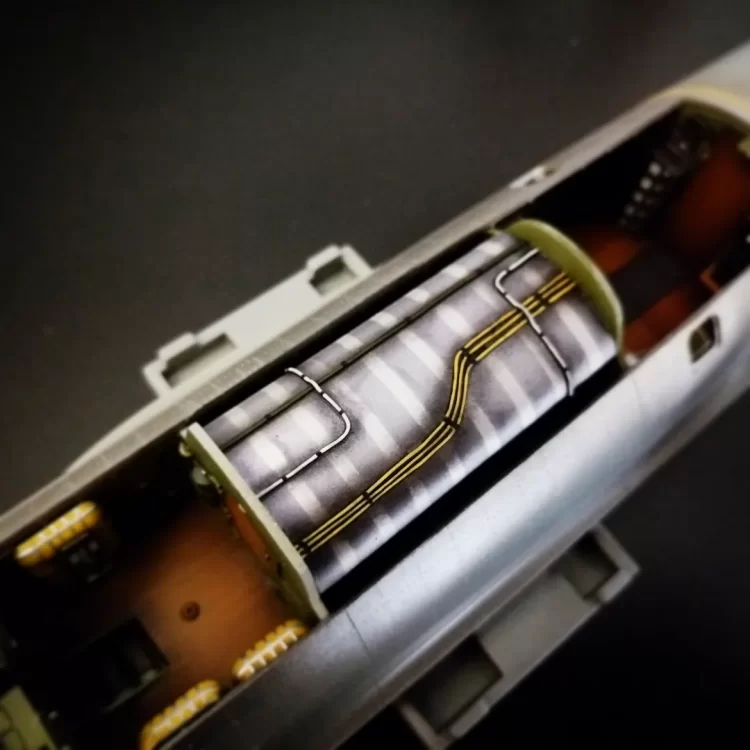
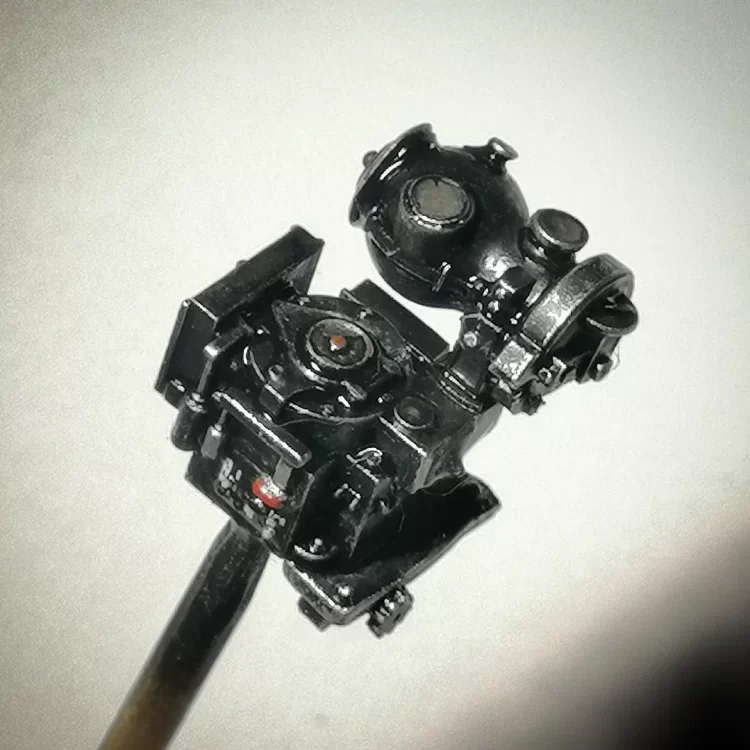
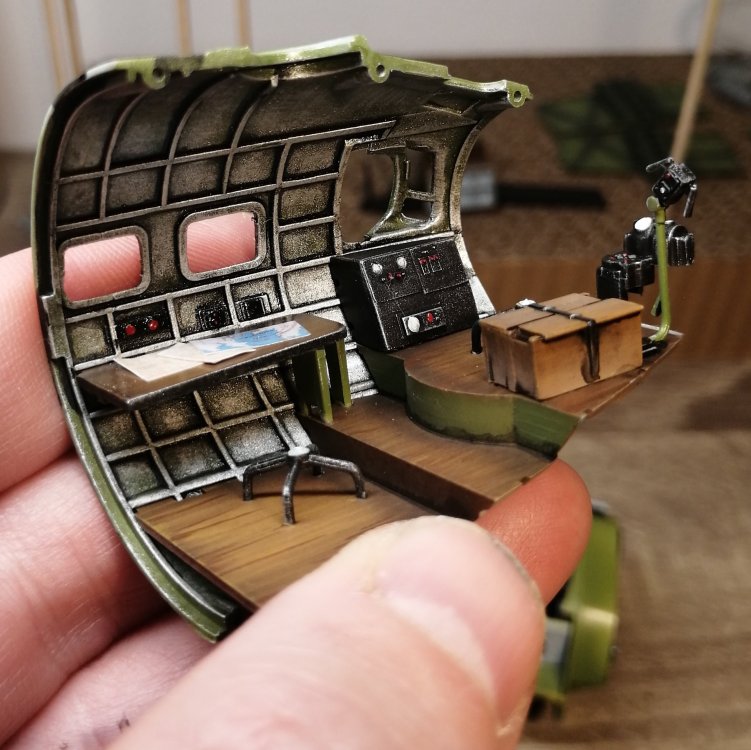
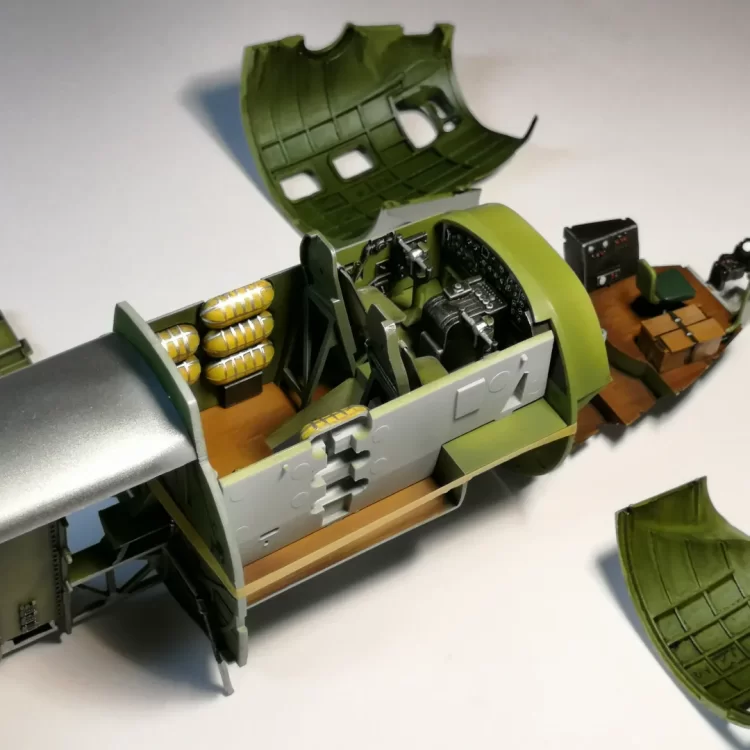
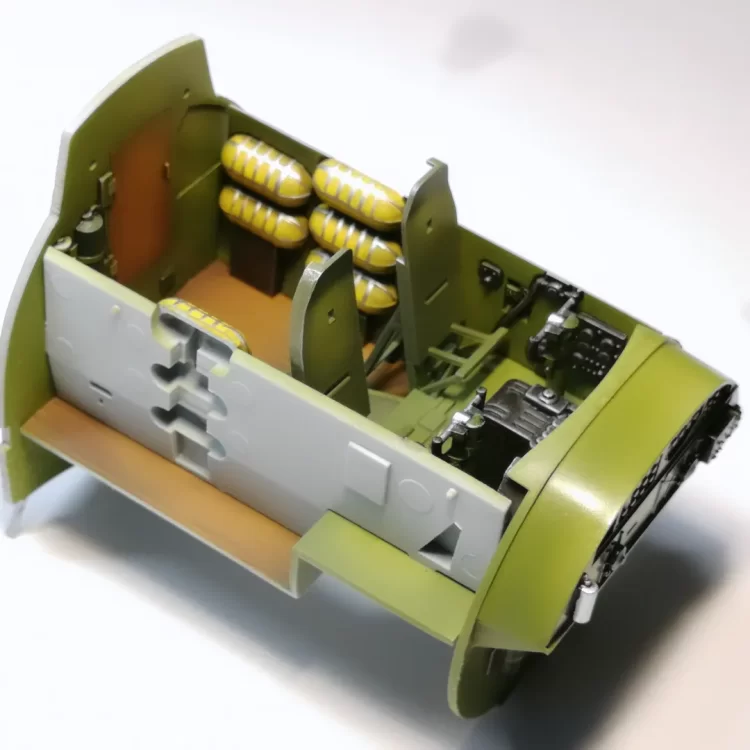
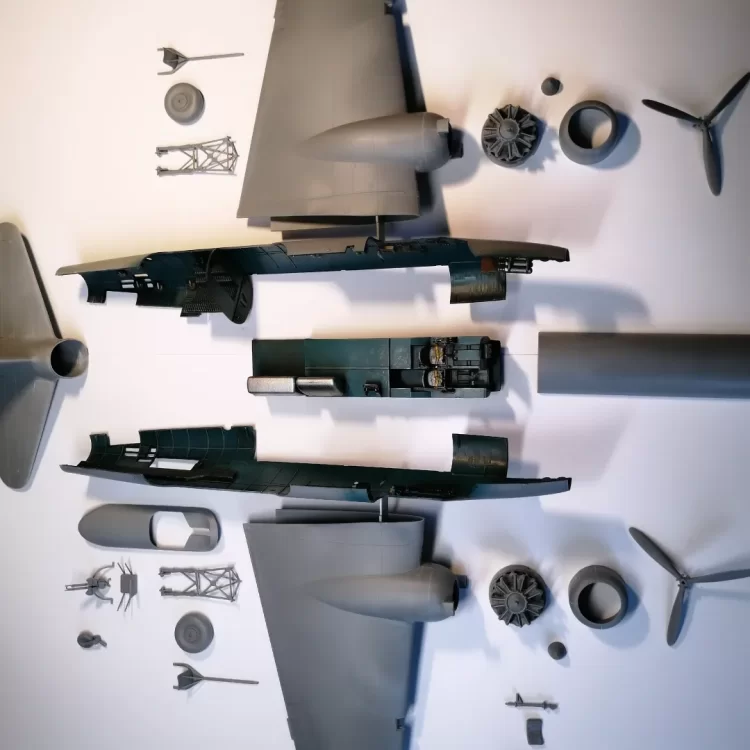
Hi all, Some updates on the (sub)assembly's. Painted all the OOB engines, quite happy with the basic detail. Got an Norden Bombsight 1/48 at the Lingen modelfair couple of weeks ago, it really adds that extra mile to the detail. The OOB-Norden is just not what I wanted, especially when it is that visible through the front window. Added some scratch cabling and lines to the somewhat dull bomb bay roof. I will leave to top detachable, this just adds some slight playfully details.

-
When you make sure that the pin and receiver are fitting well, as in the pin is fully inserted, you can glue more of the gear struts against that bulkhead. It will offer some extra support I would say, if you treat the model as you should treat a static model, it will do fine. I'm more afraid of the times I will take it out on display somewhere else.
-
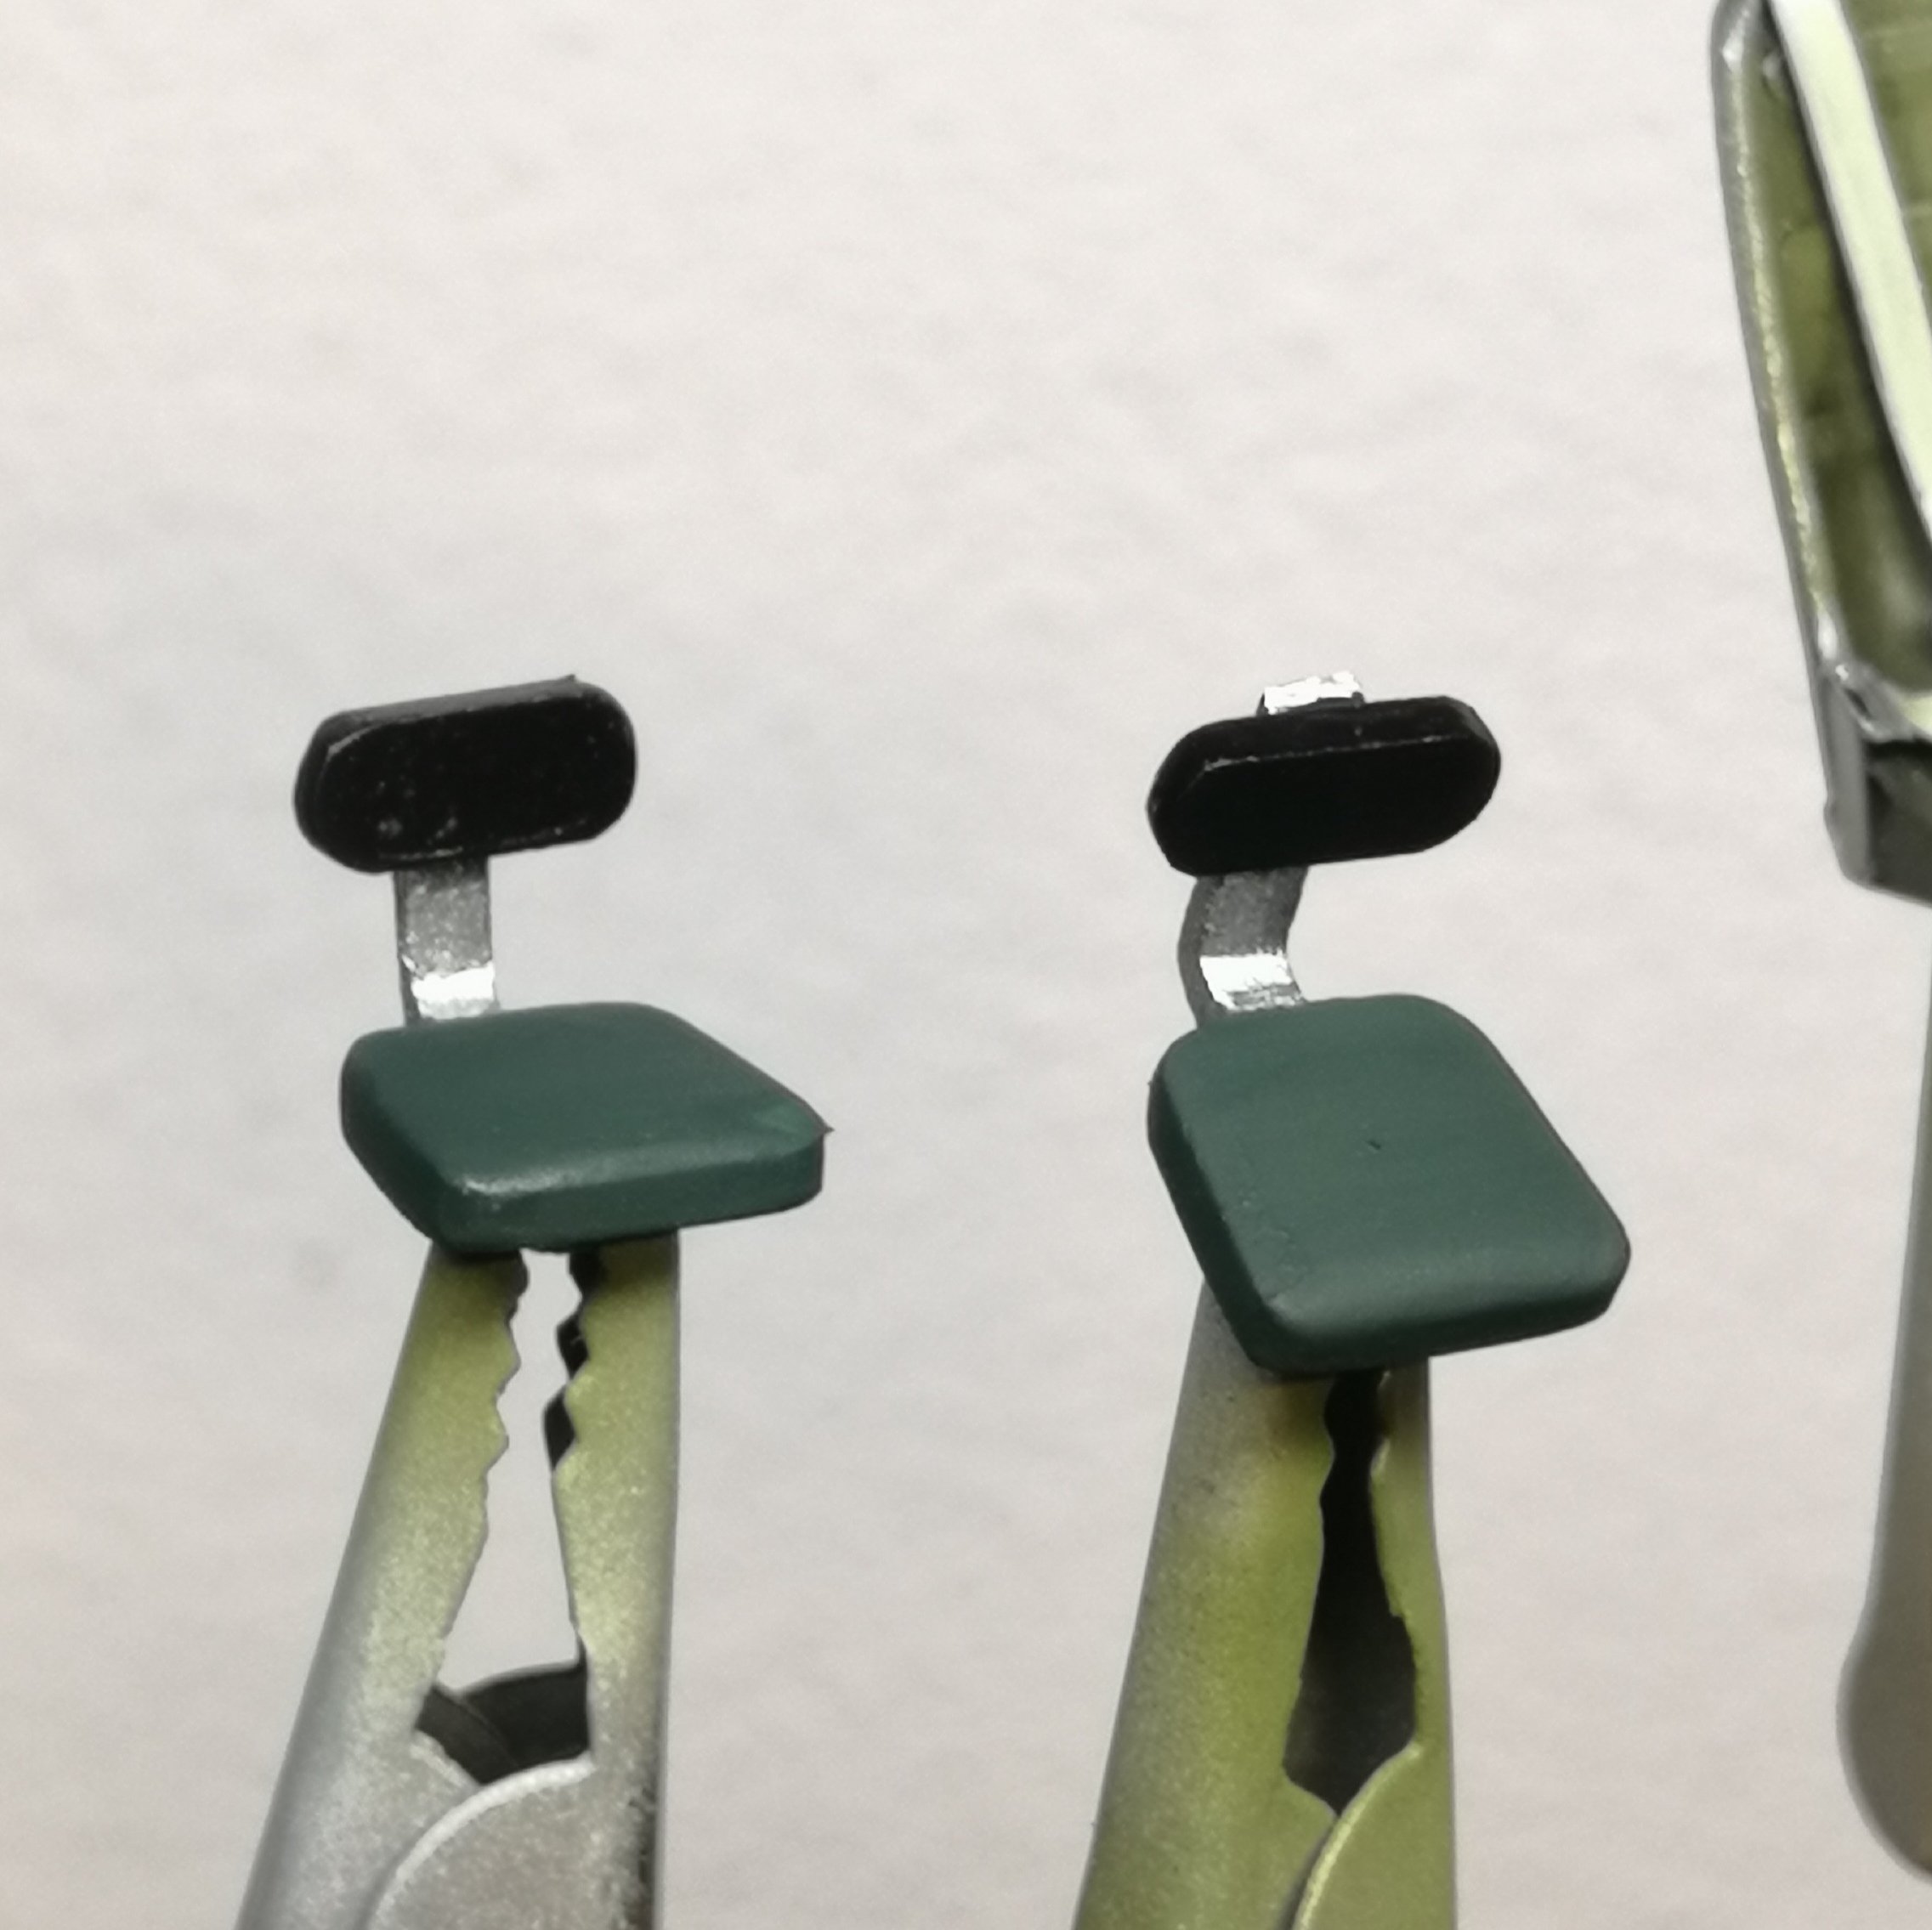
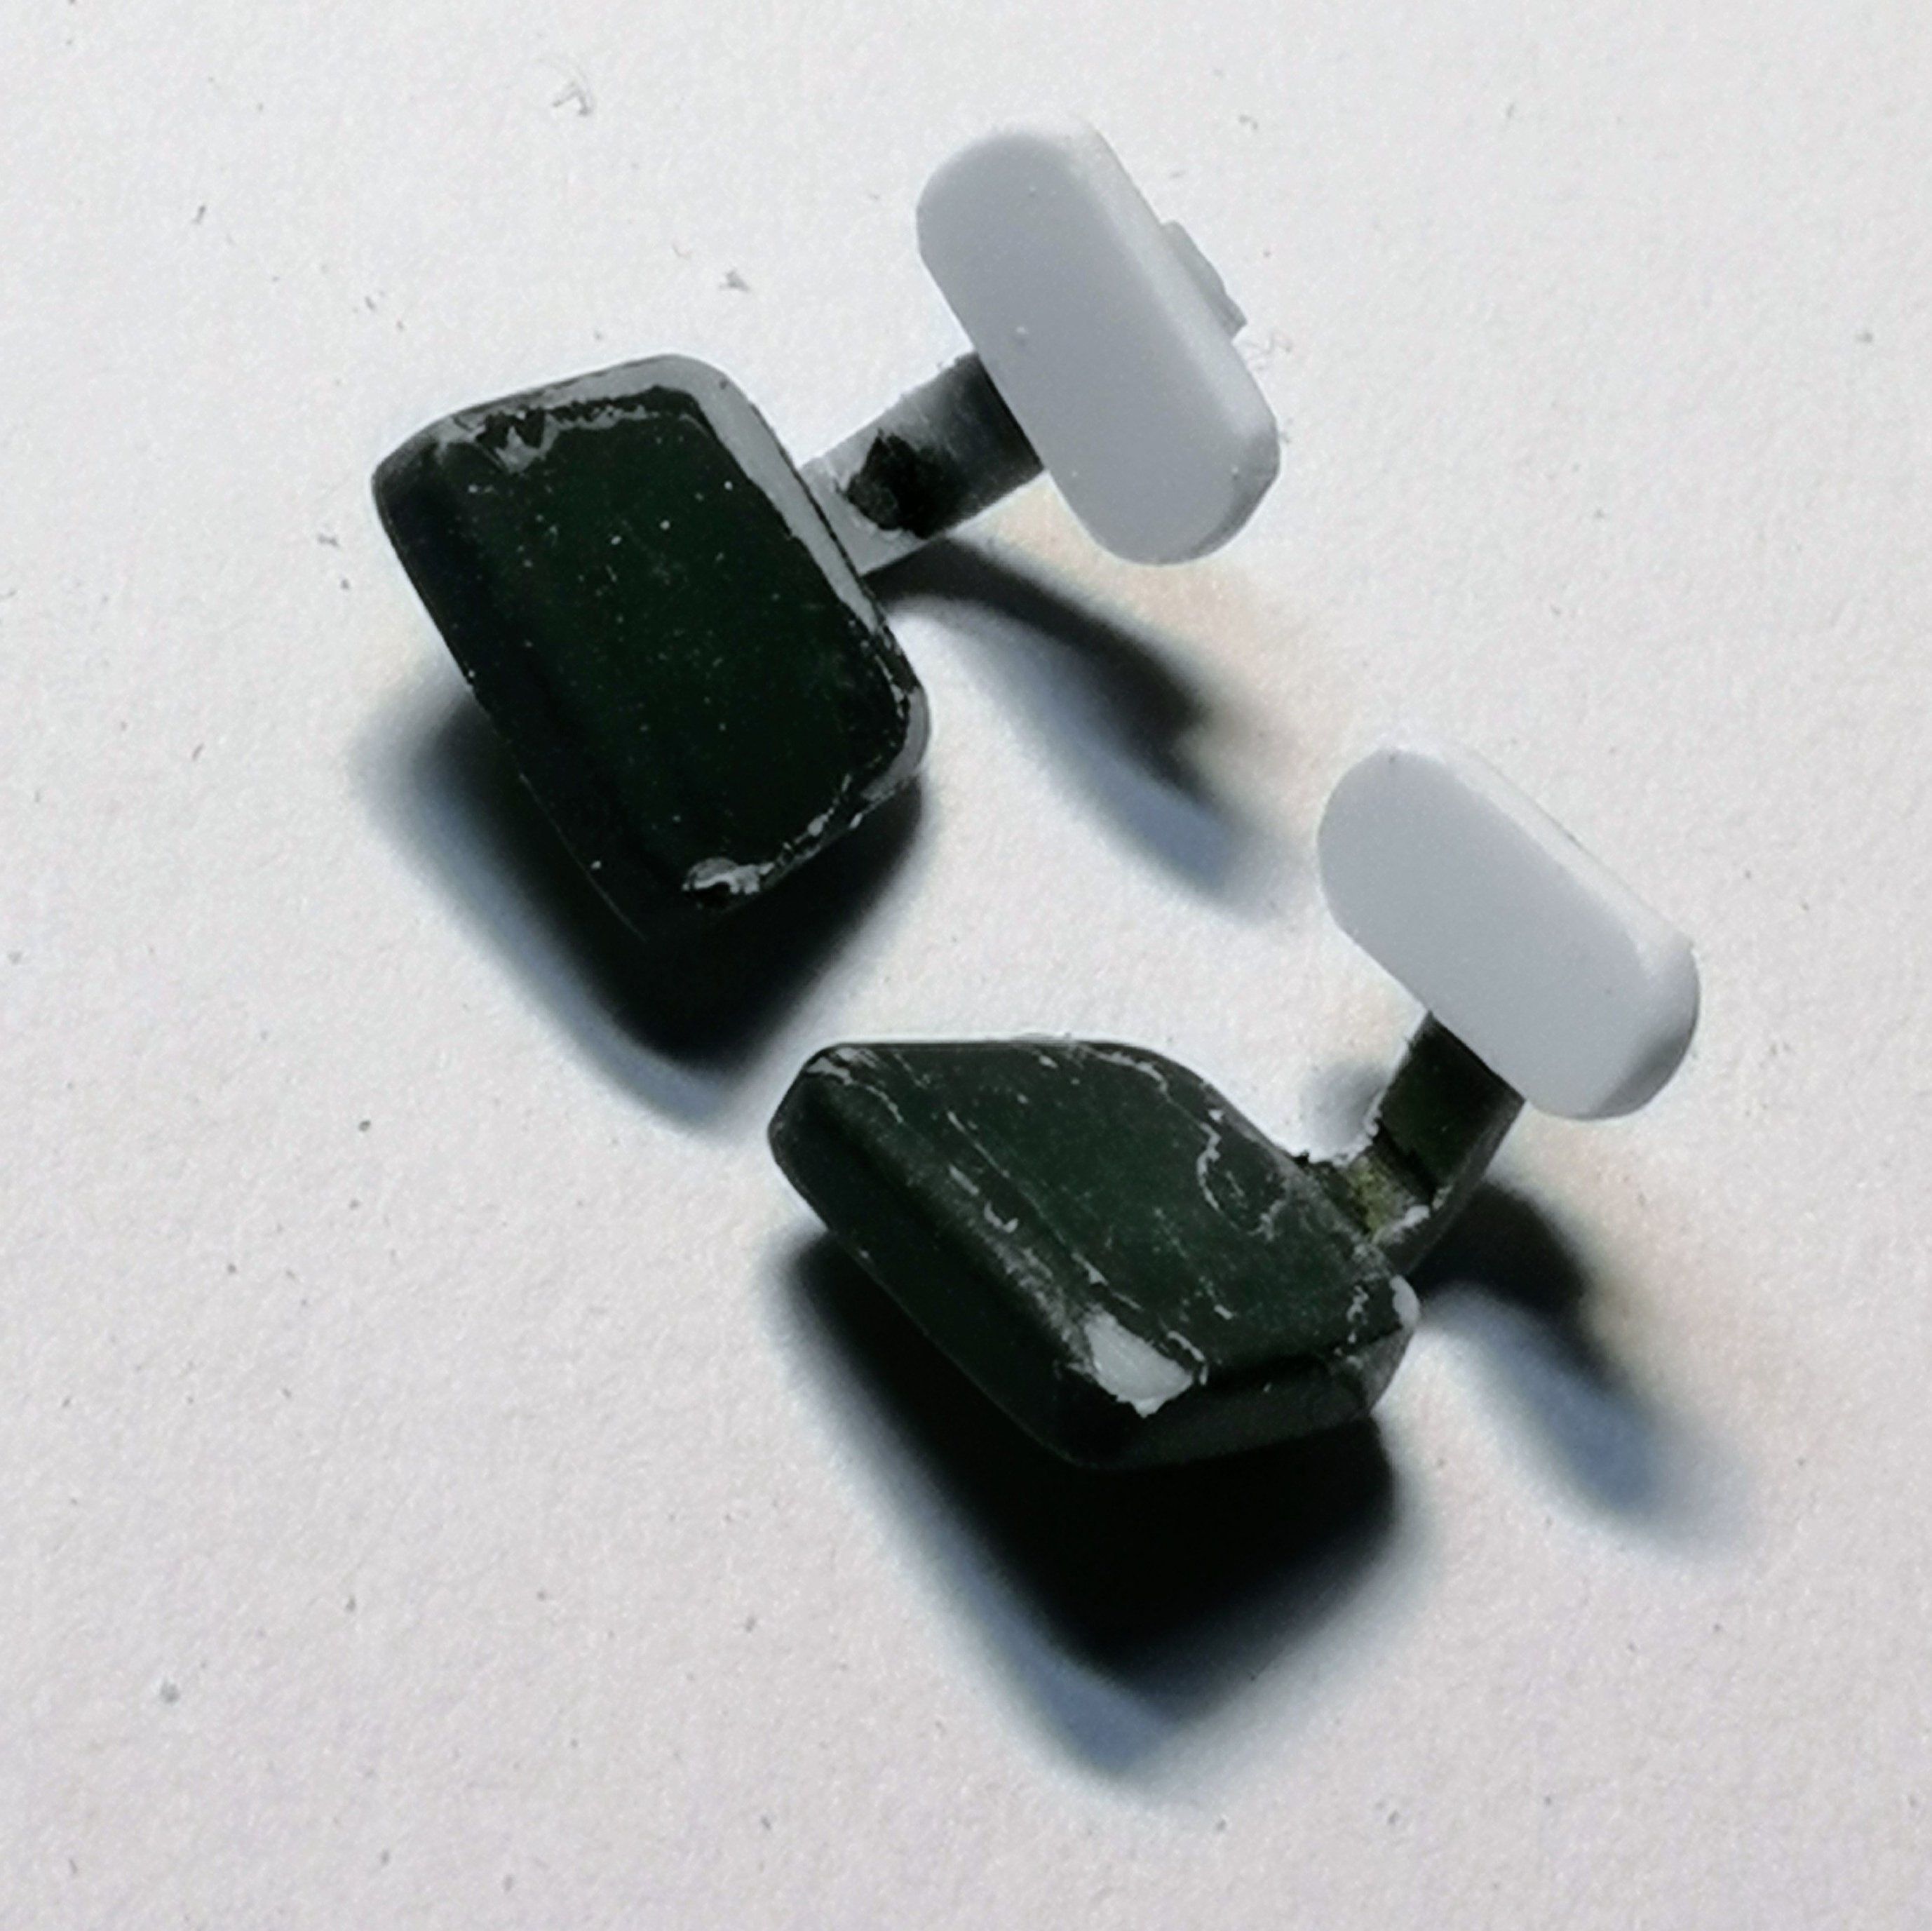
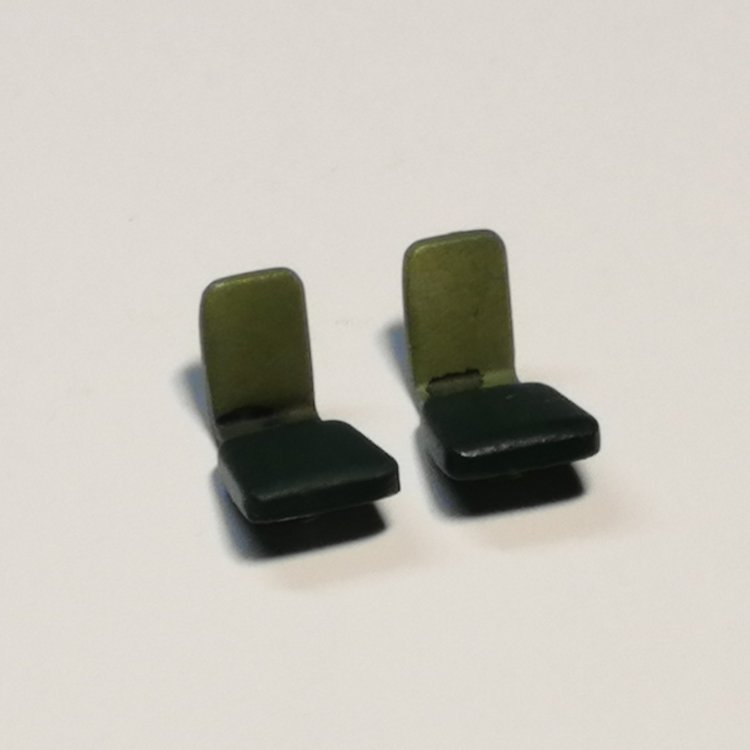
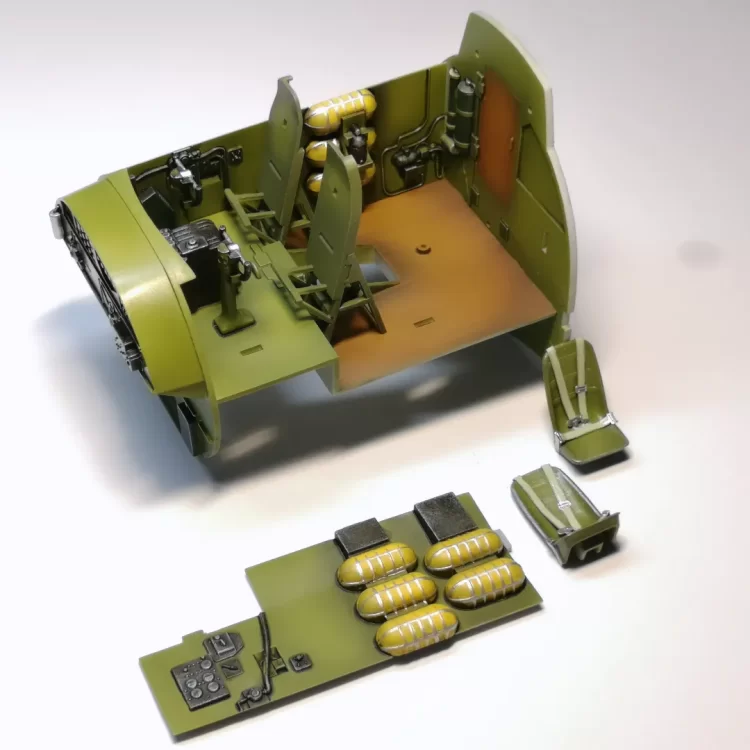
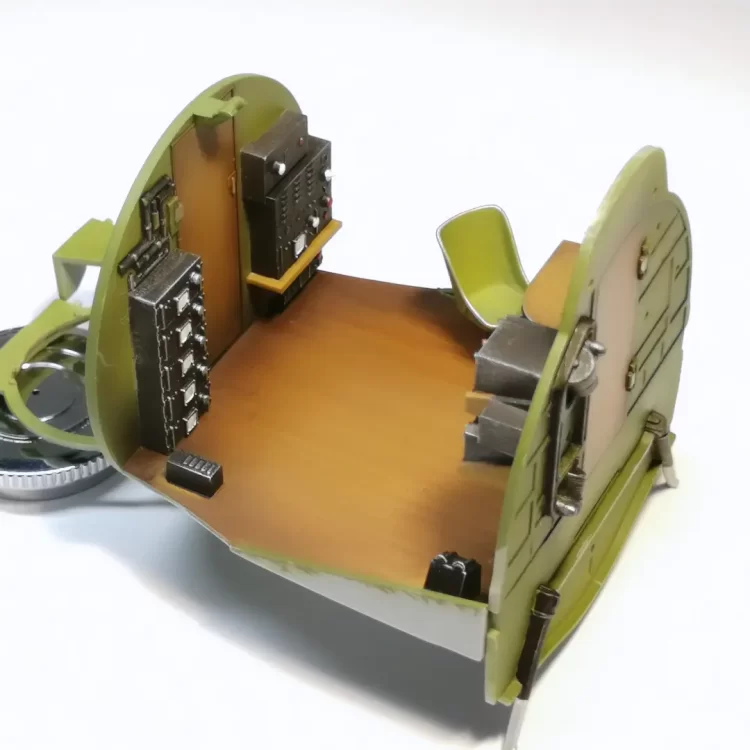
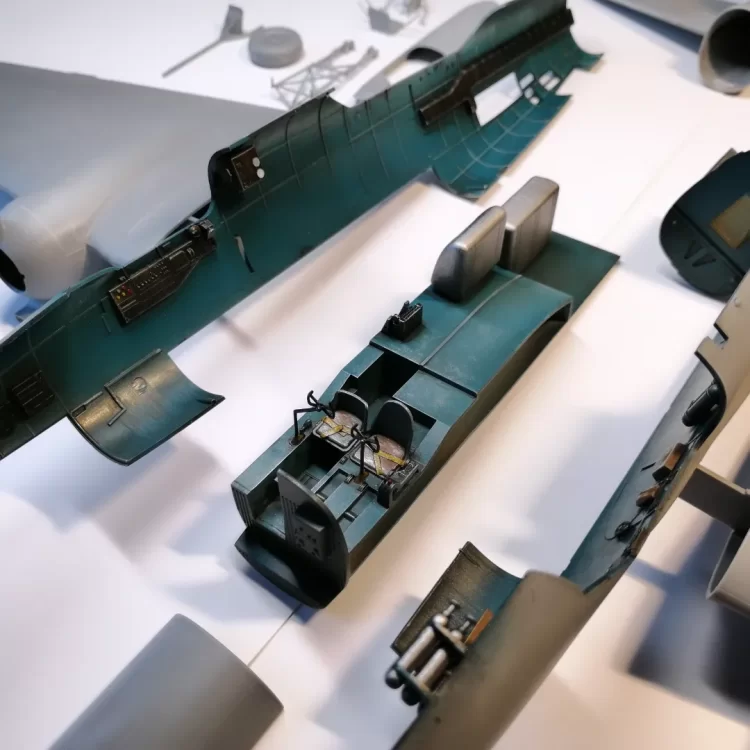
Did some upgrading on those horrific front seats. Removed the back and shaped with my exacto knife. Used some evergreen to fabricate some back rests. Quite happy with the result. Painted the forward fuselage bare metal, the green underlay offers a nice variation of color.


-
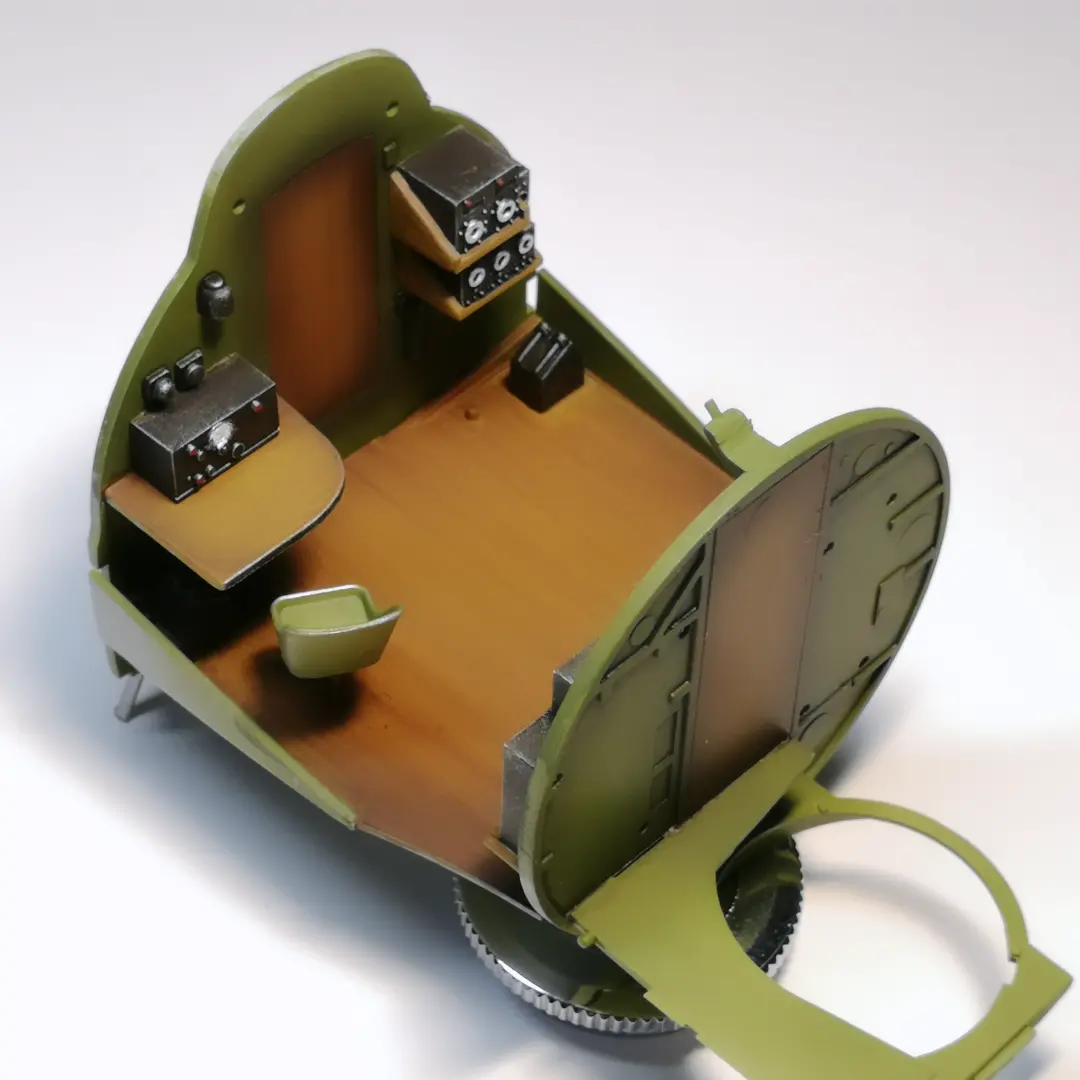
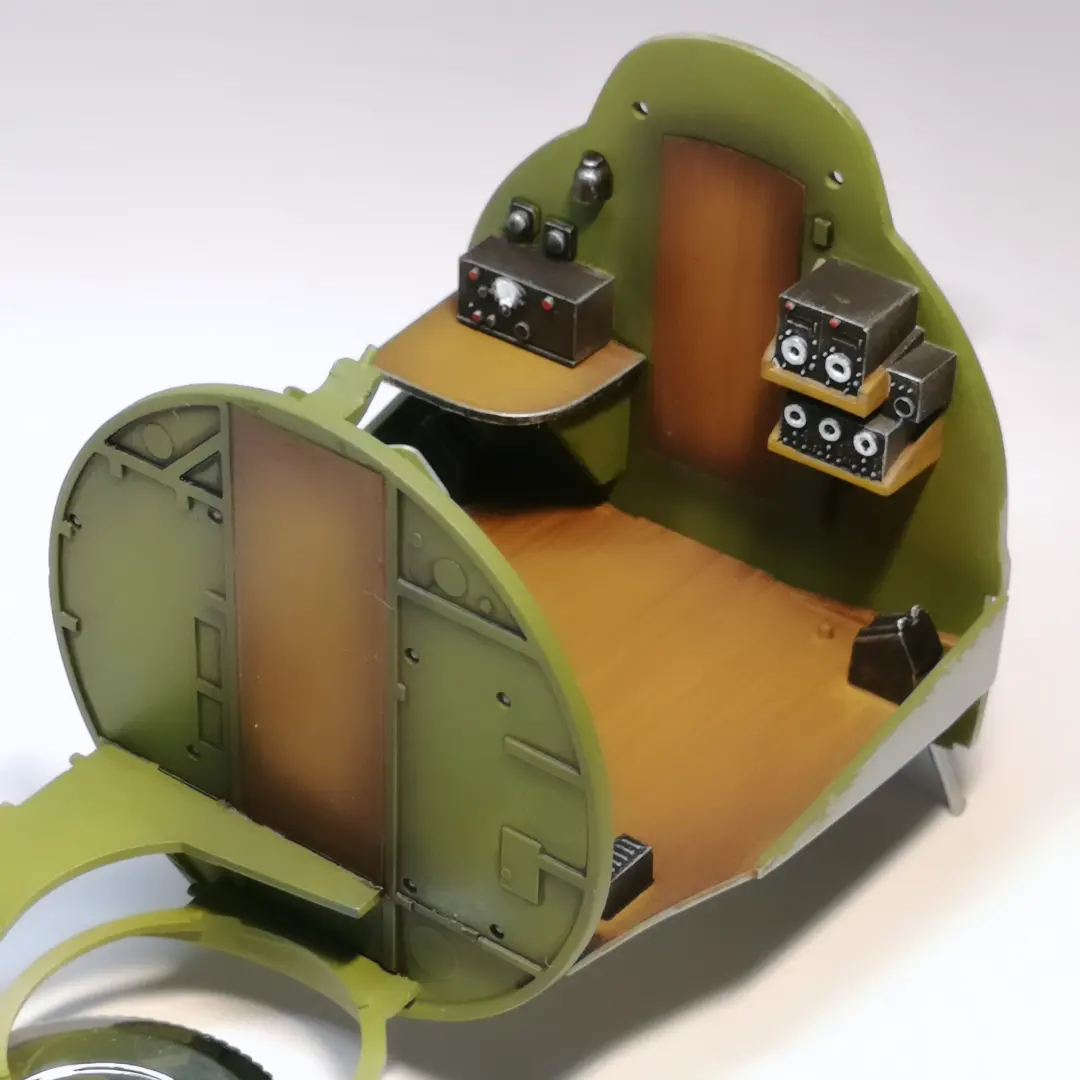
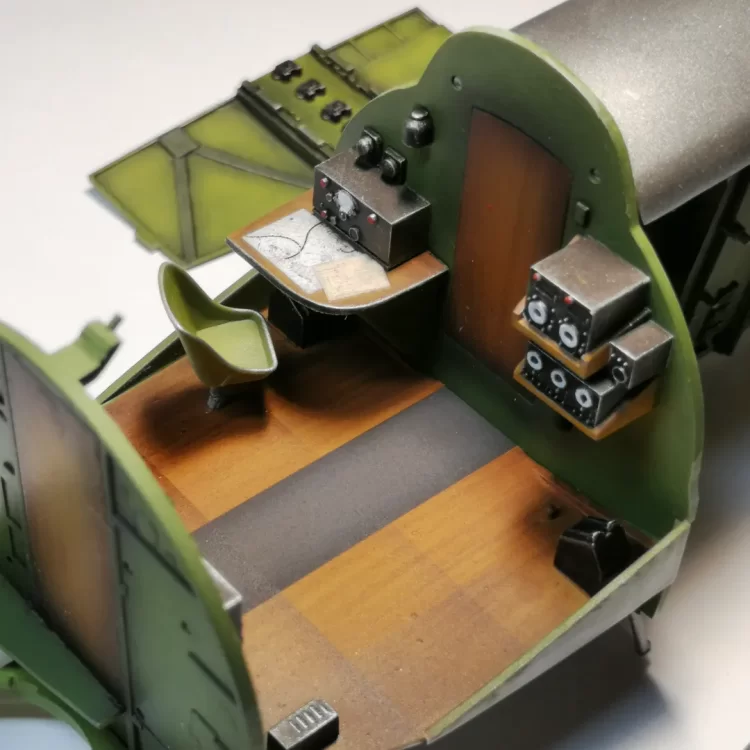
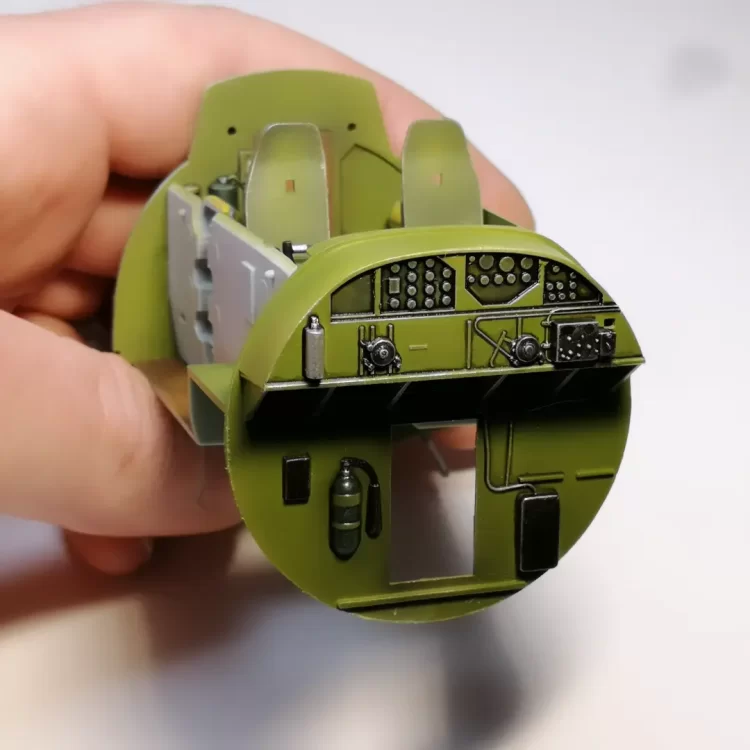
As promised! This evenings work: the front and back interior. So sad that nearly all of it will disappear once the fuselage is closed. Will try to score some more add-ons at Lingen this weekend. 🤗 Im really bothered that there a no control levers and the way the steering looks like. Maybe I'll score a nice Norden Bombsight on the way... Added some shades to create the plywood feel to the floor. Made some maps and logbooks, completed the front interior. Next up! Fuselage painting (inside)!

- 24 replies
-
- 11
-

-
Thanks all for the support! Steadily continuing. Will be updating tonight. 😊
-
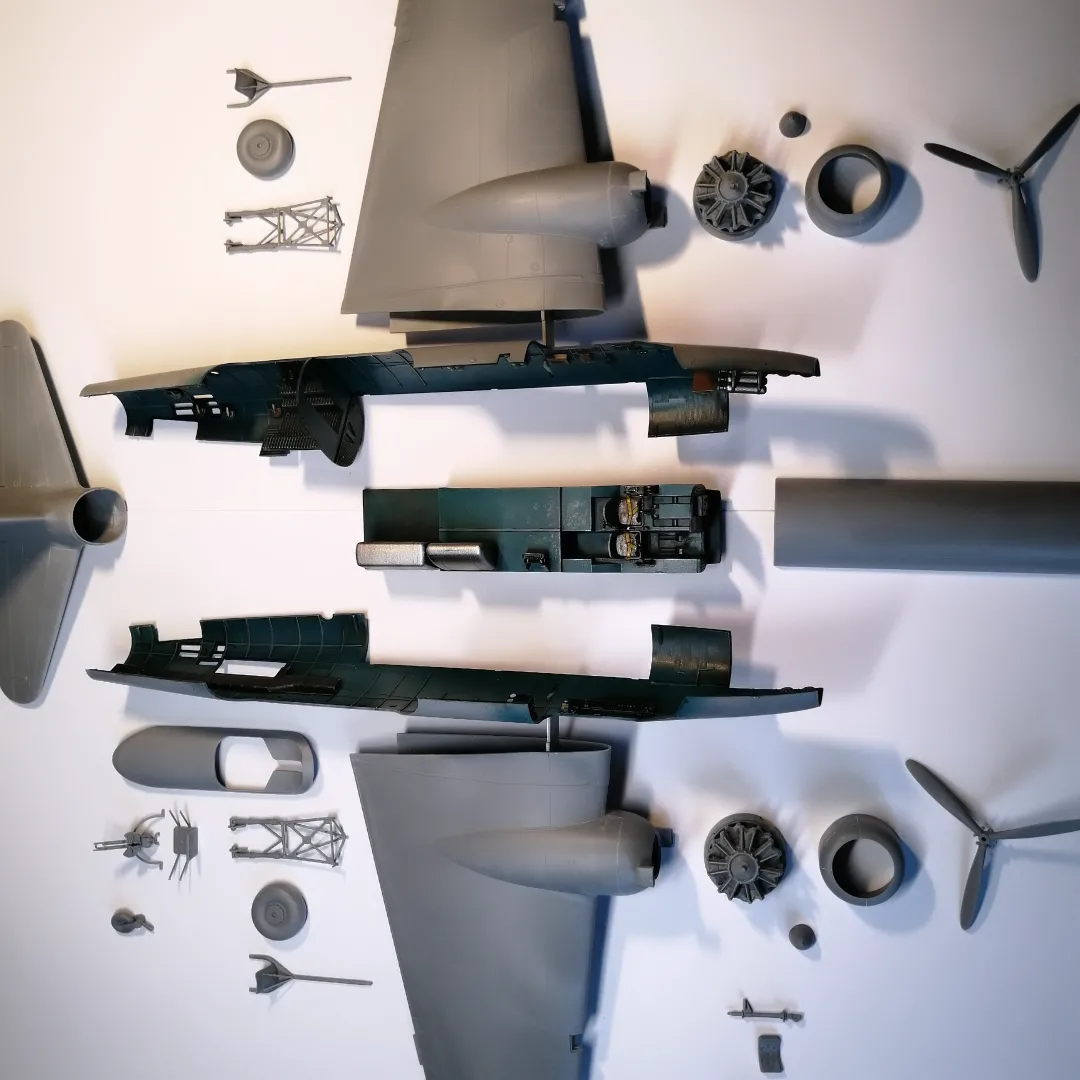
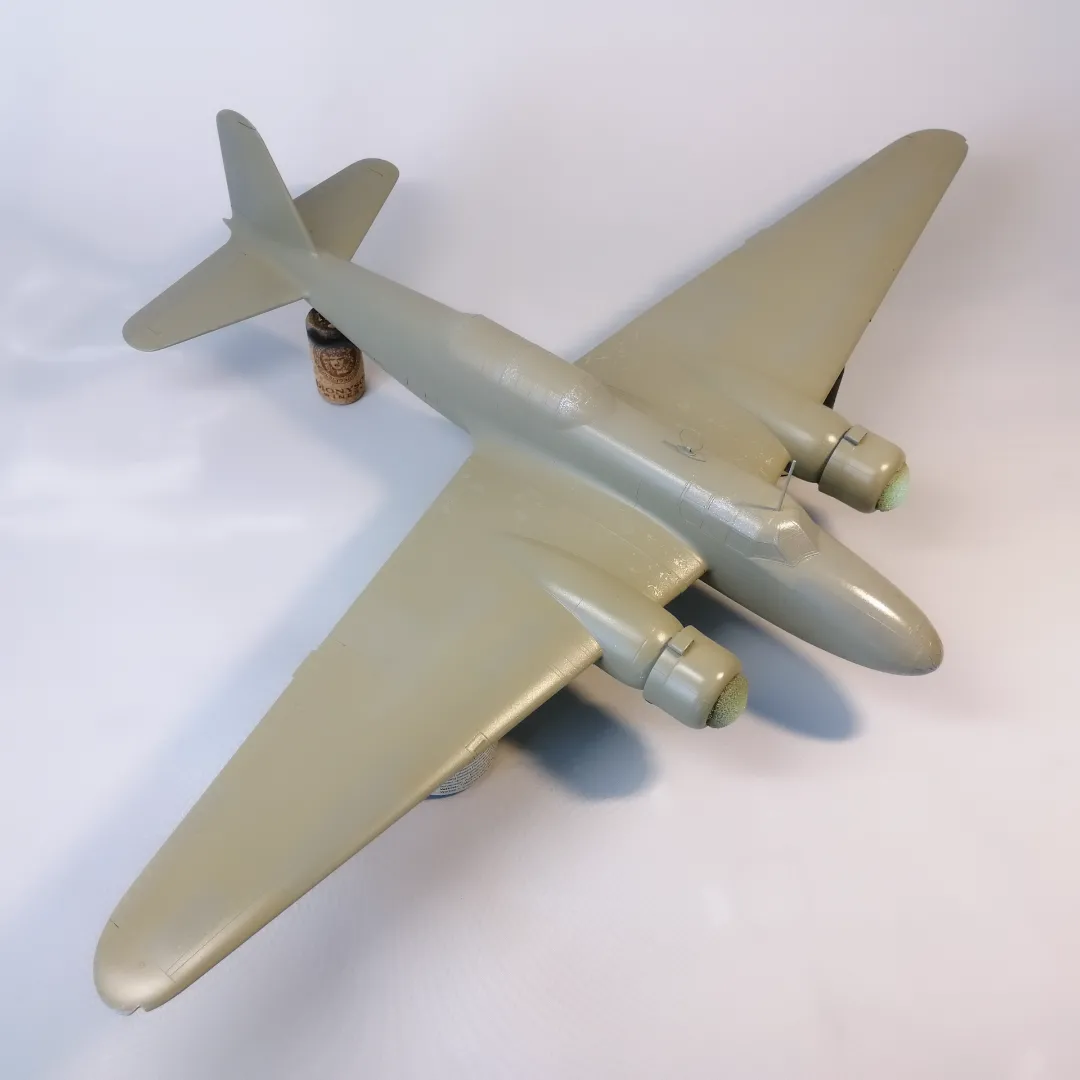
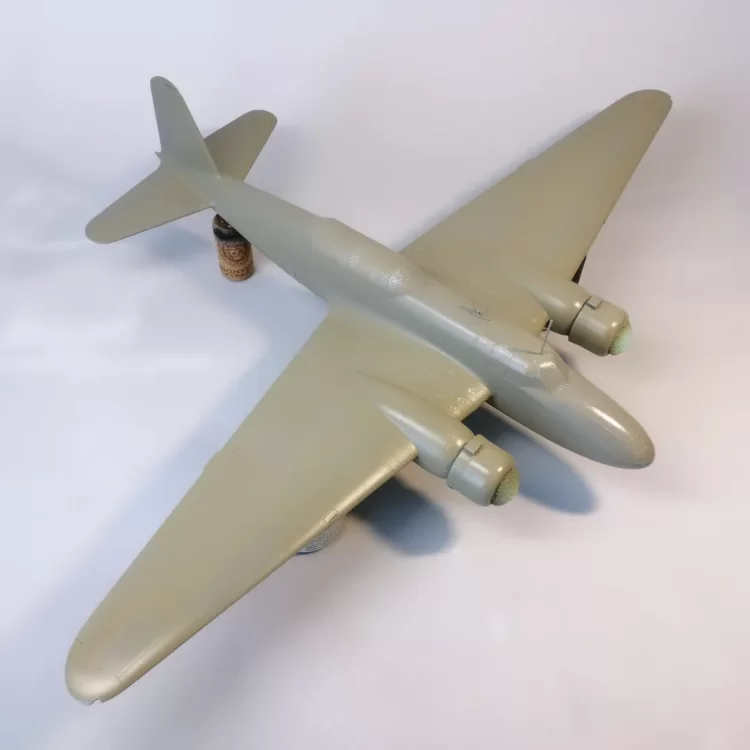
Hi all, This weekend I've started off with my new project, the B-17G by Hong Kong Models in 1:48 scale. I did some work on checking out the reviews and stuff. Of course, having been inspired by the new series Masters of the Air, which tells the story of the Bloody 100th, of the 8th Airforce during the second world war. This is my second HK-Models kit, first one being the Lancaster. I really enjoyed the Lanc, tho it's has some flaws. The way these kits are engineered is just magnificent. Lots of slide molding, minimum ejector pins and lots of details! I alway try to get the most of an out of the box build, adding some home made stuff or leftovers from previous build. For this project I'm following that same principle. Most of the interior detail will never be seen again, no use to go all out. Going for the Queenie on this one, want to fool around with variant of Olive Drab, and make a great show kit! Today, I concluded the first session of the build. Assembled the bigger portion of the interior, painted it up, weathered it and added decals (not in these pics) Build was fine, some nasty ejector markings and some slight adjustments to the dry fit proces. All and all pretty happy with the result! Enjoy! Will be keeping a regular update on the build. Follow me on Instagram or Facebook: j.roen87 Cheers!


- 24 replies
-
- 13
-
-
If you had to choose, Hobby Boss with at least some rivet details and recessed panels or the good ol' Monogram with the raised panels, which would be the best for this day and age? Looks like the canopy is totally off and the rivets look like M24 bolts on the Hobby Boss... I've got Monogram B24J with all aftermarkets, with the 486th BG decals, but I'm doubting. Sell the MG or just build it. I'm not a riveter.
-
Hi all, Just finished the ICM Sally. Quite a nice kit to build, though I did had some serious issues with fitting and the ICM style of engineering. Landing gear is fitted very fiddly. This is a real downer as the way it's connected inside the nacelles makes it extremely delicate. The fitting of the loose tail. It's just not what you want. Of course, they made it modular to fit with other types, but it's just odd. Fitting of the wings was also a hard part, as the plastic was slightly warped. When I tried to make it fit, it actually broke. No weighted wheels and I did expect more detailing of the interior. It was a bit disappointing seen as the kit is at 48th scale. All and all a nice kit to build, nothing out of the ordinary, but it really needs adding of aftermarket parts. Paints and other products by AmmoMIG and AK-Interactive. Cheers.
- 1 reply
-
- 4
-
-
All done.


- 16 replies
-
- 10
-

-
-
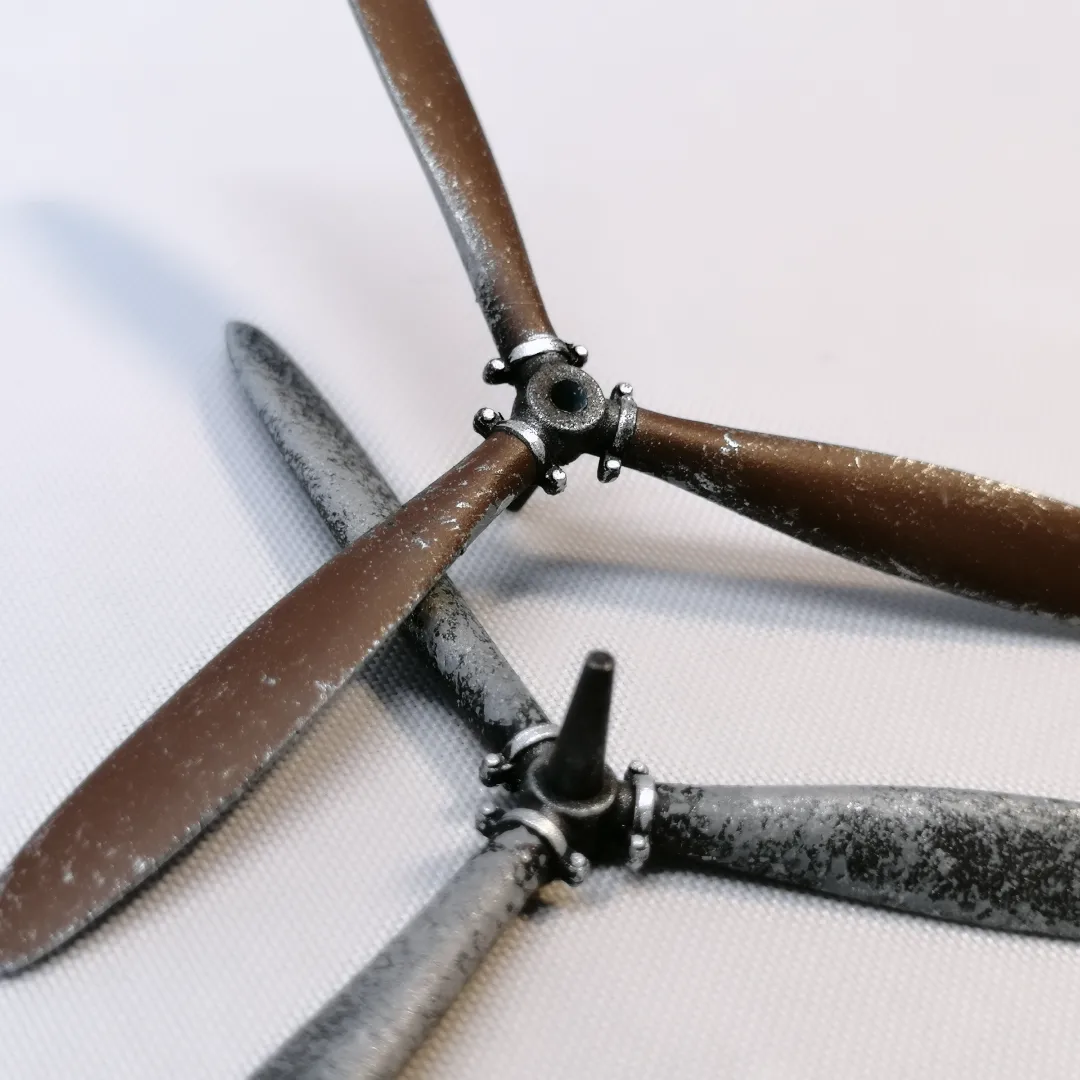
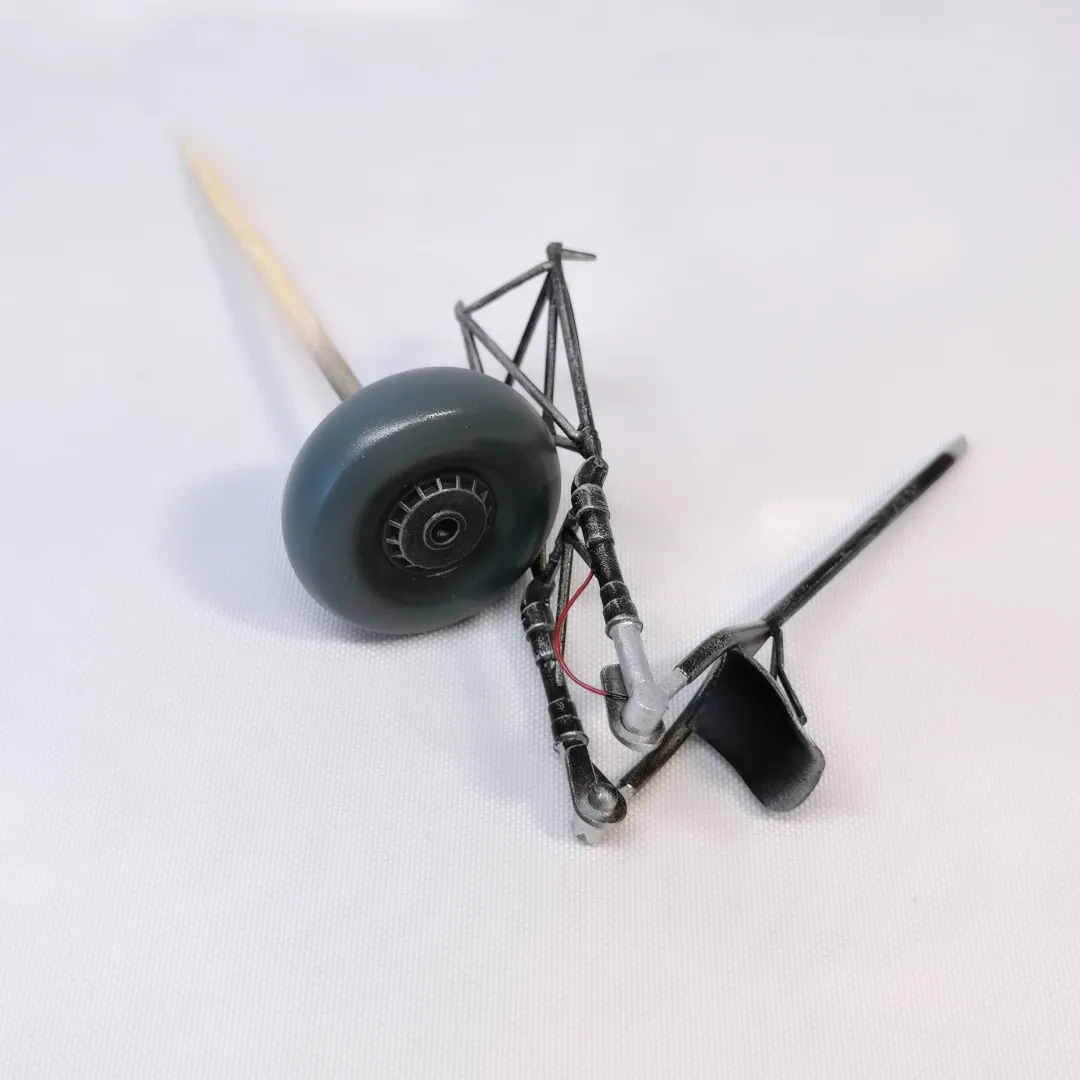
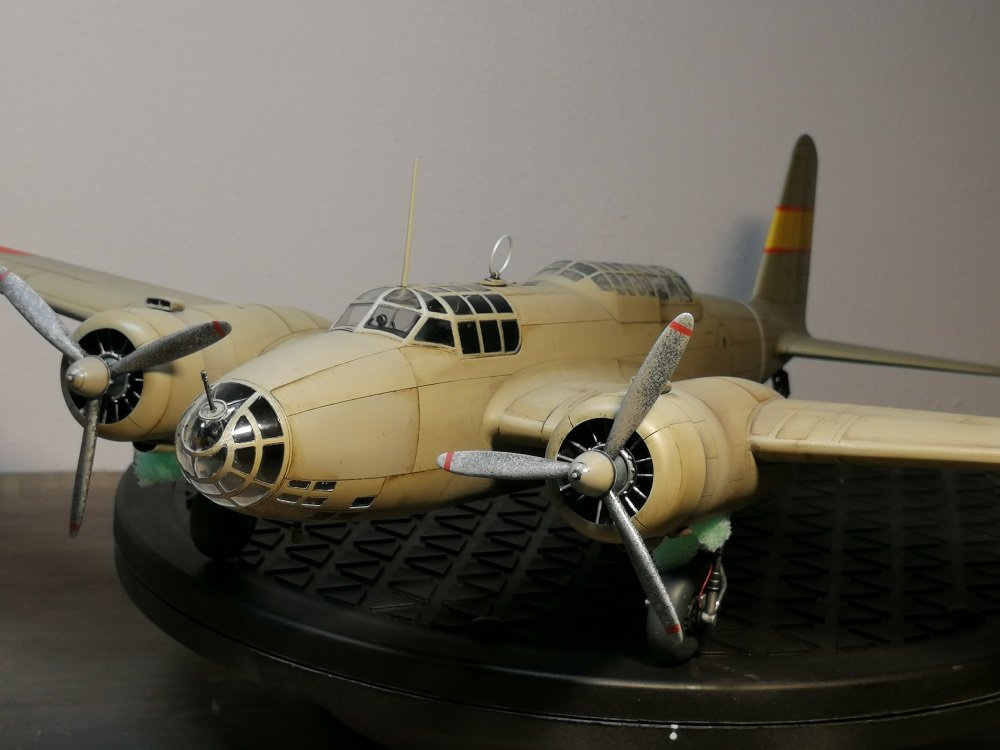
Just a little update from my side; Today i finished up most of the plane. Removed the masking, glued to wheels and props and did some final post-shading and blending. Added the rigging and hoping to finish up tomorrow. Got a new kit in the queue, so need to finish this beauty. still with some foam during the curing of the glue. the wheels are a real nightmare on this kit, as the way that they are glued inside the wells is just awefull engineered. quite some visible detail to be seen. unmasking the canopy very satisifying when it's all going as planned. belly, still in its glossy coat.
- 16 replies
-
- 13
-
-
Oooh, thrust me, se will get dirty. 😂 I always like my birds worn and torn. Will do a lot of post shading after the decal-proces.
-
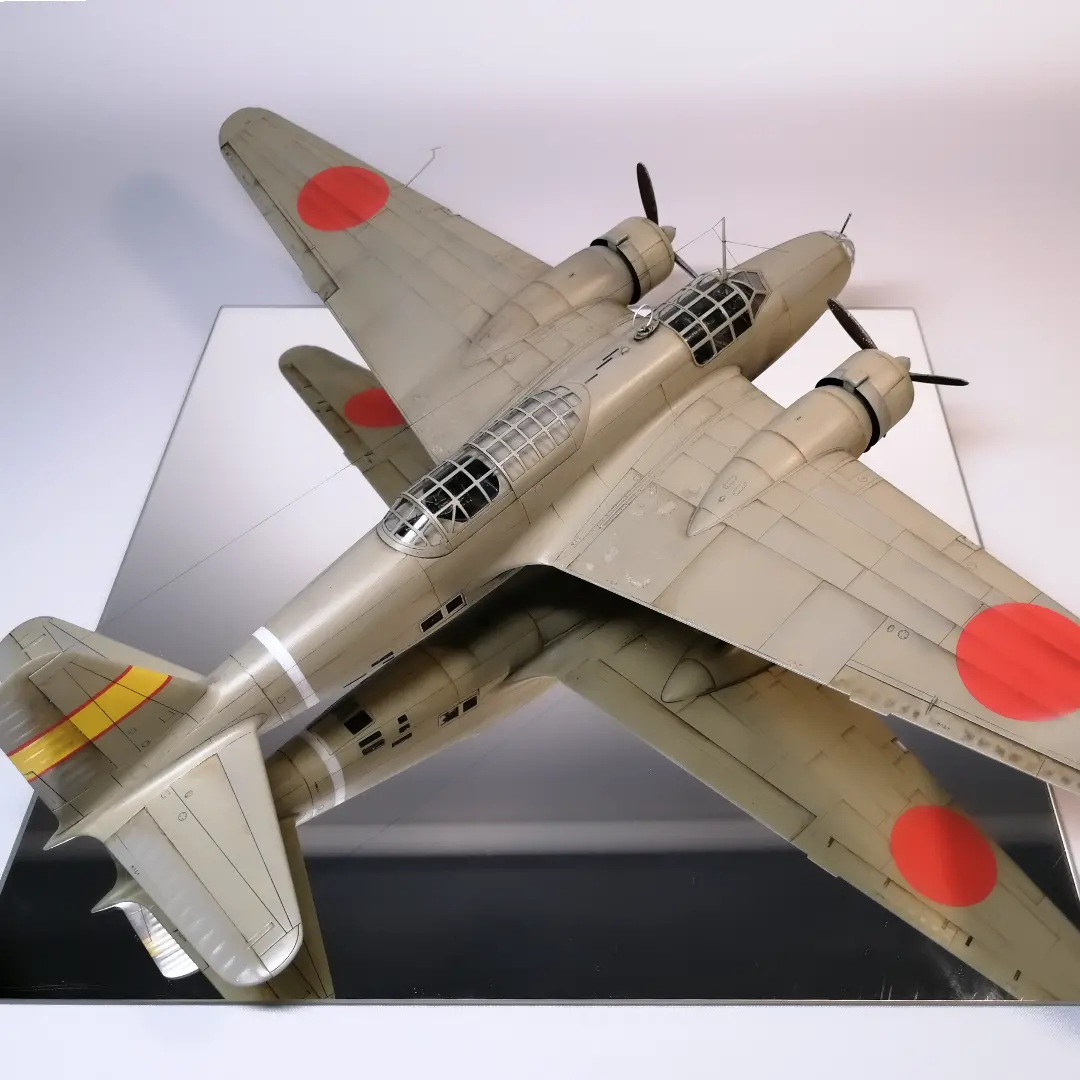
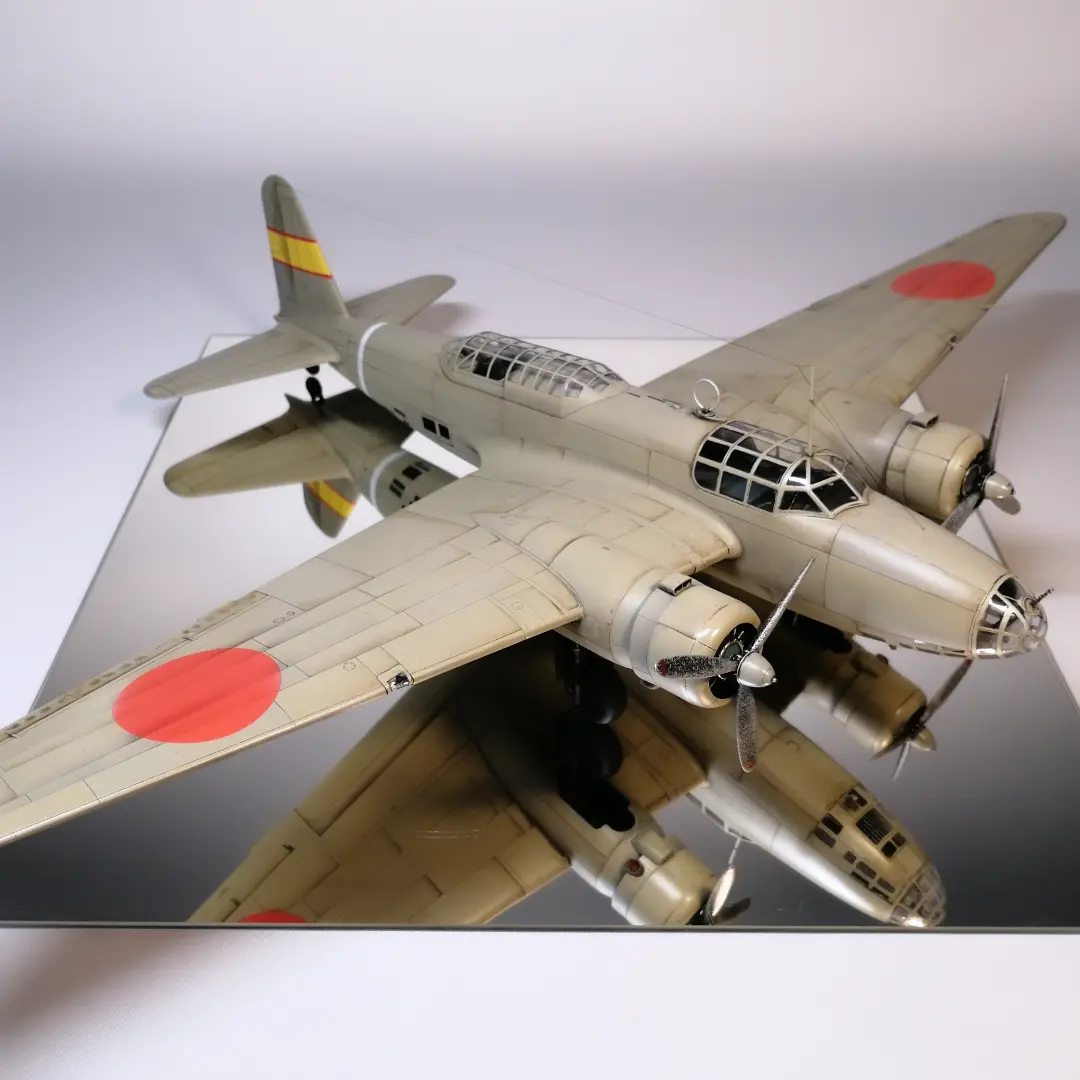
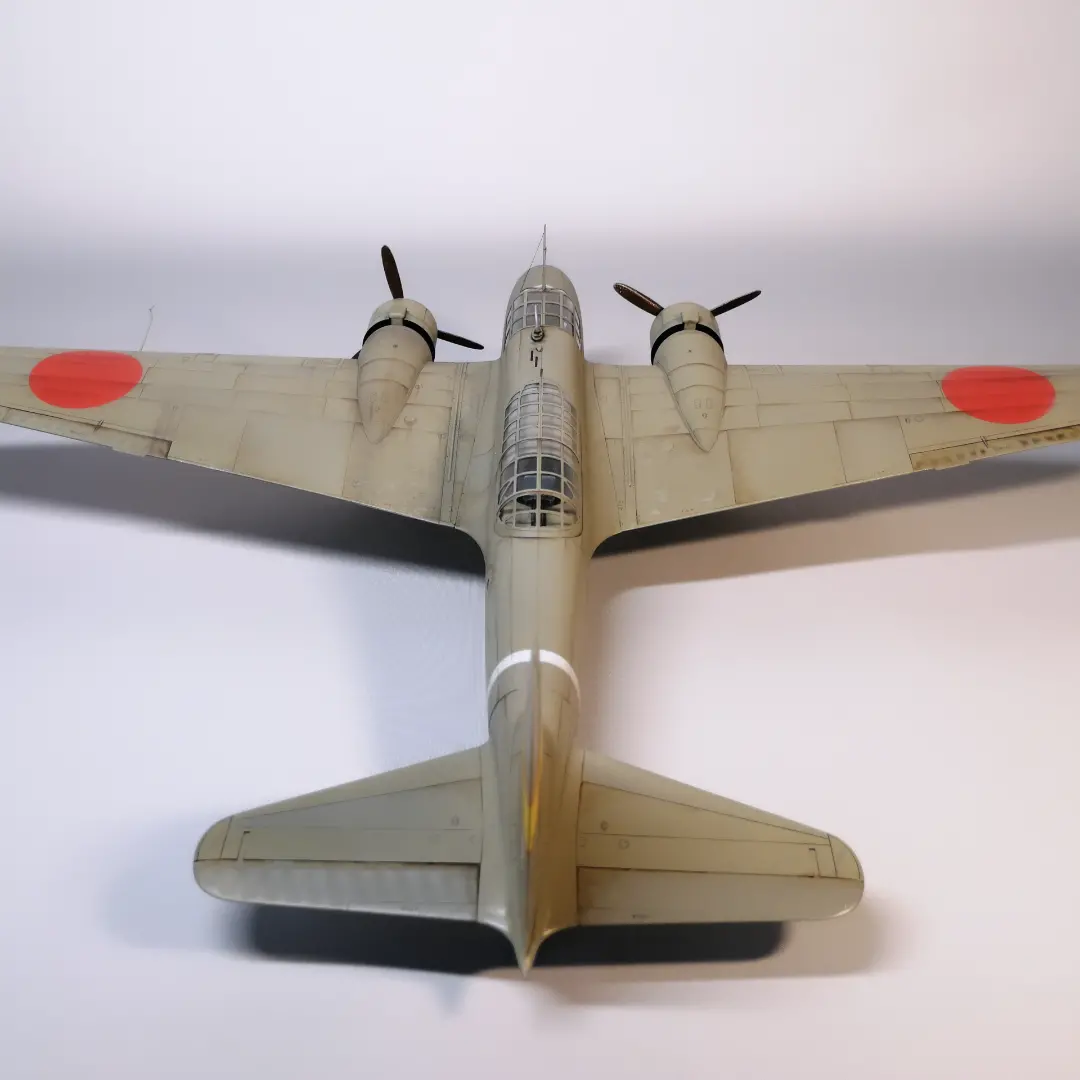
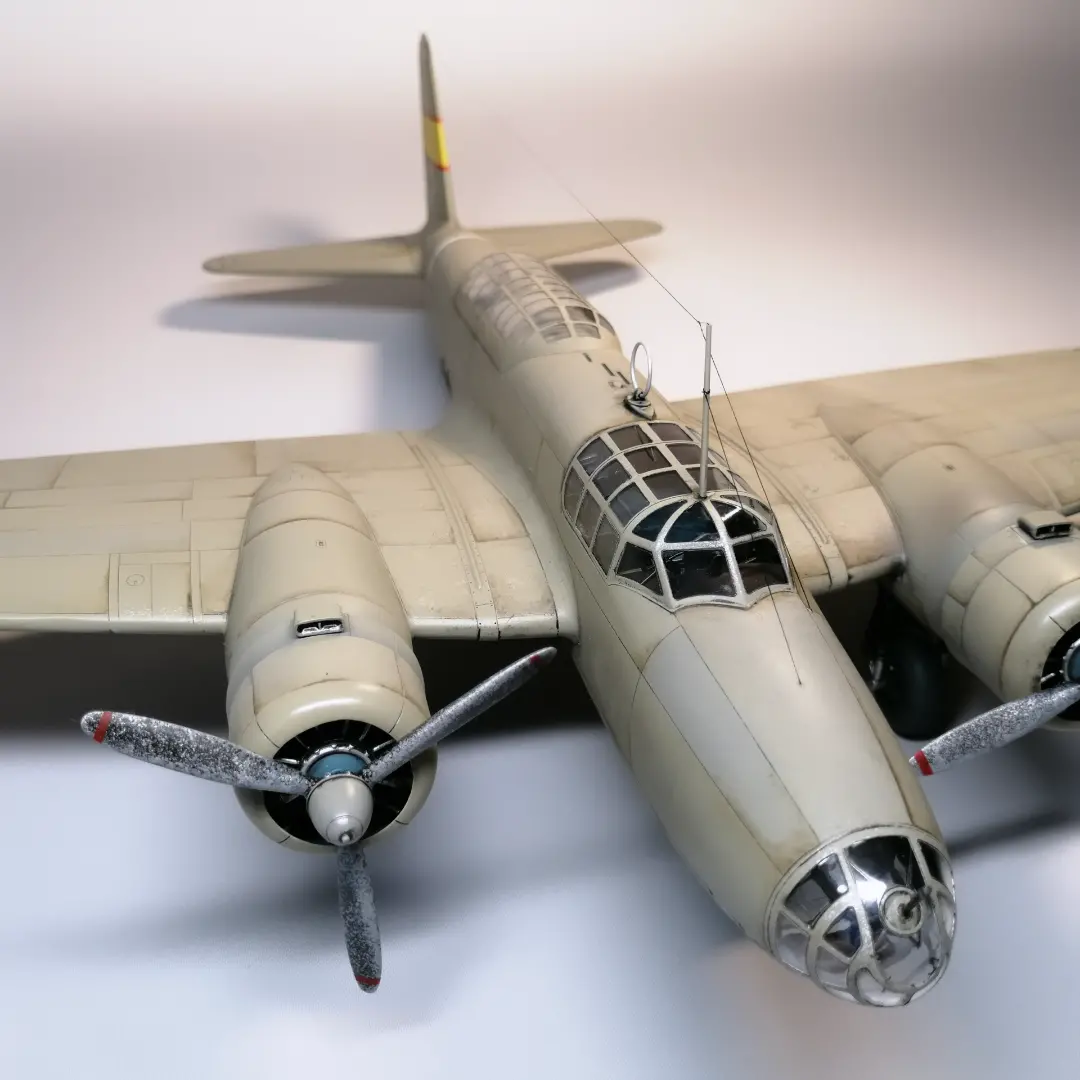
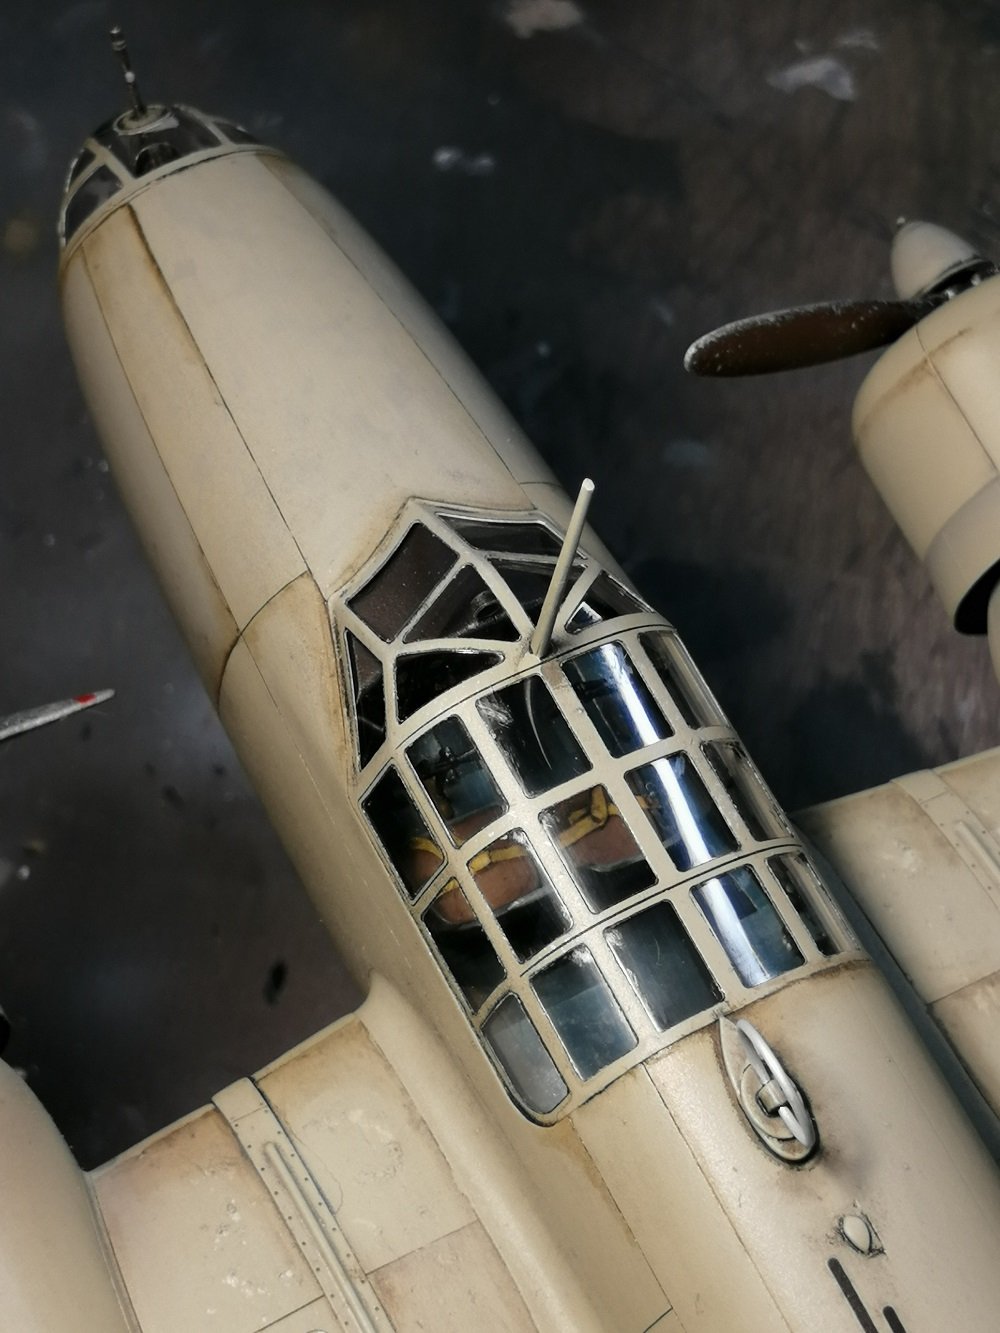
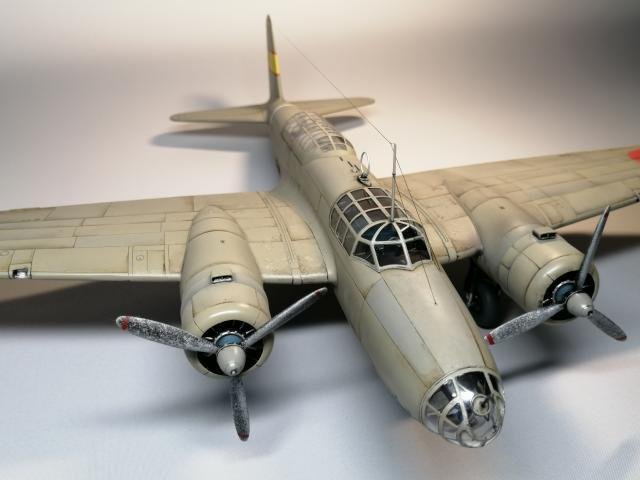
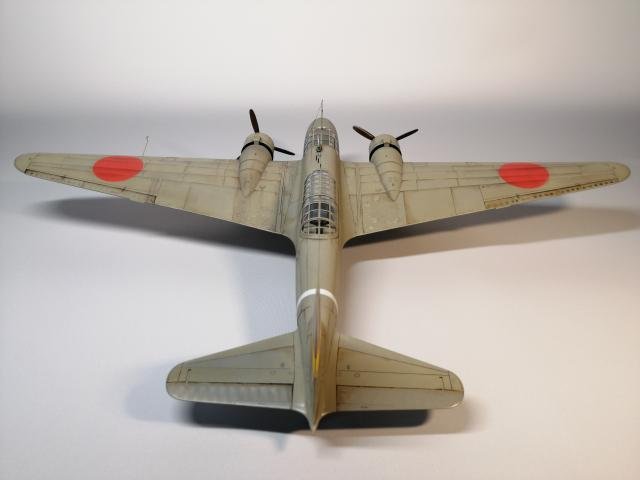
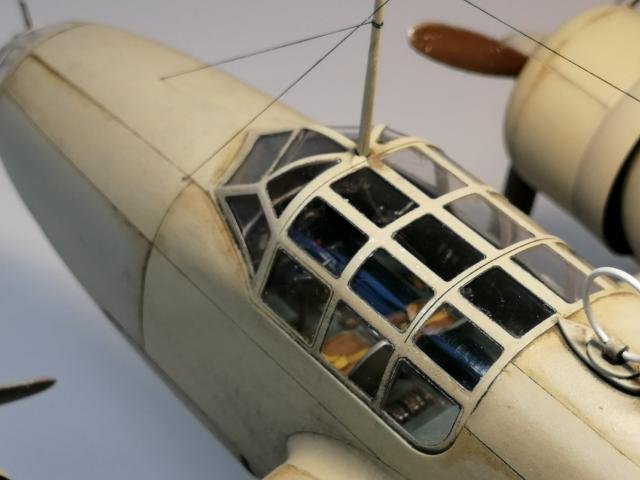
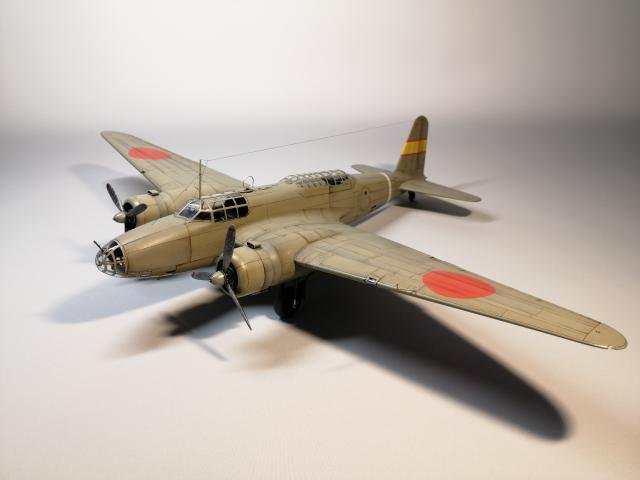
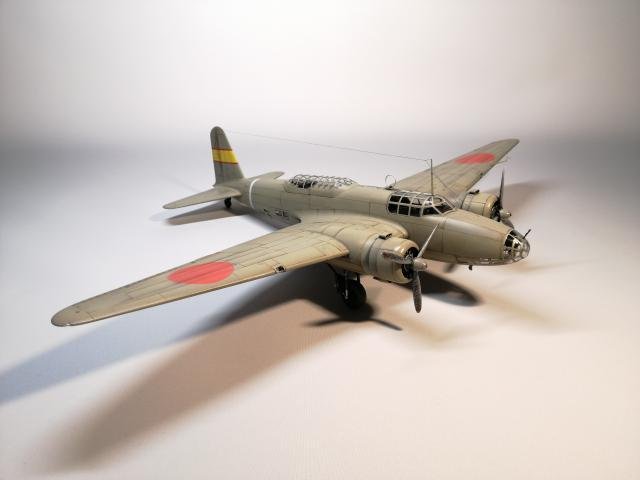
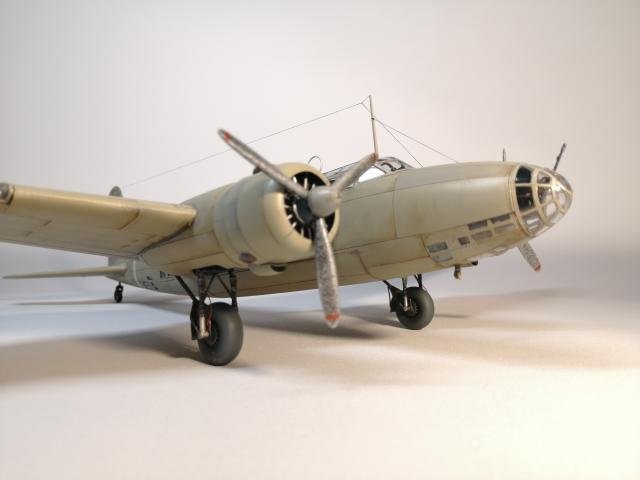
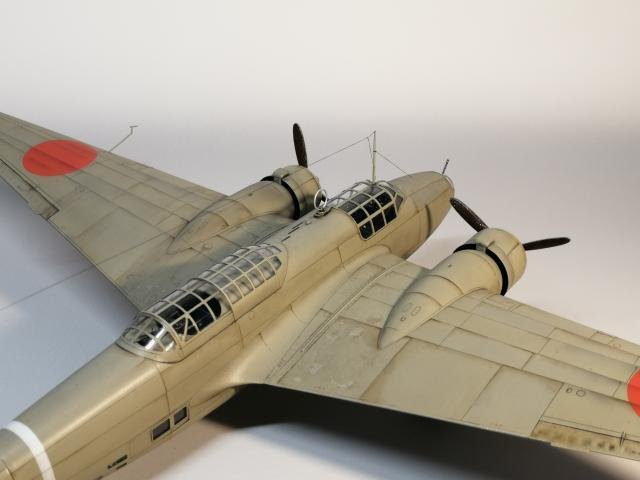
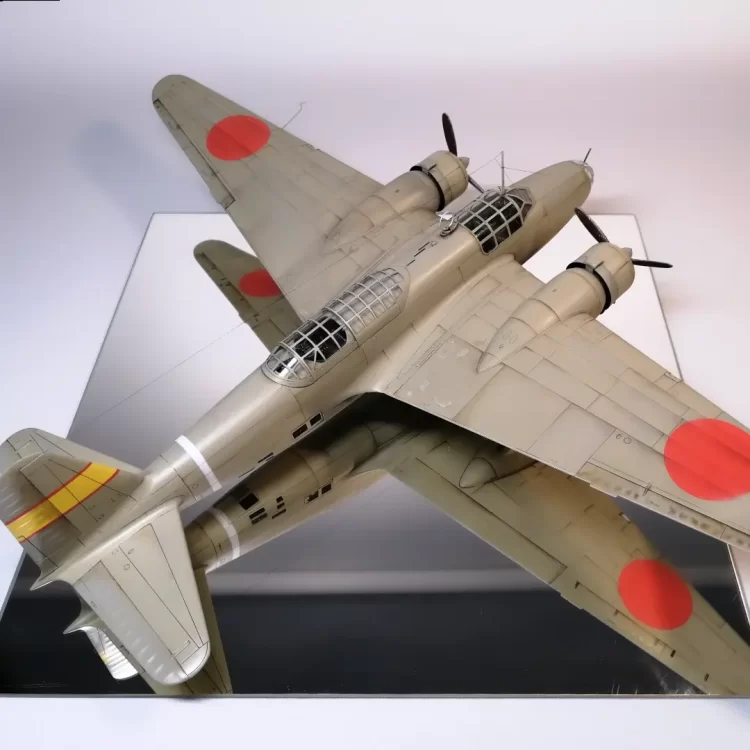
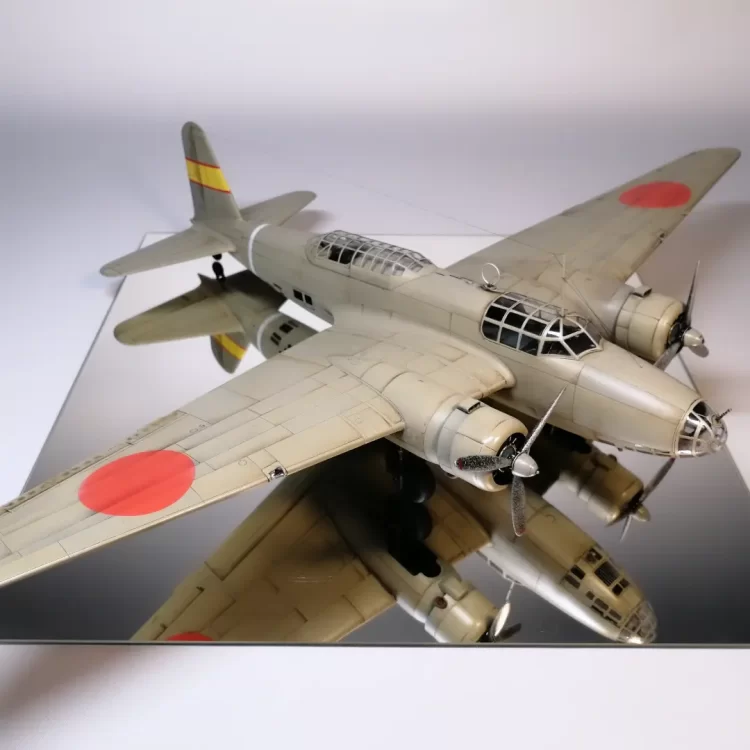
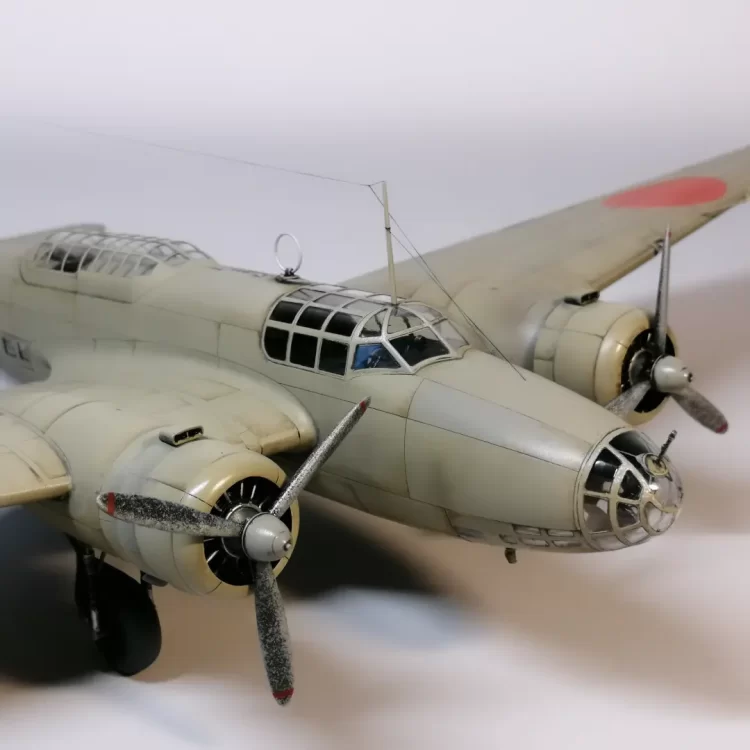
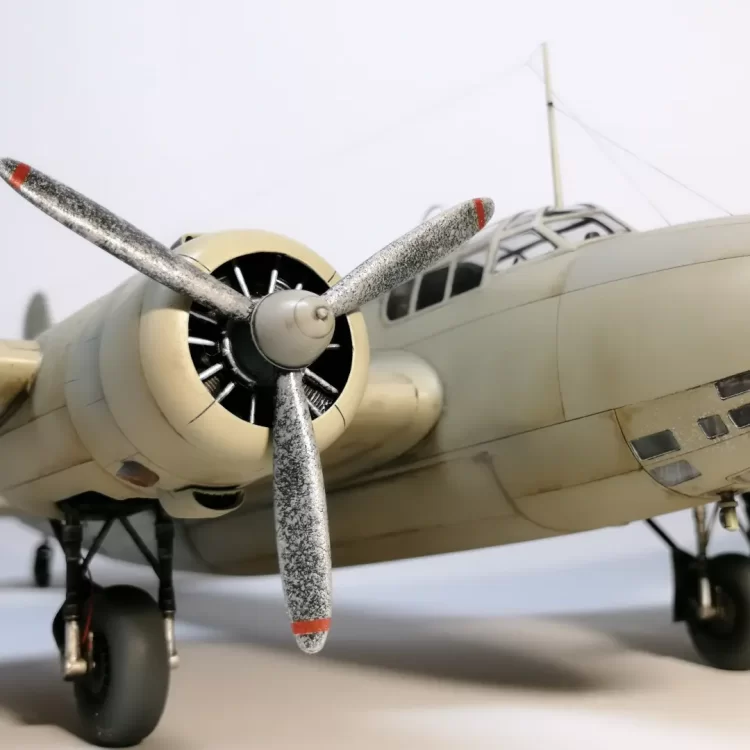
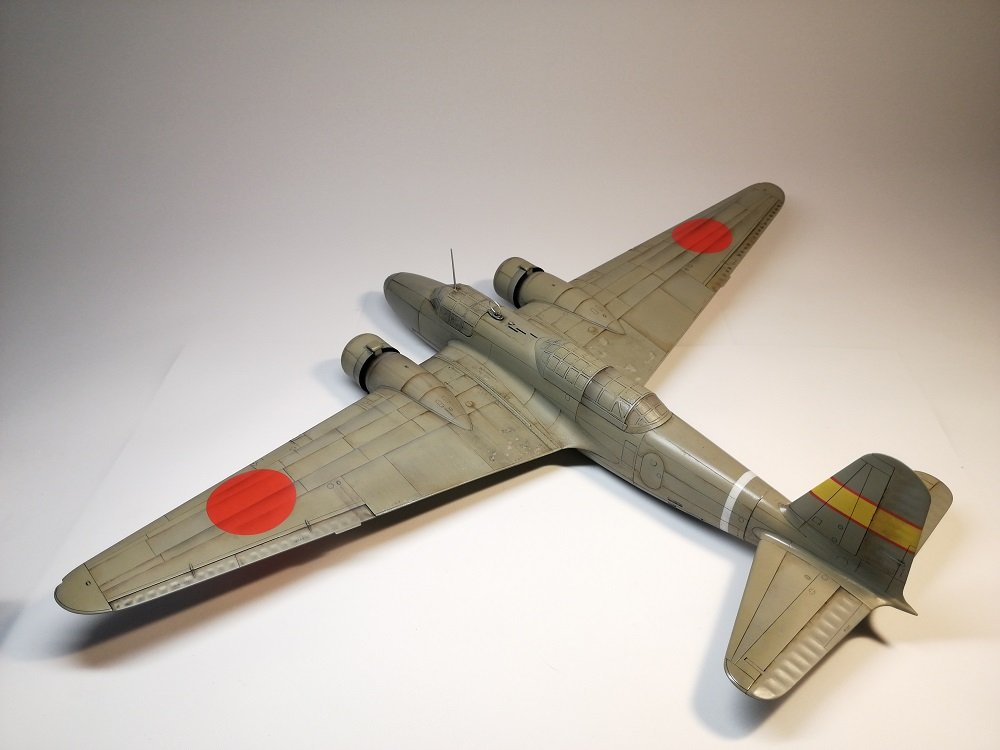
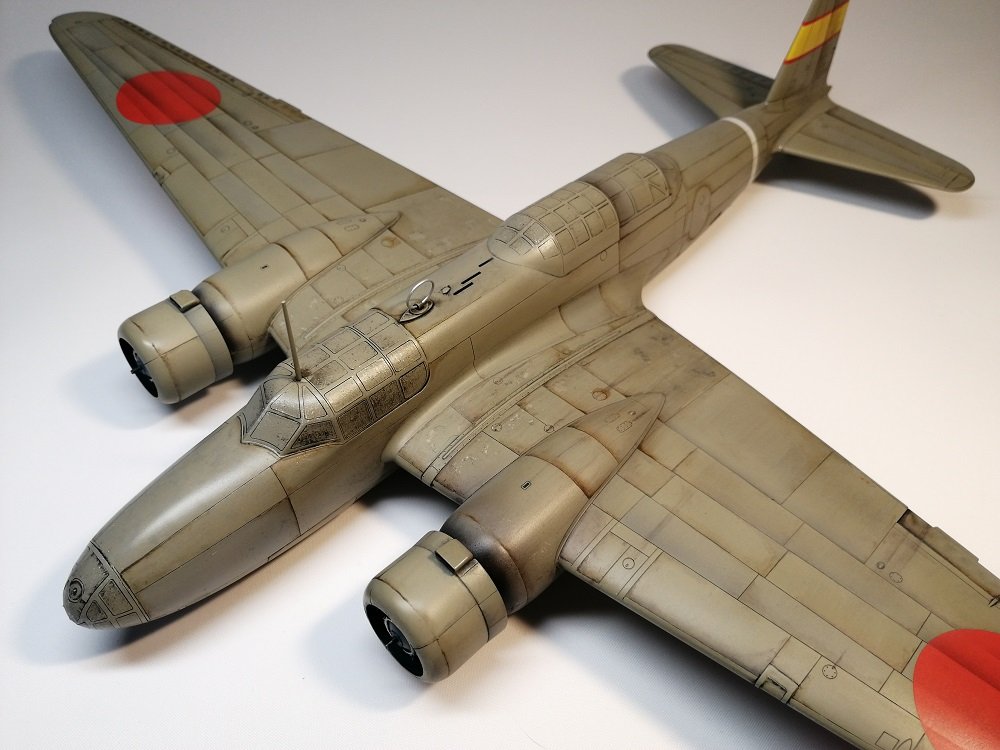
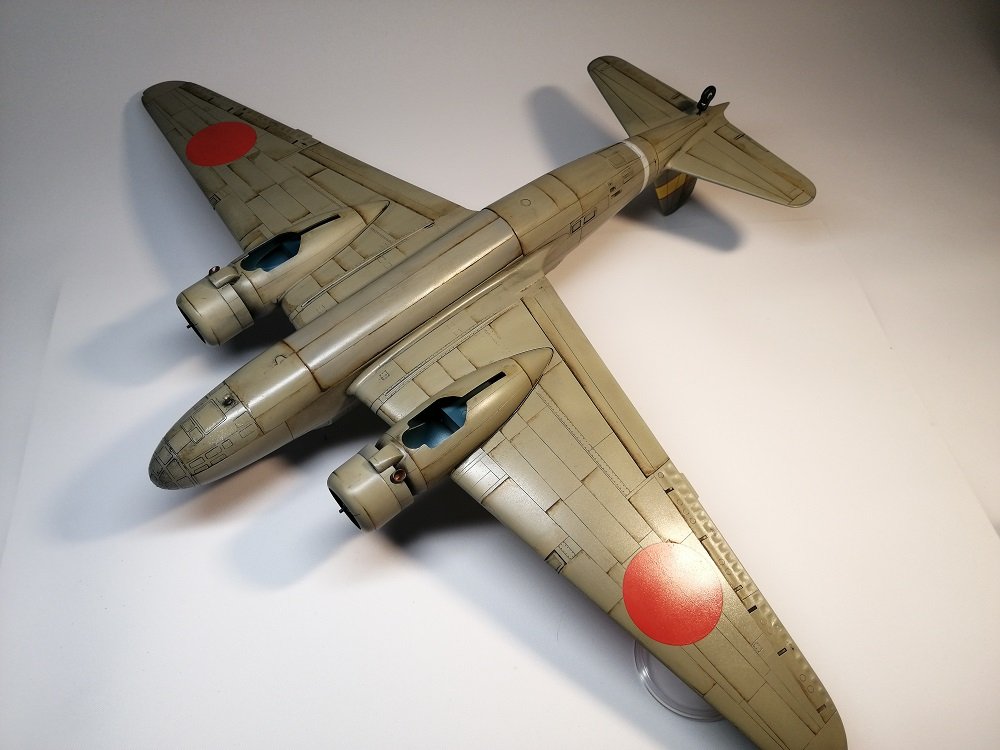
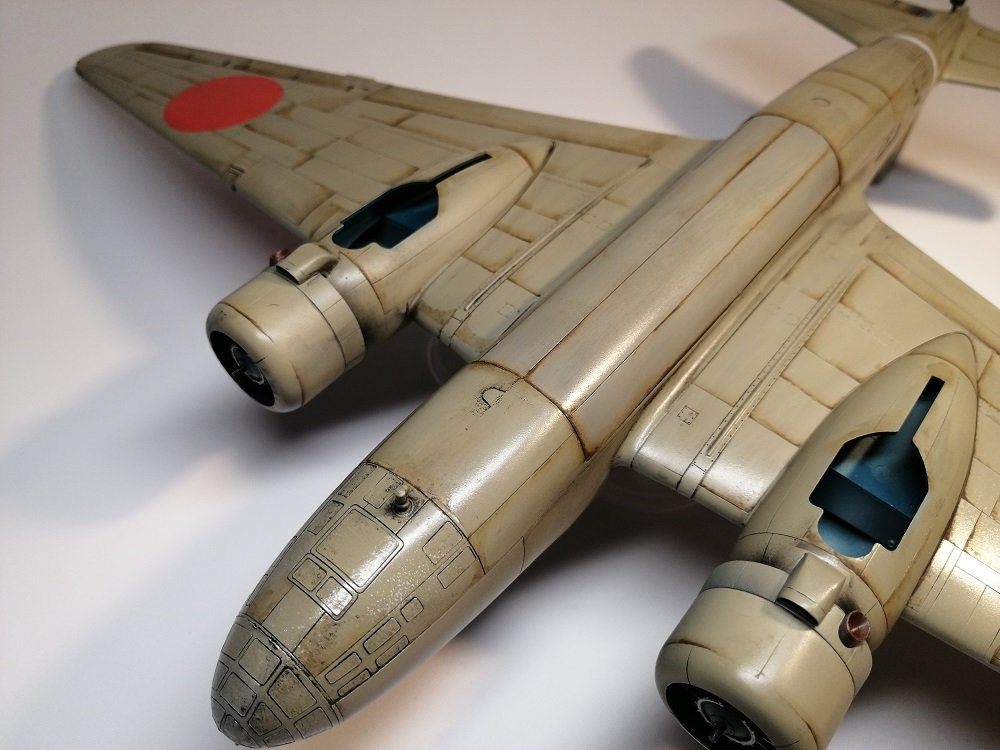
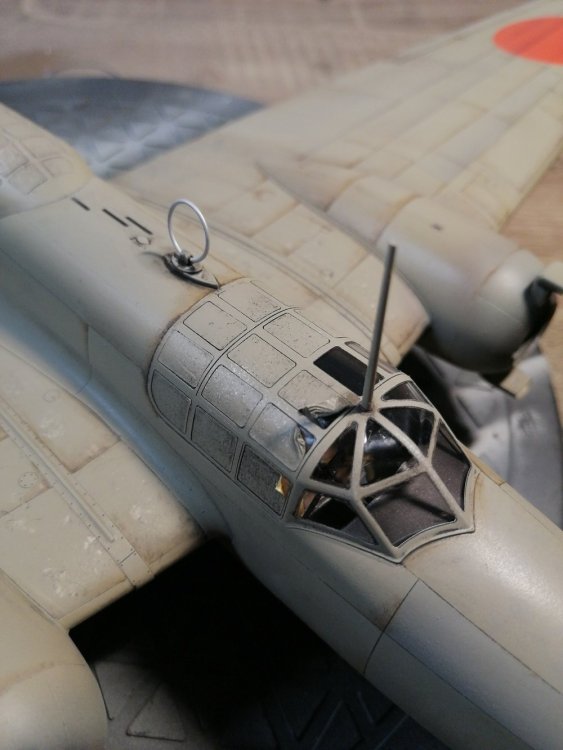
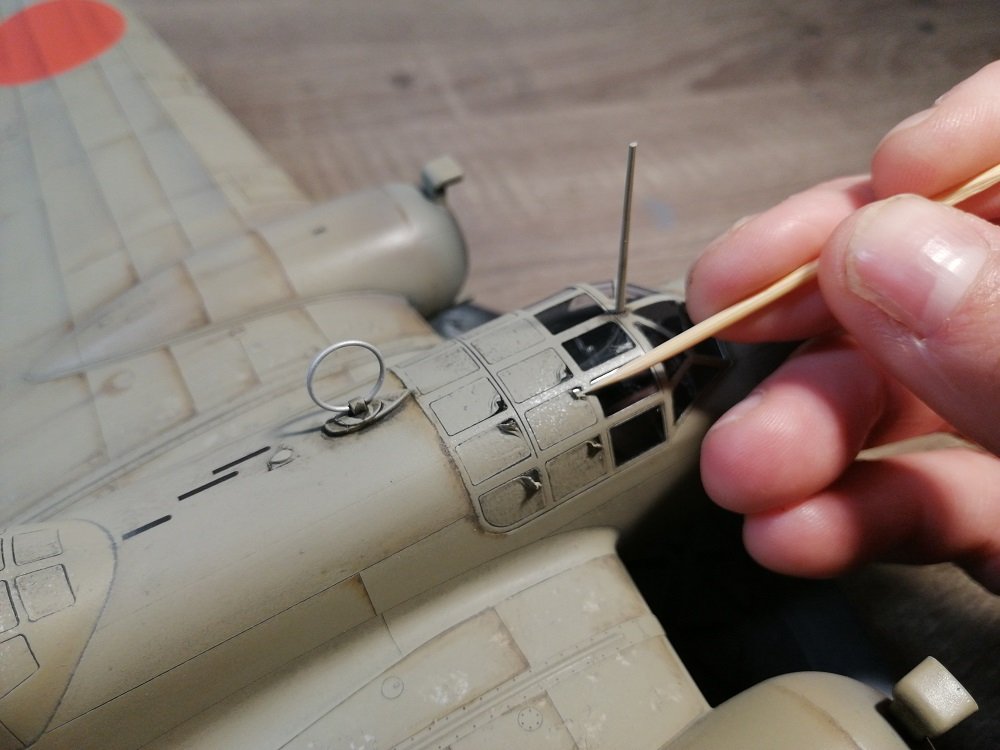
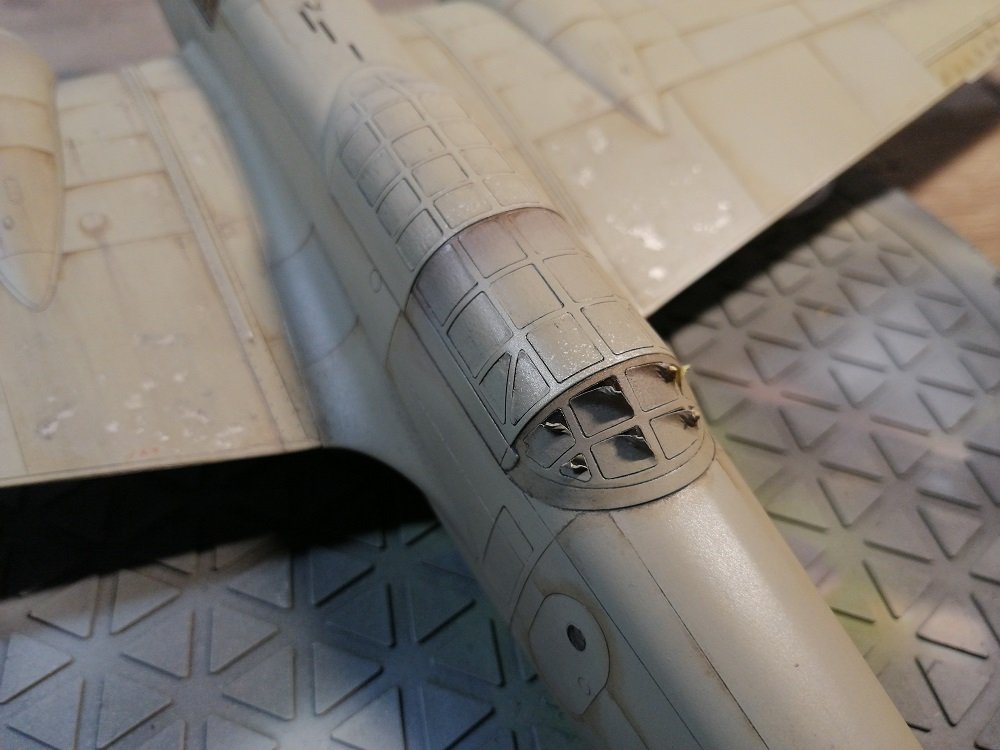
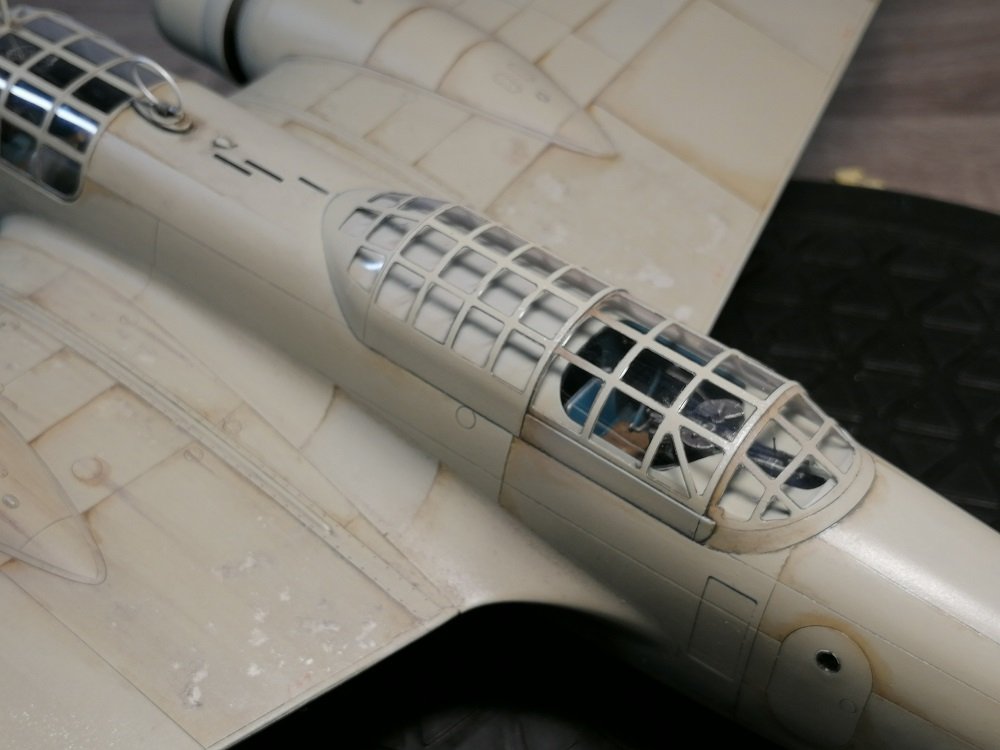
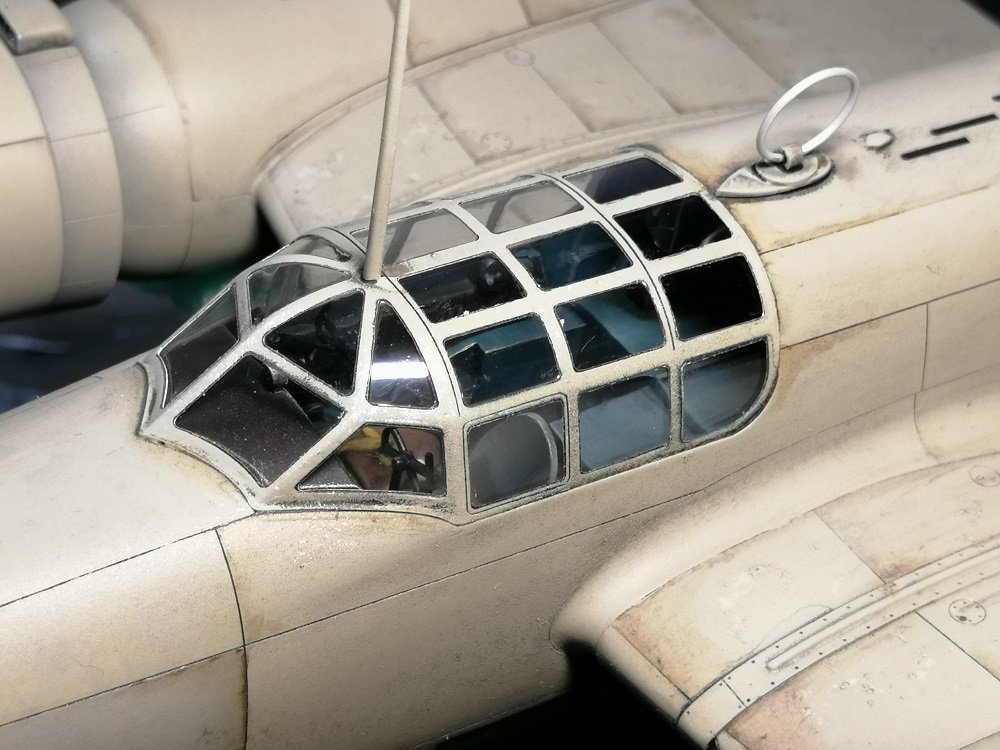
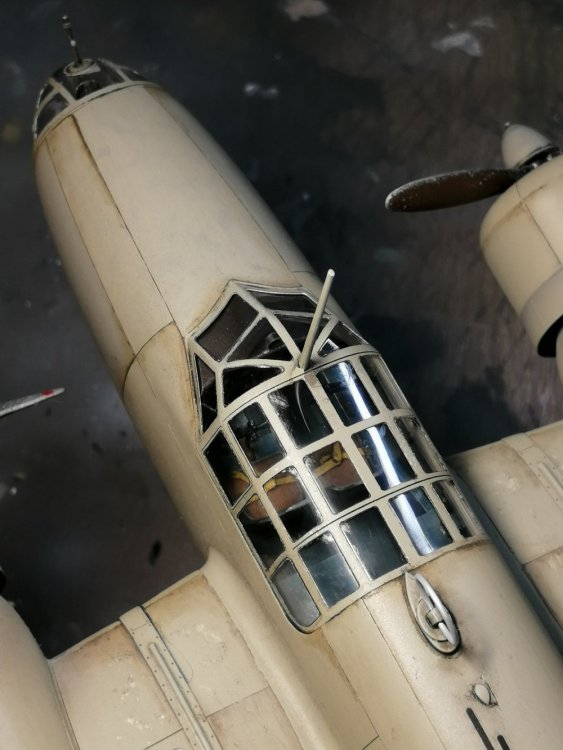
Hi everyone, Just wanted to share my recent progress on the Ki-21. All is painted up, chipped, covered in a glossy coat and up for her decal session!


- 16 replies
-
- 12
-
-
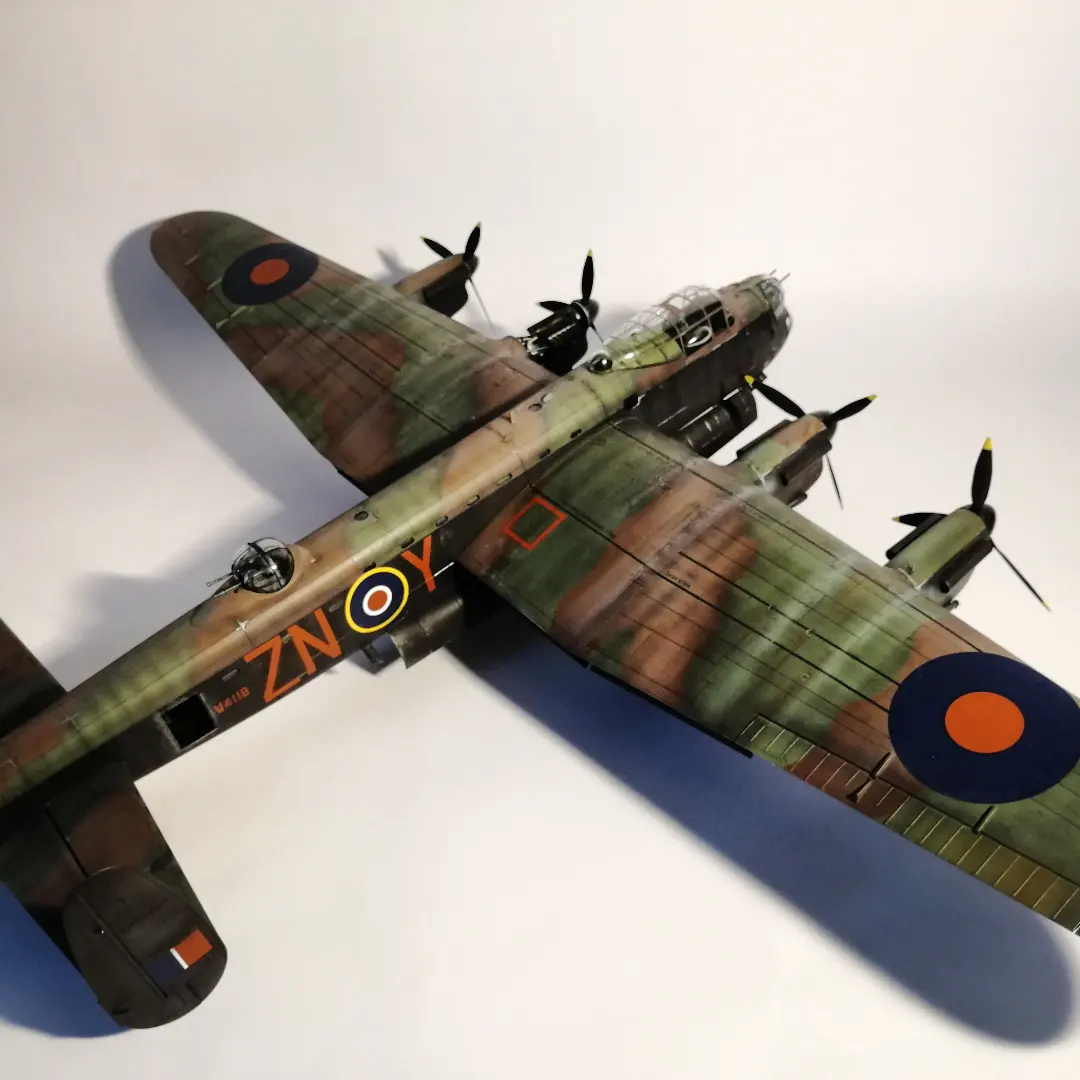
HK Models Avro Lancaster B Mk.1 1/48
Jroen87 replied to Jroen87's topic in LSM 1/32 and Larger Aircraft Ready for Inspection
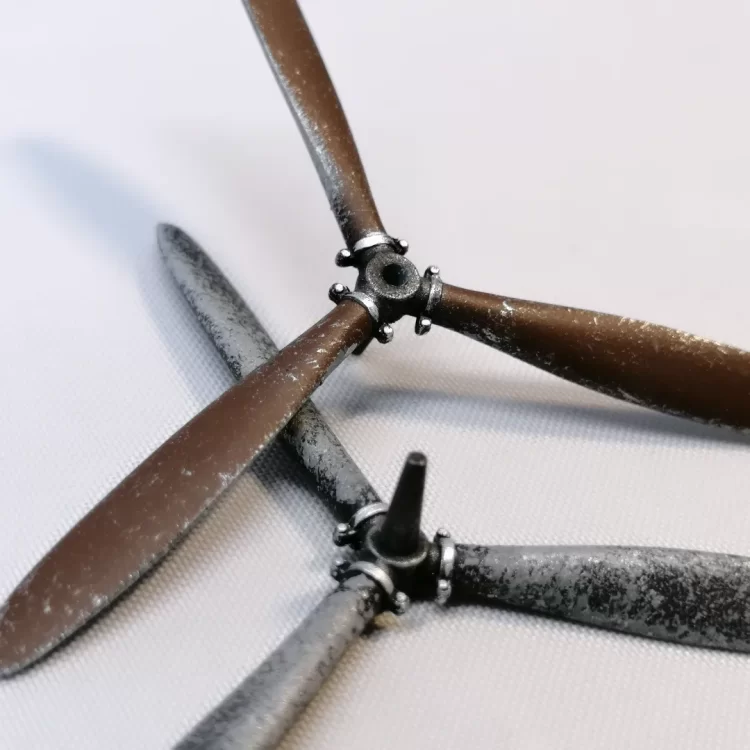
Thanks a lot! Happy with all the positive fibes here! Currently building the old Tamiya Lancaster B Mk.1 Grand Slam, with the spinning props. Of course, the props are the worst for a static model, but I'll make it look great. Will update when it's catwalk ready. 😉 -
HK Models Avro Lancaster B Mk.1 1/48
Jroen87 replied to Jroen87's topic in LSM 1/32 and Larger Aircraft Ready for Inspection
Thanks, enjoyed this one. Except for some slight errors, HK did a wonderfull job on this kit. Would definitely buy it again! Currently busy with the Tamiya versions, different build, same joy!