

Paulo Lopes
-
Posts
34 -
Joined
-
Last visited
Content Type
Profiles
Forums
Events
Gallery
Posts posted by Paulo Lopes
-
-
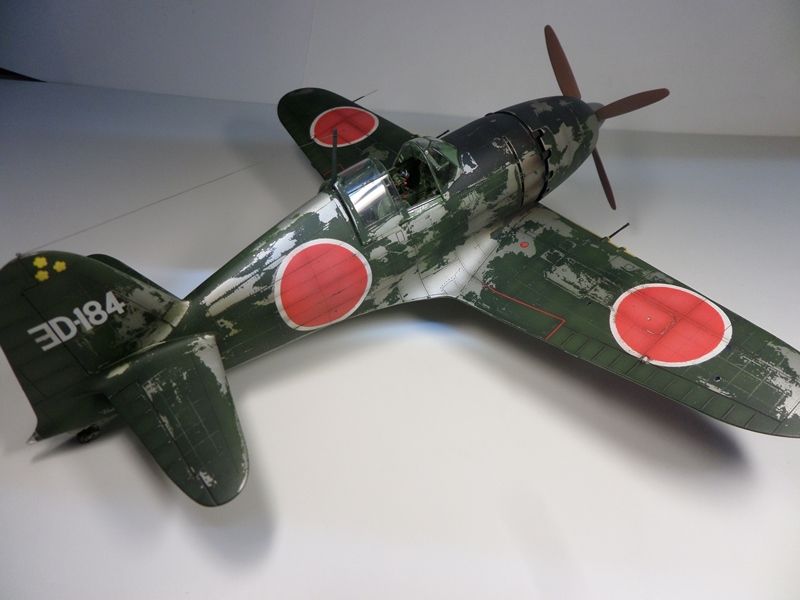
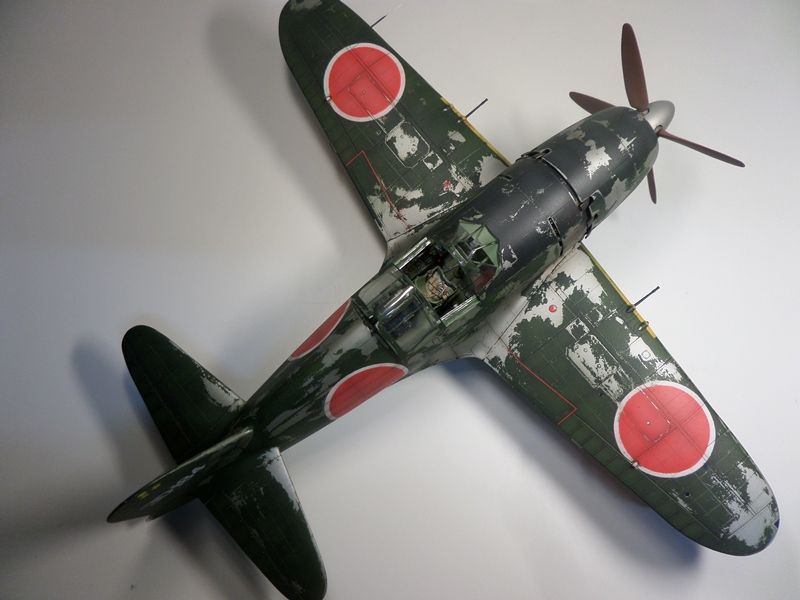
Hi, my fellow modelers!
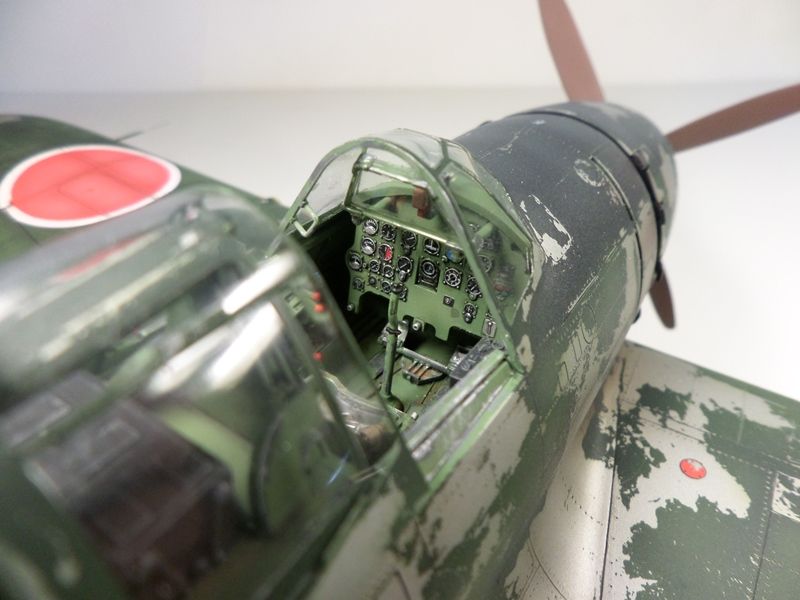
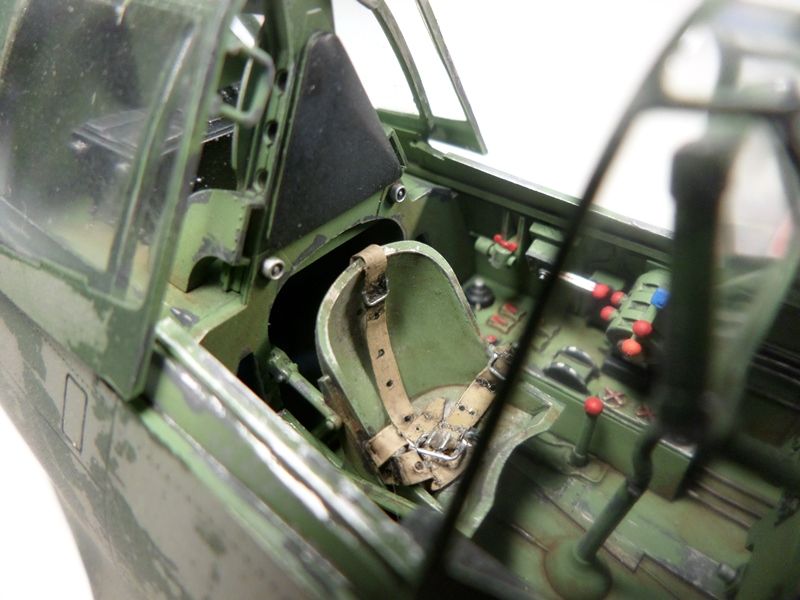
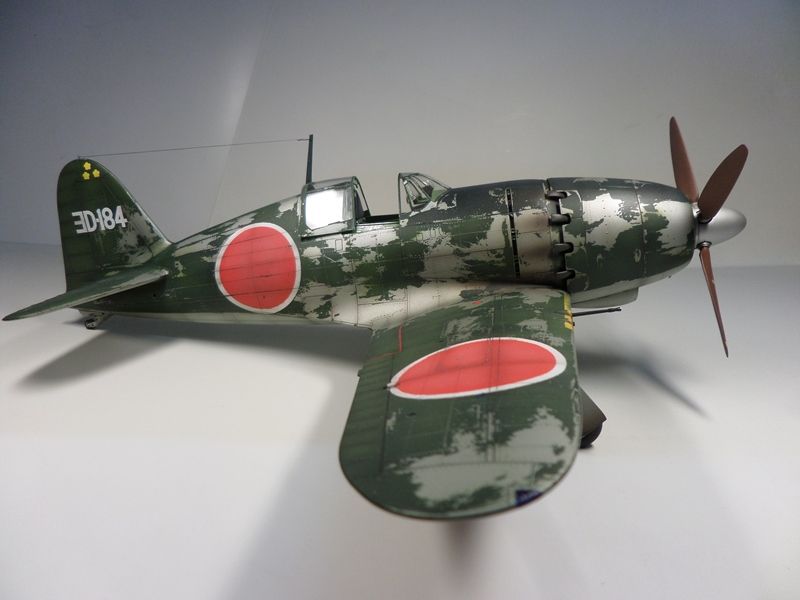
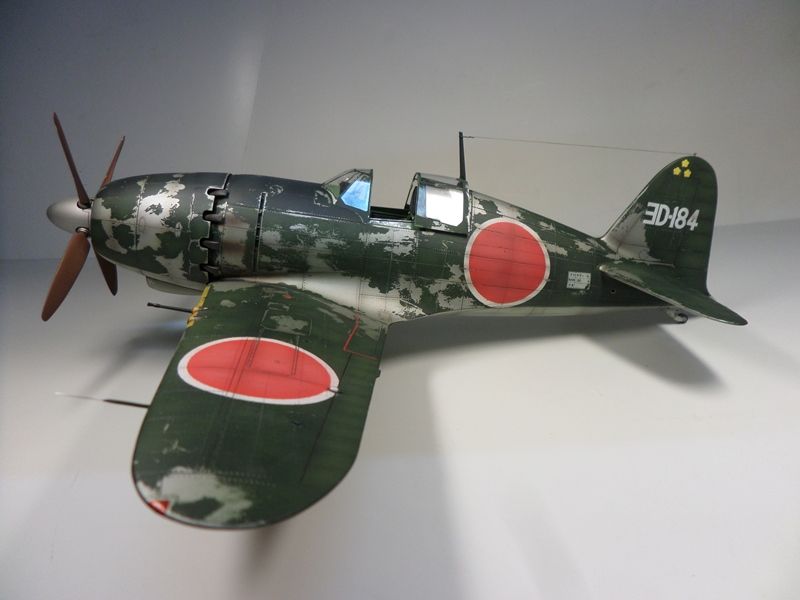
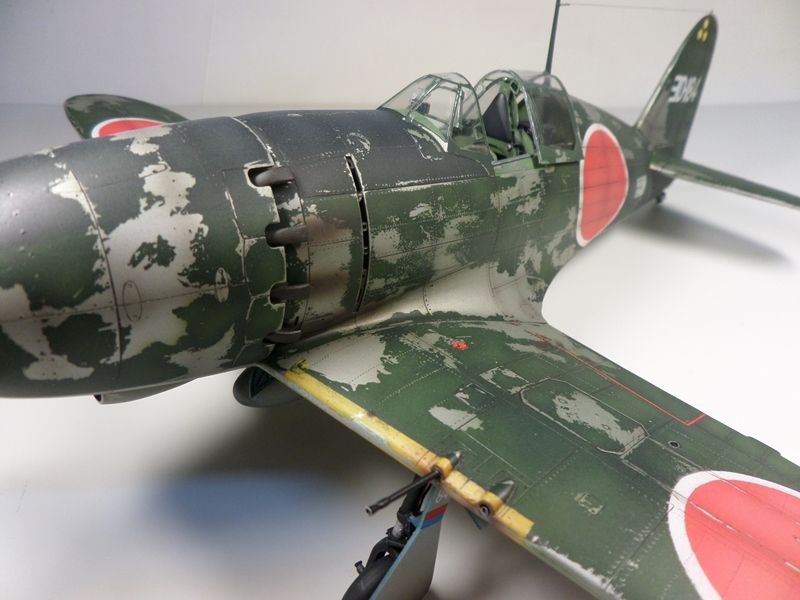
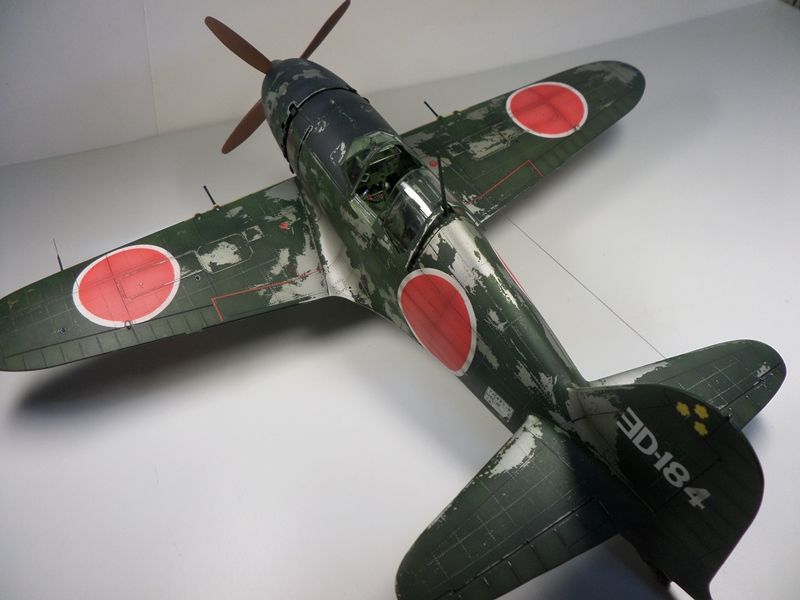
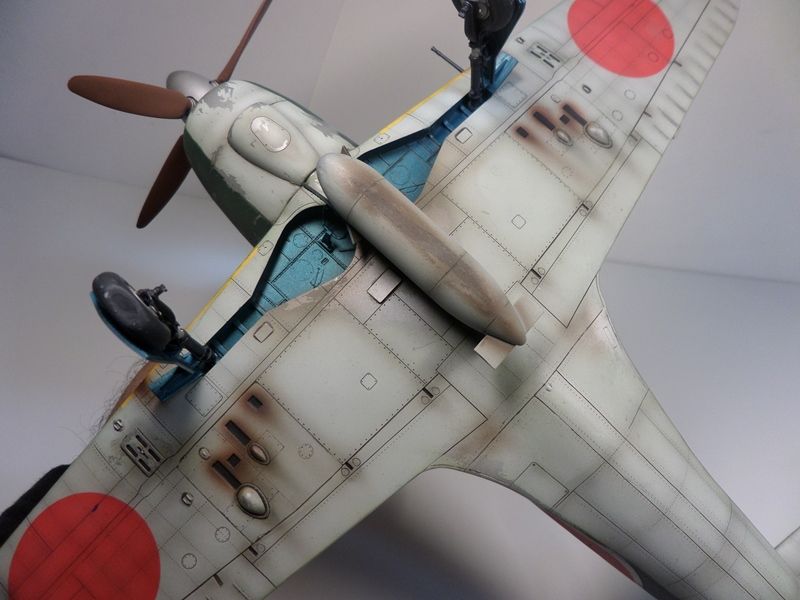
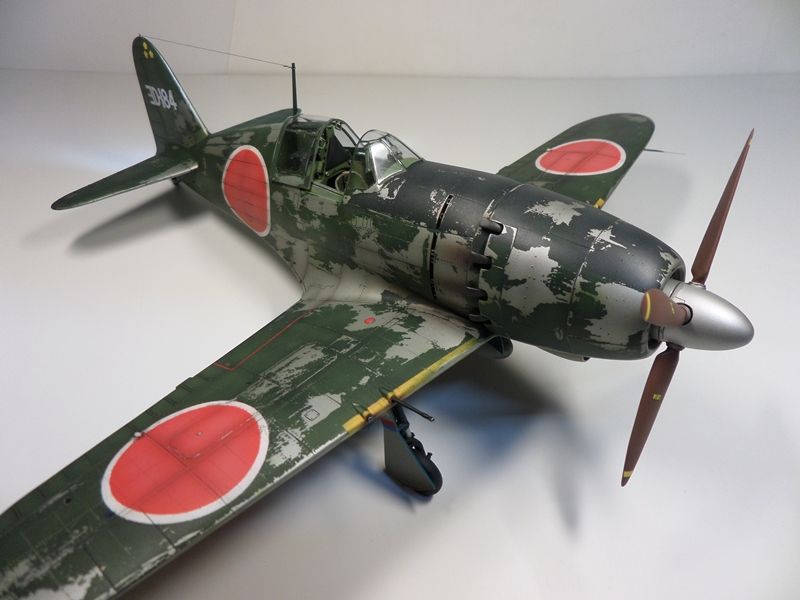
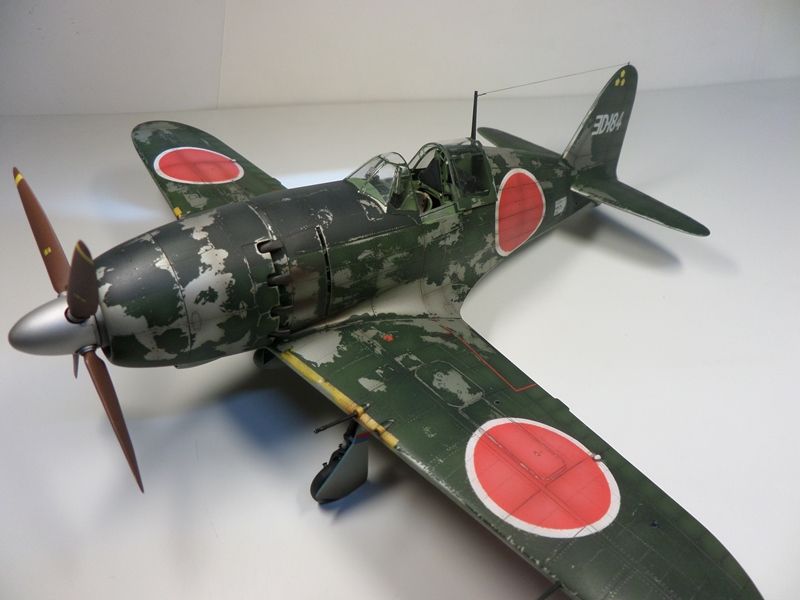
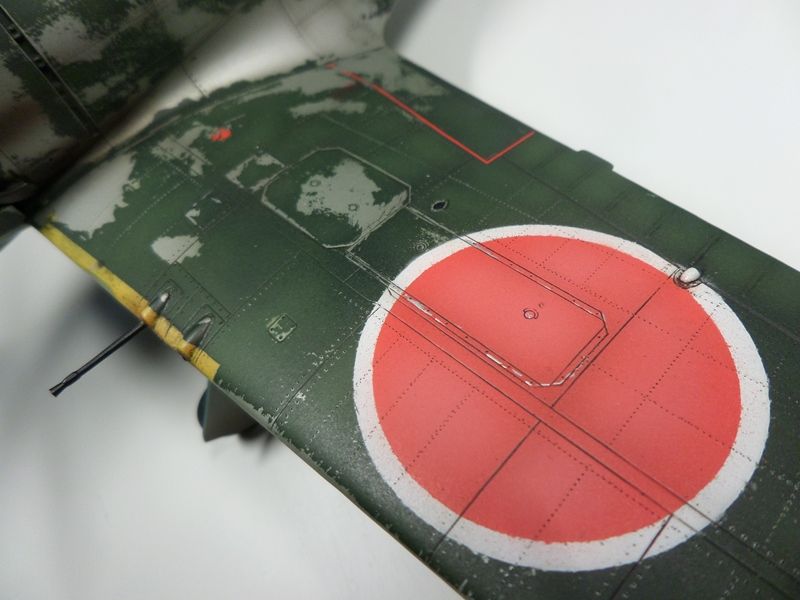
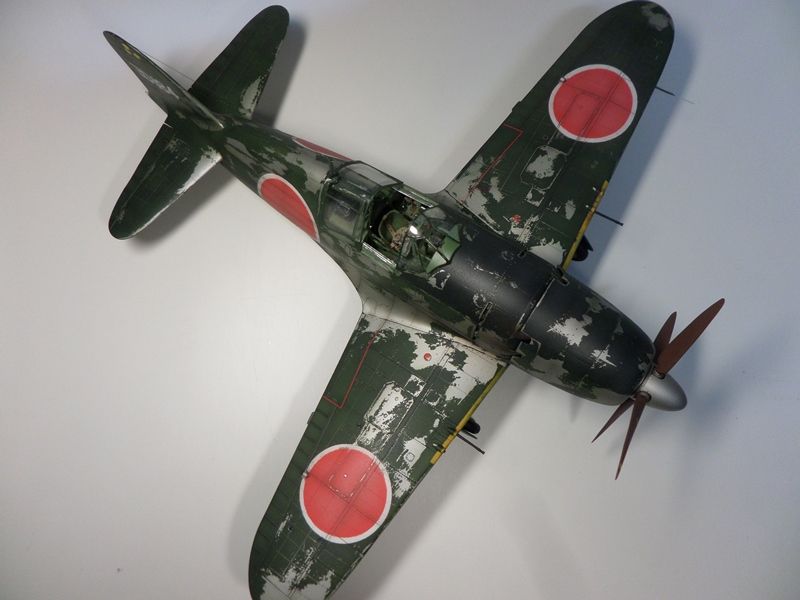
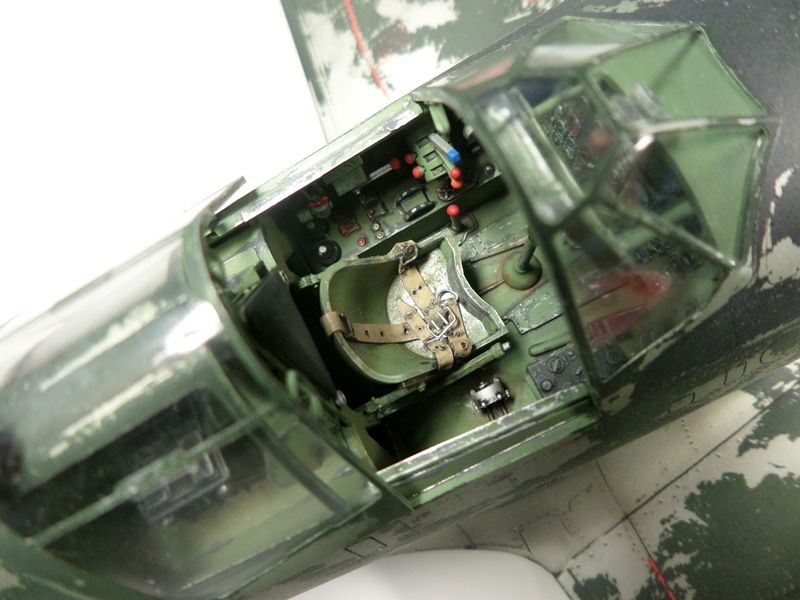
This is my 1/32 Hasegawa's Mitsubishi Raiden finished!! I opted for a very worn plane taking advantage of the model size. Painted in IJN Green (Tamiya XF-11) using the hair spray technique for the weathering. I had a lot of pleasure building this model. hope you like it too. Thanks.

-
 4
4
-
-
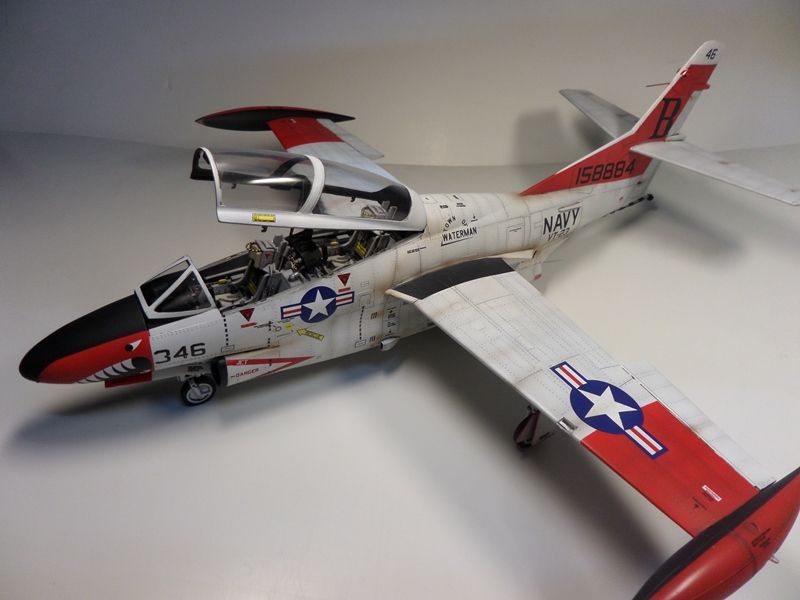
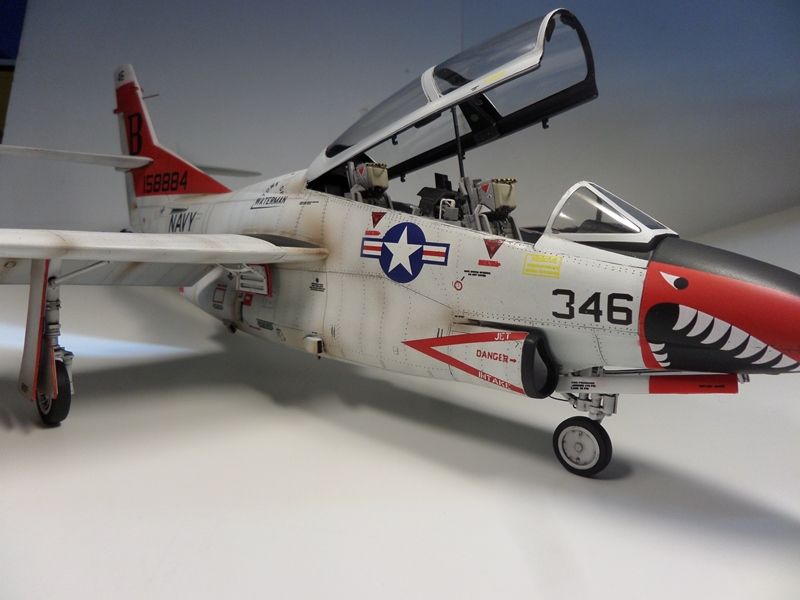
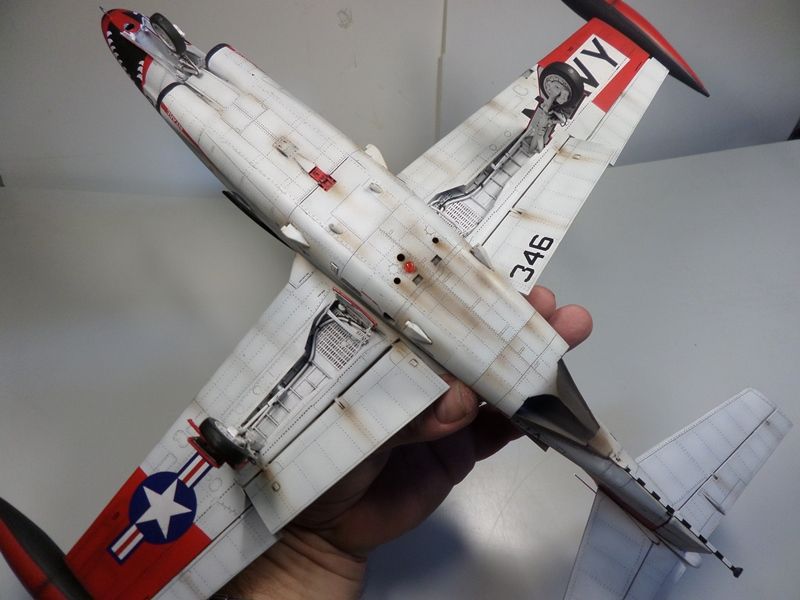
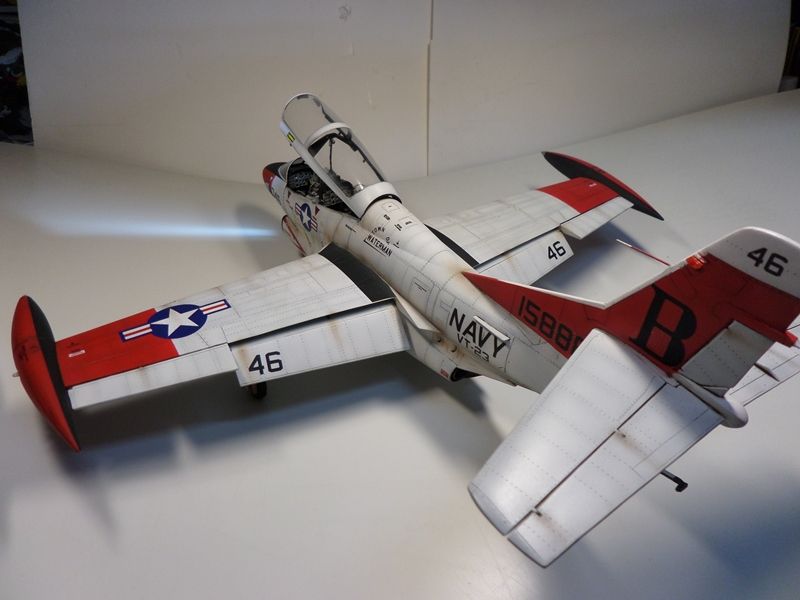
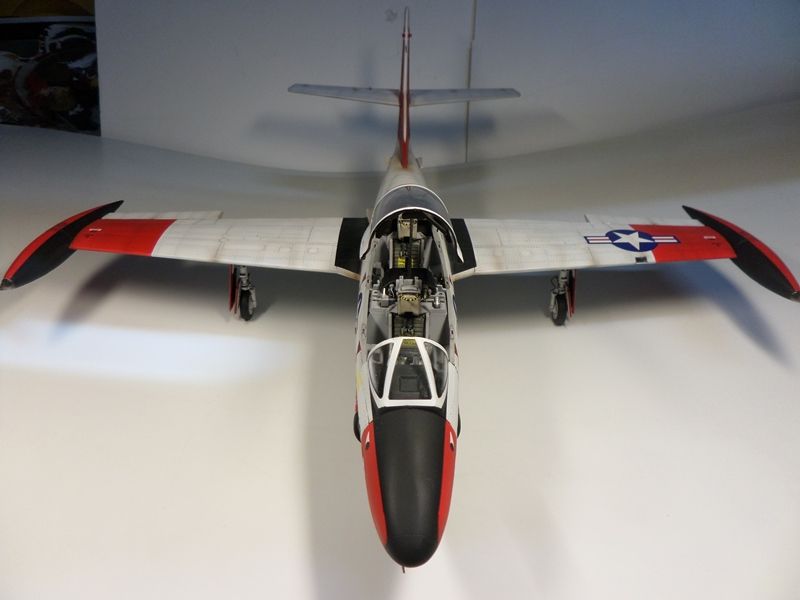
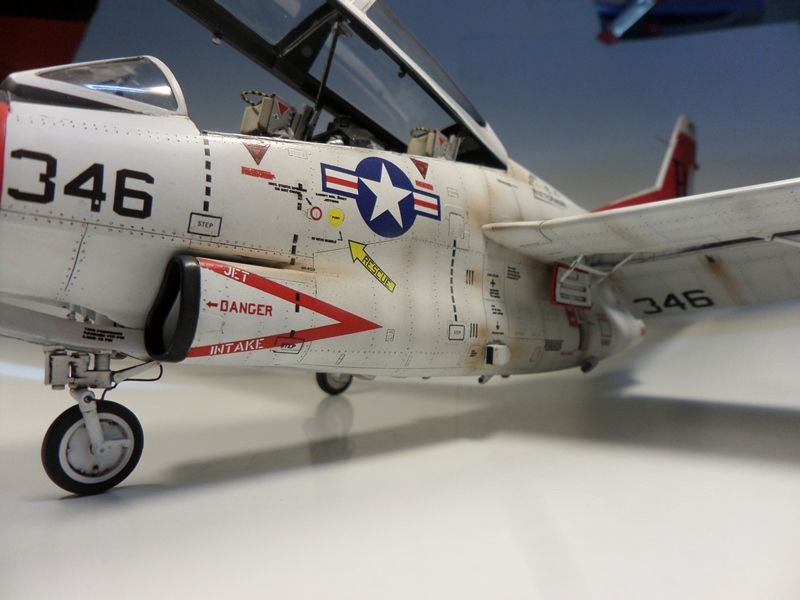
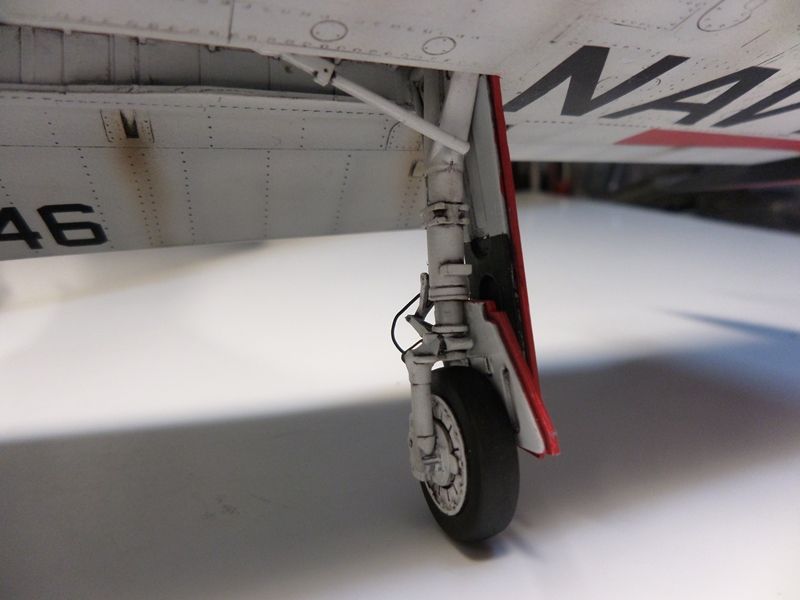
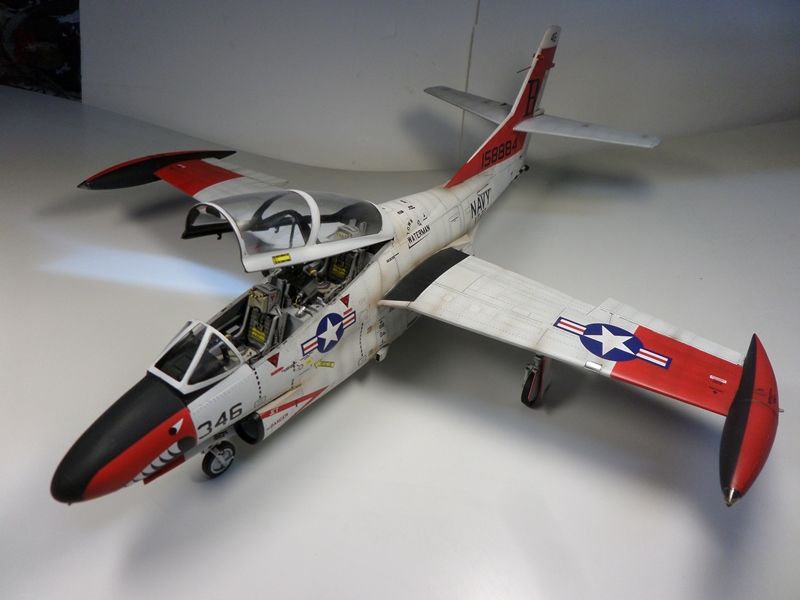
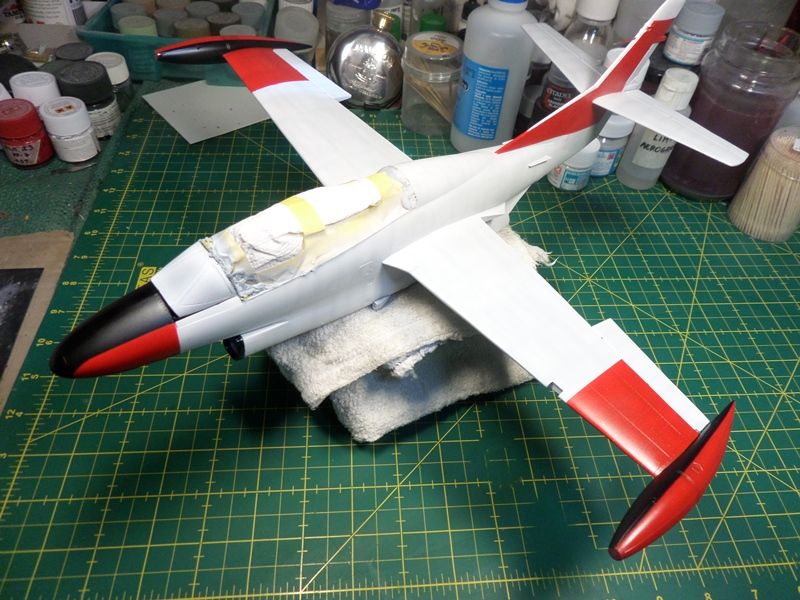
Hi!
Thanks for looking.
You can see the wip on: http://forum.largescalemodeller.com/topic/4493-t-2-buckeye-red-white-trainer-132-special-hobby/
cya


-
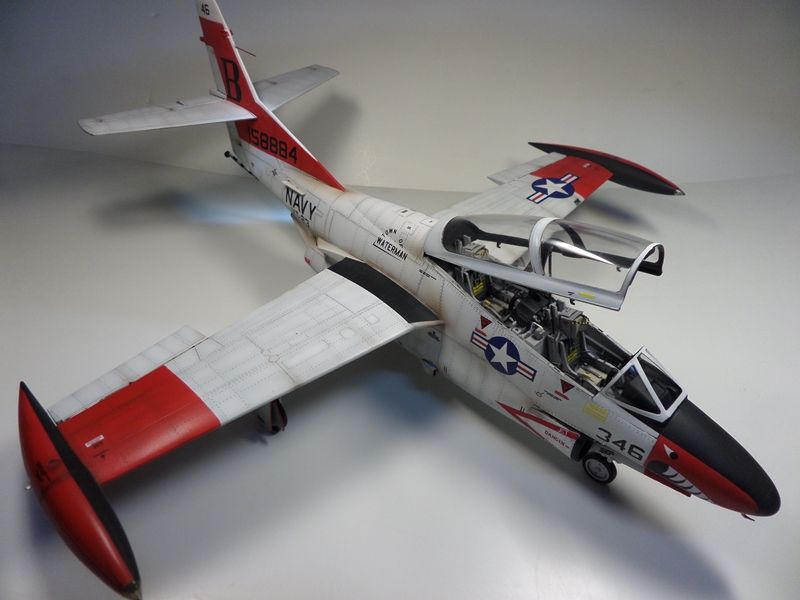
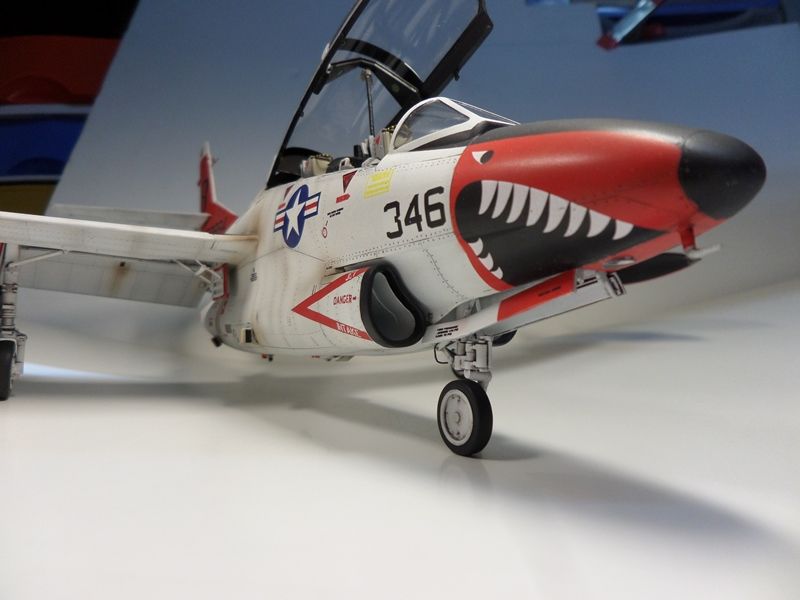
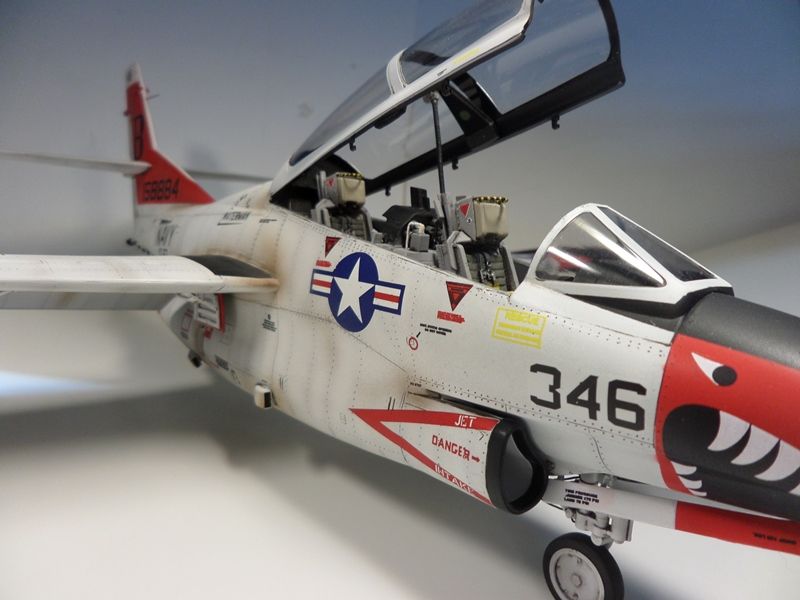
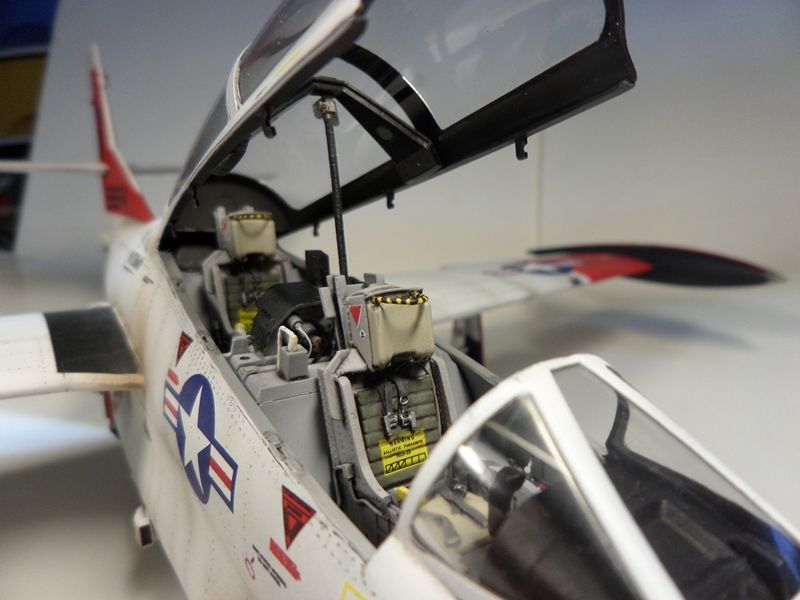
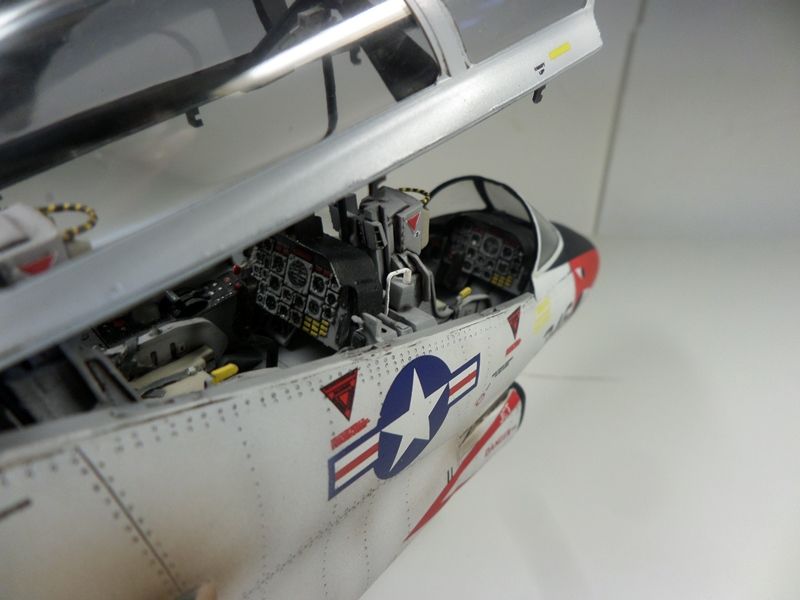
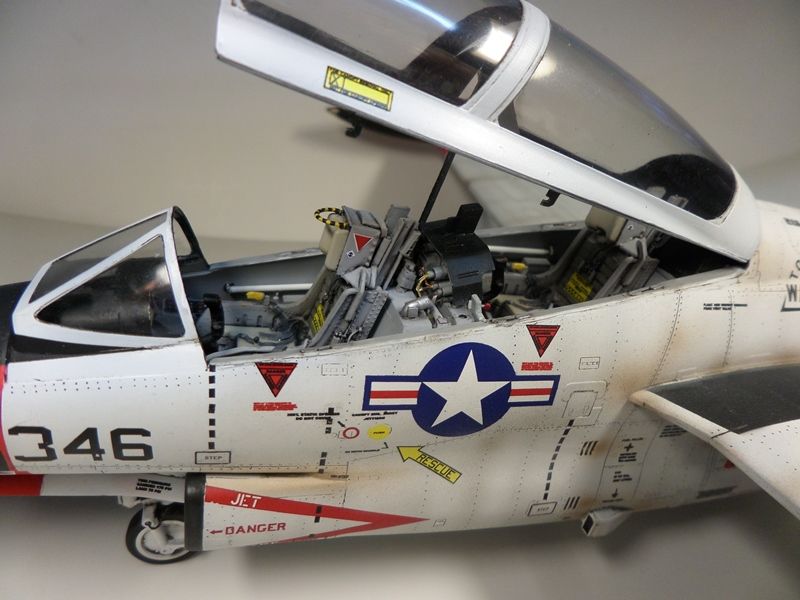
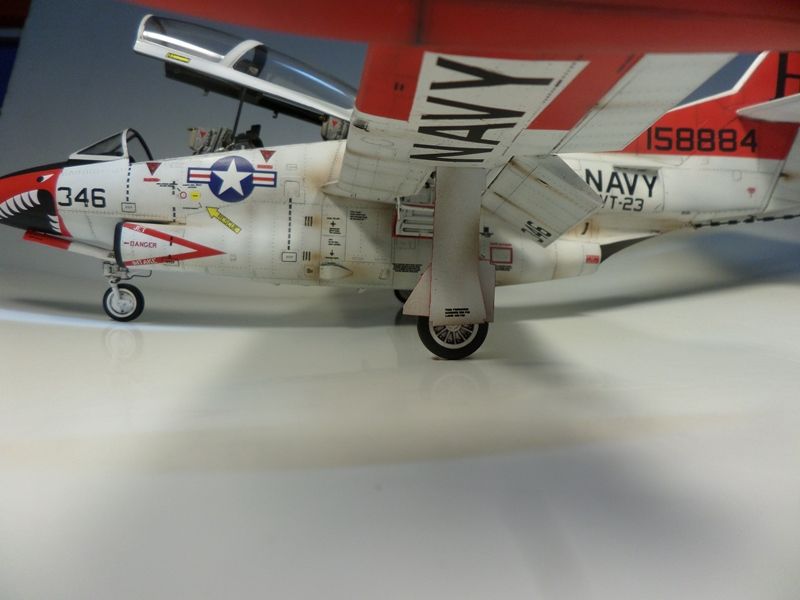
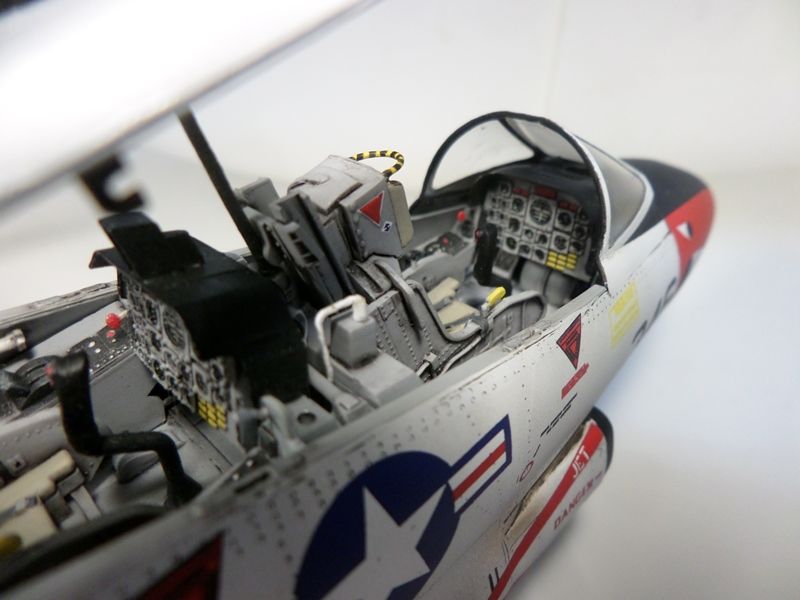
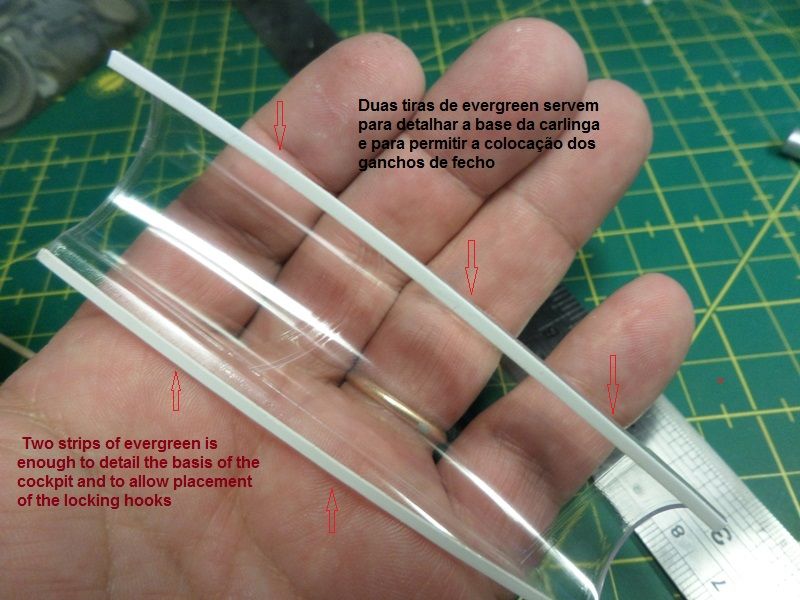
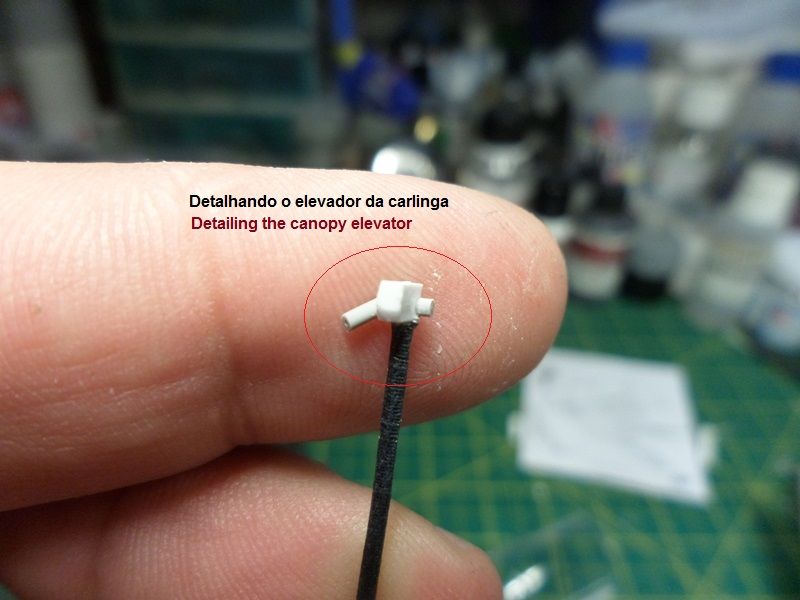
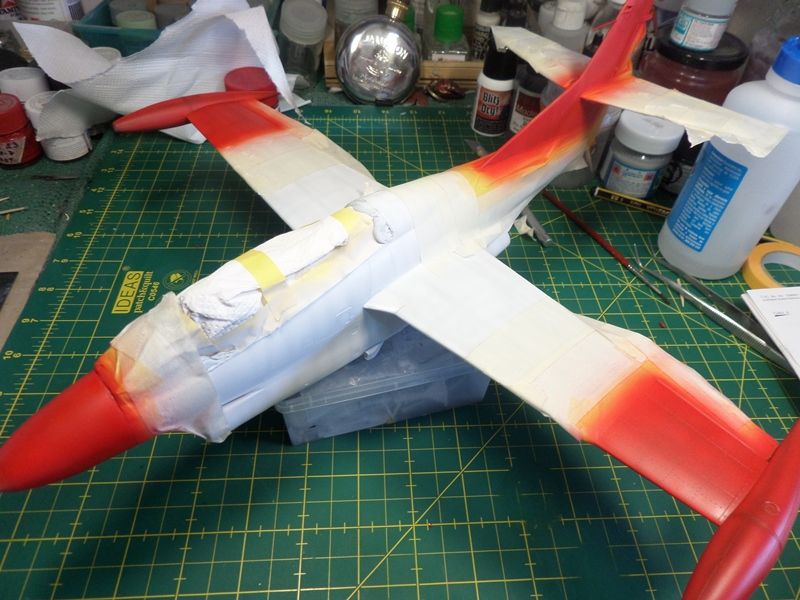
Hi,
Some more pics of the WIP. cya!
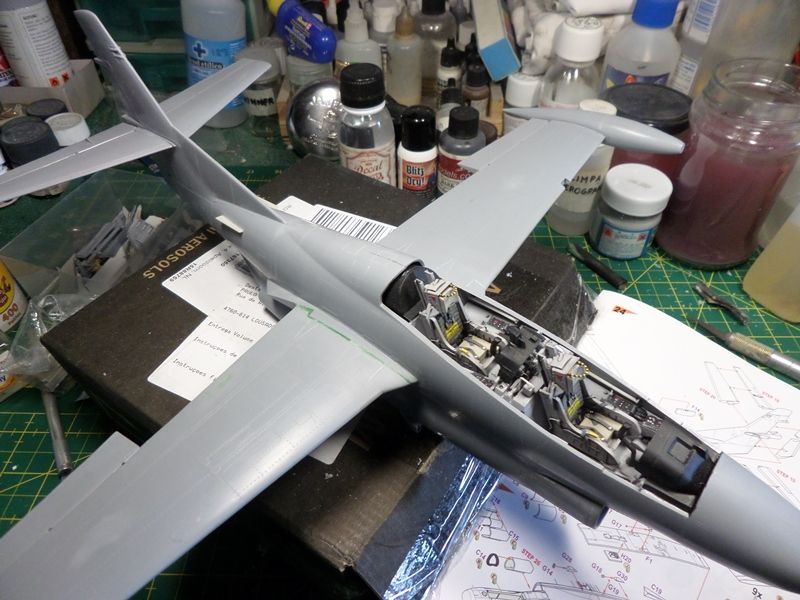
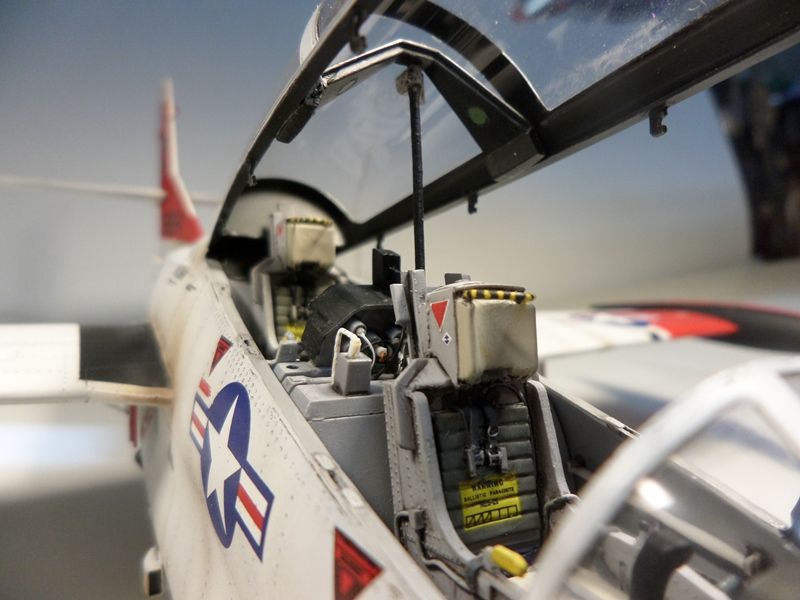
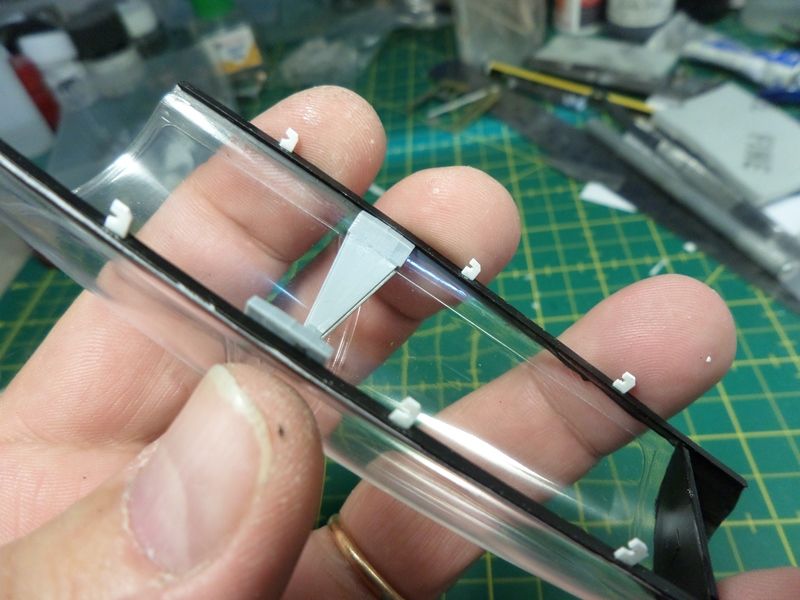
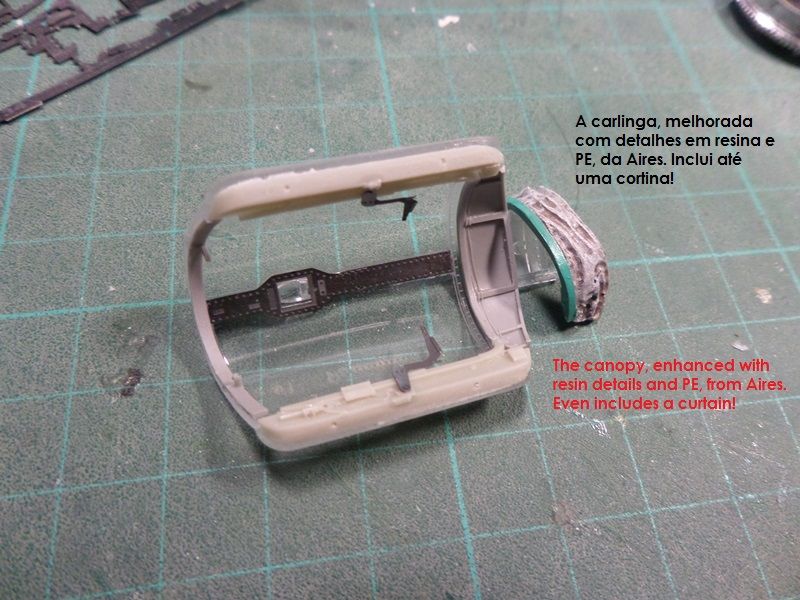
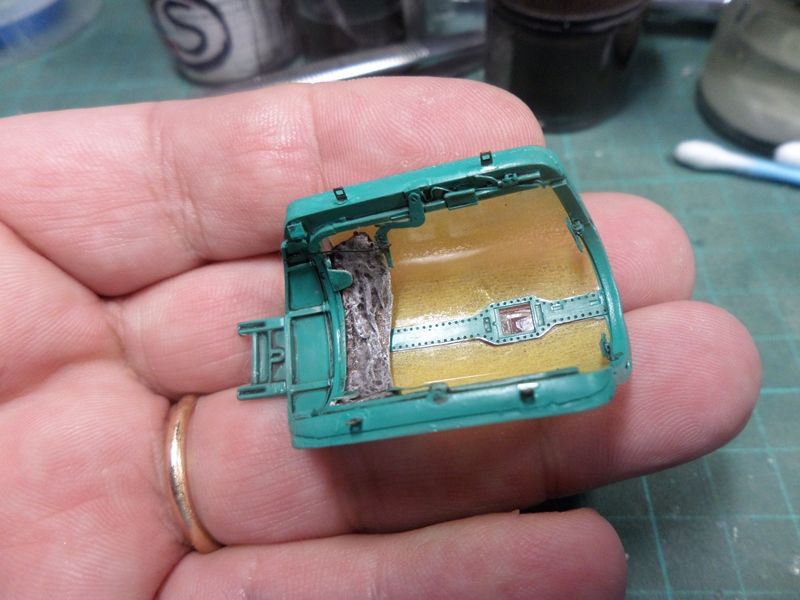
canopy, not cockpit
-
5
-
-
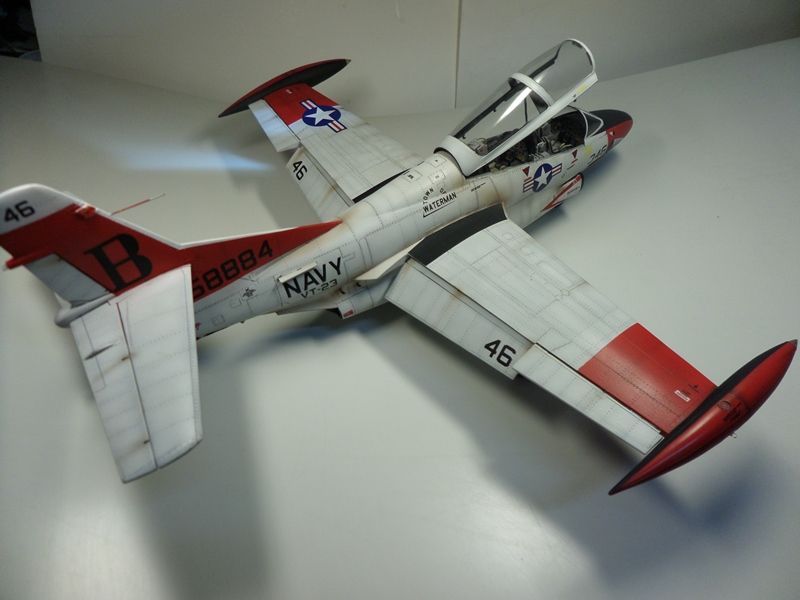
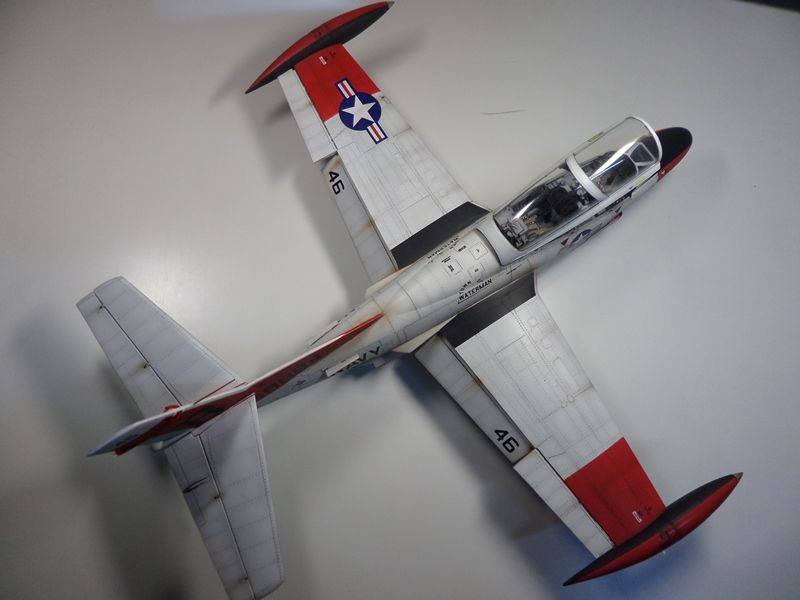
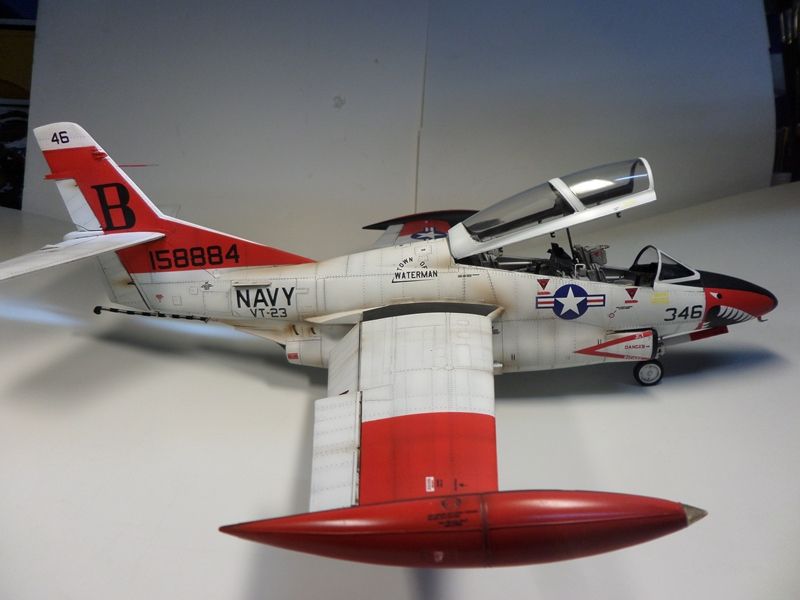
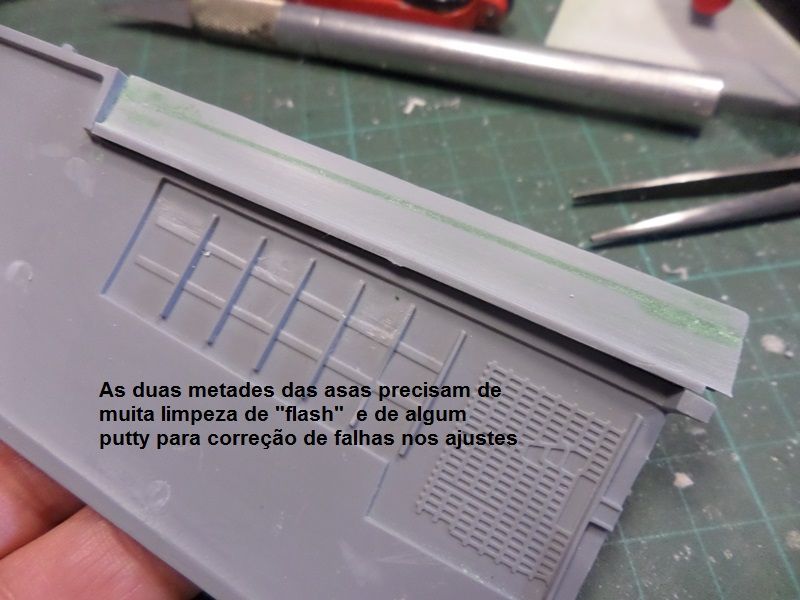
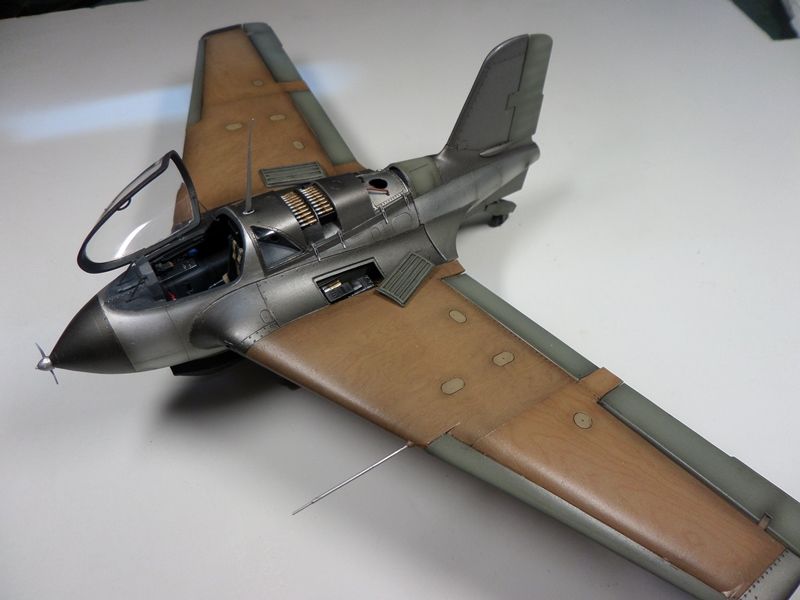
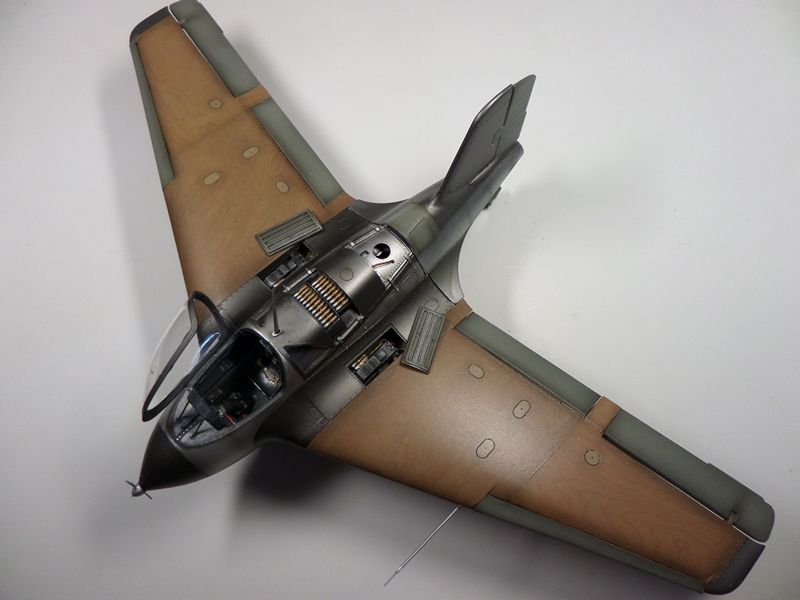
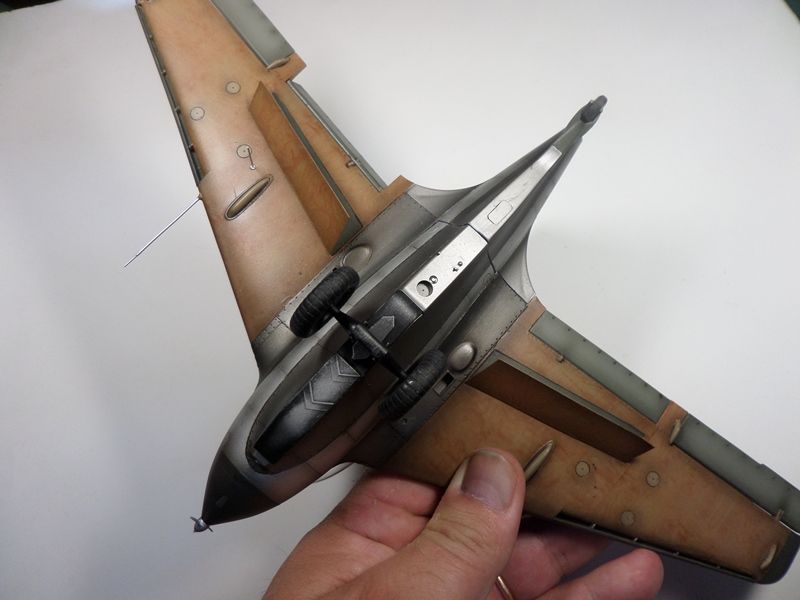
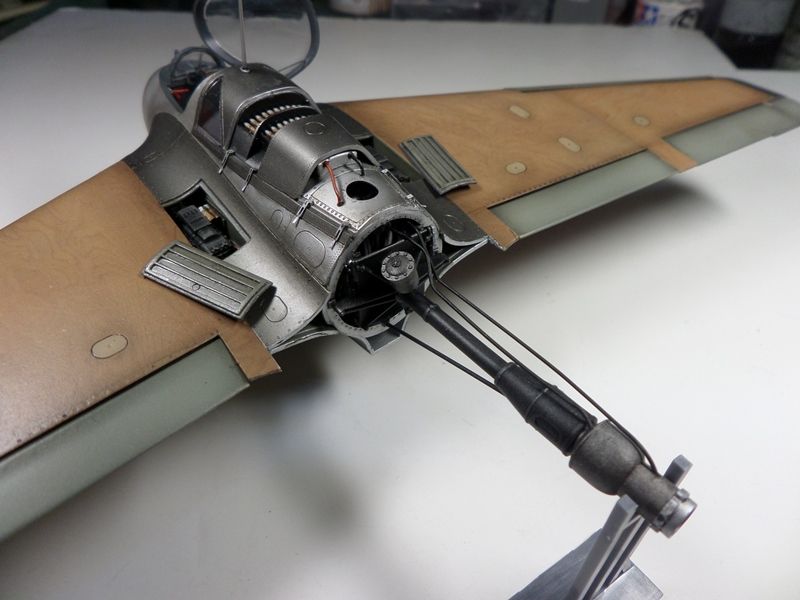
Hi, my fellow modellers!
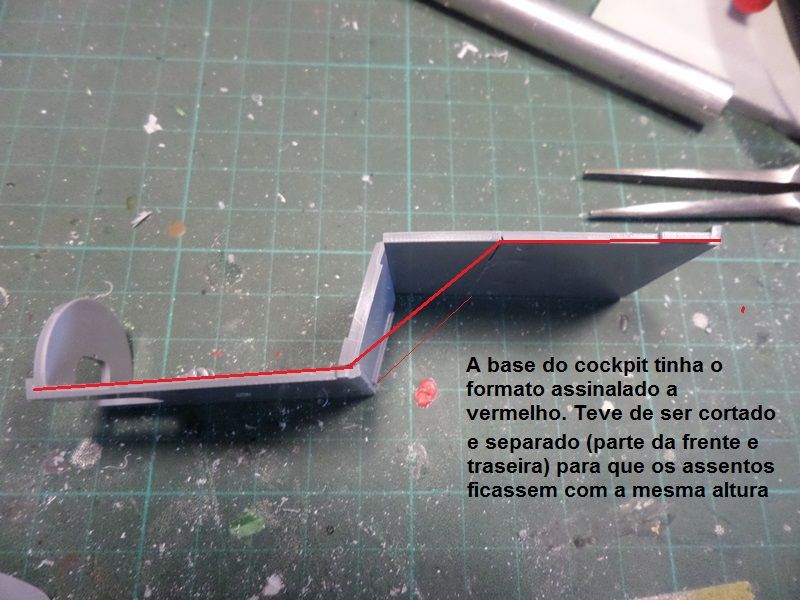
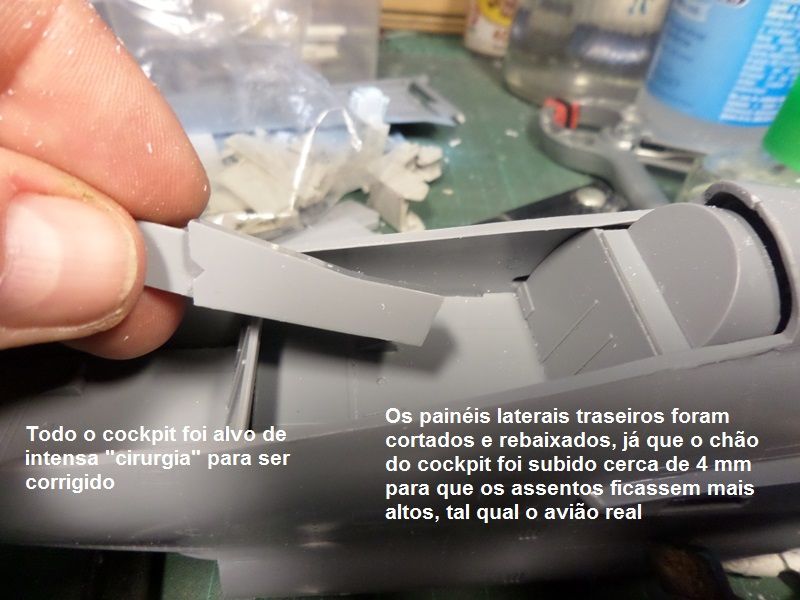
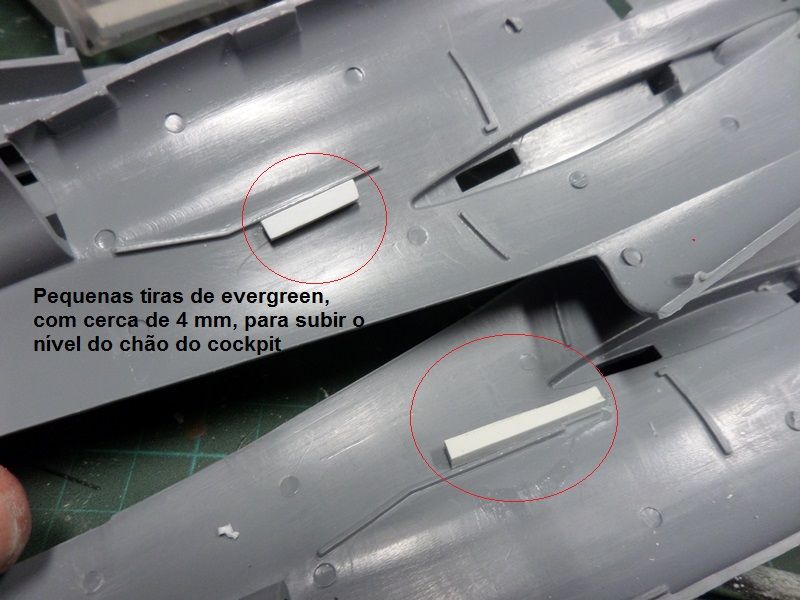
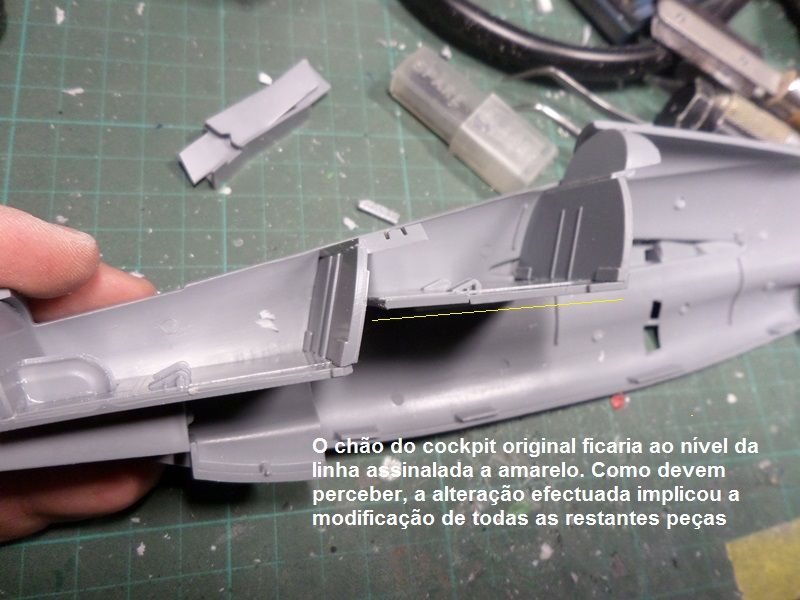
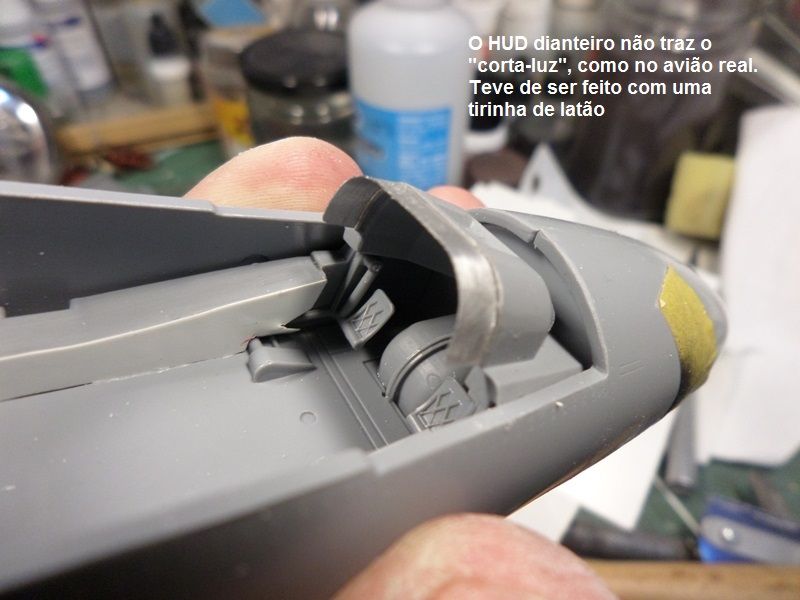
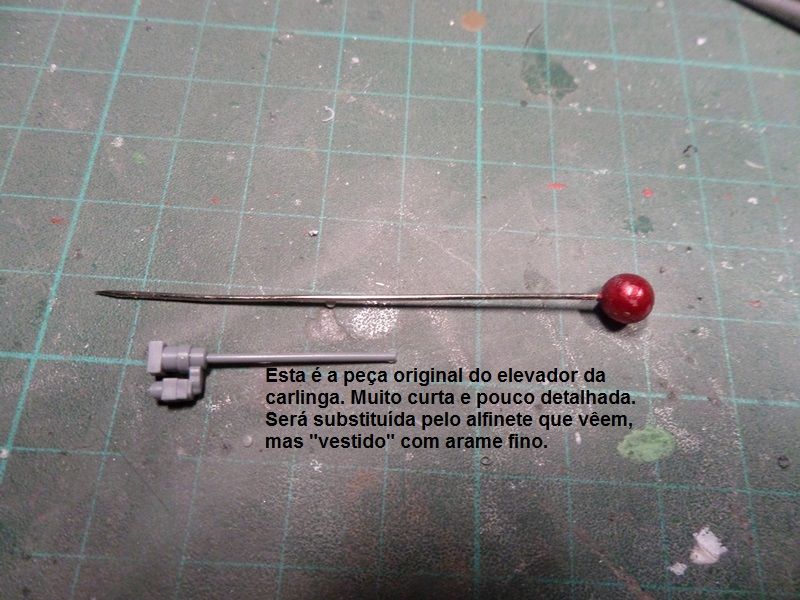
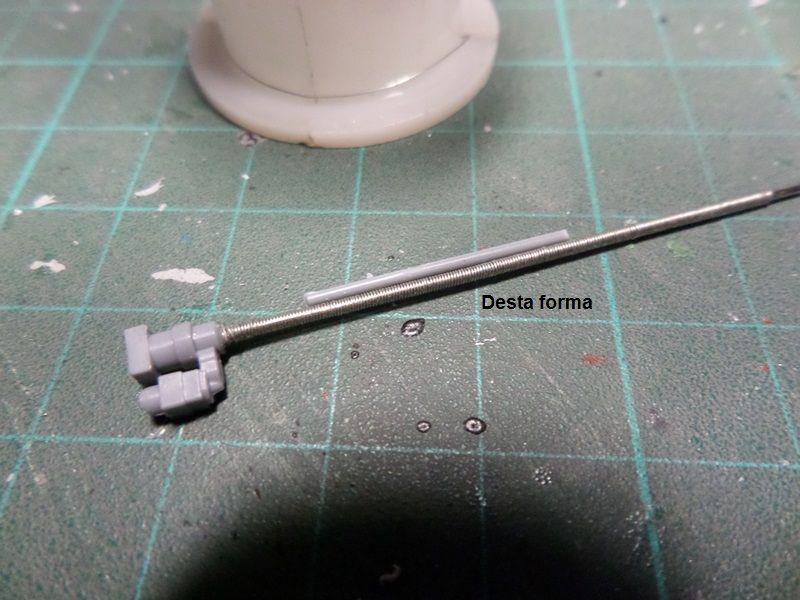
Today I present you a WIP of a model, finished last November 2015, that was a real challenge, taking into account that is a "short run" kit and have a lot of corrections and scratch to do to make it accurately built. I liked the final result. In the end, I hope you like it too. (Sorry some comments only in portuguese)


-
3
-
-
Hi!
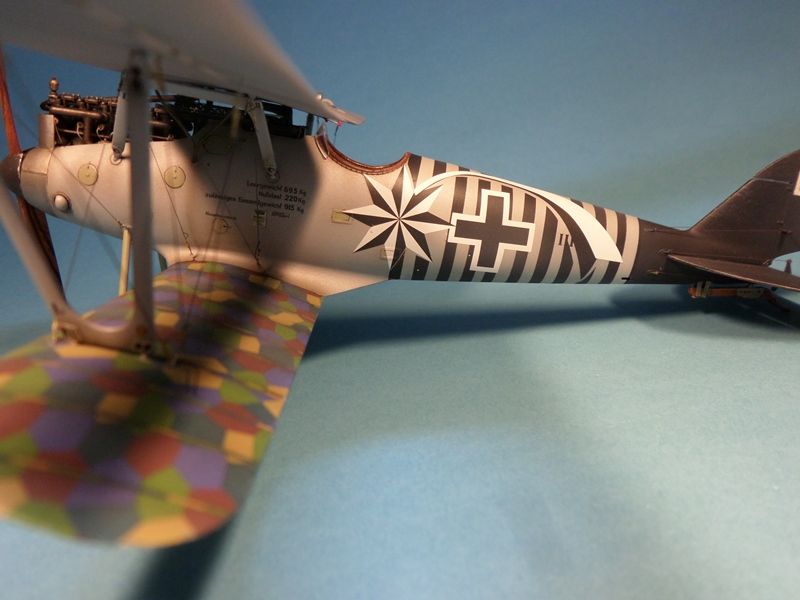
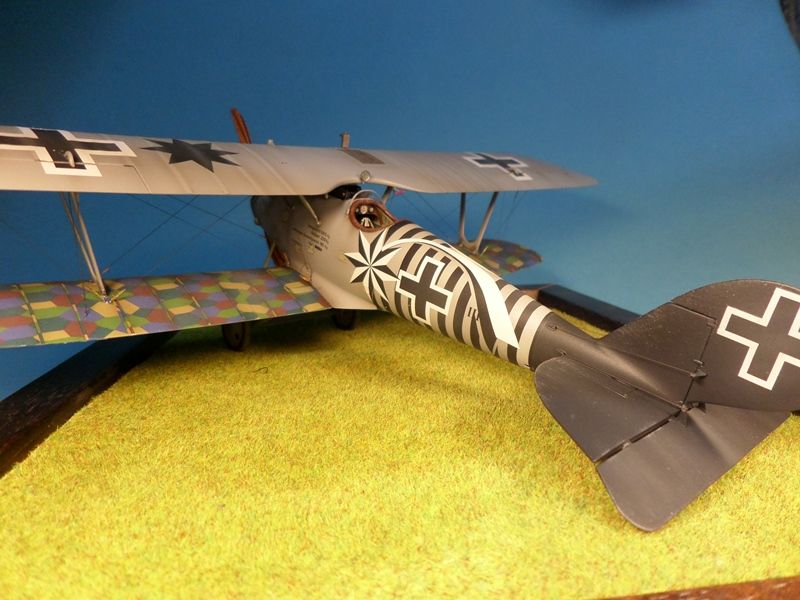
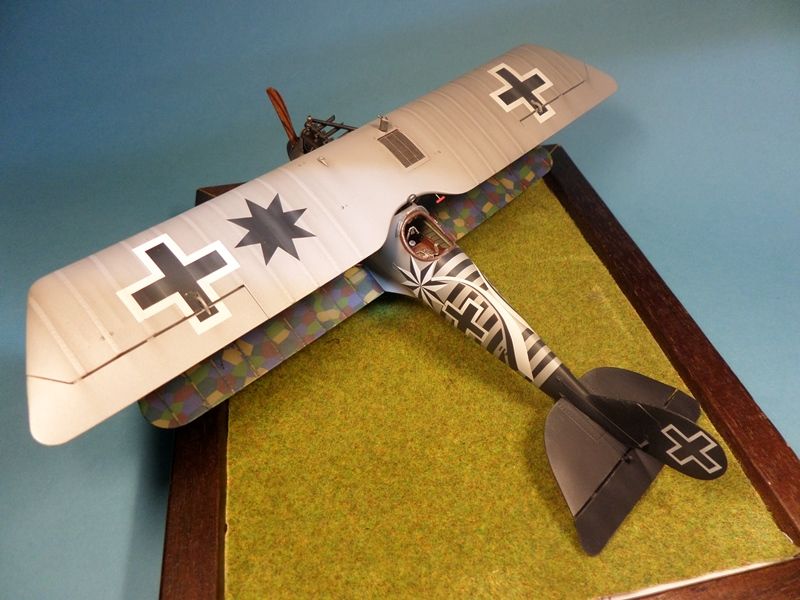
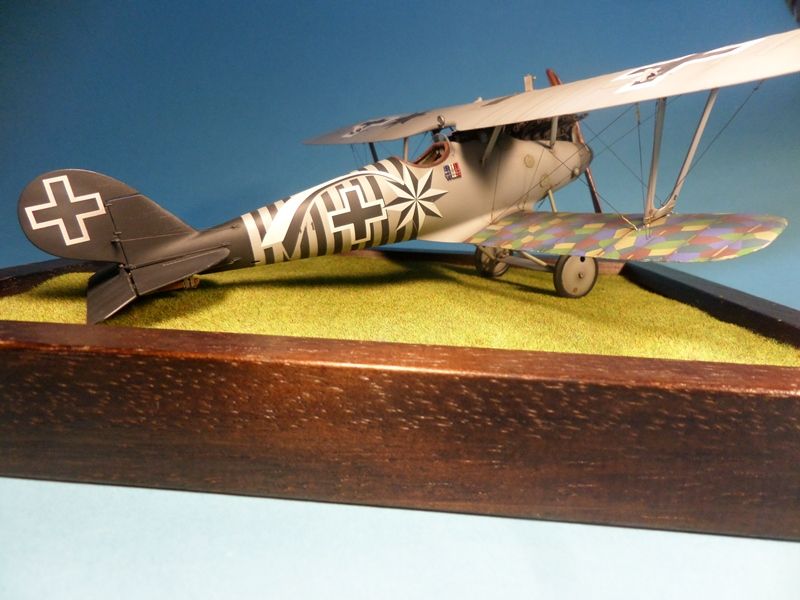
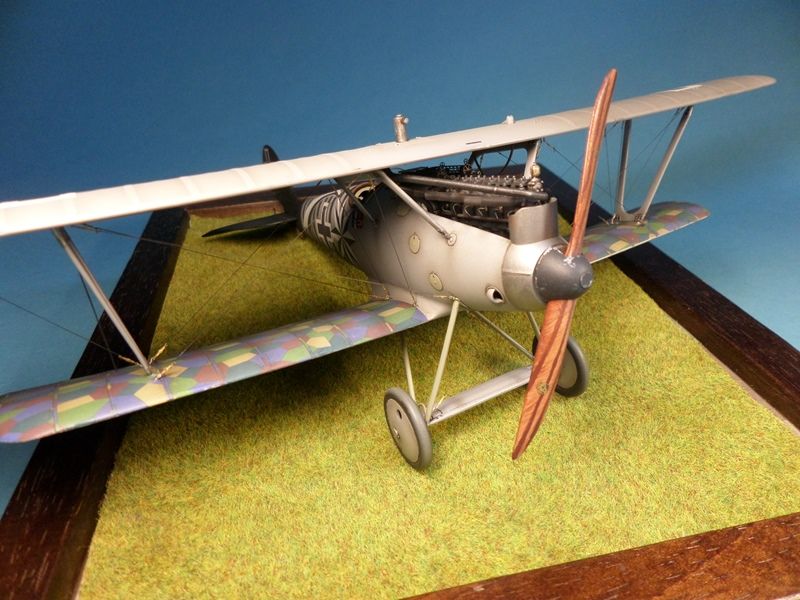
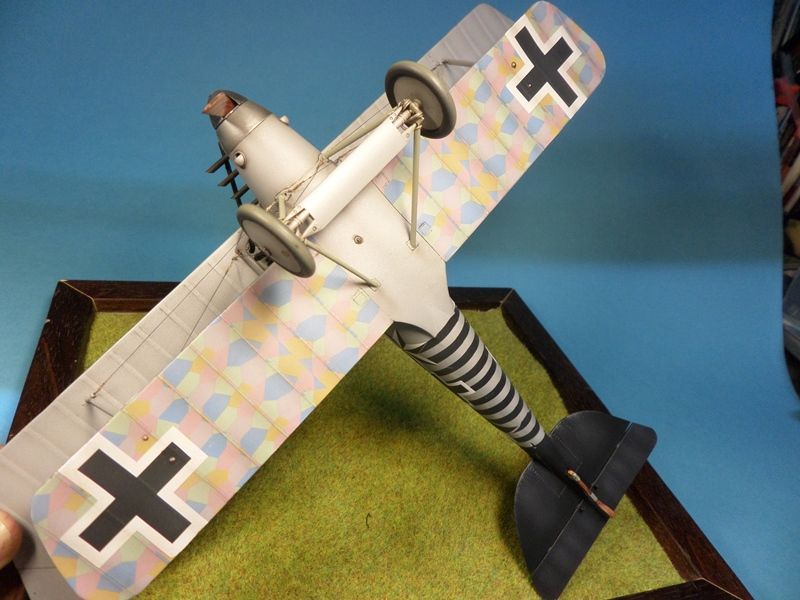
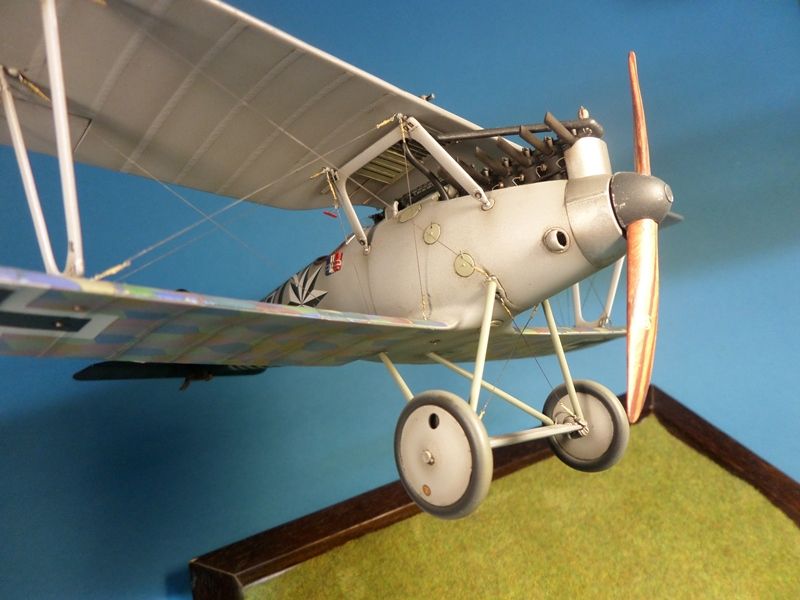
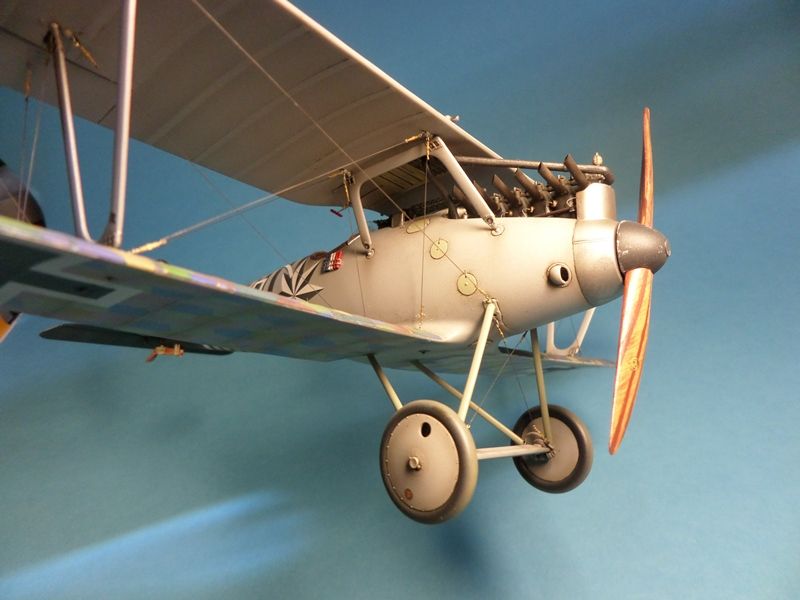
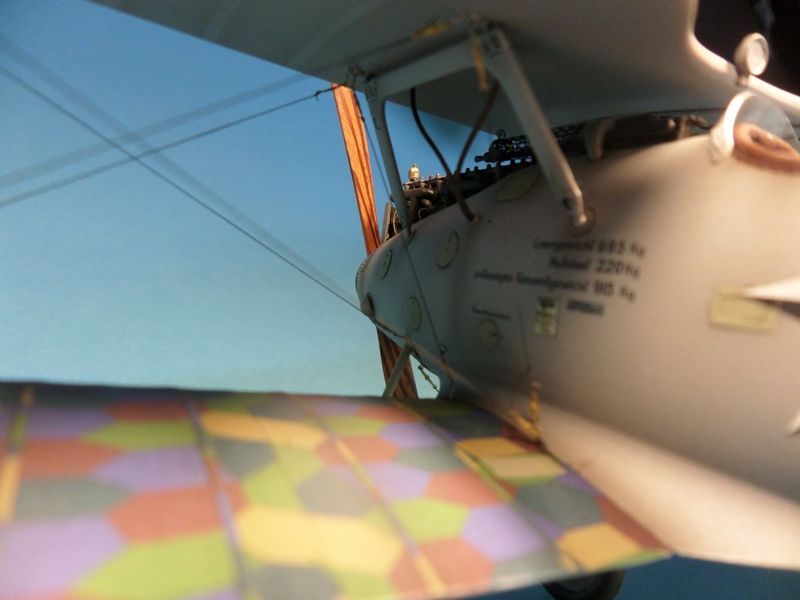
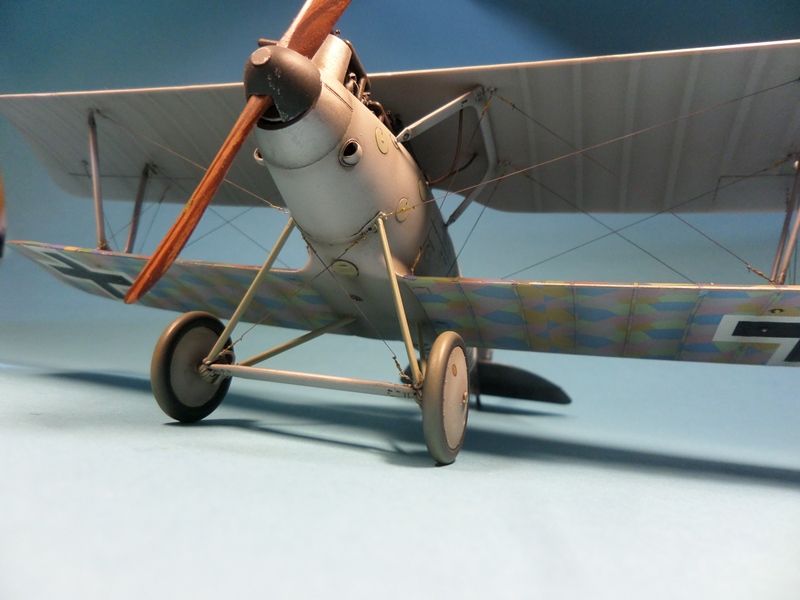
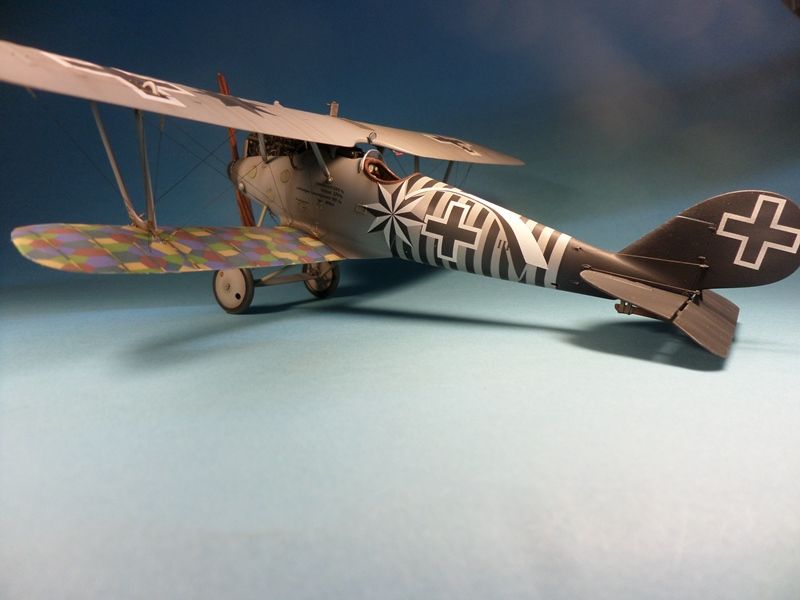
4th stage: Rigging and finish WNW Pfalz D.IIIa (still lack the base. the one in the pics is just to show the model) thanks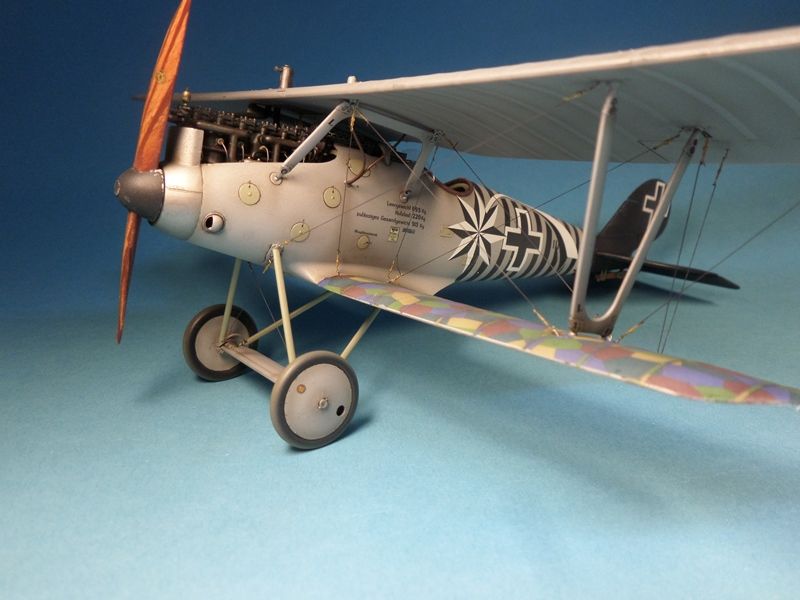
-
1
-
-
Hi!
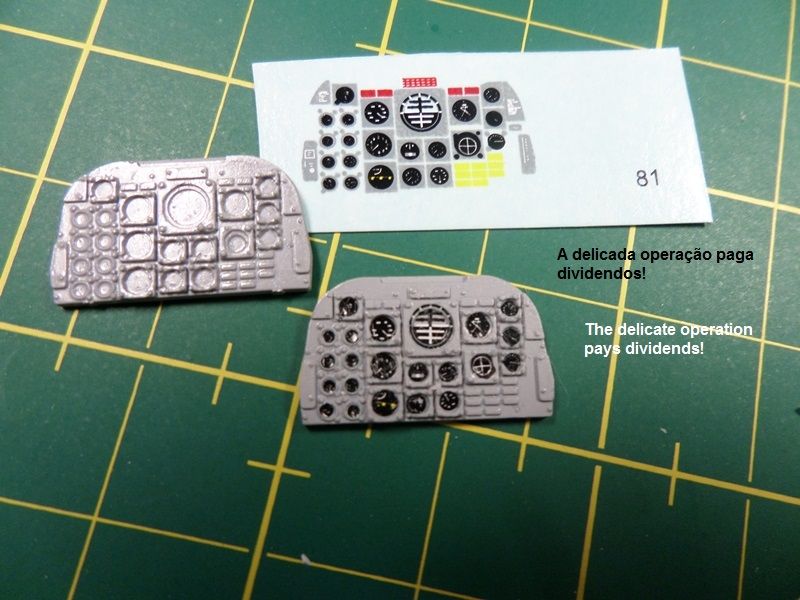
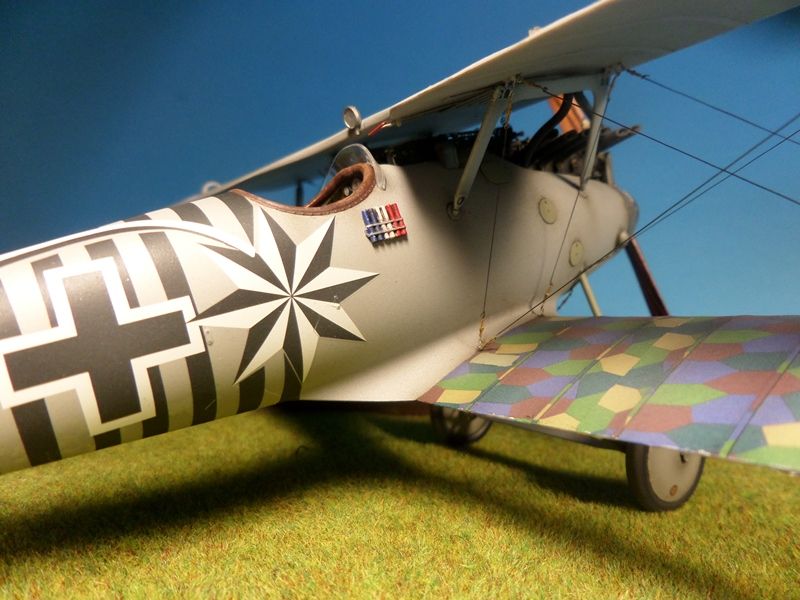
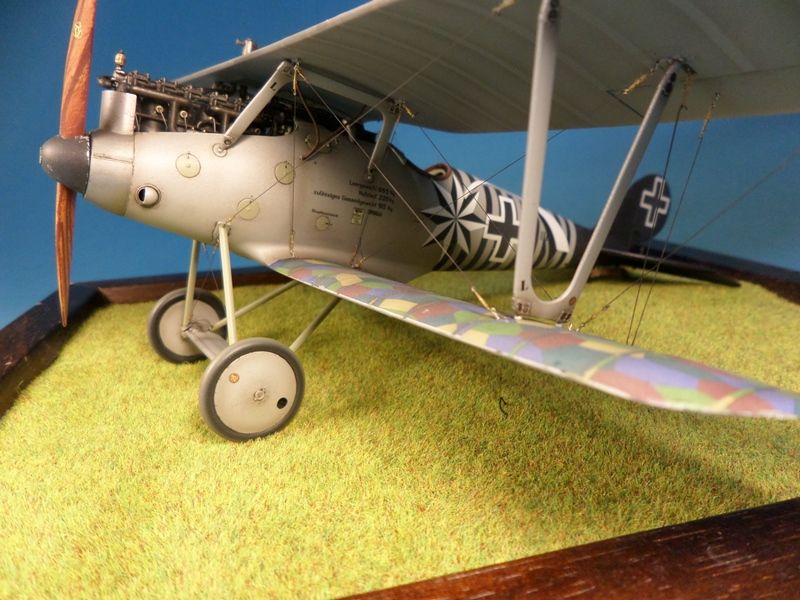
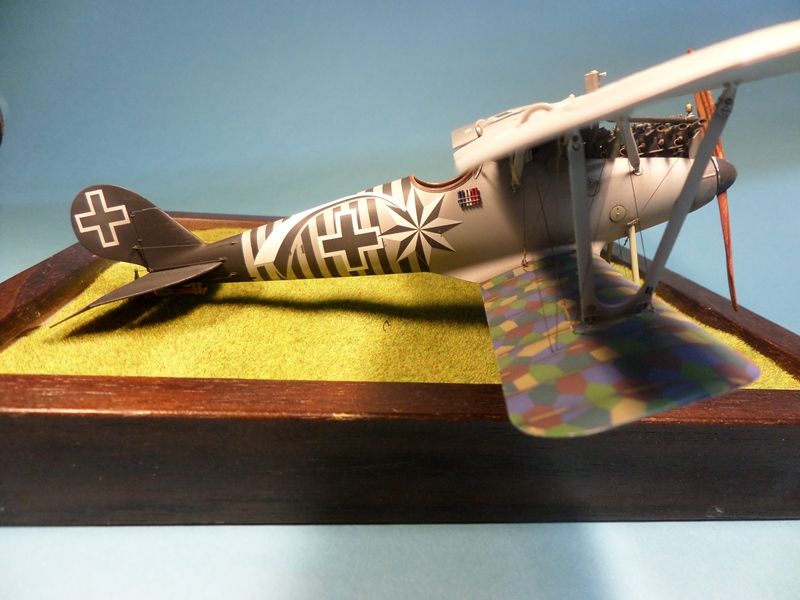
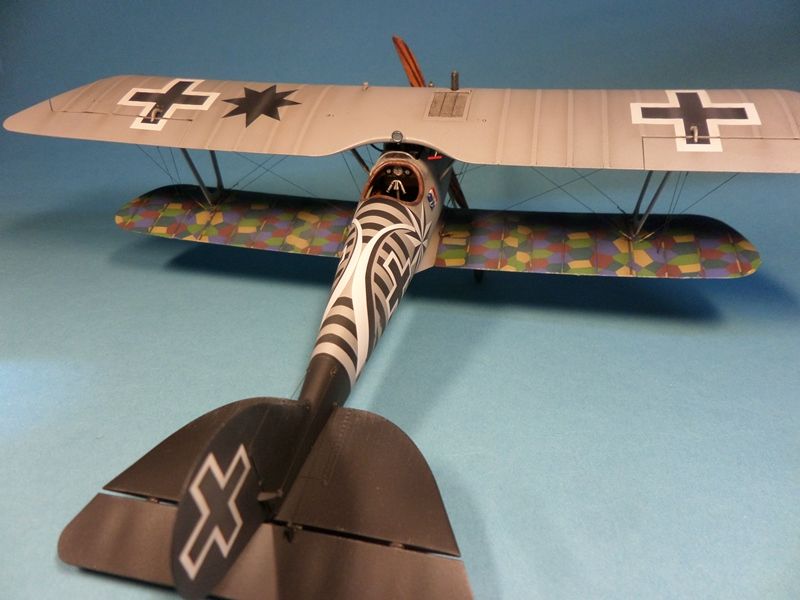
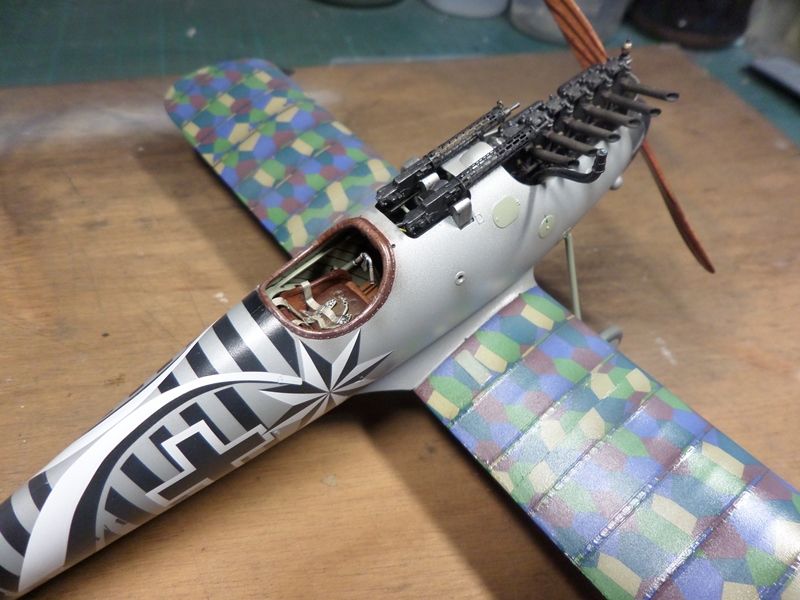
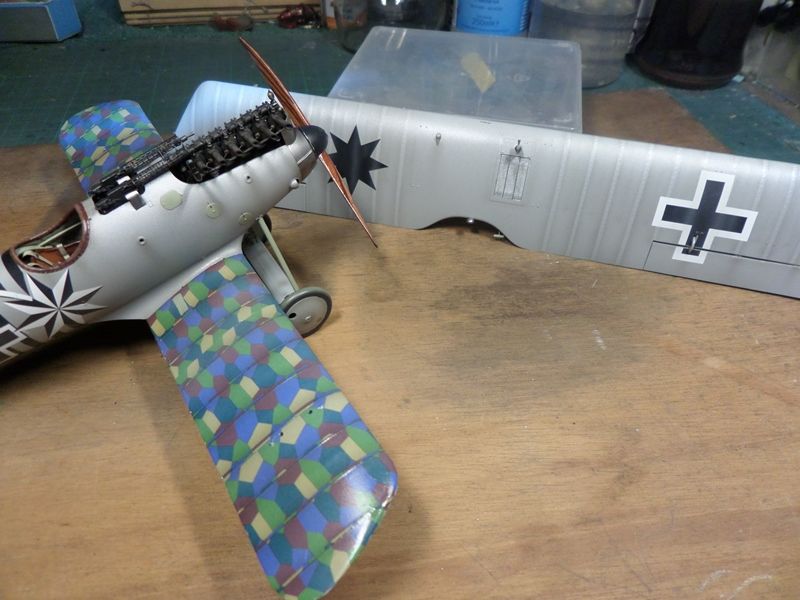
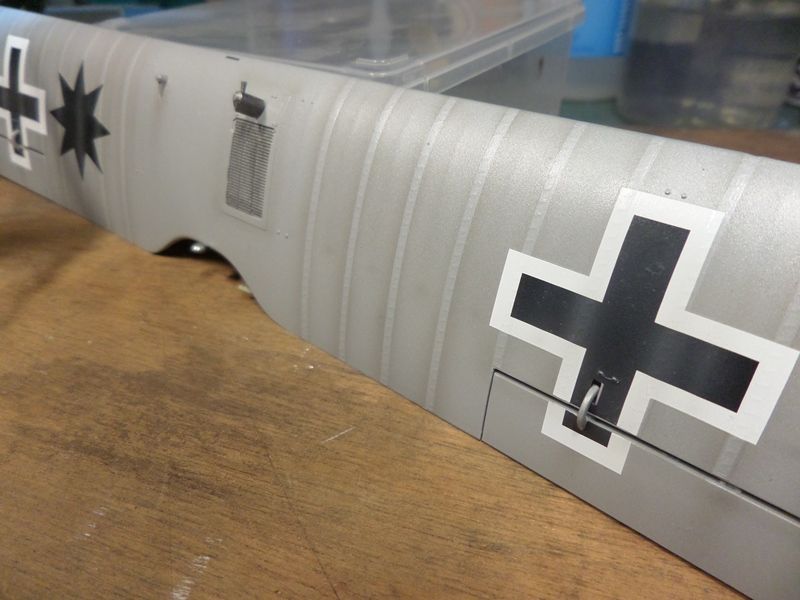
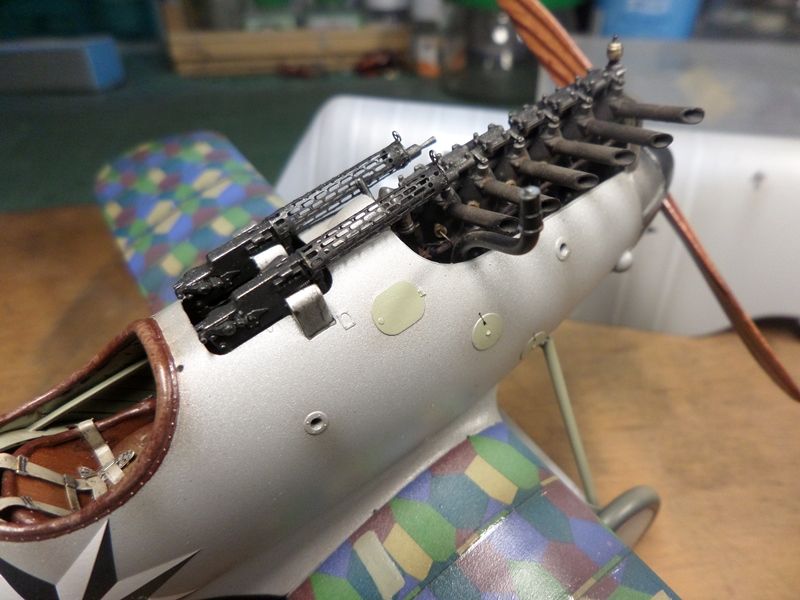
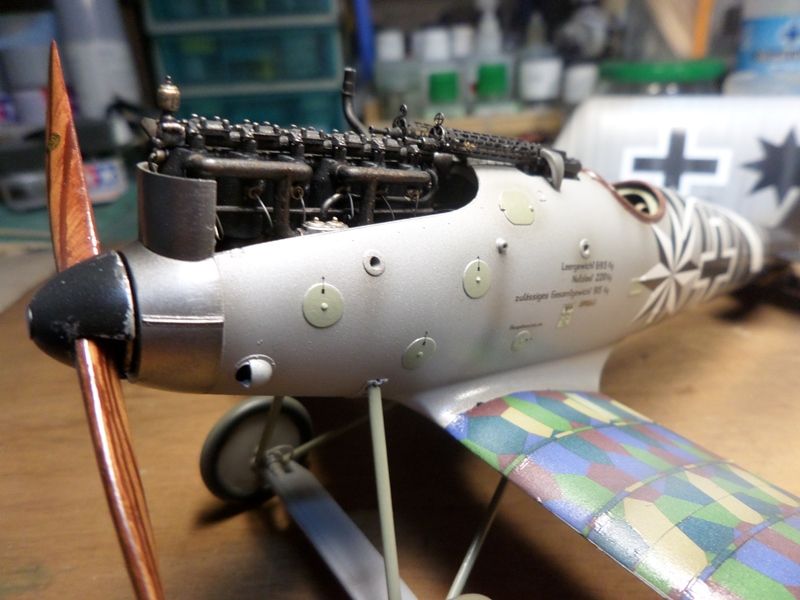
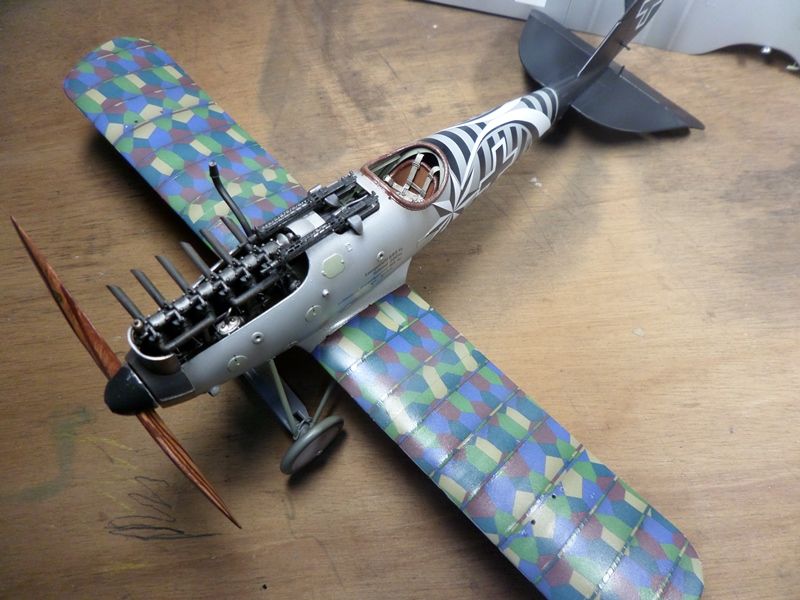
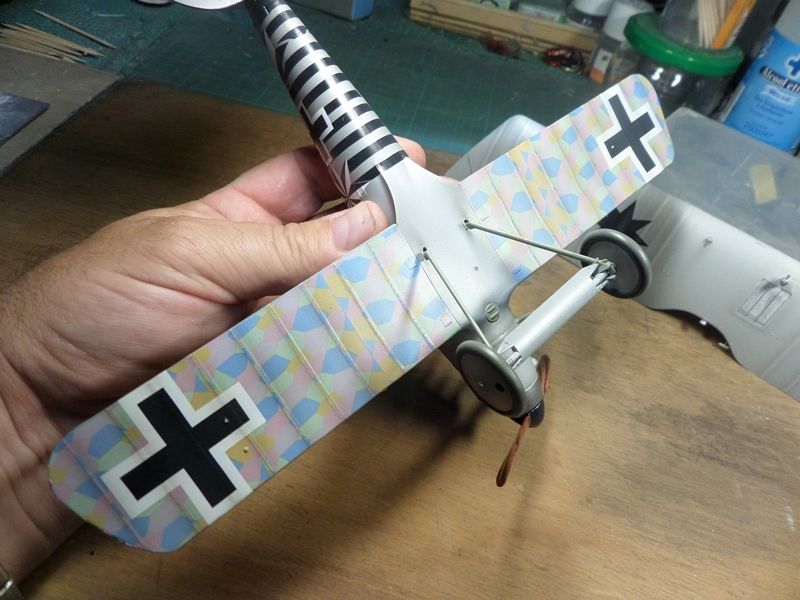
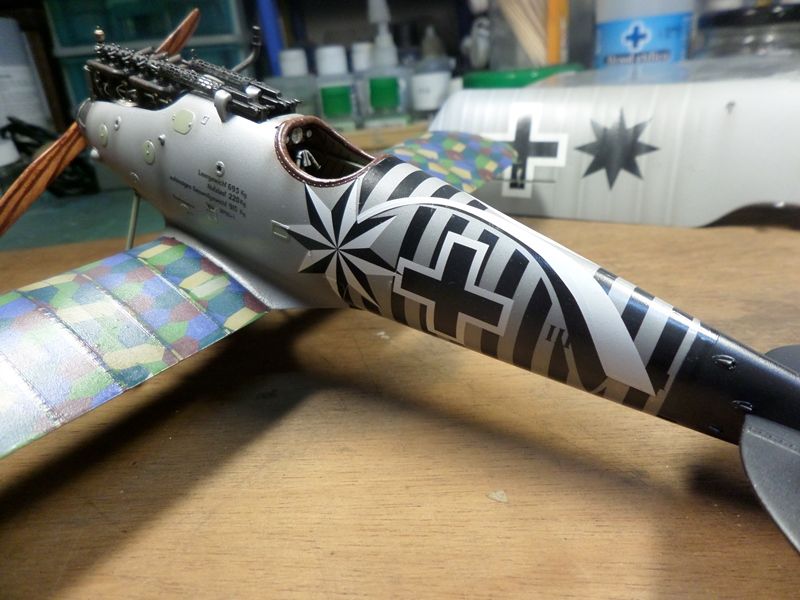
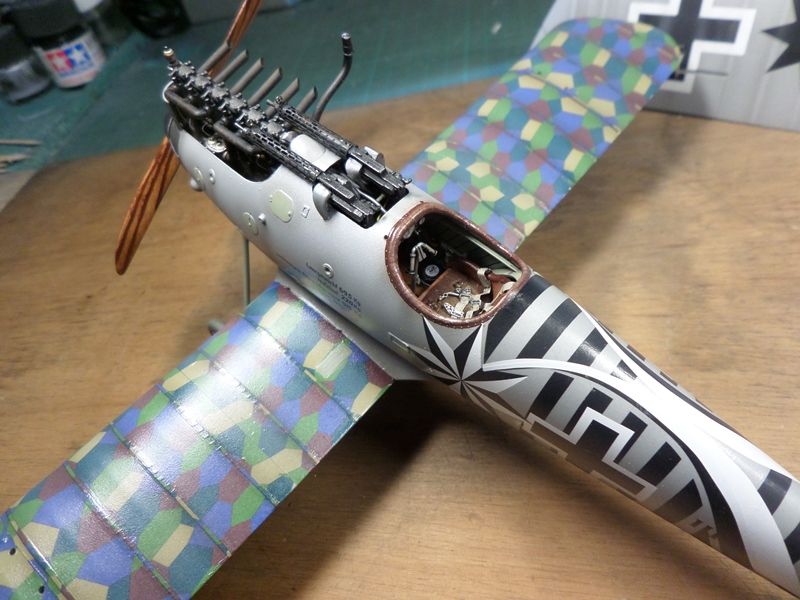
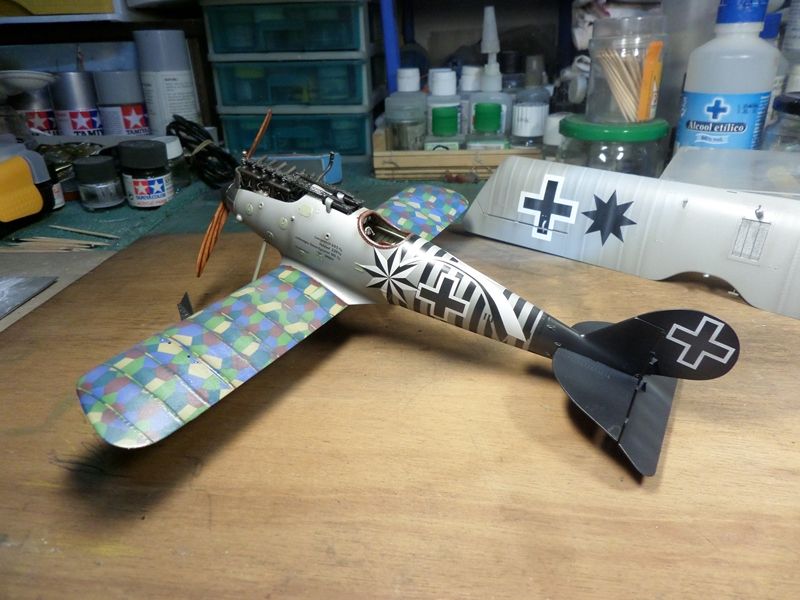
3d stage WNW Pfalz D.IIIa: painting and decals
I choose the Max Holtzem, Jasta 16b, 1918, scheme. Hard task, indeed!!
The decal scheme is very tricky and difficult. Painted with Tamiya and Gunze. The overall grey is a mix of XF-16 and XF-19. The next stage will be the weathering and rigging (oh my..!!). thanks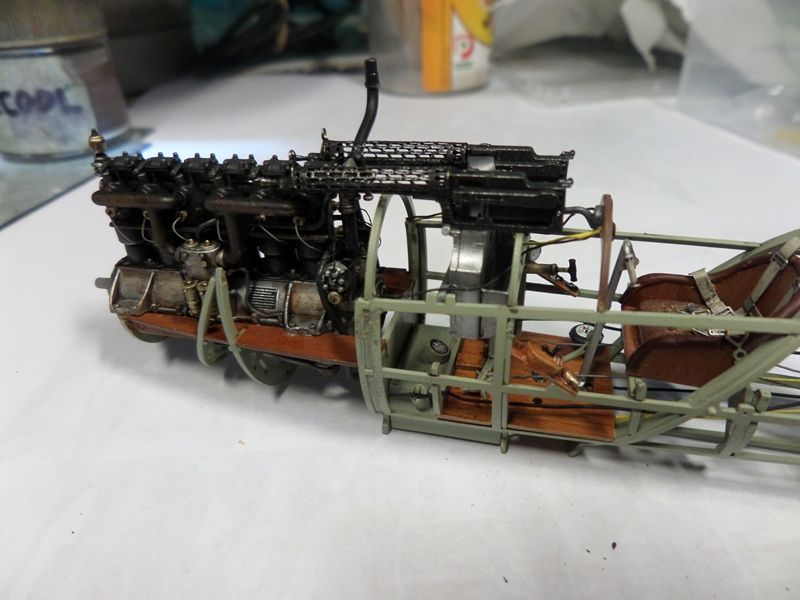
-
3
-
-
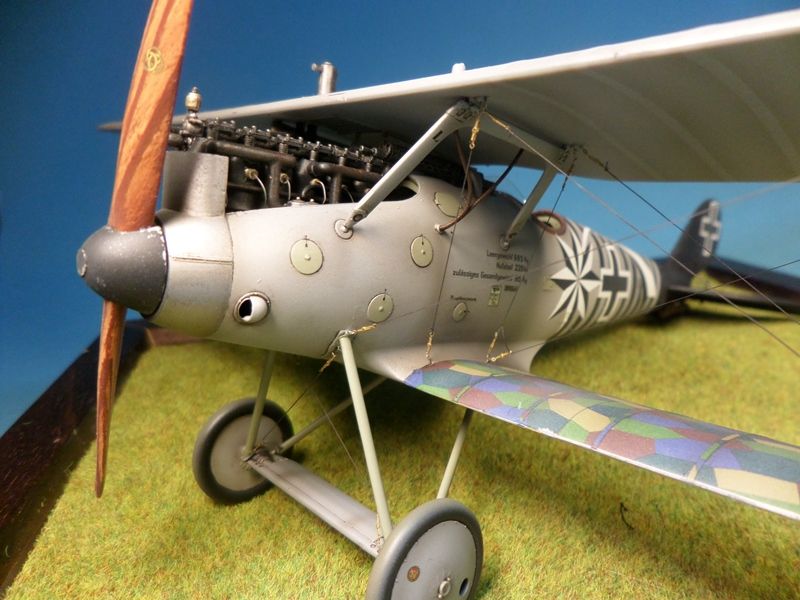
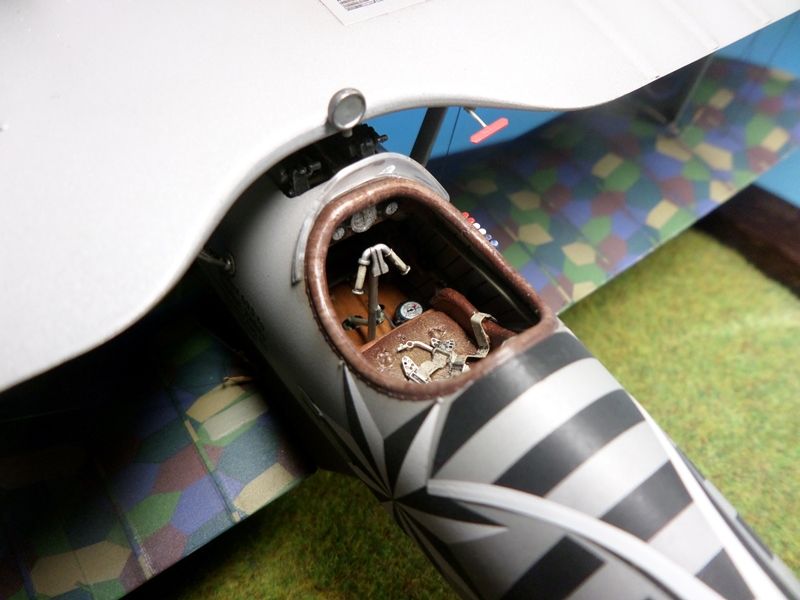
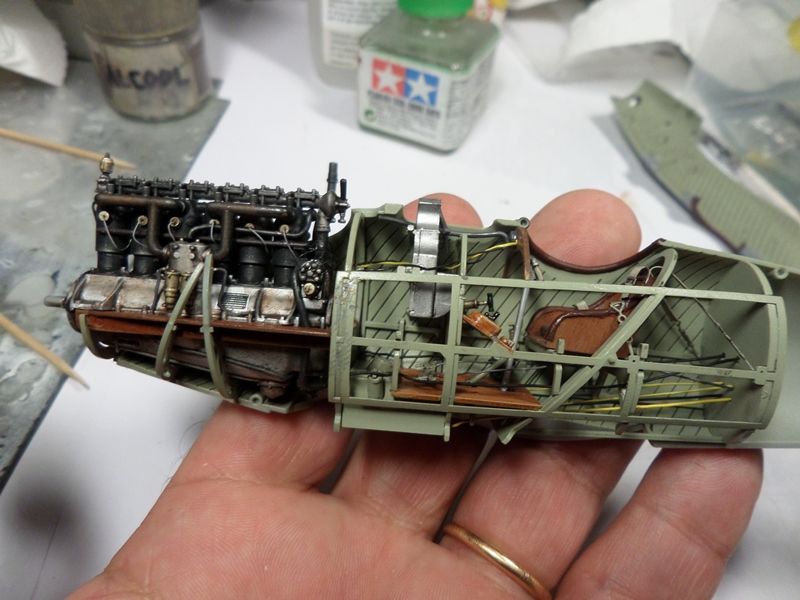
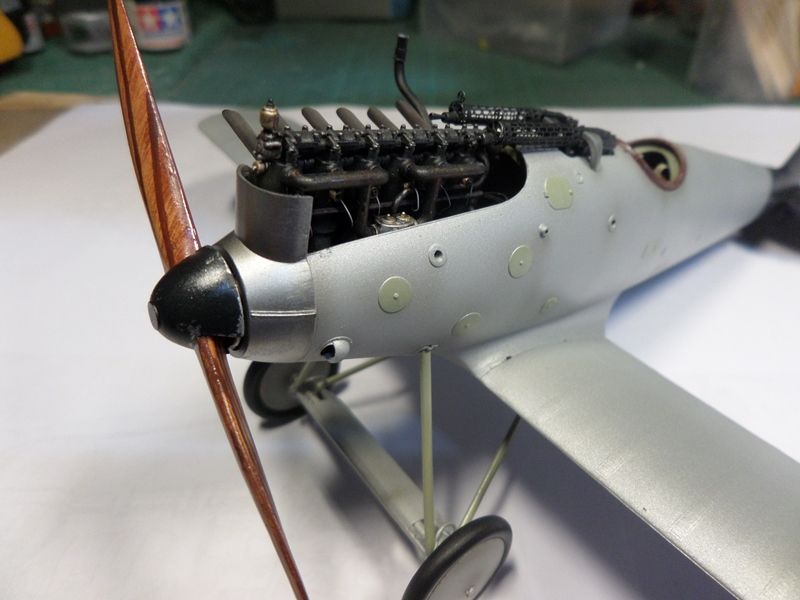
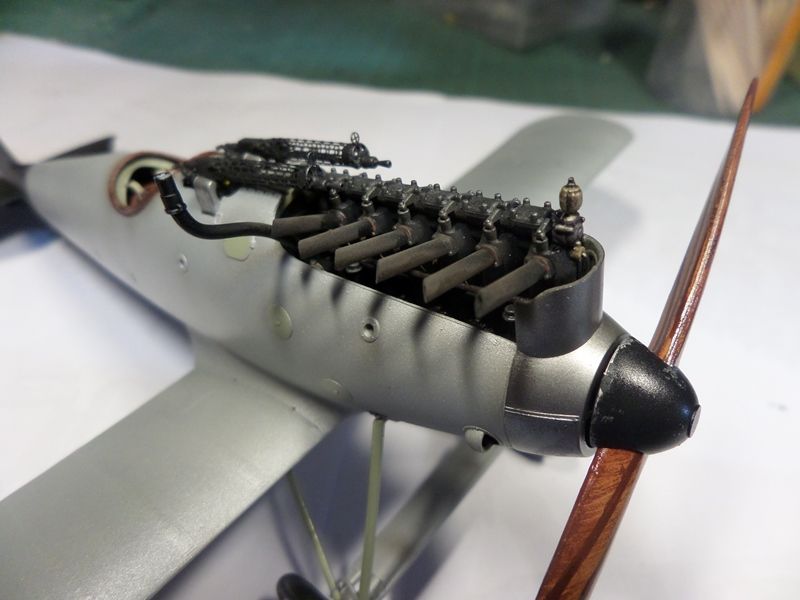
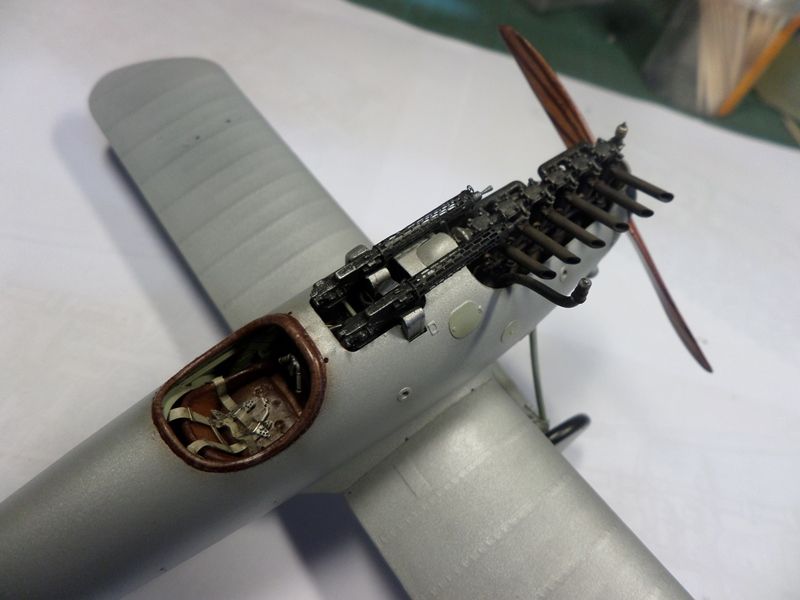
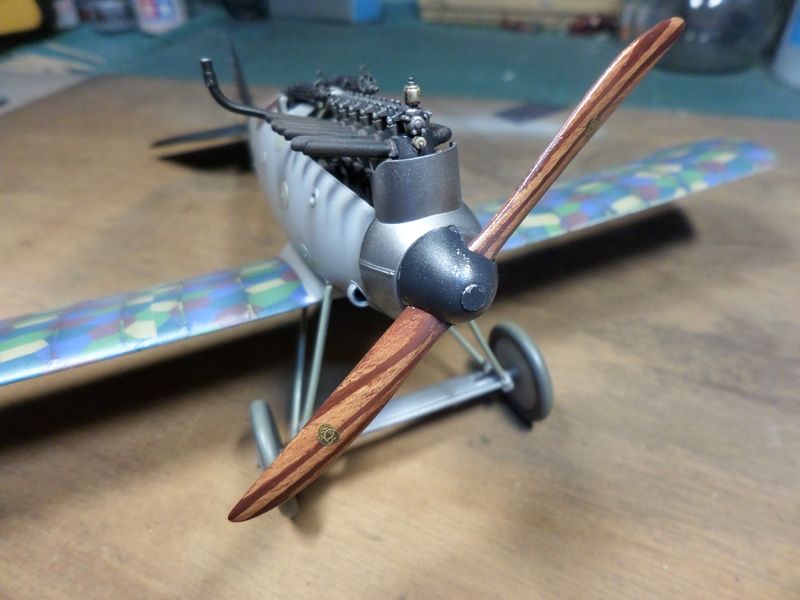
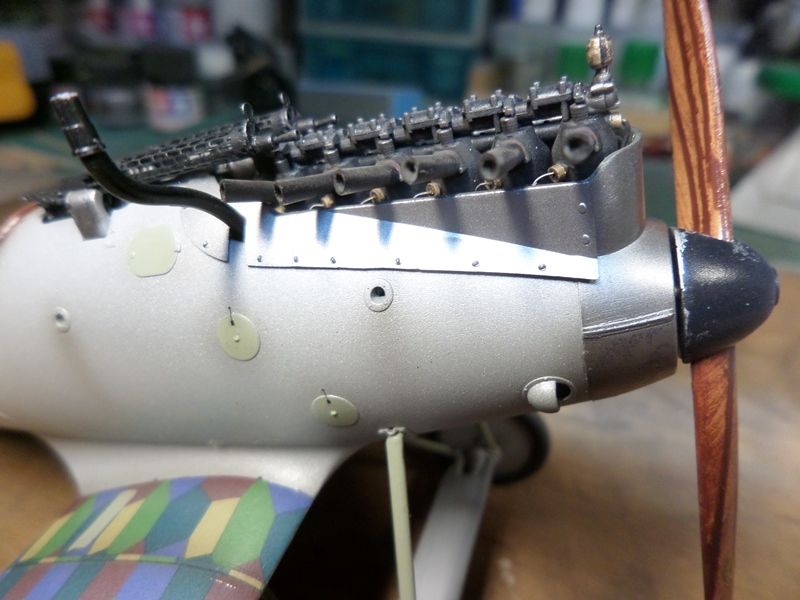
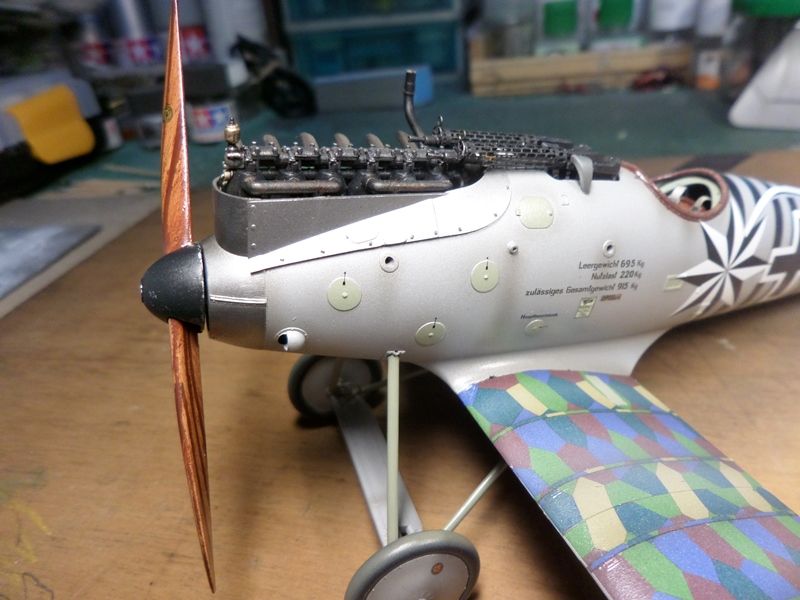
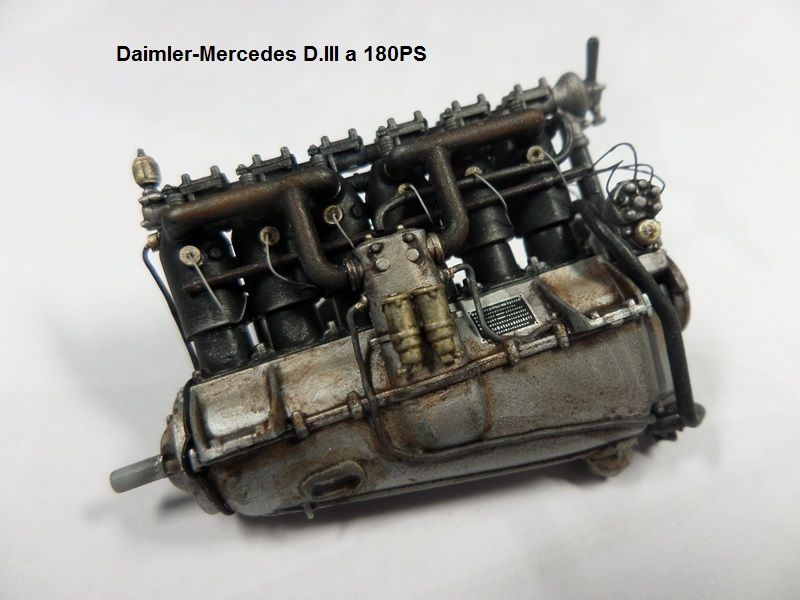
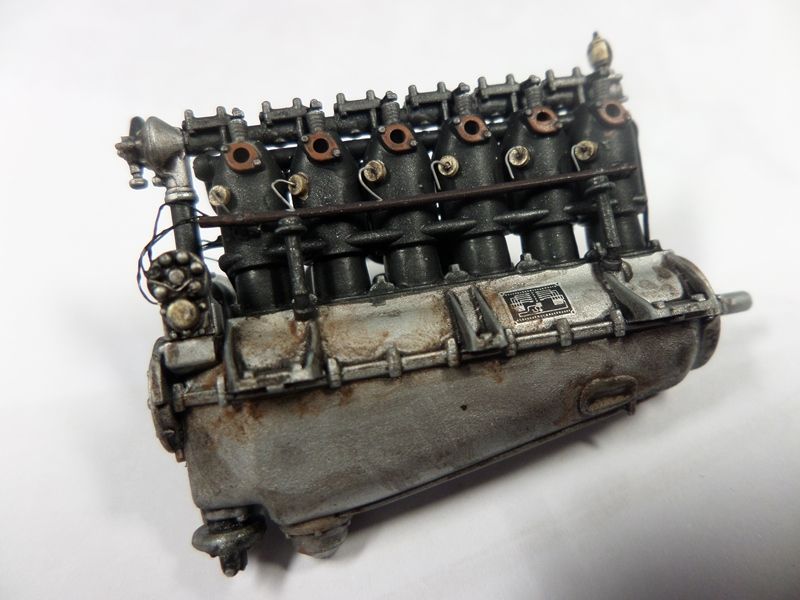
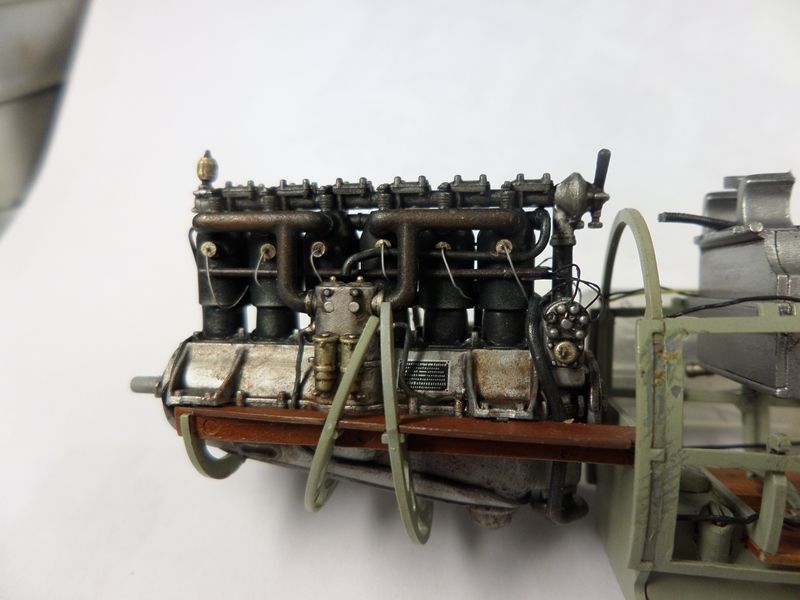
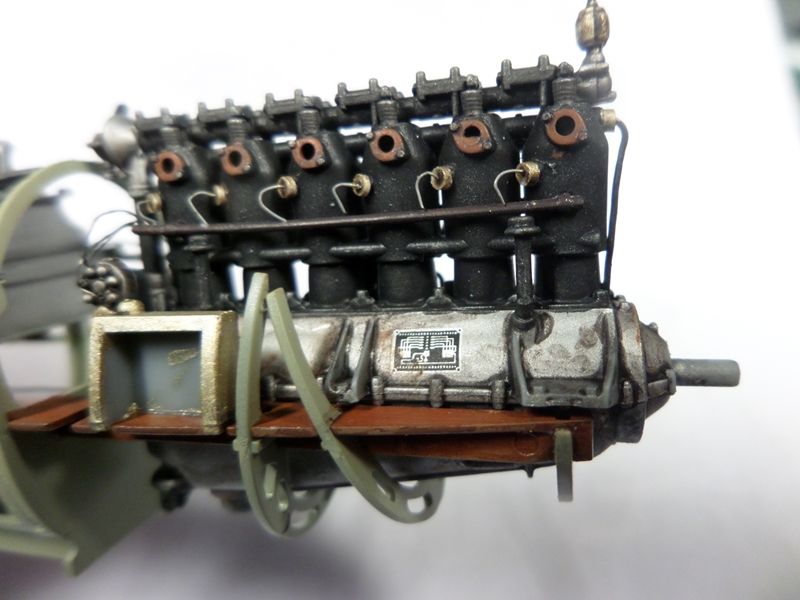
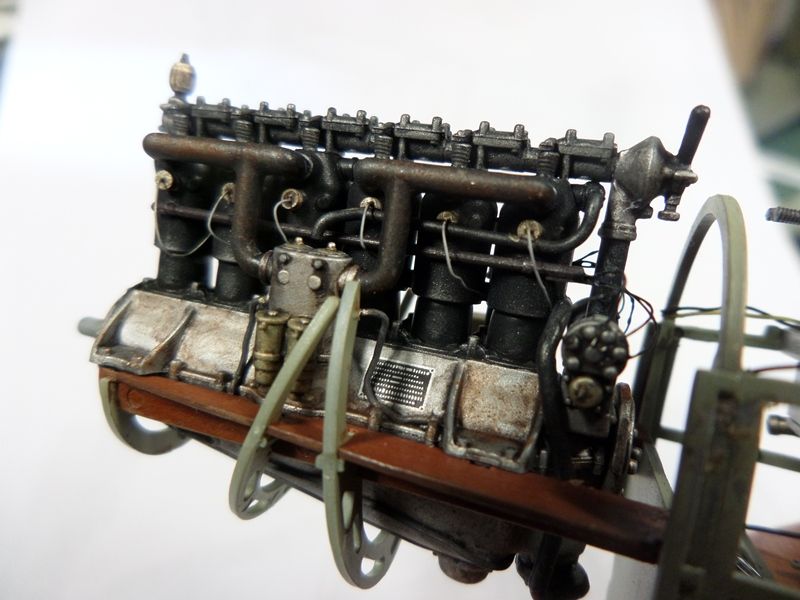
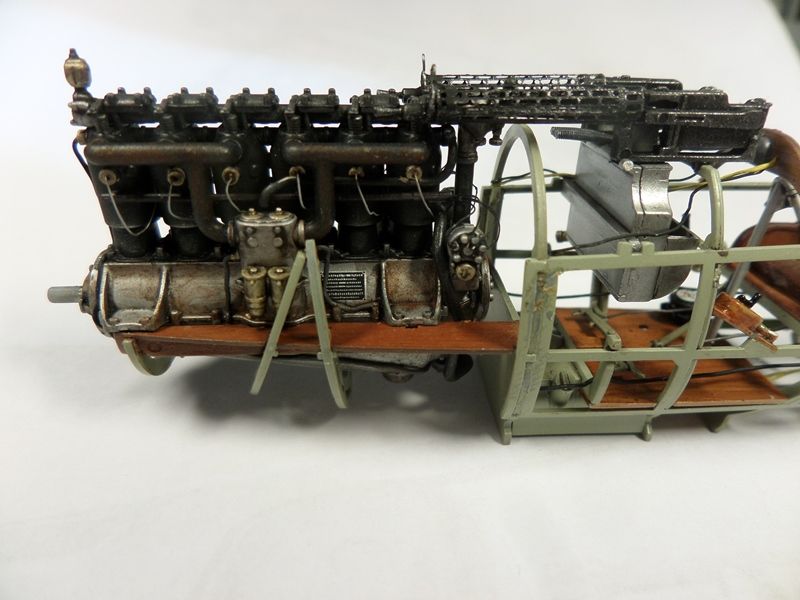
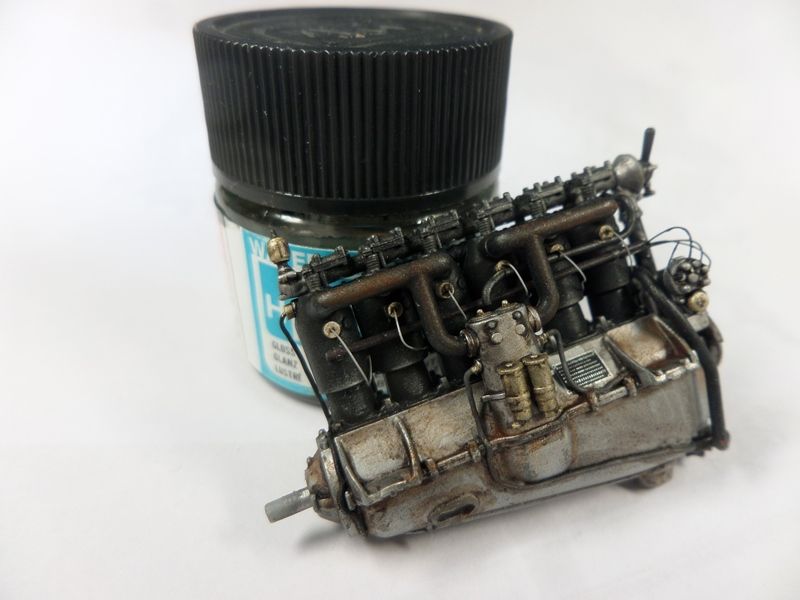
2d stage:
the Daimler-Mercedes D.IIIa 180PS. painted with Tamiya and Gunze paints. wiring and other details in scratch. oil stains made with home made washes.
cya
-
3
-
-
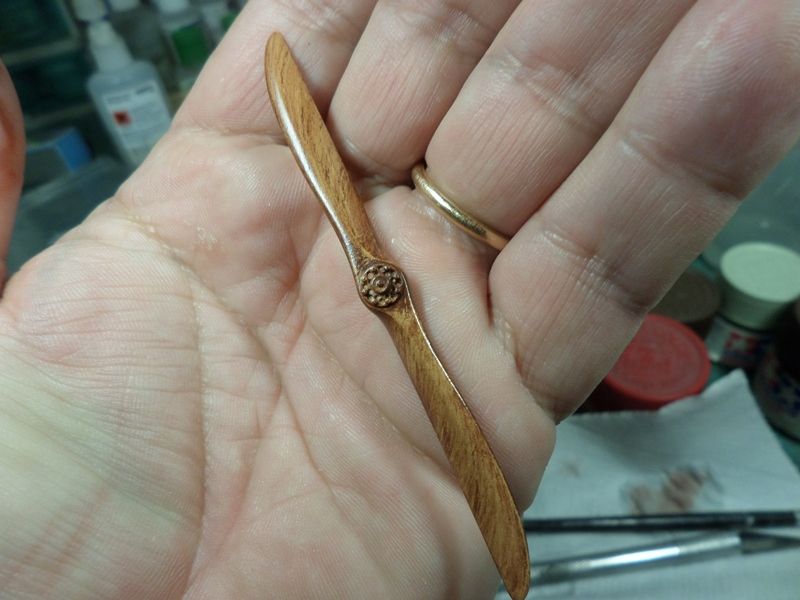
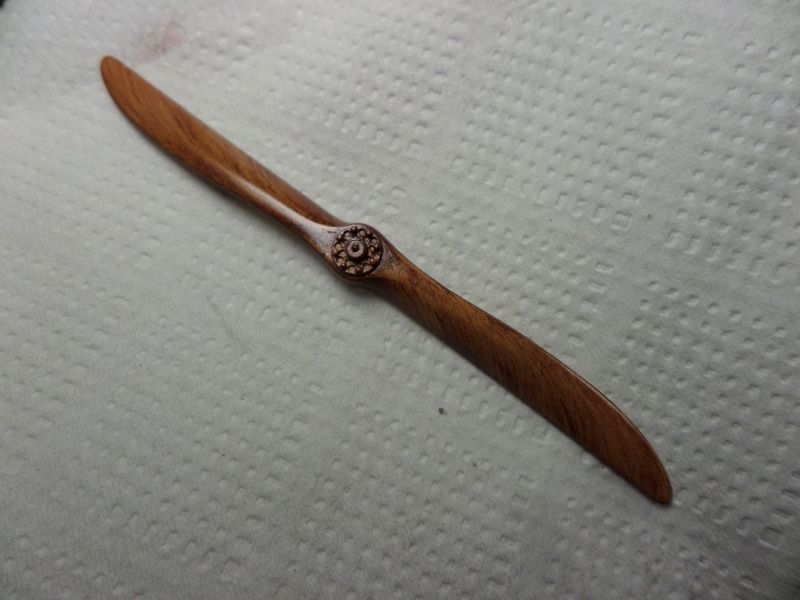
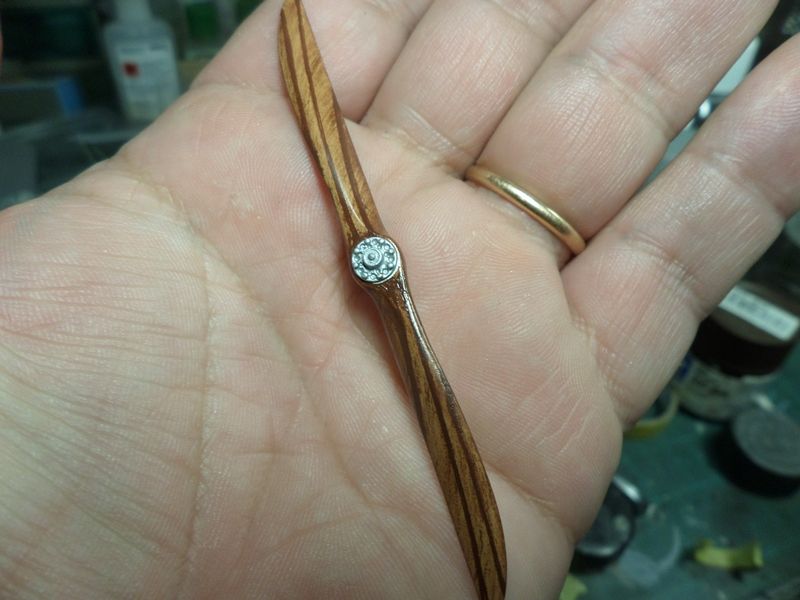
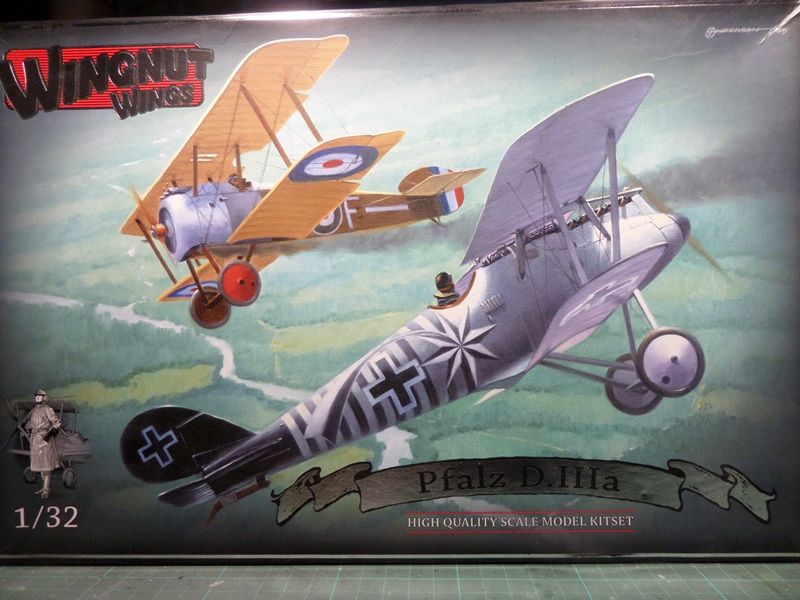
Hi,
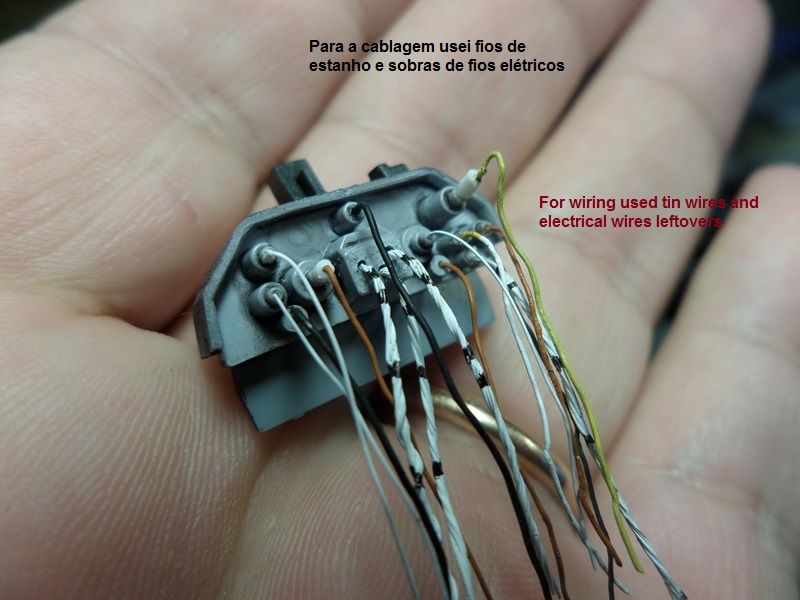
Here's my first wnw. I choose a simple one (compared with the Gotha I've on my satsh!!). I leave you some pics of the step by step. this time the cockpit module. cya
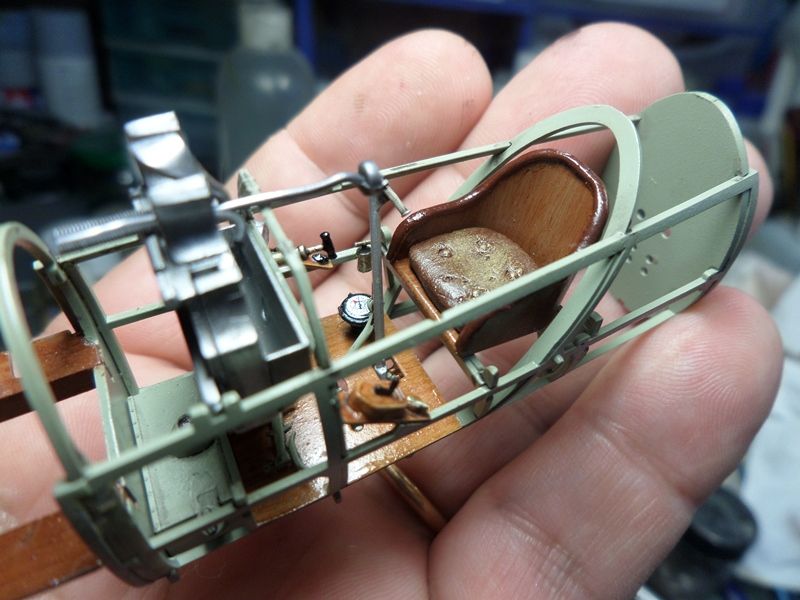
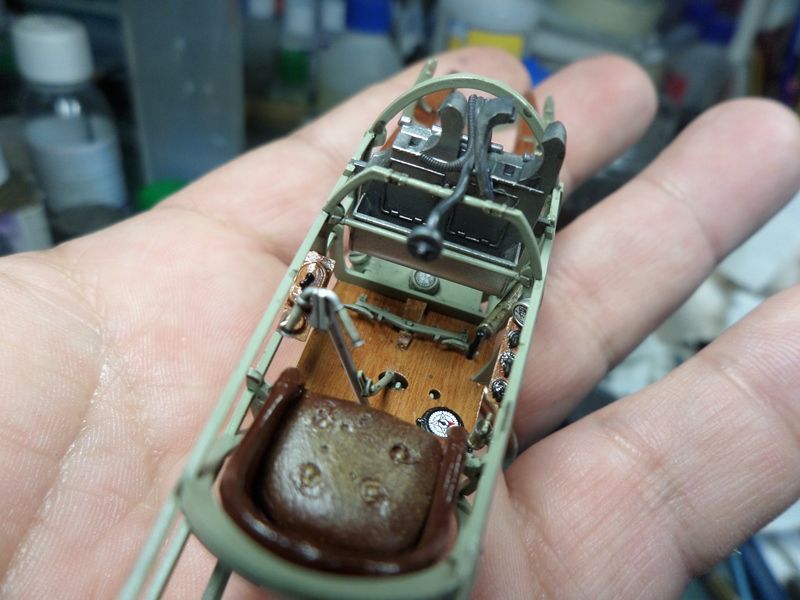
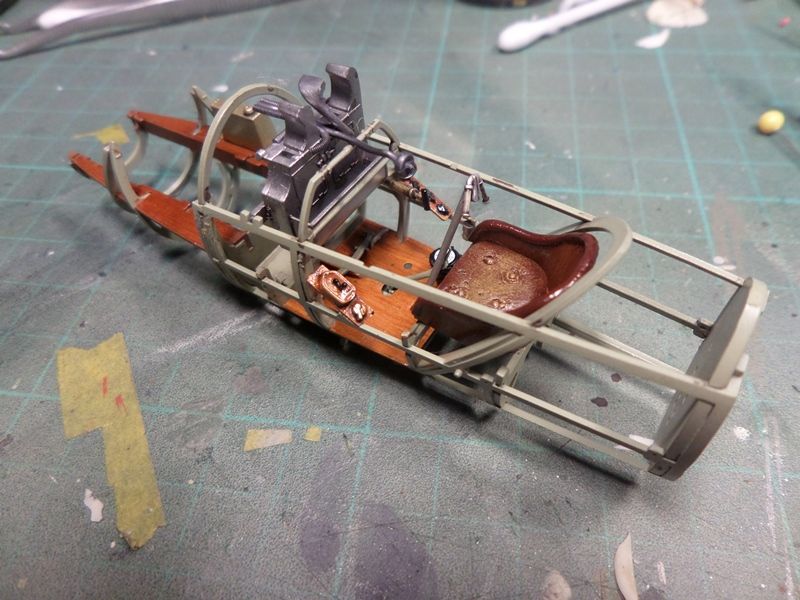
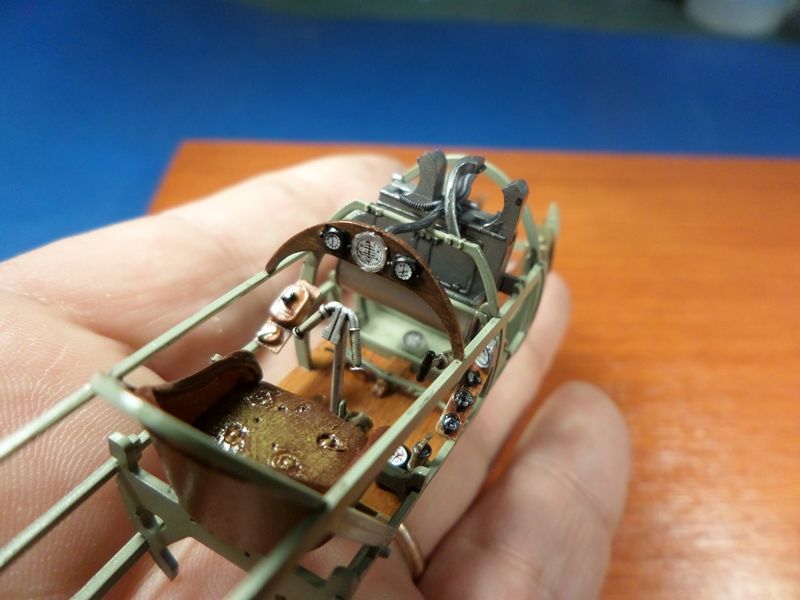
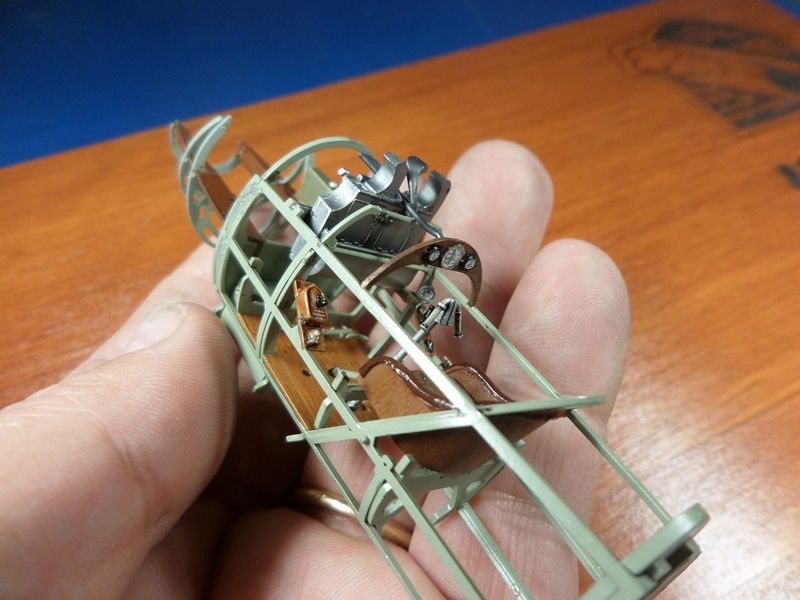
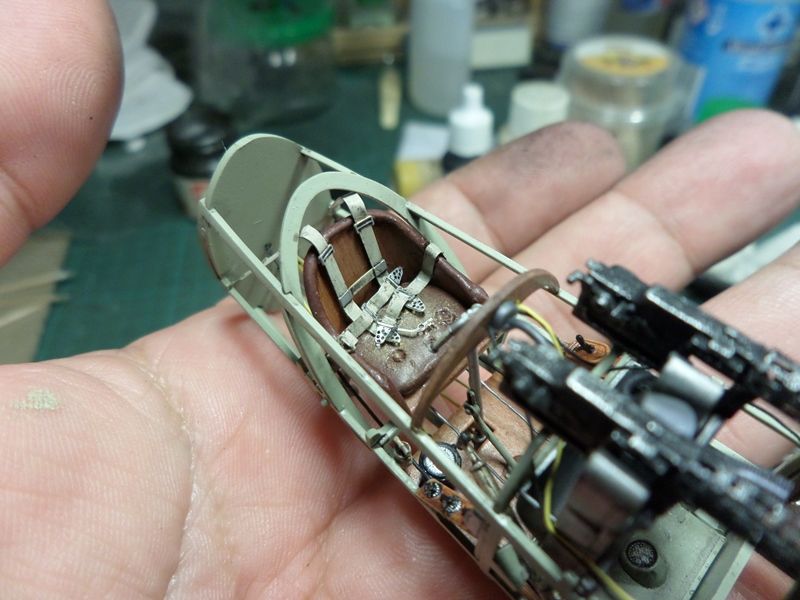
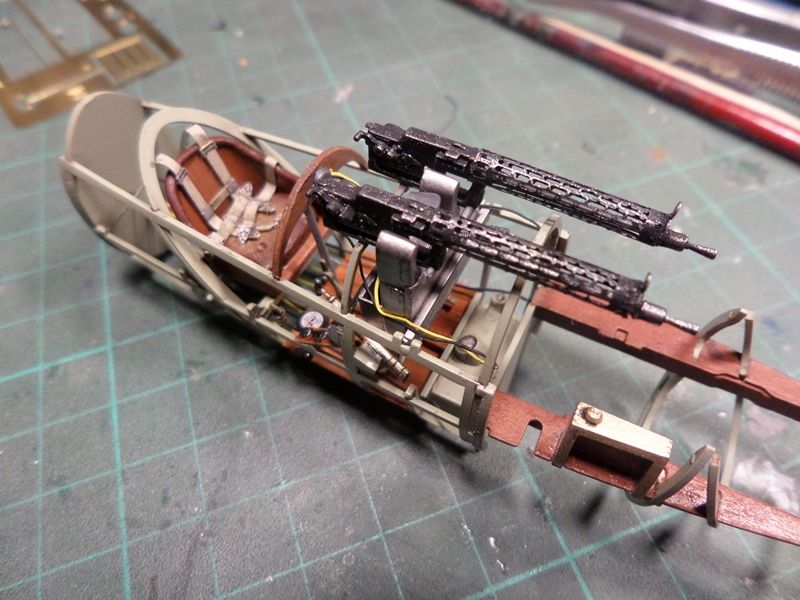
Some wiring!

-
3
-
-
Wow! Amazing work. This is why I keep looking at this forum... Would love to se a w-in-p for this build.
I have this kit in my stash - can I specifically ask for your experience/advice wrt to the side windows? I've heard that their fit isn't great. Did you use aftermarket replacements? Did you have to use filler/sand etc? Anything you'd suggest?
I'm going to hold out for the RB Scheuch Schlepper before starting mine
Thanks for sharing
Doug
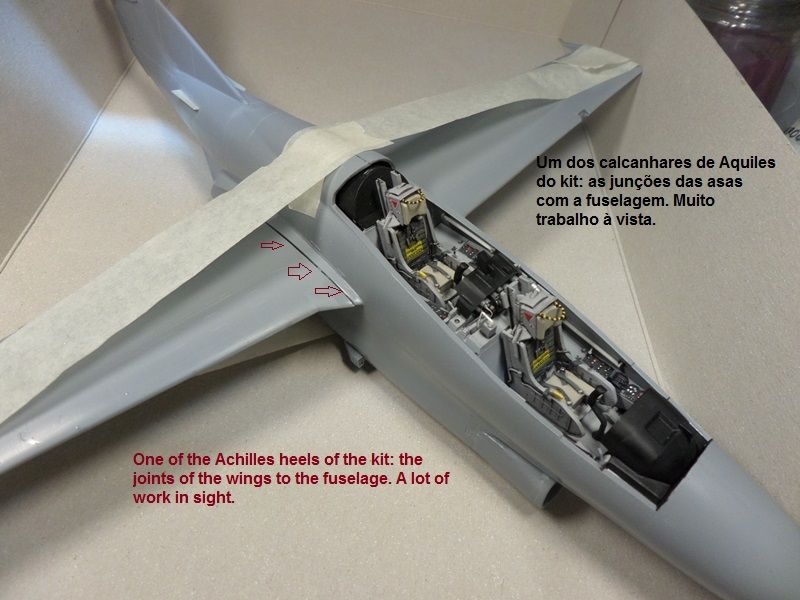
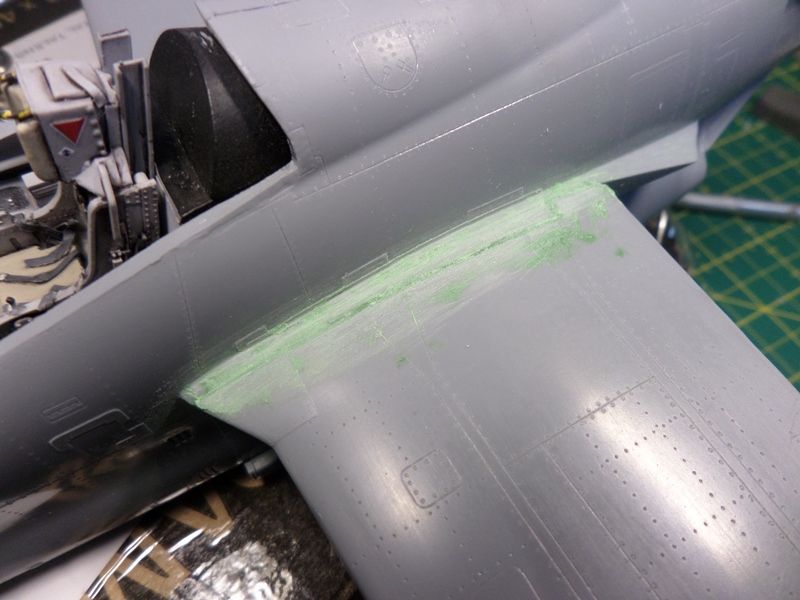
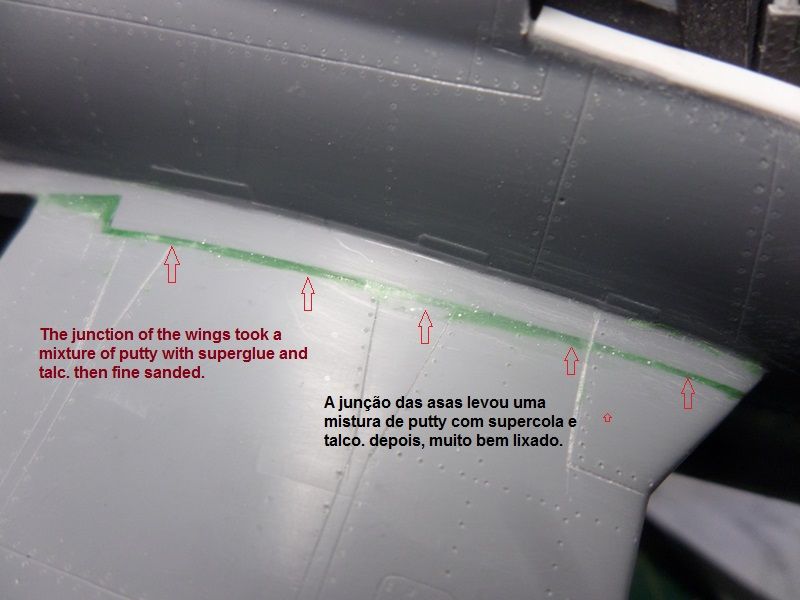
Hi Doug,
Sorry about the late reply! About the side windows, I can tell you I didn't find major problems. I glued them with a special optical glue, that dries with ultraviolet light, and stays invisible. The only aftermarkets I used were the fantastic Uschi van der Rosten wood grain decals. For me, nothing compares with the wooden effect they bring to the model. The only major problem I found in the kit, was the wings junction to the fuselage. It takes a lot of sanding and filling with acrylic Vallejo putty.
best regards
-
1
-
-
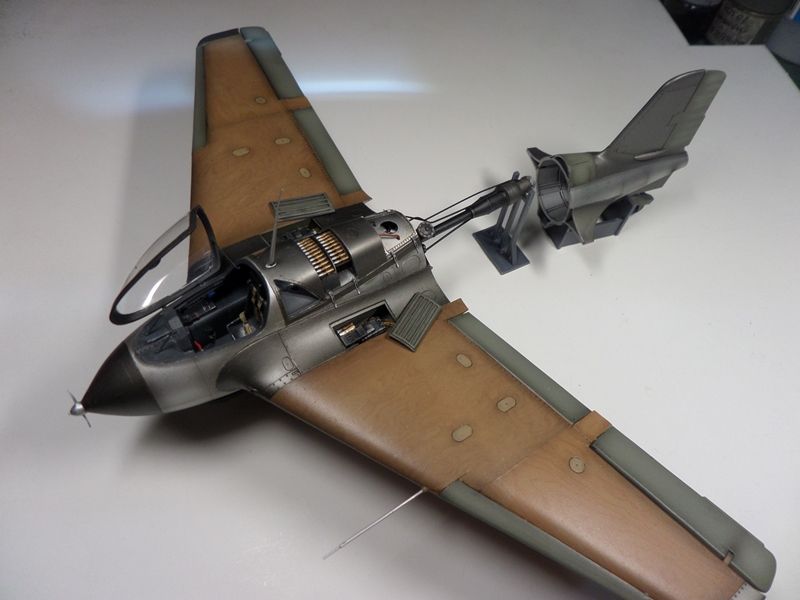
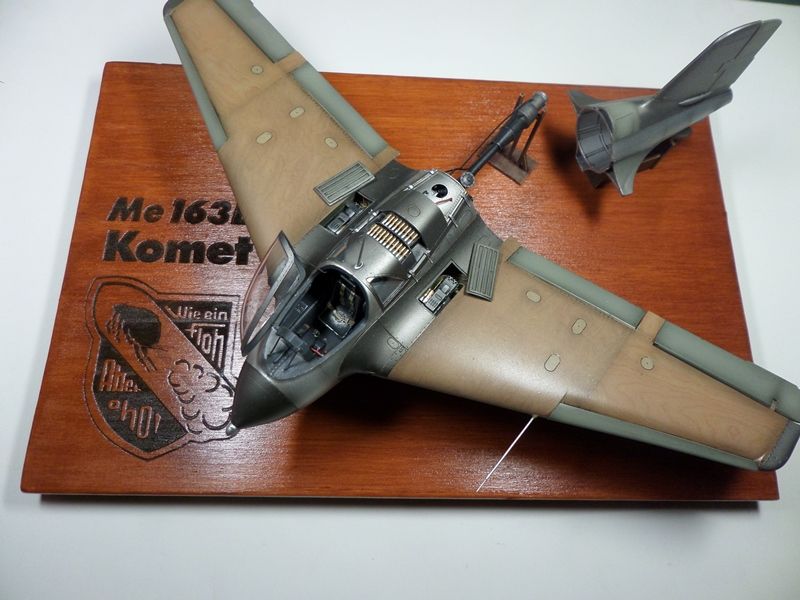
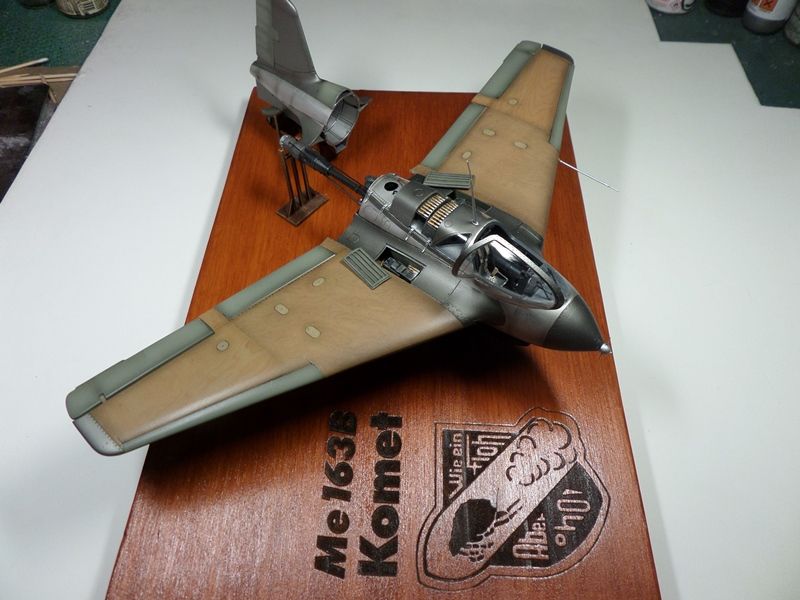
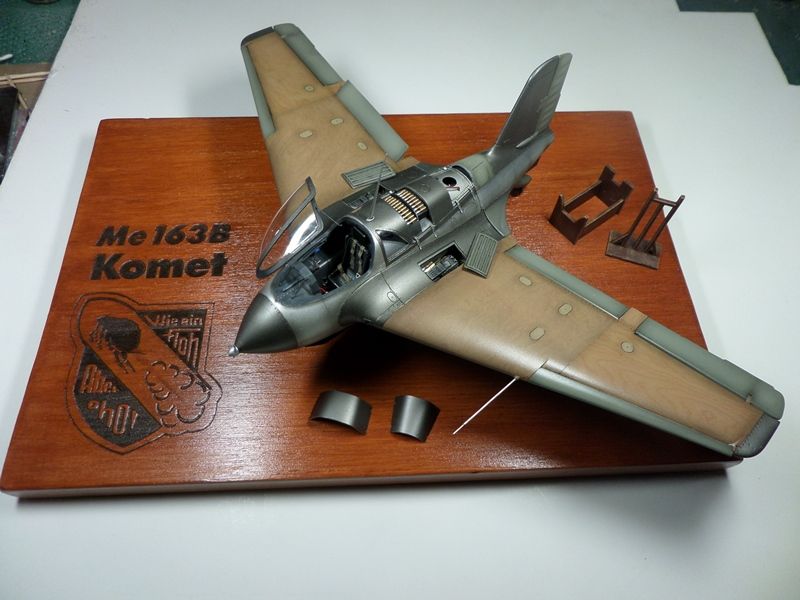
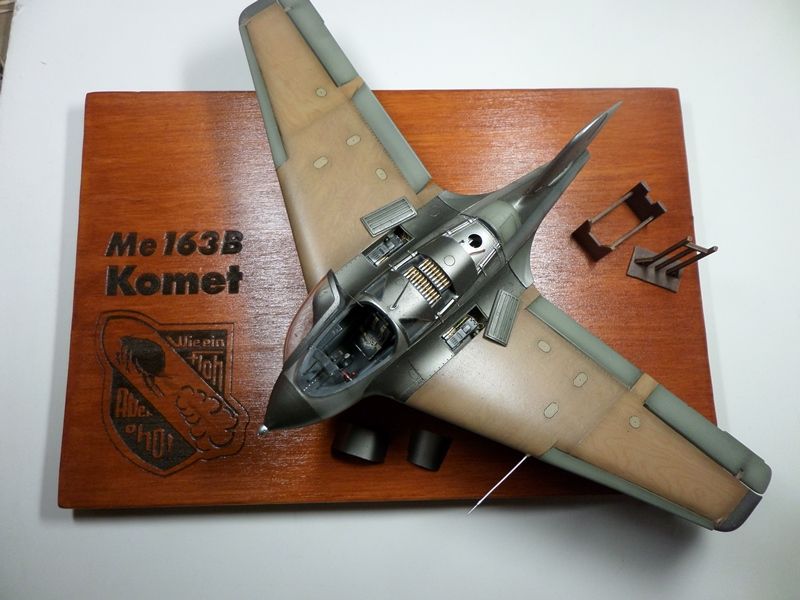
Hi,
Here's my vision of the this WW II rocket powered "german wonder weapon". The kit is quite good, only with some fit problems (nothing really serious). I used wood grain decals, from Uschi van der Rosten (excellent) and Alclad II paints. The dispplay was home made, with pine wood plate painted with translucid acrylic varnish, mahogany color, with the Komet squadron 2/JG400 logo laser engraved, by a good friend of mine. Hope you like it.
thanks.
-
4
-
-
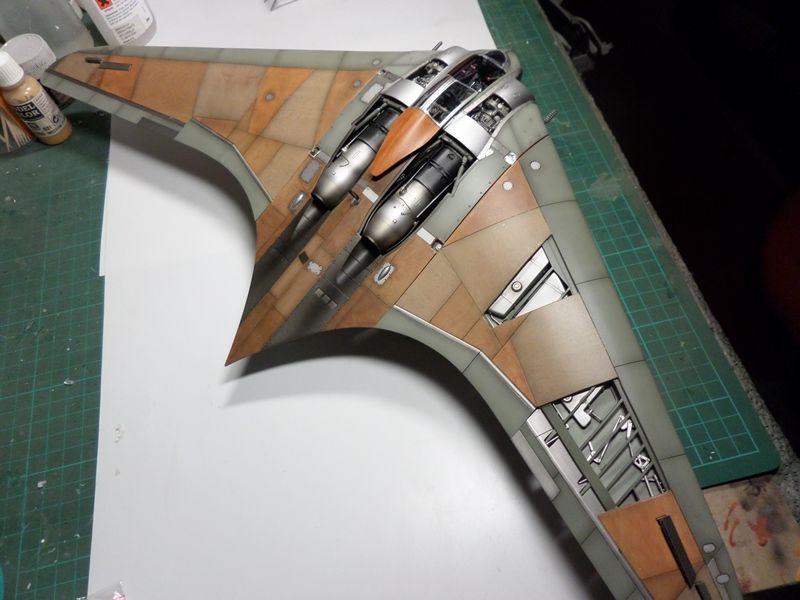
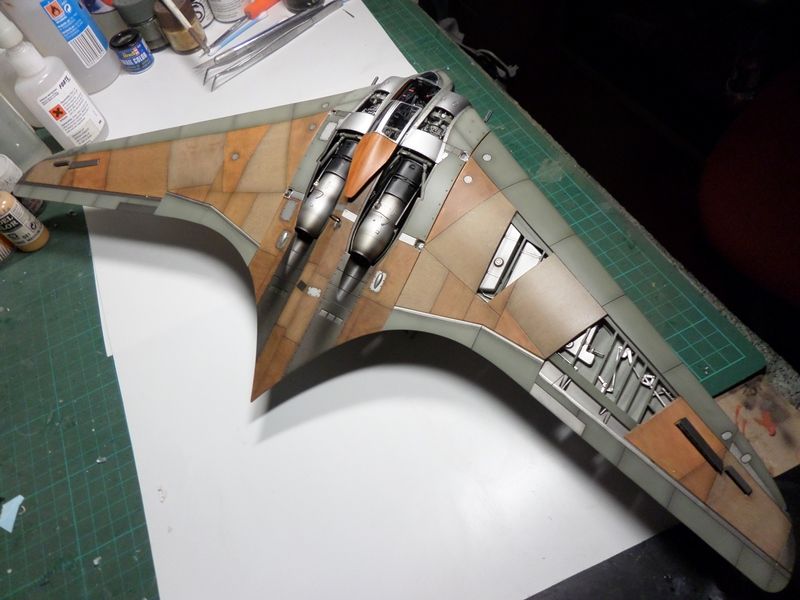
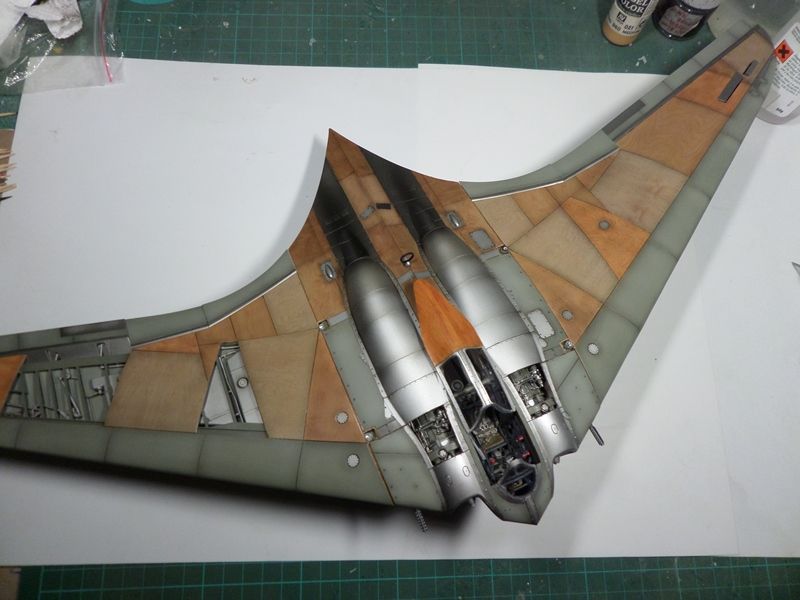
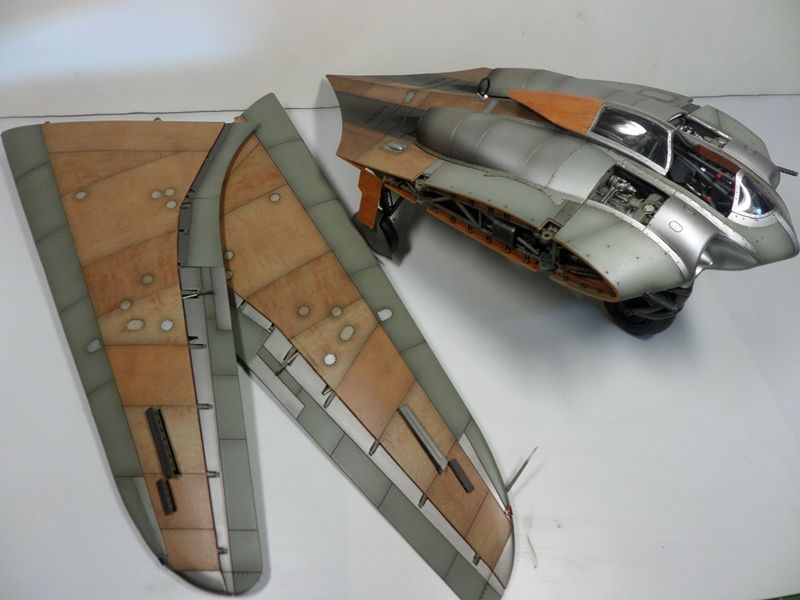
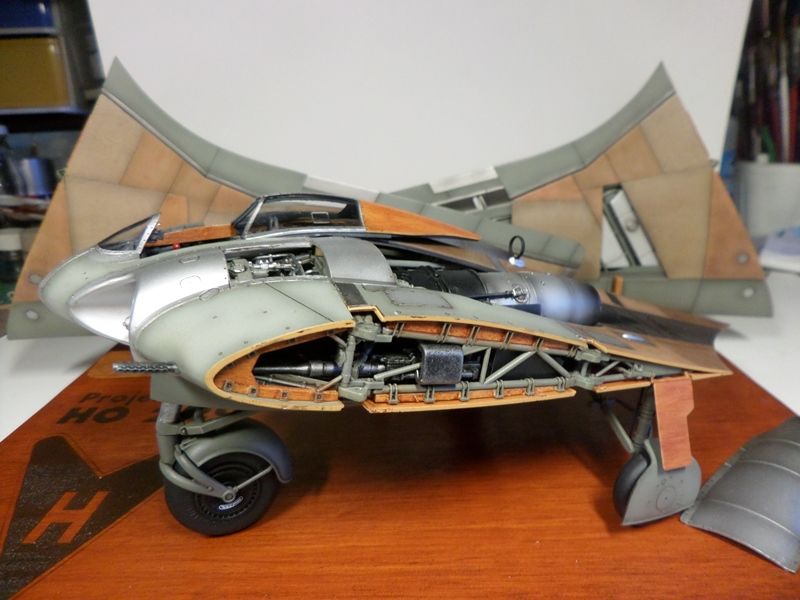
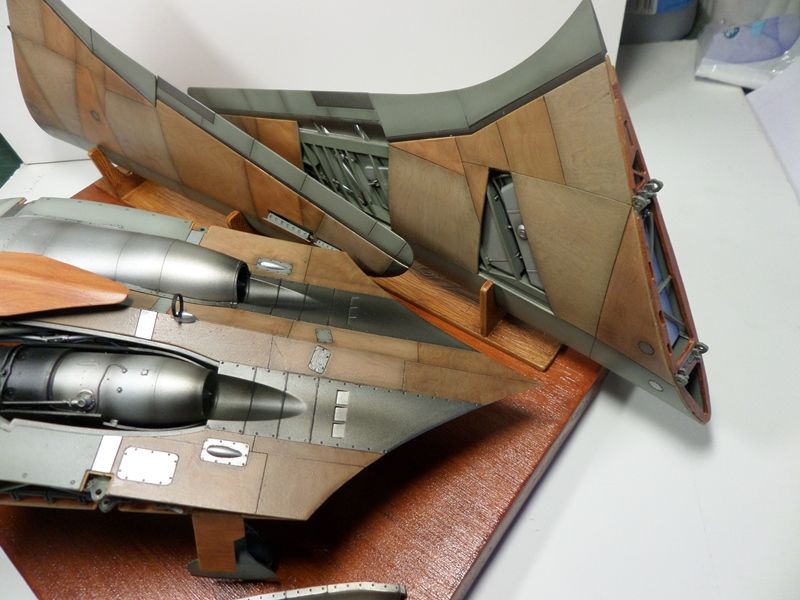
Hi
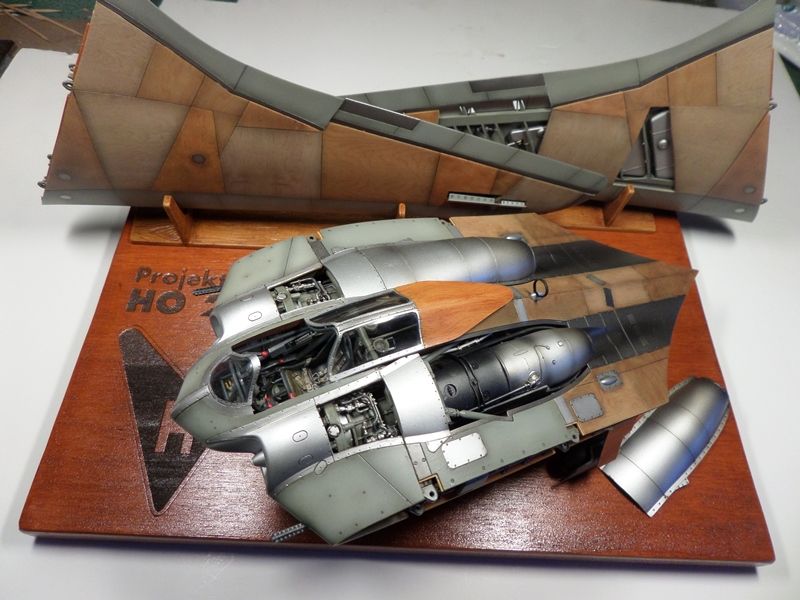
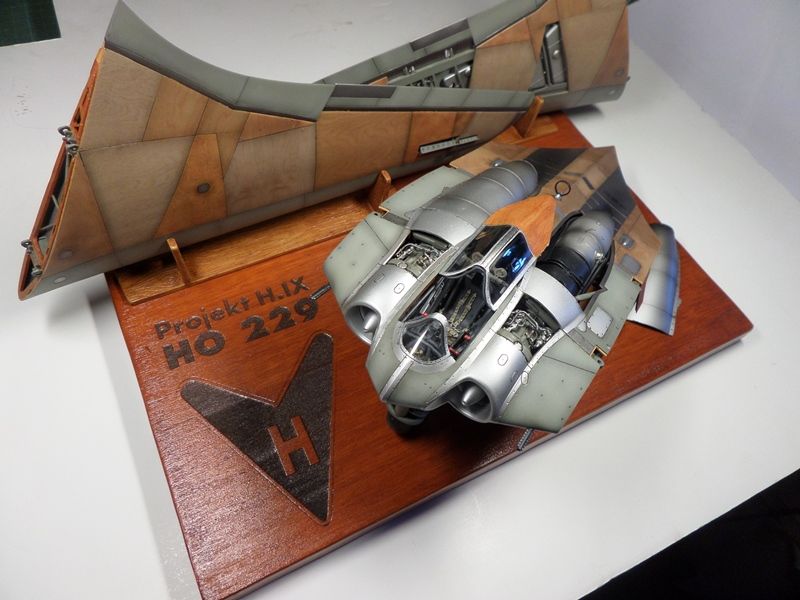
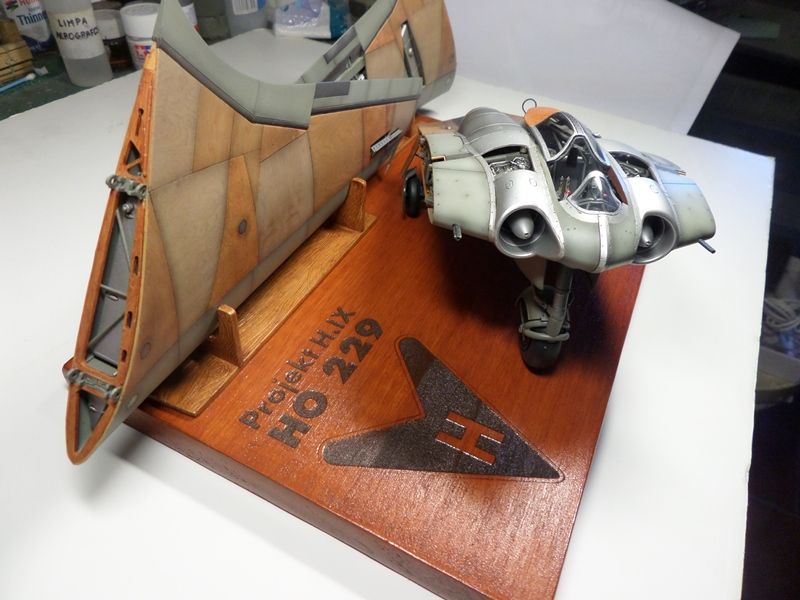
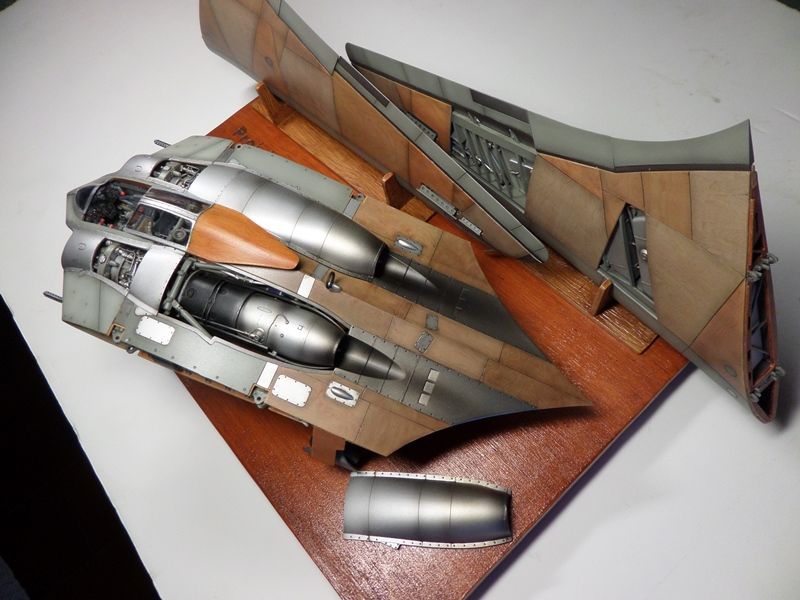
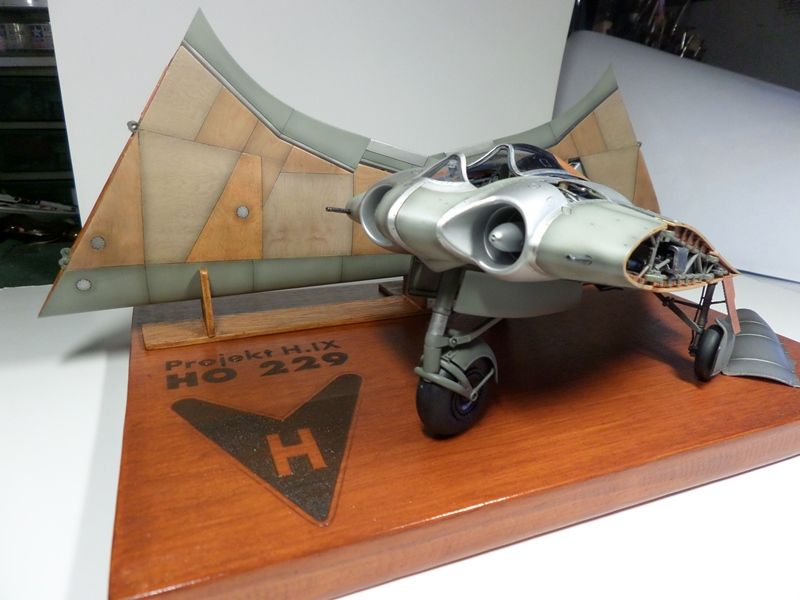
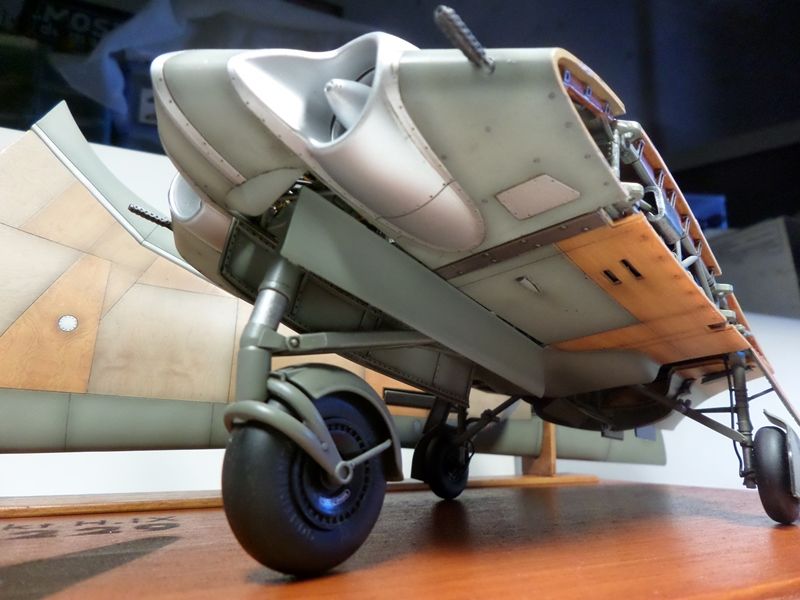
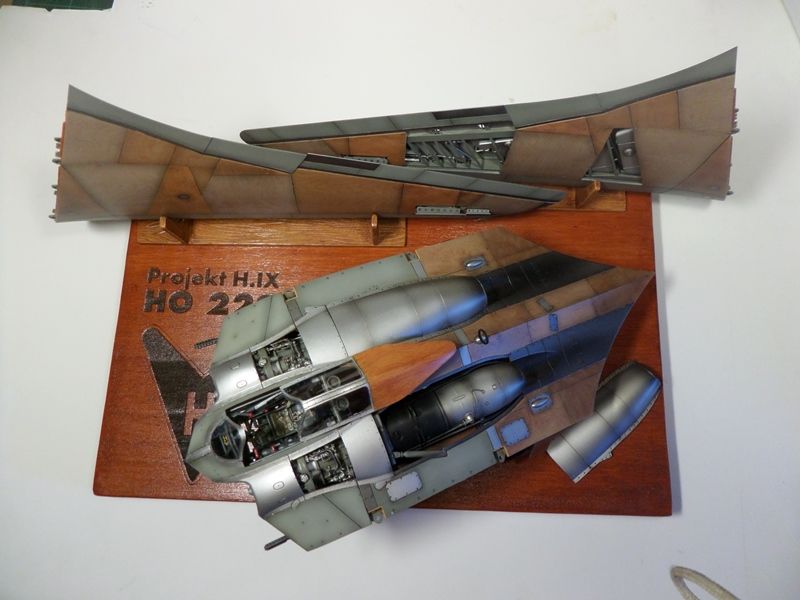
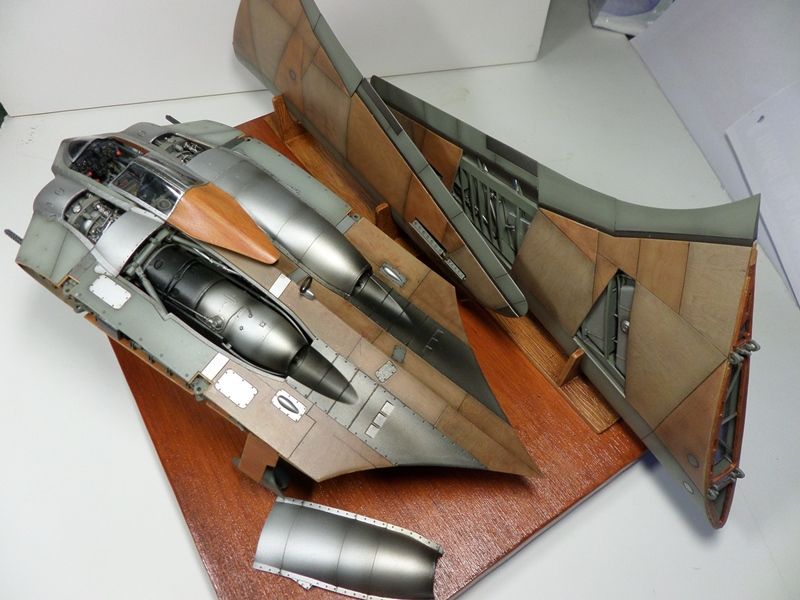
This is the result of my work on the beautiful and excellent kit from ZM. I I opted for a parcial unpainted model, using the excellent Uschi van der Rosten plywood imitation decals . The painted parts (mostly fuselage) were with Tamiya RLM 02 (XF-22 (3)+XF46(1)) and Alclad II. The wood effects of the underside and some airframe structures were painted with Vallejo (flesh colors) and "burnt sienna" oil colors. I also used X-19 (smoke) as a filter. The display is home made, with pine wood plates, painted with mahogany acrylic translucid varnish. The Horten logo was laser engraved by a good friend of mine. Hope you enjoy!
thanks and sorry about the lack of WIP.
-
8
-
-
Really nice finish on this bird!
Can I ask you 2 specific questions about painting
1) What technique did you use to demark the (soft but clear) different colors on the upper surface (I'm guessing paper masks with spots of poster-tack)?
2) What technique did you use to bring out the panel lines after painting (maybe airbrushed "transparent smoke" or pastels)?
Thanks
Doug
Hi!
Sorry about the late reply!
About the first question: It's quite simple to demark the colors. To make them "soft but clear" I always use rolls (worms) of "Blu-tack", a kind of plasticine, from the label Bostik. It's fat-free and very efective.
about the second question: I used a oil wash (a mix of sienna and black oils with white spirits) and, at specific points, I apply a very thin smoke (Tamiya X-19) layer.
Hope that helps.
all the best,
Paulo
-
Hi Gus!
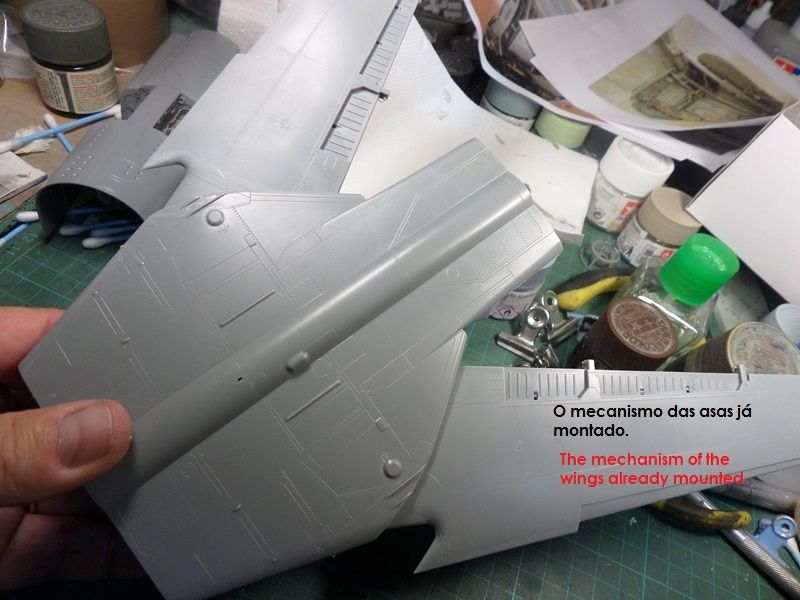
You can be sure that you'll need a lot of weight. No less than 30/40 gr. Remember that the rear fuselage includes a full Tumanski engine and has a complex wings gear.
cya
-
Hi!
For a beginner with the airbrush, it seems quite nice. You picked a great kit I´ve had the opportunity to build on this forum, although in a different version. If you need any tips of my WIP, you can see it, below, in this section.
I will be following this WIP with great interest.
cya
-
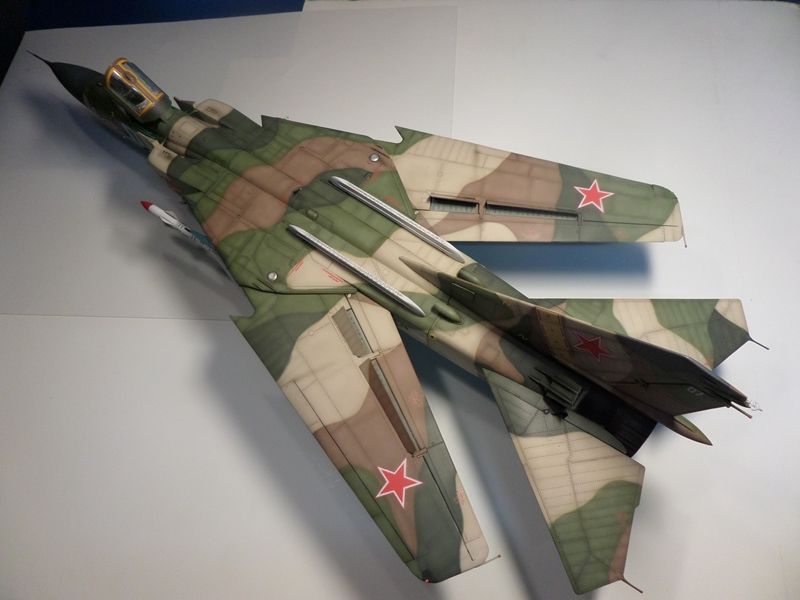
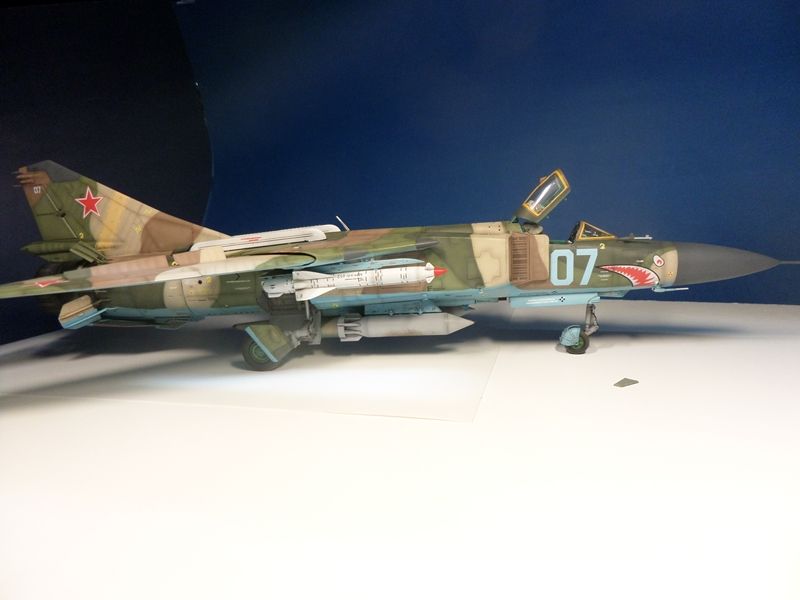
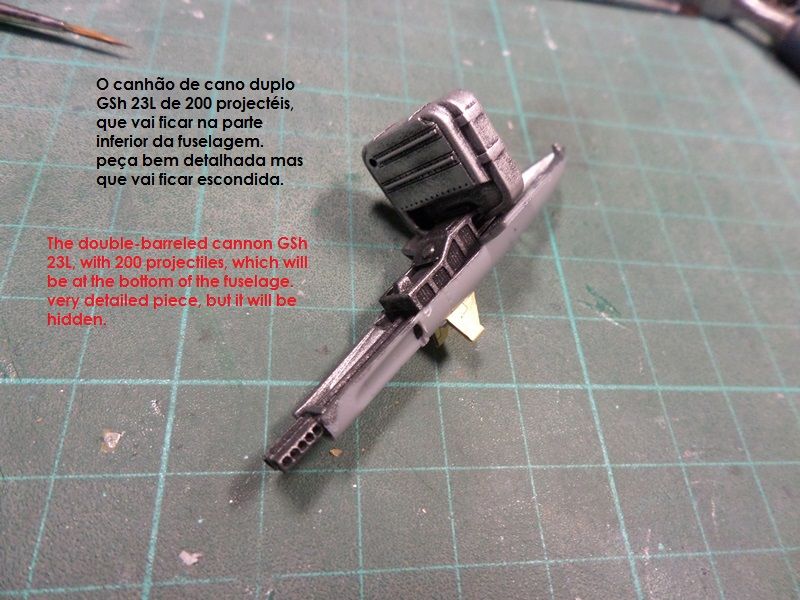
My fellow modellers,
Here is my recent finished work. Hope you enjoy. thanks for watching
WIP link: forum.largescalemodeller.com/topic/3049-mig-23-mld-flogger-k-trumpeter-132/

-
7
-
-
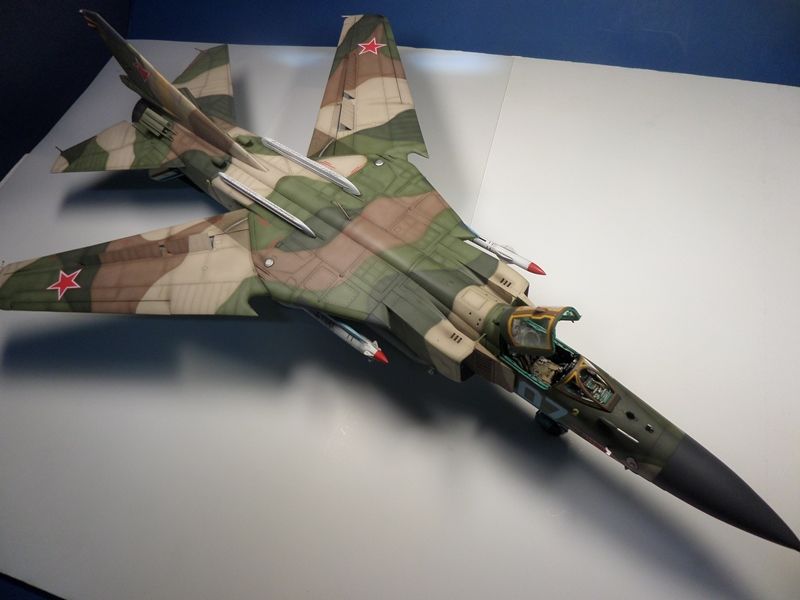
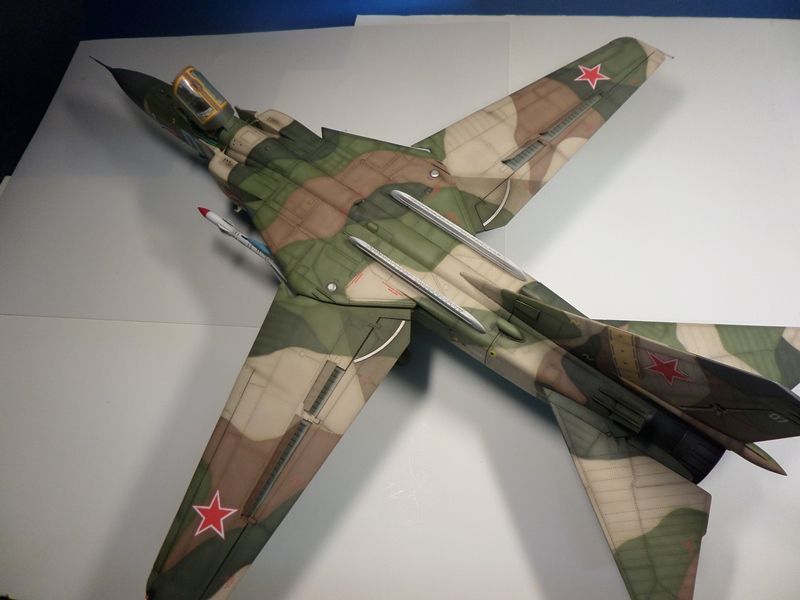
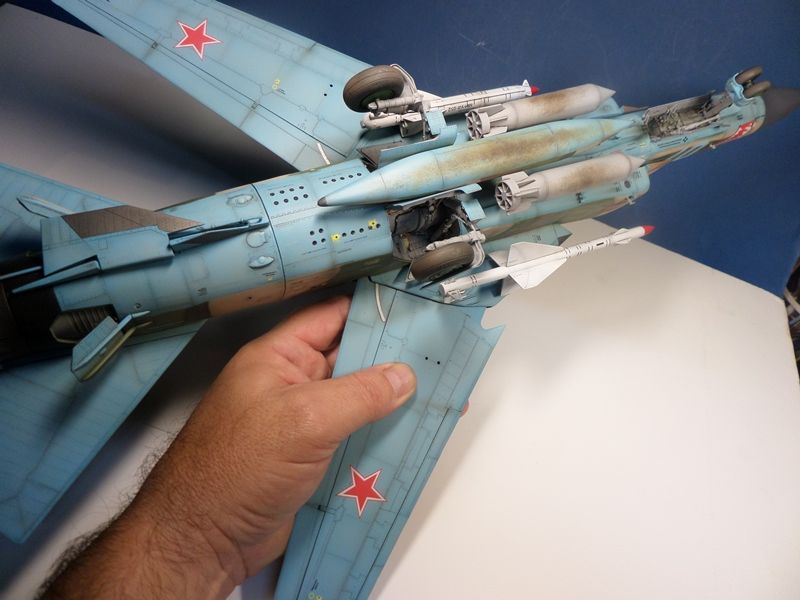
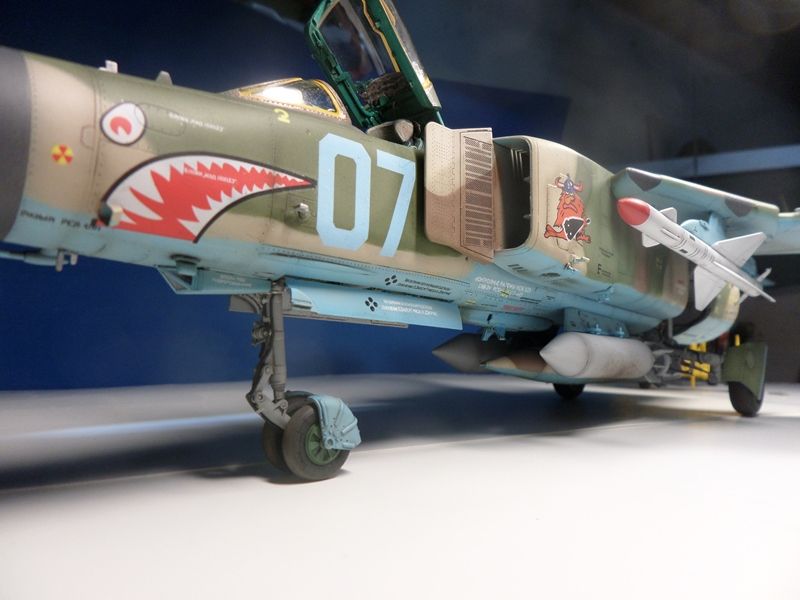
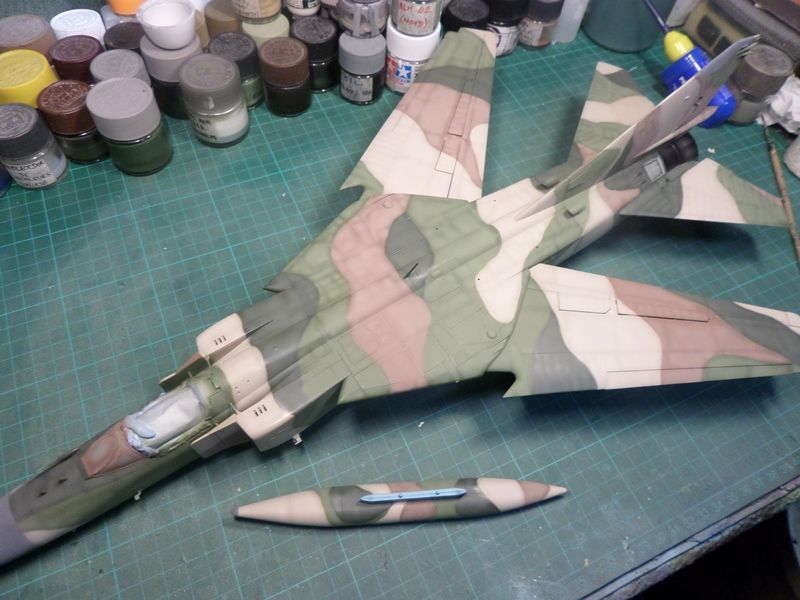
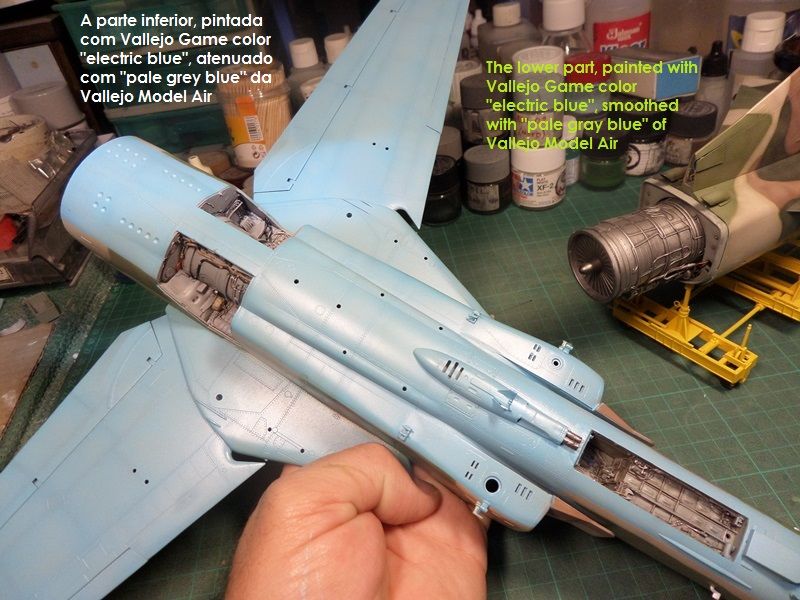
Hi my friends,
I've just finished my MIG 23 MLD Flogger K. For the upside camo I used Gunze and Tamiya Colors. For the underside used Vallejo Game Color.
Thanks for watching.
cya
-
2
-
-
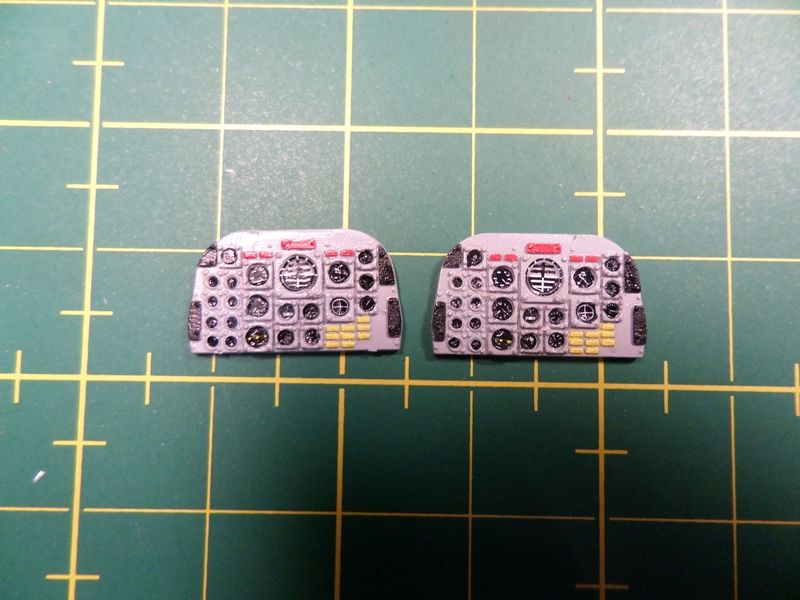
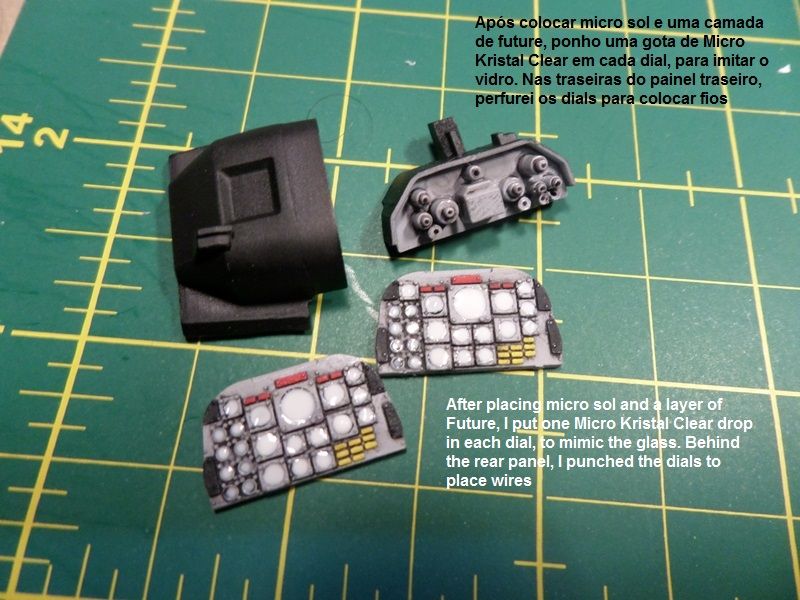
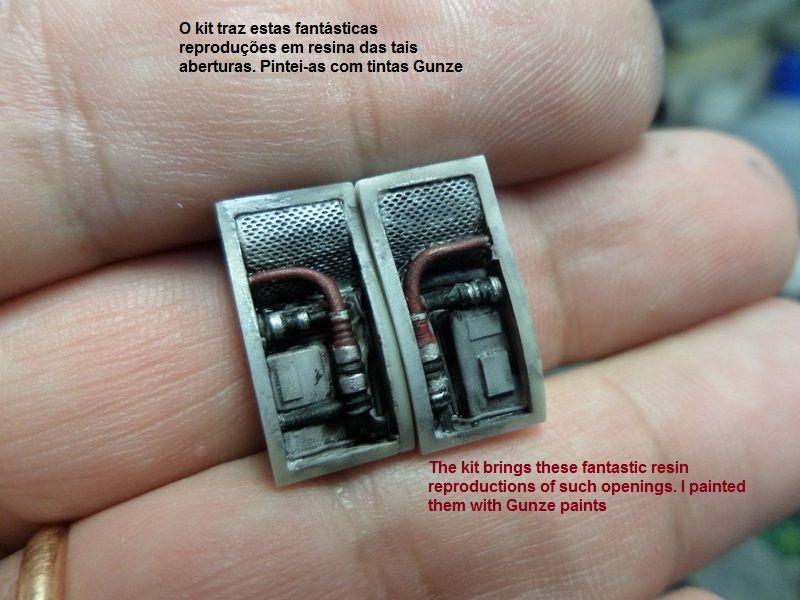
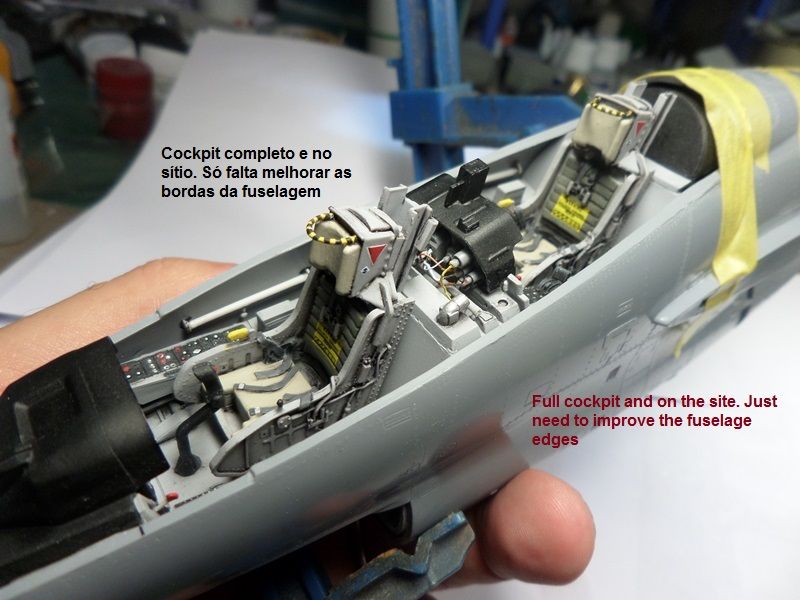
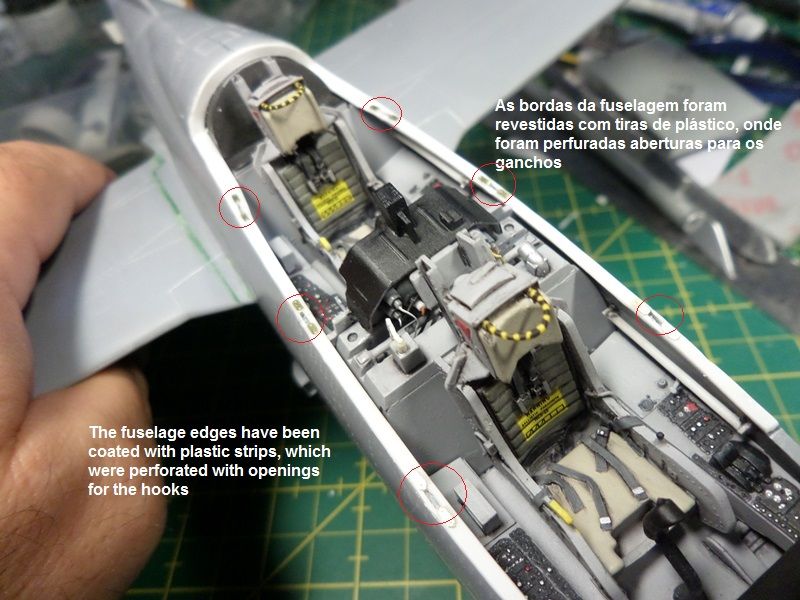
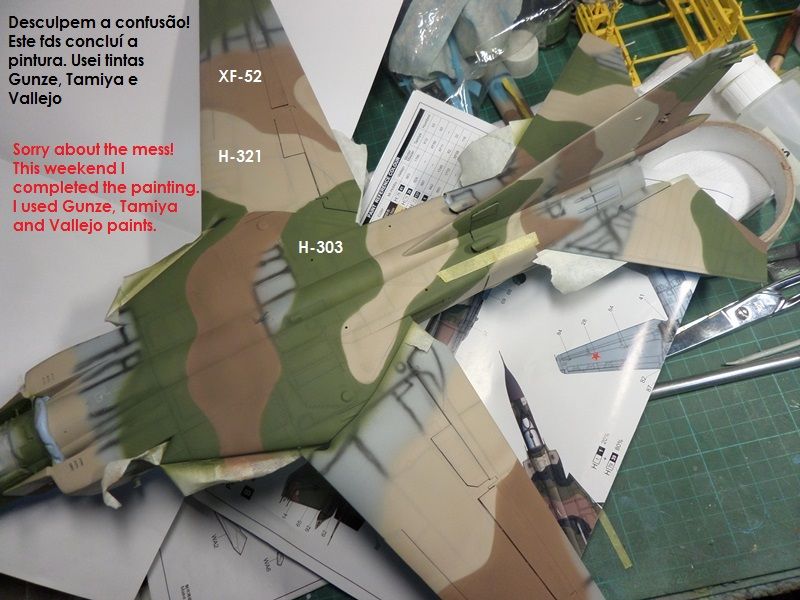
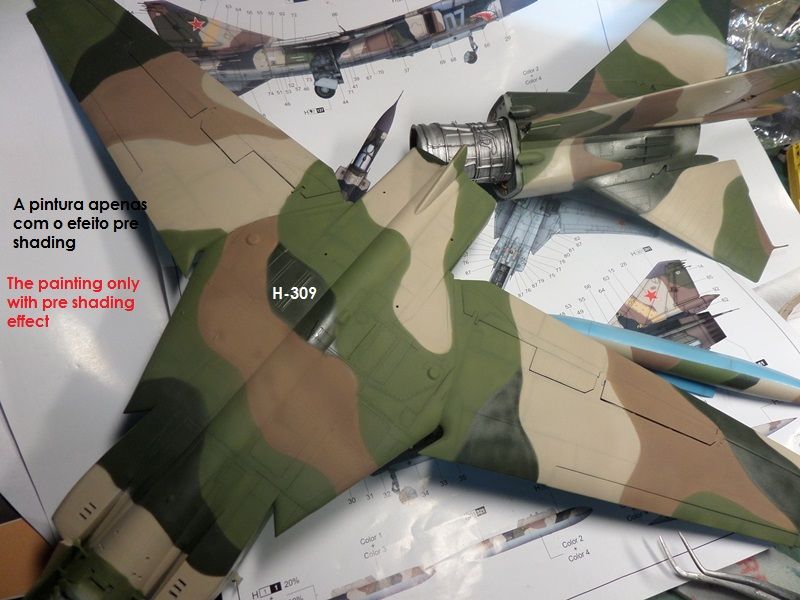
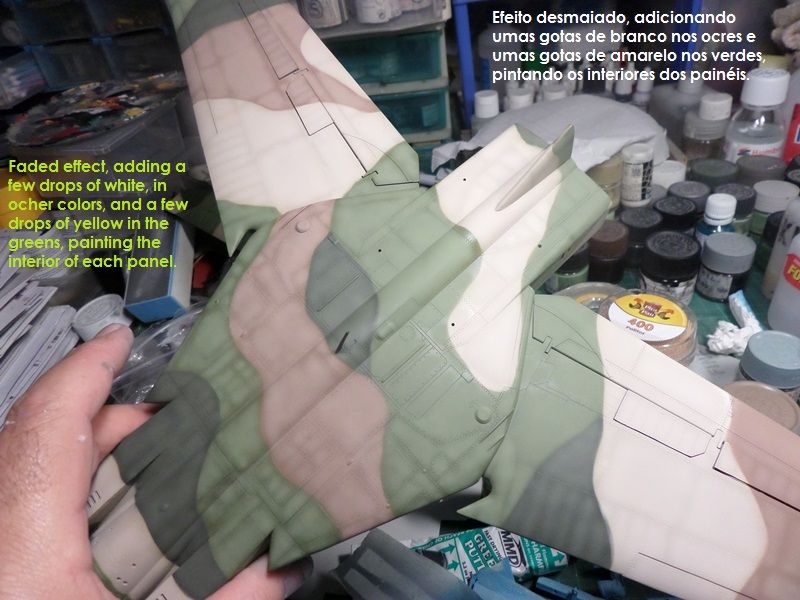
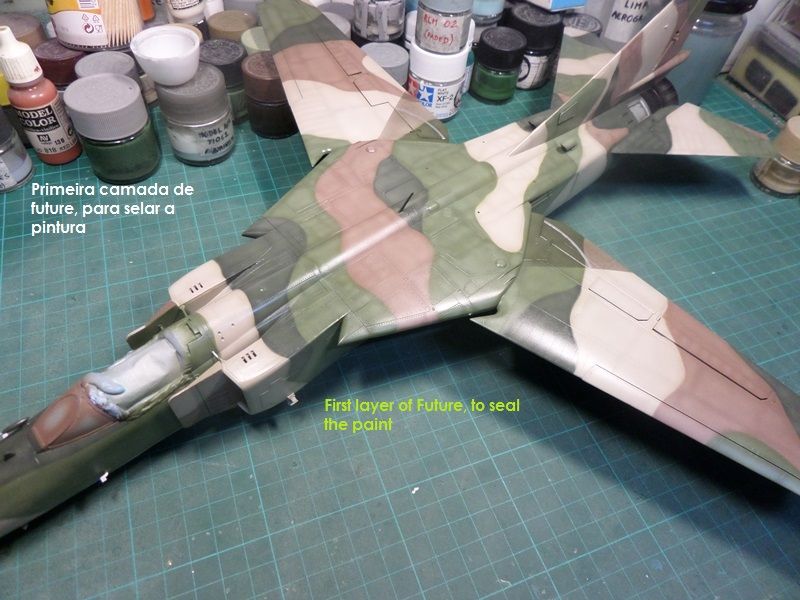
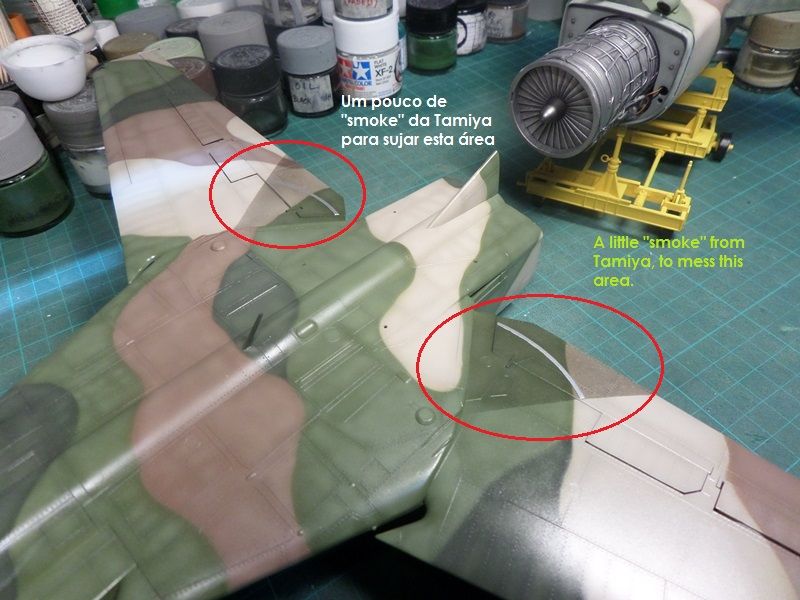
Hello my friends.While not exhausted my Photobucket bandwith, I leave you my weekend work: the painting.I leave you the photos with notescya
-
1
-
-
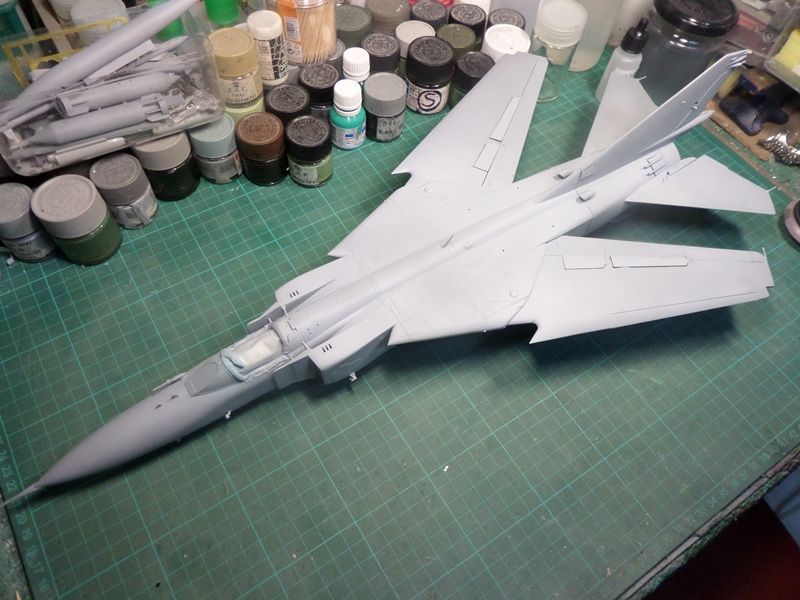
Hi fellows!
One more step....
cya

-
1
-
-
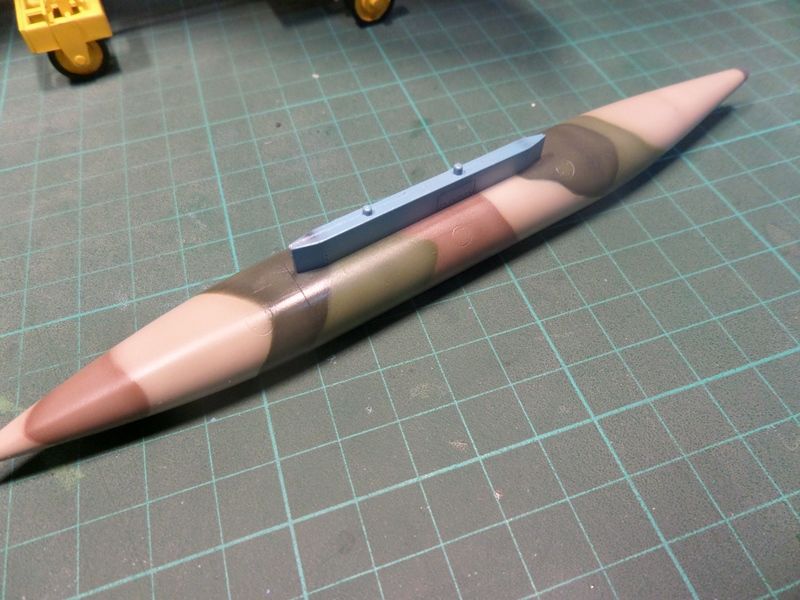
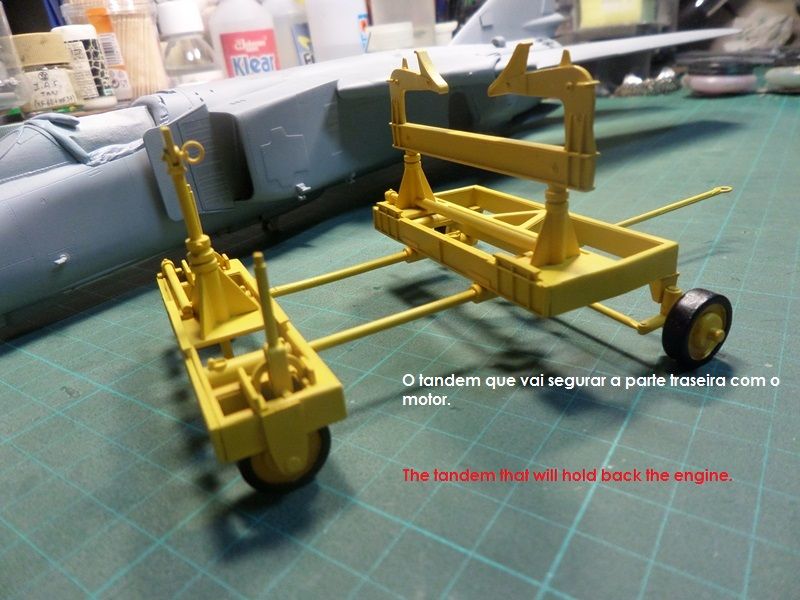
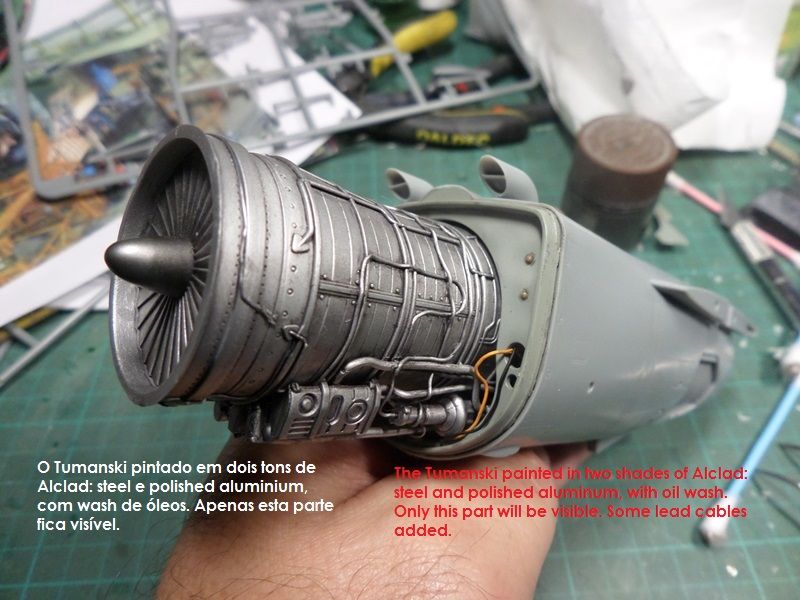
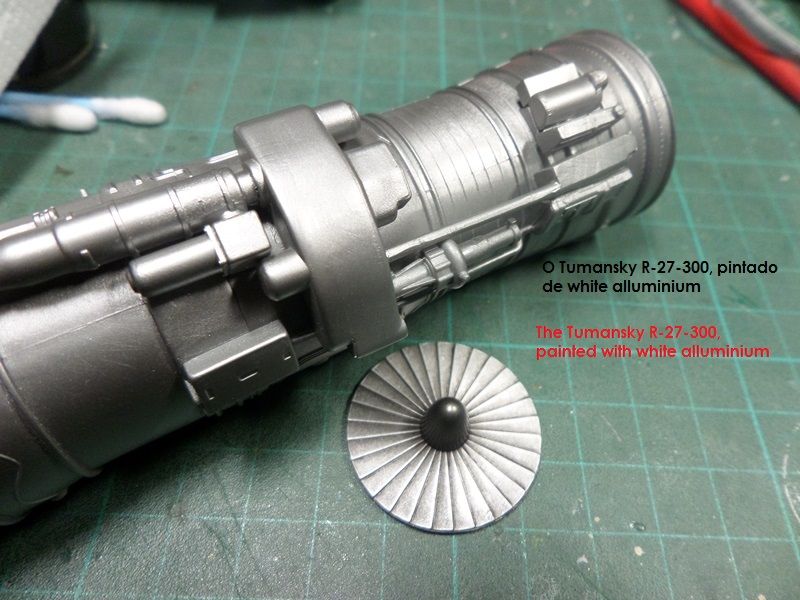
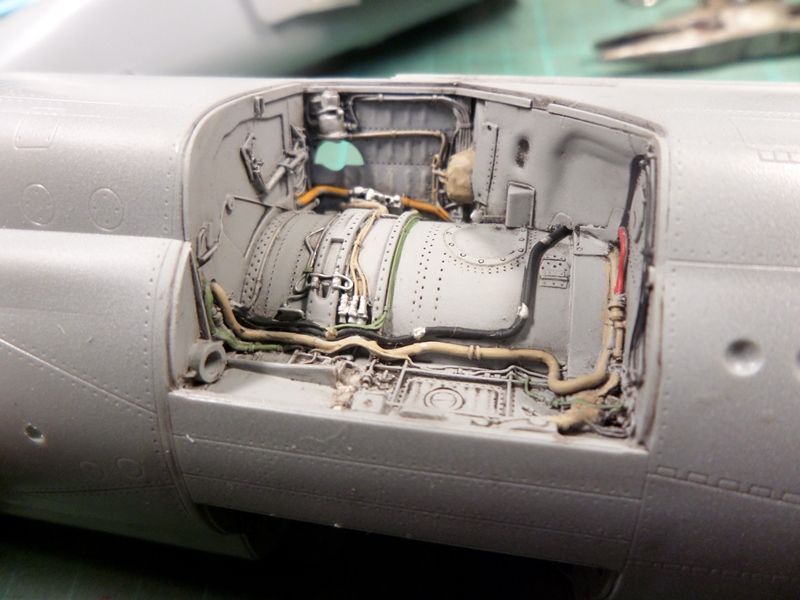
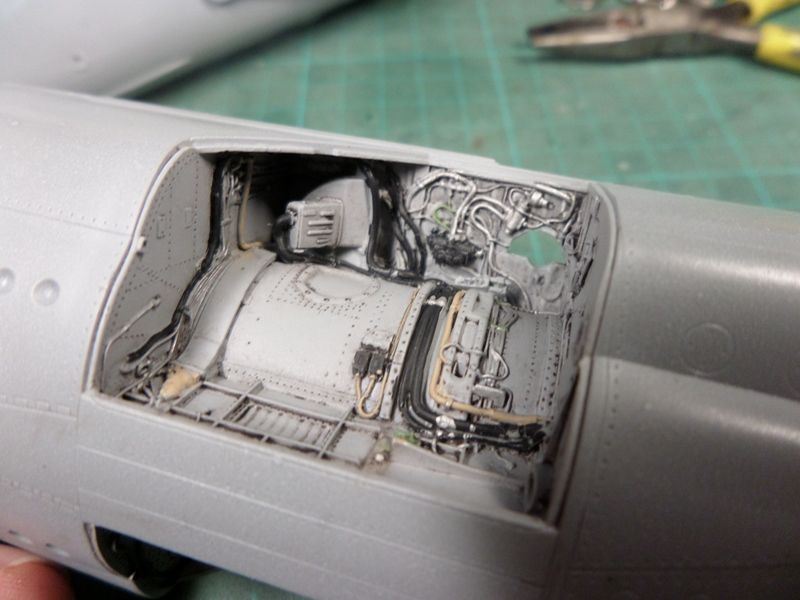
Hi,A further development of the construction. this time detailing the Tumanski engine and fuselage.cya

-
3
-
-
Looking great Paolo.
Can I ask what Tamiya colours you mainly used for the KM-1 seat? I'm just starting the Trumpy 23MF and I'm having a bit of trouble deciding the best match for the light duck egg type colour - some say FS35622, but doesn't seem to be agreement.
If my cockpit ends up looking half as good as yours I'll be a happy man.
Thanks
Gus
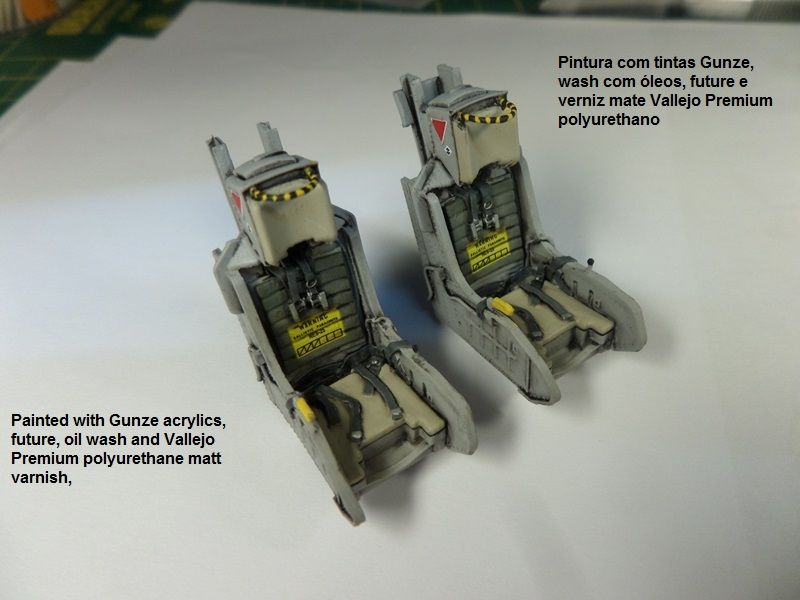
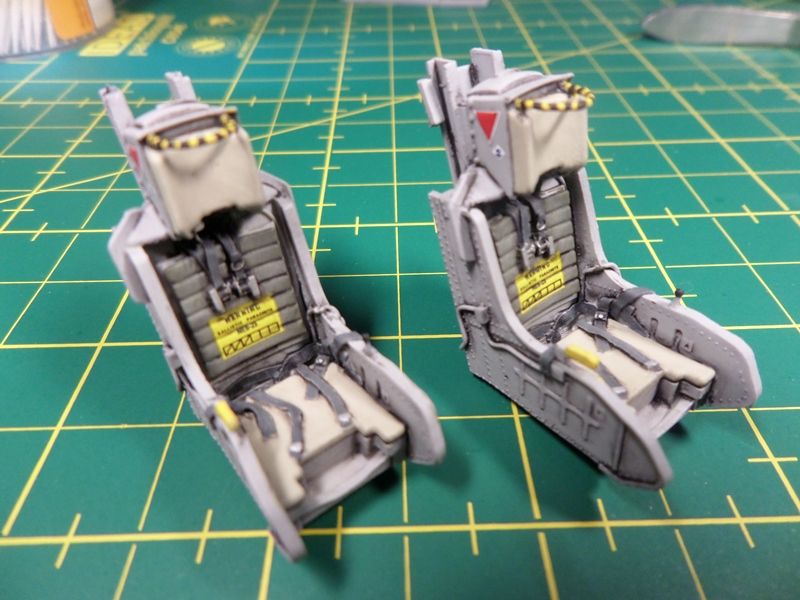
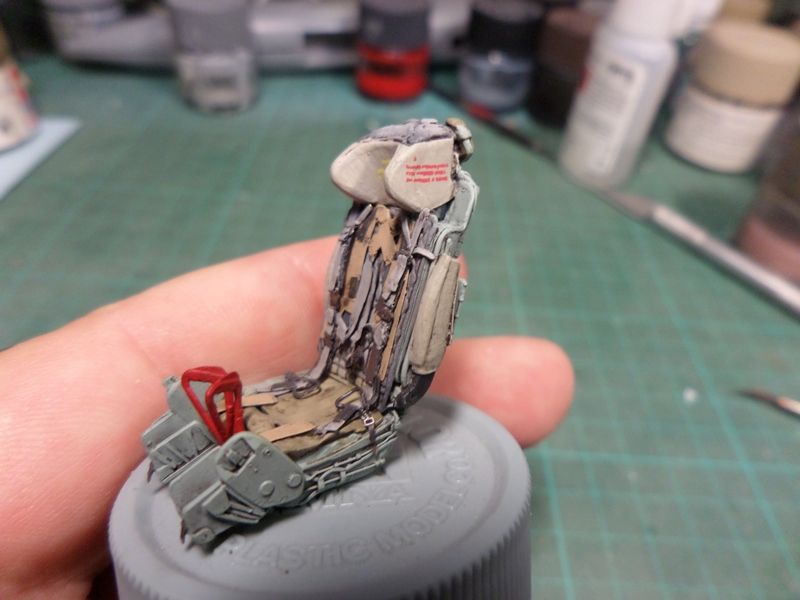
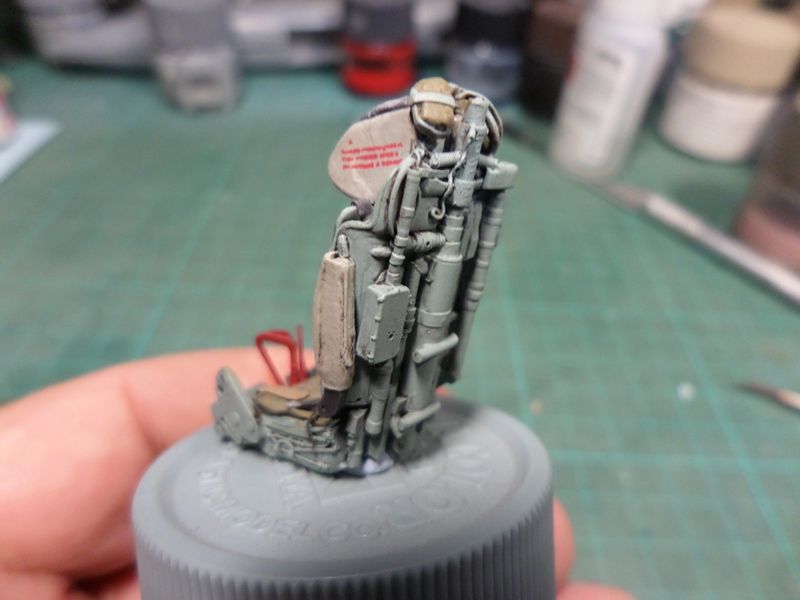
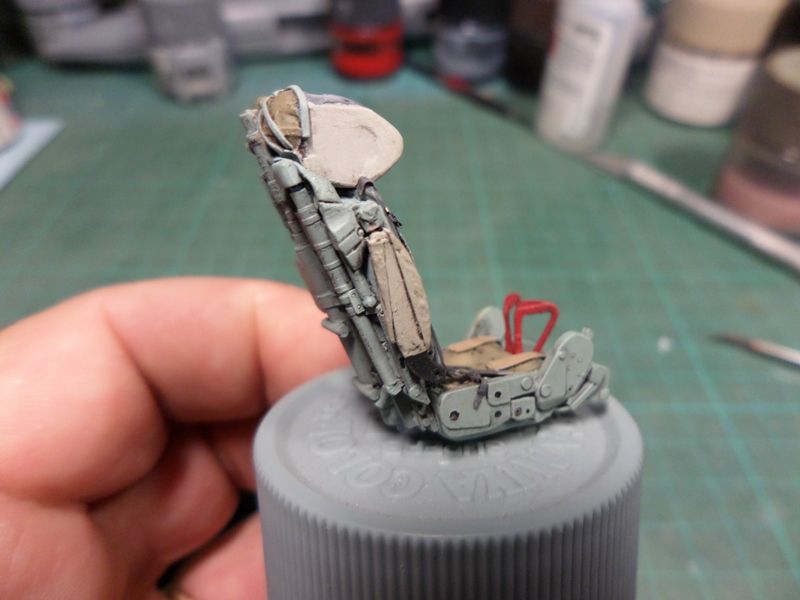
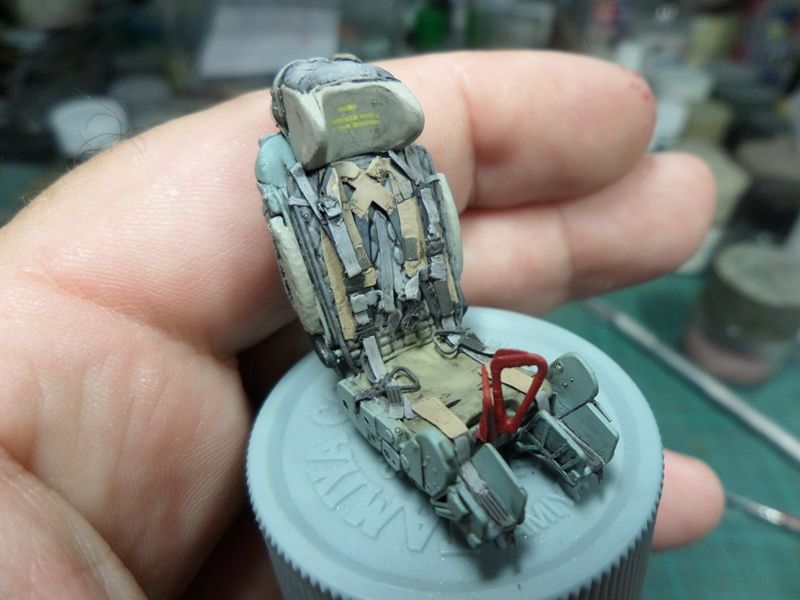
Hi Gus!!
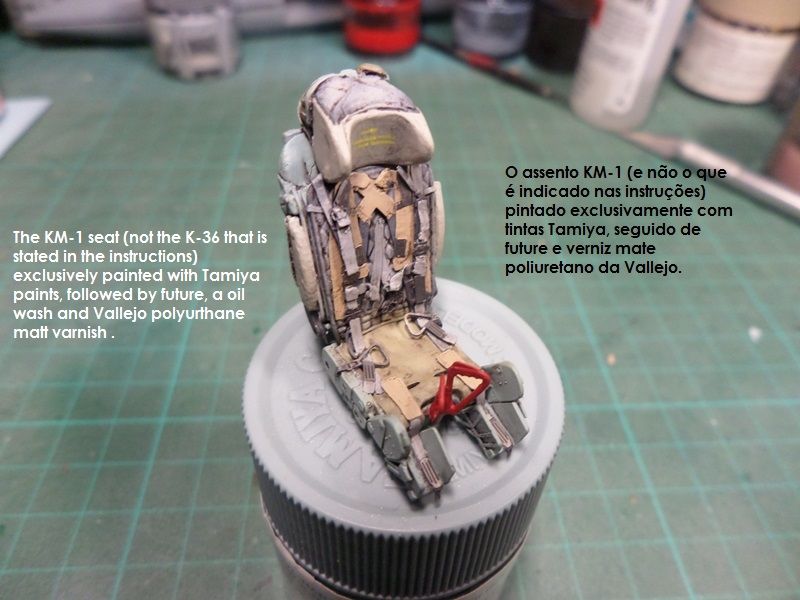
Thanks for looking. I painted my KM-1 this way: To the body of the seat, I used a mix of light blue XF-23 (2)+ sky grey XF-19 (1); to the arms rest and head rest I used a mix of medium grey XF-20 (2)+XF-19. Seat harnesses I used the same tone of XF19 with the adition of o few drops of black. Details with multicolor Vallejo range.
Anytime you need, just ask! thank you.
best regards, PL
-
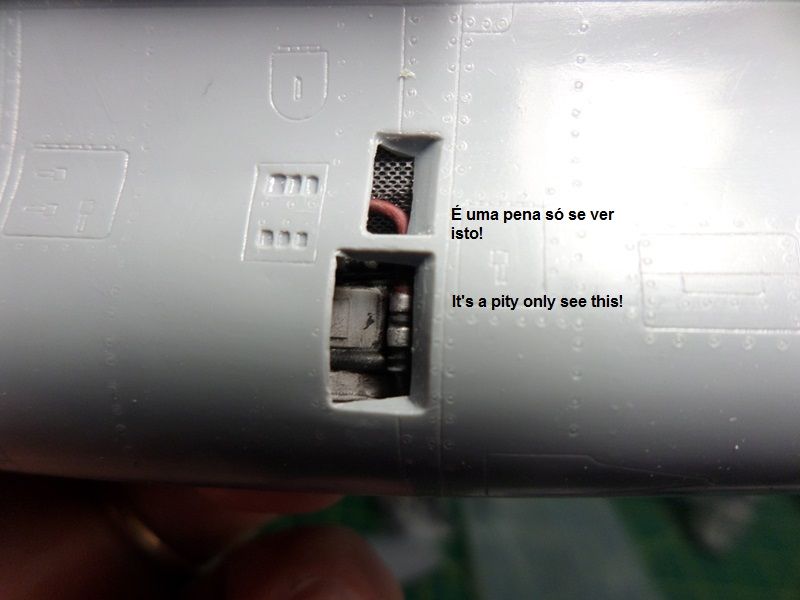
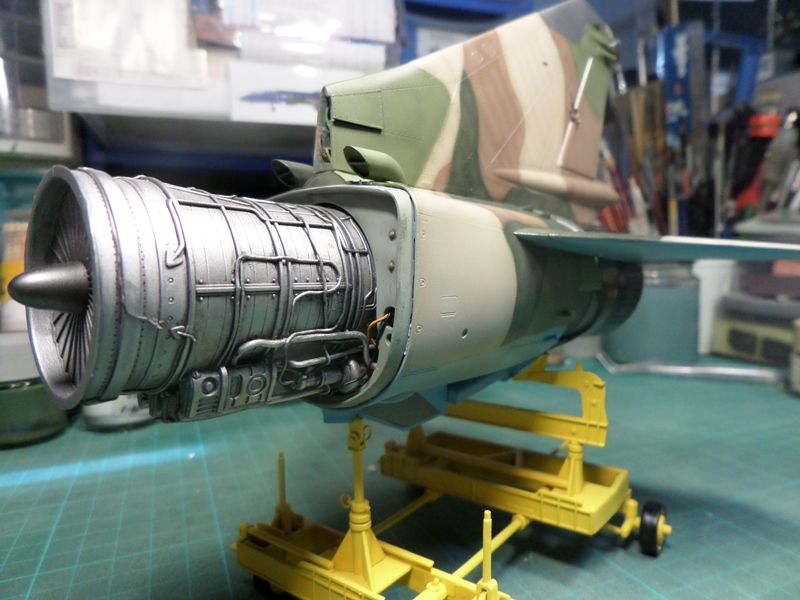
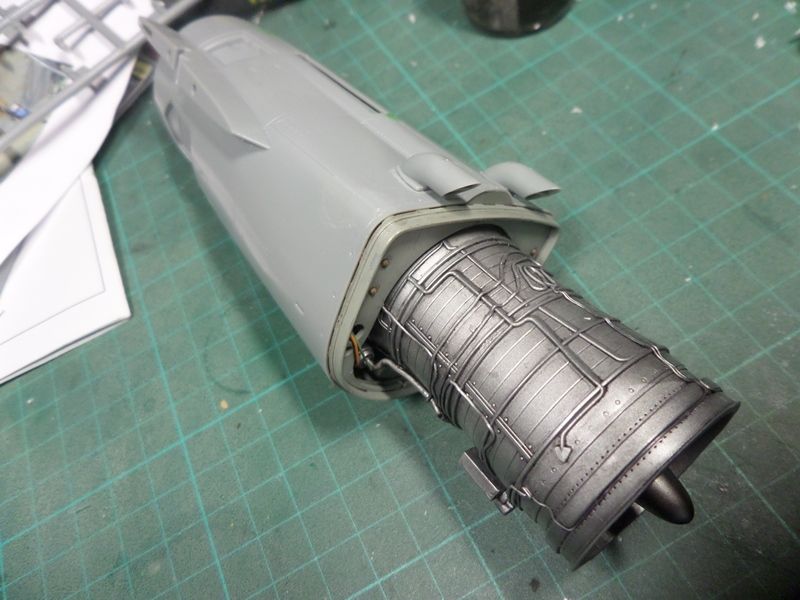
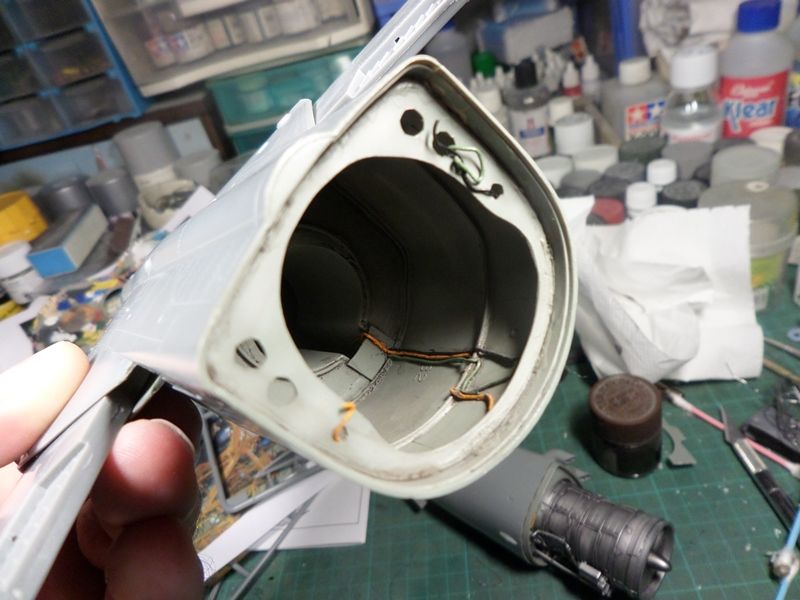
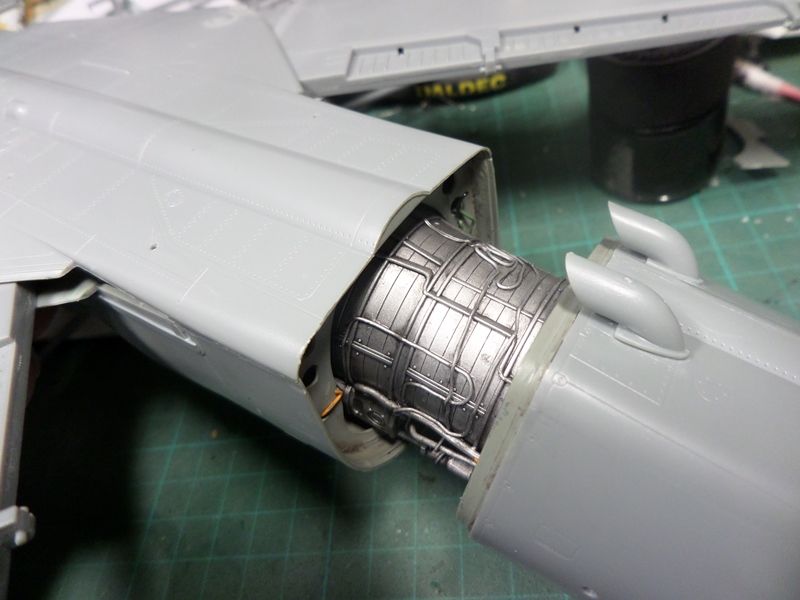
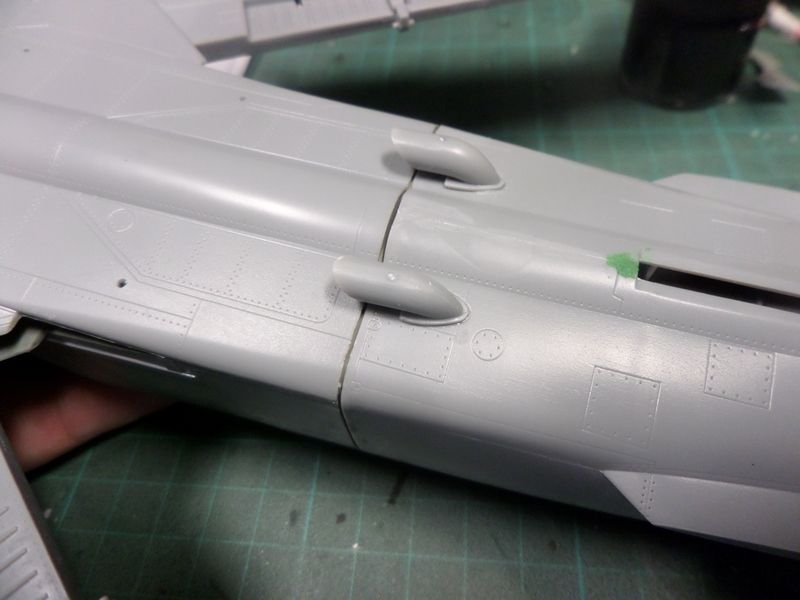
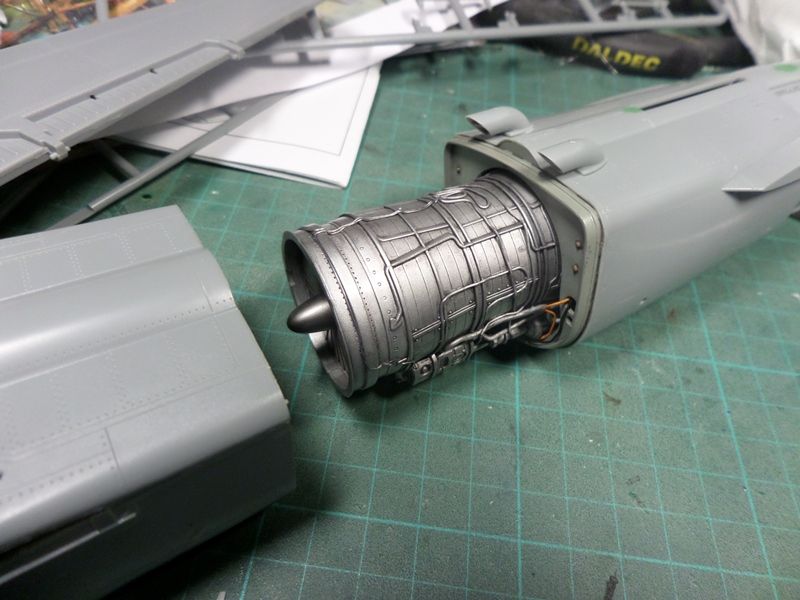
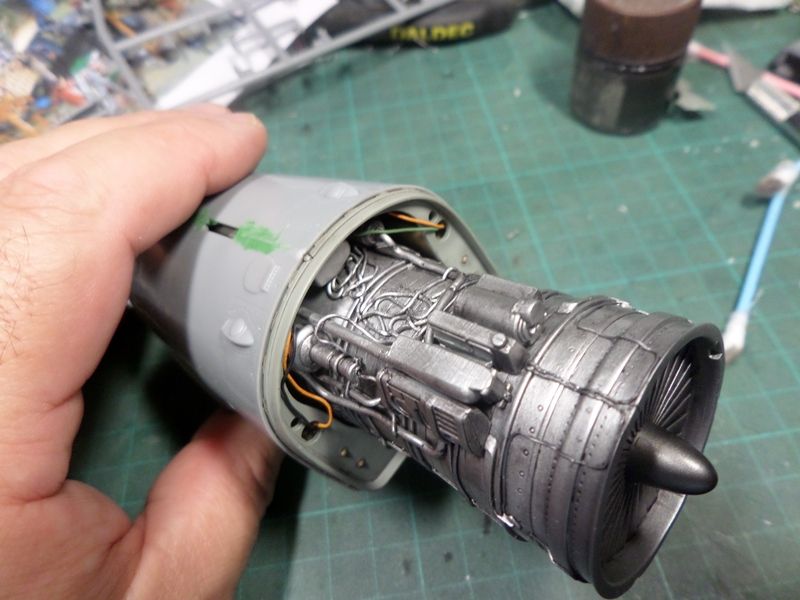
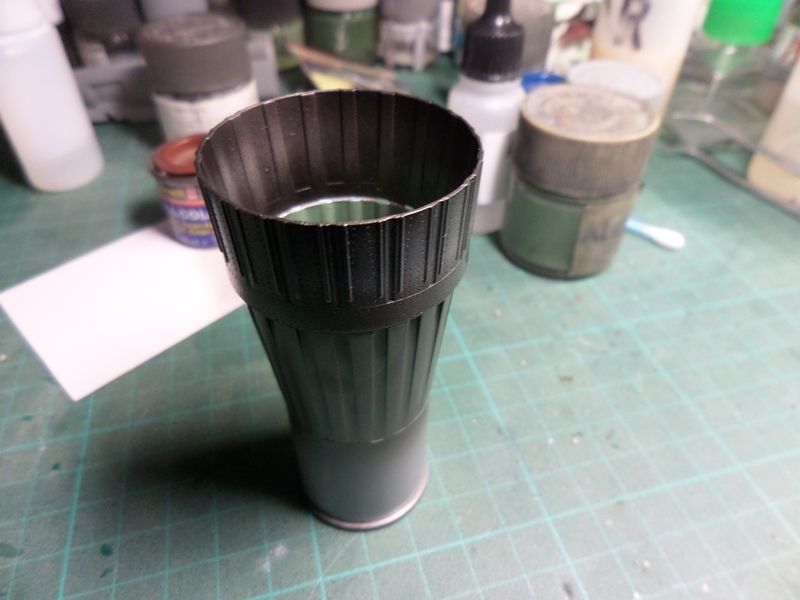
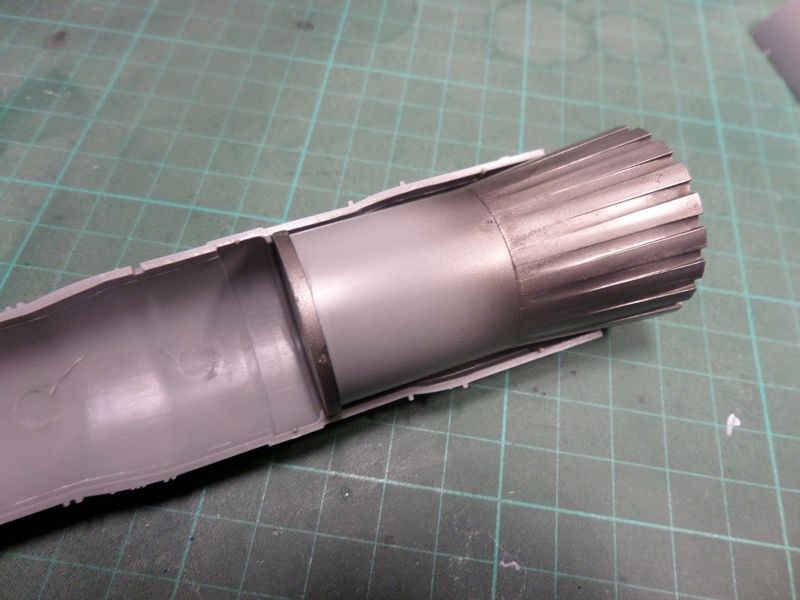
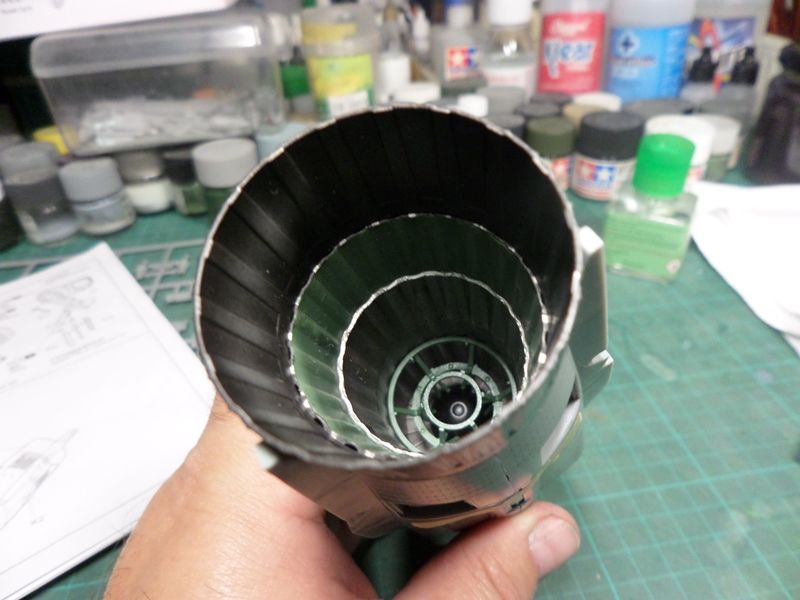
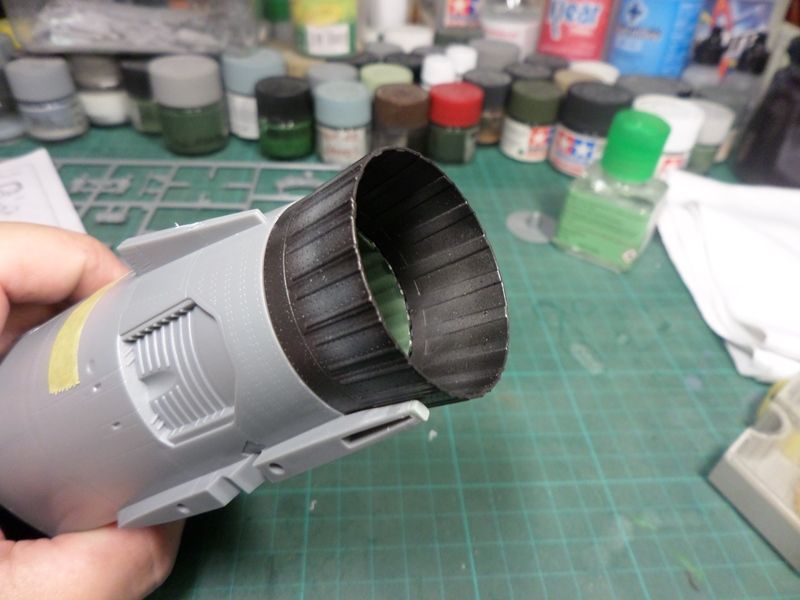
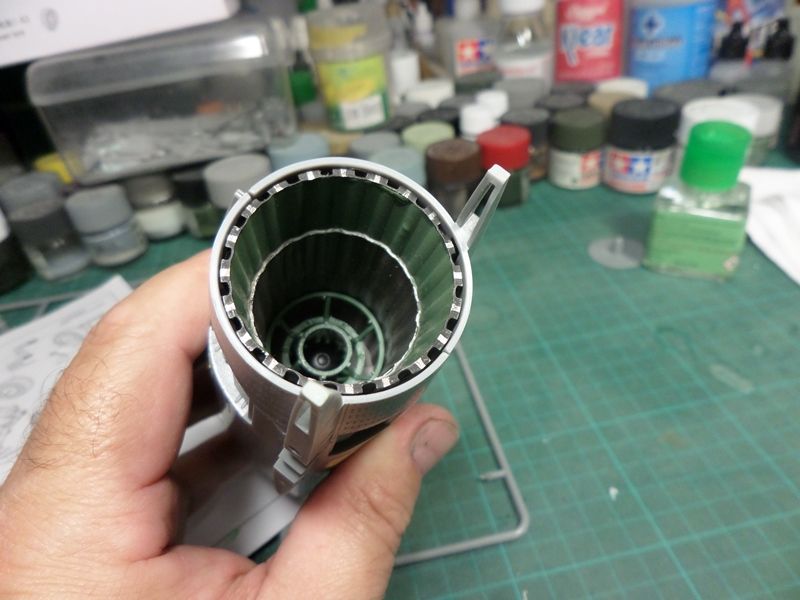
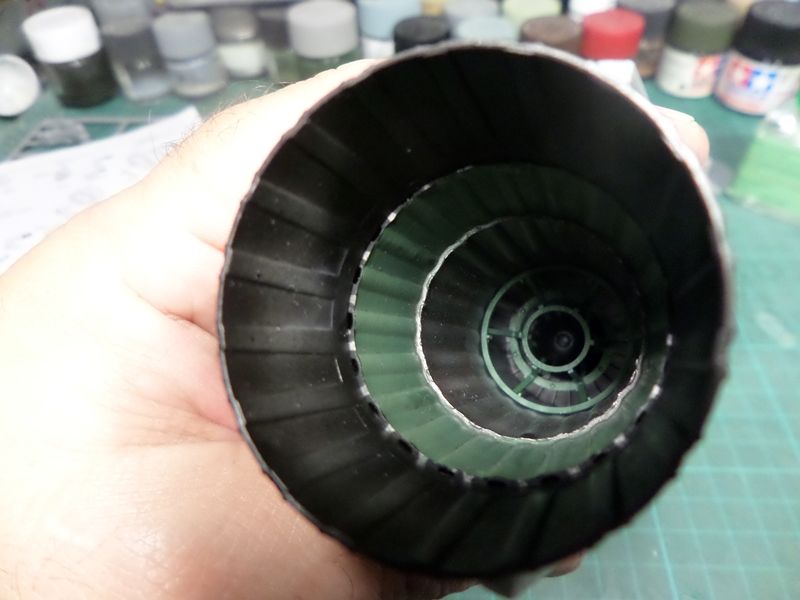
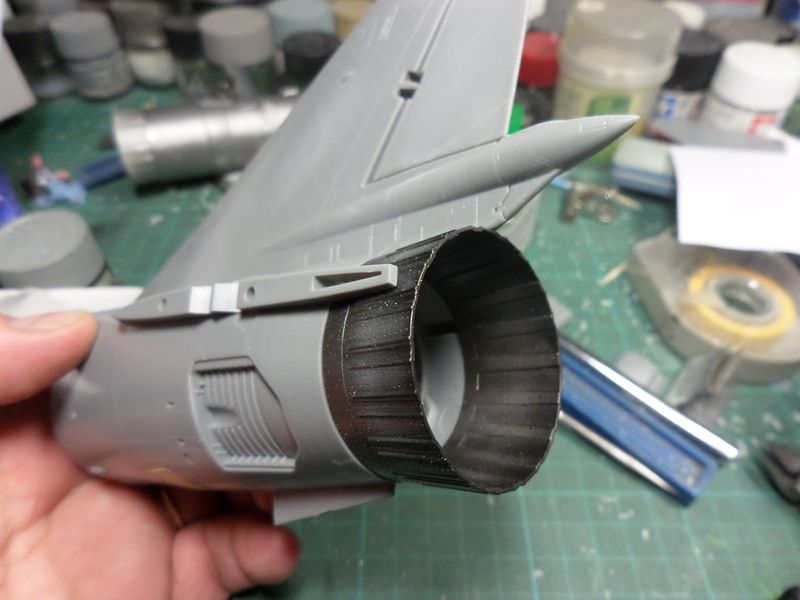
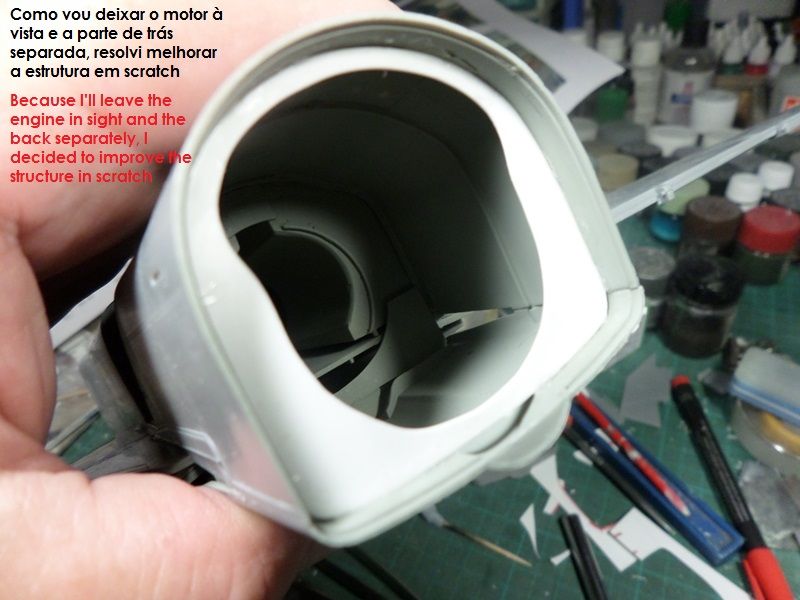
Hi !!
After the "blackout", here I am with some updates! I decided to build the kit exhaust nozzle, with extra work of paint! It's true that the Aires set is amazing, but I have already spent a reasonable some of money in this kit and, really, I think the original is quite good too. After all is not the most visible part and I'm going to build the engine with extra detail, leaving it separatelly from the rest of the fuselage.
I leave you the most recent pics.
cya

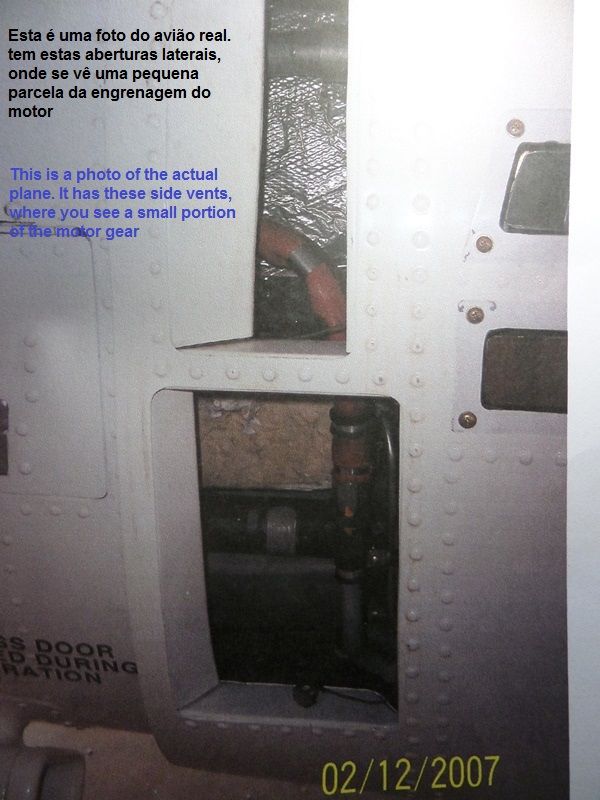
THIS IS THE REAL THING. JUST TO COMPARE.
-
Sorry about the lack of visible pics!! I'll fix the problem this weekend.
-
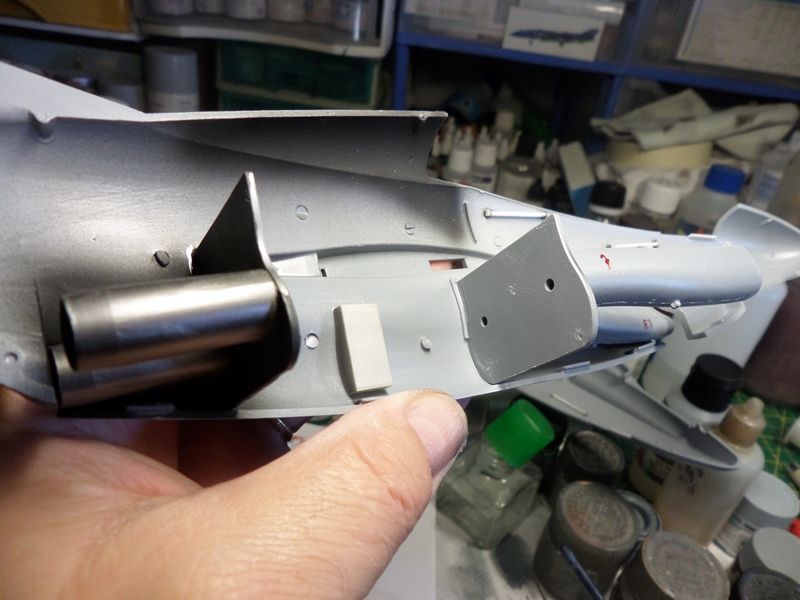
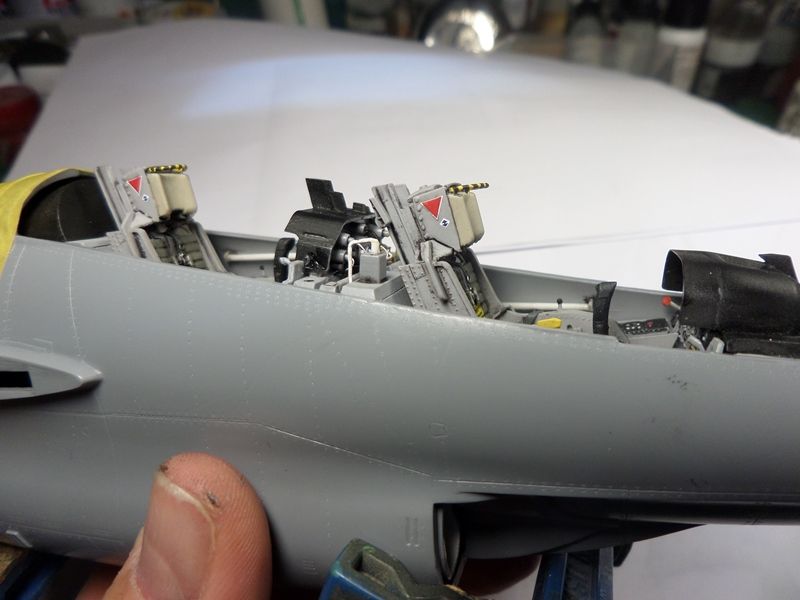
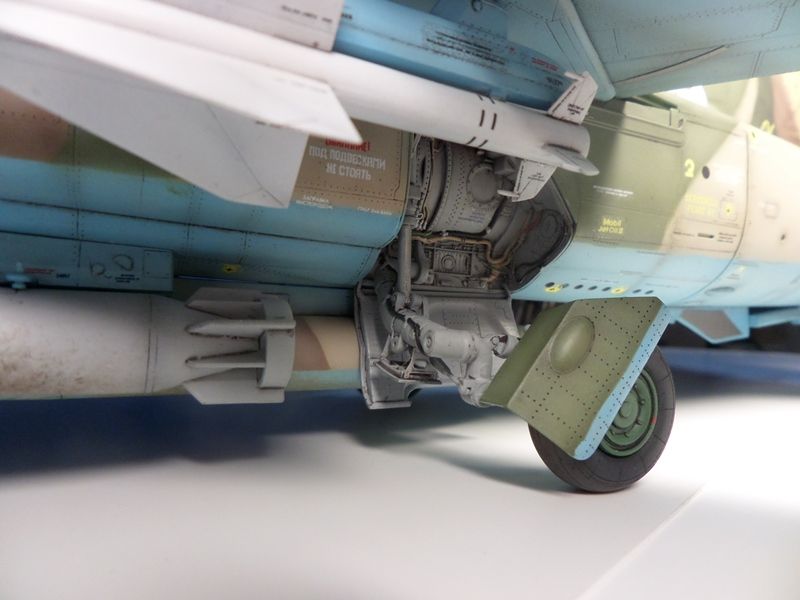
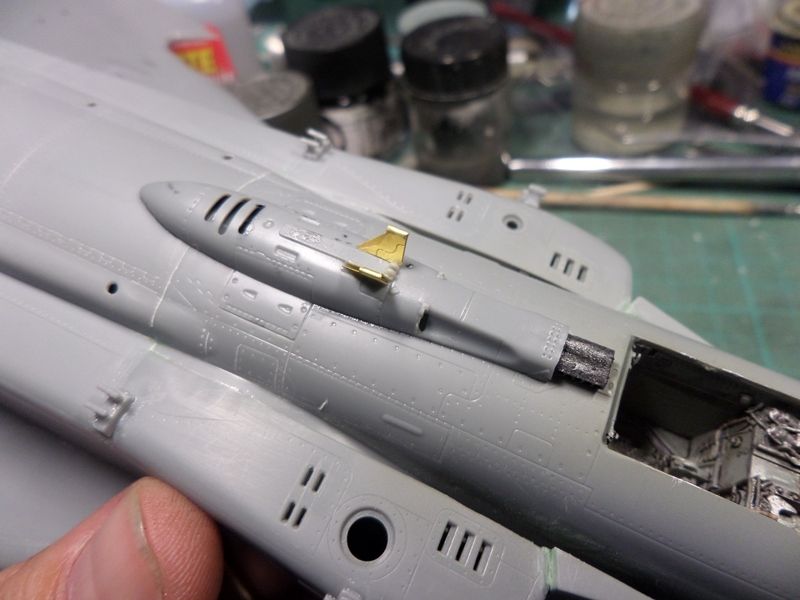
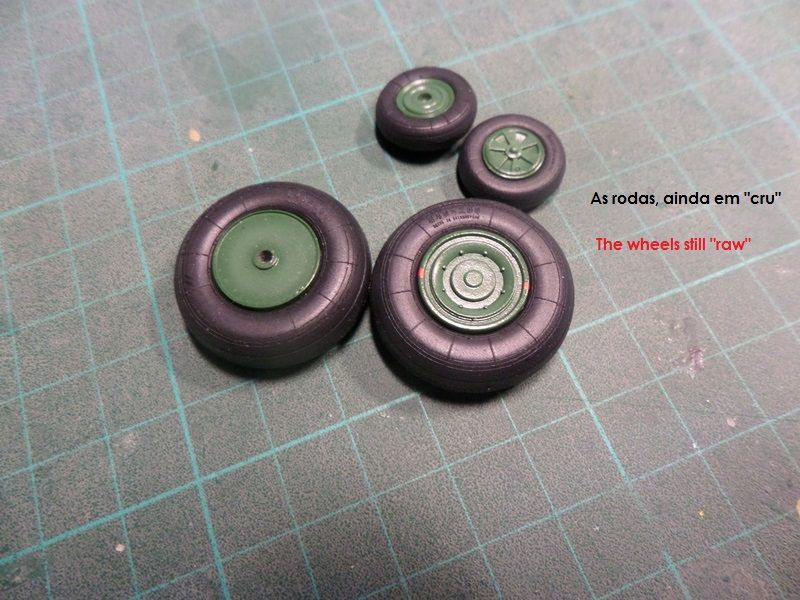
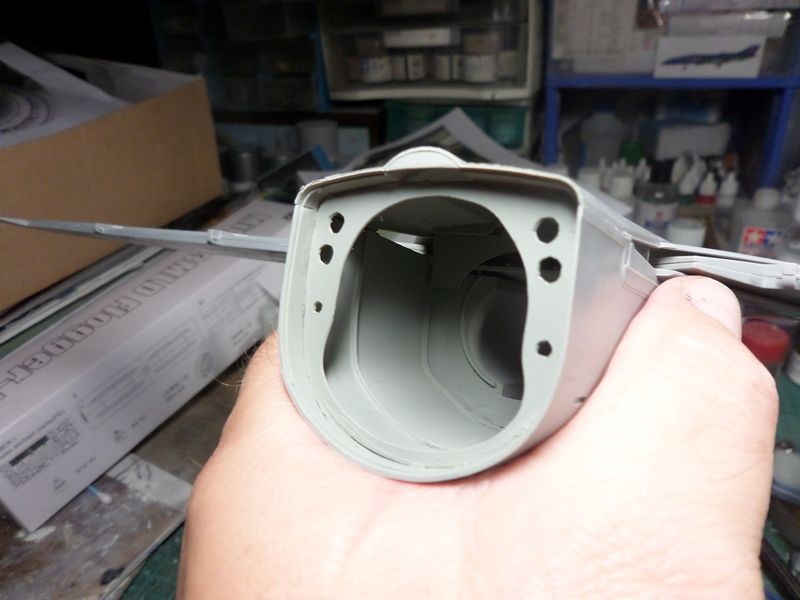
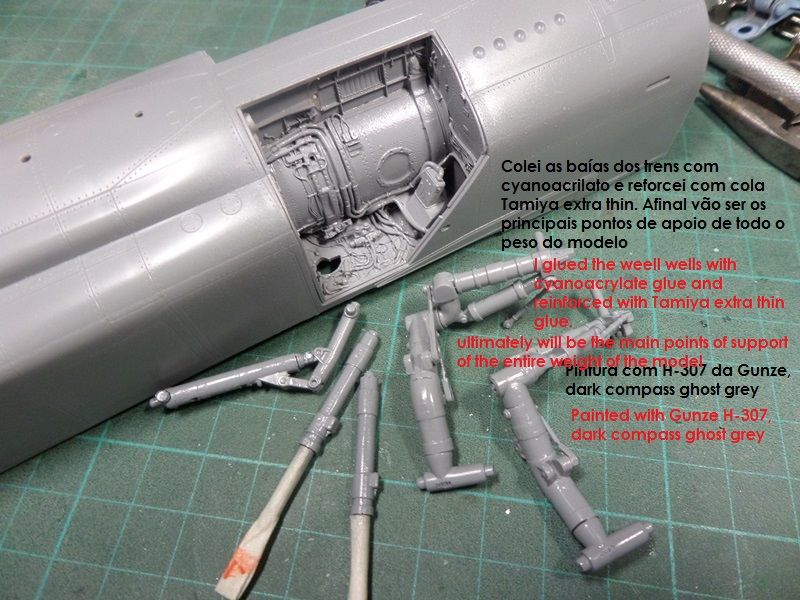
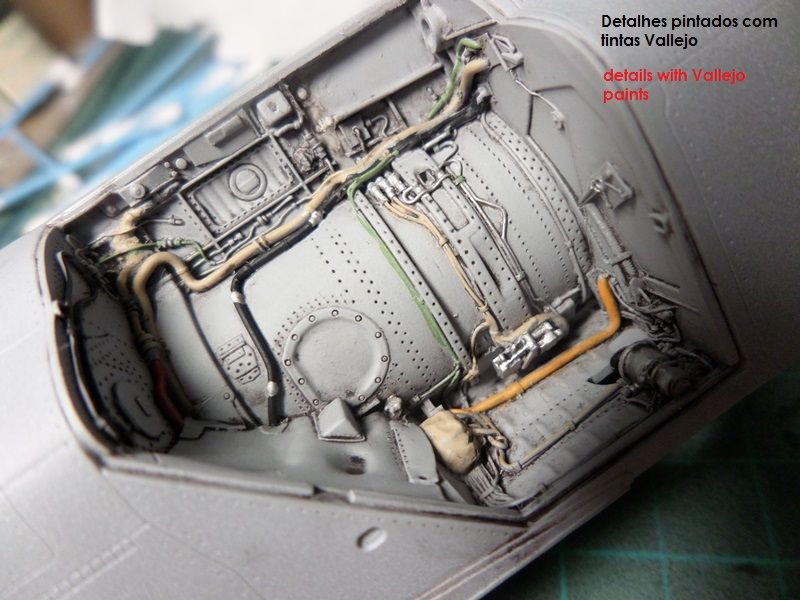
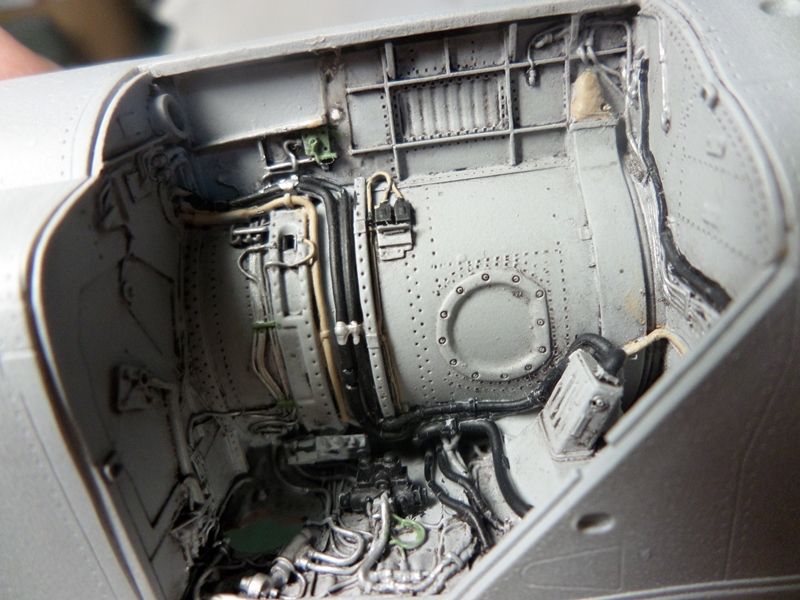
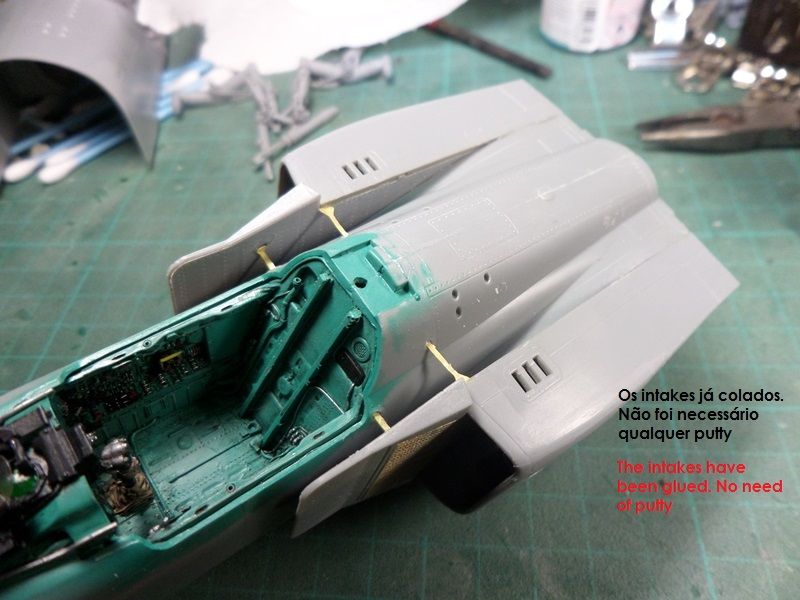
Hi.
The wheel wells, intakes and wings.
Wheel wells painted with Gunze H-307 dark compass ghost grey.
thanks.
-
2
-
-
Hi
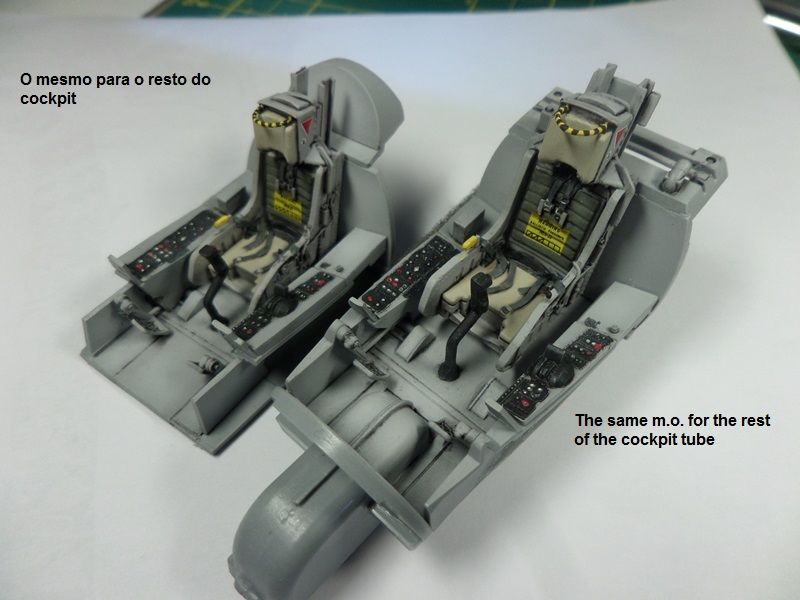
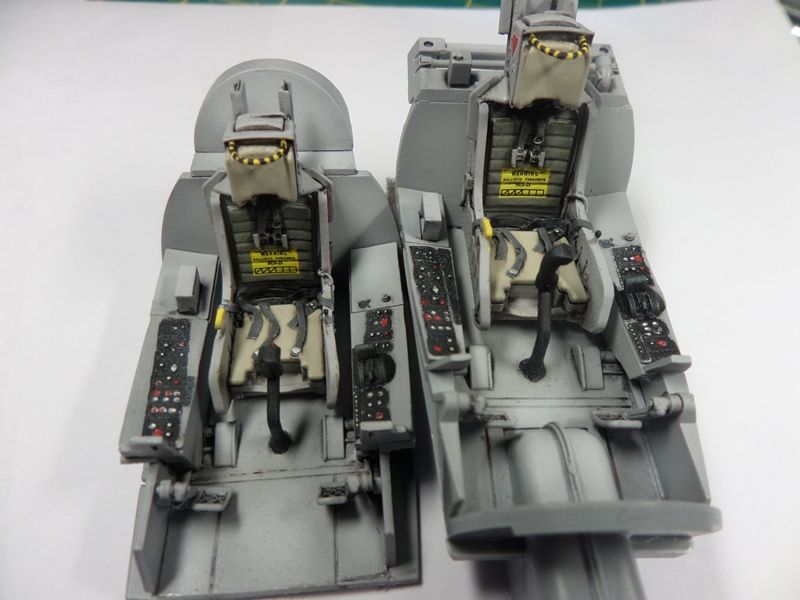
Thanks for the sugestions anda tips. about the exhaust nozzle I'm still thinking about buying the set in resin, because I started working on exhaust that the kit provides and, frankly, with the help of some scratch I think it will be pretty good! But....you put the devil on me!! maybe...
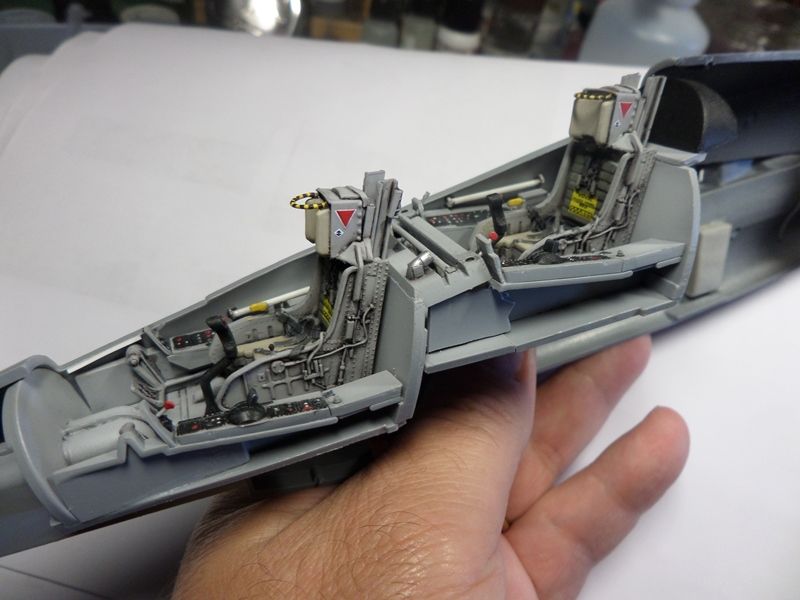
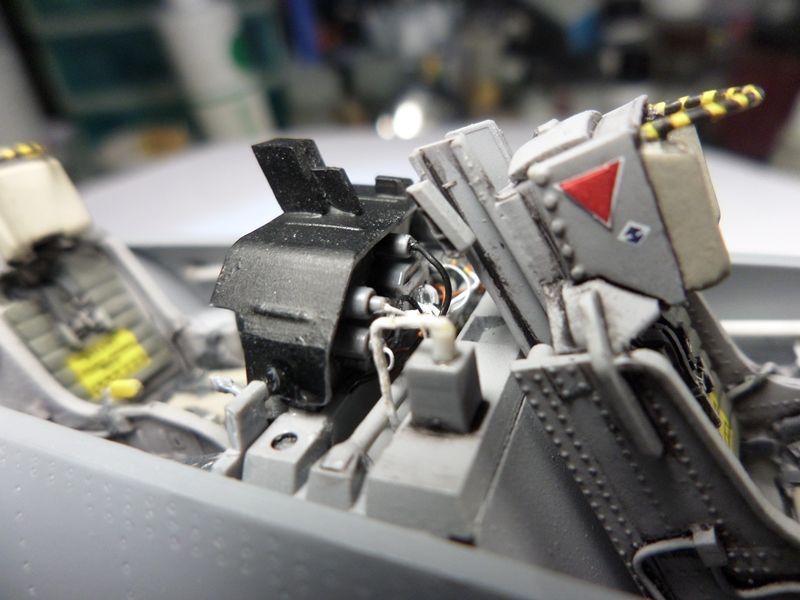
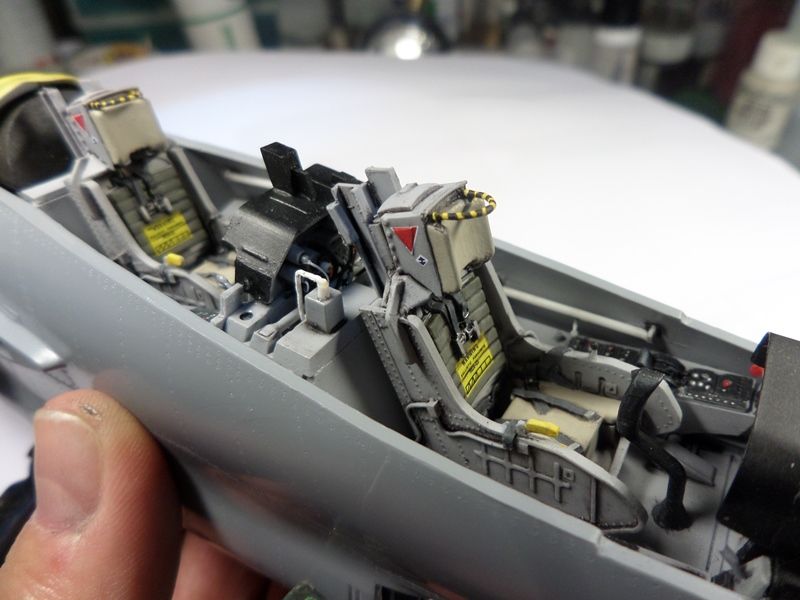
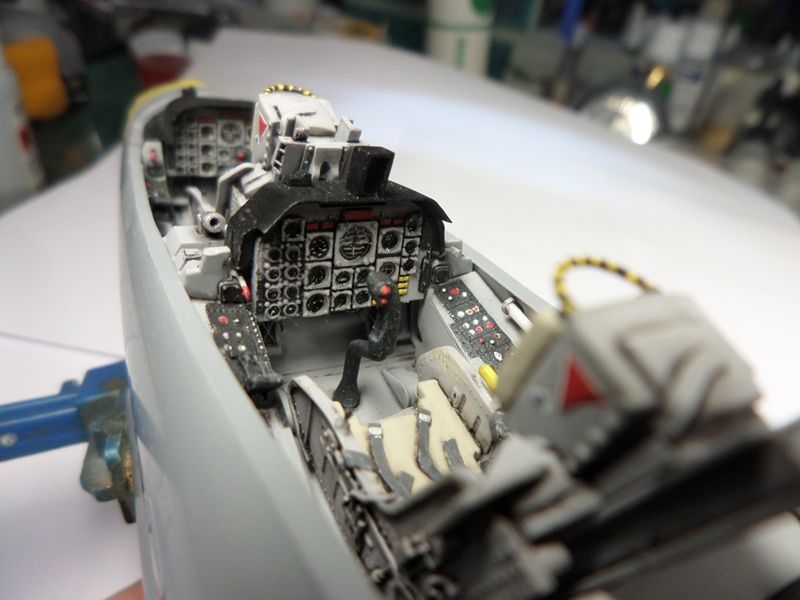
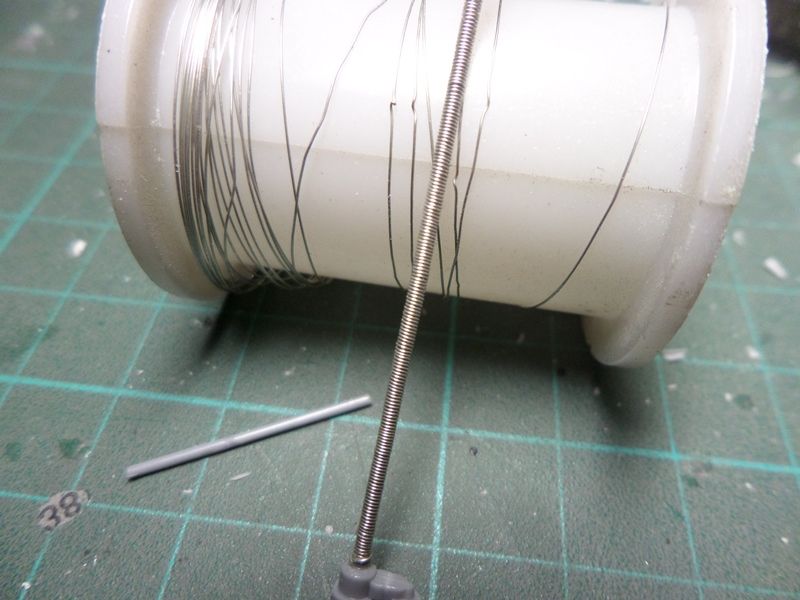
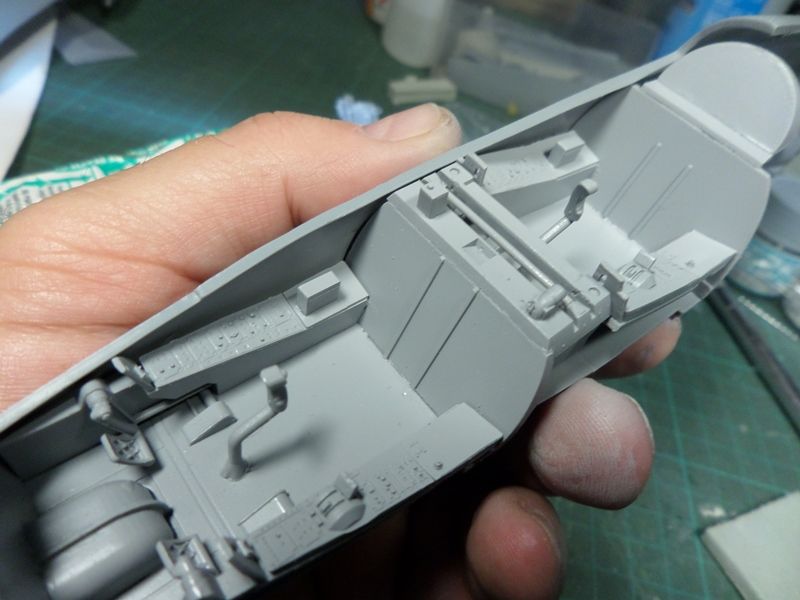
For the moment, stay with some pics of the KM-1 ejection seat.
thanks again
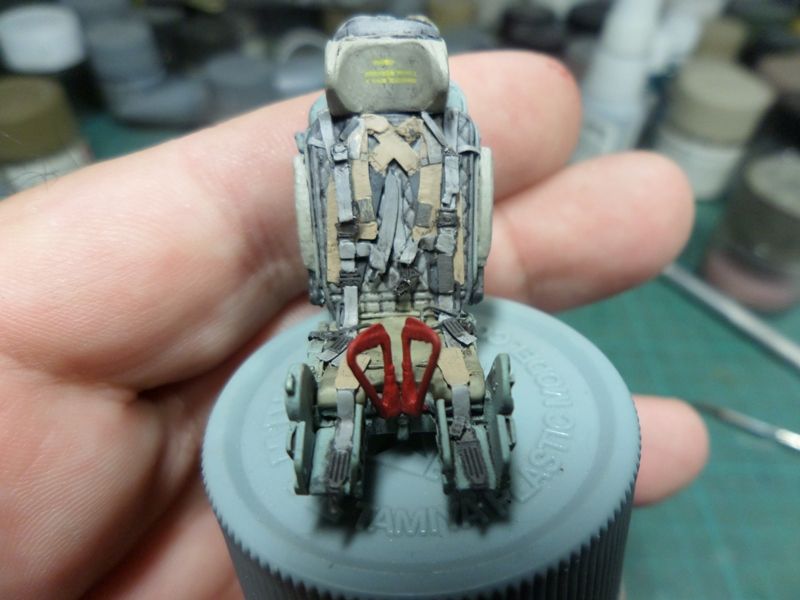

-
4
-
Mitsubishi J2M3 Raiden (Jack) 1/32 Hasegawa
in LSM 1/32 and Larger Aircraft Ready for Inspection
Posted
Hi Cees!
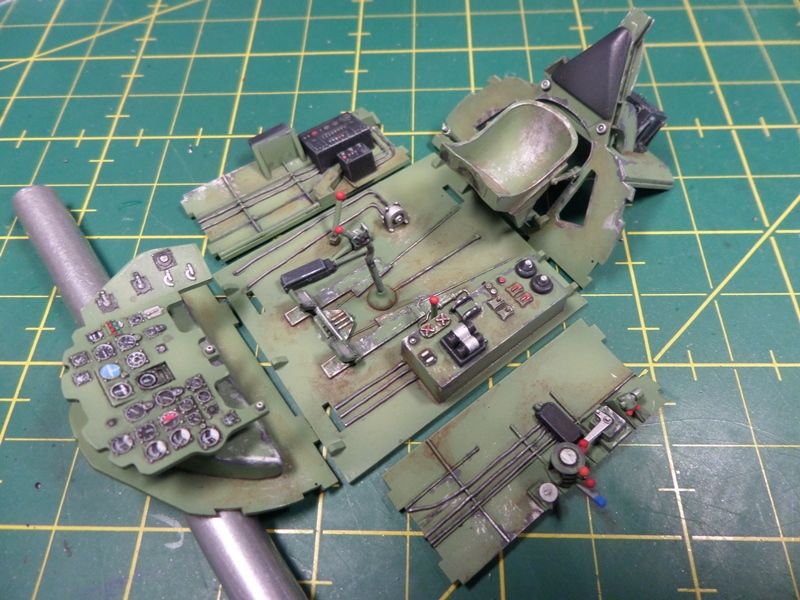
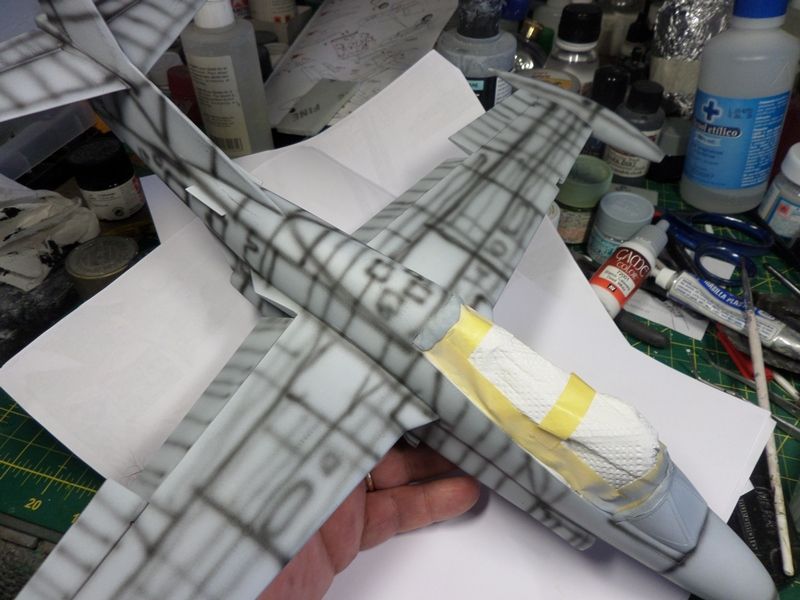
In fact, I painted the black panels almost the same time of the overall green. Just before the color painting, I apllied a coat of lacquer paint TS-30 "silver leaf", from Tamiya, and a thin layer of hair lacquer (from my mother in law arsenal!!). Then, with warm water, a rough brush and a toothpick I started chiping, slowly and controllably. With this method, all the masks I used were well suported by the top layer (I used Tamiya tape, previously used to lose grip).
cya