

Paulo Lopes
-
Posts
34 -
Joined
-
Last visited
Content Type
Profiles
Forums
Events
Gallery
Posts posted by Paulo Lopes
-
-
Hi Zé Pedro!!
Back again! what a beauty!!!!!! indeed a superb job.
-
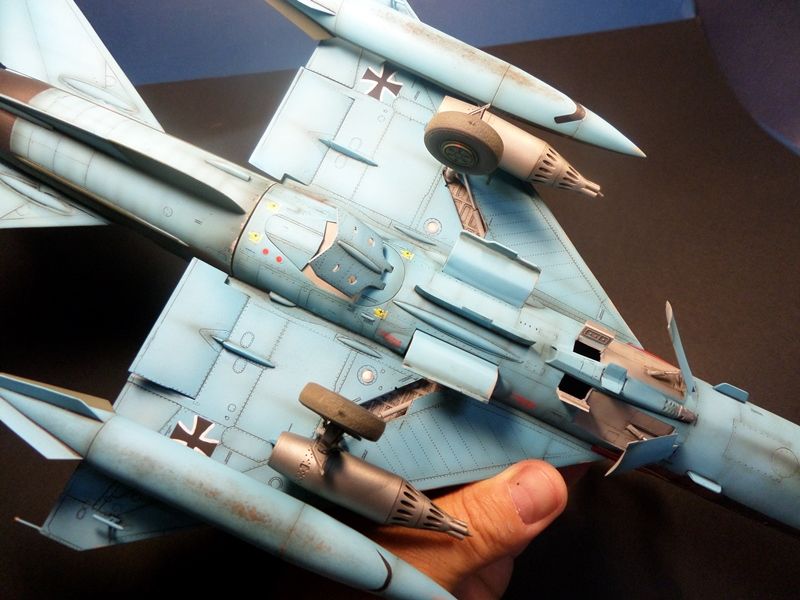
Hi!
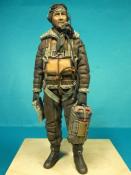
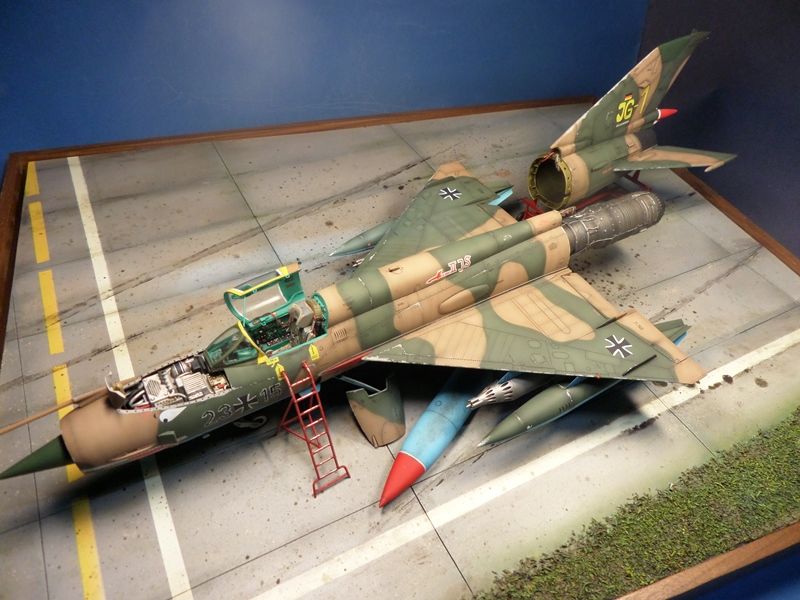
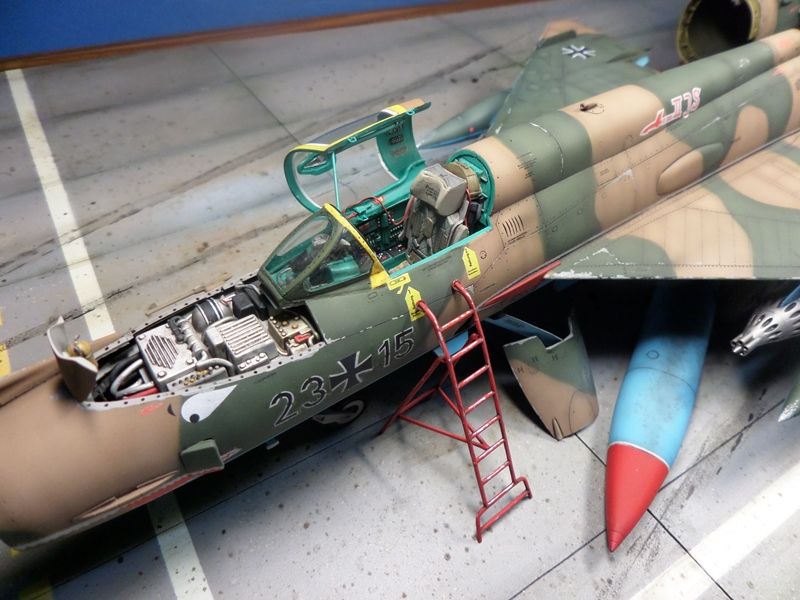
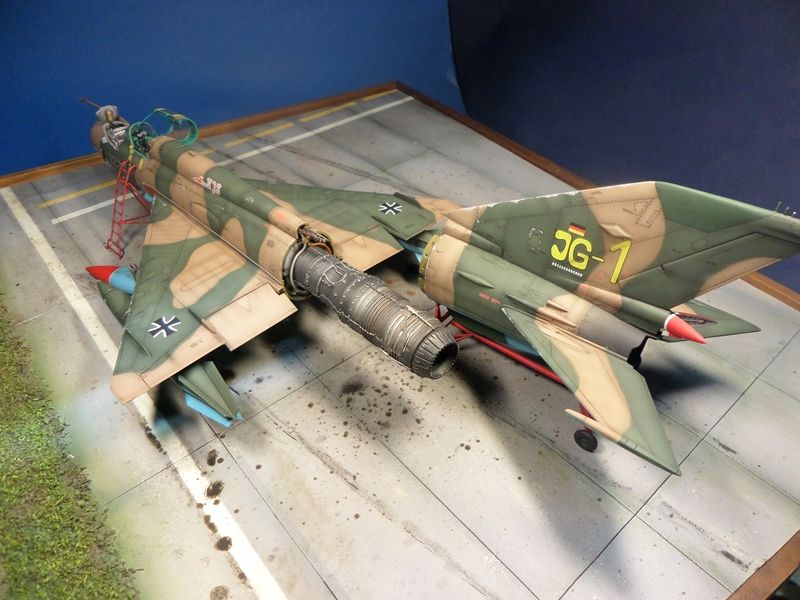
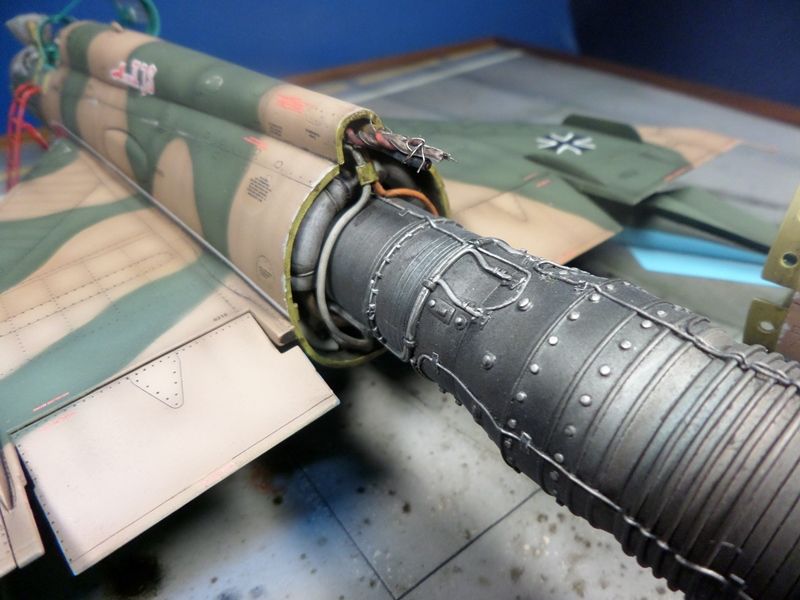
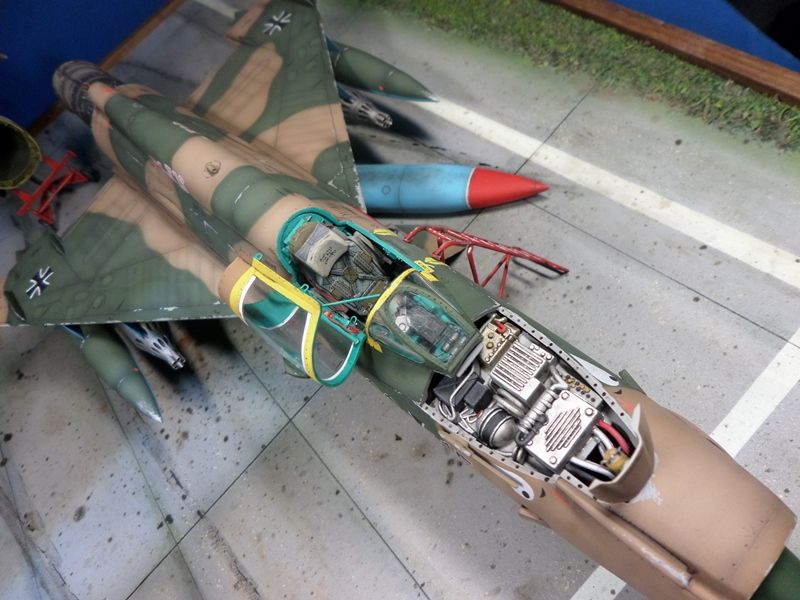
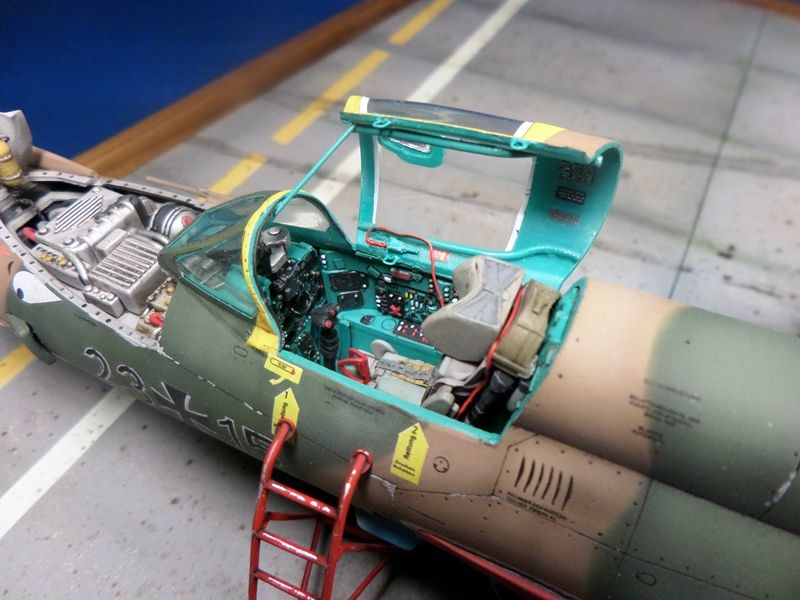
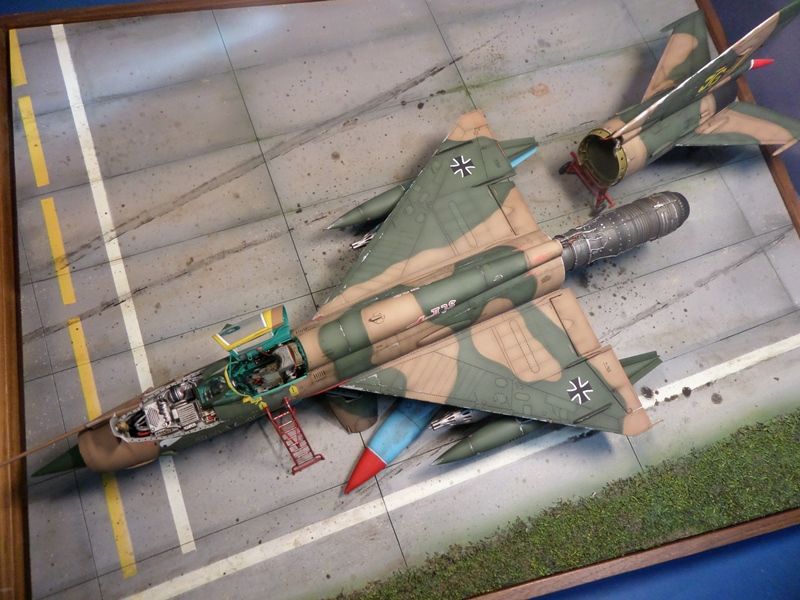
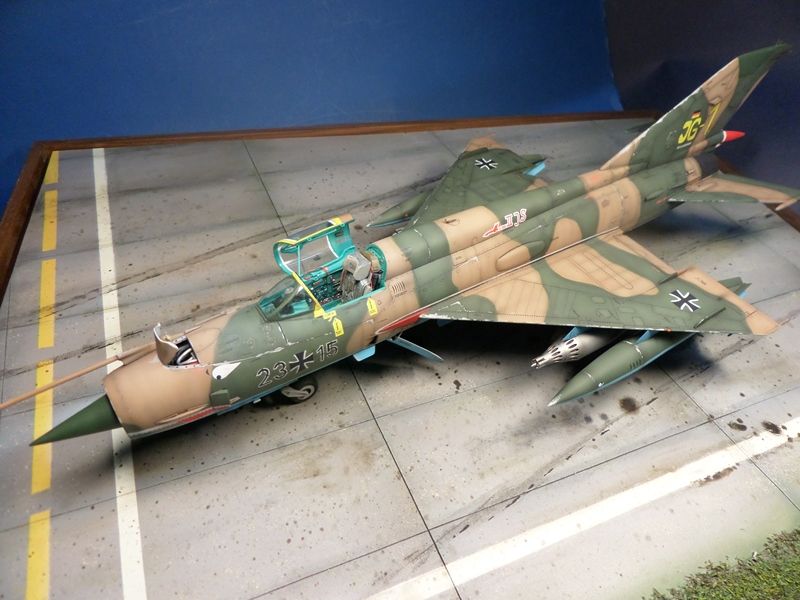
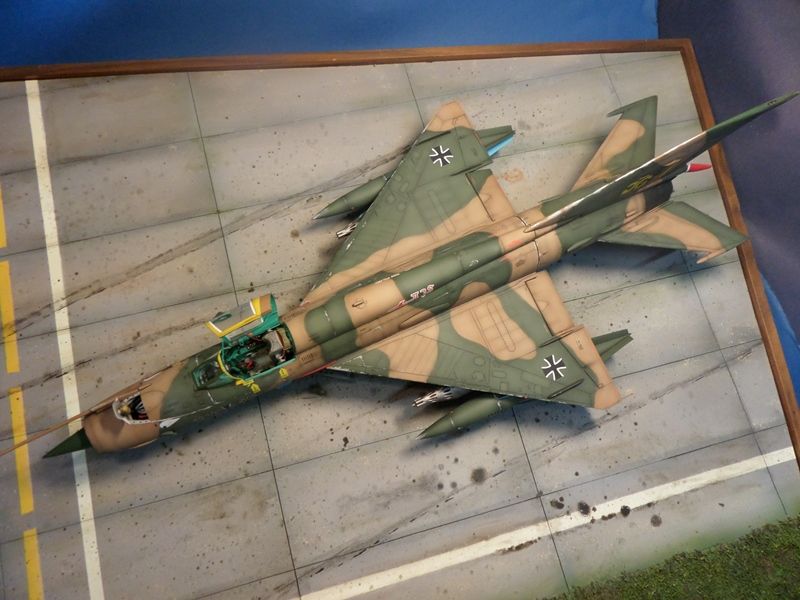
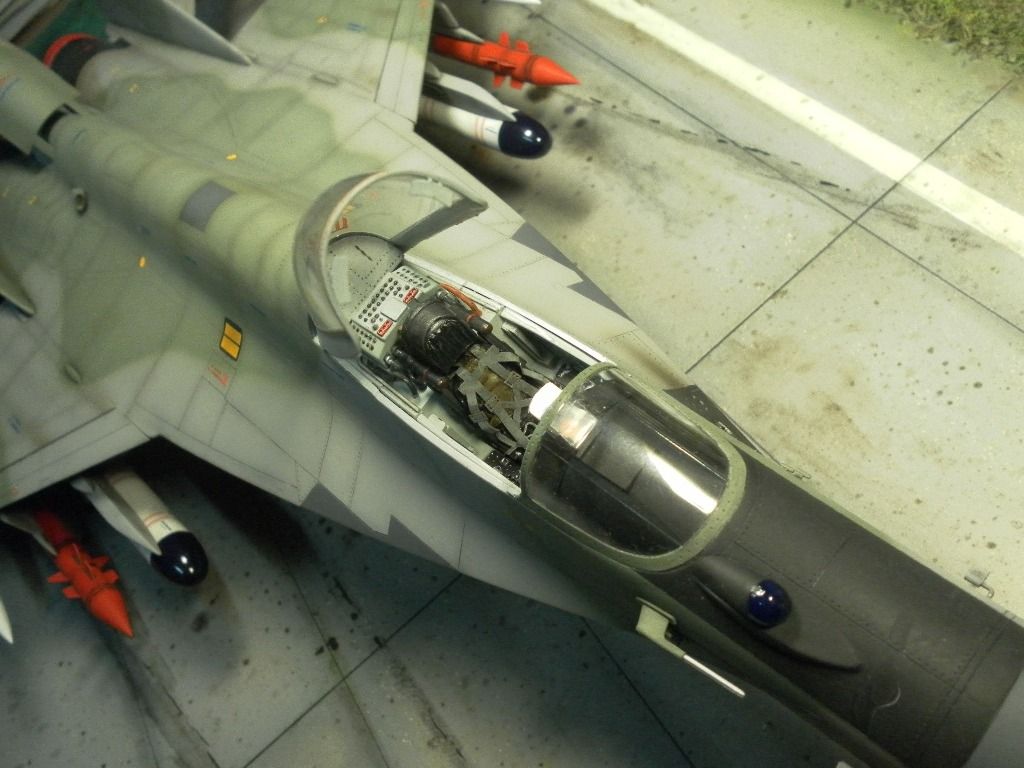
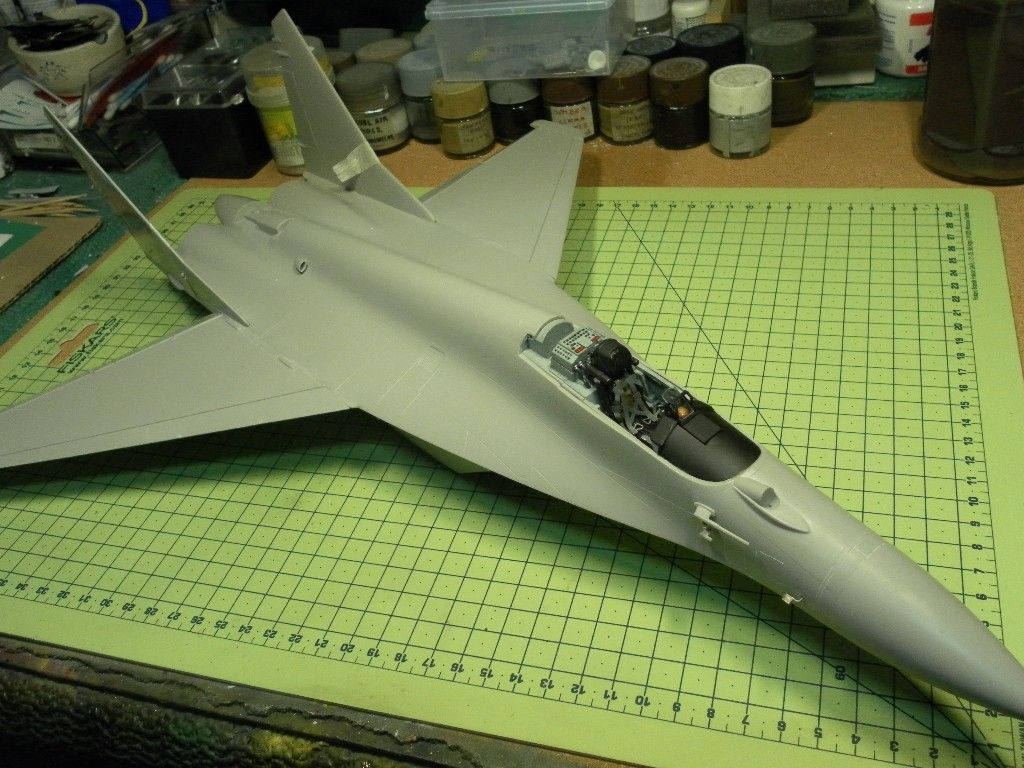
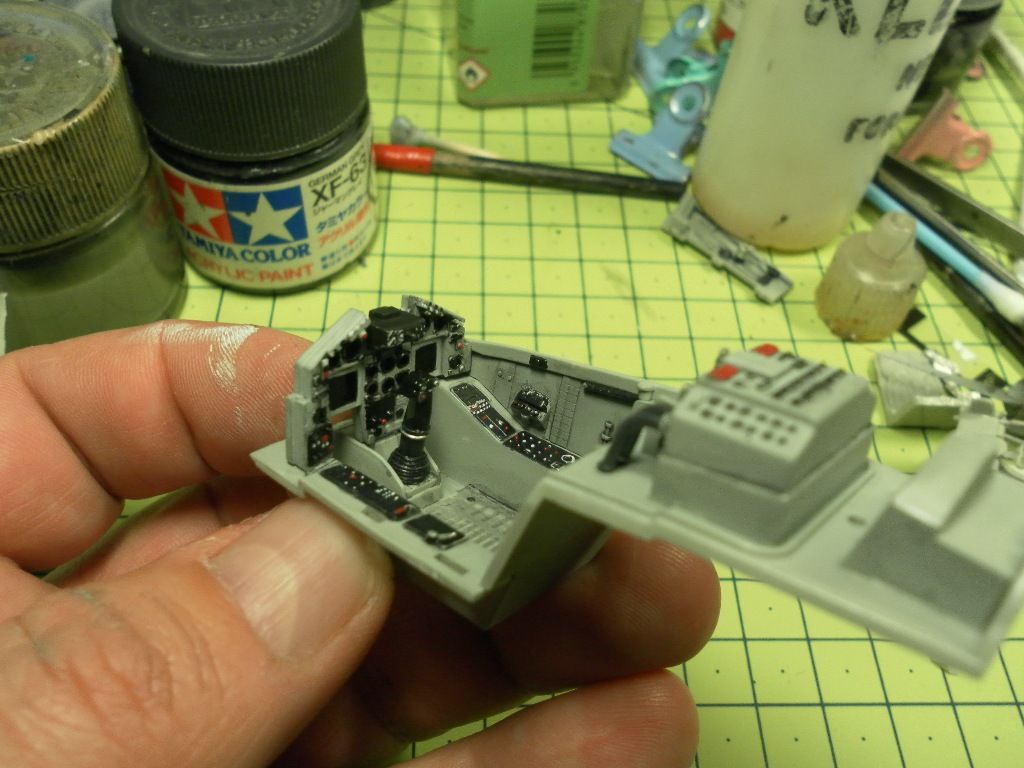
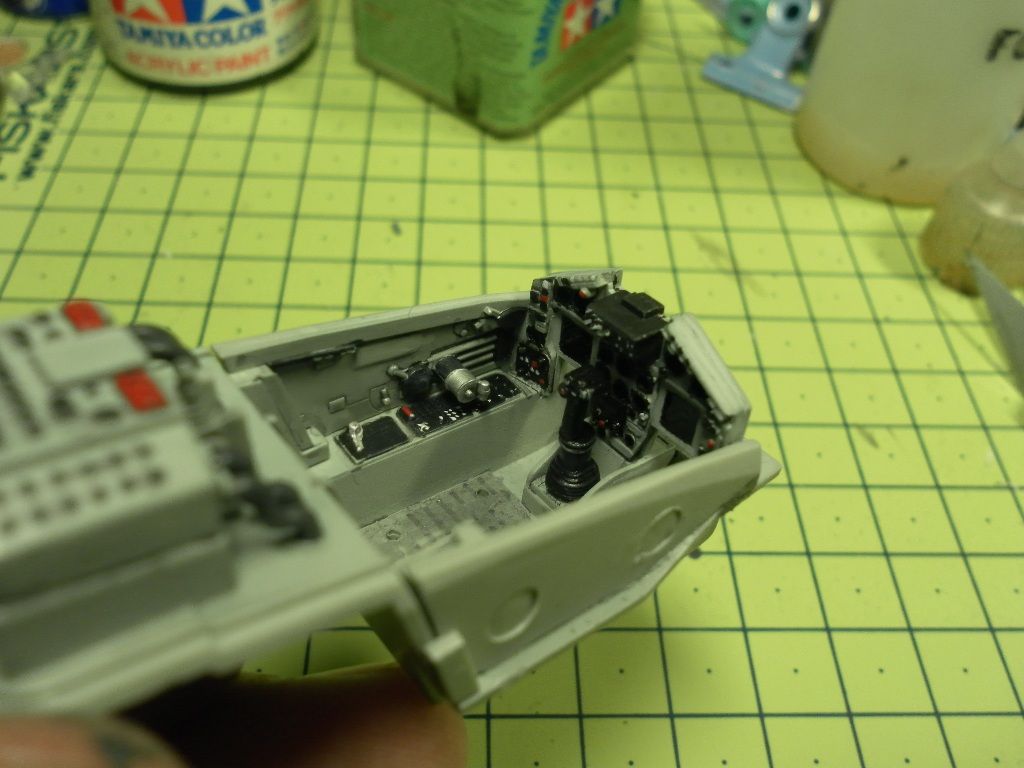
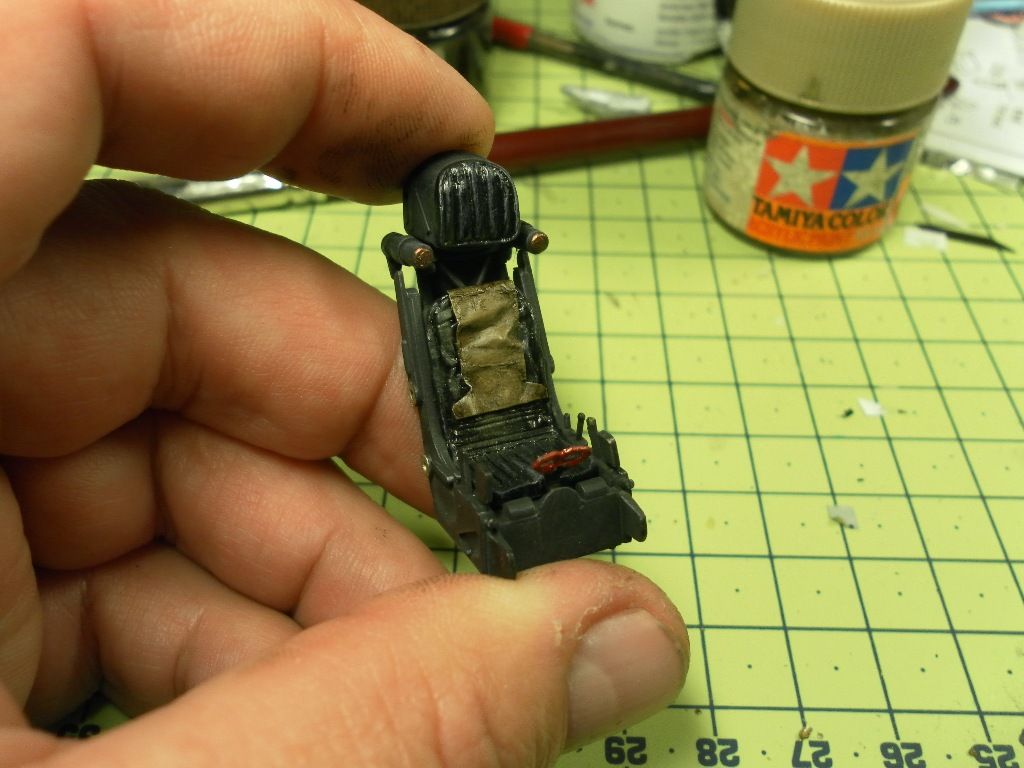
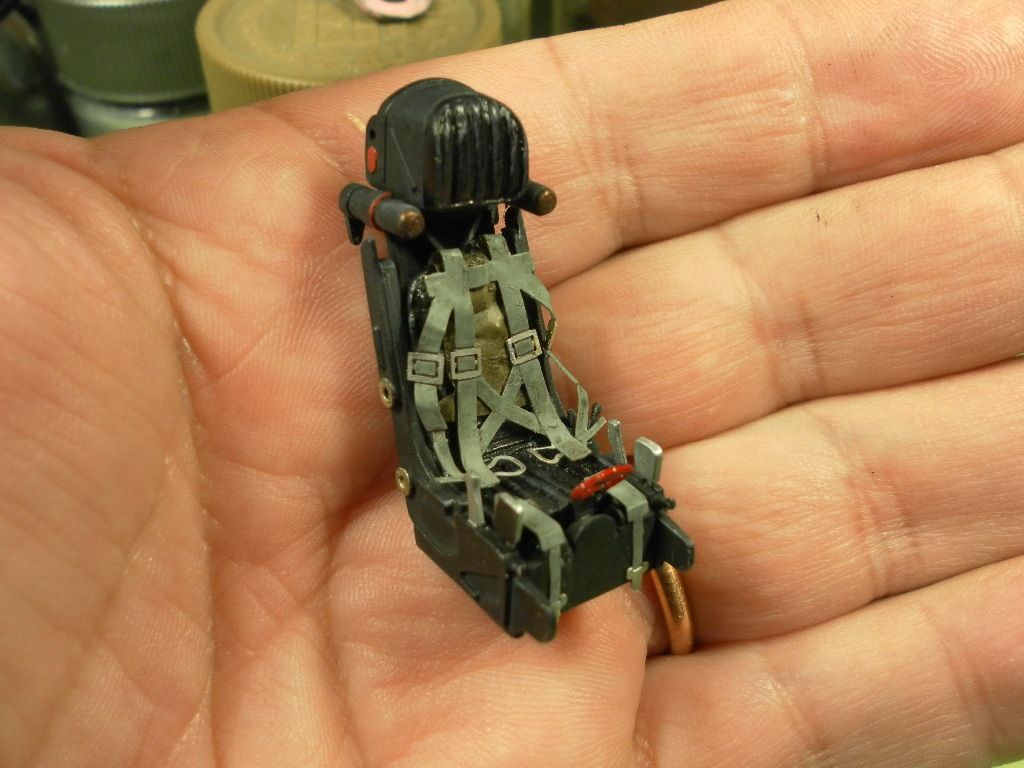
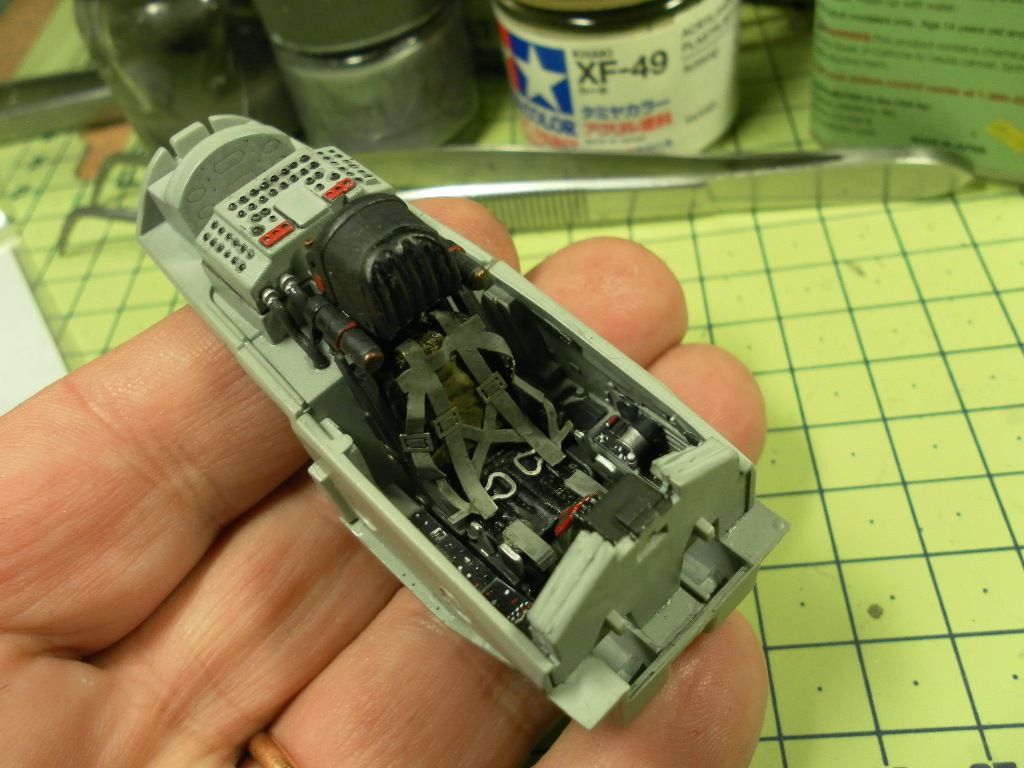
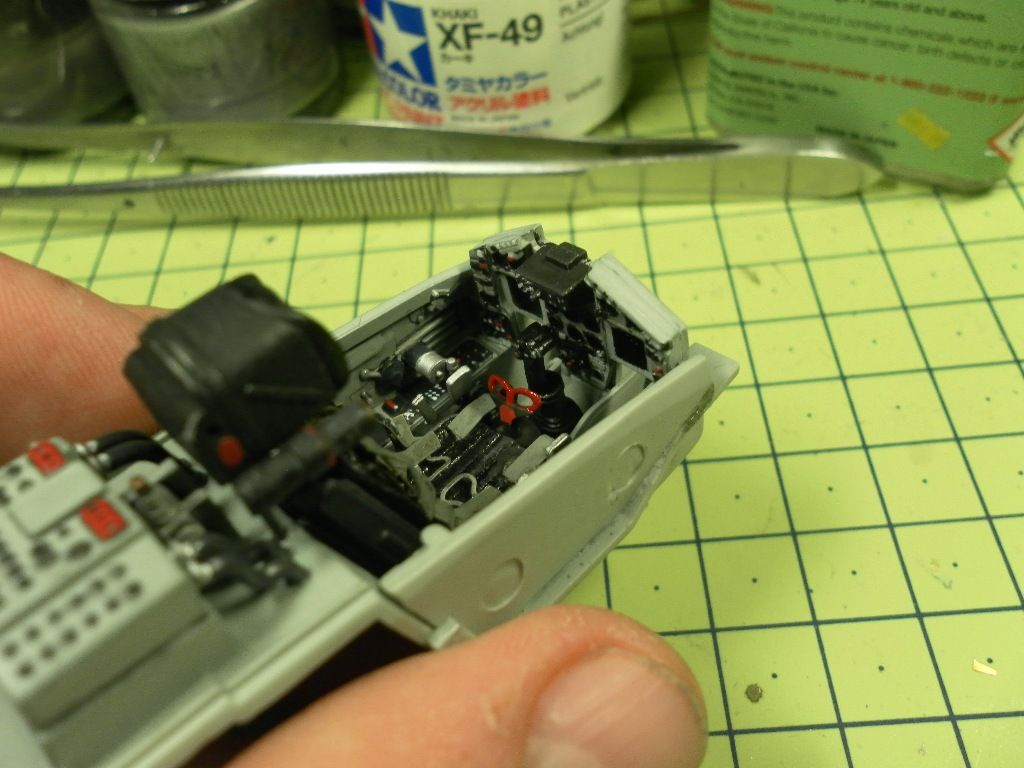
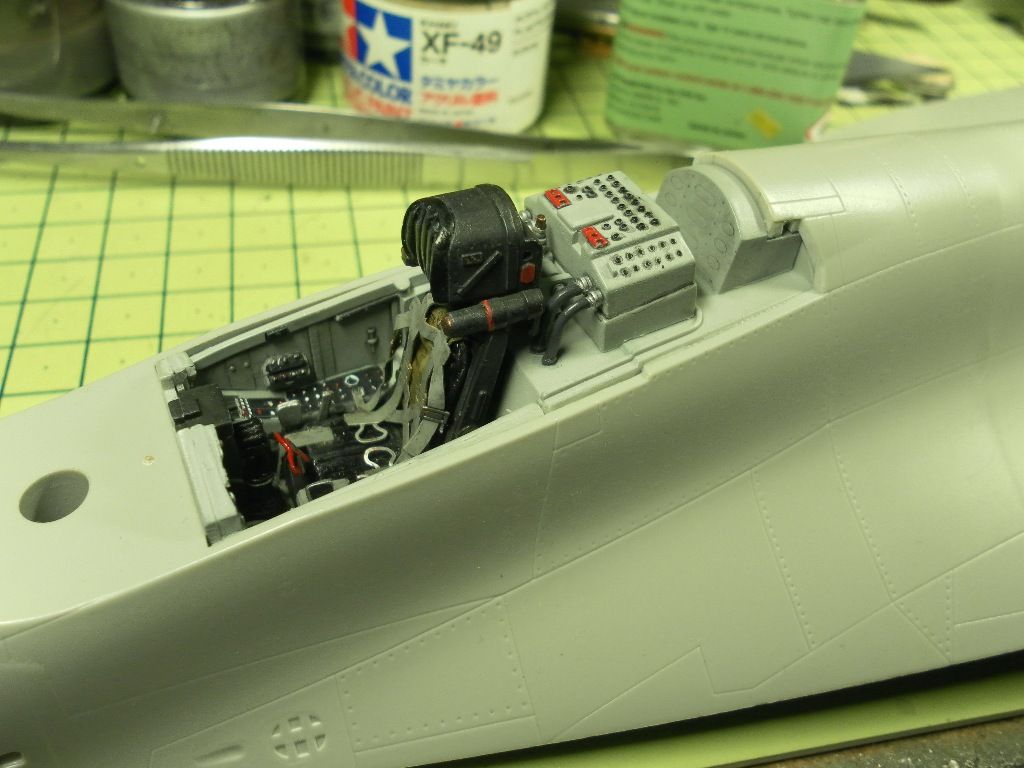
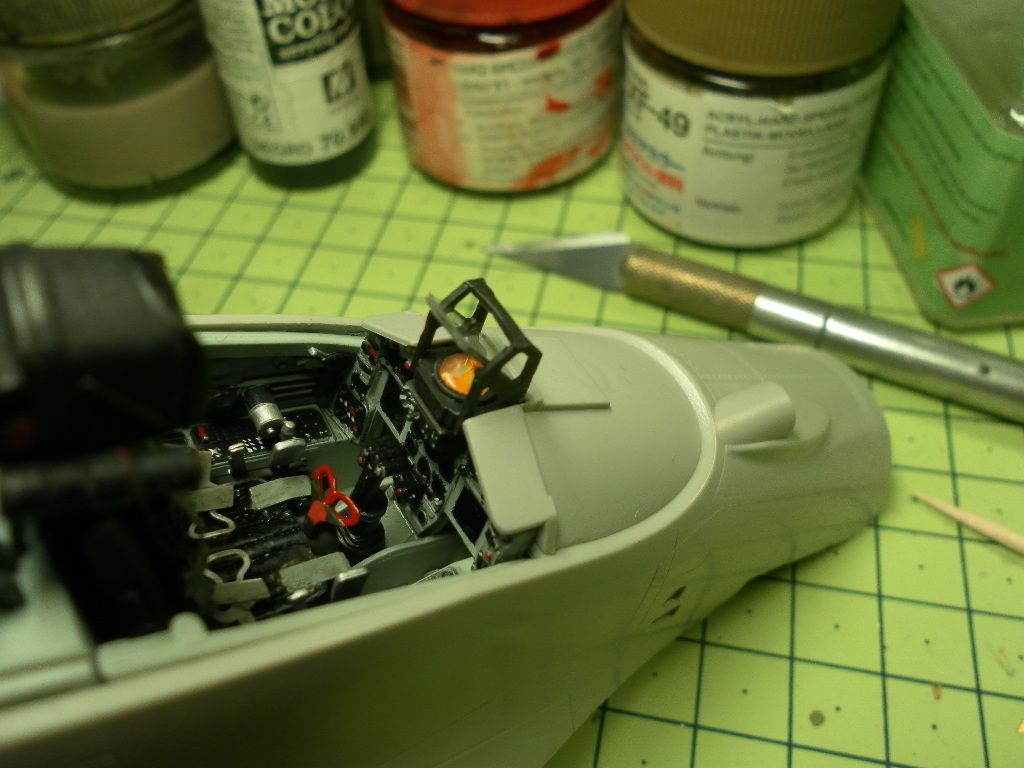
This is the old Trumpeter Mig 21, built almost OOB with no aftermarkets, only with some lead cables and lots of home made scratch.
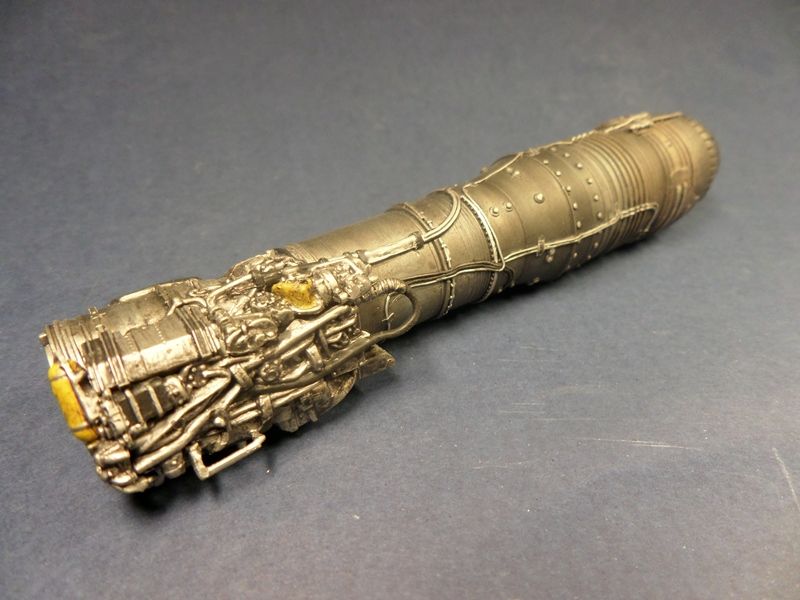
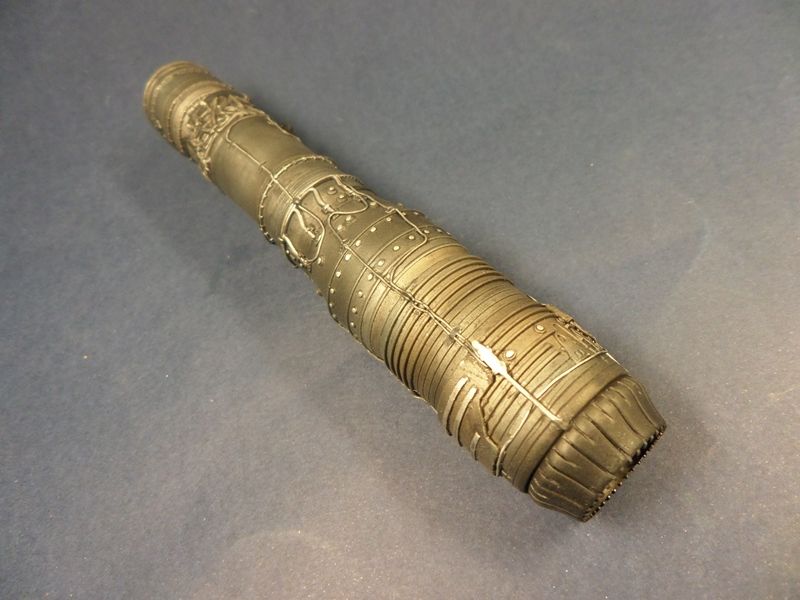
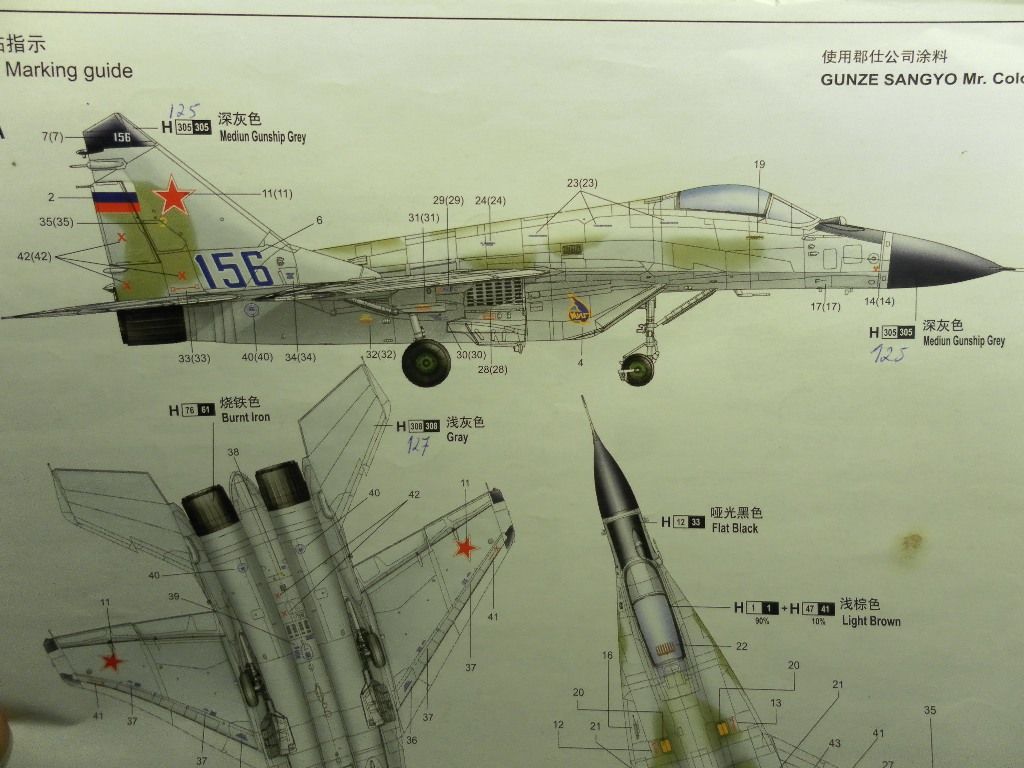
I choose the kit decals, of the West Germany (before 1990) JG 1. I used Tamiya and Vallejo colors, except for the cockpit where I used the specific emerald green from Akan paint. I also post some pics of the Tumanski engine, before assembled in it's place.
Hope you enjoy


-
 3
3
-
-
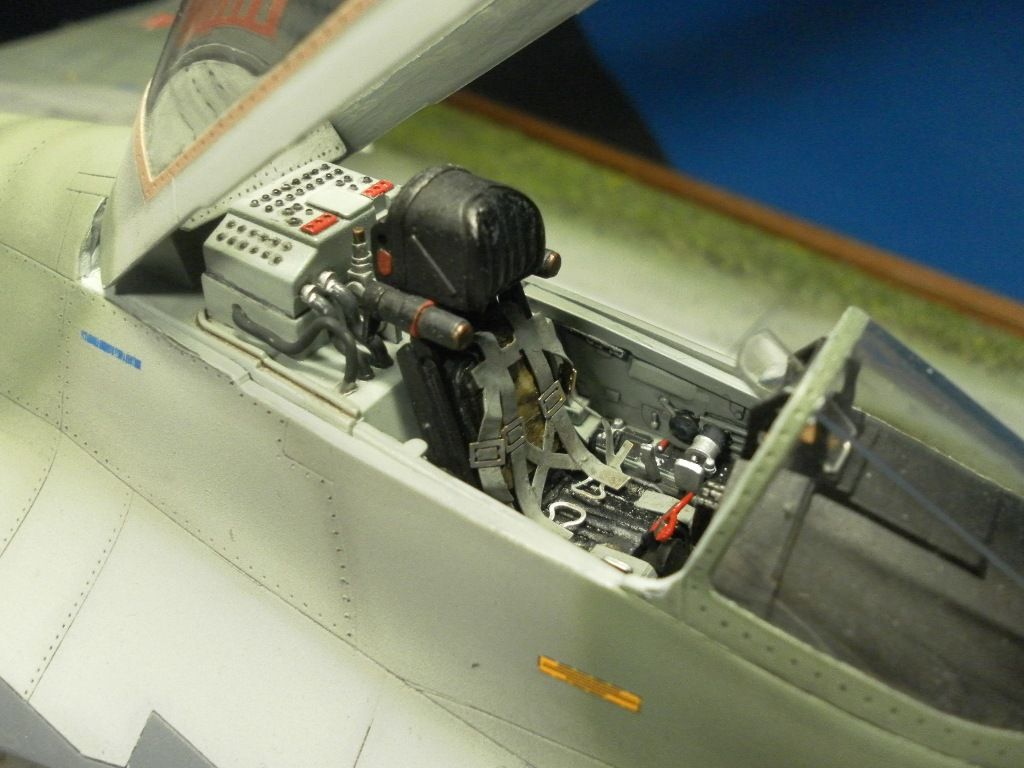
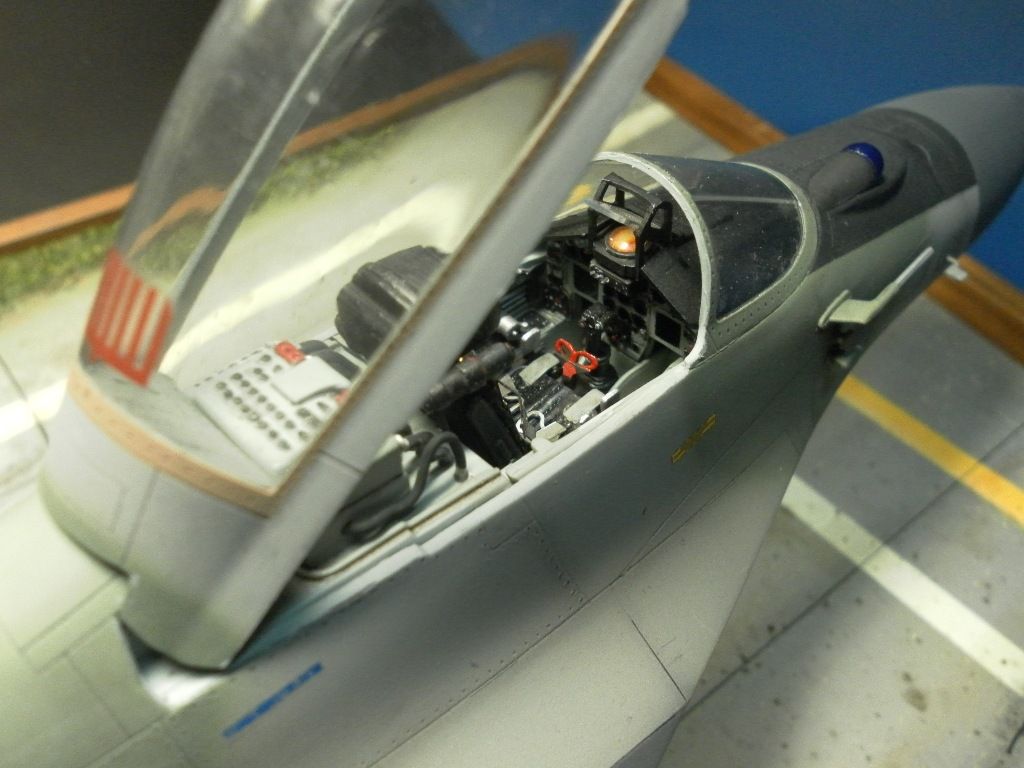
Hi!
Sooner than I expected I finished the model. I used Vallejo polyurethane matt varnish for the final layer. The landing strip base was superbly made and kindly offered by my good friend João Carlos Teixeira.
Hope you enjoy.
All the best,
PL
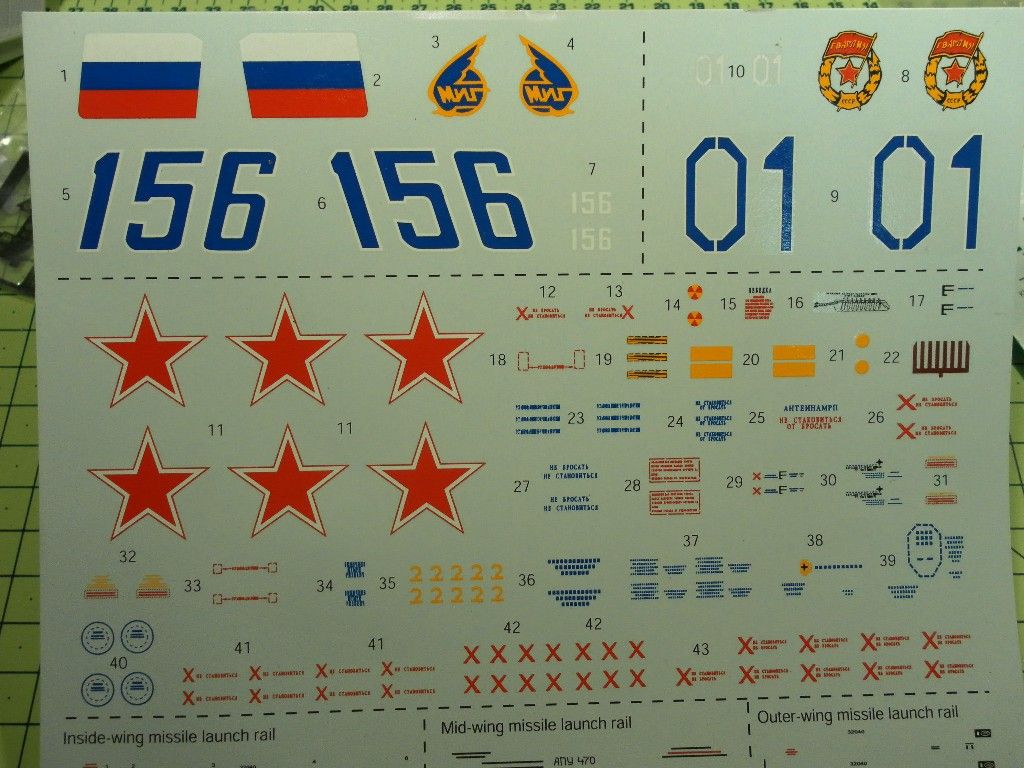
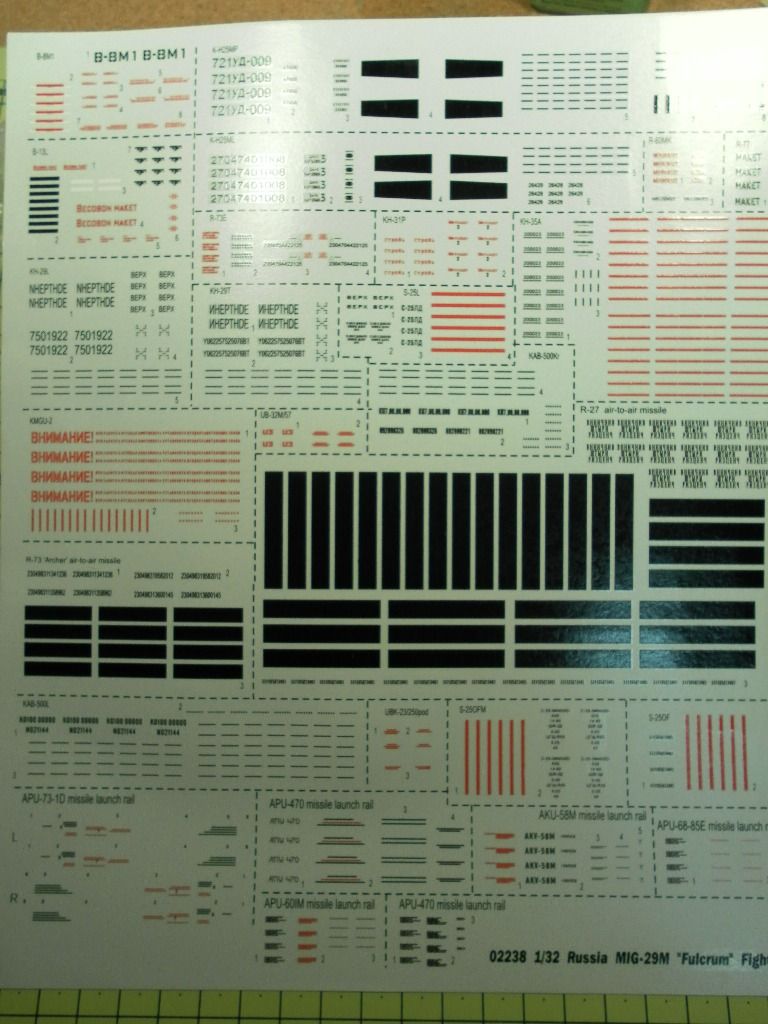
WIP link: http://forum.largescalemodeller.com/topic/1817-mig-29m-fulcrum-132-trumpeter/
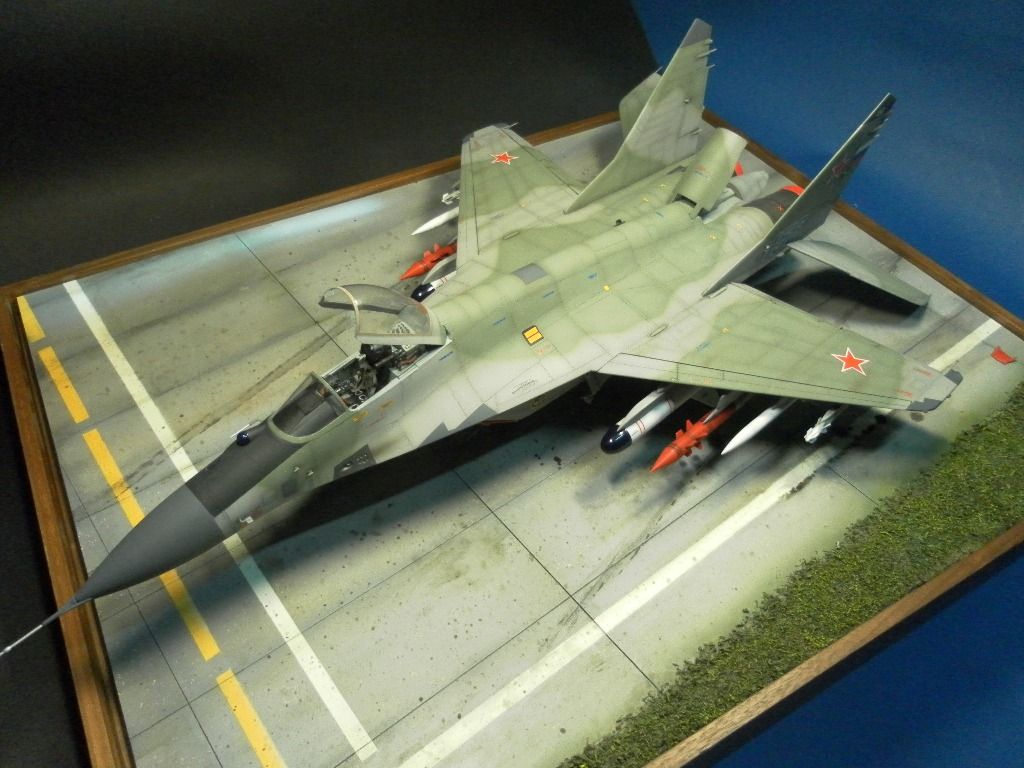
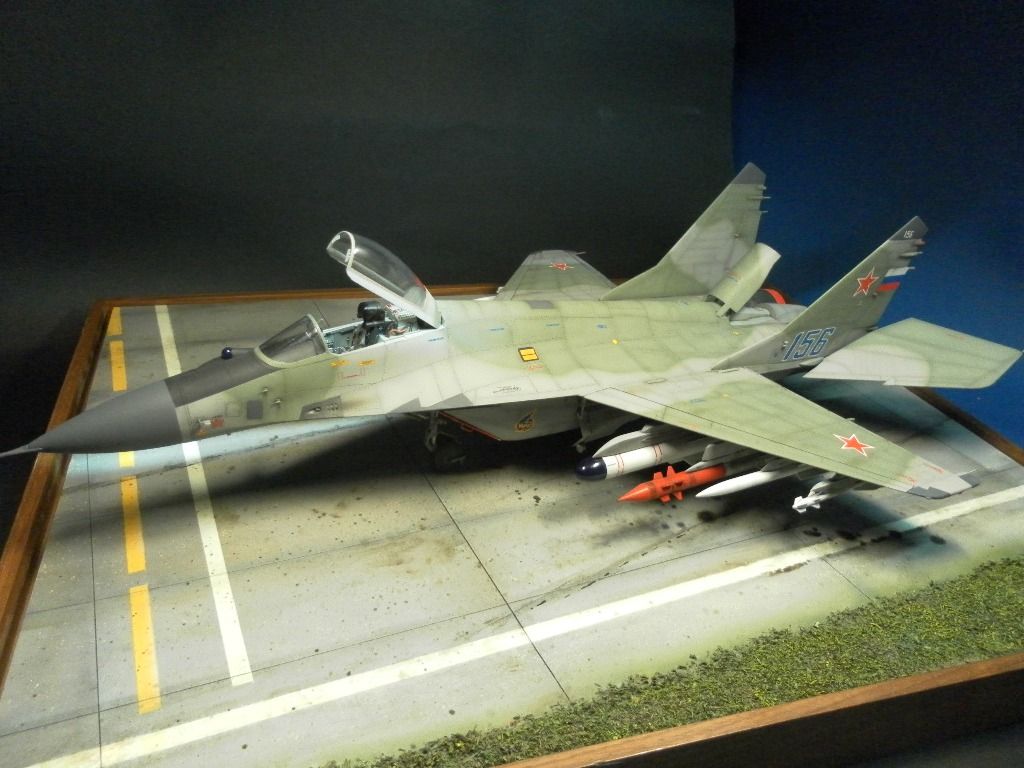
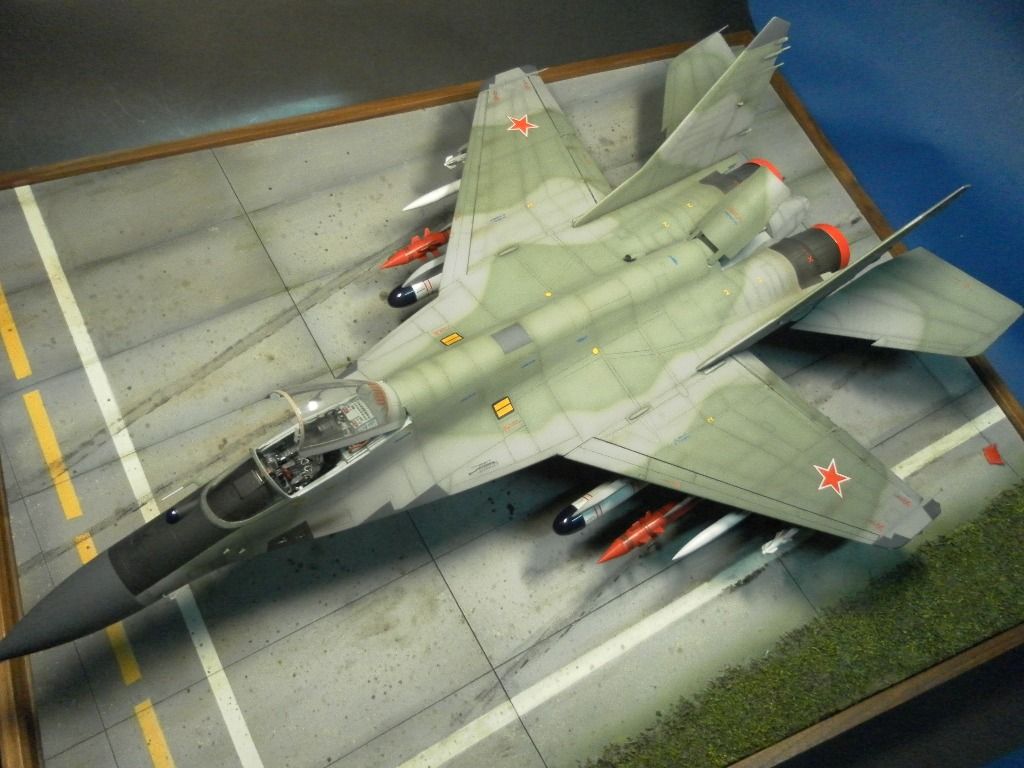


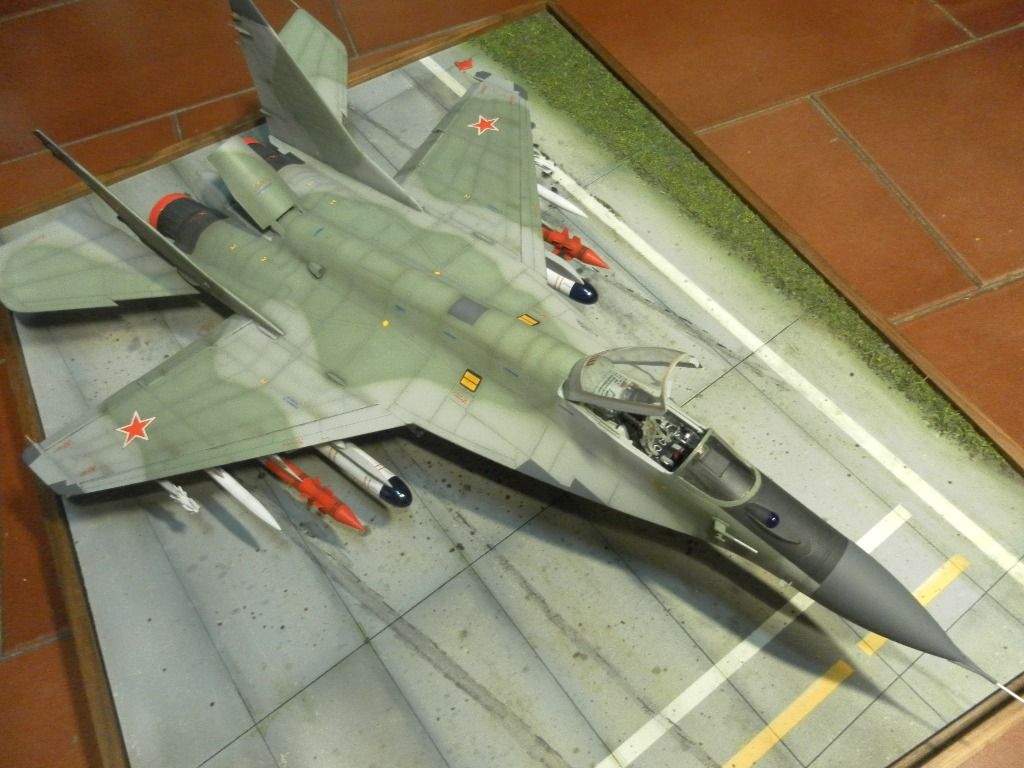
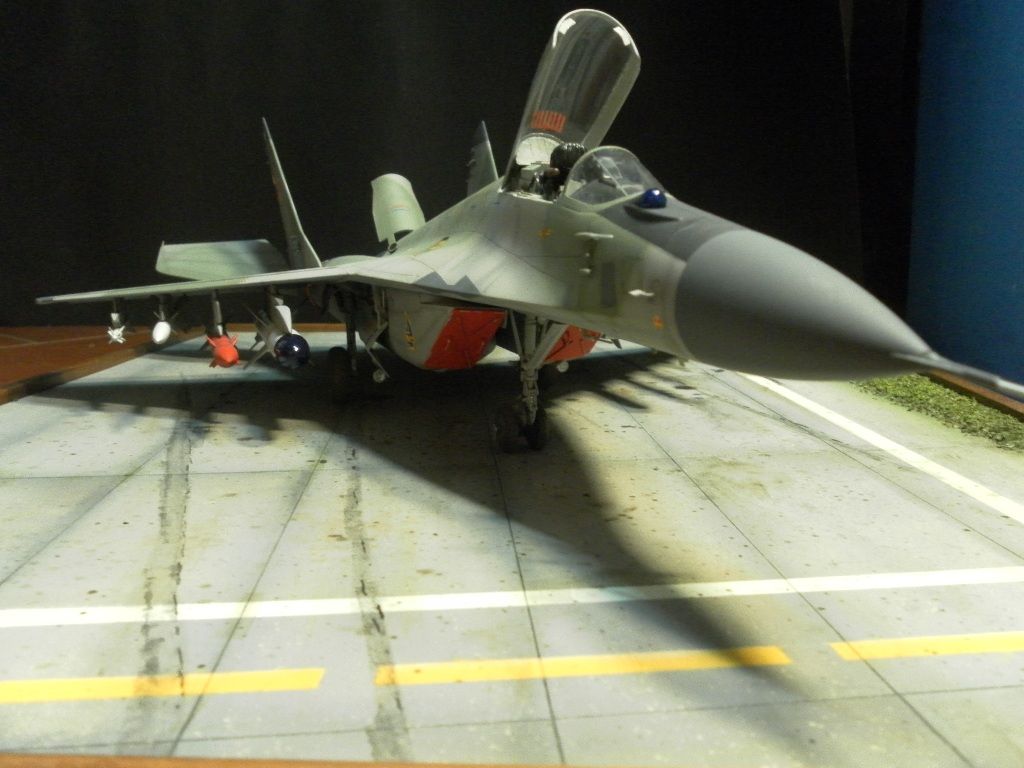
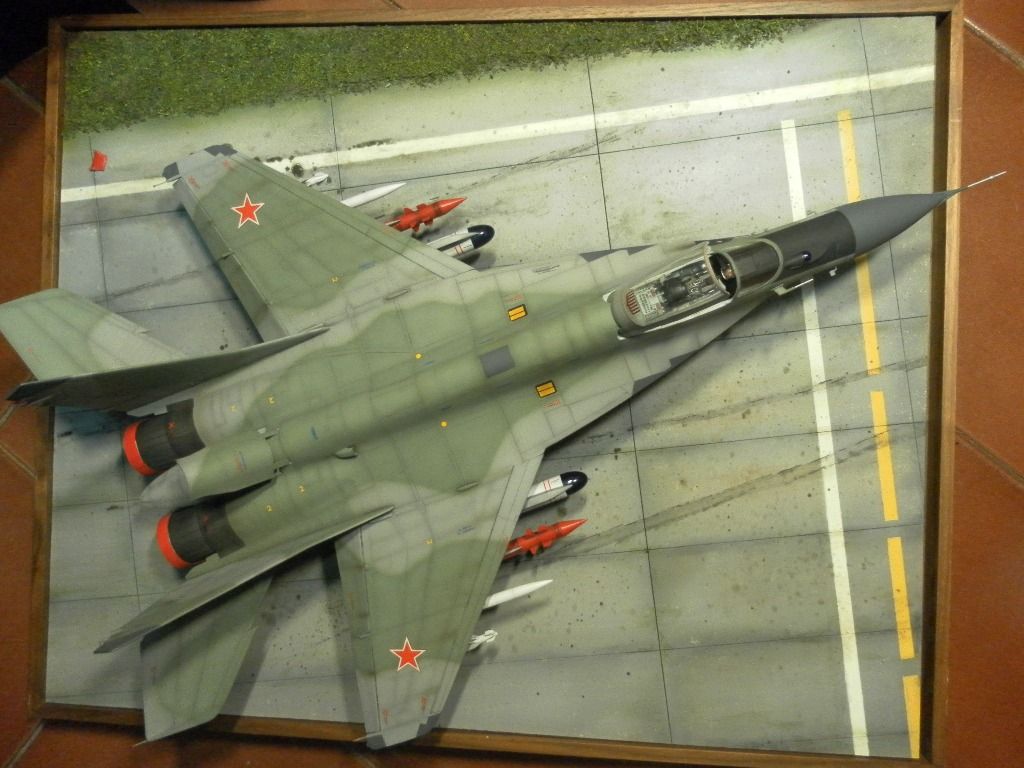
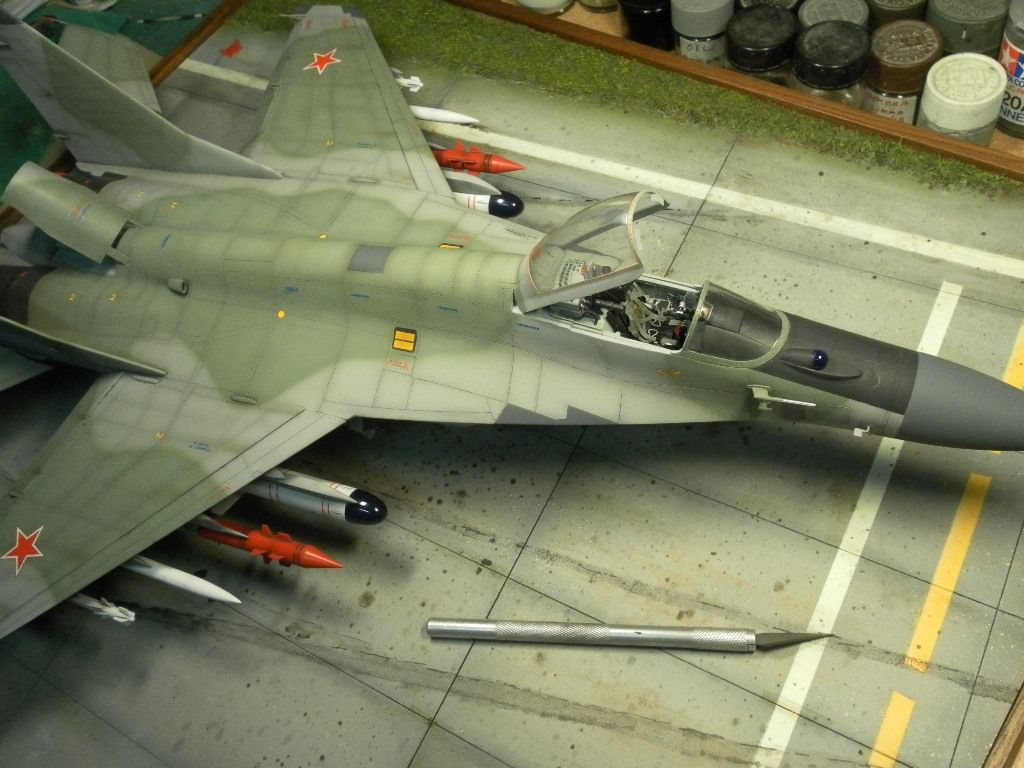
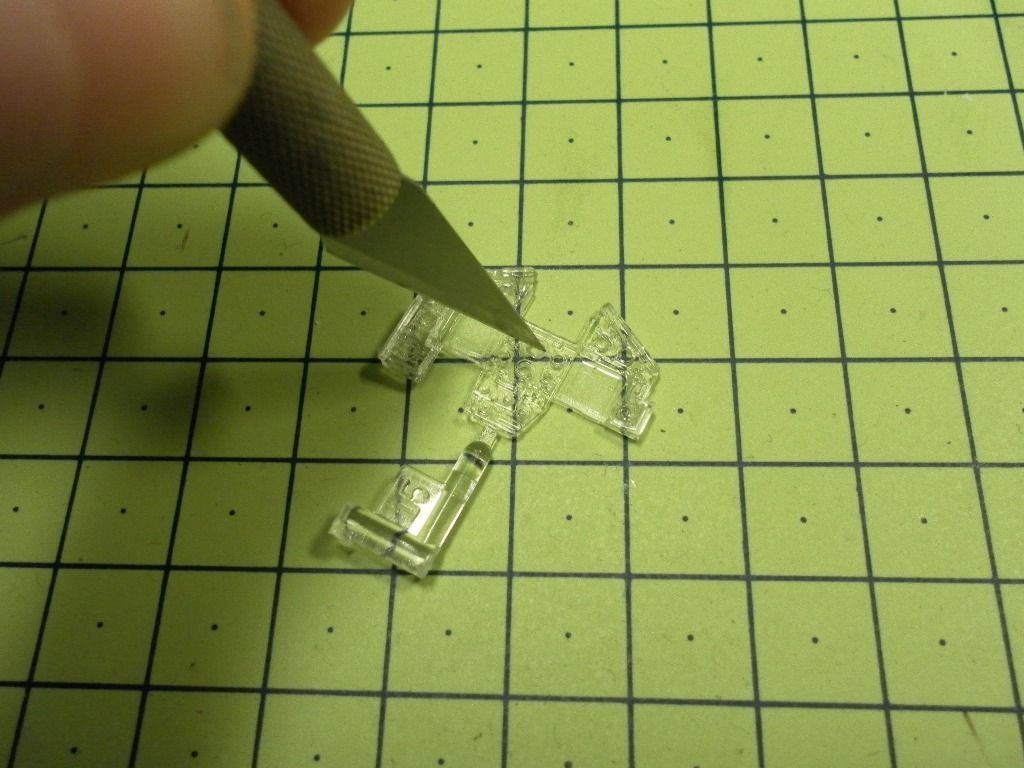
The blade is to compare the sizes.
-
3
-
-
Hi!
Model's done! pics over in "finished work"
Cya
-
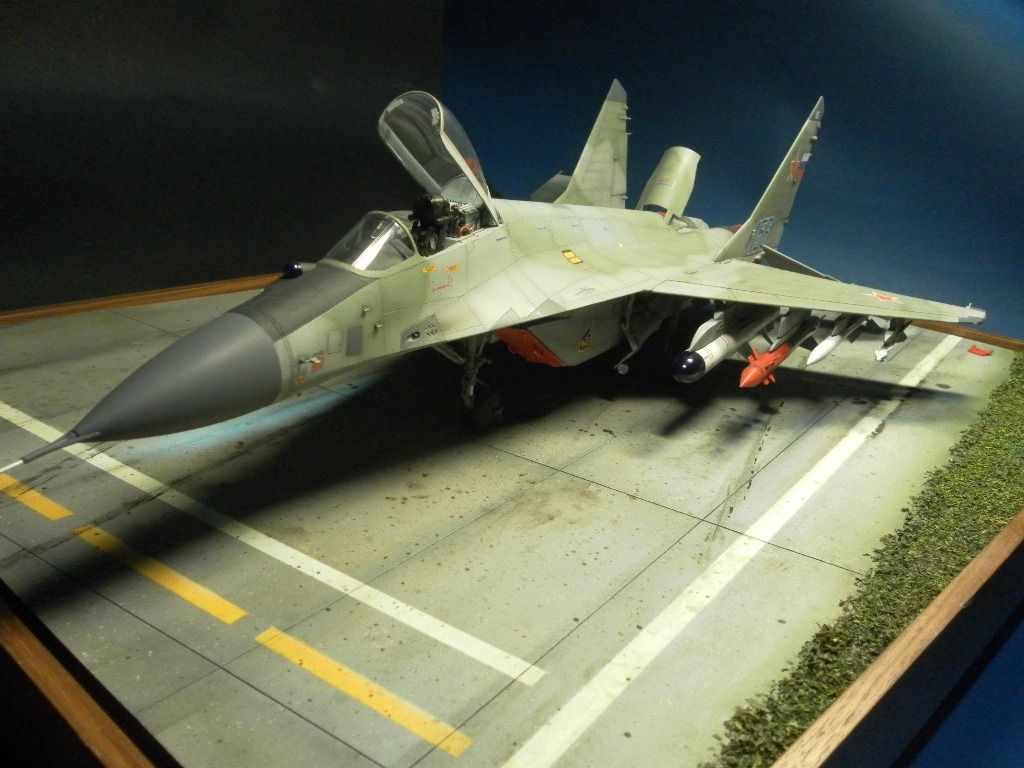
Hi guys!!
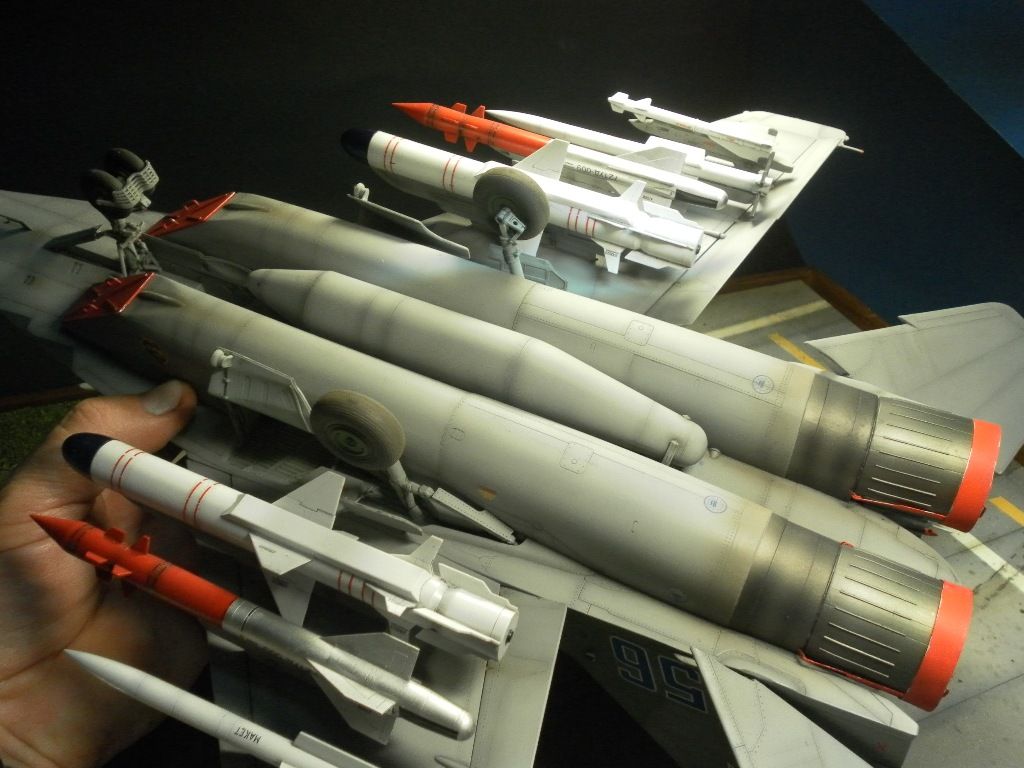
Another update. This time I applied the oil washes with a home made "recipe". I also built and painted the missiles that are going to equip the Mig.
I hope you enjoy.
Cya.
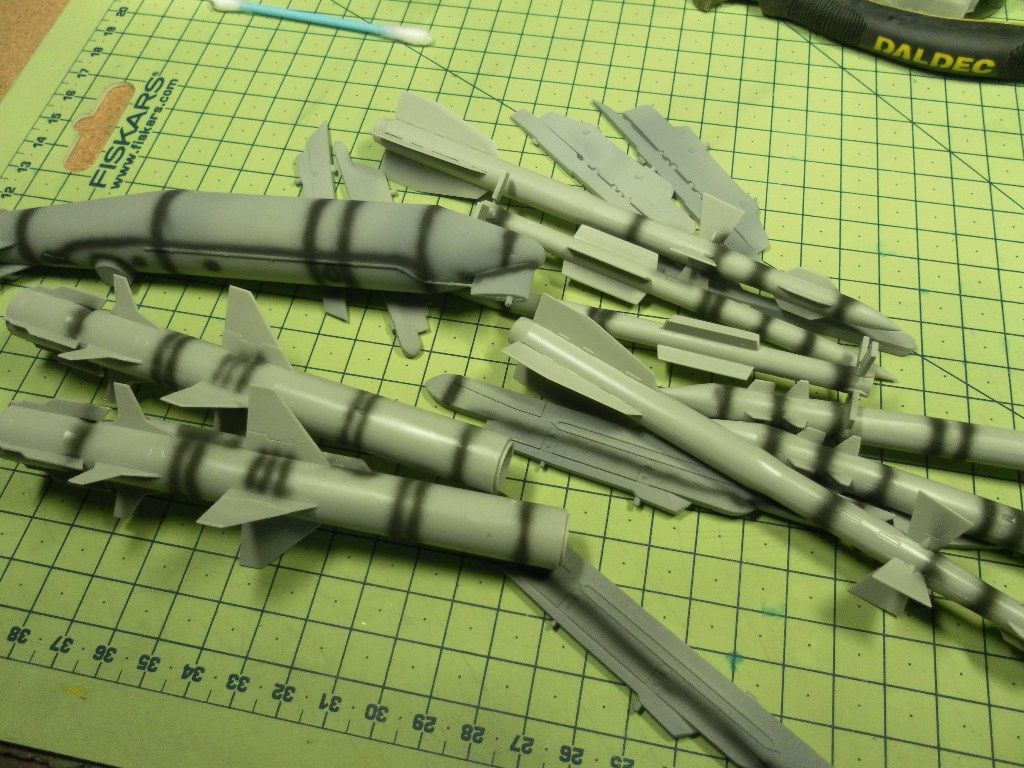
This is the Kh-35A, a russian subsonic anti ship missile
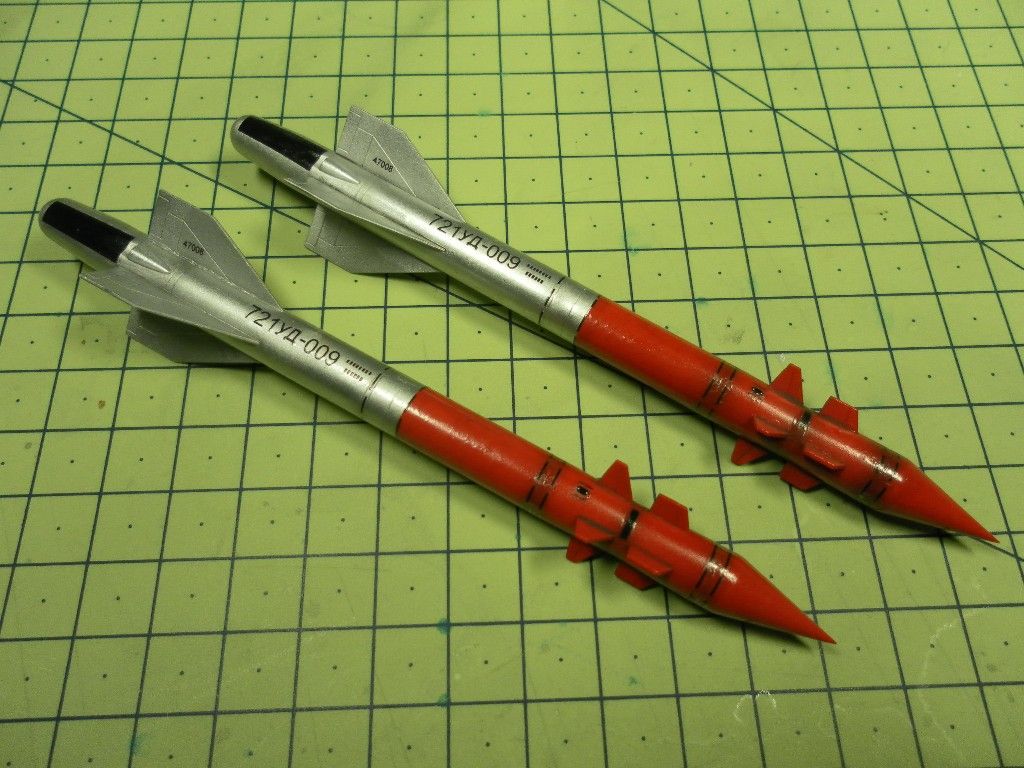
The Kh-25 MP, a russian air-to-ground, anti-radar missile
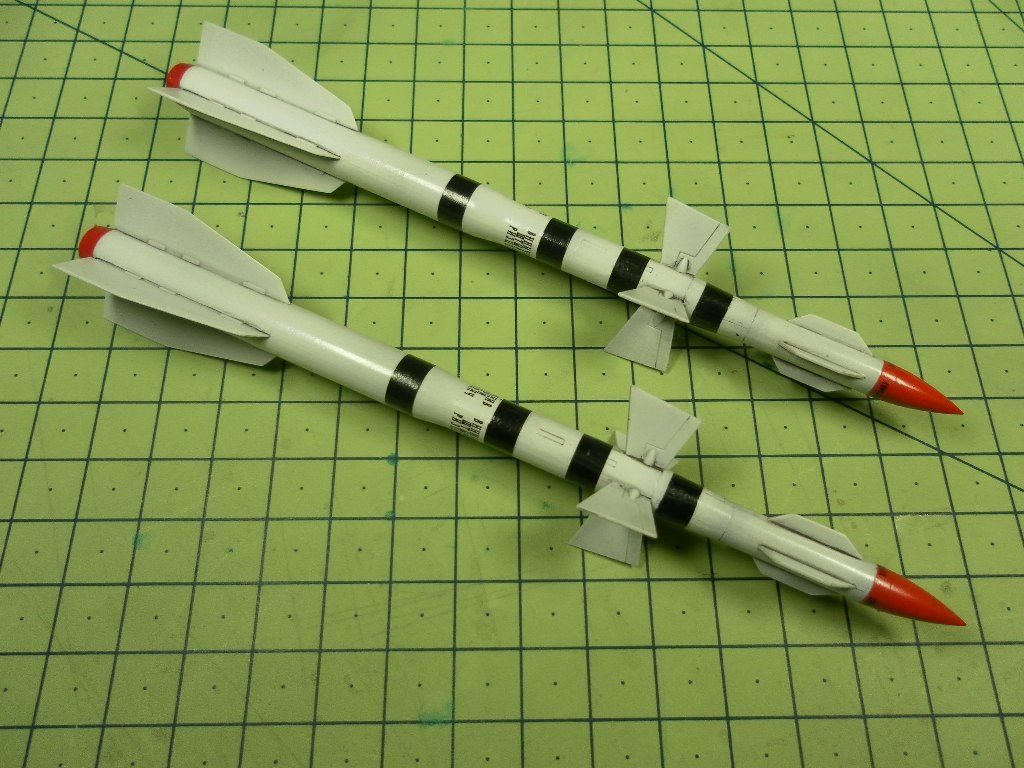
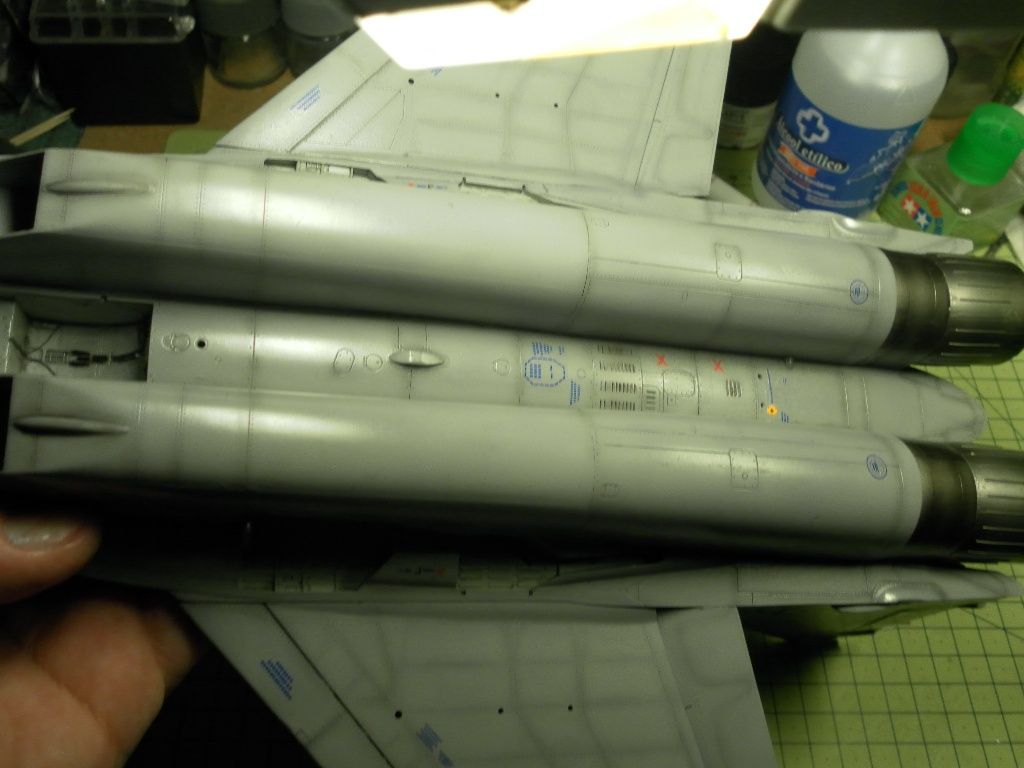
The R-27ER, a russian air-to-air medium/long range missile
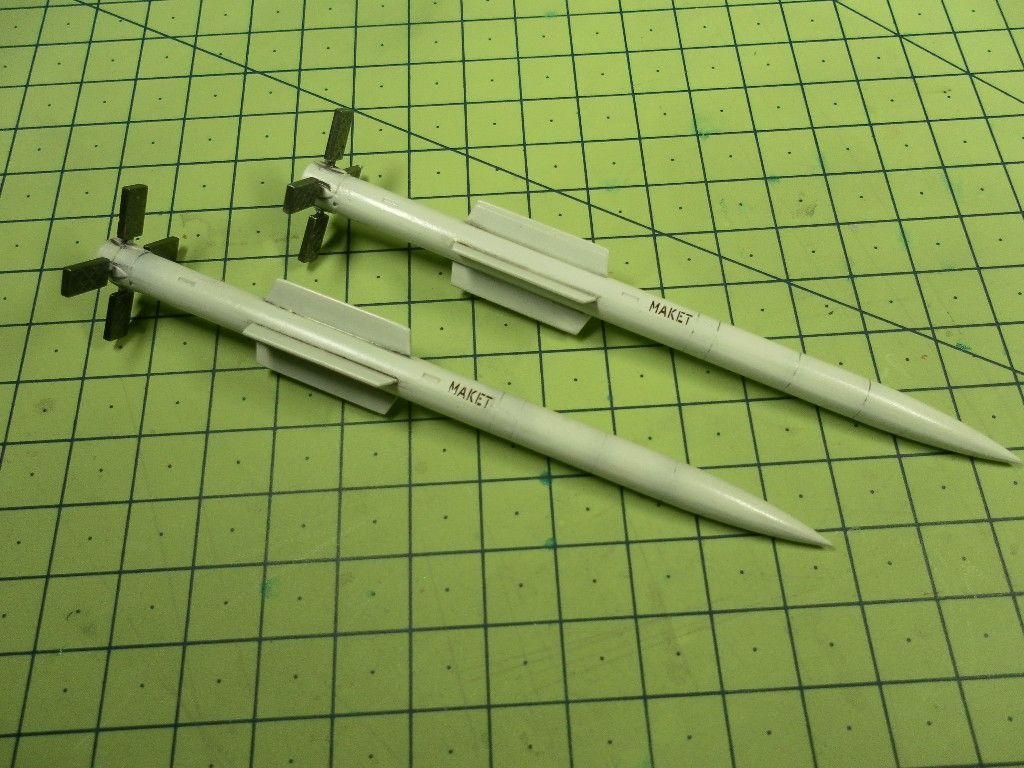
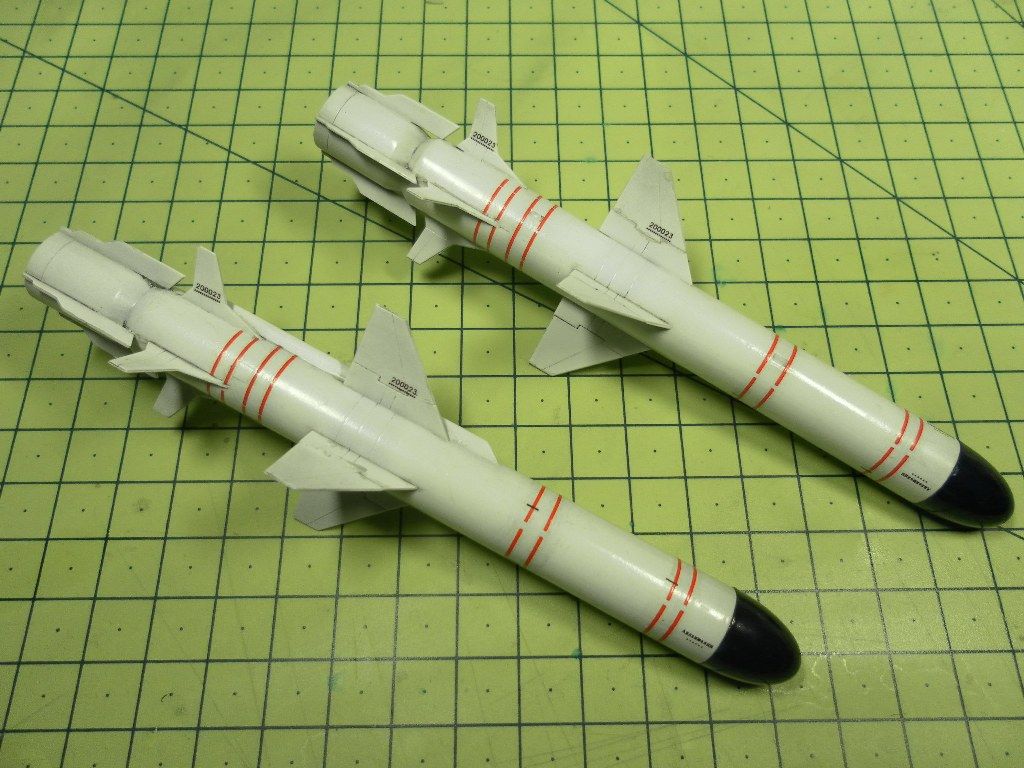
The R-77, a russian air-to-air, medium range, radar guided missile
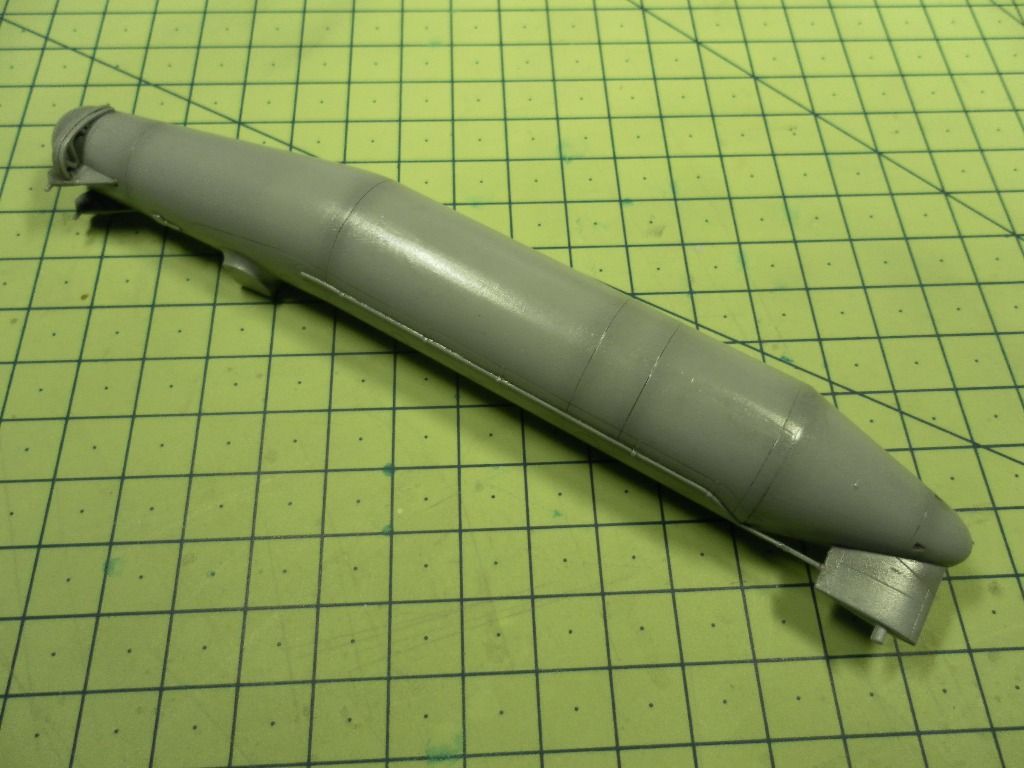
The ventral fuel tank PTB-1500
-
1
-
-
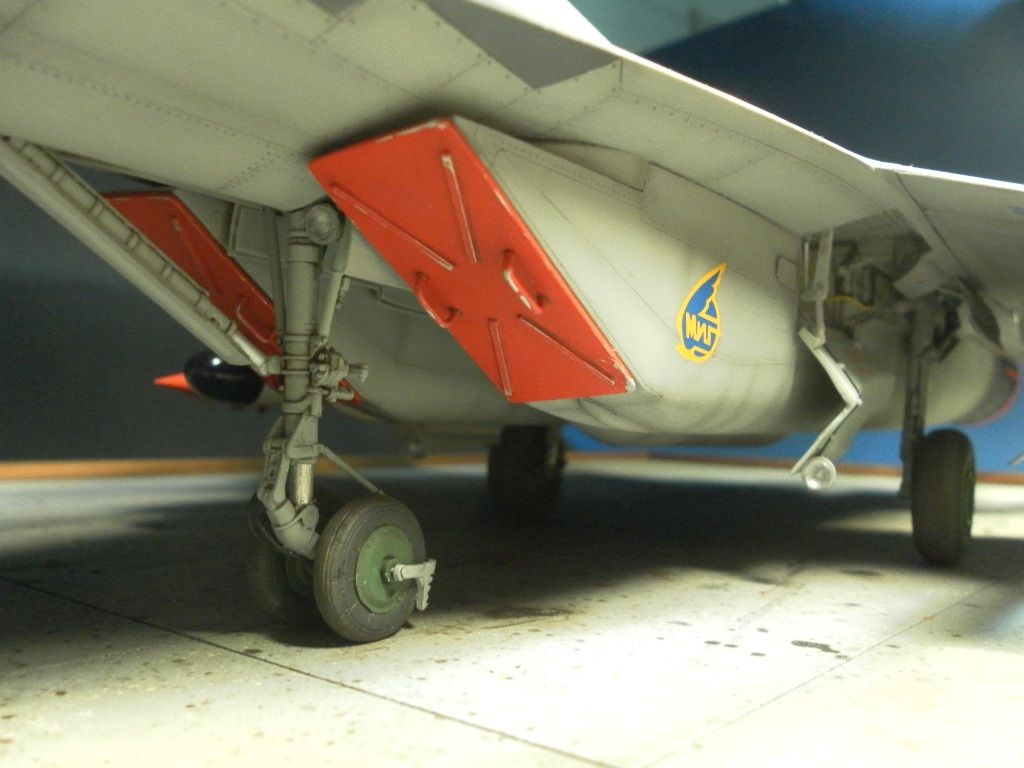
Hi,
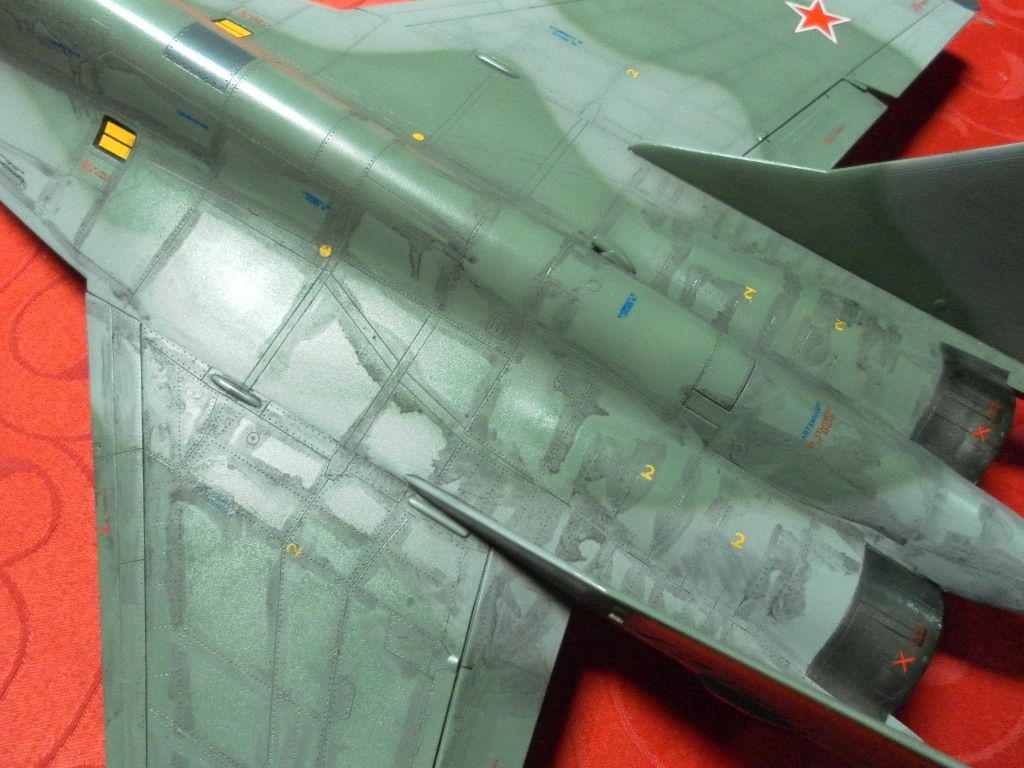
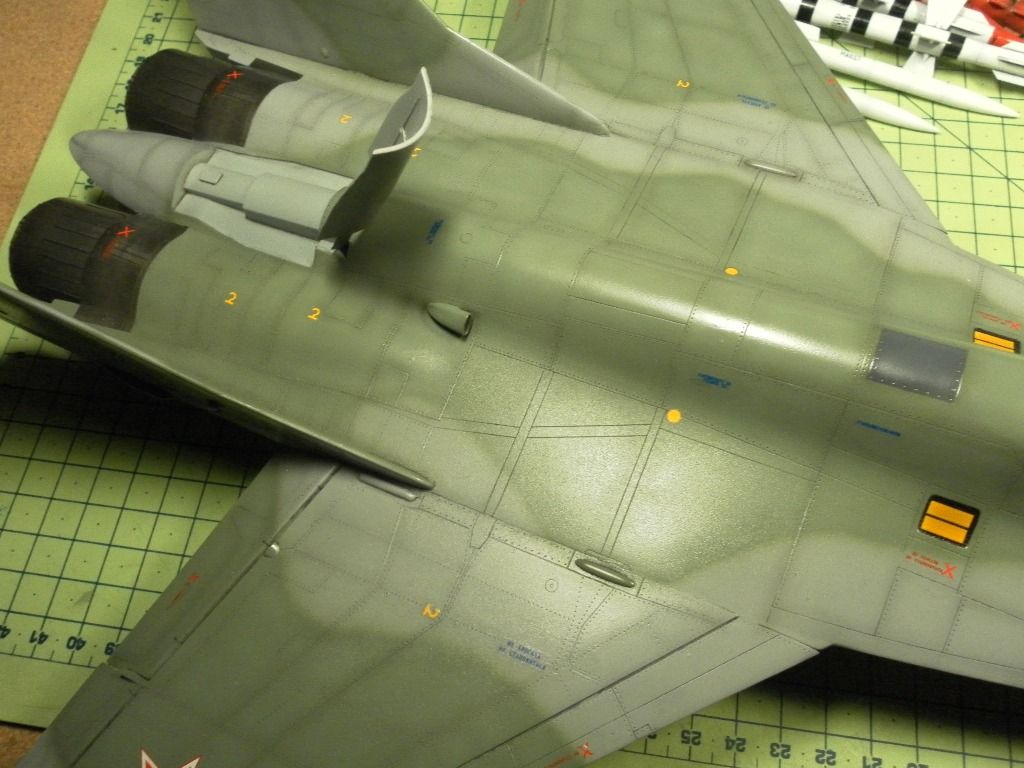
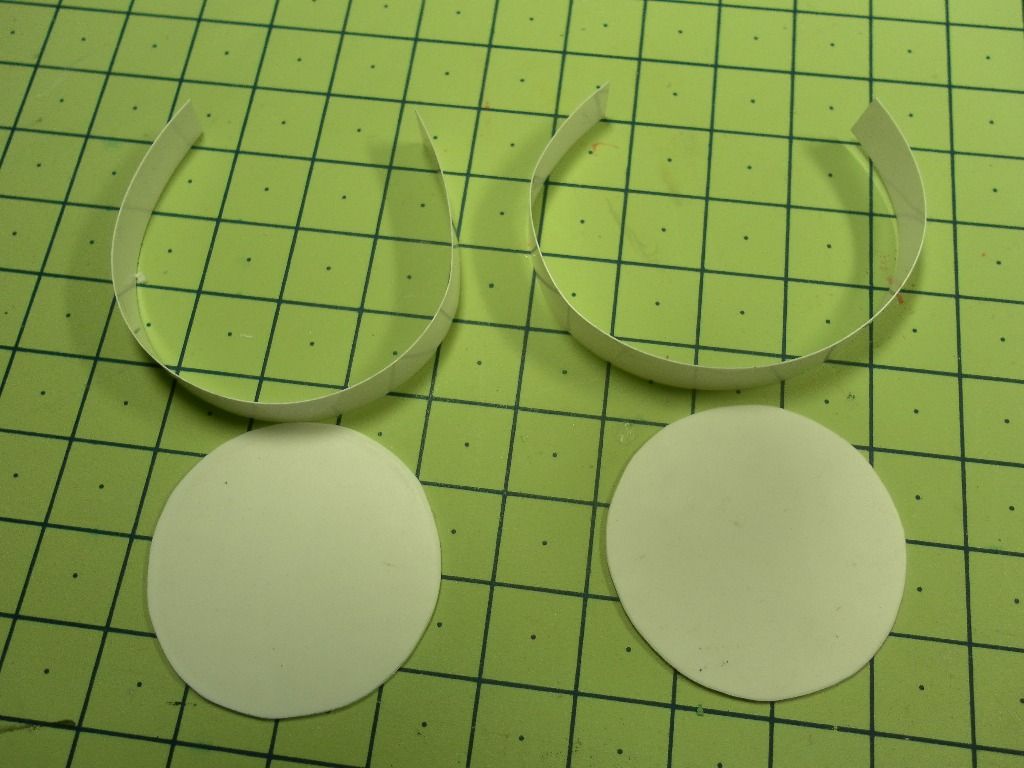
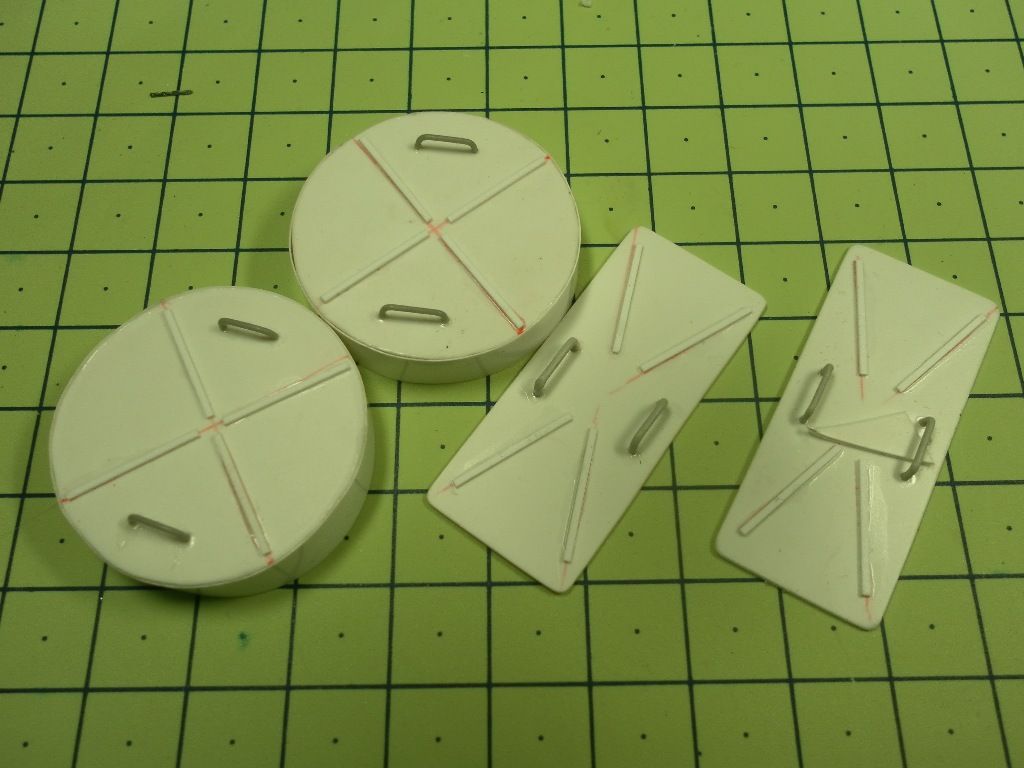
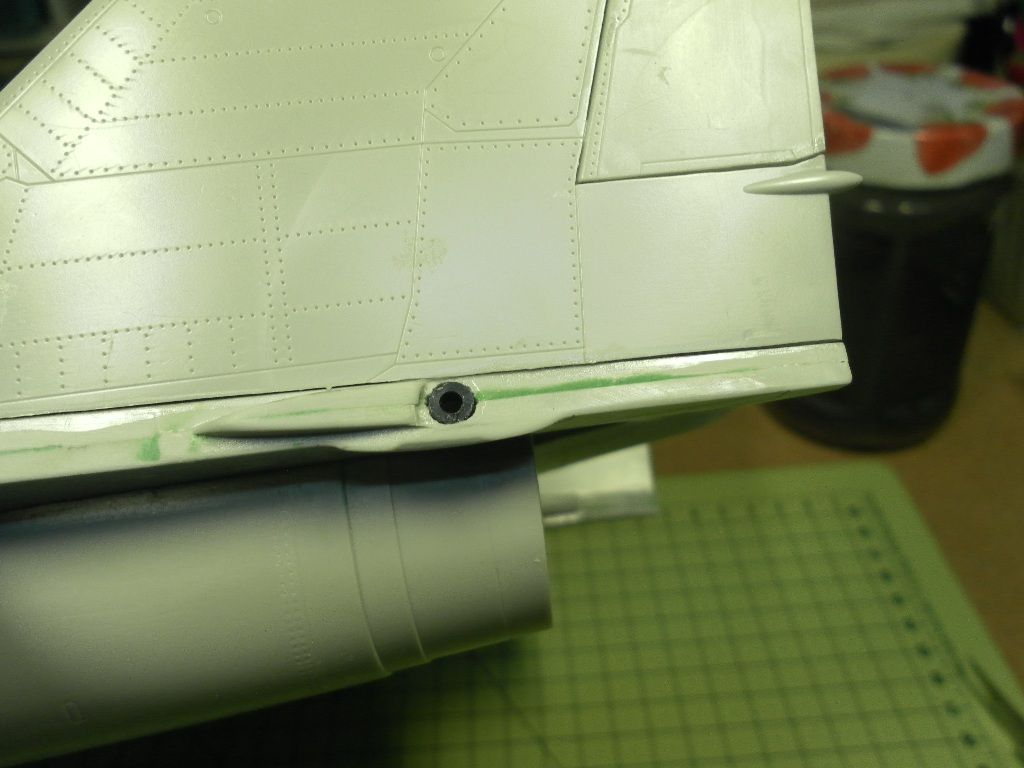
Once again, another update. This time scratching the covers of air intakes and engine nozzles, "plus" the painting.
Cya!

for the covers of air intakes and engine nozzles I used plates and strips of "evergreen" plastic.
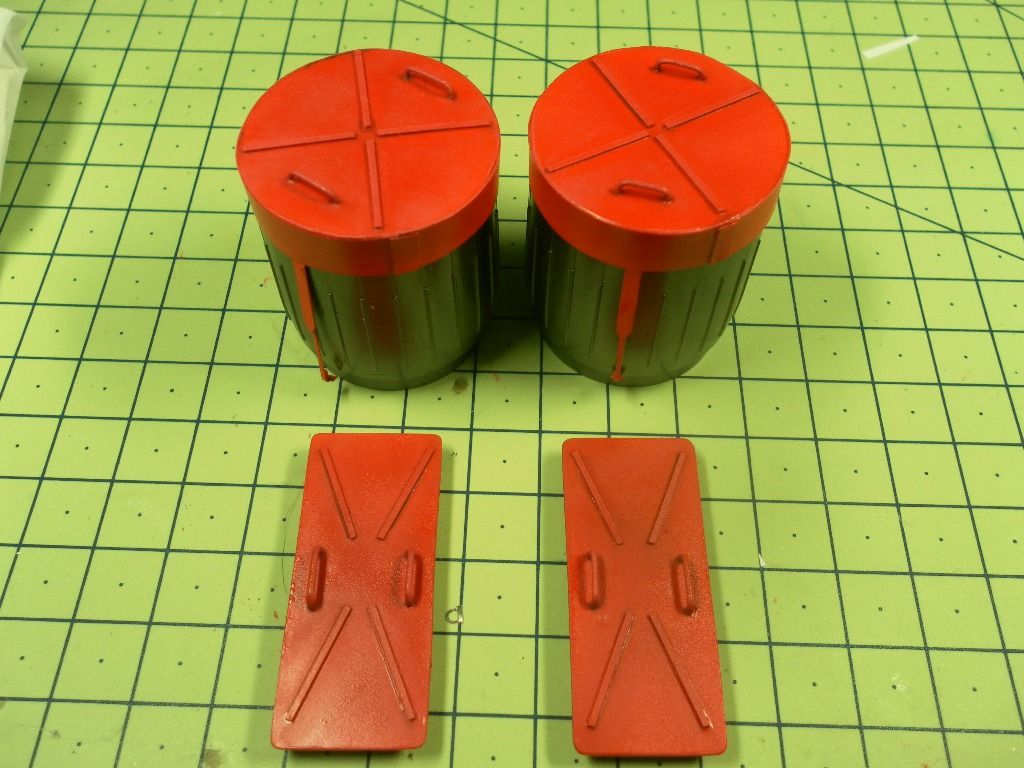

Covers painted with insignia red and some silver chiping.
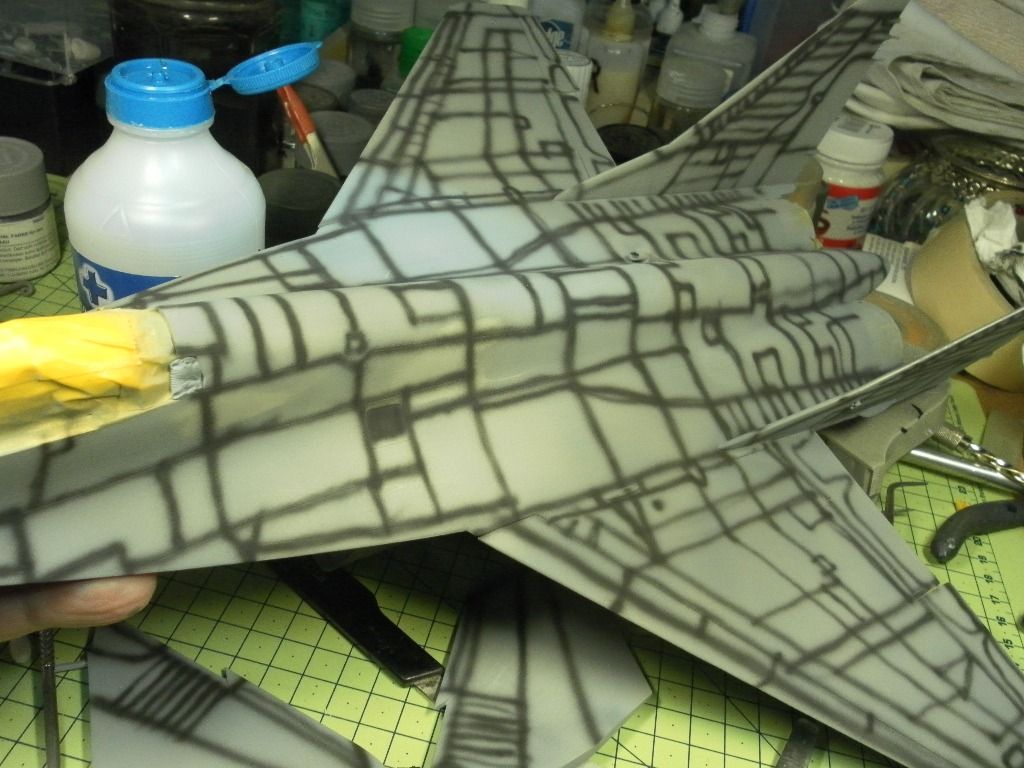
Pre shading with acrylic black Tamiya XF-1
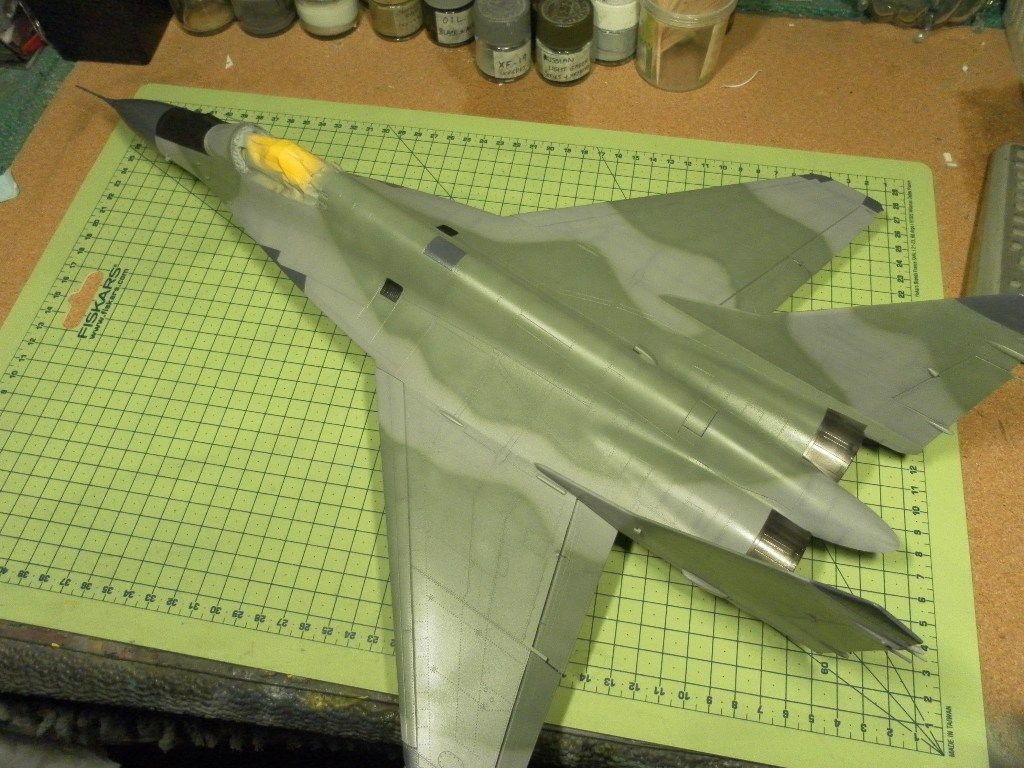
The camo is in two-tone: Skygray and green light, that I got using the following mix: for the light green I mixed Tamyia XF-65(2)+ XF-23(1), which subsequently added a few drops of white XF-2 to give the lights in the center of each panel.The gray tone was obtained with XF-19. I used a Iwata Revolution airbrush.
-
3
-
-
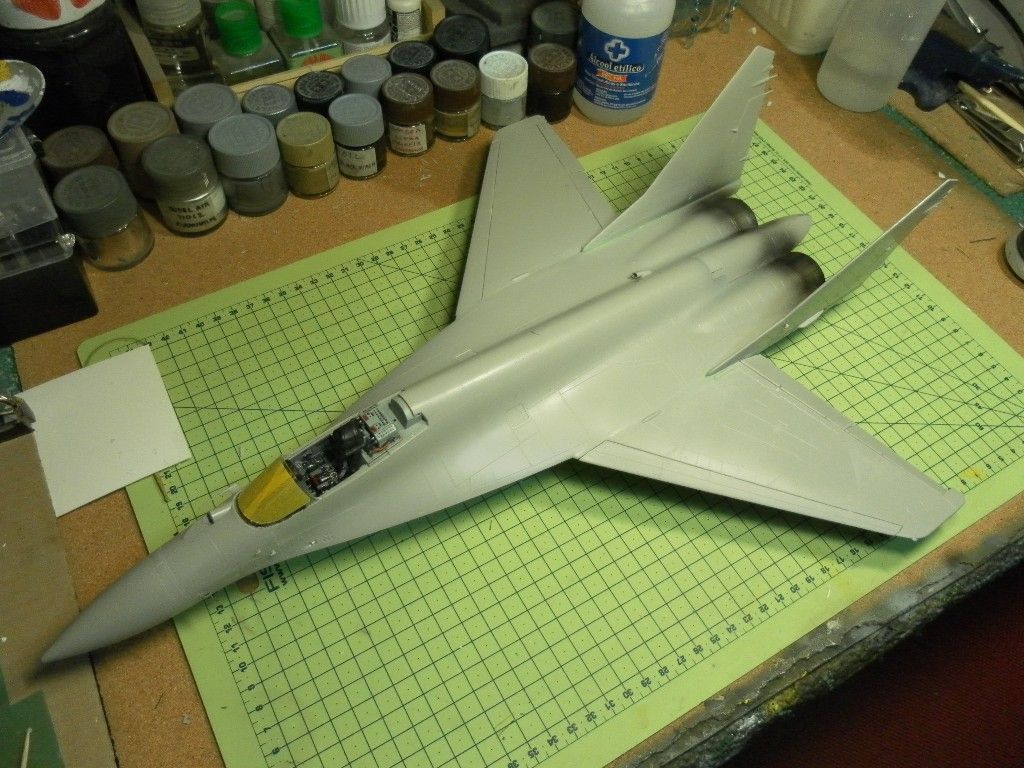
Hi,
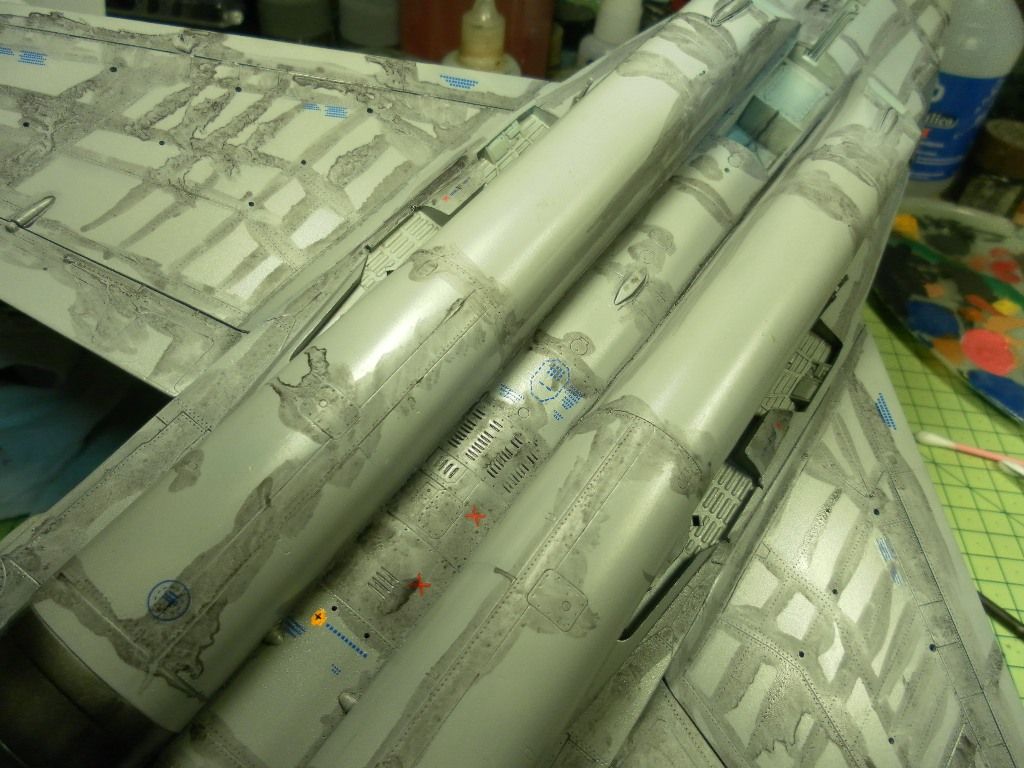
Today I show you an update of the model construction, including the fuselage and exhaust nozzles, with the necessary details. I chose not to add any scratch on the exhaust nozzles, trying to enhance the paint to create the illusion of reality. I hope you enjoy.All the best,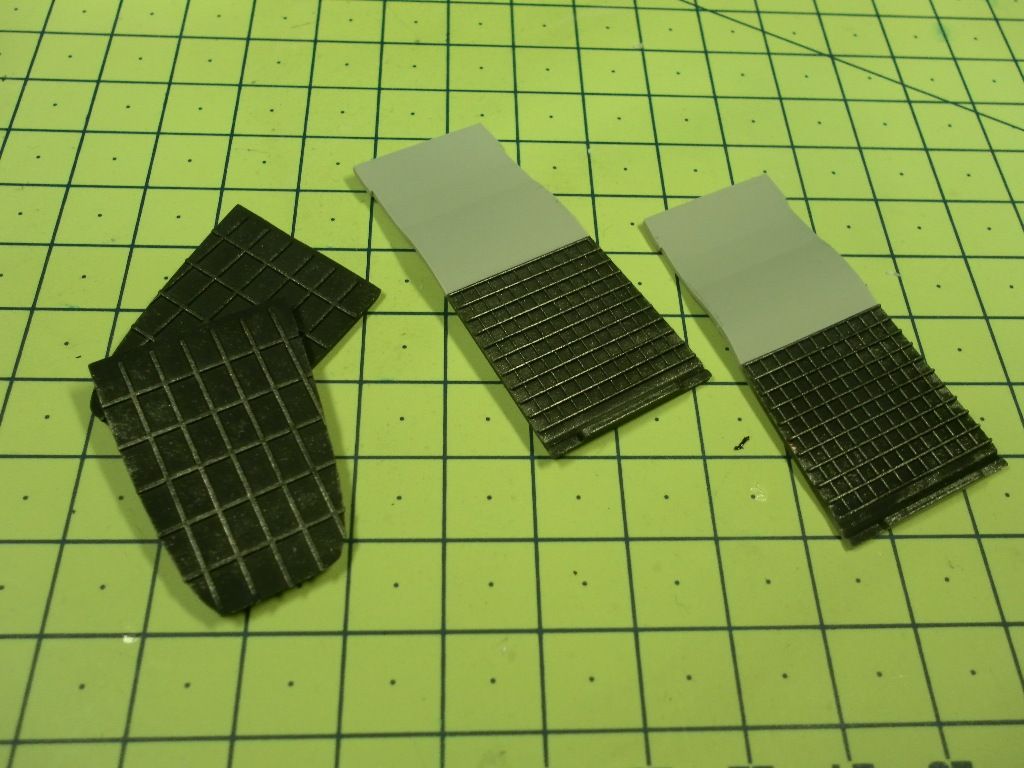
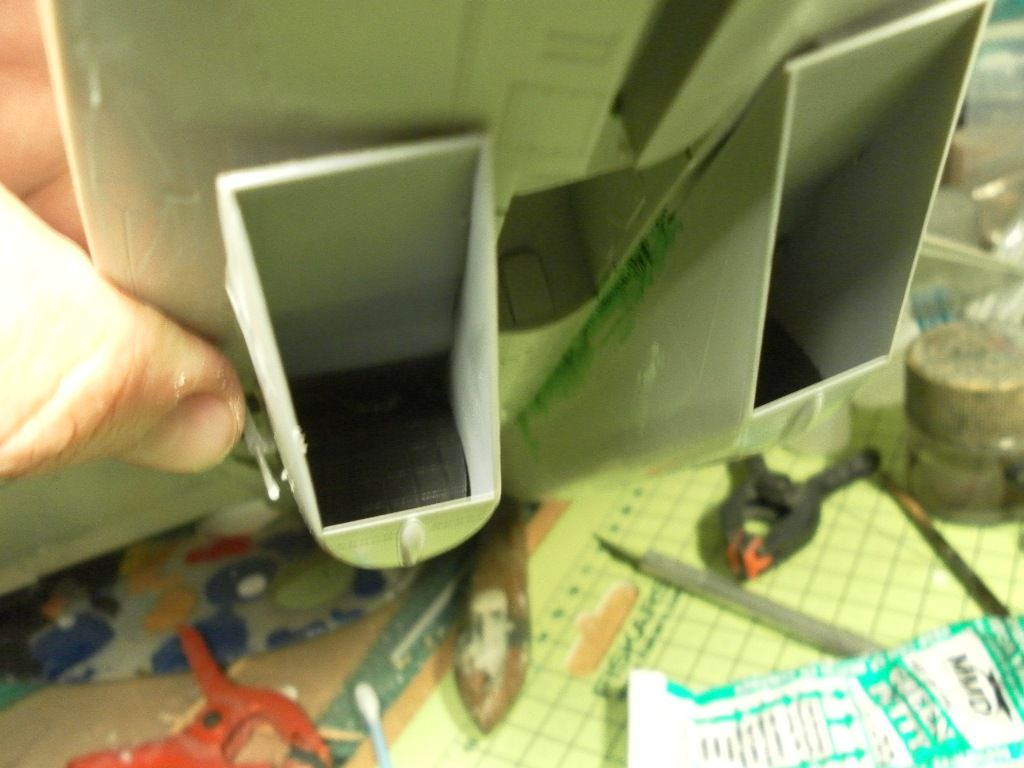
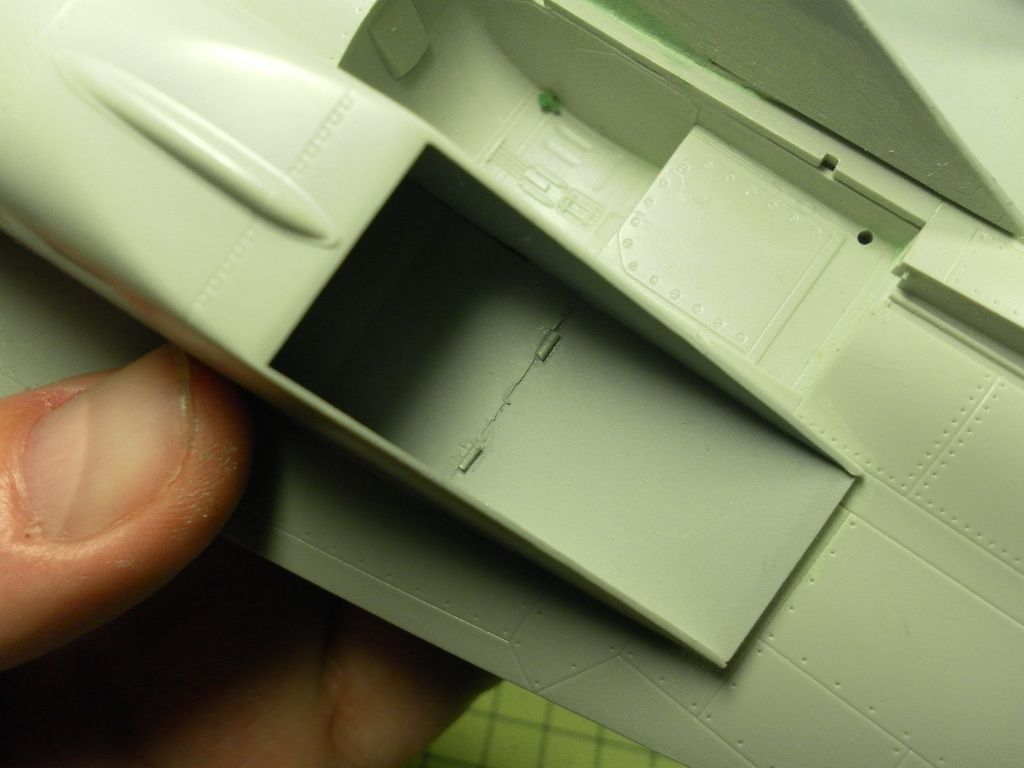
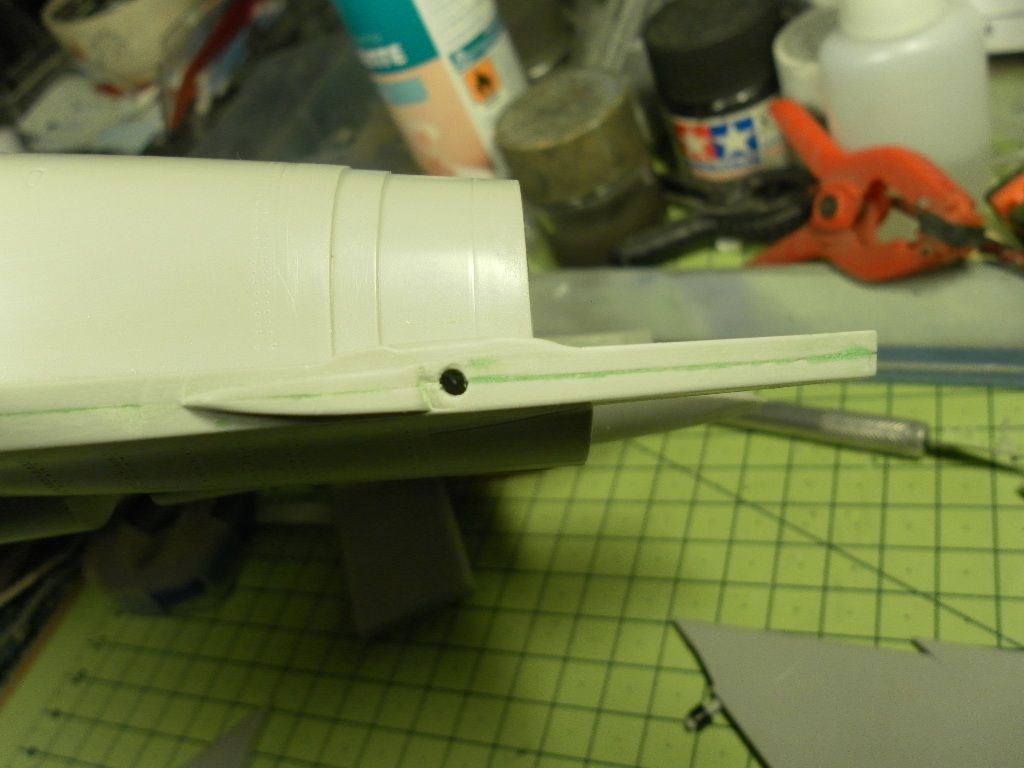
Although not well represented, these are the covers of air intake openings. I painted them black to give the illusion of depth.
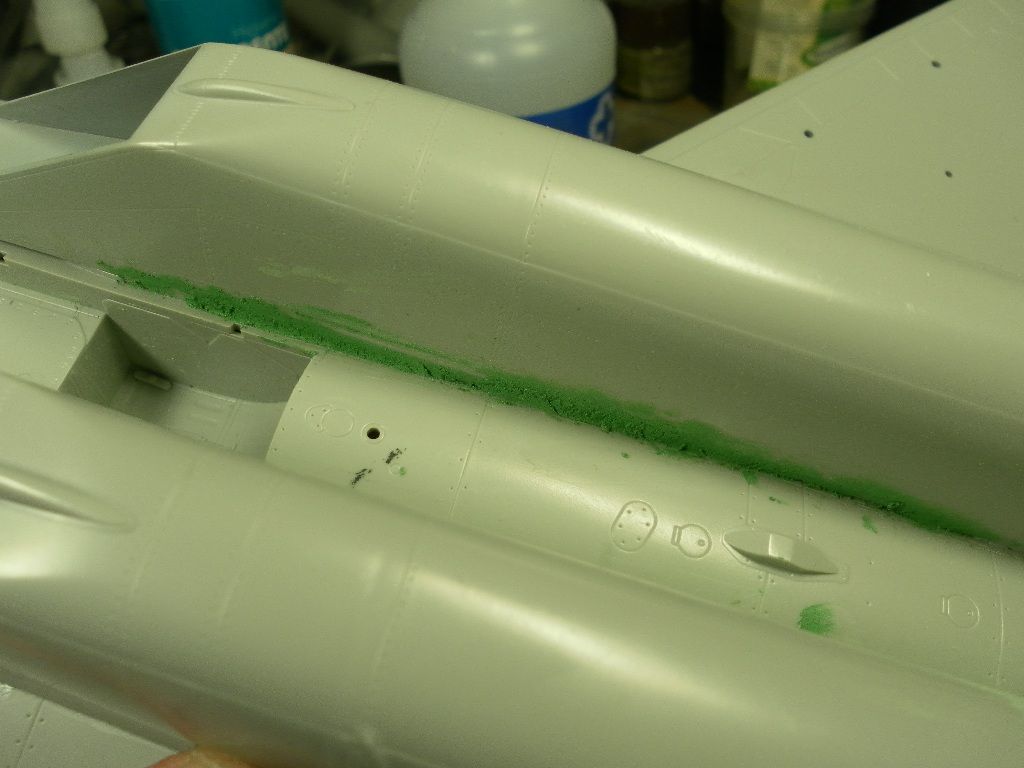
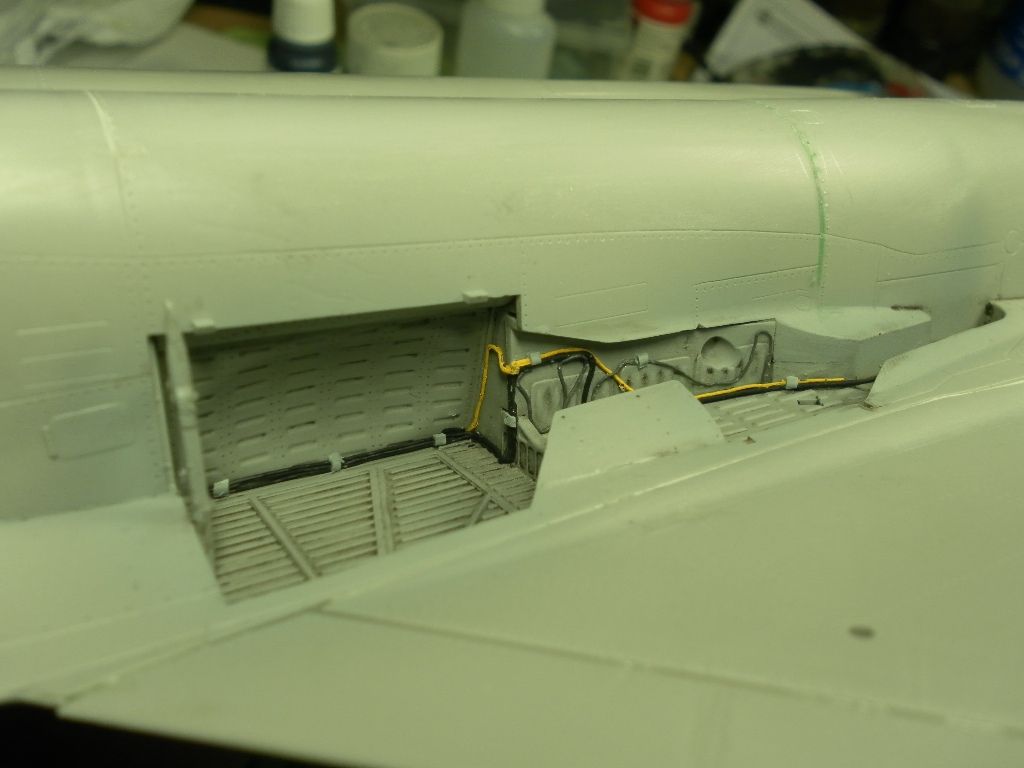
A lot of green putty connecting the intakes to the fuselage
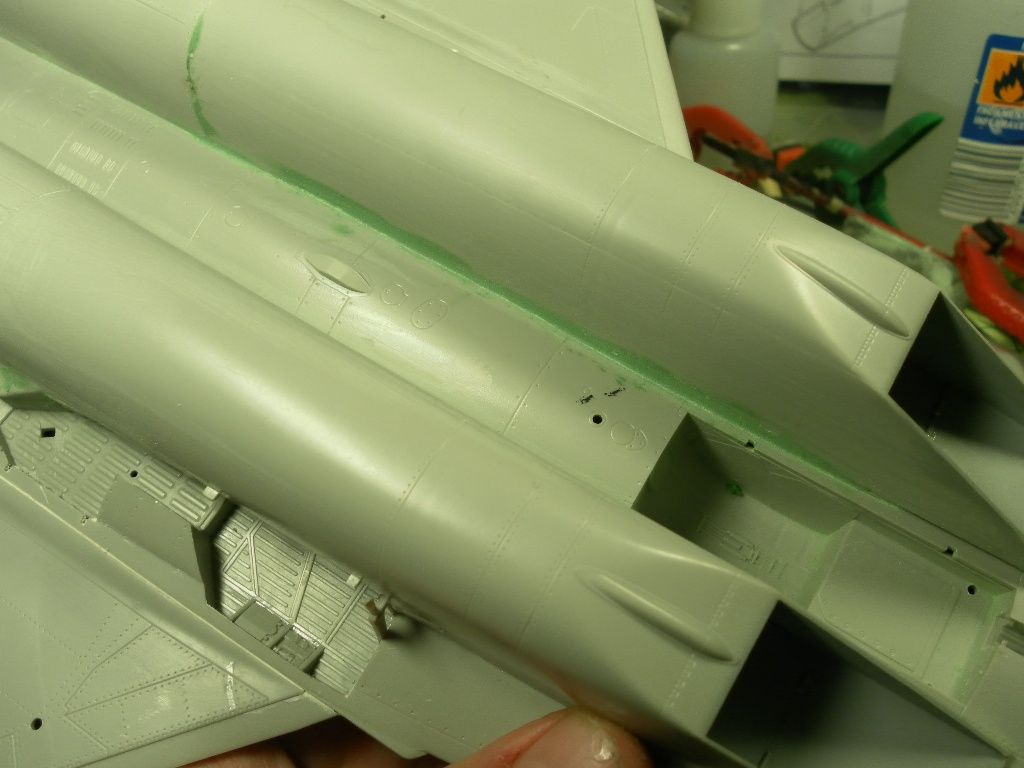
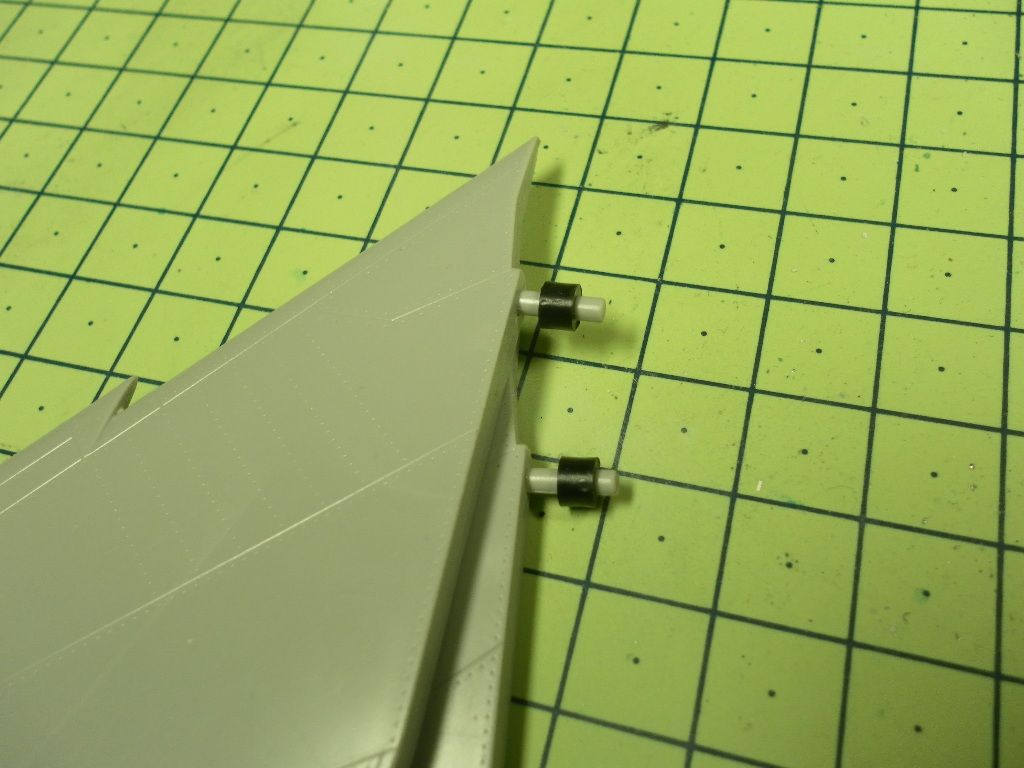
For the junction of the horizontal stabilizers to the fuselage, I chose to place two vinyl rings, to allow its mobility.
Partial look of the fuselage

The exhaust nozzles were painted in various shades of Alclad II, namely "steel", "aluminum", "jet exhaust", "pale burnt metal" and various mixtures with blue and red enamel. The interior was painted with quick sprays of acryilic white.

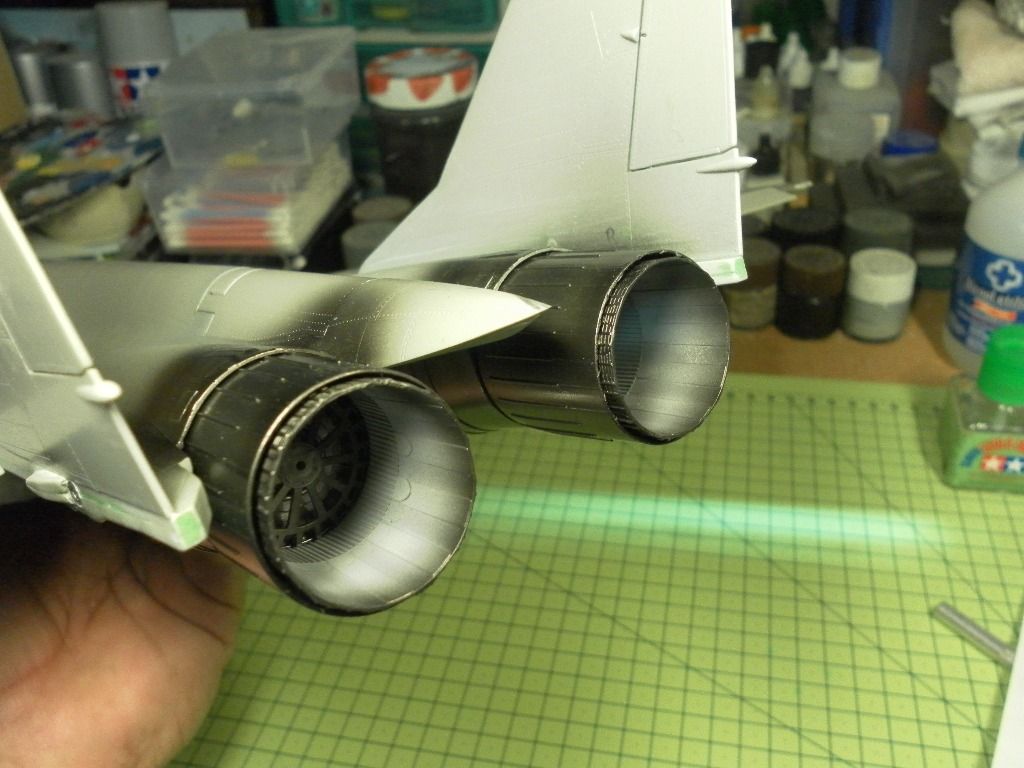
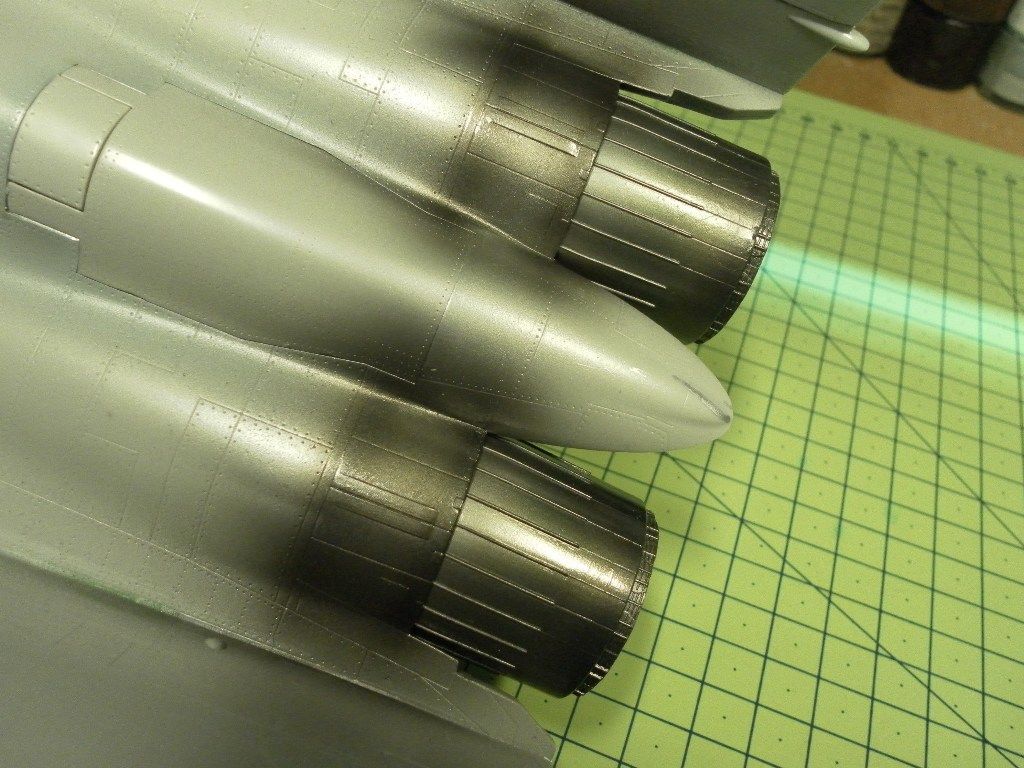
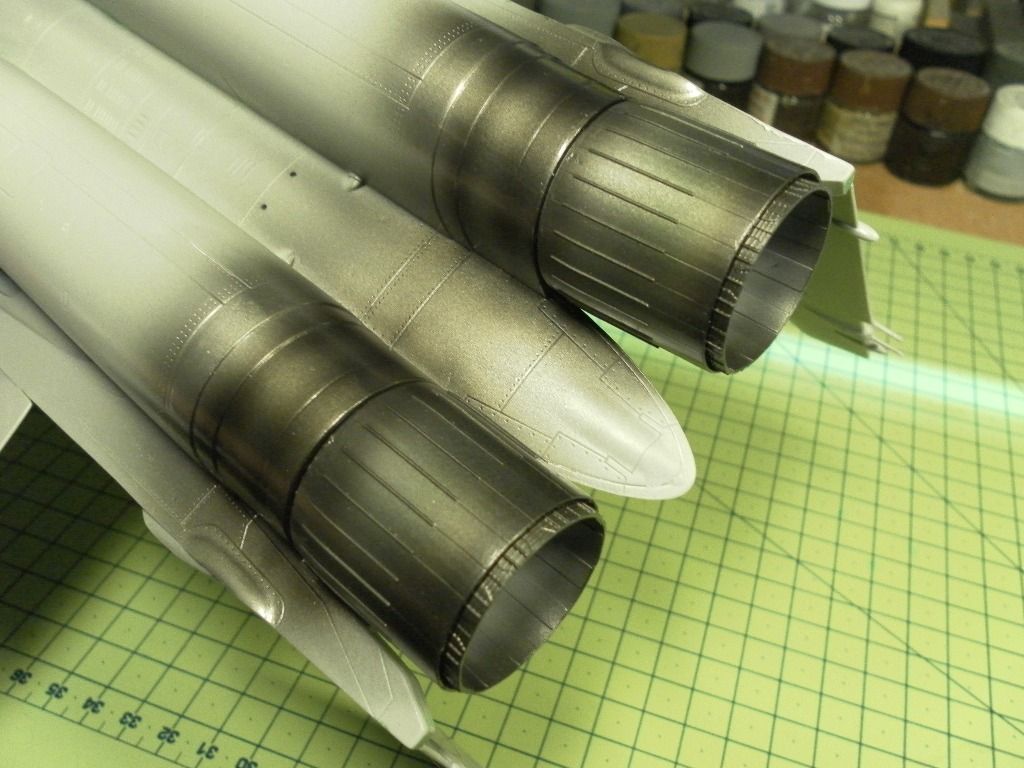
Here, in a subtle way, you can see the red, yellow and blue tones of the nozzles
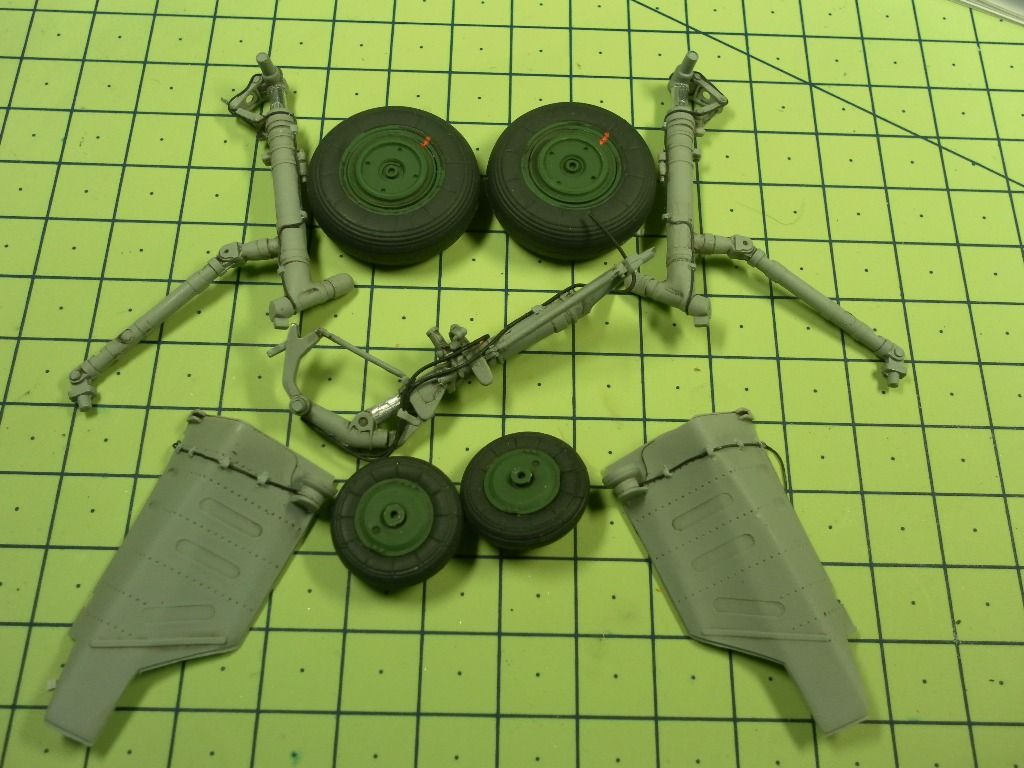
The landing gear and wheels, with the addition of some tin wire.
The landing gear bays, with some wire.
Cya!!
-
2
-
-
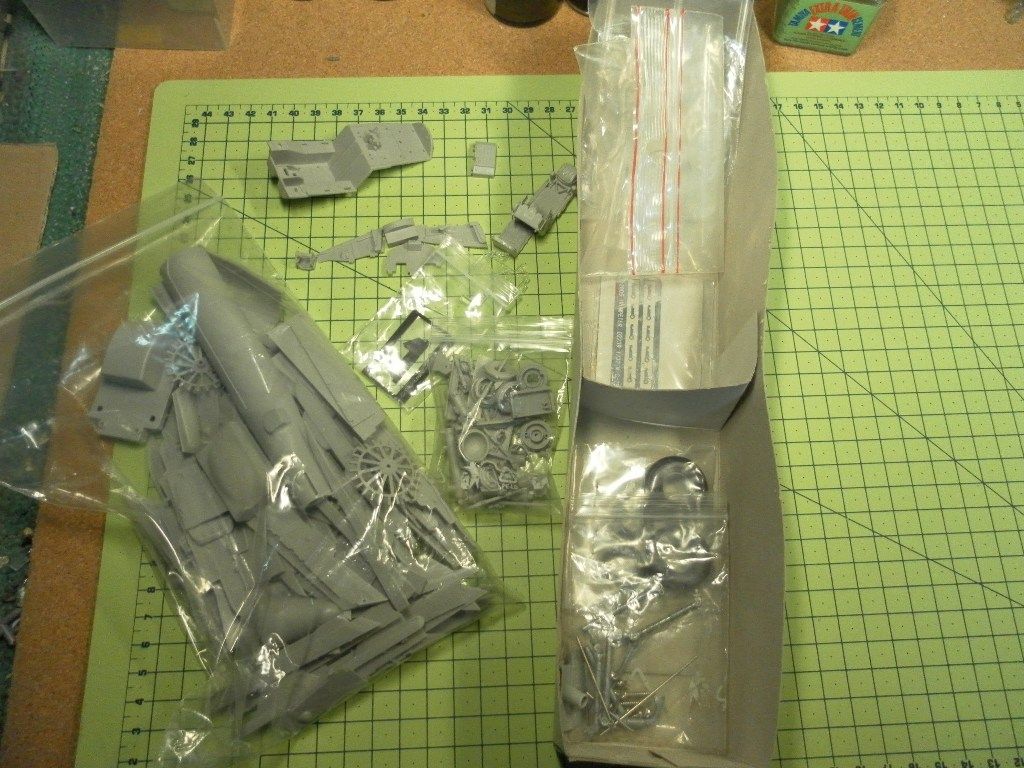
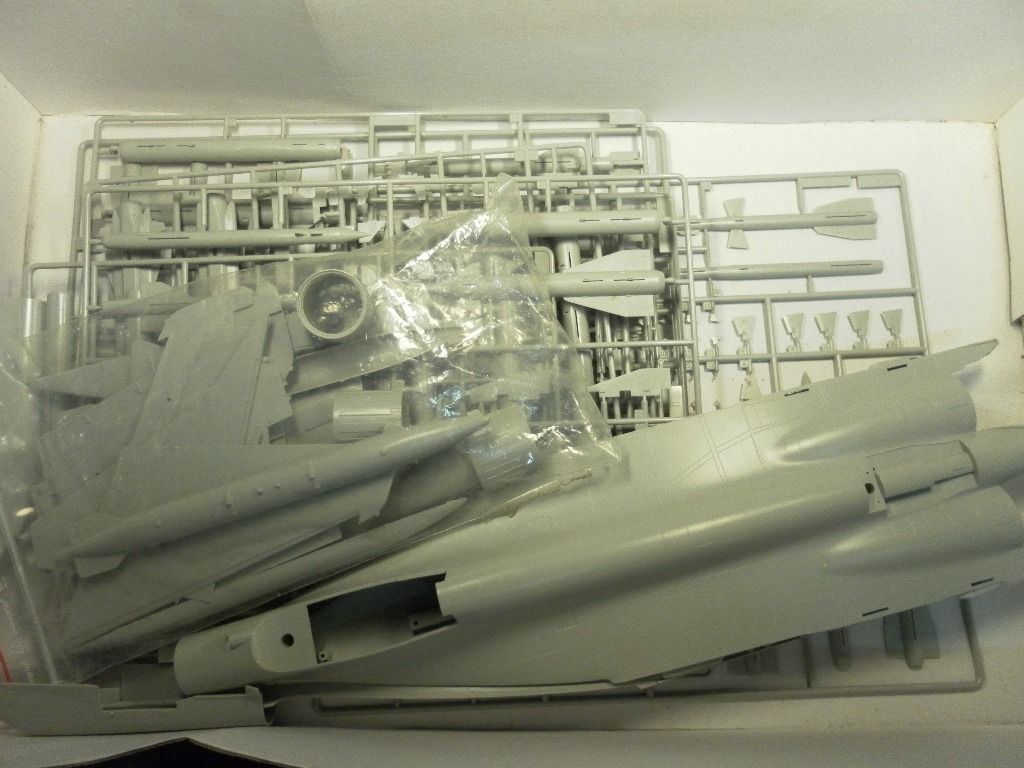
Hi,
As my presentation, I will start the construction of a well known kit of Trumpeter: the MIG 29M "Fulcrum". I'll do it OOB, with some scratchbuilding for the engine nozzles. I'll post in accordance with the advances, which requires some patience (for you
 )
)All the best,
PL
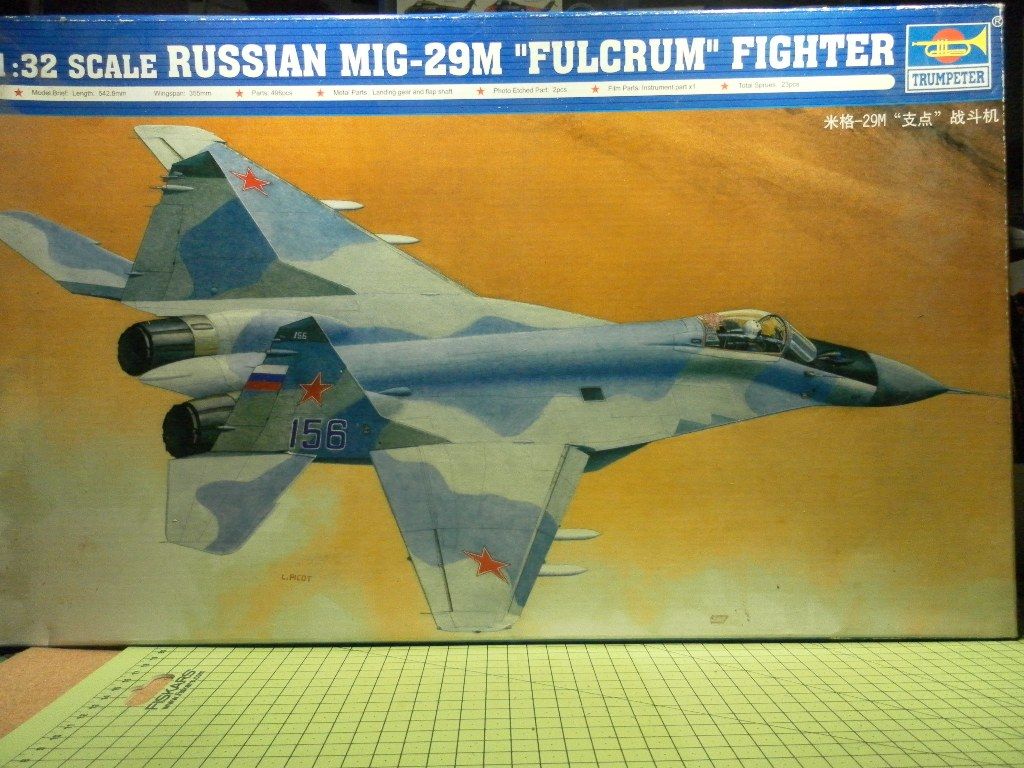

-
2
-
MIG 23 MLD Flogger K - Trumpeter 1/32
in LSM 1/35 and Larger Work In Progress
Posted
Hi again!