


nmayhew
-
Posts
1,145 -
Joined
-
Last visited
Content Type
Profiles
Forums
Events
Gallery
Posts posted by nmayhew
-
-
25 minutes ago, DocRob said:
Your oil rendering really pops on the NMF, I like it a lot. I tend to weather my planes from very light to heavy use and incorporated various techniques to do so. I never used oils on NMF, but having recently bought a Tamiya Mustang, there is the mule.
Thanks for your how to descriptions, which are very helpful. Like you, I switched from Alclad, because of their fragility, but my go to metals are AK's Extreme Metals, which are great to spray, look truly metallic and are robust.Cheers Rob
My pleasure. I am only passing on what I have learned over the past few builds - I am of the school that if can do it and make it look halfway passable, then literally anyone can.
On the AK Extreme Metals, I have a bunch of them and actually use them - for brush painting bits and bobs, including dabbing rivet heads and using mineral spirits to clean up the excess (a tip I picked up on Youtube from DoogsModels). I am not entirely sure how those AK EMs - which are I think enamels at heart? - will take OPR with mineral spirits though. The best place for paint chemistry type questions is SMCG on FB.
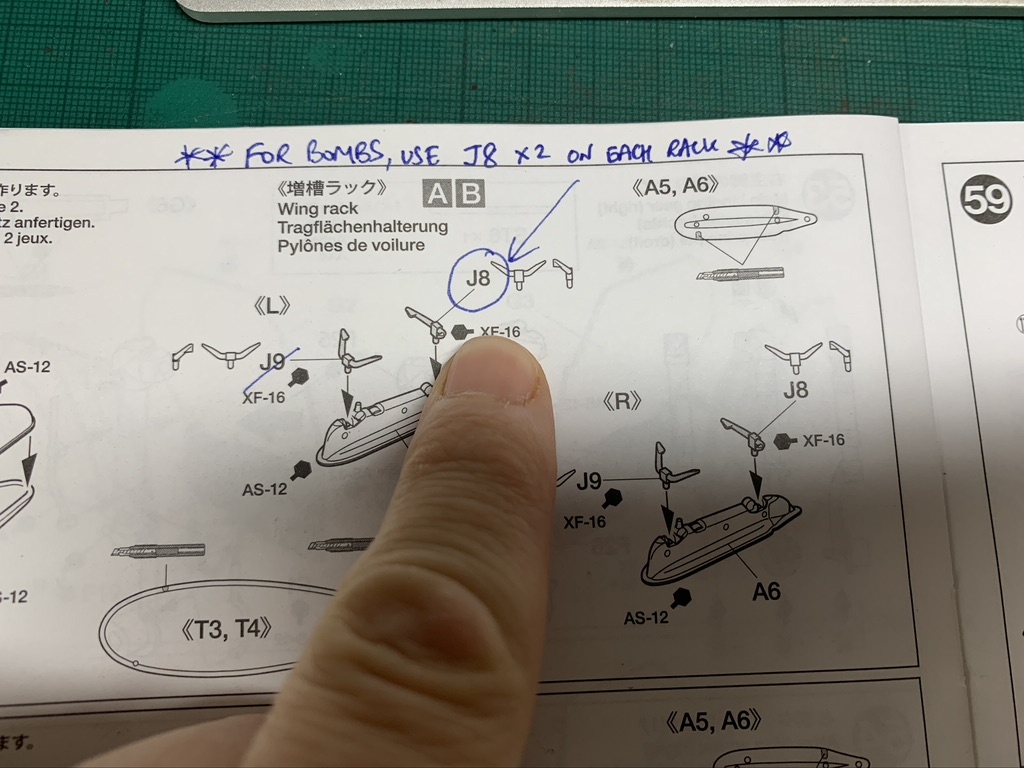
Just a note if you are planning a bombed-up P-51, you need to use J8 on both ends of the bomb rack; the J8 / J9 combo is for fuel tanks which have a different profile. Extra J8s are included in the regular P-51 D kits so no need to cannibalise etc.
I

-
 3
3
-
-
hi,
i'll jump in and say I'm not entirely convinced by the the effects of that wash - just looks too chalky and as if the model has been on a shelf for a year in my house (dust accumulation = large!)
whilst the effects might be desirable in certain patches / areas, I think the blanket approach is maybe a bit lacking in control?
i think there are better more controllable ways of making a potentially flat / uninteresting paint finish more engaging... using the Mr Myagi approach of "the best block is 'no be there' ", I would try to avoid the situation in the first place with maybe black-basing, use of spatter templates etc (both very easy and forgiving techniques); but if you are where you are, I would definitely give some oil paint rendering - "OPR" a go; if you don't like what you end up with in any given section you can just erase and start over etc.
just my 2p of course
-
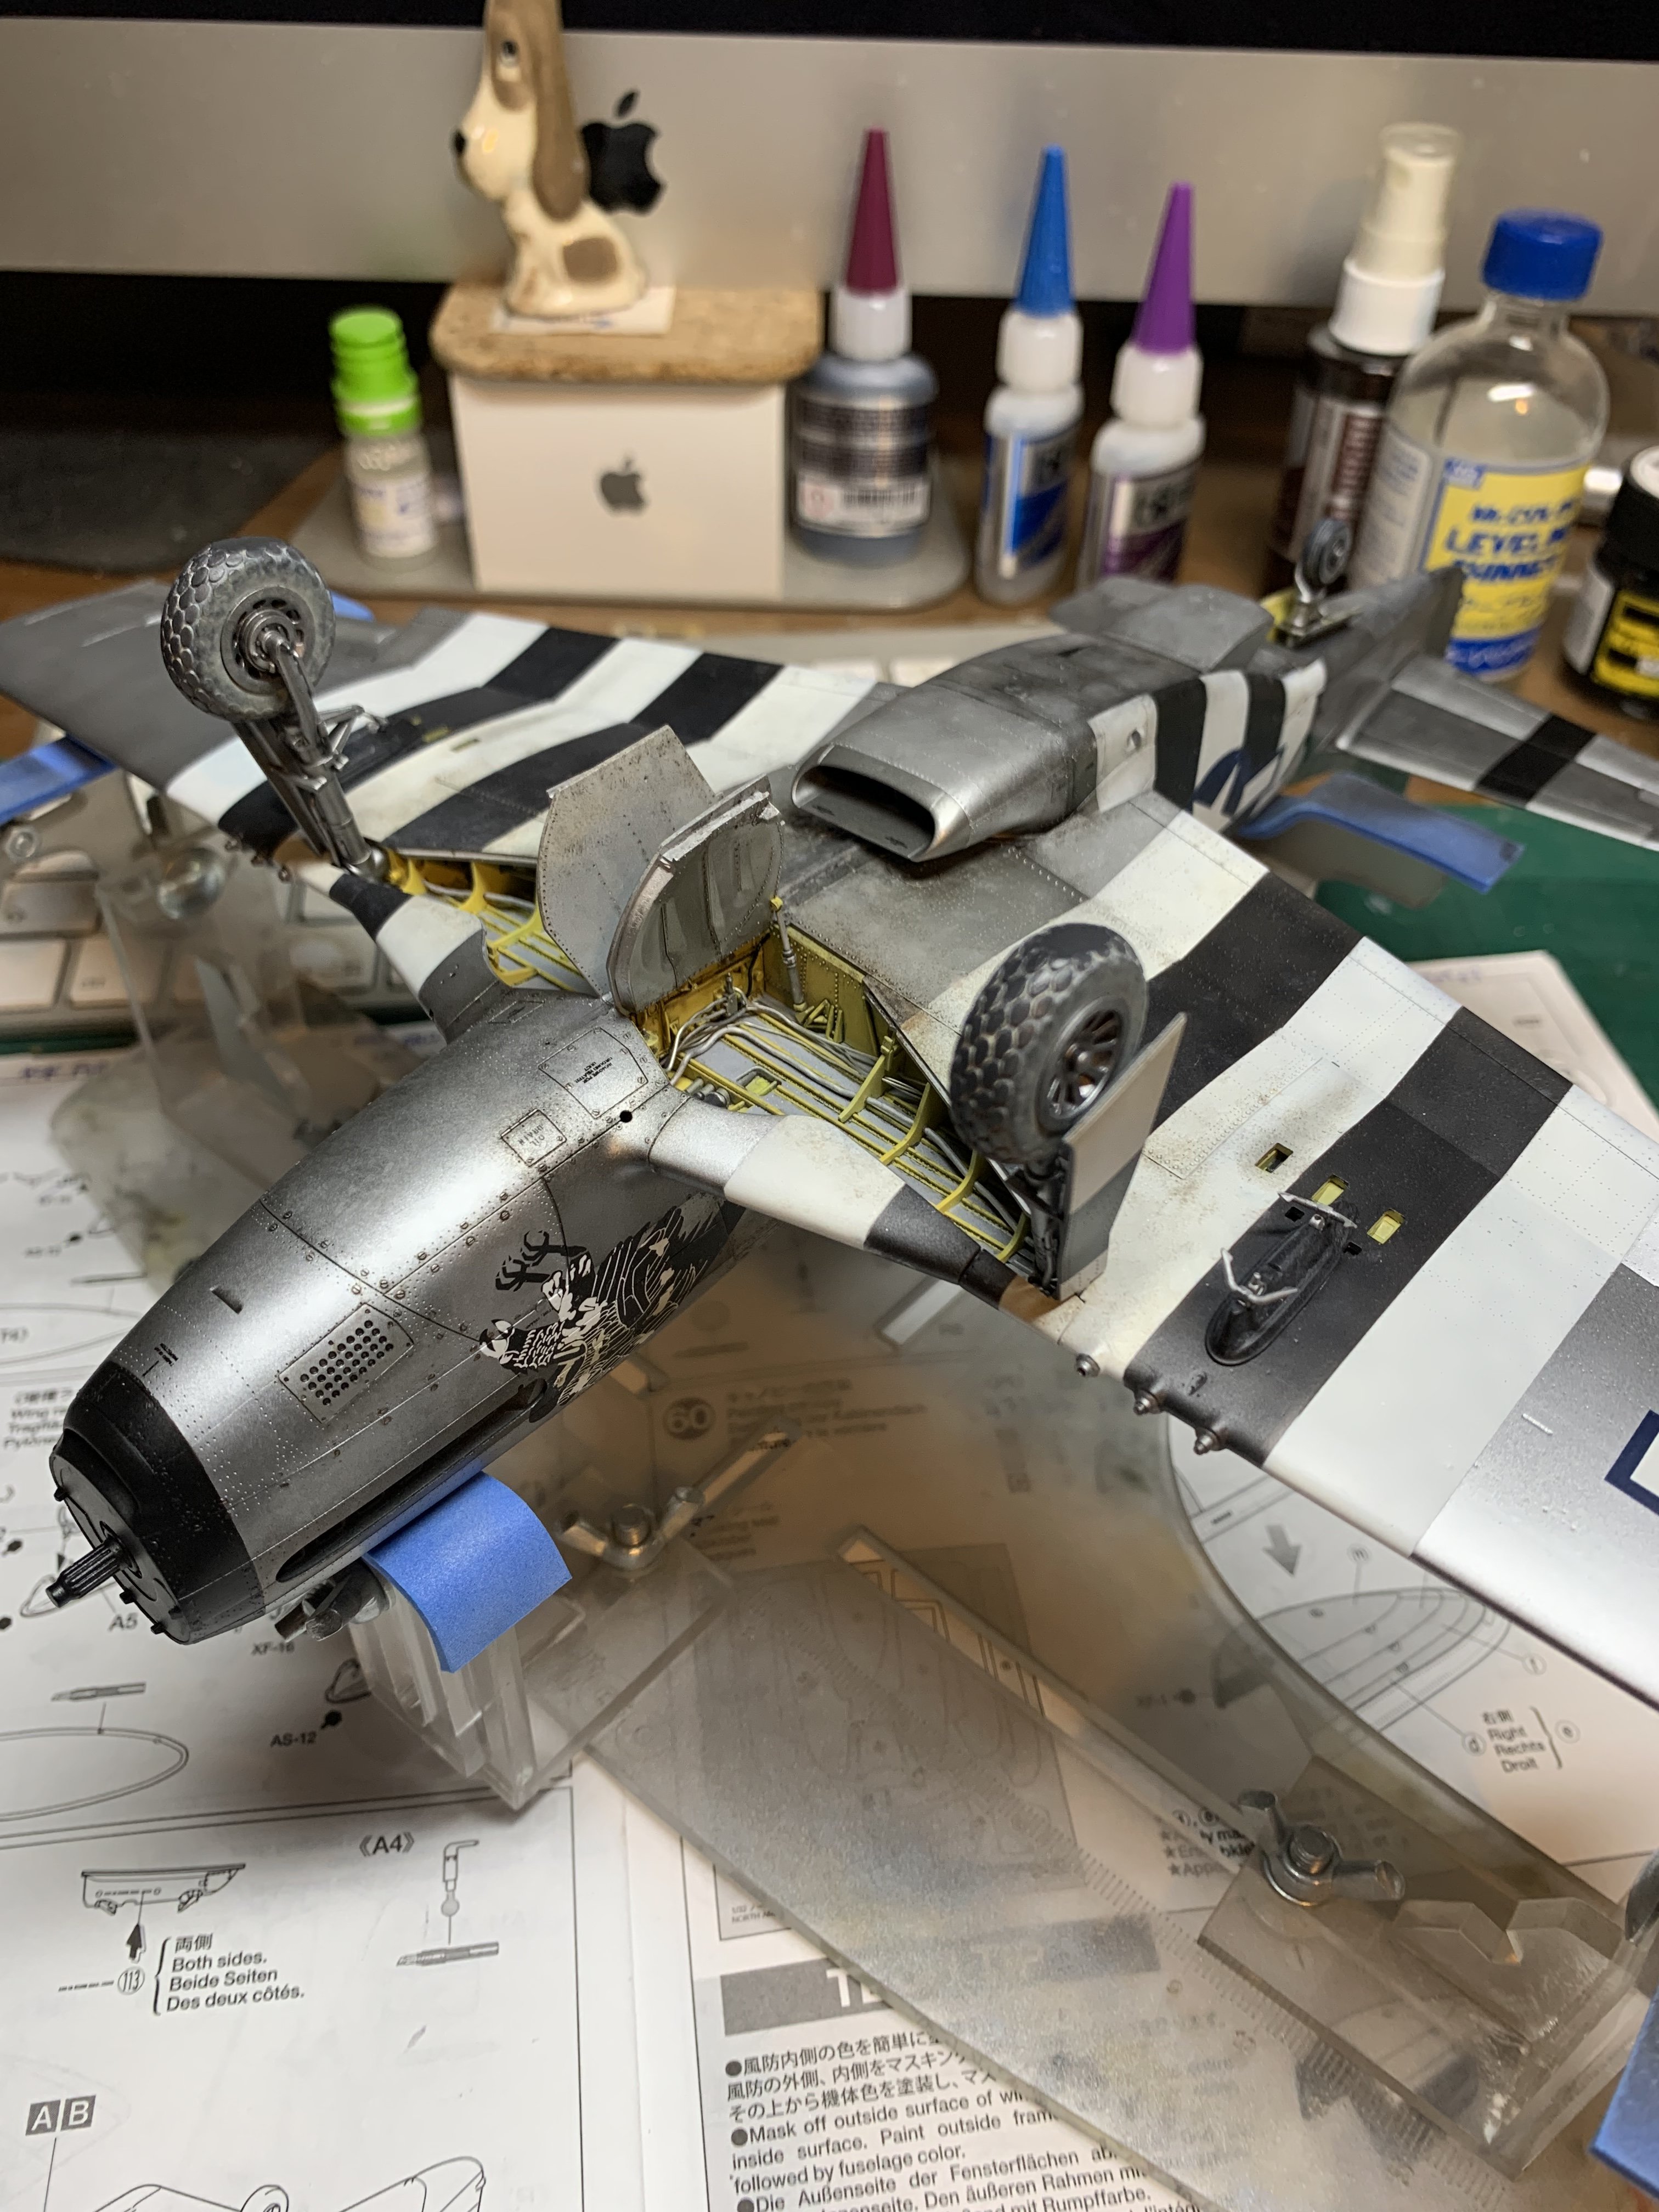
feel like i am getting very close to the end but still quite a few bits and bobs to do
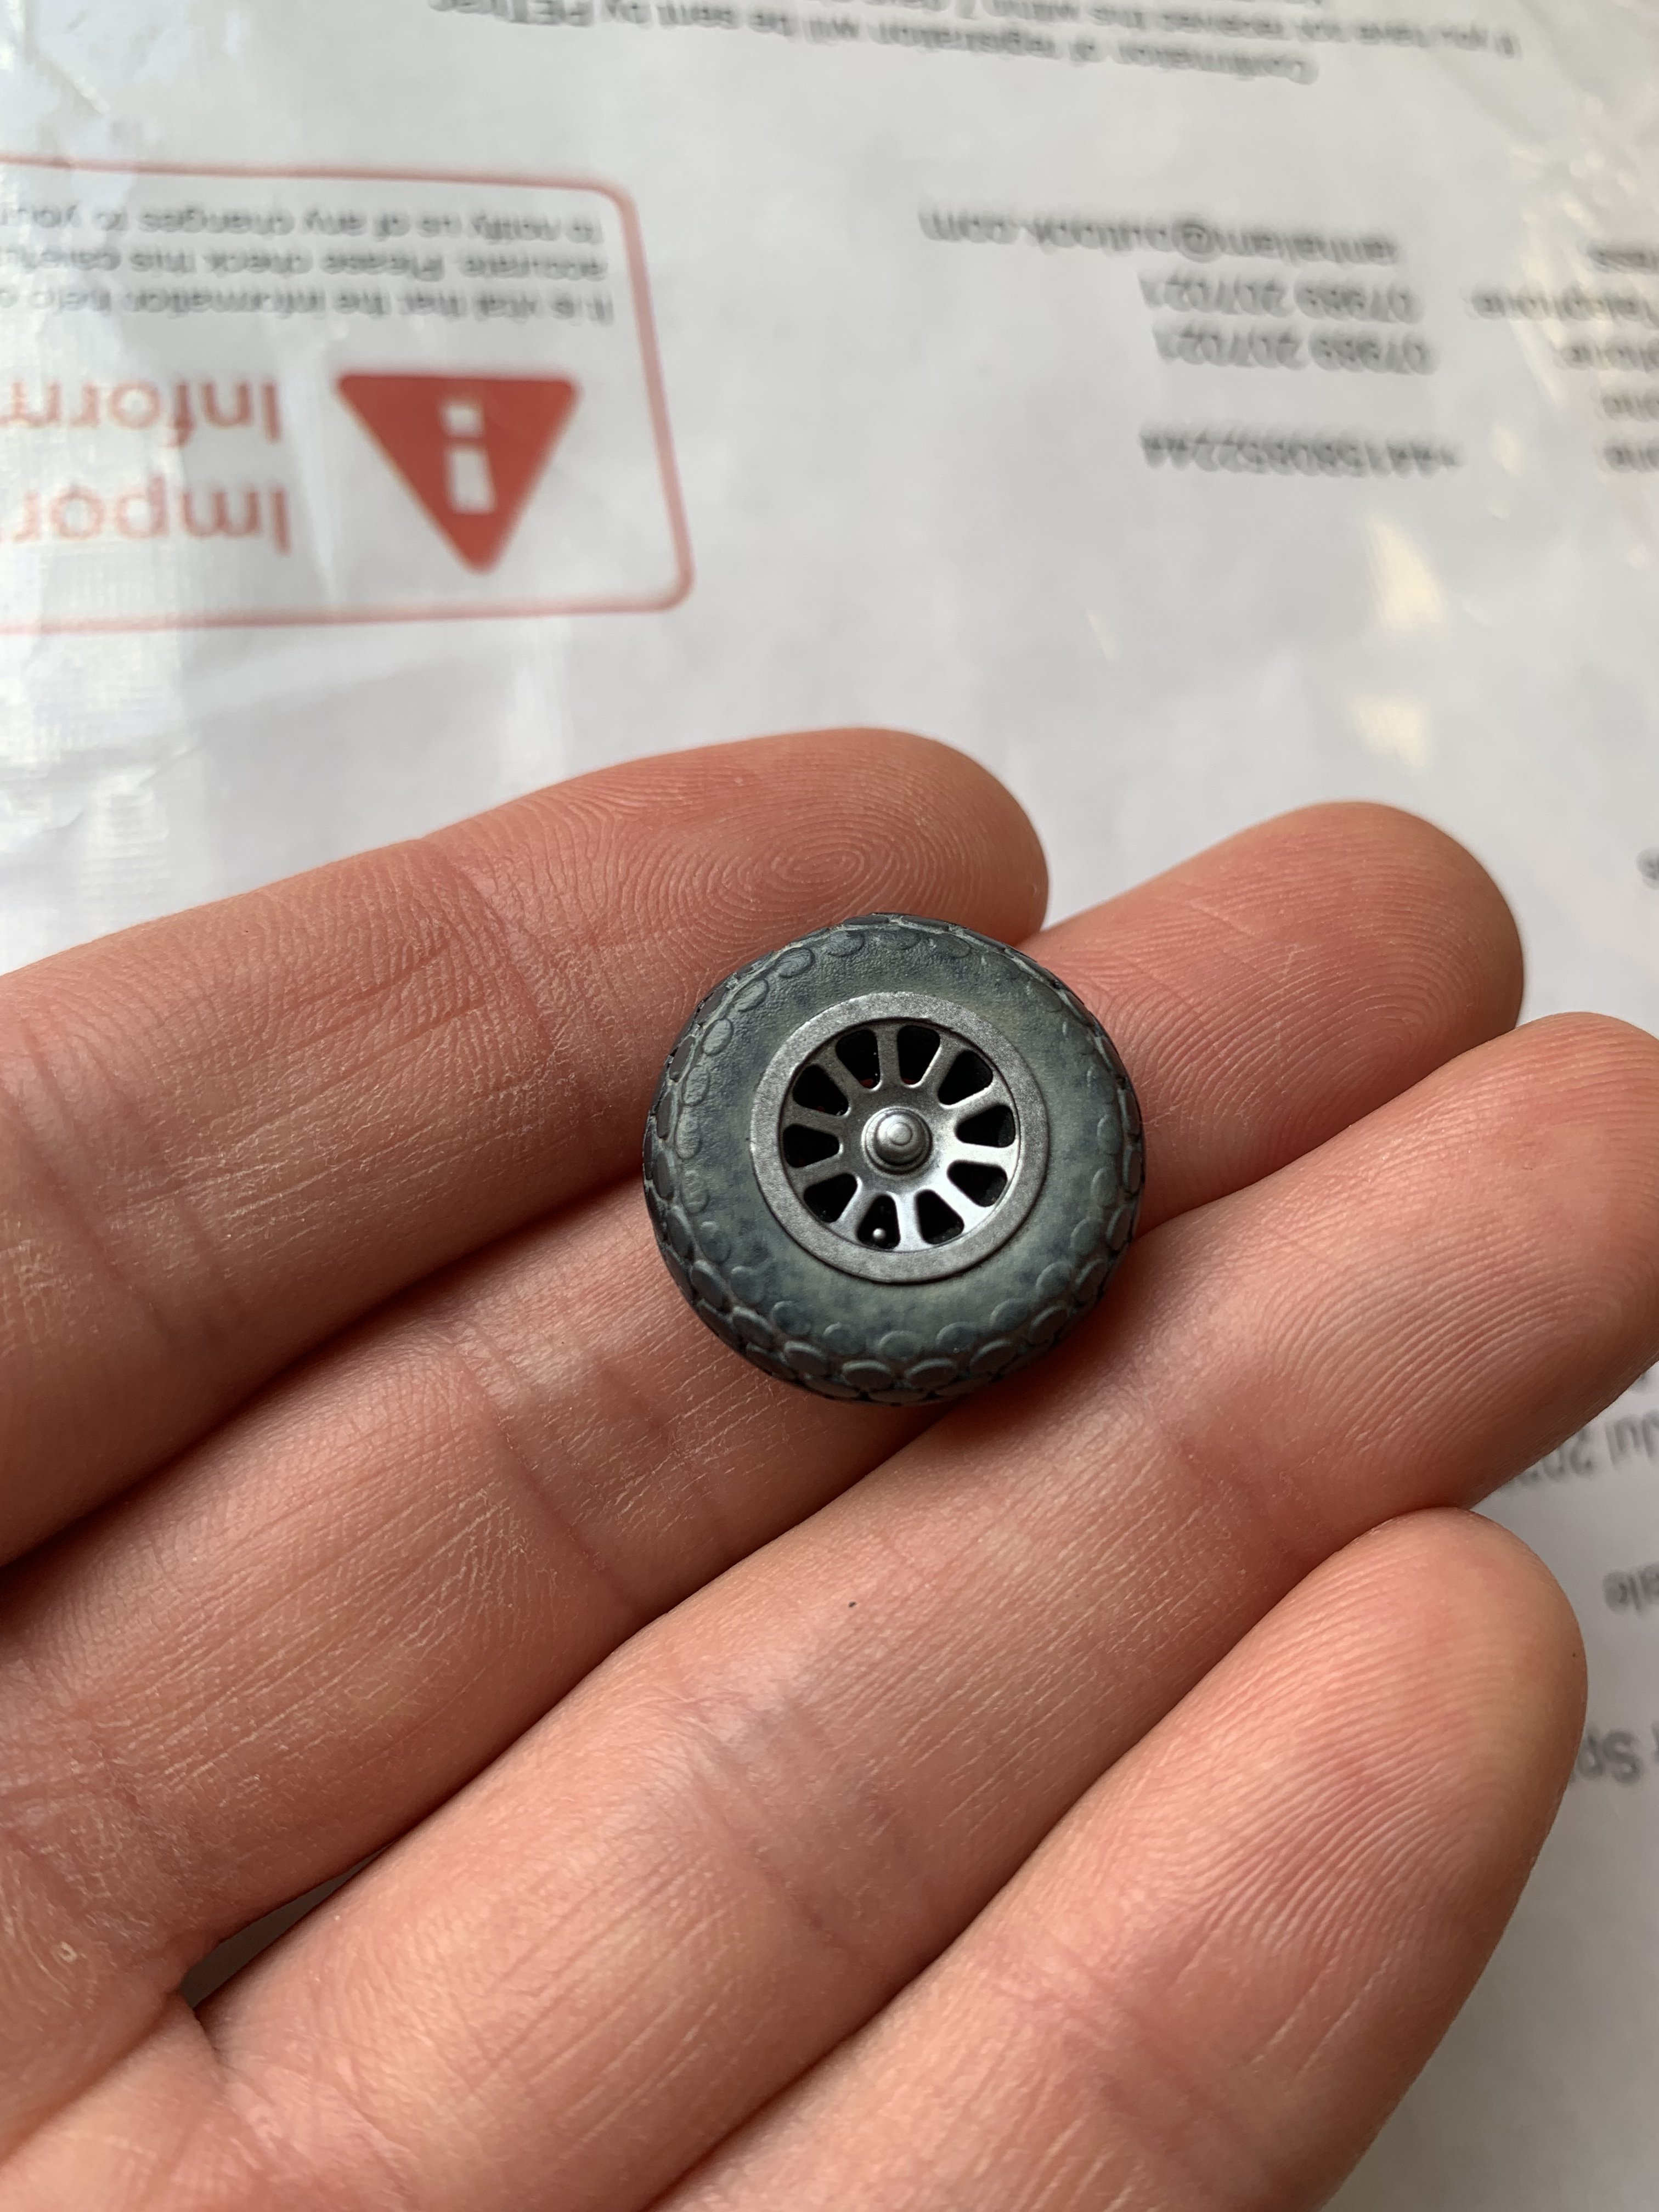
although i like the look of finished landing gear, i never relish putting them together, so I did them and the tyres much earlier in this build
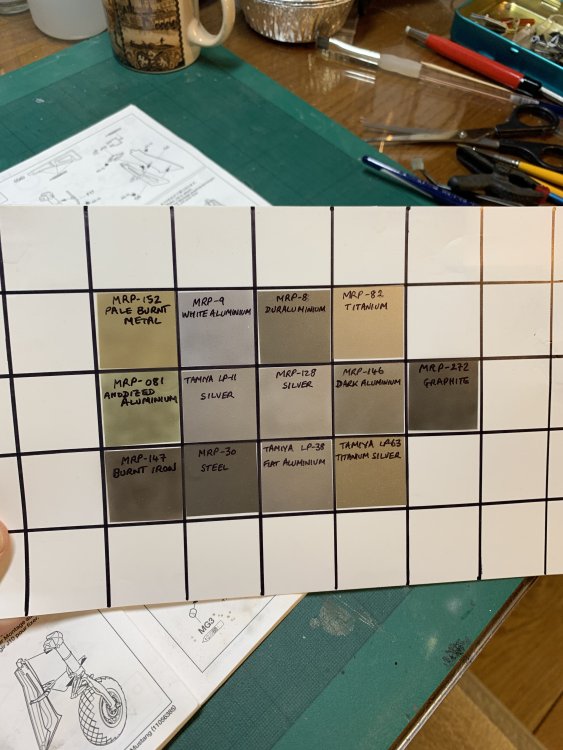
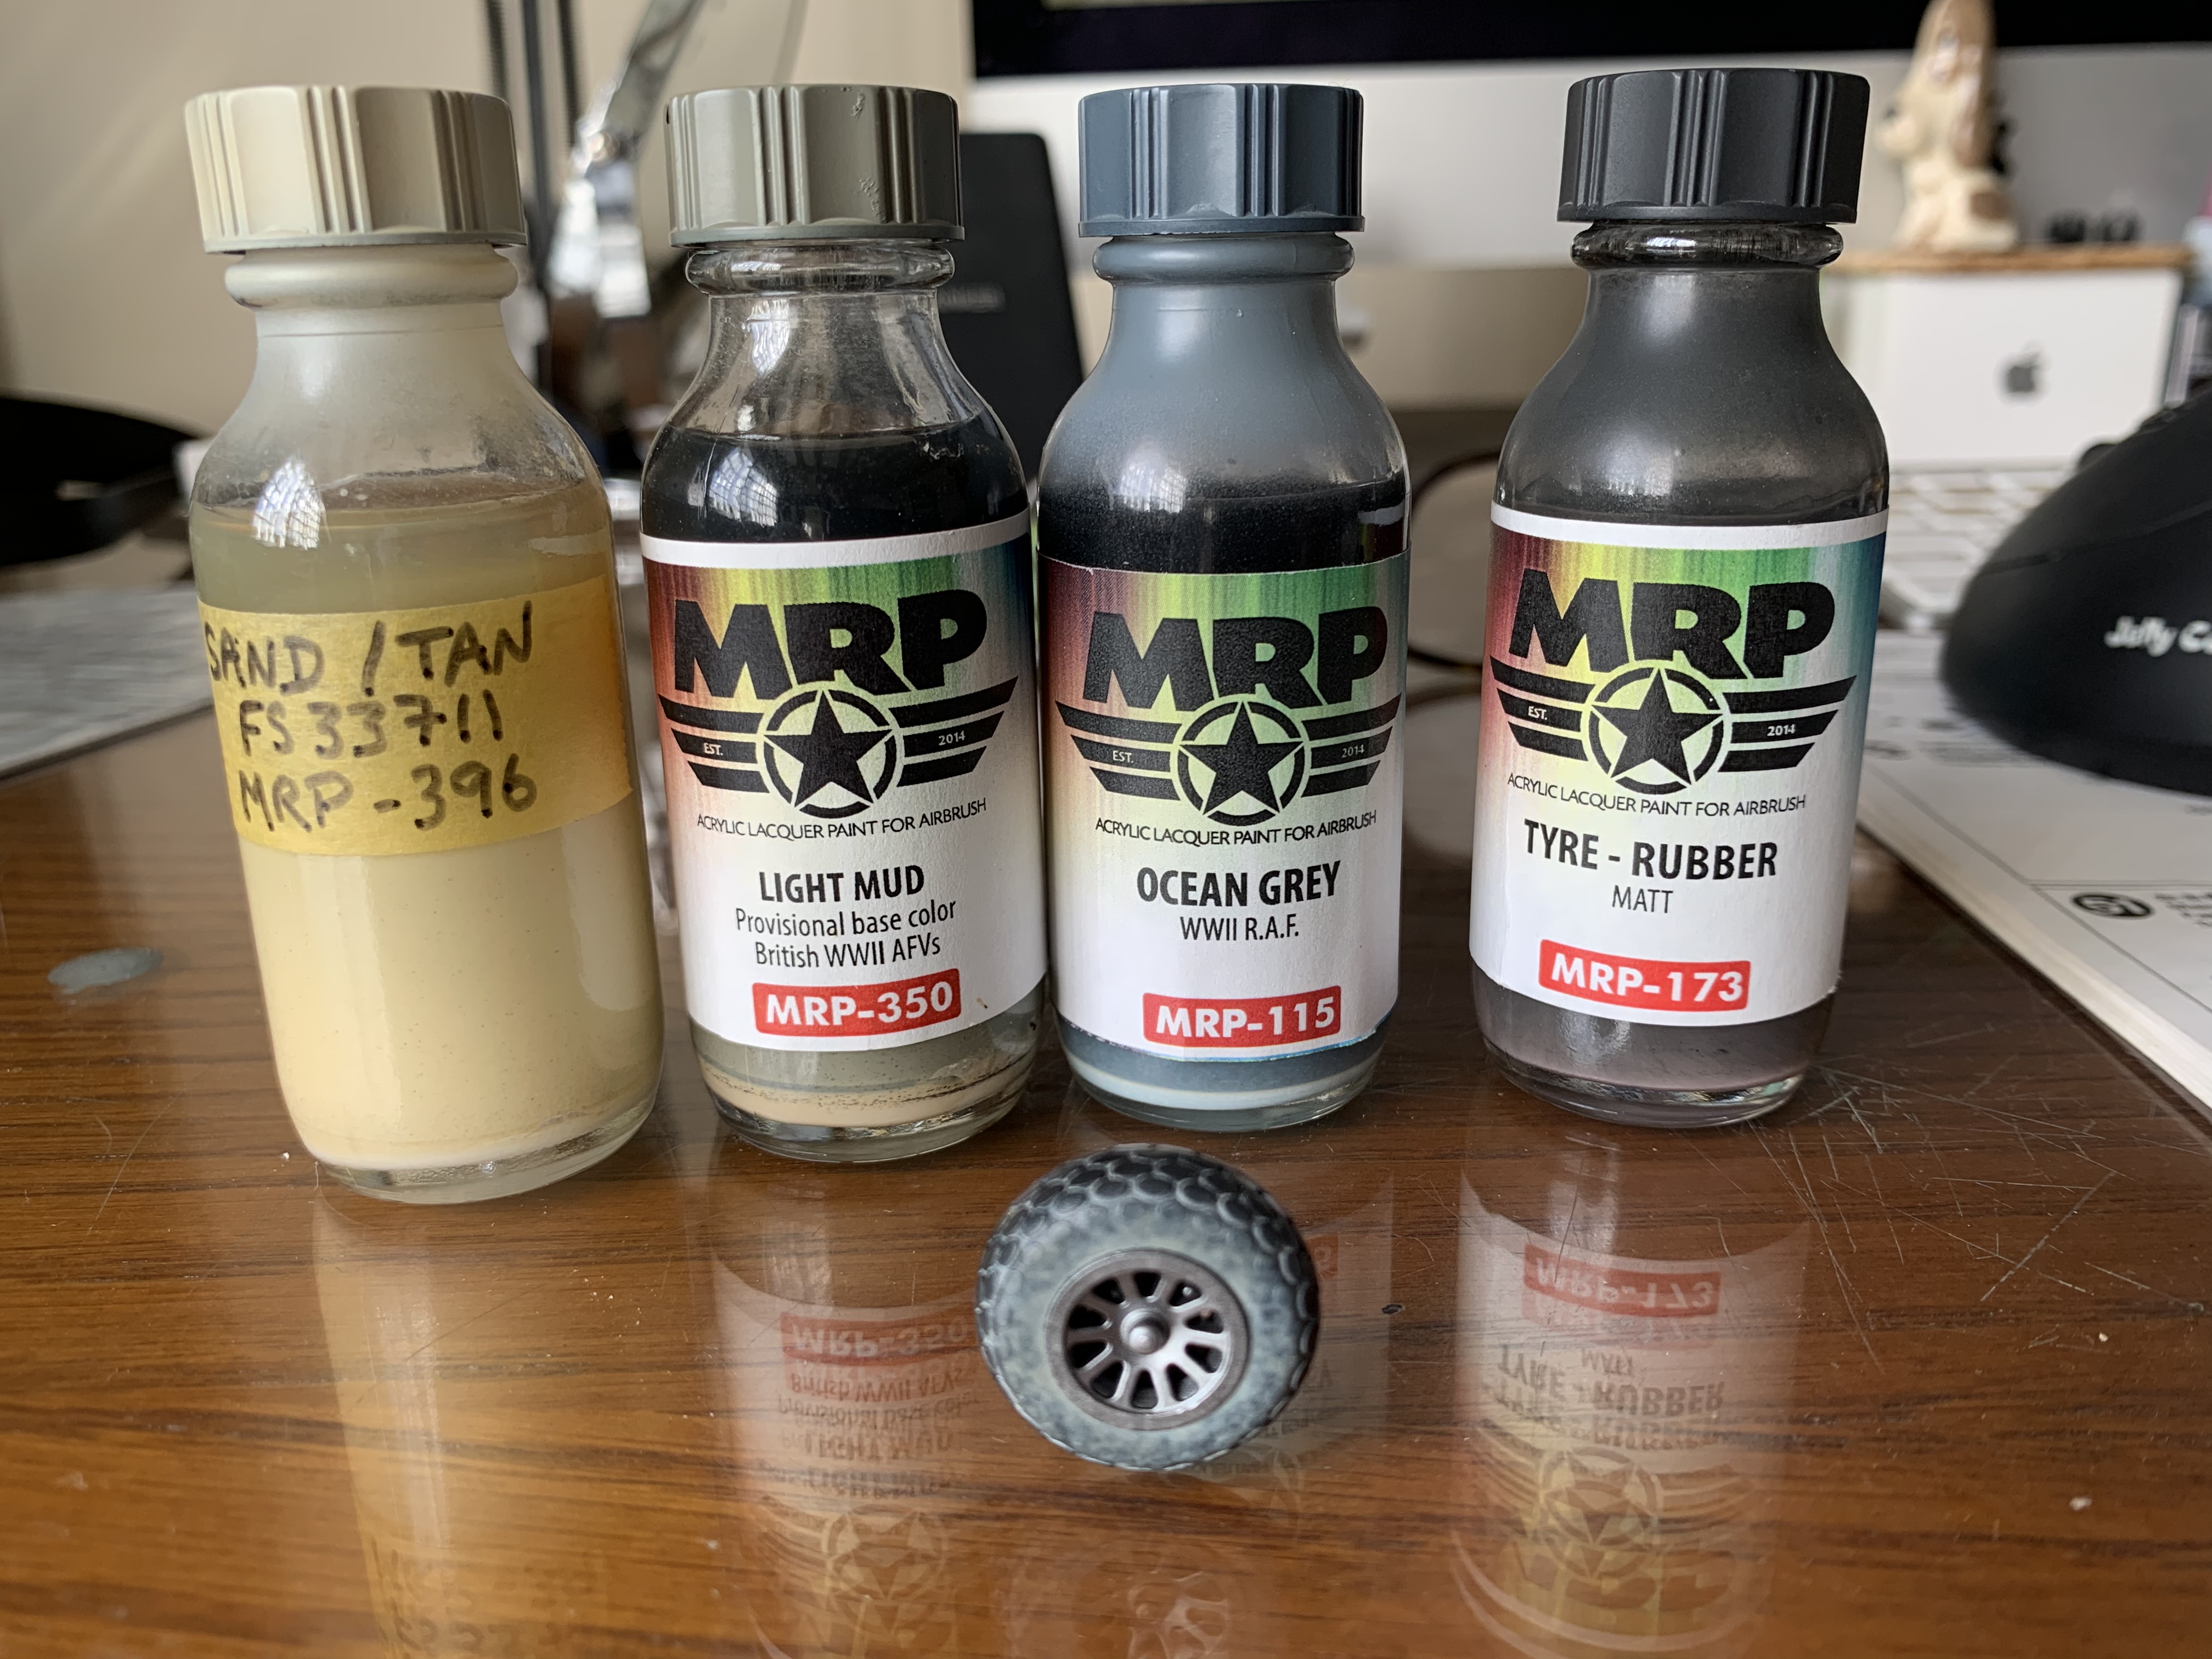
the oleos were sprayed with a few different MRP metallics - i forget which - but I didn't get too hung up on the shiny chrome part, I just made sure it was a discernibly different colour which in this scale is necessary I think
the tyres are Barracuda, and fit the kit part perfectly (refreshing surprise)
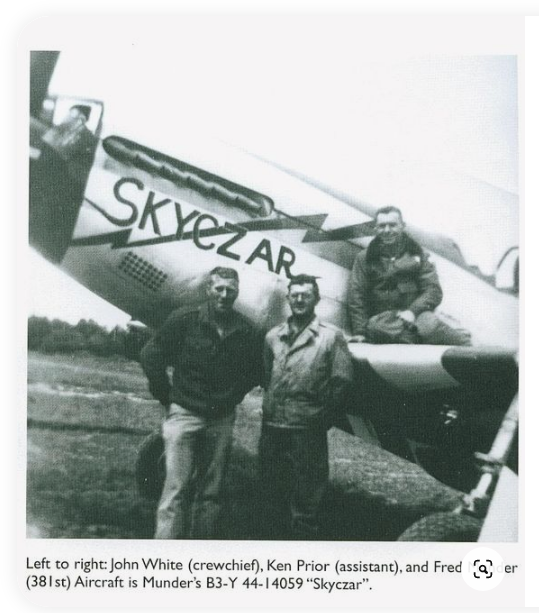
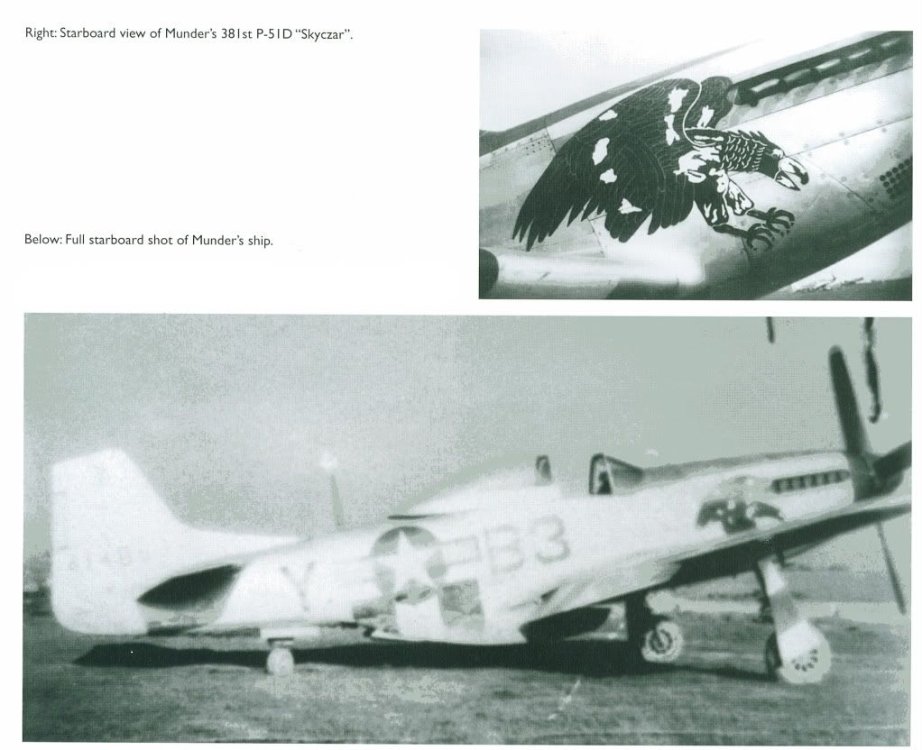
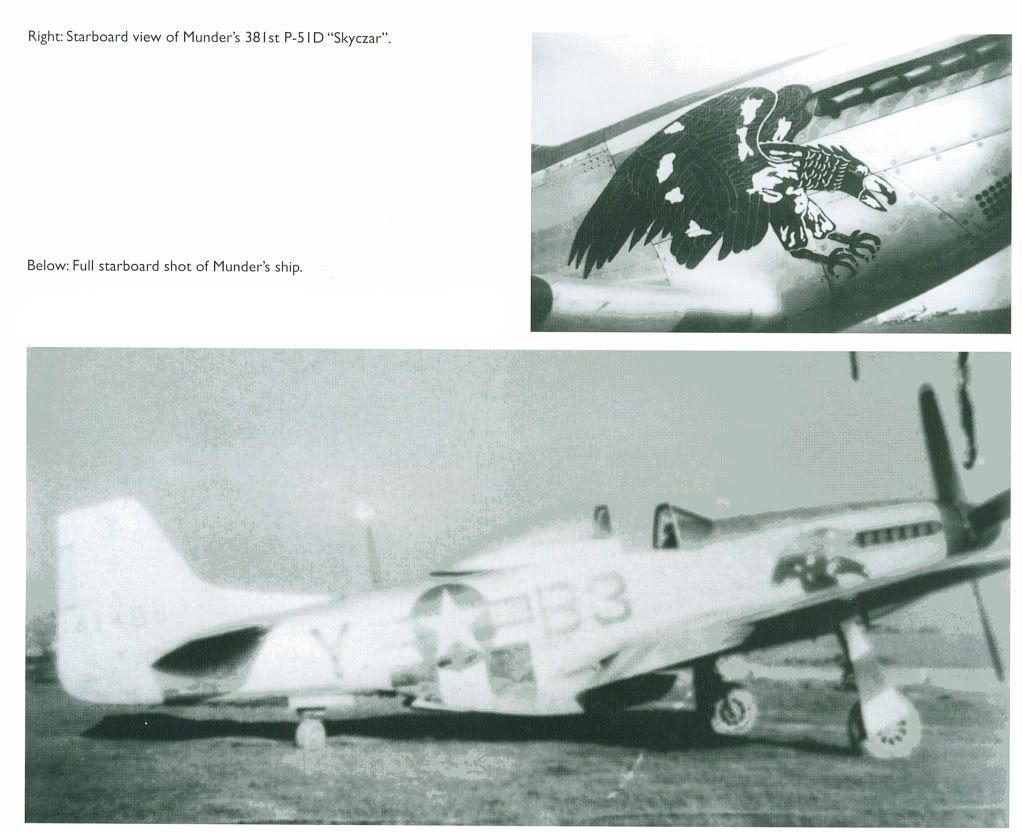
pics of Skyczar are not that great and it may have a more octagonal tread but afaik tyres were changed out so as long as you are using something that you know was used in theatre you can rest easy with your choice; for me, I have Kent Miller's big book on the 363FG so I was able to see the variety of tread patterns used
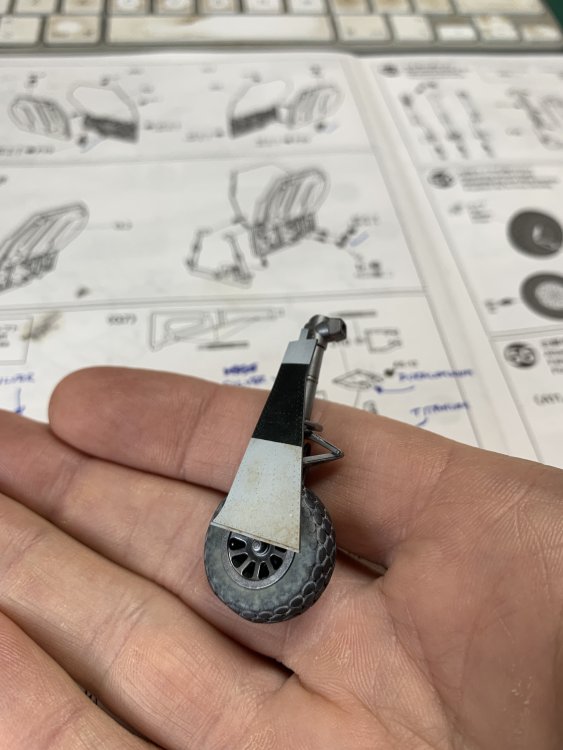
Tamiya's engineering for the landing gear is pretty cool - screwed in place they both line up as they should
the wheels are not glued - and won't be - they are a reasonably tight fit, but you can still turn them to make sure the flat part lines up etc; the wheels must go on the oleo before the gear cover is attached

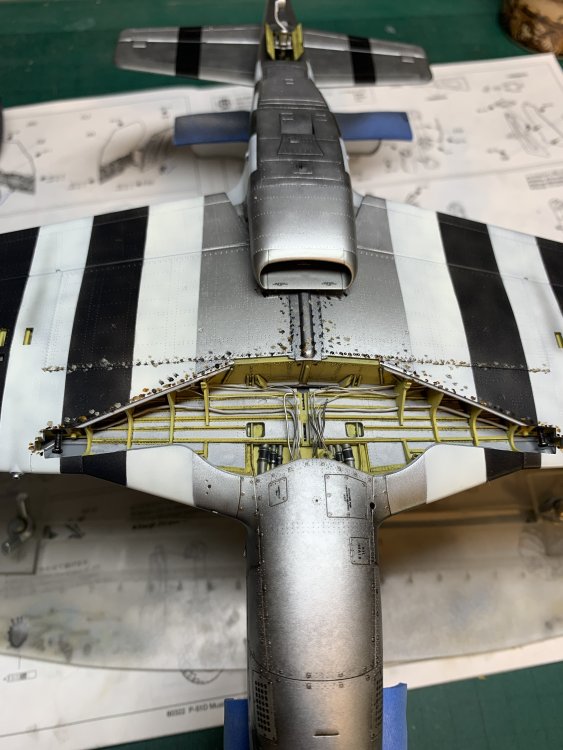
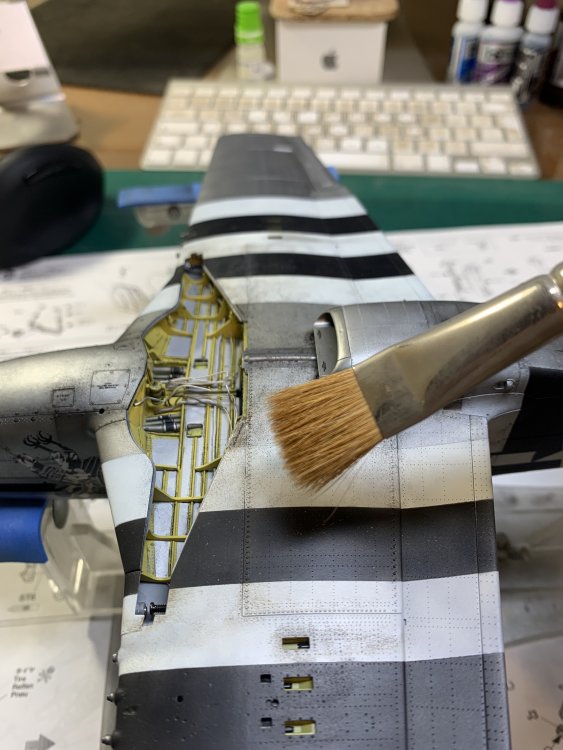
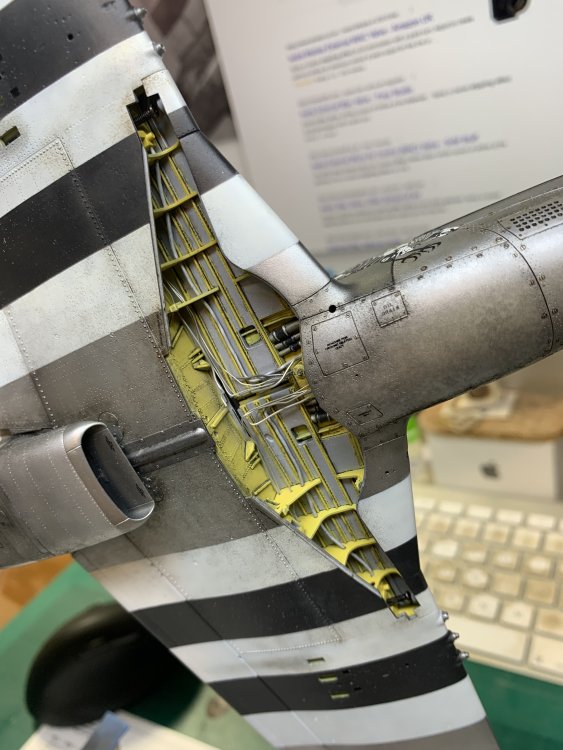
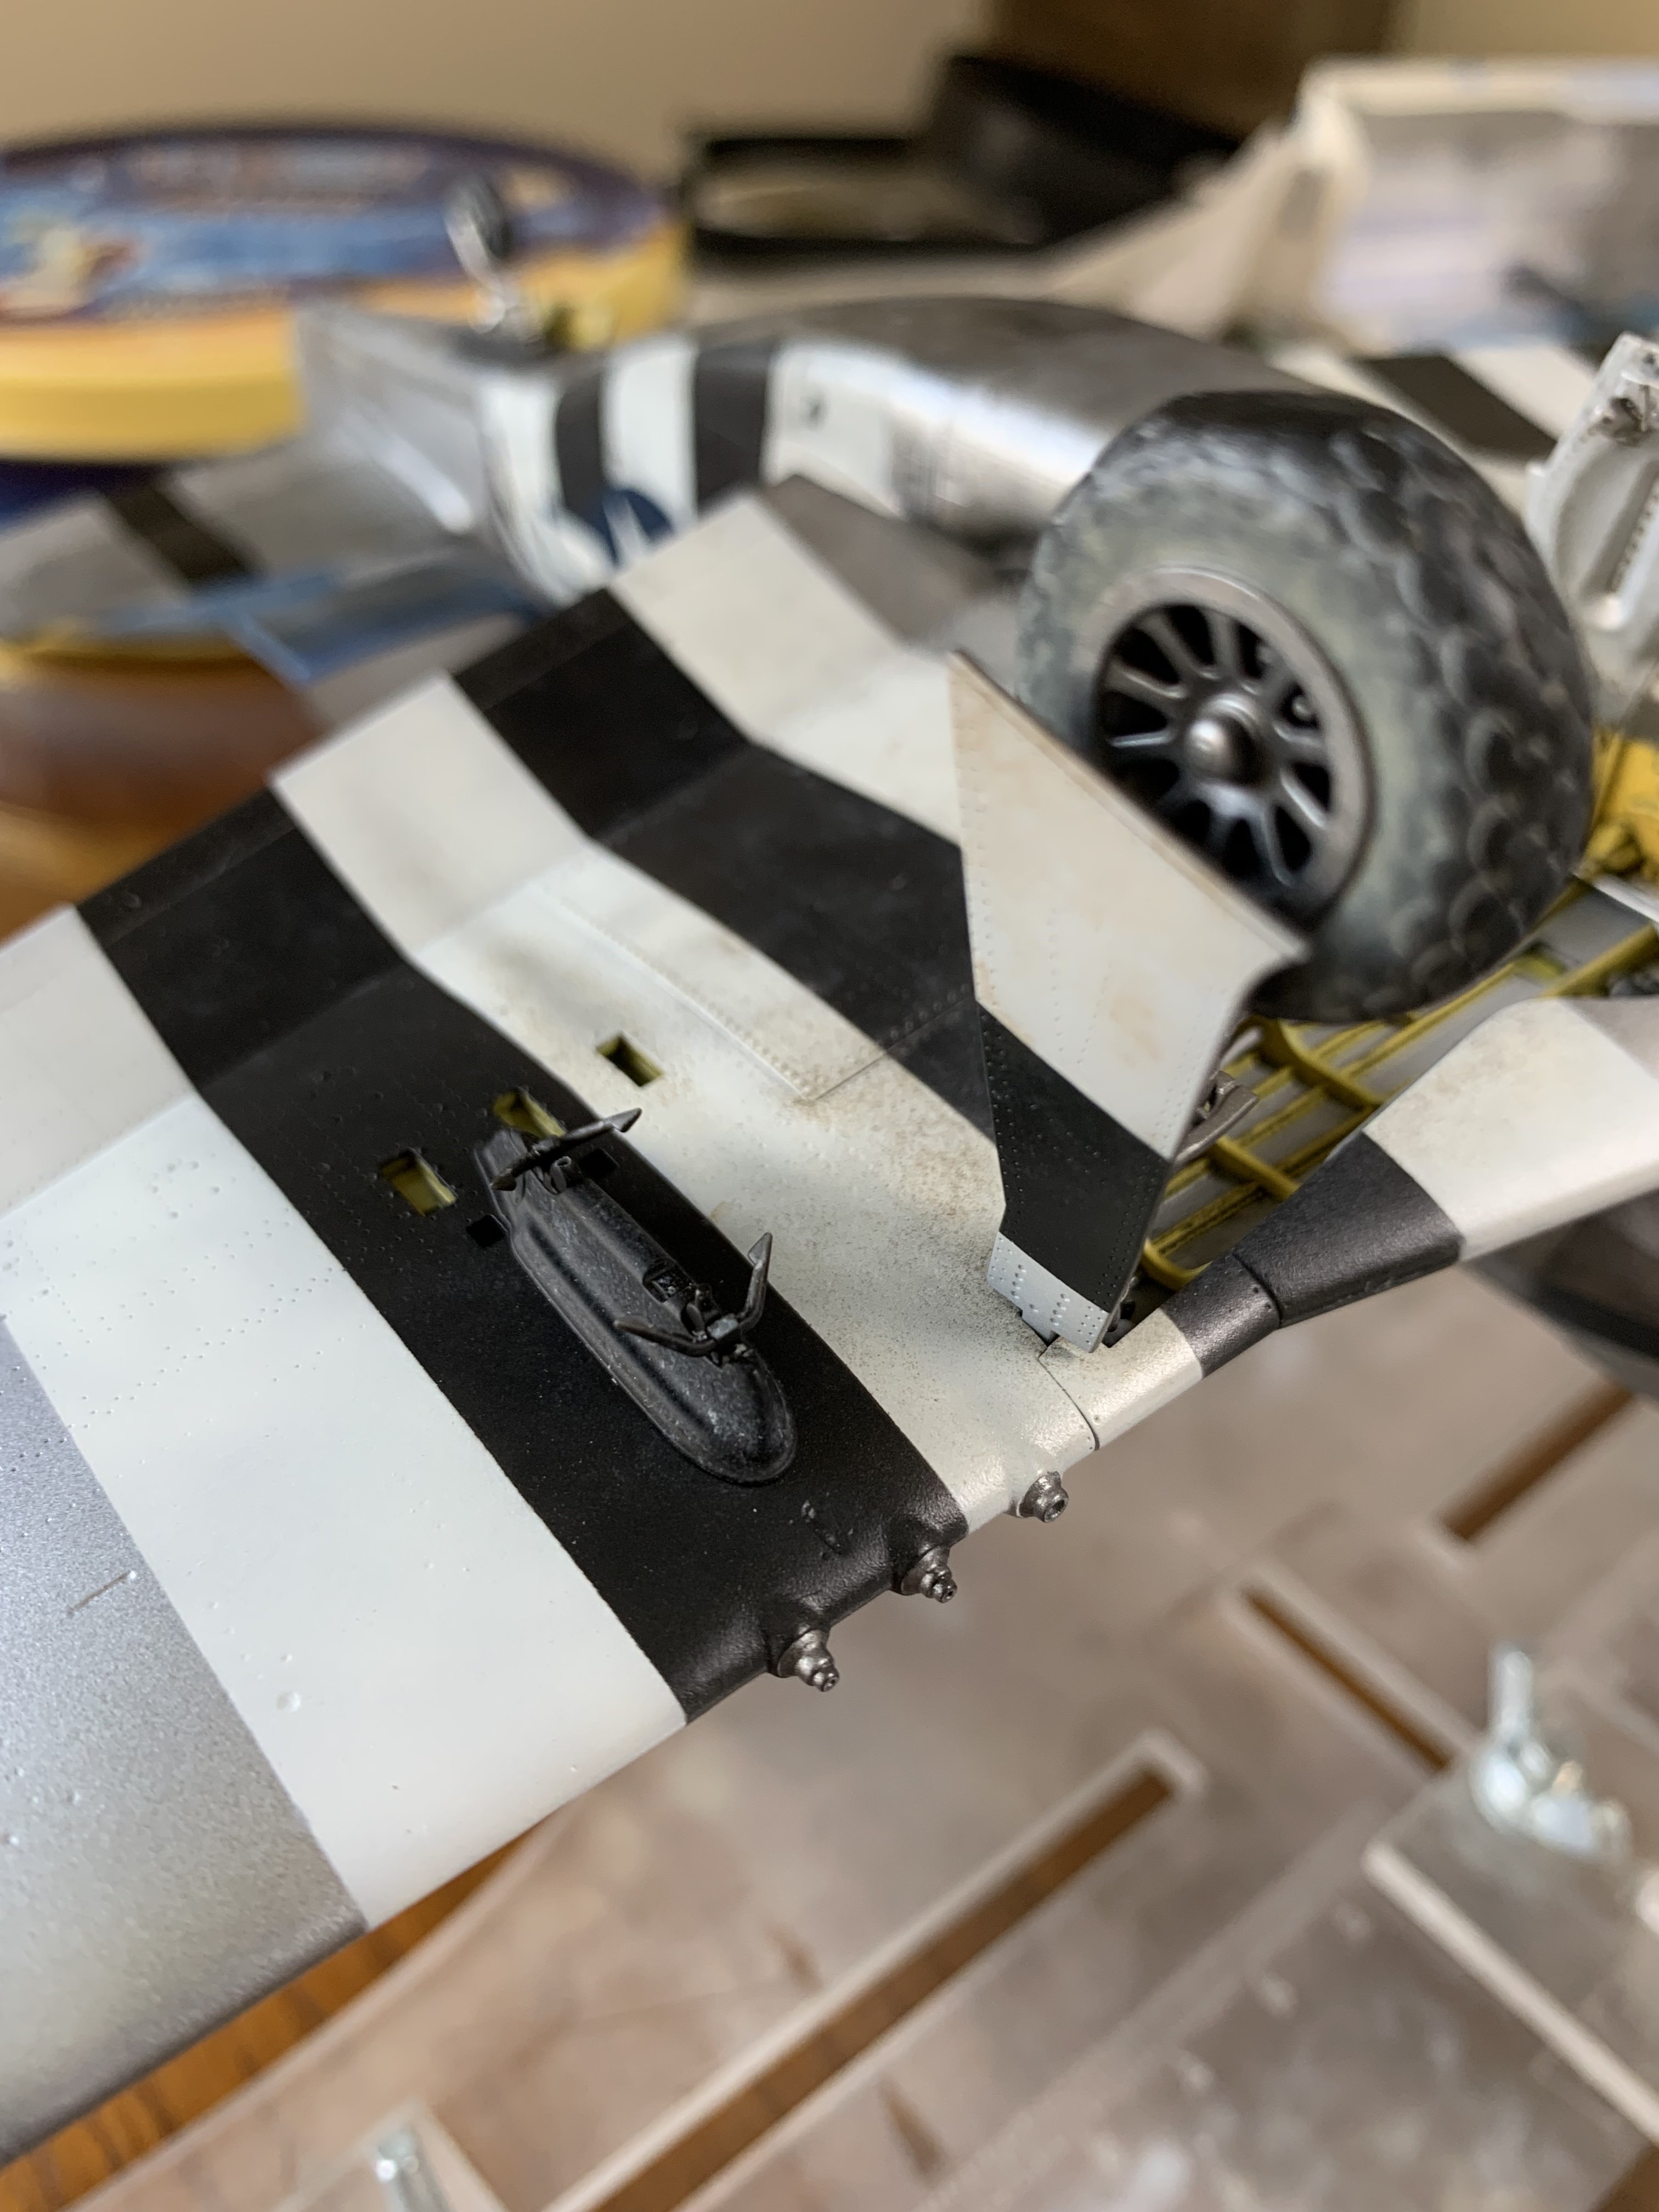
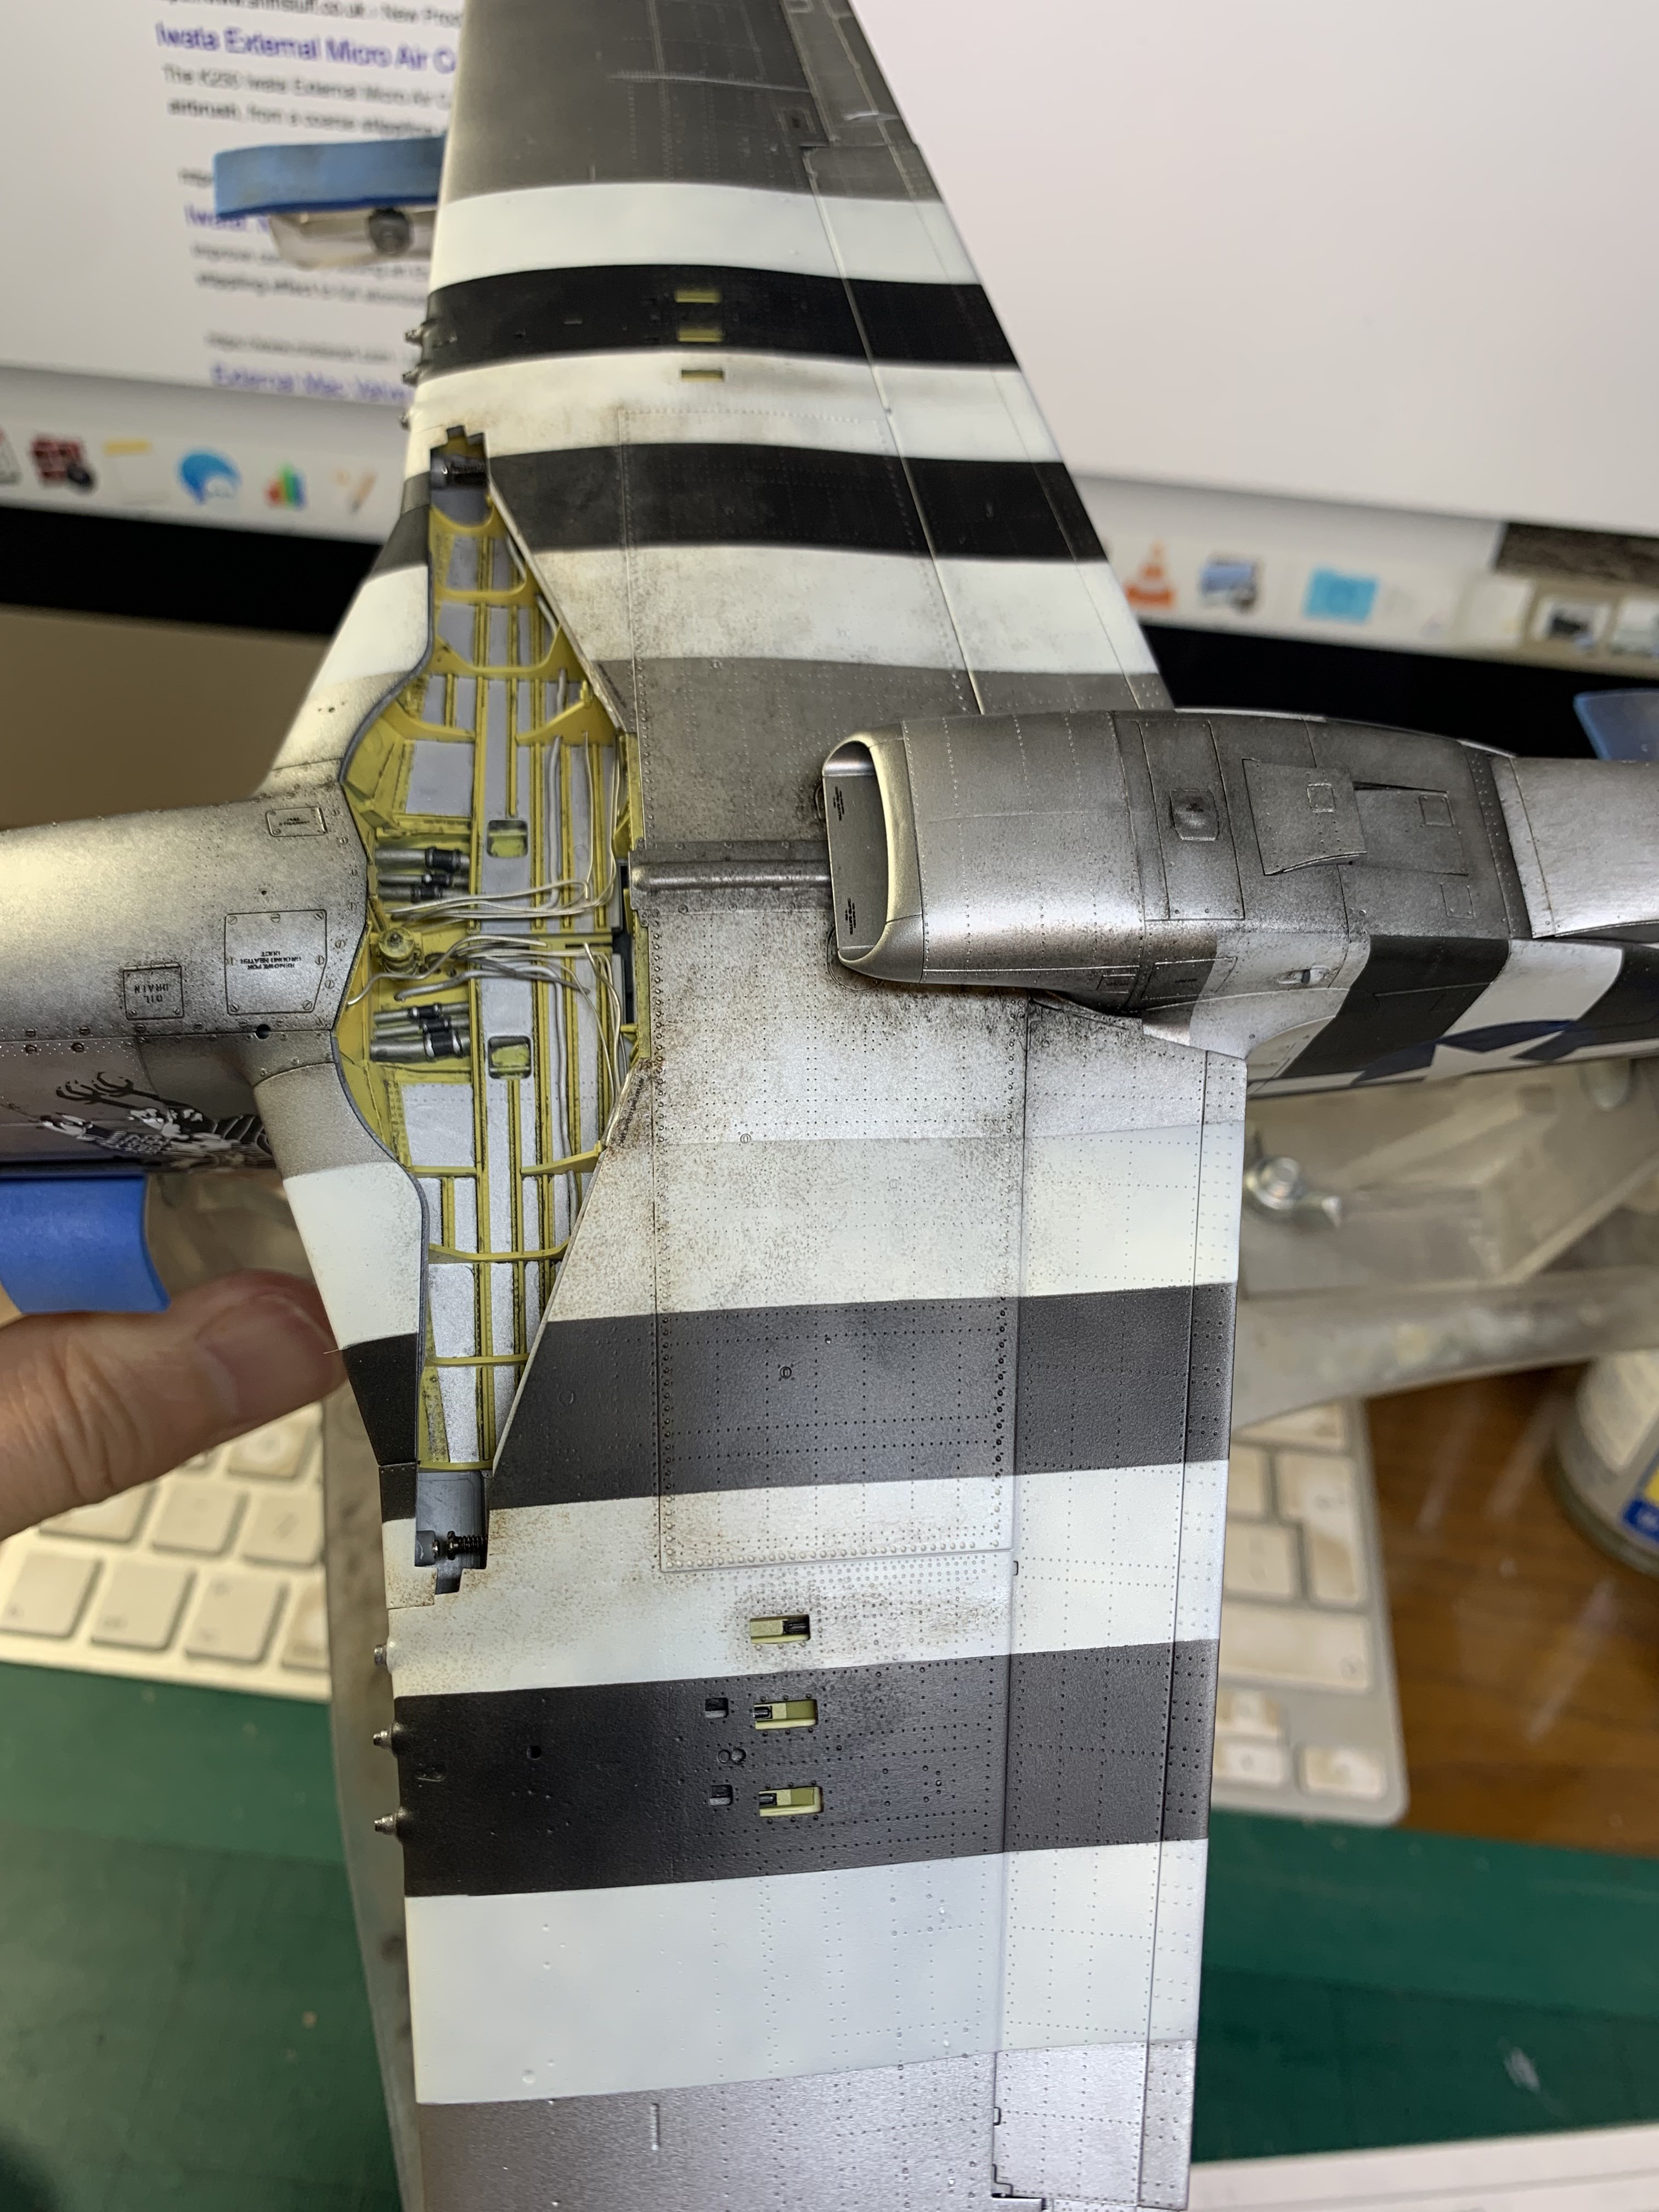
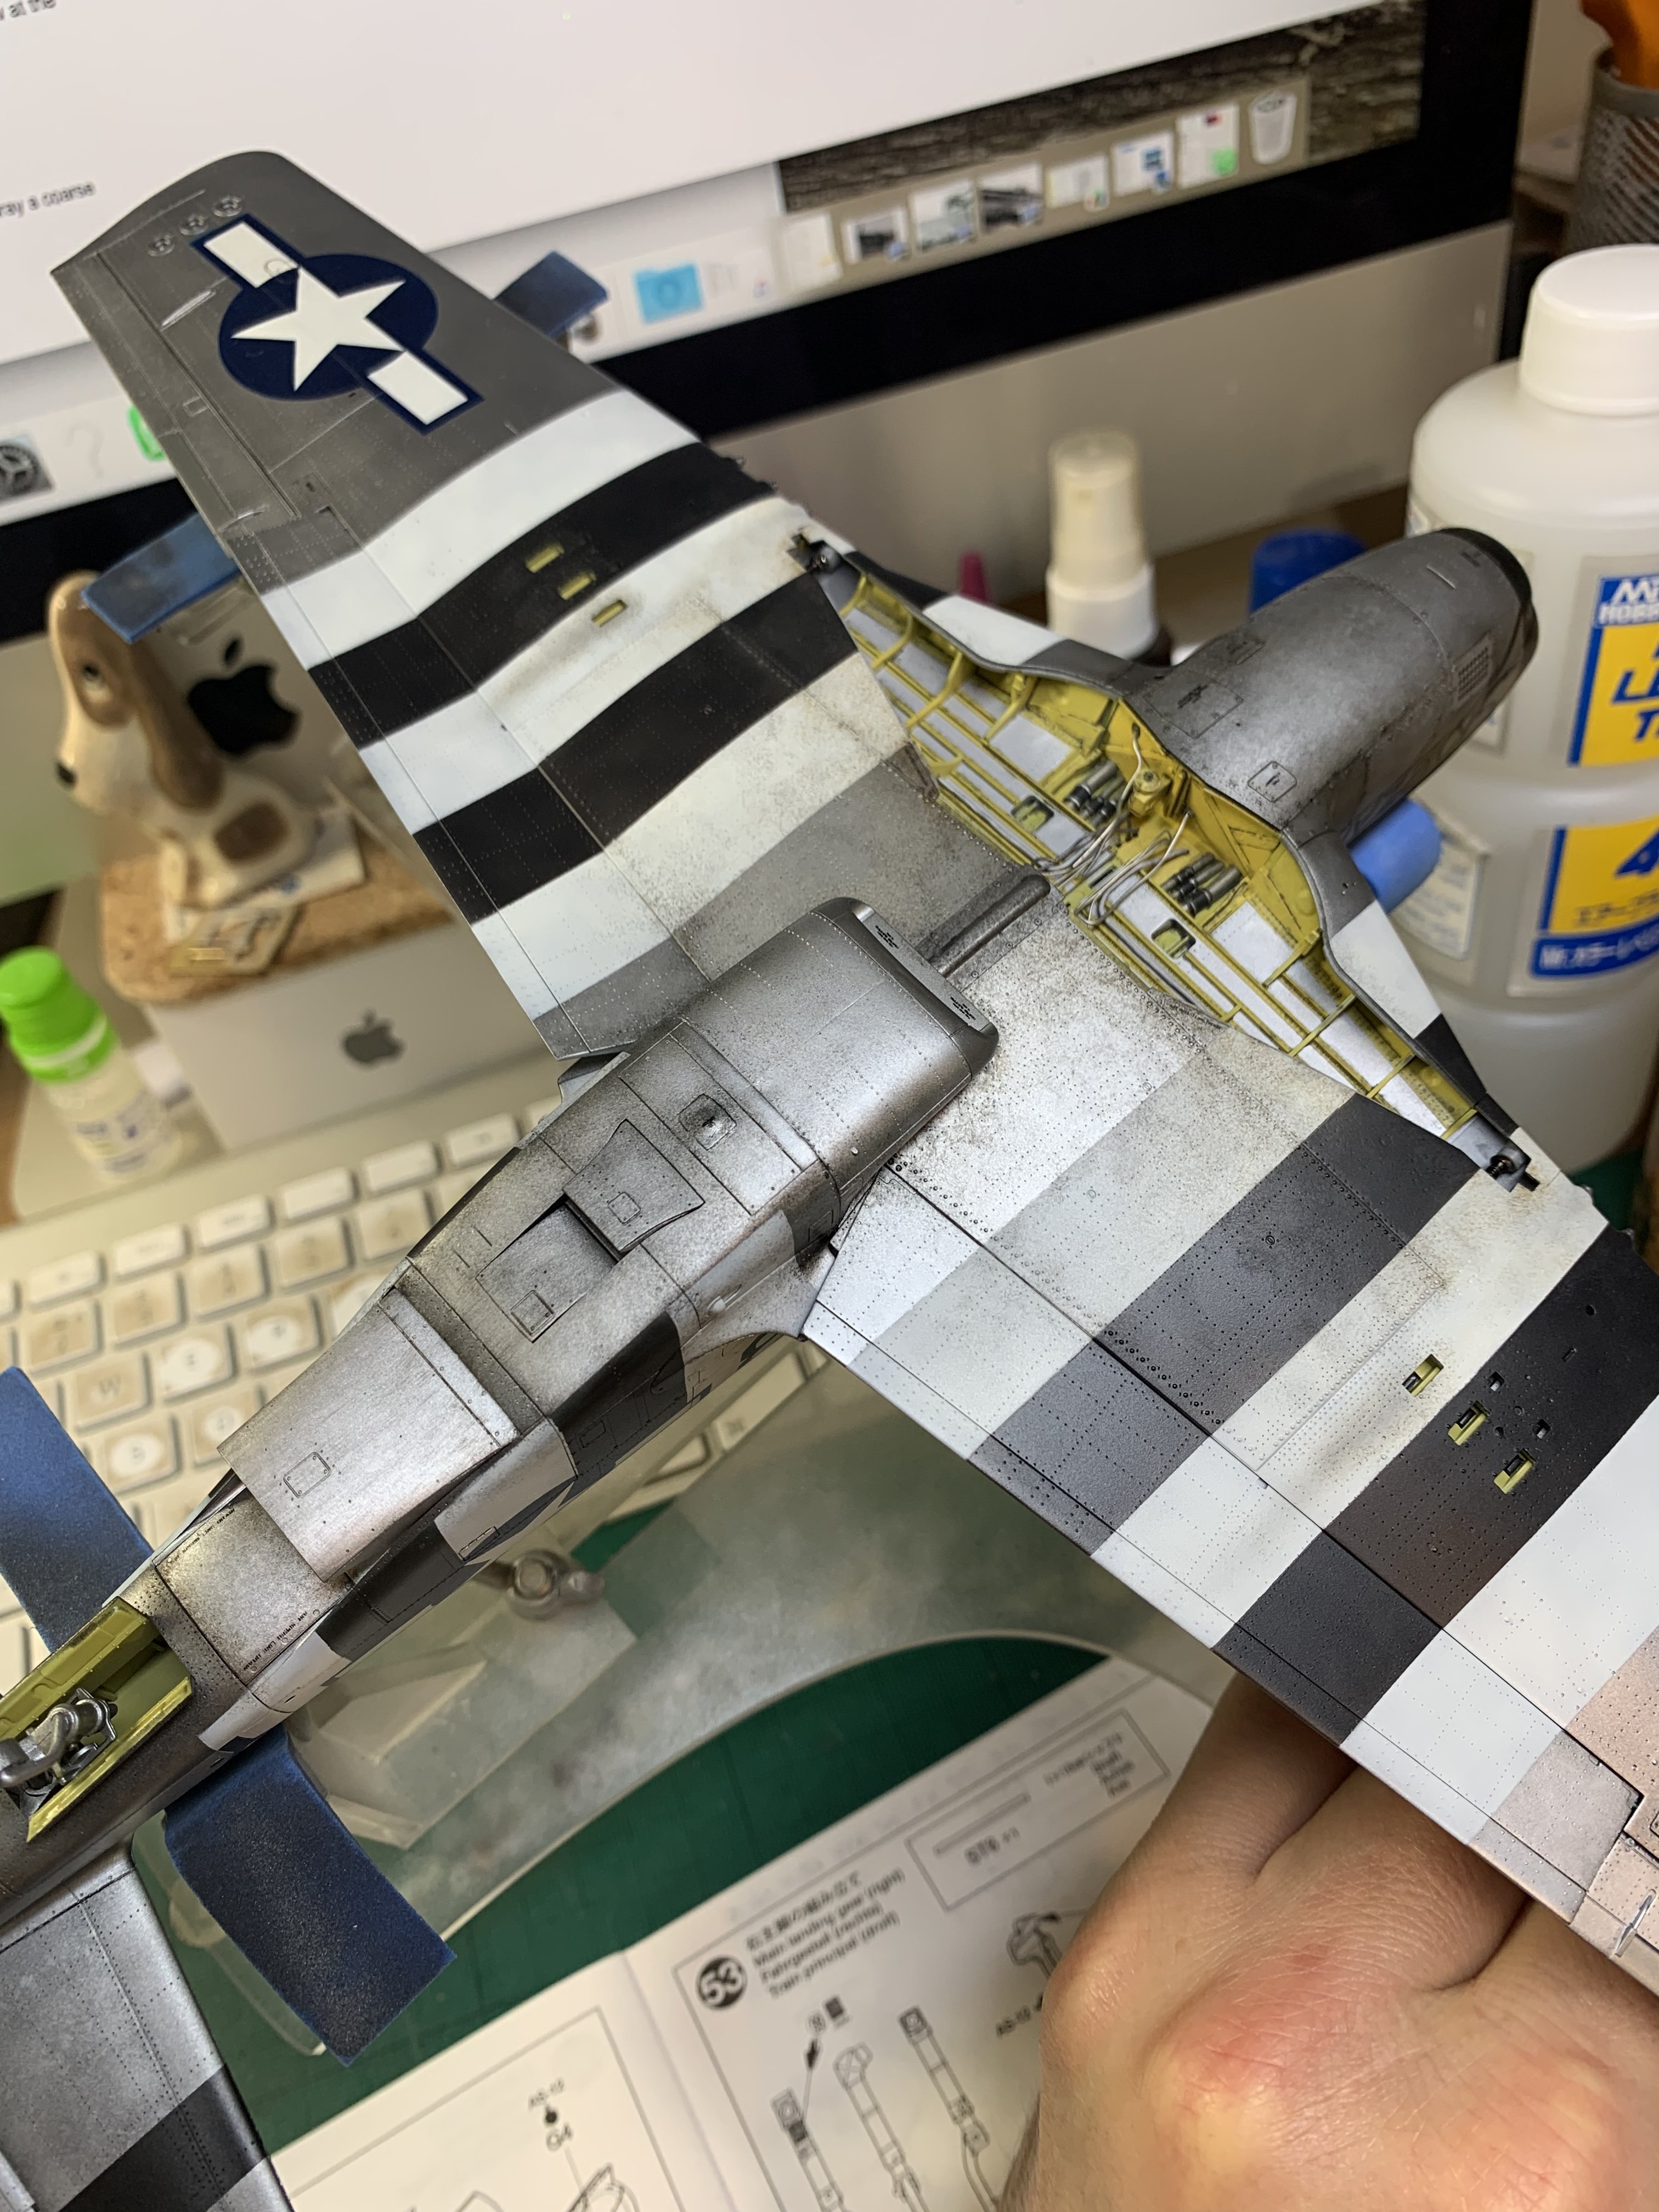
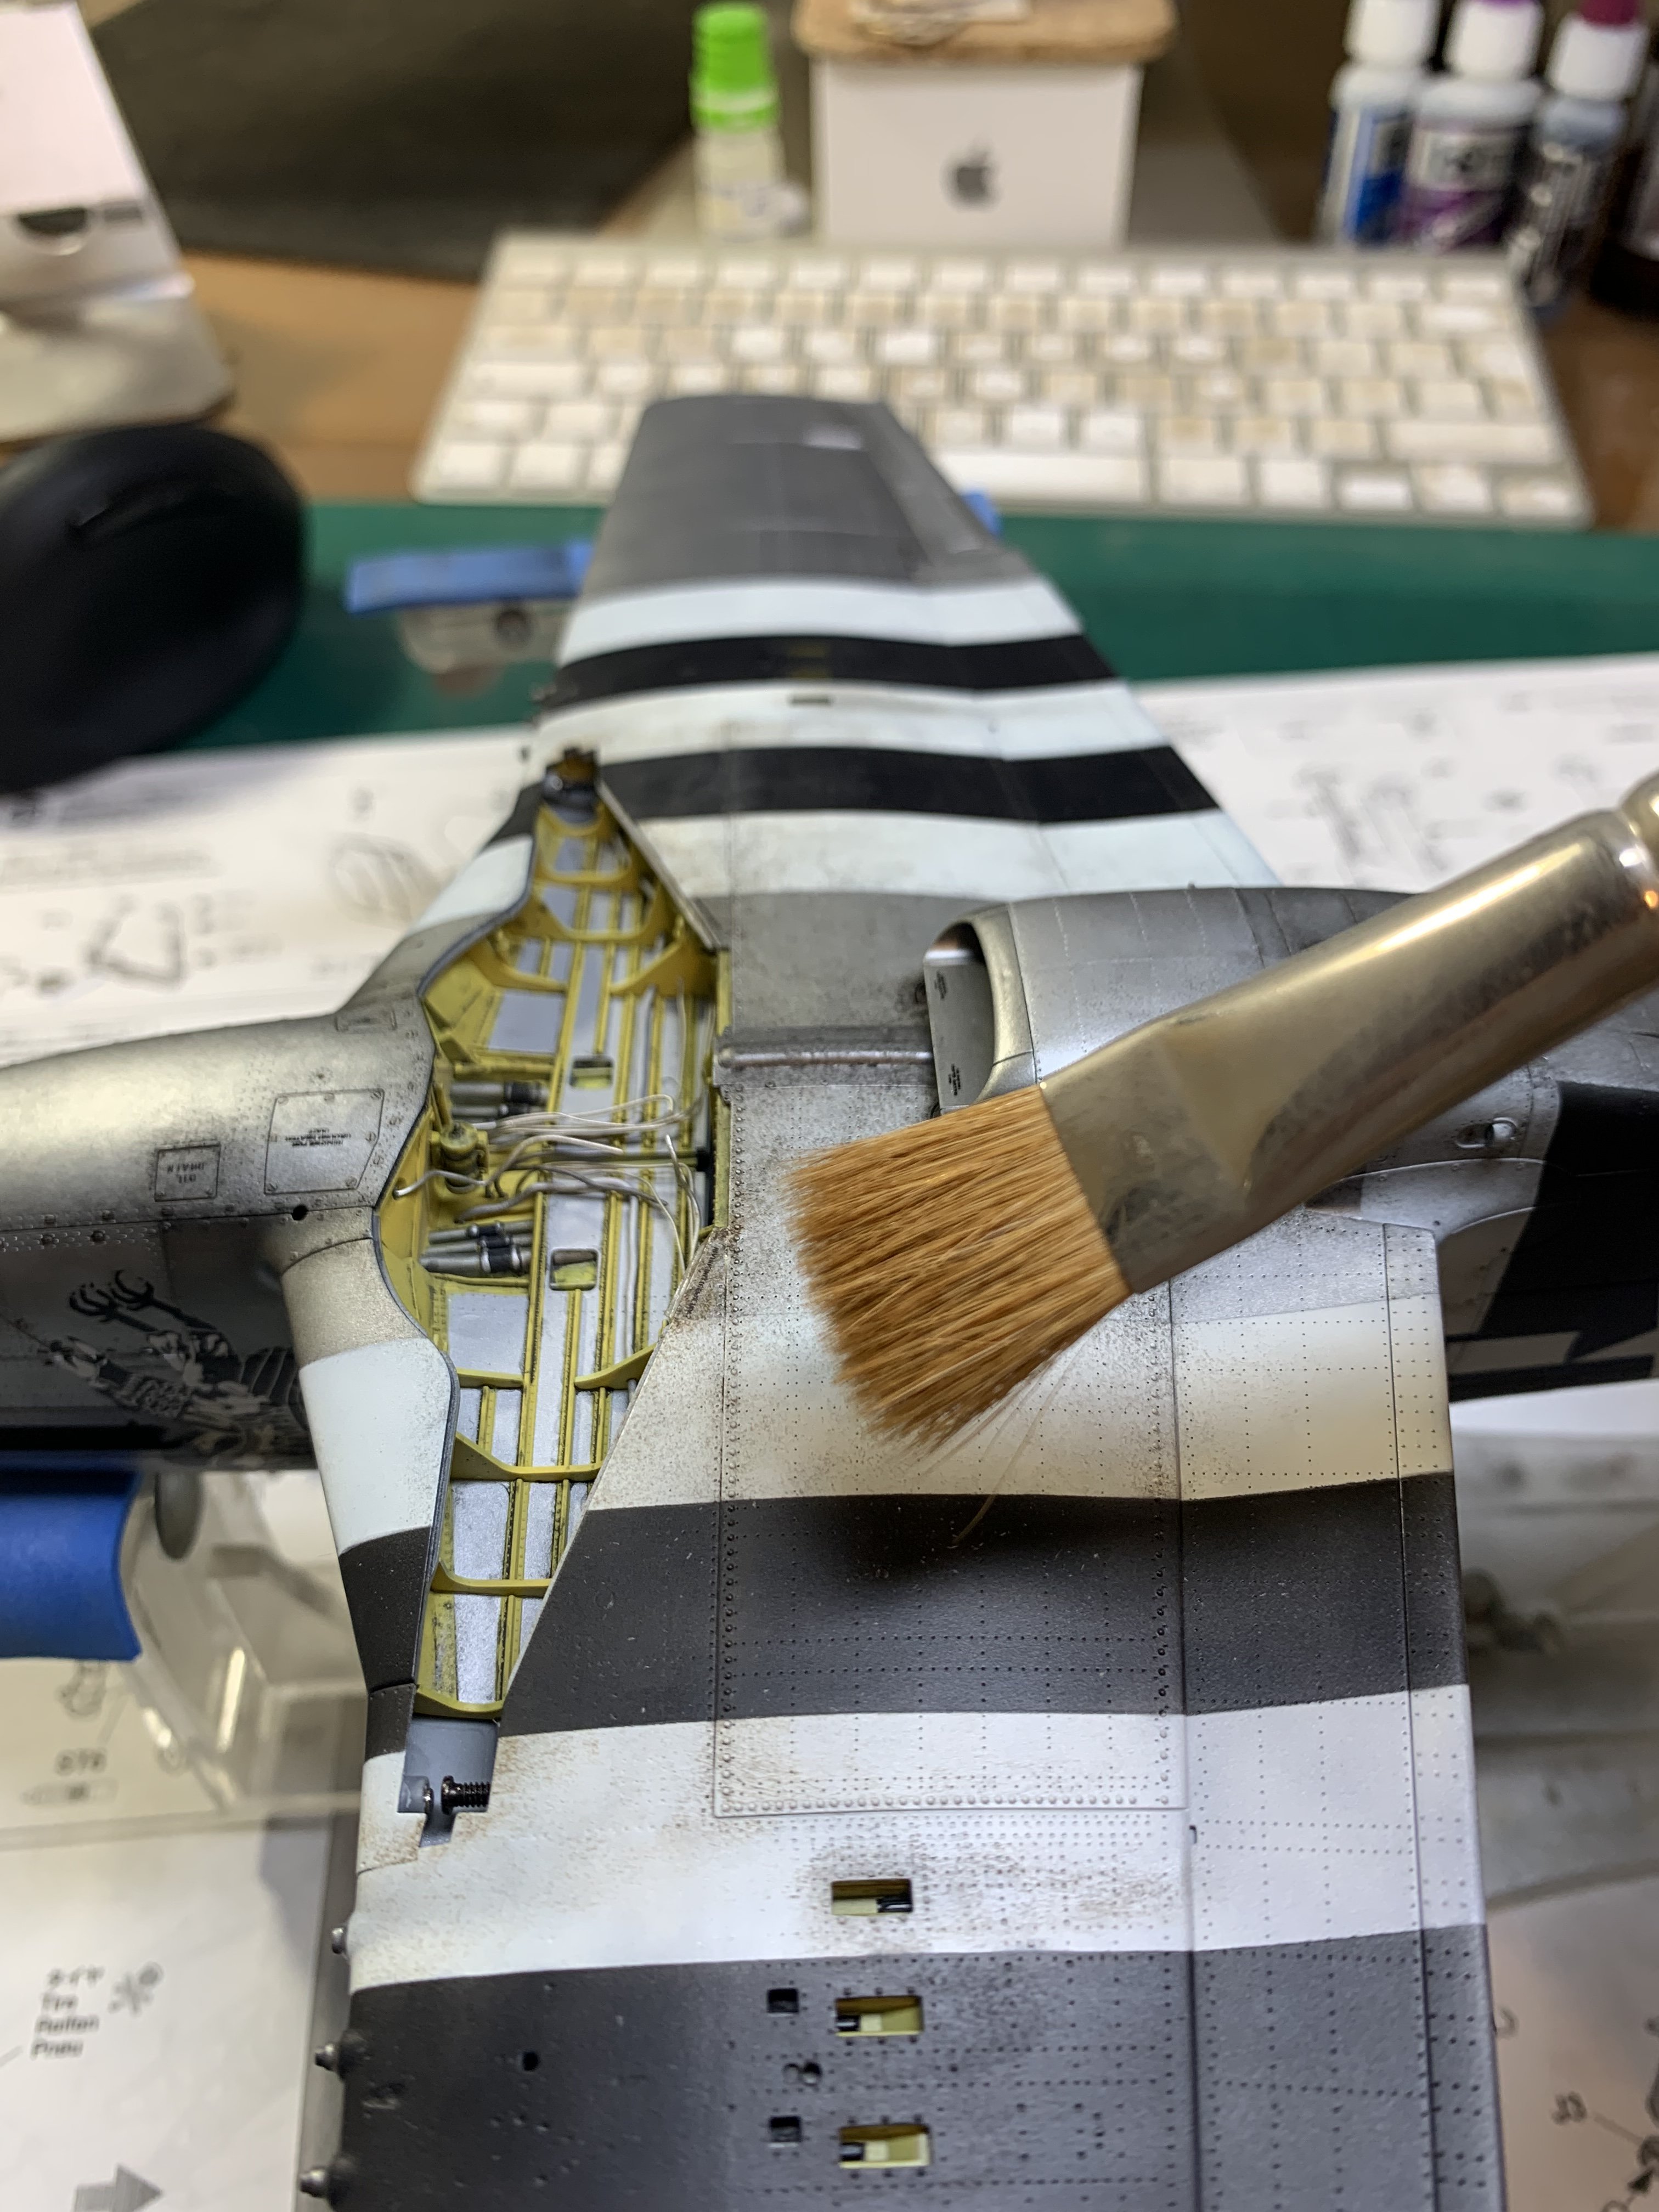
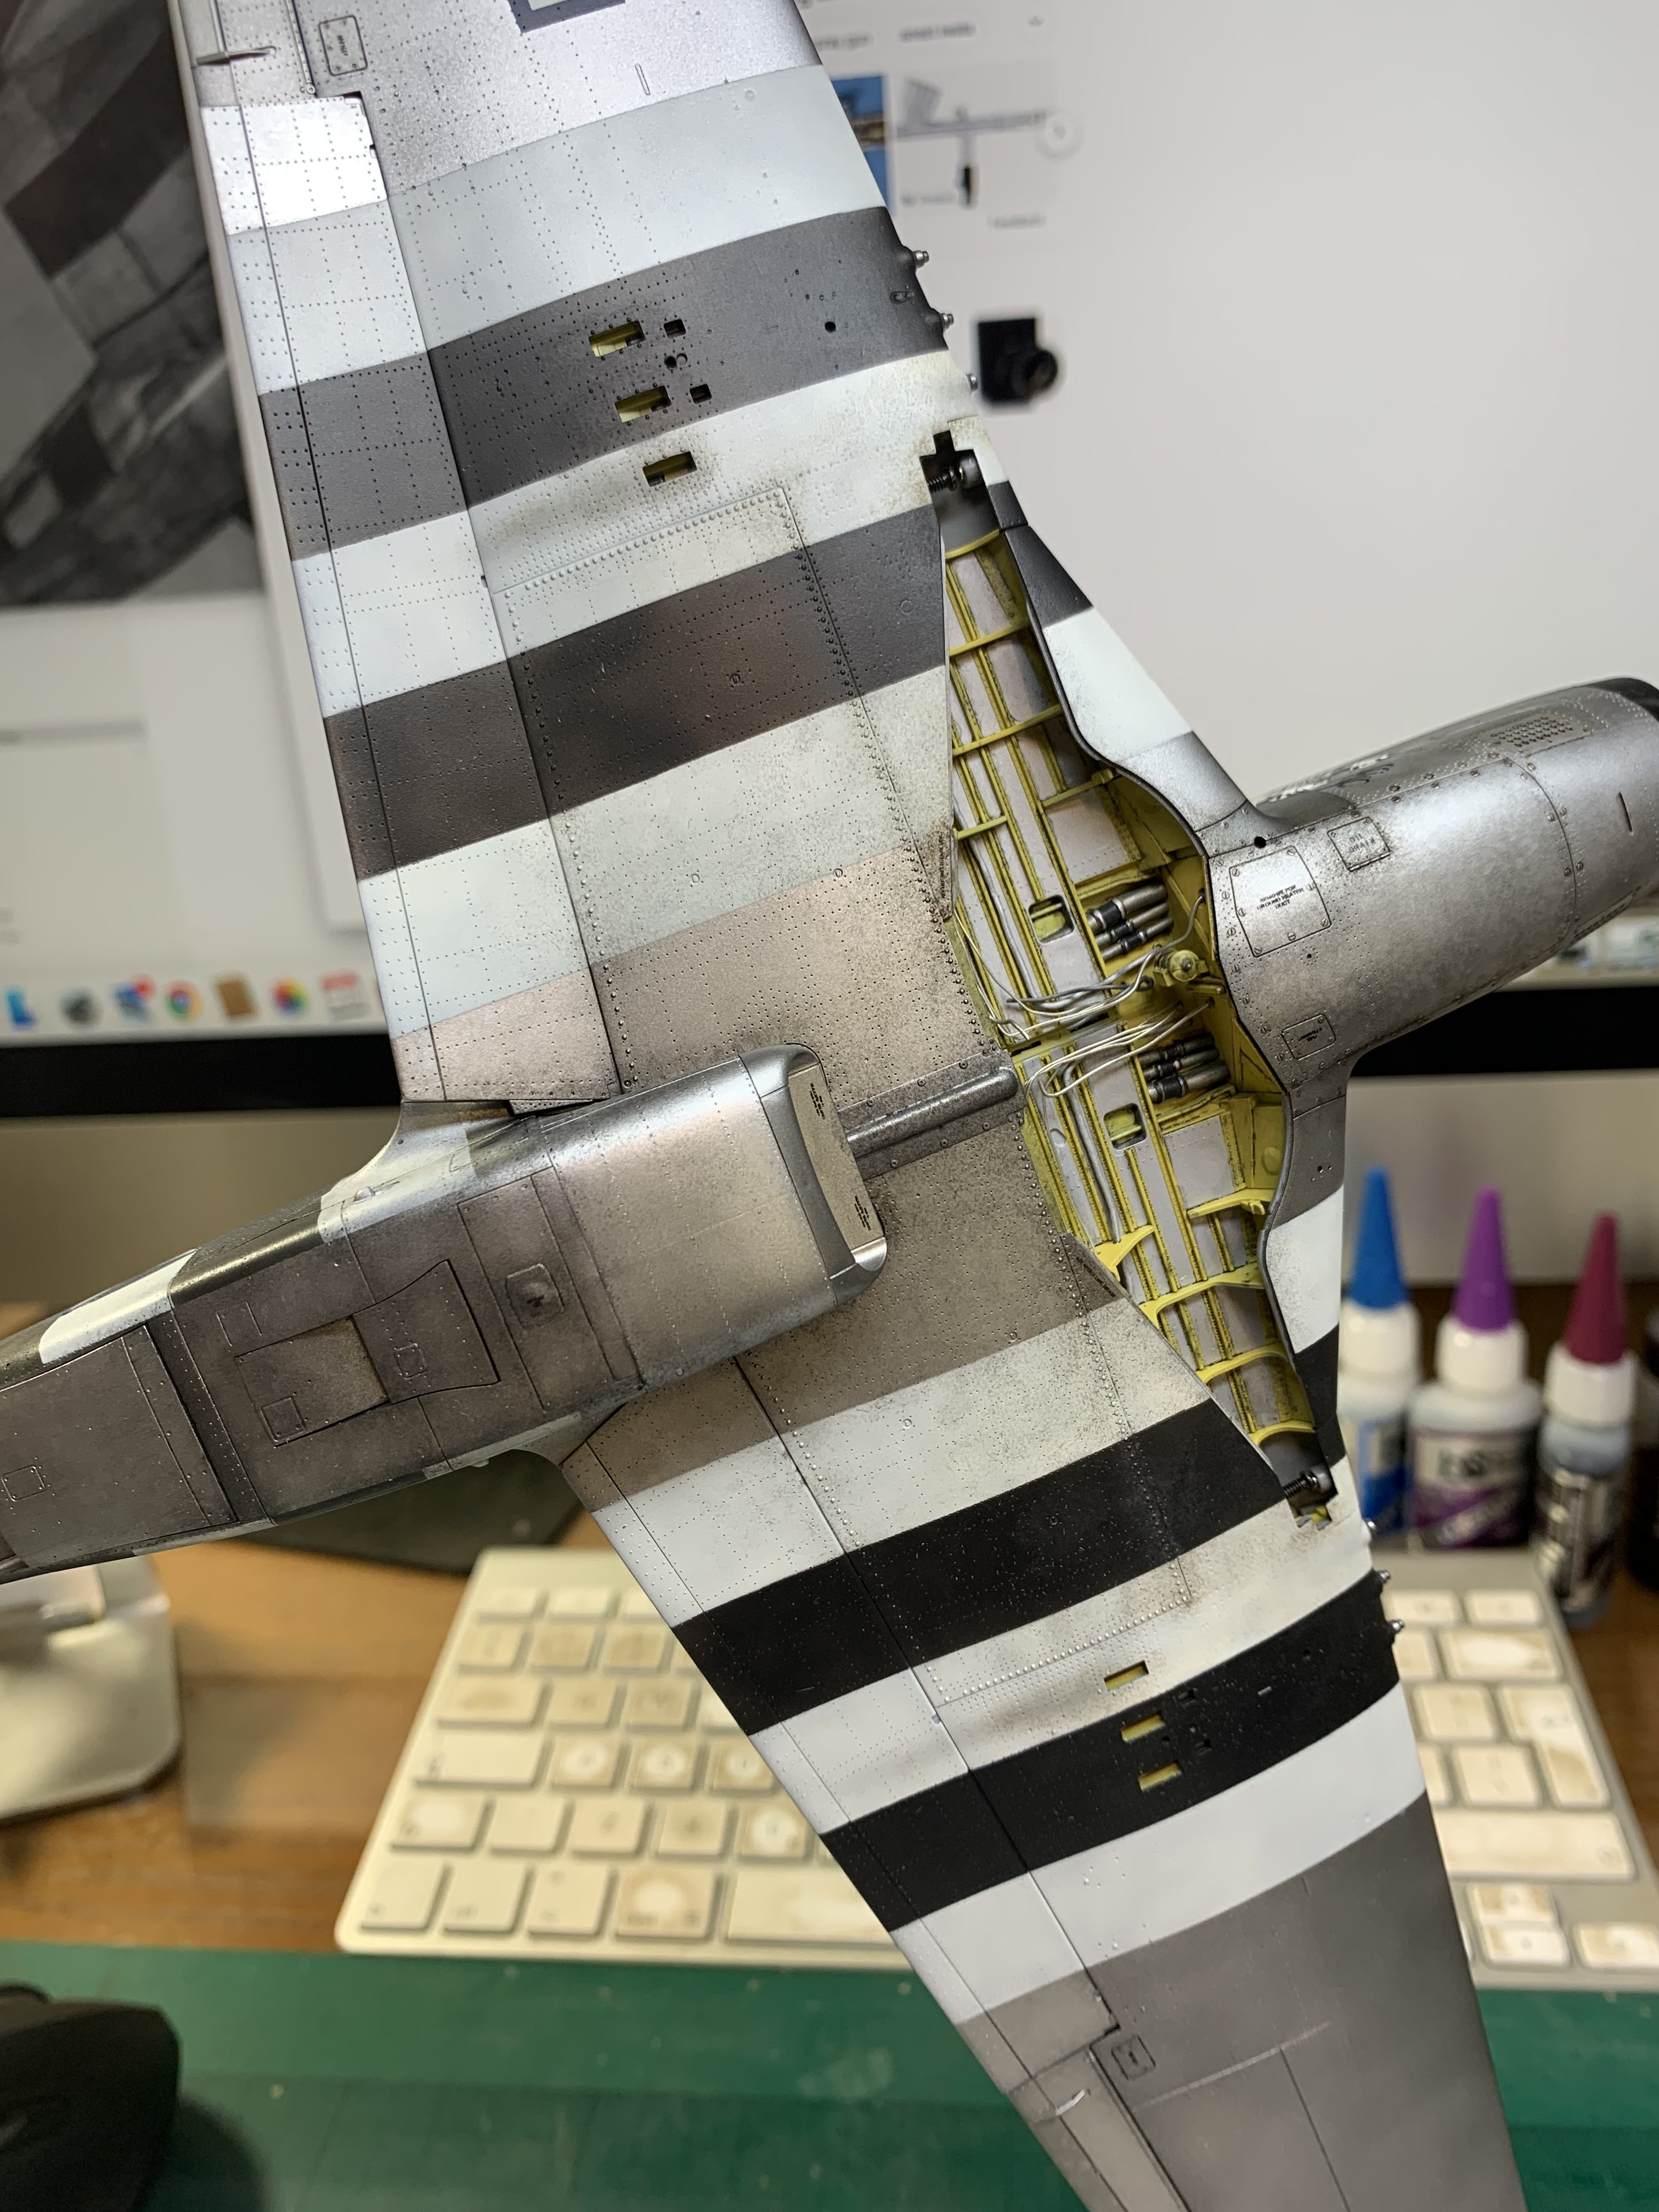
in pic below you can see some dirt (oil weathering of course) on the inner gear doors; it is a great shame that no-one has had the balls to make aftermarket resin (or 3DP) wheel bay (for all the extra wiring) and clam shell doors half open / almost closed
my attempts to busy it up were just that - I have probably only added a tenth of the plumbing that was actually in there!
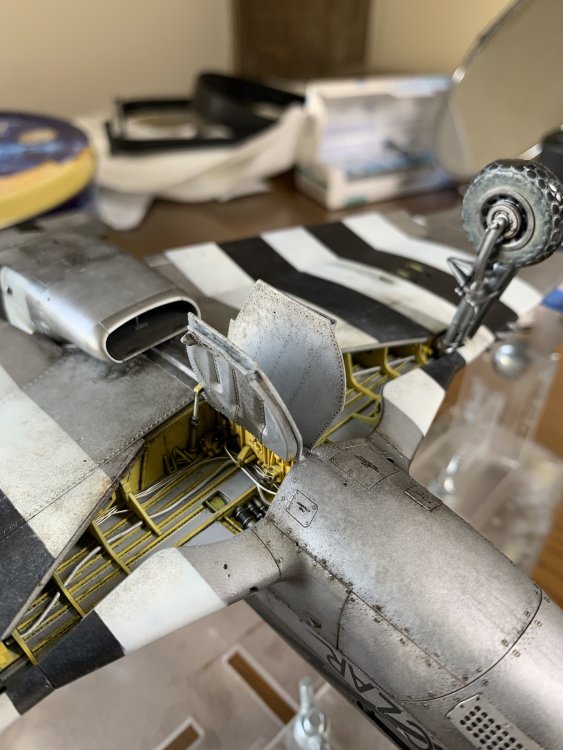
bomb racks are glued in place - interesting that the little arms are actually painted aluminium in the photo but the crappy iphone camera hasn't picked that up at all!
tomorrow when i have daylight i will add weathering on the underside of the wings around the bomb carriers - pics seem to show that although there was obviously no foot traffic there (!!) this area did get very grimy - lots of mechanics / armourers hands / shoulders and backs rubbing up there I guess

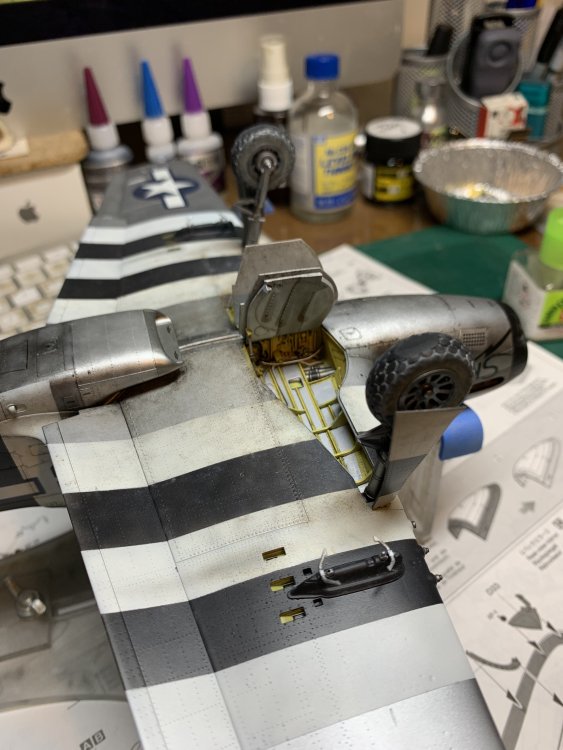
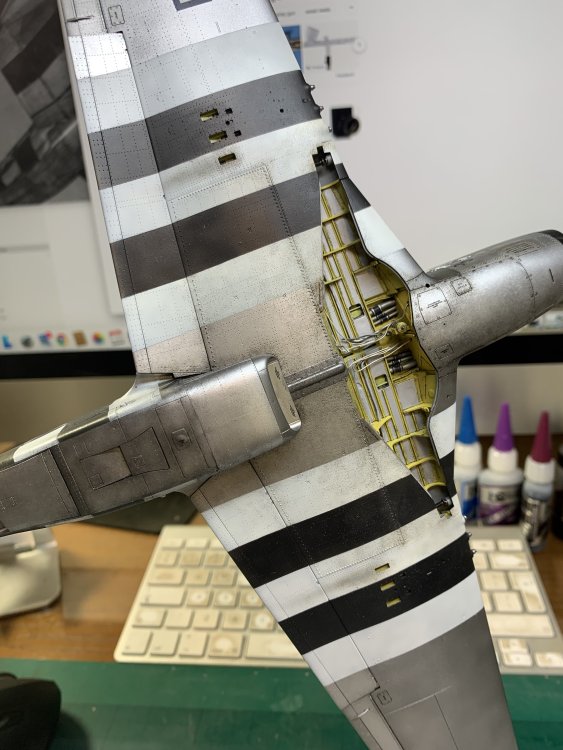
a wider shot - the arms show up silver in this pic

you can see here that i need to dirty up the bomb area...way too clean!
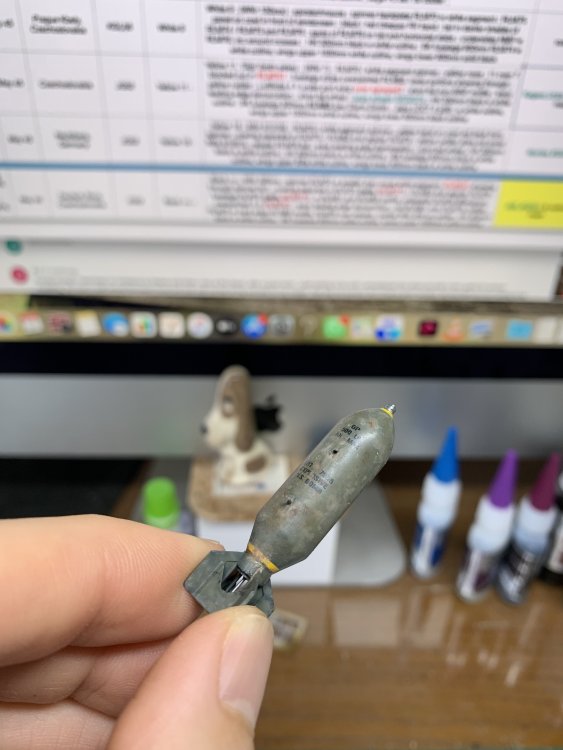
Eduard bombs - nice resin two piece efforts; I will add the propeller thingy on the front at the last minute (just asking to be knocked off lol)
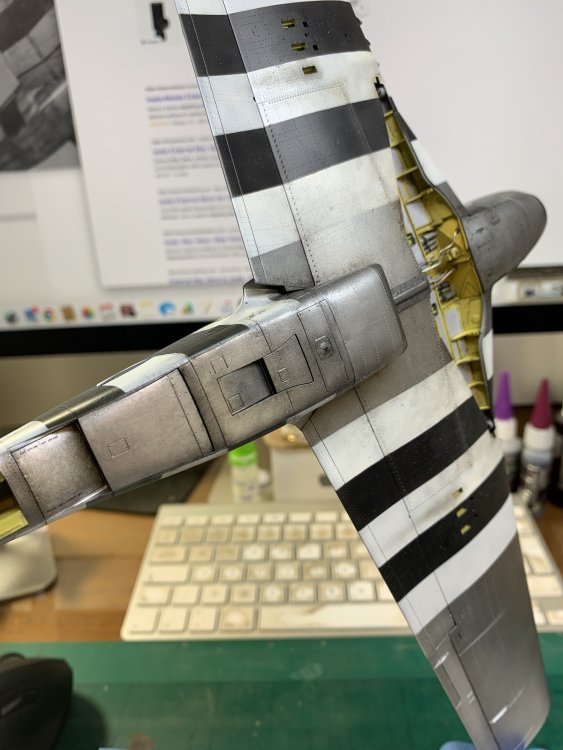
stencils are HGW, although Eduard decals are their "new" type where you can peel off the film
the stripes are Eduard decals and are a f*cking PITA!!! The carrier film means that lining it up right at the tail is nigh on impossible (unless you add the fin piece afterwards); this in turn means the stripe is not long enough to make it round the whole bomb; i ended up masking and spraying the remaining bit of stripe required - a huge faff for what was probably less than 2mm of yellow laid down!!
but...in the end reasonably pleased with how they look; in the pics below i haven't yet given them a matt coat, so they look a bit better but you get the idea
these things were often piled up in the open, rolled around on the dirt etc so weathering them is a must for me because 1) i think it is a fairer reflection of what they actually looked like and 2) plain single colour bombs look really really meh in my book; such a relatively small detail can make a big difference to the overall look of your model and as i have said before, you can't really goof up weathering with oils - especially here.

that's all for now; will try and update again tomorrow
cheers
Nick
-
6
-
-
18 hours ago, KevinM said:
So I bookmarked the site I watch alot of YT normal TV is woke/BS and weathering is an artistic license within it self yours looks wonderful.
")
Oh and therein lies the problem in some part I am an enamel guy probably have 200 bottles of MM and a mix of others.I like Alclad for my NM finishes which is lacquer paint.Hence the reason one has to use a clear opposite of weathering agent which for some reason does not always work for me.
over the years I have been through many types of paint
MRP is hands down THE BEST all round paint for airbrush (the Aussie SMS lacquer stuff is apparently on a par, but I have no reason to switch).
If i was you, I would get some MRP for a particular project; you'll love it never look back
Alclad...hmmm...some of their metallics look lovely, but they have as much resilience as a chocolate fire guard; personally, I have used them but then dumped them in favour of MRP.
Just my experience, and your mileage may vary, but i really think you are holding yourself back staying with those enamels 🤷♂️
-
3
-
 1
1
-
-
9 hours ago, Martinnfb said:
Lovely, finally someone creates realistically weathered P-51 aluminium finish. And then, there is THE HAND
")
Well done.
Hey, I moisturise, so it’s all good 😃
4 hours ago, KevinM said:I wish I had that confidence scaredie cat.I also think that pluming in the wh wells looks much the part.

Well for years I always used to tell myself and others ‘I like my aircraft quite clean’ but I was just deluding myself. I was scared to try but I also didn’t know HOW or WHAT to try.
my basic how to’s are meant to show people that you can indeed just dive in and you won’t drown.
For those who want some more in depth tutorials I would suggest seeking out Will Pattison’s YouTube channel - lots of vids on all the basics (and I mean all the basics) but also some specific ones on OPR (oil paint rendering). And if you Facebook, I would also suggest joining the Scale Modelers Critique Group - as I’ve said before in terms of technique I learned more in 3-6months there than in 10-15years on modelling forums.
just to say once again: paint with lacquers eg MRP, or acrylics like Tamiya, - basically anything not enamel; semi matt or matt surface (if it’s shiny gloss you’ll just push the oils all over the place like slipping on an ice rink); good quality oils like Winsor and Newton or Abt 502, odourless mineral spirits eg Sans Odour… and away you go!
-
3
-
3
-
-
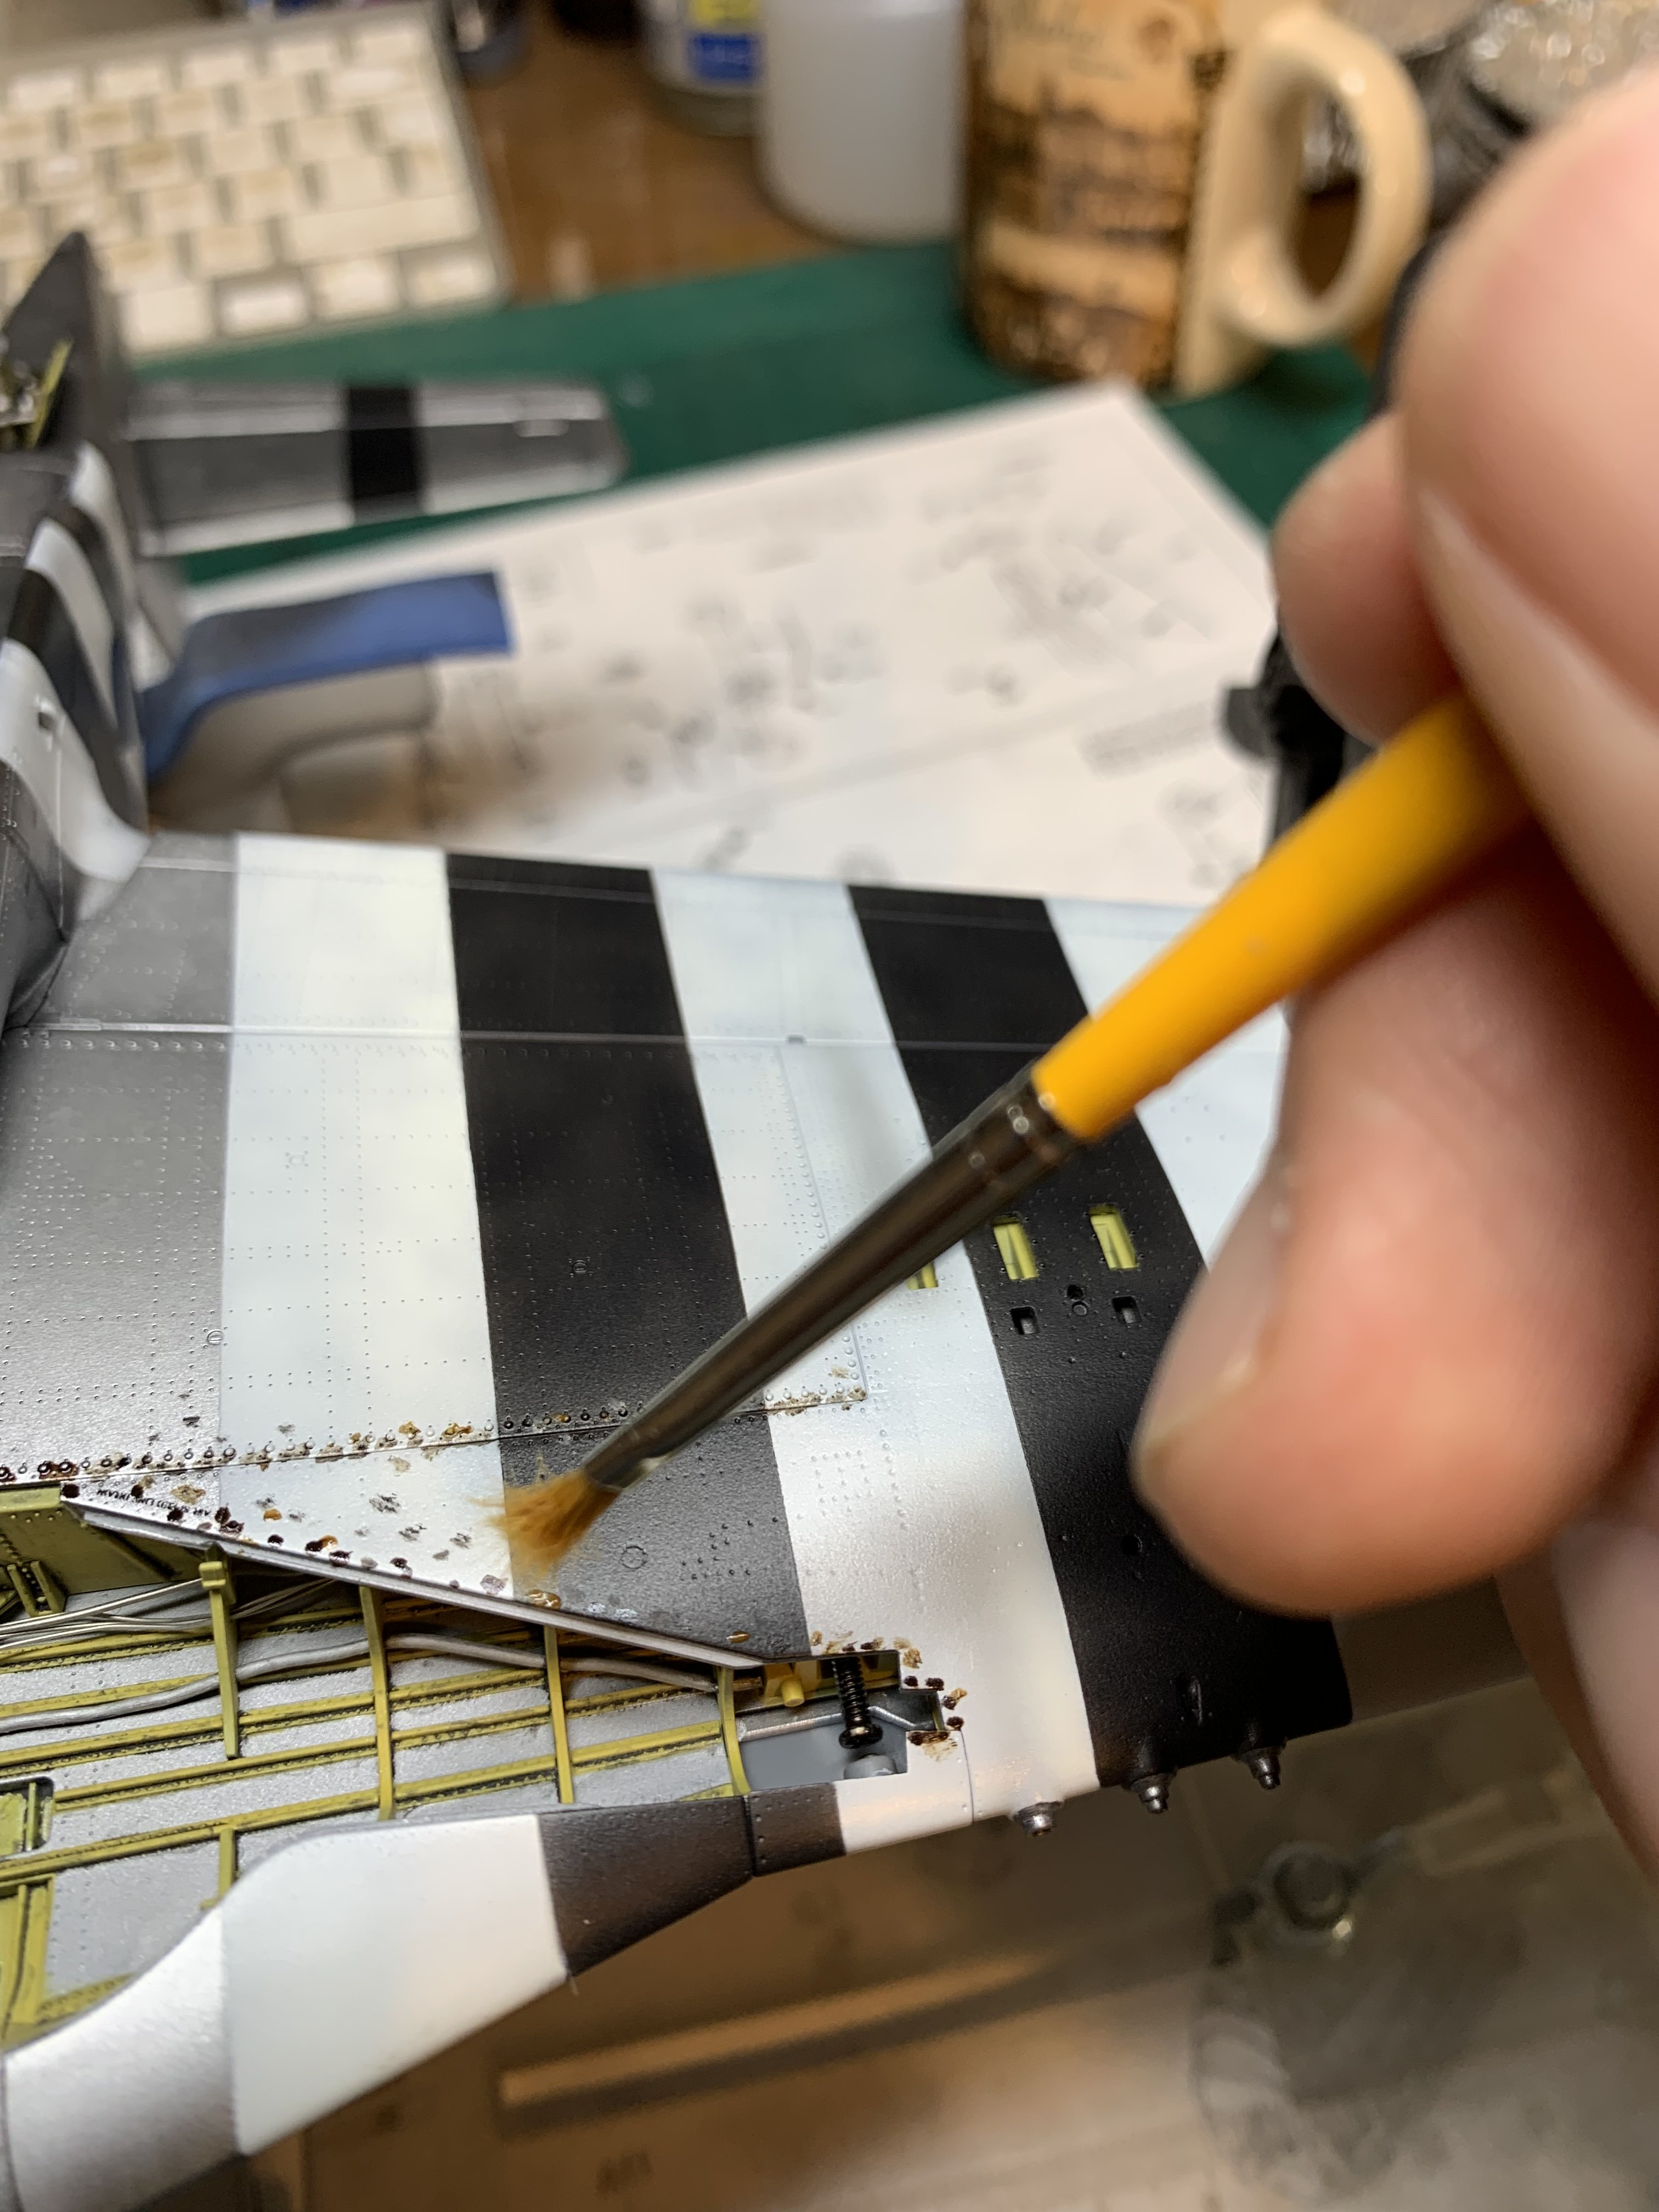
Some weathering underneath
I have given fairly in depth step by steps as to how I work with oils in my P-40 Neville Duke build, and I’m not doing too much different here
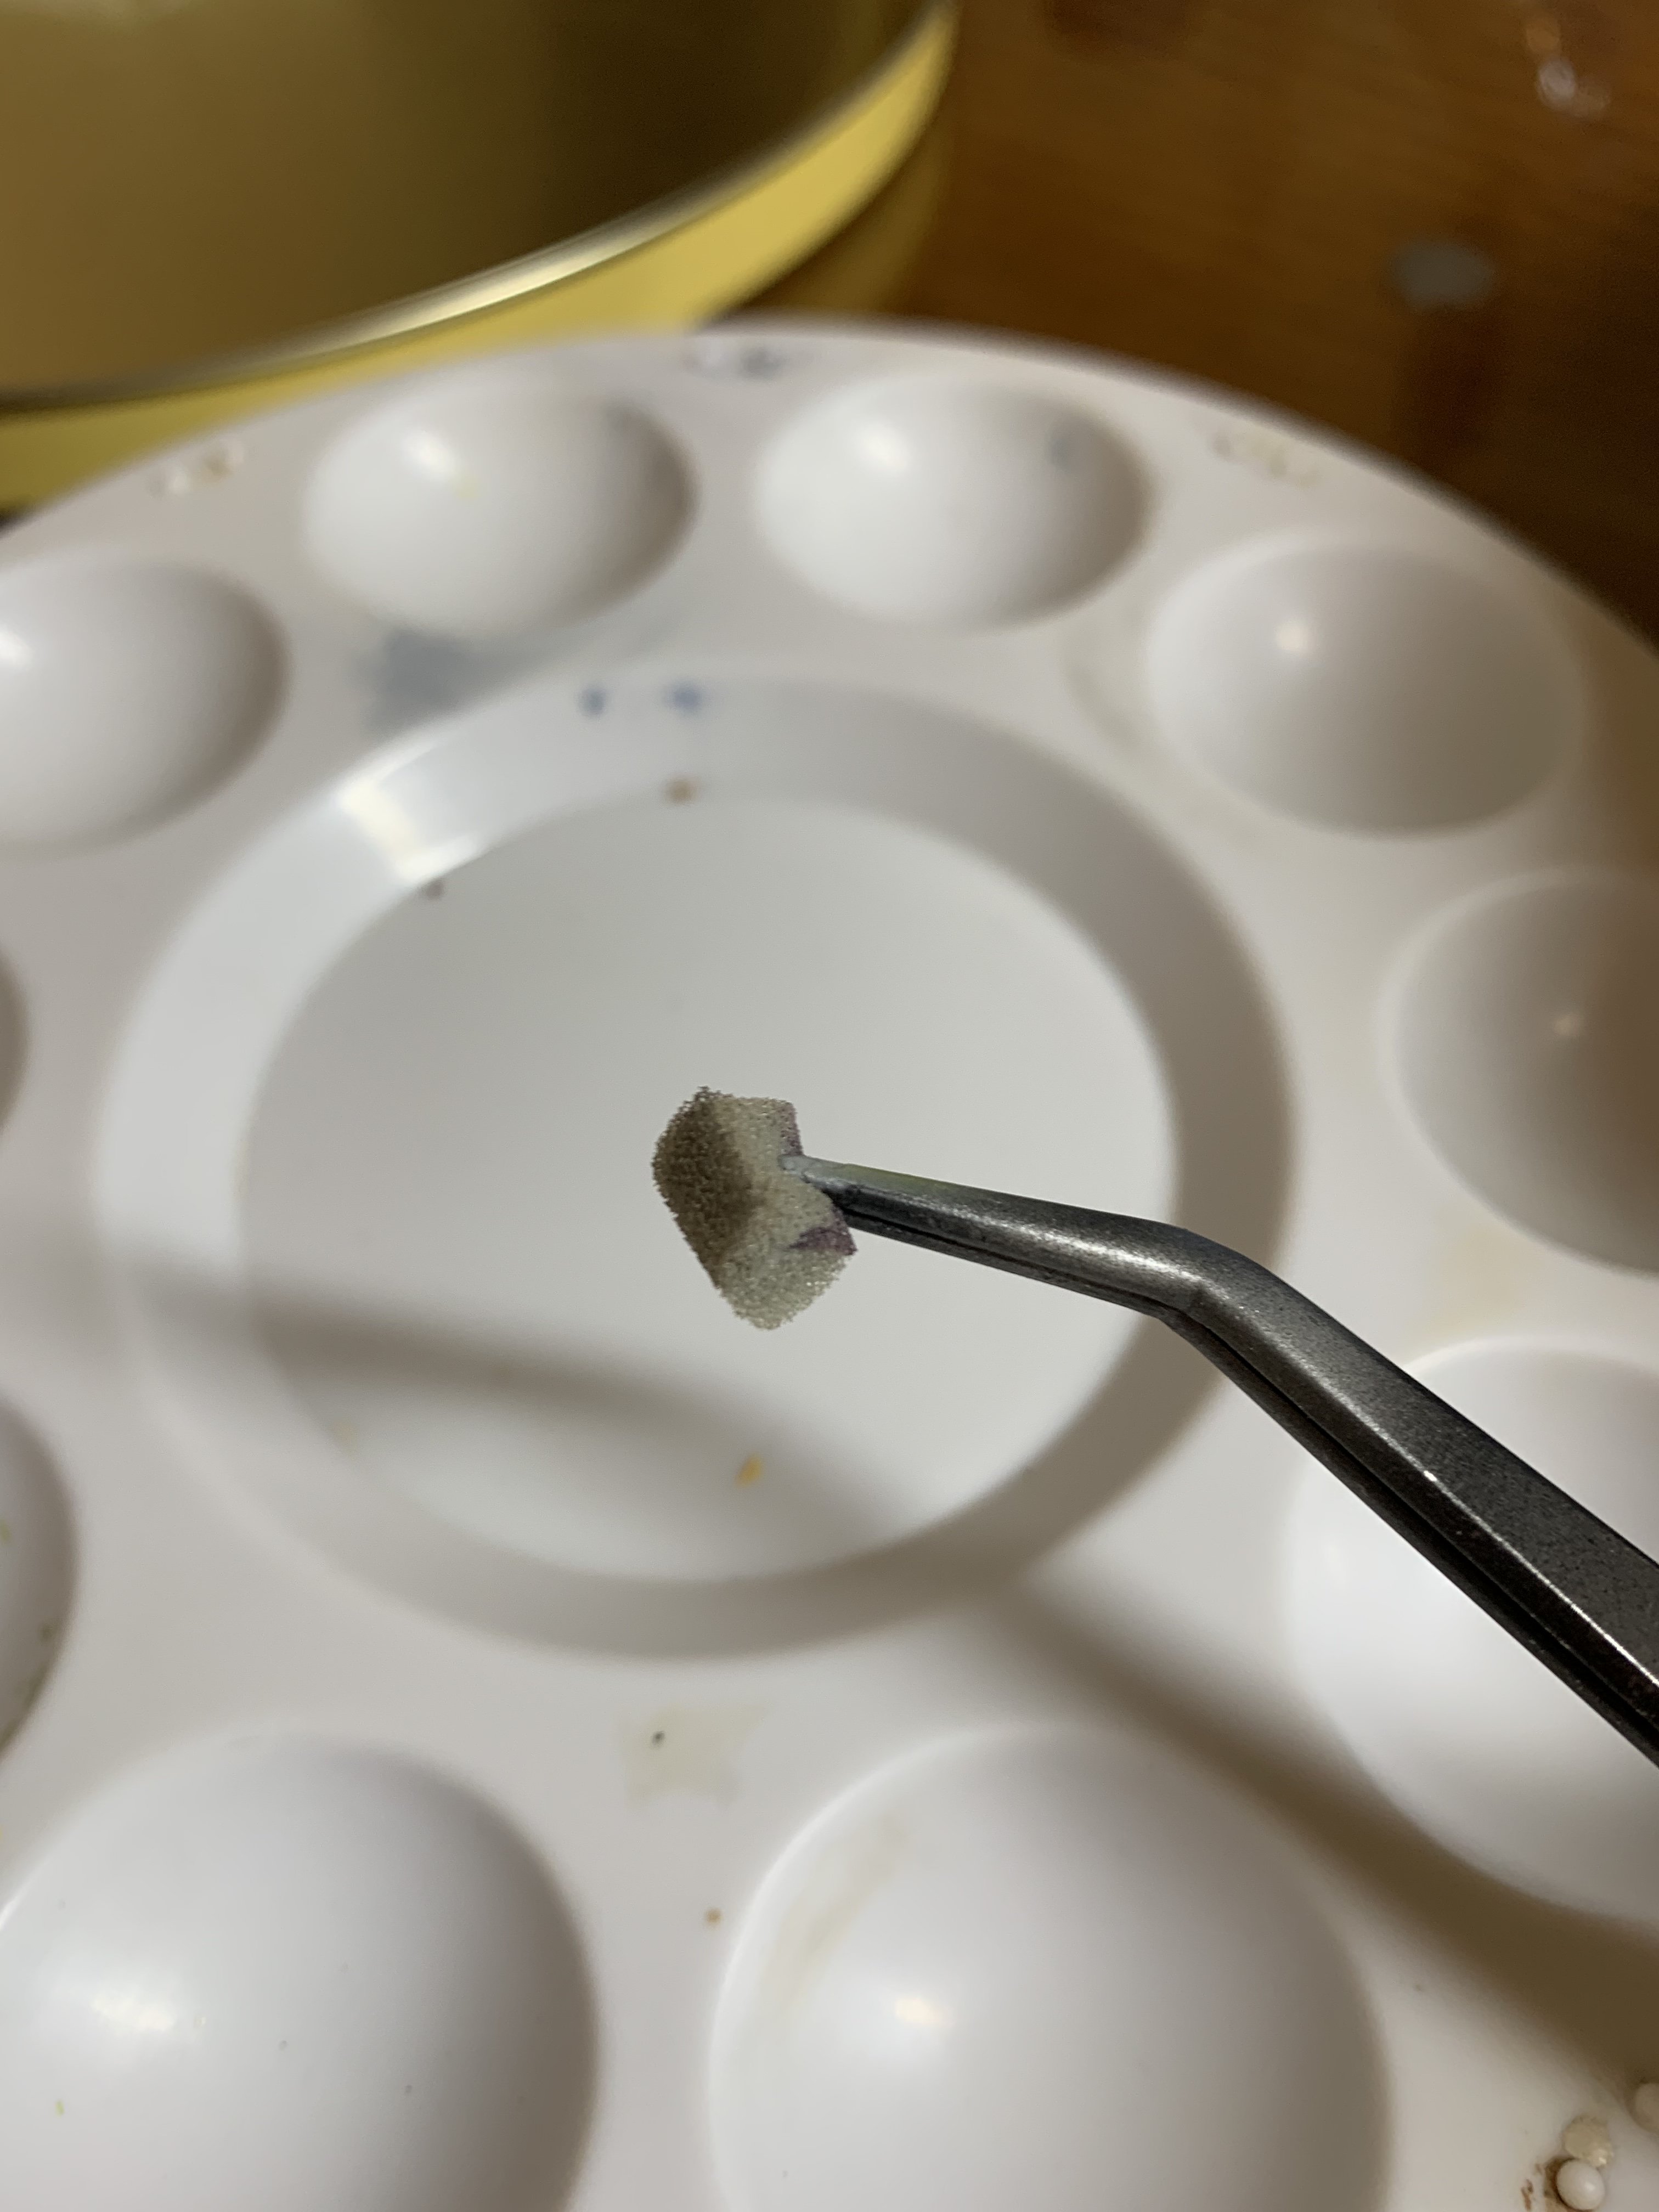
pallet was 4 days old and not the best; I put a drop of Sans Odour on each colour to bring them back to life
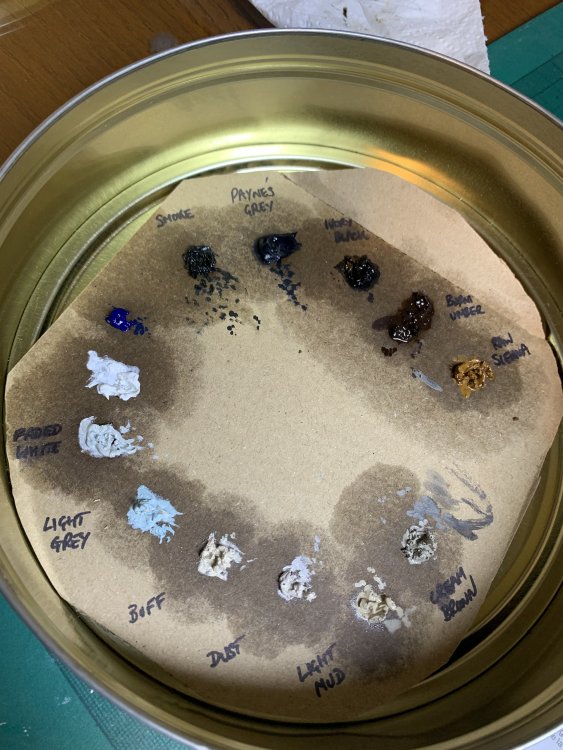
One thing I find helpful with weathering is to have in mind what you want to achieve and think about what colours / processes are involved - this session was going to be dark stuff on the central areas; I will then review and add some lighter tones tomorrow if time permits
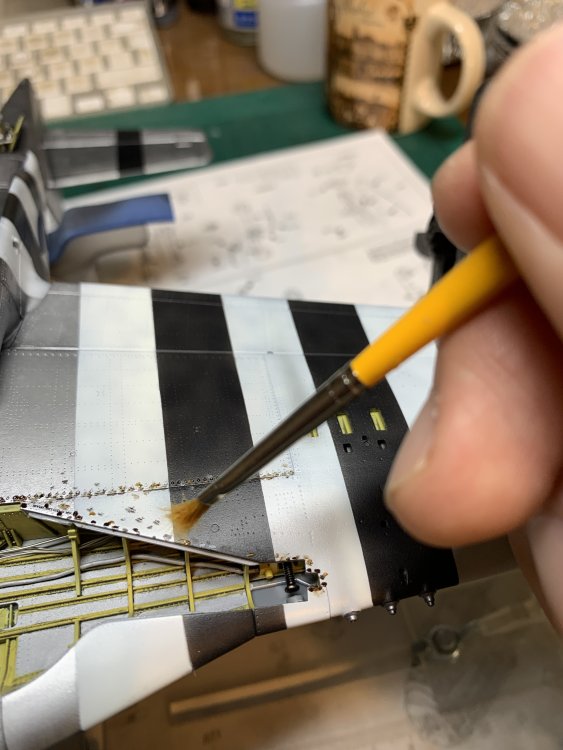
I started with some dabs of oil from a brush - the paint was creamy ish consistency but probably drier than normal
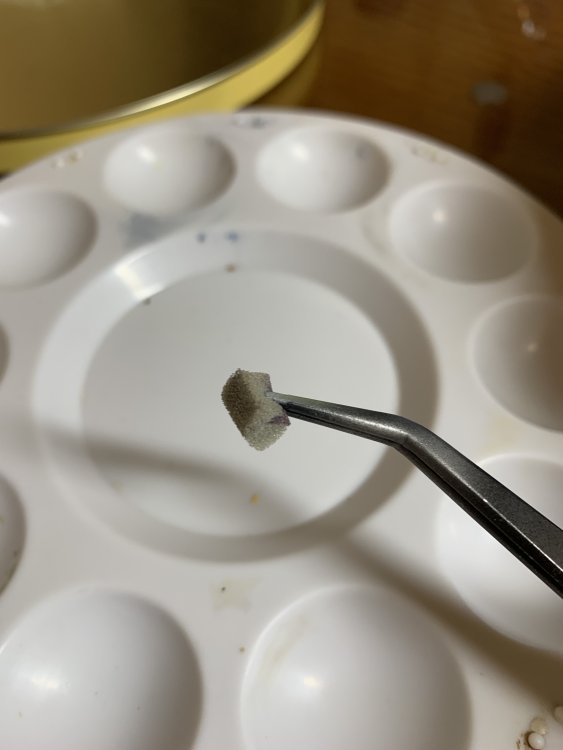
whilst there are pics of P-51s leaking like Corsairs, the pics I have from 363FG don’t really show that; so the aim will be dirty, not ‘leaky’; sponge dipped in thinner then almost dried back out and shitty brush are used to blend
i re-iterate that with oils the main thing is don’t be scared because if you f*ck it up, just flood / wipe with mineral spirits and erase; non-enamel paints will be impervious to MS.
after various dabbing and sponging here is what we have


I wasn’t unhappy, but it did look a bit ‘rough’, so out comes the big brush - I think some of these are known as a deer foot stippler - which is totally dry.
gentle dabbing and blending softened everything - not sure this comes out in the following pics, but in the same session the oils are likely not fully dry
as an aside, if you are happy with any given piece of work and want to ‘save’, you can give them a blast with a mini hair drier (Mike Rinaldi tip) - this is something you can do in session and continue. Another method is to shoot some MRP Clear thinned with Mr Levelling Thinner - this will very subtly ‘melt’ the oils in to the surface (Will Pattison / SMCG tip).
anyhoo, here is where we end for the evening before I went to watch the rugby
finally, something from the original painting stage…re metallics I found putting together a colour card helpful
-
8
-
2
-
-
always sad to hear stories like this
my advice: build a Tamiya 1/32 next
life's too short to spend too much time on sh*t kits
-
1
-
-
i try to ignore it for the most part but when someone tries to tell me I need to look in the mirror because I'm building a 109 or a Das Reich Tiger rather than a P-47 or a Sherman they can f*ck off
I am comfortable with my choices and feel no need to virtue signal my anti-Nazi credentials. If we do actually get into all that, I'm happy to tell them how my Grandfather was 7RTR Churchill driver in Normandy, one Great Uncle served on MTBs in Royal Navy, the other in Matilda tanks in North Africa; that I have been to Normandy with a coach load of veterans - back in 04 - to pay my respects etc etc etc.
the parallels with another recent movement whose motto related to certain lives and their importance is interesting - in both cases there is absolute zero room for any other view, or any sensible discussion; it's one view or you're a racist.
I think that's all I better say!
-
3
-
1
-
-
Hi Chris,
first off, primer was black MFS1500. I worked from a few pics showing panel breakdown and what colours I wanted them to end up - this is all fairly arbitrary.
Then spatter template of mostly the ‘end’ colour, see where I am, then start to add spatter of some of the other metallics near the end.It was first time I’ve done this and all fairly unscientific! Some of the panels are probably darker than I would want, but overall quite pleased.
Specifically, there was no traditional panel line preshading.
Hope that’s some help at least?
-
3
-
1
-
-
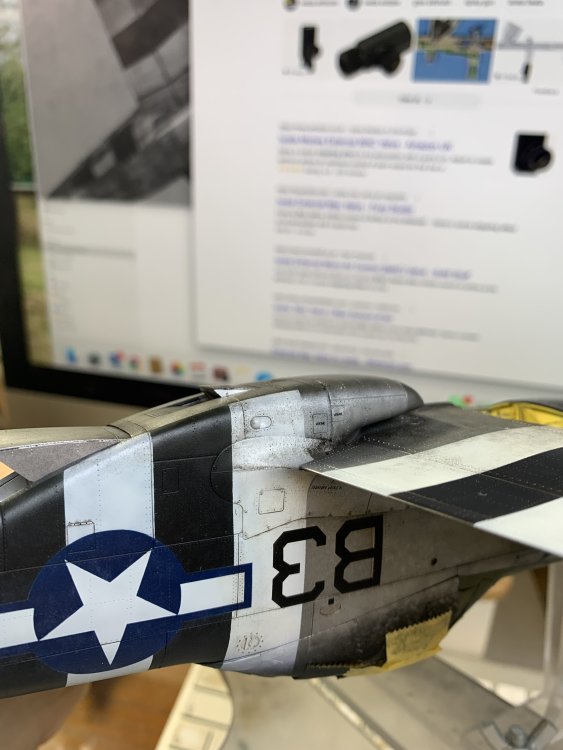
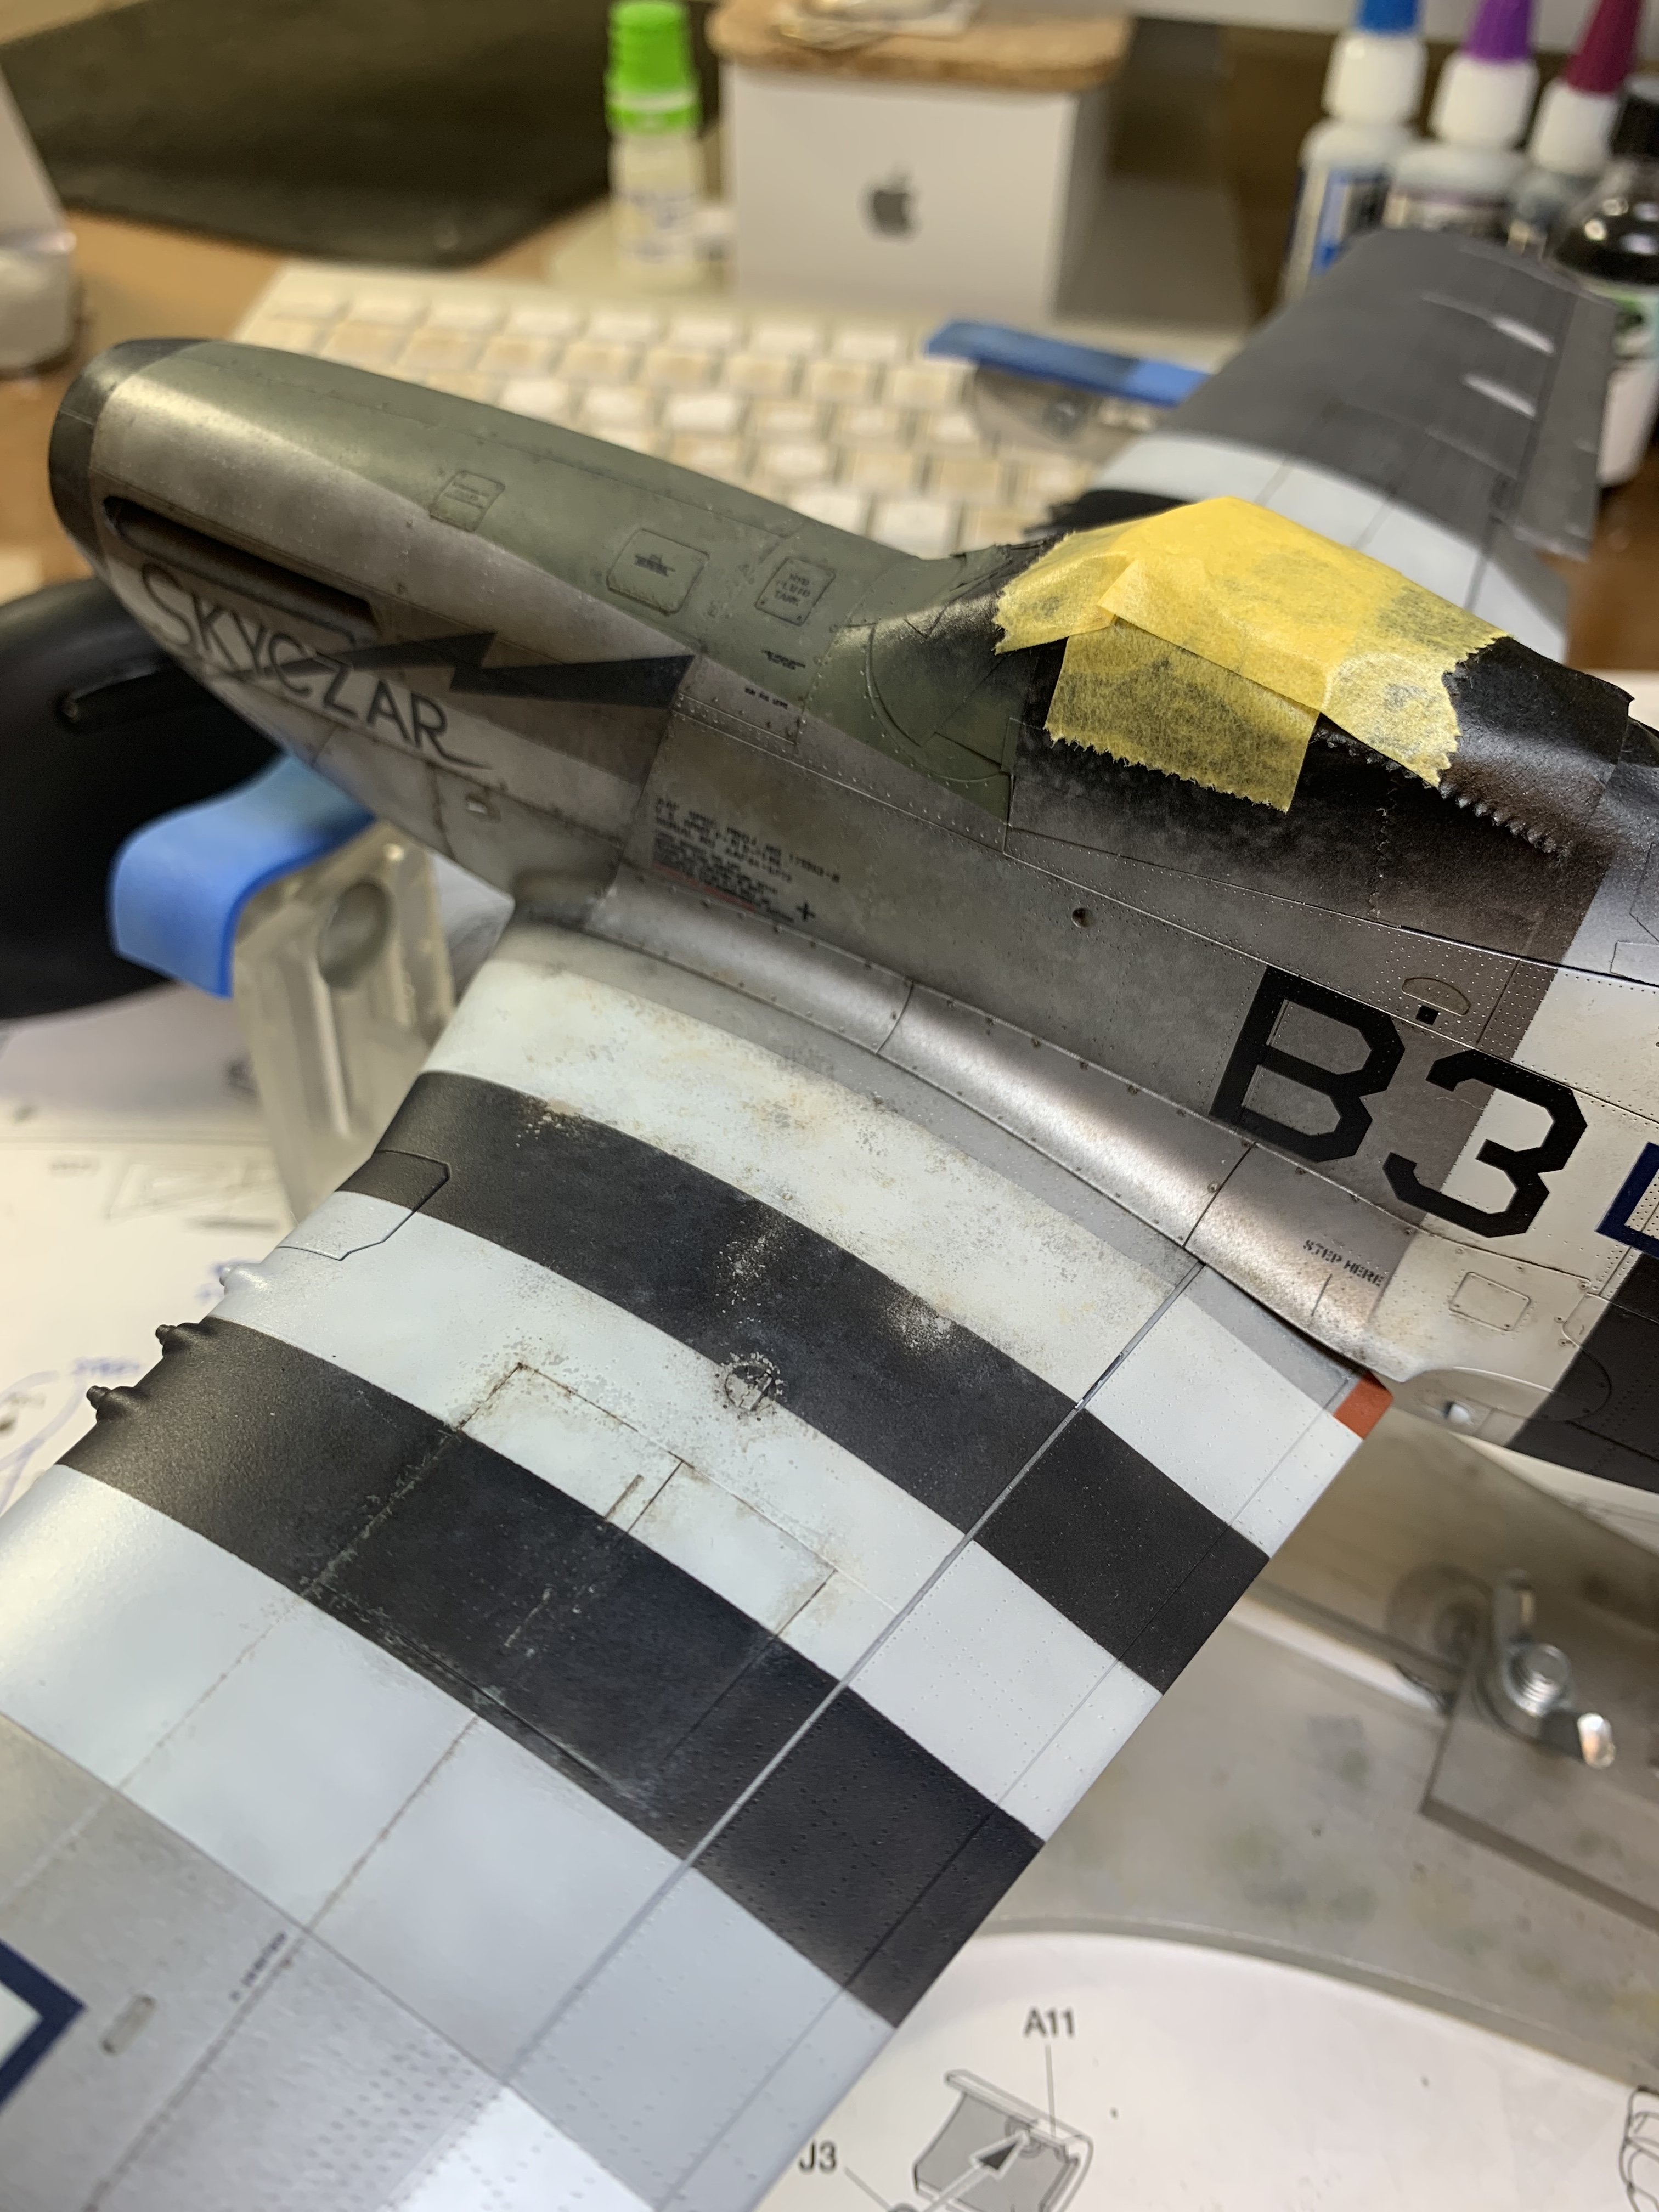
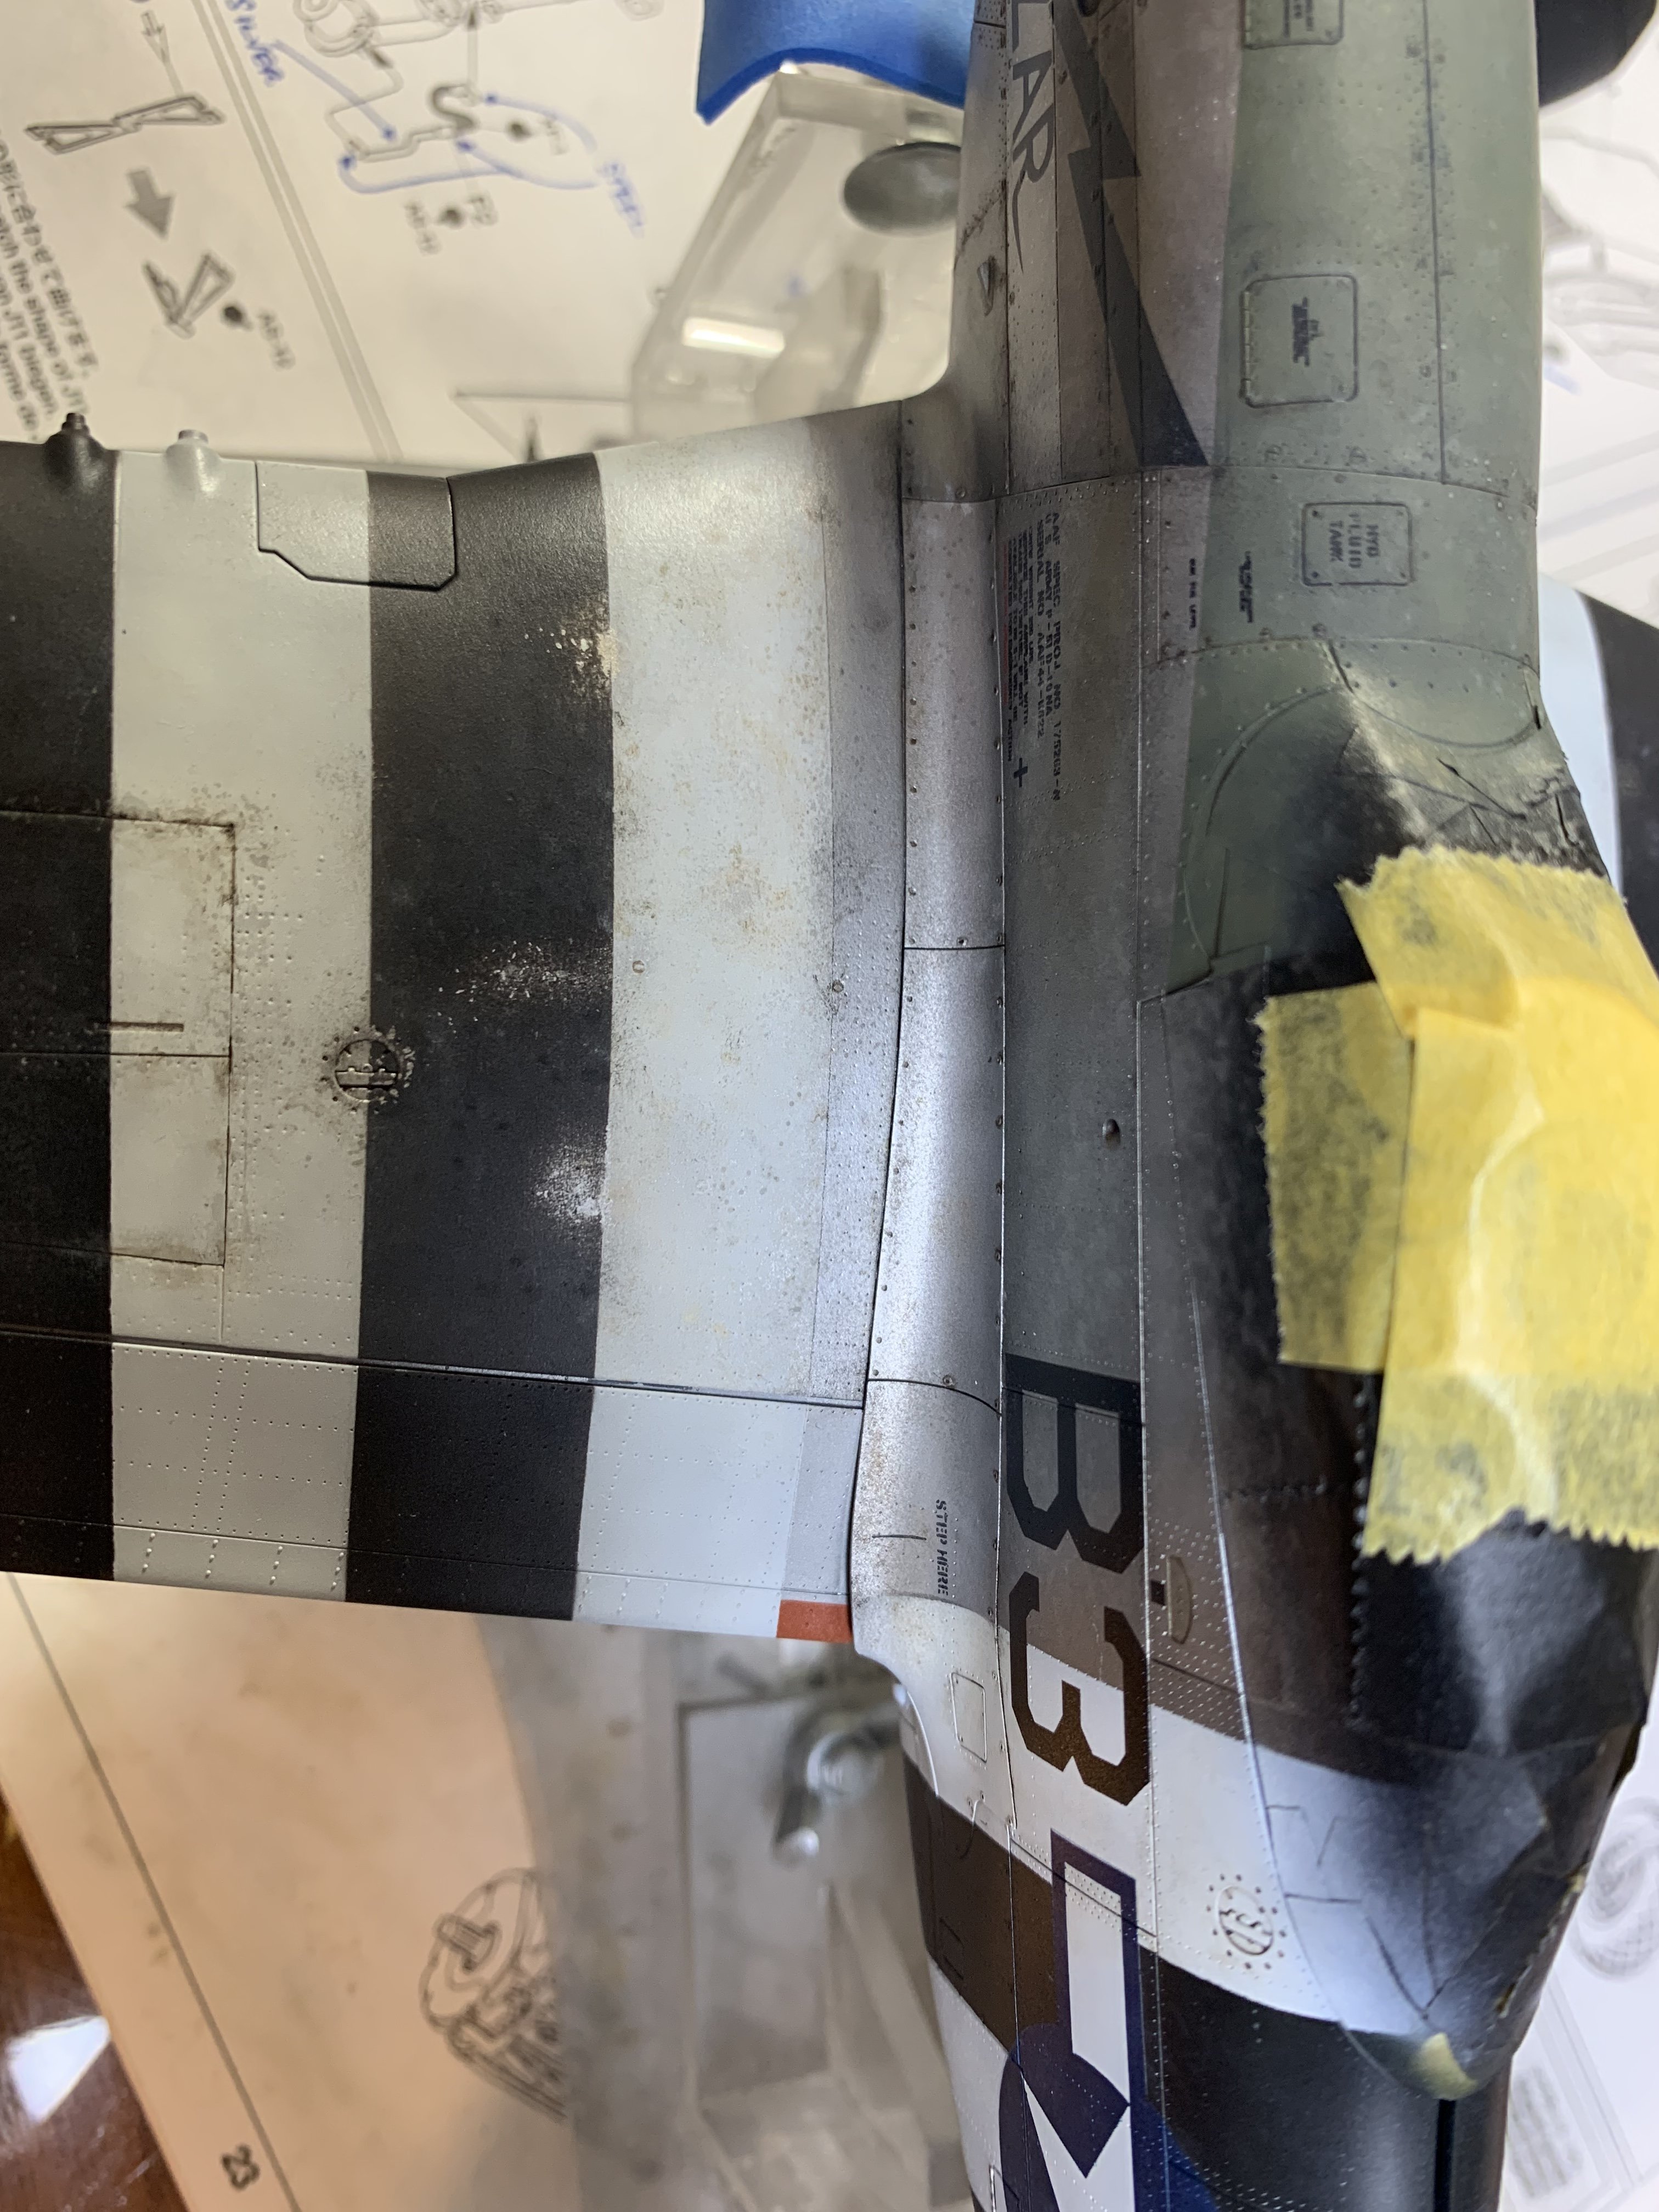
Construction mostly done, now starting weathering.
crappy iphone pics is all i have but let me have your thoughts on my wing roots and topside weathering please.
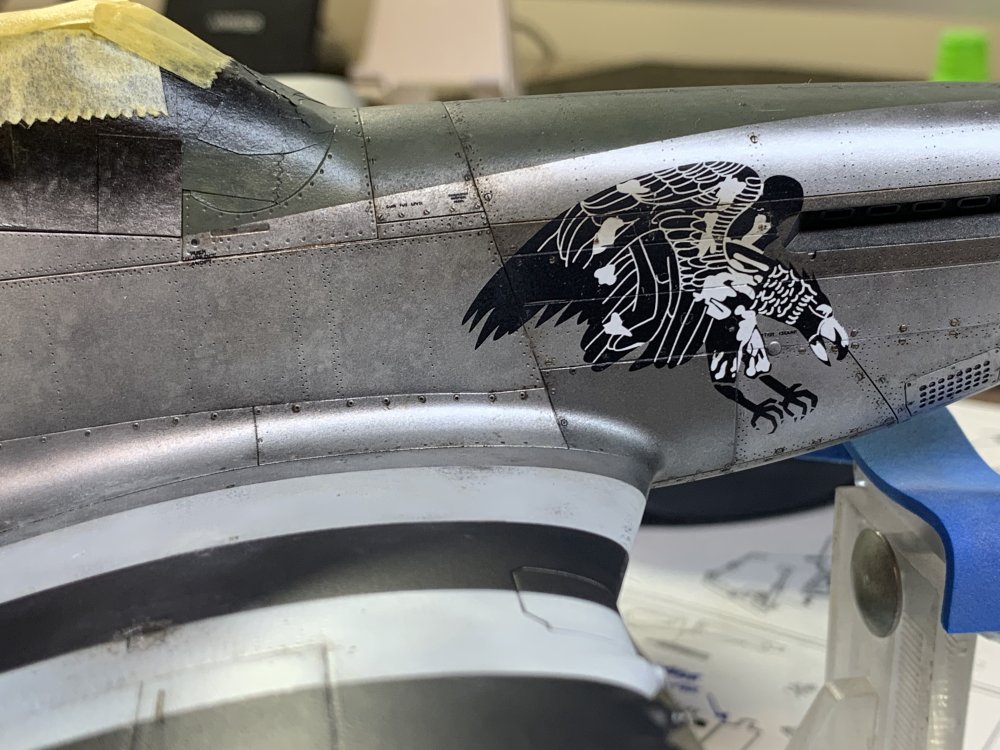
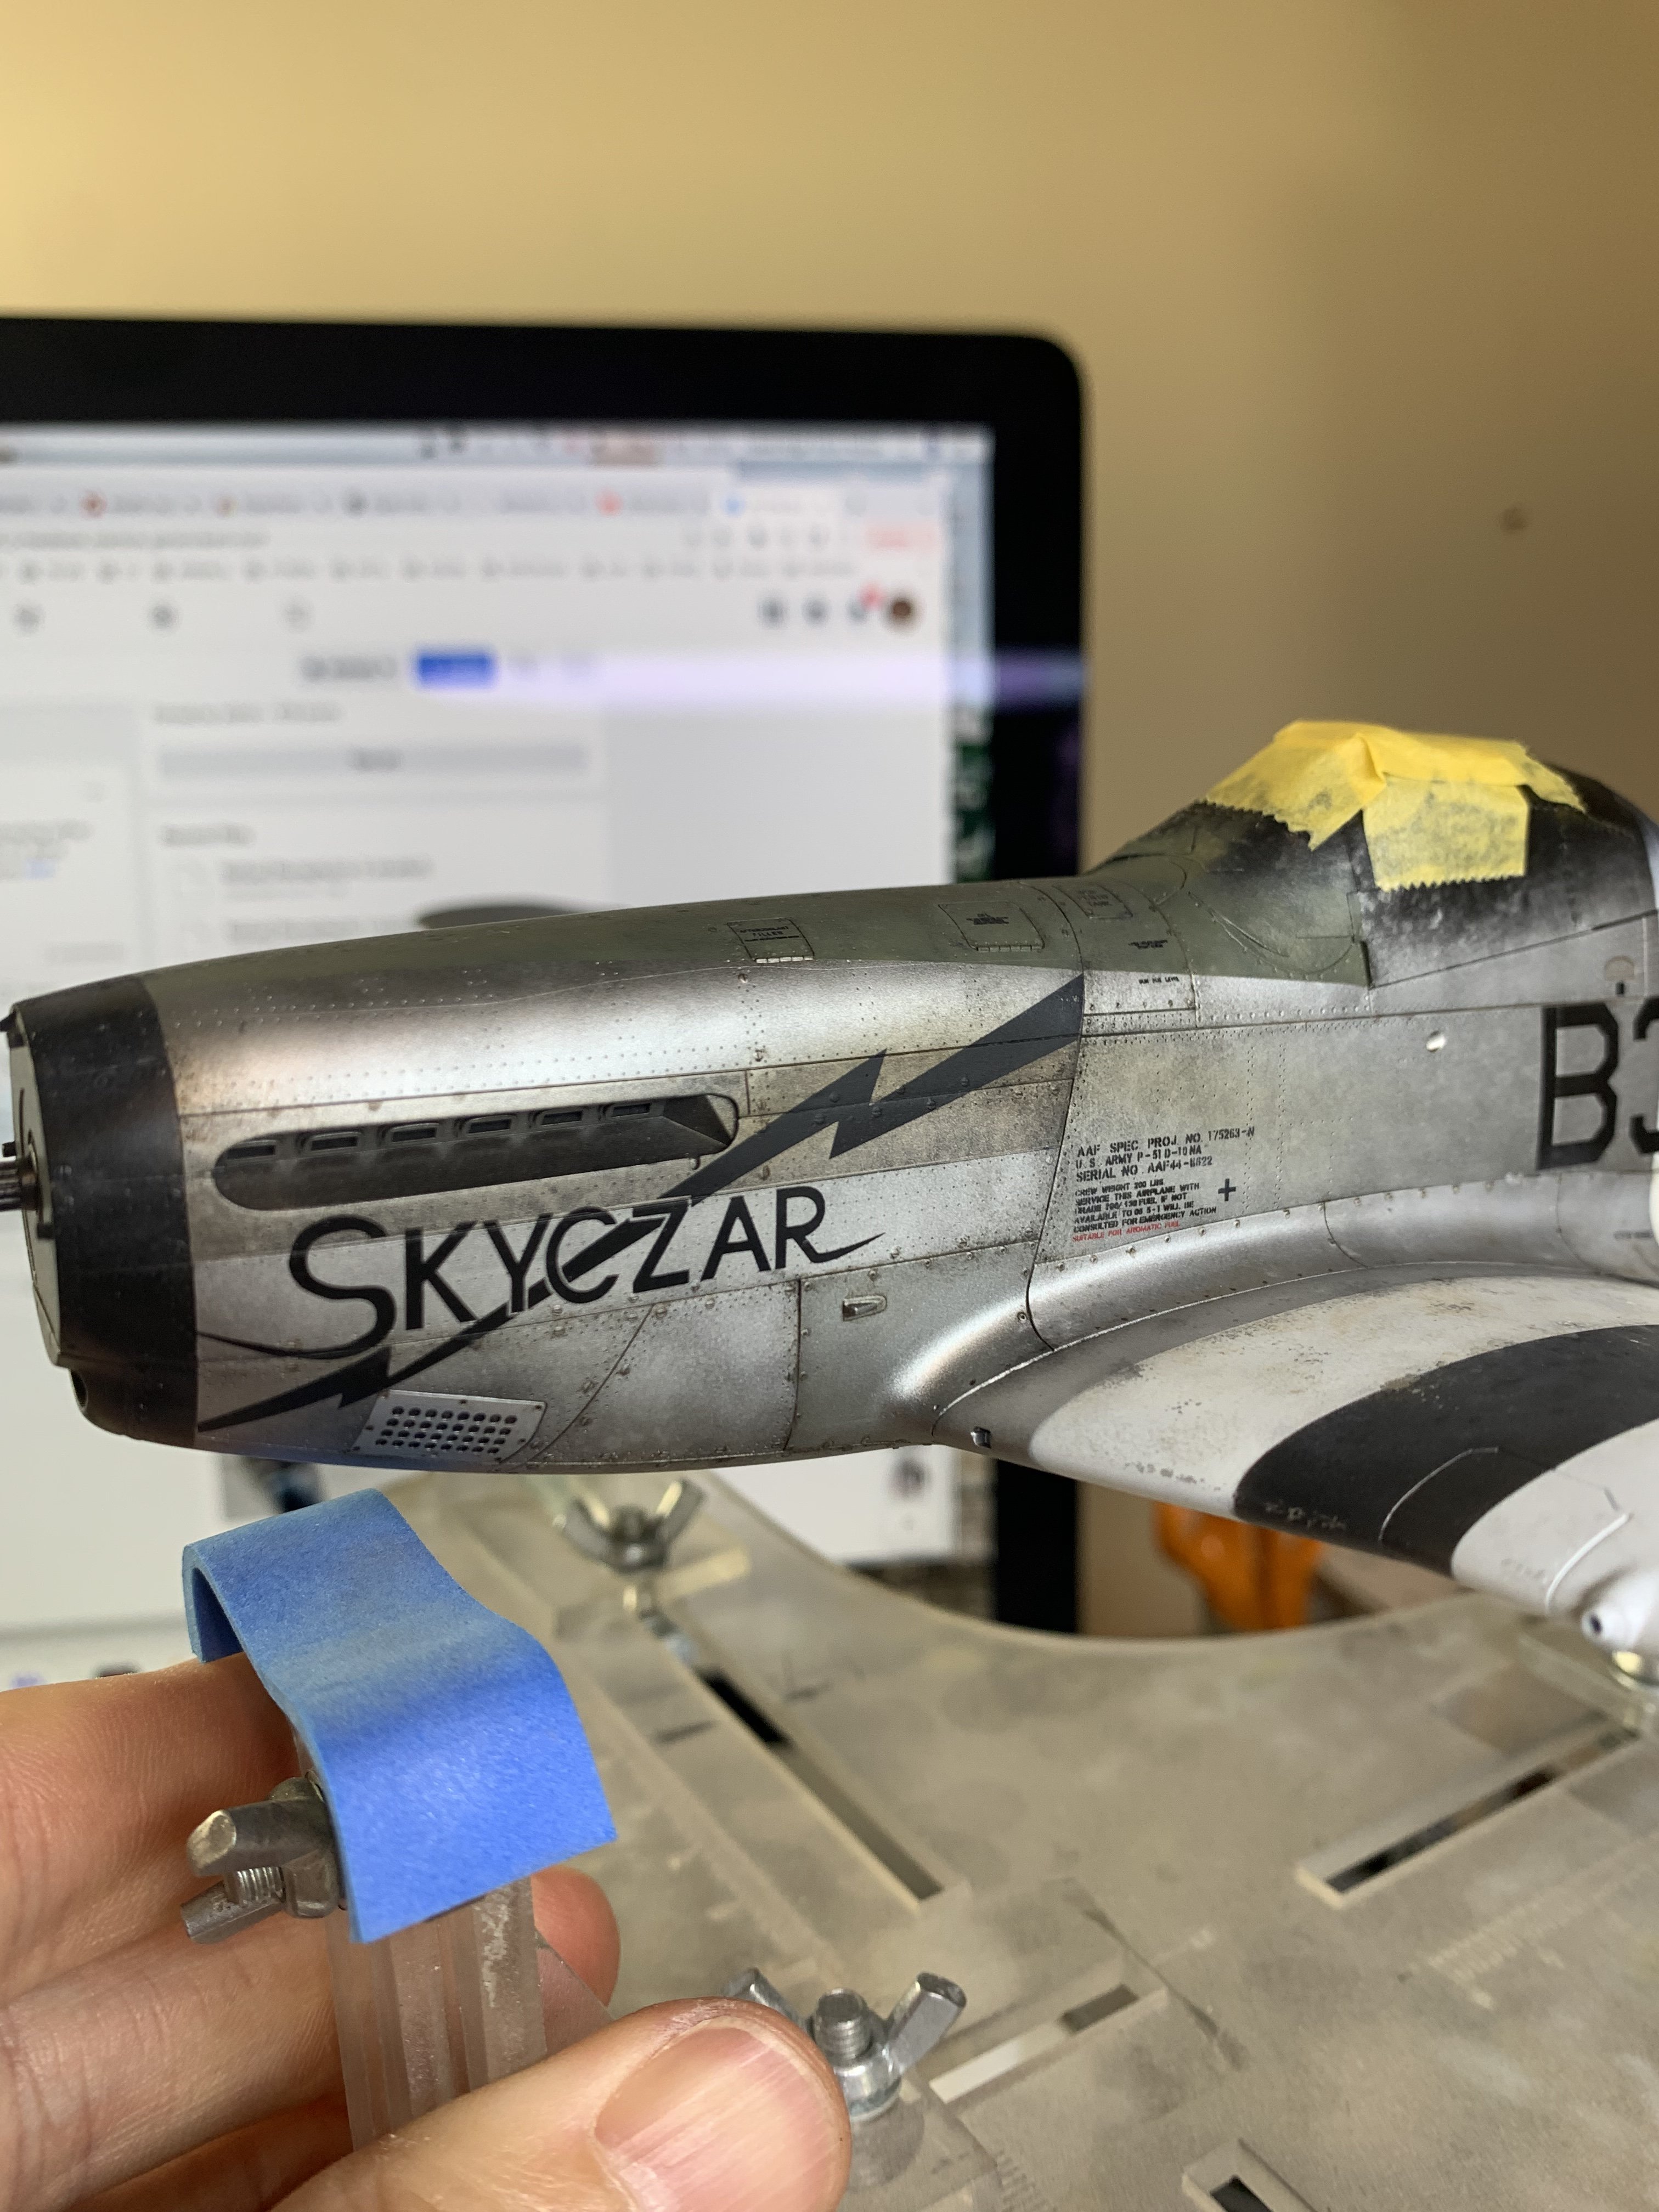
Tamiya 1/32 painted with MRP metallics using Uschi spatter templates to break it up a bit. Markings are Montex masks. Lifelike decals for the bird and Skyczar. HGW stencils.Weathered with oils and just now some spattering of MRP Exhaust Soot with MAC valve (first time doing that). Exhaust stains are sprayed with that same MRP Exhaust Soot.
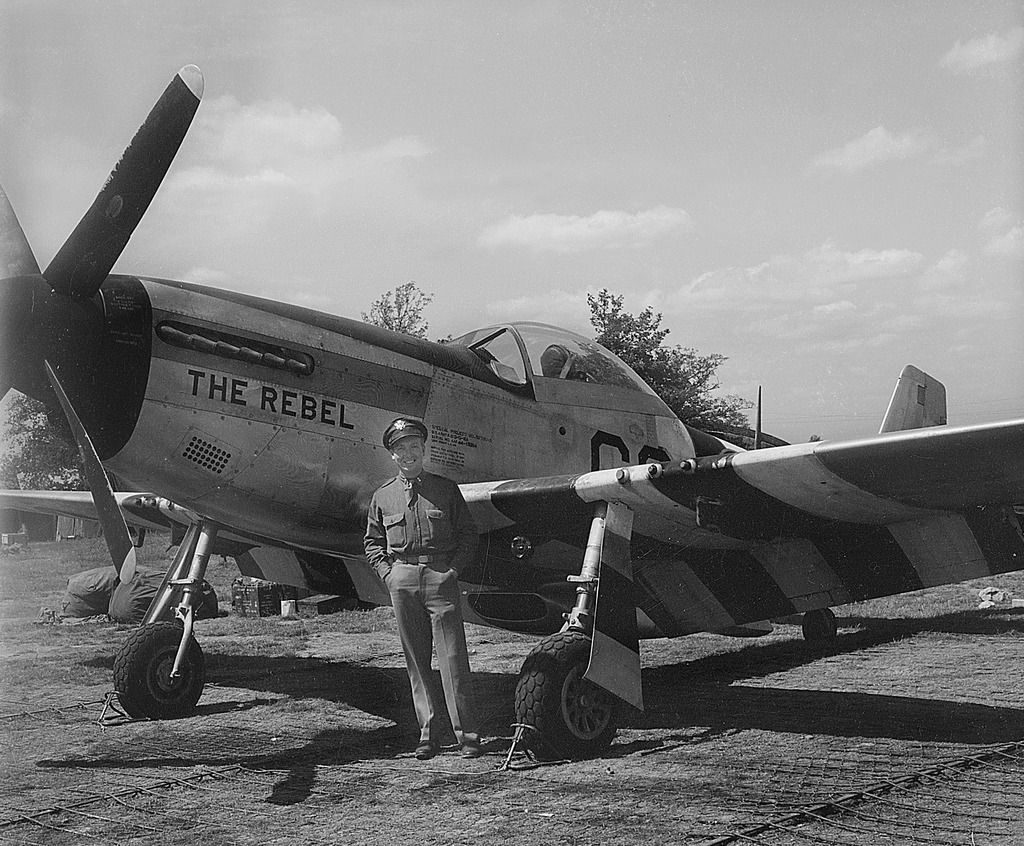
Plane was based just down road from me for a few months before going over to France post D-Day. I have lots of pics of unit birds, but only a few of this airframe, and only one close up worth using for weathering.My model is probably dirtier than the real thing if The Rebel (same unit) is anything to go by, and i wish i had done less chipping on the stripes, but overall I think it 'works', although of course it could be better.


-
9
-
-
Had never heard of that floor mounted sight - wow very interesting!
very (very!) briefly, how did it work? Was there a reflector part that the pilot looked through up at eye level, projected up from the floor? And what was the floor part getting its information from, if that was the direction of all this?
I’m very confused, as you might have gathered!
-
3
-
-
2 hours ago, CrankyCrafstman said:
I don't do facebook, or any social media.
Ron G
Okay, then the website forum you want is Missing-Lynx.
I would have previously recommended M-L as the first stop but DP is building / has built 1/16 Pz IVs and also making 3D printed parts for them
best of luck
Nick
-
1
-
-
11 minutes ago, Bomber_County said:
So during the working week I average about 20 minutes benchtime each evening, therefore the Wildcat is creeping towards the finish line, slowly……..

I take 20mins just to remember where I left off lol
-
 4
4
-
-
May I ask why you were sanding away so far from the wing root?
I tried to see the pre-sanding pictures but couldn’t tell whether it was a decent fit or not
-
3
-
-
You want David Parker on Facebook
-
On 10/15/2022 at 3:37 PM, Peterpools said:
Gaz
ZM, like Tamiya solved the issue of positional flying surfaces with either separate parts or parts with multiple hinges - a very nice touch. But why in the world did ZM choose go with a textured finish on all the plastic parts? Is it a cost saving measure by not polishing the molds as much as need be? Who knows, surely not me.
I don’t think they “chose to go with…”
I honestly think it’s just the best they could manage which is pretty sh*t in this case (talking about the texture, not the kit as a whole).
if this were an armour kit, I could understand the attempt at rolled steel texture etc, but this is pretty poor.
as for solutions, I think will sand then prime, when that joyous time comes!!
-
3
-
-
On 10/11/2022 at 2:19 AM, CANicoll said:
Just curious, why did you sell the Eduard 1/48 kits? Prefer to concentrate on the larger scale aircraft? I have to say, moving from the 1/32 Revell kit to the 1/48 Tamiya ME 262 is a HUGE shock. The Tamiya kit is SO SMALL!!!
CN
Because 1/32 is the one true scale
#manscale
😃
-
3
-
3
-
-
Sorry for your decal woes but…
masks or HGW wet transfers for main markings; HGW will also cover you for wet transfer stencils
i would only consider decals when there is absolutely no alternative
-
3
-
-
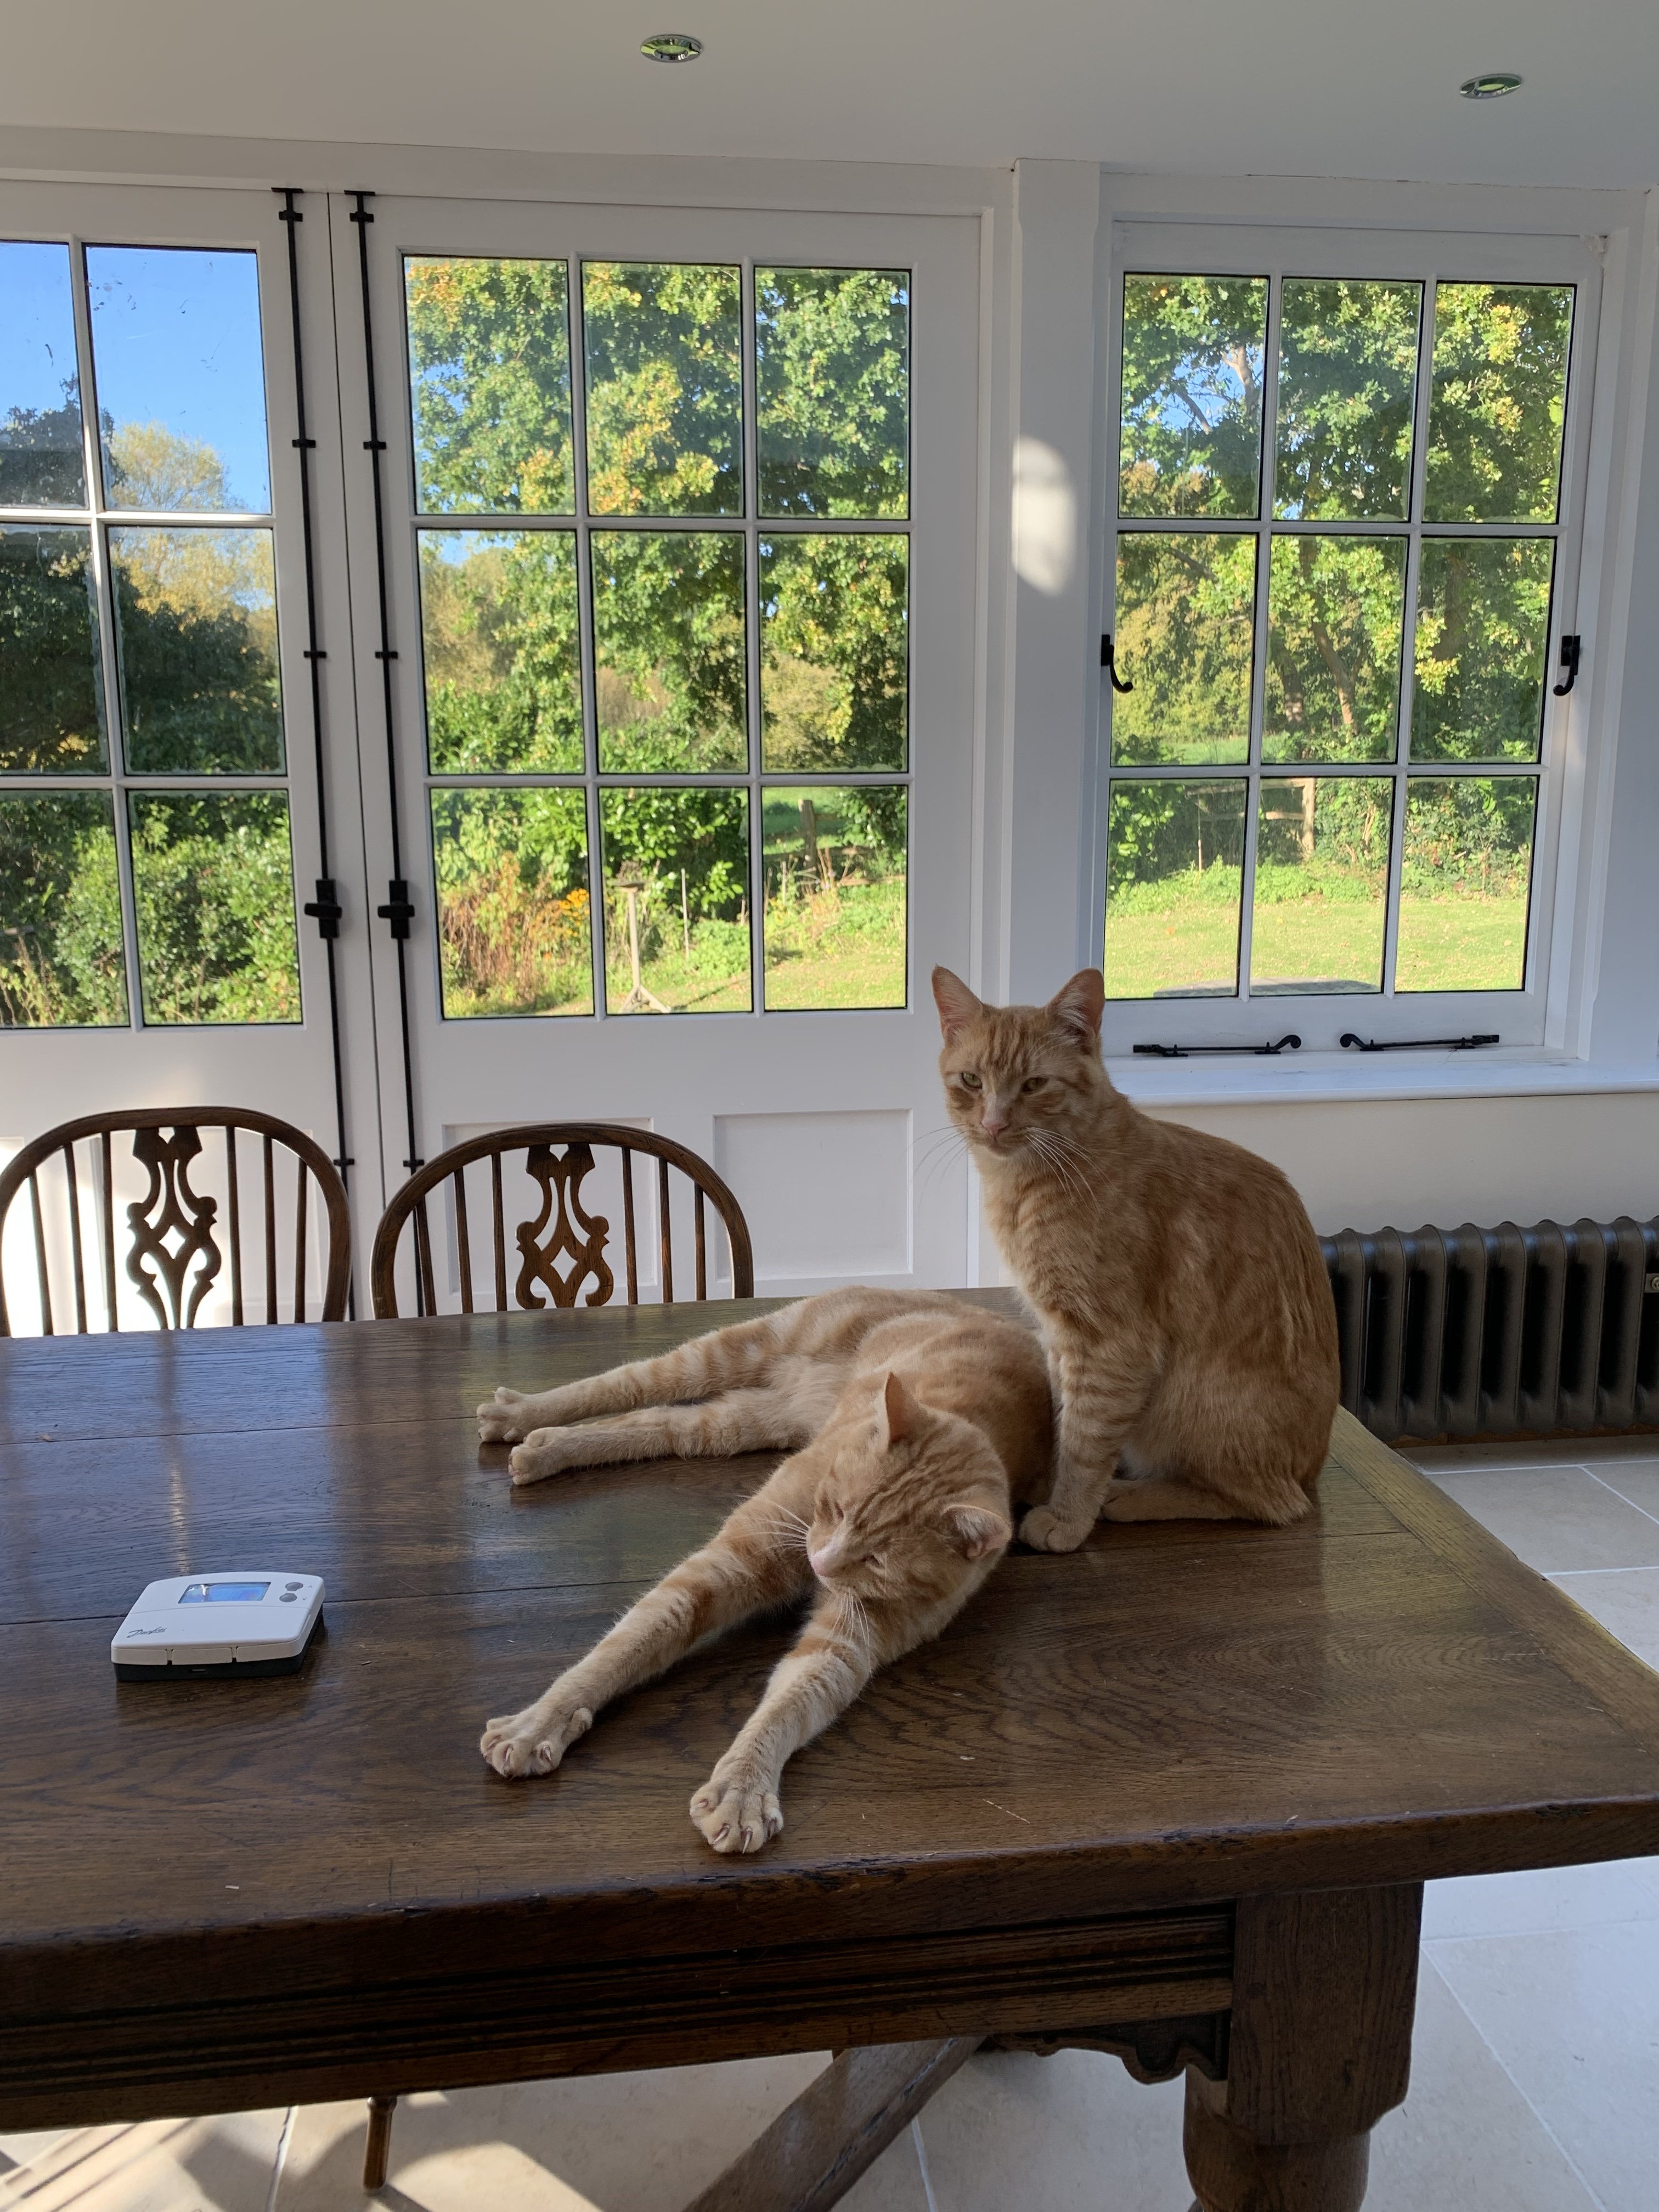
Dempsey and Makepeace from the 80s cop show

Fuggles and Bramling (named after Kentish hop varieties)

All four were rescues, caught and taken from the local rubbish dump to the cat home where we fell in love with them. We’ve had them since April, after the last of Spitfire, Hurricane and Monty passed earlier this year. It’s taken them a while, but they are now my firmly ‘at home’, and rule the roost here.
-
8
-
-
Awesome progress and definitely saving this down for when I build mine
but have to say yikes that tail plane pic looks ugly when you zoom in (looks like a very ‘industrial’ grit sandpaper was used?)
sorry, but thank you again - this is invaluable work
cheers
Nick
-
1
-
1
-
-
On 10/6/2022 at 12:29 AM, Peterpools said:
Gaz
Everyone looks into the cockpit and at the canopy first time they enjoy the completed model.
translation: "no pressure"
😃
-
1
-
5
-
-
strange omissions
re filler, the only non-shrinking non-cracking ones i know of are home made sprue goo or 2 part epoxies, but the latter may set hard as nails and be difficult to scribe, even if they may sand well; all the glazing type / lacquer based ones will shrink a little I believe
your mileage may vary etc etc
-
4
-
1
-
-
11 hours ago, Bill_S said:
Peter, I don't have the SH Whirlwind; the instructions I brought were from the ZM Bf109G15/U4. Most of the guy at the meeting had never heard of ZM, nor seen one of their kits. They were amazed by the ZM manual.
Never heard of Z-m?!
Do they live in some 1/72 backwater? 😮
-
5
-
-
I am still in two minds how I will tackle this area, and might even leave it as is. I just think the attempts to sand away the excess material will look like just that ie be obvious the area has been given a right seeing to.
The fit also looks looser than a whore's drawers!
This area could have been such a win for Z-m, and lead other manufacturers to approach tail planes like this, but just turned out that what they gave with one hand they more than took away with the other.
I have read all the back and forth between Radu and Vincent on this one but can't help think Z-m massively dropped the ball here. What they ended up with is a 1/72 scale interpretation of fine detail, just scaled up to 1/32!! #fail
Thanks again for putting this together in such a detailed and helpful manner. As someone who used to do this occasionally (for LSM and its predecessor), I know how much work it is.
Cheers
Nick
-
5
-
2
-


F4U-1A Corsair Tamiya 1/32
in LSM 1/35 and Larger Work In Progress
Posted
agreed - I have a bunch of Anyz stuff and I don't think any of those braided lines are that appropriate for 1/32 - the braid is just too chunky (and apart from that I am not sure that half of the things we want to use them for were actually braided hose in the first place).
it's a great shame their spark plugs and other similar 'gubbins' do not come pre-drilled to mate any associated wiring - I tried and failed to drill them out, and just gave up.
i like the way lead wire is super easy to work with, but i have to be careful not to dent it with tweezers; again something I usually fail at (if you look closely at my P-51 wheel well - but don't tell anyone lol)
Can't wait to see more of this build
Nick