

pg265
-
Posts
57 -
Joined
-
Last visited
Content Type
Profiles
Forums
Events
Gallery
Posts posted by pg265
-
-
Hi,
Thanks for all your kind comments Mates.
This WIP was started ... times ago, but restarted recently.
The build is now finished, today in fact!
Sorry for posting a long message with a lot of pics 'till last step of the building process of the Ferrari.
I hope it is not an issue...
Well, here's one which is all disheveled, long hair and loose: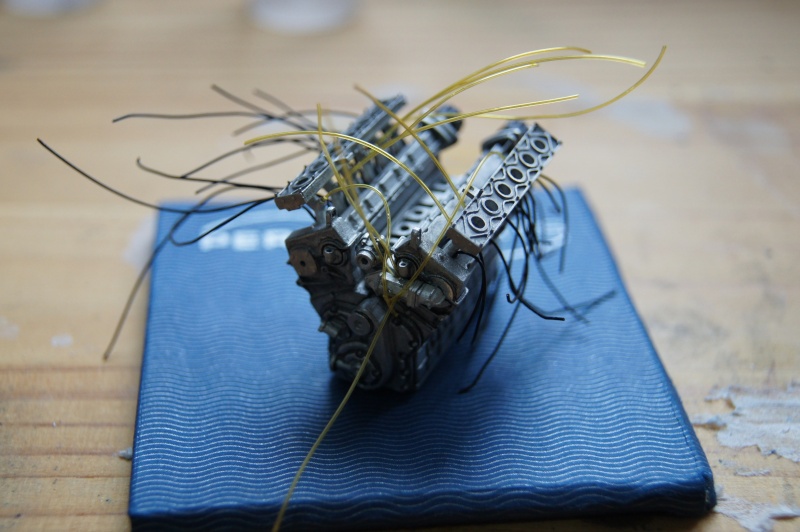 We'll have to take care of him ...I did not like the original links more than that.I decided to make new ones:
 A nice hair cut and new links installed:
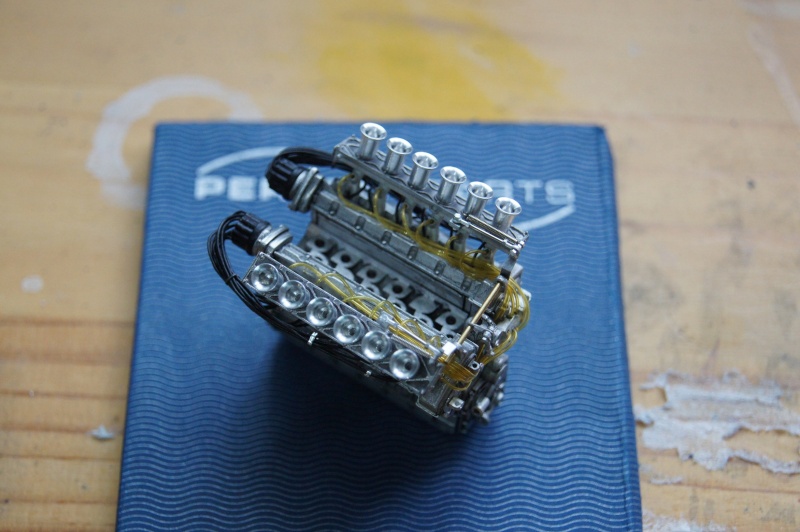
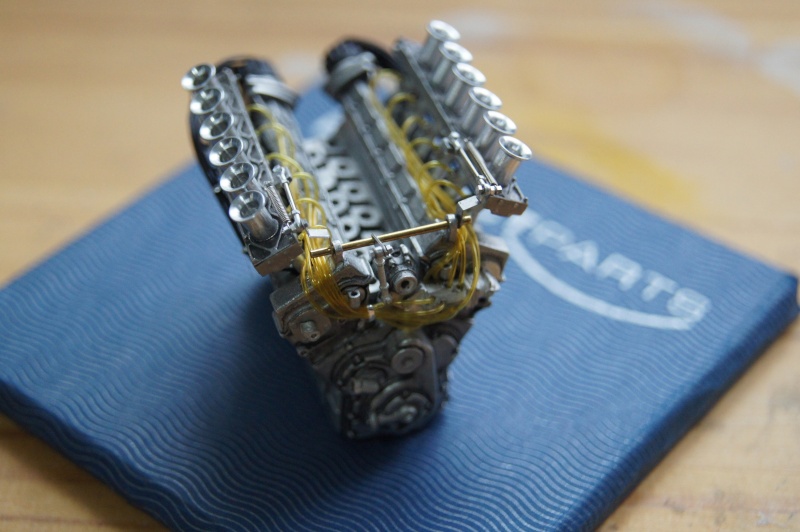
 The "jars" are polished and fitted to the roll bar .I took the opportunity to install RB Motion Banjo fittigs:
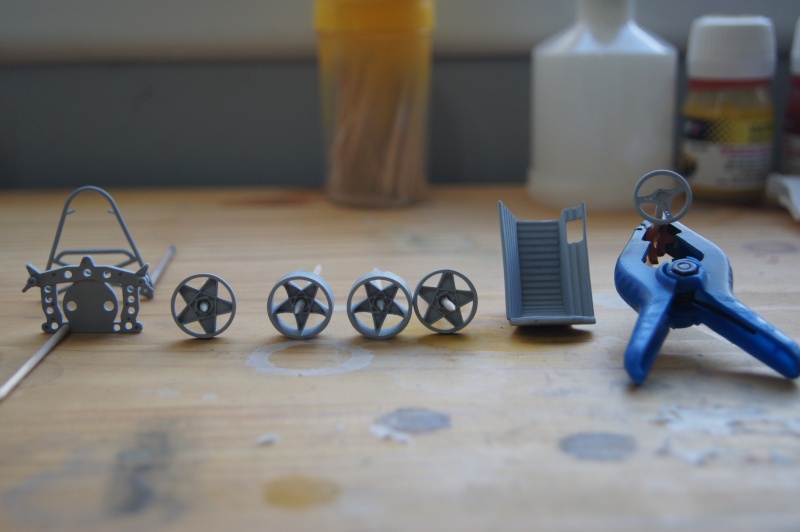
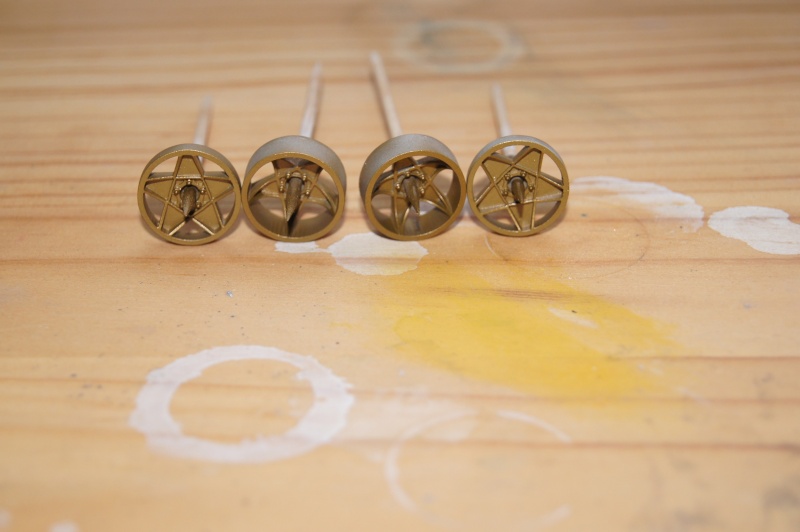
 It remains to connect all this little world ...New paint for the wheels: the Gold done before didn't please me...So Primer, Alclad Black, then Alclad Gold tomorrow:
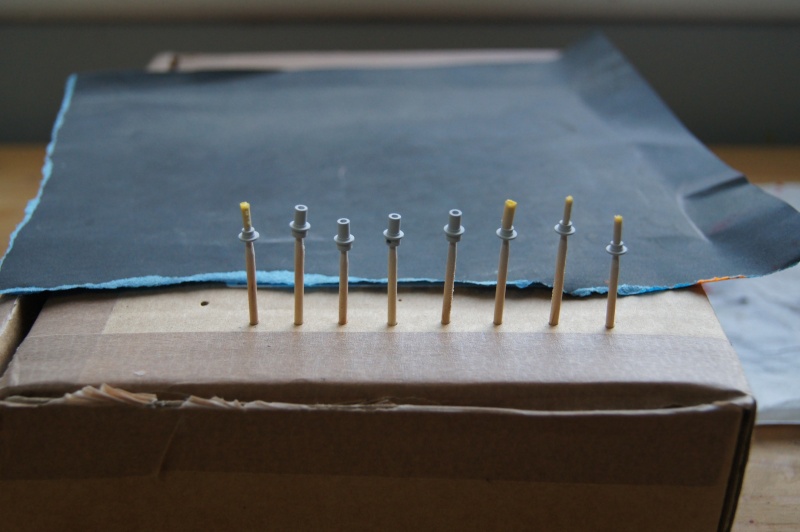
 Wheels are drilled for the Valve stems from Rob.Schock absorbers are also primed with Gravity.
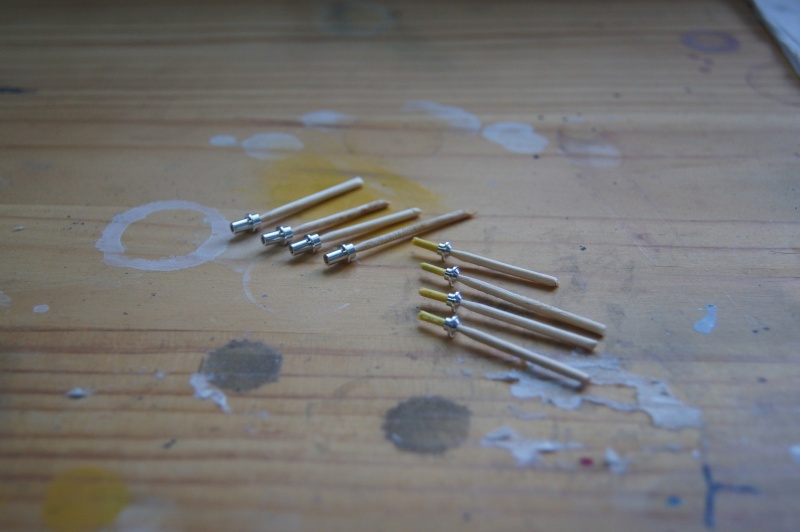
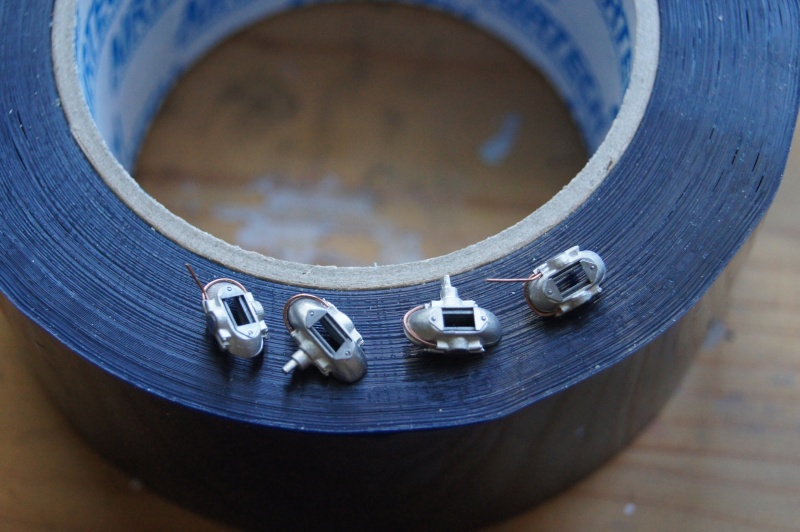
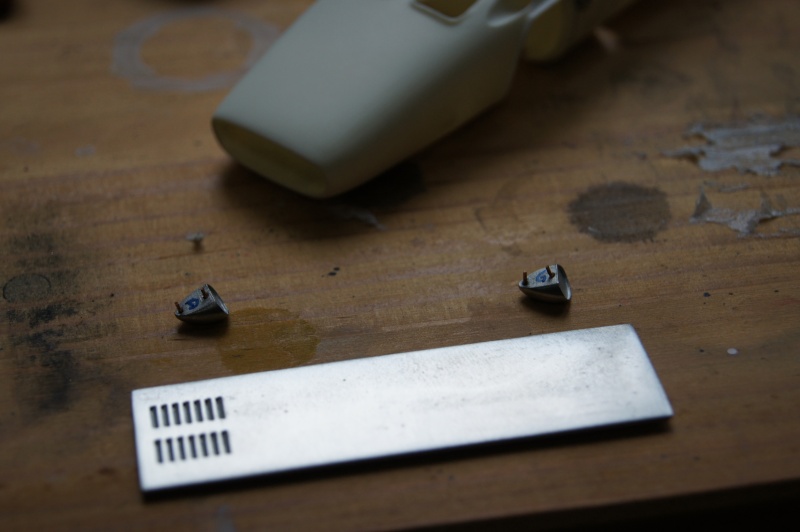
 Here the work of the day: brakes!In order to properly clean, coloring and "scratch" the disks (White Metal), I quickly crafted small plates of turned aluminum.They will allow me to hold them on a small tool holder to be fixed in the drill chuck.Turned parts:
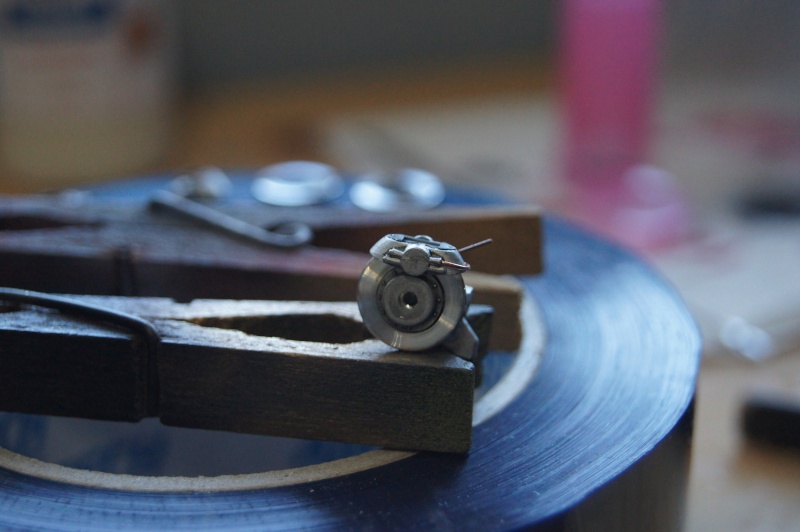
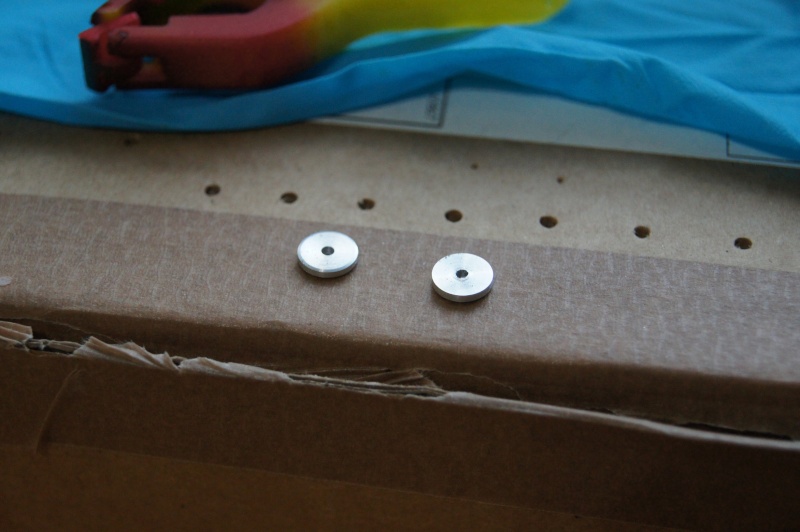 Disk on the tooll:
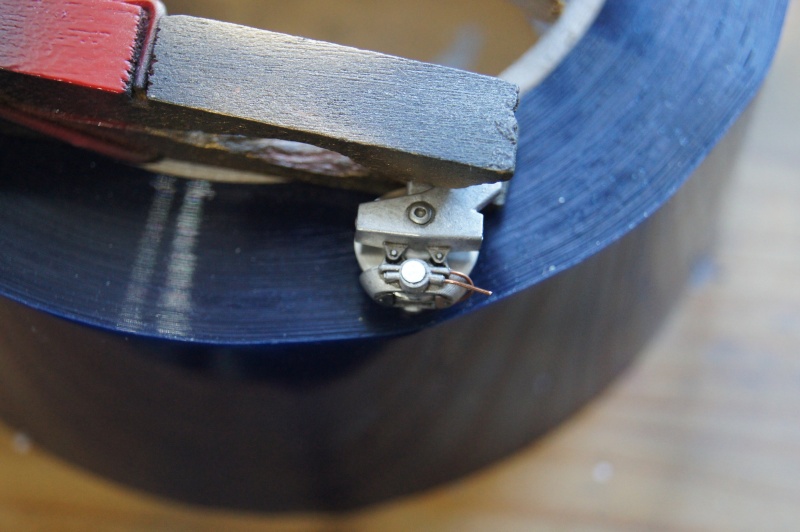
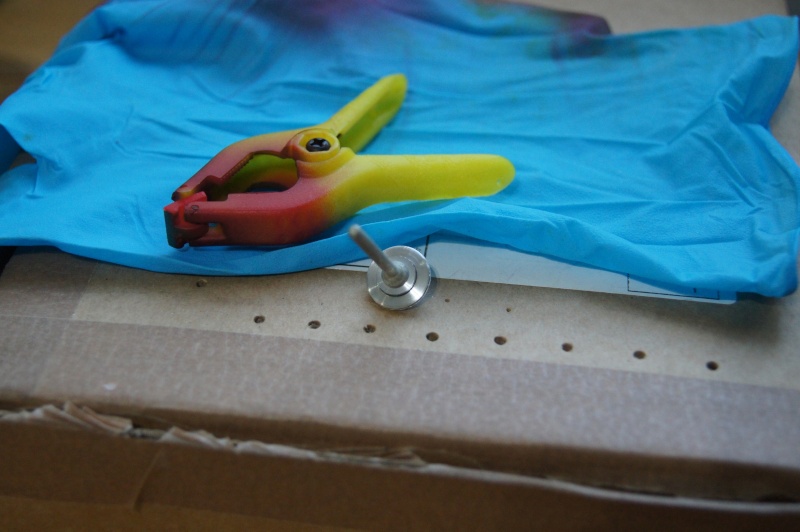 Done but still dirty:
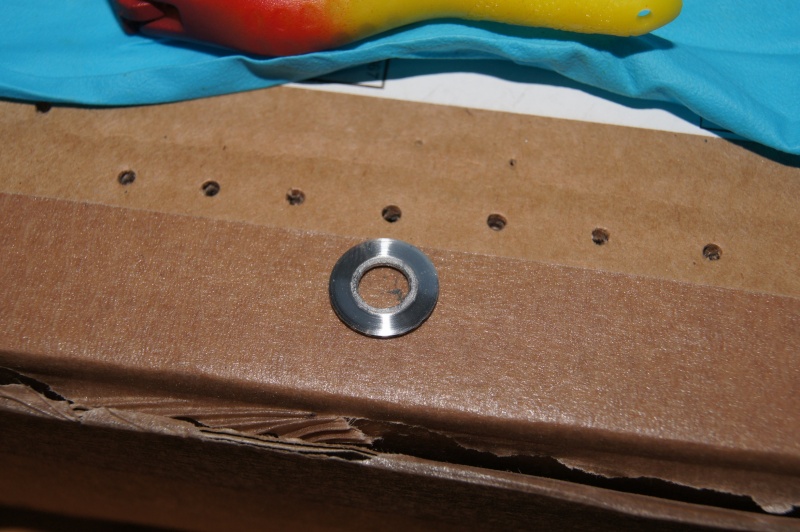 The rear discs are detailed with beautiful PE parts, but lack detail for my taste.
 0.4 holes drilled in the part:
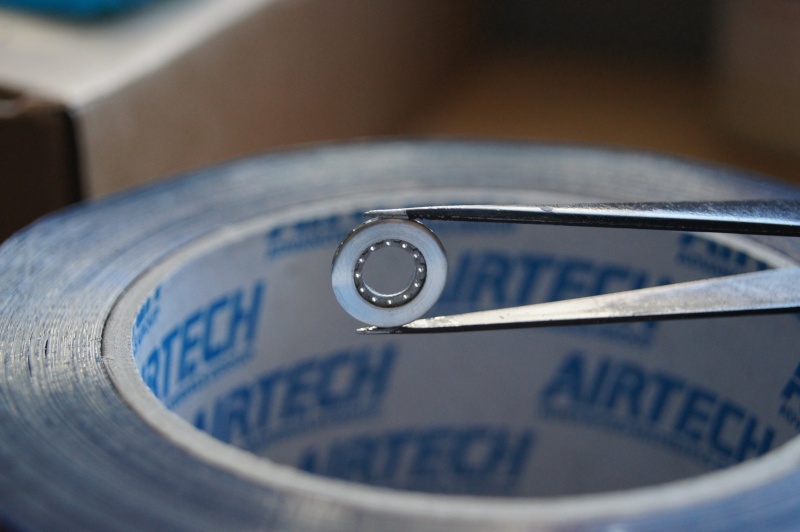 Allen head from Rob (RBMotion):
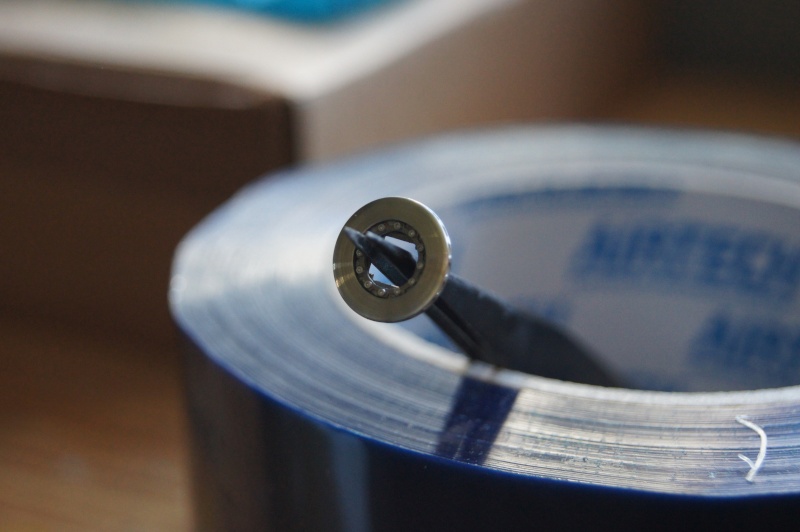 Brakes are also... Calipers :wink:Drilled and equipped with copper pipes and brake bleeders from Rob once again
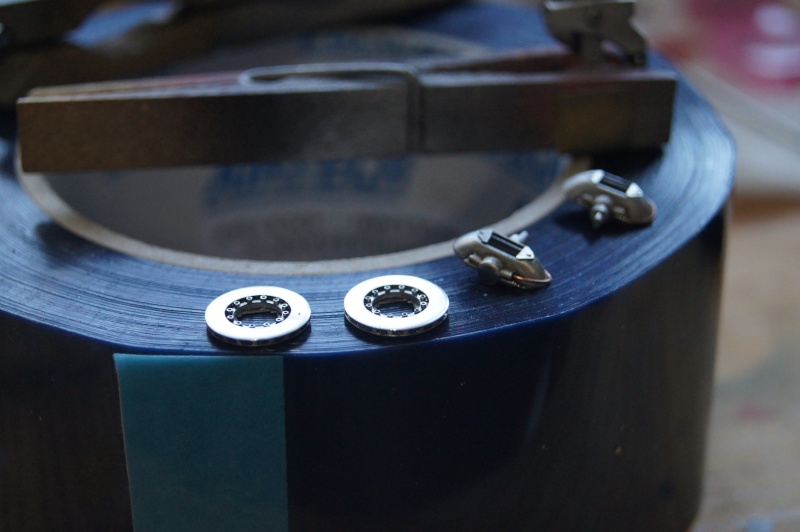
 The front discs on their hubs:
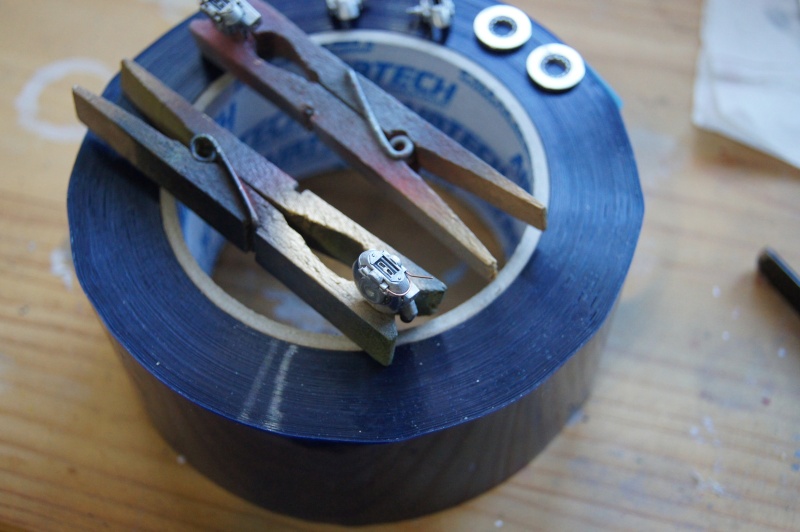
 Rear ones with a first light "wash":
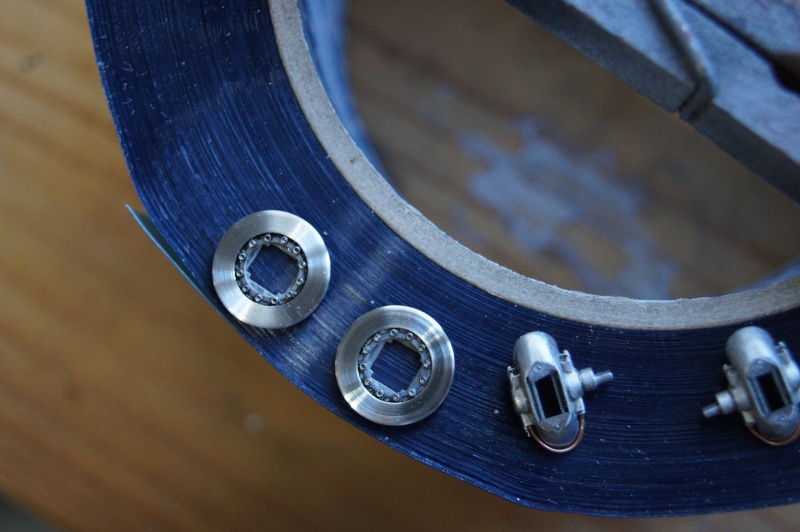
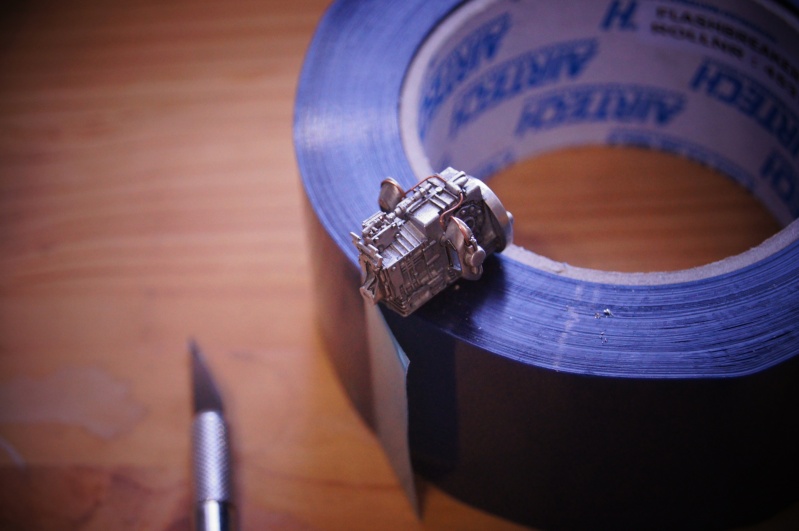
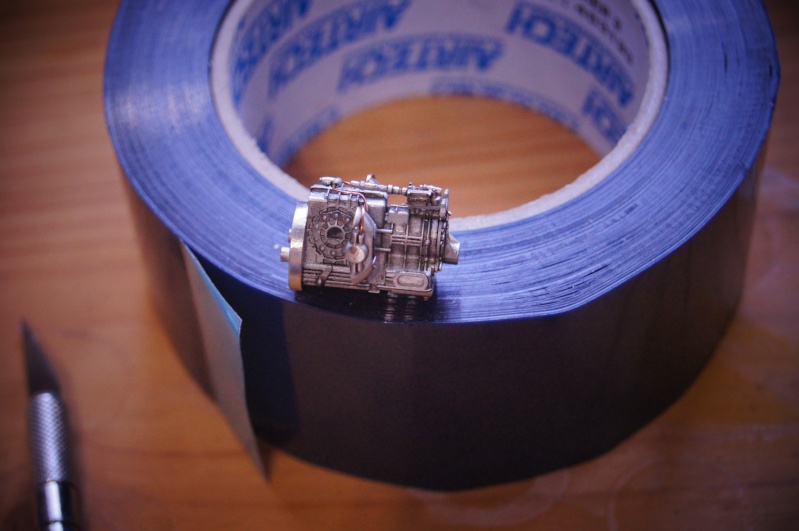
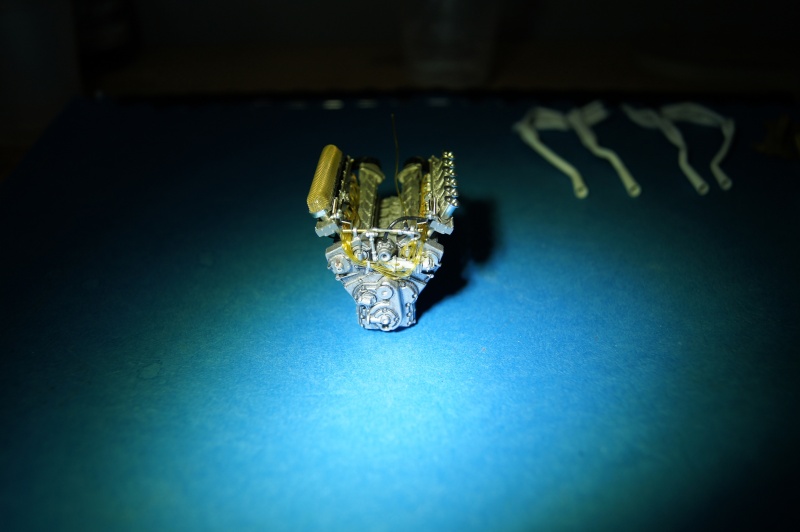
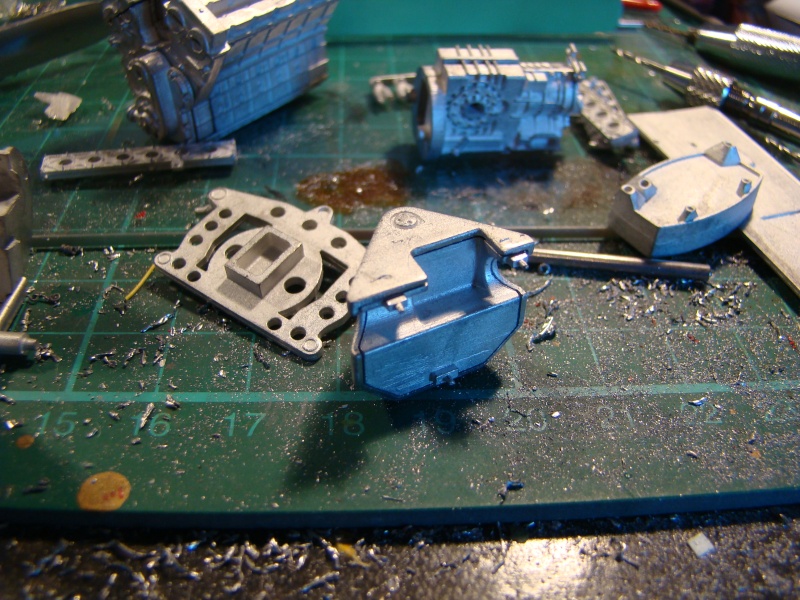
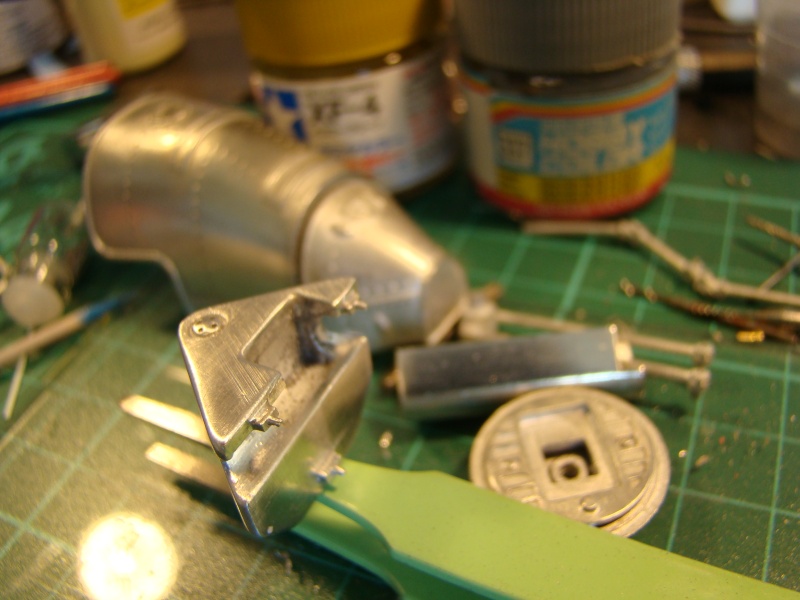
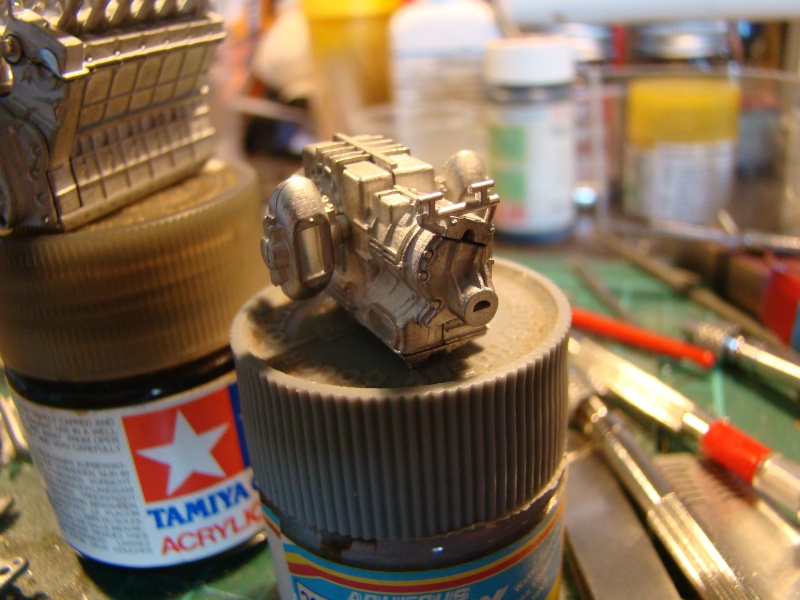
 I started to work on the gearbox:
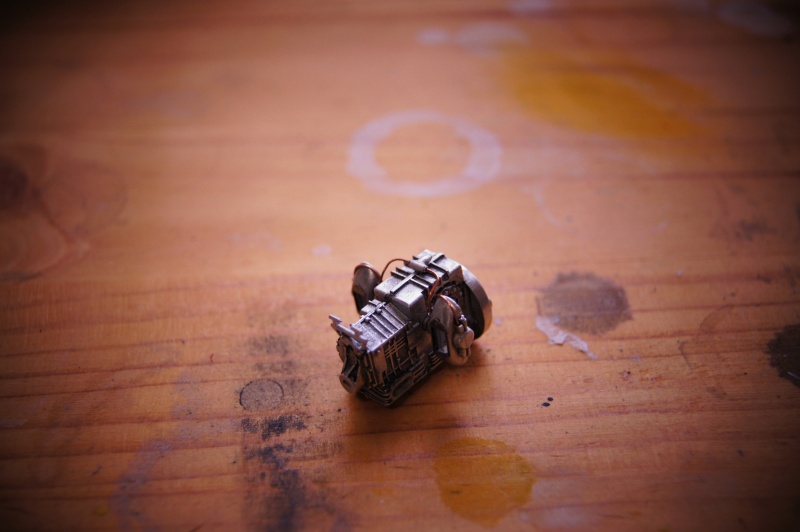 ...but was not very satisfied.So, I tried to add some more details:
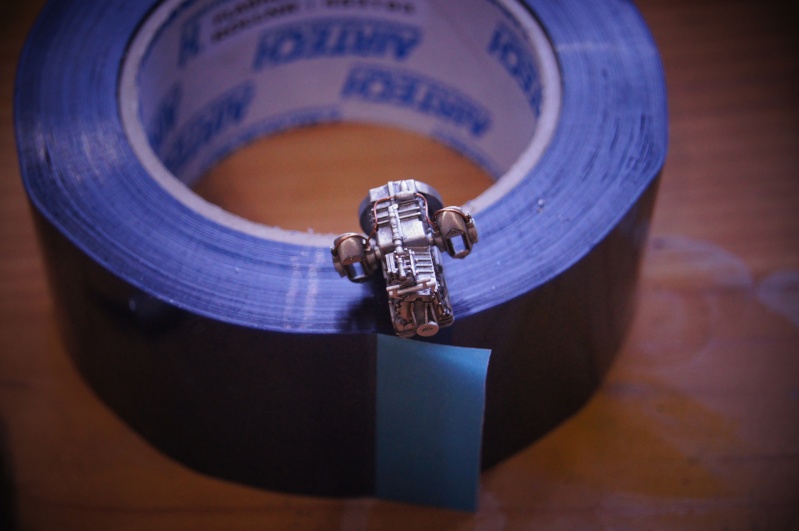
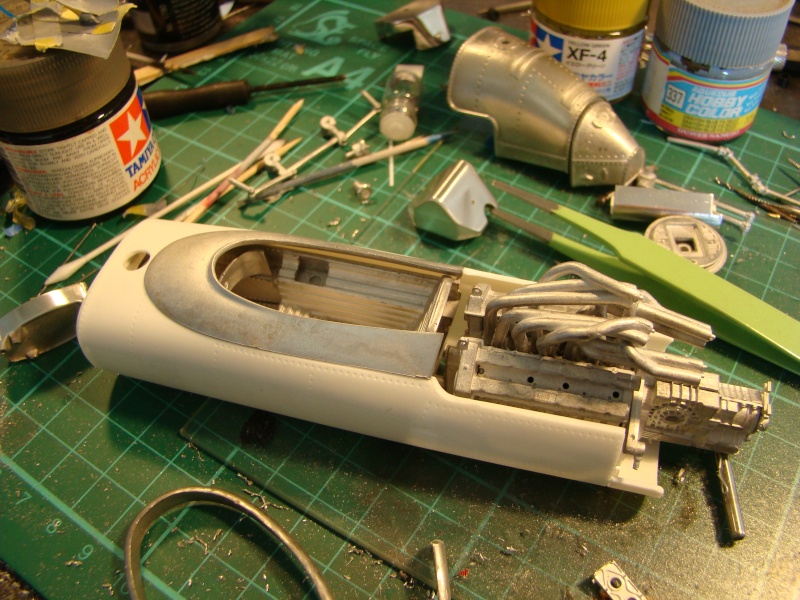
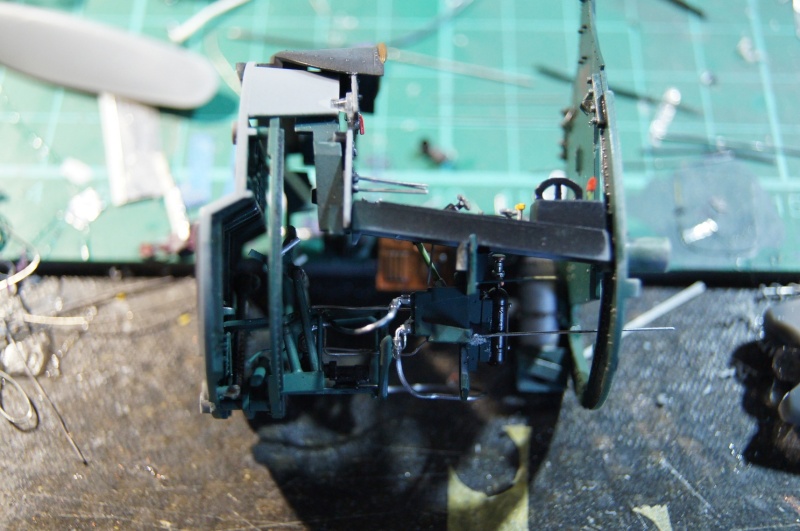
 J'ai aussi bien travaillé sur le reste des éléments du train arrière et des photos ne devraient pas trop tarder...Plumbing time for the front bulkhead:
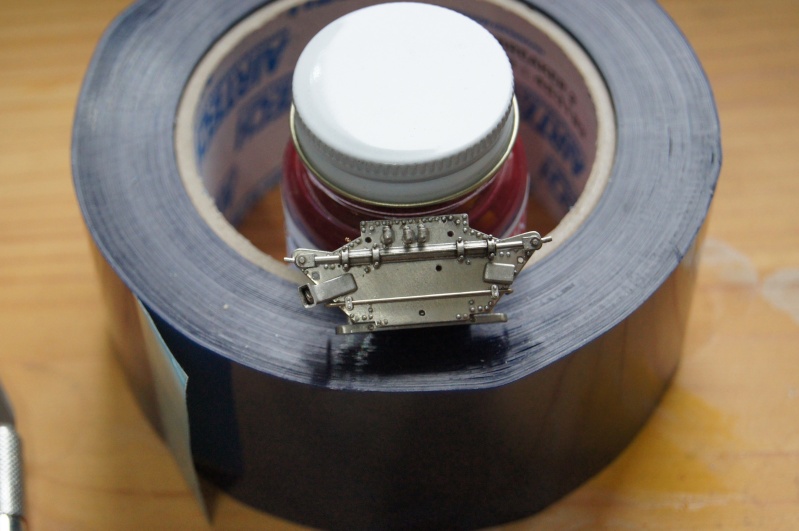


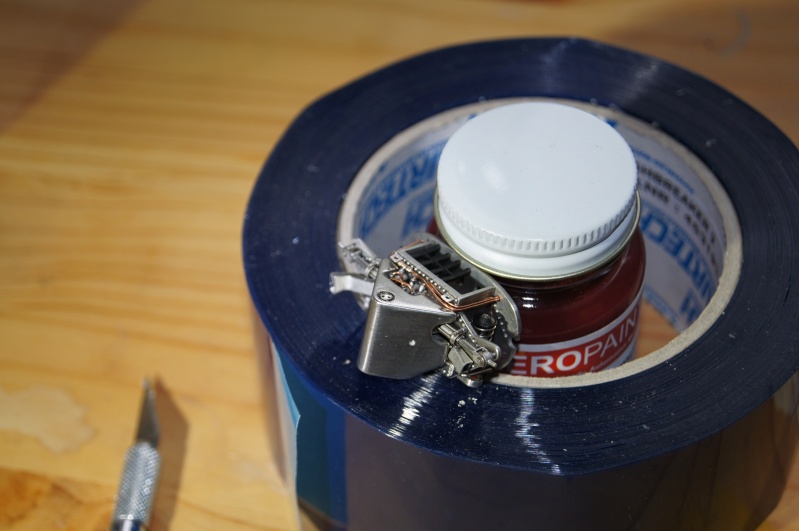 Small progress on the rear:
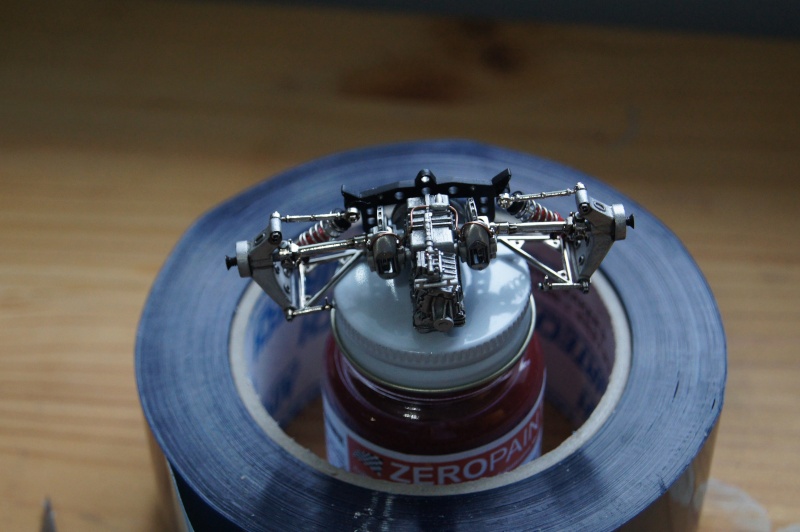
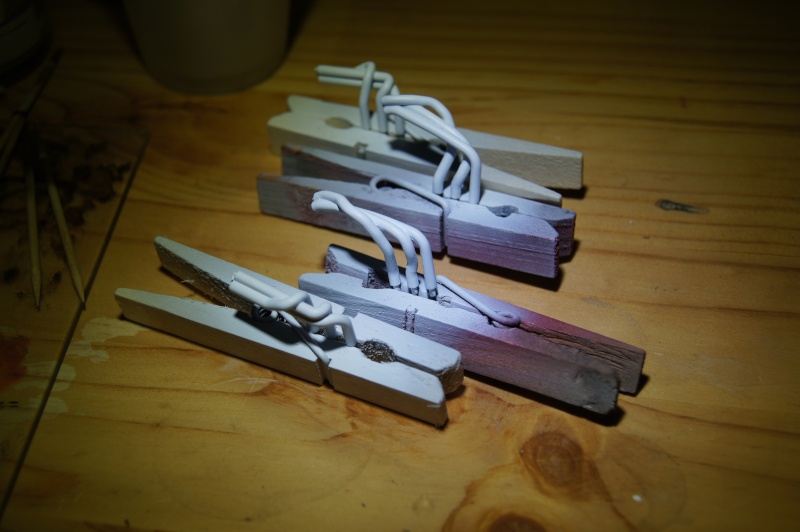
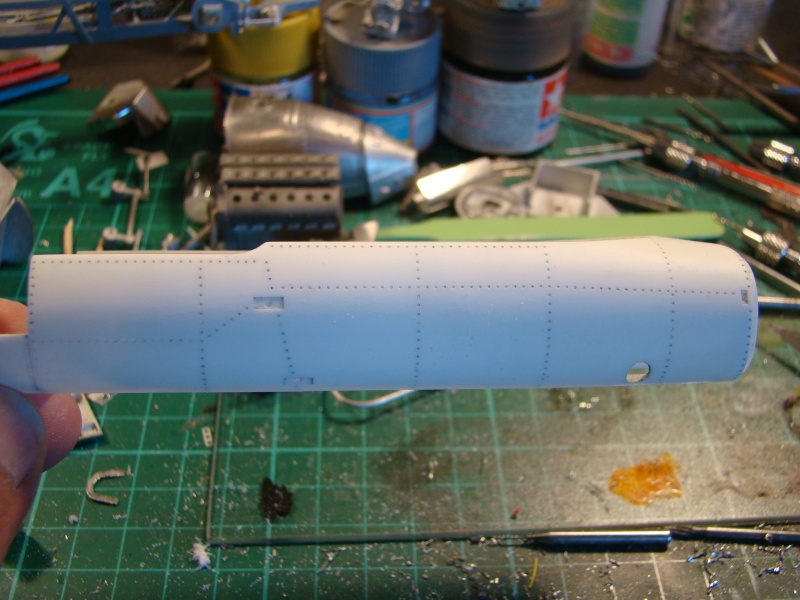
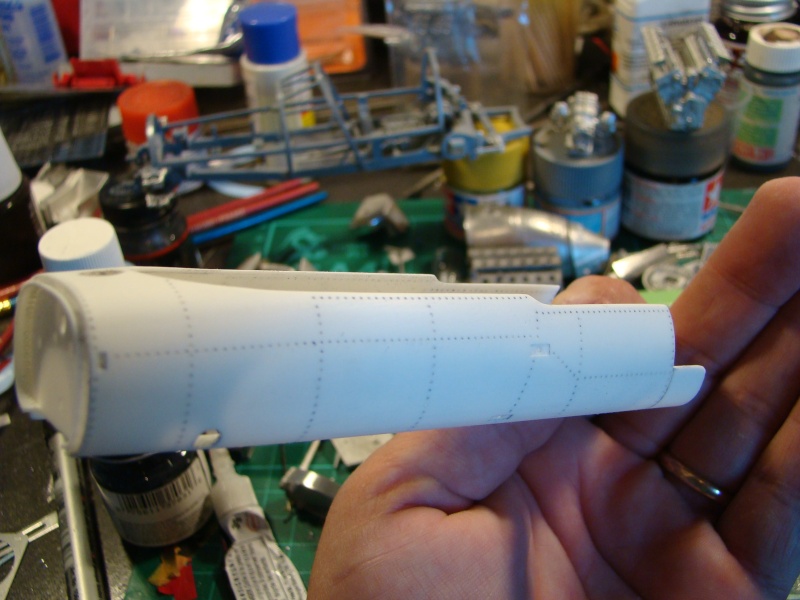
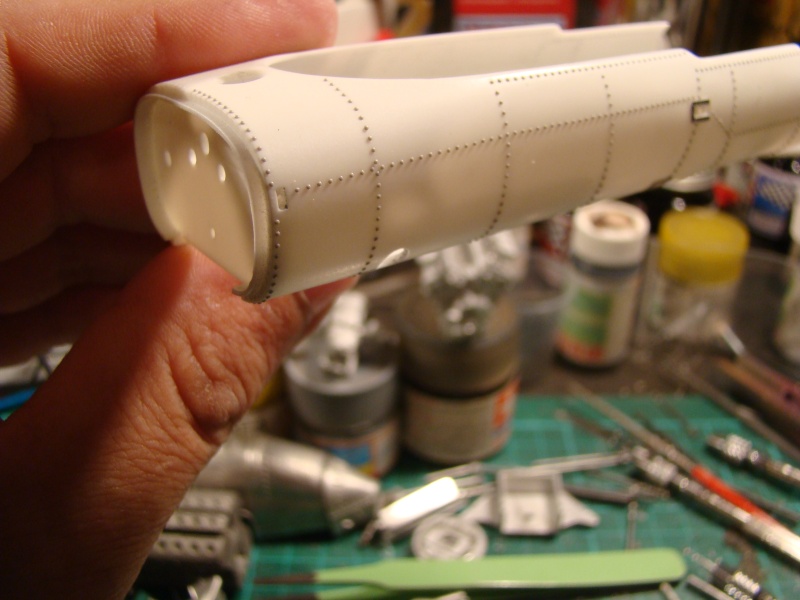
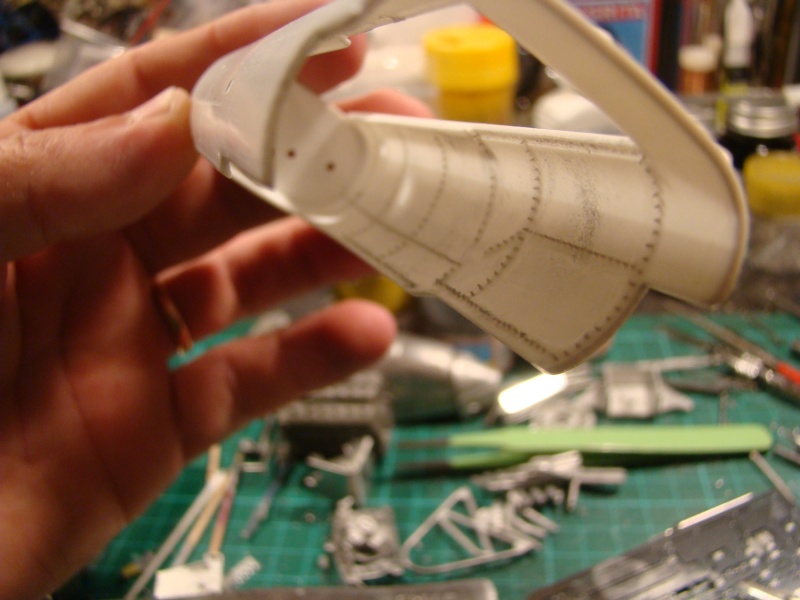
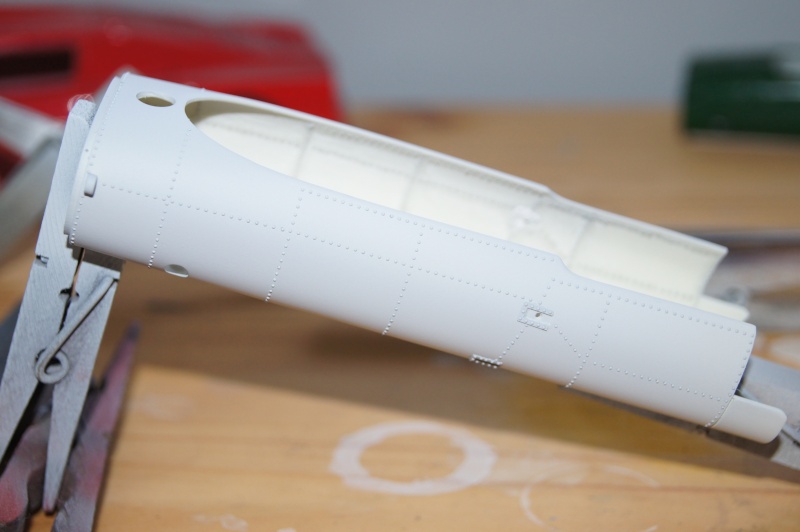
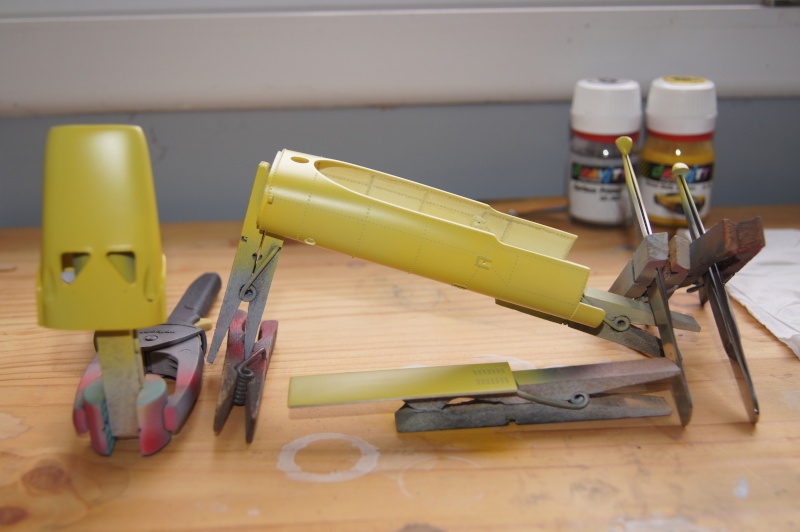
 Prep and primer of the exhausts:
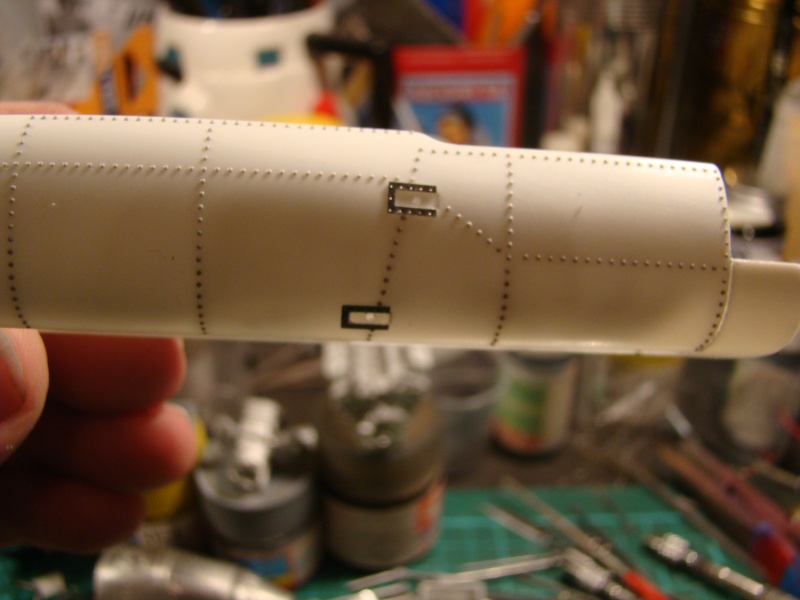
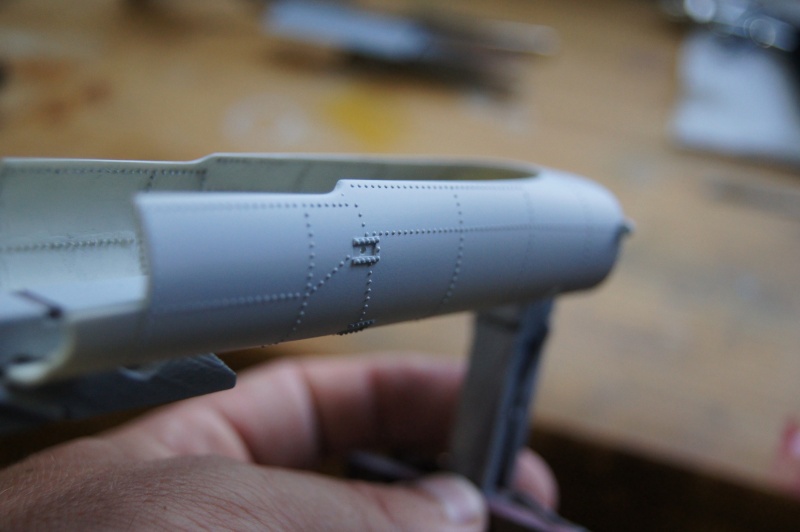
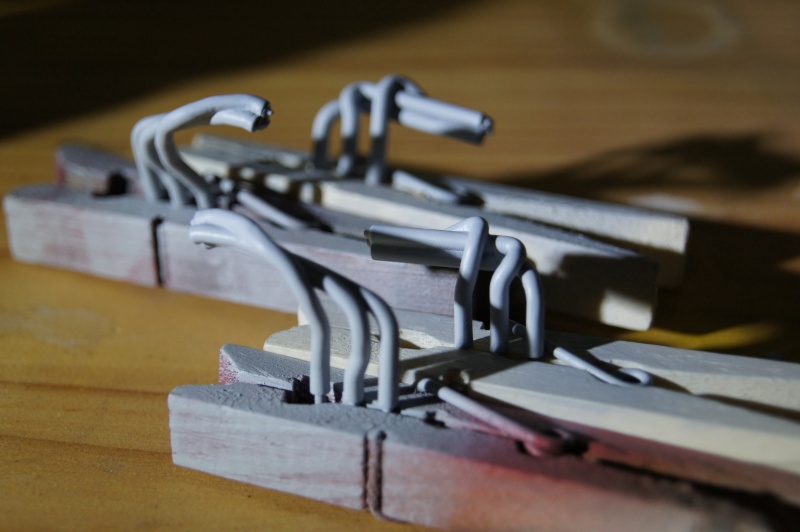 First try of the white color: ZP "pure white".And weld lines:
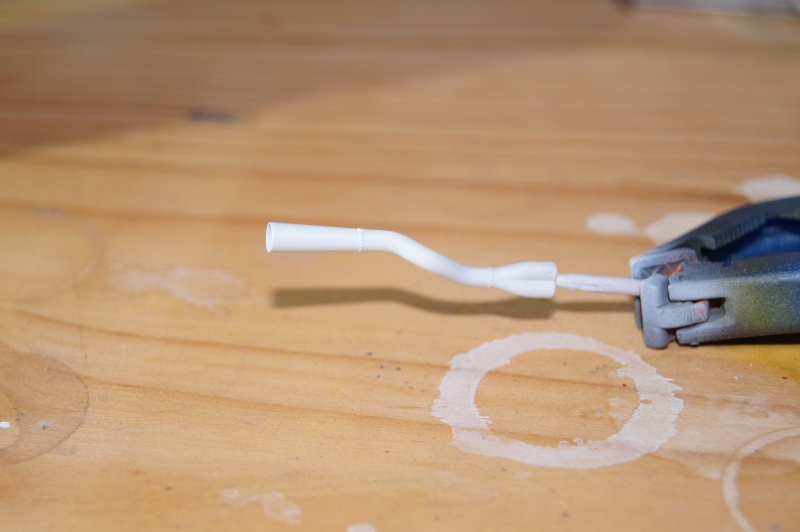 Plumbing of the dashboard started:
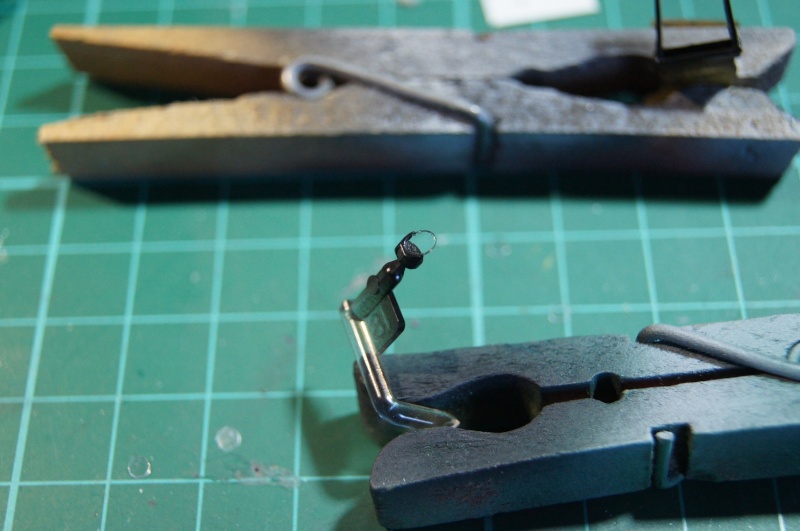
 Black painted caps, then mask and paint process including Klir for the finish coat and oil .Seam is intentionally left in order to depict (or try to...) the plastic bottle.
 Lockheed bottles installed:
 Light wash on the metal tanks:
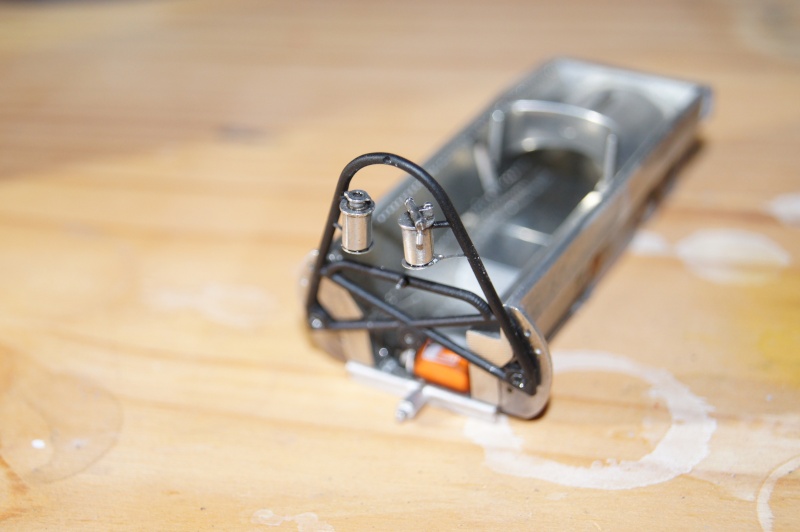 ...And finally a small test fit:
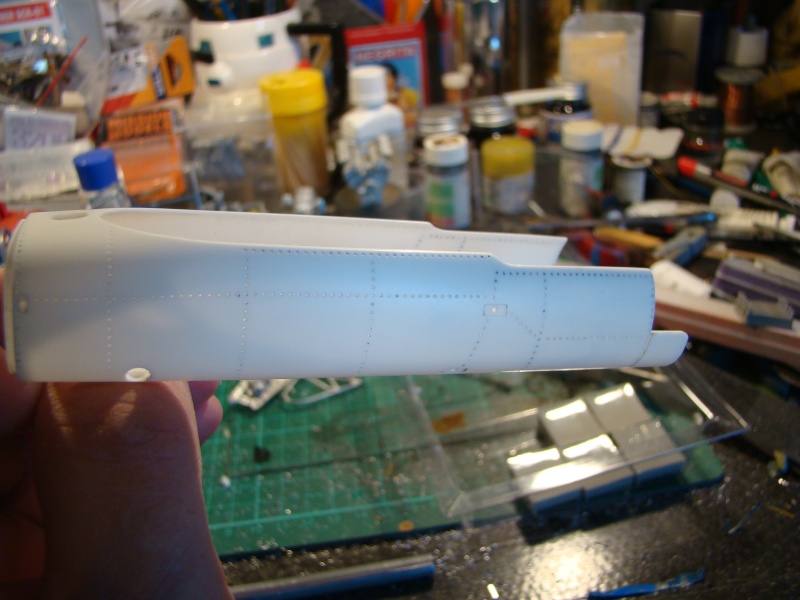
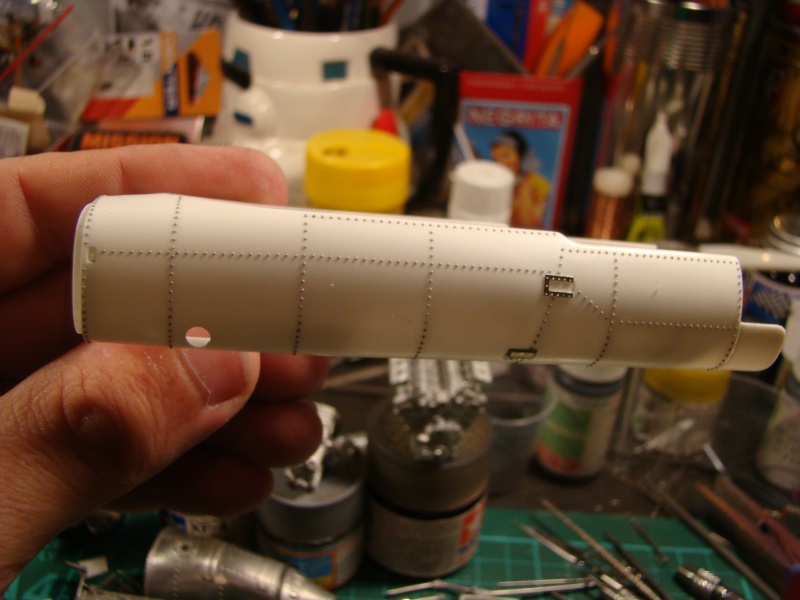
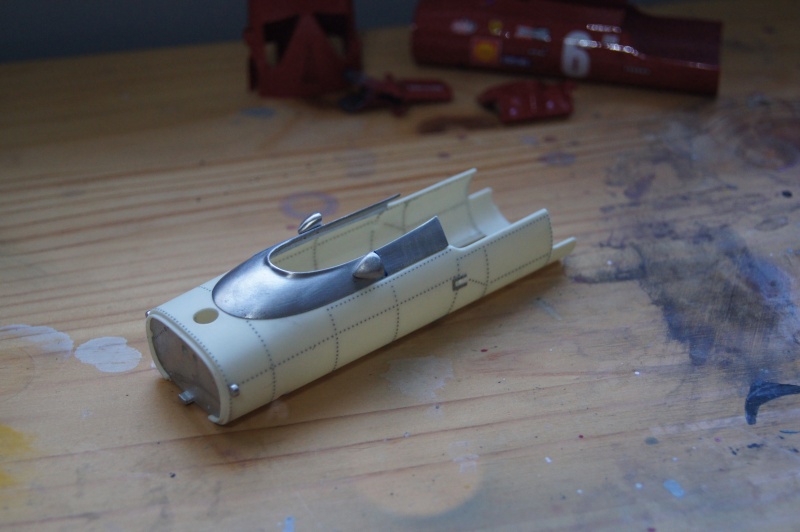
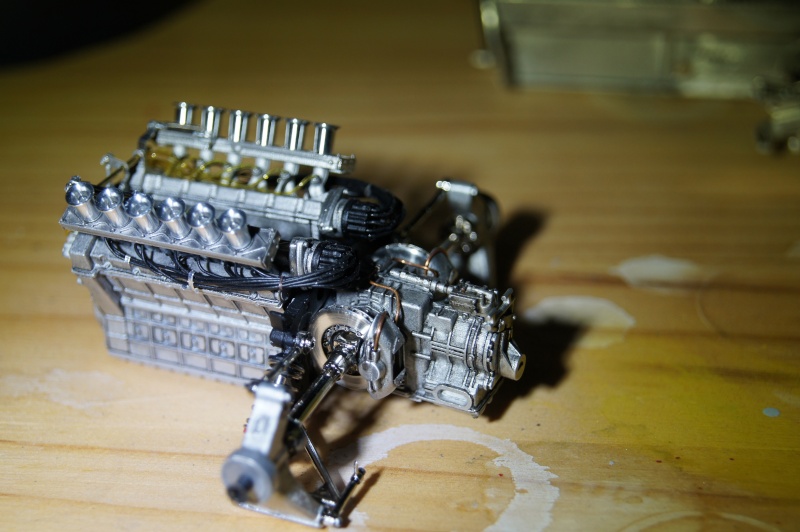 ZP White is now applied on the exhaust parts:
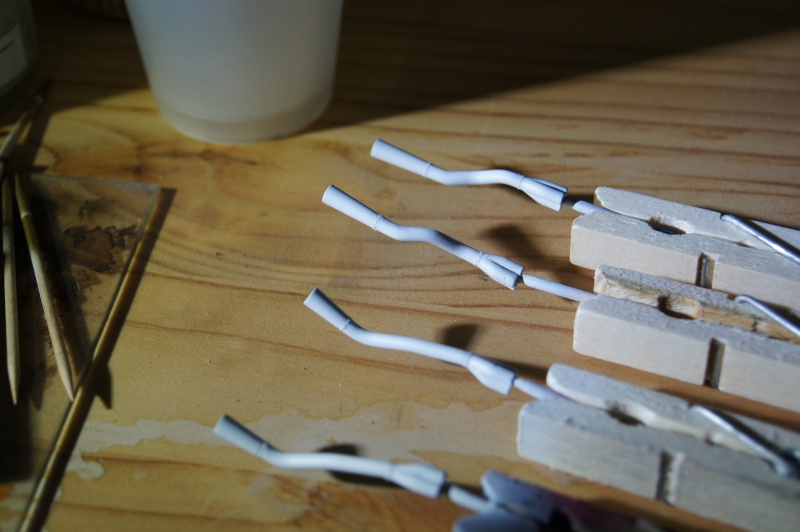
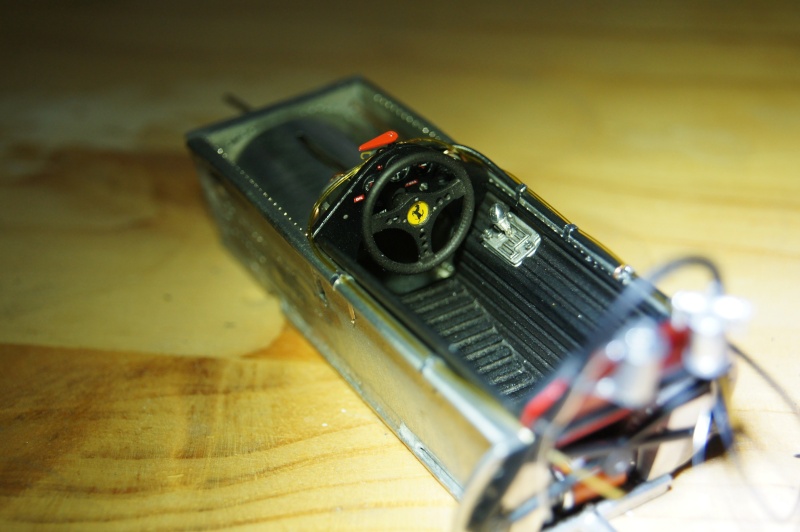
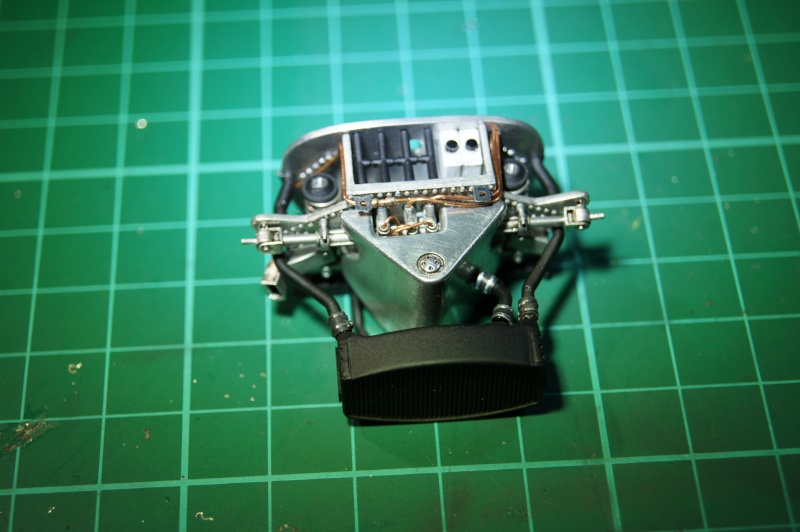
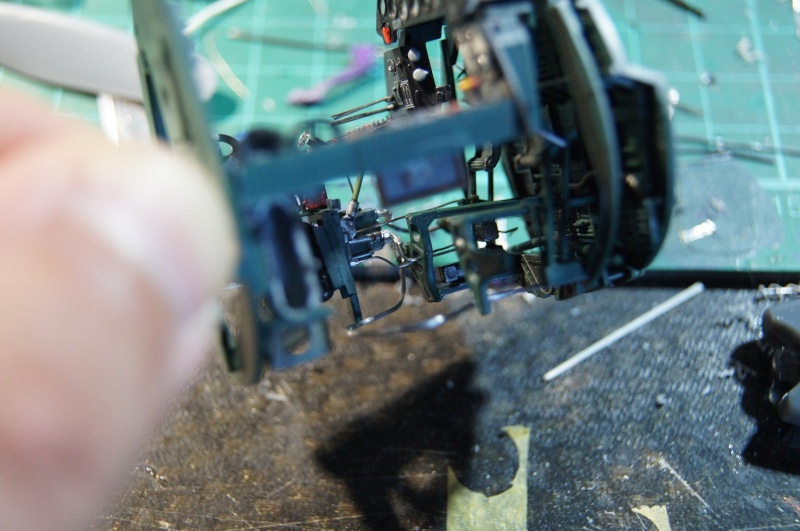
 Few details added on the dashboard: Nuts, bolts, wiring...
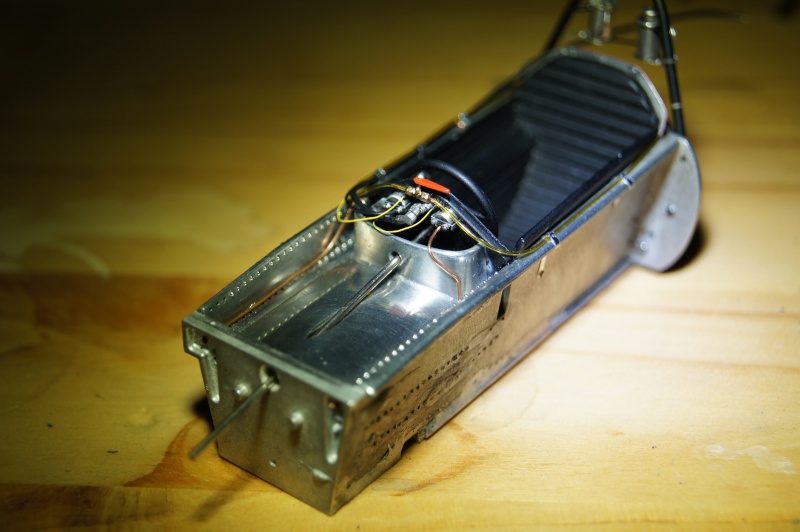
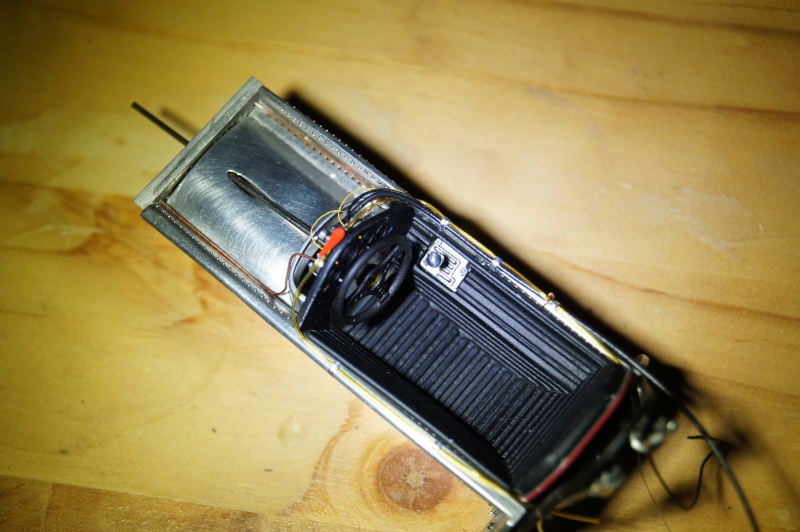
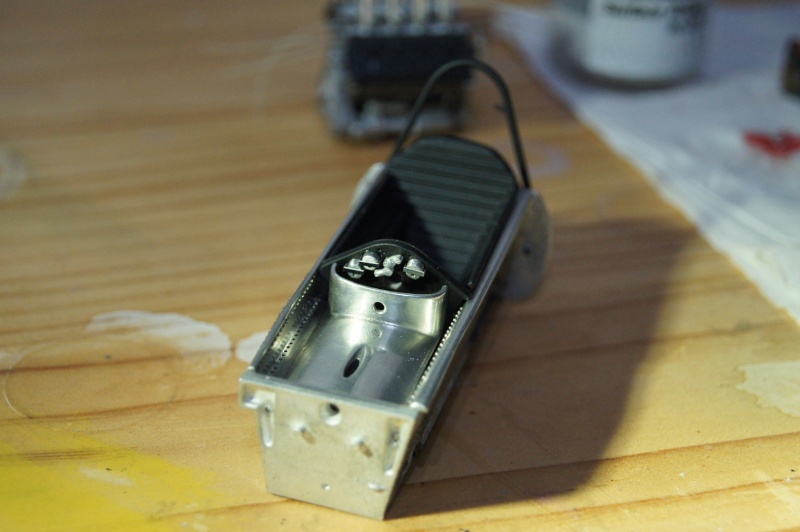
 Still working on the battery... waiting for cables:
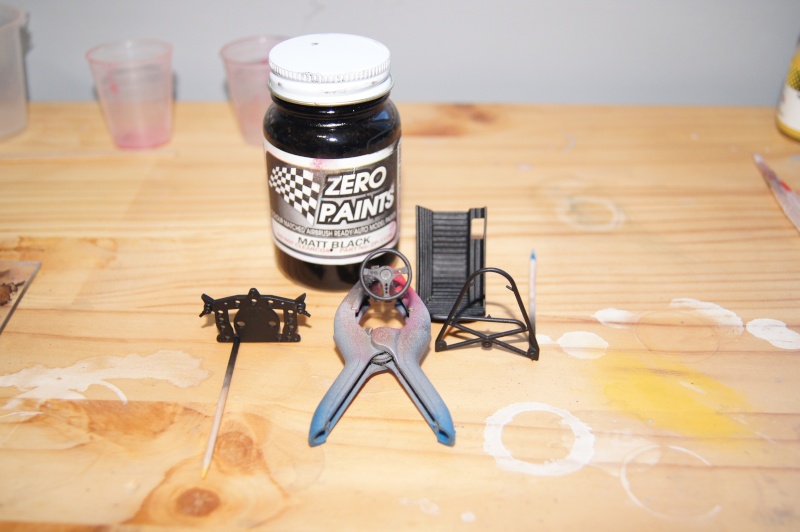
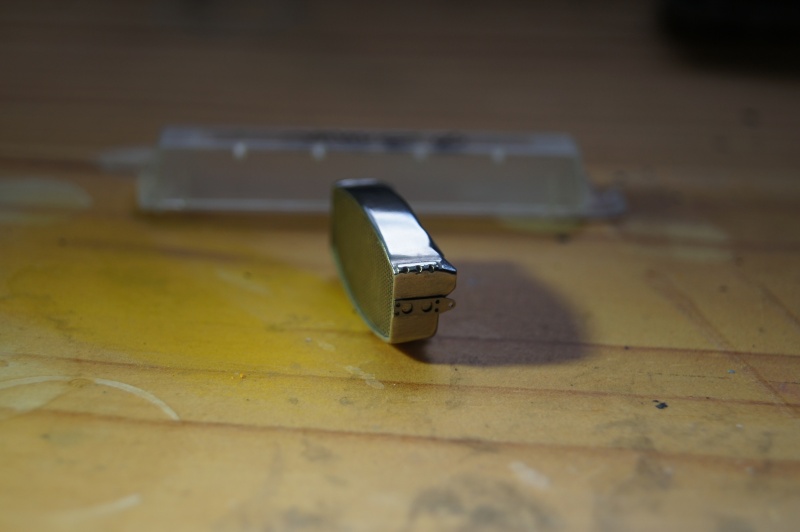
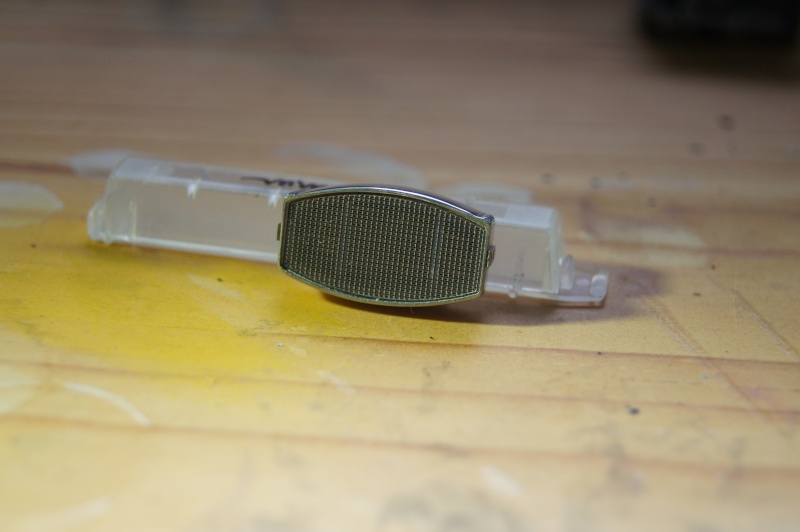
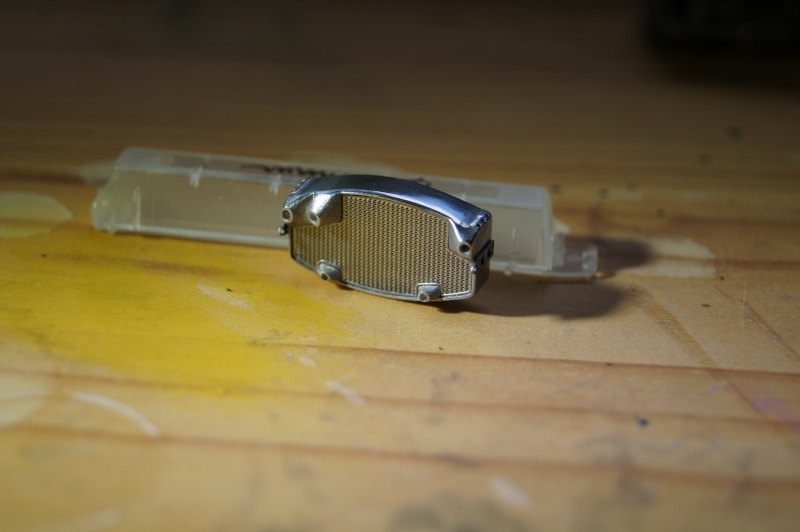
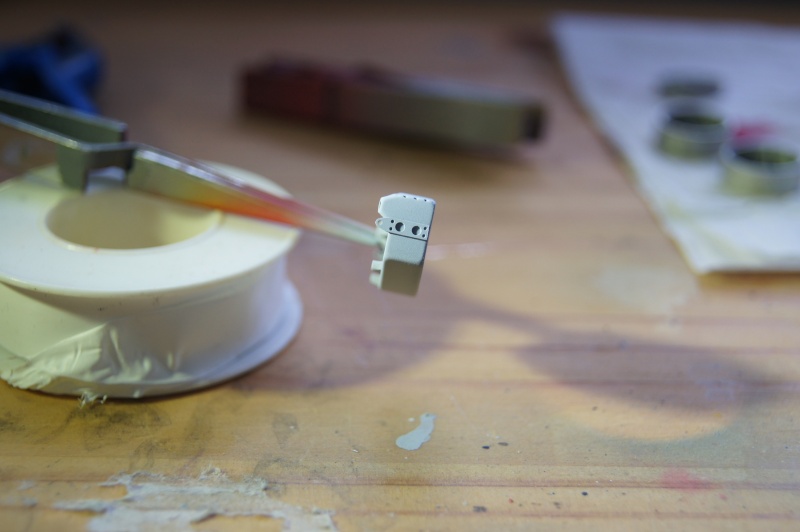
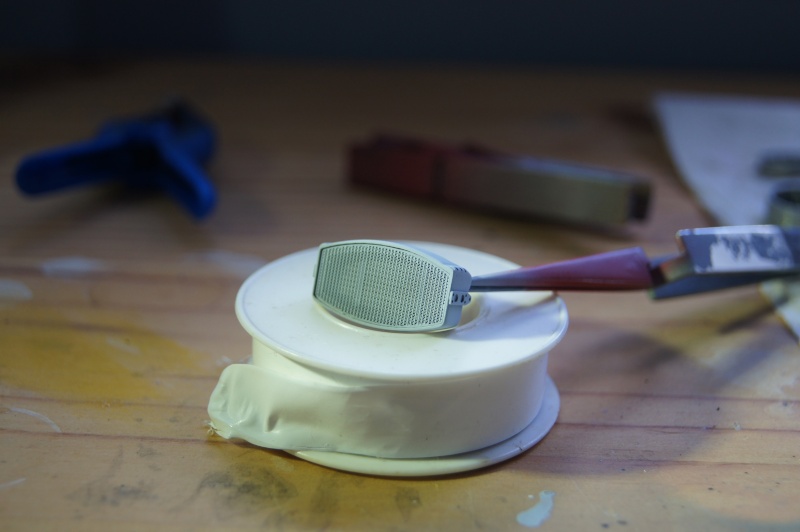
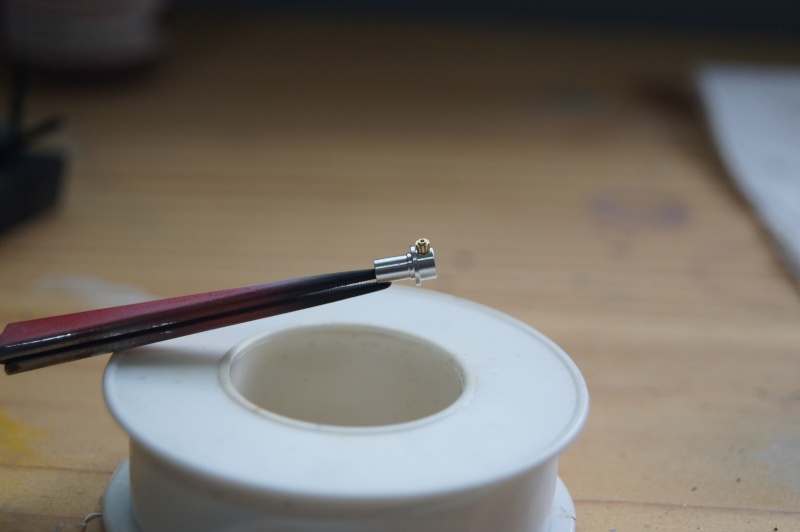
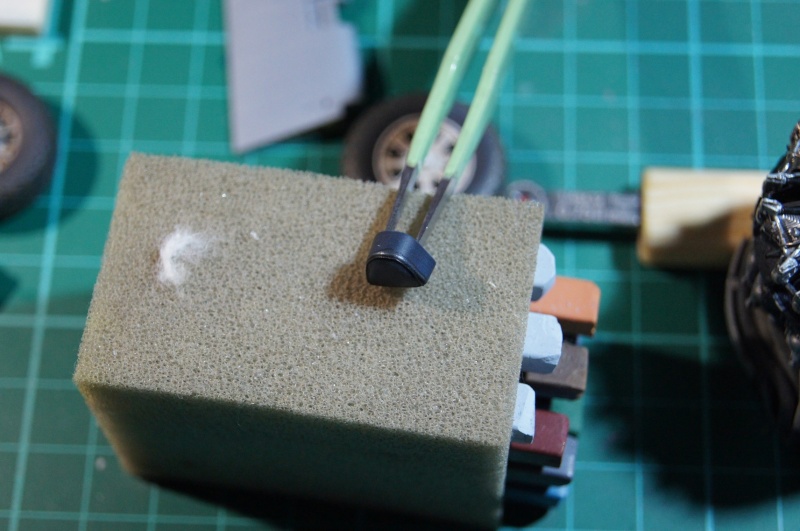
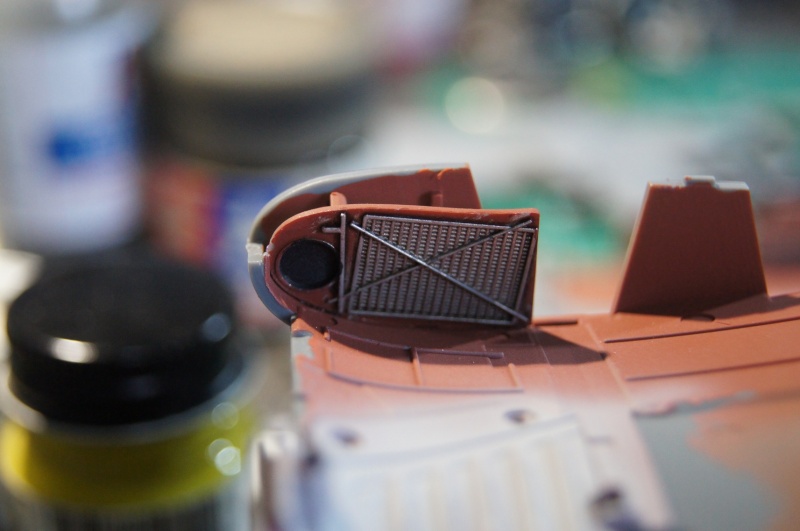
 New machined knob, polished and installed on 0.8 SS rod.The beautiful genuine grid is just detailed with machined bolts and lightly weathered.
 Cockpit is now almost done.I also decided to scratch build the fuel tap which appears on some of my pics, but not on others...
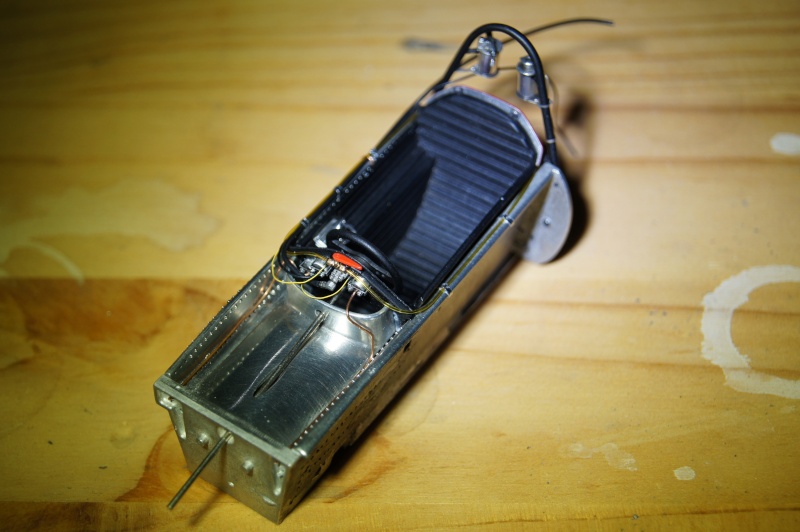
 Tube installed on the expansion tank:
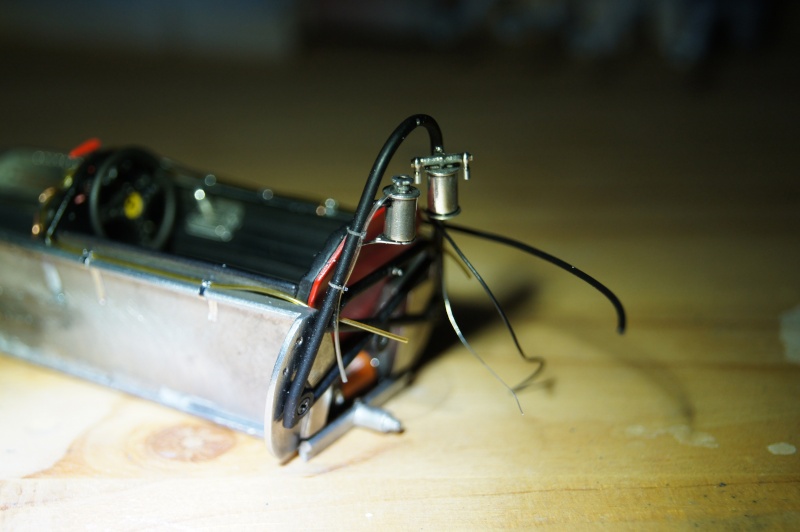 Test fitting of FWD parts:
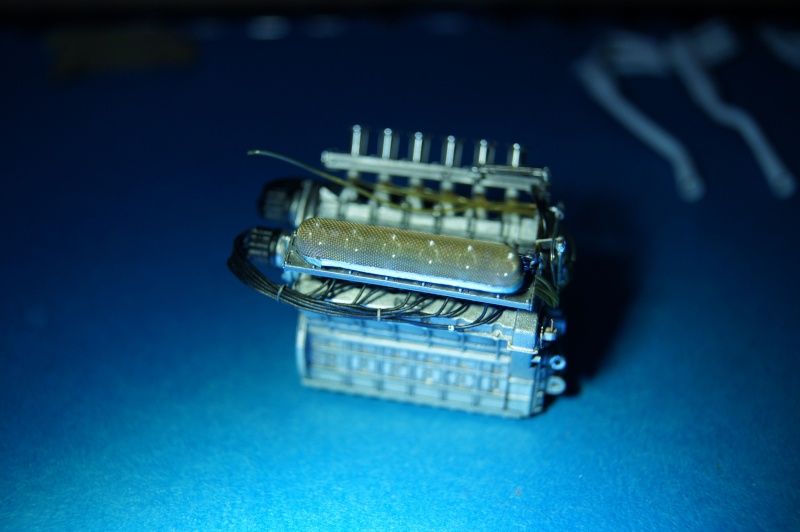
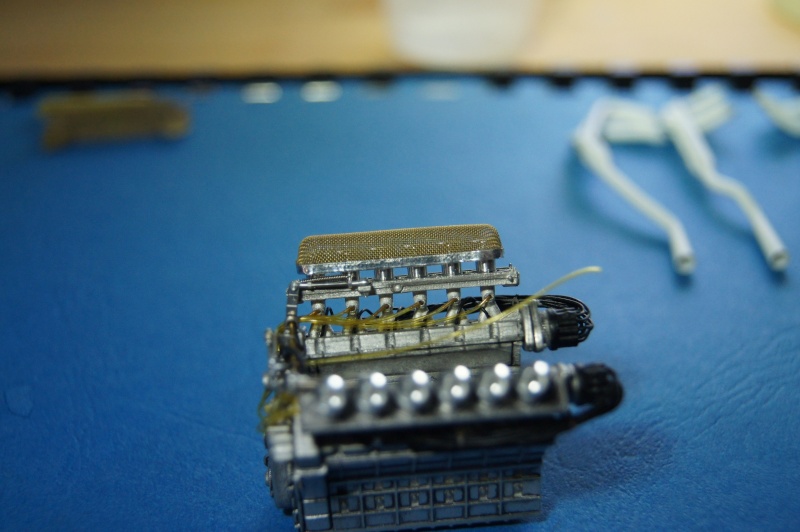
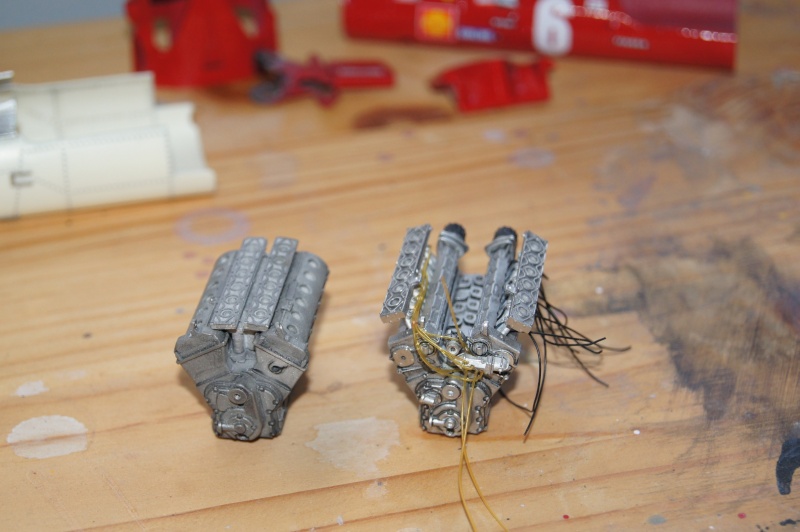
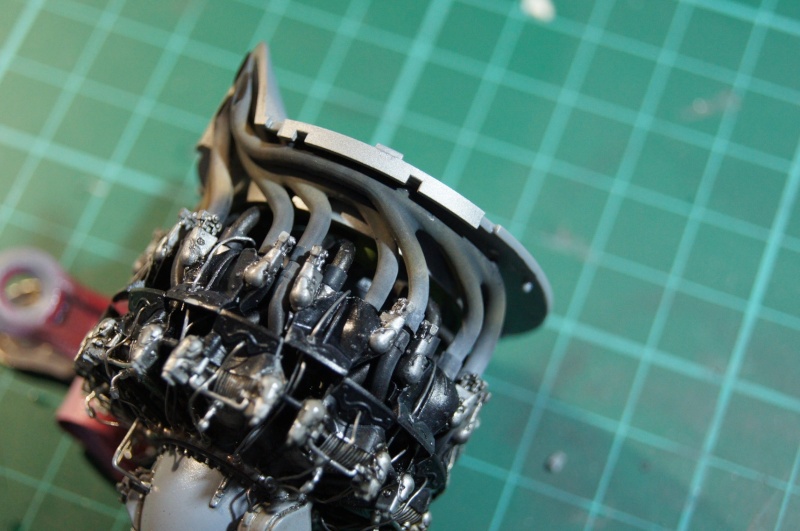
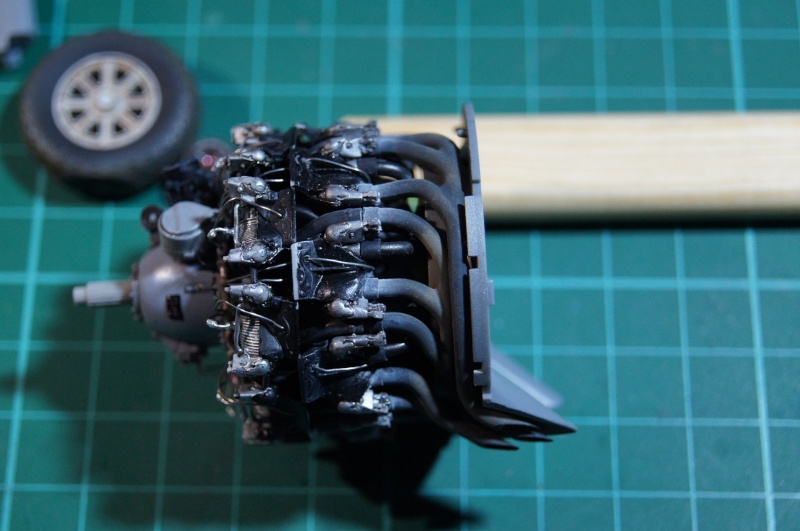
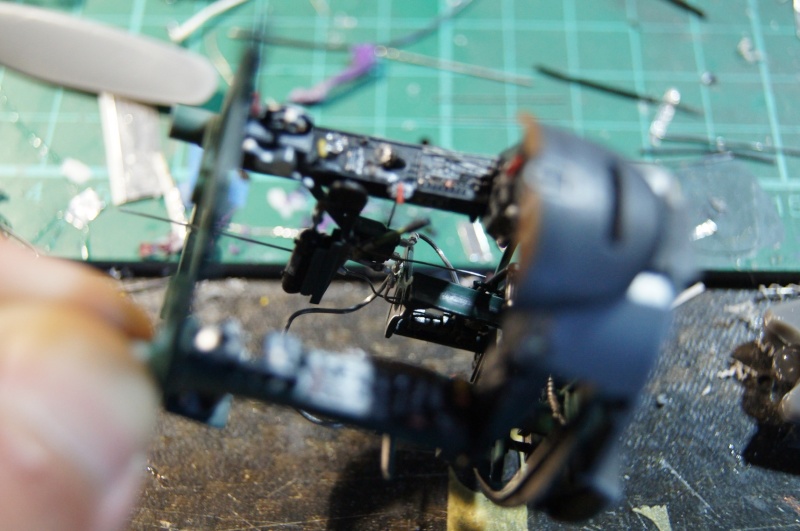
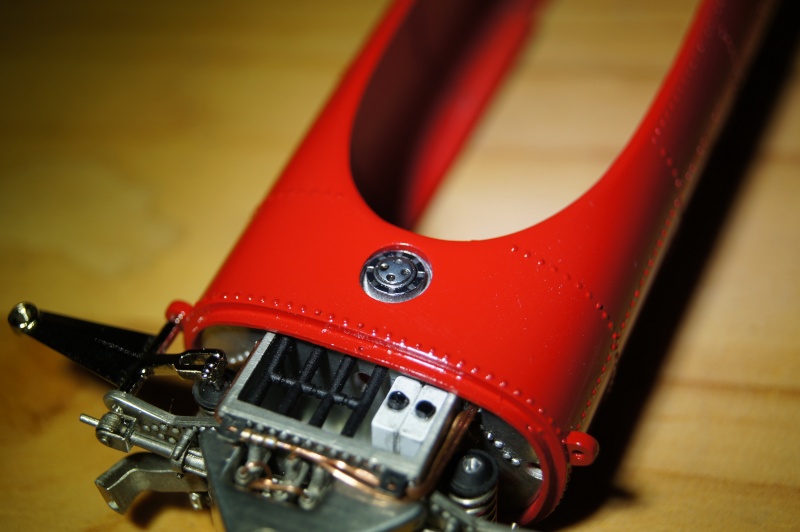 Still adding tubes and cables on the engine...:
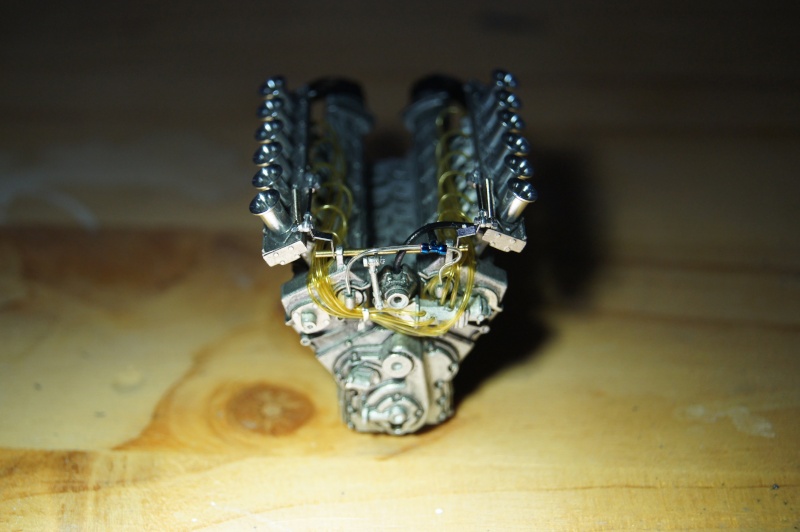 Do and undo...I was not so happy with the fuel lines: redone:
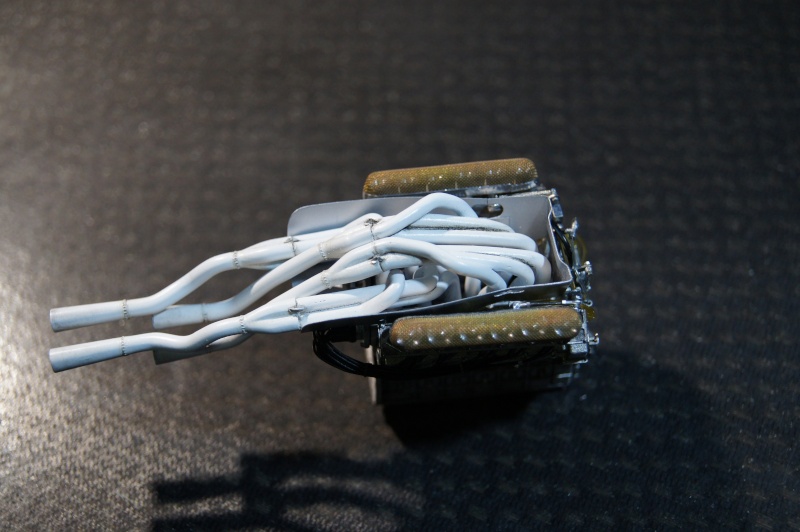
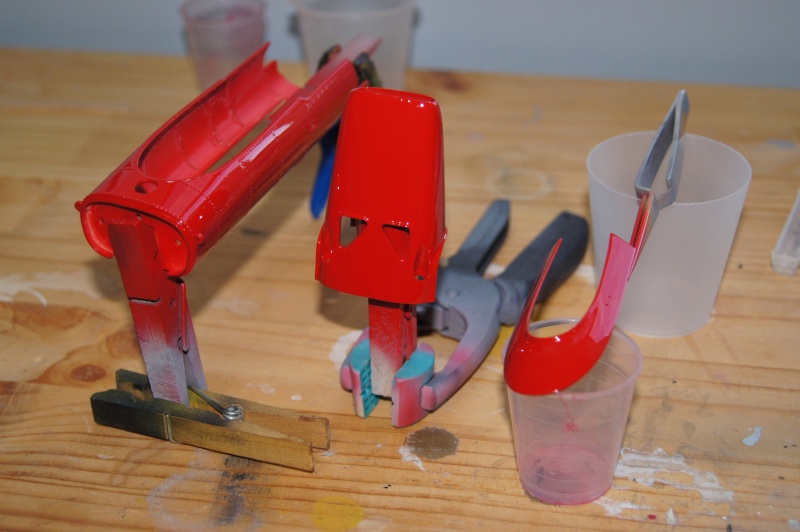
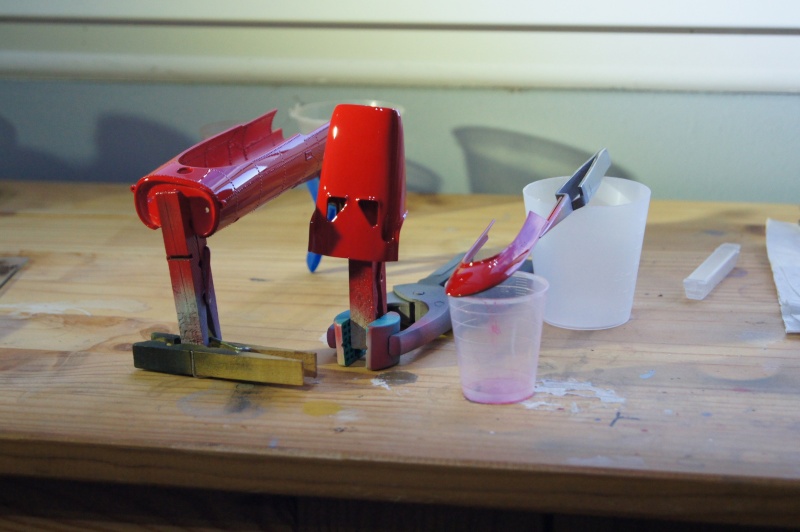
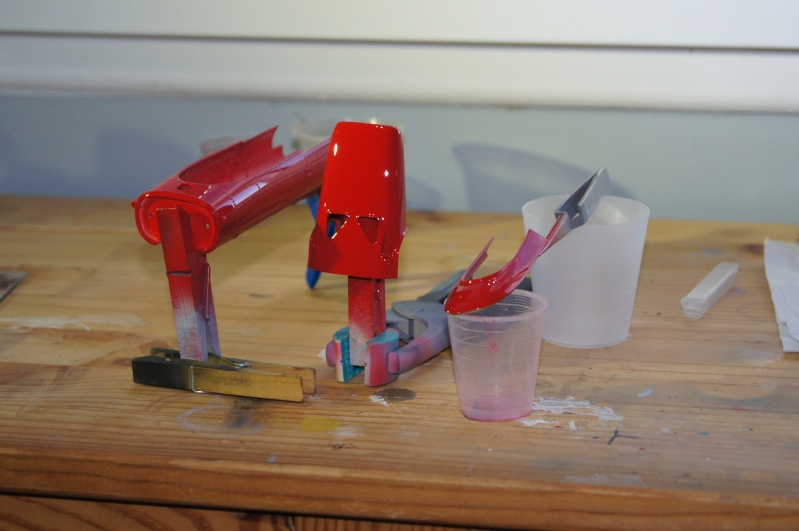
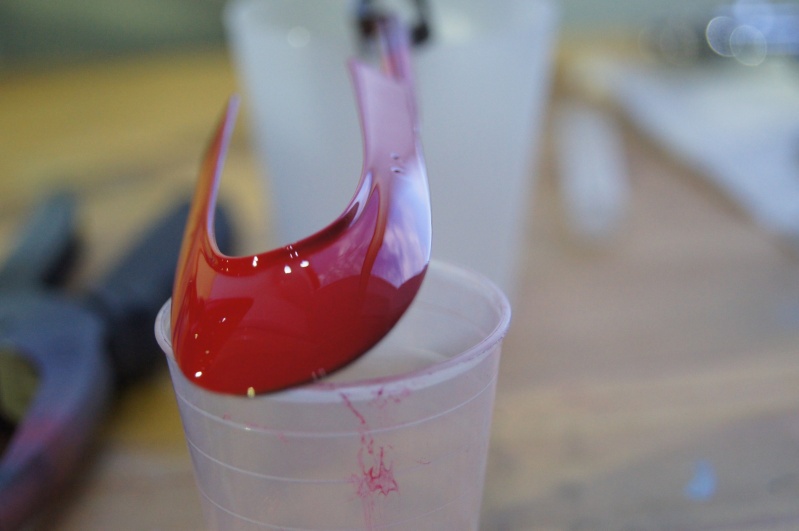
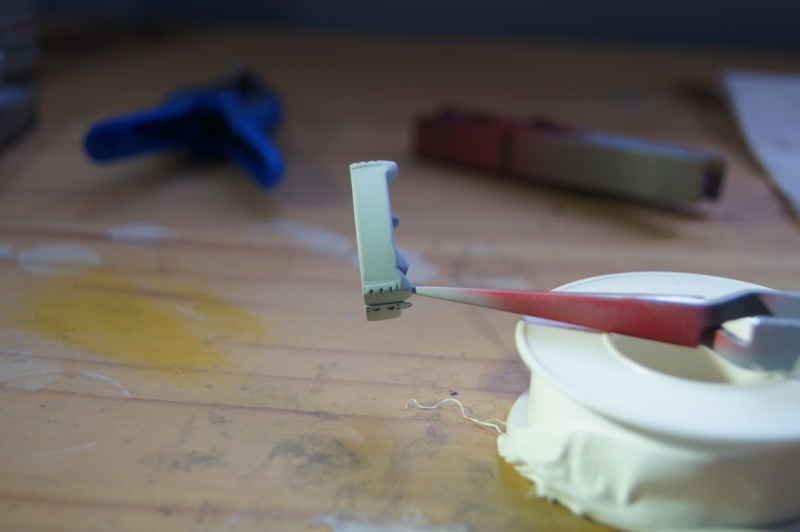
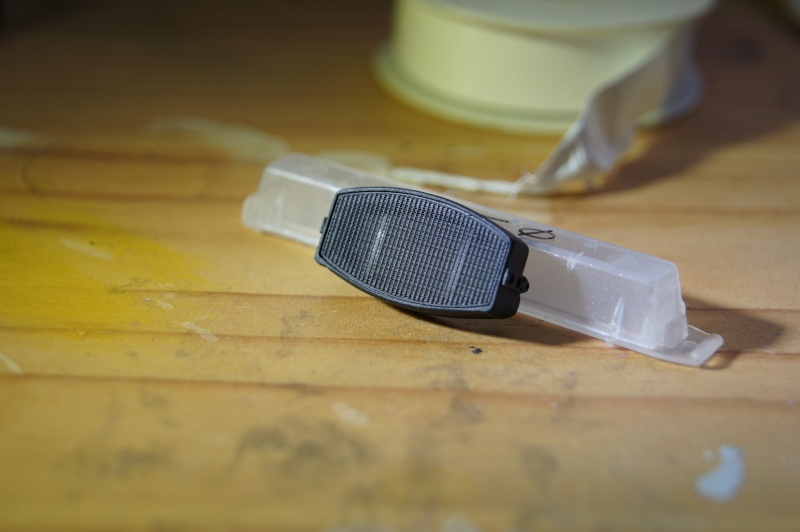
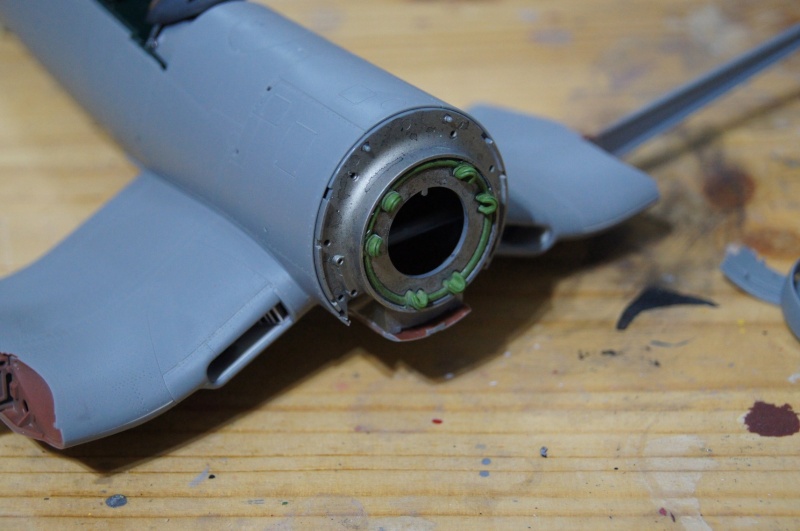
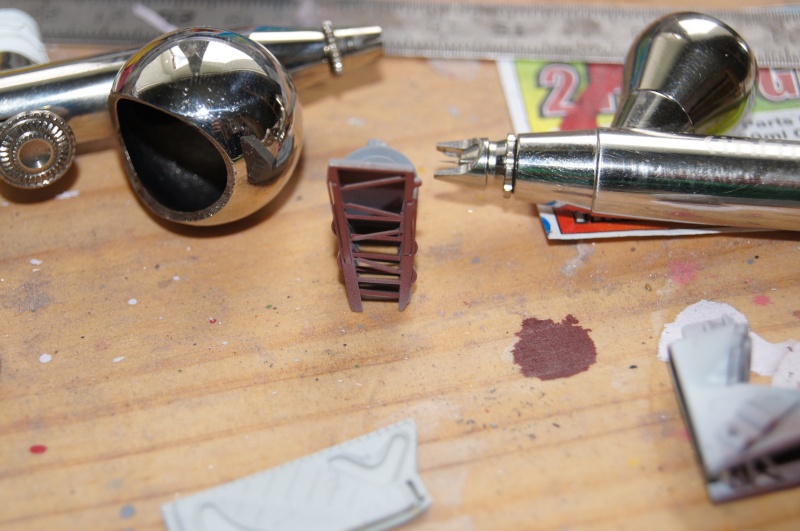
 The wire mesh that protects the velocity stacks against ingestion of foreign objects (FOD) is shaped using the included tool.The mesh is a bit too "flashy" for me.I put the grid under the flame to give it a more suitable color.The shaping is thereby slightly more facilitated.A small test seems to validate this solution.
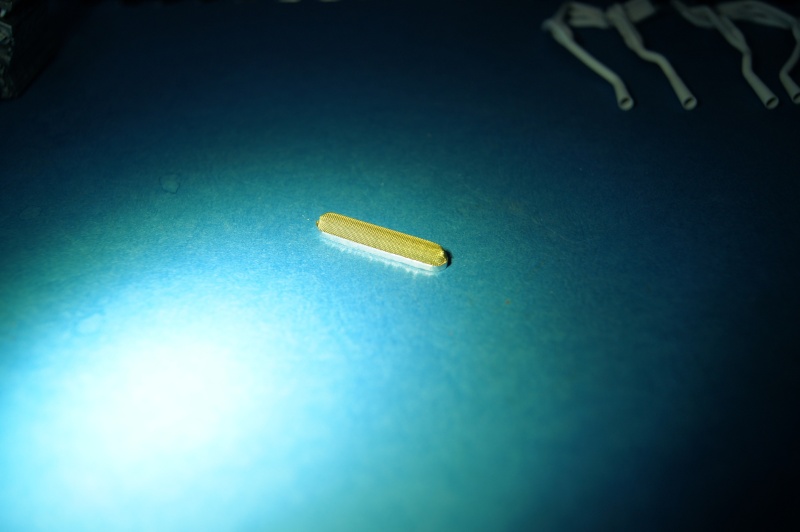
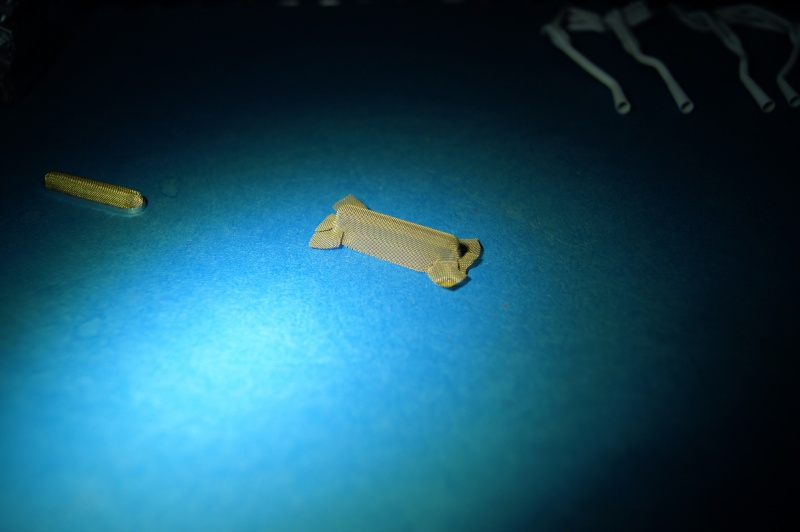
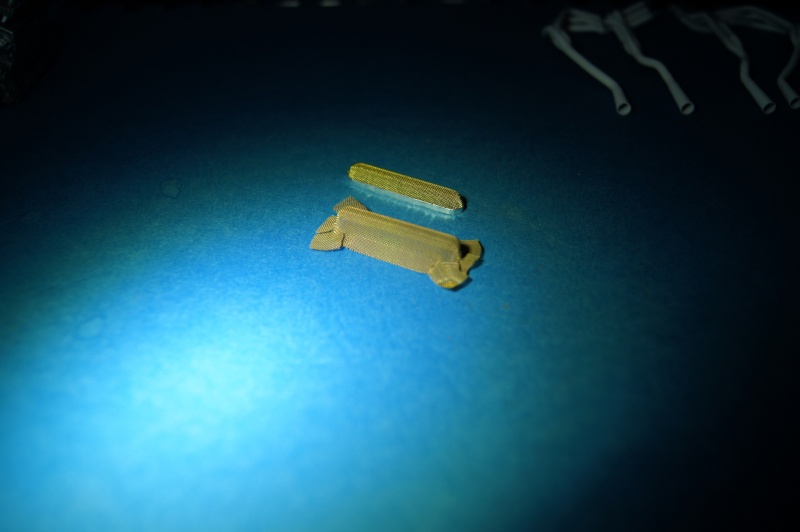
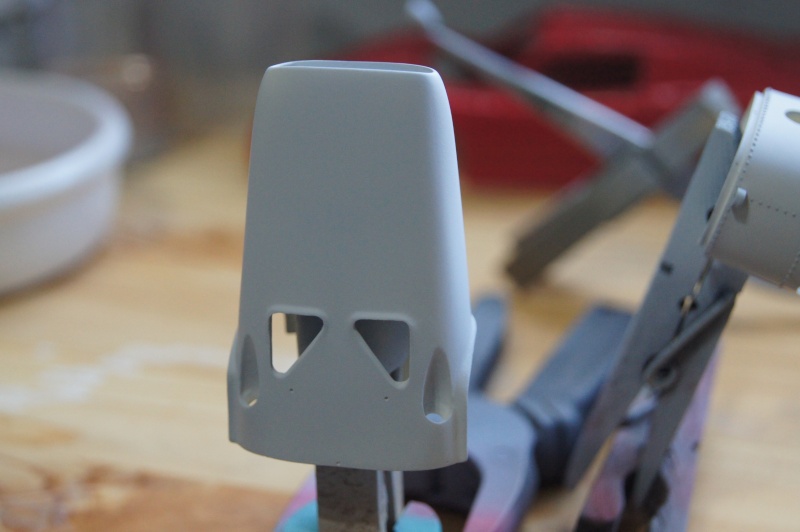
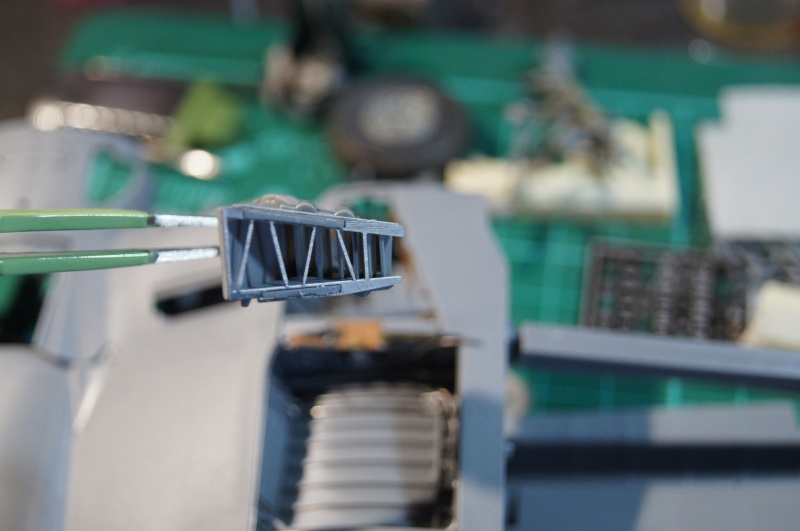
 As mentioned above, the heat shield is made, its implementation validated.it only remains some paint and weathering:
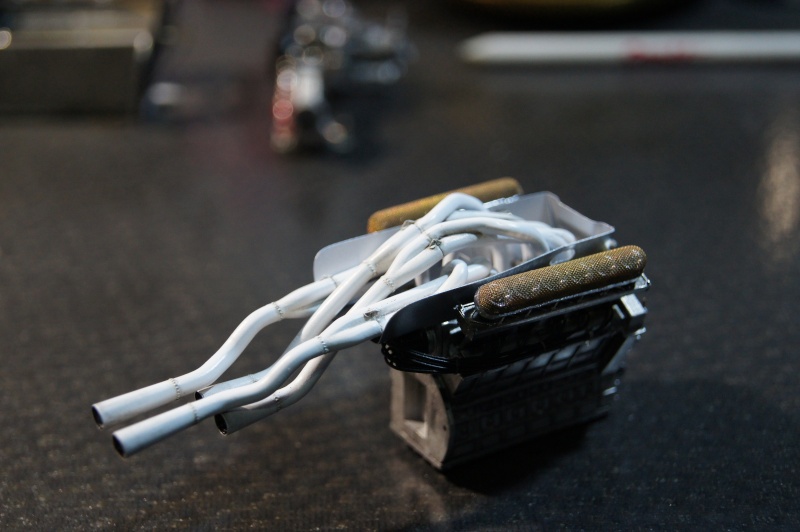
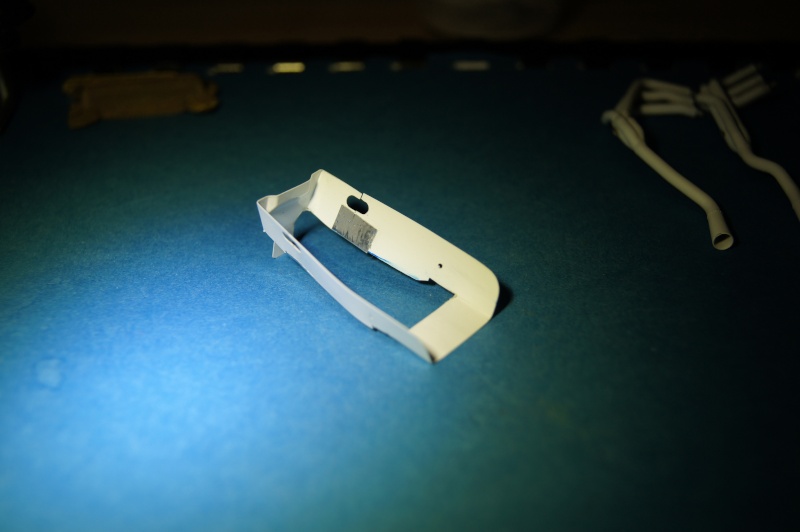 Exhaust assembled:
 And exhaust clamps installed:
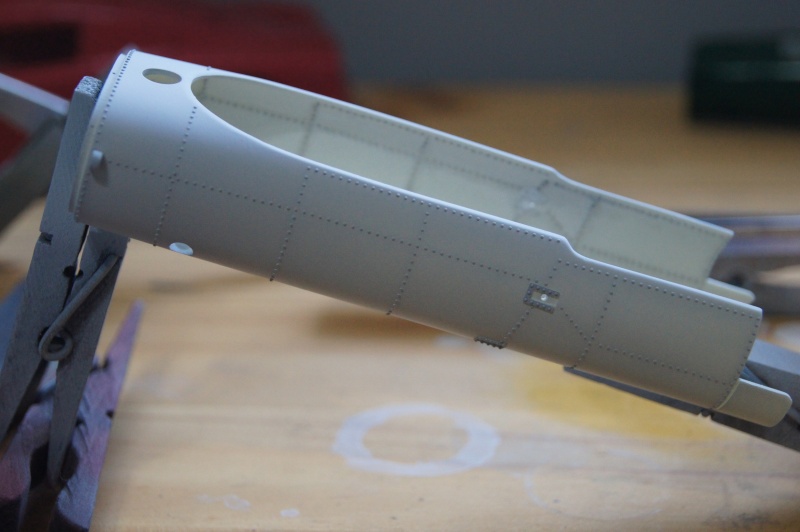
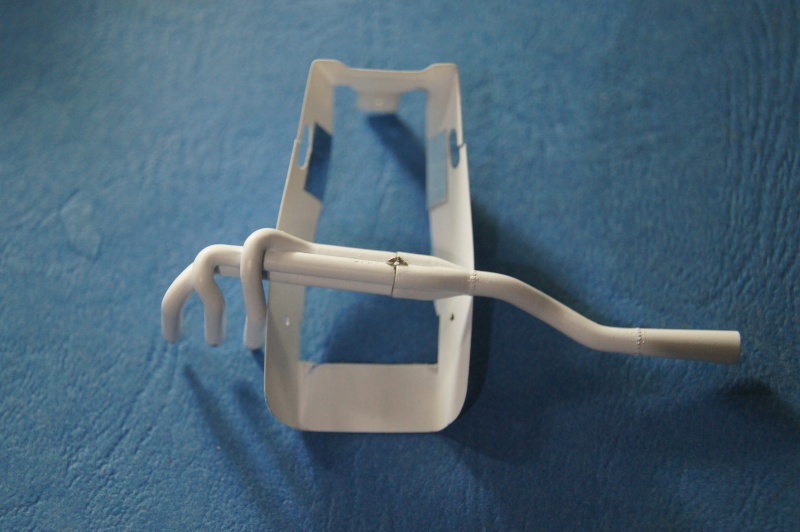 A new light coat of white is quickly sprayed, then a thin coat of Aqua Gloss in order to protect the paint.
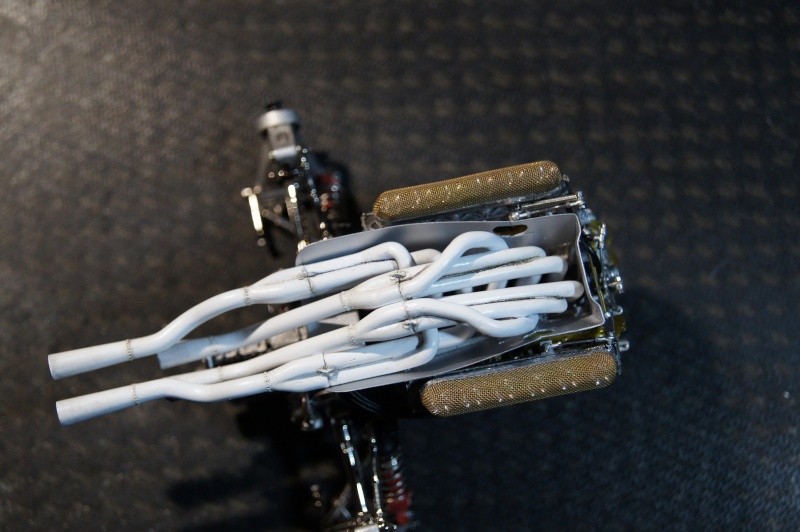
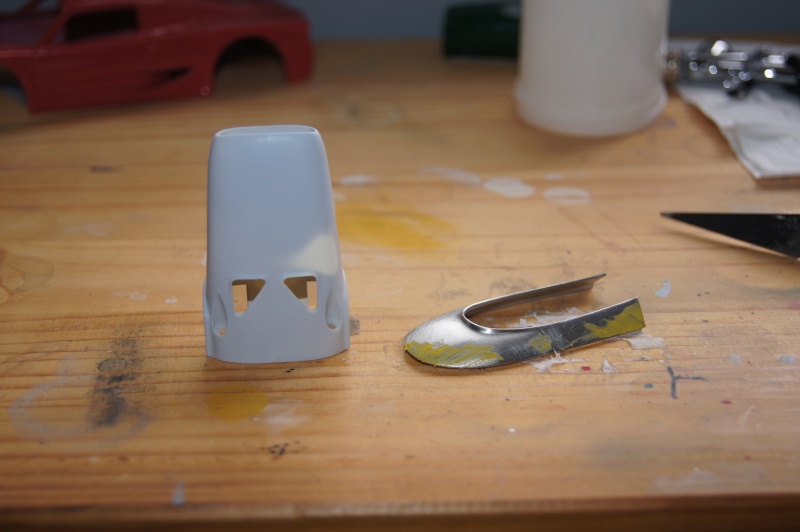
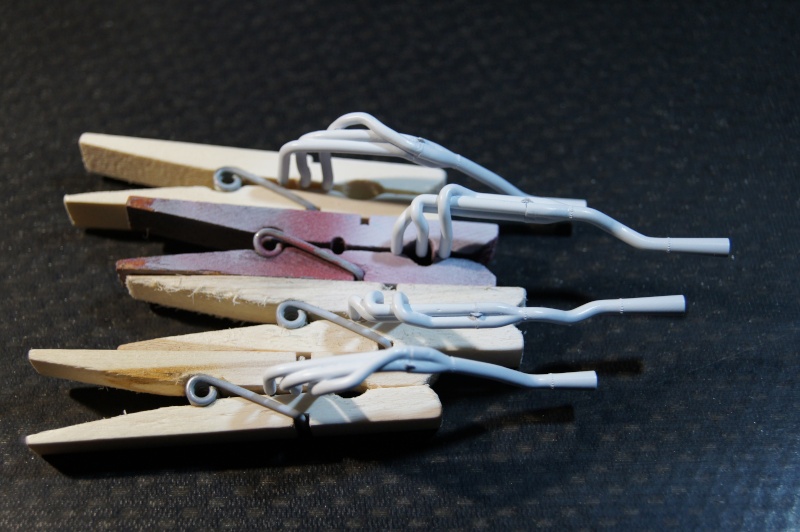 Sorry for the pics...The heat shield is sprayed with Alclad White alu over a primed Dull Alu base:
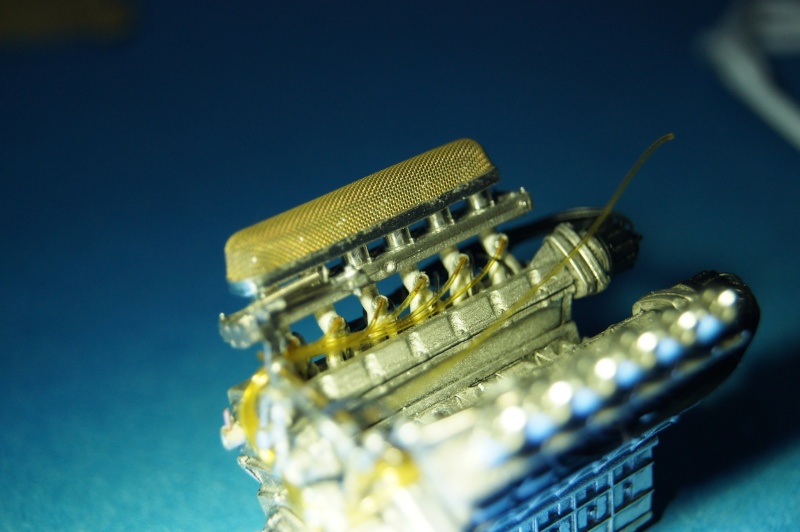
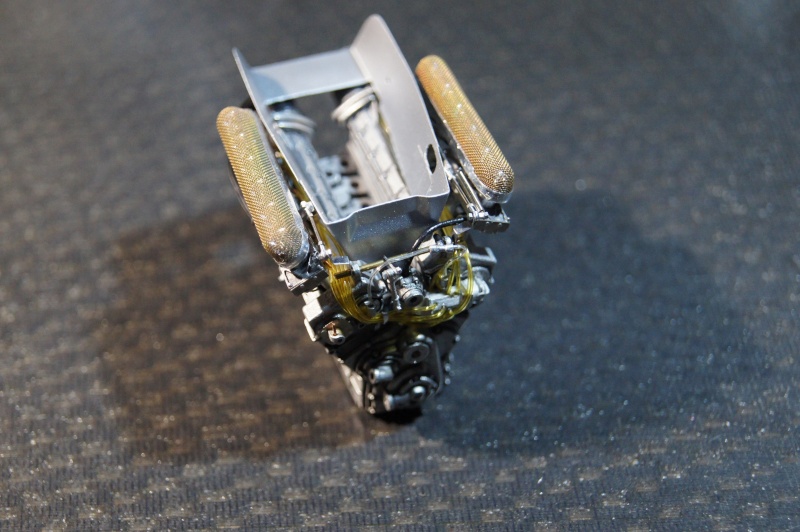 The mesh is temporarily installed.Test fit of the exhausts over the heat shield:
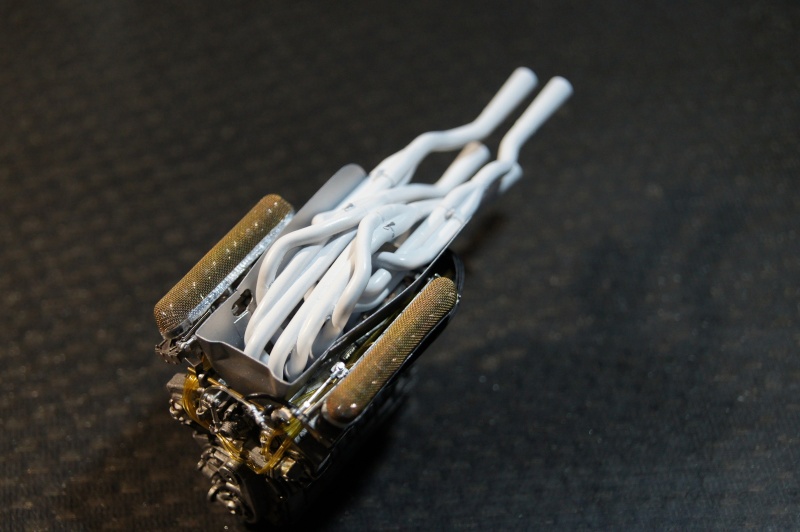 Weathering started (oils):
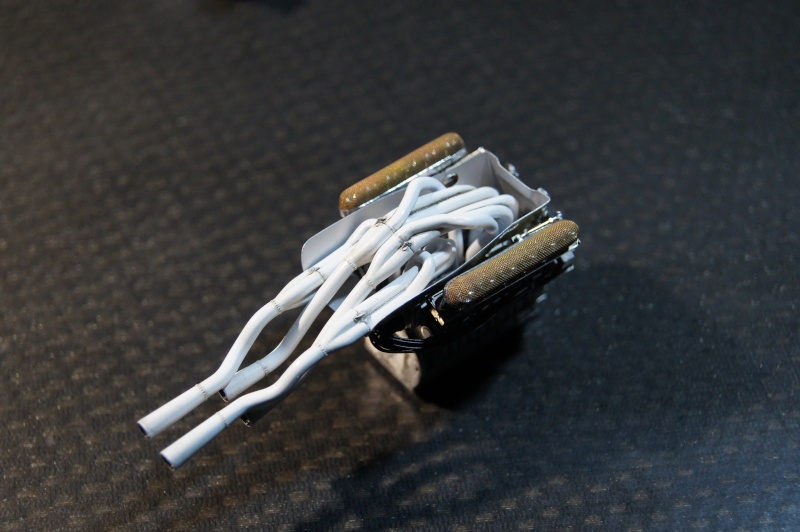
 It may need to be accentuated (very slightly) in some areas and reduced for others.And a missing part.Pas lourd, pas lourd, pas lourd...A new one is made using 0.6 brass.
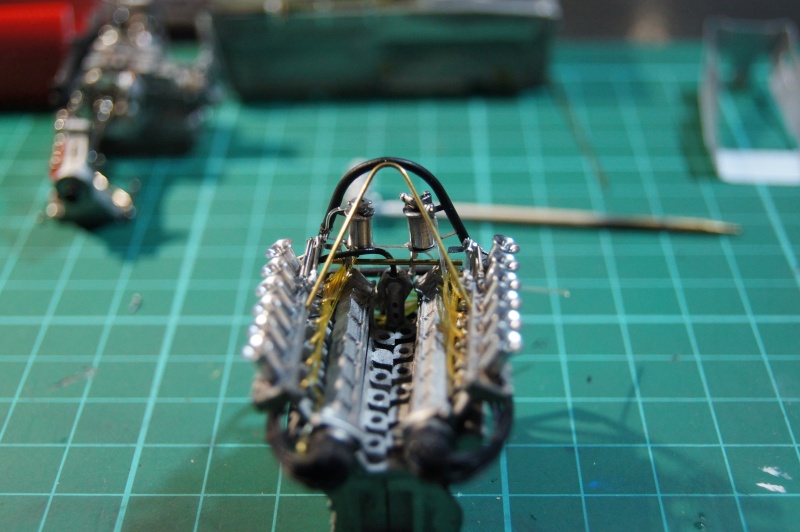 Primer and Alclad Black already done and waiting for the Airframe Alu.Decals time:
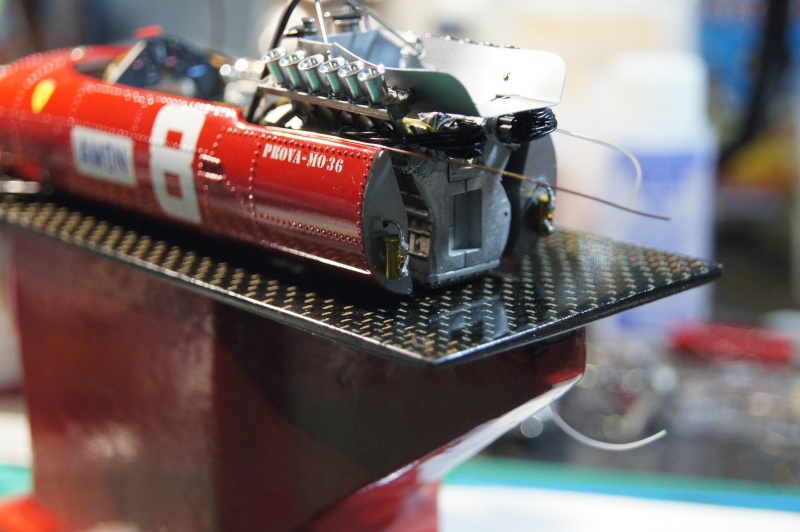
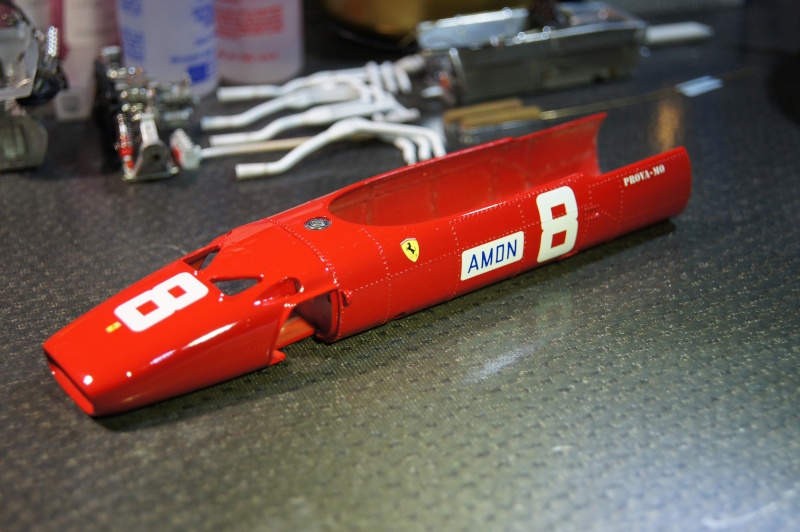 I'm not sure about the PROVA number...Next to her sister from 69:
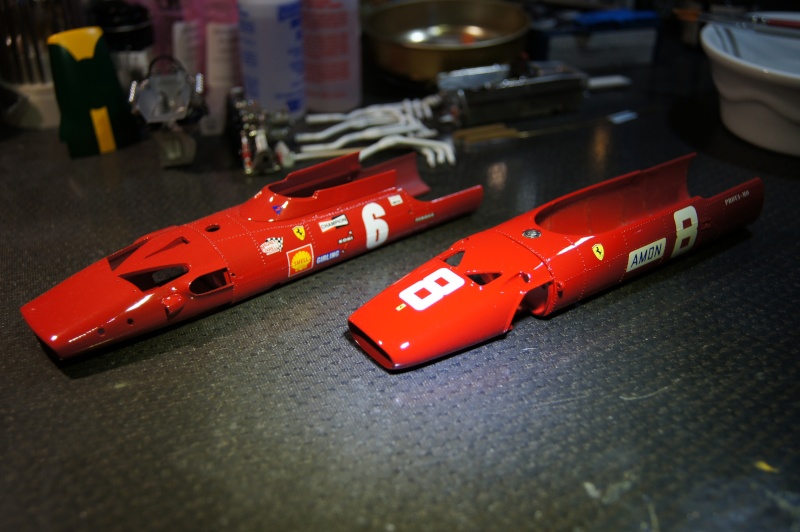
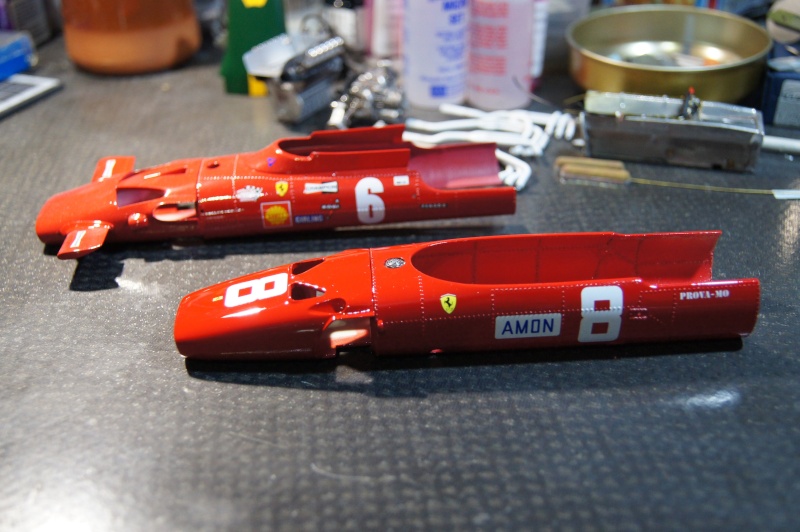 Less sponsor in 67?...Rollbar finished and installed:
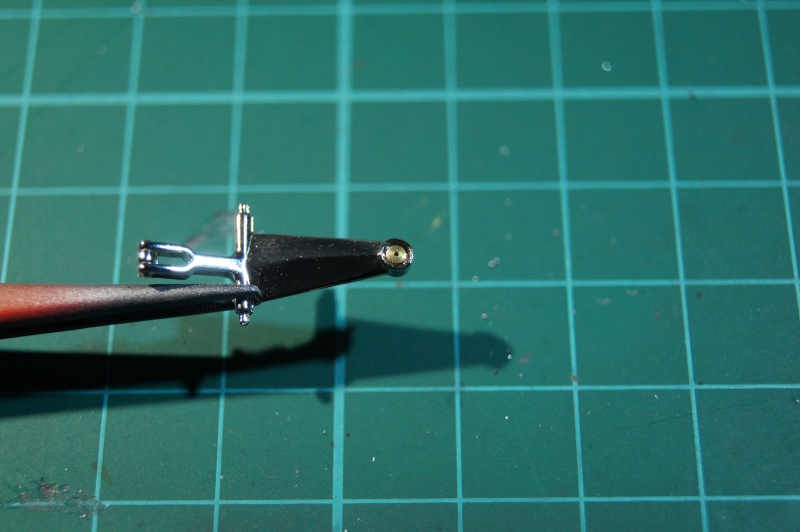
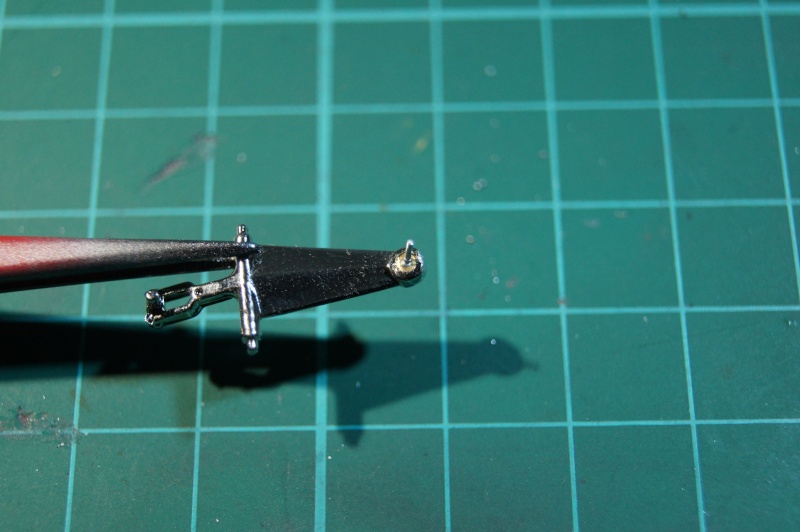
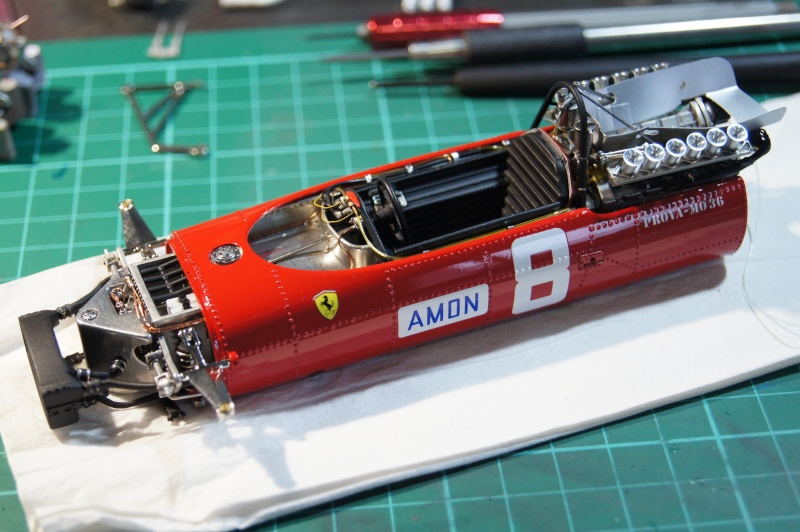
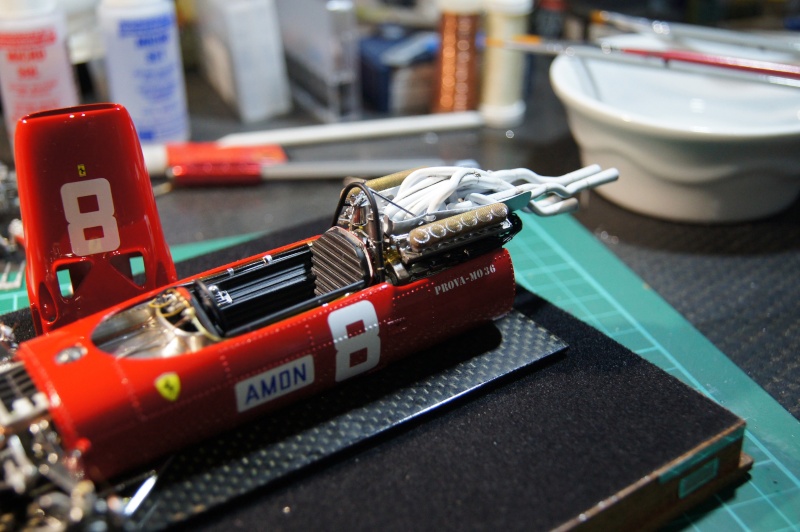
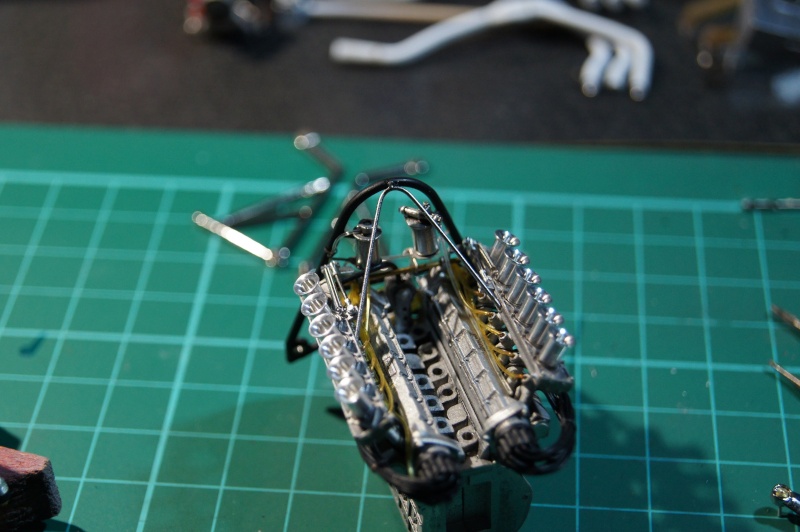 Engine also installed and everything is connected (Oil filter, tachometer...)Hubs are modified to avoid the use of the black screws: I prefer ball joint

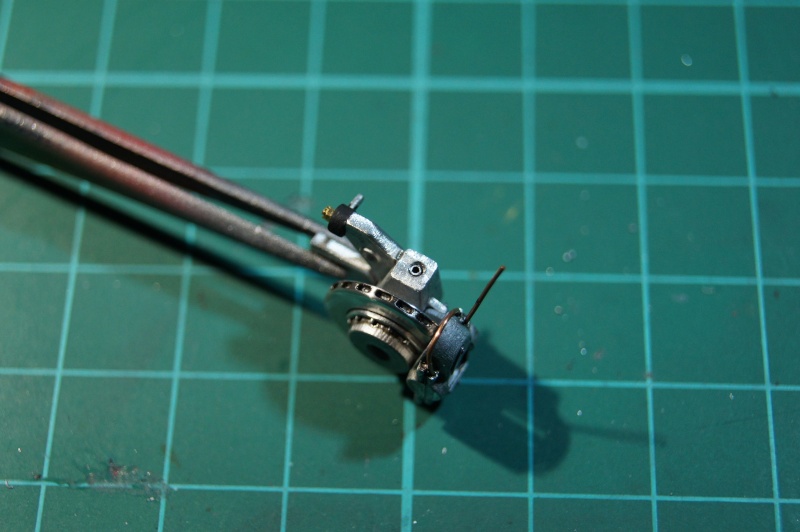 A screw head is added on the dampers adjustment knobs:
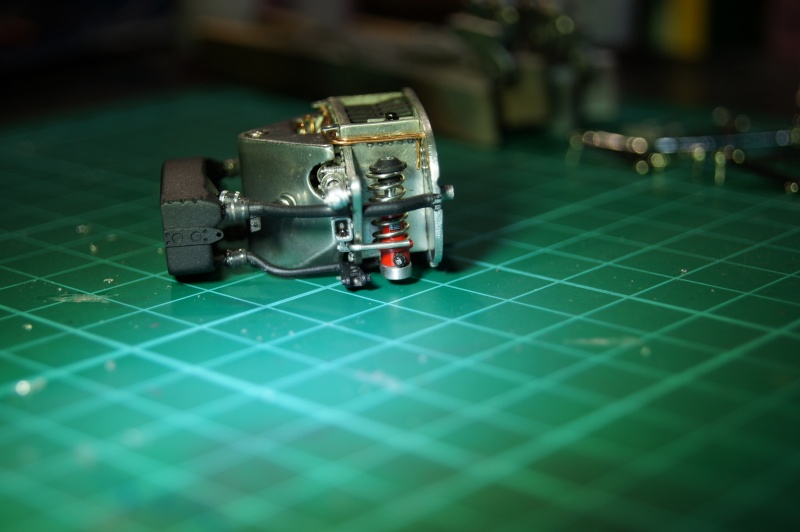
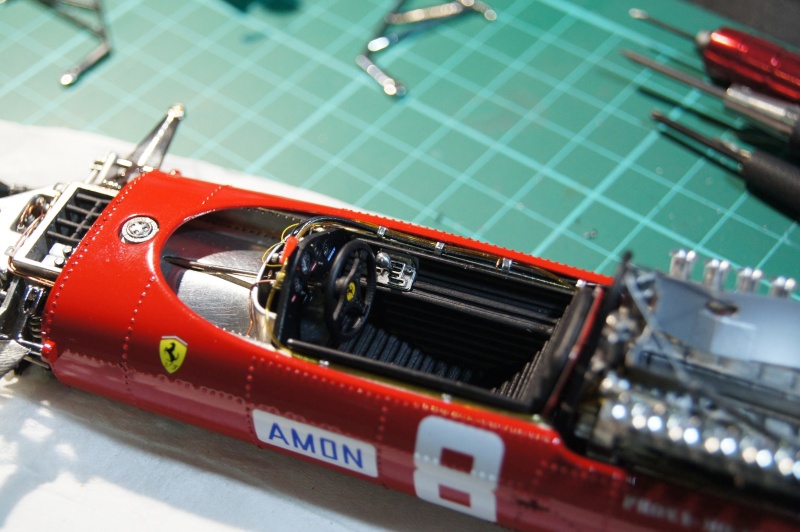
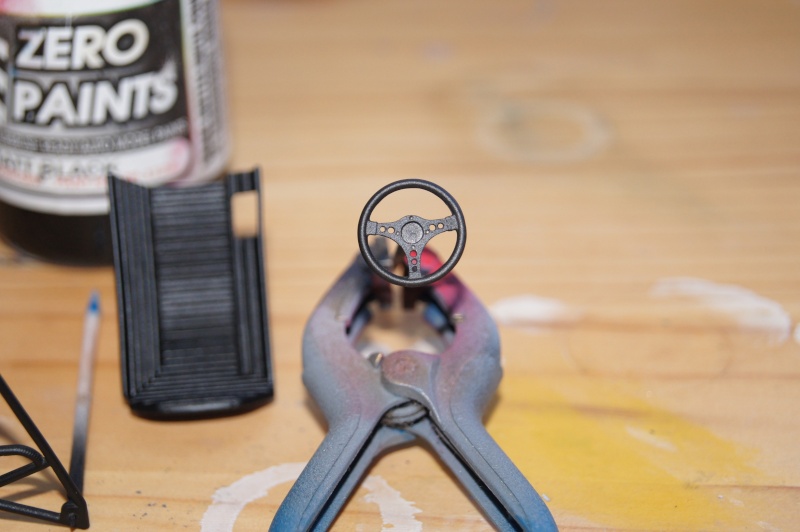
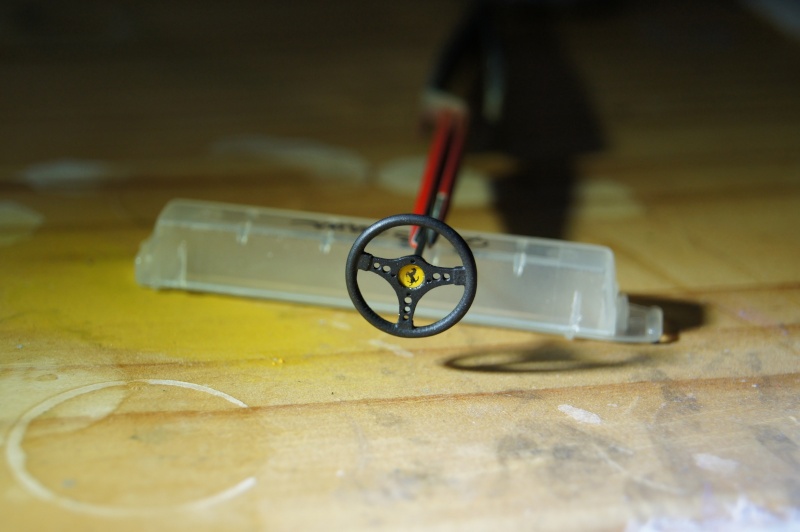
 Sensors details added on the radiator hoses.A quick oil (W&N) dry brush was done on the seat and the steering wheel.
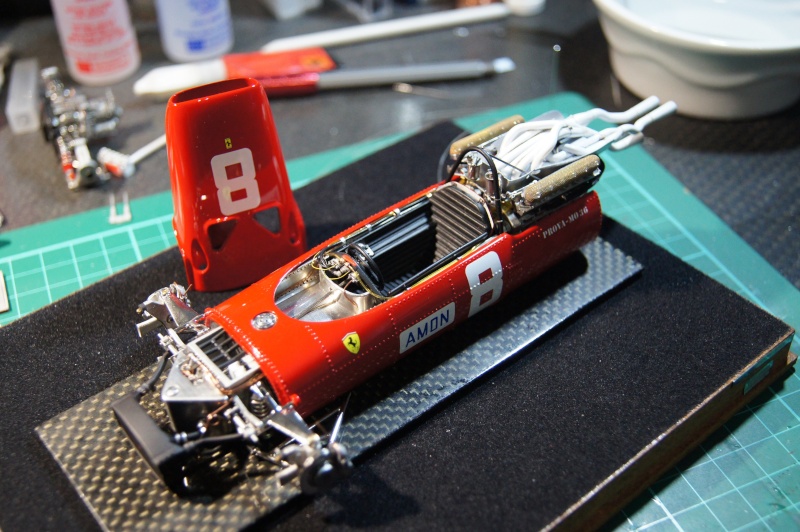
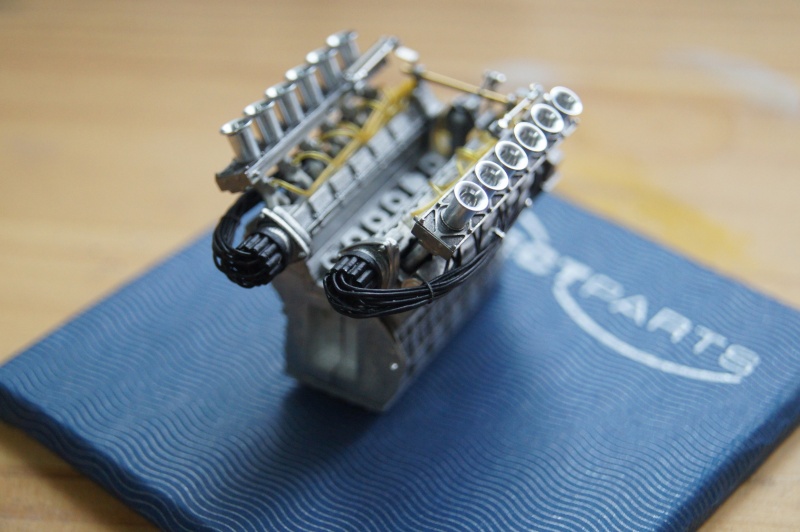
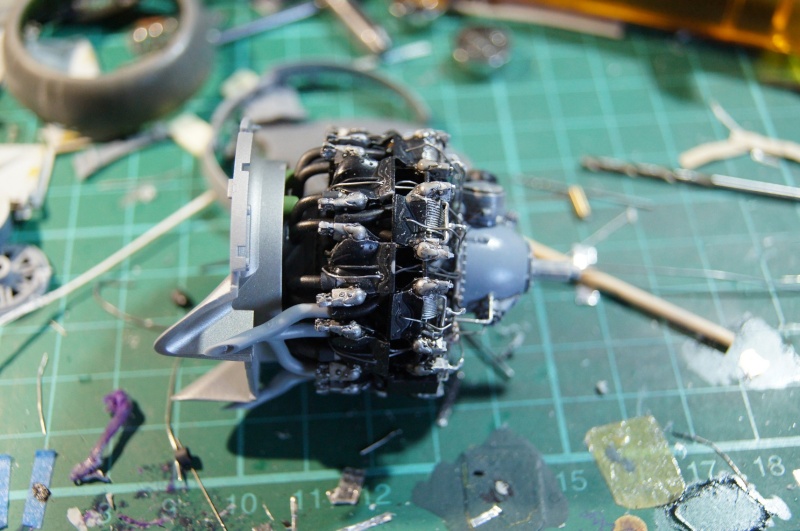
 Fuel pumps were slightly detailed
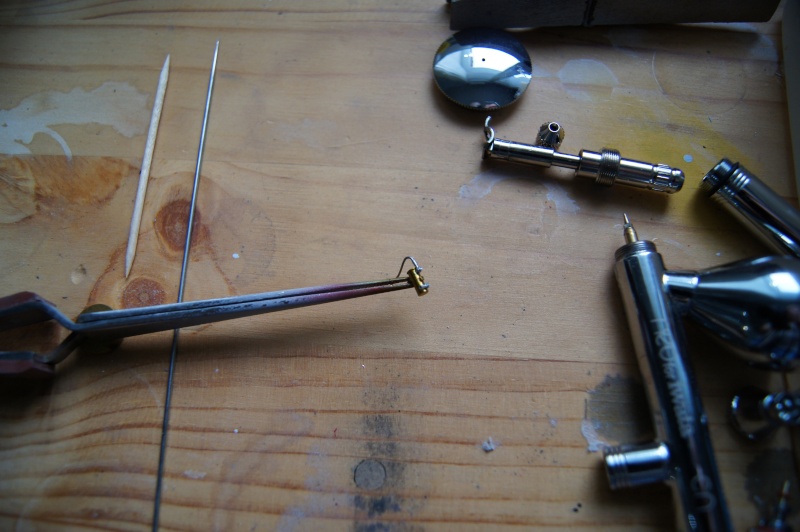
 Same for the Alternator using RB Motion unbelivable stuff!
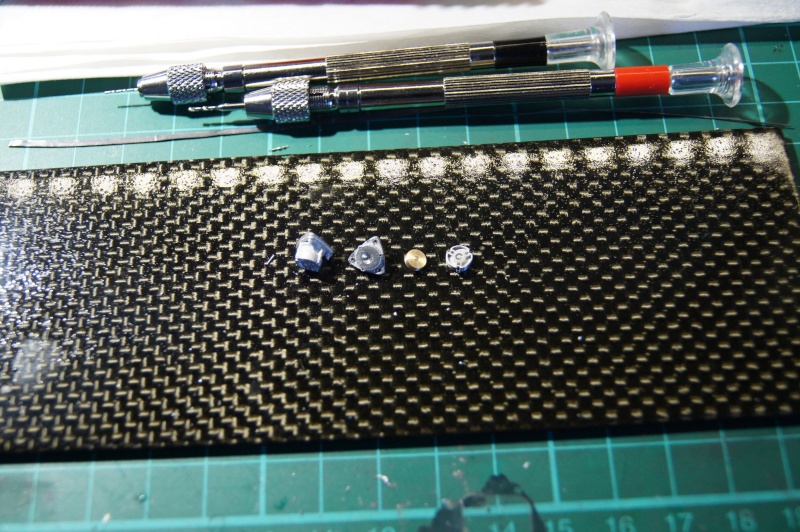 Installed:
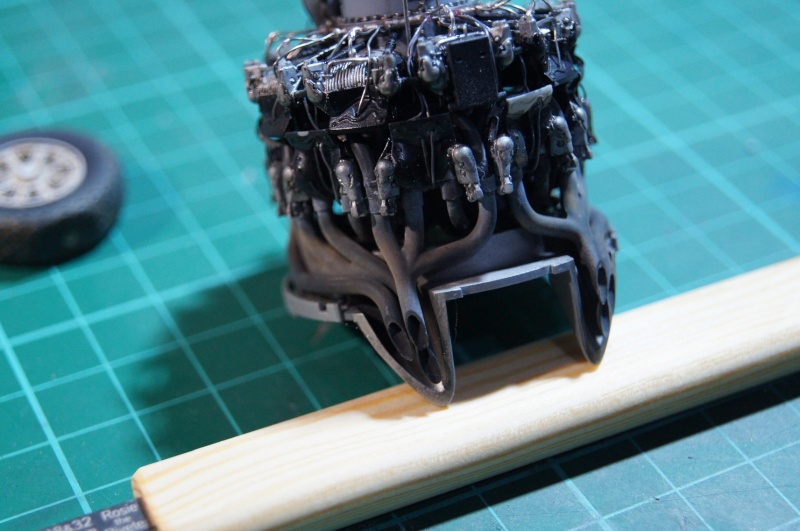
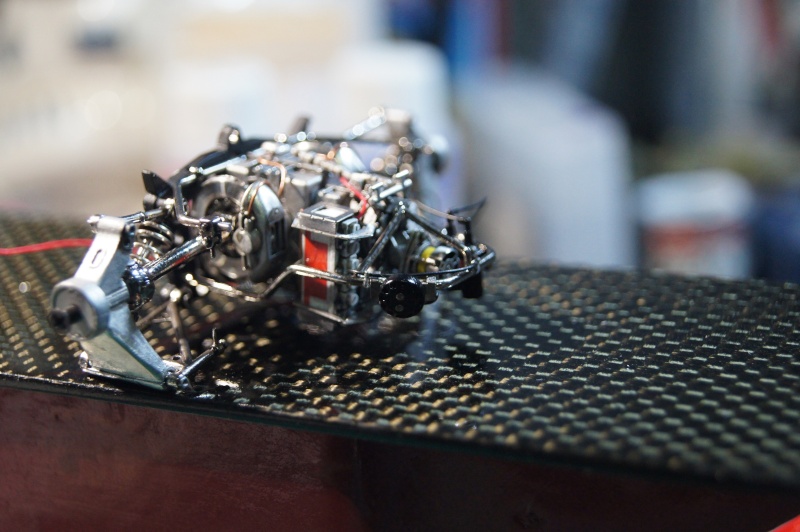 Engine and gearbox married:
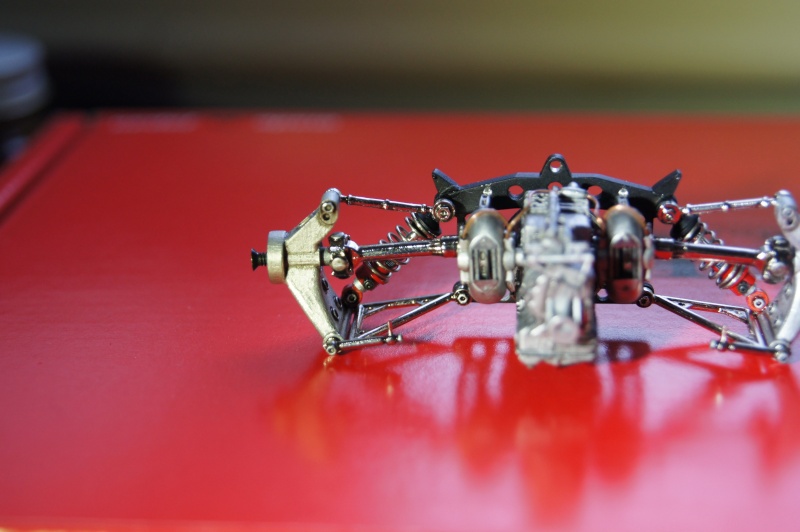
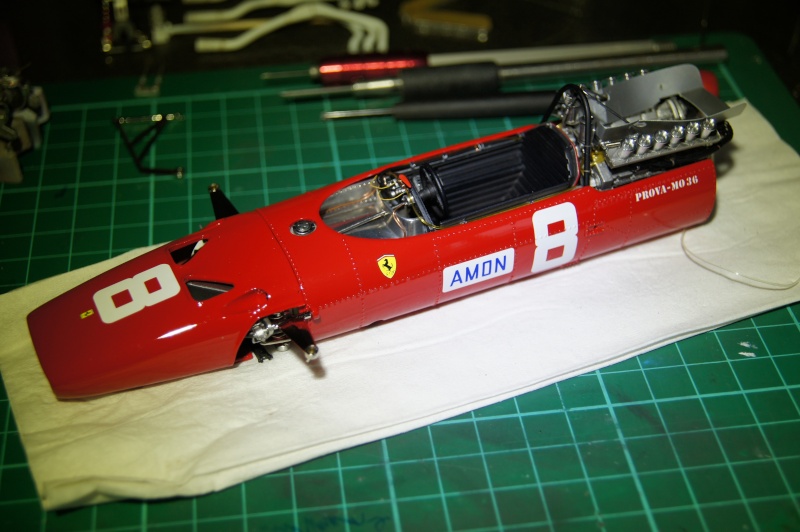
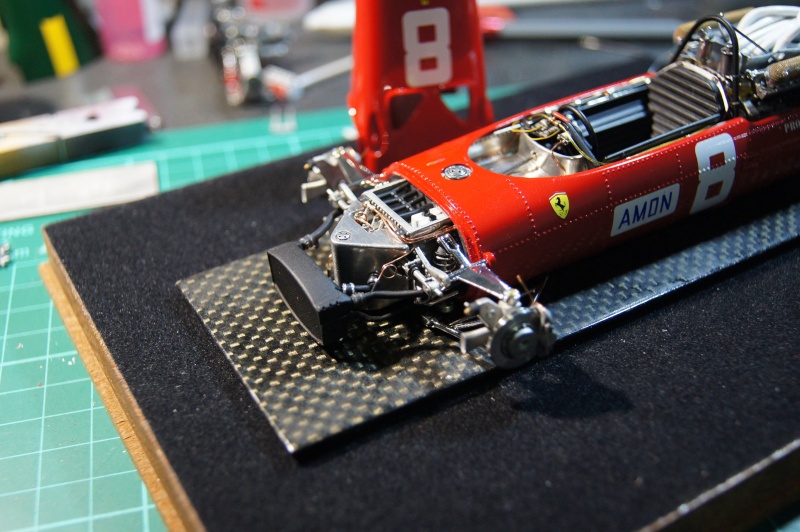
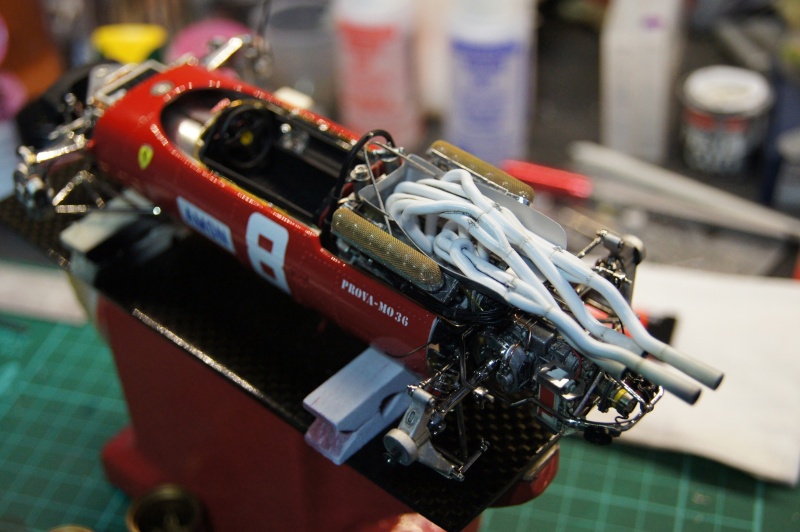 Just need to connect the front brakes lines and the radiator holders to finish the front area:
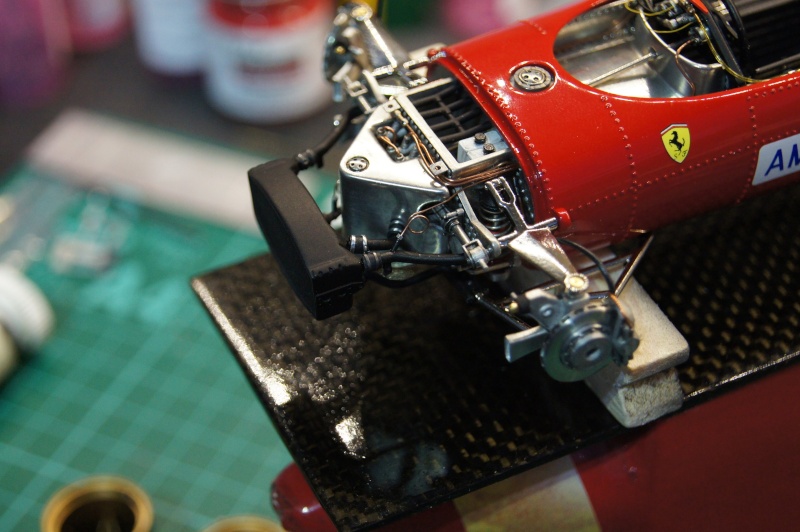 Pascal
-
 2
2
-
 1
1
-
-
Hi,
I've recently started a new project: the Ferrari 312F1 1967 from Model Factory Hiro, 1/20.
This is one of the greatest kits I've worked on.
Here are few pics:
First, test fit. No glue on the parts... nice fit :wink:
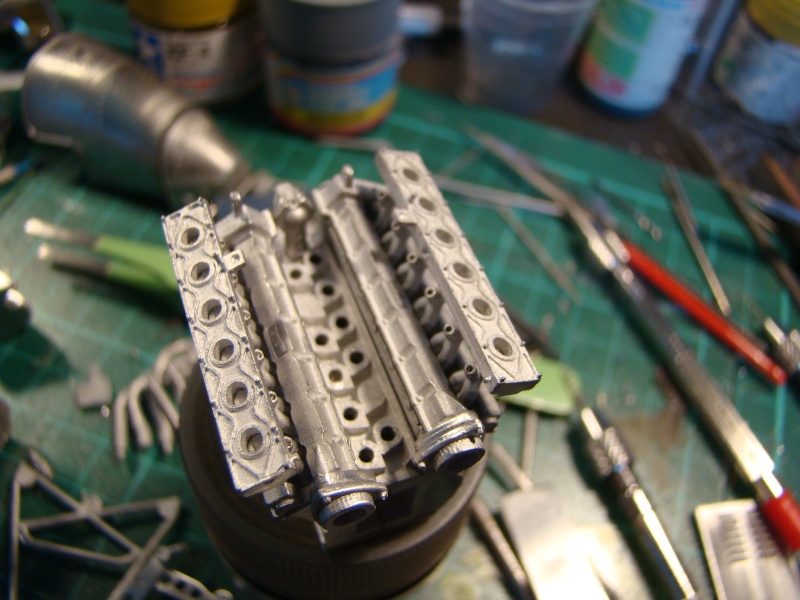
14 first engine parts:

few parts of the gearbox:

some of the cockpit parts:
assembly of oil tank by welding:
preparing front cooler for welding:
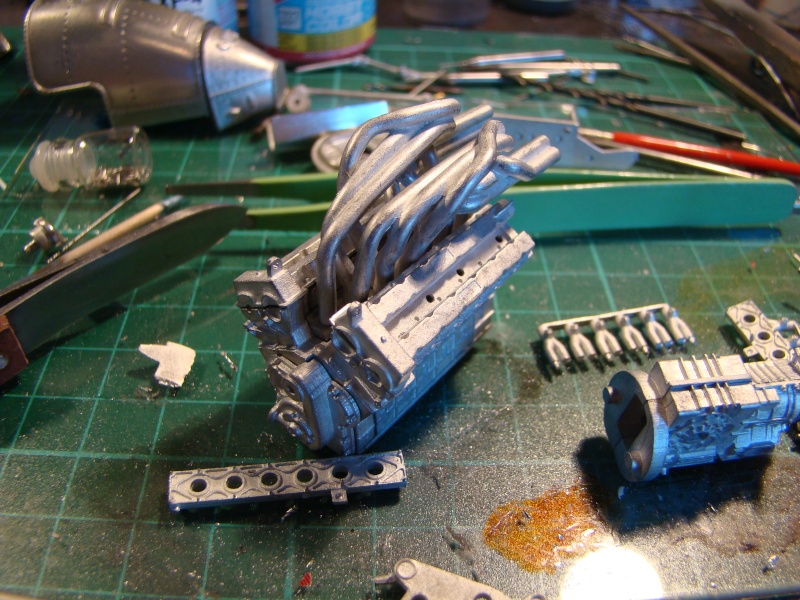
Small progress on engine, some of the parts glued together...
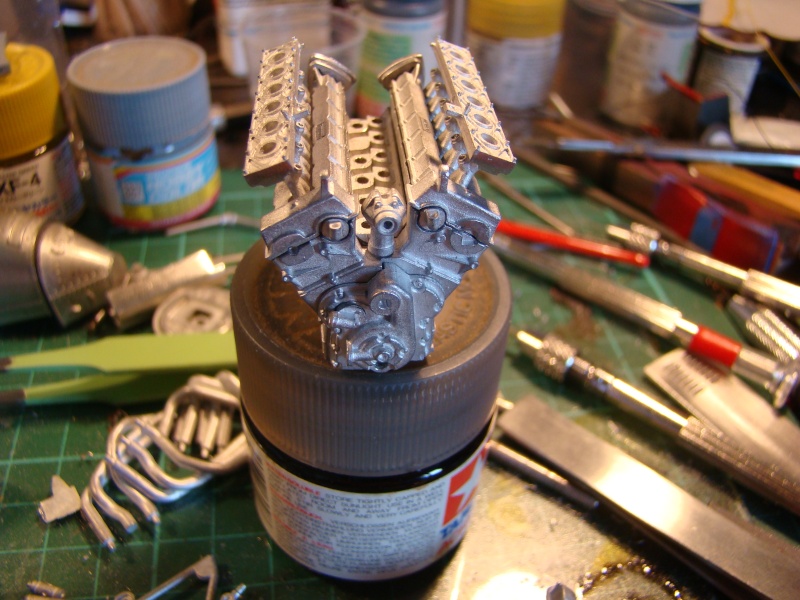

Few holes and...few rivets:

Resin rivets:
Backside view :
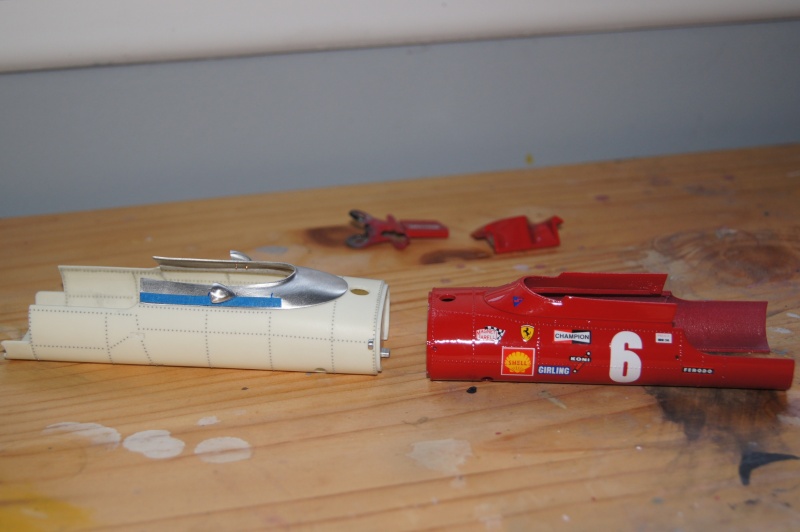
I set about installing mirrors on the body ... not so easy!
I noted the dimensions depending pictures of the car and decorating instructions for positioning.
Drilled two holes to be able to insert copper wire in each mirror, and drilled the upper body including one hole slightly larger on the front for adjustment.
I let a bit length for inserting two bolts on the inside face of the bodywork part.
Few things were done on the engine and you can see the comparison with his little brother from 1969...
Wheels painted gold:
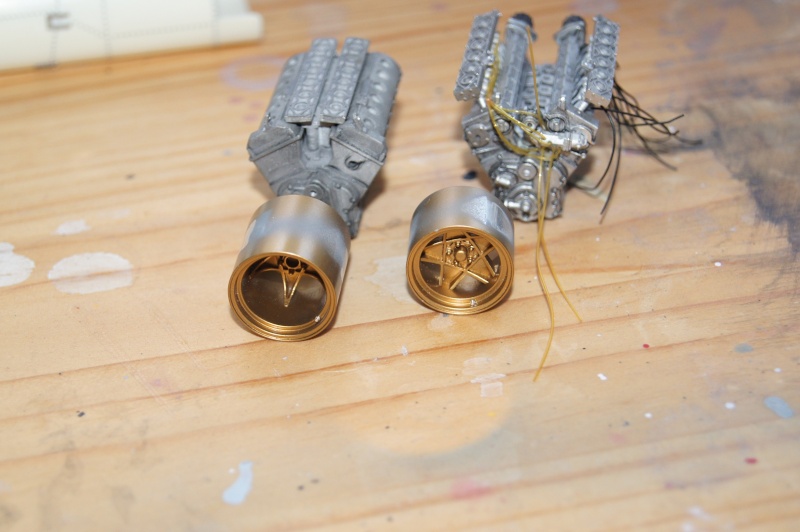
Onc again 67 & 69:
Time to test the "Surface Primer" from GRAVITY COLORS.
the good point is that it works upon resin, metal and plastic.
First of all some parts need to be prepared or finished before painting process.
... And holes need to be done once again!
But it seems I like rivets :roll:
1st, drilling the PE:
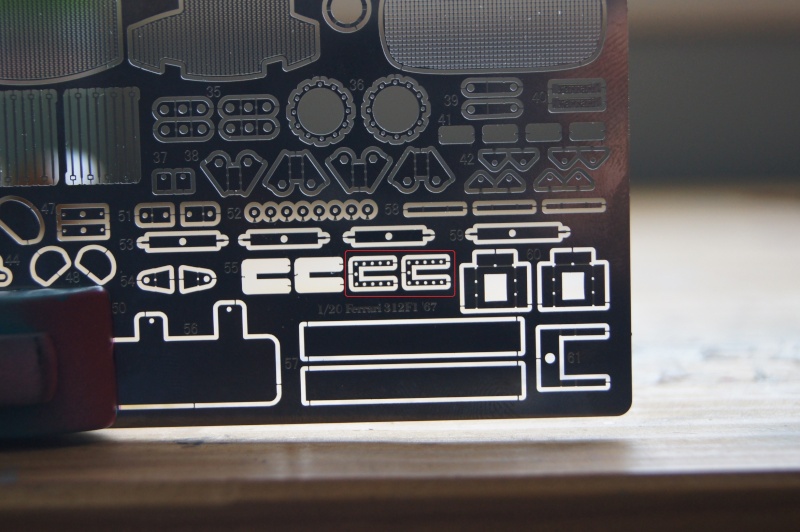
In position:
holes drilled in the resin tub :
another test fitting next to the 1969 little sister.
Mirrors details:
Time to play with the gun
Mr Sparmax Flat Pattern & the Primer from GRAVITY COLORS
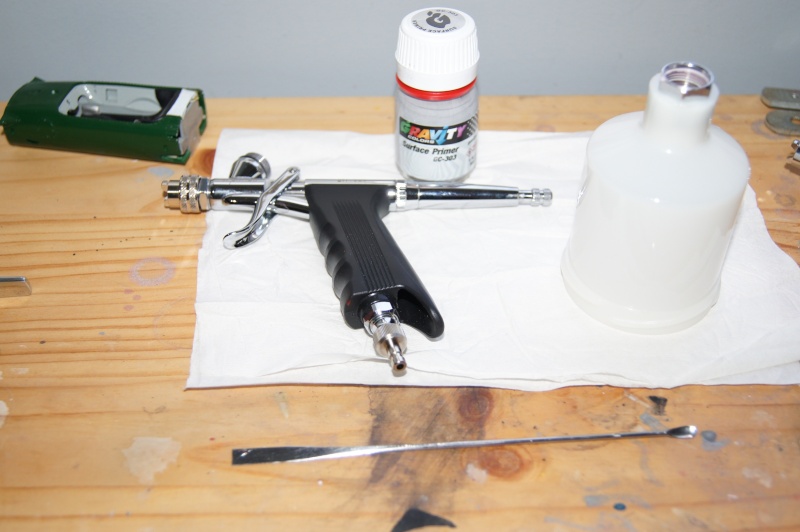
Pics with and without the camera flash:
Surprising 1st almost transparent coat, then miracle and a real pleasure to work with!
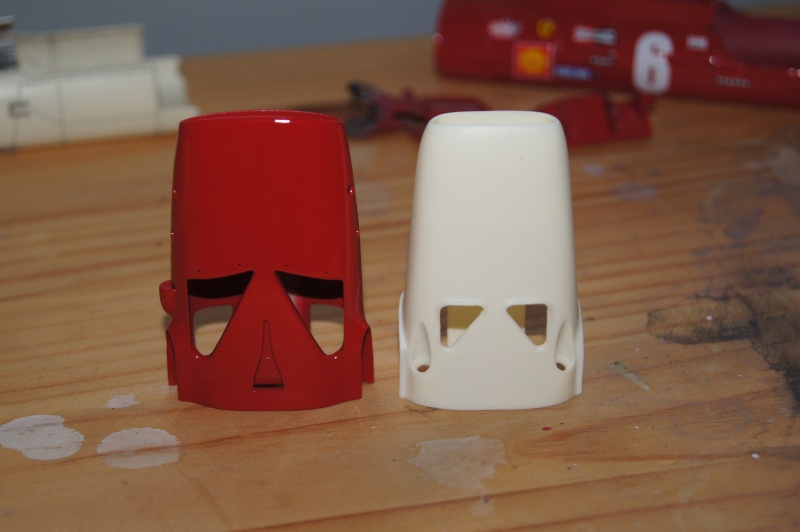
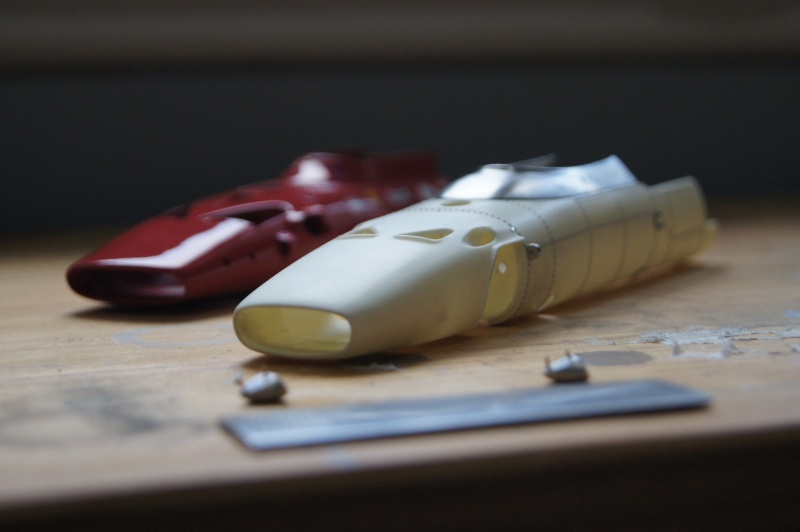
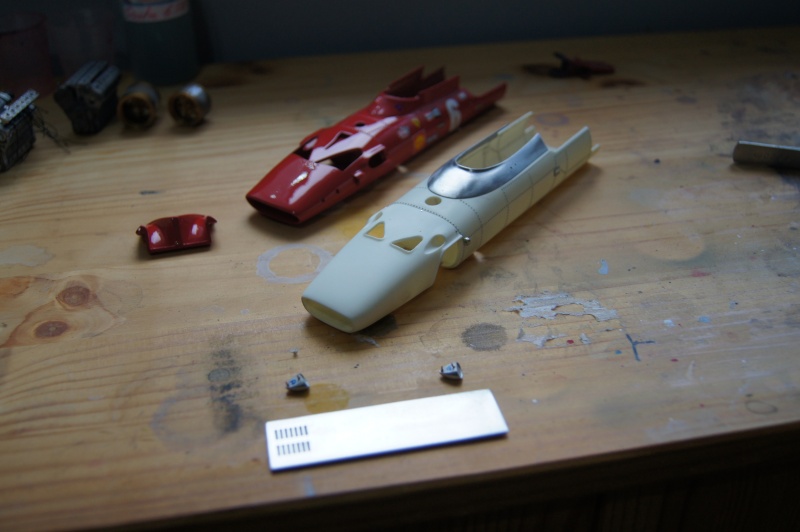
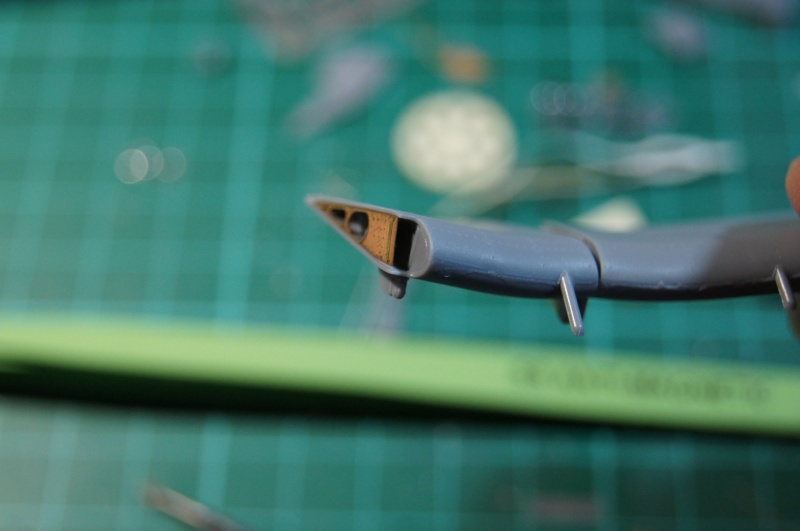
The nose
Still little work to do on the nose
Top results:
Slight problem on the nose and upper body part due to Staedtler permanent ink marker: still visible after primer...
Wet sanding and putty

Mori Mori
Next step of the painting process.
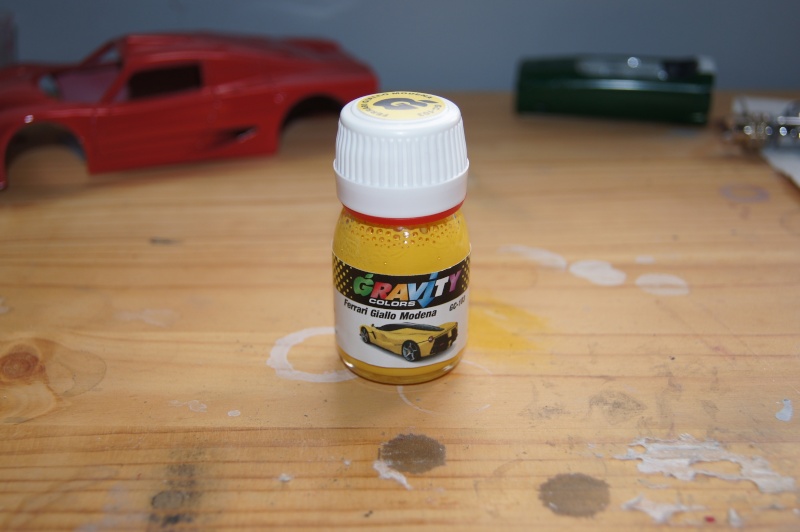
A light color coat is done over the grey primer.
That will be the Giallo Modena for a great and bright Rosso Corsa!
Sanding and primer...
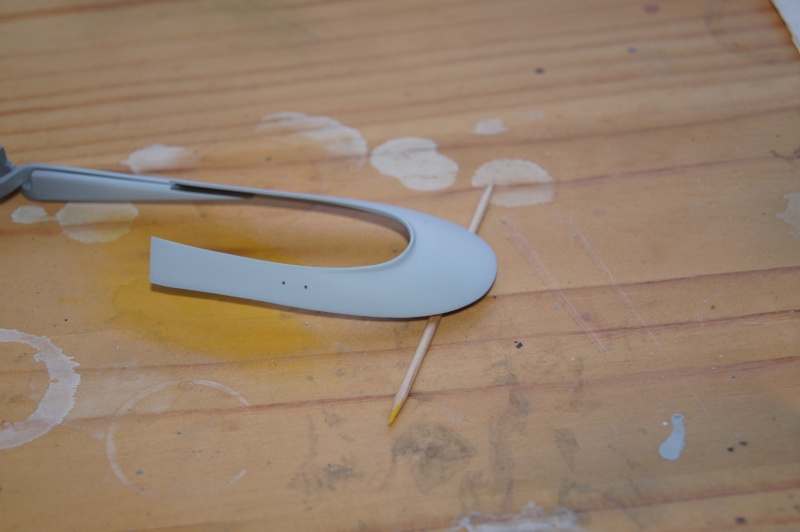
... Yellow:
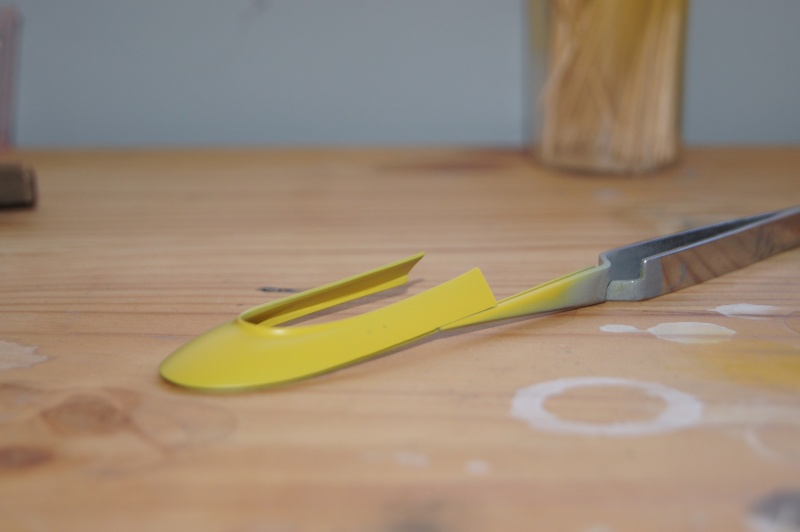
Rosso:
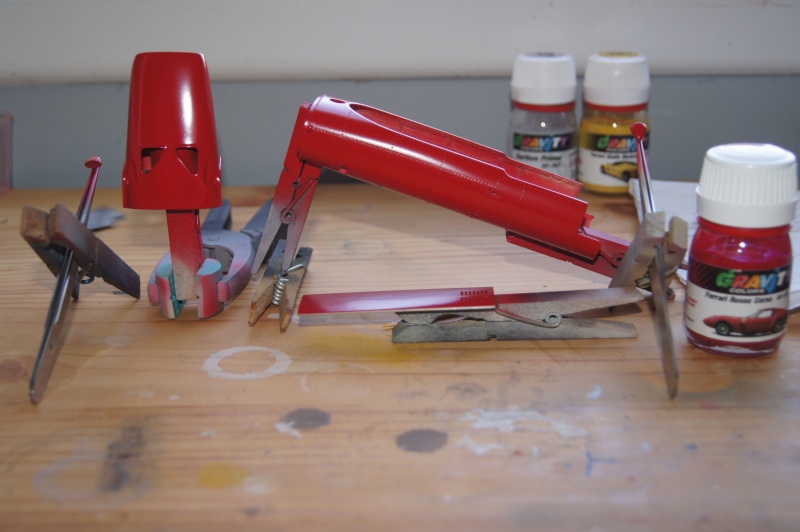

prepared and primed:

ZP Black
Here are the "wrongdoers"... :twisted:
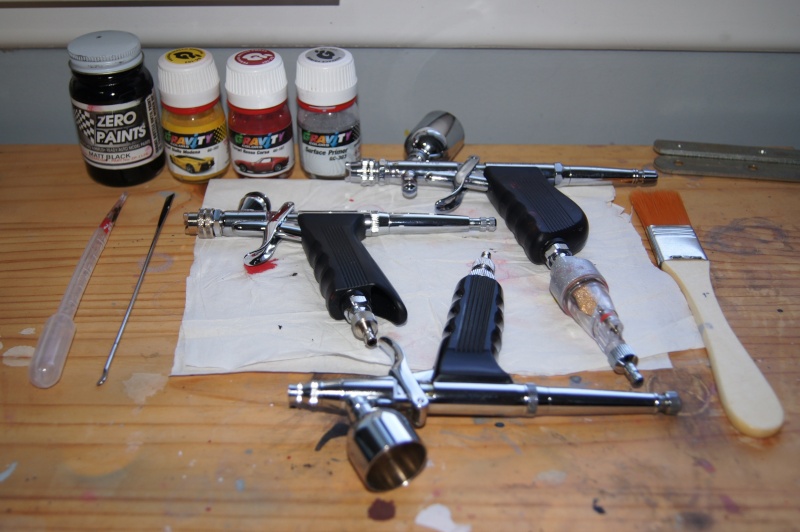
GRAVITY paints are AWESOME!!
Easy to work with, extremly thin coats can already give a beautiful result and a strong deep satin finish.
They also dry very quickly: perfect!!
Next step is the finnish coat that will be given by the Clear.
So let's go for the Gravity Colors clear coat test!
New gloves, stirrer and cup for the mix.
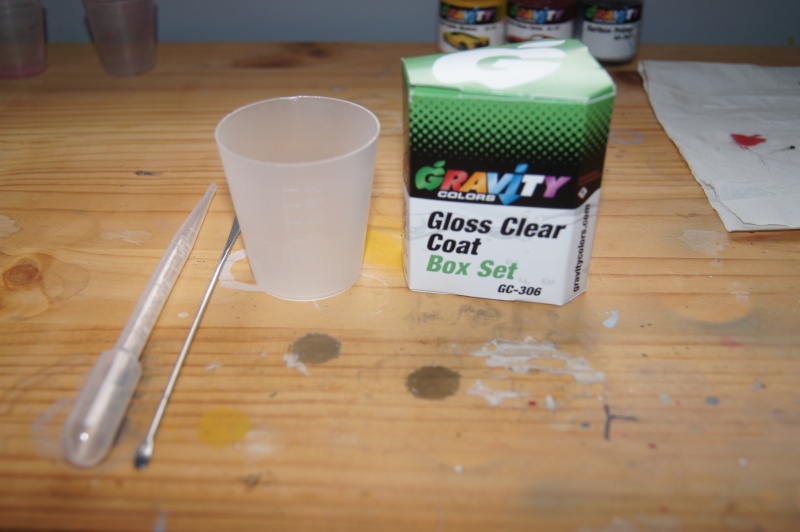
3 components: clear, activator and thinner with a 3:1:1 mix ratio.
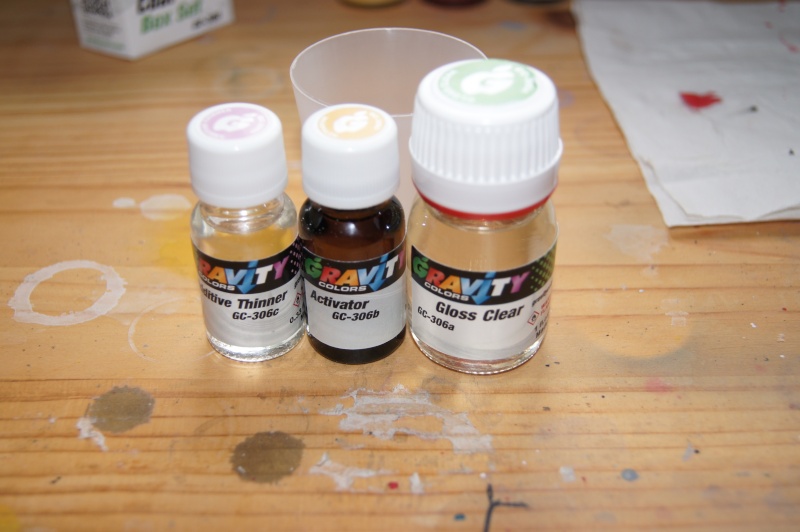
I always let the mix at rest for about 5 to 10 minutes in order to let allow to the chemical mix to degas.
You can add more thinner if necessary.
Then, one mist coat and, 5 to 10 mn later, a wet coat (or more): that's all!
Parts drying in the "magic box":
To sum up:
Great and pleasant product.
The gloss is... SHINNING!! Deep gloss even if thin.
Only 6ml of clear 2ml of activator and 2 of additive thinner were used...

Alclad gold on the center of the wheels.
The ones shown before were the 1968 312 F1 :oops:
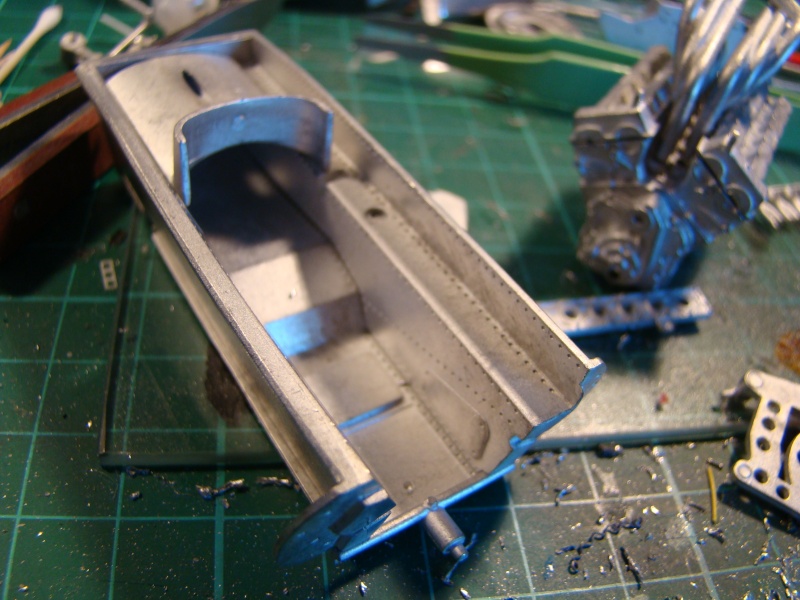
The tub is drilled and equiped with 0.5 stainless steel rivets.
Then the tub parts are assembled (welded) with low temp solder (70°C).
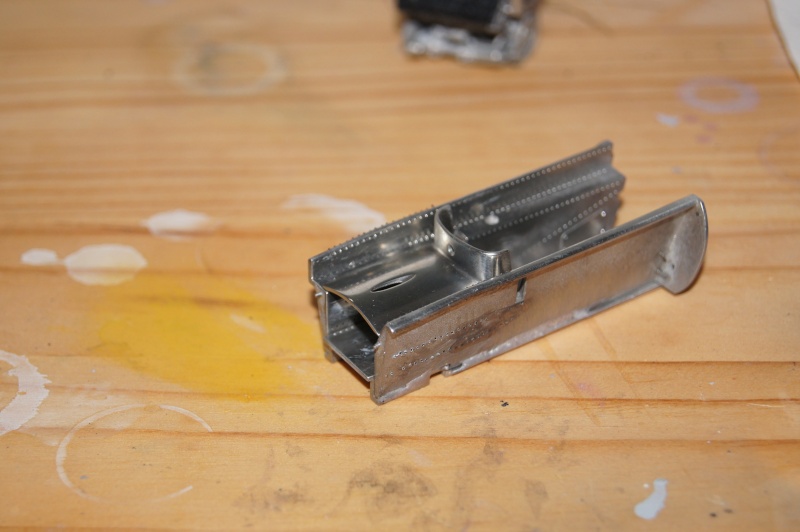
Same thing for the front tub part with Calibre 35 0.7resin rivets this time.
The frontwhite metal bulkhead and his PE part are drilled, but I didn't used the PE part...
I just used it as a template for, I think, a more realistic result.
Once again, Calbre 35 0.7 resin rivets were used.
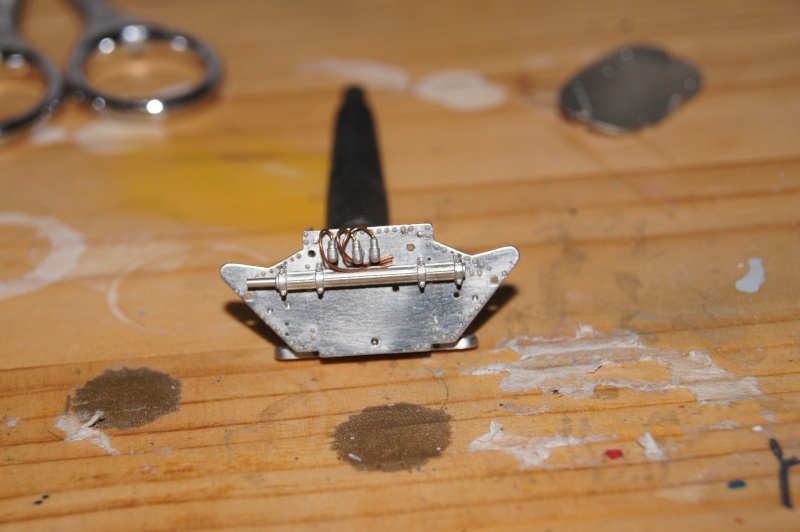
The steering column is cut and the external part of the steering rack is replaced by stainless steel 1.2mm syringe needle cut at the right size.
0.7 resin rivets once again.
Pedals won't be visible at the end...
http://i21.servimg.com/u/f21/12/38/43/52/dsc07214.jpg[/
Front face of the dashboard installed in the tub:
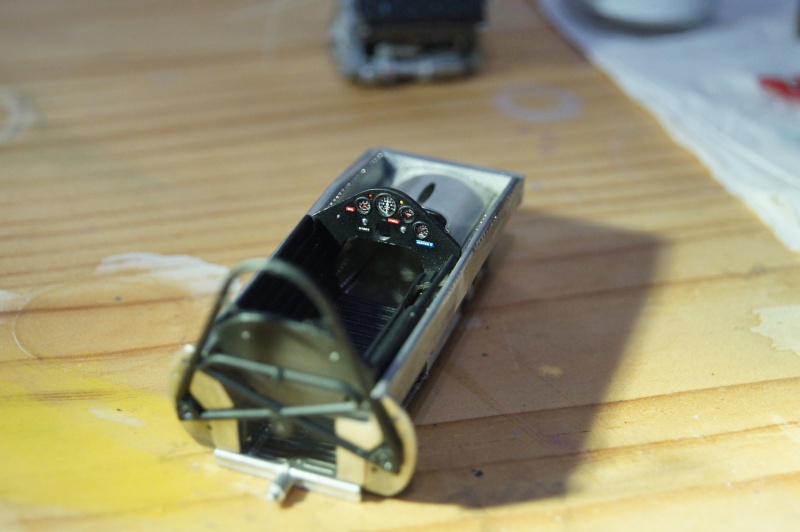
Aft:
Close up:

Gauges are covered with a "glass" made of Rodhoid cut with a Waldron Punch & Die but it's not really visible on the pics :? ...
Cavallino !
Radiator is ... empty!
I've tried to make it a bit more realistic or, if not, just more pleasant for me :mrgreen:
Brass 0.8 and Alu scotch "aircraft" type:
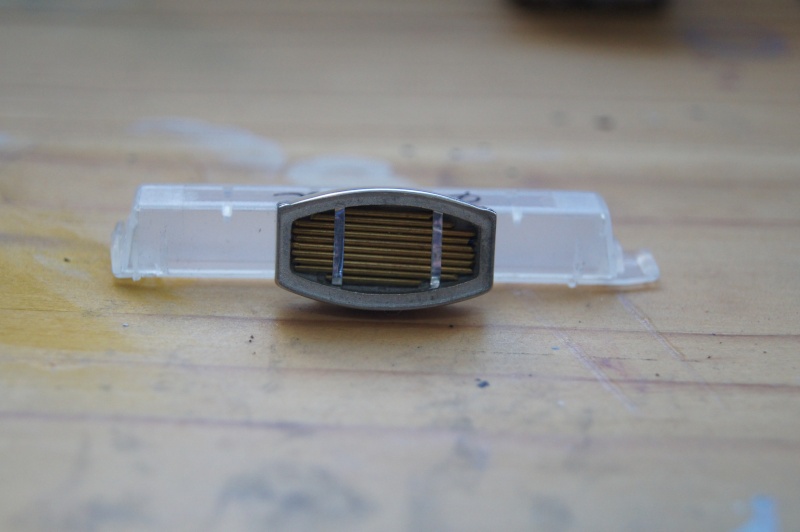
Nice and still bright...
Fwd and aft mesh:
Primer GC:
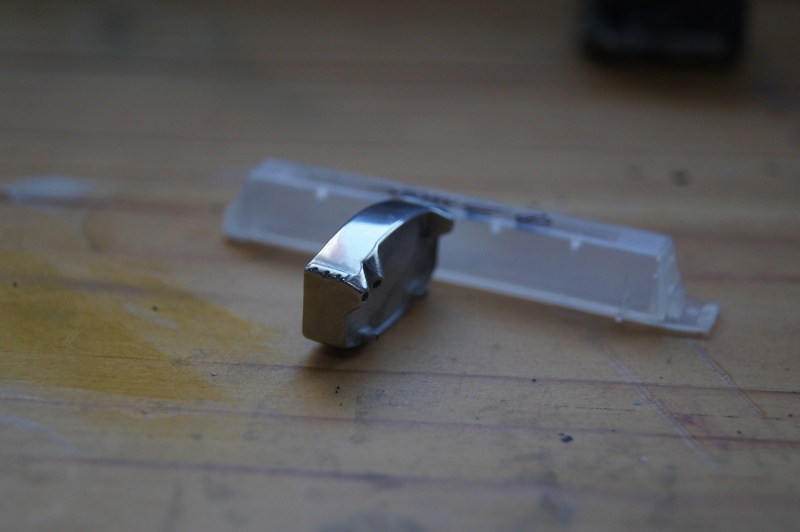
Dampers are great: made of machined aluminium.
Just a detail added from F1 Specialties.
I wonder if I haven't already seen the same detail added somewhere...
Not perfect, but not bad

Black ...is black:
Almost invisible once the engine is assembled to the body, but I couldn't resist :twisted:

Teflon mask and Orange FRAM from Gravity Colors.

Oil filter done.
Hope you'll like it...
Thanks for reading.
Kind regards,
Pascal
FORZA!
-
3
-
1
-
-
Hi,Thank yoy Rio and Jonathan!Small update on the Grey part.Mask off and first Weathering steps

 Just oils Gris de Payne + Ultramarine deep and Burnt Sienna.Without Patafix:
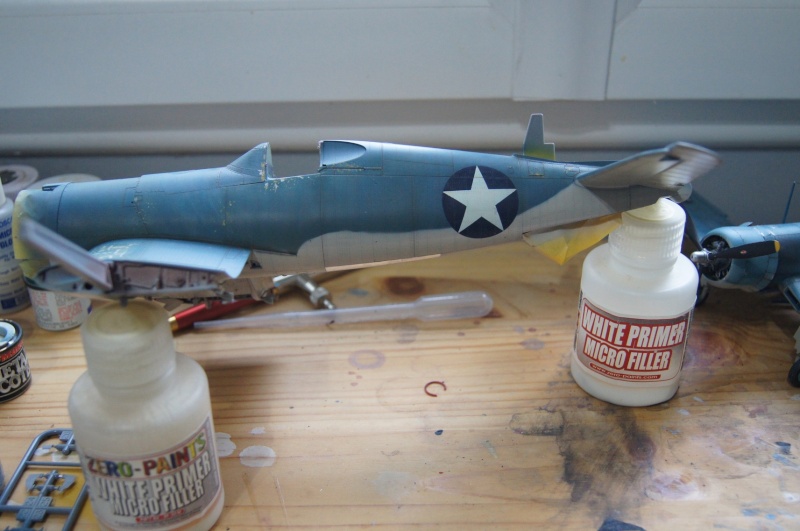
 Need to repair a "f#@~%" mistake.Quickly done... maybe to quickly, so...But still naked...
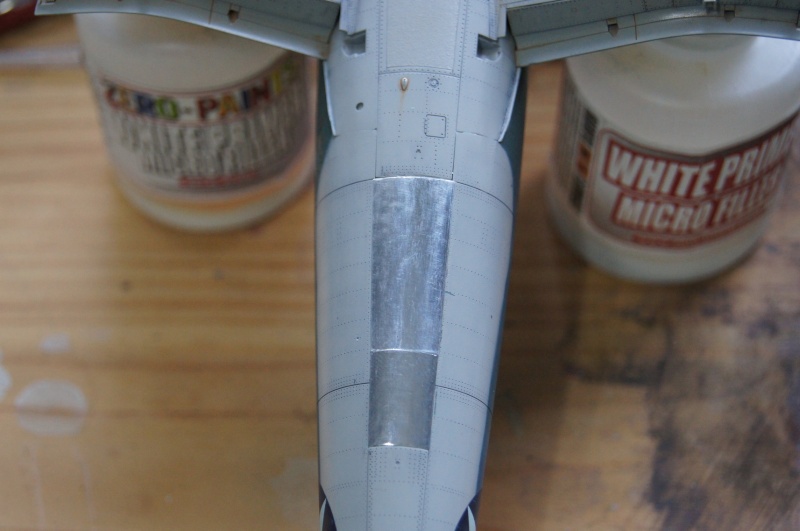
 More soon.Pascal
-
1
-
-
Hi,
Paint work is still progressing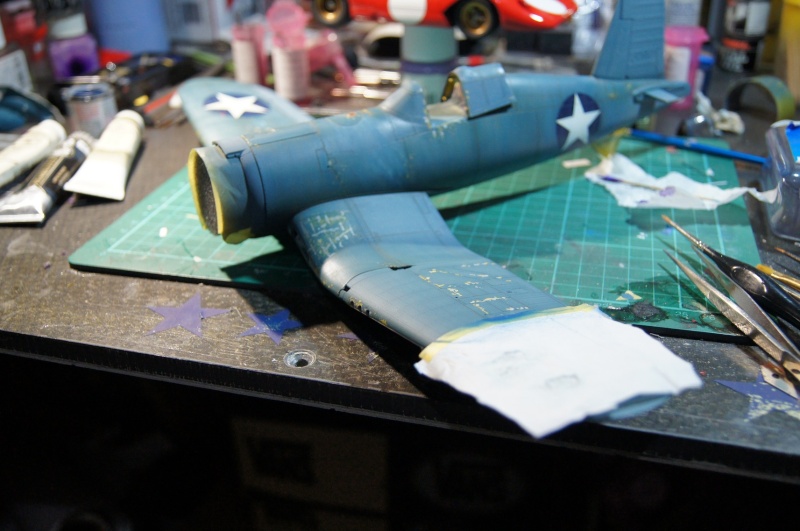
 ... And decal job is starting:
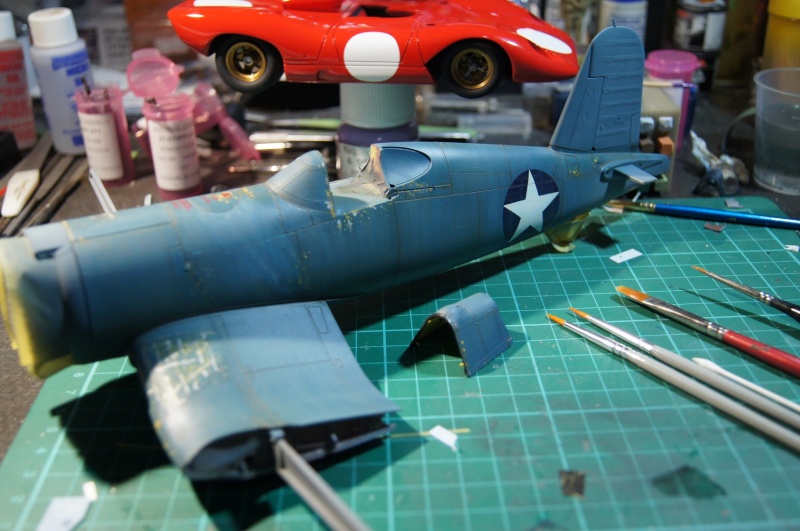
 The biggest are cut to avoid too much carrier film:
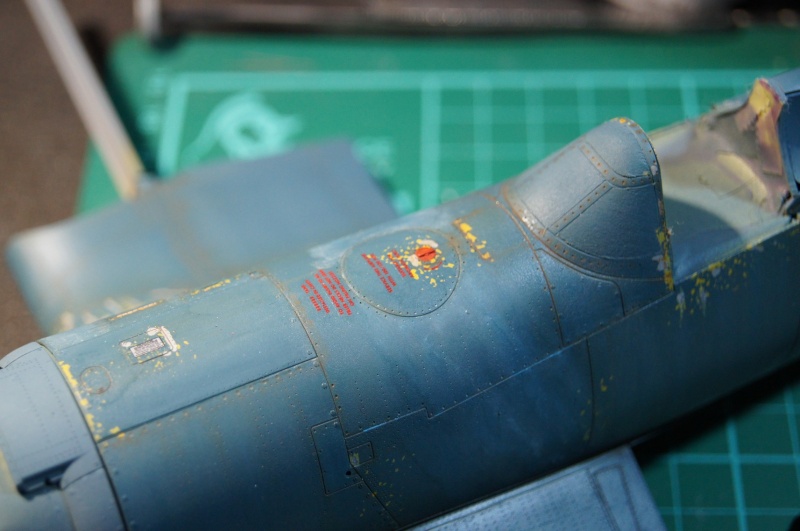
 Decals will also be "weathered".More soon.Pascal
 -
Good evening,Thanks for the kind comments and for following the WIP!Weathering is still progressing.It previous work patiently is refined until satisfaction... Not yet.
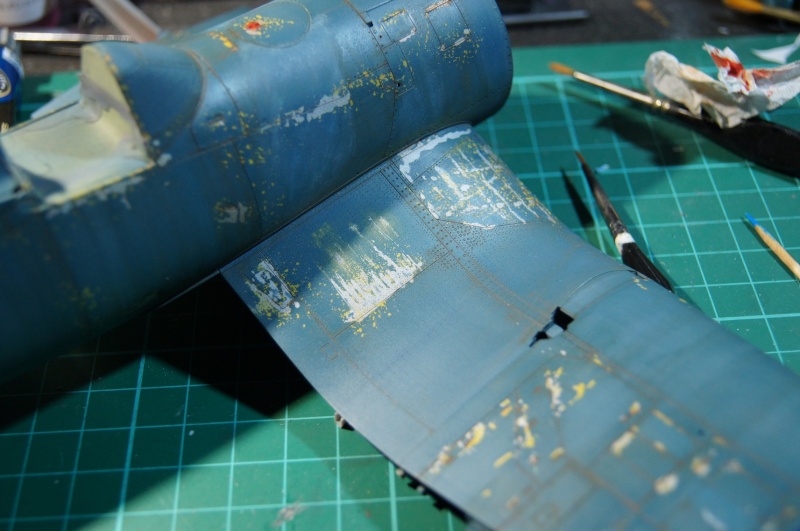

 Start of the underwing:
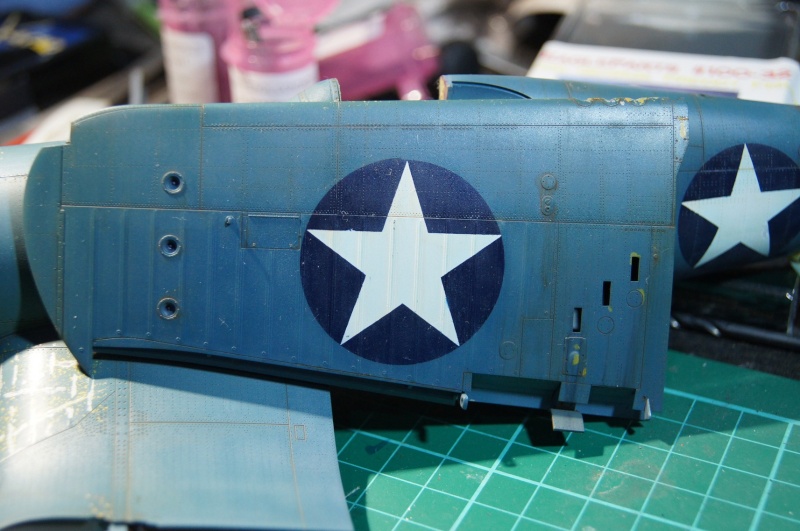 More soon.Pascal
-
Hi,
Stunning... Incredible, speechless...
Work of art!!
Pascal
-
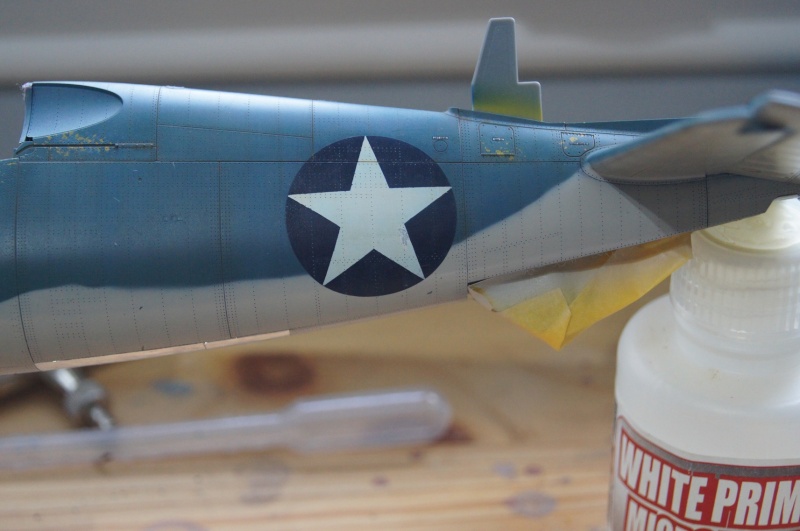
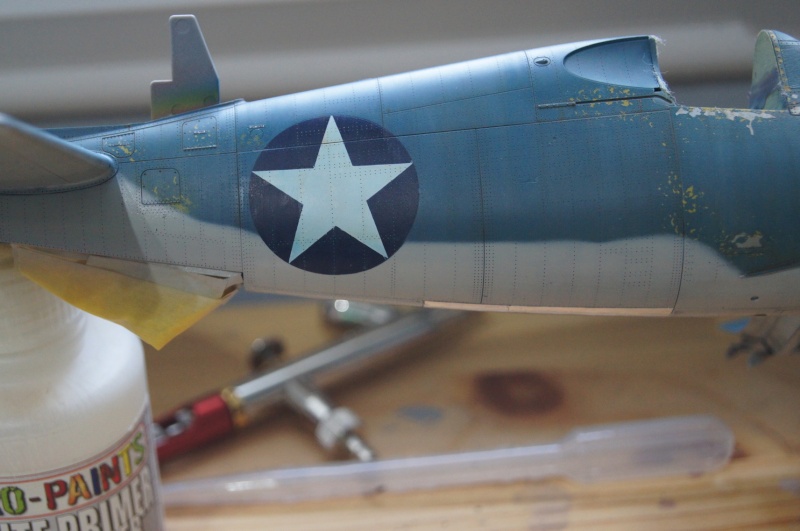
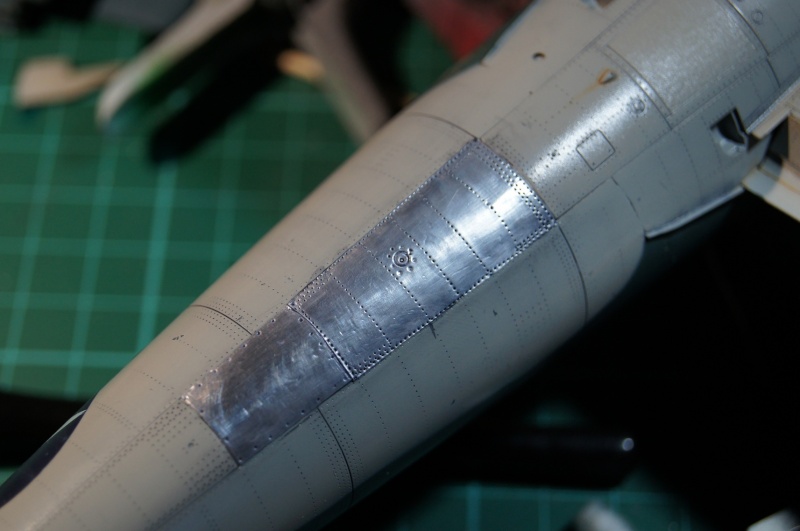
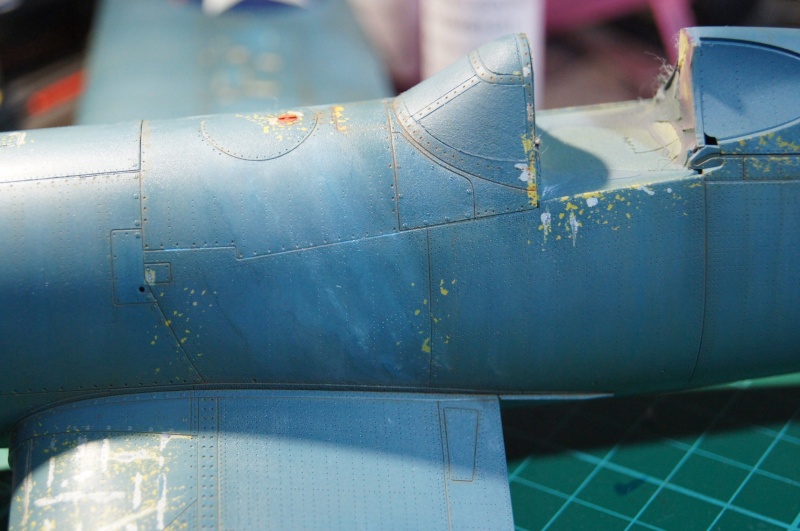
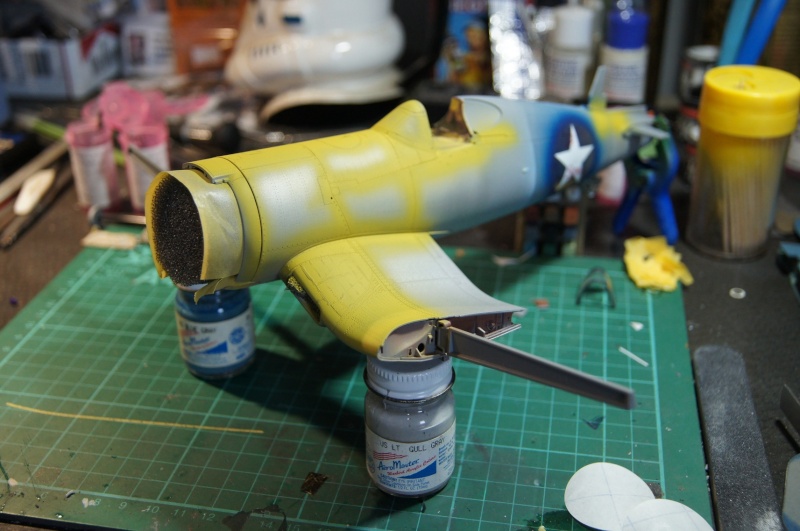
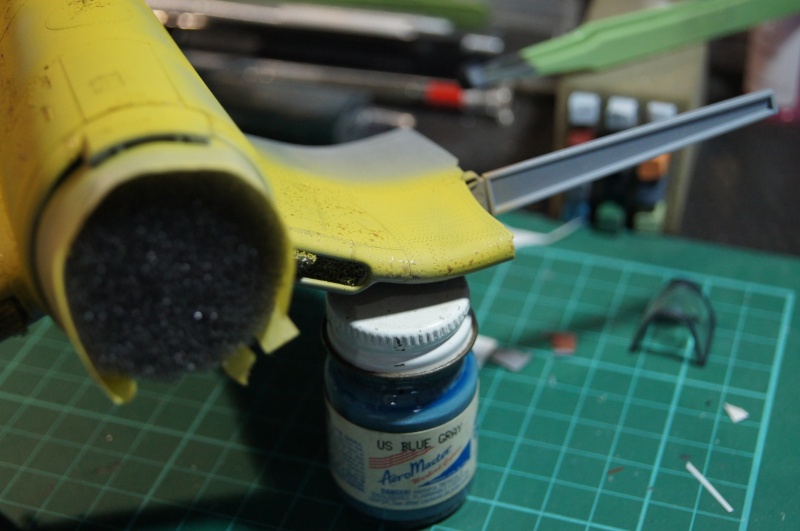
Hi,Thank you very much Mates.Started to work on the Blue Grey.First step with lightened Blue sprayed with 0.2 nozzle.Light color is a mix of Blue Grey and Light Gull Grey from Aeromaster.
 Surface is rubbed with a soft cloth for a smooth paint surface and to remove the Maskol
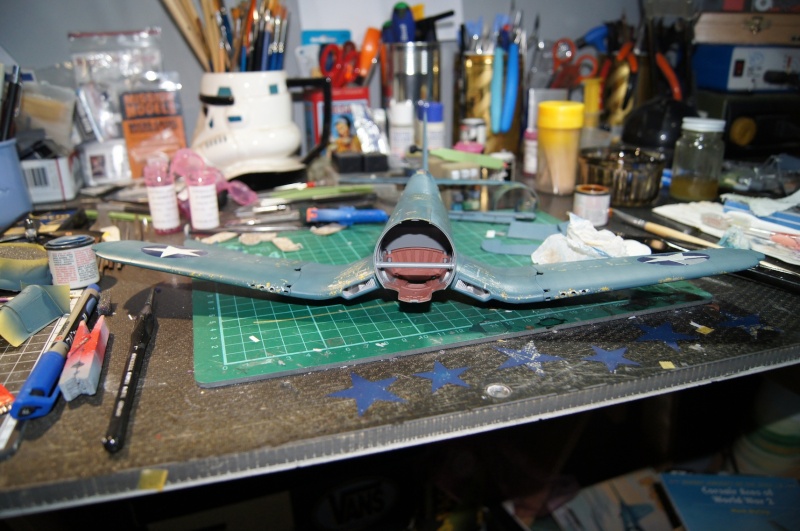
 Then oils
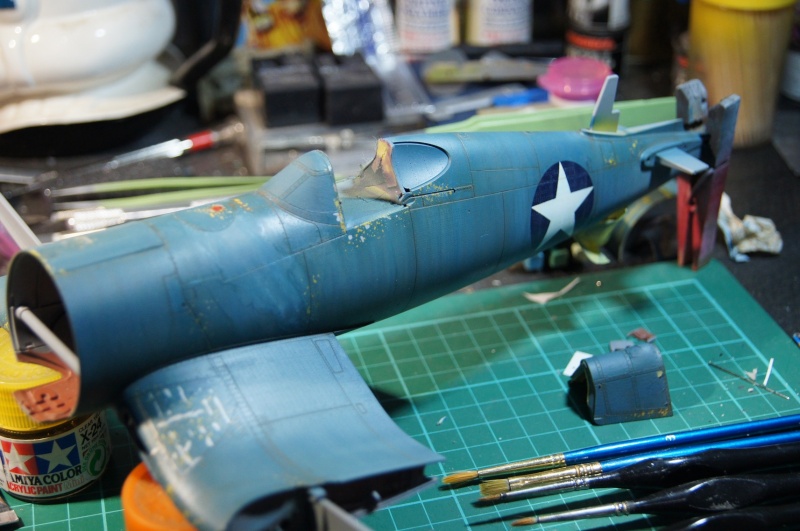
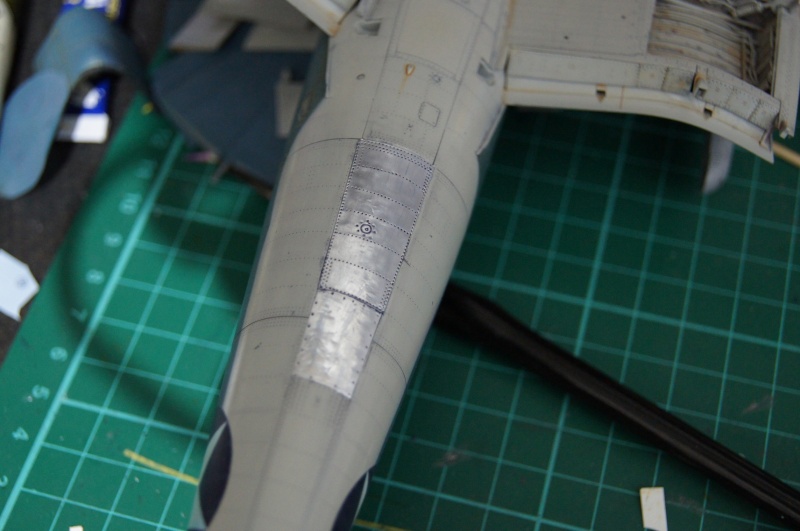
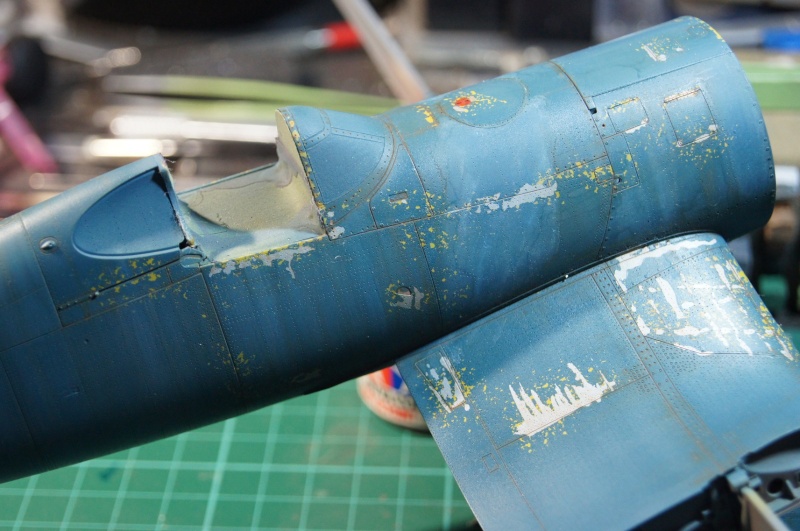 Raw Umber W&N on the panel lines.Then Sépia (Rembrandt), Titanium White, blue... between fuselage frames , worked with lighter fluid.
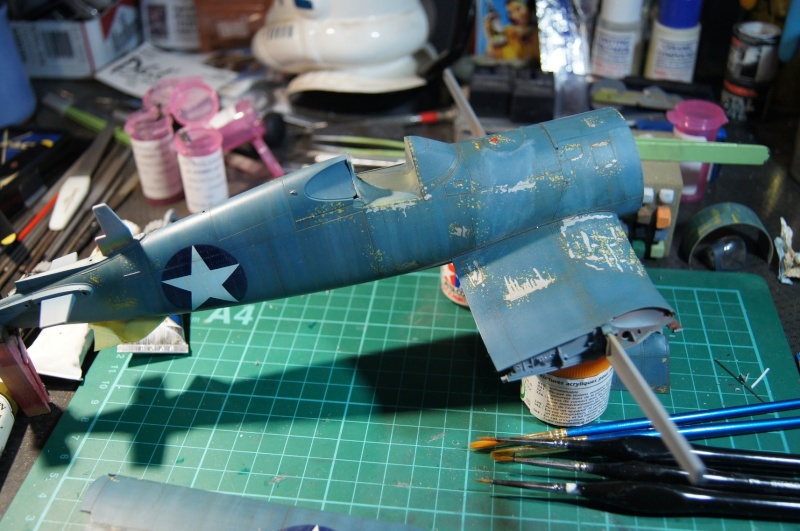 Same on stars
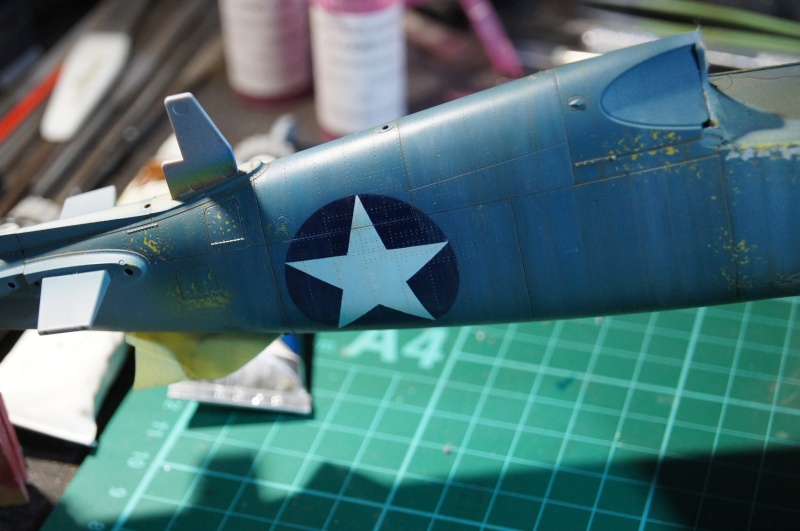
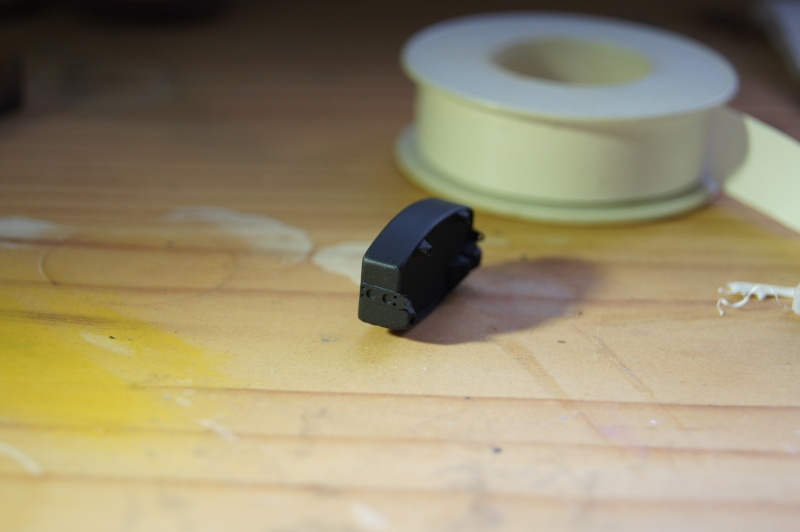
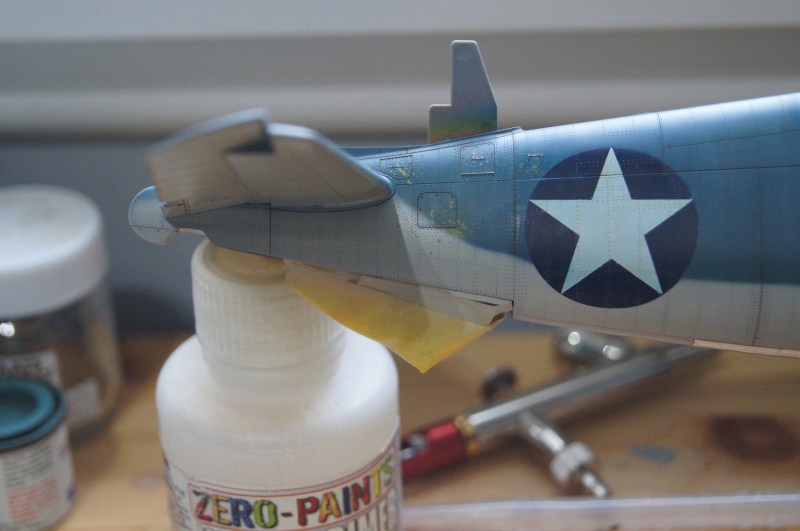
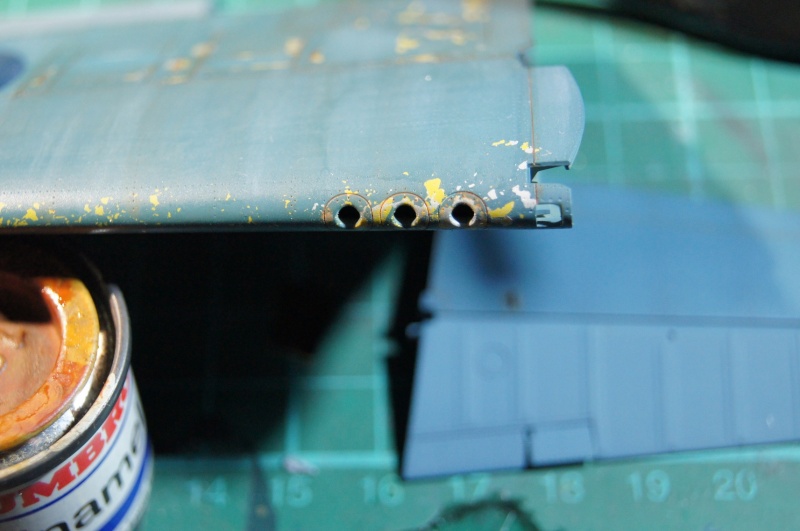
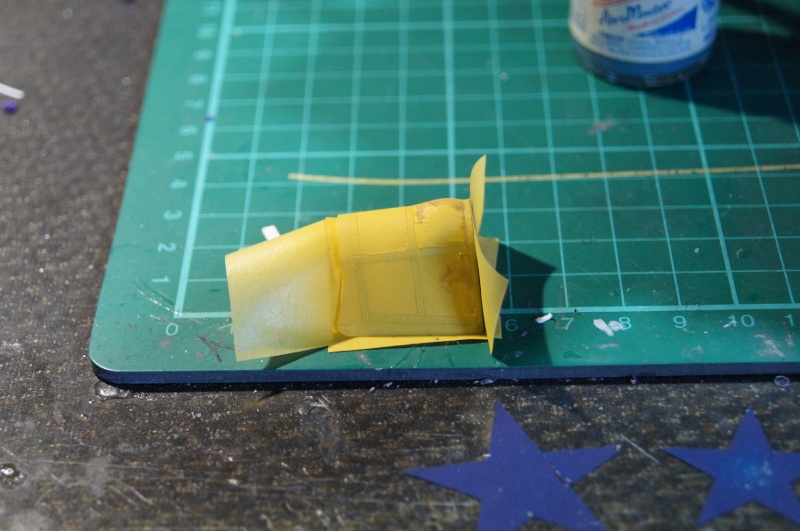
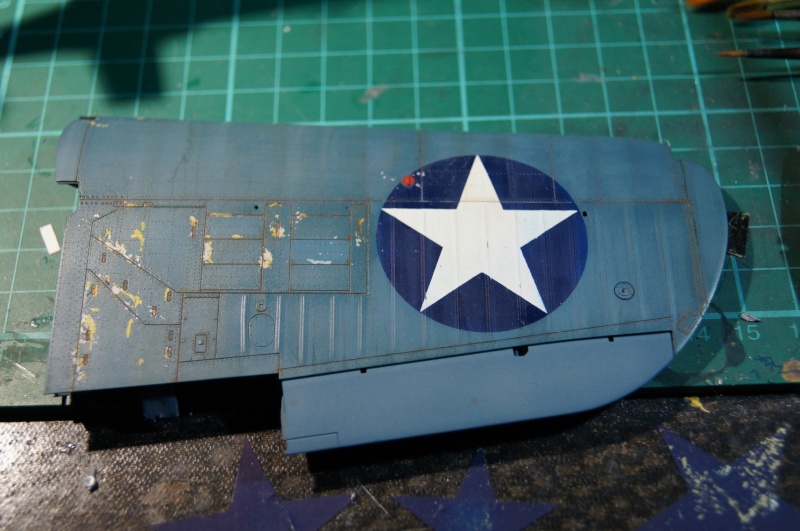 White tape will soon be put over the gun muzzles
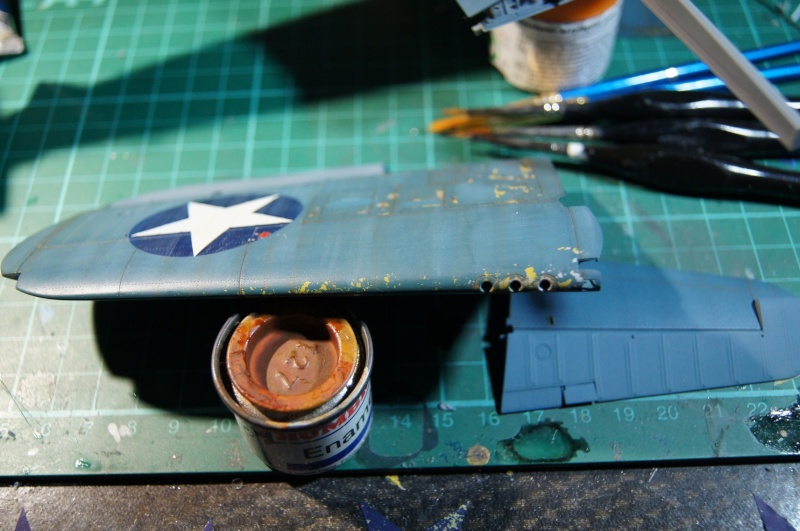
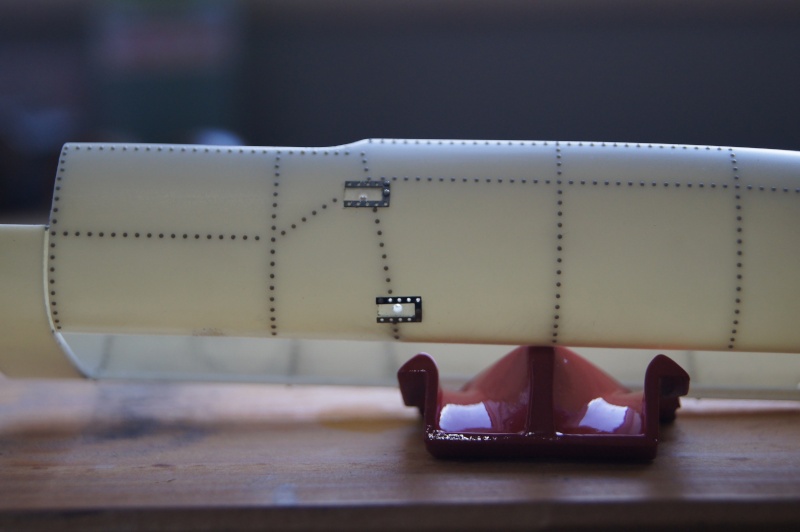
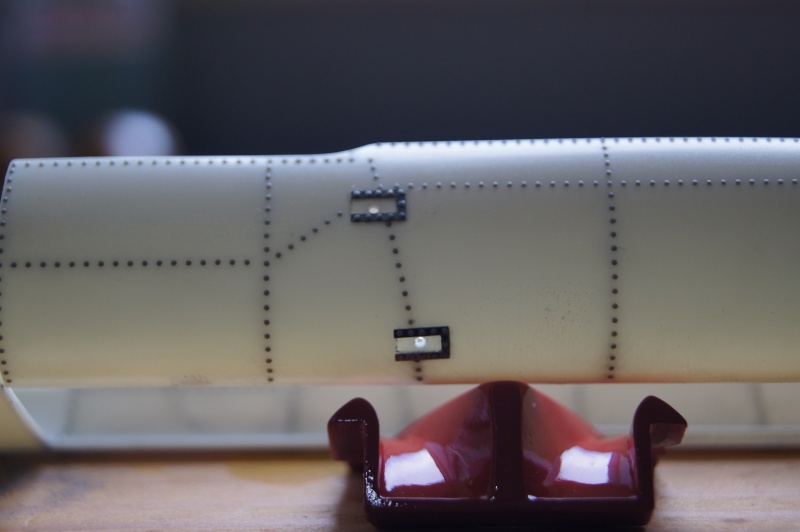
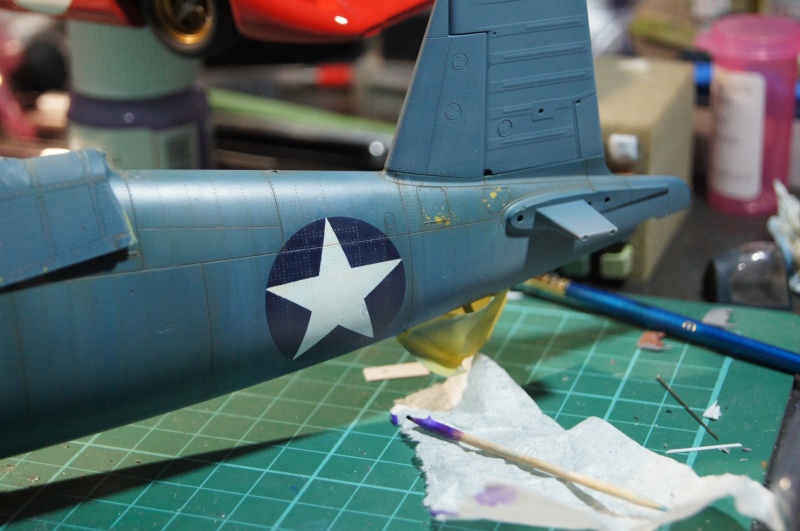
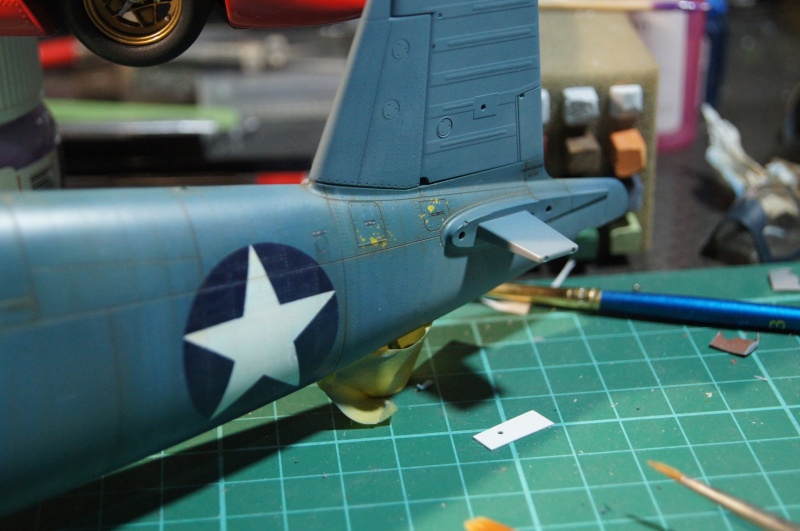
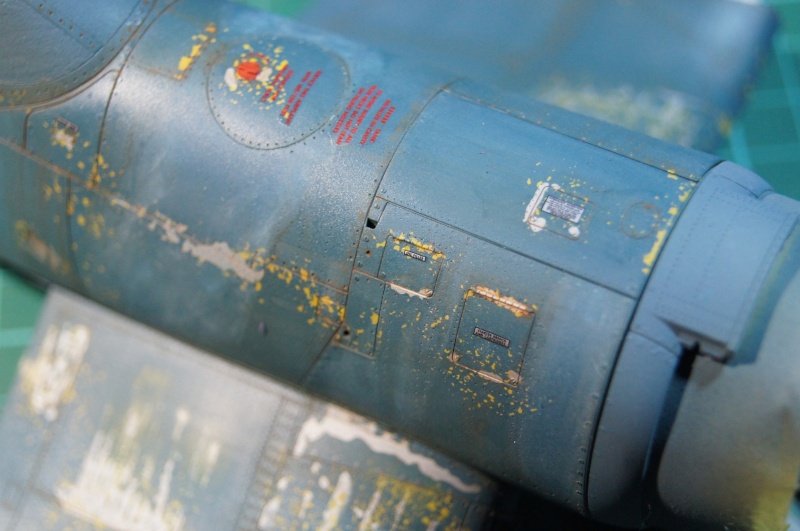
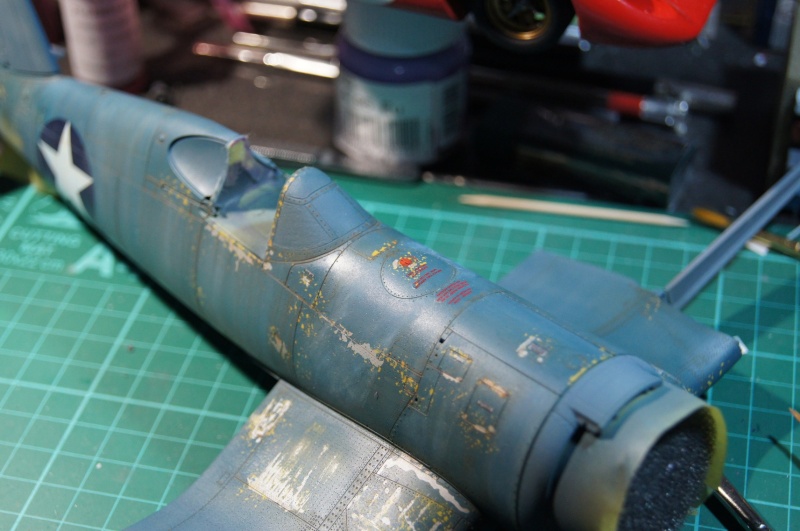
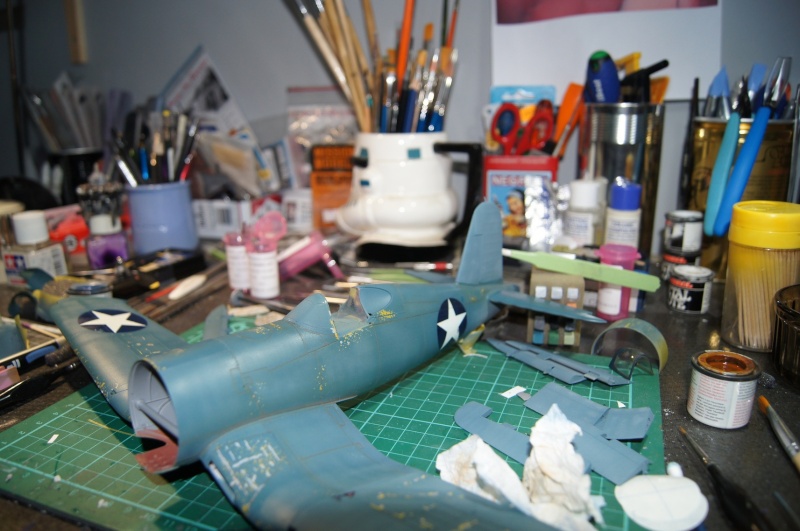
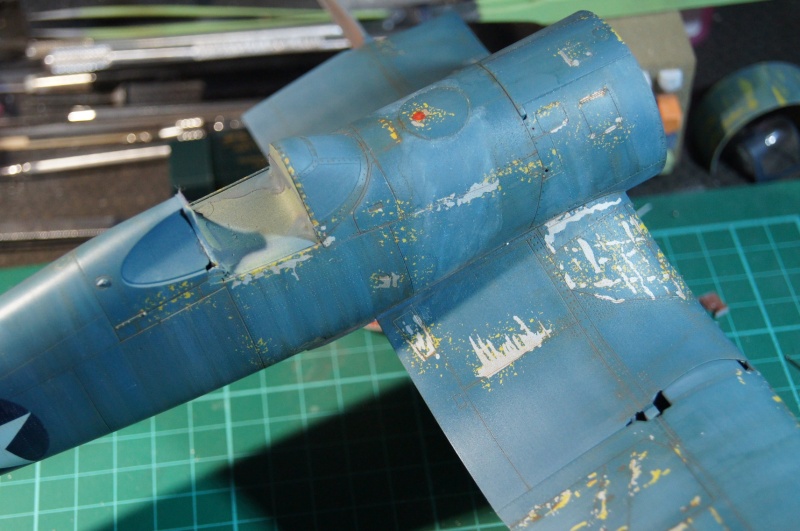
 I've also tried to represent the discoloration due to Avgas leaks on the fuselage sides
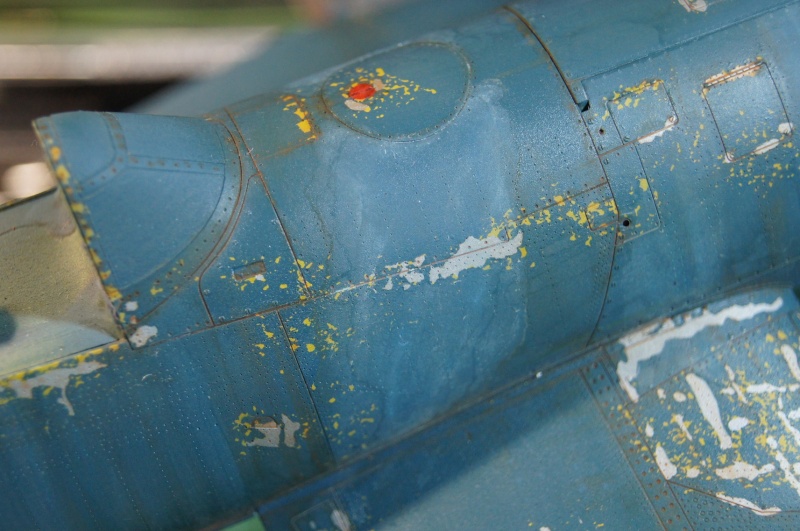 And few leaks and fluid traces
 Paint of the canopy is done
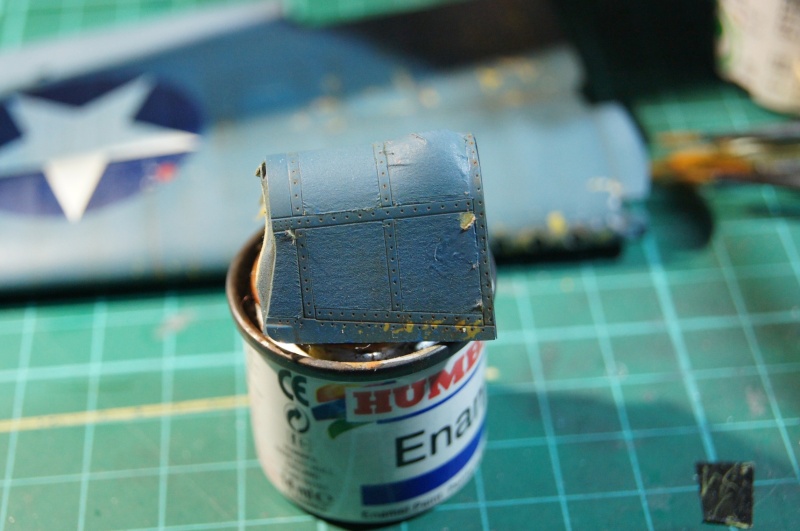 Overviews of the progress
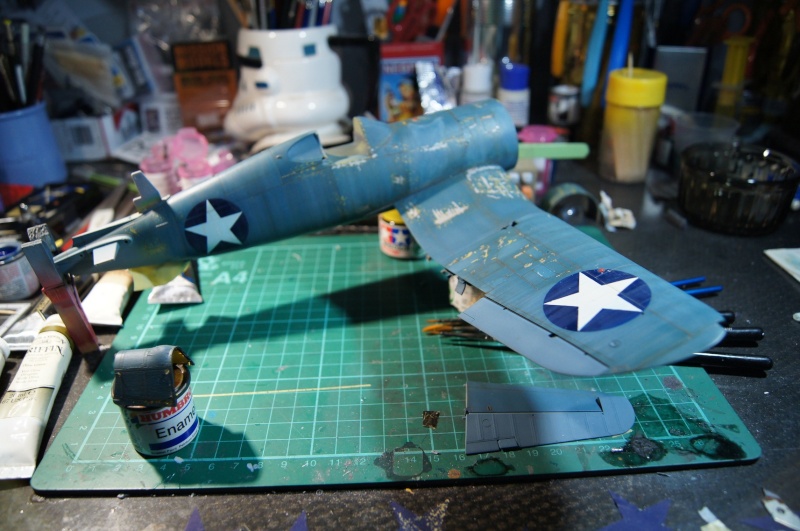
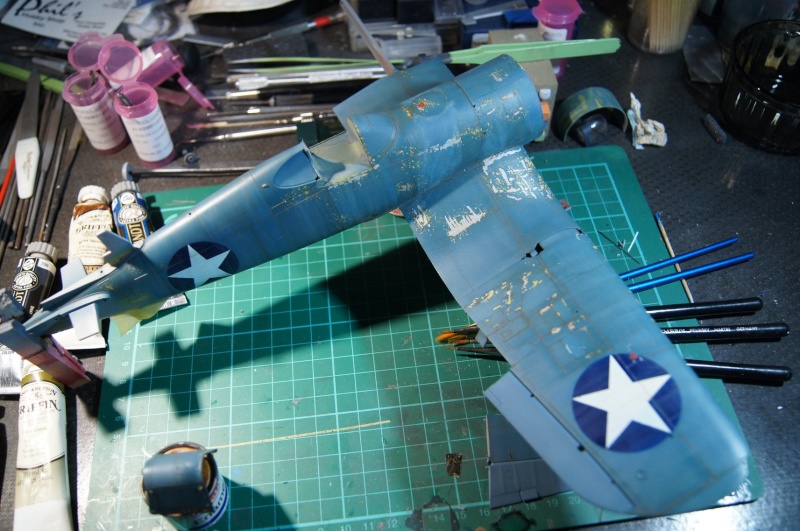
 Voilà.Pascal
-
Hi,Thanks a lot for kind comments!Salut Jamme! Très heureux de te lirePaint job update.Kabuki "Stars" out and light 8000 sanding on the full disc
 Before a full disc mask
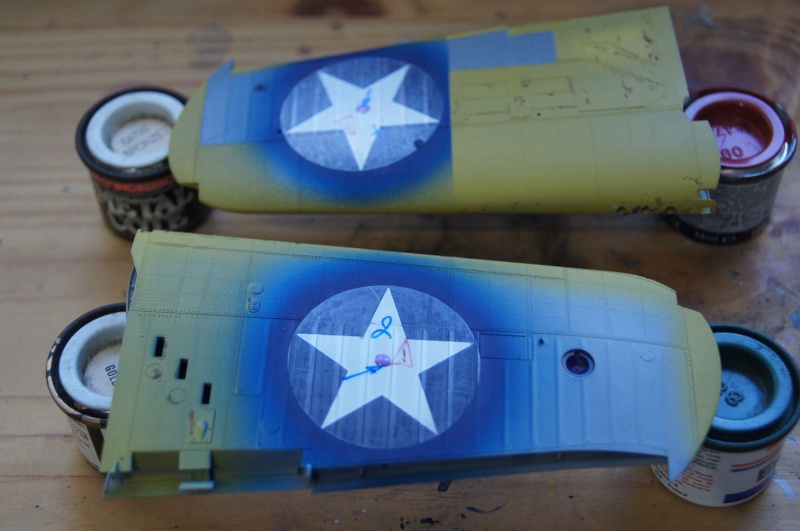 Blue Grey (Aeromaster acrylic)
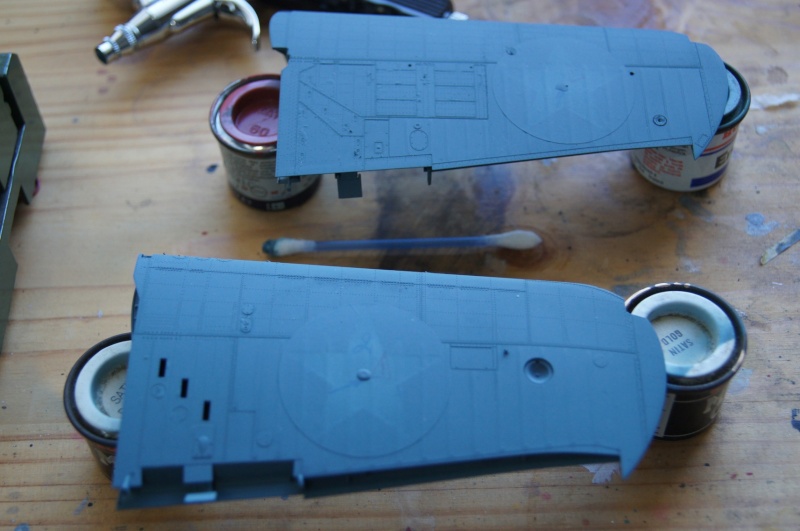
 Liquid mask before sprayed semi gloss black
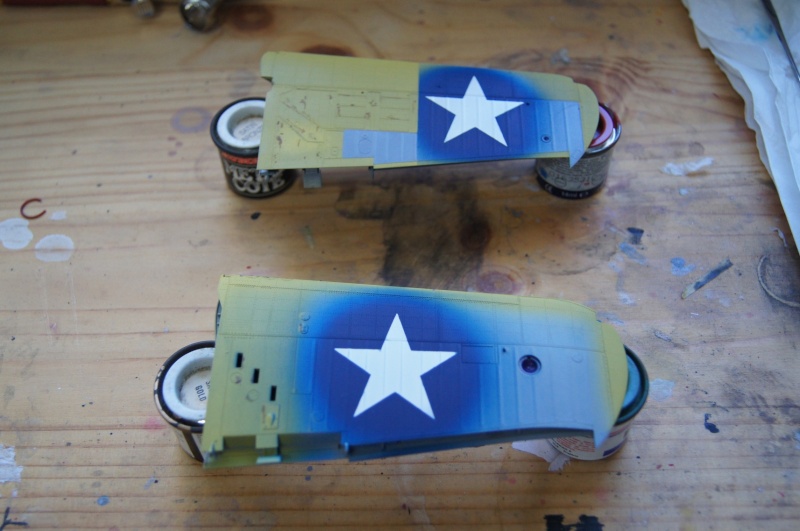
 Frisket mask for the side Stars
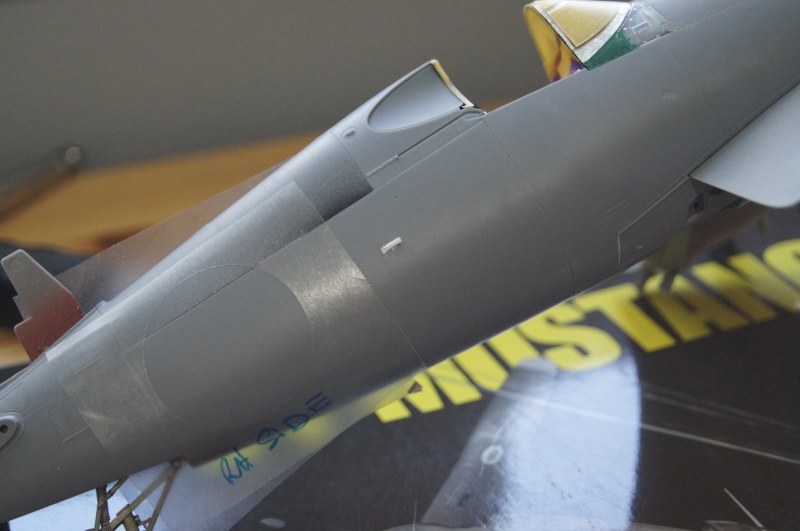 White (RLM 21 Aeromaster) spryed over the mask
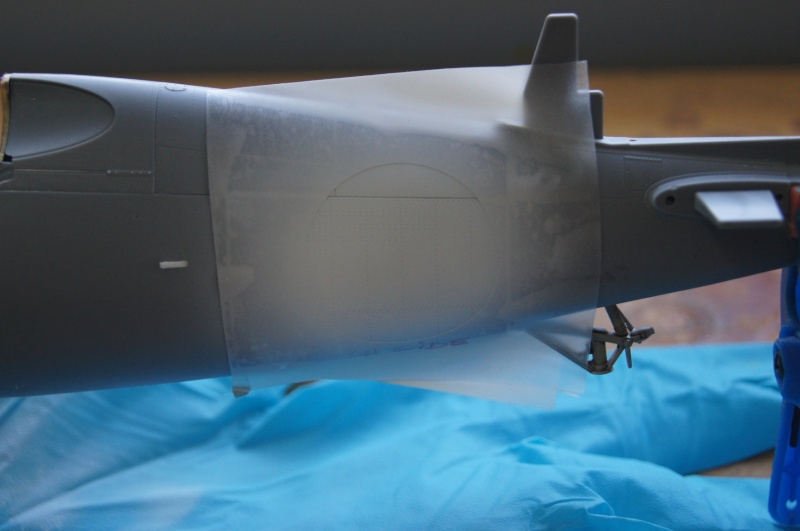 Maketar star
 Aeromaster Insigna blue without mask to avoid paint thickness
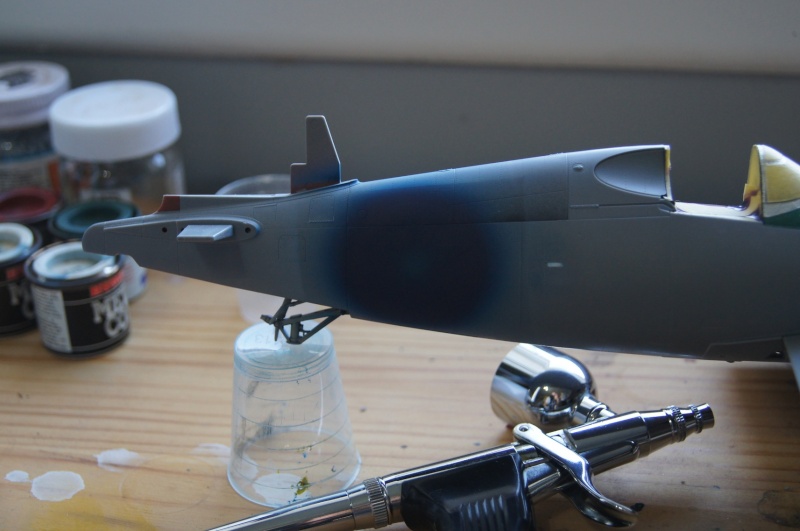 Quick 8000 sanding and the center of the Frisket mask is installed over the disk
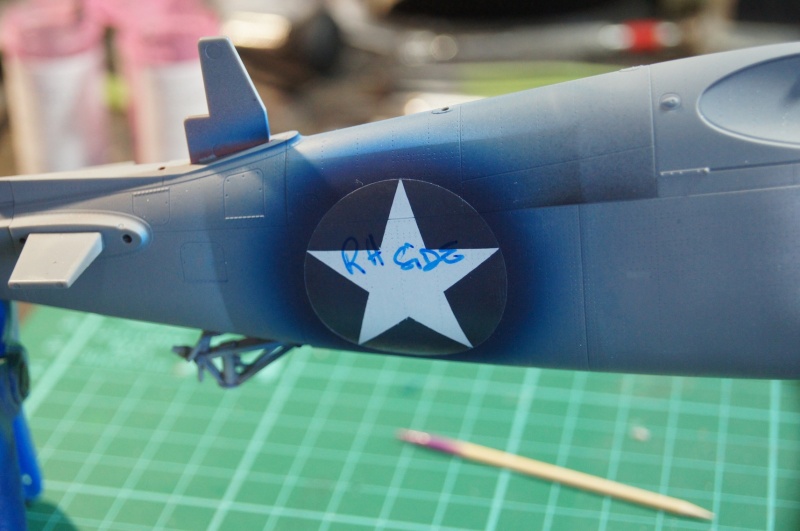 Tamiya tape out again
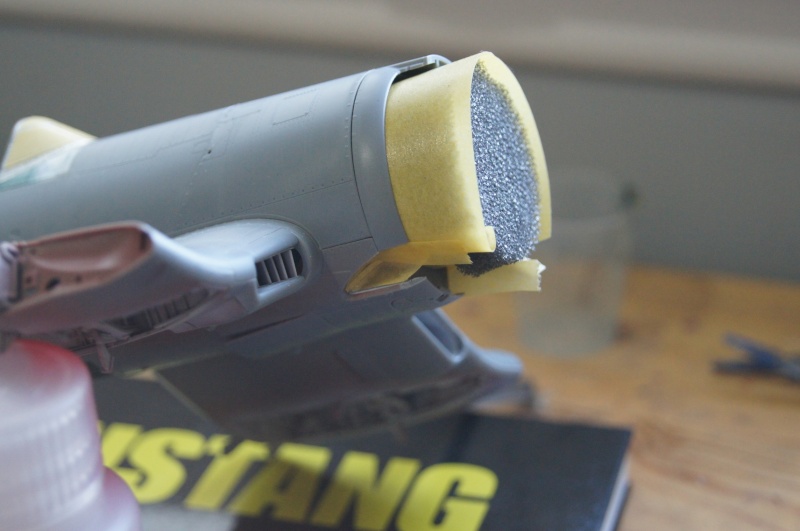 Grey ZP primer
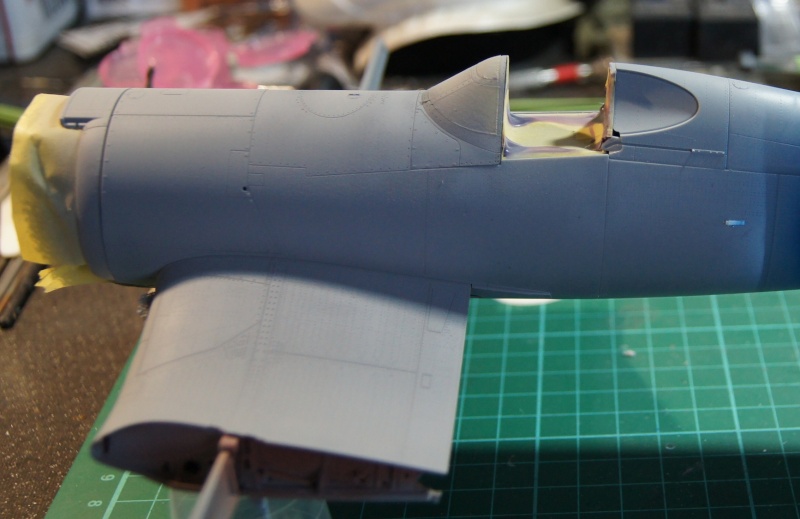 Then Semi Mat Alu from Alclad
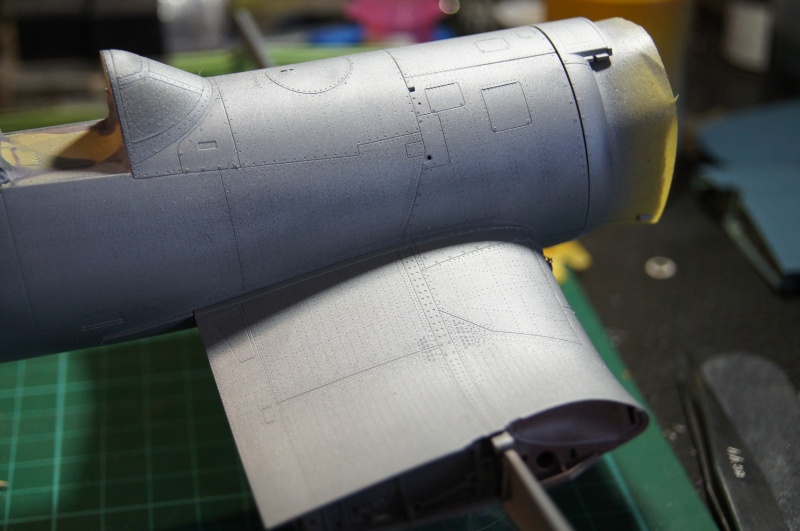 First chipping step with Maskol
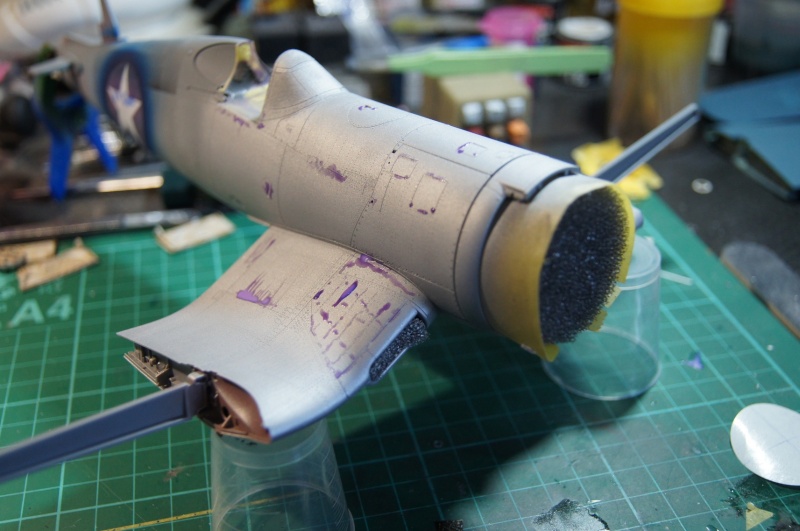 Zinc Chromate (Model Master Acryl)
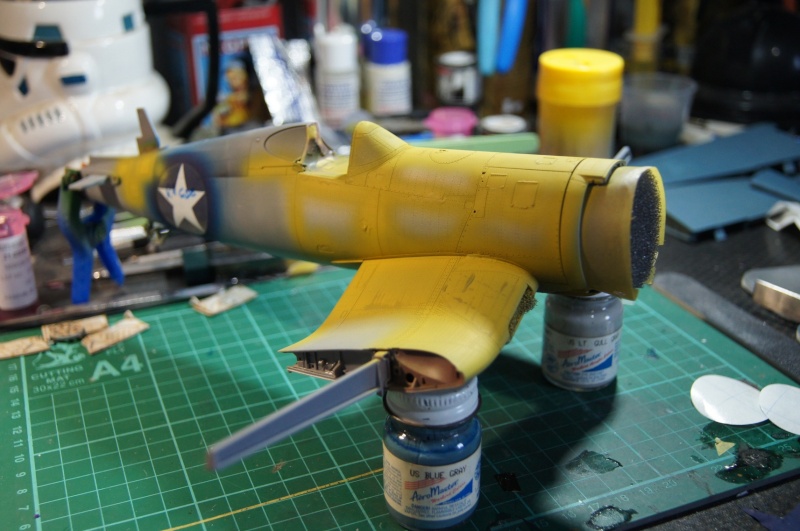
 And Maskol again
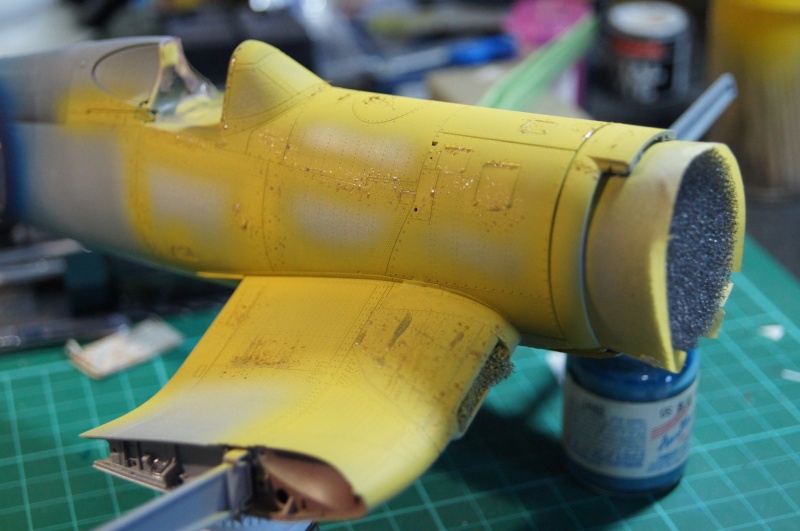
 Aeromaster Blue Grey is finally applied on the plane
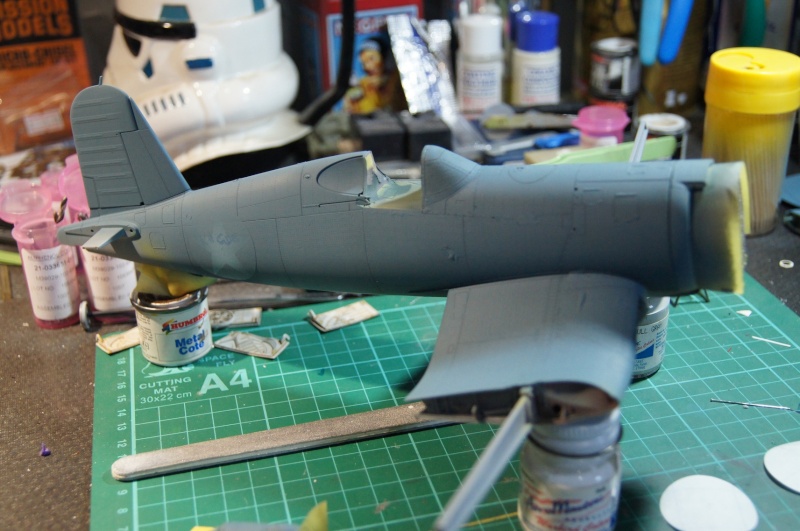

 That's all.Pascal
-
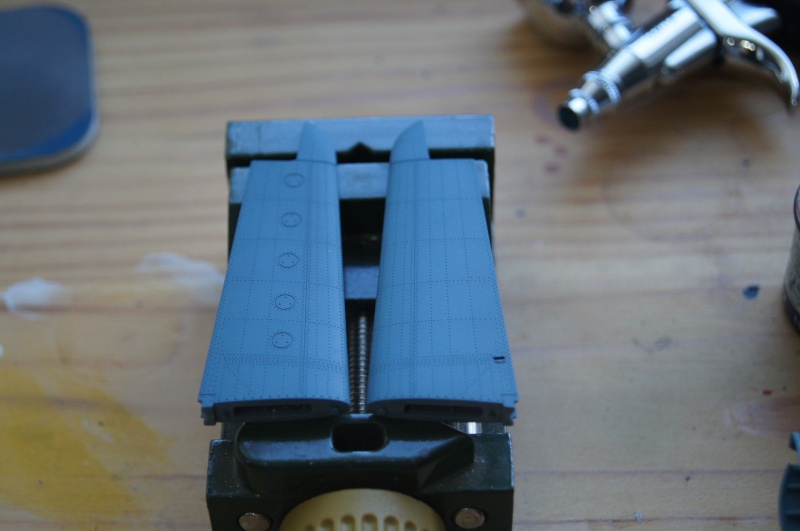
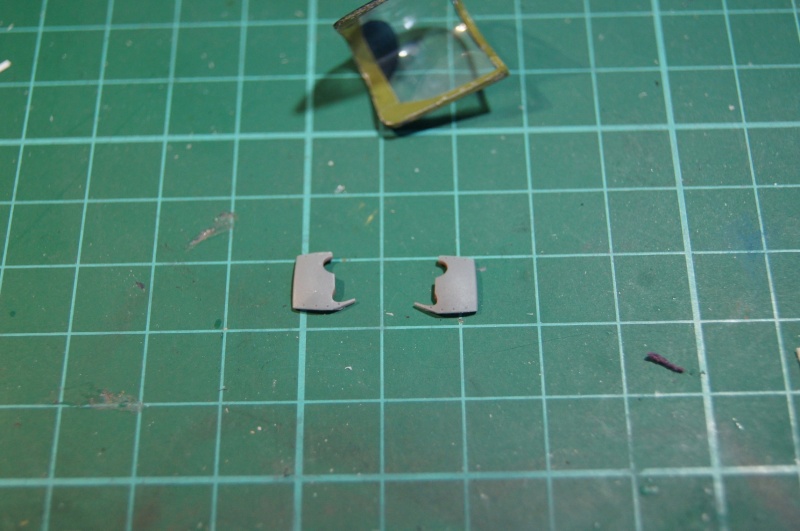
HI,Thanks guys!Small update.I cut the front exhaust plate.
 Kabuki Stars for the next step
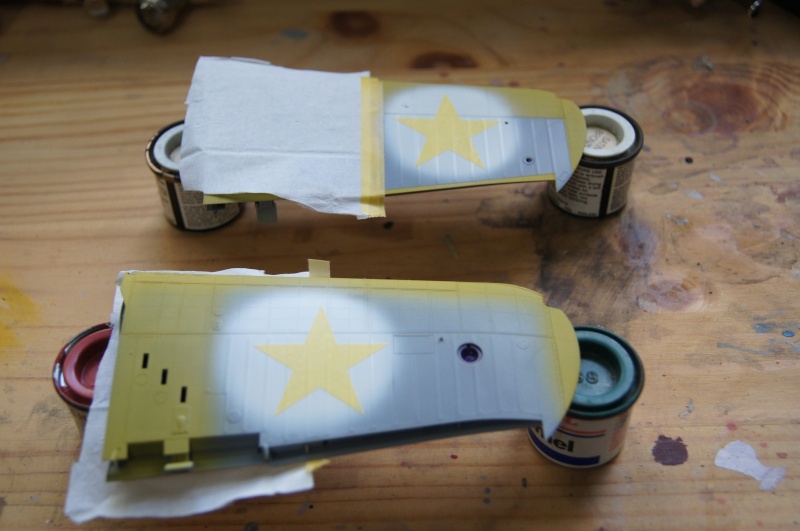 Insigna Blue... and problem with the Gunze white
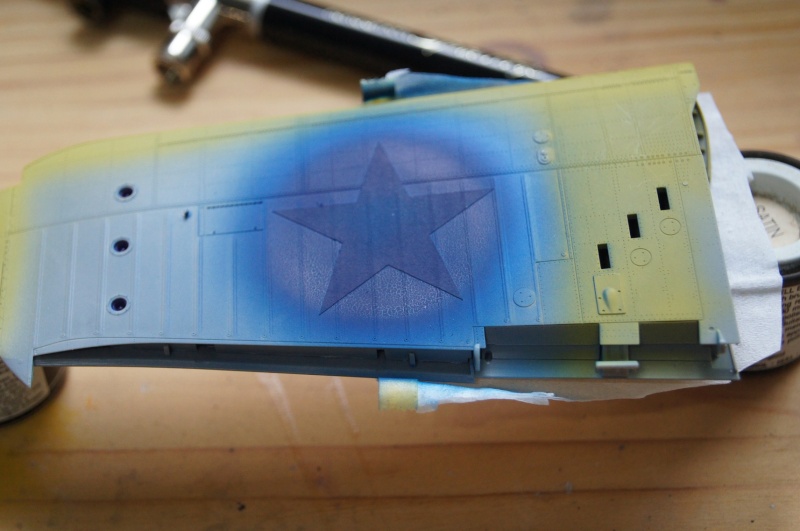 sanding with 6000
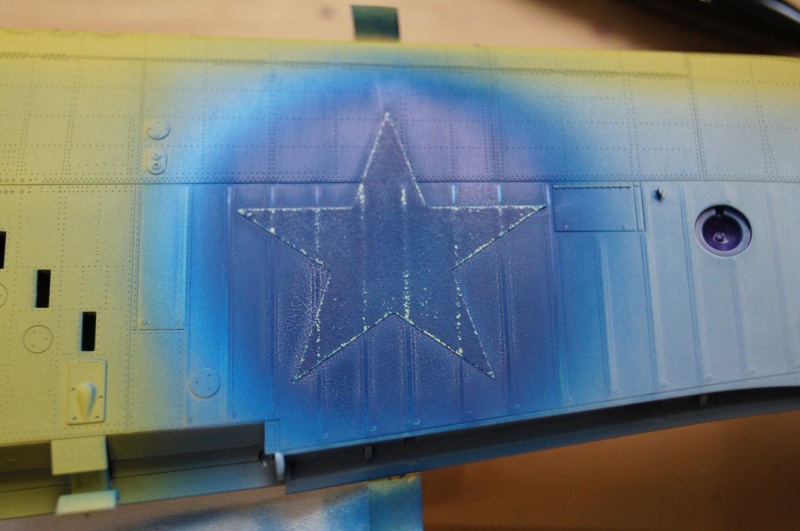 Micro Flat.
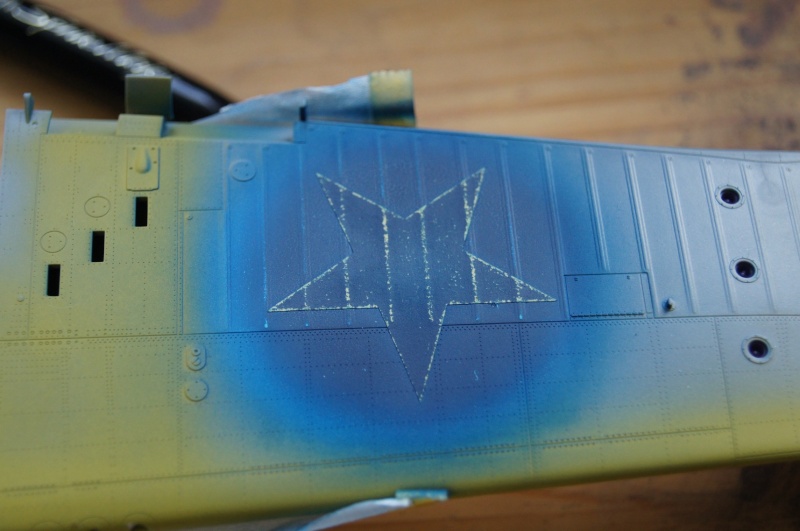 ... Insigna Blue
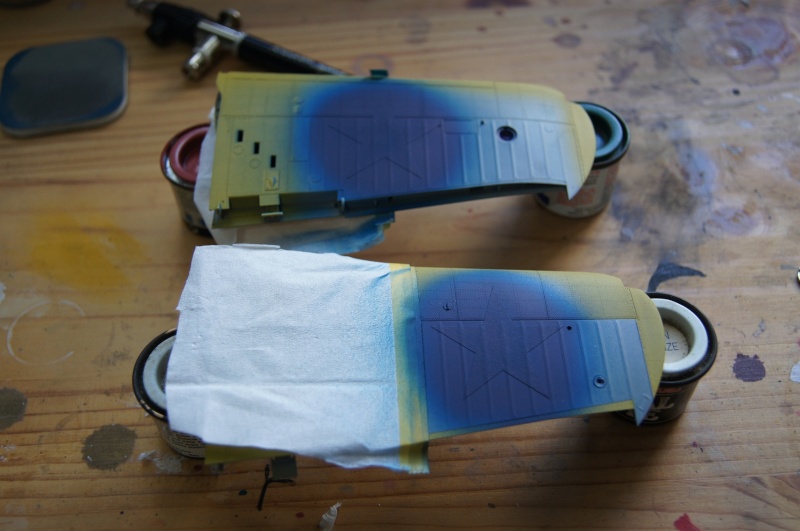

 Maskol on the ZC this time
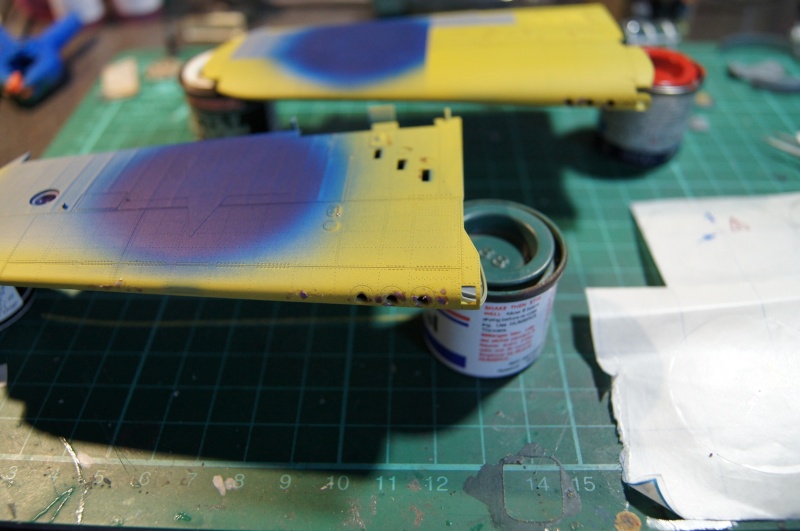 I made my own mask.
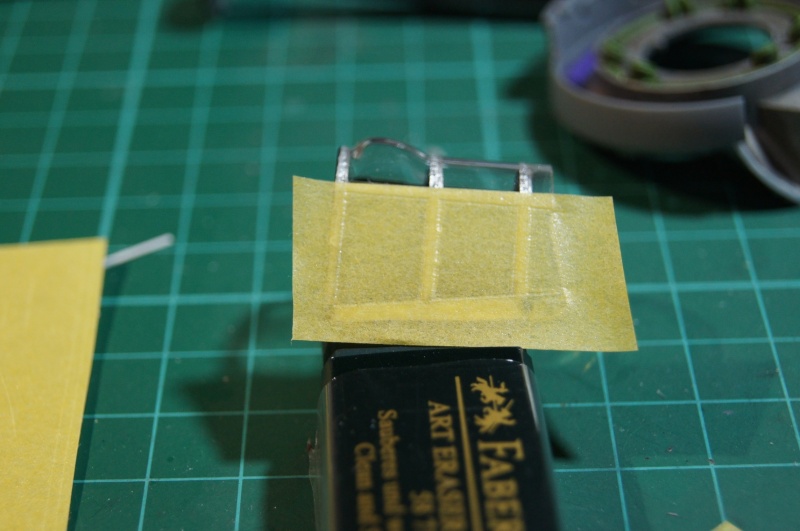
 More soon.Forza Jules.Pascal
-
1
-
-
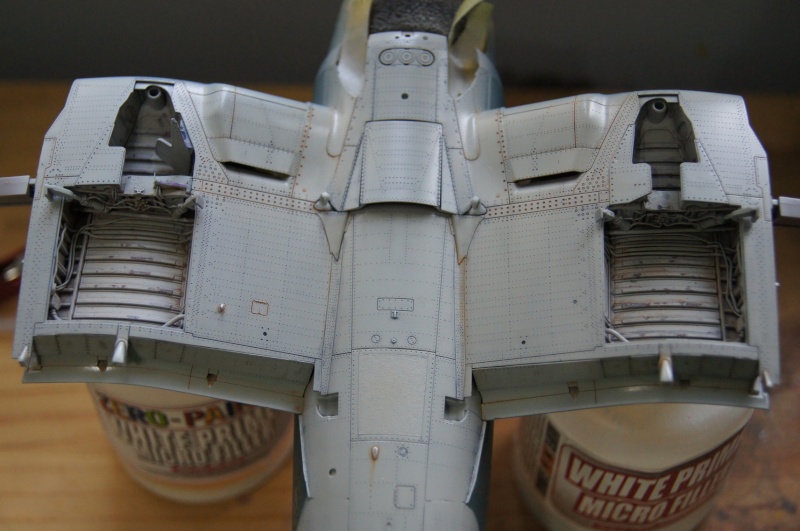
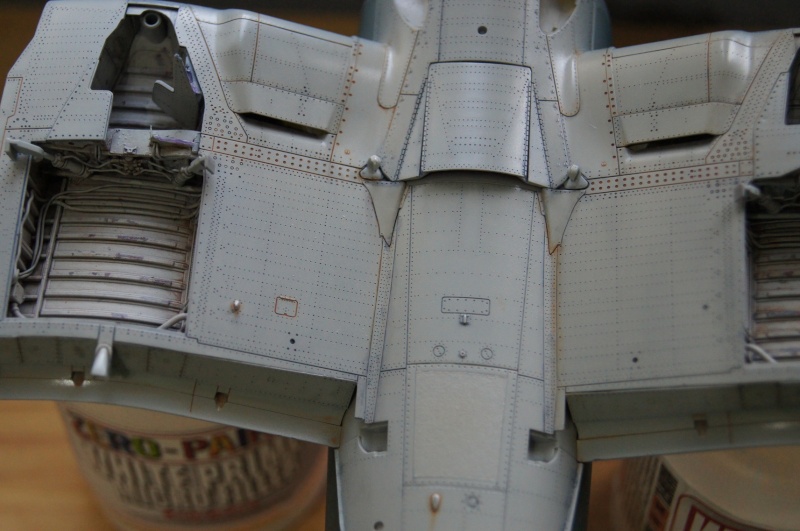
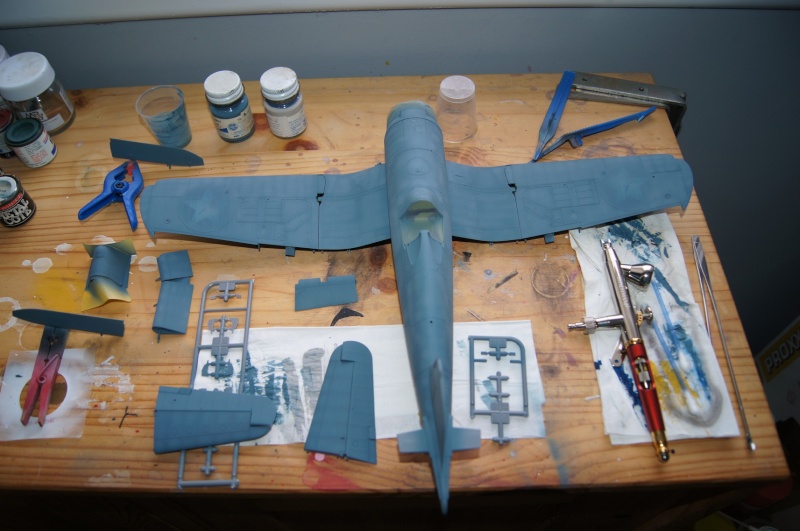
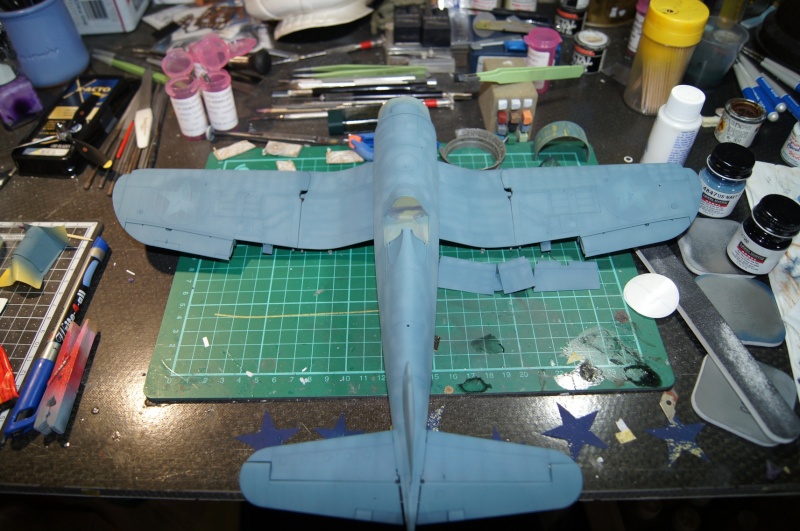
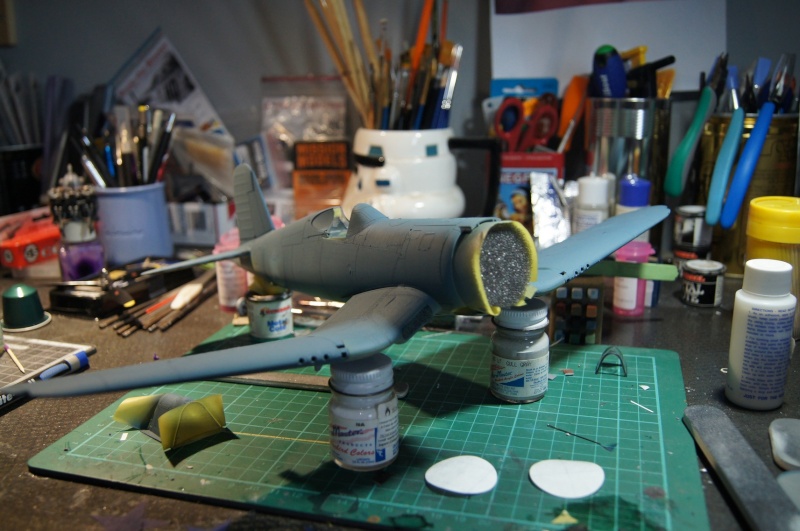
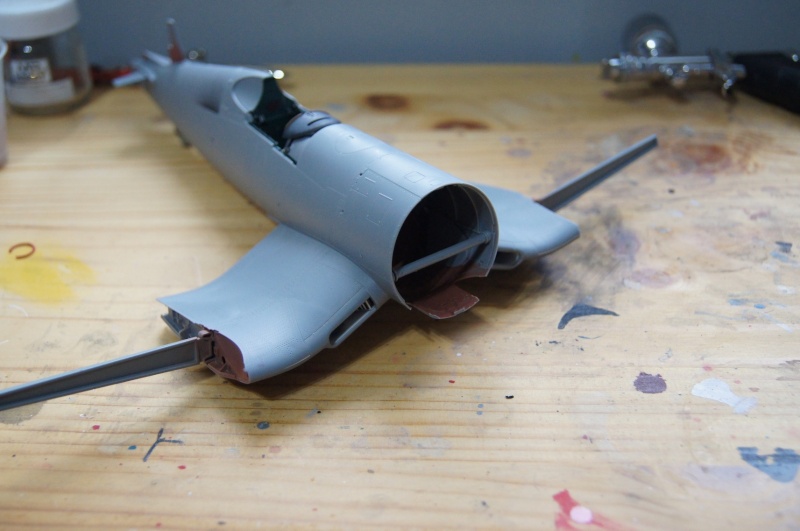
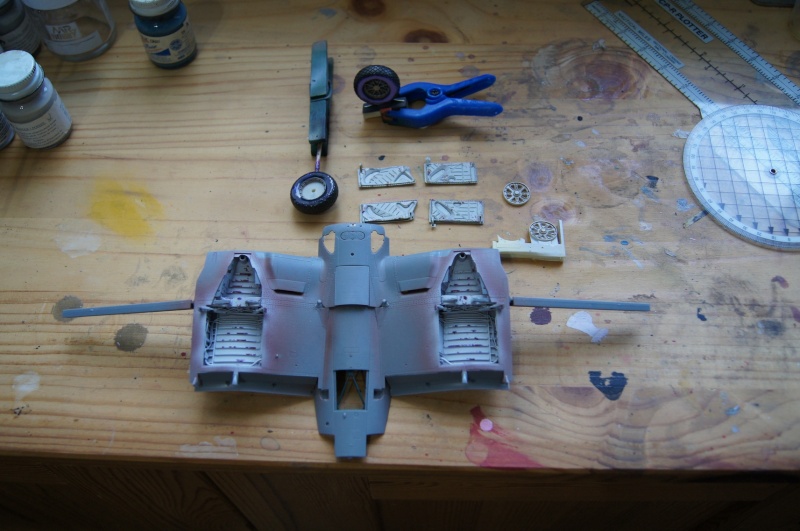
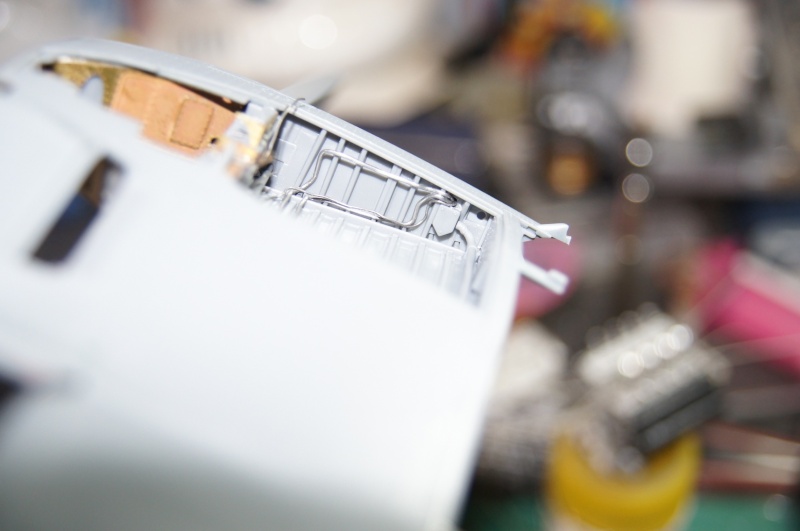
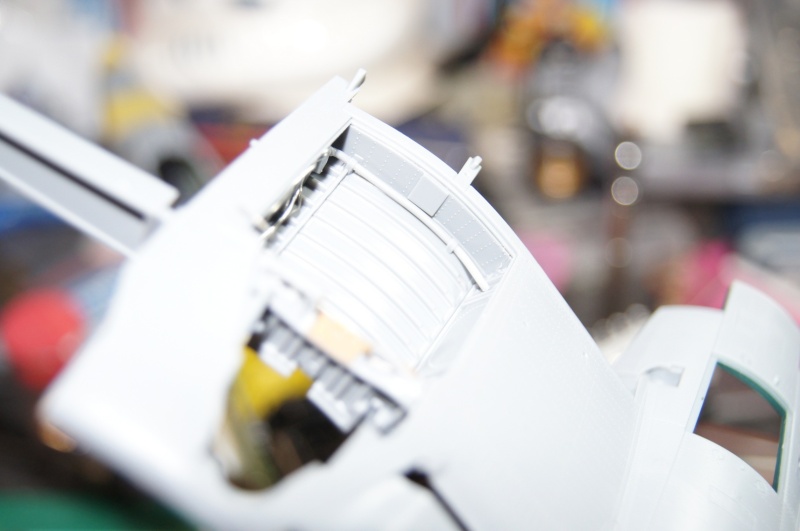
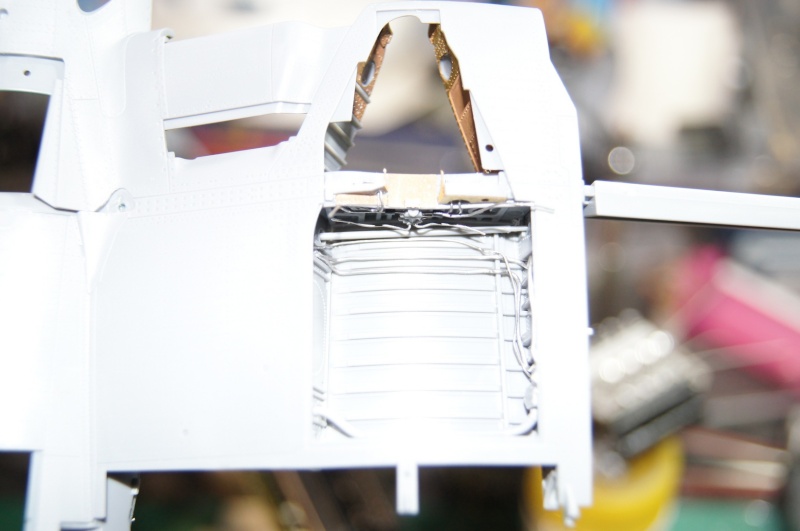
Hi,Small progress on the Corsair.Paint work is starting on the folding part of the wings.Gear bay is almost done after the color was modified:
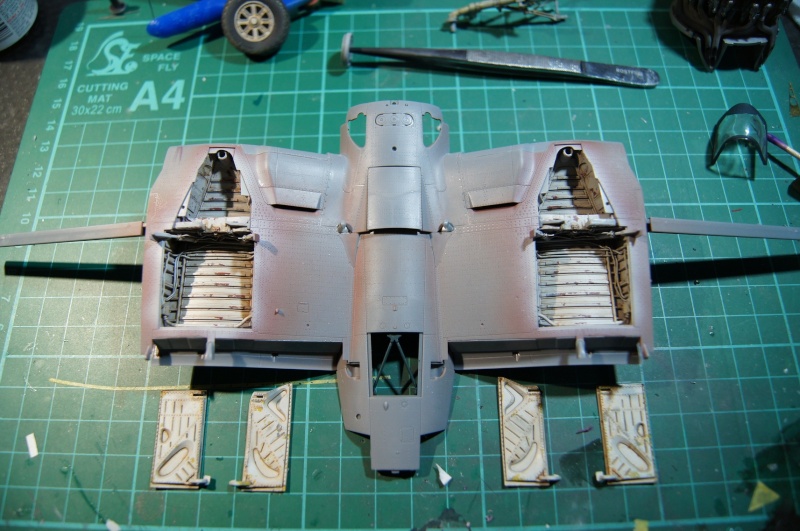
 White ZP primer:
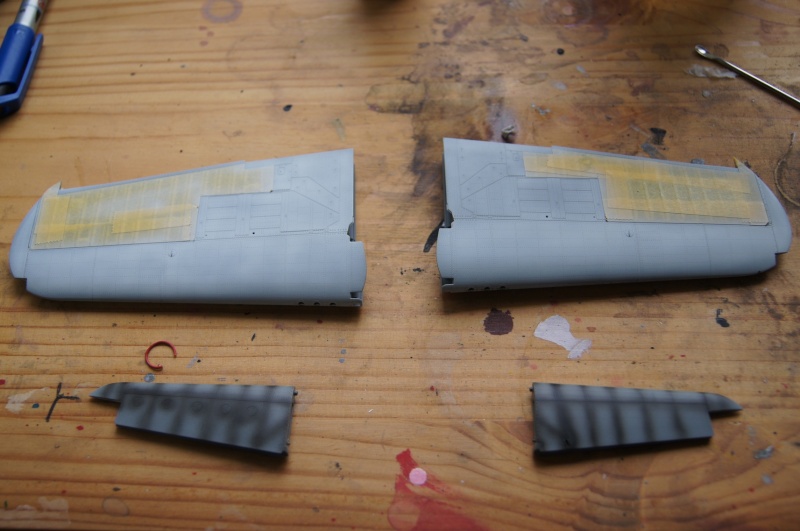
 Pre shading process on the stabilo.Dull alu from Alclad over the white primer:
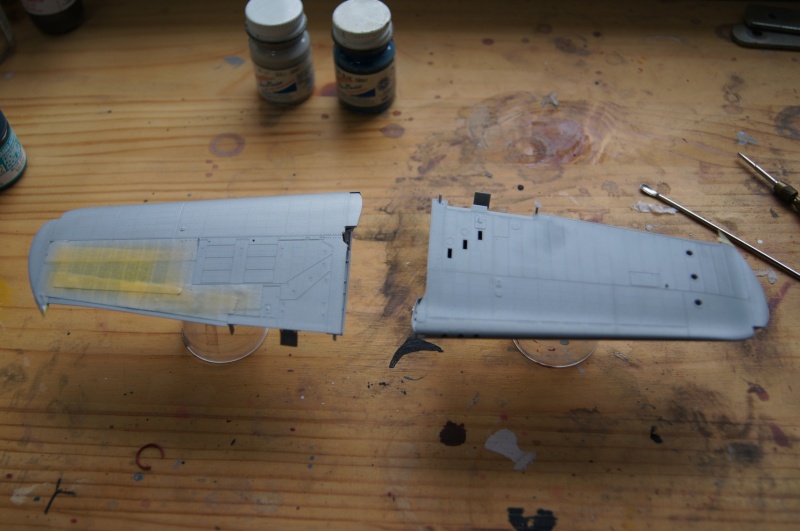
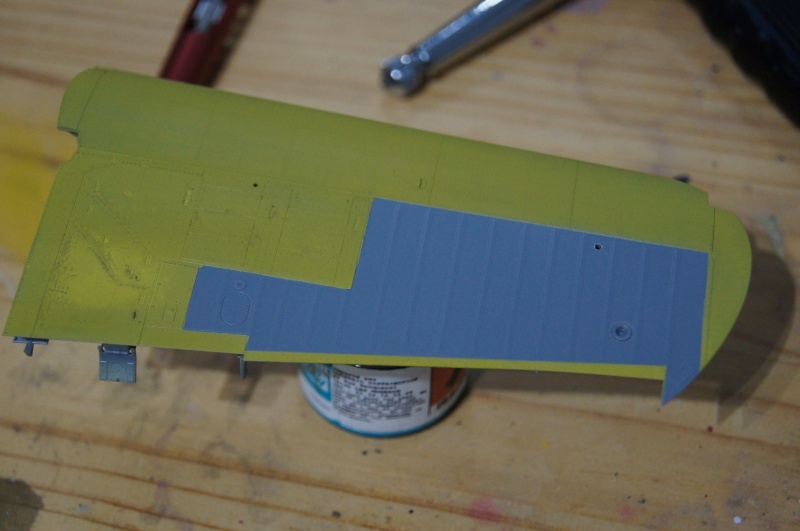
 Maskol for the chipping effect:
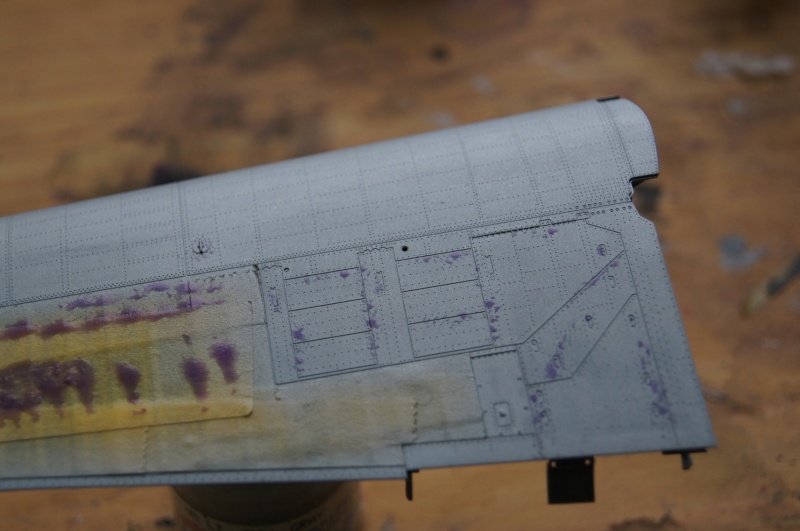 Time for Zinc Chromate (Model Master Acryl):
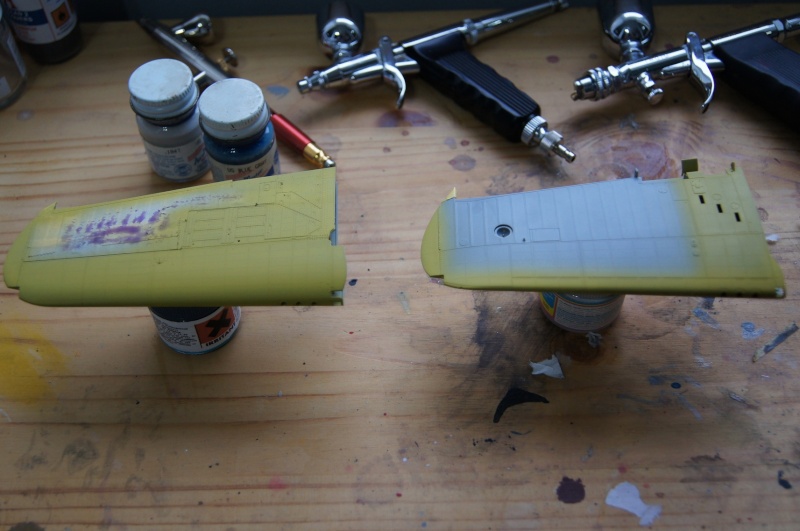
 Quick hairspray coat:
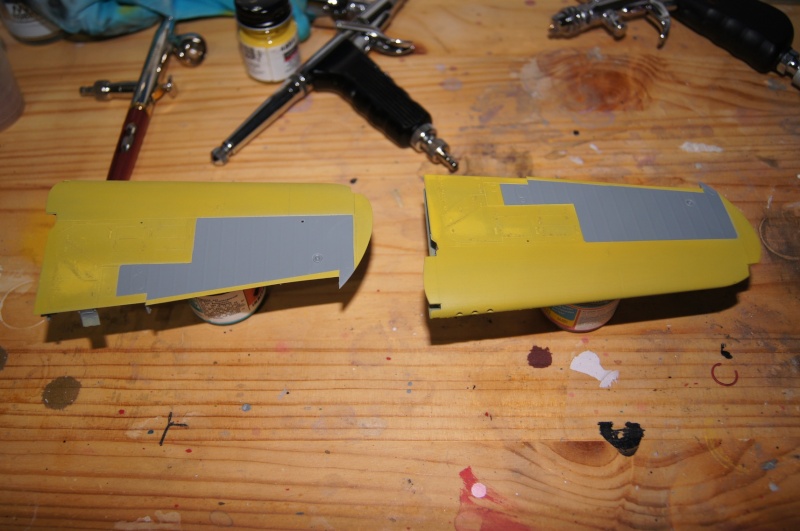
 Soon Stars:
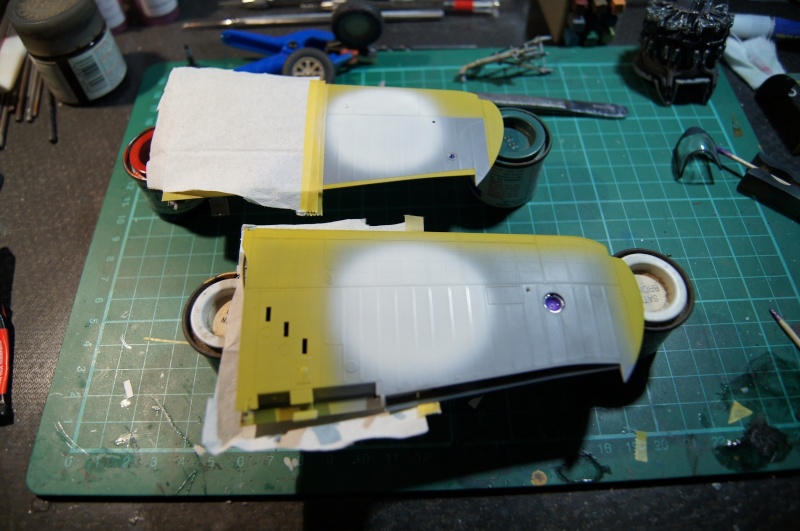 Voilà, c'est tout.Forza Jules.Pascal
-
1
-
-
Hi,Bad day, sad day.Japan GP. FORZA Jules.I wasn't satisfy with the grey color.Parts masked waiting for the new color.
 Paint "research".Aeromaster Blue Gray for the upper surface:
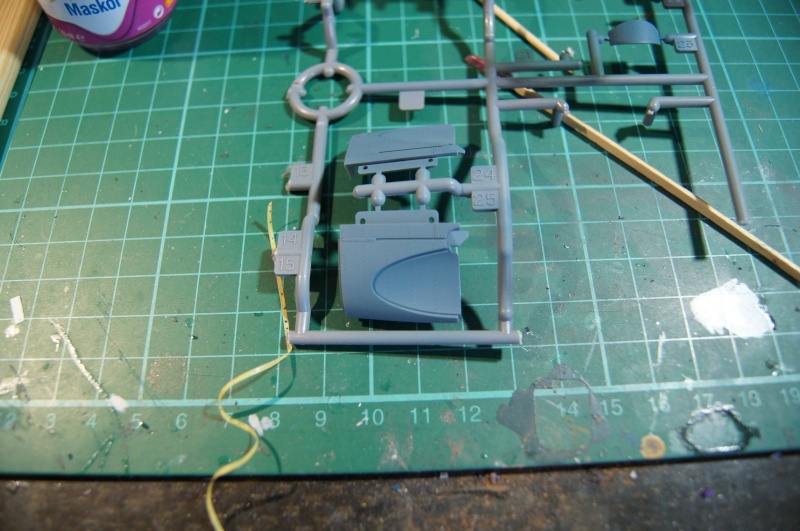
 I love that paint!Same part after post shading of Blue Grey from Gunze on the rivets + light coat of Klir + oils ( W&N Raw Umber for details, Titanium White for effects) + Micro Flat
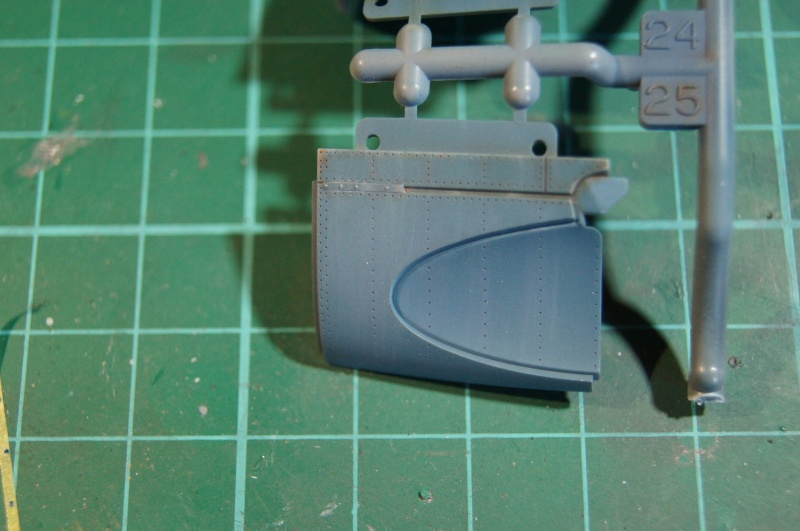 This one after post shading of Blue Grey from Gunze on the rivets + light coat of Klir + oils ( W&N Raw Umber for details, Titanium White and Olive Green for effects) + Micro Flat
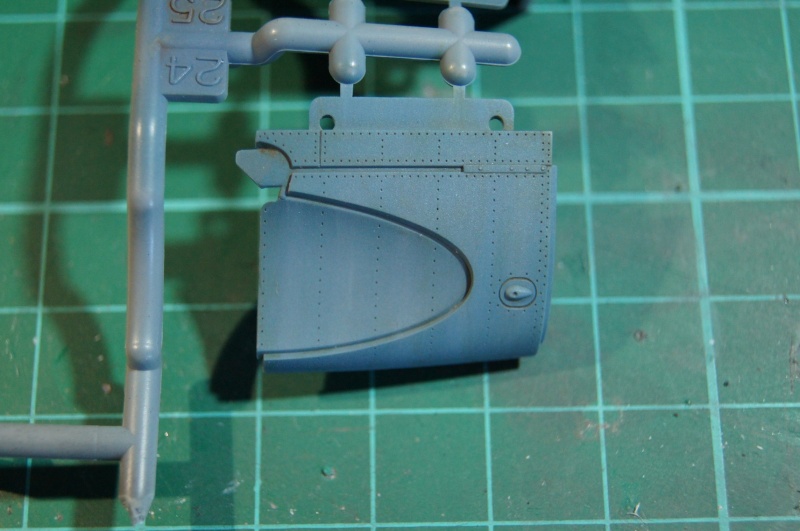 Here, just Gunze Blue Grey with a light coat of Micro Flat
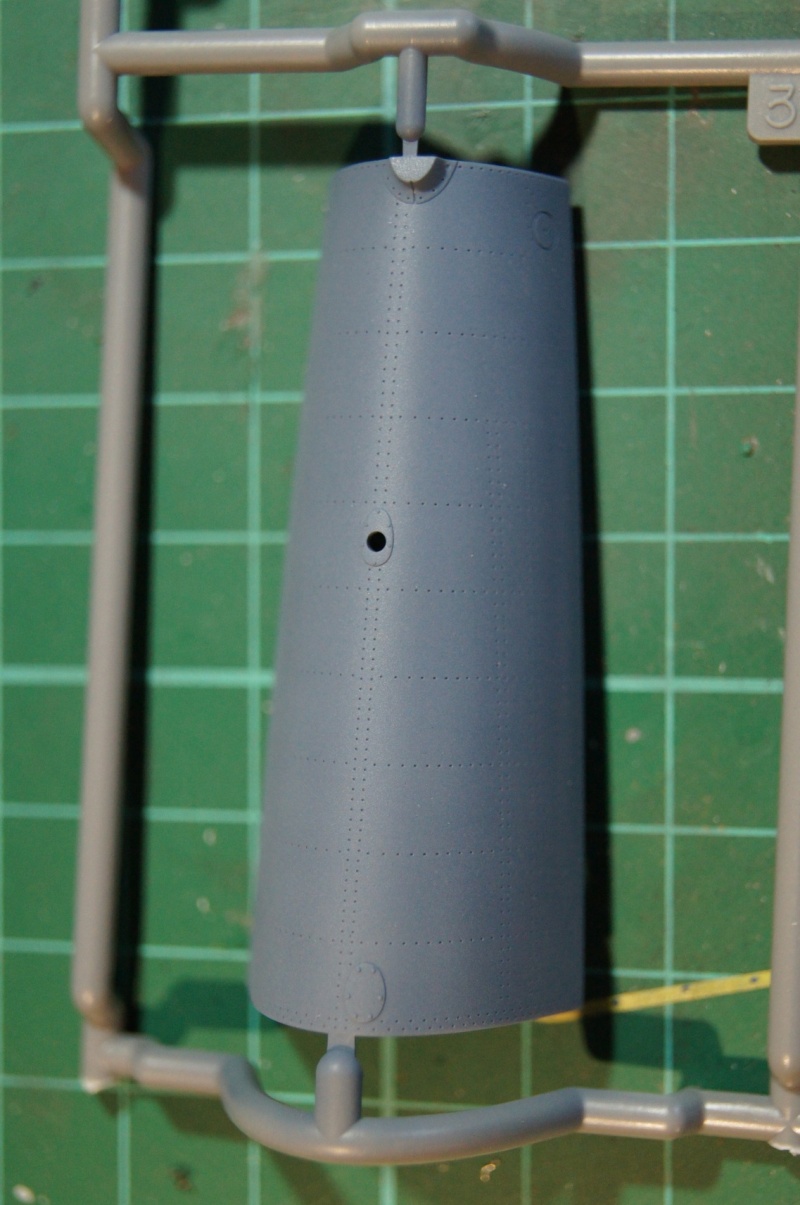 Same thing for the lower surface color.Comparison between Aeromaster and Gunze.Heavy black pre-shade...Gunze on LH, Aeromaster RH:
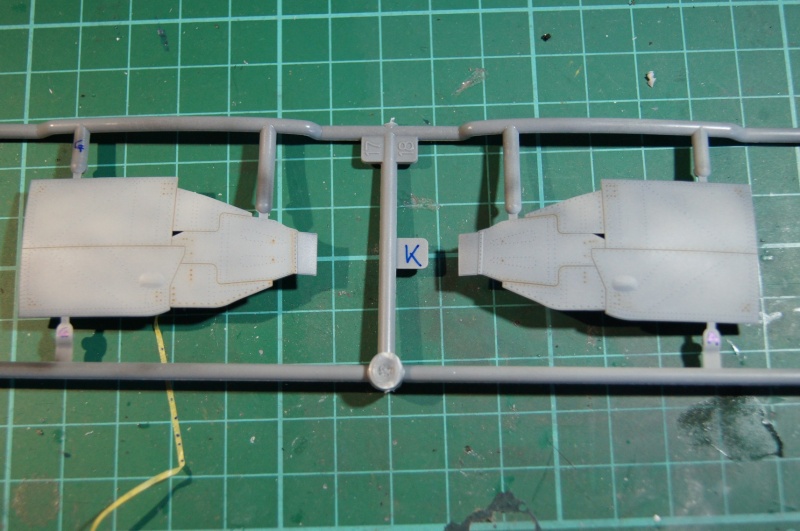 Gunze Light Gull Grey + Raw Umber + Micro Flat
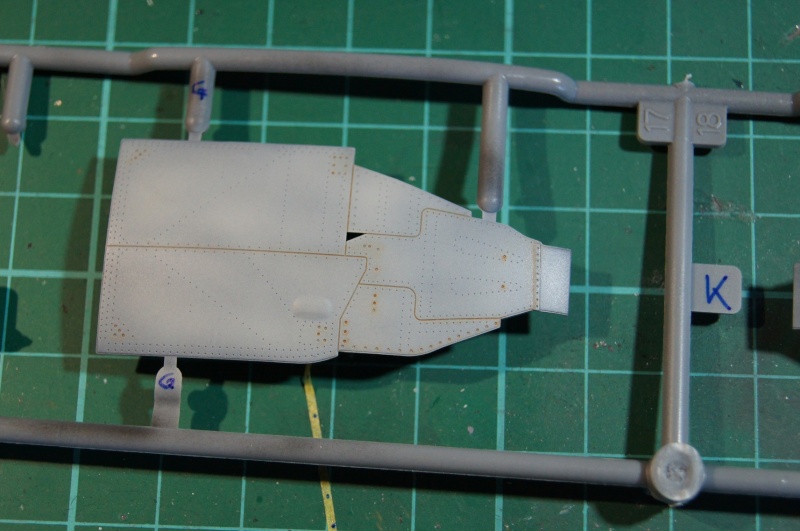 Aeromaster + Klir + RU + Micro Flat
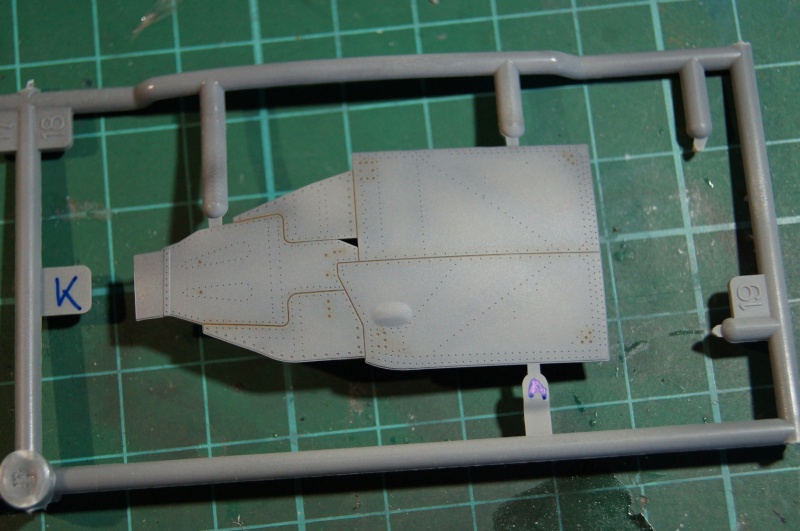 Gunze H-51
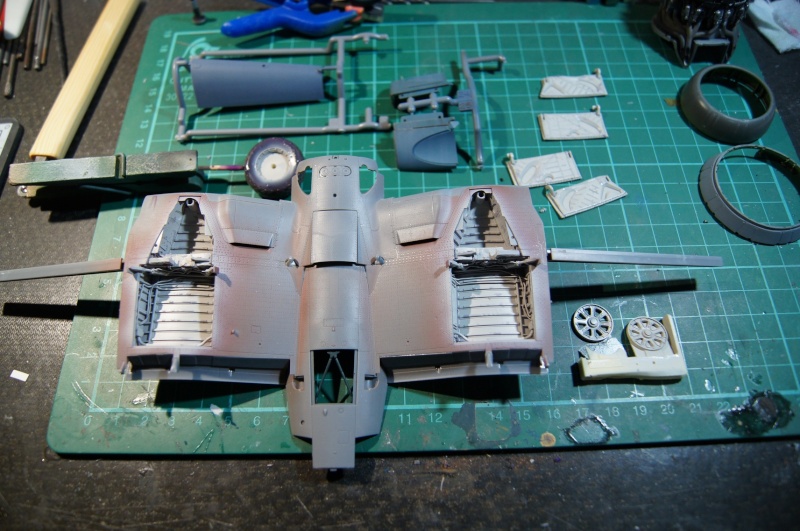 Pascal
-
1
-
-
Hi,Thank you very much!Micro progress
 But it was a very busy day:- Sport early this morning (Japan GP practice),- small flight just after the morning sport to enjoy this sunny day,- housework (garden ...), but some connection with aviation!


 Pics:Test fitting after some corrections
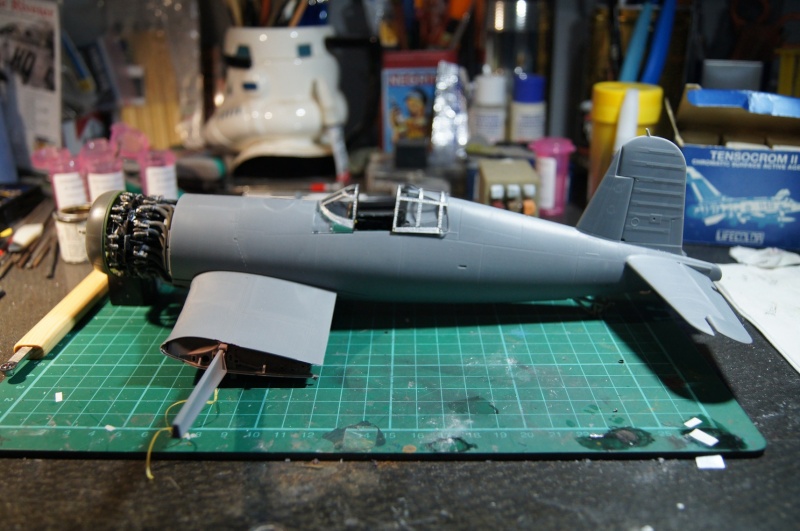
 Need holes! Brassin parts don't have!!
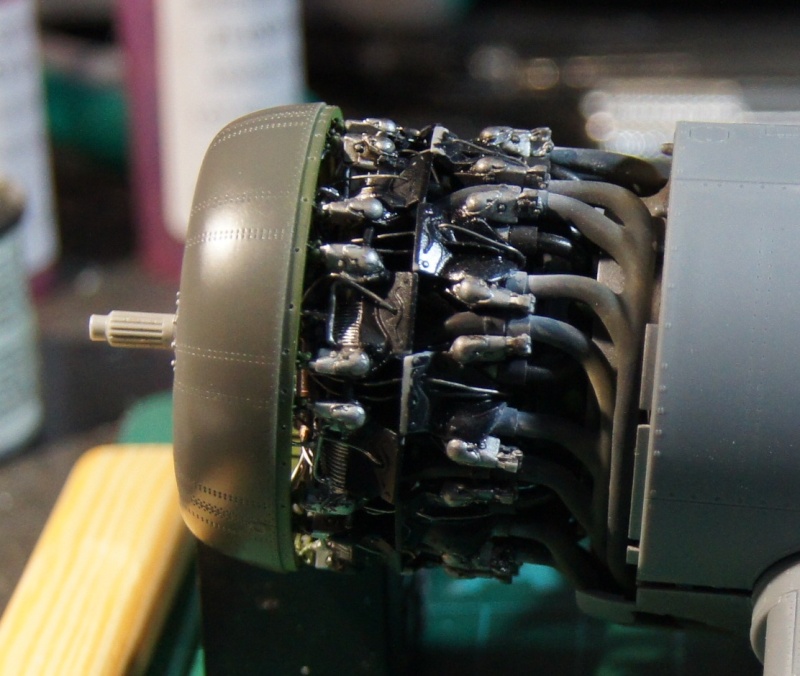 More soonPascal
-
1
-
-
Hi everybody,Thanks a lot Hawkt1Small progress.Some work done on the exhausts:
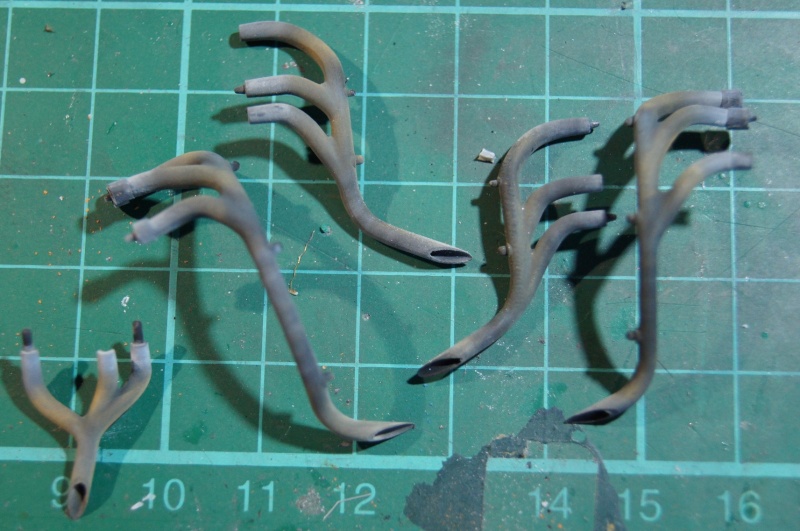 With pastels:
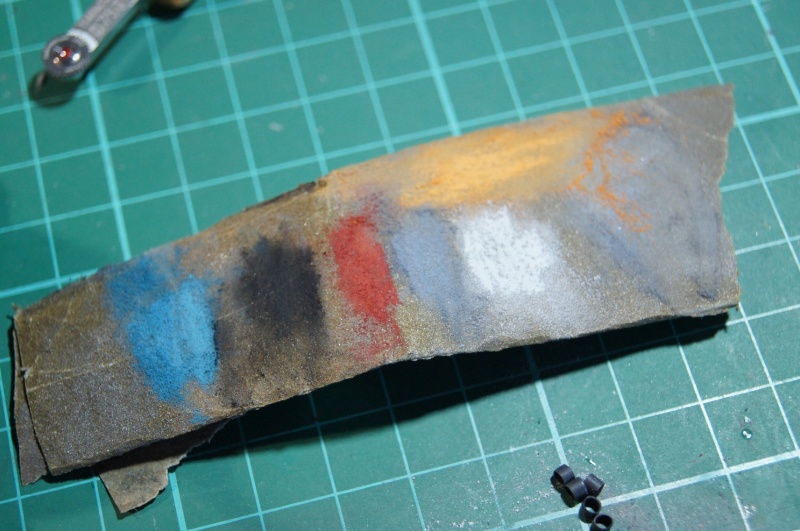 "Test fit":
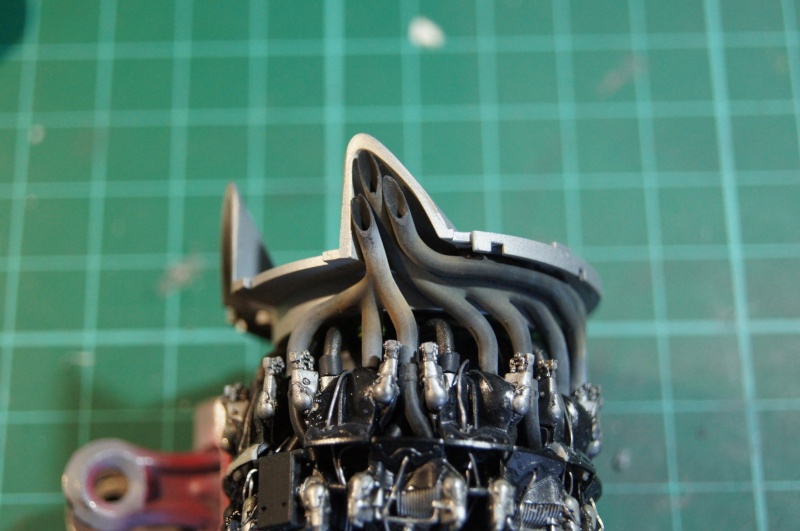
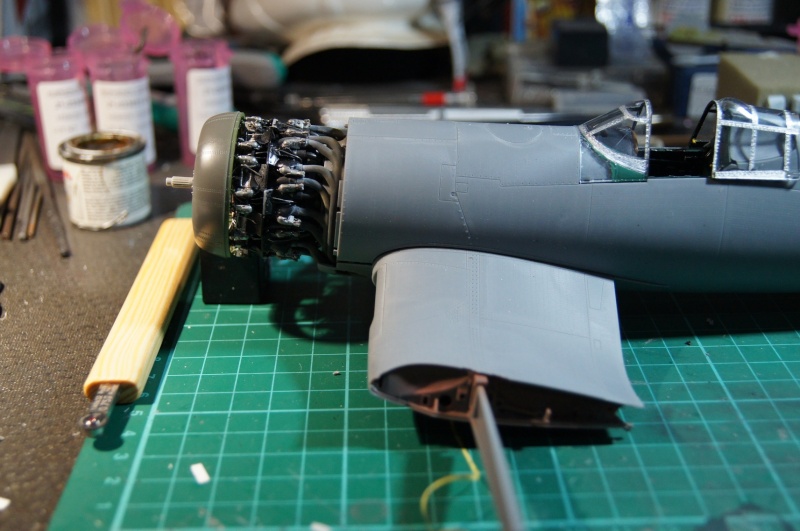
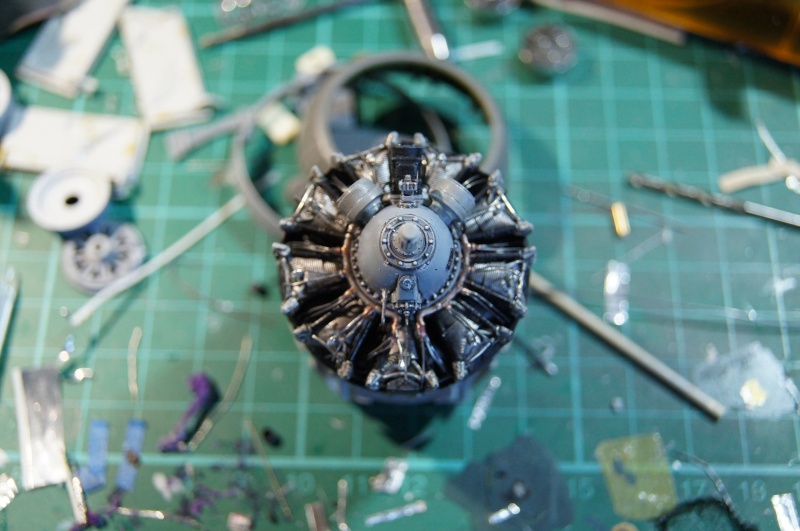
 Plastic assembled on the resin P&W:
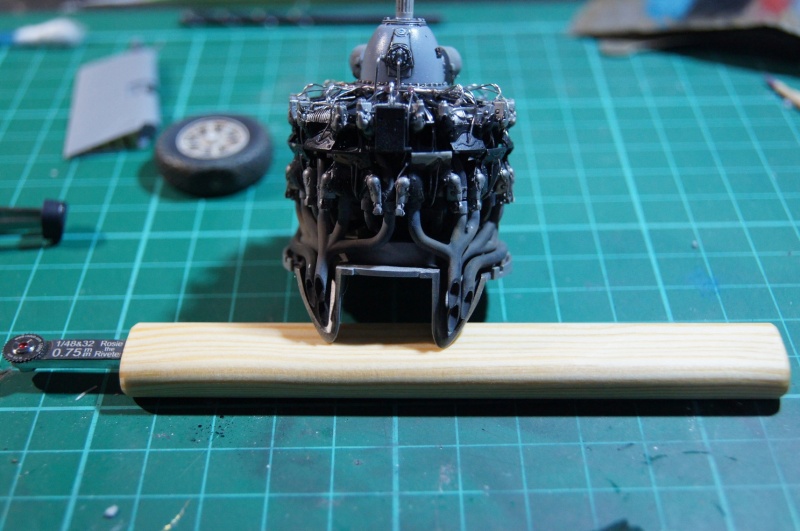
 "Sewing" (Passepoil in French...) done on the headrest:
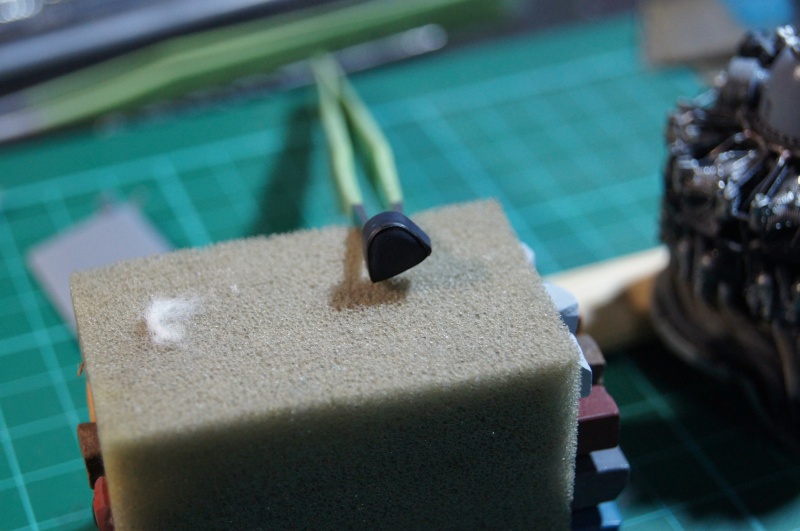
 Small weathering with oils and Humbrol 144.Second "wash" with oil on the wheels:
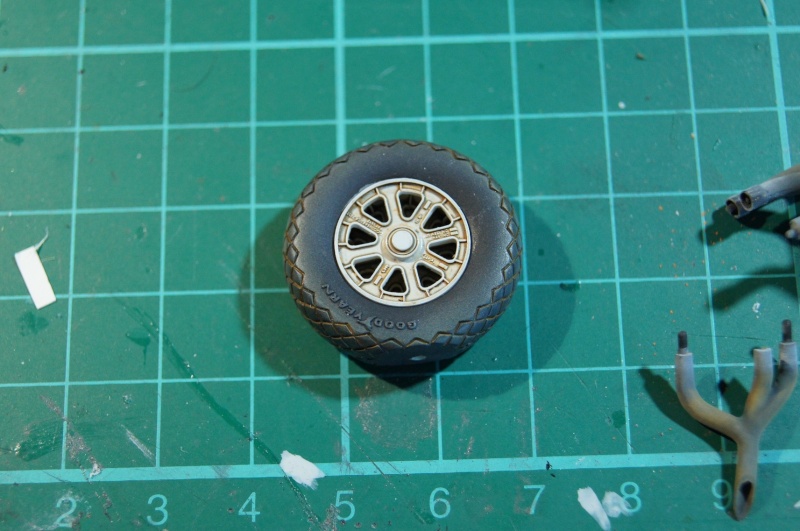 That's all for today.More soonPascal
-
3
-
-
Hi,Small update.A very thin veil of Light Gray went on aluminum rims.Maskol protects tires.
 The Maskol is removed and black is quickly sprayed to do a touch up on the tire and slightly darken the flanks
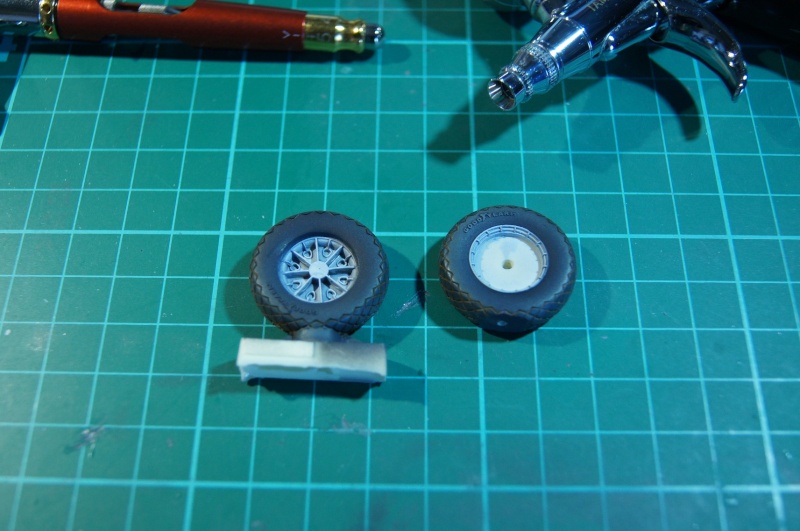 The first weathering step:
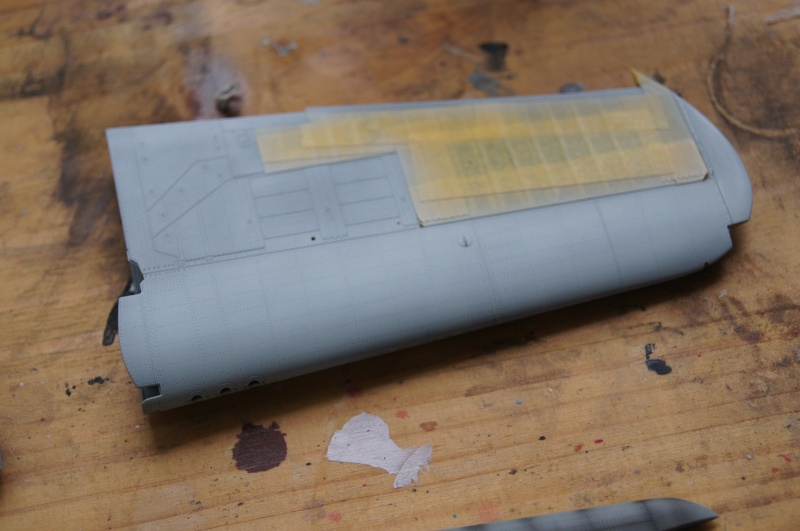
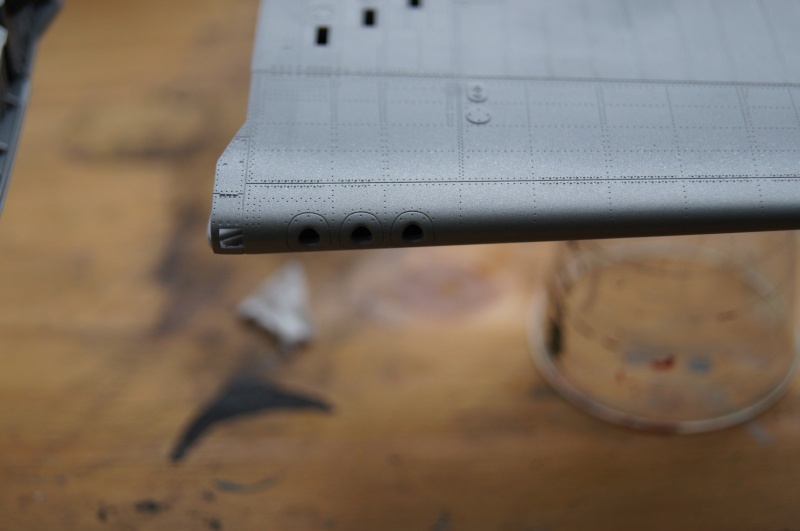
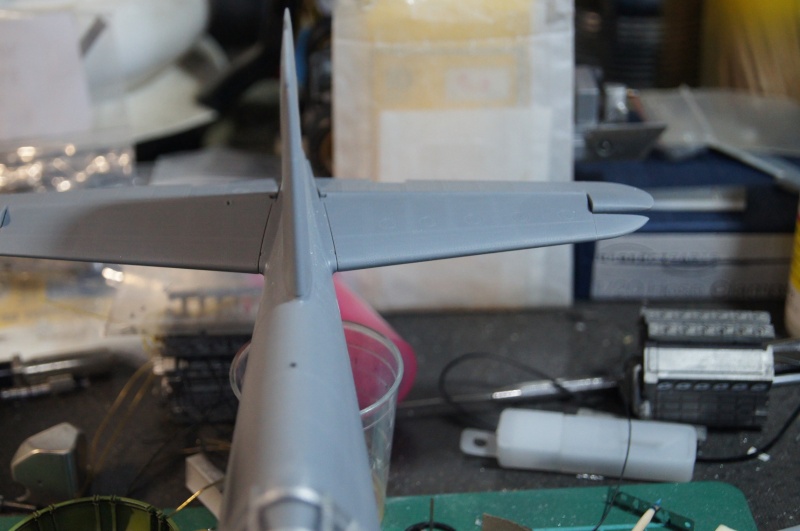
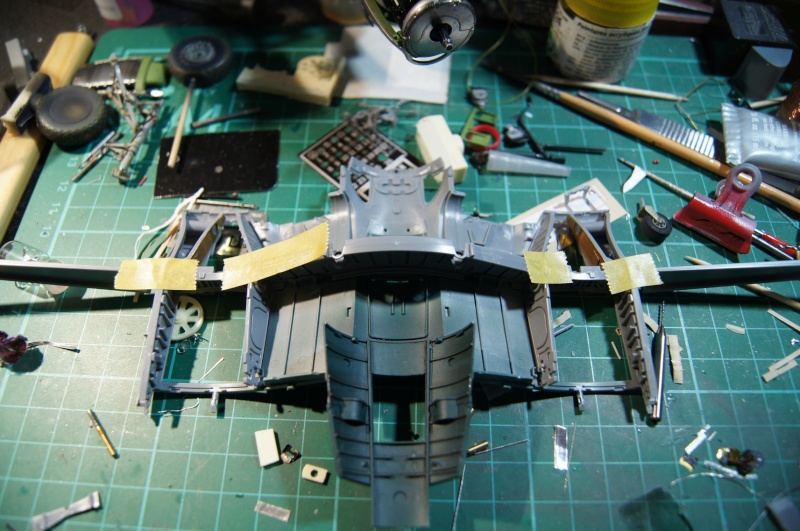
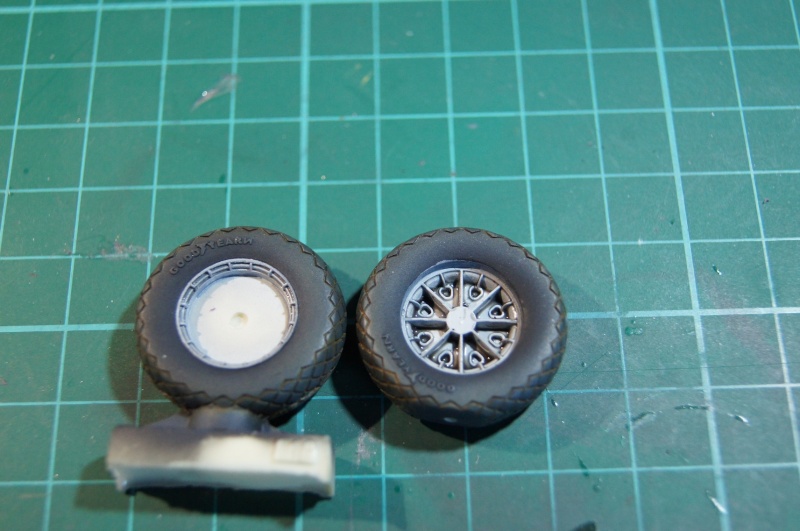 It was also time to take care of the wings.One word about the build quality: Perfect!
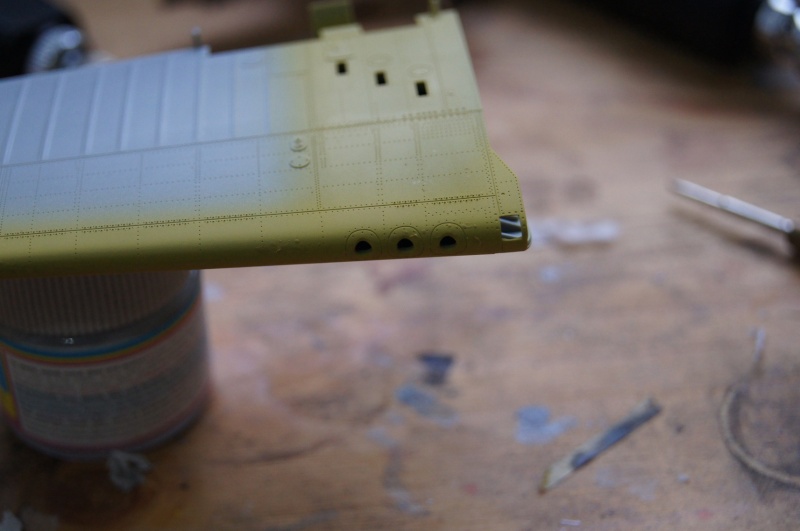
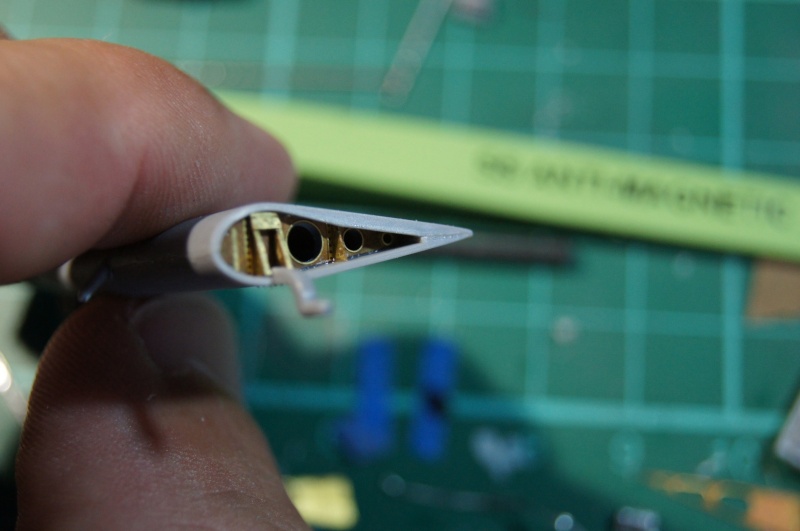
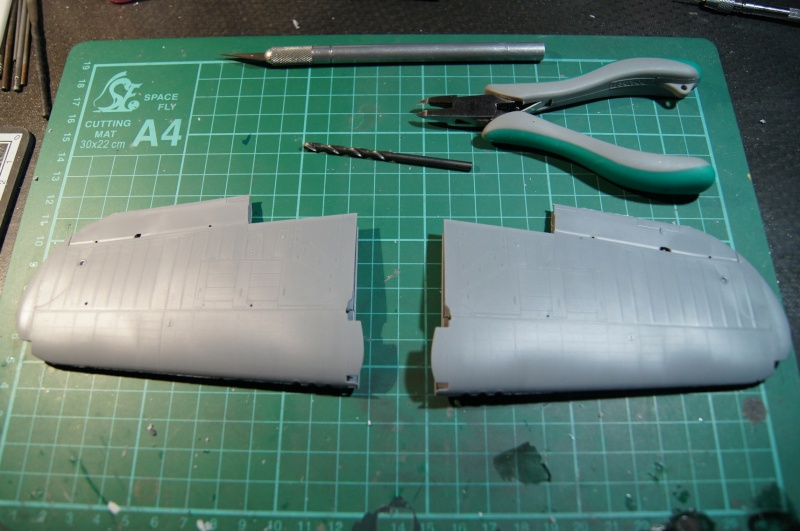 Wing tips are separate parts ...
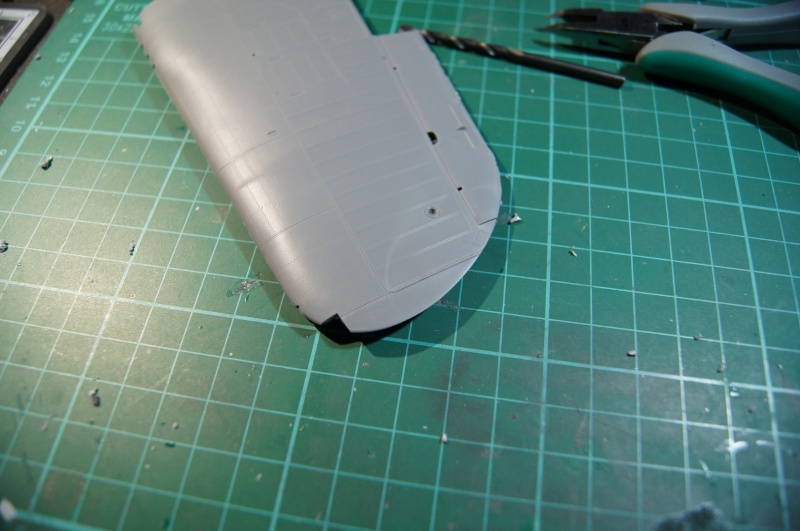
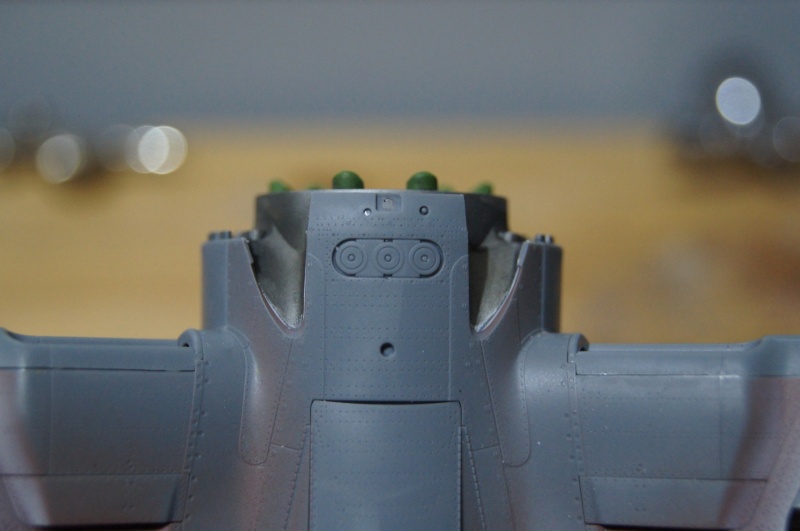
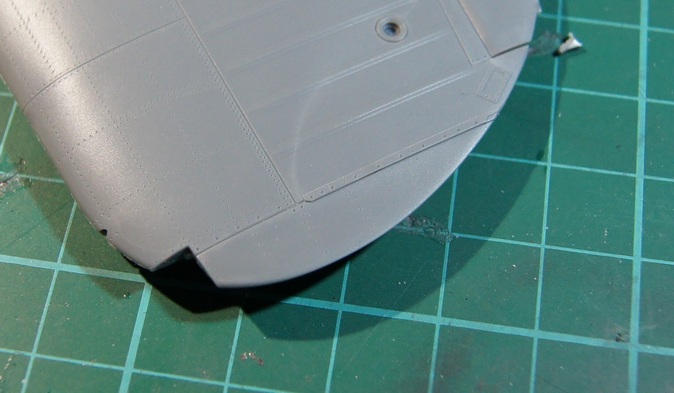 Deadly accuracy of the assembly!!Care should be taken not to forget to pierce the upper surface for the passage of small circular lights mounted from inside.
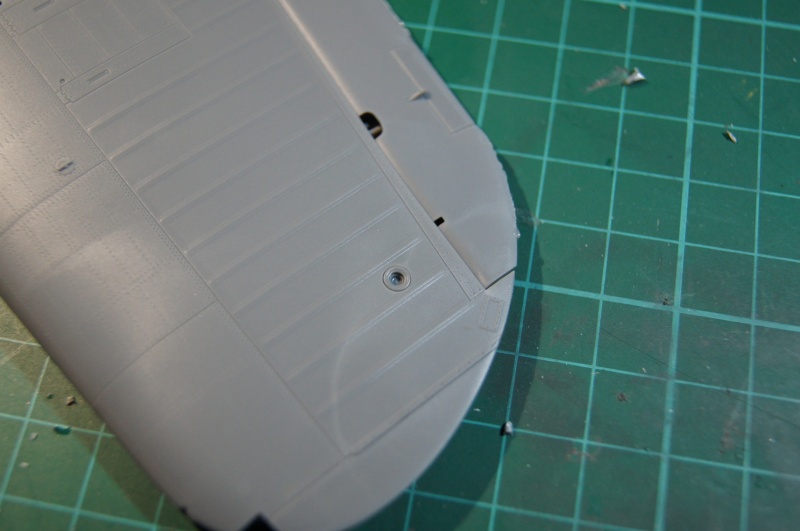 The propeller received his second thin coat of Alclad Black
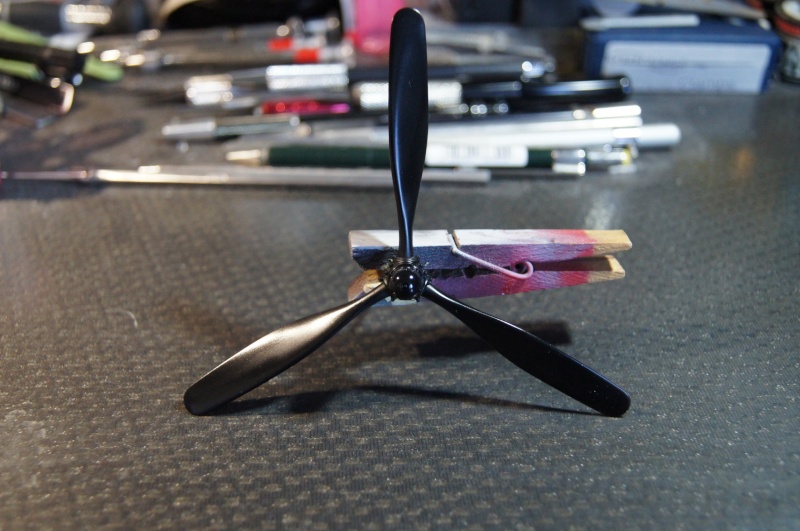 Then ... 2 light coats of Airframe Aluminum
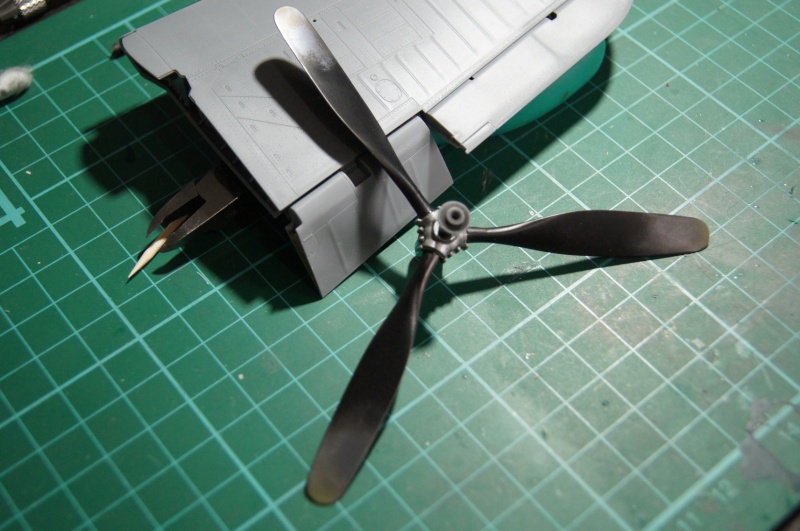
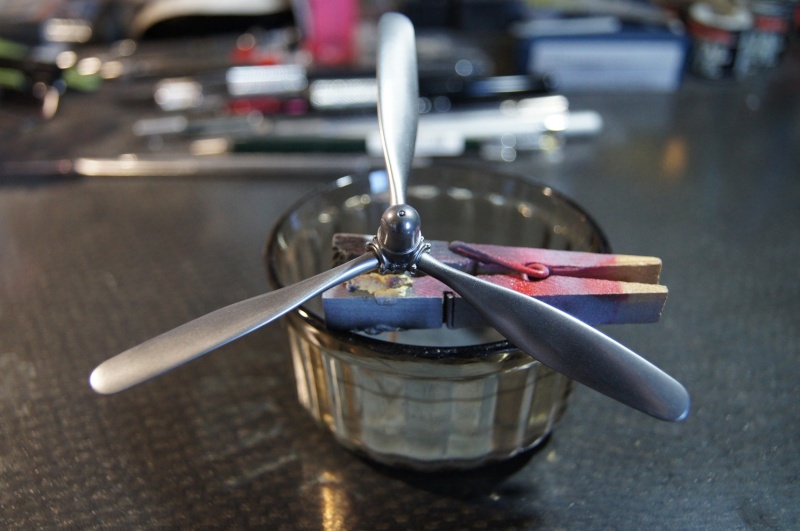 The blades are then taken up with a little more pressure and less paint to keep the tone, thickening the layer to make it more solid and less shinyTime for the Black (Semi Gloss Black from Model Master Acrylic)
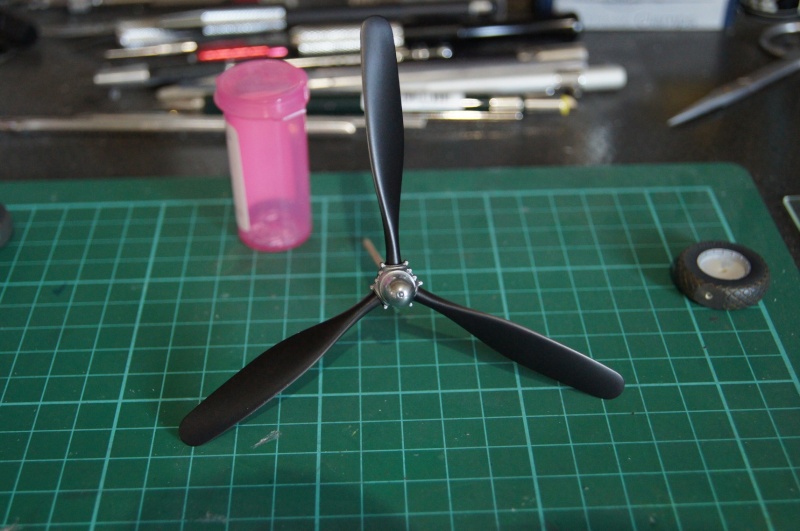 The layers are very thin while emphasizing the central, and the trailing edge of the blades.Lighter on the leading and the rear end face of the blades.
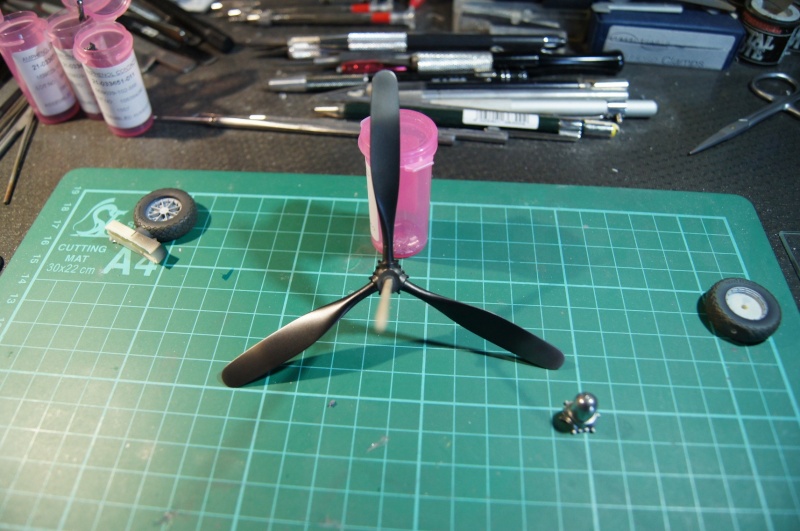 The yellow should be passed quickly on the blades tips....Time for Yellow!Masking tape and a bit of Maskol on the tip leading edge:
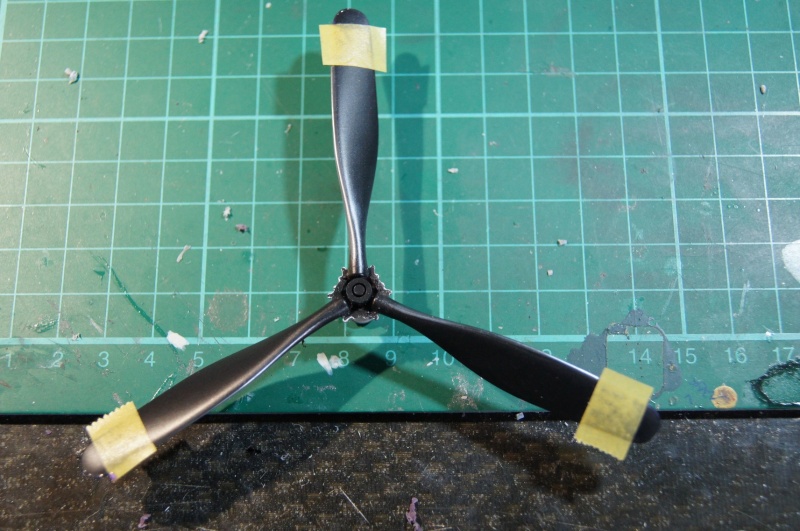 Yellow Zinc Chromate as primer:
 Insigna Yellow:
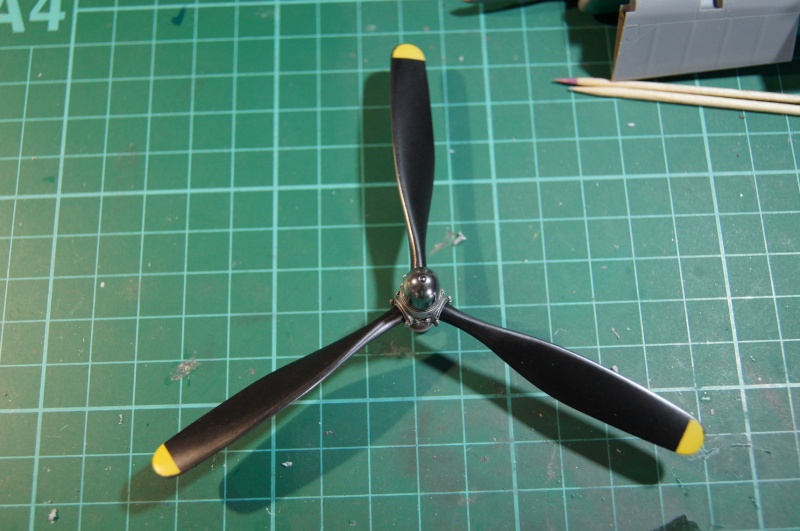
 A mist of yellow is srayed on the back side:
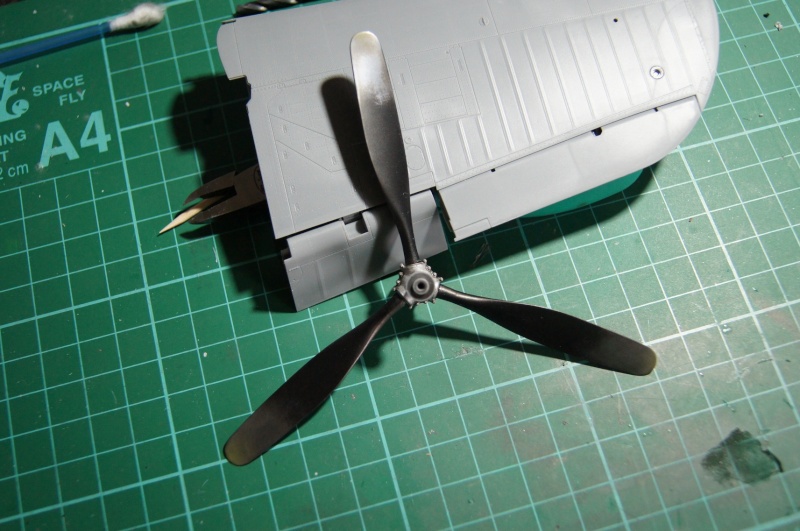
 Discreet, but that's the purpose!Part of the hub is painted Mat Alu and the tip Airframe Alu.
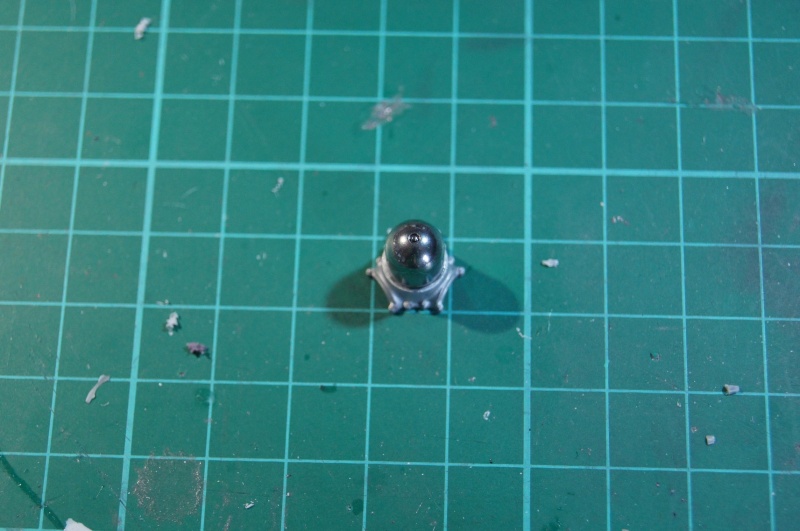 First "wash":
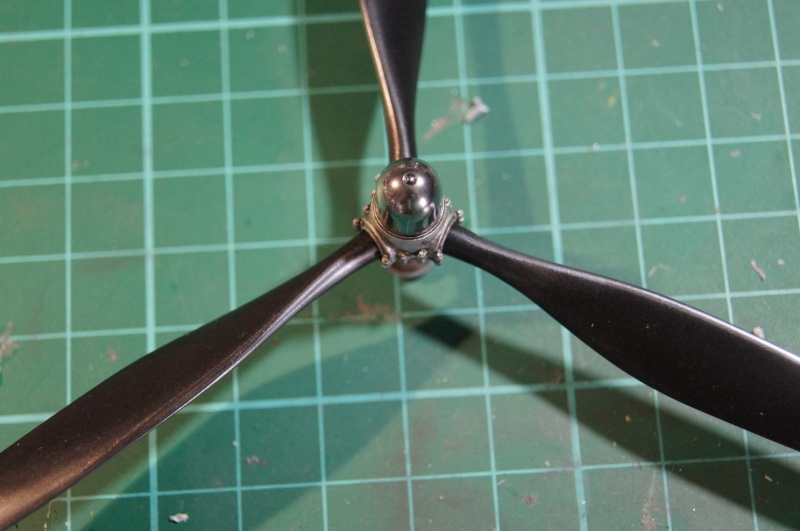 With Hamilton Logos and instructions:
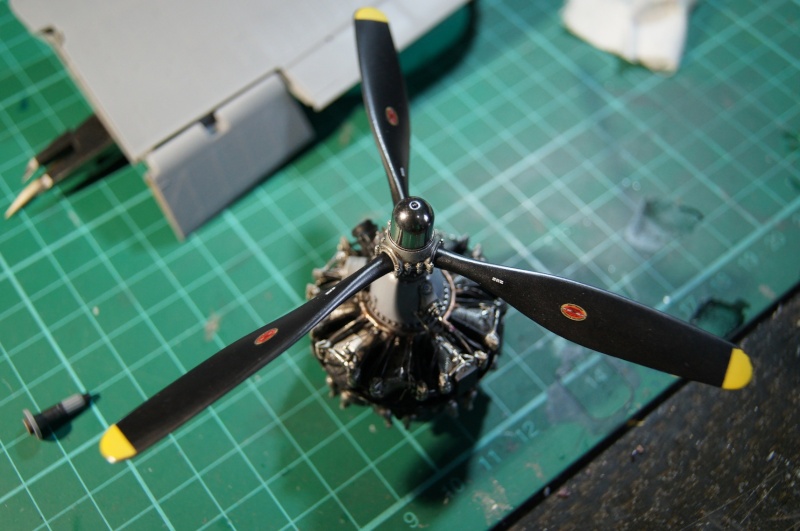 Wings done:
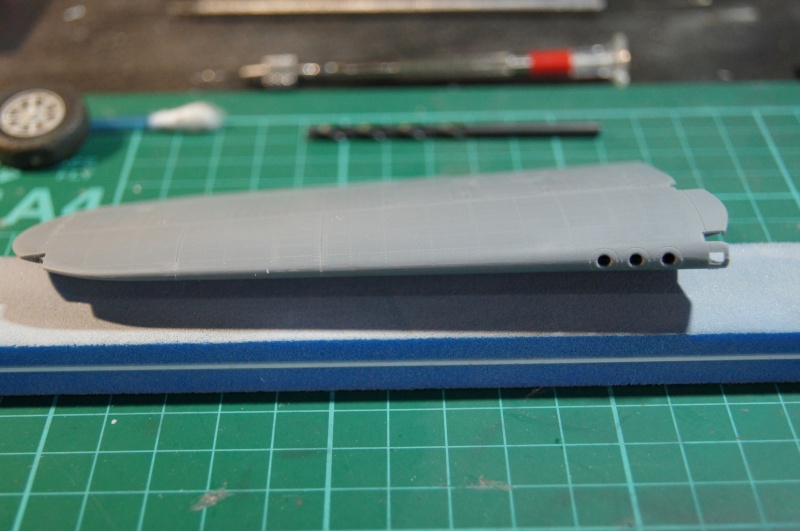 Test fit... Terrific!!
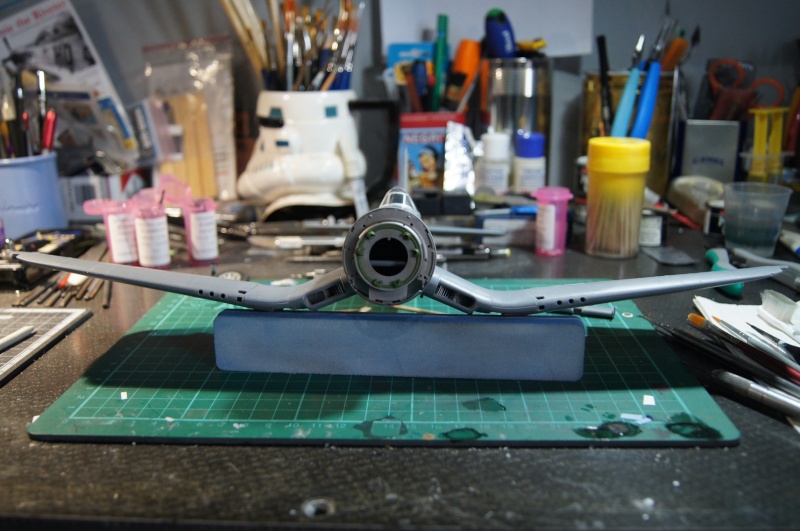 More soonPascal
-
2
-
-
Good evening,Thanks George!Progress but few pictures.After bonding the two halves of body, the bead is removed with a blade.A very rapid transition from abrasive in places enough to guarantee a good surface finish, no filler.A slight darker line at the junction area is sometimes perceptible, but it is that the weld of melted plastic.


 Exhausts were drilled, refined and covered with a thin layer of "cockpit black":
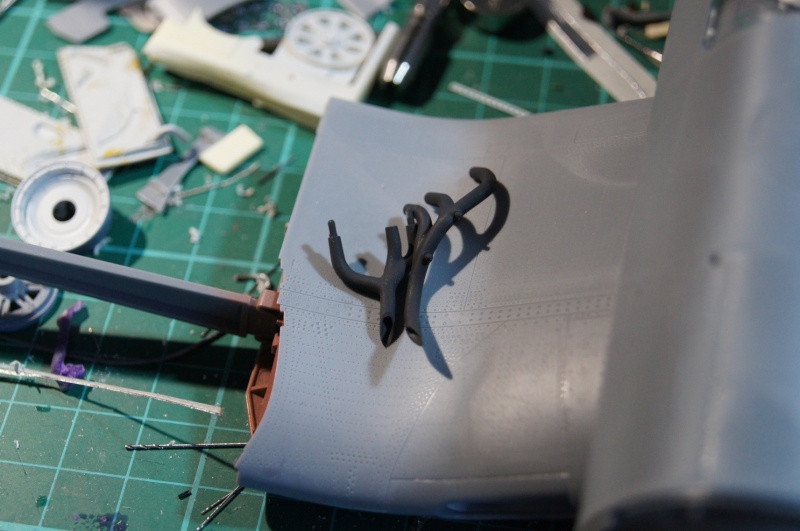 Very thin layer of Alclad Black Primer in anticipation of the "Airframe alu" underlayer :
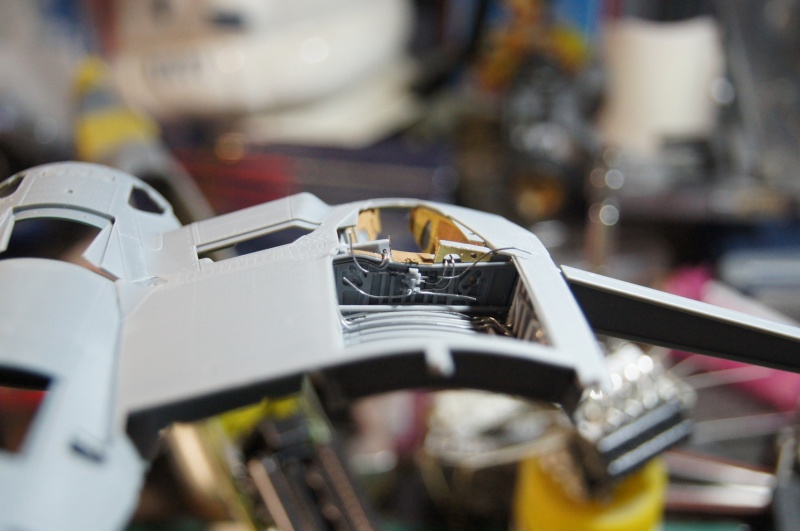
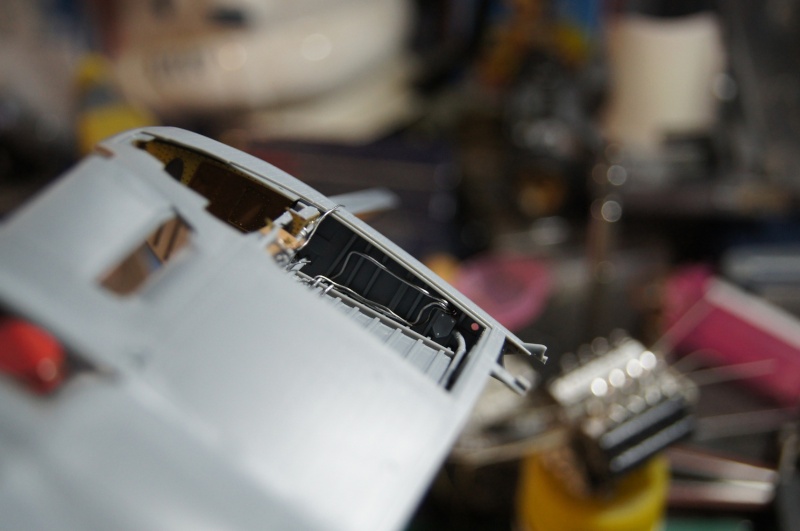
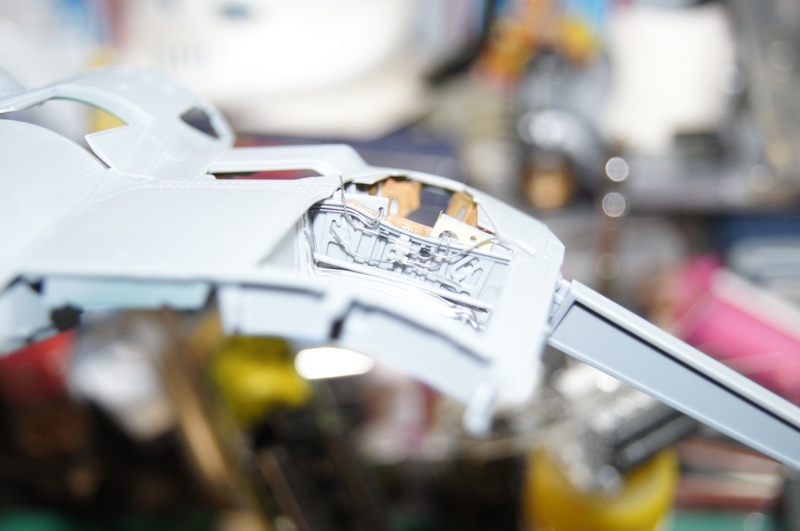
 The inside of the glass parts are partially weathered:
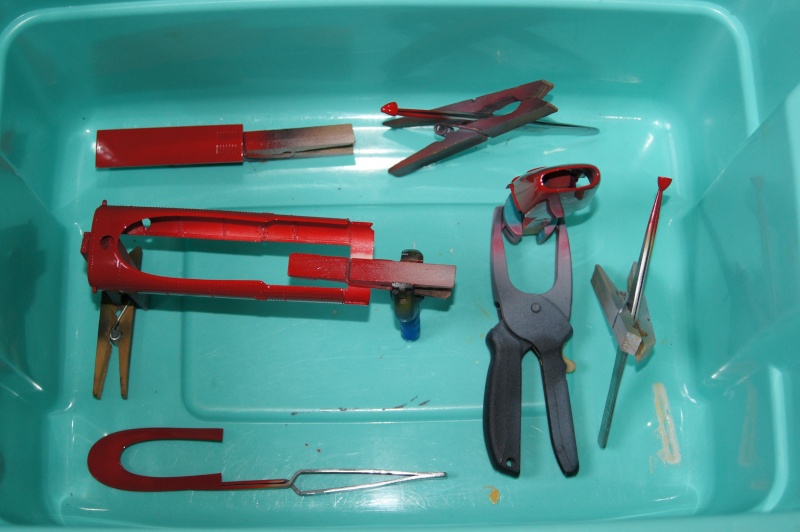
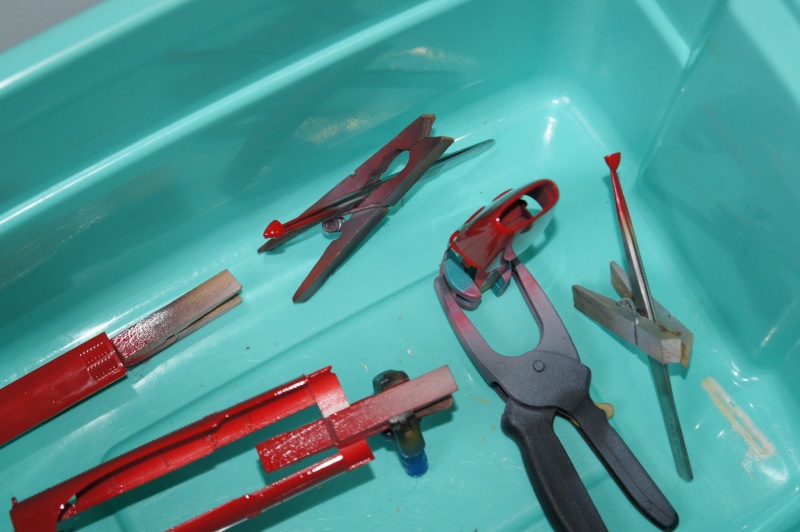
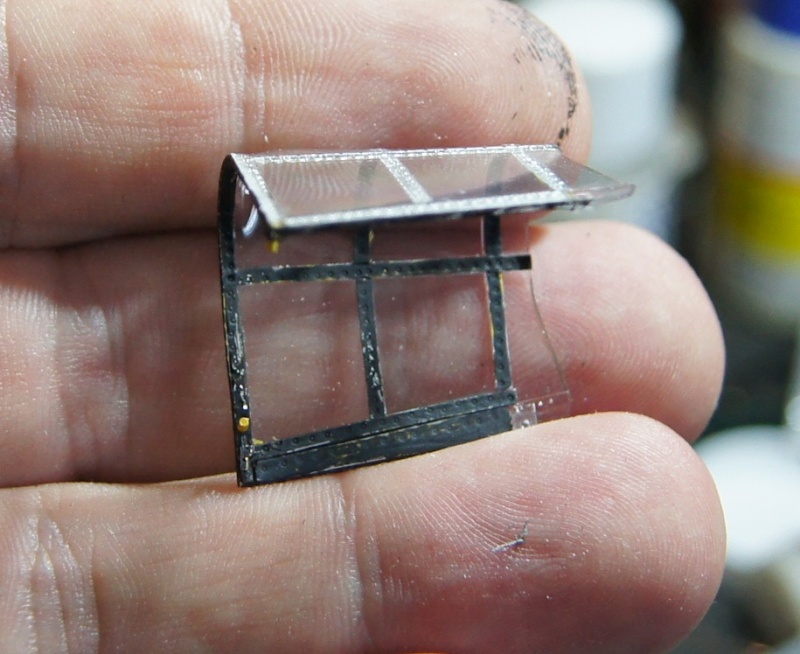 These tasks have been an opportunity to try one of the last painting tools:
 I start to stock up in anticipation of the next ... Corsair
 More soon.Pascal
-
1
-
-
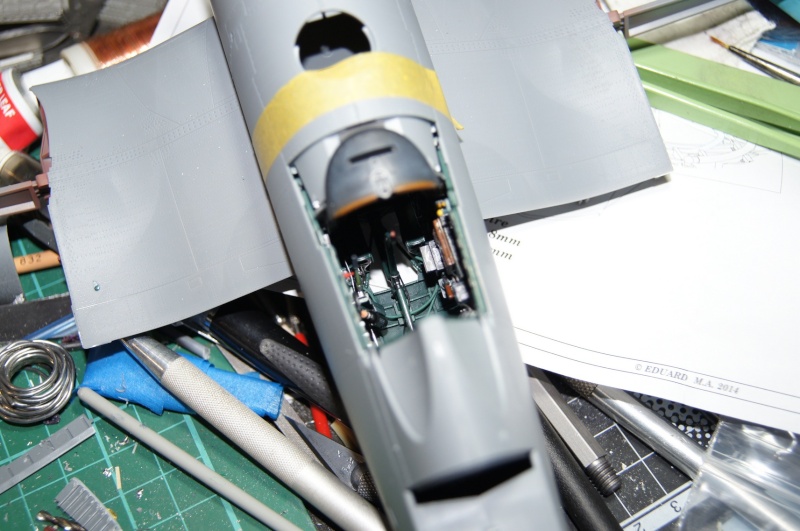
Hi,The cockpit is now enclosed in the fuselage.I finalized the stick adding the conduct of the "funnel". Hard to see with the center wing box in place, but I will try to take a picture tomorrow.Lower window reinforcements are also installed, painted and slightly weatheredas well as the "bottom" of the cockpit.The pipes have all well took their place: Cool!
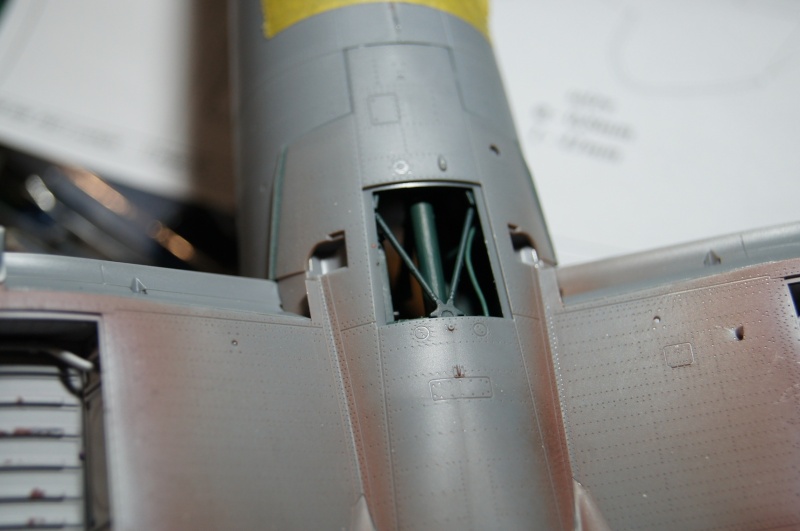 Next step : Maybe weathering the wheel wells
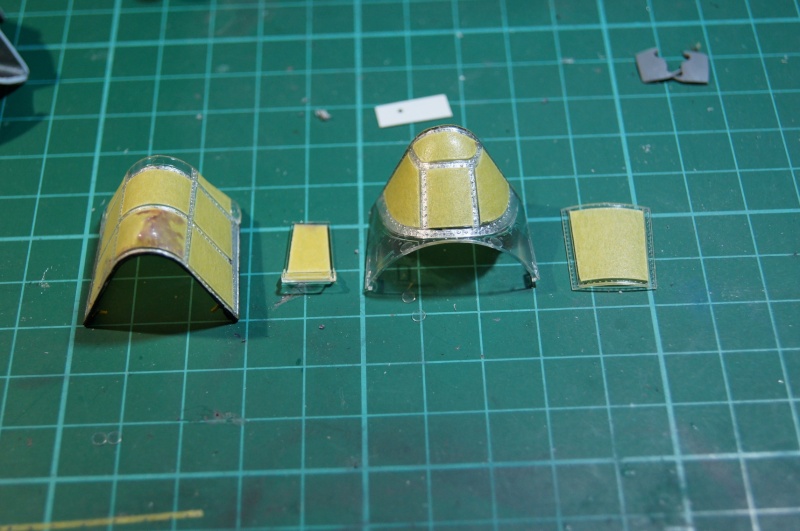
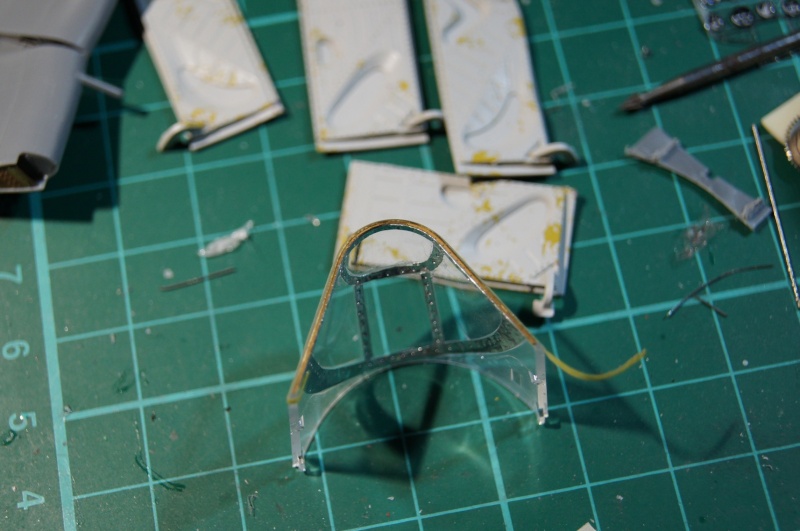
 I also paint the internal frames of the windshield and canopy.Green for the first, to have the cockpit color on the lower area of the transparent part:
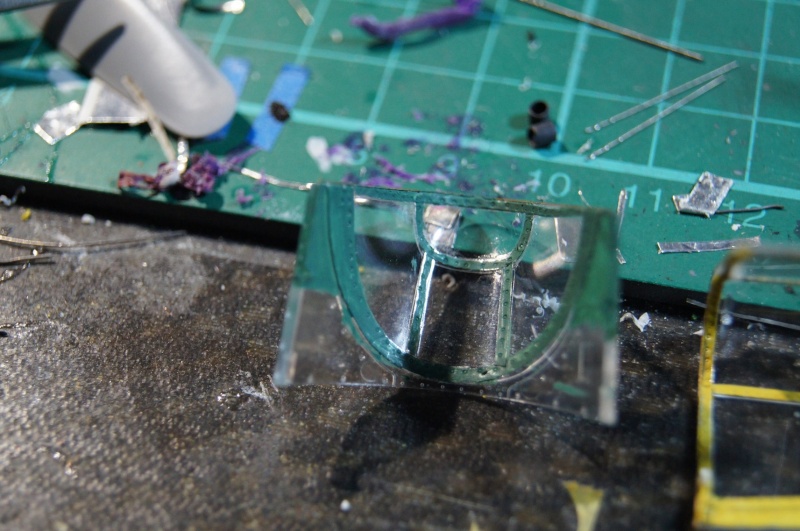 Still need to install the flap control handle on the left side, straddling the transparent part and fuselage.Tamiya part is misplaced in my opinion. Eduard seems to have made the same error on the new resin cockpit ...The canopy is equipped with its opening handles , slightly visible at the moment, and receives a coat of zinc chromate.
 The under layer will allow a possible additional small effect in the weathering process...I know it is not really consistent in terms of color (maybe hue is the right term? Sorry for my poor English...), but ...More soon.pascal
-
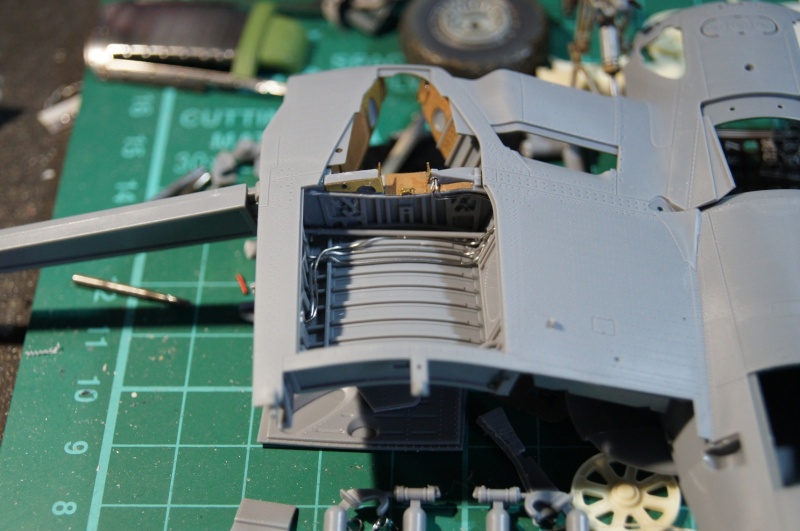
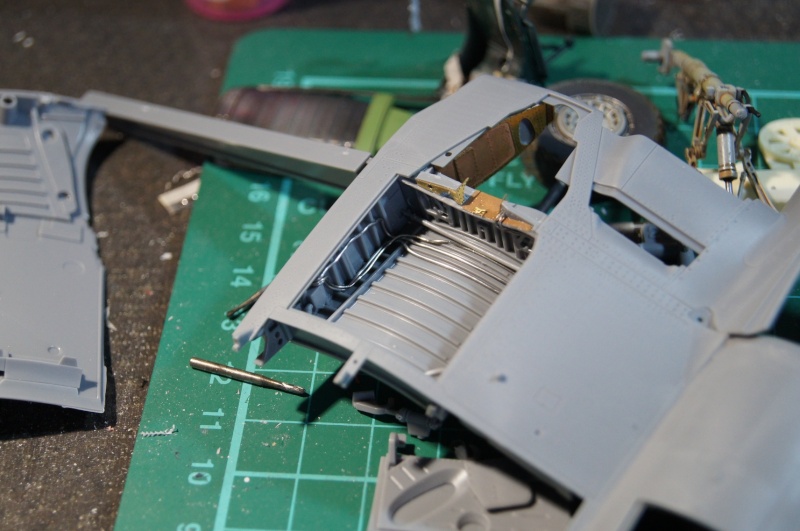
Hi,Thanks a lot for nice comments!Salmon is a mix from Model Master Acrylic paints.Small progress, but progress.I was not really satisfied with the cockpit because of the details I had decided not to represent ... were missing!So I removed the support of the hydraulic system to add connections and pipes.It seems a bit raw at the moment but once painted, it will look better.Fittings .031 "and .038"0.3 cables pipes, 0.5, 0.6.
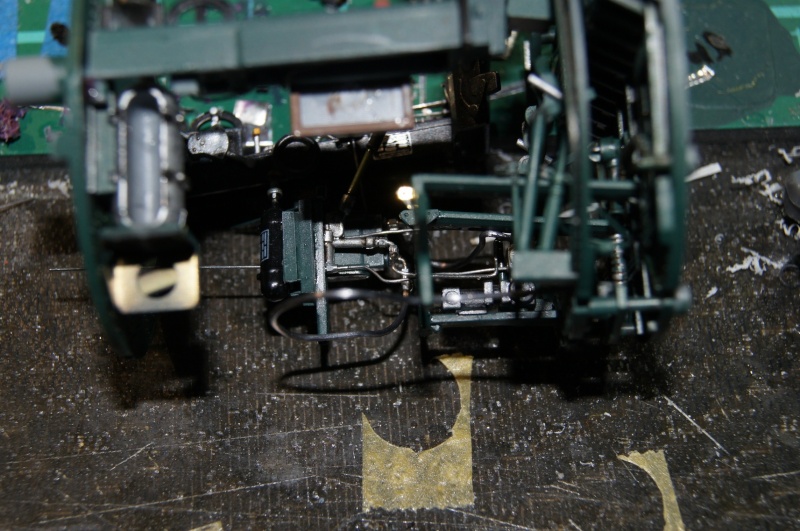
 That's it.pascal
-
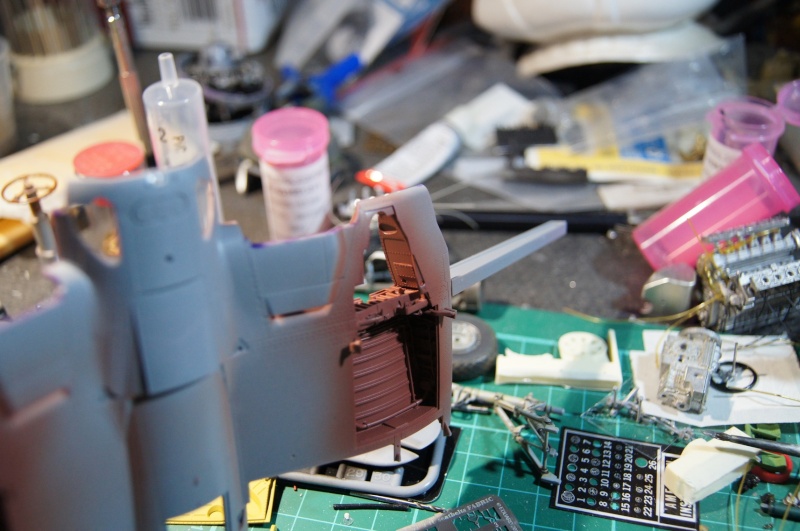
Hello there,Thank you.Tiny update.In order to definitively close the fuselage and install the center wing box, the latest additions are underway.It is therefore necessary to finalize the cockpit and the engine to have no surprise during assembly of the firewall.This last determines the successful integration of the entire front section.The motor is thus completed to 98%:

 Some details still need to be added before a light "aging" and installation of reinforcement arms of the lower window:
 More shortly ...pascal
-
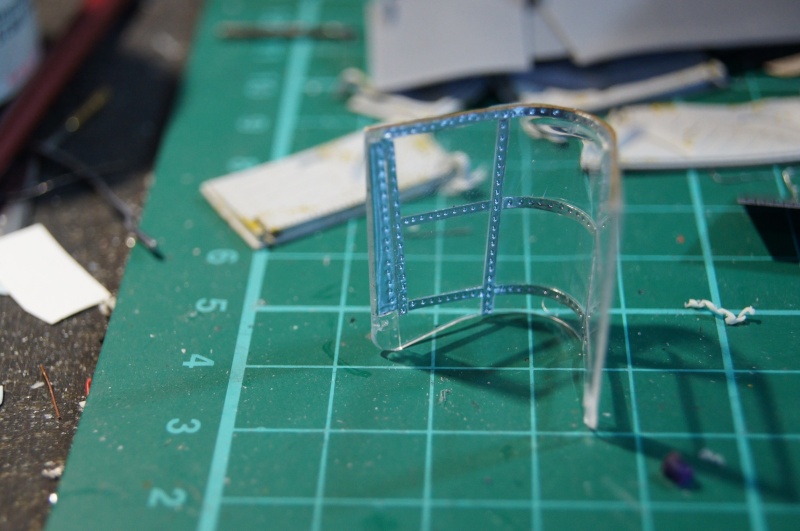
Hi,Small progress...Time to work the same way on the windshield.
 Test fitting.
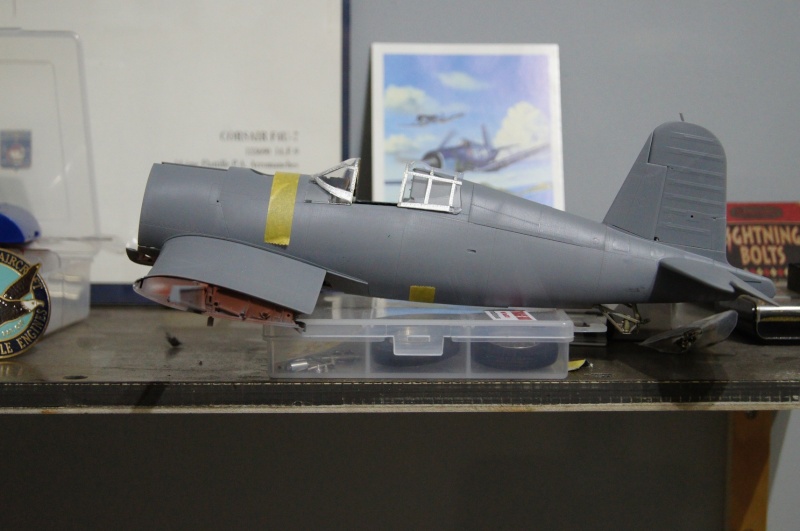 Pascal
-
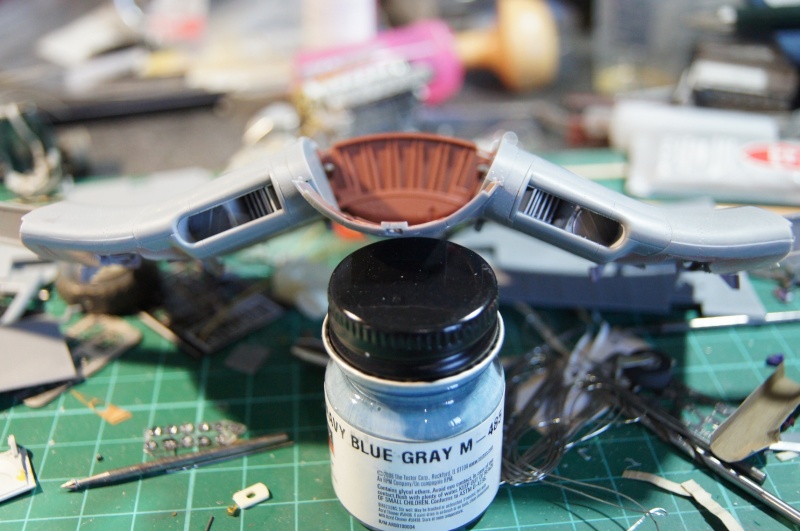
Hi,Some progress on the Corsair.Work continues in the central section.I sprayed a coat of "Salmon" protection in the wheel well:
 Light Gray (Gunze):
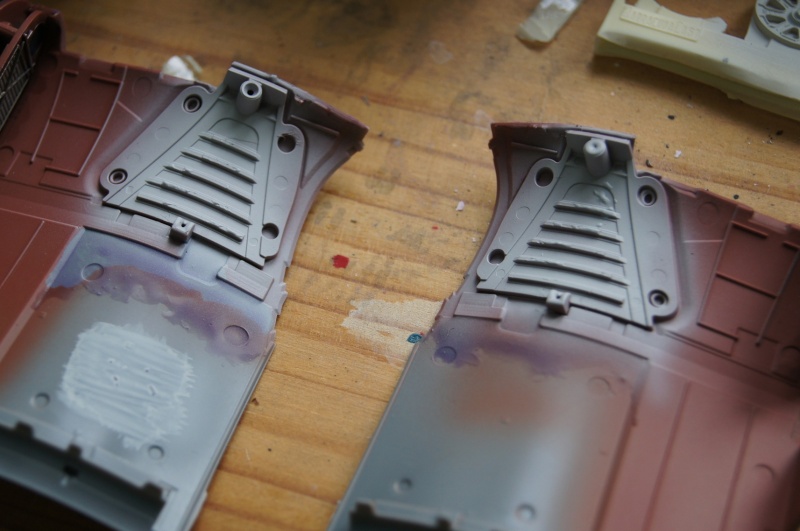
 Zinc Chromate on the doors:
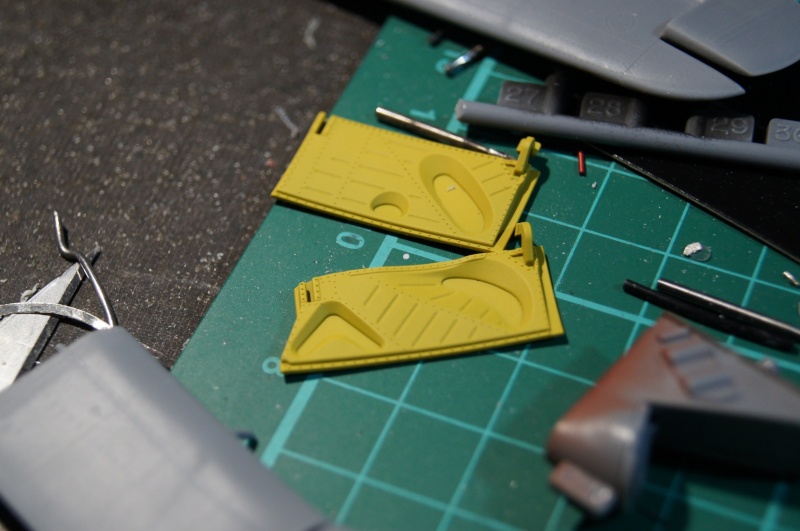
 Rims; lovely details on those proposed by Barracuda compared to those (already very thin) from Tamiya:
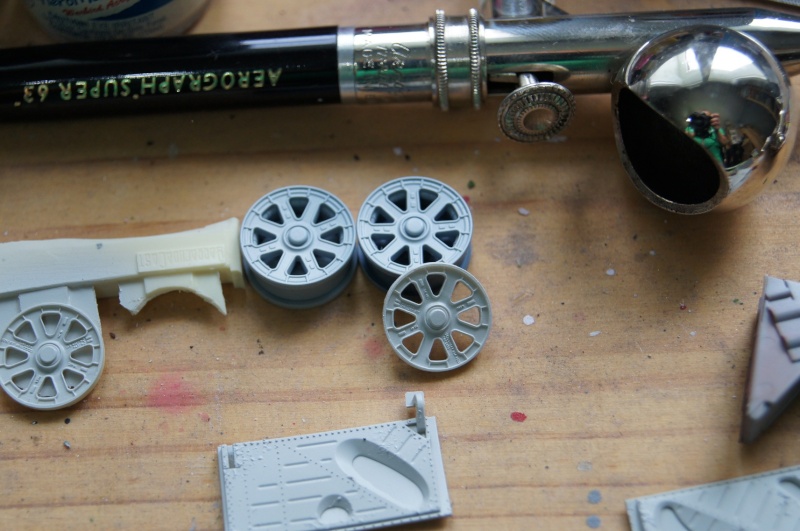 Oil coolers are completed:
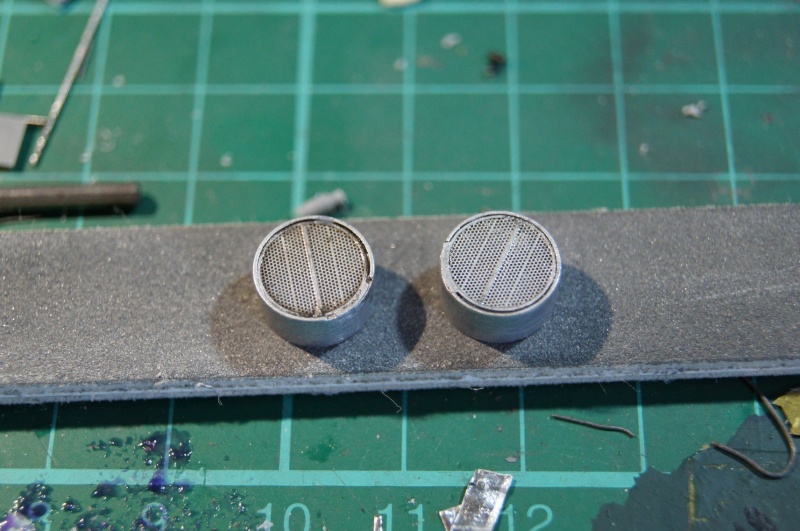 then installed:
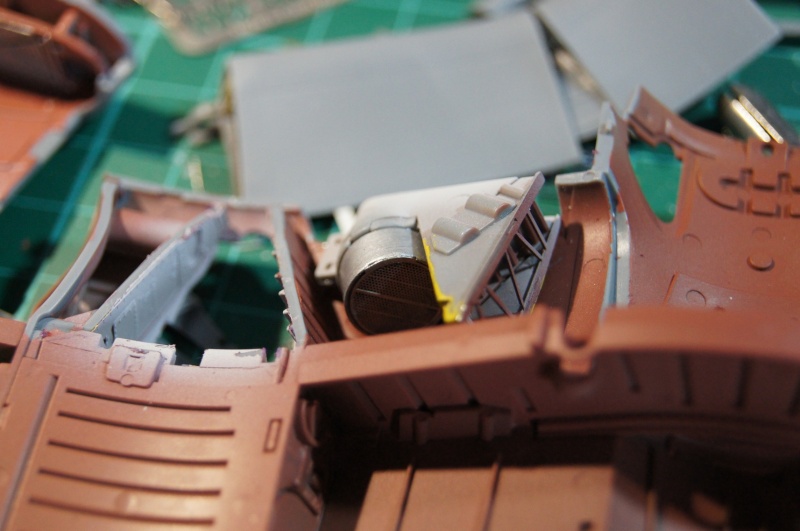
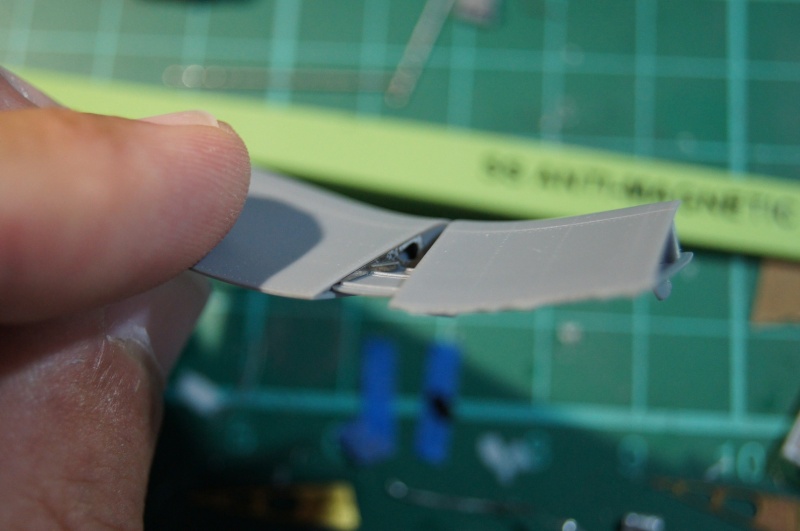
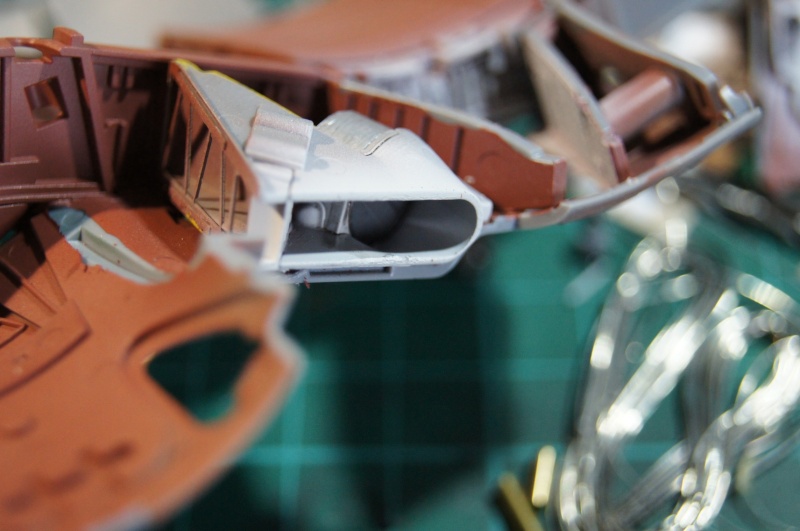 They can be distinguished through the cooling flap whose lip was refined:
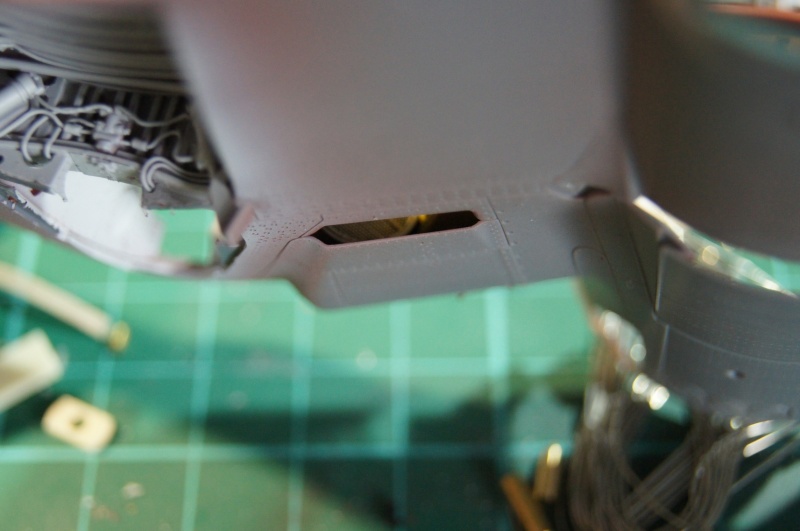 The leading and trailing edges of the fowler are completed and all awaiting paint:
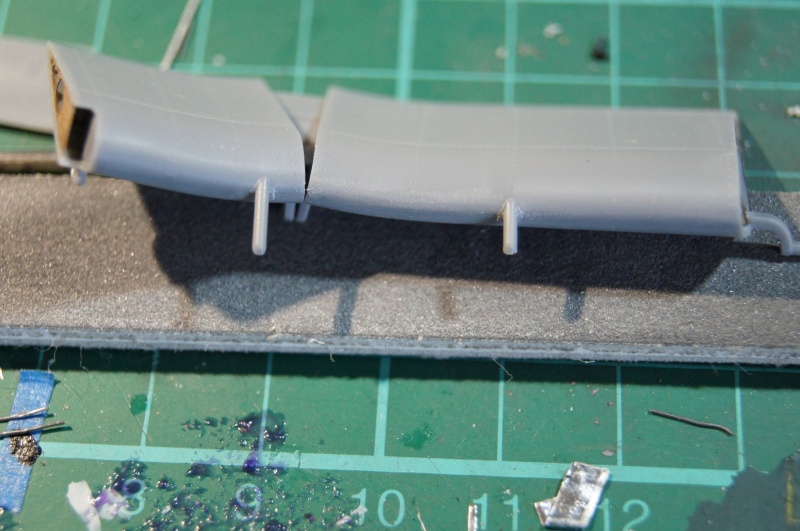
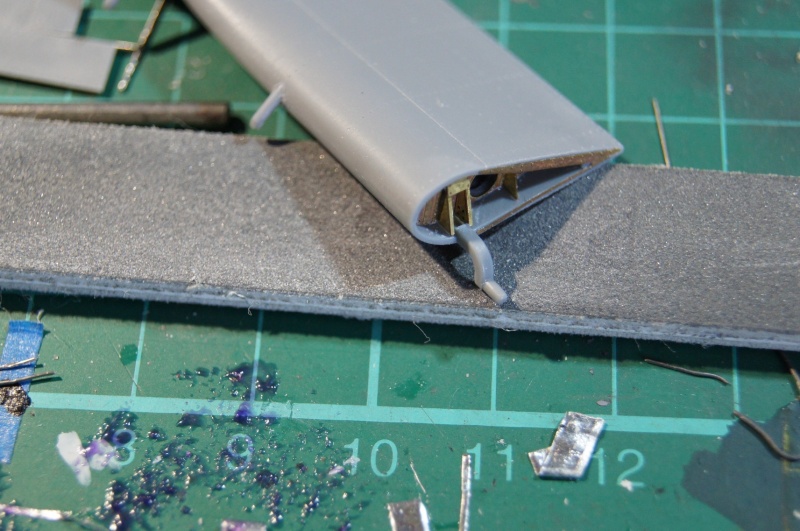
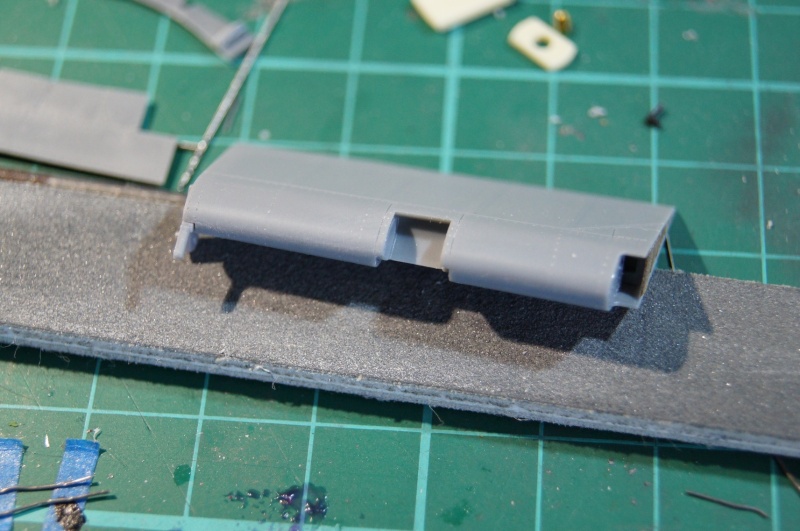
 Test fit:
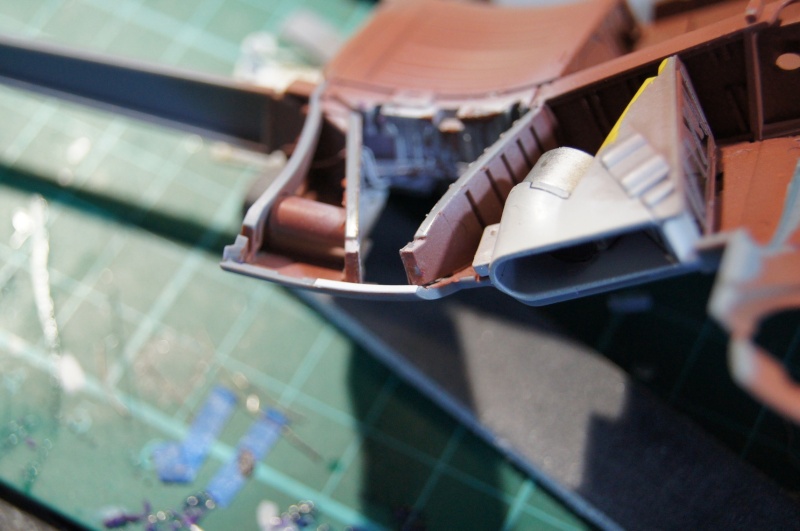
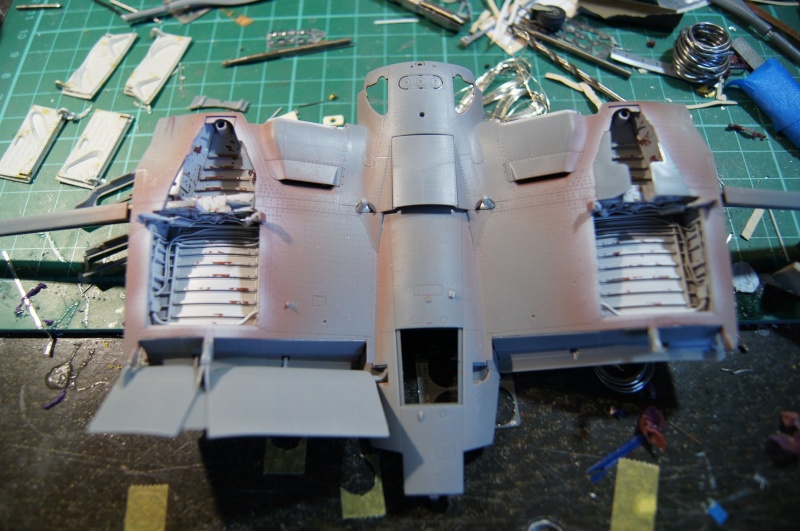 For assembly that suits me, I placed strips of plastic card at the "break" of the lower wing part.This enables perfect alignment of the radiators intakes and prevents putty after assembly.Just leave a slight backwardation(?):
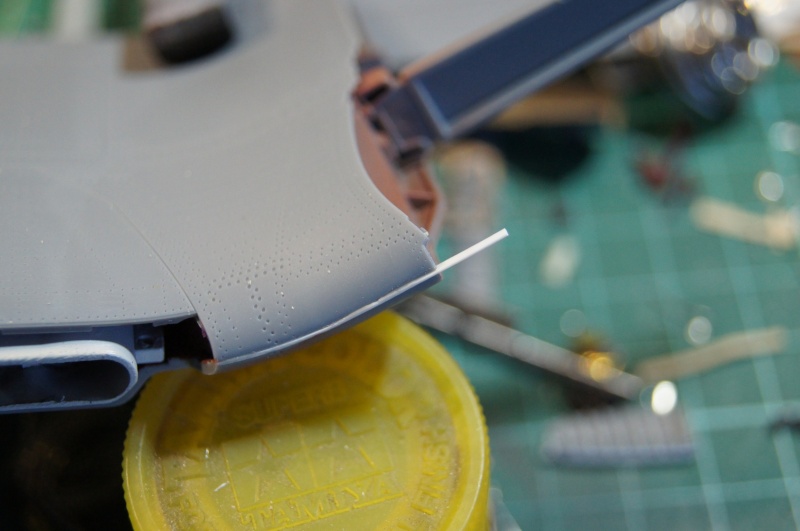
 Gluing of the extrados:
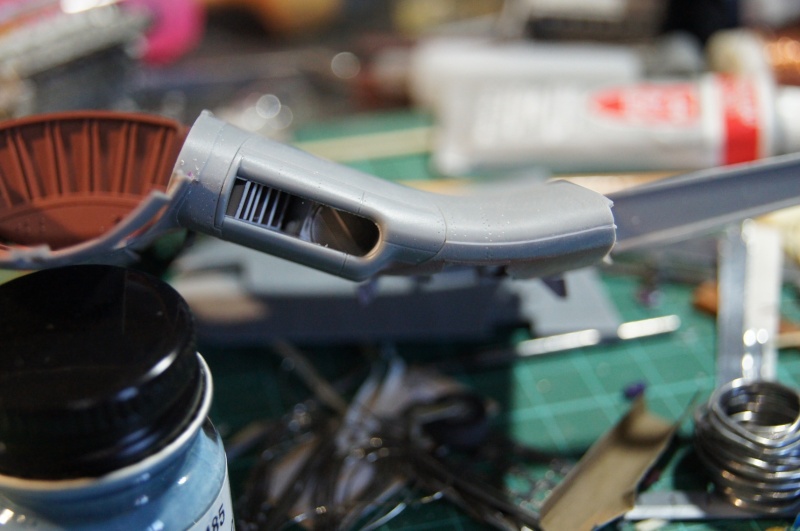
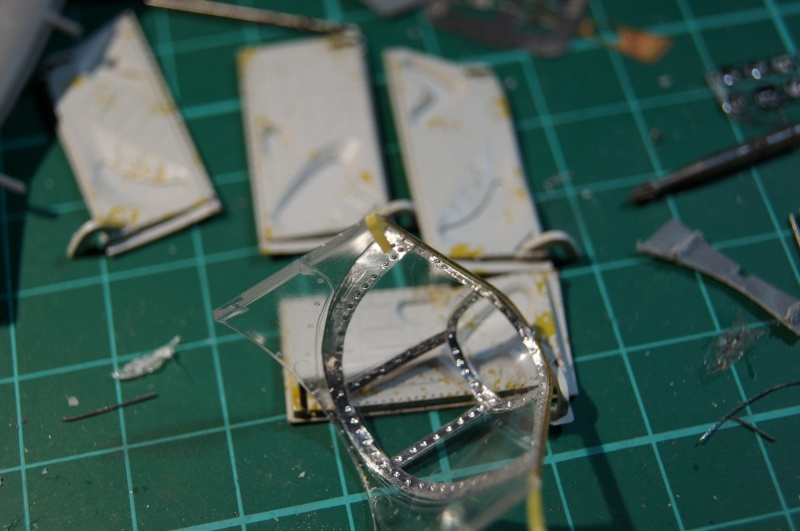
 I finally started working on the canopy.Internal frames are never shown or proposed in photo-etched ... it does not suit me.I (tried) to systematically achieve this detail which seems to me rather important in a cockpit, the more so when it is on the 32nd.
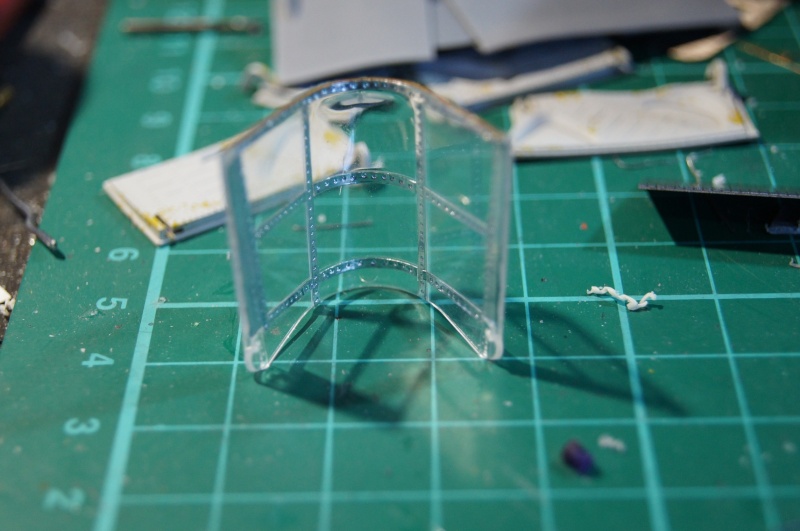
 Further details will round, I hope the start of detailing.Voilà.Questions and comments are welcome.Pascal
-
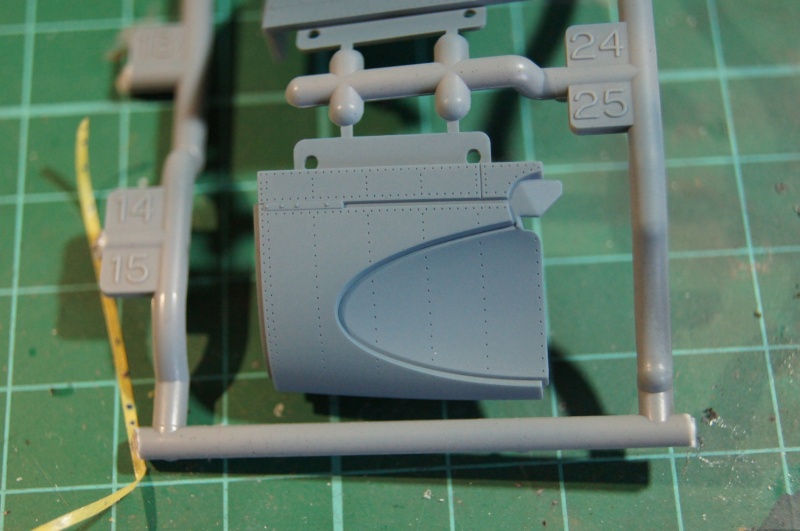
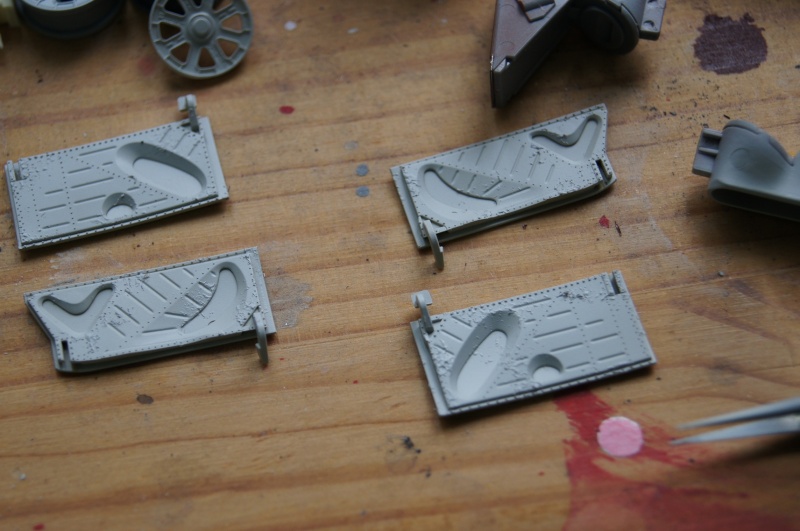
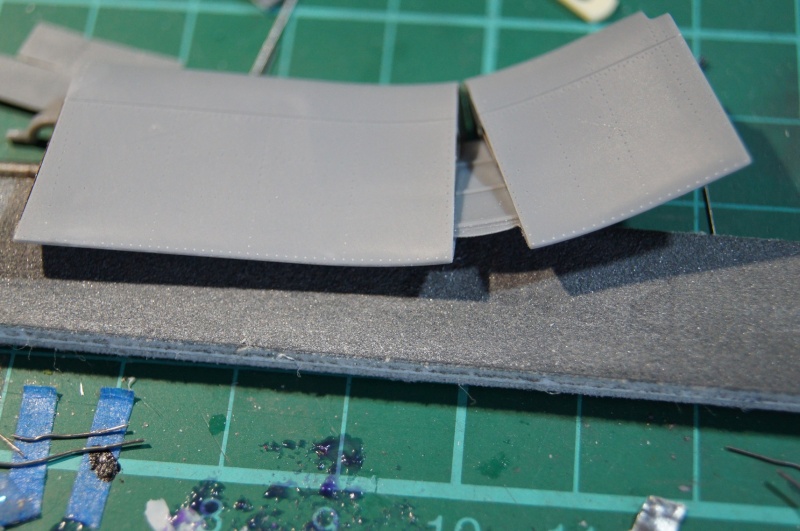
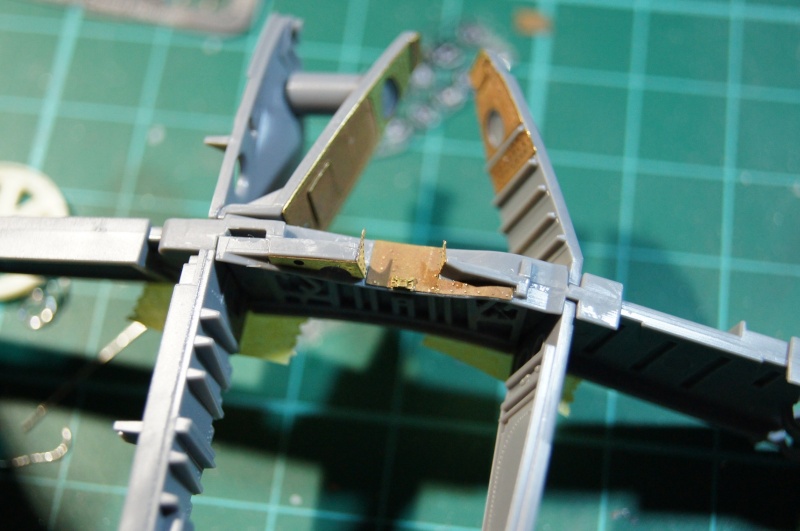
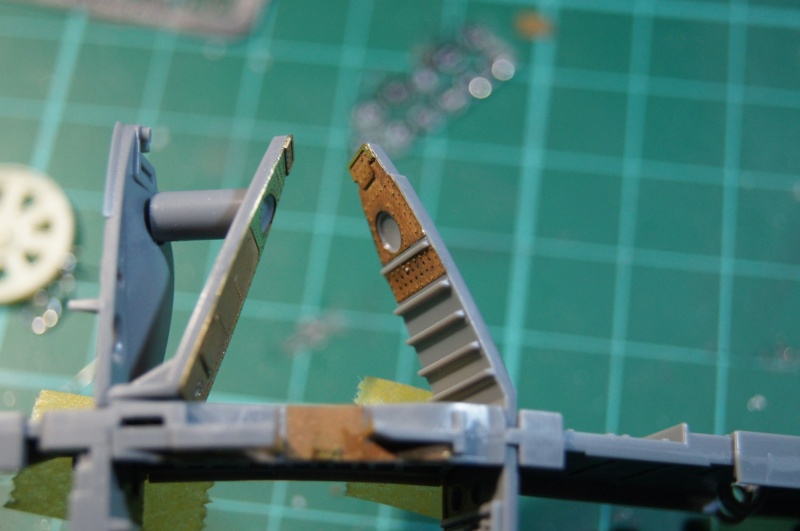
Hi,To continue on the wing and the central portion particularly, I started to work on the flaps.These "Belles Bêtes" so special and identifiable amongst all!The Tamiya assembly is of impressive quality and rendering without external addition is already terrific.However, I decided to replace some kit parts by few photo-etched from Eduard.This also causes a bit of rework on some kit parts ... that will need some adaptation .The result, however pleases me, so it's worth a little extra work.First, inside flap:
 Central flap:
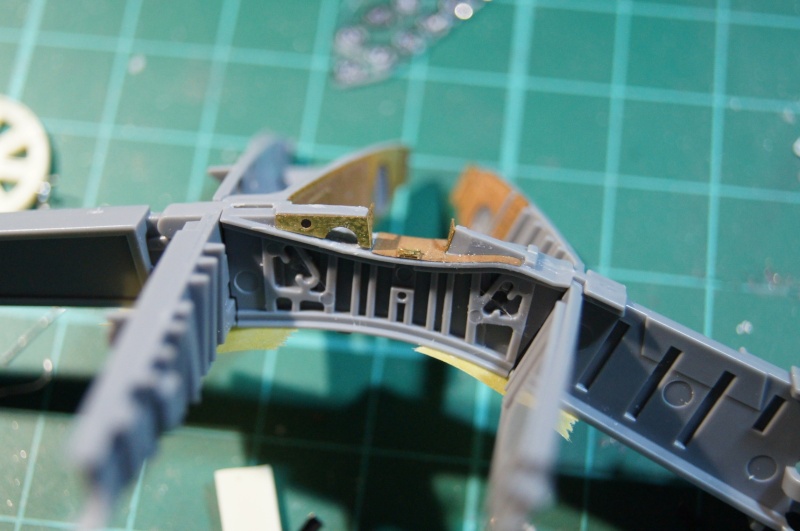
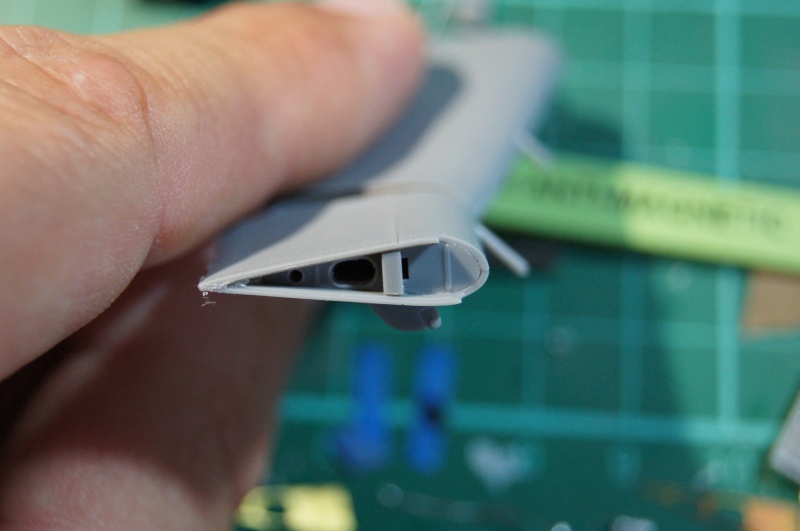 You have to think to open the perforations of the original parts to give a little more meaning to these details.
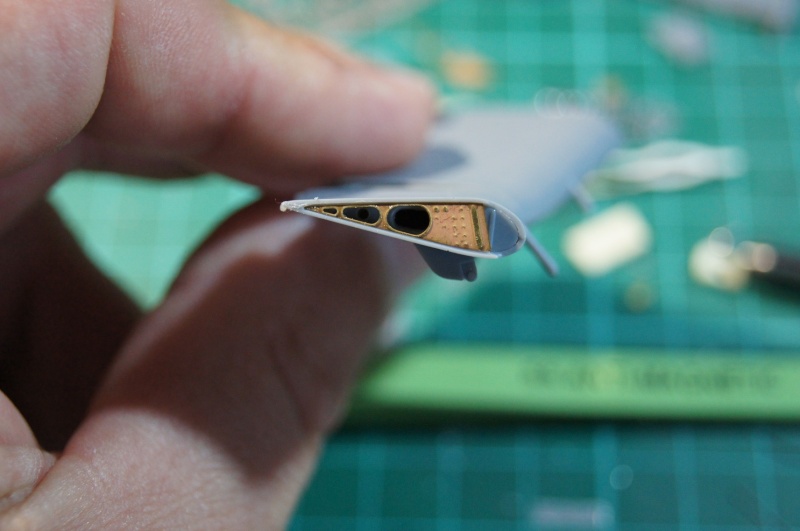
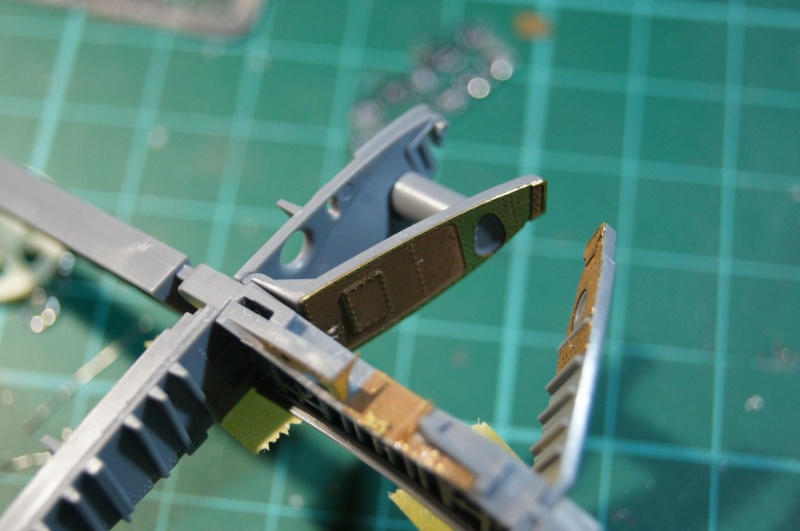
 Outer wing flap:
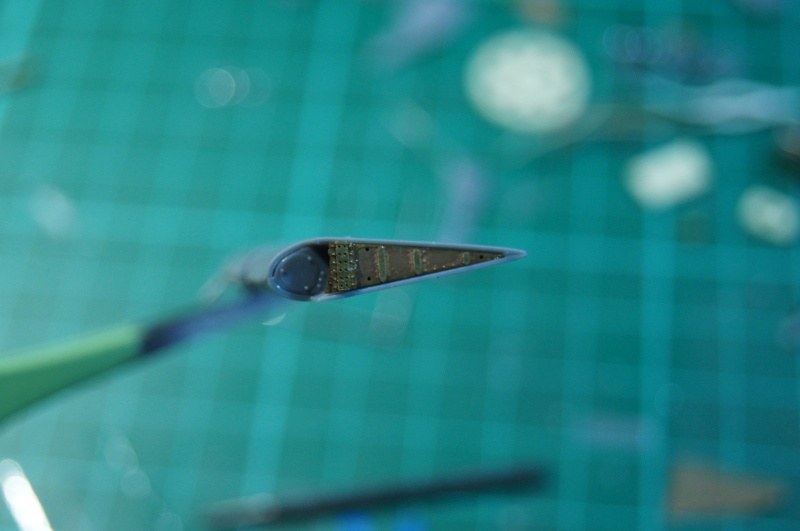 Tamiya PE parts to detail the internal sides of the flaps:
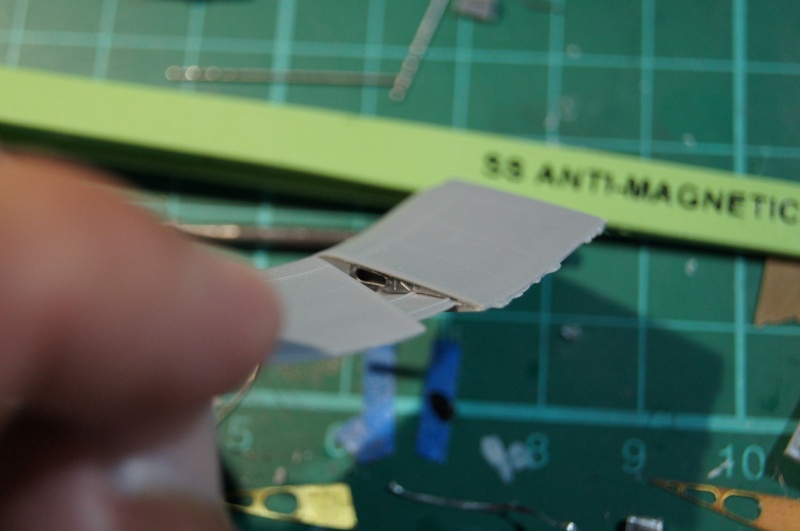
 Wheel well doors: STUNNINGYou just have to slide the doors on the installed actuators to finalize this step!
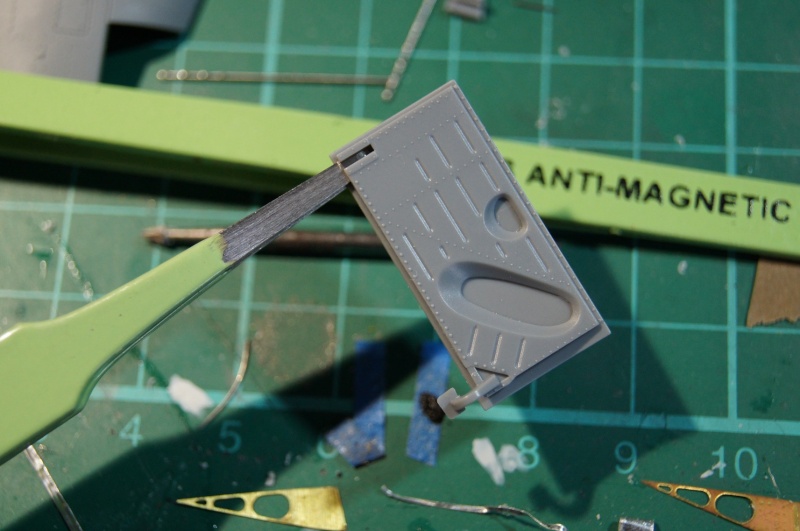
 Perfect angle for both right and left doors:
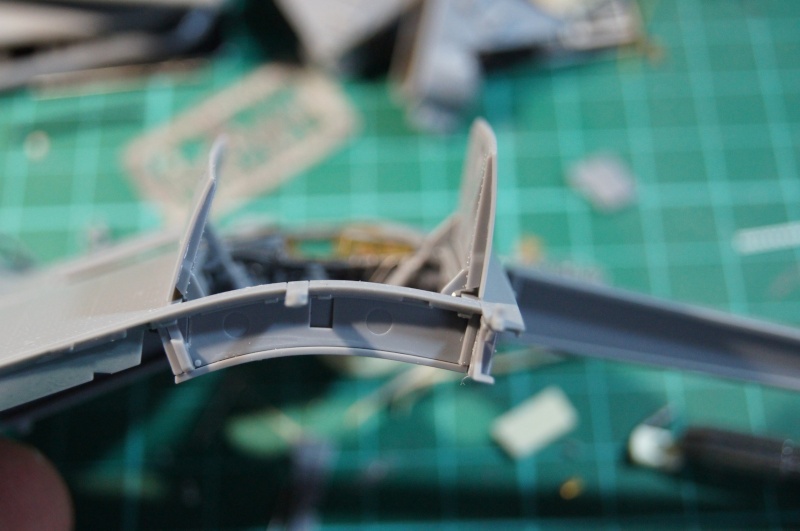 Voilà.Pascal
-
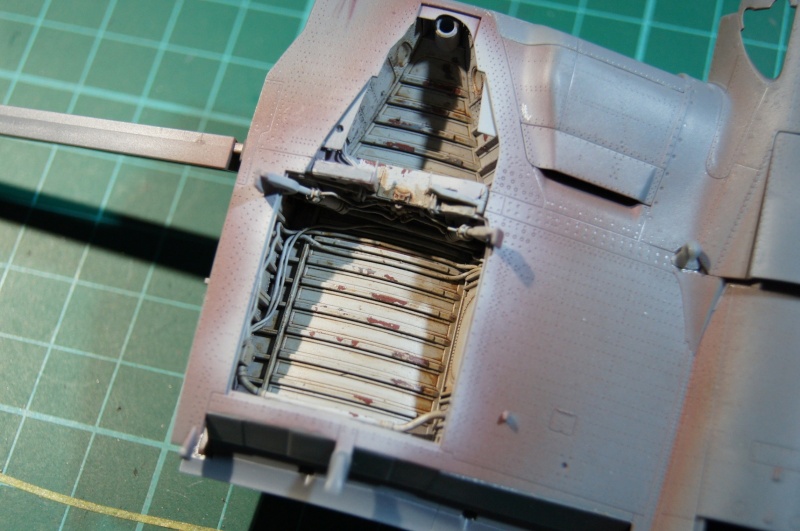
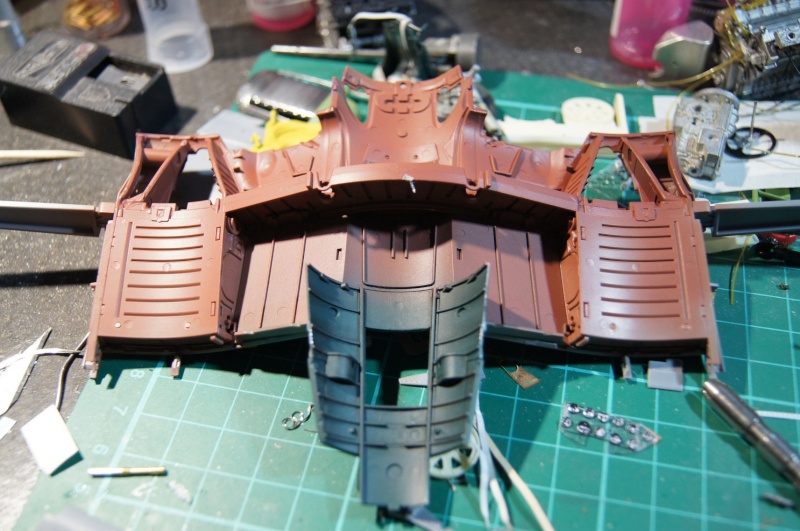
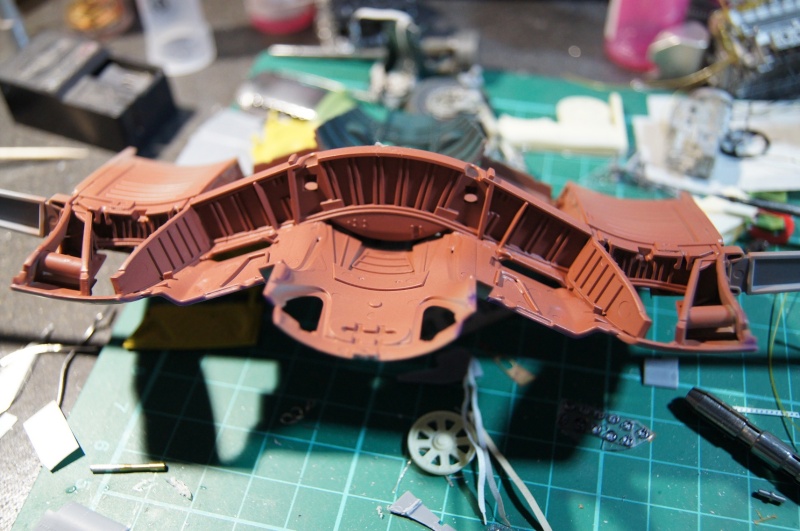
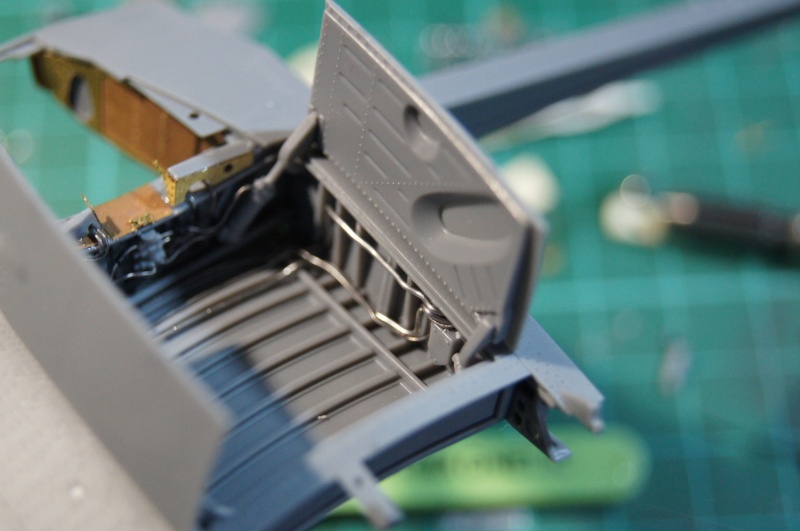
Hi,Thanks a lot MatesLittle progress in appearance, but it's an important step that is preparing to be crossed.Wheel wells are now detailed and will allow me to soon spary the interior color on that part of the plane.Oil coolers assemblies are also ready to be painted "Salmon" then "Light Gray".La baie de droite:
 The hydraulic distributor of the compartment:
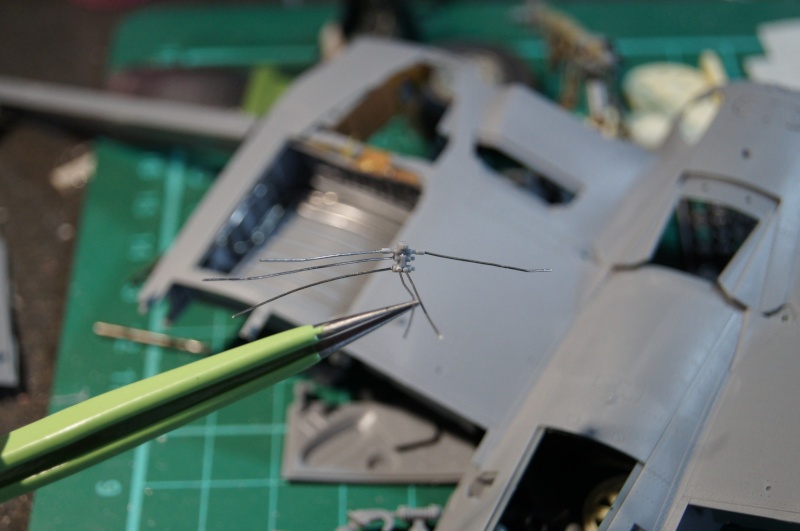 Installed:
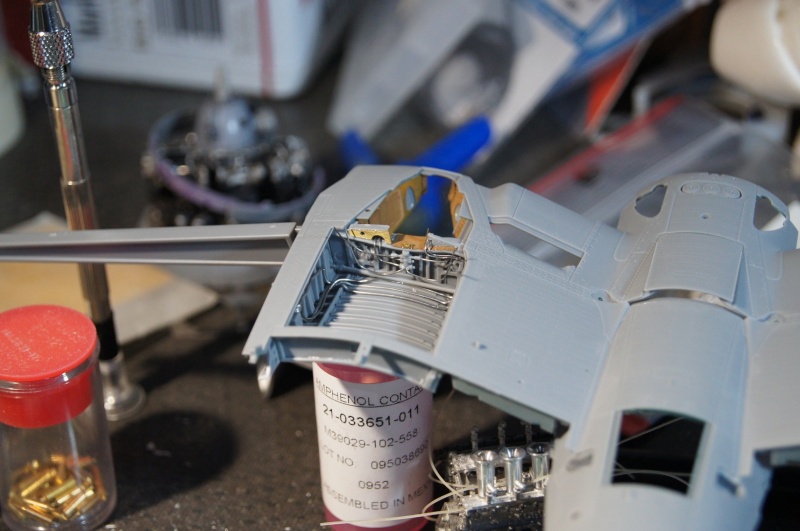 I lost one and ...still does not explain to me the relentless calm that I showed face the ordeal.This one comes from one of the other boxes; but I'll have to order a sprue to replace the part...One of the wings oil coolers:
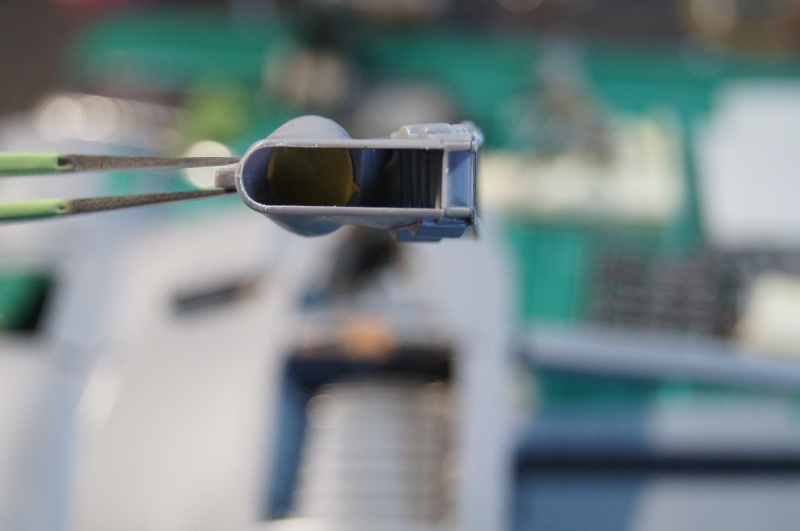
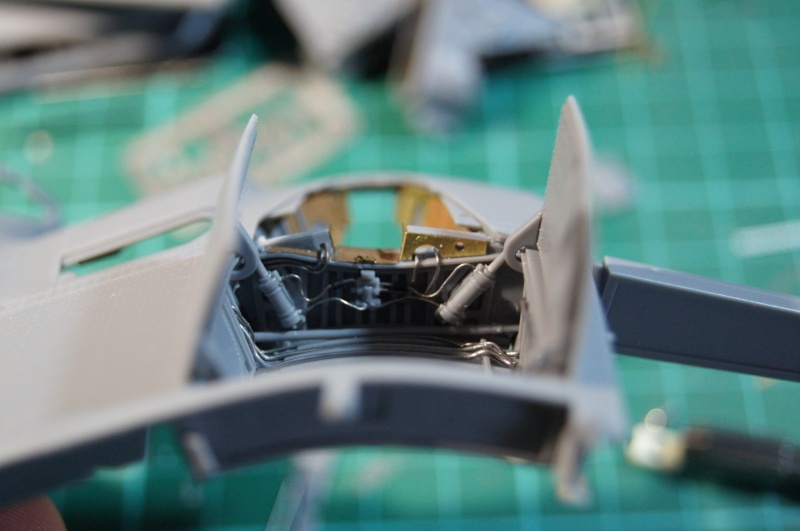
 I replaced the original photo-etched by the one proposed by Radu Brinzan, and masked it before primer and camouflage.The parts are much finer and detailed than the kit ... already pretty!Everything is connected:
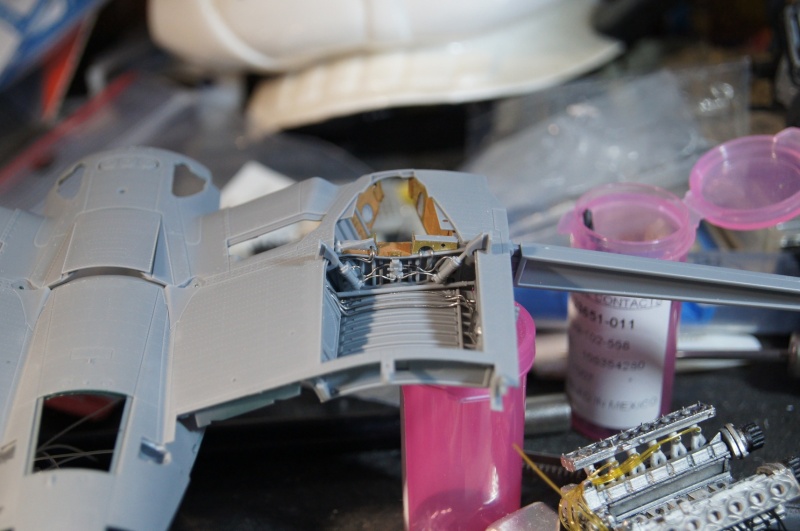 One of the wing root extrados:
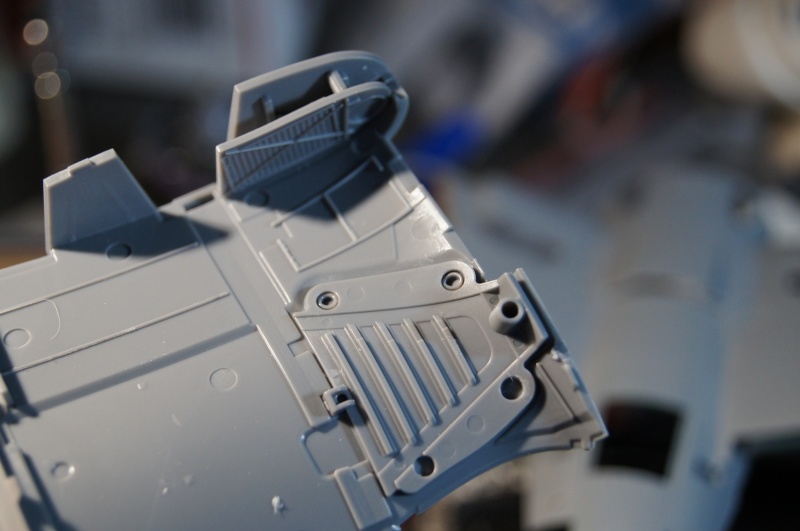 Voilà, voilà.More soon.Pascal
-
1
-
-
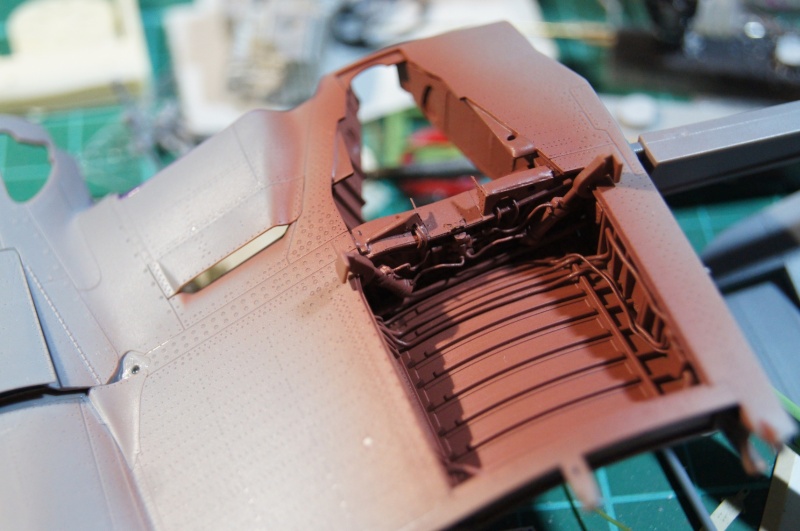
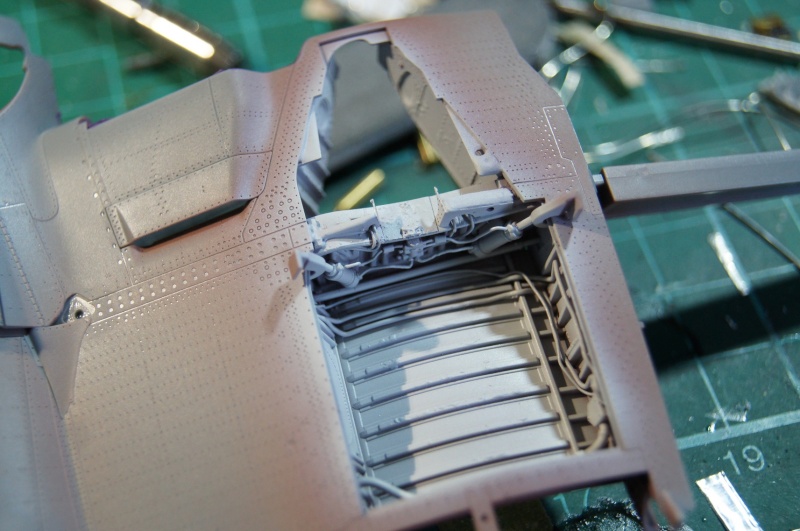
Good evening,Firstly a big thank you to you to follow the WIP of the small marvel from TAMIYA.And of course a big thank you for all your kind comments!Wheel wells are superbly handled by Tamiya and their installation is precise and cleverly designed : a joy to build!I find that some details can still be added very simply. It will give a little more reality to this space that is a bit empty.The hydraulic distributor is prepared, lightly modified, drilled and finally equipped with its piping.It was finally set up against the front wall of the bay.Other pipes depart from the distributor through the aperture provided for this purpose.Others from the wall, walk behind the retraction actuator to reach the small forward compartment.Various pipes installed on the root partition side are formatted to run on the bottom of the compartment and back on the opposite to finally get lost in the passage toward to the folding part of the wing.Well, after all this Blah Blah as preamble, pictures.They are taken with and without flash in order (achieved or not? ..) More clearly show the details.

 That's all.Not much for today, but it's pretty long and time consuming.More soon,Pascal
-
Hi,Started to detail the wheel wells...
 ... Still have a lot to do.Flaps are also on the bench and will be detailed with PE.Wings oil coolers will also be detailed with PE, but not the one provided in the kit.Voilà.Pascal
-
1
-
Ferrari 312 F1, Chris Amon,1967 GB Grand prix. MFH, 1/20.
in Non LSM 'WIP
Posted
Oups!
I forgot those dampers pictures
The Rooooaaaarrrring Beauty should (very) soon be finished!
Thanks a lot to Misao HIRO for all those incredible kits and thanks a lot to Rob (RBMotion) with his impressive range of stunning stuff!!
Finished!
The Roooaaaring Red Beauty is now ready to rejoin the paddock!
Last job was the nose: done.
Not very clean but enough for the pics:
Comments and remarks are welcome
Pascal