RAF Liberators
-
Posts
10 -
Joined
-
Last visited
Recent Profile Visitors
1,487 profile views

-
I used UV seting epoxy resin then clamped it up real tight, then applied the UV light. Once it was set I liberally applied clear CA to fill up any gaps and then sanded it all down using grits down to 12,000 grit. I had hoped to make it totally invisible thinking I could do it like the auto windscreen people do repairs.
-
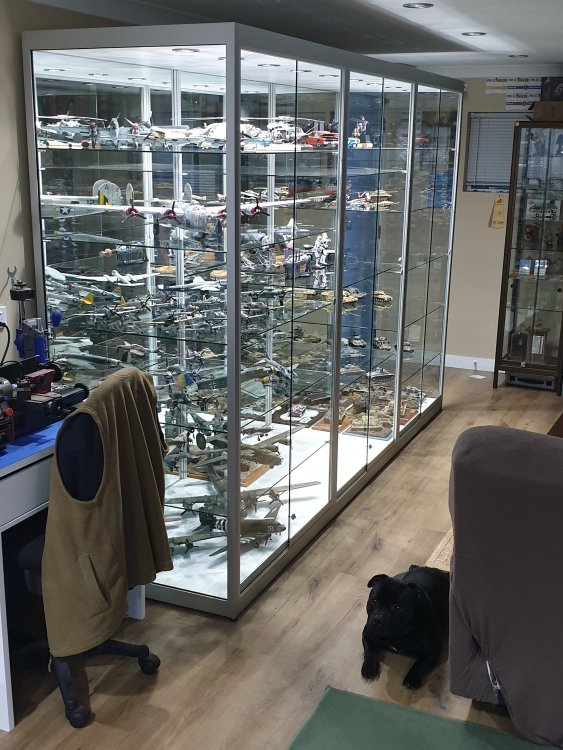
Thanks everyone for your kind words, I had thought my 5 minutes of internet "fame" were over but an article over on LSP (not written by me) has rekindled interest. I store them in a rather large cabinet I have in my build room, it's 3000x2000x800mm L,H,D (see attached) They took about 3 - 4 weeks each to complete.
-
Thanks everyone, now I'm just left with the Dilema of what to drag out of the stash now, I'll leave the Lanc for now, need a break from big stuff lol
-
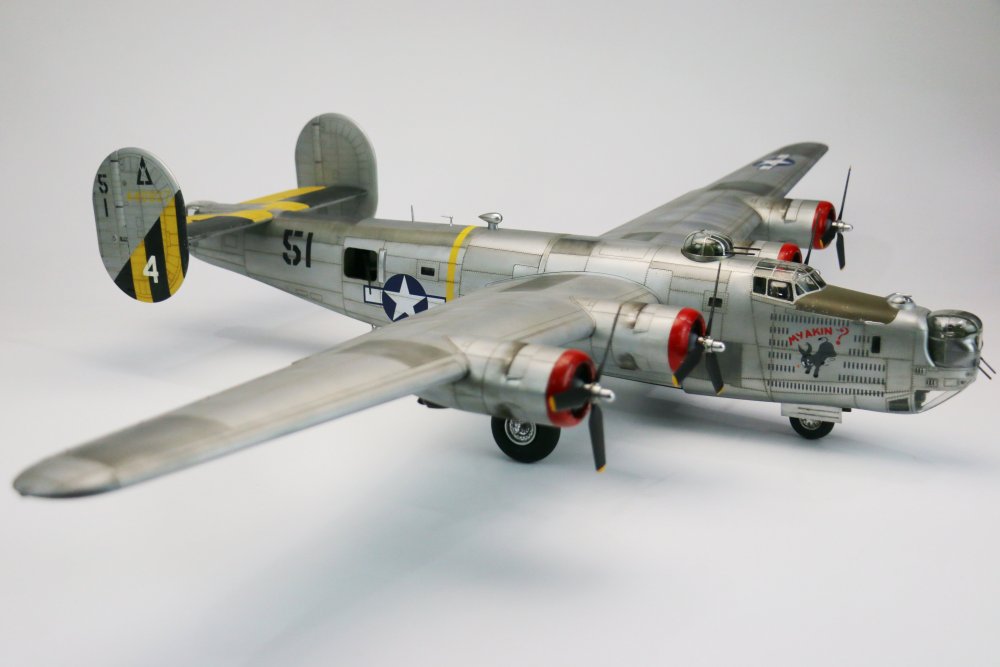
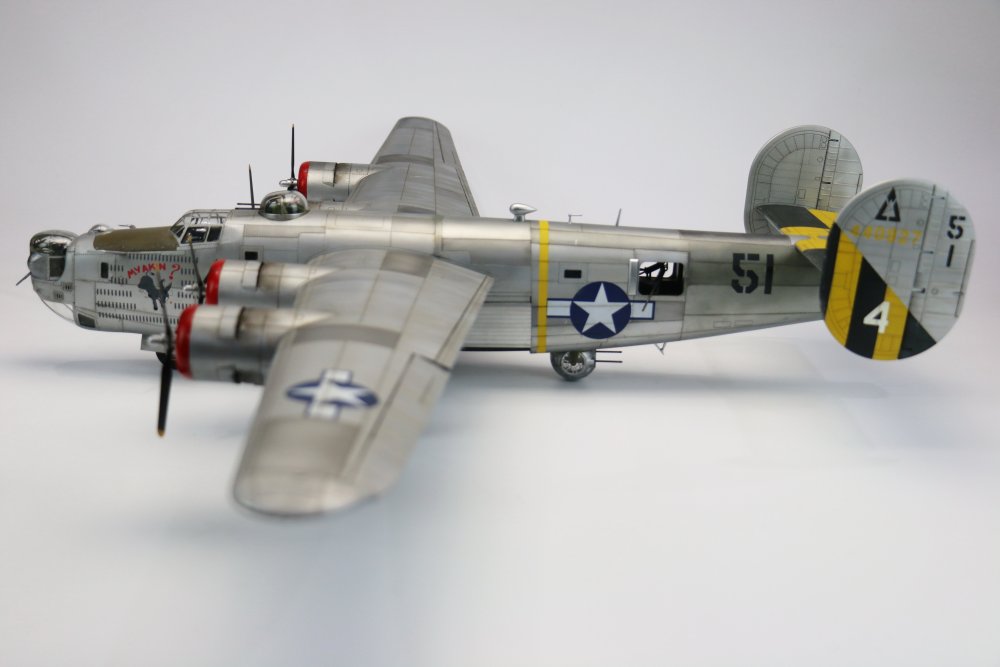
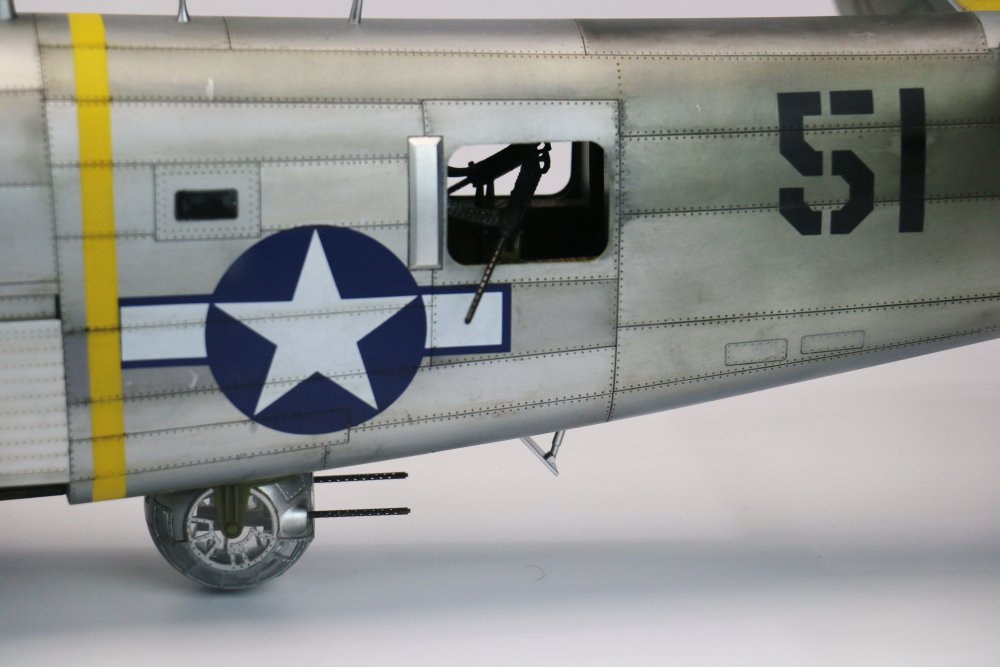
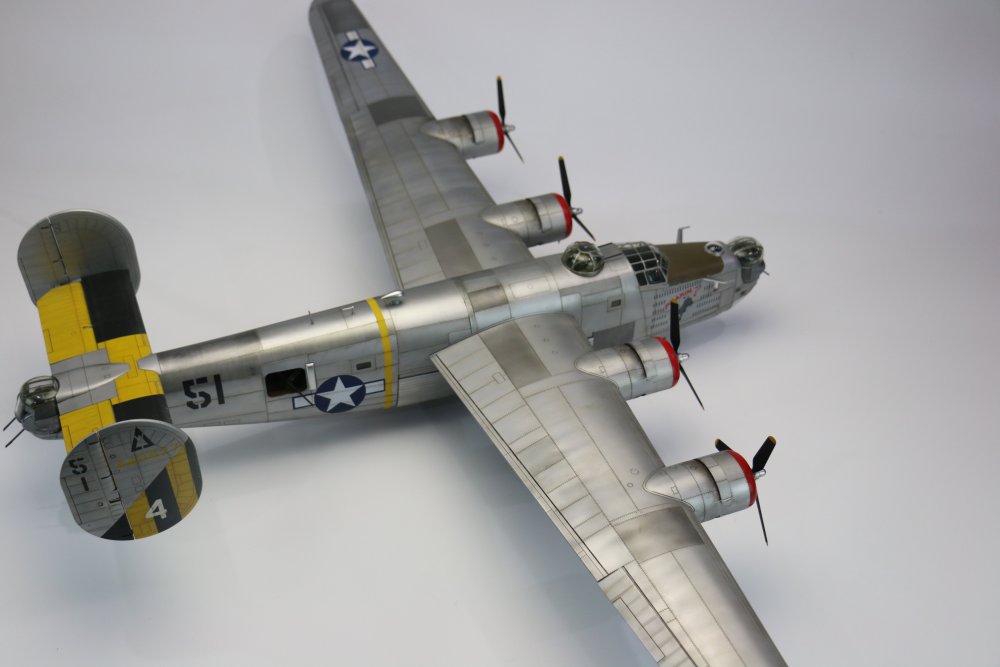
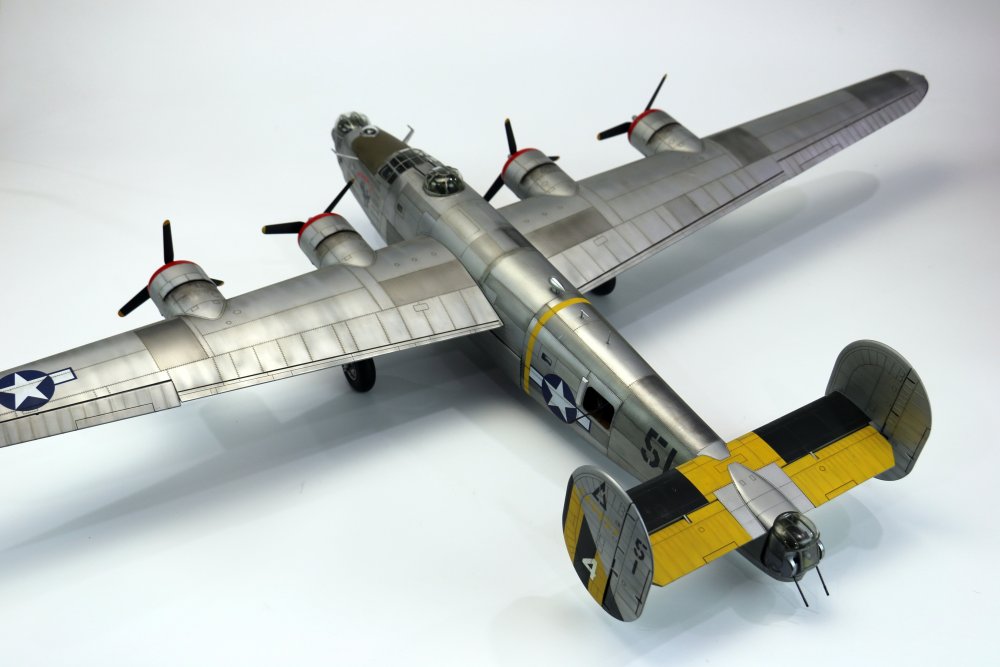
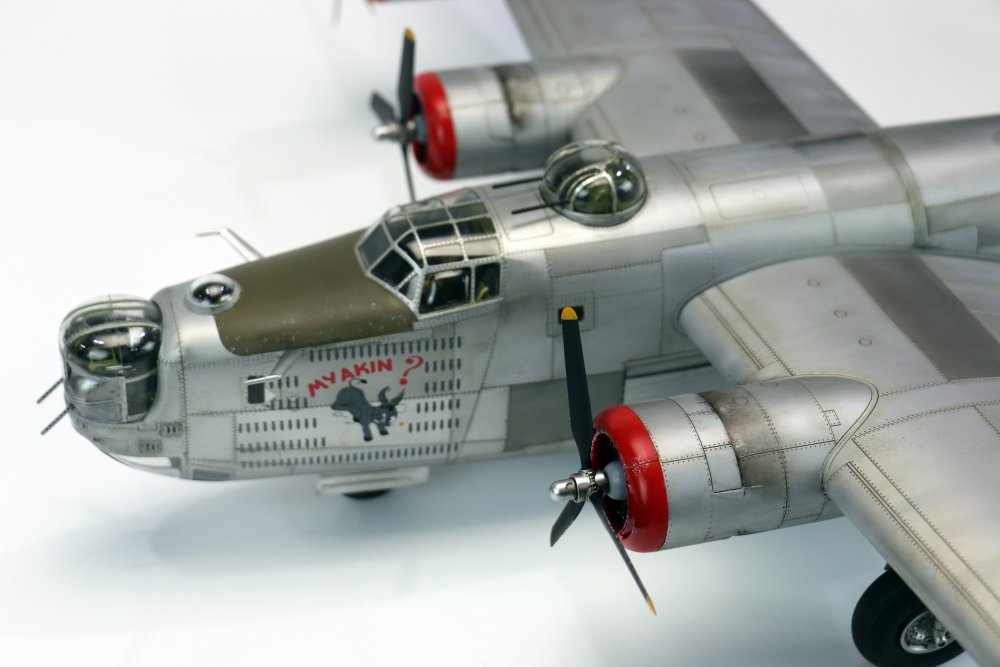
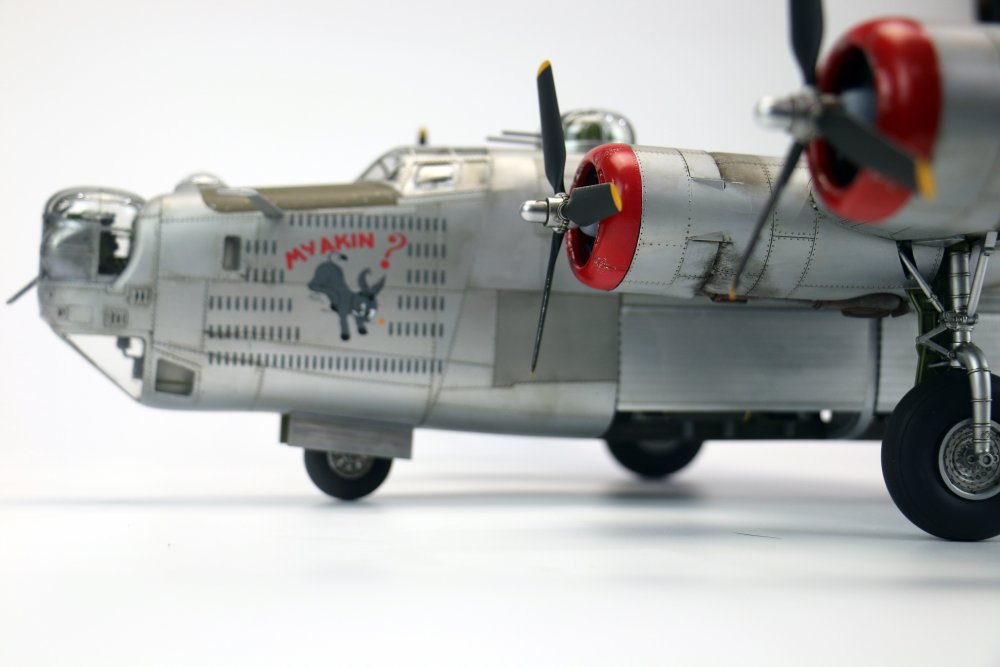
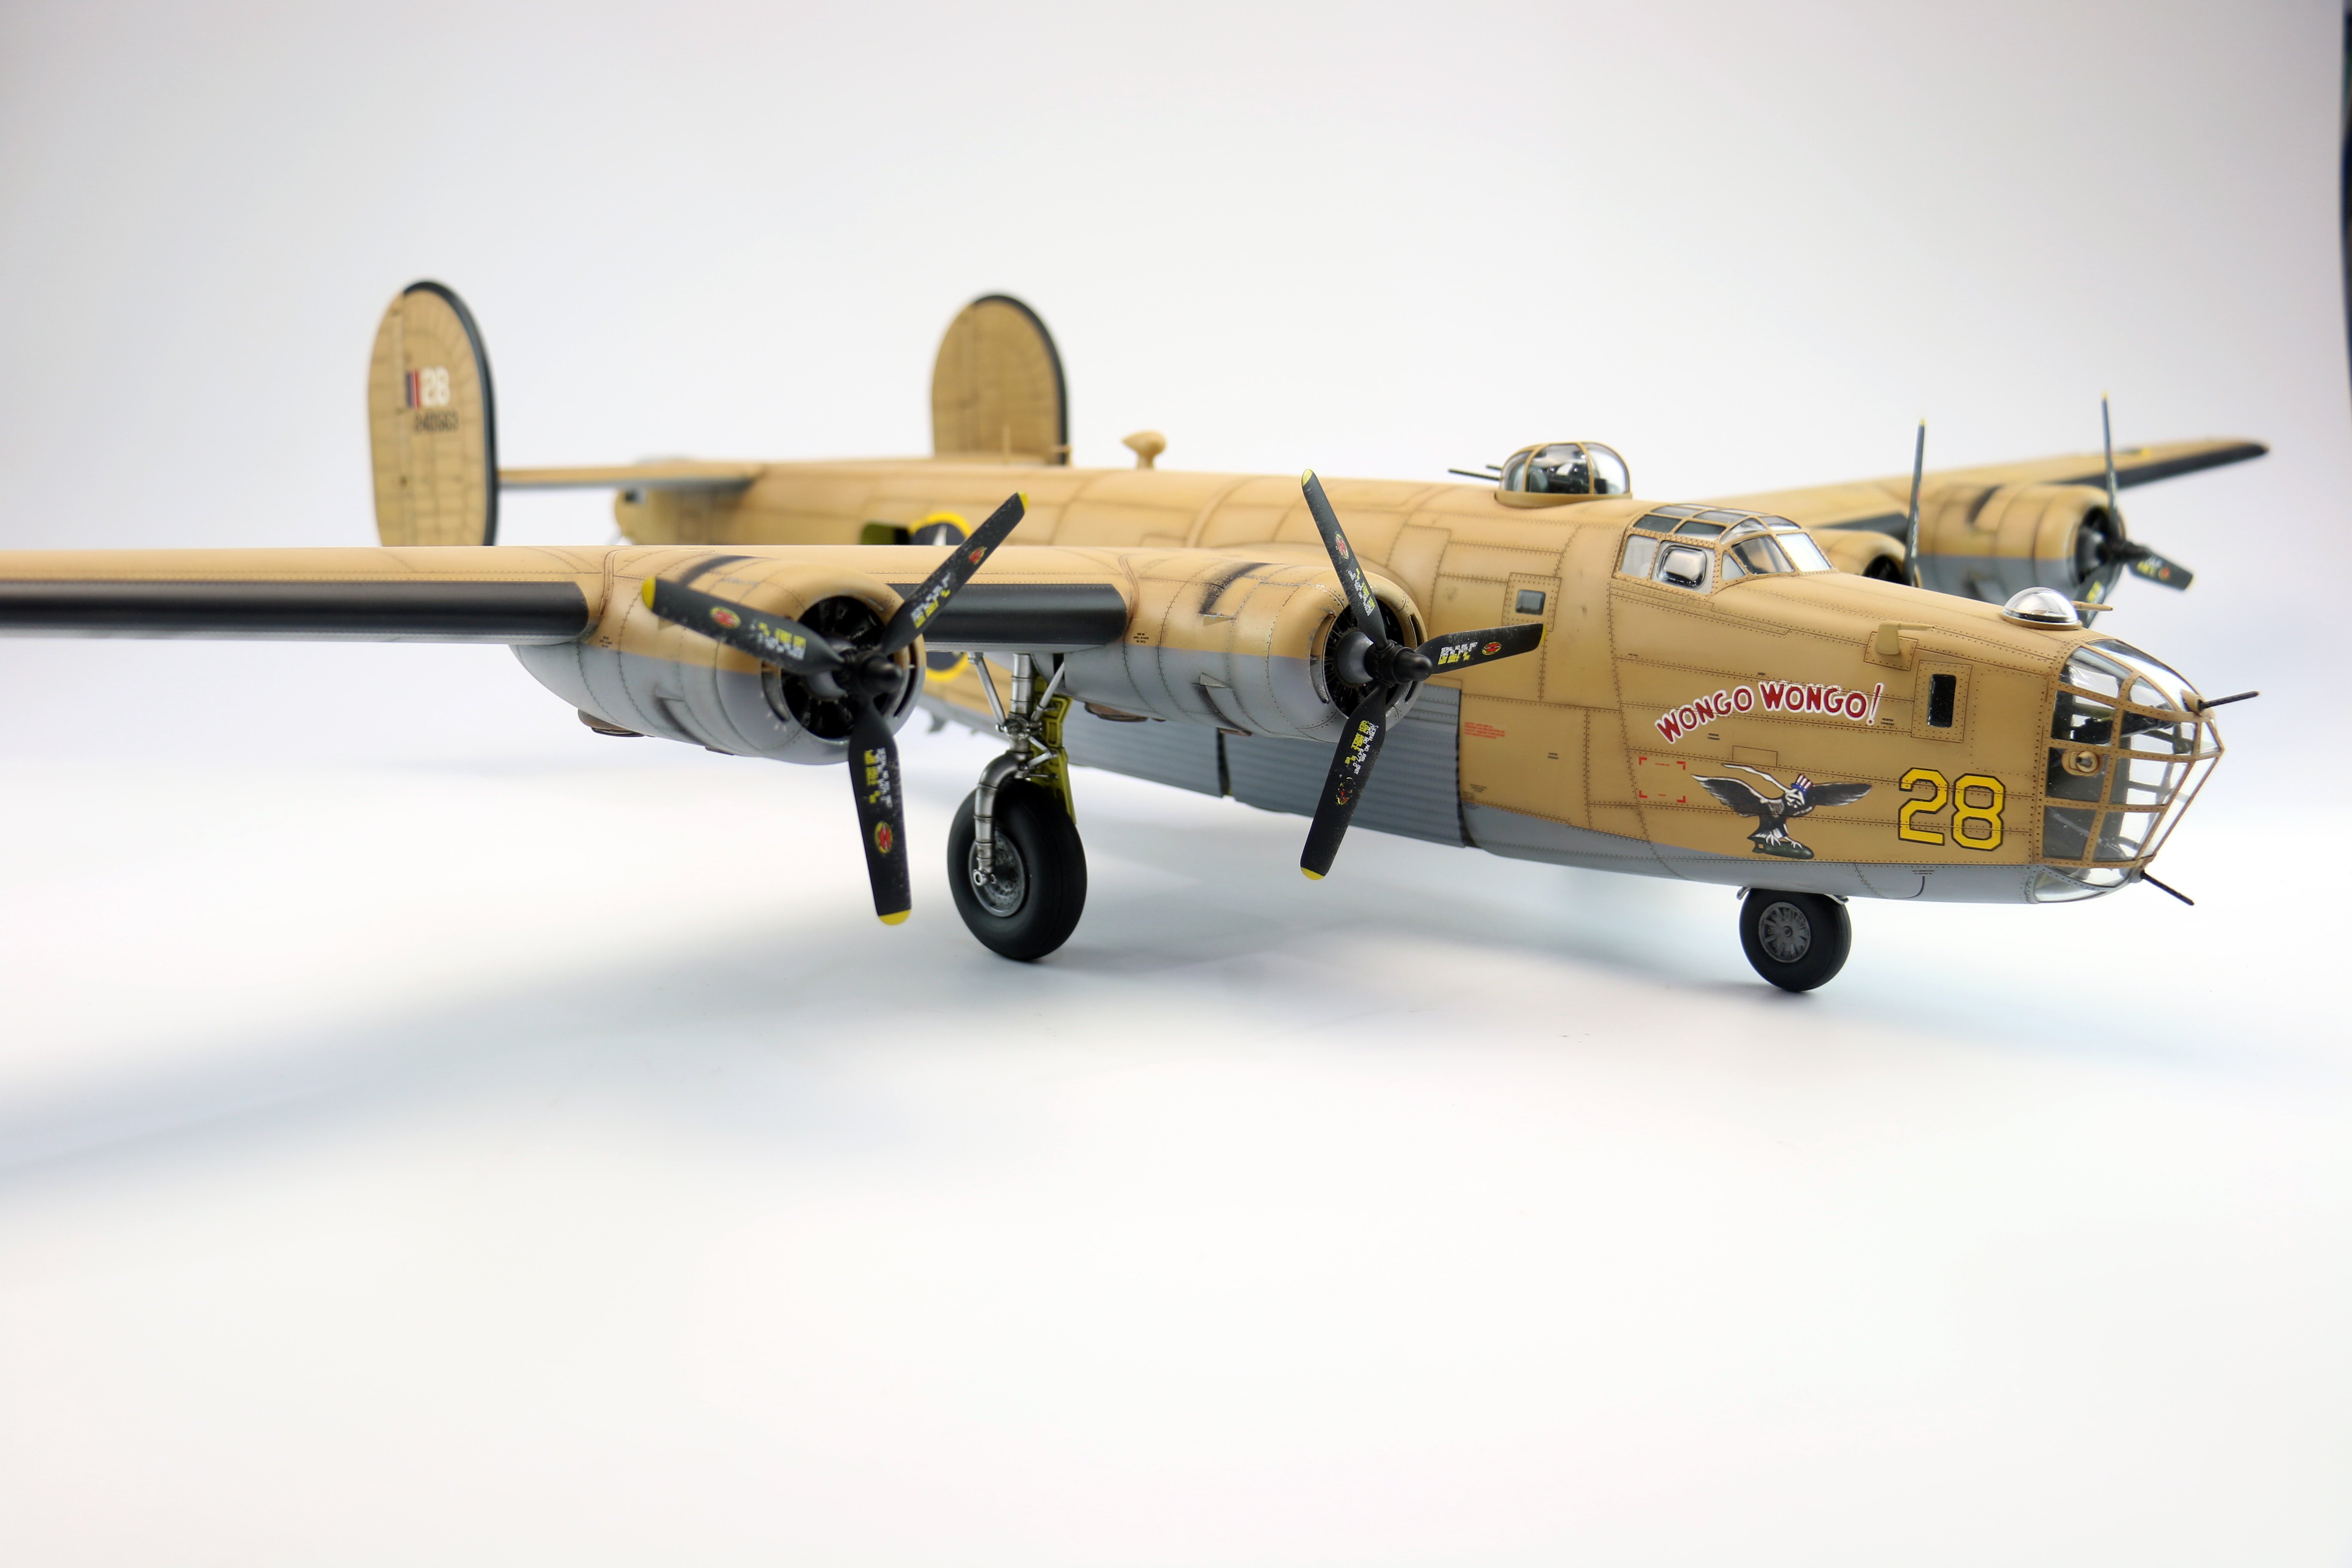
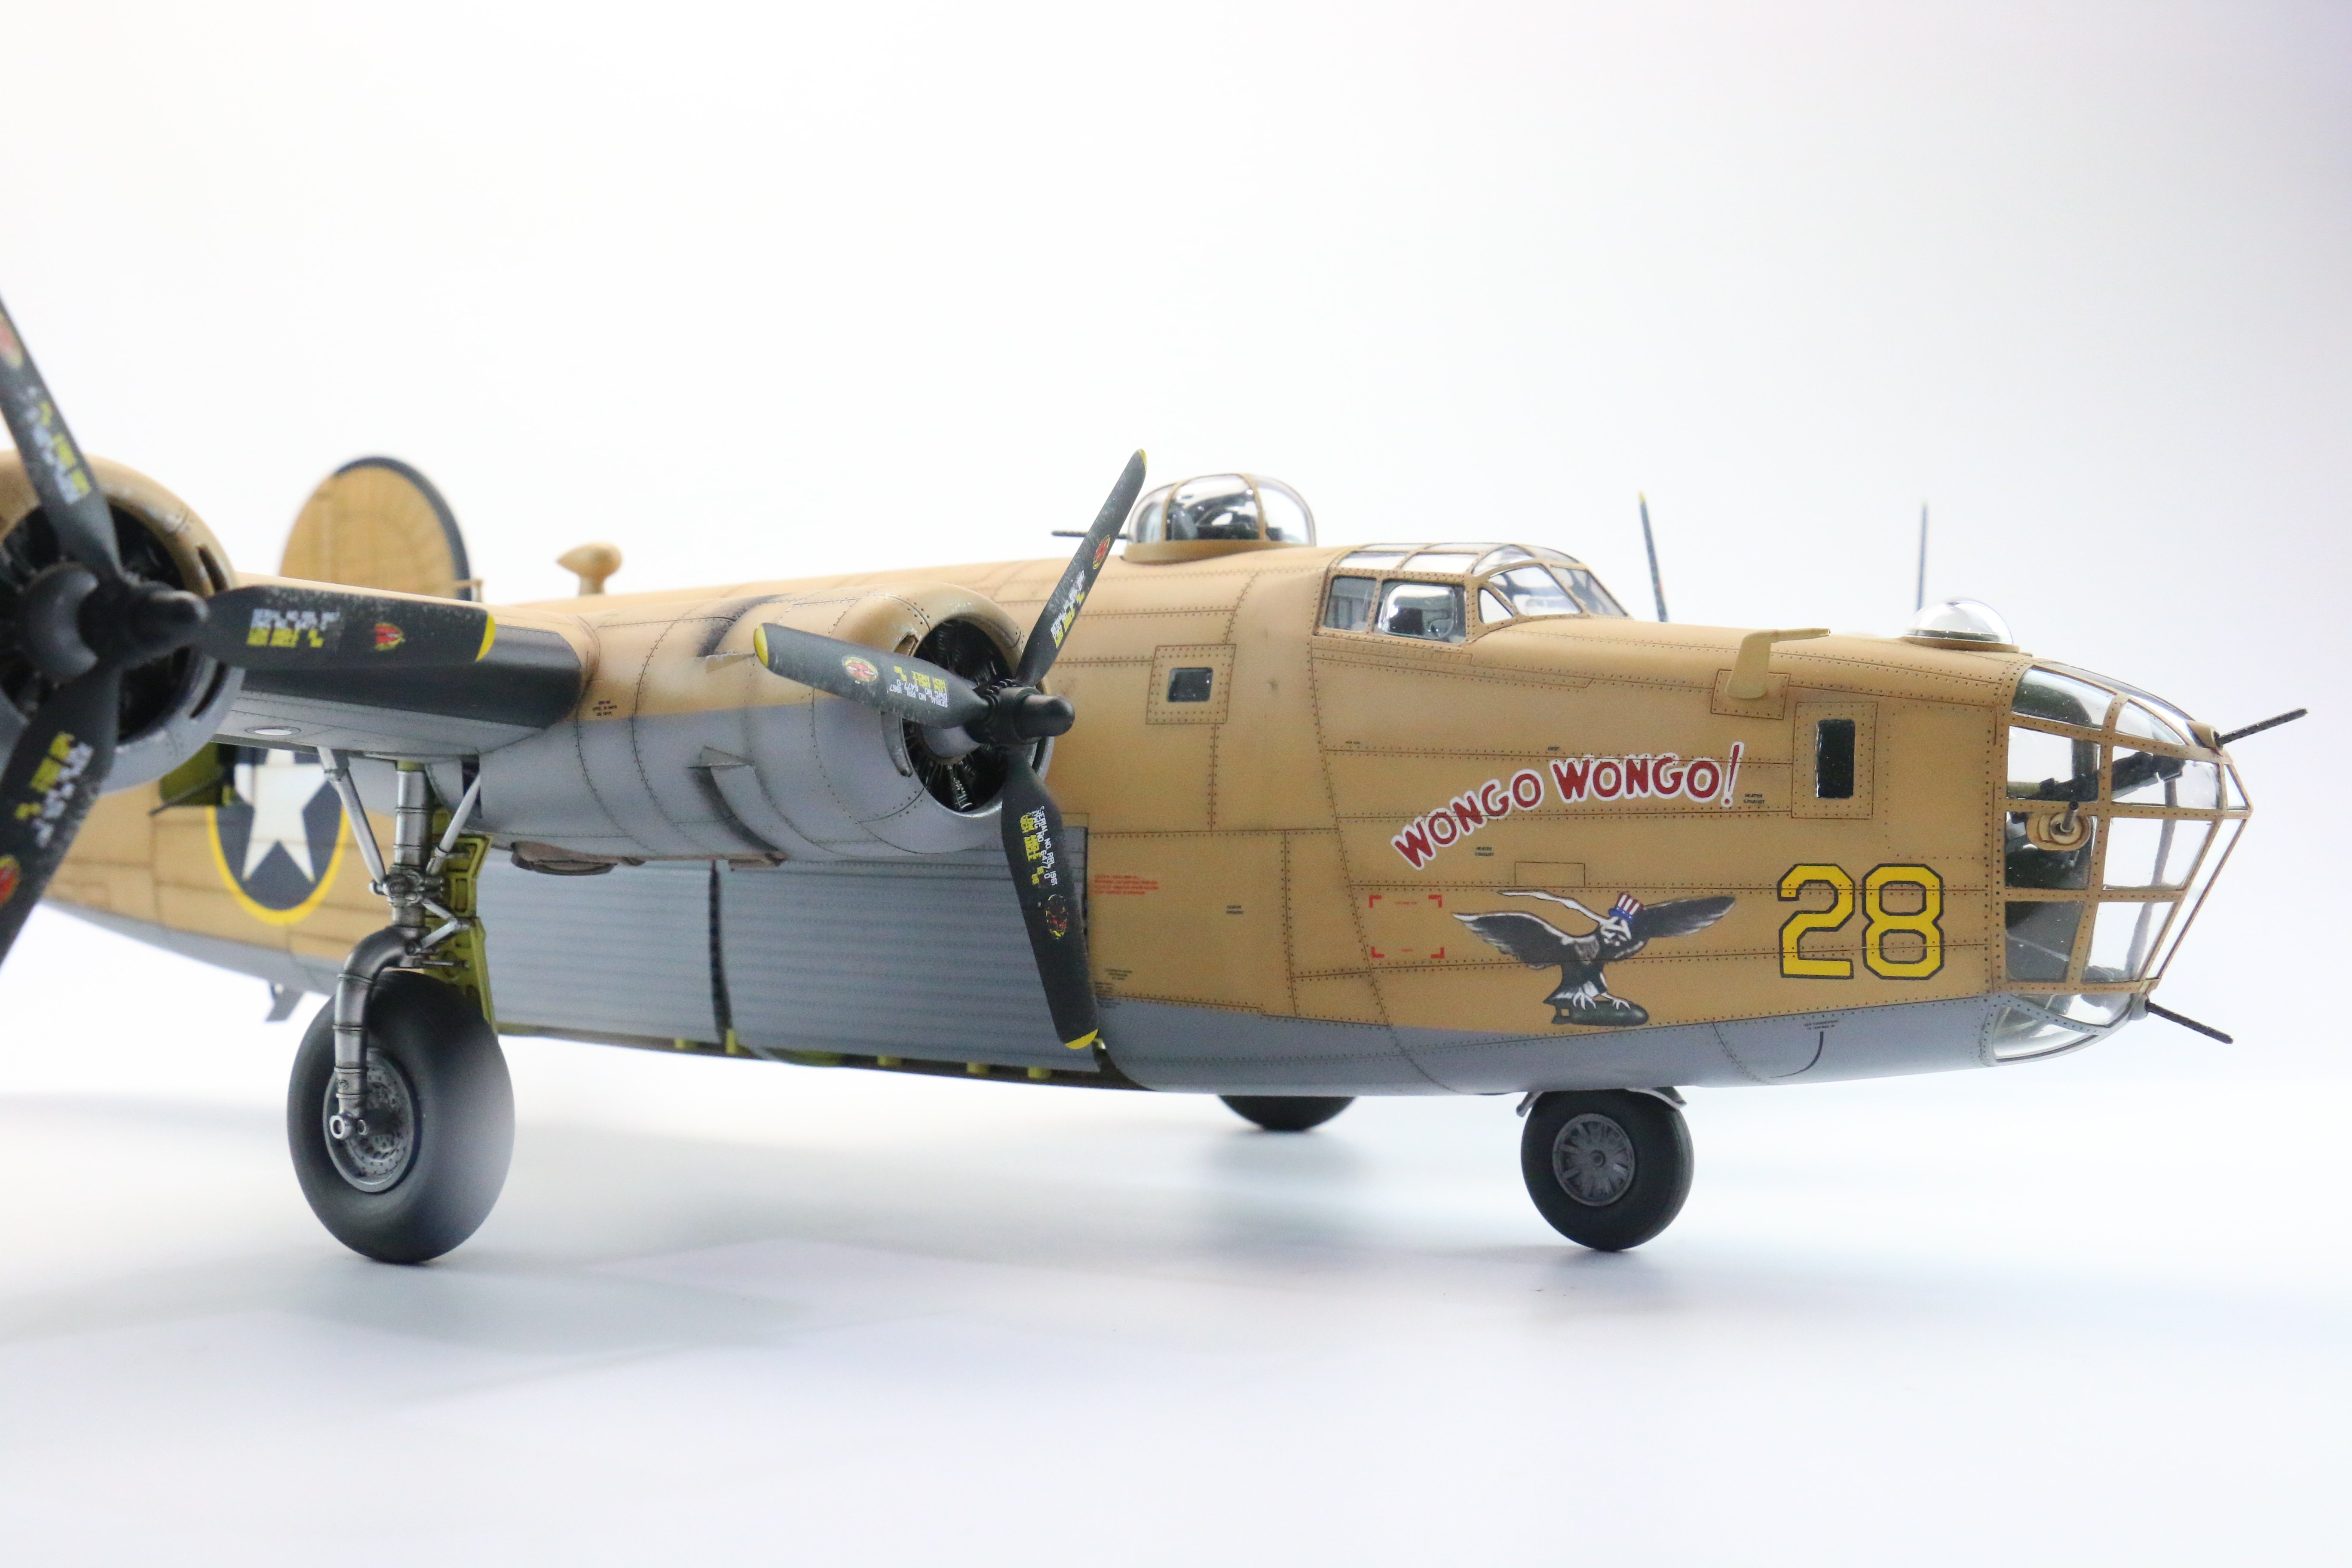
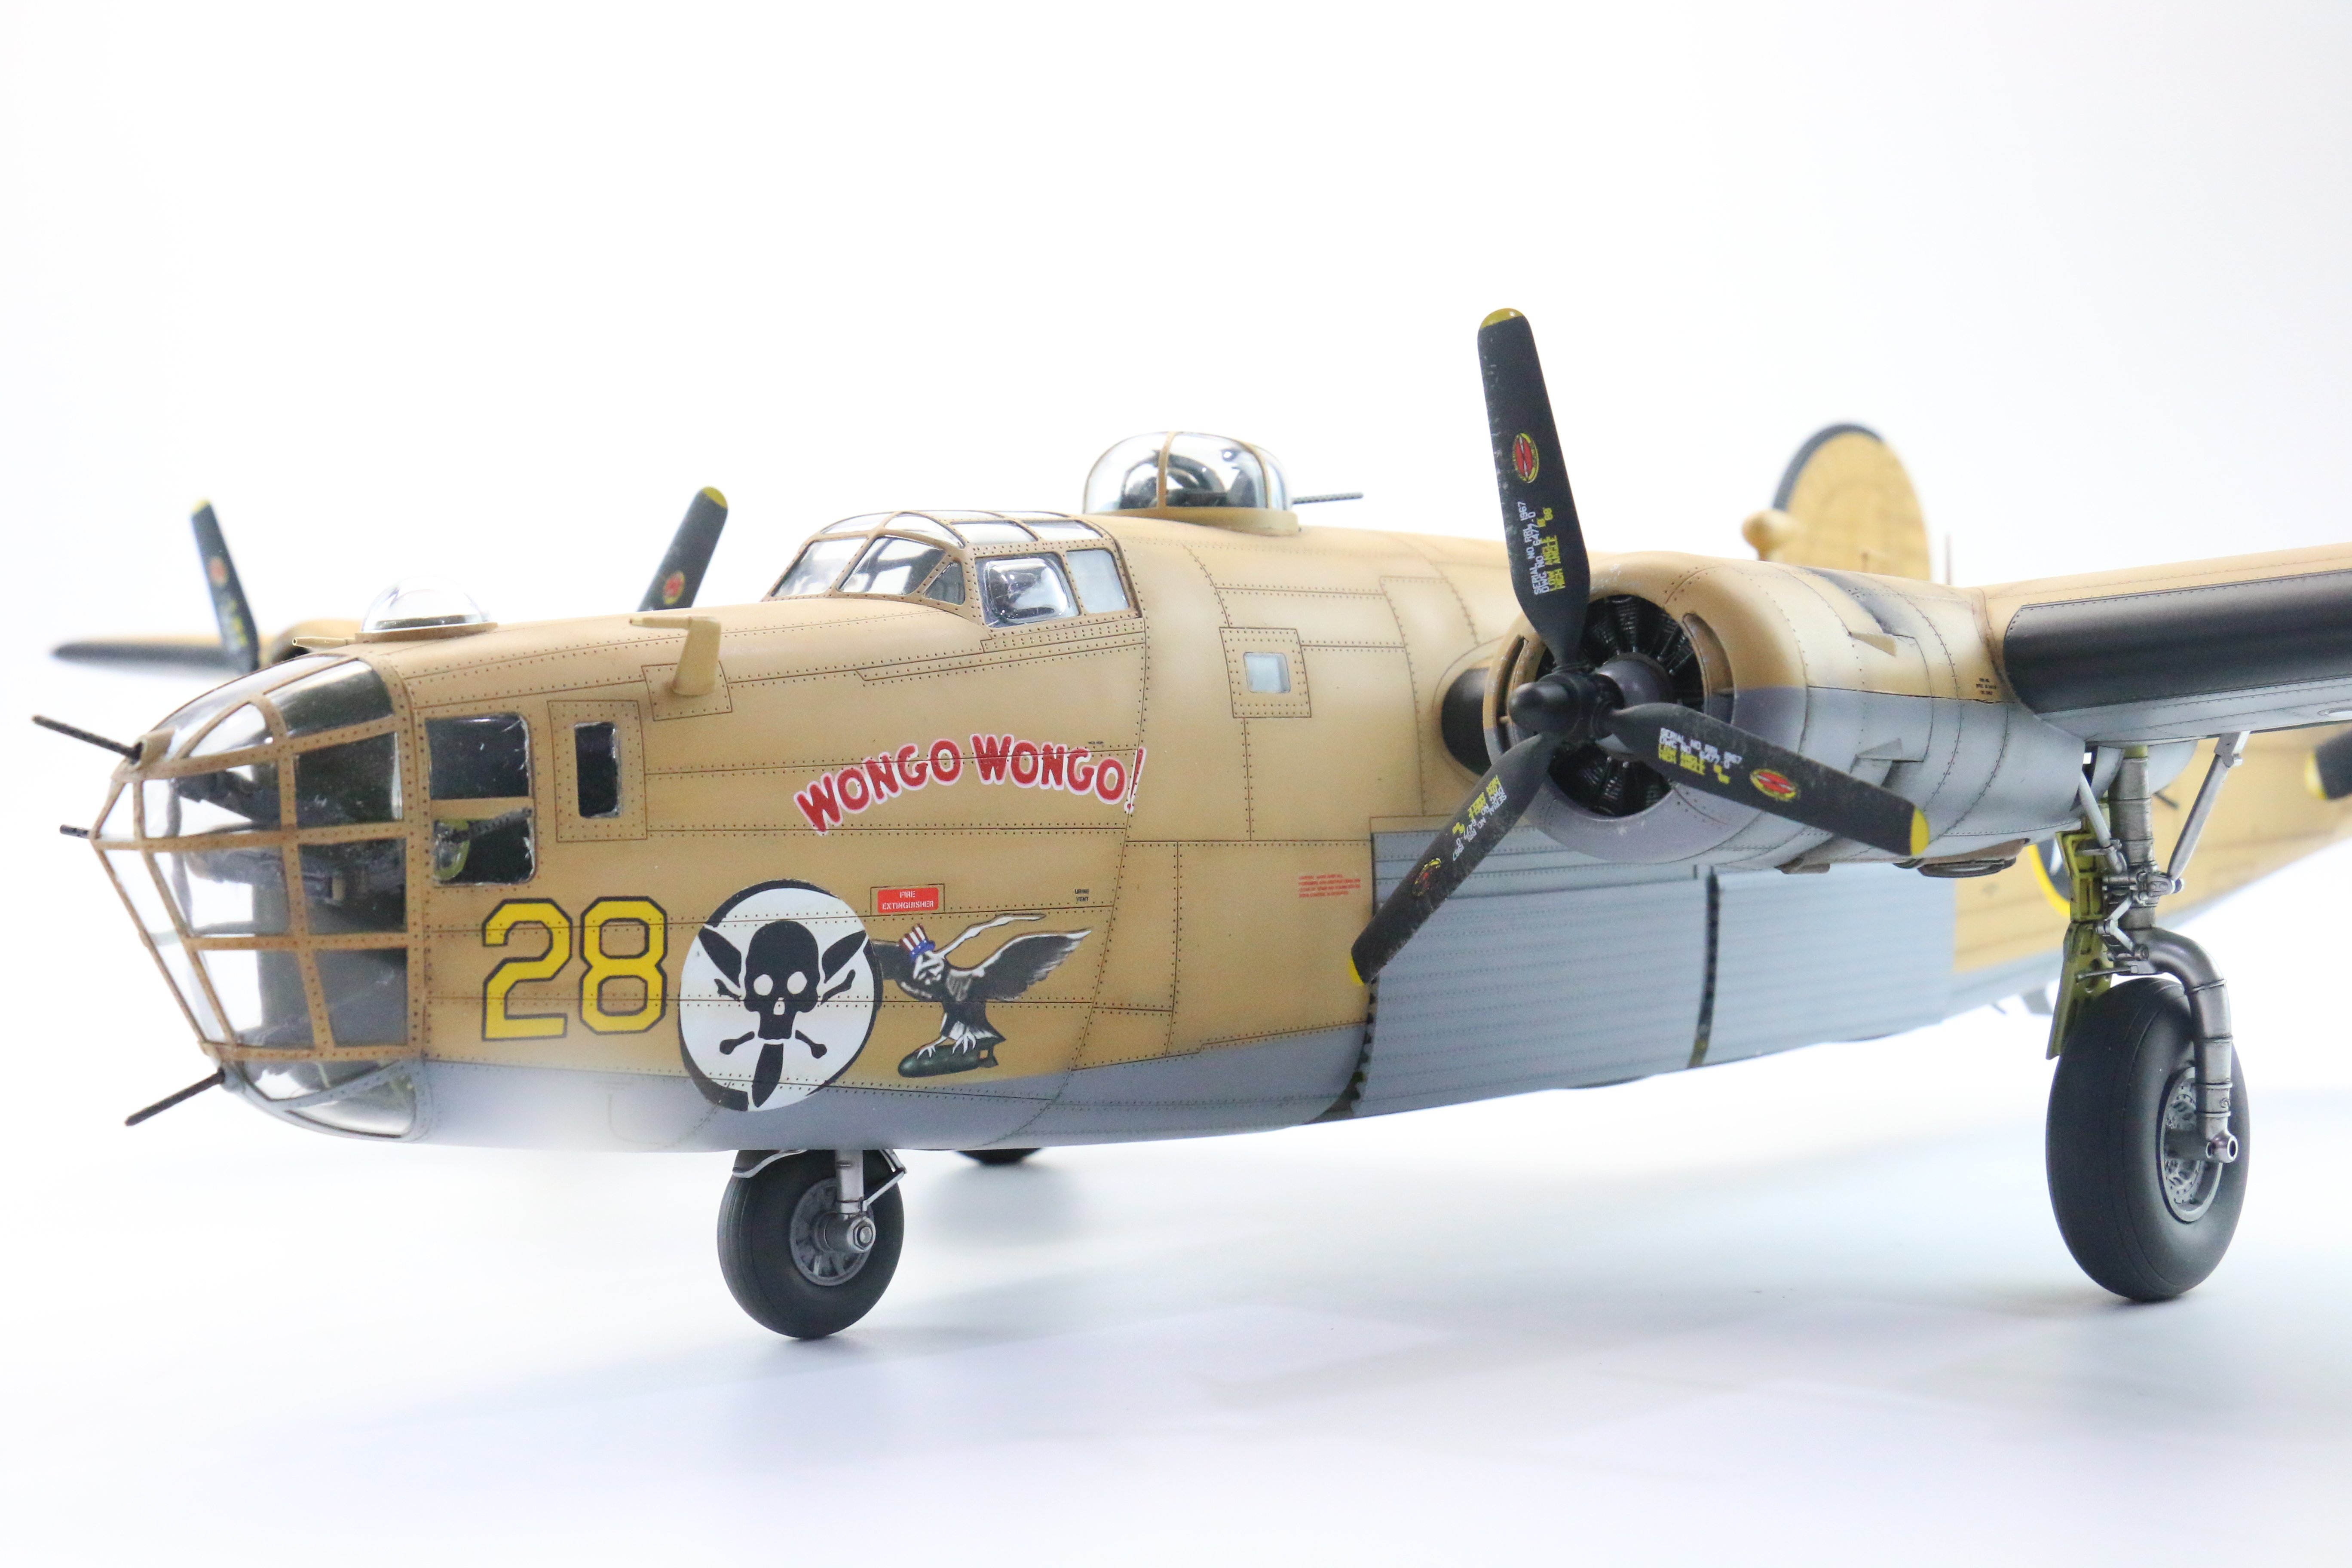
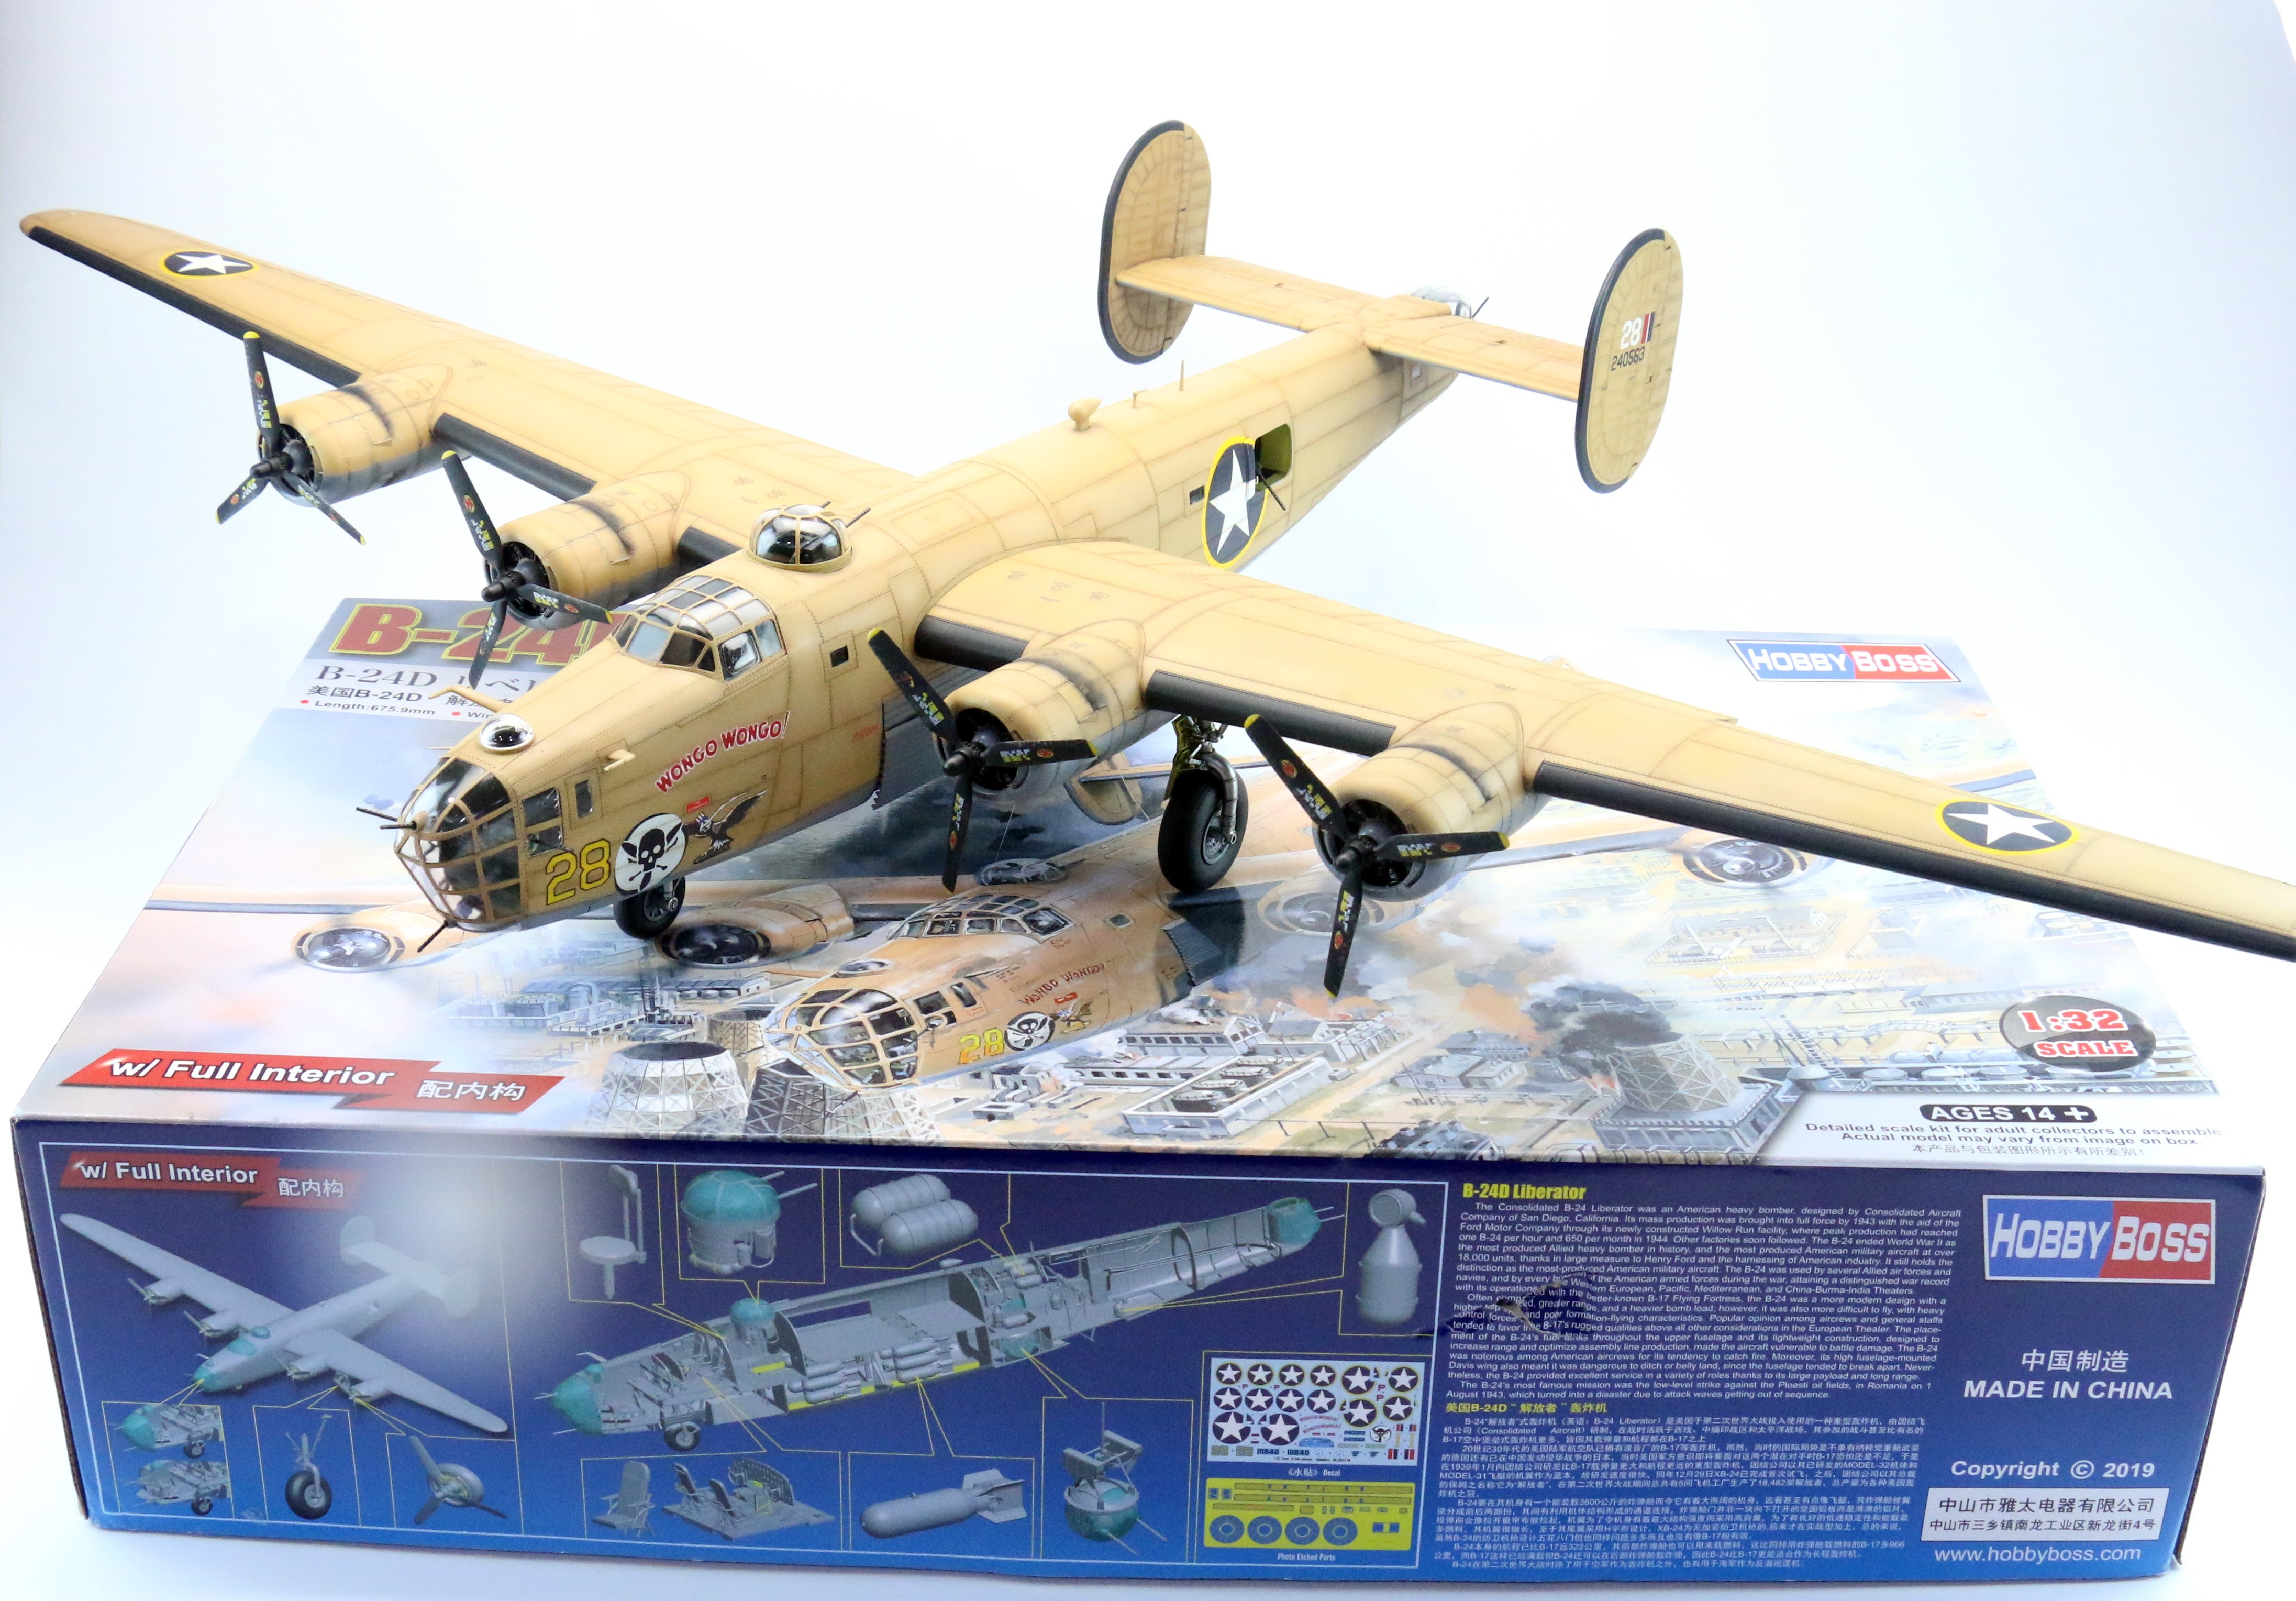
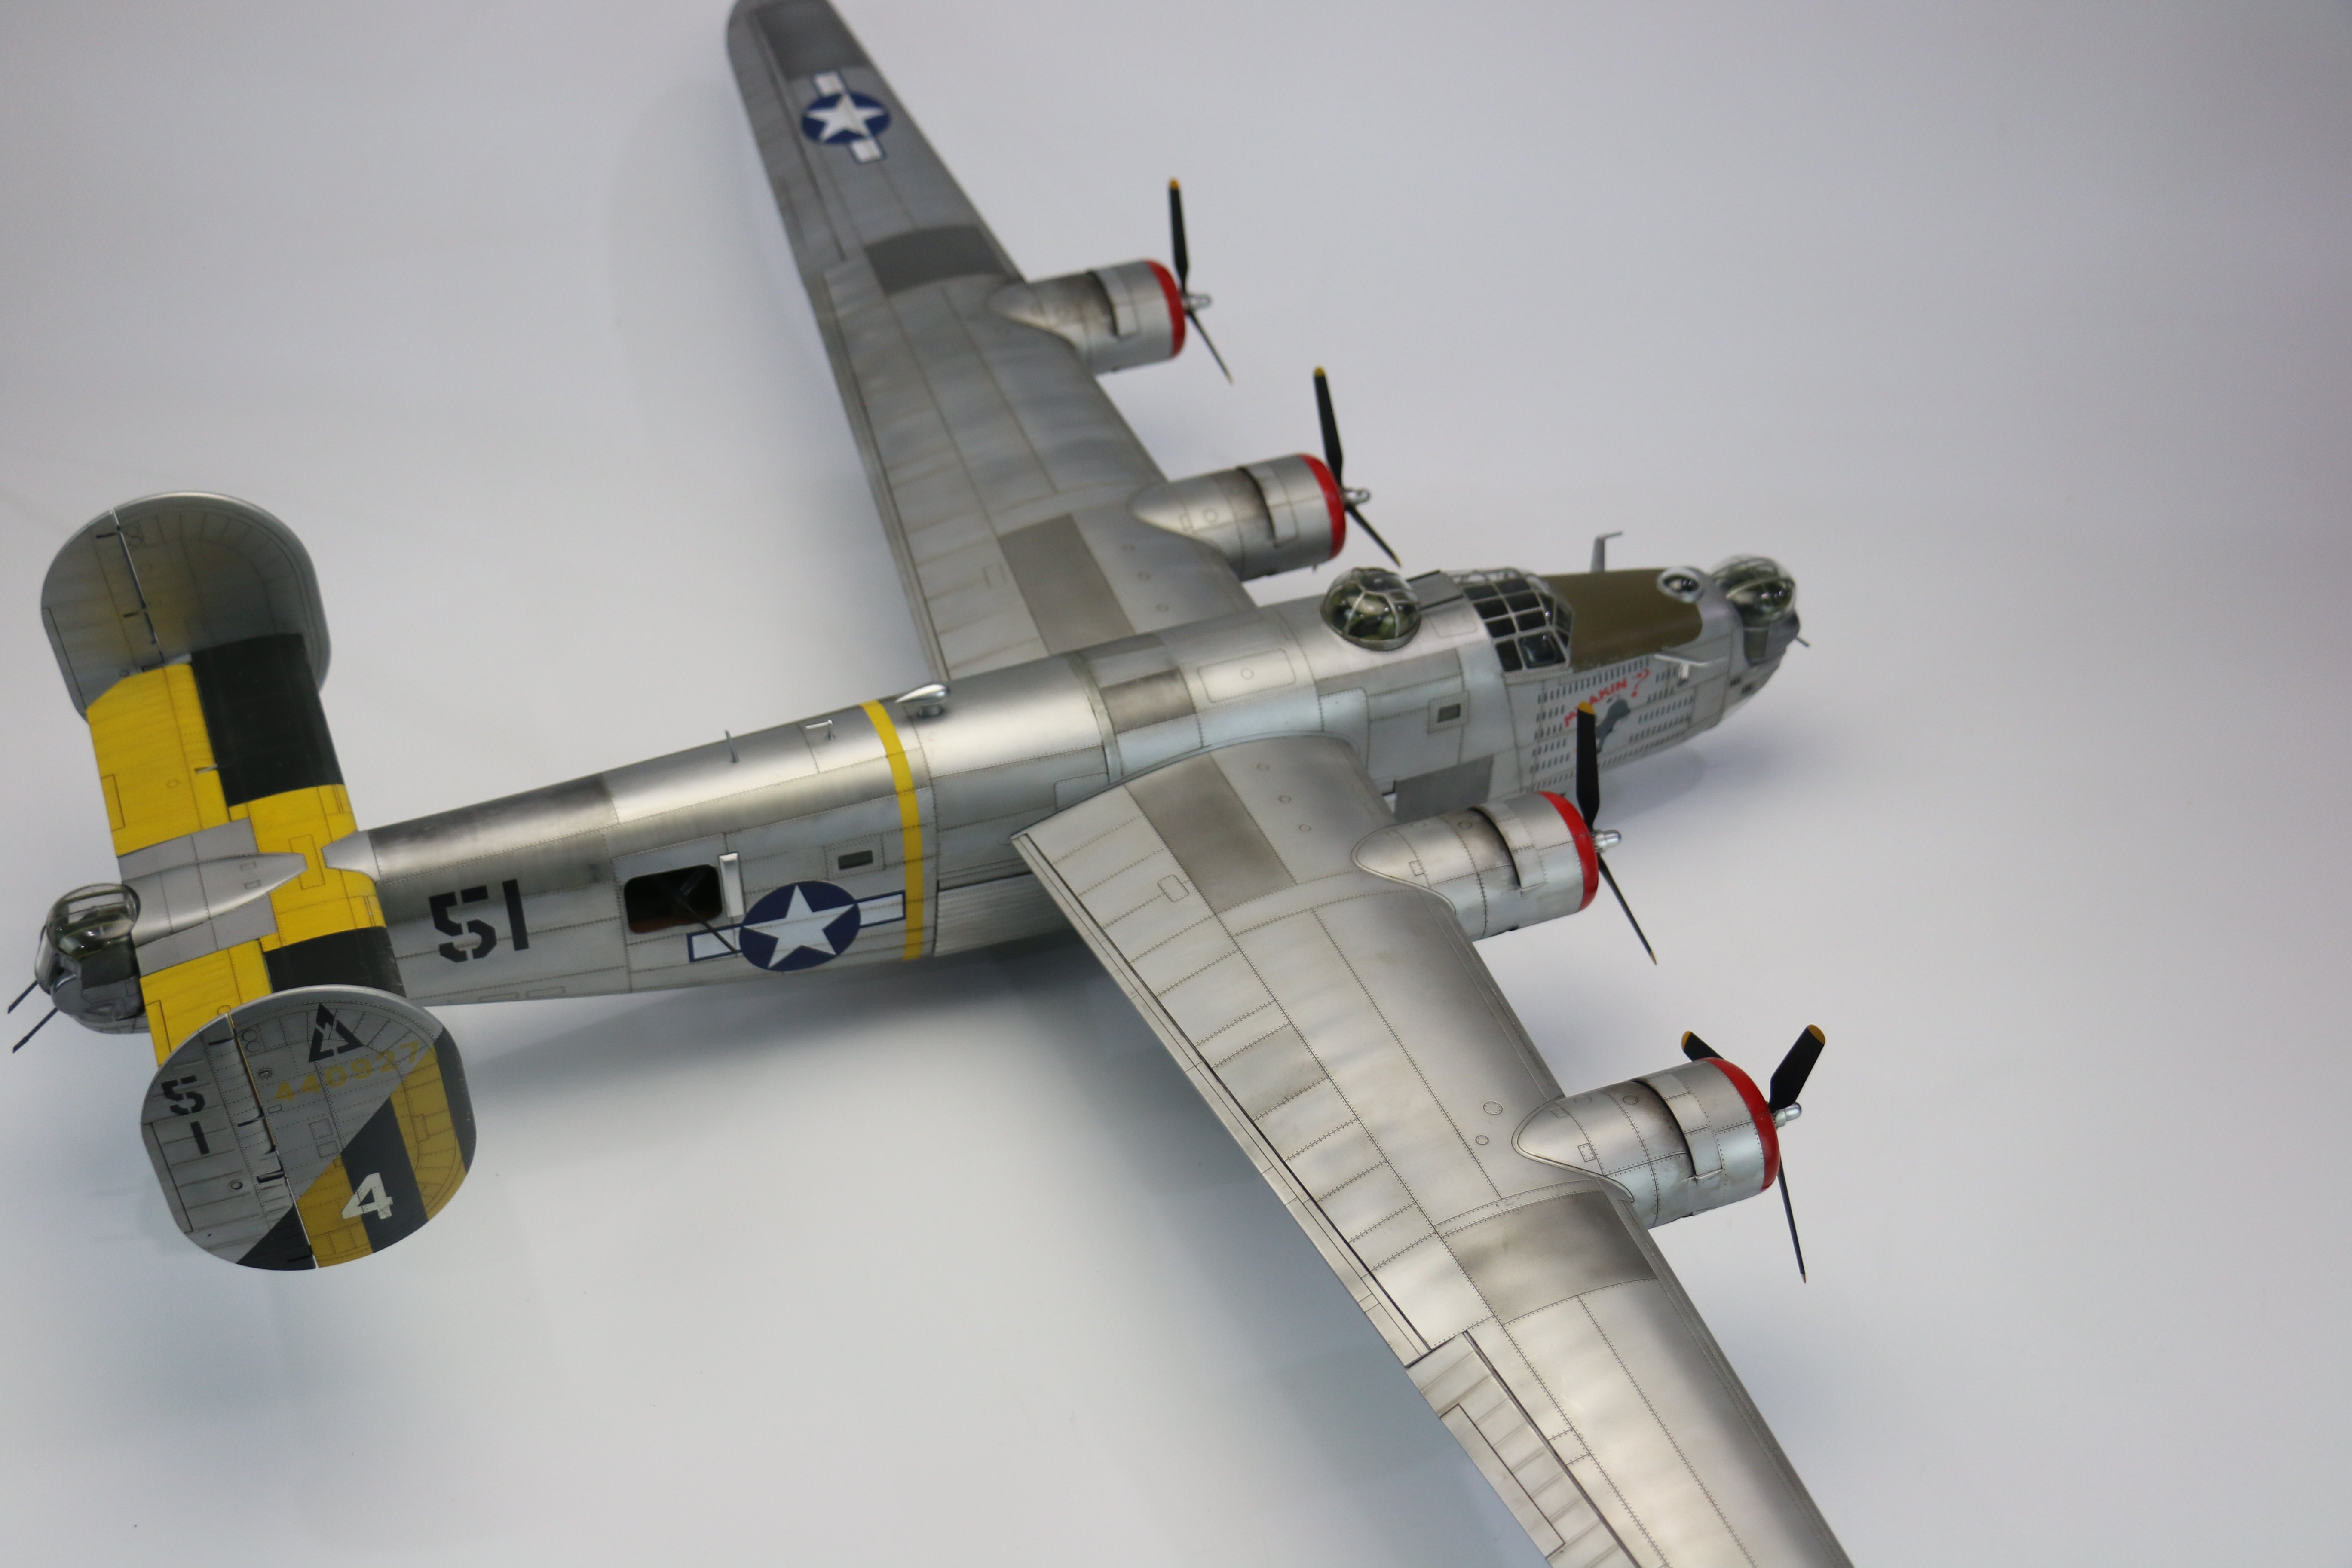
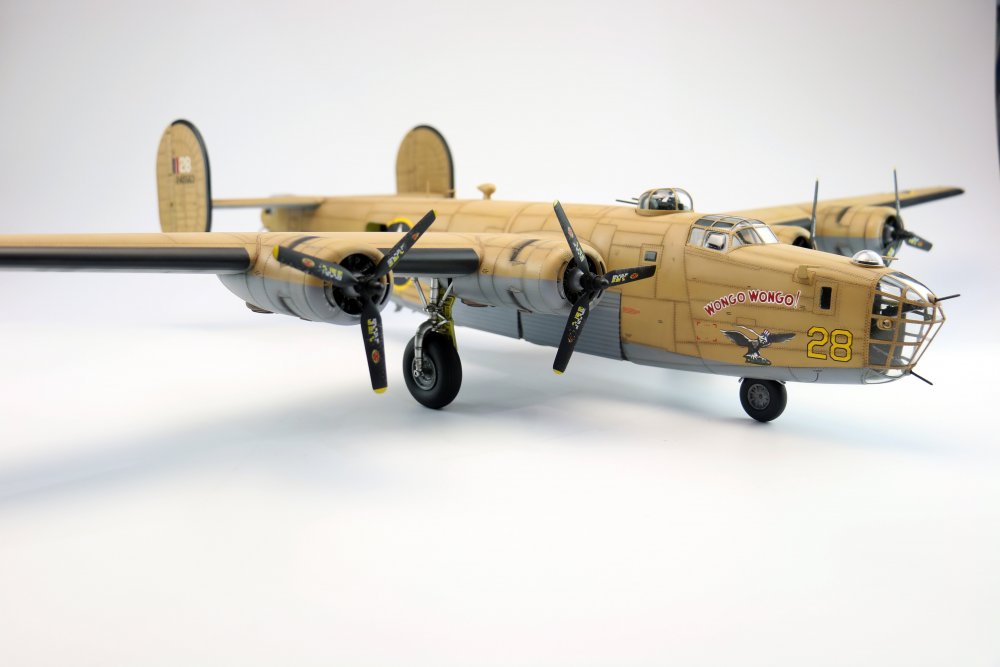
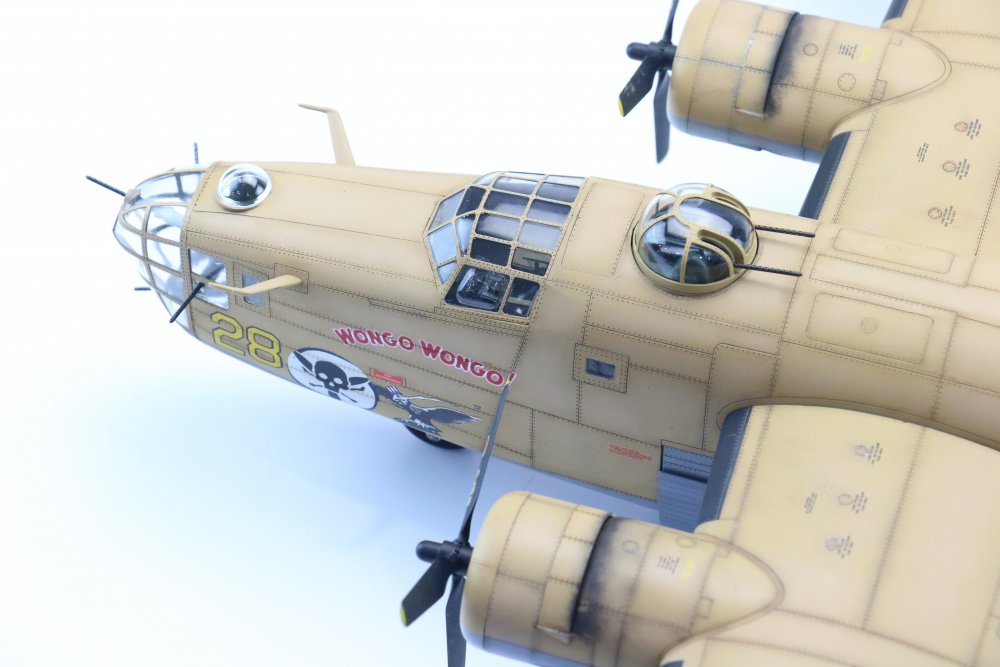
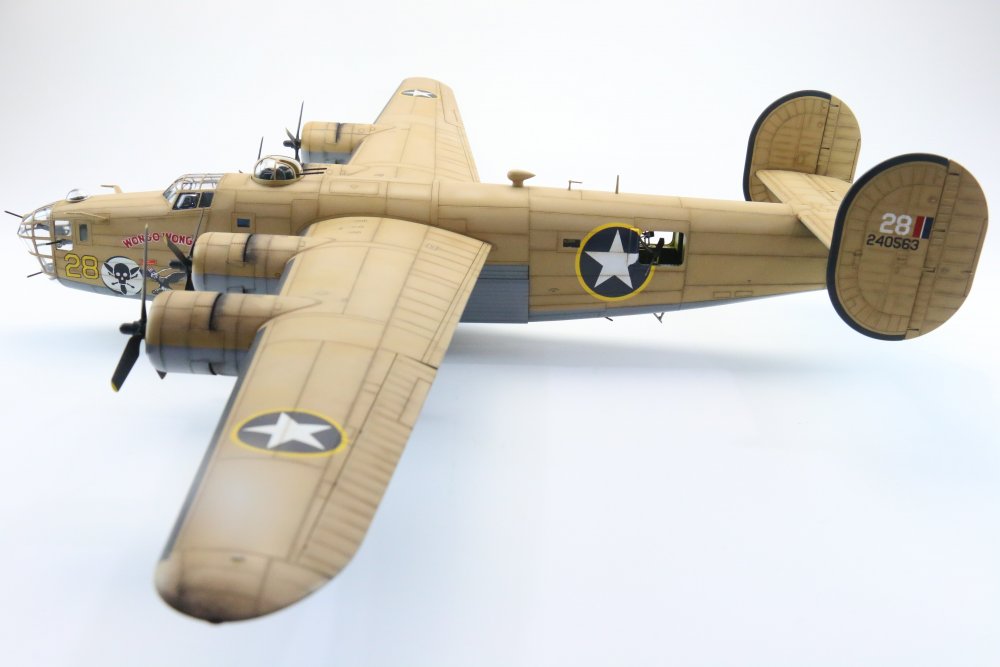
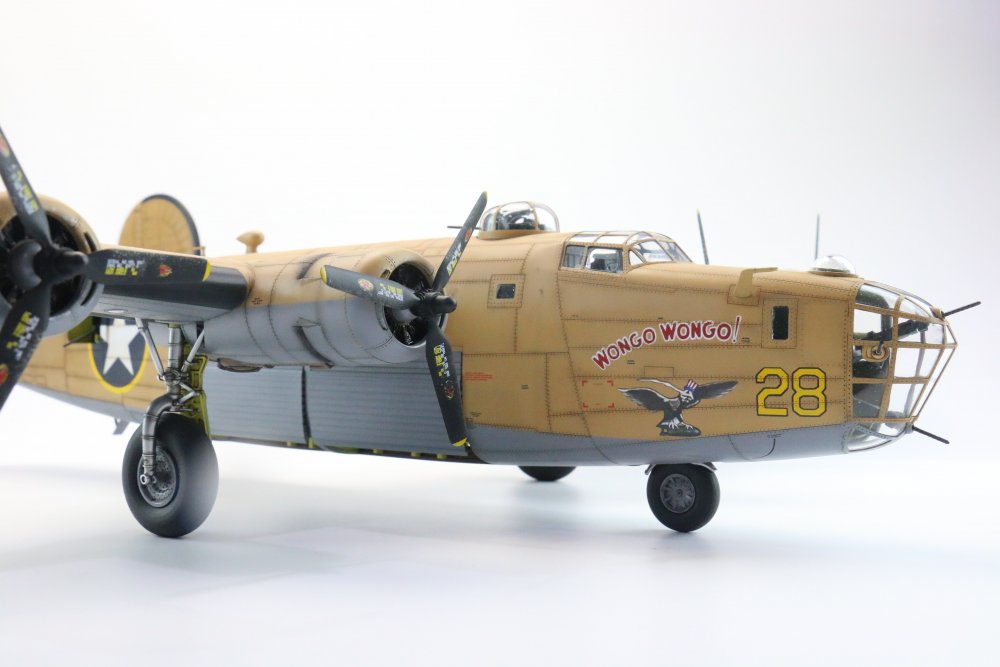
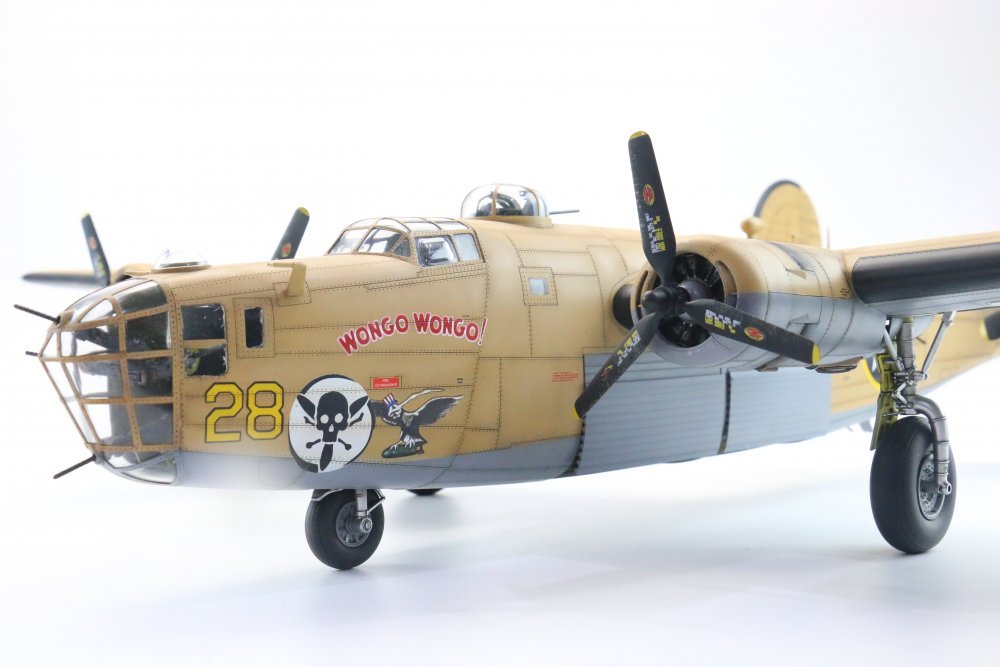
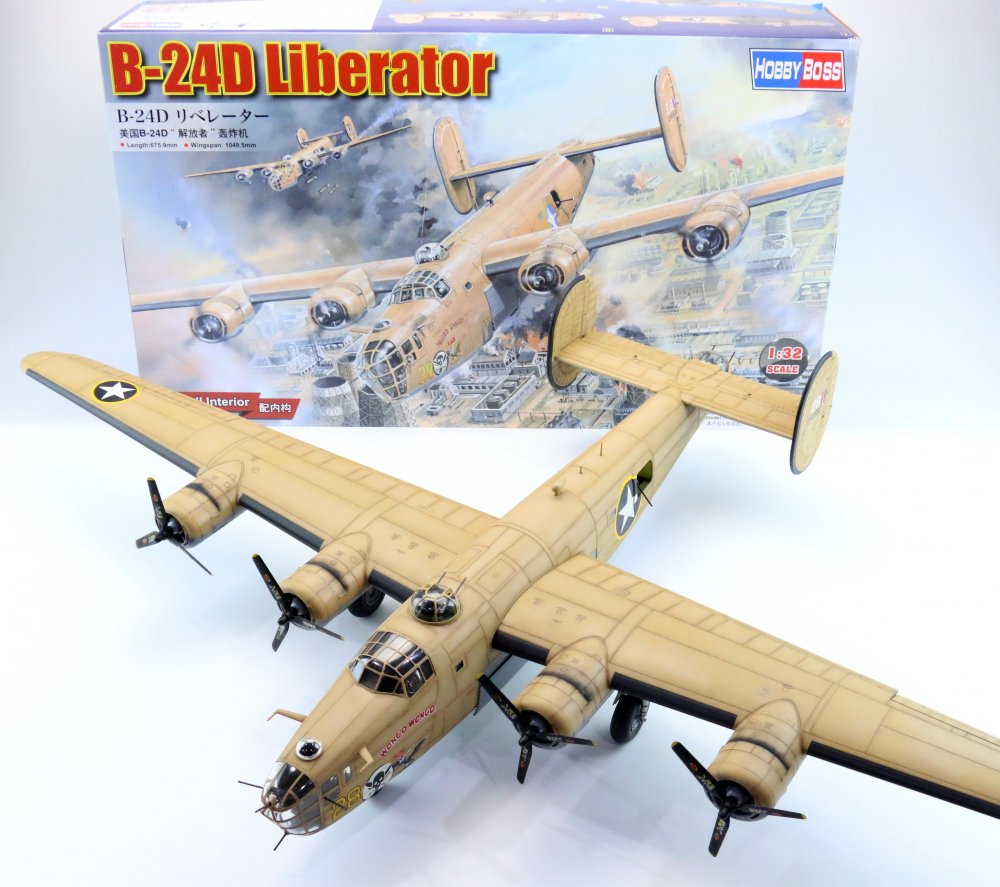
It's me again with yet another 1/32Liberator build from HobbyBoss this time it's the 'D'. Built almost straight from the box, I did add belts, .50 cals from Master Models, National ingsignia Stencils from DN-Models and standard Stencils from Profimodeller. Painted with Gunze Acrylics and Lacquer paints and weathered with Ammo of Mig washes etc. For all the Facebook users who are bored of seeing me spamming this, sorry Thanks for looking, the build is on my FB page https://www.facebook.com/g1models/


- 19 replies
-
- 20
-

-

-
300gms is if you can put it directly under the top front turret, which is impossible. Because of where you have available to add weight I put mine under the Navigators area (just behind the main cockpit). I drew up the interior of the area in CAD using a profiling tool to make sure I had the right cross sectional sizes. I then 3D printed "storage containers" and filled them full of lead shot, I added a lid and put them inside, I ended up having to create an additional 5 x "ammunition crates" which also got filled full of lead shot and lowered in through the mid-upper gunners position (top turret) and set with 5 minute epoxy. In the end I think I had just over 500gms in the front of the bird to keep her down and even then it's touch and go when a fly lands on the rear stabilisers lol
-
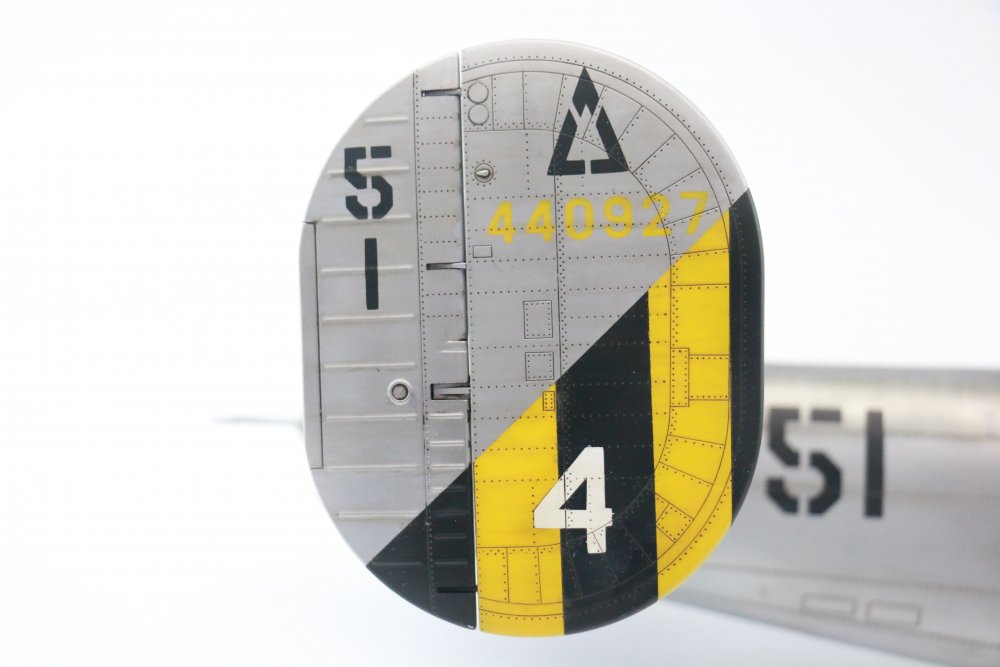
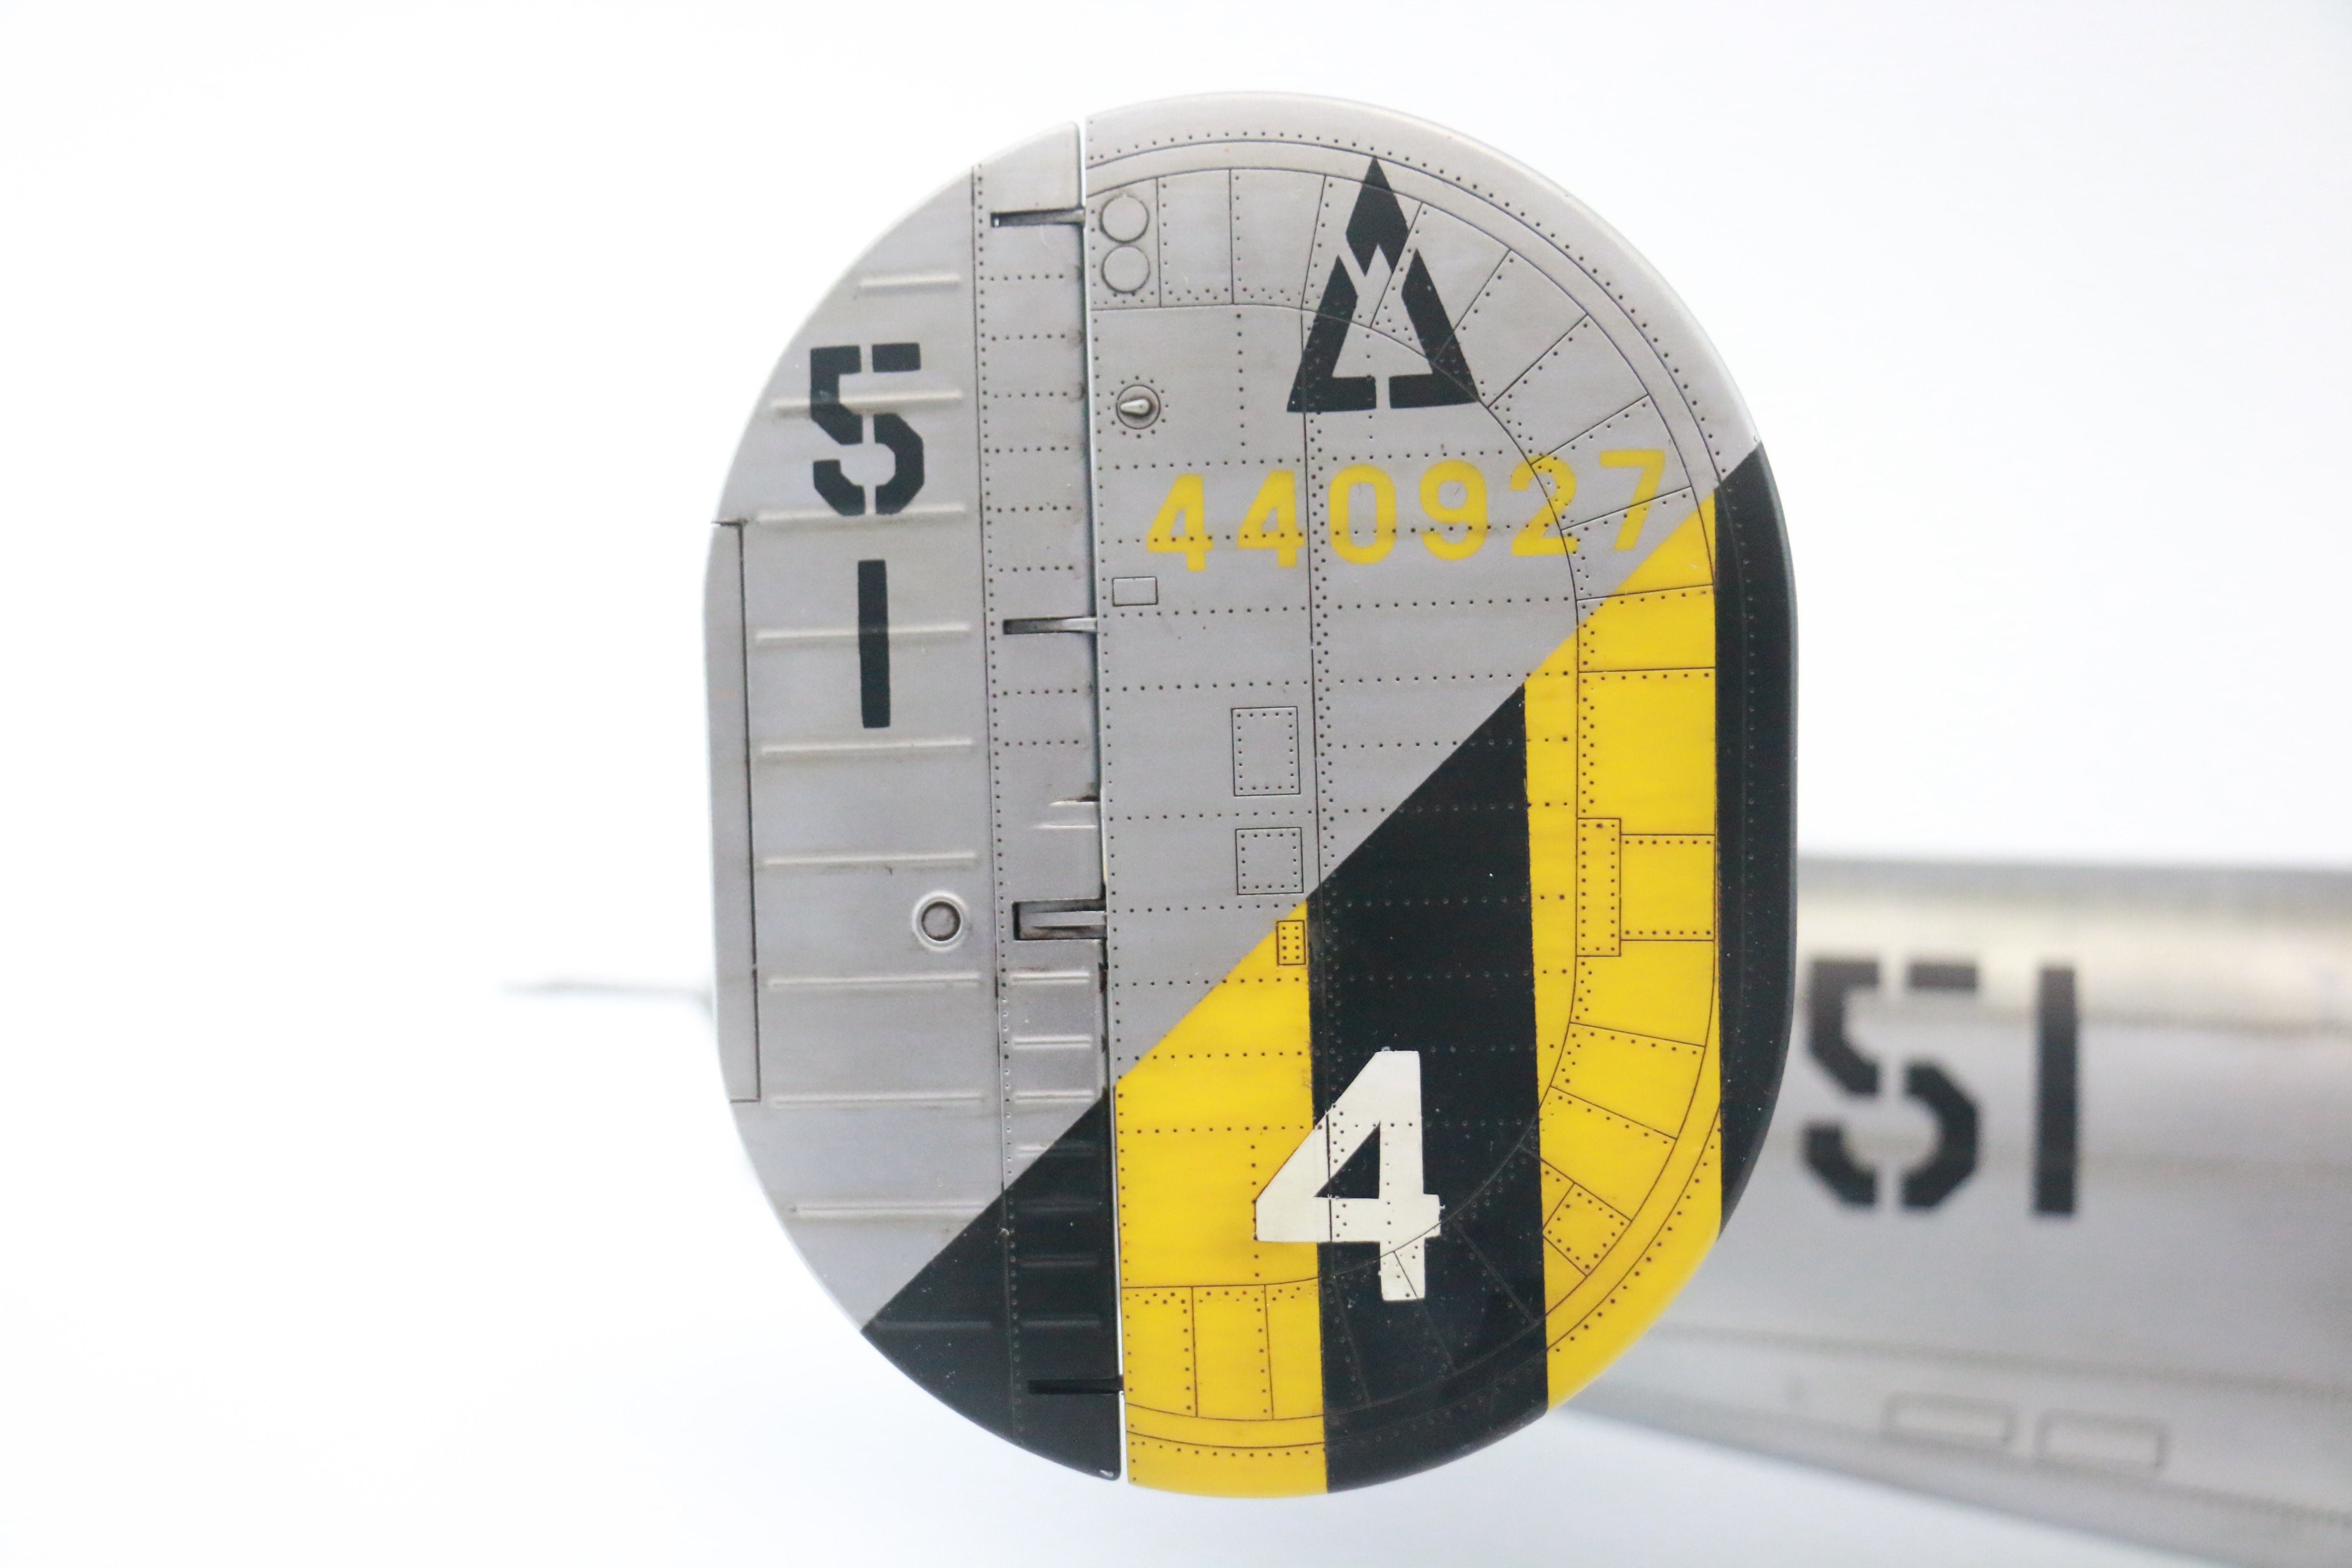
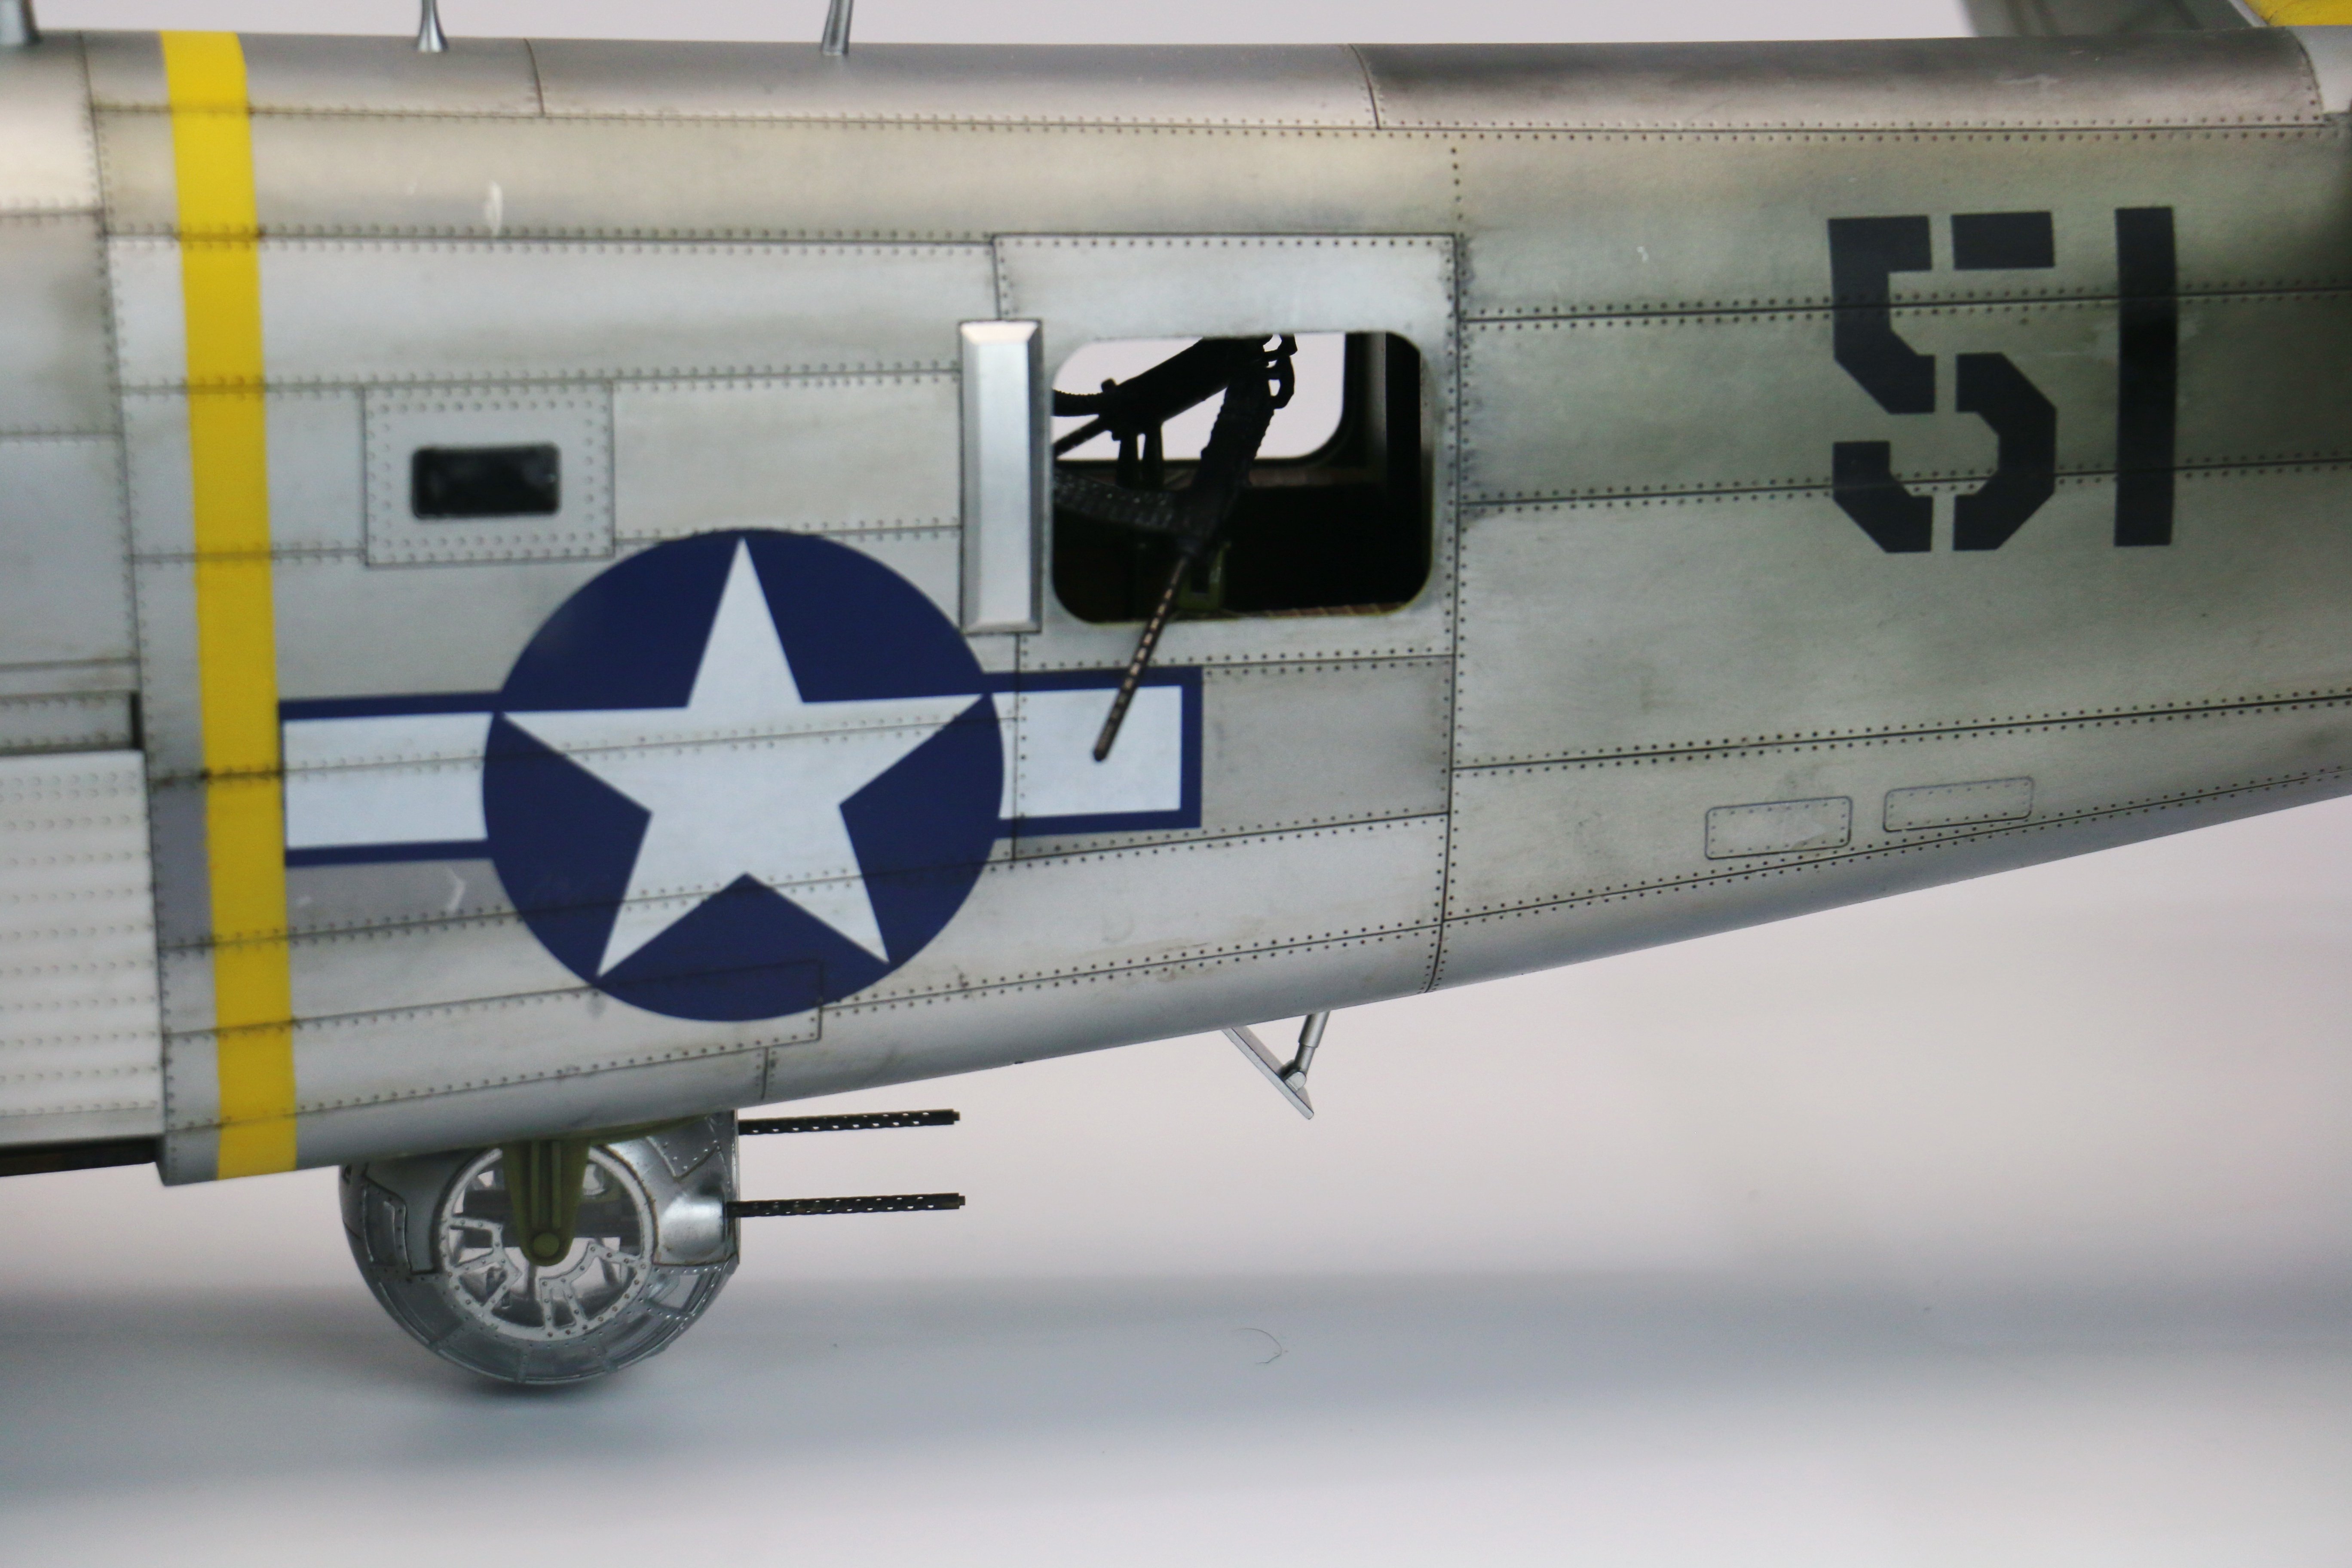
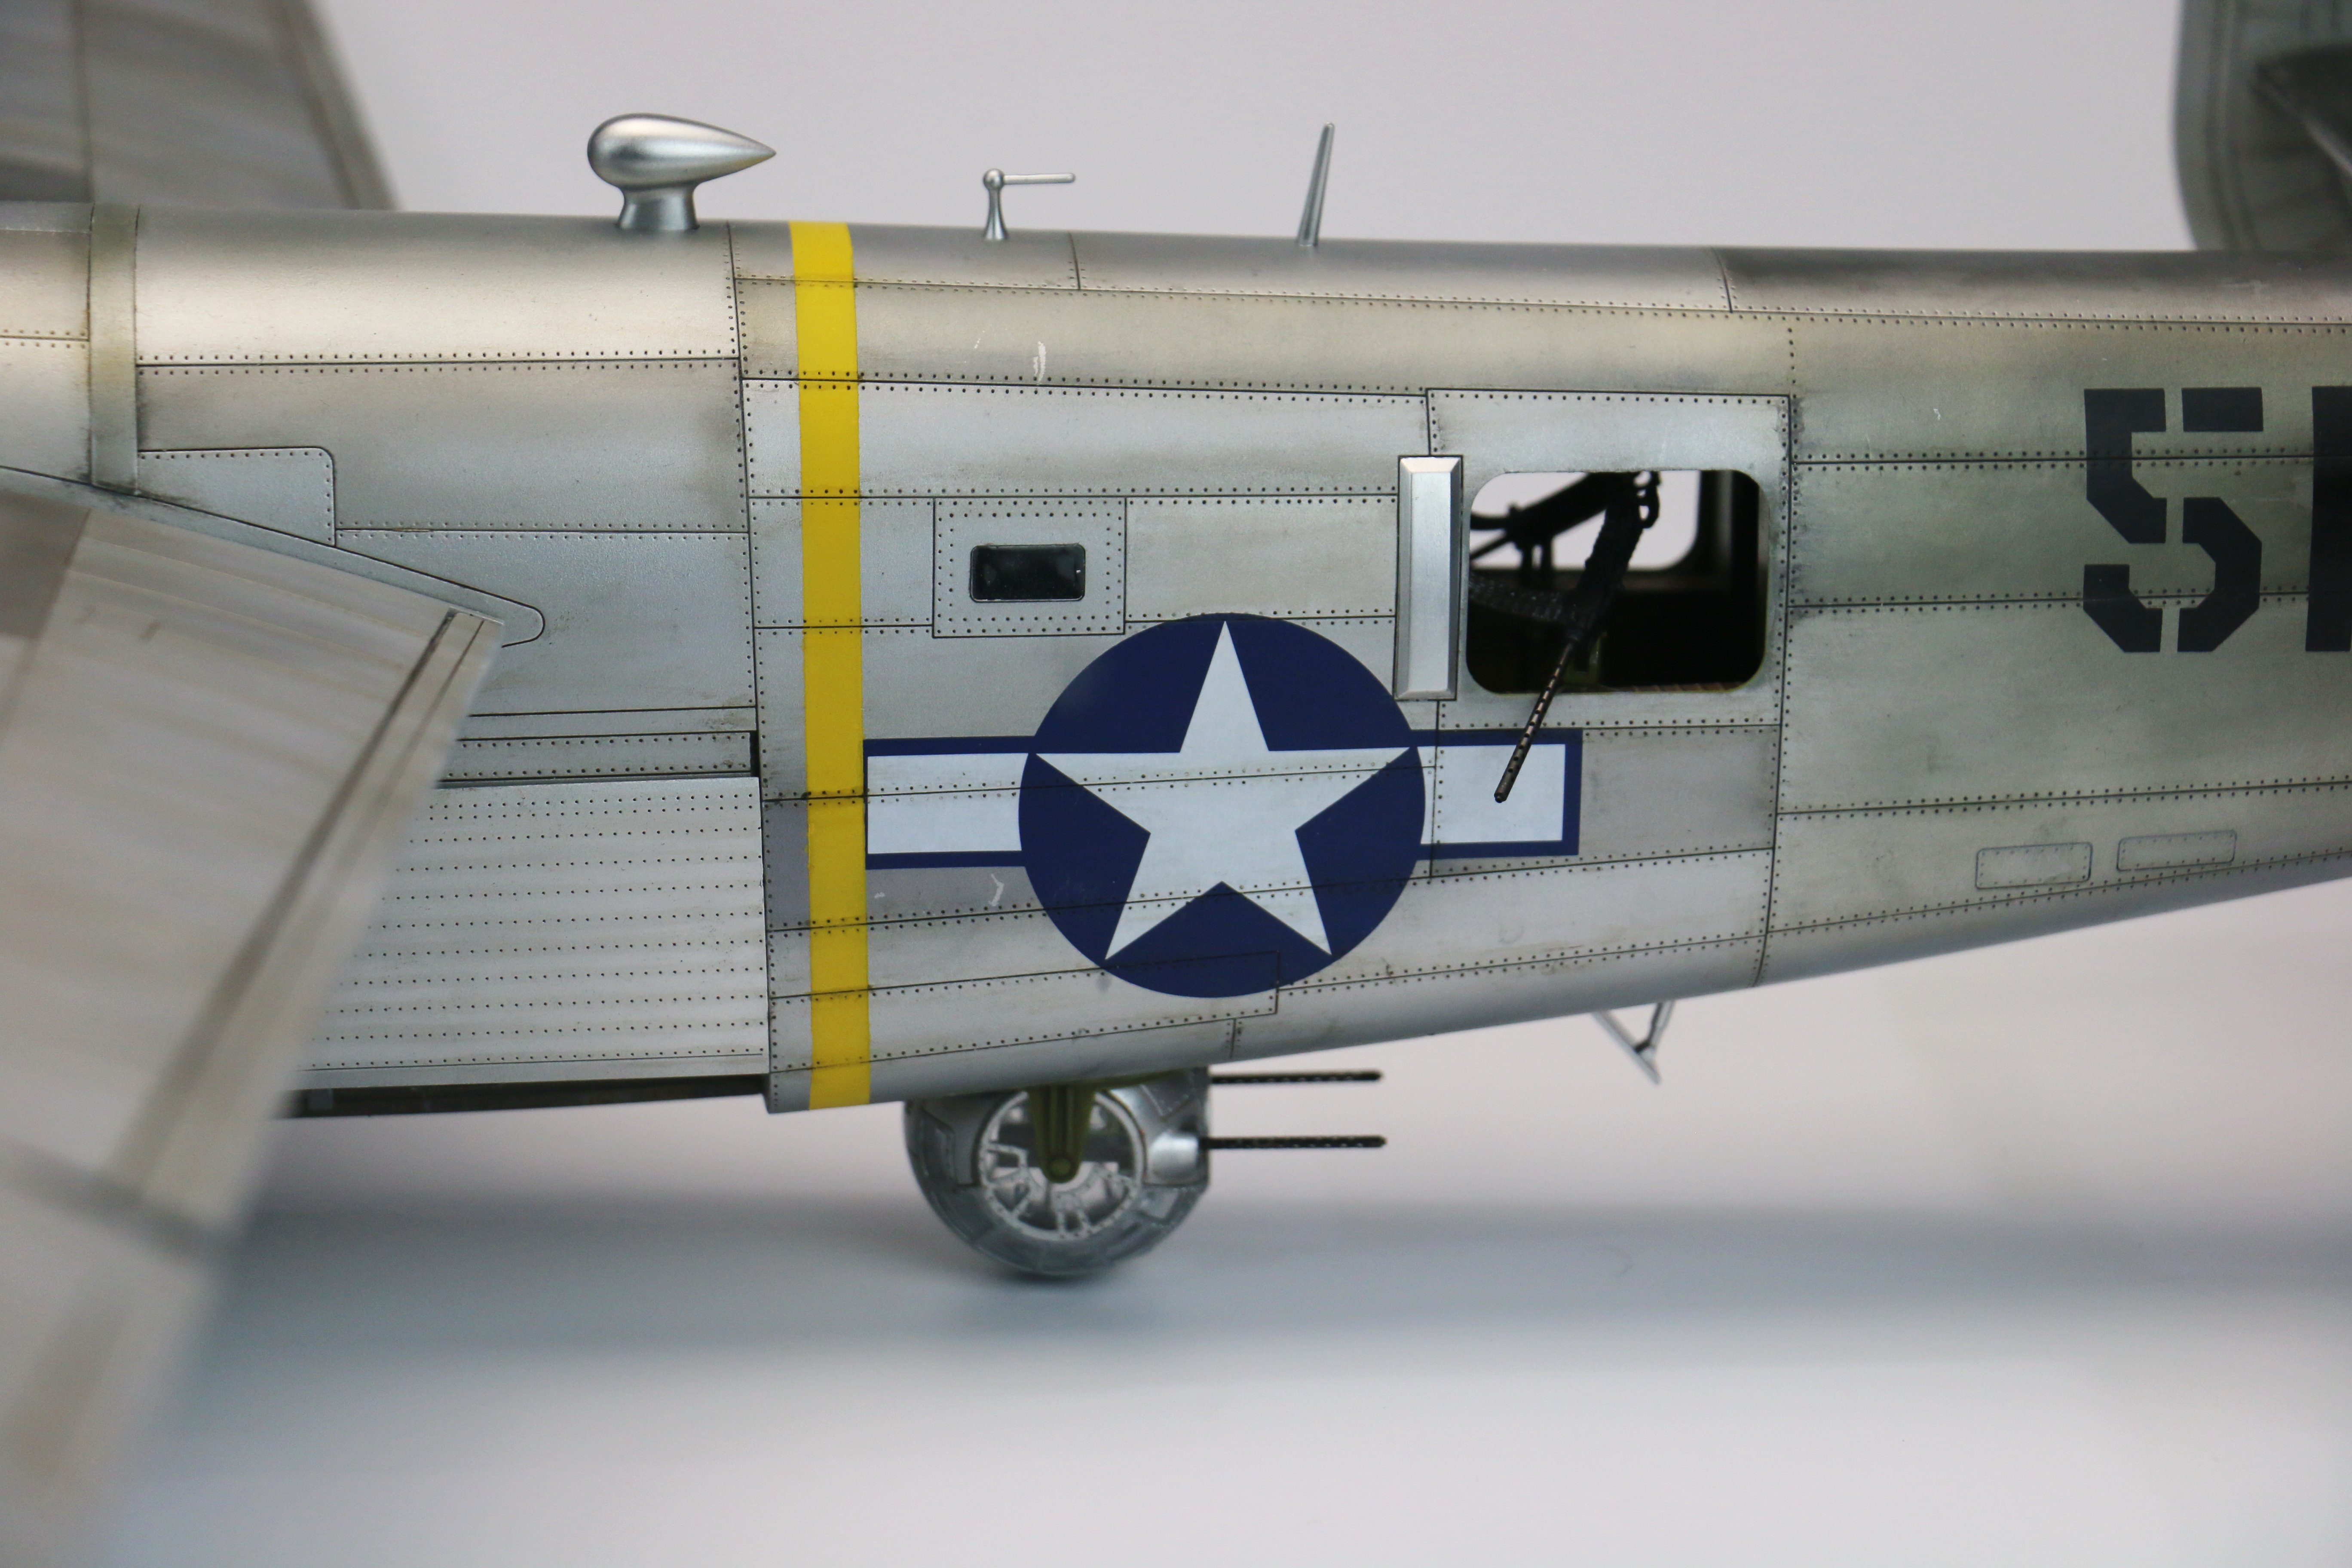
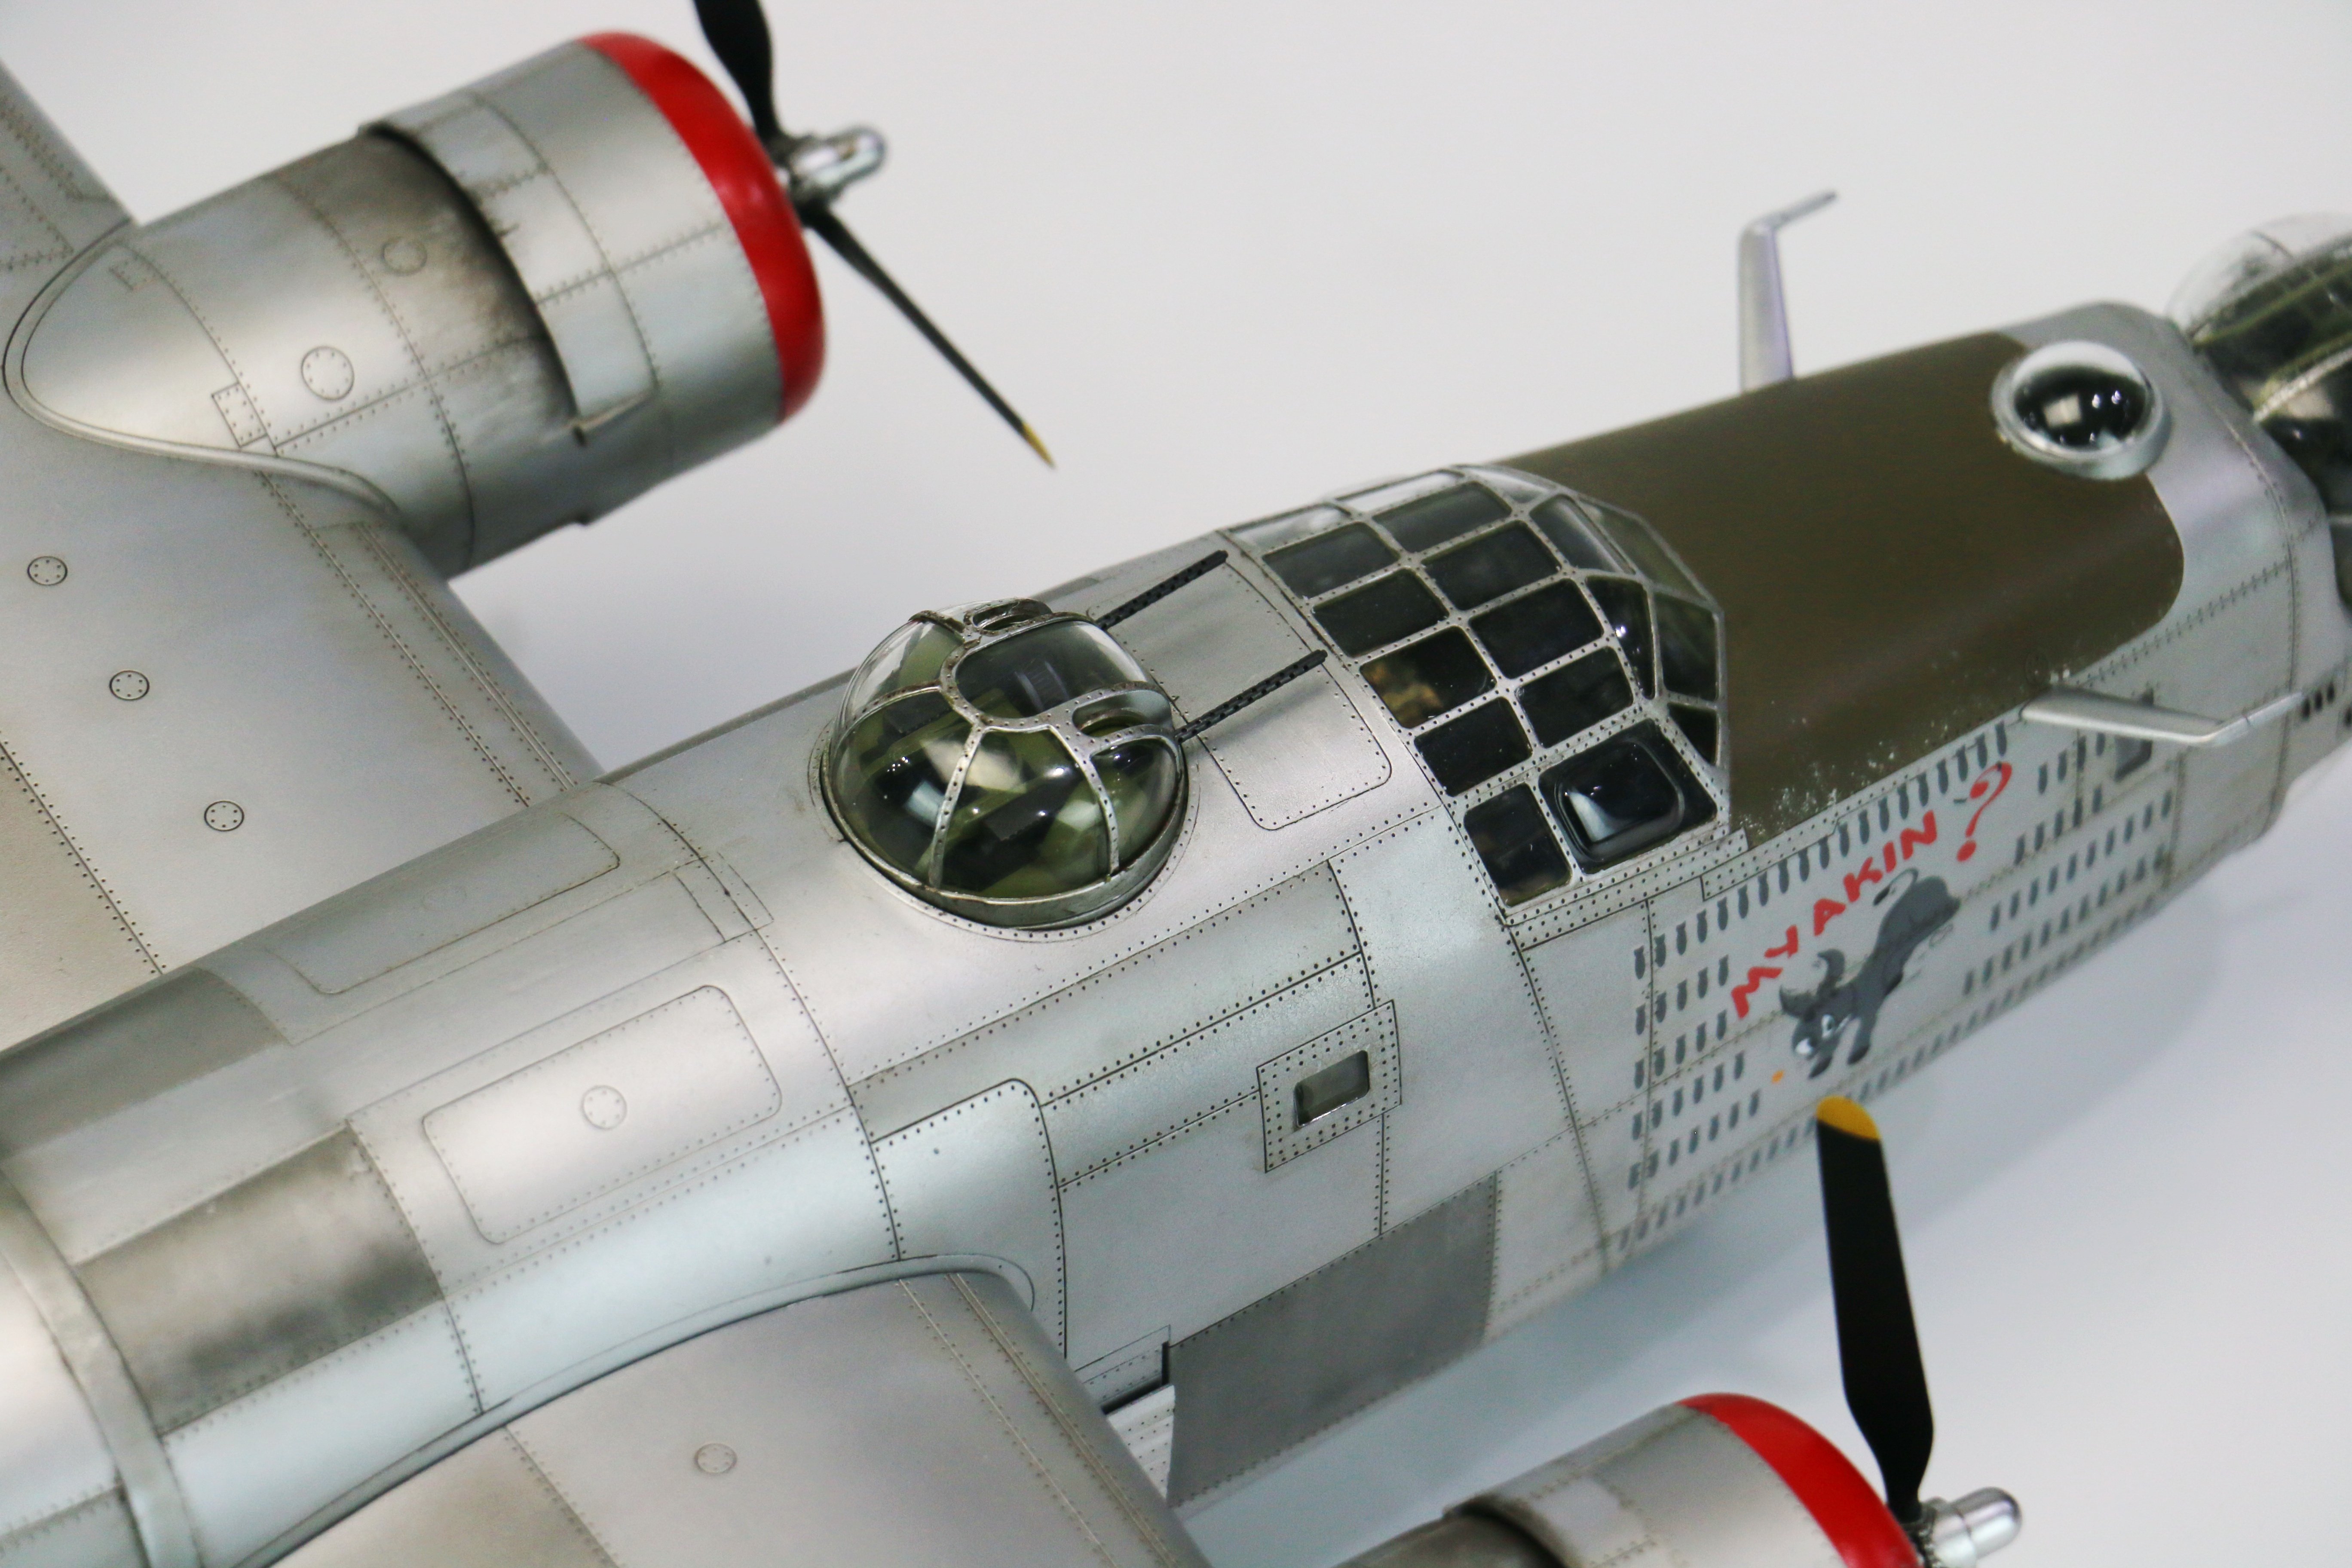
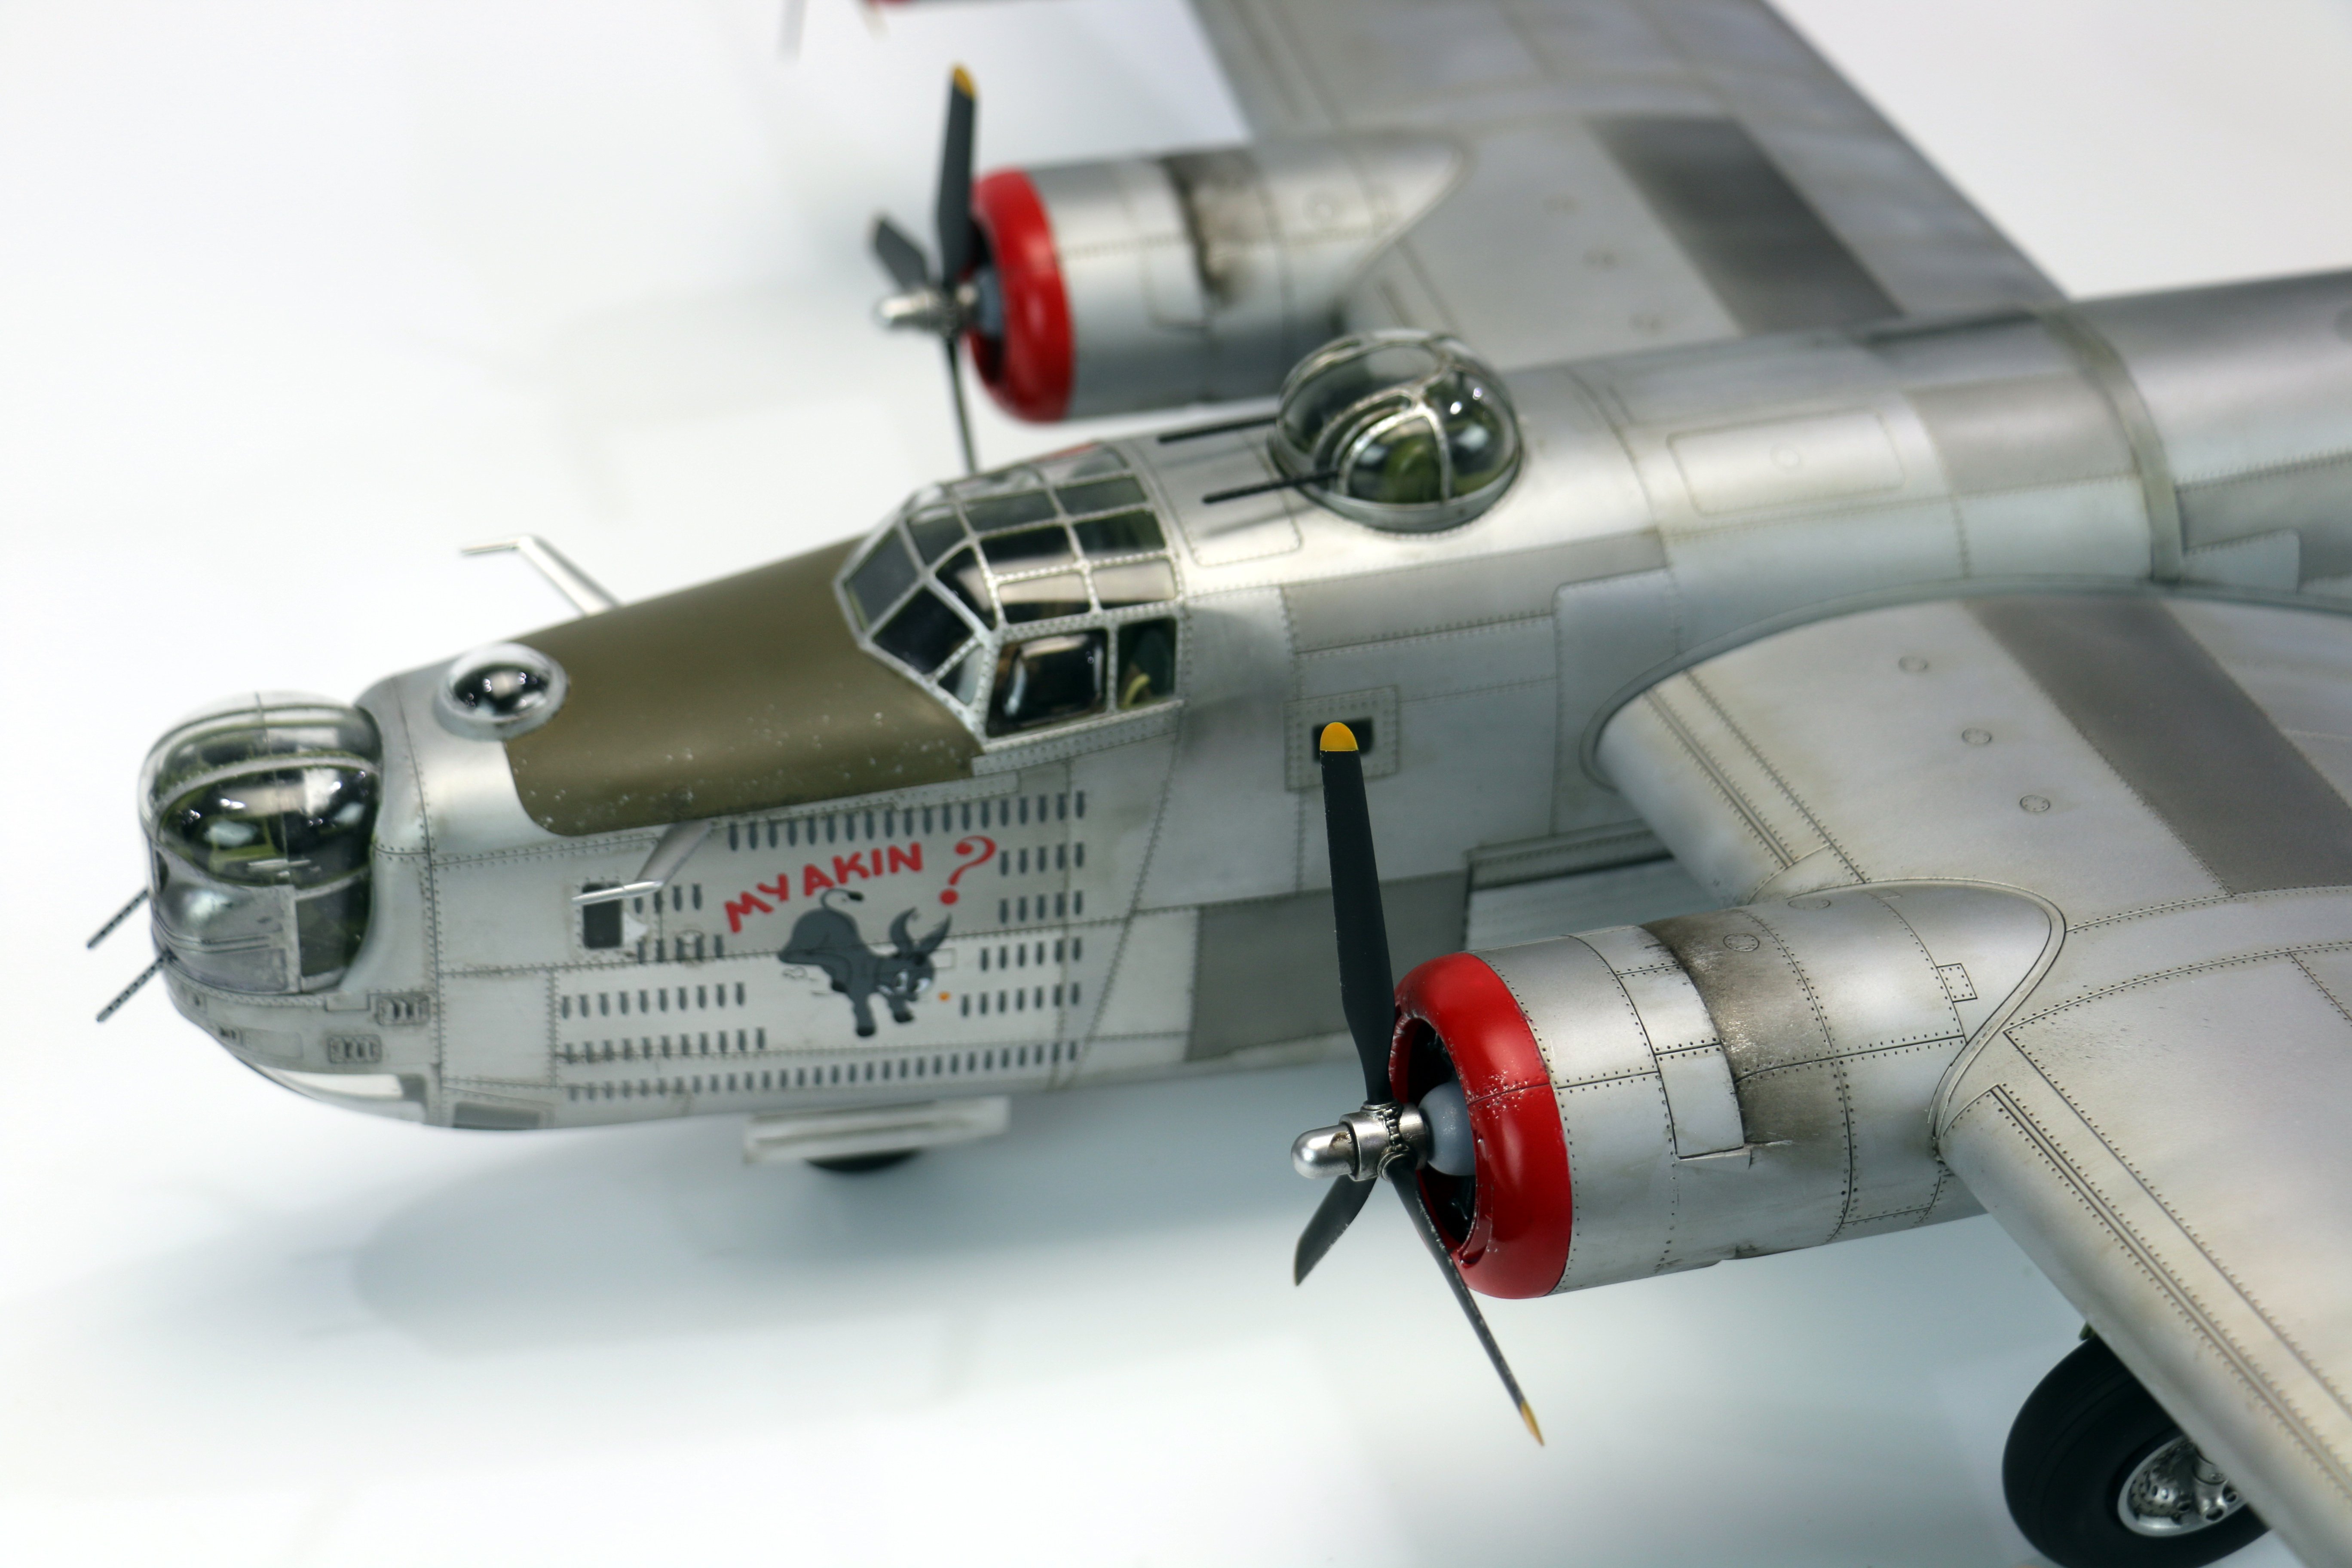
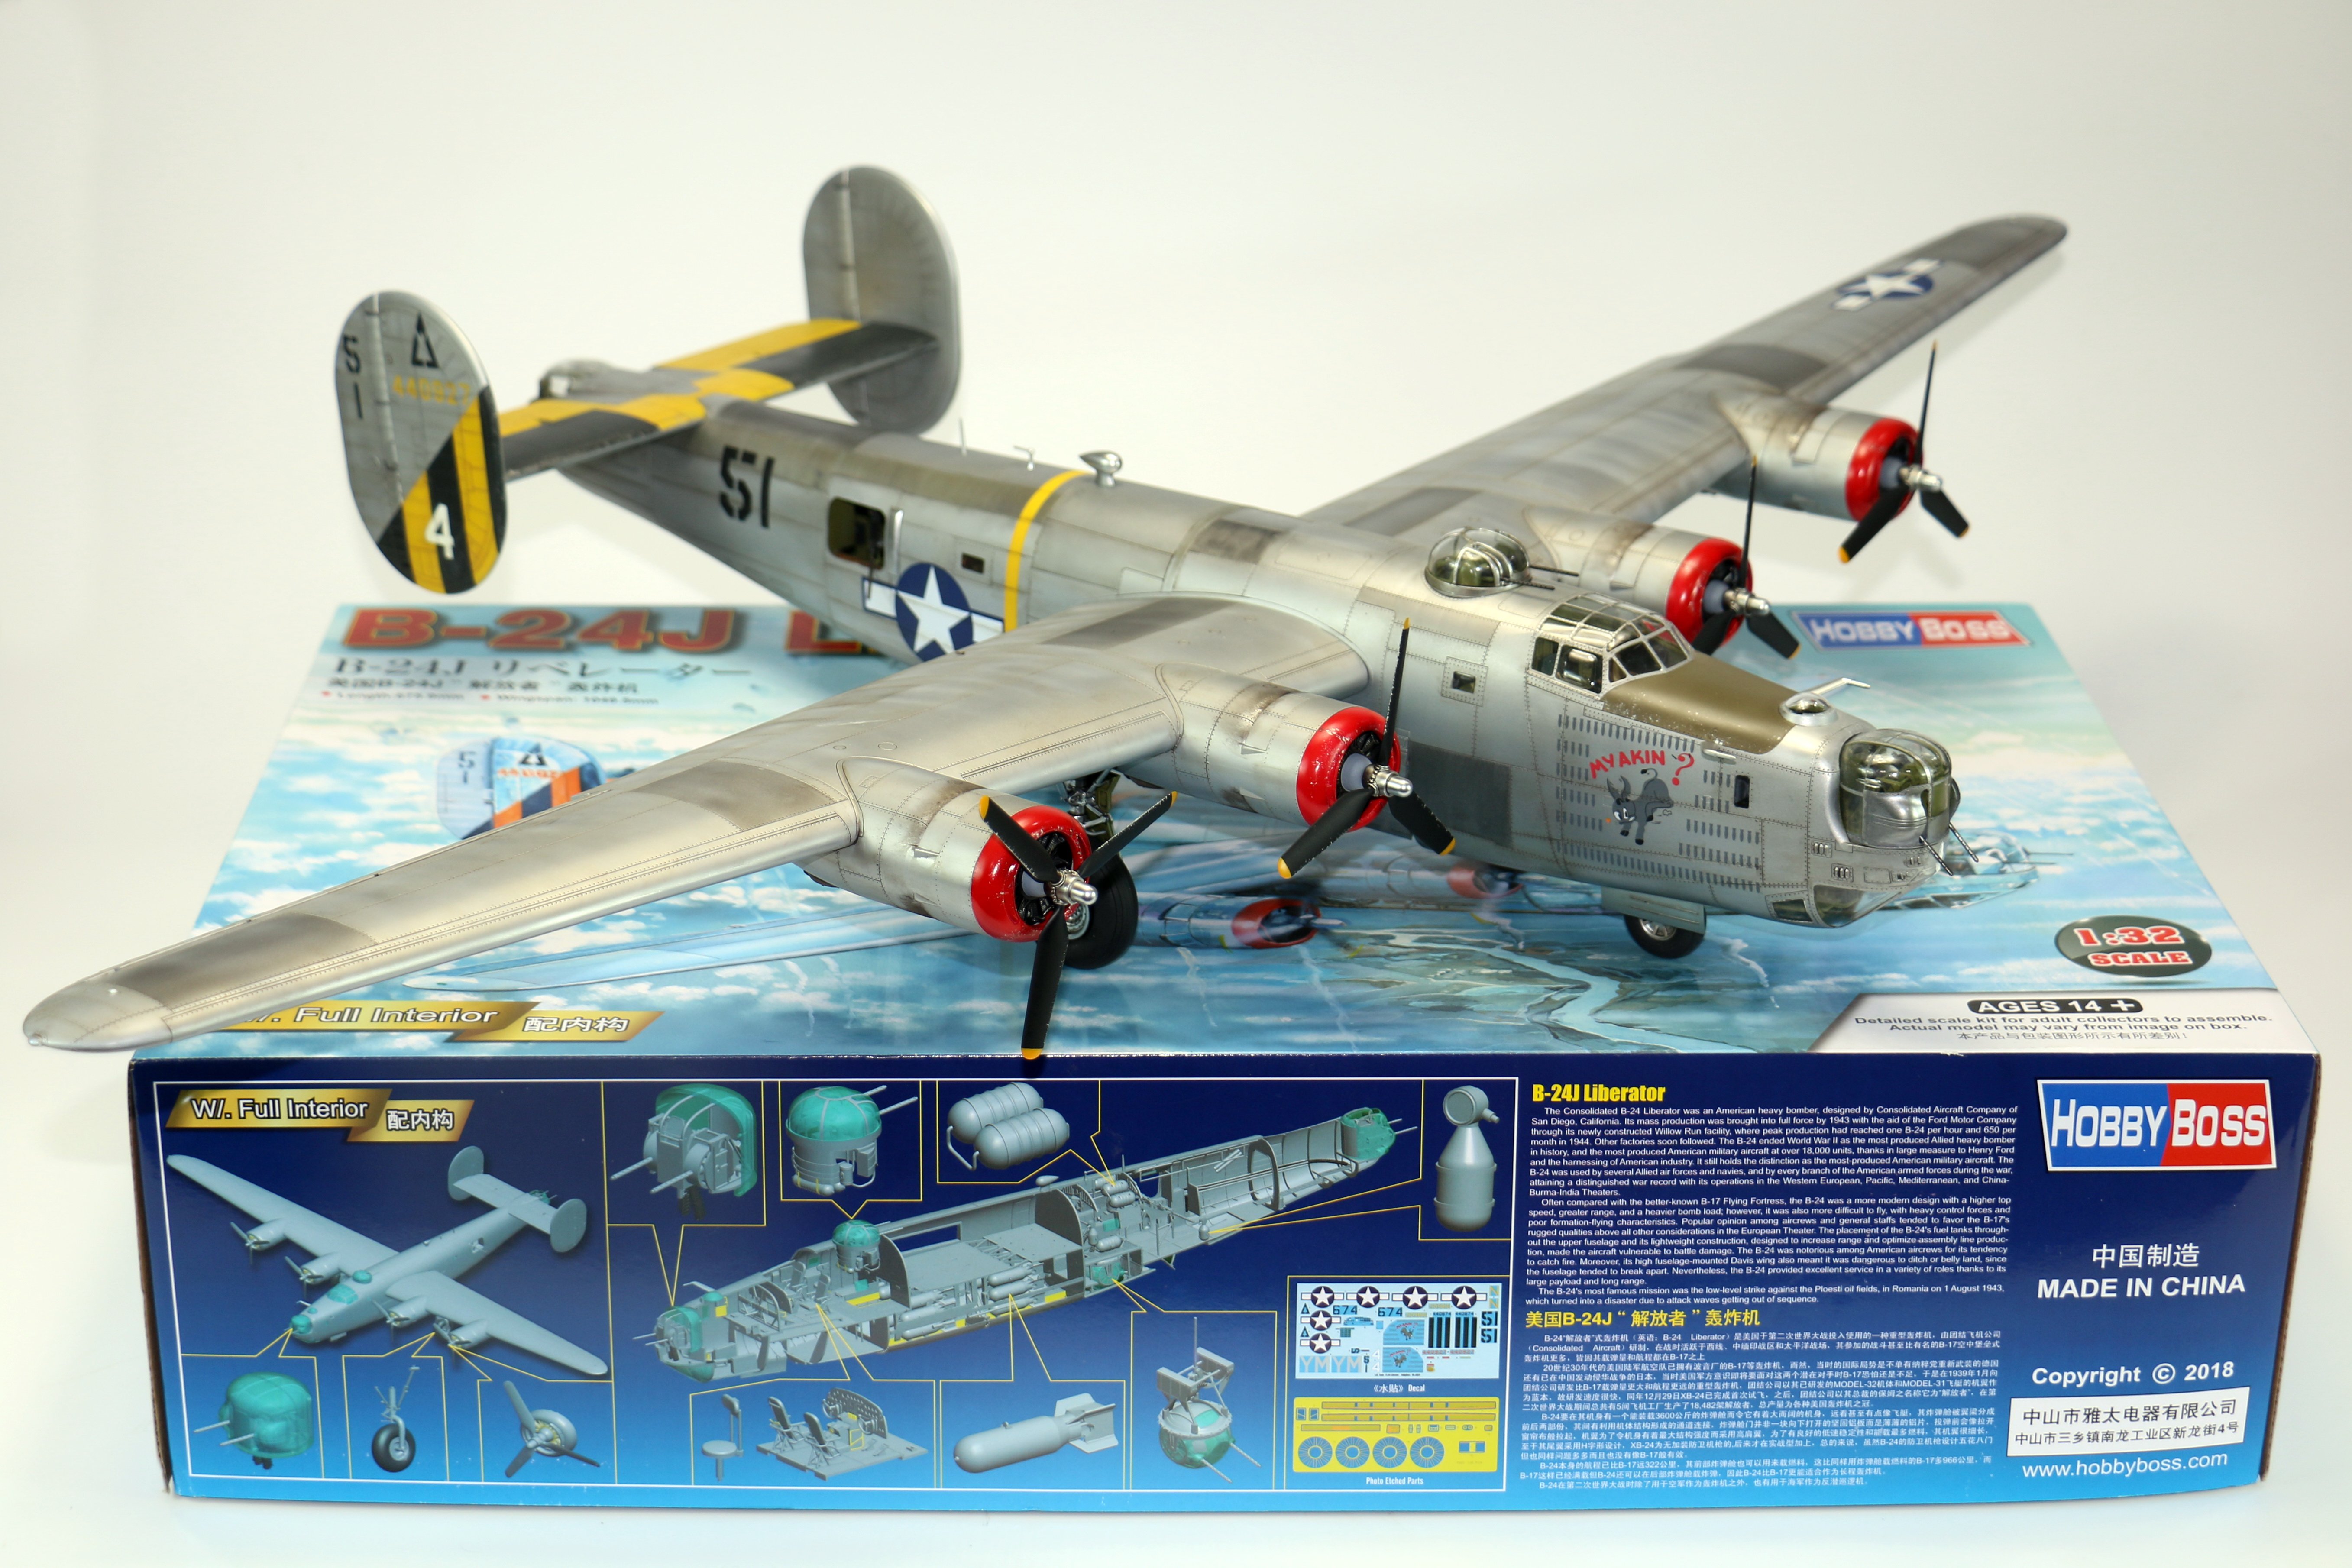
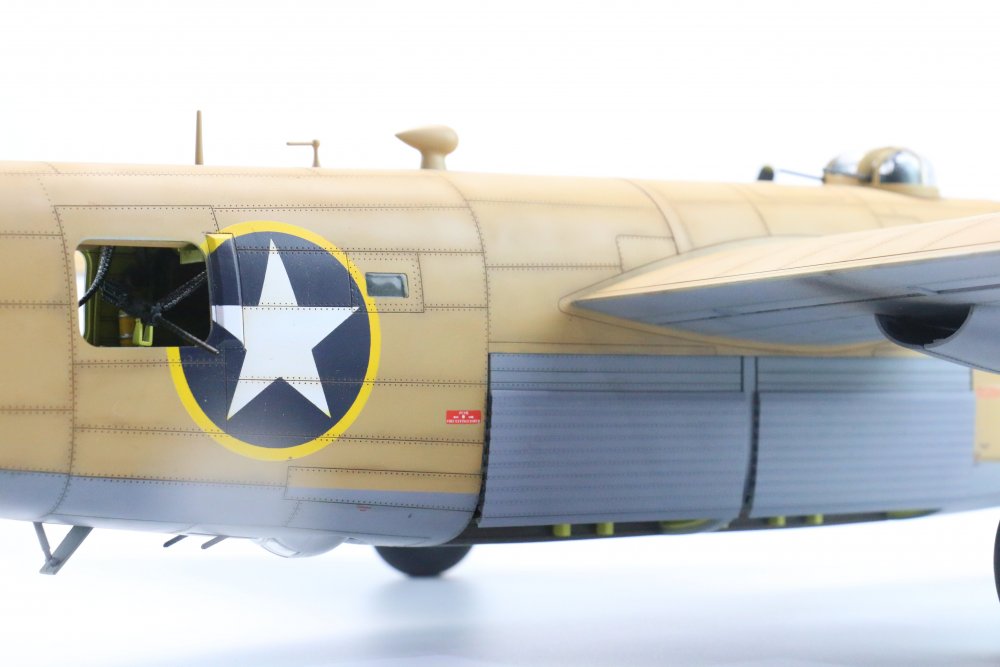
Thanks everyone, I wasn't sure if I'd over done it with the places I was posting. So I went back under my rock but if people want to see the tutorial it's here (sorry you may need Farcebook). The process is really simple. Step 1 - You airbrush the Alclad Bright Silver Candy Base over the section you want to paint. The Alclad paint is rock solid and was dry to the touch within half an hour. Step 2 - Mask off random panels, I used Post it Notes as they are very low tack and give a razor sharp edge. I then mix Dark Aluminium or any other of the silver based paints from Alclad with the Alclad base and lightly spray the masked off panels. Other panels I've used the metal powders from Uschi van der Rosten and again masked off the panel and using a cotton bud gentle wipe the powder across the the panel. Once it's got a good coat get a clean cotton bud and polish it back to the finish you want. Step 3 - Spray the model with a gloss clear of your choice, I used Mr Hobby Clear in a rattle can and also Aqua Gloss Clear from Alclad, it really depended on how lazy I felt it doesn't matter as the Panel Line wash doesn't seem to affect the gloss coat. Step 4 - Literally slap some Panel Line wash (I used a 50/50 mix of 1616 Orange Brown & 1617 Blue Black) slap it on all of the panel lines, rivet lines etc and leave it to dry. Step 5 - After you've left the Panel wash for half an hour or so (it can be longer, I left one section over night) start to remove it with a dry cotton bud wiping in the direction of airflow over the panel. It's important that it's a dry cotton but and not one with white spirit, thinners etc on. Wiping it dry deposits a patina on the surrounding panel while clearing the excess off. Keep swapping out the cotton buds for clean ones until you're happy with the effect. Step 6 - Very lightly mist the base coat back over the centres of the panel. I then sprayed the whole thing with a Matt coat using Testors Dullcote, (this evened out the finish) and depending on whether you want a aged aluminium finish or a high gloss finish you can apply either a full on gloss or as I used a semi gloss on the leading edges and high points that are more likely to get abraded by airflow.
-
All good Hubert, I didn't take it that you were being an armchair expert
-
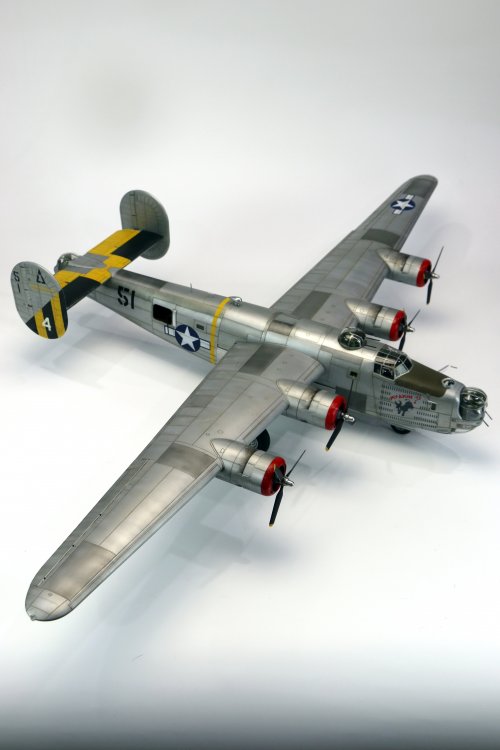
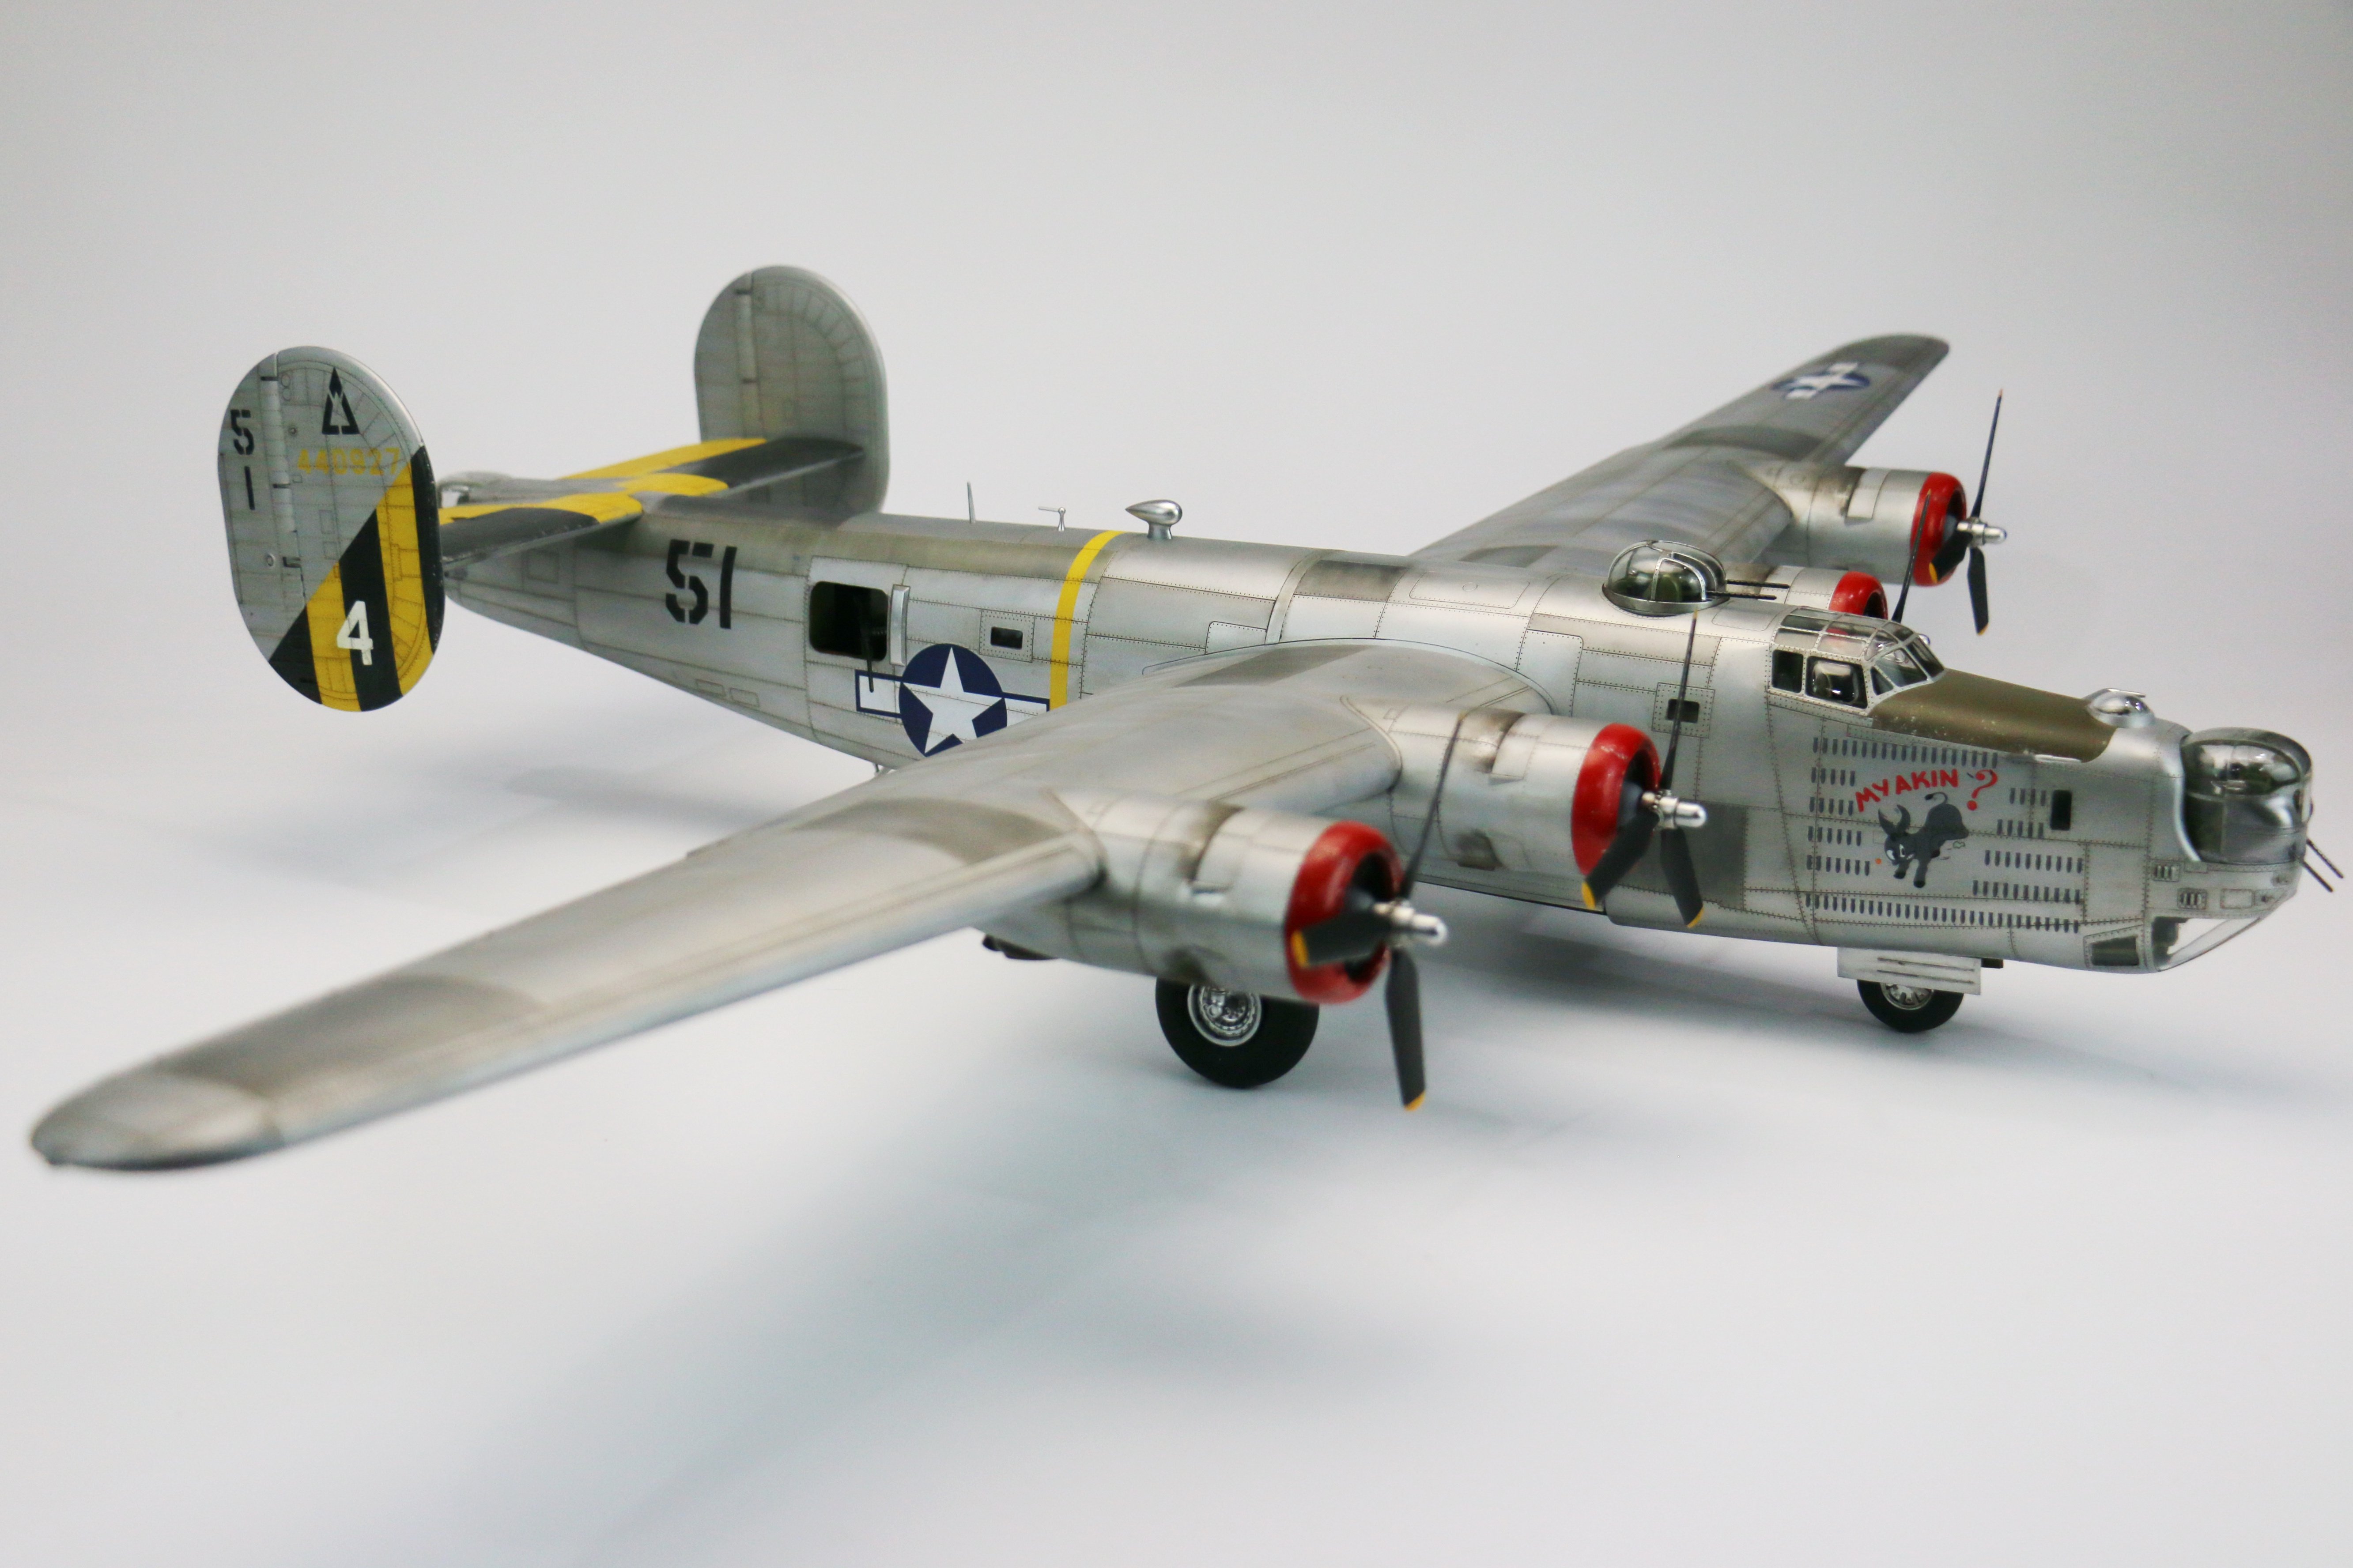
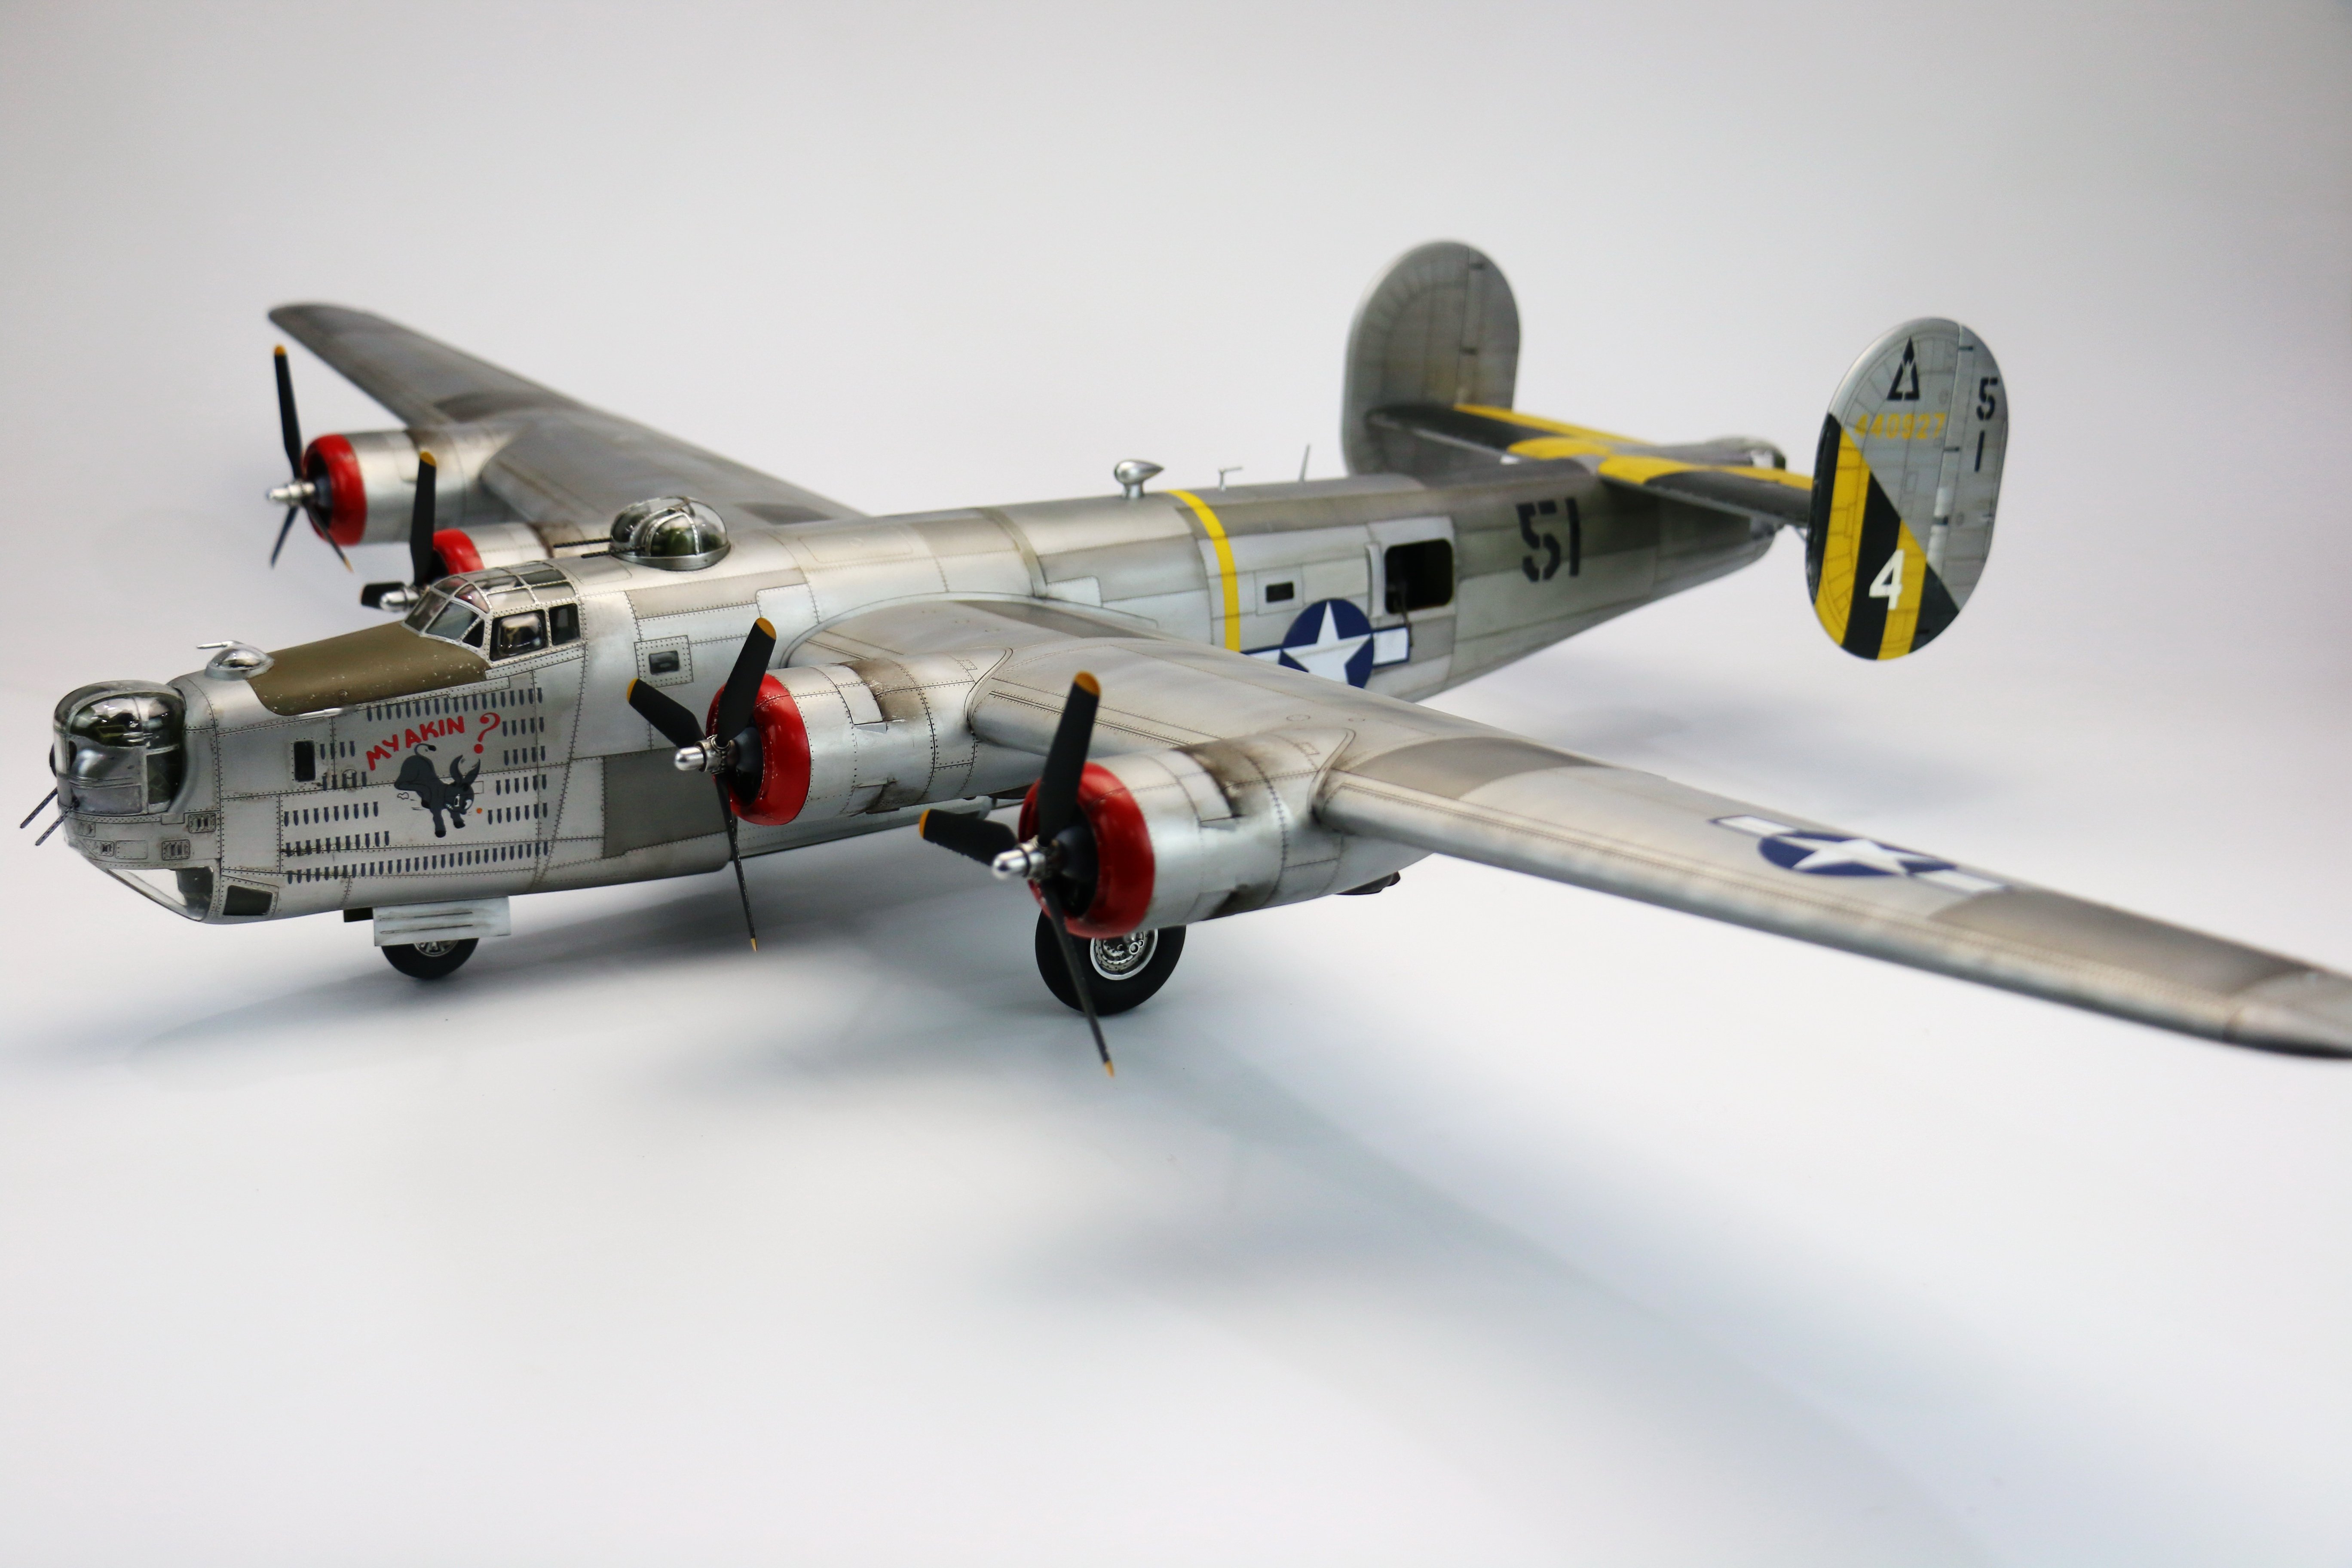
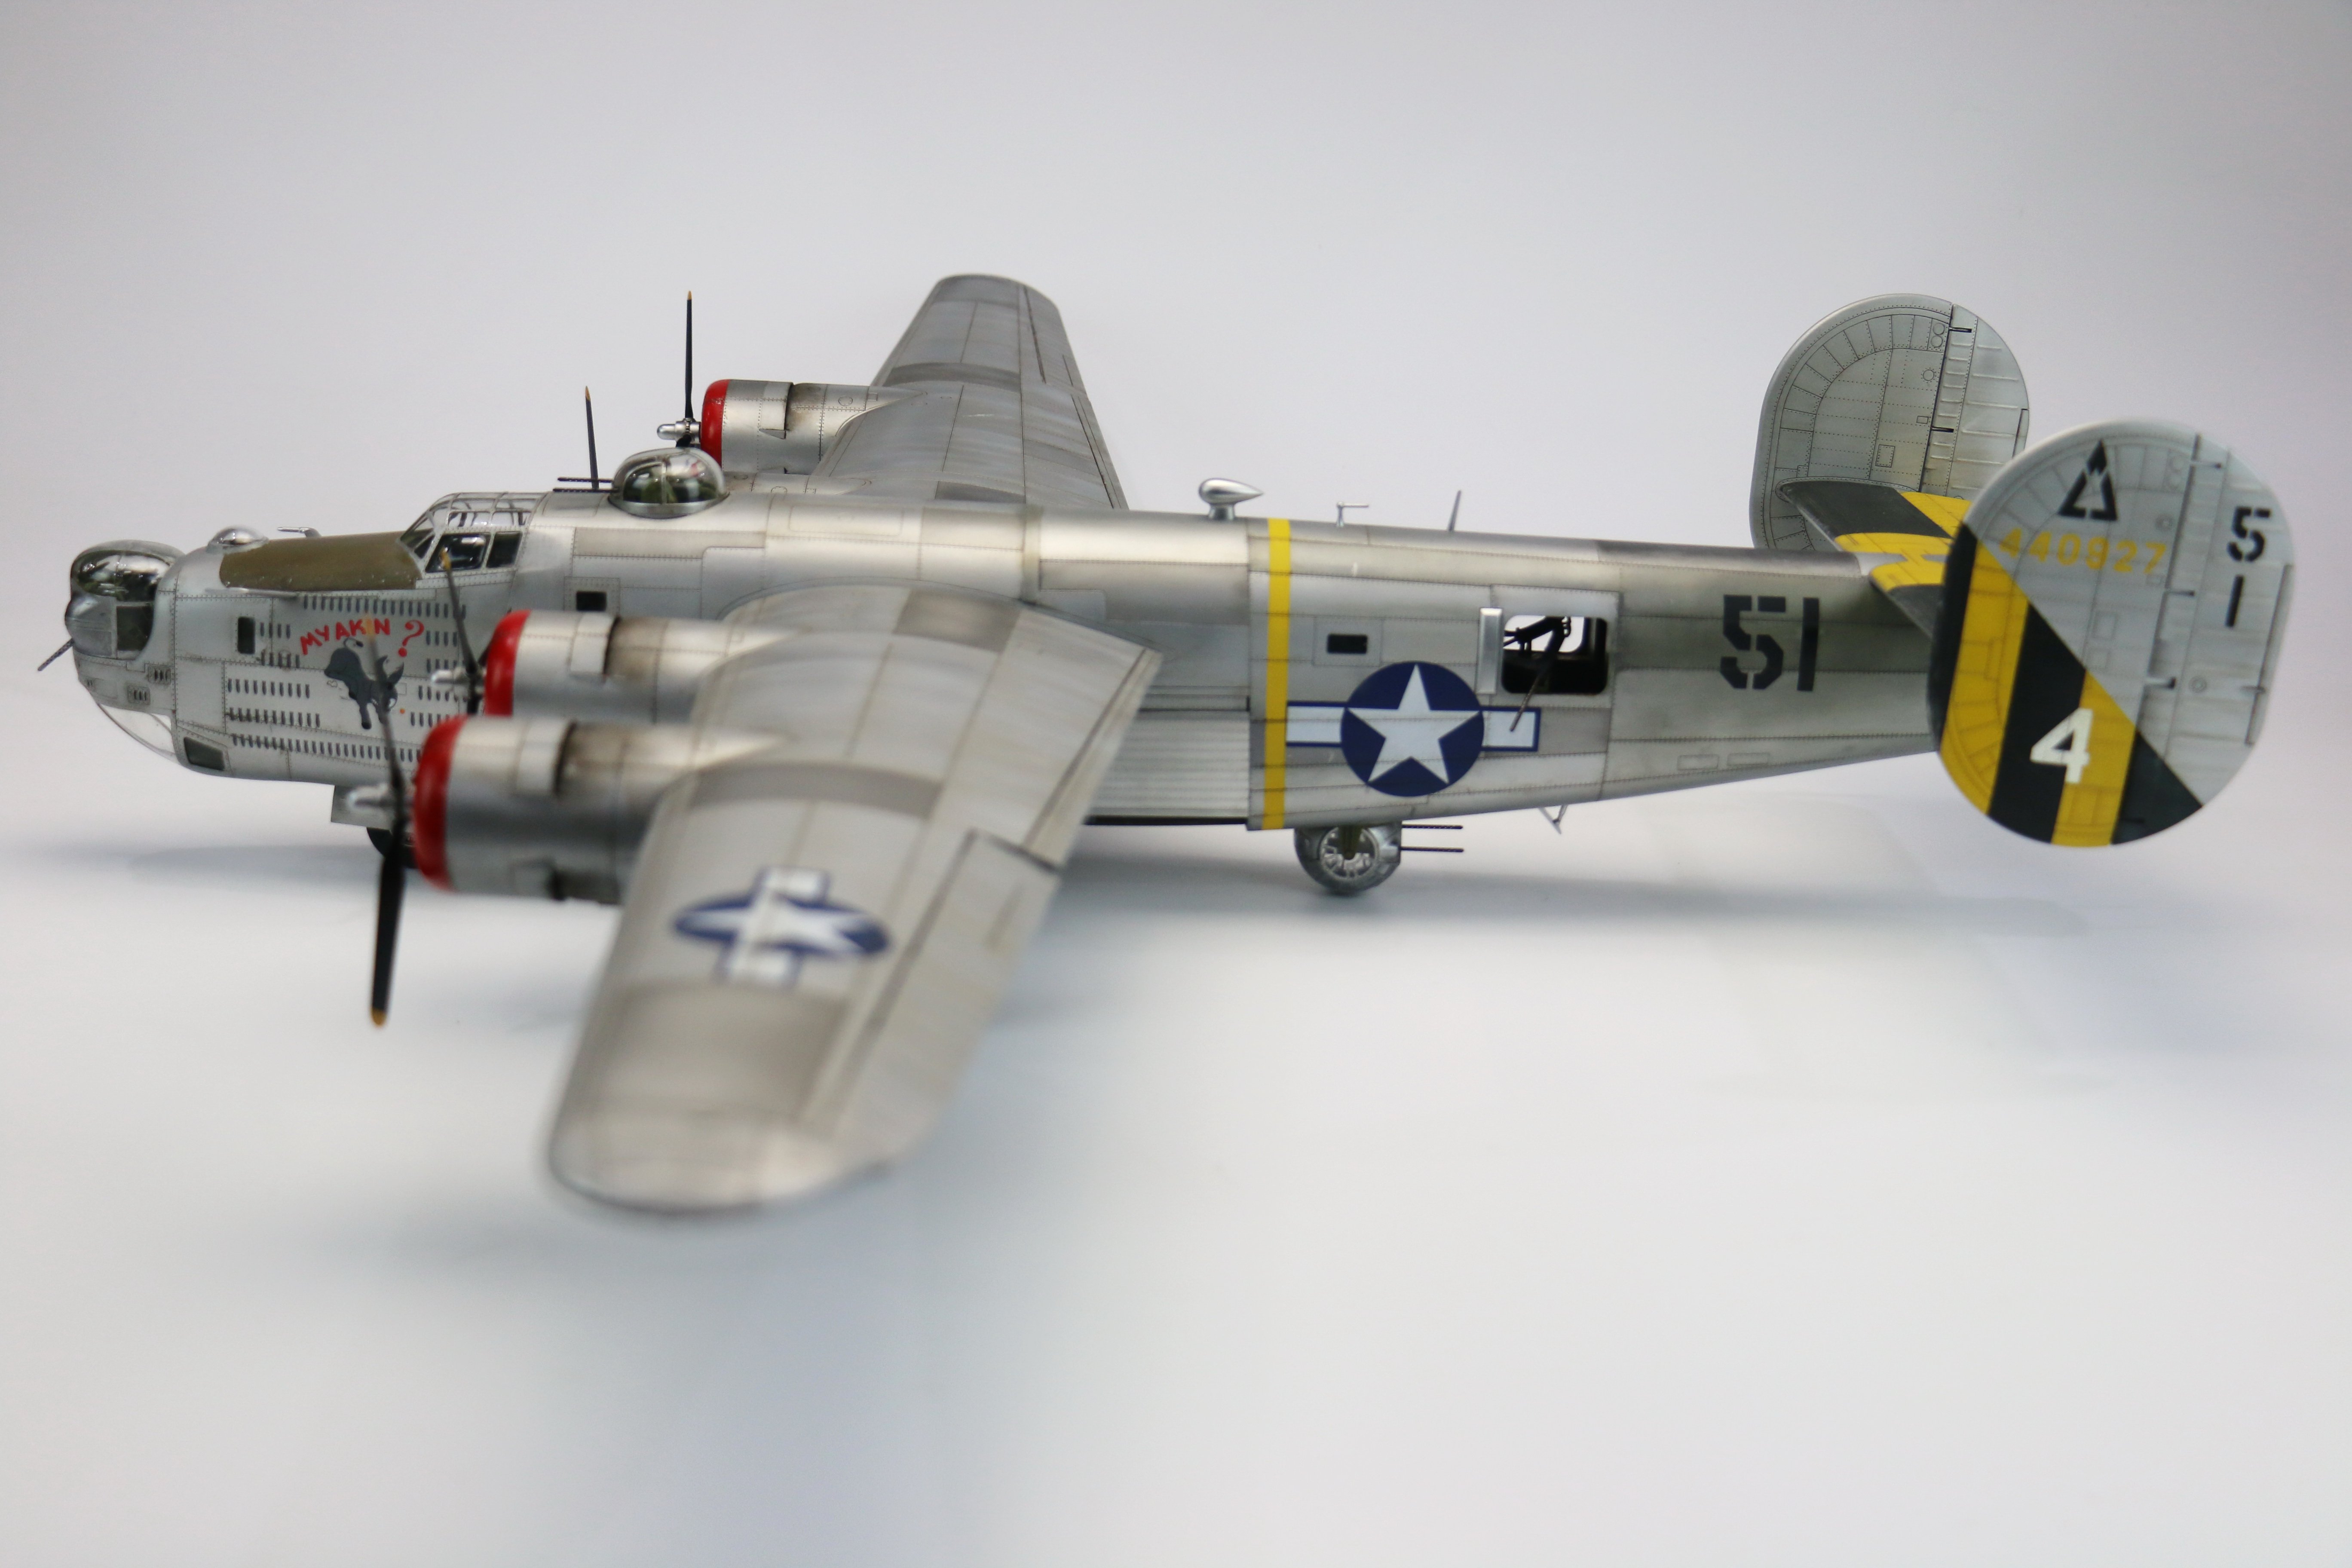
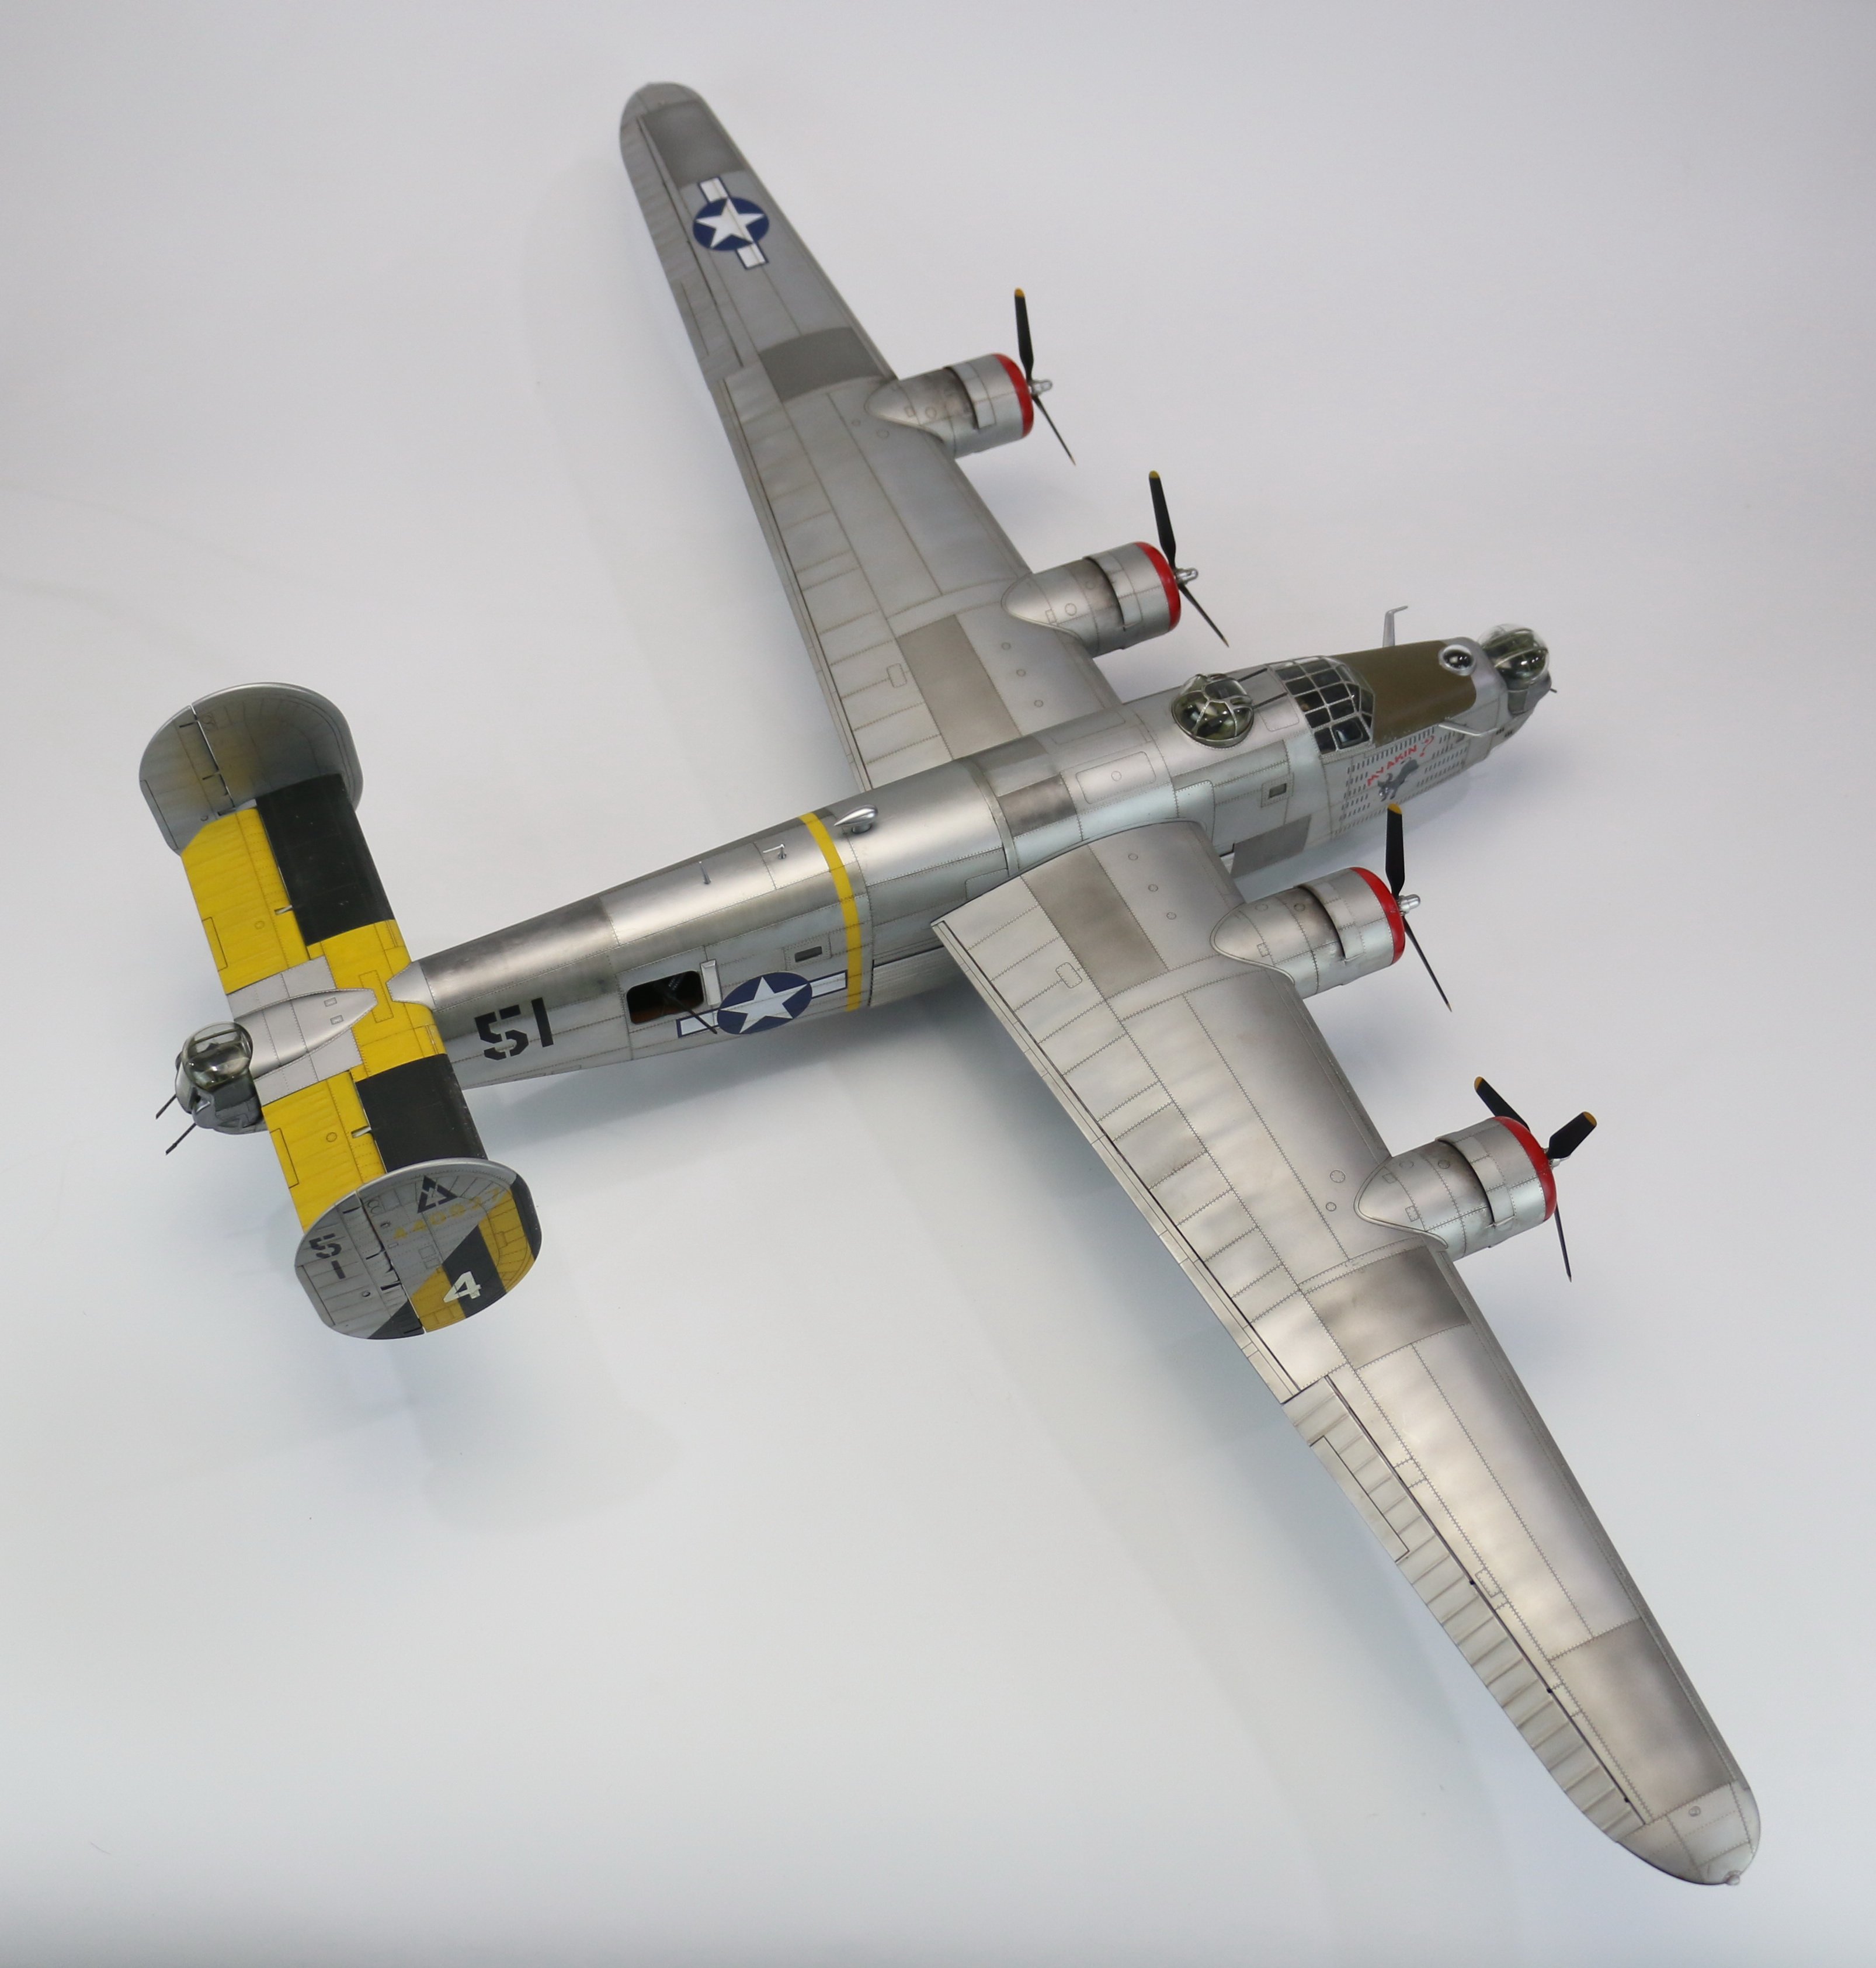
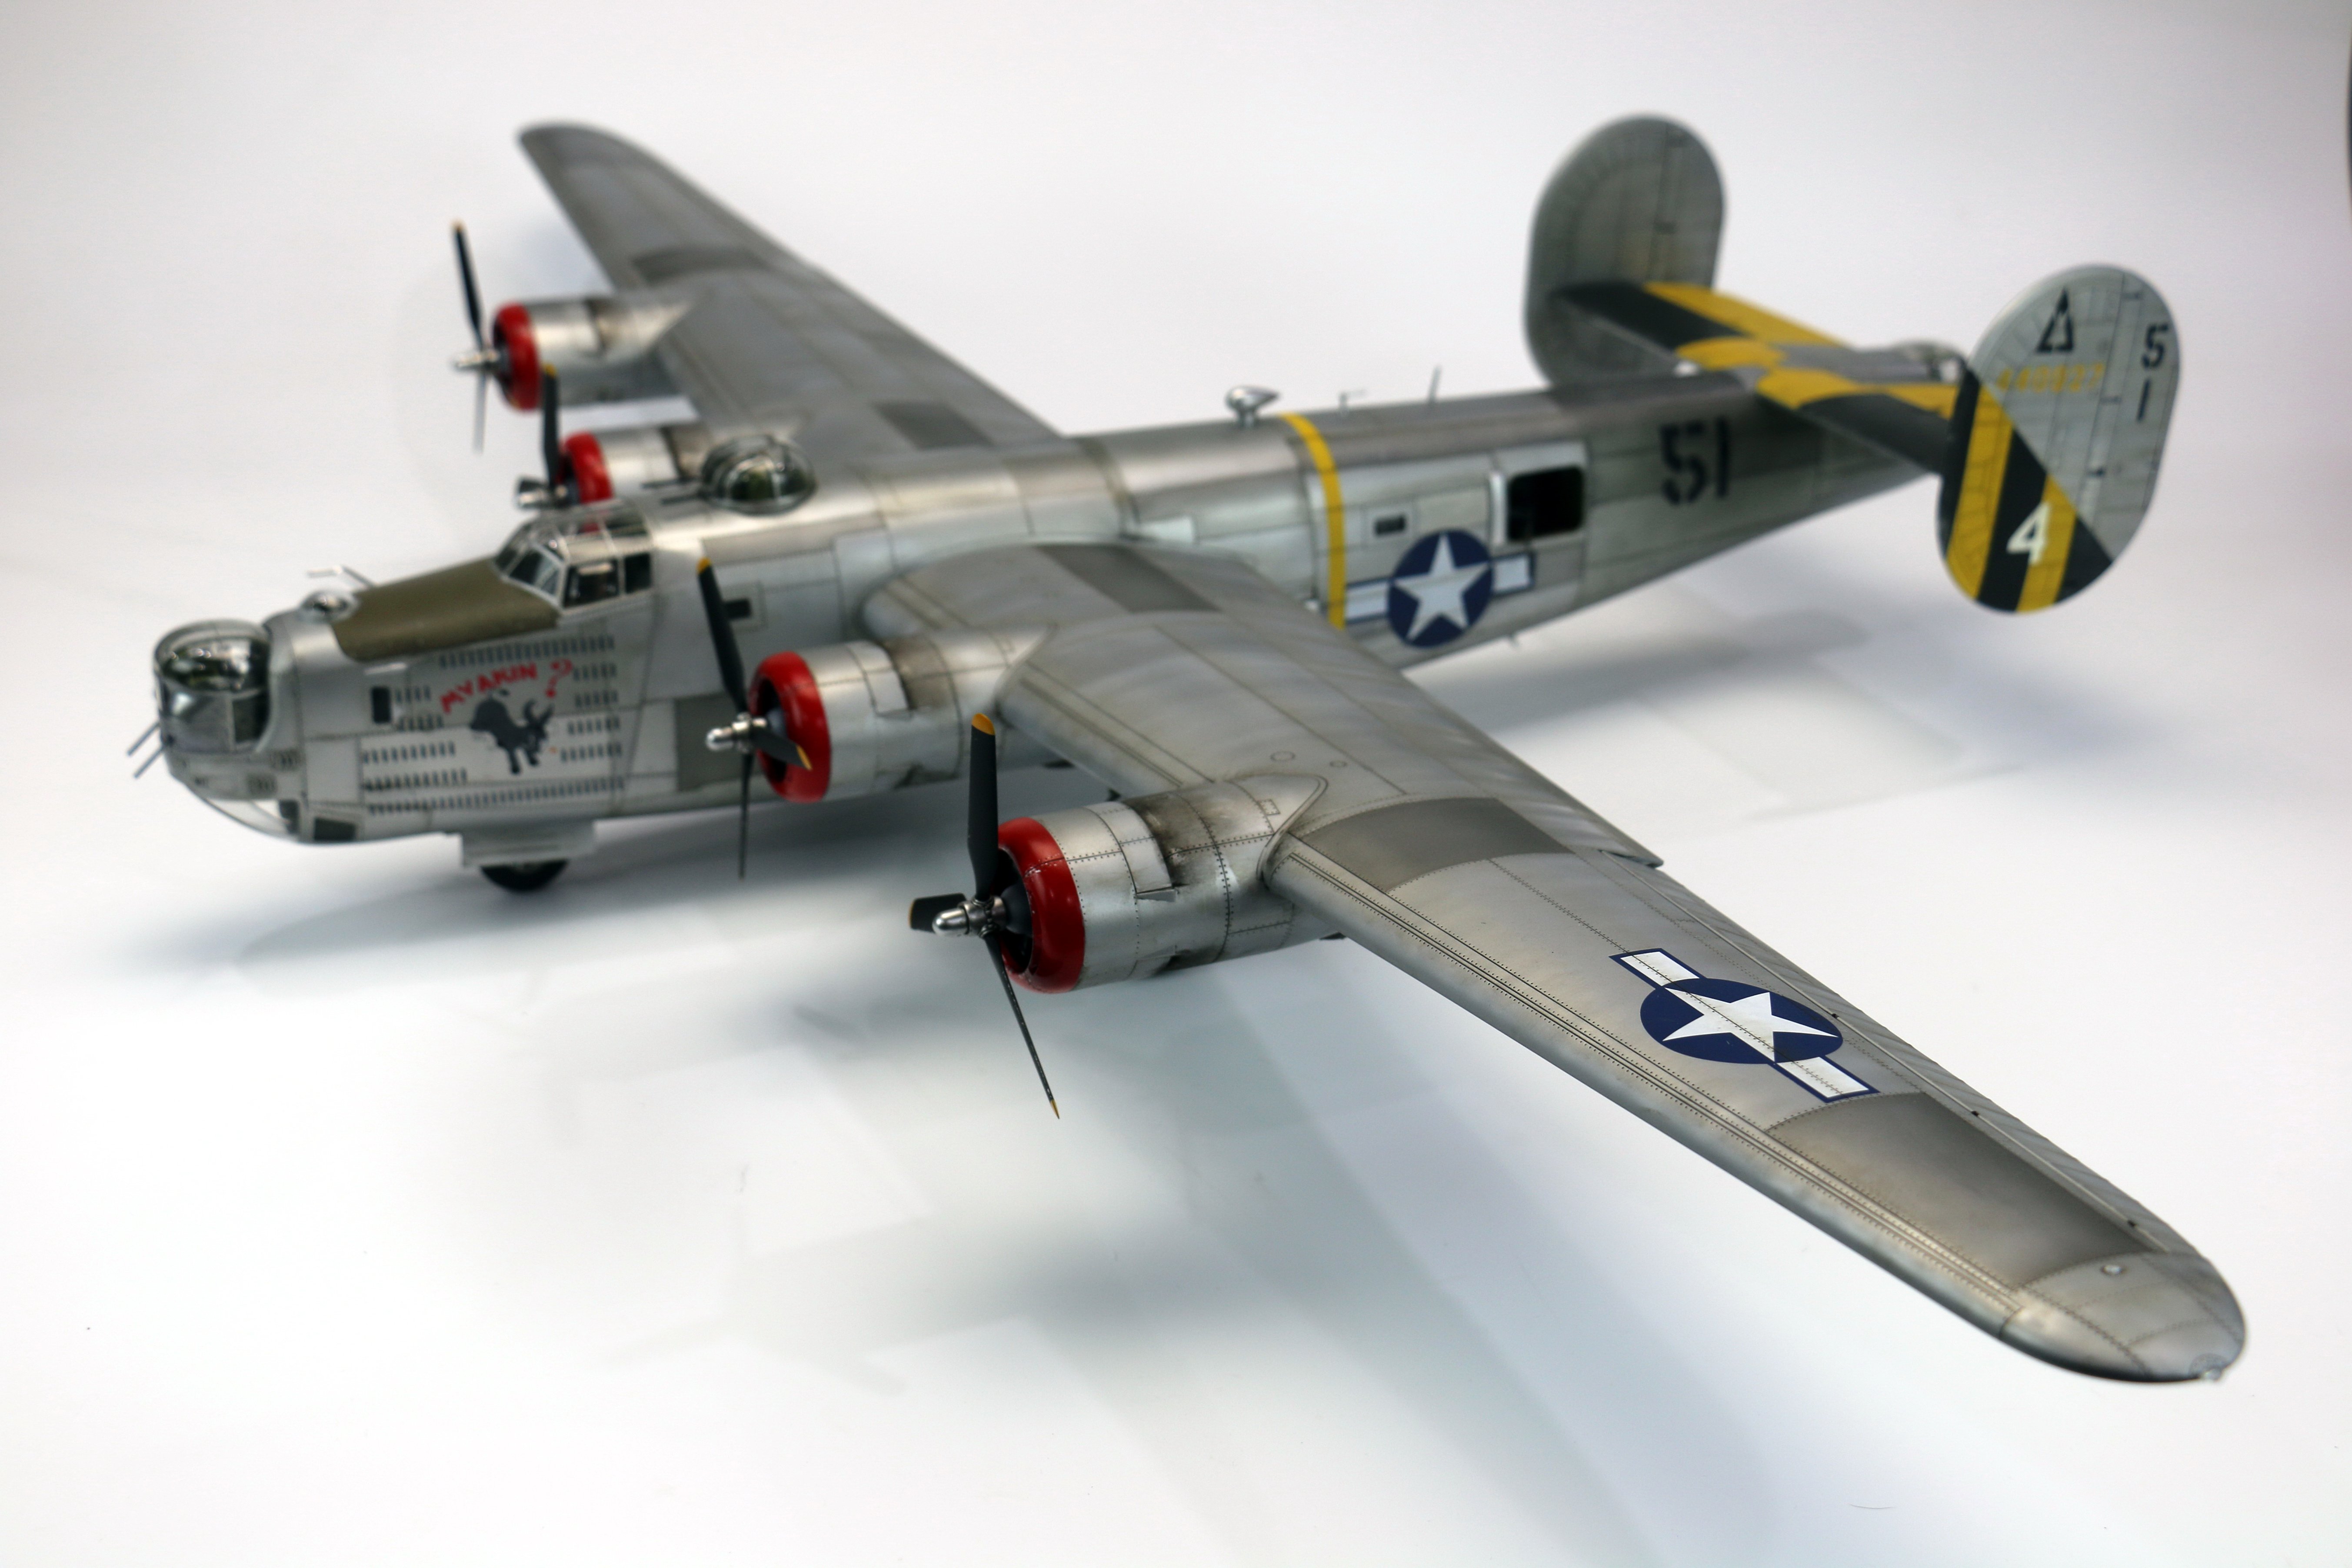
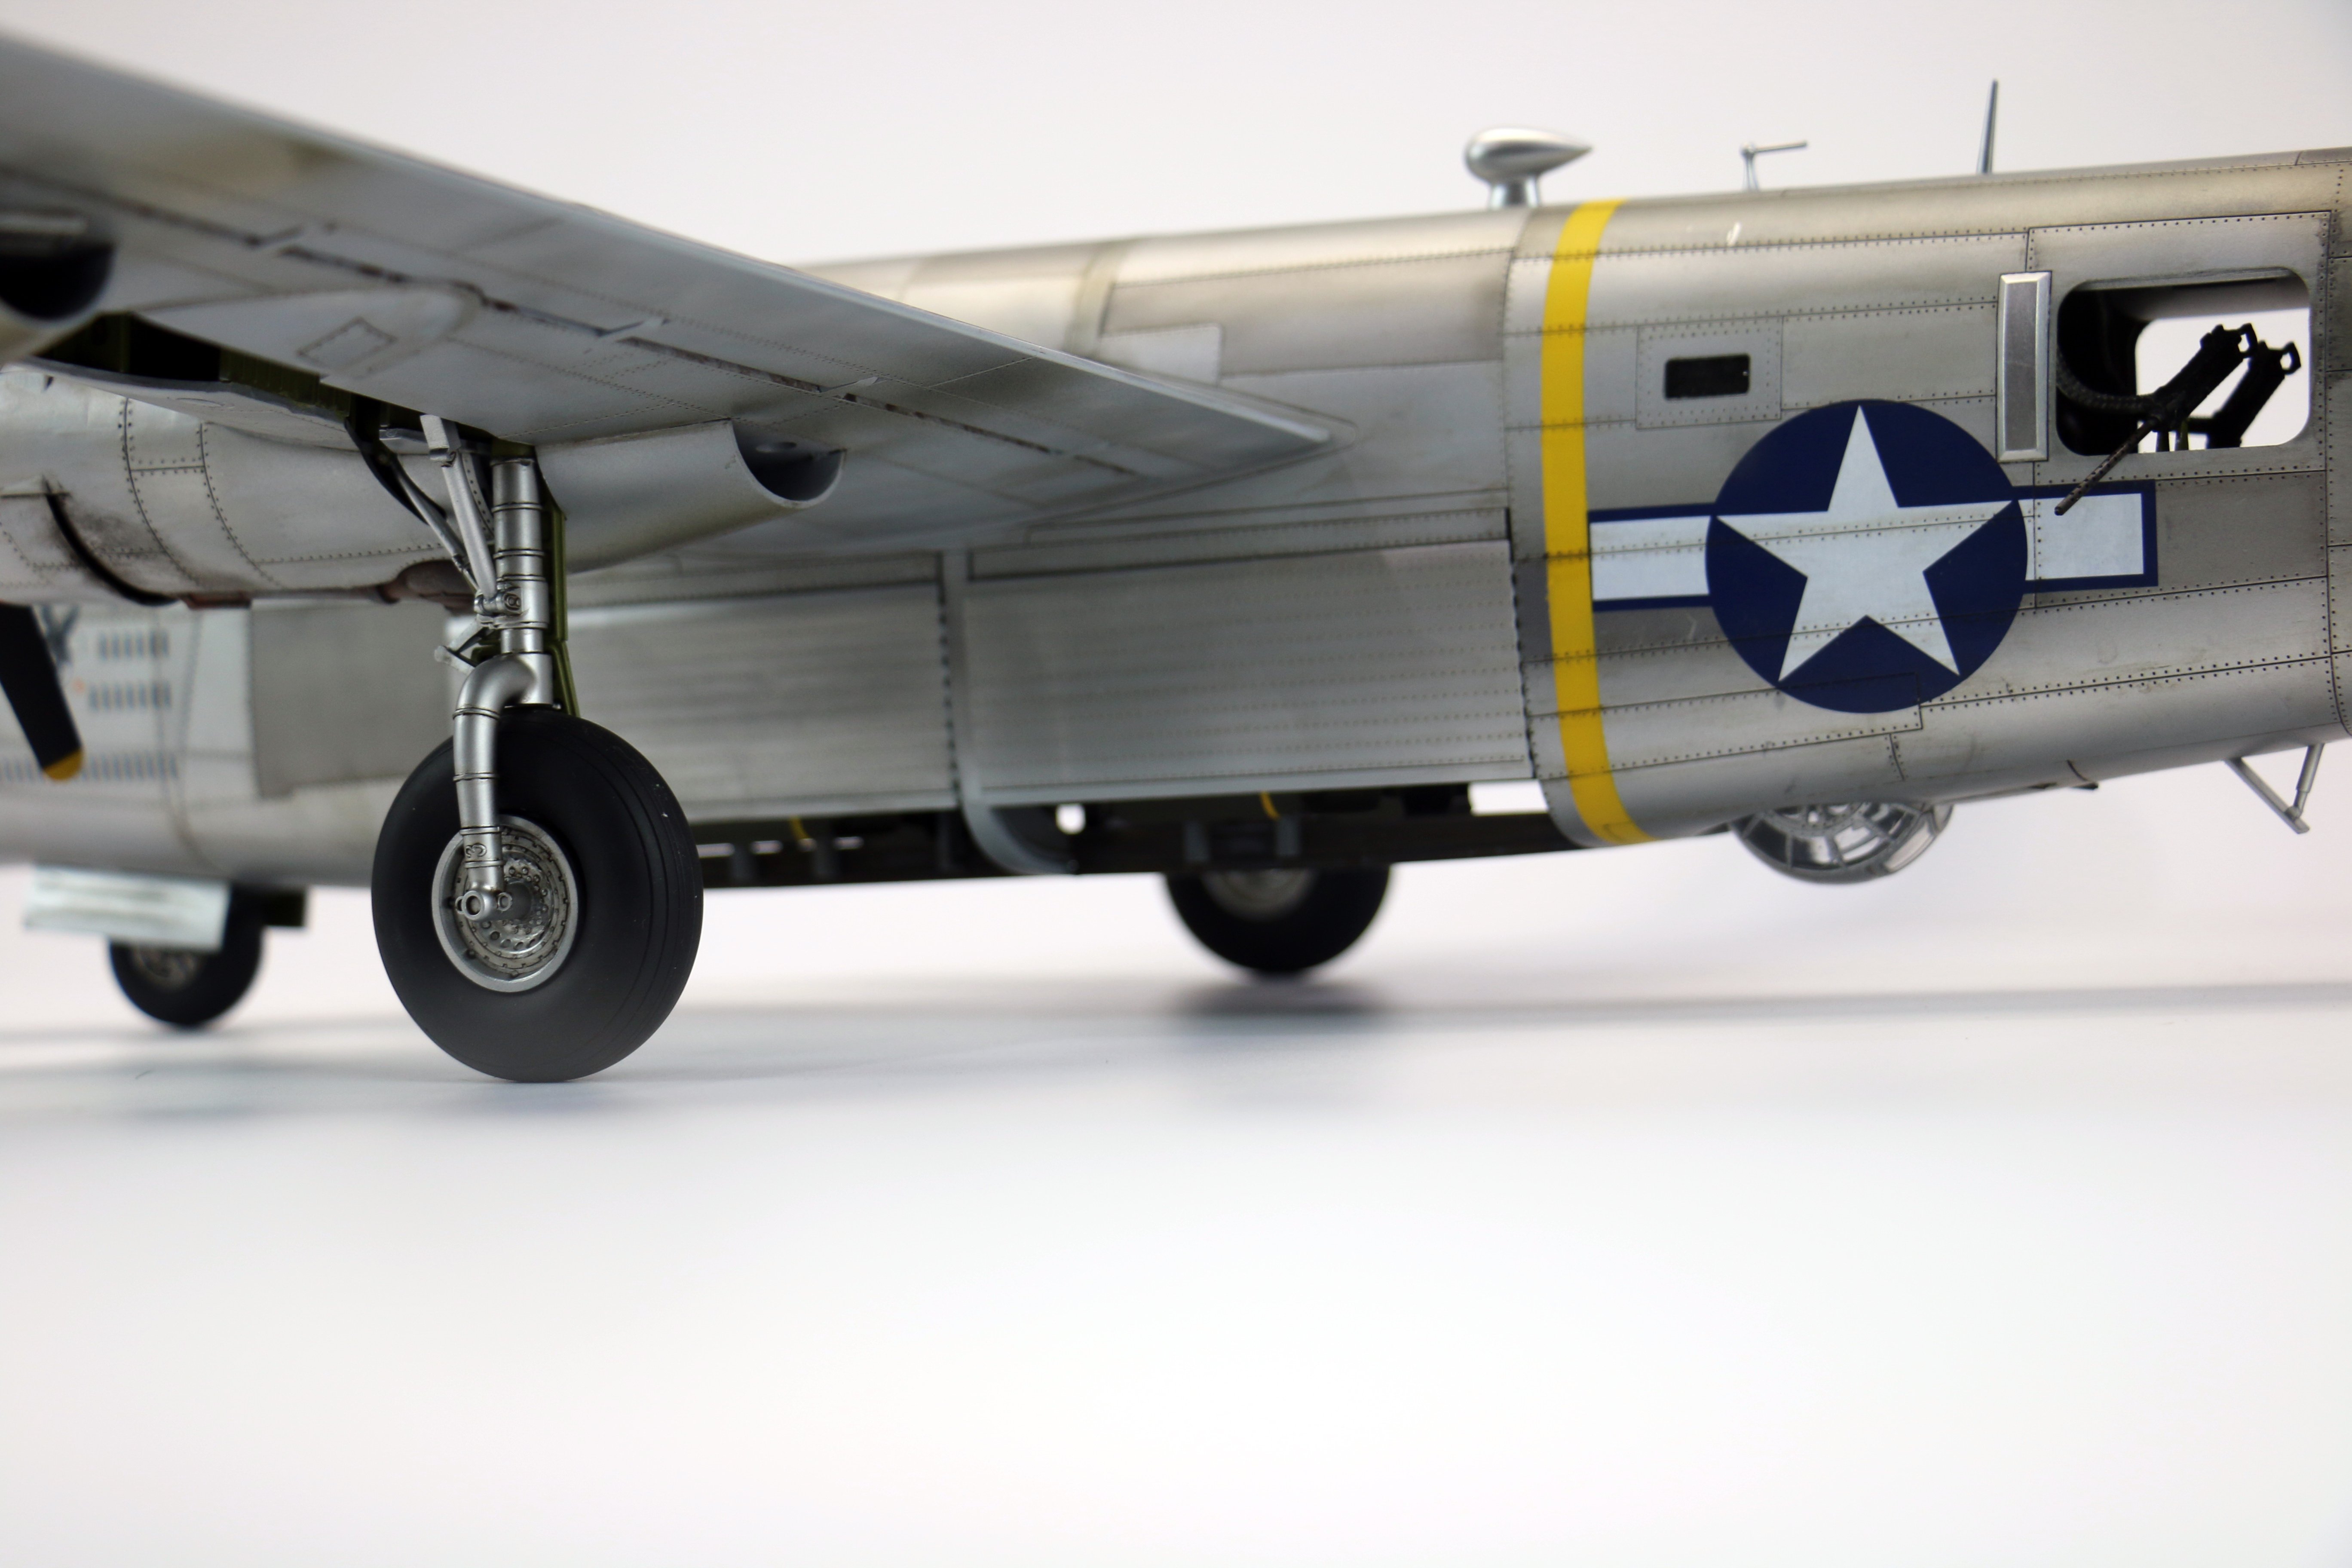
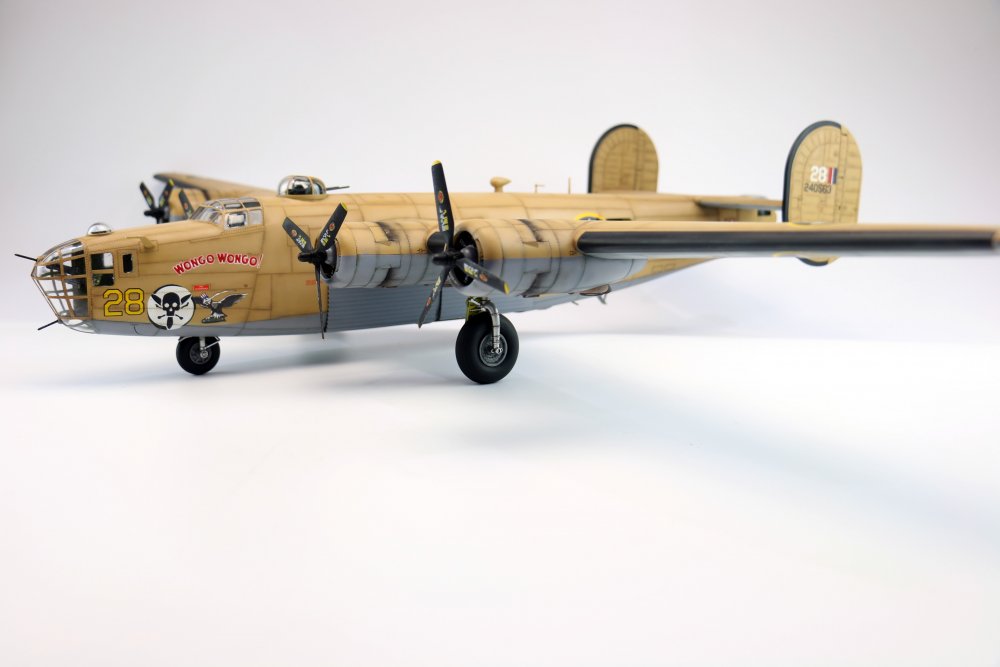
Yes the wing root is wrong but you shouldn't be able to see it from the photos I've taken, it's not something you'll really see unless you're looking from the other end and you can't because the fuselage is in the way. As I said from my first post, there are faults with the kit but nothing to stop you building a good example of it. people should stop listening all the armchair modellers and build stuff. PS Engine cowlings are correct for the variant, people often forget that the Liberator was built across 5 factories by 4 different companies (one built from preassembled sections). Often the differences were quite vast. Another misconception is that the De-Icing boots were solid rubber and weren't susceptible to chipping etc. The solid de-icing boots were stopped after the LB-30 (I had an armchair modeller try to tell me otherwise when I built my Monogram kit, he got put in his place lol).
-
Thanks Fellas, wow don't know what to say, not used to all the accolades, I must admit I'm enjoying my 5 minutes of fame out here on the interweb. There's only one way to go now and that's down lol After such a warm For sure I'll be posting more stuff here for sure. It might be a few weeks as I've got to finish painting some Warhammer Orc monstrosity for a friend. I don't tend to build much in the way of big stuff but that's been changing. The last big thing I built was the Trumpy 1/35 Hind I've got the HK B-25 and B-17 on the rack of shame. I feel the need to build some armour, at least you guys are ok with armour so I might post some of that as well. Thanks for look. Gary
-
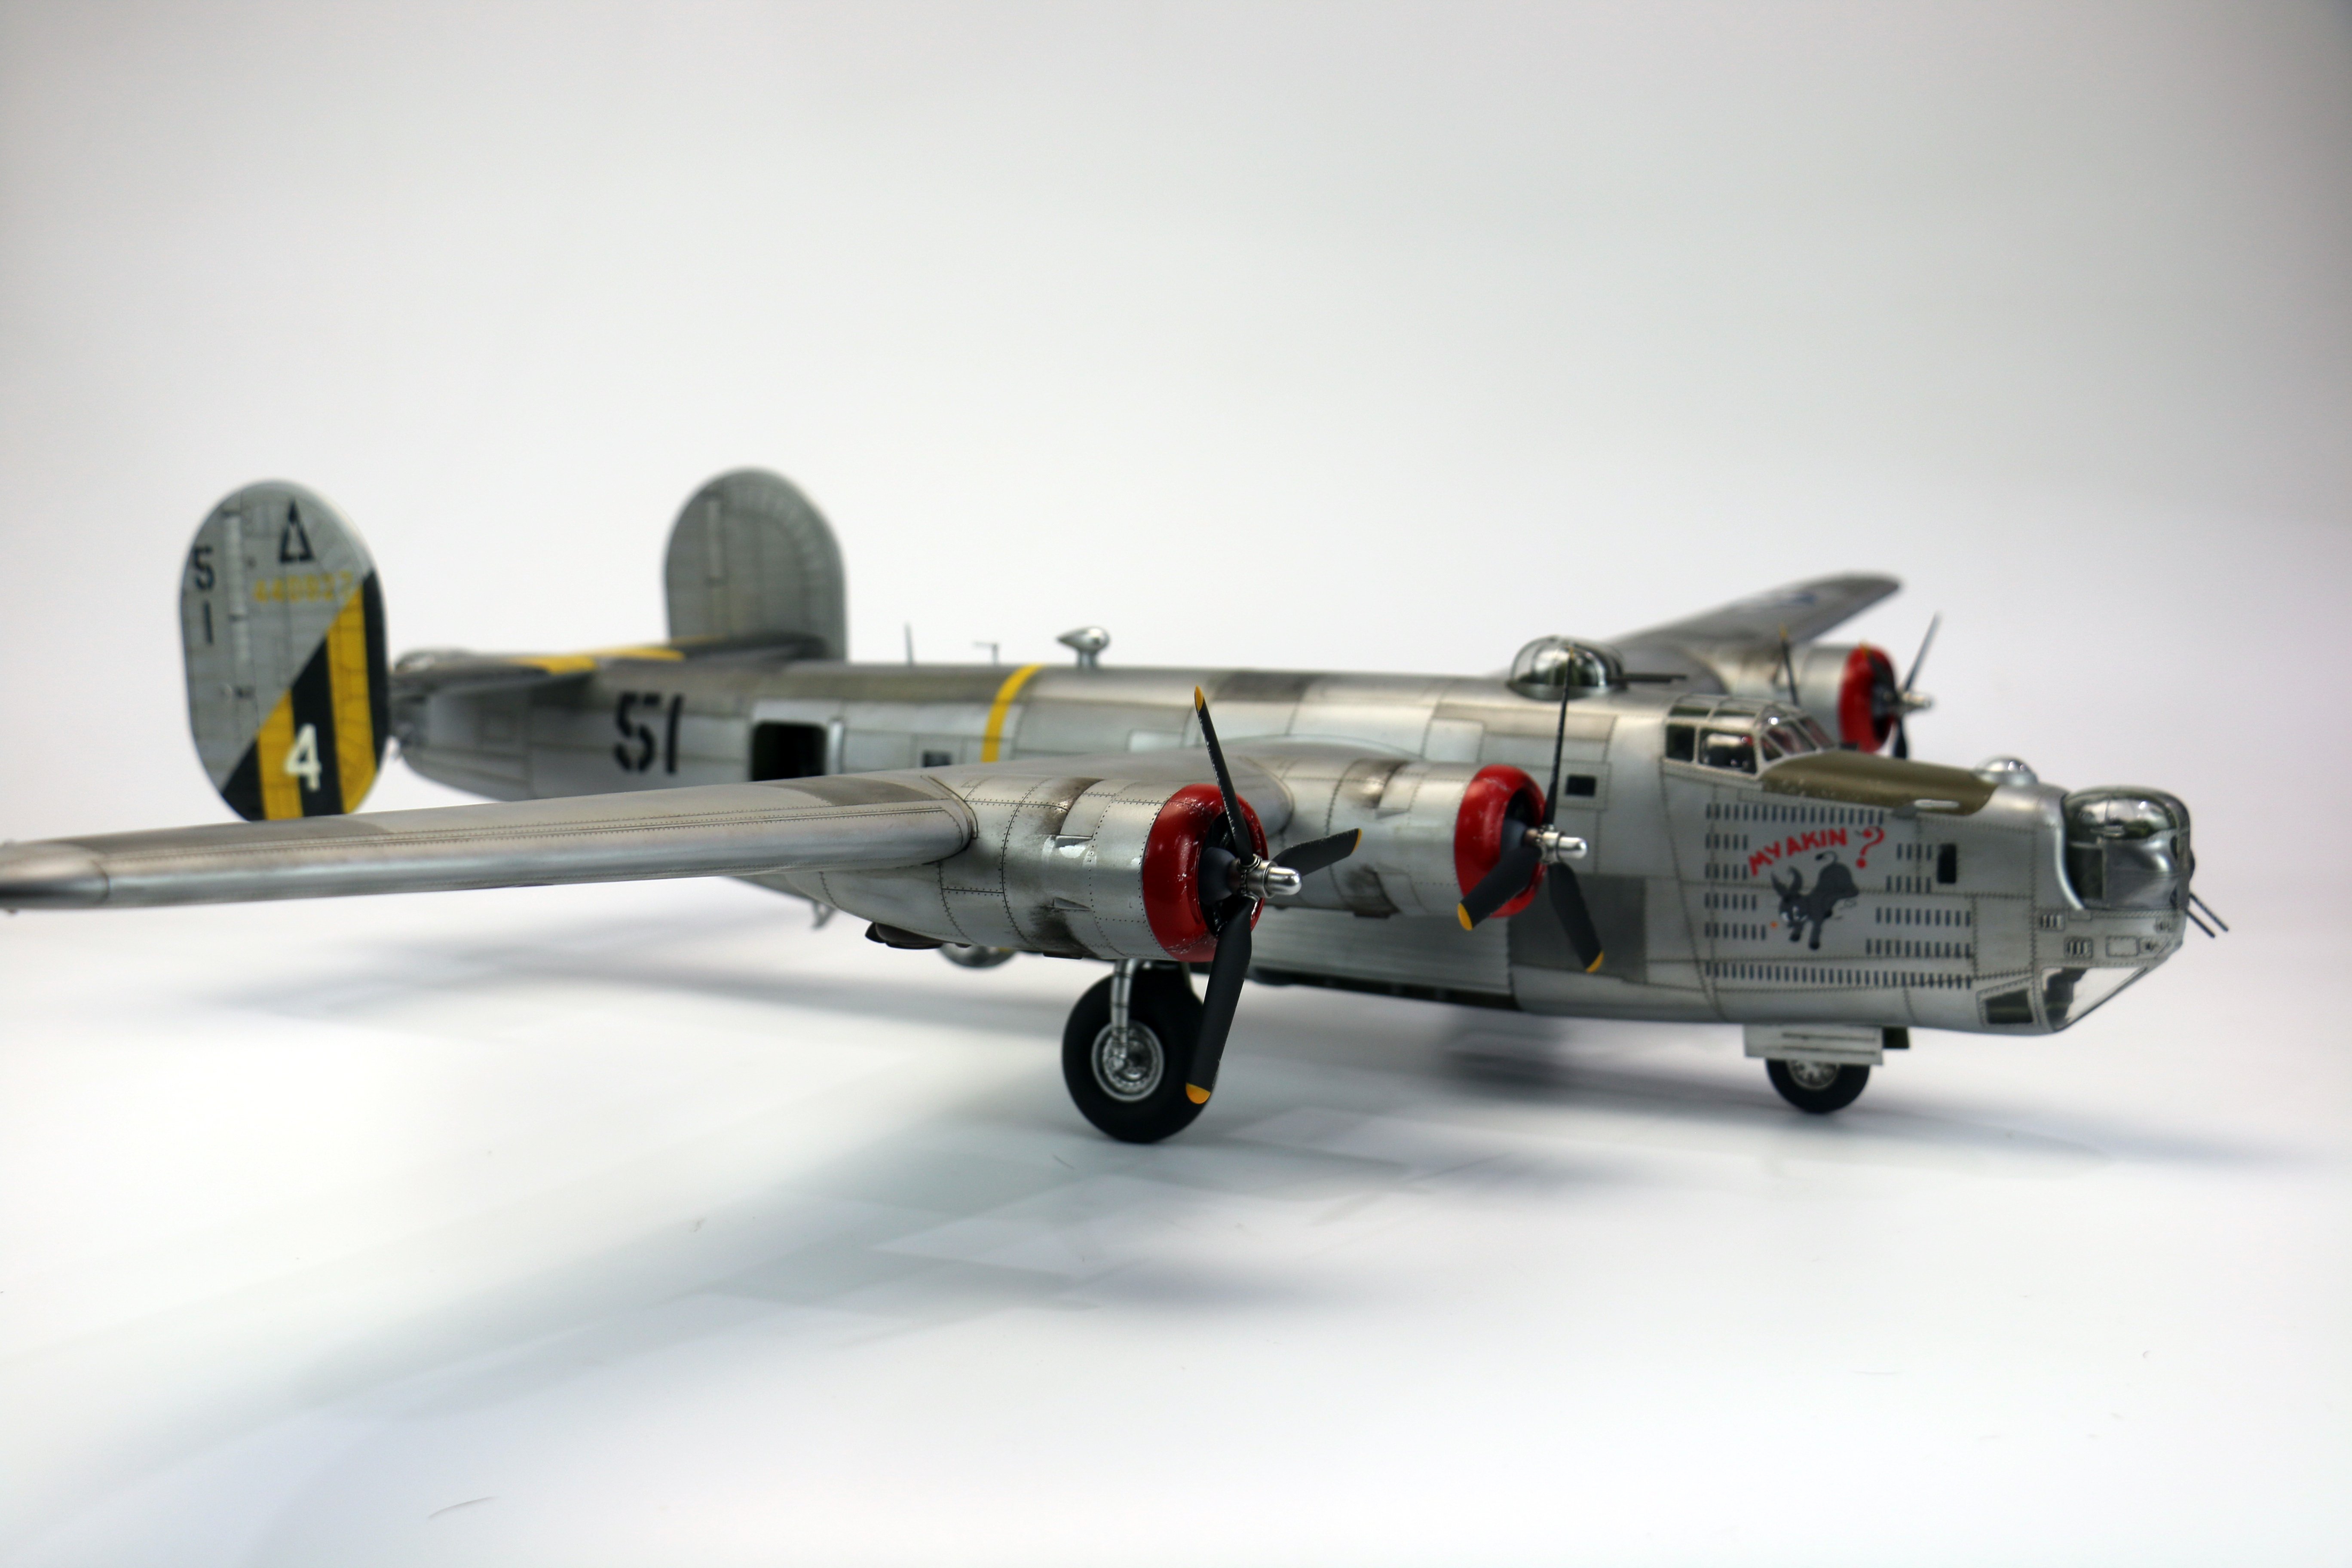
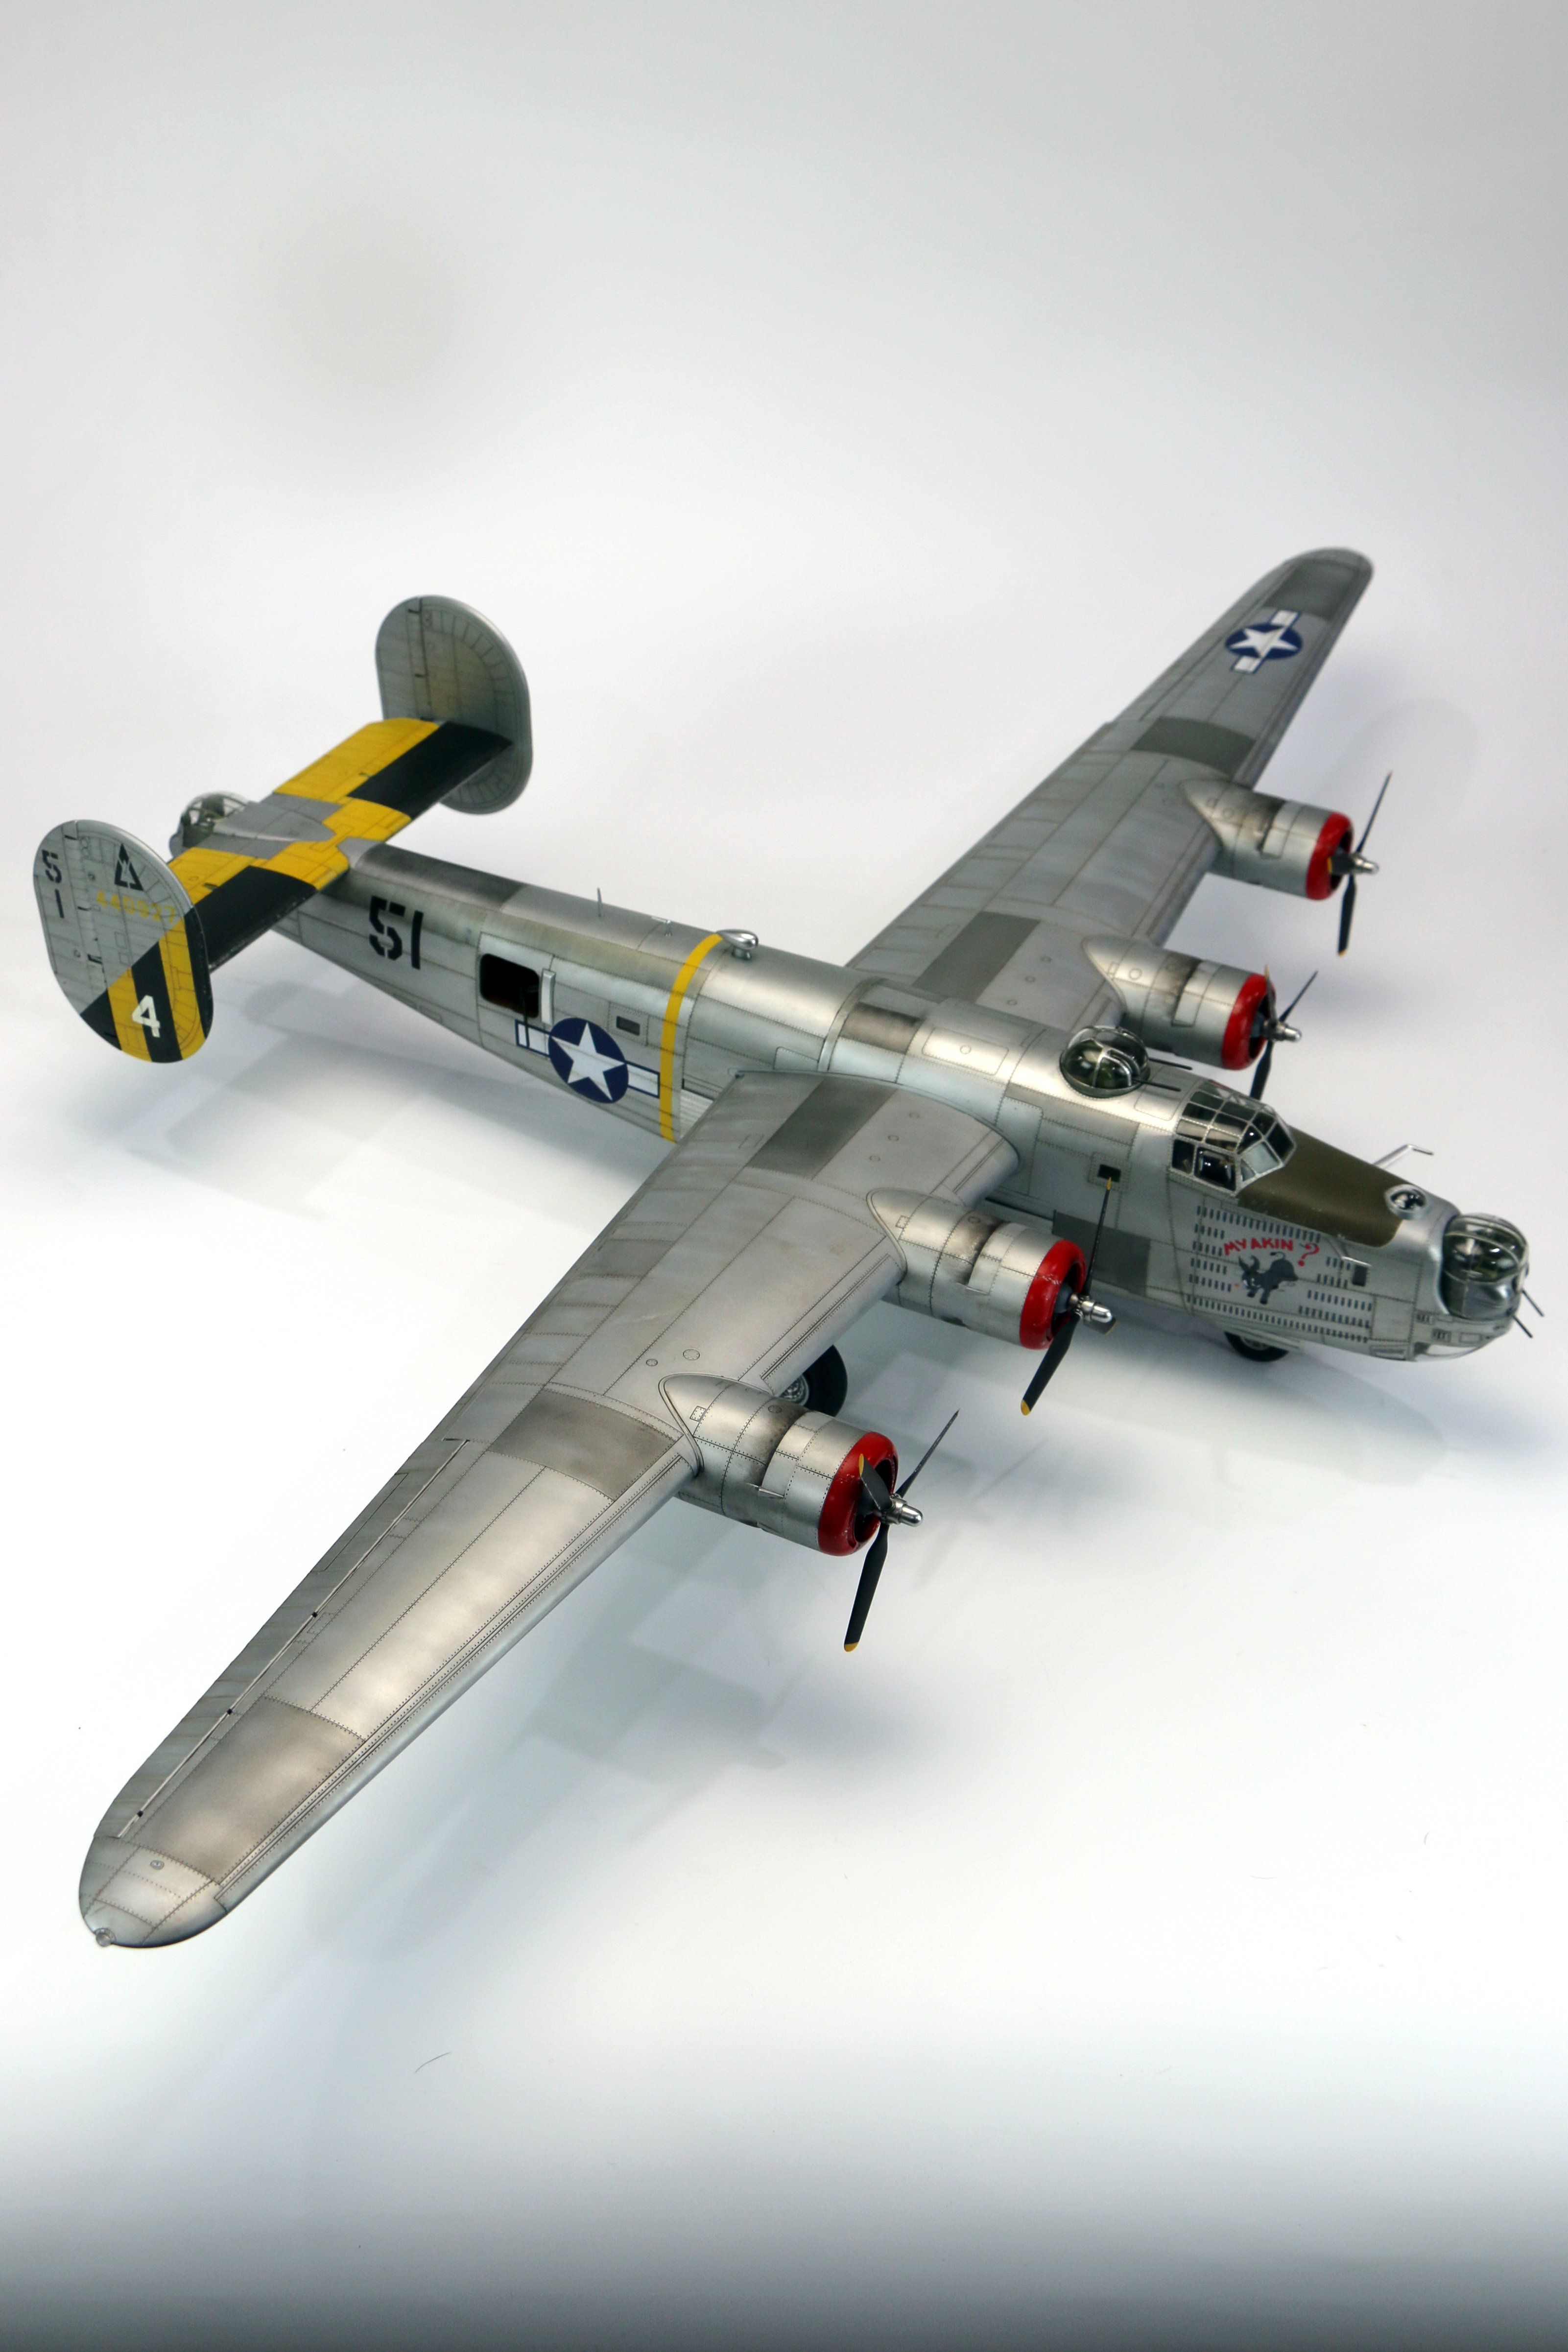
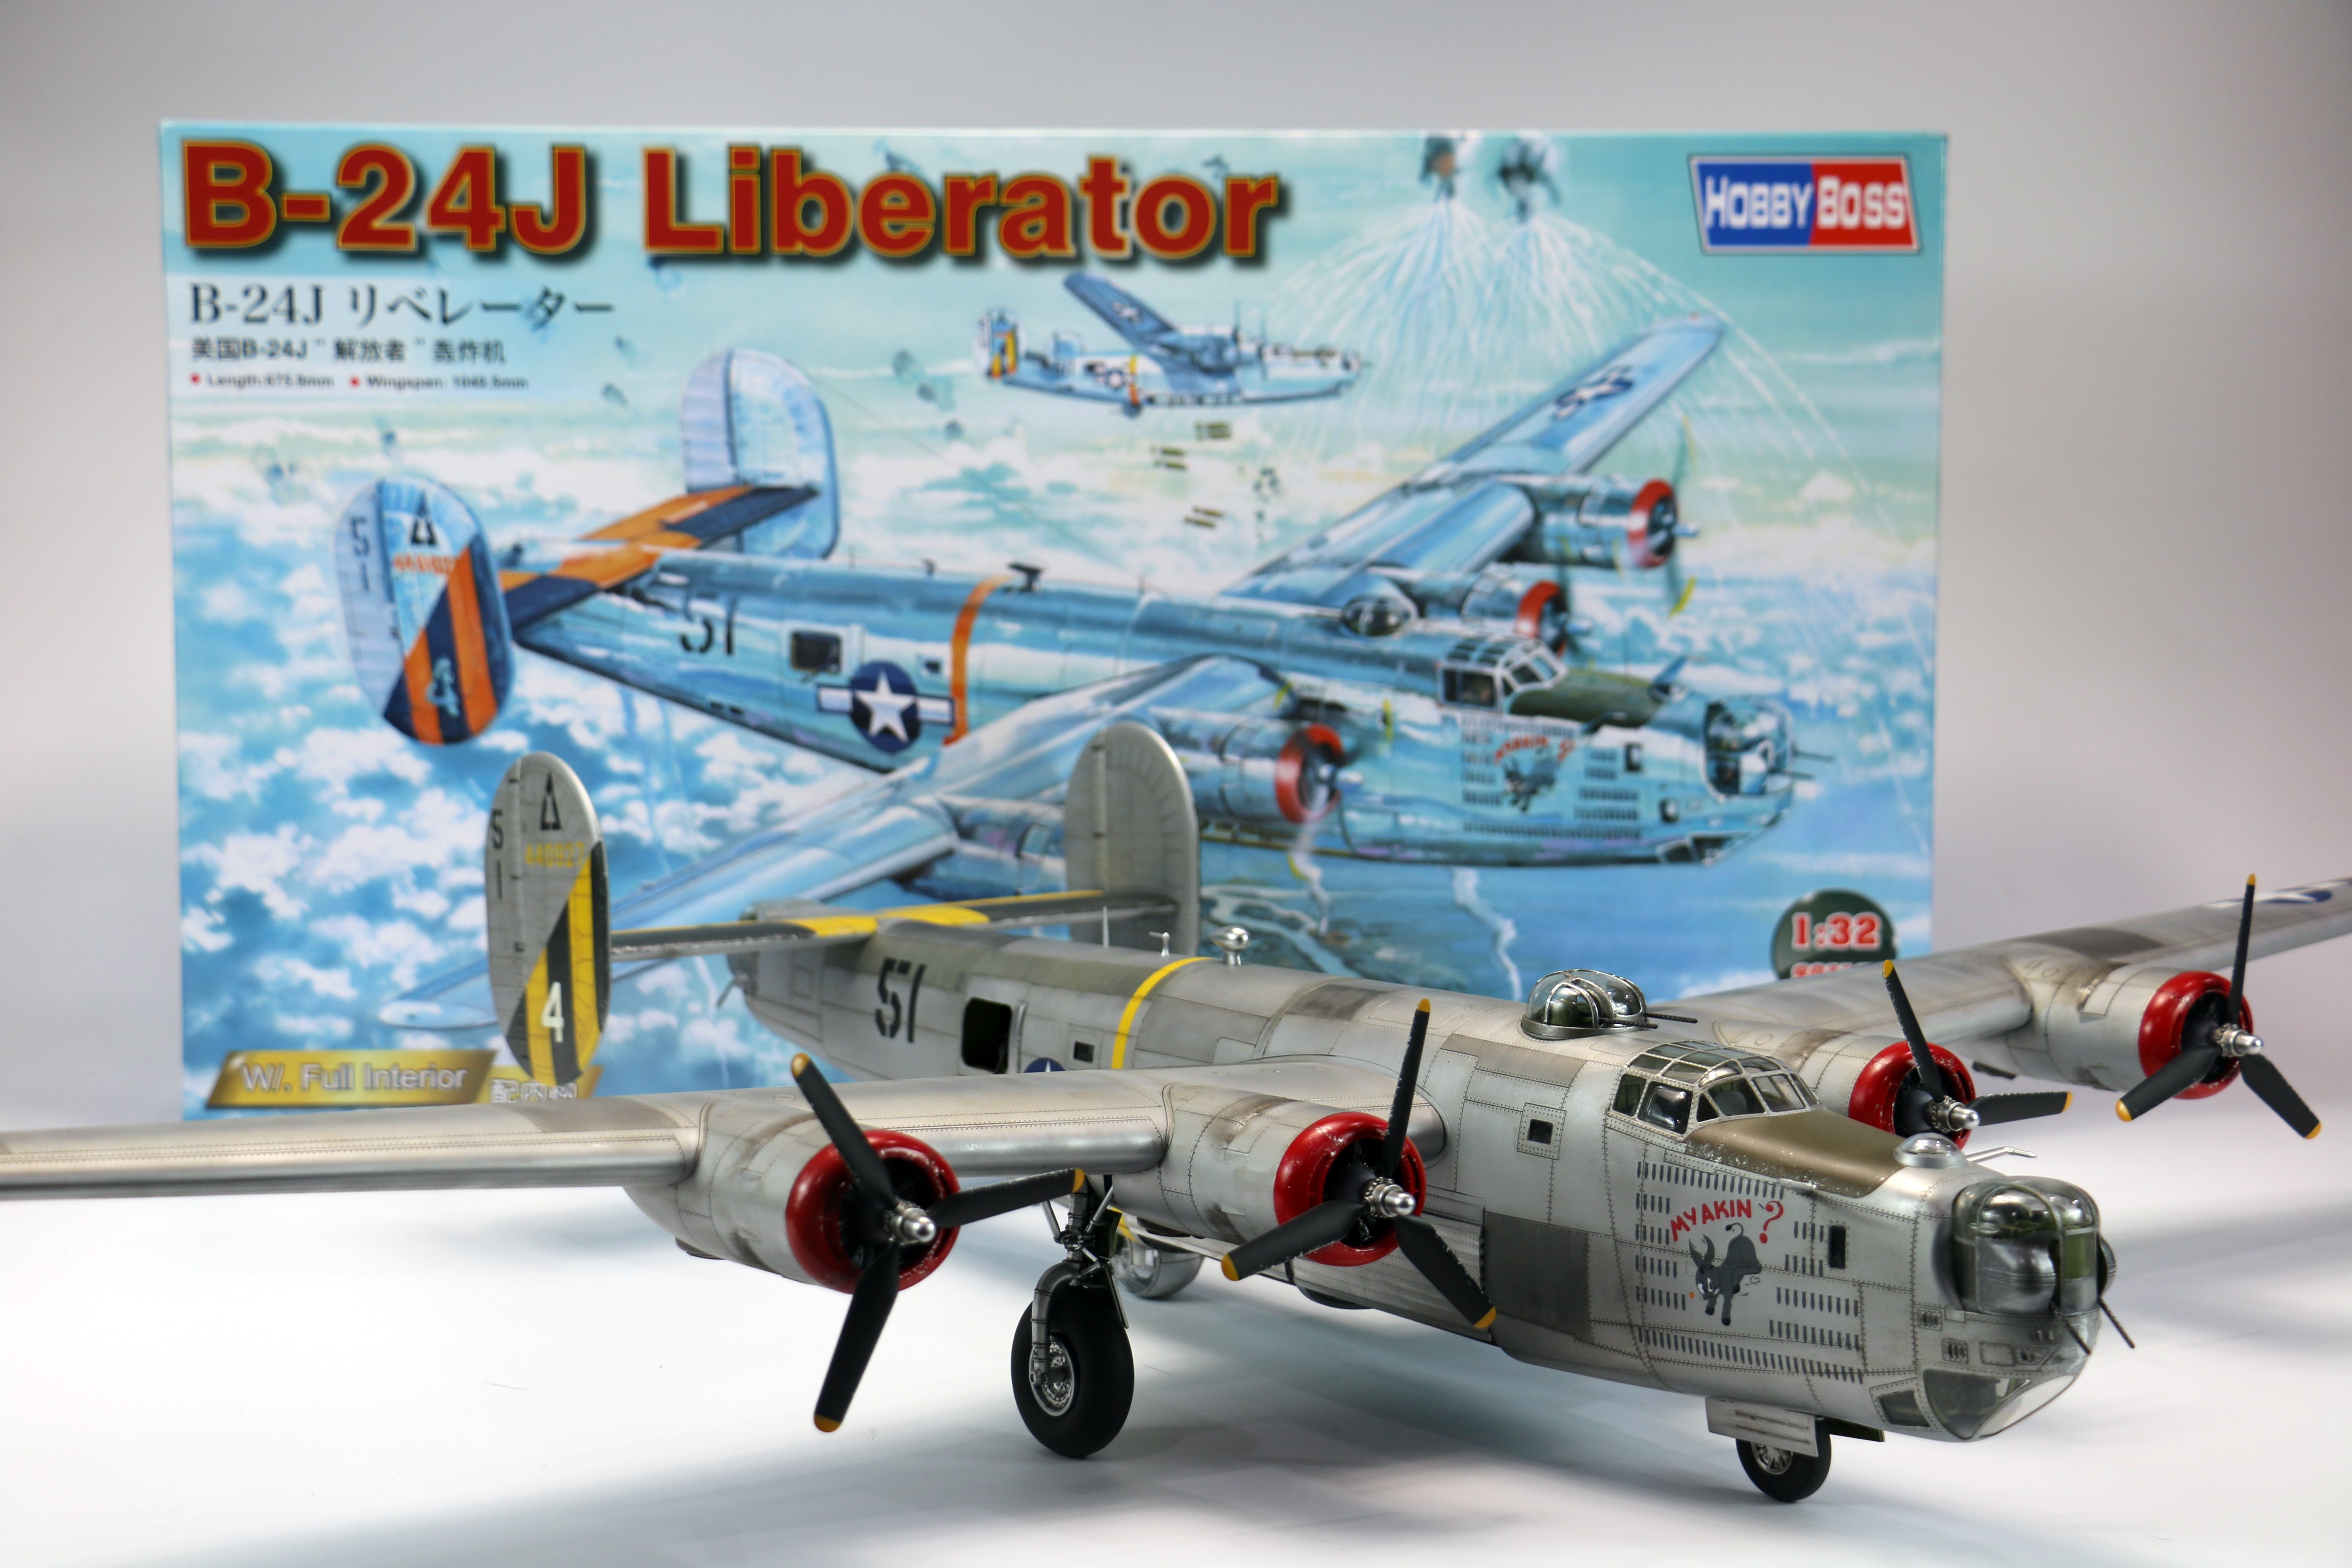
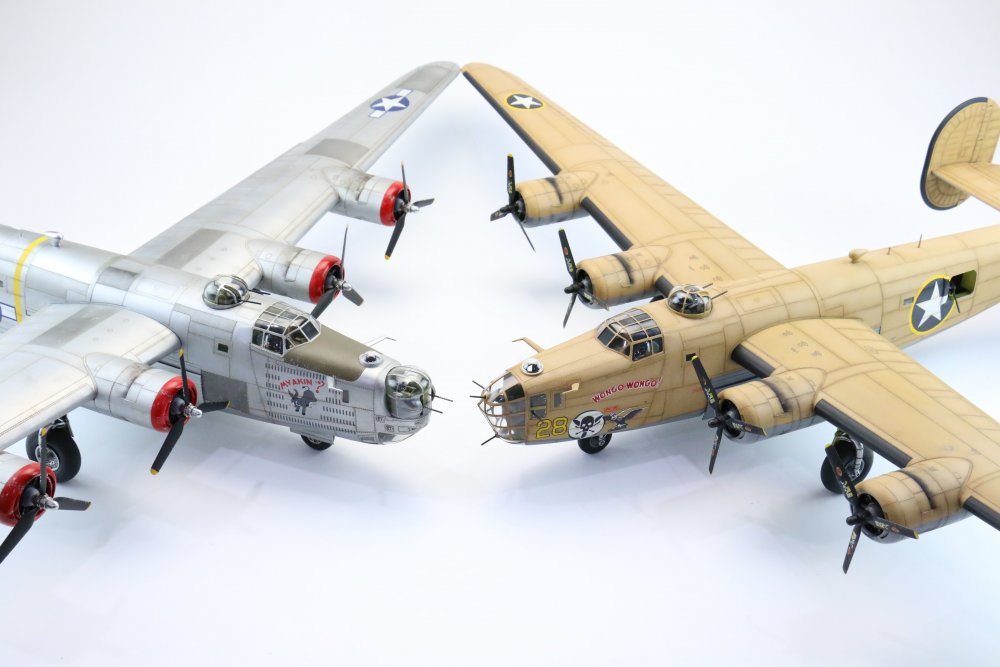
Hey folks, I think this is my first post, I'm normally a lurker, I don't tend to post outside of my regular sites just read other peoples stuff. But I've been told I should post this over here so here I am, cap in hand showing you my finished bird. It's out the box and yes I'm fully aware of all the shortcomings of the kit, Davis Wing, Turrets yardy yar etc etc I've put Master Model Barrels on it and some RB belts, not that you can see them, but other than that she's El Naturel Finished in Alclad, Gunze and Ushchi metal powders, weathered with Mig products. Thanks for looking and be gentle......... Gary