


GusMac
-
Posts
2,900 -
Joined
-
Last visited
Content Type
Profiles
Forums
Events
Gallery
Posts posted by GusMac
-
-
Have to say I still prefer the original Blue Oyster Cult version.
-
 3
3
-
-
Amazing work and a perfect example of why I've never gone near a biplane kit!
-
1
-
 1
1
-
-
Nice weathering and finish. The figure's hair isn't blond enough for Robert Shaw! 😁
-
2
-
-
Looks like your experiment with the chipping was successful, very nice finish
-
4
-
-
Cute.
-
1
-
-
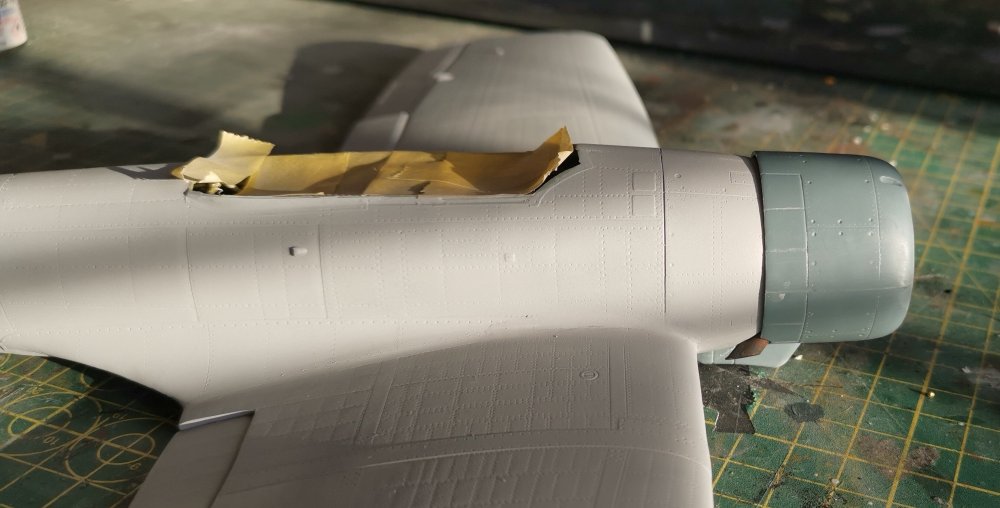
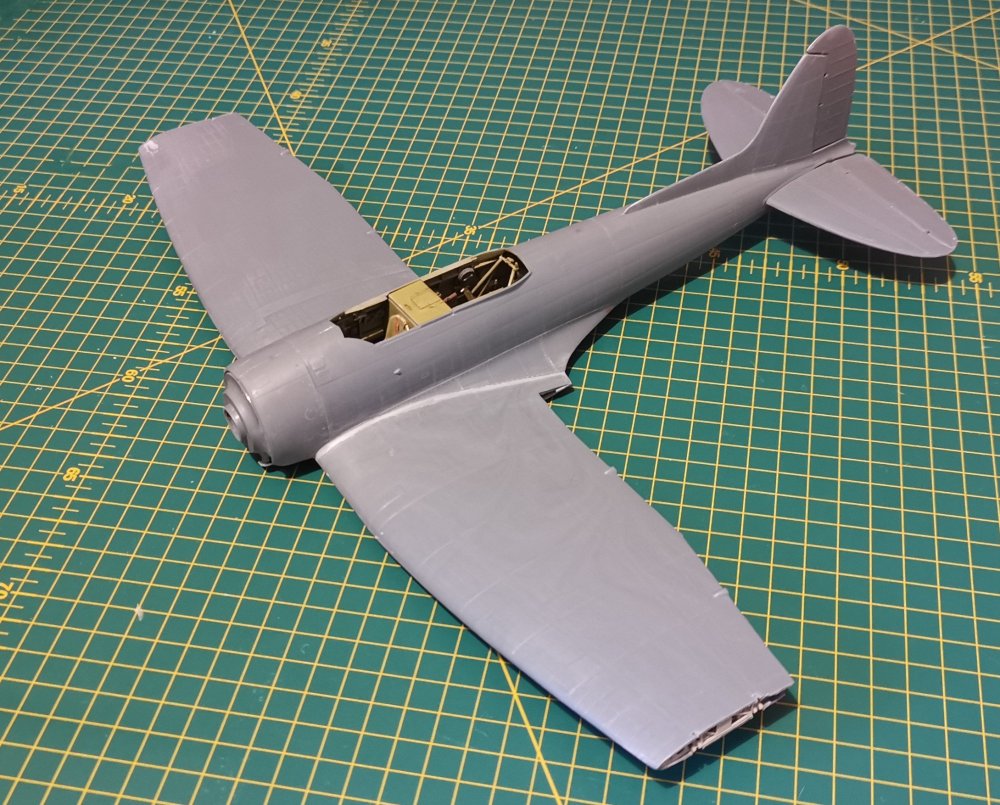
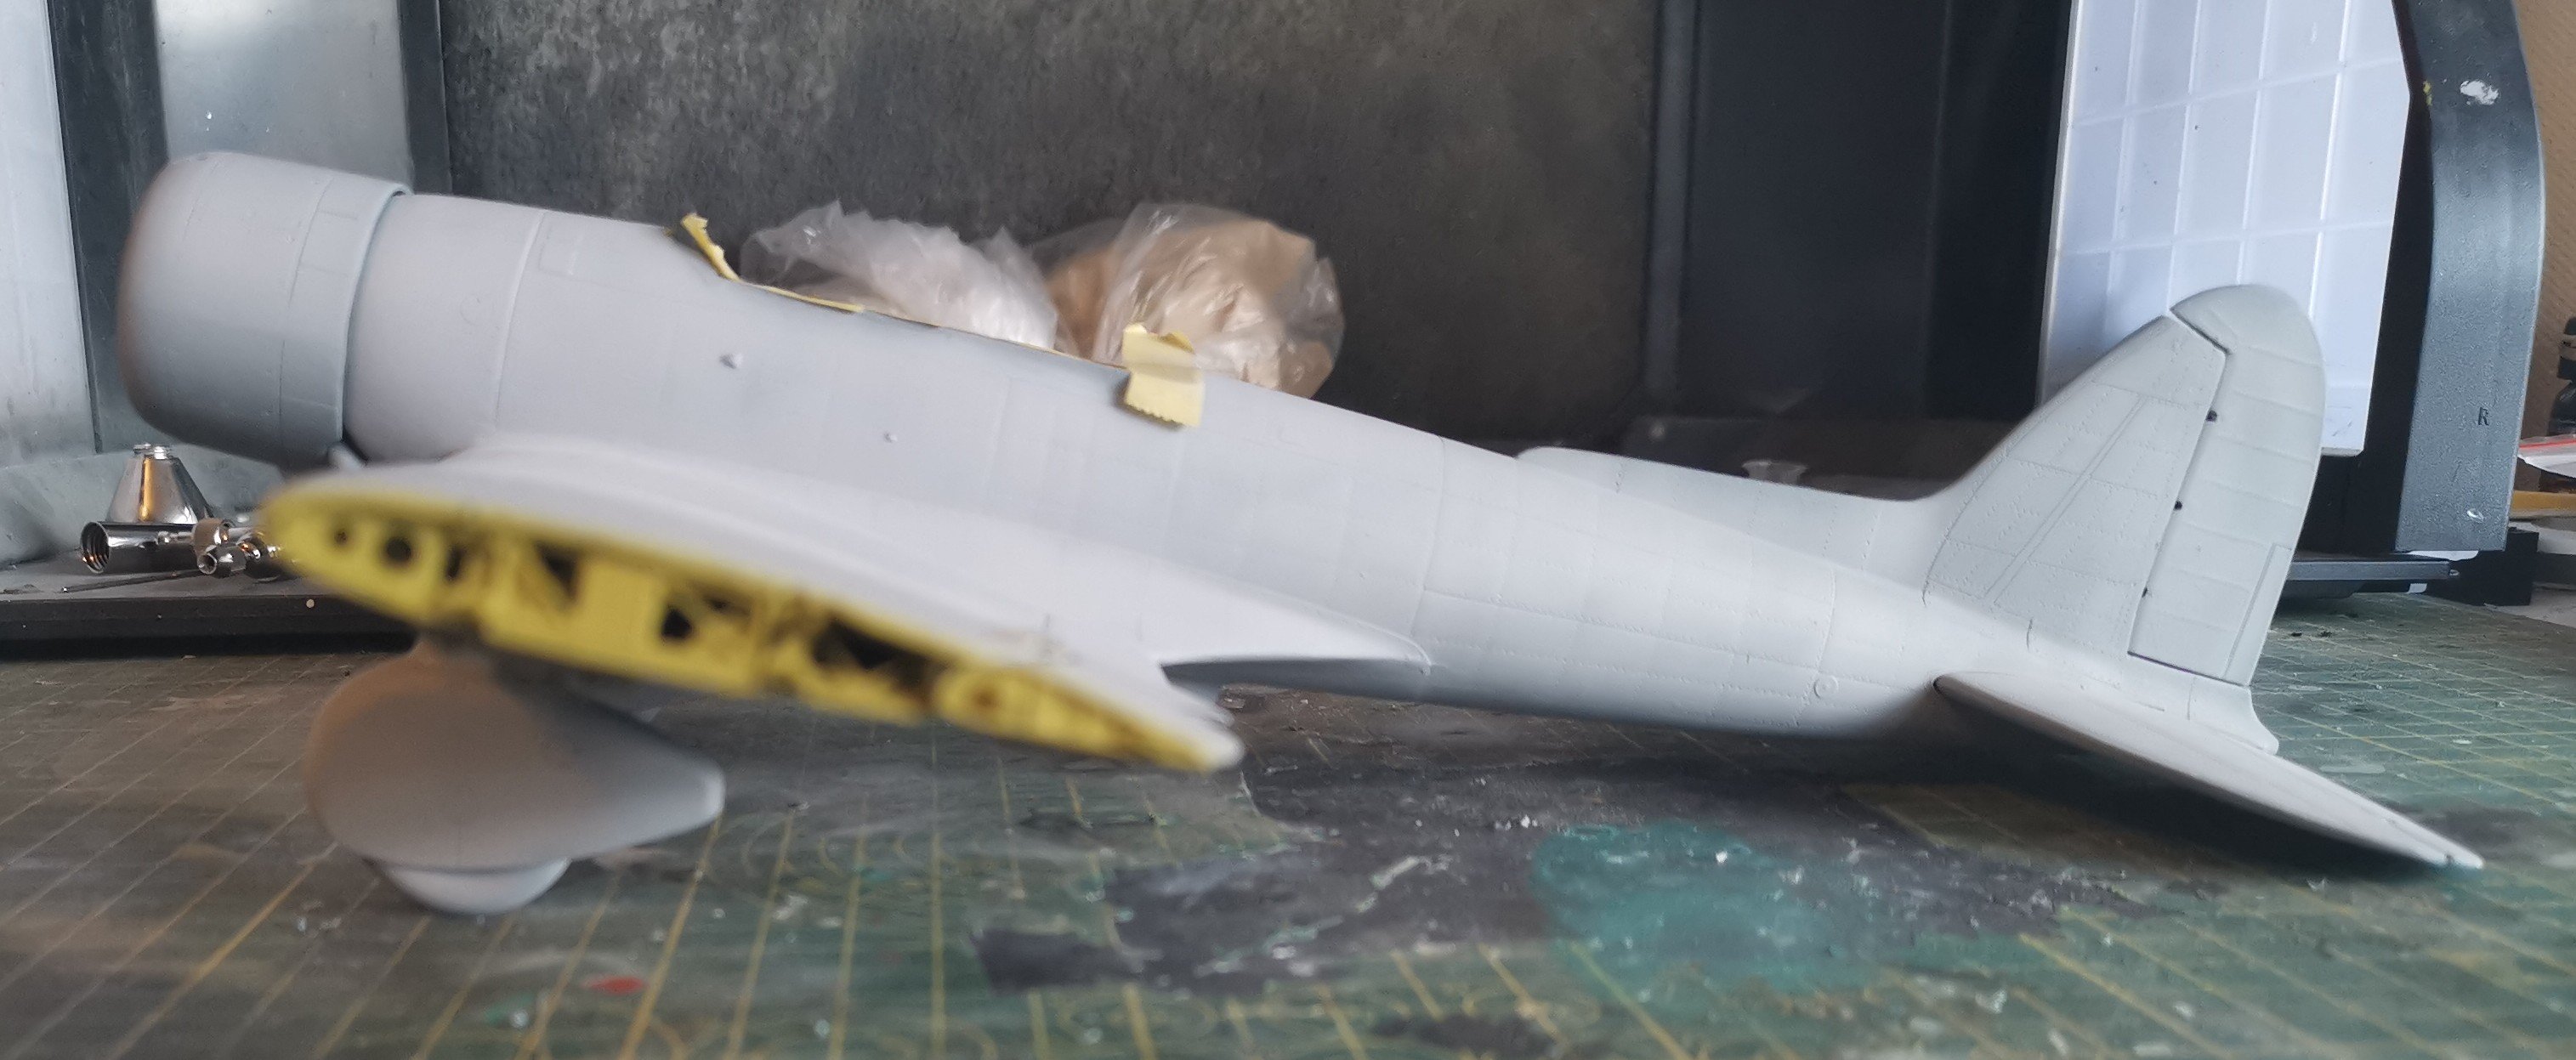
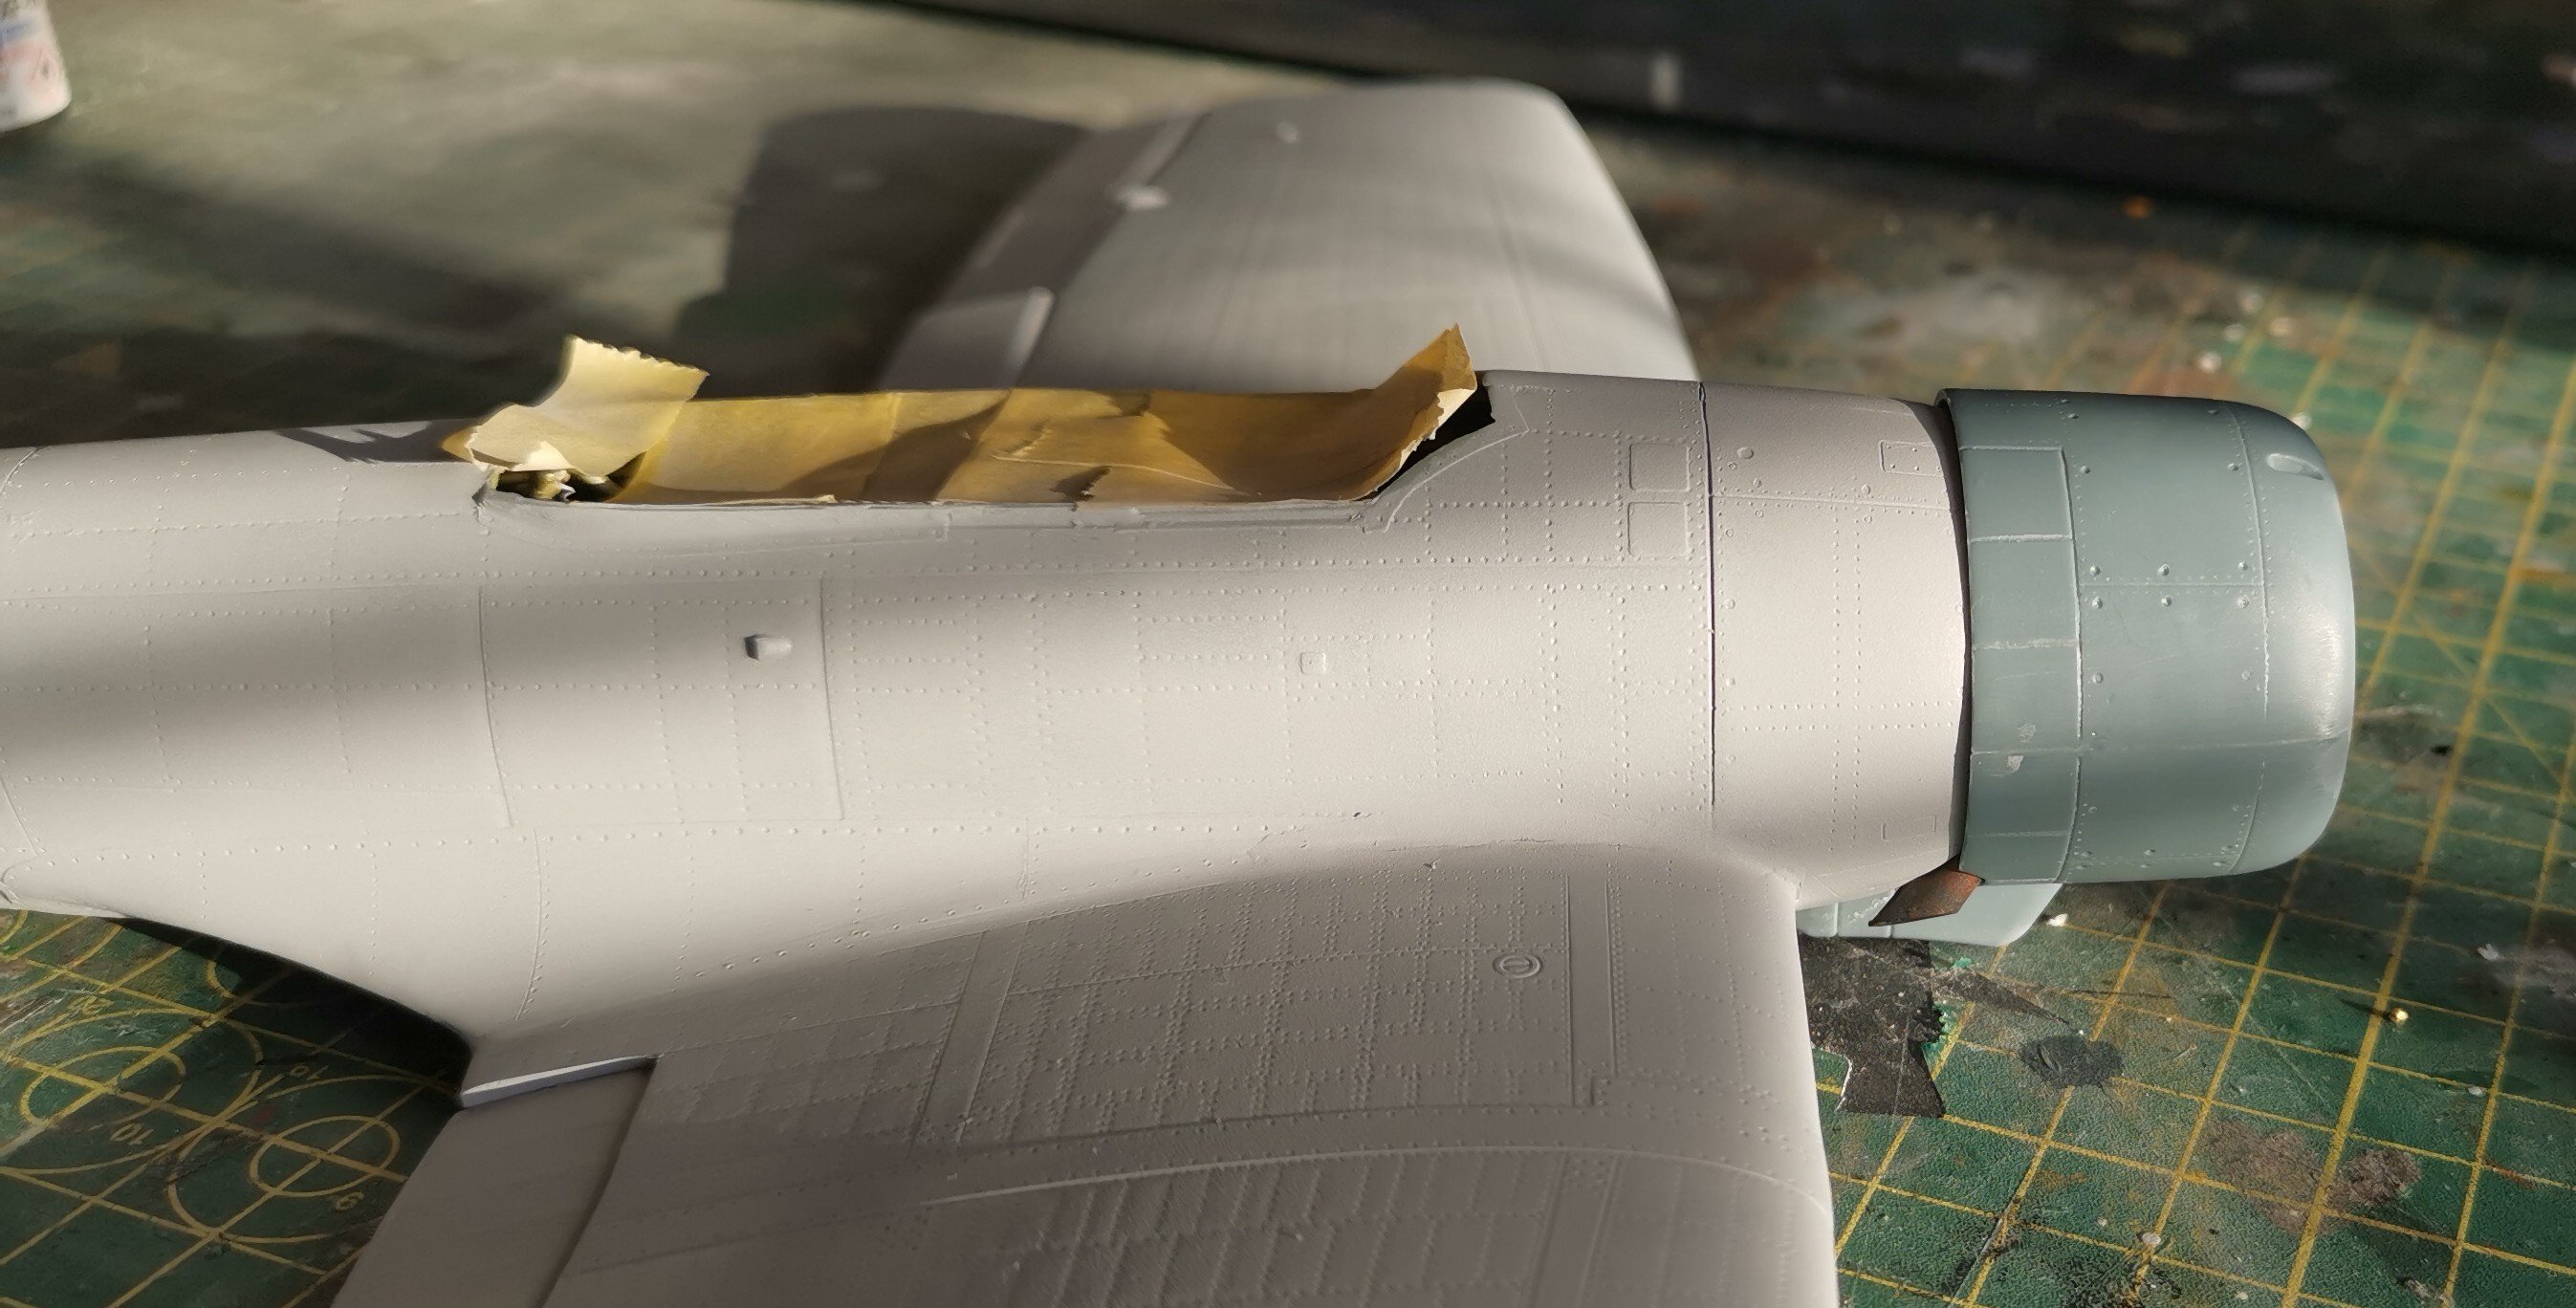
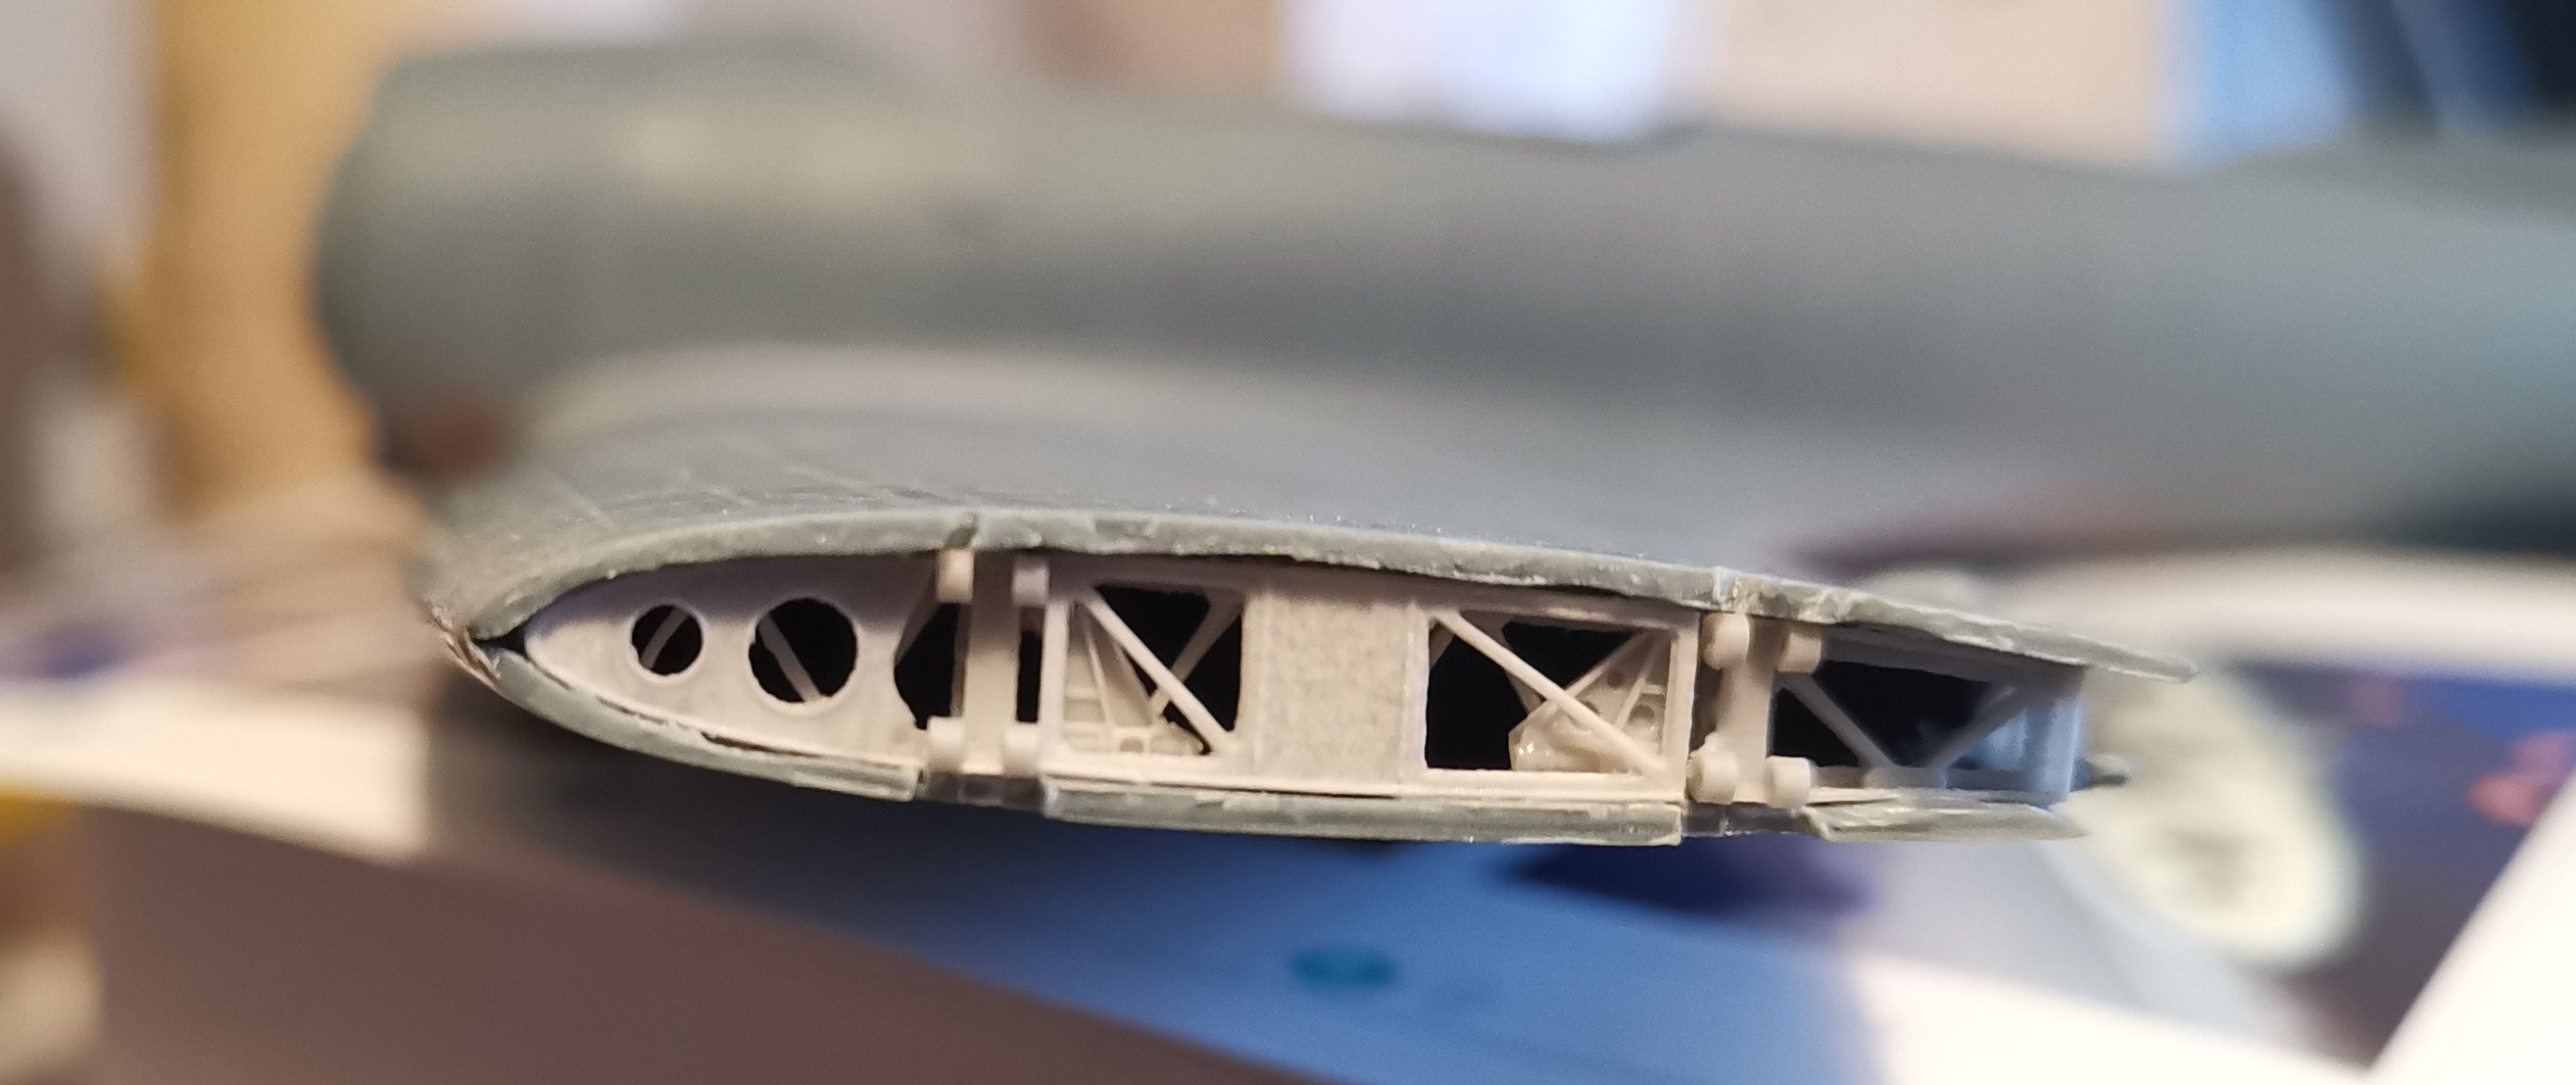
So, all the final bits are attached to the underside - wheel spats, dive brakes, bomb cradles, etc. Primed all of these and now we're ready for the painting.

Not entirely sure which grey is best for the underside but I'm going to try Tamiya XF-12 IJN Grey for a trial. Happy to be corrected if I'm barking up the wrong tree.
-
4
-
-
8 hours ago, Spitfire said:
Looking good and I'm still taking notes.
Cheers
Dennis
My best advice Dennis would be to bookmark Ernie's build and follow his recommendations. Certainly for this portion of the build it's definitely a big improvement on the instructions.
Definitely a fun build though and it's certainly going to be something different in the display case.
-
2
-
-
Followed Ernie's advice and with a bit of fiddling we have a decent result I think.

Definitely don't think I'd have got as nice an outcome if I'd followed the instructions.
-
8
-
-
Looks great Rob. Steady hands required for that.
-
2
-
 1
1
-
-

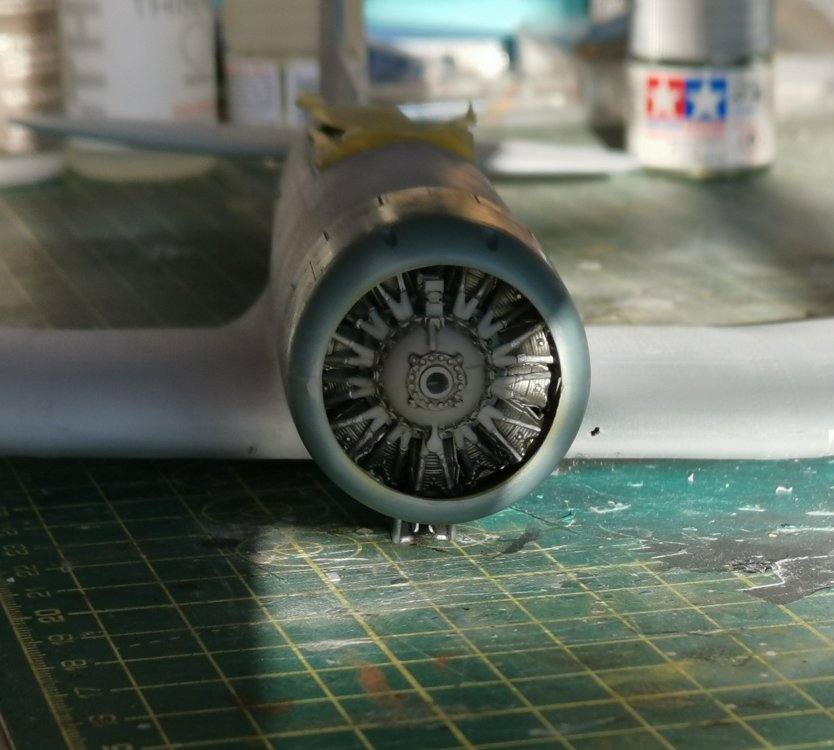
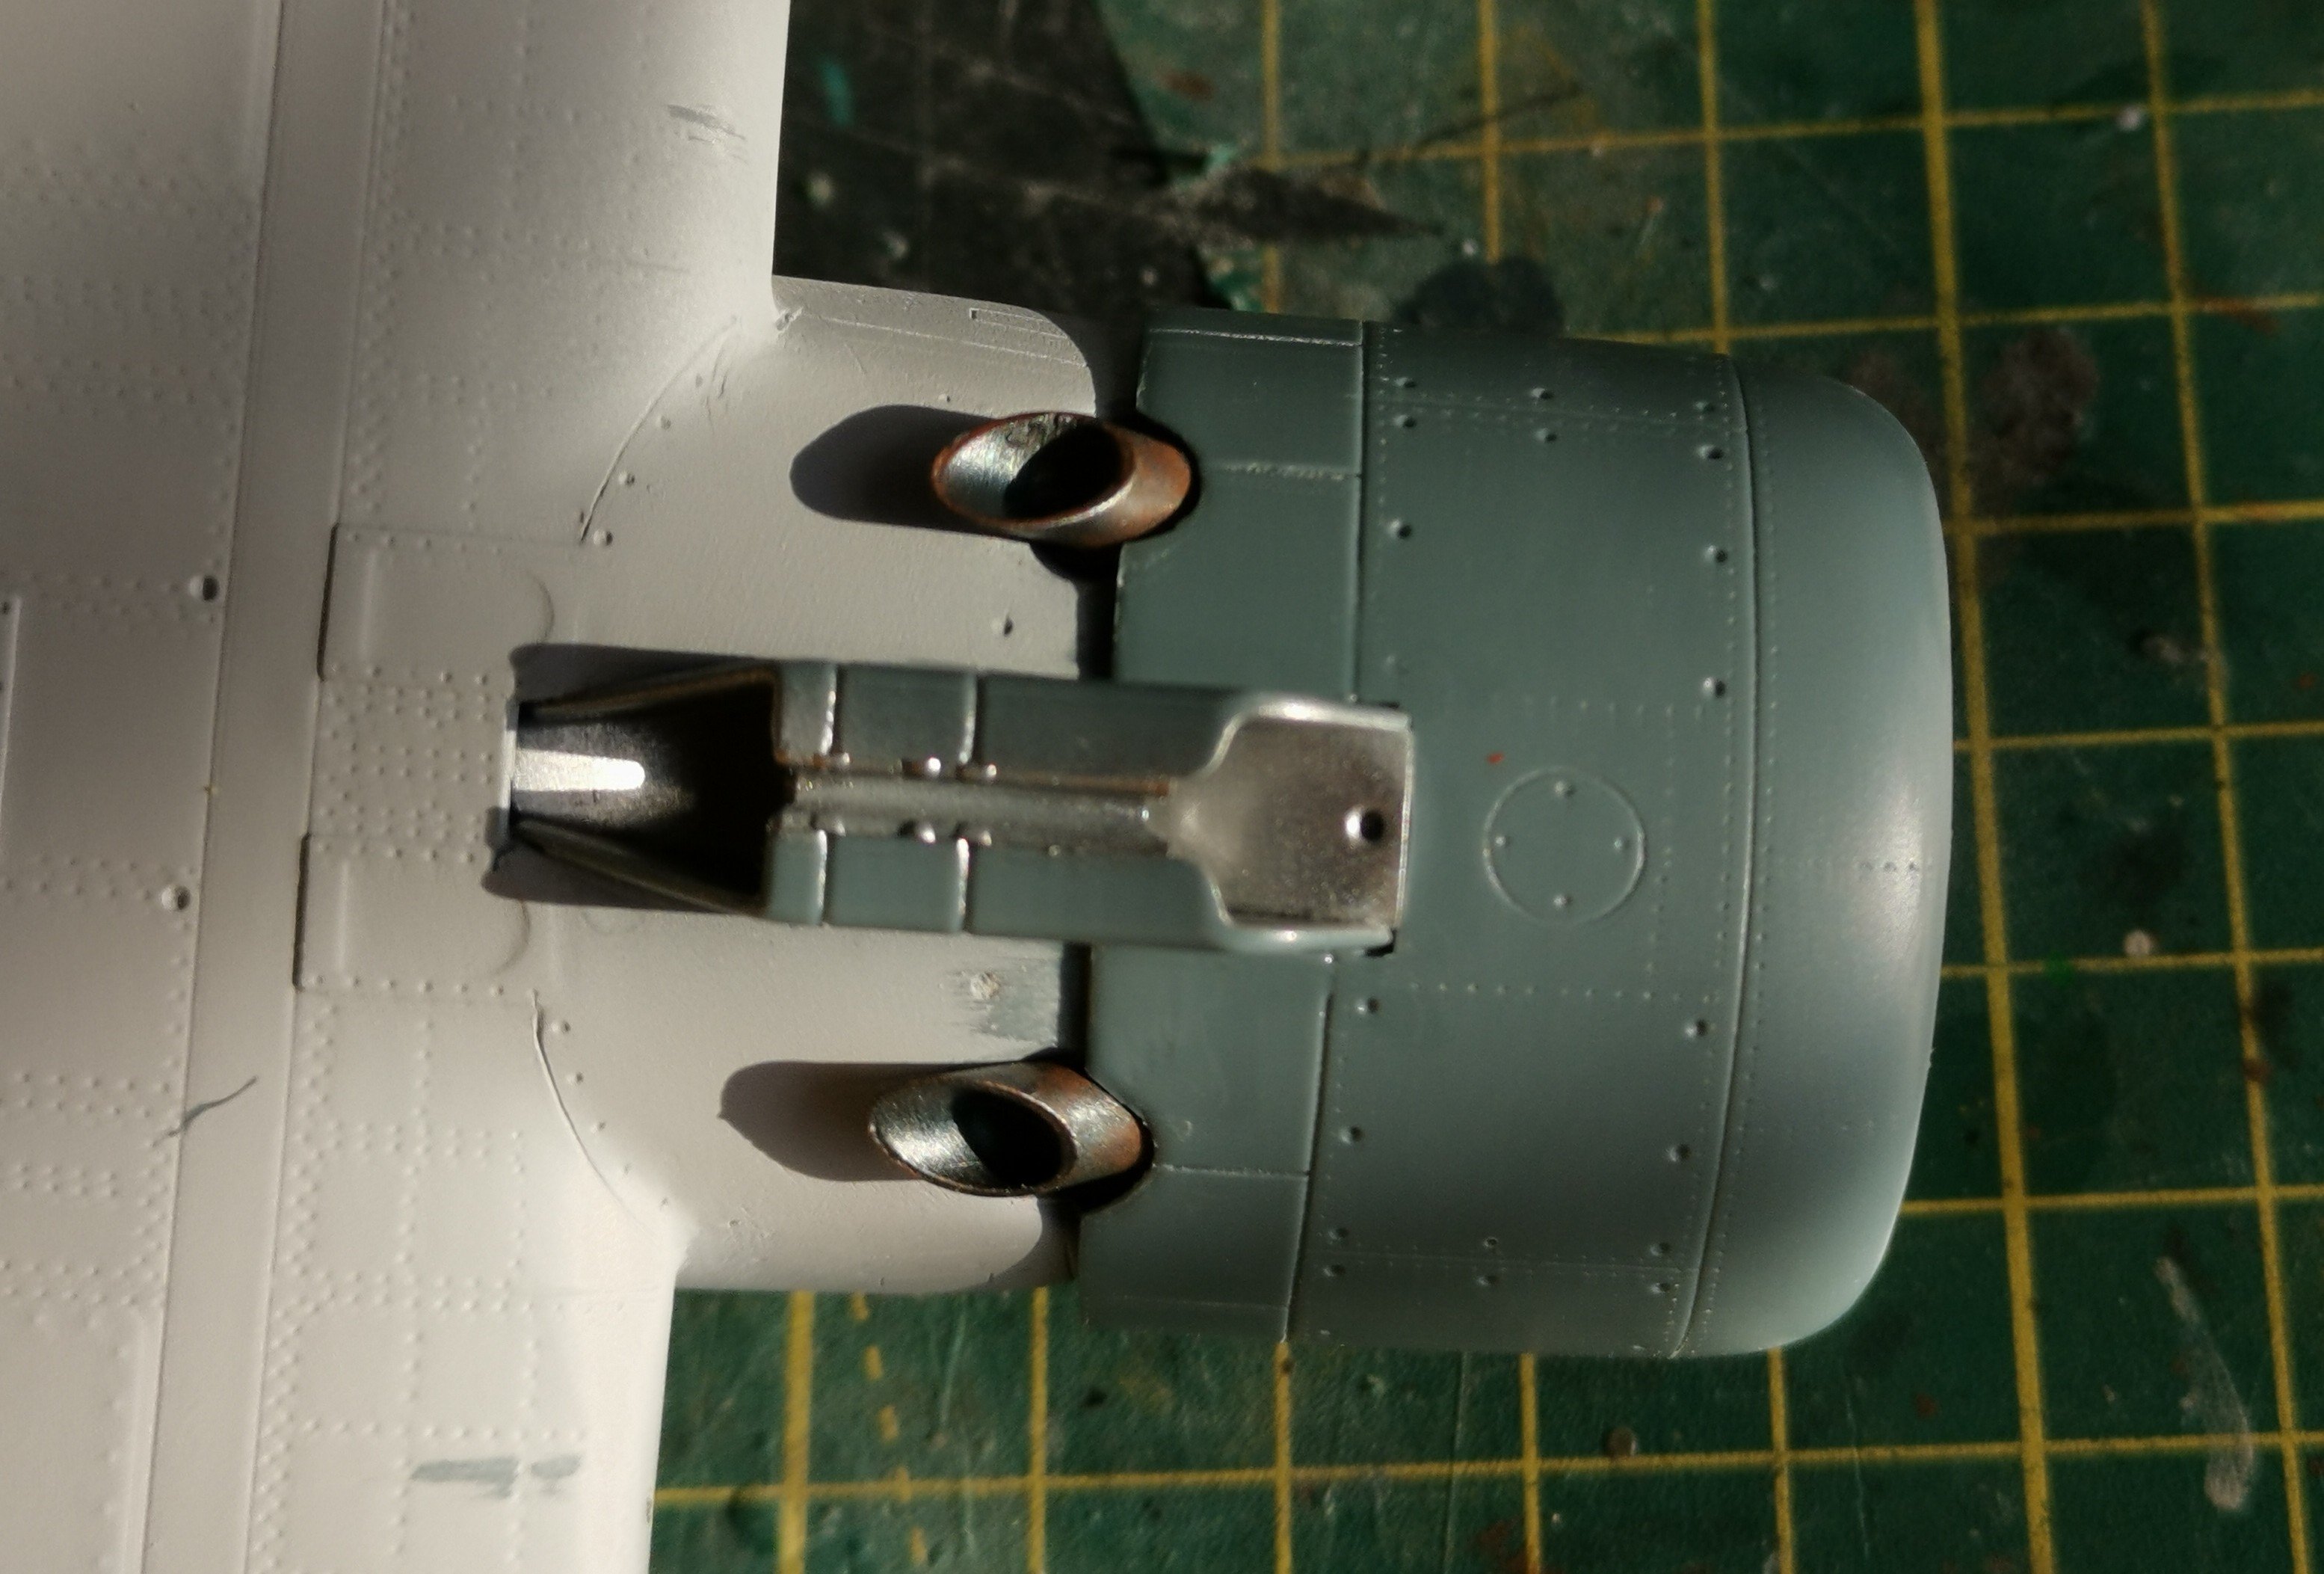
Engine is now painted up and ready to install. I've got the cowling assembled and filler in a few gaps, so it needs finessed, then I need to get the oil cooler assembled. At this point I'm going to follow Ernie's advice as he mentioned that following the instructions is not the way to go here. The recommendation is to fit the oil cooler to the underside, then fit the engine and lastly fit the cowling. I suspect it'll be fiddly, so watch this space....
-
7
-
-
Hi Ralph, I just got that very airbrush at the weekend to replace my older H&S Evolution. I've only used it briefly so far but it sprays very well and it's easier to clean than the older version. Spares are also very easy to find as well. I'd heartily recommend it.
-
3
-
-
The Canada geese are protected over here but are a complete pain - they've turned the grass areas in some public parks into something that resembles the Somme. I think a few folk would fancy taking a few out given the chance.
Not convinced I'd want to eat one though, given their diet I suspect they might be a bit 'oily'
-
2
-
-
This is the updated version of my previous airbrush Kevin and it seems to be a step forward in terms of detail. Neat little details on the needle and nozzles so that you can't mix up the different sizes, etc. Just seems like typical German engineering efficiency.
-
2
-
-
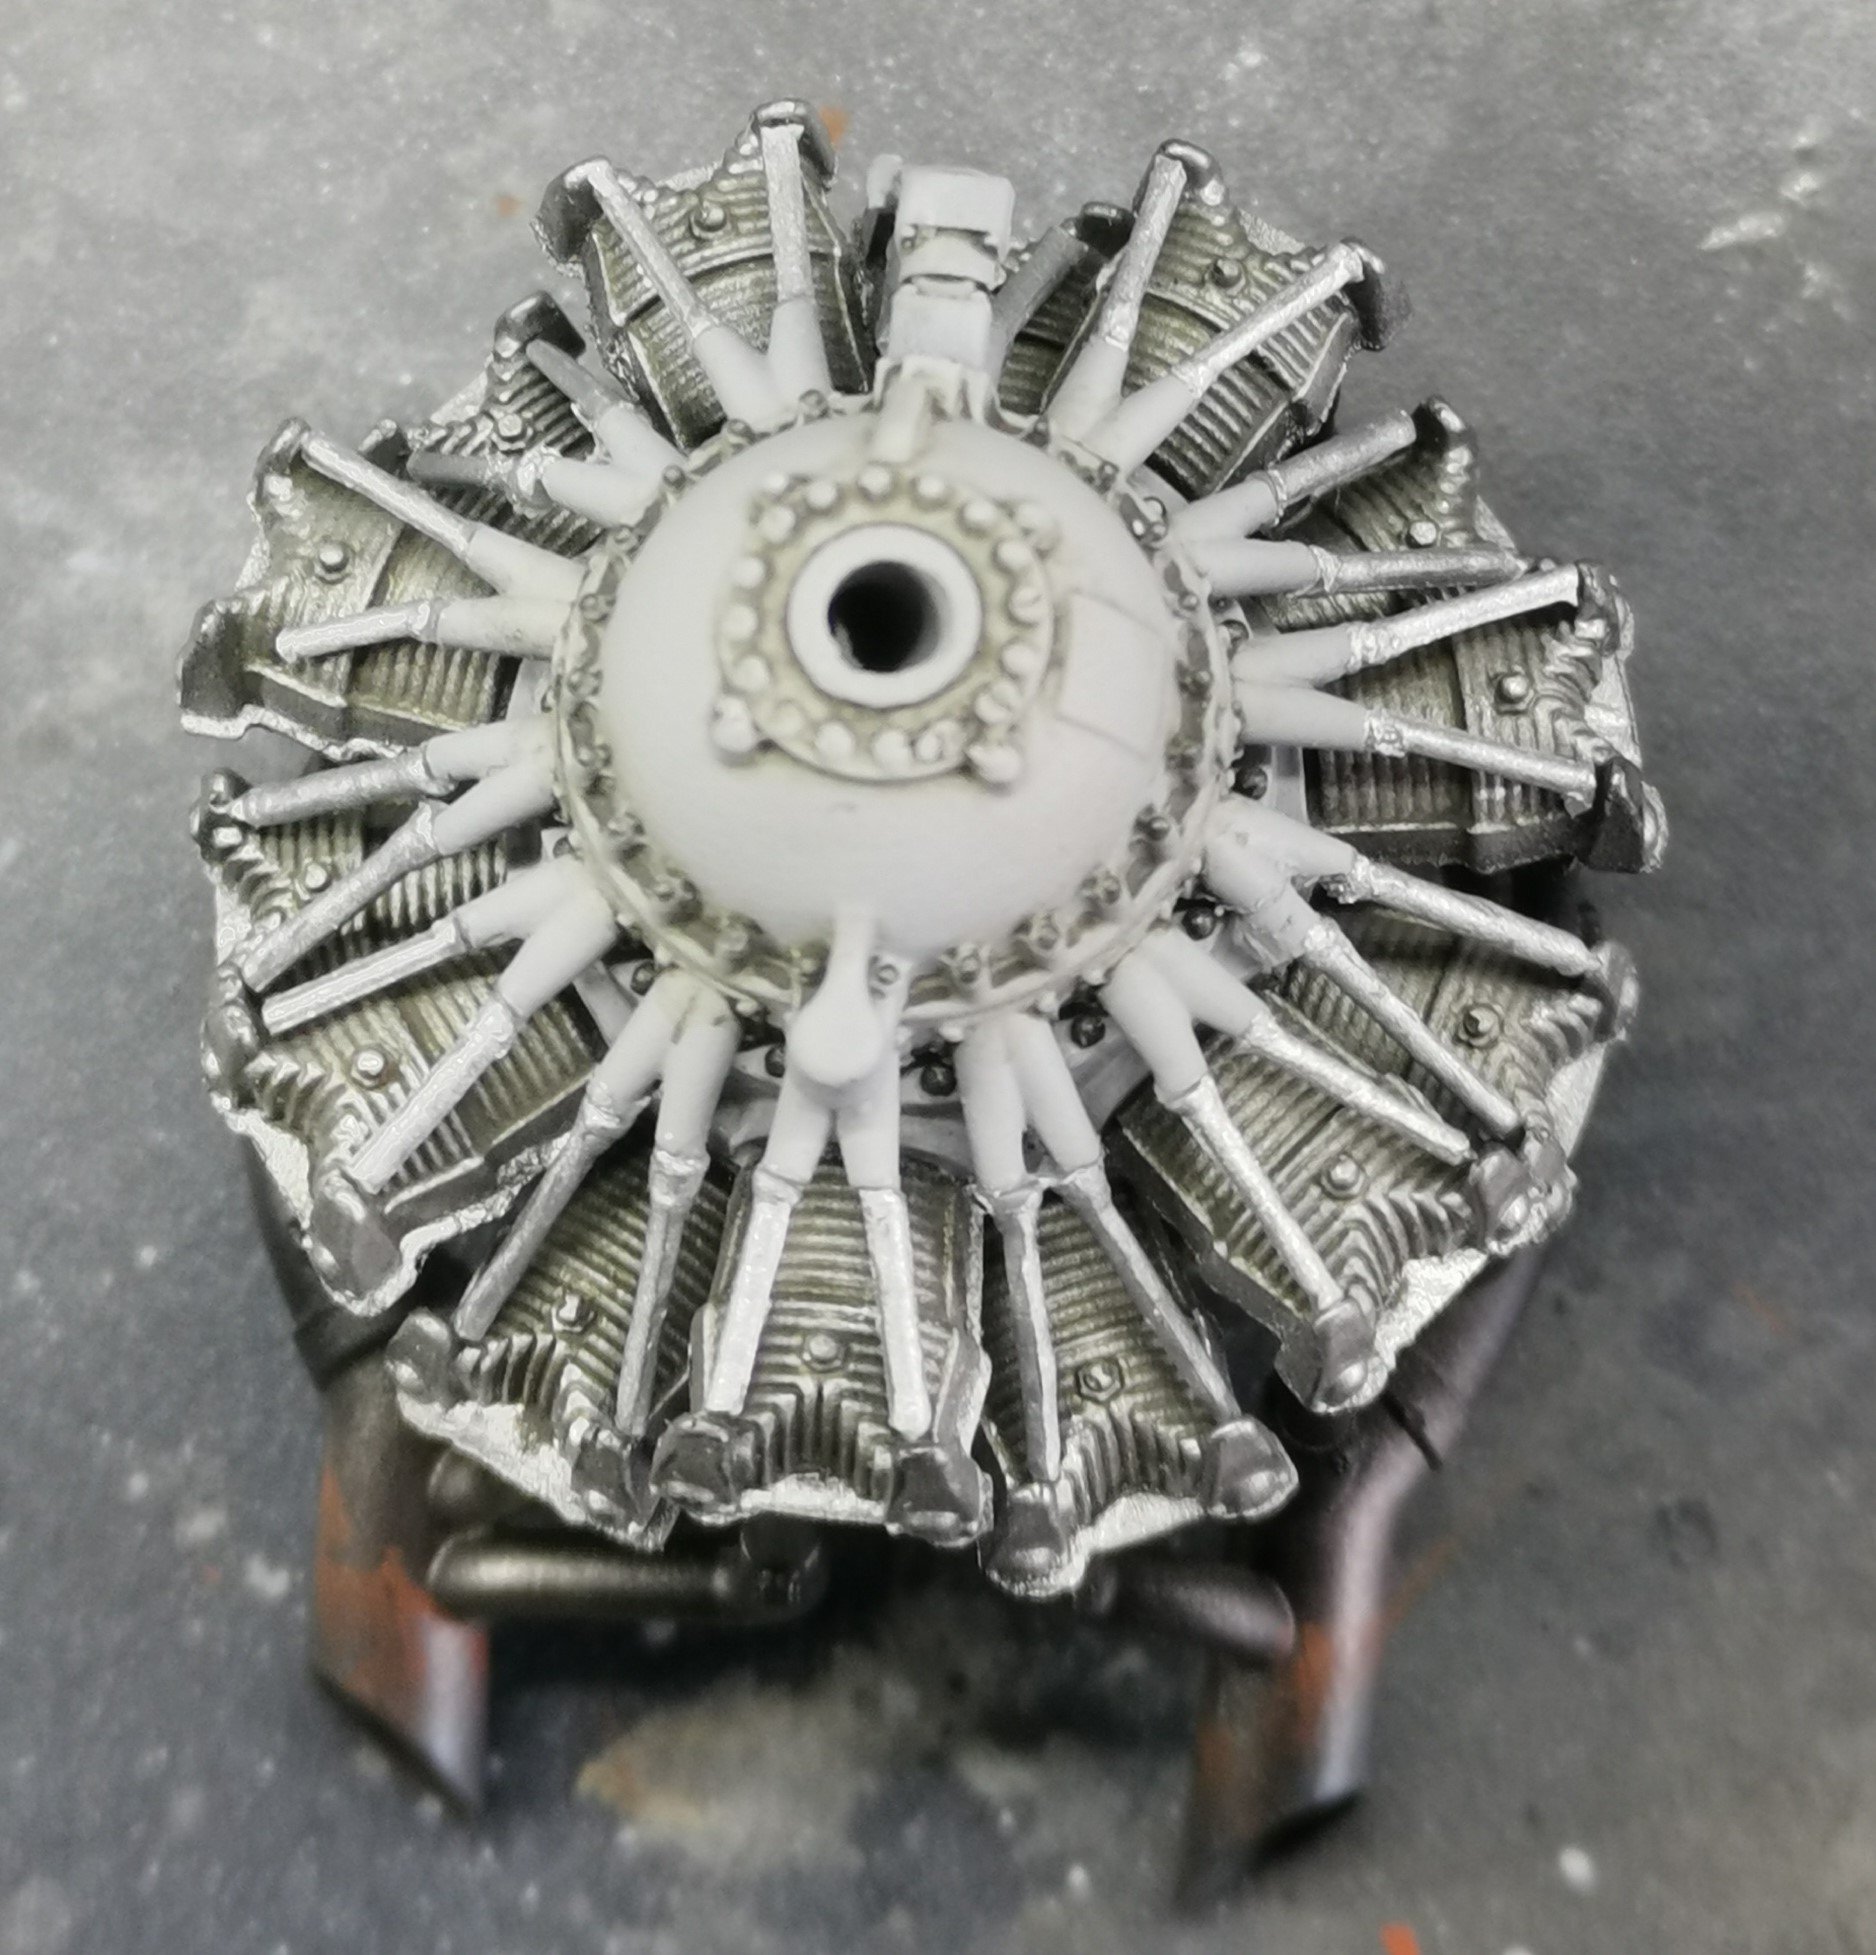
Started the clean up on all the resin parts for the engine and noticed a couple of issues which are going to take a bit of extra work.
Firstly
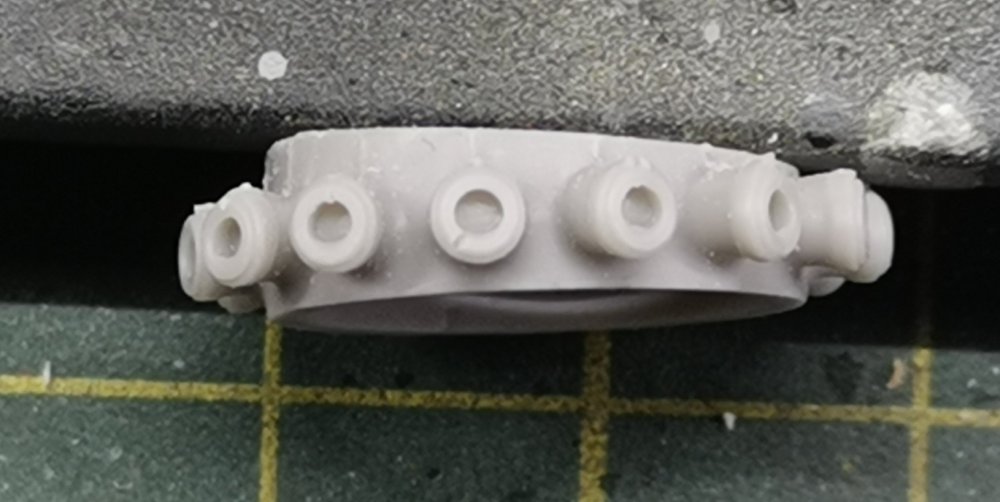
This is the mounting ring for the engine to the firewall, so unless the engine is configured so it can fly in circles easily then this is going to take a good bit of grinding to get things level and straight!
Secondly, here's the front of the most prominent piece
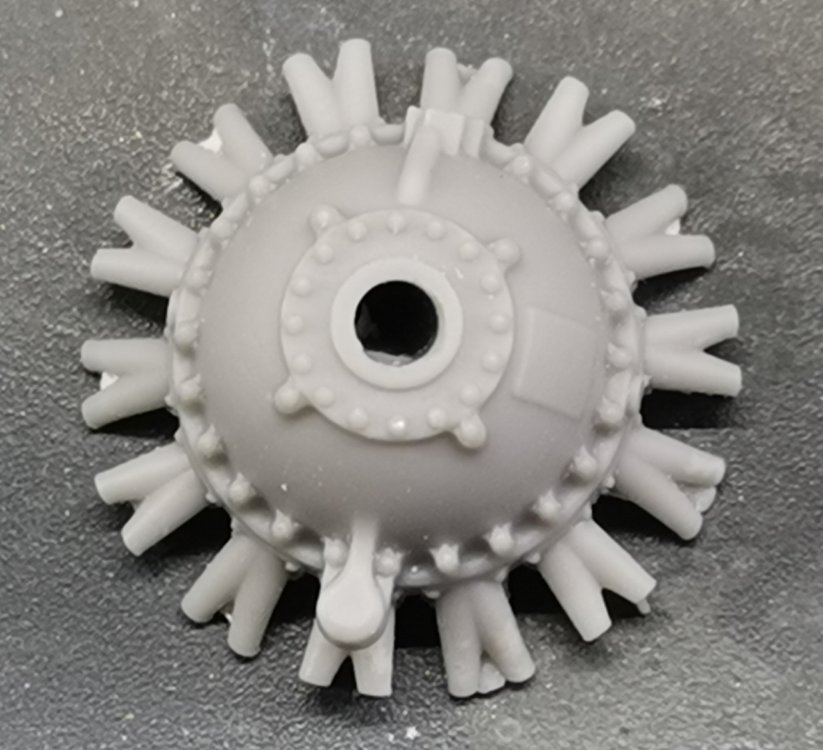
Looks okay until you see the back view...

The opening for the pin that goes through the entire engine is completely off whack, so much so, that I think it's essentially useless. I think the best way forward is to glue the prop shaft in from the front and cut the tip of the pin and just glue this to the front of the cylinder banks.
Pretty disappointing quality control given that this is sold as quite a pricey detail set. Given the current status of things with Infinity and HPH there's certainly no mileage in contacting them for a replacement!
-
5
-
-
Just arrived today, my early Father's Day present.
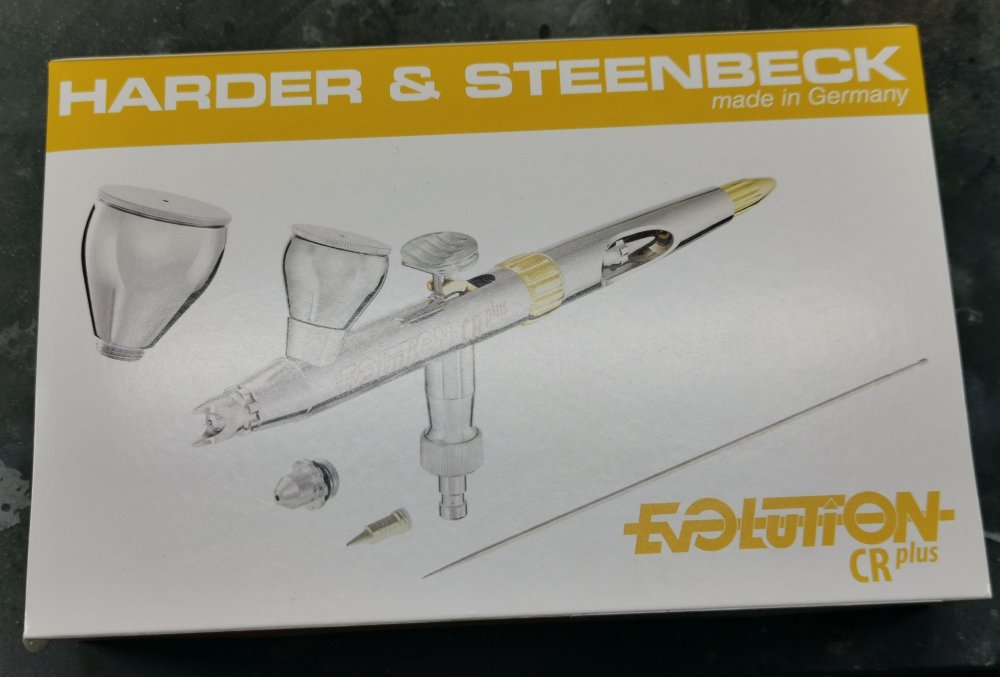
Looks great and has an easier breakdown that the previous version I had.
-
5
-
-
7 hours ago, ScottsGT said:
But to this day I still wonder what was behind that door to the left
Possibly a karaoke bar similar to one we were recommended in Manchester when we were at a conference. There were only 2 problems with it - firstly, the karaoke was in Mandarin and secondly, it looked like if you weren't in the Triads you weren't getting a shot anyway!
One of those places where every head turns and stares at you when you open the door, so needless to say we beat a hasty retreat and went to the Irish bar down the street.
-
1
-
1
-
-
I've ordered a new H&S Evolution CR2024 2 in 1 with the 0.28 and 0.45mm tips. It's basically the updated and improved version of what I had. Should be here on Saturday, so early Father's Day present for me!
Managed to use the old cheapo Chinese brush I have to get primer down on the airframe so far, so next step is a start on the resin engine. That'll have to wait as the next few nights are our local beer festival, so I'm going to be otherwise engaged! 😁🍺
-
3
-
1
-
-
Great to see you back Ernie. From a purely selfish point of view I may pick your brains about your Val build! 😁
-
2
-
-
Ah damn, I was dithering about ordering the Me410 but it's a moot point now.
-
2
-
-
Going to be a slight hiatus here as my airbrush has gone phut just as I started laying down the primer.
Anyone got any suggestions for a replacement for my H&S Evolution 2 in 1 ?
-
1
-
-
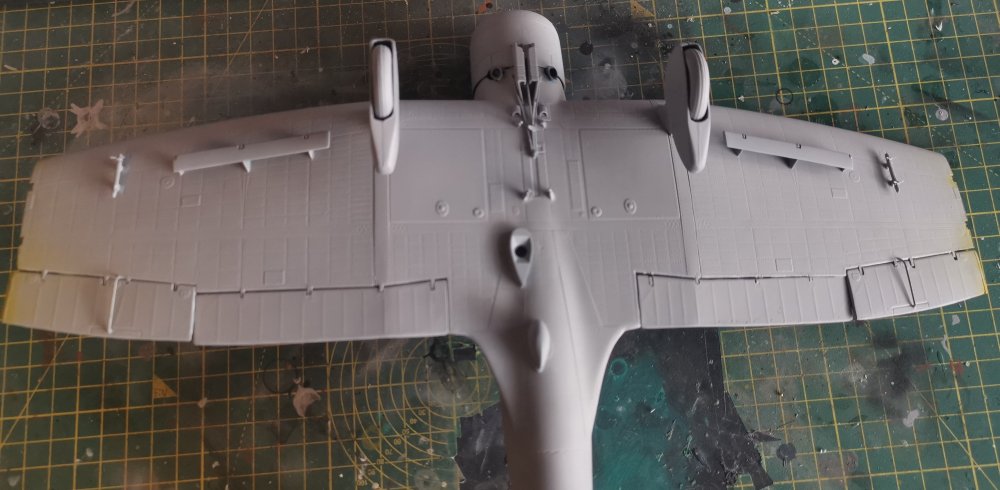
Got the wings completed but only took pictures of one side.

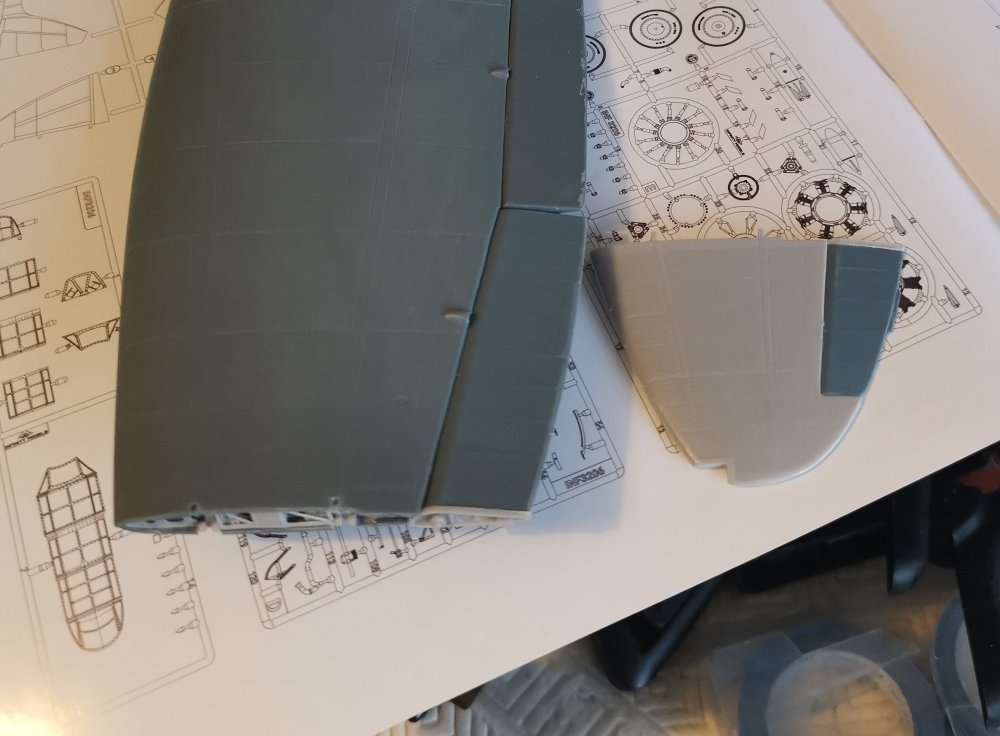
Pretty happy with how they're looking. The hinge pieces for the flaps and ailerons are really poorly moulded so I think I'm going to scratch my own using wire and Evergreen.
Plan is to prime this all now as I think any repairs will be easier before I add the spats and wheels, etc.
-
6
-
-
Slow but steady progress on this one. Got the gaps at the wingroots filled and detail restored and the tail feathers are on.
The resin parts are in for the port wing folding mechanism. Fit was easier than I expected but I'm not sure the other side is going to be so simple. That's tomorrow night's entertainment!

-
7
-
1
-
-
Amazing how quick the exhaust stains seem to have appeared given how few hours it's probably flown when this was filmed. Very cool.
-
1
-
-
Yes, that's a pretty stark difference Rob. My Molotow pen is only a few months old, so I'll need to watch and see if it goes 'off' as Hubert says.
Will definitely check out the AK option. I've used their Extreme Metals and found them very good.
-
1
-


Infinity 1/32 Aichi Val
in LSM 1/35 and Larger Work In Progress
Posted
Just realised I hadn't posted an update on this for a while but progress has been made.
Main painting is done and just started masking for the white squares for the fuselage hinomarus. Also realised I'll need to buy a circle cutter as the templates I have don't go large enough for the wing markings. Any suggestions for a decent one?