


Moses Prahn
-
Posts
30 -
Joined
-
Last visited
Content Type
Profiles
Forums
Events
Gallery
Posts posted by Moses Prahn
-
-
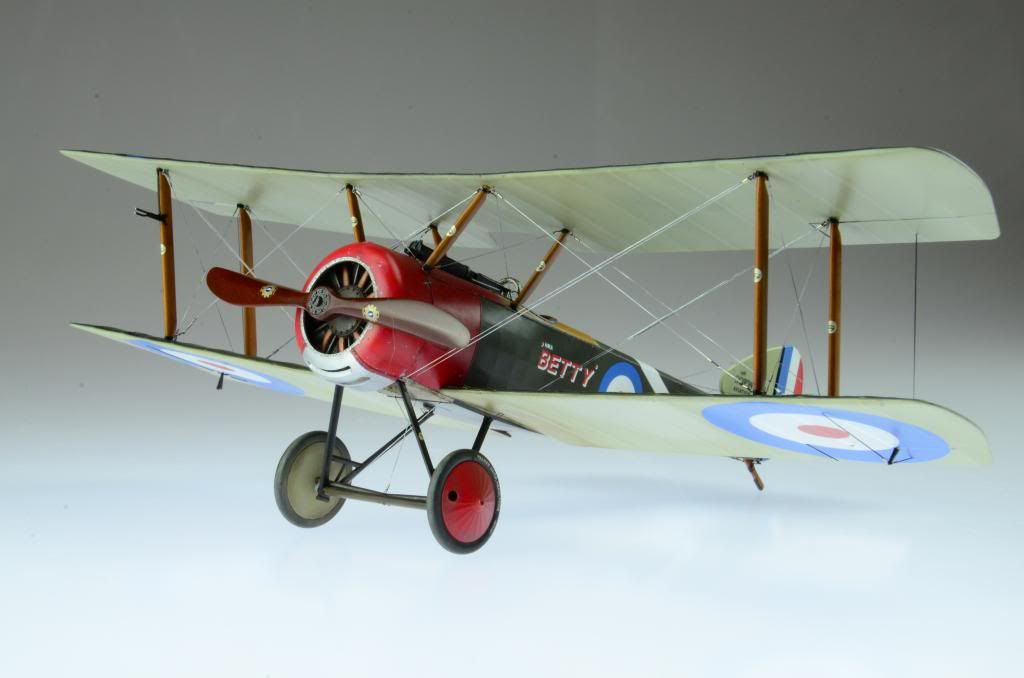
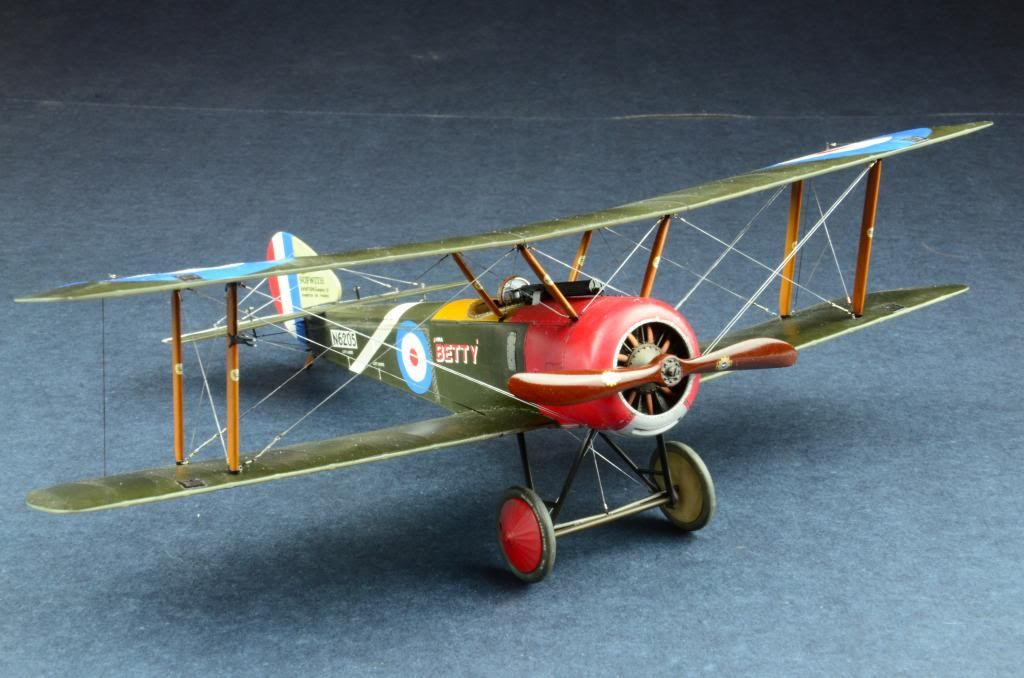
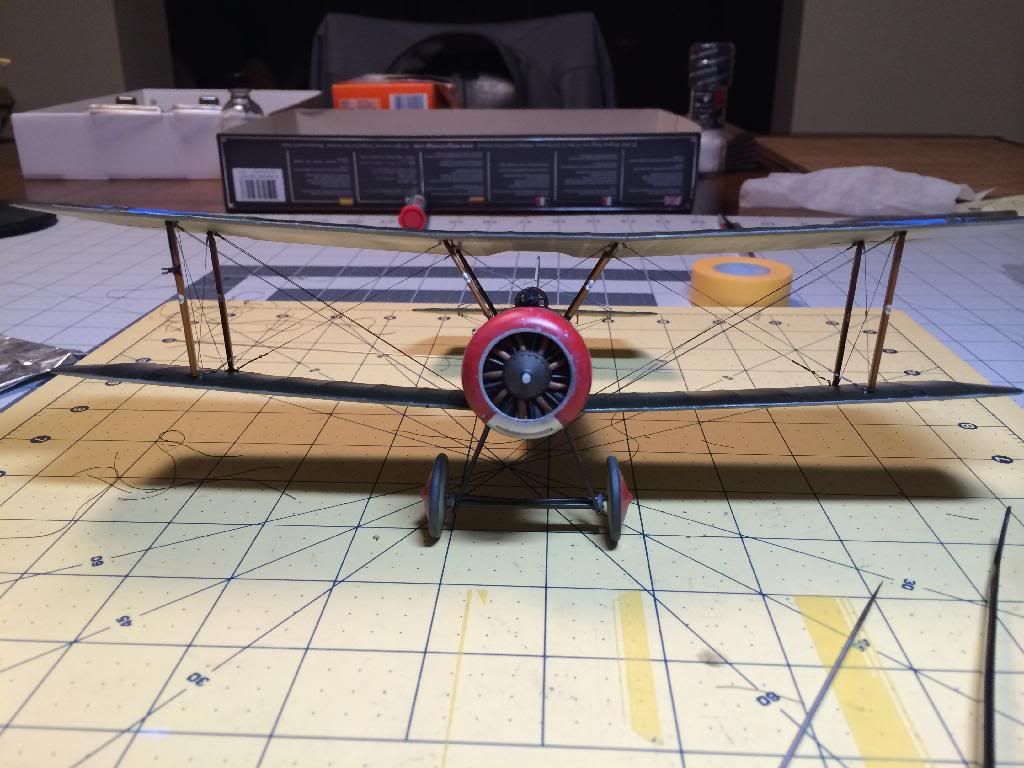
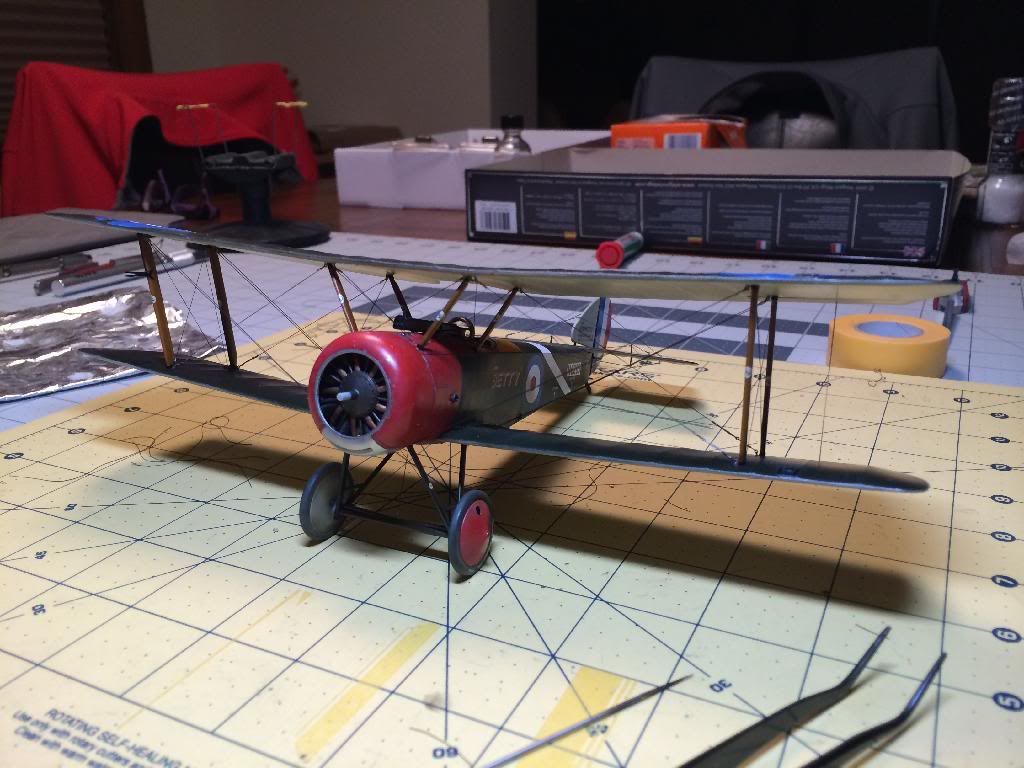
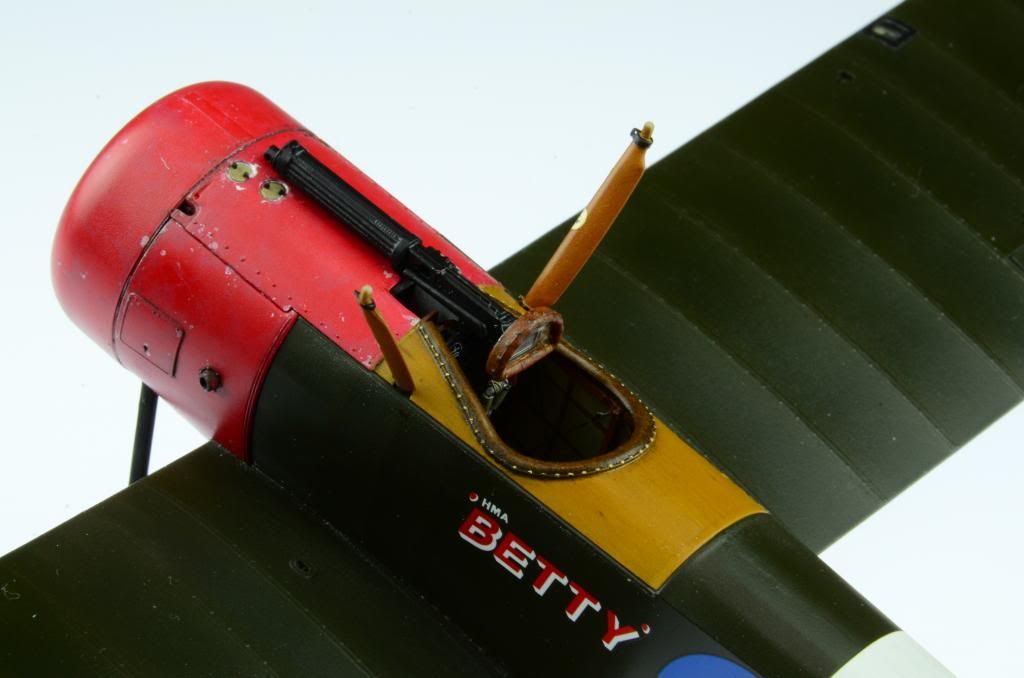
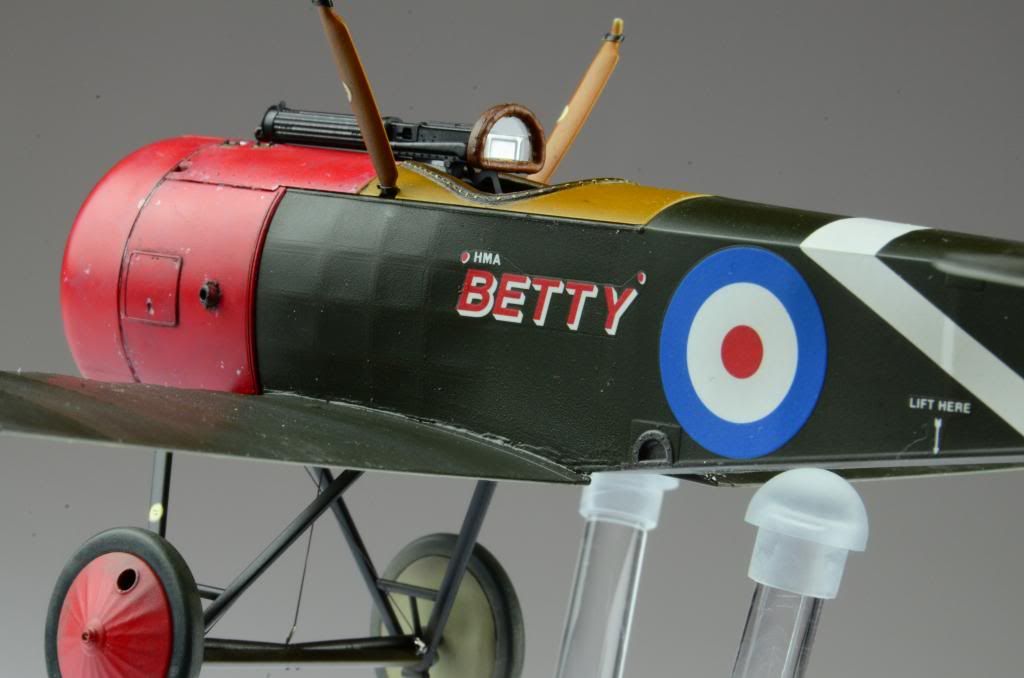
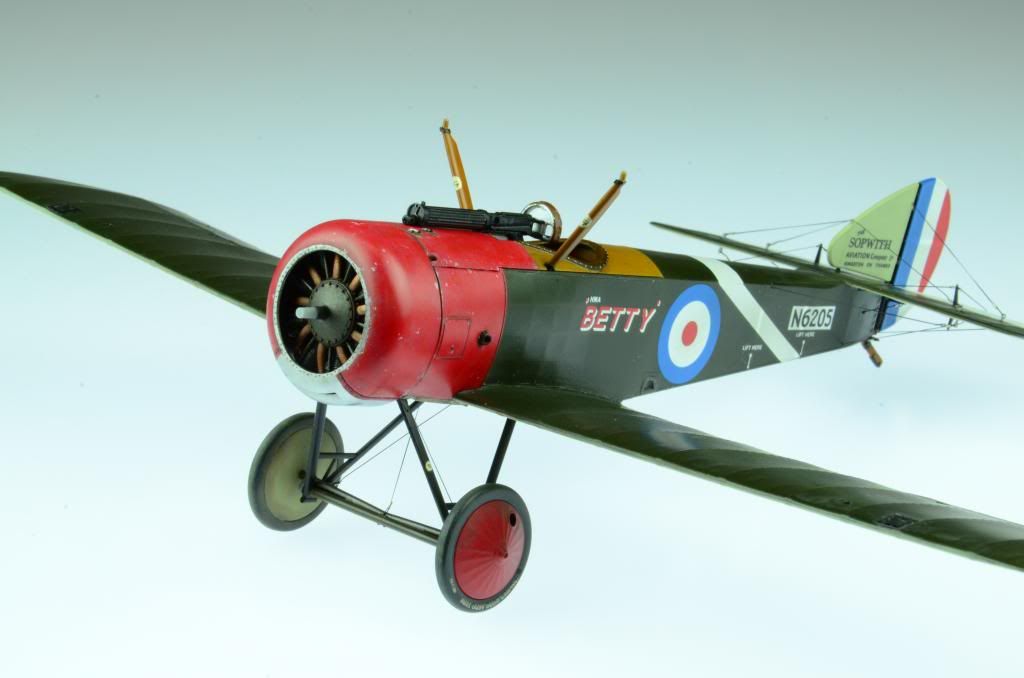
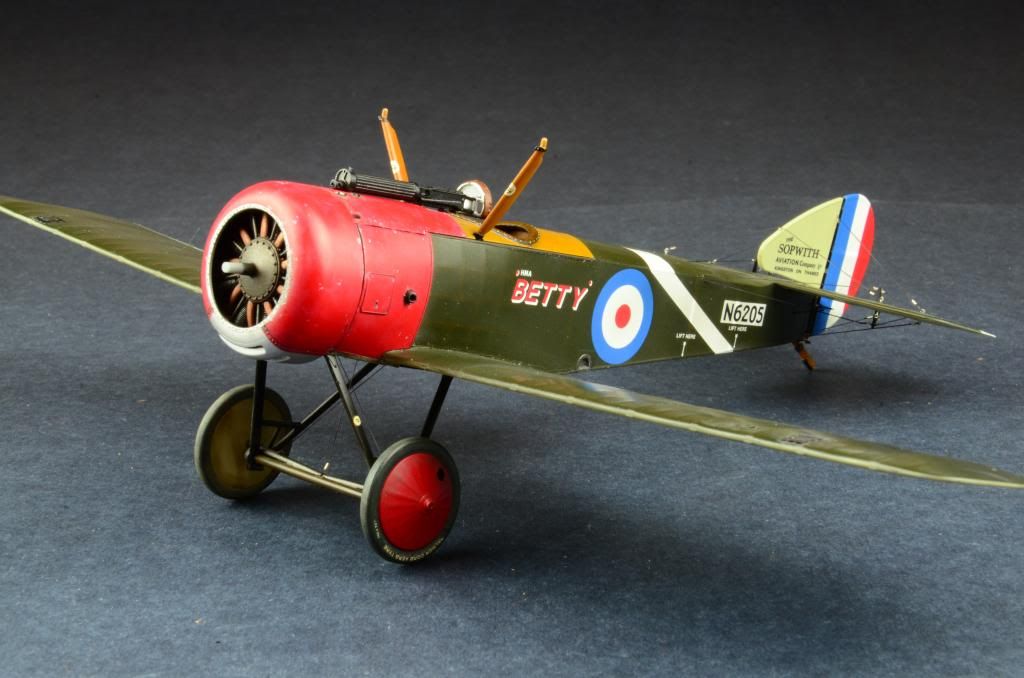
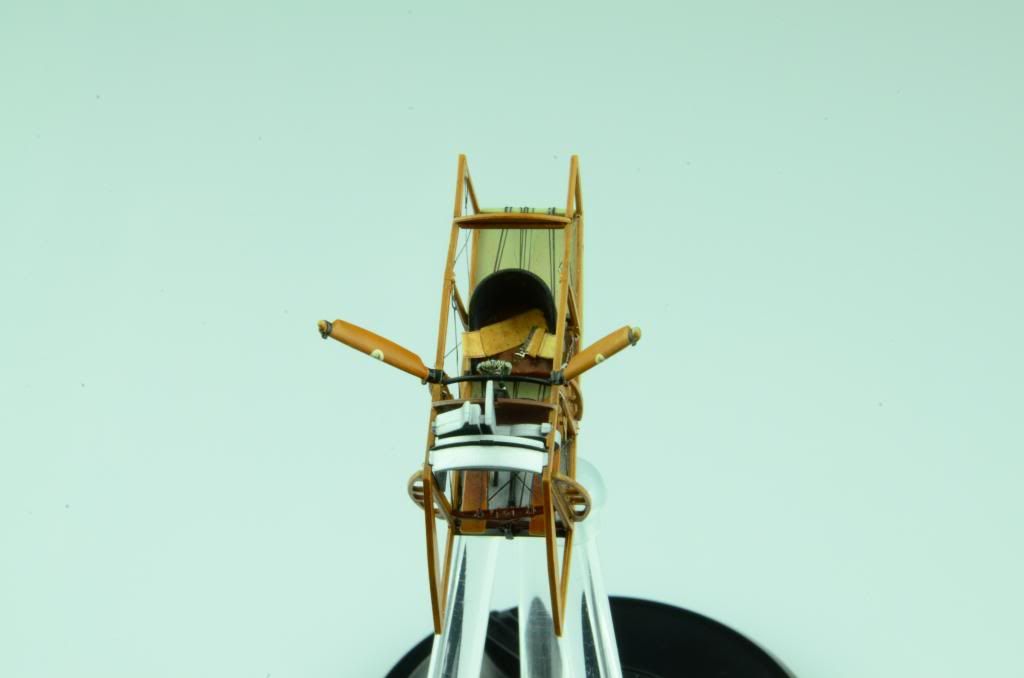
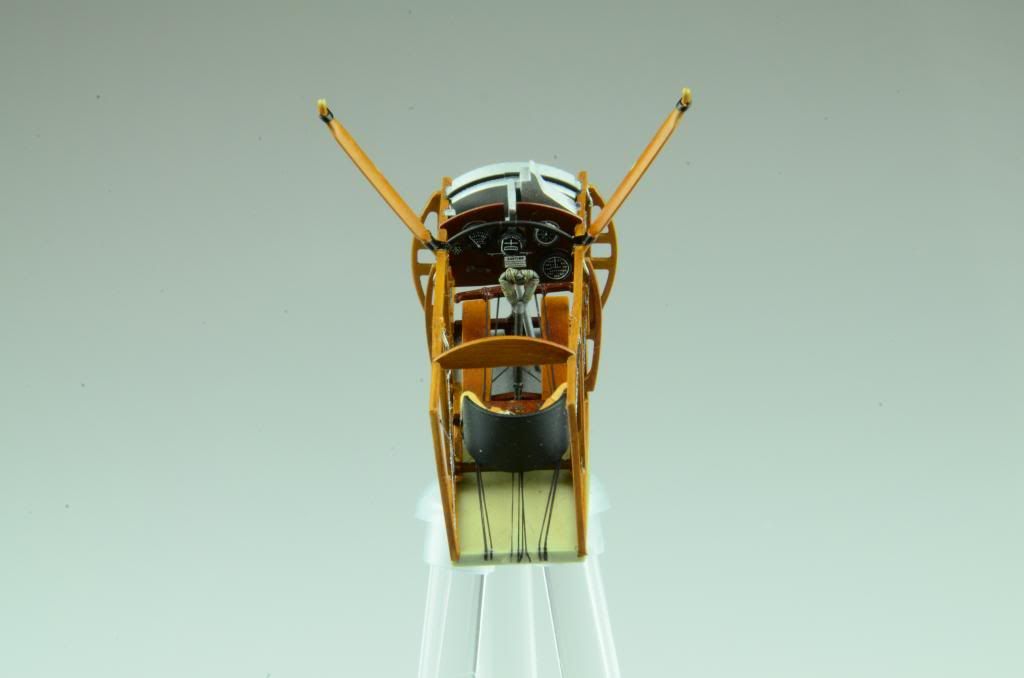
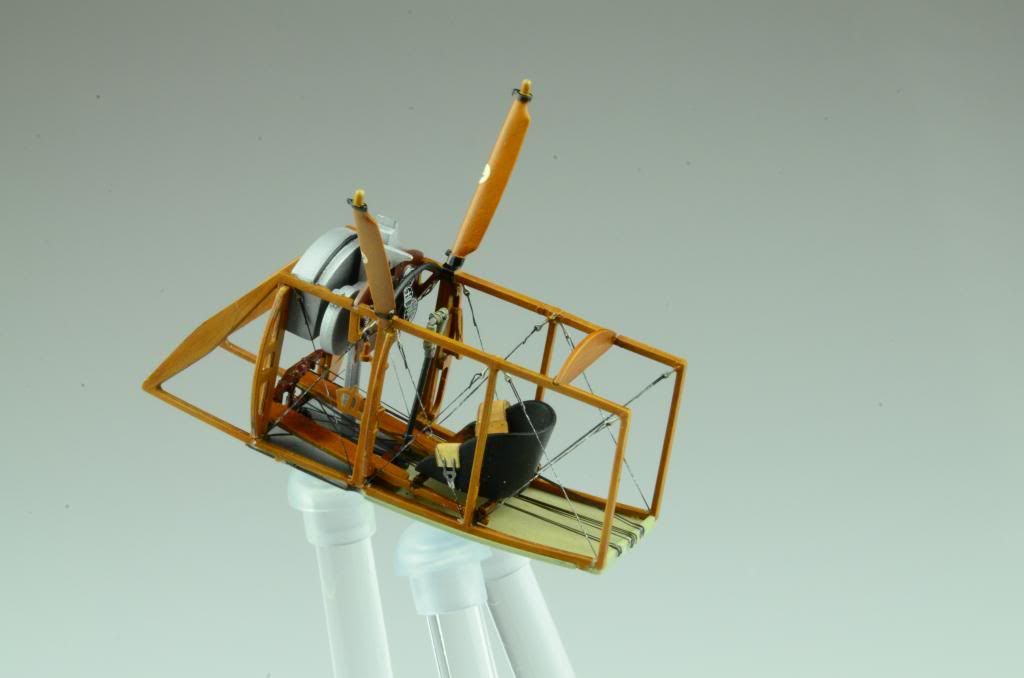
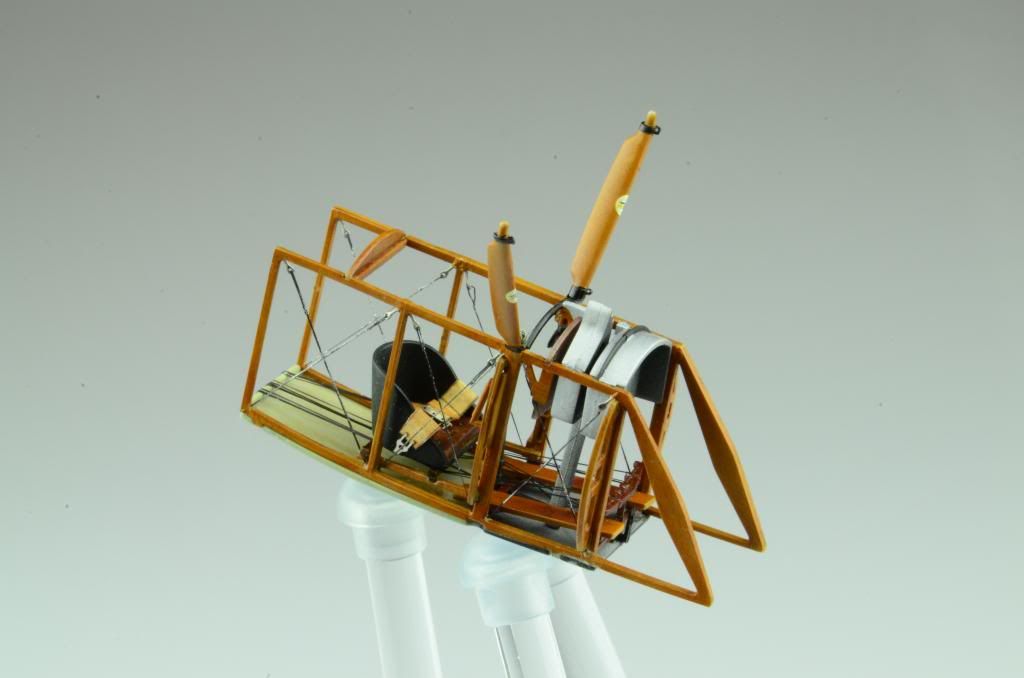
Finally calling the betty done! I may make a handful of touch-ups down the road, but for now, she is ready for display. Once the rigging was on I made my final adjustments to the rigging, and put the prop on. Not sure if I am going to secure it with glue - as it is a solid fit as is, and may be handy to be able to remove if I ever need to get past it to make any adjustments, or heaven forbid - repairs. I am posting a coupld of pics here, and the full suite will be in the completed builds section.
Hope you have enjoyed this adventure with me. For a build that had many, many firsts for me as a modeler, I am very happy with the way this turned out. There were a ton of lessons learned along the way, and the next WnW kit will be eagerly anticipated.
-
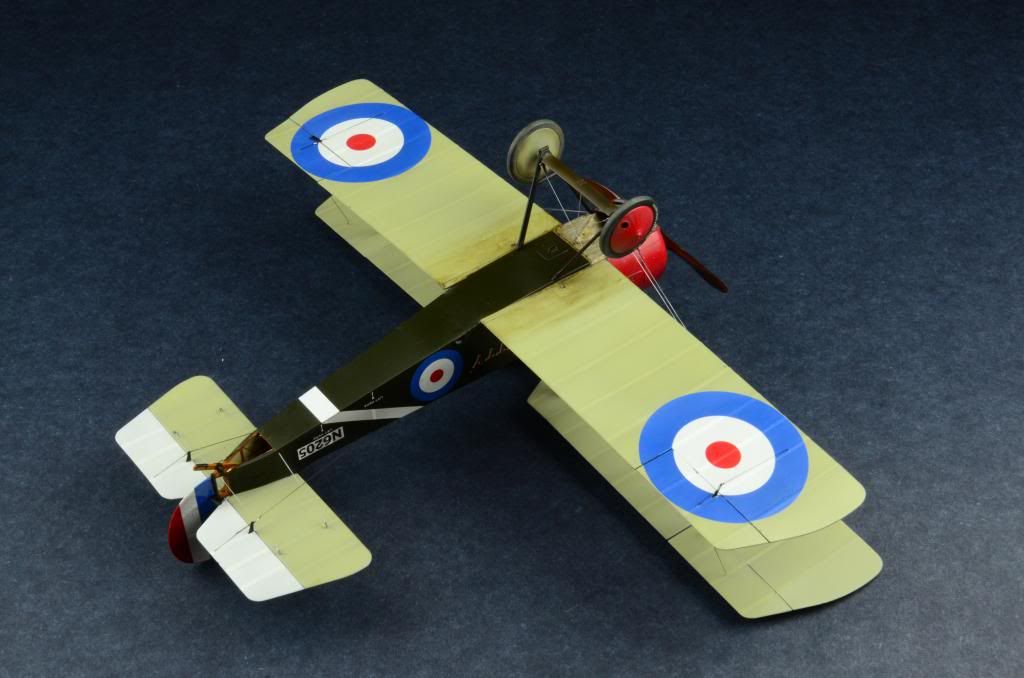
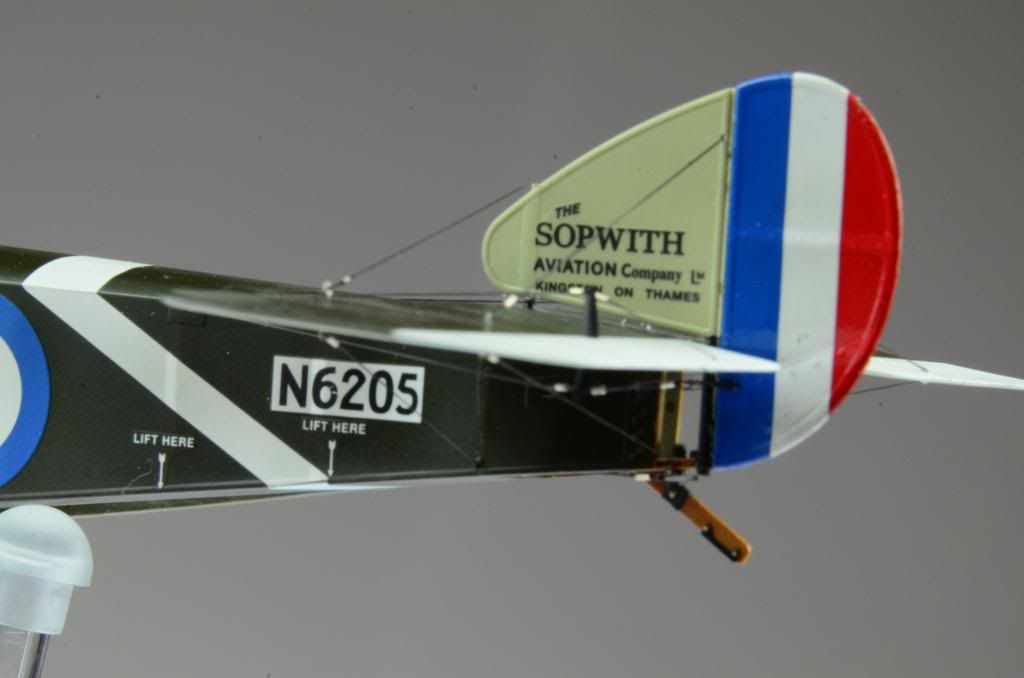
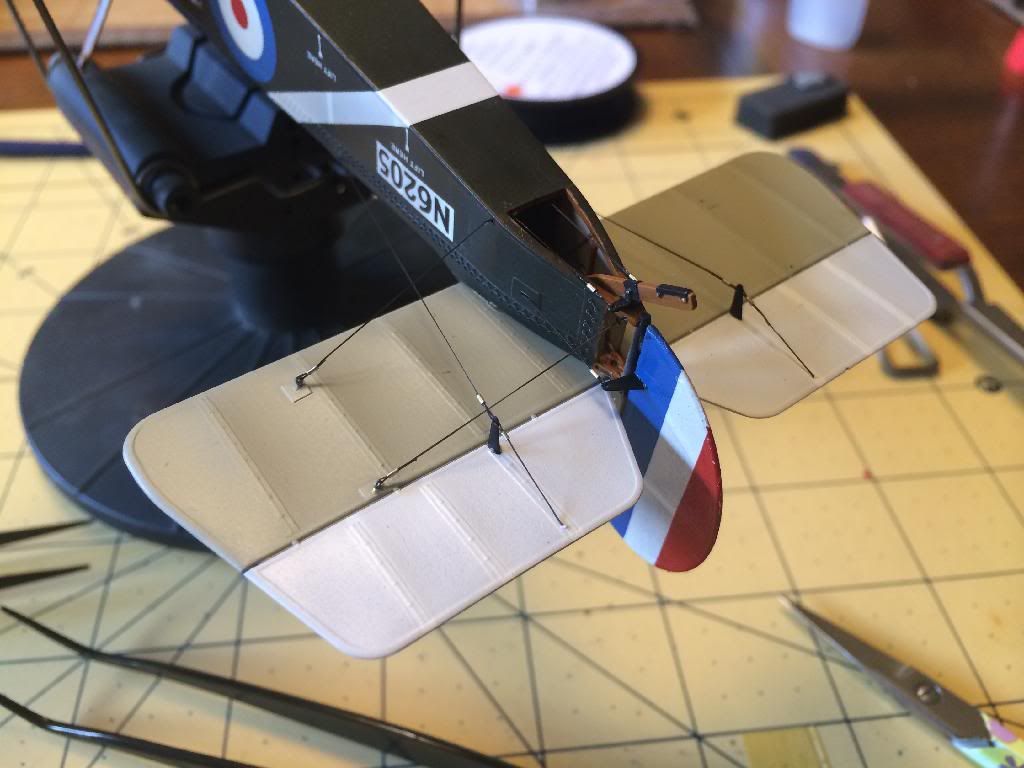
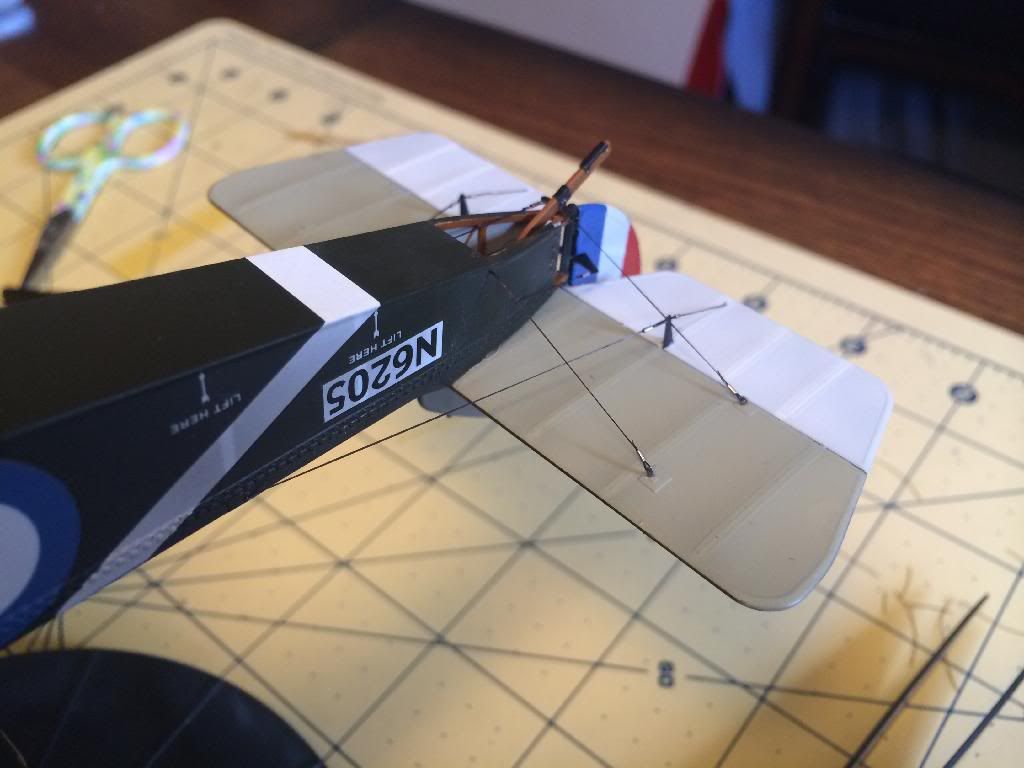
And, rigging is done! Took a touch longer than anticipated, but was able to get the last line glued in place just a few minutes ago. I will get her out to the photo table for some real shots, but in the meantime, here is an in progress shot as well as a look at the rigging wrapped up. Still have a couple of things left to do to be able to call the Pup officially completed, but this is about as near to the home stretch as it gets!
I prepped the top wing with all of the rigging lines that attached into the bottom wing. For the lines starting from an anchor point on the bottom wing that I used turnbuckles on, I secured one end in the bottom line, and then left some slack to work with and ran the line through the micro tube, then the anchor, back through the micro tube, without gluing in place. With the extra line I was able to line everything up, and secure the anchor into the top wing right before I glued the top wing in place. this allowed me to simply pull tight, glue and snip the excess line. Saved a ton of time, and allowed me to avoid having to work in the tight quarters between the wings!
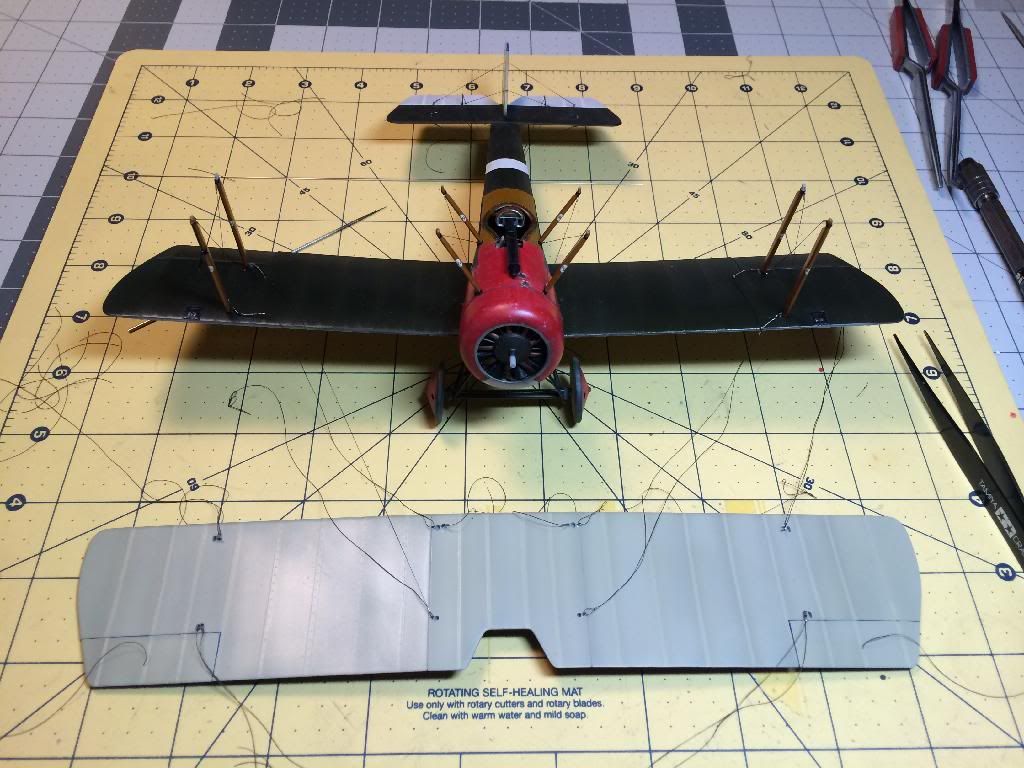
A couple of the scrap pieces are still lying on the mat, which are a little distracting. I am pleased with it!
-
 2
2
-
-
Dave, fantastic build. Very well executed, and thanks for sharing the details about the craft printer! I wanted to ask, could you share more details about what you have hanging out of the cockpit? It looks like some type of O2 regulator to me, but I have no idea (and am far from an expert on this era of aircraft). Looks like some excellent additional detail and I would love to know more about it and how you achieved it. Thanks!
-
1
-
-
Finally on the home stretch with this build! A little more progress and some better photos to post up today. I will be the first to say the Pup isn't perfect, but it has been a lot of fun, and a great learning experience. I am already looking forward to my next WnW build! That said, I do think there were a number of items in this build where the first attempt was unsatisfactory and I worked at it until I was satisfied with the results. Developing these skills has been very rewarding, and I know it will pay off in future builds as well.
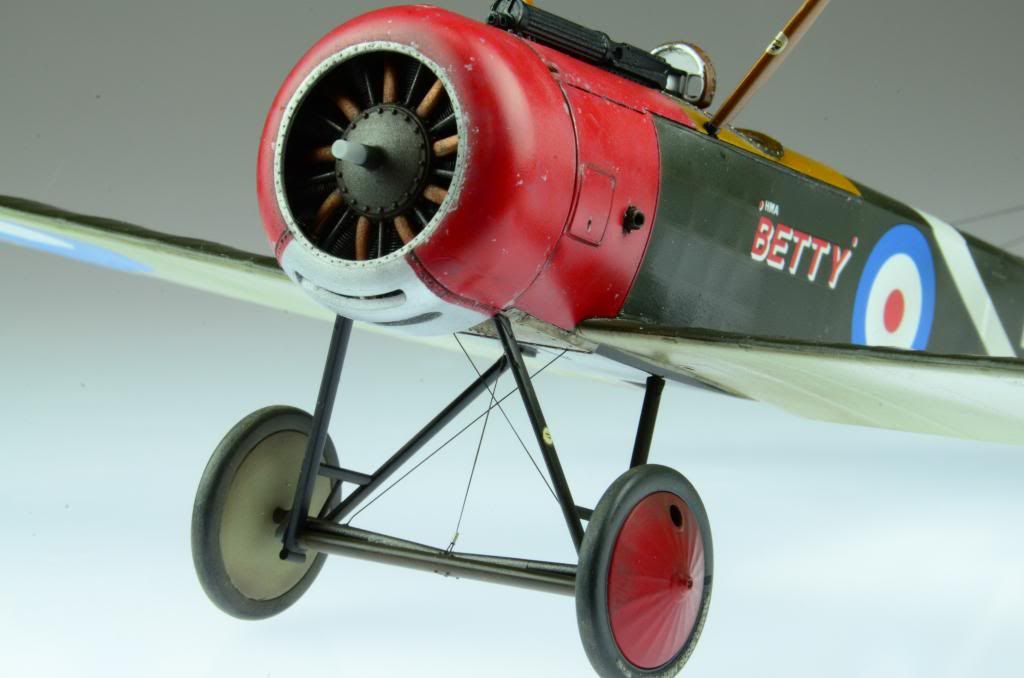
On to the good stuff! When I last left off I was wrapping up the red cowl, only to find that in my attempt to protect my wood grain finish on the cockpit deck had not been successful. Oh well, there are worse things I could need to redo (puttying and sanding come to mind!), so I set off on that while applying the coat of alclad light sheen to the rest of the plane, and fighting the dust that is everywhere in my work area. Definitely building a paint booth before I lay down my next finishing coat that has any degree of gloss in it! Once cured, I attached the cowl pieces to the fuselage, and closed the cockpit up. Next I installed the Rhone, and test fit the front cowl and then secured with the handy touch 'n flow. To wrap up the final bit of assembly on the front end I secured the vickers and shifted focus to the undercarriage. While working through these items I wrapped up assembly and the weathering for the undercarriage and wheels. Fairly straightforward, the only challenge seemed to be finding where the anchor points for the three lines of rigging should be attached on the undercarriage structure. I made an educated guess based on the reference photos I could find, but ultimately, it was a minor detail that I didn't want to get hung up on.
Which takes us to rigging. Oh the joy! Ultimately it is tedious, tiny, slow work (at least for me), but incredibly rewarding when it starts to take shape. I feel that I was fairly well prepared, in that I planned ahead for how I was going to tackle the rigging. I have finished the rigging for the tail, and will tackle the front wings next, which I estimate I will finish up in the coming weeks. For now, I have the following progress to report:
-
4
-
-
It has been too long since my last update. Things have been quite busy here, but I am finally getting back to the bench here and there and making more progress on the Pup. Most recent news is that rigging is underway! While redoing the wood grain on the cockpit deck, I started some prep work and testing out the rigging. So far so good - slow, tedious work - but it is coming along and it finally feels like I am in the home stretch! Will post more quality pictures with the real camera once I am able to get this on the photo table.
-
2
-
-
Unfortunately my efforts to strip the paint not the top deck made its way past the tape and ruined my wood grain. While not ideal, I am trying to be positive about this opportunity to re-do the wood grain, and decided that with this opportunity I should try to add a little wear and fading to the lacquer/finish on the wood grain. Any suggestions on how to achieve these type of results? I am open to any suggestions or advice on what has worked for anyone else would be welcome.
-
1
-
-
Dave, Lawman, Jon - thanks for your comments and support. It is definitely encouraging to have a group that encourages you to continue on and helps you want to share your progress.
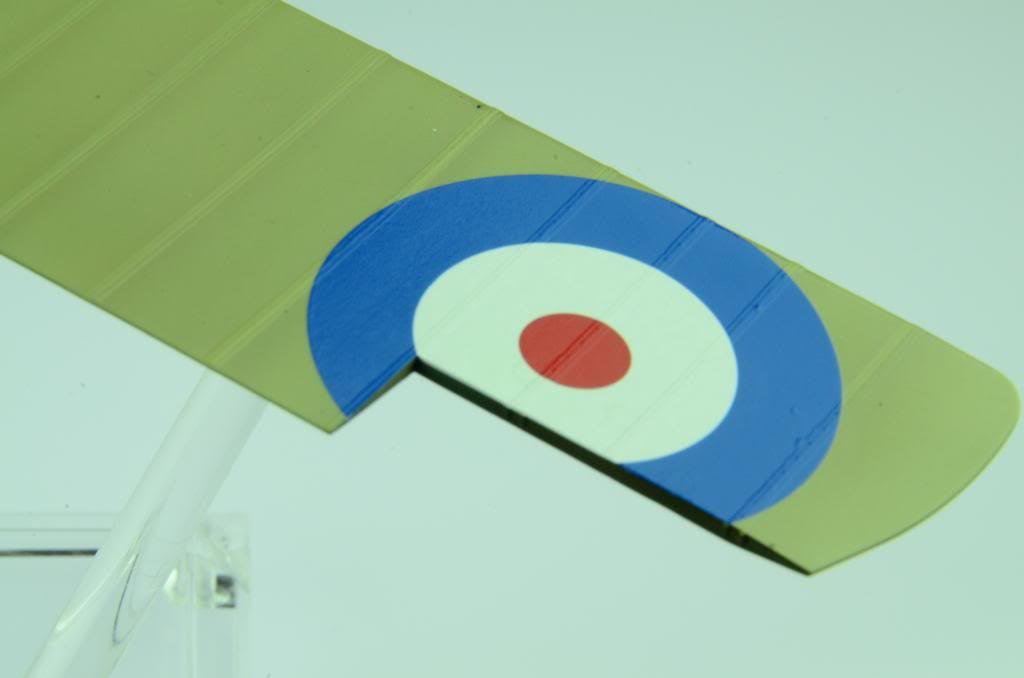
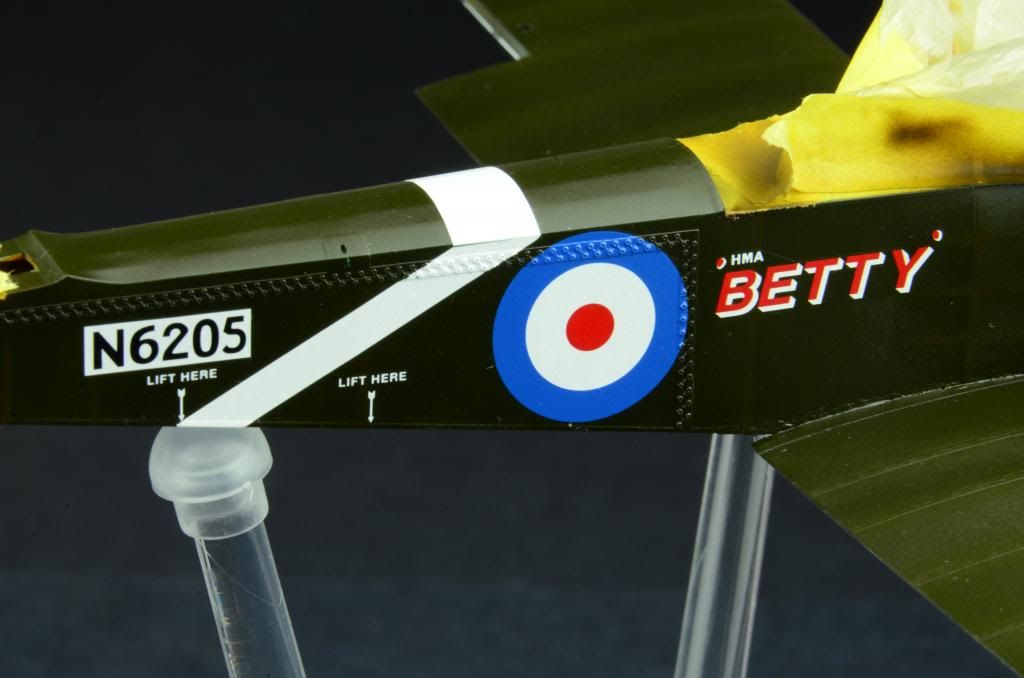
I was also able to get a start on the decals over the weekend. Great decals that go down with very little fuss. I also like that there are far fewer to put on than later WWII era and modern jet aircraft! With a little setting solution and a touch of heat they settle in nicely over the ribbing on the wings and the stitching details on the fuselage. I poked holes in each ring in the stitching to allow them to fully settle in. With the weathering these will look more normal as the small holes will pick up the sludge wash and add to the effect (that is my plan at least!).
With this progress I finally feel that I am getting close to the home stretch! As odd as it may sound, I am really looking forward to tackling the rigging! I reserve the right to retract that statement!

-
1
-
-
Quick update after the weekend and a little time at the bench today. I was able to get the cowling pieces wrapped up tonight. Very happy with the results compared to my first, second, and third attempts! It is hard to capture the subtly in the color variation, but it worked out to be exactly the effect I was going for. Now, I will also state that I have no historically accurate idea of how these parts would have worn and appeared, but I will take some artistic license here and go with what I've got.
Started this round off with the black primer, and then a coat of the alclad aluminum. It didn't lay down as smooth as I normally get, so I broke out the 6000 grit and went to work. Once satisfied I buffed it with the dremmel to get a super sleek finish. I also used this to thin some areas on the cowl to let a little more of the base black primer to show through. Working with red I knew this would add some variation, and I am glad for the effect.
With the aluminum base down I added a very sparse amount of salt in preparation for the red coat. Once it dried I came back and knocked half of the salt off. I sprayed the red coat and took a look with the salt removed. I had some longer scratches masked with liquid frisket that I decided to remove. Once satisfied with my red base I let it dry, and then came back with the dremmel again to buff it up.
At this point I salted the entire area. Using a mix ratio of 3:1 red:white, I sprayed a very thin coat over everything. Once dry, I removed the salt, and then applied a new layer of salt. Once that had dried I mixed a very thin cup of grey blue. This was sprayed very very lightly. As I started removing the salt I wasn't as happy with the effect. So I added a drop of red to the rest of the cup to get a slightly light purple hue and sprayed that on the more exposed area. This gave a fantastic worn look in comparison to the red base. I then removed and wiped all of the salt off and finished up with a final coat of a very thin mix of the original base red color. This worked to bring everything back in line, and to soften some of the contrast with the lighter coats.
The result is tricky to photograph, and like most finishes, is best appreciated in person. I realize looking at my photos that I didn't take a shot with the front of the ring that I masked to preserve the bare metal. I will add a picture of this tomorrow.
Once this gets on the rest of the plane I will finish it off with some final weathering touches including the exhaust, but for now, I am calling this done. No more stripping back to the plastic and starting over on this one!
-
2
-
-
I have to commend you for your tenacity. This is fantastic and very useful information.
Thank you for sharing! I know your hard work will pay off...if not now definitly in the future. Definitely looking good!
Thanks Jonathan. I have learned a lot from the members of this forum, so I am happy to give back in a small way. If anything I hope to bridge the gap between the excellent modellers on here and those who may be similar to me by posting about my humble attempts at achieving the basic skills others have already mastered.
Very impressive! IMHO, the last effect, although the red and chipping look good, the rough texture from the salt gives the impression more of a derelict than a worn aircraft cowling. It reminds me of how an old car would rust out in NY from the road salt. or an abandoned car in a farmers field.
I love how you keep trying! My standards for my own work are just as high. It's not uncommon for me to paint, strip, and paint again, as many times as it takes until I'm satisfied. My Tamiya Spitfire was painted and stripped 3 times before I was happy with it.
Thanks for the continued support Lawman! I appreciate your positive support, despite my self-inflicted setbacks!
I think that you have made a great choice Moses.
Thanks Dolly - sometimes you learn and start over again knowing what not to do!
Hi Moses,
Sorry, haven't been to your build in a while.... But I still very much like what I see. Can I give some constructive feedback?
-I really DO like the post-linen-colour woodwork in your cockpit. On the photo's I can't see that it isn't sharply defined. It would've been nicer IMHO if you could've brought in some shading in the linen colour. That would break up the recatngles somewhat. And I imagine that richt underneath a wooden spar there could be a hint of shade? In walk-around photos it would be difficult to see as we usually use flash in cockpits because of the abominable lighting conditions in most museums... Secondly, if you should employ a pin-wash around those wooden structures, that also gives a sense of depth and camouflages if the masking wasn't spot-on everywhere! If you can't reach it anymore, no sweat, it DOES look good as is!
-I'm glad you decided to re-do the cowl chipping! Instead of using the salt-technique you could try the hairspray technique? AK Interactive has a dedicated product for it, although you could use the cheapest, weakest hairspray you can find in the supermarket... Imagine yourself asking the girl at the counter for the worst hairspray they carry in the store...

Erik, thanks for your feedback - it is always welcome! I agree I should have done some additional weathering to the interior canvas walls of the cockpit. Not sure why I skipped it, as I normally do on my WWII era builds. Oh well, more to look forward to in the next WWI build. I will have to try that AK interactive worn effects you recommended. I have seen a handful of their items that look fantastic. It has been added to the birthday list! Thanks!
-
I was all set to move onto the gloss coat and the decals, but the cowl pieces still didn't sit right with me. Seeing a post about salt chipping/weathering (thanks Doogs & Martin), I decided I should give it a shot on the cowl pieces to see if that would get them right for me. I set out by putting the salt on, and letting it dry. For the first pass I used a thinned mix of red with a drop of off white. Once dried enough I knocked some of the salt off with a toothbrush and a toothpick (letting the salt dry overnight resulted in some stubborn areas), and I set out with my next coat, which added a little thinner to the rest of the cup (red/white) as well as a light grey blue. Sprayed a thin coat, let dry, knocked off some salt, next coat - which was just the thinned grey blue. Last coat was of thinned Tamiya smoke. About halfway through I had noticed a couple of things:
1 - if I sprayed a thicker coat of the thinned paint, the thinner would break up the smaller salt pieces and set them "afloat" on the piece.
2 - as thinner would seek out the floating salt pieces (capillary action?), more volume accumulated around the edges of a salt piece and took longer to evaporate than the thinner in an open area away from any salt.
3 - pieces that had a bath in the thinner, were more likely to attach to paint that was down a layer or two (more time for the thinner to eat through the layers of paint).
4 - when these pieces were chipped off in the end, they revealed layers down to the base primer coat, resulting in black chipped areas on the pieces.
Now, this isn't entirely a bad thing. In fact, it was quite useful to learn, and I am sure I will incorporate this in future salt chipping/weathering sessions. However, this does result in a more worn look than what I was aiming to achieve. Result of this learning opportunity is below.
Verdict? I would love to hear your thoughts.
For me, and what I am trying to achieve, we are a little overdone in the weathering department. Really like what I was able to learn, and I feel a lot more confident using this technique going forward, but it just won't work for me on this build. The last thing I will say to support my decision is that because I painted all of the pieces independent of the final assembly, the chipping, fading, and weathering simply doesn't line up. For example, if you take the side cowl pieces, and line the straight side up with the top piece, none of the chipping effects align, in fact, they don't even look plausible. Ultimately, it was back to the drawing board.
Then I had an idea. The kit comes with two sets of fuselage halves - depending on which variant you are constructing. I decided, to use the extra set as my frame to hold all of the pieces together. This would allow me to work on the cowling, and the gloss coat and decals in tandem, without either interrupting the others workflow. Excellent!
I stripped the cowl pieces to the plastic, and attached them to the extra fuselage. Without the internals the fit isn't perfect (my masking to protect the wood finish didn't help either), but it will help me to achieve the finish I am after.
Gloss coat has been applied to the rest of the plane and is drying. Primer and aluminum coats have been sprayed on the cowl pieces. Once dry enough I buffed the cowl pieces for a super smooth finish. Next step will be some very light and strategically placed salt for chipping in preparation for the red. I am aiming to keep up the good progress this weekend and be a couple of steps closer to rigging!
-
1
-
-
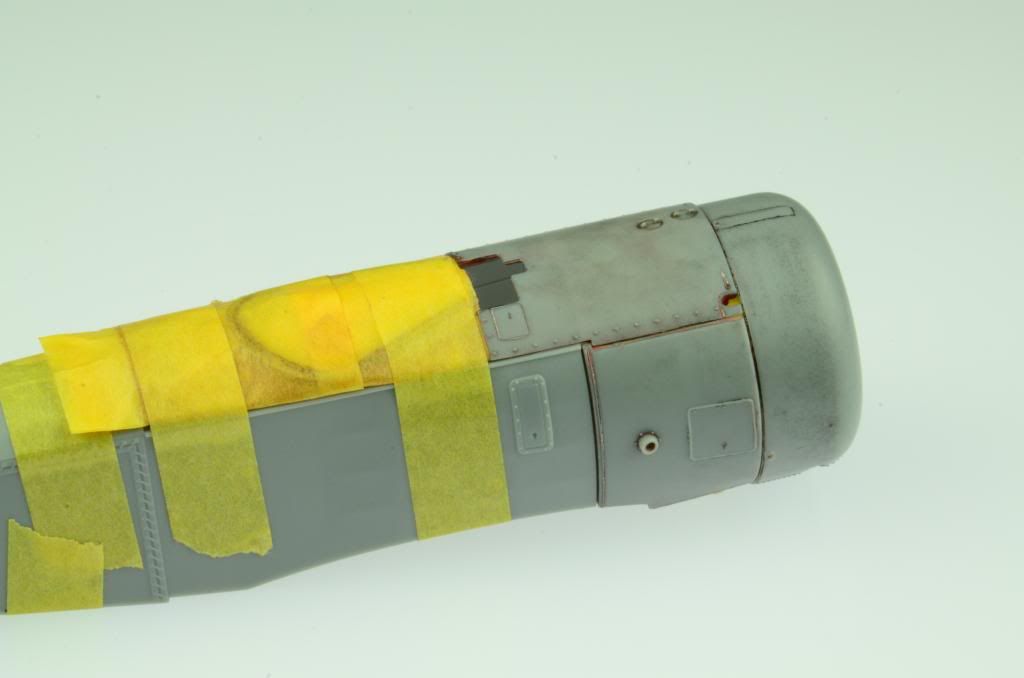
With the cowl pieces and the horizontal stabilizer ready for weathering, I decided it was time for a quick test fit, and I snapped a picture of how things are starting to come together. Not wanting to re-mask the cockpit I didn't remove the masking I have to protect it from the gloss coat that will go down in prep for the decals. But, it is nice to start to get an idea of how everything will come together!

Was able to get the decal on one side of the rudder tonight, I am looking forward to making progress on the rest of the decals on the Pup this weekend!
-
2
-
-
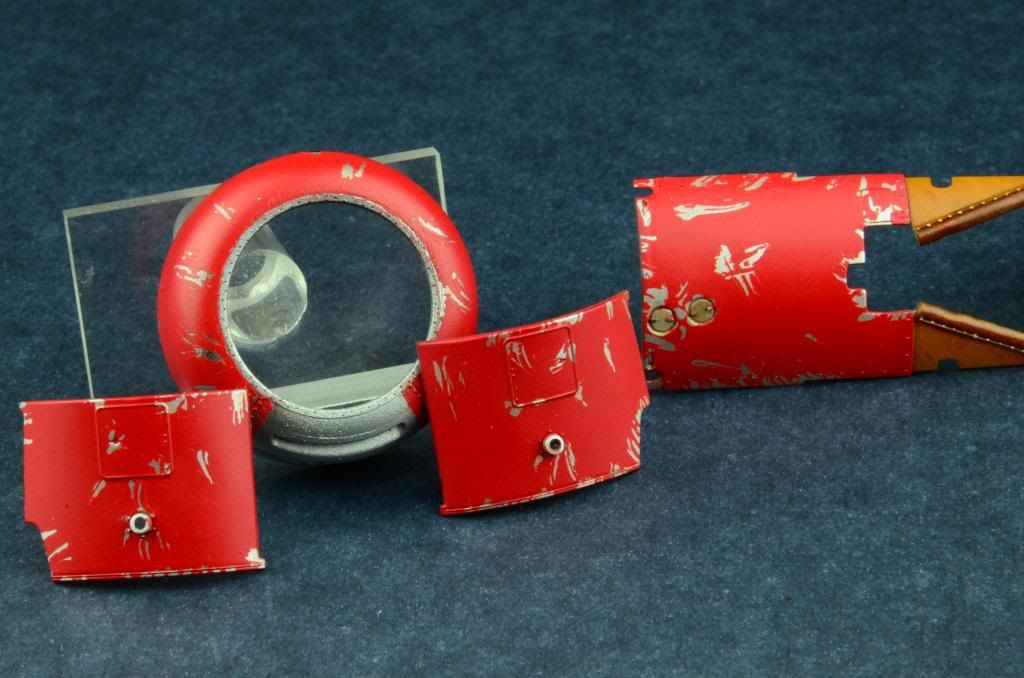
With the chipping and the red not working out for me the way I wanted, I pulled out some denatured alcohol and removed the red. This was my first time using this method to remove paint. It was a good learning experience, especially compared to using the much hotter Lacquer thinner I had as an alternate option. It lifted a small amount of the alclad aluminum I had as a base, but overall, left a nice worn effect that worked as a good base to start with.
With the red off, I decided it was back to selecting which red to use - and I landed on the Gunze C327 - Insignia Red. I think part of what was throwing me off with the Tamiya red was that it was flat. Combine that with the over chipping and it just didn't lay down smoothly for me. The Gunze on the other hand was gloss, and in an effort to knock the gloss back a little I added some Tamyia flat base to bring it back a step or two. With the second round of liquid frisket applied in a more conservative approach, I layed down a very nice coat of red with the Gunze. Much happier with this result. In the previous picture it might have been observed that there was masking over the opening of the cowl ring. This wasn't in place to protect the internals of the cowl - but as a mask for the ring around the front of the cowl. Looking closely at the profile picture in the instruction book it became apparent to me that the ring around this opening was actually bare metal. Now, I am far from any type of expert, and I have no idea if this is correct, but, I like the look of that ring remaining bare metal. So, with that, I masked the ring, and the bottom of the cowl that was not painted red. Once the mask came off, I was quite pleased with the results! The chipping is still present, and maybe a little heavy for some, but I think the impact will be subdued with some weathering to help blend everything in. But for now, these pieces are all set!
-
1
-
-
Finished up the rear horizontal stabilizer today. It has been a companion to the work completed on the wings, with the only difference coming in the rear elevators being white. With that, I set off to masking and spraying the elevator once the top and bottom of the horizontal stabilizer had been completed.
Once masked I sprayed Gunze off-white on top of a primer coat of black Mr. Surfacer 1500, focusing on a good coat over the ribs, but letting the valleys between let some of the black show through.
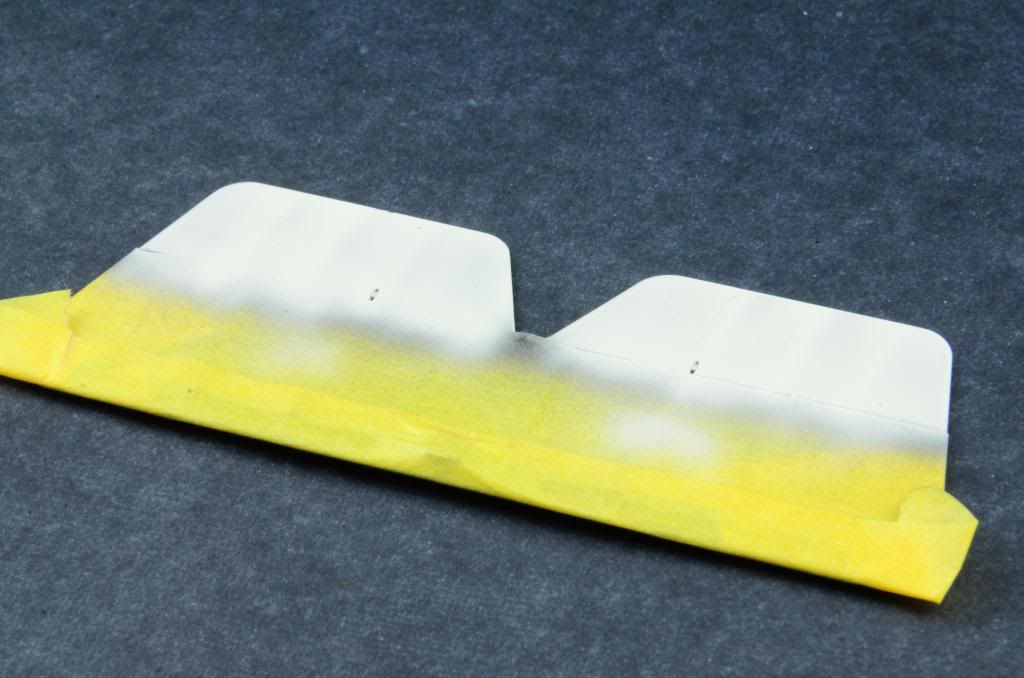
With the white down I masked the ribs and sprayed a thin coat of Tamiya smoke (same as the process for the wings). Removing the masking you can see the stark effect below.
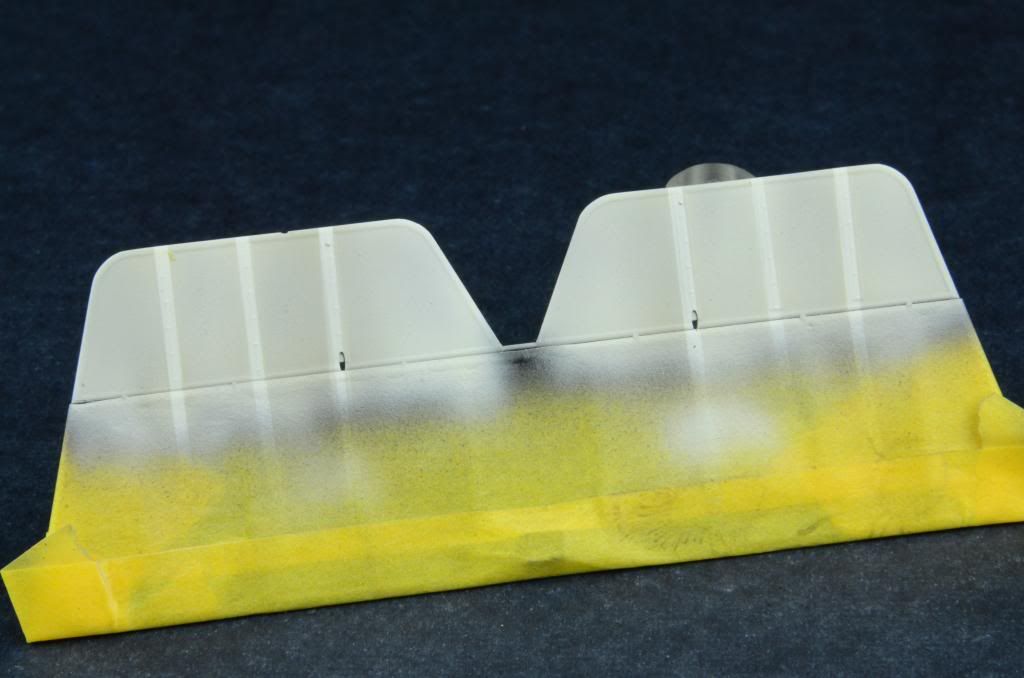
To reduce the contrast I went back with a thinned coat of the off-white and brought things back to the effect I was looking for. With the white completed for the elevators I removed all of the masking and have the below to show for it.

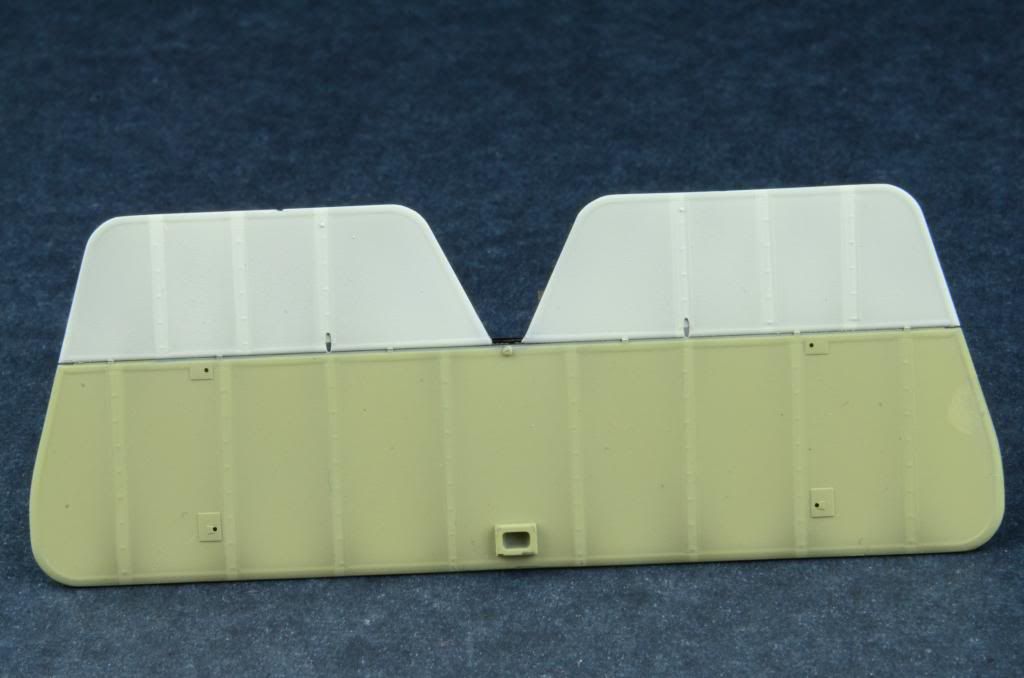
Now it is ready for some final weathering and it will be ready to be attached to the fuselage.
-
1
-
-
So far, this is looking really good! As for your chipping effect, it's really hard to say how much is too much. Once you've applied your weathering, you may find it dulled down enough to your eye. Given the amount of maintenance on those engines, rough nature of the airfileds, swirling debris, and I'm pretty sure the mechanics weren't too gentle with their tools. Those factors alone, lead me to believe you've done a pretty good depiction of the abuse some of those metal parts took.
Thanks Lawman,
I decided for me it was too much. I stripped the red, and started fresh. In addition to the chipping, I was not happy with the Tamiya red. Decided to switch to a Gunze color and am much happier with the results.
-
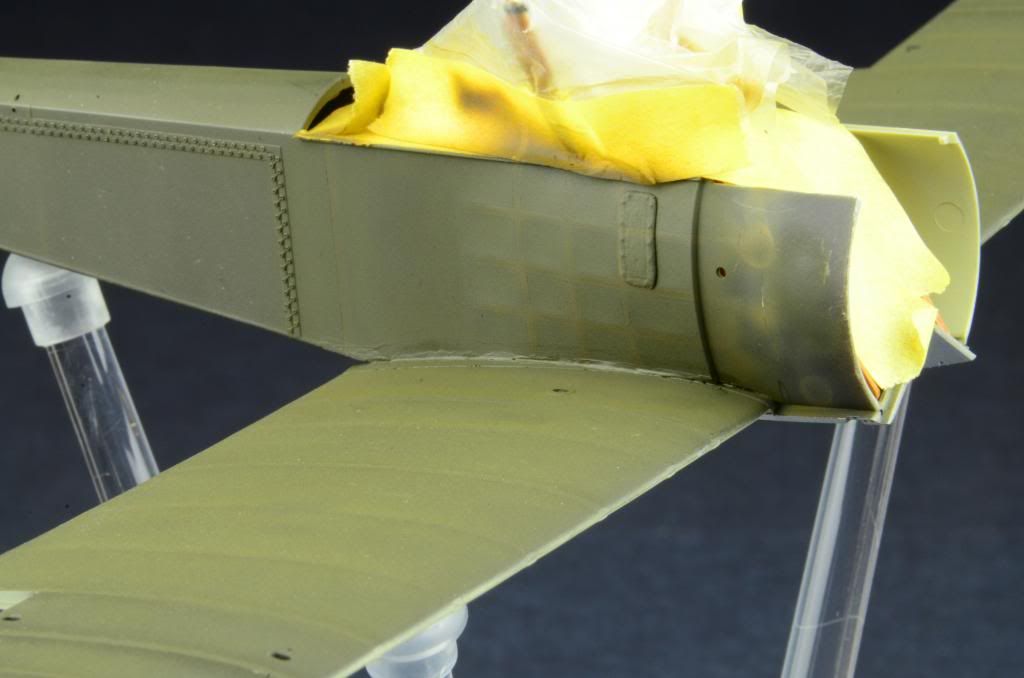
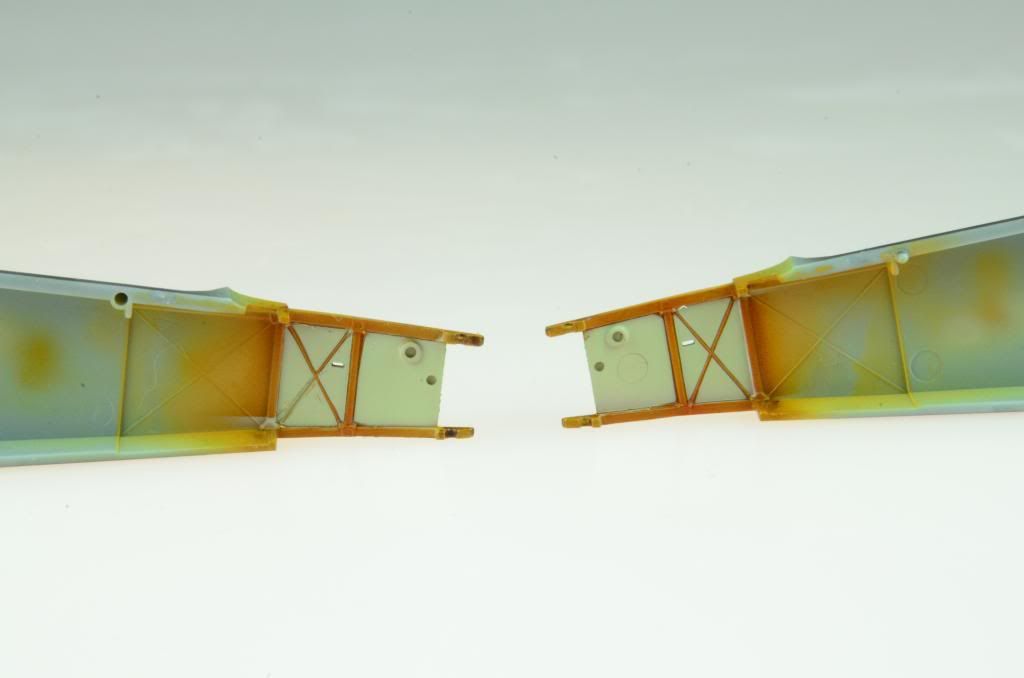
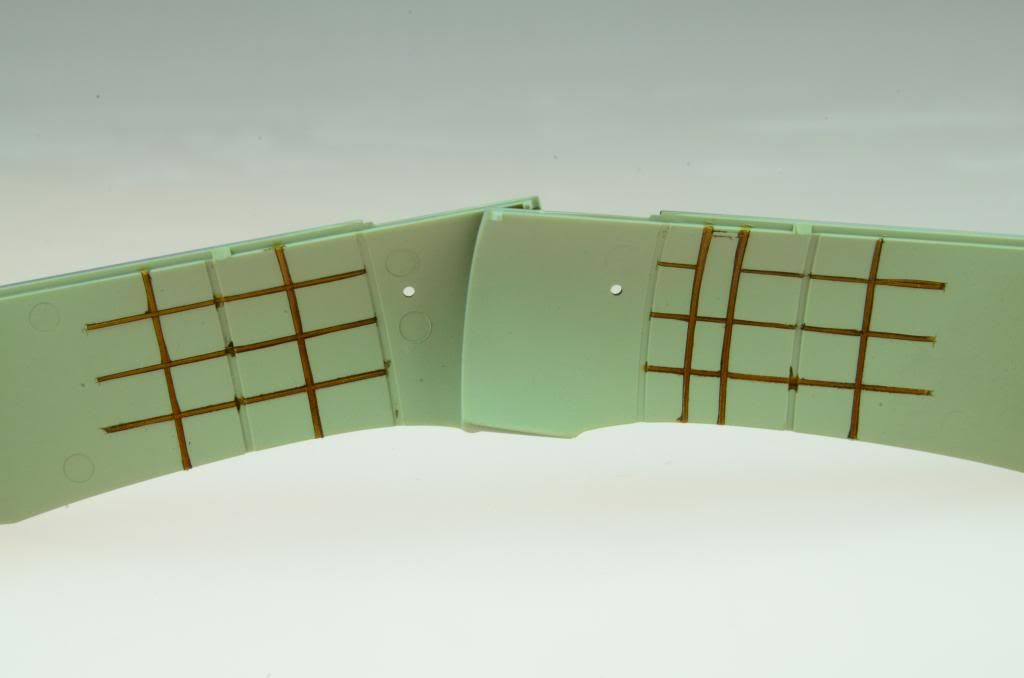
In dealing with the wingroot seam I decided to address the taught canvas over the internal cockpit framing. To the keen observer I am sure you noticed my original shading on the exterior to highlight this wear, didn't line up with the detail in the plastic. Part of that is because the slight indentations are very difficult (for me anyway) to pick out once painted in one flat tone. Here you can see in one of my test fits, that there are some "misalignments."
So while working on the seams, I also decided to address this small eyesore. See other side below.

Once I was satisfied with the seam work, I sprayed a fresh coat of olive drab, and mixed up a new batch of something "brownish and lighter than my olive drab." With the rib areas sprayed with this mix I went to work laying down some masking that was more in-line with what I was going for. It took some time, and once completed my eyes were seeing double, but I think I hit the mark much better than my first attempt. Sprayed around the mask, pulled it off, and blended with a very thin mix of the olive drab until I had the right hint of color showing through to indicate where the canvas had been stressed over the internal ribs. Much more pleased with this result!

Next up will be an update on the undersides of the wings, as well as progress on the rear stabilizer - which I hope to wrap up before posting about (just need to go back and blend back with some white). Goal is to get a gloss coat down and into some decal work over the weekend!
-
1
-
-
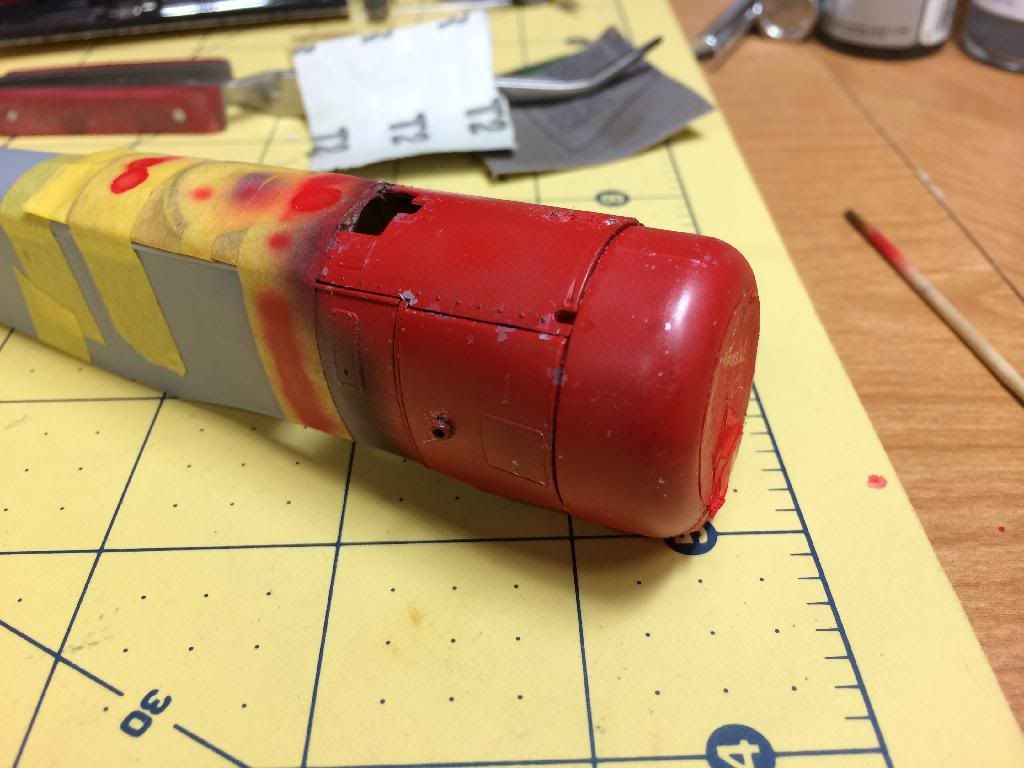
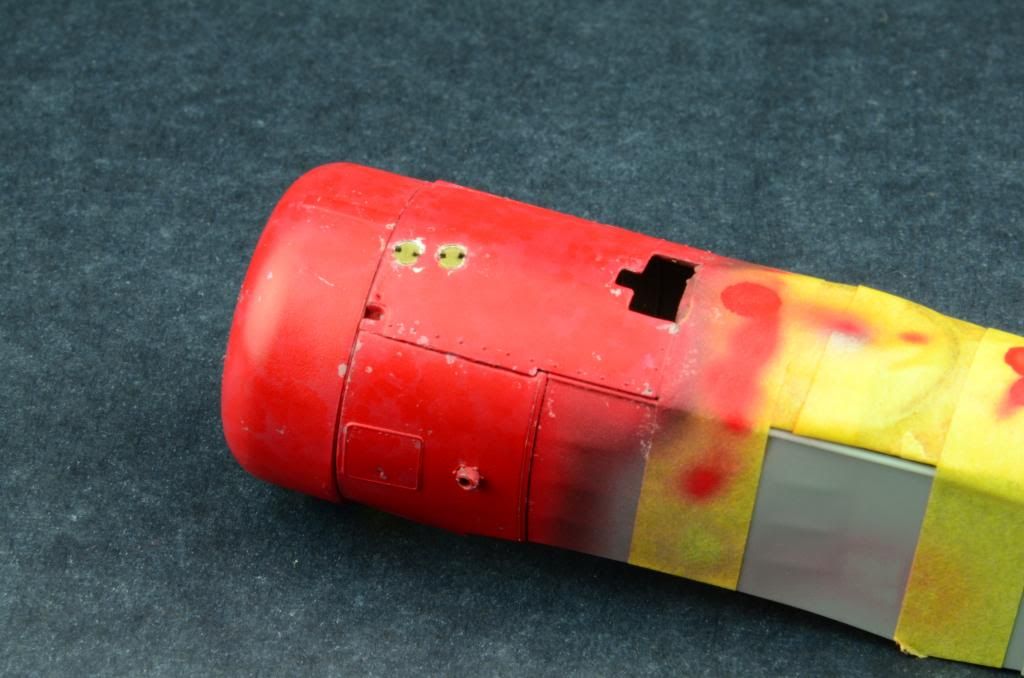
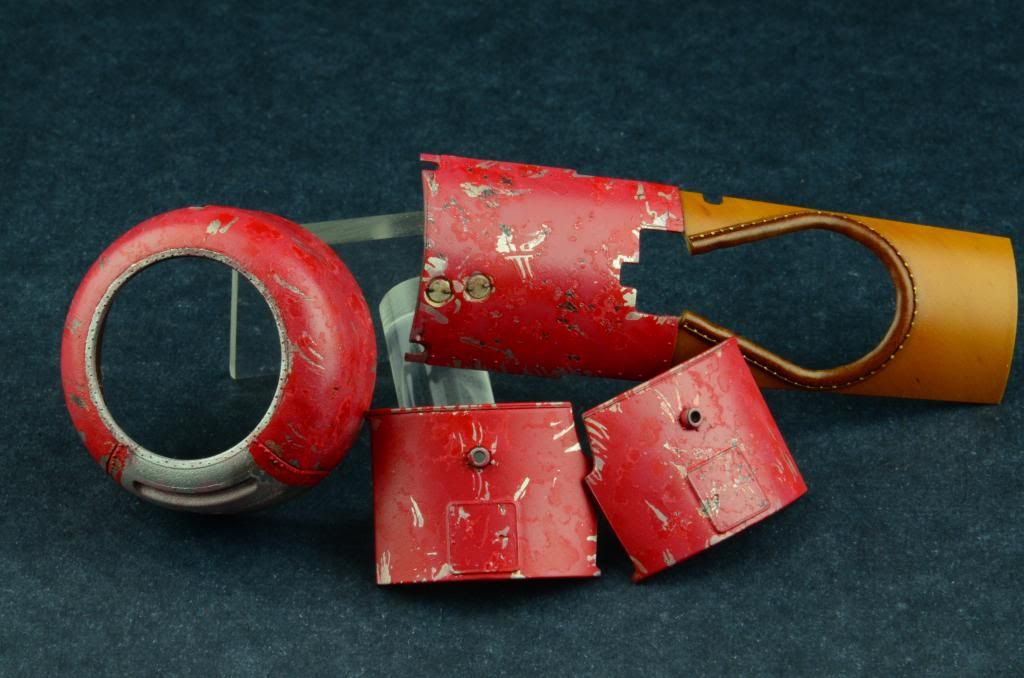
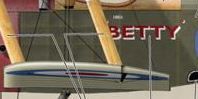
Quick update tonight with more to come tomorrow. Had a very productive three day weekend, with plenty of time at the bench. The cowl for the Sopwith PUP 'Betty" is a nice red tone. Knowing I wanted to add some chipping to the metal I painted the four kit parts with a base coat of Alclad Aluminum (over a base primer of black). Once down I used some liquid frisket to create the chipping pattern I was looking for. I did this by selecting an area, applying a small amount of frisket with a toothpick, and then pulling the toothpick through the frisket in quick random strokes to remove the excess, while leaving an almost scratch line, or pattern behind. I started to get the hang of this and was happy with how things were turning out - too happy, I think, because I feel I over did it with the frisket. That is what I am looking for some feedback on - how much did I over-do it? Any tips on how to touch this up without stripping and re-applying the red? In the below photo you can see the base aluminum with the frisket applied.
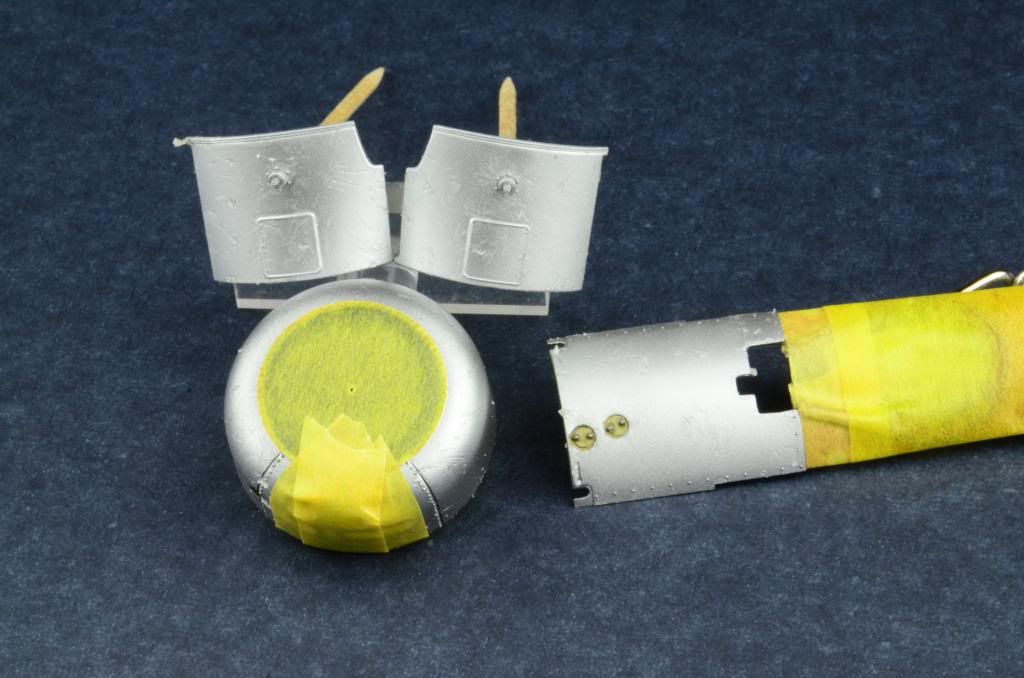
Here you can see the same parts once painted with Tamiya XF-7
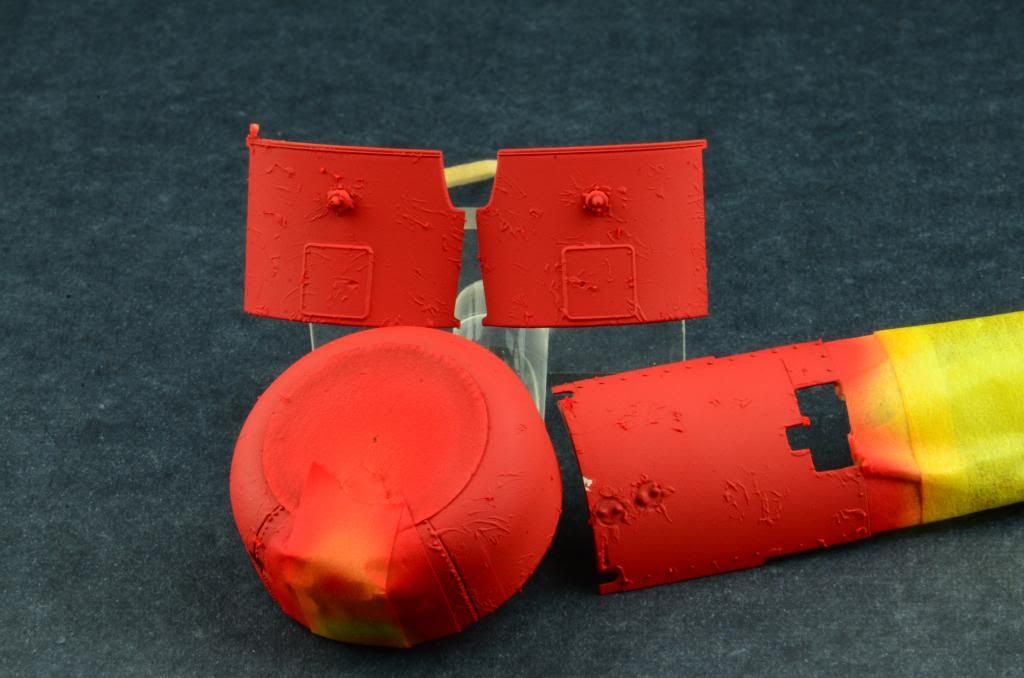
A little more noticeable that we have gone too far.
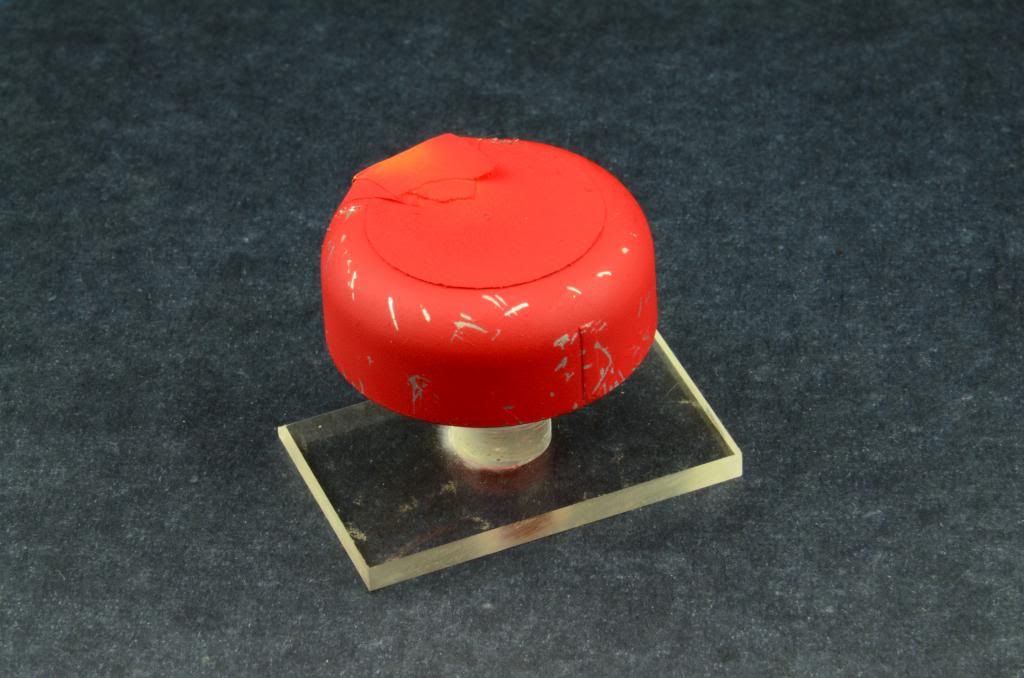
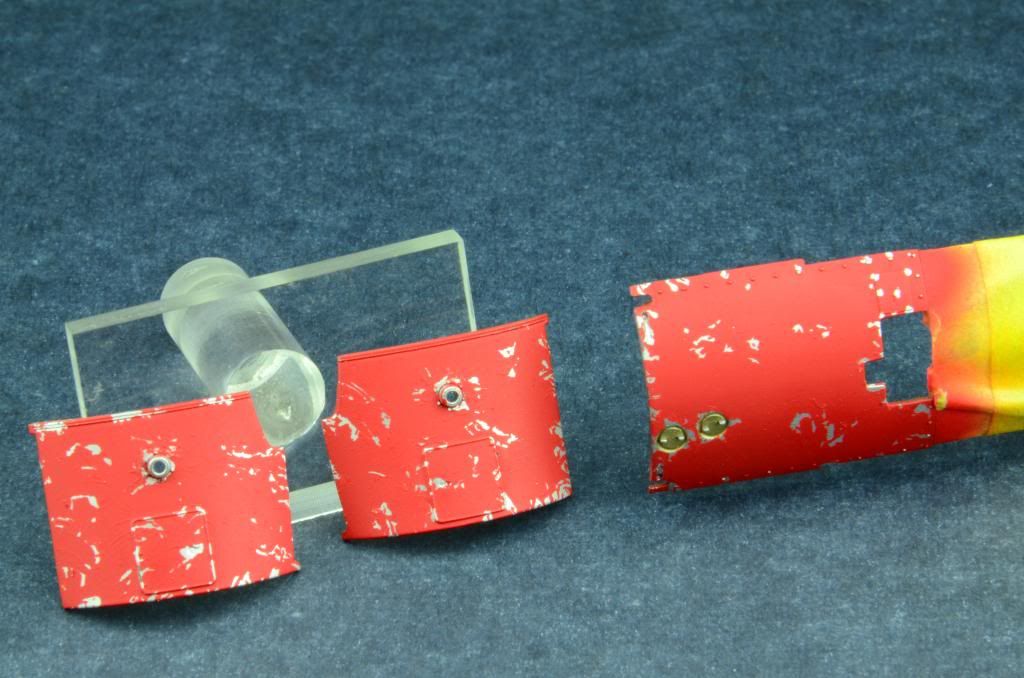
And finally, once the frisket was removed, I knew I would need to go back and figure out how to tone it back. More to come on this, as I figure this out. Comments and feedback welcome at this point. I am pleased with this approach, and will use it again, but will definitely tone it back for the next application.
-
Sasho - WOW, really loving this build. For some reason I was never a fan of these German aircraft, but after seeing your work, I am going to have to add one to the stash, and build it soon! Love the wood fuselage and the wings, great job with the small details that really make it stand out!
-
Thanks Sasho!looking excellent so far! I'm not much into british planes of the period as they are too similar in both colour and shape, but this one is shaping greatly
I'm also using the black surfacer 1500 and man its wonderfull product. Do you use the rattle can or the bottlled version sprayed with airbrush?
Best regards,
Sasho
I am definitely not an expert on planes of this period, but this has been a very fun and challenging build. I am using the bottled Mr. Surfacer 1500 - sprayed through an airbrush.
- Dave
-
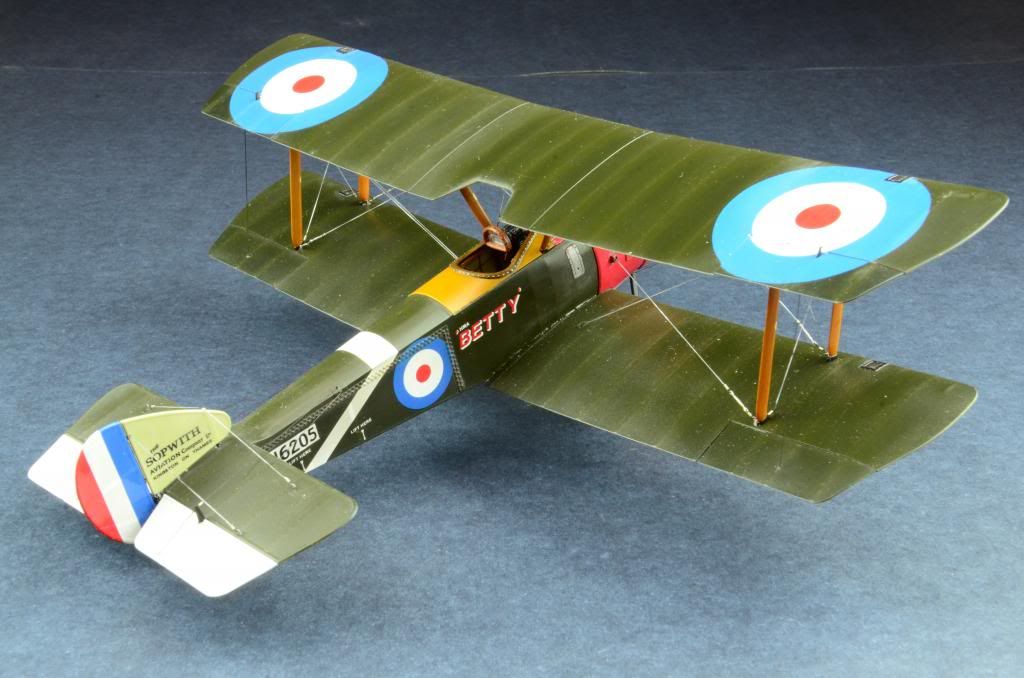
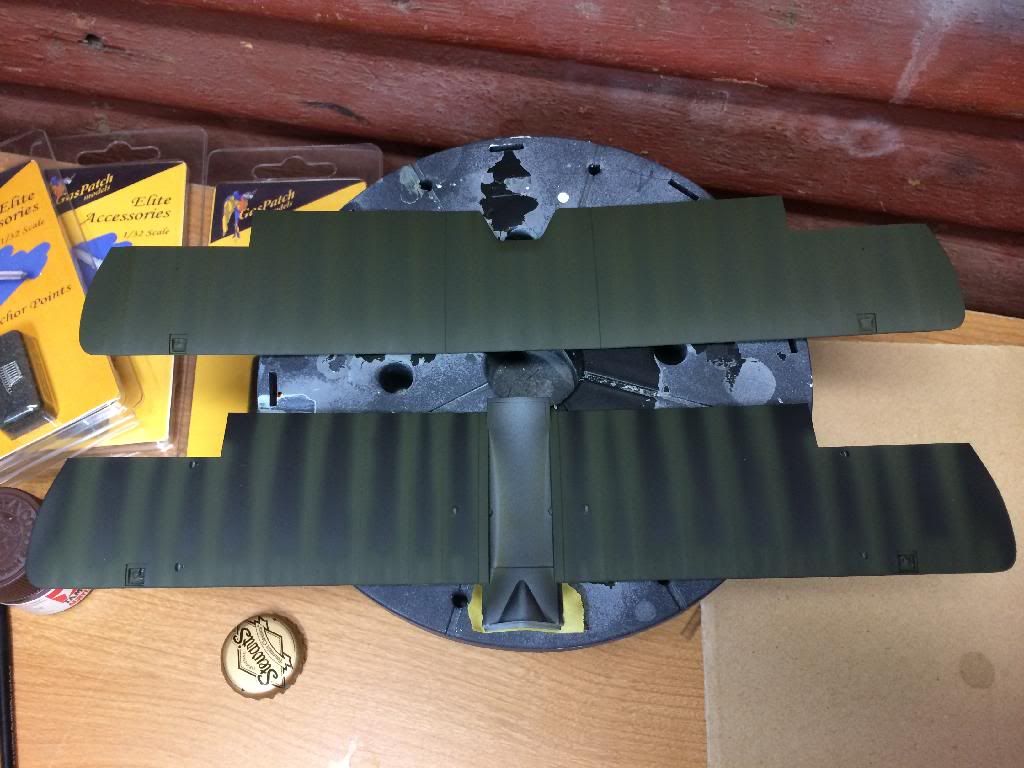
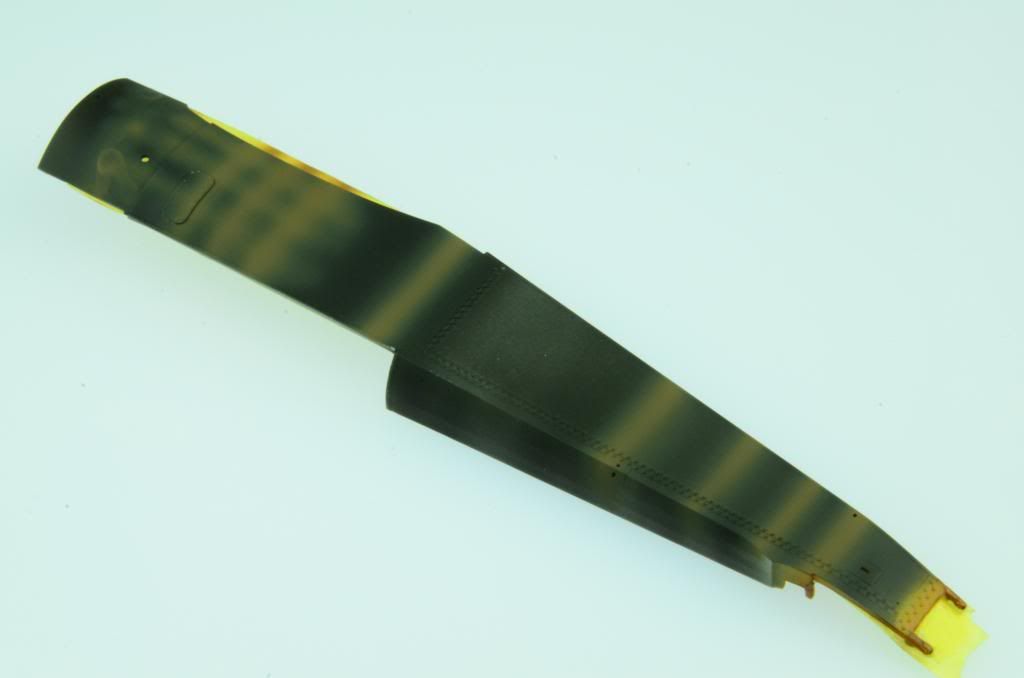
WWI biplanes (or any other multi-wing planes with struts and rigging for that matter) usually call for finishing the wings prior to securing them to the model. As such, I have been working on painting the upper surfaces as I painted the exterior halves of the fueslage. I started by applying a base primer of black, using Mr. Surfacing primer 1500. Picked up this tip from Doogs, and man, I love this stuff! Goes down great, and is perfect for adding some depth when adding thinned layers of the top color.

With the primer down I focused on adding color to the canvas over the ribbing on the wing surface. To get a solid color down for these sections I started by focusing strong color concentration on the ribbing.
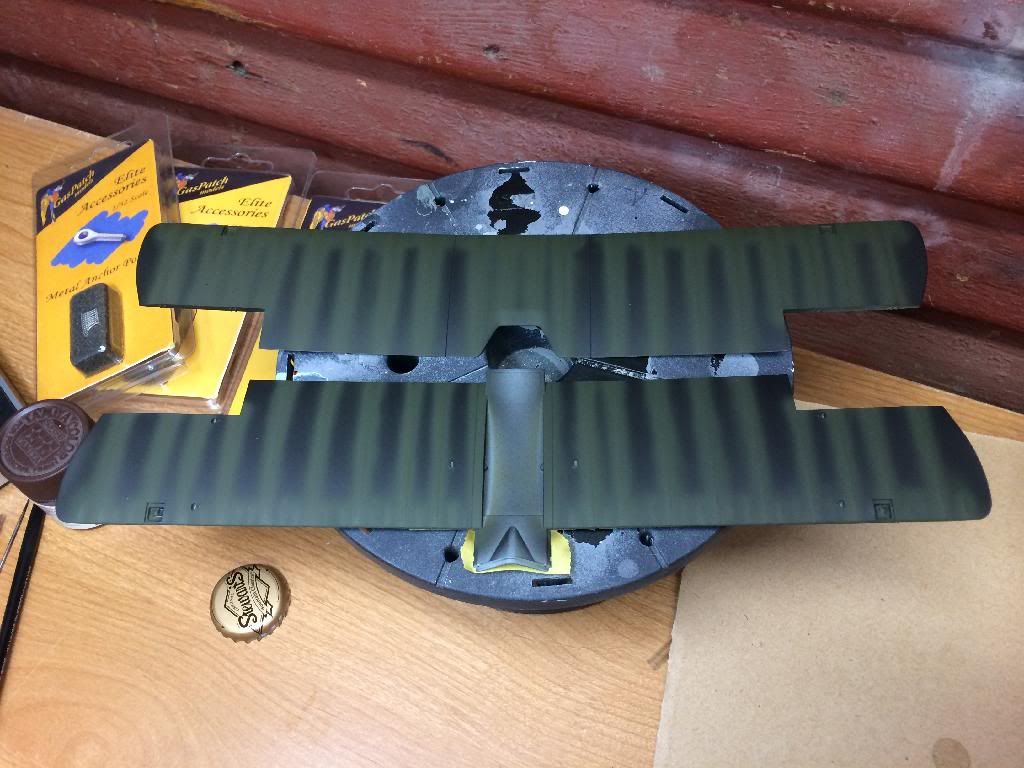
Once I had the base color layered up, I filled in the rest of the wing with a thinned coat until coverage was good - but not uniform, letting the black primer coat provide the color variation I was looking for. First picture shows the difference between the two stages, second picture shows the final product at this step (very green, thanks to playing with the white balance on the camera).
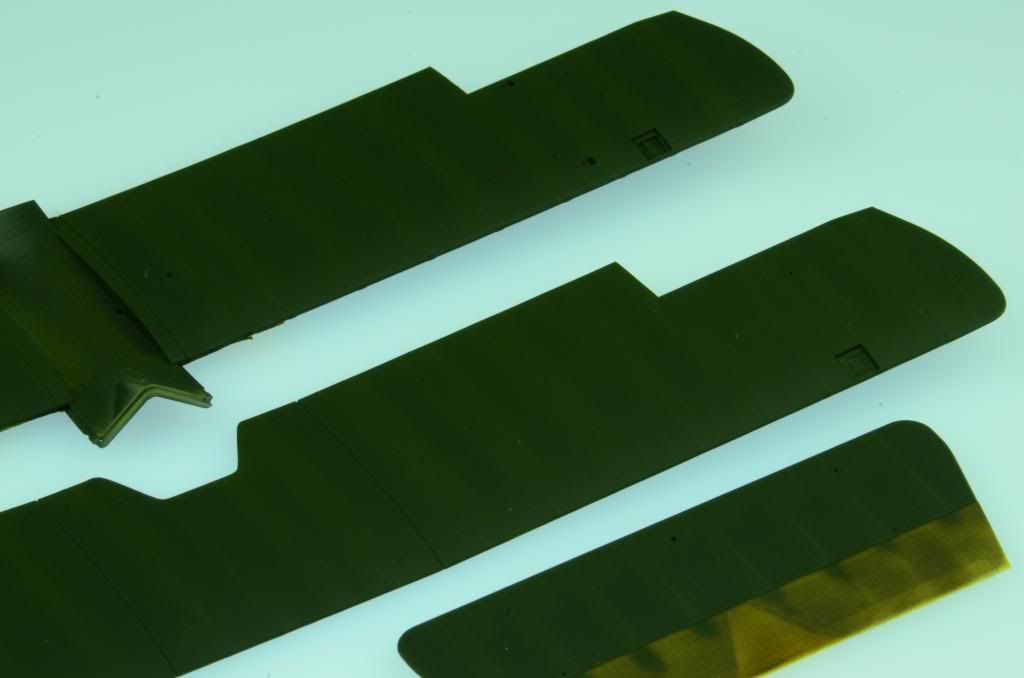
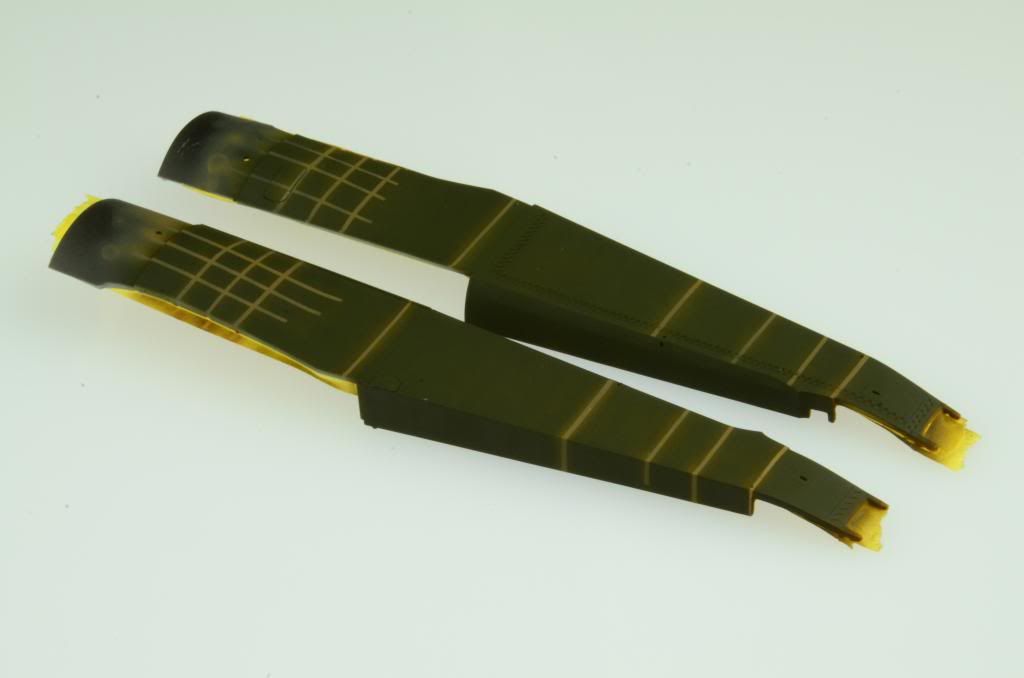
With the base color down, I masked the ribs.
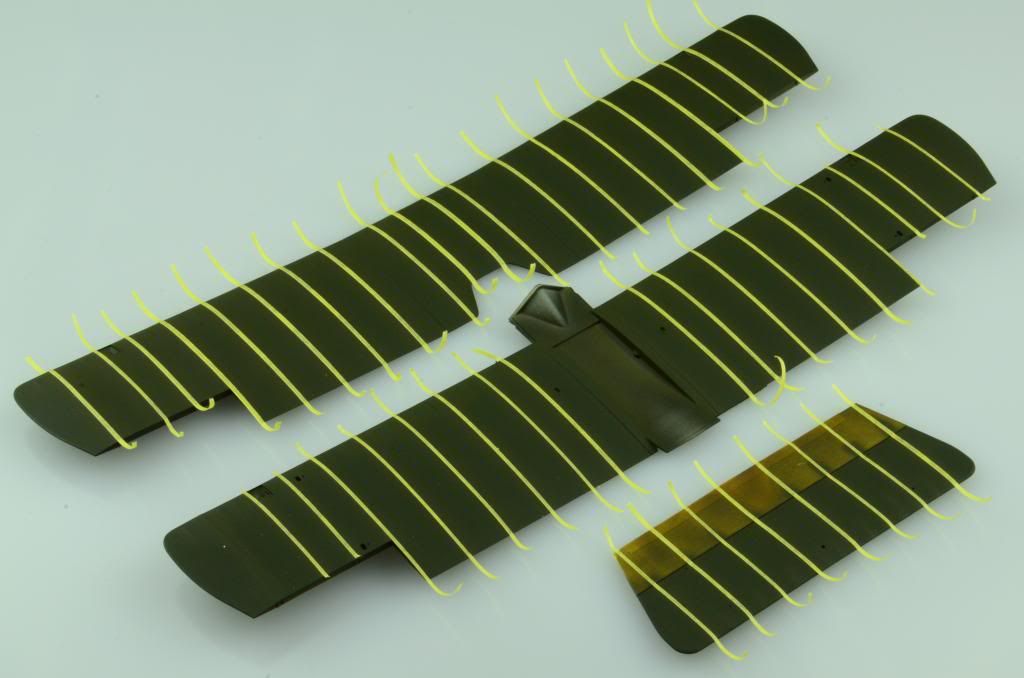
Once masked I mixed a thinned cup of Tamiya smoke, and sprayed around the ribs. Not having tried this before, there was a bit of spray, lift the tape, assess, and spray some more, until I found the right balance. Still have one or two ribs I will go back and touch up, but overall, very nice effect.
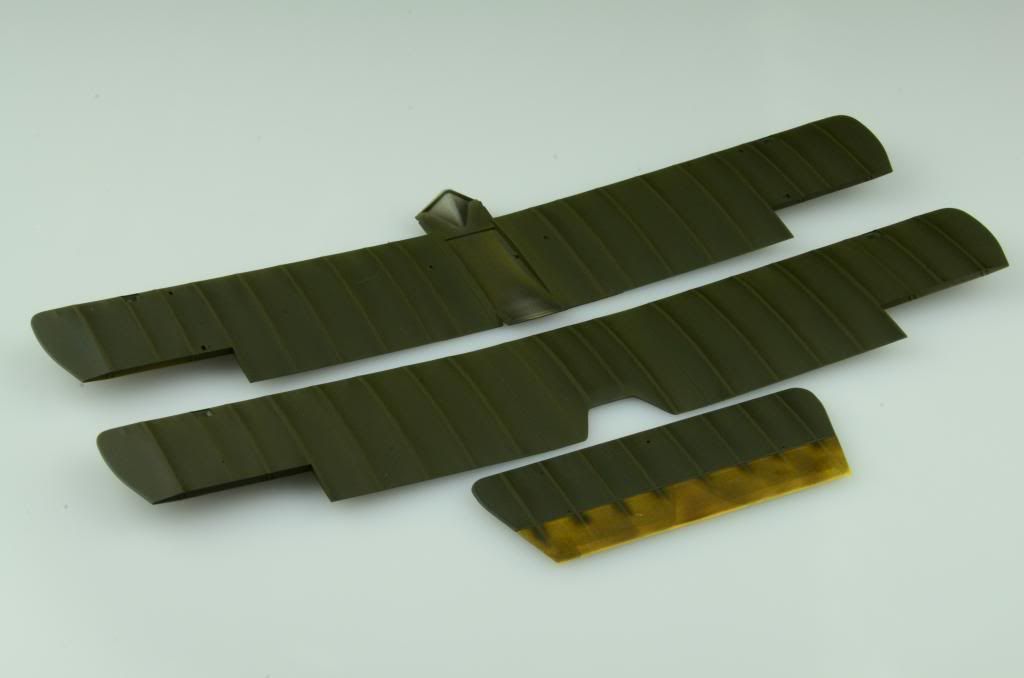
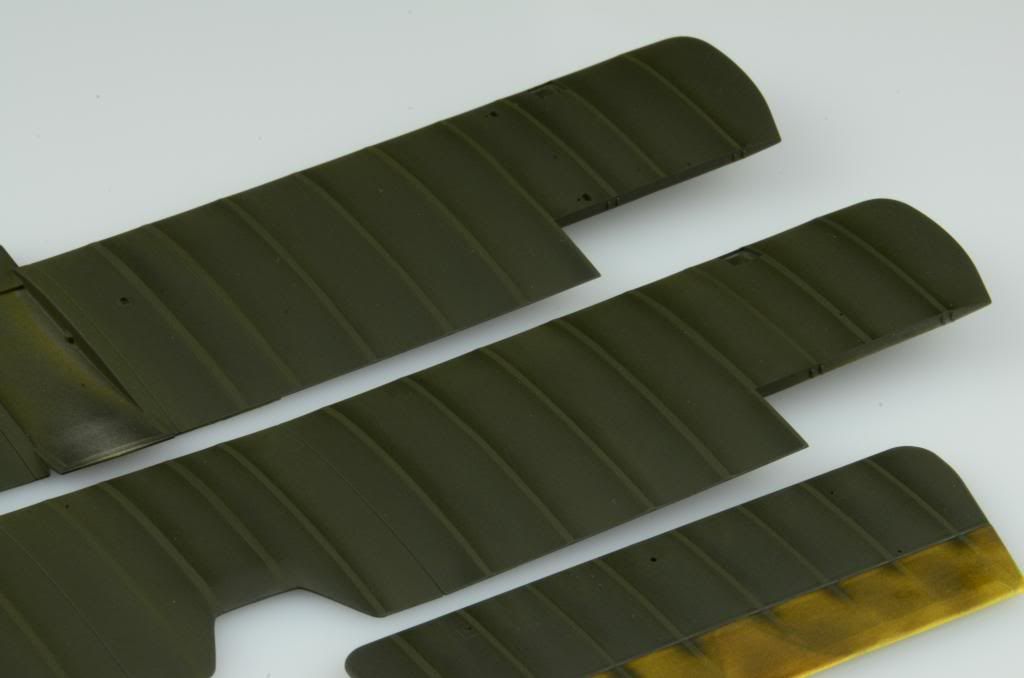
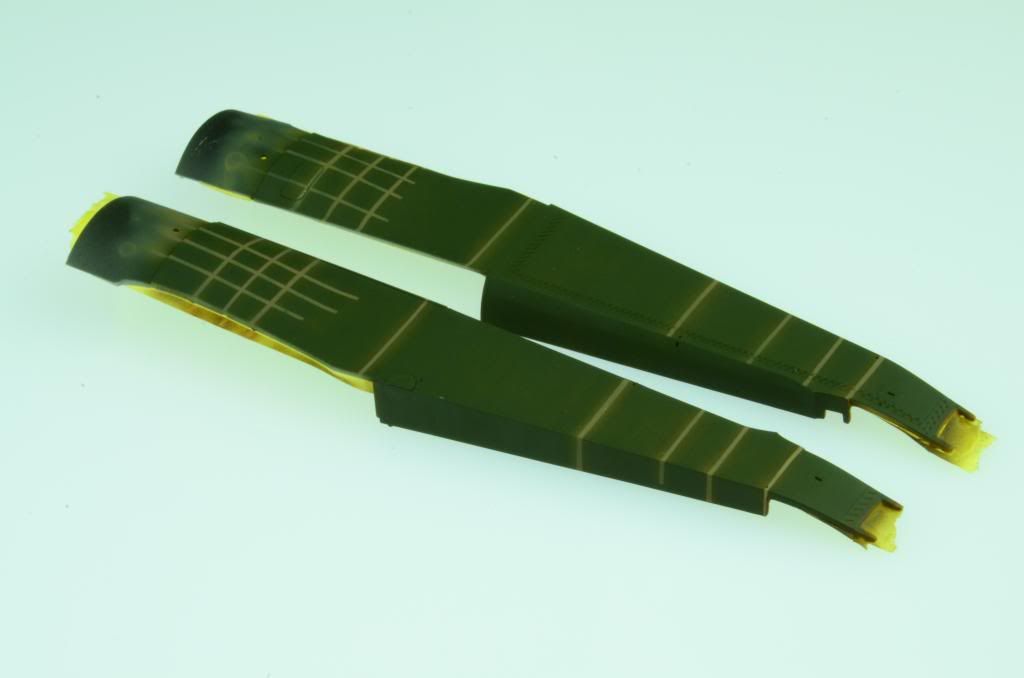
On the photo table the color goes a little green and light in order to pick up the effect of this step. Below is a shot at the desk with the iPhone. Not as great photo quality as the Nikon at the table, but gives a differnt feel for how this effect comes across on the upper surfaces.
The result isn't 100% uniform, but that is what I wanted to achieve, variation in the wear, and highlighting the ribbing. It is also quite subtle in person. On the photo table I am able to picture it under ideal lighting conditions to maximize the result. I saved the mask strips to reuse on the undersides of the wings.

Overall, very basic stuff, nothing new for this forum, but a first for me, and doubles as a quick update on my progress. For me, I am very happy with the result.
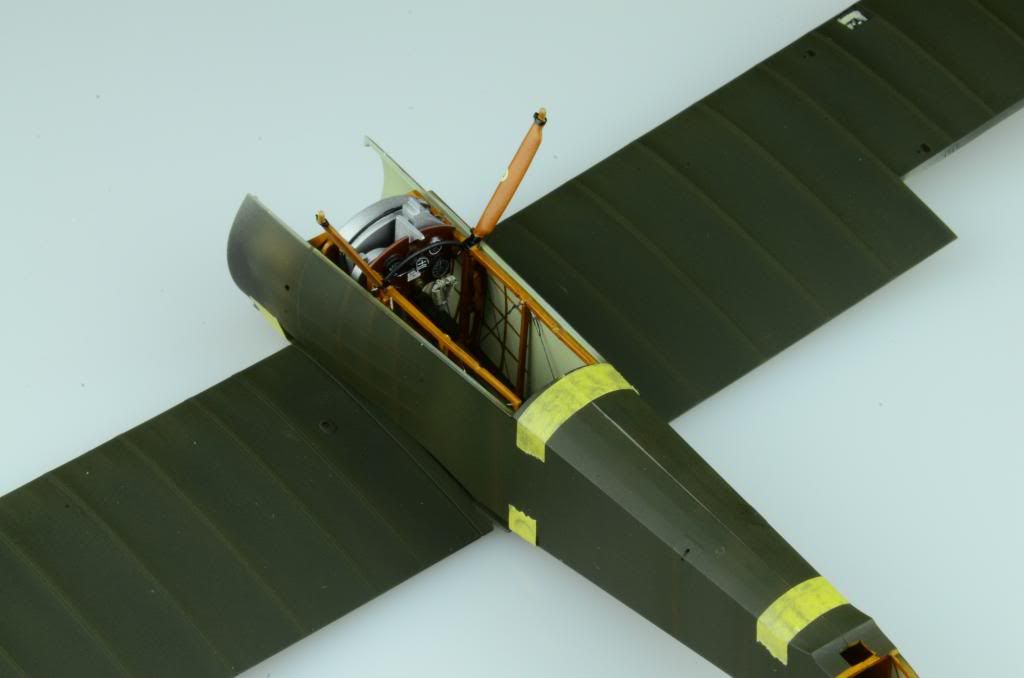
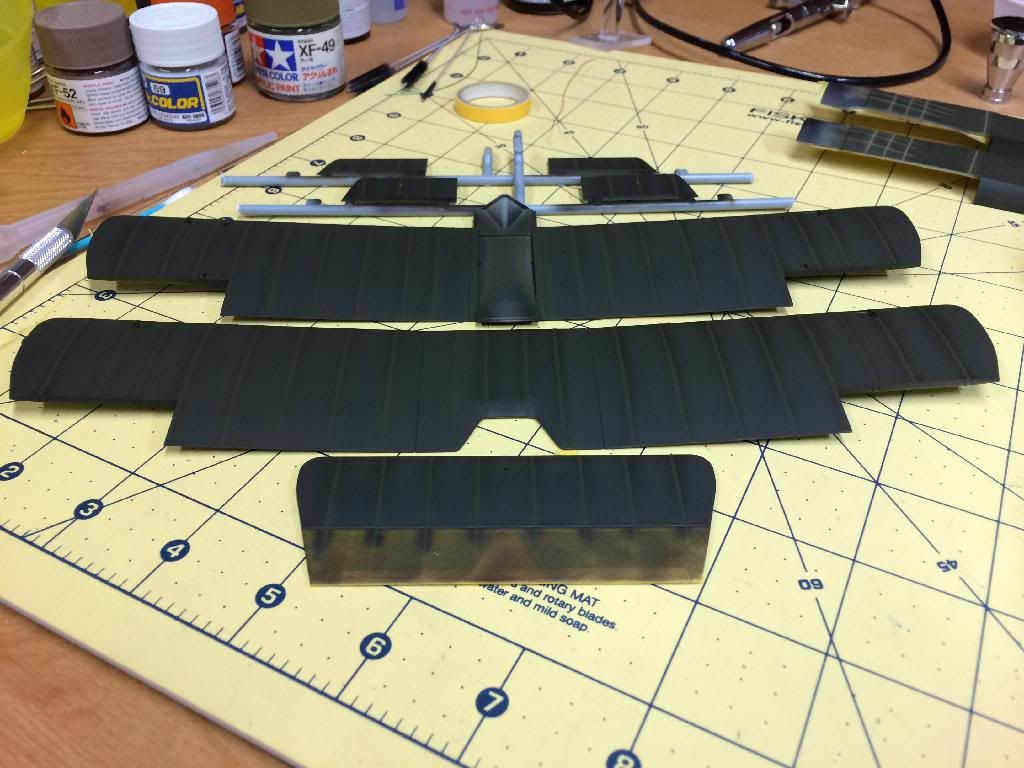
Quick shot of the test fit with cockpit and fuselage attached to the base wing (also visible with the pulley in the wings - ready to have the glass installed to wrap it up).
Test fitting shows that the cockpit (which protrueds past the fuselage halves) is a very tight fit into the bottom wing, I will be sure it fits in smoothly when I attach the fuselage/cockpit assembly to the wing. Over the weekend I glued the cockpit and joined the fuselage halves. Looking forward to the upcoming three day weekend, and am focused on getting in some good bench time. I need to keep this moving along, as our first baby is due in four weeks! Hope he doesn't come early so I can be sure to get this wrapped up!
-
2
-
-
Looking great! Love to know how you painted your interior cockpit ribbing so neatly!
Hi Dave - thanks for the compliment!
I briefly touched on the interior cockpit ribbing in one of my earlier posts, but I am not sure it fully answers your question. The quick version is that I sprayed the base canvas color, and then masked it off so only the ribbing was exposed. I lined up the tape with either side of the horizontal ribbing to avoid needing to cut the mask for one of the ribs, and then used a new xacto blade to cut the tape to cut the masking away and expose the other ribs. Once masked I painted the ribs for woodgrain effect (I definitely referenced your post on painting woodgrain in the hints and tips section, thanks!). Because the ribs are raised this approach can tend to leave a little excess oil paint in the corners where the canvas and ribbing meet, but I think it came out alright because I had a very close mask. I should probably look to add a little more weathering effect to the fuselage sides to get a more authentic look to match the rest of the wear on the plane.
Hope you are enjoying the progress!
Dave
-
Quick post on progress this weekend. Was away for business this week, and wasn't able to add as much detail from the previous weekend as I had hoped - posting from the iPad was not as easy as from the computer, and work kept be very busy (literally 8 am to midnight). Needless to say I am happy to be home, and I was able to spend some much enjoyed time at the bench this weekend. On to the progress!
Once I had the exterior wear that highlighted the cockpit ribs worked out, I only needed the seatbelts to wrap up the cockpit. The silver lining about traveling this week - the seatbelts came on Friday (thanks Grant!!!!), and I was able to spend my first bit of bench time back, getting them installed.
To add to the list of firsts in this build: First time using HGW seatbelts. Results - absolutely fantastic! Was able to get them installed, and weathered with a light touch of thinned artitst's oils. I am not sure that my selection of where to attach the belts to the seat is entirely accurate. My decision was driven by the length of the belt - if I mounted them further back, it wasn't long enough to drape over the seat. But when mounted where they currently are - I am able to get them to rest in the seat the way I wanted. In the end, you won't be able to see the mounting point without some deliberate effort, so I am satisfied with the outcome.
With the seatbelts in place it was time to install the seat into the cockpit. I was so excited to do so I didn't take a picture of the seat with the belts installed all by itself. That wrapped up the cockpit, and I have the pictures below.
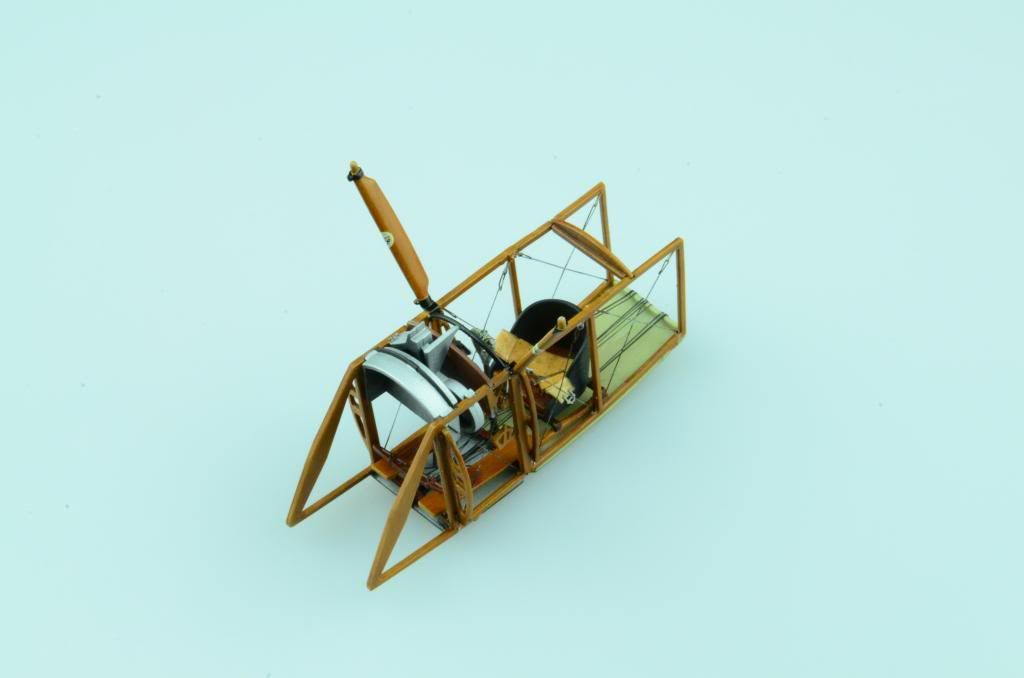
I was able to secure the cockpit assembly to the fuselage, and join the two halves. More on that once the seam has been cleaned and repainted, but overall, very good fit and join on the seam - top quality engineering on WnW's part with this kit (again)!
-
2
-
-
Made some progress on the fuselage this weekend. With a very thin mix of olive drab I blended in the lines I had previously masked until it was just noticeable enough for what I was trying to achieve. A couple of lessons learned with this, but overall I like the effect and would apply it in future applications as called for.
Next order of business will be to catch up on the progress I have made on the upper surfaces of the wings. Things have been progressing nicely, I will try and post my progress over the next couple of days.
-
2
-
-
Thanks everyone for the kind comments. It is encouraging to receive such positive feedback!
Made a little progress this week, and still have a couple of small items to post to get this WIP up-to-date.
First, the inside of the fuselage halves have raised ribbing for the wood frame. This is a nice detail, and one that will be slightly visible once completed. There is a section around the cockpit, and one at the back, where the tail comes together. I unintentionally took the two opposite approaches to painting these raised wood beams for each section.
In the tail I painted the base color for wood over everything, and then focused the oils on the wood sections. Once "lacquered" and cured, I masked the sections I wanted to be woodgrain, took a new xacto blade, and cut out a mask that protected the thin wood sections. Once complete, I sprayed the canvas color, and unmasked.
This worked well, and with the ecxeption of one small mask coming off and not applying woodgrain to the next section in the fuselage (still not sure how much of it will really be visible once the two halves are joined), it will work for how visible (or maybe I should say, un-visible) this part of the final plane will be.
For the cockpit section I sprayed the canvas color, and then decided I should woodgrain the framing - not so much a concious decision as it was a realization: "oh yeah, I should paint that woodgrain in there!" Since the canvas was already sprayed I opted for the reverse approach I took for the tail. I masked the canvas backdrop, leaving the frame exposed, and then tackled the woodgrain. While this approach worked, I don't think the end results came out quite as nice as I would have liked. The cockpit framing will cover the grooves (where there is some smudging due to not masking) but, I still feel like this isn't as "crisp: as the results I was able to achiueve in the tail of the fuselage. I guess I will see where it all shakes out once the weathering is completed, but the next time I face this with a WnW kit I know which approach I will chose.
With the inside of the fuselage painted, it was time to move to the exterior.
WIth a normal airplane build I would normally assemble the fuselage, and then paint the exterior. However, with this kit that woodgrain surrounding the cockpit opening freaks me out a little (ok, maybe a lot). What happens if I mask it and the paint pulls up! I don't think I could handle having to re-do it all. So, in an effort to avoid such a catastrophe, I will paint the fuselage halves, and then join together. At that point I can tackle any seamwork, and try and aviod having to do a full mask job - still thinking of ways I can creatively mask around it. Will post what I do when I get through that quandry.
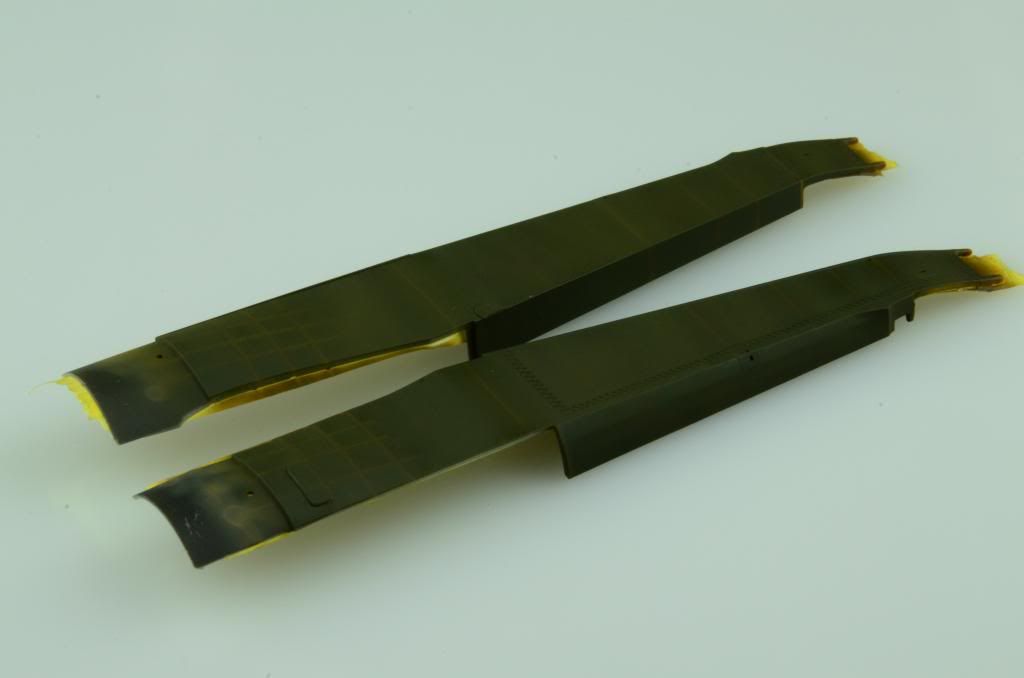
In looking at the WnW paint guide, it appears that the canvas that was tightly pulled over the internal frame, wore differently from the rest of the canvas.
I was expecting that for the ribbing on the wings, but hadn't thought too much of how that would be visible in the main fuselage of the plane. WnW does a fantastic job of slightly raising this internal framing on the exterior of the fuselage halves, nice touch, that. And, while it does match the interior framing on one half of the cockpit, it doesn't quite match the framing on the other half...interesting (see the internal framing halves have two different layouts for the vertical lengths of wood framing, yet the external detail is exactly the same on each half). But, this is a small thing to quibble about, and to be honest, it really doesn't bother me. They got so many other things right on this kit, I really couldn't care less obout this small detail.
So, on to the framing. On a whim, I decided to get creative with how the framing would effect the way the exterior canvas would wear. I threw together a quick mix of tamiya khaki and brown until it looked about right (prbably 5:1 khaki to brown) and sprayed where the frames would show. I didn't want to just blast the whole section - I wanted to use the black primer as a backdrop to add some variation in the olive drab color, plus, once my mix went down I felt it was almost impossible to see where the slight rise for the frames was. Aft of the fuselage I picked some spots to add framing based on the panting scheme. Is it accurate? Probably not, but two of them look close, and the others, well, I am going for the effect here, not accuracy. I was able to grab an in-progress shot of this, not the same quality as throwing it on the photo table (sorry for the lack of quality), but it gives you an idea.
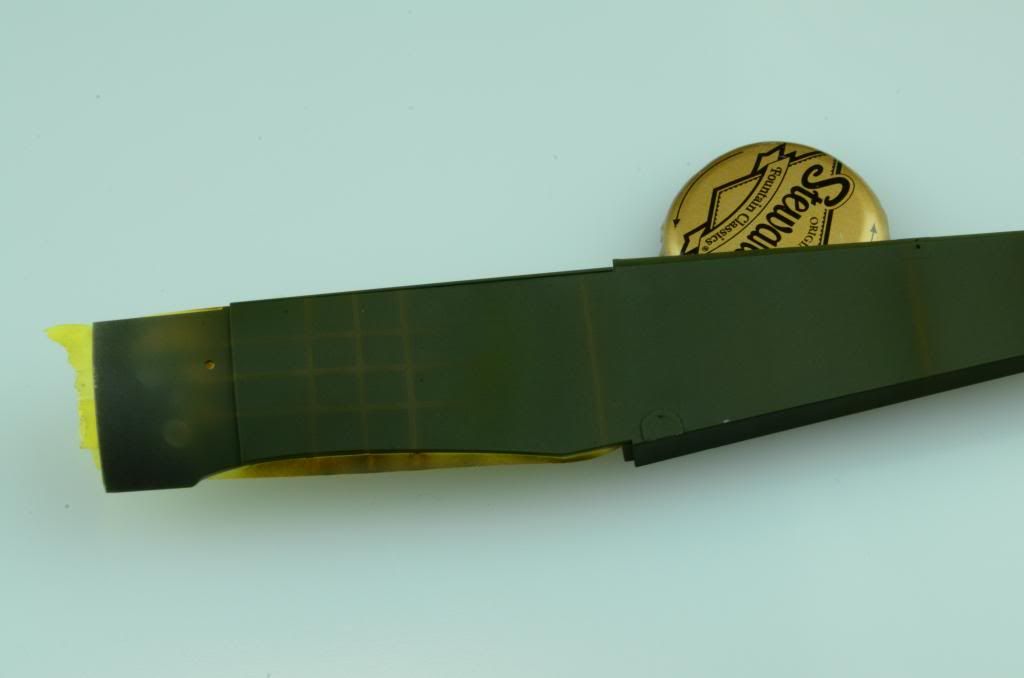
With these exploratory lines down I cut some thin stips of tape and masked off where I wanted the effect to show. The goal is to preserve this color in a specific section to aviod accidentially blowing it out with a careless pass of the airbrush. Once my initial coat of the olive drab goes down, I will pull off the masks and go back with a very thin coat to blend it in to my liking. Or, I will simply fill it in with olive drab if it looks terrible and doesn't work out. Either way, worth expiriminting with to see if I can get what I am aiming for. Now, I am sure that someone somewhere has tried for the same effect, and has successfully accomplished this with amazing results. I, on the other hand, decided to try this in the spur of the moment, and probably should have done a little research first. Oh well, if it turns out for me, maybe it will work for someone else, or they can improve on my amateur approach and make something more of it. If it doesn't work - well, then you know what to not waste your time with!
Ok - with the mask on, I sprayed the olive drab. Really striaghtforward here. I am not an exact paint color extremist (nothing wrong with that) so I just went with what the instructions called for. Layed down some thinned layers and built it up as I saw fit.

Once this had a little time to setup, I removed the masking. To reiterate, I am not looking for a perfect mask here. I want to have these strips to work with to try and add some variation to the way the canvas would have weathered in the elements over time. I will use the over masking on the ends to test how I want to blend everything together. Once I have acheived my desired effect I will apply to the rest of the frames. It looks terrible right now, but I am hoping with some steady and light blending I will be able to acheive a subtle, but noticeable effect.
I pulled these over to the table and took some better shots. However, I played with the white balance on my camera, and am now seeing some very green coloring. Time to get the photo booth operating the way I want so I can get the pictures to come out right. You can see the second photo below is much more green than the first photo. If anyone has experience with adjusting the white balance on a Nikon D7000 to work with flourescent light bulbs in a softbox and a translucent plexiglass table I am all ears. Not that I don't mind figuring it out, but I would rather spend my time on the bench instead of playing with the camera!
Once I have this sorted out I will post more on the wings and the progress I have made painting the tops the same olive drab as the fuselage.
-
1
-
-
Thats all looking fantastic, love the cockpit detail. Must say i am also impressed with your quality of photos, nice set up ;-)
Martin.
Thanks Martin! I definitely referenced your posts to get some insight on how you detailed your cockpits when building WnW kits. As for the photos, it seems that photography has been a hot topic in my local IPMS chapter and somewhat on this forum. I decided that if I was going to get more active and post photos on this forum I should get a quality setup. I will start a separate thread about my bench and photo setup. Thanks for noticing!
Dave
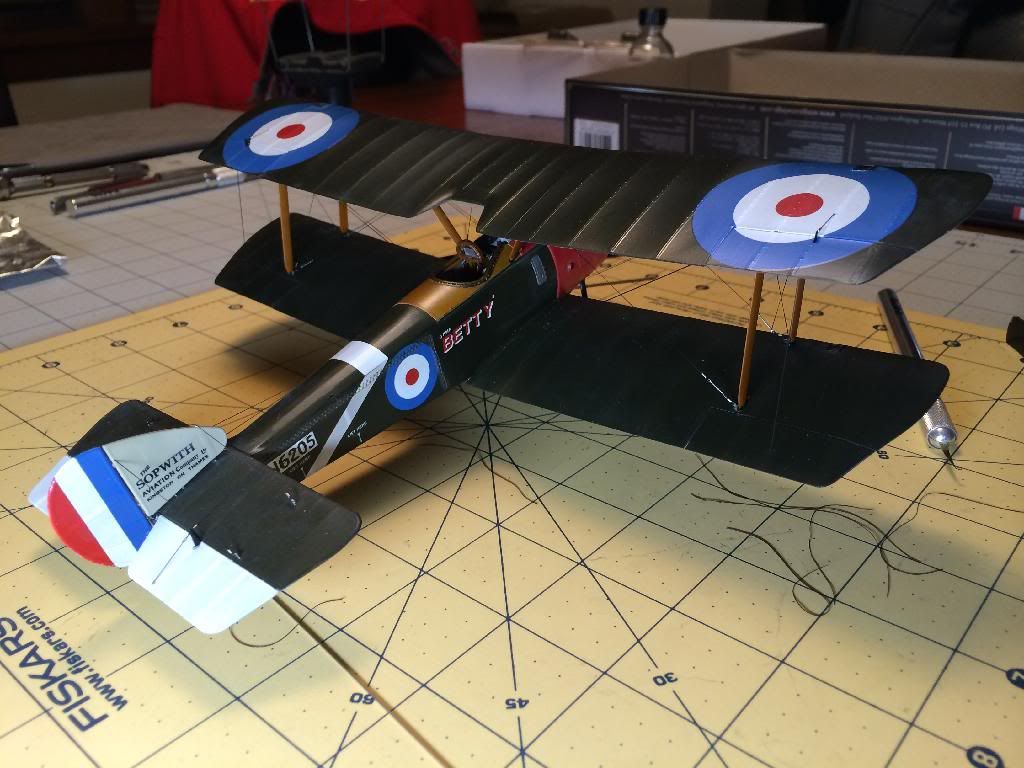
Finished Great War Builds
in The Great War GB
Posted
Wingnut Wings Sopwith Pup RNAS. Aftermarket items were gaspatch turnbuckes. WIP can be found here: http://forum.largescalemodeller.com/topic/2147-wnw-sopwith-pup-rnas-betty/
Pics: