


Moses Prahn
-
Posts
30 -
Joined
-
Last visited
Content Type
Profiles
Forums
Events
Gallery
Posts posted by Moses Prahn
-
-
Thanks everyone for your kind posts. It really is because of the friendly group here that I have decided to share my progress. While I don't see this as me sharing my ability (there are far better modelers on here than me), I do see this as my way of letting others know that I have learned from what they have shared, and that it has helped me to explore new techniques as I get back into this hobby. If anything, I hope this is encouragement for others to continue to share, as I can say it has been very well received on my end and I thank you for taking the time to do so.
With that, back to the Pup.
Once the woodgrain was completed I decided it would be good to test out a couple of techniques I would be implementing in a more visible way later on in the build - rigging. As this was a first for me, I decided to try my hand at the bracing wires found in the cockpit. Looking at other people's work I decided I would try and drill holes into the corners of the frame and run the wire, or eyelet into the hole. As others have found and shared, the most effective tool for this work is an old airbrush needle. The tough thing with the pin vice was getting the right angle - considering the fact that you are drilling on the inside of the frame and there simply isn't a pin vice thin enough to get you close to the frame like the airbrush needle can. There really isn't much room for the pin vice to be perpendicular to the corner. For the holes in the bottom of the frame I drilled straight through with the airbrush needle, but for the holes in the top, I used the airbrush needle to start the hole, a pilot hole per se, and then came back with the pin vice to carefully widen the opening without going through the top, or side, of the frame. While this was a little tedious, I did find the results to be quite good.
To replicate the actual wire I used ez line. If anything, this whole excercise was worth learning how to work with this stuff. It is fantastic (keep in mind I have no base of camparison on this), but if I can use it and be happy with my results my first time out of the gate, I think that speaks volumes about this product. As this was a learning experience, I was not as focused on the accuracy of the wires having turnbuckles, or the proper linkage in the frame. Since this will be buried inside the fuselage, and not as prominent a feature of the plane, I am ok with the results.
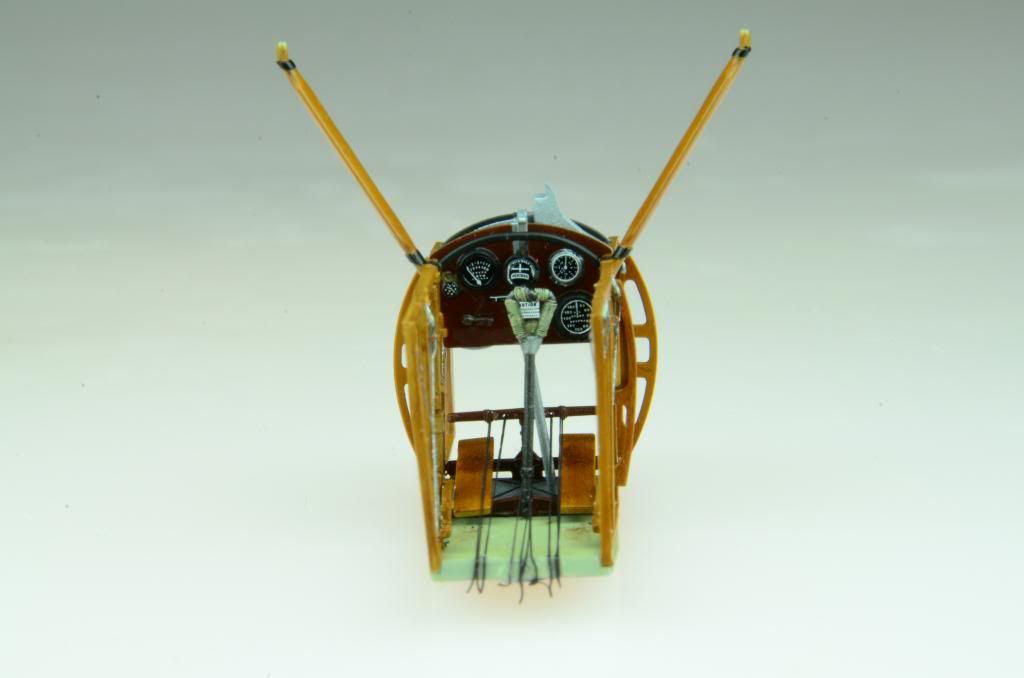
I used the eyelets from Gas Patch Turnbuckles on the top of the frame. I first ran the ez line through the eyelet, looped it around and glued it to itself as close to the eyelet as possible. One thing about ez line that I found a little surprising (I didn't really know what to expect) and quite nice, once I had learned how to work with it, is that it will glue to itself very easily. Once I had the eyelets threaded I secured them in the frame with a touch of cyano. When gluing I found it easiest to put a dab of cyano glue on some aluminum foil, then dip the tip of the eyelet to be secured in the glue, then to secure it into the frame. Very simple approach, but I found that the cyano on the aluminum foil dried quite slowly, and when I secured the eyelet, the glue dried quite quickly. Once the threaded eyelets were in place, I pulled the lines through the holes in the bottom of the frame, starting with the corners that had two lines running through the same hole, and secured the taught lines with a touch of cyano. Tedious work, but well worth the effort. Simple photo of the frame is below, better pics of the mostly assembled cockpit show the results better further below.
Once the bracing was completed, I put the kit decals on the instrument panel. Very happy with them. I then put a few drops and coats of future on top of the dials to give the appearance of glass over the instruments. Simple application, that has a very effective result.
The WnW instruction booklet has a very nice reference picture of the handle on the control stick. I quickly noticed that it was wrapped in some sort of rope - while the kit piece is nice and smooth. In an effort to add a touch of detail I decided to try and wrap it with a very thin copper wire which I found from an old antenna wire of some sort. After 45 min I was pleased with the result, and decided to finish the other two sides using the same technique. While this was probably the most time consuming thing I have done for one small detail, I am happy with the result. Is it to scale? I have no idea! But, I think it could be much furhter off, and anything smaller than the wire I worked with must be an absolute bear to try and wrap - so this is perfect for me!
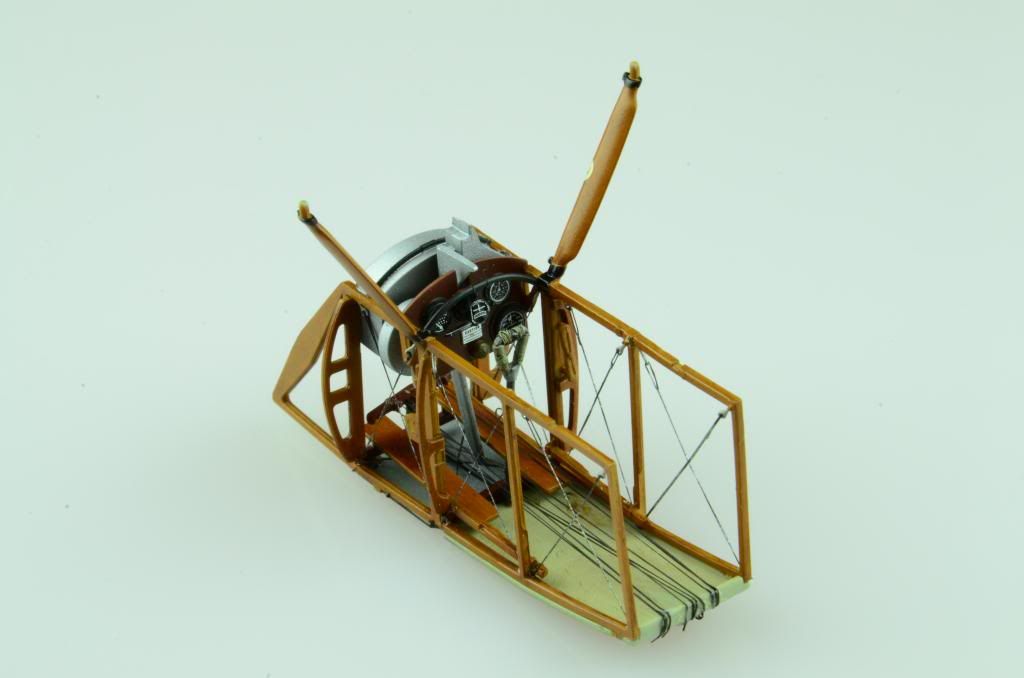
With the cockpit starting to take form I looked at the wiring diagram for the control lines running through the cockpit. I quickly realized this would need to be completed before the cockpit was assembled. I drilled holes through the rudder pedals, and control stick as indicated, and ran the lines before attaching the side braces to the floor. If you look at the picture that is head on of the cockpit you can see how these were attached. With the control wires in place and secured, it was time to attach the sides, as well as the instrument panel and expended cartridge shoot for the vickers. After test fitting the sides I realized the fit was very tight up front where the base of the frame met the wood that held the floorboards. With some careful gluing I was able to secure the sides, and drop everything else into place with relative ease. I had really anticipated a little fight on this, but in truth it went together as simple as could be. Very impressed with this kit.
As of now the cockpit just needs to have the seat installed, and the back wood spanner (I have no idea what this is actually called, but you can see the notches where this will fit). I am waiting on the HGW seatbelts before installing the seat - as I don't think I will be able to properly fit the belts once the seat has been secured. A touch of weathering was applied on the linnen floor as well as the floorboards, and with that the office is almost ready to be installed!
-
 2
2
-
-
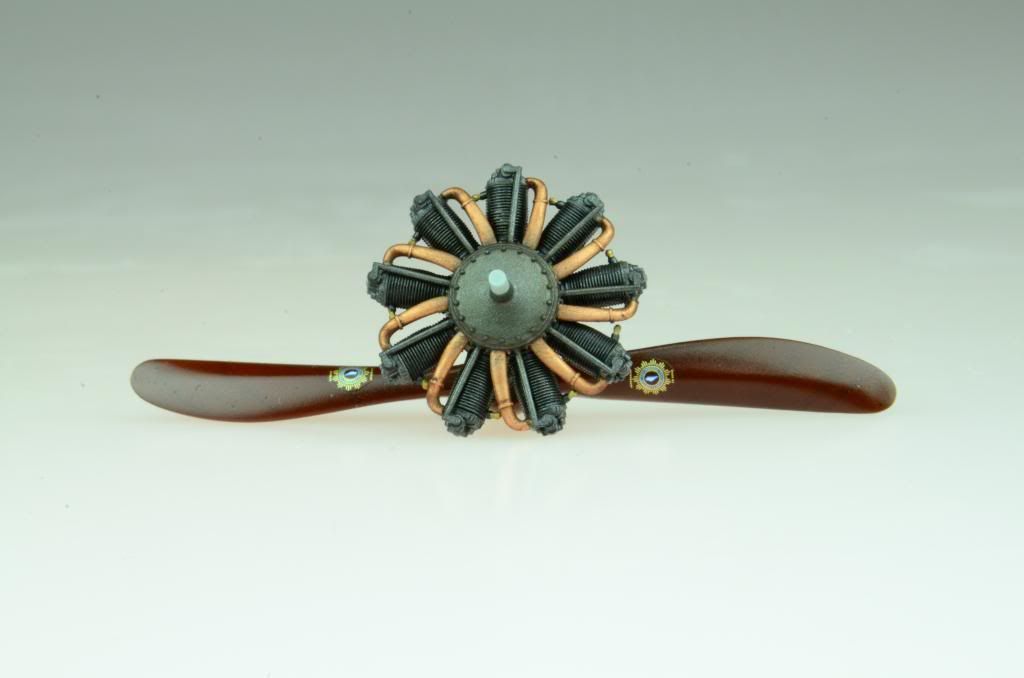
Once the woodgrain was underway I looked to maximize my time by working on a coupld of the subassemblies at the same time. I found that I was working on a handful of items that required woodgrain and time for the oil to dry before the "varnish" coat, so I started work on the engine, the cowling, the seat, and the vicker's gun to keep my bench time moving along nicely. The prop called for a dark woodgrain that is subtle in person, and nearly impossible (at least for me) to get to show up in my photos.
The Le Rhone engine was a fun project. It went together nicely with only a little fuss (mostly my fault) and built up into a really nice piece. I was going to include the ignition wires, but after I saw how visible (or should I say how invisible) all of my work on it would be due to the fact that they are aft of the cylinder heads, I decided to opt out. The cylinder intake pipes are fairly bright with the copper finish on them, and I am still debating adding some more weathering to knock the shine down a notch or two. Still to be determined at this point, but there is a chance I may still work on this. Considering this is substantially covered by the cowl and the prop, I am not too concerned about putting a large amount of time into this area of the kit - let's not forget I am working with a deadline, and still have the fun task of rigging this plane up before I am done!
Picture of the Le Rhone and prop are below:
To wrap this post up I will include the pilot's seat. Using a base of Tamiya XF-59 I applied and stippled with burnt sienna artist oils until pleased with the texture. I then added some more oil in the creases of the buttons to give some depth and the appearance of wear. For my first time attempting leather using this technique, I am pleased with the results! (a little dust I need to wipe away from the seatback). Looking forward to the HGW seatbelts (another first) to include with this seat. Once I have the belts installed I will secure the seat in the cockpit assembly and seal up the fuselage!
Will post more tomorrow on the buildup and rigging of the cockpit.
-
2
-
-
First step is like most airplane builds - the office. However, this is not the typical WWII fighter I am used to. WnW does an excellent job constructing a kit that has superb detail and practically falls together - especially helpful for someone venturing into this genre for the first time!
I decided to bite the bullet and start with something very new to me - wood grain. Admittedly I was very intimidated by this technique. I scoured this forum for tips and tutorials, hints and helpful posts that would help me navigate this new skill. After I had layed my base coat of Tamyia XF-59 Desert Yellow, I found myself procrastinating the next step of fully committing and layering the oil. When I finally gave it a shot, I found I actually loved it. Yes it was intimidating, but the degree of artistic creativity you have lisence to operate under is quite liberating. When the oil was down and drying, I found myself wishing I still had more to work on! What a joy, and one I don't know I would have ever undertaken on my own, and once again I have to say thank you to everyone on this forum who has shared their talent on this subject.
Overall I am very pleased with the results. By no means are they perfect, but I didn't expect them to be. I did find a way to put a couple of knots in the wood behind the cockpit that I was really happy with. I realize it may not be the most accurate representation out there, but it fits the bill for what I wanted to accomplish, and I am happy with the outcome. The woodgrain doesn't come out as well in the pictures as it does in person. This first shot is after the oils, but before the "varnish" coat of clear yellow and orange.
I think this shot gives an idea of the final product. The brass fuel caps look a little odd because they have liquid frisket on them. The points jutting up on the caps make it difficult to tape, and the friskit fills in nicely with the quick application of a toothpick. I finished off the leather trim with the oils while working on the woodgrain. Once I had worked the oils in to a color I was happy with I stippled it with a brush to give it an appearance of texture and a little wear. Once everything was sealed with a mixture of Tamiya clear orange and yellow I treated the buttons to a light drop of Tamiya gold leaf using a toothpick. Overall, not perfect, but I am happy with the results!
-
3
-
-
Hi All,
I have been following everybody's work on this forum for quite a while now and would like to start by saying thank you to all of you for sharing your talent and techniques with everyone on this forum. I can honestly say I wouldn't be stepping into this if I concerns about you as a group of modelers being supportive and accepting of my humble attempts at this hobby.
I decided to start my foray into the scale model world of posting a work in progress on a forum with an entry in 'The Great War' Group Build. I picked up a couple of WnW kits a little while back and was looking for the right motivation to undertake one of these WWI kits regularly regarded as the ultimate tour de force for WWI subjects. After leafing through teh schemes provided, "Betty" stood out to me as the most compelling, which is convenielty the box art of this kit as well.
Being a fair bit intimidated with this build I decided to go all in and make this an epic build of "firsts" for me as a modeler. This list includes, but is not limited to:
- First WnW build
- First WWI build
- First bi-plane build
- First build with rigging
- FIrst attempt at woodgrain
- First time posting a work in progress on a forum
- First time taking my model photography "seriously" (feedback and suggestions welcome)
I am sure there are others that will come up, but either way, I am excited to be tackling this fantastic kit.
I started working on the Pup about one month ago. I am a little slow on getting this thread started, but I wanted to make sure I had some progress before starting a post that wouldn't see its way to completion. As I am working towards a deadline (wife is expecting our first child mid-March) I think I will be able to stay on track and get this wrapped up before he gets here, and my bench time slows down.
With that introduction, let's get down to business!
-
2
WnW Sopwith Pup RNAS - "Betty"
in The Great War GB
Posted
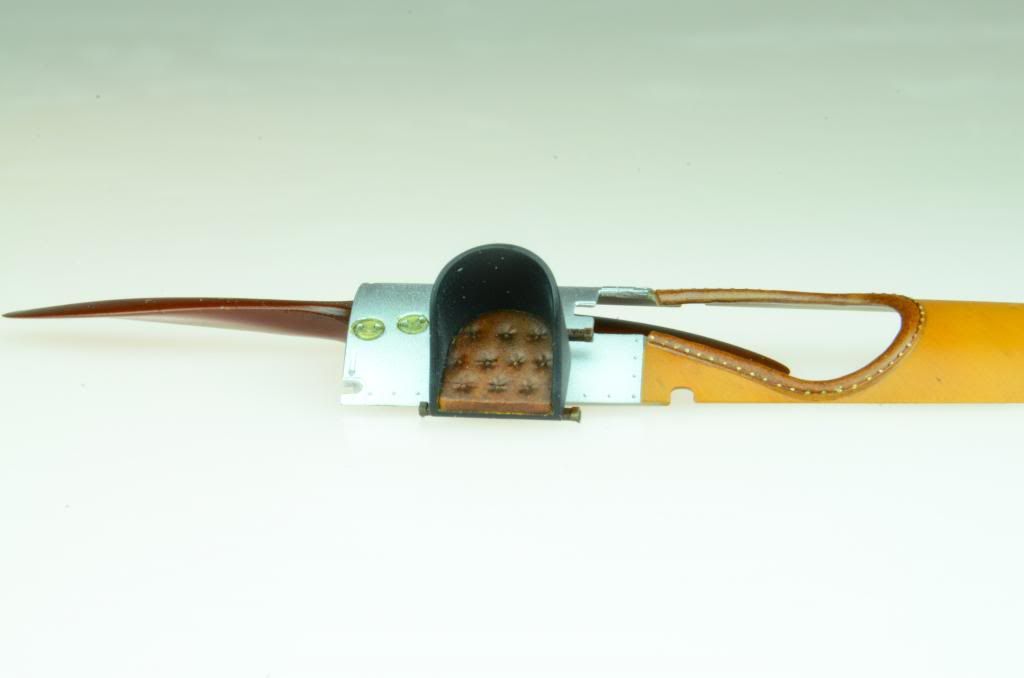
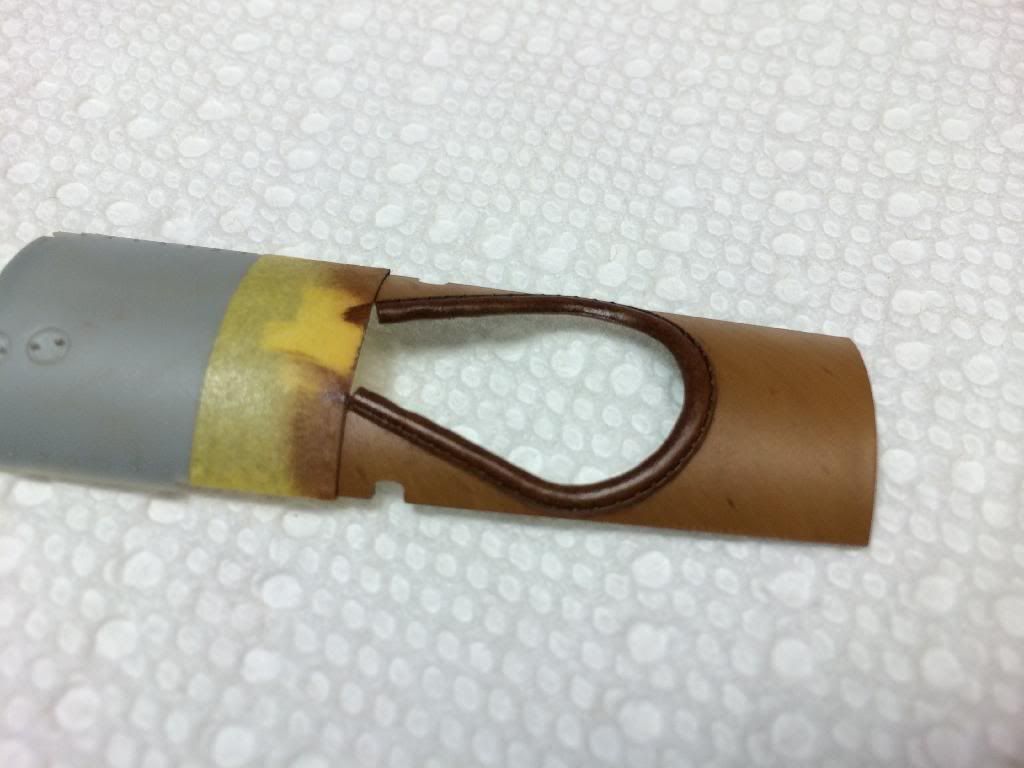
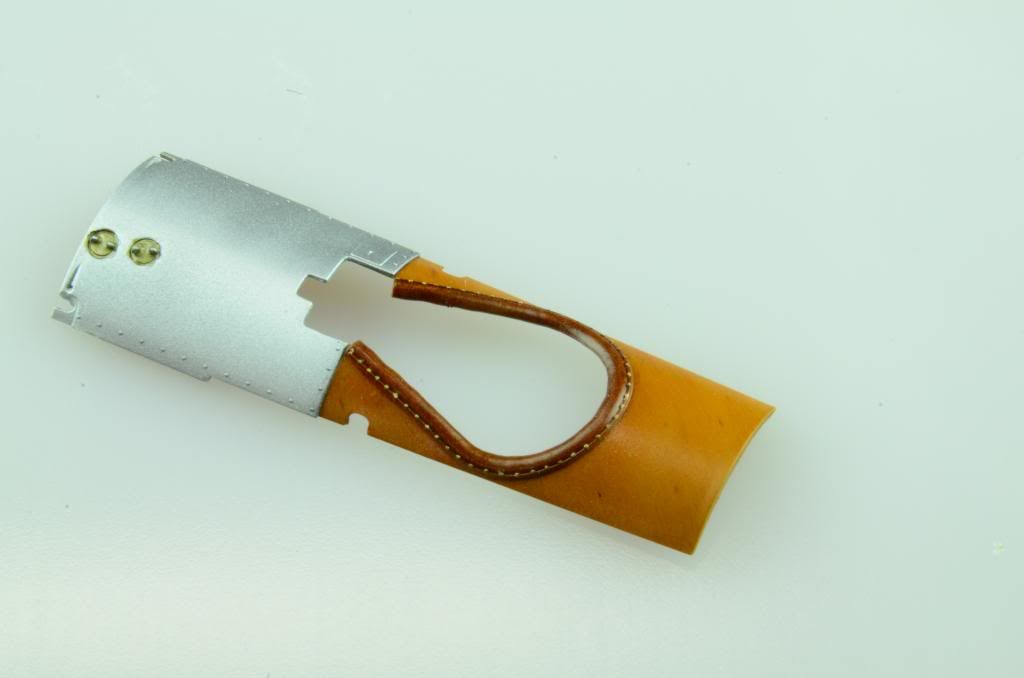
With the cockpit almost completed, I focused on wrapping up what small sub assemblies I could while I wait for the seatbelts. The vicker's machine gun, and its attached windscreen. I masked off the clear bits and sprayed alclad aluminum (no base coat, as it would be visible from the pilot's side of the glass. Once cured I masked that and applied a base for the leather padding wrapping the frame of the glass. This was then worked with artists oils (same as the leather seat pad) to get the desired result. To seal in the oils for the leather pad on the seat and around the glass frame, I still used the mix of tamiya orange and yellow. After it was applied it left a very shiny gloss coat. In hindsight I will mix in a touch of tamiya base to step some of the gloss effect back from the topcoat if I take the same route to seal in the leather in the future. In this case I pulled out some light sheen gloss and sprayed that over the leather, and seat to get the right look. Once completed I removed the masks and inspected my work, only to find I had sprayed the center section thinking it would be metal because the vickers attaches right on the other side of it. Oops. Should have studied those reference photos a little more carefully. Oh well, still happy with the way this has turned out.
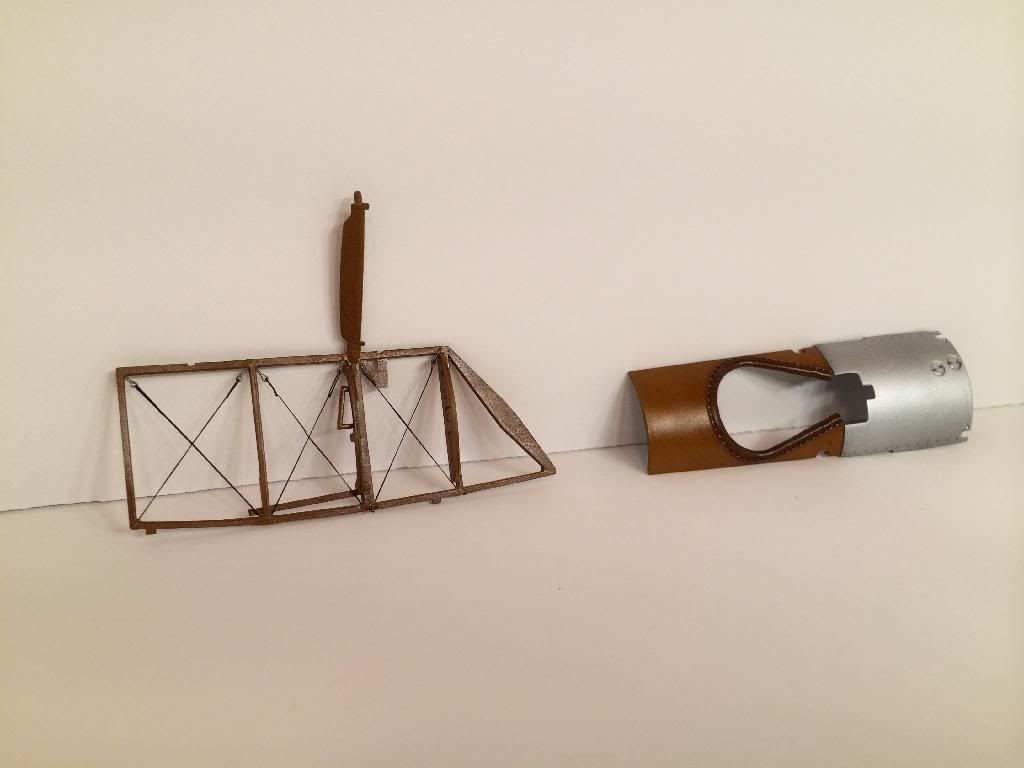
The only other items I havent mentioned thus far are the wood struts for the wings. These were painted at the same time as the rest of the items receiving the wood grain effect. I painted the brackets black (after drilling out the holes for the rigging wiring, thanks for the tip Doogs!), the pitot tube, and applied the decals. "Betty" has these wrapping the front of the strut, and with a small amount of patience, the decals went on quite easily. A couple of shots of the currently completed items are below. If the hub on the prop looks a little odd it is because I have it masked with liquid frisket - trying to decide if I want to seal in the decals with a gloss coat (these decals are so great I almost don't have to!). The tail skid is also a mixture of woodgrain and metal pieces bolted to the skid for the contact plate as well as the bracing where the skid was bolted into the plane.