


James H
-
Posts
3,255 -
Joined
-
Last visited
Content Type
Profiles
Forums
Events
Gallery
Posts posted by James H
-
-
Not that I'm that into it or anything...
But right-side breast attachment point is for the restraining bolt.
S
Cheers! I'm still learning

-
Hi ladies and gentlemen,
LSM is proud to announce our Hong Kong Models Group Build.
The remit is simple. You can build ANY of the HK Models kits here (B-17, B-25, Meteor, Do 335 and forthcoming Mosquito). You can use as much aftermarket as you want, or none at all. All projects should be under 1/4 (25% started) at a maximum.
If you fancy some banners, here they are:


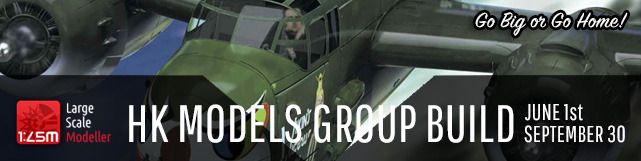


More banners will follow, rest assured.
This is a FOUR MONTH build, but can be extended as we see fit.
Prizes are under negotiation,a nd hopefully, we will have HK Models support us with this, and with some very nice prizes.
This GB starts at the beginning of June, so get yourselves ready!!!
-
 3
3
-
-
I am going to have to order one of these! And R2!
Do it!
N
O
W
-
This is seriously nice. These wood and metal 229s seem in-vogue, and you're doing this some serious justice.

-
1
-
-
I think they do, but just provide an alternative to painting.
The gold will remain, but it needs to be flattened down and weathering added, so it's fine to keep.
-
Really cool! But i just think 175 pounds is a bit steep for a kit like this...
That'll buy you around a dozen of them
-
Jesus! I hate you!!!
-
1
-
-
1:12 C-3PO ‘Protocol Droid’
Bandai
Catalogue # BAN996418
Available from Hobby Link Japan for ¥2,800
This one really needs no introduction. If you’ve never heard of, or seen C-3PO, then you must’ve been living with your head rammed in a certain physical extremity, for the last 40 years almost. This is probably the most lovable and well-known arthropod droid that has ever hit the silver screen. Along with his sidekick, R2-D2, this golden tin can character is probably one of the most loved from the original Star Wars film trilogy.
Bandai? I always thought they produced electronic video games! I suppose I'm showing my age


How I remember BandaiC-3PO (or Threepio) is just one of a number of 1:12 Star Wars figures that have been released by Bandai, and one of four that I have here. I decided to look at this one first, simply to show both the technologies and design features that Bandai have crammed into this release. If you can remember the 1:48 Fieseler Storch that Tamiya released a few years ago, then you will have found the coloured/clear sprue to have been quite a novelty. That seems to be pretty par for the course these days, with some manufacturers. Bandai have used this to good effect; not just with colour, but also with some sprue parts being flexible.
Bandai’s Star Wars releases look just sumptuous in their presentation. As with the other kits in this series, this one is packaged into a highly glossy box that shows the main character on the lid, and with a series of model images and options highlighted around the box edges. Unfortunately, all descriptive text is in Japanese, so I can’t readily translate for you. If you have a Smartphone, such as the iPhone, then there are real-time translators that can hack this text for you.

C-3PO contains SIX sprues, some of which are sub-divided into a number of other sprues, and packed into heat-sealed cellophane wrappers. Two packets contain a number of connected sprues that are plated in a gold, mirror finish. Another has a single sprue that is chrome plated. C-3PO had a replacement leg which wasn’t of the same gold finish, and this caters to that, as well as a number of other parts.
One packet contains two black sprues (one rigid and one flexible), plus a waterslide decal sheet. The last packet is the most unusual sprue I have EVER seen. It is mainly black styrene, but also has gold, red and clear elements, with the red parts appearing to be flexible. That is a neat bit of moulding on behalf of Bandai. Very impressive.
SPRUE A

This is the sprue which really captivates me due to its multicolour mouldings. The predominantly black moulding contains a number of interconnection parts, such as the torso midriff and the inside hand. The famous torso with its wiring is well depicted here. This is supplemented by a few parts that are moulded in red plastic too, plus mute gold. What this kit does supply are decals in both waterslide and sticker format, and a sticker/decal is supplied for the midriff connecting point.


Clear parts are provided for the eyes, and also the electronics module that is located in the panel on the rear of C-3PO’s torso.
Look at the arms of C-3PO, and you will see various linkages. Most of these are integral to the mouldings we’ll see in a moment, but the extras are provided here. If you want these to match the other parts, then you really need to airbrush them in something akin to Mr Metal Color Brass/Gold. These are far friendlier to apply than the Alclad colours, and don’t have the same noxious whiff.
SPRUE B1

This is a single sprue, and one that is gold plated. A good number of C-3PO’s key parts are here, such as the head shell parts, upper torso, lower torso, and some head and connective parts. Two chest plates are included, one of which has an attachment part of some sort. Sorry, I can’t elaborate further, but if you are a Star Wars buff, you may know exactly what this is. That forward plate is interchangeable too, with the part simply plugging over an internal plate, also on this sprue.


Look at the rear torso plate and you can see that the access door for the electronics unit, is a separate part. That electronics unit is also included and the door can be removed to show this.
The head is split into a rear shell, interconnecting plate, and the forward shell. Two options are provided here, with one of them having a dent in the forehead. Again, I don’t know the significance of this. I only ever saw the first Star Wars film, and that’s where my knowledge begins and ends. Clear parts are provided for the eyes. I was just thinking how great it would be to model these with a nice, soft light filtering through them. I think I may just do that, as there is plenty of space in the stand to house a switch and any resistors required.


That stand also comes with an optional post onto which Threepio can be mounted (charging post?), and because of this, a small plate to the rear of the lower torso, can be removed if you want to pose the model like this for a while. I have to say it does nothing for me, and perhaps detracts a little from the character standing on its own two feet.
Other parts on this sprue include one of the integral arm halves, ball sockets for both arms, one of the knee joints, upper left leg halves and electronics unit panel.
SPRUES B2/B4/B5/B6/B7/B8

These sprues are connected together to make a larger sprue, and again all finished in metallic gold. It’s now that we see a couple of other options. Notice that the regular bent arms are supplied as halves, with the actuators moulded on them. If you want to pose the arms in a less bent position, then you can make these from a series of individual parts, such as upper/lower halves and separate actuators. It will be useful to use one of these other arms if you wish to pose the model in this iconic way, as the arms and hands can rotate.


Optional hands are also included, with the fingers less bent on one set. I really do like the options available here. Due to the arm actuators, it wasn’t really feasible to have a fully moving unit, and I think Bandai’s compromise is certainly very workable. All limbs are movable to a degree, including the legs, and here you see the upper right leg, and the lower left, plus the left foot with a separate sole.


Bandai also did a great job of moulding the upper arm/shoulder connection parts, although these are a number of parts that unfortunately have the sprue connections on the part face. As these are very minor parts, they will easily be touched up.
SPRUE B3

The reason this sprue is moulded separately is instantly evident. Yes, it’s finished in chrome, and not gold. C-3PO had a chrome finish lower right leg which was obviously shown to be either a replacement, or from another droid. As a result, this sprue contains the lower leg halves, knee joint, actuator, foot and sole. Lastly, the electronics unit is to be found here.


SPRUE PC

‘PC’, I hear you say. Yes! I think the best way to look at this is that it might mean ‘Poly cap’. The plastic is flexible, and contains a multitude of joint connectors. Instructions show that not all of these parts are to be used, so it must a sprue that is common to a number of releases. As well as the joint connectors, the flexible torso connectors are also moulded here.
SPRUE SWB3

This last sprue contains the model’s plinth. As this is a common part, it has a hole within it that is plugged with a specific part on the first black sprue. Notice that a small connector part is also supplied, which is ideal for joining the base for the R2-D2 kit. With these joined, I might be inclined to add some yellow sand to the base, simulating the Tatooine surface.

Plastic Summary
Moulding is seriously high quality, with plenty of detail and minimal clean up required. The latter is essential when you consider the metal plating on the majority of parts. No defects can be seen, and you really don’t need to worry about ejector pin marks here!DECALS

As I have already mentioned, both waterslide and sticker options are given for all of these. I’m not a fan of stickers, and at least with the decals, you’ll be able to get them to bed down nicely with setting solutions. Printing, in both cases, is excellent.
Instructions


This is printed on a long, fold-out sheet, and shows every single section of the model, referenced against a drawing that highlights the specific section under construction. Very clever, but then, quite necessary as most folks simply won’t be able to understand the Japanese text. Options aren’t as obvious to start with, and you will need to study the instructions for a couple of hours first. Printing is in a combination of black & white, plus colour, with a number of model photographs included.
Conclusions
Just wow!! I know some modellers will be concerned with plated parts, and won’t like them……BUT, remember that this finish is a perfect base onto which to add a combination of satin and matt varnishes to simulate the tarnished finish of the real thing. Accentuated with grime and sand, then you really should have a replica of C-3PO that is very close to the movie character. You will need to follow the instructions illustrations closely so that you understand the options available to you, but that is only because of my lack of understanding of the Japanese language!Whilst I’m no fan of Sci-Fi, this and a number of other kits from the same range, are manna from heaven for me. These iconic characters were a big part of my childhood, and to see them immortalised in an amazing kit is just what I’ve wanted to see for many years. Thanks for fulfilling that guilty passion, Bandai!
VERY highly recommended
Review kit courtesy of my own wallet. To buy this directly, click THIS link.
James H
-
1
-
-
I don't think I've seen one of these built, so thanks for sharing this with us.
Beautiful work!
Oh, and Welcome to Large Scale Modeller

-
1
-
-
The candy stripe frame paint on the canopy frame looks great. Wish I'd done that.
-
1
-
-
This looks amazing Nick!
Real good to see what you're doing with this one. You enjoying it so far?
-
1
-
-
Looks a great kit. I'd like to see it built up
-
I would love to see this as a regular build too.
-
Also paid for my Fw 189 pre-order today, for a little more HpH resin loveliness...
-
Now this one is very interesting.
Such a great kit, and I can't wait to see how this turns out in Nippon colours.
-
1:32 Do 335 Pfeil
EagleCals
Catalogue EC#164
Available from Eagle Editions for $19.50
For me personally, if there ever was a decal set that arrived at just the right time, it’s this particular one from Eagle Editions. Last year, I built a test shot of the HK Models Do 335B-2 ‘Heavy Fighter’ for the Military Illustrated Modeller magazine, and recently I began work on the standard Do 335A-0/1 which is slated for release later this year. As this is a test shot too, I have no decals. Luckily for me, this new decal release is also designed for this particular variant.
As with all Eagle Editions releases, this is packed into a small zip-lock wallet, with the main instructions being folded, and also forming the product image page. Also inside the package is another sheet with some reference photos, and TWO decal sheets.

The front sheet illustrates the profiles for the FOUR schemes that are possible in this pack, published in a smaller format. Actually, I am not entirely correct in saying that only four schemes are available. One of these is for the heavily weathered, captured machine in US markings. This is the one which resides at the NASM. Even though the scheme shows this in those markings, it also carries obliterated Luftwaffe markings, and as these are supplied in an untarnished form, you can opt to build this as it flew with the Germans. So, in effect……FIVE schemes (or at least 4 ½ schemes!)

When you fold out the main sheet, strangely enough, two of the pages show the four profiles again, in larger scale, with their decal placement codes. Both pages are totally identical. On one facing page, some historical and colour notation is supplied for each machine. I note that the underside colour is given as RLM65. I built my previous Do 335 with an RLM76 underside, which I thought to be correct, but this tells me otherwise. As I ran out of RLM76 though, I’m not complaining. I know that Eagle Editions sets are meticulously researched, with this set being aided by the talents of Marc Proulx.

All schemes are very similar with the exception of one machine which has a natural metal finish to the rear fuel tank panel. Another machine is shown to have no forward firing guns over the cowl, so you will need to modify the kit for this scheme. However, this is a very simple modification. If you choose to build the captured machine, you will need to add some heavy weathering to the standard Luftwaffe scheme, including of course, those overpainted markings. One image I have seen of this also shows it without its undercarriage doors, so that is always an option too.

The rear of the sheet shows the placement of the wing decals, and unlike the B-2 kit, none of the underside wing codes run into the main gear door areas, so this will be a little easier to complete. However, you still have the rear engine doors to negotiate for the fuselage codes and Balkenkreuz. These are supplied as intact items, and will need slicing if you wish to pose those engine doors in an open position.
A single sheet is also included, showing two black & white photographs of two machines from the chosen schemes. Lots of very good weathering and diorama ideas can be gleaned from these, and again, it’s Marc Proulx who supplied the images. Colour profiles are created by Simon Schatz.


Eagle Editions continue to choose Cartograf to print their decals, and we really have no complaints there. Printing is amazingly thin, but with good, solid colour and minimal carrier film. The decals also have a high gloss finish to them, plus, they are in perfect register. All of the various serials, codes and the American markings, are found on the first sheet. With one machine, it can’t be determined whether the code suffix is ‘PN’ or ‘PO’. In this case, decals are provided for both options. A small suite of stencils is also provided. I don’t think the Do 335 had many stencils anyway, so these are probably pretty complete. The second sheet carries the German markings, including swastikas. However, these are two part decals, so escape the ironically fascist laws that some post-fascist governments now employ. Thankfully, Eagle have created these with a complete outline, making it easy to properly position. You then add the central portion to complete the nasty Nazi symbol.
The machines depicted in this release are:
- Do 335A-02, VG+PH, W.Nr.240102, December 1945 (captured)
- Do 335A-02, VG+PH, W.Nr.240102, April 1945 (under German use)
- Do 335A-0, W.Nr.240105, München-Riem, April 1945
- Do 335A-0, VG+PN (PO?), W.Nr.240108, December 1944
- Do 335A-1, W.Nr.240162, Oberpfaffenhofen, April 1945


Conclusion
As I said, for me, these are perfectly timed. In fact, until the HK and ZM releases of the Do 335A-0/1 later this year, we won’t see too many of these appear in 1:32 projects, but remember that Eagle also sell these in 1:48 and 1:72 scales too. Production is excellent, and despite the lack of general variety for the Do 335, I think these particular choices are inspired. The accompanying historical and scheme notation is better than anything you generally see on the market at the moment.Very highly recommended
My sincere thanks to Eagle Editions for sending this sample to us. To buy directly, click THIS link.
James H.

-
1:32 Supermarine Spitfire Mk.IX MH434 in Civil Service
RAM Decals
Catalogue # RAM32-002
Available from RAM Models for £9.99
If you’ve ever tired of seeing endless lines of Spitfire Mk.IX models that have been finished in standard camo schemes, and long for something very different for your project, then you could do far worse than model MH434. This particular Spit has been in many films etc. wearing various paint schemes, including a brown and green BoB scheme. However, if you want a total break from the norm, then this is a sheet which I’m sure will hold appeal. How about a Spit in a civilian scheme? Yes, MH434 in one of its more beautiful paint jobs.
RAM Models/Decals are possibly a name you haven’t yet heard of. Being a regular online model shop for a period, they now aim to produce their own extensive range of decal sheets, and it looks like they aim to cover those schemes which are a little more leftfield than those which are released by their contemporaries. This specific release is a perfect example of how to grab a modeller’s attention in a single release!

Packed into an A5 zip-lock bag, this set focuses on MH434 when it carried the civilian code G-ASJV. A folded A4 sheet shows this scheme, on the front, in both port and starboard profile. Open it up and the profiles are supplied again, but along with both upper and lower plans. What makes this scheme so beautiful are the colours used, and their breakdown. All wings, tail-plane and lower fuselage are shown as silver. From this, I presume this would be what is known as ‘High Speed Silver. The upper fuselage is painted white. Breaking up the border between the silver and white, are tapering blue flashes, flanked by a narrow black trim line on either side. Wingtips are also blue, with a narrow white and black band on the inboard face.

A single decal sheet is supplied with this set, and the biggest hitters on here are the tapering blue strips for the fuselage. These run full length from the forward cowl, to the rudder post. A separate length extends over the rudder. Now, I am a little concerned here, as the compound curves of the cowl must be negotiated. It all depends on how well the decals mould to the shapes. I think it would have been useful to have had a little extra material for this area, in case things don’t close up. Looking at the plans and the wing tips, I am assuming that the clear strip running between the blue and the black, will need to show the white paintwork. If this is the case, and I’m sure it is, you will need to carefully mark the lower silver fuselage within 1mm of accuracy, along the full length of the fuse. Not impossible of course, but will perhaps mean that you should carefully replicate the curve along some card and use this as your masking and painting guide.

Of course, there are the civilian codes to apply to both the stripe and to the wings, and also a rather neat flag onto the fin. This comes with a separate red section to make up the Union Flag. Be careful with the wingtip decal application, as you want to ensure that you get this to touch all the way around the tip diameter. The instructions do give paint references codes for numerous manufacturers, but I can’t vouch for the blue exactly matching the decal. After all, manufacturers have their own interpretations of specific colours too.
What isn’t mentioned in the instructions are any modifications to the airframe, from its military format. Of course, the gun ports would be faired over….but was this with individual plates, or a new leading edge? Check your references. This applies to the shell ejection chutes too. Presumably, there were a number of cockpit differences too. Again, try to get a little extra information.

The decal sheet is printed by Fantasy Printshop, and really is excellent. Colour definition is great, and everything is solid. Carrier film is minimal, and registration is perfect.
Conclusion
As I have said, you will need to reference some areas of this aircraft before you can proceed. This goes for both airframe and scheme, but, should you do that successfully, and apply that stripe, then you will have one amazingly beautiful Spitfire for your display. RAM are to be applauded for tacking this subject. If of course, the stripe frightens you a little, then dare I say it, you could use it as a basis to mask that part of the model, and of course use the remainder of the decals as standard. The options are there, and hopefully I provided a few ideas for you to pursue, should you purchase this very nice decal release.Highly recommended
My sincere thanks to RAM Models for this review sample. To purchase directly, click THIS link.
James H

-
1
-
-
Great looking Fokker
I'm only jealous because I'm crap at armour.
-
1
-
-
I love this build. Sure the inspiration that will see me kickstart mine again.
You're doing amazingly with this kit. Sure hope you publish a full build of your next masterpiece up here.
-
Holy crap!!! That is astounding.
How expensive is it to print this out?
-
1
-
-
That... detail... is insane!
Doesn't Eduard do fabric belts too?
It sure does. They can be bought separately, but I really think they should have been included here instead of the metal belts.
-
1
-
-
1:32 F4U-1A cockpit
Eduard 'Brassin'
Catalogue # 632053
Available from Eduard for €41,25
Bunny Fighter Club price: €35,06
It hasn't taken Eduard as long to release a complete cockpit upgrade for the recent 1:32 Tamiya F4U-1A Corsair as it did for the initial Birdcage variant, and I'm pretty pleased about that. Having the kit in my stash for a pending magazine project, and knowing the level of detail within the cockpit, it may seem surprising that a whole resin replacement is now available, but just wait until you see this! You really won't want to build that kit without first seeing the detail that this upgrade offers. Before you say it though, yes, this set does differ from the original F4U-1 cockpit. I can't give a list of general changes, but the pilot seat on the F4U-1A set is in a higher position than it its predecessor.
Eduard have used their satin black cardboard package for this release, and before you open it, you can feel that it's quite weighty. When opened, you'll see that part of that weight are the four, double sided and folded instruction sheets required for this project, followed by SIX bags of resin which is cast in a combination of light grey, mid grey and clear, plus a small wallet with two PE frets and an instrument panel decal. Two casting blocks are packaged within the main box, un-bagged due to their delicate nature.

The resin parts are protected within the box by pieces of soft grey foam, and the instructions are wrapped around these for extra security. This is going to be no quick project, and the FOURTY-NINE pieces of resin and around SIXTY photo-etch parts, are testimony to that. Strangely enough, I'm attracted to the bag with the two largest parts first, plus those loose parts:
Eduard appear to use the darker resin for the thinner components, and here, these are the deeply curved floor and the upper side walls which are attached at a late stage in construction. Light grey resin is used for the forward and rear bulkheads. The detail within these key areas is stunning, with plenty of subtle detail hiding around the key structures and avionics/pipework/cabling. I have to say that some carefully applied washes and dry brushing will bring levels of detail out that would normally be overshadowed by the larger cockpit components.

Holding the various parts together, you can see that a lot of effort has been made in ensuring that detail areas, such as constructional elements, line up perfectly, as was seen in the 1:48 Spitfire Mk.IX cockpit replacement set. There are a number of minor webs on the cockpit floor, underneath cabling and pipes, and this will need careful trimming away. This goes for the main, central web in the floor too. These thinner, fragile parts are connected to their casting blocks via thin resin walls which look easy to remove and clean up. You will fine smoothly recessed areas on the sidewalls into which the side consoles will neatly fit, so there will be no guesswork here. A number of avionics boxes and cabling are included too.


The main, light grey components for the bulkheads are a detail painters dream; especially the forward bulkhead with its mass of pipes, wiring, junction boxes etc. My only real criticism of these parts are the quite thick casting blocks which will need some elbow-grease to remove and clean up.

This is a very complex set and one which will bore the pants off you if I describe every single piece (many of which I couldn't' even put a name to), so from here, let's take a look at this bag by bag, with photos, using captions where appropriate. I will also highlight anything which I think you should be aware of.


Wallet 2

Wallet 3

Wallet 4

Here we can see that Eduard have given the choice of two different instrument panels. A full resin part is supplied, including cast instrument detail. Those instruments also have dial detail, so unless you're into dry brushing and micro-detail painting, you might prefer the other option. That second option is a resin panel with only a minor amount of cast detail. A first layer of PE is then applied, and then the instrument decal. Finally, a PE fascia is overlaid to complete the panel. This will be painted, and onto this you will lay the instrument decal before then applying the fascia. In an unusual move, this fascia panel is supplied as base brass, and is not colour-printed.
Wallet 5

Wallet 6

All resin parts have been thoughtfully connected to their casting blocks in the least obtrusive manner possible. Many connecting areas fall along assembly joints, or will be hidden from view, despite them not really being a problem anyway. Eduard has mastered the easy to remove system for casting blocks, with only those two bulkhead parts having blocks which will require some substantial effort to remove. Many parts are also quit e fragile-looking, such as various pipes etc, and again we see these parts cast in the darker grey resin, which perhaps is a little different and more resilient to being handled. No flaw can be found anywhere, such as breakages, bubbles or short cast. This is as good as it can possibly get.
Photo Etch

There are two PE frets in this set, with one being colour-printed, and the other in bare brass. The colour fret contains the seatbelt set which is composed of belts and separate buckles. I think I prefer the textile belts to these though, for a more realistic effect and weathering possibilities.

The second fret holds the various instrument panel layers, with neatly etched bezels. A series of levers are included too, as well as pedal adjustment ratchets and various brackets. Etch quality is excellent, and small connecting points mean parts will be easy to remove from the fret.
Instructions


There is a LOT of work involved in assembling this, and an even bigger job in painting it, but that is fun, right? There's no doubt that Eduard have done an admirable job in presenting the various constructional sequences with relative clarity. Newly attached parts are shown in blue ink, whilst any surgery required to the host kit, is inked in red. There is indeed some surgery to perform, but this seems to be limited to the removal of the moulded structures (frames) within the cockpit, and no actual wall thinning is required. This should be a relatively easy project to install within the plastic. Colour reference codes are supplied for Mr Hobby paints, throughout construction. A useful parts map, with part numbers, is supplied on the rear page of the manual. To complete the cockpit assembly, you will need a little lead, tin or copper wire for various tasks.
Conclusion
In the UK, you can buy this set for £30 to £35, and whilst the Tamiya kit itself can be bought for around £90 to £95 (cheaper from Lucky Model etc), it seems like quite a high proportion of cost to spend on just the cockpit. Having said that, the sheer number of parts in this set, and how thorough it is, for me, is a perfect reason to do so. It seems incredulous that you could improve the Tamiya kit parts to such an extent that you'd scrap them completely, but this is exactly what this set provides, at the same time, offering a mammoth leap in detail over the original. For me, this set is a MUST!Very highly recommended
My sincere thanks to Eduard for the review sample seen here. To purchase directly, click THIS link.
James H

-
3
-
-
Fantastic! Wanted to see one of these being built here. Thanks for sharing.
Looking mighty fine so far.
-
1
-
-


GB Info and banners
in HK Models GB
Posted
Ha! I'll do the Russian Mossie