

colt6
-
Posts
205 -
Joined
-
Last visited
Content Type
Profiles
Forums
Events
Gallery
Posts posted by colt6
-
-
Really cool!! Will follow this for sure
Arno
-
looking better and better with each post

I have a question thou - where do you get information regarding the yellow cables, fuel lines and other similar details?
Best regards,
Sasho
Hi Sasho,
thanks for your compliments. Most of the fuel lines are included with the kit, the yellow wiring I did after pictures from the museum plane and of course with a little artistic freedom. Lol
Arno
-
 1
1
-
-
Just attach the wings with needles and start weathering, I like thing's dirty! Lol
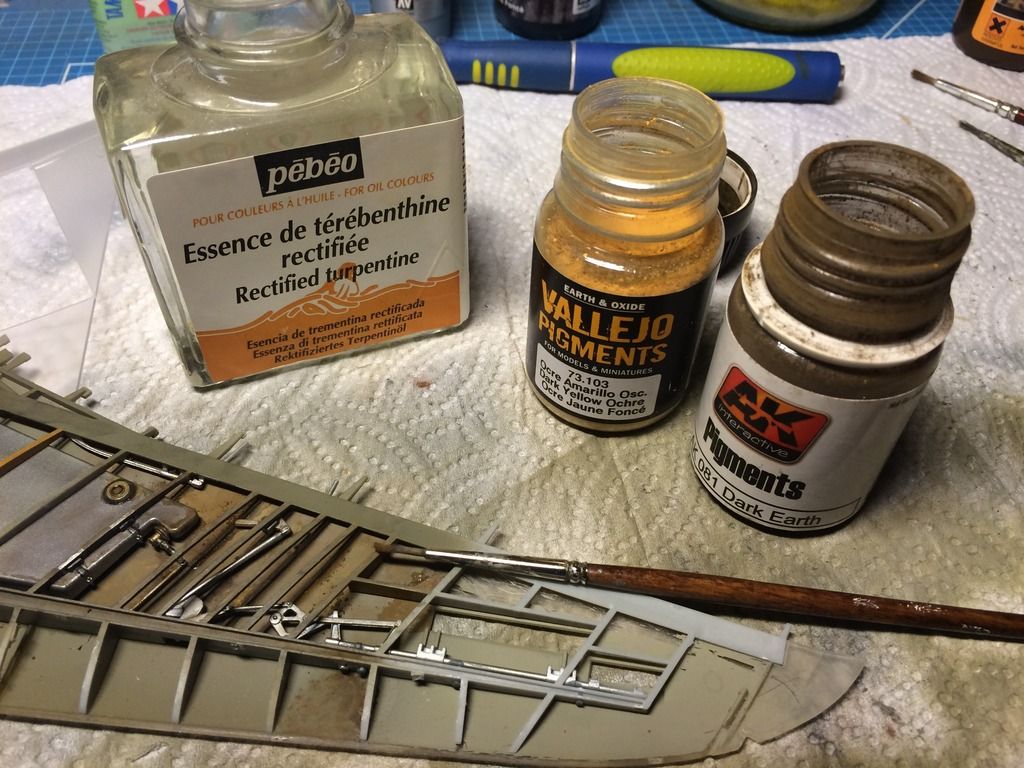
I worked with AK washes and pigments.
Thanks Arno
-
1
-
-
Soooooooo beautiful how you paint the wood!!!!!
Arno
-
1
-
-
Phantastic start and your painting skills are great!!
Arno
-
1
-
-
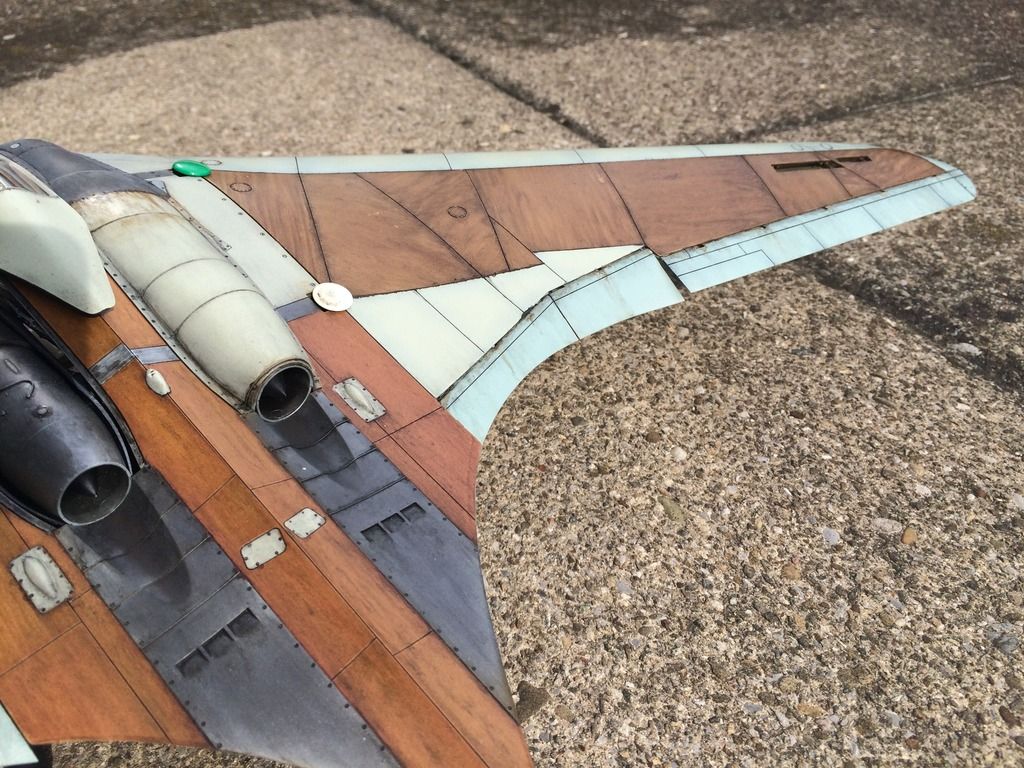
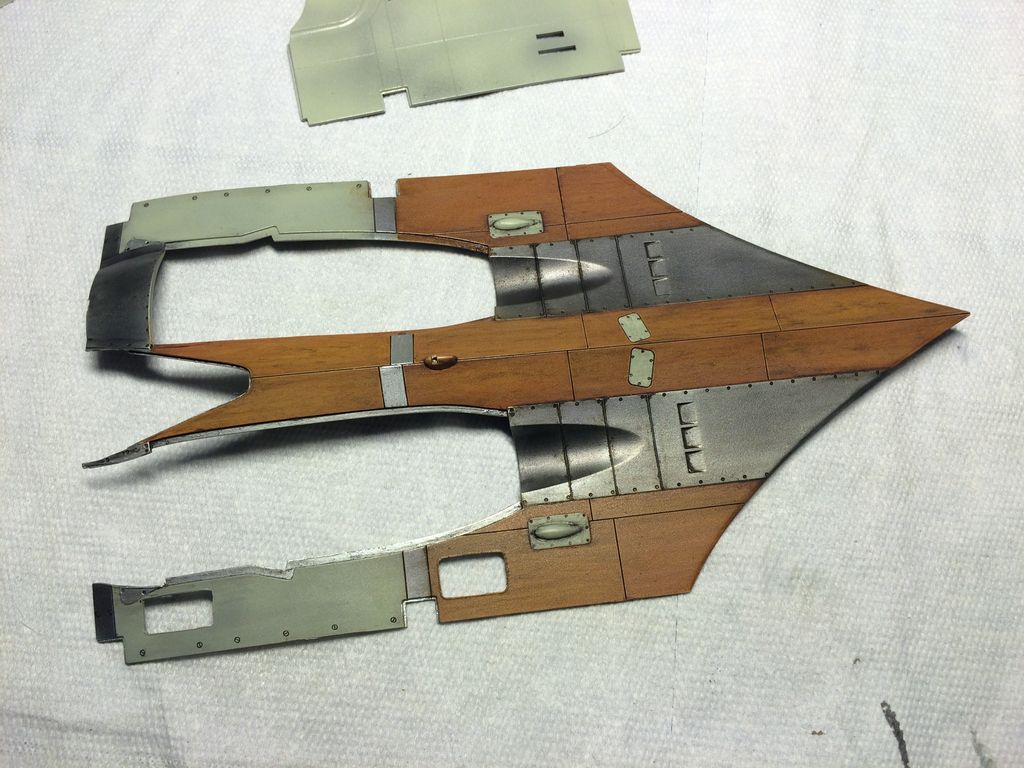
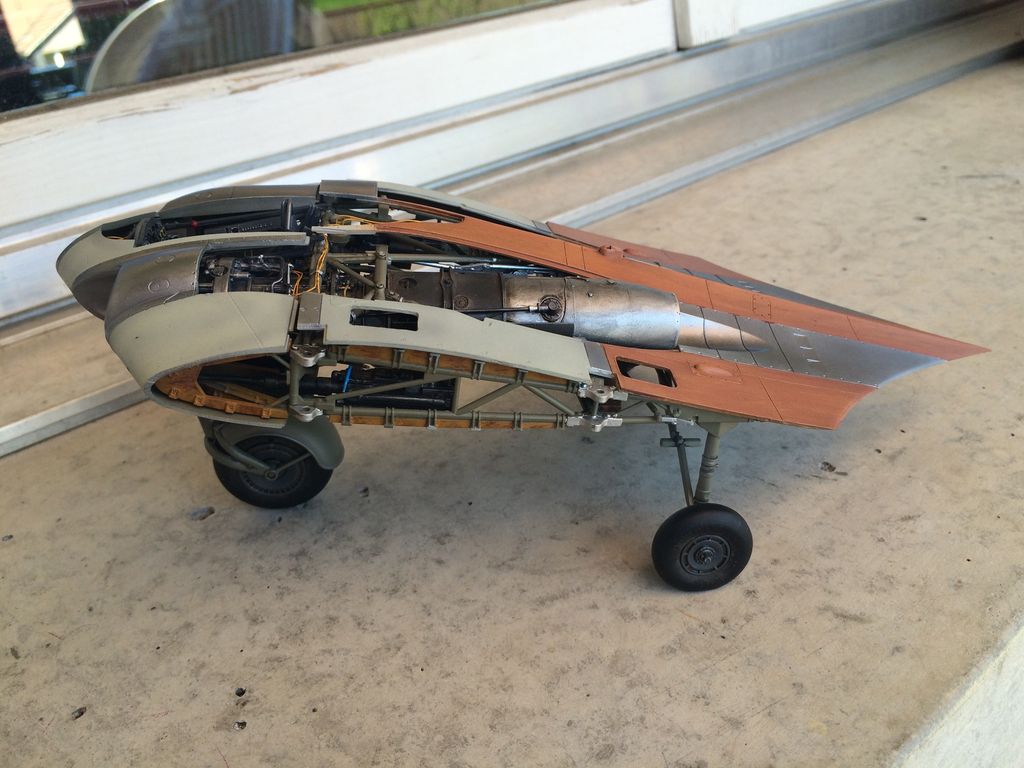
After building in the tanks and start to weather them, I close the wings and start to paint them. It came out to dark and it looks now more like mahagony then plywood! Lol
More and more, I love to work with oils

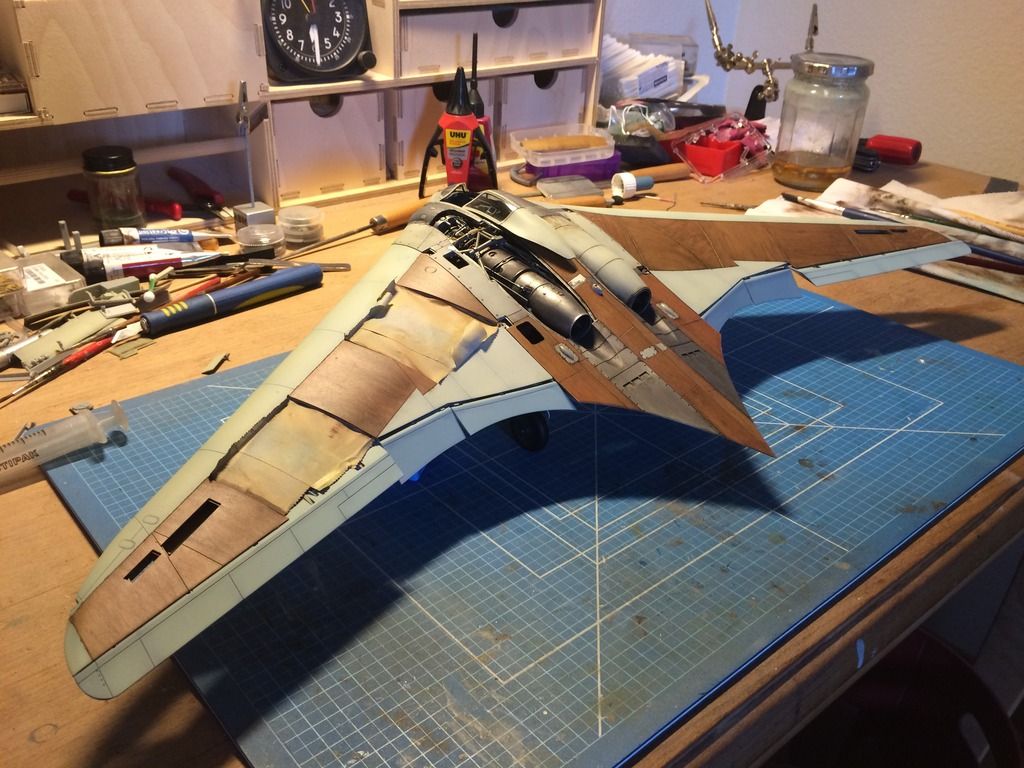
So now let it dry for one week ( I hate that!!) and then the gloss varnish and weathering.
Thanks
Arno
-
3
-
-
Again thanks gentlemen!!
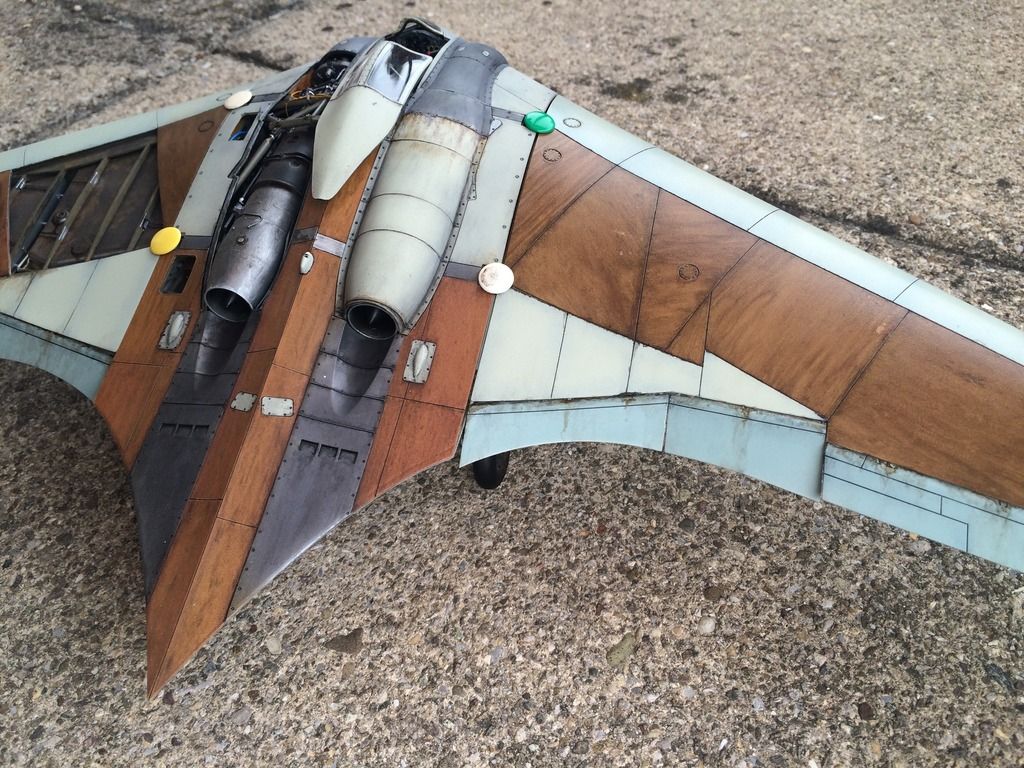
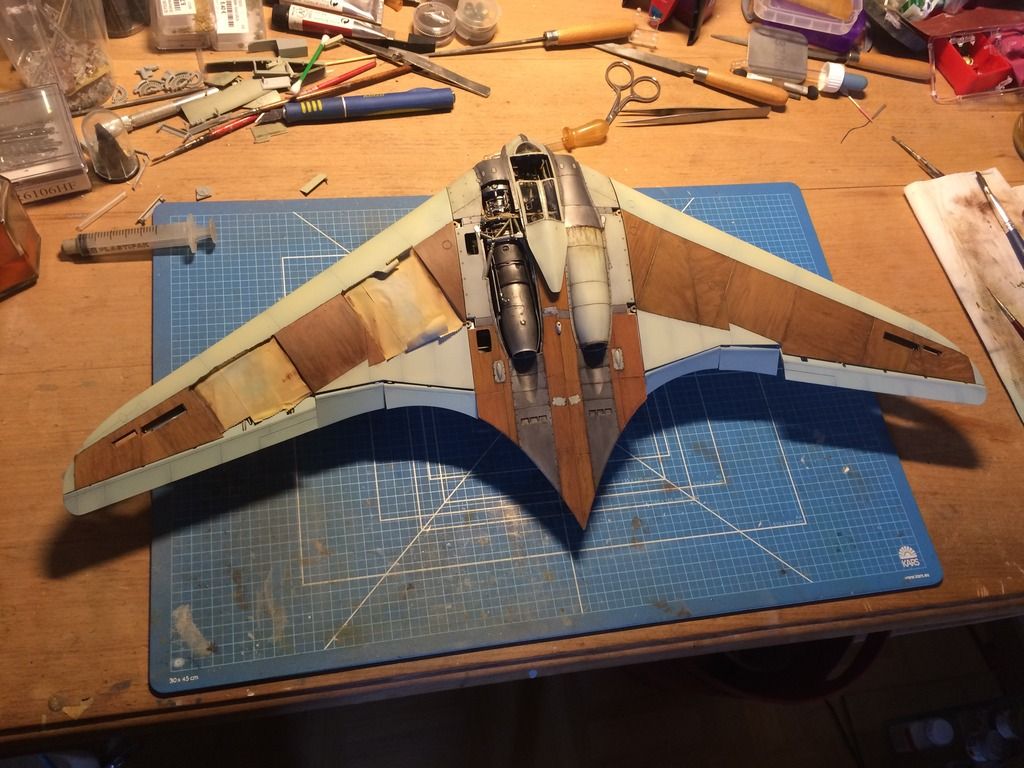
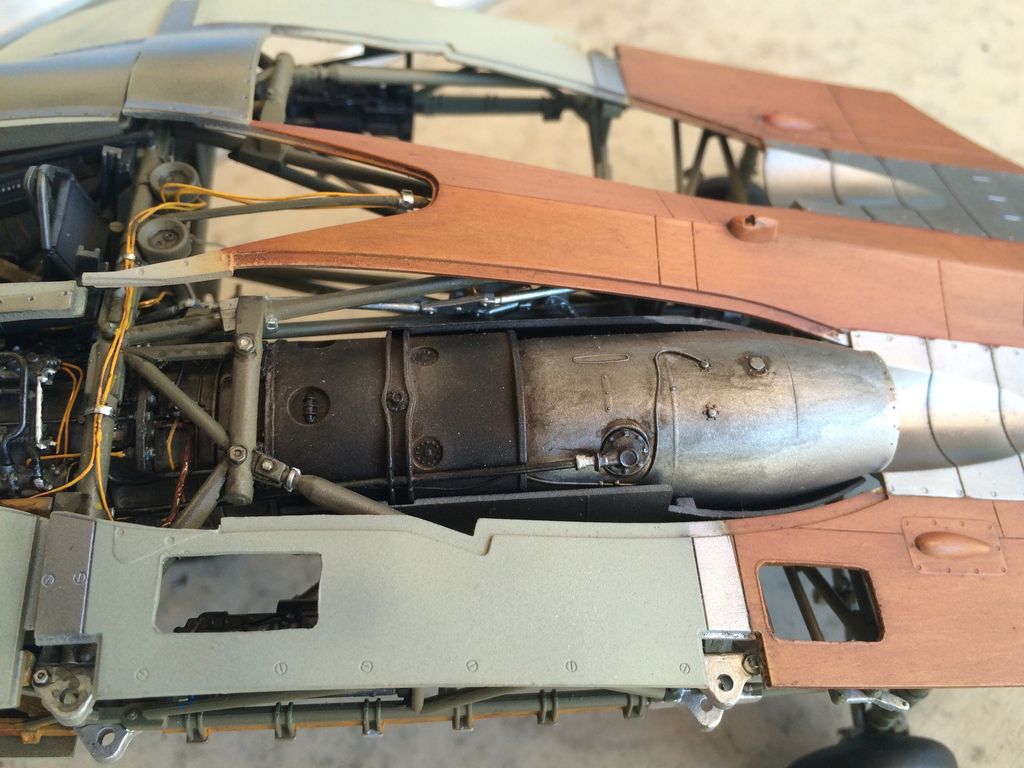
Main frame is nearly finished now. Done the right engine cover, with a little oil running out ( maybe to much). and the cockpit canopy, Look at the quality from that clear parts!!
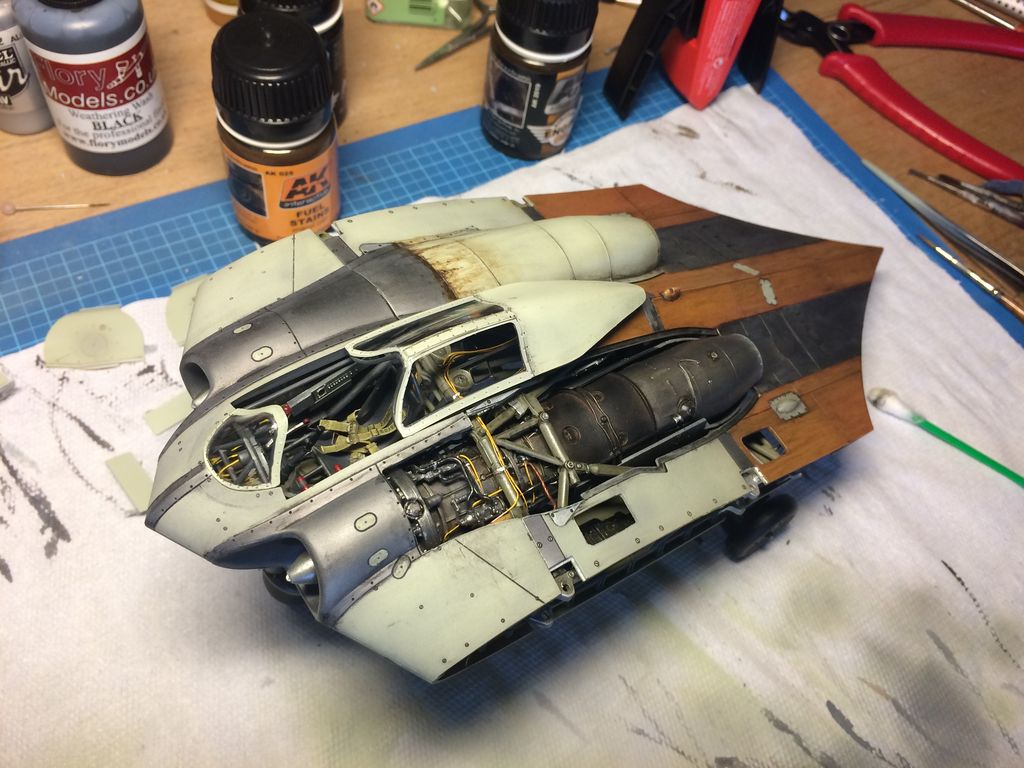
And so lets start with the wings
Thanks Arno
-
6
-
-
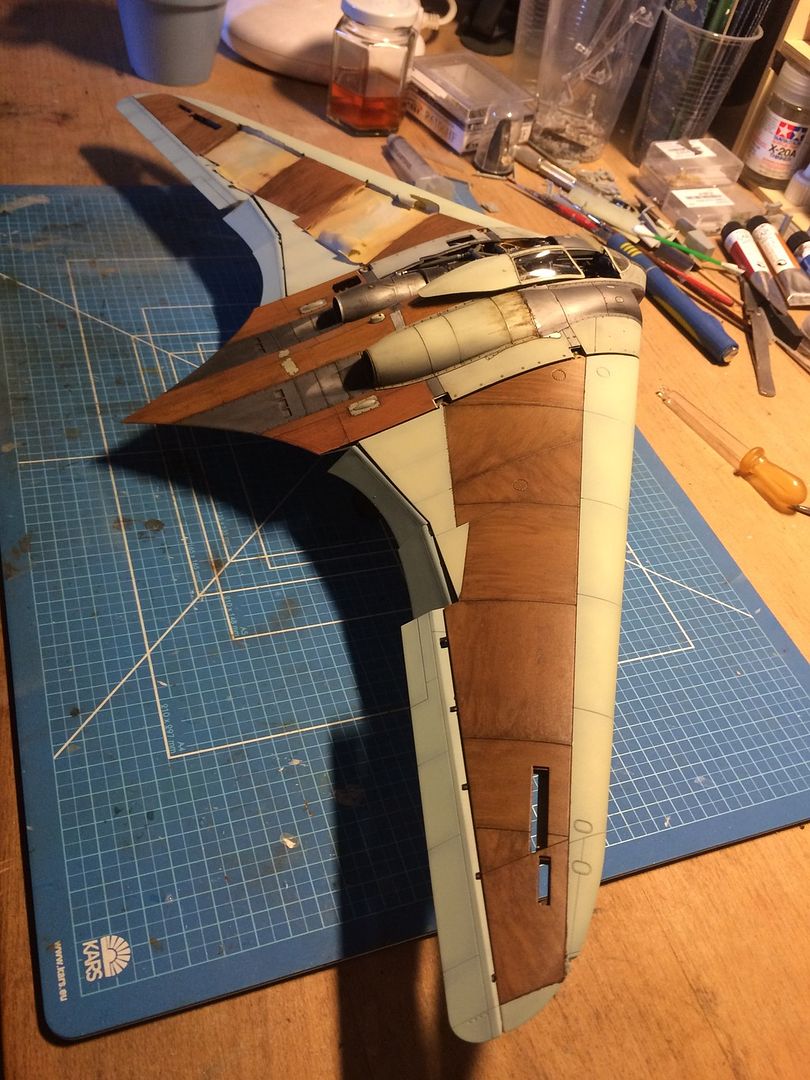
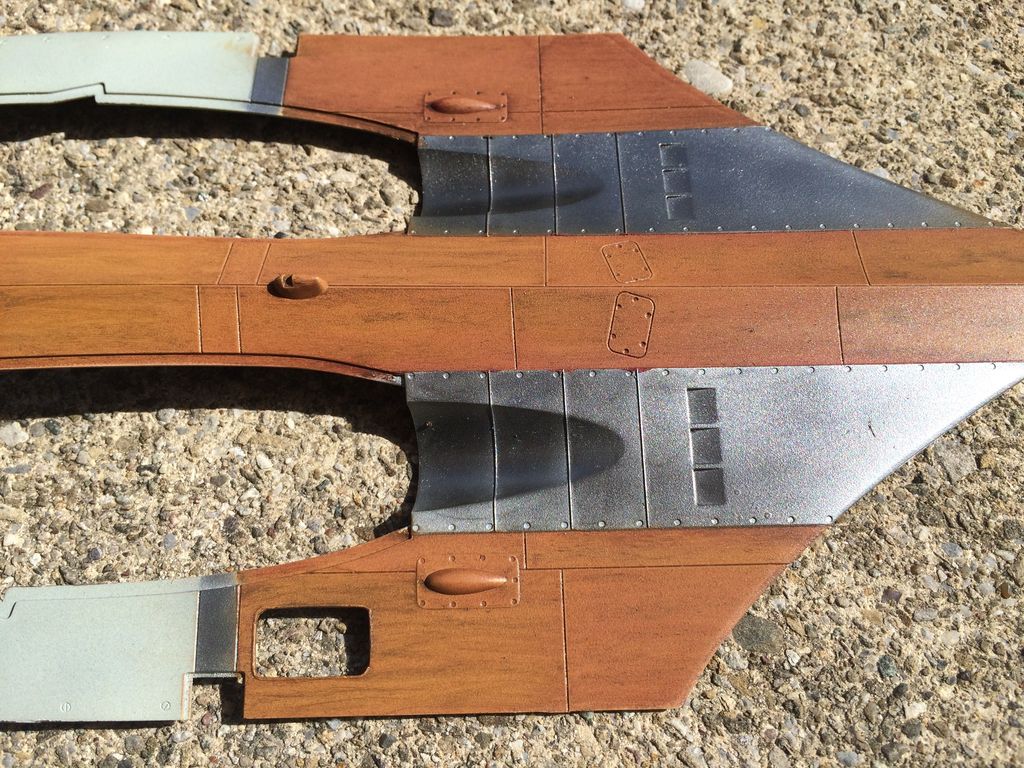
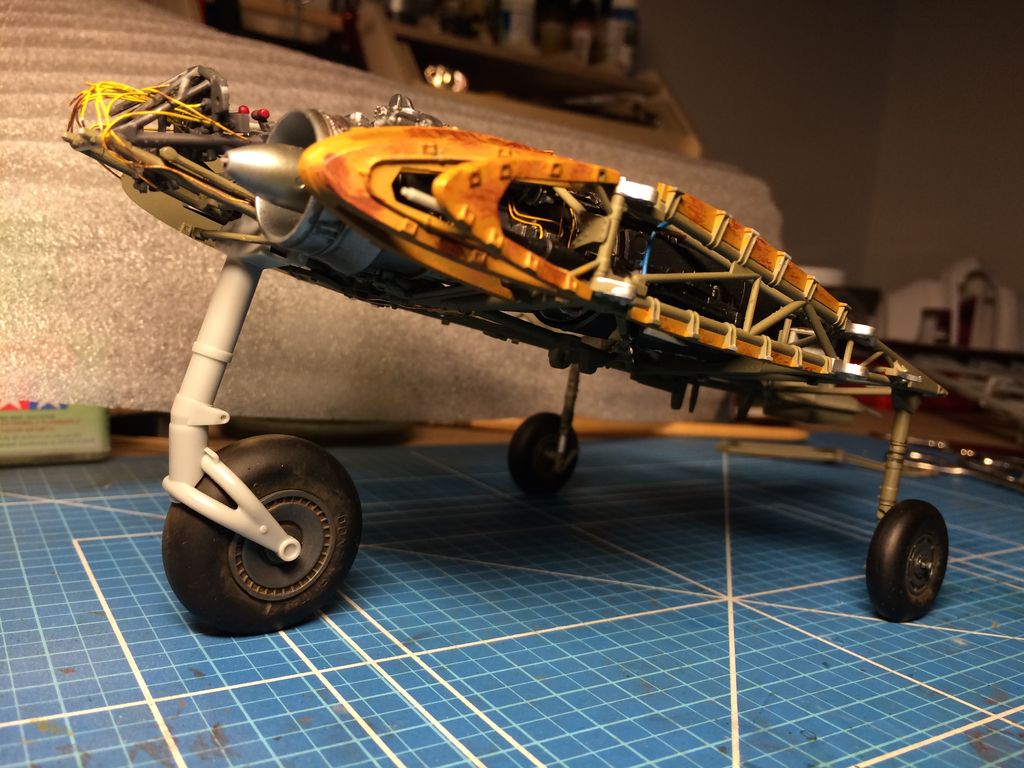
After a week drying time for the oil color's, I sprayed Vallejo Gloss varnish over all and start to make things dirty. Of course with Flory's wash :-) And a few dot's of AK Grease

a few corrections and I think I can live with. Okay, maybe the wood is to dark for plywood.......
Thanks Arno
-
1
-
-
Worked a little more on the wood grain, like it more now.
-
2
-
-
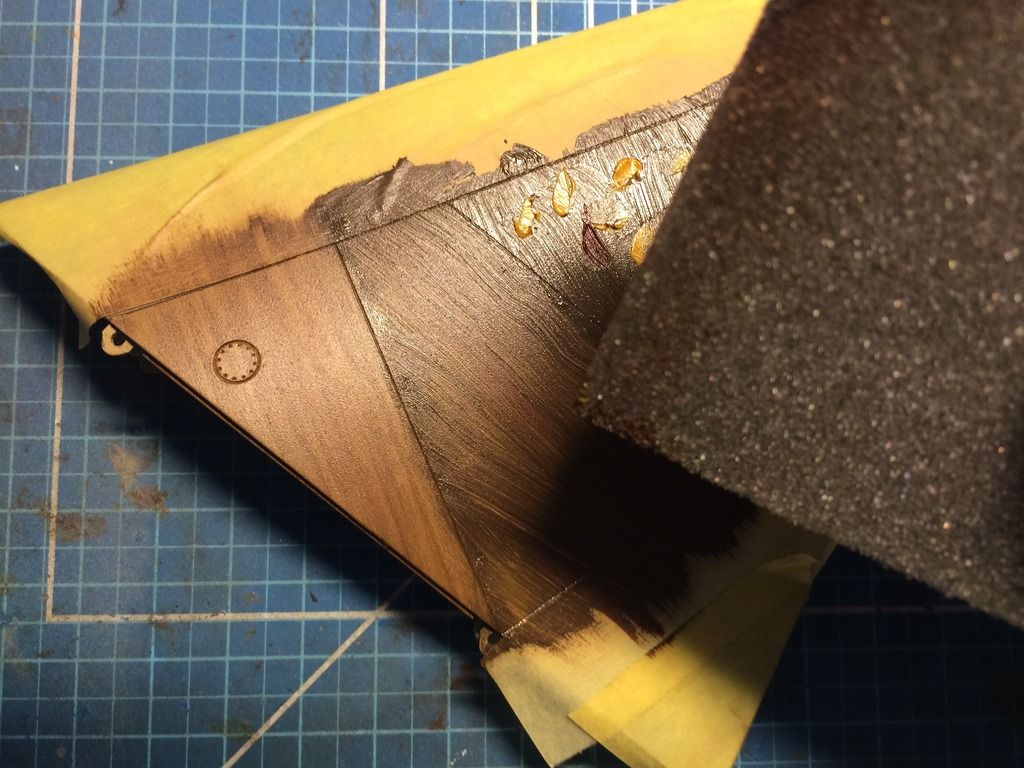
Moment of truth, try to paint wood with oil colors.
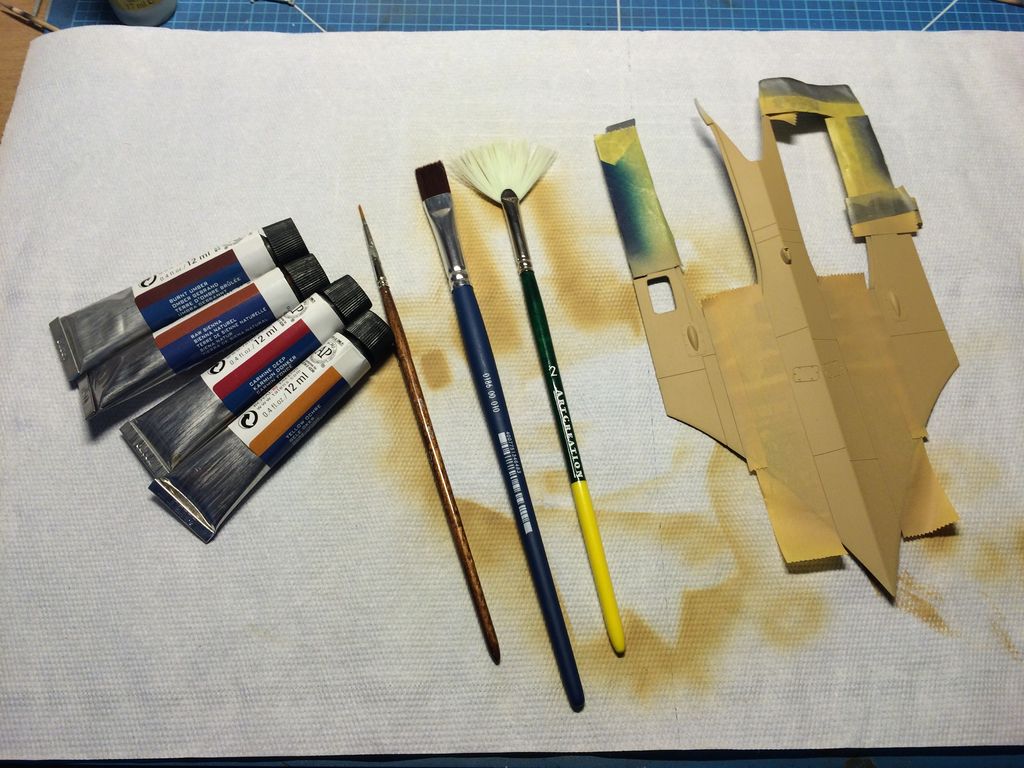
Put on the mix! Lol
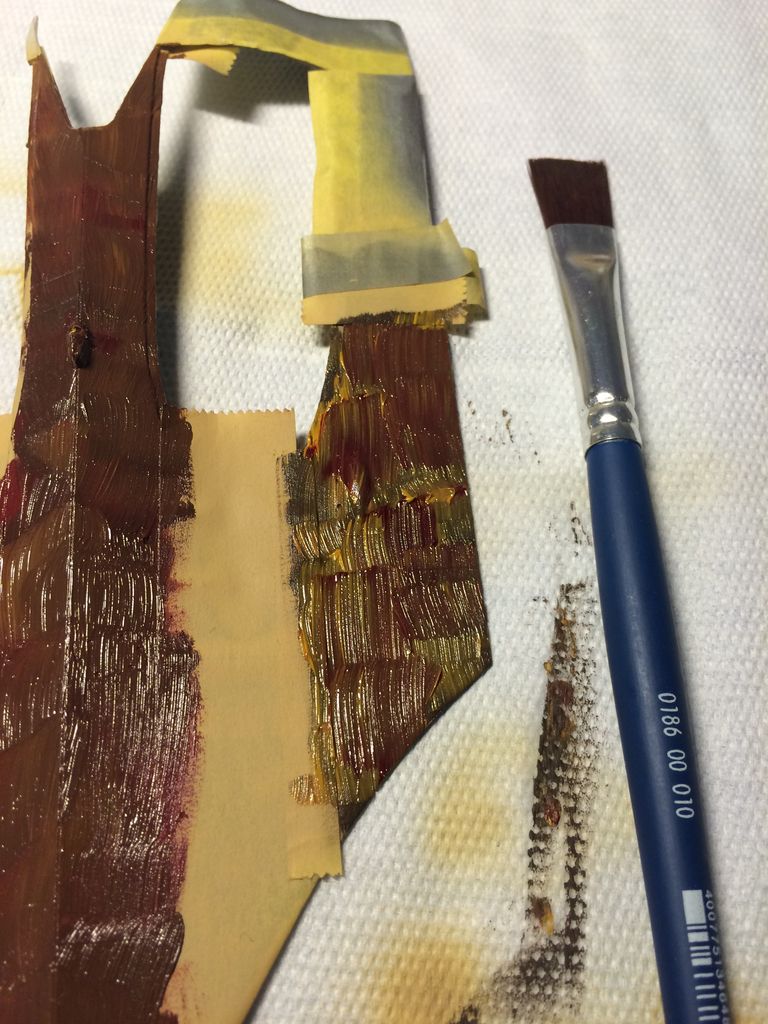
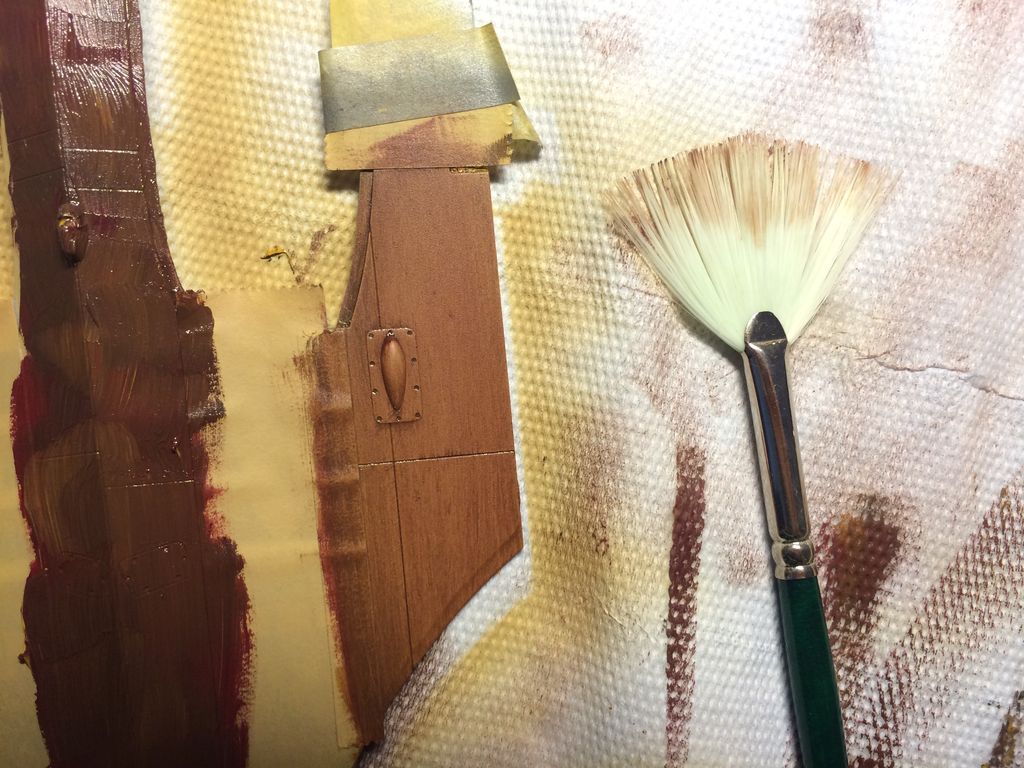
I think it should be lighter and more yellow

Thanks Arno
-
1
-
-
Yea! must also say: Love your painting skills. Making a single color interesting is for me allways a nightmare, but you.......
Arno
-
Great work! Love the camo!!
Arno
-
Weekend!!!! So I build the gear:
As I have with the painting anyway a artistic licence, I decided to paint the not metal parts in RLM 84.
And my hot loved masking, for the metal part's
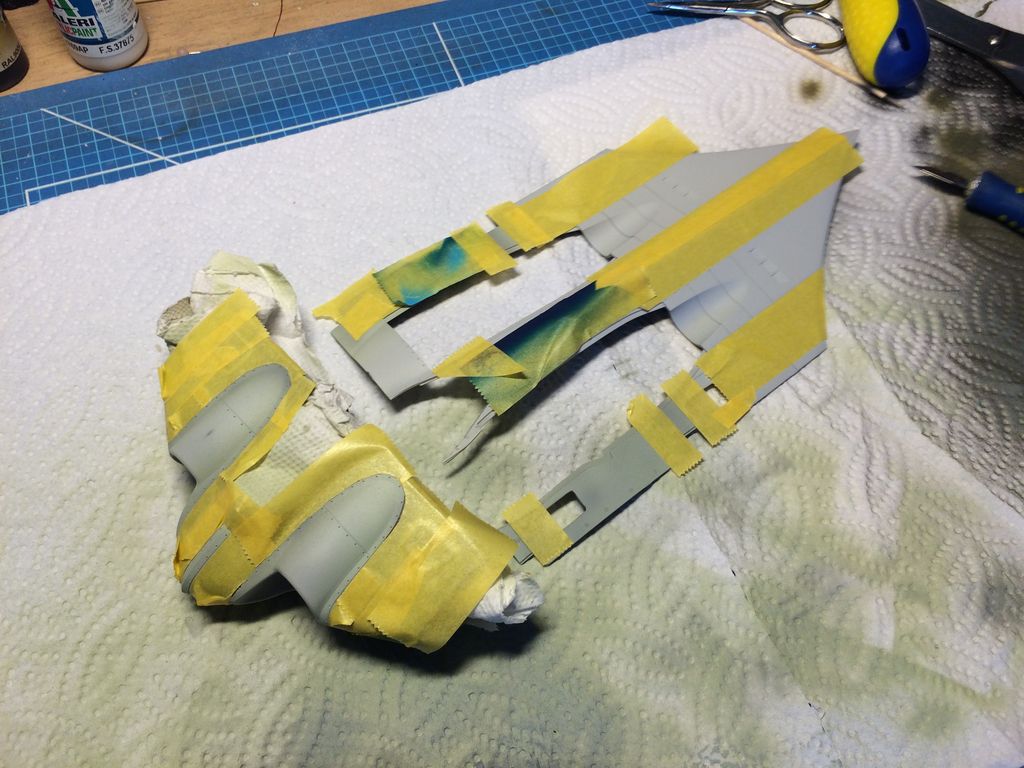
On the right side it's sprayed with Vallejo Steel Metallic and then on the left it's added Uschi van der Rosten Metallic powder's.
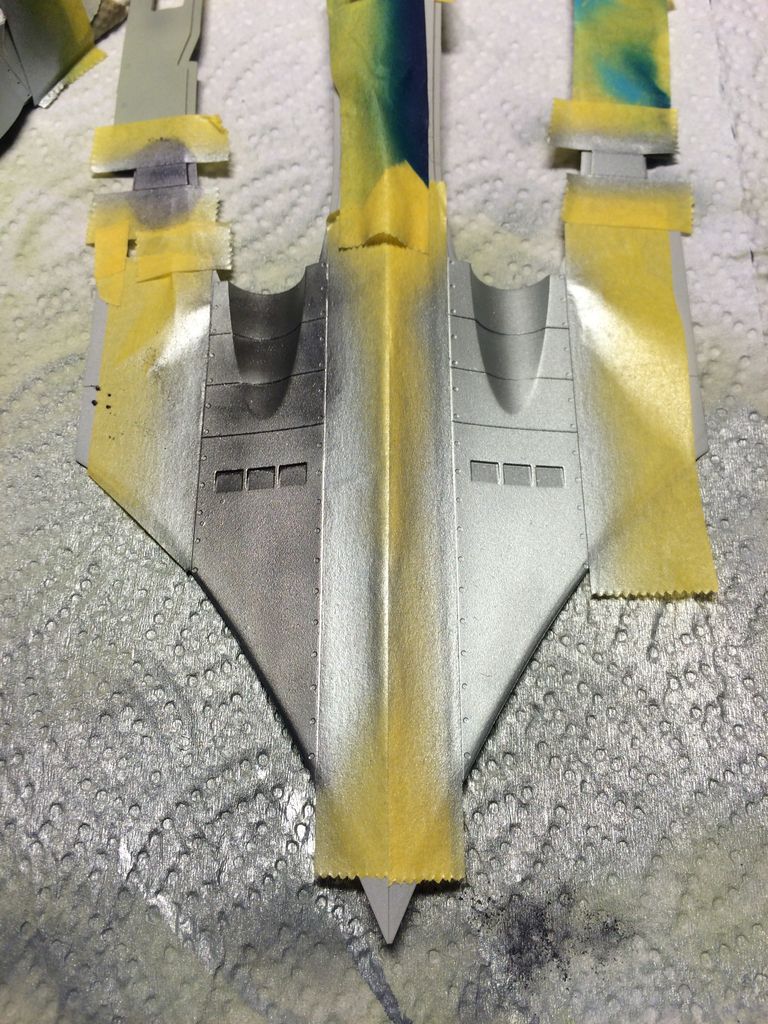
So the moment of truth, peeling of the masking tape

Of course the weathering is missing, but I think I like the effect.
Arno
-
2
-
-
WOW Jeroen, Love your metal parts, they looks so real!!!
Arno
-
1
-
-
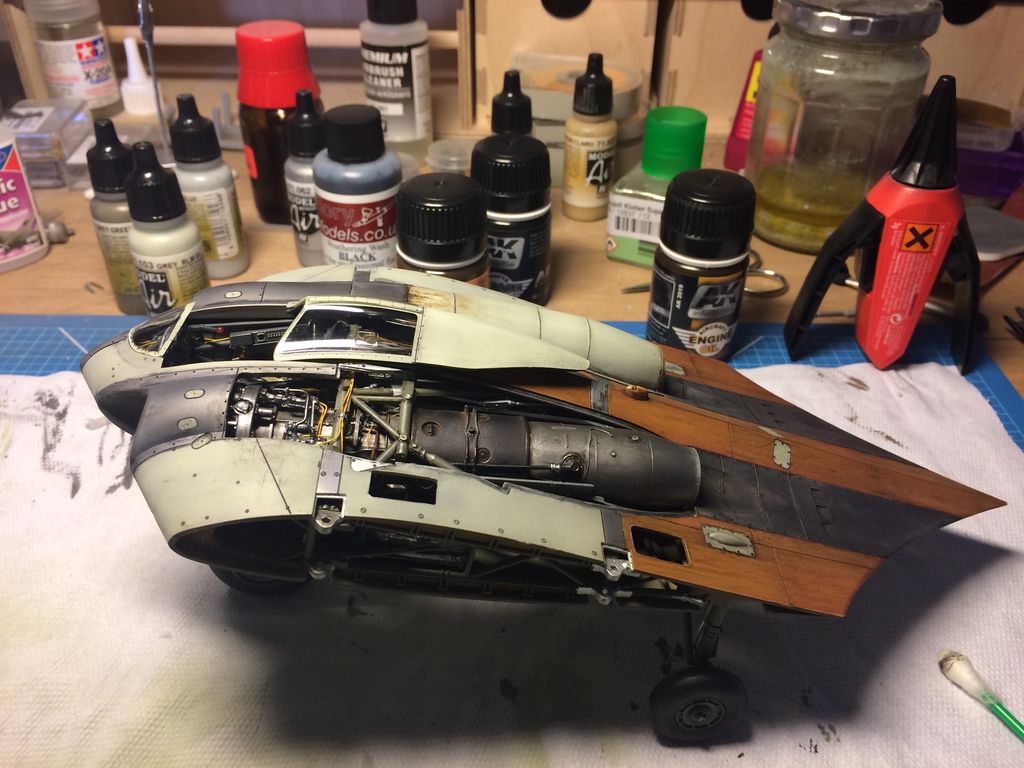
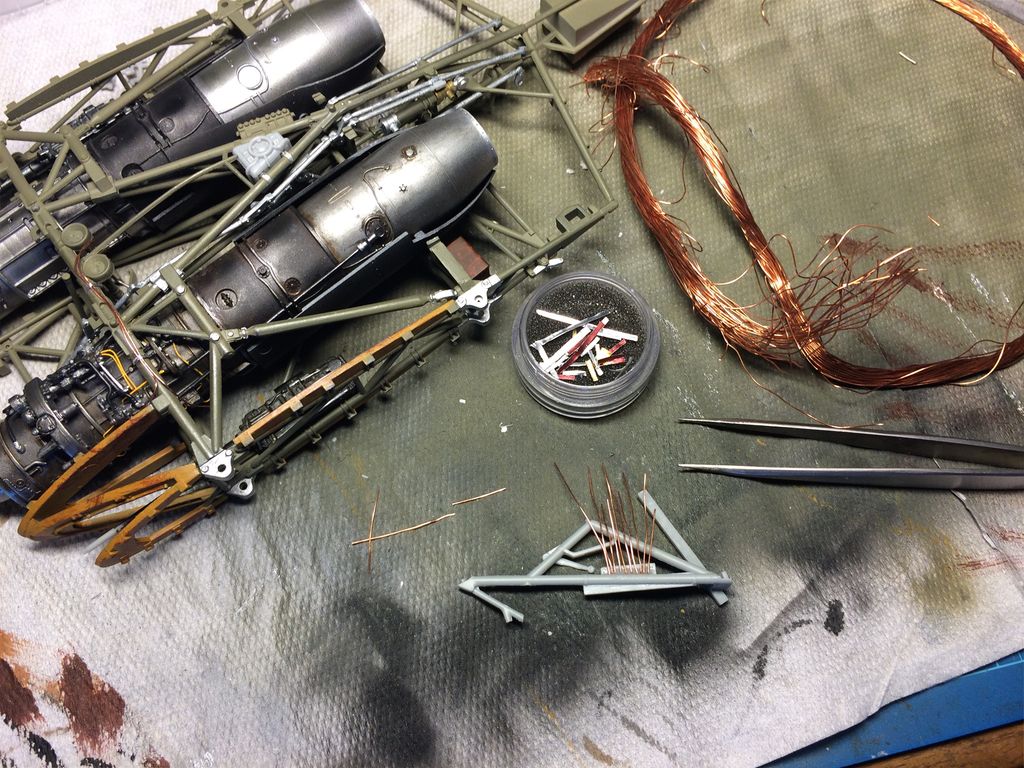
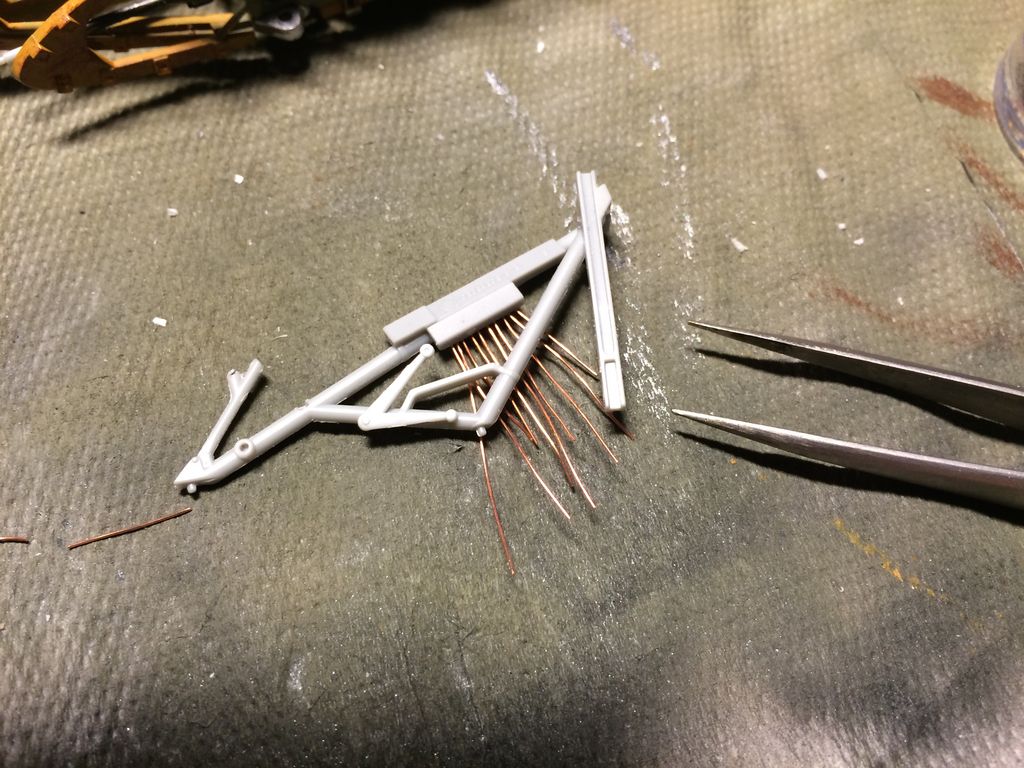
More wiring the cockpit, beside preparing our move to another apartment ( I hate moving!!!!)
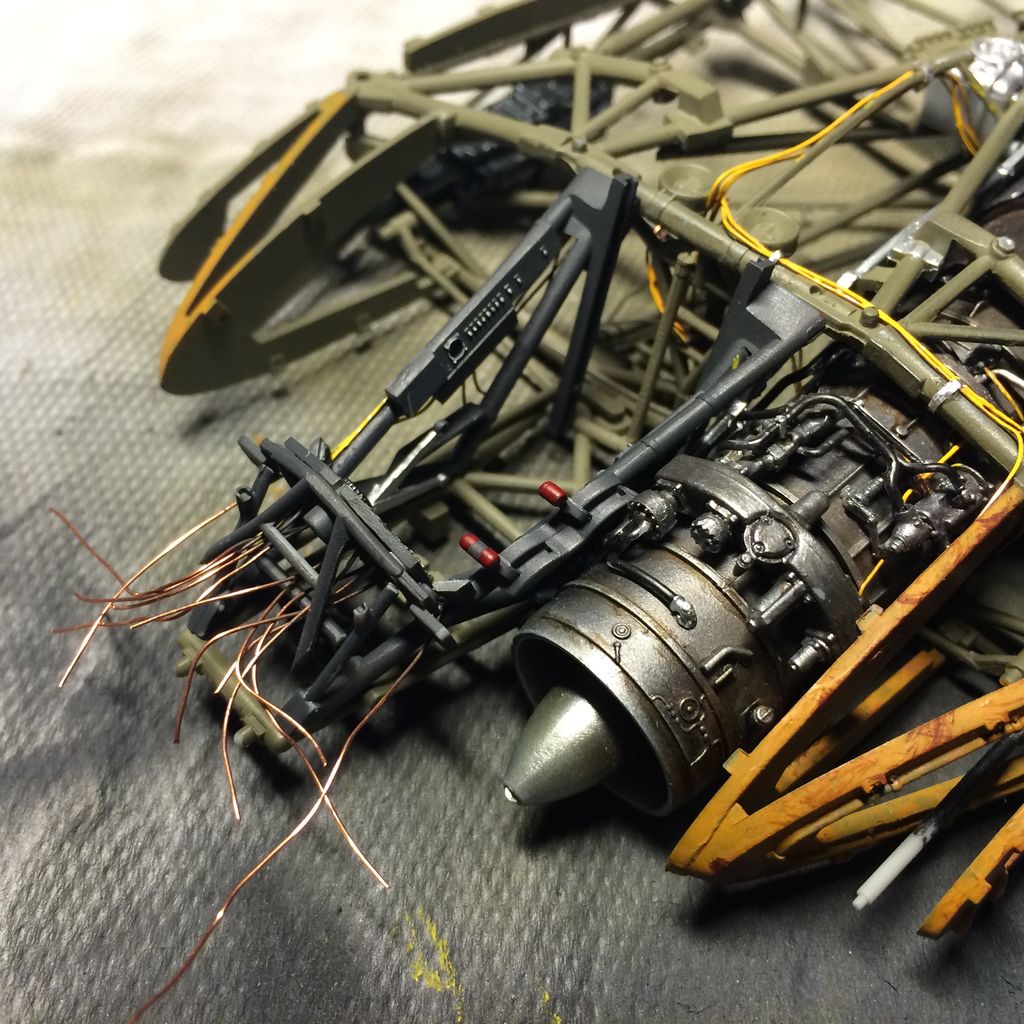
I know it looks chaotic and the german shop chief would kick me, next time I will try it better ;-)

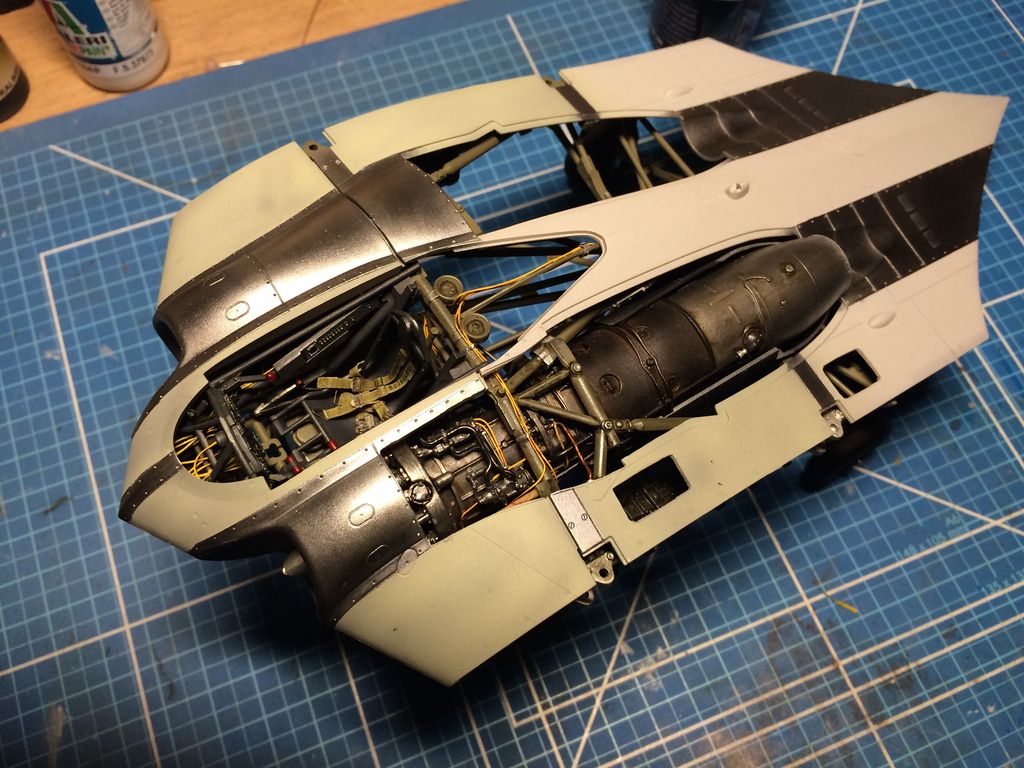
Start priming the fuselage
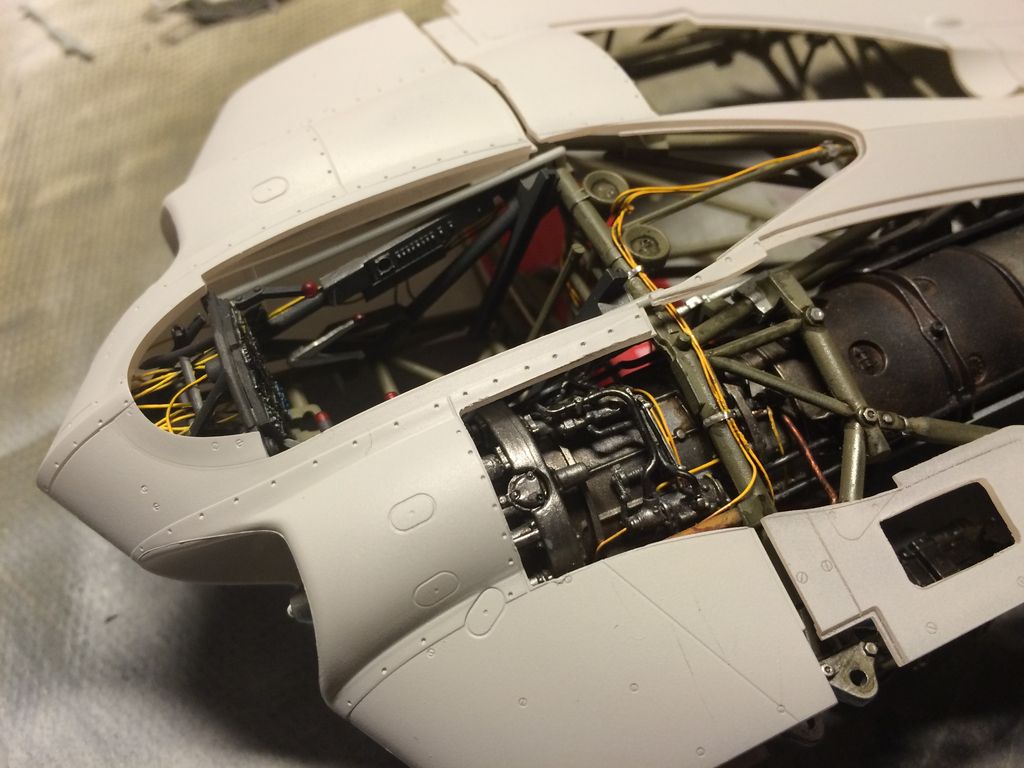
Oh I love those HGW belts, if they are would be just finished! Lol
THX Arno
-
4
-
-
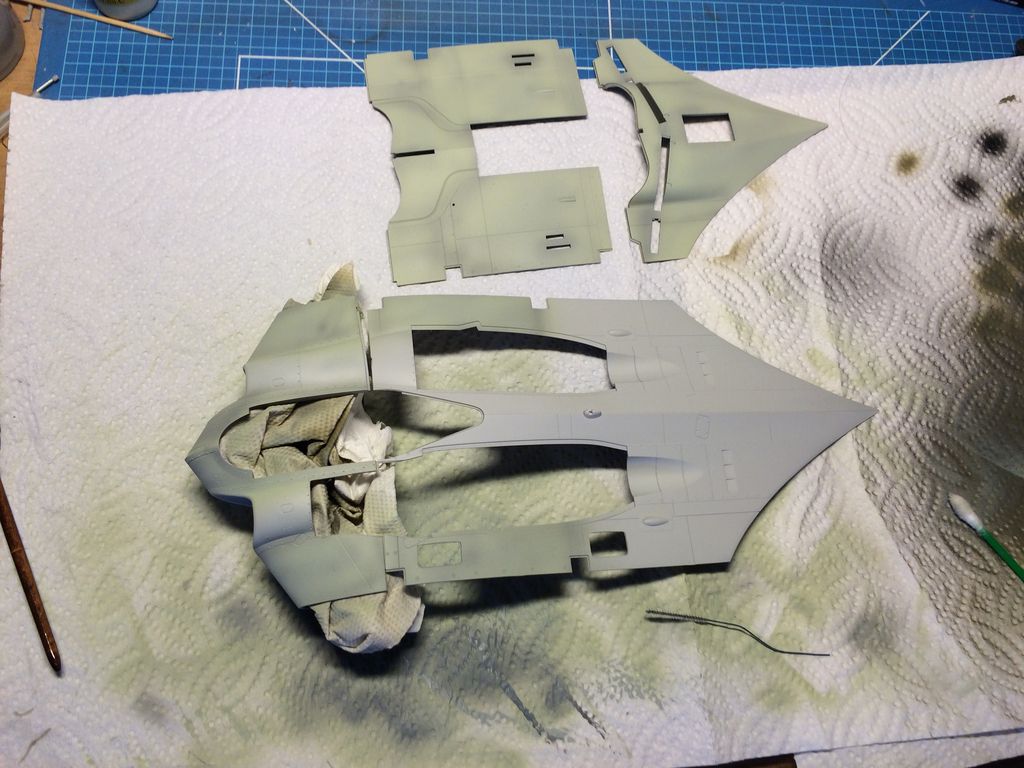
Was a little busy the last time, but finally I found my bench! Lol
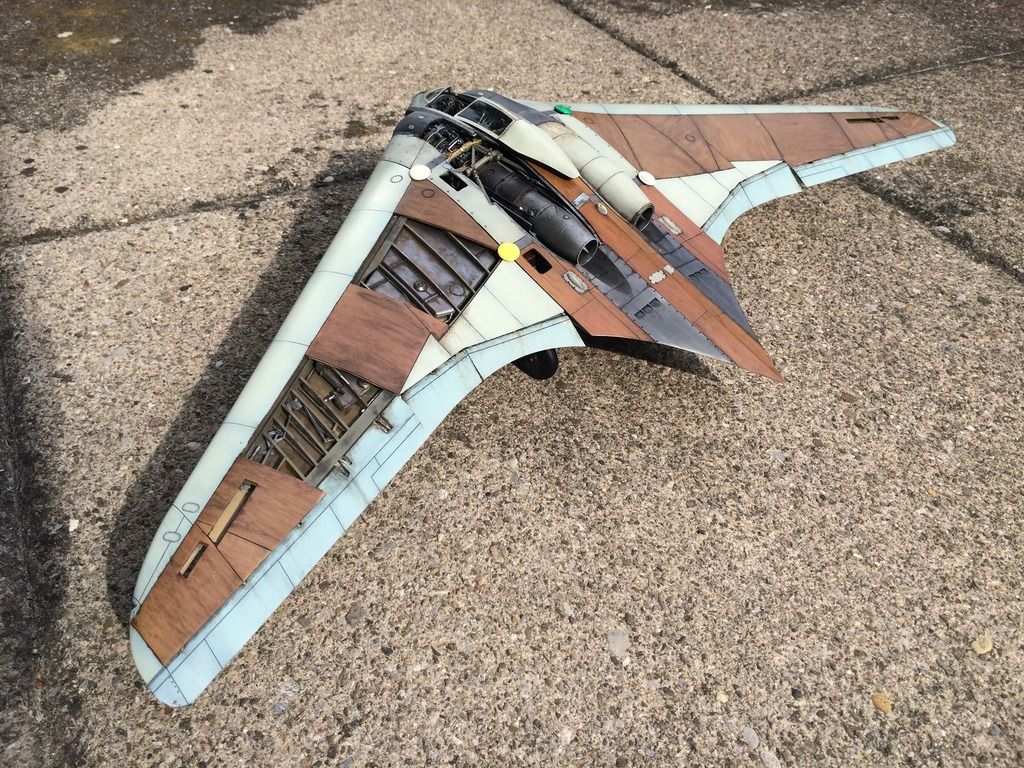
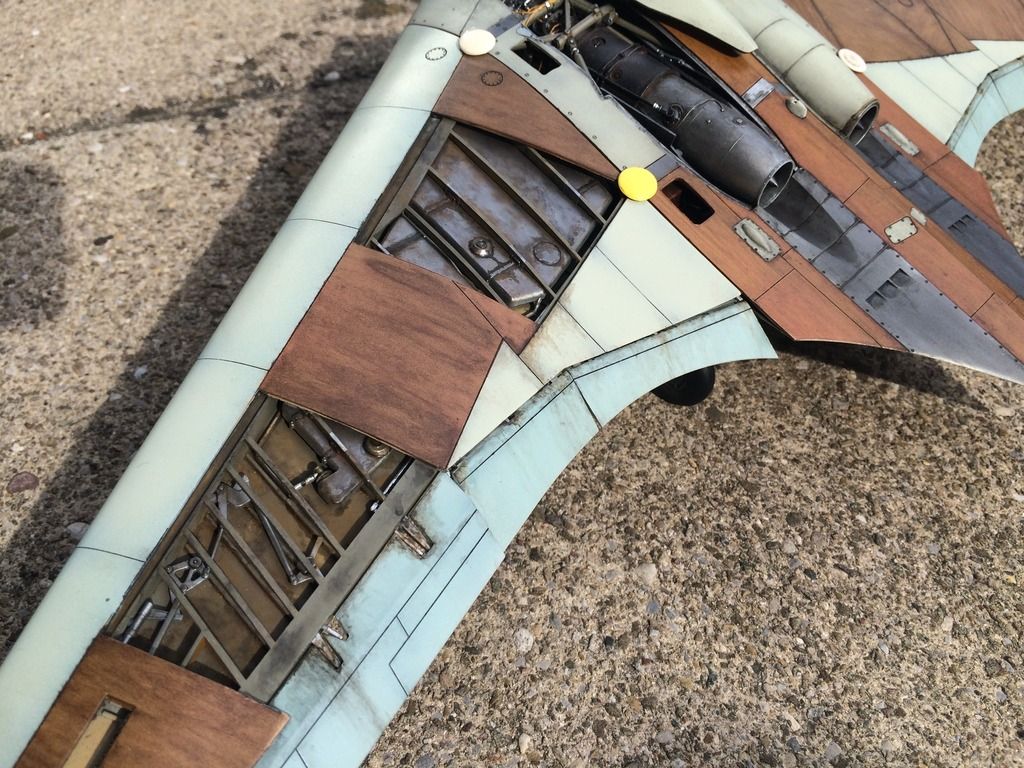
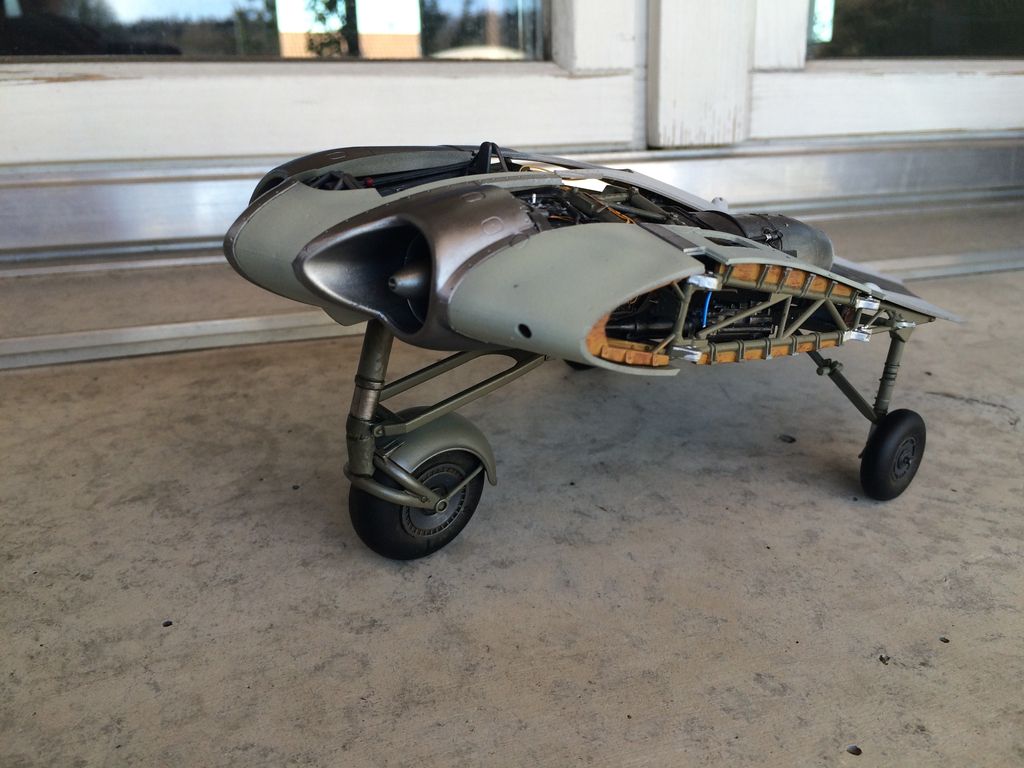
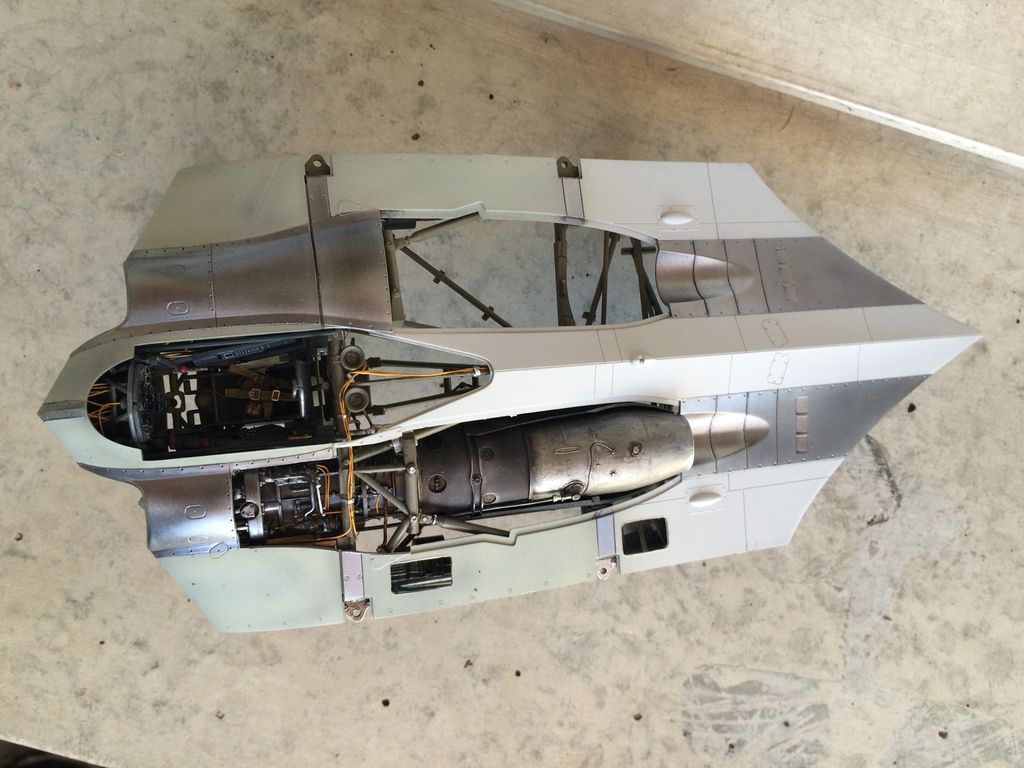
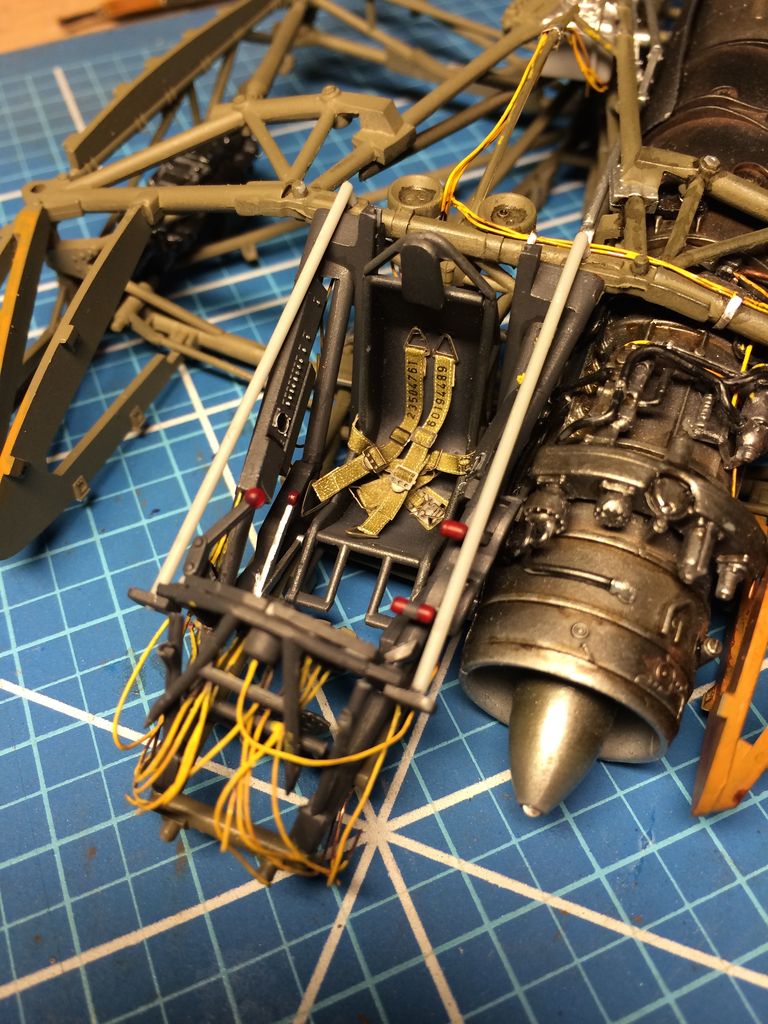
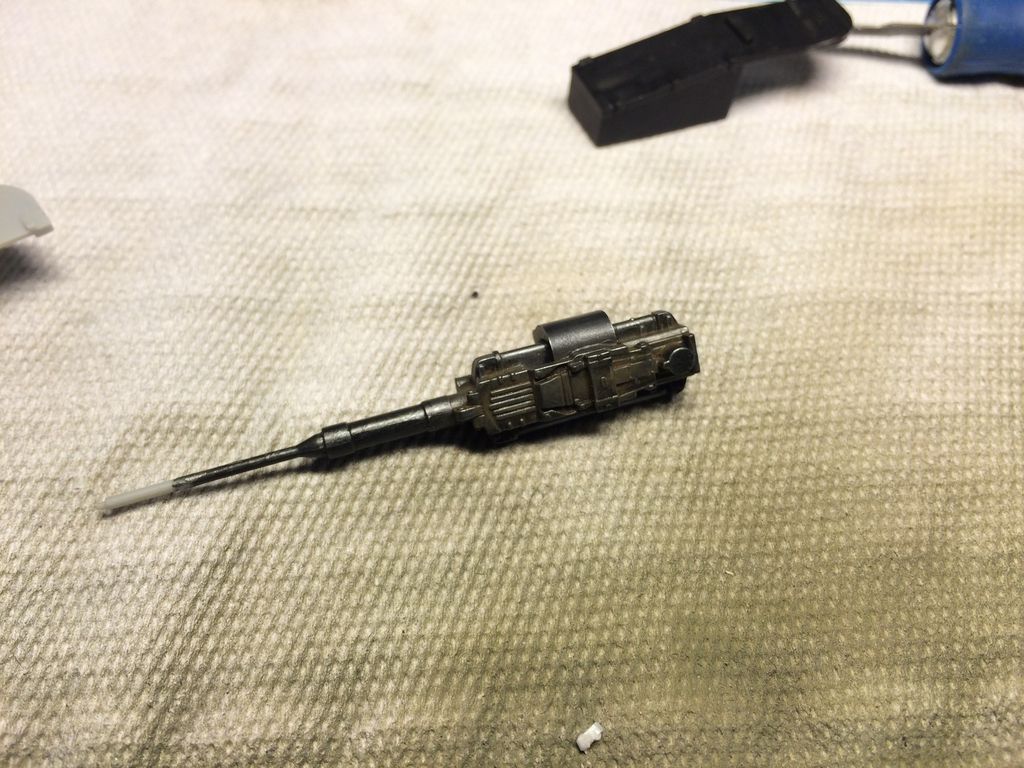
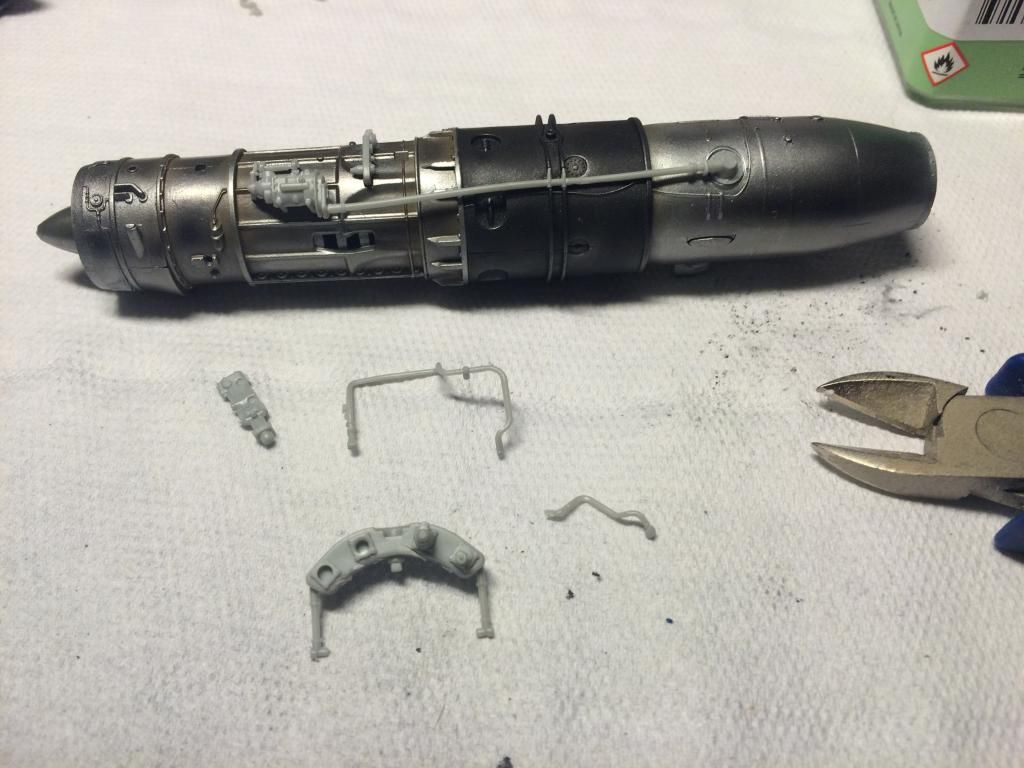
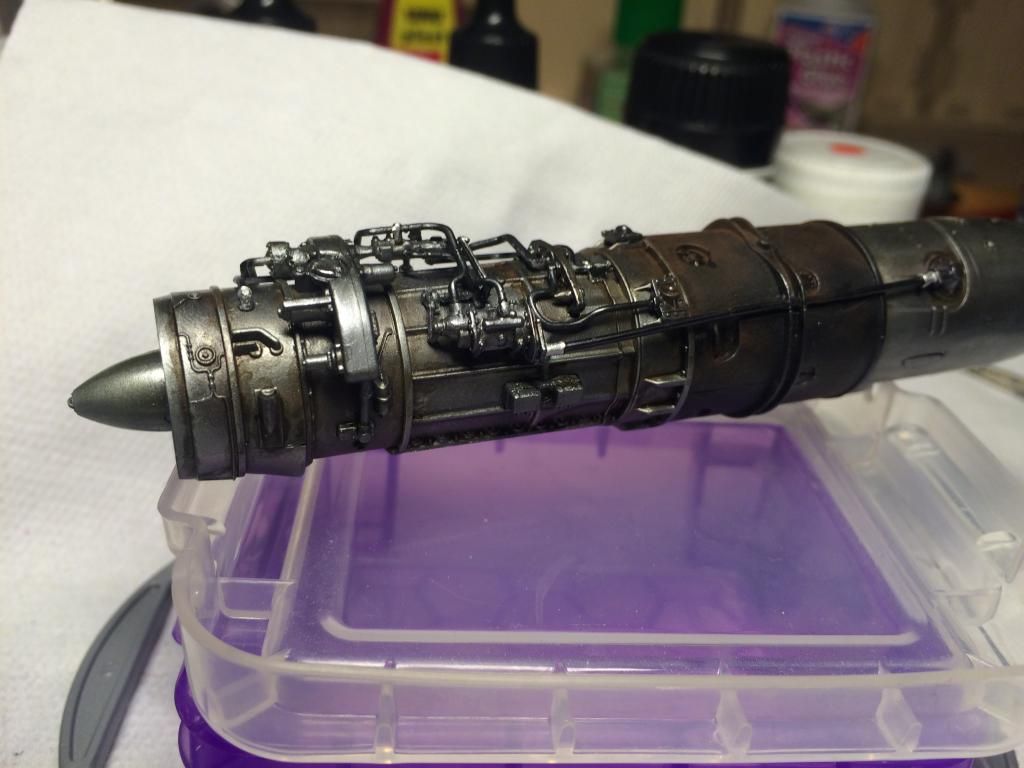
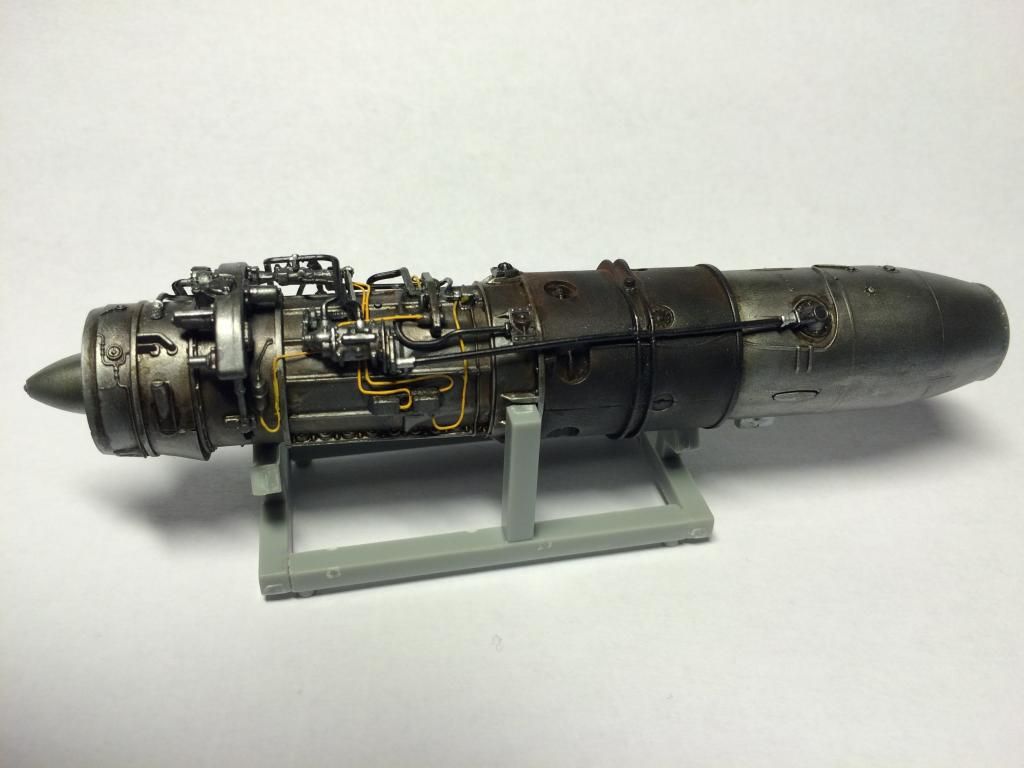
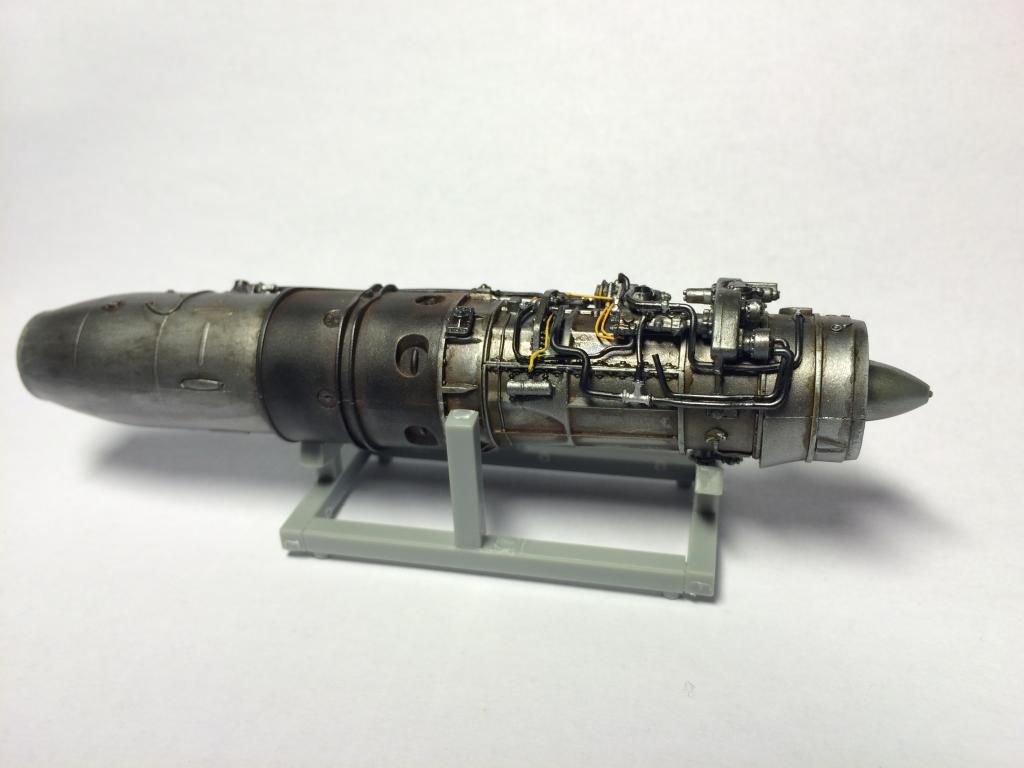
Finished the frame, not much to say then: first I thought Oh my god!!! That will be complicated. But the fit and the way the parts belong together, I must say: it was easy. I painted the MK 103 gun and made a few more cuts over the left engine. I decided to let the right engine closed, so that you can see the cool style from that bird.
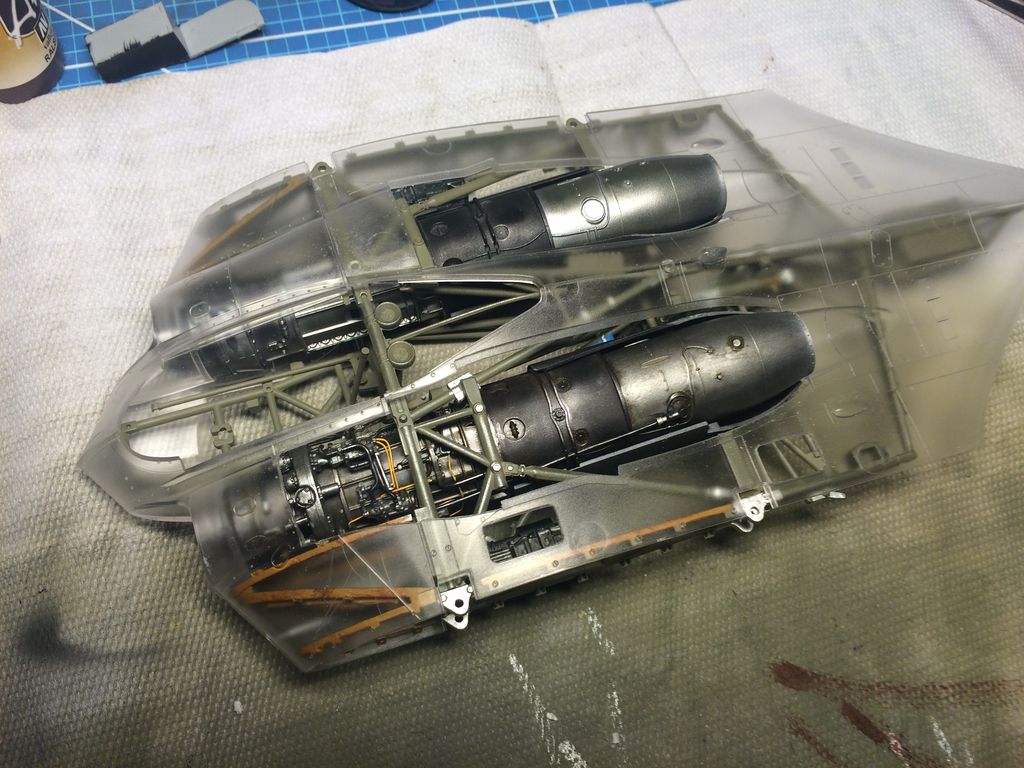
May some of you remember my He 162 with the open engine, I love to make some wiring. So I tried, with artist freedom to replicate the original cable trees.
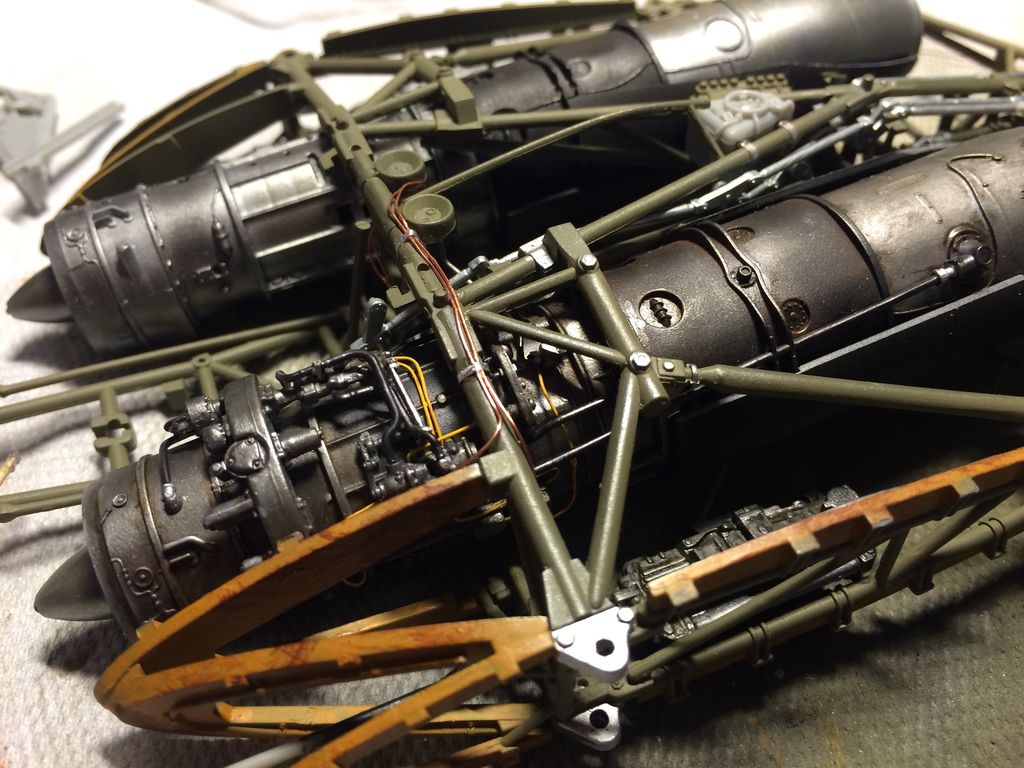
The right cockpit side with the fuse box
THX Arno
-
2
-
-
No. the stand is included.
-
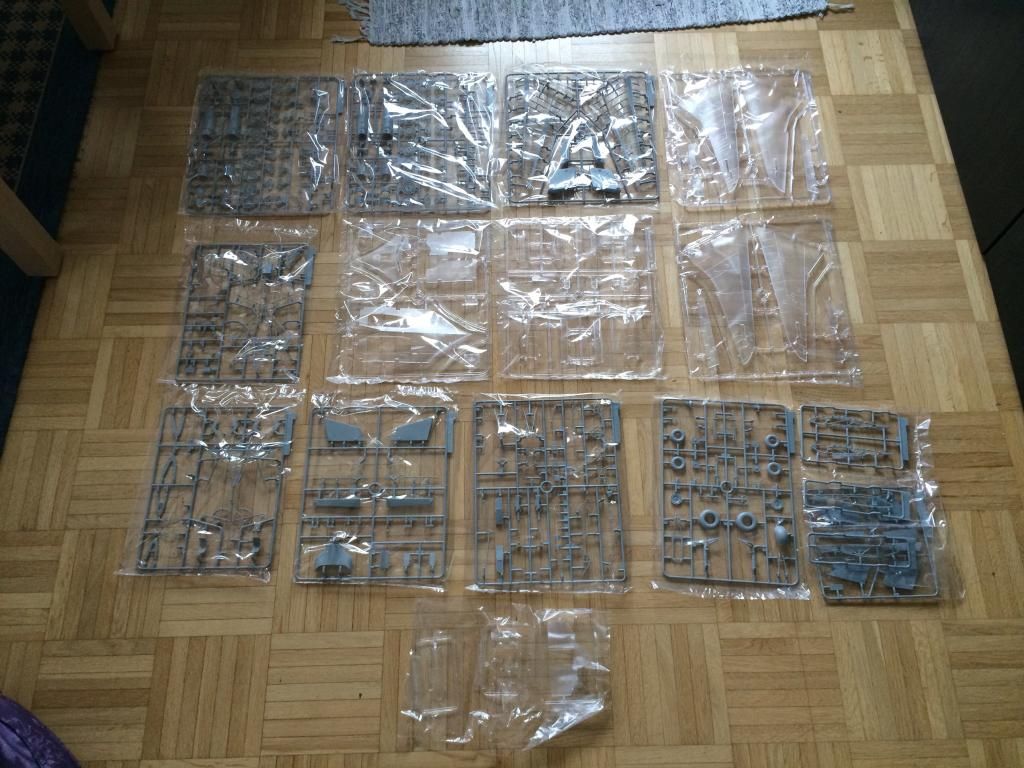
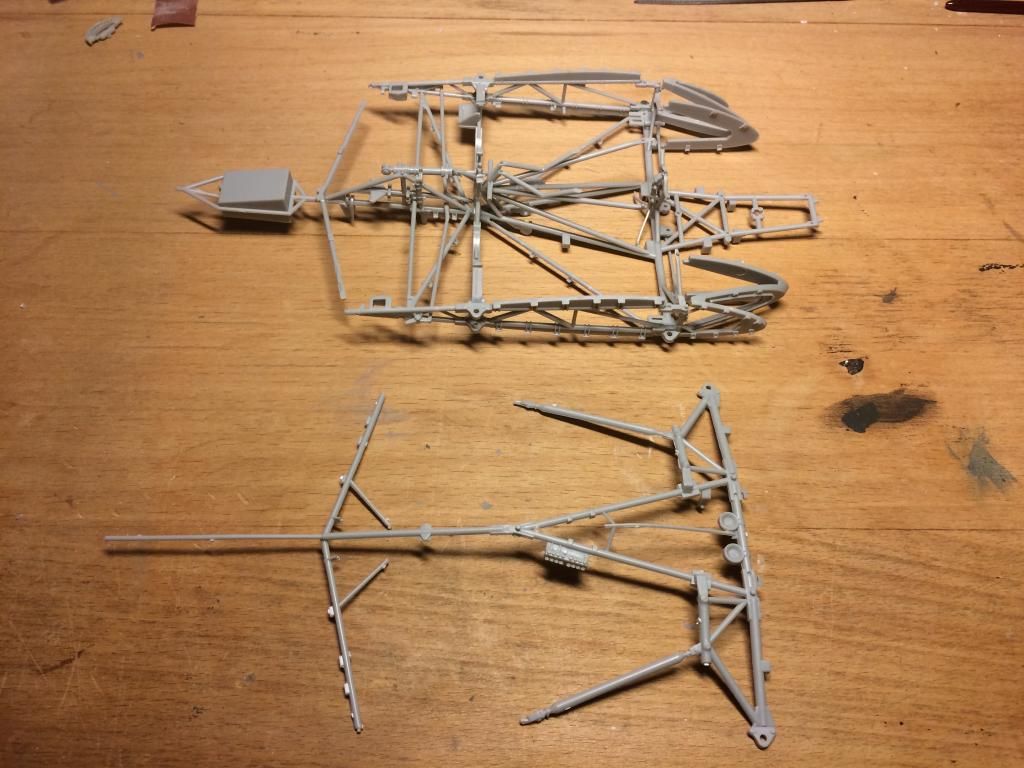
Maybe boring, but I also start the 1/32 Ho 229
 Most importent for me: it will not a crashed one! Lol
Ok let's start:
Our 50 sprues of grey:
beginning with the engines and my new metal powders from Uschi van der Rosten
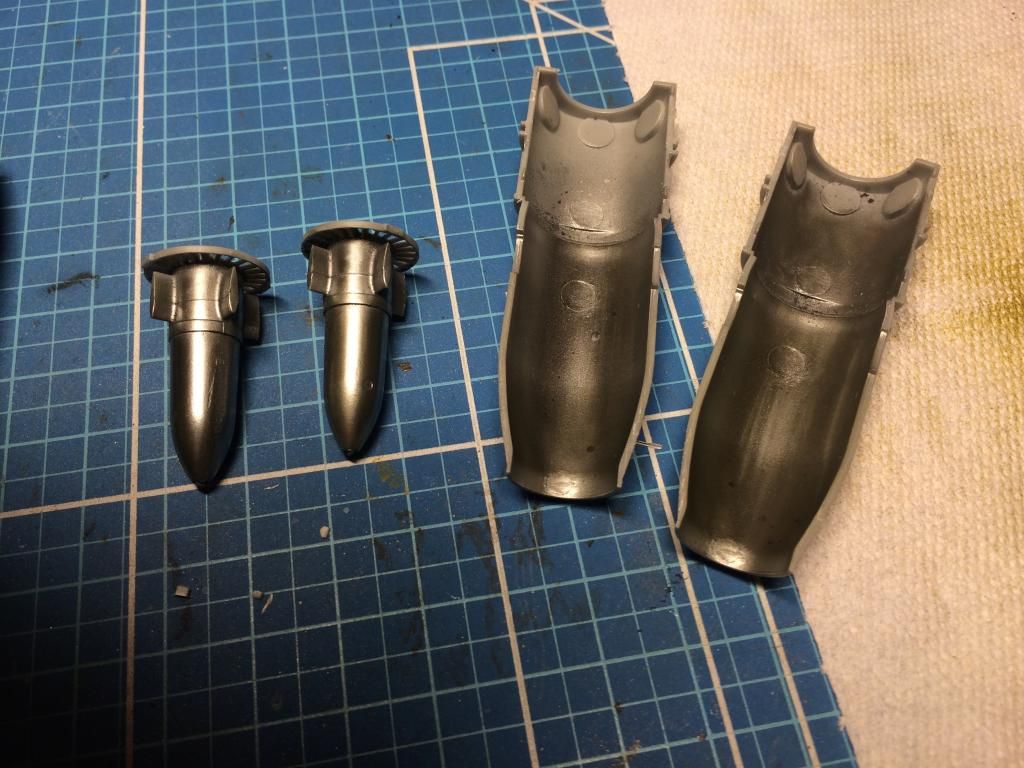
Building the frame. Must say that this kit is just a joy to build, easy and the fit is perfect!
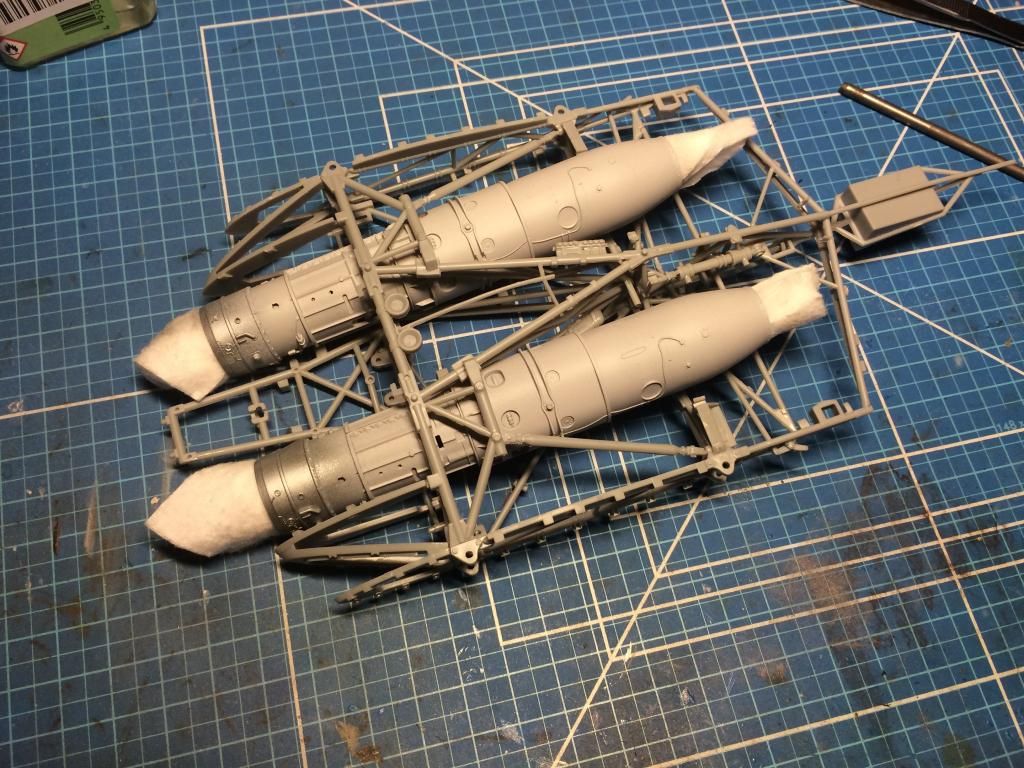
Also the engine: first Vallejo silver metallic and then Metallic P, love the effect of the powder.

The tubes delivered with the kit are just great and amazing how fine ZM is able to mould them. So great care must be taken when cutting them out.
After gluing the tubes, I weathered the hole stuff with AK Grease and Vallejo pigments:
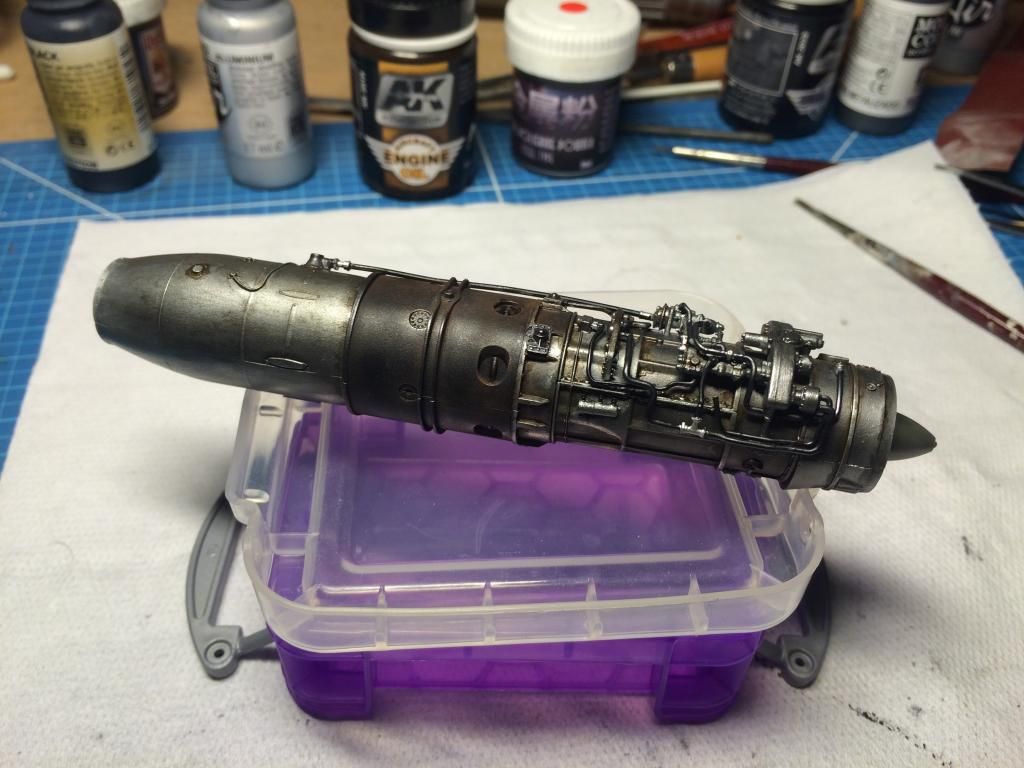
Think that a little wire ad interest.
Arno
-
4
-
-
Cool!! great start!!! Will follow this with great interest, because I'm building right now the same model :-)
Arno
-
Yea Paulster, you are right!! But next time I think I will try something bigger then 1/48. Lol
-
Great love also the weathering, just perfect!
Arno
-
I stop modelling and knitting!!!!!!! It's so great and inspiring to see your work. Thanks!!!!!!!
Arno
-
1
-
-
Oh cool I have this set also and I bought ( the dollar is so cheap now ) from Eduard the cockpit and engine. So follow you for shure.
Arno
-
Your beautiful work makes me to try one also!! Have to learn to paint wood! Congrats!!!!
1/32 Wingnut Wings Albatros D.Va (OAW)
in LSM 1/35 and Larger Work In Progress
Posted
Great start! I have the same model in my stash and will follow your build with interest. Keep on your great work!!
Arno