


beaz
-
Posts
73 -
Joined
-
Last visited
Content Type
Profiles
Forums
Events
Gallery
Posts posted by beaz
-
-
A perfectly lovely build, as always. The Nizam of Hyderabad himself would no doubt have found himself very pleased by your result!
-
 1
1
-
-
Out of the box, with the exception of the decals, some of which I'll be replacing from EagleCals' "Birdcage Corsairs: Part 2" set:
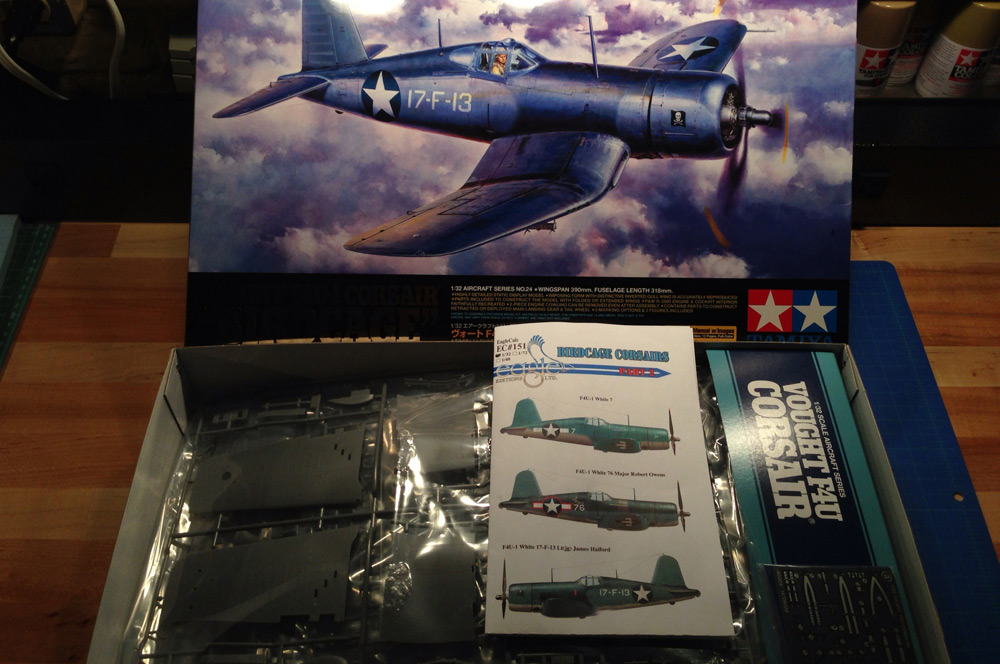
The current plan is a wings-down, wheels-up, in-flight rendition using the provided stand. Thinking now about whether or not it will be piloted and having trouble waiting until August 1st to get started...
-
2
-
-
Hey Dave!
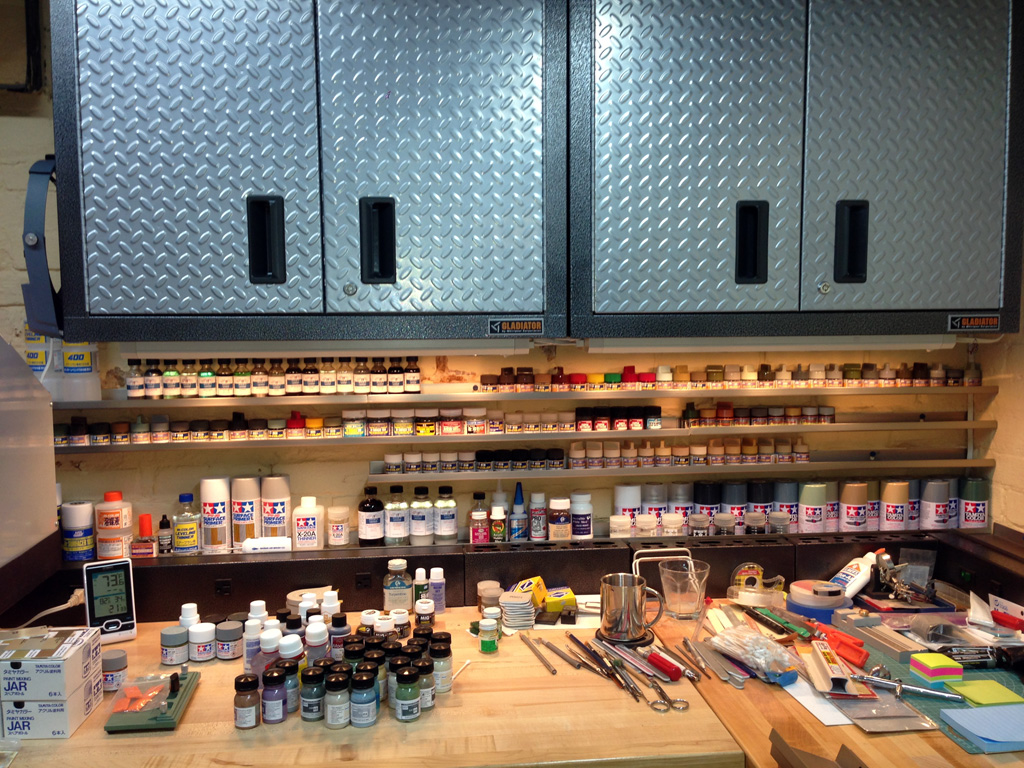
Well, summer in my hemisphere means less time for building in the shop, but I am addressing a frustrating lack of space and organization that was limiting me to one project at a time there. I've been installing some new steel shelves around the perimeter of my bench in order to get all of the bottles, tools, tape rolls, etc. out from underneath my elbows while still keeping everything close enough to reach:
I've finished with the back wall and now I'm working on the side bench, where I'm also working to add some wider shelving higher up along with some under-cabinet lighting for this second project space:
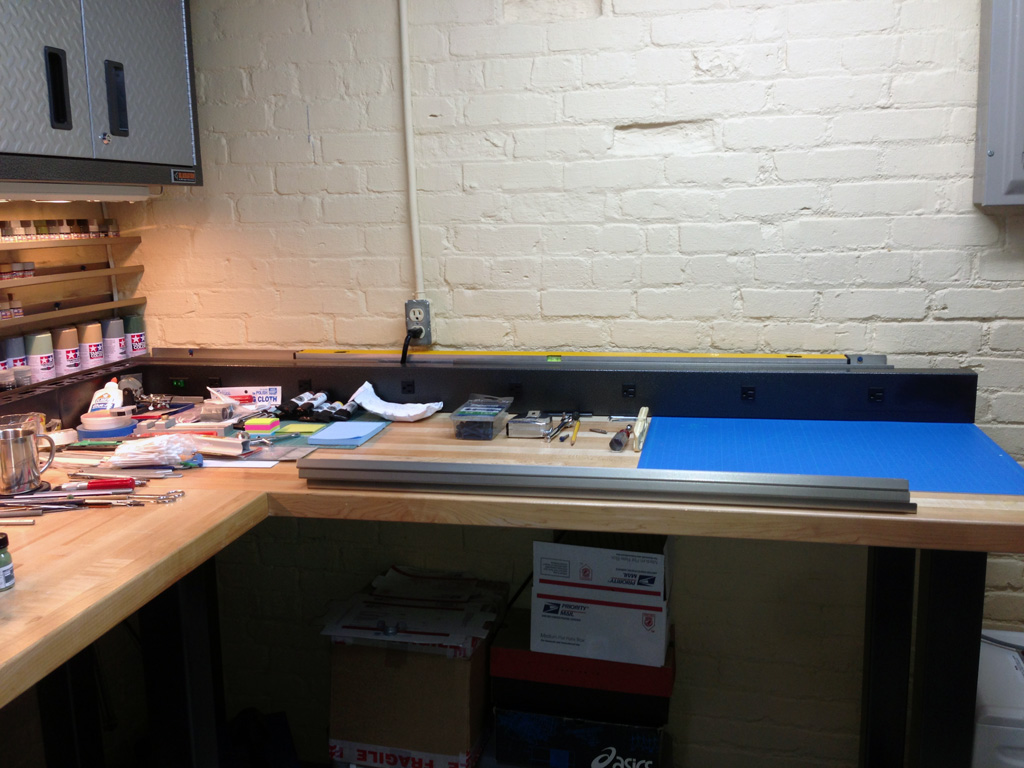
Hope to have this all ready and operational again in the next week or two.
-
Already got a set on the way!
-
Gorgeous finish on this Spit, Jamme!
I really like this build and have a newfound respect for this kit.
-
I bet there are now loads of us trying to work out how to get away with that Jeroen!!
Yup, after years of evil looks I'm down here in the basement with the Cave Crickets!
-
1
-
-
You guys are onto something here. Personally the people I consider the true experts on any given modeling forum are the ones with the most impressive and frequent builds. After all, it's a modeling forum, right? If the primary idea of a modeling forum isn't building models, then what use is it? And who do these guys putting themselves out there as "experts" but never seem to finish any builds think they're kidding?
What I love about this forum and a very small number of others like it is that the focus is on building models by people who are actually building models with a positive "just do it" kind of attitude and an unusually high level of skill and craftsmanship, no matter what the "experts" are pontificating about at the other forums.
What really seals it for me is on the rare occasion one of these negative "experts" tries to actually build something, it invariably looks like complete crap. "The kit cockpit was so inaccurate in every way that I decided to scratch build it out of something that now looks like popsicle sticks and bubblegum dipped into a can of house paint..."
-
4
-
-
One of my favorite schemes too.
-
1
-
-
Can a man be in love with a miniature barograph? Because I think I am...

-
Thanks guys!
-
This is what it's all about for me:
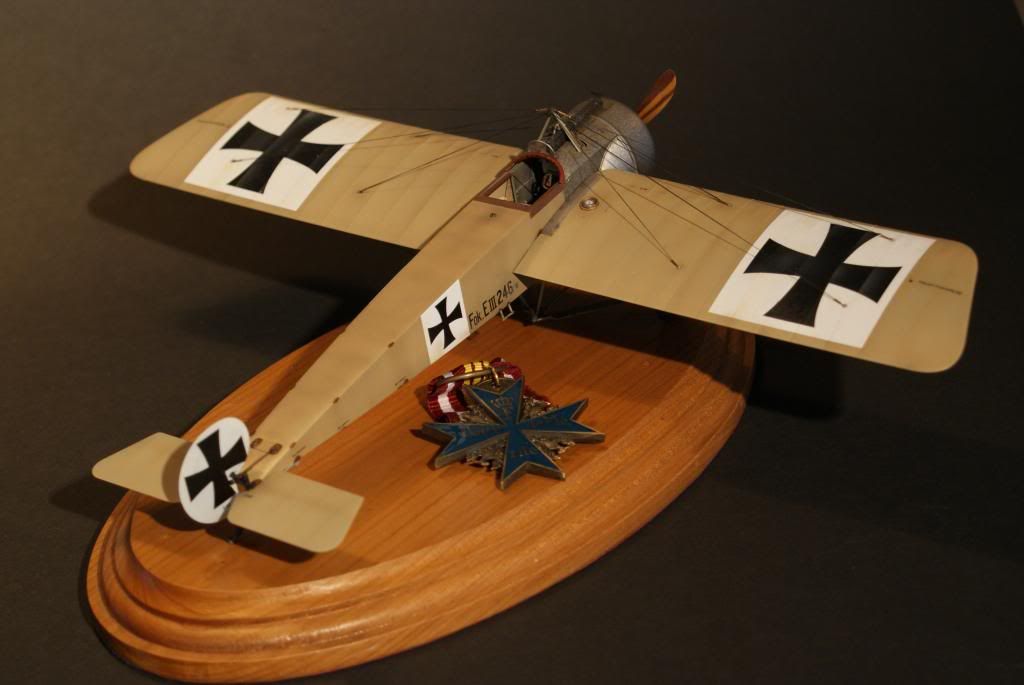
History, courage, skill, engineering, design, and a high level of craftsmanship and artistry, all from one little vignette. From the original aircraft's creators and builders, to the pilots and crew, to the design team for this model kit straight through to the modeler himself. The draped Blue Max really seals it all together perfectly, IMO.
One of my favorite builds, Jeroen.
-
3
-
-
Hey Dave,
It's getting there. I've been messing with the body color and here are a couple of in-progress wing shots, minus post-decal shading and weathering, which is probably gonna be fairly light as I'm modeling a newish plane:
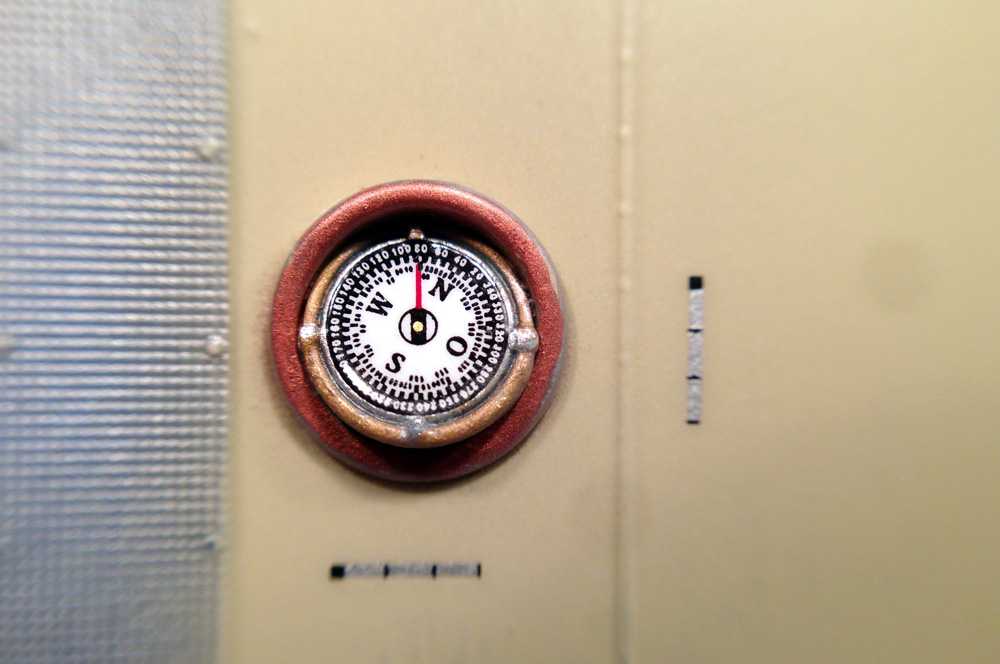

I was so impressed with Jeroen's multi-tonal compass and compass-well that I borrowed heavily from him for that!

-
I keep coming back to this thread because I can't stop looking at this model. Otto, Otto, Otto...
Jeroen, I think you had mentioned on the other forum that you used the lozenge decals included in the kit and if so I'm just really impressed by how they turned out after you finished applying the various shading passes, filters and pin washes. Comparing the decals in the box to what you have there it's like night and day and should inspire anyone who is considering trashing the kit decals to reconsider. And every bit of the rest of the model was clearly crafted to the same high standard.
It's always strange to hear someone describe a replica of what is essentially weapon of war as "lovely", but this model build-up is just flat out LOVELY in every way.
Back to looking at this model some more...
-
1
-
-
I will humbly submit that each one of you has inspired me in some way to try out some new techniques on this build, so this means a lot coming from you guys. Thank you!
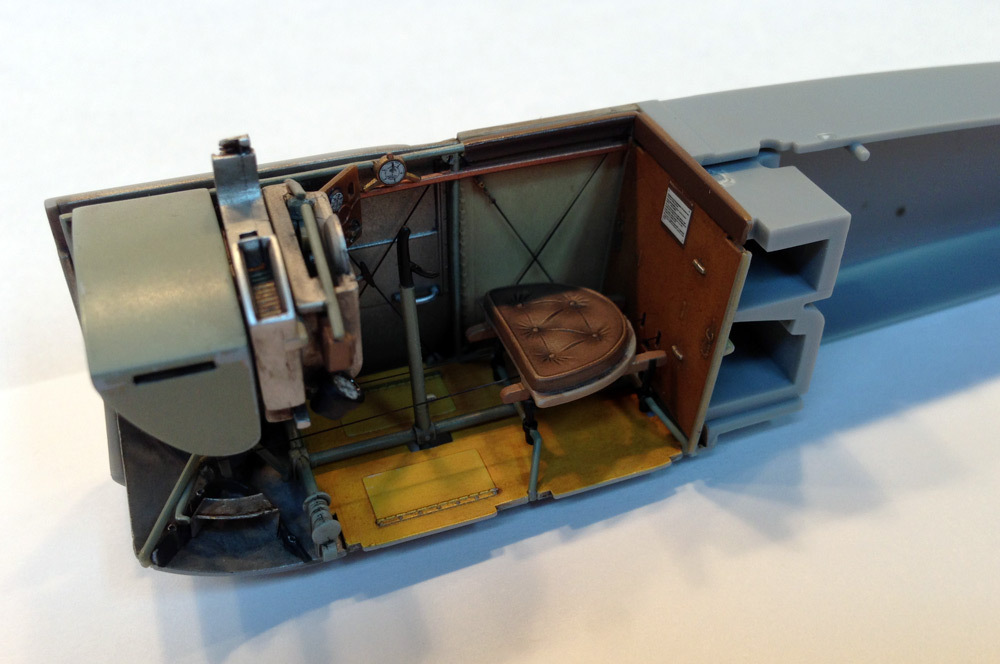
Jim, after two attempts to paint the seat cushion with brushes and oils, I stripped it and airbrushed the thing. It was amazing how much easier it was for me to do that, and to me it looks more like a "real" seat cushion now and less like a "painting" of a seat cushion.
I started with a solid base coat of Mr. Color "Sandy Brown", misted a very light mottling of Mr. Color "Propeller Color" in the lowest spots, Mr. Color "Red Brown" above that and then "Sandy Brown" tinted with "Red Brown" on the high spots. Takes a light touch and some practice, not unlike doing the mottling on a 1/48 Luftwaffe model.
A very light dry-brushing of the "Sandy Brown" on top of the upper seam, a light pin-wash in the creases with some MIG "Shadow Brown" oil, and then some Tamiya semi-gloss clear to give the whole thing a nice sheen to finish it off.
And of course now it's mostly covered with seat belts...
-
1
-
-
A few shots from my ongoing build of the Wingnut Wings Eindecker, 635/15, from their incredible "The Duellists" combination kit:

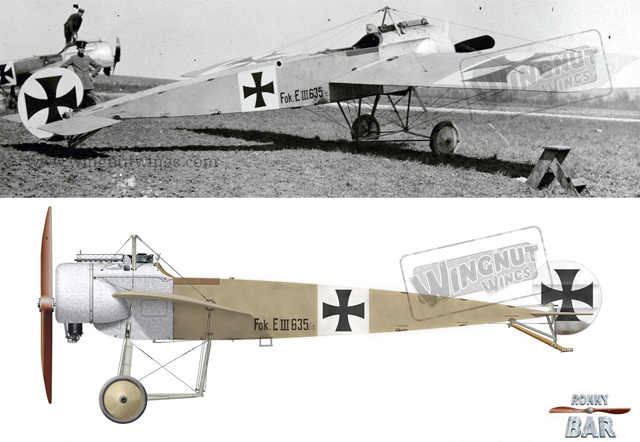
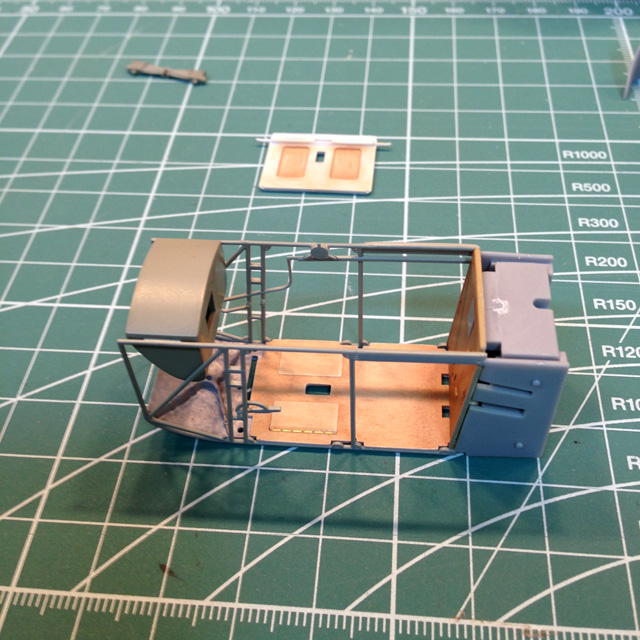
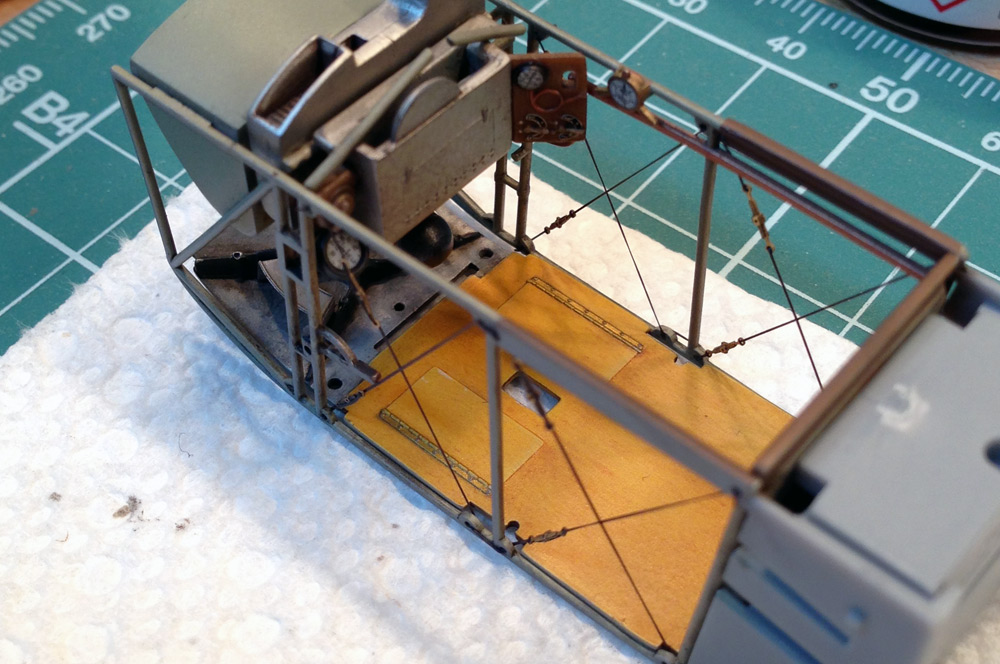
Working on the exterior finish now.
-
4
-
WnW Albatros D.V flown by Kurt Monnington
in The Great War GB
Posted
Out of the box, with woodgrain decals by Uschi, lozenge decals by Aviattic and aircraft markings from Wingnut's Jasta 18 set: