

Bill_S
-
Posts
990 -
Joined
-
Last visited
Content Type
Profiles
Forums
Events
Gallery
Posts posted by Bill_S
-
-
And the hits just keep coming! Lousy picture - it's tough to get a good one through the shrink wrap.
-
 7
7
-
-
For my "someday" TA-4J build.

-
6
-
-
Mail call!
After a very long wait, these finally arrived.
I don't know how this ended up on my front step today. I must have been sleep-buying.
I wish I could build half as fast as I buy.
-
3
-
 5
5
-
-
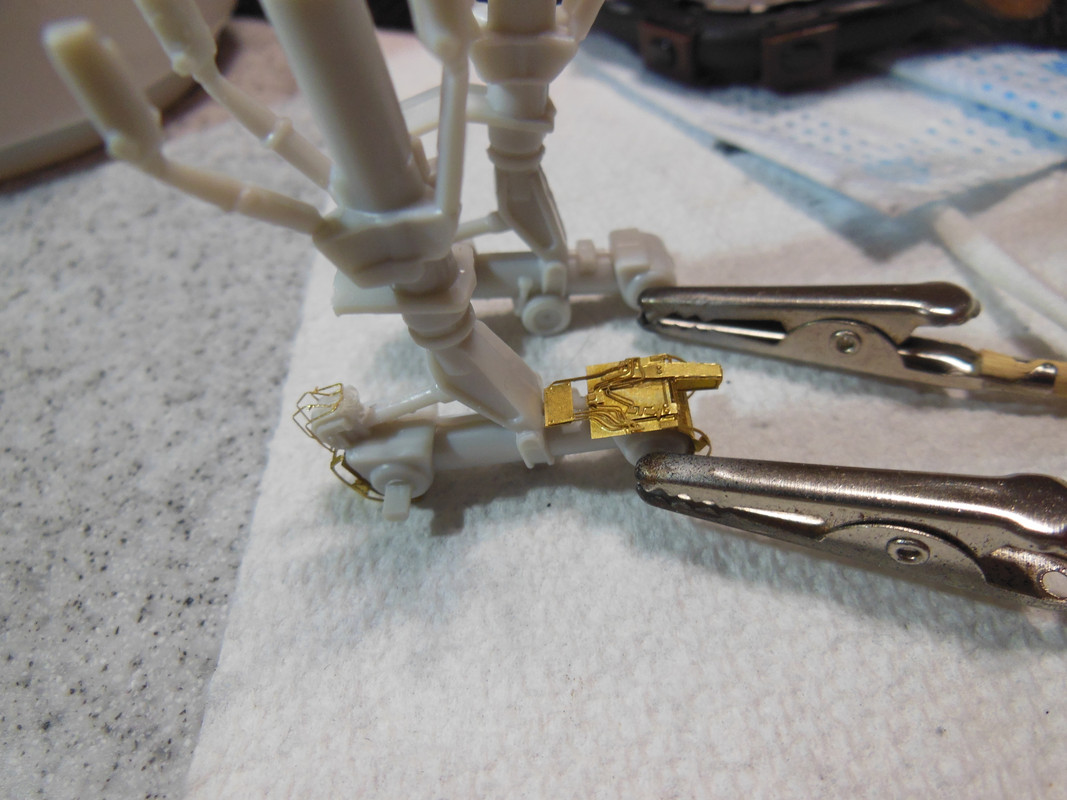
Well, my plan to build a small fixture to hold those tiny parts didn't work as well as I had hoped. My solution, though, was quite simple. I'm leaving the damn things off!
Brengun did provide two much larger pieces; they will have to be enough to dress up the engine bay. They're only tacked in place right now.
Now the next (and hopefully the last "Oh crap". Look at the access panels on the underside of the engine housing. How did they miss adding the ovals and circles on panel #4? Thankfully, this will be an easy one. Out with the scribing template.

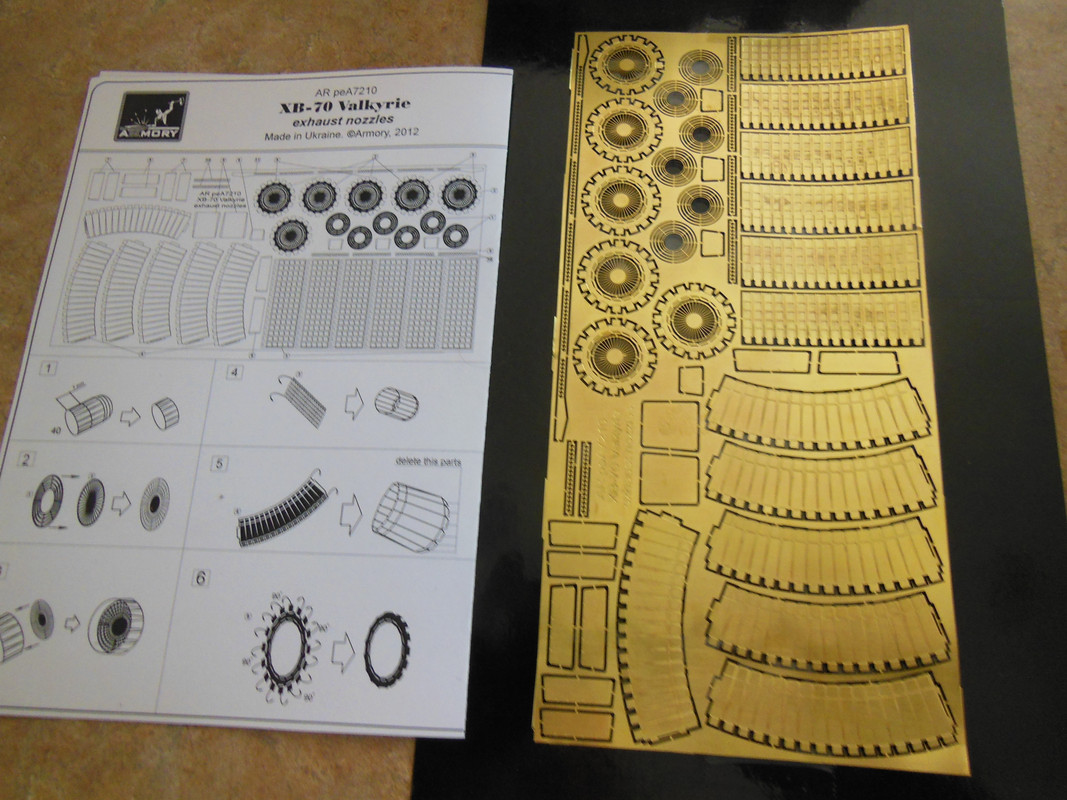
And some good news... I got notification today that the PE nozzles I ordered April 21 are in the USA! They came from Ukraine, so I'm not complaining.
-
3
-
-
I guess I was mistaken. This package arrived a day earlier than expected.

-
6
-
3
-
-
On 7/1/2022 at 11:24 AM, DocRob said:
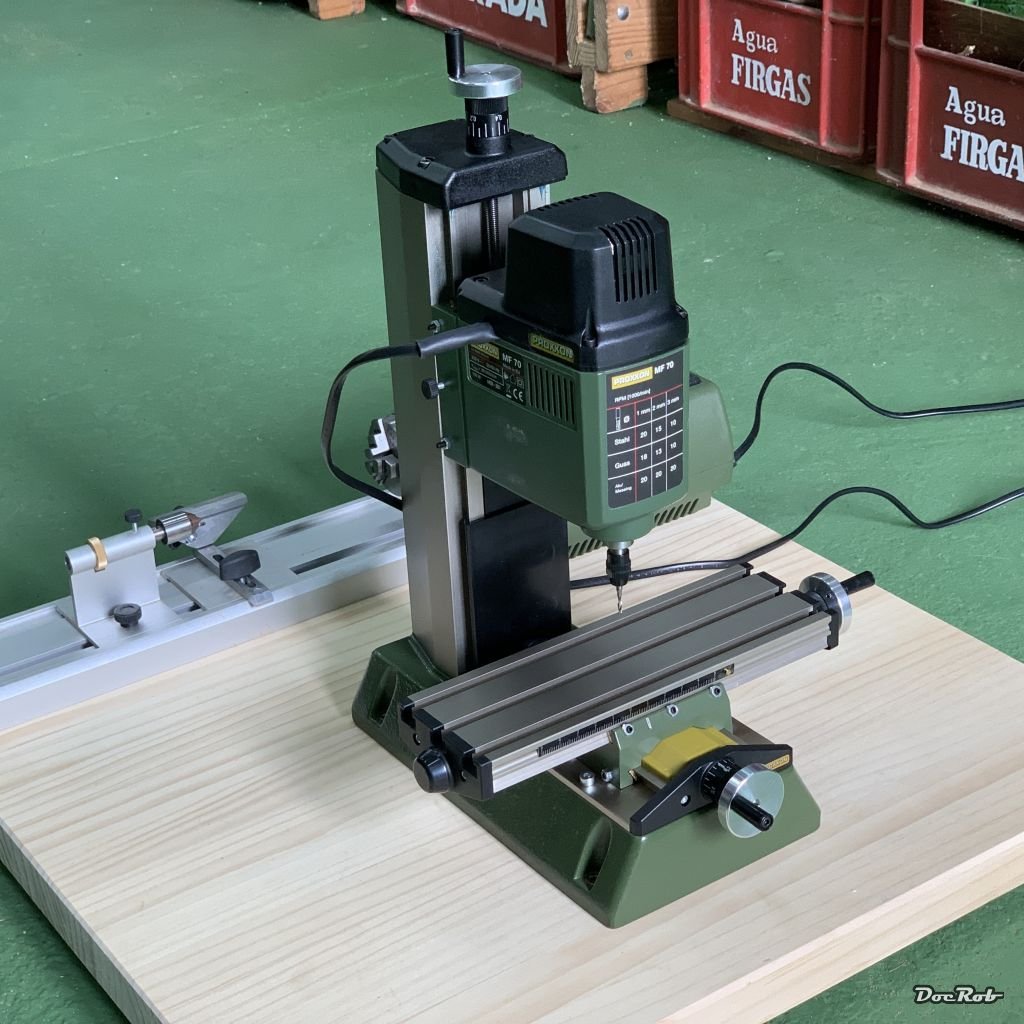
Today my Proxxon mini mill arrived and it is MINI, I dare say it's a cute little thingy. You have only to mount the table with four screws and you are ready to go, if you purchased the milling cutters, which are not included. I did that with the help of a engineers square, because I don't own a dial test indicator.
The first look and feel is promising, the clearance seems ok.
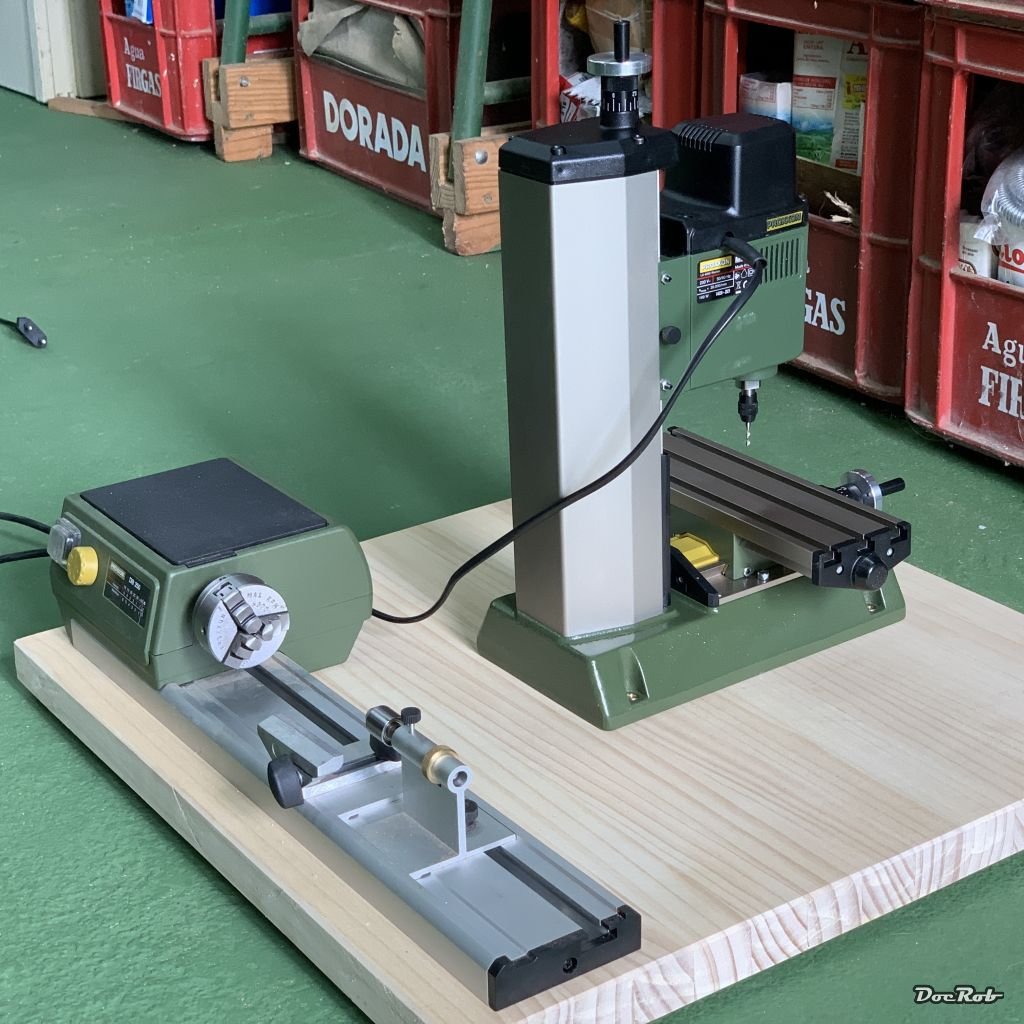
Now I have to wait for my dividing apparatus and my mini vice to arrive and then I will continue with the Duchess of Kingstons masts, which will be milled and turned.As an immediate action, I cut a 3 cm thick wood panel with 500 x 500 mm size and added some rubber feet and screwed the mill and the woodworking lathe onto it.
Cheers Rob


Very nice, Rob! Does the mill use collets, or just a chuck? You'll definitely need an indicator when you mount the vise; you can pick them up fairly cheap. I just saw one on evilbay for under $15 USD.
P.S. Nothing new for me today. Tomorrow, however, will be a different story.
-
4
-
-
4 hours ago, GazzaS said:
F'ing hell!
I think I have a plan, Gazz. I'll post when I'm ready.
-
2
-
-
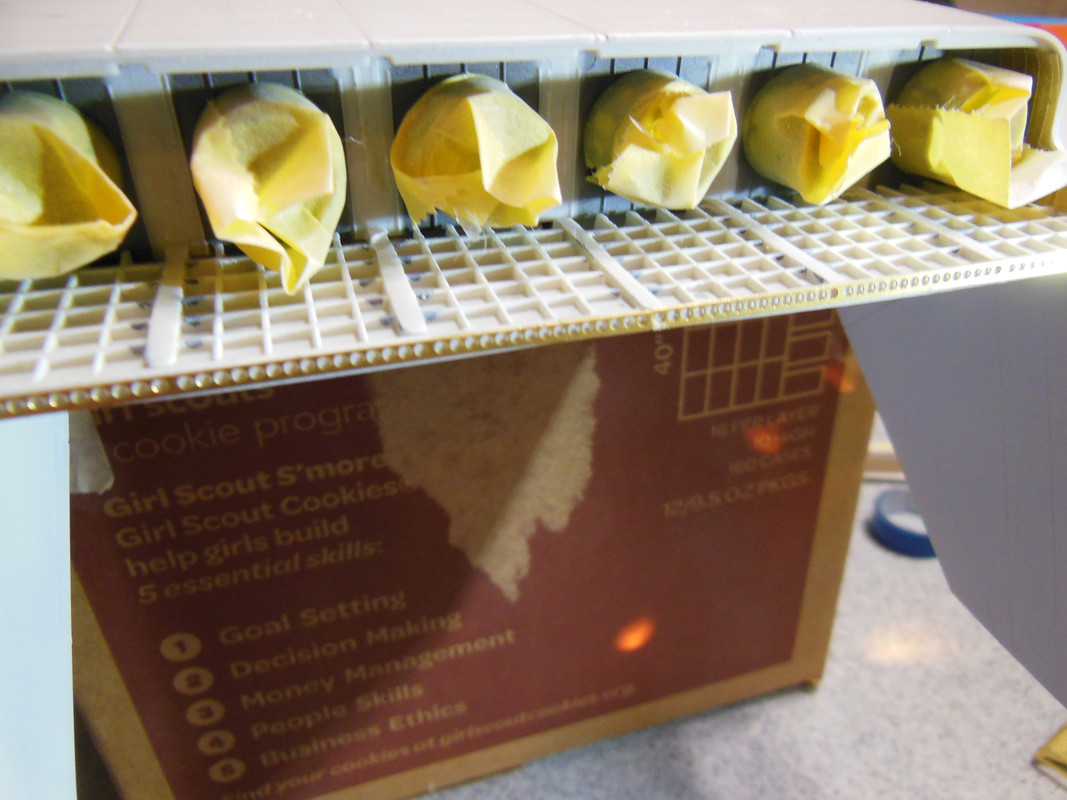
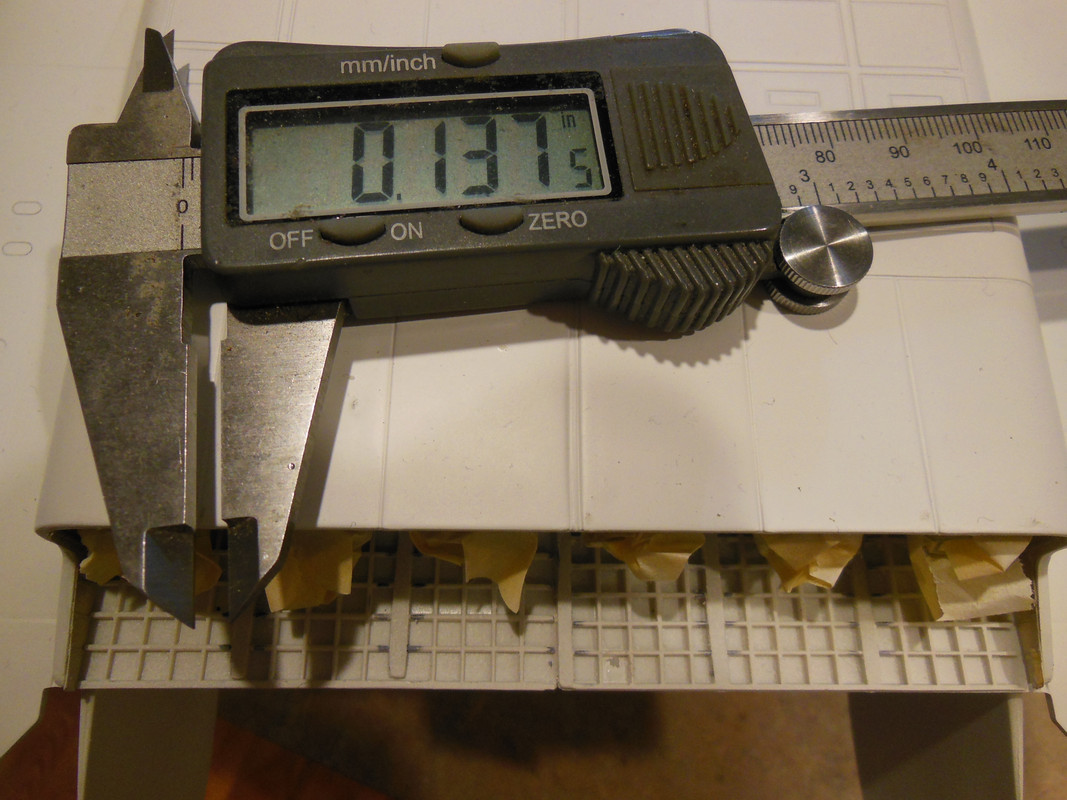
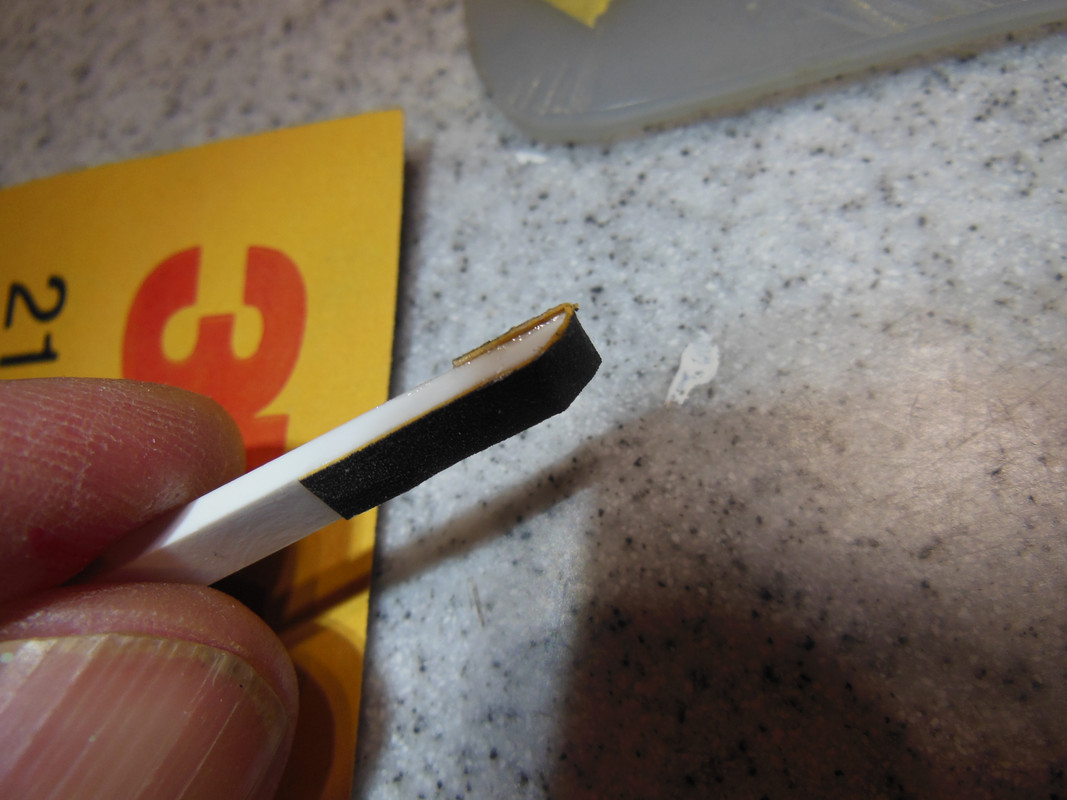
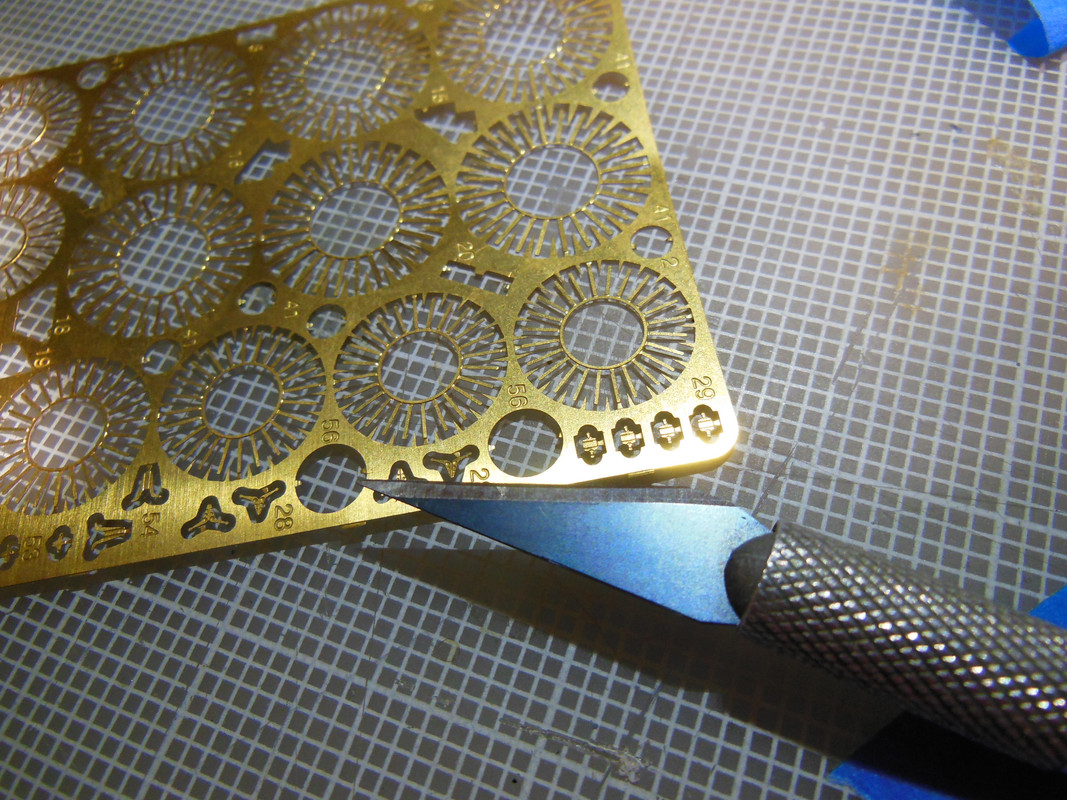
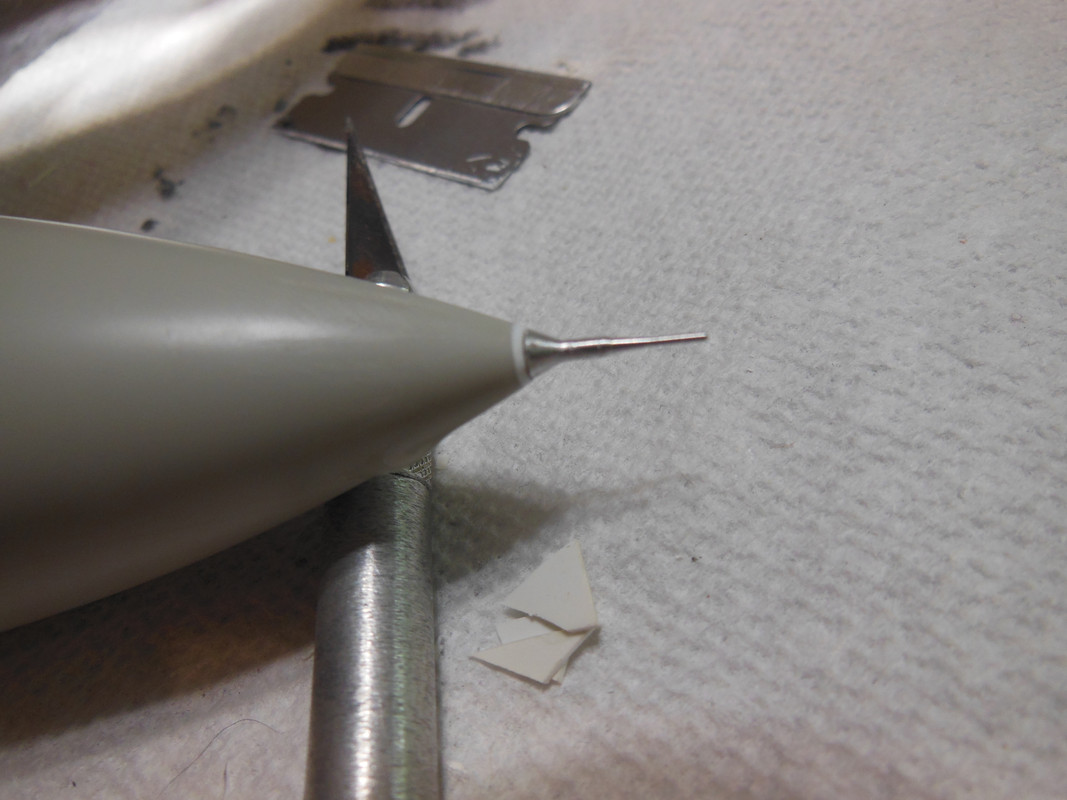
Those tiny PE pieces are all the same size. Unfortunately, the spacing on the kit is not uniform.
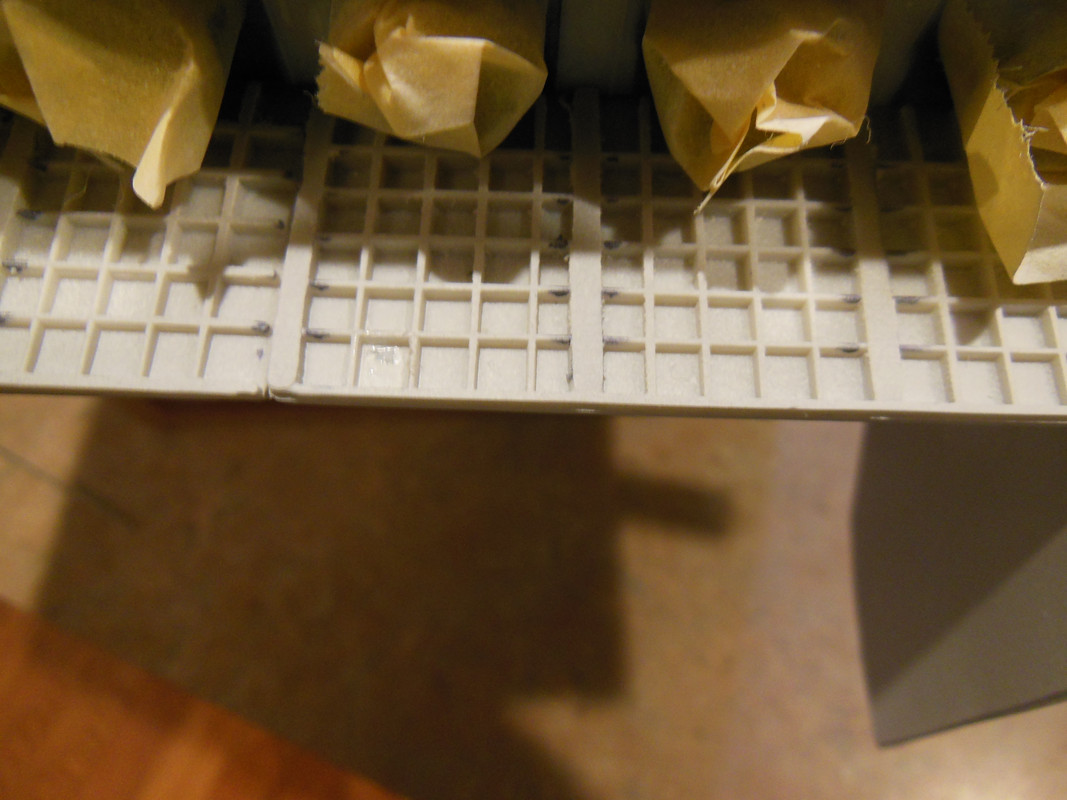
Out with the calipers, quite a bit of variation - I'll have to cut each piece to size. I just need to figure a way to hold them. This is going to take a while.
-
 2
2
-
-
Those screw holes on the bottom of the fuselage bother me. I cut some sheet plastic, and chucked it into a dremel bit.
I don't have a lathe, so I use what I have.
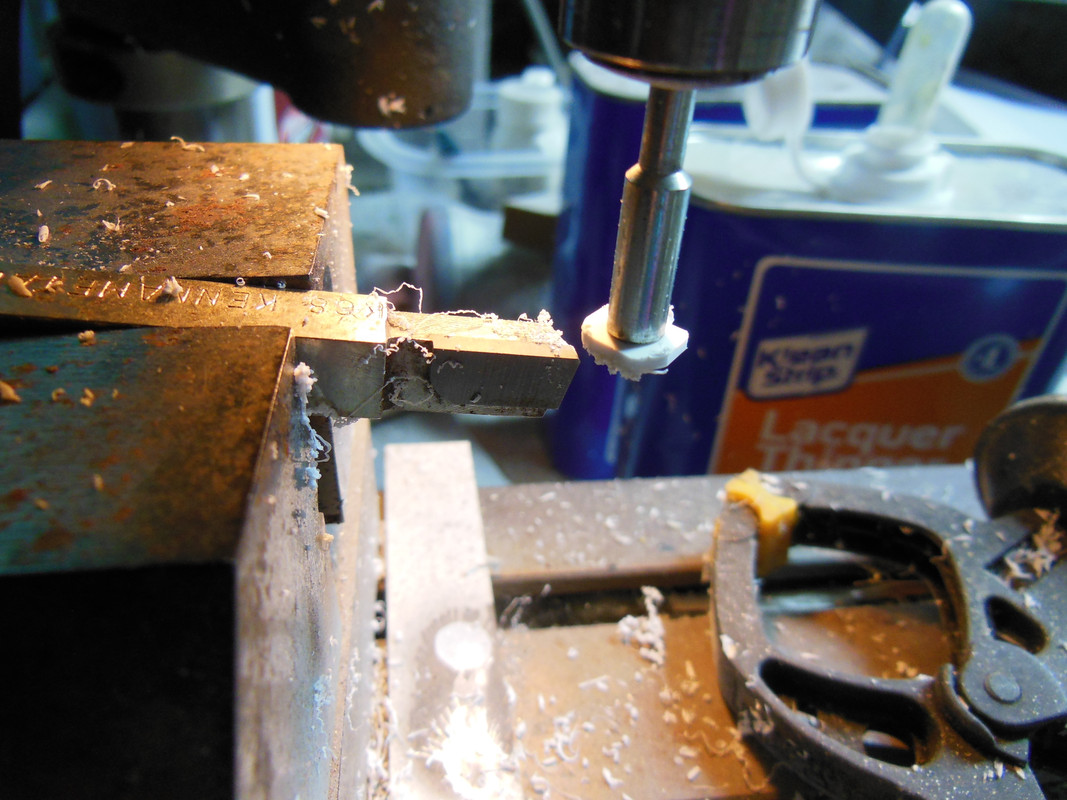
Glued in place, with some 0.060' (1.5 mm) rod to fill the hole.
A little sanding, and I've got this.
Thankfully, I only had to do three of them - it was pretty time consuming.
And some white...
-
10
-
-
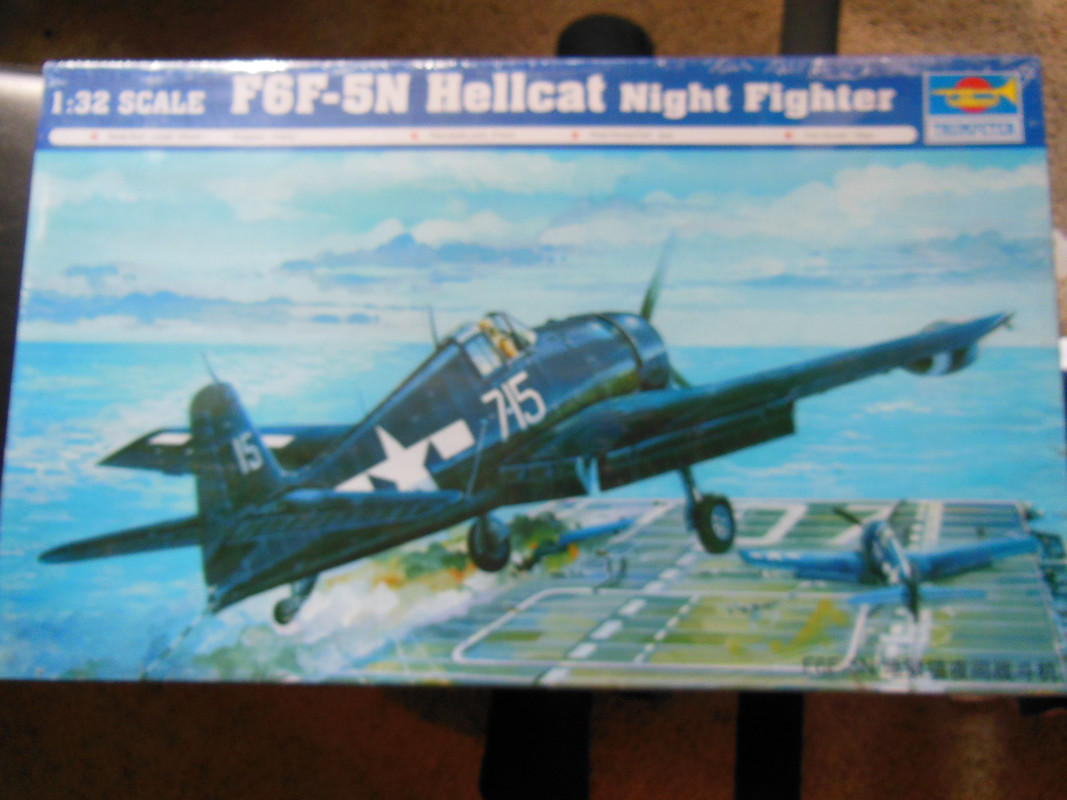
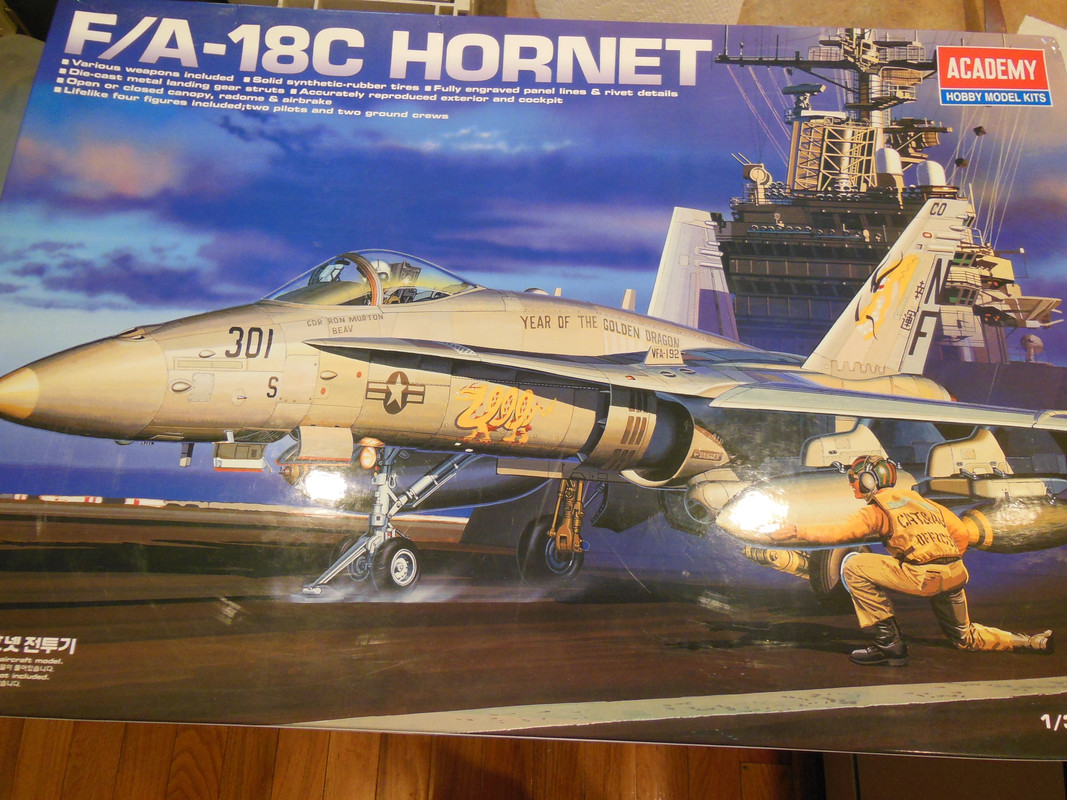
The post man left a few items for me today. Some AM for my Academy Hornet...
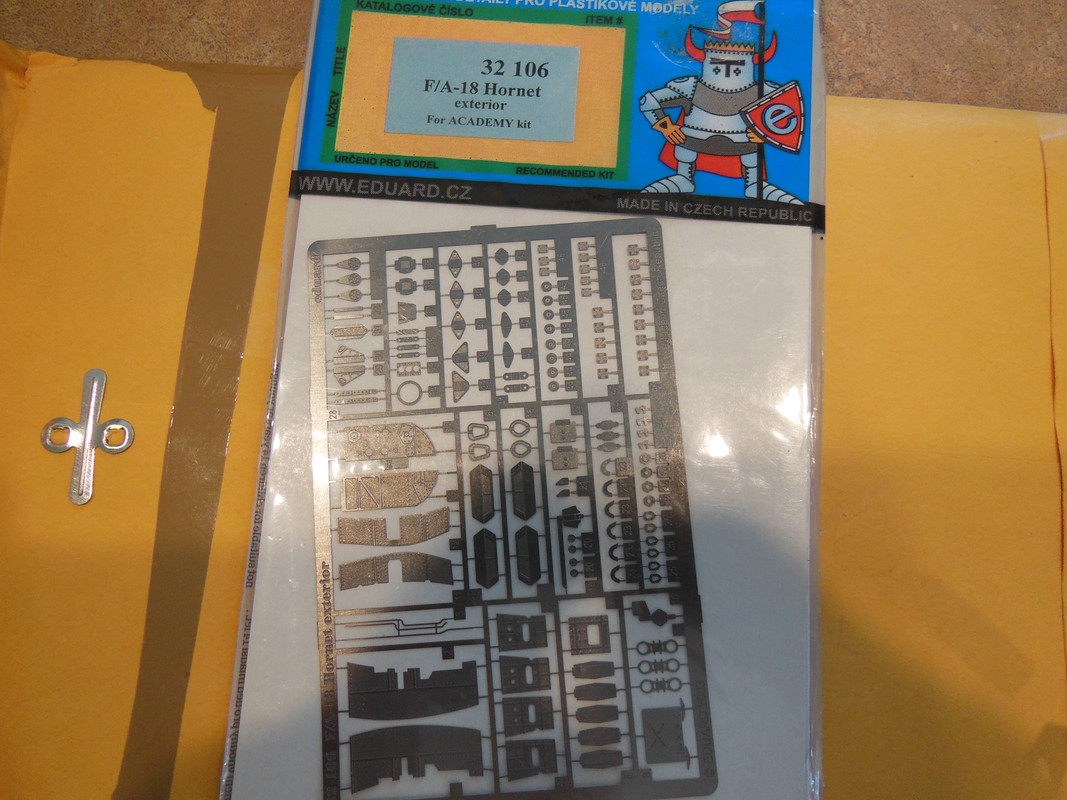
And I got a very good price on this...
-
7
-
 1
1
-
-
43 minutes ago, mark31 said:
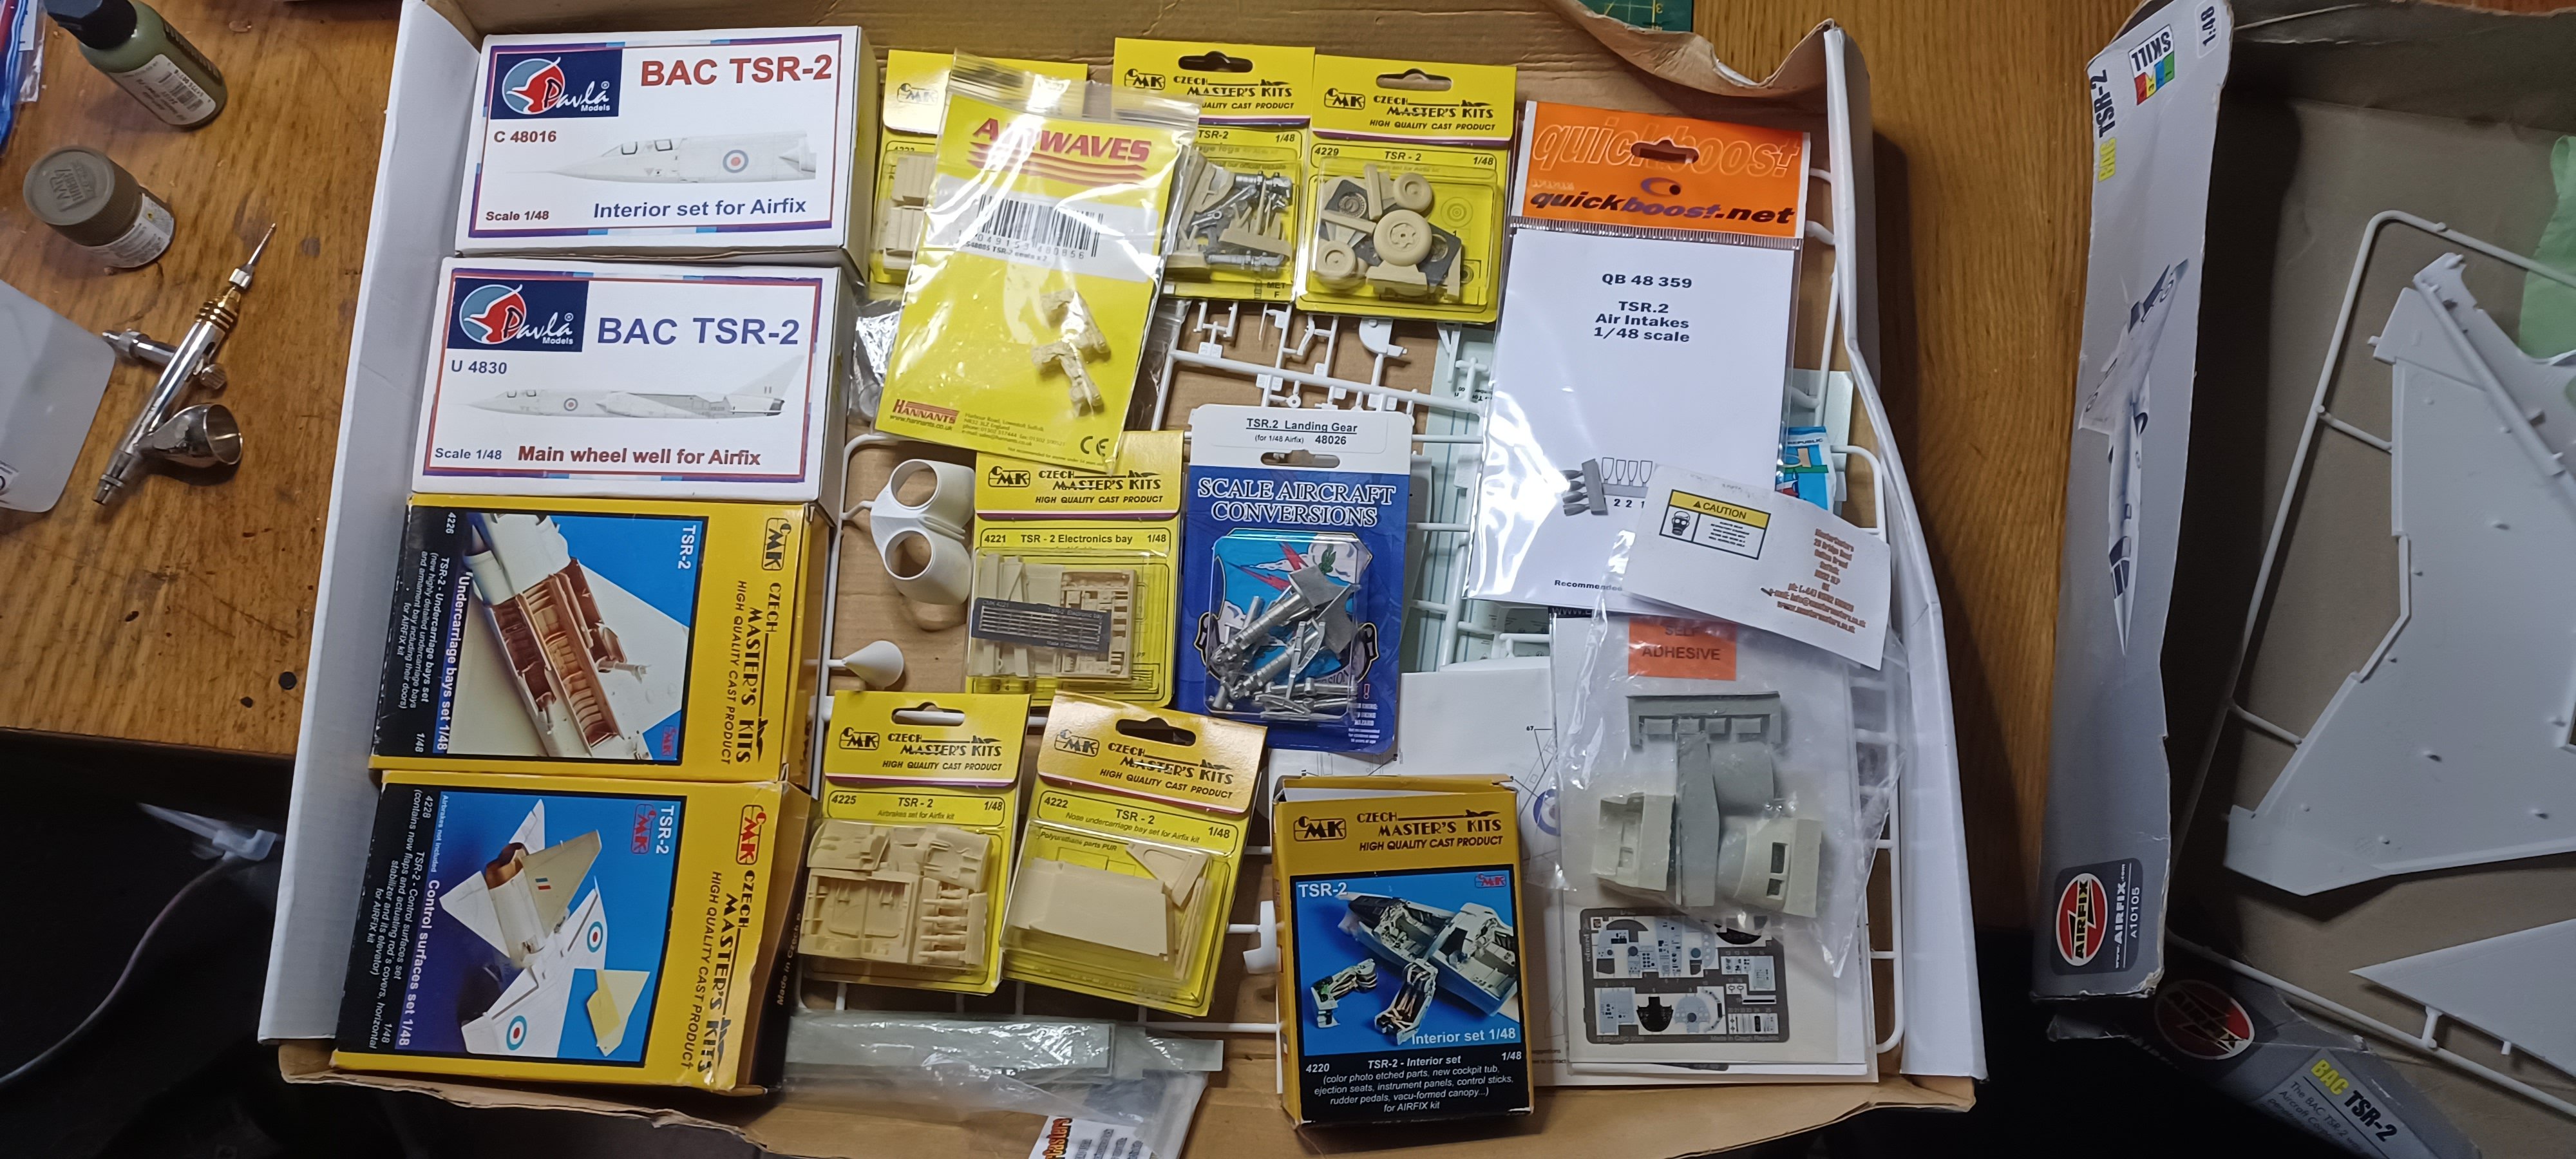
Pickd this kit up from a friend that is quiting the hobby.
The box is beaten up
But boy what is inside.
All aftermarket that there is and some sets double

and only for 70 euro
damn happy
Nice haul, Mark! No comment on the SAC landing gear.
-
4
-
-
29 minutes ago, JohnB said:
Thanks Bill. I look forward to seeing your A-1 done
") . What time period, Korean War or post war?
. What time period, Korean War or post war?
Viet Nam, John.
-
3
-
-
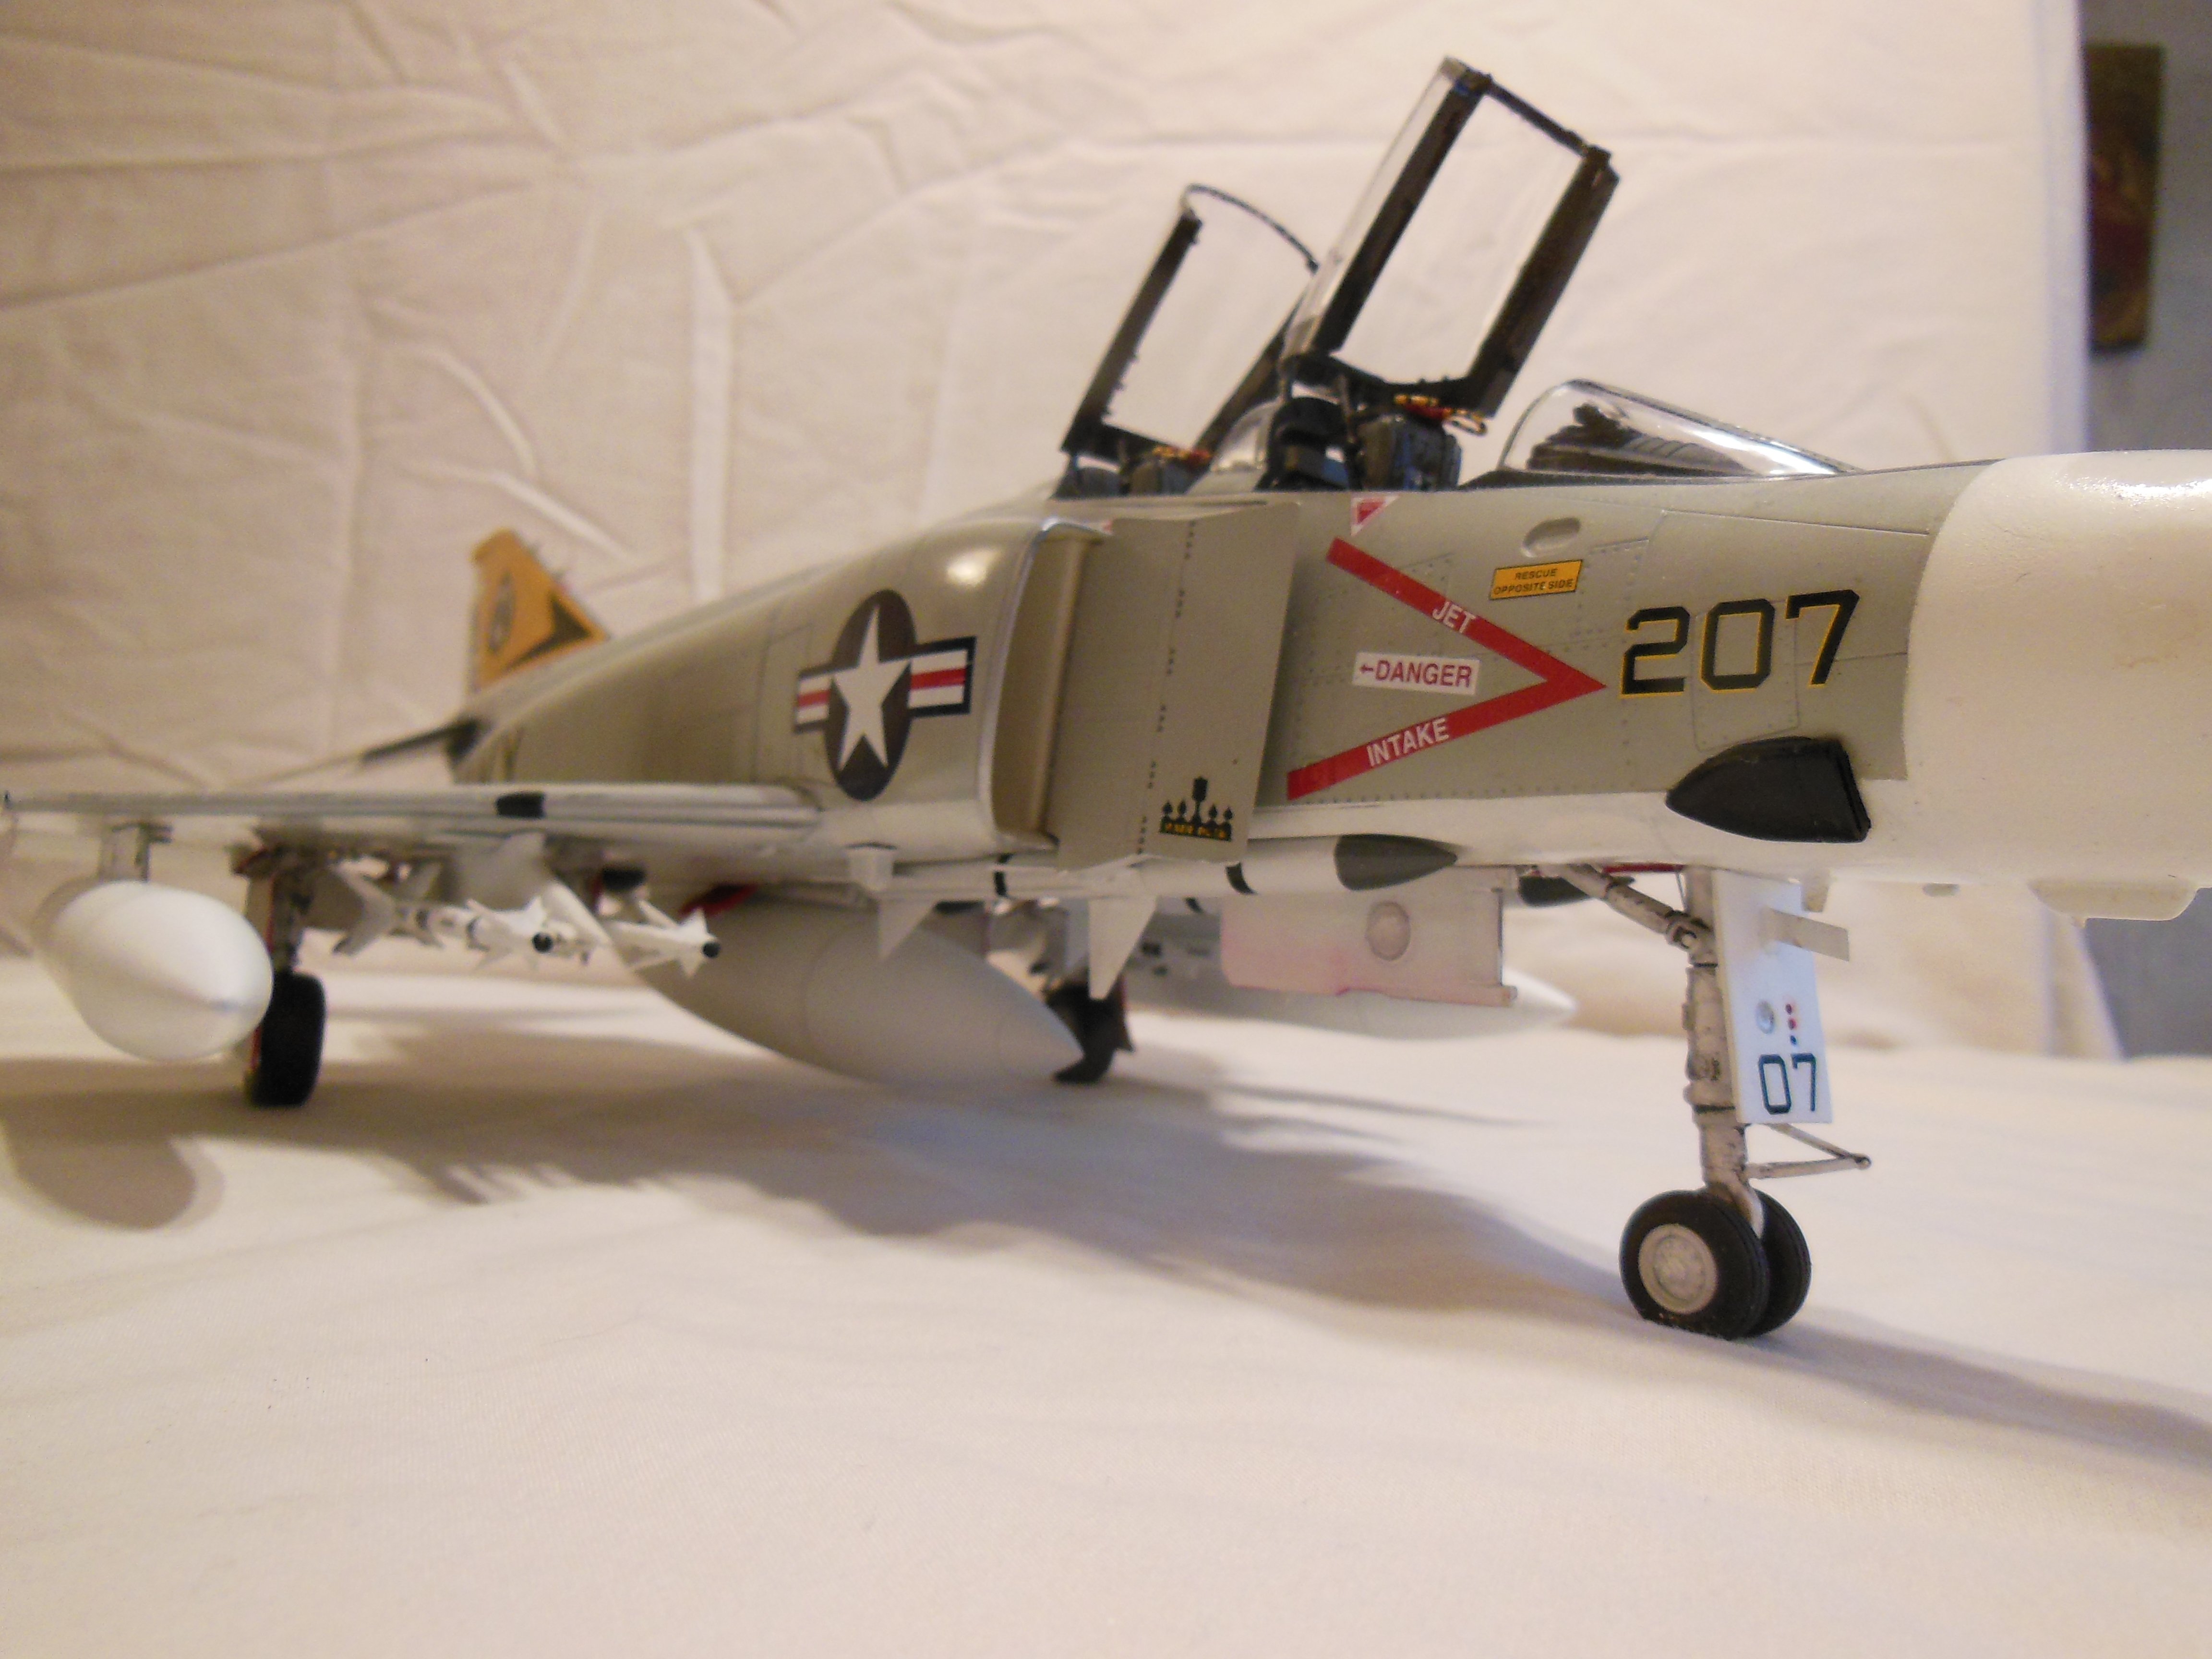
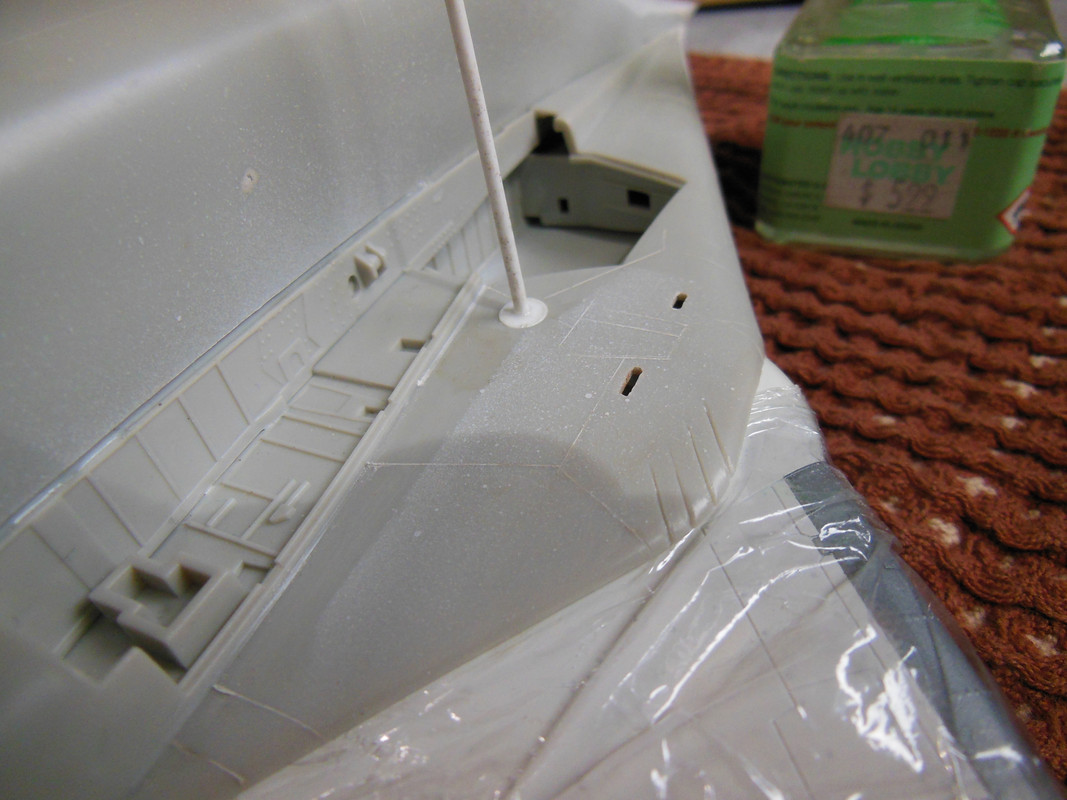
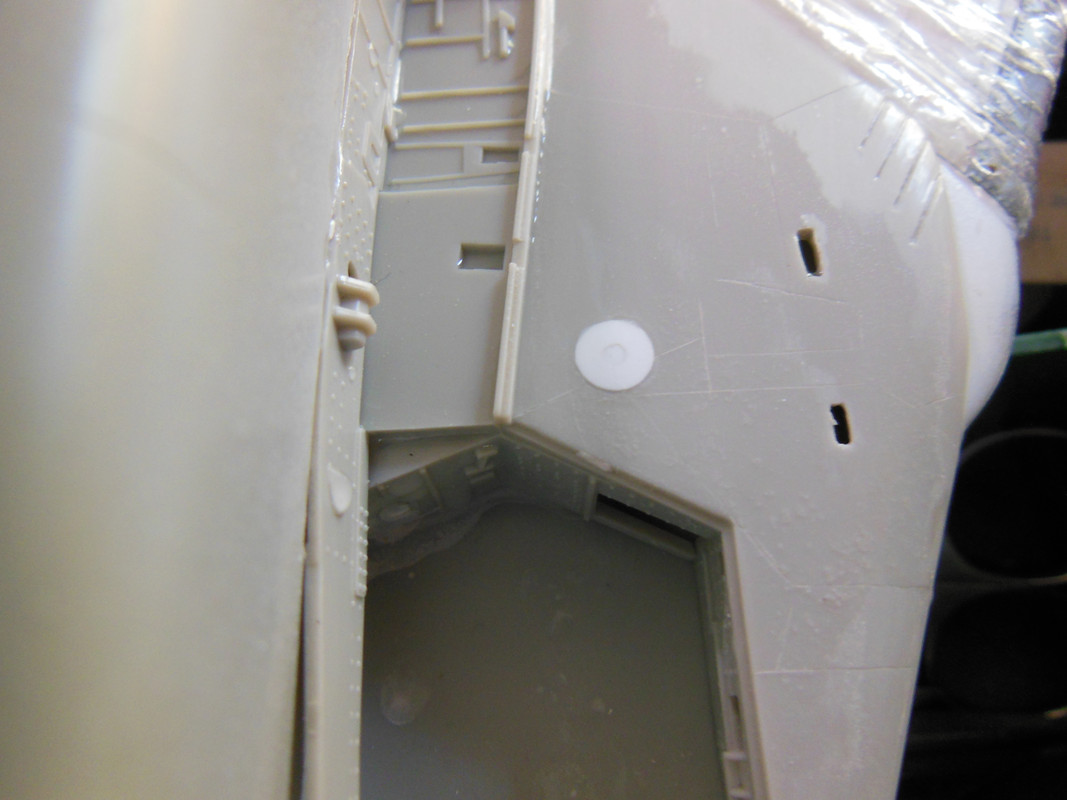
One of the last seams to be filled. I think.
I had one area that I should have sanded prior to installing the intakes. I had to fashion a sanding tool out of Evergreen strip.

There are a few small panel lines that I missed while scribing. Once I take care of those, I'll need to do some final surface prep and off to the spray booth.
-
7
-
-
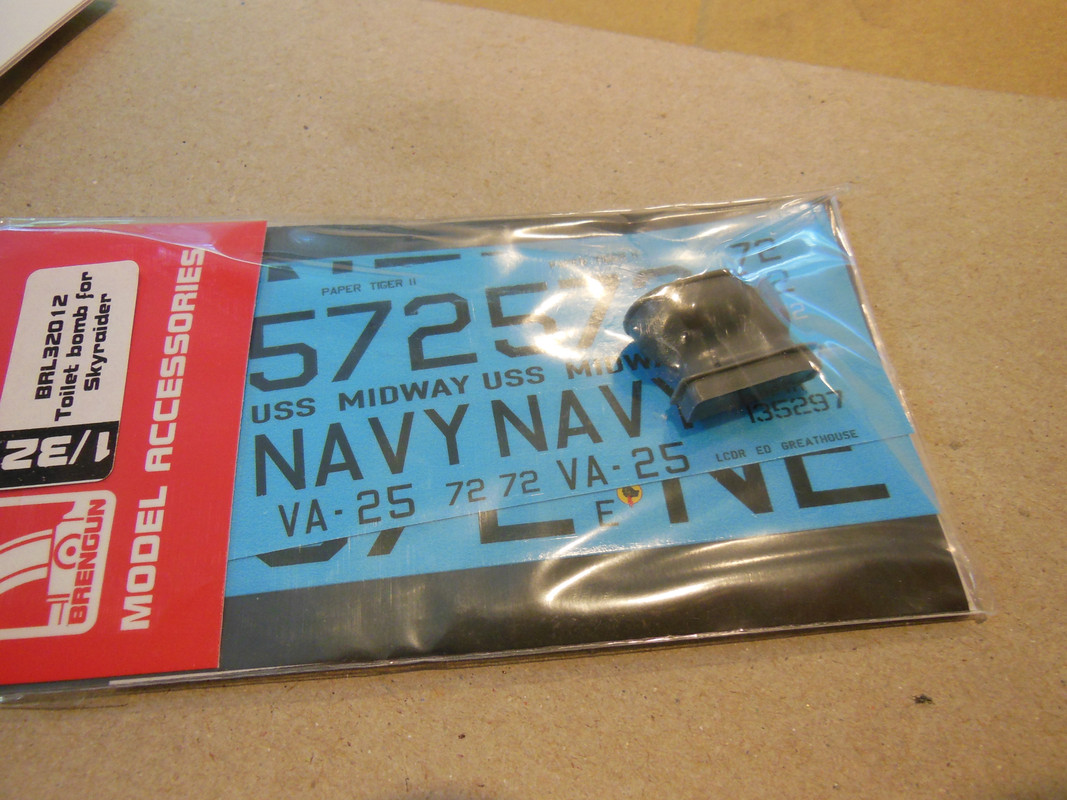
Looking good, John. I've got the Navy version in process, and I just received the toilet bomb. My static dischargers are intact, but I did manage to snap off a cannon barrel.
-
4
-
-
It looks great, Phil! Trumpy's 1/32 kits can be hit or his; they definitely used their A team on the TBF/TBM kits.
-
2
-
-
As usual,a job well done!
-
1
-
-
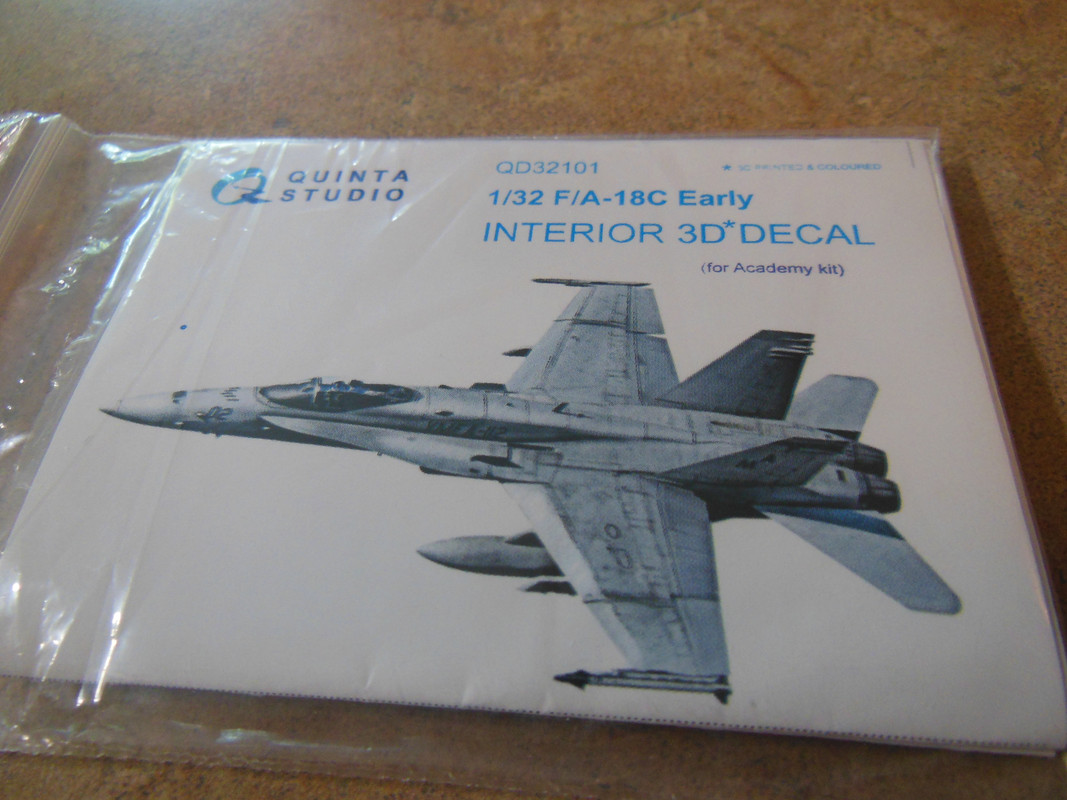
I was very pleased with the Quinta Studios set for the Tamiya Tomcat. I just ordered the cockpit upgrade for my Academy F-18.
-
2
-
-
Welcome to the Forums, Ernie!
-
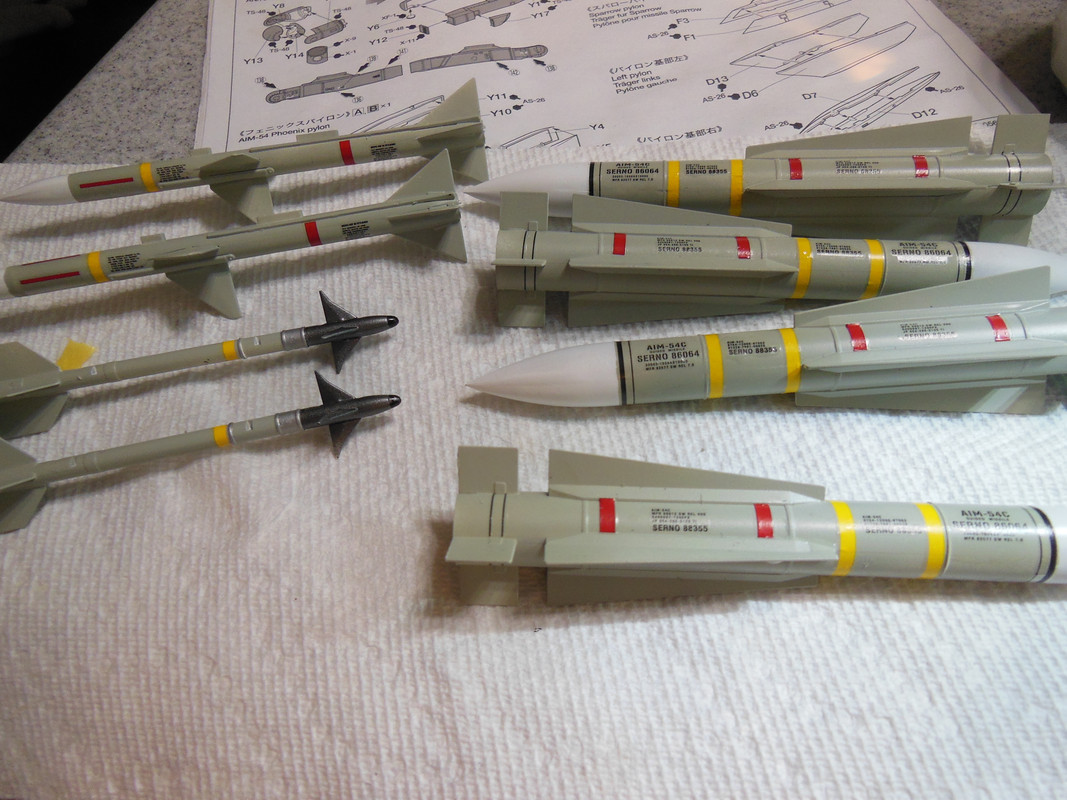
Back after my camping trip... some minor masking.

Nearly done with the missiles. Lots of decals.
-
11
-
-
It was like Christmas here today...
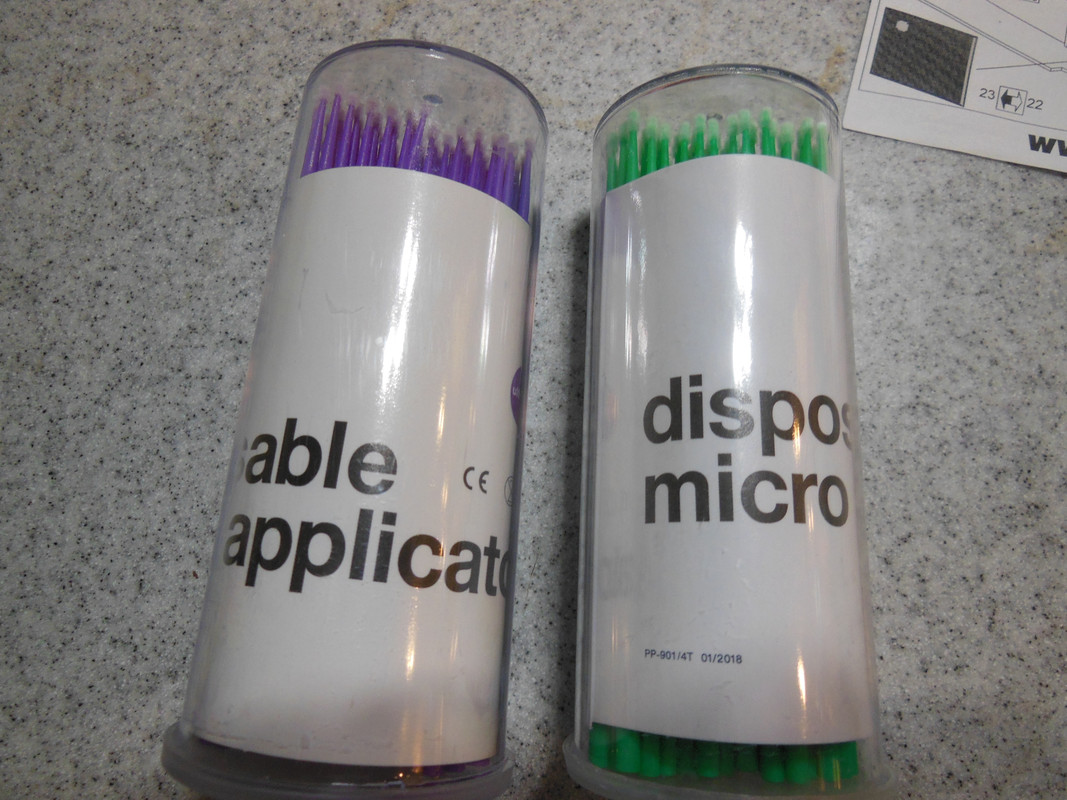
I find that I use these a lot. Never for paint or CA.
-
7
-
1
-
-
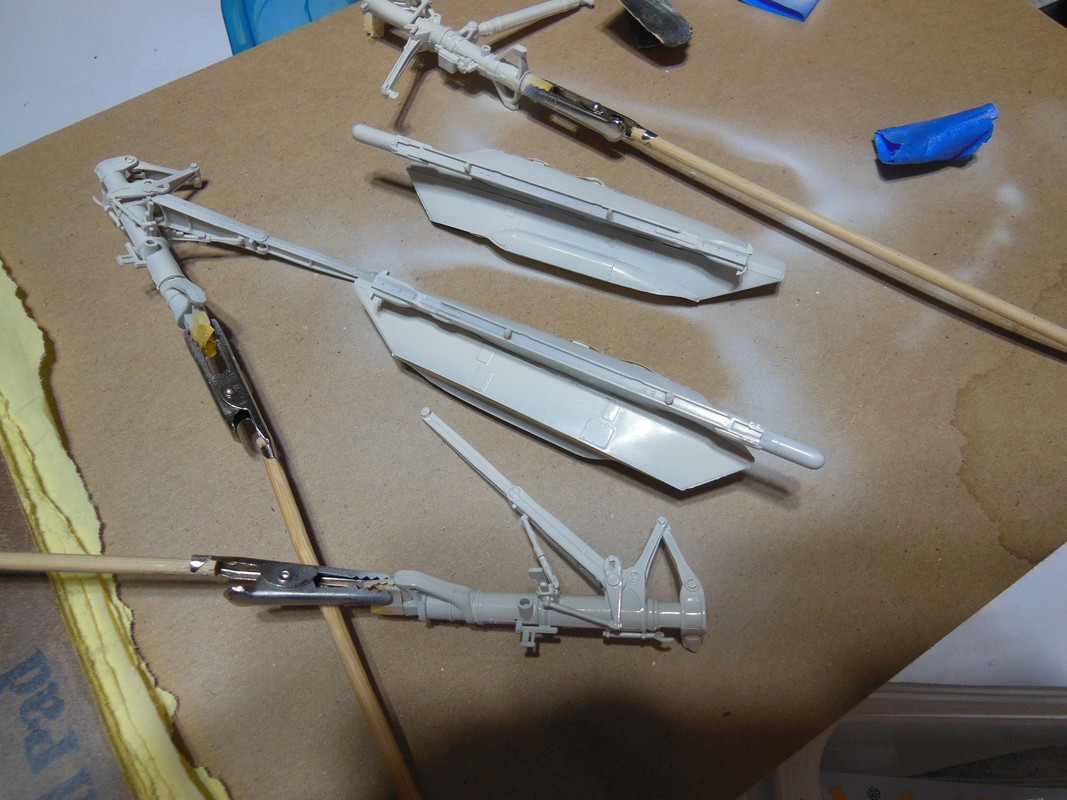
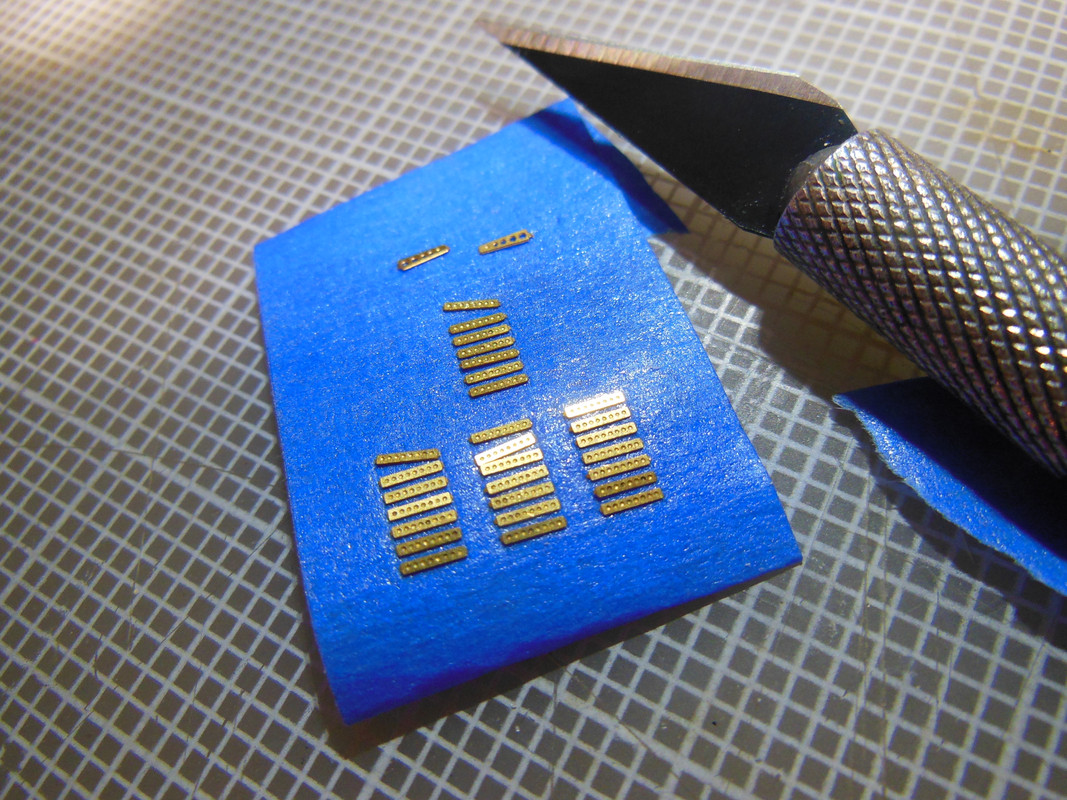
Back at it. Got some PE work done on the gear doors.
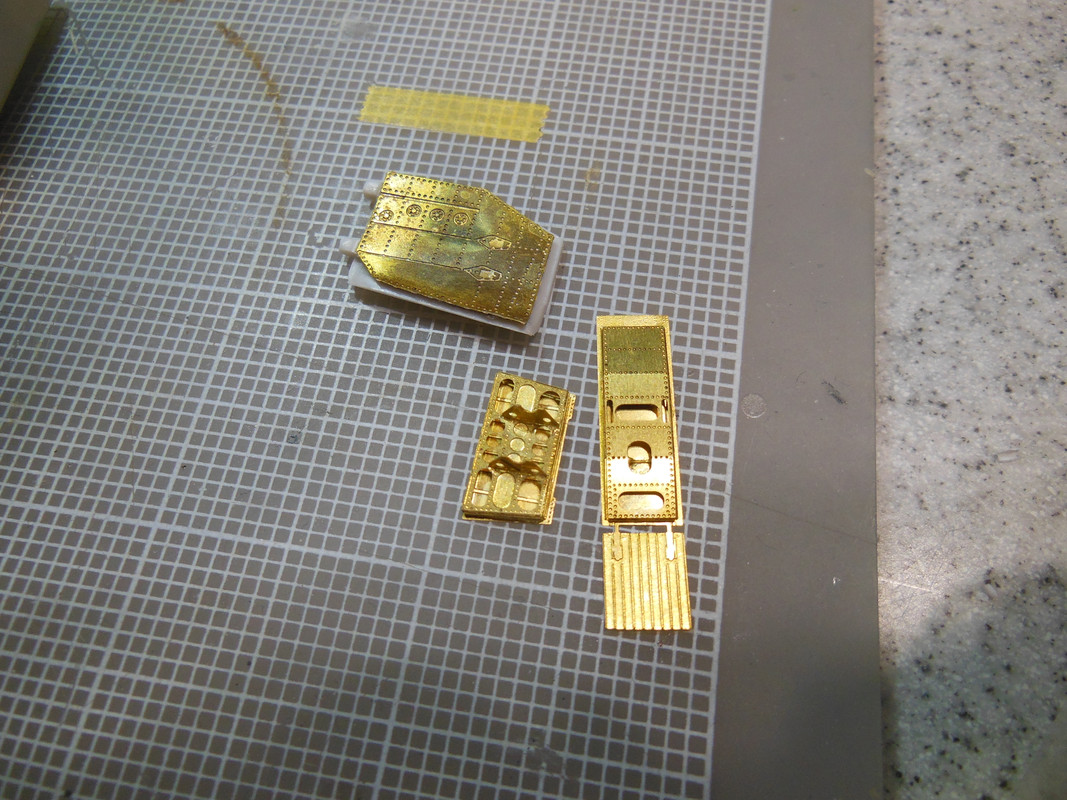
Some of the hinges are tiny, with multiple folds...
Plenty of PE for the main gear.
Thirty pieces to dress up the engine bay. I probably should have added these prior to attaching the tails.
Only five more weeks until the PE nozzles are due to arrive.
-
7
-
-
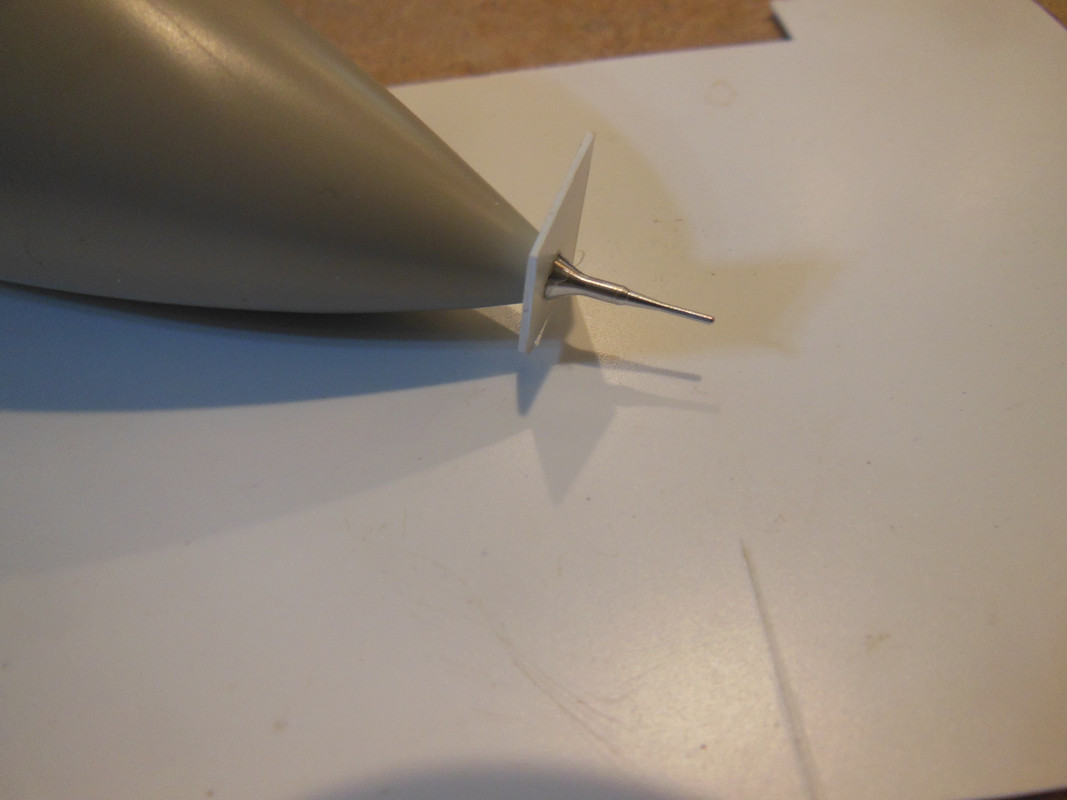
Success. Now to put it away until I determine how much nose weight will be required.
-
7
-
-
Sad news indeed, Ernie.
-
5
-
-
Compressor faces painted and glued...

And intakes installed.
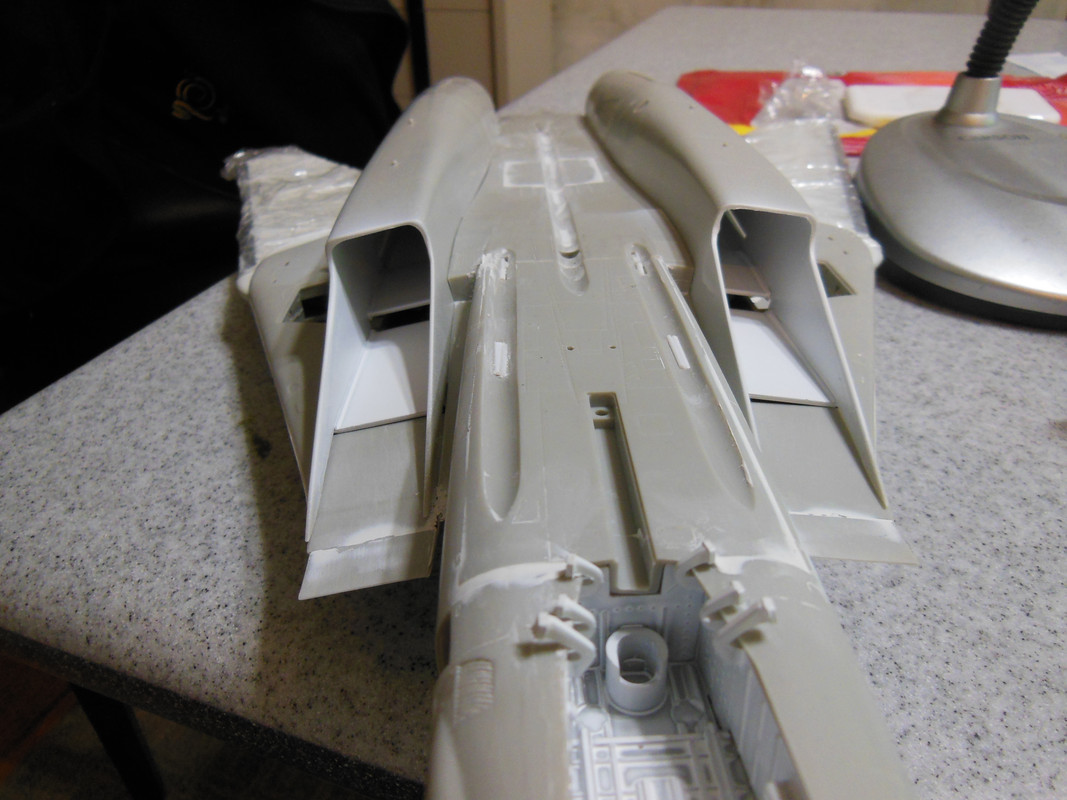
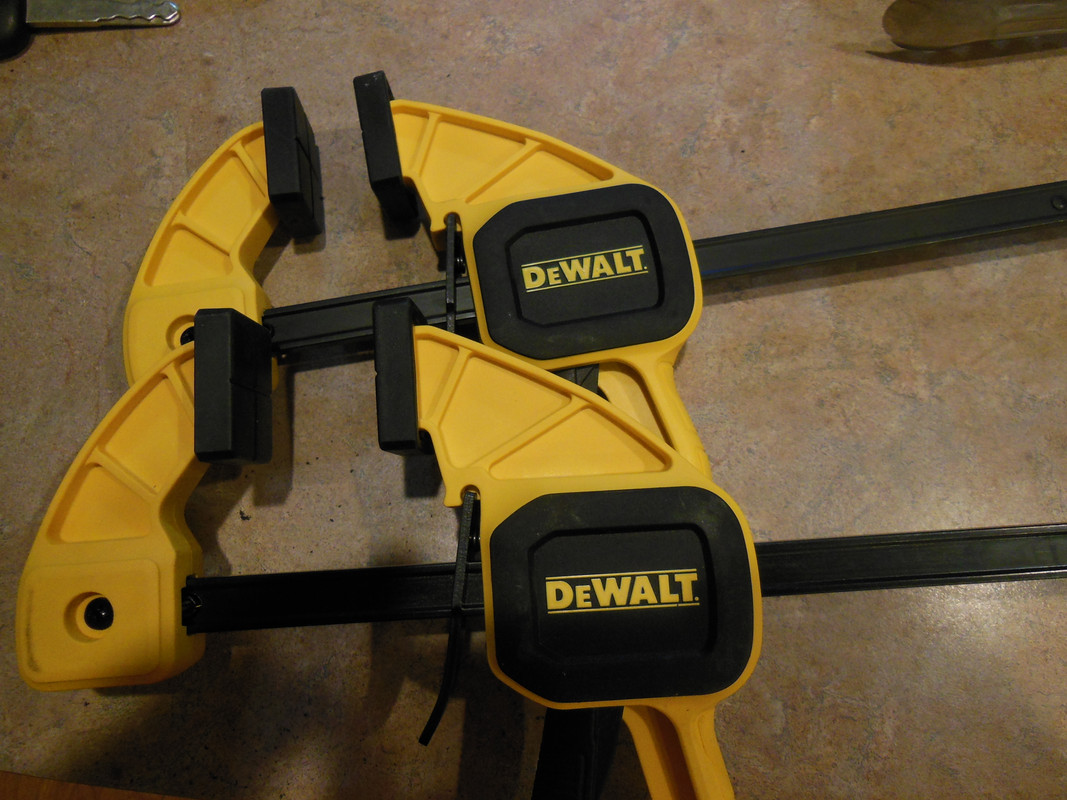
She's starting to look like a Tomcat! I had to apply a little pressure to get the intakes to bottom out. One of these days, I need to get some lightweight bar clamps.
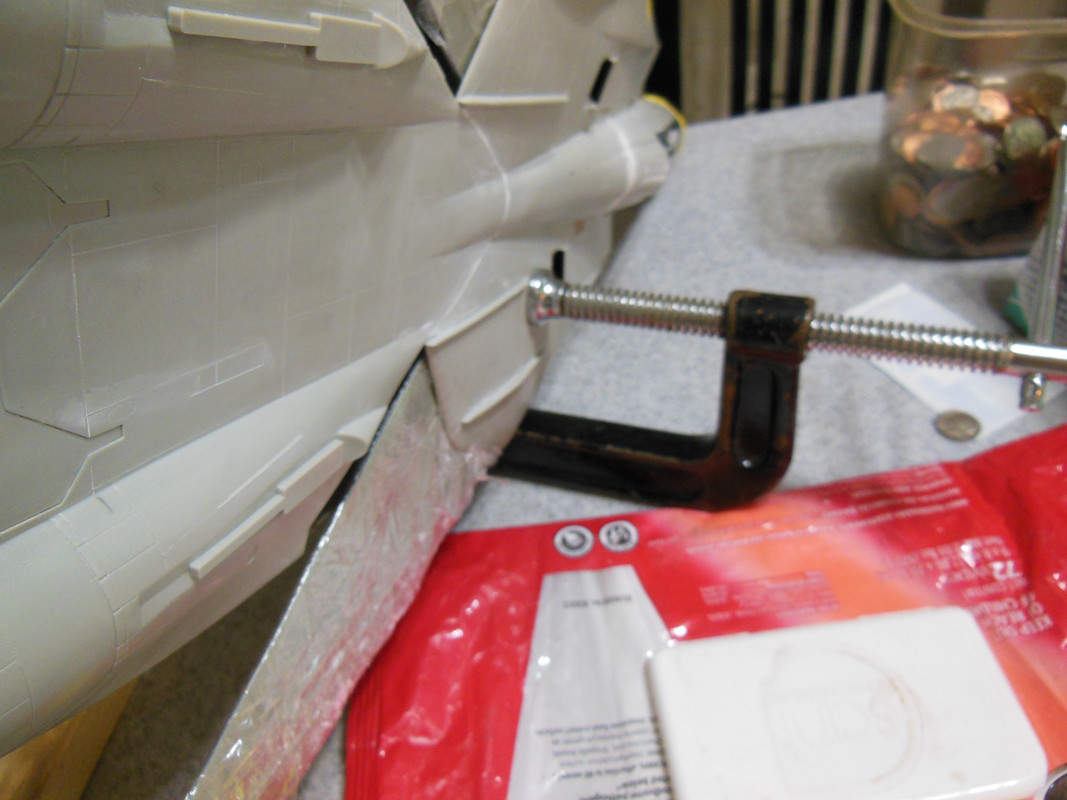
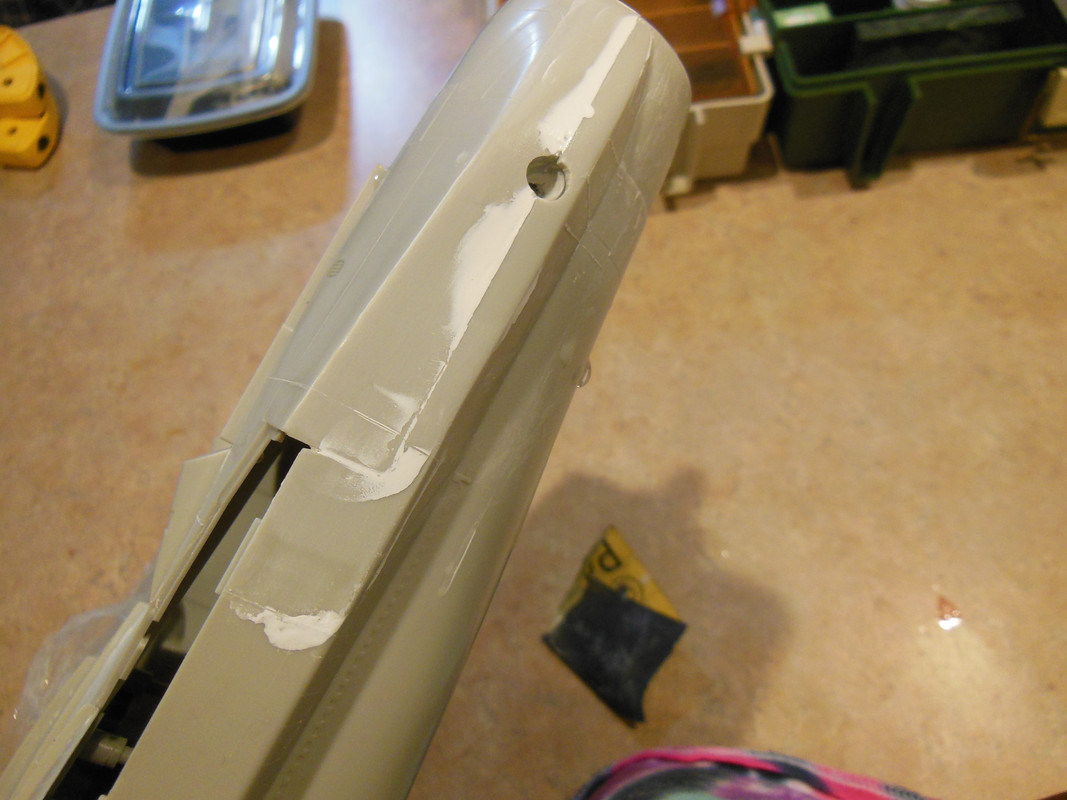
While I'm waiting on the intakes to cure, I took a look at the nose. Master Models would have you build up the nose on the Trumpeter kit; no mention was made of the Tamiya offering.
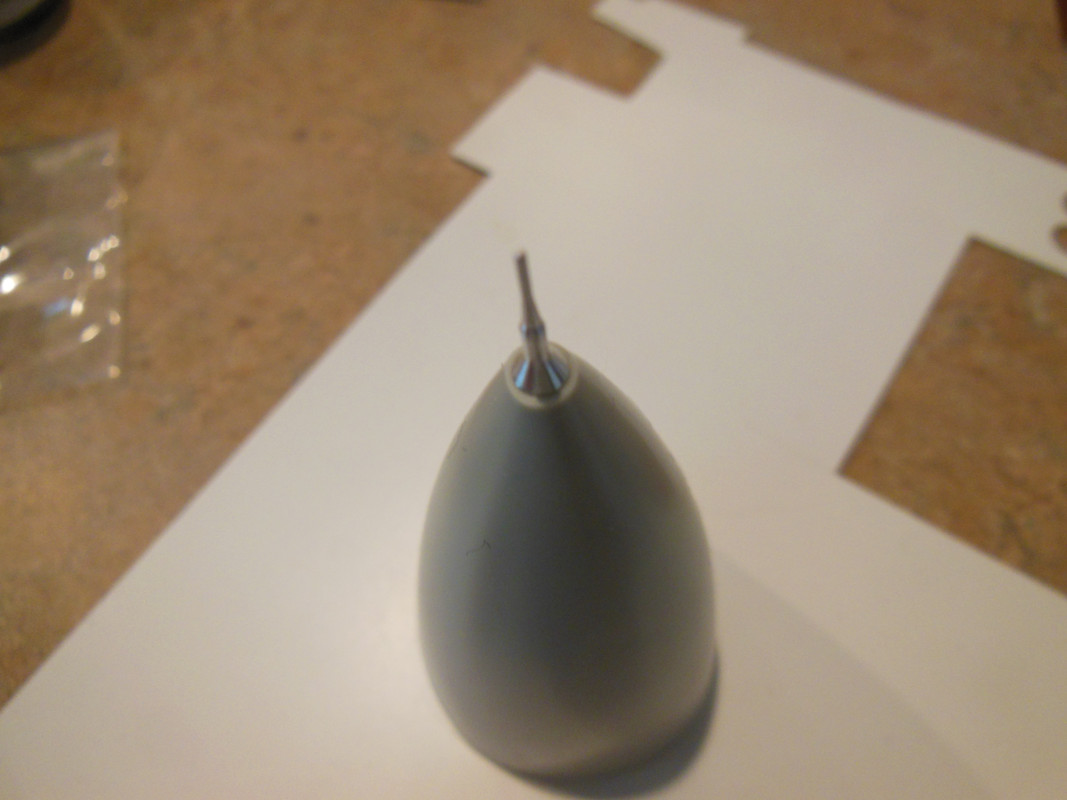
There's a definite step there. It makes me wonder if the AM part is off. A hole drilled in a piece of 0.020" (0.5 mm) sheet stock. Once dry, I'll trim and sand. Hopefully it's thick enough.
-
8
-

Border Models (Wingnut) Lancaster
in Modelling Discussion
Posted
I wonder if it has WNW tolerances. Will a coat of paint affect closing of the fuselage? A moot point for me, as I am VERY slowly progressing on the HKM kit.