

EmperorKai
-
Posts
73 -
Joined
-
Last visited
Content Type
Profiles
Forums
Events
Gallery
Posts posted by EmperorKai
-
-
Thanks gents and for looking in on my build!
Back home now from my travels and just now getting caught up.
Cheers!
Kai
-
 2
2
-
-
Peter, John- thanks much my friends.
Kai
-
1
-
-
Thanks friends for the kind words. I’ve been travelling with little acess to internet lately, so please excuse the blanket reply.
Looking forward to returning home in the few weeks and to building some more
")
Kai
-
3
-
-
Ditto everybody!
-
3
-
-
Thanks Drifter! Toys for Christmas, batteries for birthday.

-
1
-
-
Fantastic parade there Gaz!
Kai
-
15 hours ago, GazzaS said:
Just Awesome! I too have learned to put my pigments on last.
Gaz- thanks much and for following along with the build!
-
2
-
-
16 hours ago, Grunhertz said:
That is just gorgeous a real beauty
Thanks Grunhertz!
-
2
-
-
9 hours ago, Uncarina said:
Kai,
Amazing work on this kit and a stellar result!
Cheers, Tom
Thanks Tom!
-
2
-
-
23 hours ago, Martinnfb said:
Masterpiece , considering the amount of work invested into this build and the related challenges, the final result is absolutely fantastic. Bravo !
Cheers
M.
Thanks Martin!
-
2
-
-
Thanks Harv! Thanks a million for watching over my build
Kai
-
3
-
-
Very nice Mikester- these look great with the backgrounds!
Kai
-
2
-
-
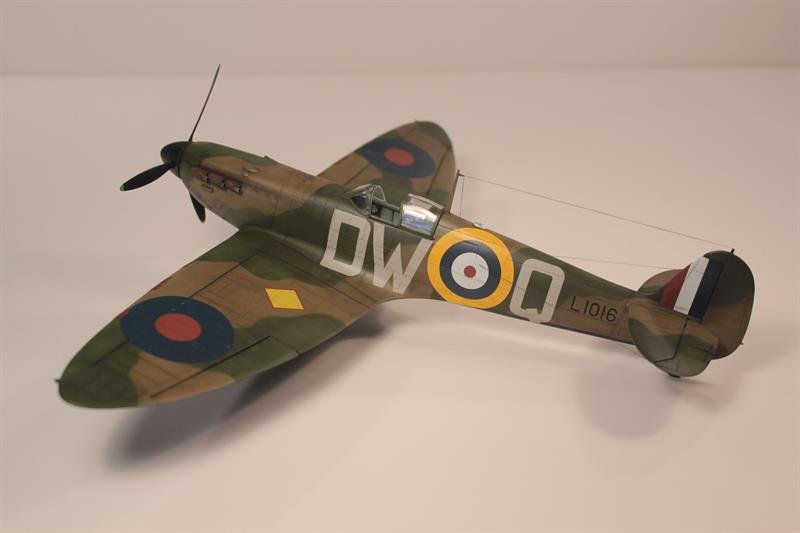
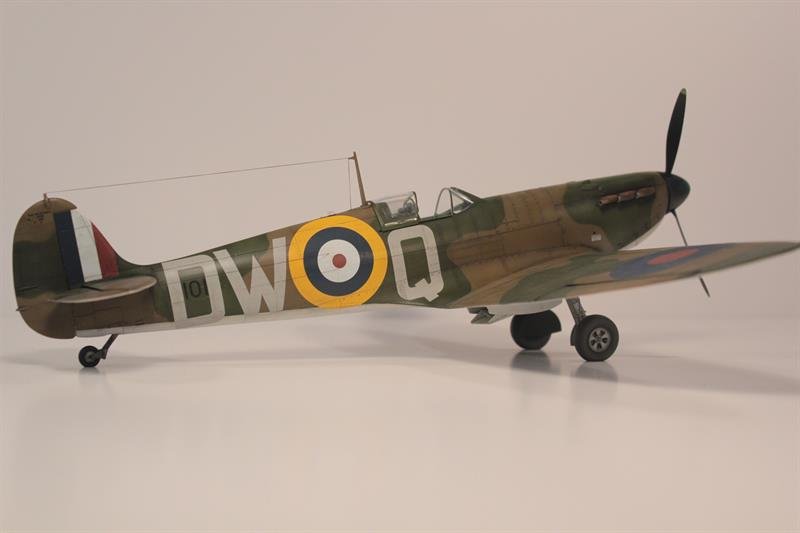
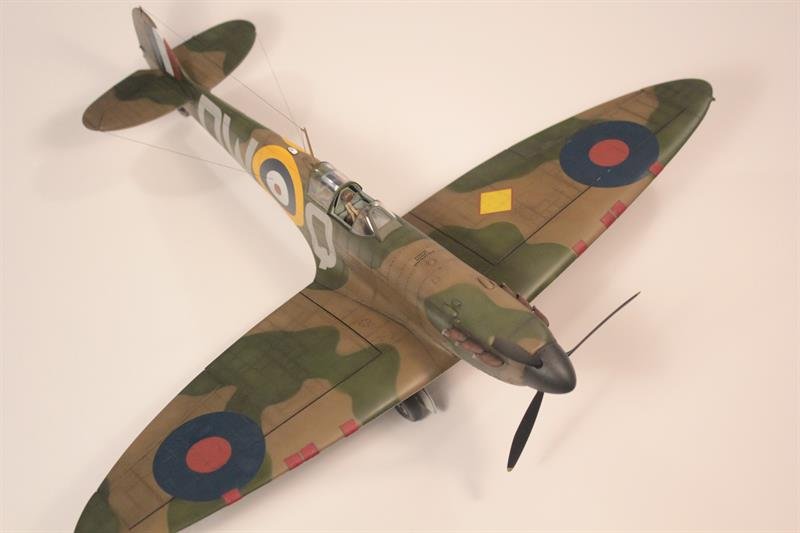
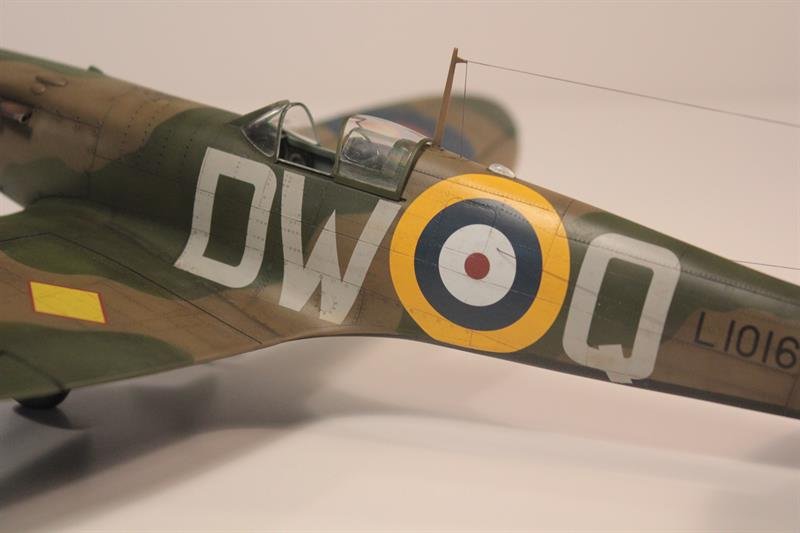
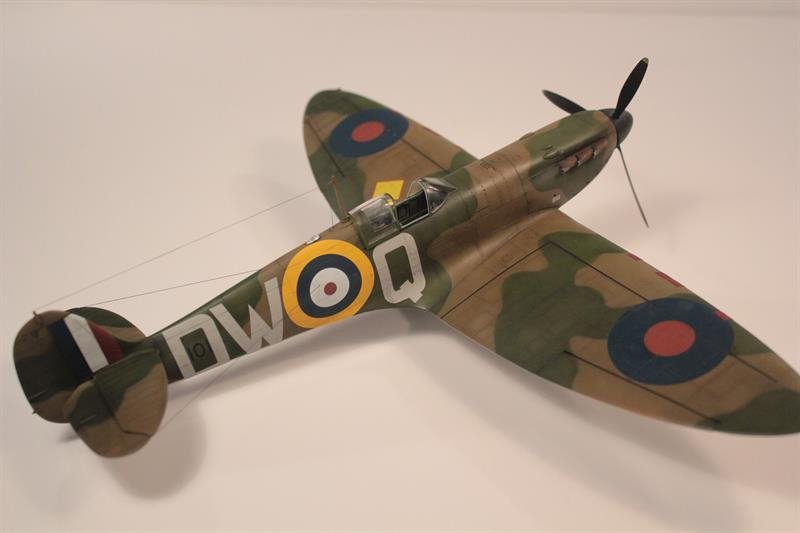
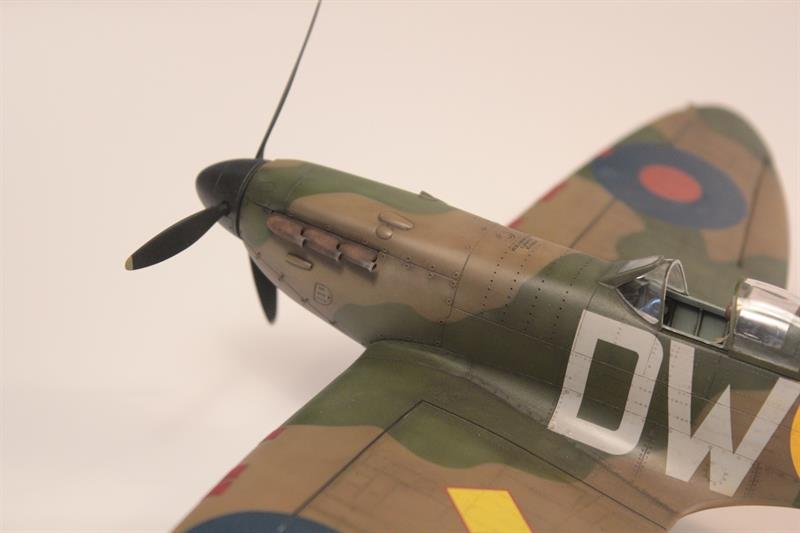
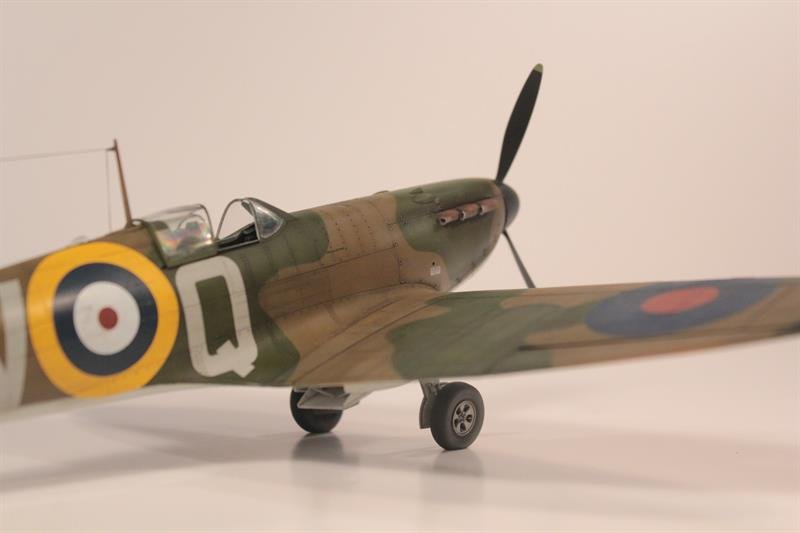
F/O Albert Medcalf’s Spitfire Mk.I (L1016 DW-Q), 610 Squadron
610 squadron began operations over the Belgium area in early May 1940, and by the 27th were supporting the Dunkirk evacuations when they encountered an He-111. While the the bomber was dispatched, 610 squadron in turn found themselves in combat with some 40 Me-110’s. Three of the Messerschmitt’s were accounted for, however 610 lost two of their own- Sergeant William Medway and FO Albert Medcalf. By the time operation Dynamo was concluded, half of the original members of 610 squadron would killed, missing or wounded.
This is the old-tool Revell kit that was originally released in 1969. To improve some of the details, a donor Hasegawa kit was raided for:
- cockpit
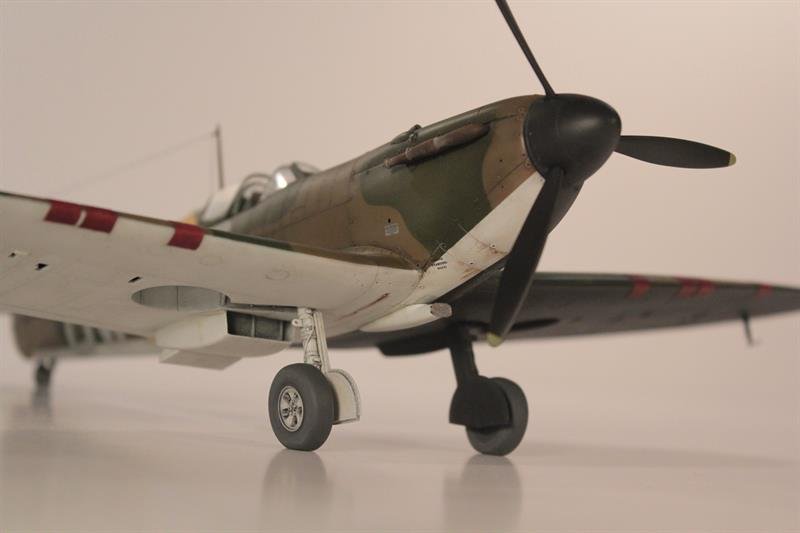
- carburator scoop
- propeller
- canopy and windshield
- landing gear doors
Aftermarket used includes:
- Quickboost exhaust
- Brassin landing gear
- CMK/Quickboost seat
- True Details wheels
- EZ-Line for antenna wires
- Eagle Edition decals
Scratchbuilding and corrections were needed to address many of the kits shortcomings:
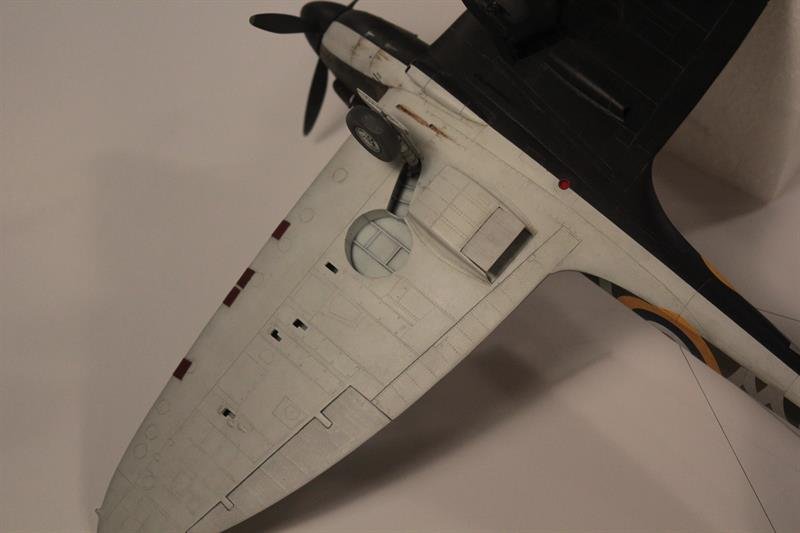
- landing gear bays
- gun ports
- radiator and oil cooler
- minor interior and exterior details
- fit issues at cowl panels and control surfaces
Build time was about 2 months. Colors are generally Vallejo (which went on very nicely) along with some Tamiya and Model Master enamel. Mig Dark wash, oils, pigments and pastels were also used during the finishing process.
The work-in-progress build thread can be found here.
I enjoyed the build and am pleased with the outcome. Thanks to all those that followed along and for the helpful input and encouragement. I hope you enjoy and Happy New Year!
Kai
-
13
-
 1
1
-
A final update here.
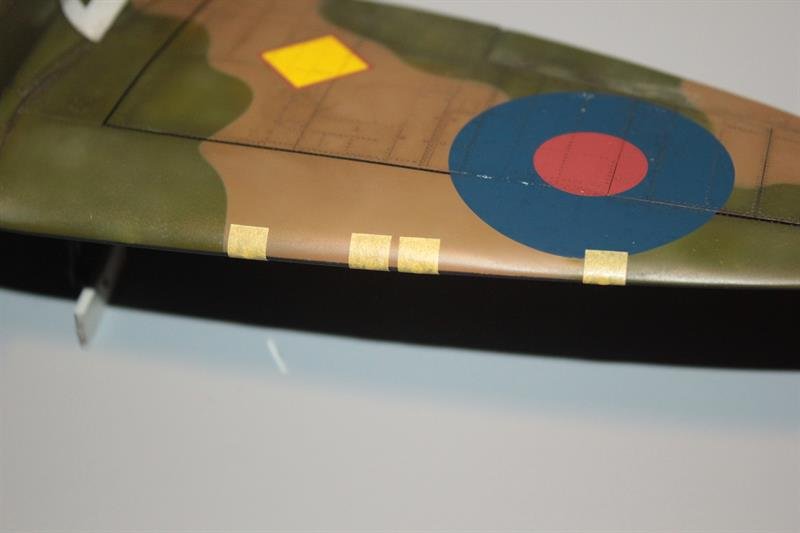
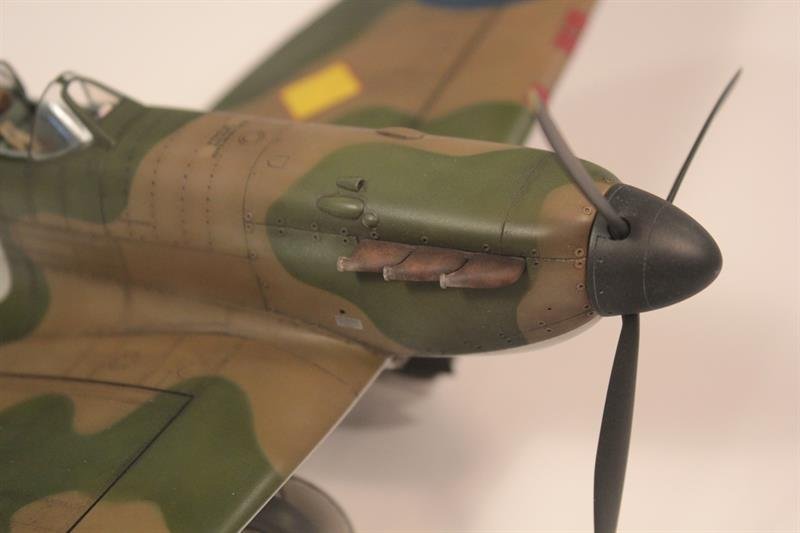
The Eagle Editions decals included the tape for the gun ports, however they looked a little bigger than images I was finding on the internet, so I used Tamiya tape instead. I ended up painting these Model Master Crimson Red.
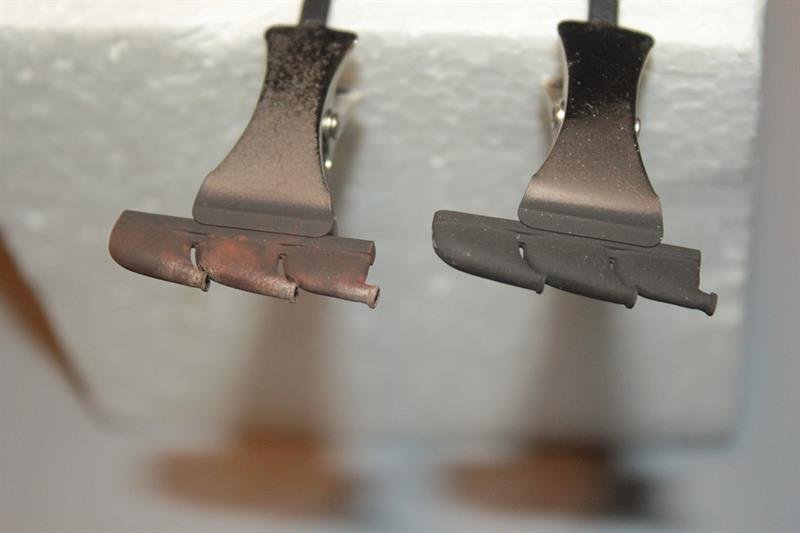
Here is a before-after pic of the Quickboost exhausts which are much better than either the Revell or Hasagawa parts. On the right, the base color, which is a home brew mix made from Tamiya colors. On the left, a simple application of pigments. Much of the effect was lost once a flat coat was applied, so I had to re-apply pigments and some pastels to restore the effect once these were glued into place.
All the bits and pieces, loose ends and last minute knick-knacks have been added, and at this point, the build is now complete, making this all but my second for 2018. Hoping to improve on this in the new year
Pics of the completed build can be found here.
Thanks much for looking in and following along!
Kai
-
6
-
-
12 hours ago, Peterpools said:
Kai
Amazing work as always and on one of my Tamiya Spit builds managed to do the exact same with the wing walk lines. Where needed, I doubled decaled as well.
Mig Panel Line Wash looks dead on and with just the right touch
 . I’ve been using Tamiya Panel Line Washes and except for the black, the gray and brown aren’t that effective over most colors. Any chance on doing a mini tutorial on how you use and apply the Mig Wash
 ?
?
Keep ‘em comin
Peter
Thanks Peter! It's good to know I'm not the only one to cross that bridge sideways...
I haven't tried the Tamiya panel washes yet, but have most of them. I'd love to do a quick tutorial on the Mig wash. Let me check on pics as they would help illustrate the process.
Kai
-
15 hours ago, nmayhew said:
looks wonderful
never had solvaset do that to eaglecals but you made a good recovery!
Thanks for looking in Nick.
I've never run into this issue either. I'm wondering if using the Tamiya Markfit under the decals and Solvaset over the top was just too much. It's also possible I missed a spot when wiping the decal down to tack it into place, leaving a bubble of the Markfit underneath...
Kai
-
1
-
-
16 hours ago, Grunhertz said:
Lovely work sir. A friend of mine has just released insignia masks for 610 sqdn but looks like you did just fine without them
Thank you Grunhertz!
-
1
-
-
17 hours ago, Wingco57 said:
Blimey!!! That's fantastic. Those codes really fight for every inch available on the fuselage.
Thanks Cees! There were moments I didn't think they would fit!
Kai
-
1
-
-
19 hours ago, GazzaS said:
Kai,
The Wash and decals look great. The large fuselage markings are my favorite Roundels on any aircraft. I always thought little roundels ugly. Looking sweet! would hardly know it was such an old kit.
Gaz
Thanks Gaz! Funny thing is I'm kind of the opposite- I think I favor the small ones as they are so different from the typical Spitfire markings.
Kai
-
1
-
-
On 12/30/2018 at 4:45 PM, Martinnfb said:
I just noticed the river being punched by beading tool. Wow.
Thanks Martin- Actually, ended up doing the cowl fasteners the hard way. I punched round discs from .05 sheet styrene and then glued each in place (thank heavens for Optivisors). Once the glue was dry, I then went to each one and drilled out the centers with a pin vise.
That said, I've needed a beading tool enough times now I think I'll get a set.
Kai
-
1
-
-
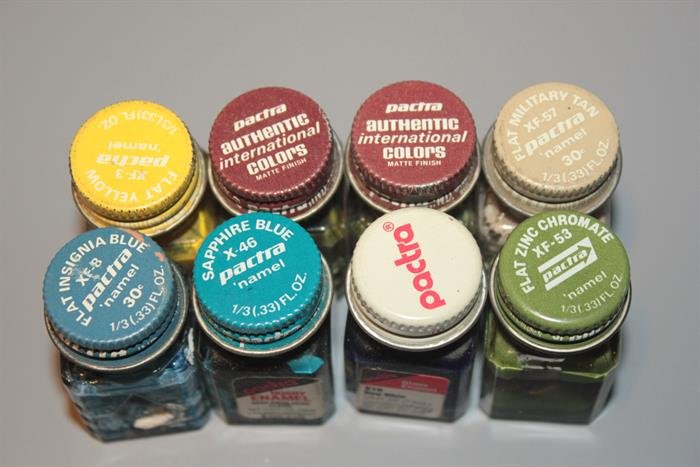
Still have some of those old Pactra paints. 30 cents a bottle- Blasphemy!
Kai

-
4
-
-
Damn, beat me to it!
Kai
-
4
-
-
Gaz- considering Revell pilots are born ugly to begin with, you did an awesome job. Keep going buddy.
Kai
-
2
-
-
Helluva round John! Looking forward to your next builds in 2019
Kai
-
5
-
Raising the Kursk
in General Discussion
Posted
What is the gray object? It looks like it could be a tube launched cruise missile...
Kai