

EmperorKai
-
Posts
73 -
Joined
-
Last visited
Content Type
Profiles
Forums
Events
Gallery
Posts posted by EmperorKai
-
-
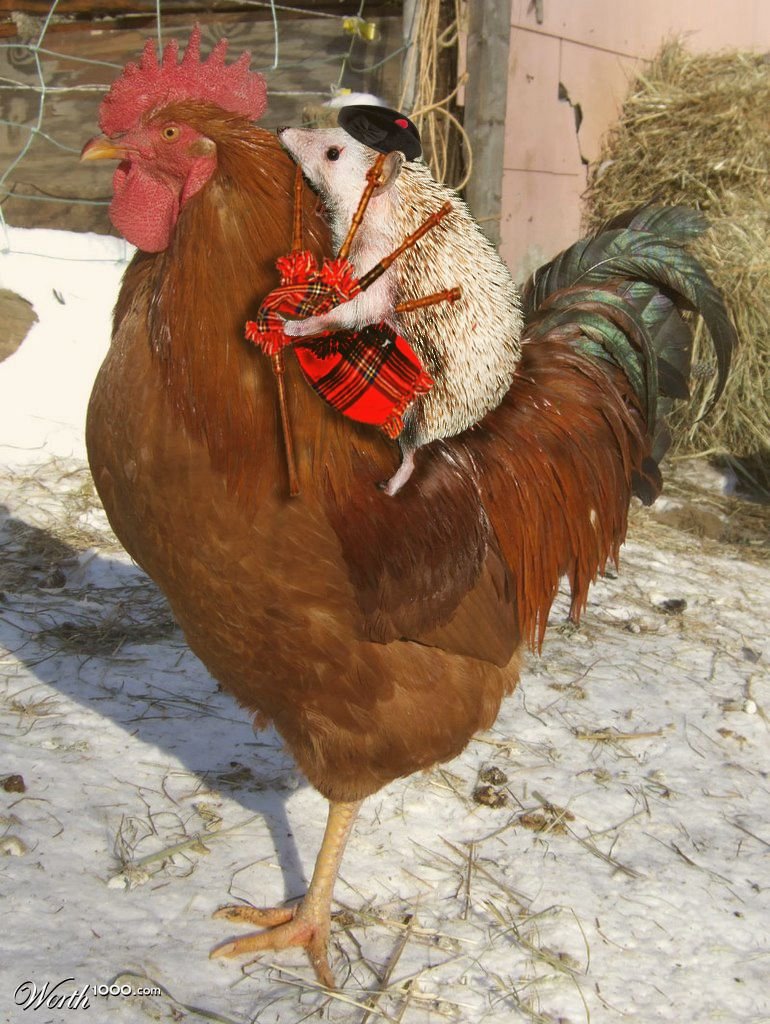
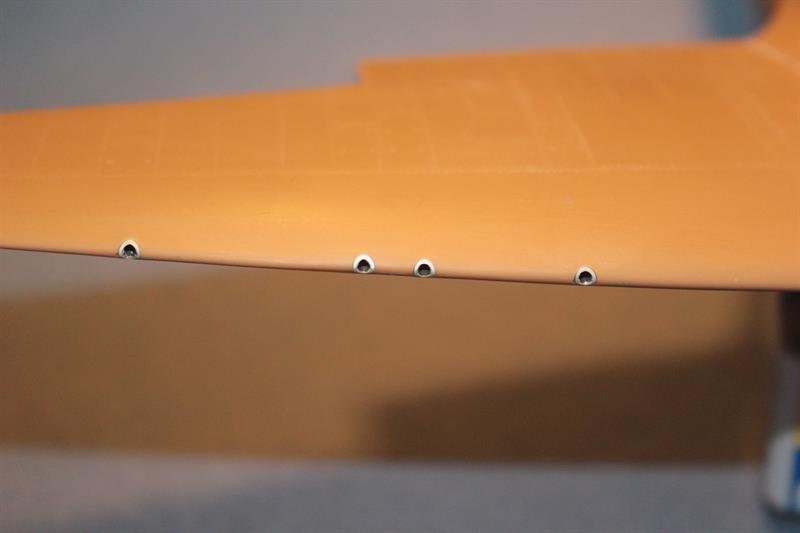
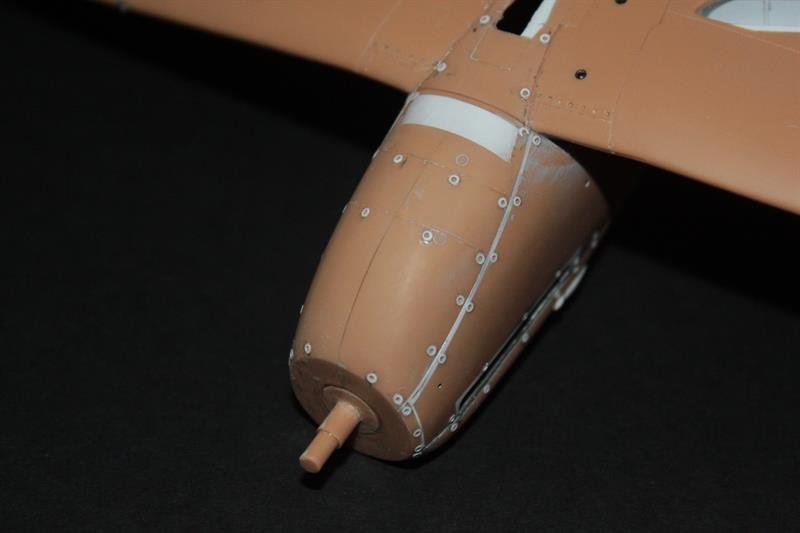
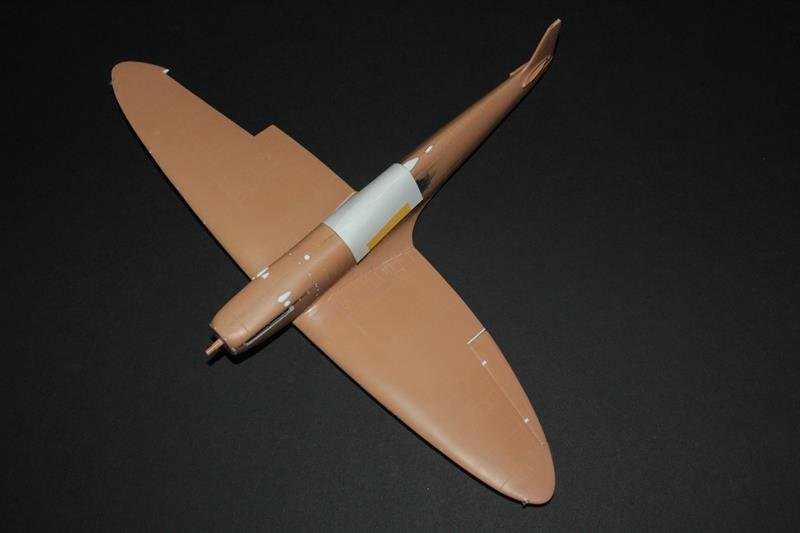
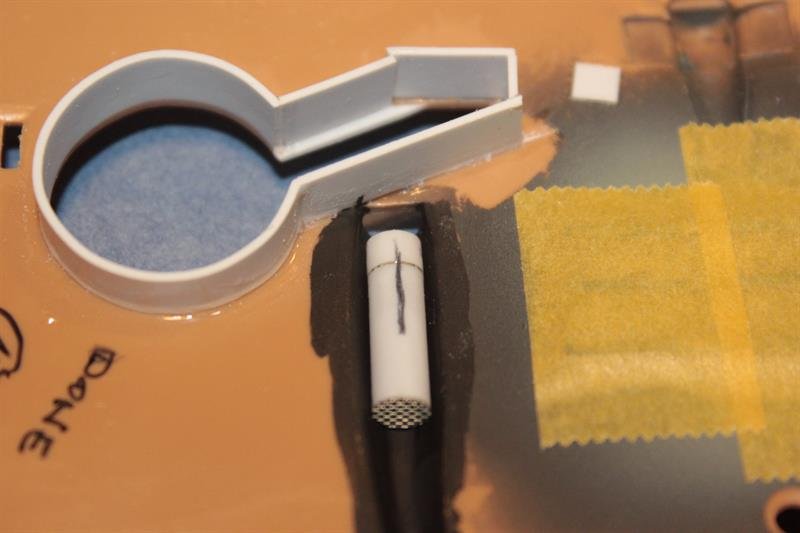
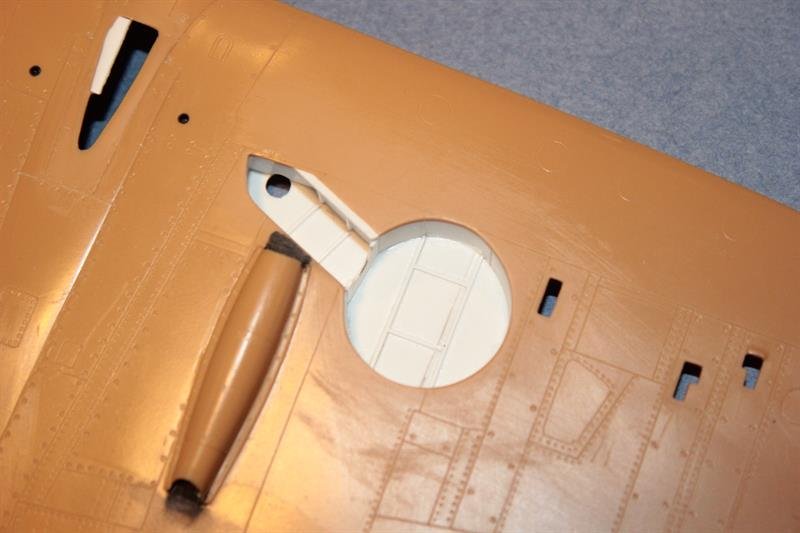
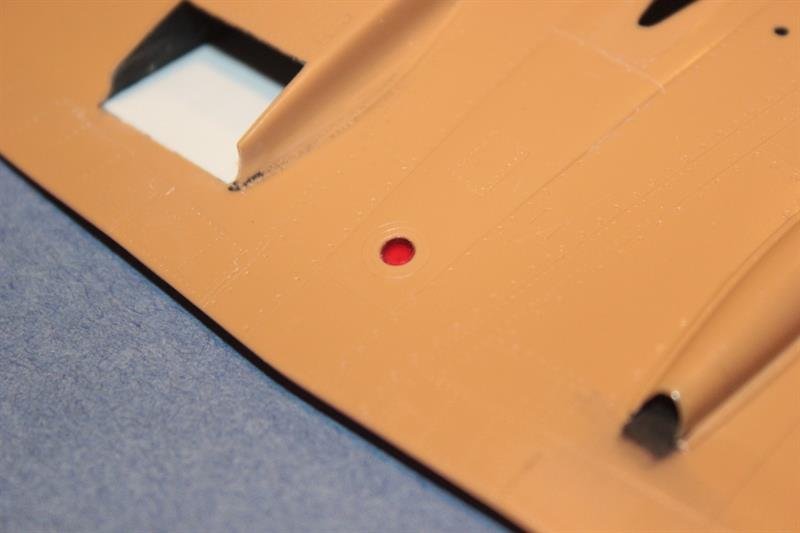
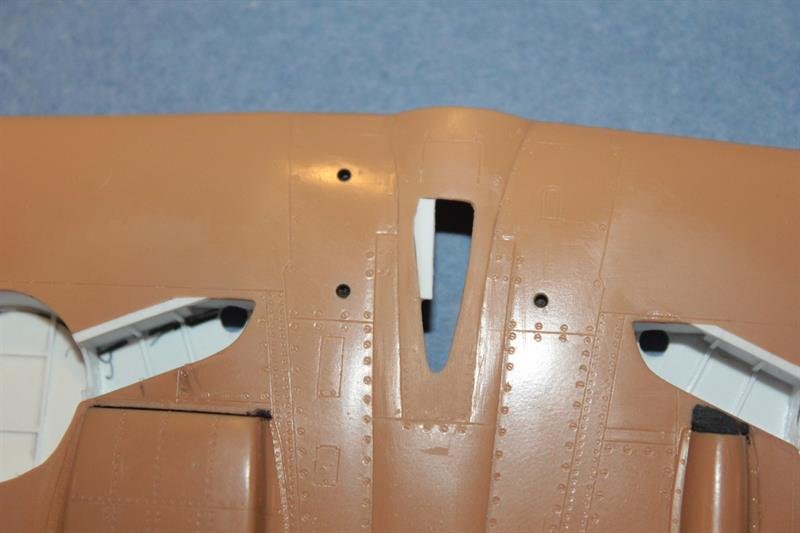
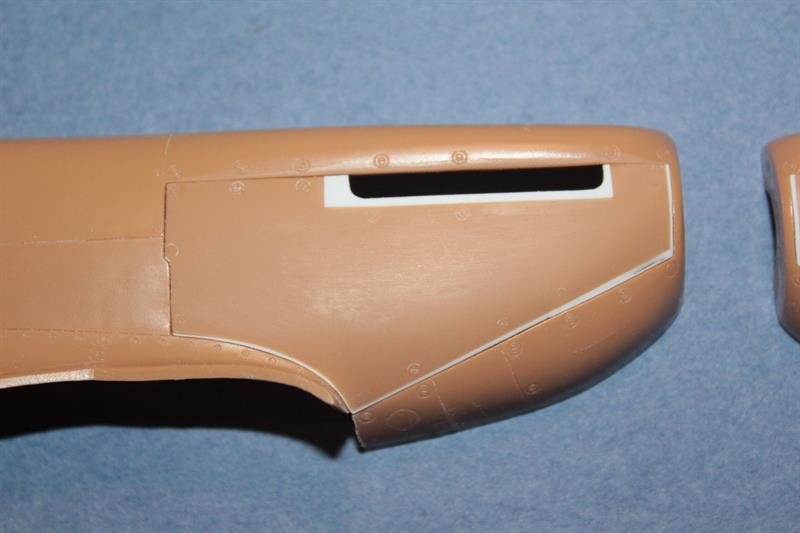
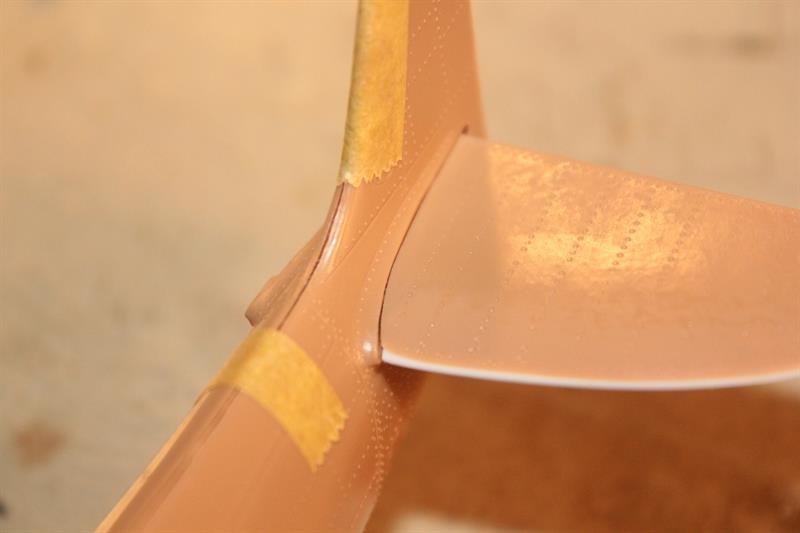
WINGS
Having spent the weekend toiling away, I now have the wings joined to the fuselage and cleaned up. The contour under the nose where it joins the wing section didn't look right so strip styrene was added to fill it out for a nice smooth profile.
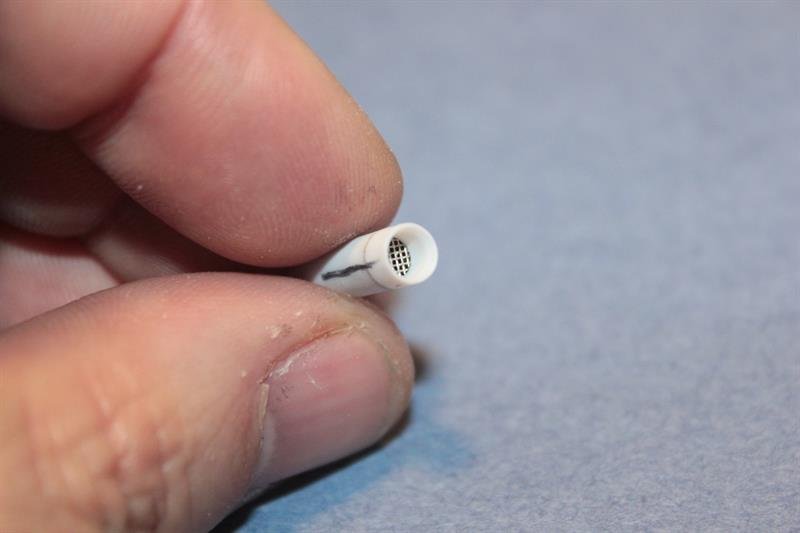
The ports for the guns are faired over on the kit with "tape", so these were opened up and dressed properly with aluminum tubing. The kit ailerons need additional attention as well, and at this point I have one completed. Cowling fasteners were also finished up along the underside now that the major sanding is done. Hope you enjoy!
Kai
-
 9
9
-
-
Thank you gents for the encouragement and looking in on my build!
Tom- I didn't notice that until you pointed it out. Nice catch!
Kai
-
3
-
-
Looking pretty sweet Martin. Can’t wait to see where you go next with the paint. I already can’t wait to build this kit, and you’re build is making me think hard about doing it sooner rather than later.
Kai
-
3
-
-
Fantastic work as usual John!
Kai
-
1
-
-
Beautiful work Peter. Always enjoy watching your builds and glad to see you’ve got your mojo back!
Kai
-
1
-
-
You go Gaz! I would also encourage you to let the shape and dimension questions go, and just build it, have fun with it and be that kid again.
Kai
-
5
-
-
Nice start GusMac! I like the really weathered ones too.
Kai
-
5
-
-
Thanks for the kind words! Should have another update tomorrow...
-
2
-
-
Thanks much!
-
3
-
-
Thanks Rob and for looking in on my build.
-
4
-
-
THE FUSELAGE
The fuselage was closed up and I've started adding various details such as cowling fasteners and "hood bumps" for the Coffman starters, etc. Missing panel lines and rivets were added as well. At this point, this post is caught up to where I'm at now.

-
7
-
-
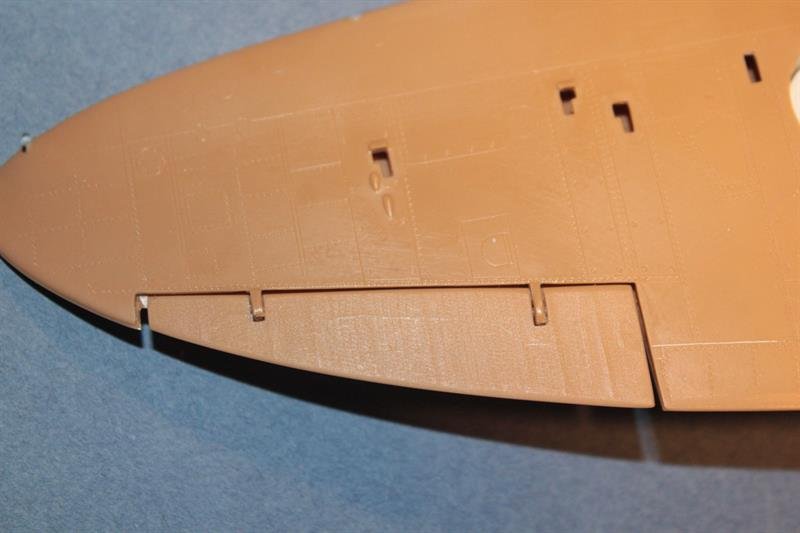
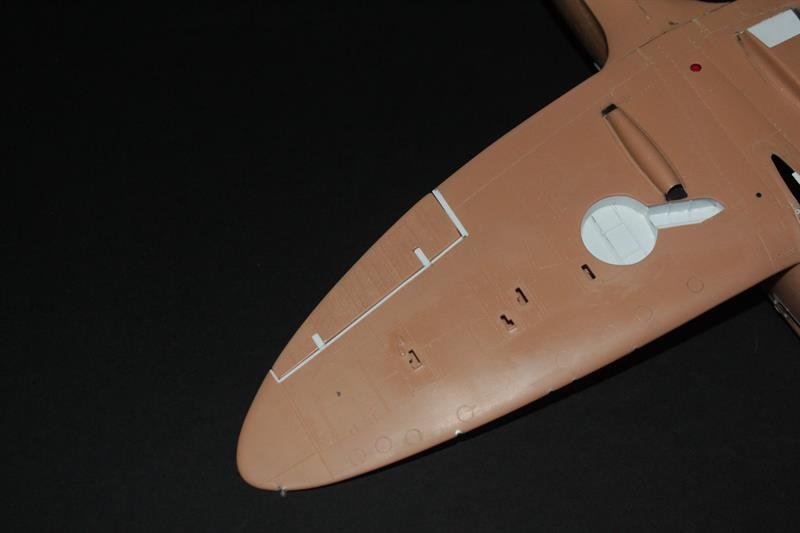
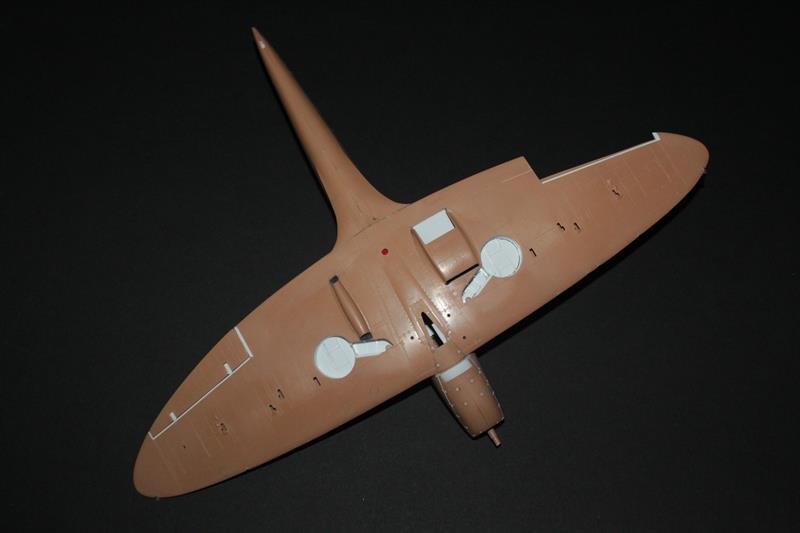
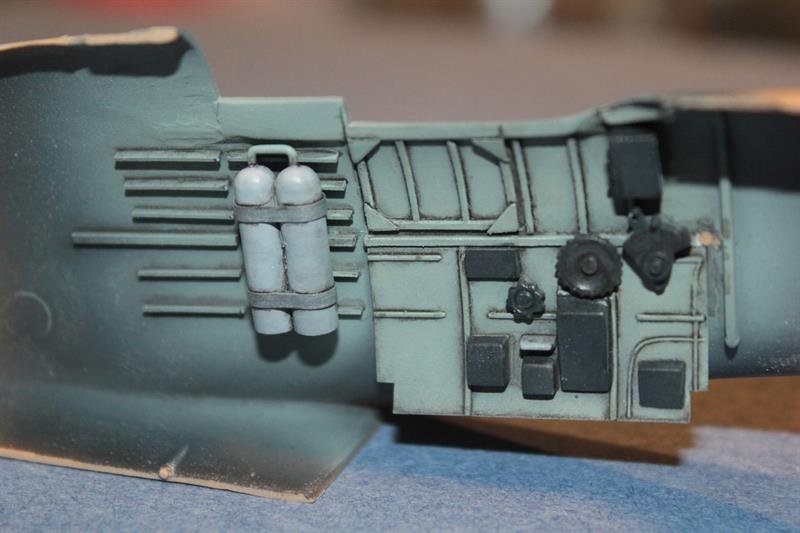
THE WING
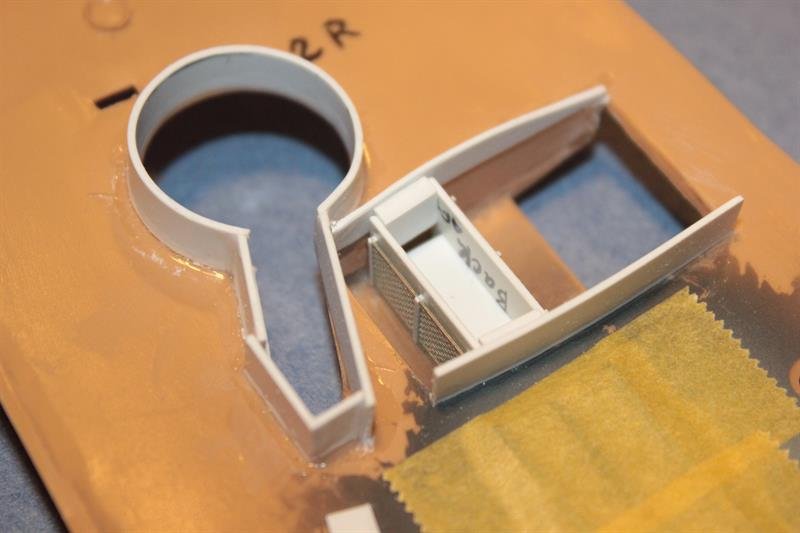
Probably the single biggest issue with the kit is the lack of wheels wells. As a 10 year old, I was able to land many an aircraft just fine without them, but for this project I decided to include them

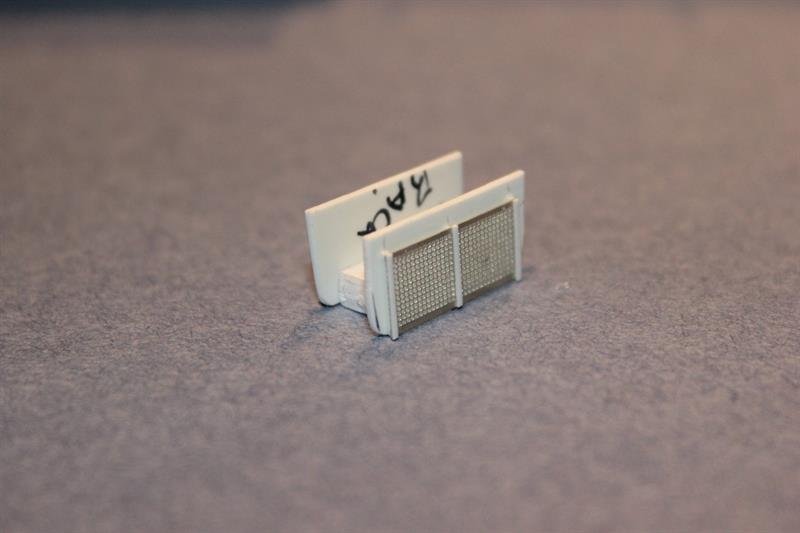
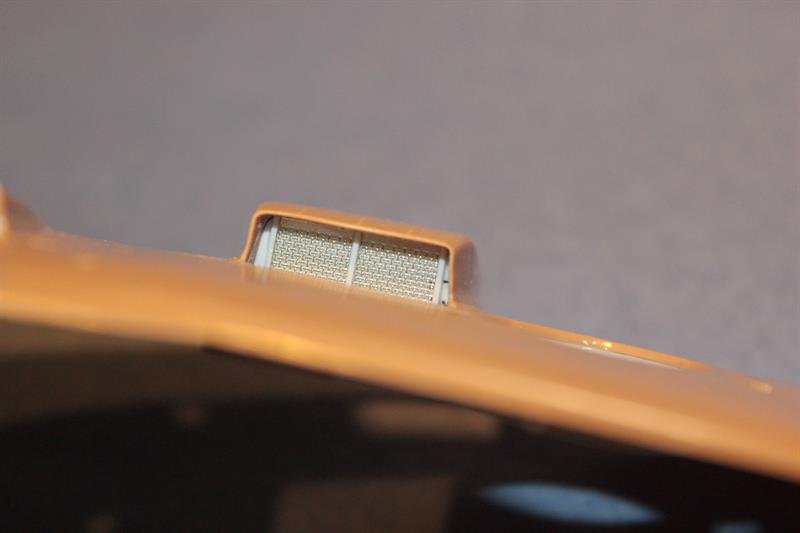
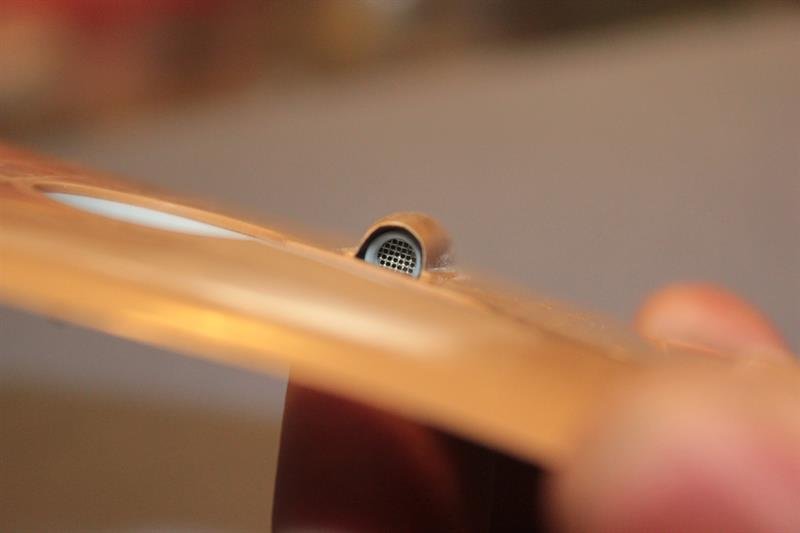
The radiator and oil cooler were also built up with styrene and leftover photo-etch. The air scoop for the carburetor was also removed so it can be replaced with the Hasegawa scoop.
-
4
-
-
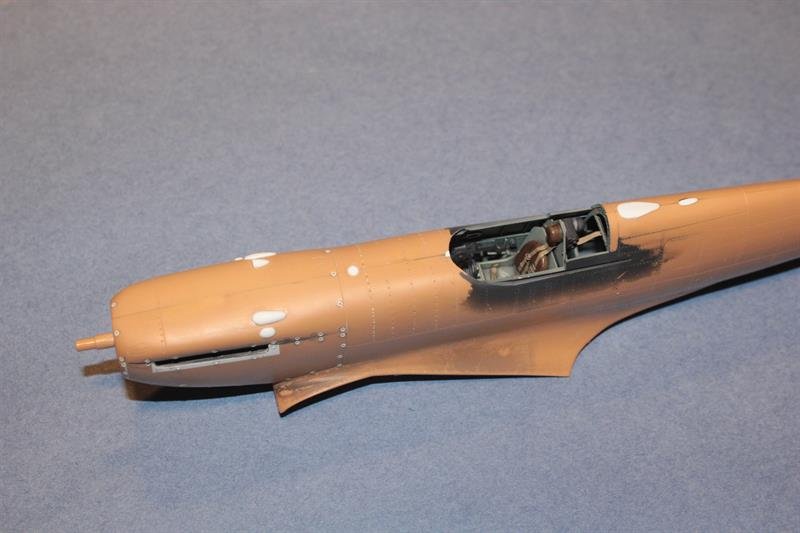
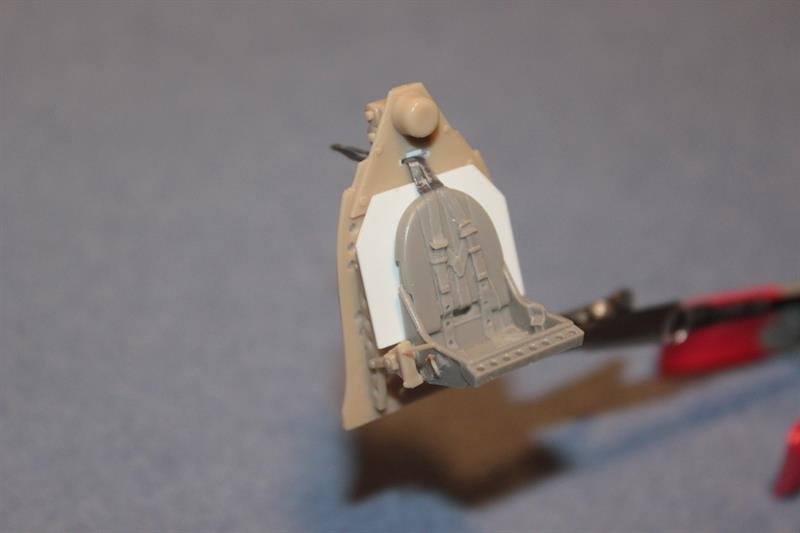
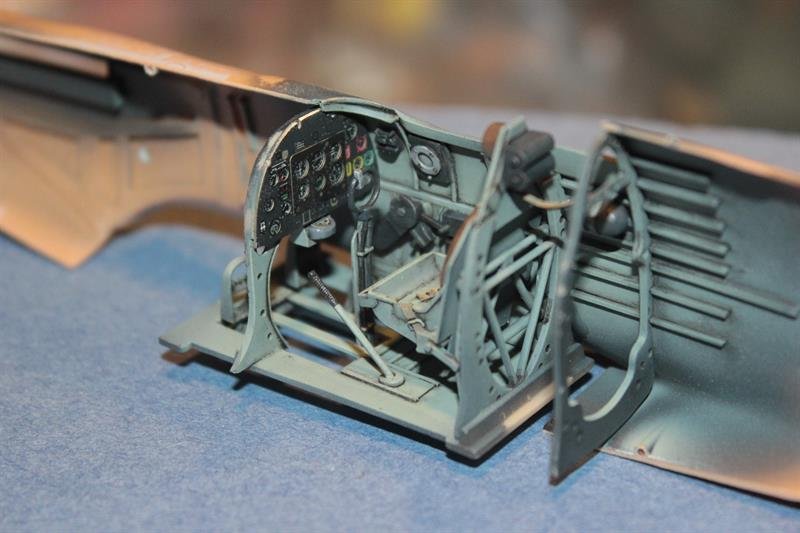
THE COCKPIT
The Revell cockpit is also typical of the era, so the Hasagawa cockpit was fitted and embellished with a Yahu instrument panel. A CMK-Quickboost seat was also added. Strip-sheet styrene was added to flesh out the fuselage and various other details.
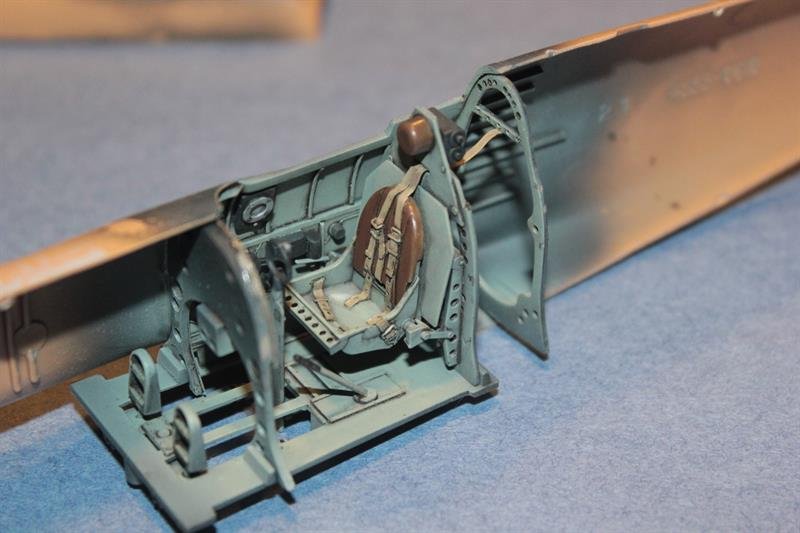
-
10
-
-
Thanks Mikester!
-
1
-
-
Another fit issue encountered was the engine panels. One of the signatures of the the Revell kits were panels that exposed engines and moveable control surfaces. At the time, and to a model-building kid, these features were awesome. However they also pose accuracy and fit issues. In the case of the Spitfire, the panels are undersized. I also found that the opening for the exhaust stacks are different sizes (!). These were corrected with styrene as well.
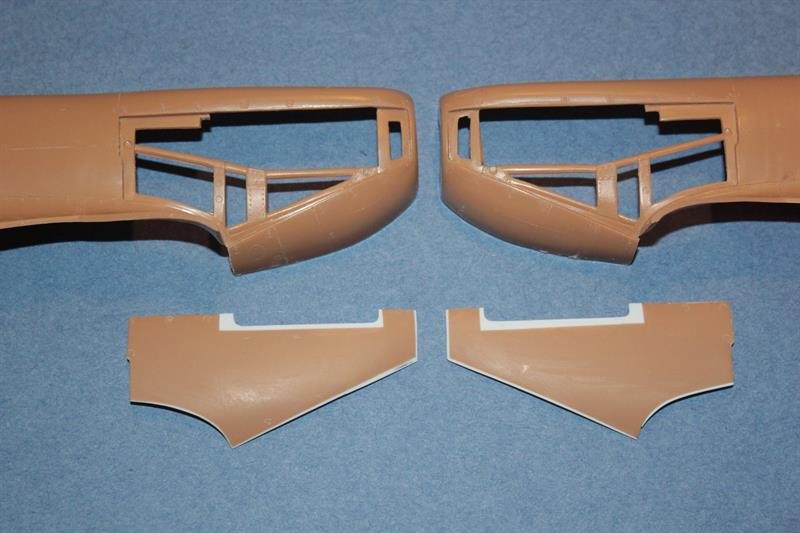
-
3
-
-
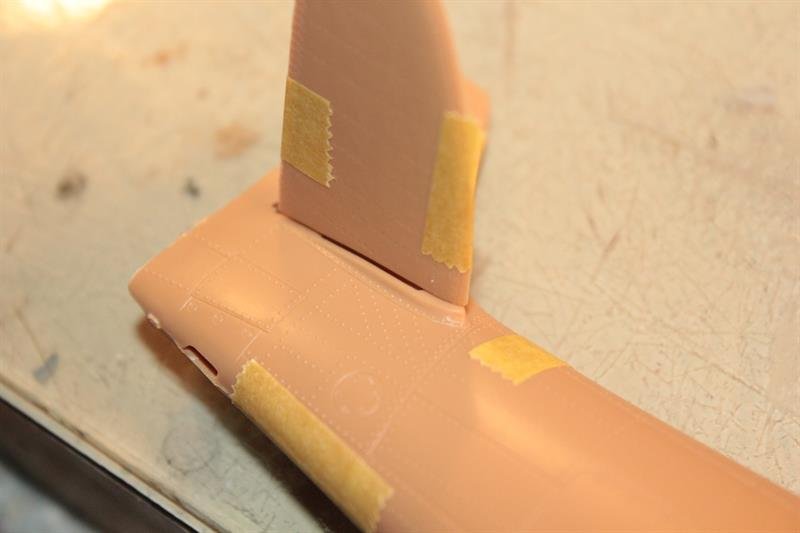
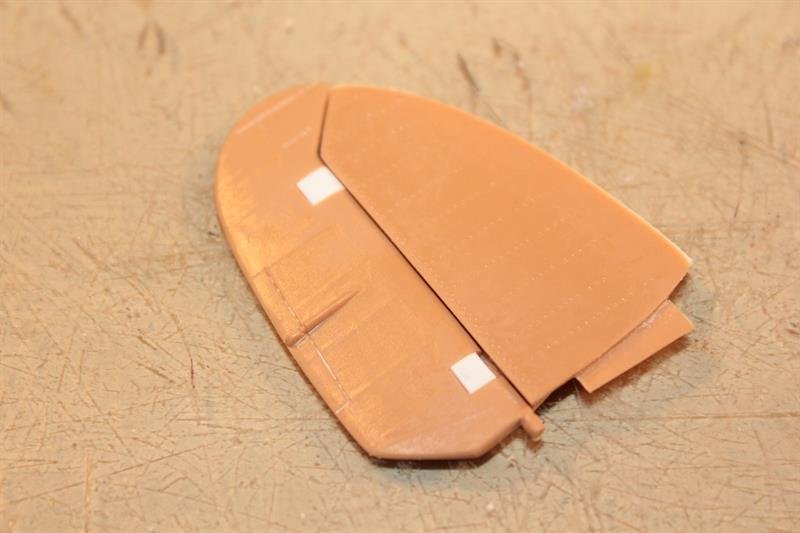
THE BUILD
During the initial dry-fitting, a number of fit issues became apparent. In the case of the stabilizers, they appear to be too thin and result in a mismatch where they meet the root at the fuselage. .020 styrene was sandwiched between the halves to address the difference. The elevators were also cleaned up in similar fashion.
-
4
-
-
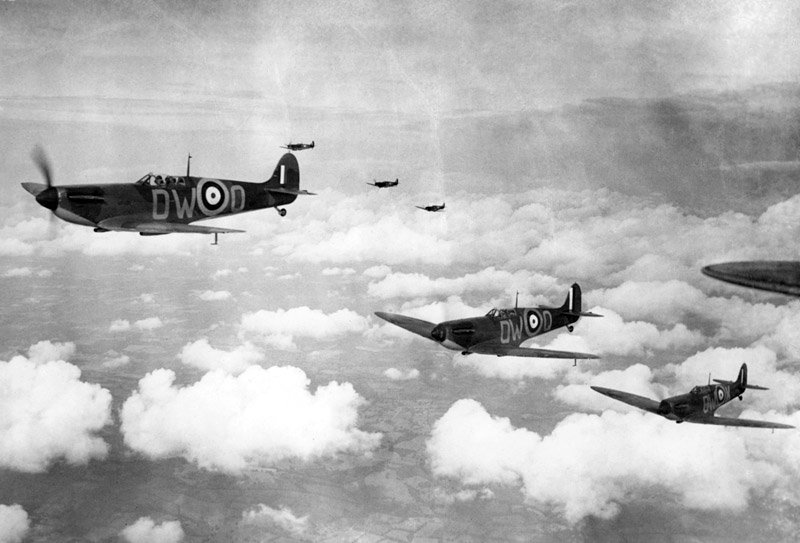
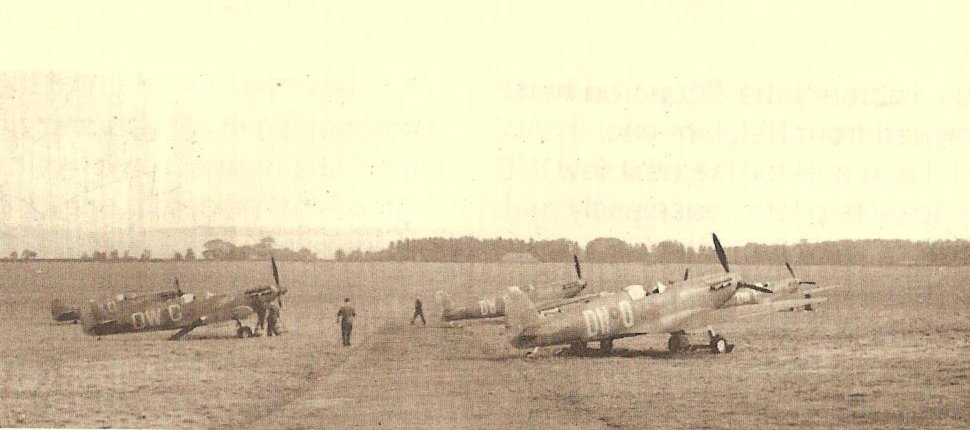
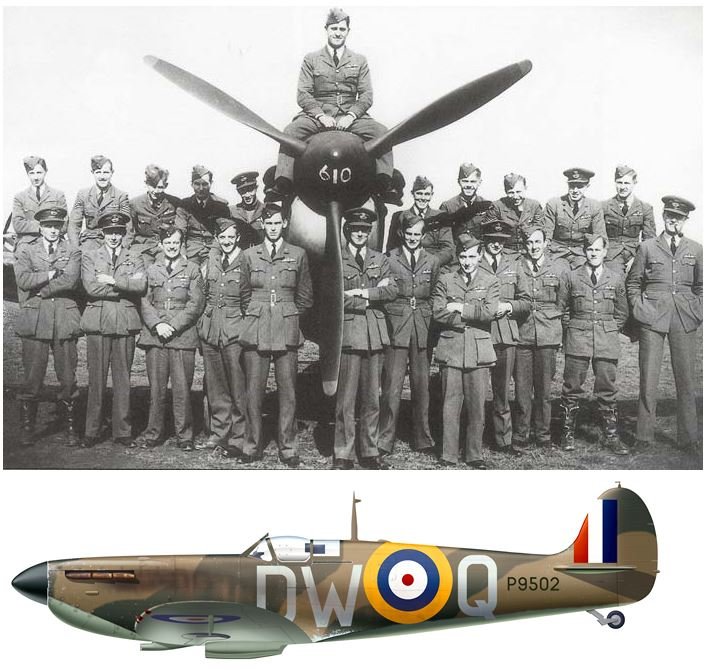
There are a number of images that show 610 sqn, and even specifically DW-Q, however as far as I can tell, these are from July 1940, which is after 610 was replenished with aircraft and pilots. By this time, DW-Q was assigned to P9502 (?) which was flown by Sgt. Ireland.
-
3
-
-
Medcalf’s aircraft was actually L1016 and was one of the original aircraft acquired in their call-up in late 1939. The only pictures that I was able to find of the actual aircraft date from this time period, with many of the aircraft sporting the early type B roundels on the fuselages. There were many variations in the roundels, lettering styles and underside colors, etc. It also appears all were the DeHavilland 3 bladed props.
-
3
-
-
My goal for this project is F/O Albert Medcalf’s Spitfire MkI from 610 Squadron. In their first action, 610 sqn was supporting the Dunkirk evacuations on May 26, 1940. On that day, they encountered and went after an He-111. While they downed the bomber, they in turn found themselves in quite a furrball with some 40 Me-110’s. Three of the Messerschmitt’s were accounted for, however 610 lost two of their own- Sergeant William Medway and Medcalf. By June, half of the original members of 610 squadron would killed, missing or wounded.
-
3
-
-
INTRODUCTION
As of late, I’ve been craving to build another aircraft- relatively quick, with minimum complications and above all, no stress. I’ve also been especially interested in early war subjects, specifically Battle of France and Dunkirk and so I landed on doing a Spitfire Mk Ia. I’m not all that knowledgeable when it comes to the Spitfire, so I’ll be learning as I go here.
I might also note (for those who may not be familiar with my builds), I’m a storyteller and tend to post my builds in an article-like fashion. As with many of you, the hobby is just as much about the history as it is the model and I hope you enjoy my journey here.
THE PROJECT
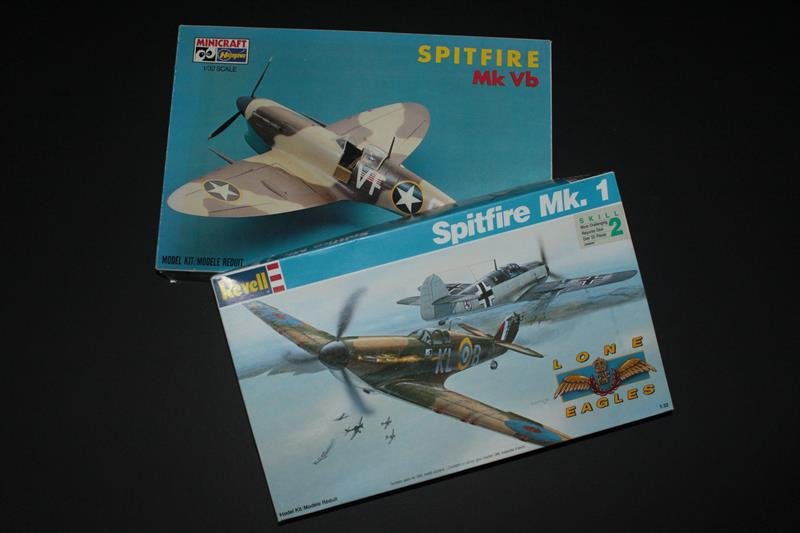
I’ve had this old tool Revell kit sitting in my stash for over 20 years now. While it is one of the better Revell kits from 1960’s era, no doubt there are other Spitfire kits to choose from. But it’s already in the stash and a relatively quick build, so it fits the bill perfectly.
After looking it over, I decided to mash a Hasagawa kit (I have 3 of these- ugh) with the Revell kit to address some of the weaker areas of the kit. I also decided to make the Revell kit the starting point as it has engraved lines - the Hasagawa kit of course has raised lines that I would feel compelled to re-scribe, which is simply more than I want to get into for this project.
I also want to mention that I’m actually about 3 weeks into this project, so I’ll be doing a couple of posts to catch up on where I’m at.
-
2
-
-
Peter! Thanks my friend
-
4
-
-
Howdy friends! Glad to find you find you all here- looks like this is where all the cool kids hang out
Thanks for the warm welcome!
-
6
-
Spitfire Mk Ia: 610 Squadron, May 1940
in LSM 1/35 and Larger Work In Progress
Posted
Cees- Thanks! I too have a soft spot for these old Revell kits and its always good to hear from another Revell University alumni. The Spitfire and 109G were two of the better kits as they weren't as "fuzzy" as the Mustang, Thunderbolt or Stuka.