Robert
-
Posts
9 -
Joined
-
Last visited
Content Type
Profiles
Forums
Events
Gallery
Everything posted by Robert
-
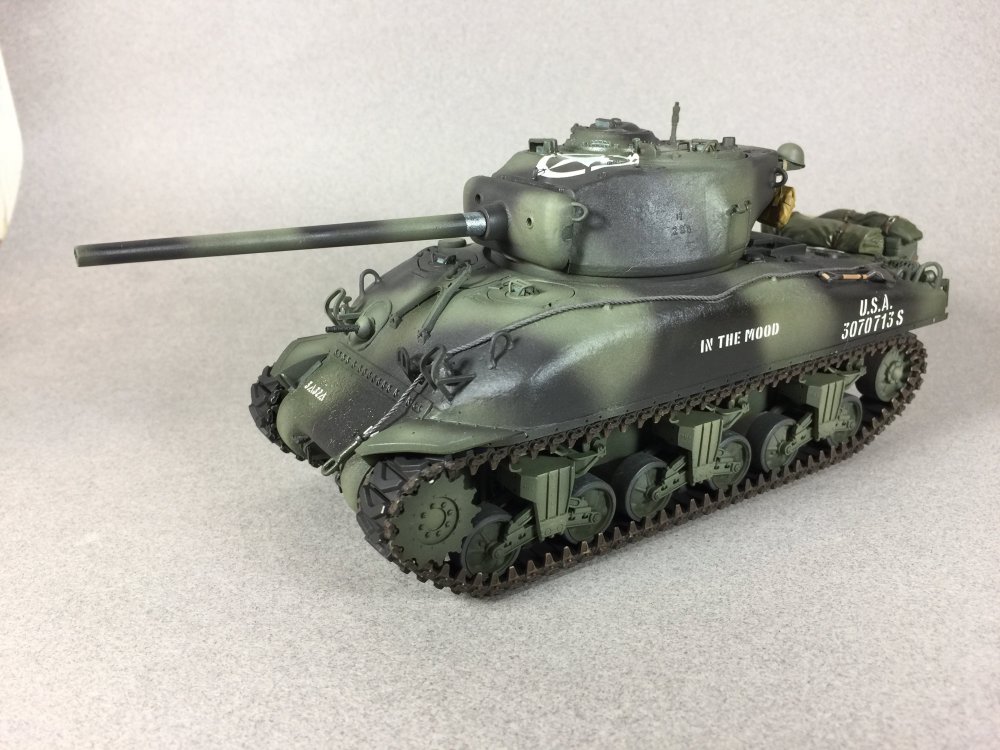
Washes done. I need to dullcote, dry brush and add pigments.

-
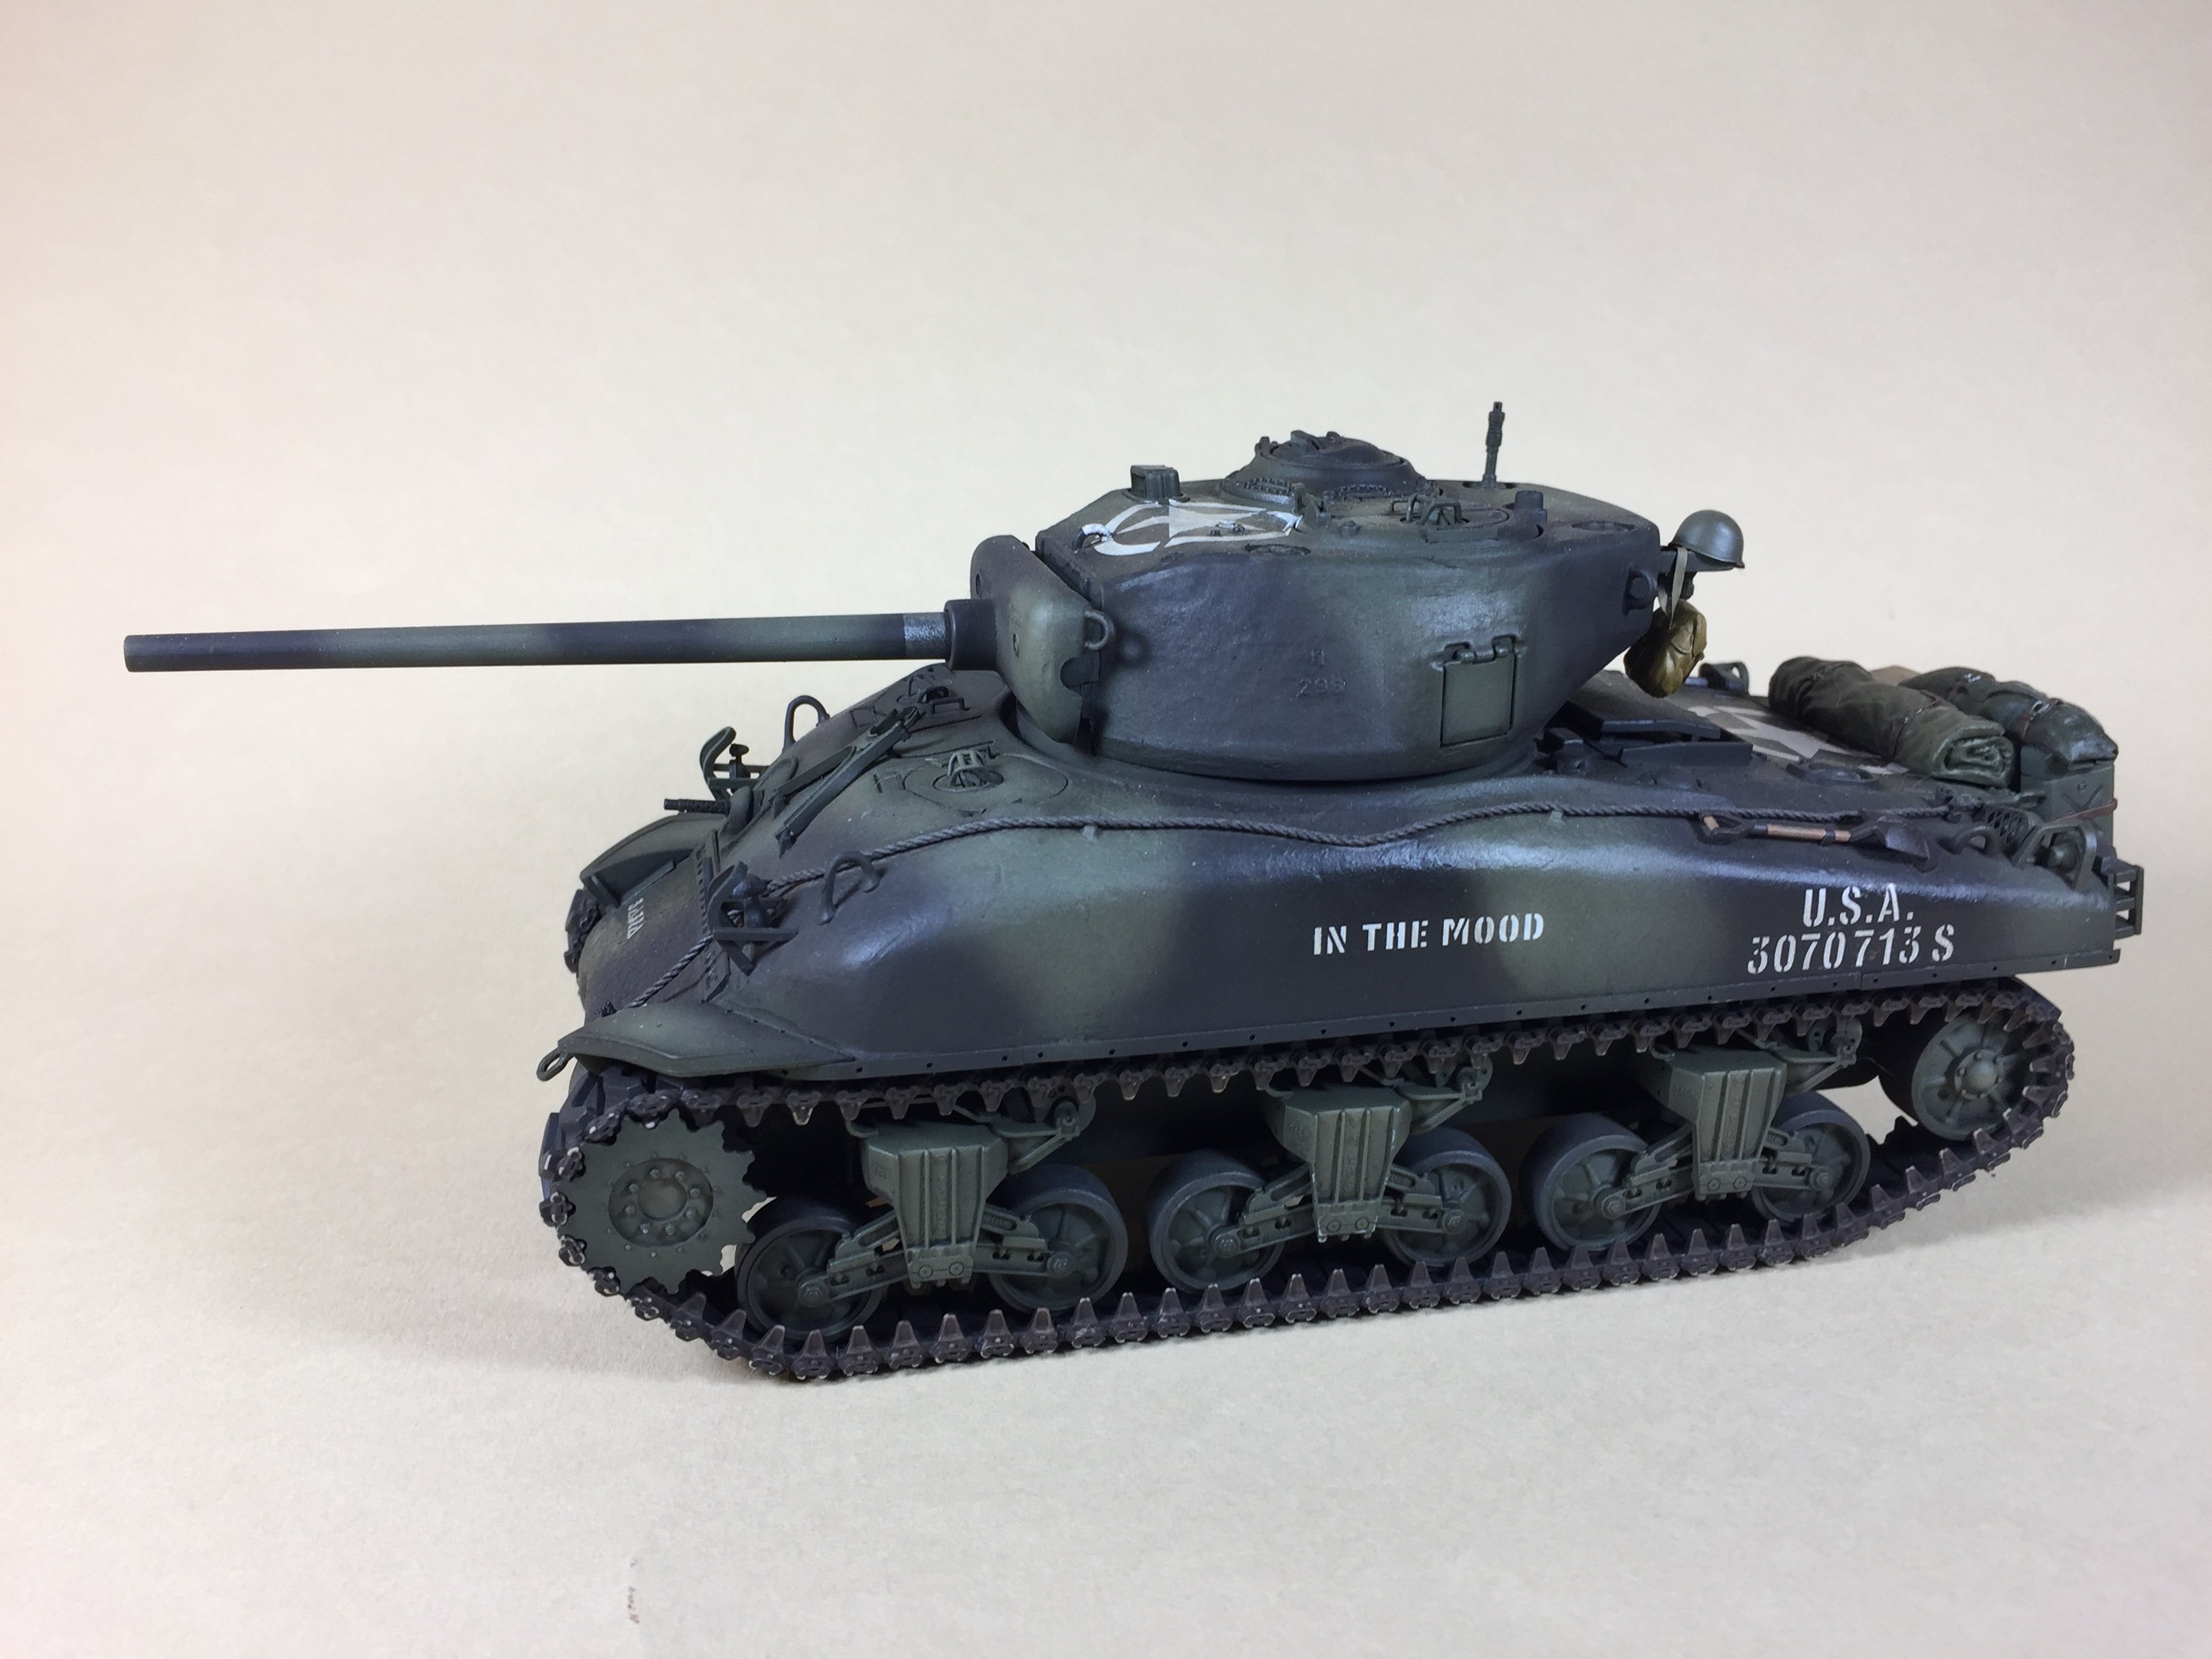
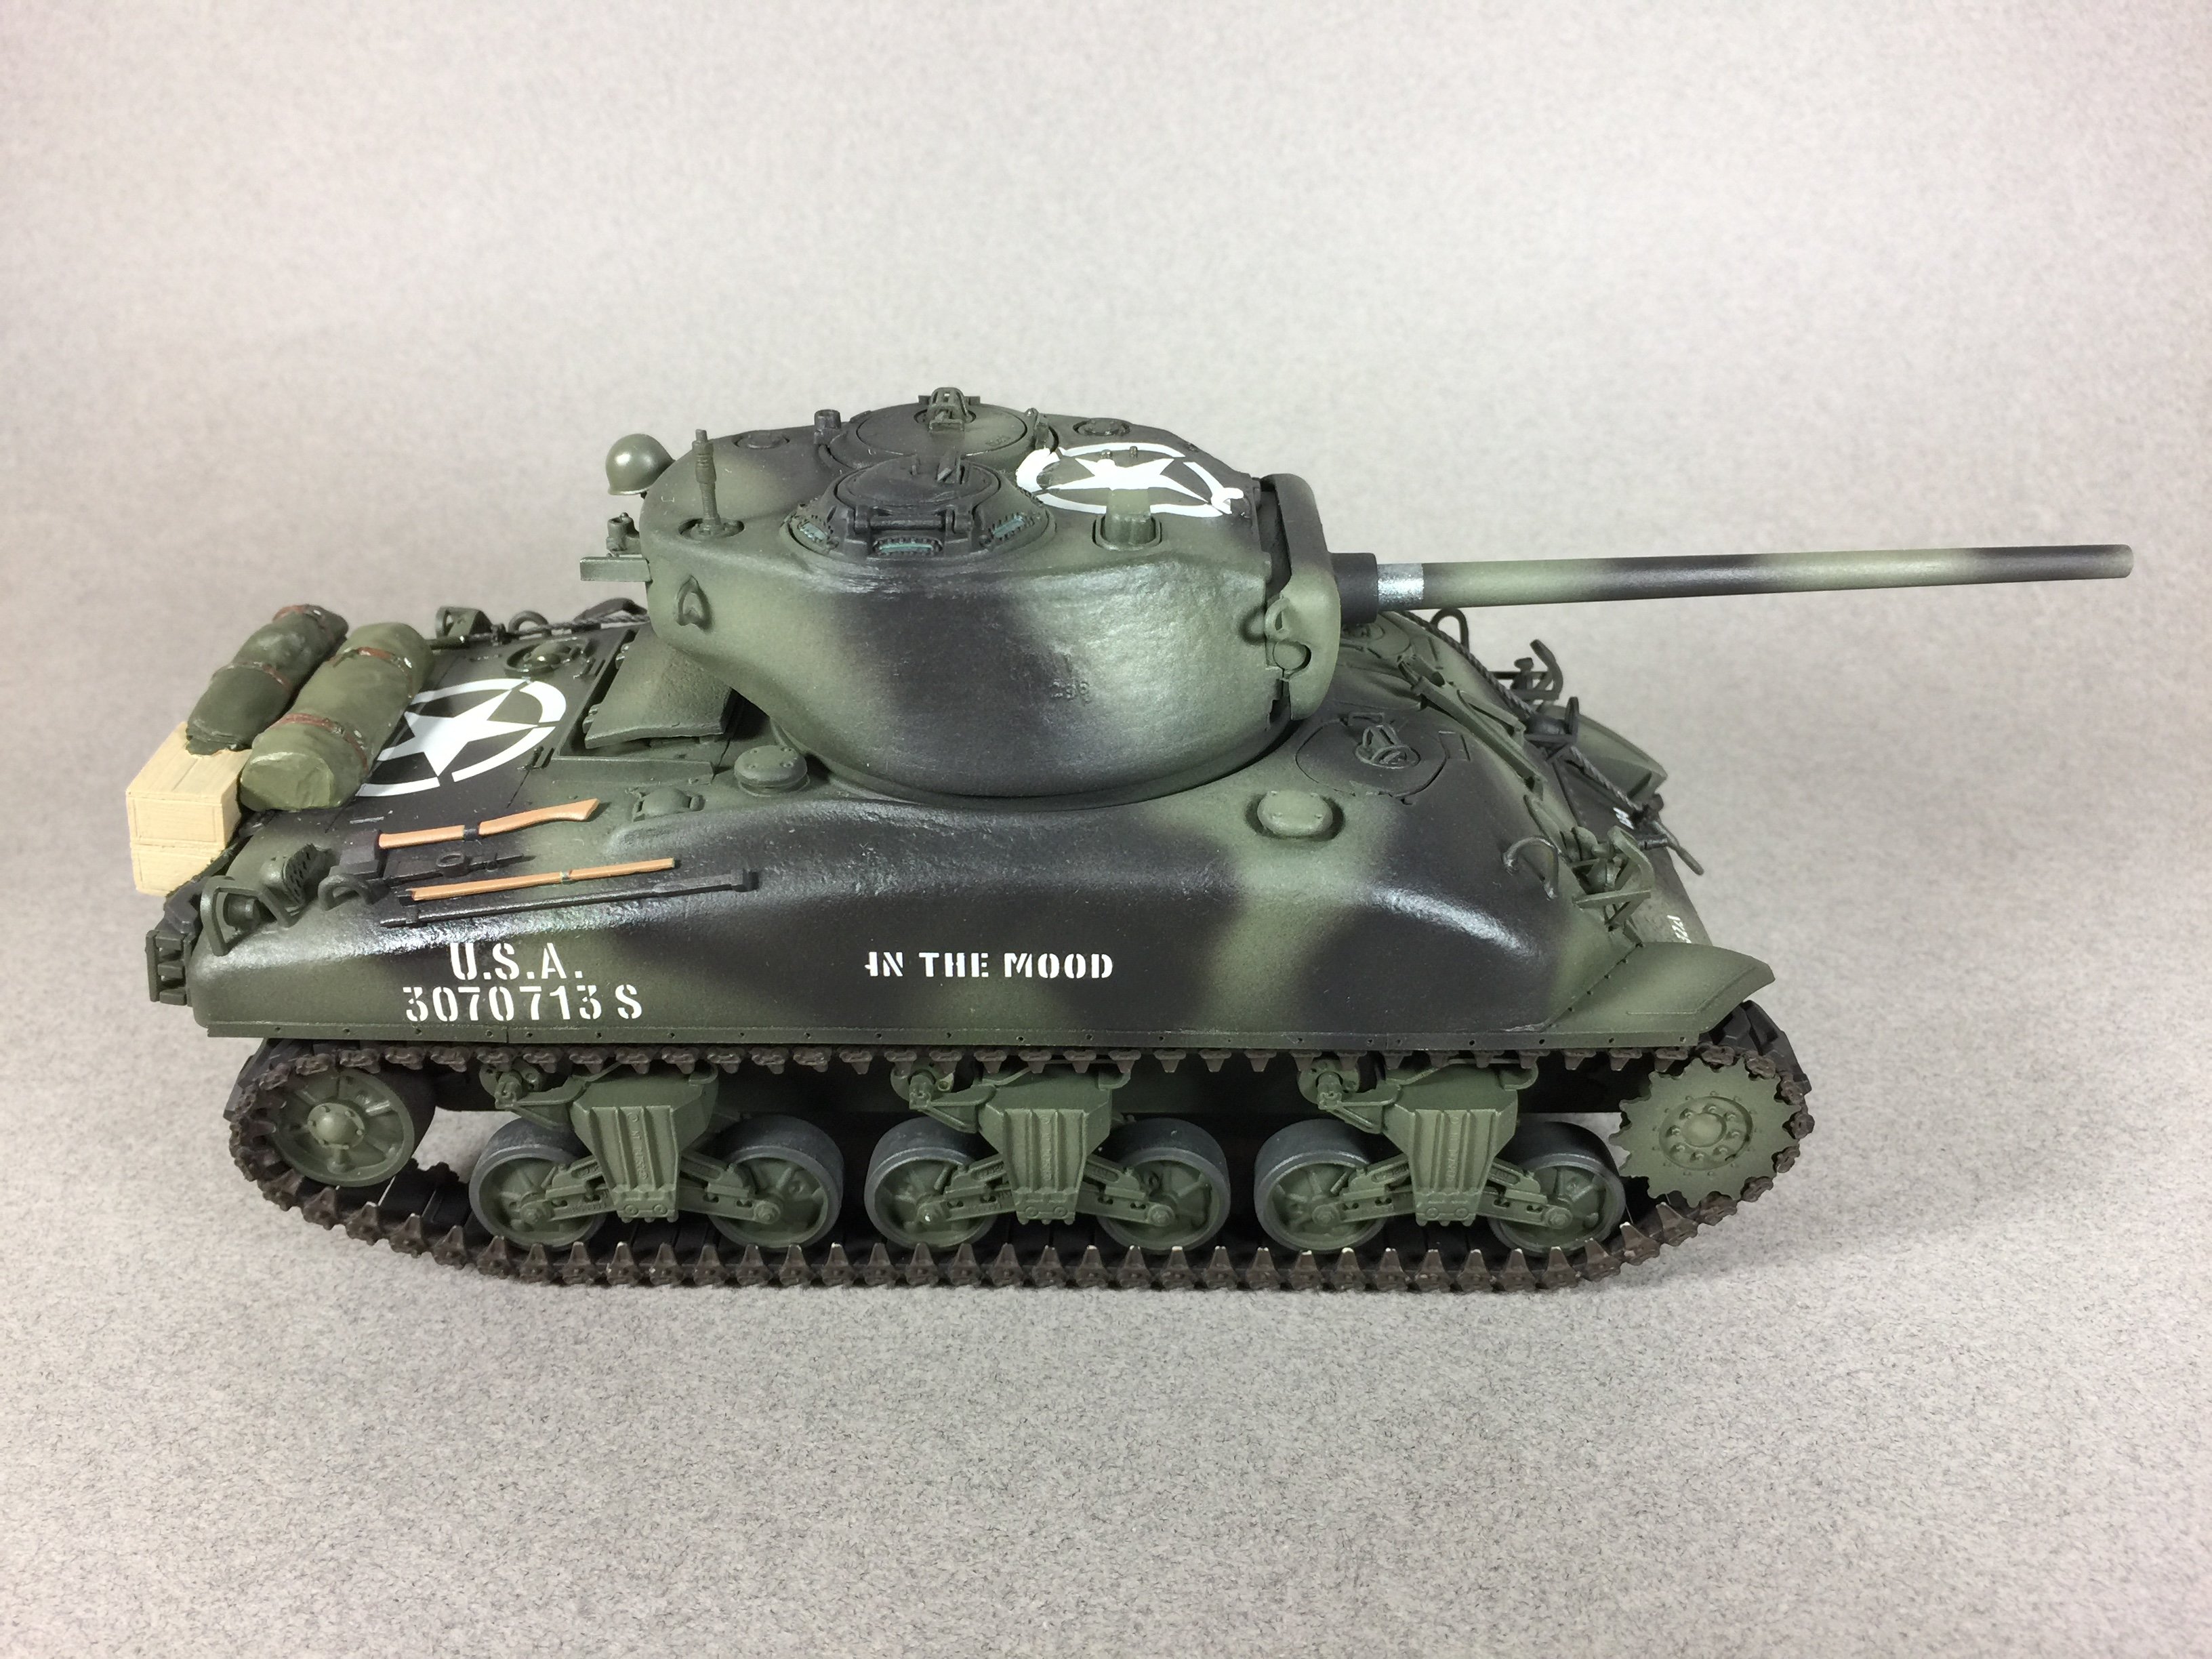
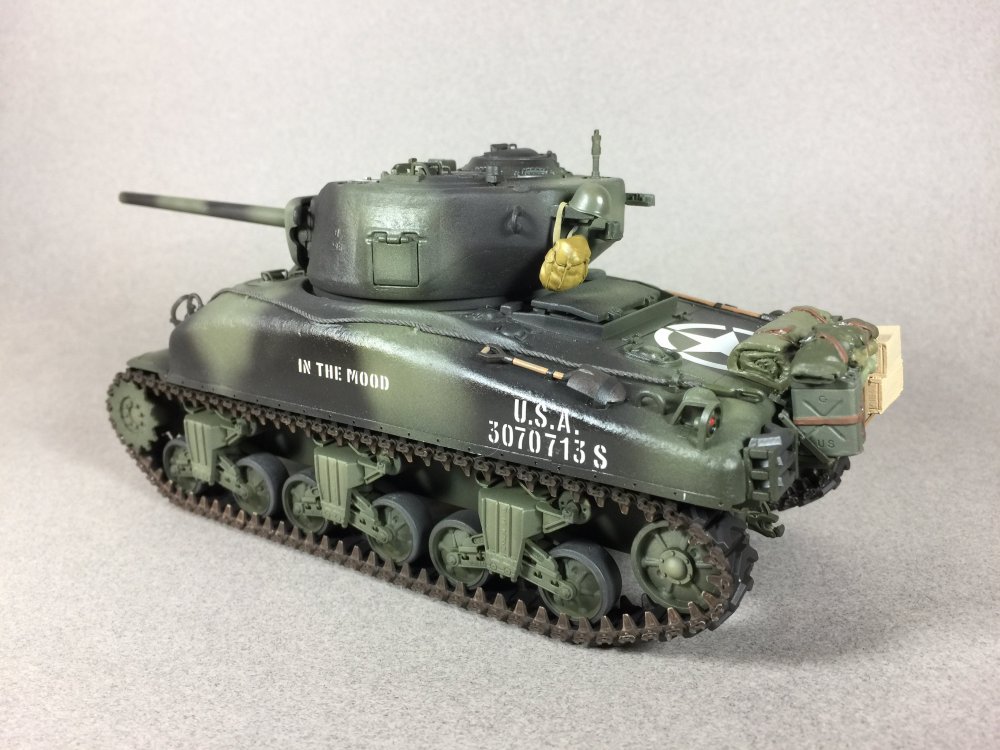
I think the contest ended a couple of days ago but I am still finishing this. During the build phase I noticed the hull hatches had a problem that was not easily fixed, the plate that the periscopes fit into was sitting way too high when it should be flush. I tried hatches from my spares box, from other unbuilt kits and no dice - apparently the only hatches that fit this kit are the ones that came with it, so it sat mocking me for the longest time until I found a spare sprue on ebay from this exact kit and got back to work. I carefully cut the old hatches out and replaced them and finished out the kit adding some stowage etc. Currently she's painted and decaled with a sealer coat of future and awaiting a oil wash and some dirtying up, paint touch ups etc. Thanks for looking in and sorry for the delay

-
 Here's a pic of one destroyed in normandy https://www.worldwarphotos.info/gallery/germany/tanks-2-3/brummbar/ondefontaine-6-august-1944/
 -
I added the rest of the details to the hull, I also added the sand skirt attachment strip, fender braces and cast in steps from styrene. I added the casting numbers between the towing lugs on the transmission cover. The tow cable clamps, ends and string are from Formations. Thanks for looking and please let me know if you see any goofs.
-
I filled in the armored ventilator cover and sanded and filled the ridge between the turret halves. I started adding the turret details. The dragon antenna mounting base has a weird lump on it that had to be removed and I added a spares box antenna. I also filled in the recess with the casting numbers (American Steel Foundries type) as the M4A1 (76) were manufactured by Pressed Steel Car who used Union Steel turrets which have the large casting numbers on the turret sides and roof which still need to be added. I assembled the mantlet and barrel and now we're looking better. Note the early 76mm barrel with no threading or muzzle break that was typical of very early M4A1(76). While the above was drying I started some upper hull work. The earlier M4a1(75) had four main fuel tanks each with their own fill port, the M4A1(76) were replumbed so that only one fill port was needed per side. The Dragon panel with vent cover that comes from a M4 kit (probably thier normandy m4) and needs to have the fill ports removed. Removing them leaves a hole but during the time frame our tank sits in they used up existing panels and simply blanked off the fill port so I cut small squares of styrene for this. One side done and one to go, if you do this make it easy on yourself and don't add the vent cover until after you're done removing them Some styrene was needed to plug up the sponsons The hull .30cal mg is just bad! I raided the spares box and found a really nice ball and barrel assembly from TMD More work on the upper hull, there are two recesses near the tail end that I could find no reference for, I filled em. I also added the front ventilator cover from TMD with symmetrical bolt pattern as the kit comes with the asymmetrical pattern. The kit offers two options of engine cover plates, I used the one with the armored cover for the engine oil. I mocked this up and now we're starting to look like a tank! Lots more to do thanks for watching
-
I glued all the running gear onto the lower hull and let it dry overnight, then added the DS tracks. I had to trim about 3 links off per side to get a decent tension. As noted previously in this thread the lower hull did not fit well and needed some trimming. I still ended up with a small gap at the upper hull to transmission cover joint and added a .010 strip of styrene to close it up. The upper hull mocked up, not glued yet. I glued the turret halves together and it is going to take a bit of filling, sanding and texturing. I will also be filling in the ventilator hole as I won't be adding it. making progress slowly buy surely
-
Thanks guys, I finished off the rear hull with a couple of little issues. The directions show the idler axles to be installed in the upside down position, the side with the bolts should be facing down, the fit was also lacking and took some trimming and fitting. This is a important area where good strength is needed as the idler will snap off with tight tracks. I also sanded down the backside of the side hull idler mounting plates so I could get a better stronger fit. I drilled out the shackle lugs and did not add the extra lug on each side as my reference photos only show one per side. The small nipple on the end of each axle will need to be trimmed off as well. There are two different Idler wheels on the sprues, make sure you use the nicer ones with a insert and rear detail I finished up the bogies by drilling the four bolt holes on each side (for the reversible return roller bracket) and adding the track skids. That's all for today as I glued the bogies to the lower hull and it needs to dry. Thanks for looking!
-
I apologize for the delay in starting this, life got in the way and ruined my plans but things are mostly back to normal. Enough about that it's on to the build. The first steps start in typical fashion with the suspension. Dragon's bogies fit too tight and can cause problems so I drilled out the holes (except the upper return roller) with a 5/64 bit. Also note that only one side of the rocker arms has casting marks (the side without the pins) so this side needs to face out, the wheels are two pieces each with a insert that fits into a keyed tab, I cut off the tab inside the wheel so it makes things easier. The wheel side with the insert should be placed facing towards the tank as it leaves a unsightly seam. A few in progress bogie assemblies, While I was waiting for the bogies to dry I turned to the lower hull. It doesn't look like the image in the instructions so I test fit it to the upper hull to see if there would be problems. Sure enough the sponsons on the lower hull are too long and needed to be cut down to fit, it also left a nasty gap towards the front that I will fill with some evergreen styrene. more soon
-
Hi All, I will be joining this group build with the Cyber Hobby M4A1(76) W, I plan to make a very early version without the threaded barrel, turret ventilator etc. I will be doing "In the Mood" which was Lafayette Pool's second tank (the earlier being a 75mm M4A1). I haven't broken the seal yet so it may be out of the box it may not depending on what is inside. Constructive criticism and comments welcomed and thanks for watching!