


One-Oh-Four
-
Posts
1,757 -
Joined
-
Last visited
Content Type
Profiles
Forums
Events
Gallery
Posts posted by One-Oh-Four
-
-
DXM digital! Saw the Grey Wolf fly his display in it during RIAT 2017, great looking bird!
-
 3
3
-
-
On 5/17/2022 at 10:19 PM, BlrwestSiR said:
Looks like there's some figures coming out that might work.
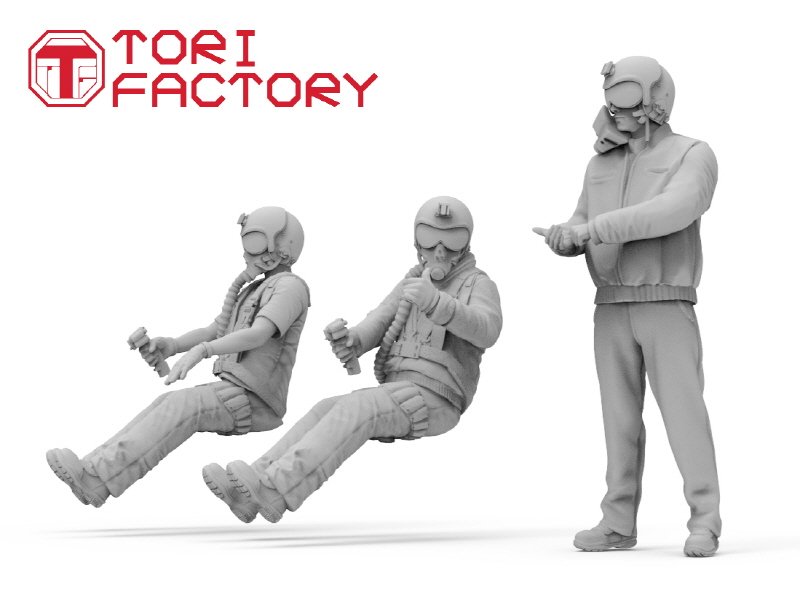
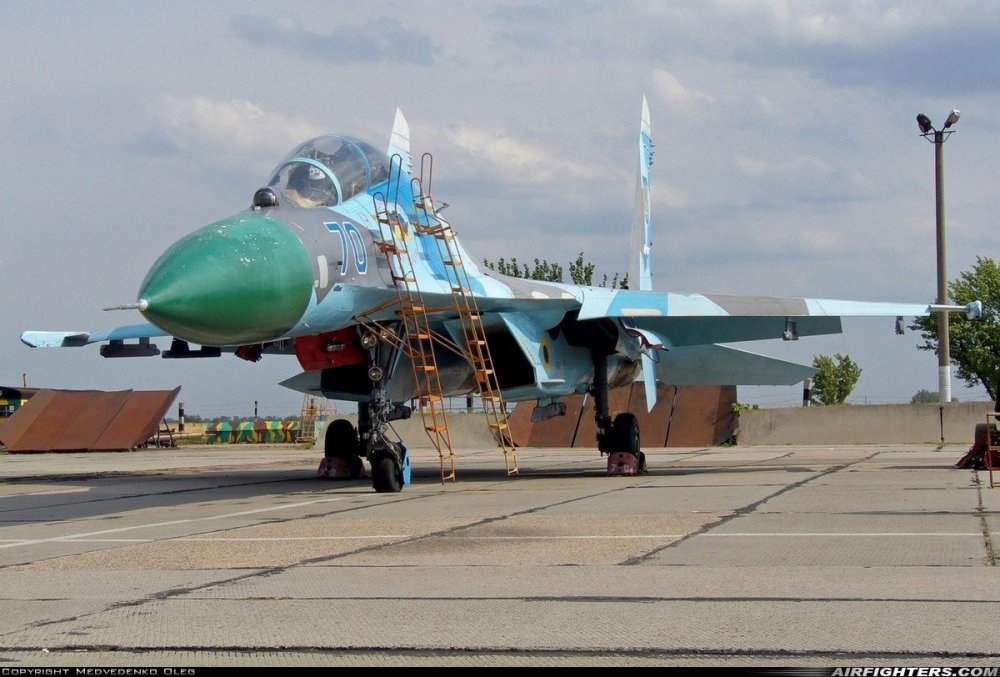
Don’t the Ukrainians fly with those big round bulbs with a bunch of holes in the upper front like the russkies? 🤔
-
3
-
-
Yeah, awesome!
-
2
-
-
-
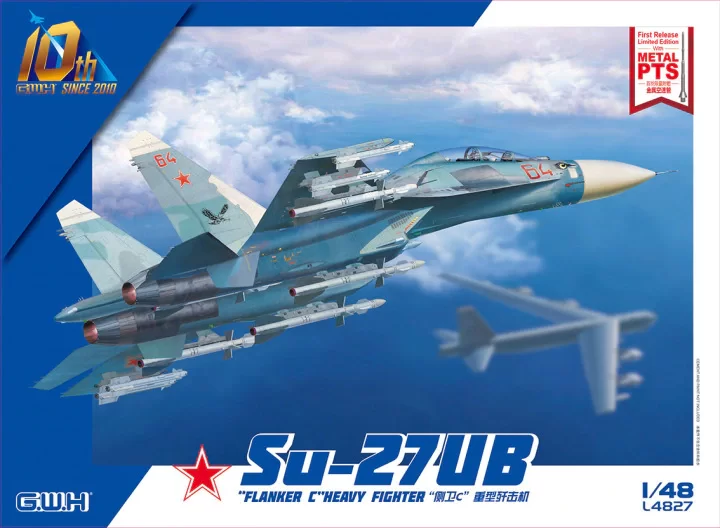
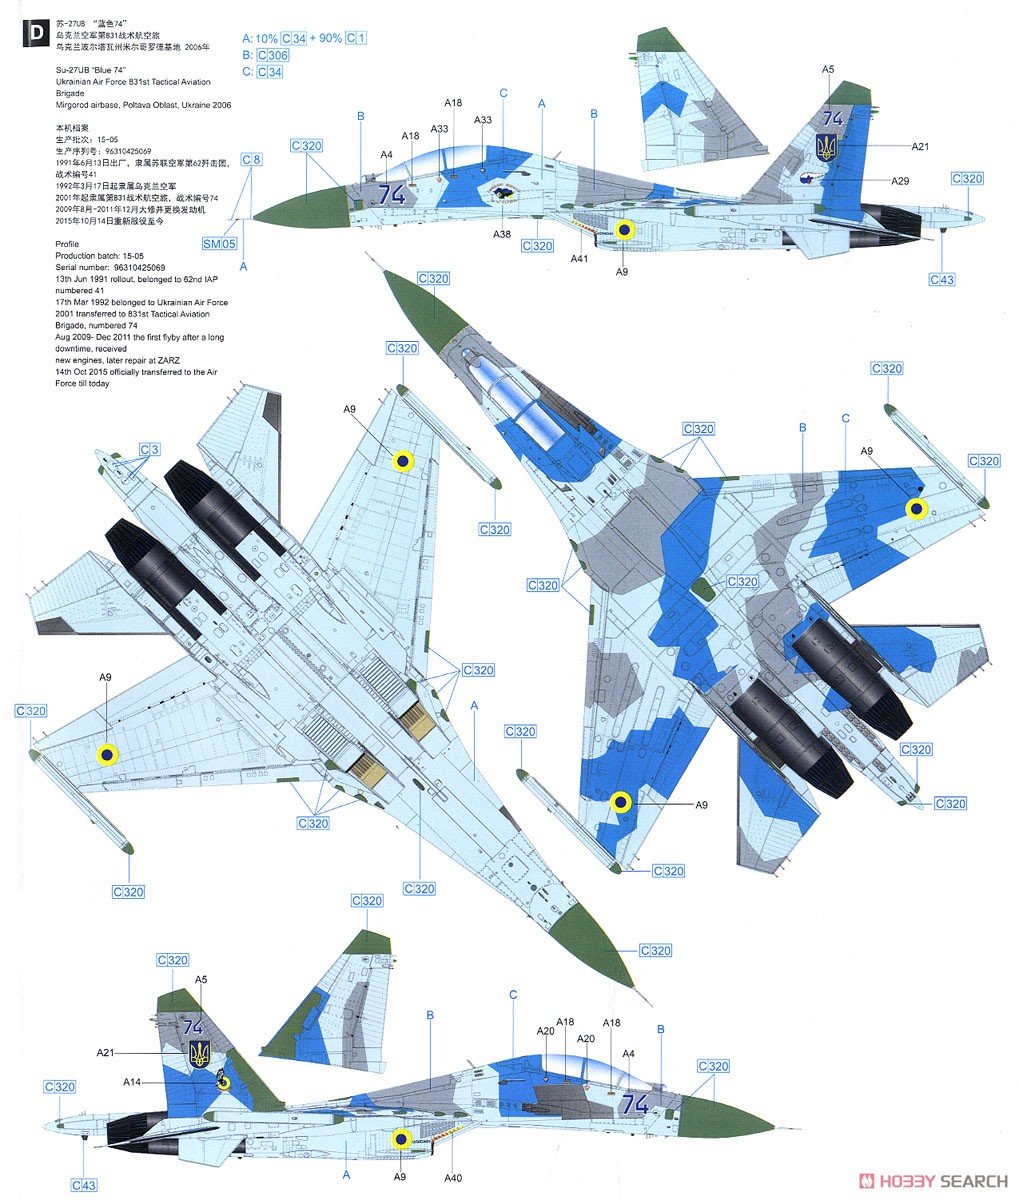
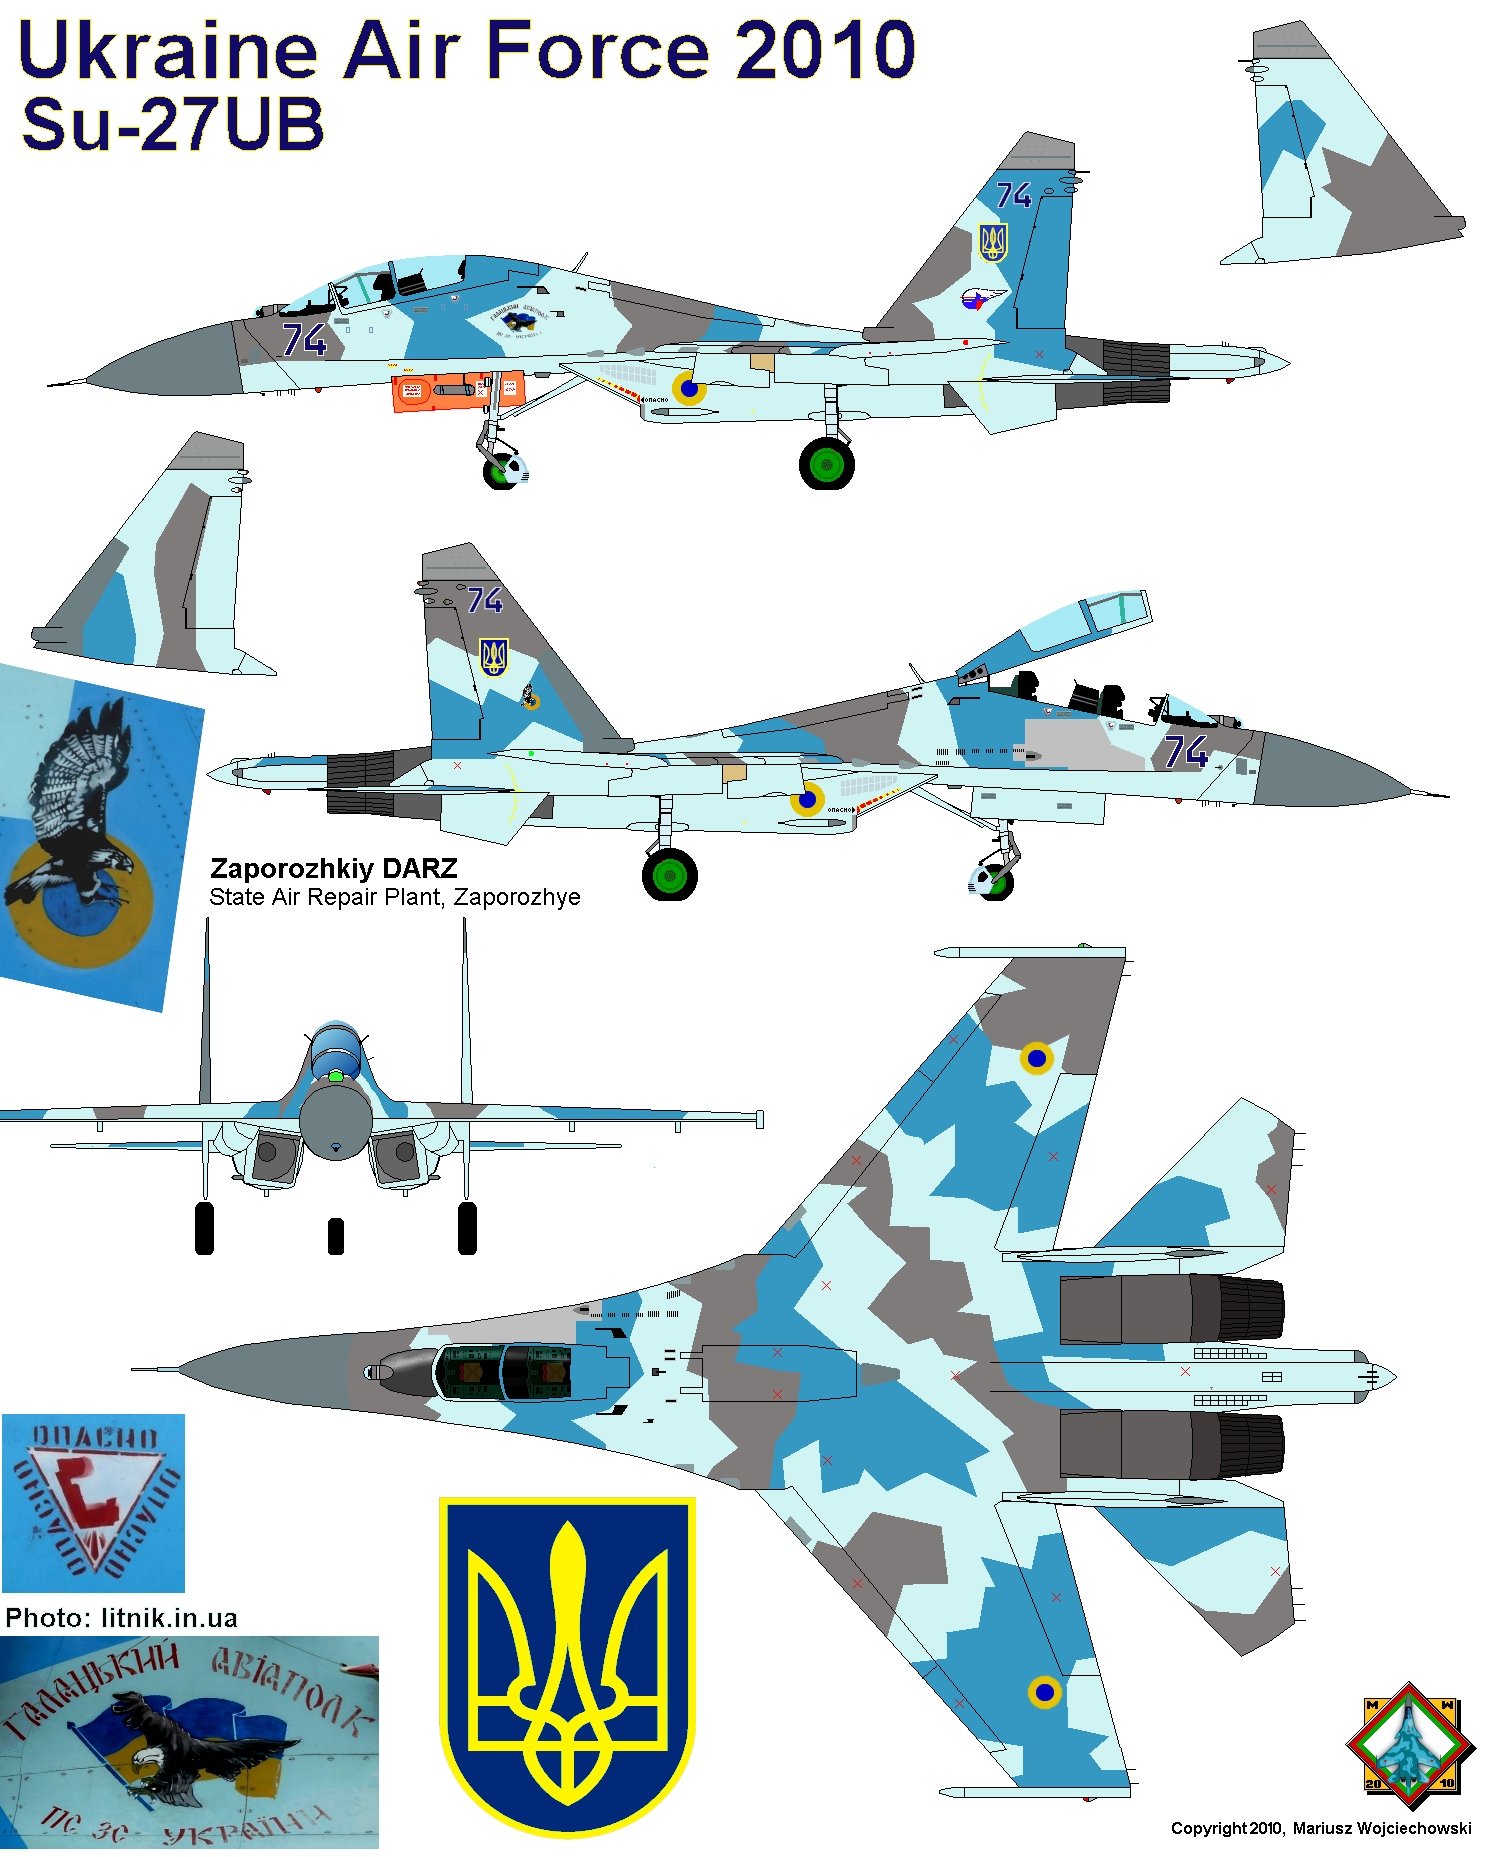
I have edited the title and opening post: I’ll be building the 1/48 Great Wall Hobby Su-27UB instead. The 1/32 Trumpeter kit is a little bit too involved to reasonably be finished around the deadline of this GB. The GWH kit offers the accurate shapes and details without having to graft a plethora of resin onto the base kit. The first actions in the cockpit have been done, although not interesting enough yet to show in pictures.
So I’m still asking you for patience. To get through that waiting period, here’s another Ukrainian folk song:
Bayraktar!
-
3
-
-
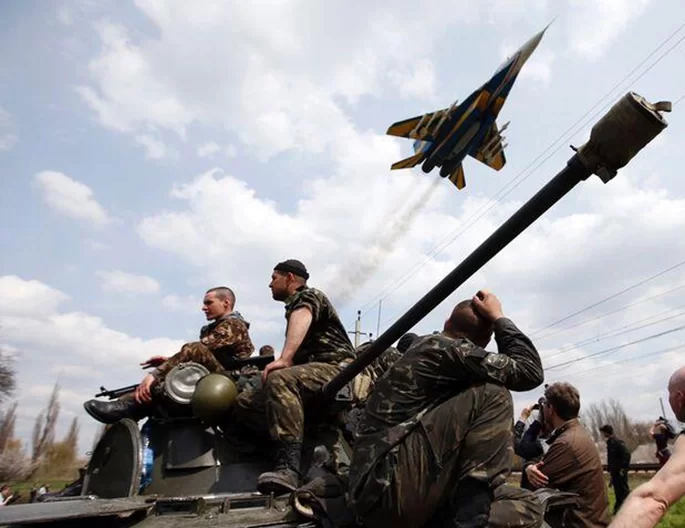
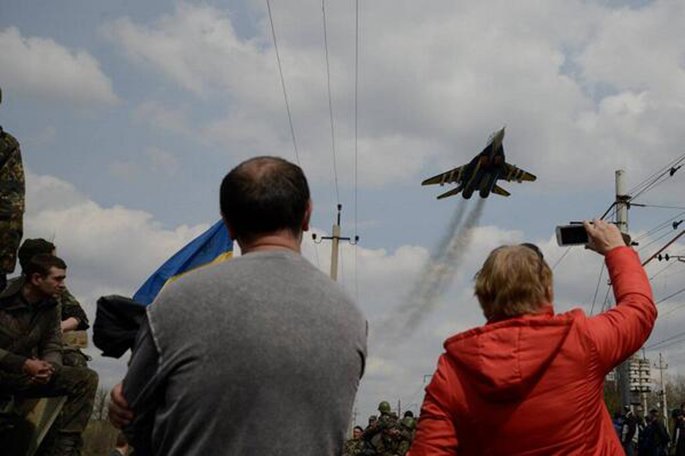
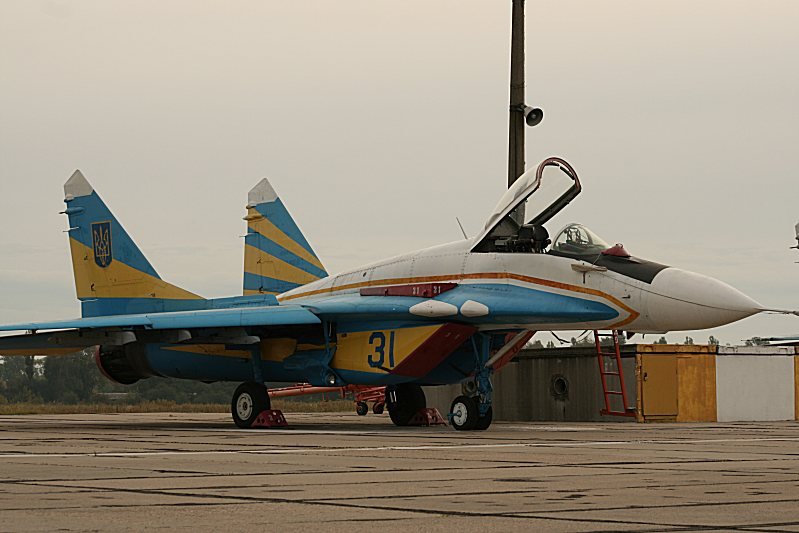
Another nice idea could be the MiG-29 of the Ukrainian demonstration team that did operational sorties in the team colors…
https://theaviationist.com/2014/04/16/ukrainian-mig-29-show-of-force/
-
8
-
-
It’s slow going. I think I have all I need now. Nice thing is that ResKit and Armory are Ukrainian companies.
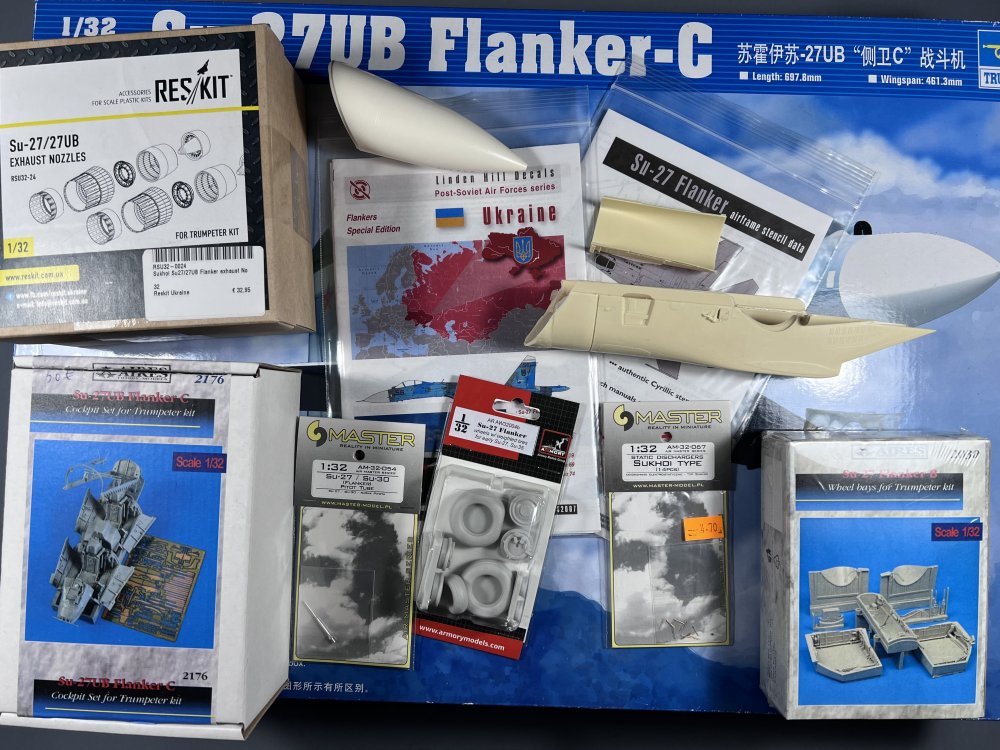
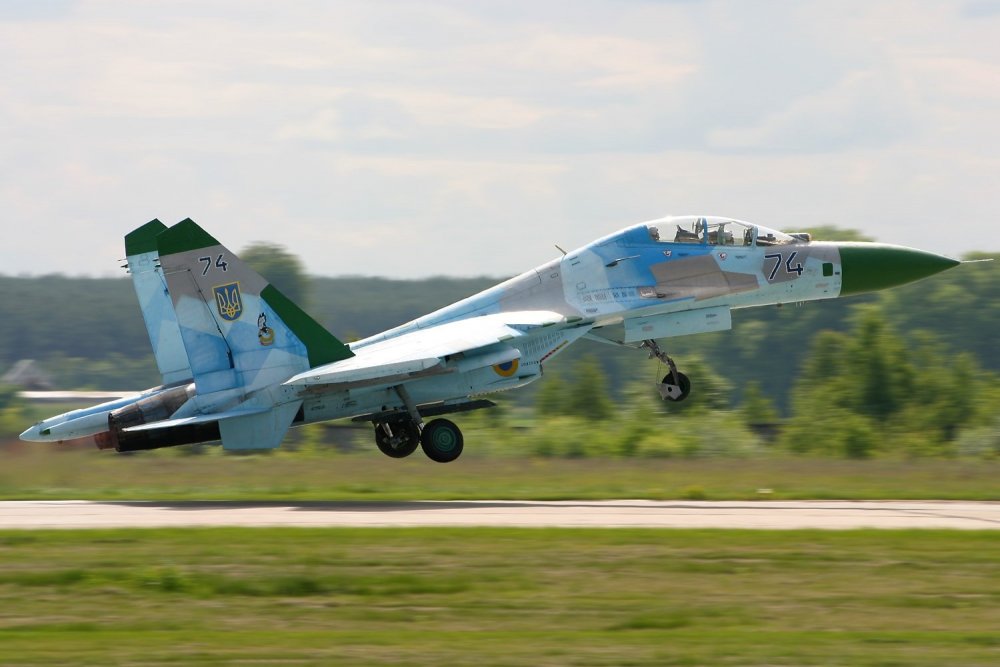
I have the Zacto nose and inlets for ages in my stash. I had meant them for the single-seater, the one I have is the first edition, non-Zactoman-copied kit. I was of two minds if I wanted to use these bits on the UB, keeping in mind that there are some shape-errors in the forward fuselage section and windshield that I don’t see myself correcting. But since February 24th I have decided that the single-seater will some day be built in Ukraine’s digital scheme and not as a Russian or Belarussian aircraft. Although I have the masks from Foxbot Decals, the decalsheet for the details like registration, badges etc. that is also needed is next to impossible to get, as Foxbot is also from the Ukraine and they have at the moment better things to do than worry about shipping decals! So that one will have to wait until the “orcs” (as the Ukrainians call them) are ordered home by rasPutin.
In any case, thanks for the patience, to see progress, I’m afraid you’ll have to exercise some more of that. To lighten the wait, here’s a Ukrainian folk song with a contemporary twist:
Undertitling included.
-
2
-
 1
1
-
-
I guess I’m a bit like the Russian army: I ran into some logistical difficulties. Somehow I couldn’t find half of the aftermarket sets I know I have for this kit. Found some, while a couple of others are still MIA. I’m on my last nightshift at the moment, so I hope to start later in the day or tomorrow. Thanks for the patience! 😬
-
4
-
 1
1
-
-
I’ll give Trumpy’s 1/32 Su-27UB a go, with Linden Hill decals and Aires resin details.
Edit: To have a slight chance of finishing this project on time, I’ll be switching to 1/48, more particularly the awesome Su-27UB from Great Wall Hobby.


-
8
-
1
-
-
On 4/20/2021 at 10:57 AM, JeroenPeters said:
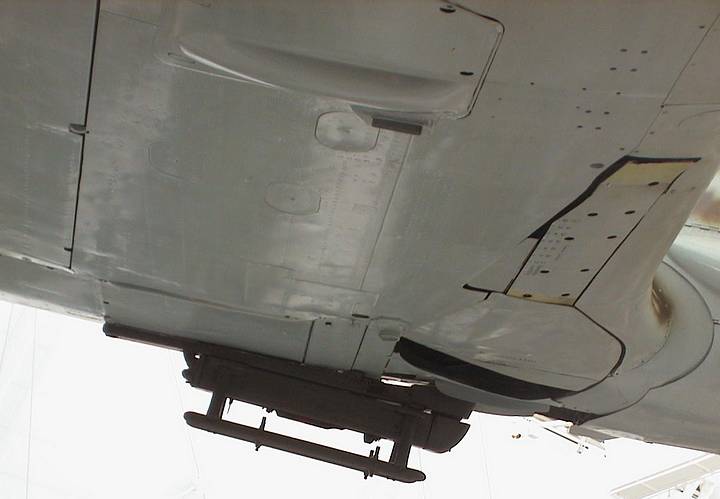
Since I used the F8 kit to build this A8.... I need to reinstall the outer MG151 cannons.
This means bulges on top of the wings. Easy. They're included in the kit.
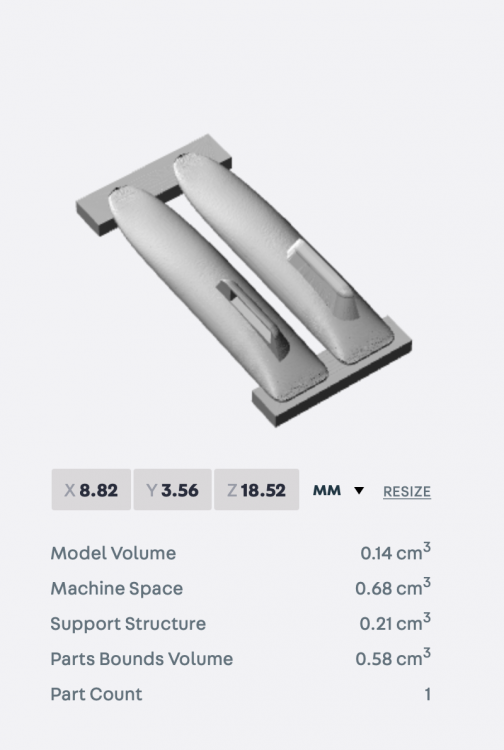
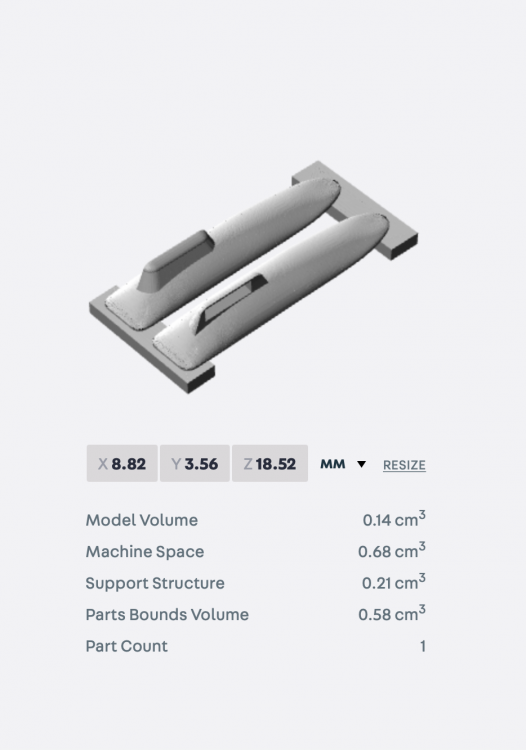
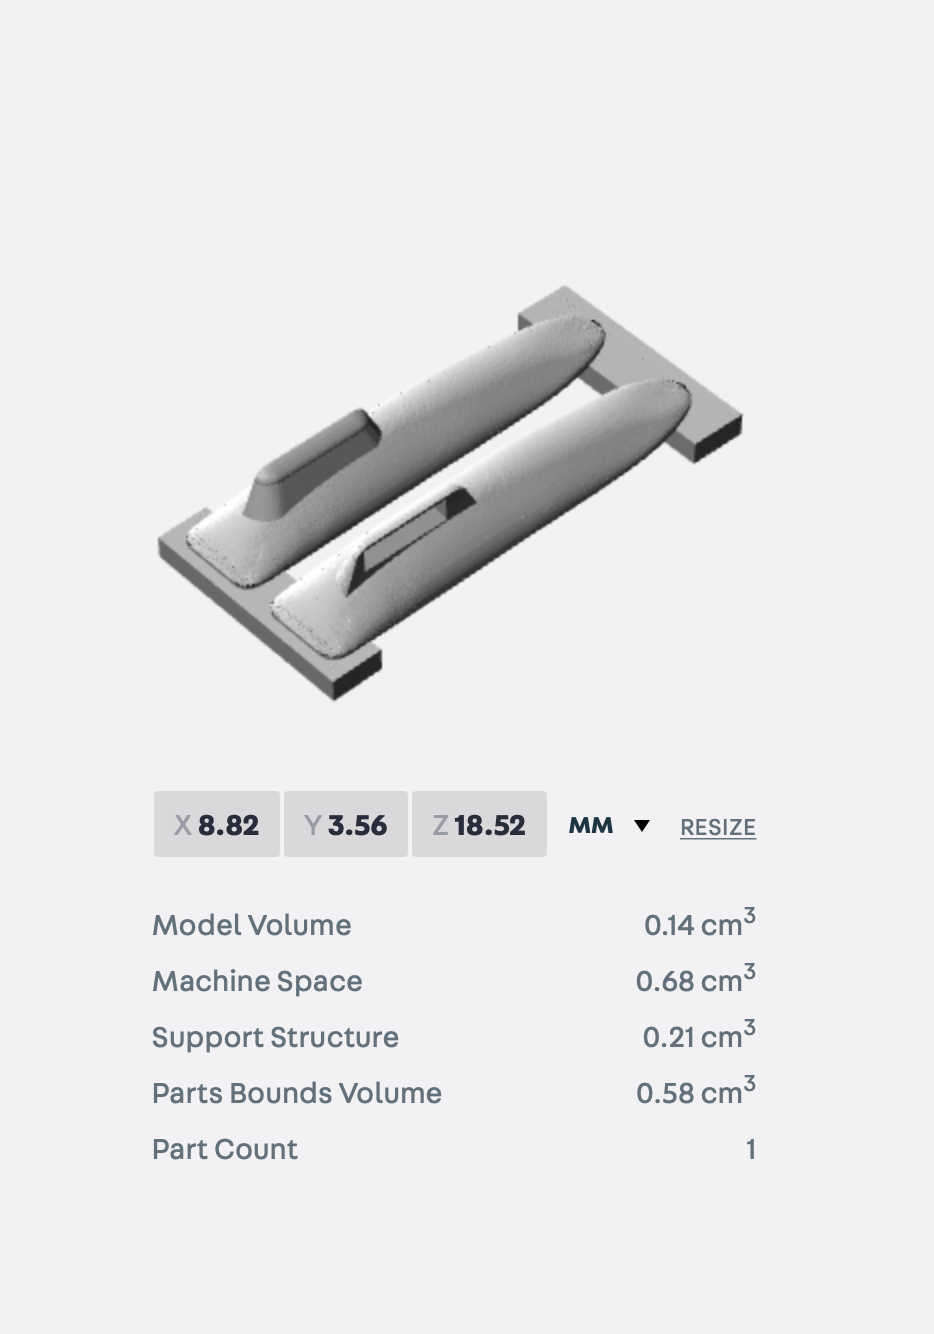
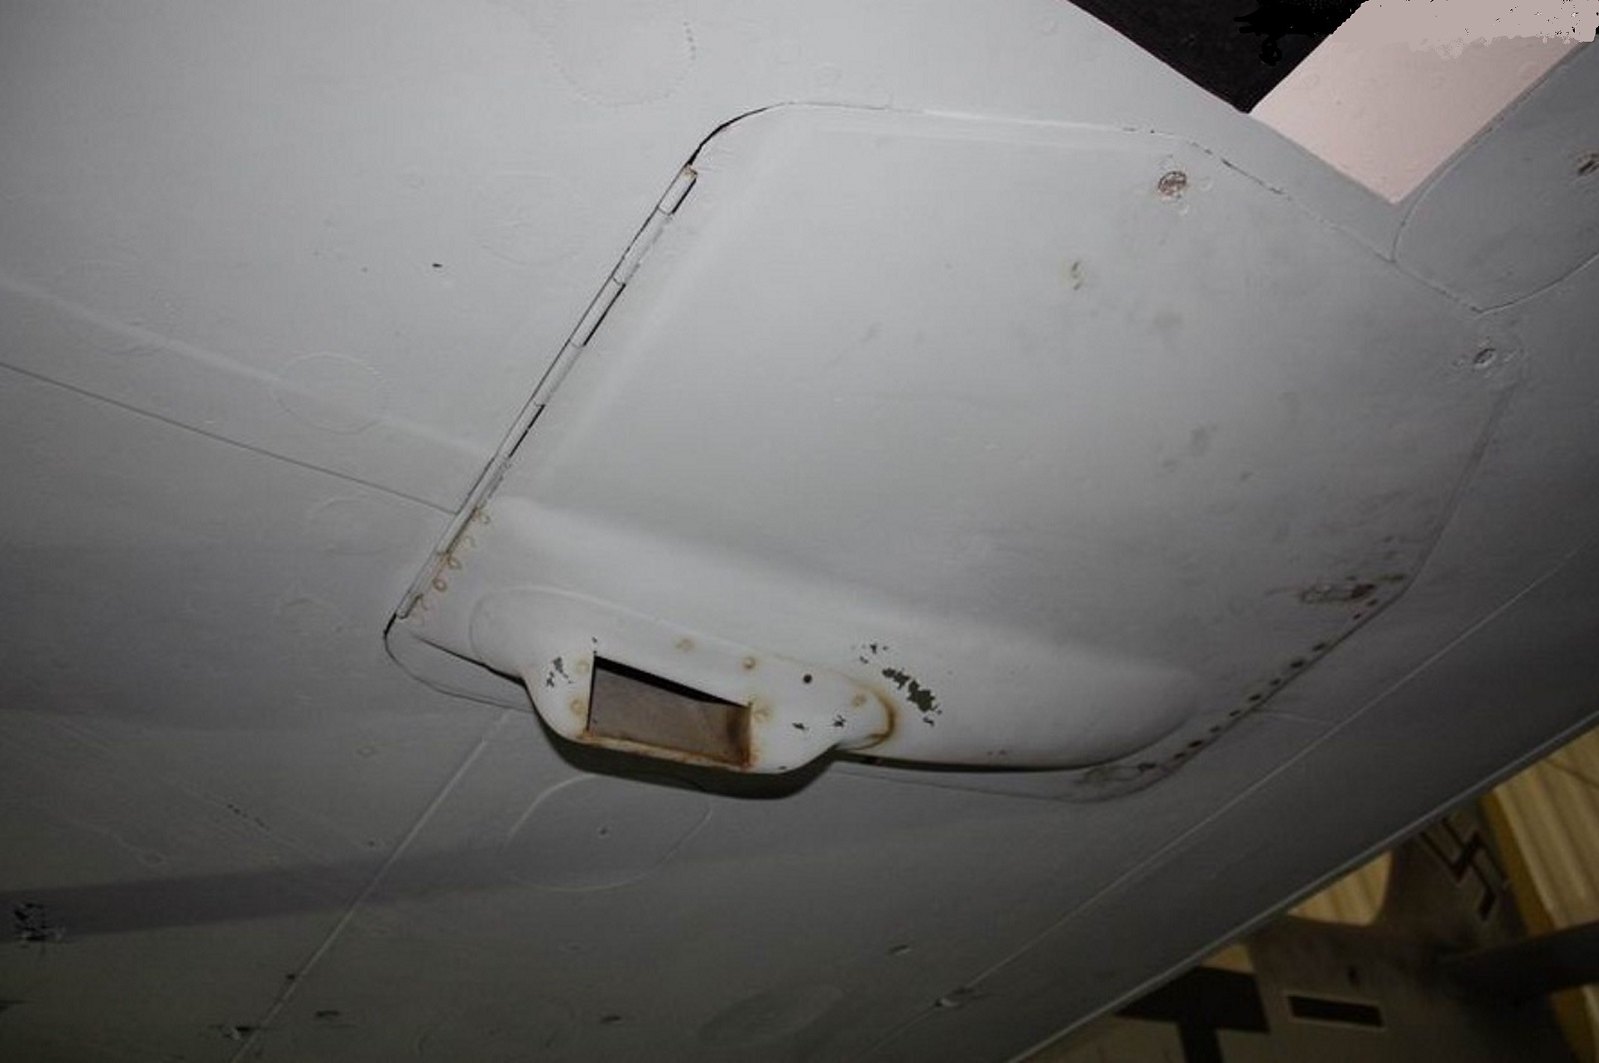
And Bulges on the underwing acces panels. Harder. These bulges are quite intricate. Especially the ammo chutes. I tried to draw them up in 3D. Luckily Revell did not get the shape right. They actually used the Mk108 bulges and ammo chutes. So in the end this is an upgrade. Just ordered my 3D efforts. We'll see.Also removed the inspection panels in the large panel.

Jeroen, were those blisters parallel to each other? From the top of my mind I recall they were of a different shape to each other? Or was that the case with the 30mm blisters?
-
3
-
-
Hey Tim, what sources are you using for the detailing of this kit?
-
3
-
-
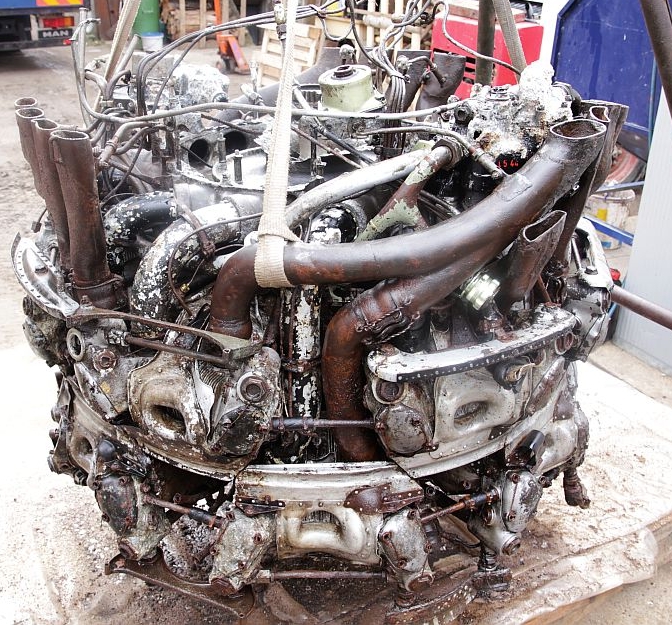
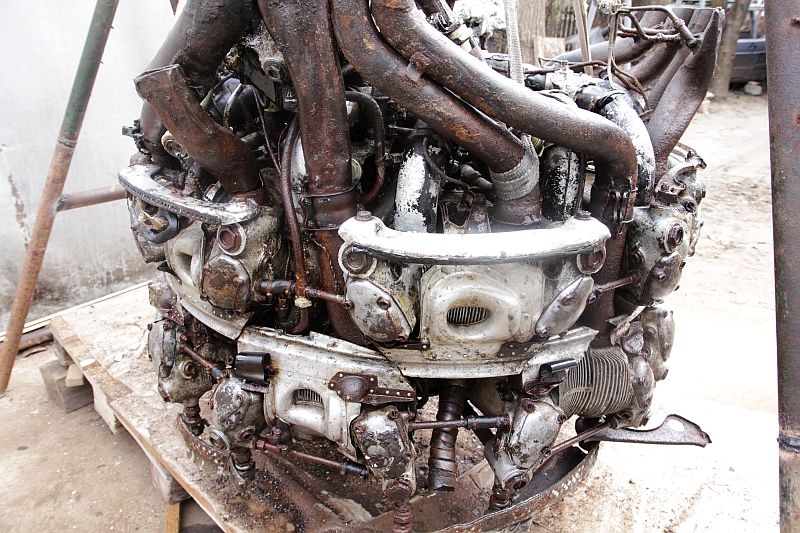
The BMW 801 at the IWM:

The rust on the cylinders shows it's steel, while the cylinder heads are aluminium. BMW 801 at Fort Veldhuis Museum:
.jpg)
And some photo documentation from warbirdsnews.com. The photos are via Andor Burnáczki:

-
6
-
2
-
-
21 hours ago, JeroenPeters said:
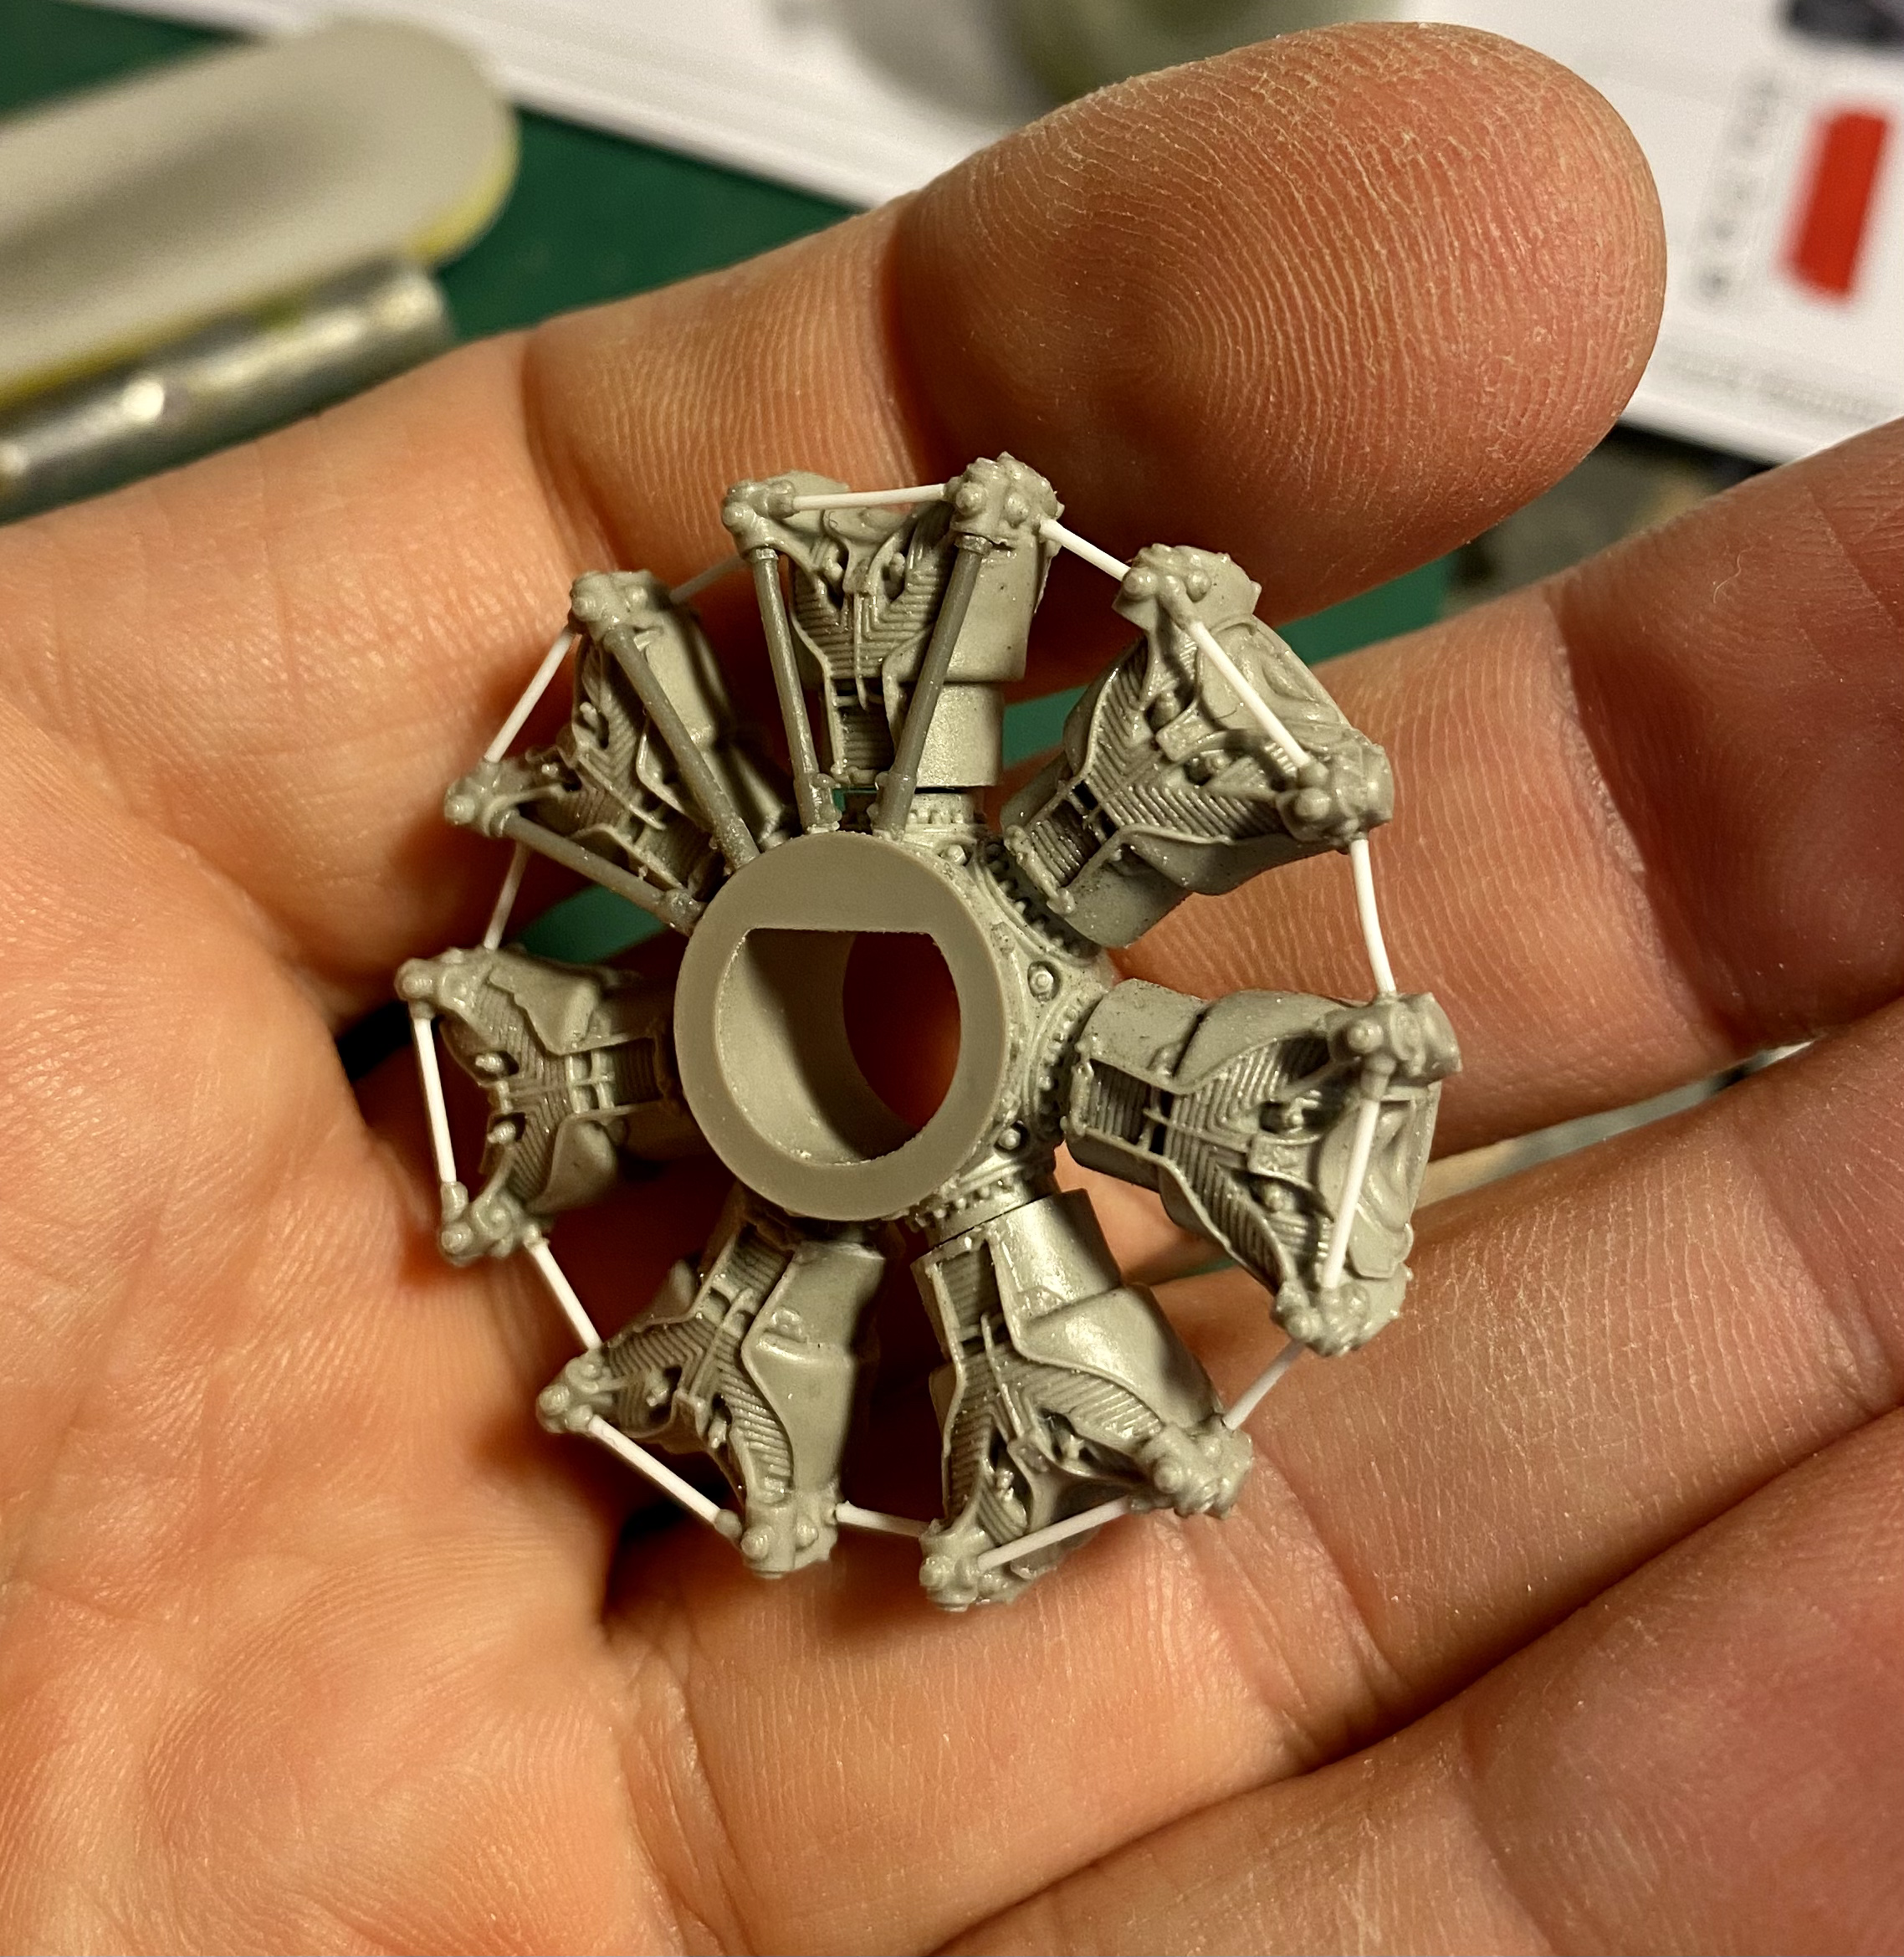
So i learned that the pushrods go in before you glue the cilinders. No problem to correct but it could have gone easier.

Wouldn't you want to paint the cylinders, pushrods and the like before fitting them? Reaching all those different colored items looks to me like being a pain in the sphincter after assembly....
As you may remember from the SIG-chat, my personal theory is that the cylinders were made of steel and painted black (so as not to rust) while the cylinder heads and valve covers were aluminium...
I know the American radial engines had black cooling baffles around the cylinders and atop the cylinder heads. In one of my books on the Fw 190, a restored museum engine had aluminium colored baffles fitted....
If that is accurate, the Americans probably used stamped sheet steel, painted black, while the Germans used stamped aluminium sheet?
-
5
-
-
On 3/8/2021 at 7:41 AM, Wingco57 said:
Thanks Carl, was waiting for this. Just what the doctor ordered.
I have just ordered a set.
cheers
Cees
Interested to learn what the quality of the parts is!
-
3
-
-
Orrrrrrr..... You could just connect all the aftermarket sets and forget about the kit itself!

-
6
-
 1
1
-
-
Hi guys,
Hopefully some of you know.... Did the F-15C have the same panellines as the F-15A? If not, where did they differ?
I know, sounds like a rivet-counter's question, but I like to get things as accurate as possible!
Thanks in advance!
Erik B.
-
3
-
-
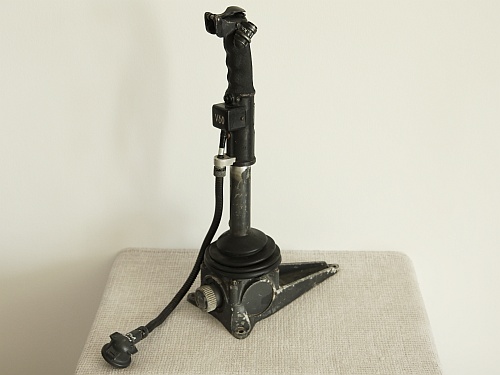
Maybe a stupid question but I could never figure out how the driver was able to keep using the foot pedals without adjustment while cycling from under armor to head-out-the-hatch-driving. Looking at the illustration of the seat, it moves up and forward? So the driver, when under armor, actually sits a bit behind the hatch-opening instead of straight under it?
He'll have to watch the back of his head, though, while going under armor, those hatch-openings weren't that big, even on the big-hatch hulls! But they sure were hard!
-
3
-
-
Okay, I'm sold! Use the scratch built items!

-
3
-
-
How much does this set differ from the kit cockpit? As far as I remember that isn't too bad? Maybe the seat is a bit clunky?
Do you have some pics to compare? I was planning on using the kit cockpit but if the Brassin pit is a hands-down winner and much better overall, I might reconsider...
-
3
-
-
11 hours ago, Axeman said:
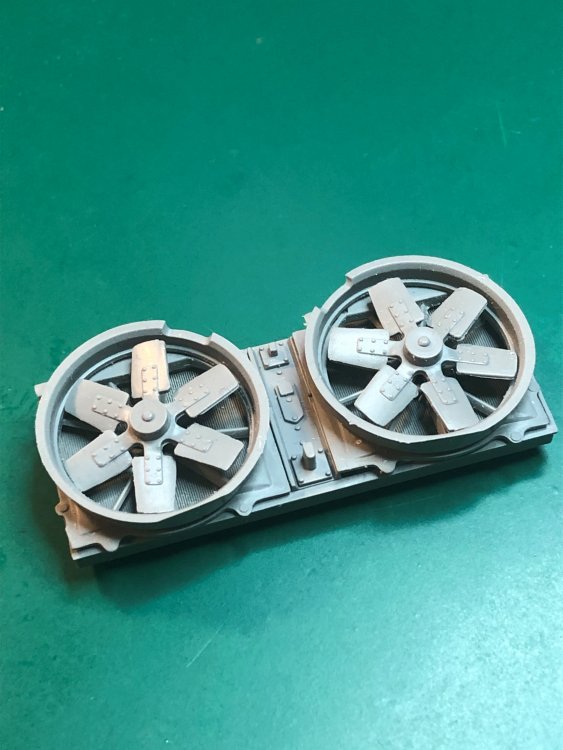
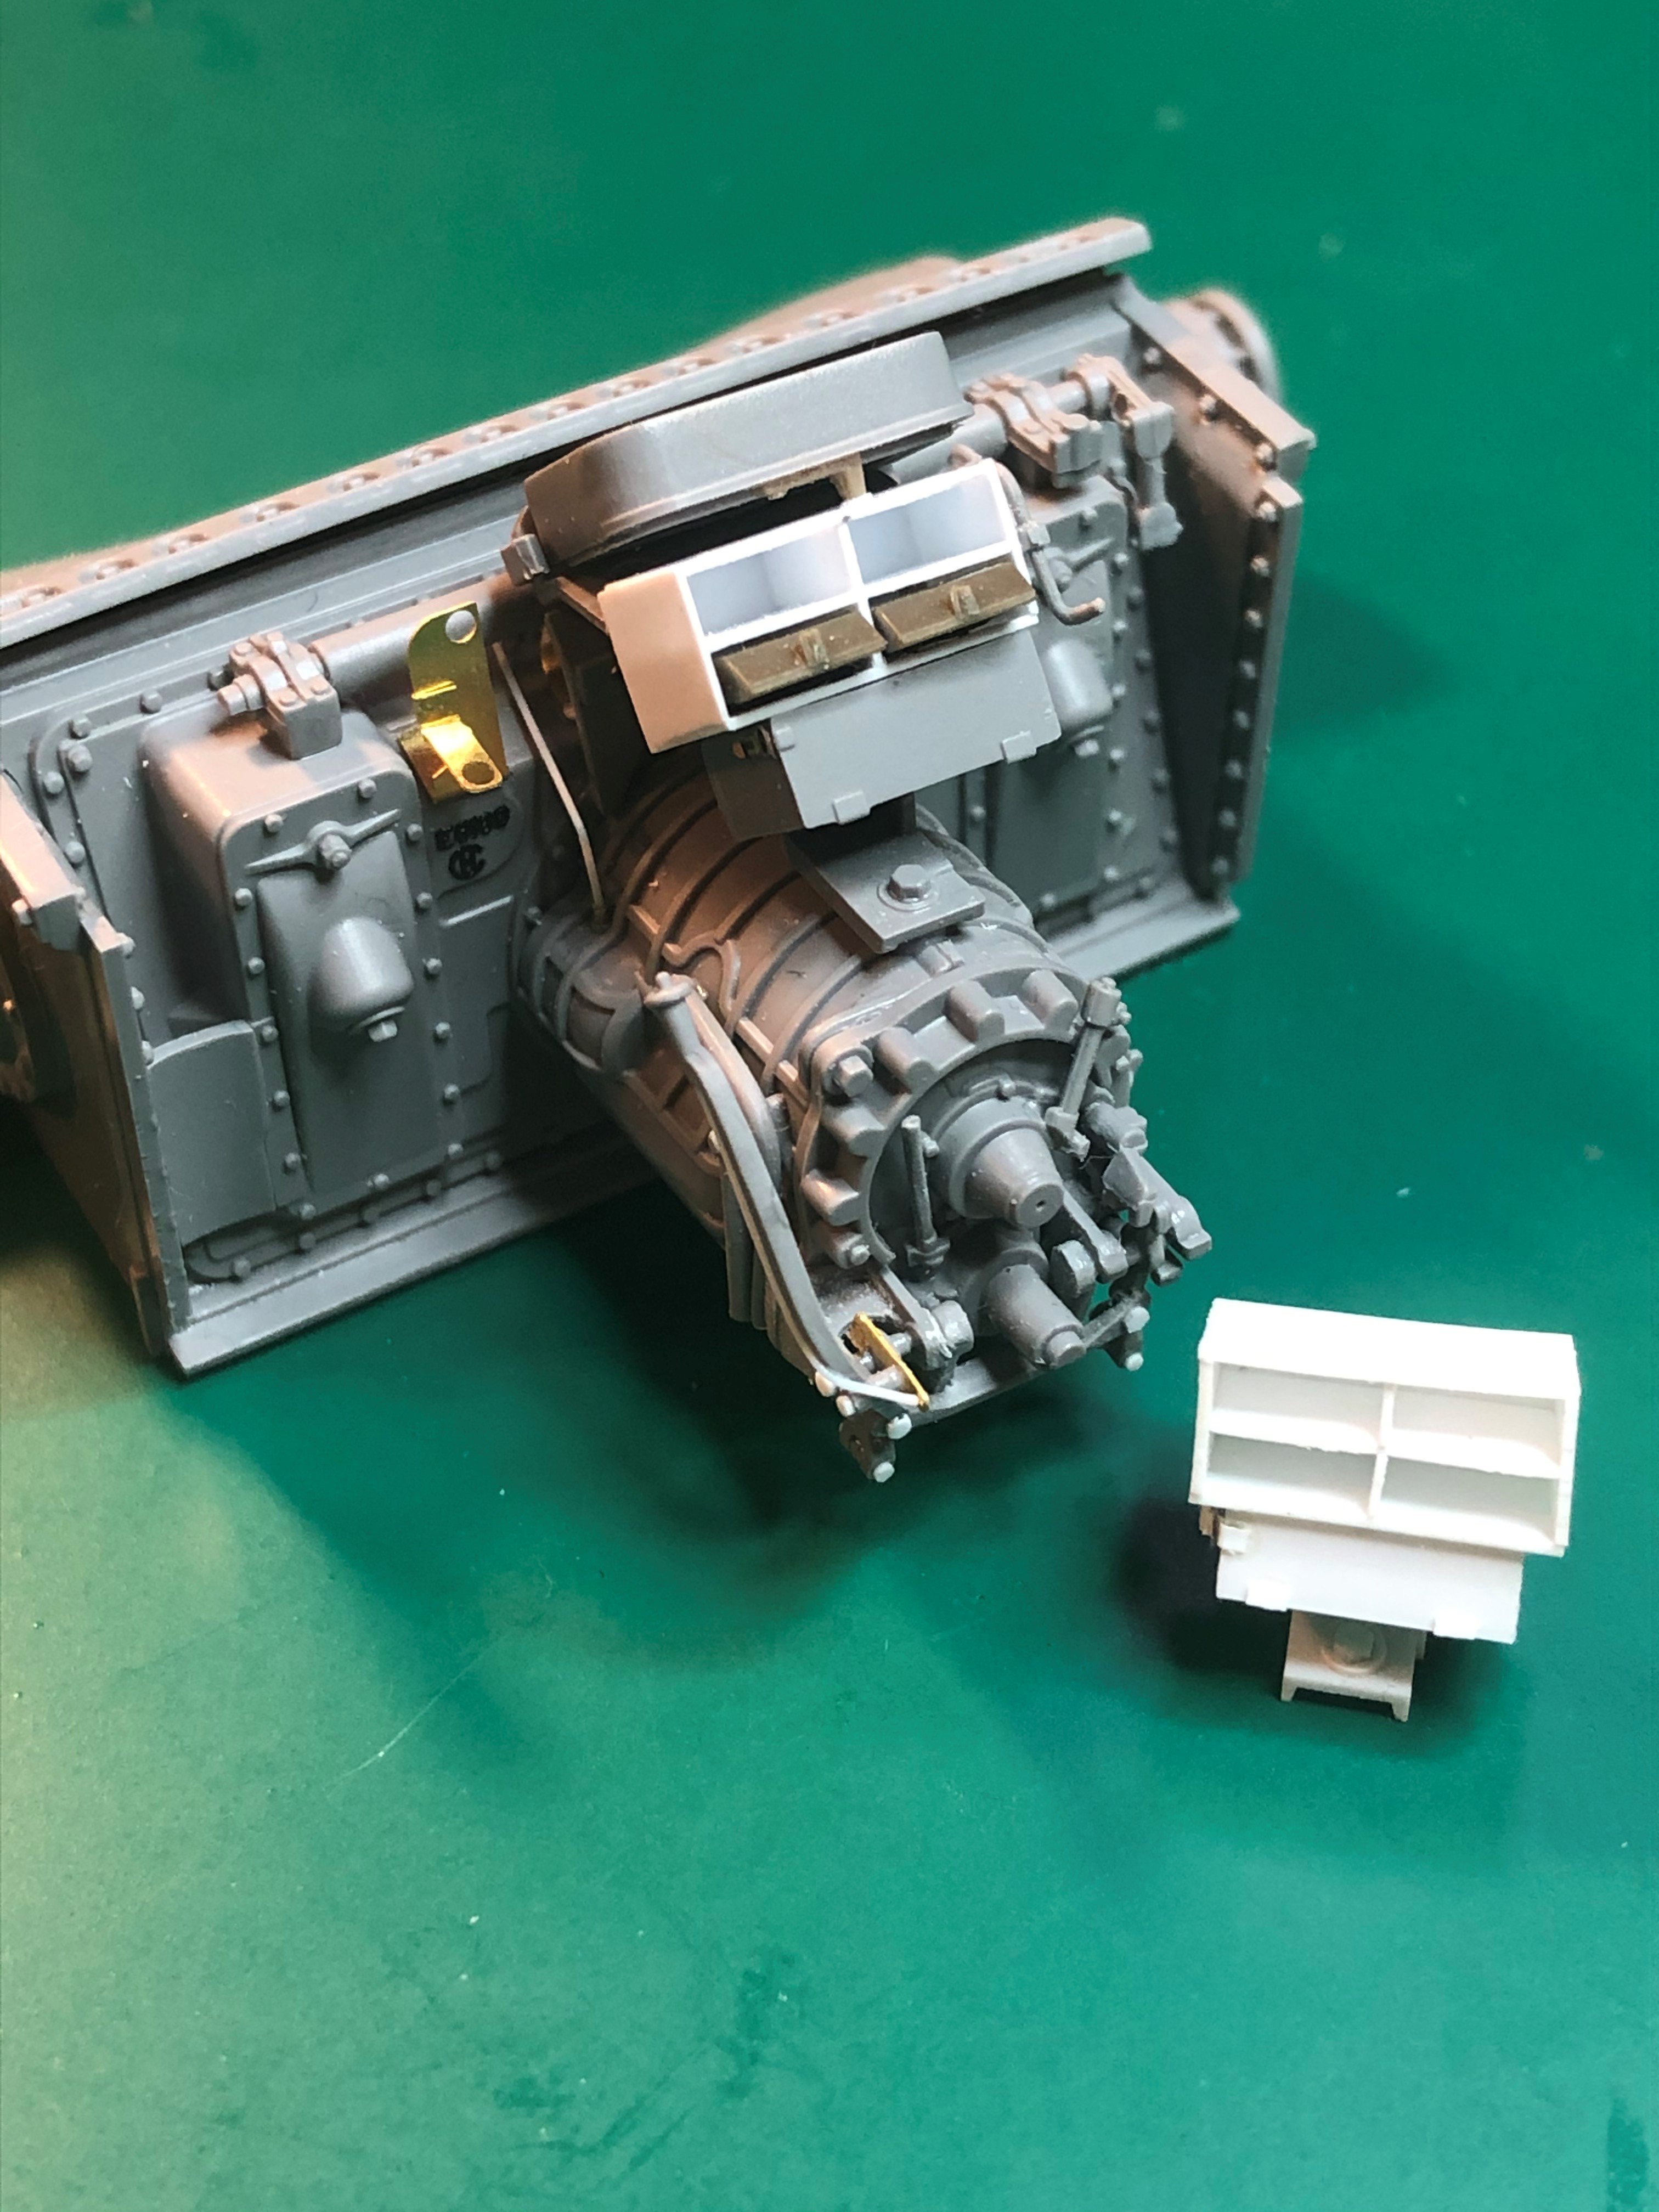
Continued on the engine compartment dry fitting the fans and worked on the fan belts doing some scratch building as I am trying to get two belts showing were the kit has only one.
Scratch built the periscope holders on top of the transmission housing since the kit has them molded in. Below the power train assembly is what I scratch build for the M4A3 I was building from an Asuka kit (previous work in progress that I did not complete). Came pretty close to what the kit has in size and dimensions. On the differential housing I added casting marks (under the primer holder, photo etch).
Added the clutch and throttle linkage and test fitted the floor plate for the drivers seat.
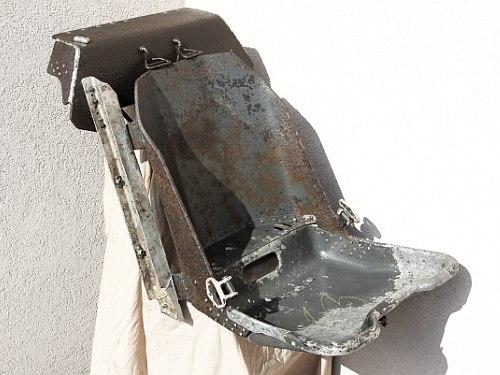
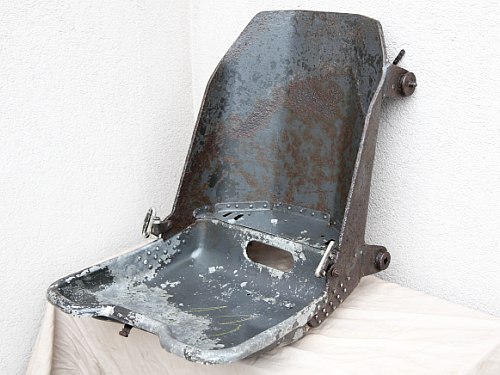
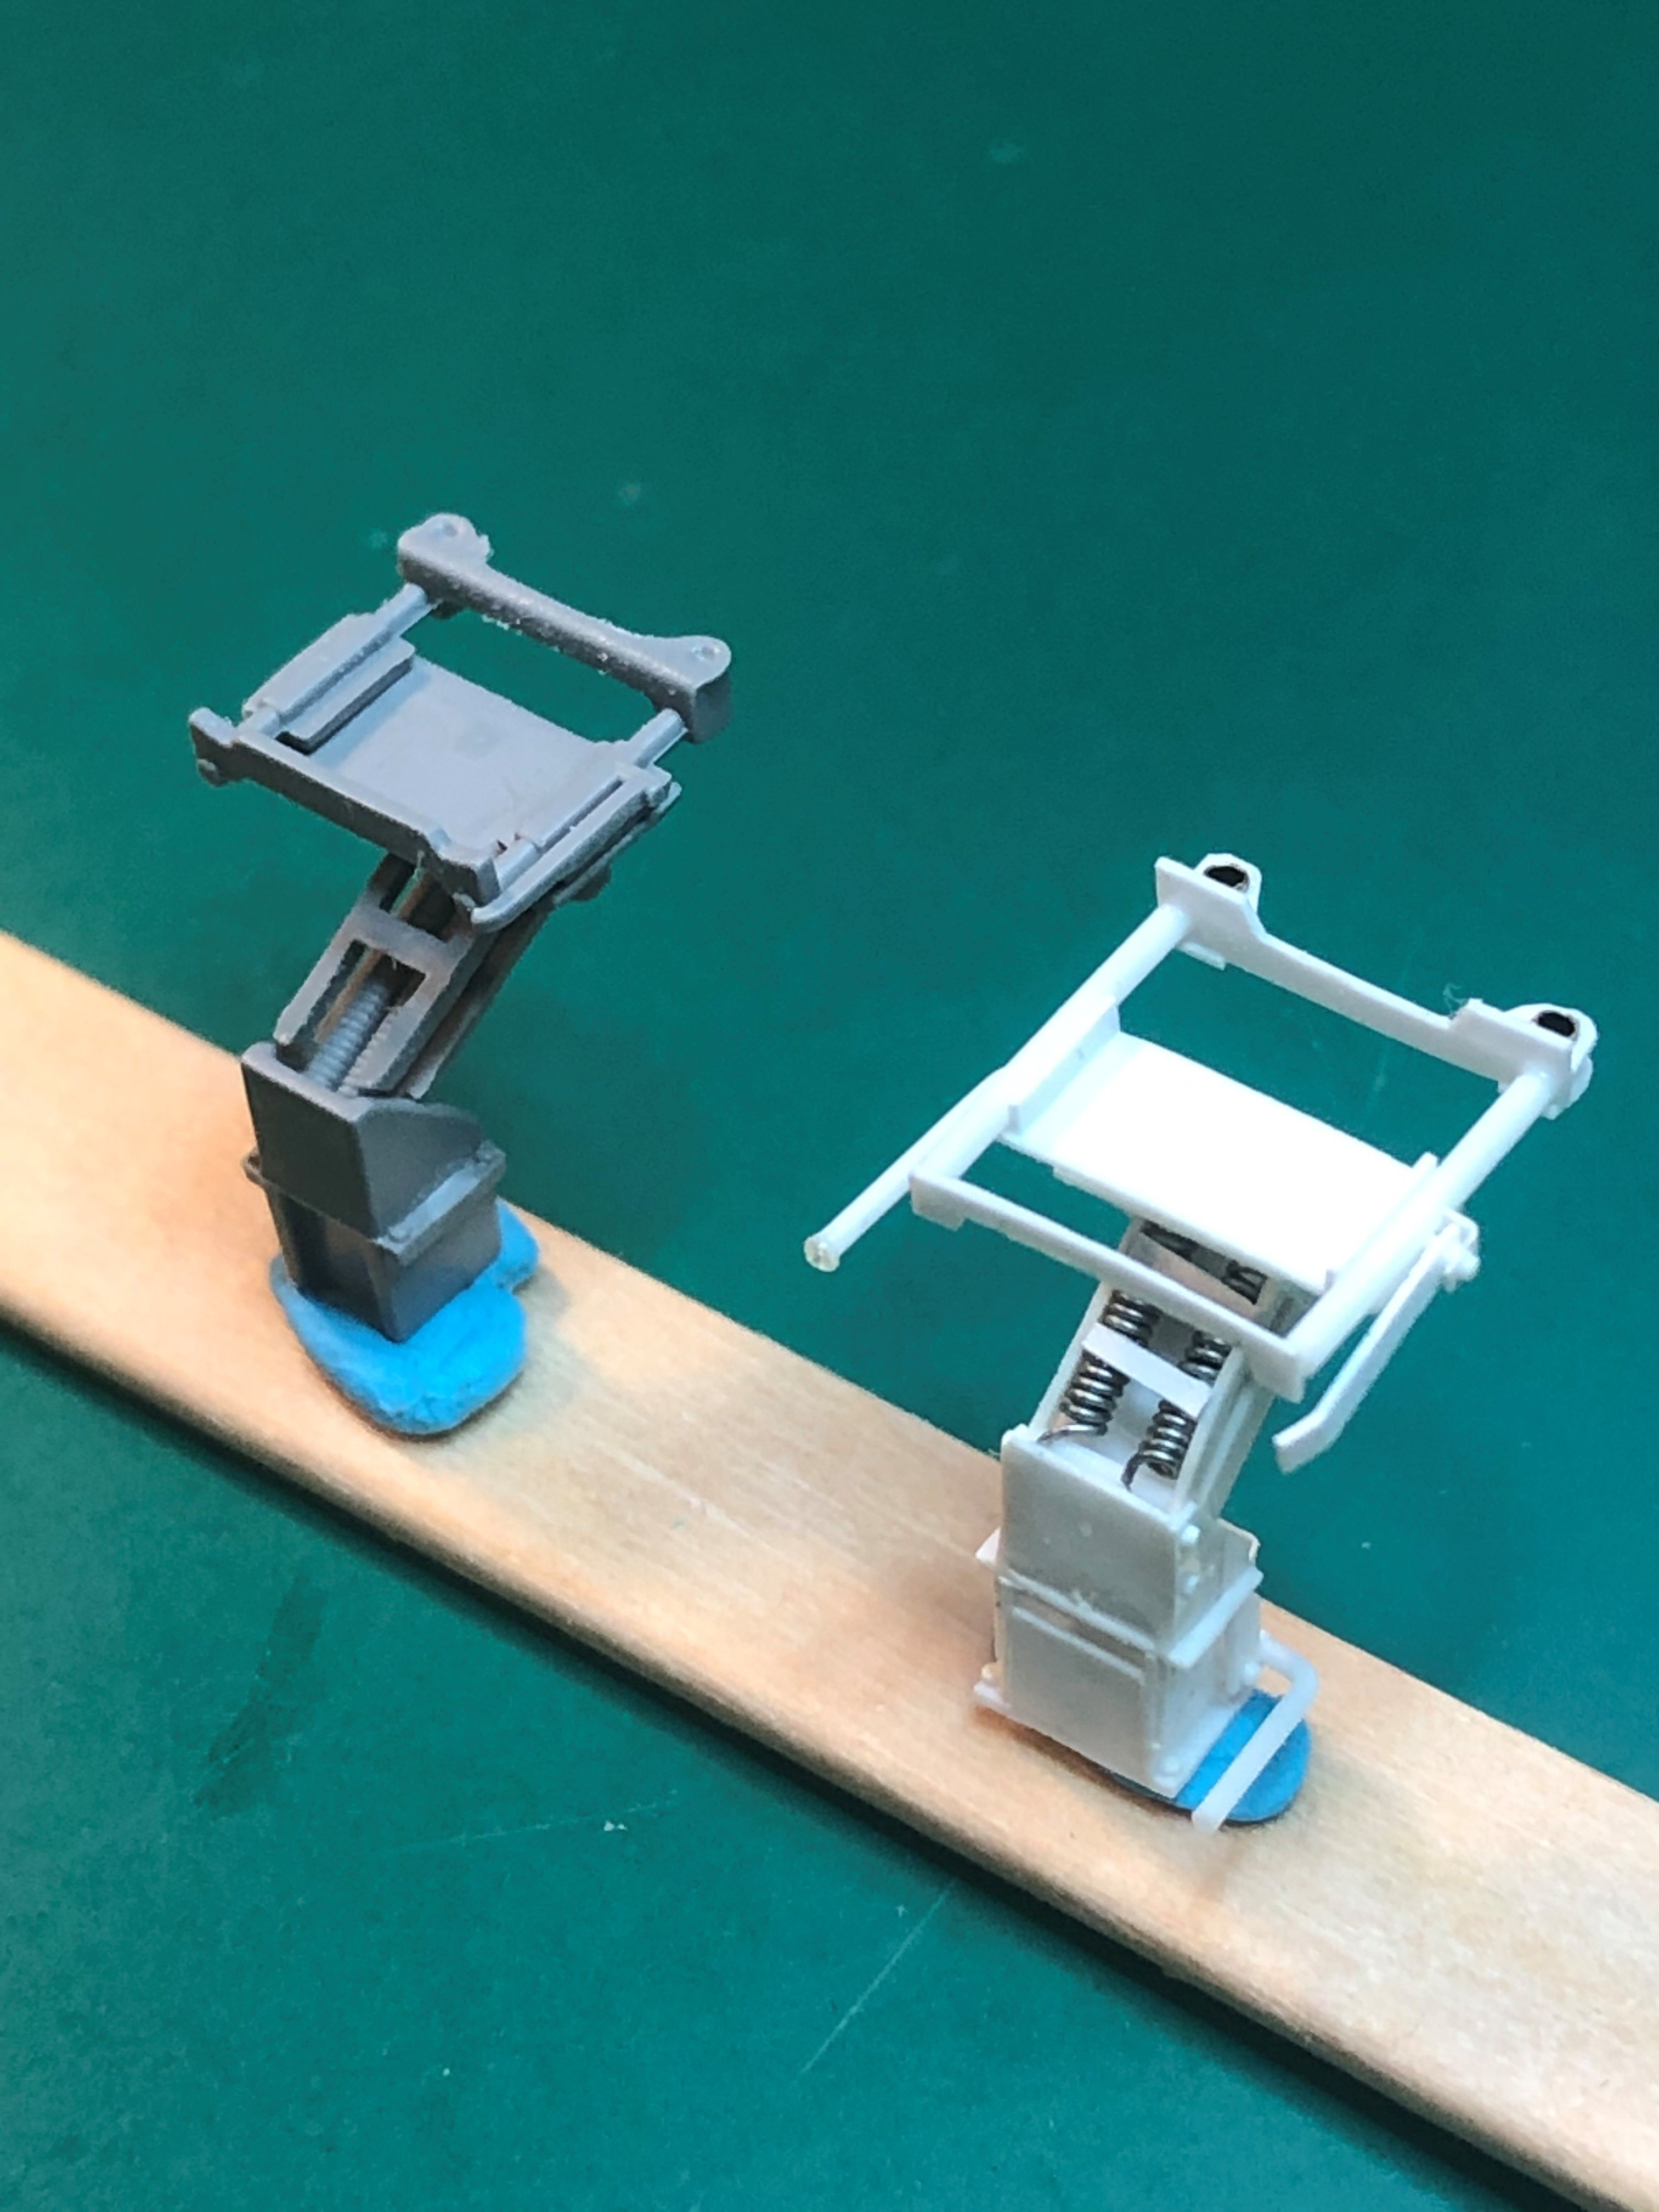
Put together the kit seat and then compared it to one I scratch built. I actually think I prefer the scratch built one. Anyone have thoughts on which seat to use?
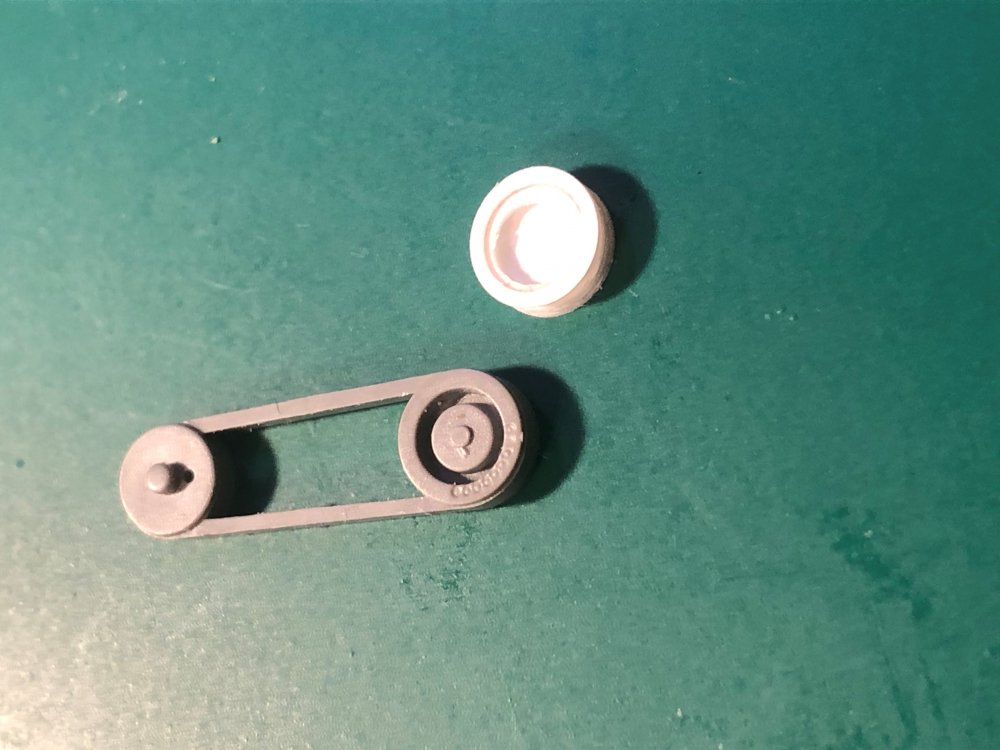


Hi Axe,
The details on your scratch built seat frame ar much finer, so I'd prefer that one. The RFM unit looks to be somewhat smaller, so I hope you'll have no trouble fitting the seat between the sidewall and the gear lever(?). On your last photo it looks as if the bow gunner/radio operator's station has some more room for the seat?
On the other hand, how visible will the seat frame be? Are they only observable through the front hatches? IIRC, the Sherman doesn't have a bolted down hull roof like the Panther and Tiger II did, did they? Are they visible if the turret is placed next to the hull or is there some big-ass bulkhead in front of it?
So; clearly visible: definitely the scratch built items. Hardly visible: the kit items, use your time and energy you save by NOT building the second seat for the rest of the interior. Or: hardly visible: but you WANT them to be there and are happy to know that it's much better than RFM's efforts: use them!
")
-
4
-
-
14 hours ago, JohnB said:
I plan to use the kit decals although I do have some after market ones which are for his later markings.
Interesting! I'm very curious to see how they'll look, once on the model. I always hear horror stories about the being too thick. Interestingly enough, Cartograf decals are not the thinnest, either, but I have never seen anybody griping about them. Or I just haven't seen them doing it!
-
1
-
-
Wow, great build, great resource!!
-
4
-
-
On 2/18/2021 at 12:16 PM, Wingco57 said:
Thanks Kai,
See my last reply.
And oops, possible distraction alert.
The postman only rings once.
Famous last words....

-
On 2/16/2021 at 1:48 AM, JohnB said:
I have always liked the Bout One Mustangs of the ROK AF so now that Tamiya has provided us with the needed decals and bits needed to build one I'm going to get with the program and model this one flown by Dean Hess. Should make a eye catching model.
")
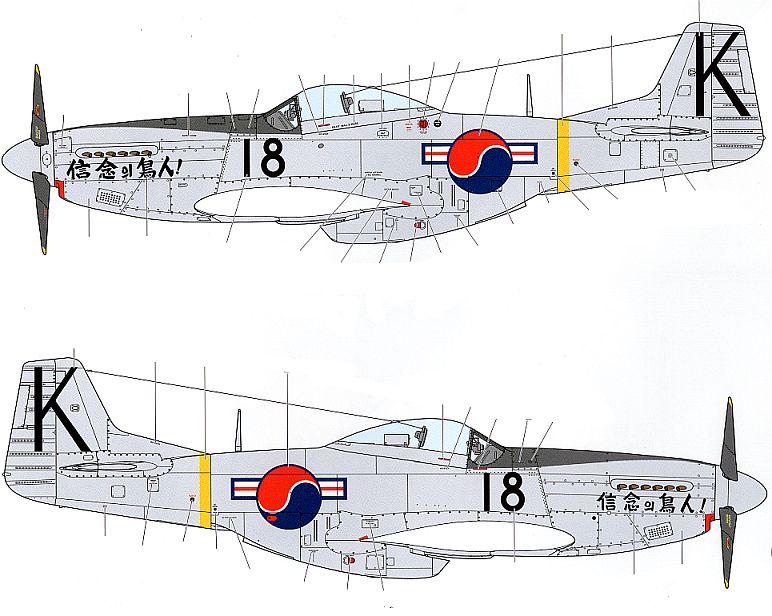
Nice! Looking forward to see your progress! Are you planning on using the kit decals or do you source the markings from somewhere else / masks?
-
5
-


Group Build rules:
in Everything Ukraine Group Build
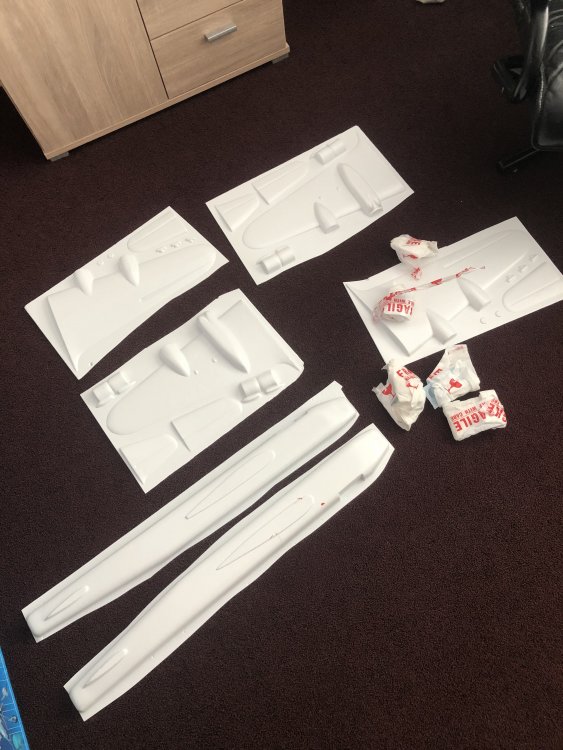
Posted
I hope you’ll do the extension for this GB as I’ve been doing *some* work on my Flanker Estate but have been struggling to find the time to show any meaningful progress yet.