PeteF
-
Posts
233 -
Joined
-
Last visited
Content Type
Profiles
Forums
Events
Gallery
Everything posted by PeteF
-
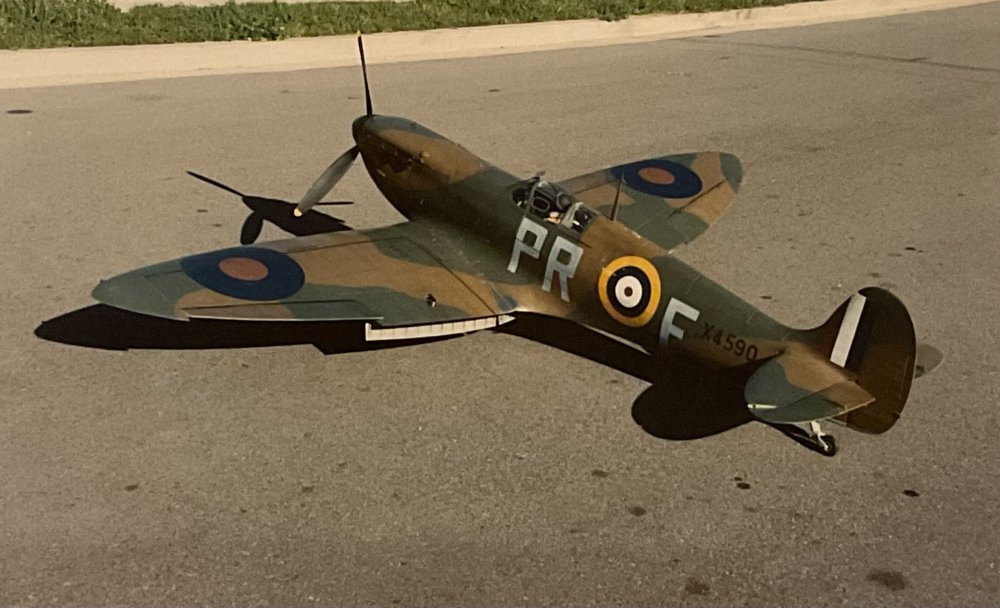
That desert camo scheme is gorgeous. My big spit was a Mk I
-
The flap linkage doors on the wing remind me of a 1/4 scale Spit I built (back in 1998) where I made those functional. Getting them (and the fiddly two piece on each wing split flaps) to work smoothly and for the door to open/close properly lead to a lot of swearing. Took several weeks to get it to work. Eventually my wife thought these were Spitfire parts called the “F**king flaps” and the “F**king doors.”

-
At one time, I had an encyclopedic knowledge of Spitfires but had never read about this one. Would be an interesting subject for a kit basher:
-

1/24 scale Daimler Ferret (Kit Form Services resin kit)
PeteF replied to PeteF's topic in LSM Armour Finished Work
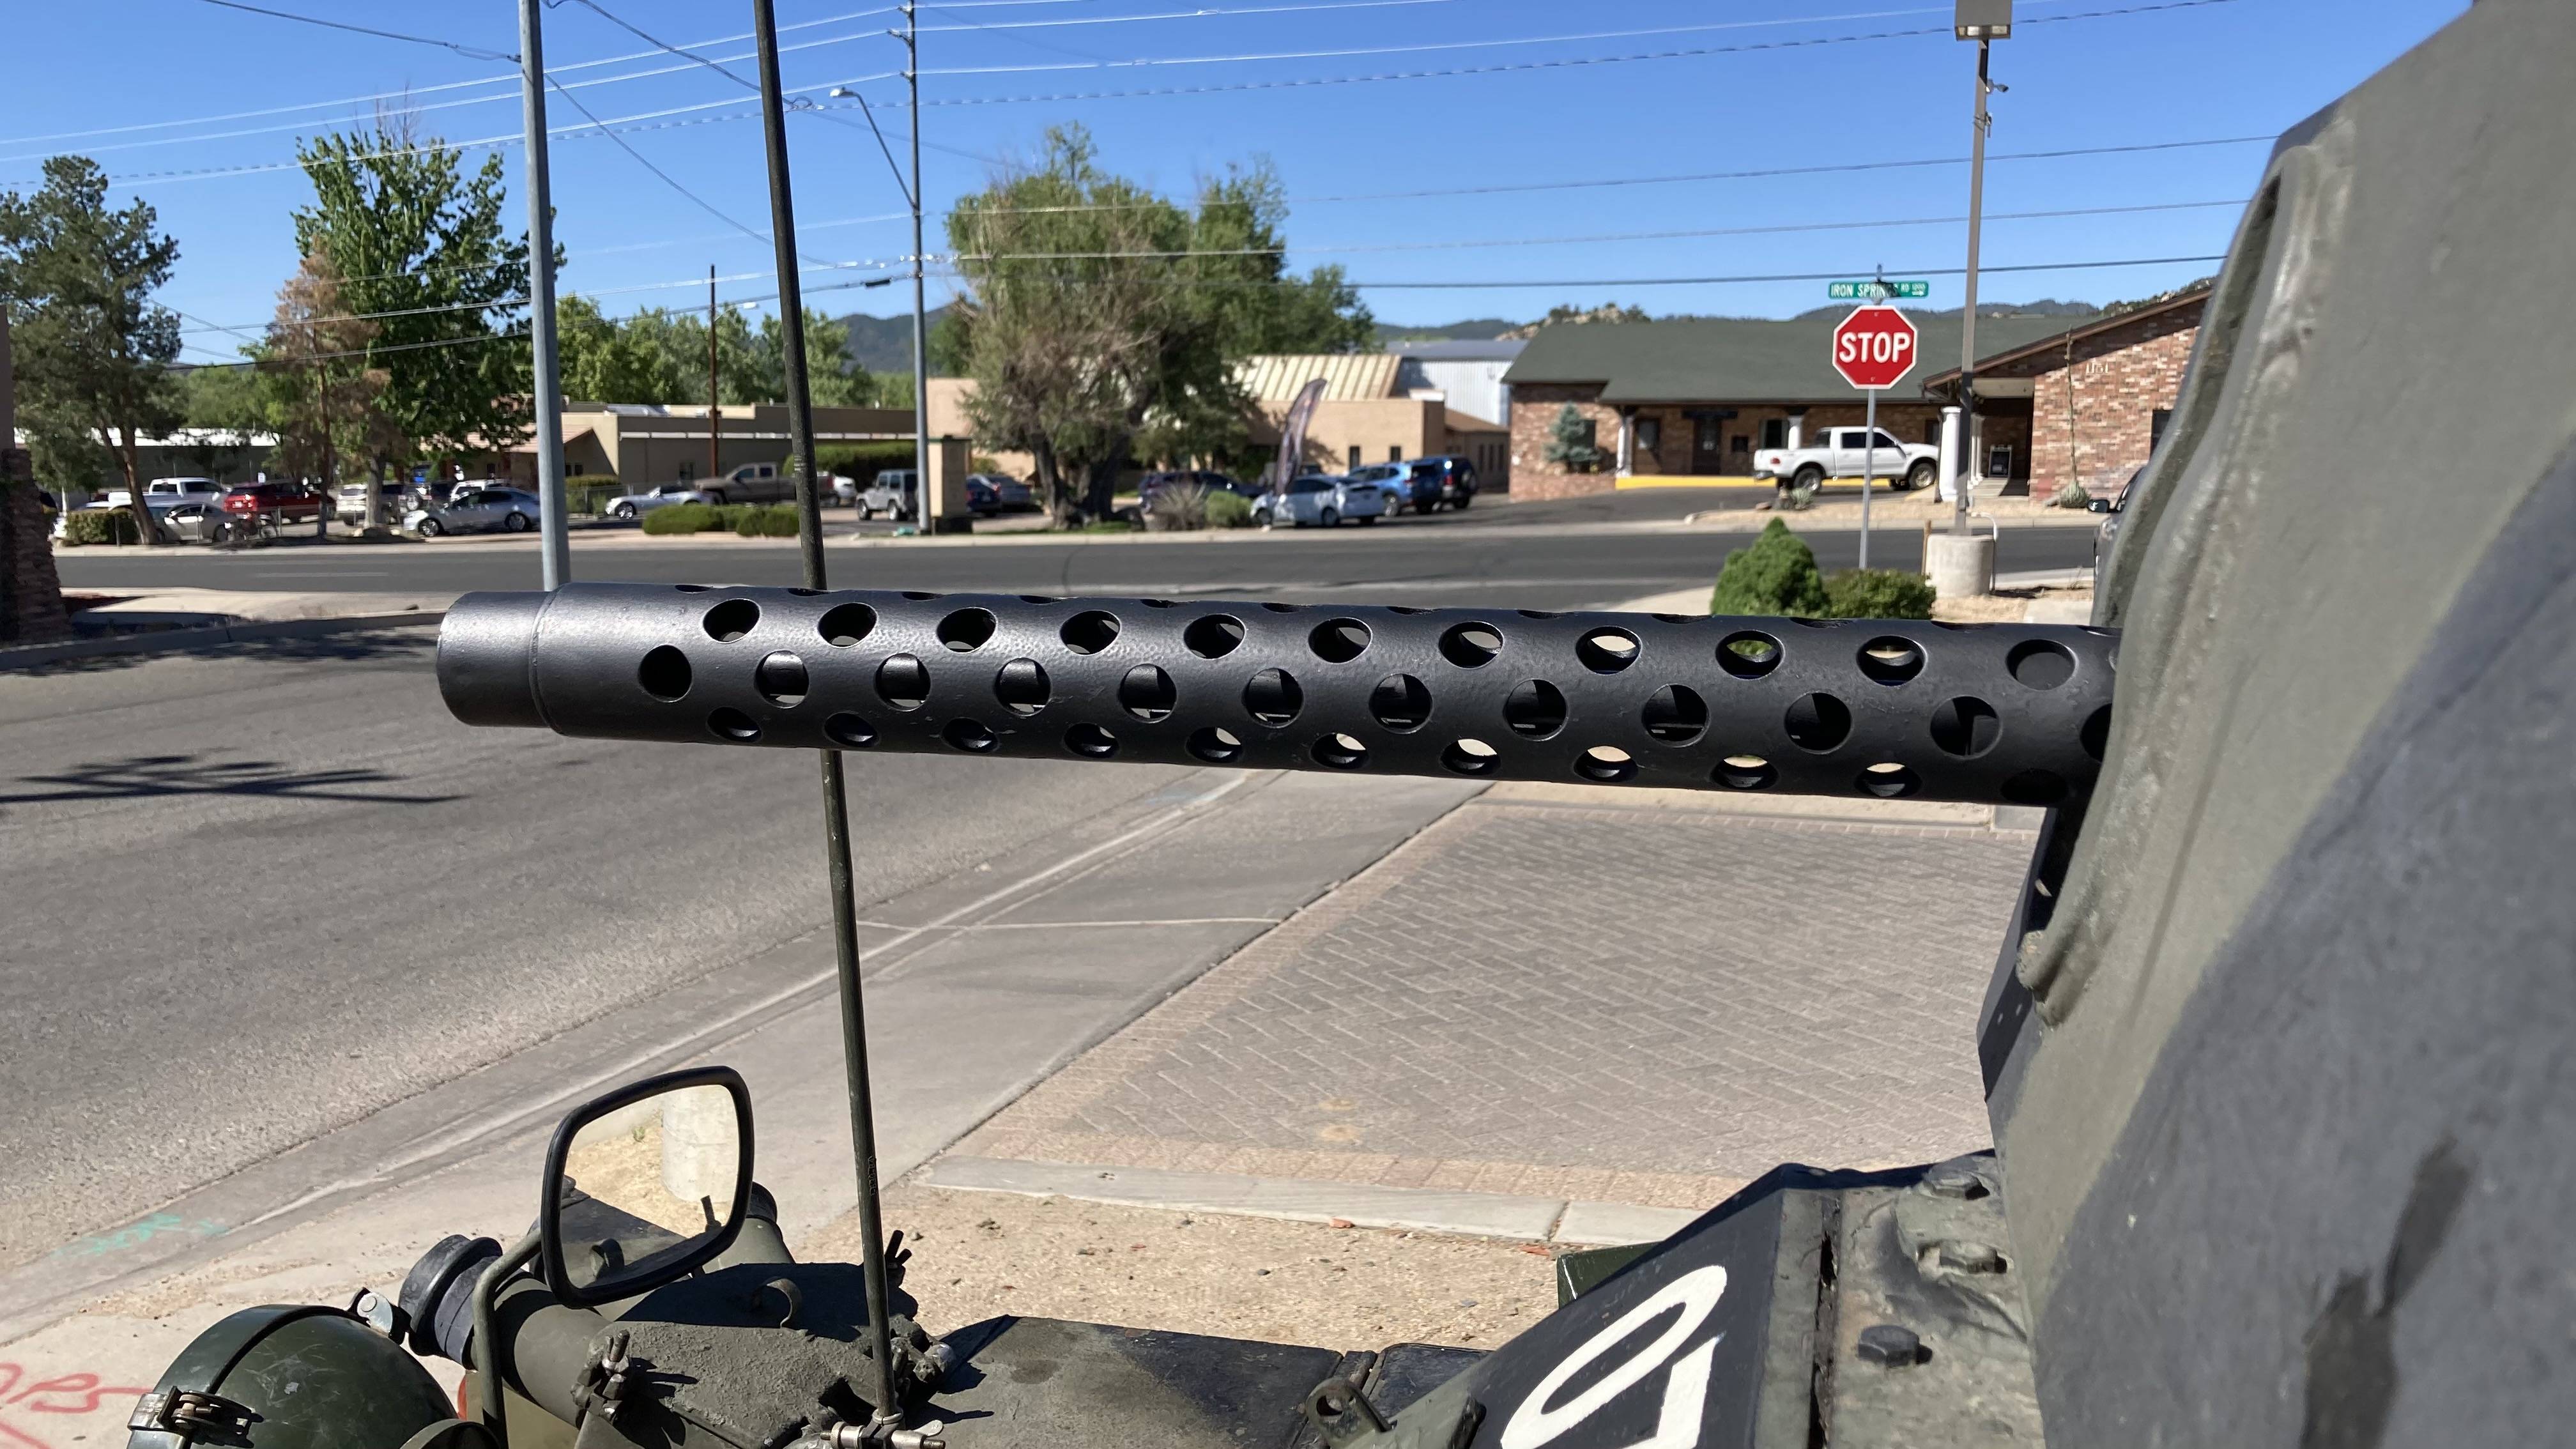
They’re too expensive just to have a barrel poking out and the mount in the turret is for a GPMG. The 1911 mounts are impossible to get because they were all removed and trashed when they were replaced by GPMGs. -
1/24 scale Daimler Ferret (Kit Form Services resin kit)
PeteF replied to PeteF's topic in LSM Armour Finished Work
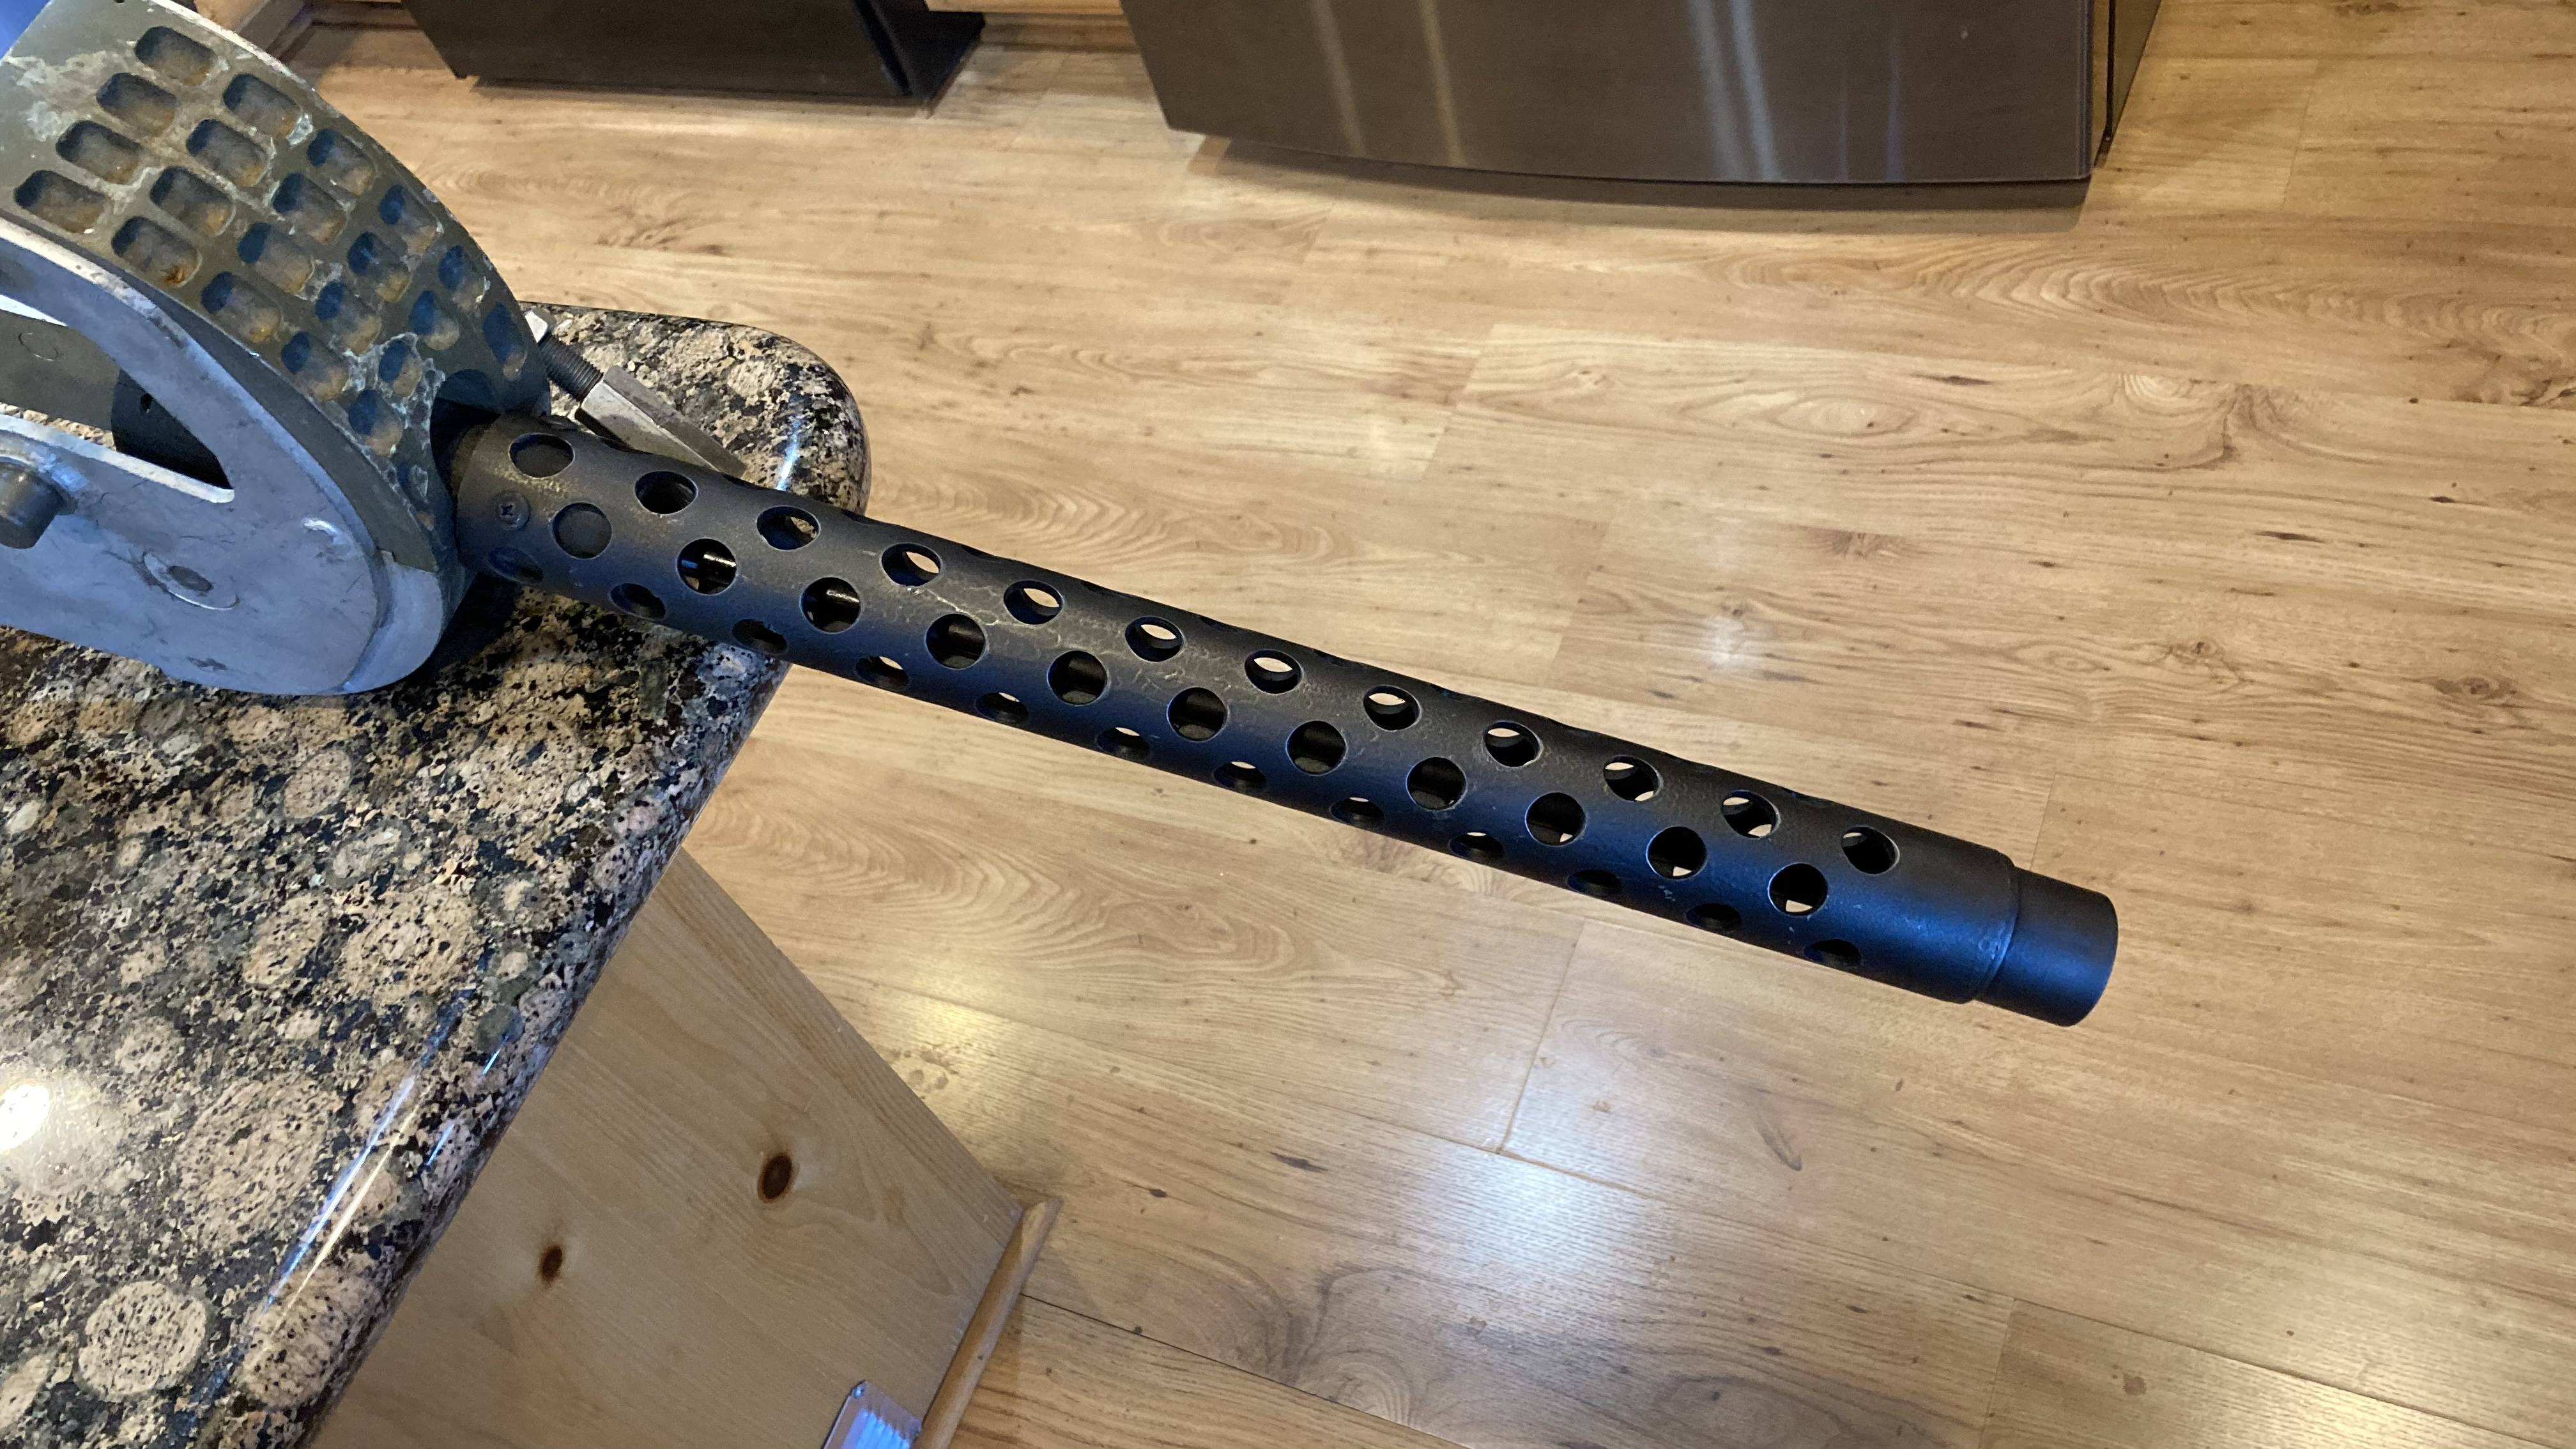
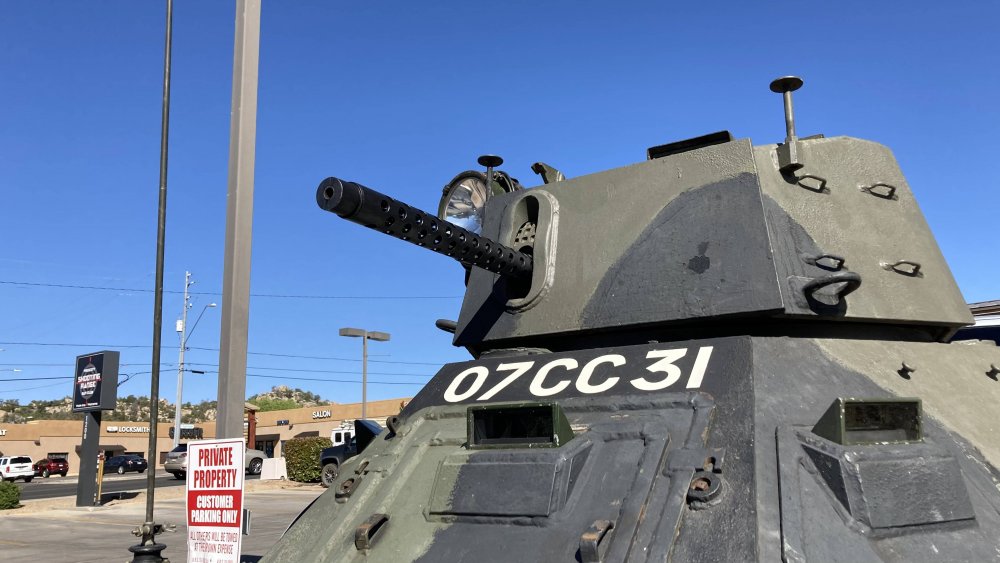
More model building on the real one. M1919 gun barrel.


- 13 replies
-
- 5
-

-

-
- kit form services
- daimler ferret
- (and 1 more)
-
1/24 scale Daimler Ferret (Kit Form Services resin kit)
PeteF replied to PeteF's topic in LSM Armour Finished Work
Always a modeler, I had to paint the correct vehicle number on the real one.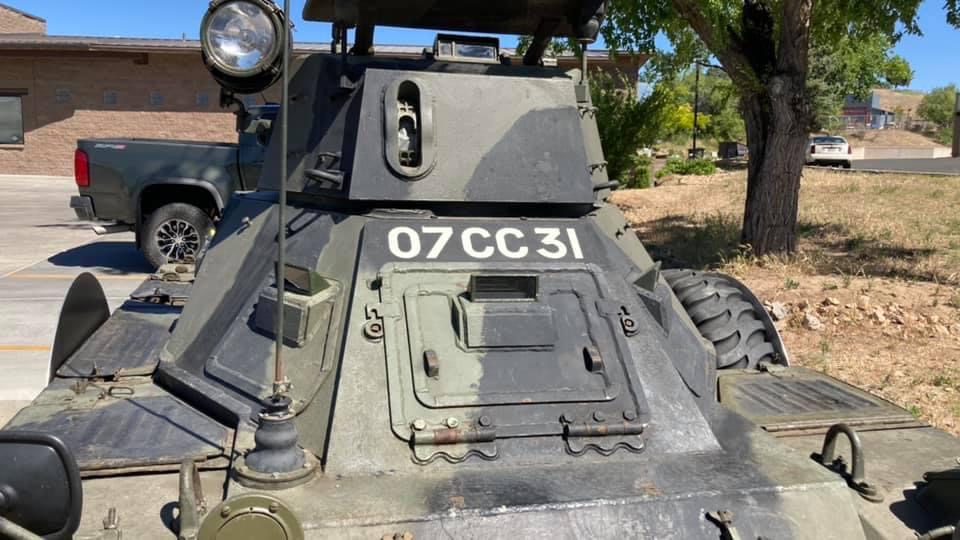
- 13 replies
-
- 4
-
-
-
- kit form services
- daimler ferret
- (and 1 more)
-
1/24 scale Daimler Ferret (Kit Form Services resin kit)
PeteF replied to PeteF's topic in LSM Armour Finished Work
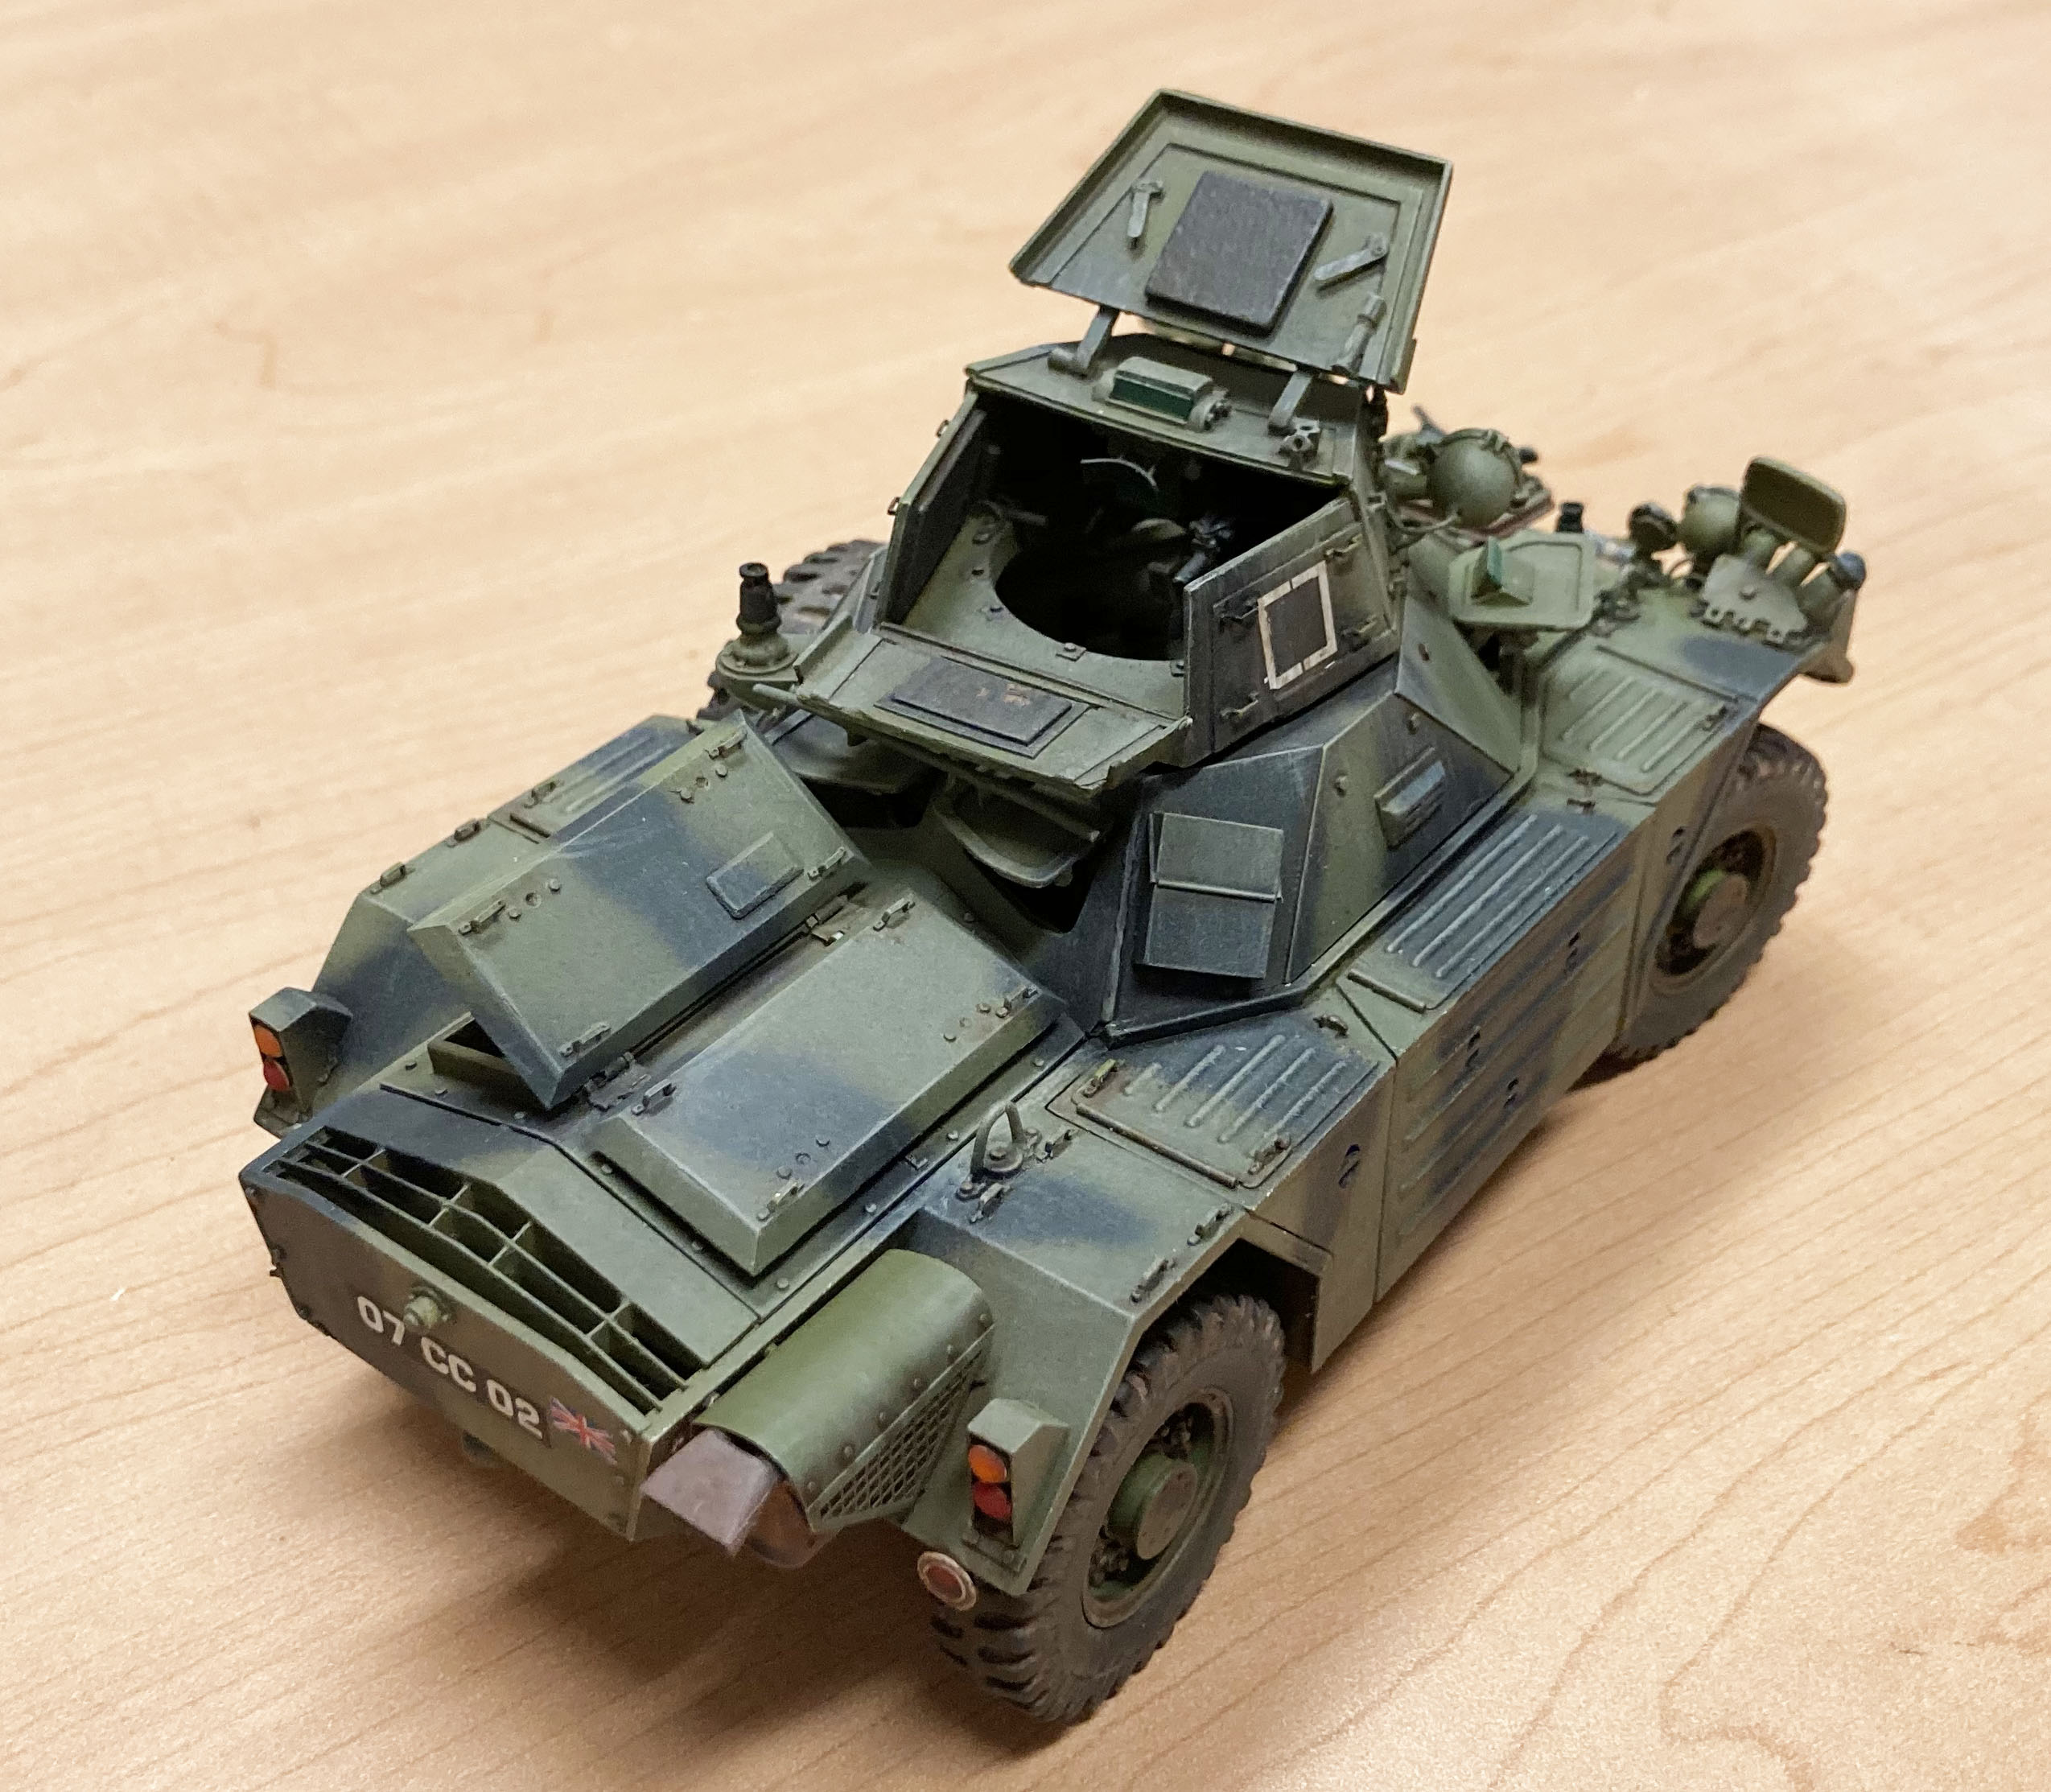
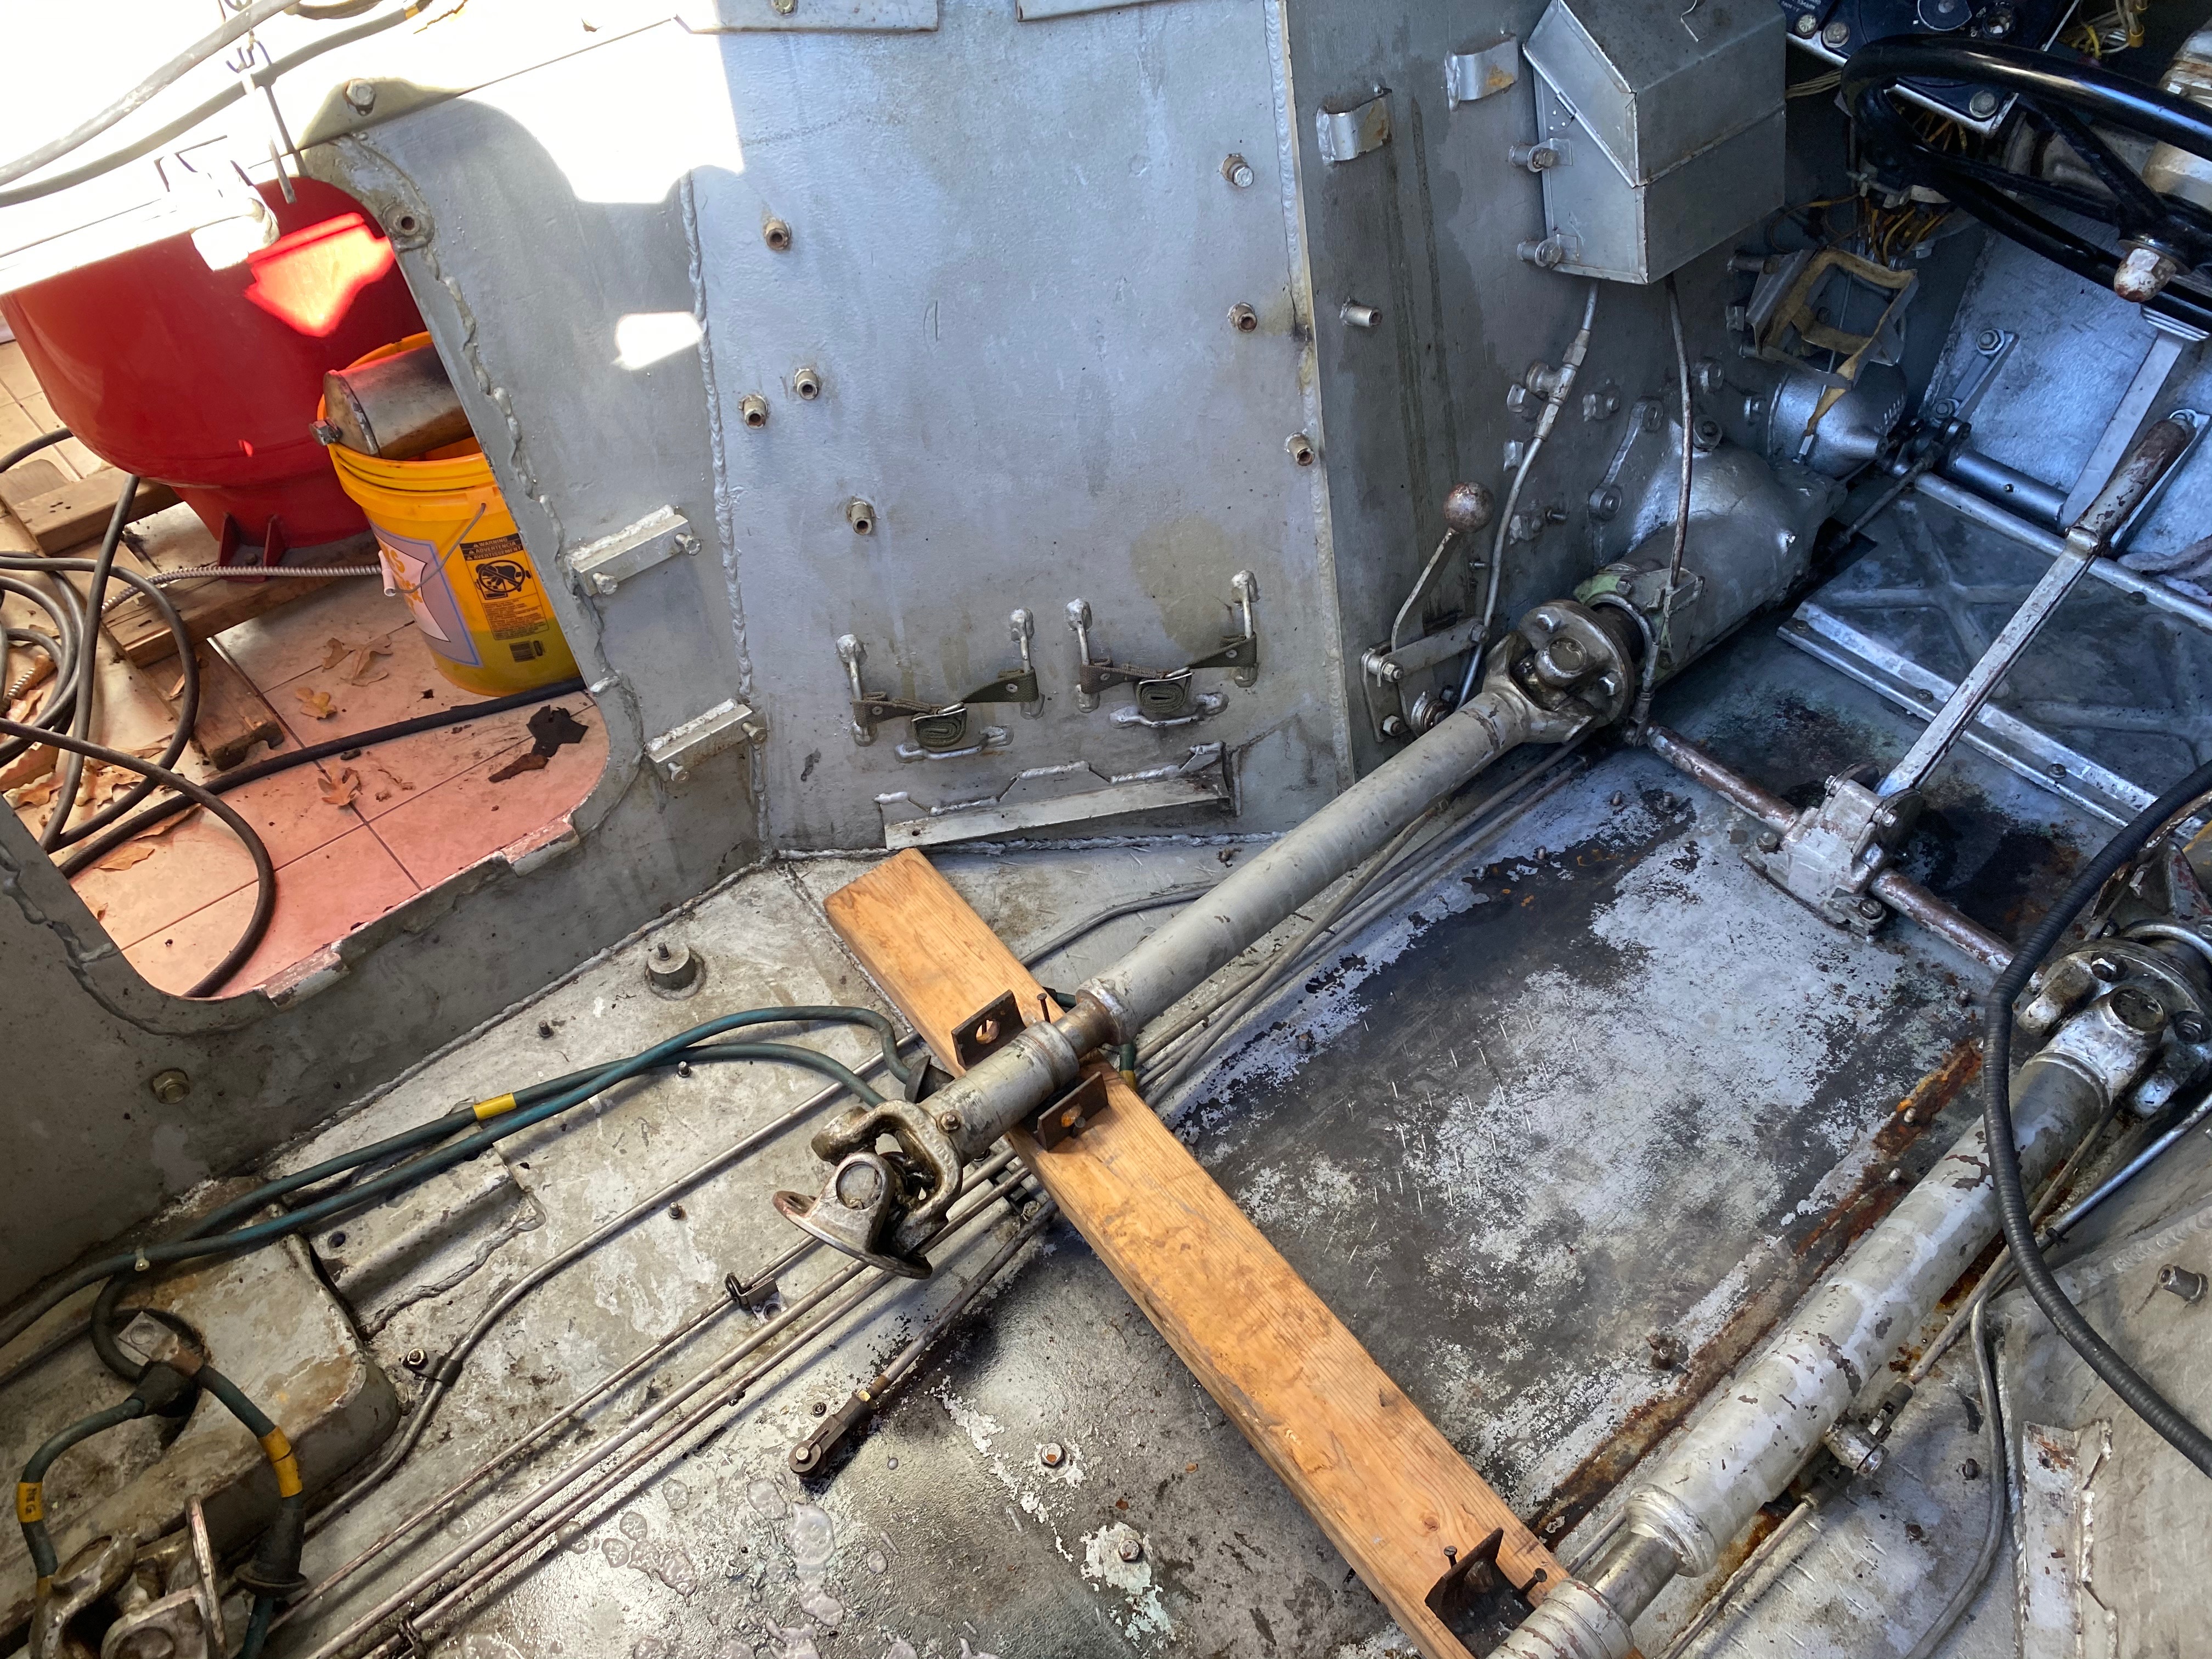
Jey Leno just did a segment about his. You can see the driving position. His was built in the same batch of 225 Ferrets as ours.- 13 replies
-
- 4
-
-
- kit form services
- daimler ferret
- (and 1 more)
-
Chinese/Japanese type 94 tankette. Takom
PeteF replied to belugawhaleman's topic in LSM 1/35 and Larger Work In Progress
You’ll find that you get huge “bang for the buck” if you start with a tan dry brush. REALLY dry brush...barely any paint. It’s not necessary to go nuts with chipping and grime but a dry brush will accentuate details and edges in a way that makes the shape look like a miniature object and less like a model. Corners, raised rivets, edges and then fading and streaking from normal sun/rain exposure. Then consider it was driven largely on dirt roads so the tracks/wheels would always get dirty. Then some washes to accentuate lines, shadows and the areas of dirt that run off the machine when it gets rained on. Doesn’t need to look battle worn but the first week it gets left outside and driven on dirt and it will stop looking “fresh.”
-
Chinese/Japanese type 94 tankette. Takom
PeteF replied to belugawhaleman's topic in LSM 1/35 and Larger Work In Progress
-
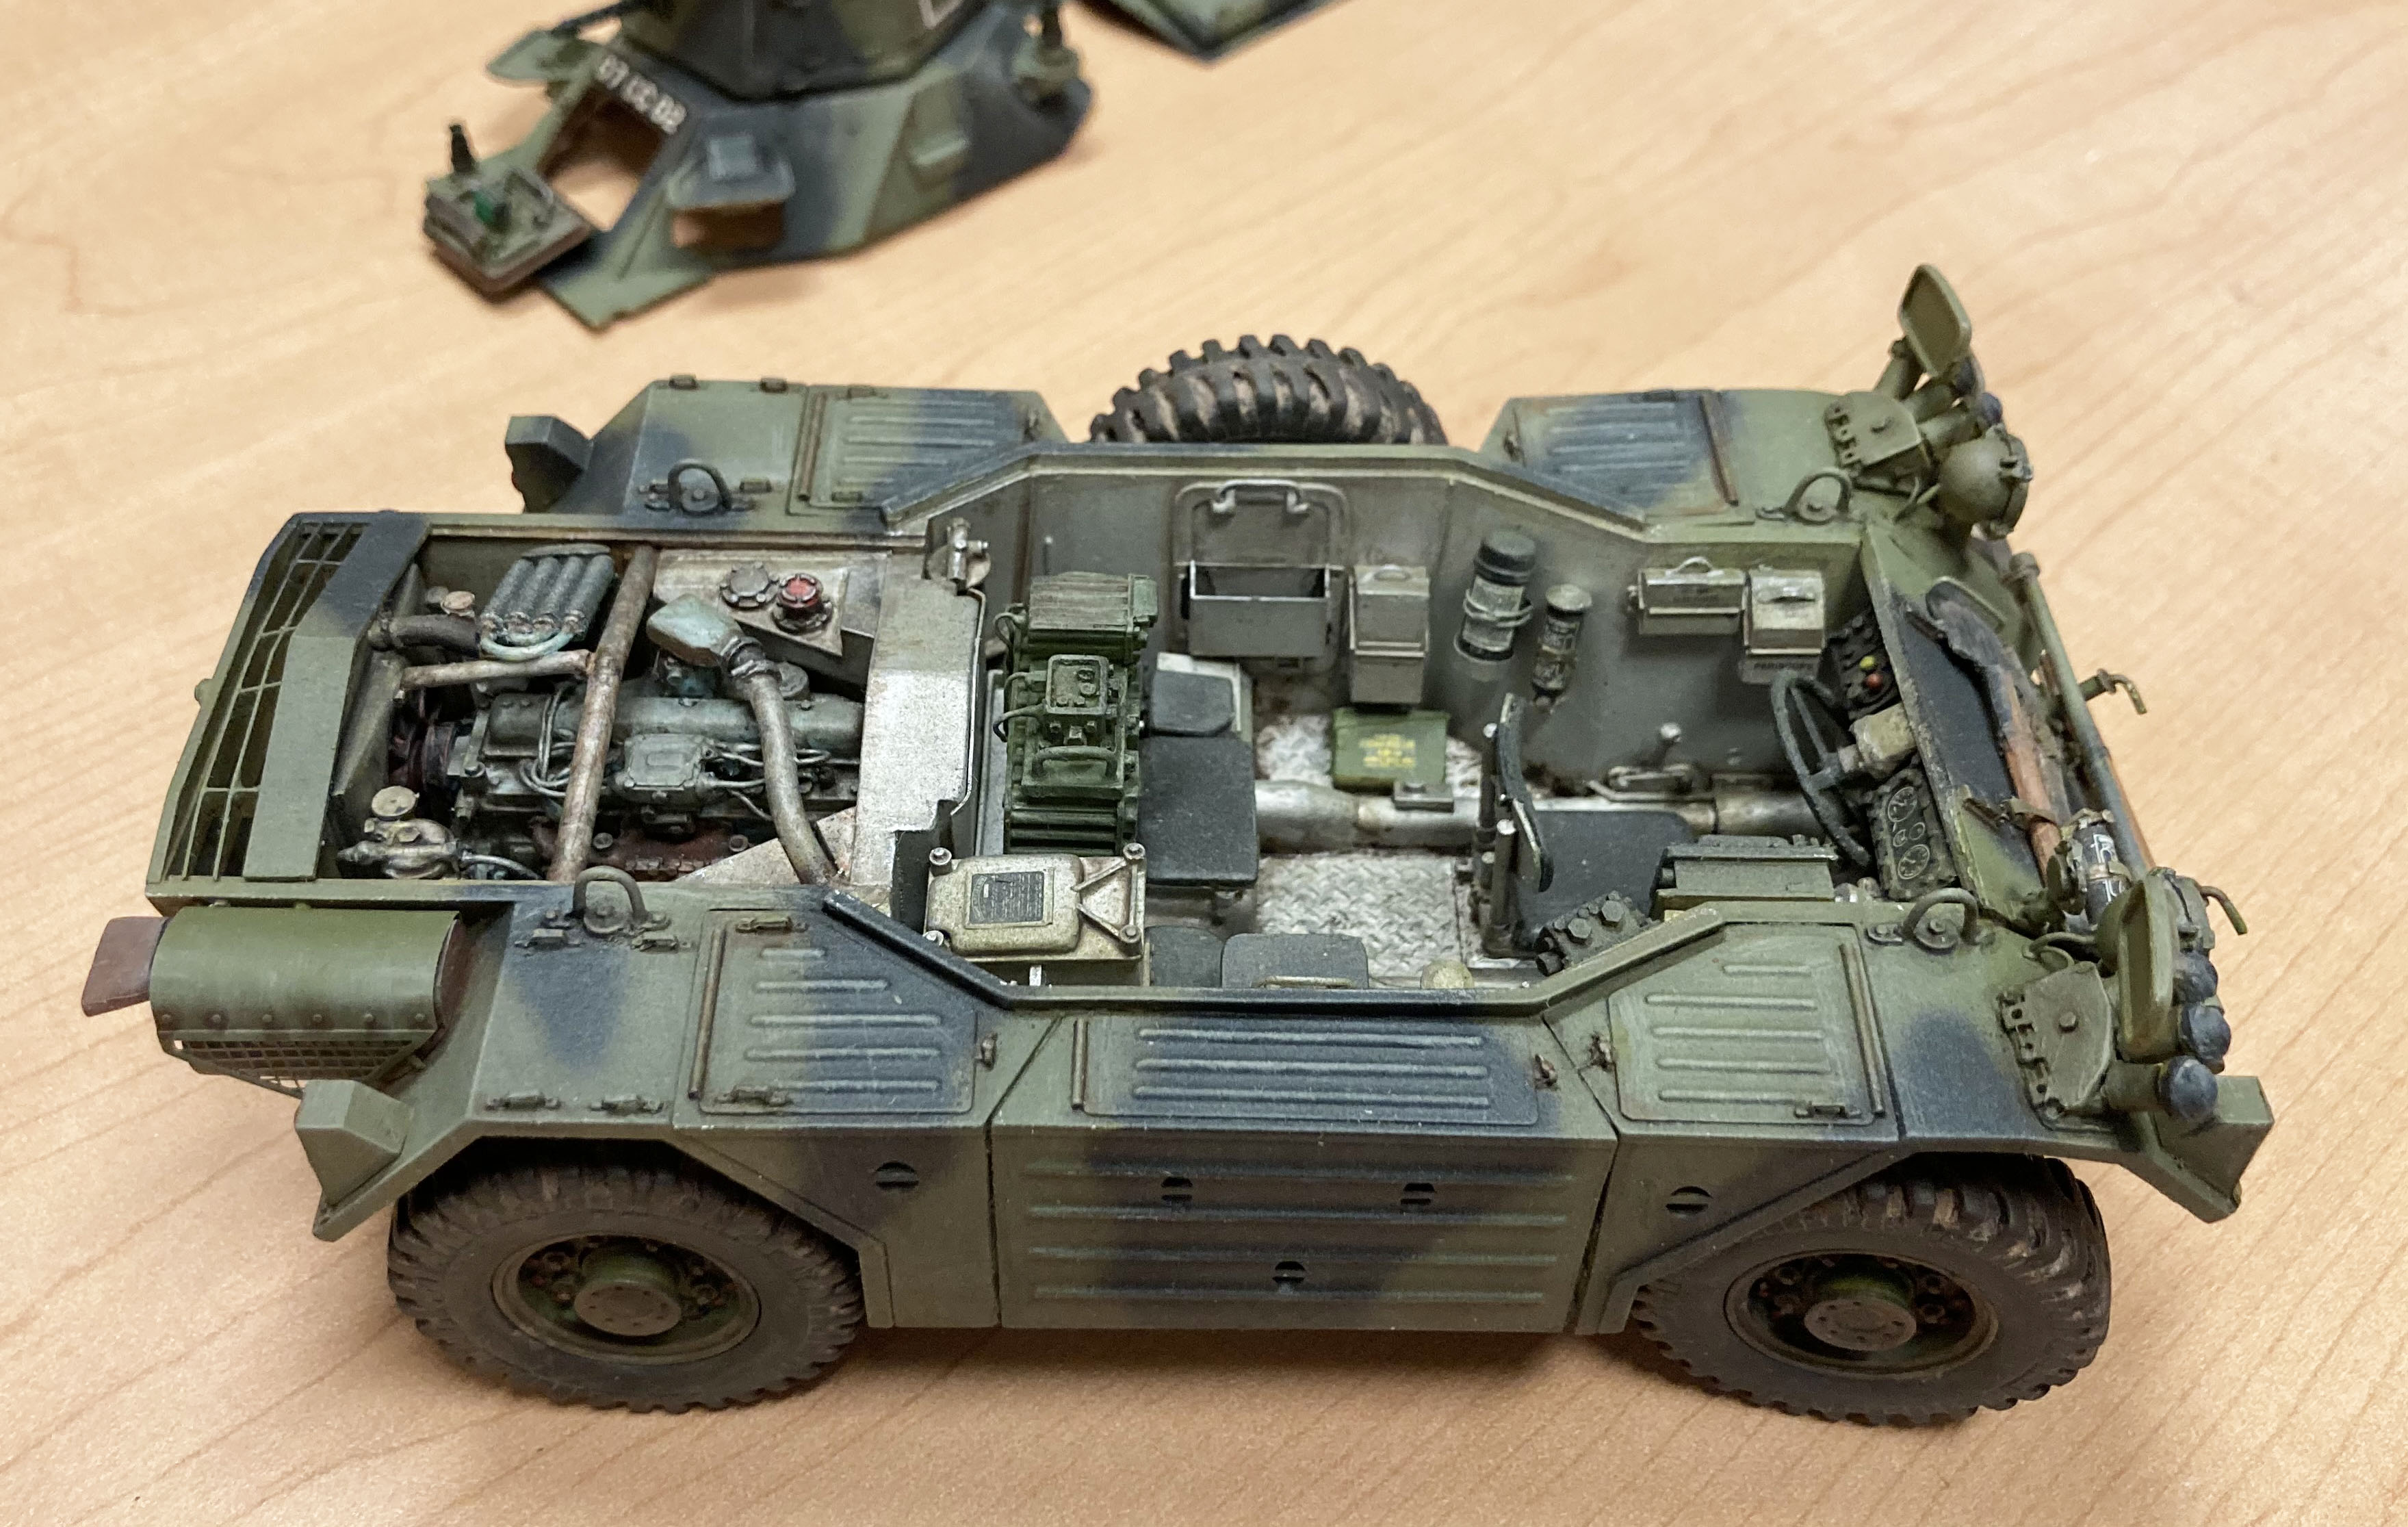
1/24 Kit Form Services Daimler Ferret resin kit build
PeteF replied to PeteF's topic in LSM 1/35 and Larger Work In Progress
Still noodling. Added the ubiquitous water can.
-
1/24 Kit Form Services Daimler Ferret resin kit build
PeteF replied to PeteF's topic in LSM 1/35 and Larger Work In Progress
Considering I'm building for the guys who are doing the restoration, they'd totally notice anything that wasn't scale...certainly puts extra pressure on it. There is typically a water "Jerry" can on the left rear fender. The one it the kit didn't fit well but I have it modified to go so I just need to paint it and attach it. -
1/24 Kit Form Services Daimler Ferret resin kit build
PeteF replied to PeteF's topic in LSM 1/35 and Larger Work In Progress
Even though I was "done" I wasn't quite done. Worked on the straps on the engine hatch today...last little details getting taken care of.
-
1/24 scale Daimler Ferret (Kit Form Services resin kit)
PeteF replied to PeteF's topic in LSM Armour Finished Work
Link to WIP thread. So much of it was fitting small pieces that it was hard to document it meaningfully. Much different than an aircraft model in that the large assemblies were pre made and all the time was in attaching things that were mostly complete but of which there were a zillion fiddly ones.- 13 replies
-
- 4
-
-
- kit form services
- daimler ferret
- (and 1 more)
-
1/24 Kit Form Services Daimler Ferret resin kit build
PeteF replied to PeteF's topic in LSM 1/35 and Larger Work In Progress
My wife and I were traditional graphic designers prior to switching to Mac in 1987. This is one of the few things we have remaining from that era of our lives. -
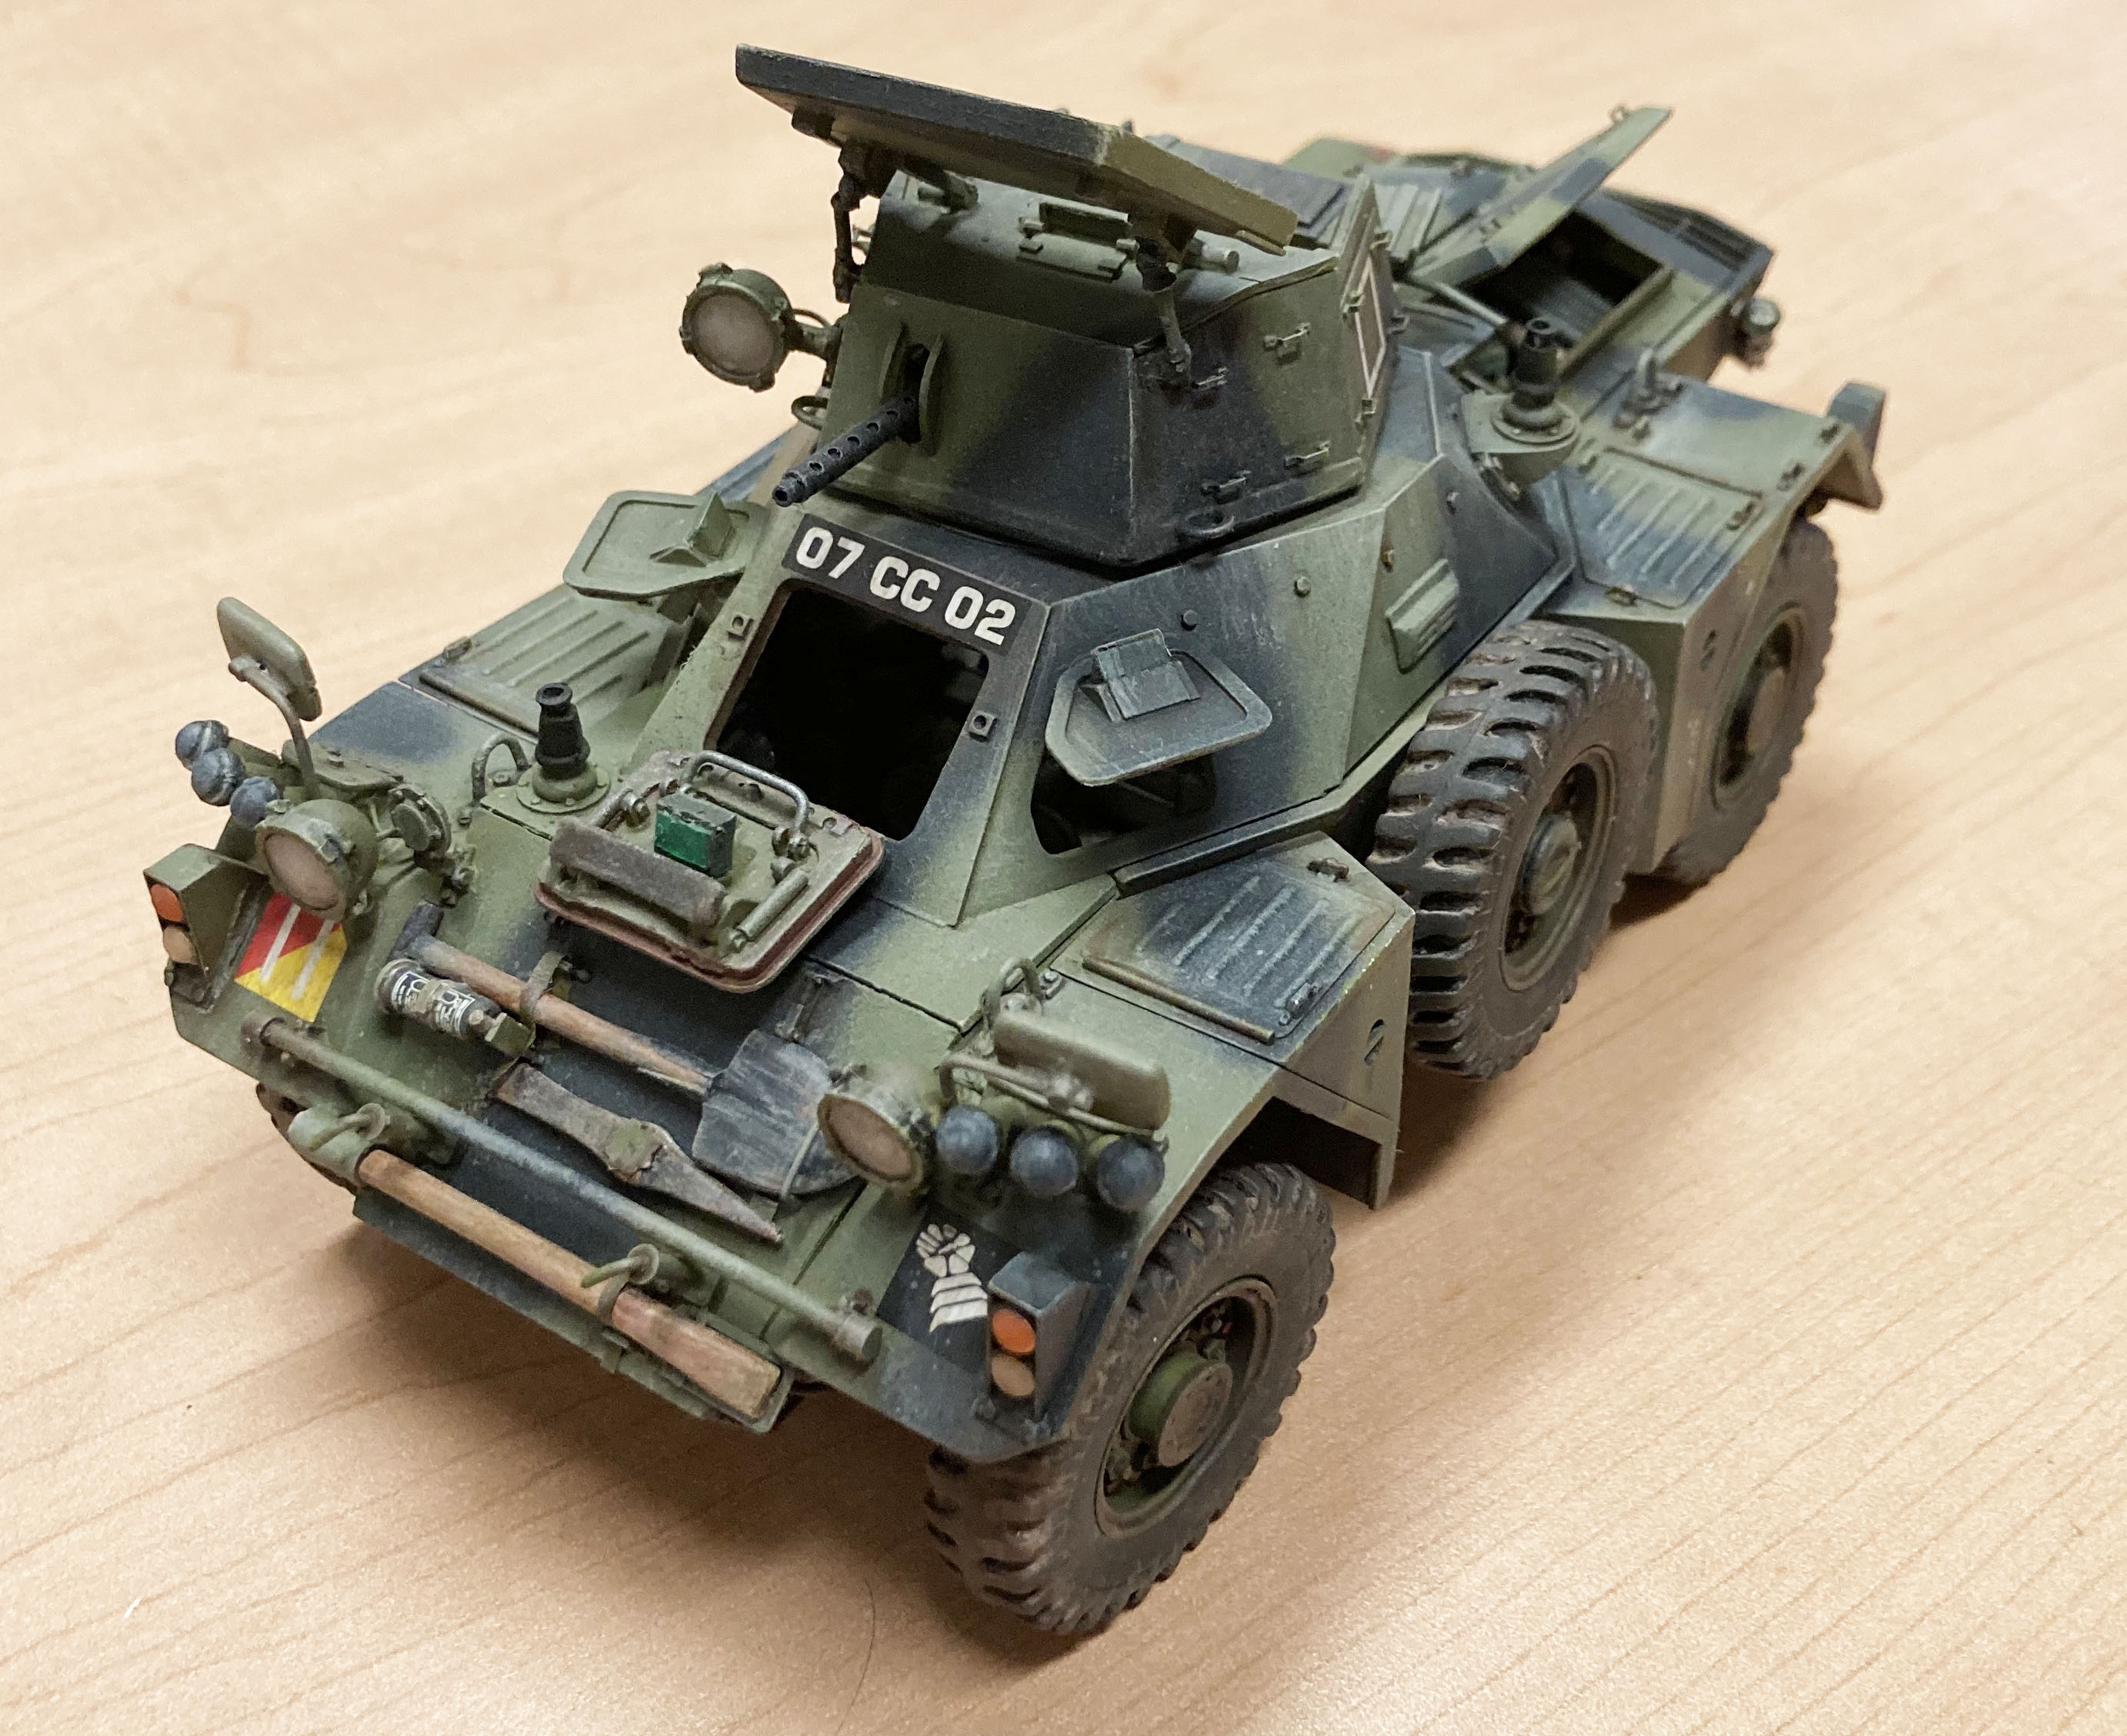
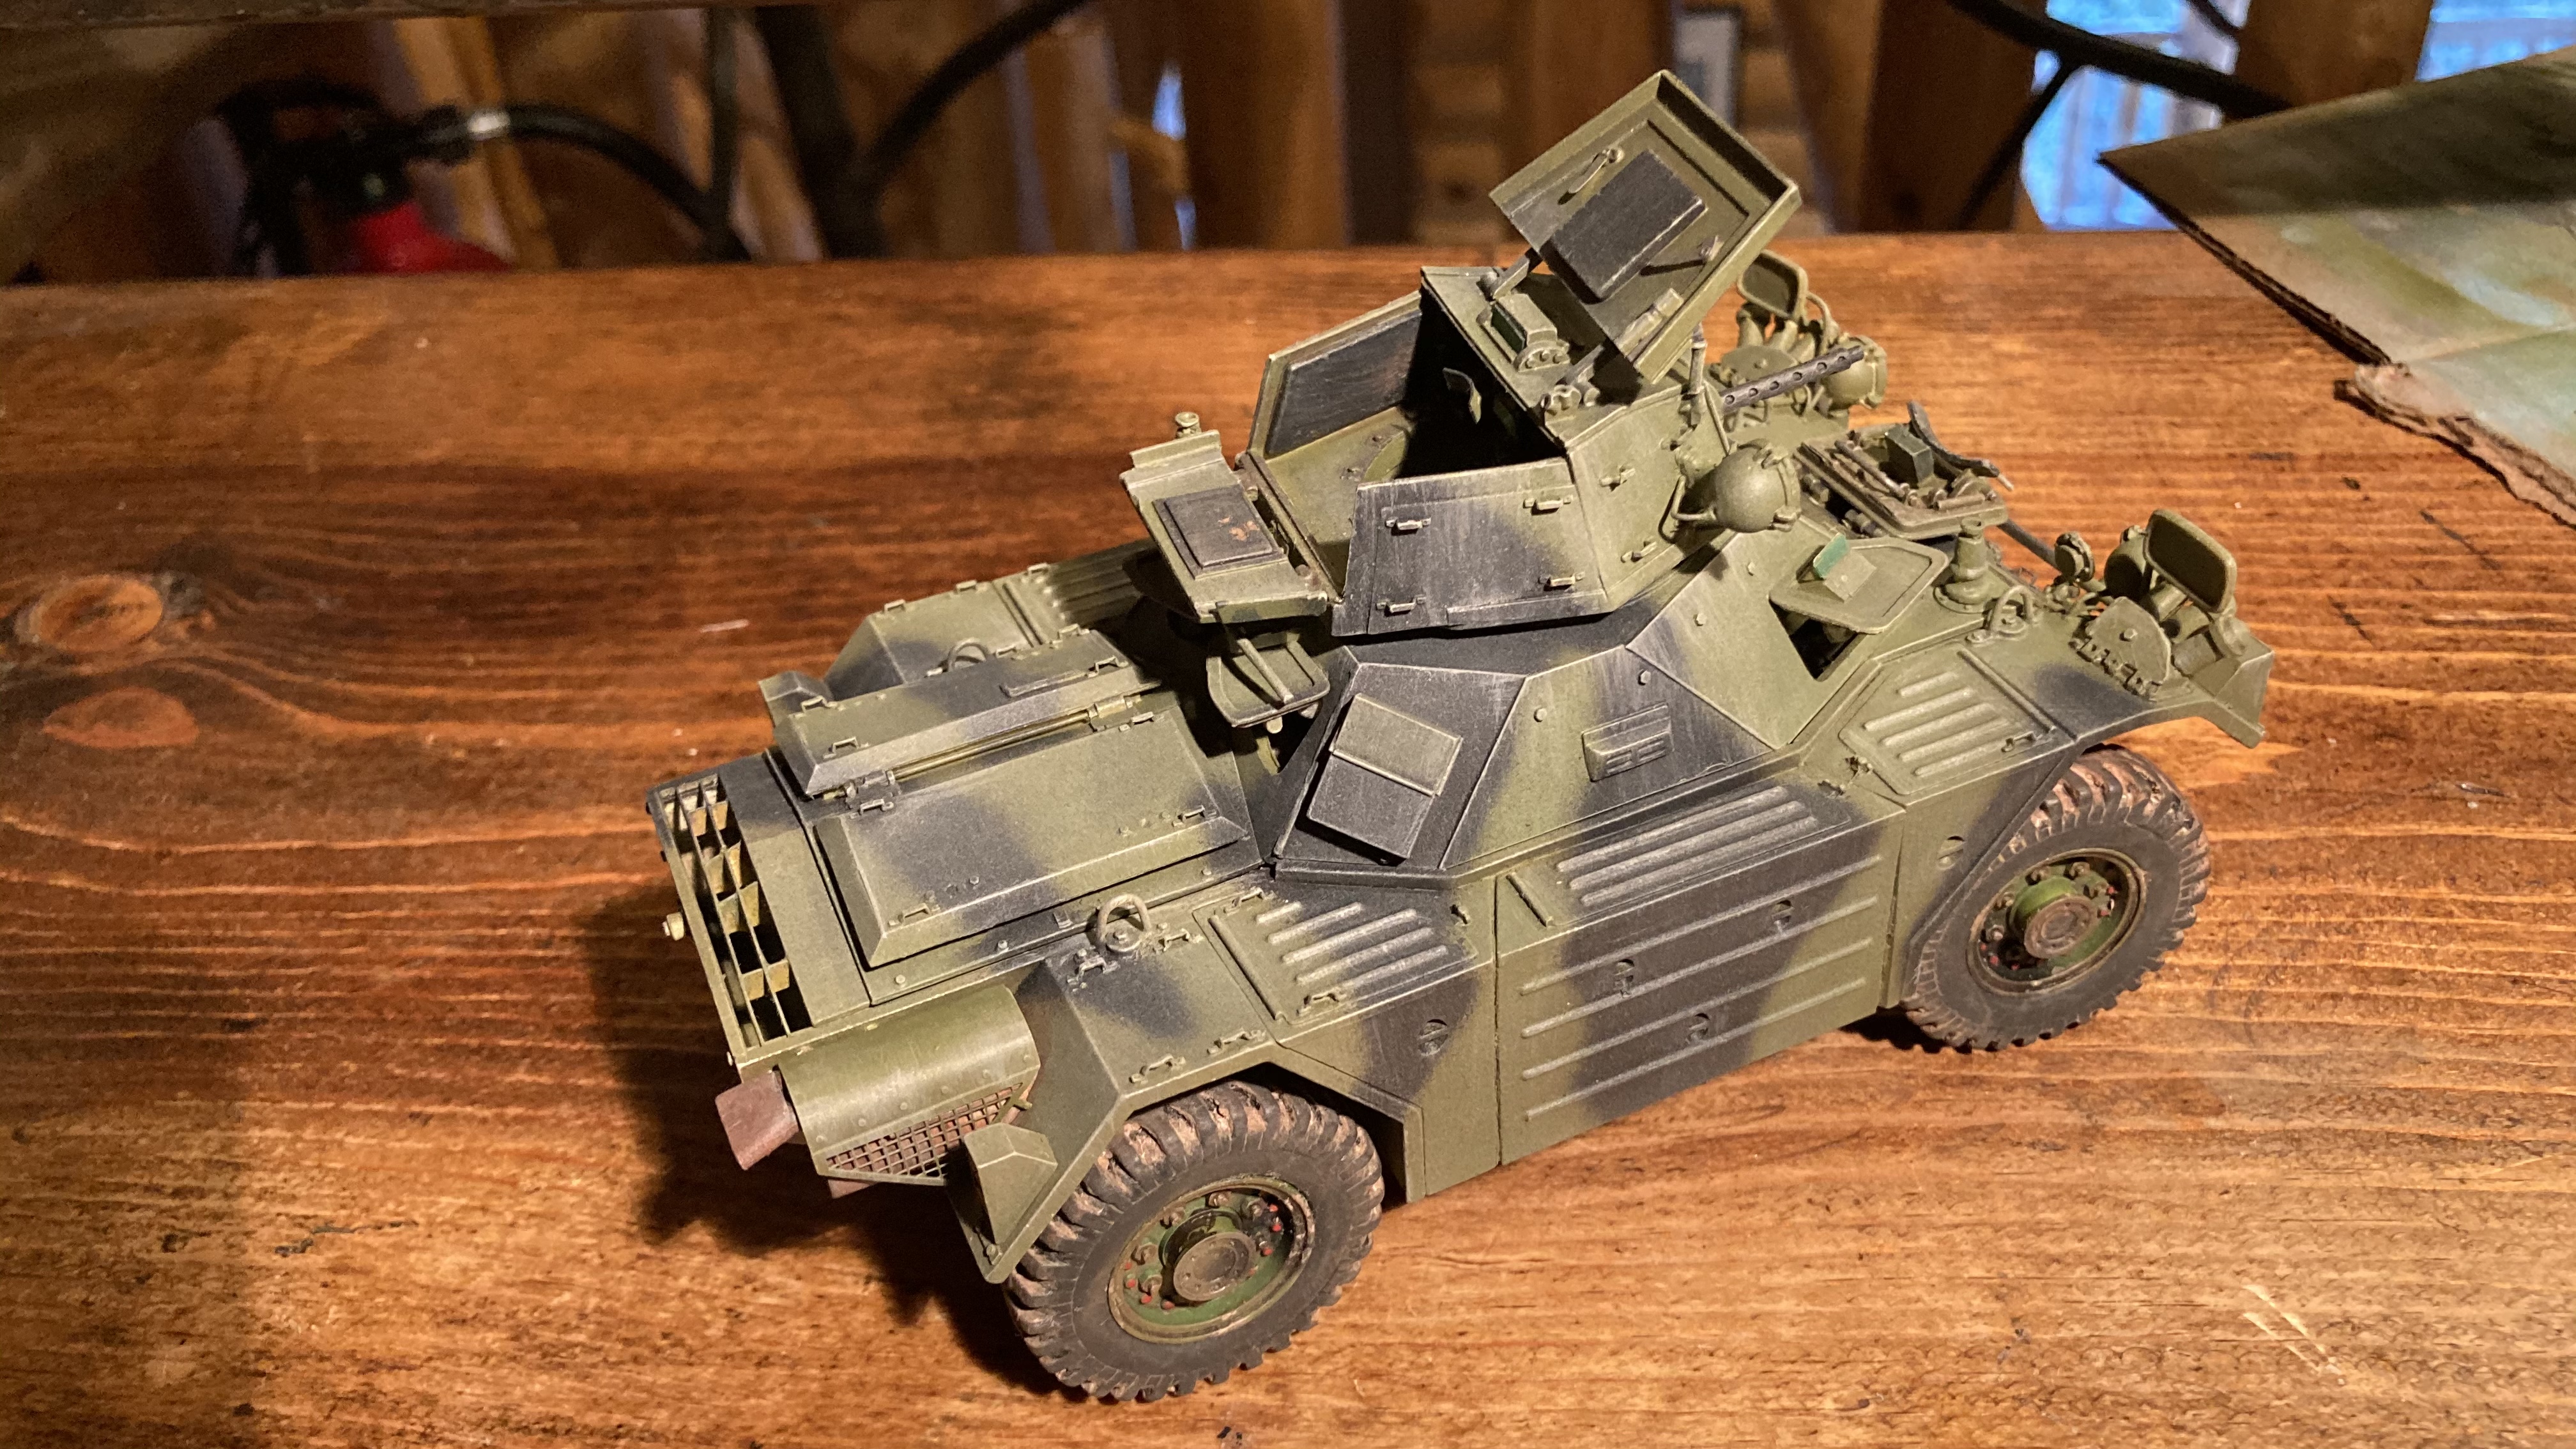
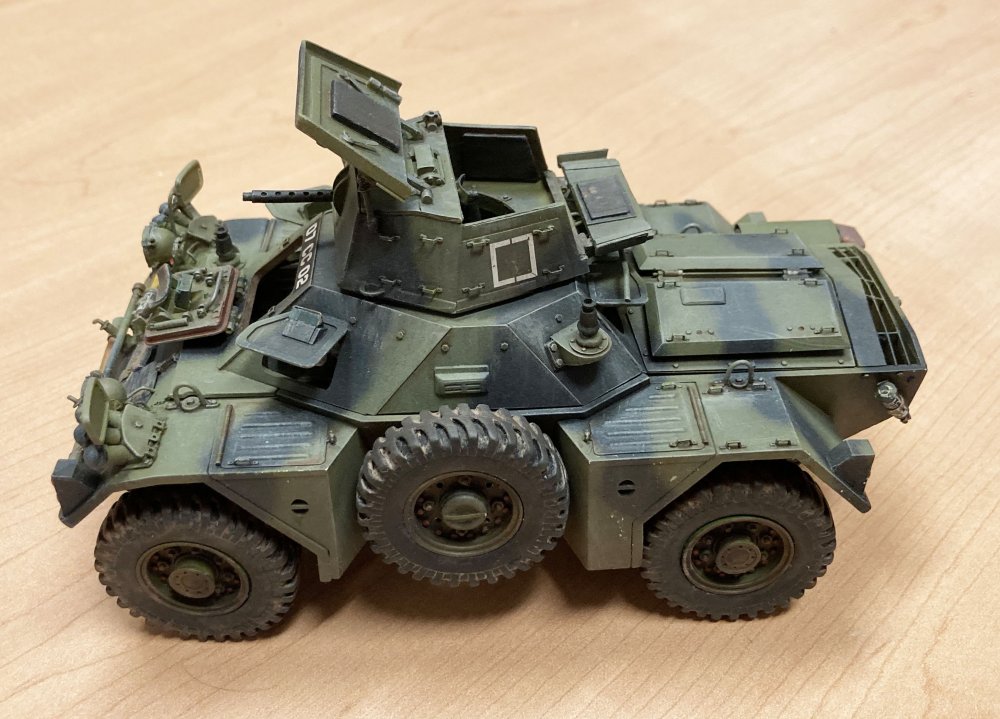
Finished except for antennas and rear view mirrors. Excellent kit, first time building a resin kit, first armor kit I've done. Models a 1959 Ferret that we purchased and is under mechanical restoration in Texas.


- 13 replies
-
- 9
-
-
-
- kit form services
- daimler ferret
- (and 1 more)
-
1/24 Kit Form Services Daimler Ferret resin kit build
PeteF replied to PeteF's topic in LSM 1/35 and Larger Work In Progress
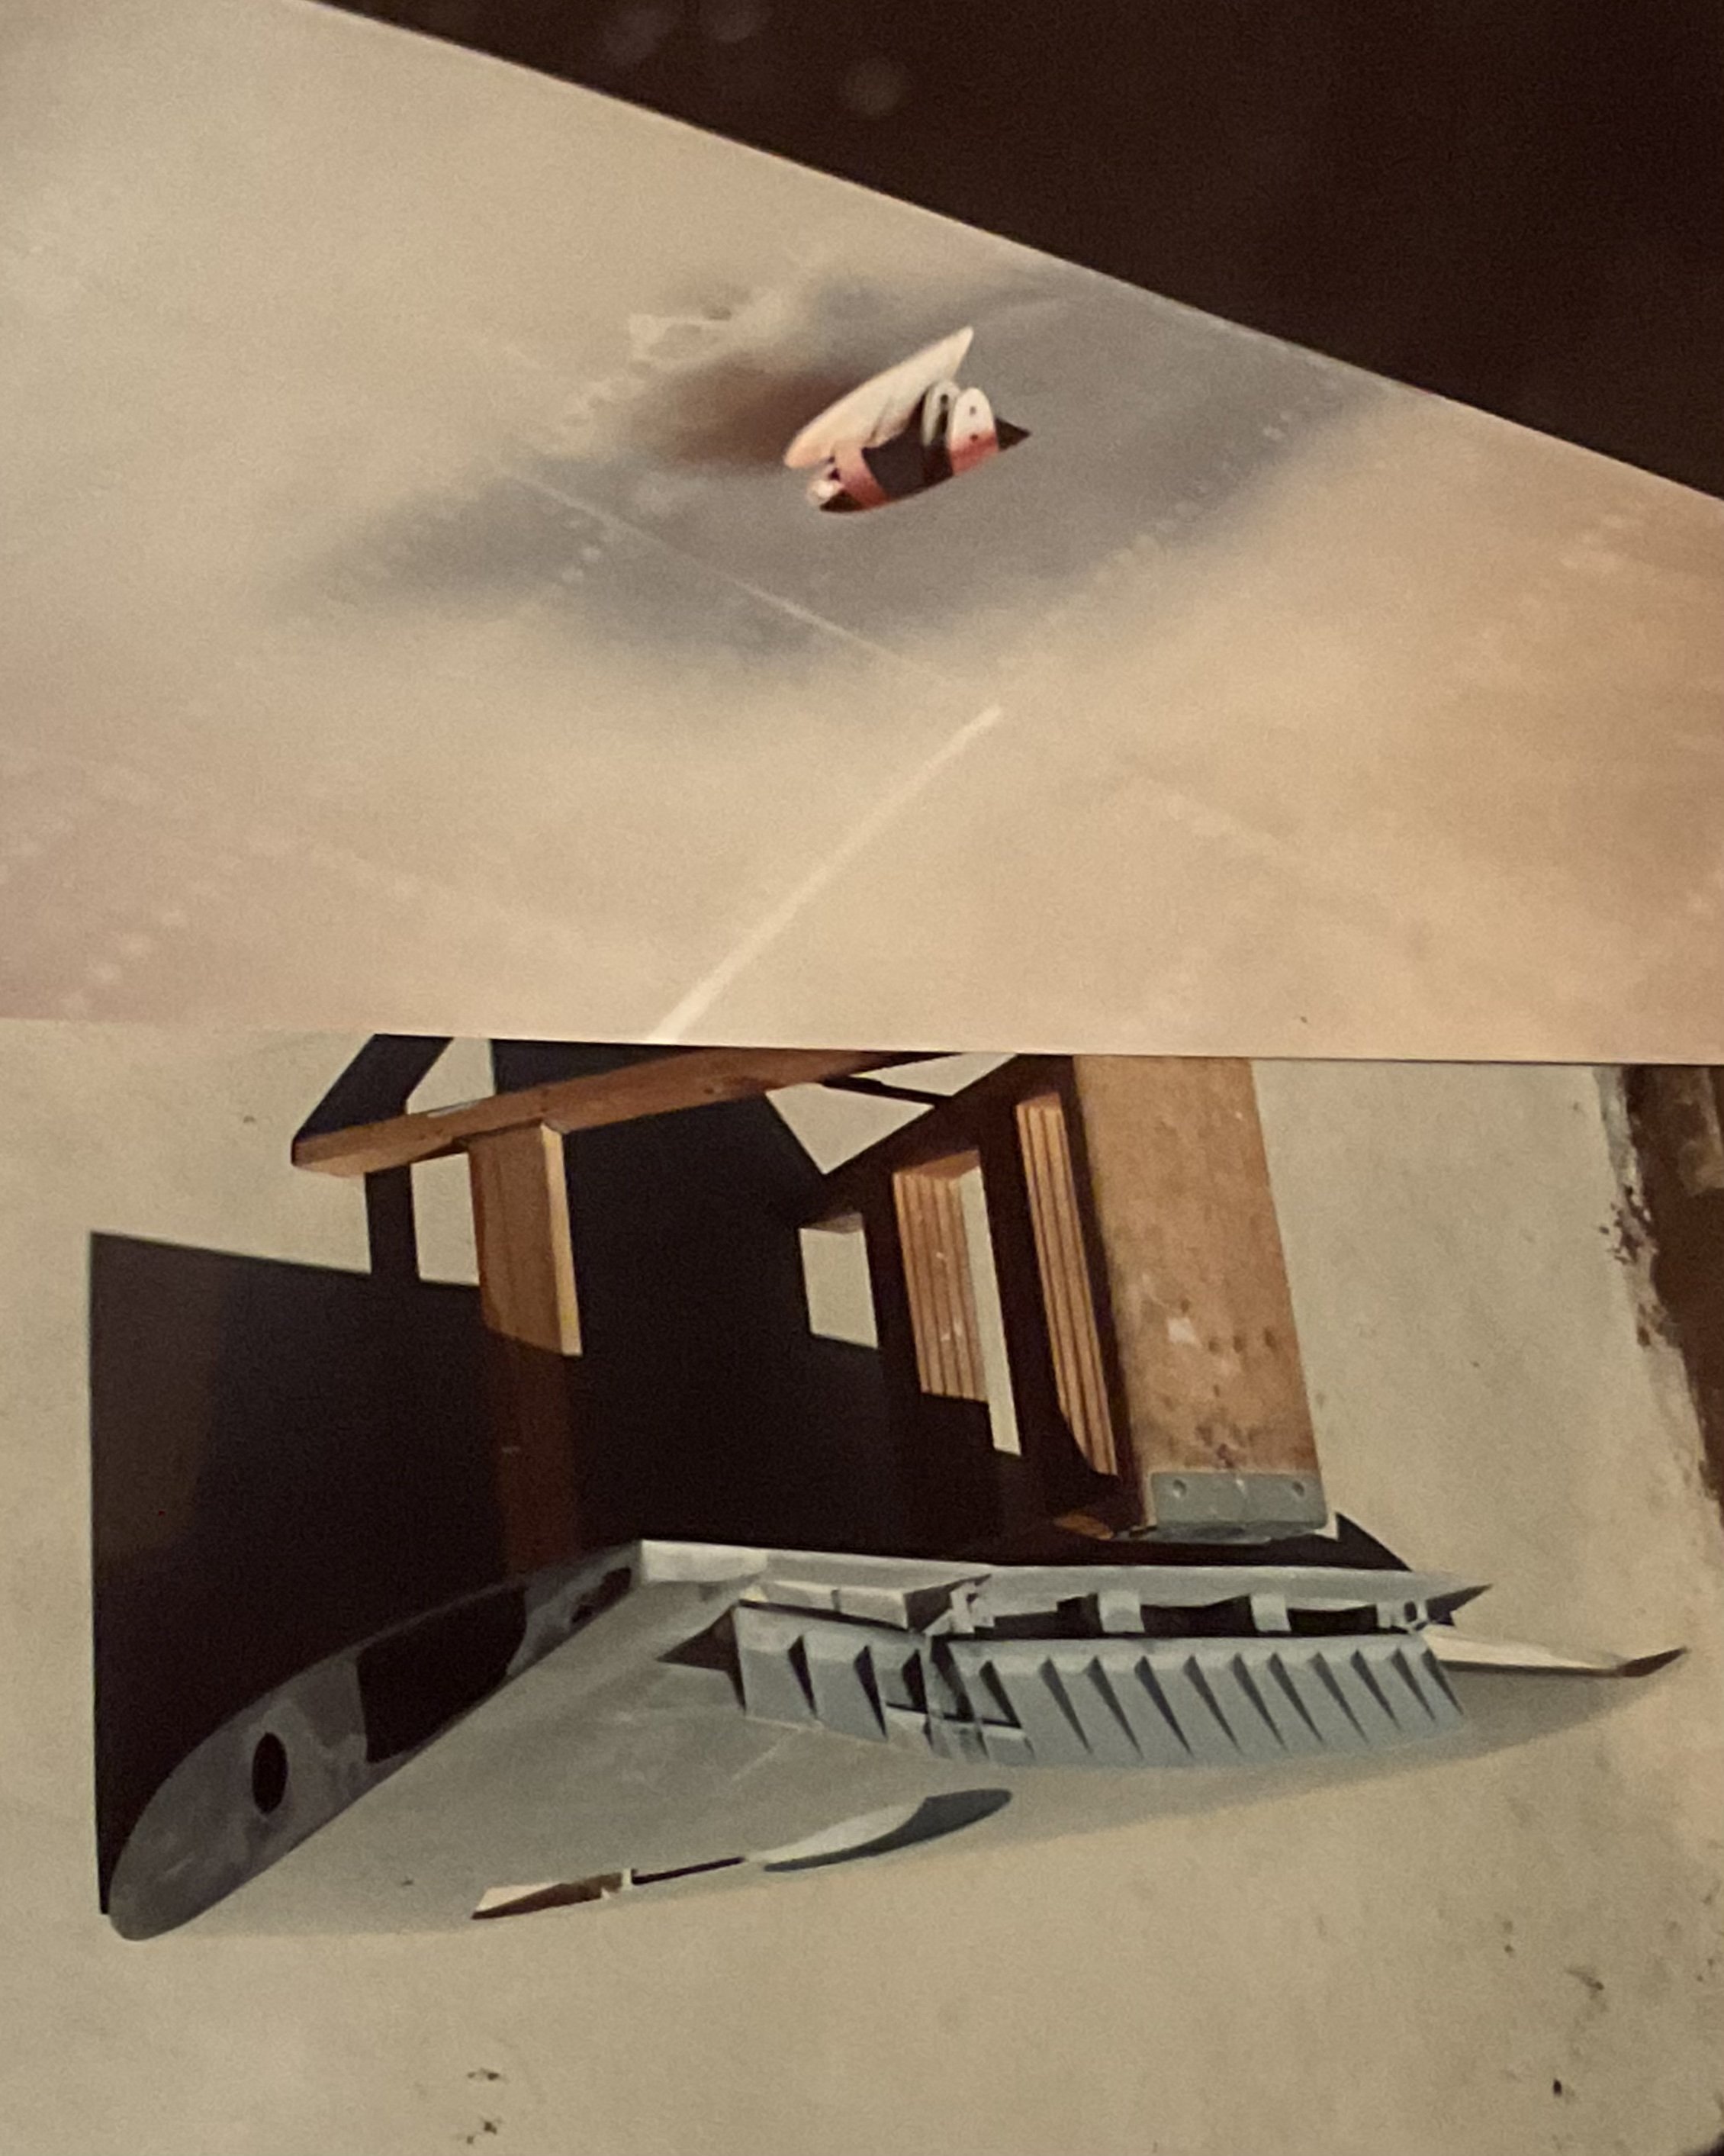
To show how small a Ferret is, here it is "parked" next to my same scale (1/24) Mosquito in my office: iun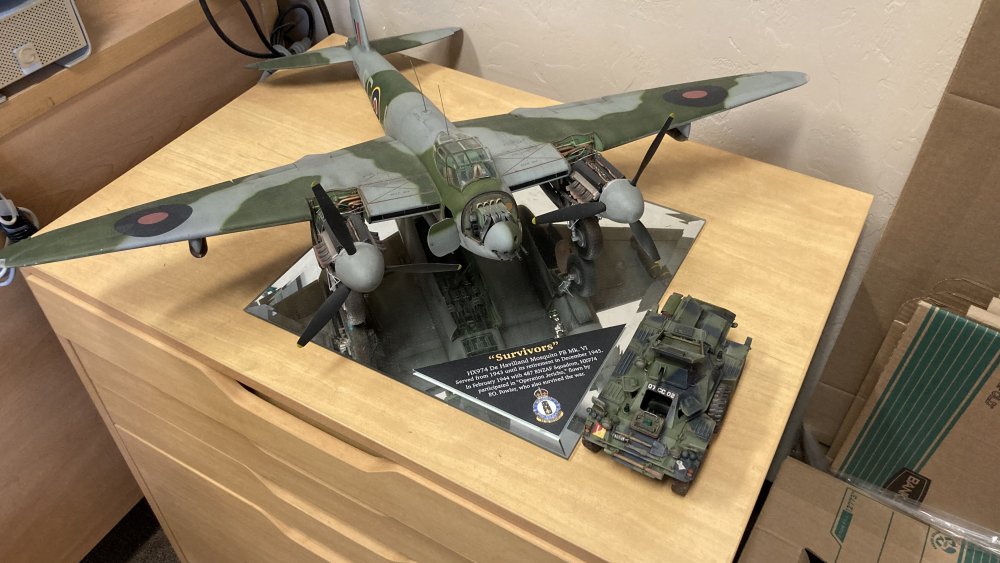
-
1/24 Kit Form Services Daimler Ferret resin kit build
PeteF replied to PeteF's topic in LSM 1/35 and Larger Work In Progress
The kit has incredible brake, marker and turn signals. The light lenses were to be glued on to painted silver backing. I used canopy glue but the seal became air tight. I don’t know if it will ever dry clear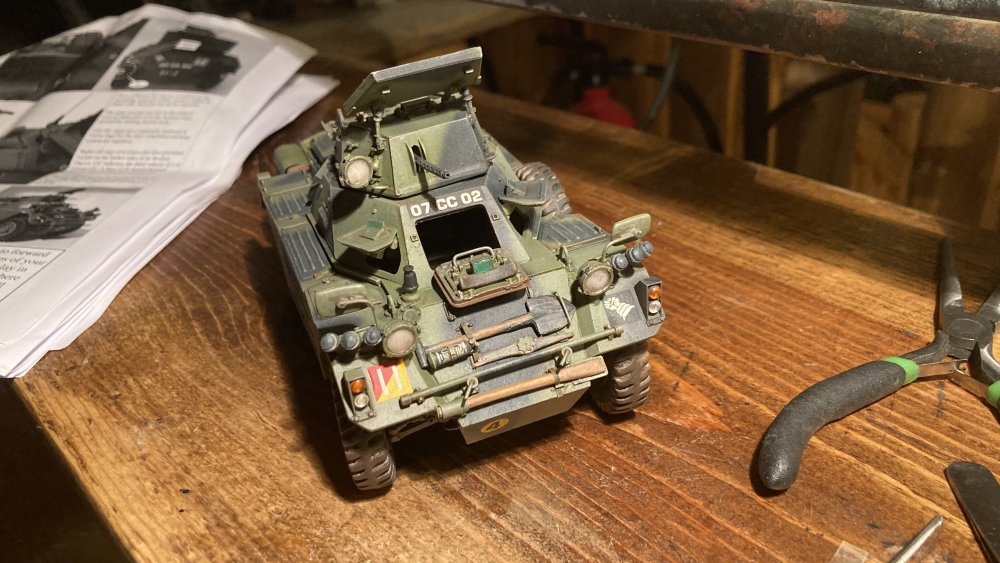
-
1/24 Kit Form Services Daimler Ferret resin kit build
PeteF replied to PeteF's topic in LSM 1/35 and Larger Work In Progress
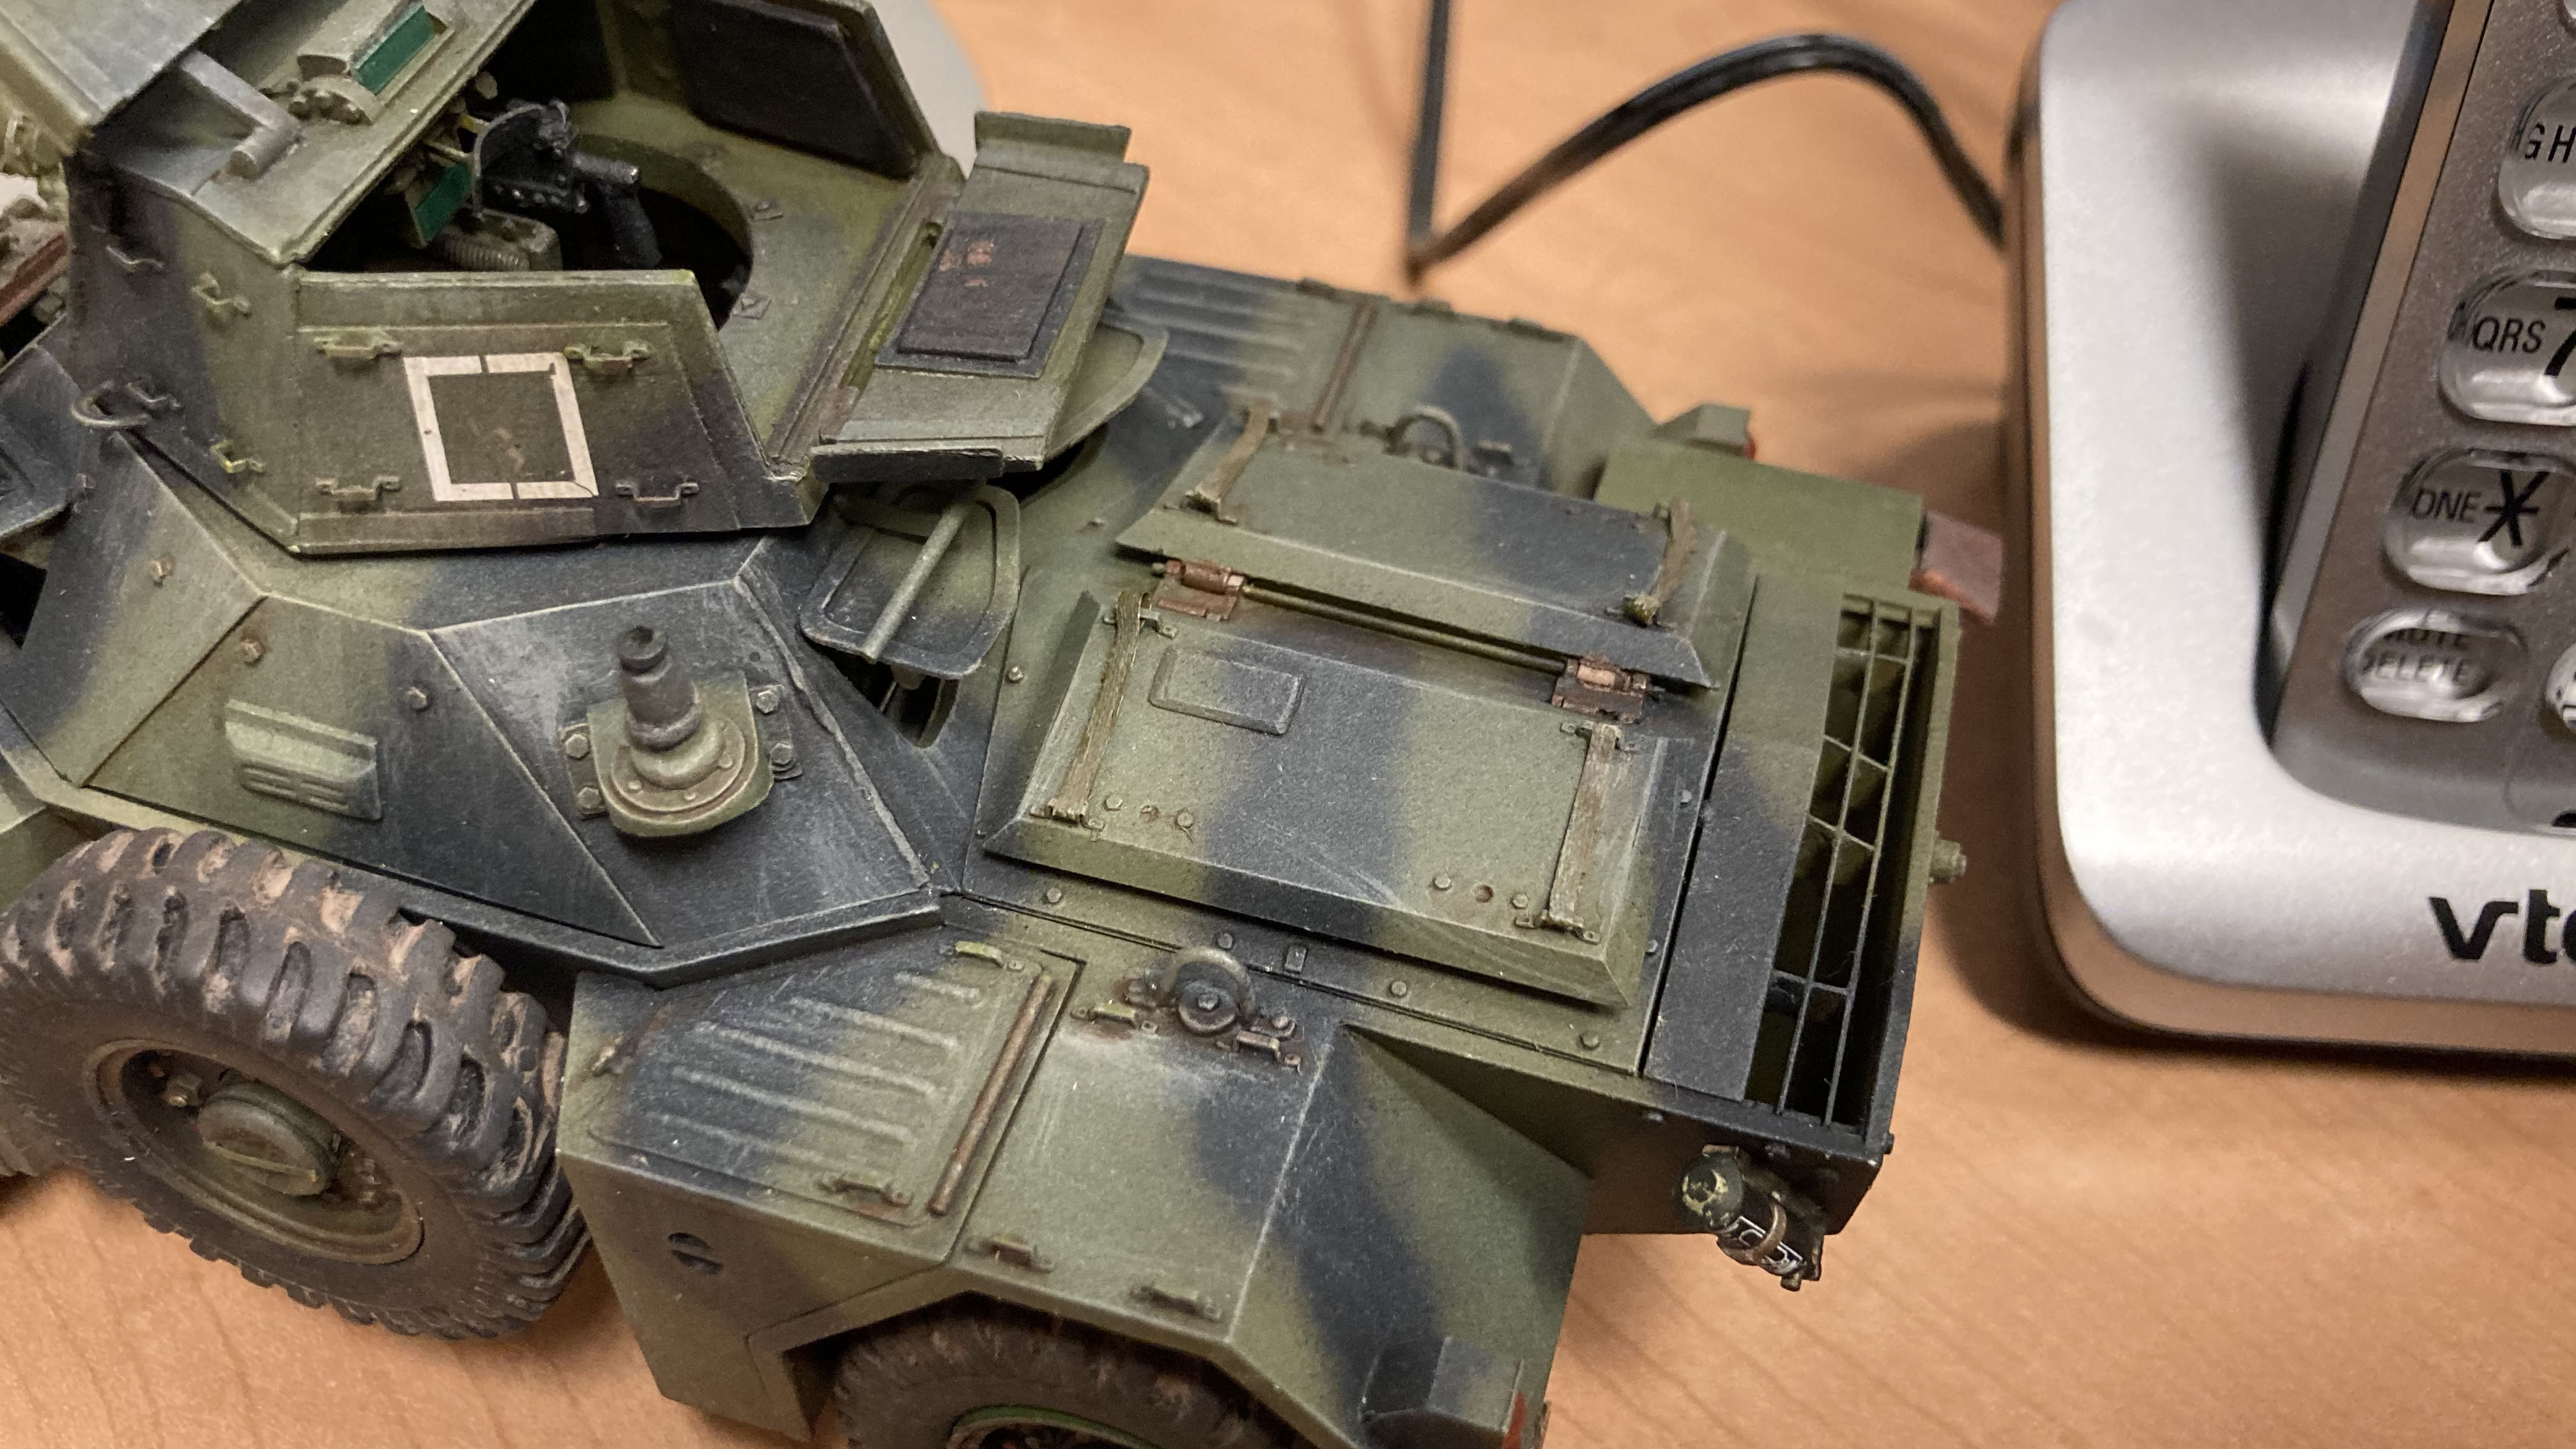
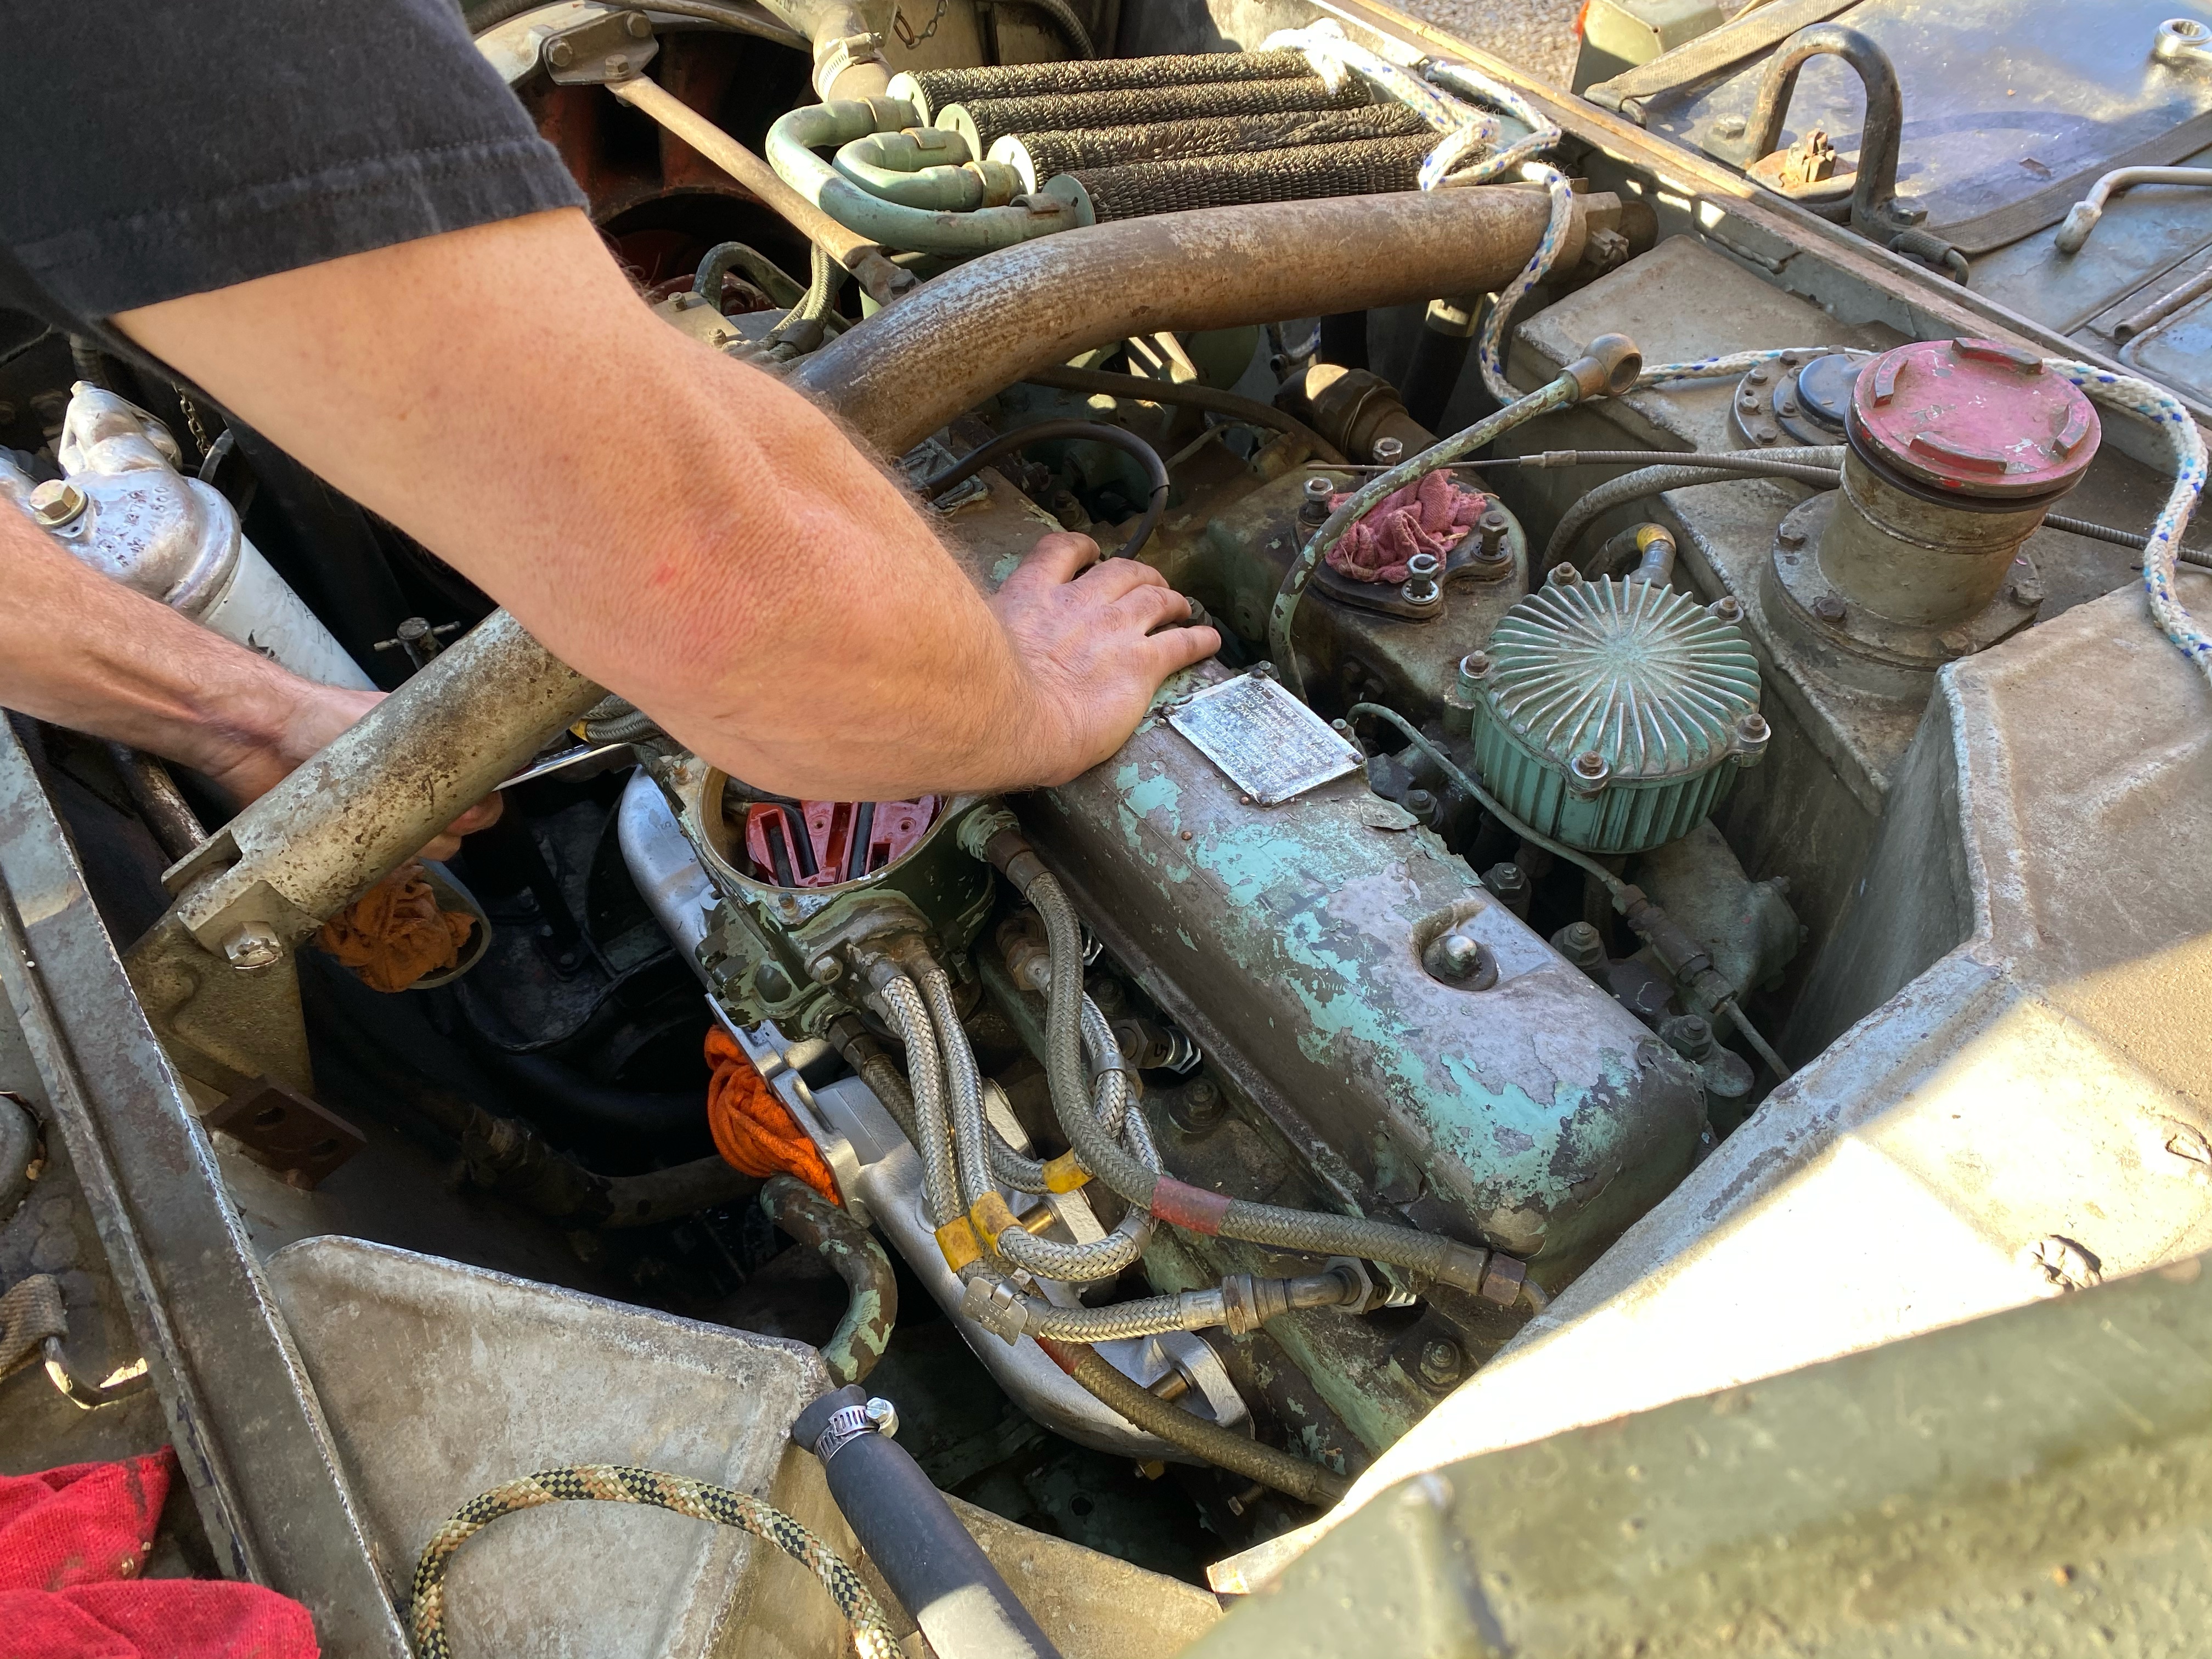
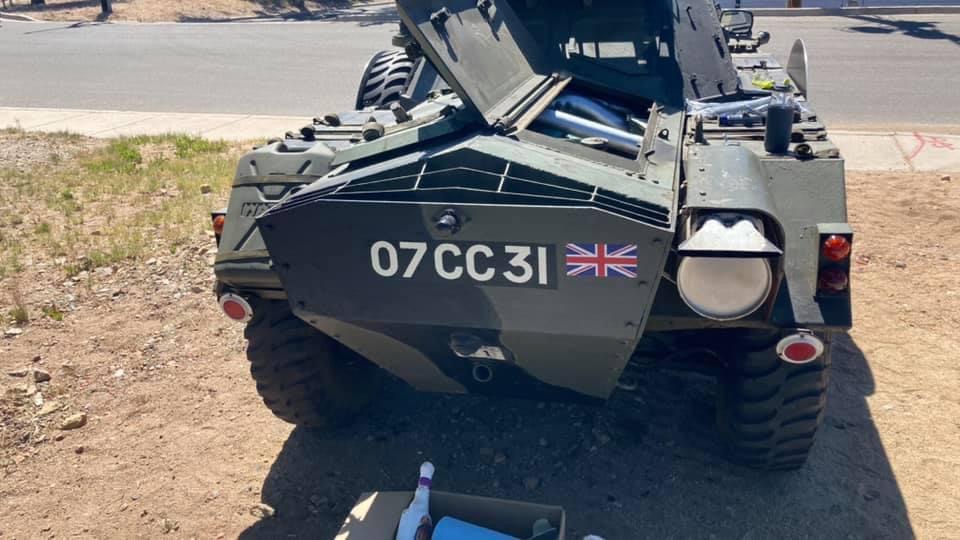
Here are some shots of my Ferret being worked on...you can see how much weathering 61 years of use has created.

-
1/24 Kit Form Services Daimler Ferret resin kit build
PeteF replied to PeteF's topic in LSM 1/35 and Larger Work In Progress
Thanks, The light I'm using is pretty bright so over-does how it looks in natural light. I'm finding weathering armor to be super fun. -
1/24 Kit Form Services Daimler Ferret resin kit build
PeteF replied to PeteF's topic in LSM 1/35 and Larger Work In Progress
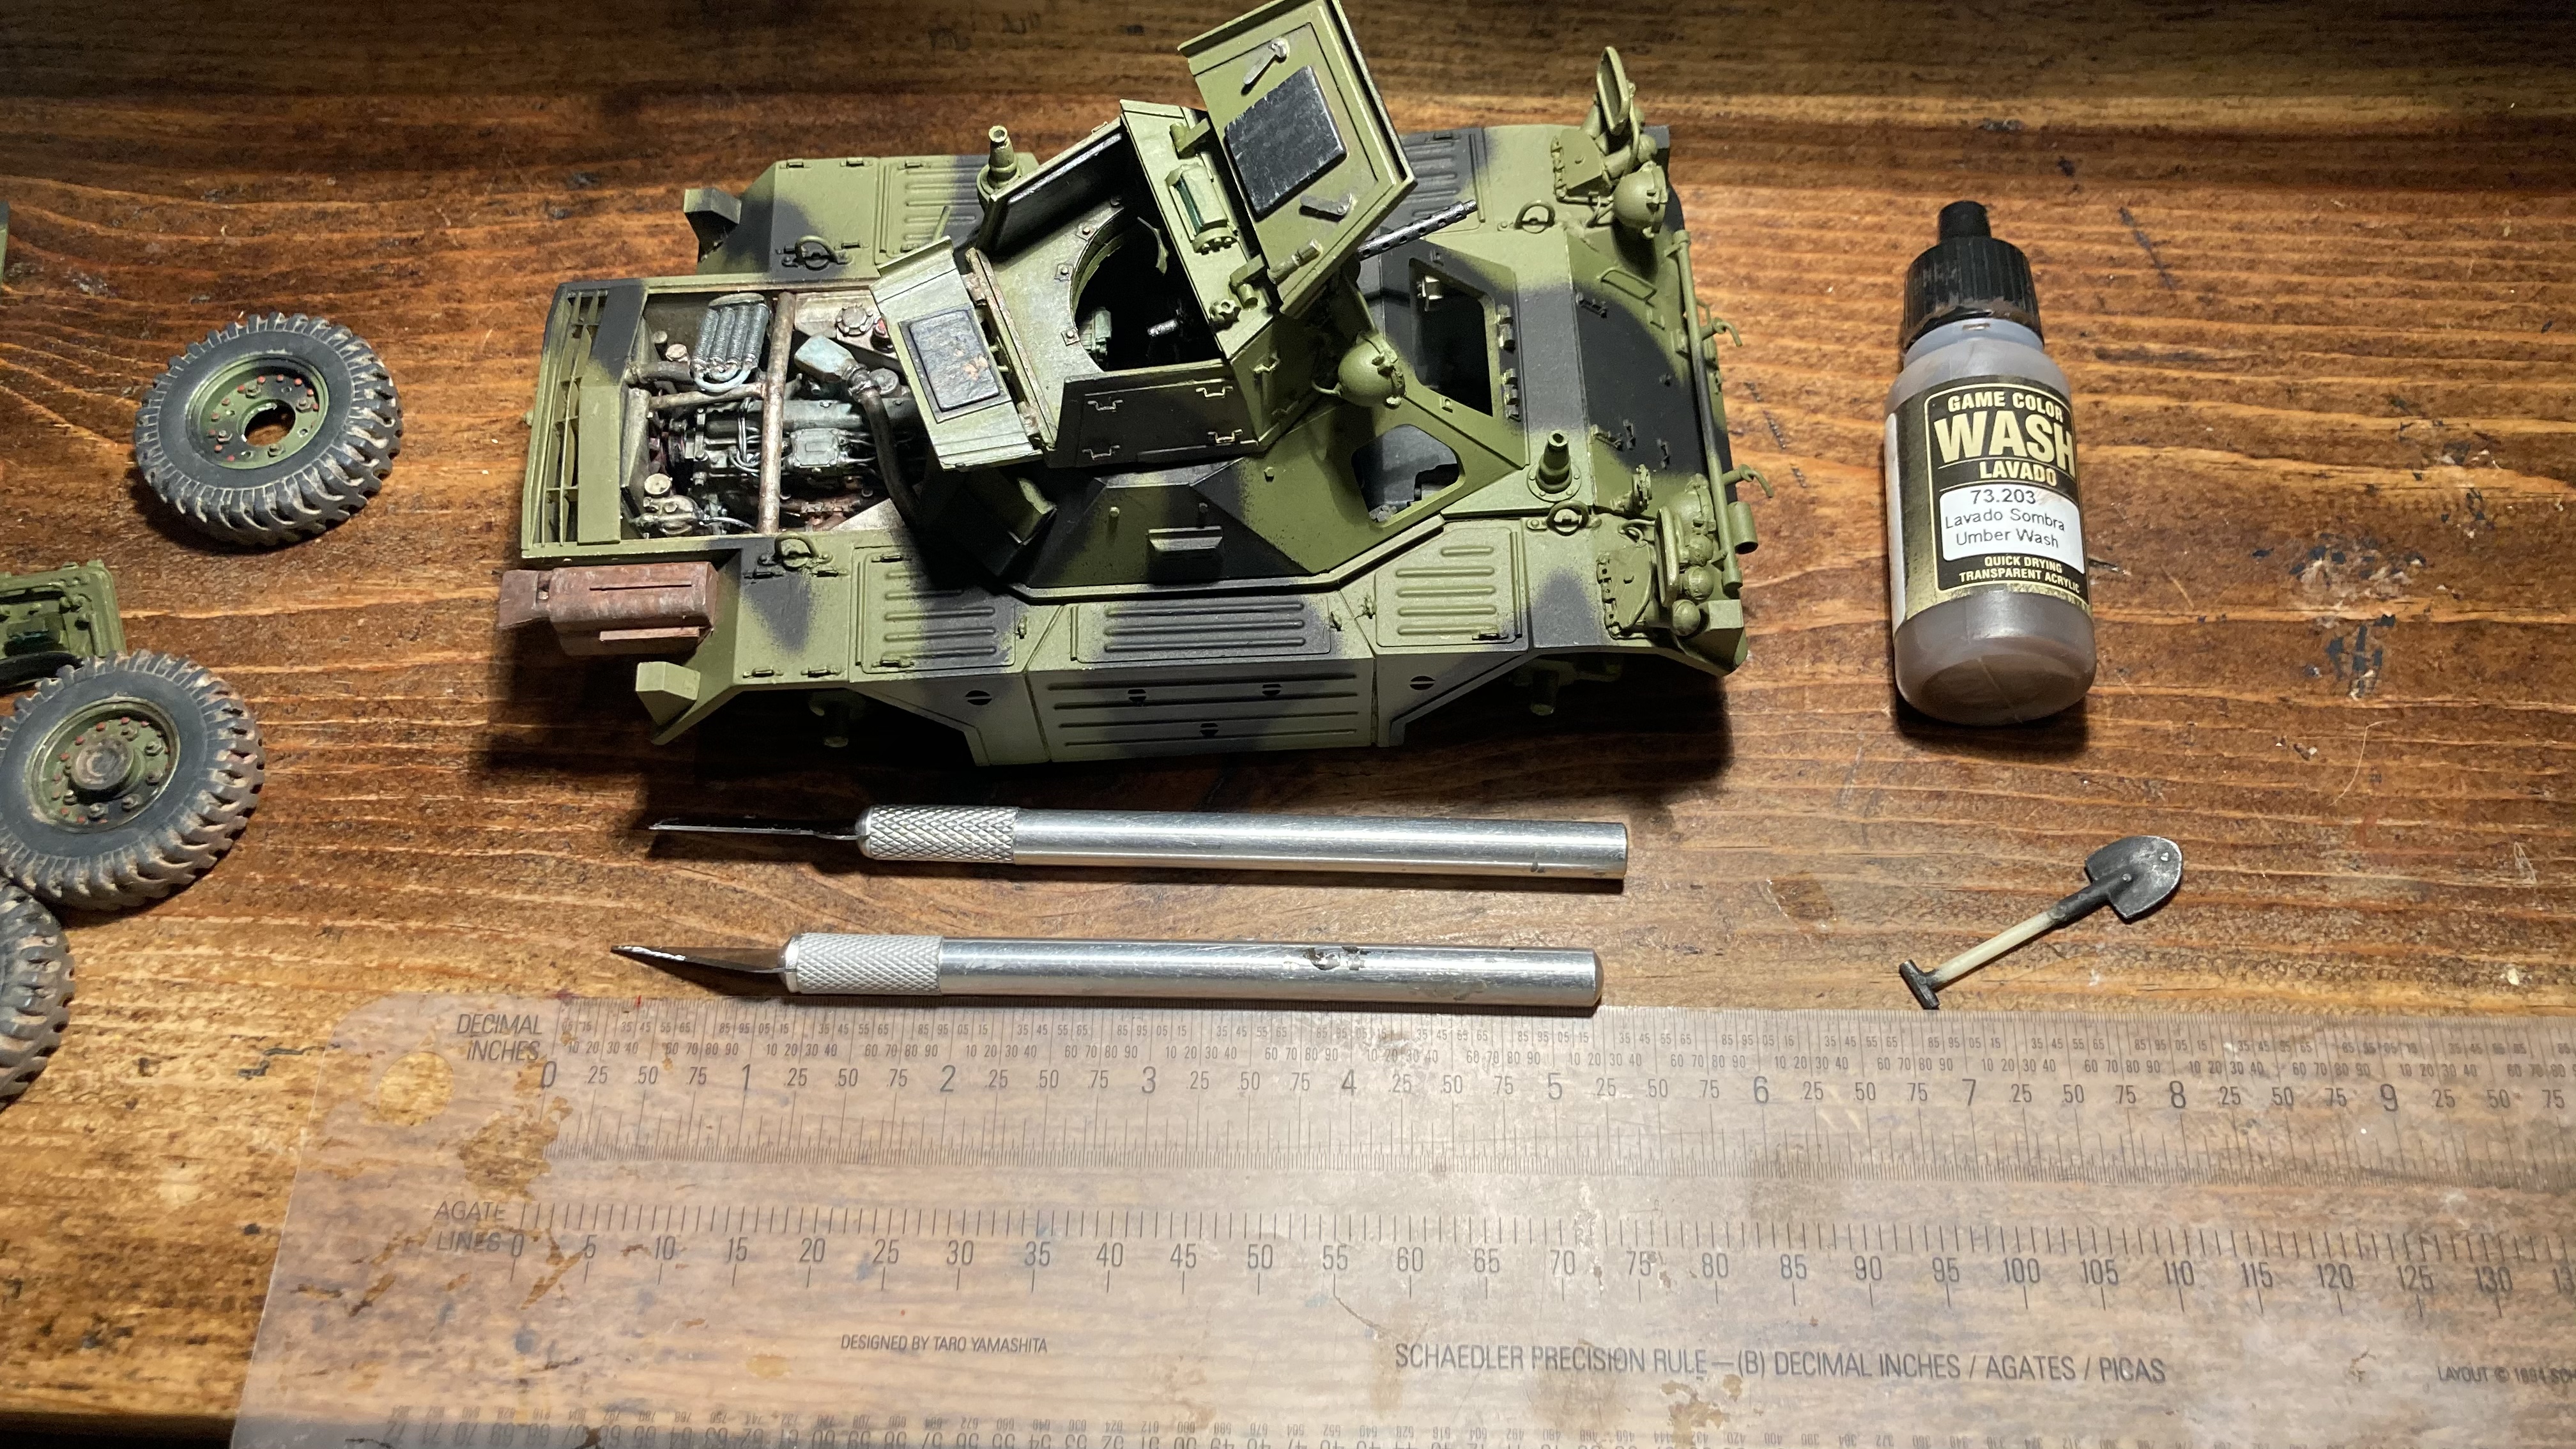
Tools and decals added.
-
1/24 Kit Form Services Daimler Ferret resin kit build
PeteF replied to PeteF's topic in LSM 1/35 and Larger Work In Progress
Washes...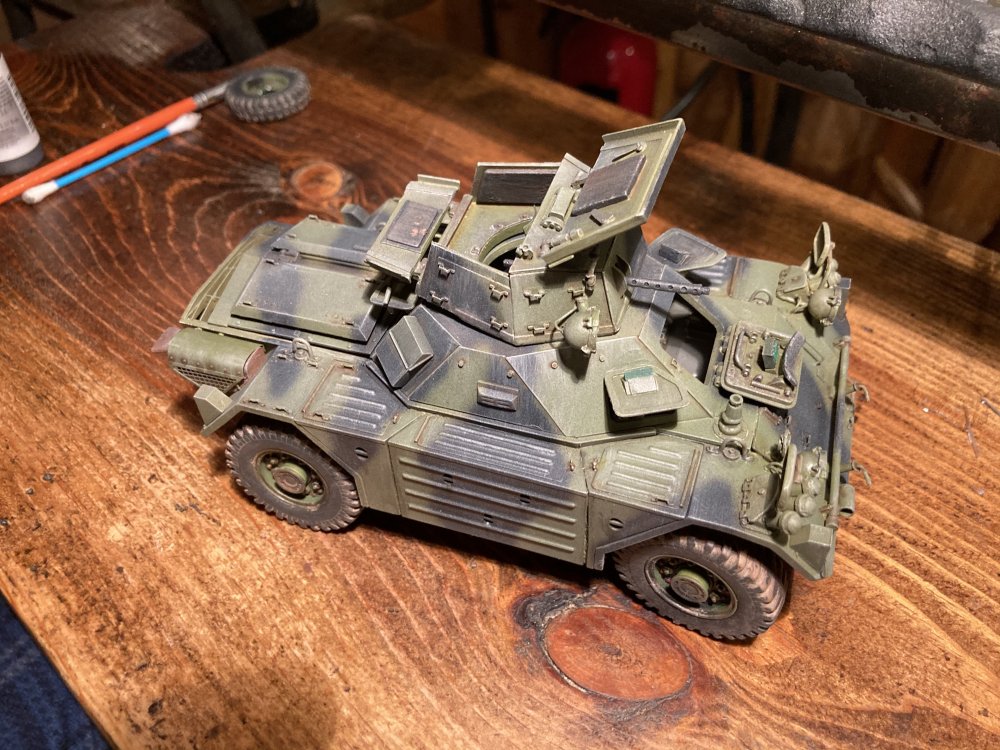
-
1/24 Kit Form Services Daimler Ferret resin kit build
PeteF replied to PeteF's topic in LSM 1/35 and Larger Work In Progress
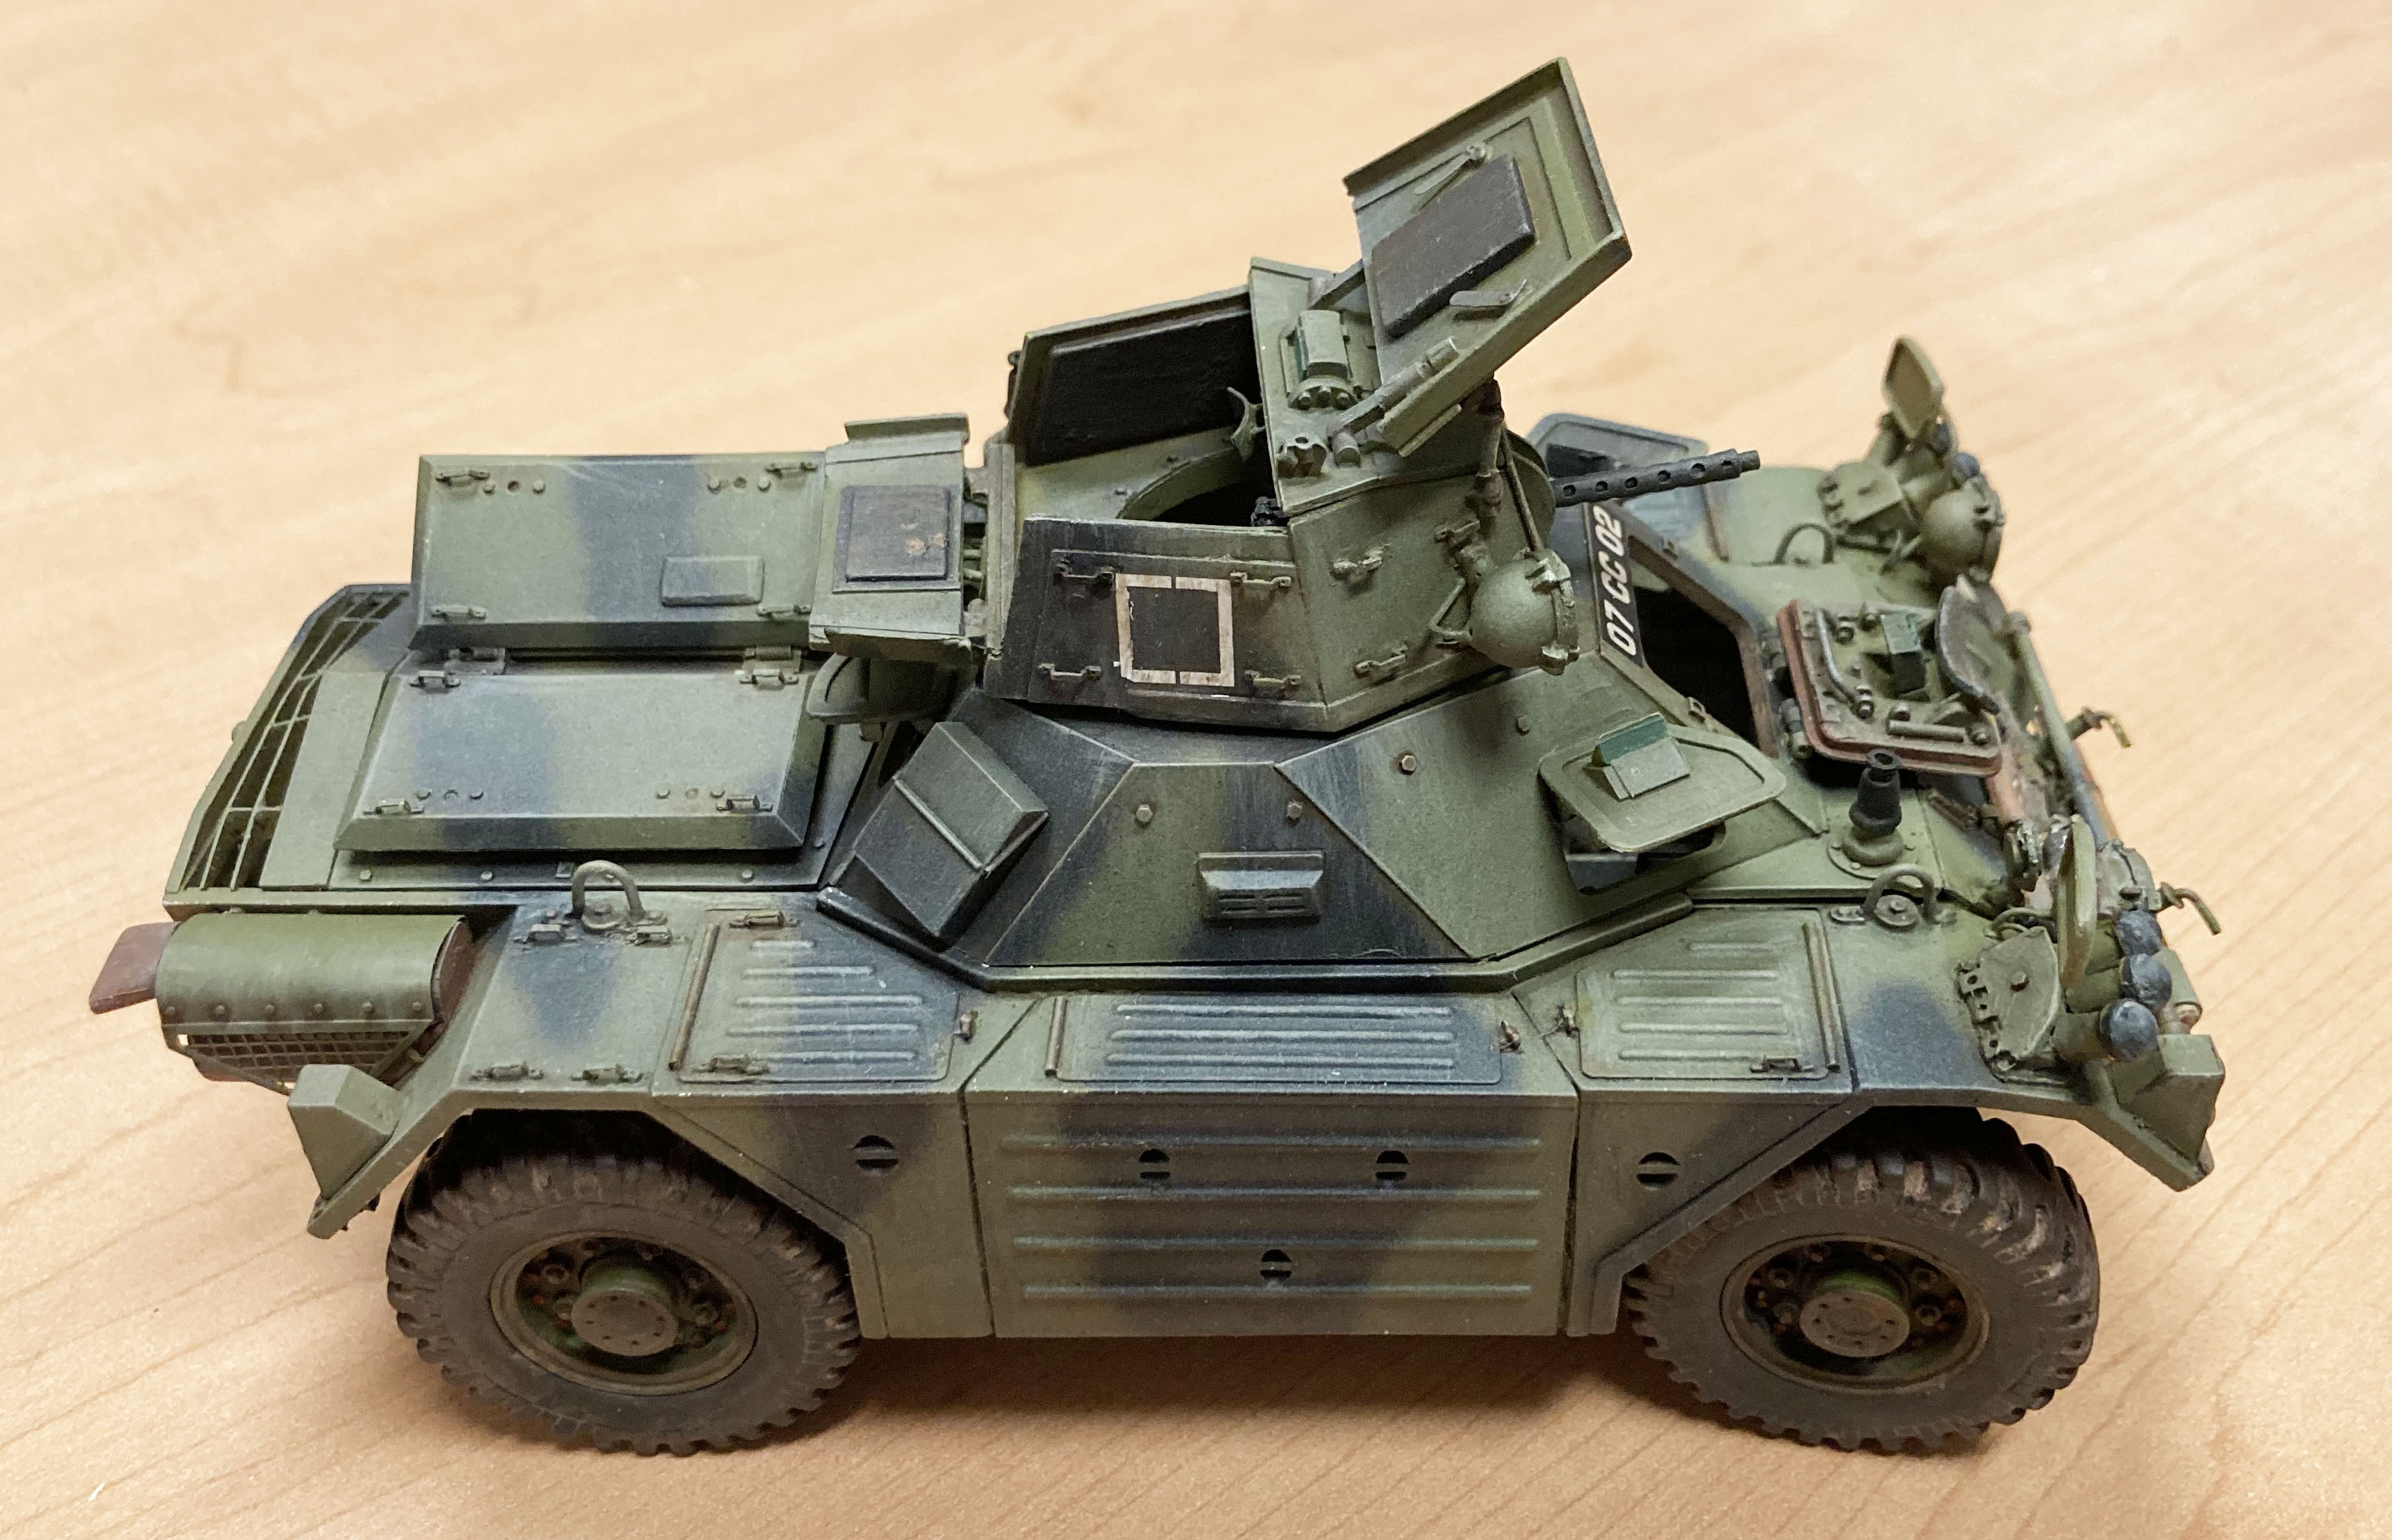
First round of exterior weathering...fade and highlights.
-
1/24 Kit Form Services Daimler Ferret resin kit build
PeteF replied to PeteF's topic in LSM 1/35 and Larger Work In Progress
The photo is a bit deceptive. The real Ferret is about the size of a regular car so the model is “small” but the scale is large. It’s about 6” long.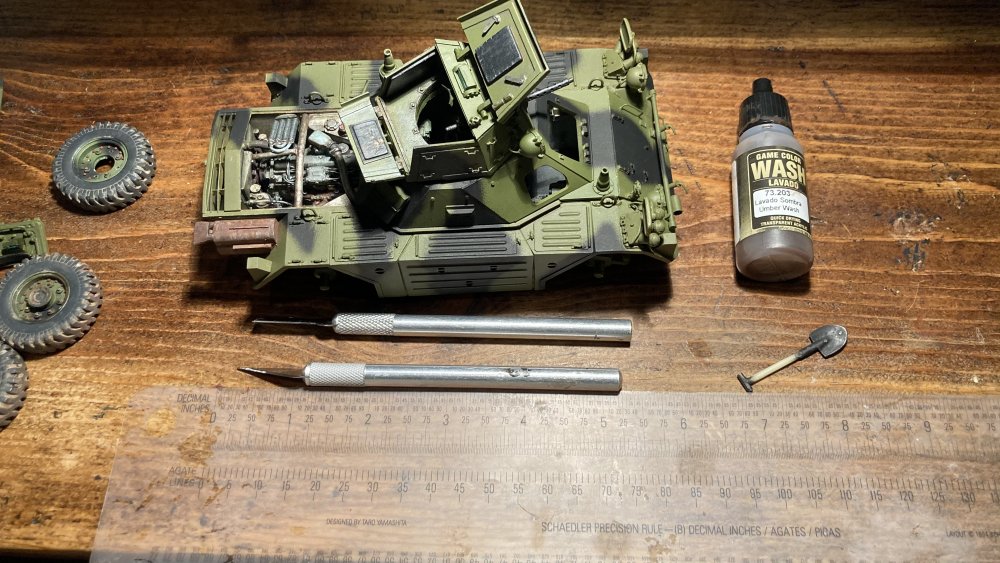
-
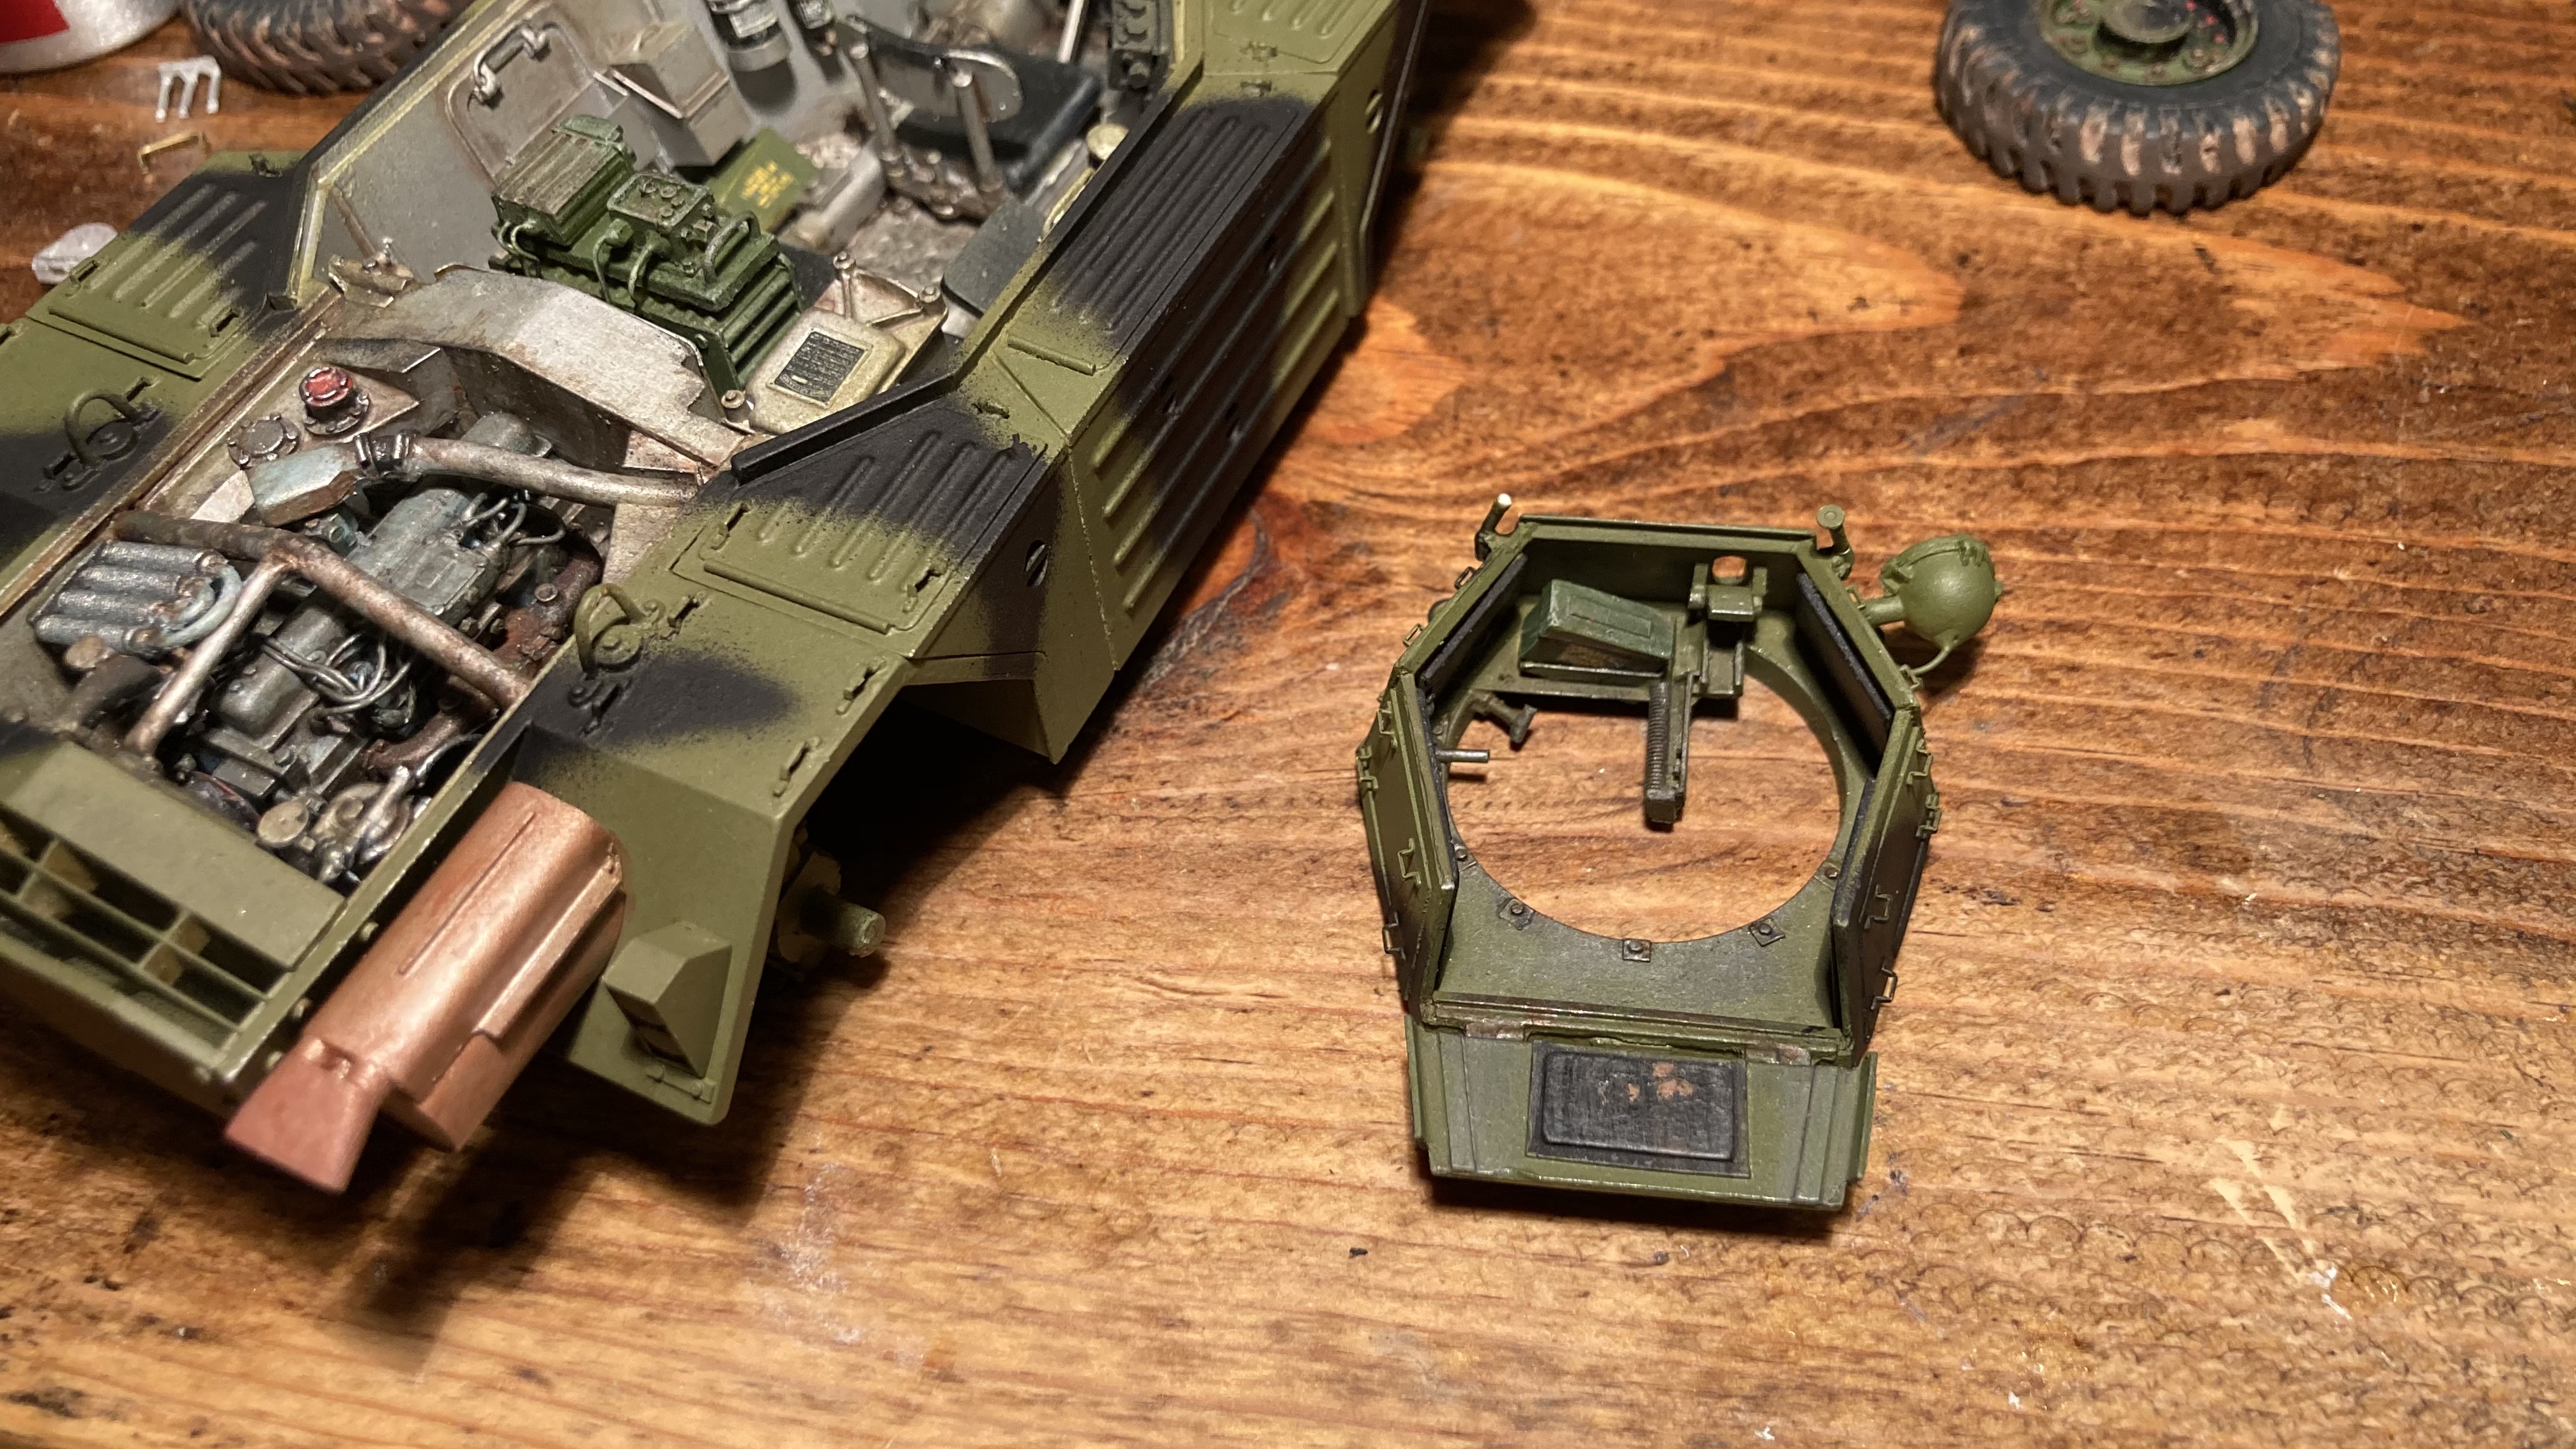
1/24 Kit Form Services Daimler Ferret resin kit build
PeteF replied to PeteF's topic in LSM 1/35 and Larger Work In Progress
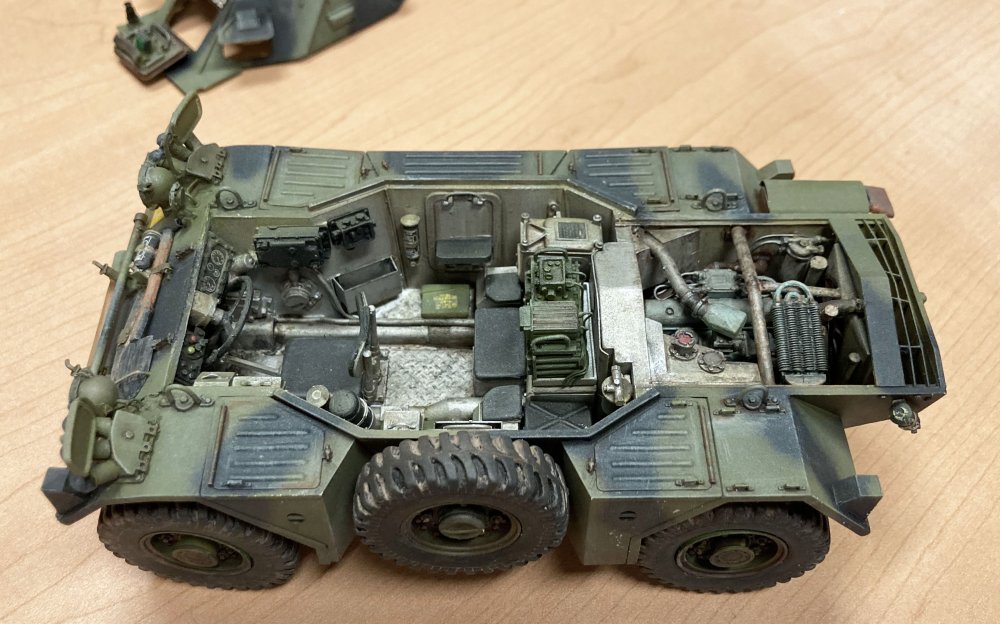
Thanks. It’s interesting to explore the vehicle in 3D. I’ve never built an armor model or a resin model. This is a top notch kit that is a bit above my ability for building tiny bits without getting glue everywhere. I’d recommend any of their kits. I’m now into the fiddly painting where I’m more comfortable.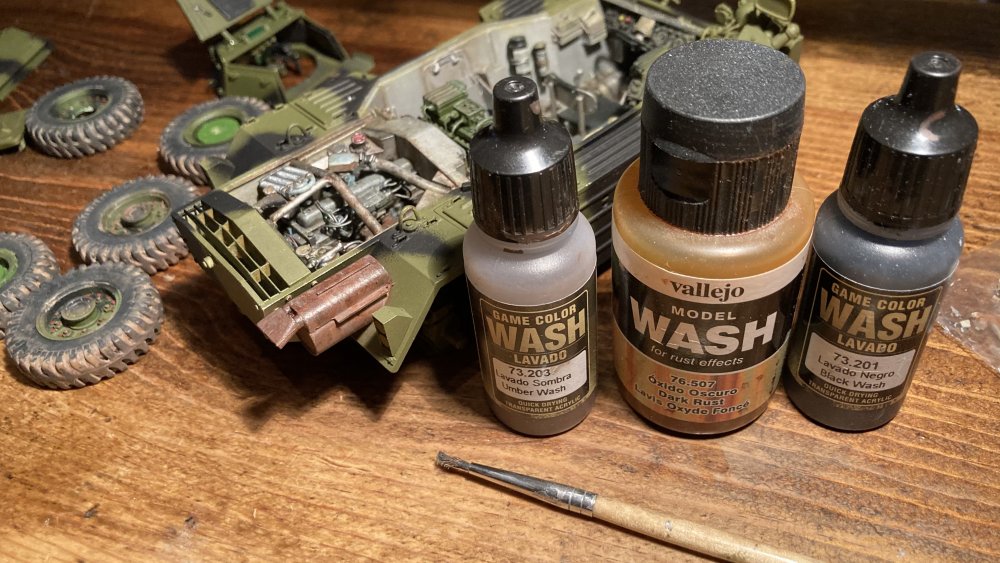
-
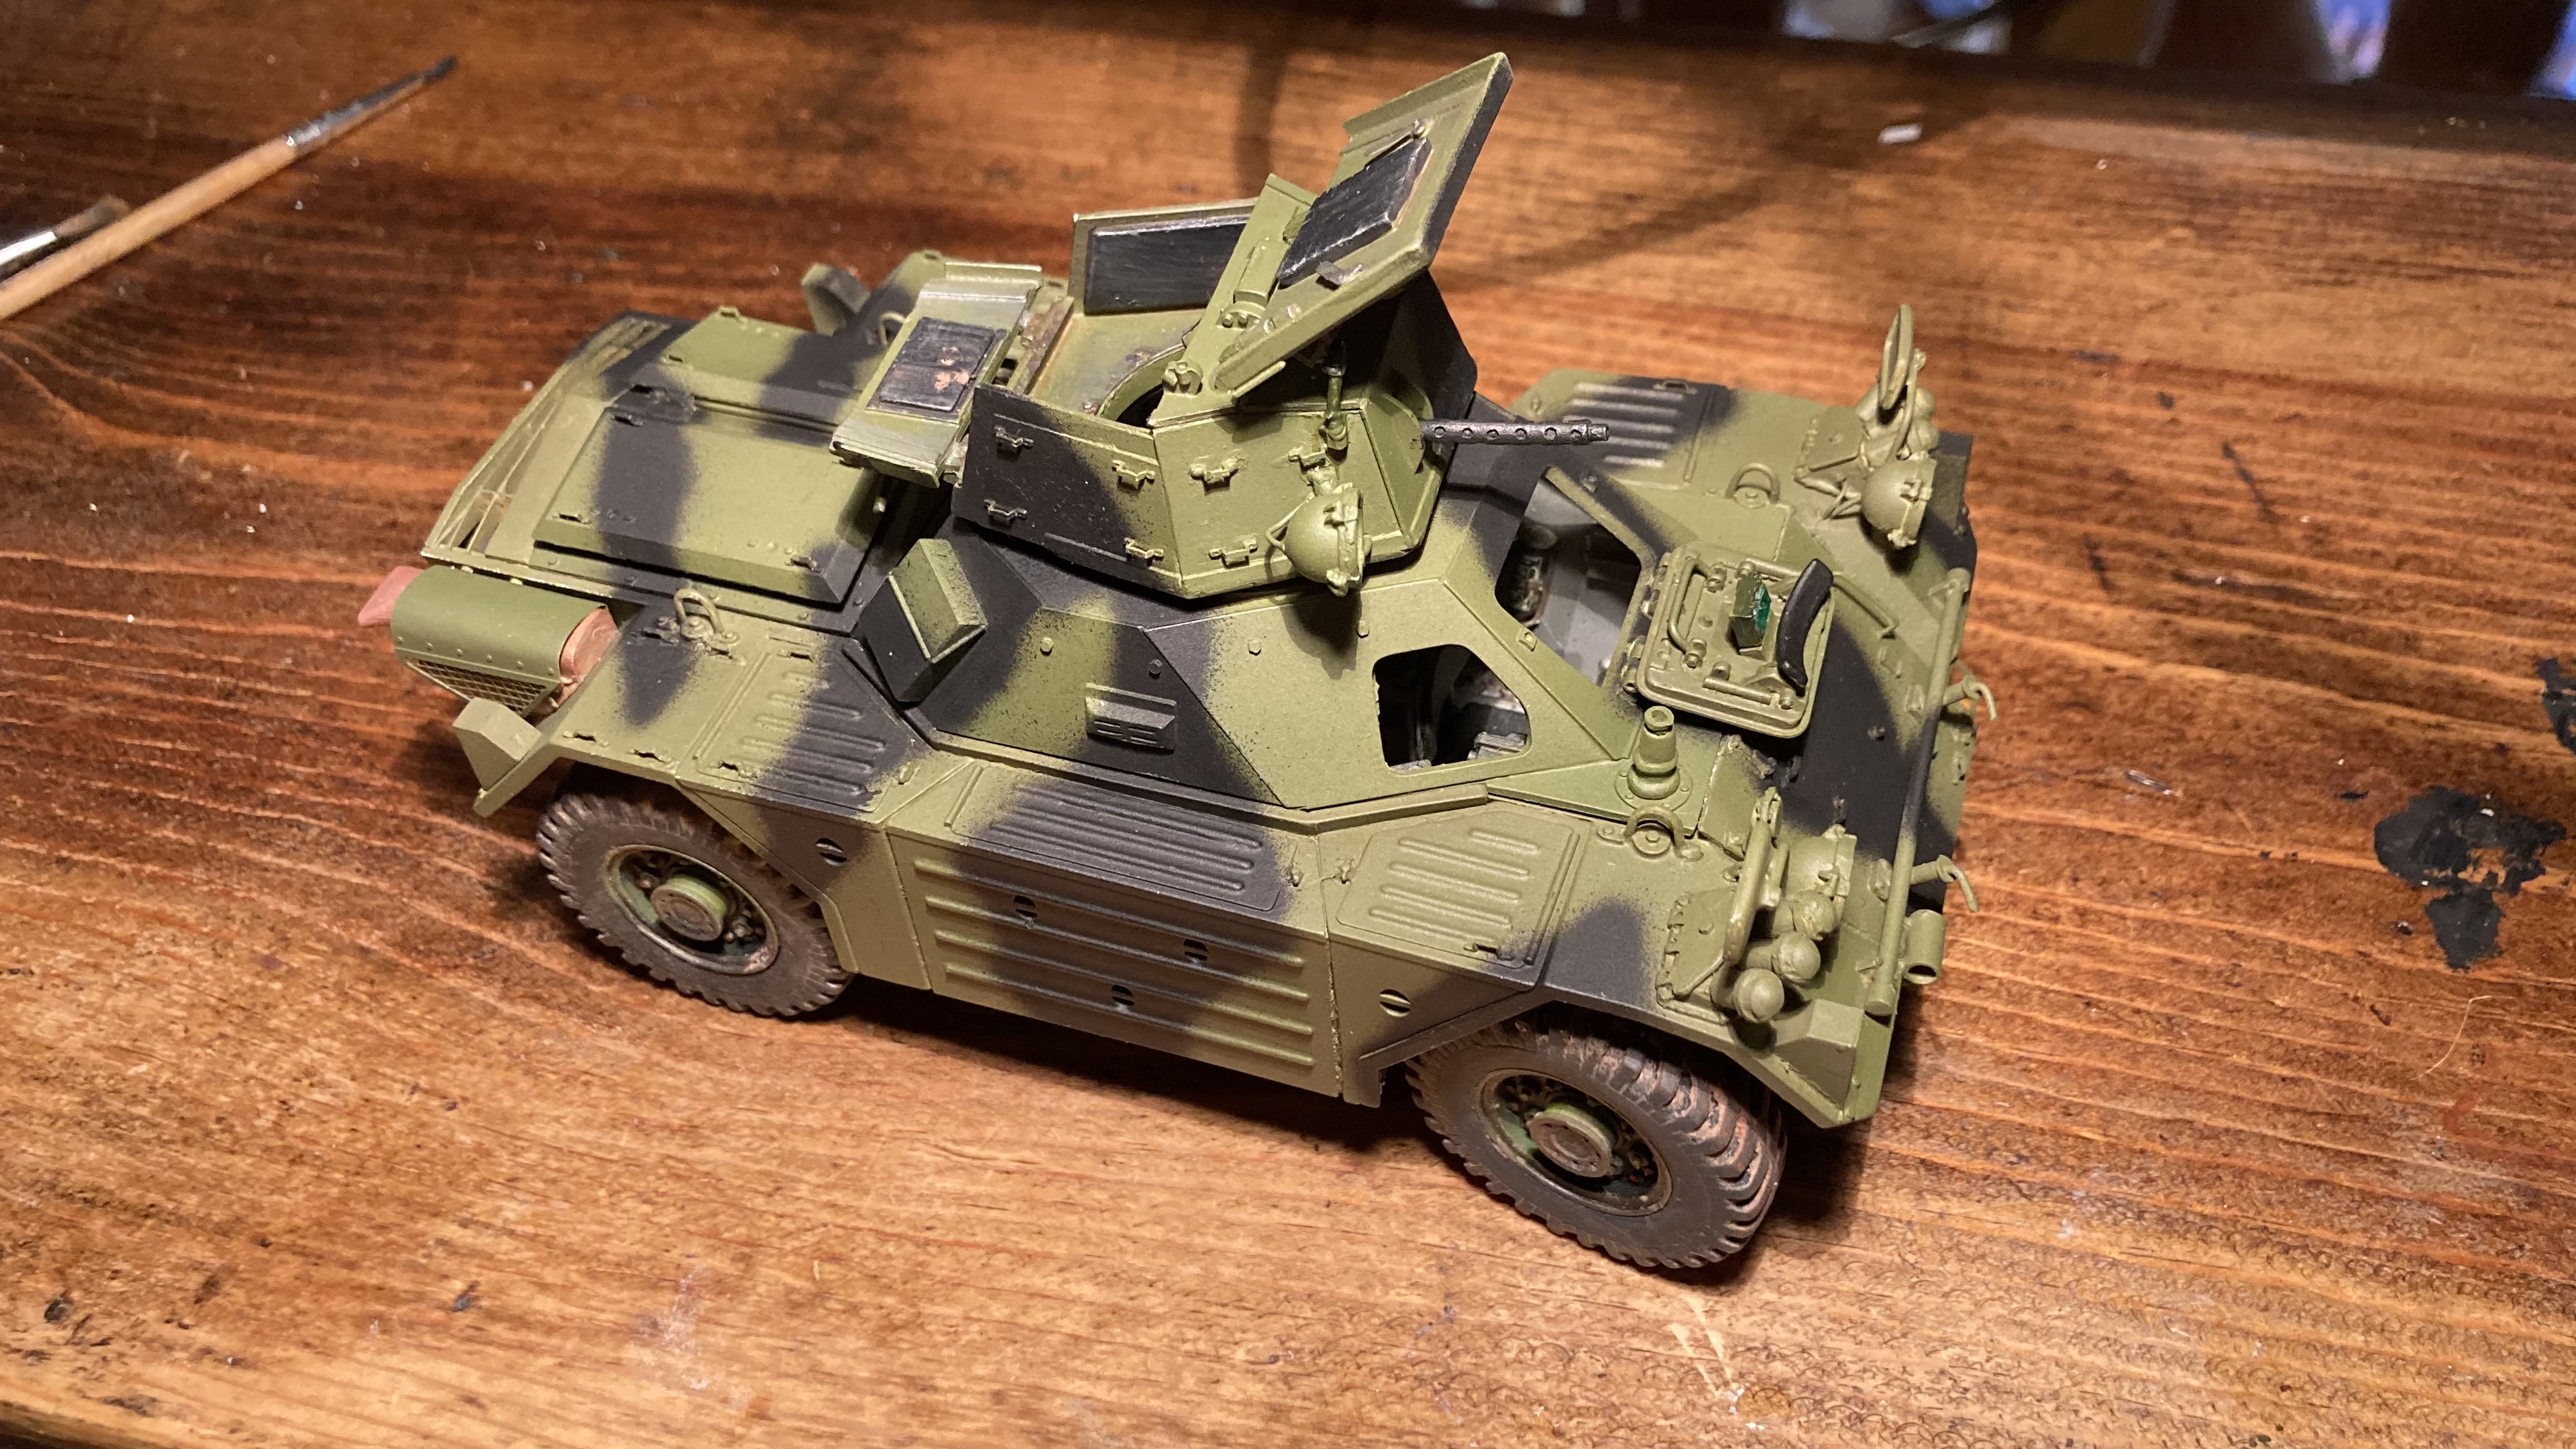
1/24 Kit Form Services Daimler Ferret resin kit build
PeteF replied to PeteF's topic in LSM 1/35 and Larger Work In Progress
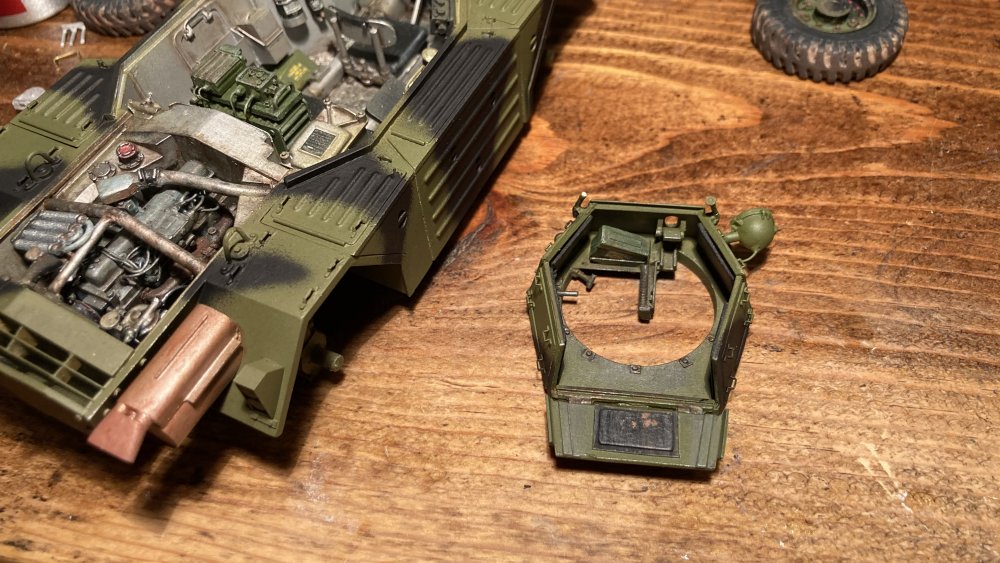
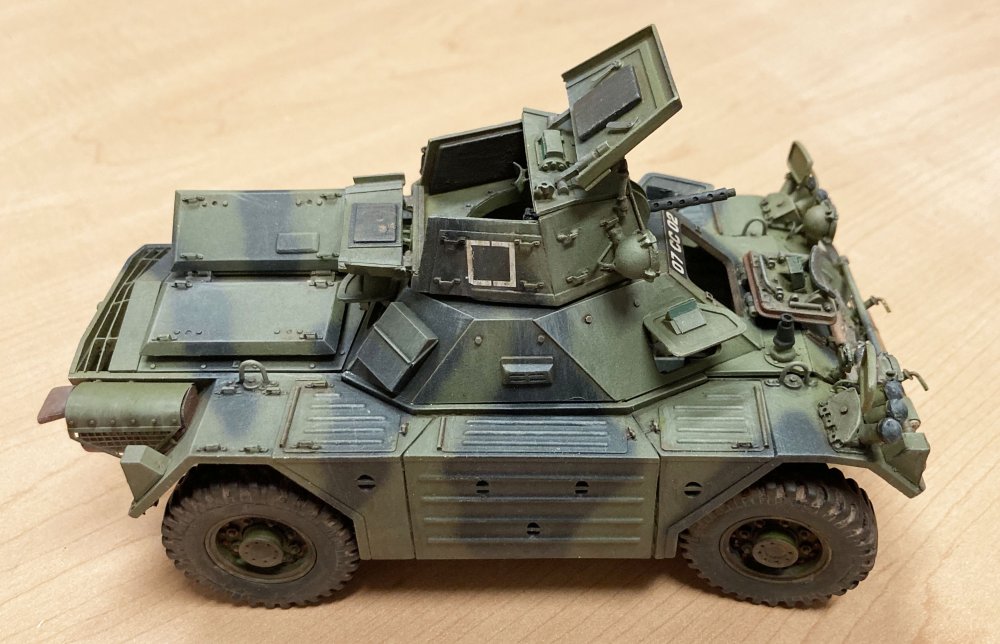
Got the camo on and most of it built (turret and wheels are loose fitted here). Now comes a ton of weathering.