PeteF
-
Posts
233 -
Joined
-
Last visited
Content Type
Profiles
Forums
Events
Gallery
Everything posted by PeteF
-

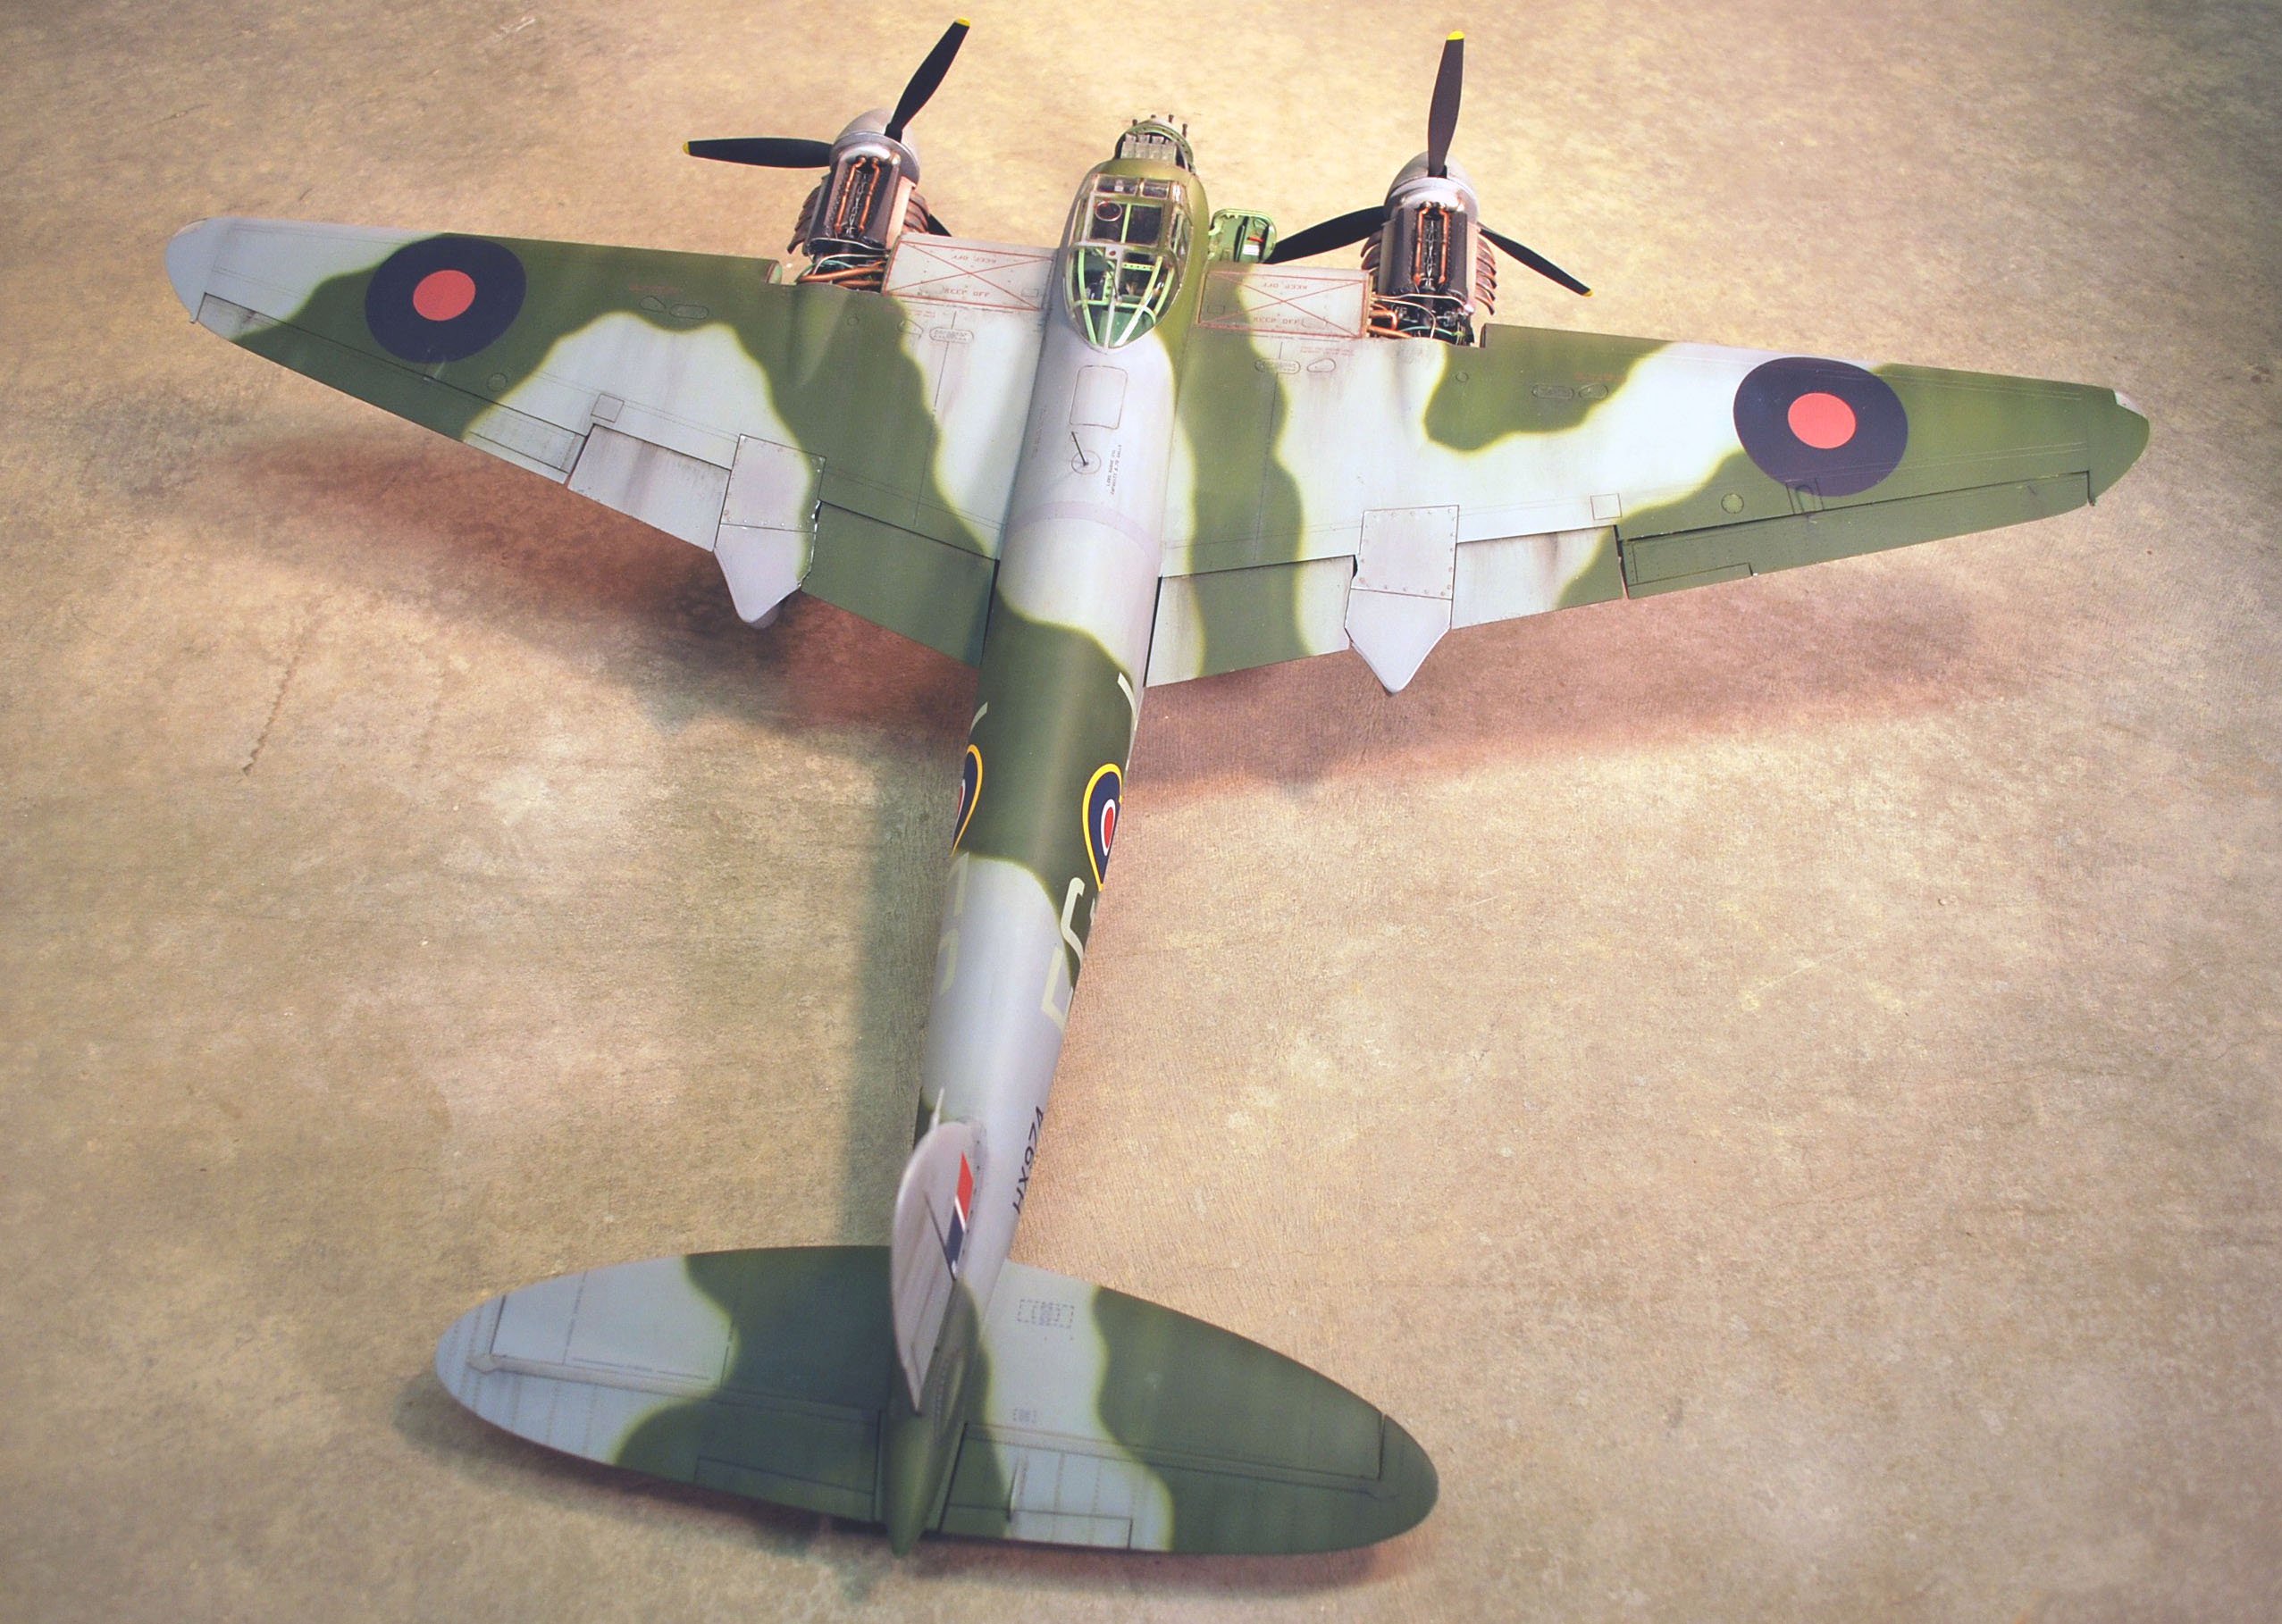
1/24 Airfix Scale Mosquito build
PeteF replied to PeteF's topic in LSM 1/35 and Larger Work In Progress
I made a rather lengthy review/help video for things to look out for on this kit. Hopefully it will help anyone looking to build one of these. -
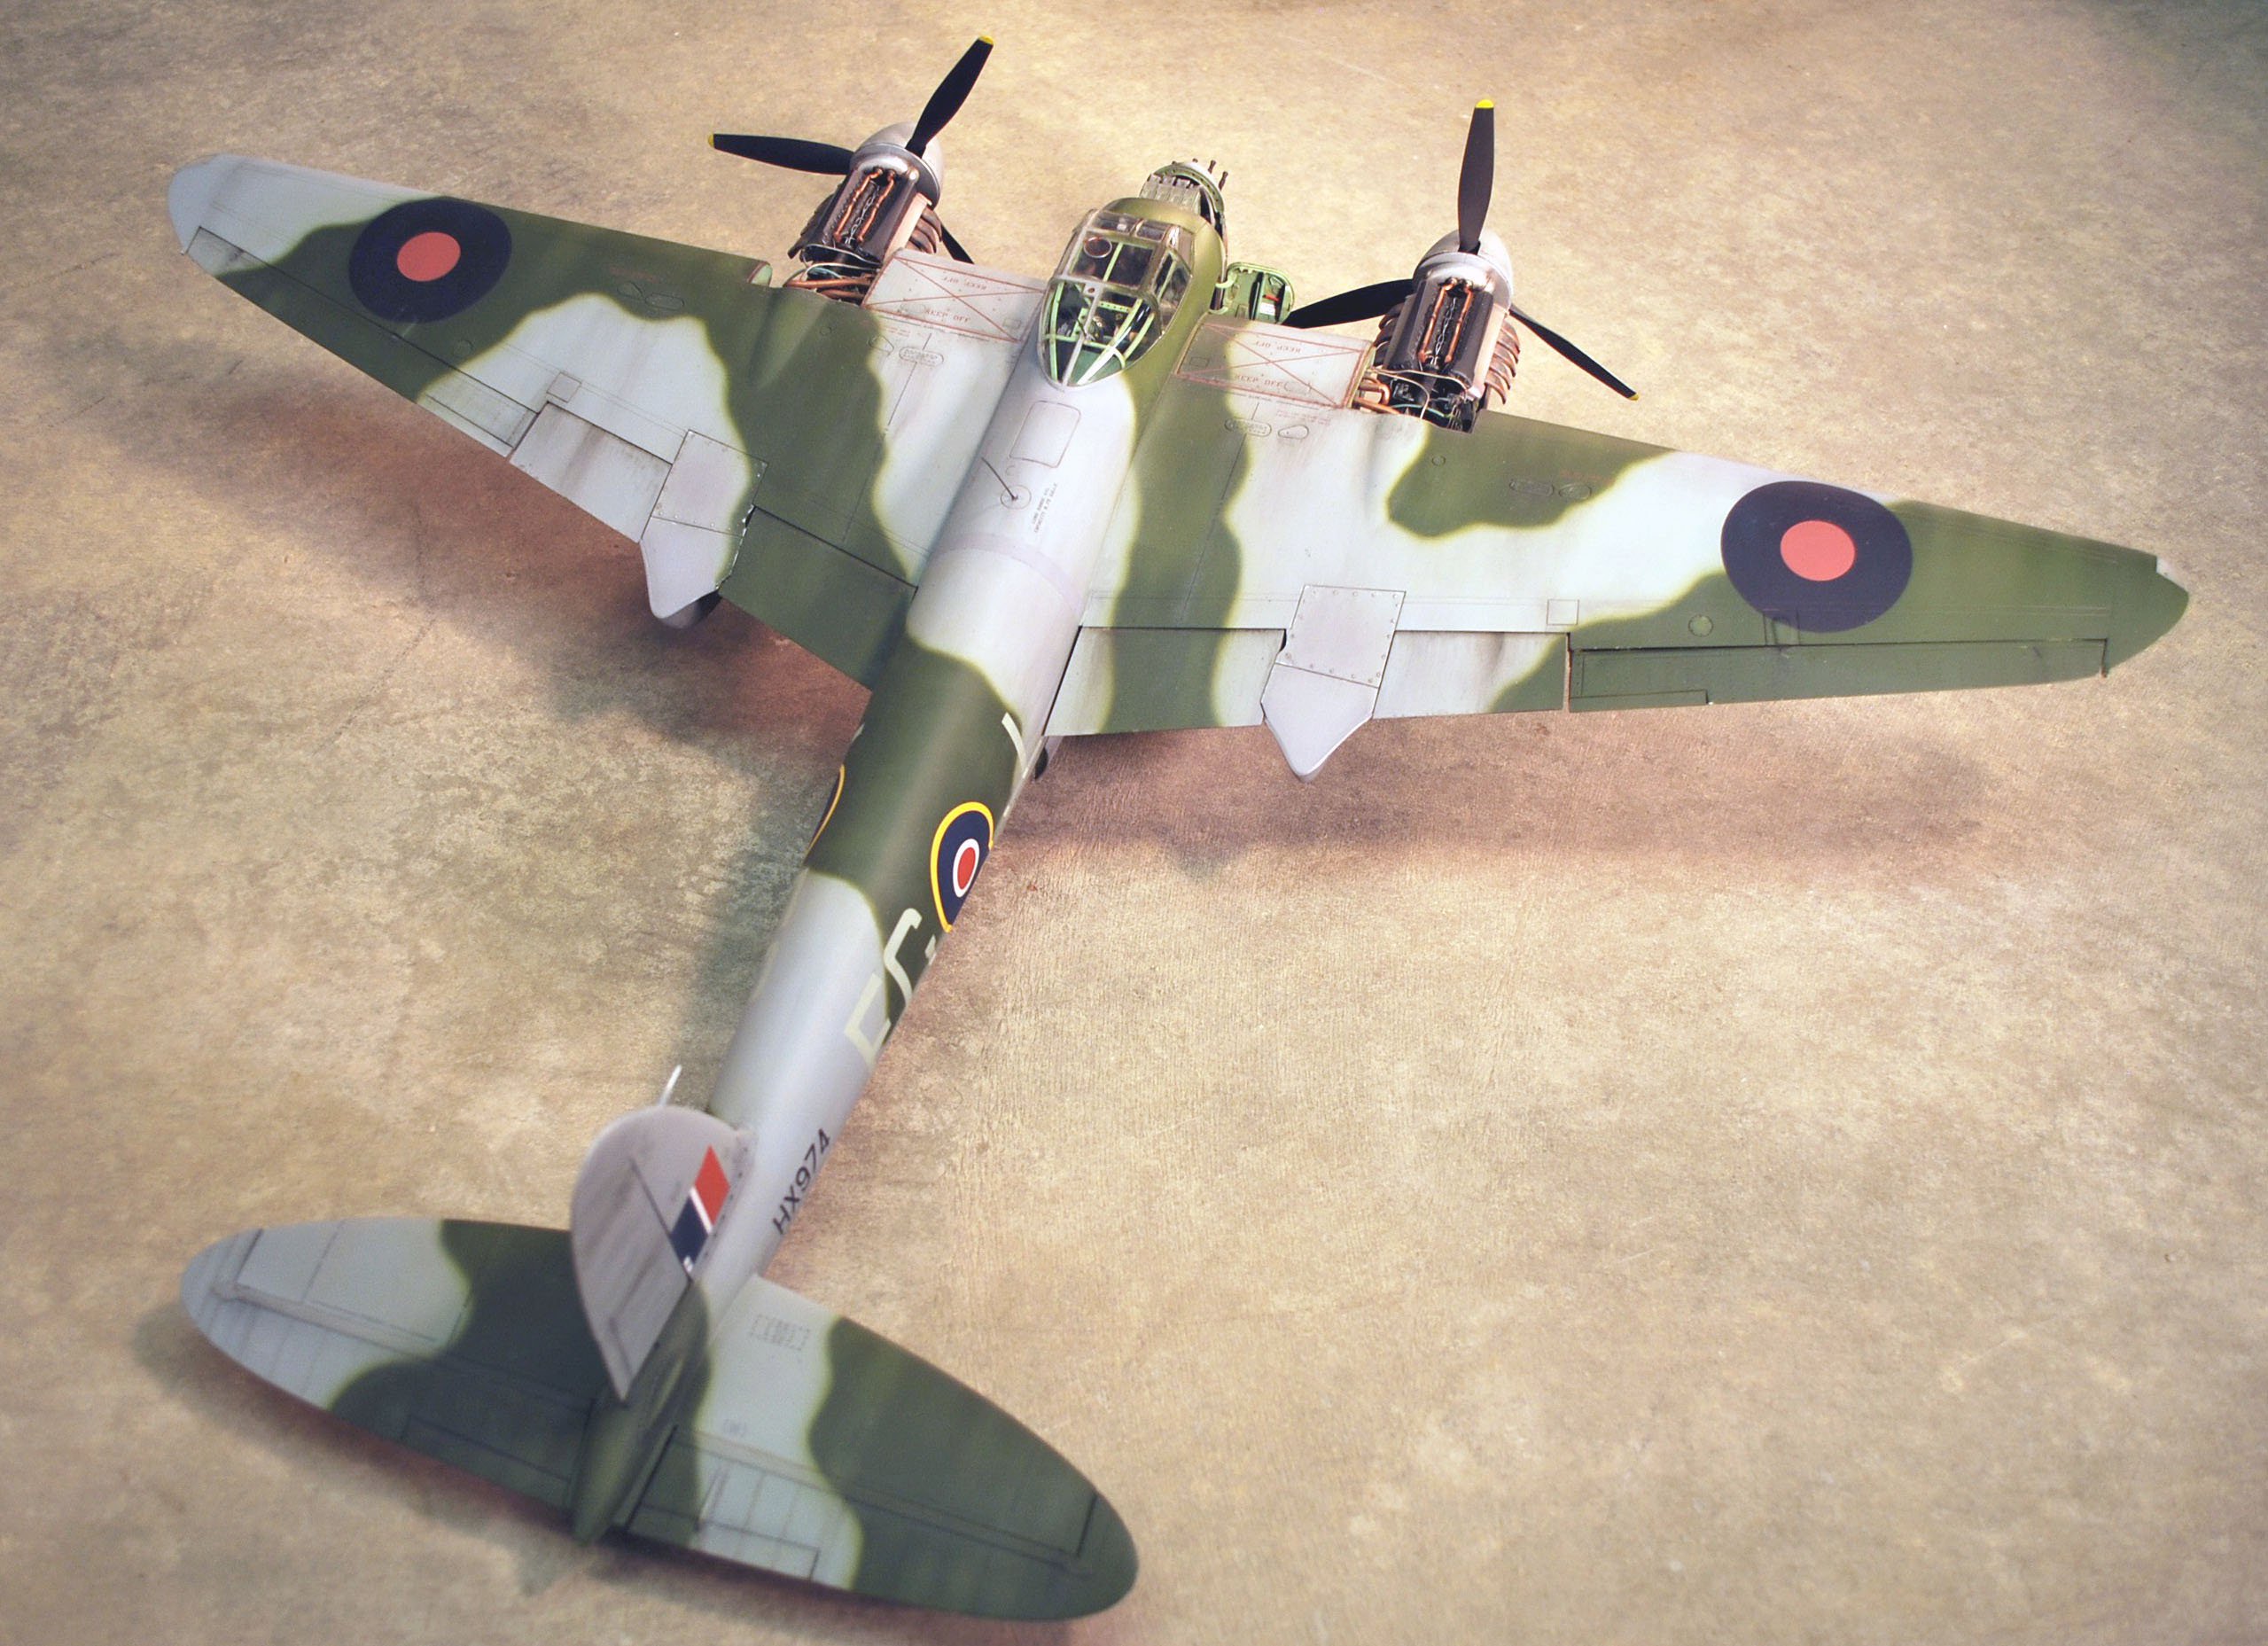
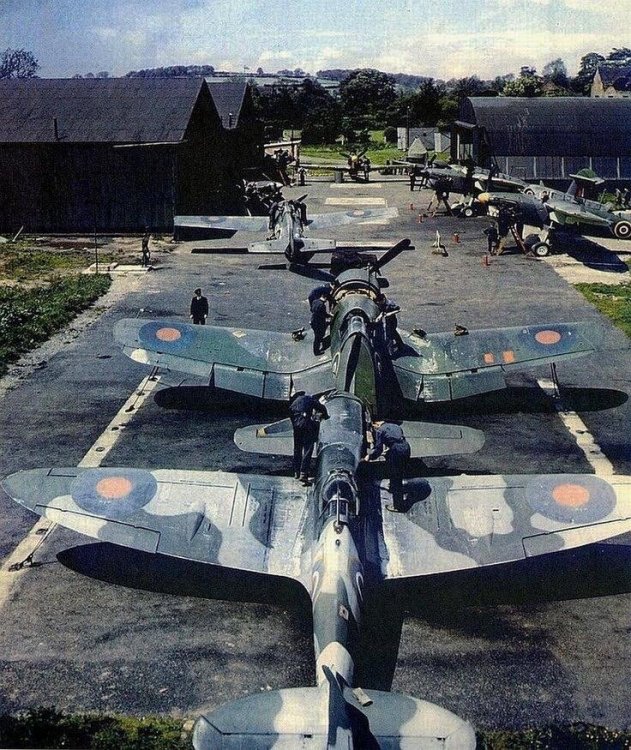
Look at these beauties.
-
Yep. I did a lot of large scale models of Spitfires and now with the internet, a lot of archival photos are available and some of those plane have literally nearly no paint on them. Any war plane that was painted and survived any amount of time looks like absolute beautiful junk. I’ve always been heavily biased towards well worn and weathered subjects.
-
That’s a great subject for some really good weathering!
-
1/24 Airfix Scale Mosquito build
PeteF replied to PeteF's topic in LSM 1/35 and Larger Work In Progress
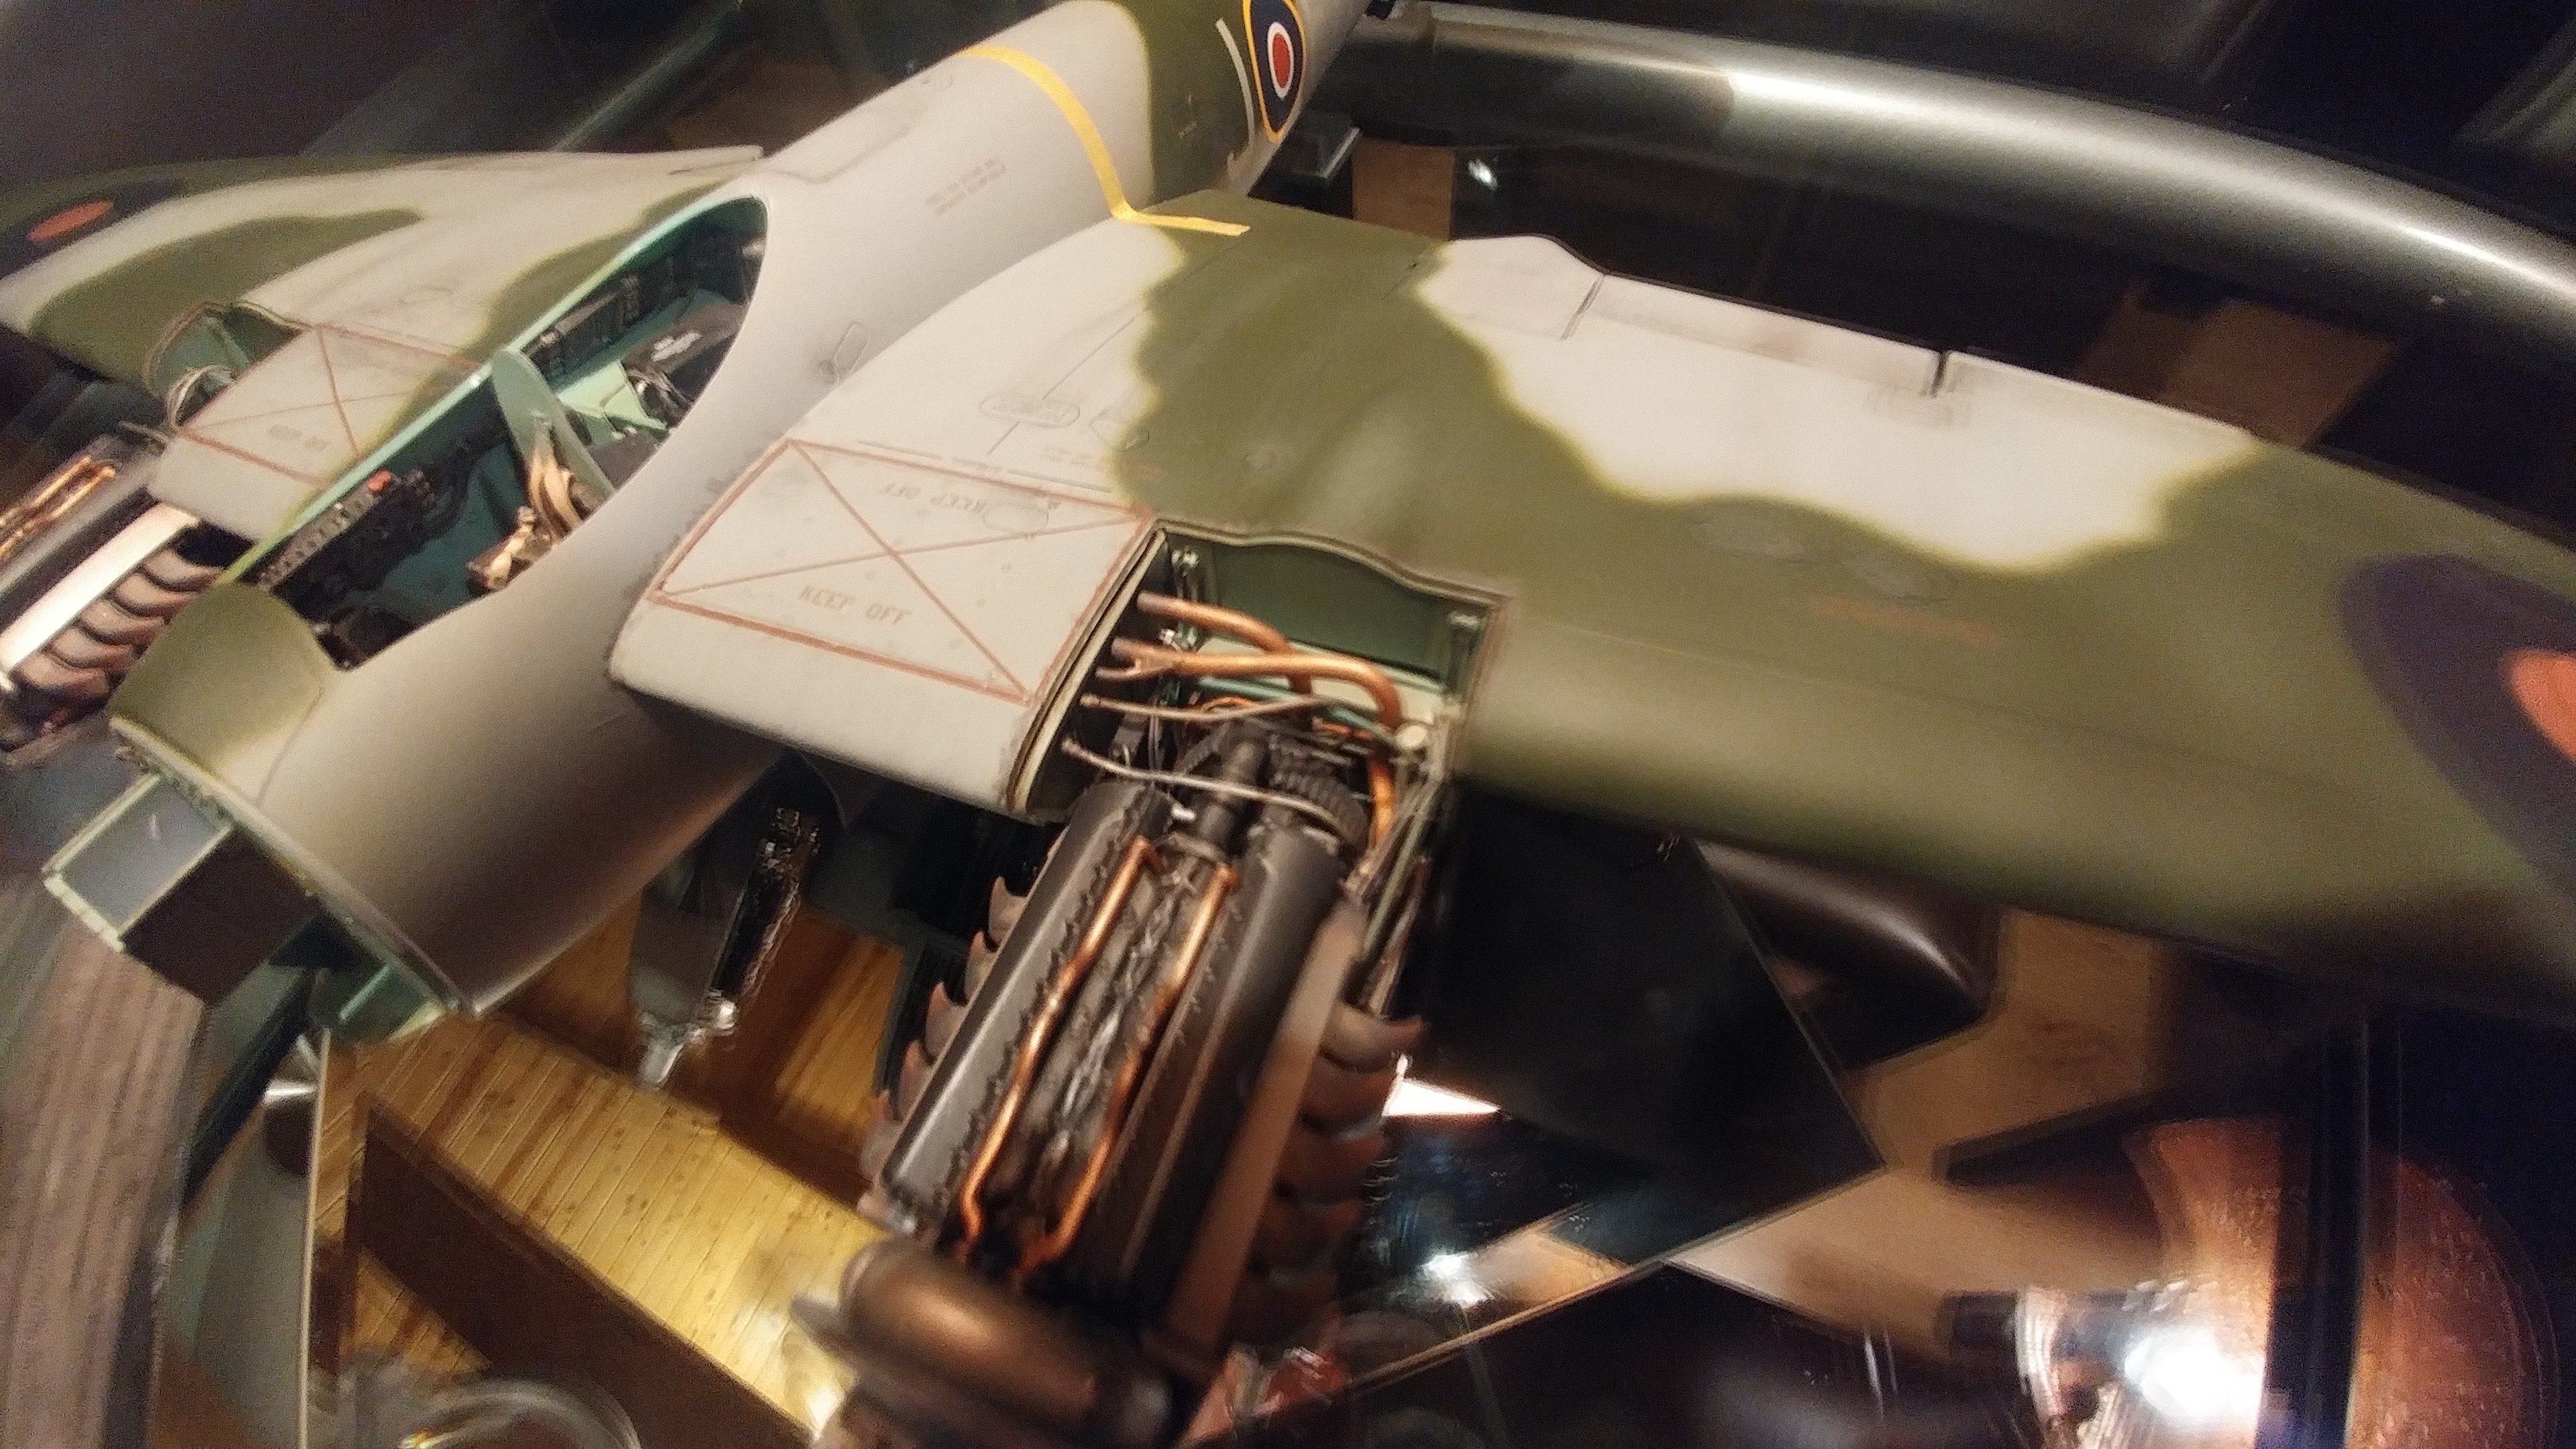
Oh, I never posted photos of the engine panels. They had no internal detail either.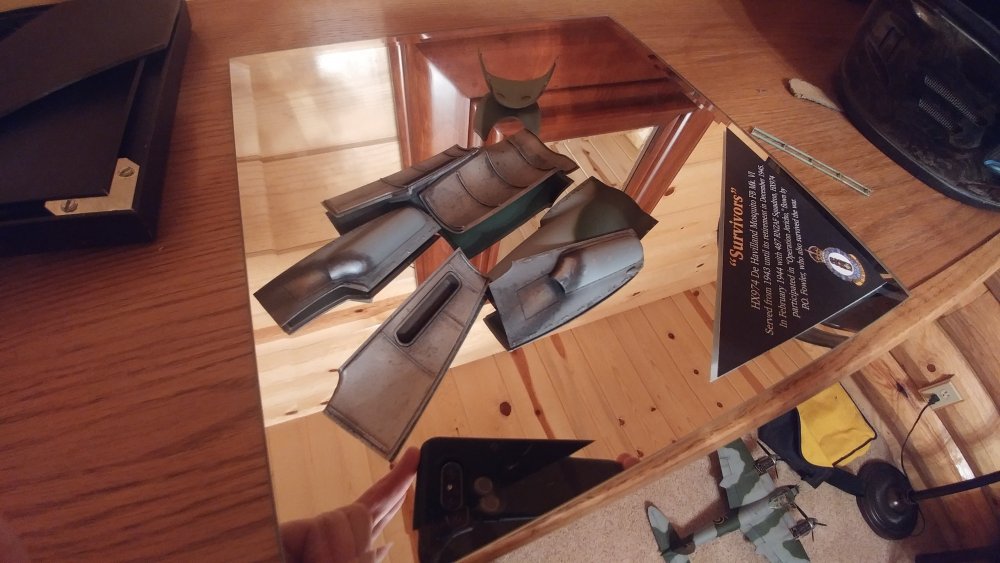
-
1/24 Airfix Scale Mosquito build
PeteF replied to PeteF's topic in LSM 1/35 and Larger Work In Progress
Yep, it was weird. I get that alignment and basic fit and finish are important but I thought presentation, extra work and extra detail was worth something as well. Not in this case. Yep, two judges for all the aircraft. I’m done with IPMS Arizona...don’t need to revisit it. If I build another model, I’ll keep it a project for personal challenge and satisfaction only like I should have kept this. -
1/24 Airfix Scale Mosquito build
PeteF replied to PeteF's topic in LSM 1/35 and Larger Work In Progress
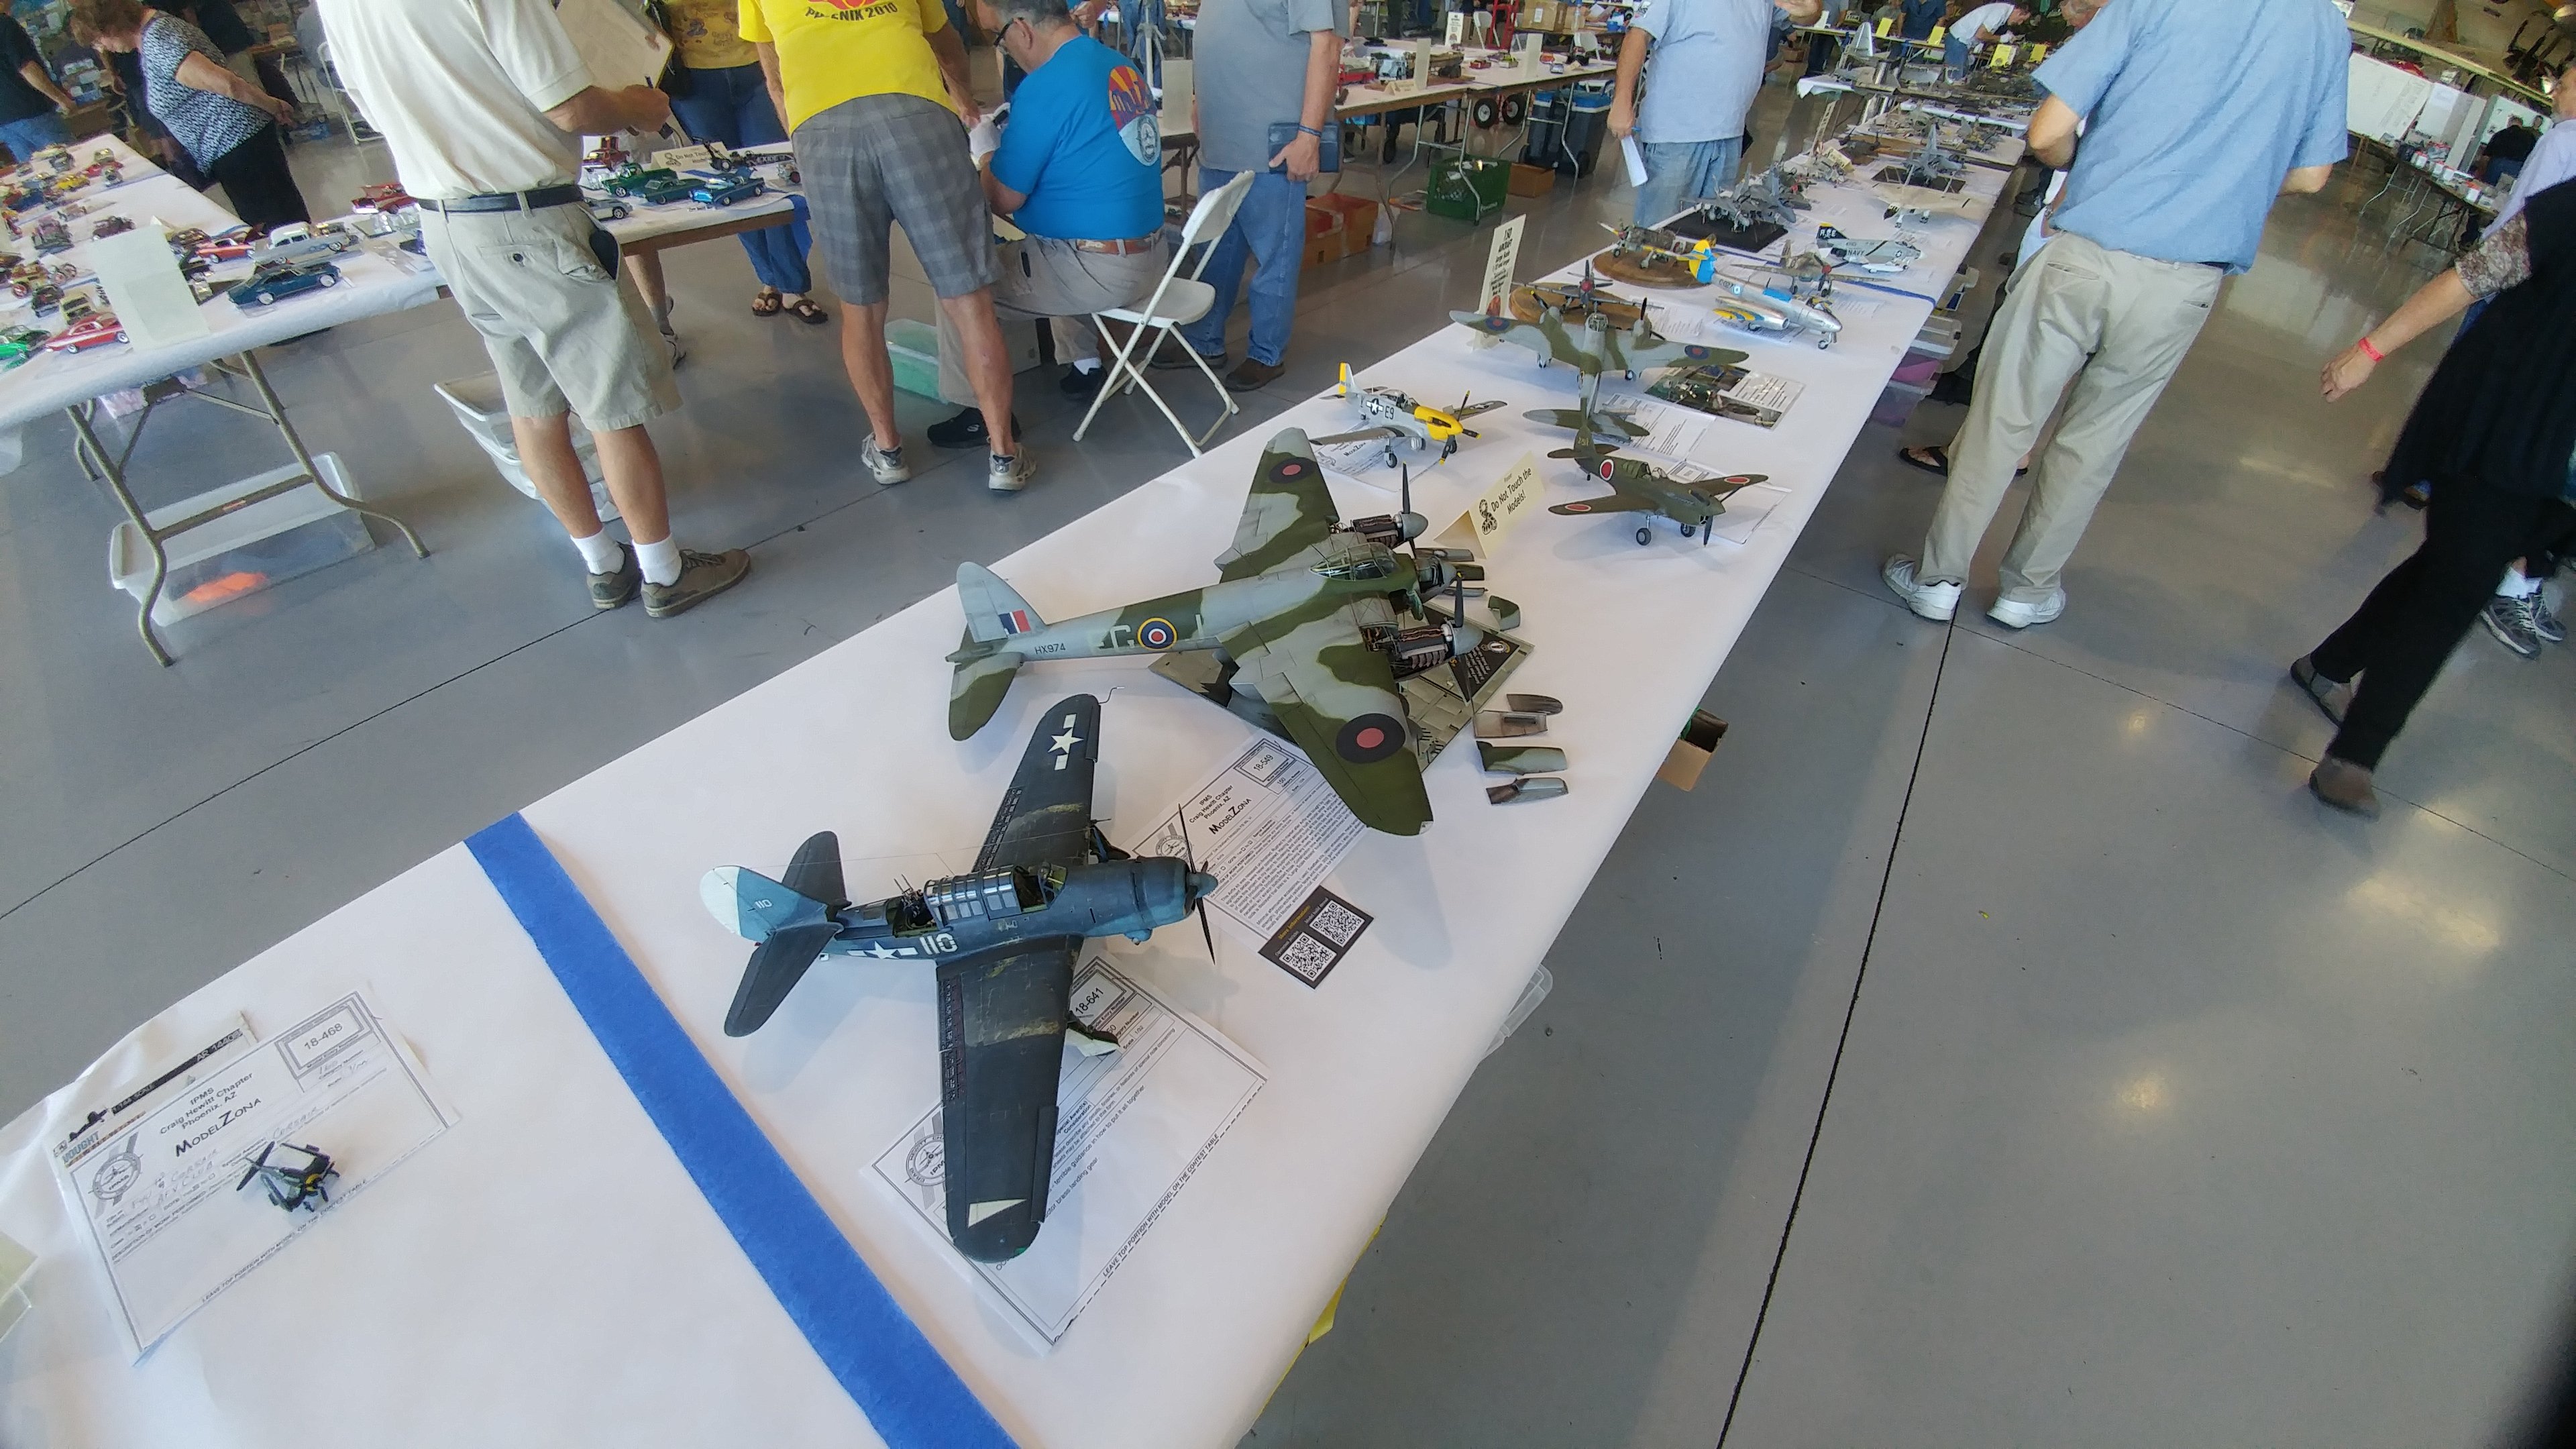
Here's the table for large scale. That P40 with Japanese markings and that P51 were in the top 3. Either the Revell Spitfire or Helldiver was the other one.
-
1/24 Airfix Scale Mosquito build
PeteF replied to PeteF's topic in LSM 1/35 and Larger Work In Progress
The two aircraft judges had every scale of model and WW1 to judge. Where I saw and heard judges of other categories using lights and really talking together (one said of a diorama “but it shows great effort and that’s worth something), these guys seemed to be just quickly judging on overall fit and finish. There was a Helldiver that had really good paint and that I could have seen as superior to my plane (discounting the fact it had no detail or open panels beyond what you would see on the flight deck) but the other three planes that placed were clean but totally uninspired. There was no story, no detail beyond what a pack of photo etched parts gets you. There were 9 planes in large scale and we left after I saw I wasn’t in the top 4. we left. This morning I twisted the metal landing gear straight...it didn’t occur to me that I could have fixed it then and there but they really displayed no real interest in my plane during judging. -
1/24 Airfix Scale Mosquito build
PeteF replied to PeteF's topic in LSM 1/35 and Larger Work In Progress
Ywah, it was disappointing. The armor judges discussed one tank in the time it took the two plane judges to do the entire large scale category. Those armor judges were tough but fair. I flipped my plane for the plane judges to see the bottom and they spent maybe 3 seconds looking at it LOL.I don’t think they even looked at the judging sheet. -
1/24 Airfix Scale Mosquito build
PeteF replied to PeteF's topic in LSM 1/35 and Larger Work In Progress
Here's a tip...the landing gear is not easy to get the toe right...especially as you finish the nacelles before mounting them. If something goes askew, you're screwed. One of my wheels was toed out so the judges spent 5 seconds looking at 500 hours of work and blew it off and didn't place it. -
Man, not only do I have to worry about turnbuckles but which way they point? Aaargh, I haven’t even got as far as “what do you use for wire?” LOL
-
Man, builds like this are going to push me to try and figure out how to do rigging...itching to do some WW1 models but not sure if I have the patience. Looks fantastic!
-
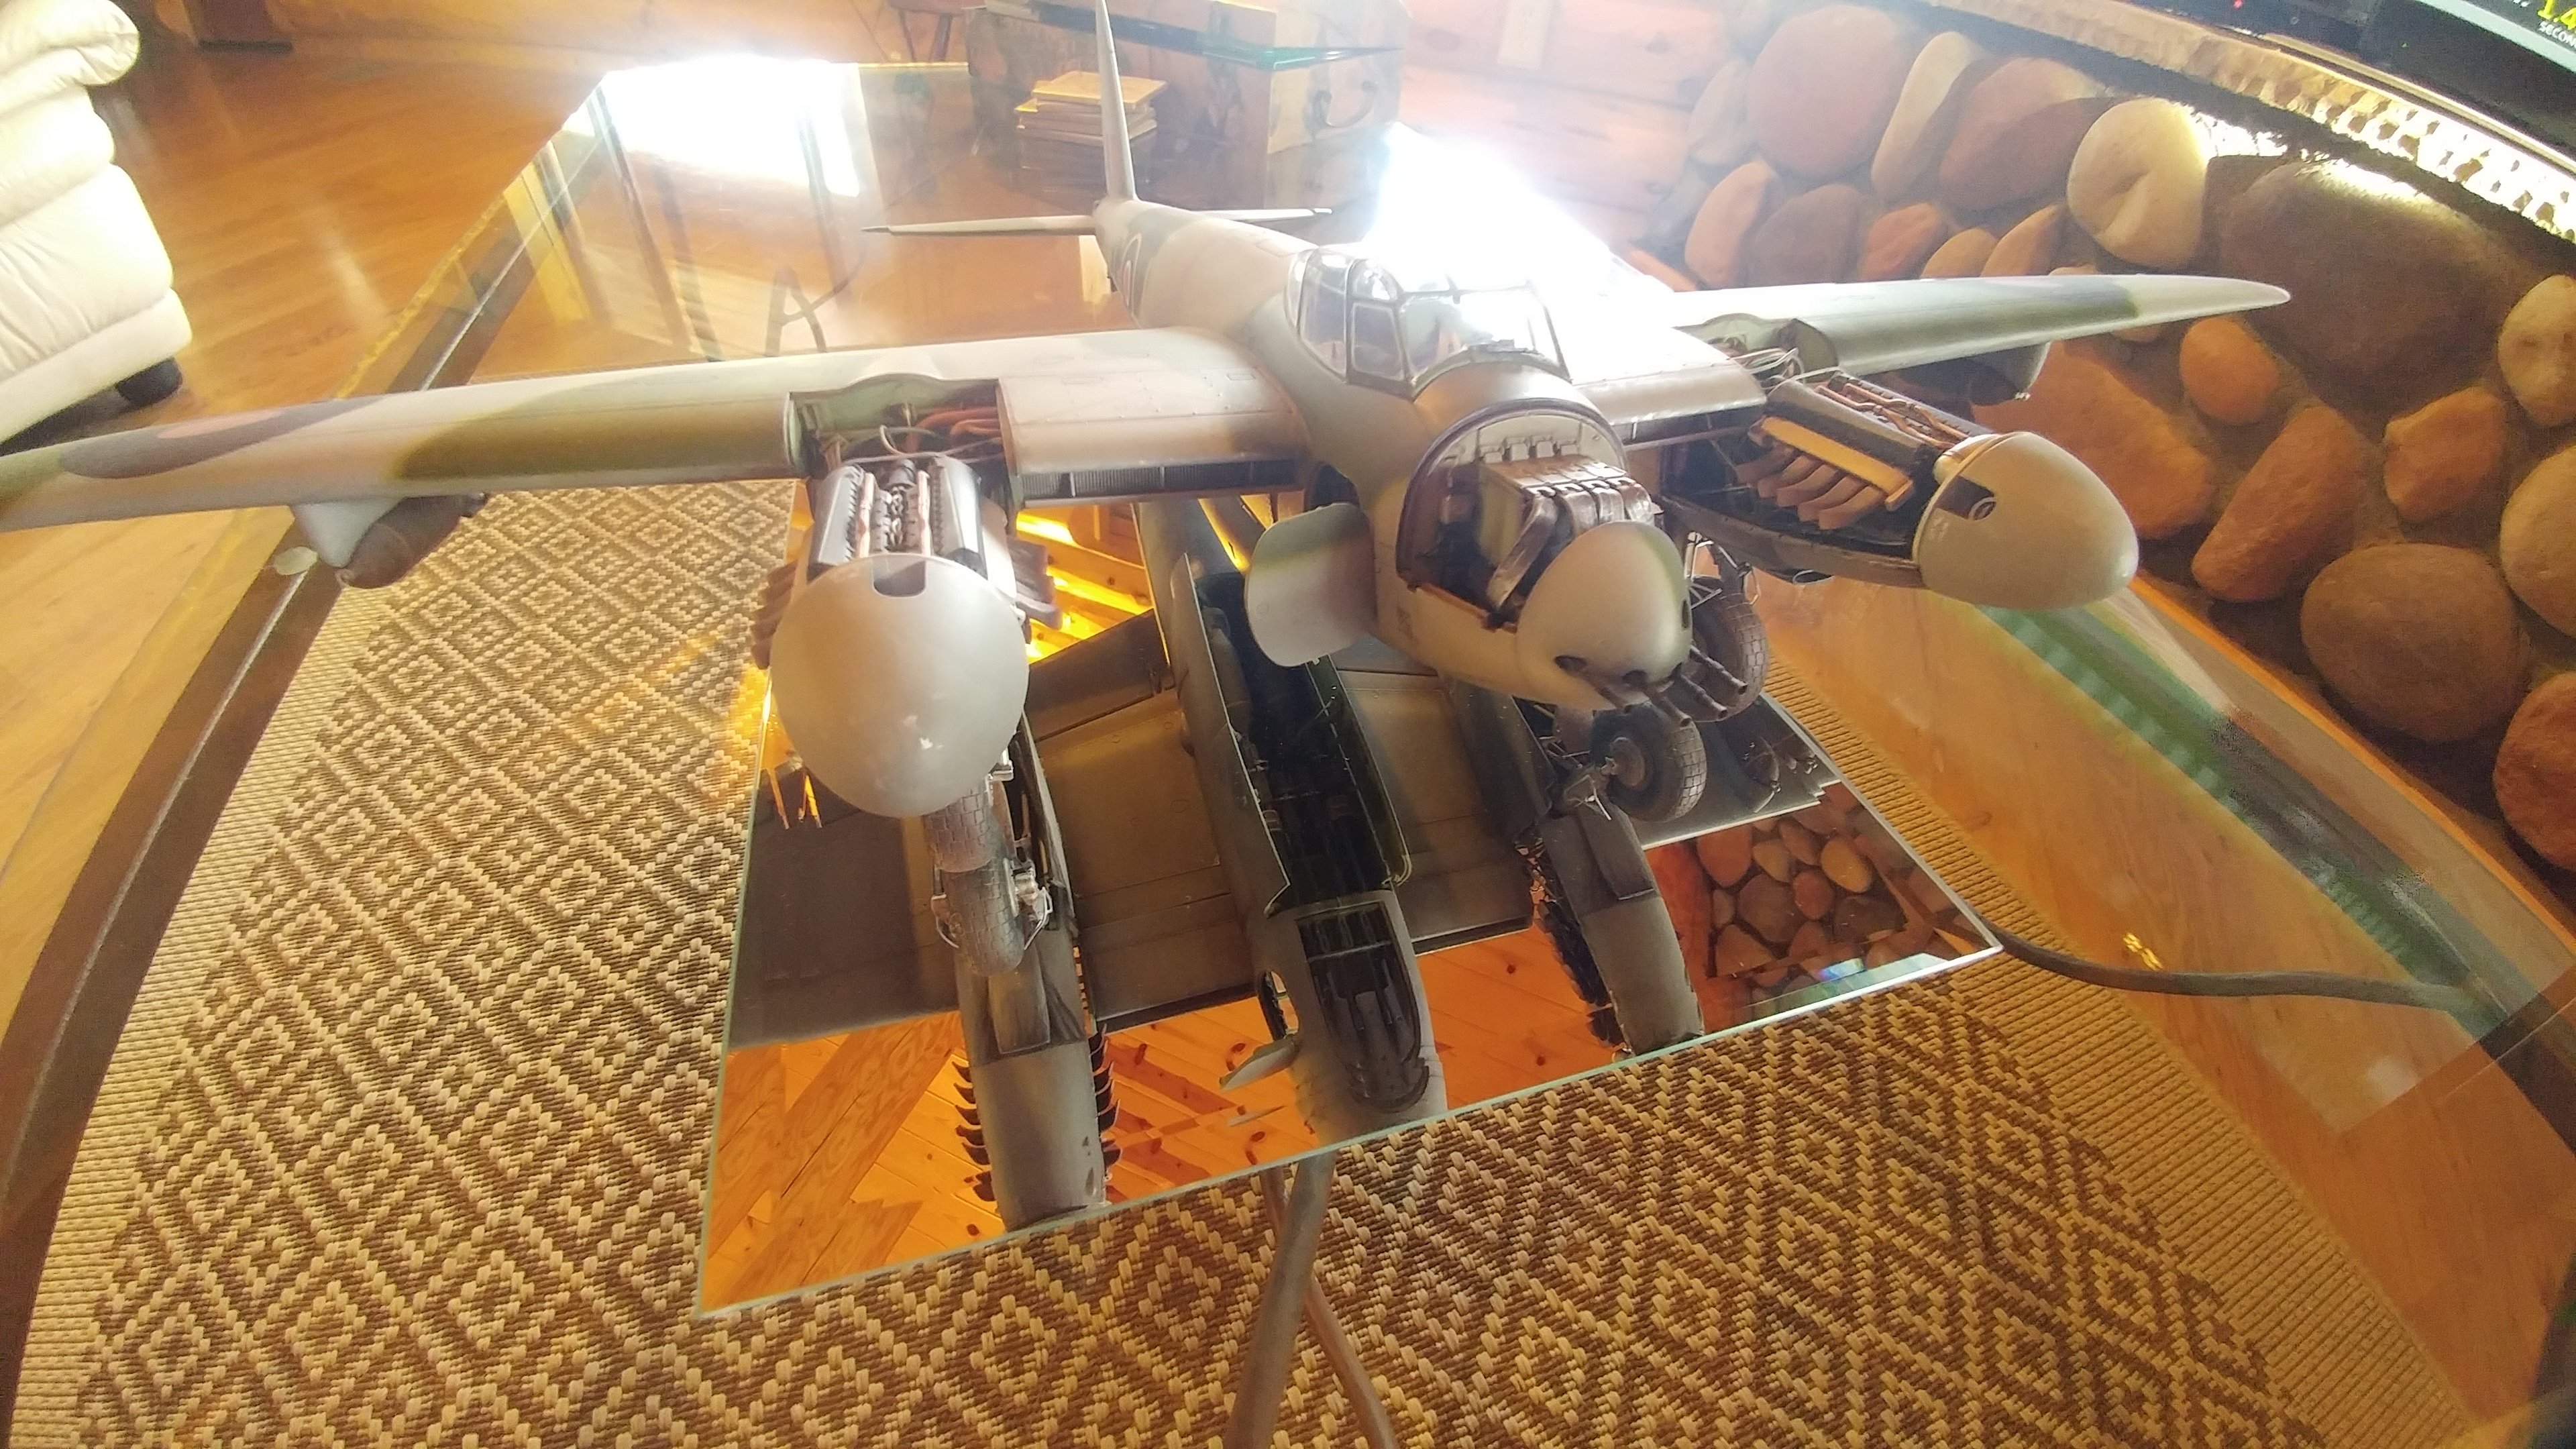
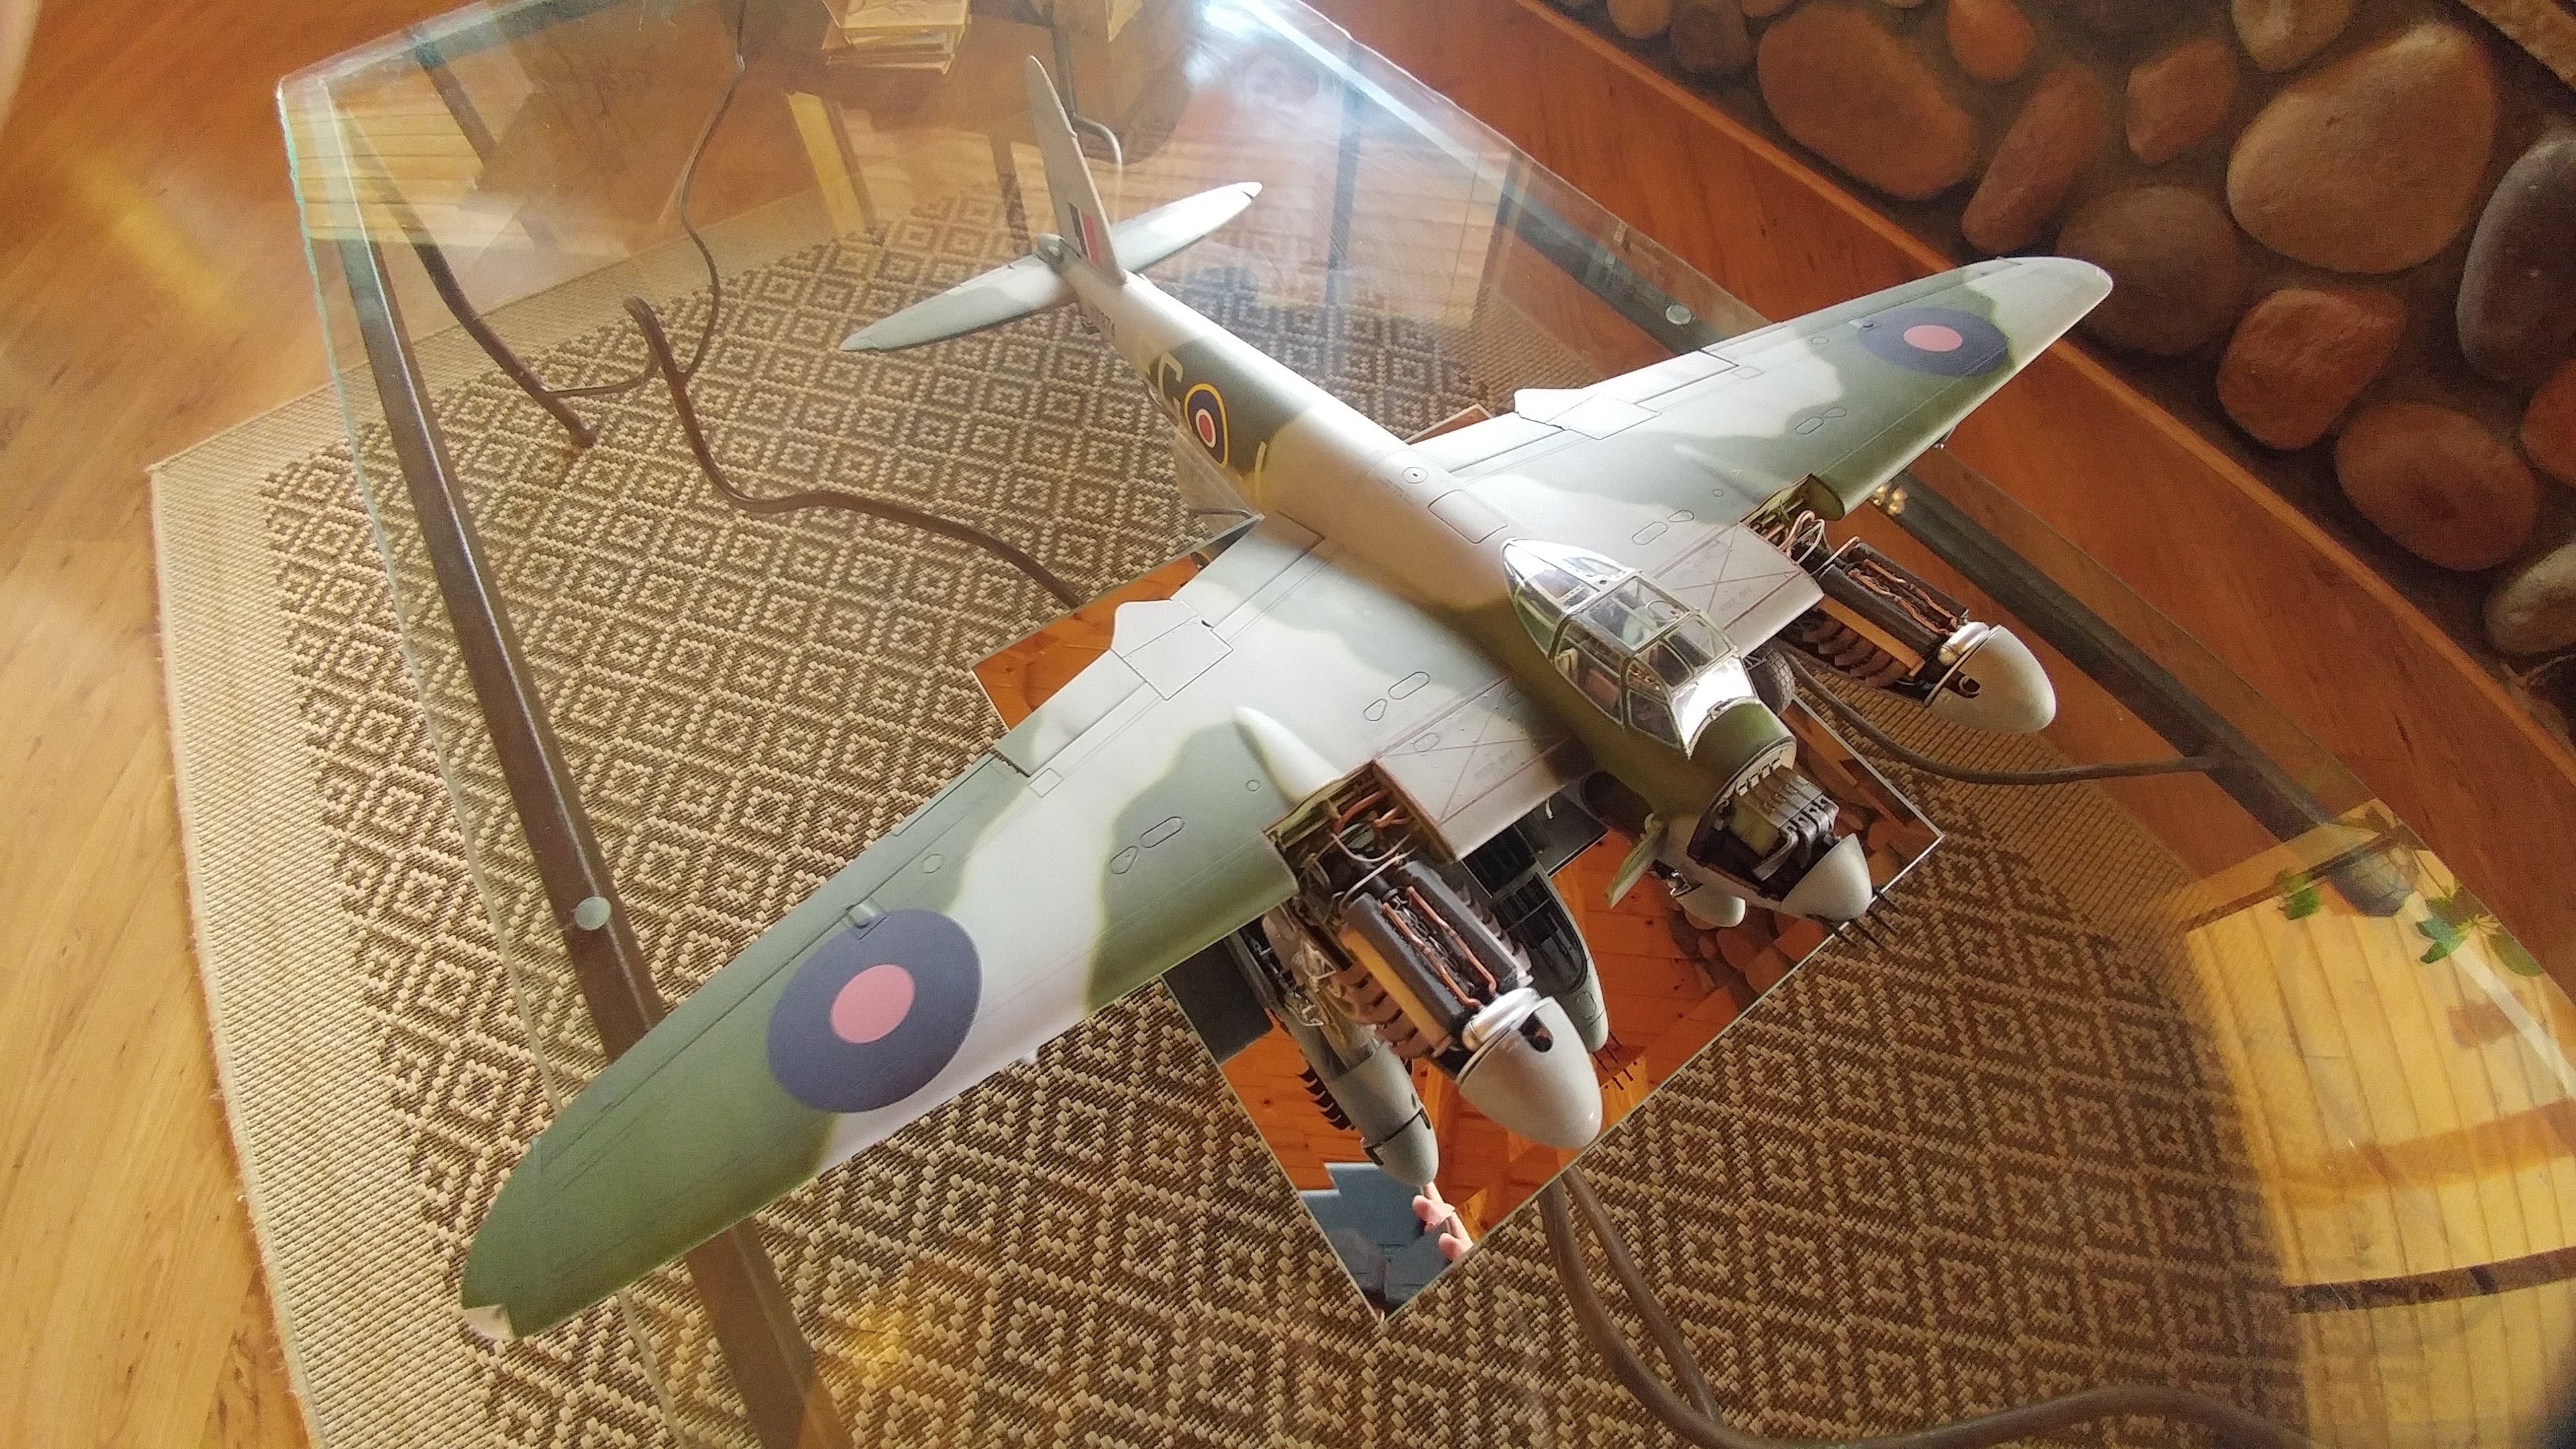
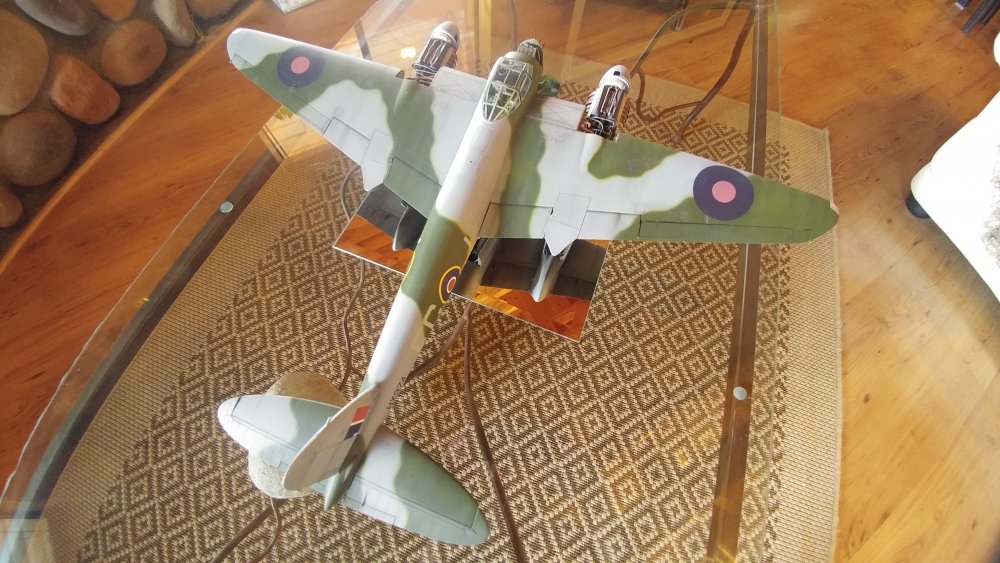
And the display.

-
1/24 Airfix Scale Mosquito build
PeteF replied to PeteF's topic in LSM 1/35 and Larger Work In Progress
And here's its show display.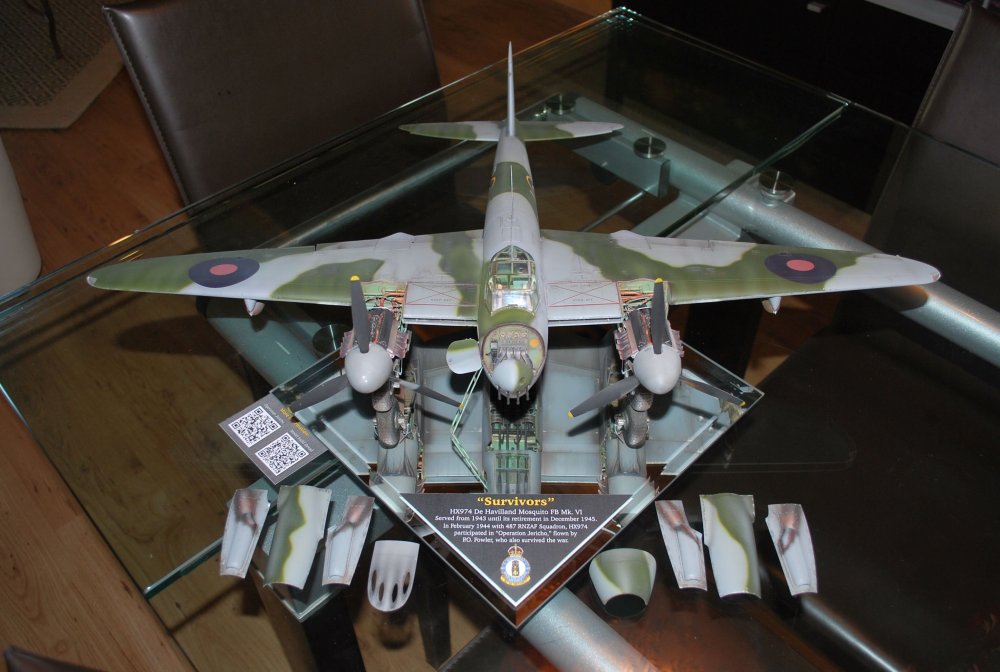
- 359 replies
-
- 10
-

-
1/24 Airfix Scale Mosquito build
PeteF replied to PeteF's topic in LSM 1/35 and Larger Work In Progress
Posted a new topic in the "done" section but it's basically done. I have to detail the engine panels for display but that's it!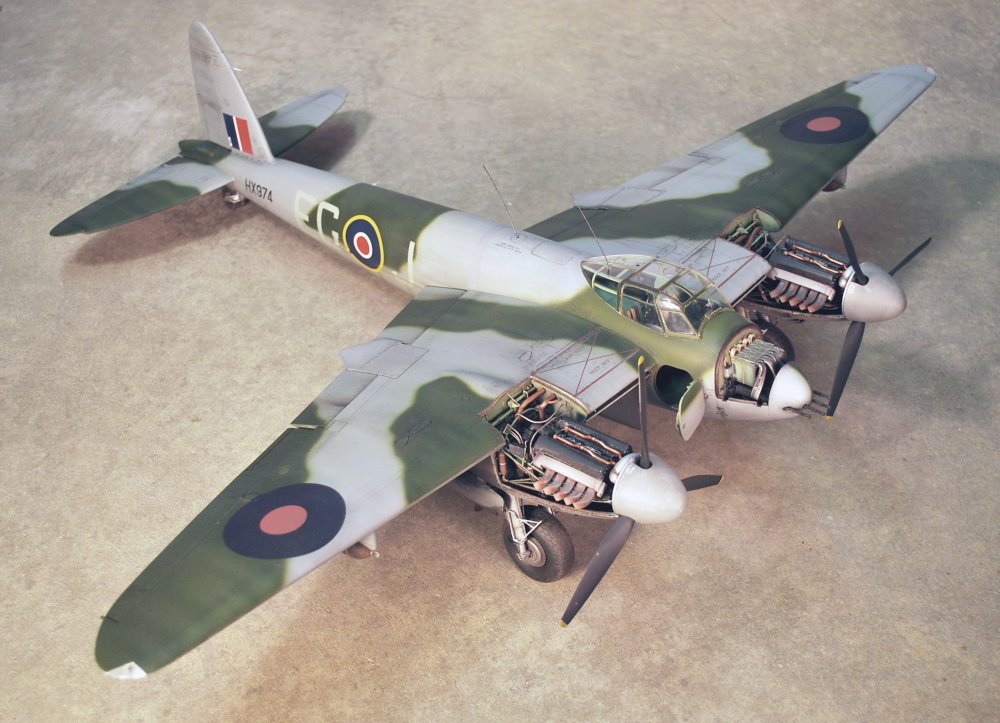


-
Looks like it took me about 500 hours. Fiddly kit. Lacking huge important bits of details and ranged from excellent to crap but I guess that's like all models.


-
A Wee Side Project: the Airfix Car Door Tiffie
PeteF replied to Uncarina's topic in LSM 1/35 and Larger Work In Progress
Apparently Airfix was able to actually detail that kit...unlike the unfinished Mosquito. Thinking of doing one of those later, looks great so far! -
1/24 Airfix Scale Mosquito build
PeteF replied to PeteF's topic in LSM 1/35 and Larger Work In Progress
Propellers done.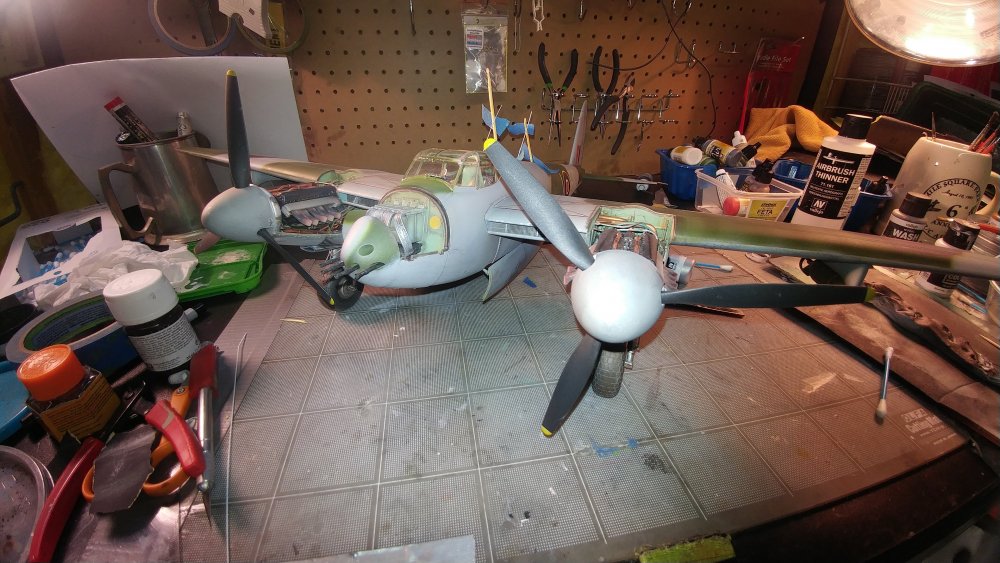
-
1/24 Airfix Scale Mosquito build
PeteF replied to PeteF's topic in LSM 1/35 and Larger Work In Progress
Jig for holding the whip antennas lol.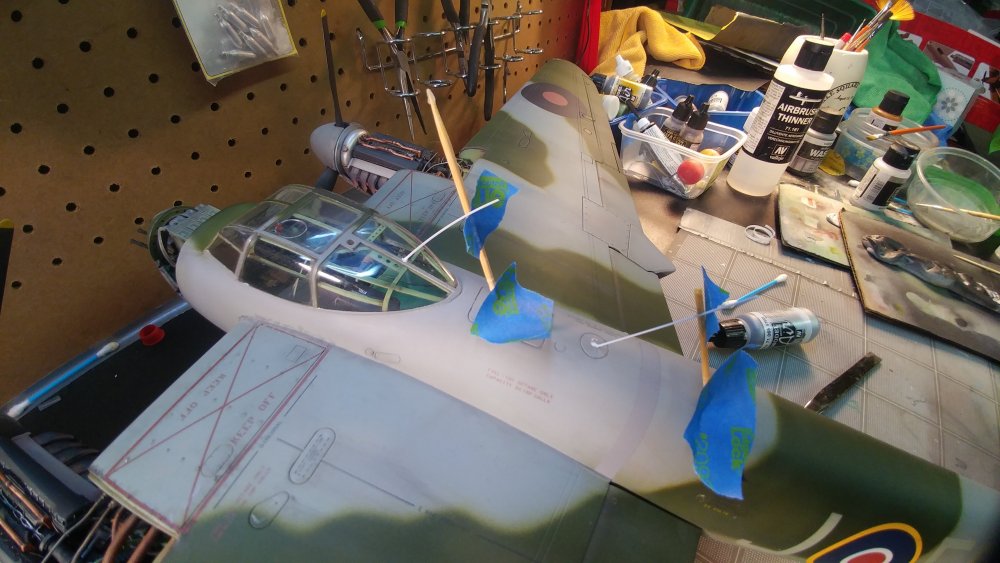
-
1/24 Airfix Scale Mosquito build
PeteF replied to PeteF's topic in LSM 1/35 and Larger Work In Progress
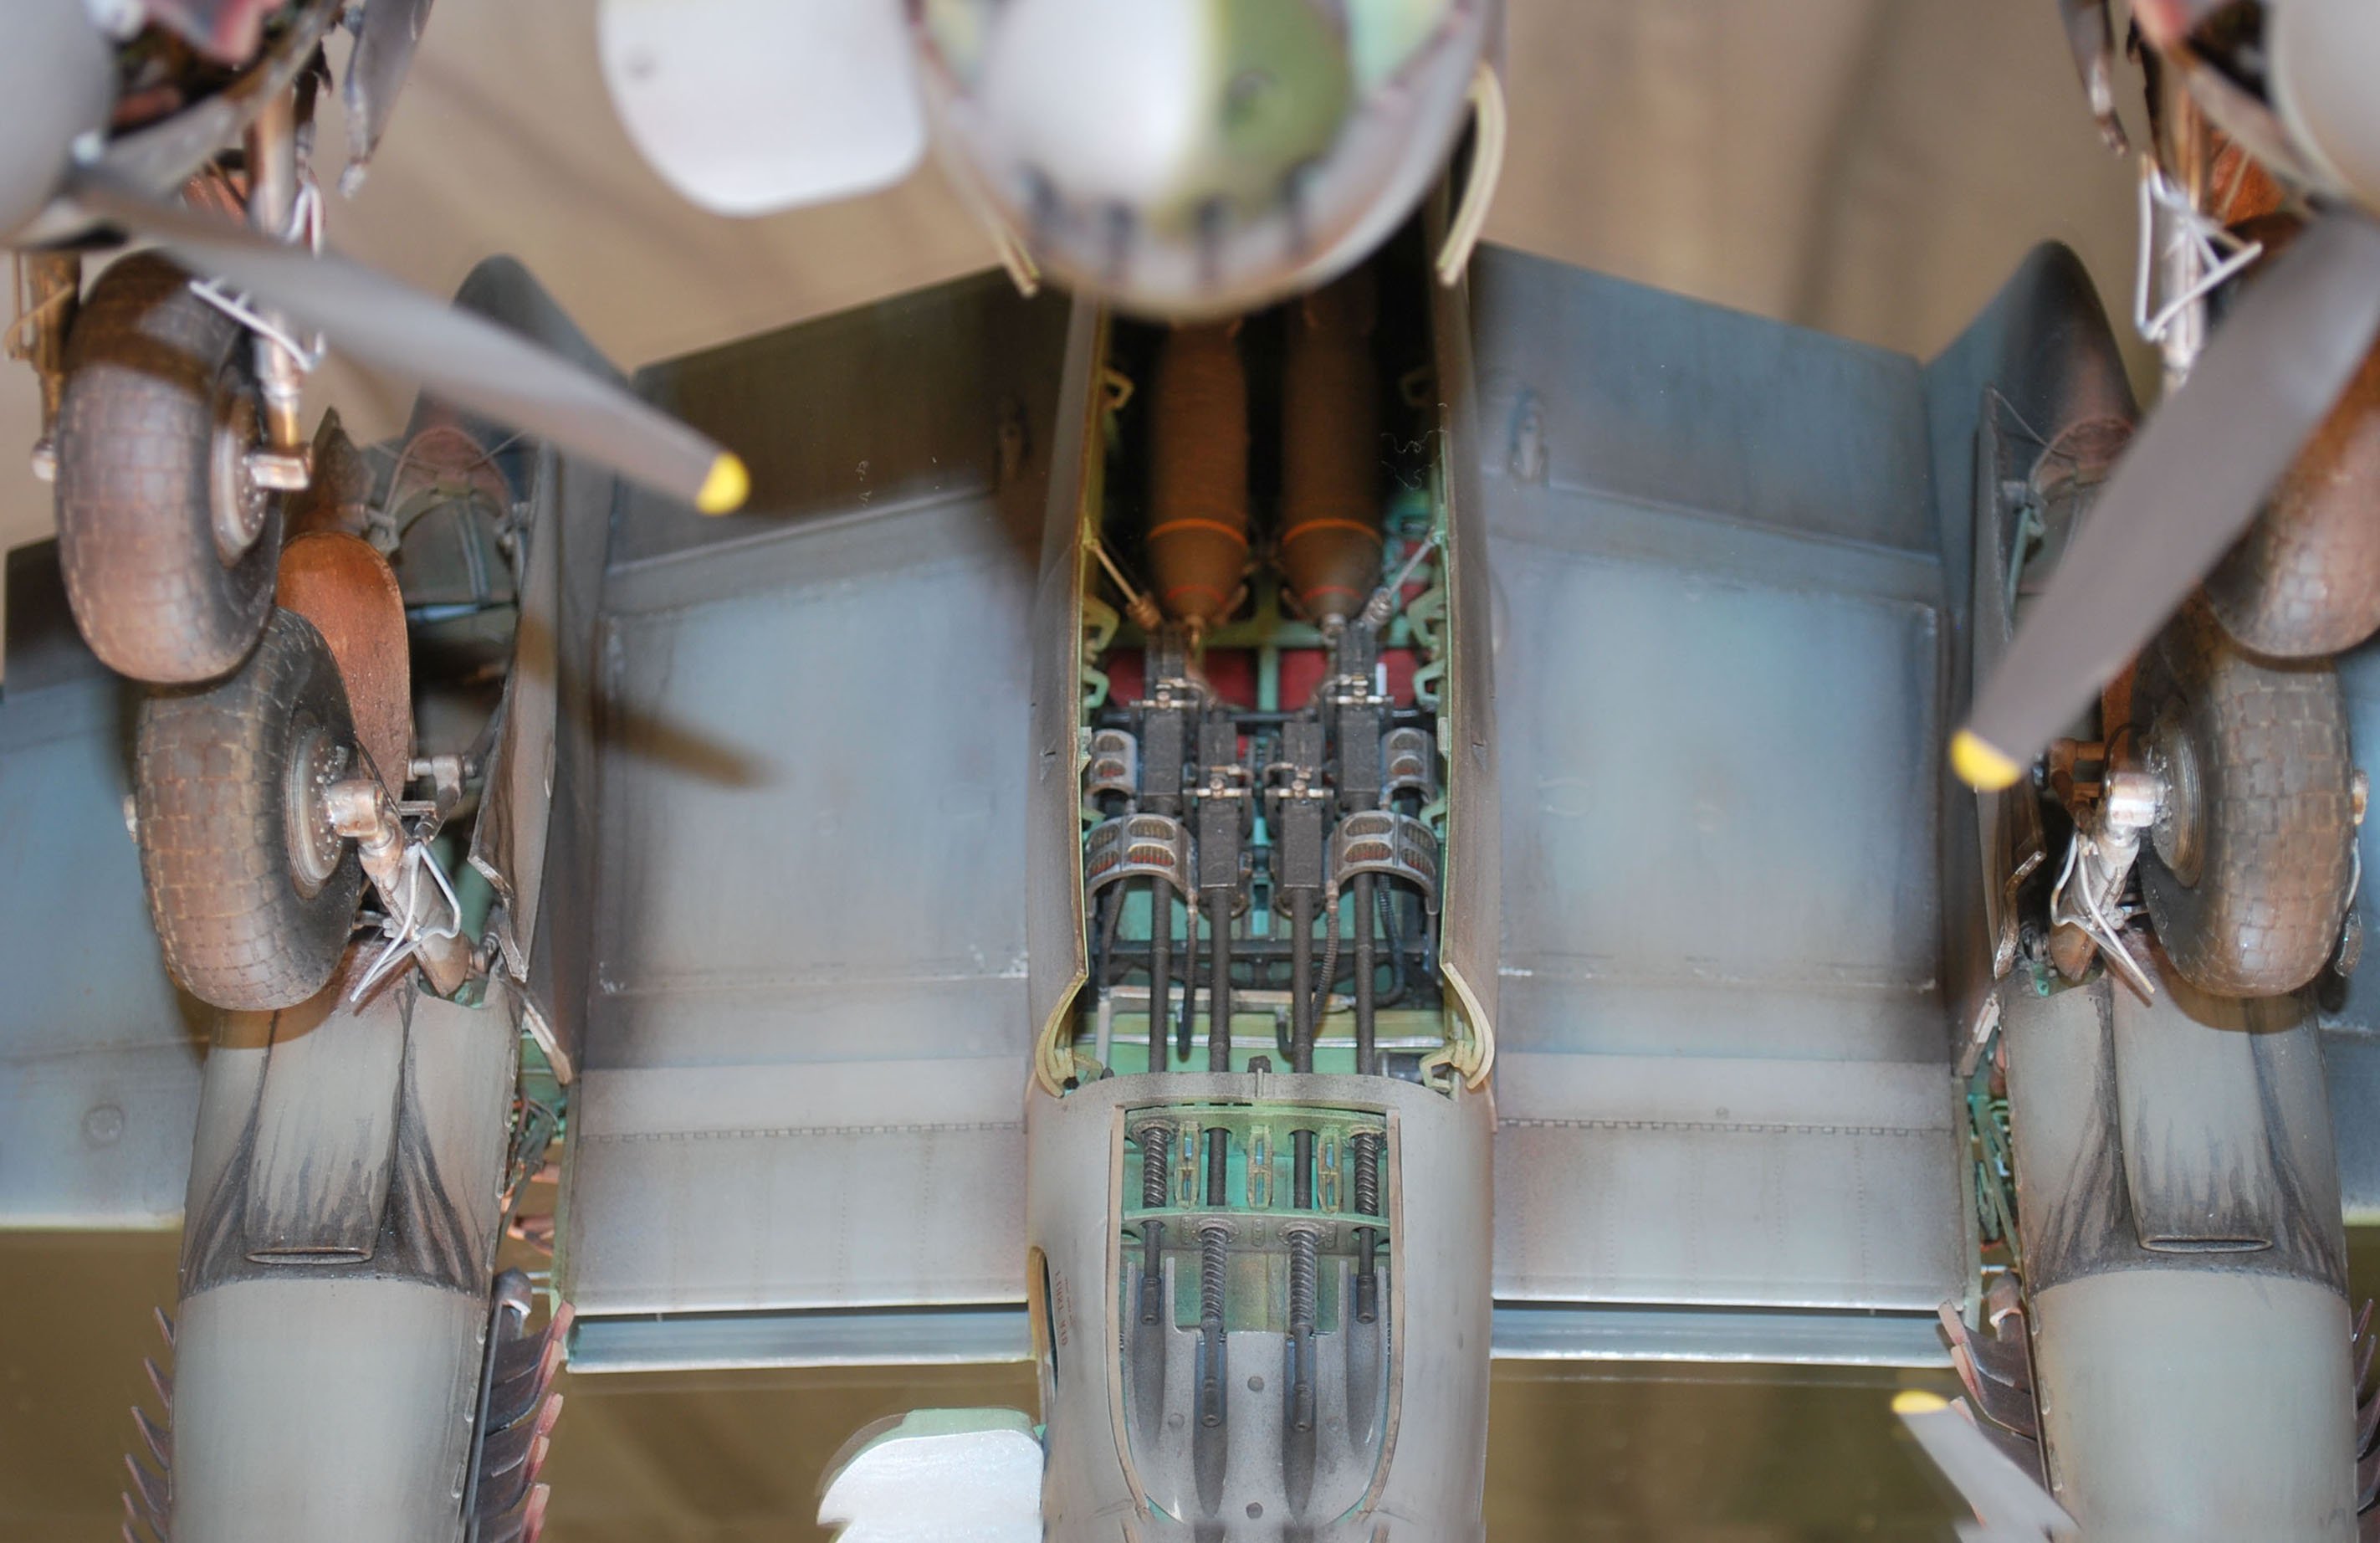
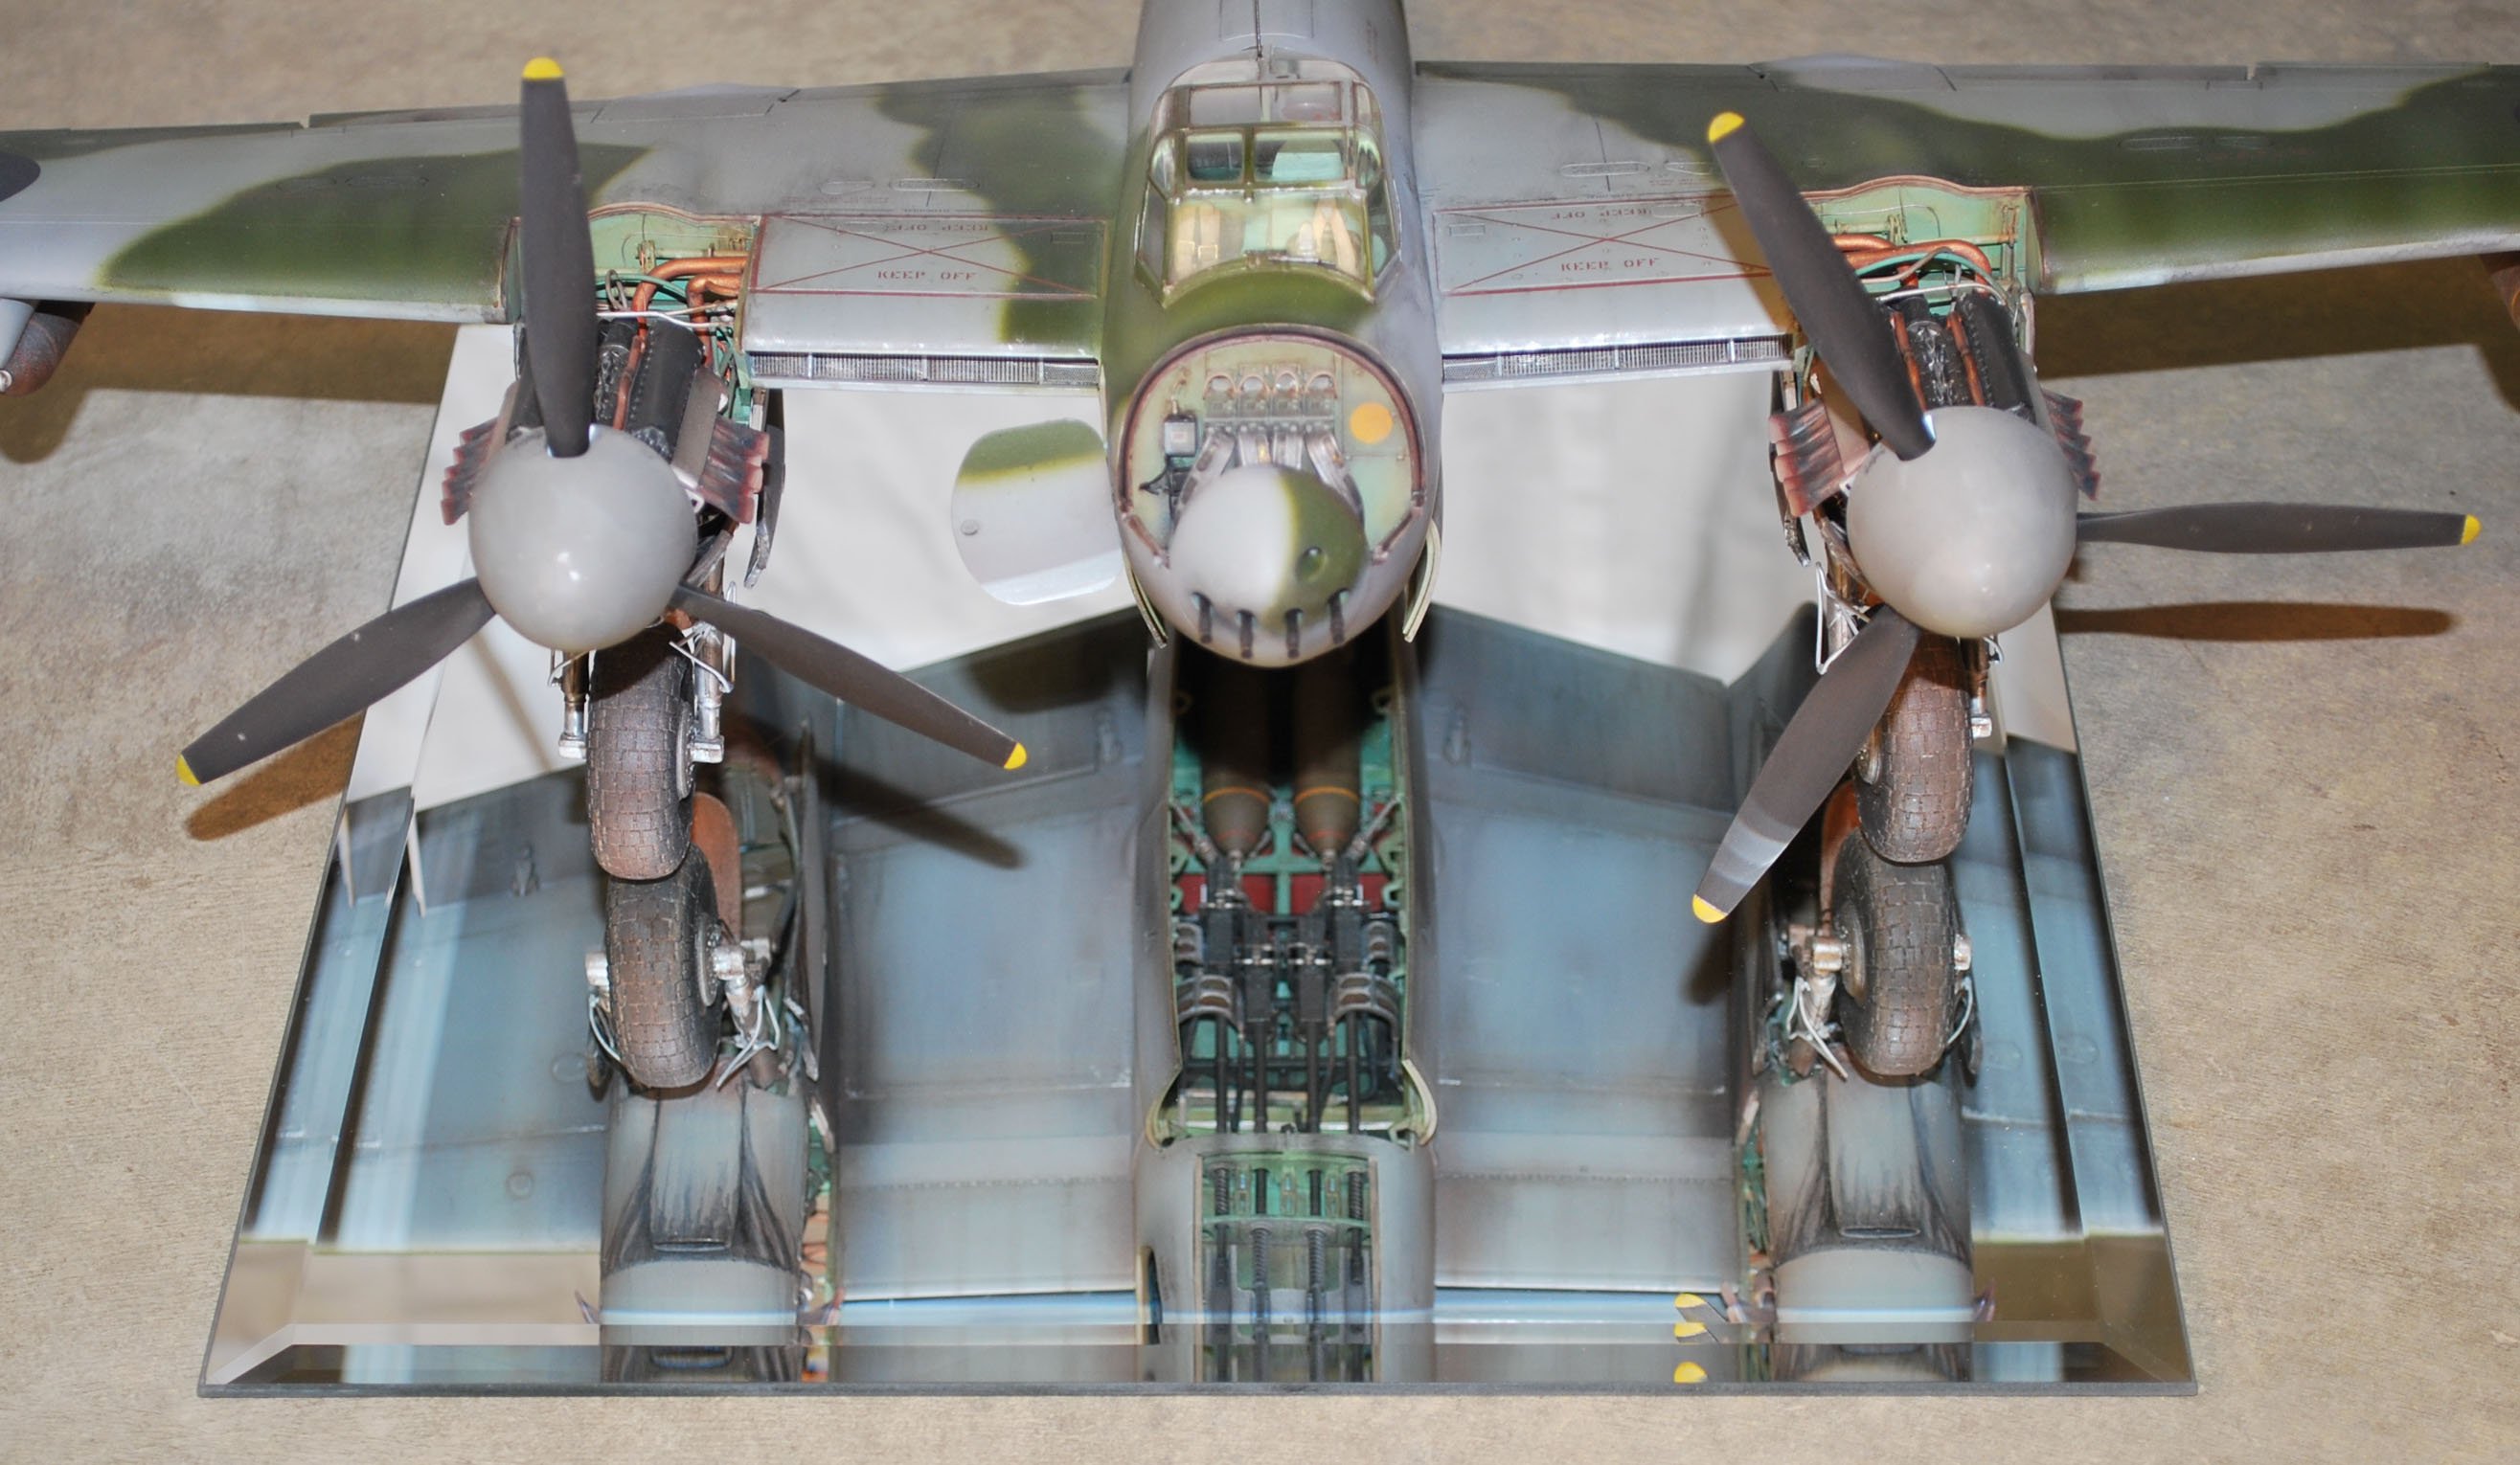
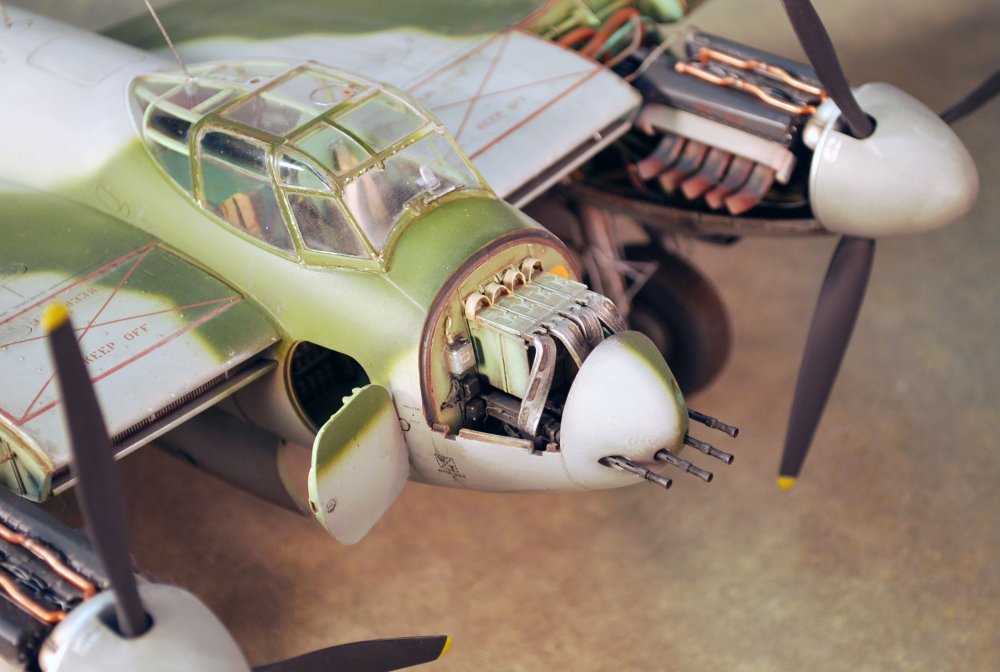
And here's how the guns came out with the disappointing ammo chutes. Basically the paint completely flaked off the rubber as I was installing them and I had to hand repaint them in situ. I could never get a clean and adequate effect in the "windows" so gave up and this isn't the best part of the model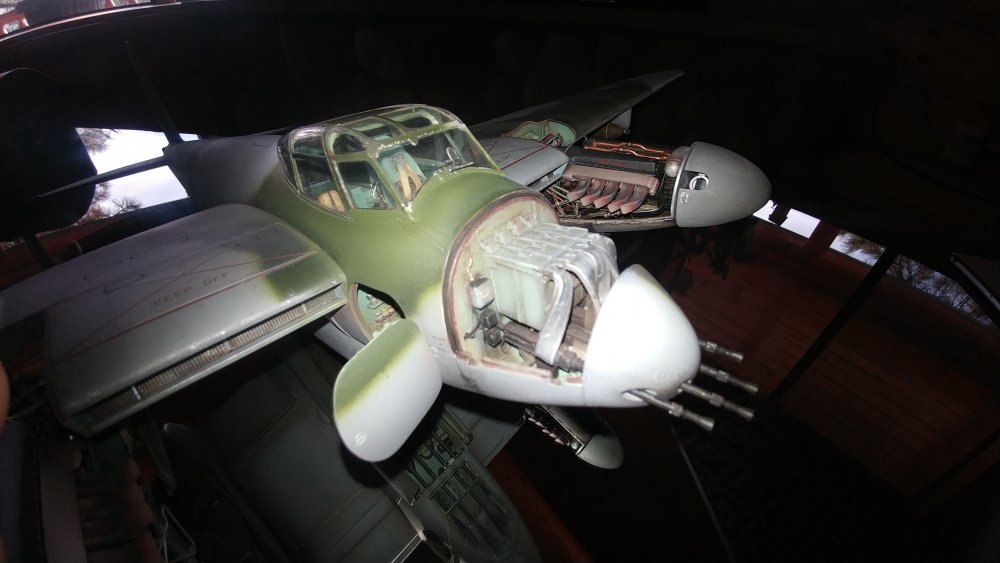
-
1/24 Airfix Scale Mosquito build
PeteF replied to PeteF's topic in LSM 1/35 and Larger Work In Progress
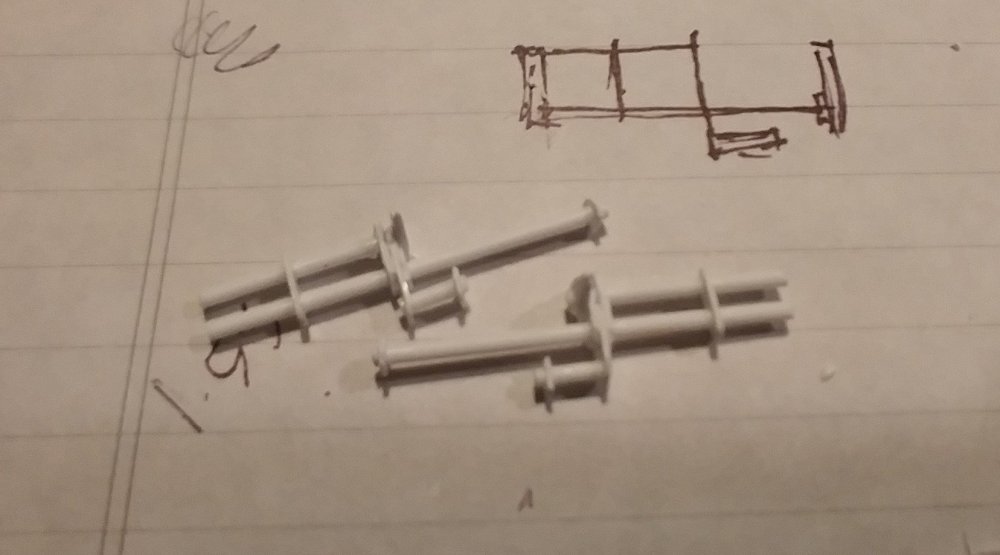
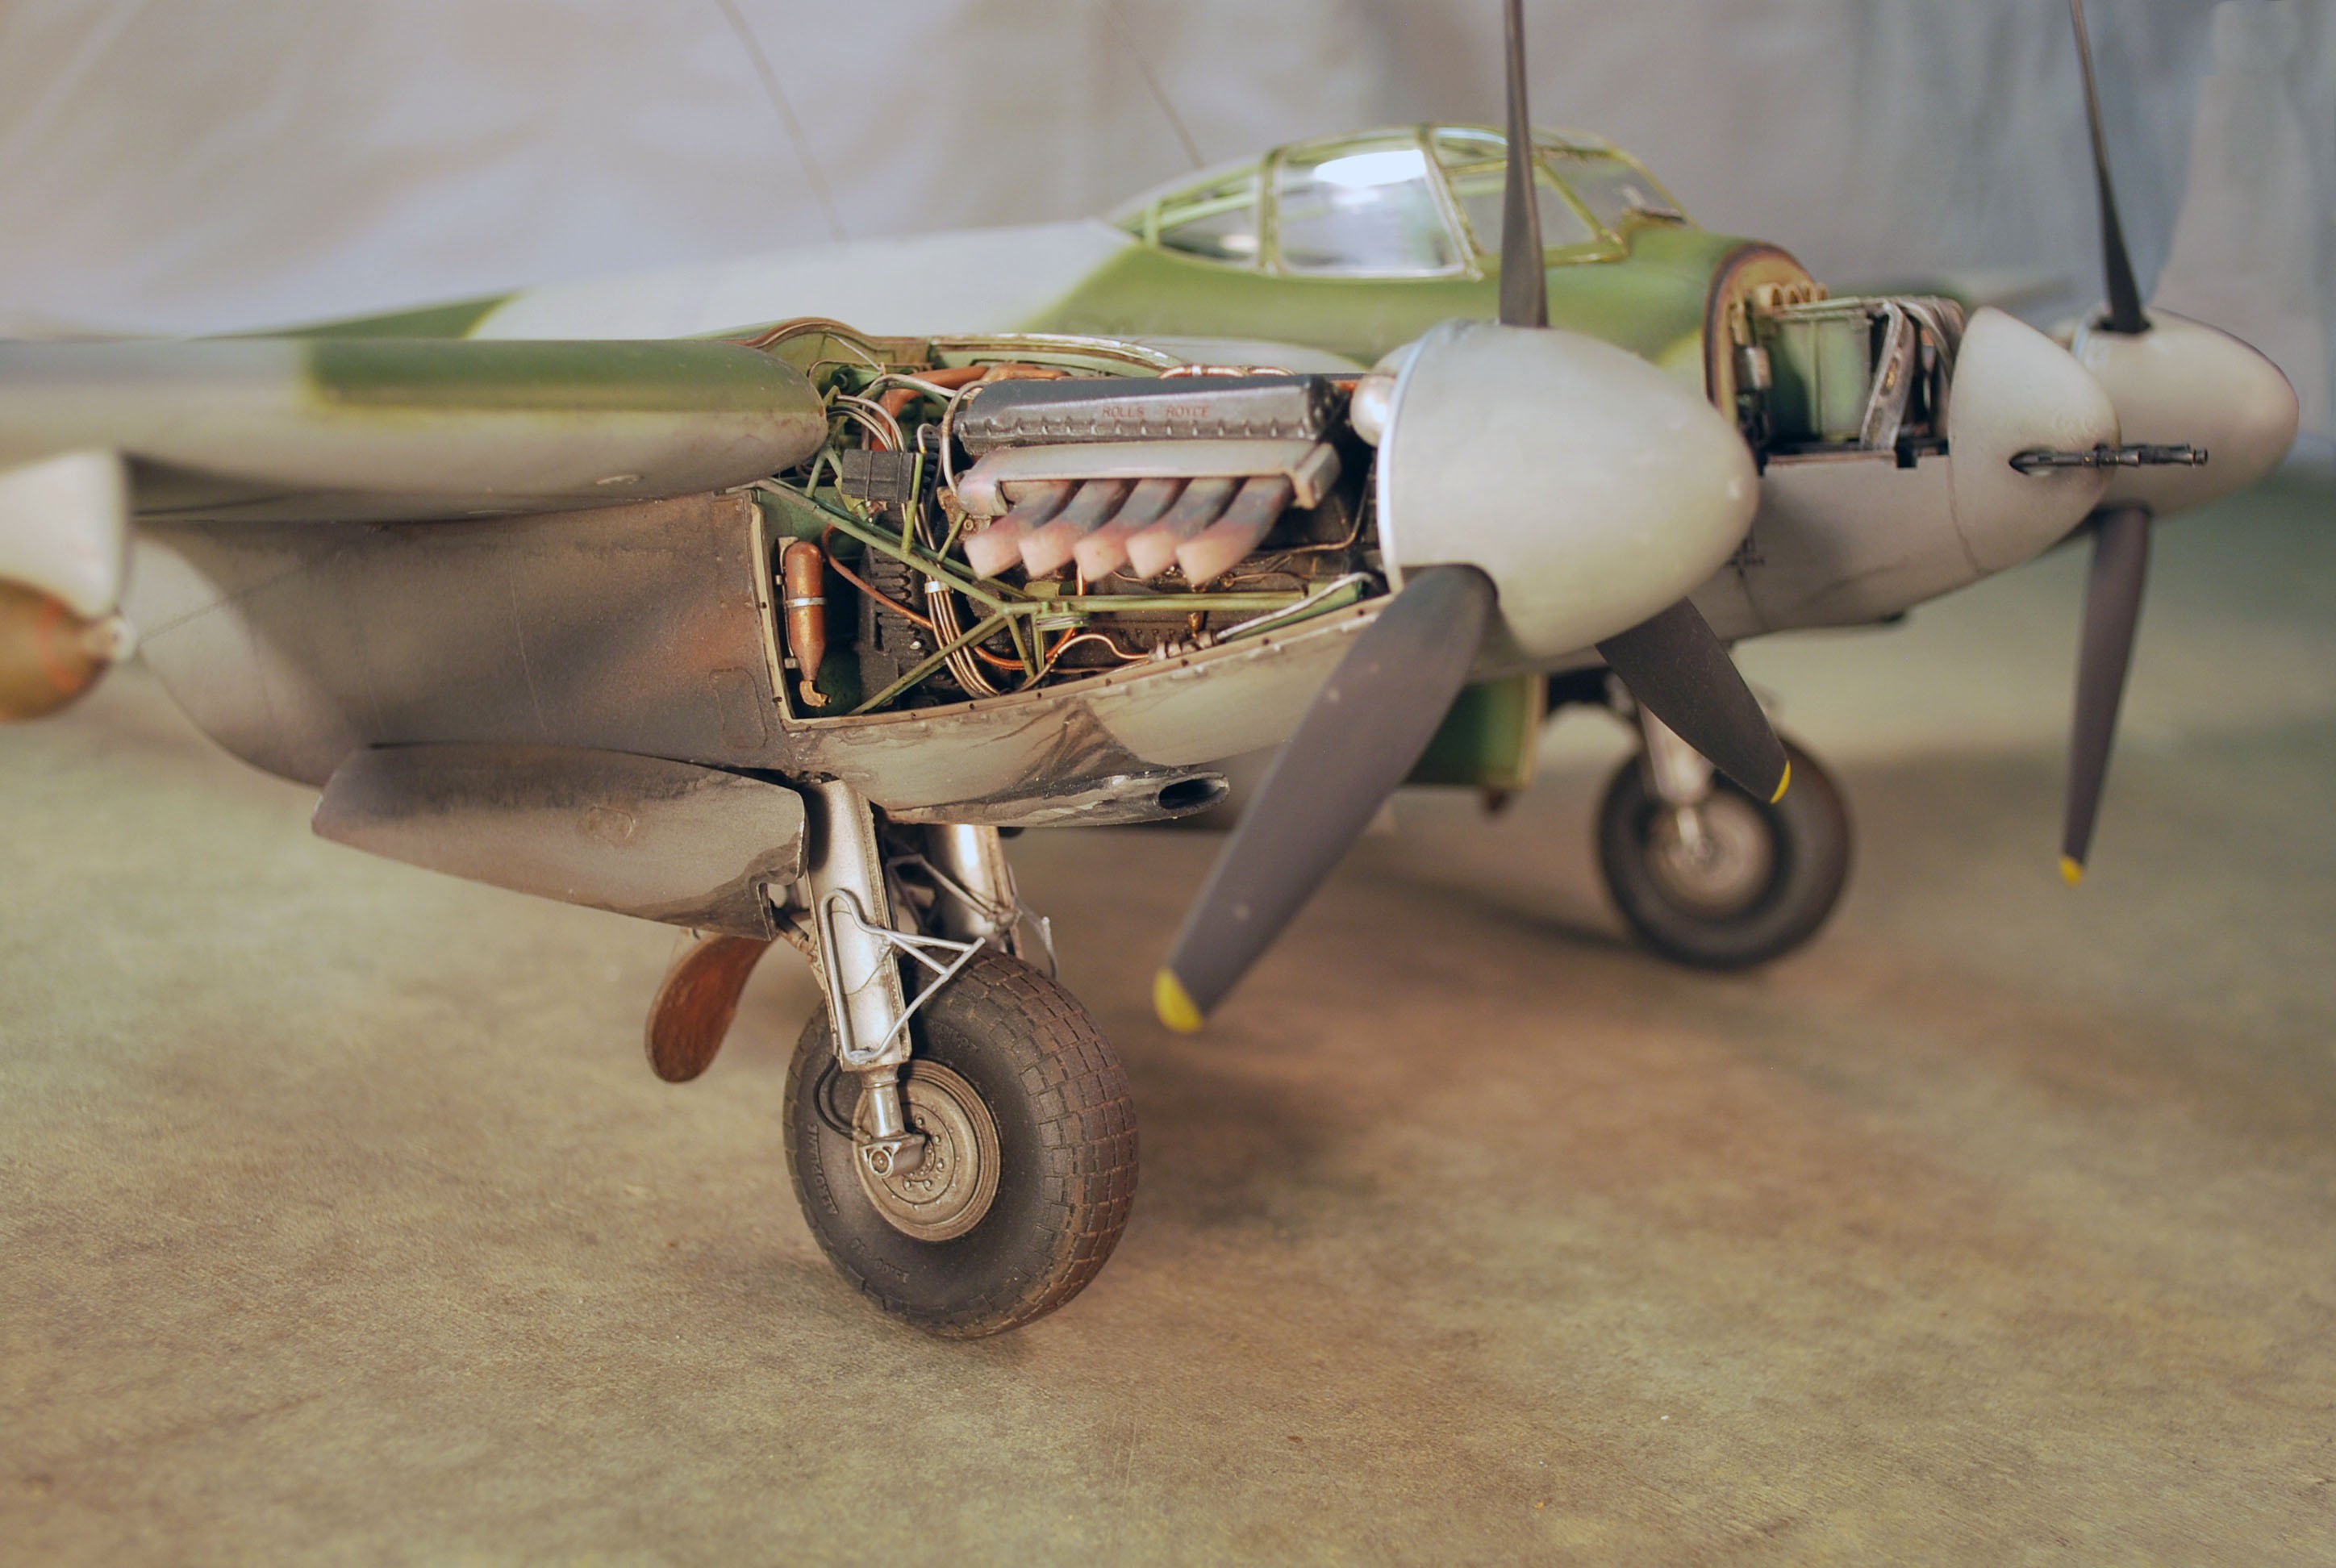
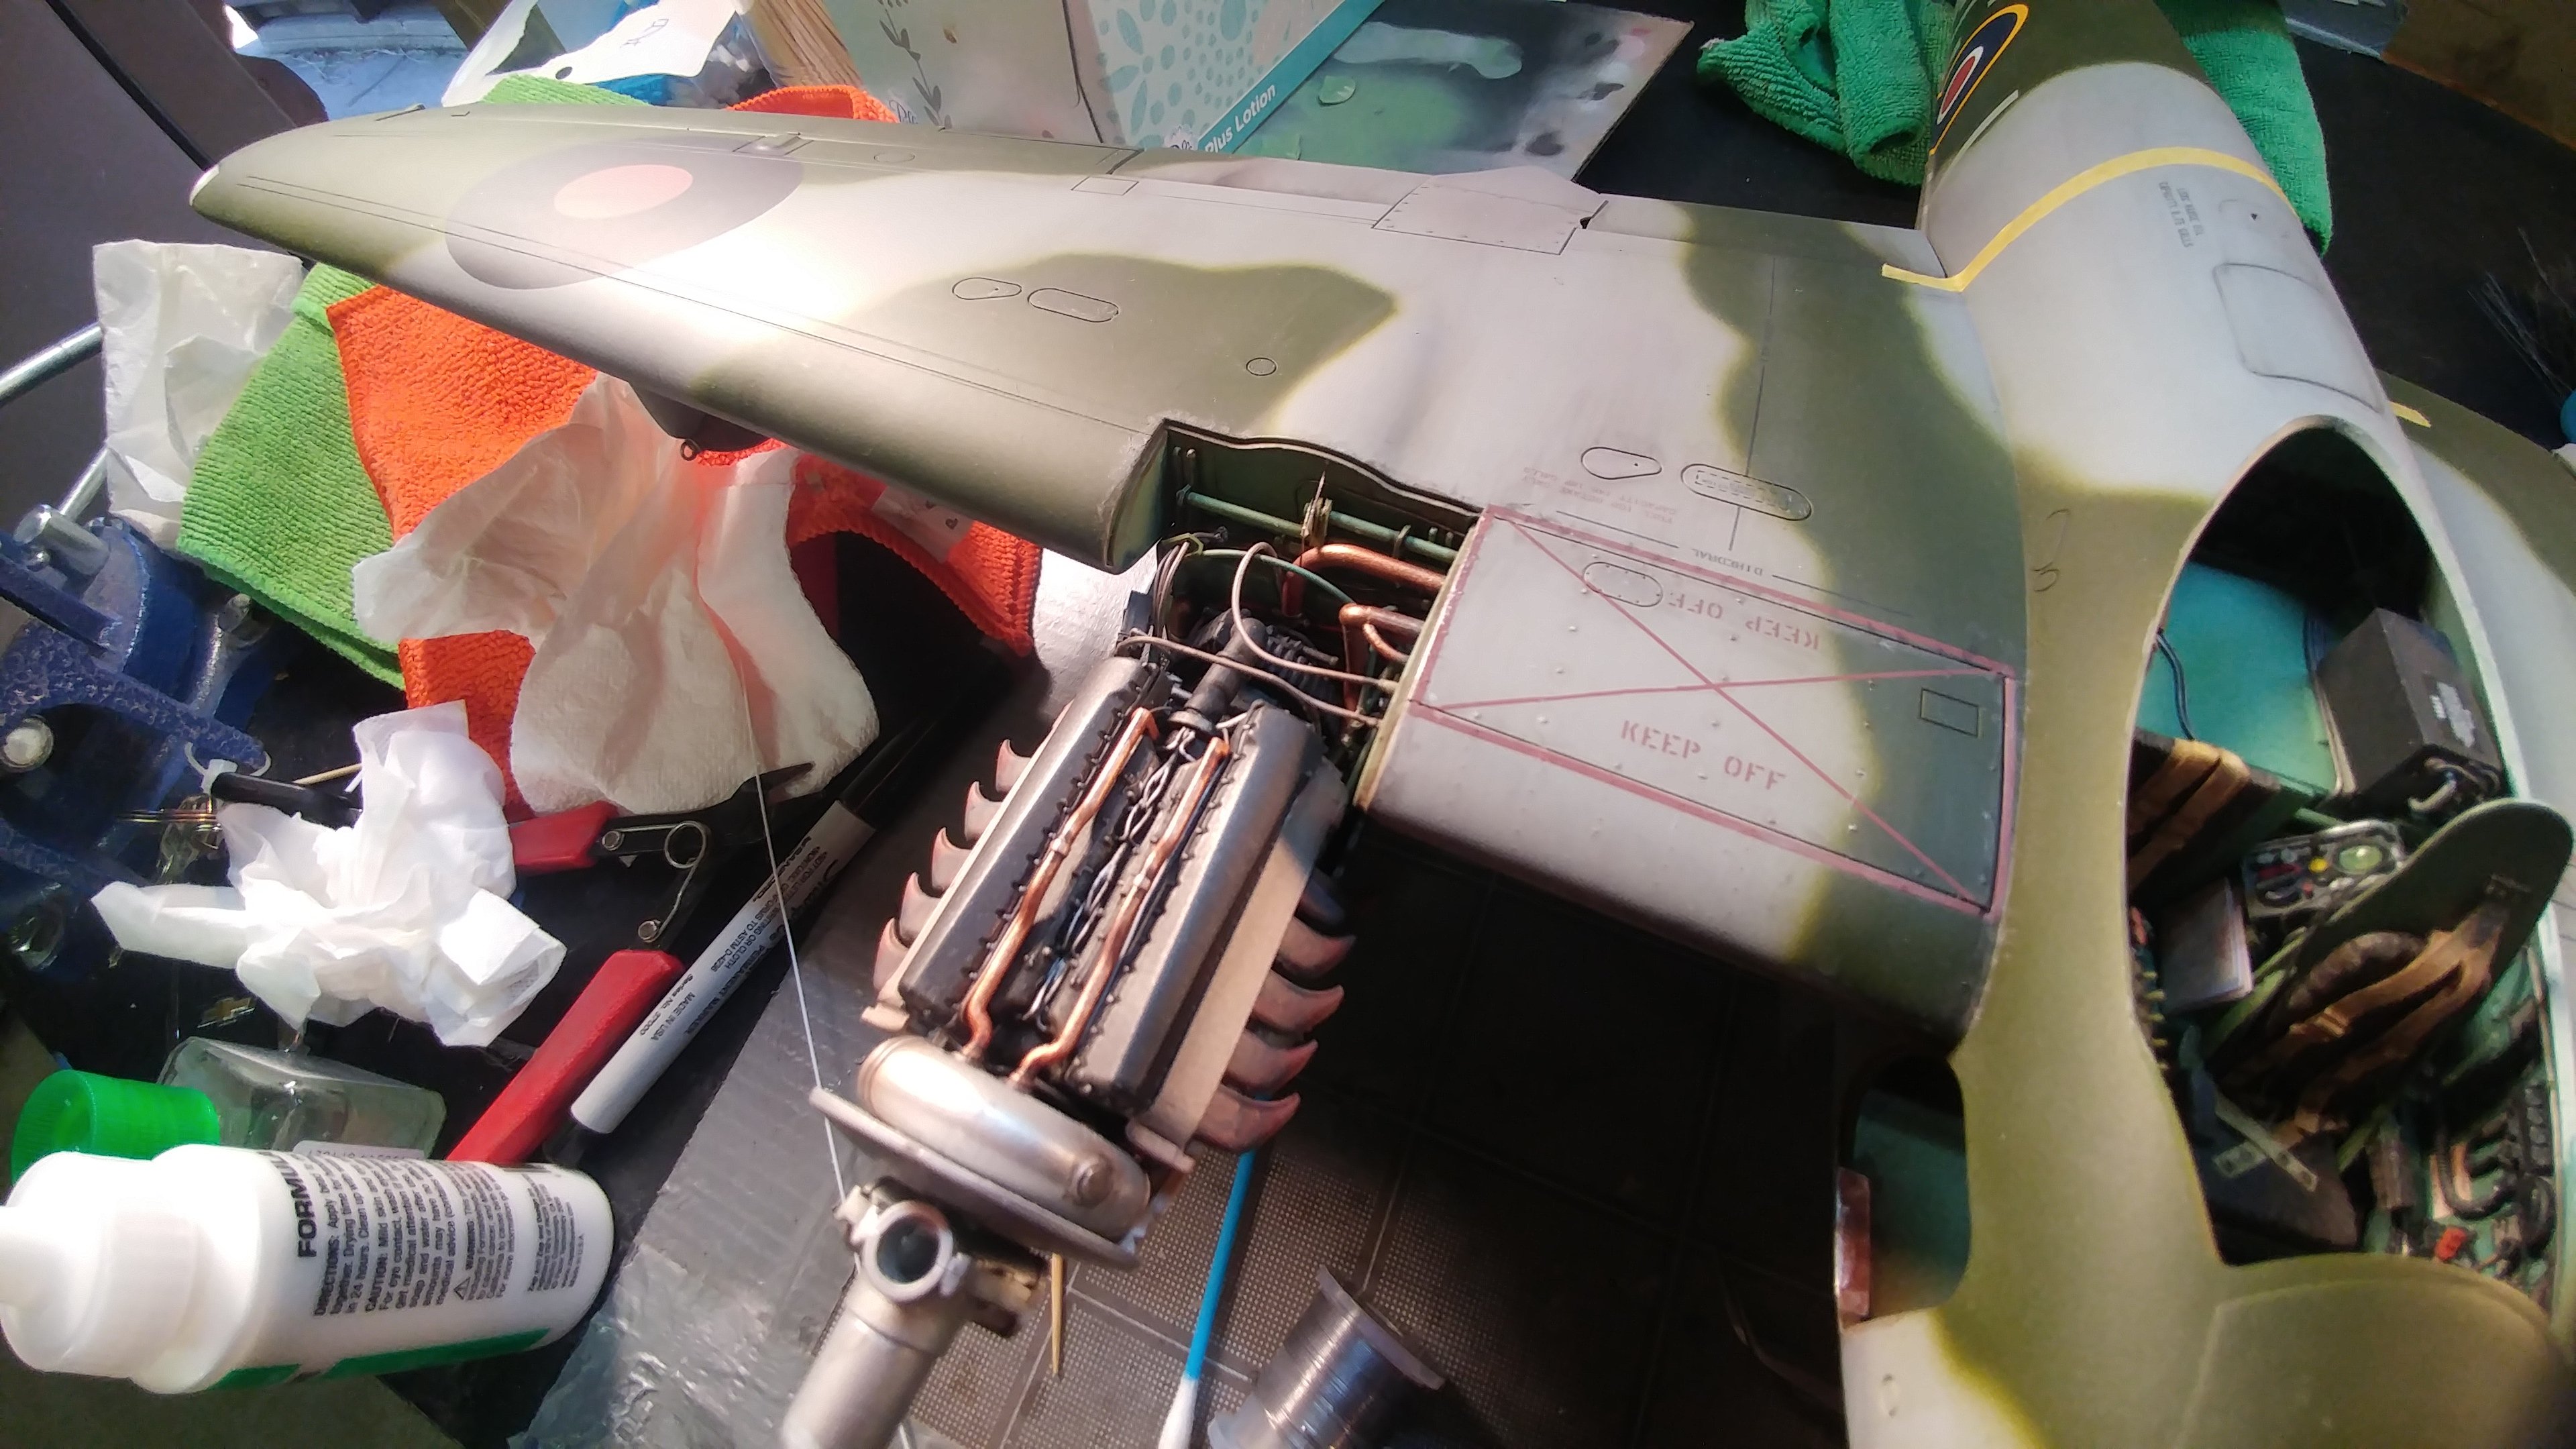
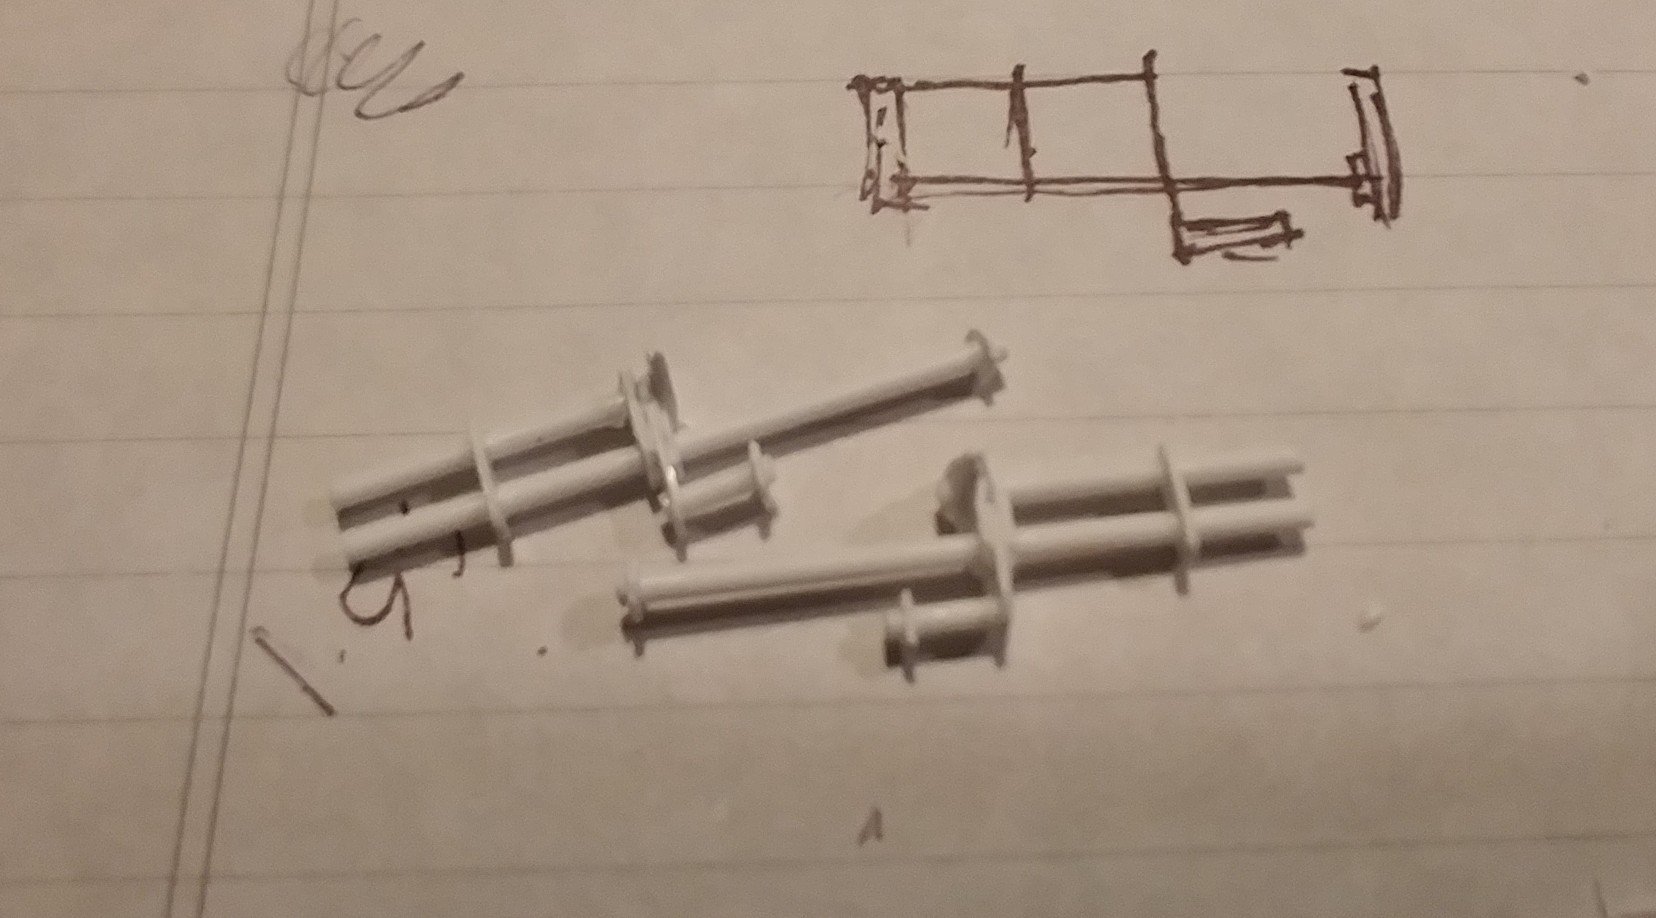
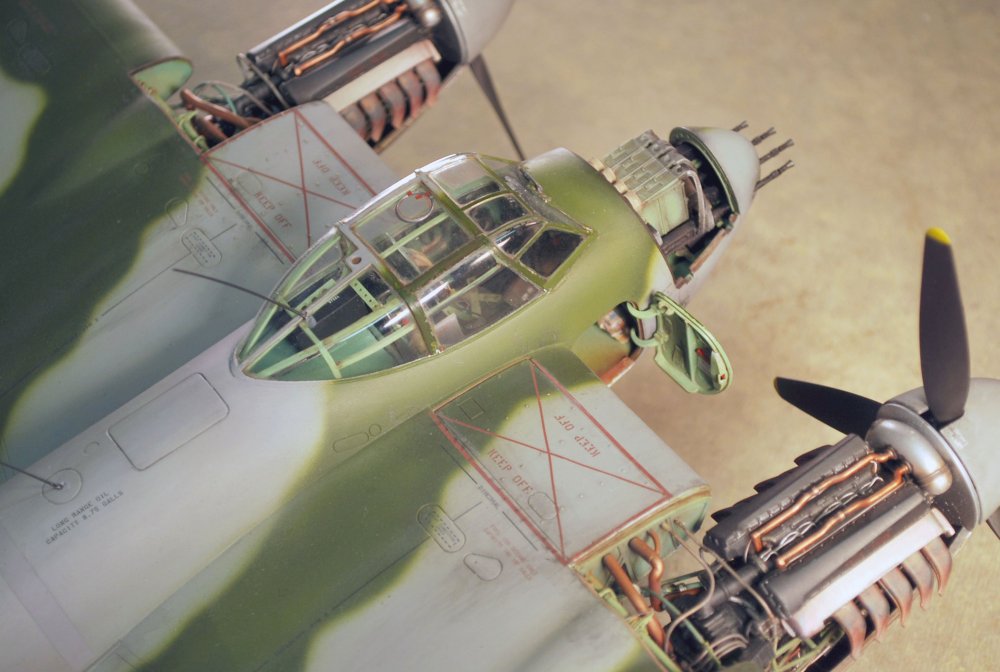
Here's a better shot of the throttle/mixture control rods. This is one of those "make or break" parts that should have been in the kit. I found some good references from the web of these. I've seen other scratch built versions on Airfix Mosquitos but they weren't very scale.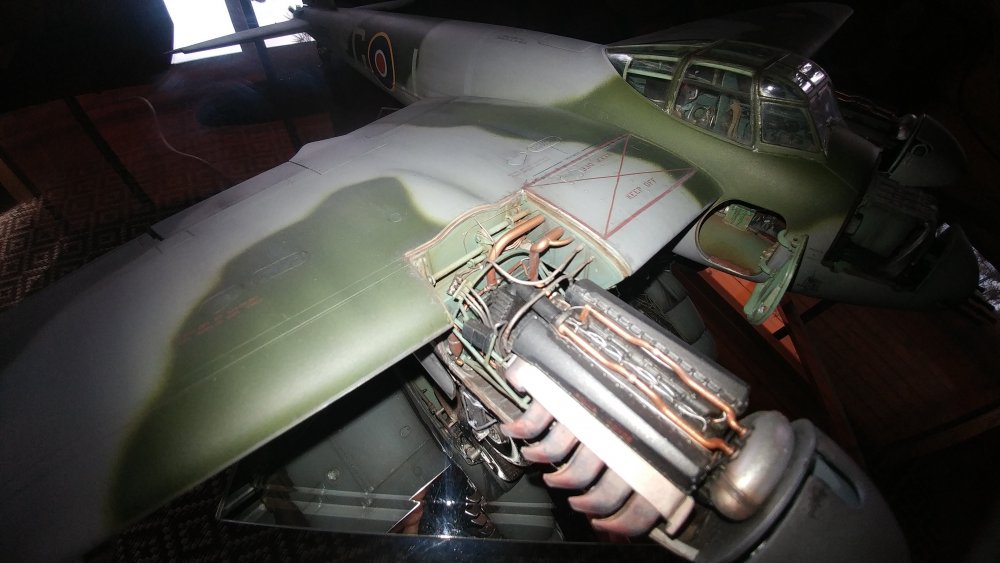
-
1/24 Airfix Scale Mosquito build
PeteF replied to PeteF's topic in LSM 1/35 and Larger Work In Progress
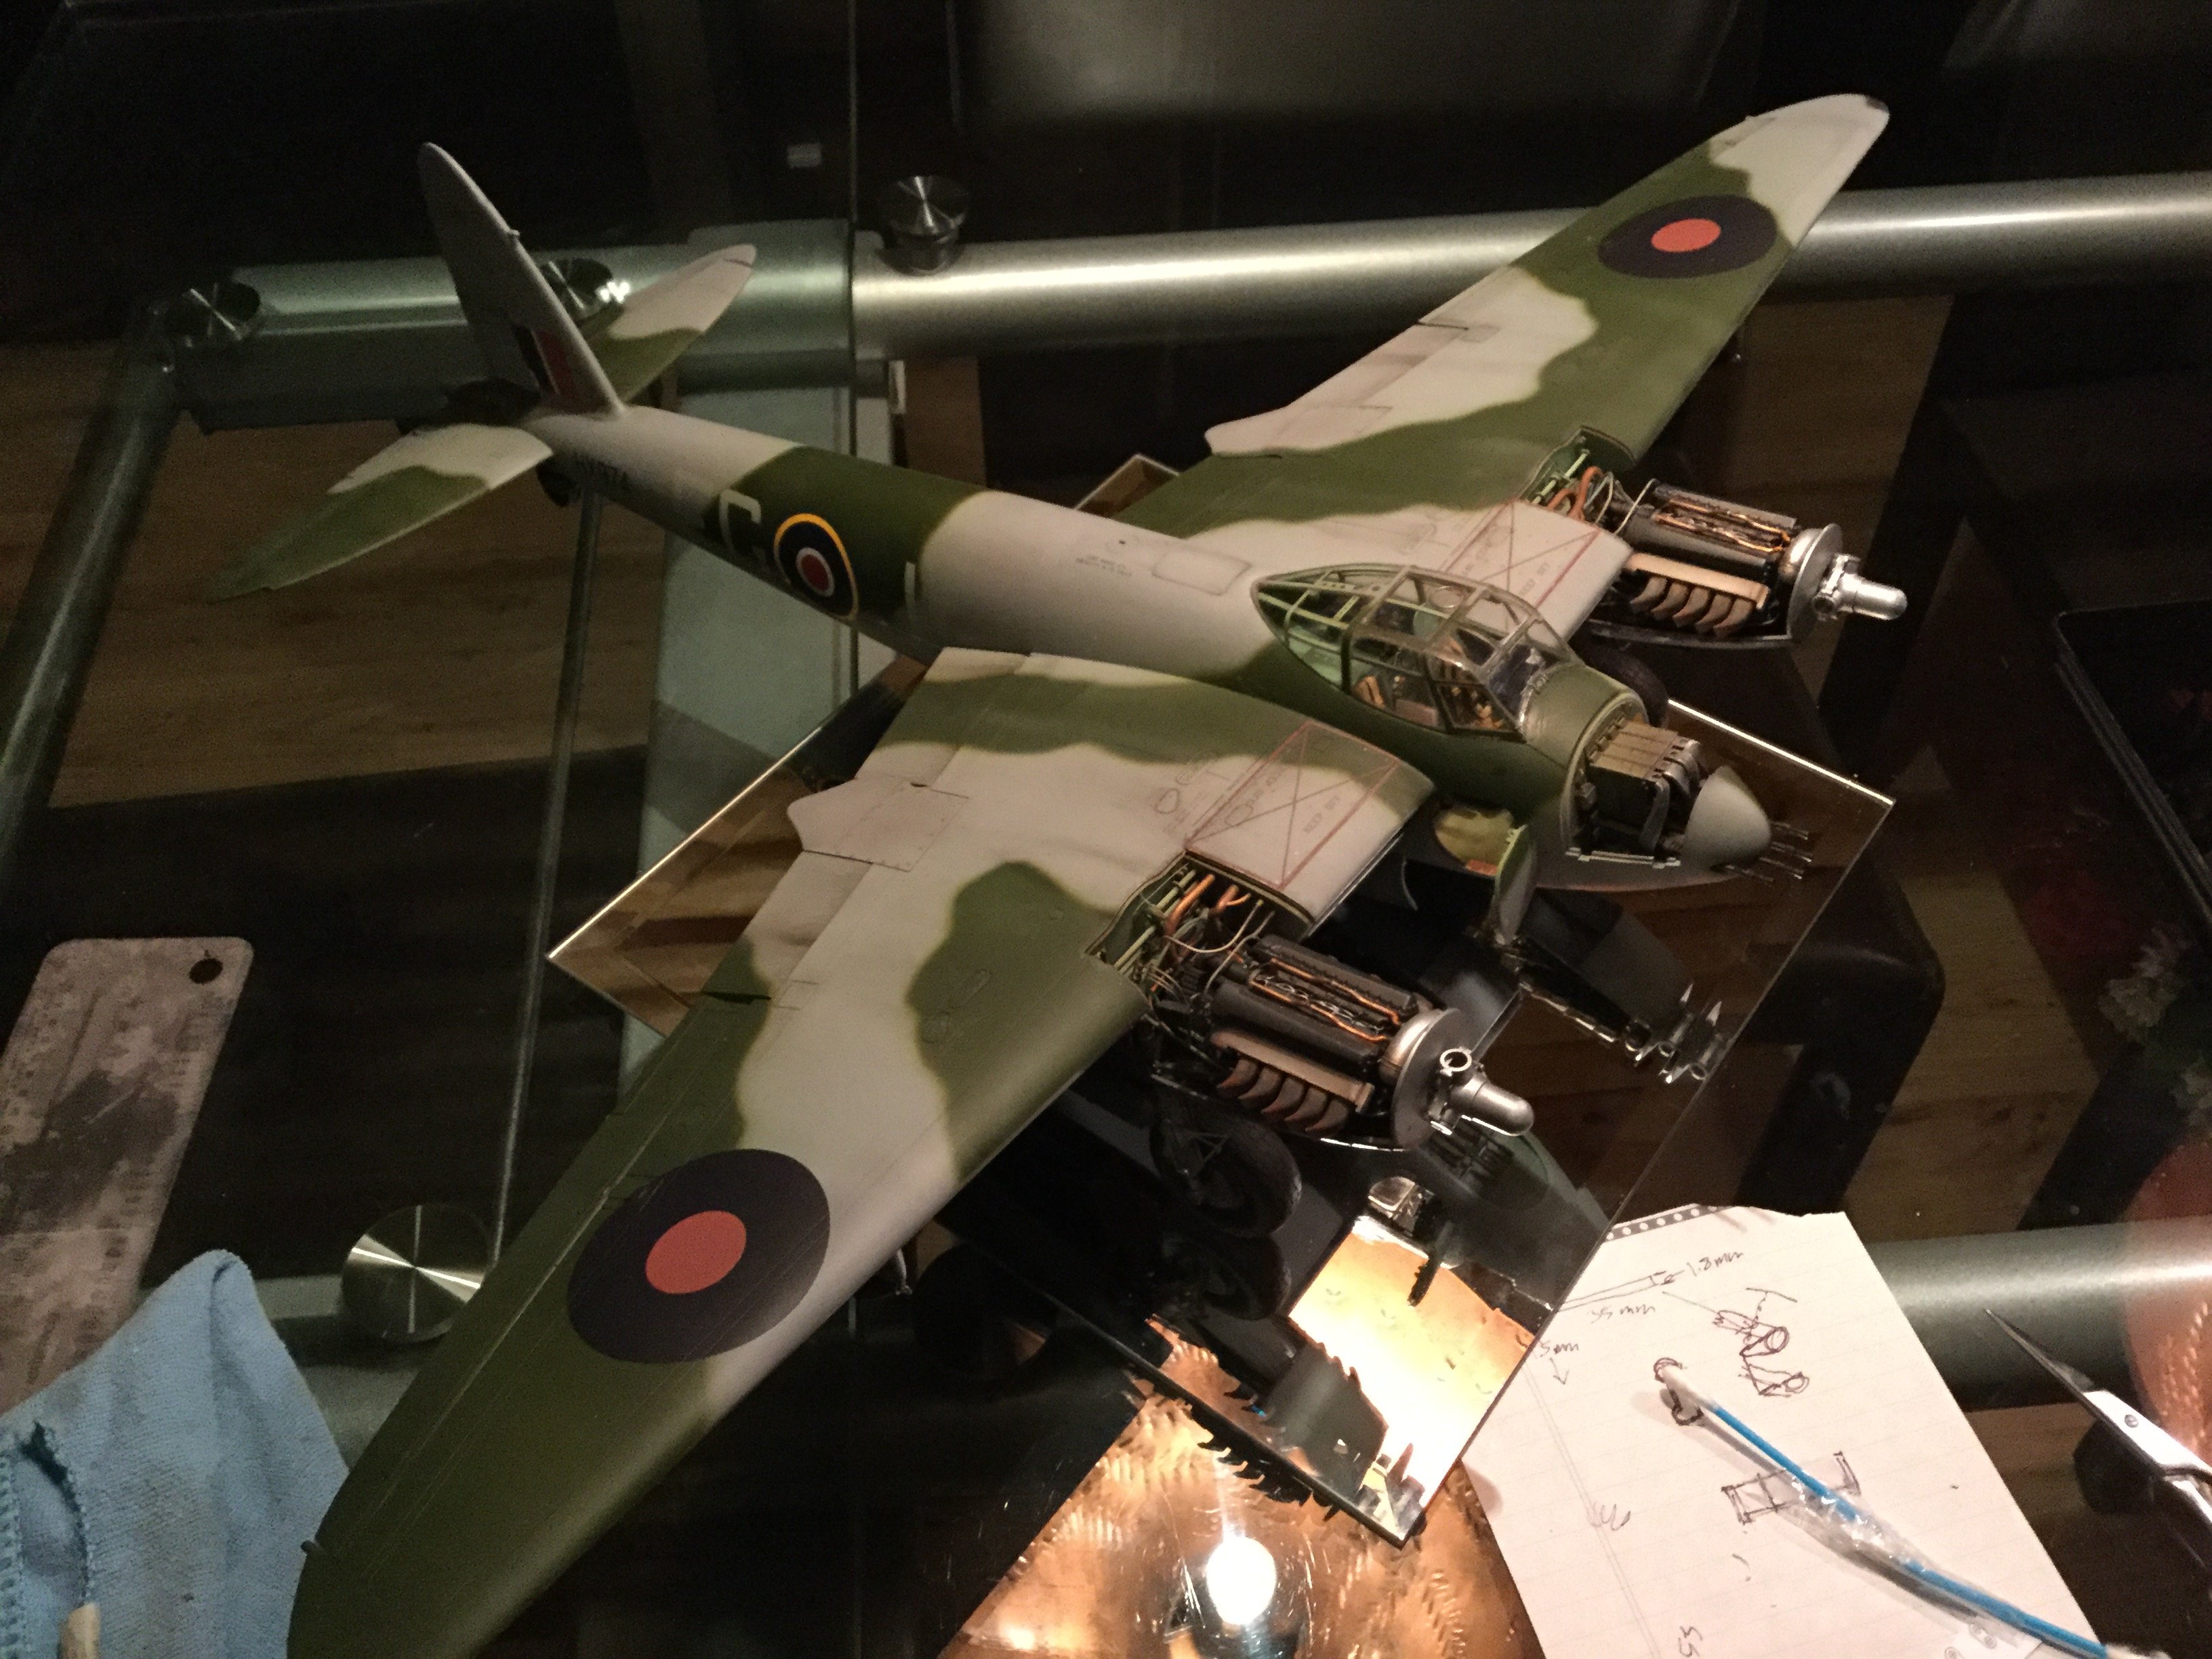
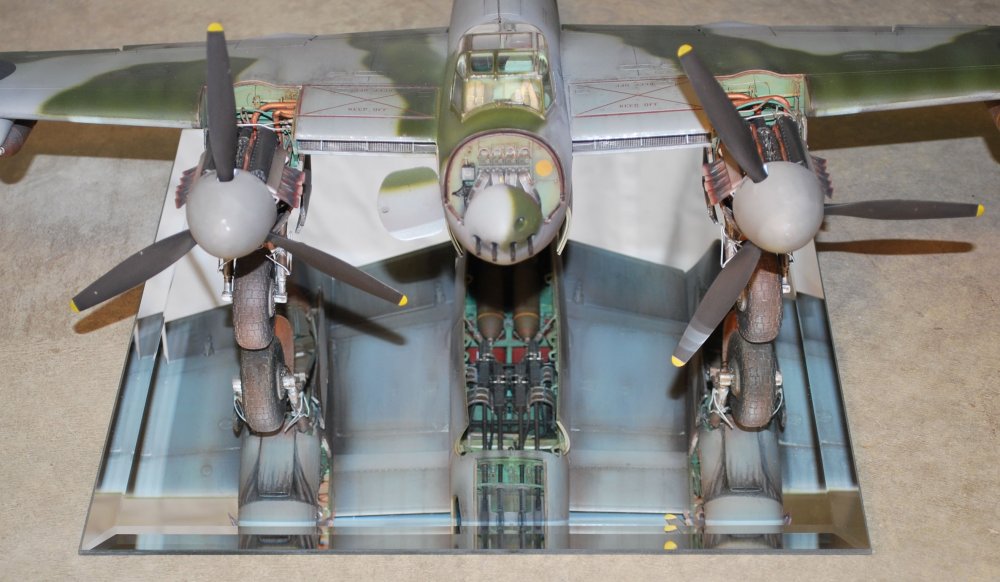
Got a display mirror. Bunch of detail stuff done including the spinners (yay, the windshield wiper is on!). Getting close...which is good because there's an IPMS contest next Saturday.

-
1/24 Airfix Scale Mosquito build
PeteF replied to PeteF's topic in LSM 1/35 and Larger Work In Progress
It’s assembled! Not finished but assembled. The rubber ammo chutes in the front really let it down. Poor detail, paint doesn’t stick and I couldn’t get a decent effect in the shallow dents where you can see nto the chutes. Kind of gave up on them. Now just detailing and filling and touching up the canopy seam. And the props and spinners.
-
1/24 Airfix Scale Mosquito build
PeteF replied to PeteF's topic in LSM 1/35 and Larger Work In Progress
Installed:
-
1/24 Airfix Scale Mosquito build
PeteF replied to PeteF's topic in LSM 1/35 and Larger Work In Progress
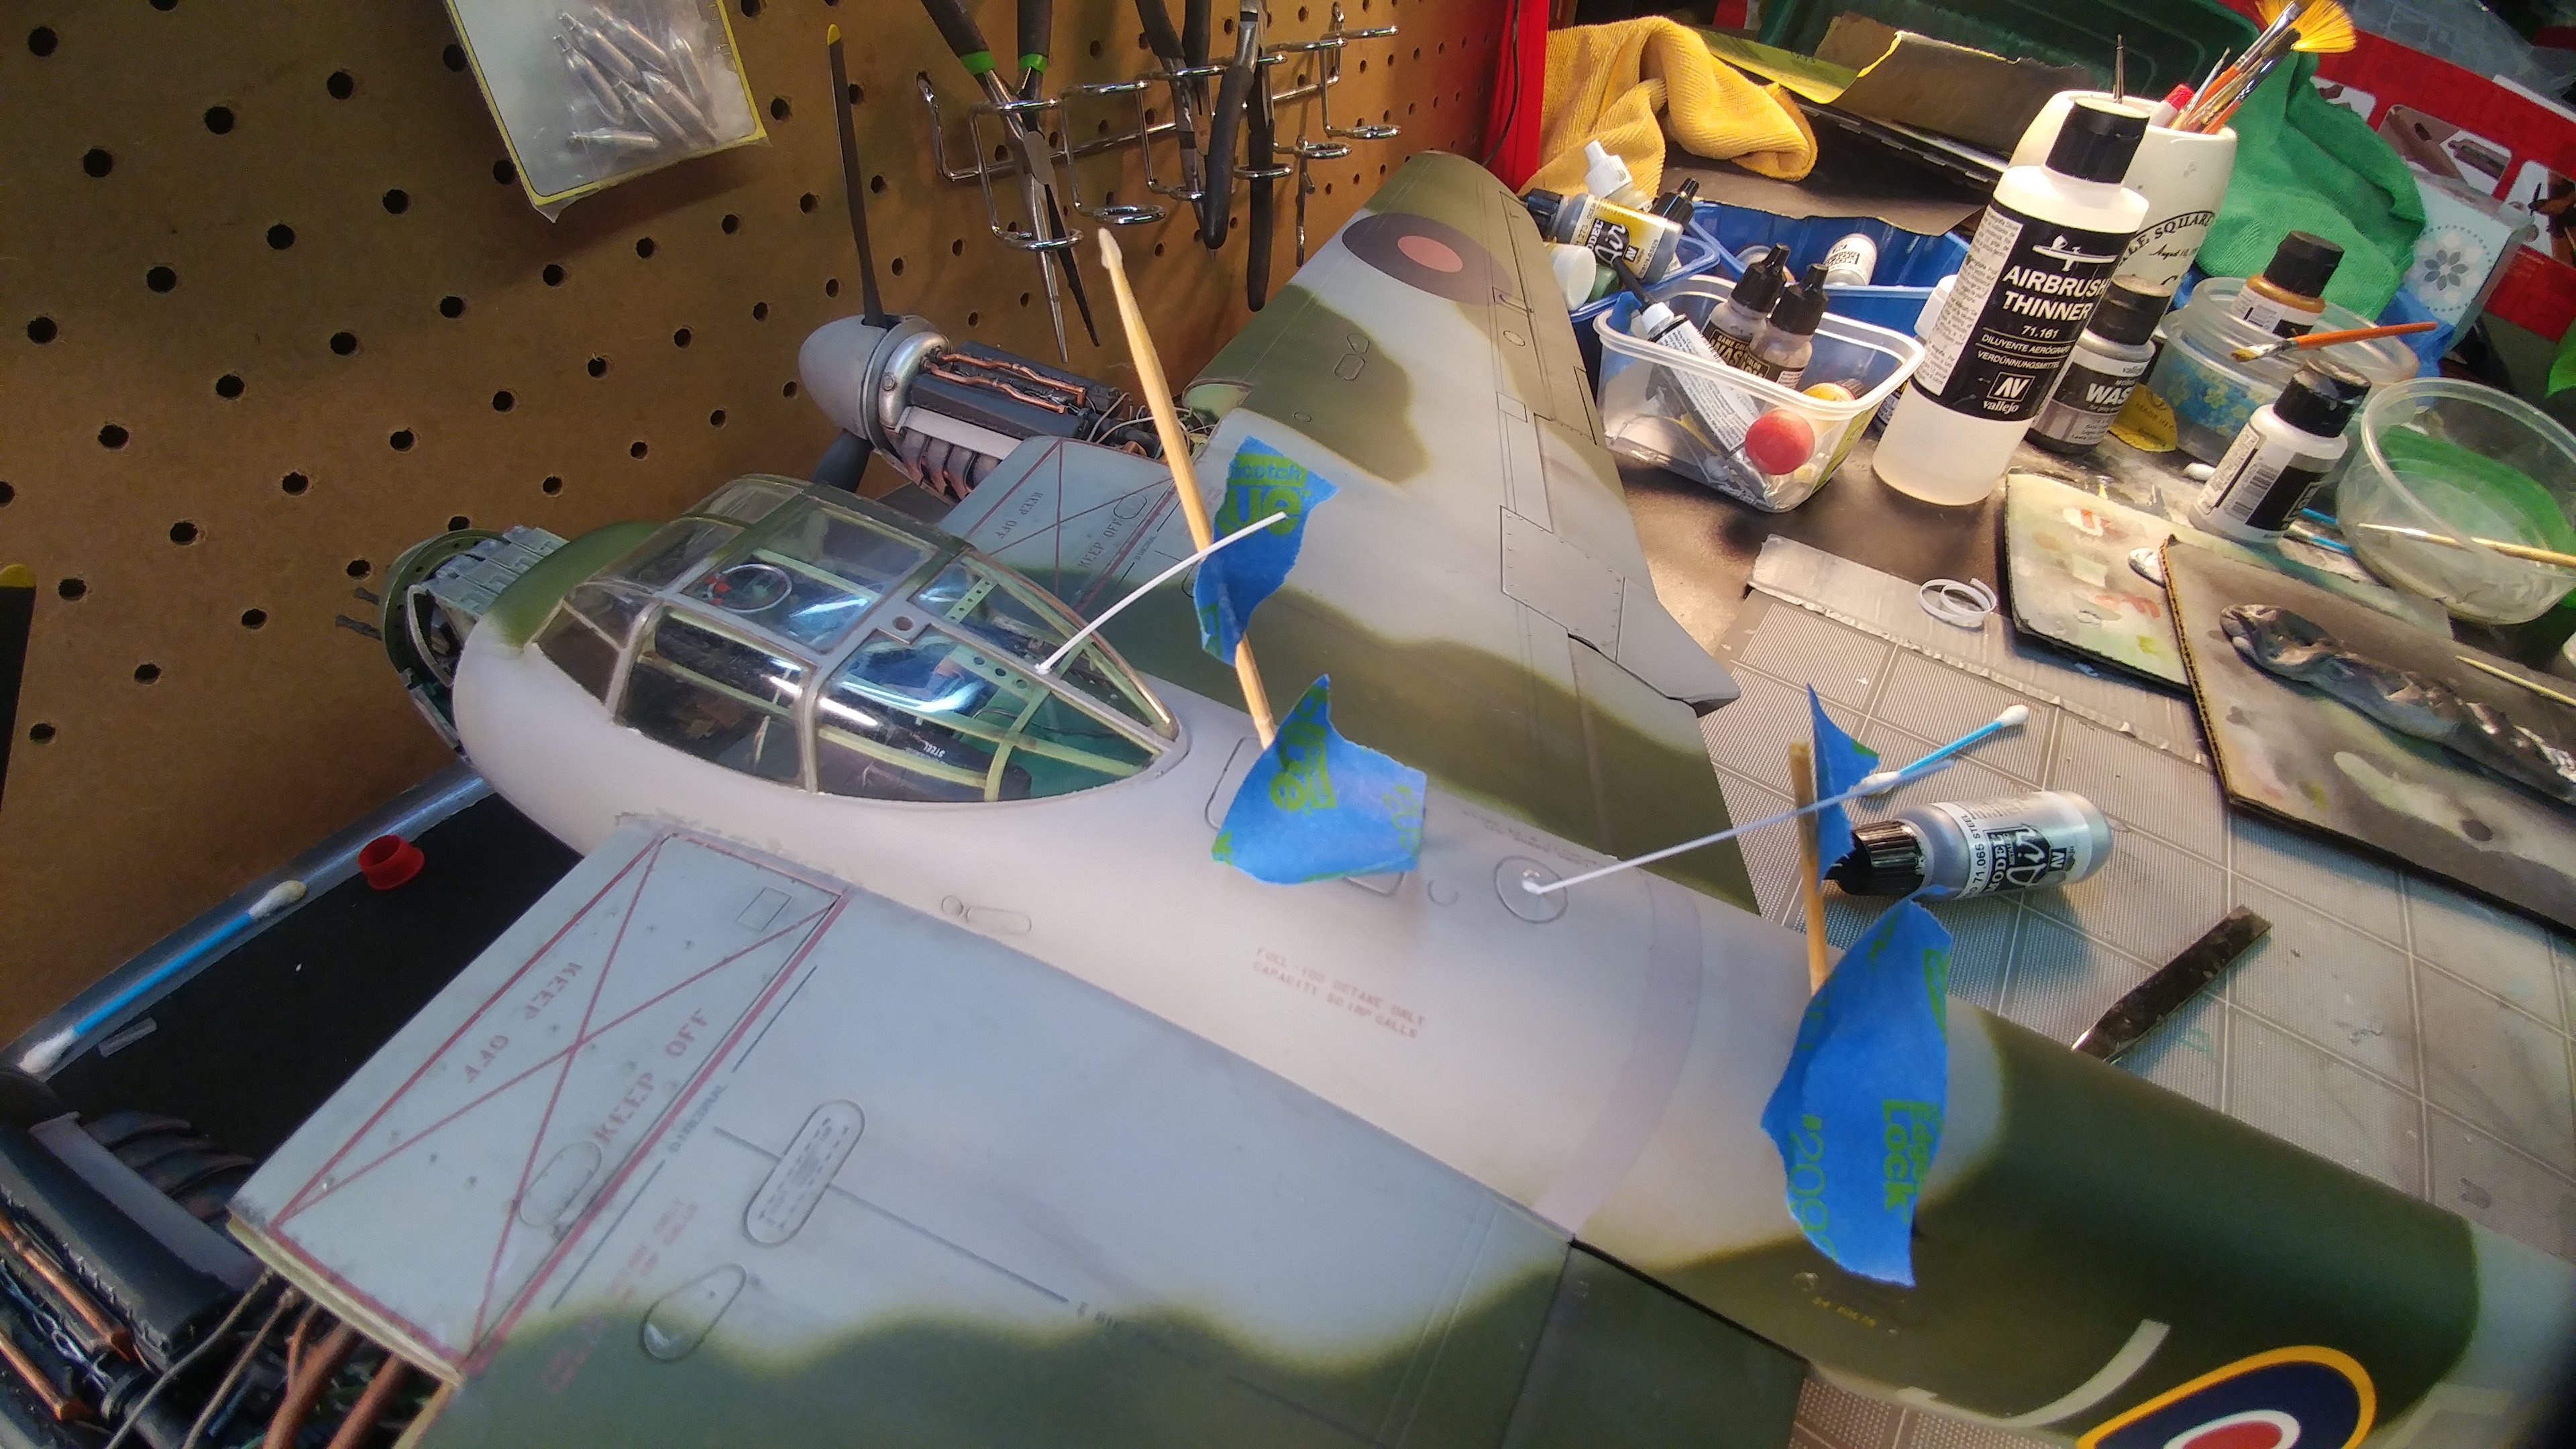
The big open space on the firewall on the bottom pic should have the throttle and mixture control rods which are totally missing in this kit. Finally scratch built them. Paint and install tomorrow. Hope to have all the final assembly done tomorrow so I can start concentrating on final detailing.