PeteF
-
Posts
233 -
Joined
-
Last visited
Content Type
Profiles
Forums
Events
Gallery
Everything posted by PeteF
-

1/24 Airfix Scale Mosquito build
PeteF replied to PeteF's topic in LSM 1/35 and Larger Work In Progress
The fact the axles and eyelets and pivots for the main legs are metal means they’re infinitely stronger than the plastic parts. People told me the plastic will fail within days or weeks of the model sitting with all its weight on those points if you use the plastic gear. -
1/24 Airfix Scale Mosquito build
PeteF replied to PeteF's topic in LSM 1/35 and Larger Work In Progress
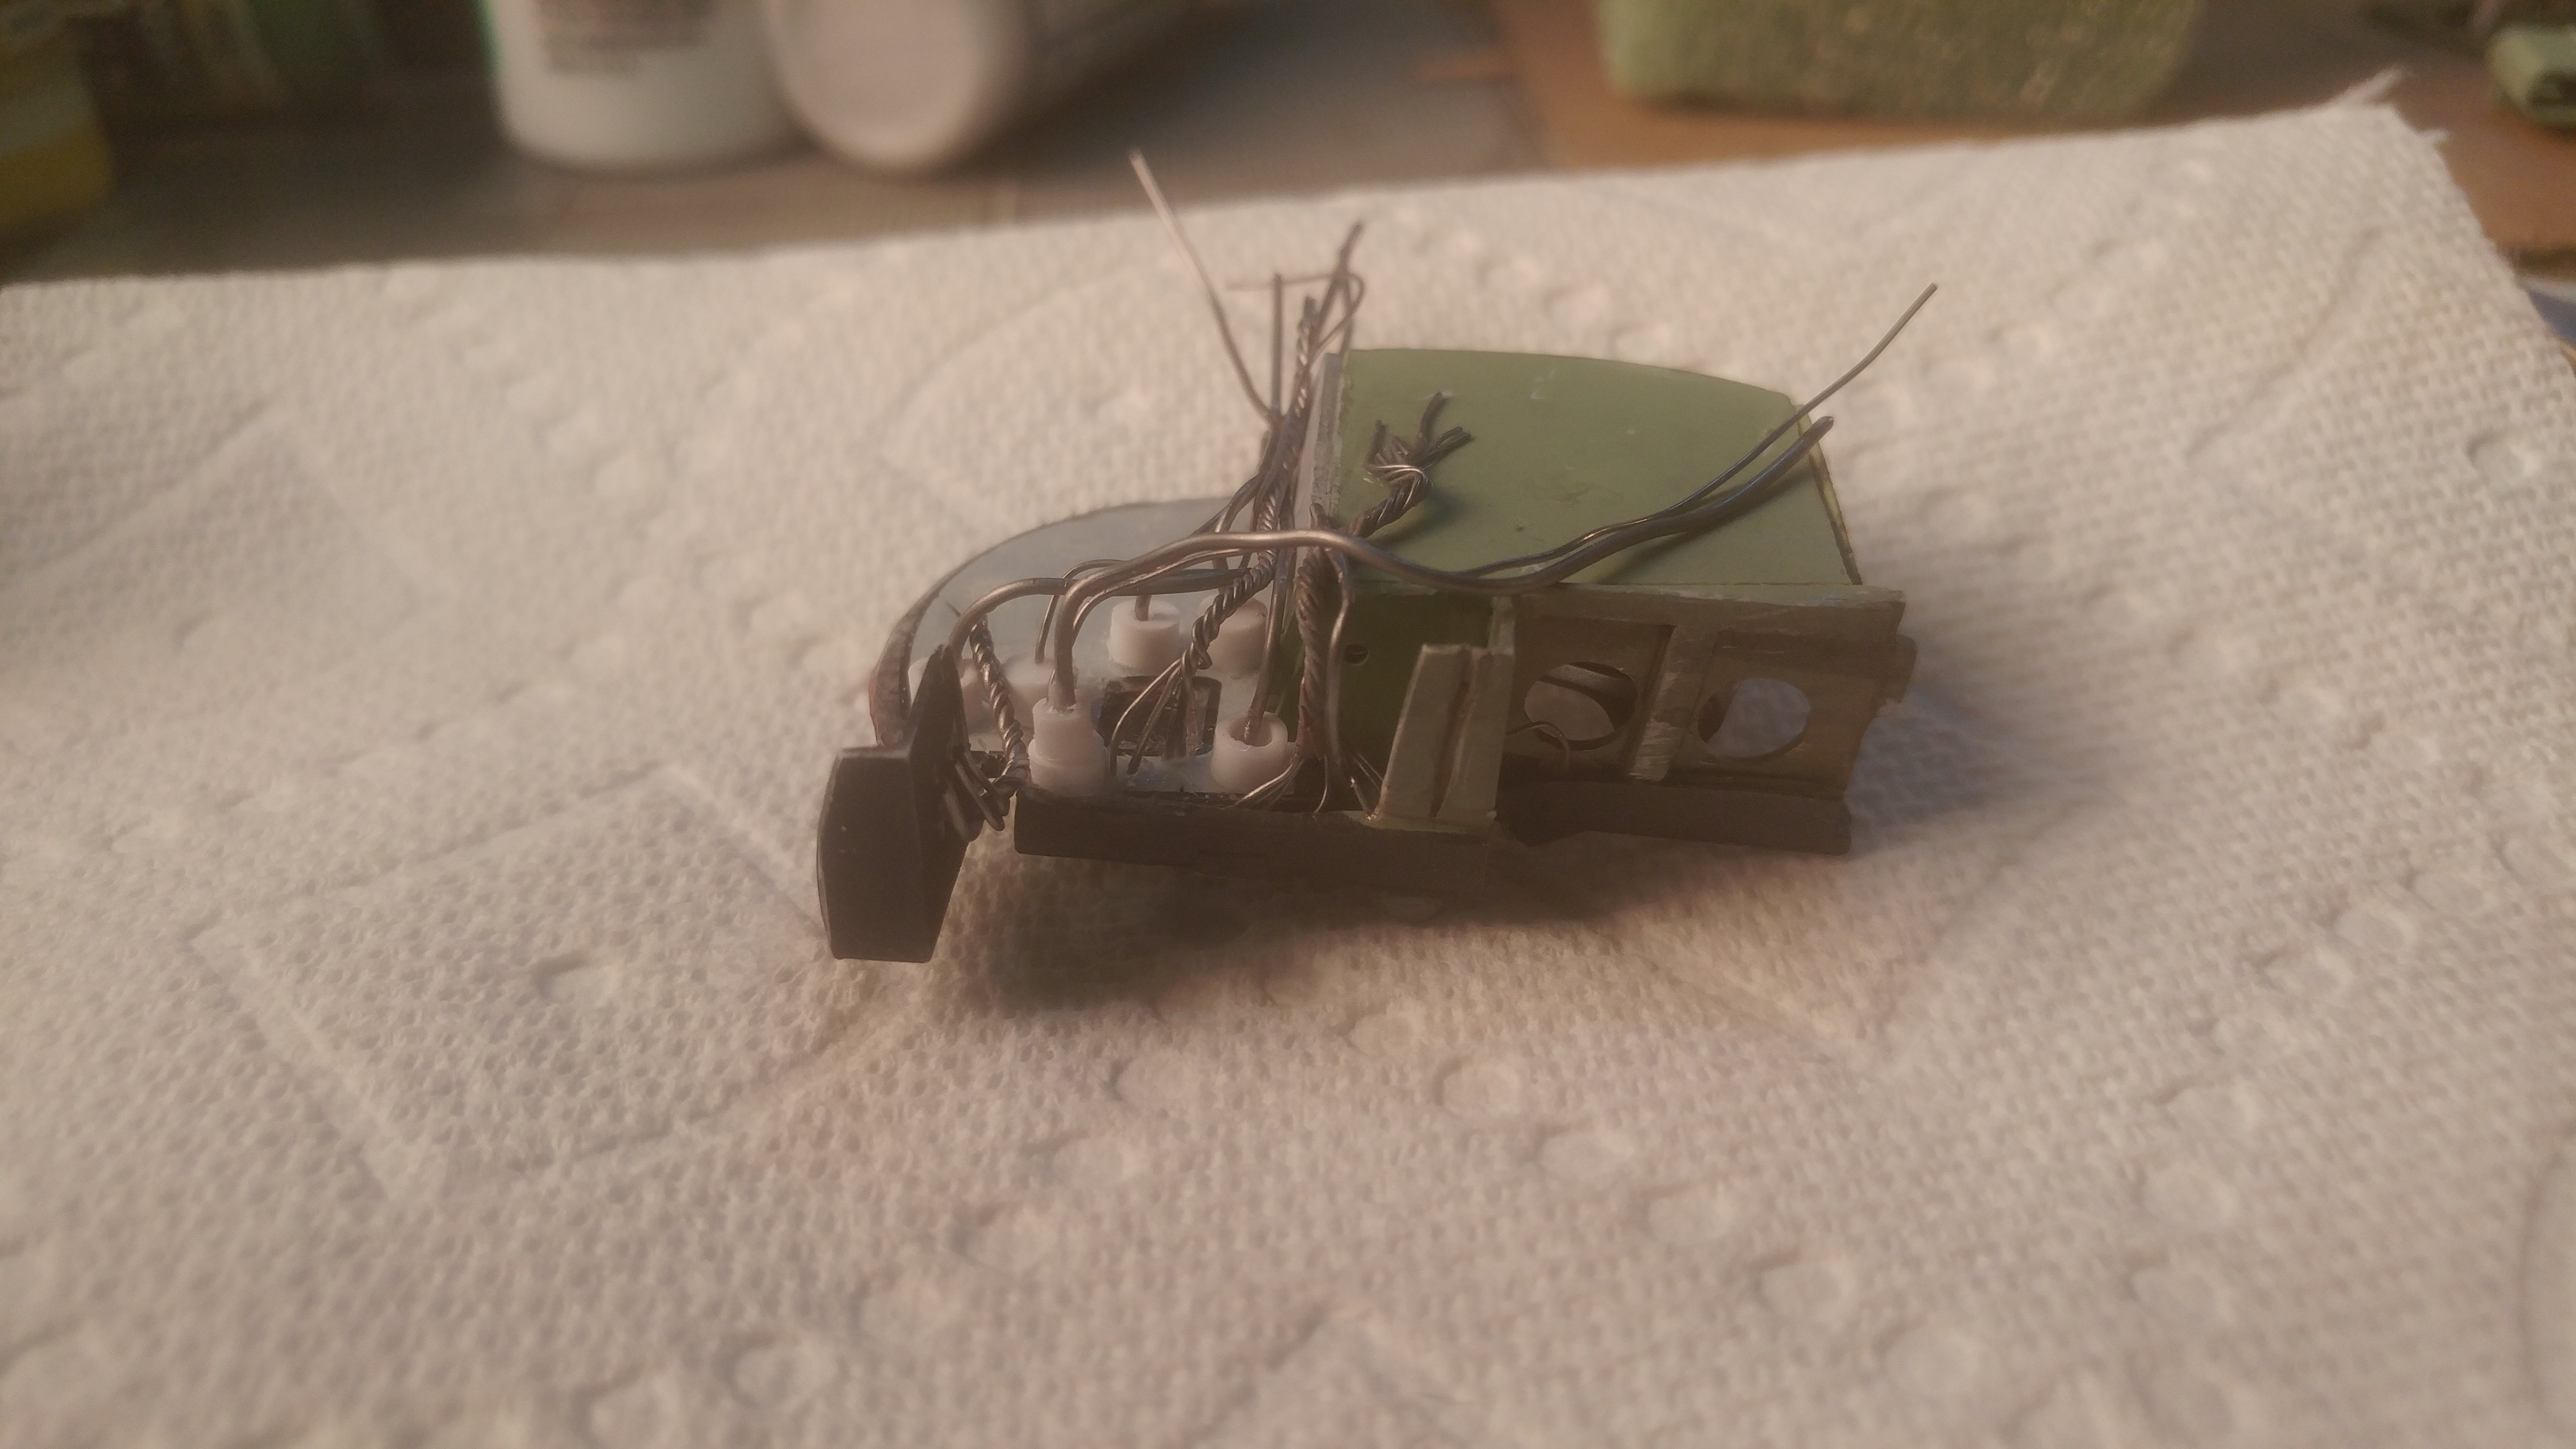
Today was finish back of the firewall day.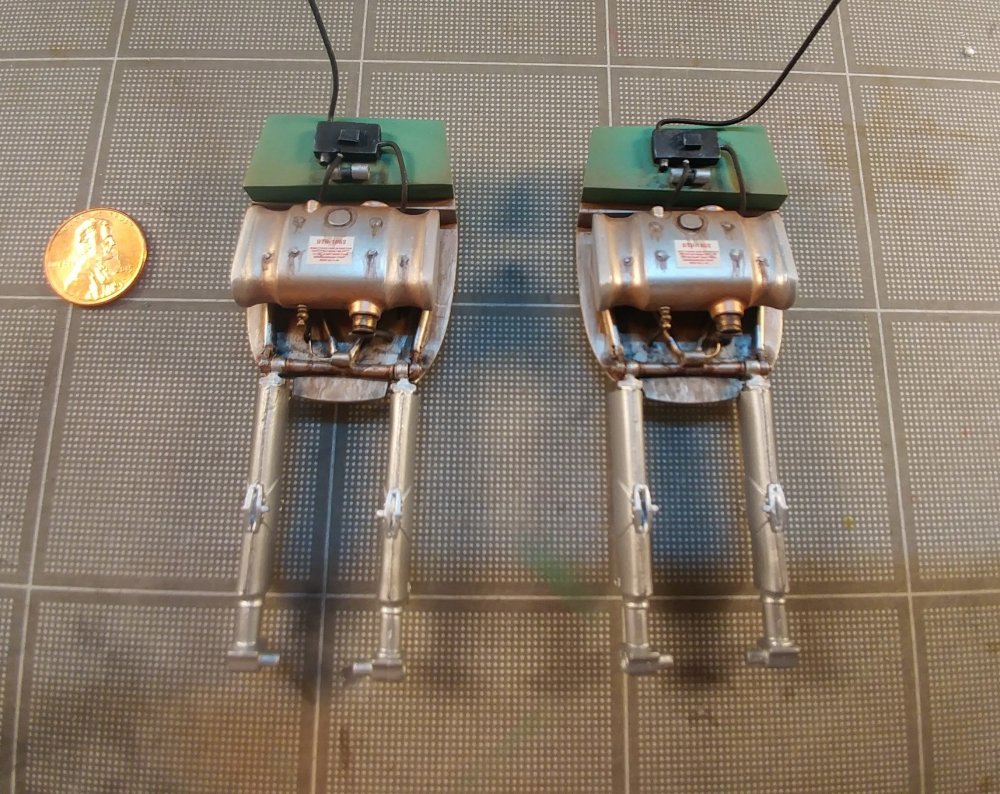
-
1/24 Airfix Scale Mosquito build
PeteF replied to PeteF's topic in LSM 1/35 and Larger Work In Progress
Thanks guys. I was always torn with my Nanchang...I spent hours and hours polishing and touching up paint, cleaning oil off and always thinking “I used to spend hours and hours painting this sort of detail on models!” I used to fly with real planes, including an F4F which had horribly non-scale paint schemes and think “I know modelers who spend more time on the accuracy of their paint jobs than you did on your multi-million dollar real fighter!” But no question, familiariy with and having worked on and flown planes removes a certain curtain of confusion about what is what, how it works and how it looks and wears.
-
1/24 Airfix Scale Mosquito build
PeteF replied to PeteF's topic in LSM 1/35 and Larger Work In Progress
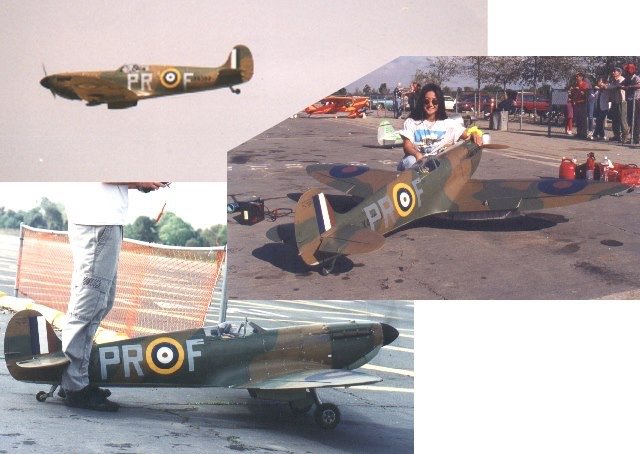
Just as an aside, this was my old 1/5 scale Spitfire and 1/4 scale Spitfire. I did scale competitions with these and won a regional Scale Masters event with the big Spit. Wife for scale. Sold the 1/4 scale one in 1997 and it paid for my pilot’s license...not sure which was more work, that or this Mosquito! LOL.
-
1/24 Airfix Scale Mosquito build
PeteF replied to PeteF's topic in LSM 1/35 and Larger Work In Progress
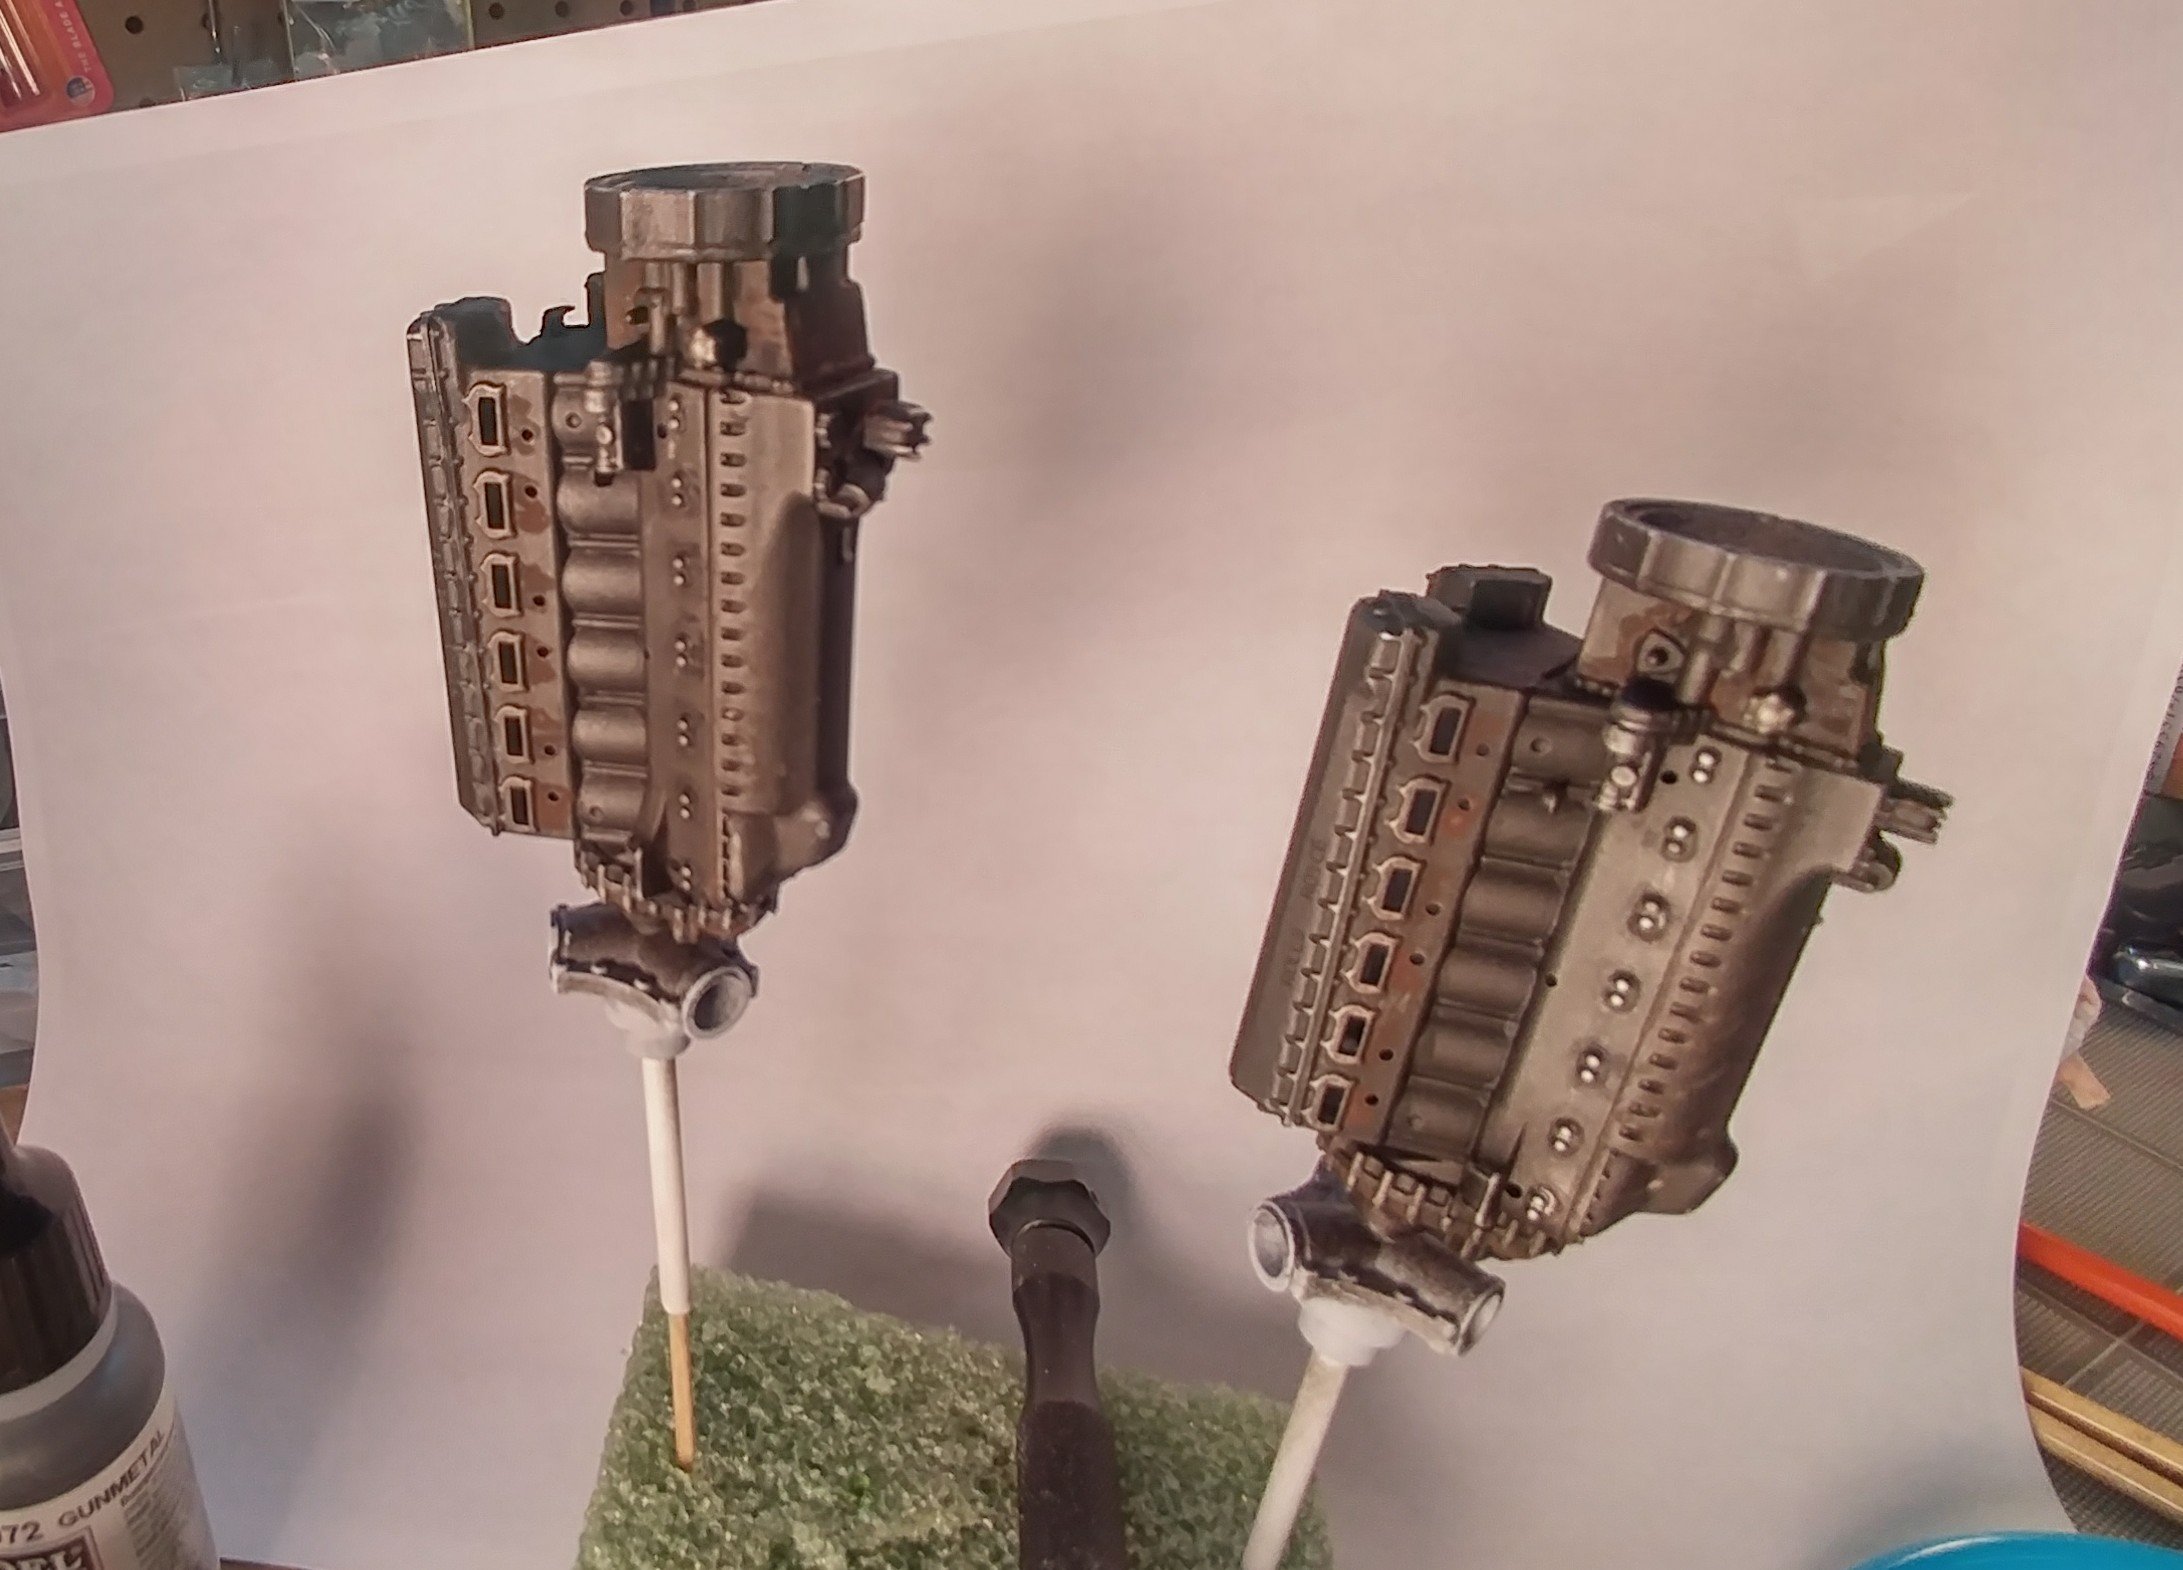
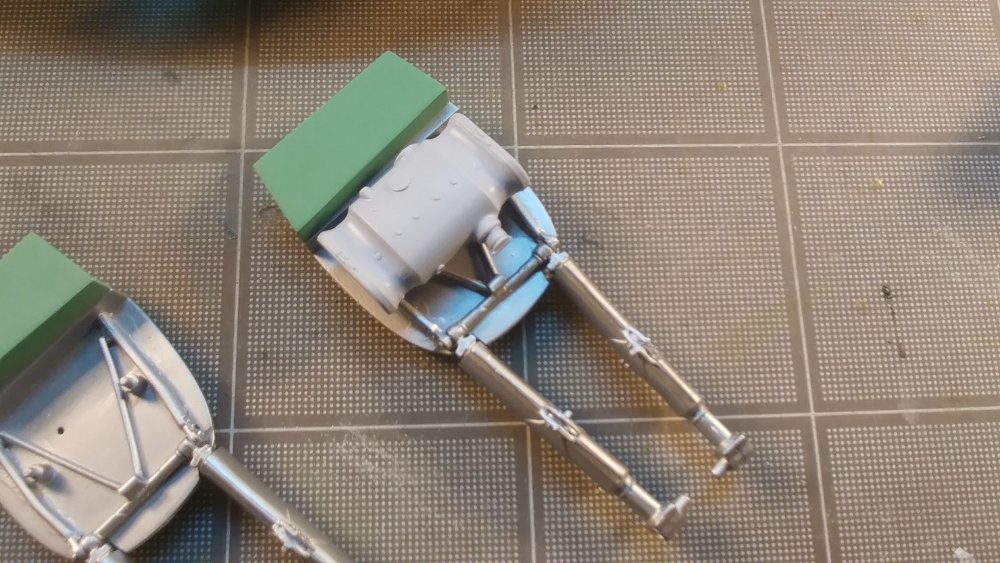
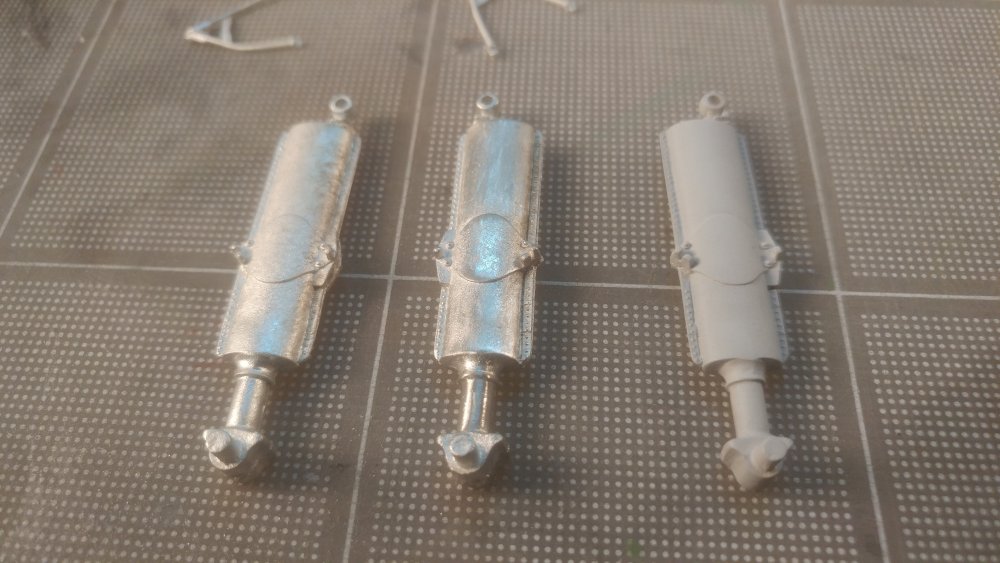
So I worked with the front of the metal main gear...it's pliable and bendable in a good way. I took a big risk by deciding to solder the two cross braces. I was so careful and 3 out of 4 were fine. 4th one I got a blob of solder that wrecked the end (upper right of right hand one in the pic). Got it sort of kludged into position but happily, the oil tank will completely obscure this section. Painting a lot of parts along the way so they can cure before I add detail and weathering.
-
1/24 Airfix Scale Mosquito build
PeteF replied to PeteF's topic in LSM 1/35 and Larger Work In Progress
Yes, Scale Aircraft Conversions. The rear struts and mud flap from the kit are retained but the main struts and their supports will be metal. That will be the primary weiht bearing part. -
1/24 Airfix Scale Mosquito build
PeteF replied to PeteF's topic in LSM 1/35 and Larger Work In Progress
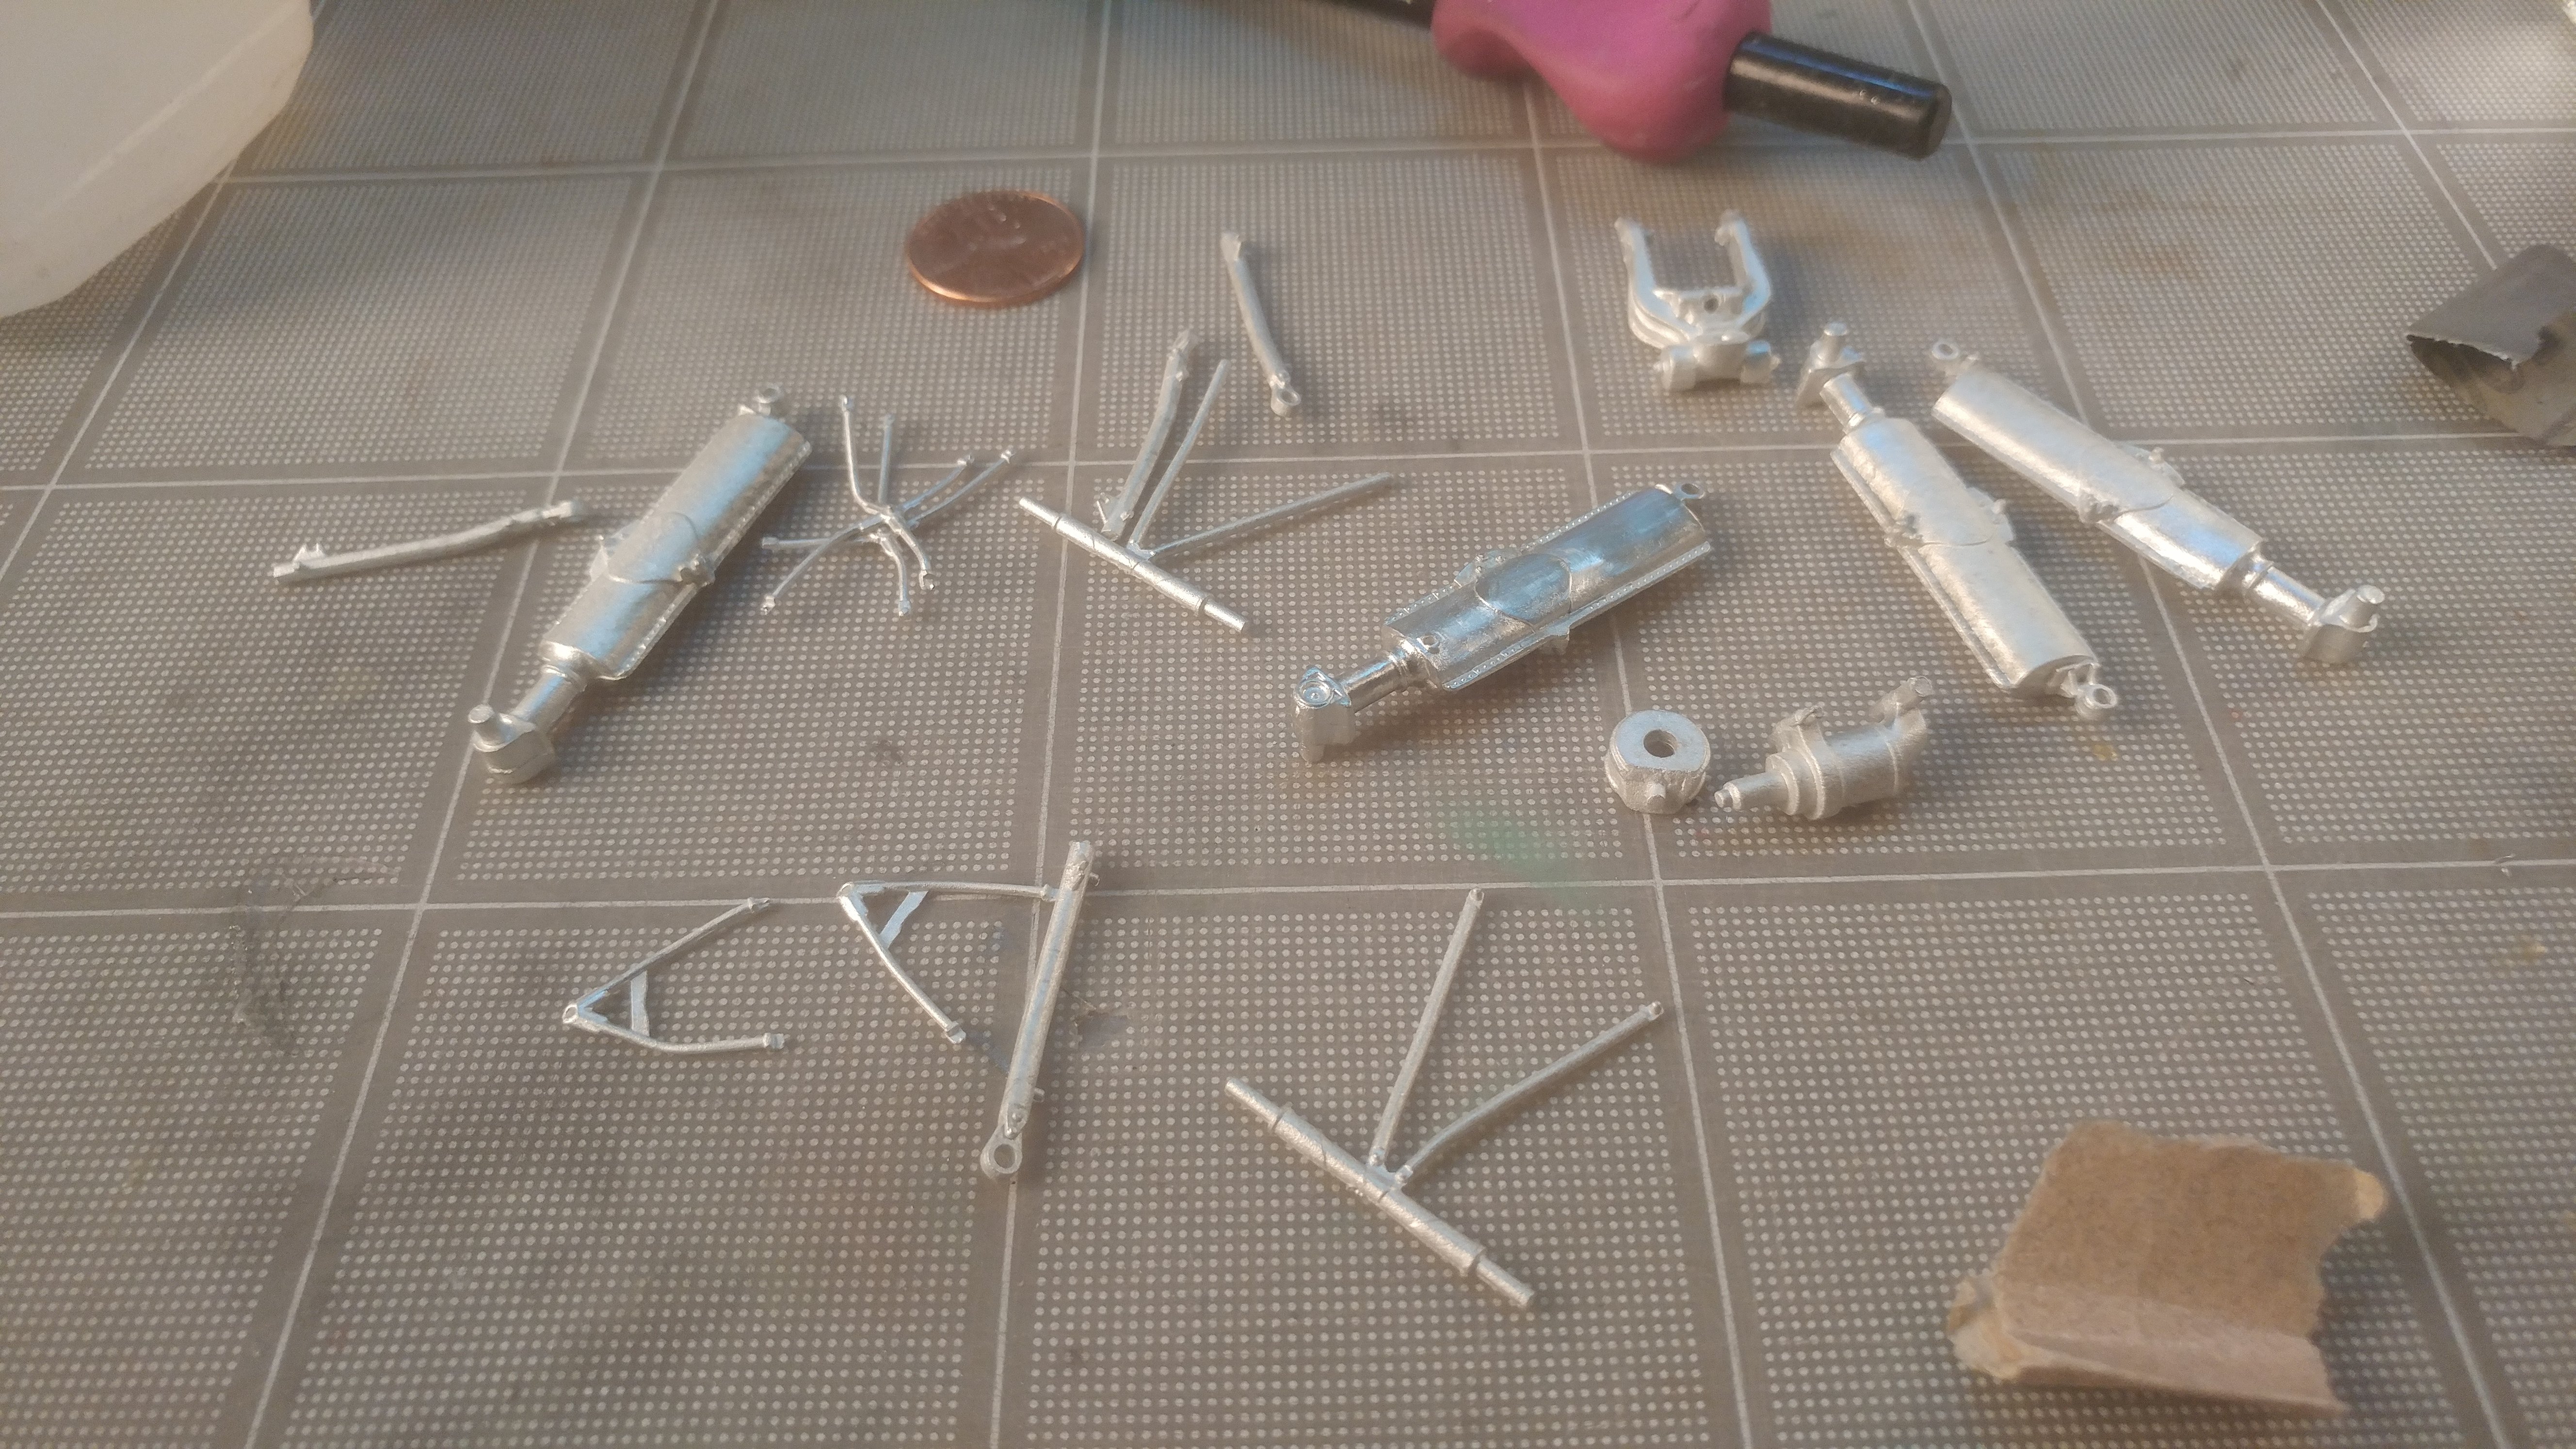
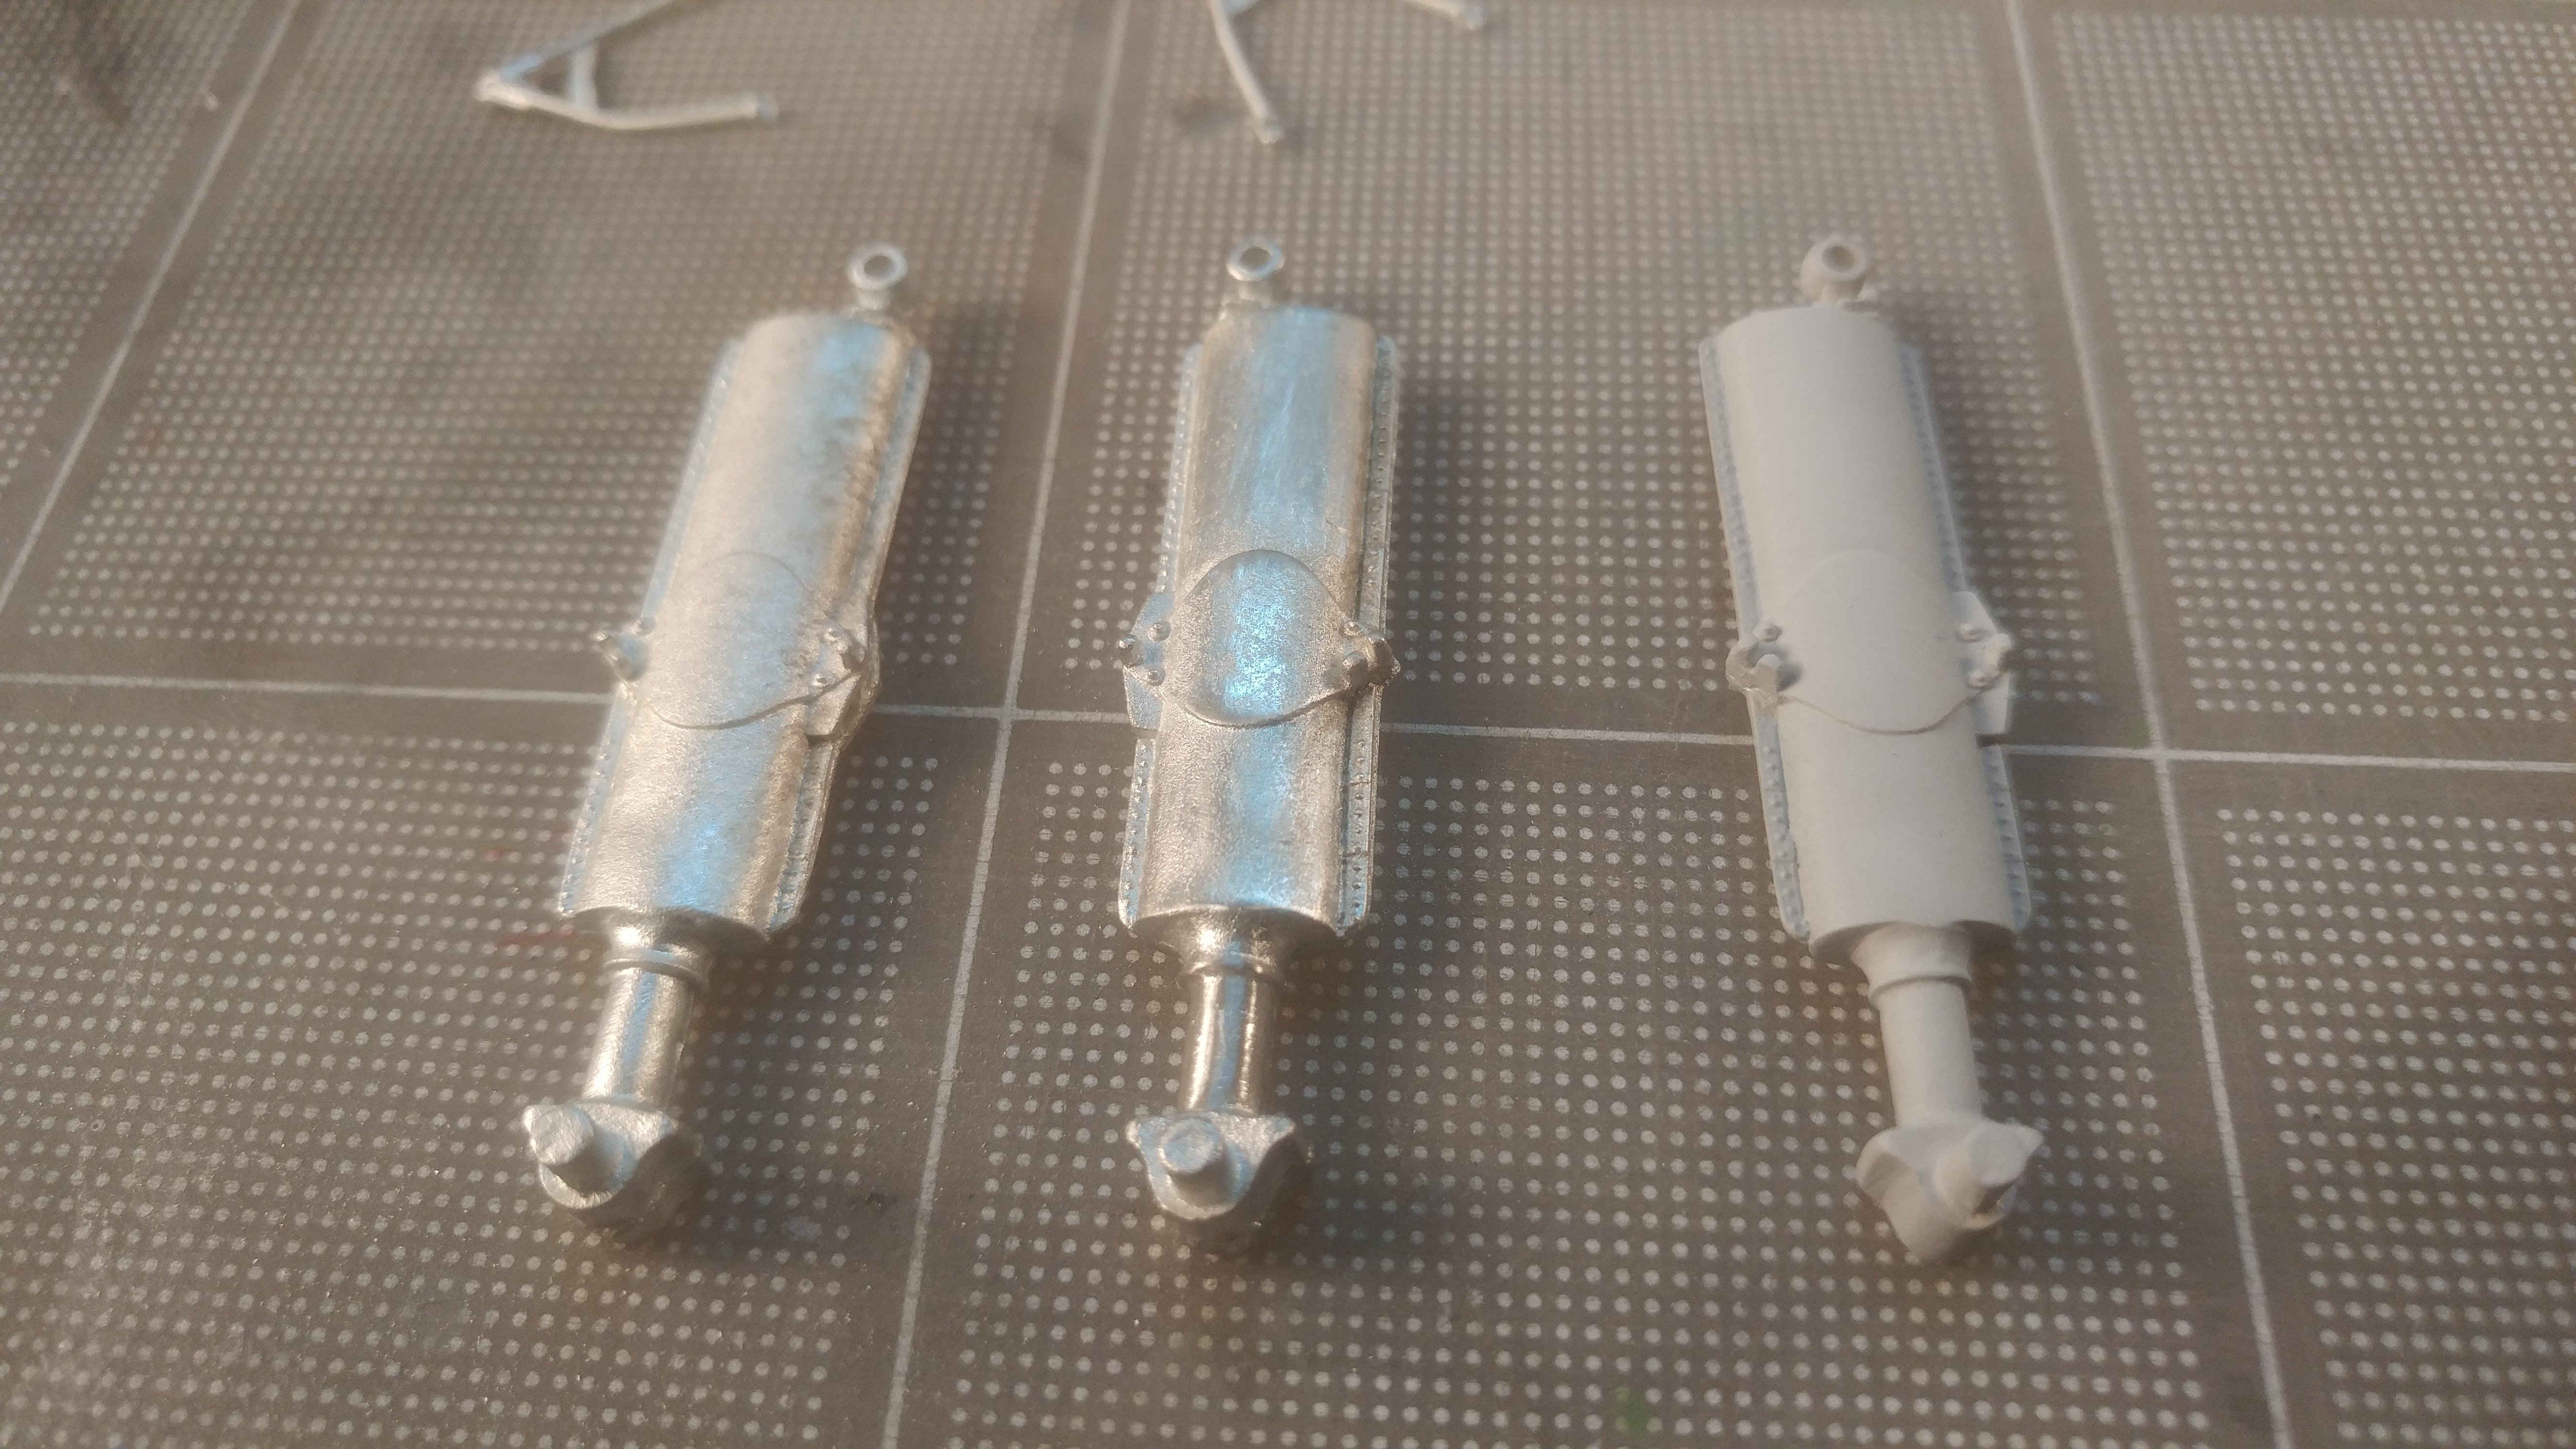
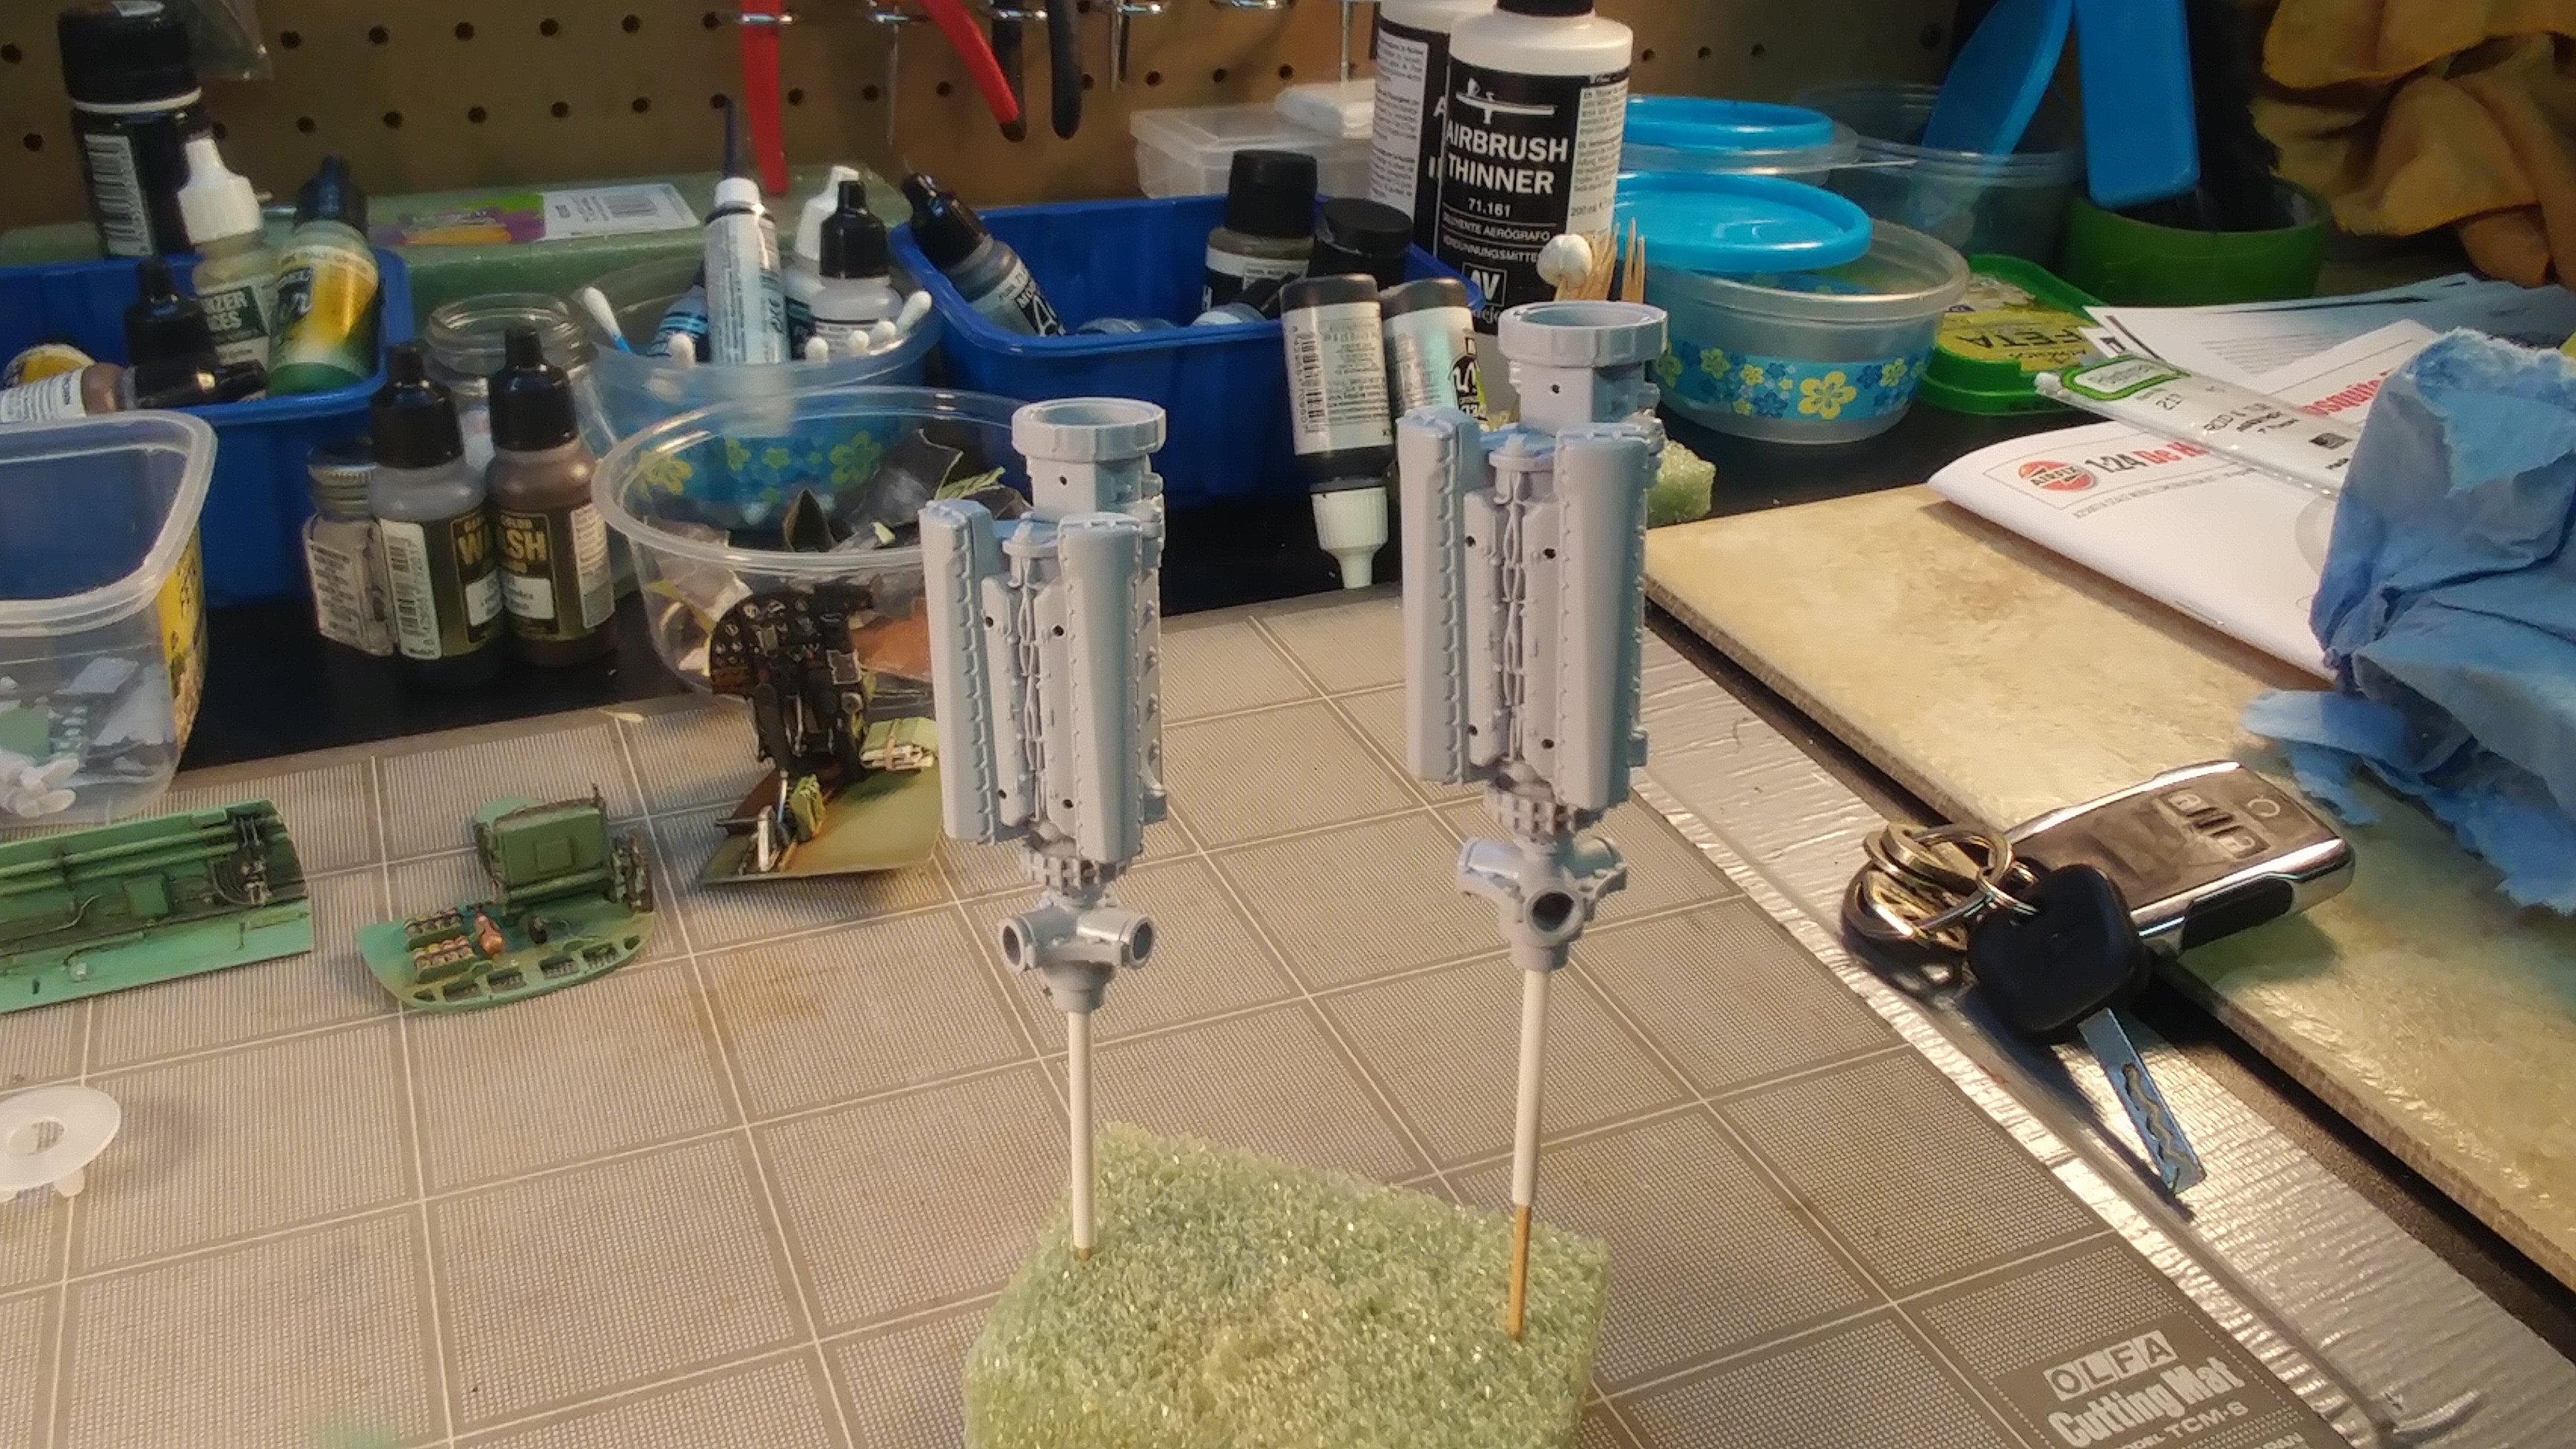
Been getting detailitis so I've been doing bodywork and pre-painting interior sections. My metal landing gear kit arrived. I was warned by several people that the plastic gear would not support the weight of this model (particularly with added lead wire). Started prepping and primering parts. They're pretty nice. Have some light bodywork to do but not much more than with the plastic bits. A bonus is that eventually I can polish the oleo leg to a high shine. Pic 2 is one each out of the package, prepped and primered.
-
1/24 Airfix Scale Mosquito build
PeteF replied to PeteF's topic in LSM 1/35 and Larger Work In Progress
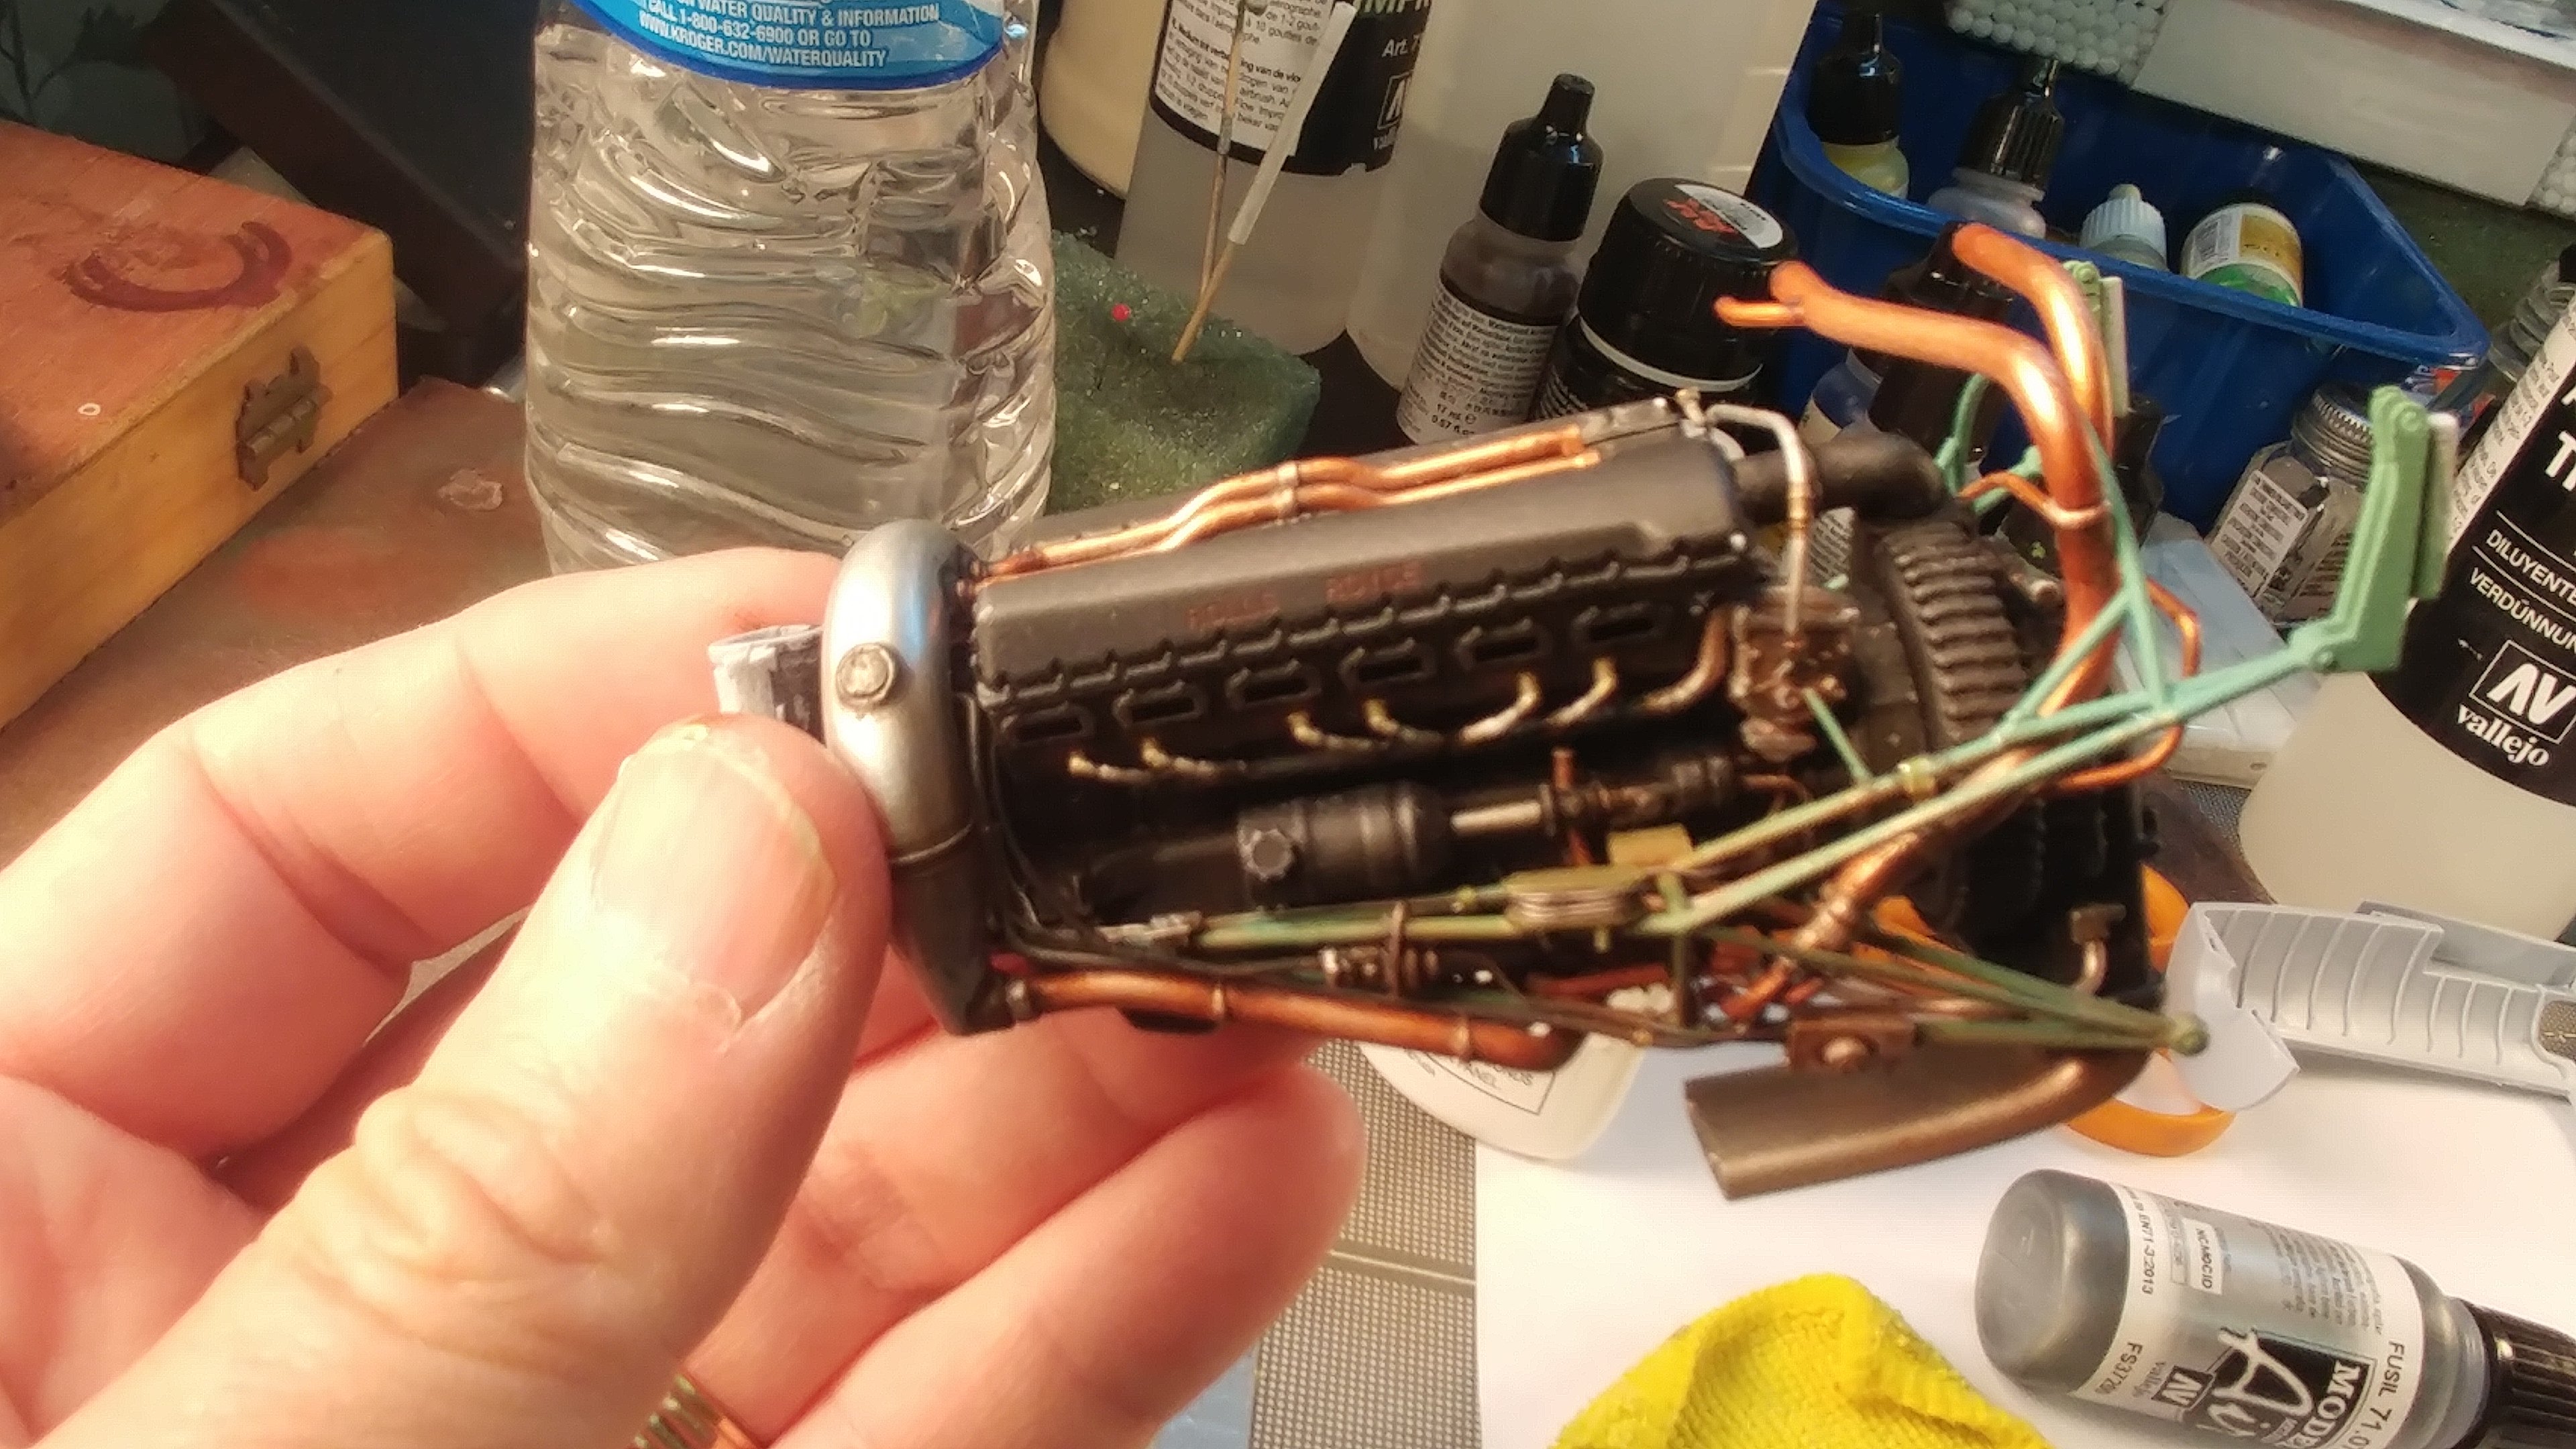
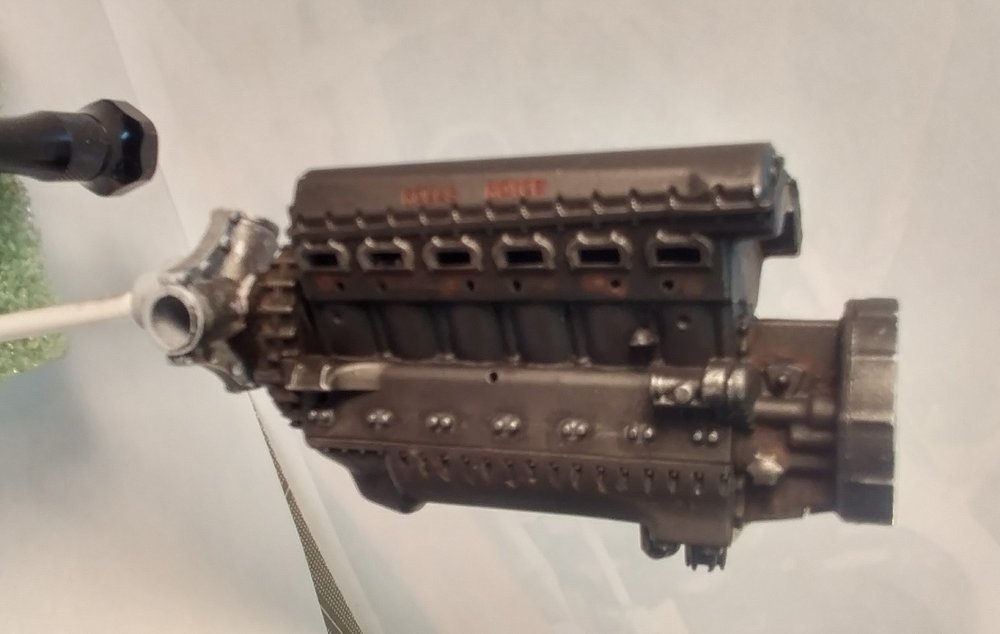
I'm starting with the base copper then using a rust wash in the nooks and crannies and at the ends to give it some shading. Then some black wash at the joints. Polishing the middle and upper parts so they have a nice gradient across the piece. I need to keep using my wife's phone LOL. The lens cover on mine is broken so the photos come out soft and oddly lit since the lens is shooting through a bunch of cracks.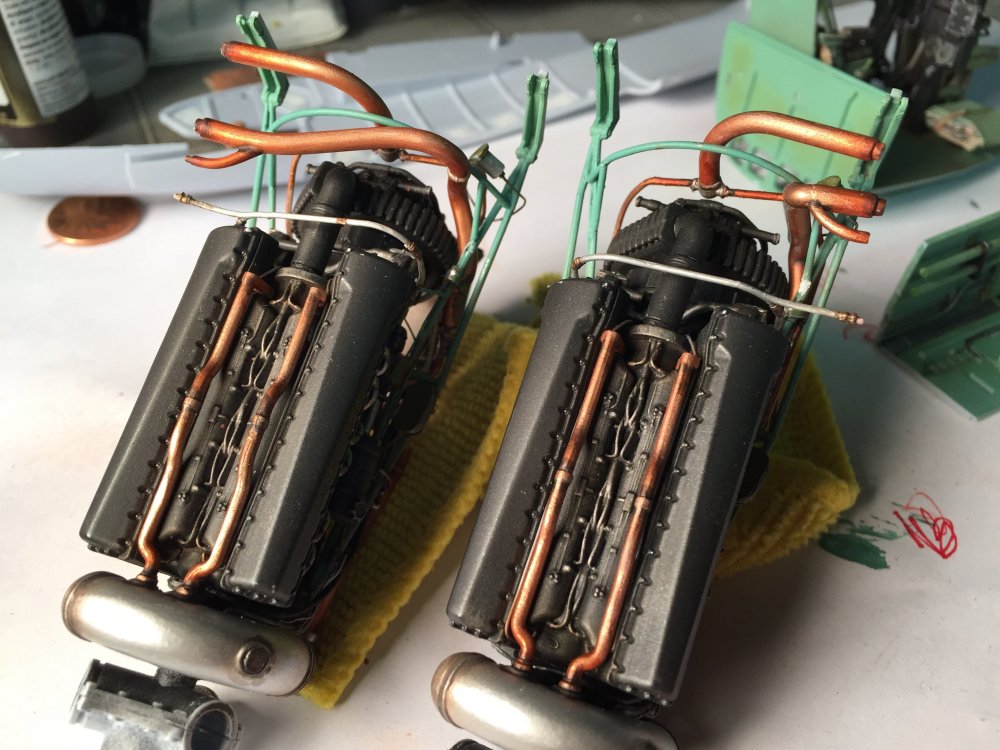
-
1/24 Airfix Scale Mosquito build
PeteF replied to PeteF's topic in LSM 1/35 and Larger Work In Progress
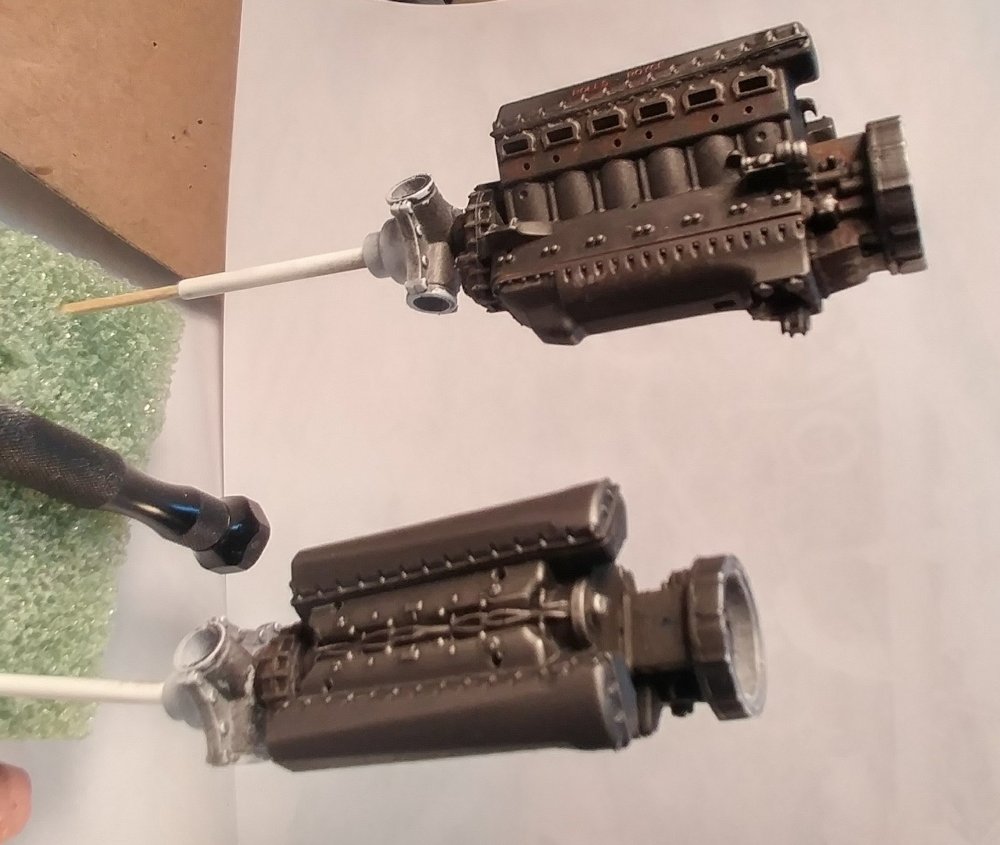
My goodness there is a lot of copper cooling pipe! I discovered that this metallic polishes great with a dry brush. Think I'm getting some convincing copper. Also added the missing bit of engine mount.
-
1/24 Airfix Scale Mosquito build
PeteF replied to PeteF's topic in LSM 1/35 and Larger Work In Progress
I admit it...I had to look that up -
1/24 Airfix Scale Mosquito build
PeteF replied to PeteF's topic in LSM 1/35 and Larger Work In Progress
Um yeah, Airfix forgot this part of the engine mounts.
-
1/24 Airfix Scale Mosquito build
PeteF replied to PeteF's topic in LSM 1/35 and Larger Work In Progress
More details...now that I get into the kit, it's quite remarkable how little engine detail there actually was. It's quite a lot of work having to scratch build 2 of everything!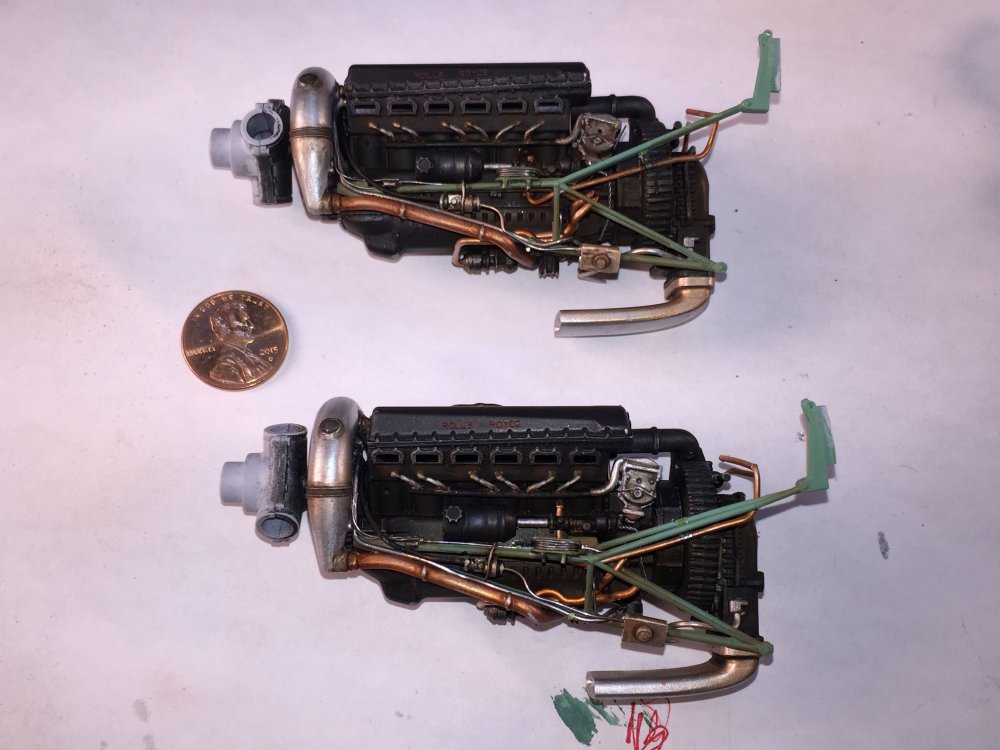
-
1/24 Airfix Scale Mosquito build
PeteF replied to PeteF's topic in LSM 1/35 and Larger Work In Progress
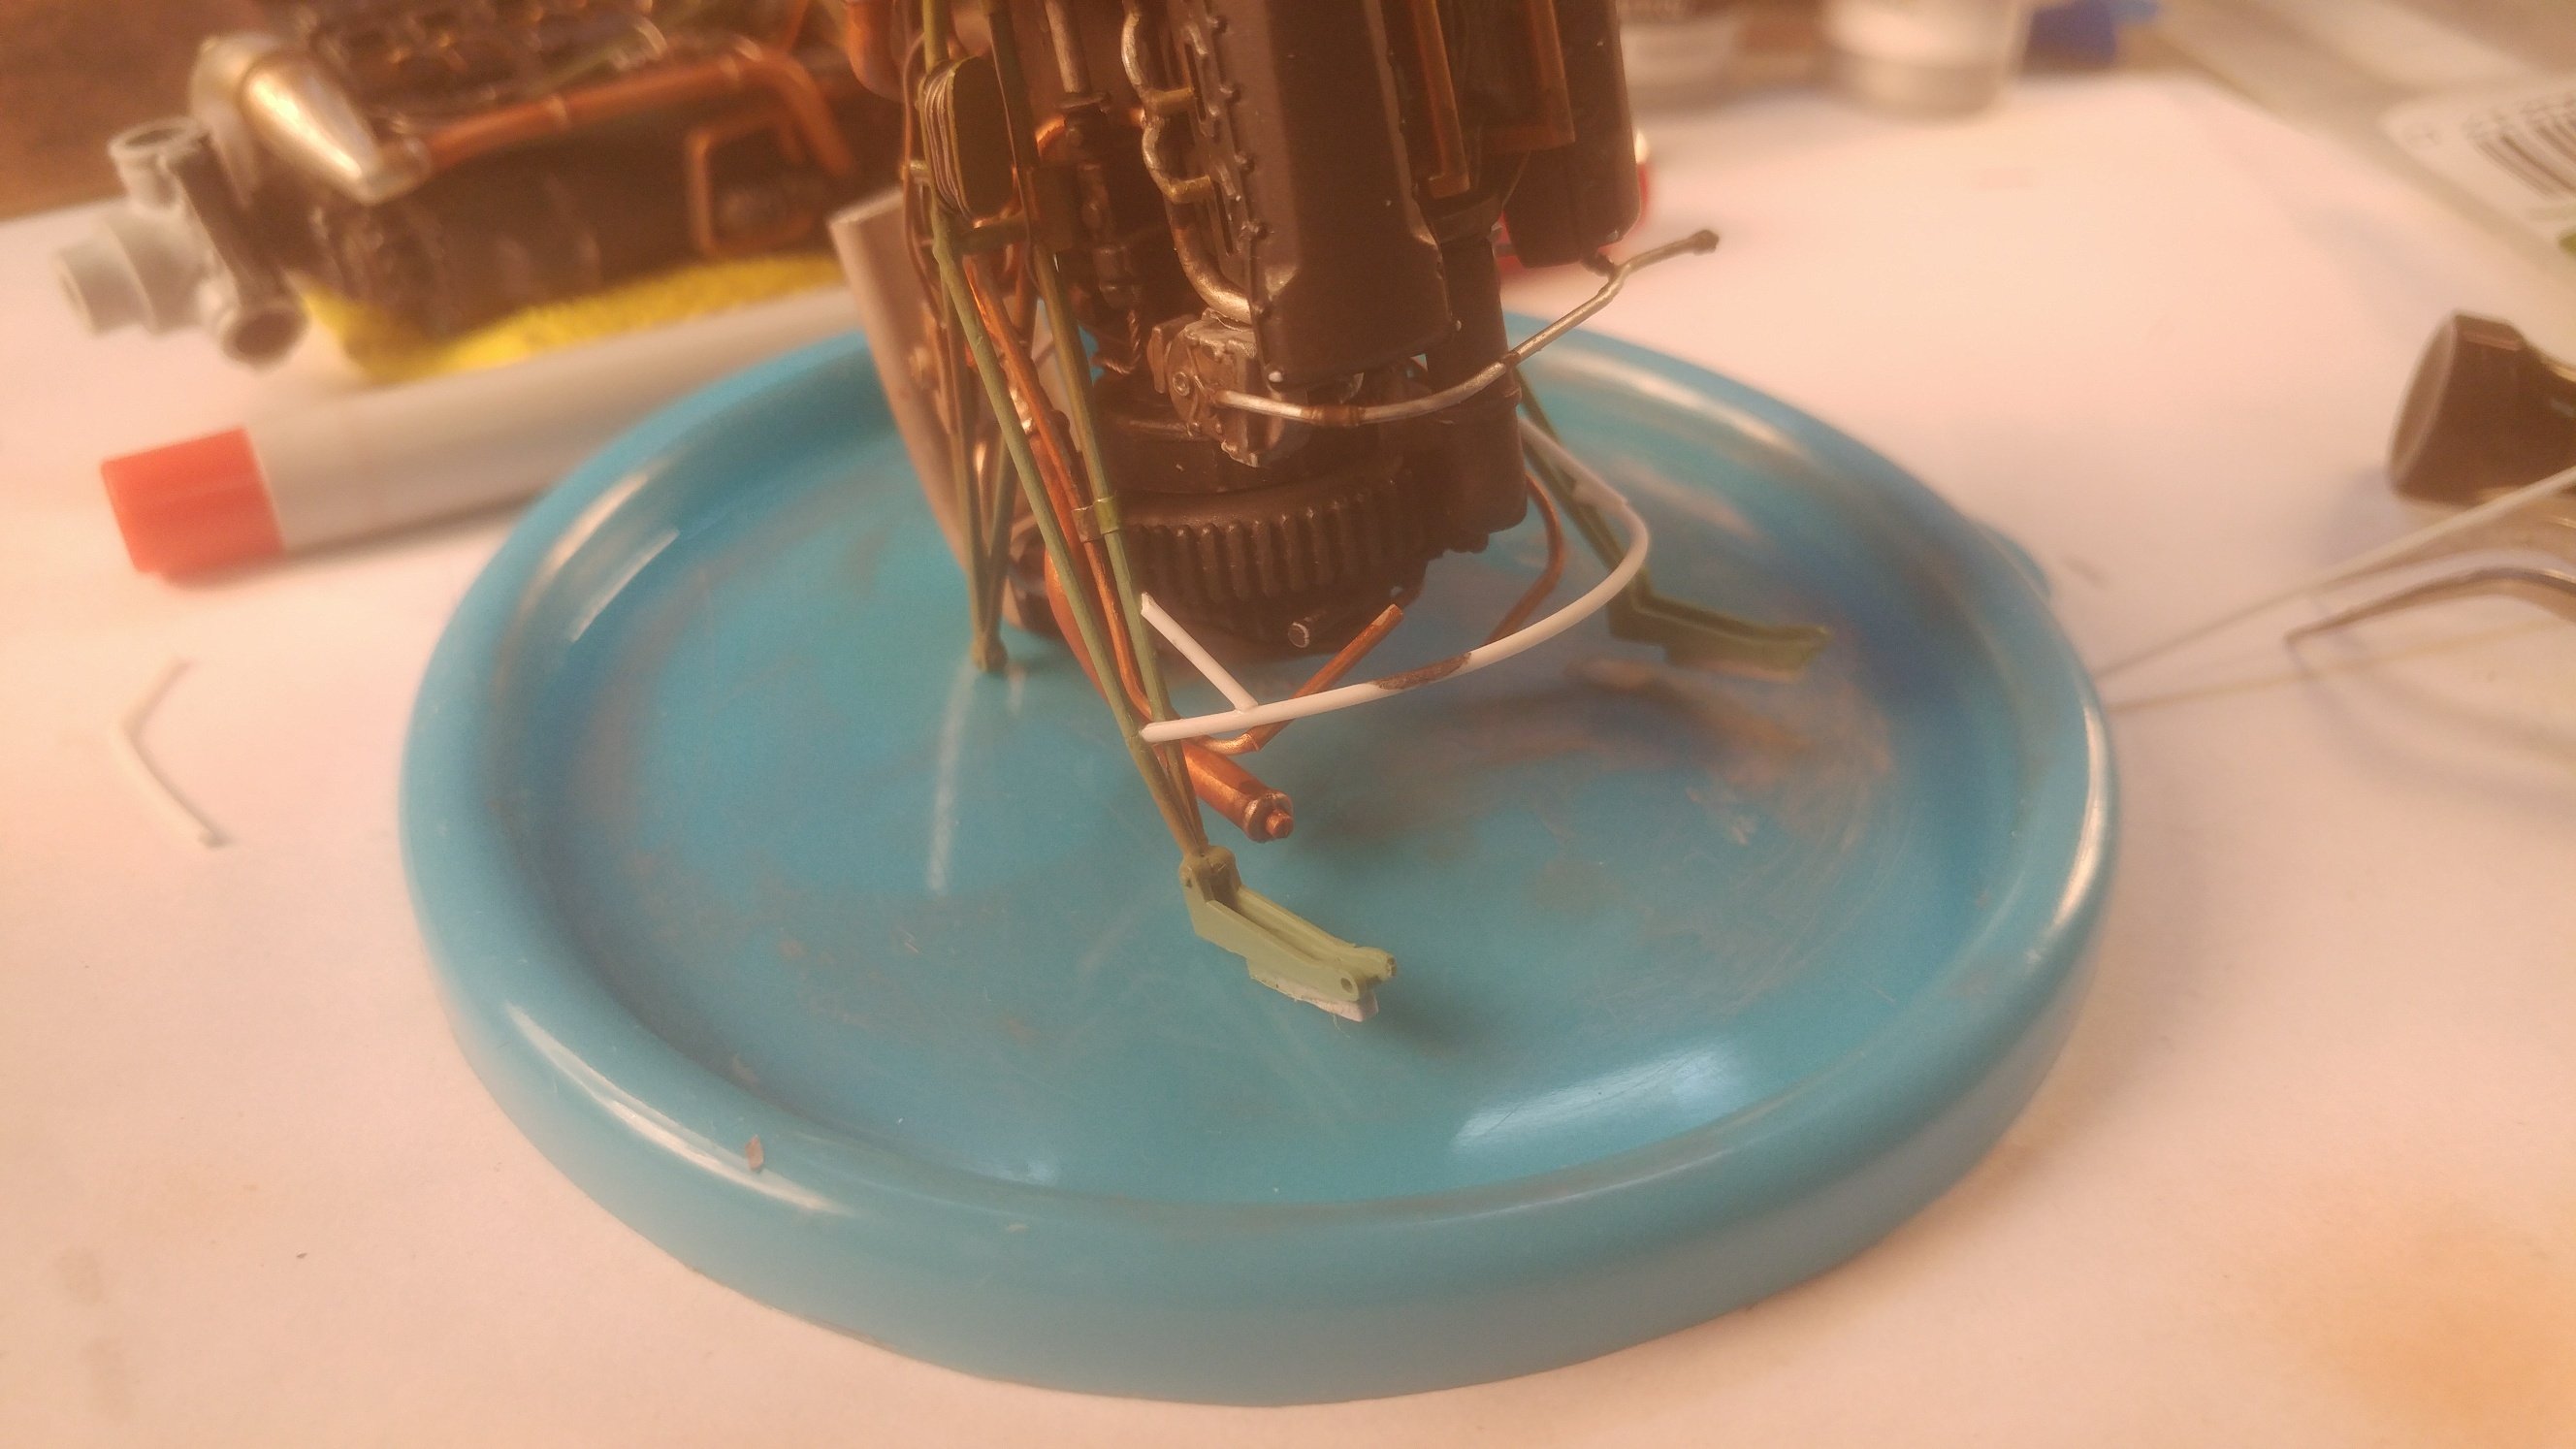
Hit my first real issue with the kit. All the engine mounts (2 parts per side) were either broken on the sprue or broke cutting them off the sprue. Apparently I wasn’t careful enough with the huge sprues but they were delicate. I ended up gluing wire to the back of them to reinforce them. Finished the kit tubing and started scratch building the other wires on this side. Also rechecked my references and found that most of the kit provided tubes were the copper cooling lines. Using very thinly cut strips of aluminum tape for the wire wraps. Sticky, strong and pliable with tweezers.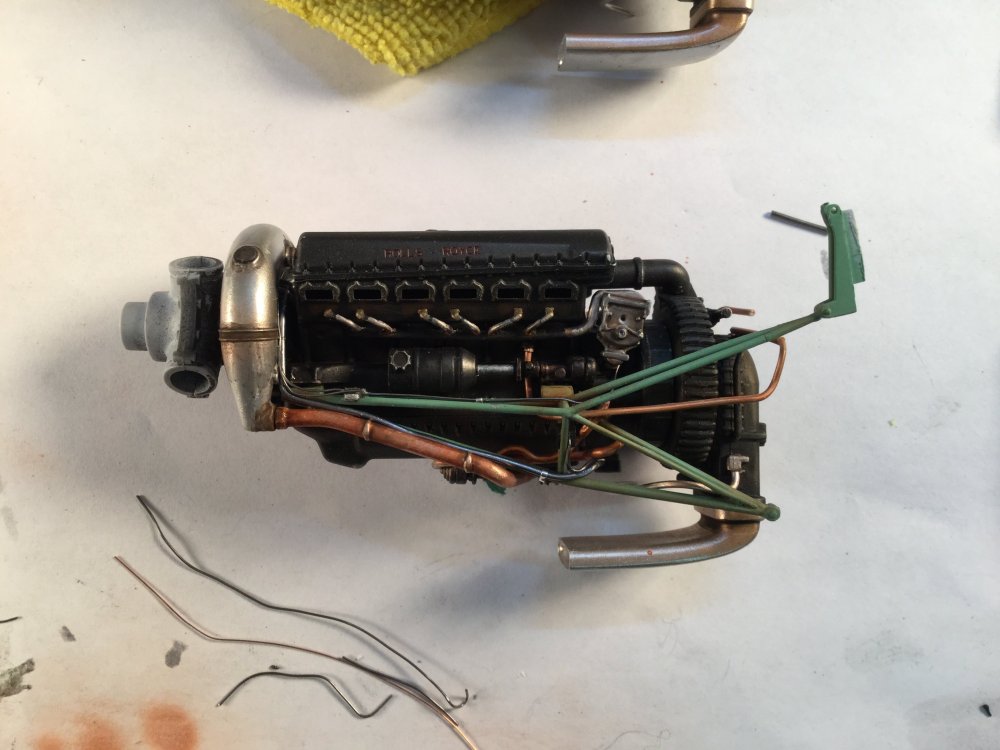
-
1/24 Airfix Scale Mosquito build
PeteF replied to PeteF's topic in LSM 1/35 and Larger Work In Progress
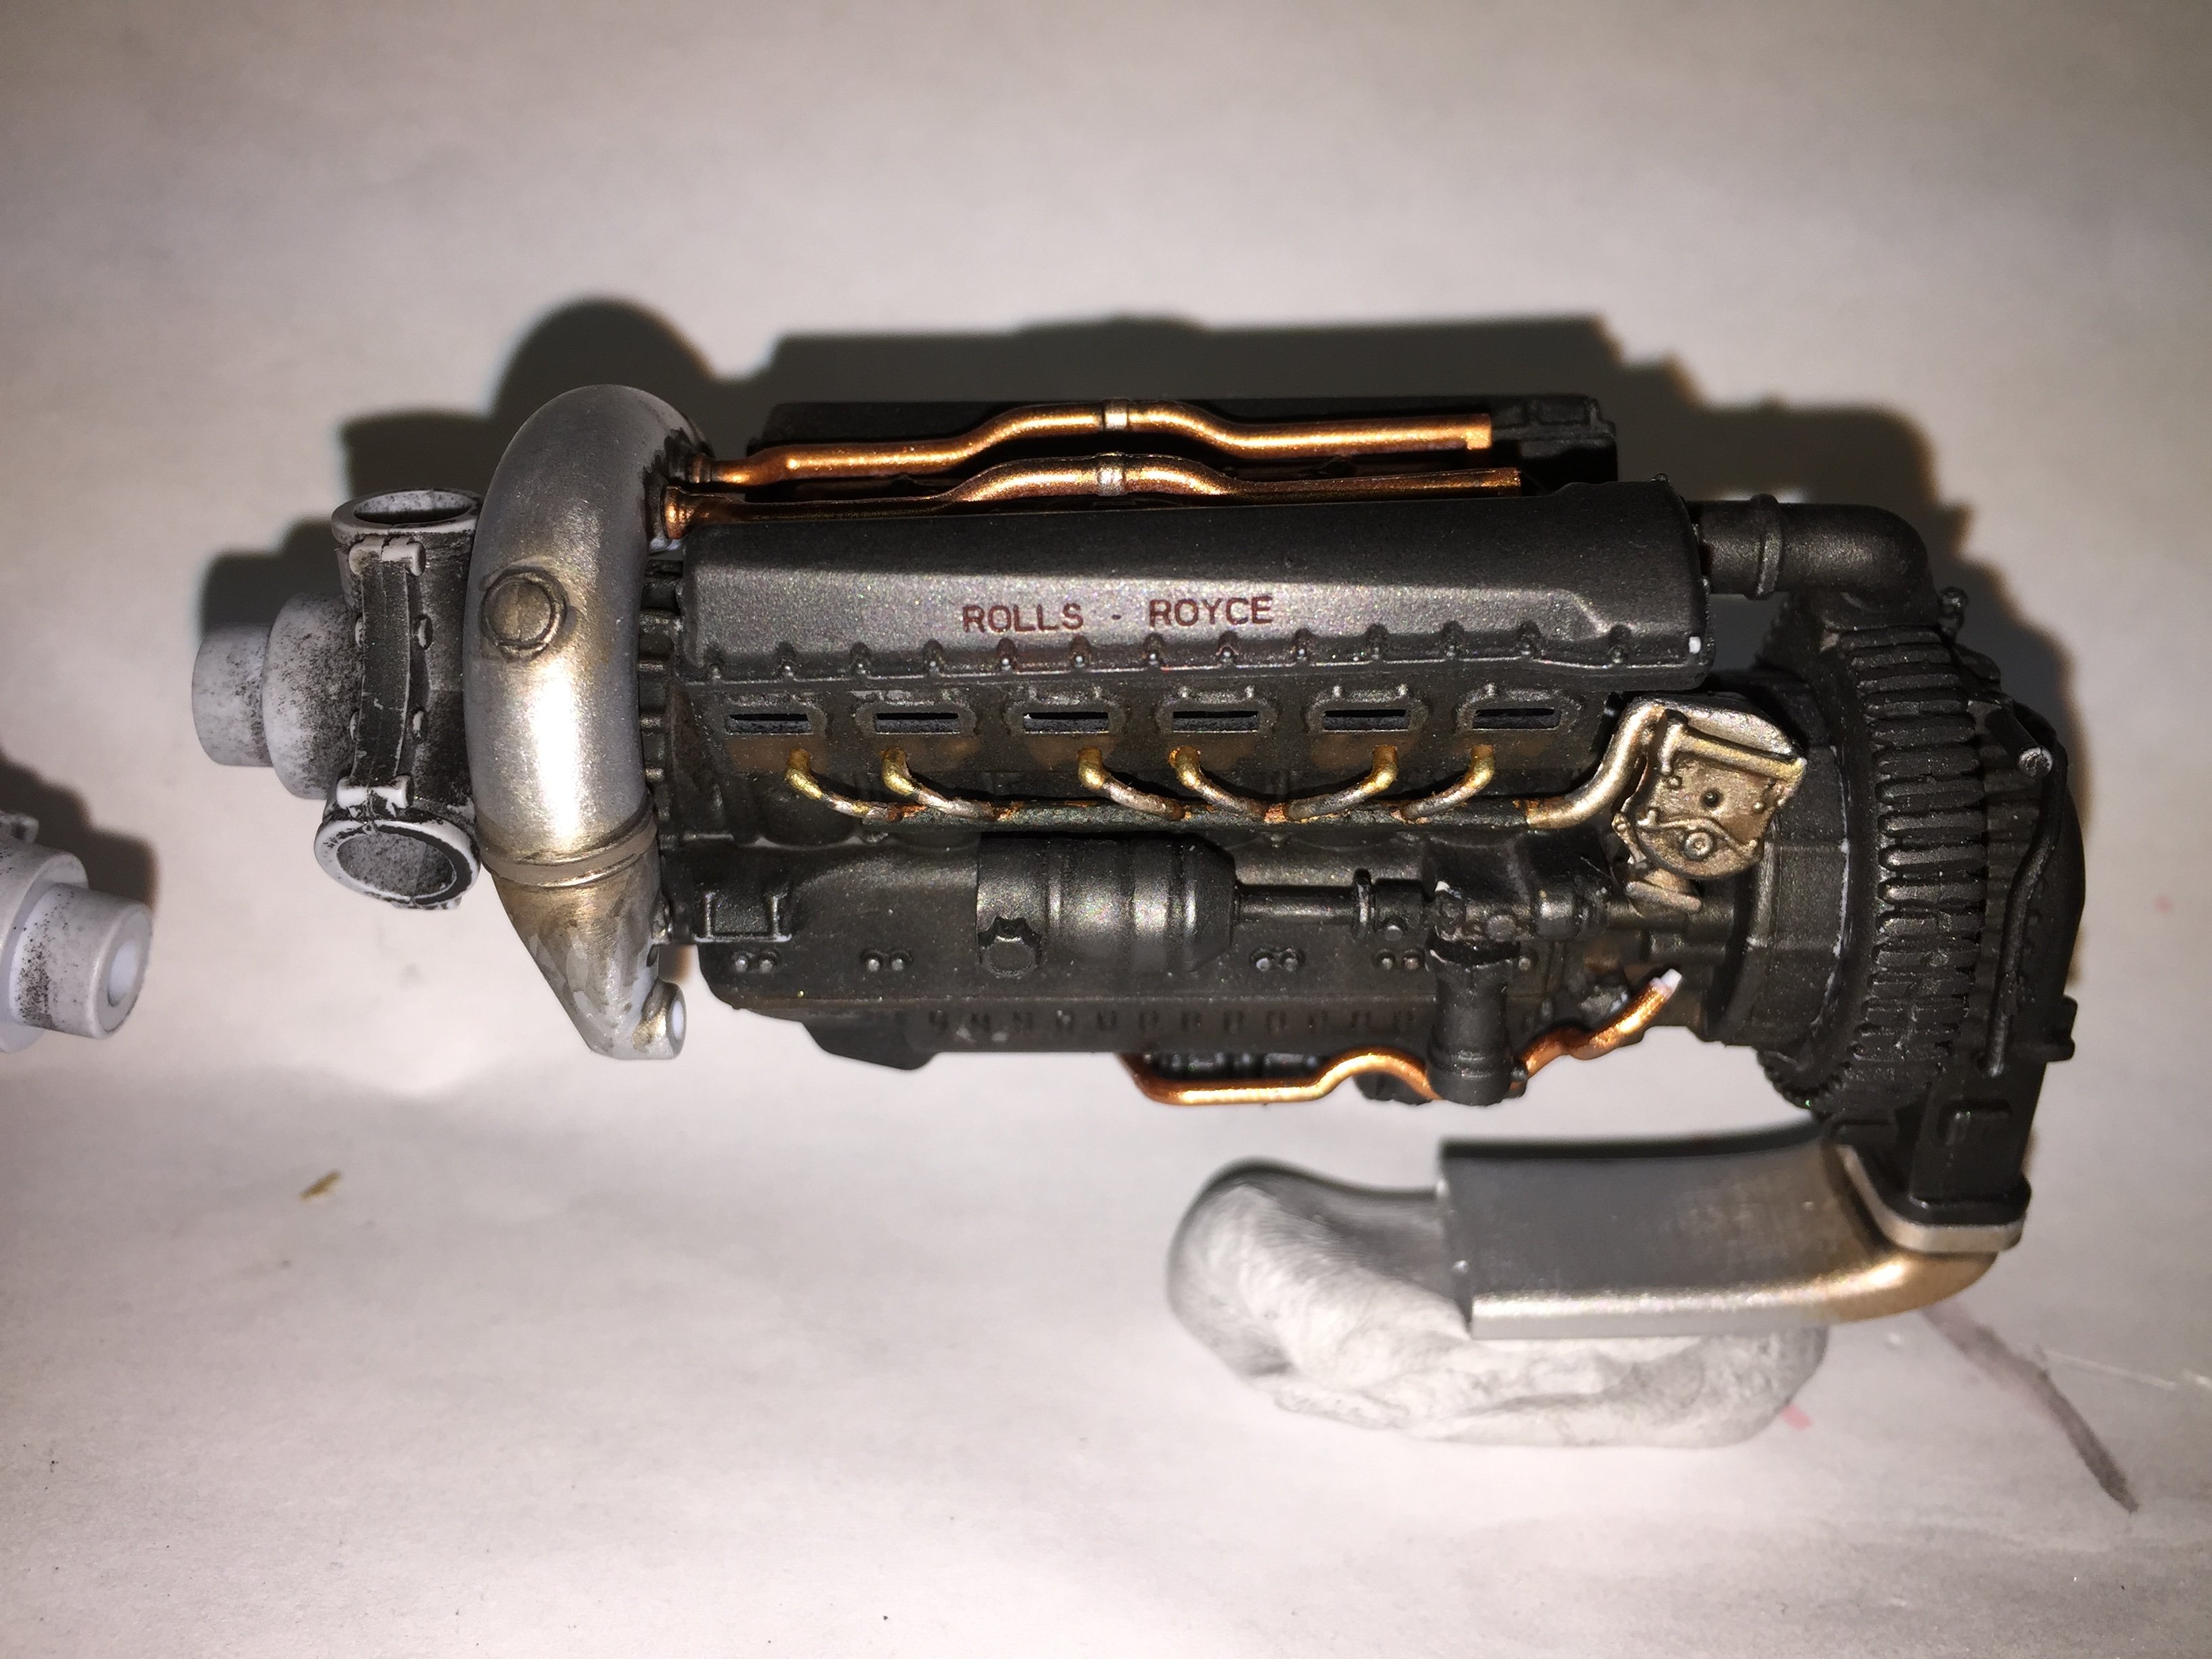
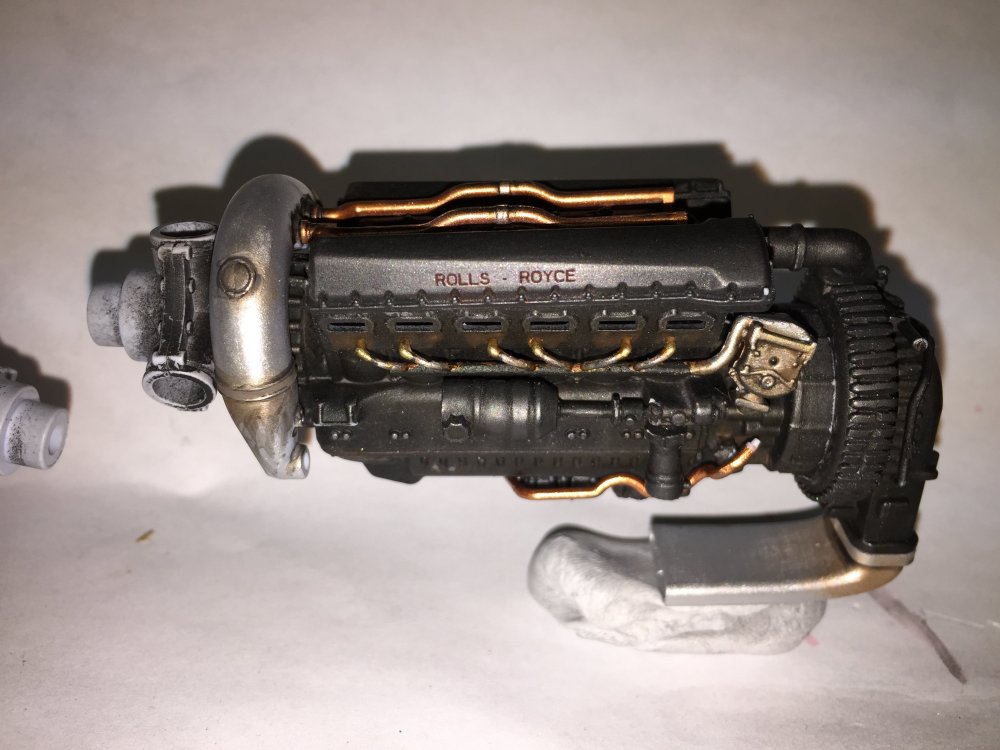
Yes, I’m using all acrylics. I have copper, brass, gunmetal, aluminim, silver and steel in Vallejo paints. I’m also using a rust wash for good effect. The engine is mostly flat black with graphite rubbed in but the copper is painted copper color with a little highlighting with a dusting of silver and rust wash sprayed in the corners with a mix of silvers for the “clamps” and some black wash for the edges. -
1/24 Airfix Scale Mosquito build
PeteF replied to PeteF's topic in LSM 1/35 and Larger Work In Progress
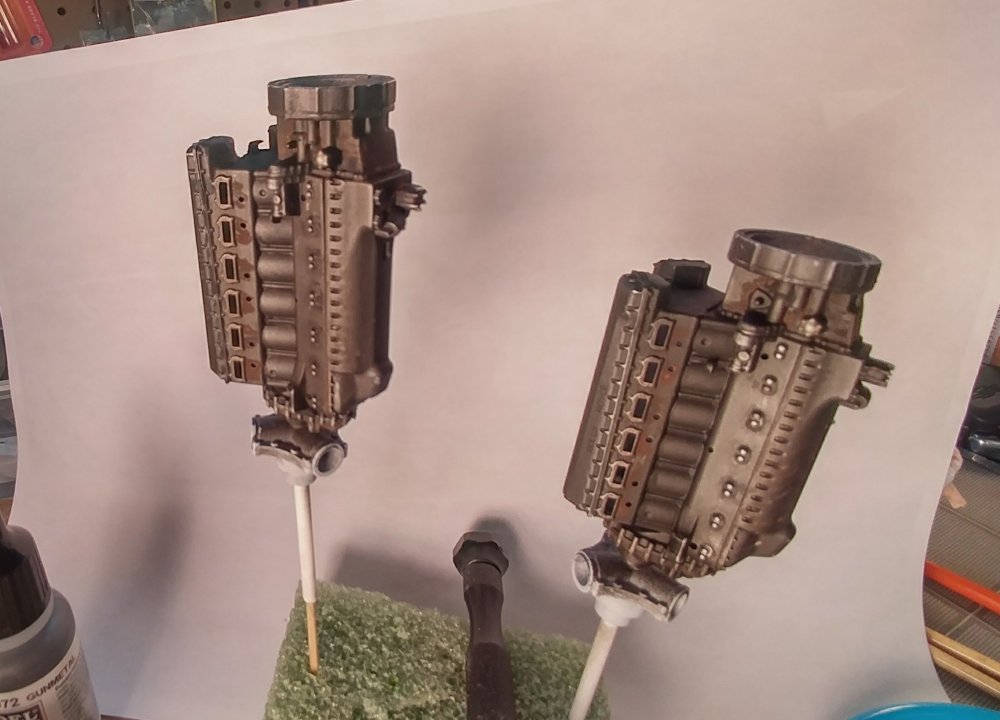
Engines finished and ready for the mounts and final external wires. I have to say that no only are the Vallejo metallics really convincing but they dry rock hard in a few minutes. I'm used to the old enamels (particularly Testors) that basically never dried! It was handy of Airfix to have you put the propeller hub on during engine construction as it makes a great holder.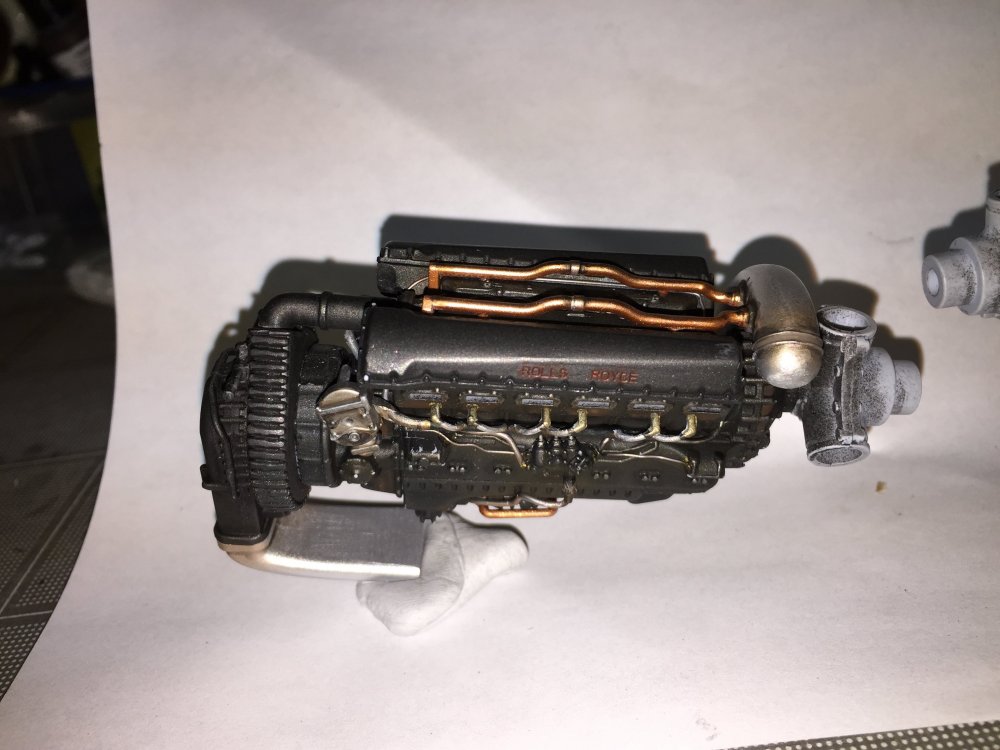
- 359 replies
-
- 10
-

-
1/24 Airfix Scale Mosquito build
PeteF replied to PeteF's topic in LSM 1/35 and Larger Work In Progress
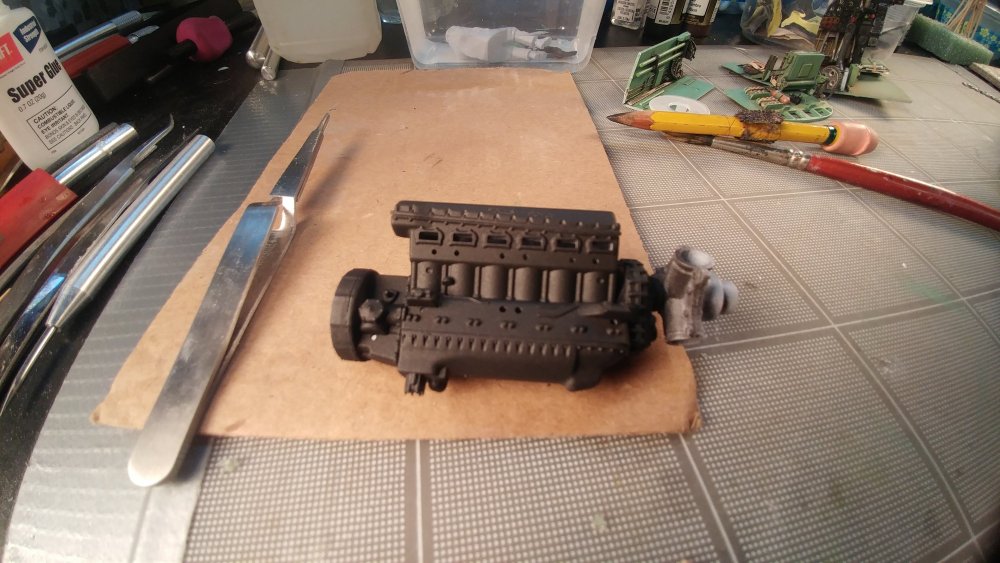
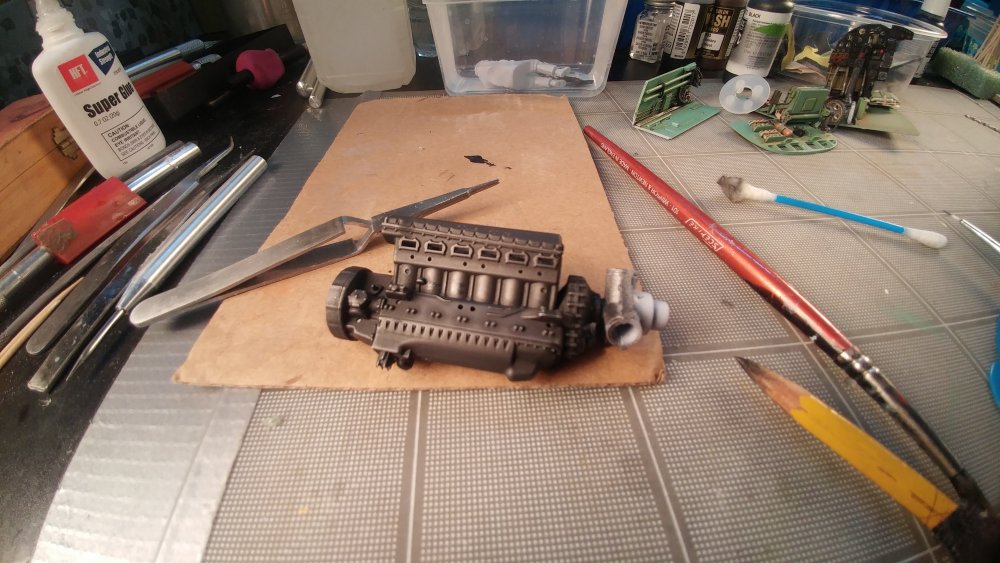
I was getting a little sick of the cockpit so I put together and painted the basices of the engines. Below is a good example of the difference between paint-only (4 parts flat black, 2 parts metal black and 1 part gunmetal), and paint with graphite rubbed into it: Then added Some weathering and grime...next I'll start doing the hoses/wires/pipes (those with the kit and those not in the kit) and the supercharger. And, of course, the Rolls Royce type. I tried to do this with capillary action and rubbing the excess off with a moist Q-tip but I was lifting the paint. So I ended up rubbing the excess off with my finger and more graphite:
-
1/24 Airfix Scale Mosquito build
PeteF replied to PeteF's topic in LSM 1/35 and Larger Work In Progress
When I was young, I thought nothing of 1/72 scale kits. I swear, 1/24 is about as small as I want to work now LOL. -
1/24 Airfix Scale Mosquito build
PeteF replied to PeteF's topic in LSM 1/35 and Larger Work In Progress
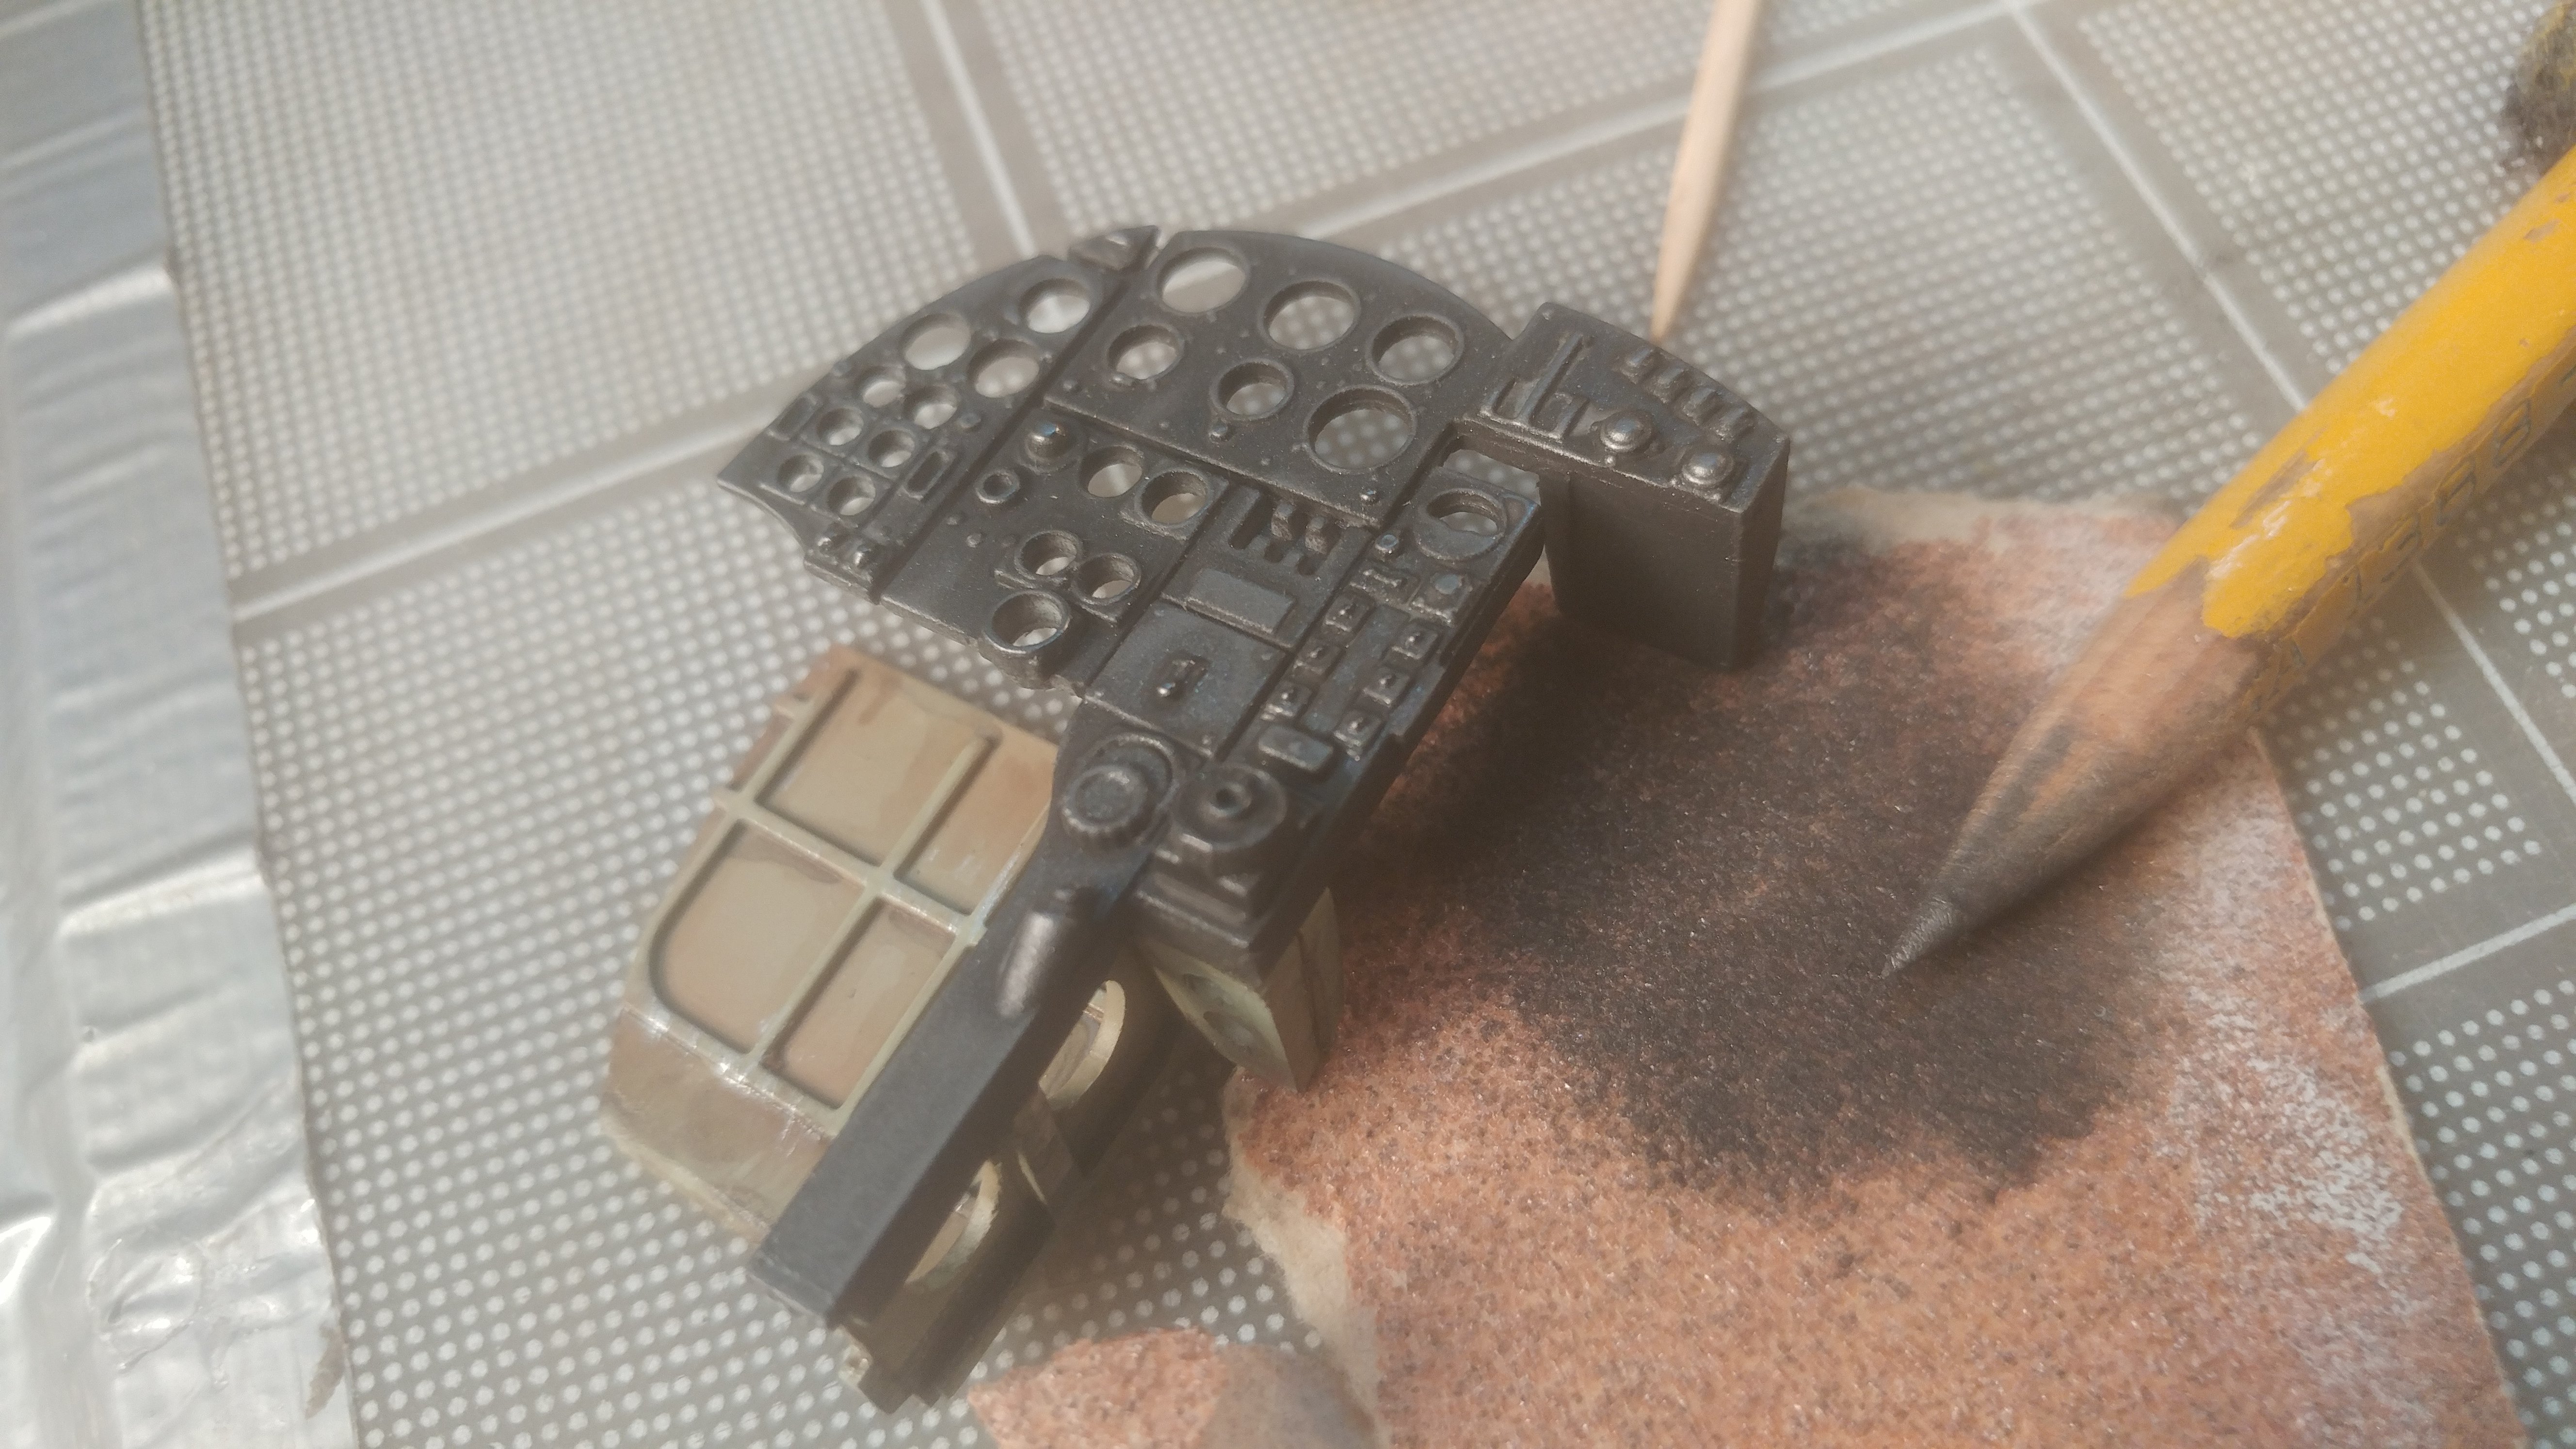
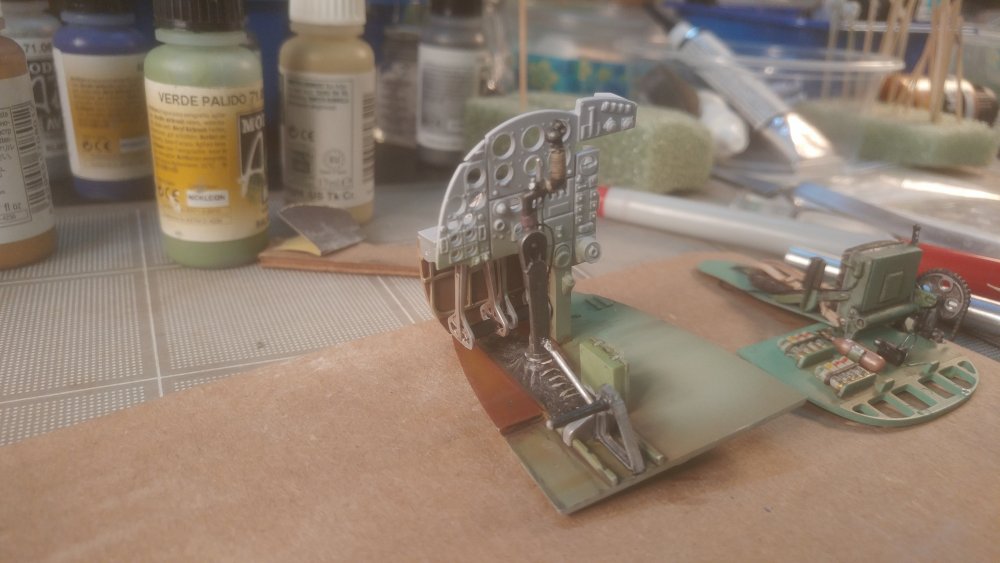
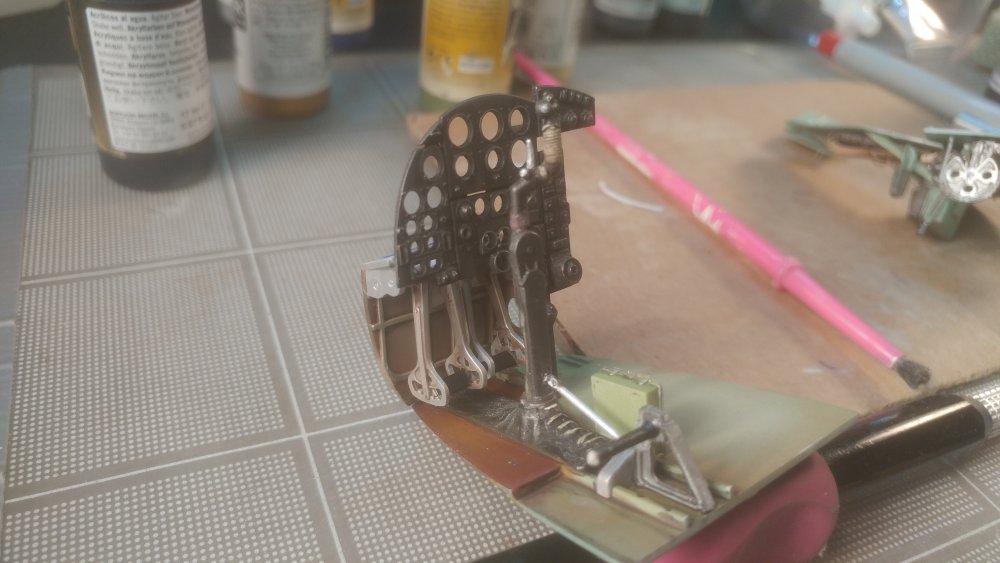
At least some of the right side of the instrument panel may be visible through the door so I did some wiring there. IP is done plus the map box.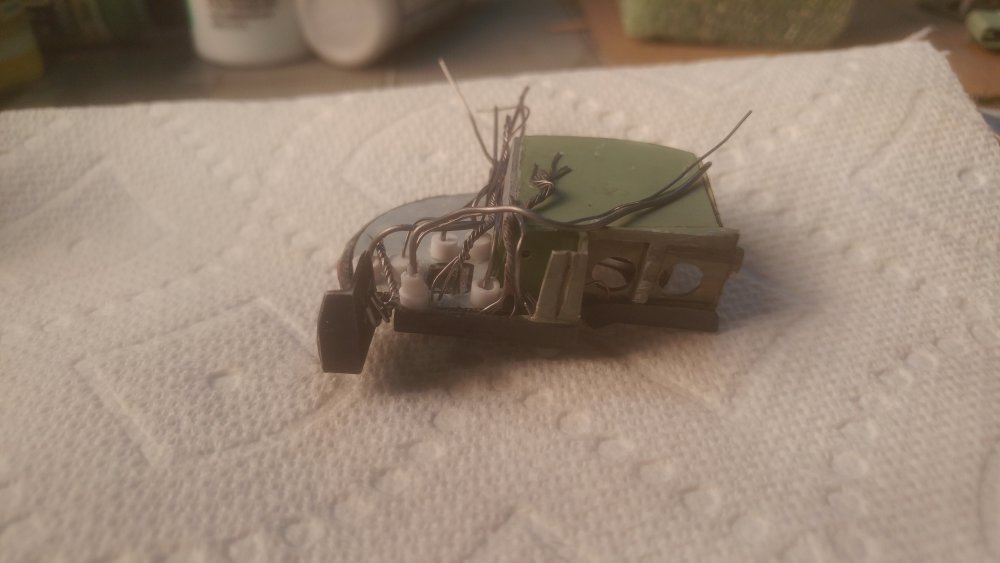

-
1/24 Airfix Scale Mosquito build
PeteF replied to PeteF's topic in LSM 1/35 and Larger Work In Progress
I started on the instrument panel and rudder pedals. The model had basically a "wall" around the instrument panel so I cut that all away to reveal the panel to the right of the rudder pedals and added some detail (not quite authentic). I do have a nice set of aftermarket decals. The Airfix ones are great! Only you are supposed to apply them ONE AT A TIME to the blasted instrument panel plastic. I'll add some visible wiring later. This real plane was stored and operated outside in England. My Nanchang was relatively pampered and the cockpit still got filthy so I am going with "this thing gets filthy from the dirt and mud tracked into it by the crew". I never did a tank (some day) but this model feels a bit like doing a tank. I did the instrument panel in a mix of metallic and flat black and wasn't happy then I suddenly remembered one of the best tips I ever got that I used in RC scale. Sand off the graphite from a pencil and rub it into the paint. It is miraculous...makes the metal look "real" with no effort. It's amazing when doing engines and guns as well. Some test fitting here, I screwed up the rudder pedals twice but eventually got them right. Have to paint the colored details on the panel and do the instruments later...maybe tomorrow.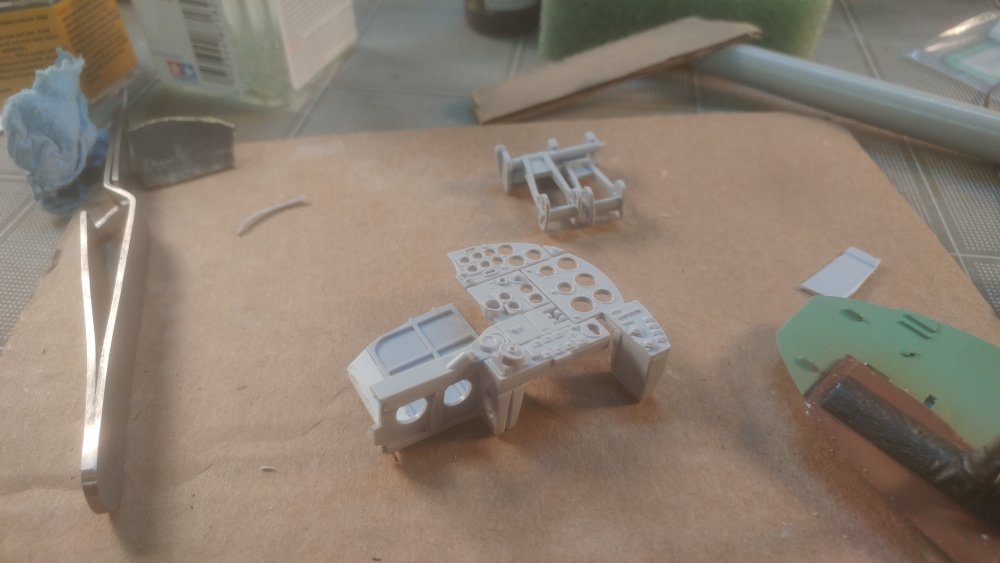

-
1/24 Airfix Scale Mosquito build
PeteF replied to PeteF's topic in LSM 1/35 and Larger Work In Progress
Hi Jeff, I found a plane that was in 487 New Zealand squadron that took place in the Amiens raid whose pilot has the same last name as me. Though there are no pictures of his plane, it is HX974 with the code letters EG-J. I'm pretty sure I can make that out of some of the paint masks I've found on line. -
1/24 Airfix Scale Mosquito build
PeteF replied to PeteF's topic in LSM 1/35 and Larger Work In Progress
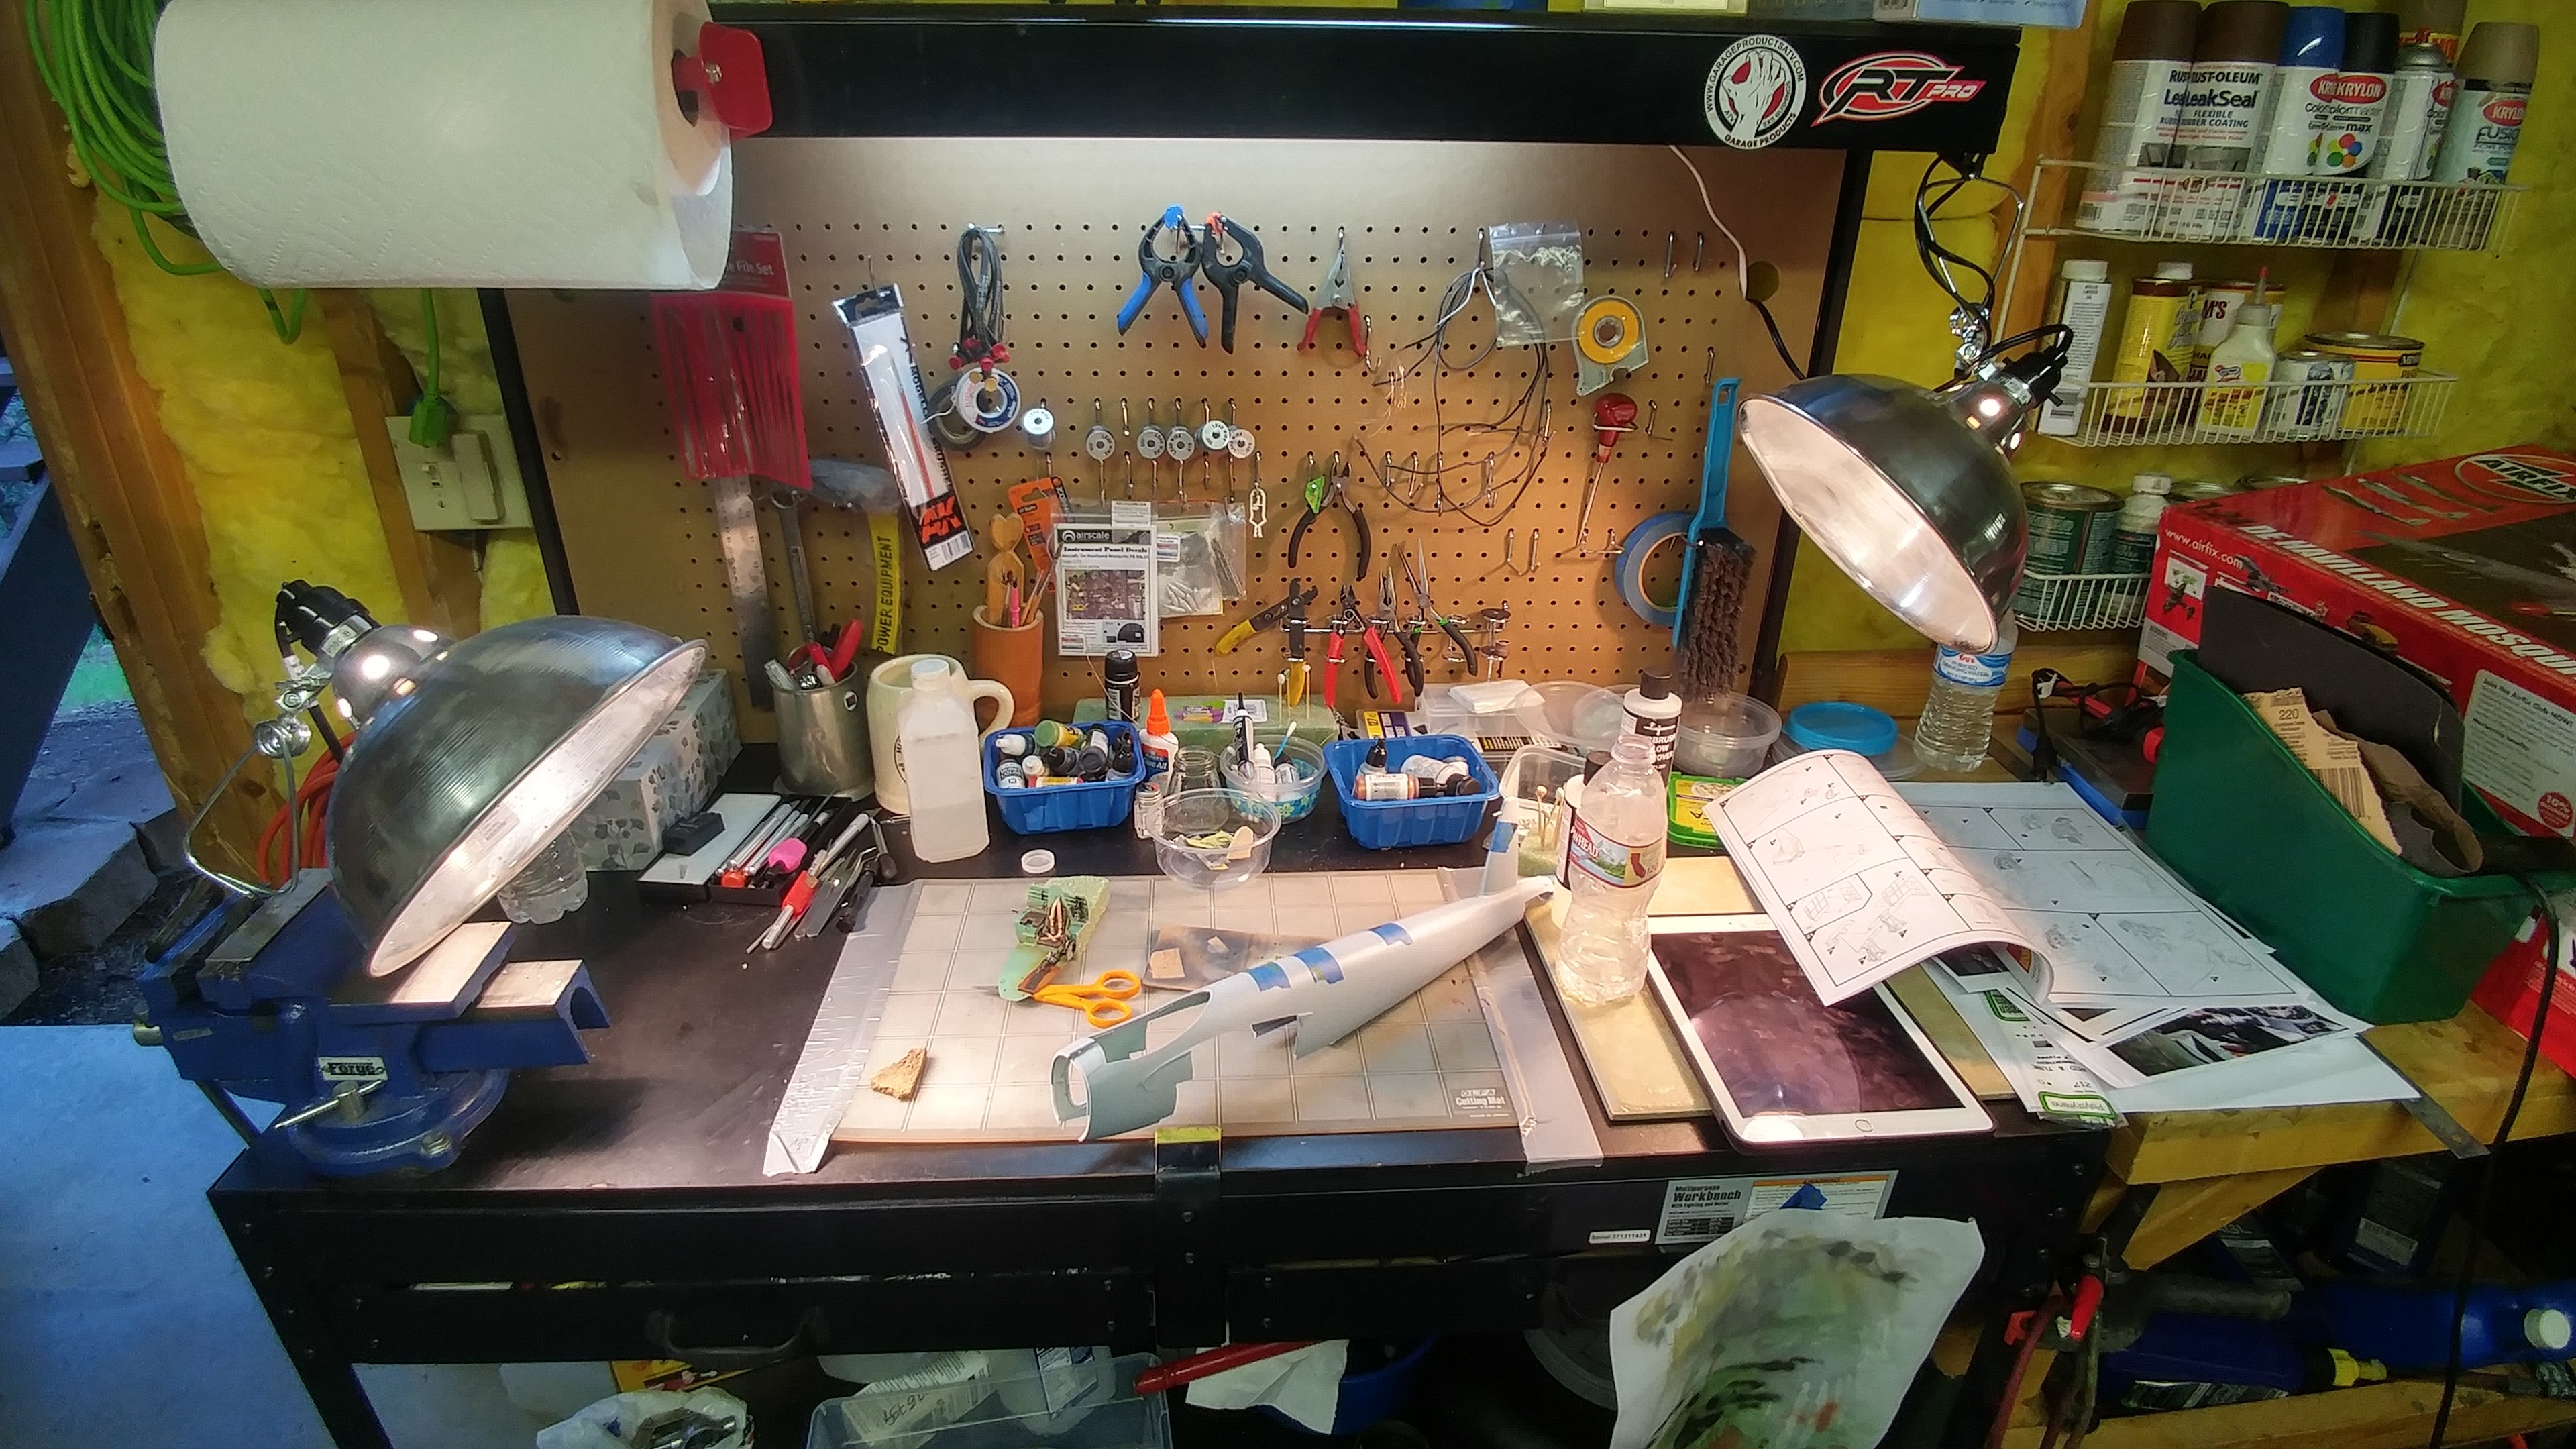
Thanks, I'm REALLY liking using acrylic paints. Water cleanup and the ability to keep my hands clean is one of the best things I've found with the new suite of tools. Here's my little work bench in the store room.
-
1/24 Airfix Scale Mosquito build
PeteF replied to PeteF's topic in LSM 1/35 and Larger Work In Progress
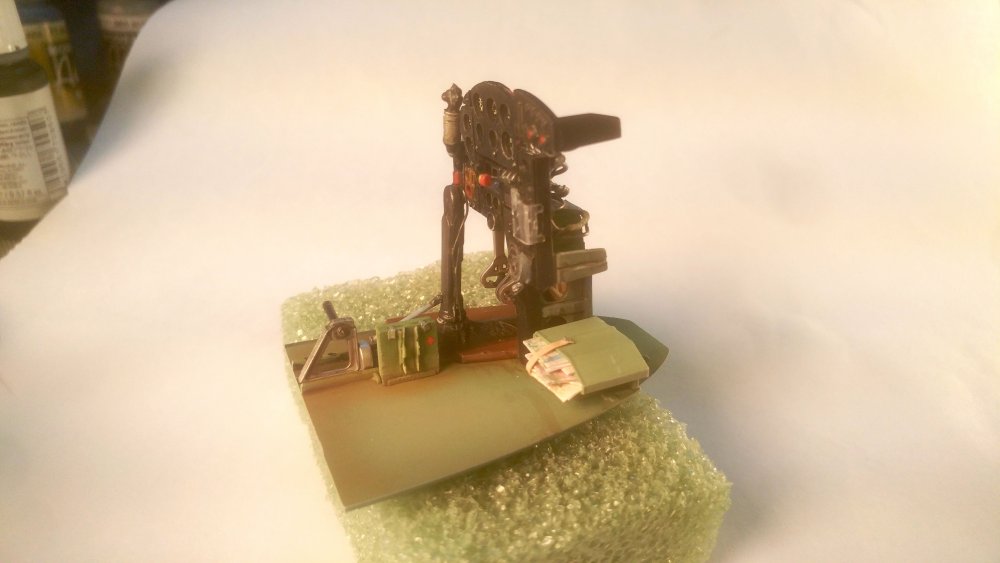
The sides of the joystick weren't moulded all that great but I used .010 lead wire to make the rope wrap and wires. There is also another control rod on the bottom of the joystick. That brings me up to date on the build. I have to make a second Sutton harness for the navigator before I finish that "seat." I pre-ordered a photo-etch GEE radio set but it's not supposed to be available until mid-October. Don't think I'm going to end up waiting that long so we'll see what I do with the radios.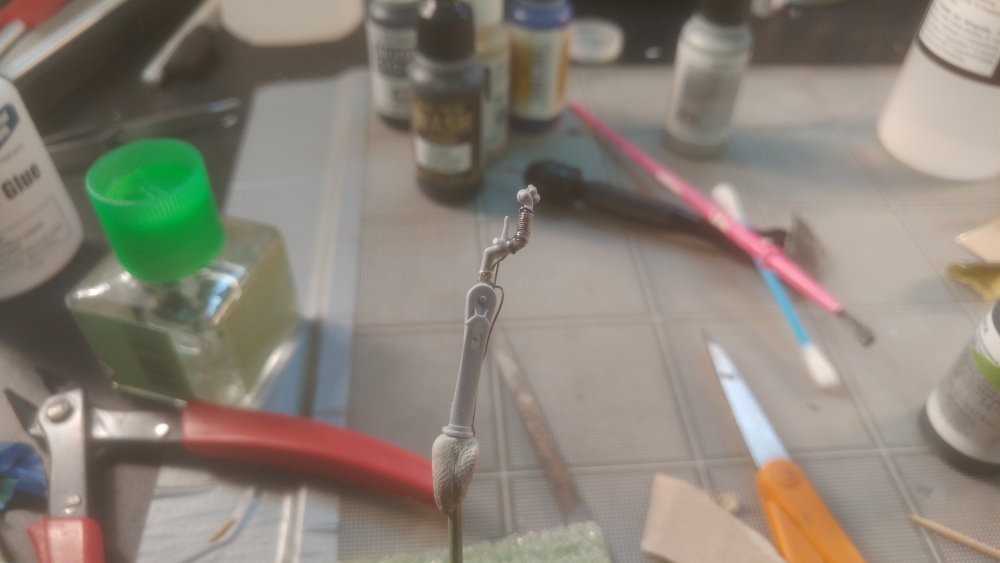
-
1/24 Airfix Scale Mosquito build
PeteF replied to PeteF's topic in LSM 1/35 and Larger Work In Progress
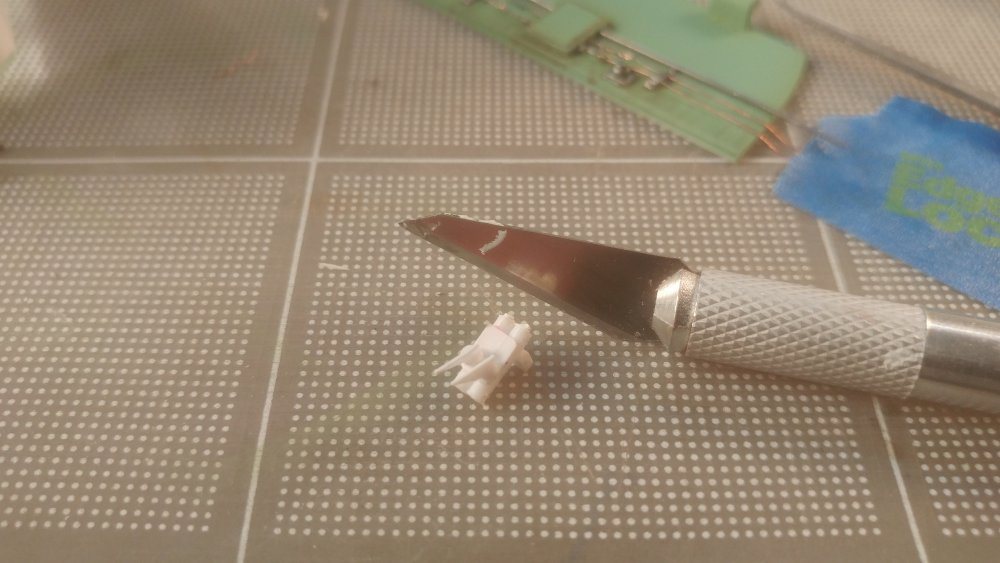
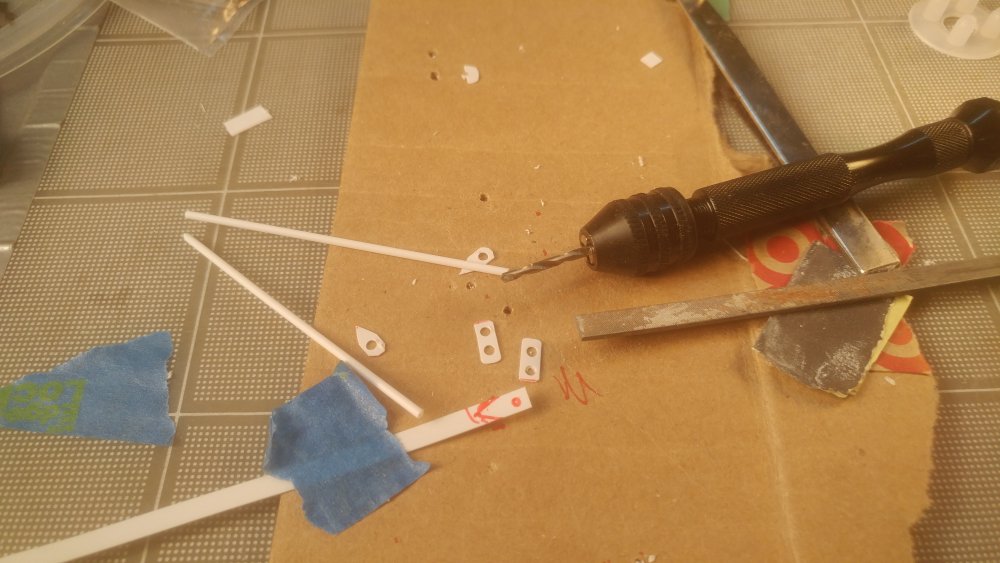
There was no decal for the first aid kit but the reference I had showed some sort of weird holder on the front anyway so I scratch built that.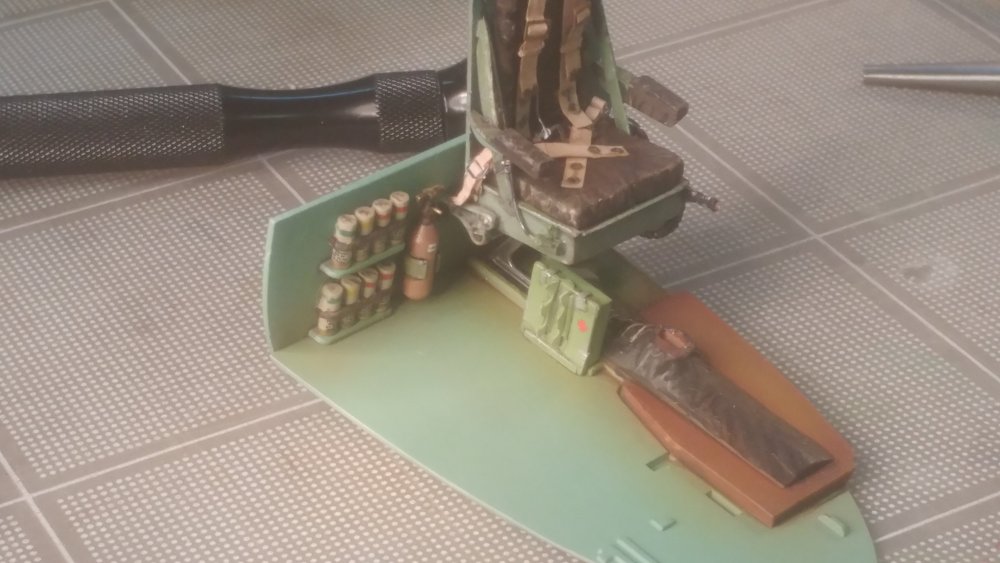
-
1/24 Airfix Scale Mosquito build
PeteF replied to PeteF's topic in LSM 1/35 and Larger Work In Progress
The flares had insane little decals. I got the type ones to work but hand painted the colored stripes using references. Also found a great reference for the fire extinguisher.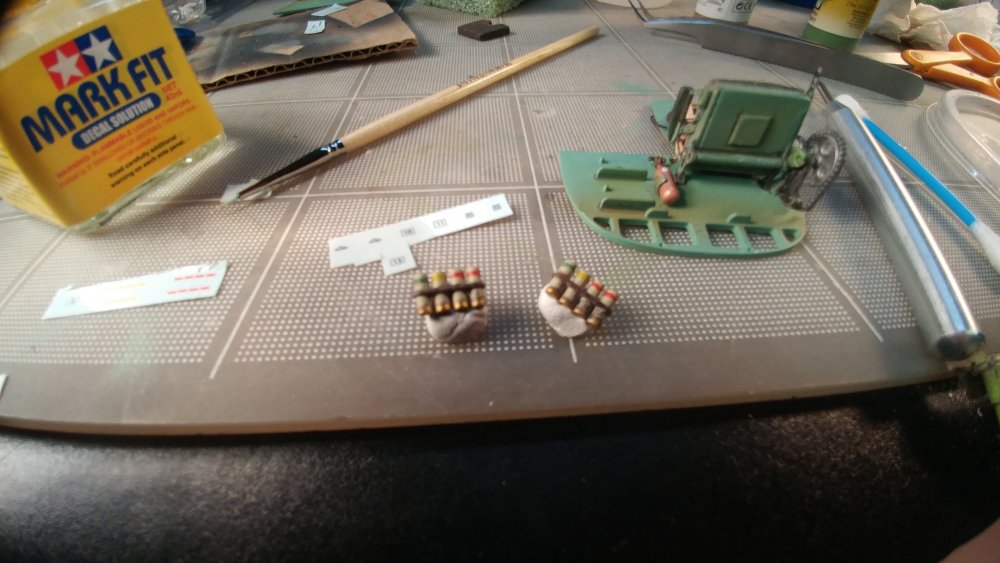

-
1/24 Airfix Scale Mosquito build
PeteF replied to PeteF's topic in LSM 1/35 and Larger Work In Progress
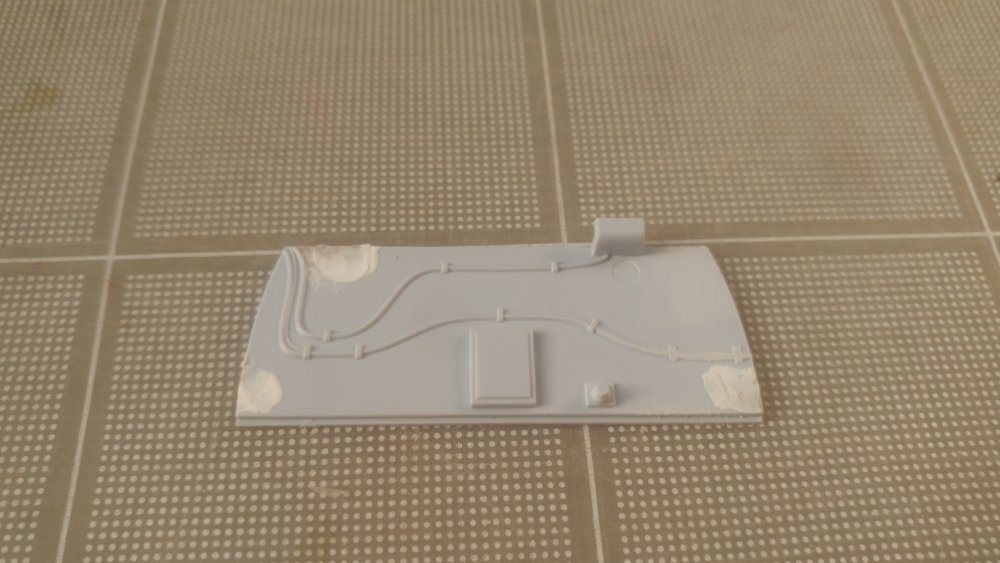
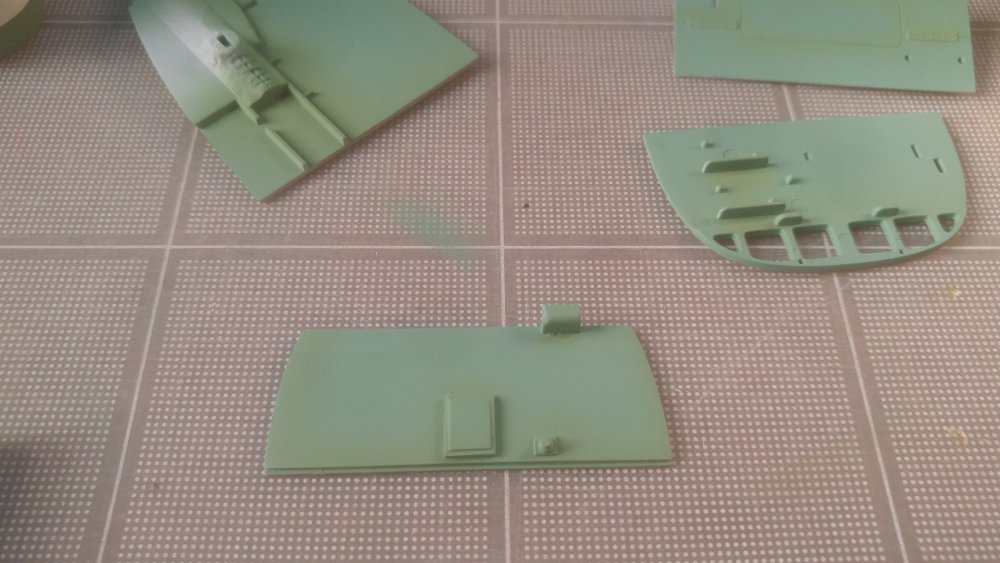
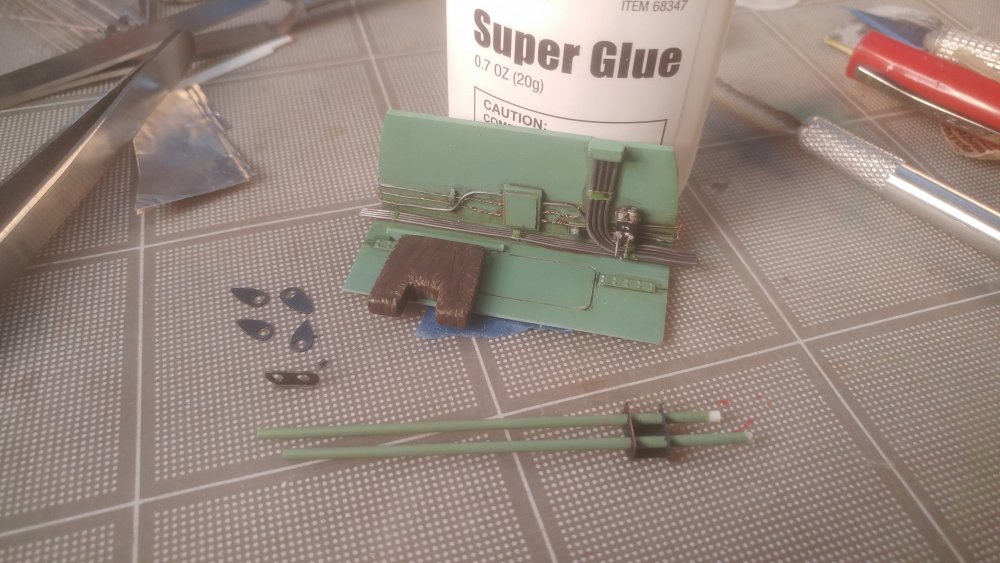
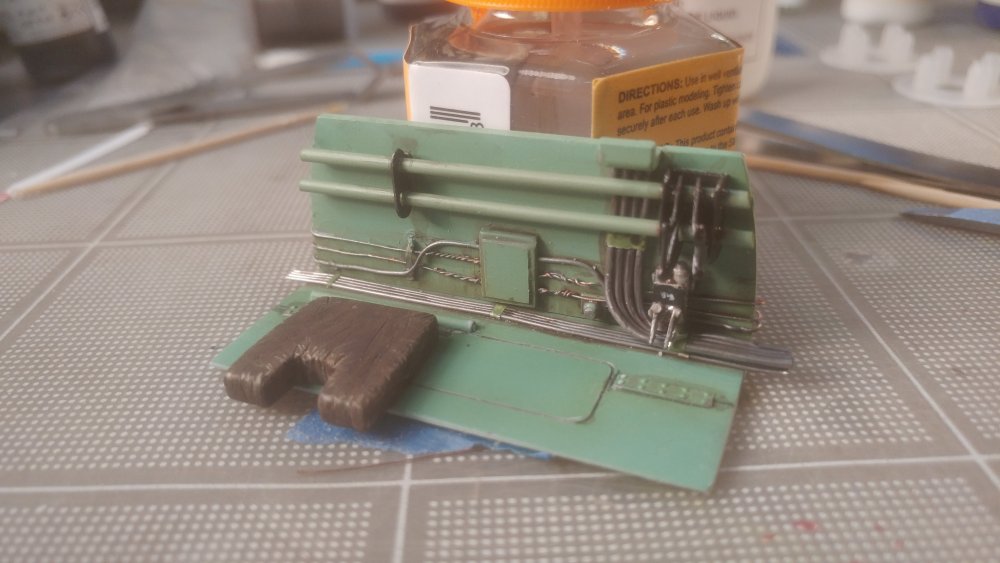
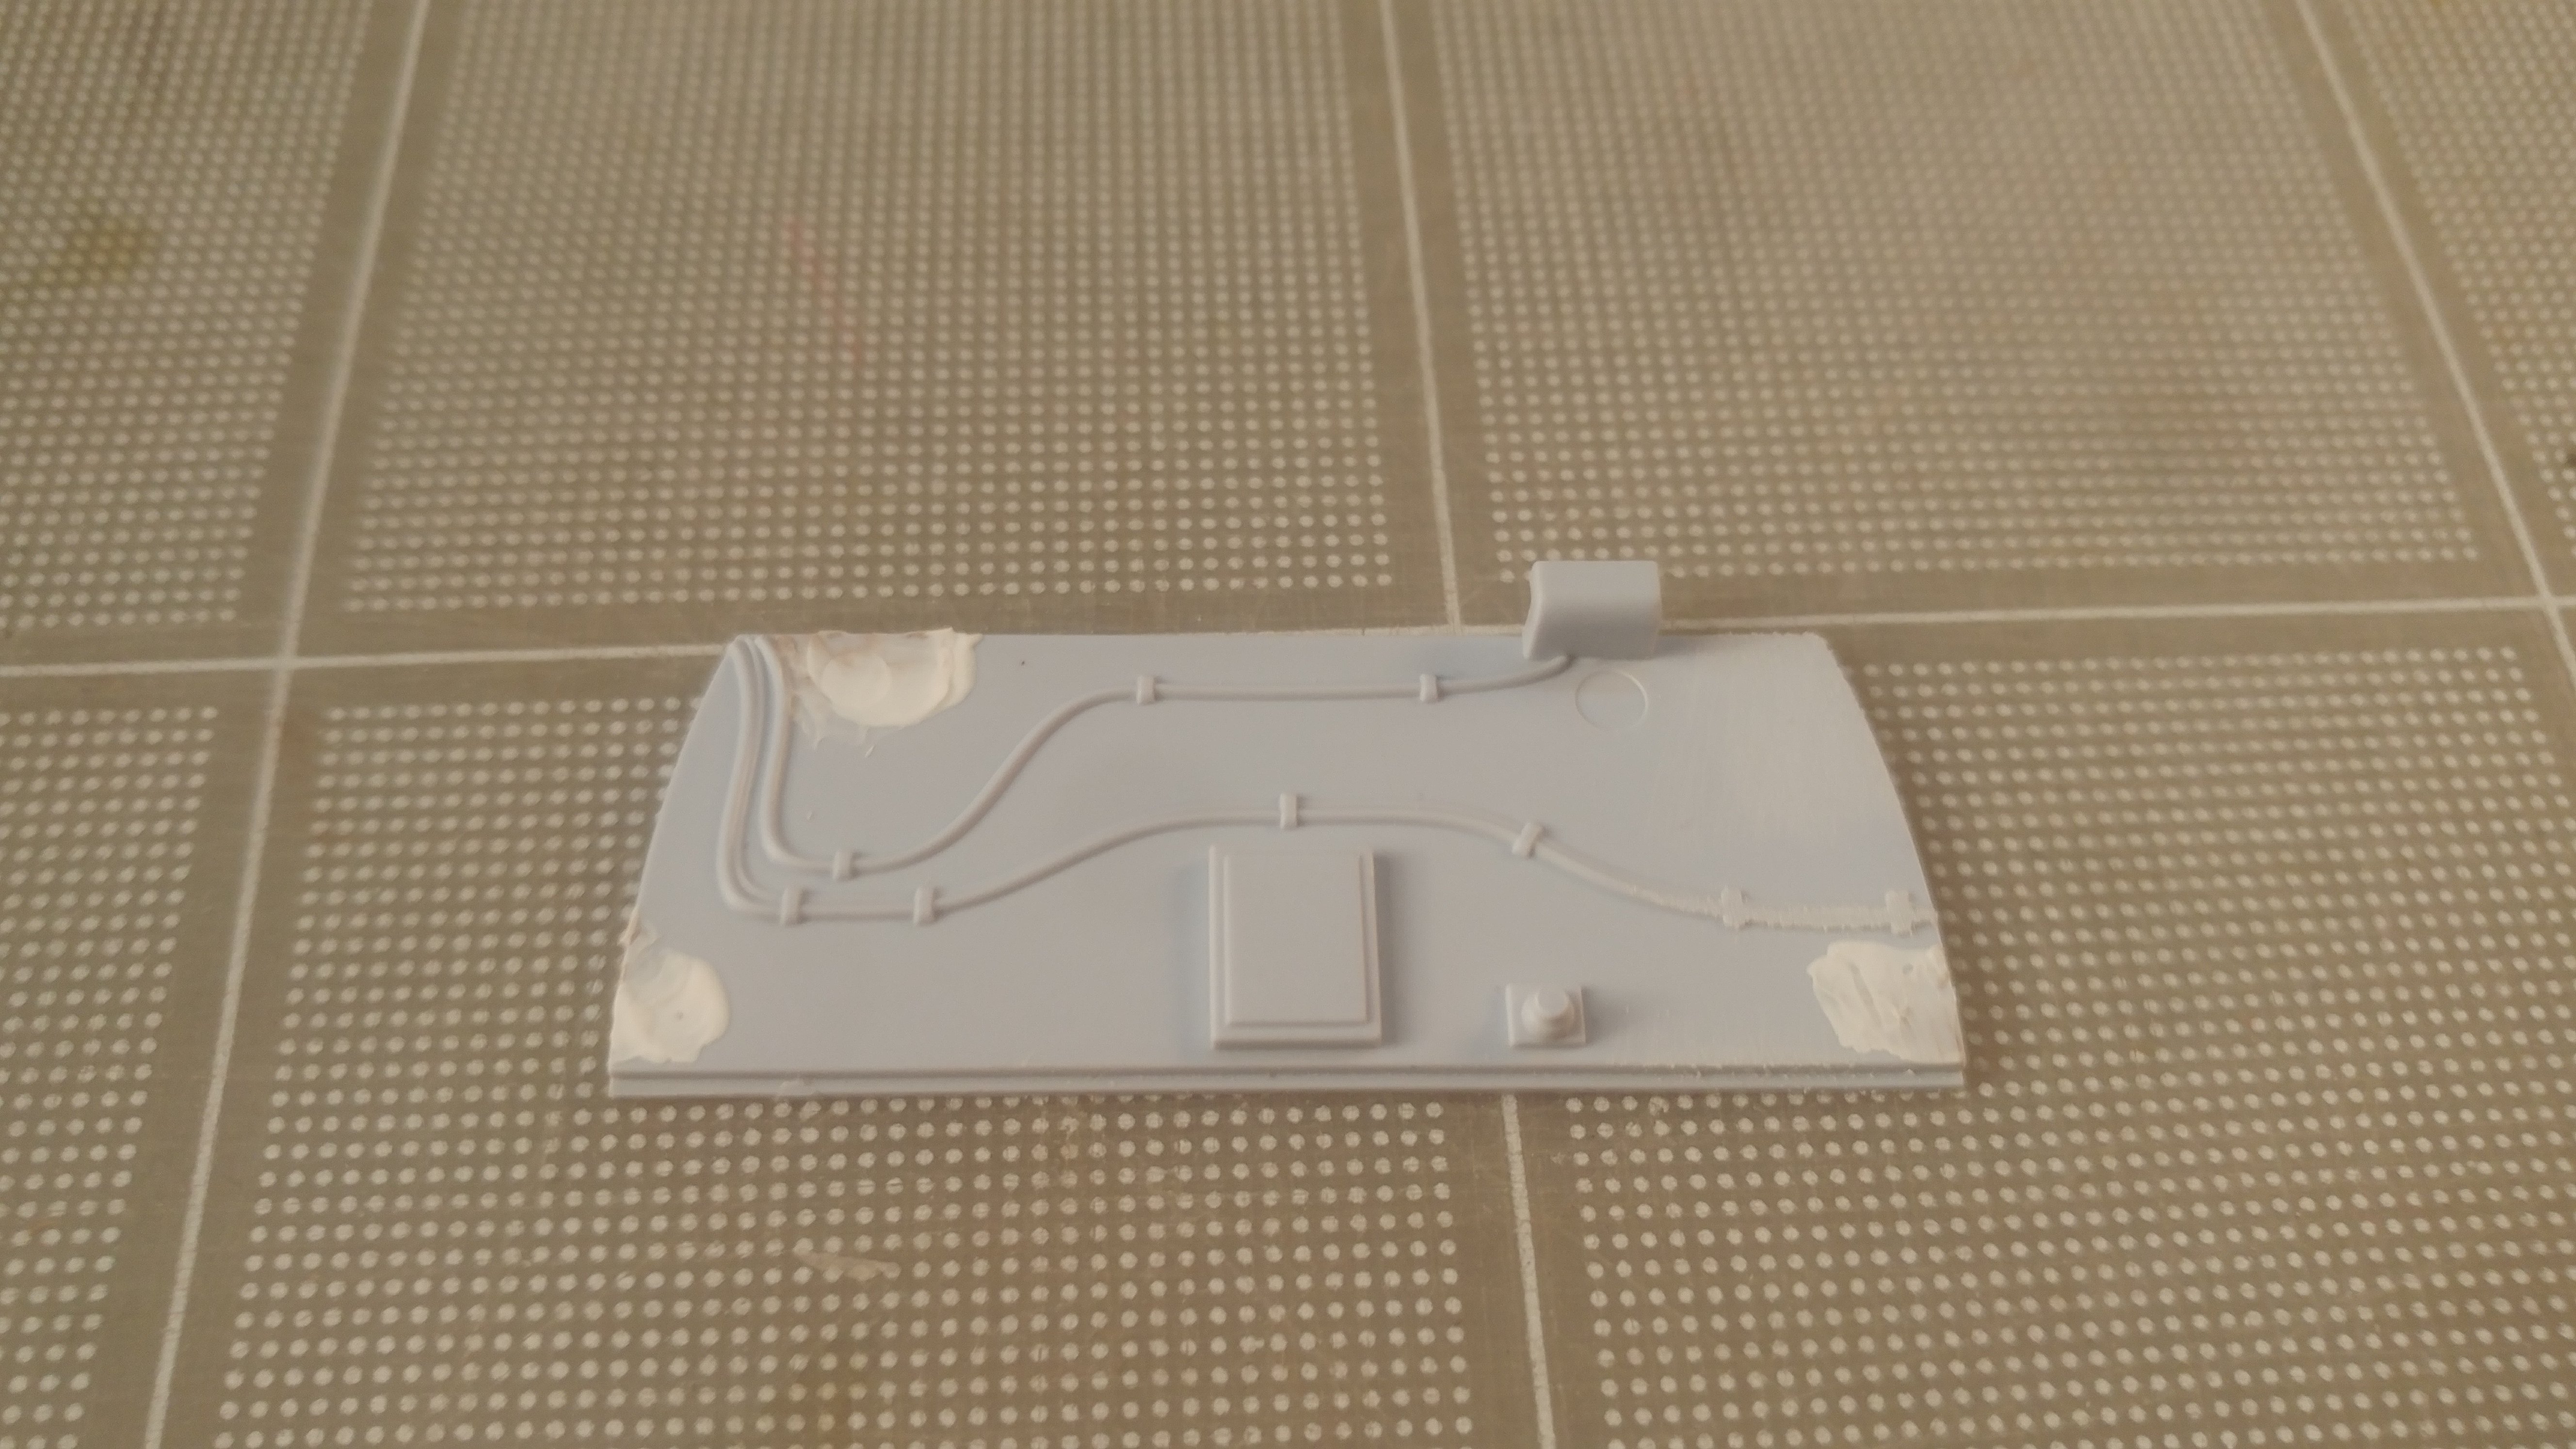
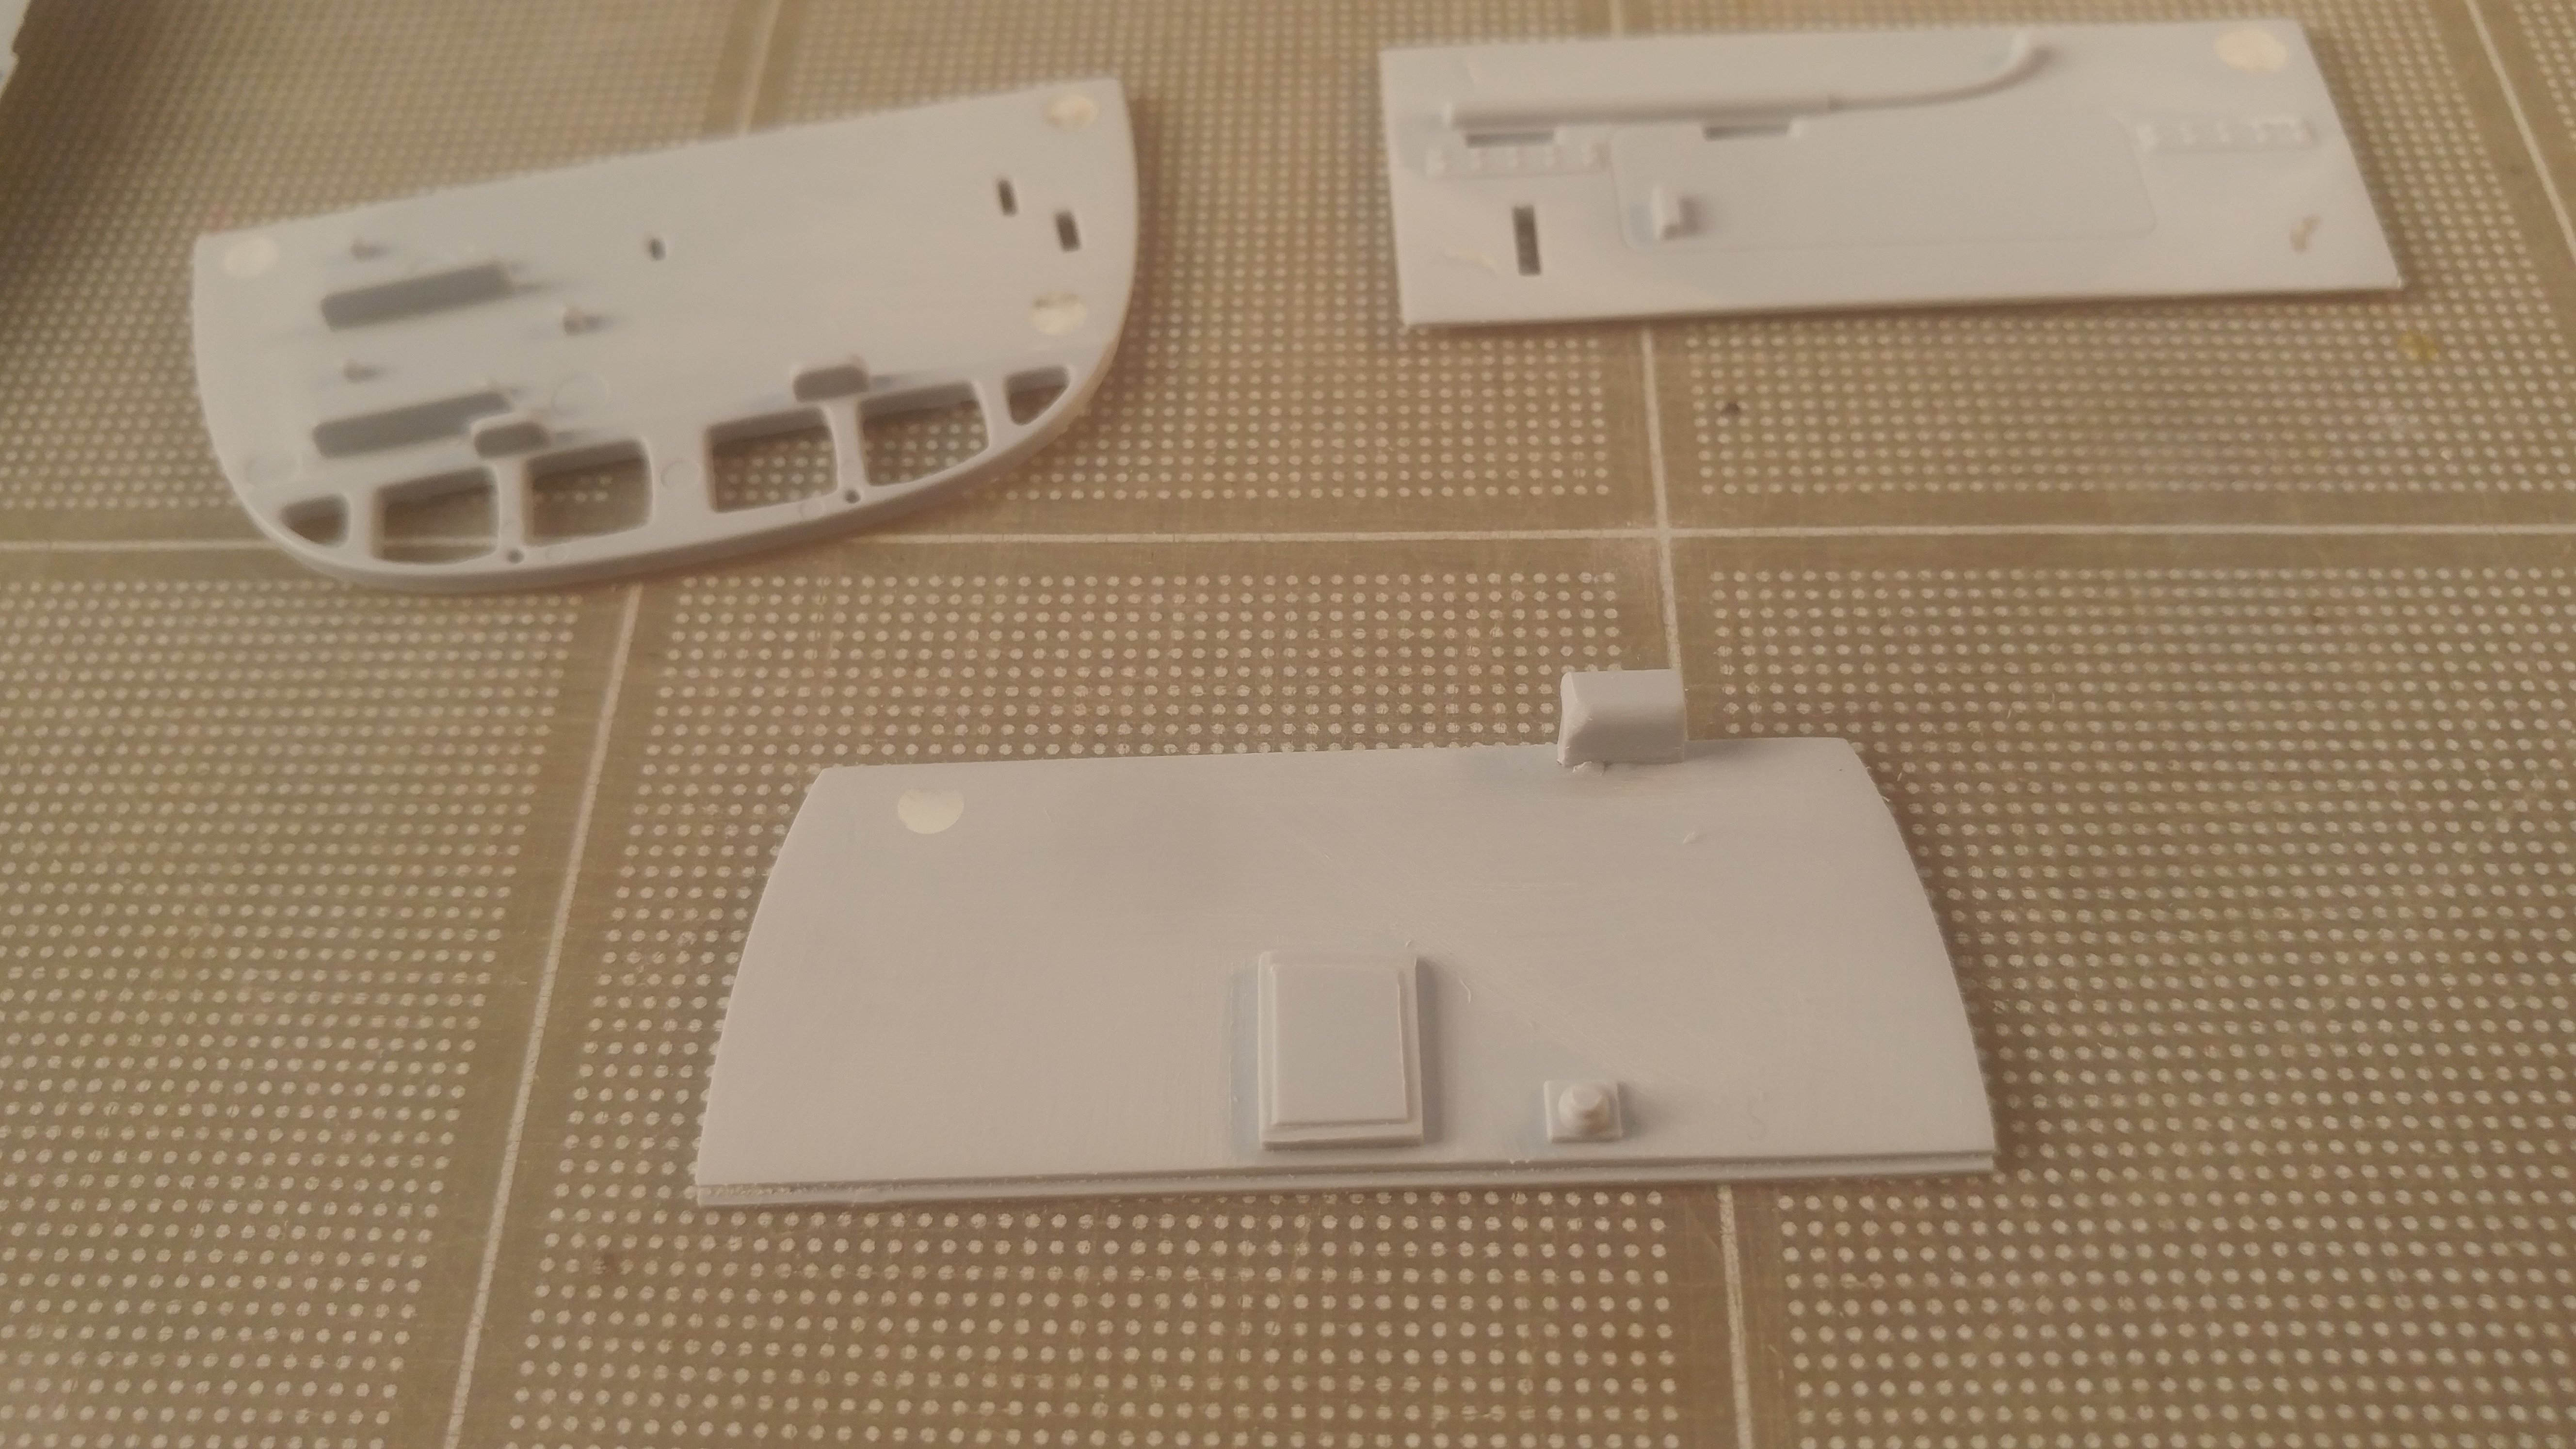
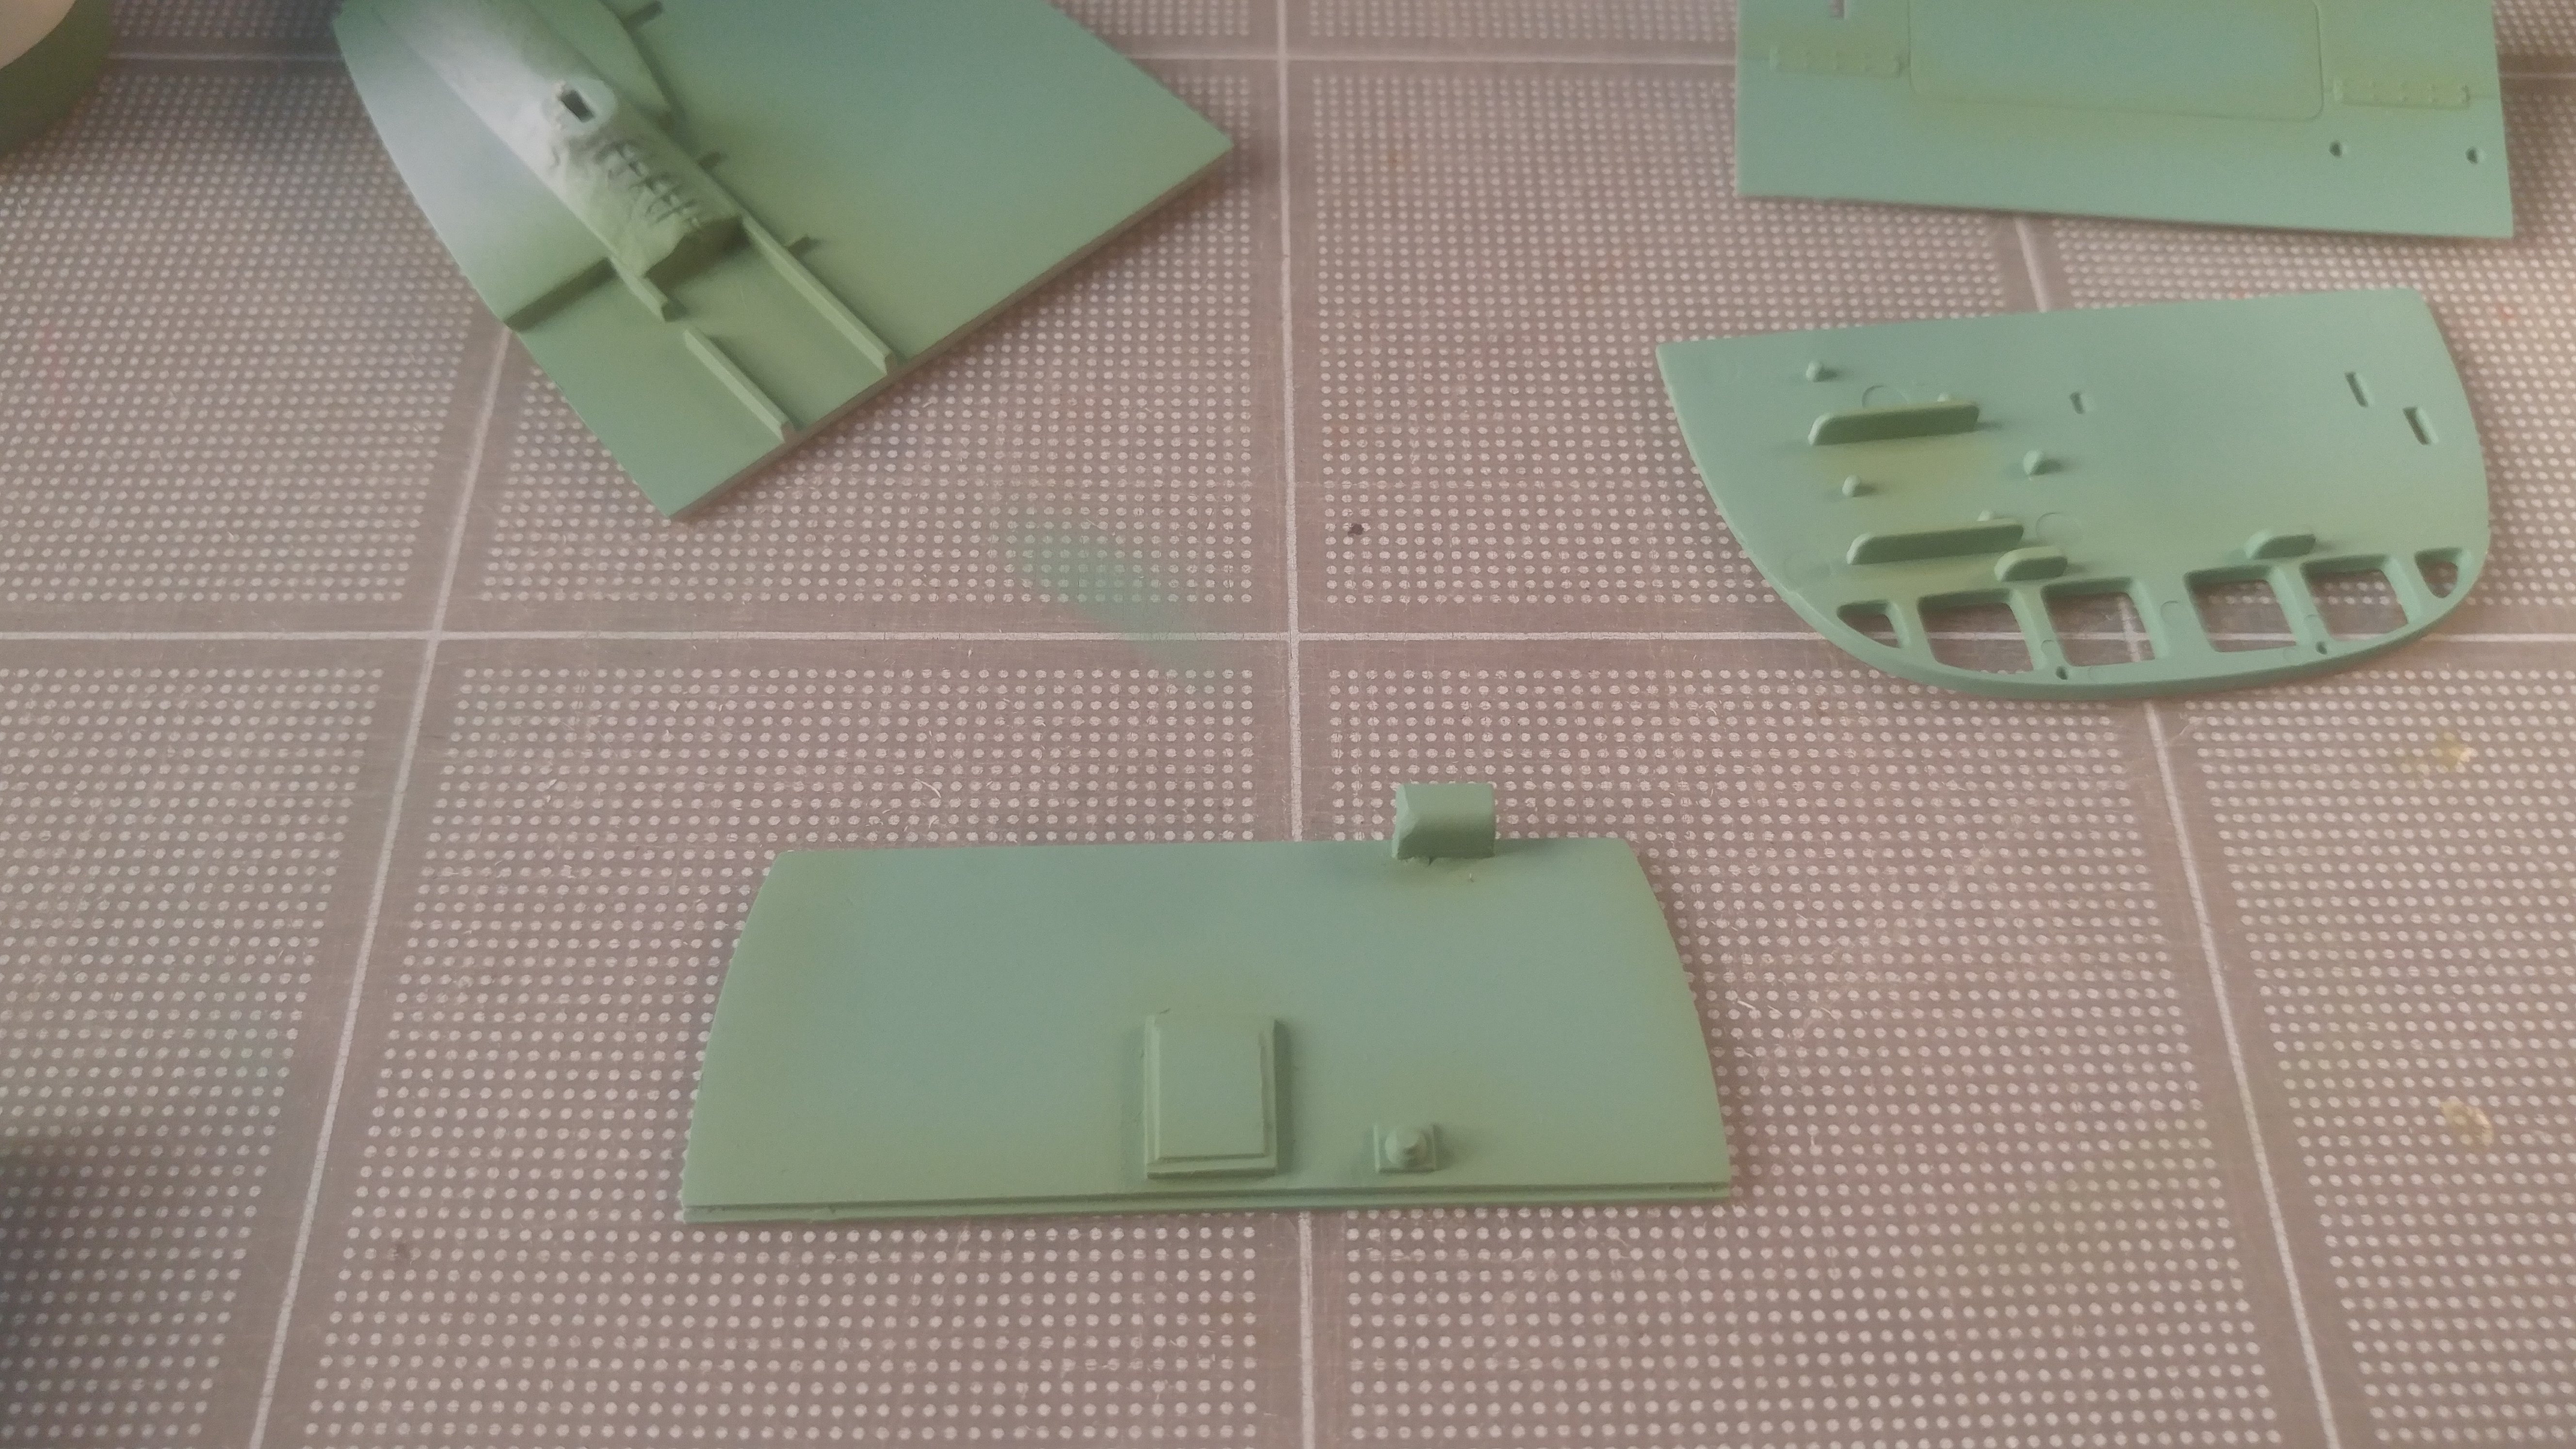
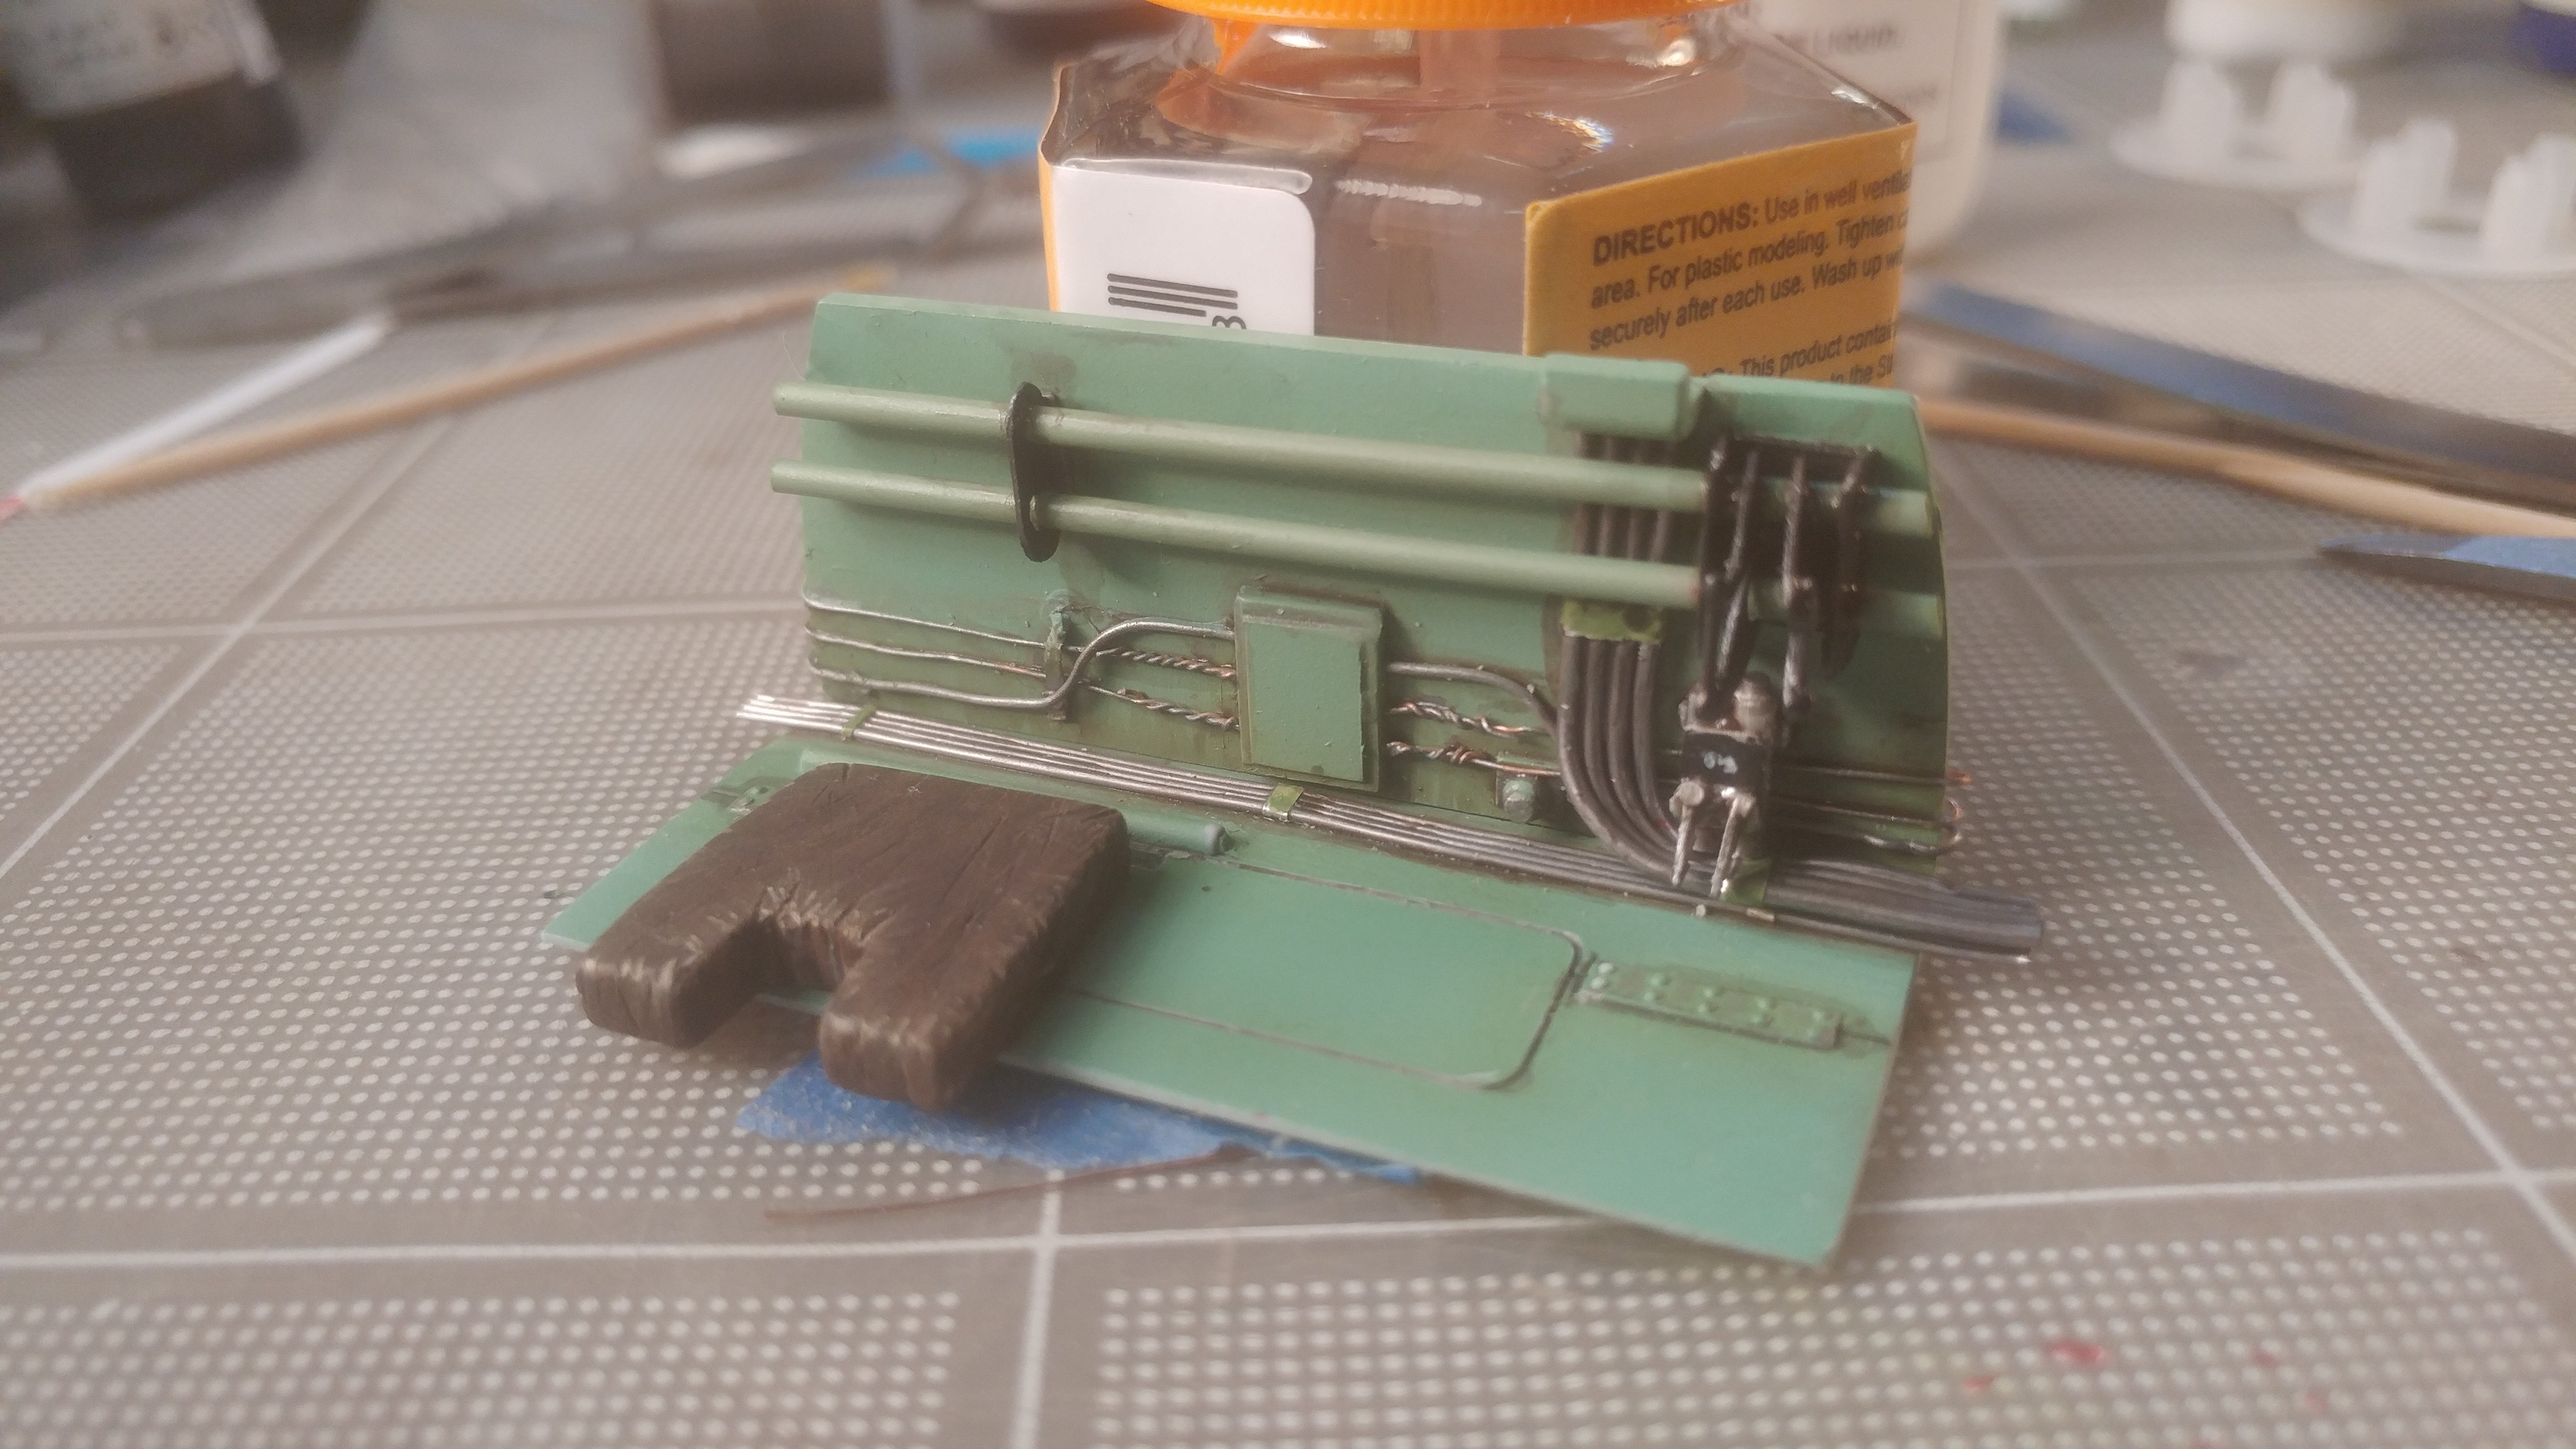
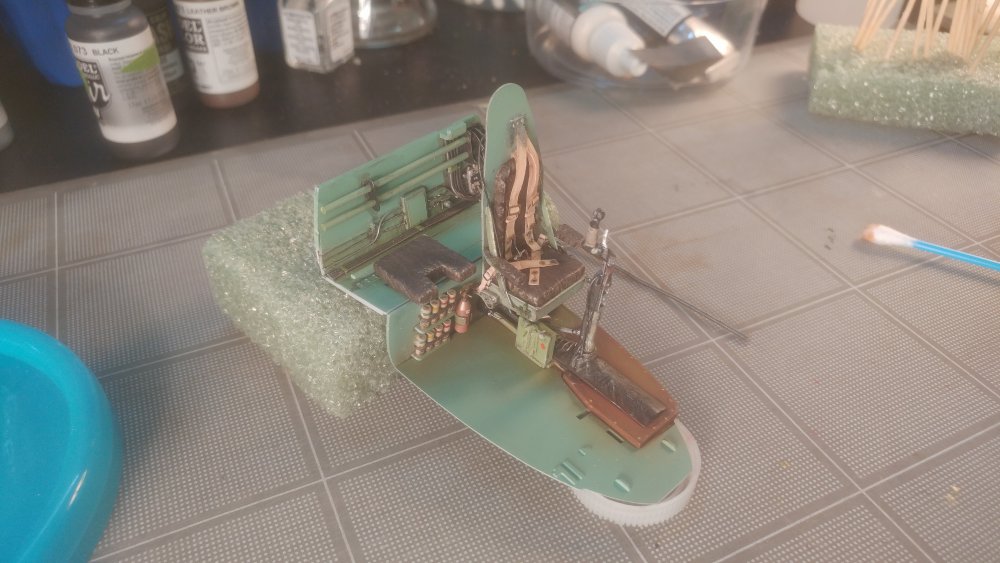
I had read about lead wire...that is a great boon to model building that I didn't have available in the "old days" so I stocked up. This panel at the back of the cockpit was pretty generic in the kit. The whole rear cockpit panel is the leading edge of the wing spar with the mixture and throttle control rods, a bunch of wires and some control cables so I sanded off the moulded in wires and scratch built the detail (some to come later) with wire, polystyrene tubes and cut sheets.