
FME erk
-
Posts
501 -
Joined
-
Last visited
Content Type
Profiles
Forums
Events
Gallery
Posts posted by FME erk
-
-
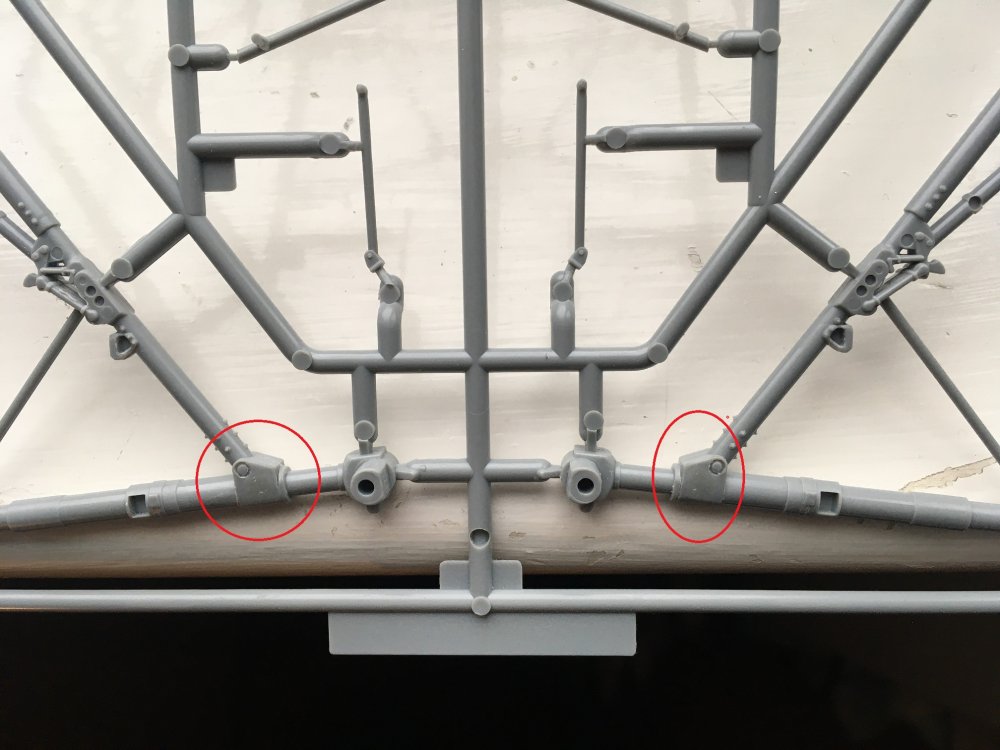
HK's main undercarriage legs have two 'holes' in the verticals yet on the real aircraft they are a solid cast. Why HK molded these like this is anybodys guess . . .
After applying HK sprue glue to the undercarriage legs last Friday, I finally rubbed them down, still on the sprue, to obtain the end result . . .
Thanks for looking in, more to come sooon

Ian

-
 5
5
-
-
Who could we possibly ask,
 to develop and produce some Hercules engines for the 32nd Lancaster ?
 ")
-
1
-
-
What Phil said, plus unbelievable attention to the detail . .
Ian
-
4
-
-
3 hours ago, Bomber_County said:
Great attention to detail Ian, those engines look so small against the mass of the Lanc. It would be interesting to do a Hercules engined Lanc next........
If only somebody was brave enough to create a 3D render and produce one for production . . .
-
2
-
-
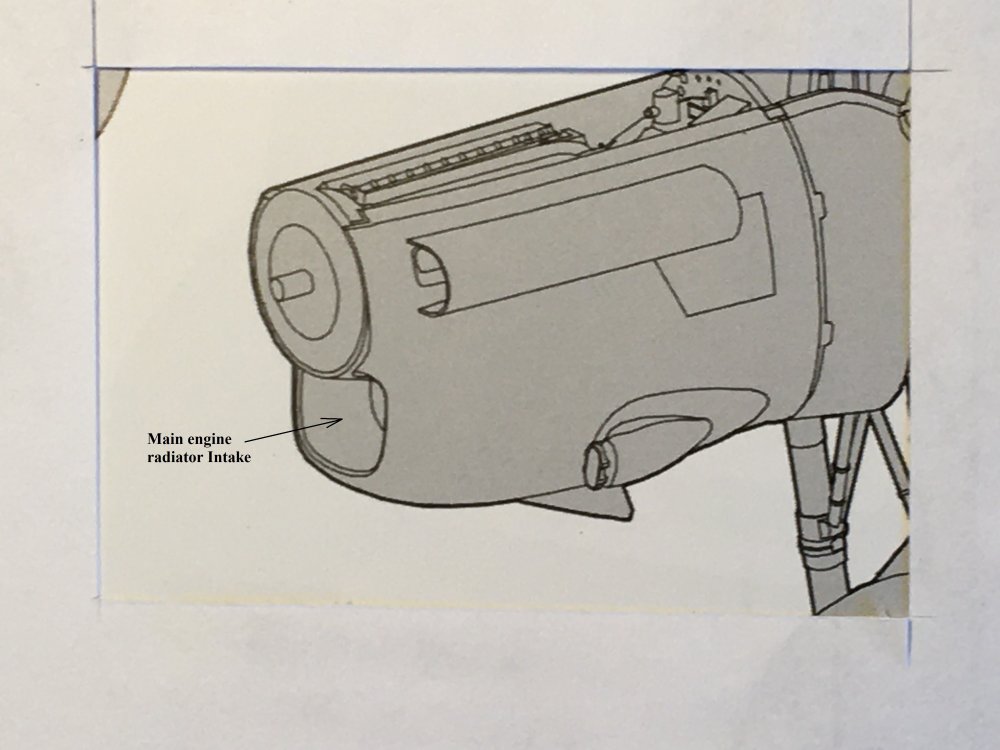
The next small change I have attempted are the engine rads that sit at the bottom of the engine and are viewable through front engine intake . . .
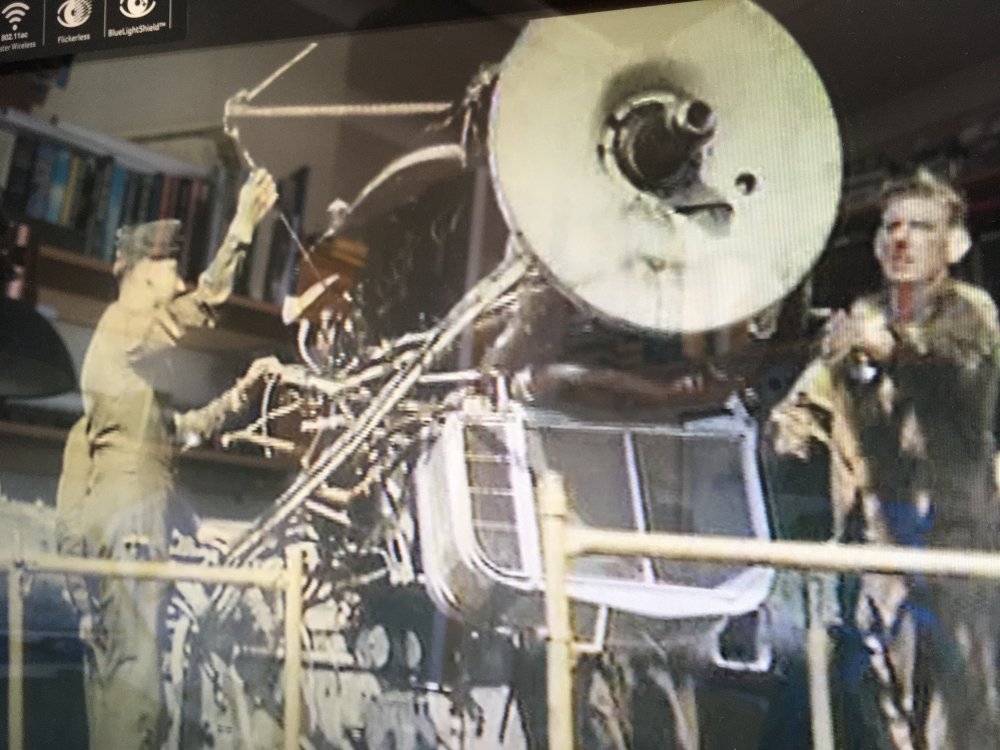
The photos that Carl has posted show what looks to be a wartime pattern of radiator type. The kit radiator is a post-war type and that type only has two halves ie a single divide. Carls photo show THREE sections and the second photo shows the example taken from the film 'Night Bombers'
Third photo shows the rad off 'Just Jane' with its two sections and the type molded in the kit . . .
My attempts to replicate the 3 section radiator, probably a first for this kit . . .
I didnt use the part No 3 from the kit and originally the bottom section of the rad was curved as in the wartime photo but It would not fit into the front cowl from the kit so was therefore cut at angles to fit in . . .
Moving onto the next modification . . . hey ho
Ian


-
5
-
 1
1
-
-
Great photo Carl, thanks for sharing those . . .
Certainly a lot of pipes and wiring
 to try and incorporate into the model
Ian
-
4
-
-
2 minutes ago, Kaireckstadt said:
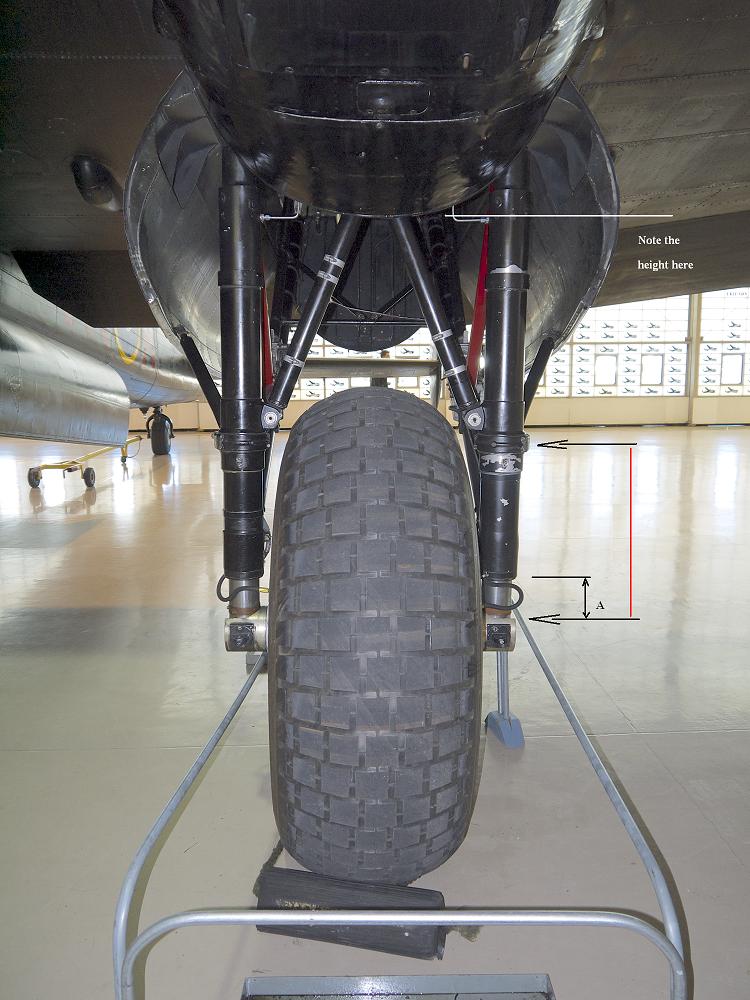
Here’s another picture showing clearly the need for shortening the MLG:
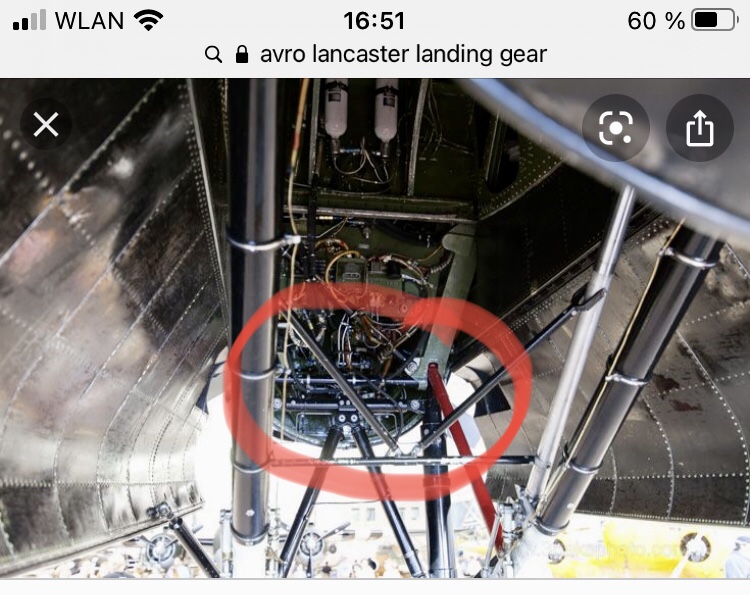
That clearly shows that when you build the model you should NOT be able to see the crossbar on the central brace . . . thanks for sharing that photo . . .
-
5
-
-
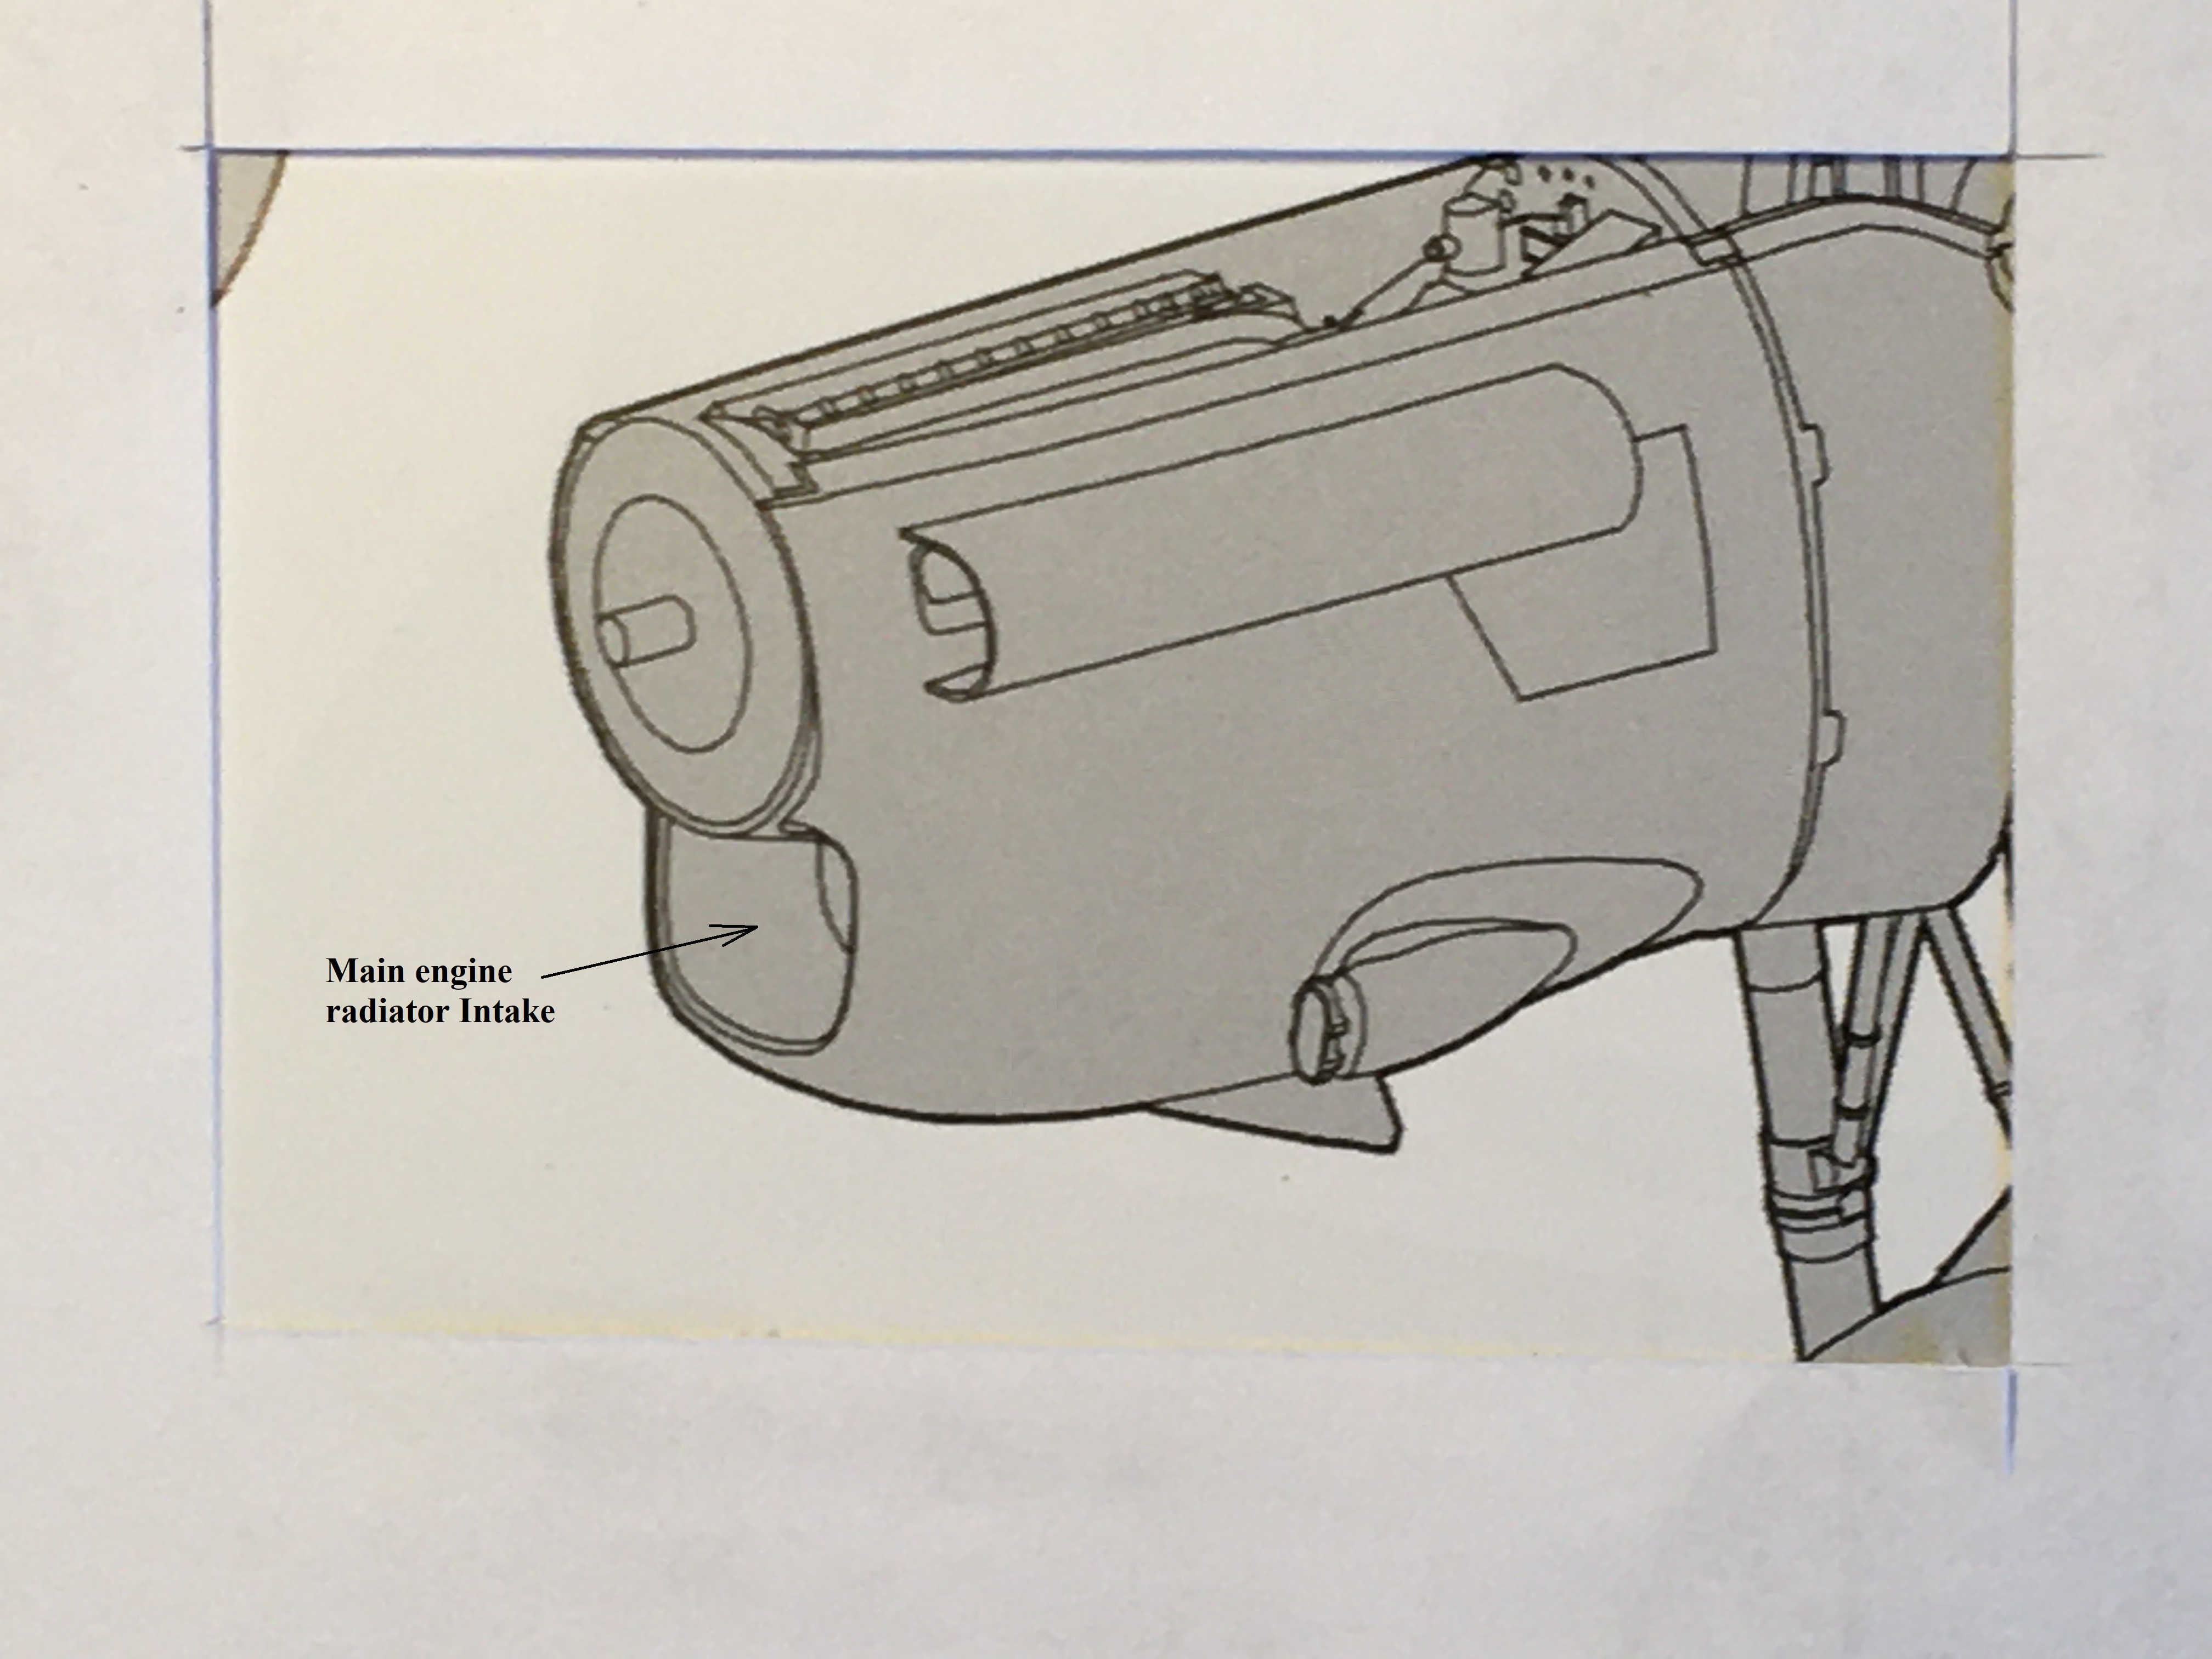
Can anybody help who might have done this ?
I am trying to work out how to mount the radiator in the engine nacelle without the engine . . .
HK have provided the 'dummy' fitting, which they dont mention, but a great idea for fitting the exhausts out of the cowling but I think they forgot about fitting the radiator at the bottom. The rad is fitted with two pins that secure into the bottom of the engine, Y8, but there is no location/slot for the rad to fit into securely by itself within the bottom cowling itself . . .
Ian
.thumb.JPG.07263512f591b6281b8da5b58b2489b2.JPG)
-
3
-
-
Another mod that is a personal choice is the opening of the bottom cowling on the engines so that you can see the radiator from the rear. The flap fits onto the kit with no issue but I think it just looks better to have it open as per the real aircraft . . .
Here is my take on the modification, pretty straight forward

Ian
-
4
-
-
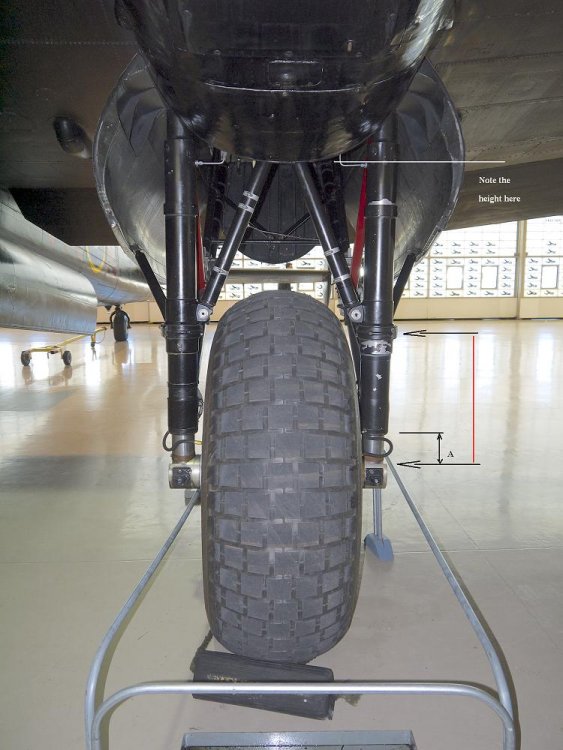
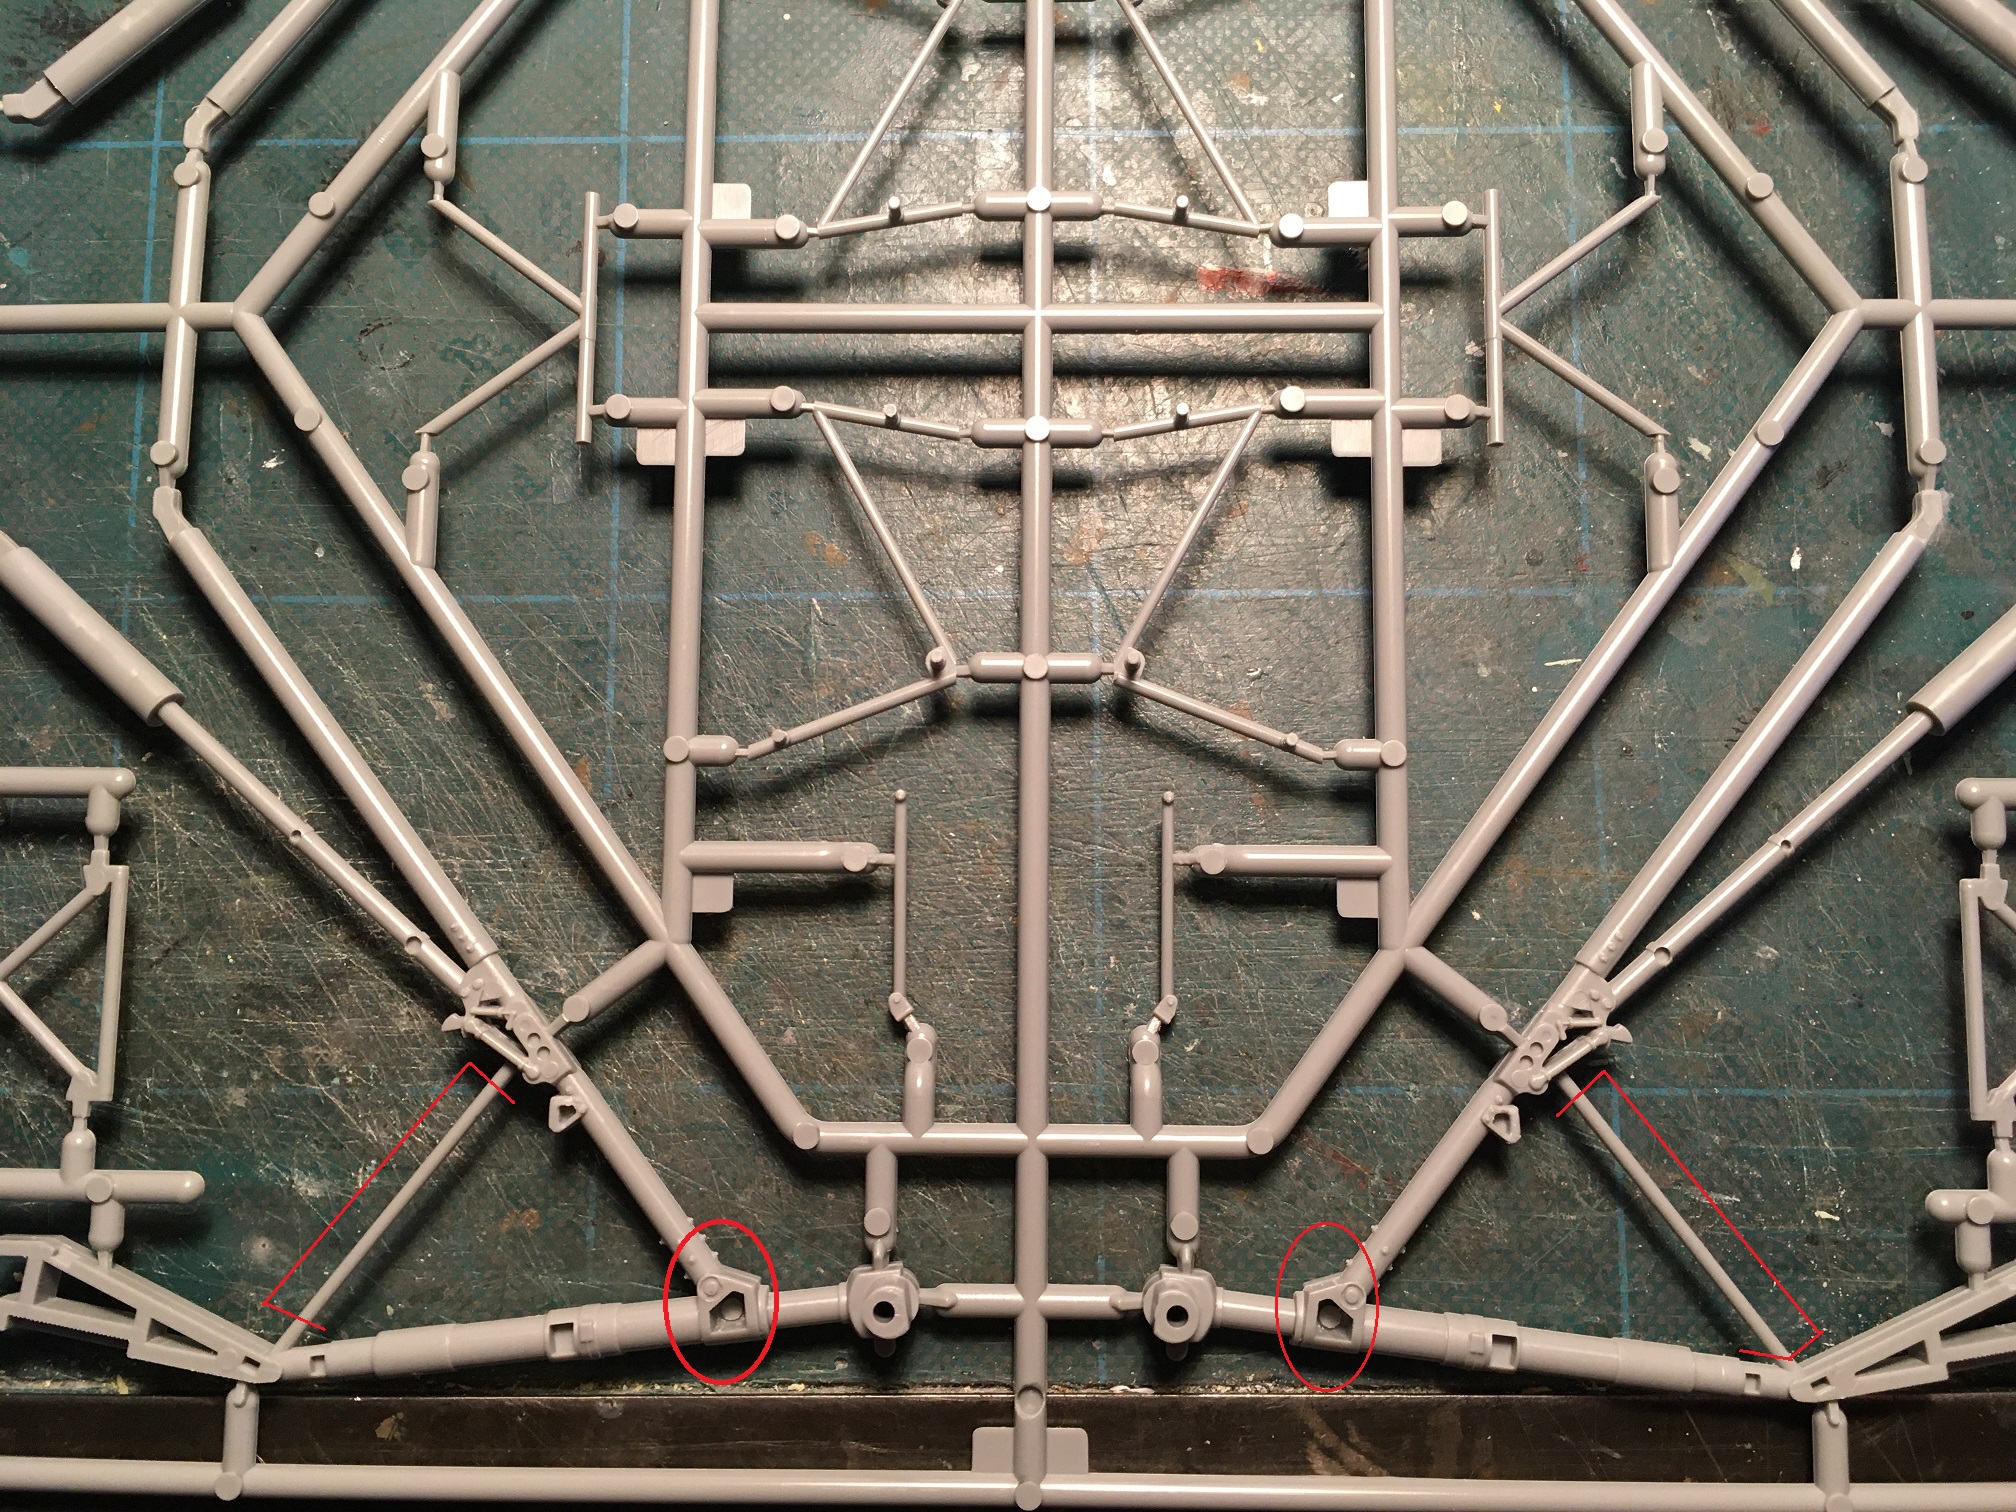
I haven't shortened the legs yet so cant give details but if you look at the actual aircraft and see where this is compared to the bottom of the cowling then compare to kits that have been made you will see that it does need to be shortened . . . . Note the central brace, you cannot see the horizontal cross bar at the top of that brace . . .
I hope that helps ??
-
2
-
-
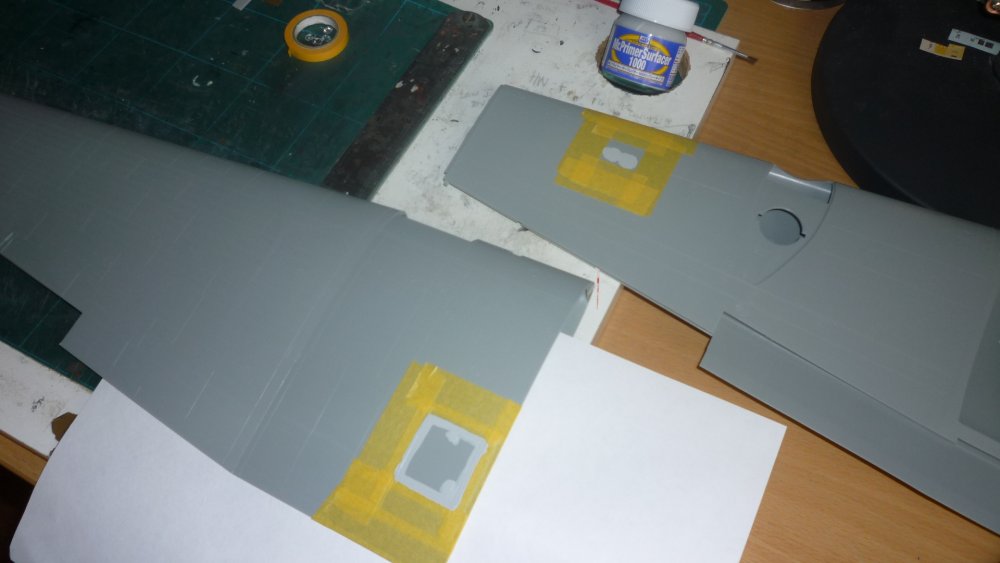
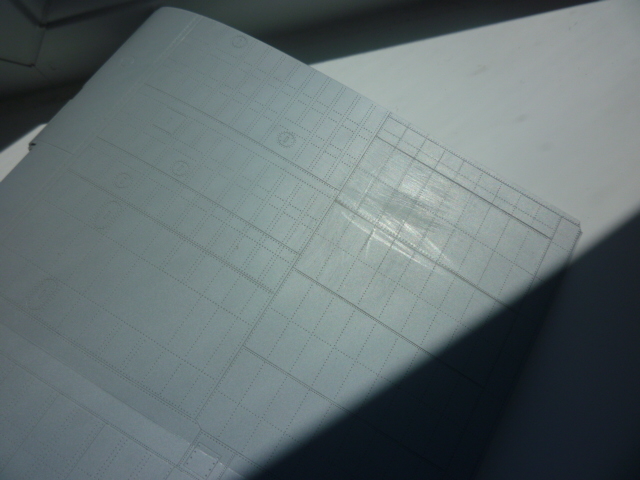
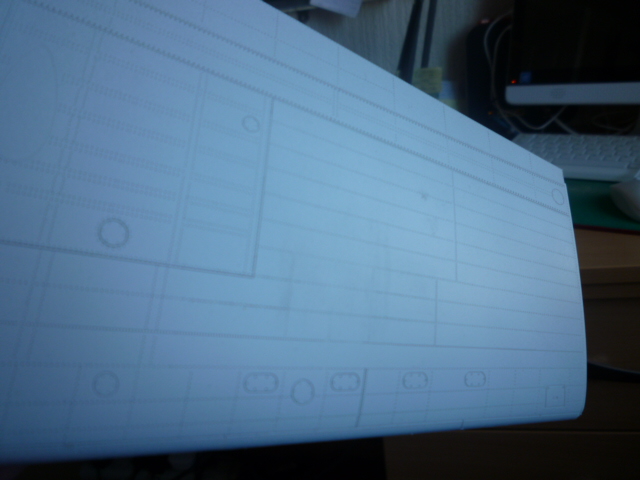
As previously mentioned on the first page, two defects on the wings, the Port upper side had a second Dinghy stowage hatch and the starboard underside has landing lights . . .
After applying Mr. Surfacer some weeks ago I have now eliminated both issues and hopefully you will be able to see the results as I hold the pieces in the correct light to photograph them . . .
The next thing that wants attention are the undercarriage legs. In the photo you can see the 'hole' in the vertical strut. It would probably support the kit no problem but there shouldn't be such a hole therefore I shall be sinking some sprue glue in there to make good. Also, the 'Non-retracting bar needs removing for I have not seen any photos of this in place on a wartime aircraft, I suspect its used on todays flying examples . . .
More to come
best regards
Ian

-
2
-
-
Thanks Carl.
I look forward to receiving the parts in good time . . .
Ian
-
2
-
-
Thanks Tom
I just hope MY expectation of the complete scene will be as good as I imagine it to be . . .
I have a number of 'Erks' to paint up to help set the scene
cheers
Ian
-
1
-
-
Carl
Thanks for the comparison photos.
The Eduards bottom section has more detail for sure but if the Mossie super fits then I will take that.
Many thanks again Carl
cheers
Ian
-
3
-
-
Look forward to seeing some colours on her . ..
Ian
-
3
-
-
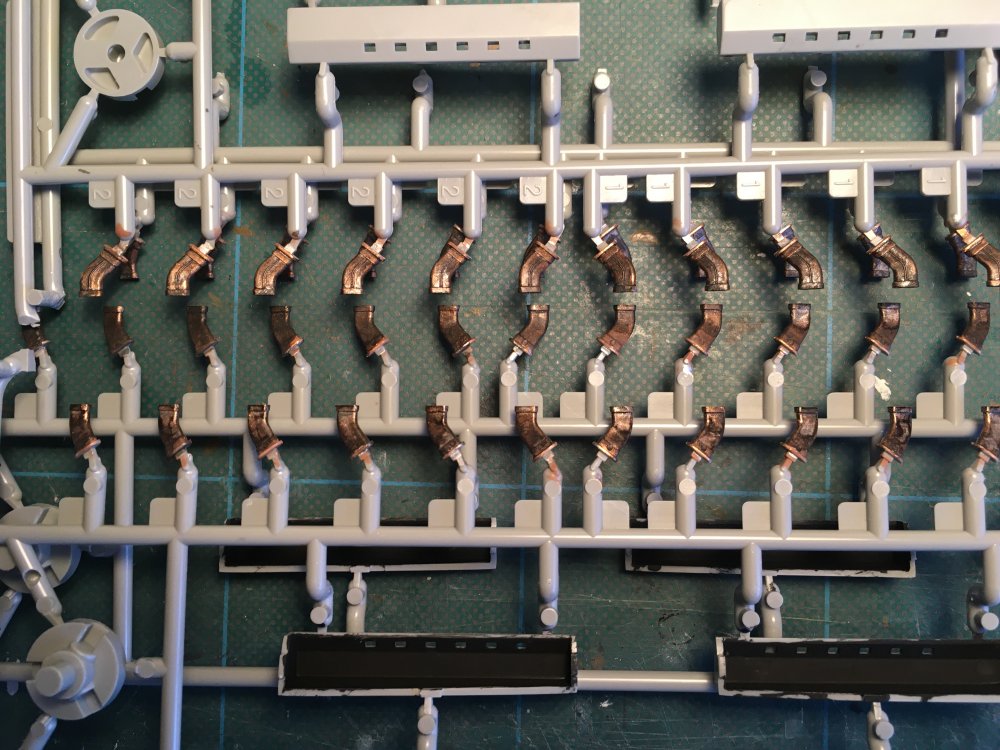
Last night I was busy re-sizing the exhaust shrouds and placing fixing brackets to fit on the cowlings.
Drying overnight, I cut them so they look more appropriate for fixing . . . .
First photo shows the actual 4 tabs for fixing the shrouds
Making up the brackets
In situ on the kits cowling . . .
another little modification to improve the appearance
Ian
.thumb.JPG.53eb3a64b6988cda88b07ea5ea394d84.JPG)
.thumb.JPG.8ee403460cb06a560c3cf5687245aee1.JPG)
.thumb.JPG.2dcf28967905102f607400a1f41b7d37.JPG)
.thumb.JPG.01f7fdb22ff39535d5eb5124825f0234.JPG)
-
7
-
-
Morning Carl
I have sent you a PM
many thanks
Ian
-
3
-
-
Carl
Many thanks for your suggestion . . . would the parts make up a complete engine ?
If so I would consider placing it in the engine space . . .
I would have to bow to your knowledge as to fitting it but I would certainly give it a try
Cheers for that
Ian
-
3
-
-
Evening all . ..
I have managed to assemble the mock-up exhausts with the cowling cover, I dont think they look to bad . . .
There are three points to which the box of exhaust stubs fixes inside the engine cowling A goes into Aa and B is the centre fixing point.

Next up will be to make the fourth engine position very soon to display an engine . . .
cheers
Ian
-
4
-
-
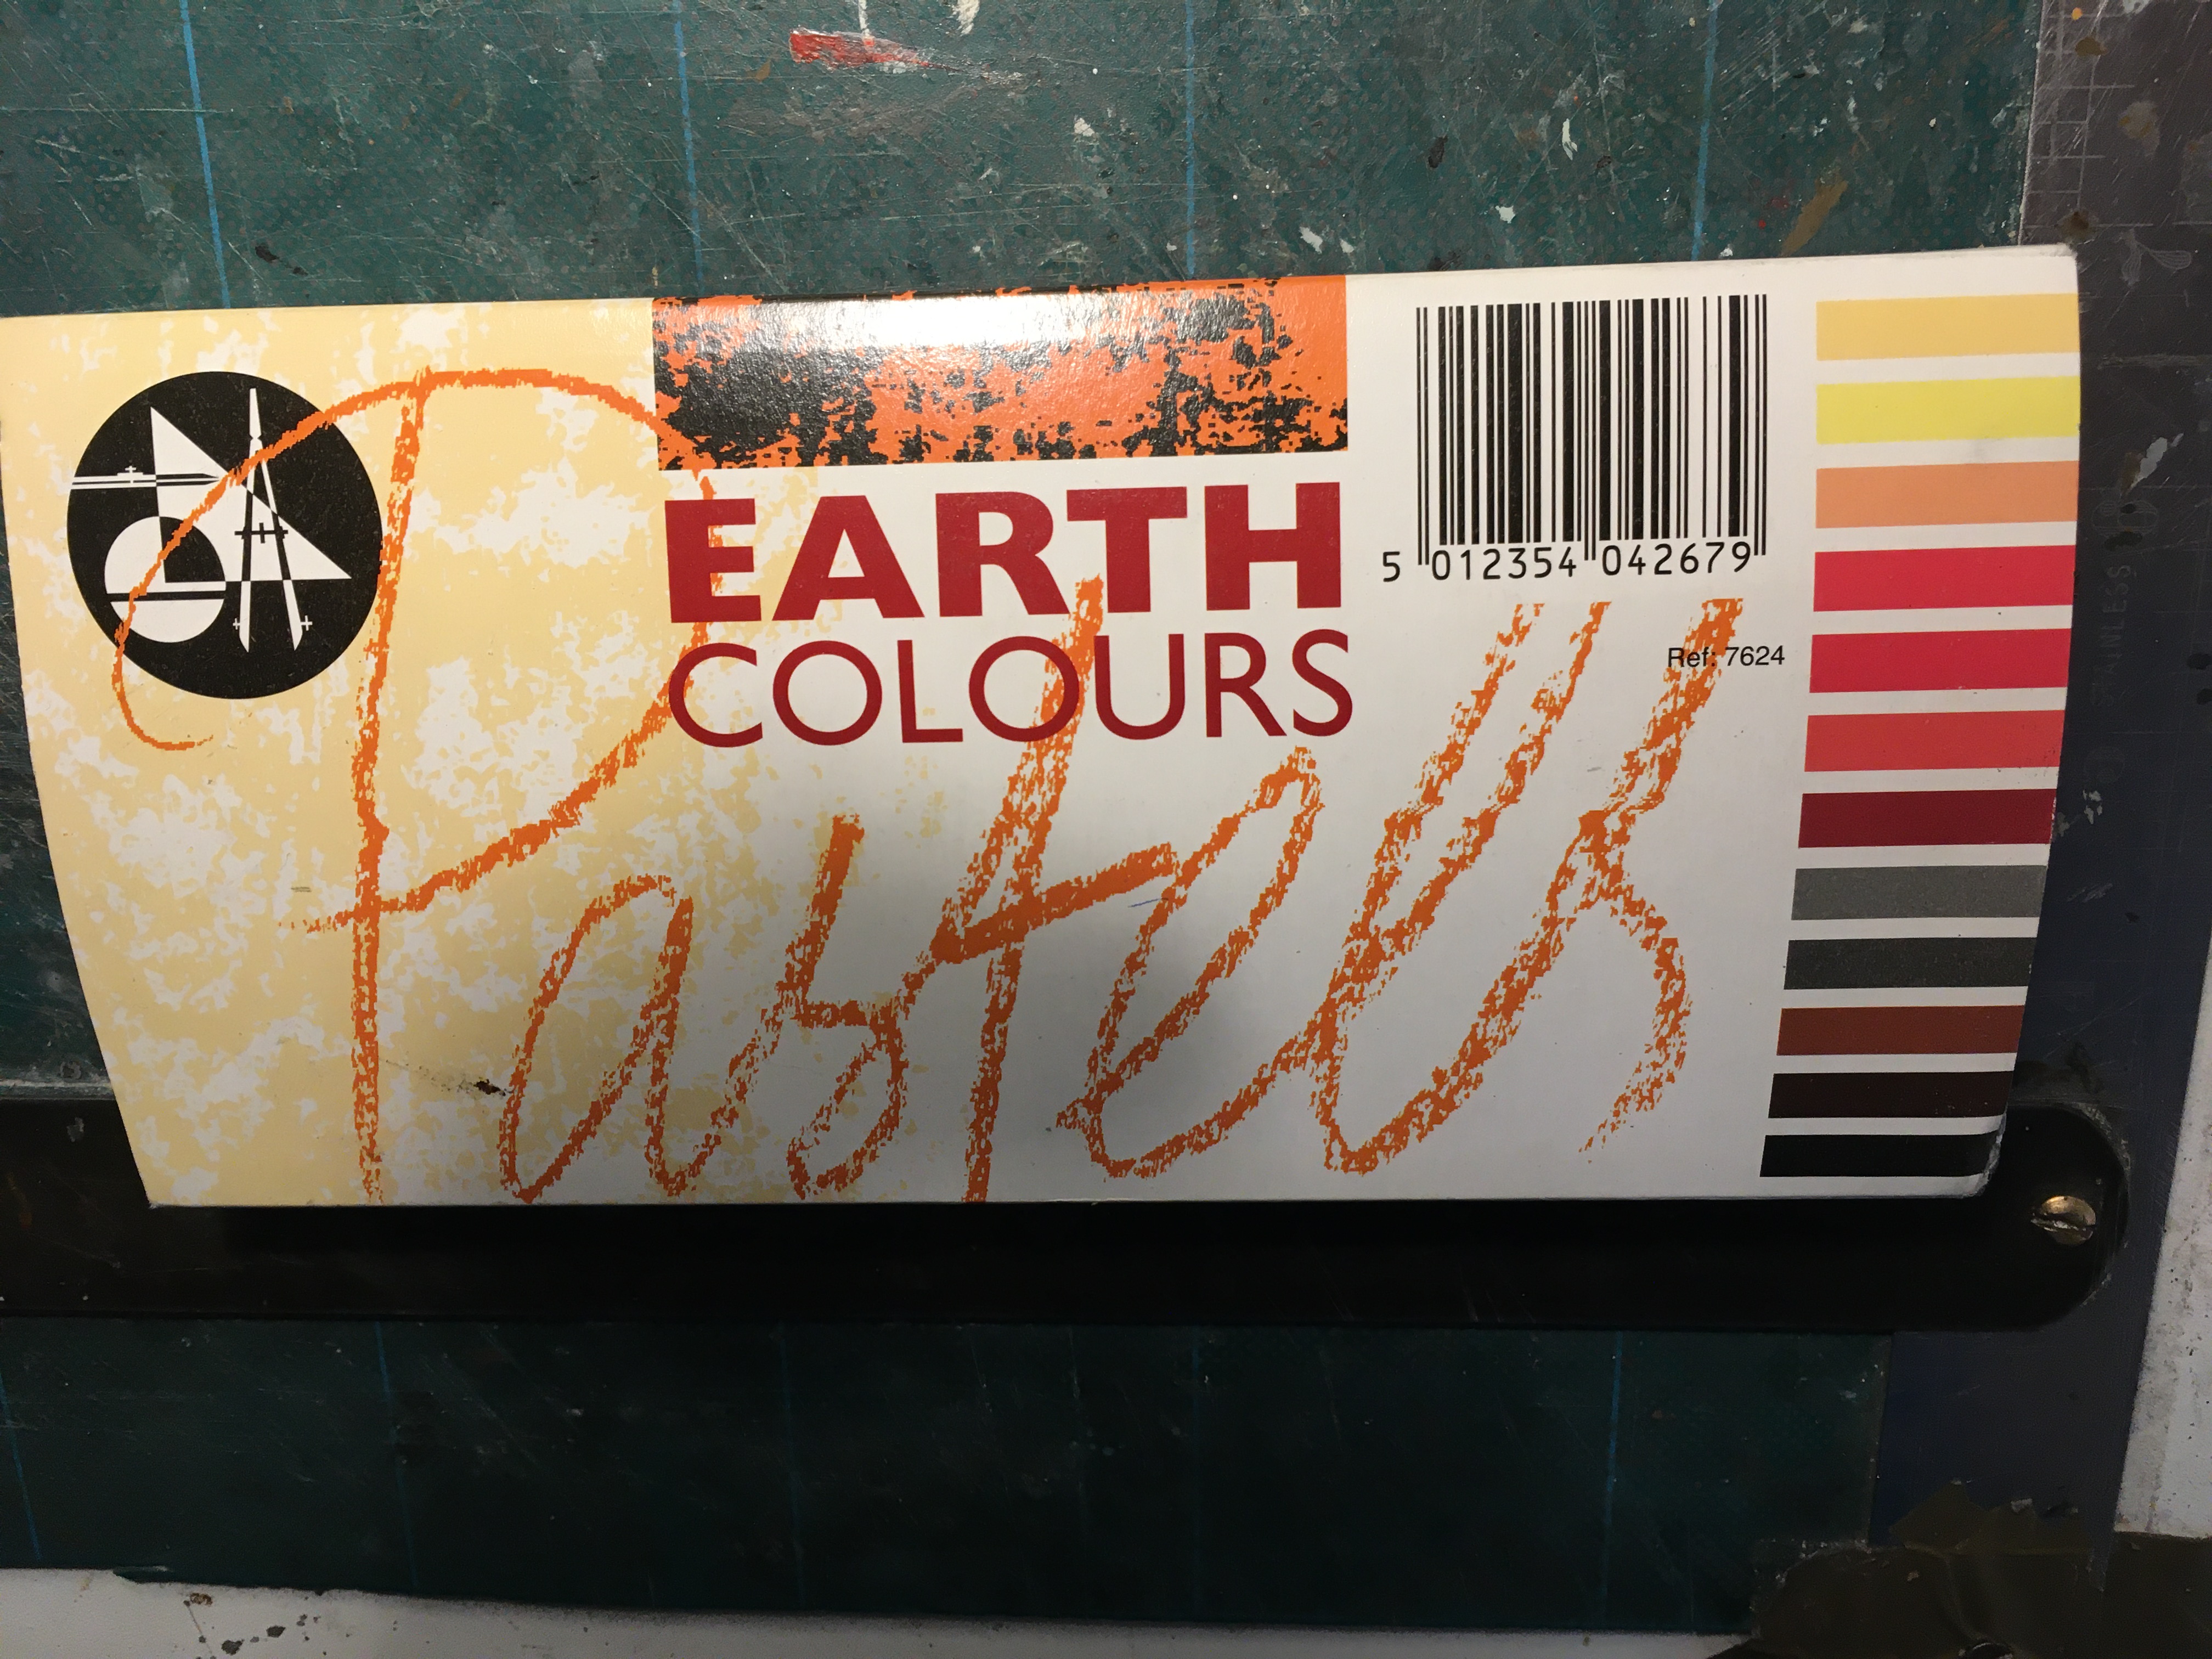
The pastel chalks are the last thing really and I have all my Lancasters and a few other in a display cabinet so they dont get handled . . .
-
1
-
-
Kai
Have a look in here . . .
The crew bus was scratch built.
I dont use anything once I have applied the pastel chalks !
I did spray a matt varnish but it all disappeared ??
I haven't use any after that experience
Hope it helps
cheers
Ian
-
1
-
-
Kai
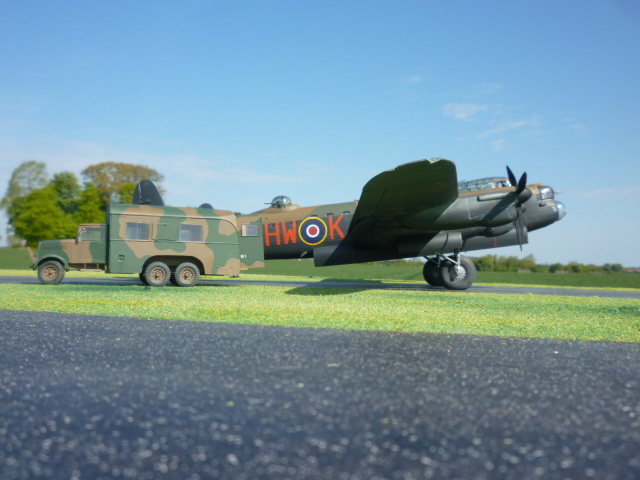
Its the Tamiya Lanc in 48th scale.
Many alterations were made which included moving the W/op.'s window, enlarging the second escape hatch along the fuselage and removing the wing section joint lines to name but a few.
The back drop is from Australia used in the railway modelling world, it comes in a 7ft roll if I remember.
AS for the powders, I use these chalk sticks that I scrape into a small container and then apply with a brush across the wing flow . . .
I hope you like
Ian


-
1
-
-
Many thanks for those Kai
I shall certainly look to those or reference . . .
I usually applied powders to try and get that effect
Cheers
Ian
-
2
-
-
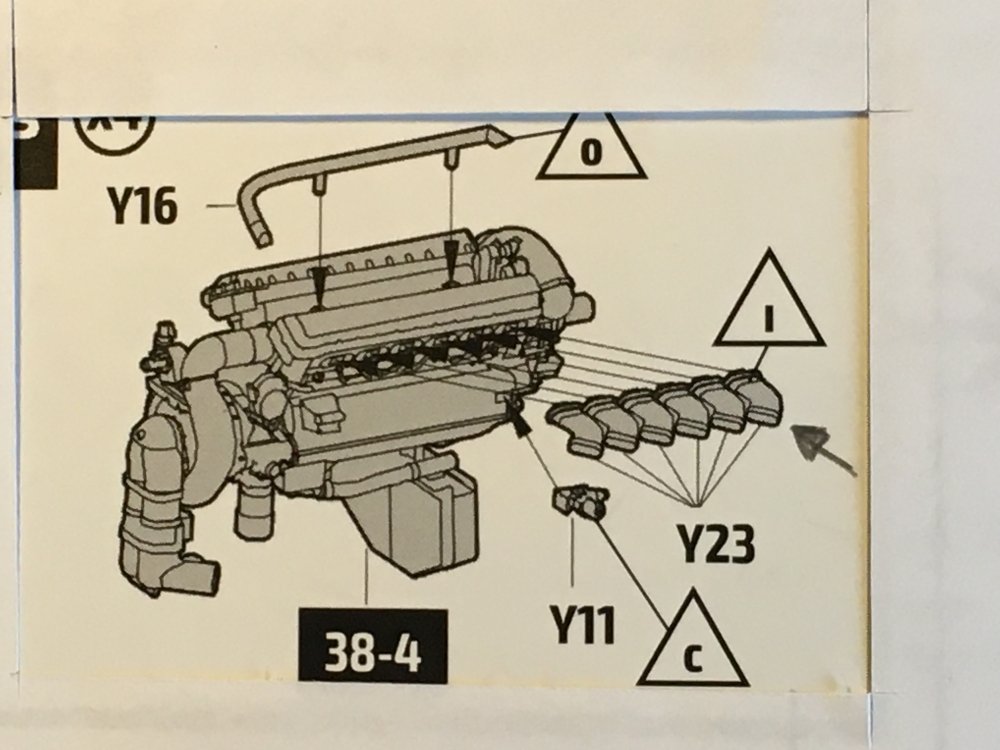
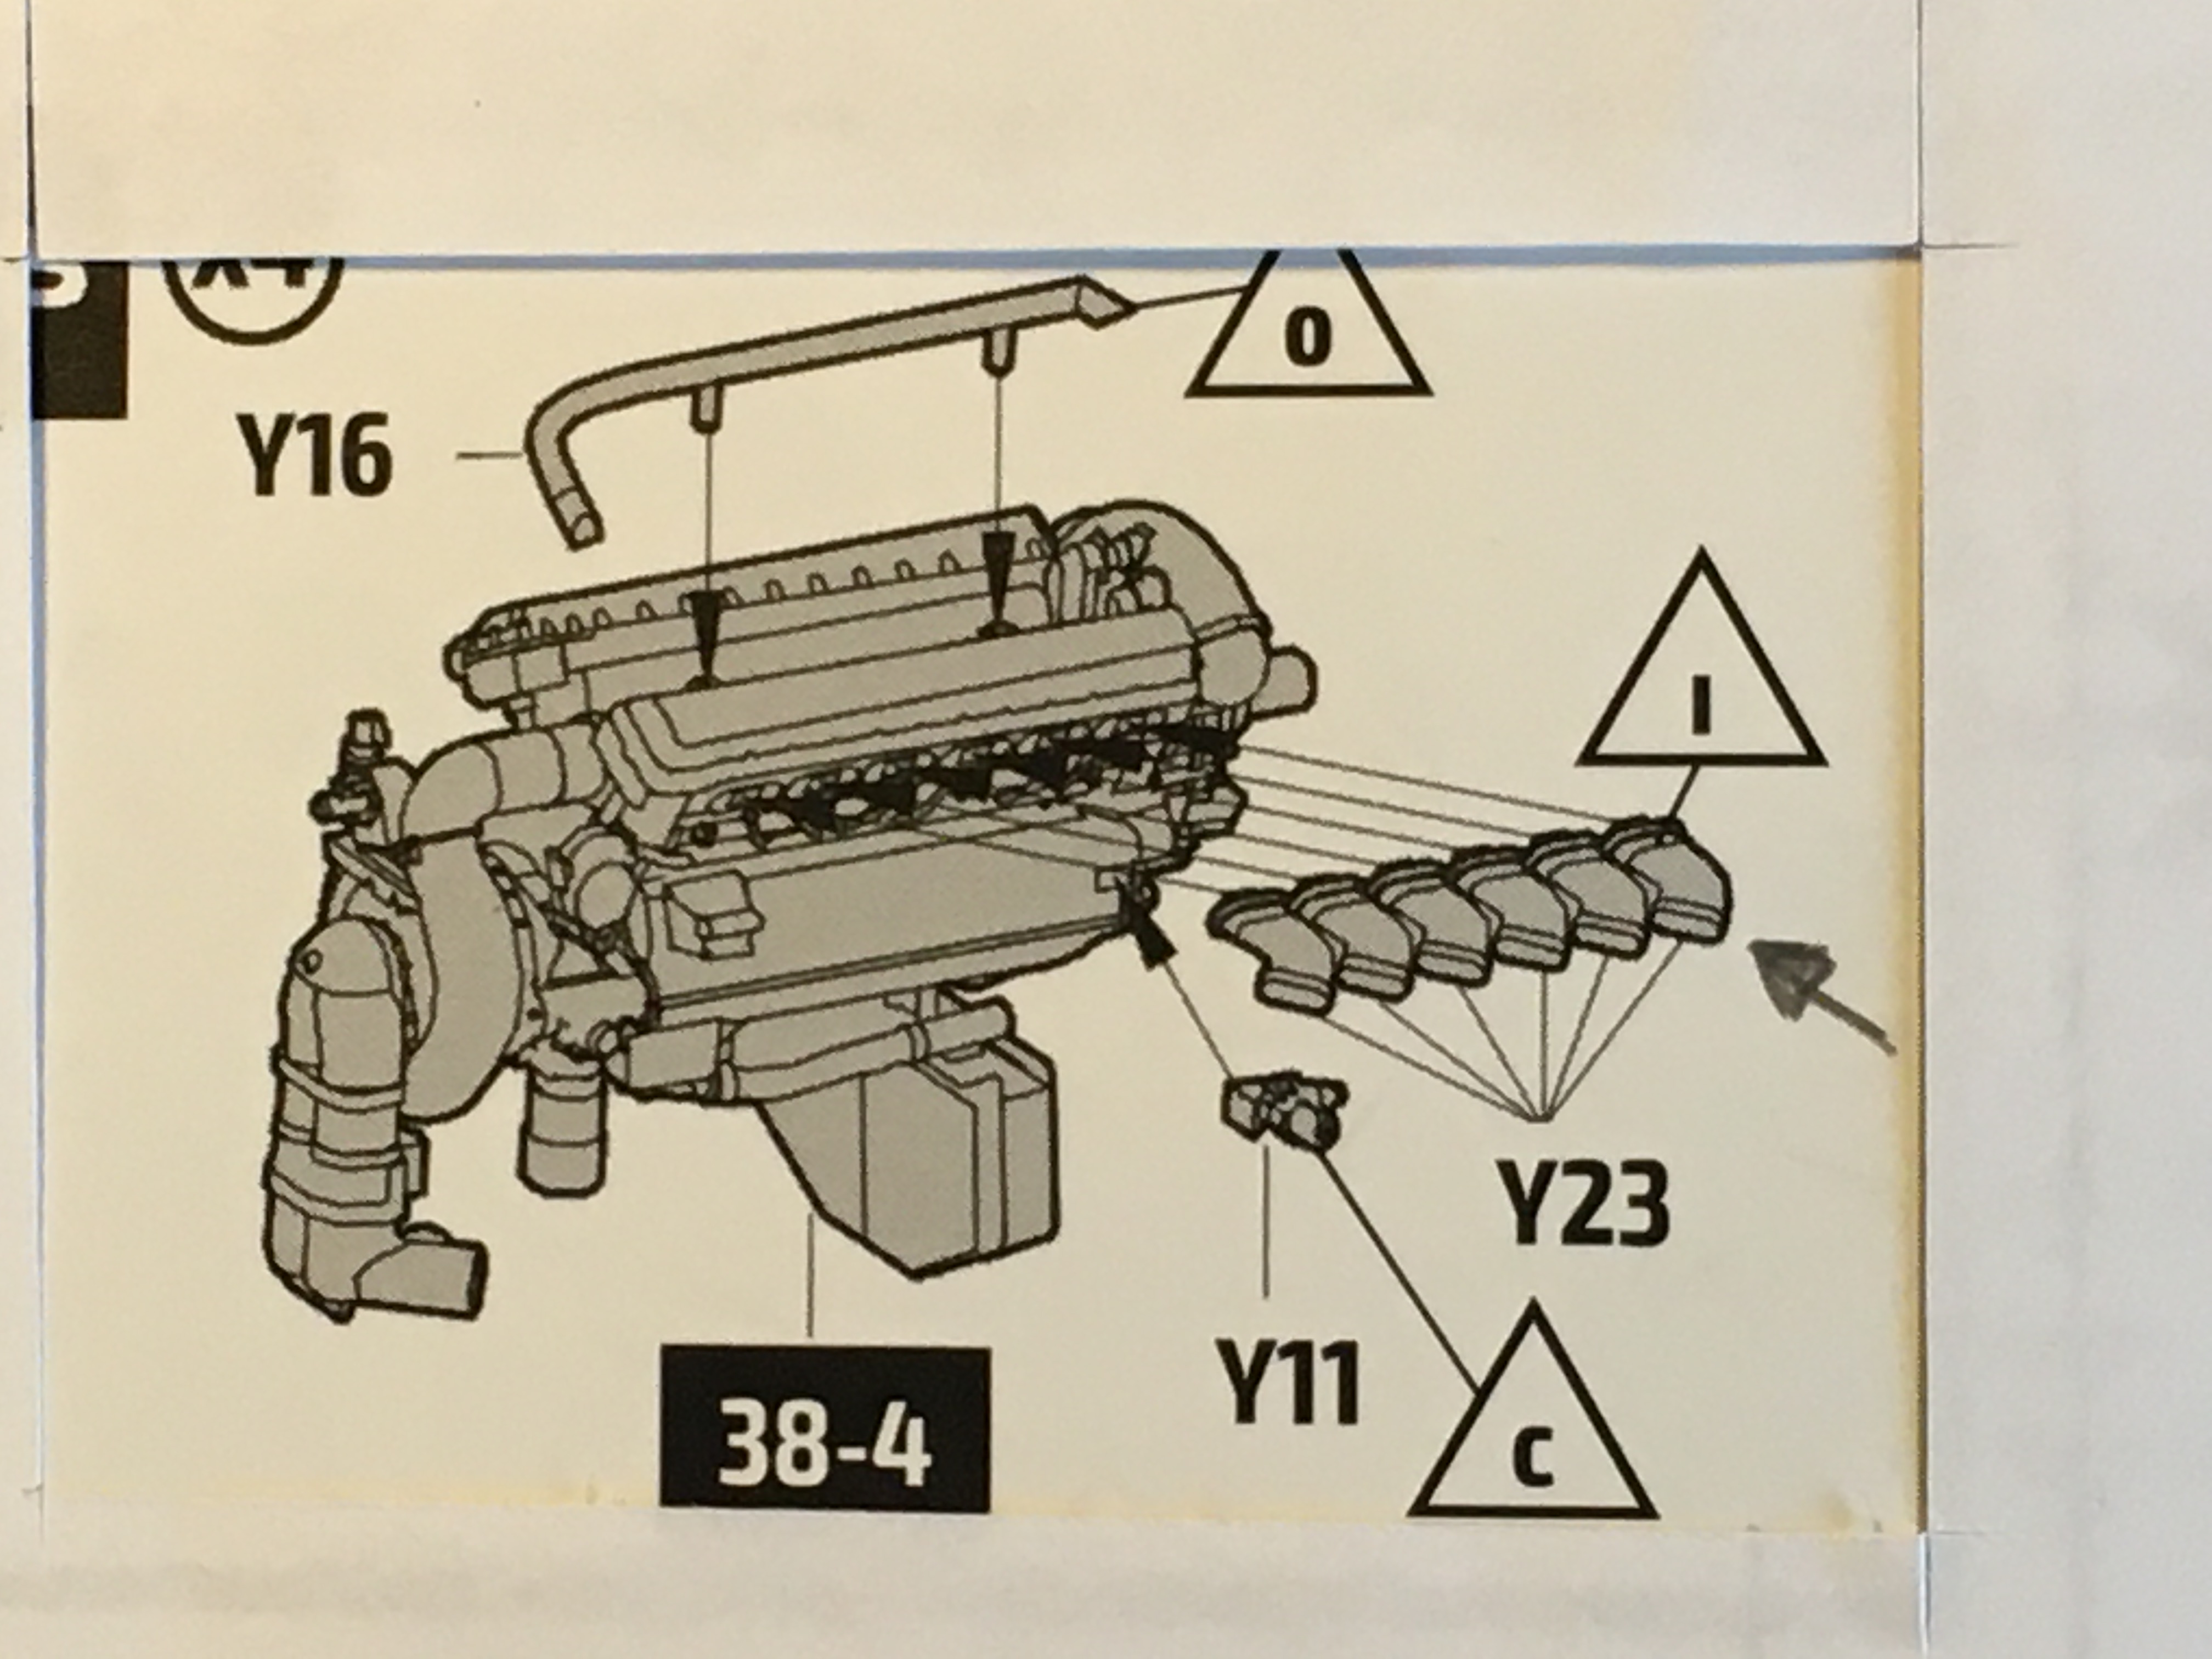
I looked at the engines and their construction.
I only anticipate building One to show it off and considered it for display in the diorama setting . . .
The engine assembly is quite straight forward but as I said I only want one complete engine but there is a short cut that is not illustrated in the Instruction booklet.
First photo is the almost final assembly where you add the individual exhaust onto/into the engine block . . .
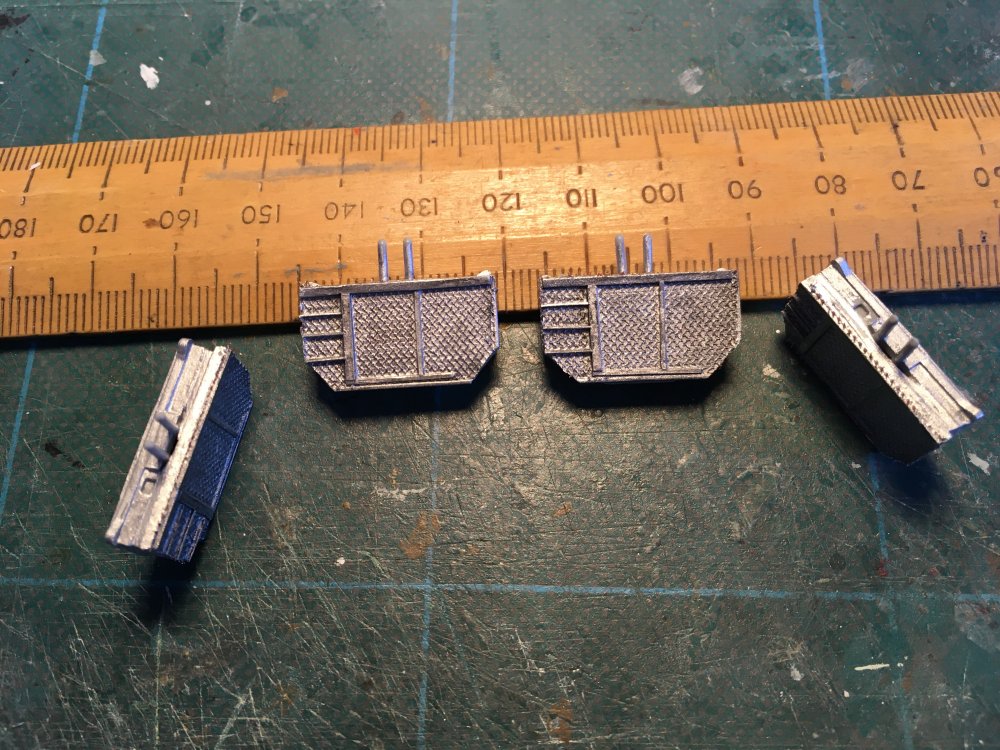
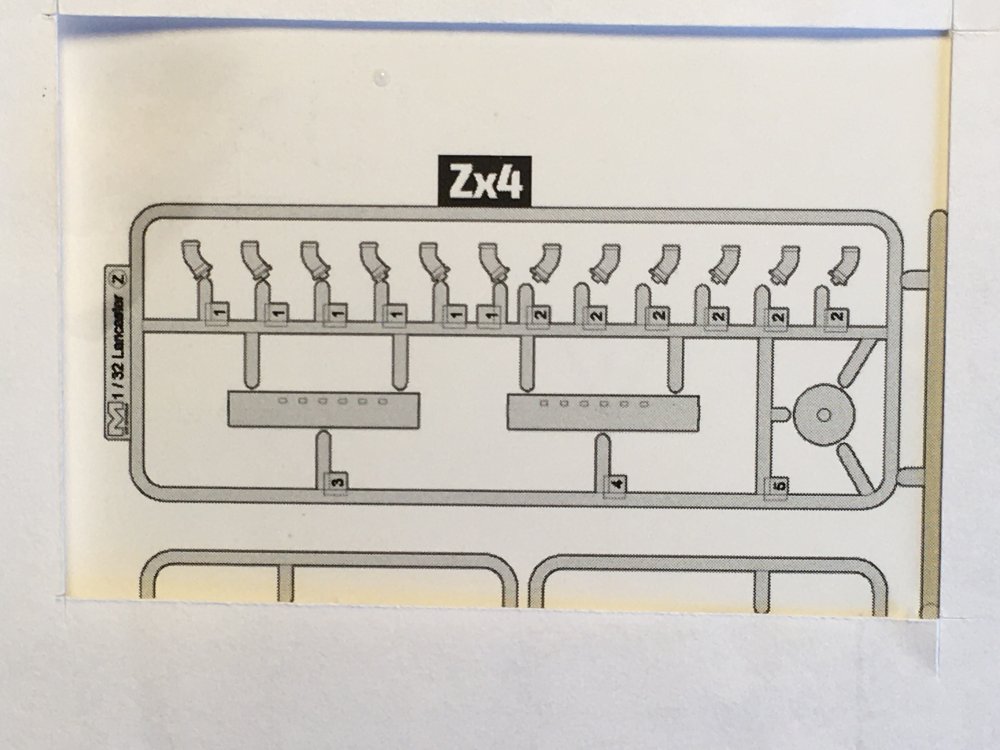
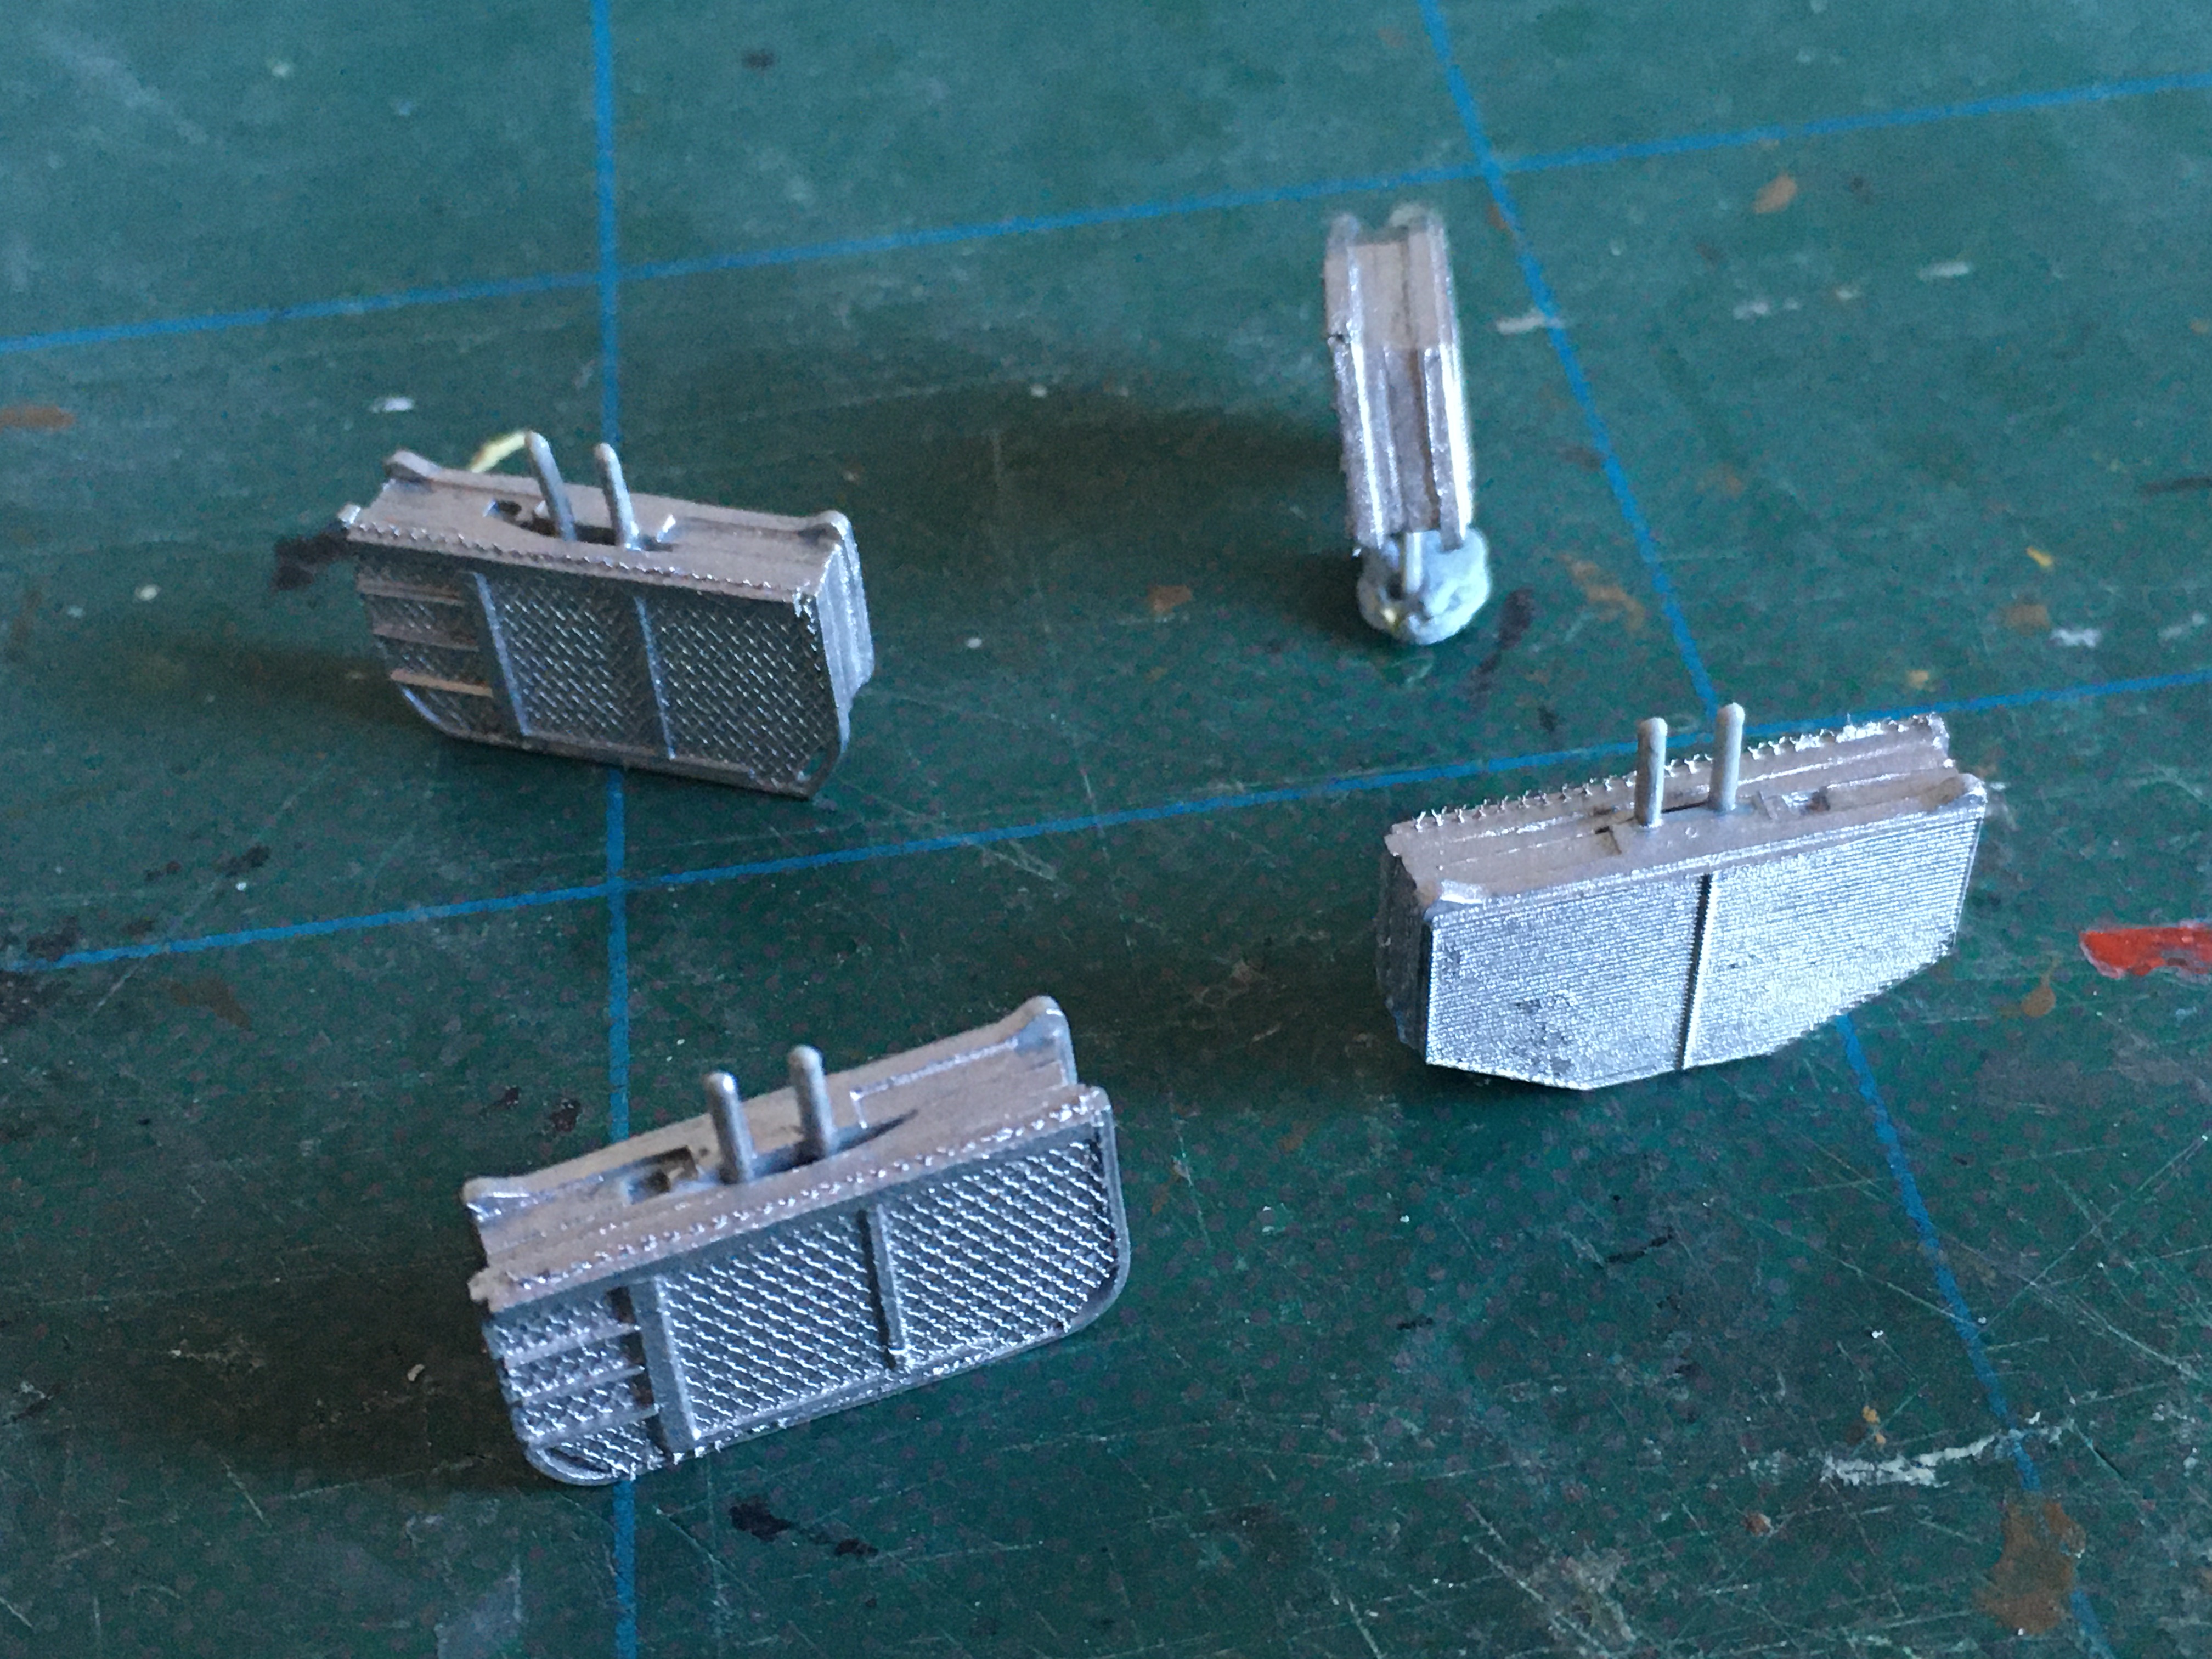
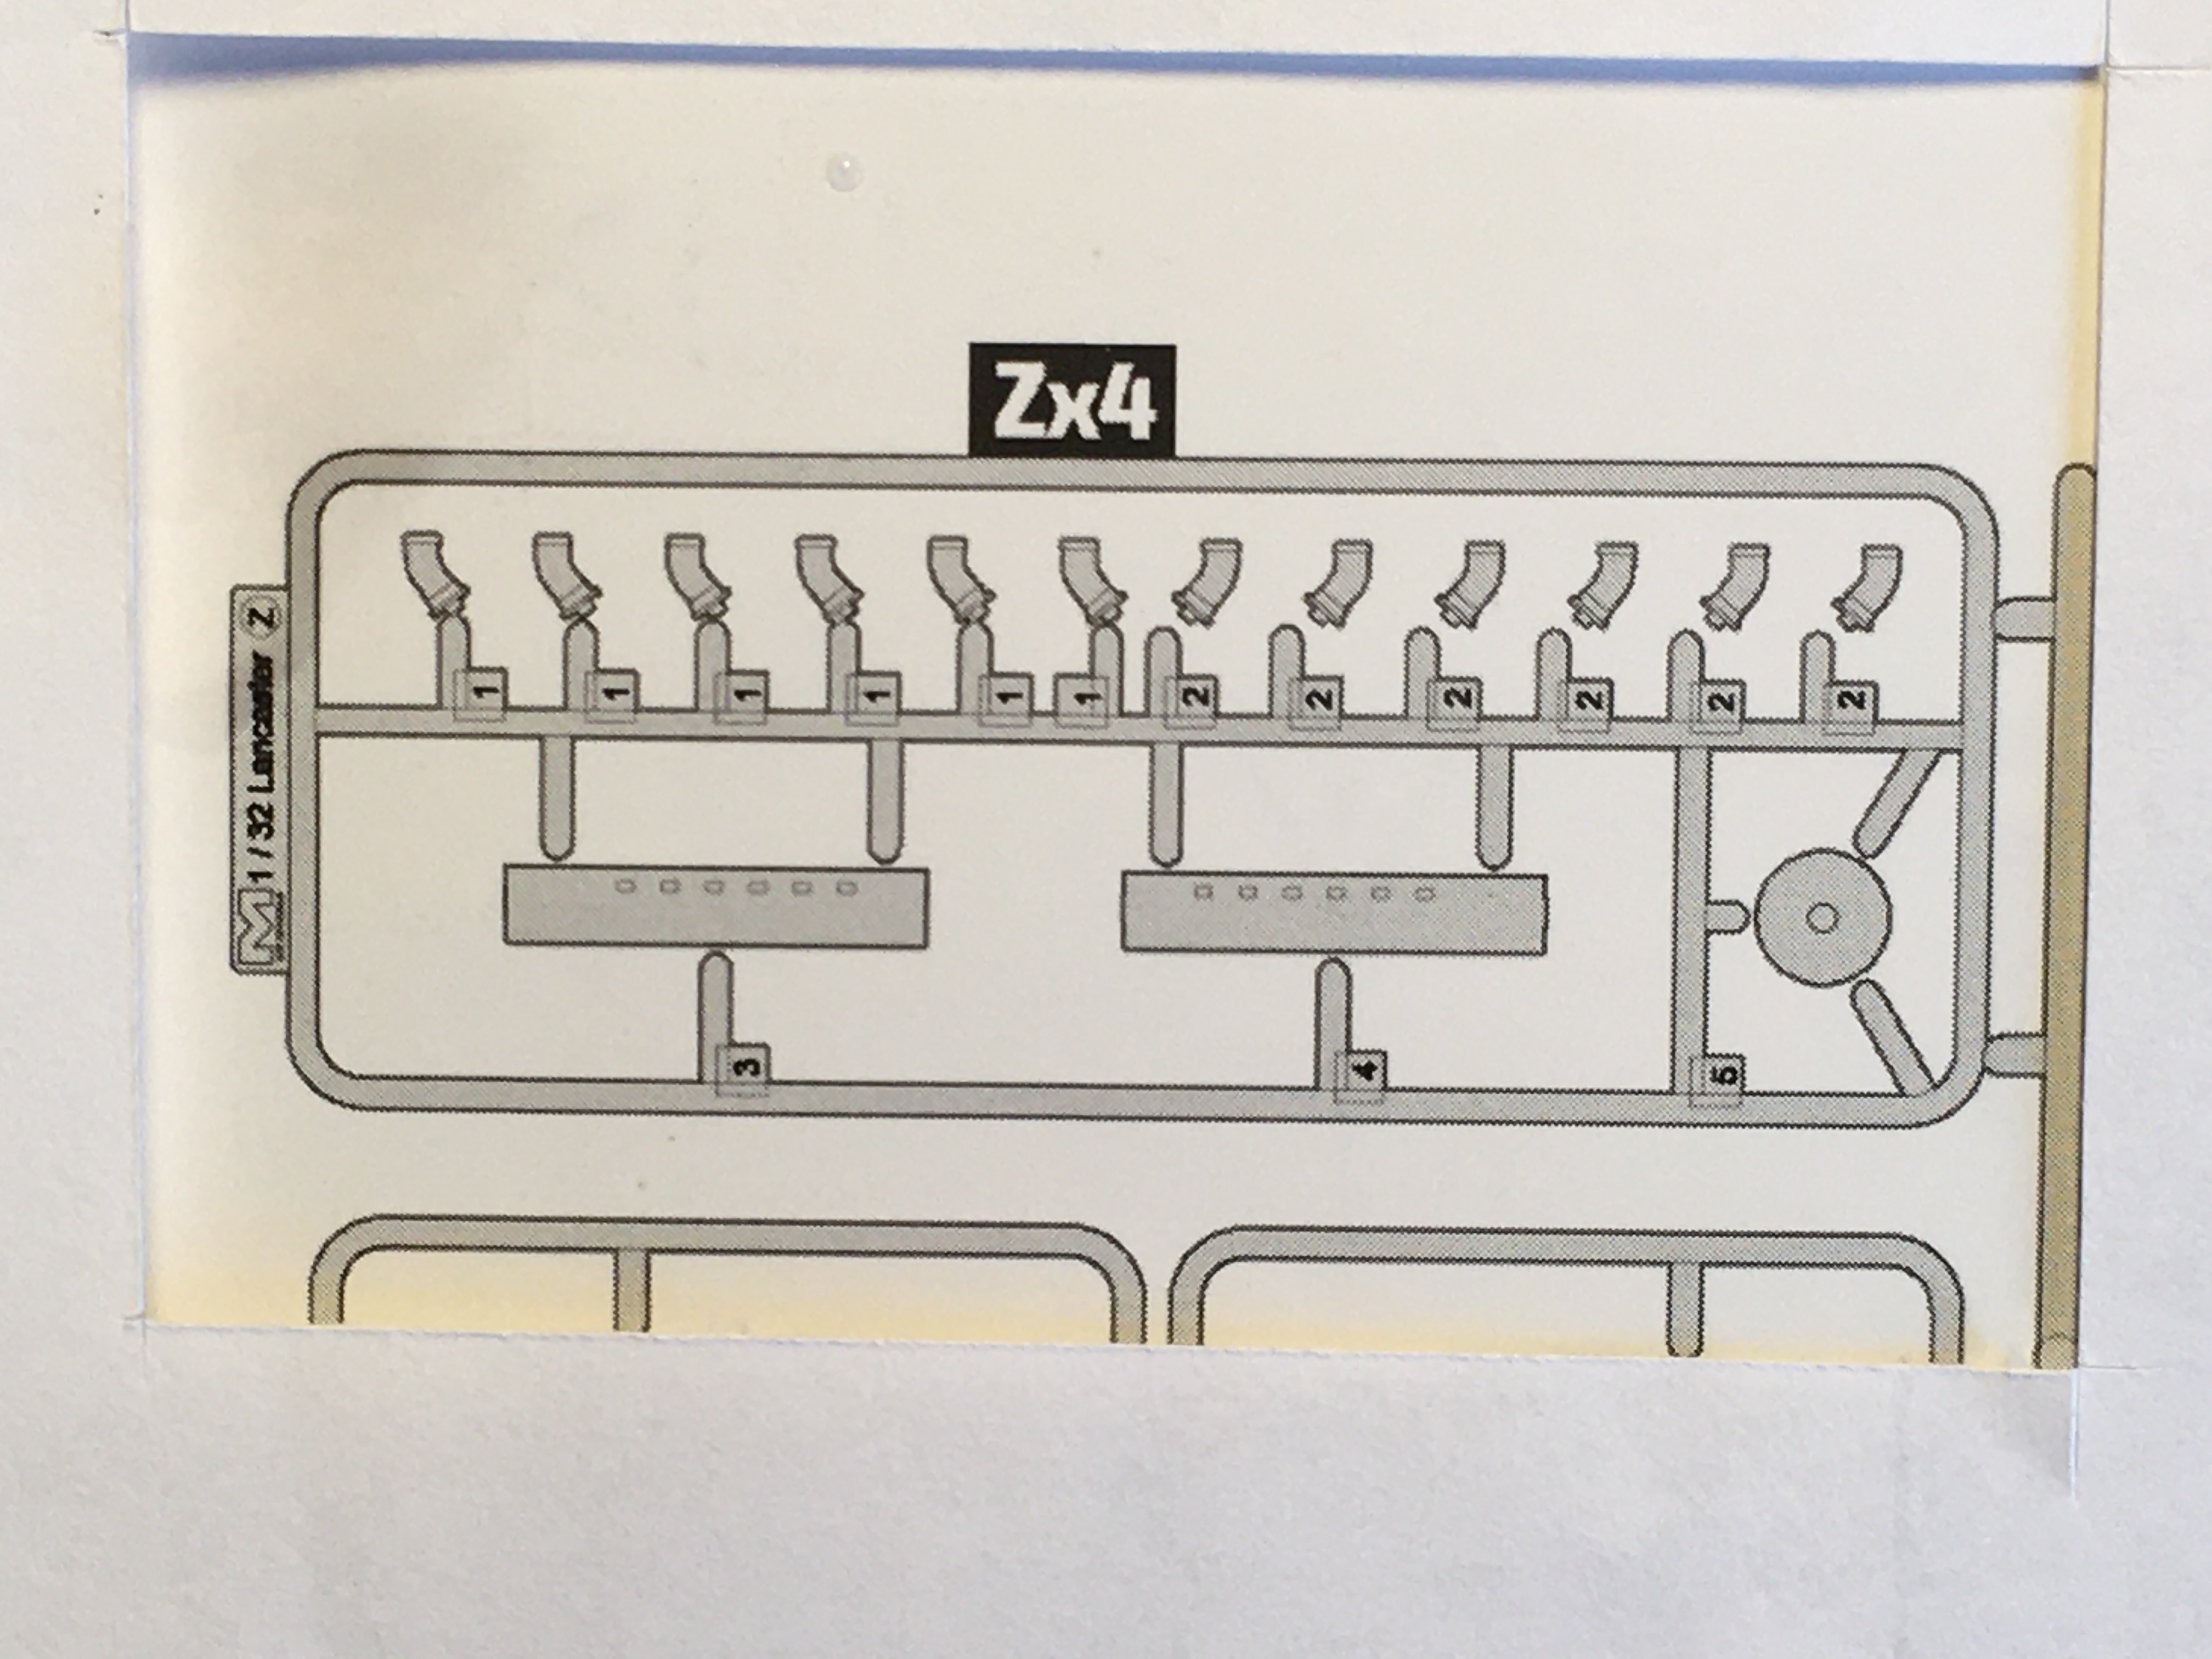
As mentioned, there is a short cut if you dont want to build ALL the engines and I cannot understand why the instructions dont even offer the alternative ? the sprue required is lettered 'Z' . . .
The two long box items at the bottom have three tabs that slot into the back off the engine cowling so you can then just add the individual exhausts . . .
Shown are my sets painted up, you only need to paint inside the box . . .
Another reason for assembling these 'false' exhaust outlet is because, in my opinion, the exhaust shrouds, are way to large and to that end, once the exhausts are fitted I will be able to see just how far they extrude from the engine cowling. Only then will I be able to cut the shroud(s) down to size.
Have a look at a number of those already built, they stick out to far then look at an actual aircraft, the difference IS noticeable.
Thanks for looking in
Ian
-
3
-
1
-


.JPG.c62ae5bf2508fe09fdfdaa34d7a068d8.JPG)


.JPG.177e234384c64cbb308799713ad9bba4.JPG)
.JPG.c99ee318c6c08f4e2502570d864cd5fb.JPG)
.JPG.5ea3e41f759d9820c0c4e8ea86637926.JPG)
.JPG.c1e8a5728ff1ba25d722c1768c3d521c.JPG)


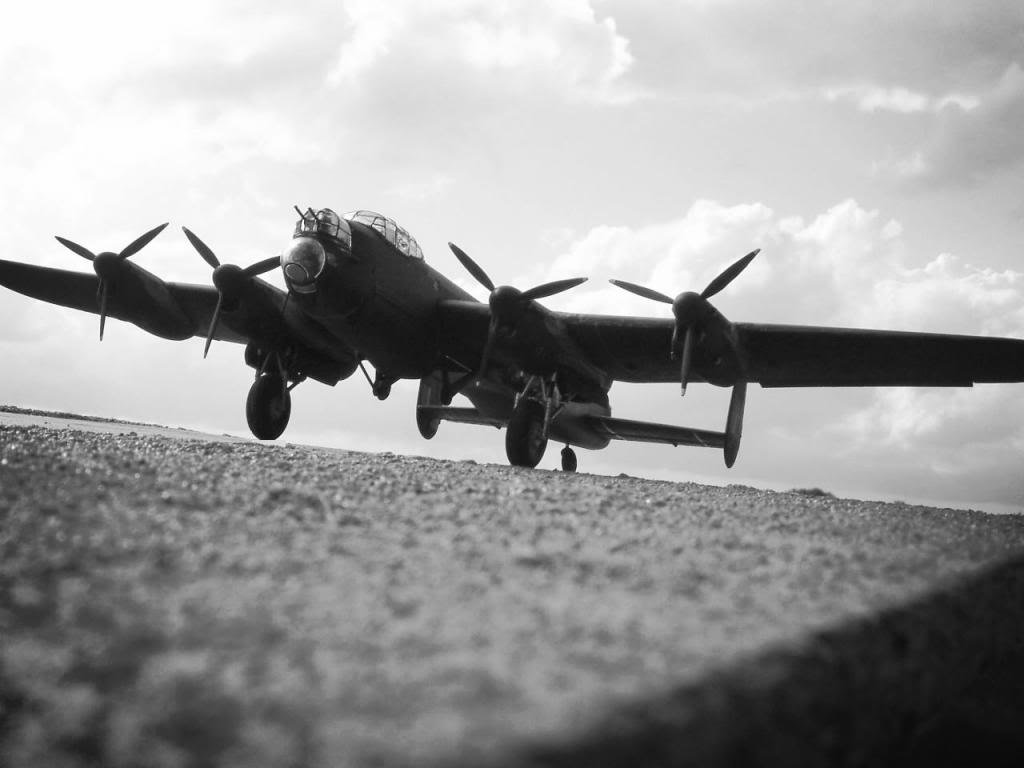
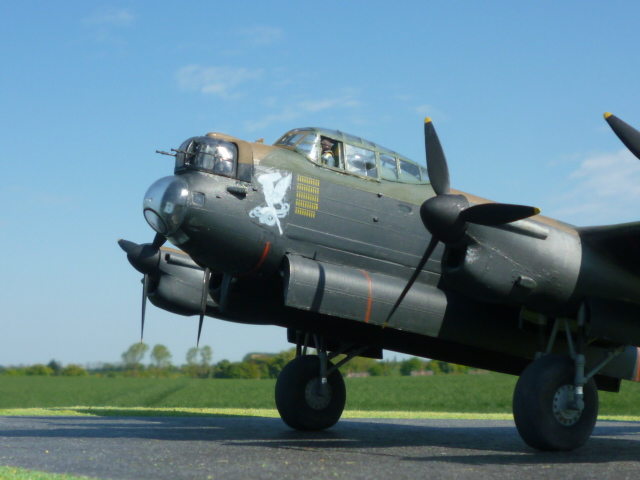
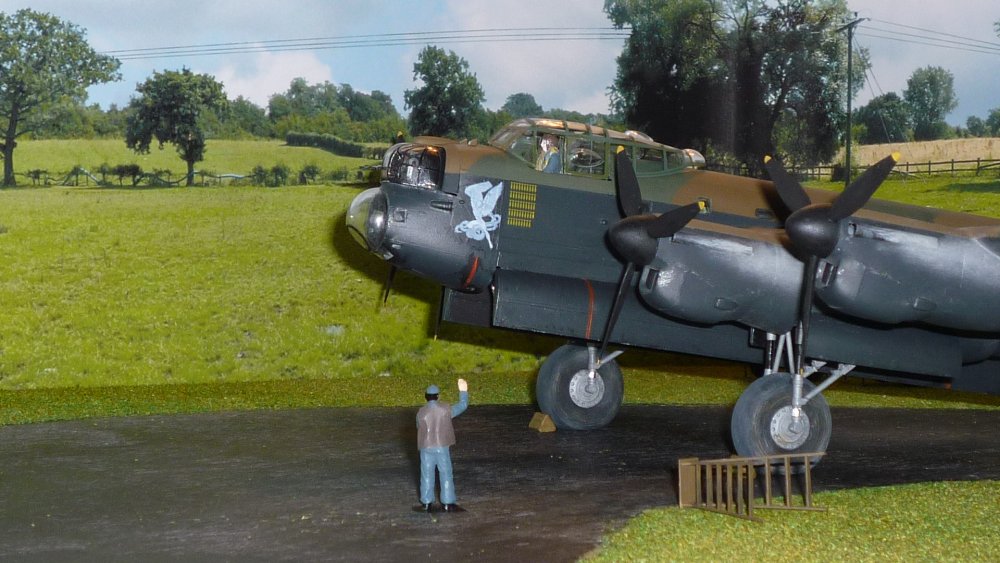
Lancaster ND644 in 32nd scale
in LSM 1/35 and Larger Work In Progress
Posted
You make a good point Carl, if they just simply copied the kit legs then they too will be to tall . . .