


Axeman
-
Posts
172 -
Joined
-
Last visited
Content Type
Profiles
Forums
Events
Gallery
Posts posted by Axeman
-
-
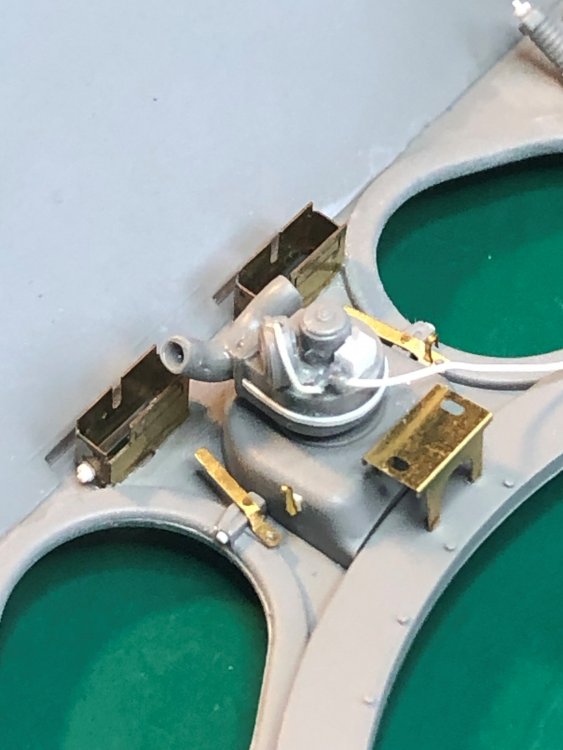
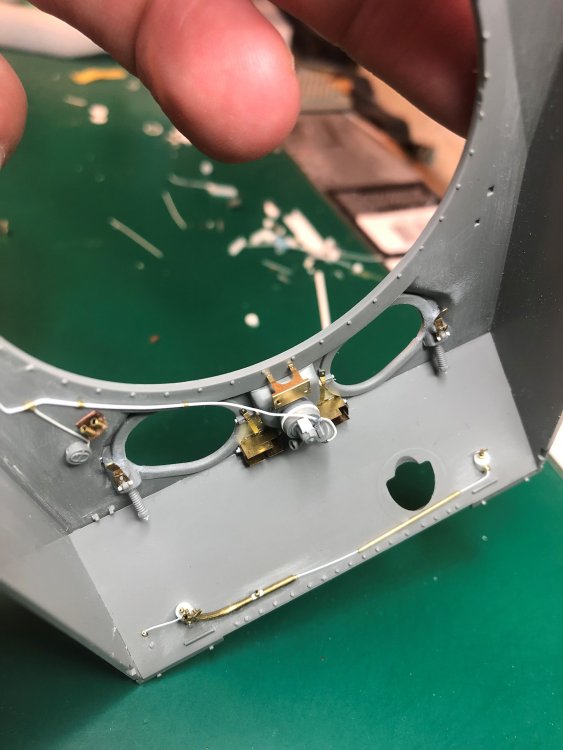
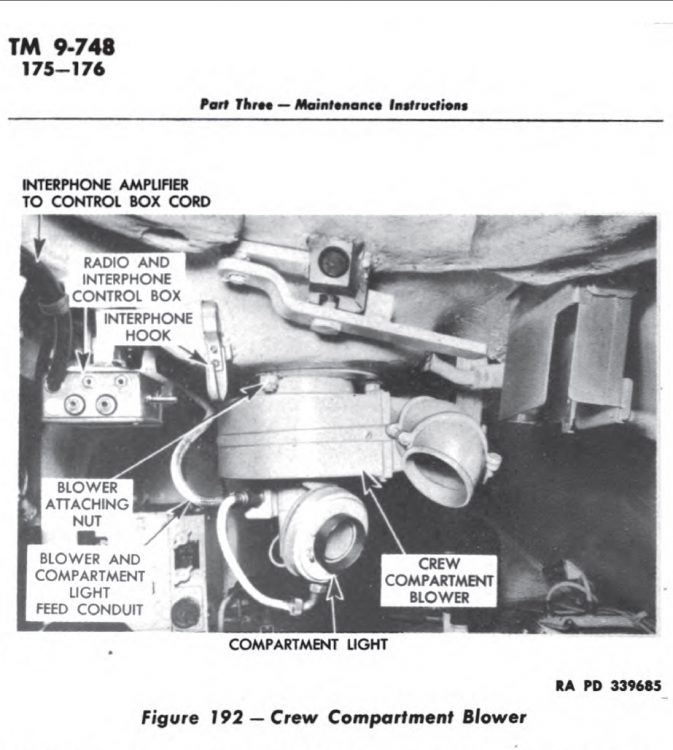
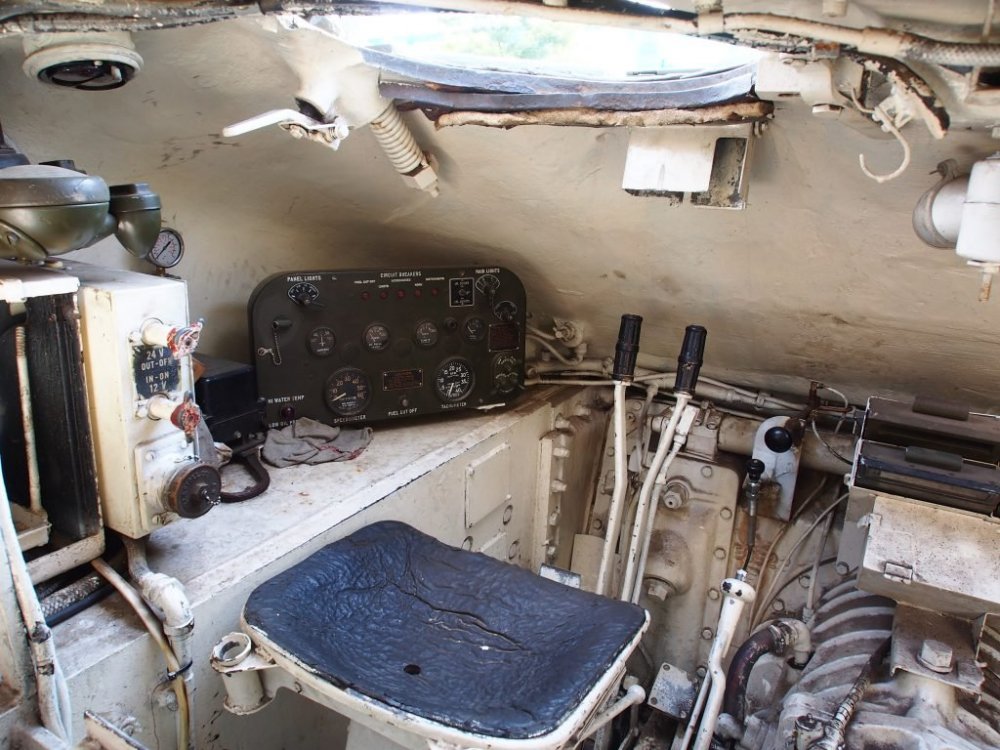
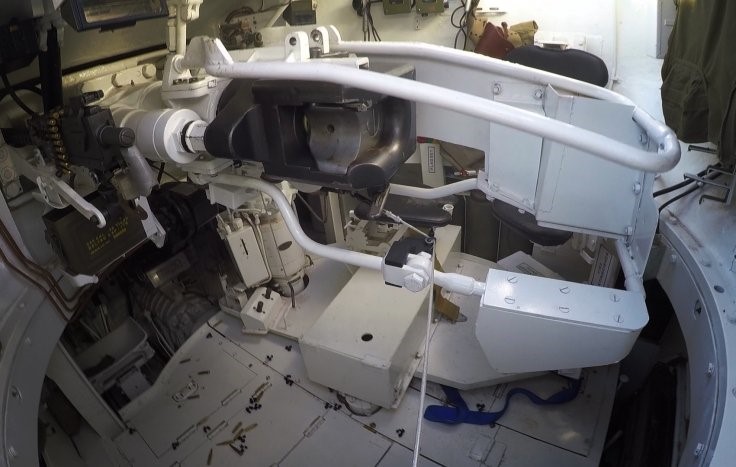
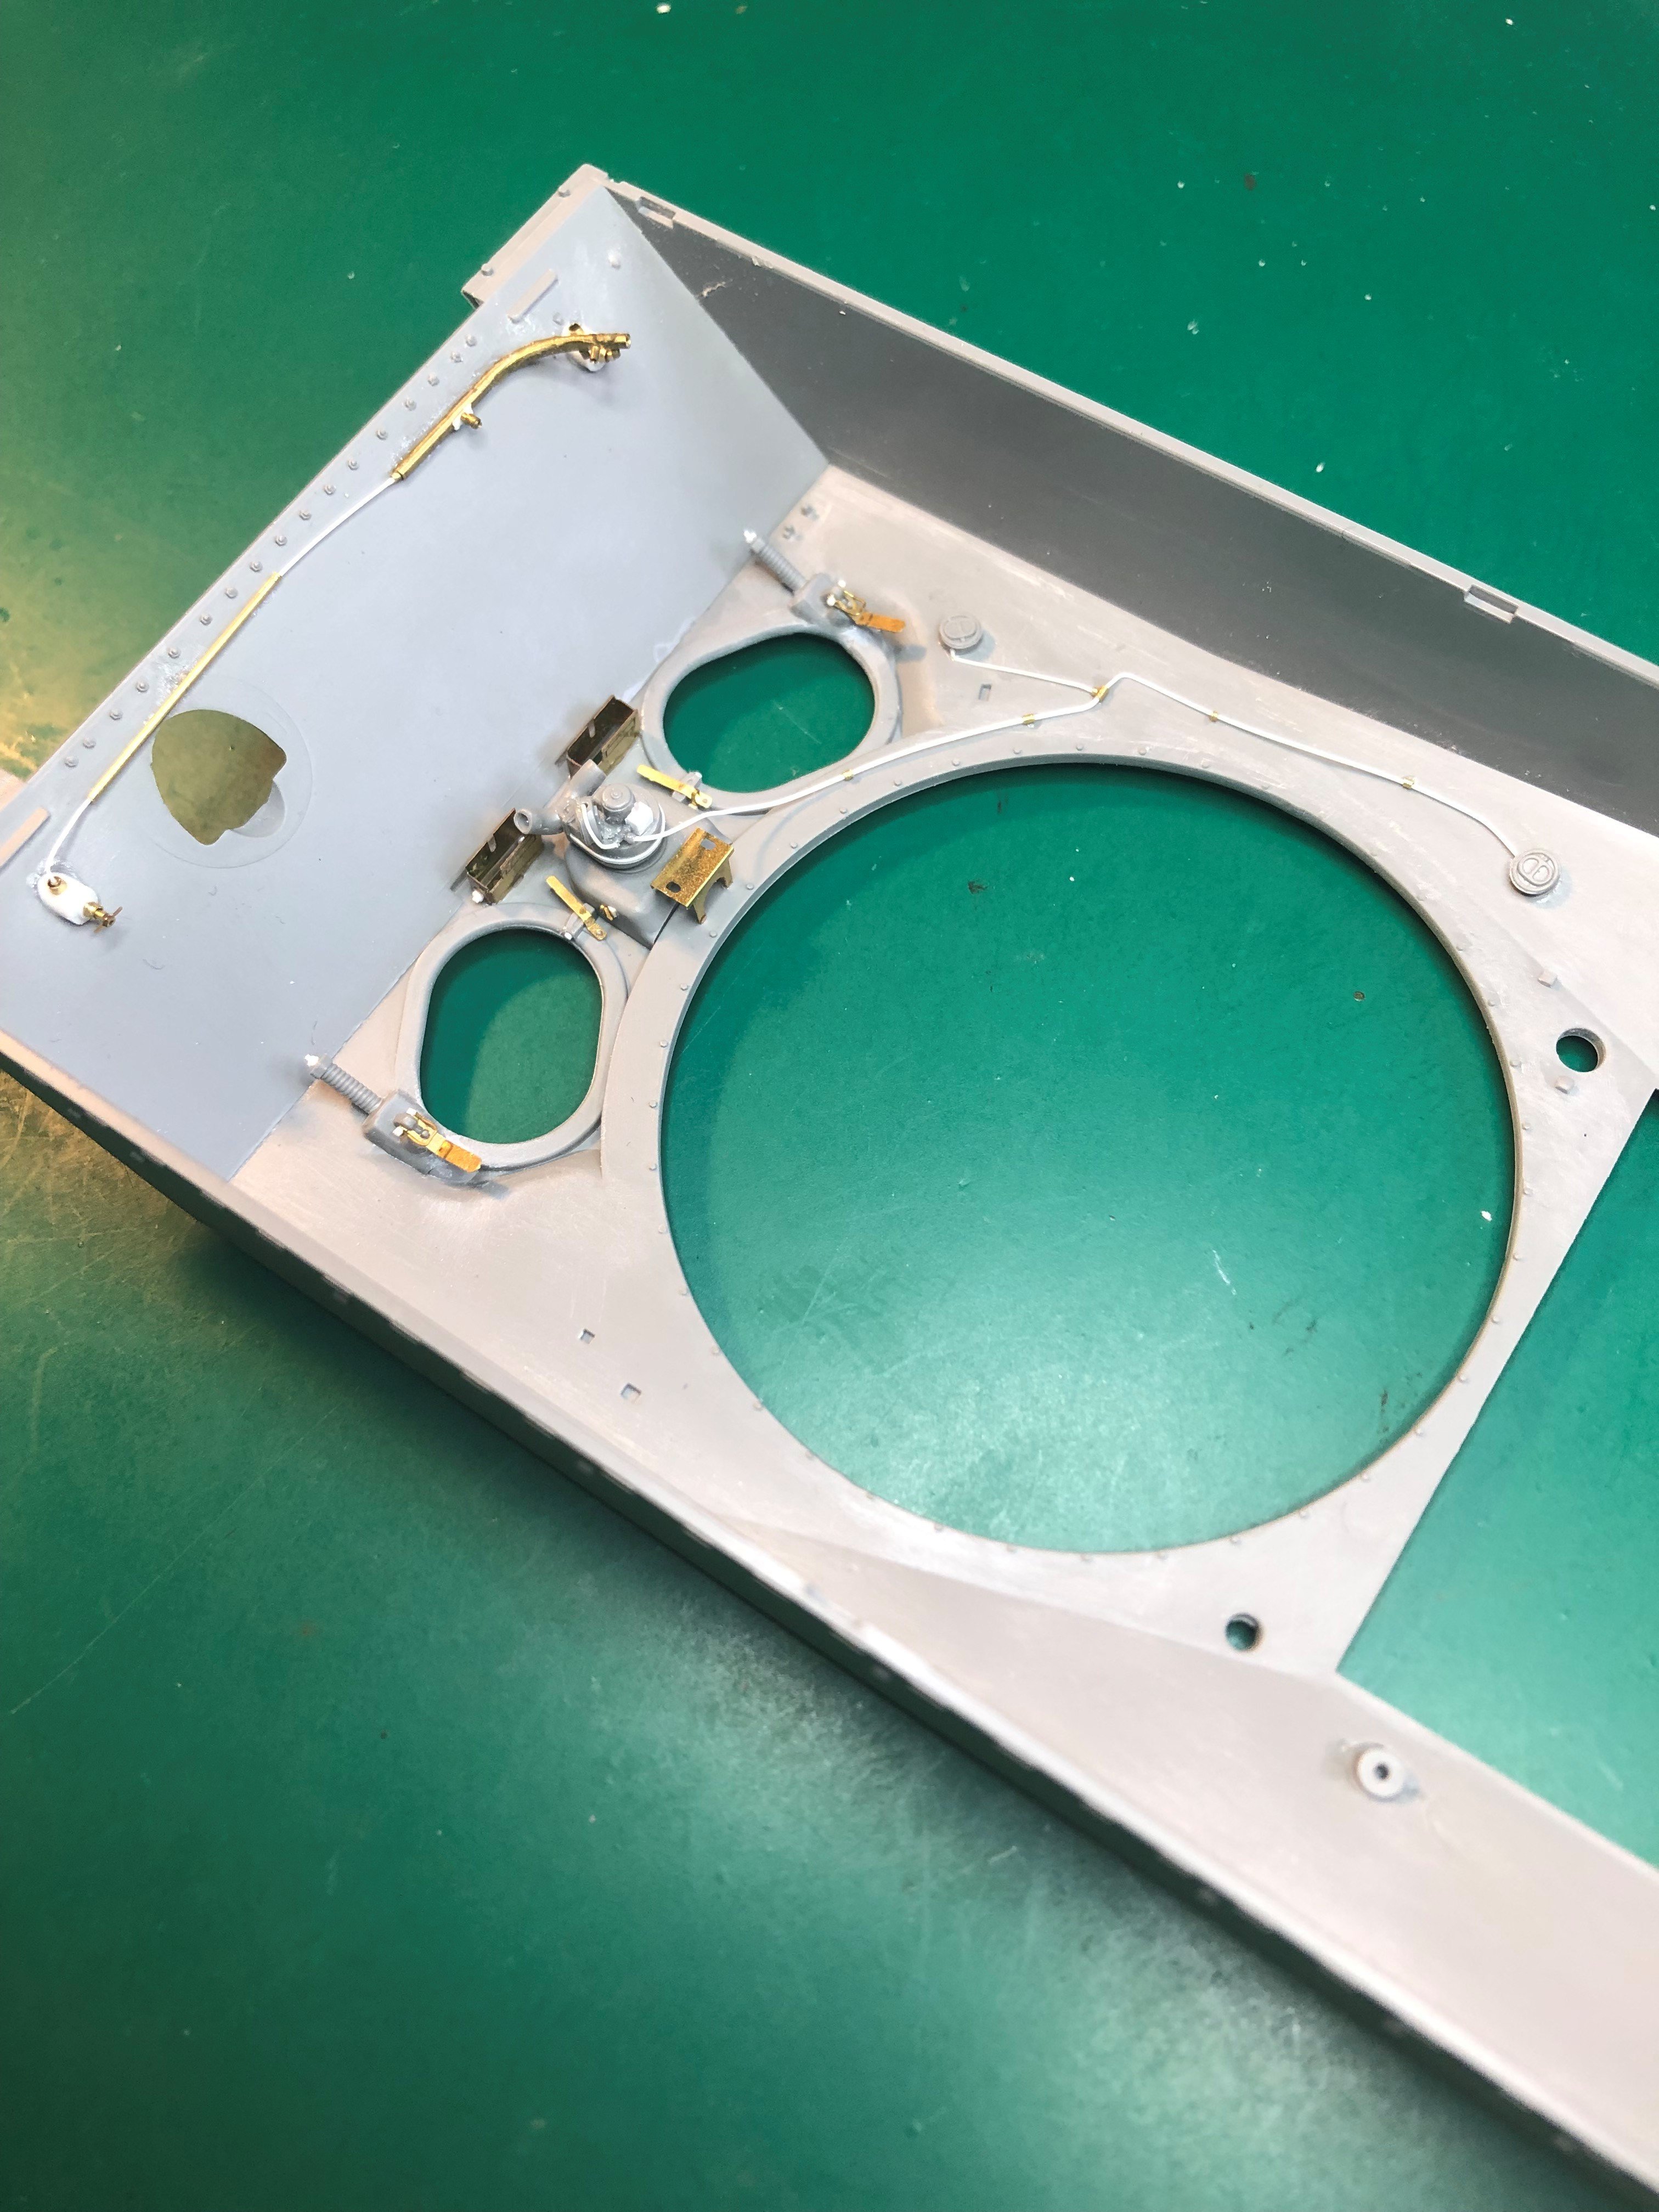
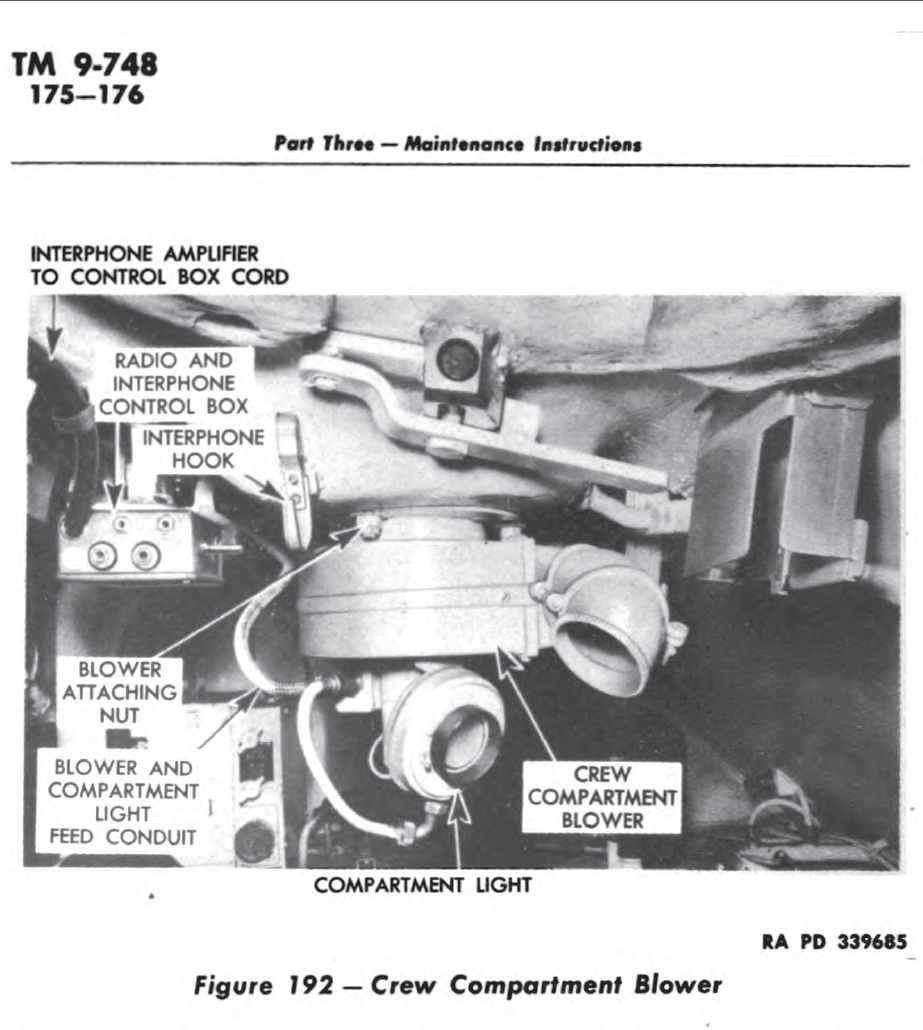
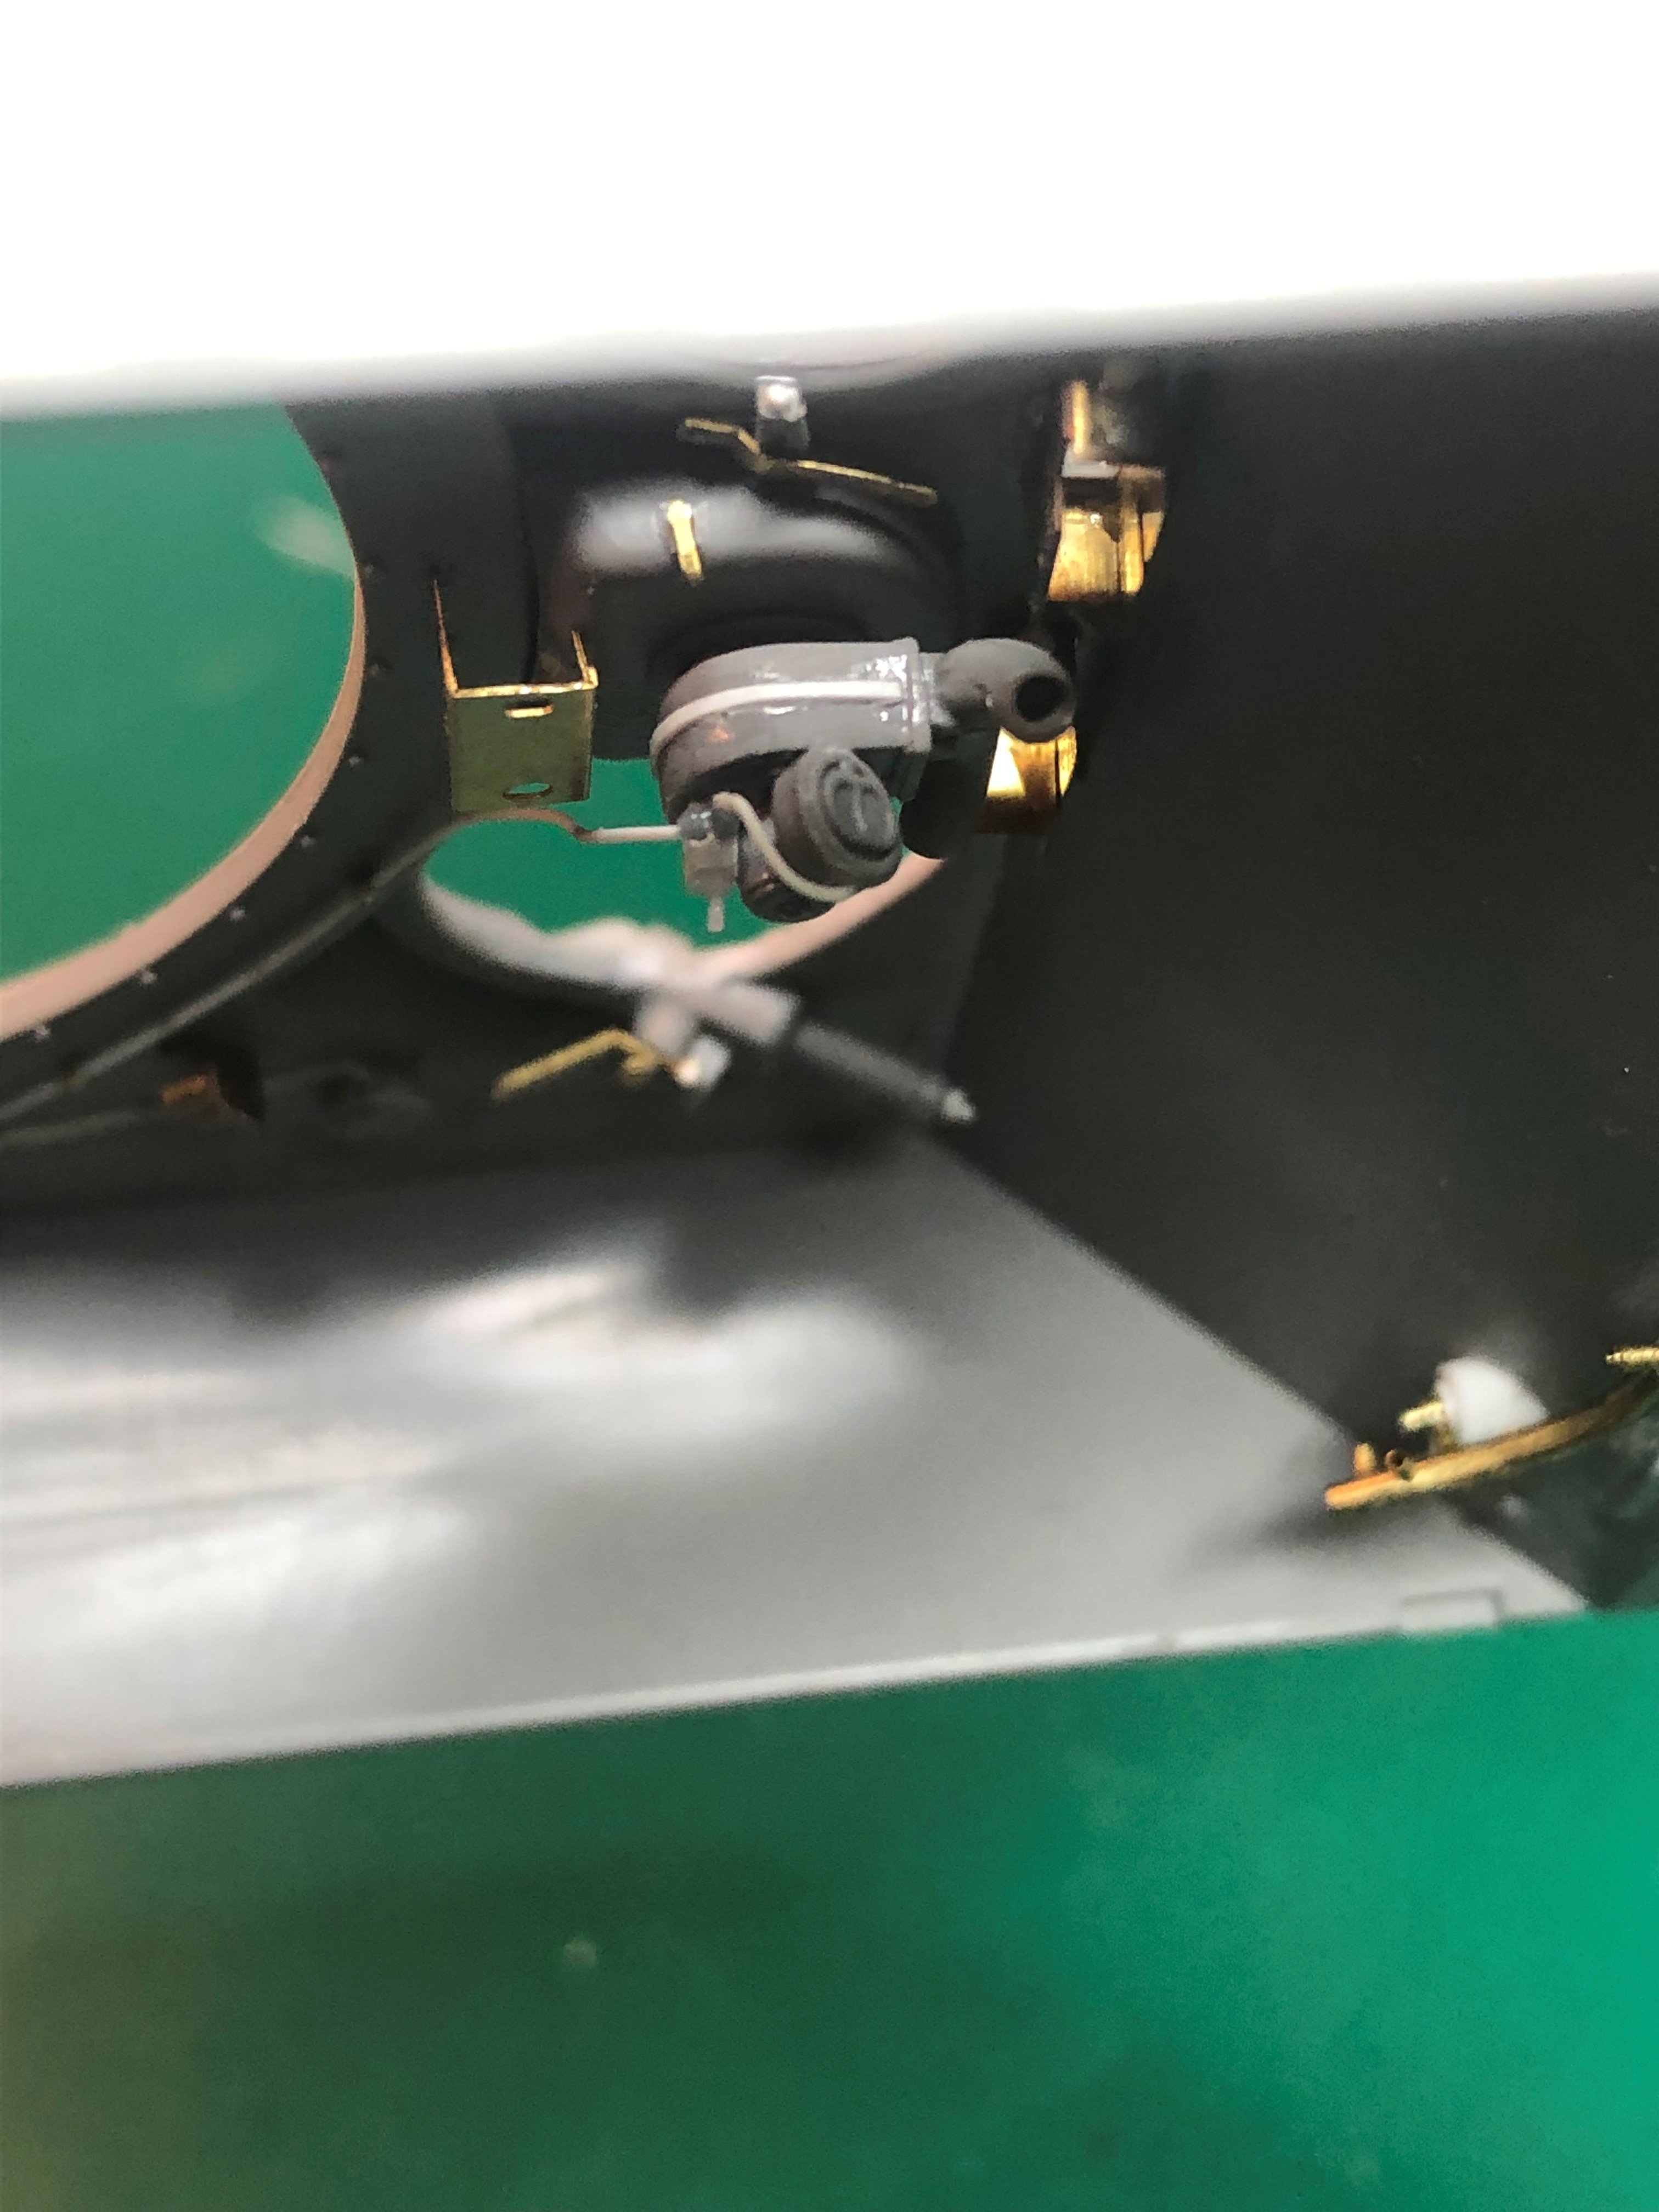
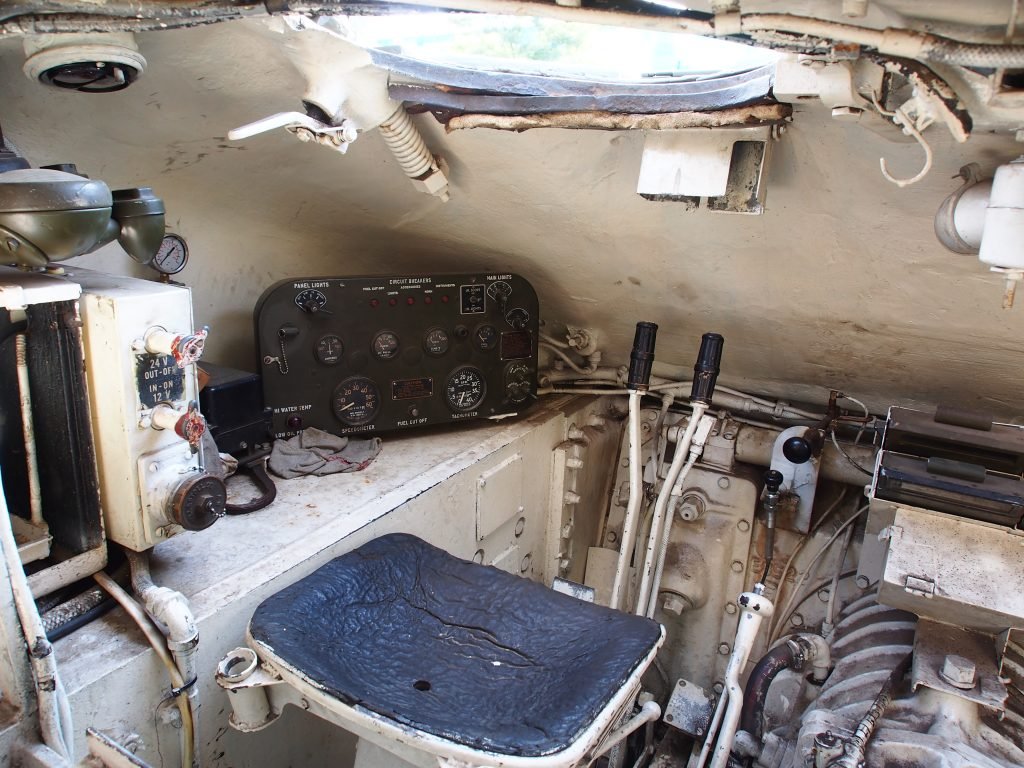
It has been a little bit but got some work done on the interphone and blower area between the driver and assistant driver positions with wiring and a few additional details. Still have to add the radio boxes but will do that after they are painted. Included a picture from the Technical manual as well as a photo of the interior of a Sherman showing the wiring to the connections to the headlights near the control panel.
Starting painting the seats but I am still weathering them. I will have that for next time.
Tim


-
 8
8
-
 1
1
-
-
Thank you. It felt good to start painting.
-
2
-
-
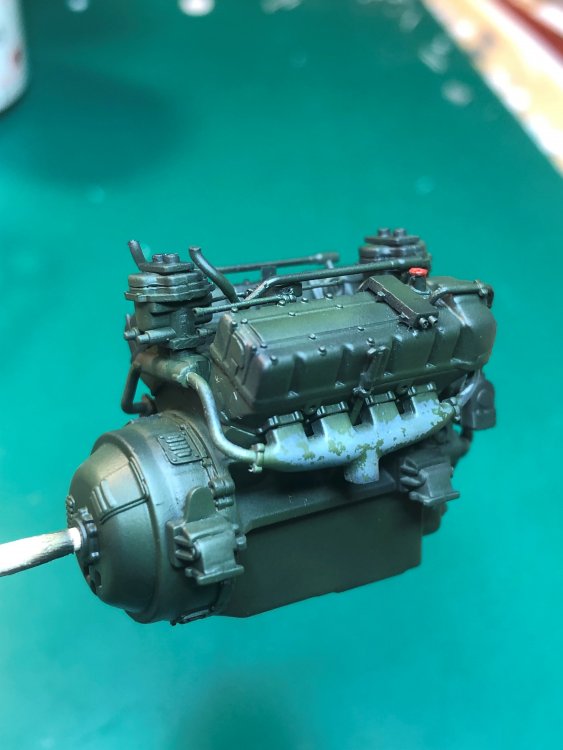
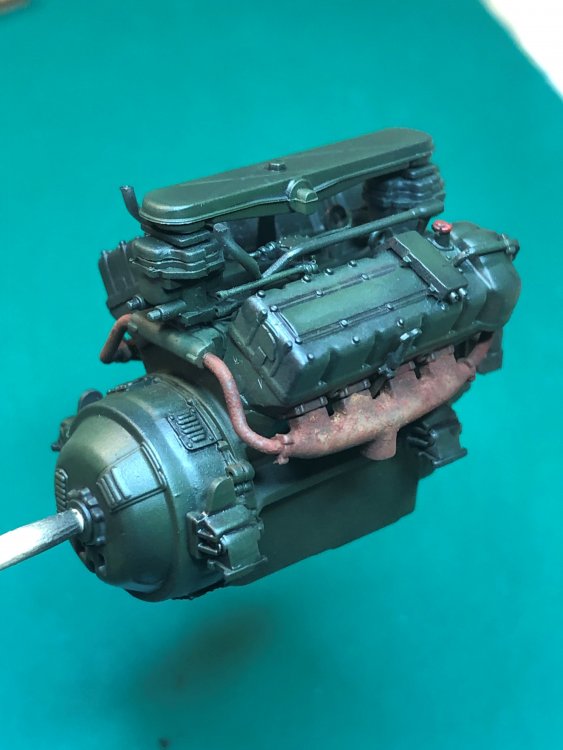
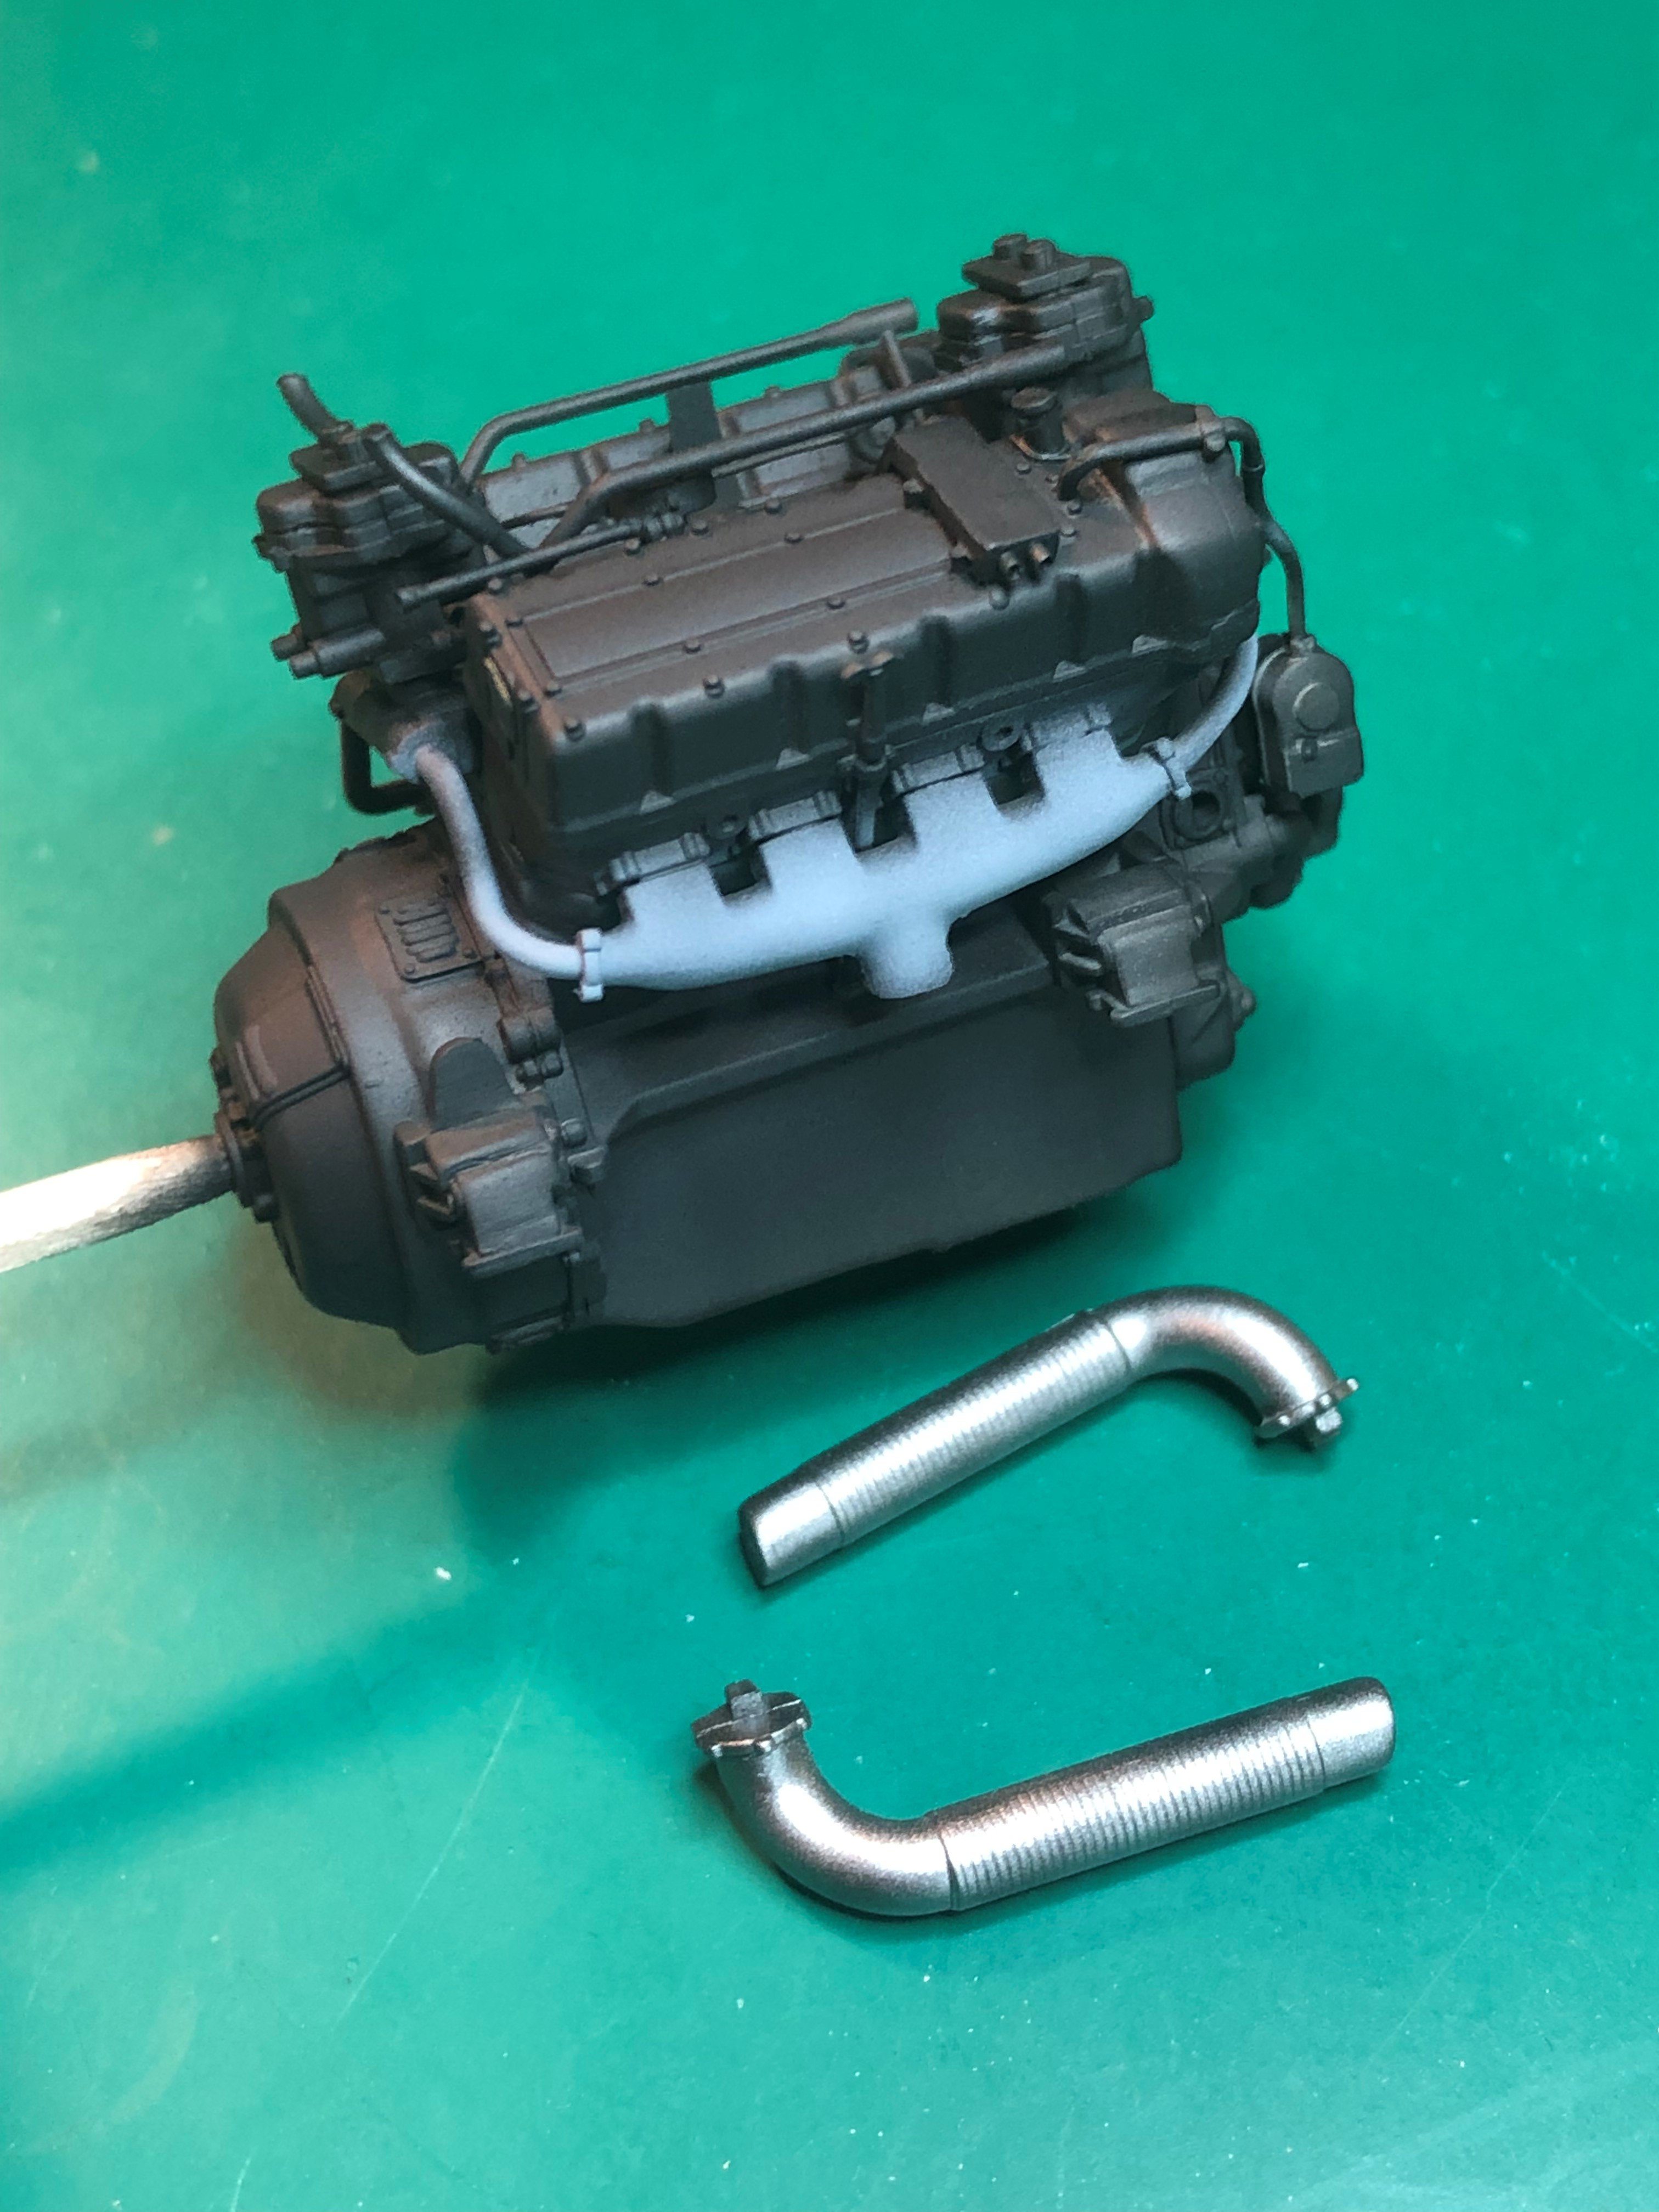
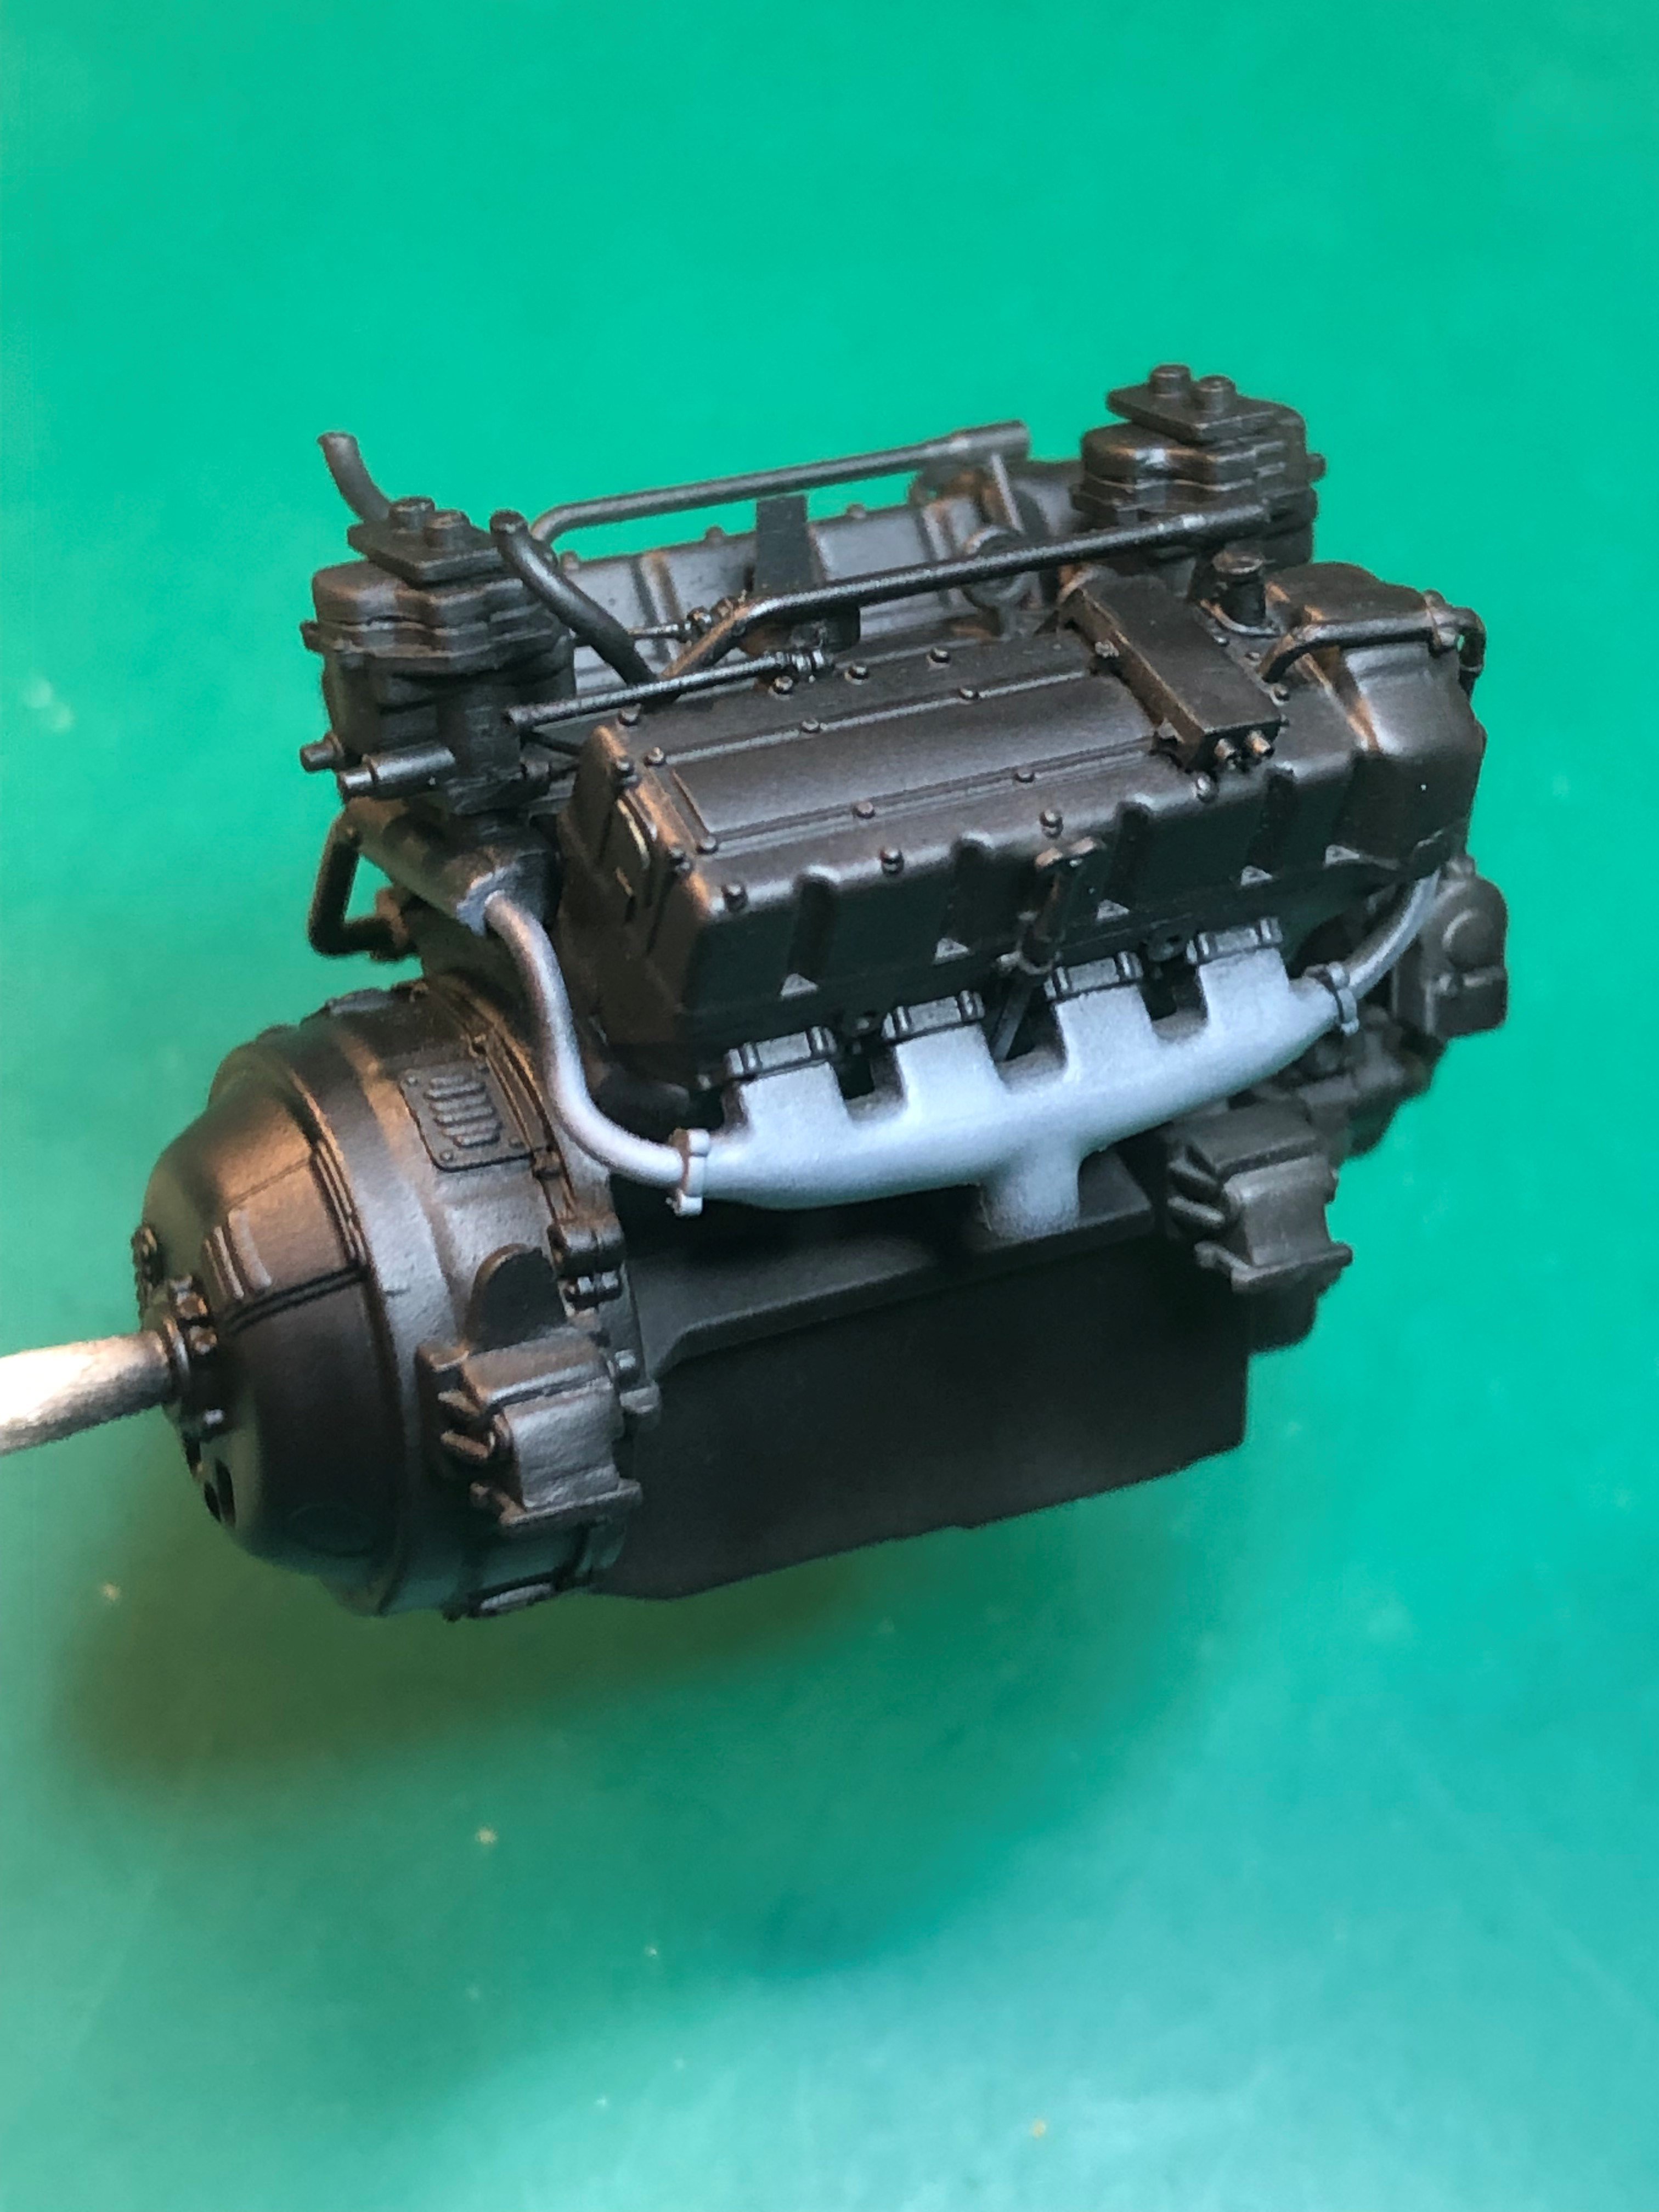
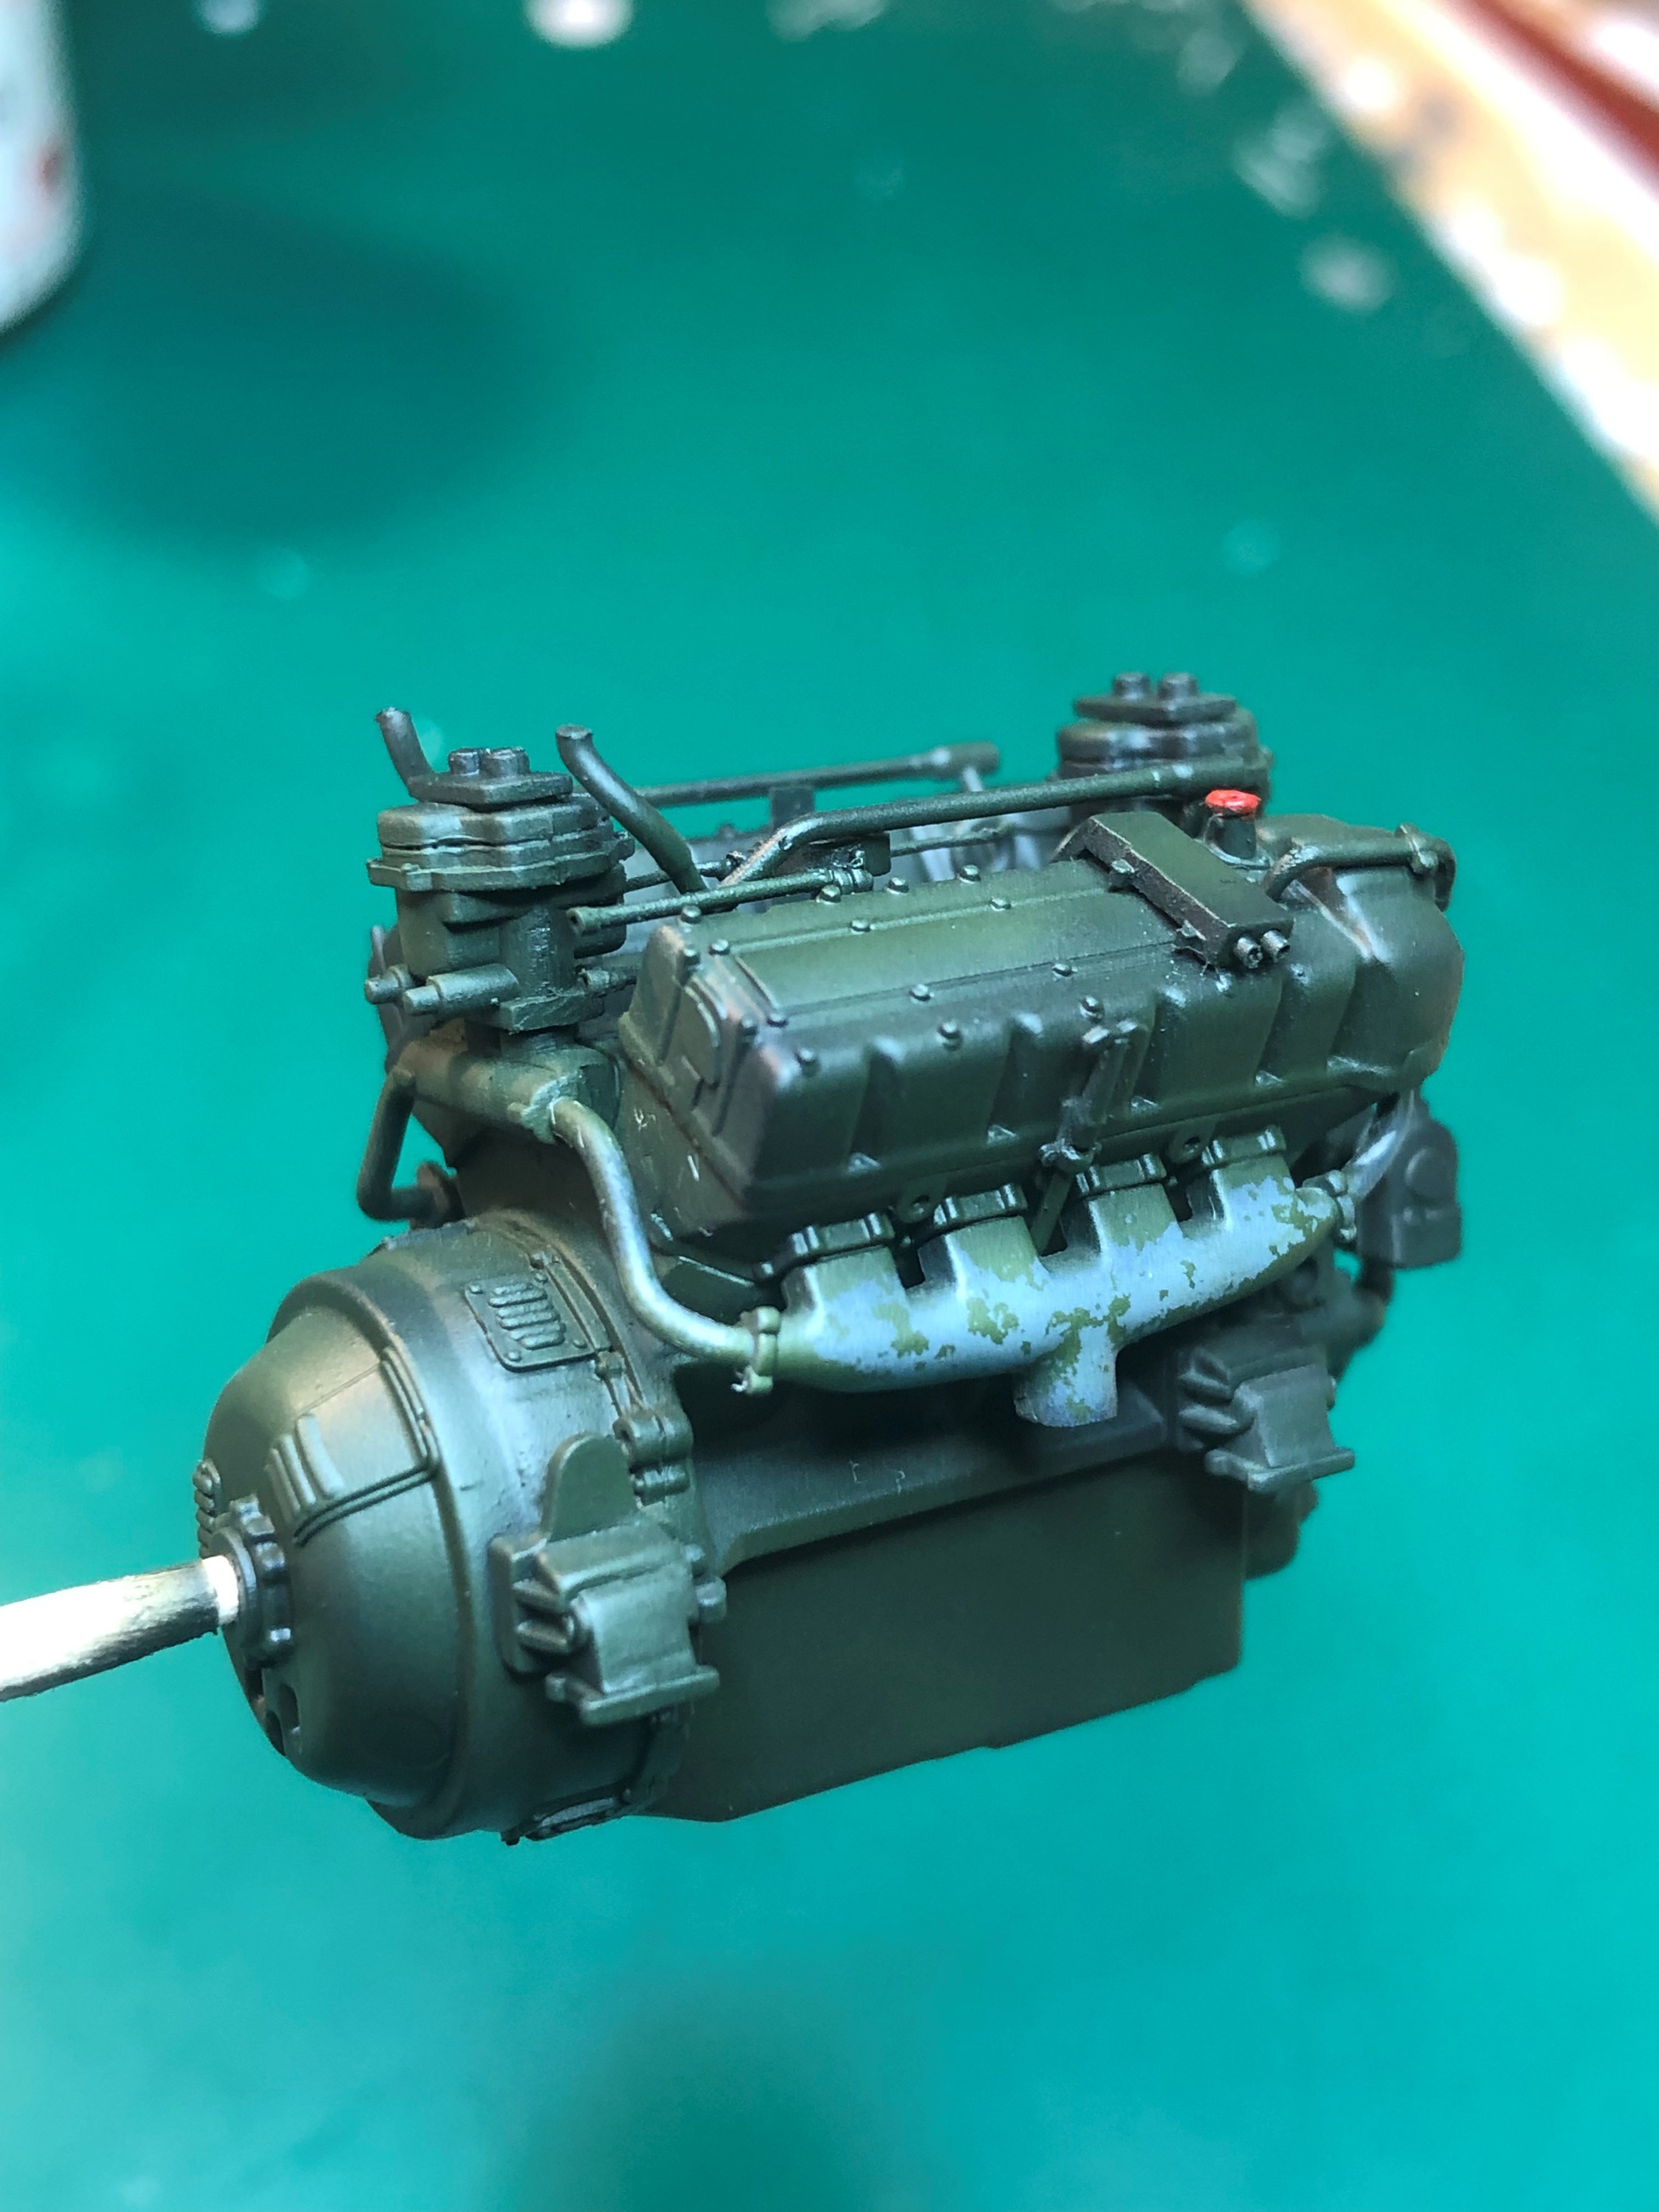
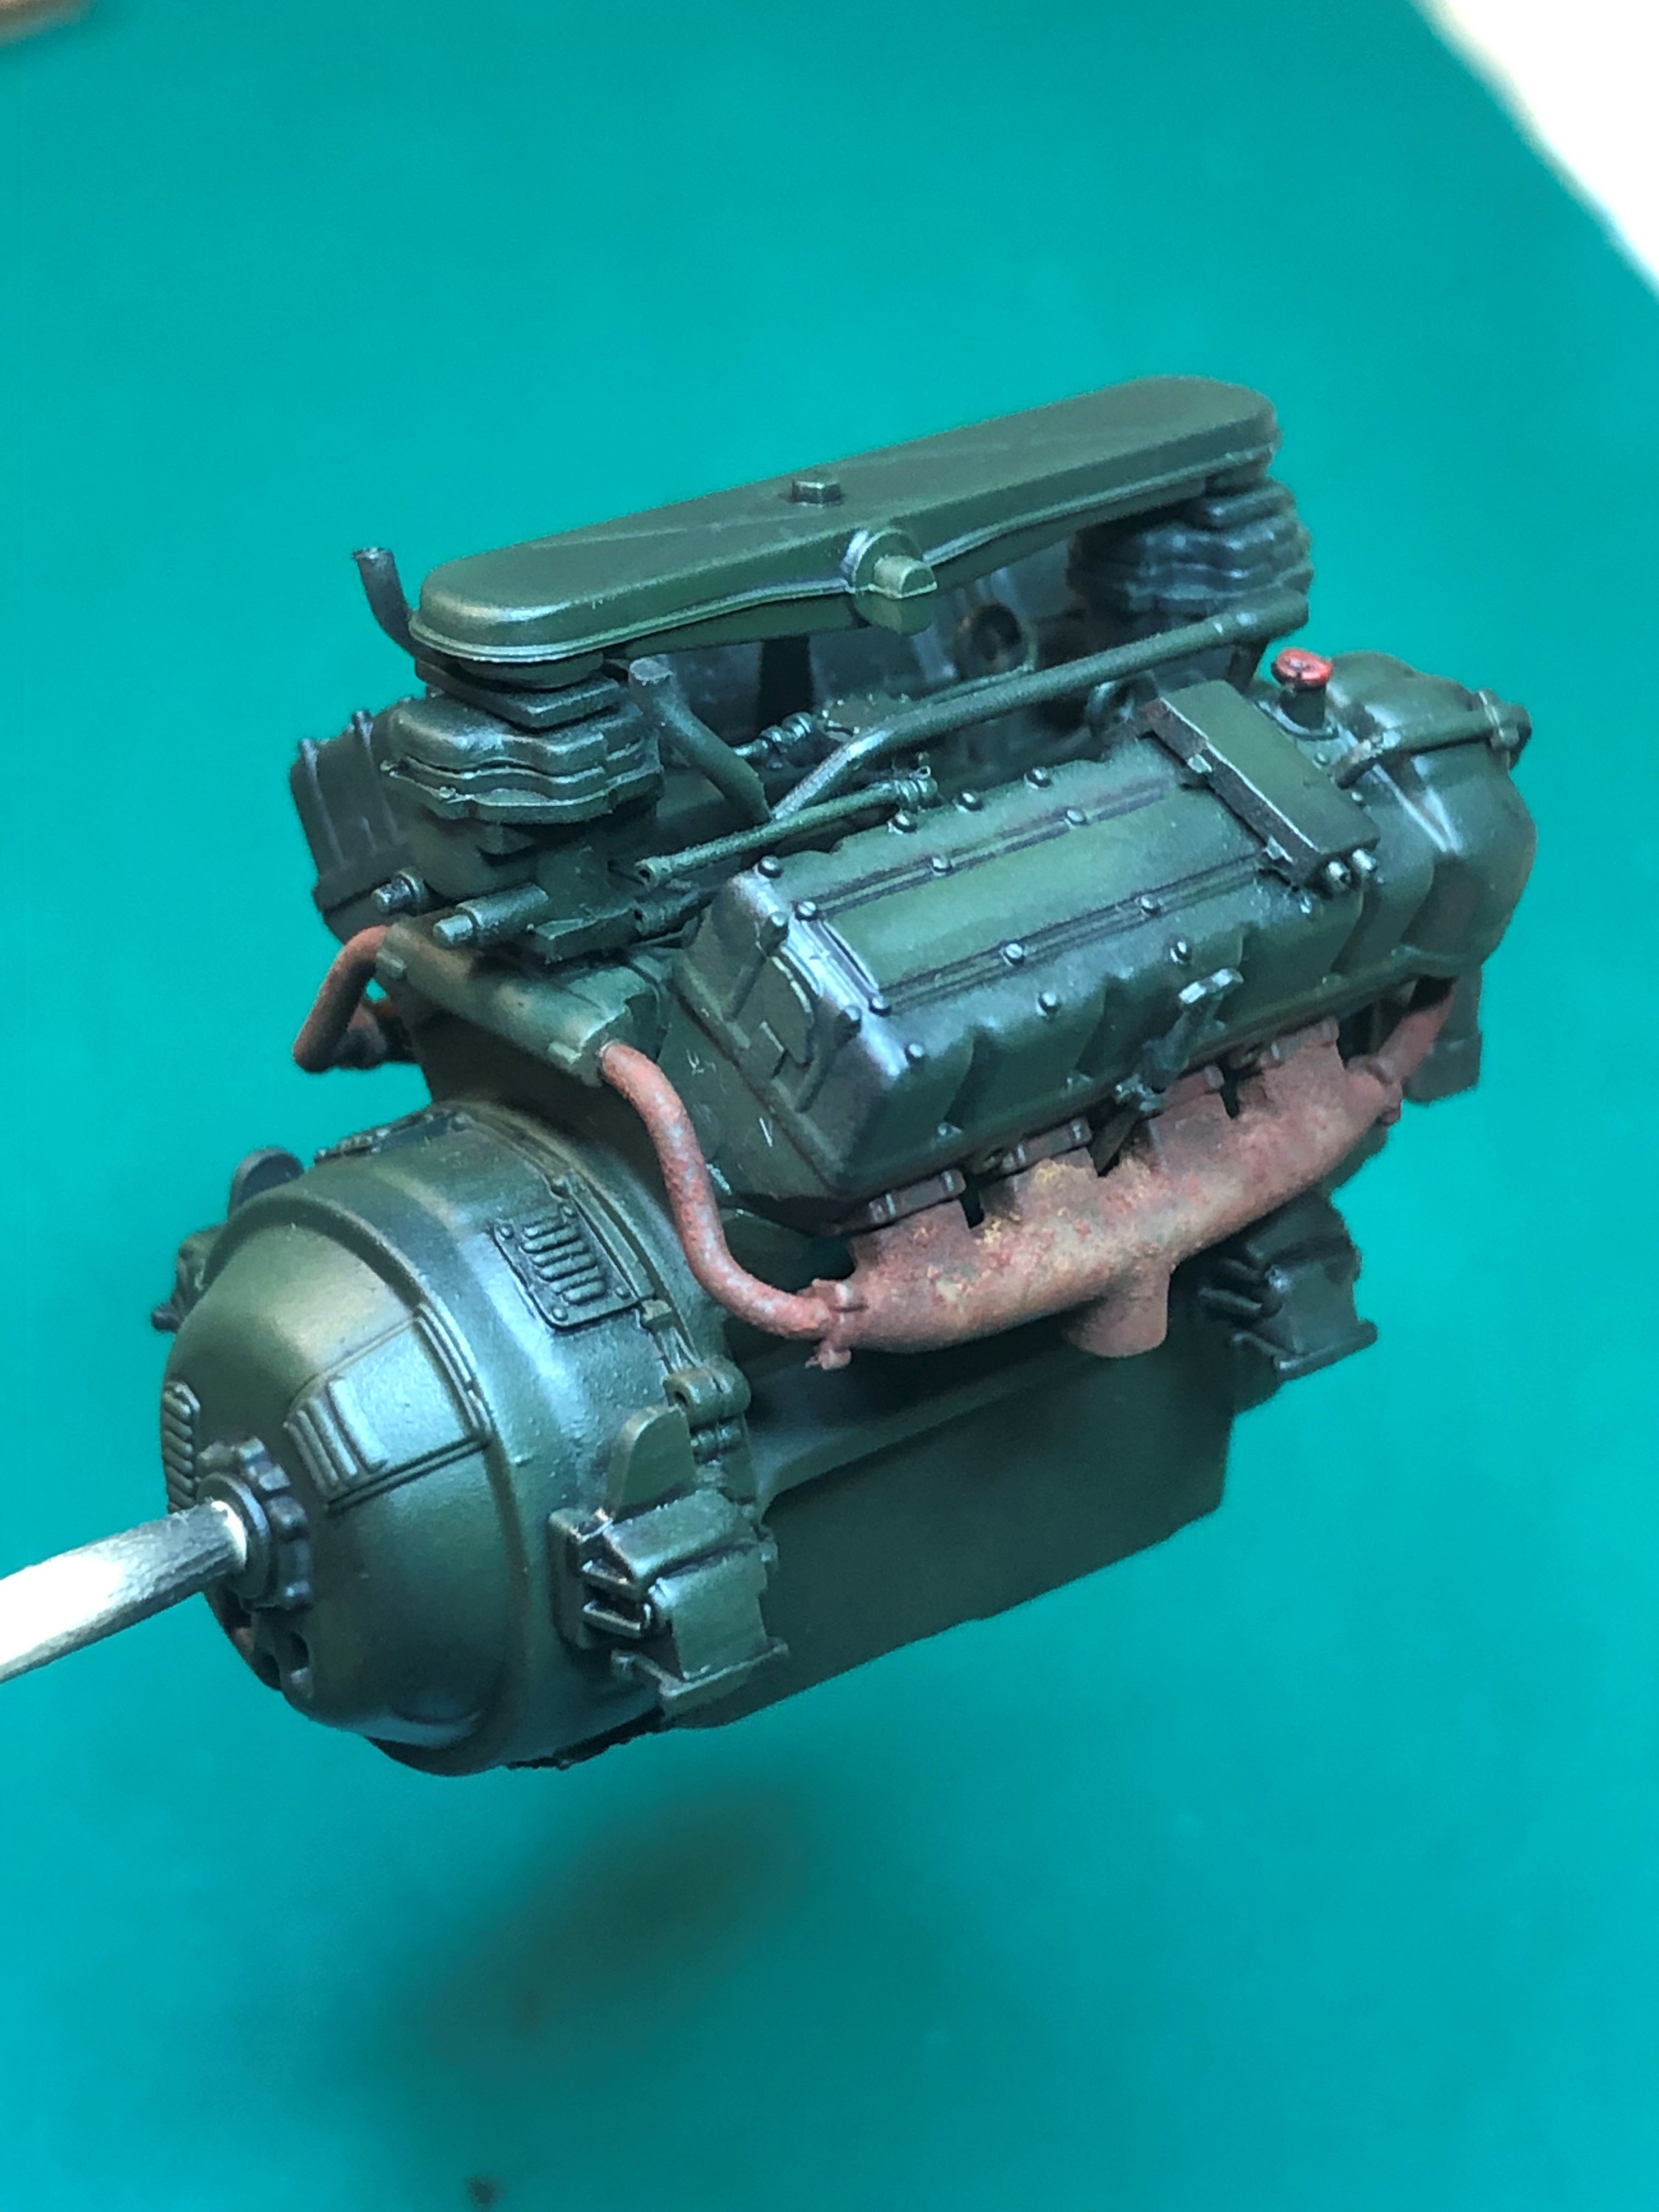
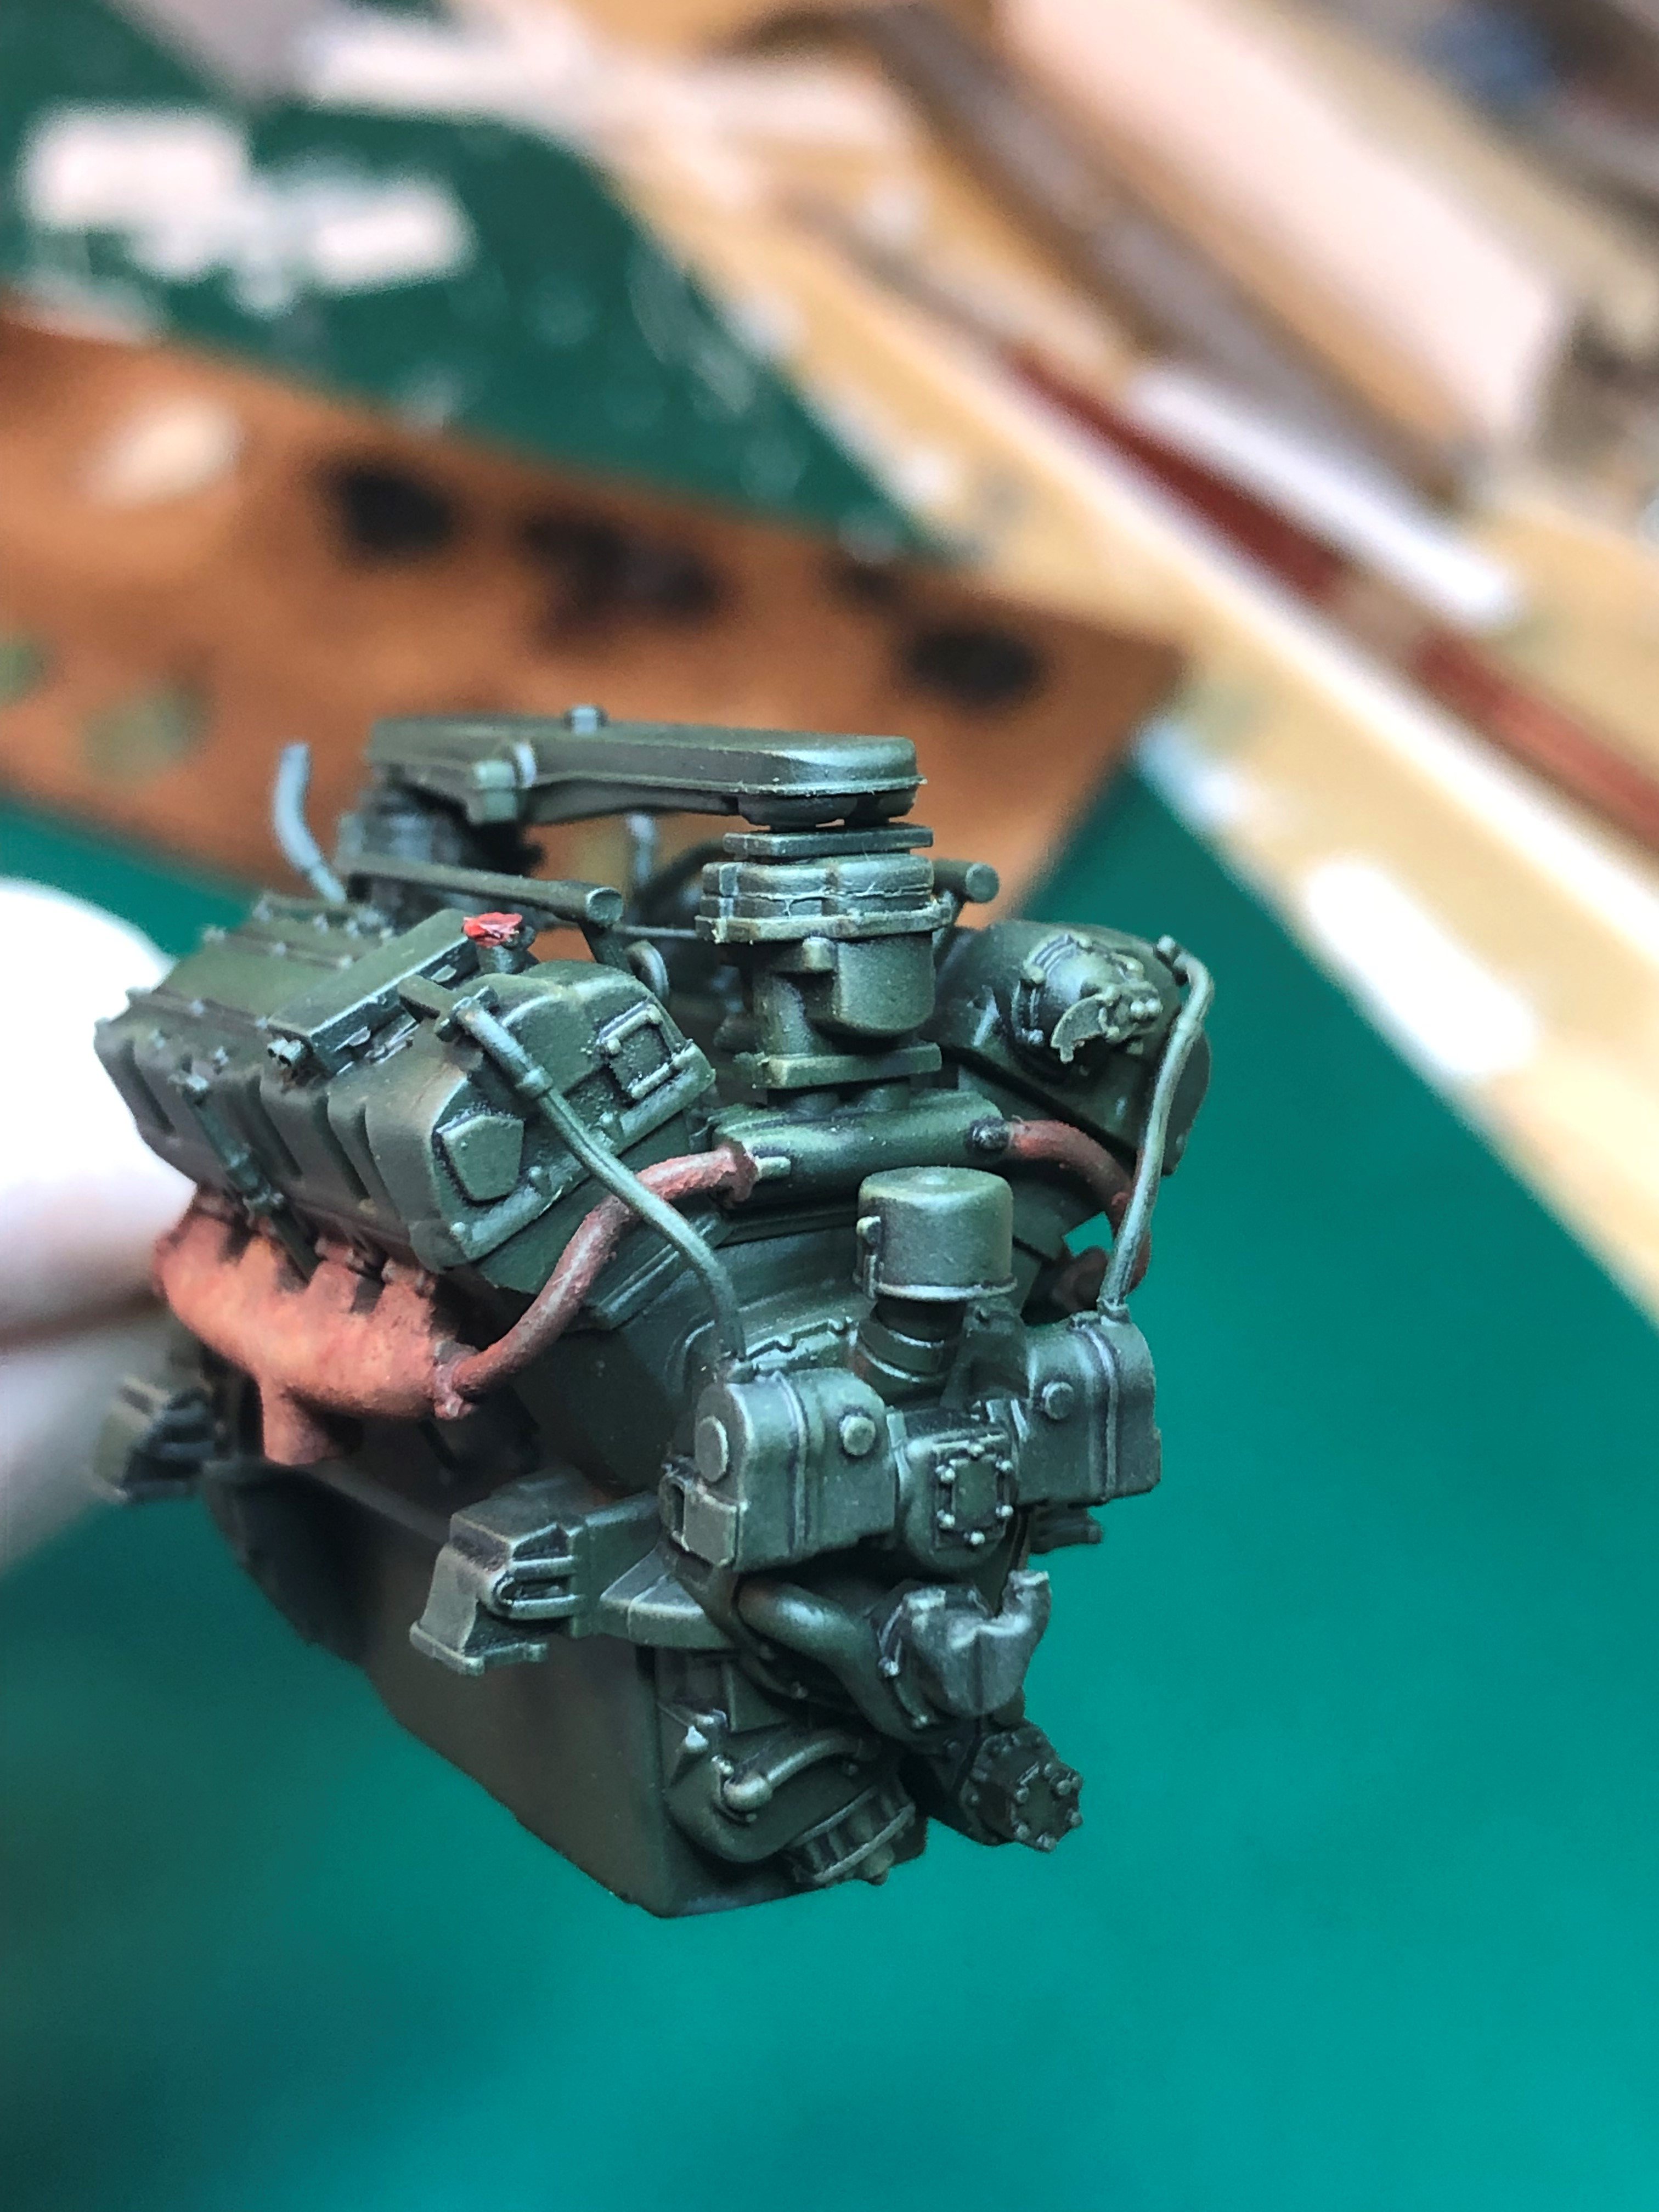
September was busy with work and did not get any bench time. Finally got back to the bench this month. Worked on the engine this week.
Primed the engine with Mr. Surfacer 1500 black. First time airbrushing Mr. Surfacer. It sprayed nicely. I usually use AK Primer and Microfiller. Then painted the exhaust tubes metal and the top of the exhaust grey as I believe this would be the portion that has the greatest amount of heat (Also found a picture with this section grey and it looked good). I then sprayed VMS Satin Varnish. This is the first time using it. It worked great just not used to putting down a wet coat when airbrushing.
Next, sprayed a couple coats of hairspray and then painted the entire engine Tamiya Olive Green. Once it was dry to the touch I did chipping on the grey portion of the exhaust. This was in anticipating of showing paint wearing due to the heat. Next I gave another coat of varnish on the exhaust area. Next I added a combination of AK Rust Streaks, Dark Rust Deposits and Medium Rust Deposits. While the enamel was wet I added Medium rust pigment getting to what I liked.
Then I did a pin wash with oil paint and then dry brushing with Wilder Olive Green which is still lighter than the Tamiya Olive green.
Still more weathering to do. A little more spotted rust on top along with stains, dust.
Until next time.
Tim


-
7
-
1
-
-
Back from my vacation and I was able to get some bench time over the weekend.
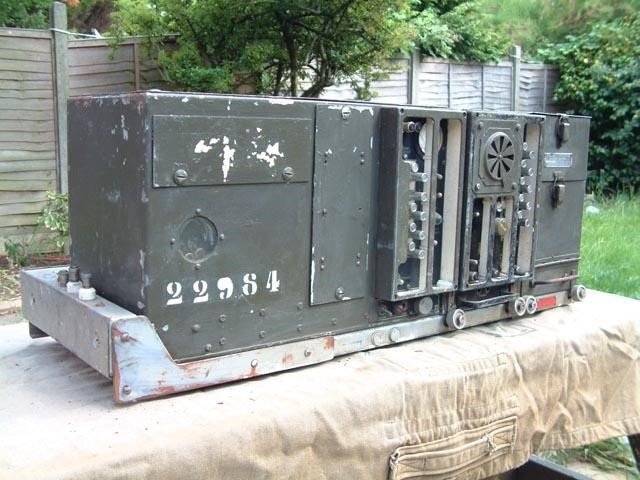
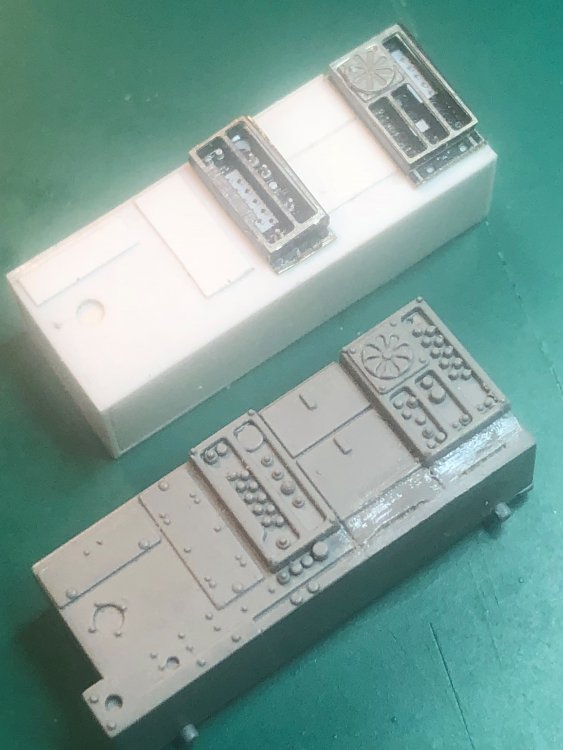
I was attempting to remove the molded in handle detail from the kit radio but messed it up. So, I needed to scratch build a new radio, SCR-508. Luckily, I had purchased an Eduard Photo etch set for an M16 so I can get the correct latched for most of the compartment doors. In the set was photo etch for the radio. I did not want all of it, just the radio face plates for the switches. I was able to cut them out and added switches. More switches and dials to go. The protective covers around the switches were included also and I super glued photo etch on the bottom to get it raised. In trying to clean up the super glue with AK Eraser the colored portion of the photo etch came off. This is what I wanted anyways to make is easier for painting to match the rest.
I also built the tray the radio sits in as a separate piece so it can be painted aluminum easier. I have more details to be added to the tray.
It is a start and hopefully I can finish it up this week.
Tim


-
7
-
-
It is just jaw dropping, amazing work. Tim
-
2
-
-
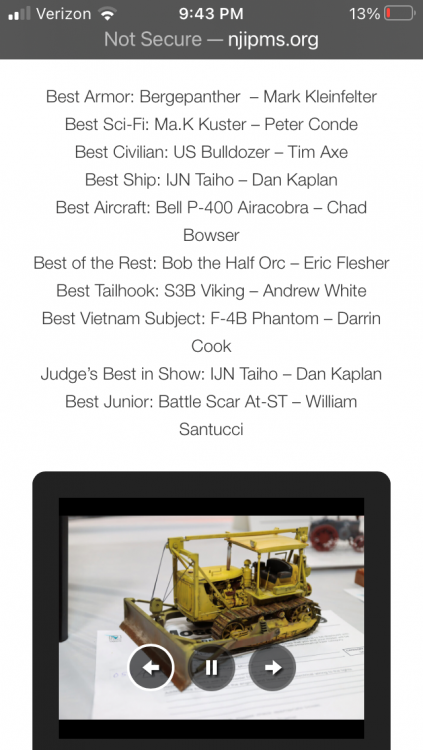
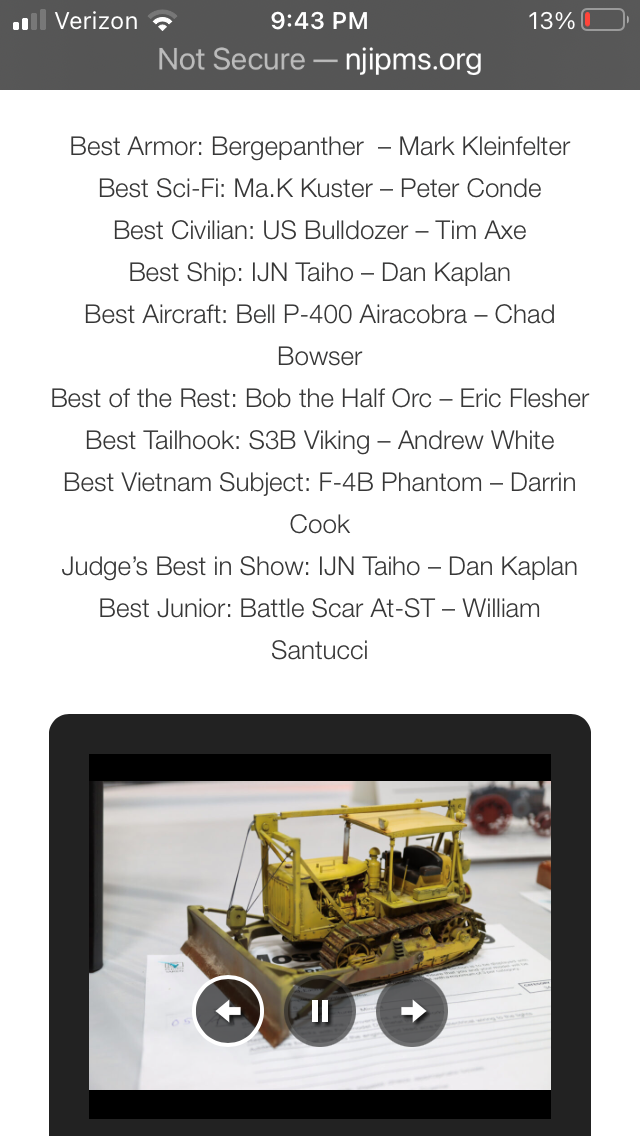
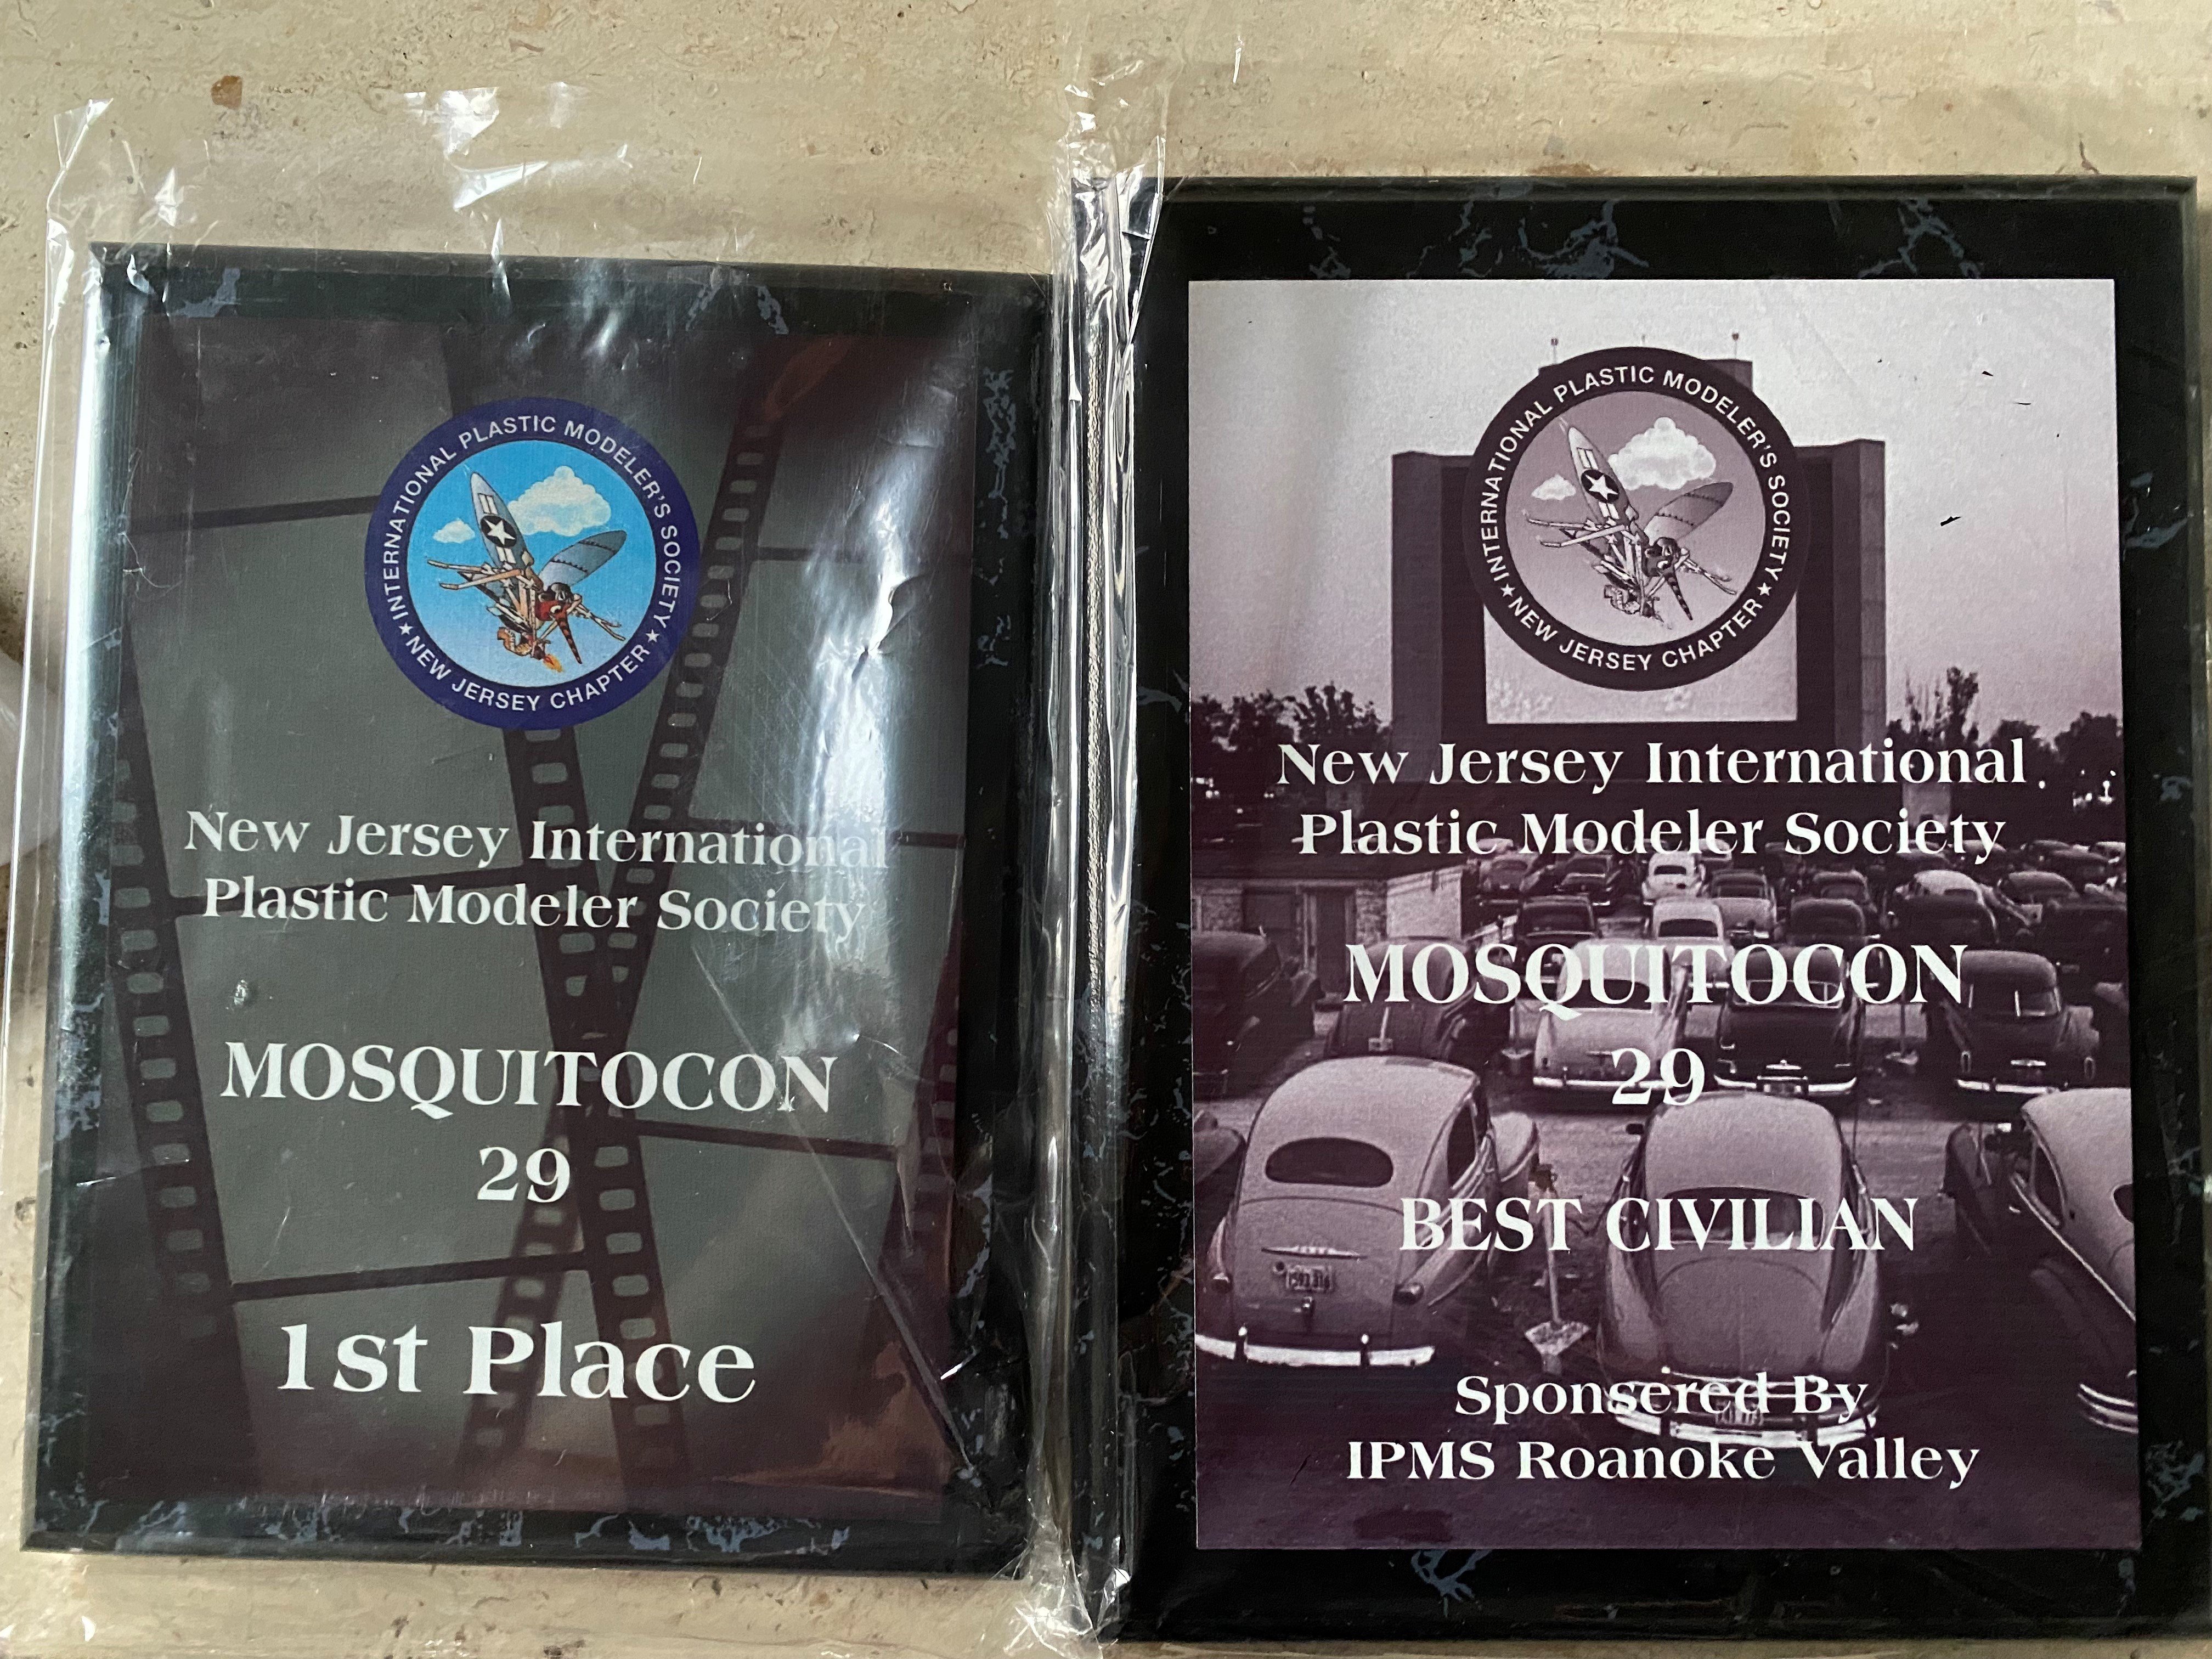
Well last weekend was the first competition for NJ IPMS (New Jersey) in 2 years. The hall was crowded with lots of entries everyone built up over the last two years. I entered two items, the U.S Bulldozer from above and a 1/48 P-51D-5. I entered the bulldozer in the trucks/commercial vehicles. I though maybe it had a chance at 3rd place. I have won 3rd place finished for a tractor 4 years ago in this category. So, I thought maybe, especially after all of the encouraging comments you gave me.
Well, in the truck/commercial vehicle category I got first place. I was shocked. After that I thought well that is it. I actually thought about leaving. Turns out, good thing I did not. They then went into the special awards categories and then they called my name for Best Civilian: US Bulldozer. WOW. again I was surprised. These are firsts for me. I am sure a lot of you place high in a lot of competitions with all of the great models I see here. I think this got me motivated to get back to work on my M4A3E8 Sherman with interior.
Did I mention the vendor room!!! I always spend too much.
Tim

-
6
-
-
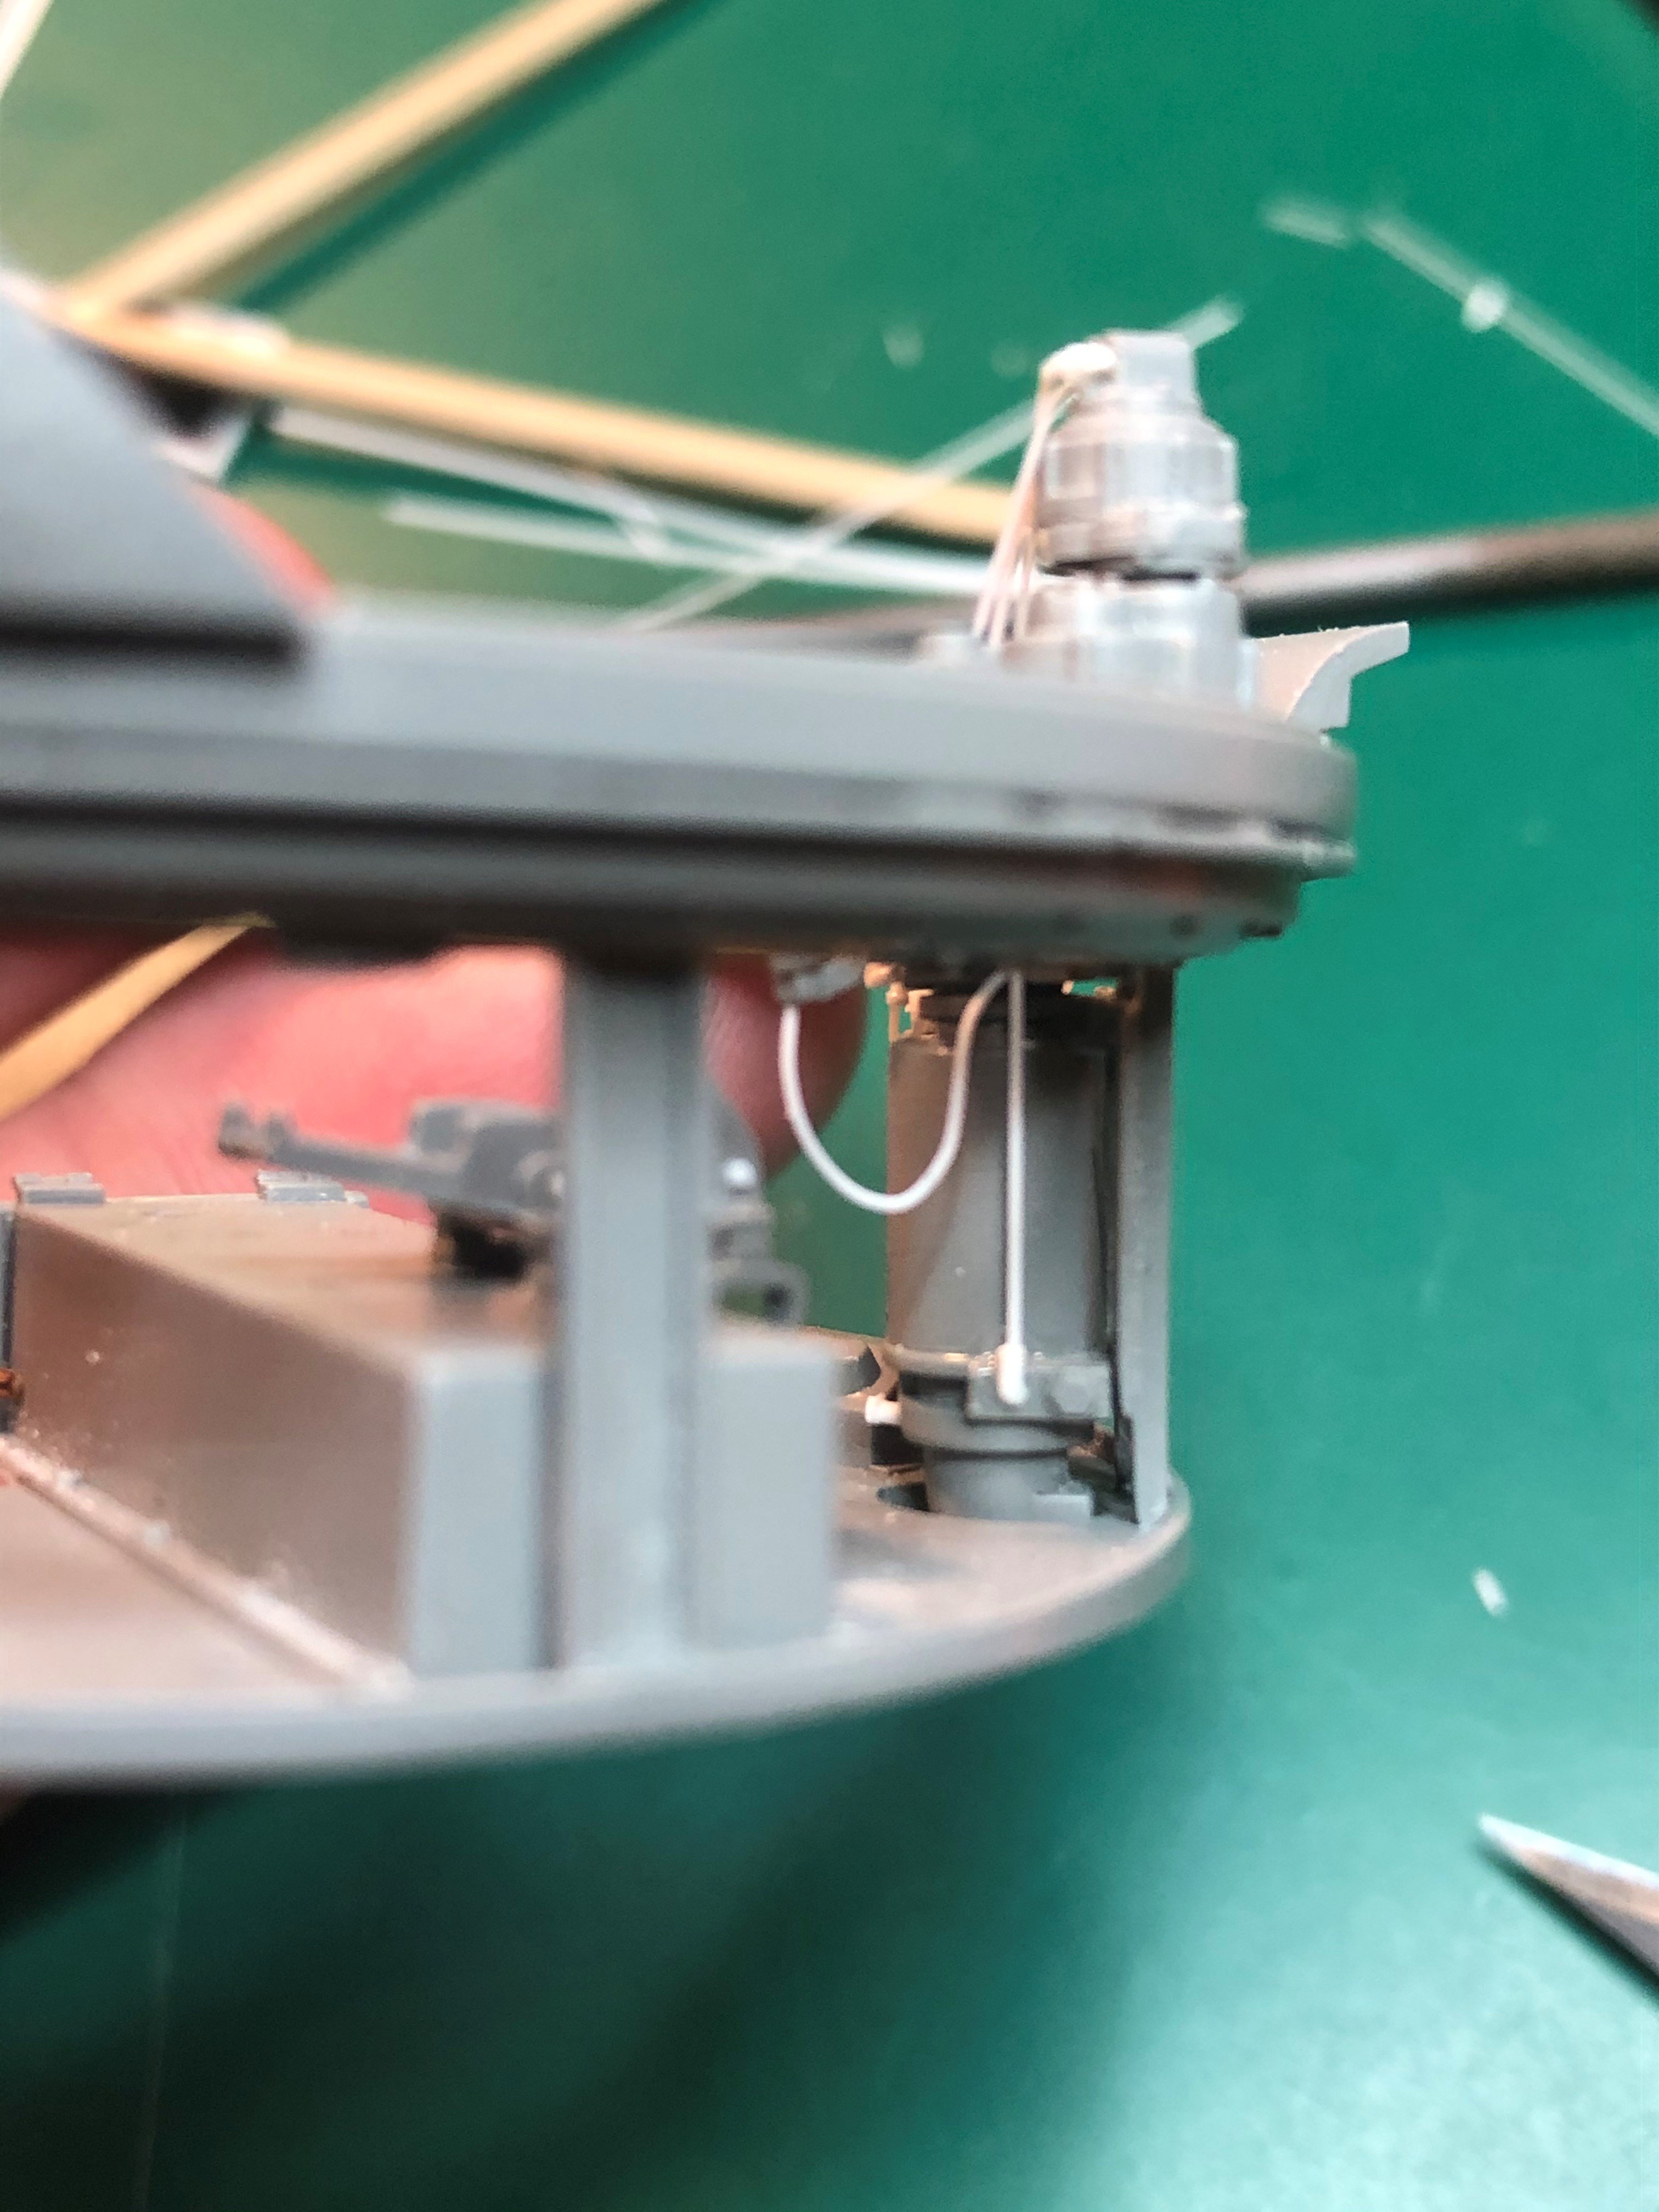
Finally got back to work on the Sherman interior. Commanders side of the turret is almost done. A few small details to add such as the binoculars holder and microphones.
-
6
-
-
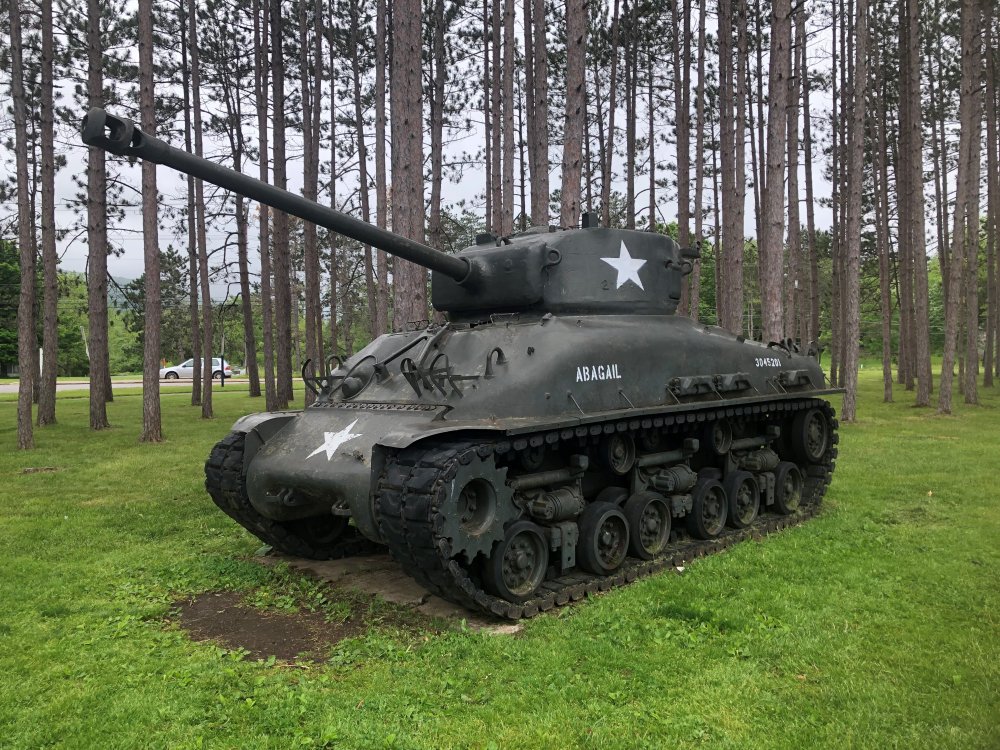
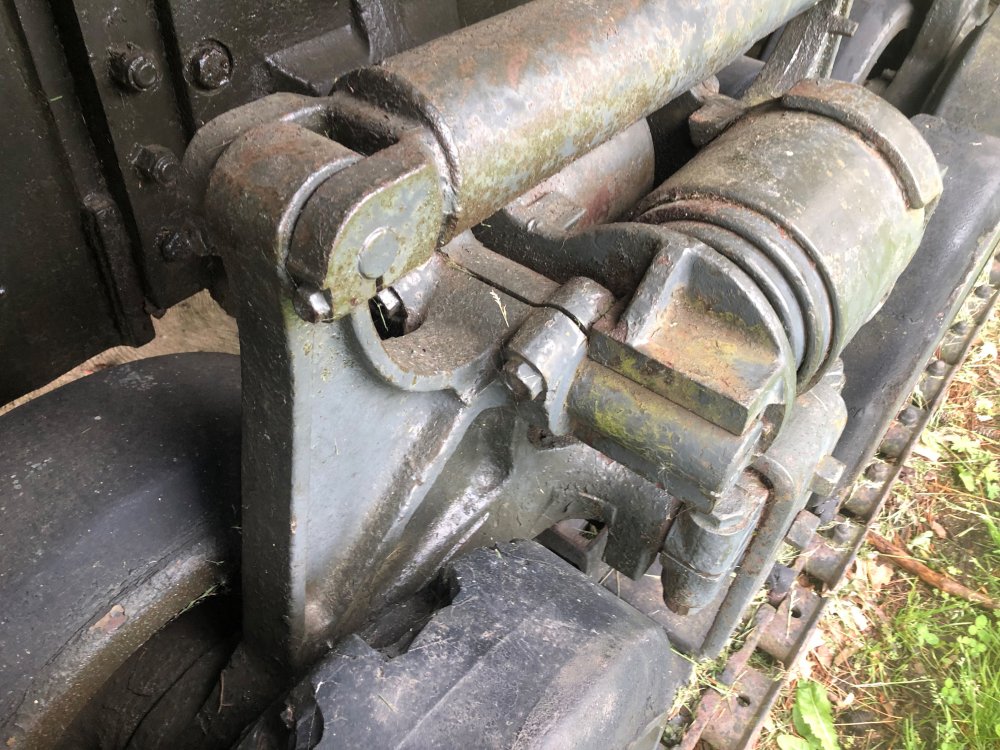
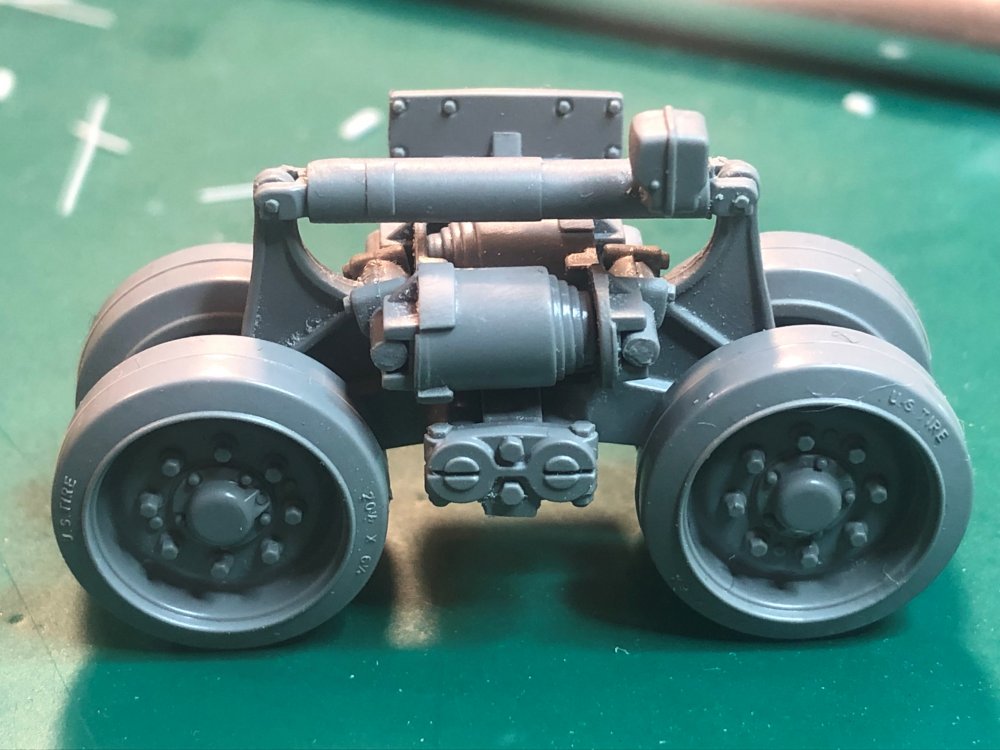
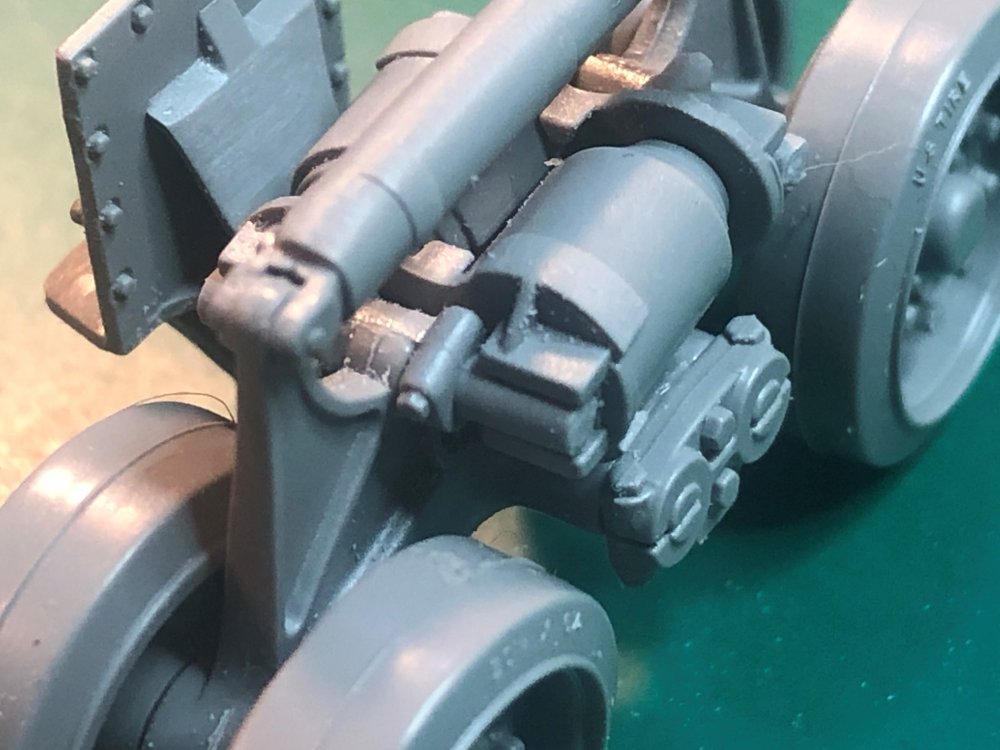
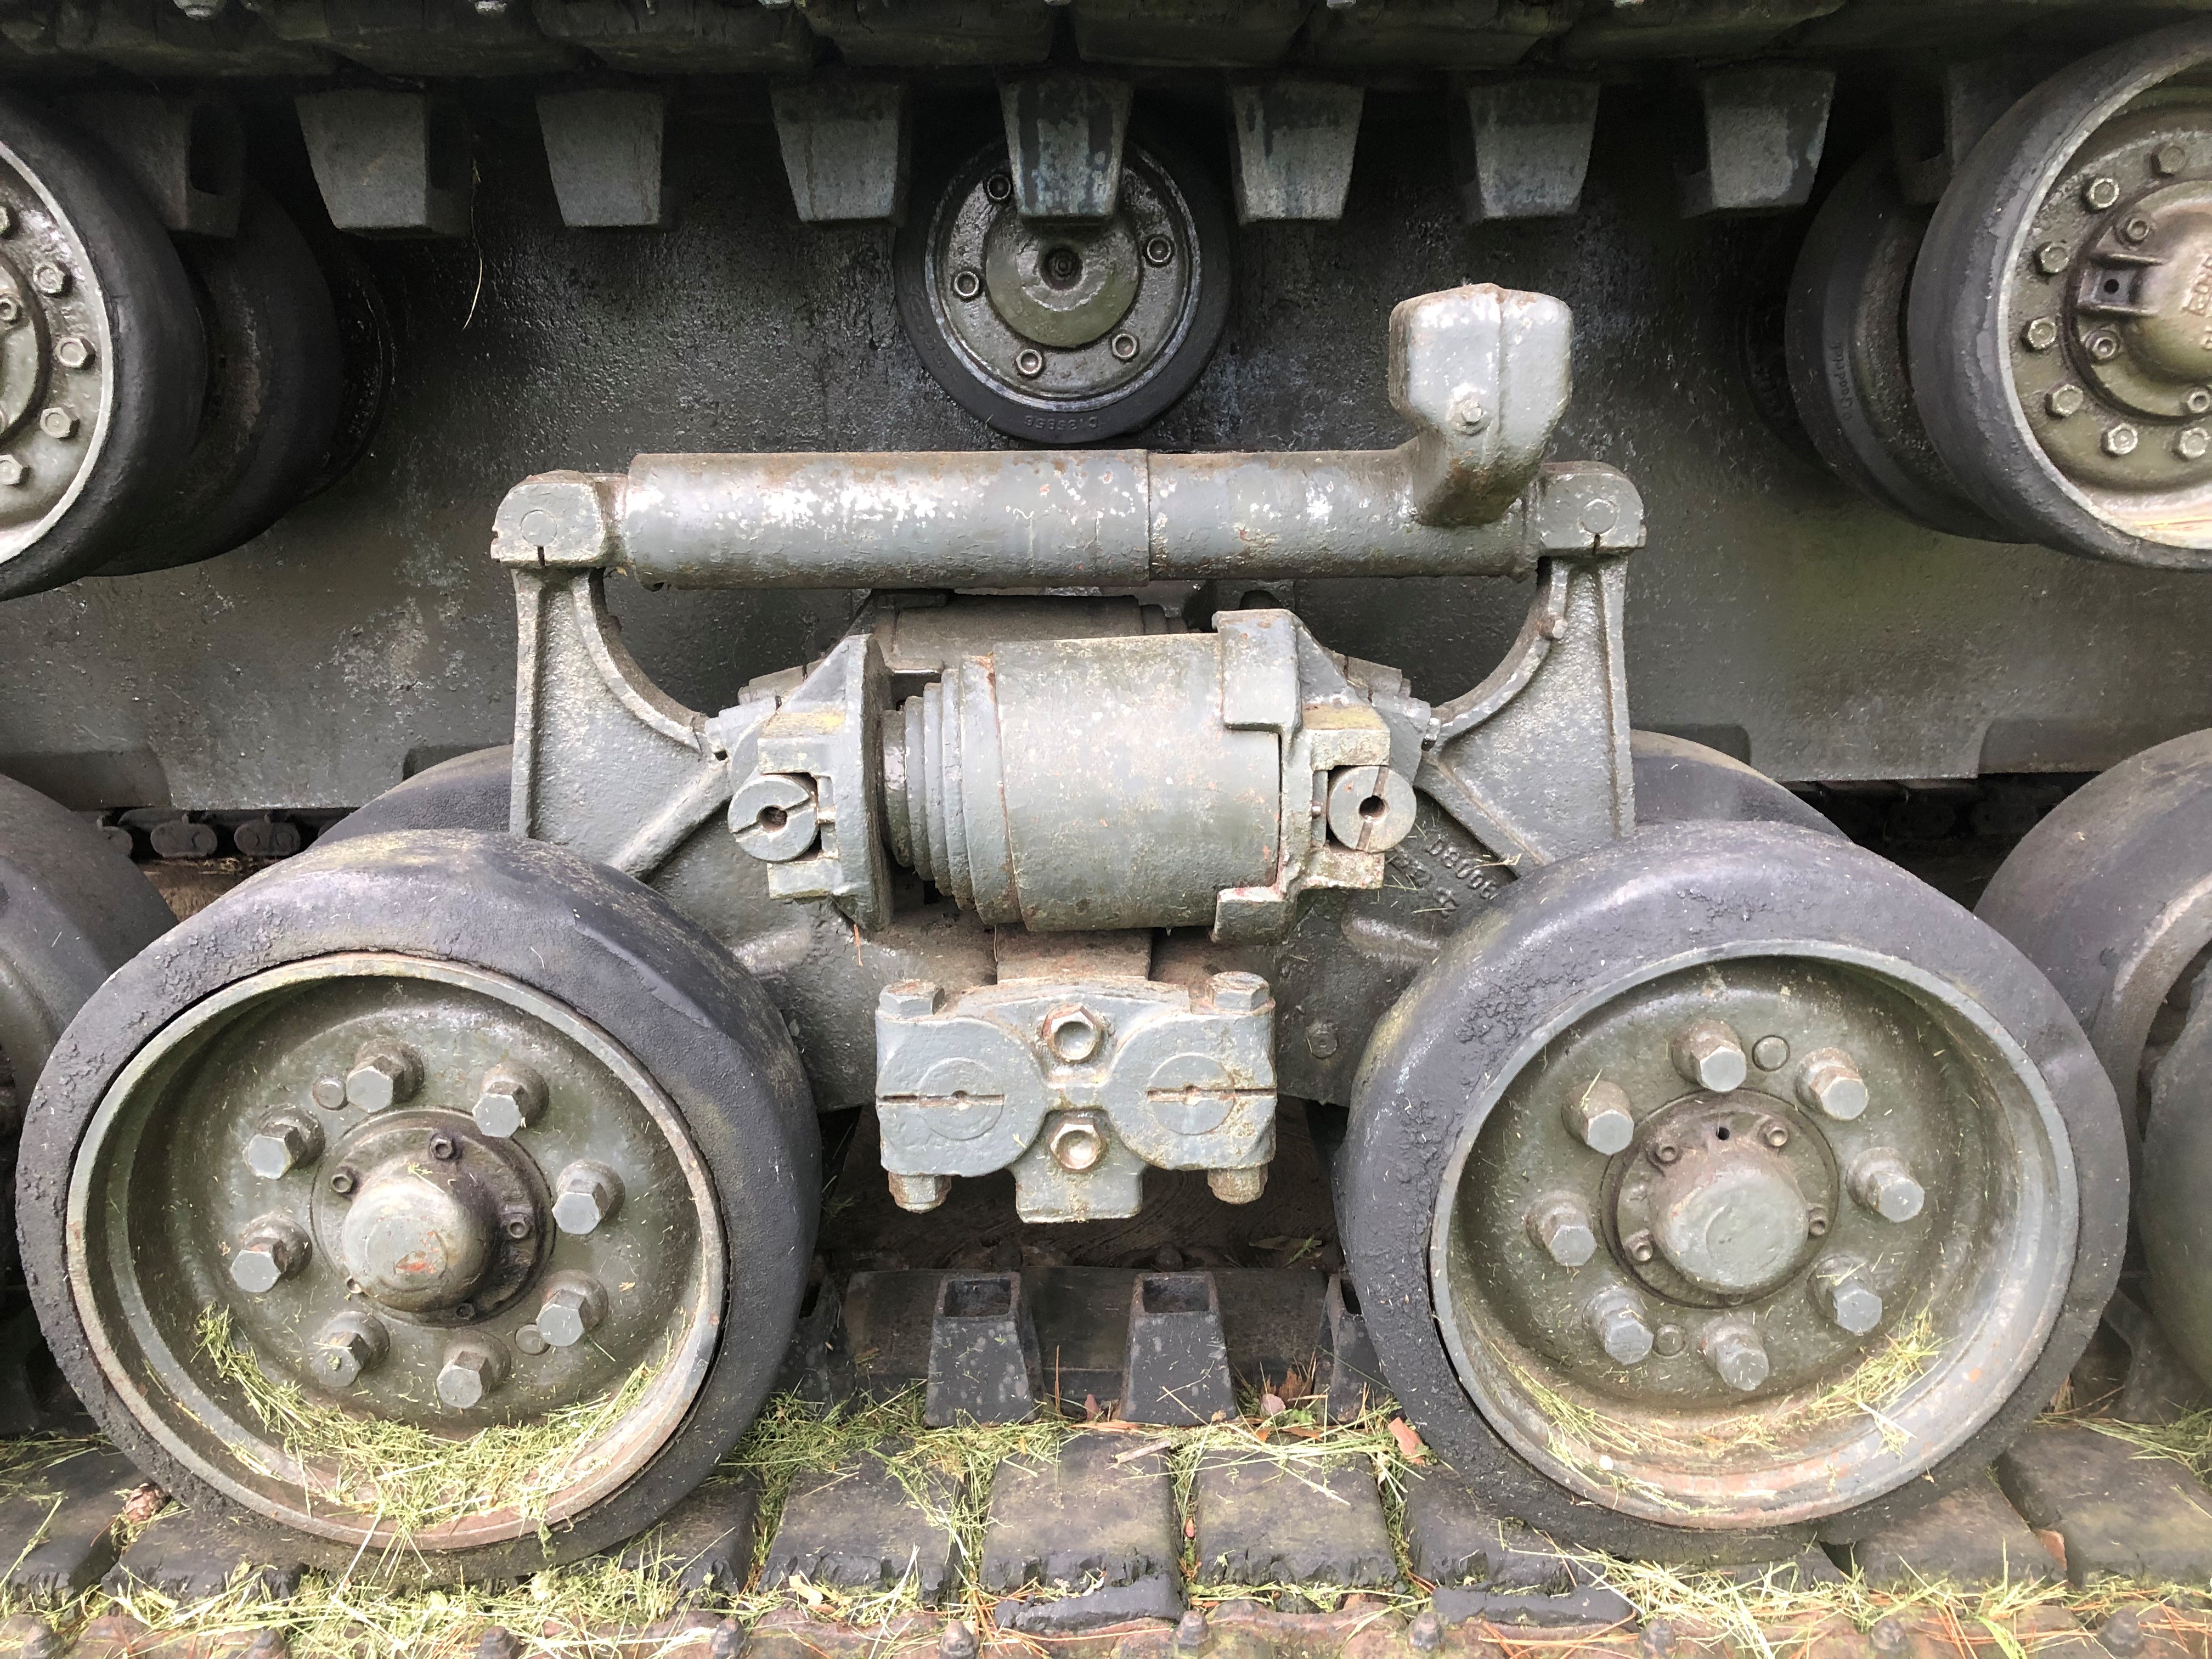
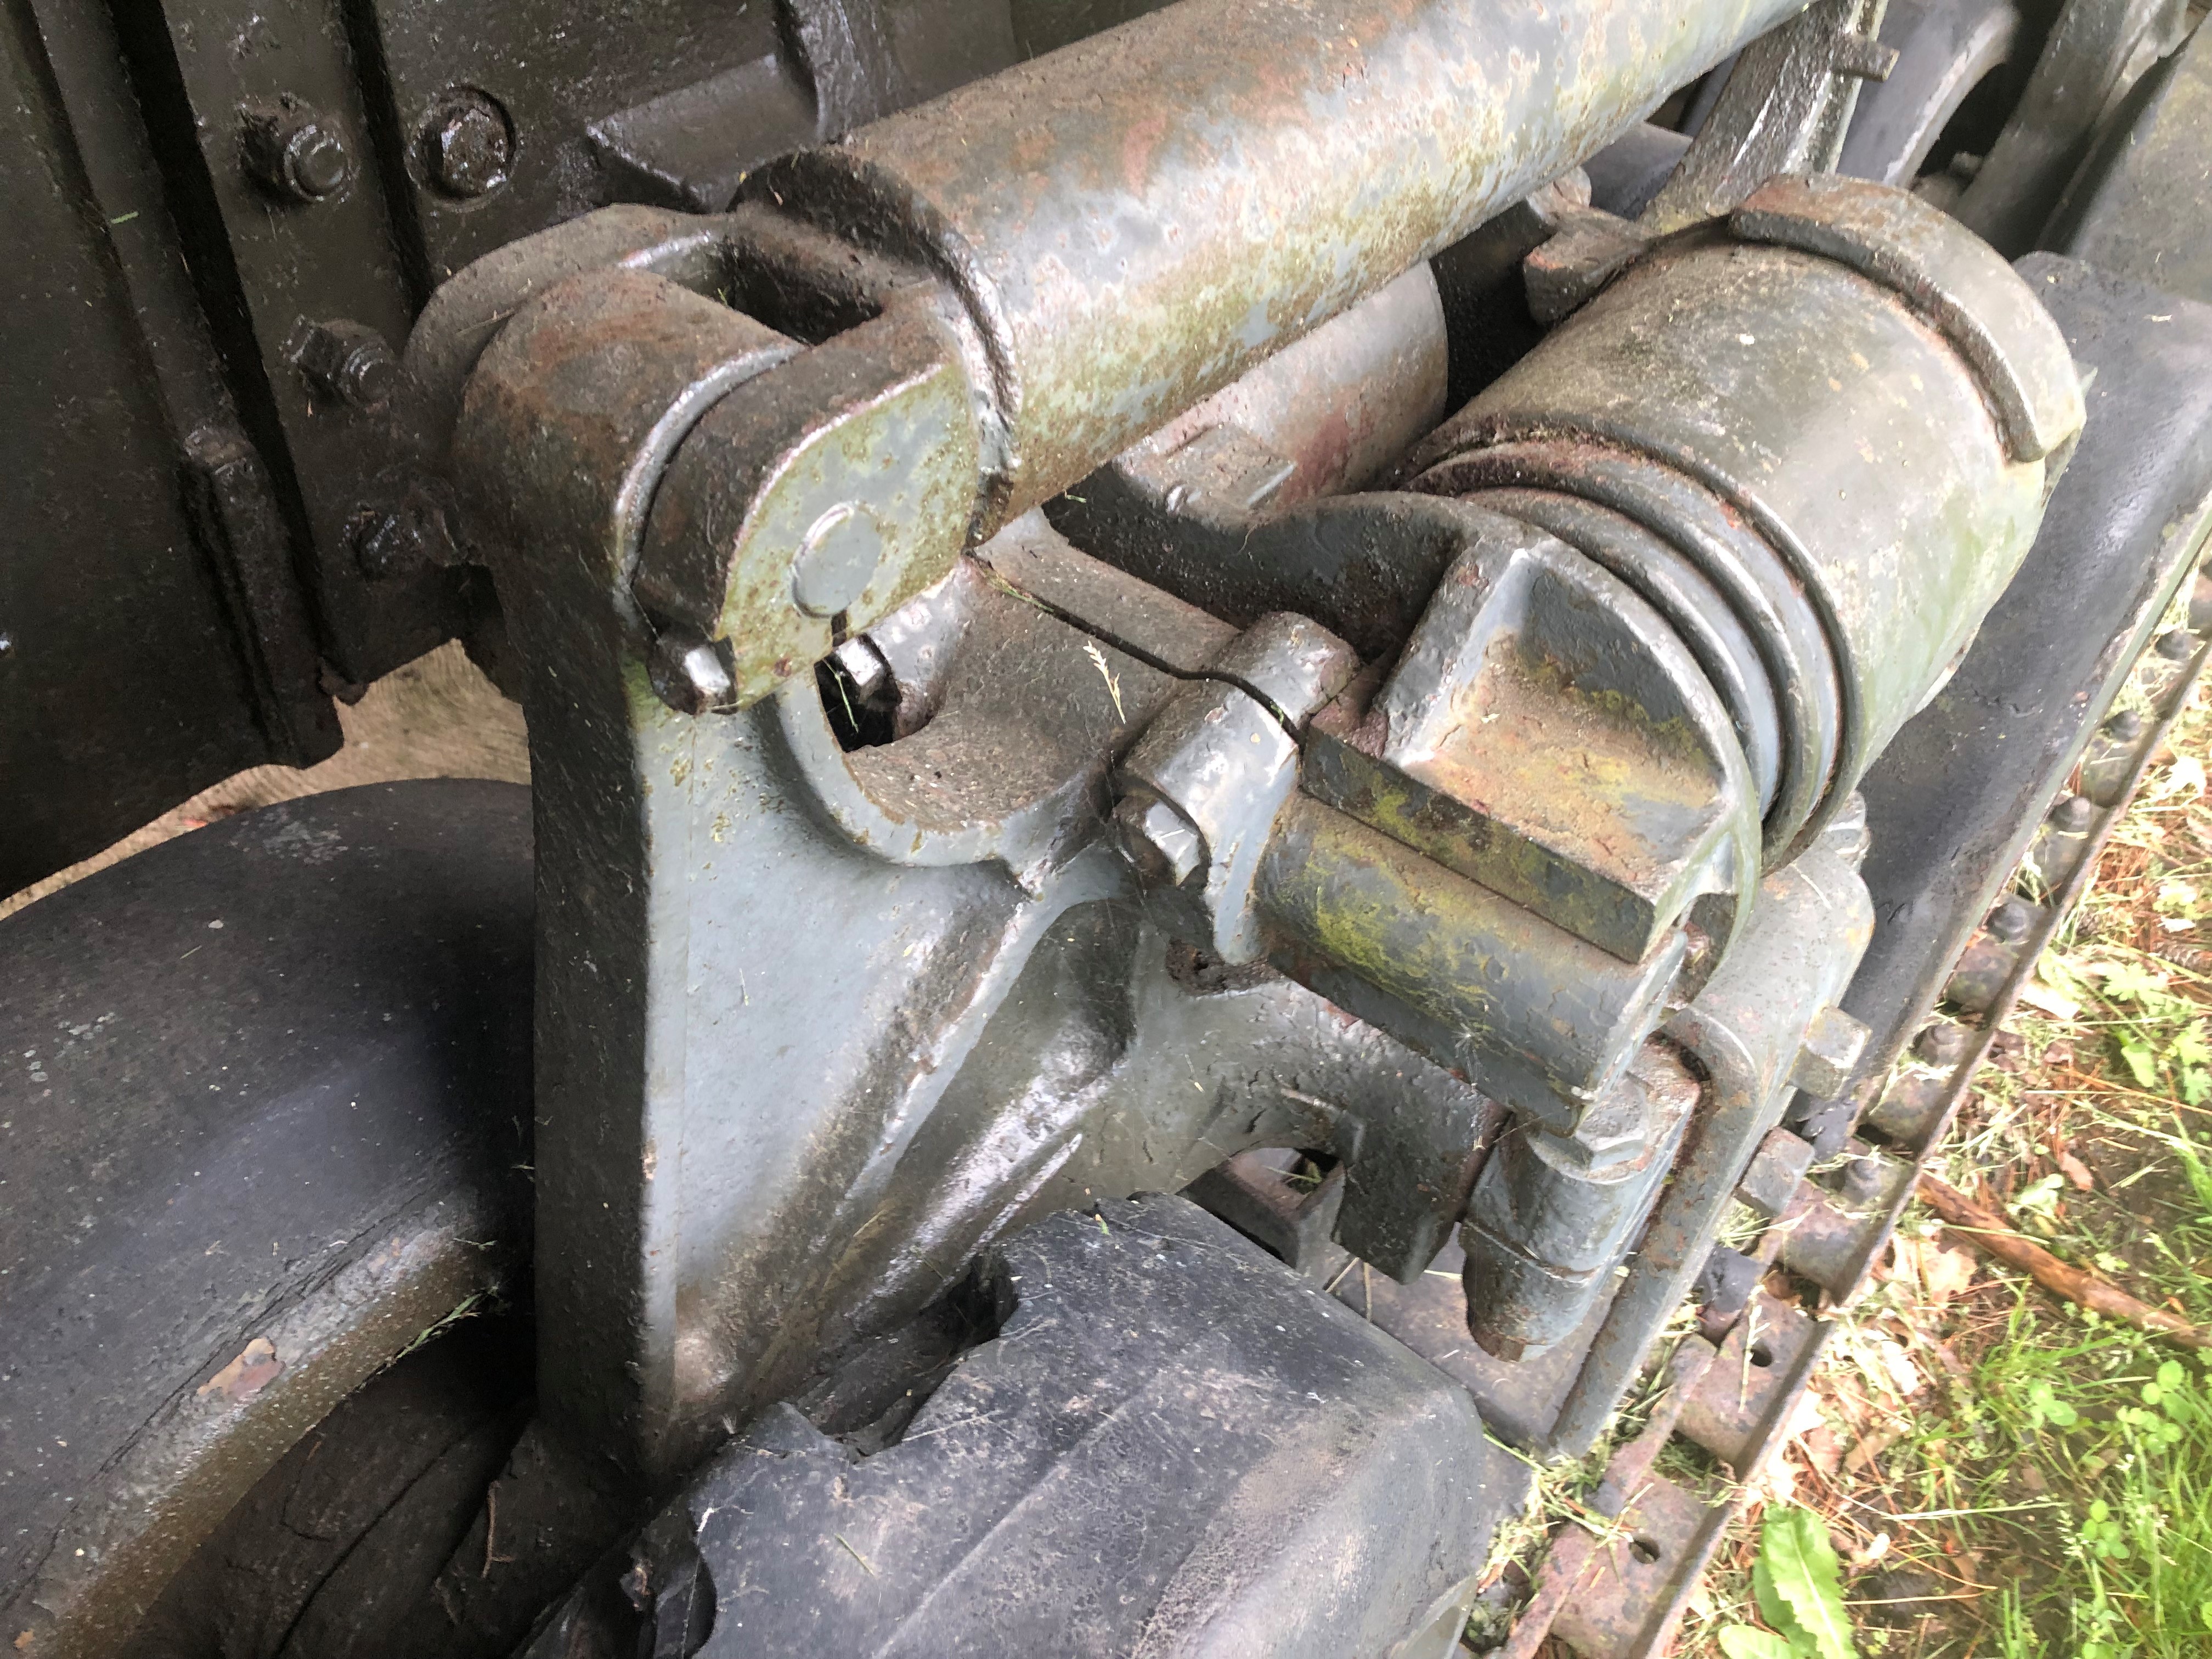
It has been a little while since I have been able to get to the bench. Finally went to visit my mother (have not seen her in a year and a half), started running after work and then took some time and went on a mini-vacation. The good thing about the vacation is that I cam across and M4A1 76mm HVSS, what luck. Not an M4A3 but allows for some good pictures. Below are few pictures of the Sherman. Worked perfectly as I started on the suspension. Put all 6 together and test fitted the wheels on one. I plan on leaving the wheels off until after the base paint is applied. I believe I will be able to put them on but will test prior to gluing.
That is it for now. Feels good to get back to the bench.
Tim


-
6
-
-
Absolutely amazing work!!!
-
5
-
-
Thank you. Once I get the cabling done the I think I can start to paint some of the pieces. Painting the interior is making me nervous. Going to use AK Real colors off white. Seems to be a warmer white.
Tim-
3
-
-
Thank you. Hopefully I can get the commanders side wall area done this week.
Tim
-
4
-
-
thanks Rob. It is 1/35 scale. My fingers cause more parts to go flying than the tools.
Tim-
3
-
 1
1
-
-
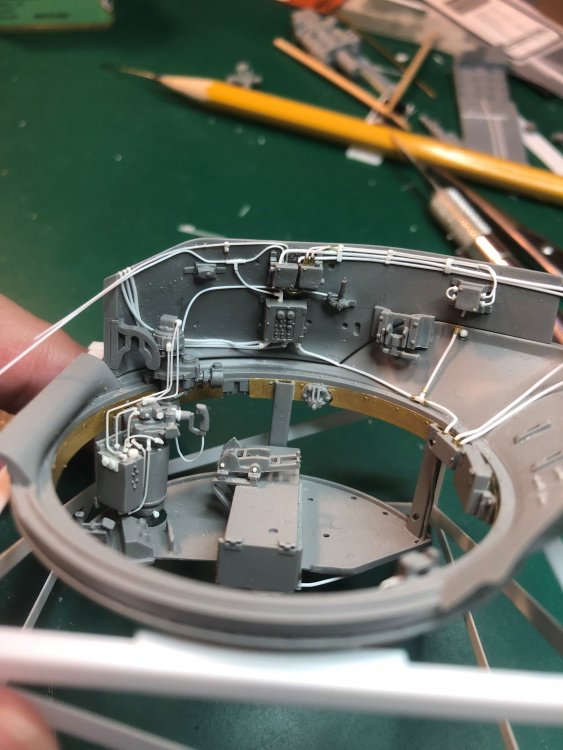
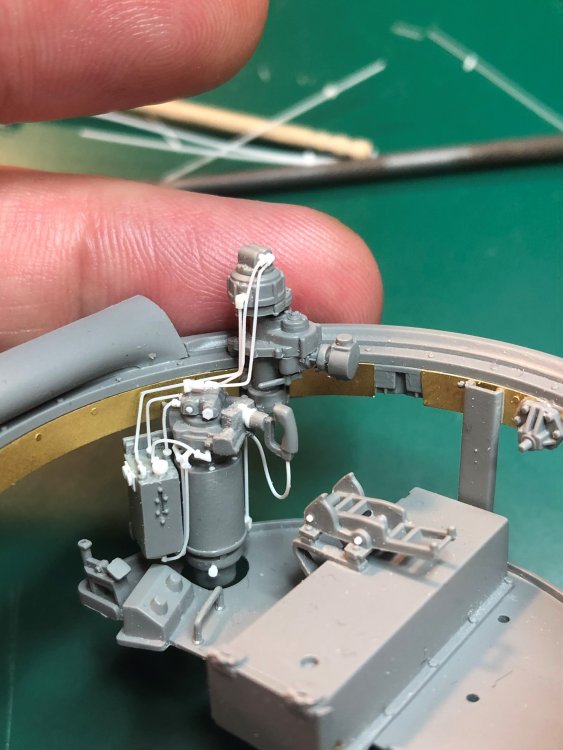
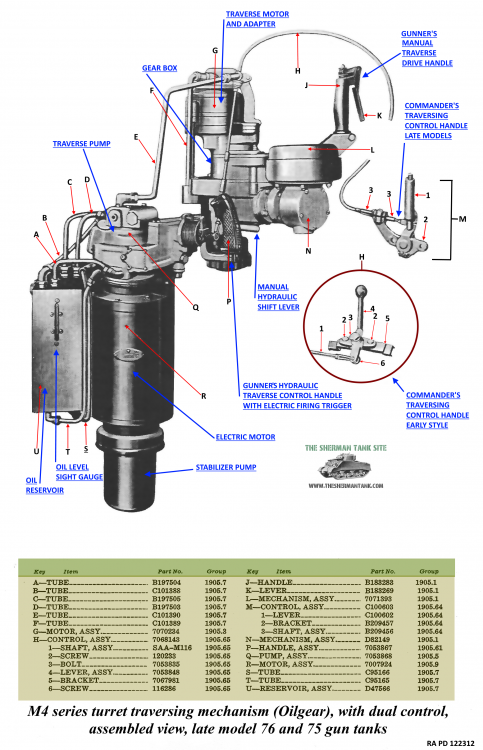
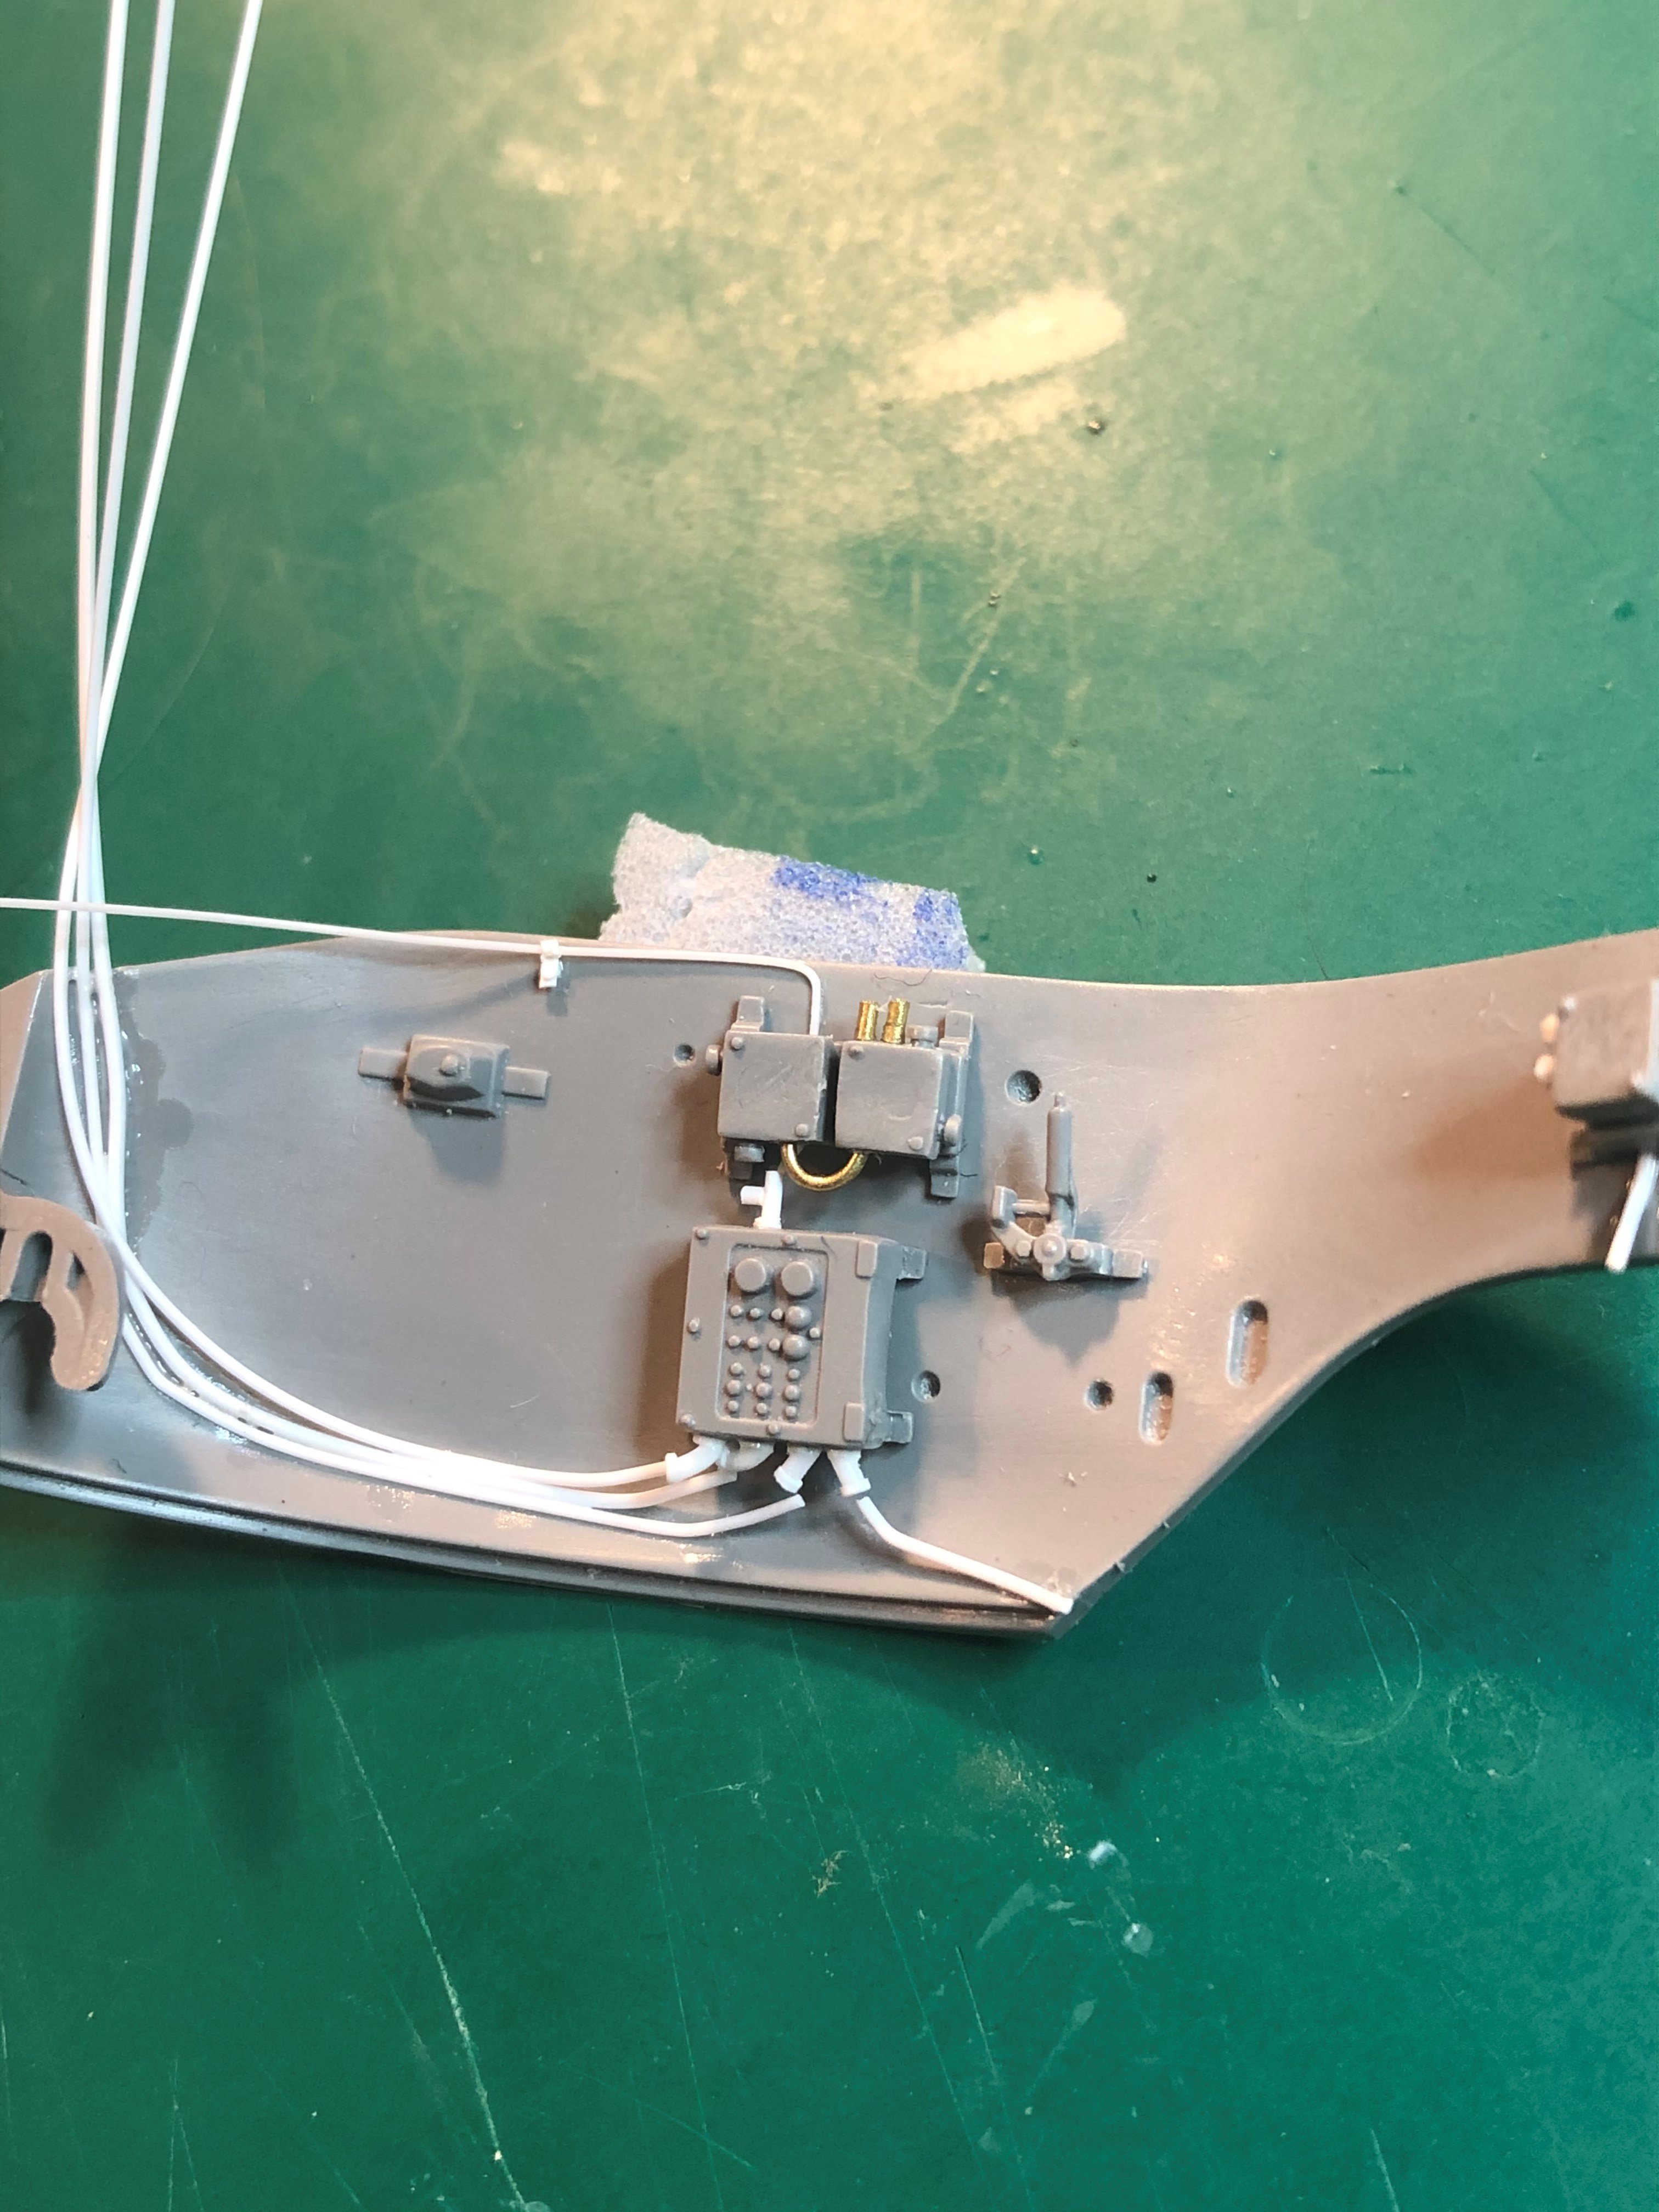
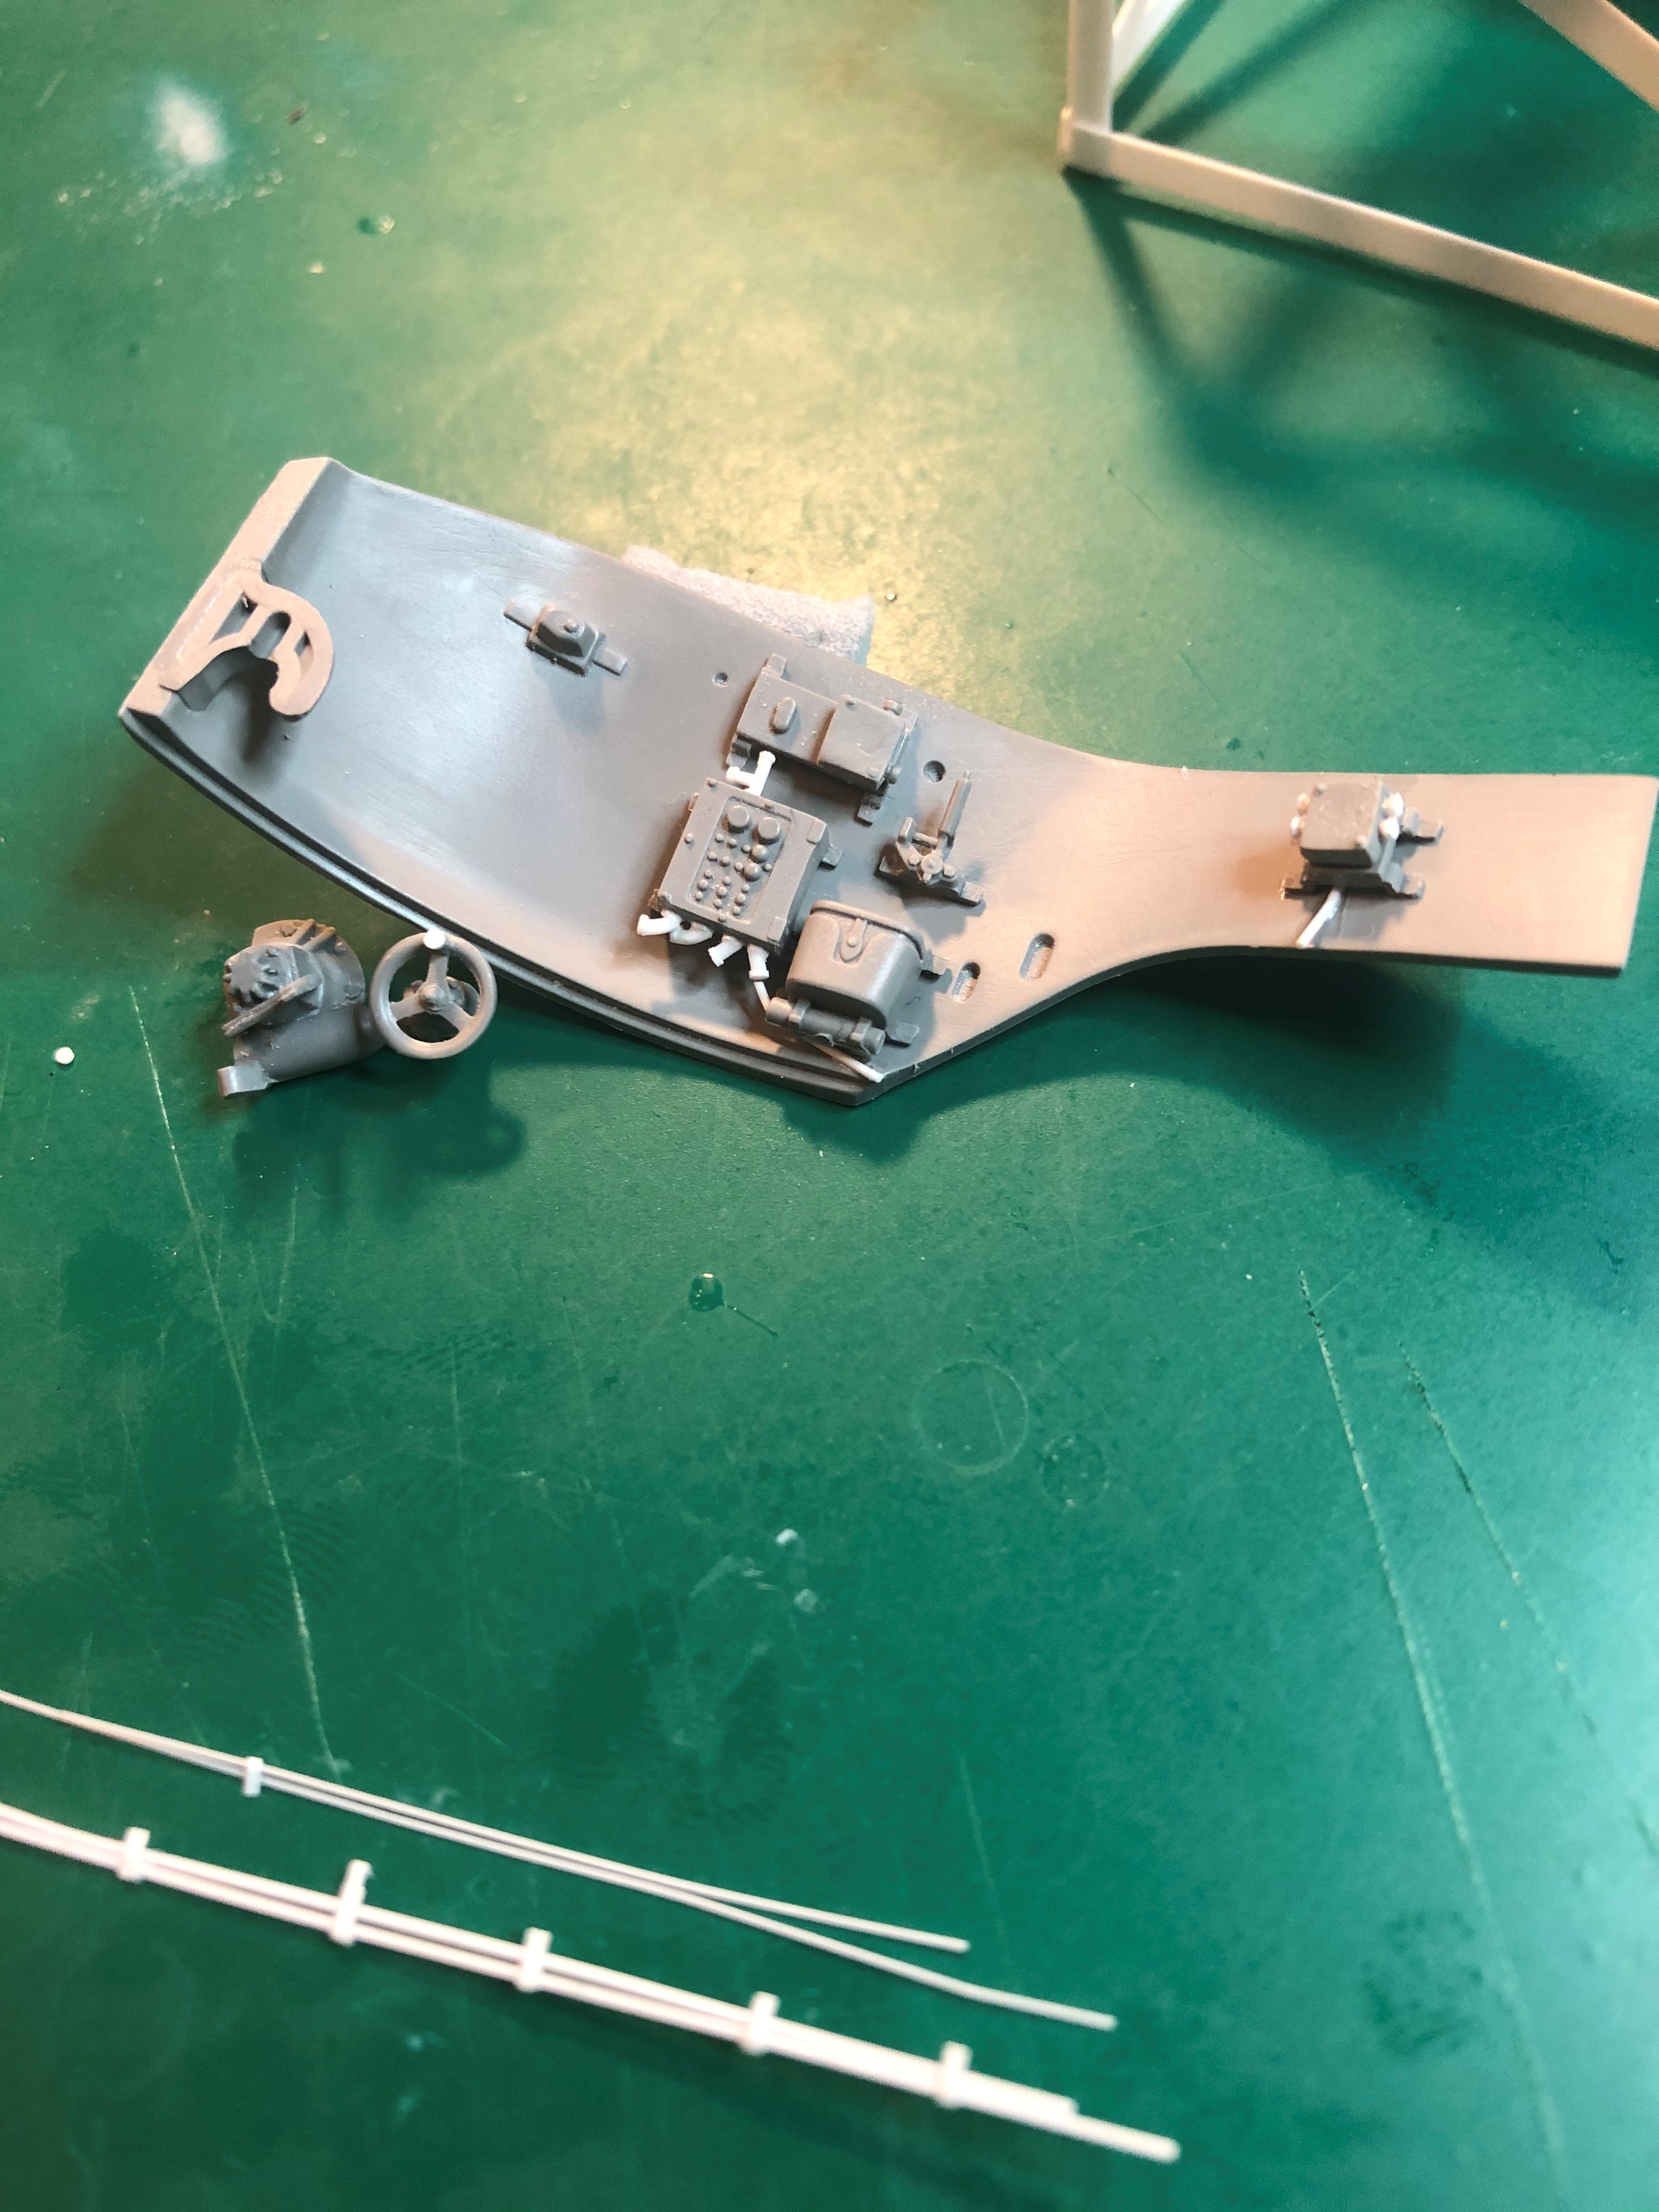
Still working on the turret interior. Added detail to the elector motor for the traversing mechanism and the gunners hydraulic handle.
Side wall wiring continues. Wiring is not glued to the control box. It will be easier to paint the control box separately and then glue it to the wall. Then I can glue the cables to it.
that is it for now.
Tim


-
9
-
-
Amazing work!
-
3
-
-
Cockpit is looking mighty good!
Great work
-
3
-
-
You have no idea (well maybe we all do) how many times I have visited the carpet monster. Thankfully some of the extra photoetch I have has multiple pieces
speaking of tweezers I may need some new ones after this project
Tim
-
6
-
-
Thanks guys!
-
4
-
-
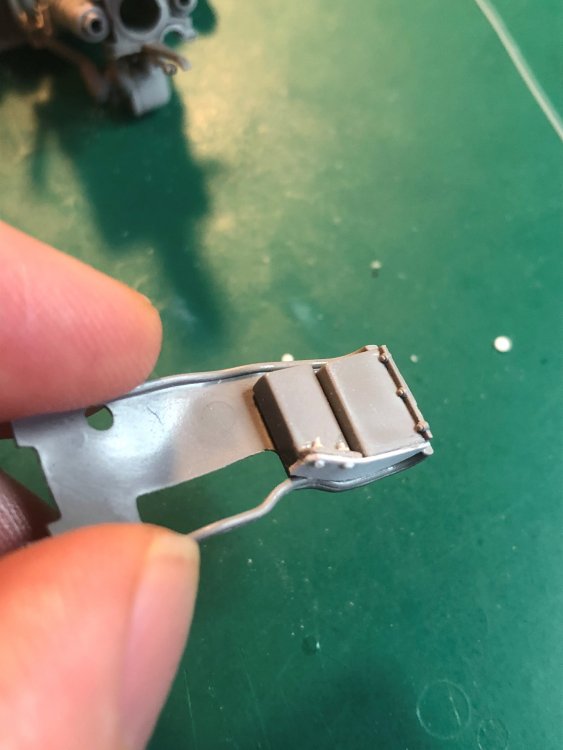
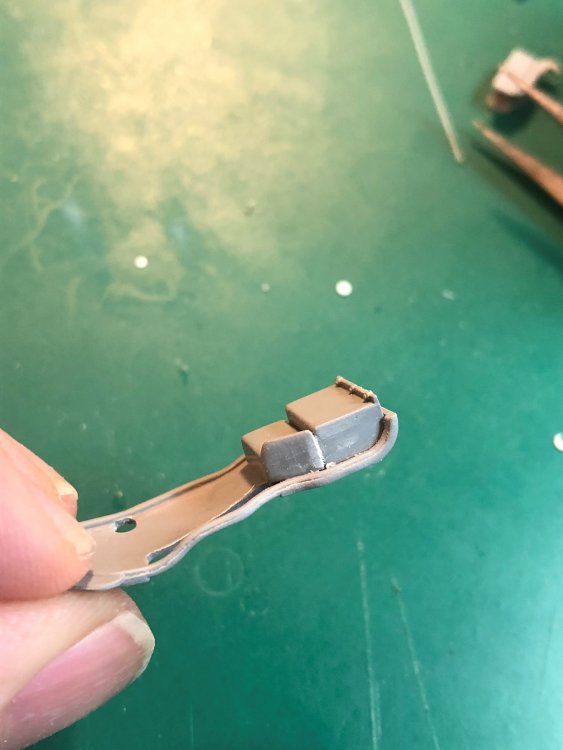
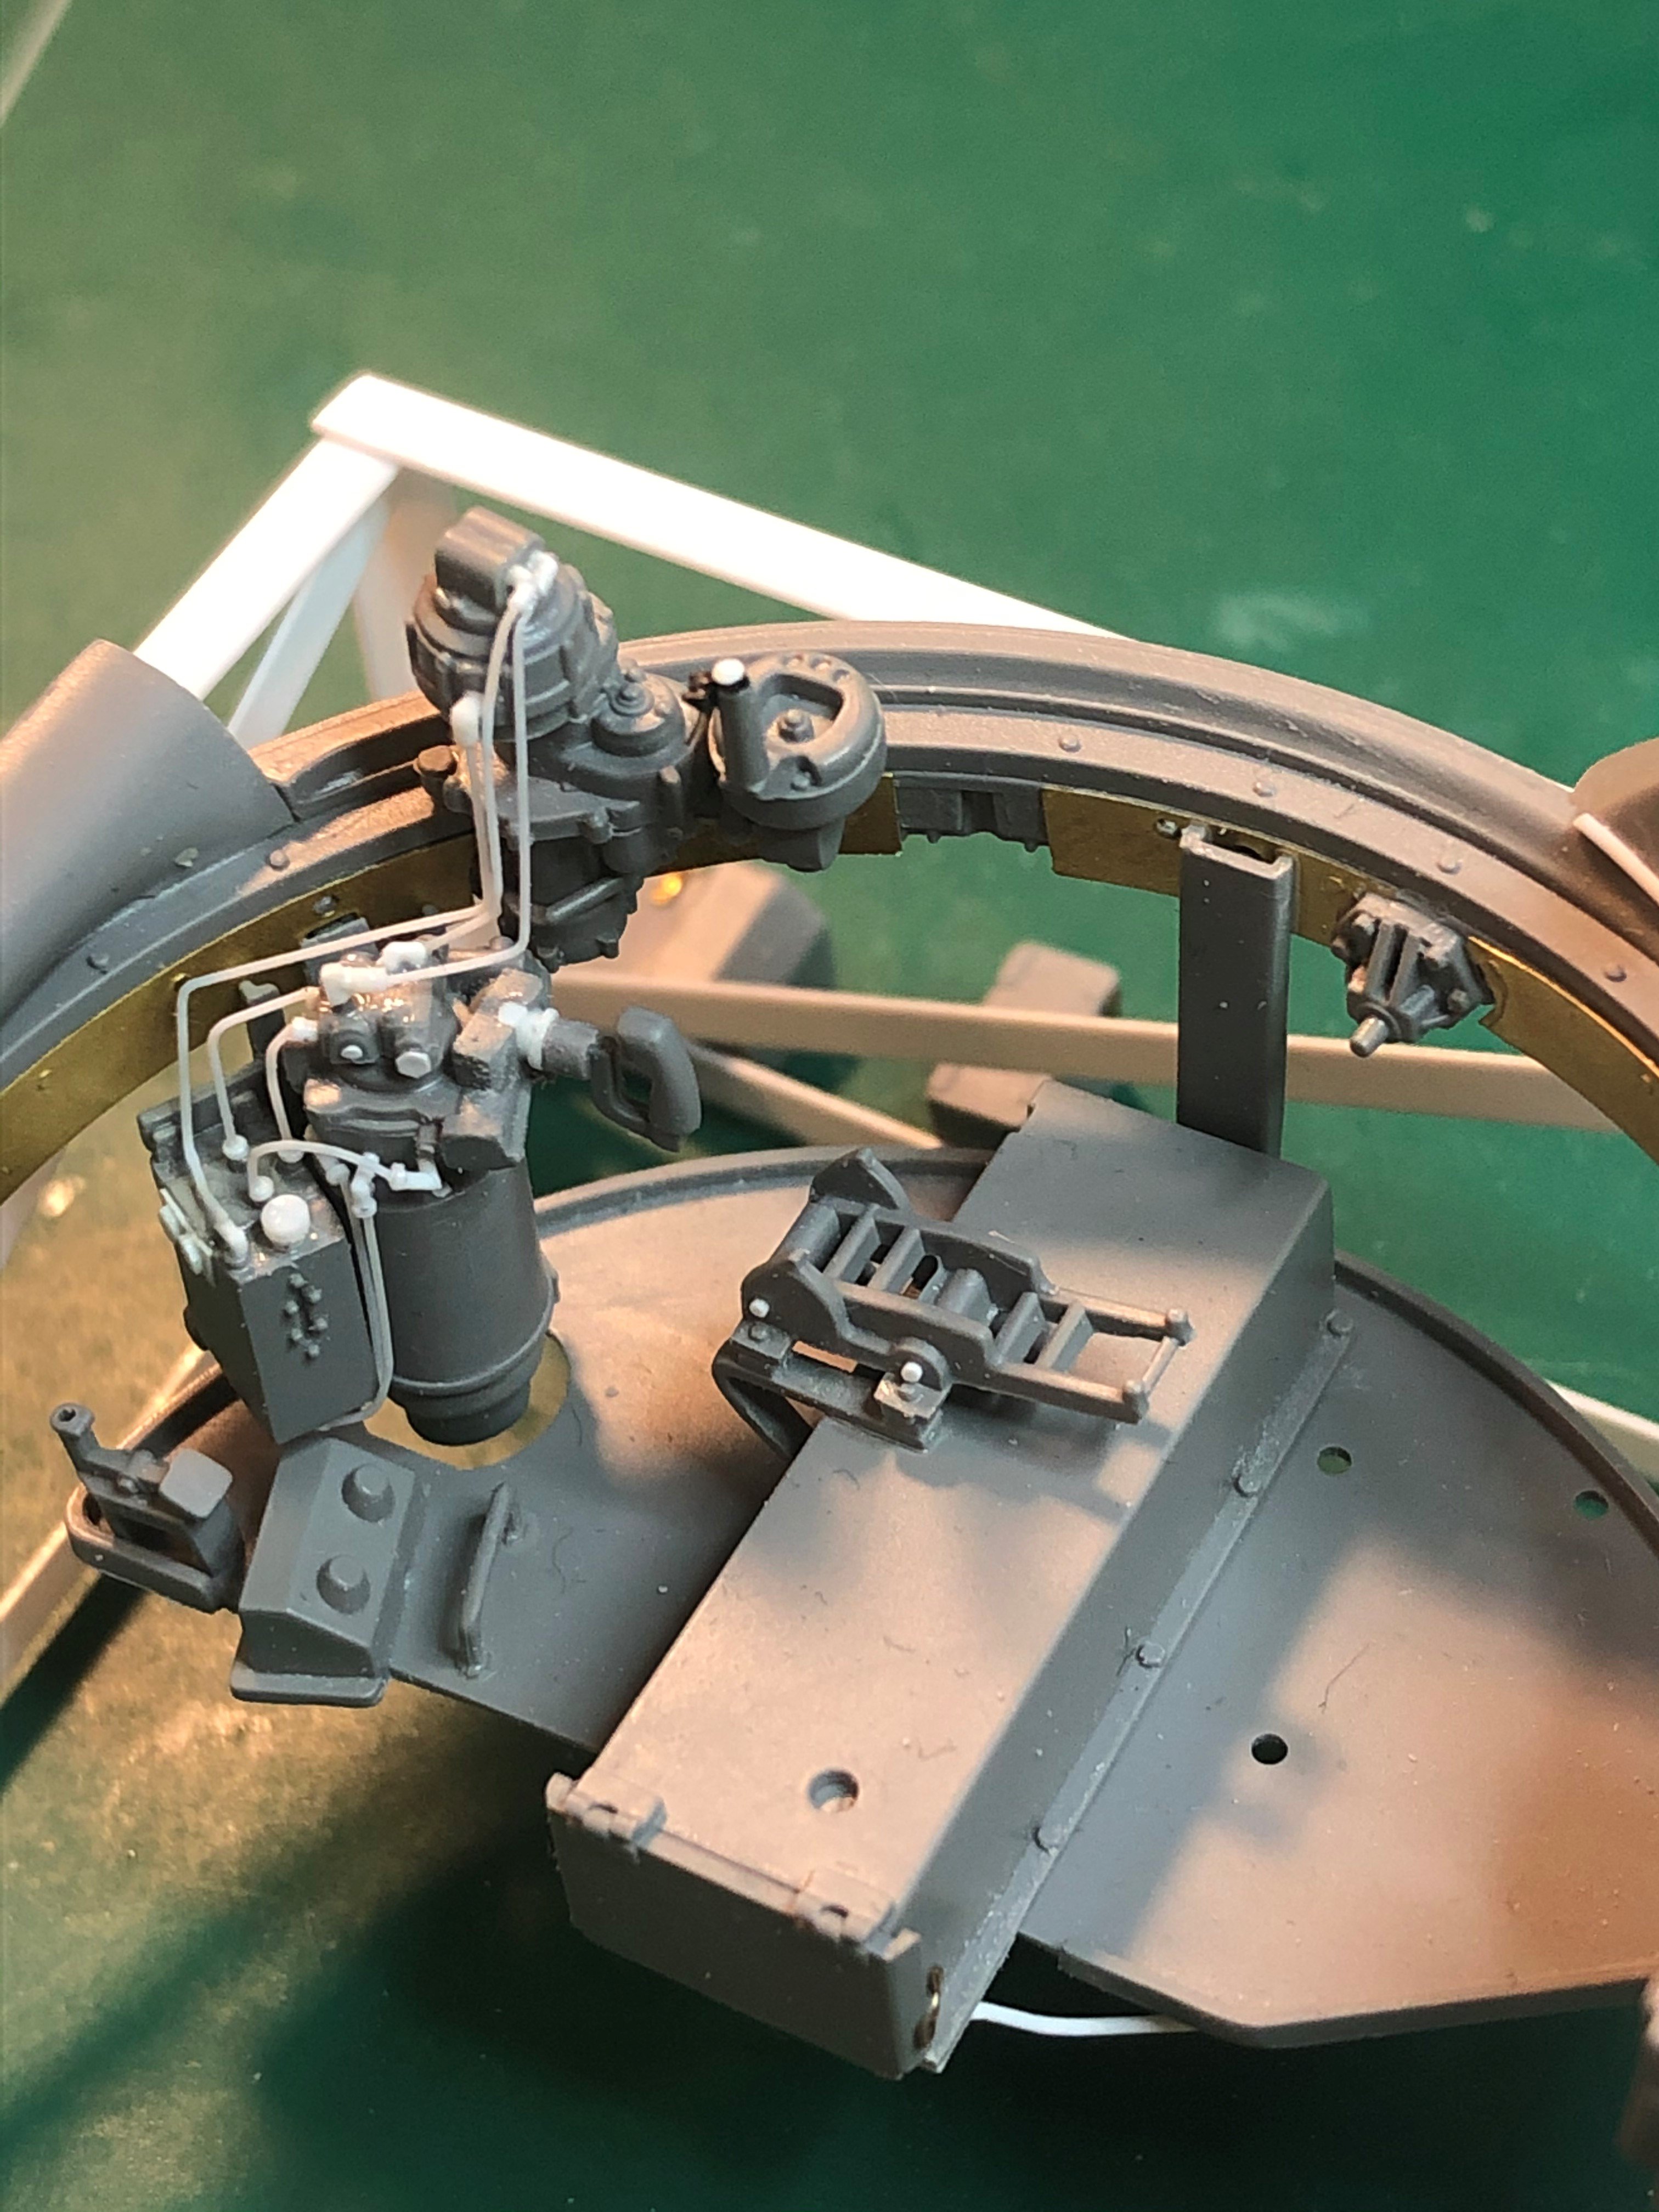
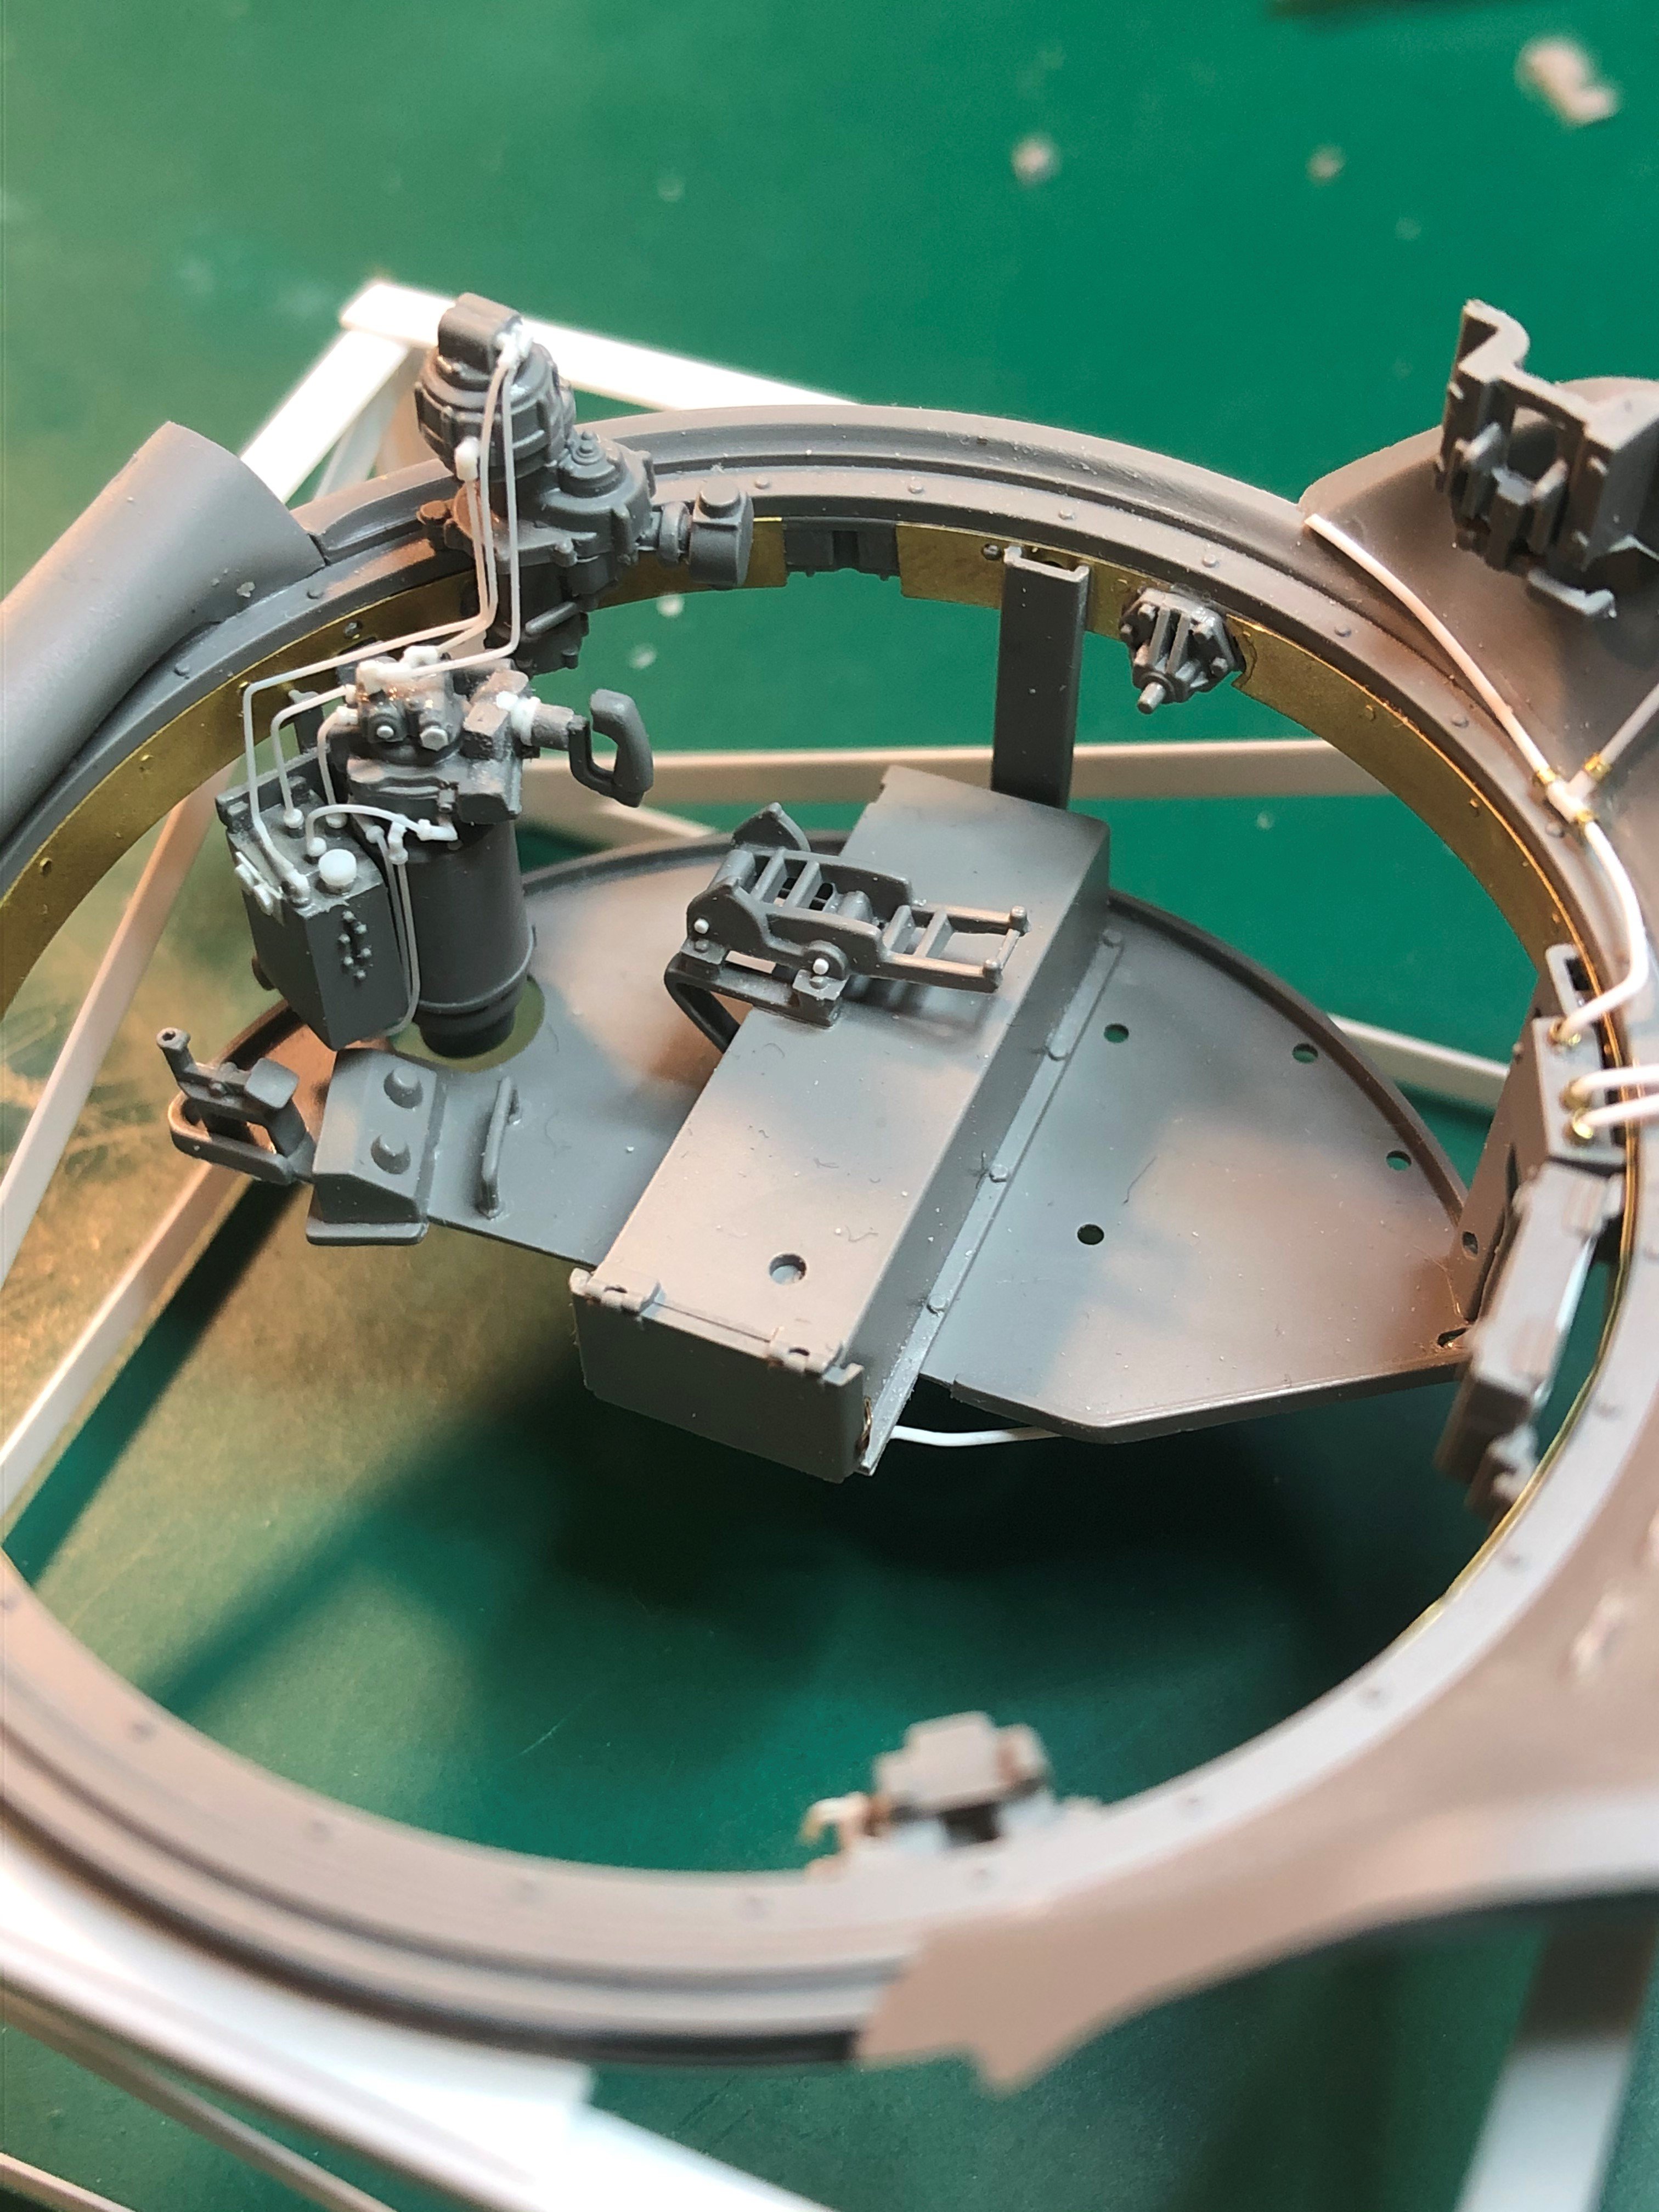
More work around the gunner and commanders station.
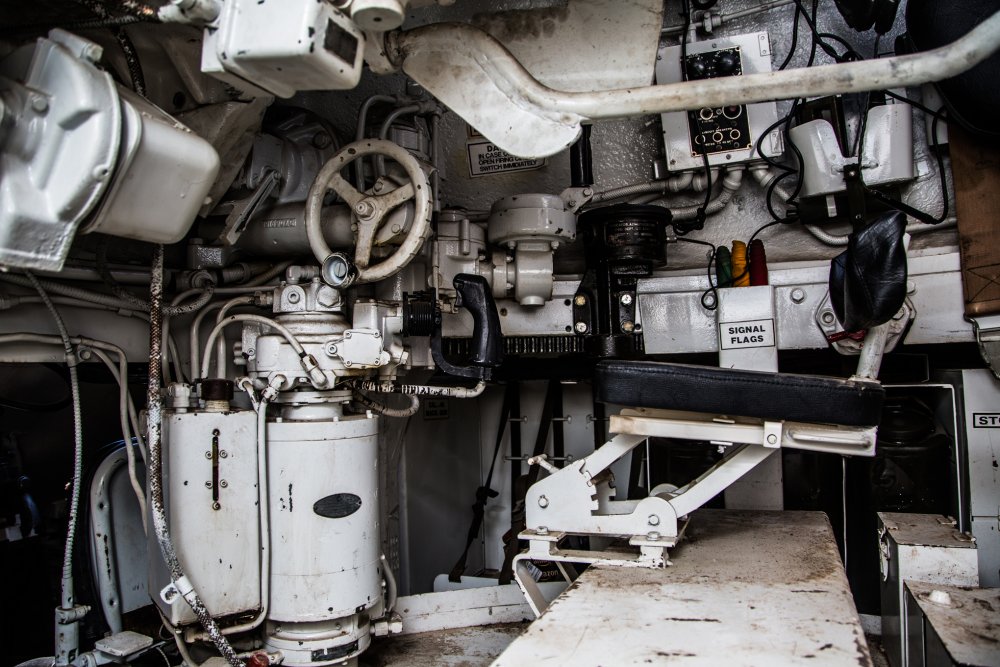
I decided to remove the molded in wiring. Also worked on the sidewall components. Most are not glued in yet as I am still working on the wiring. You can see some of the wiring starting at the bottom of the picture. Added details to the bottom of the turret control box. You can see the connections on the actual photo.
Also added detail to the manual traverse handle.
that is it for the week. Not as productive as I would like to have been.
Tim


-
7
-
-
Stunning work!!!
-
1
-
1
-
-
Thank you.
-
4
-
-
Thanks Harv
-
4
-
-
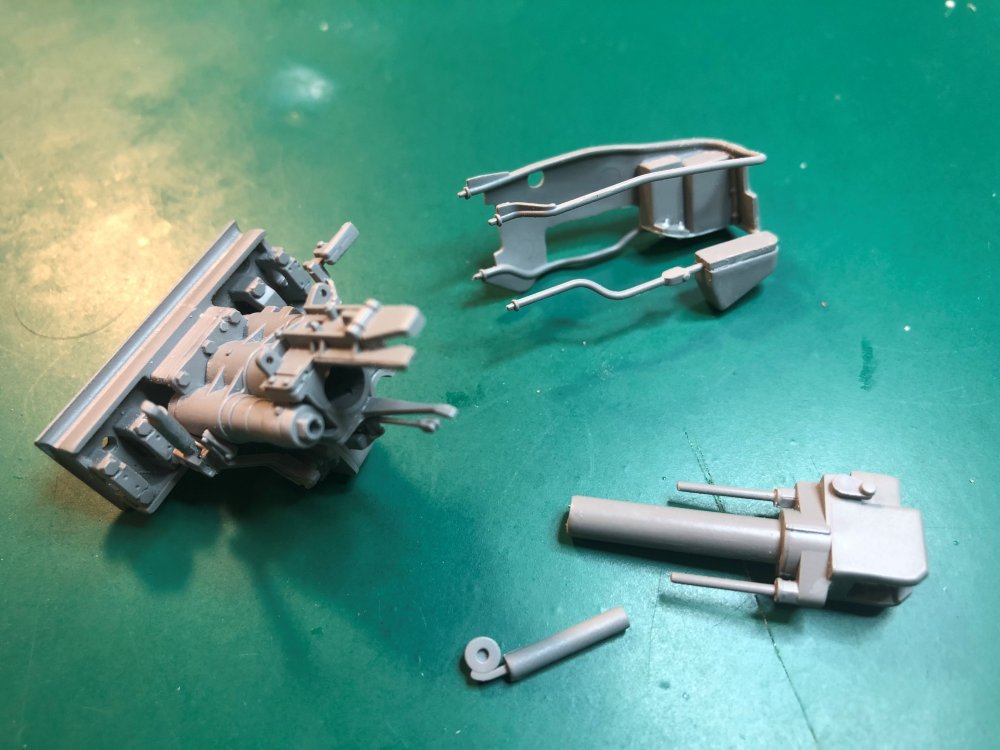
More work this week.
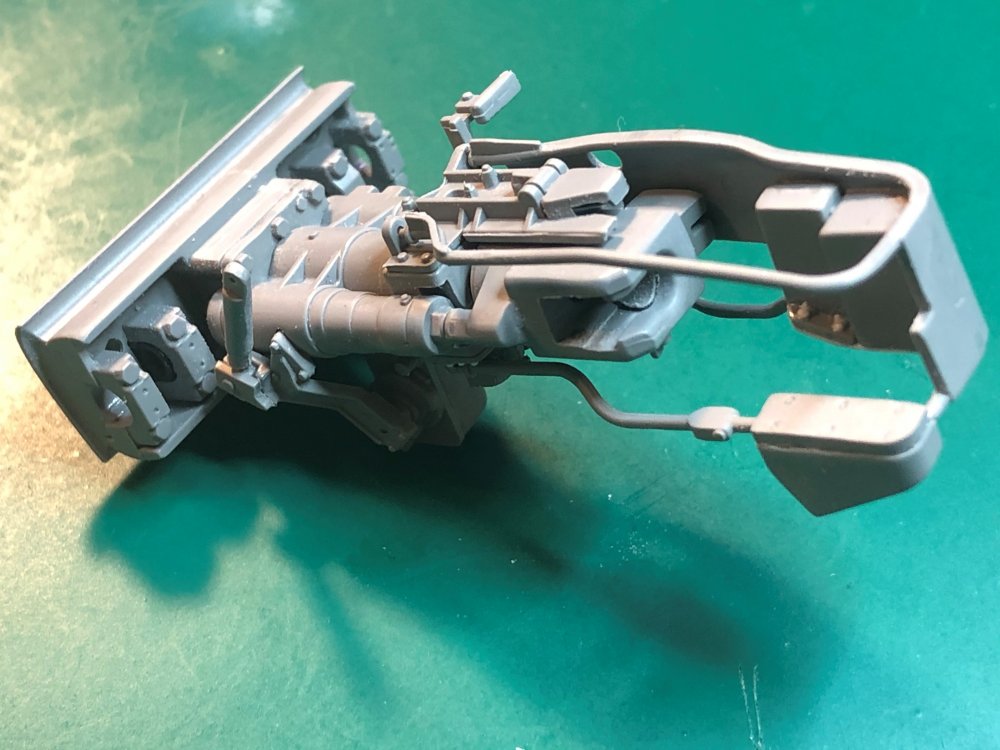
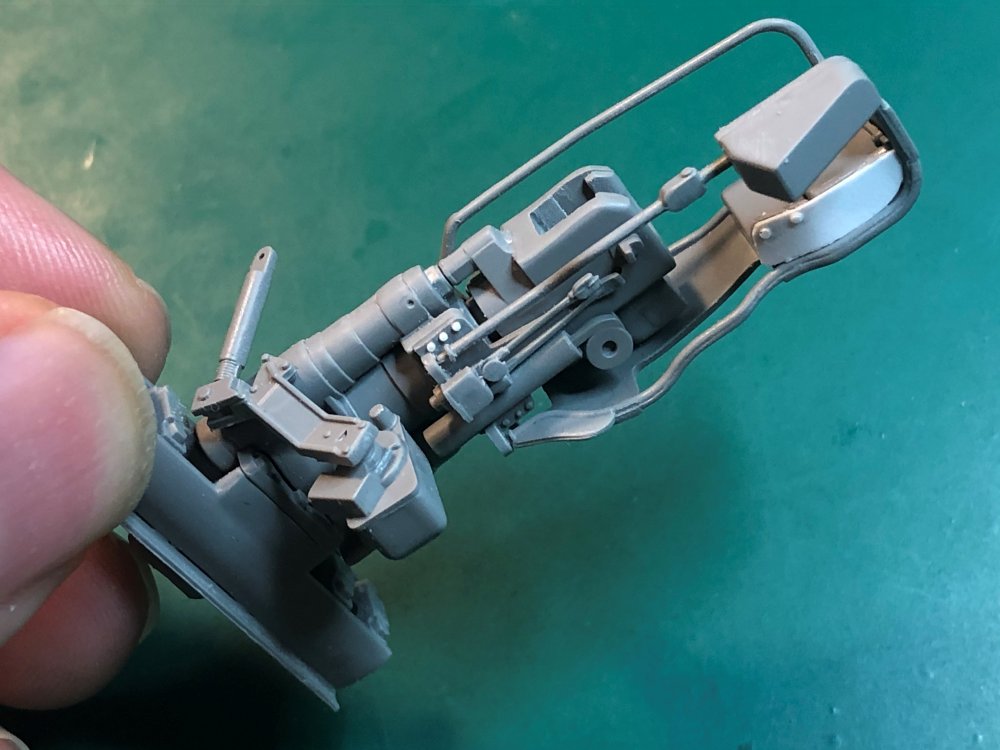
Finished the hydraulic lines around the traverse mechanism.
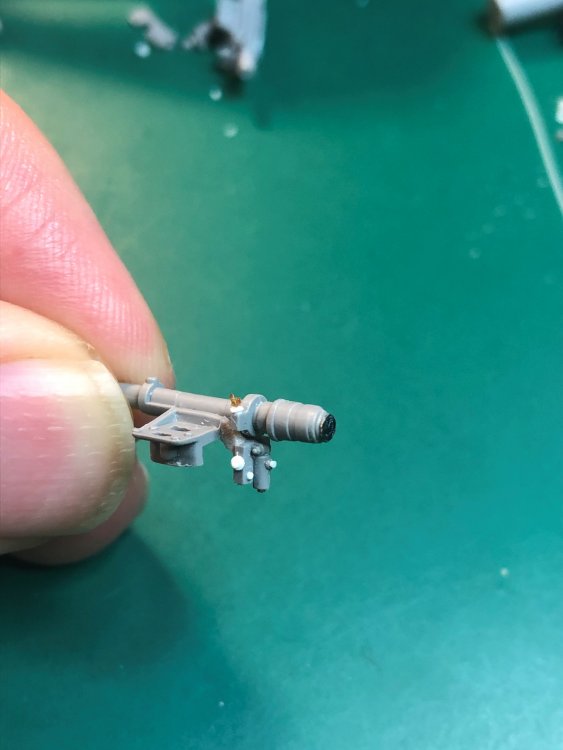
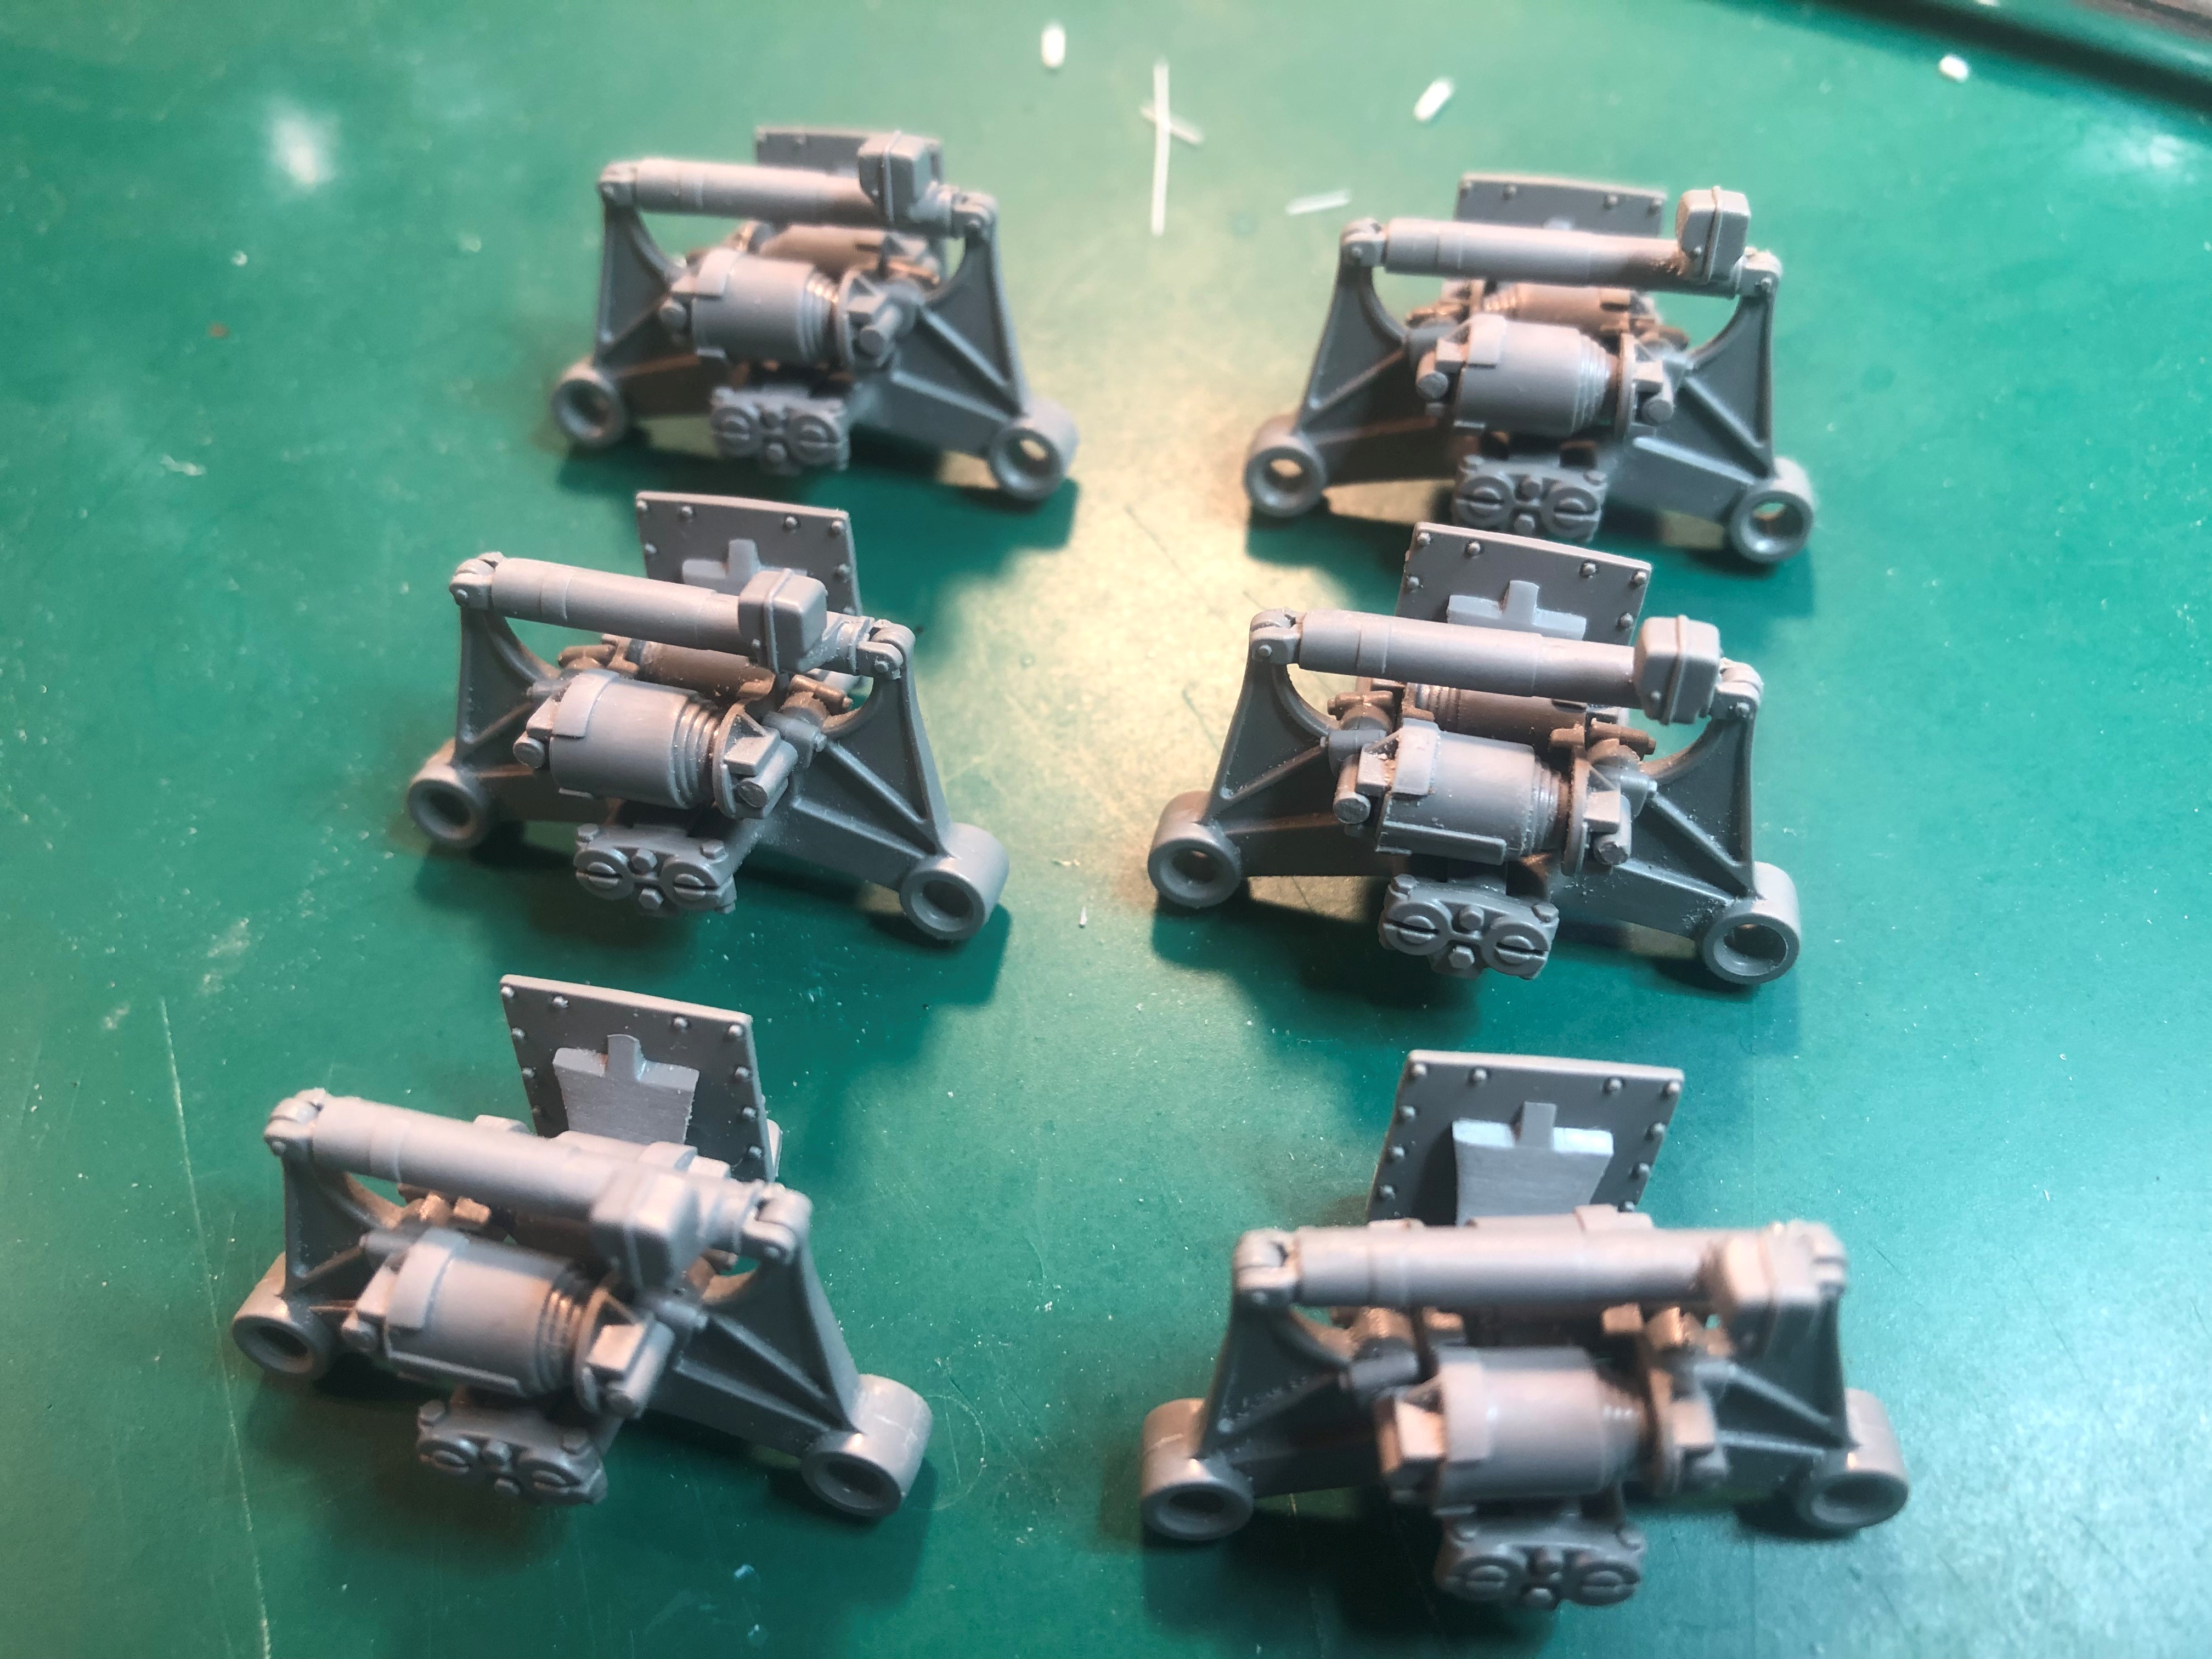
I was not sure where the cable from the manual firing pedal went to, so I decided to put the gun mount together and maybe I could find where it leads to (I think I found it). Pictures are of the gun mount assembled as well as the underside and with parts disassembled for easy painting.
Added a plate at the bottom of the counter weights to the recoil guards as the actual photos show this. It is a good thing as the bottom of the counter weights was not pretty.
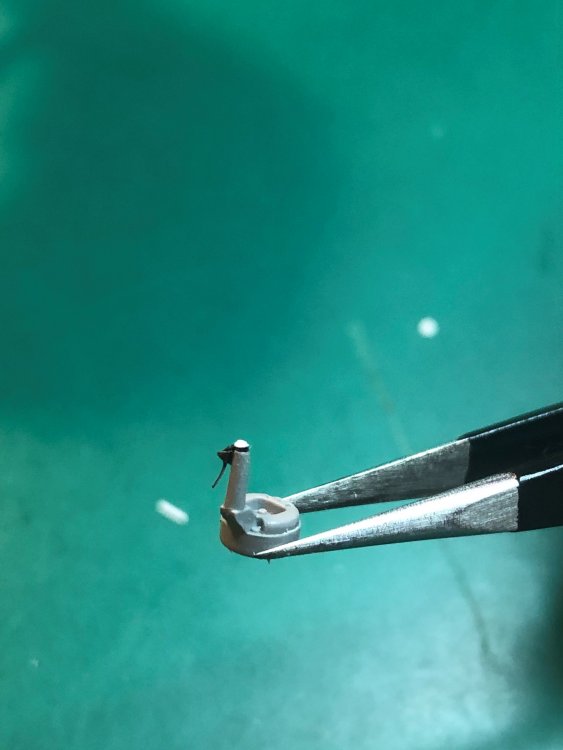
Added detail to the telescope.
That is it for this week.
Tim


-
5
-
-
Amazing work. Watching closely at the rigging. Hoping to learn a few things.
Tim
-
2
-
-
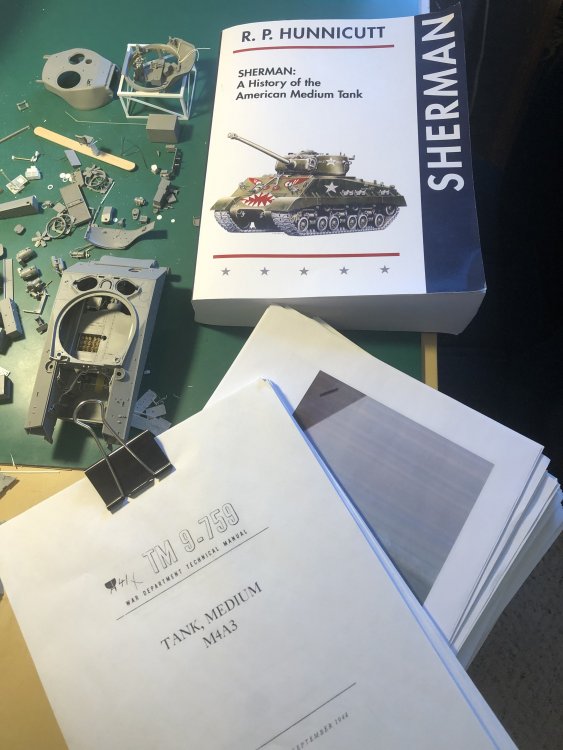
I have one book, History of the American Medium Tank, more importantly the M4A3 Medium Tank Technical Manual TM 9-759 along with about a ream worth of print outs from the internet. The Technical manual has the most from wiring to fuel line Restoration of tanks are good references.
Tim
-
5
-
1
-


M4A3 76W HVSS
in LSM 1/35 and Larger Work In Progress
Posted
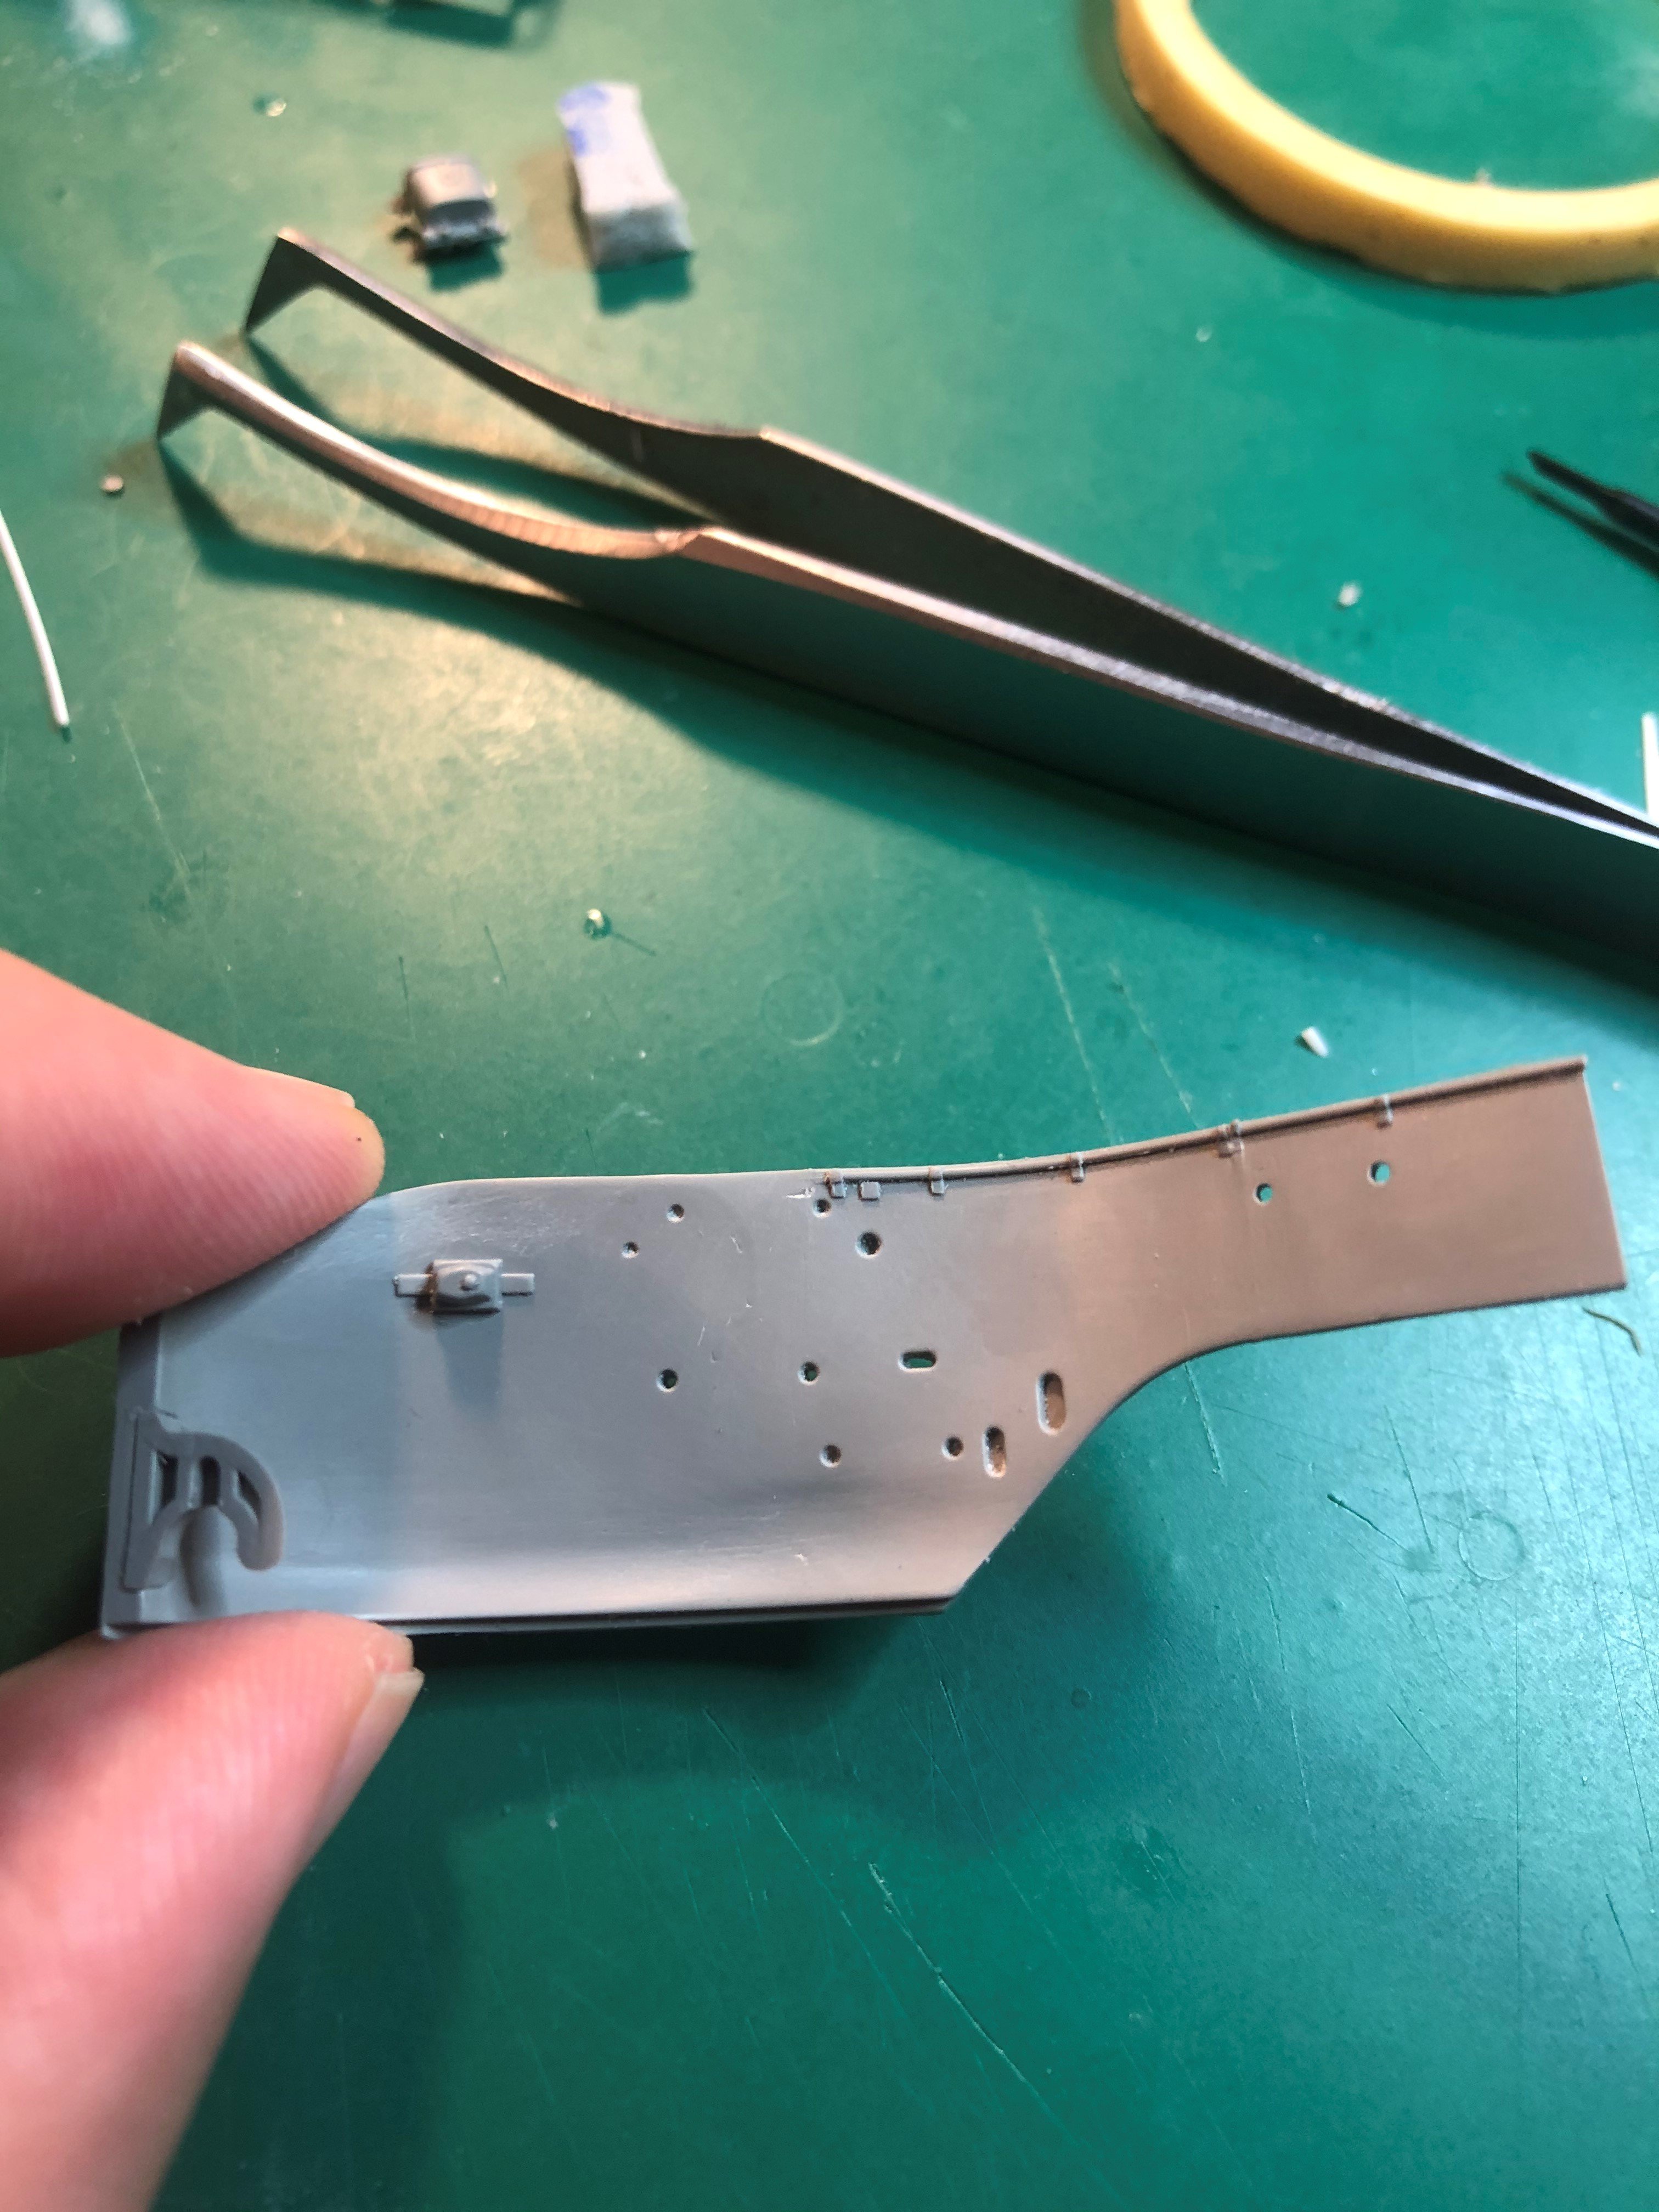
More wiring work on the interior. Glued the firewall in place and glued the wiring to the sponson. Added wiring that would be under the battery box and connect to the dashboard. Tachometer and speedometer cabling added. Finally, built and put the submachine gun holder on the side of the spare periscope holder. Transmission cabling added to the floor of the tank
thank is it for now.
Tim