Axeman
-
Posts
172 -
Joined
-
Last visited
Content Type
Profiles
Forums
Events
Gallery
Everything posted by Axeman
-
Nichimo 1/20 Cessna 172 N9812J "Juliet"
Axeman replied to Hawkwrench's topic in LSM 1/35 and Larger Work In Progress
This looks great. Brings back memories of flying lessons during college in a Cessna 152. looking forward to the rest of the build. Tim -
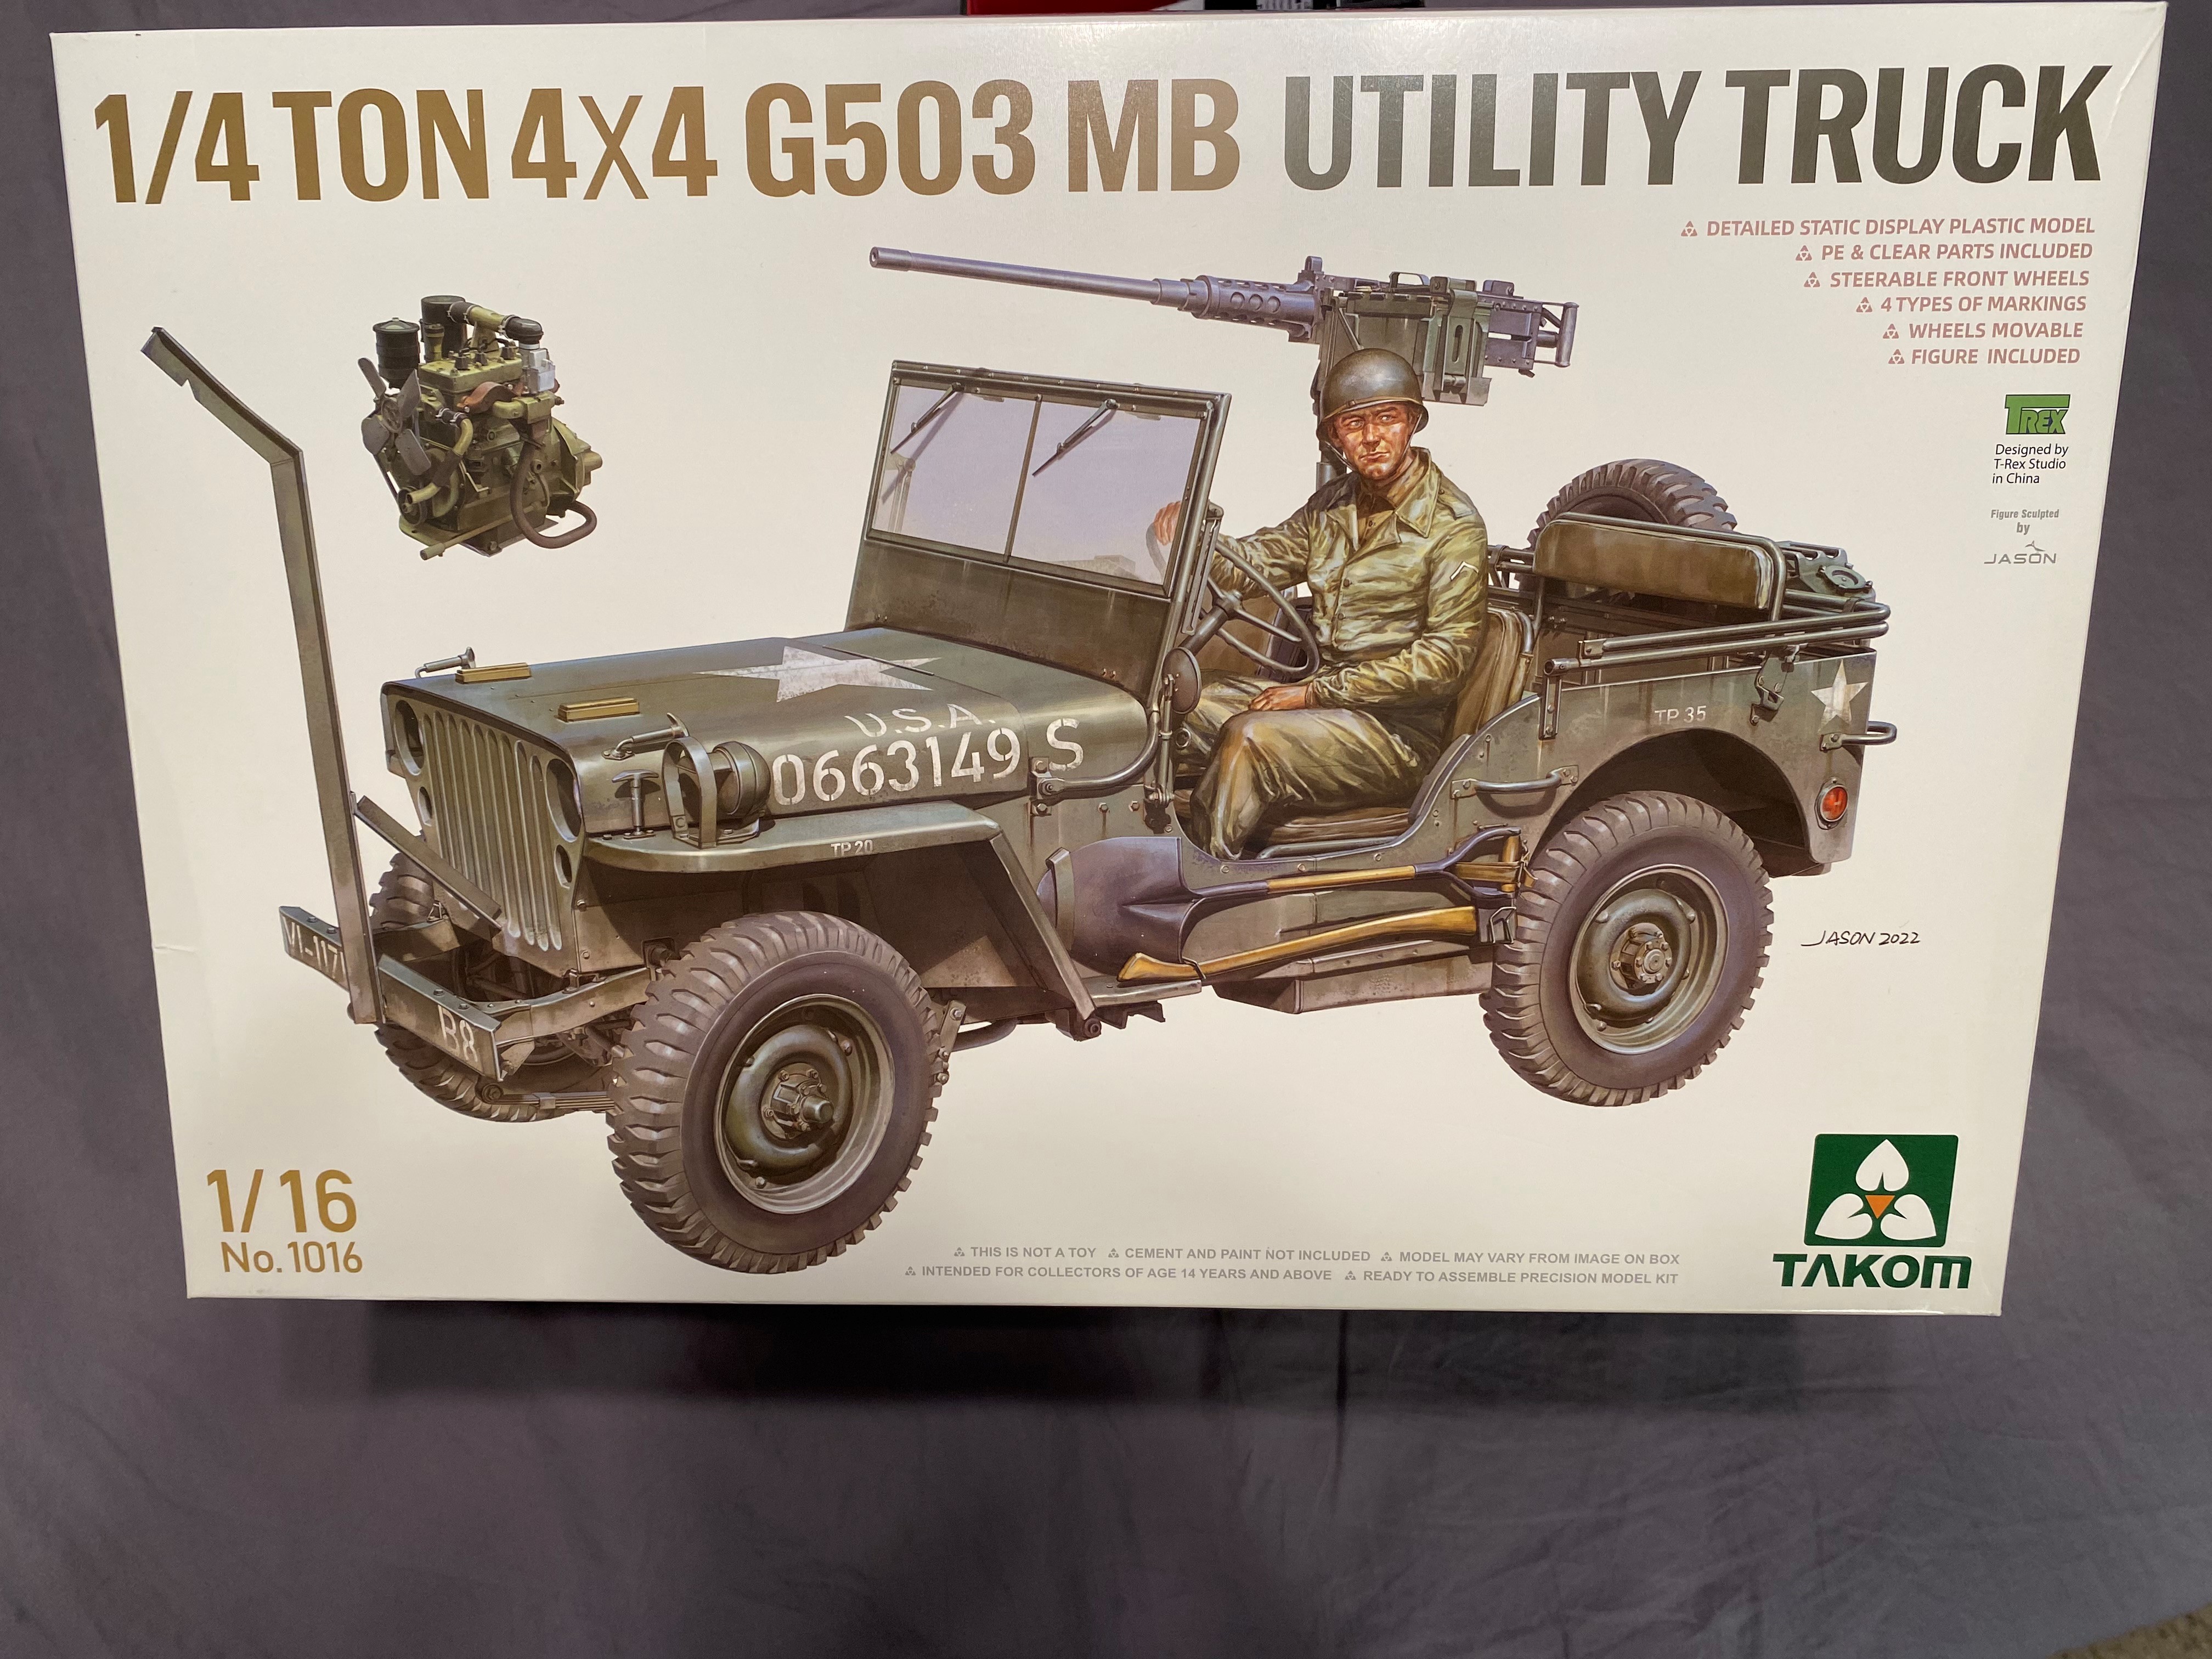
1/16 Takom Willys 1/4 Ton 4x4 G503 MB Jeep
Axeman replied to Axeman's topic in LSM 1/35 and Larger Work In Progress
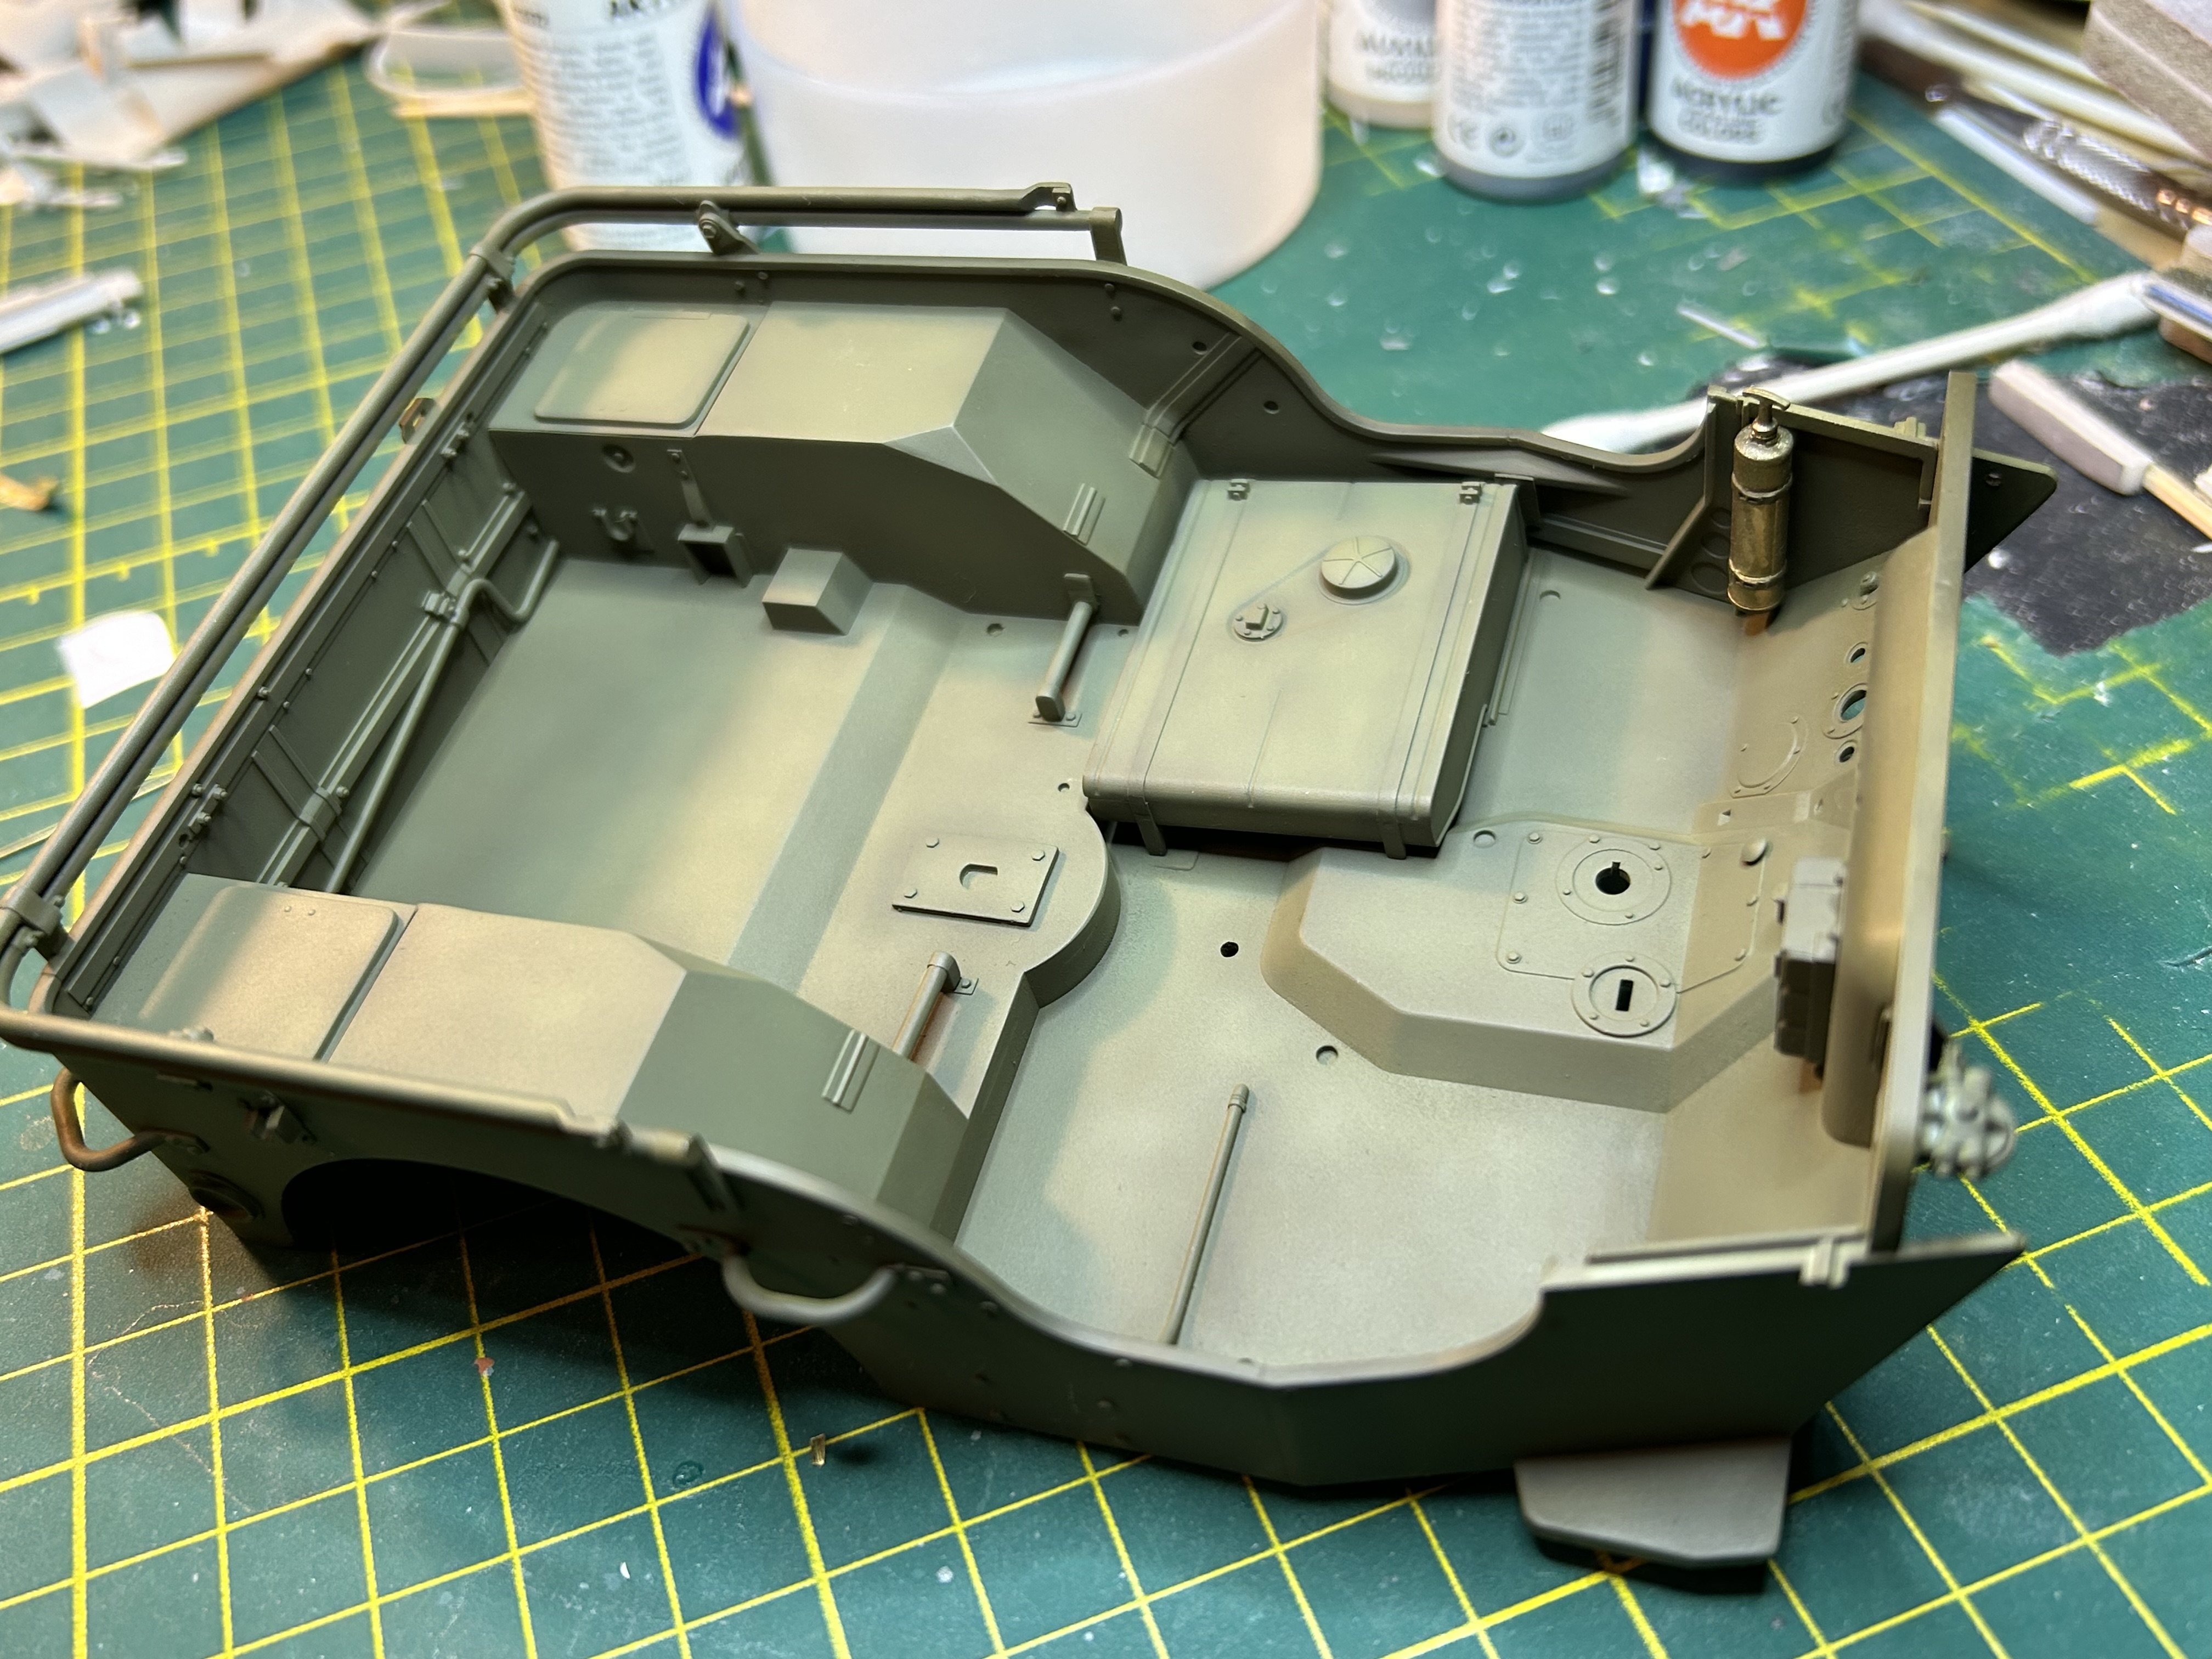
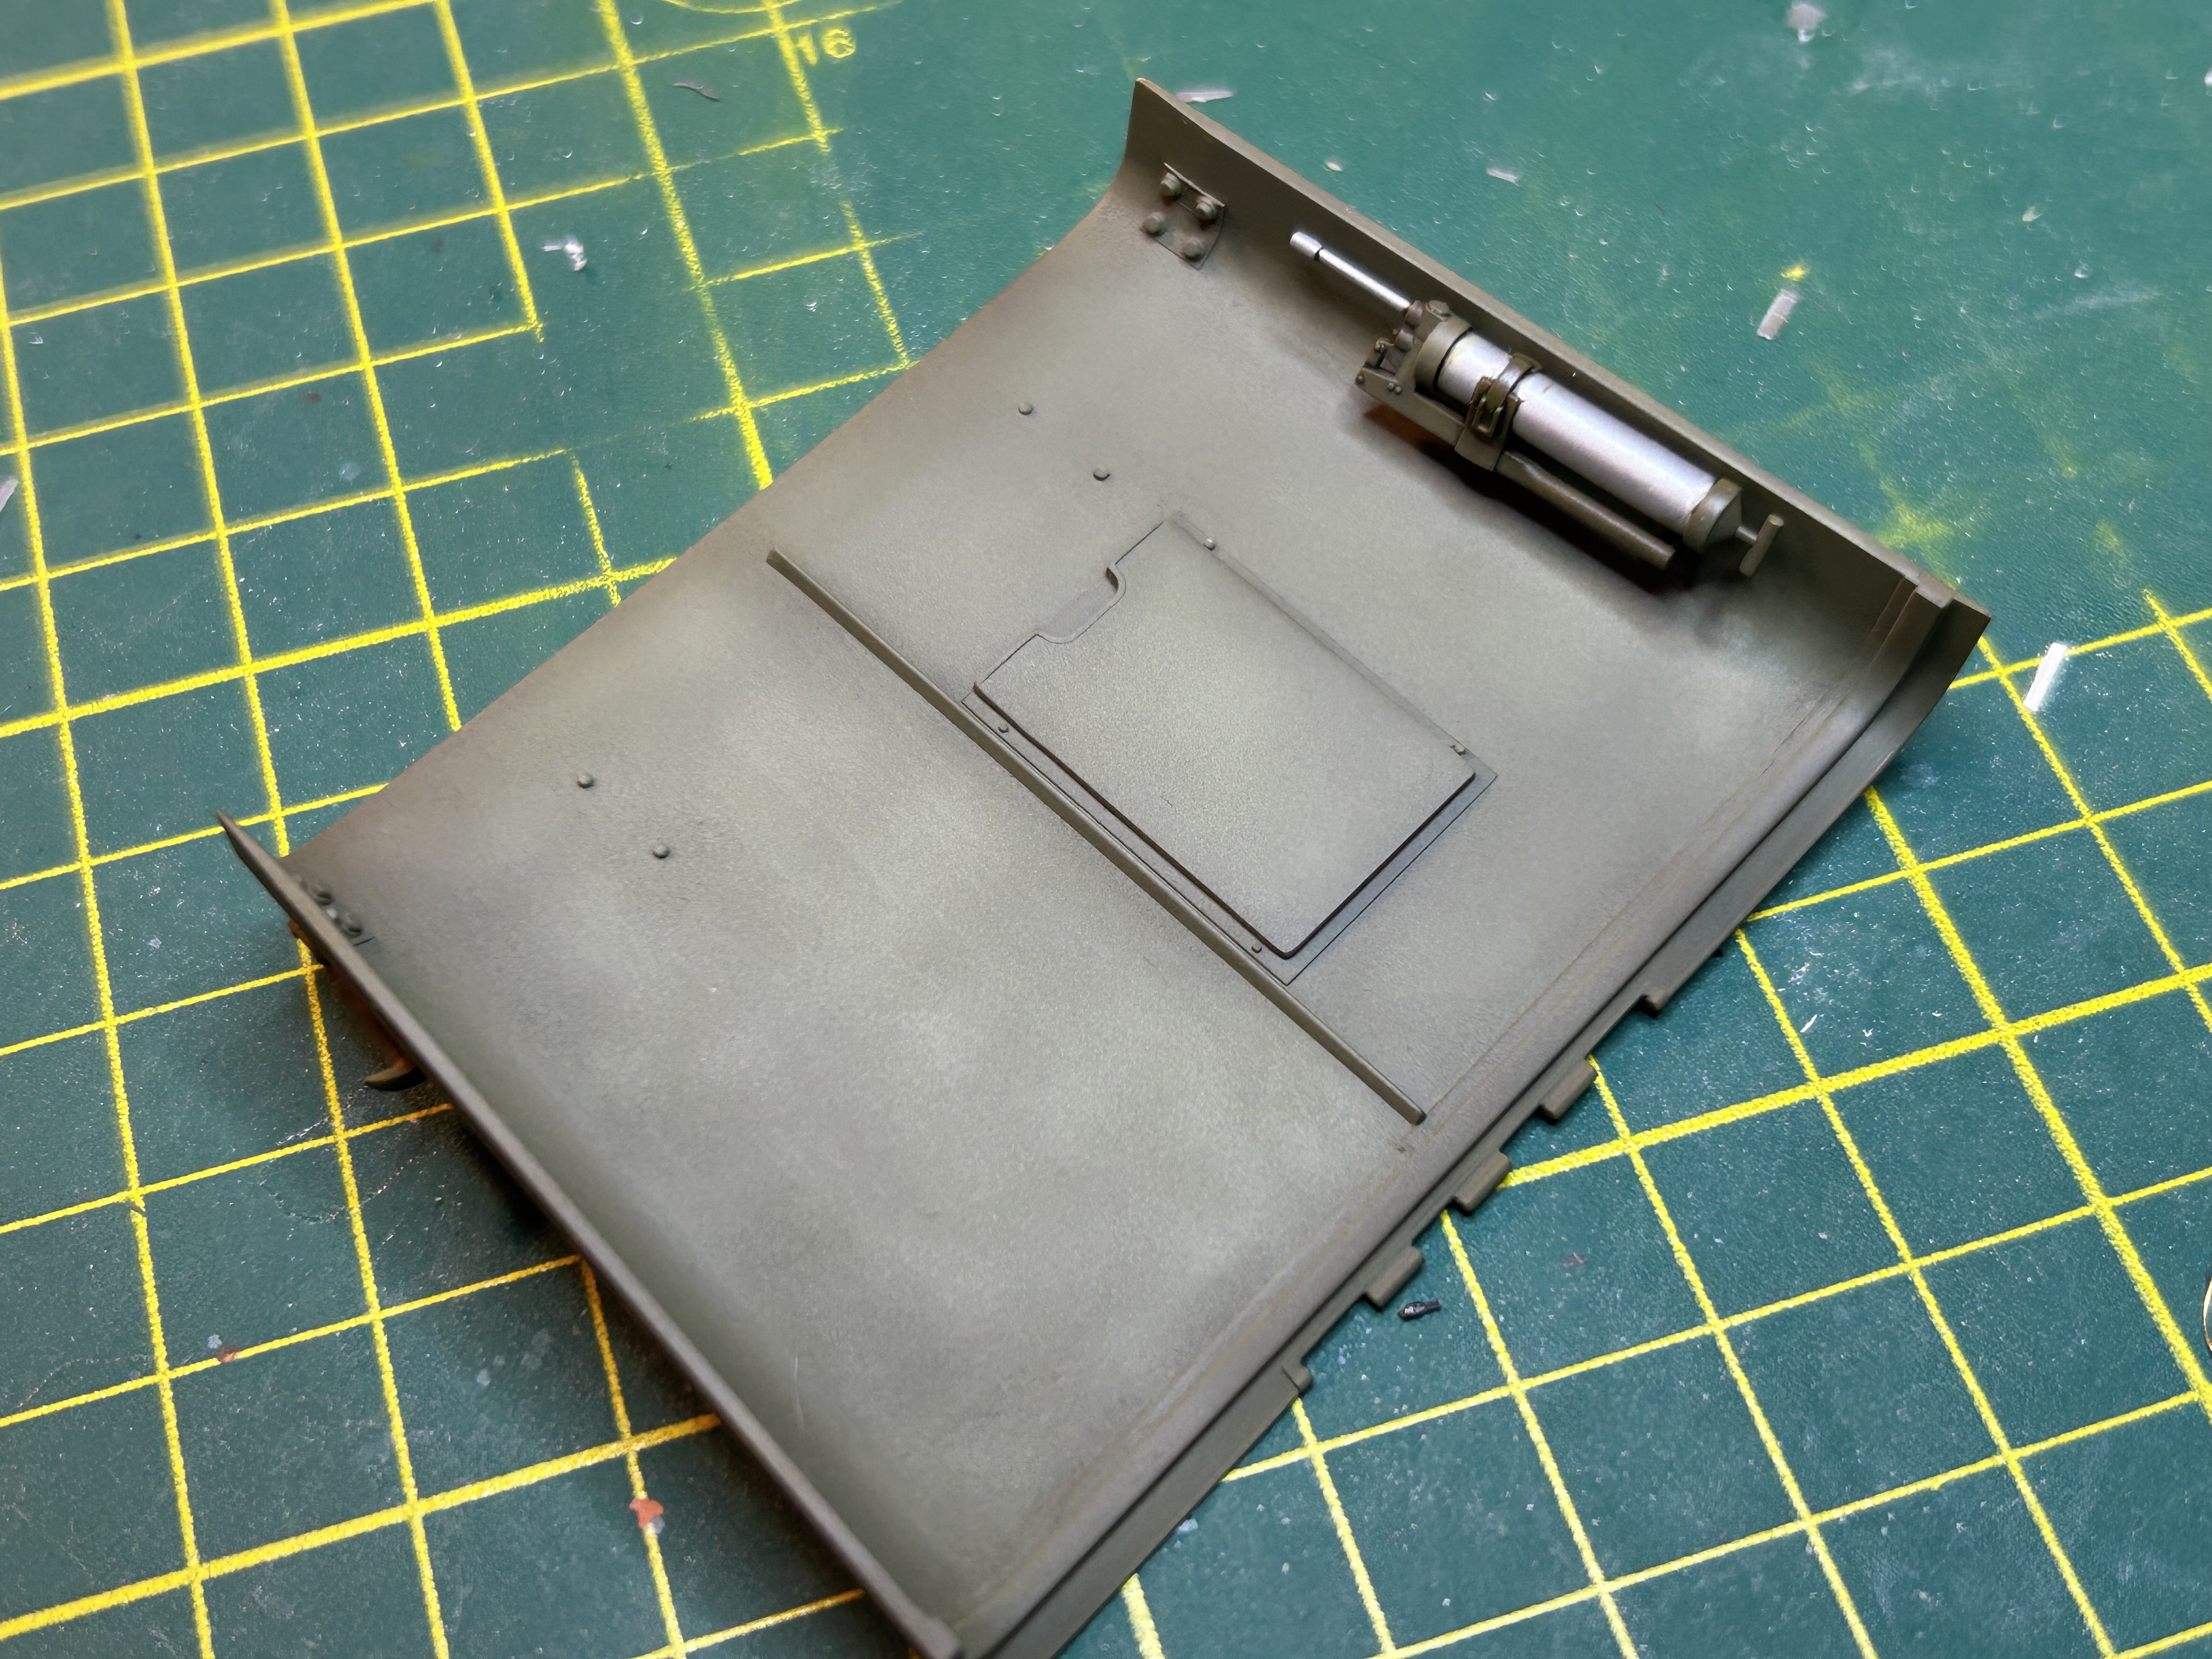
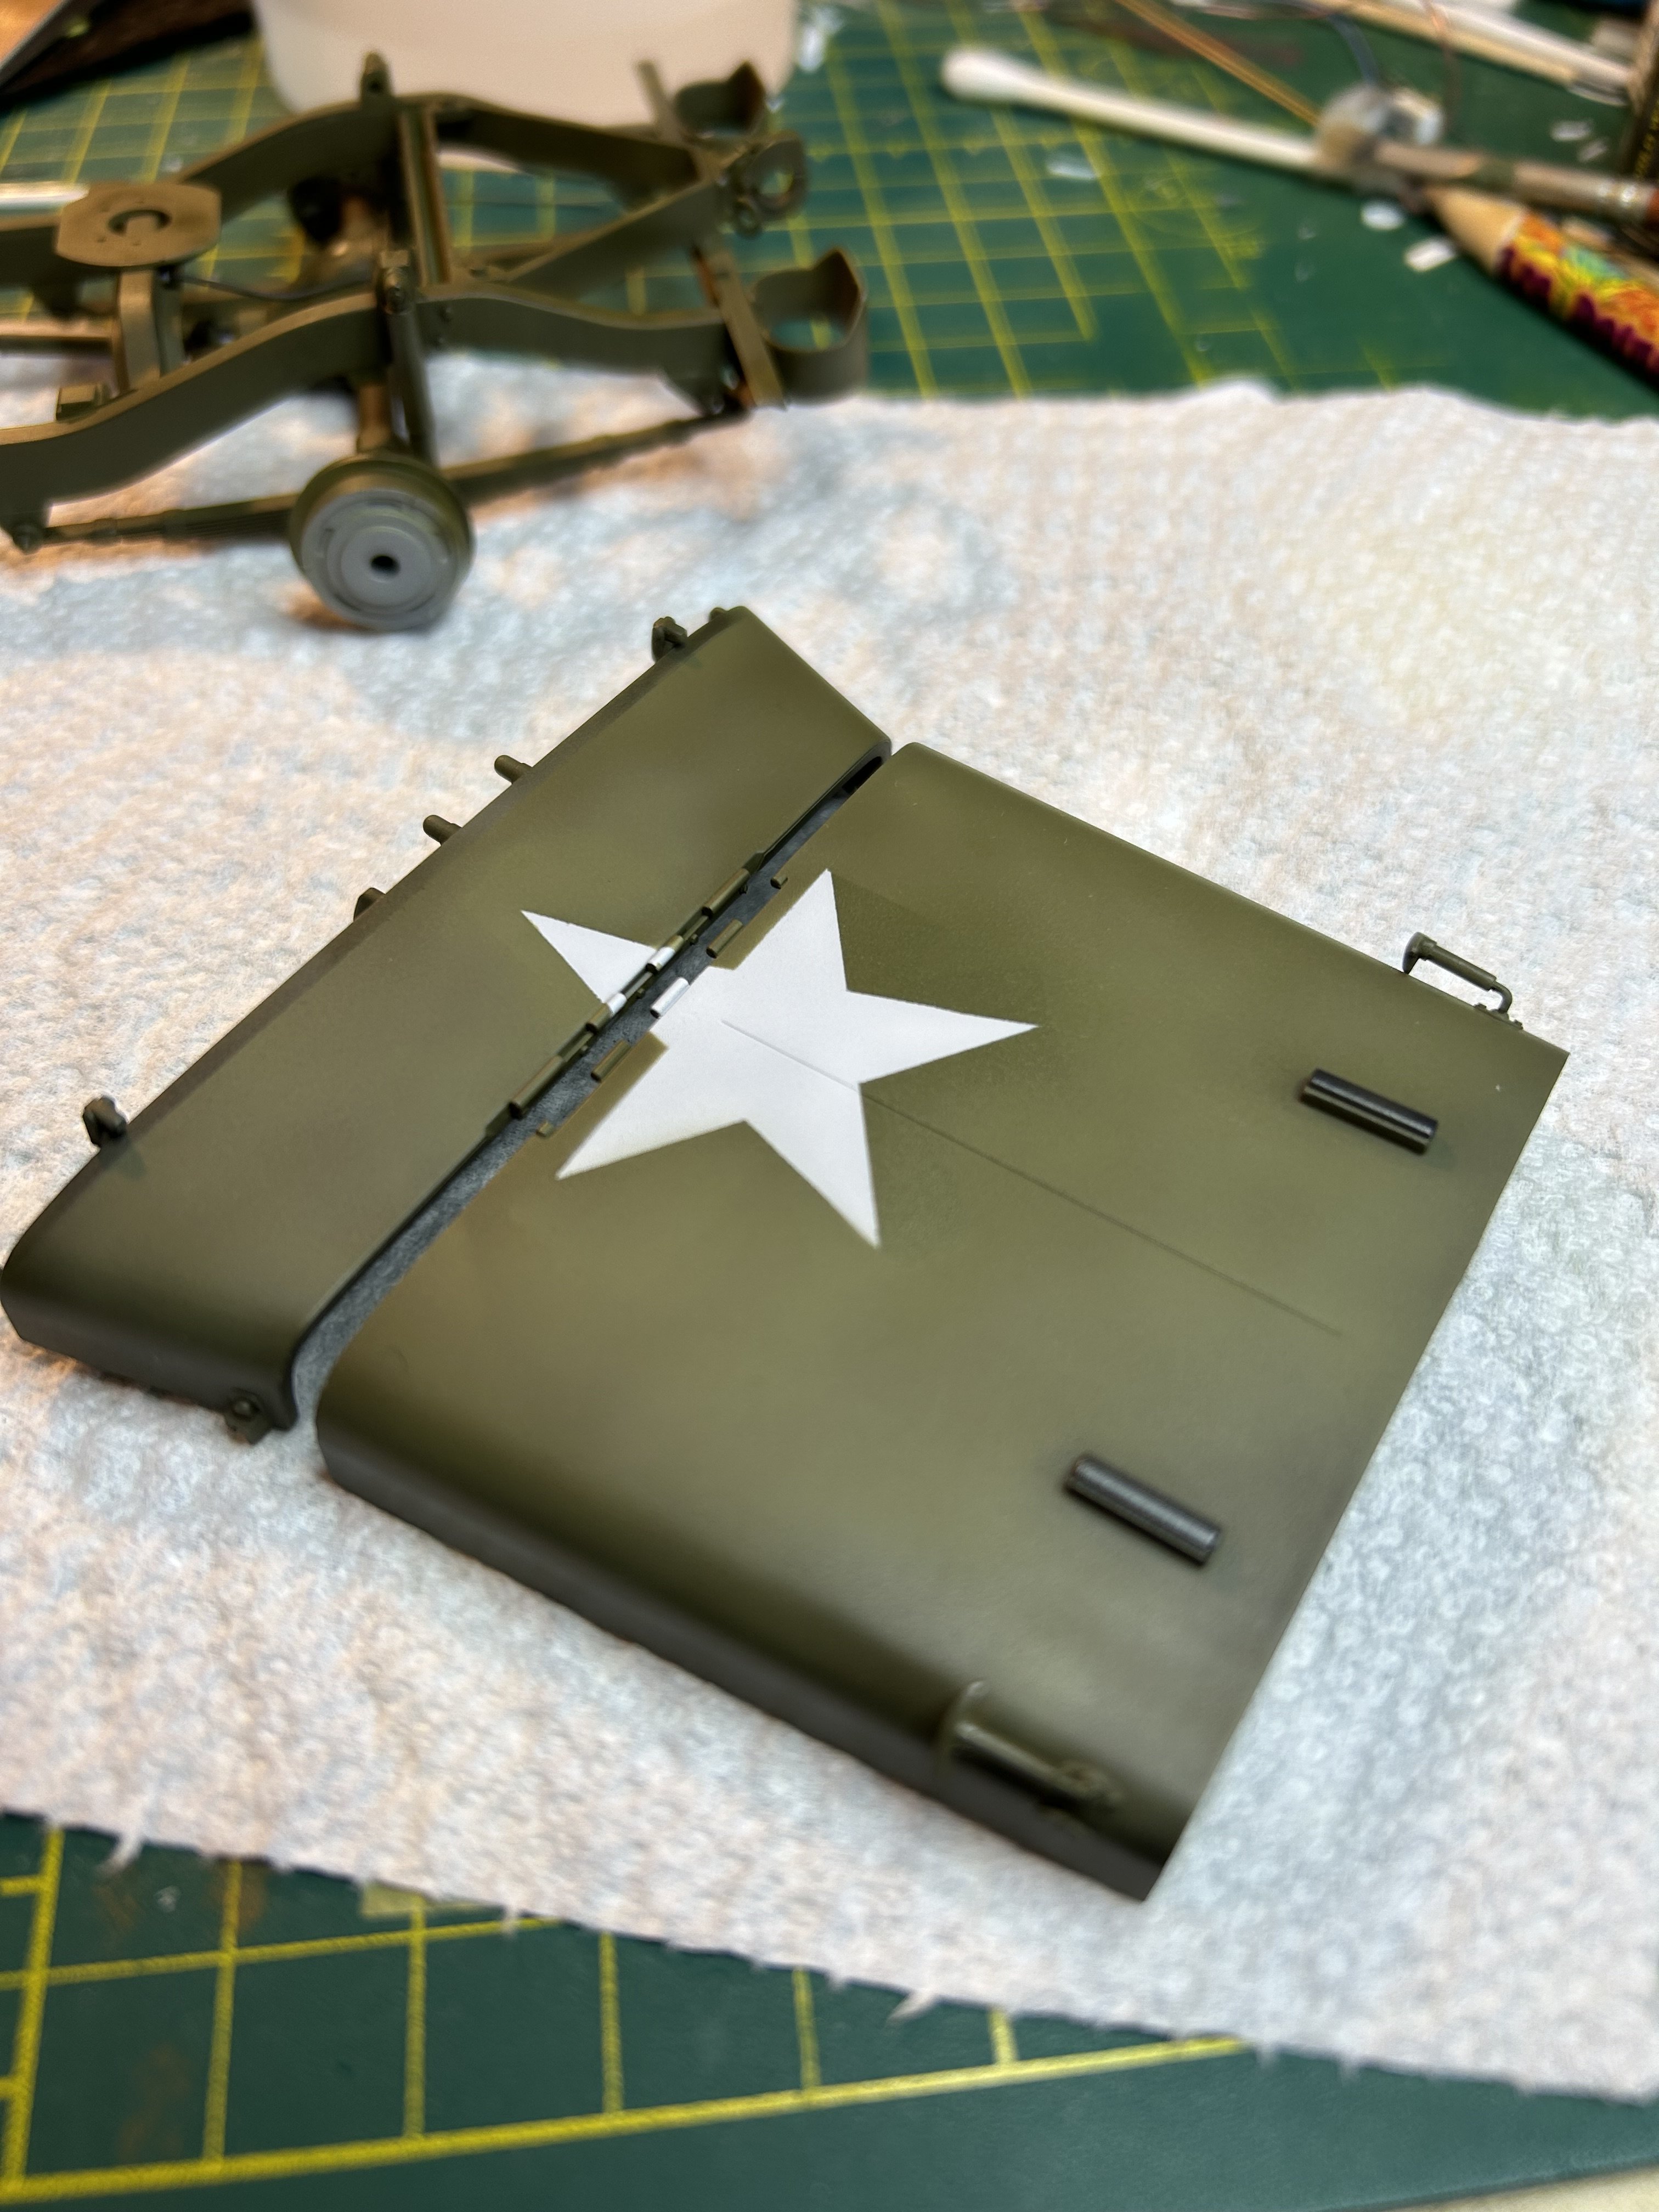
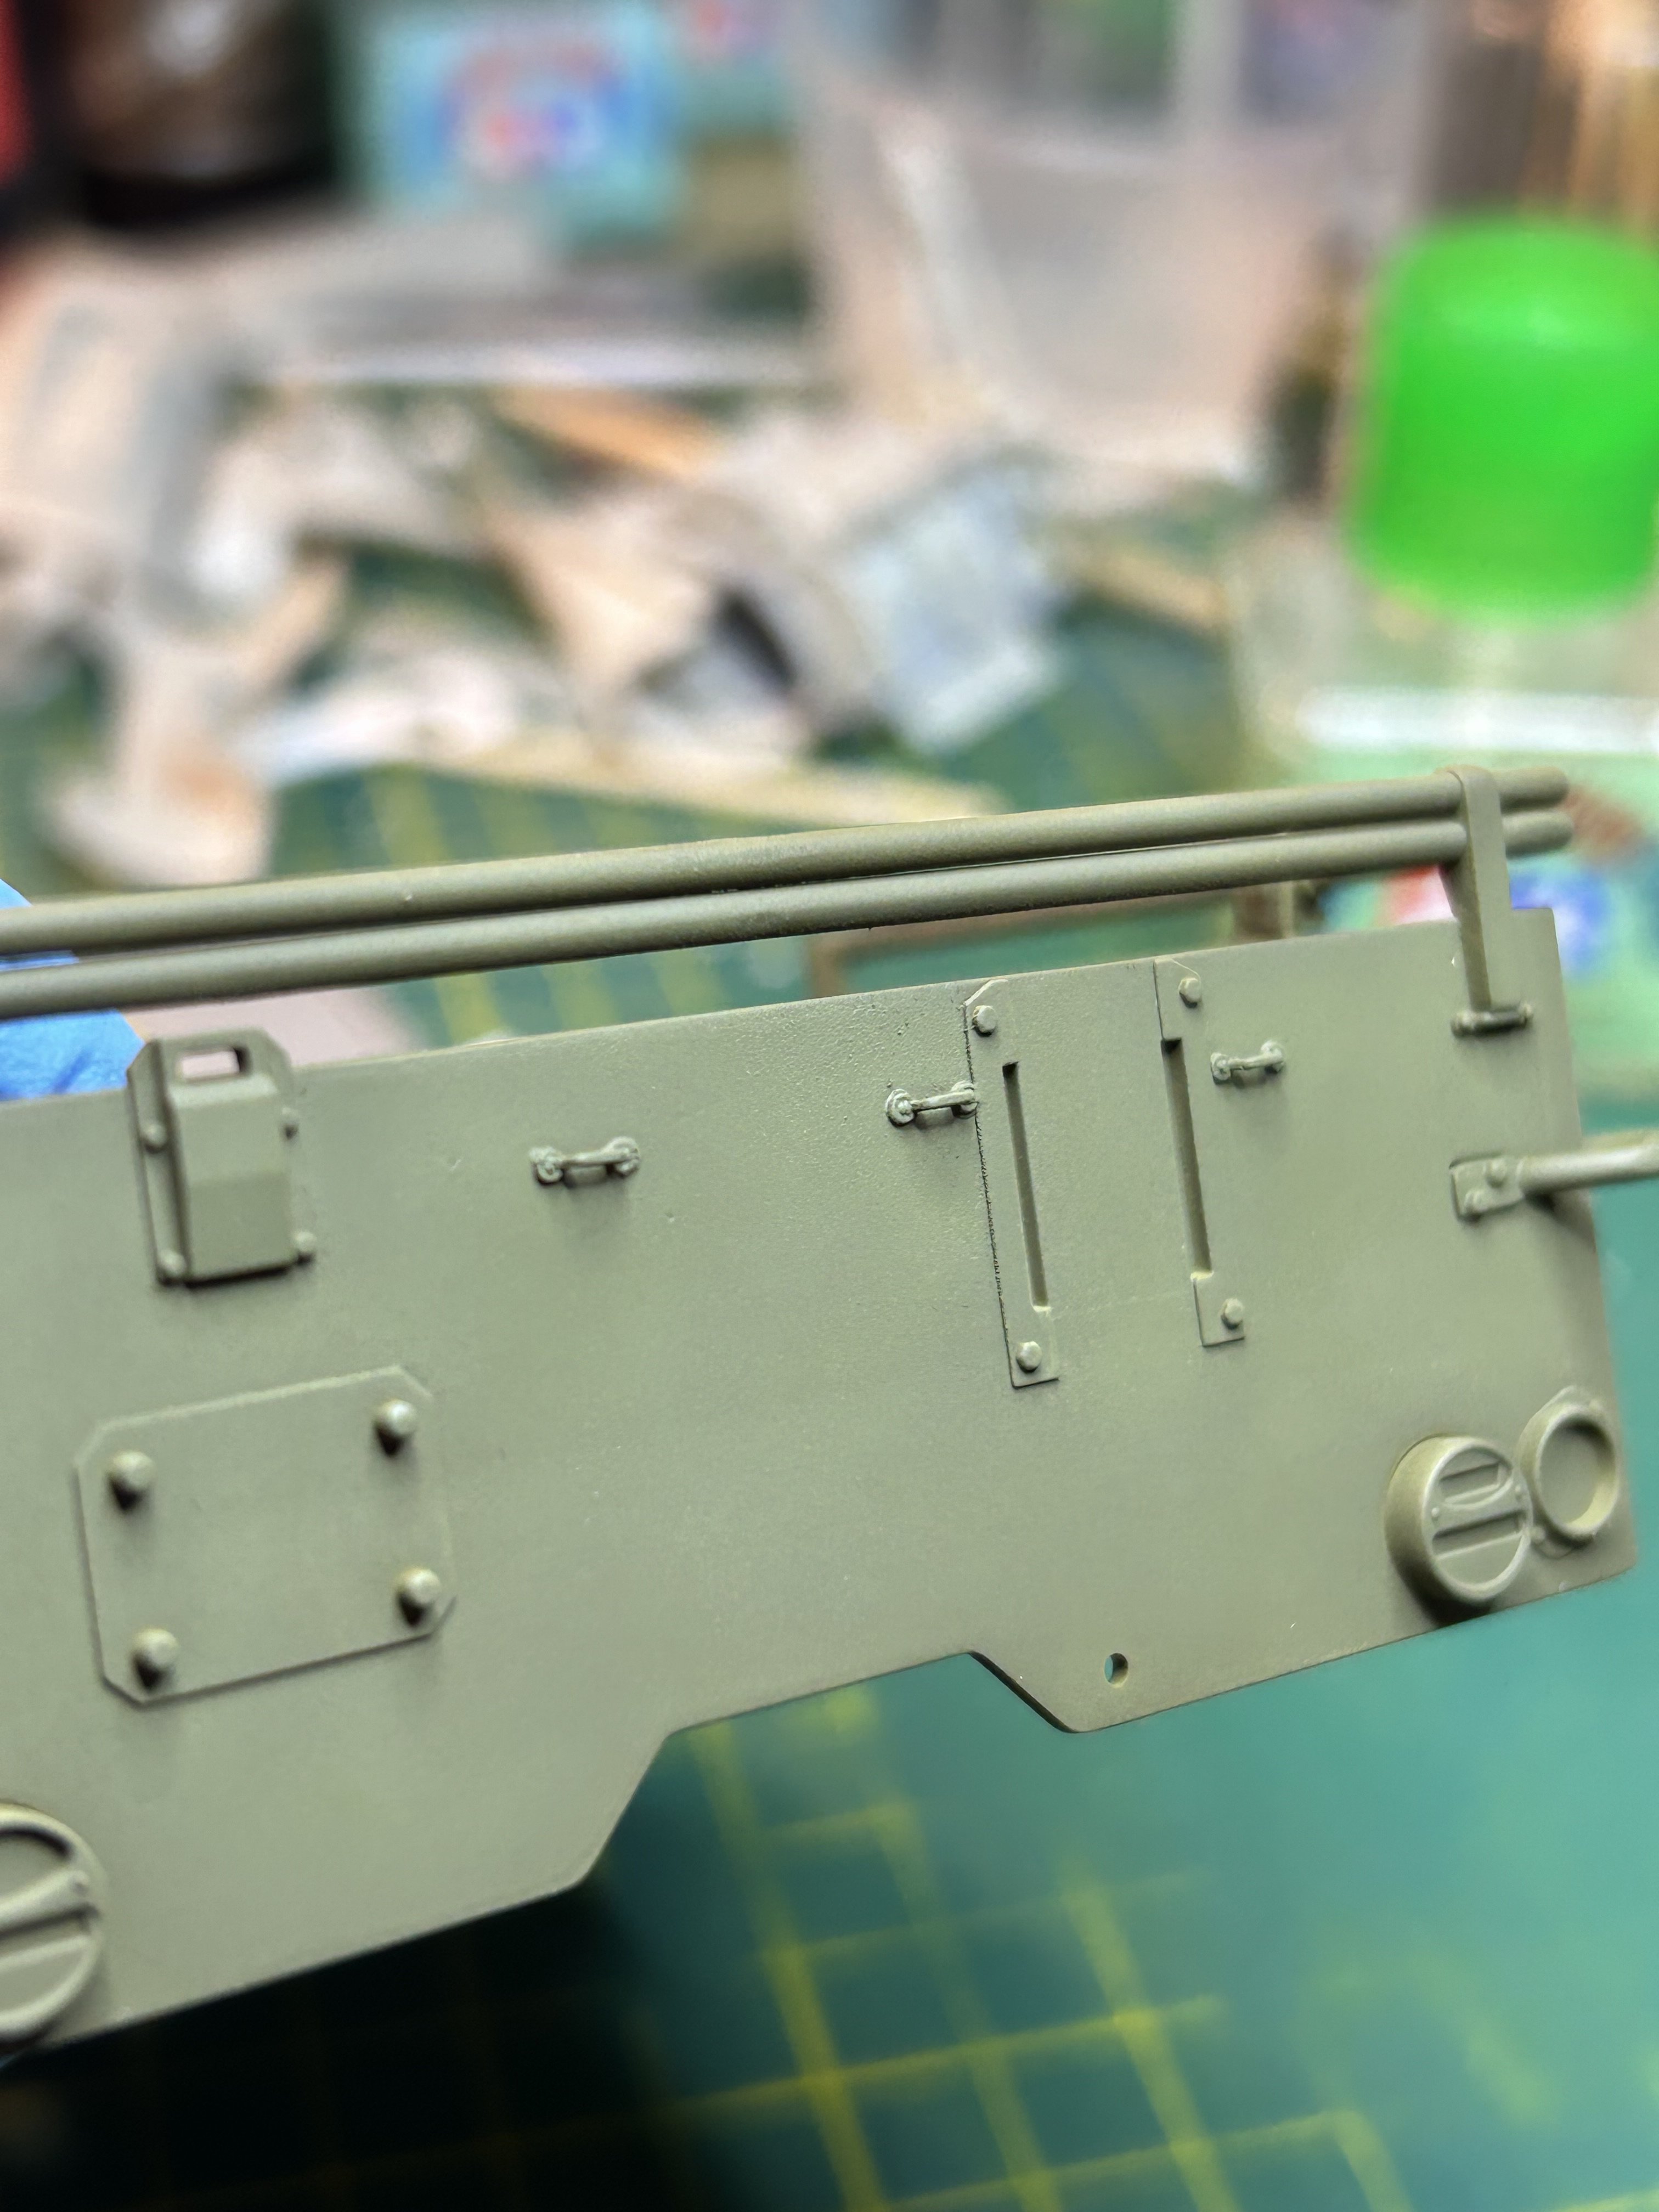
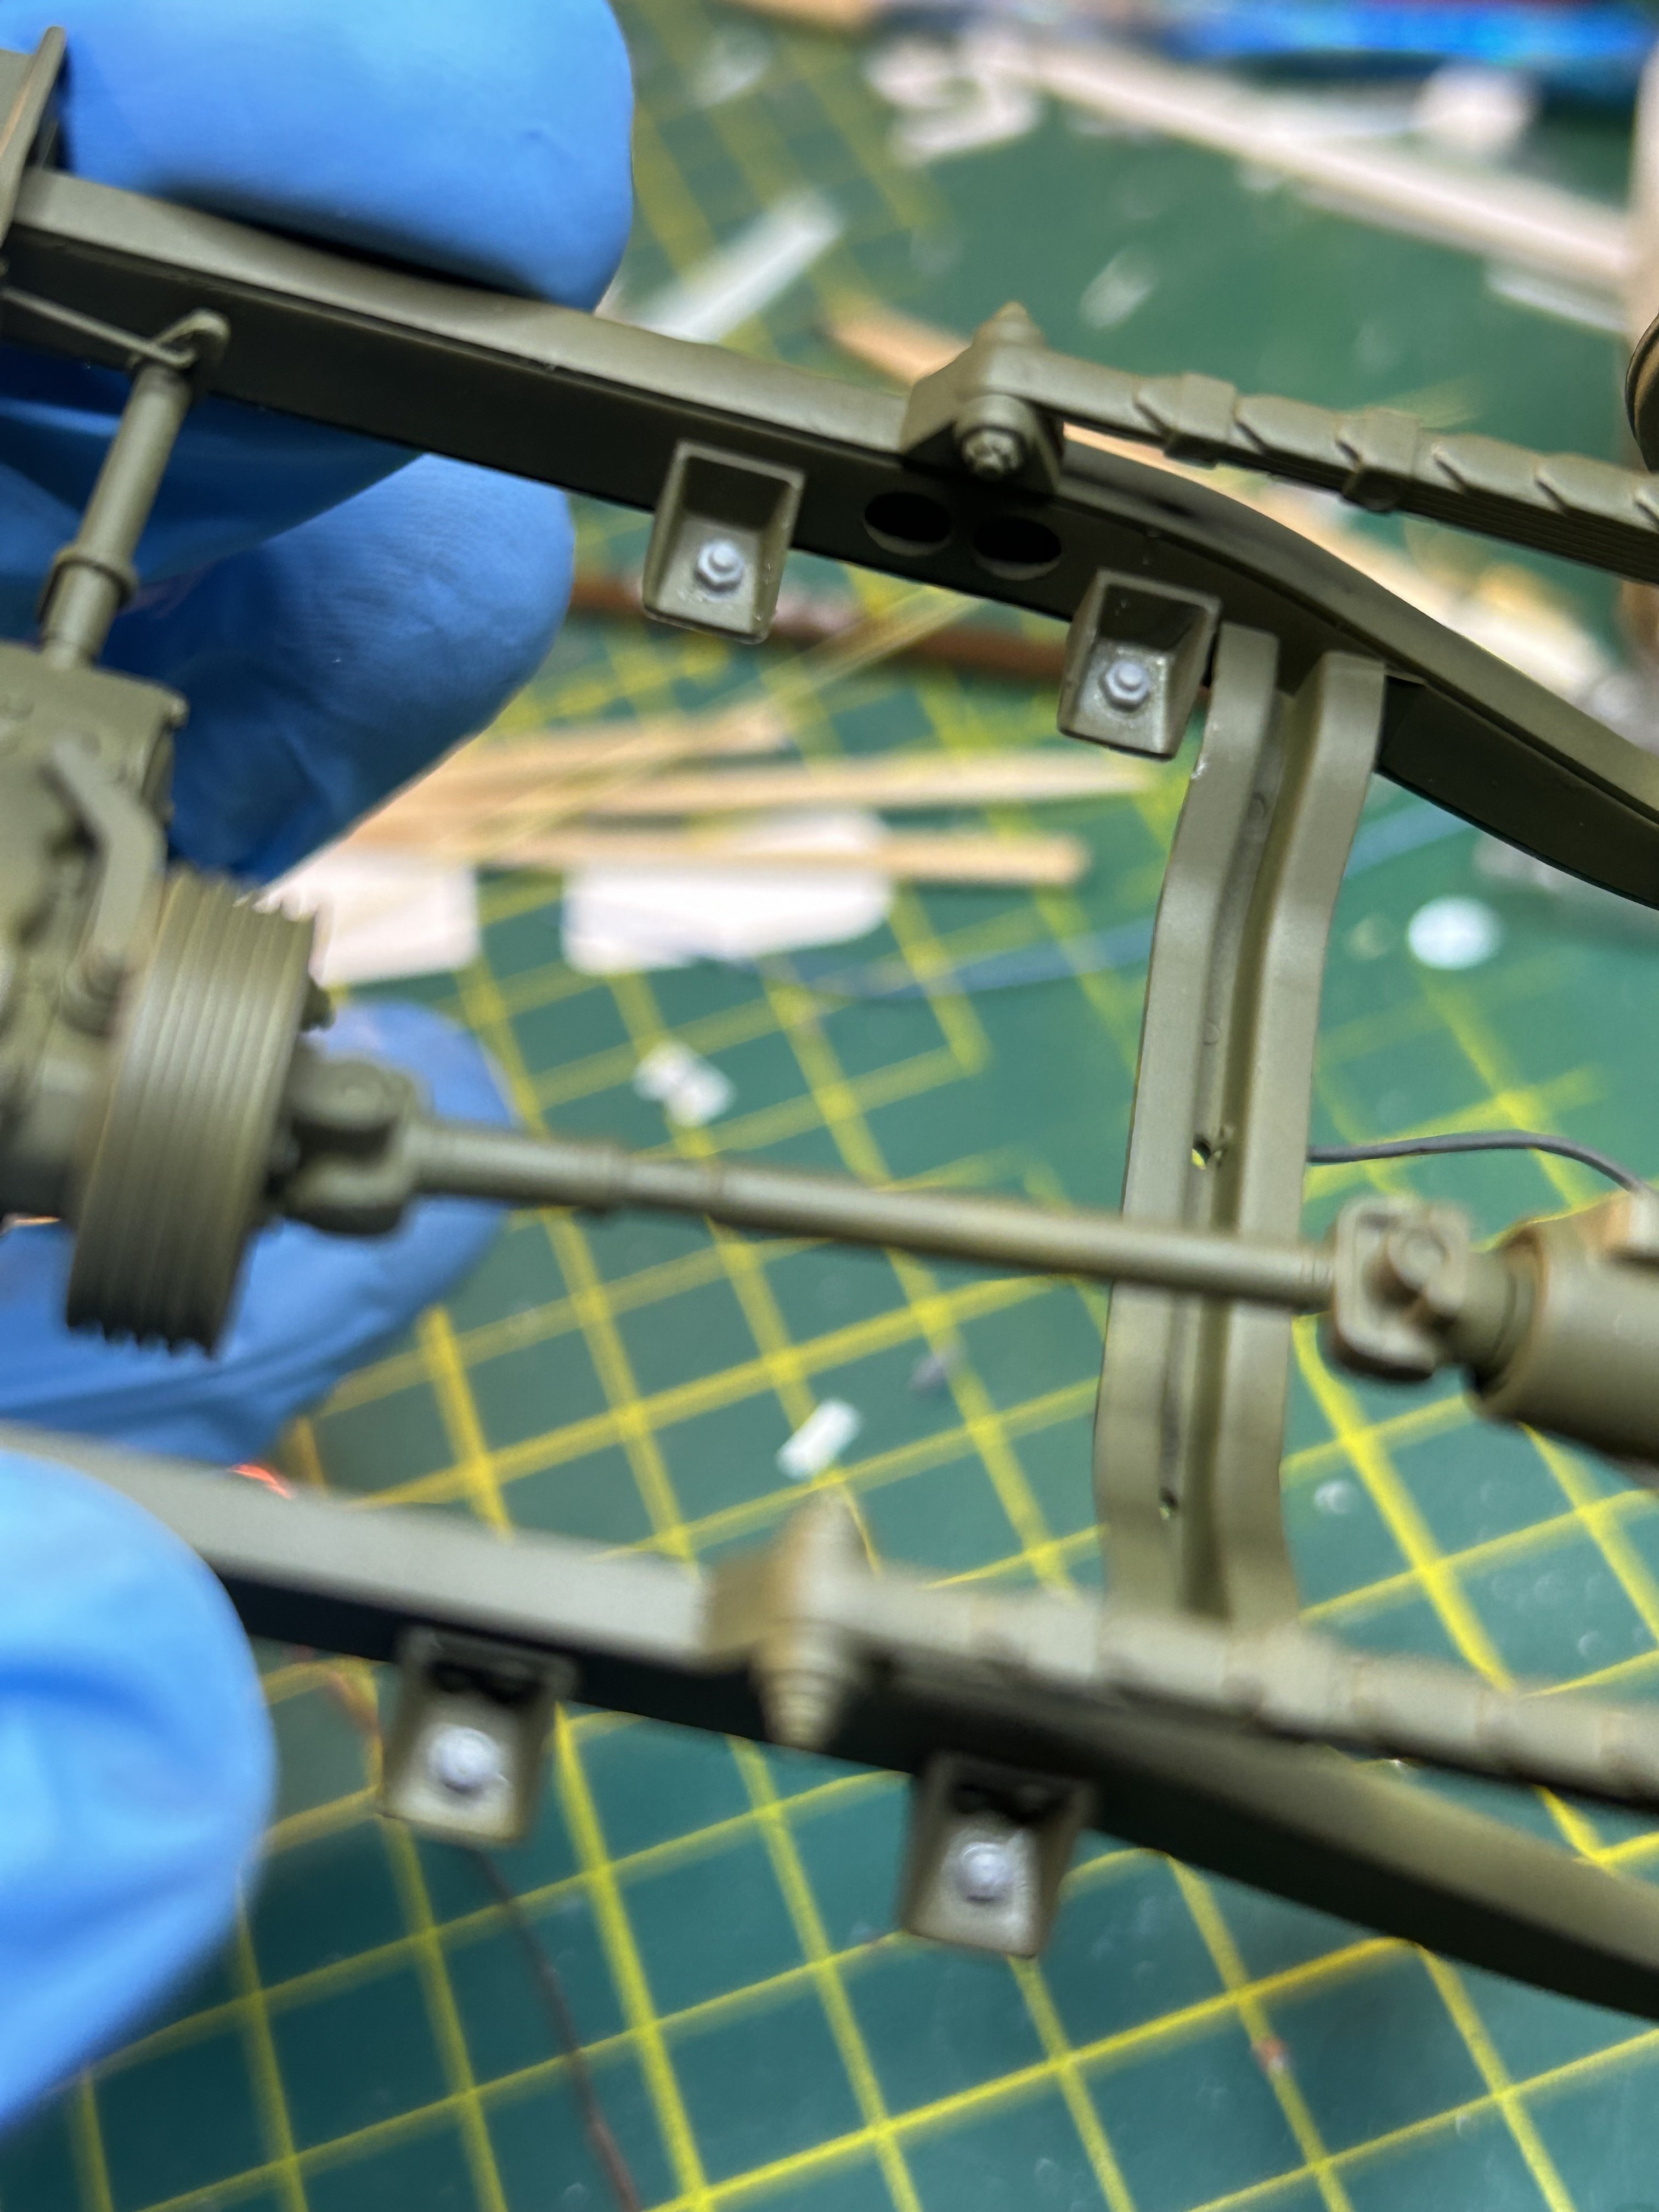
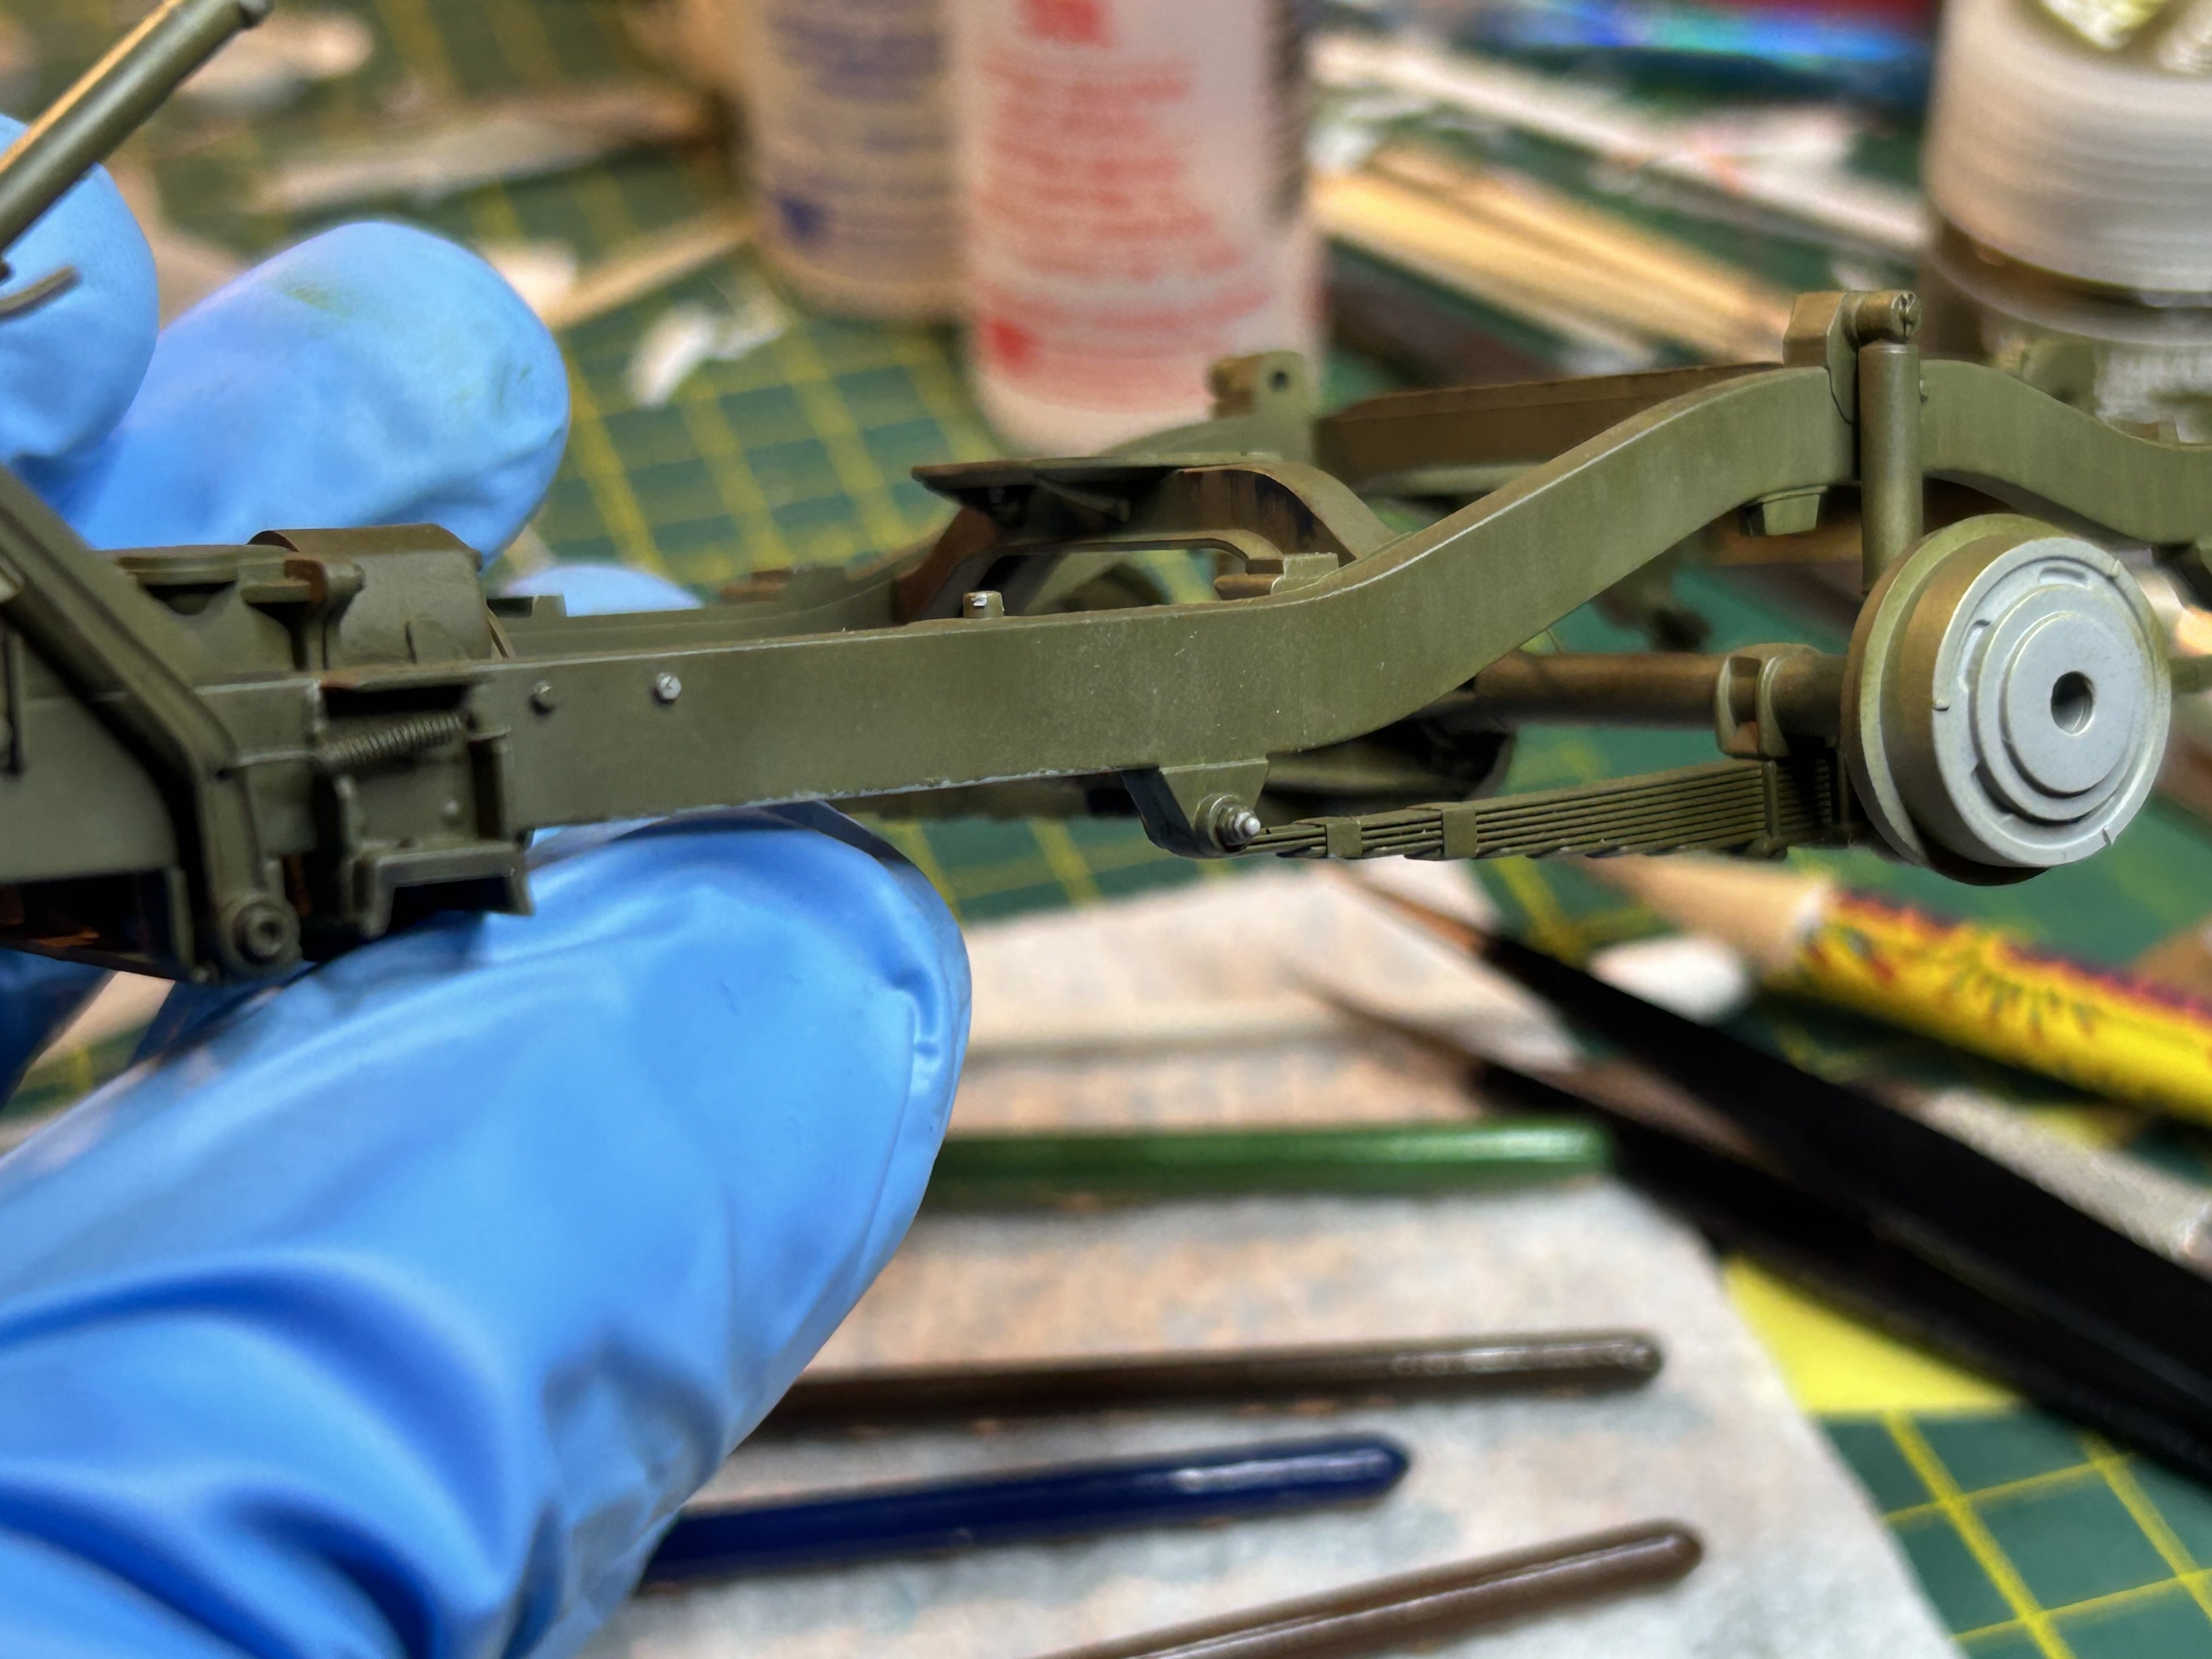
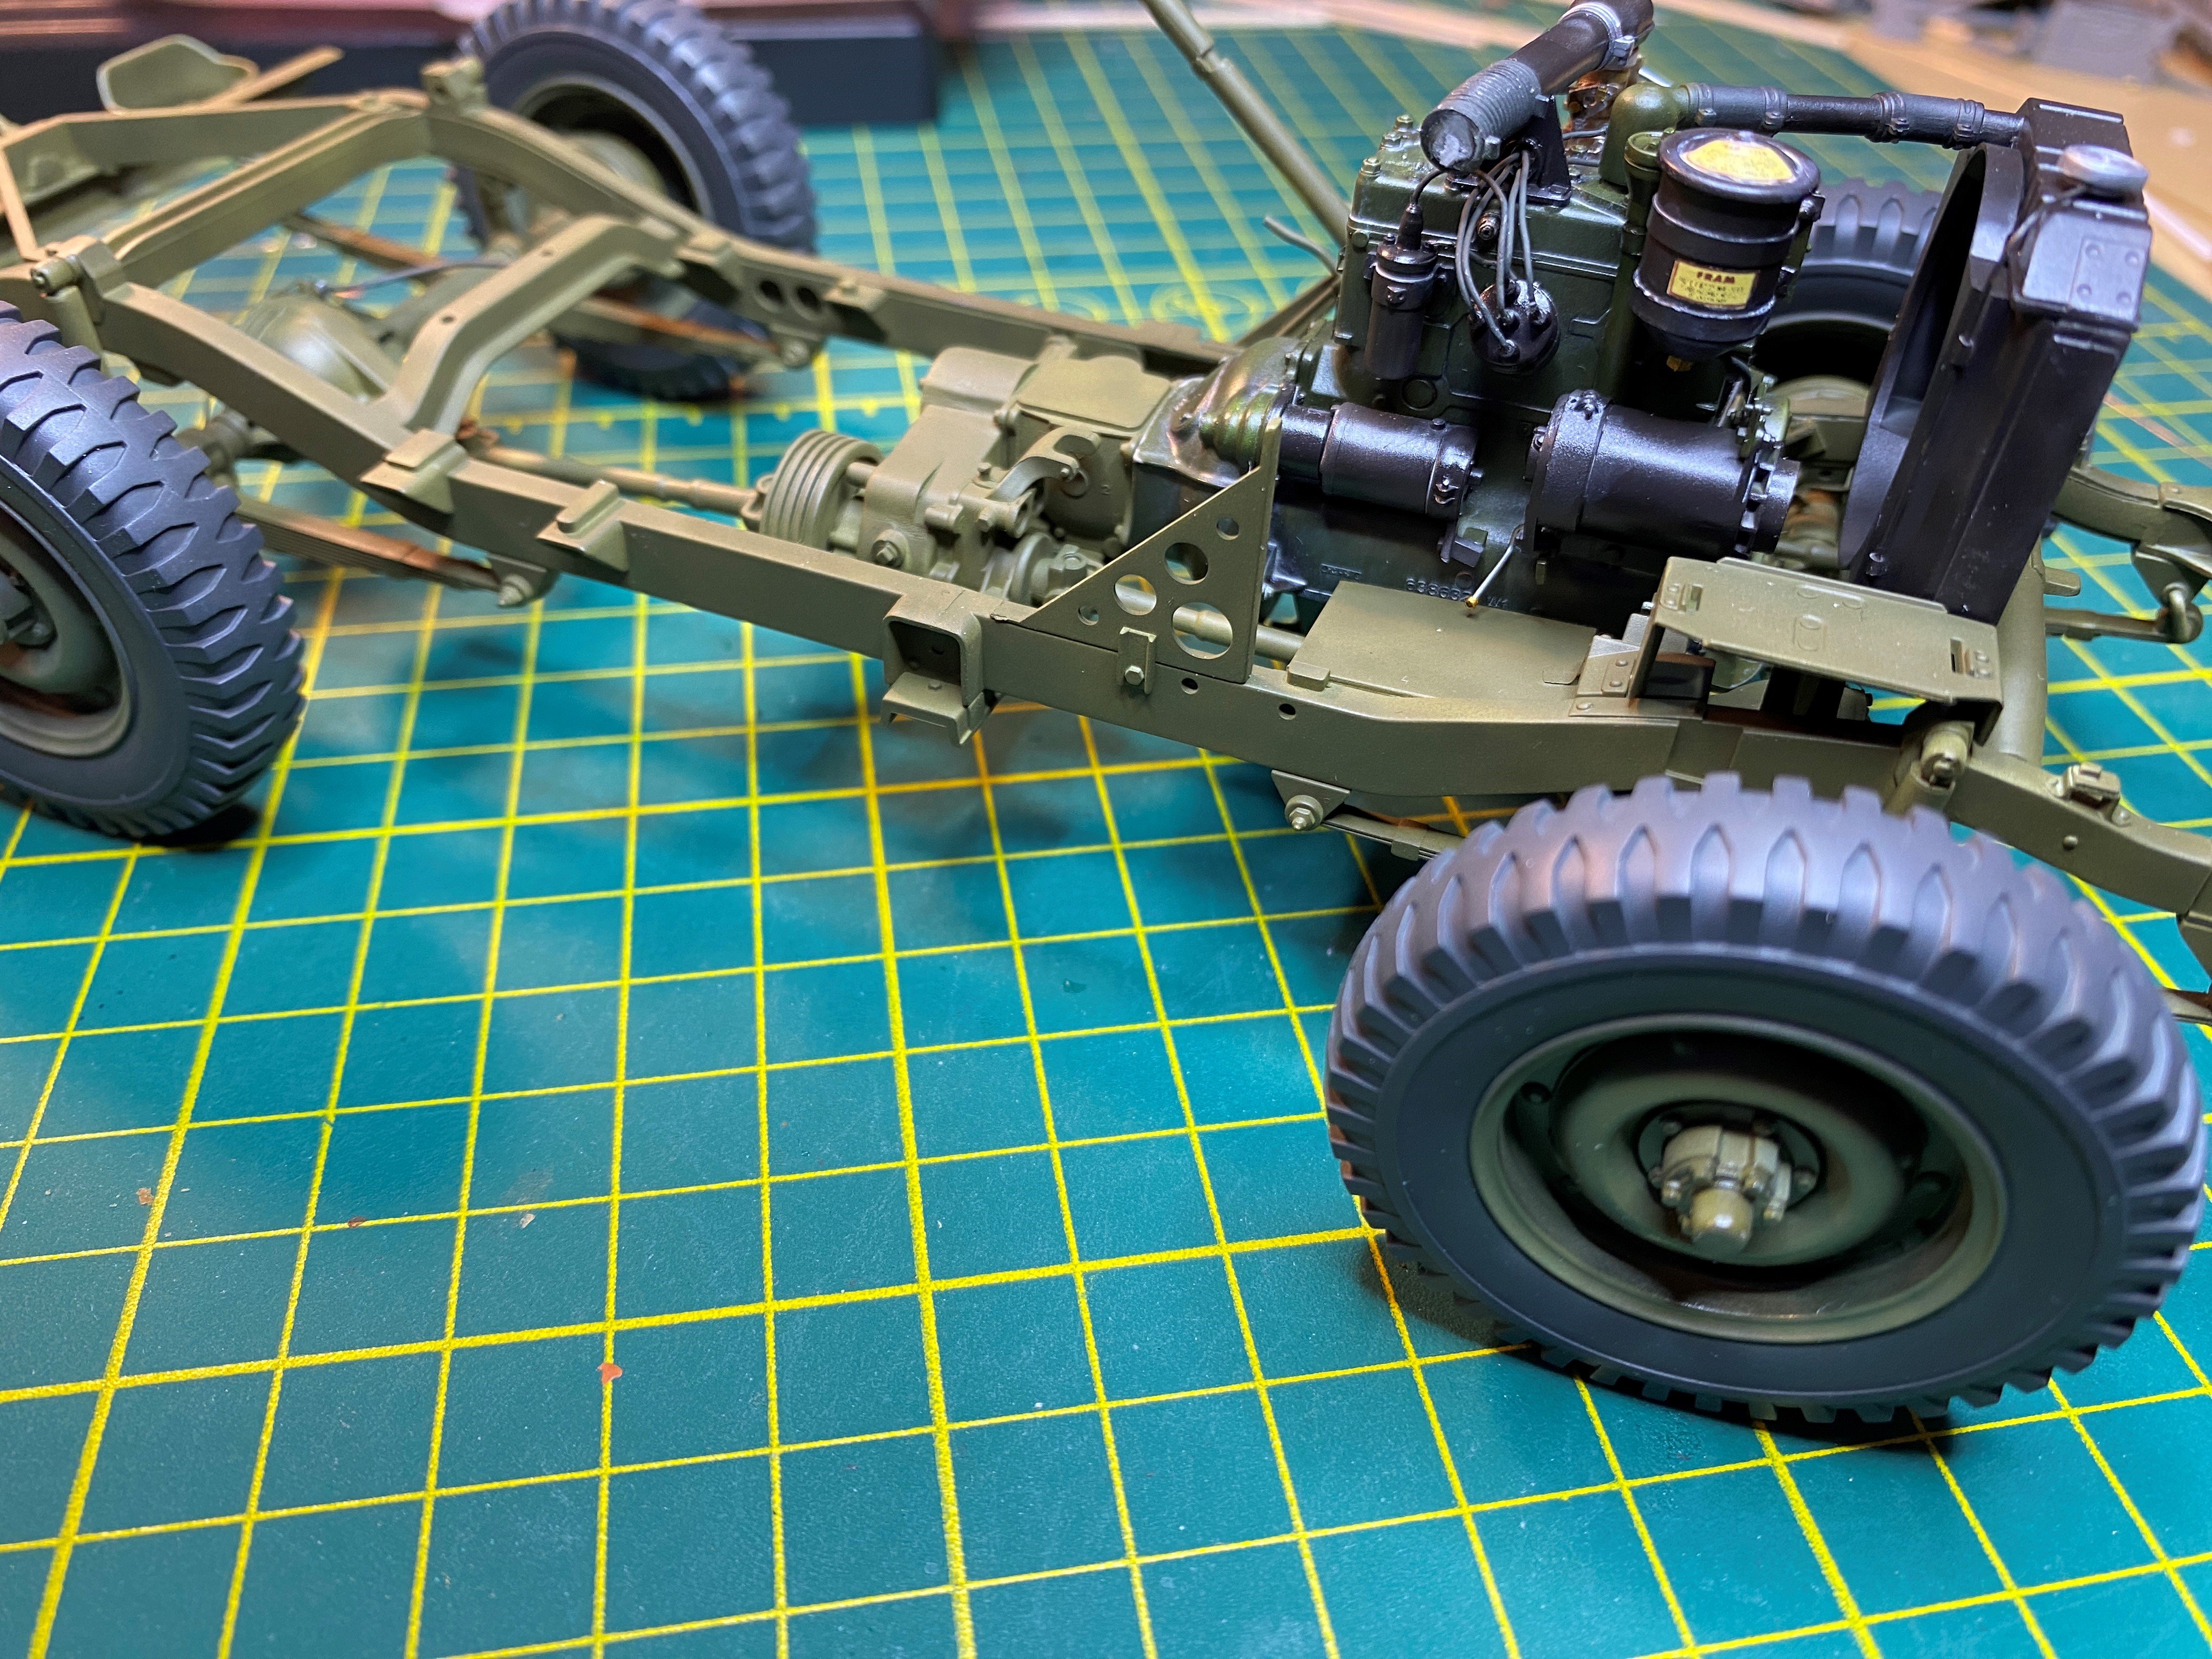
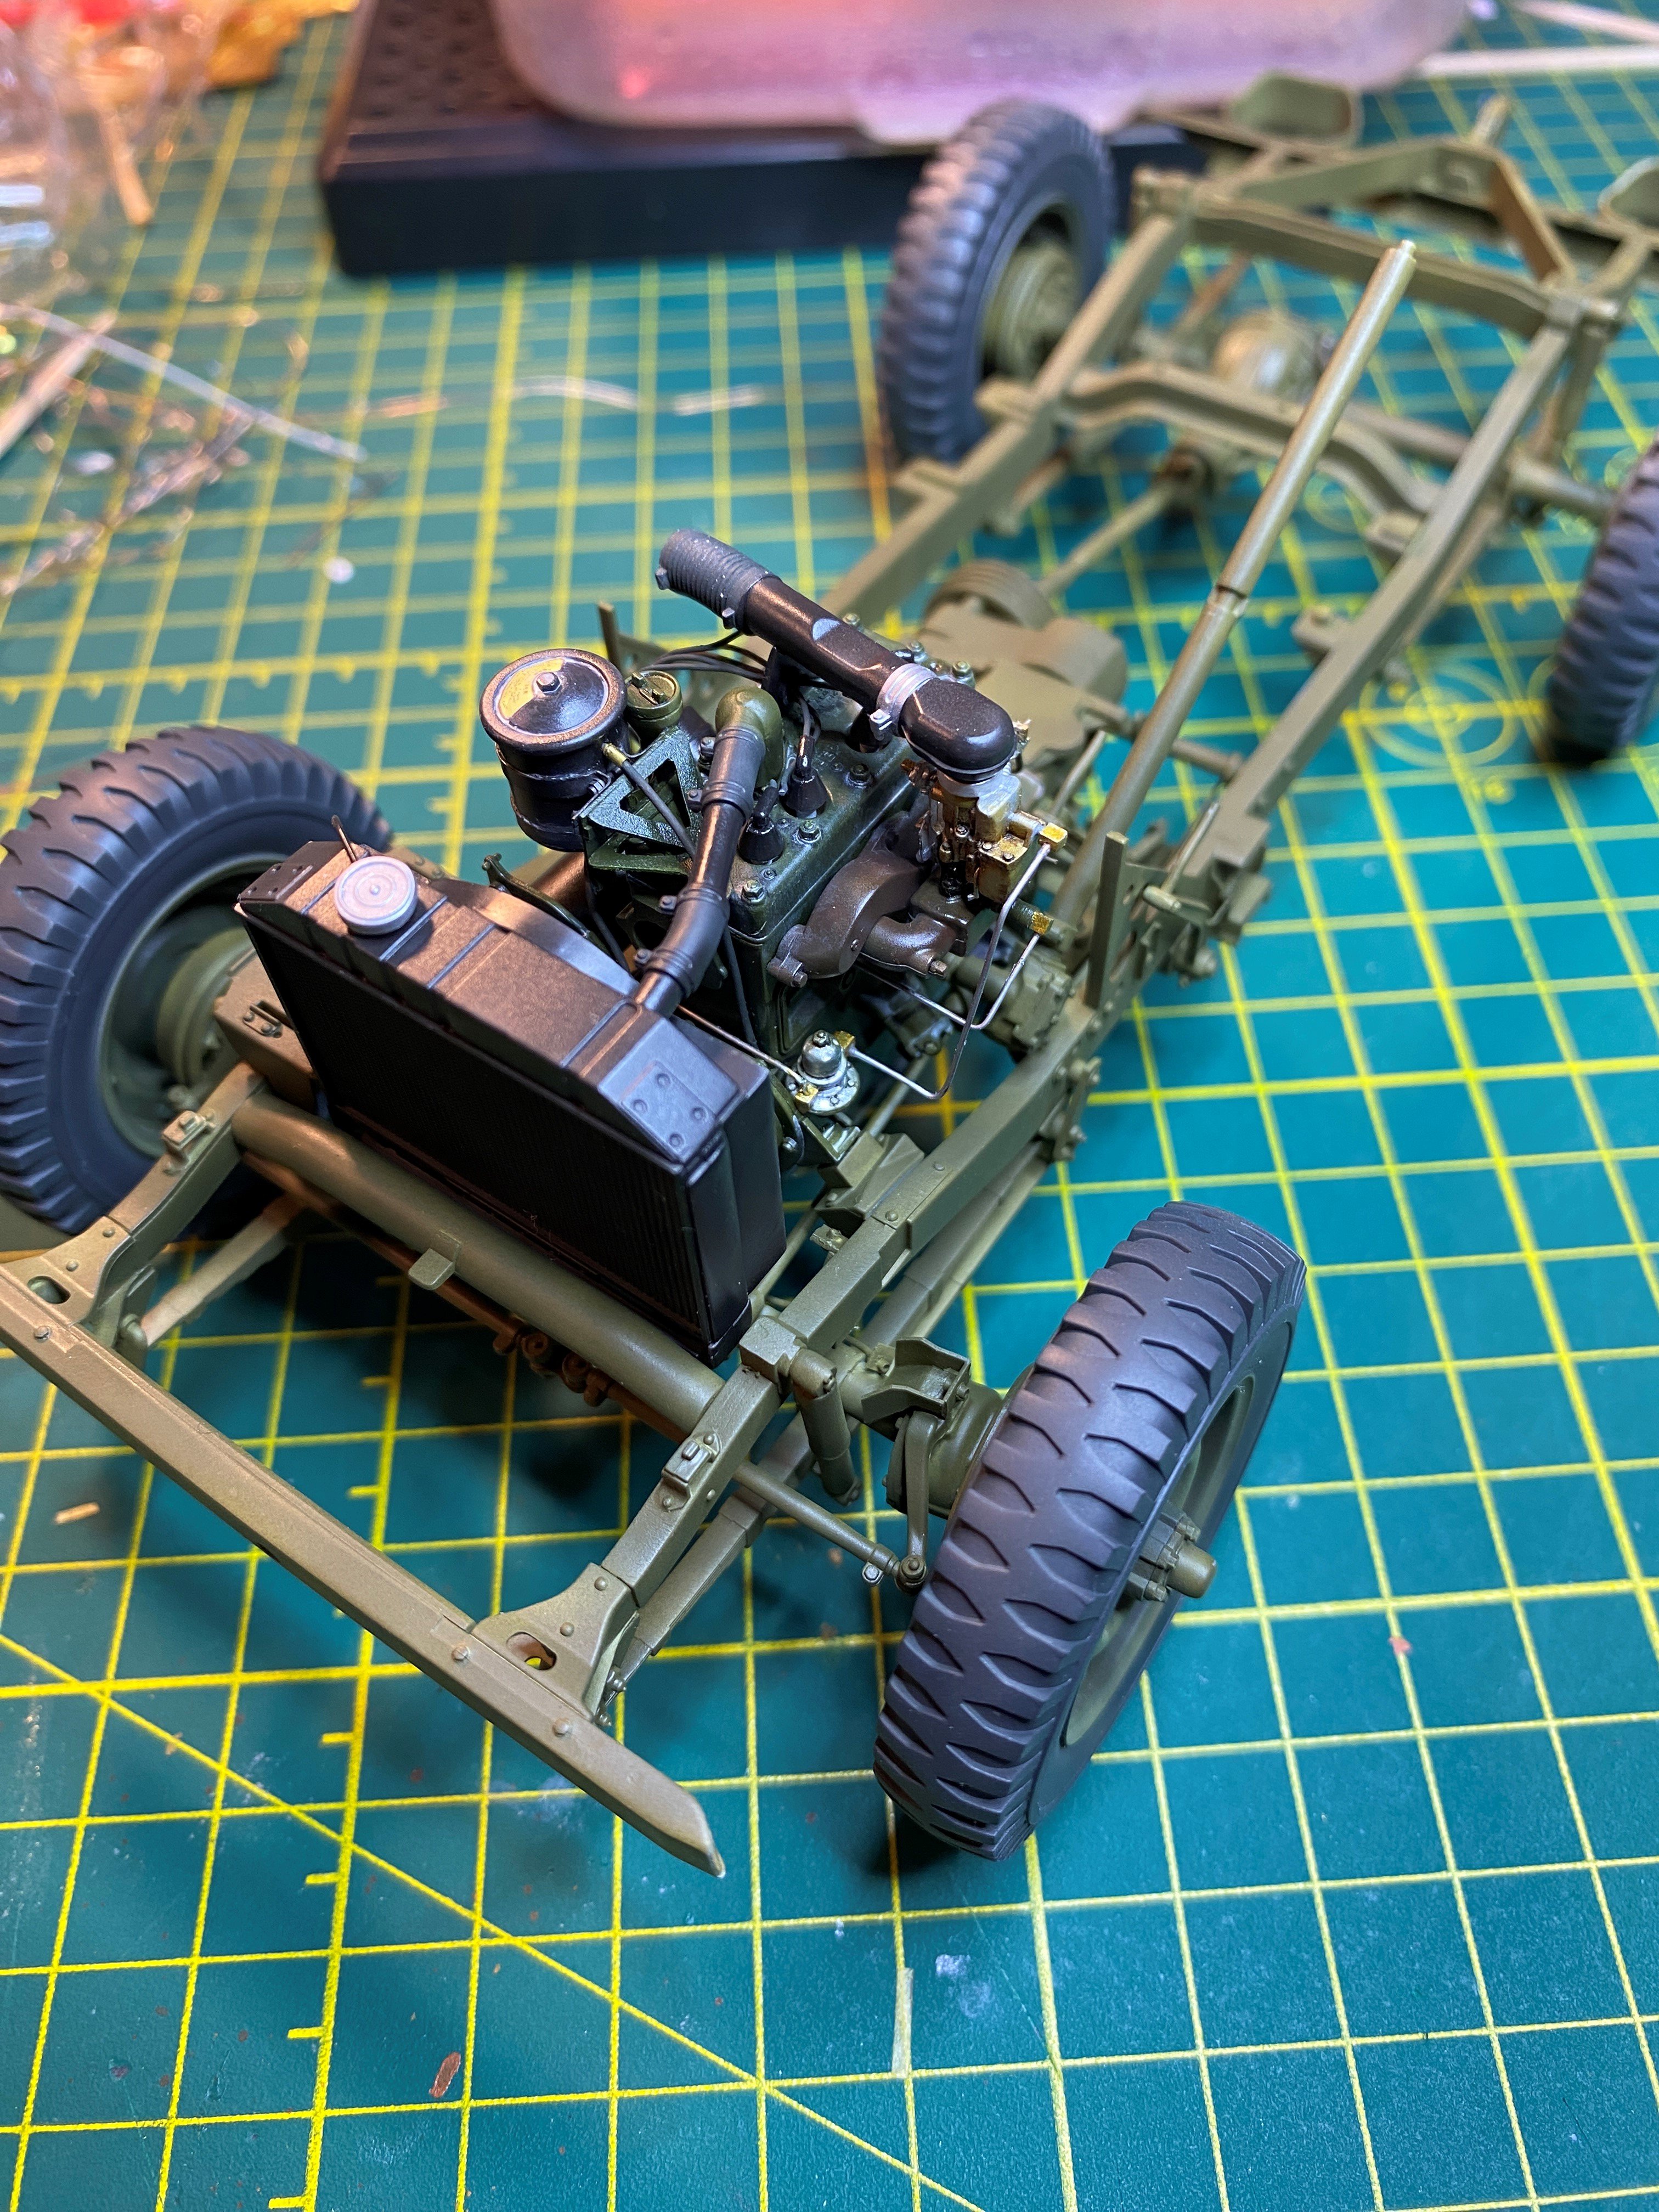
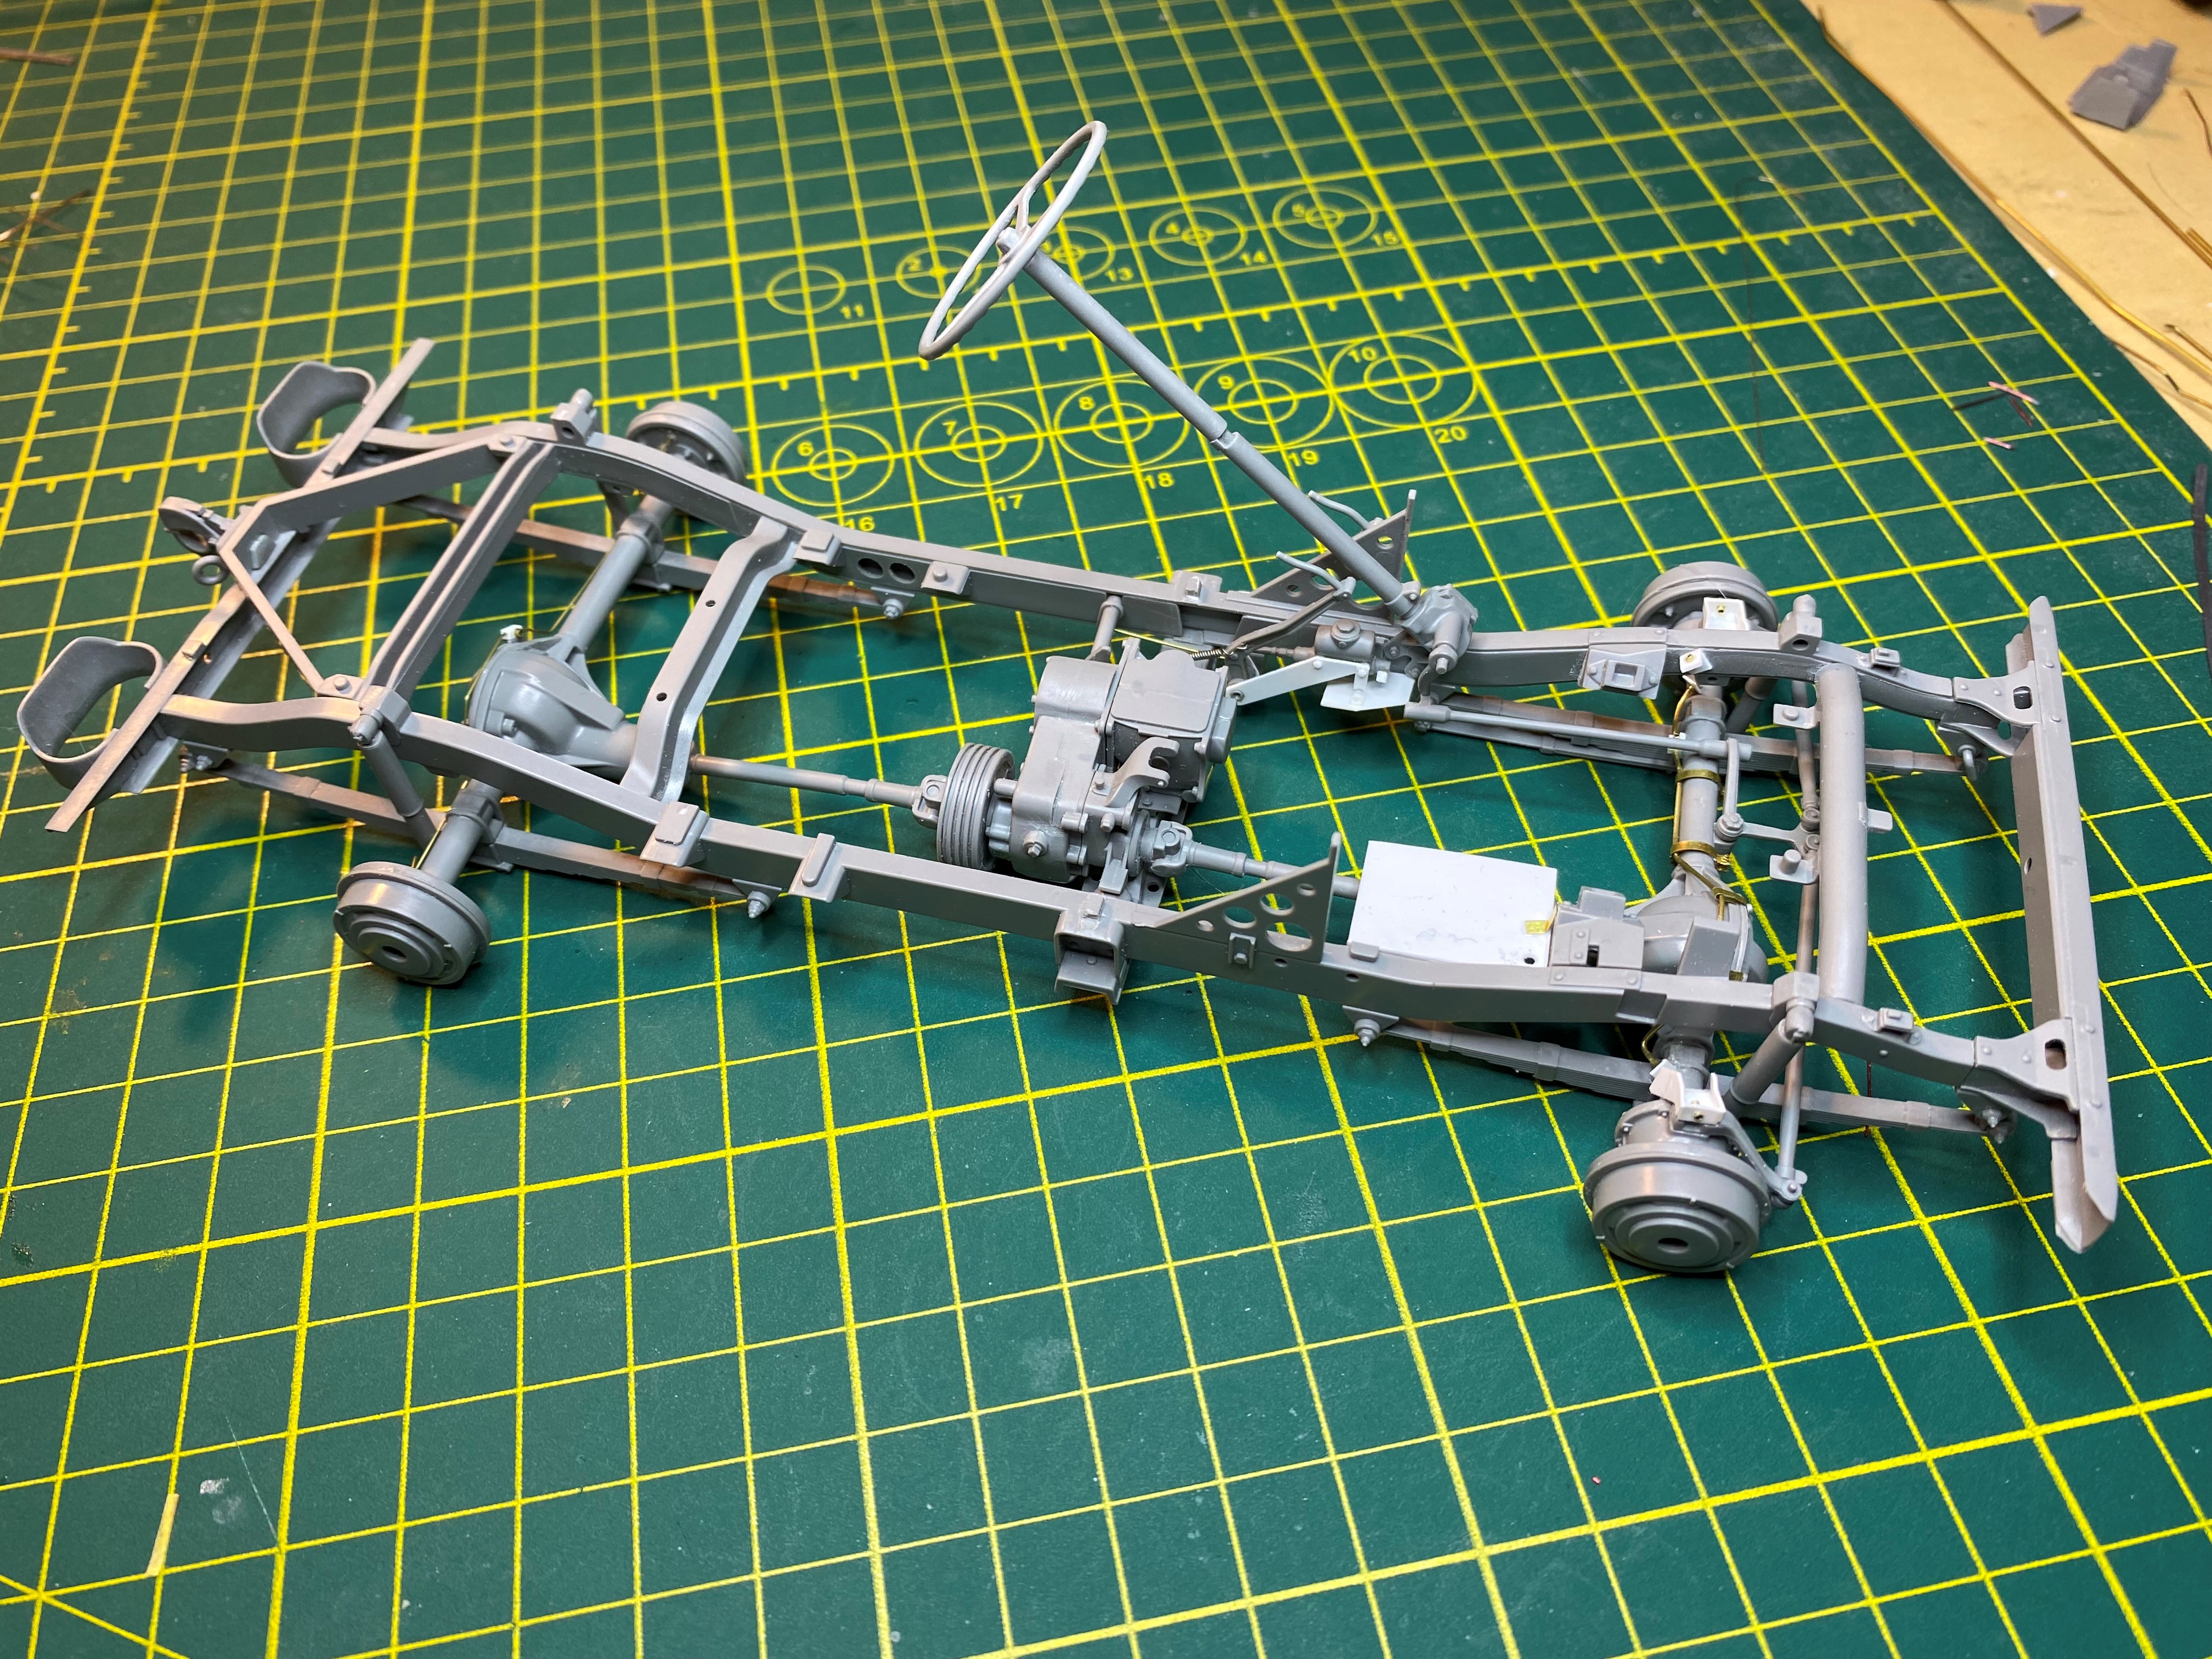
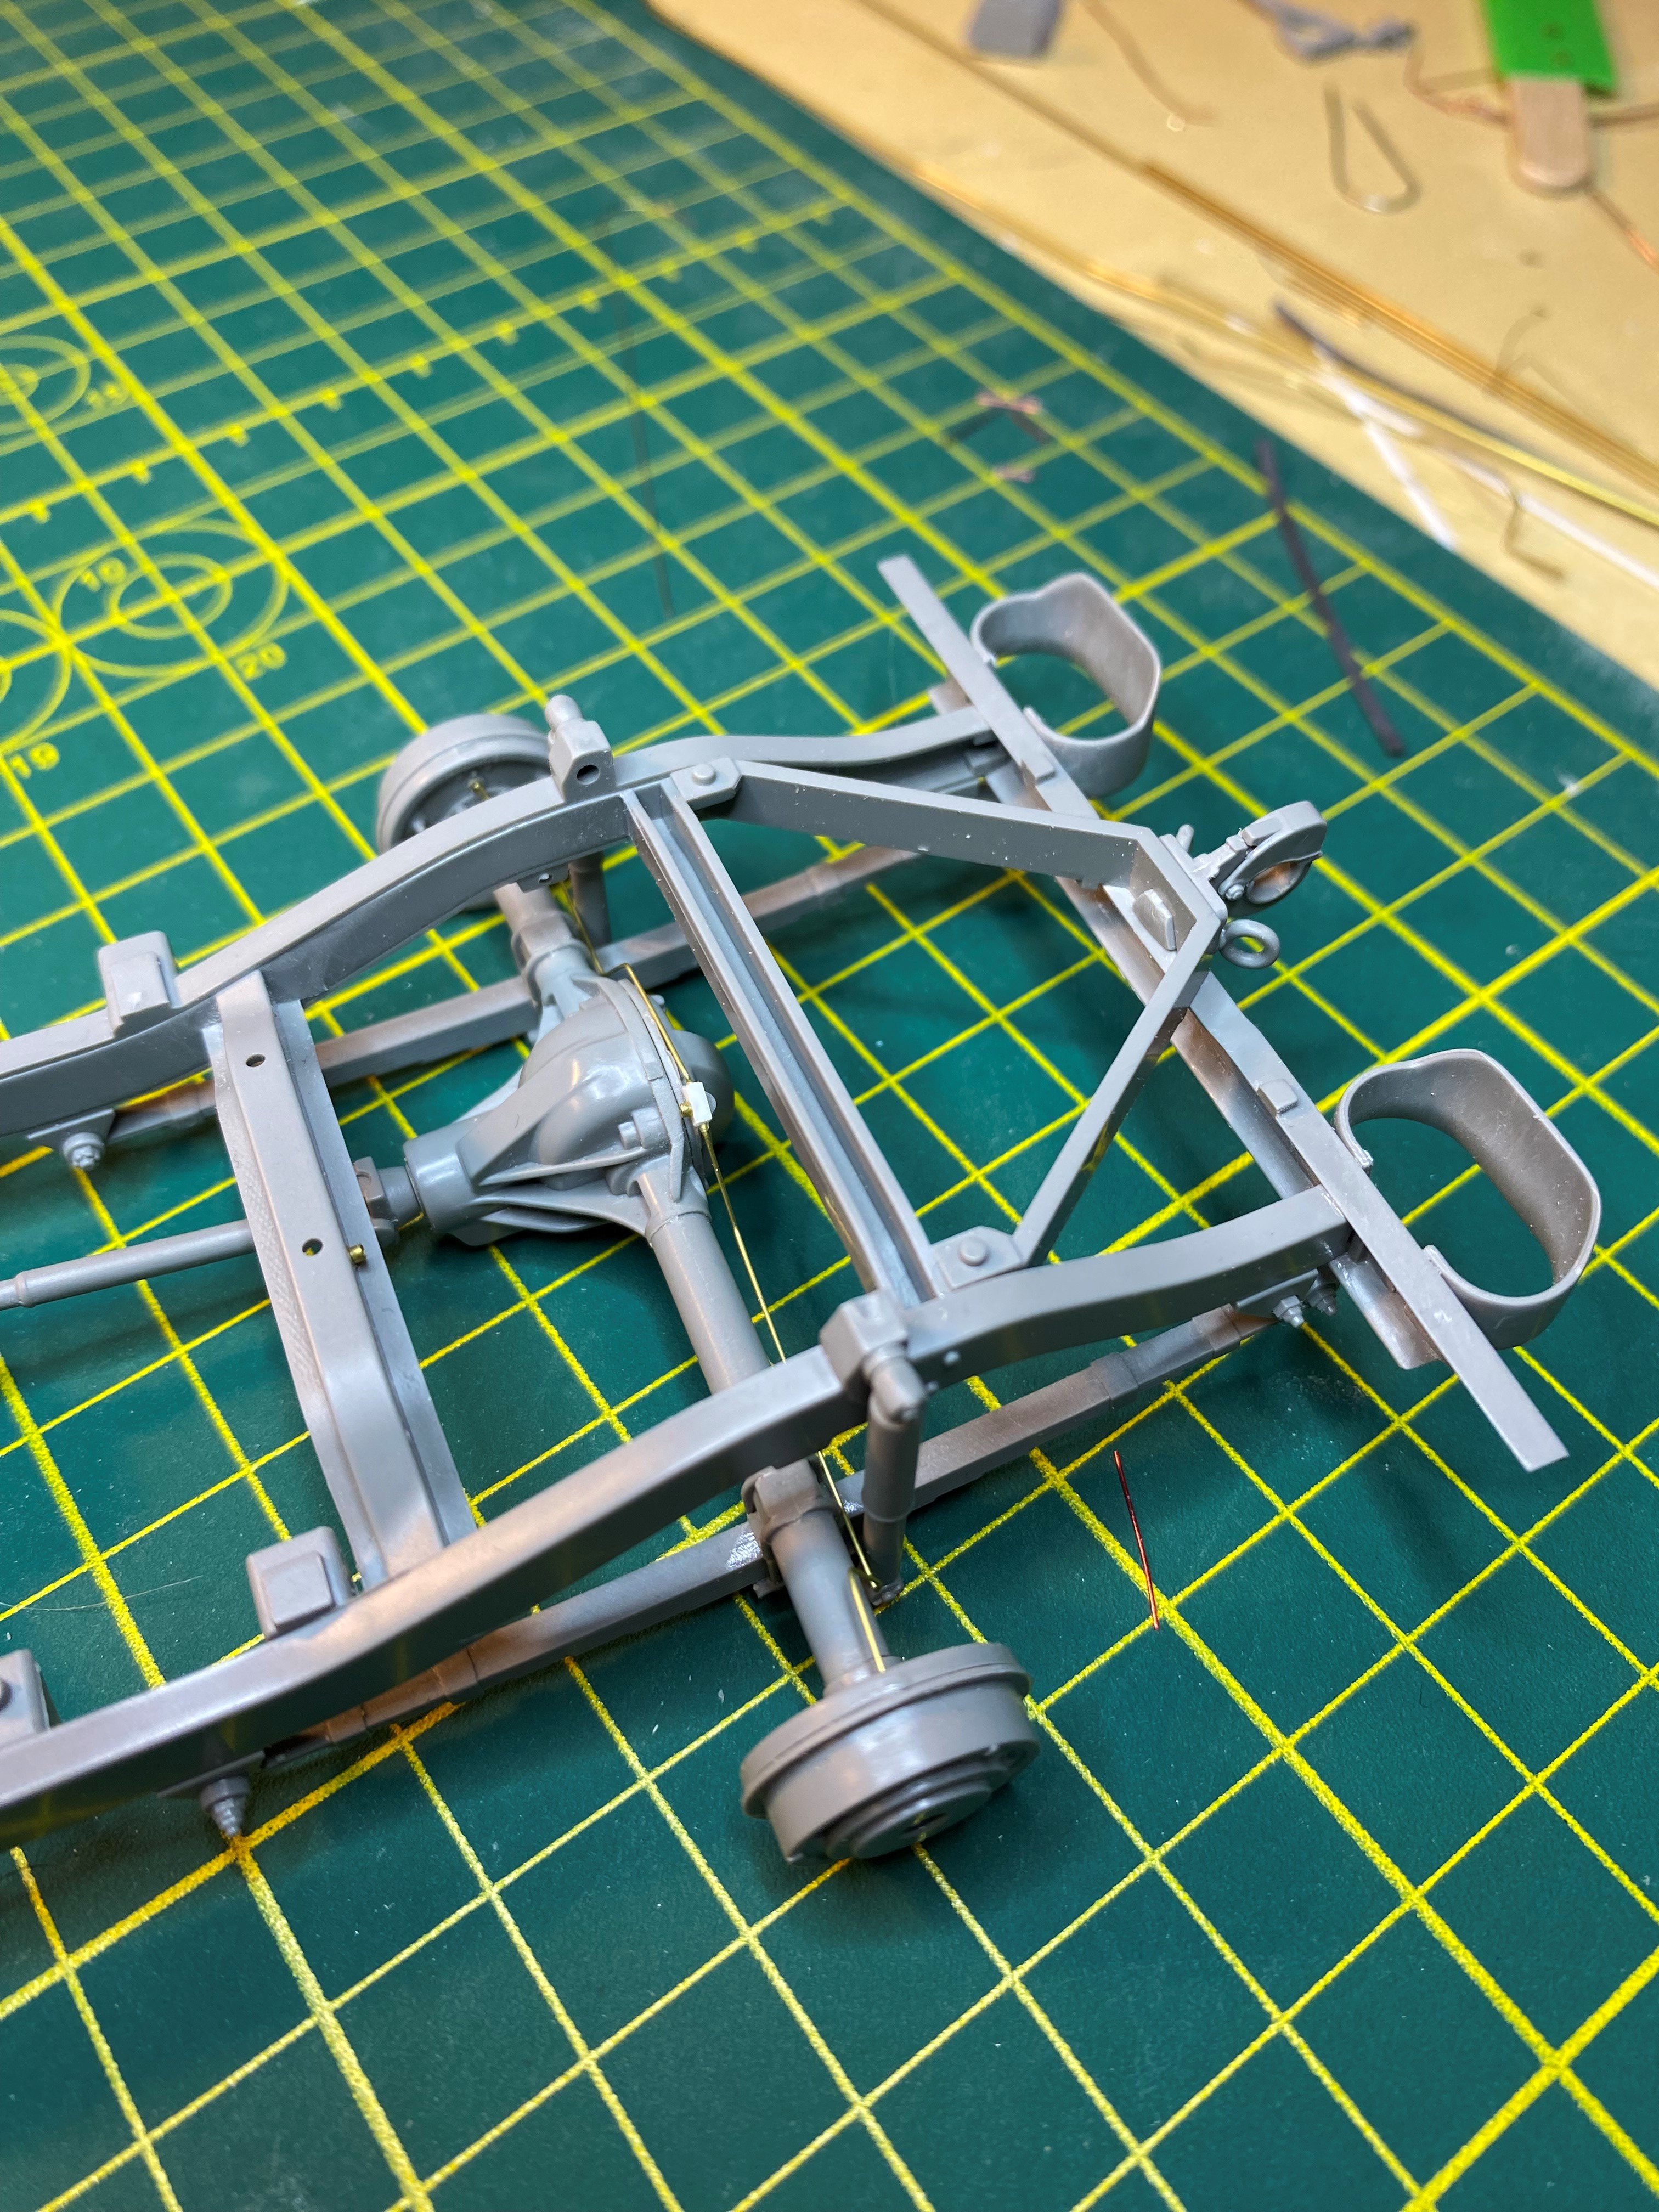
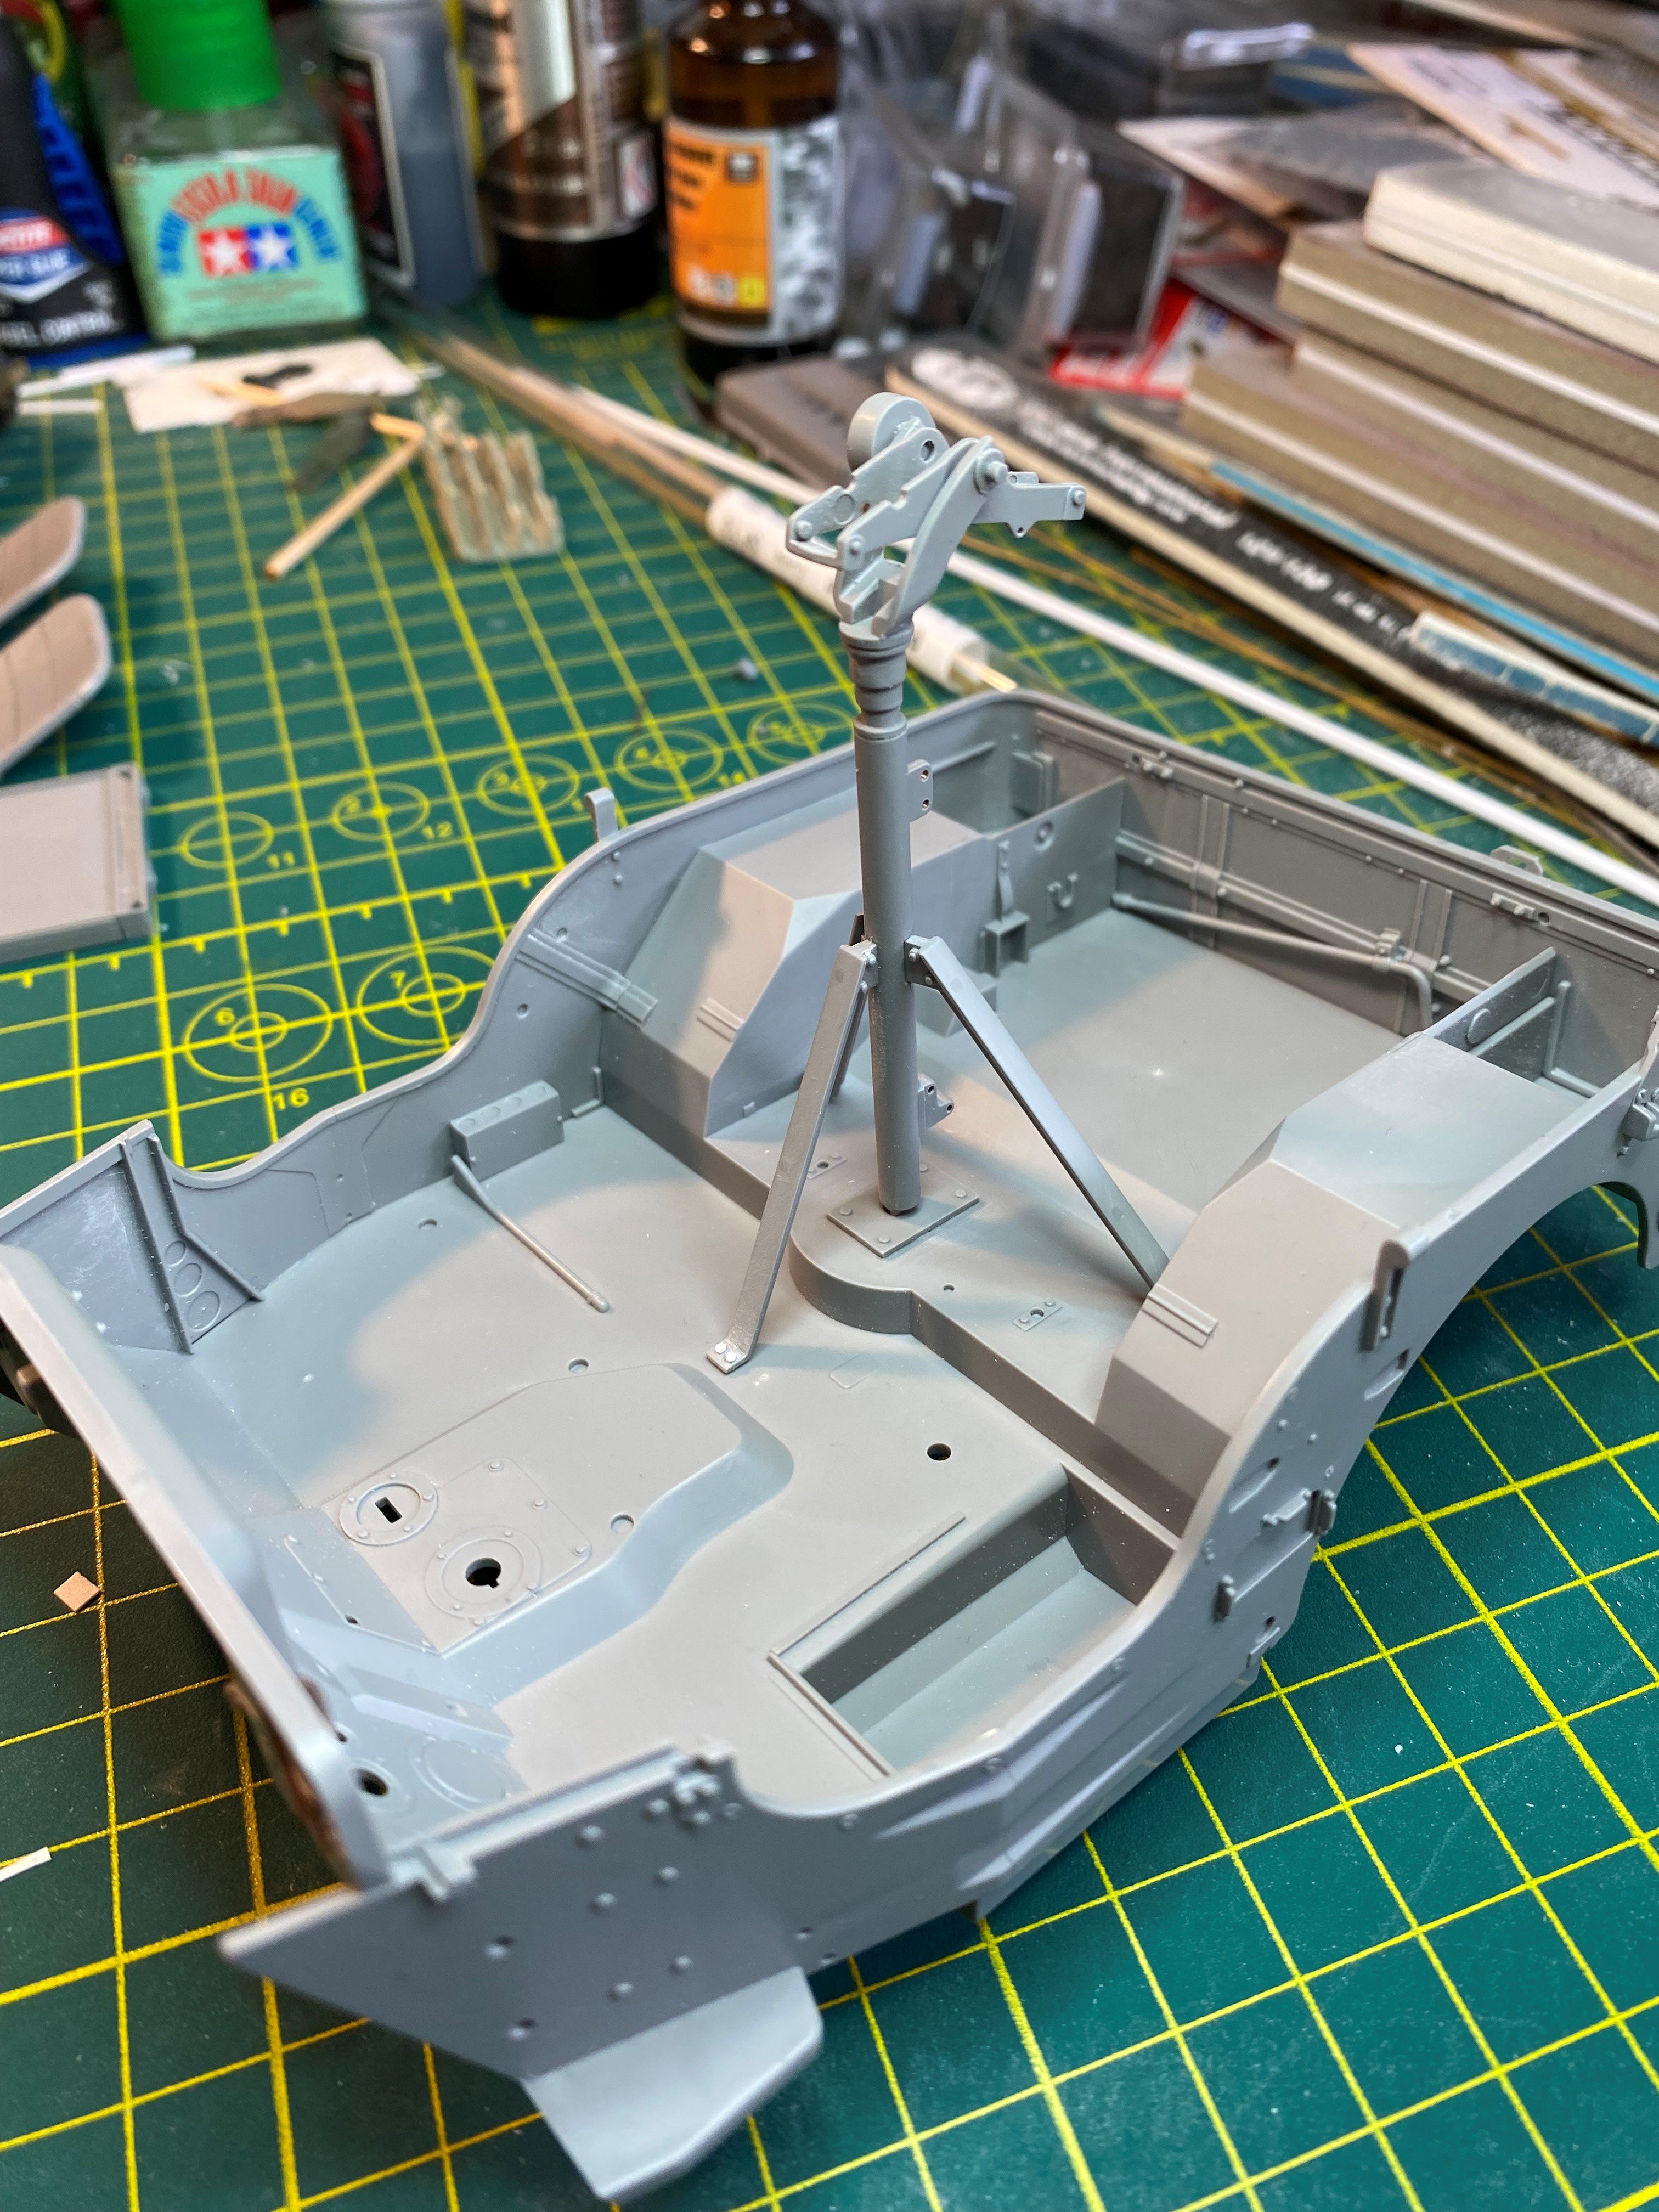
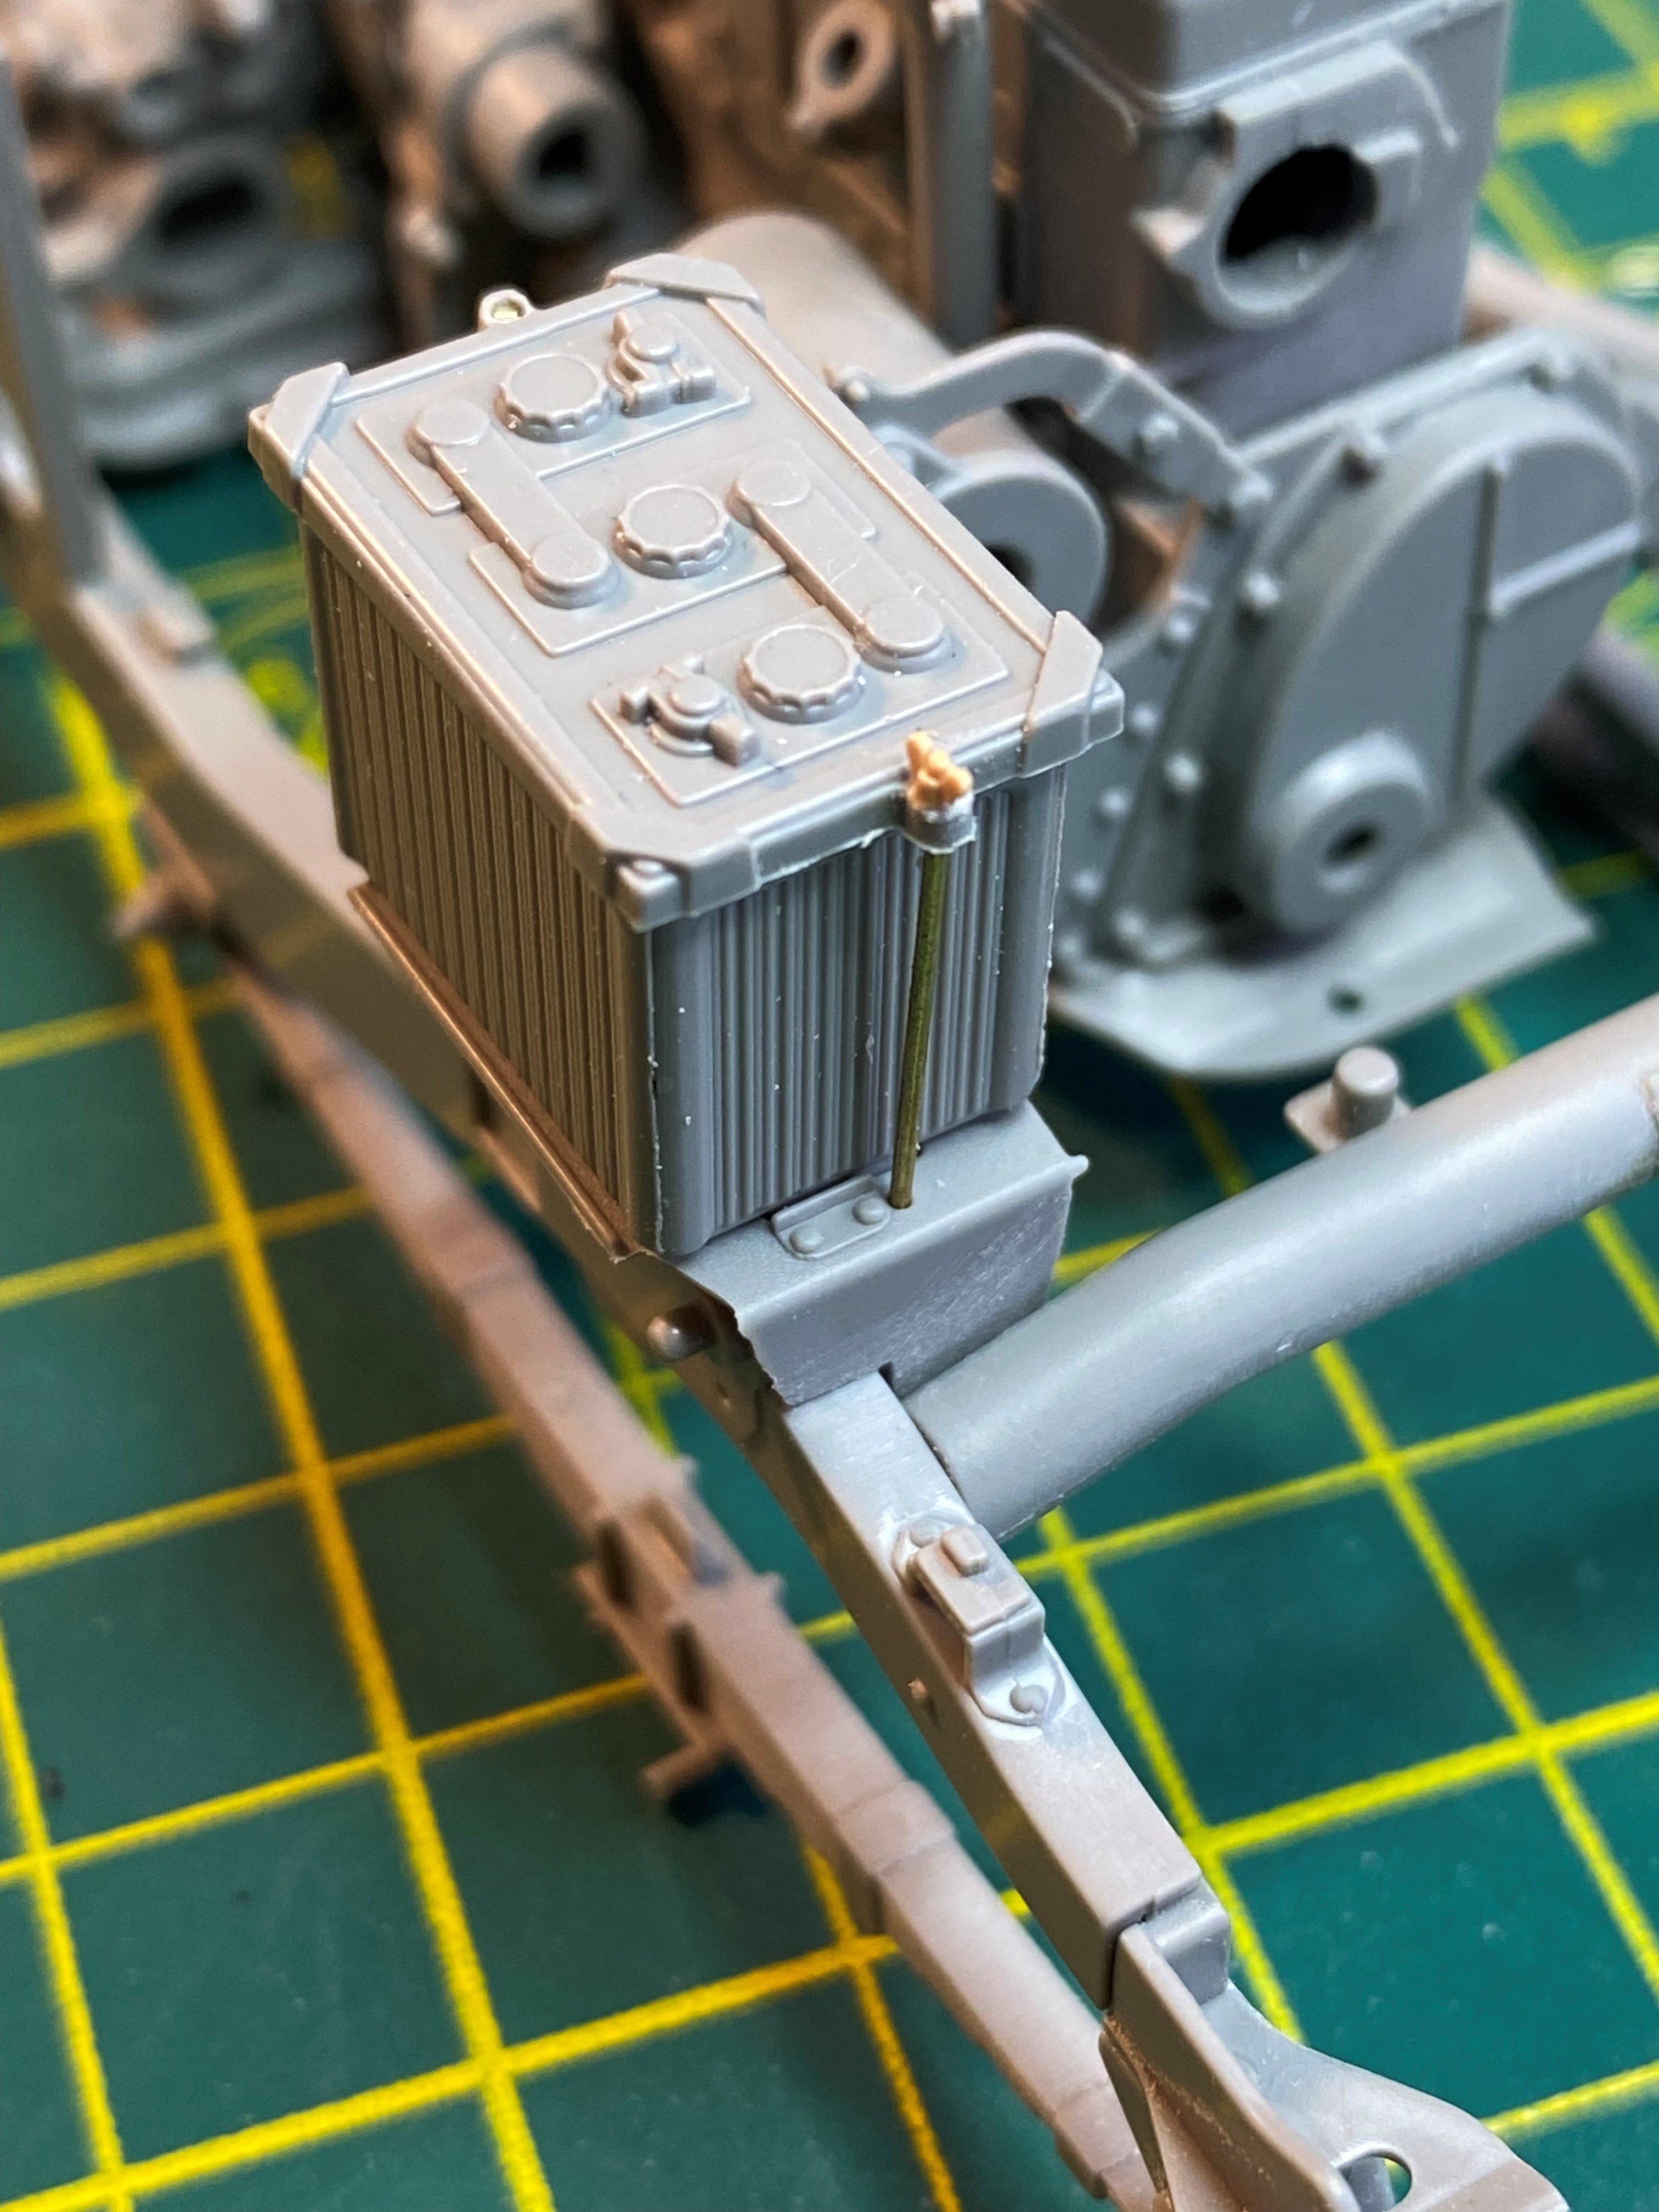
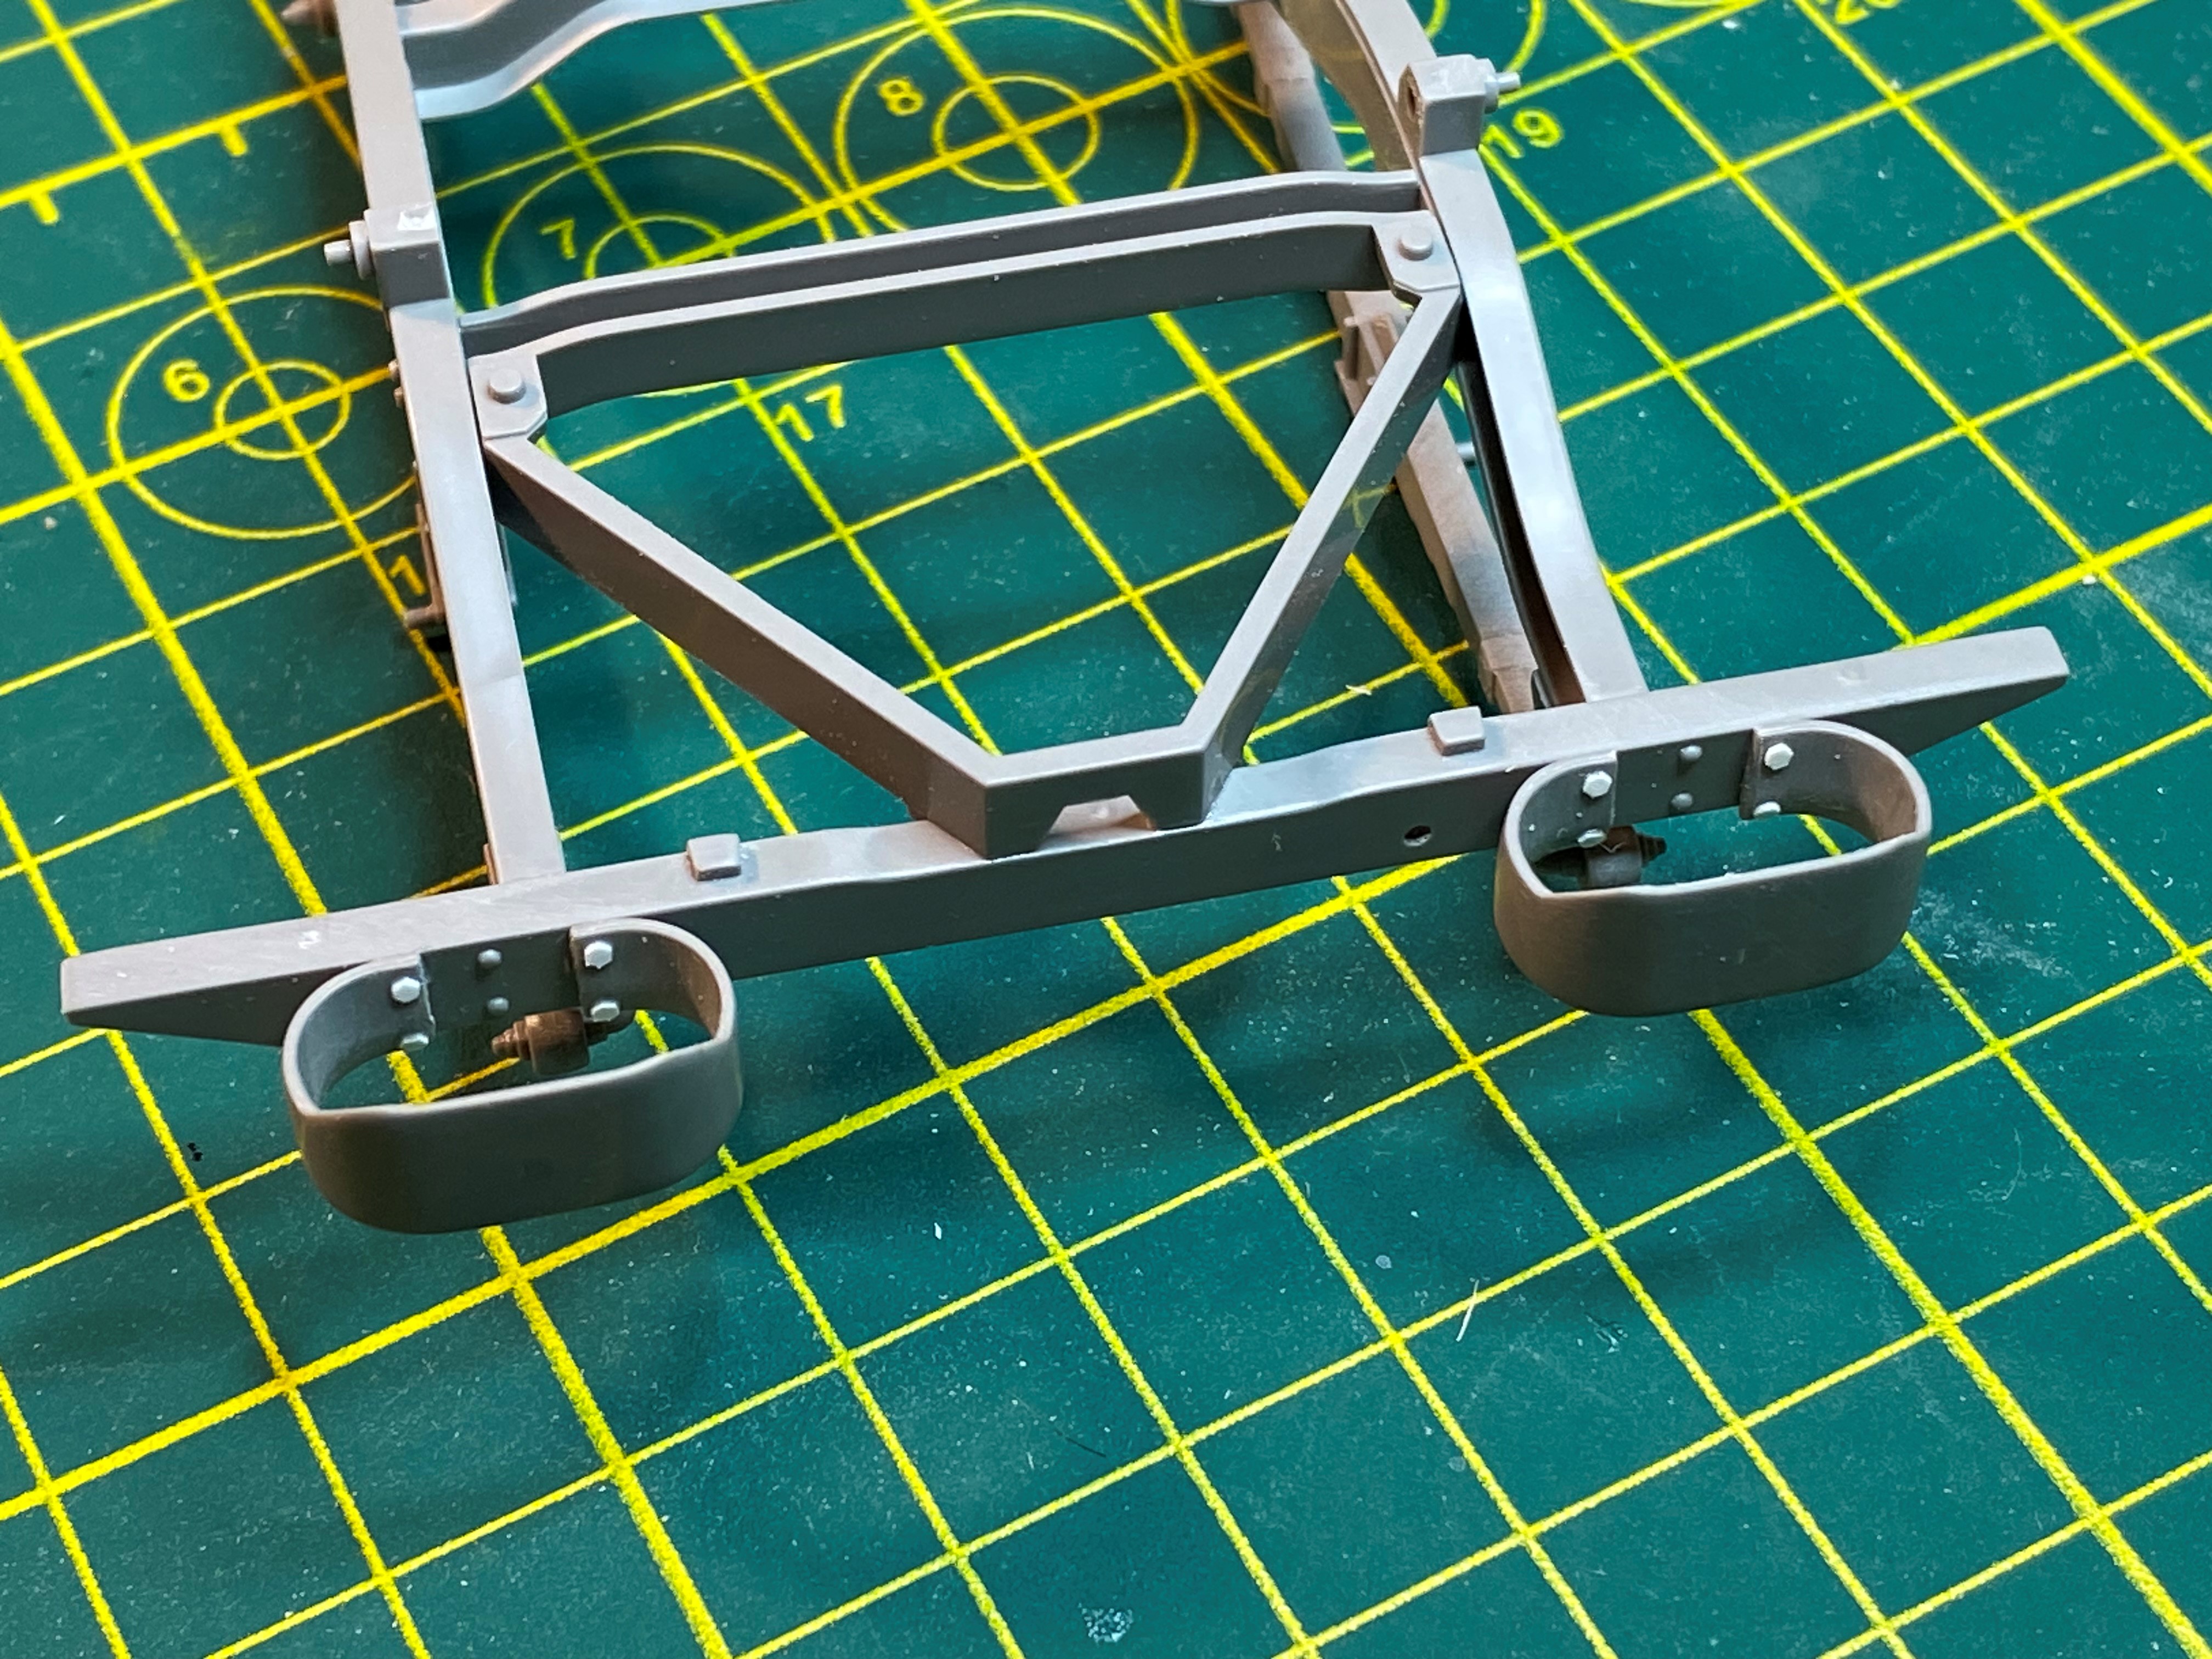
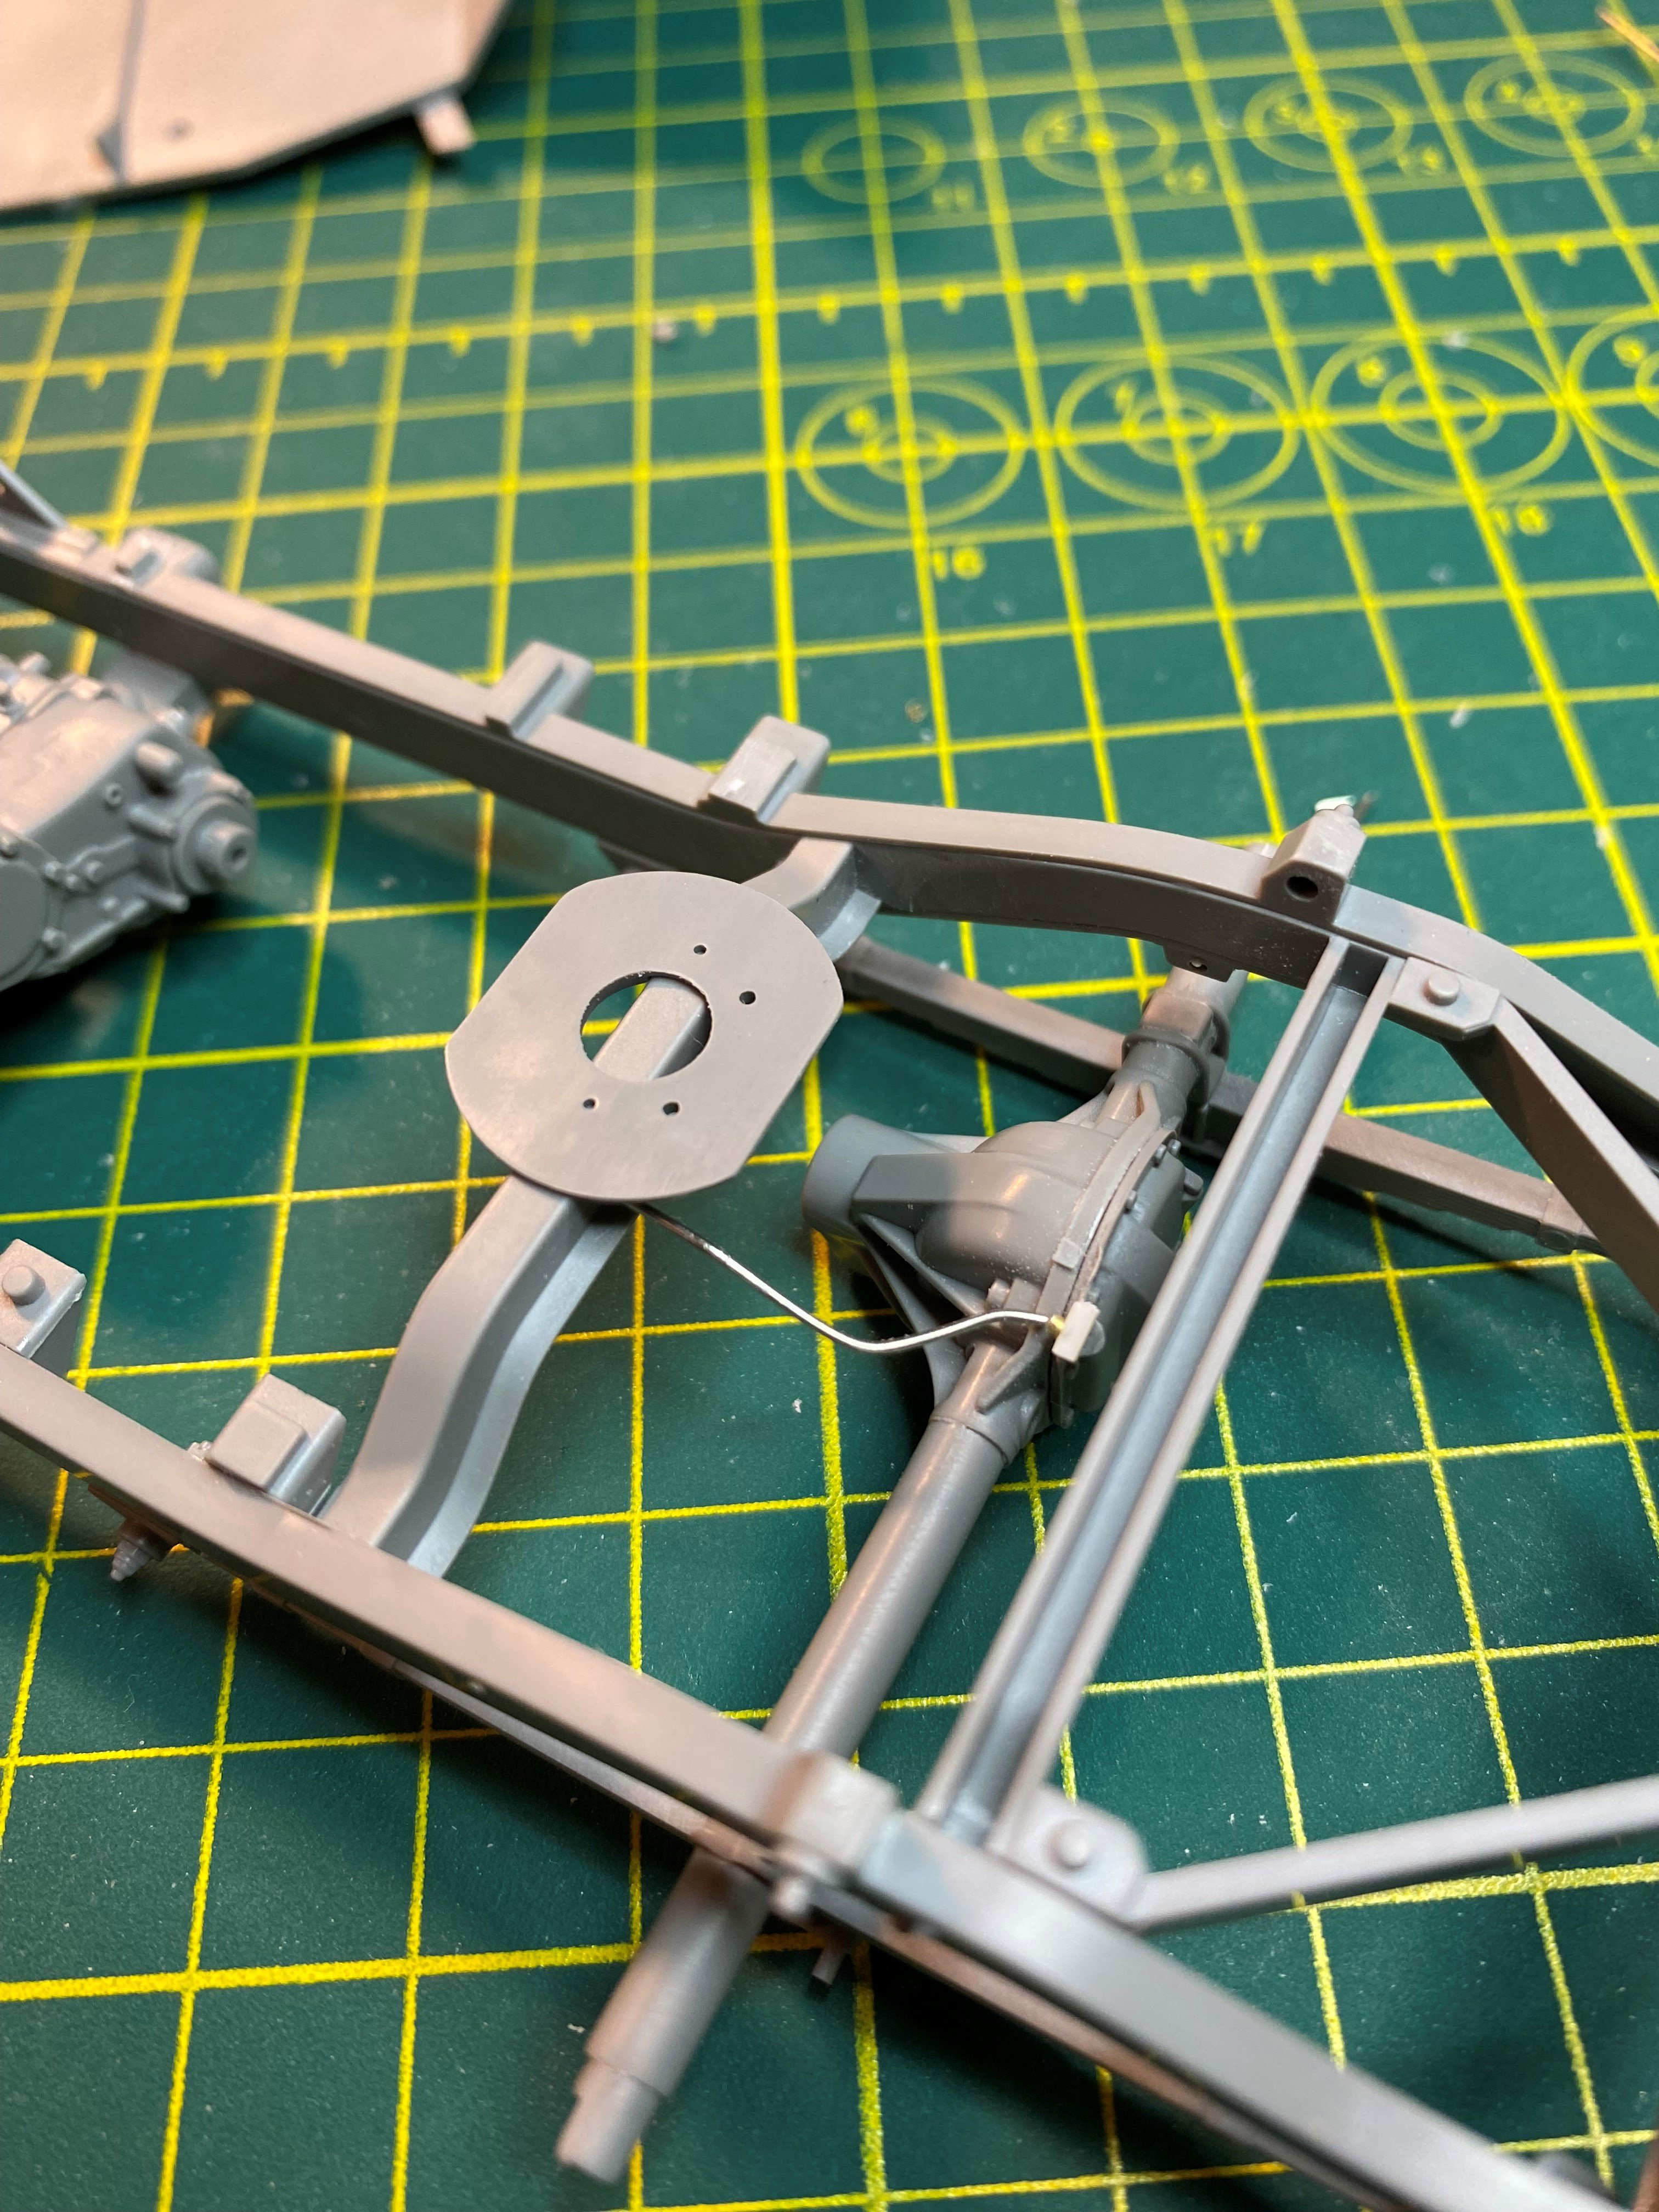
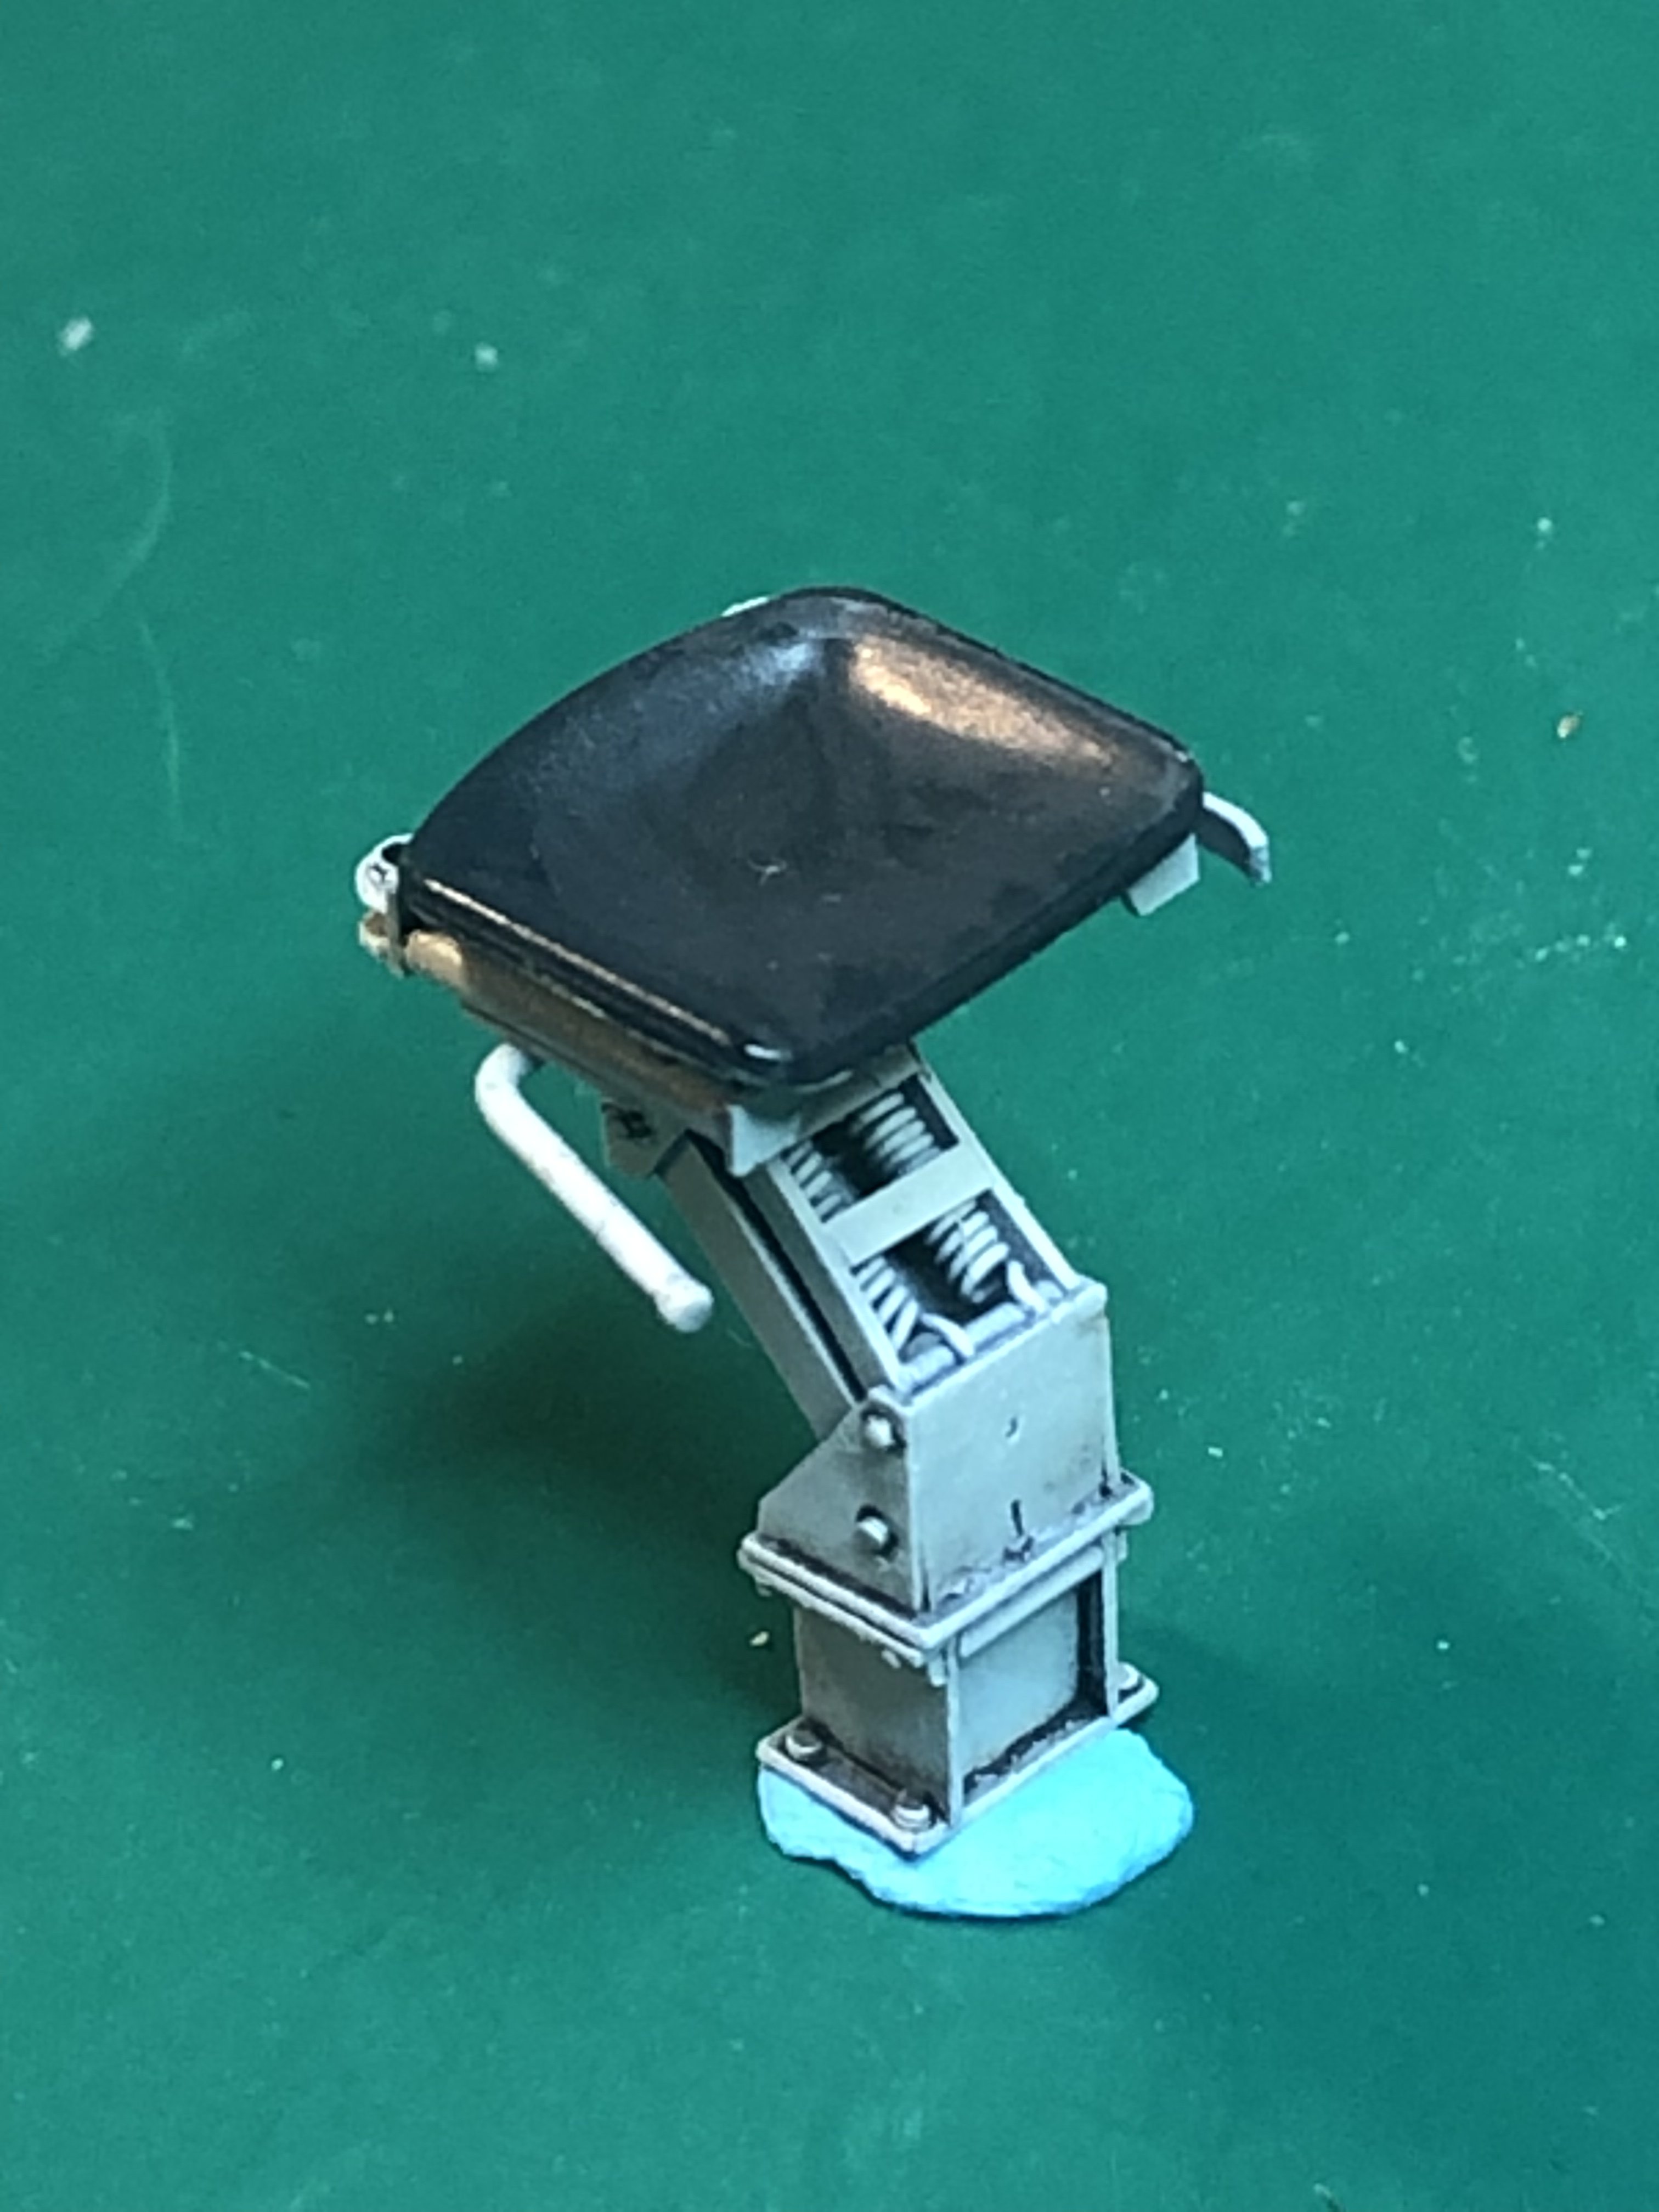
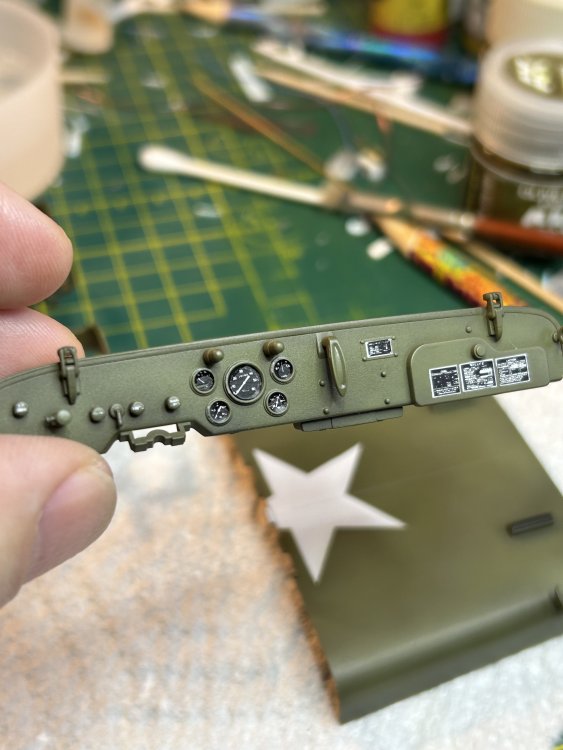
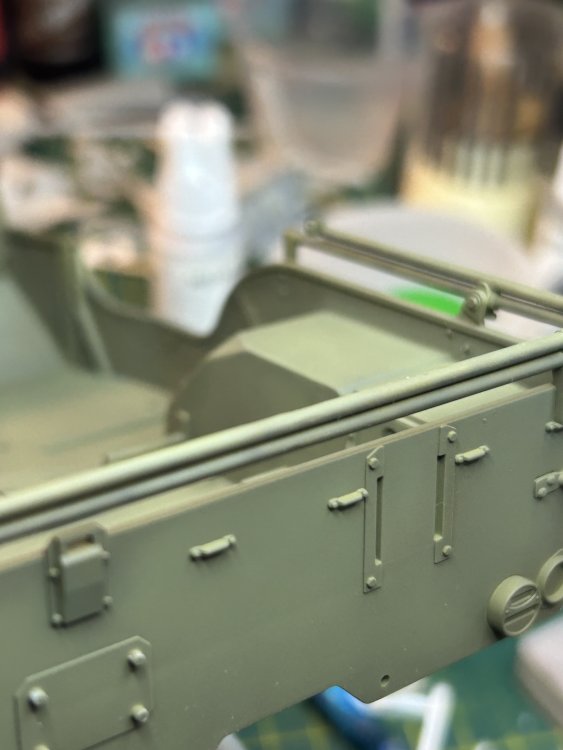
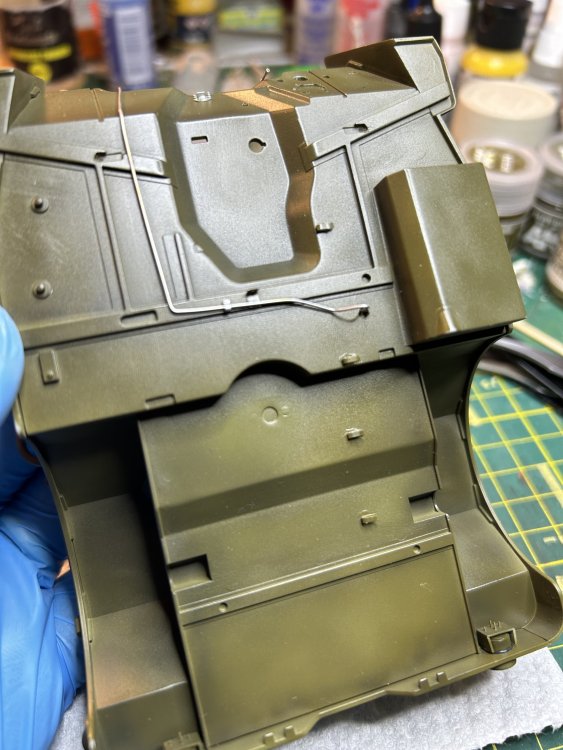
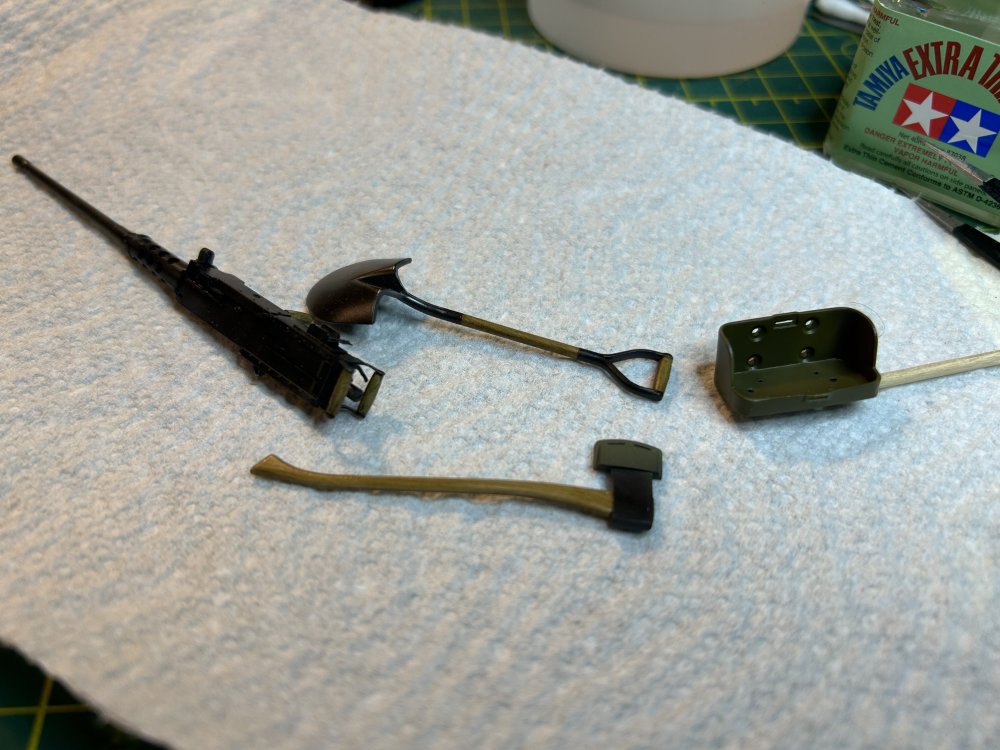
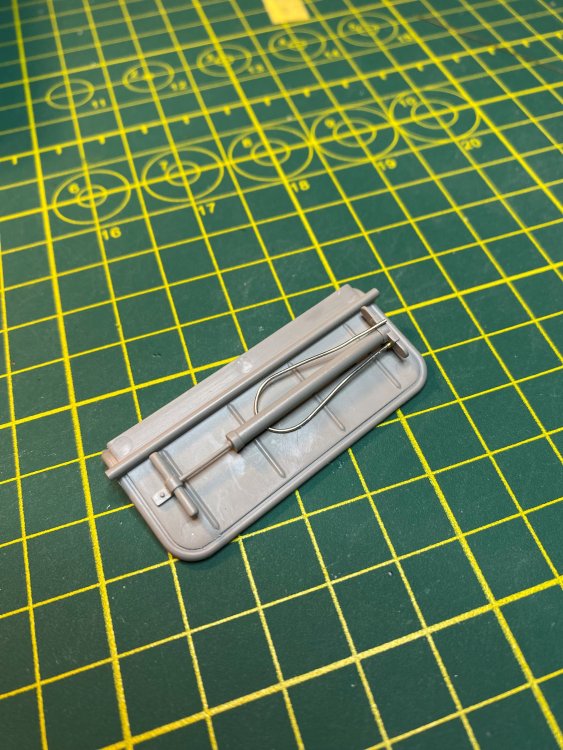
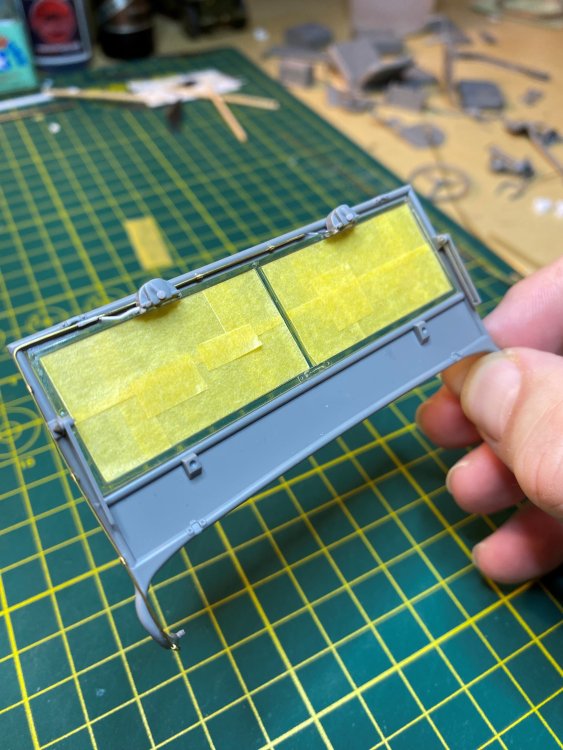
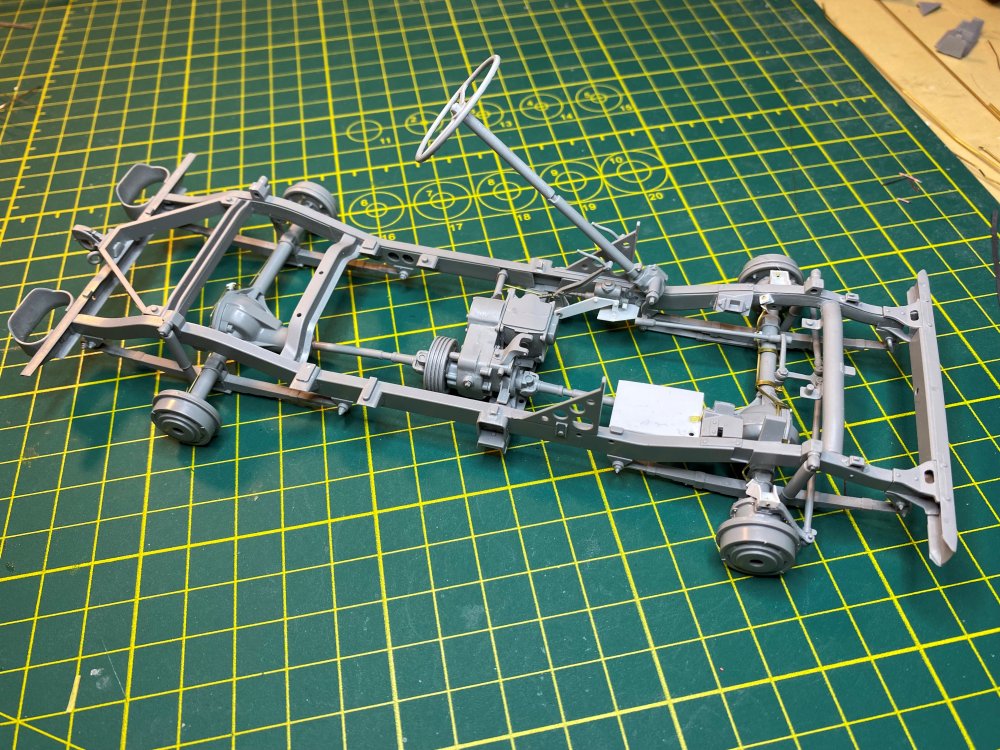
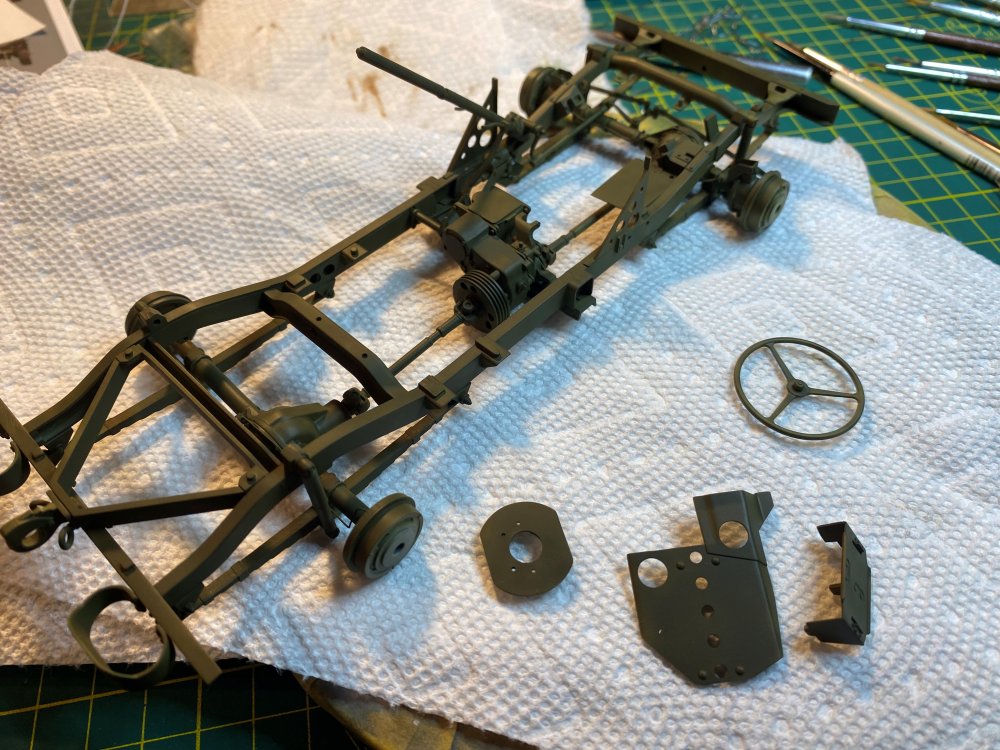
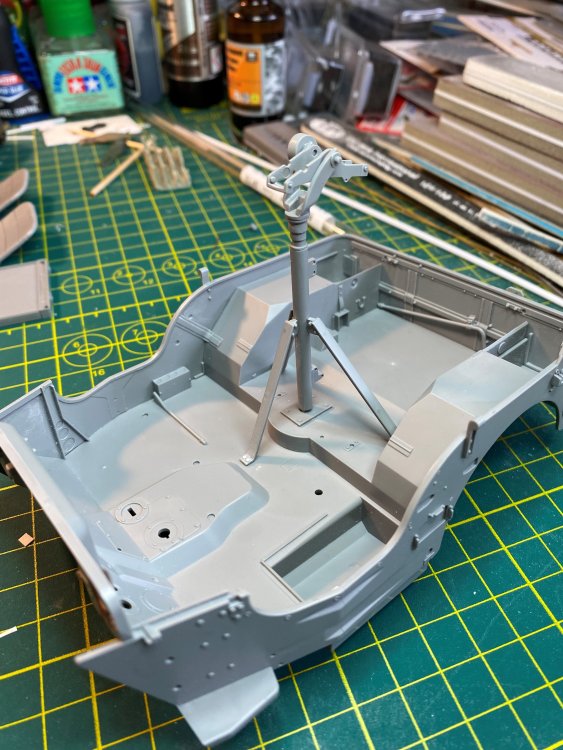
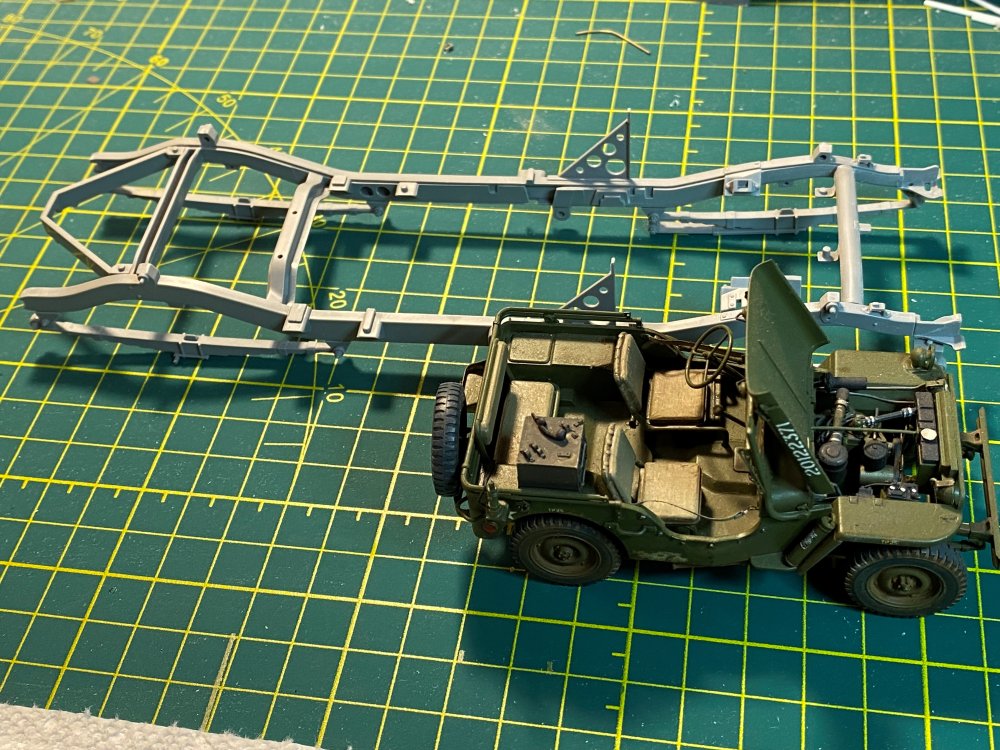
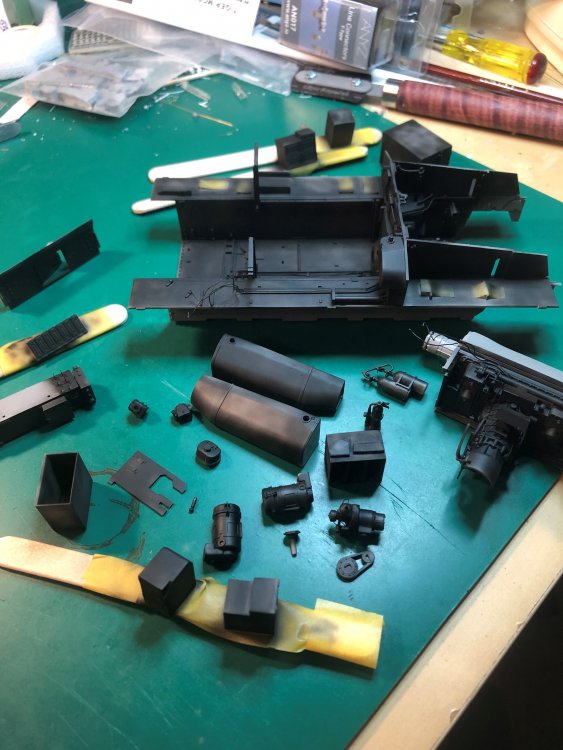
Started back on this project back in January. Here is an update on the progress. Goal is to get this project done by April 6 for the local IPMS contest. Here we go. Need to add some additional length at the front of the body of the jeep on both sides as there was too much of a gap. Sanded smooth and then cleaned main jeep tub, hood, gear shift, and other parts for priming and painting. Painting of the main parts done. Tub, hood and painted the star instead of the decal is it would be difficult to add as the hood will be displayed open Dashboard decals added. Will add the "glass" after weathering is done. Ordered additional details from Blast Models. The main item I was looking for was the jerry can holder as I want to display it without the jerry can and the straps hanging. Pictured with the pioneer tools. Included in the blast models set was footman loops. With this I decided to removed the kit loops which were molded into the kit. They were removed, plastic sanded smooth, added the footman loops, primed and repainted. Weathered the fuel tank and then filled and sanded smooth the seat bottoms for driver and passenger seats as the kit had grooves Added attachment points for the seat cushions. The bottom cushion I will only glue the back strip so it can be lifted and you can see the seat and fuel tank. While looking at transmission pictures, I realized there needs to be bolts underneath that would be used to attach the main tub to the frame. Weathered transmission for oil stains using oil paint and sides of frame. Painted the pioneer tools and the wood on the M2 browning. Also included in the Jerry can holder. Attached the engine to the frame. Added the engine stay cable and clutch cable. gloss coated the bottom of the main jeep tub before attaching it to the frame. Notice the attachment clamps for electrical cables still to be attached. Attached the tub to the frame. That is were I am at for now. Getting closer to the end.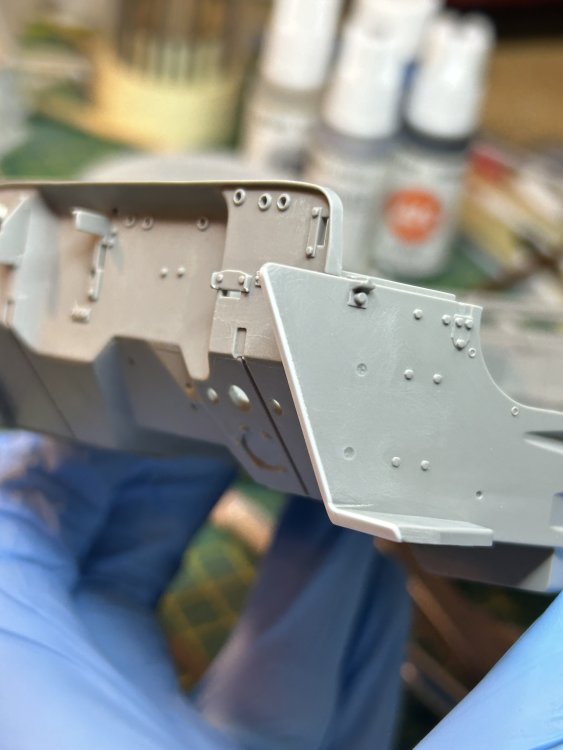


-
1/16 scale Tiger VI Ausf E early build
Axeman replied to CrankyCrafstman's topic in LSM 1/35 and Larger Work In Progress
Love the scratch building. Great job! The radios look amazing! -
Amazing detail as always.
-
1/16 Takom Willys 1/4 Ton 4x4 G503 MB Jeep
Axeman replied to Axeman's topic in LSM 1/35 and Larger Work In Progress
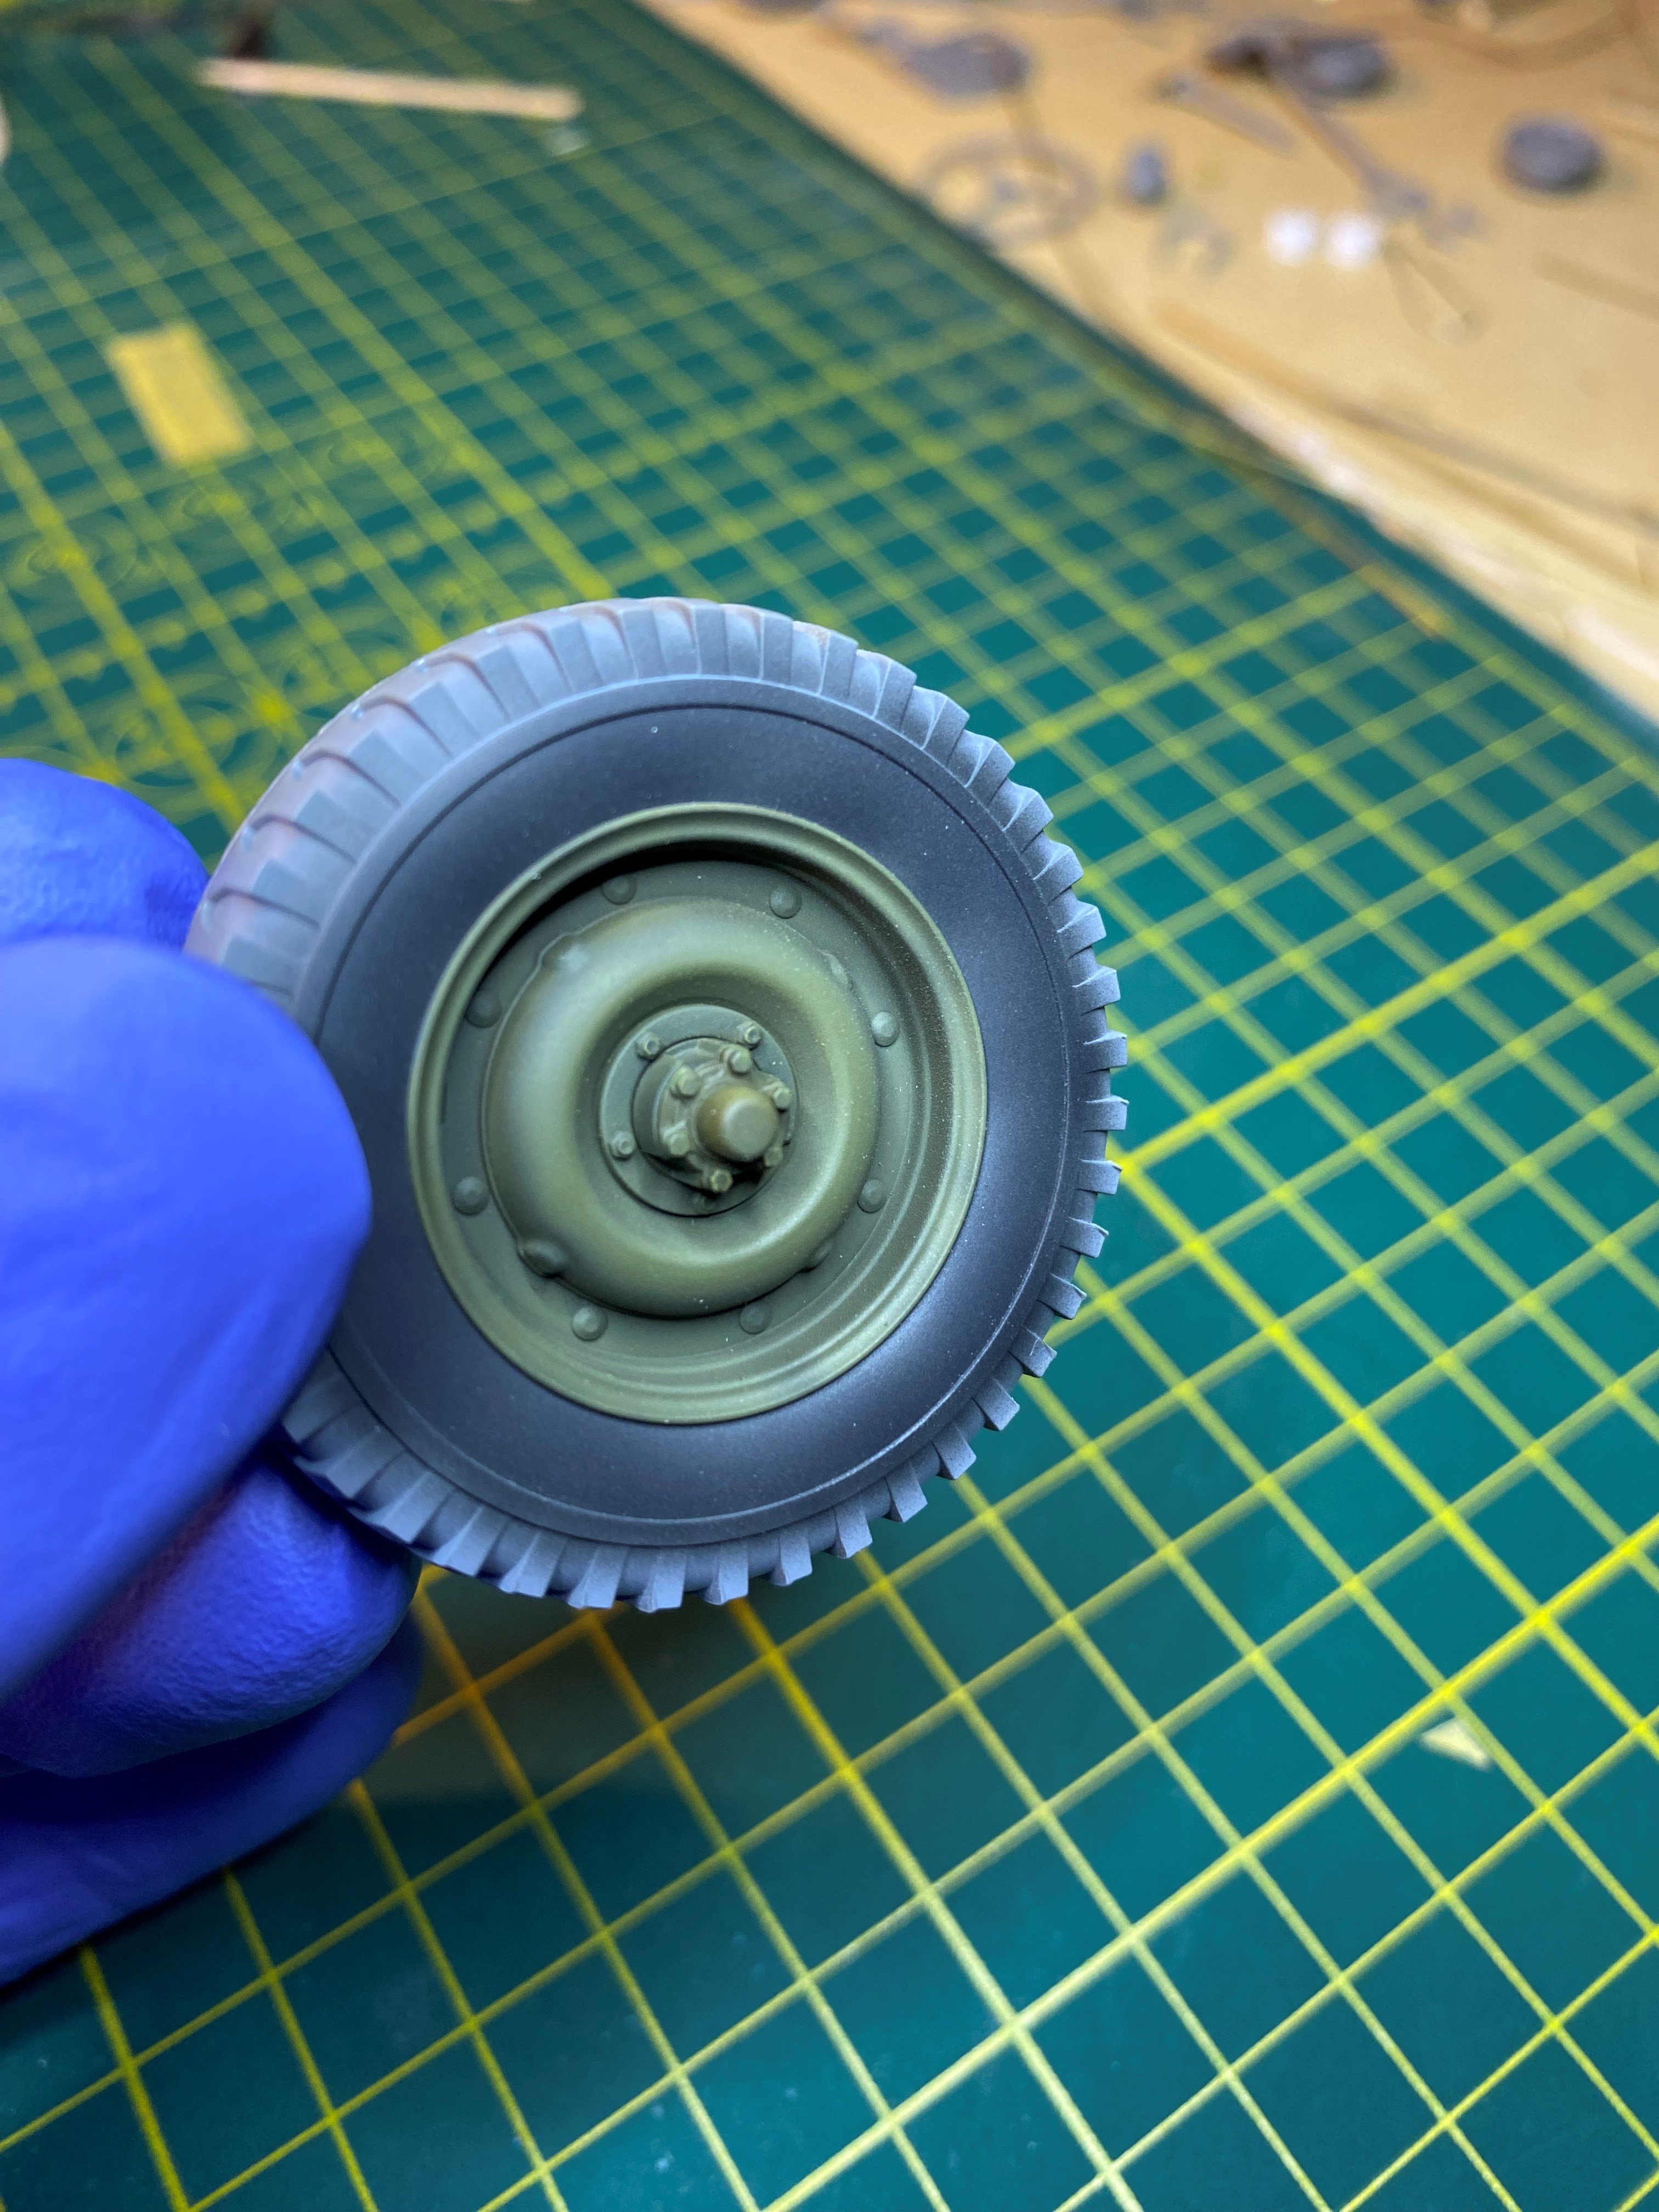
Test fitting the wheels. They are not fully pushed in but it sits level for now.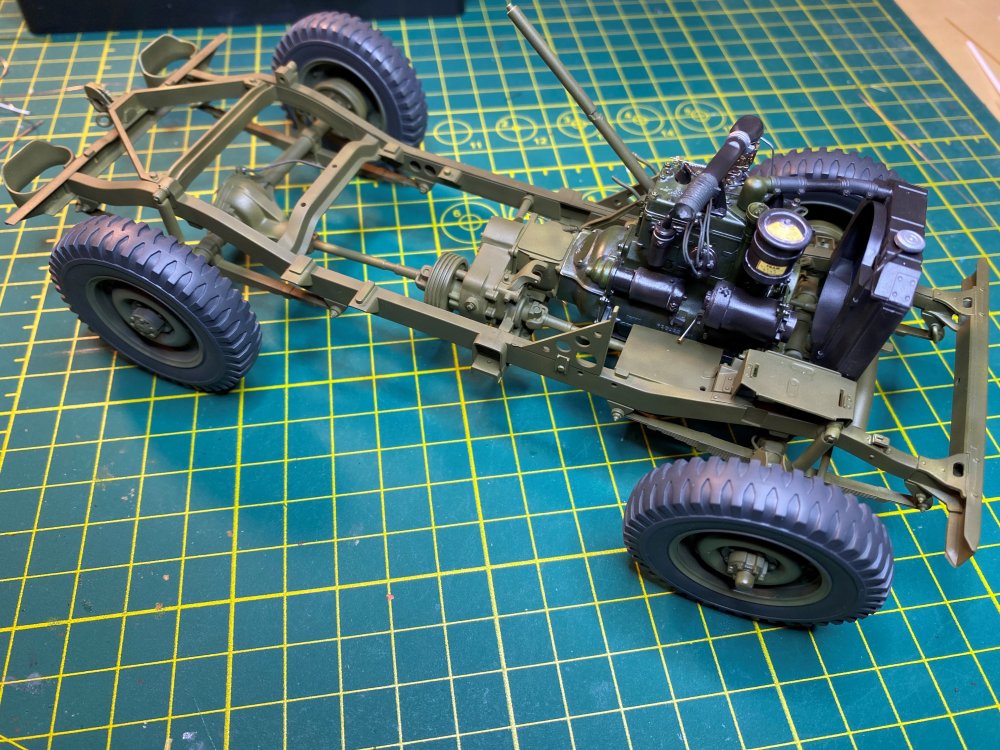


-
1/16 Takom Willys 1/4 Ton 4x4 G503 MB Jeep
Axeman replied to Axeman's topic in LSM 1/35 and Larger Work In Progress
Thank you. Need to apply some rust to the high heat areas. any suggestions on how to paint the .50 cal? What colors? Not sure due to the larger size if it would work the same as 35th scale. -
1/16 Takom Willys 1/4 Ton 4x4 G503 MB Jeep
Axeman replied to Axeman's topic in LSM 1/35 and Larger Work In Progress
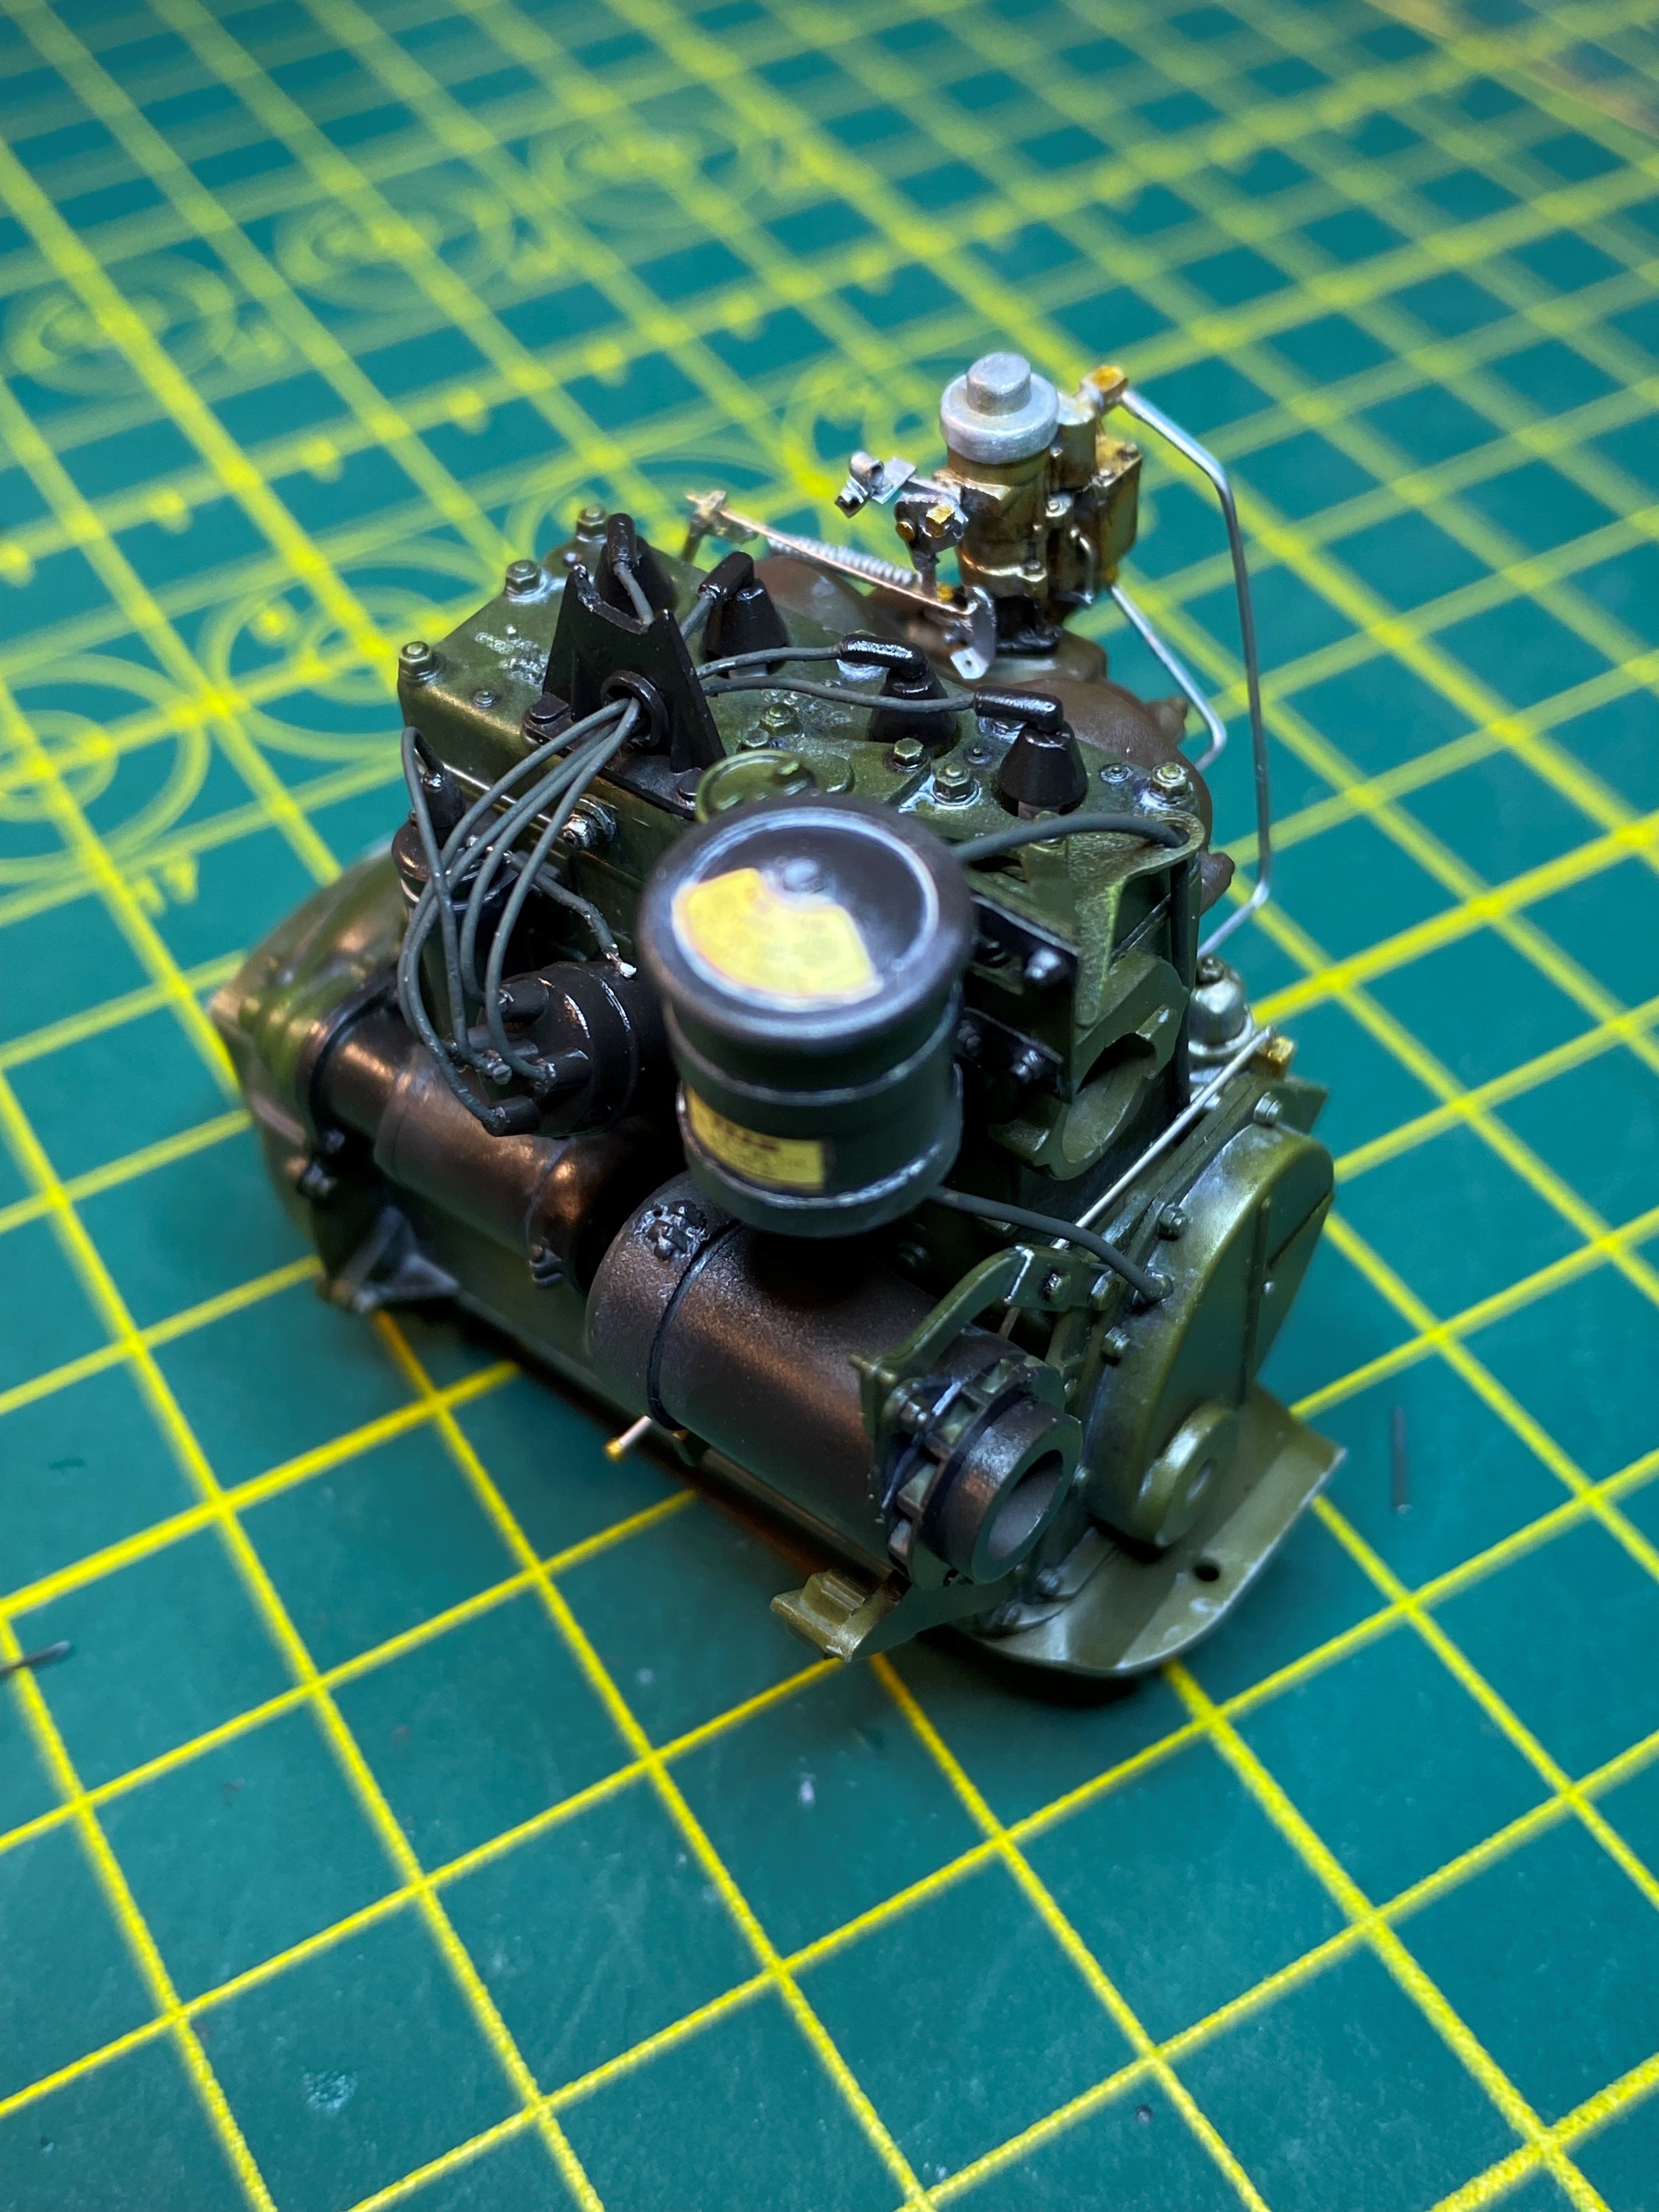
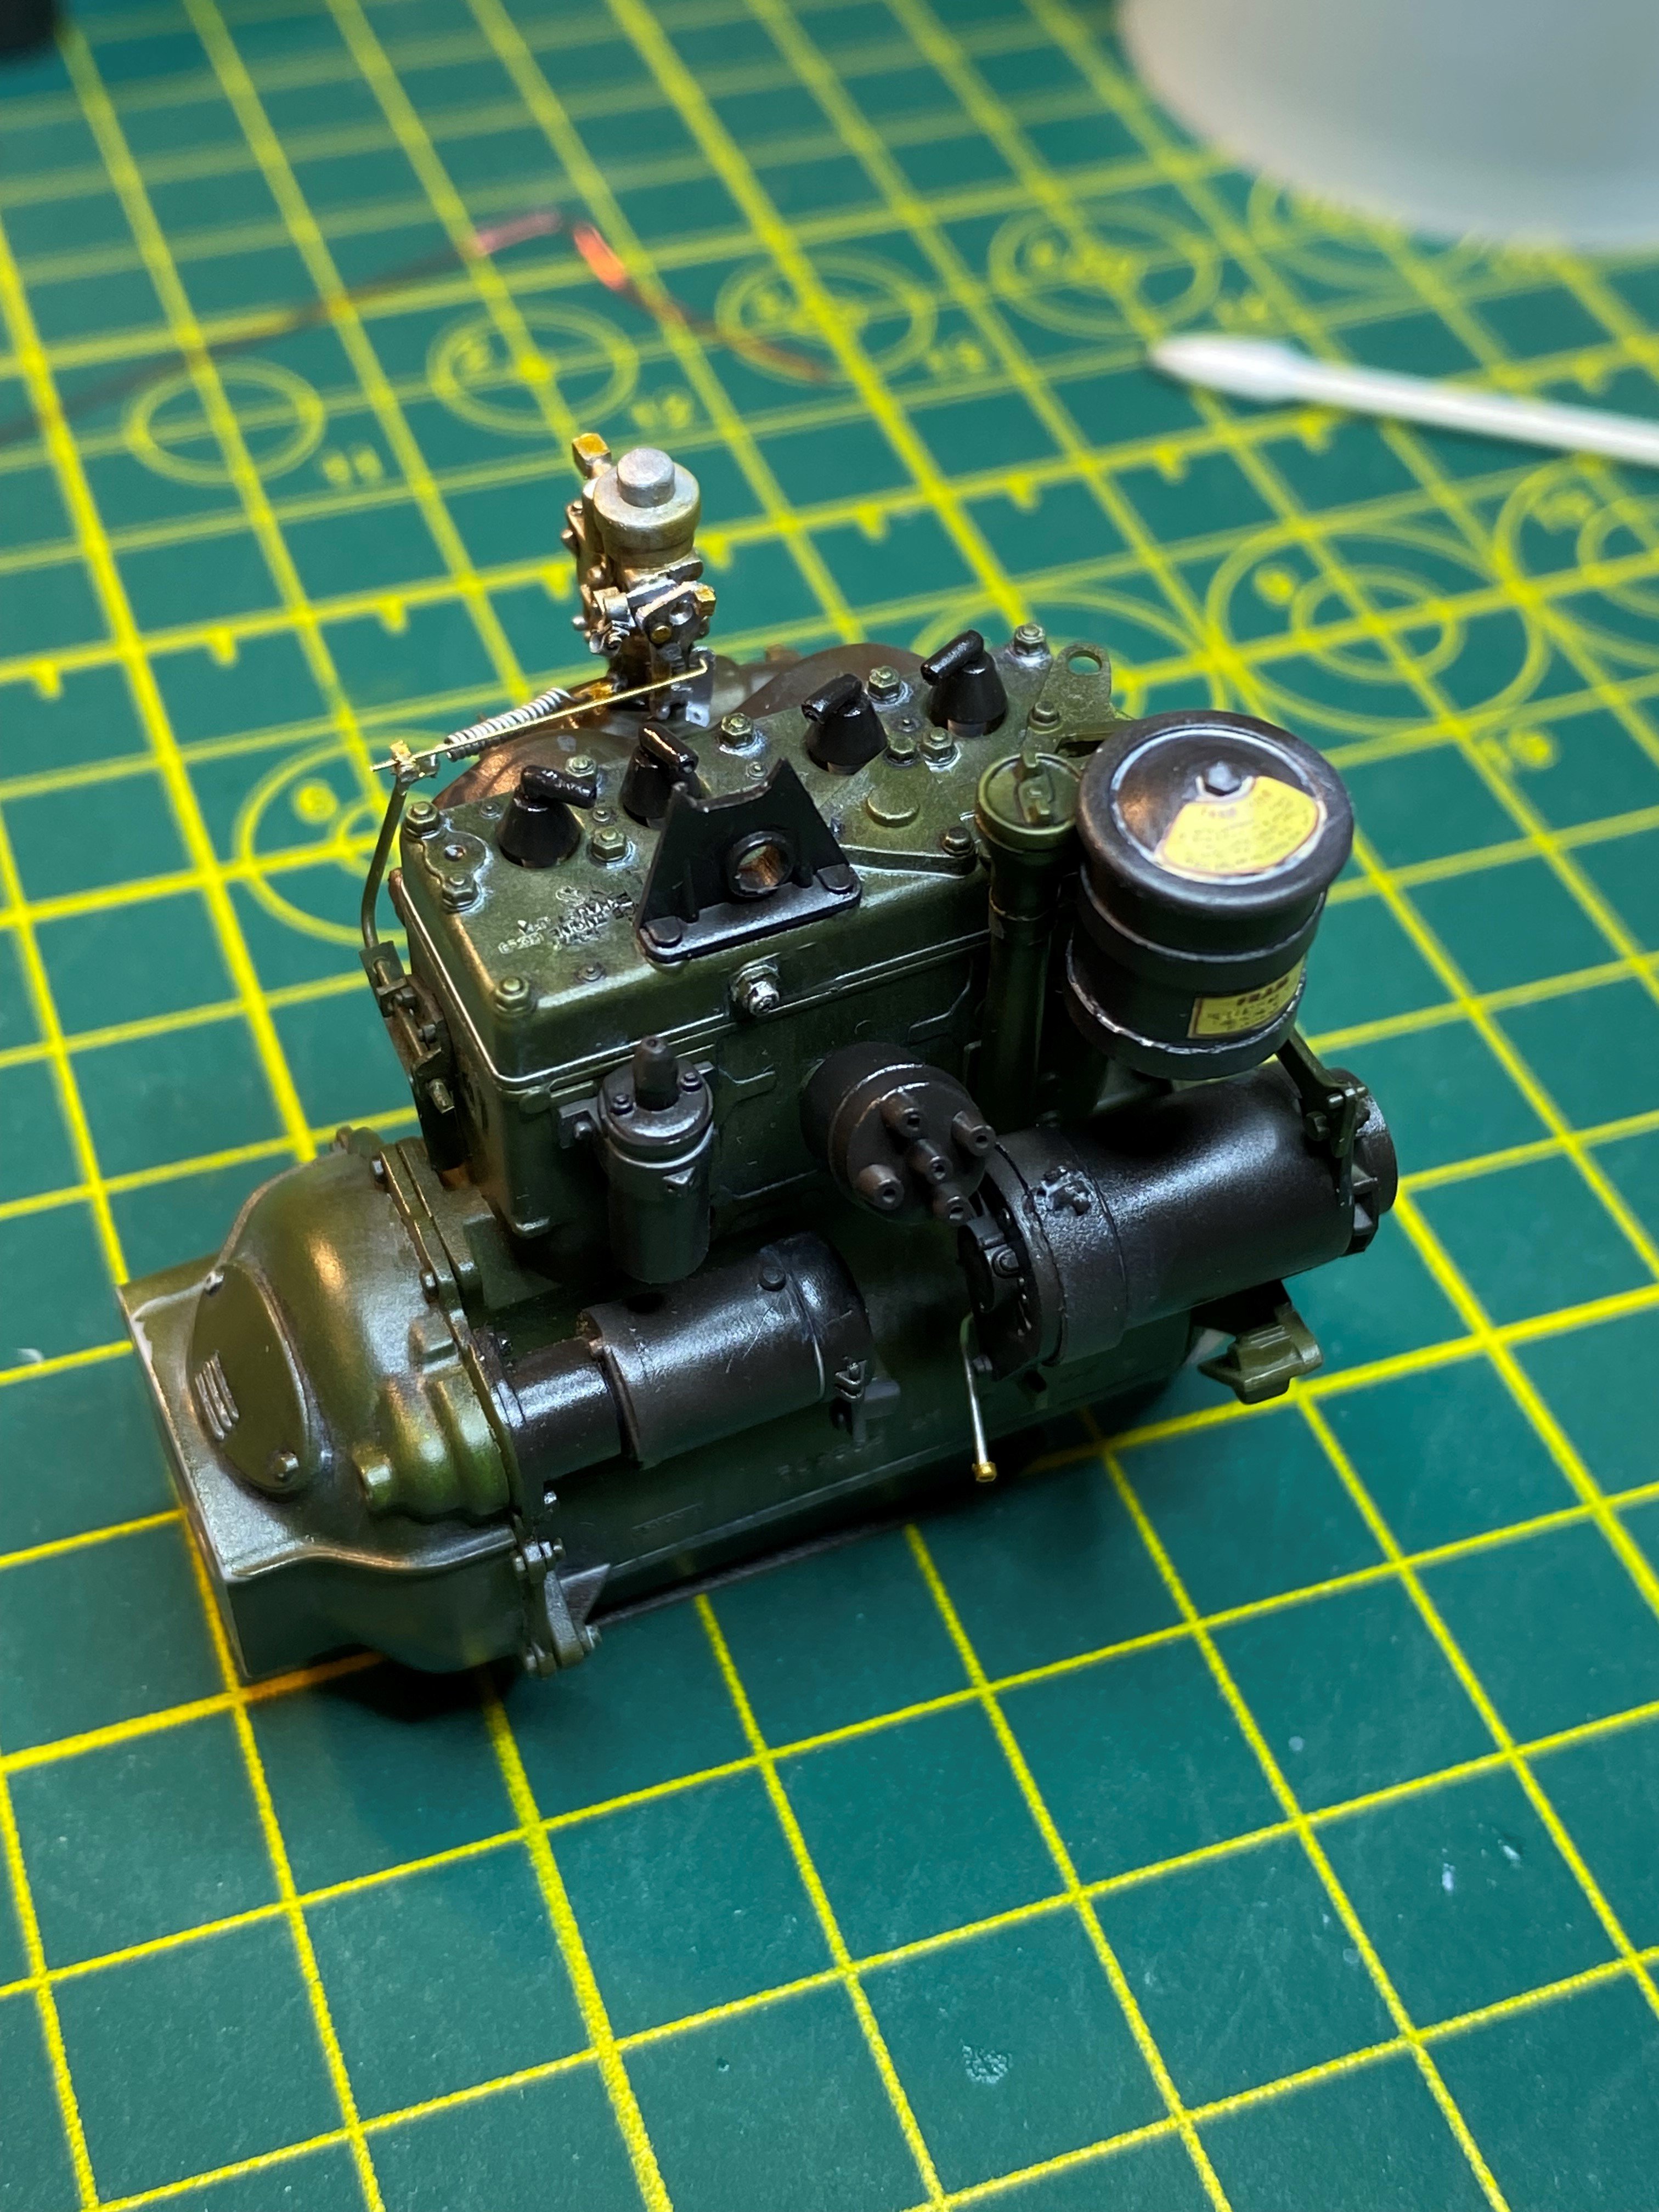
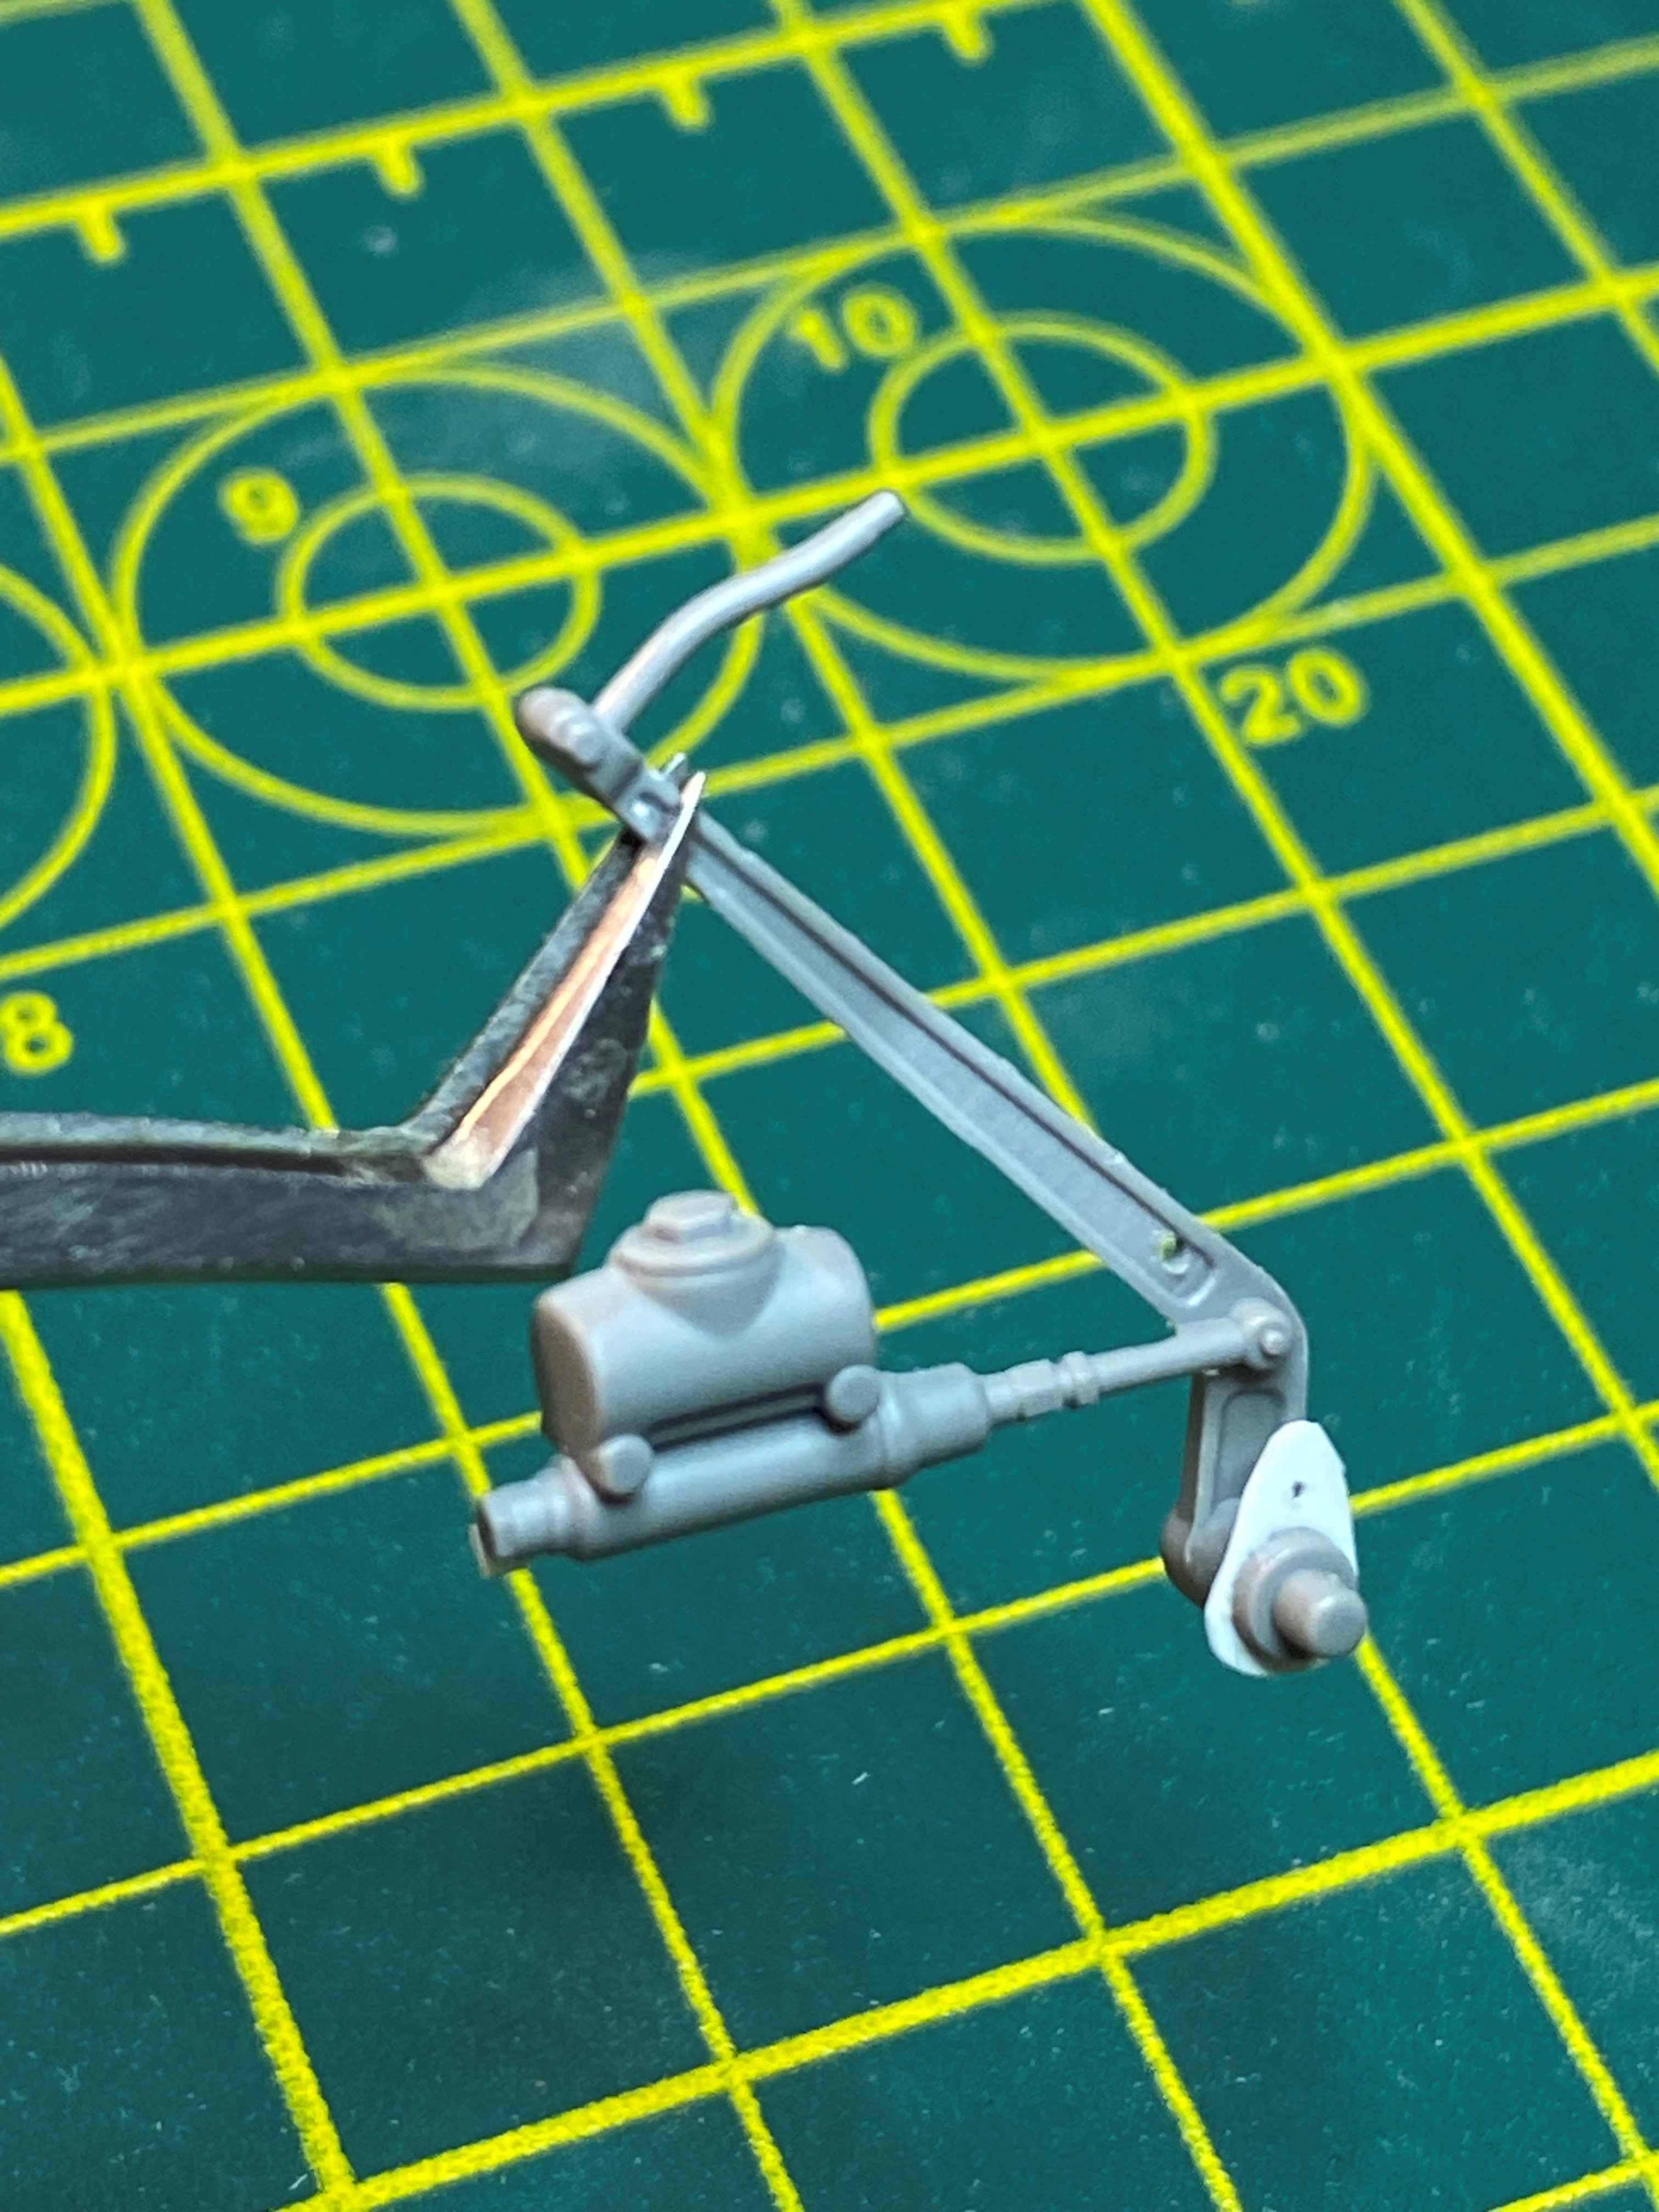
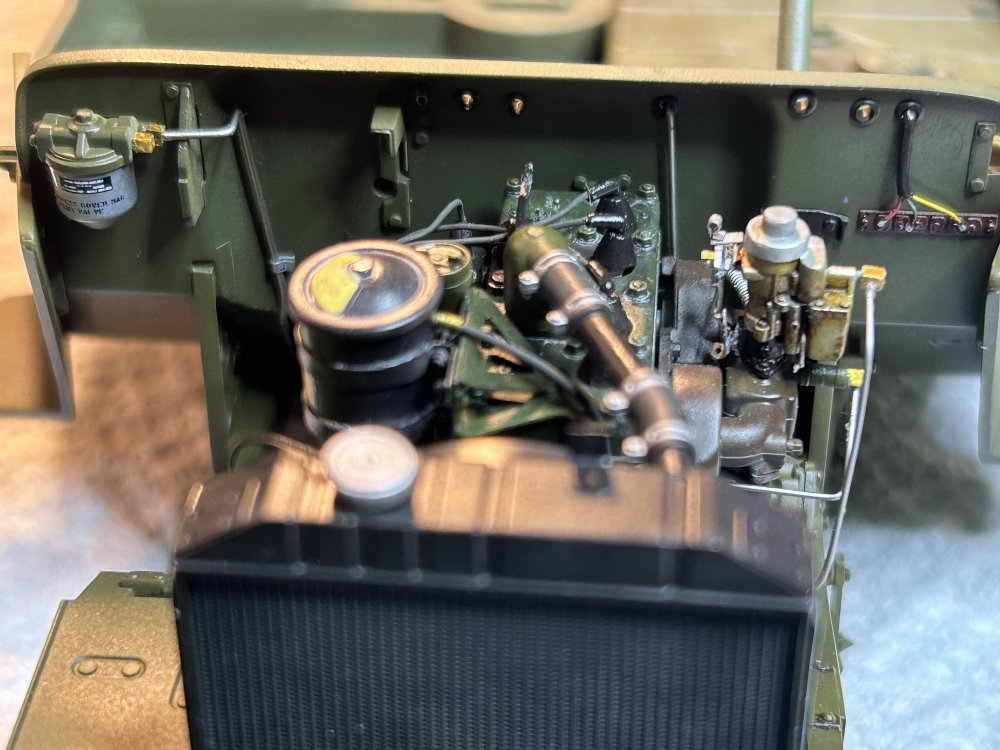
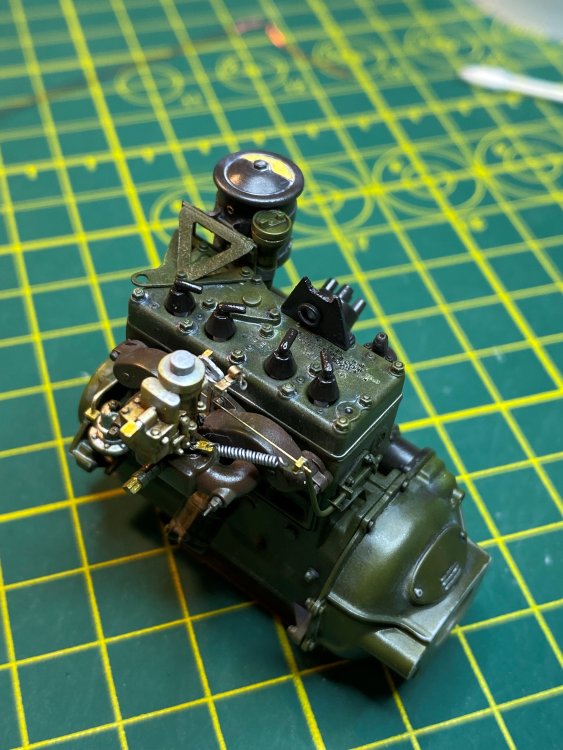
Small update. Added oil filter hoses, wiring from spark plugs to distributor, and fuel lines. Not a lot to show but it was time consuming. That's it for tonight. Tim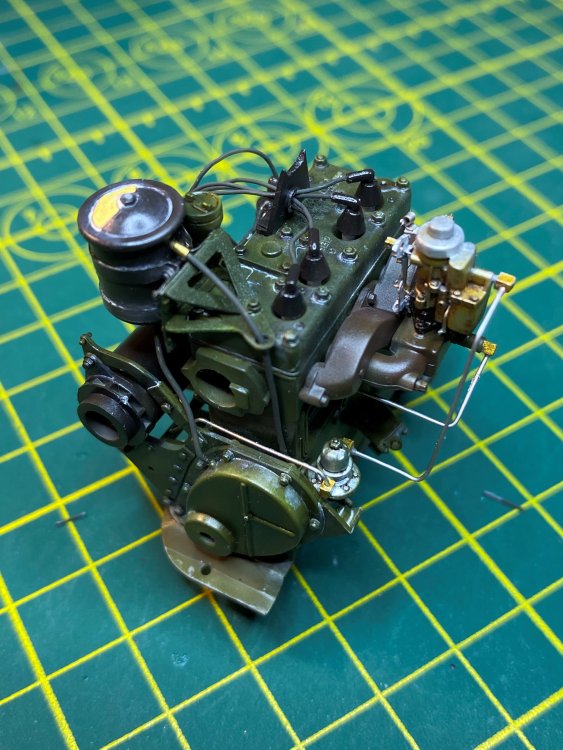

-
1/16 Takom Willys 1/4 Ton 4x4 G503 MB Jeep
Axeman replied to Axeman's topic in LSM 1/35 and Larger Work In Progress
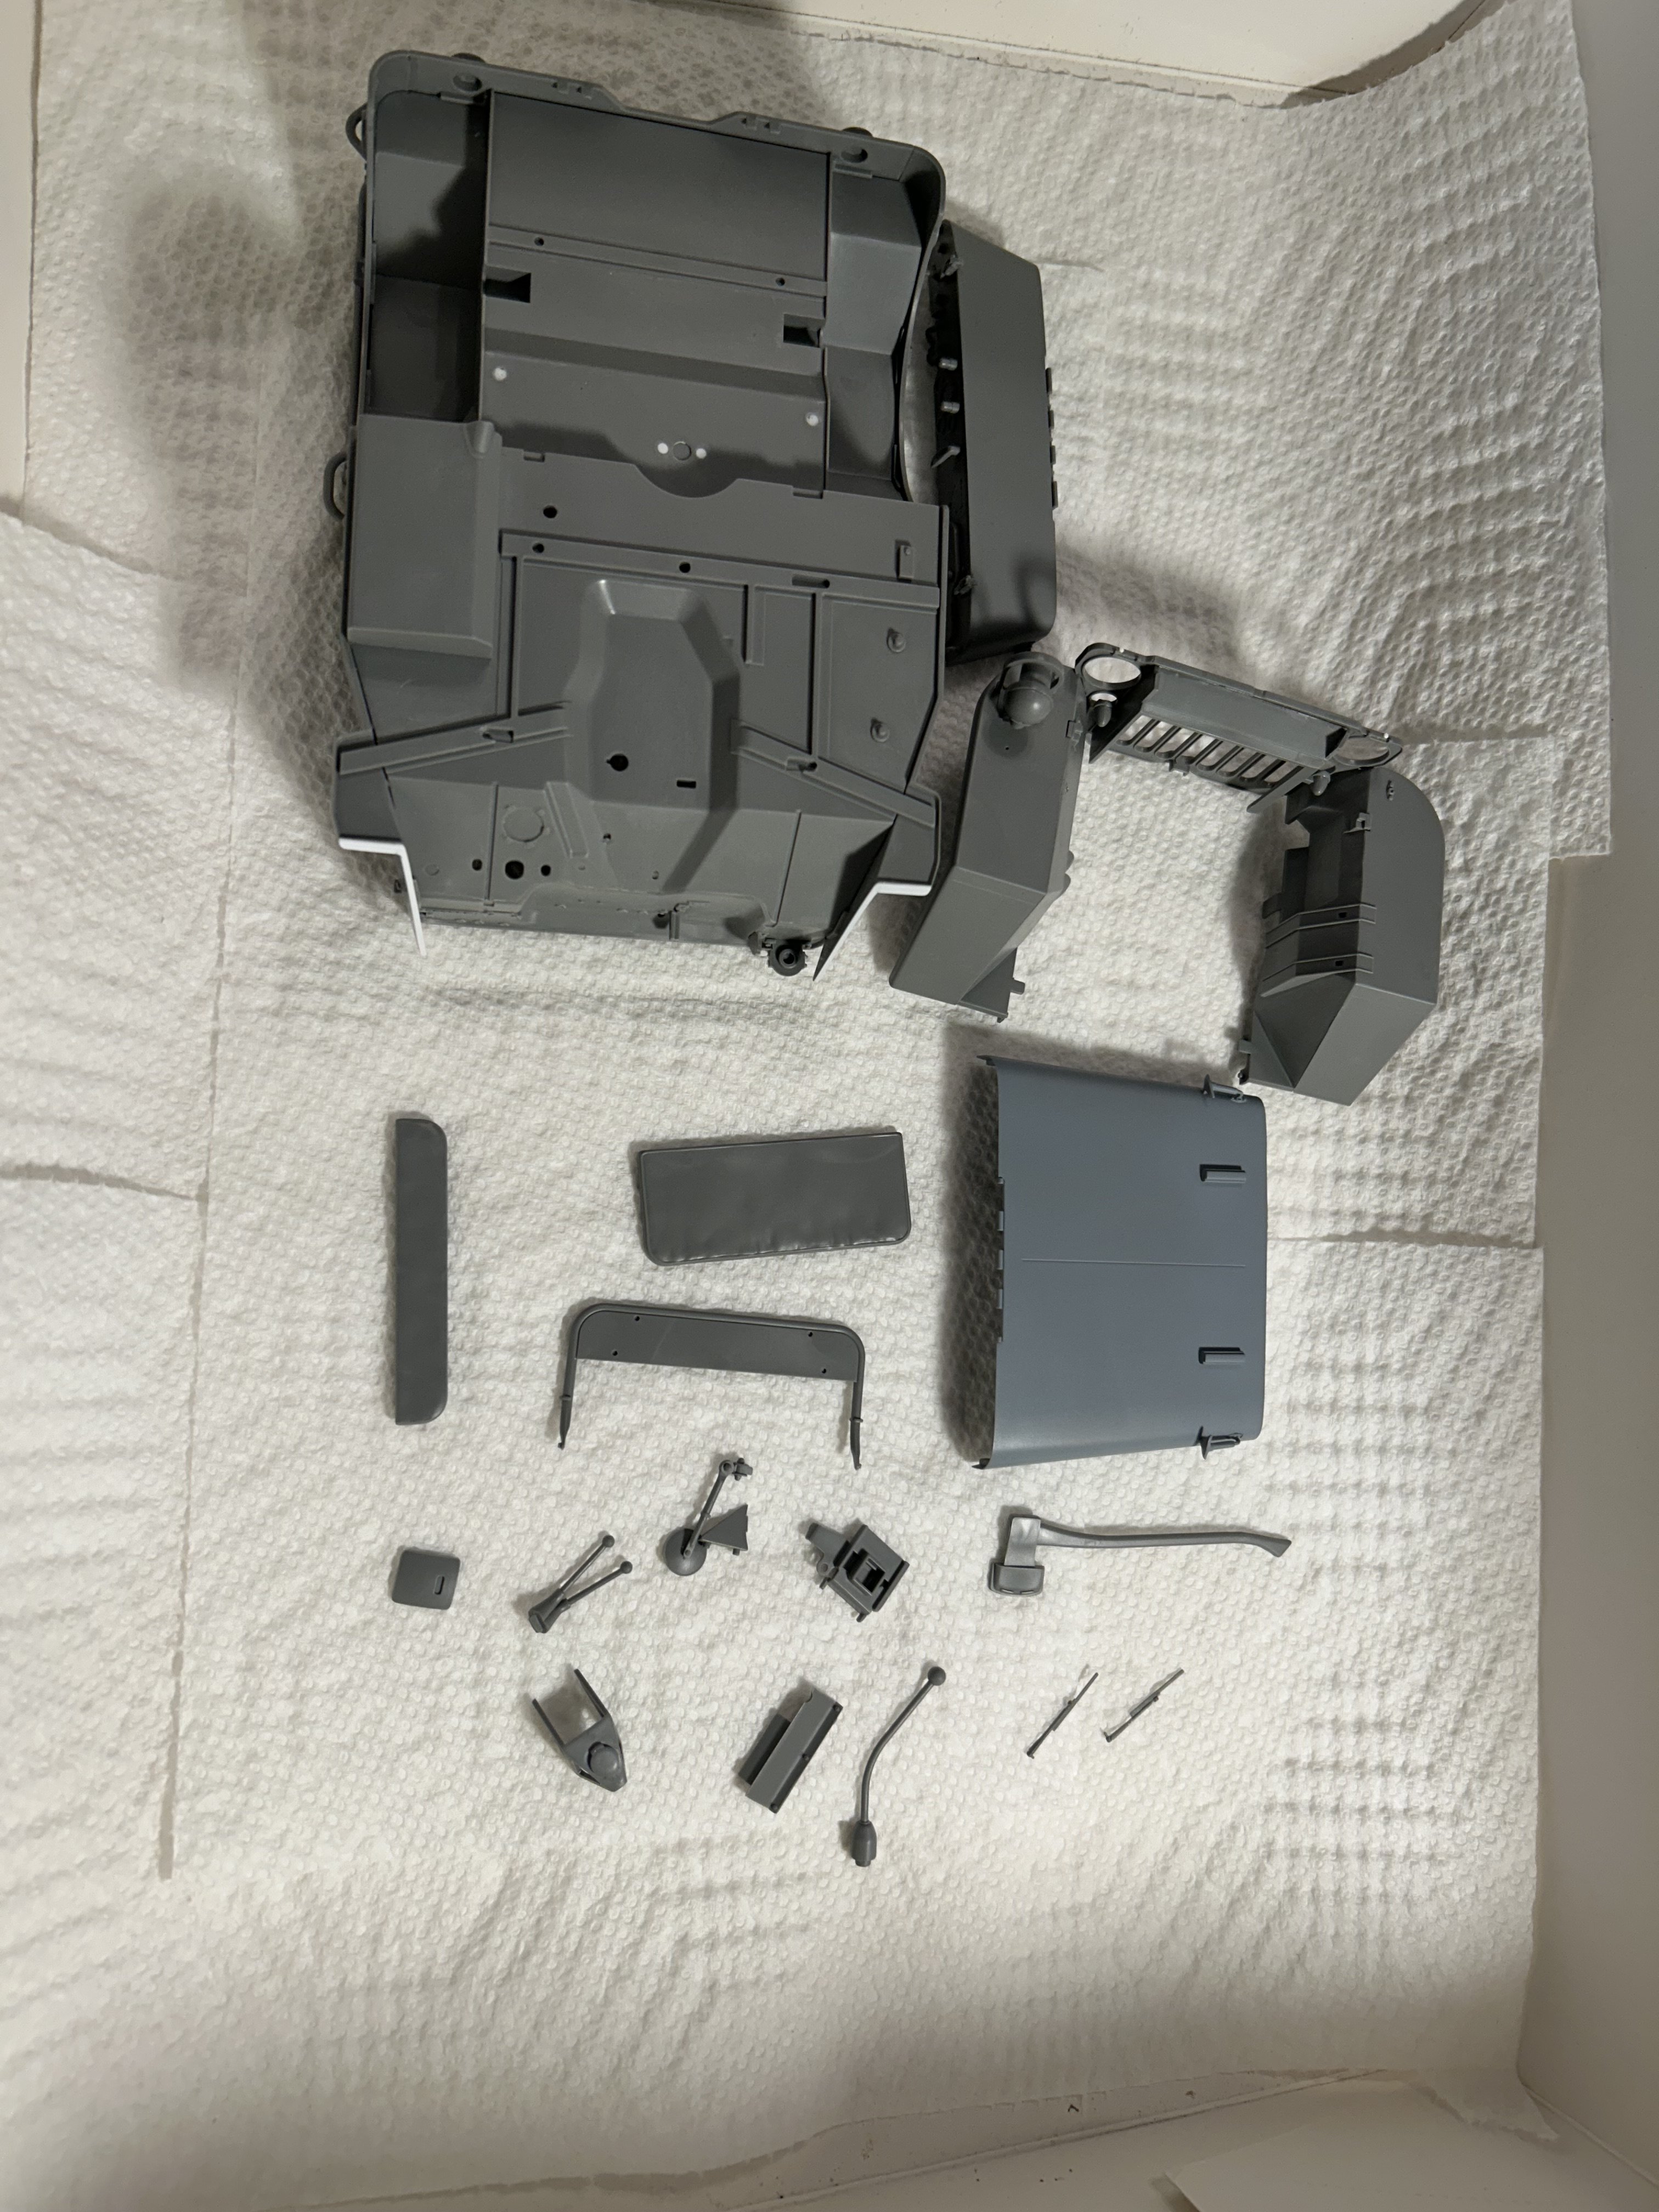
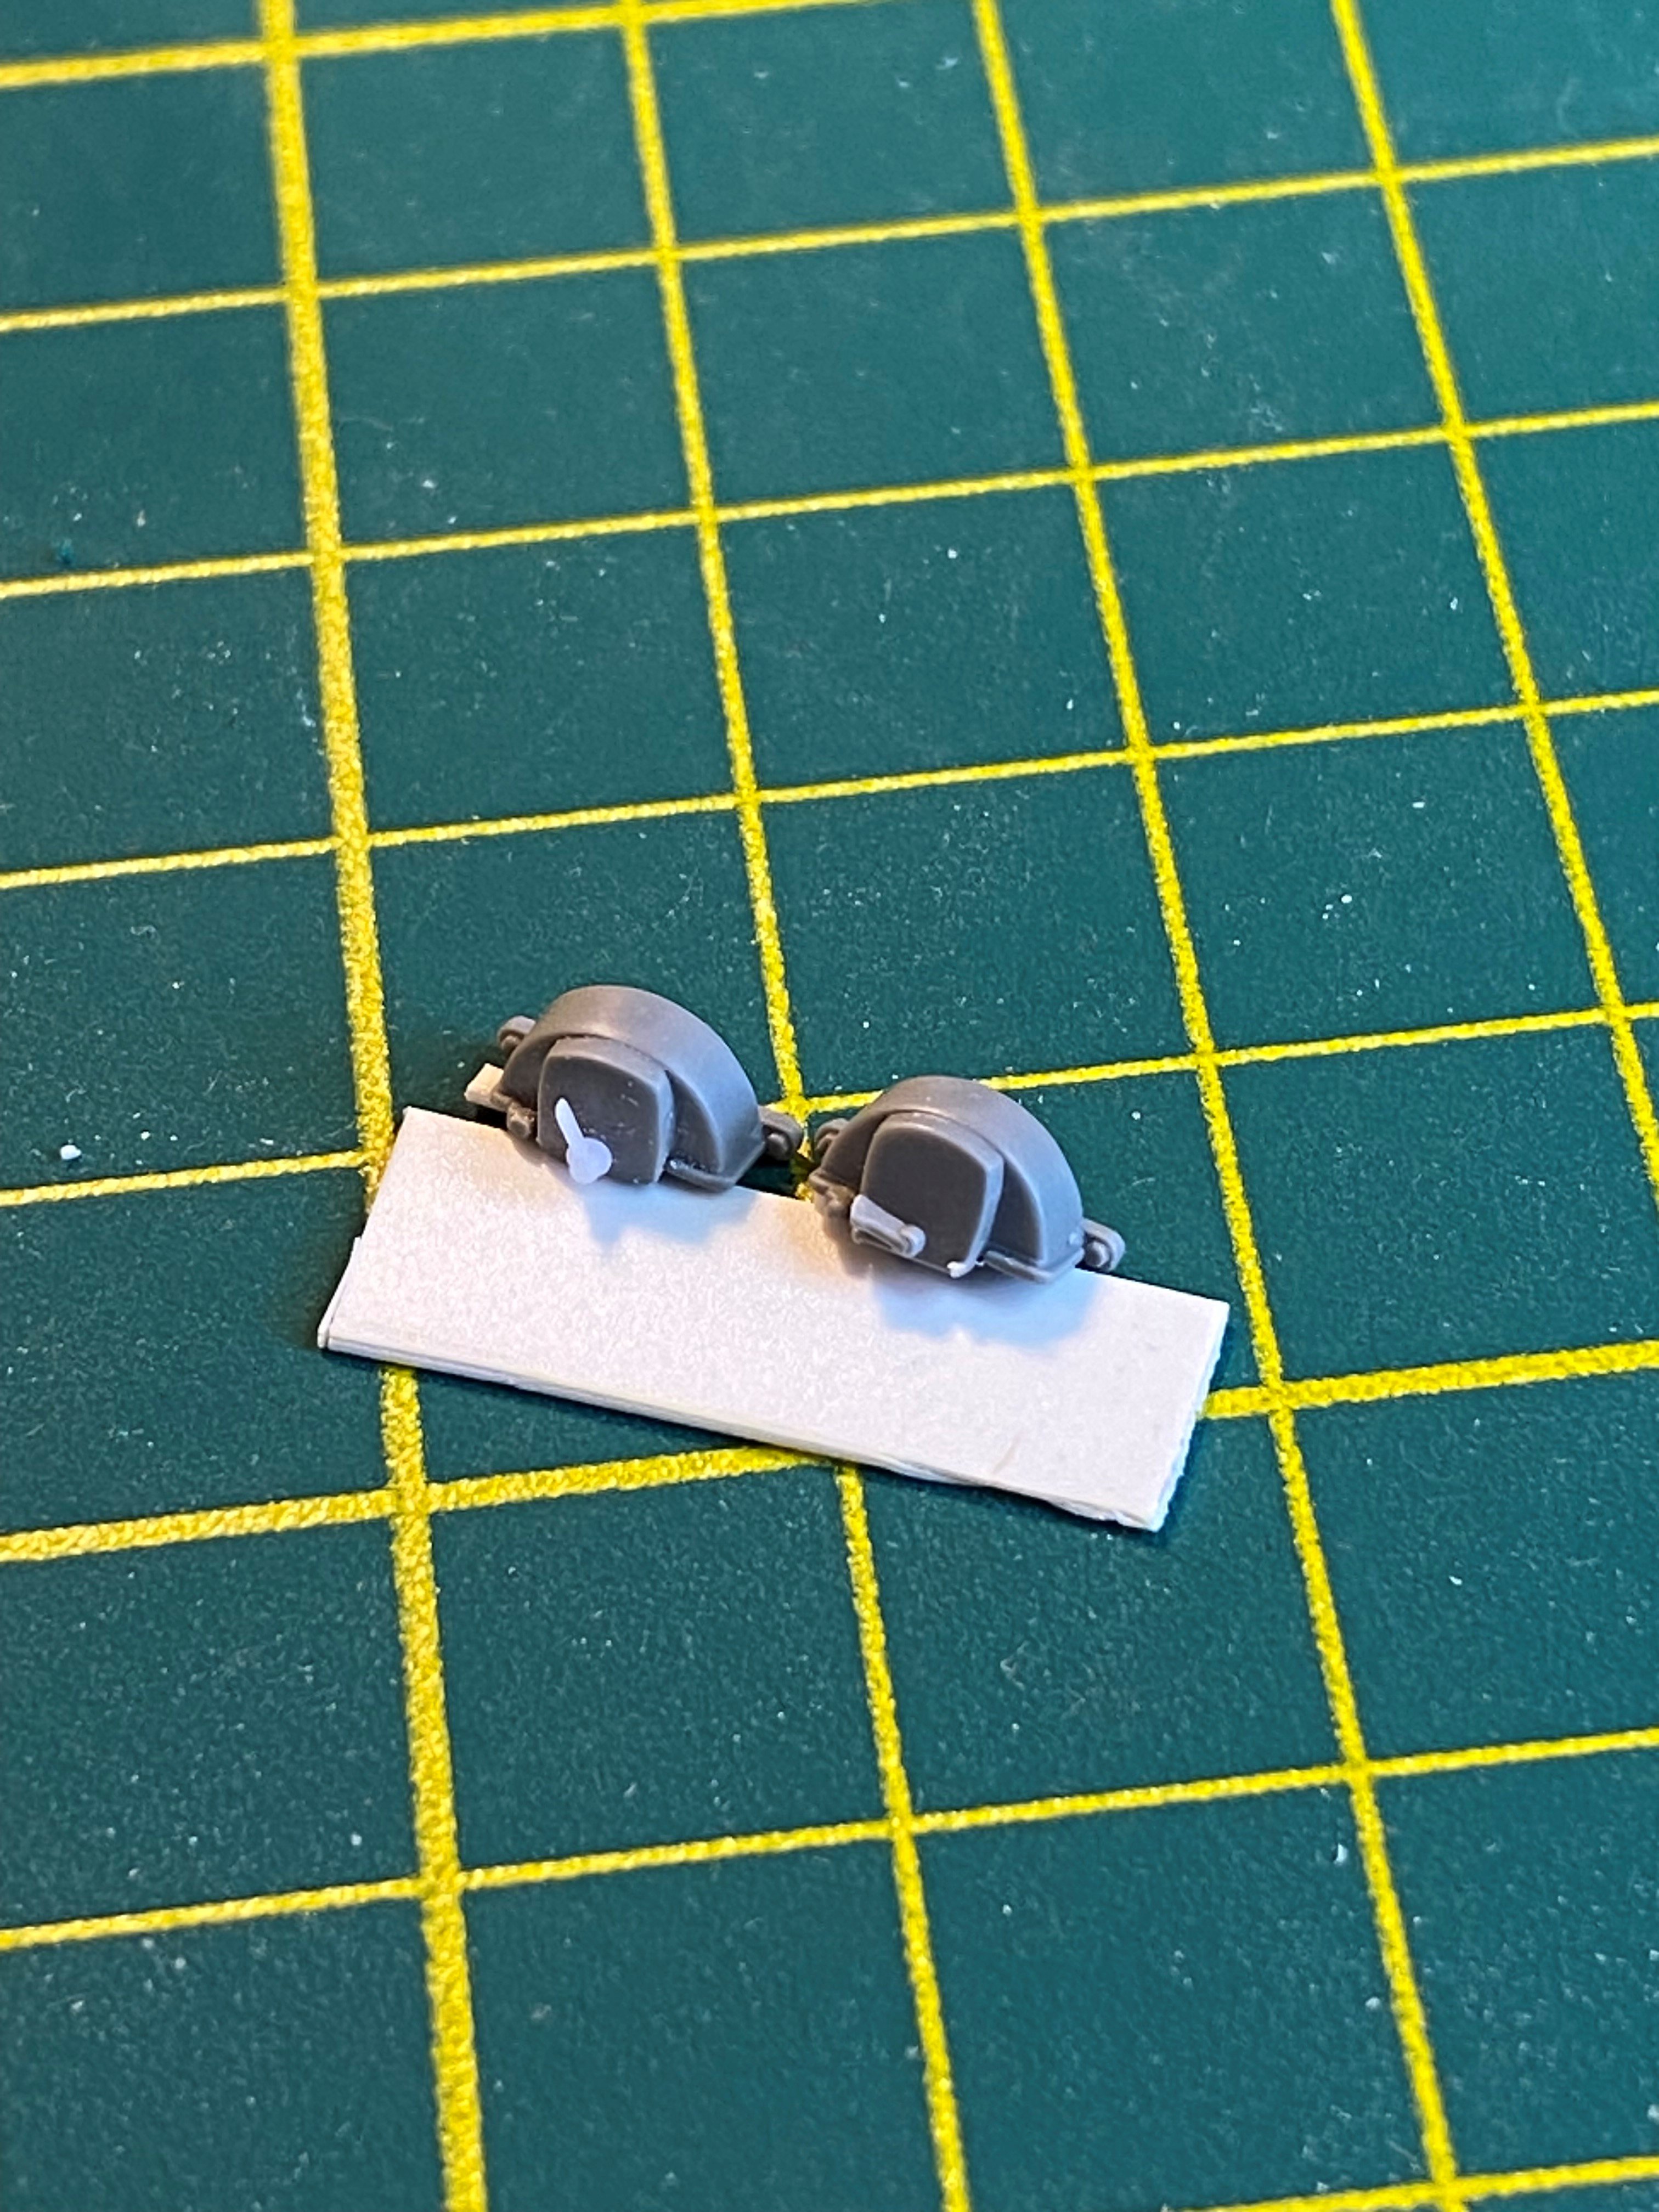
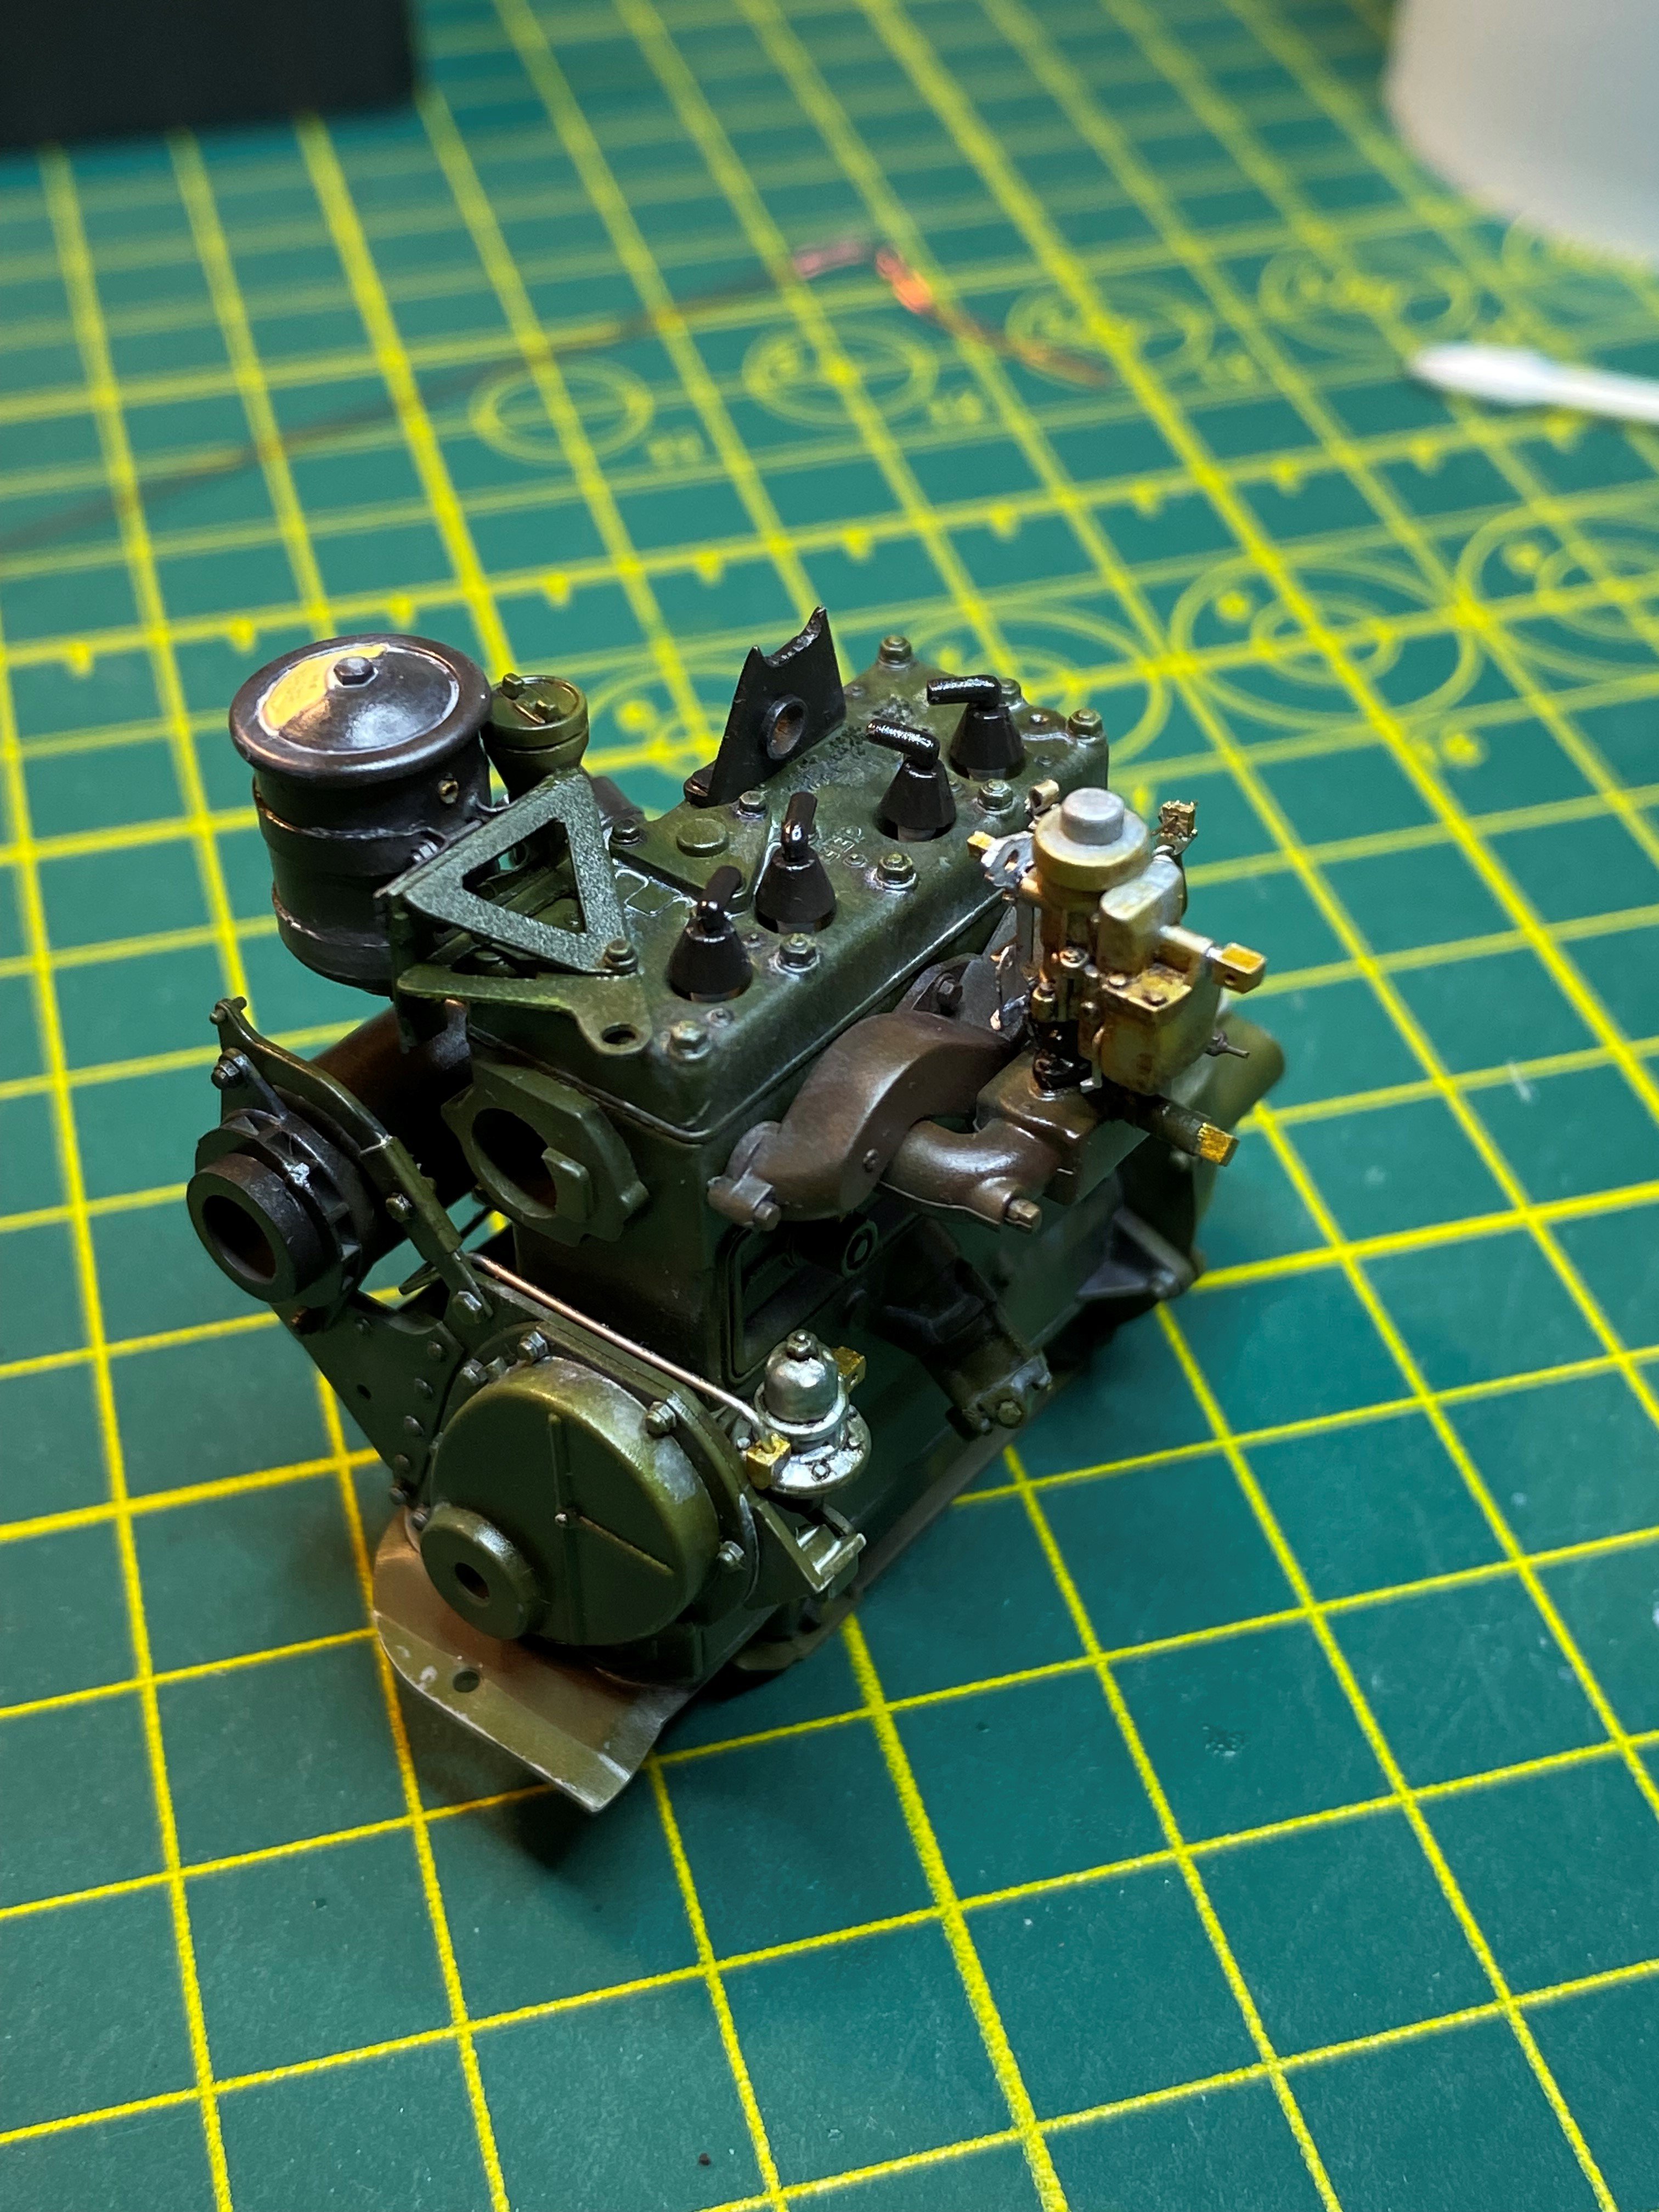
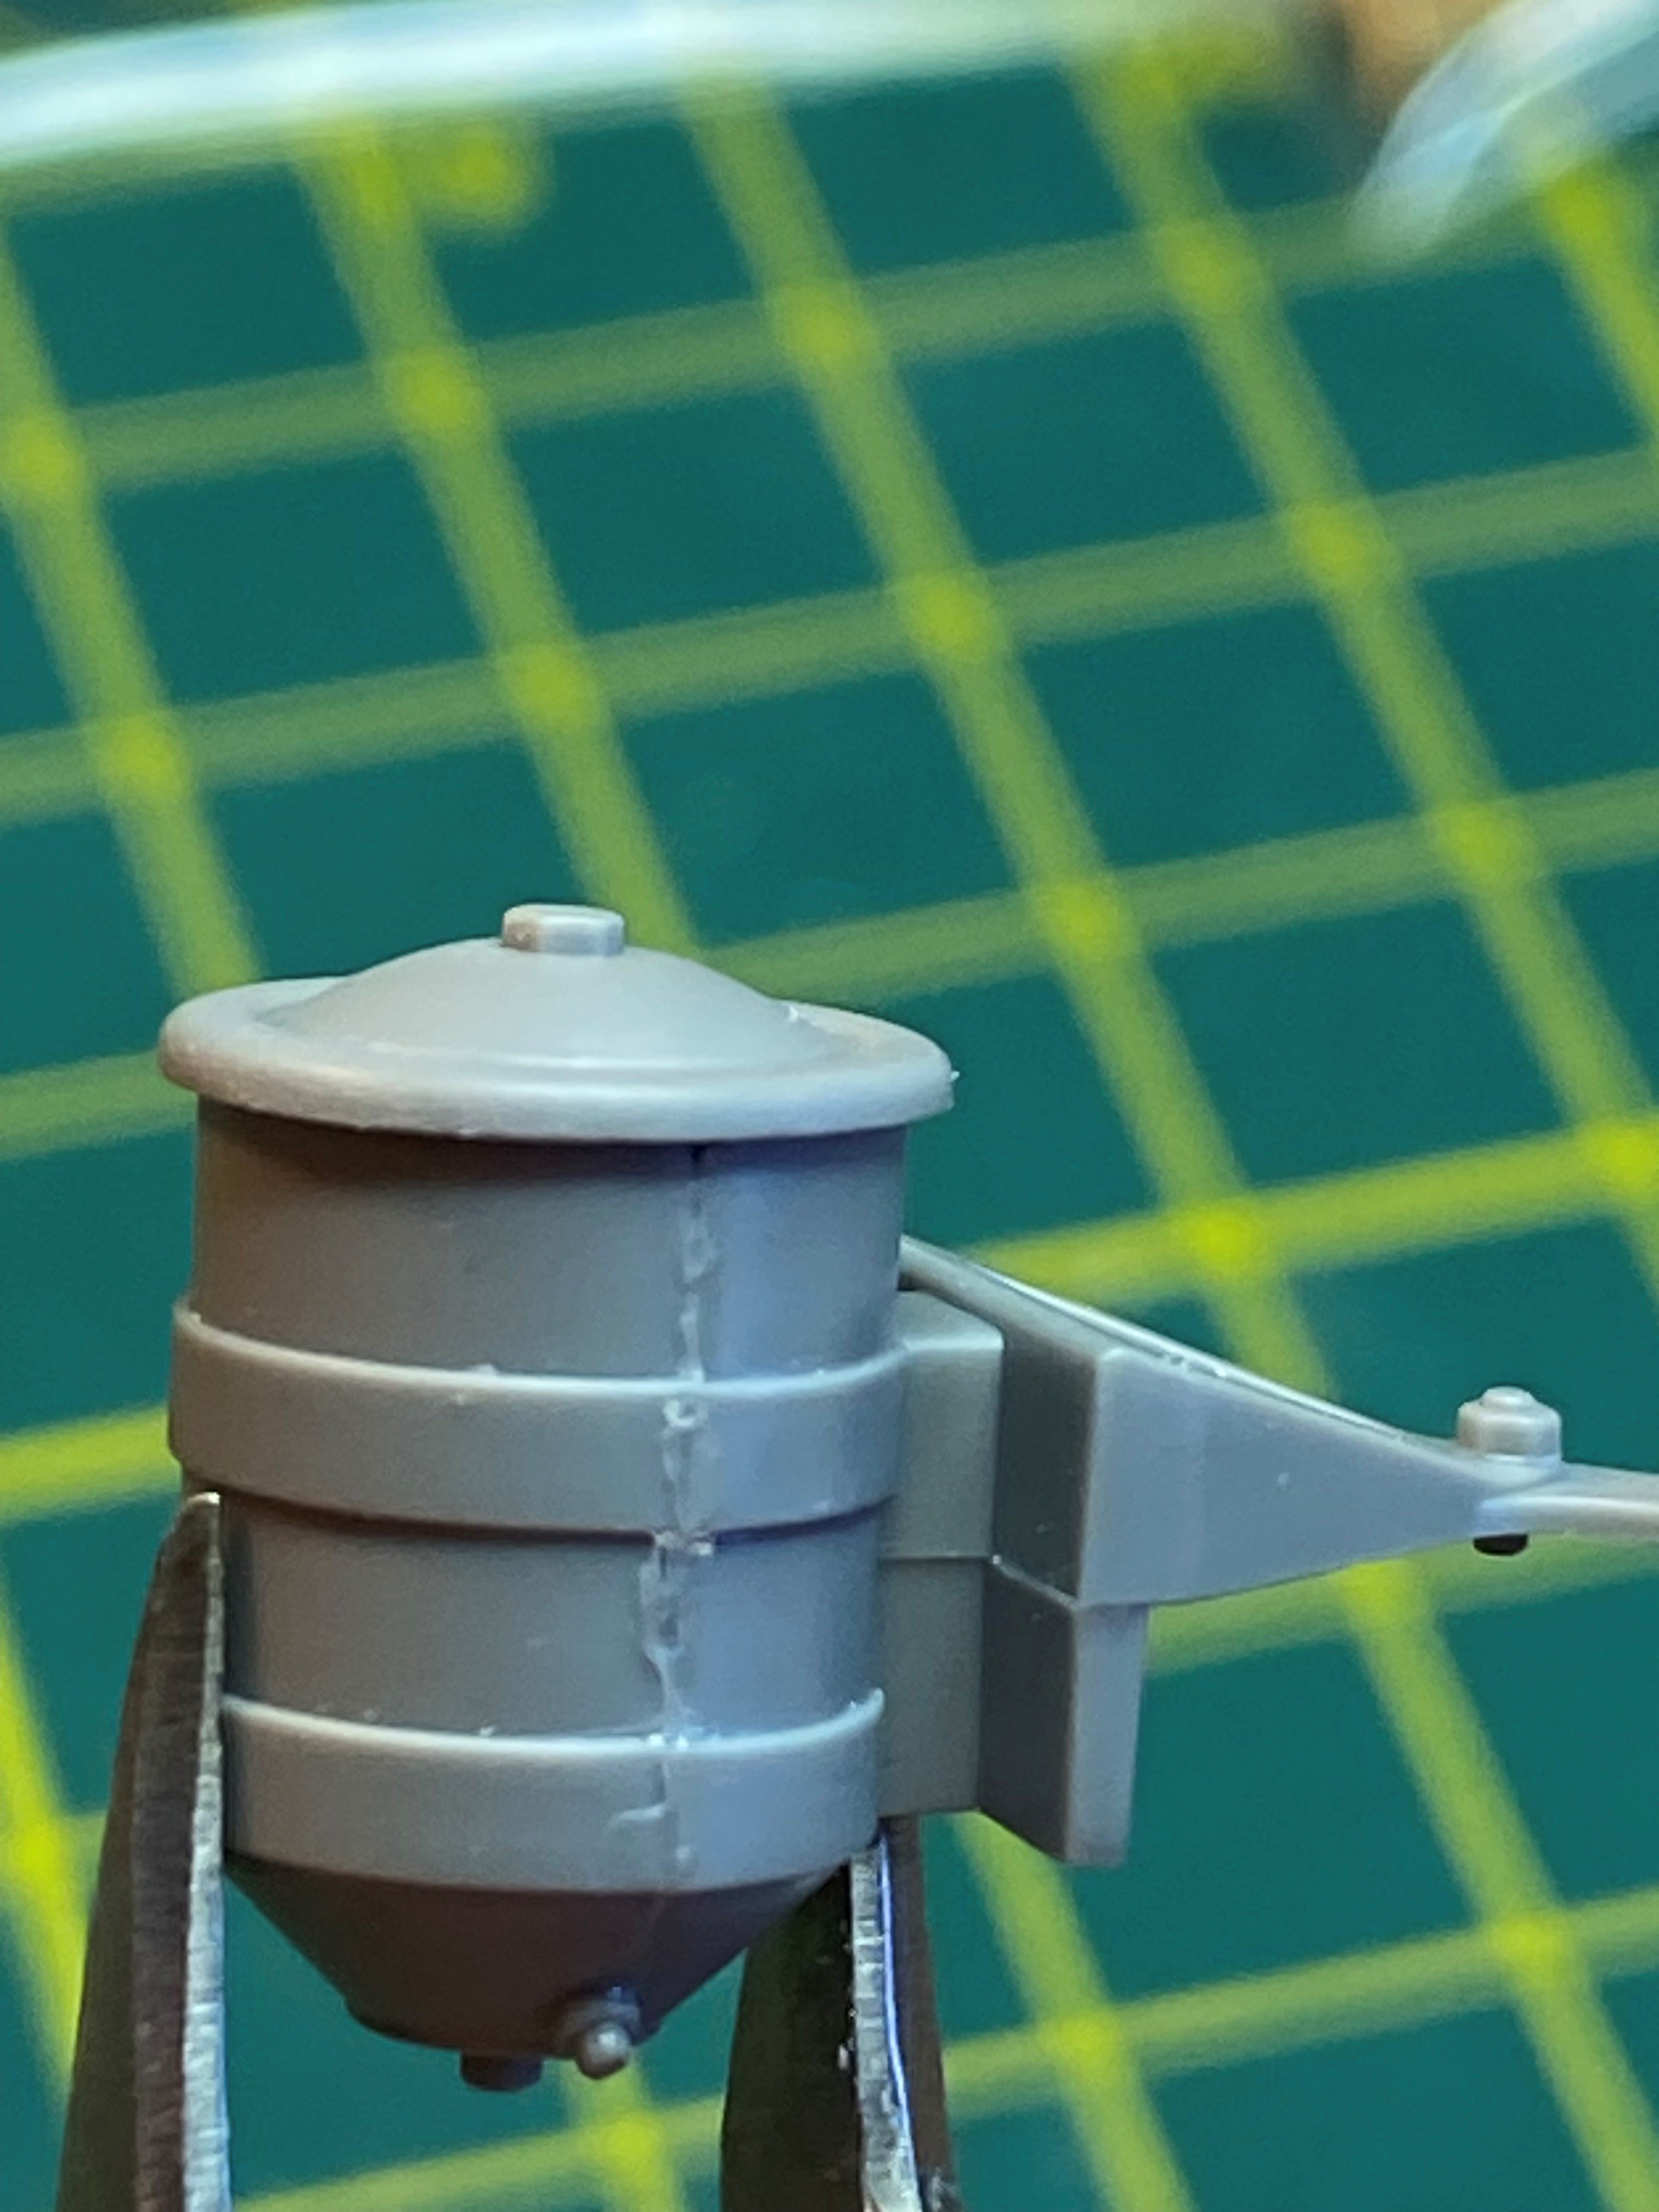
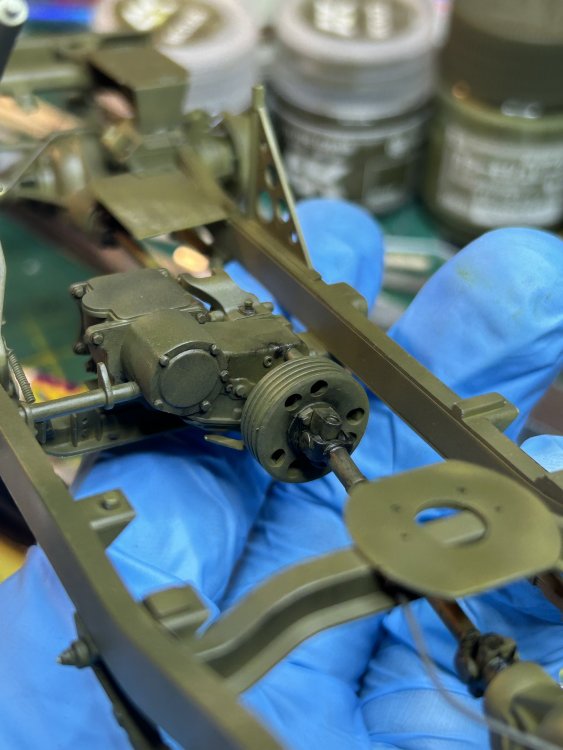
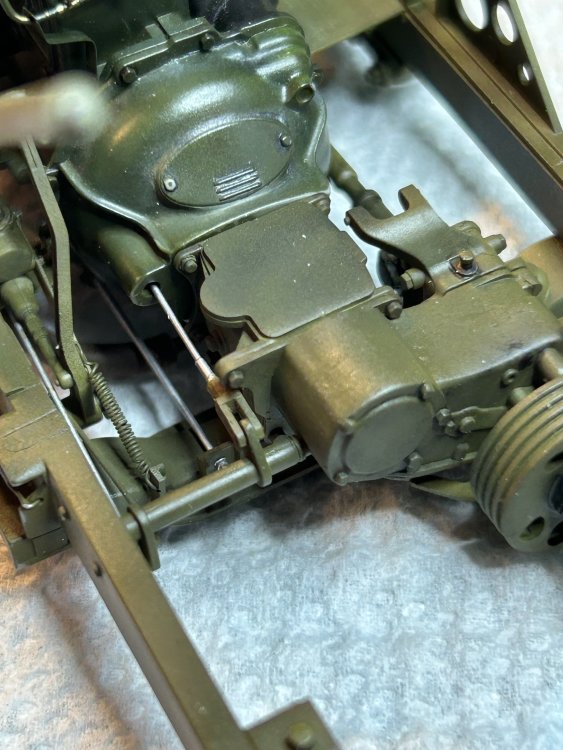
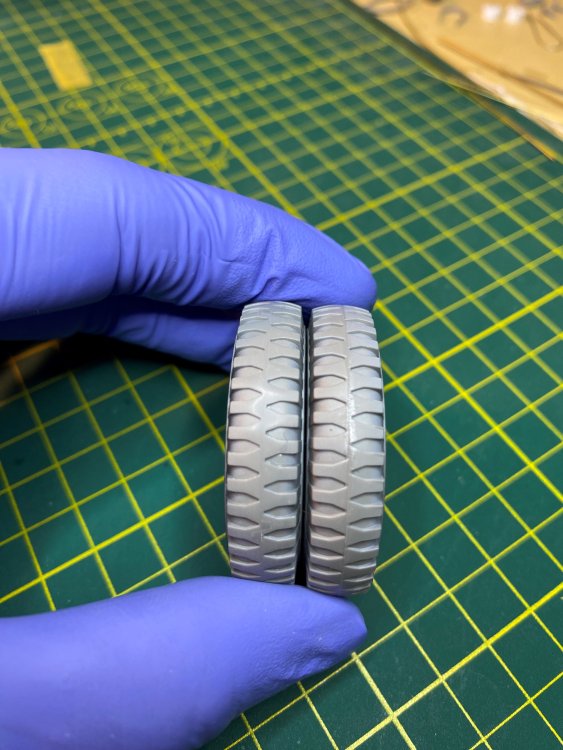
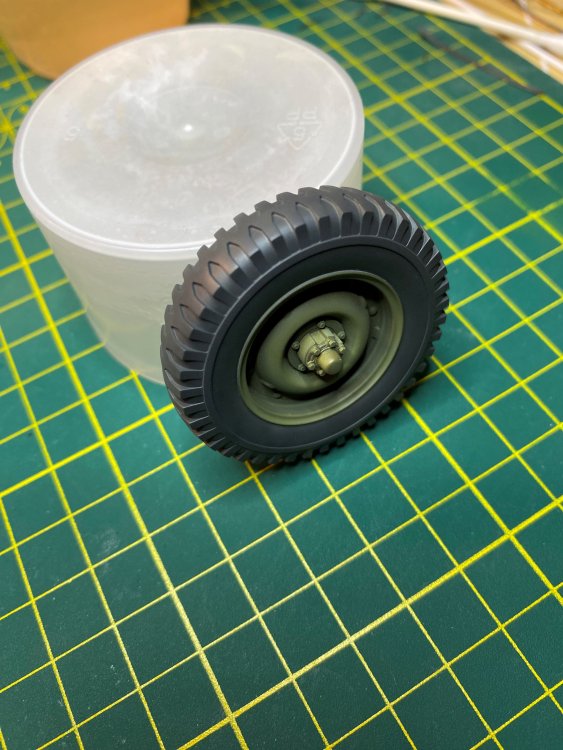
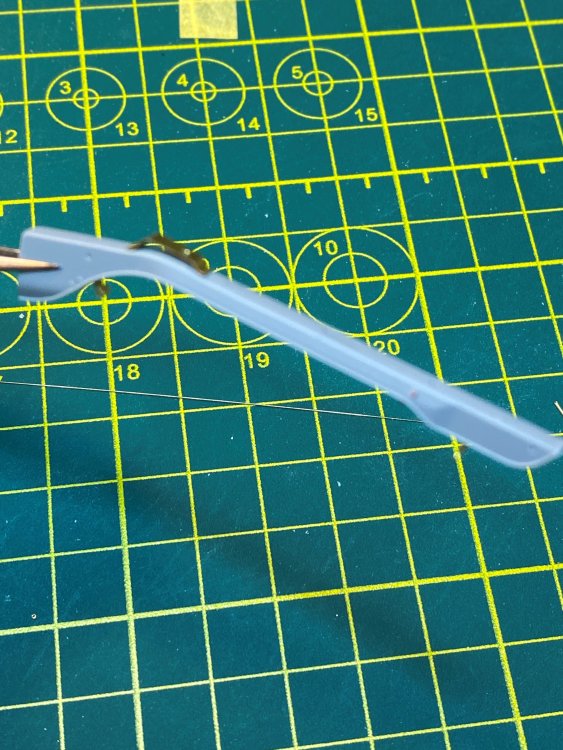
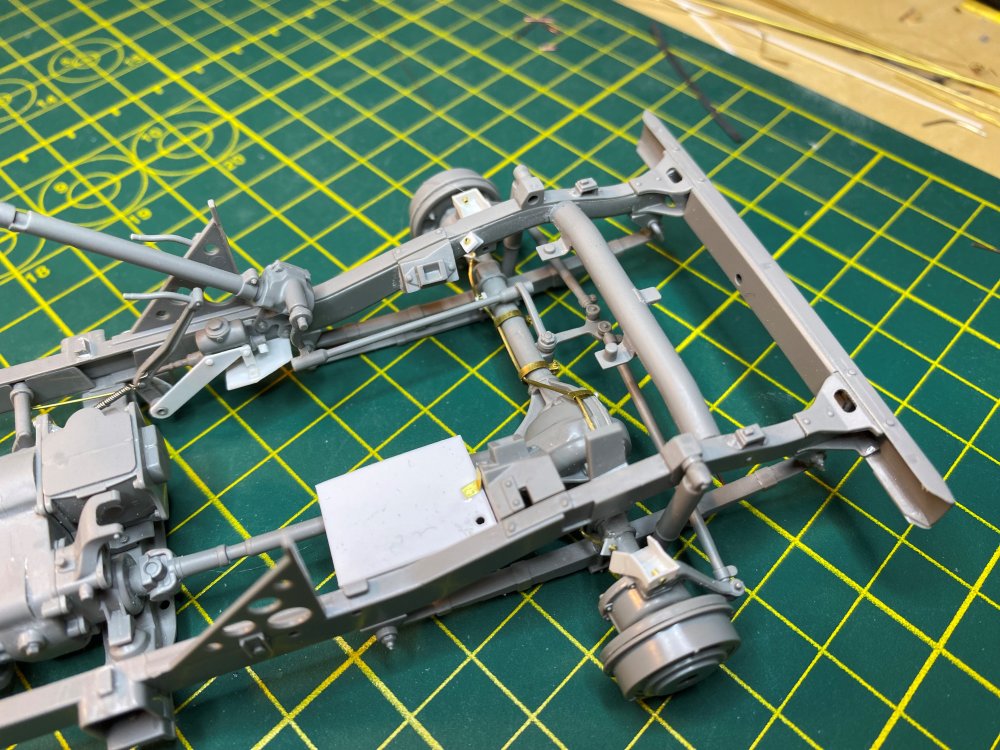
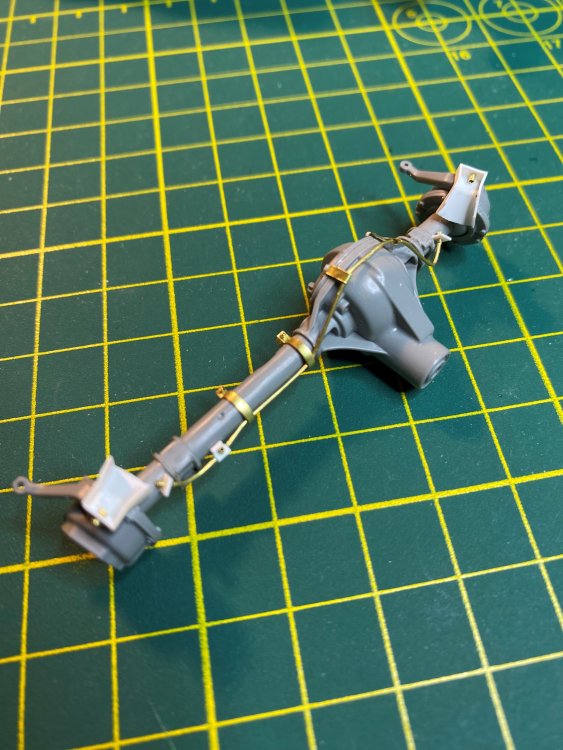
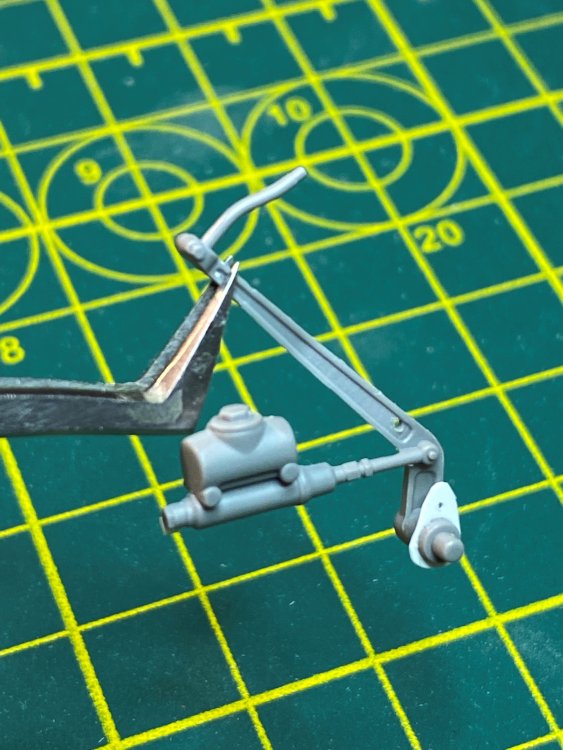
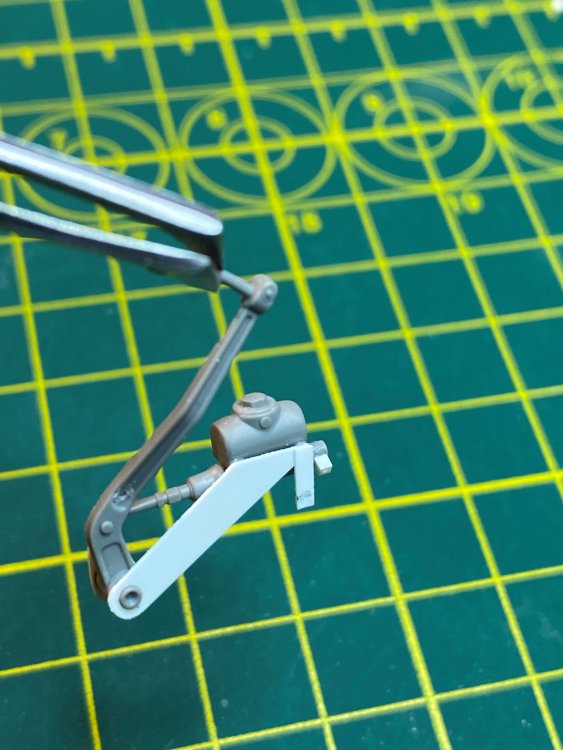
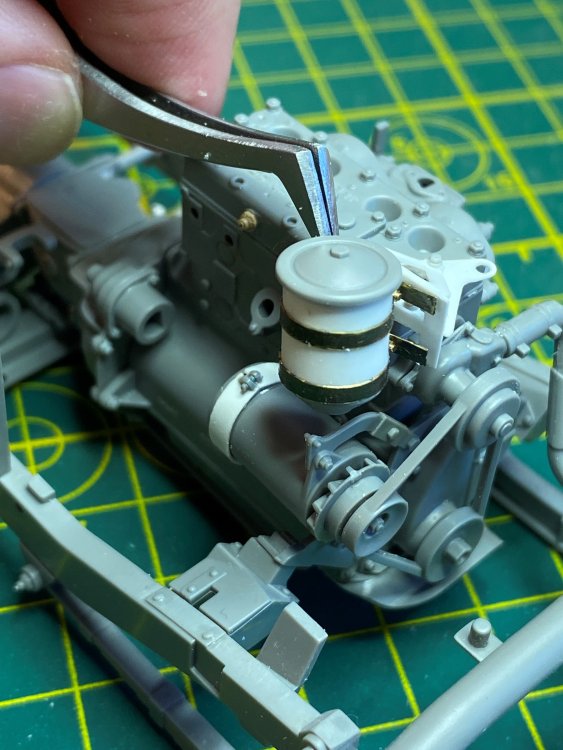
Worked on several items. First is the tires. Painted the rims olive drab and the inner part of the tire, tire black. Glued the tire halves together, removed the seam and painted remaining part of the tires. Added detail to the rifle holder. Manual pump under the rear seat. Tested the engine placement with the firewall. Windshield wiper vacuum line detail added and replaced the adjustment (not sure what it is called) knob. Frame put together and painted. Ready for more breakline detail Painted the engine and started the weathering. Next is additional oil filter lines and lines from the spark plugs. More to come. Tim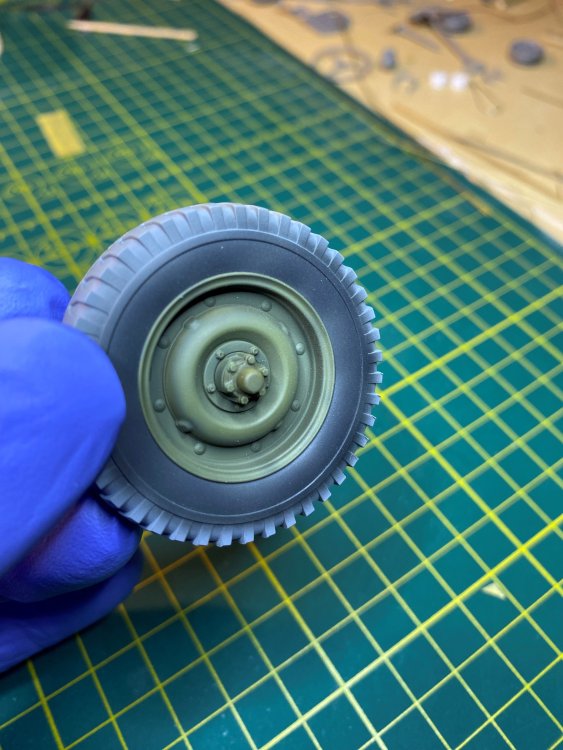


- 17 replies
-
- 10
-

-
1/16 Takom Willys 1/4 Ton 4x4 G503 MB Jeep
Axeman replied to Axeman's topic in LSM 1/35 and Larger Work In Progress
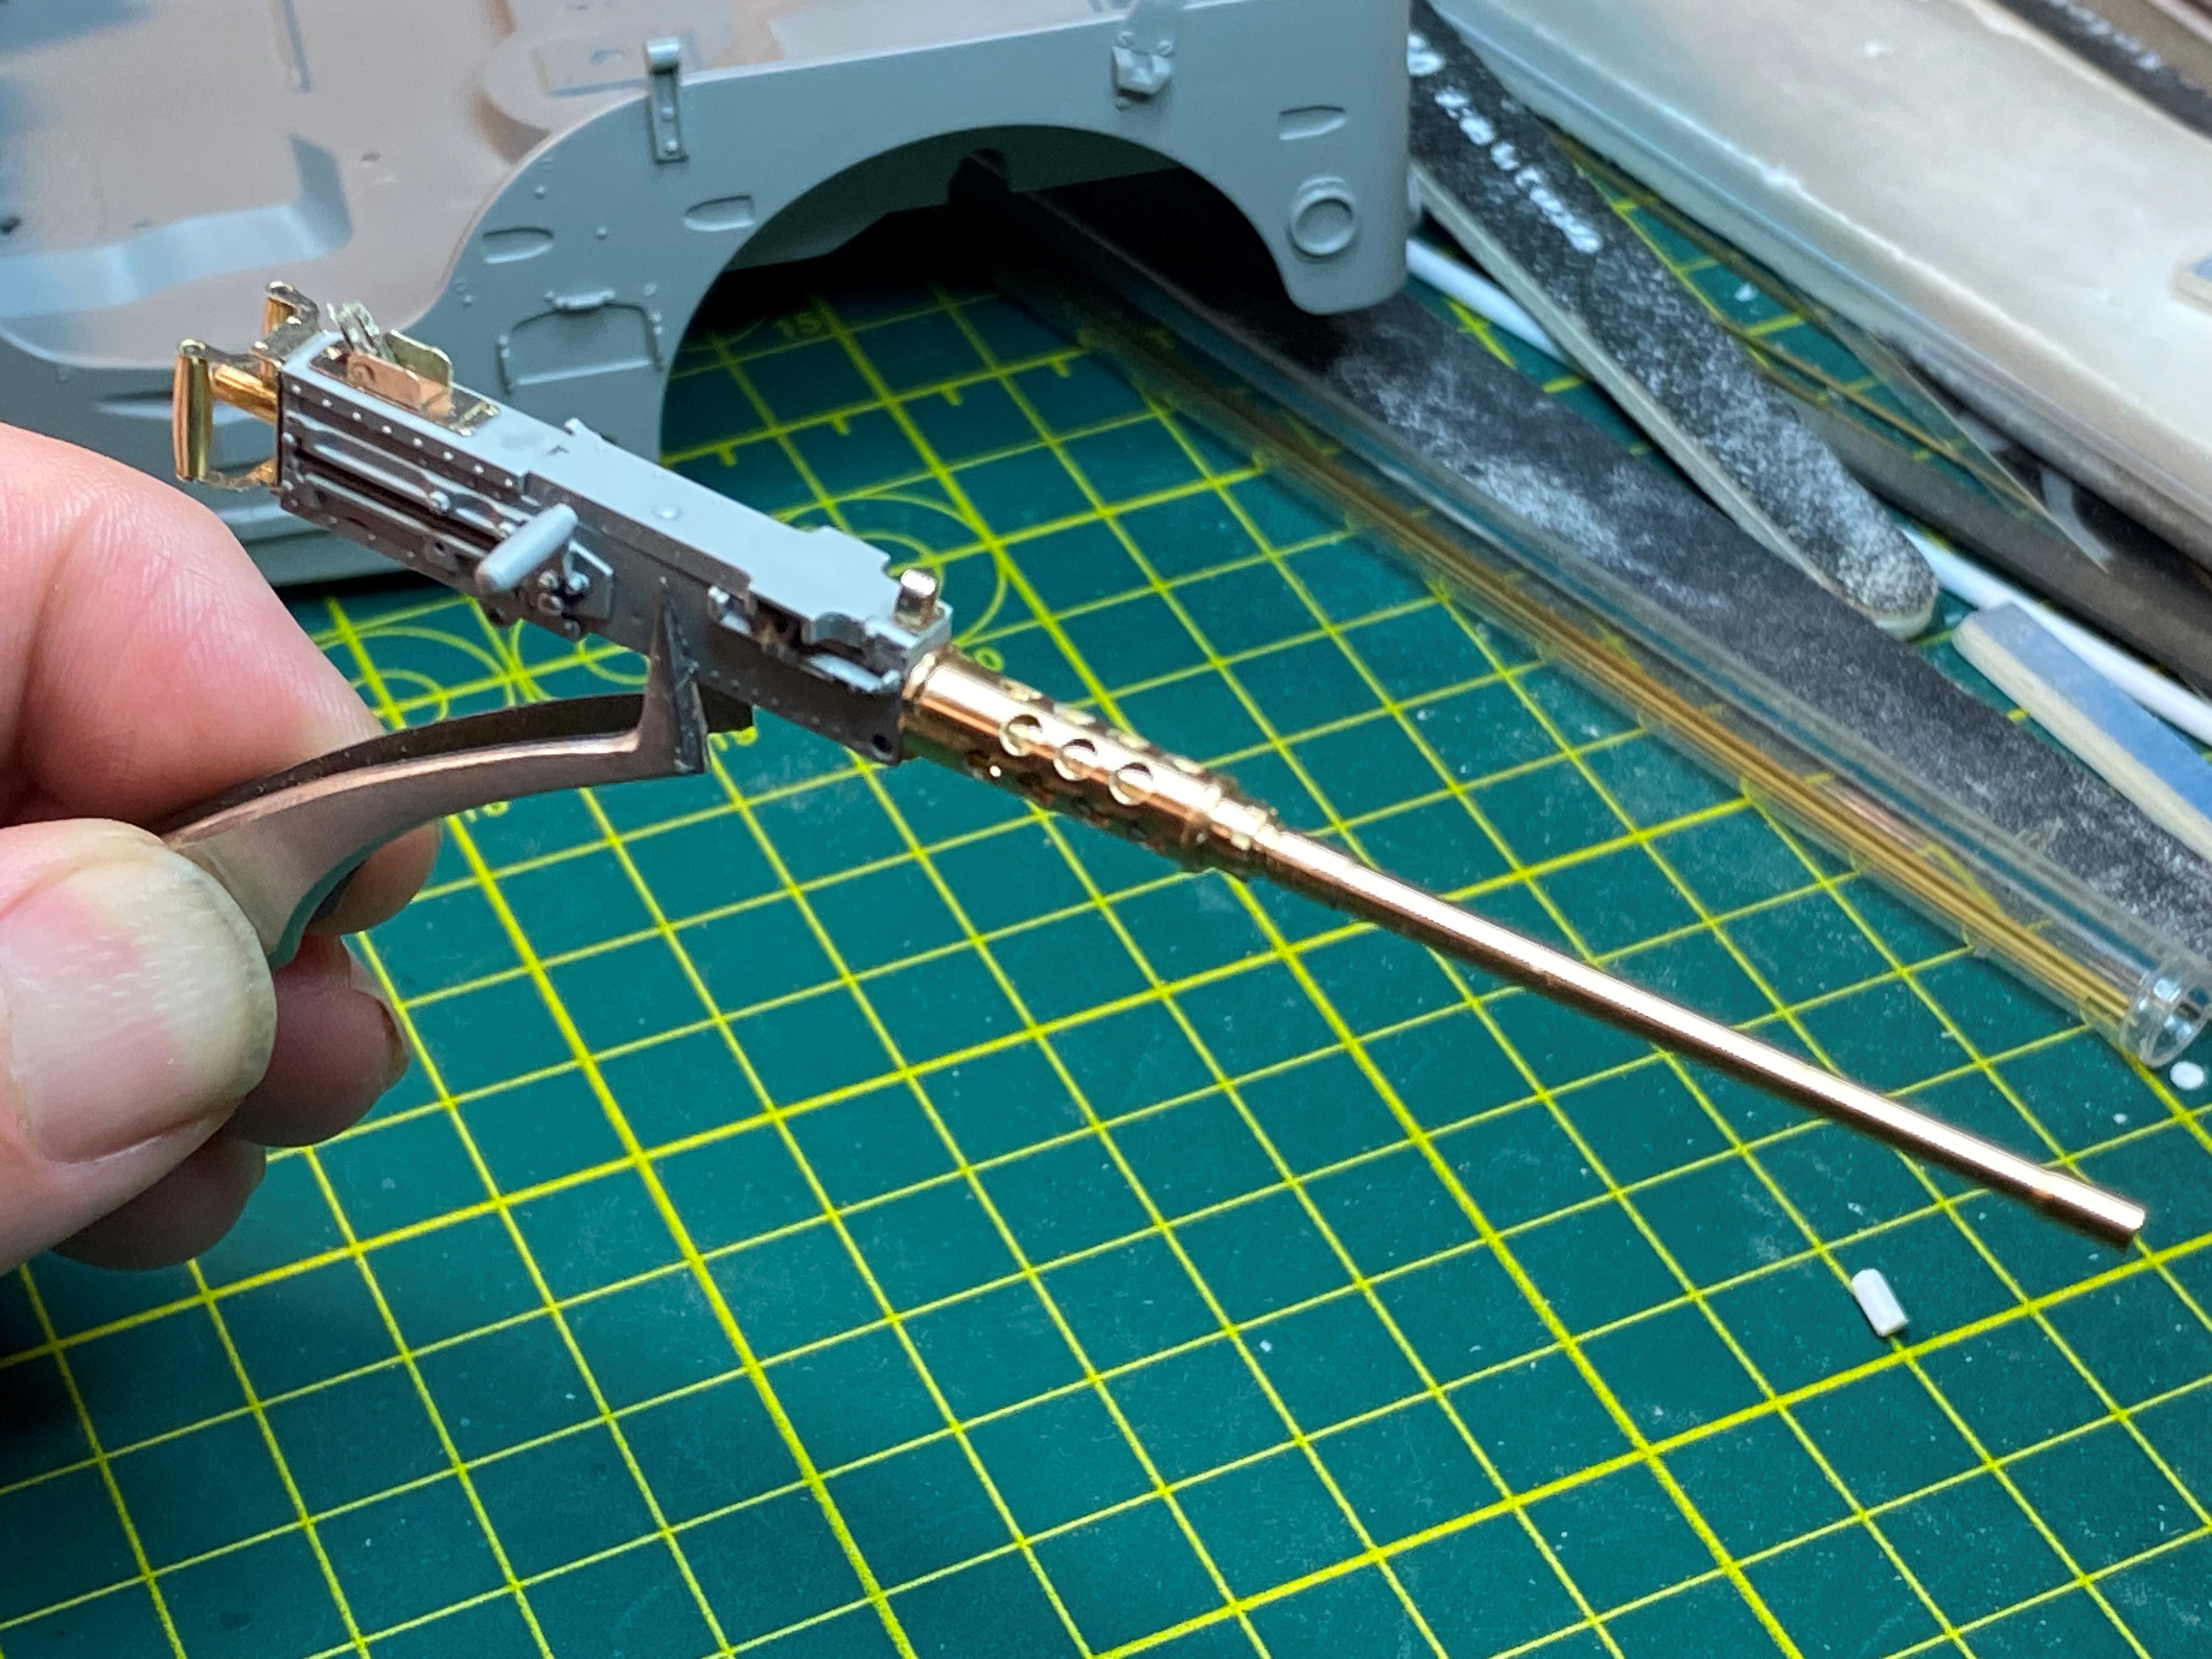
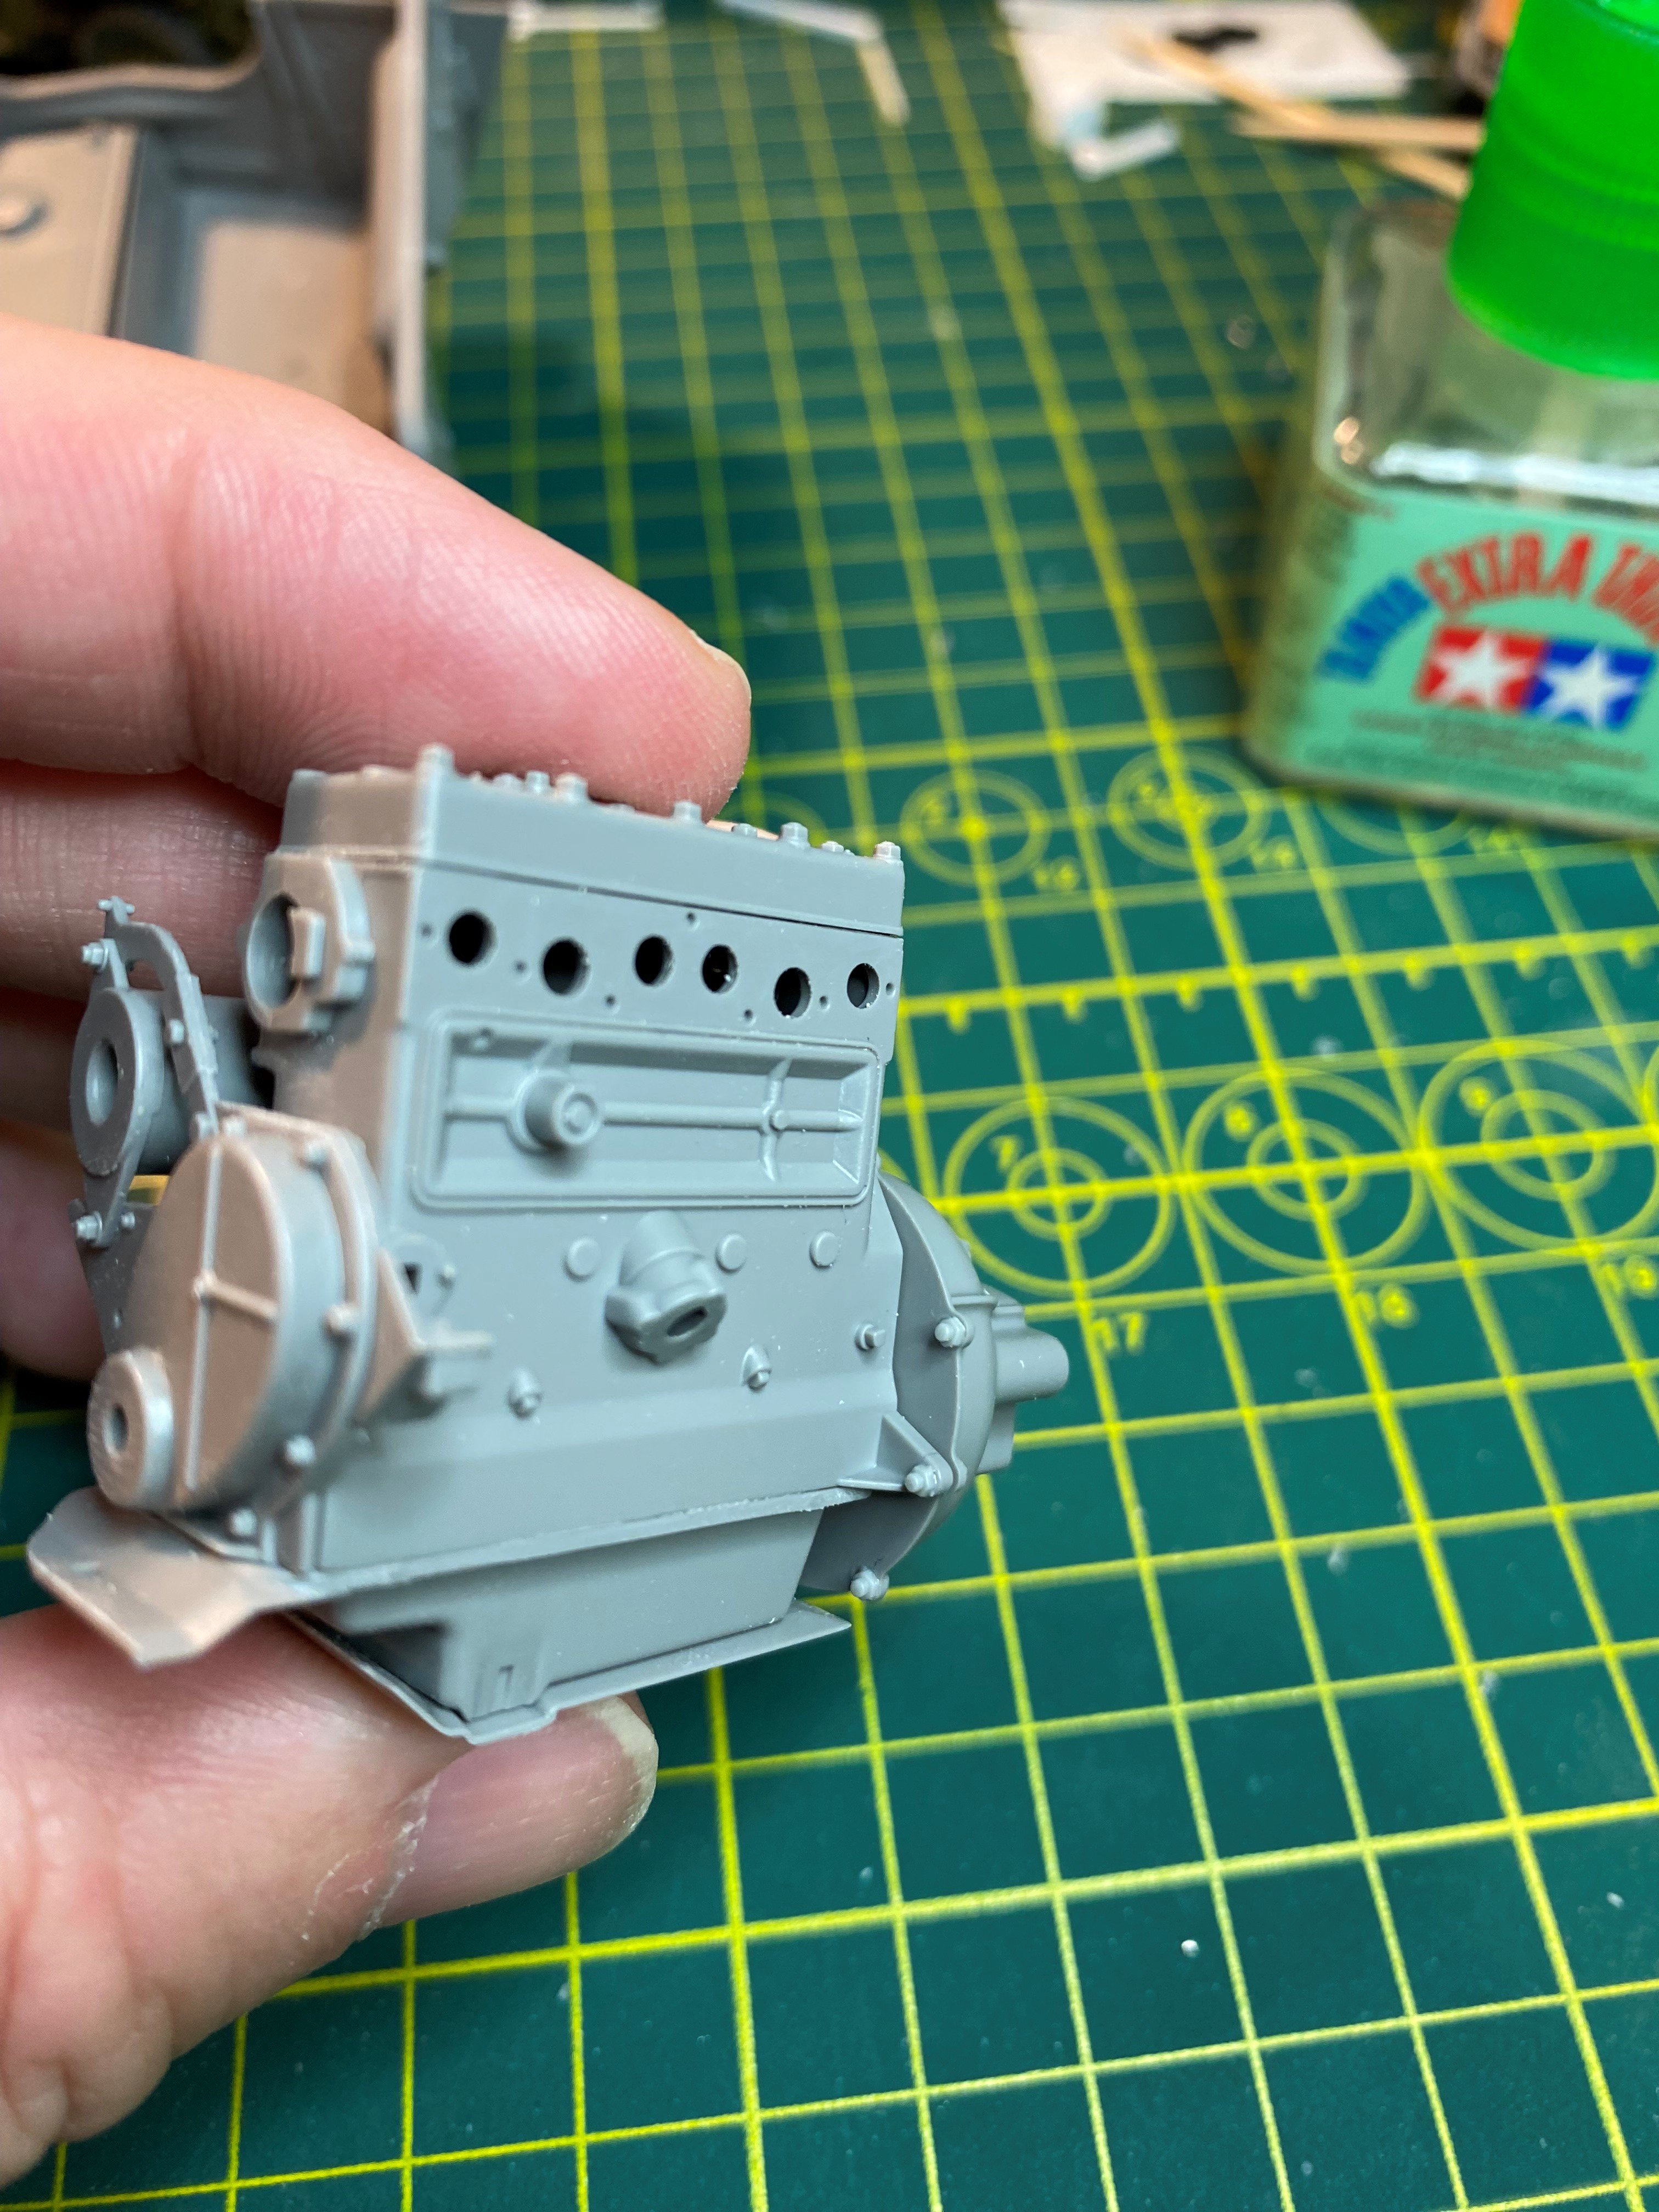
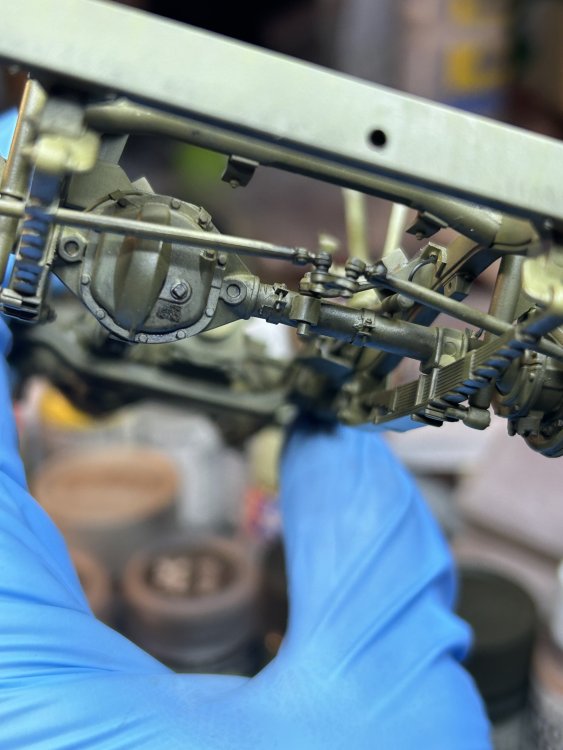
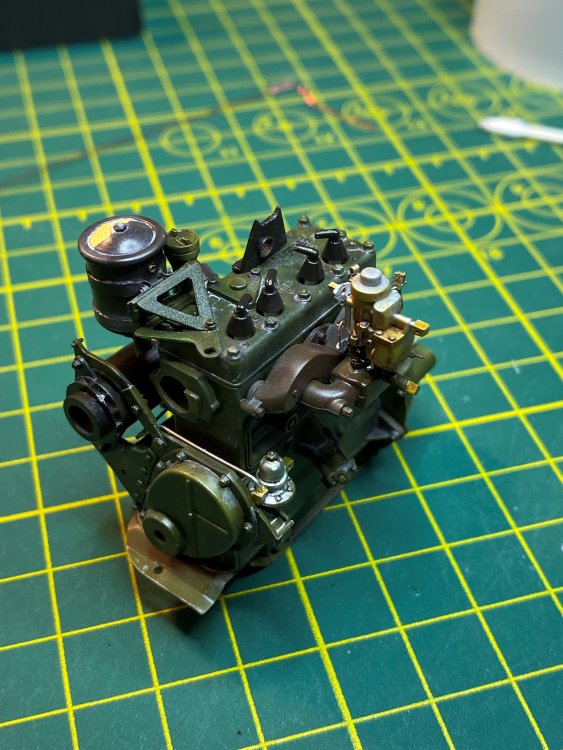
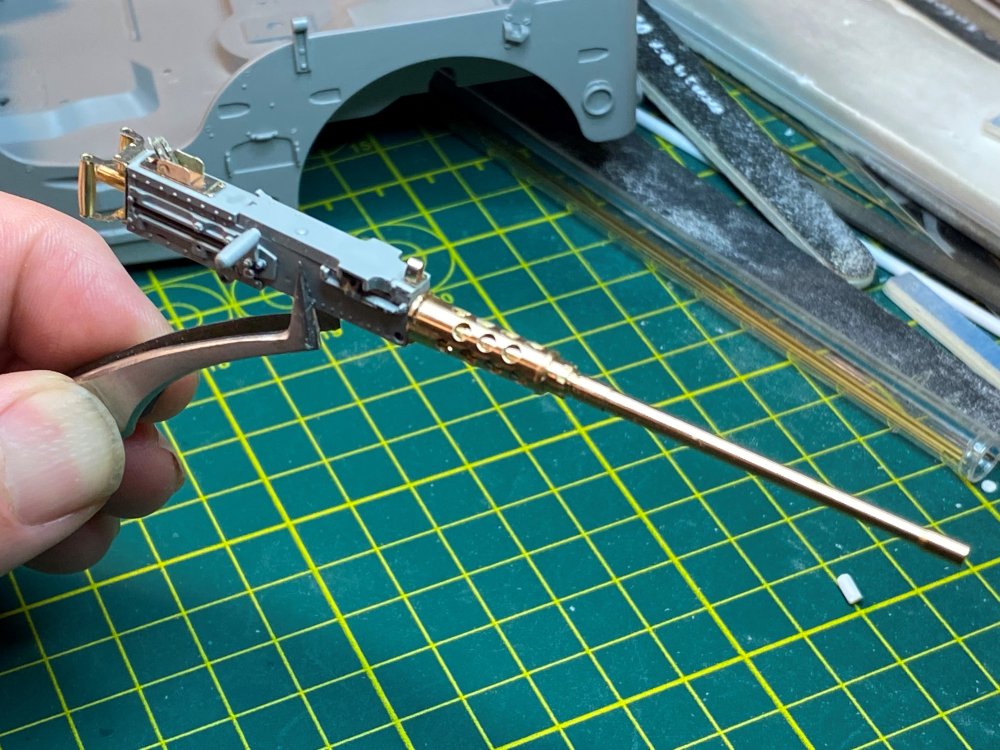
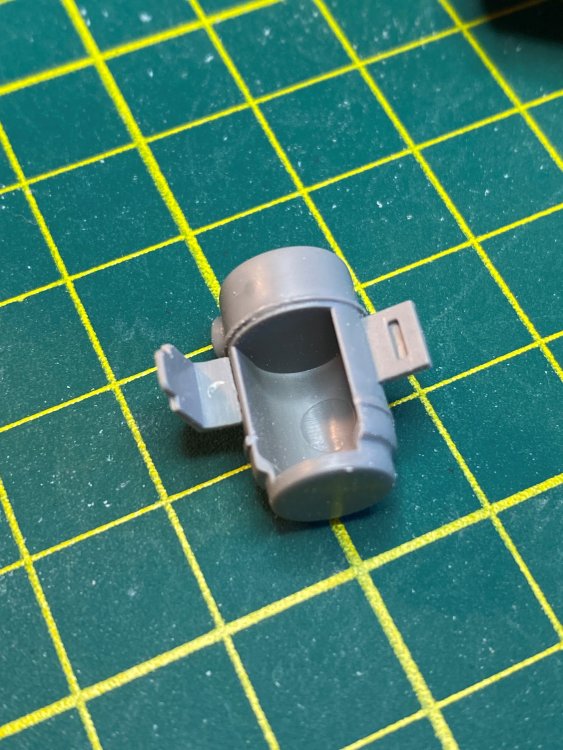
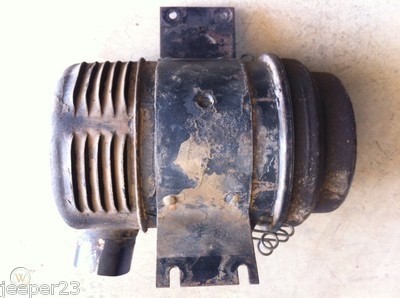
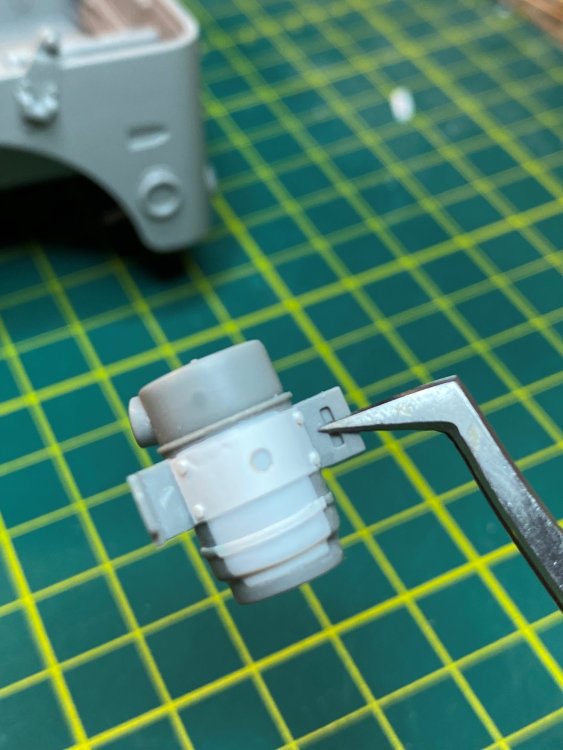
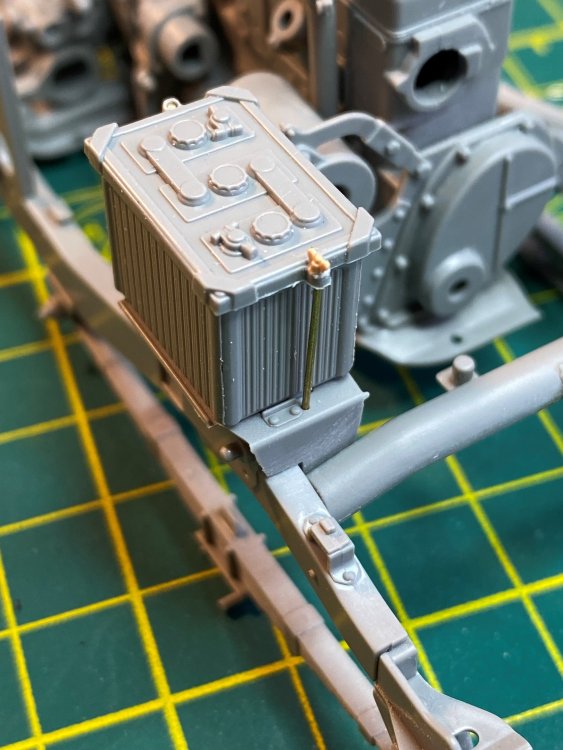
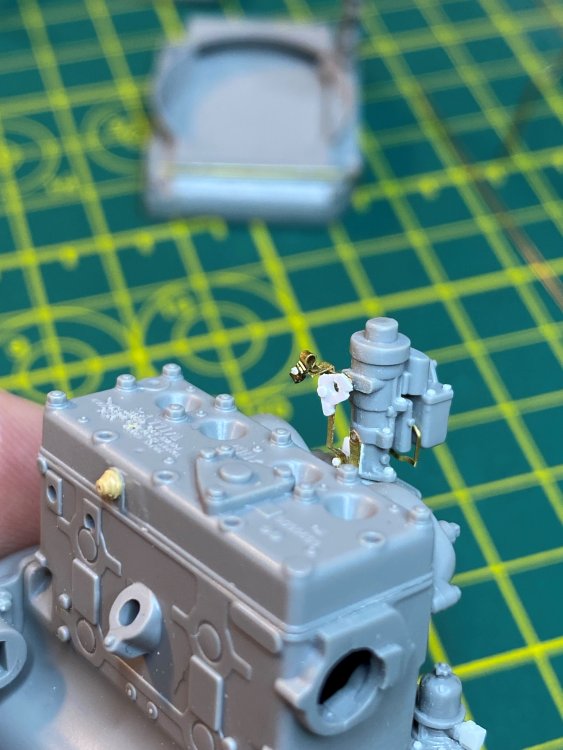
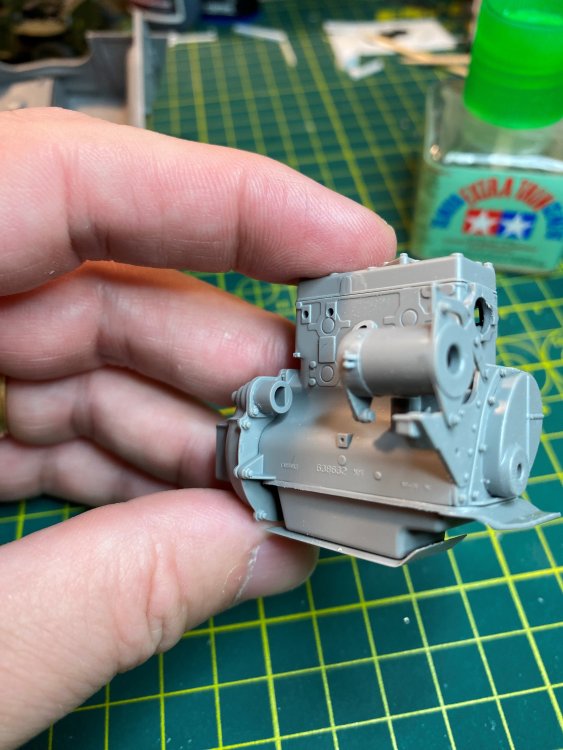
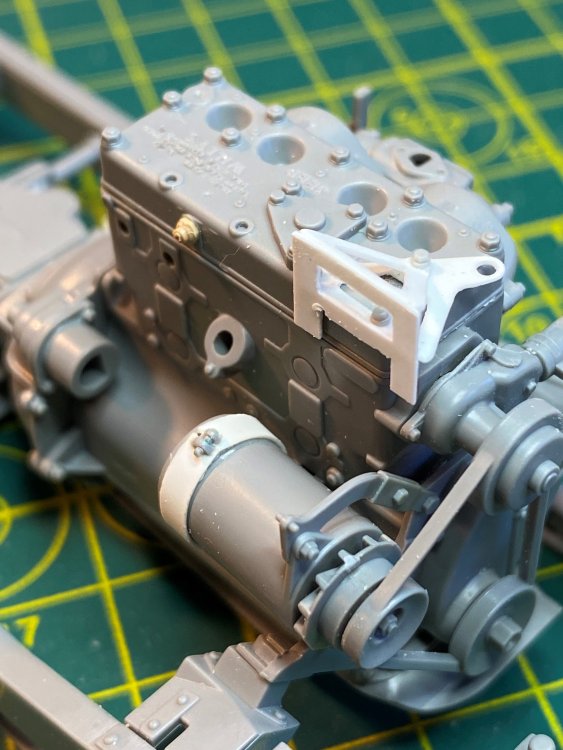
Worked on the .50 cal MG. Got a metal barrel to replace the kit part along with other details. Put together the MG tripod support and tested the fit. Next was the air filter, the back of filter was open, that just bothered me, so I had to add the back. More than likely no one will see as it is close to the firewall but I know it is there. Added a splash plate and detail for the battery including support rods and metal tubing for the battery connections. The front axle adding break lines and supports and guards on the wheels. Detailed the carburetor adding supports for cabling and gas pedal. I would have thought this would have been a good item for photo etch as it is very prominent in the engine. That is it for now. Tim


- 17 replies
-
- 10
-
-
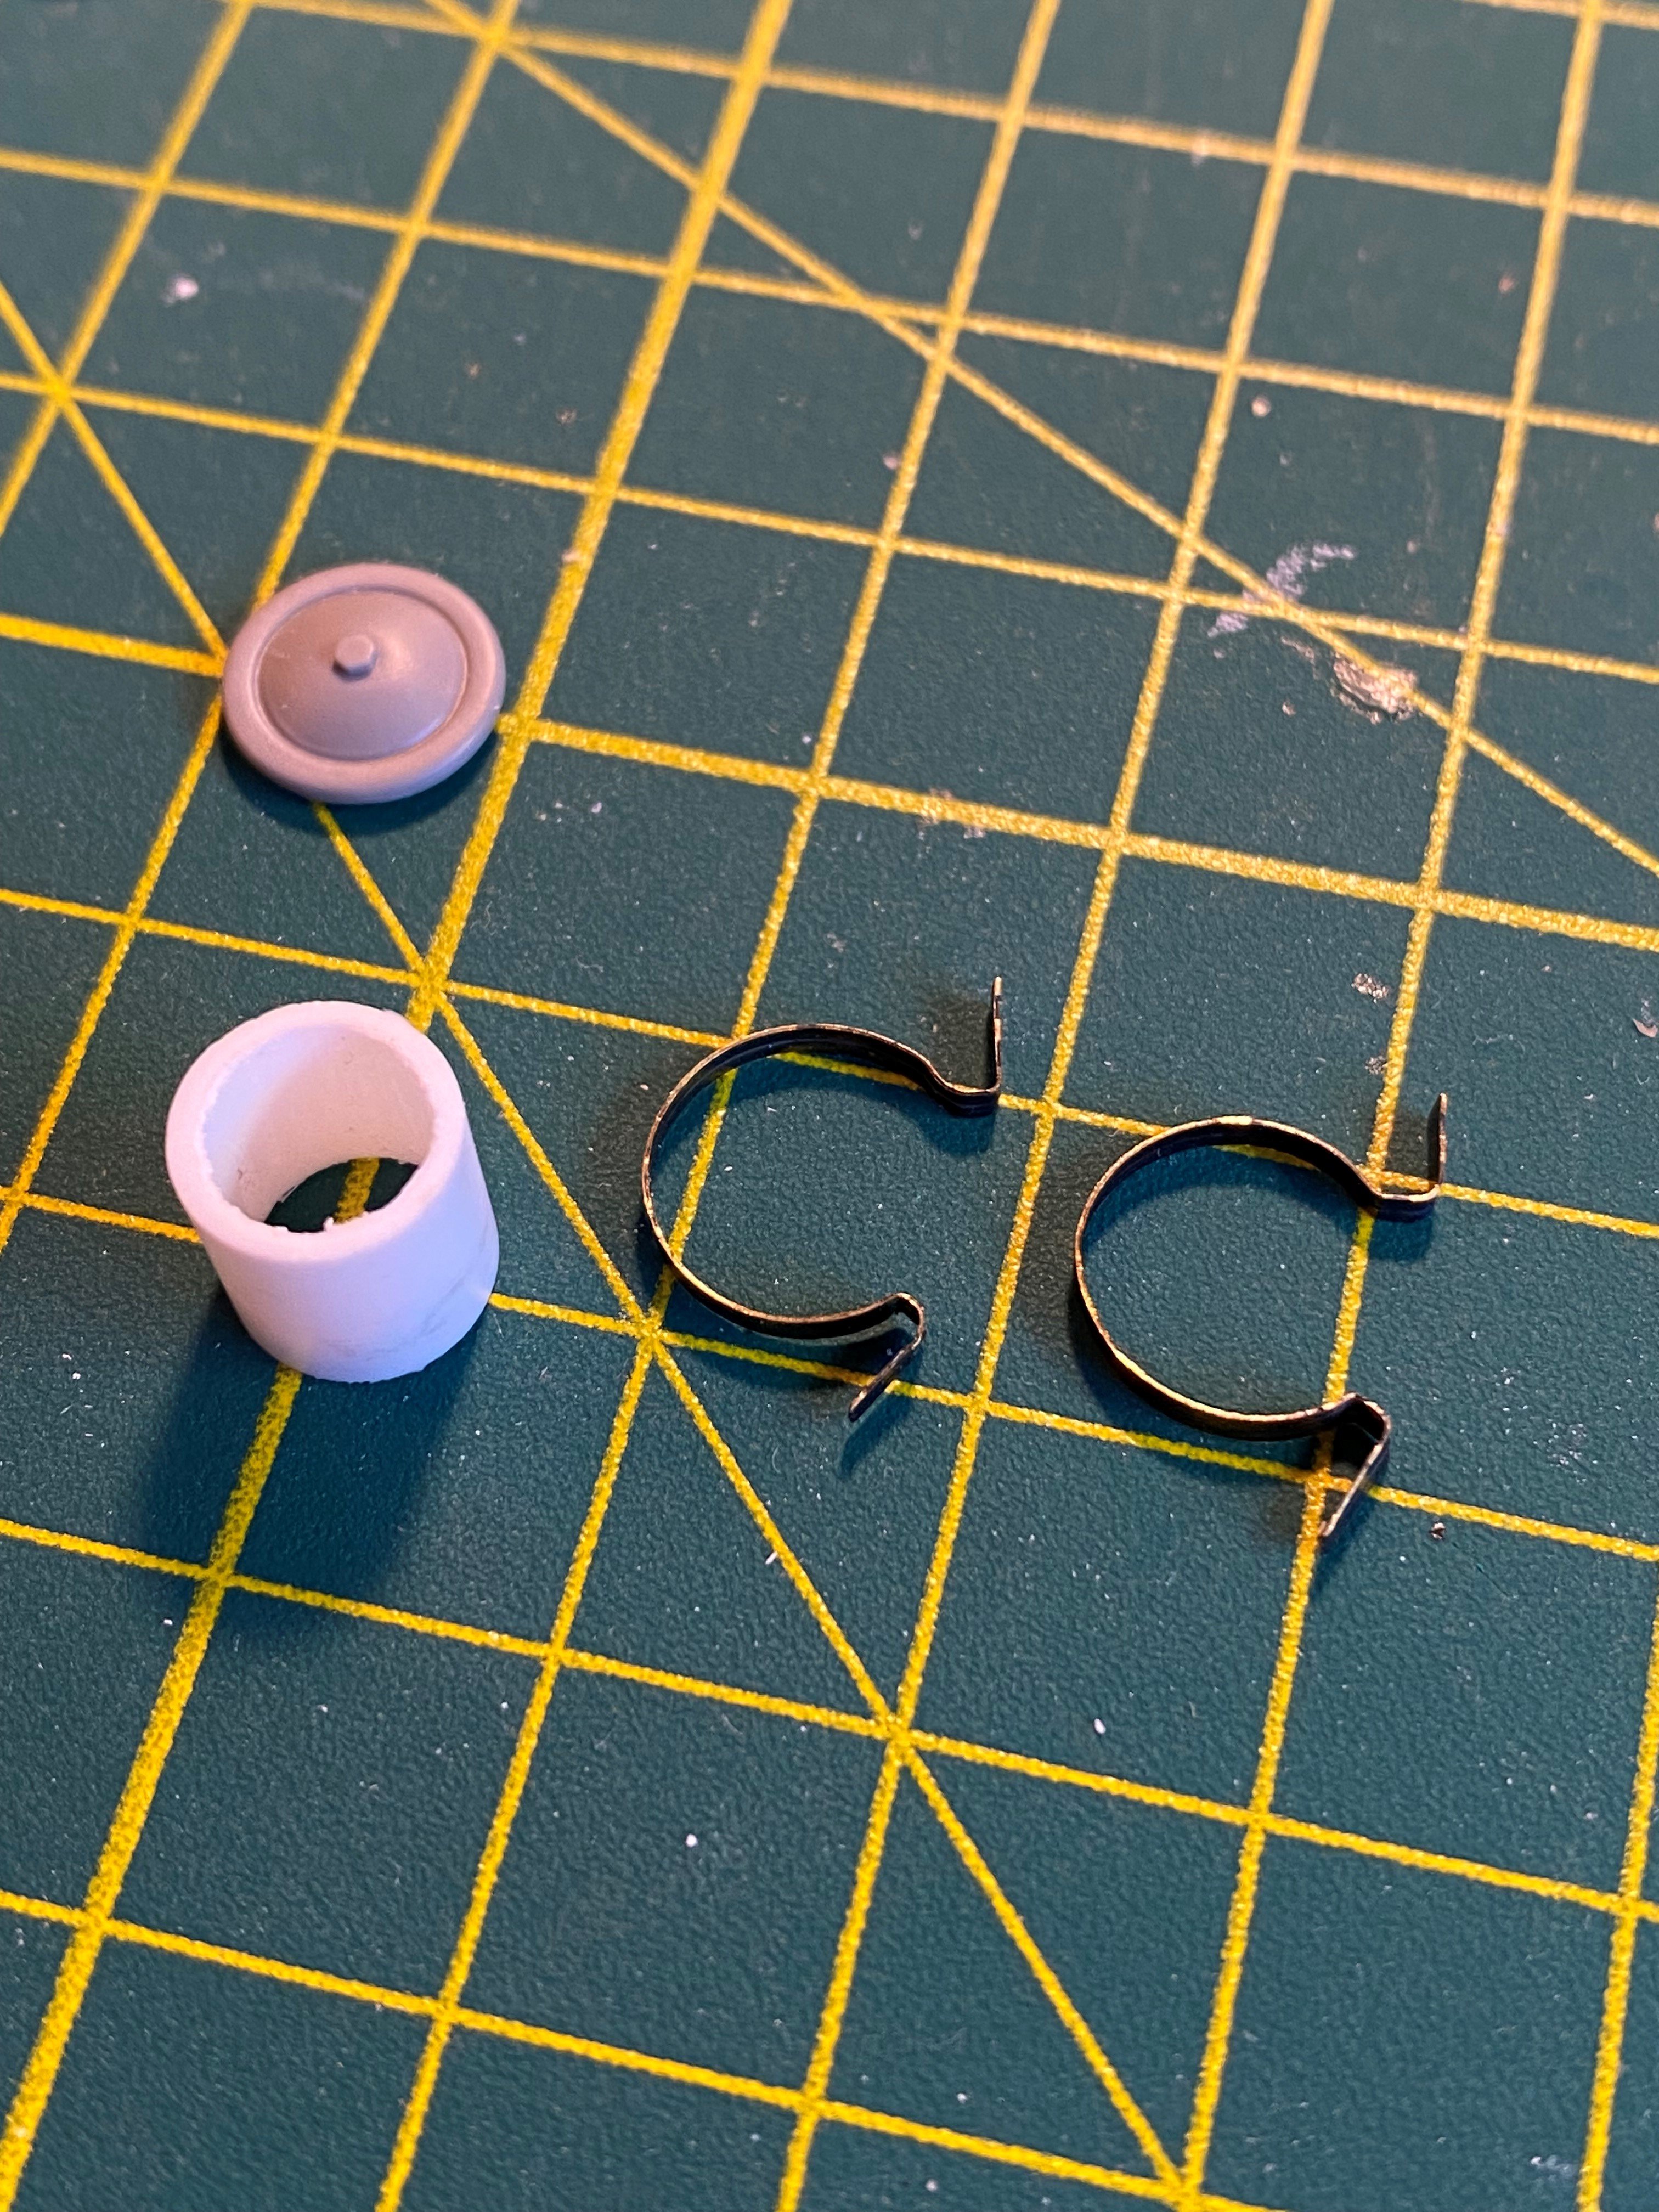
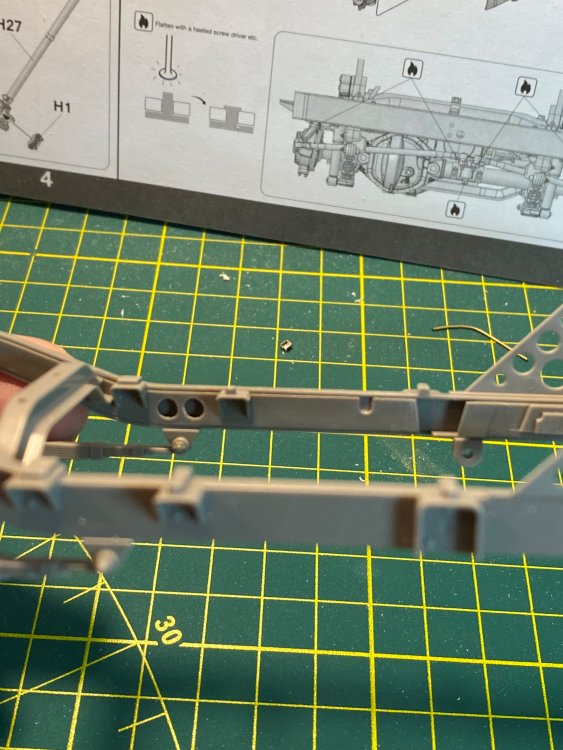
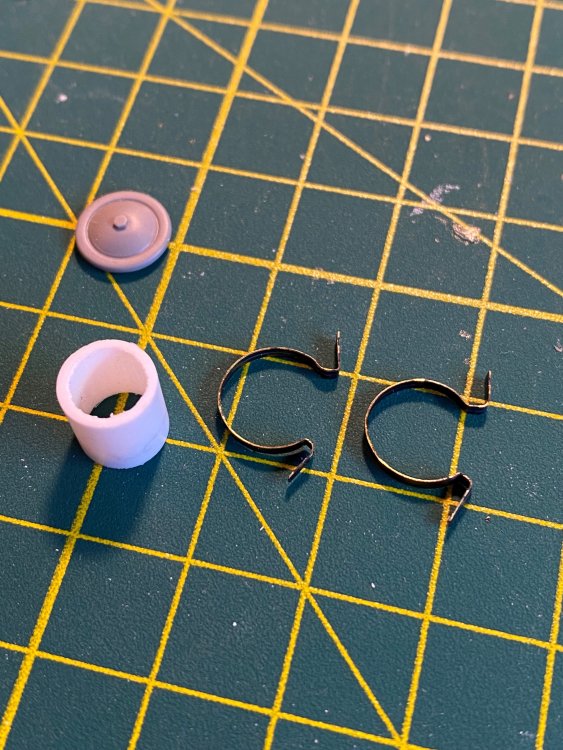
Started on the 1/16 Takom Willys MB. The plan is to add additional wiring for fuel & break lines and electrical as well as other detail. First started with adding opening that are on the actual frame. Will be able to use this to show break line running down the side of the frame. Next, I put the frame together. I put it next to a 1/35 jeep I had completed a long time ago and it is amazing how much larger the 1/16 scale really is. Per the instructions came part of the transmission. Added a few details for the break spring resistance. Added additional bolts and details to the break area. At this point I decided to add the engine firewall drill out the holes for wiring/cabling. I did it earlier than the instructions called for as I want to lay out the wiring/cabling (not gluing) before painting so I don't damage the paint. The engine was next with additional bolts being added. Worked on the oil filter replacing the kit part with a scratch built one. Also built from scratch a new oil filter holder. A little surprised with the amount of detail in the kit this part was molded all as one with no openings. That is all for now.


- 17 replies
-
- 12
-
-
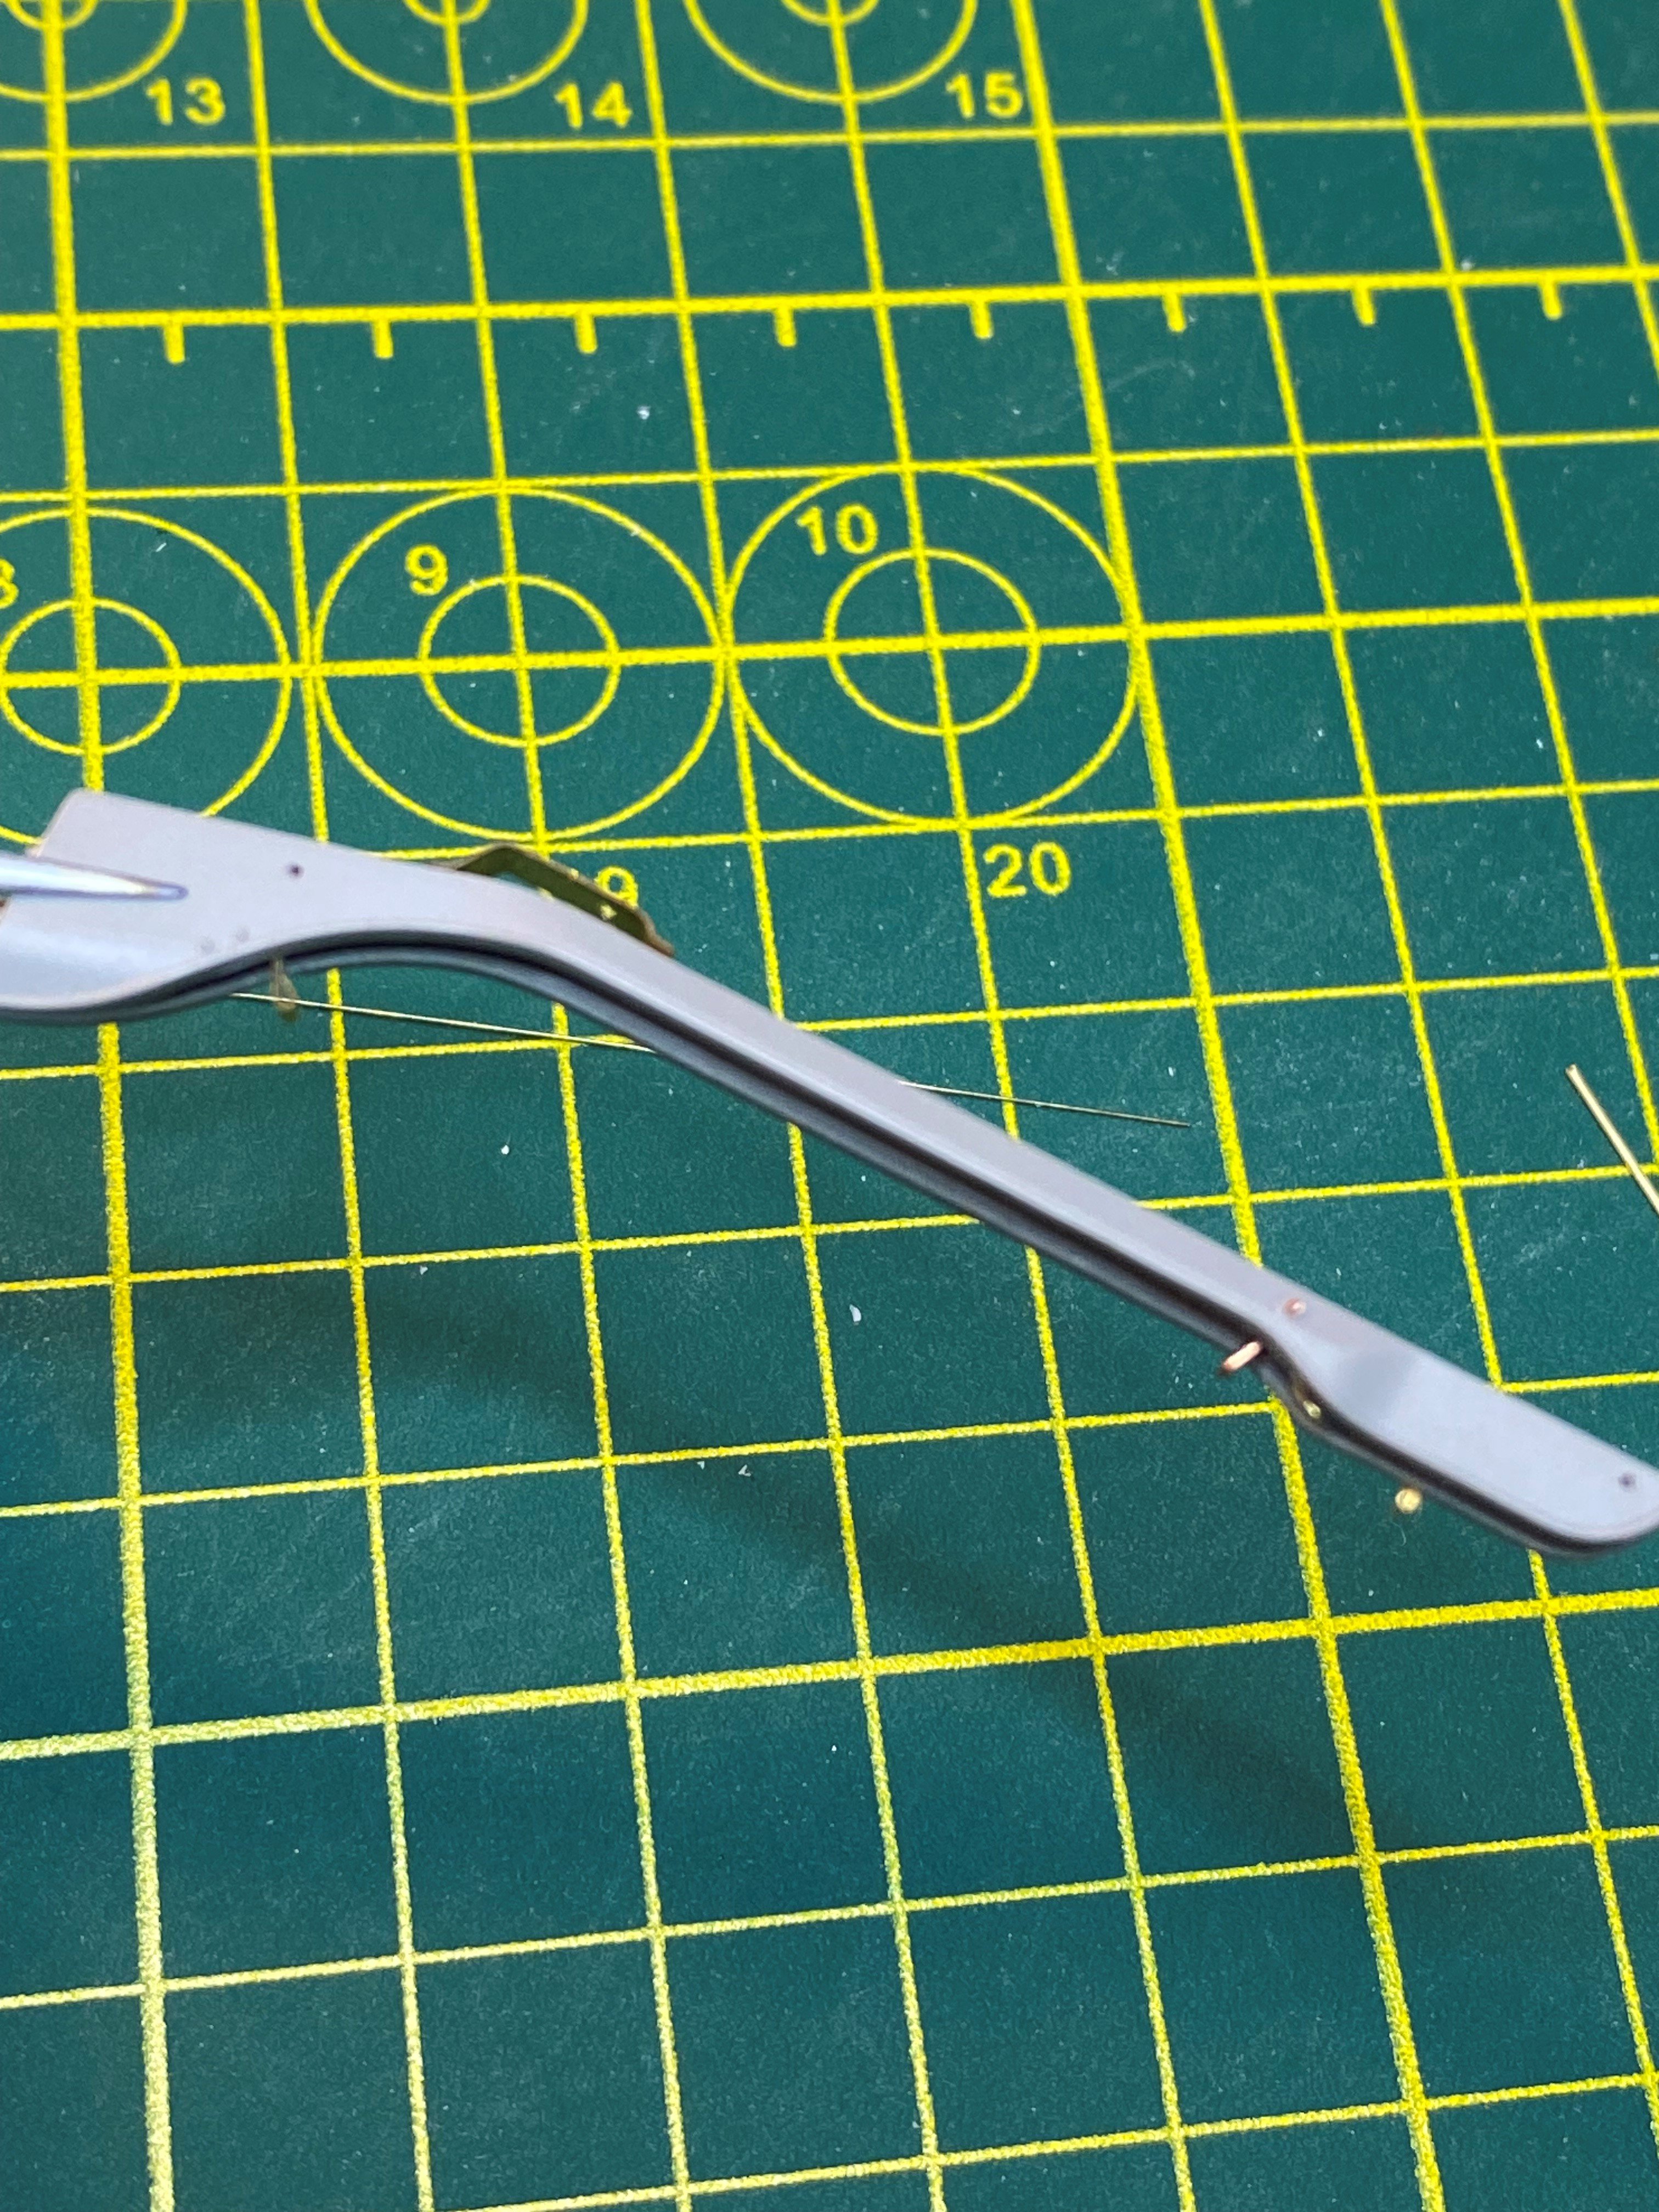
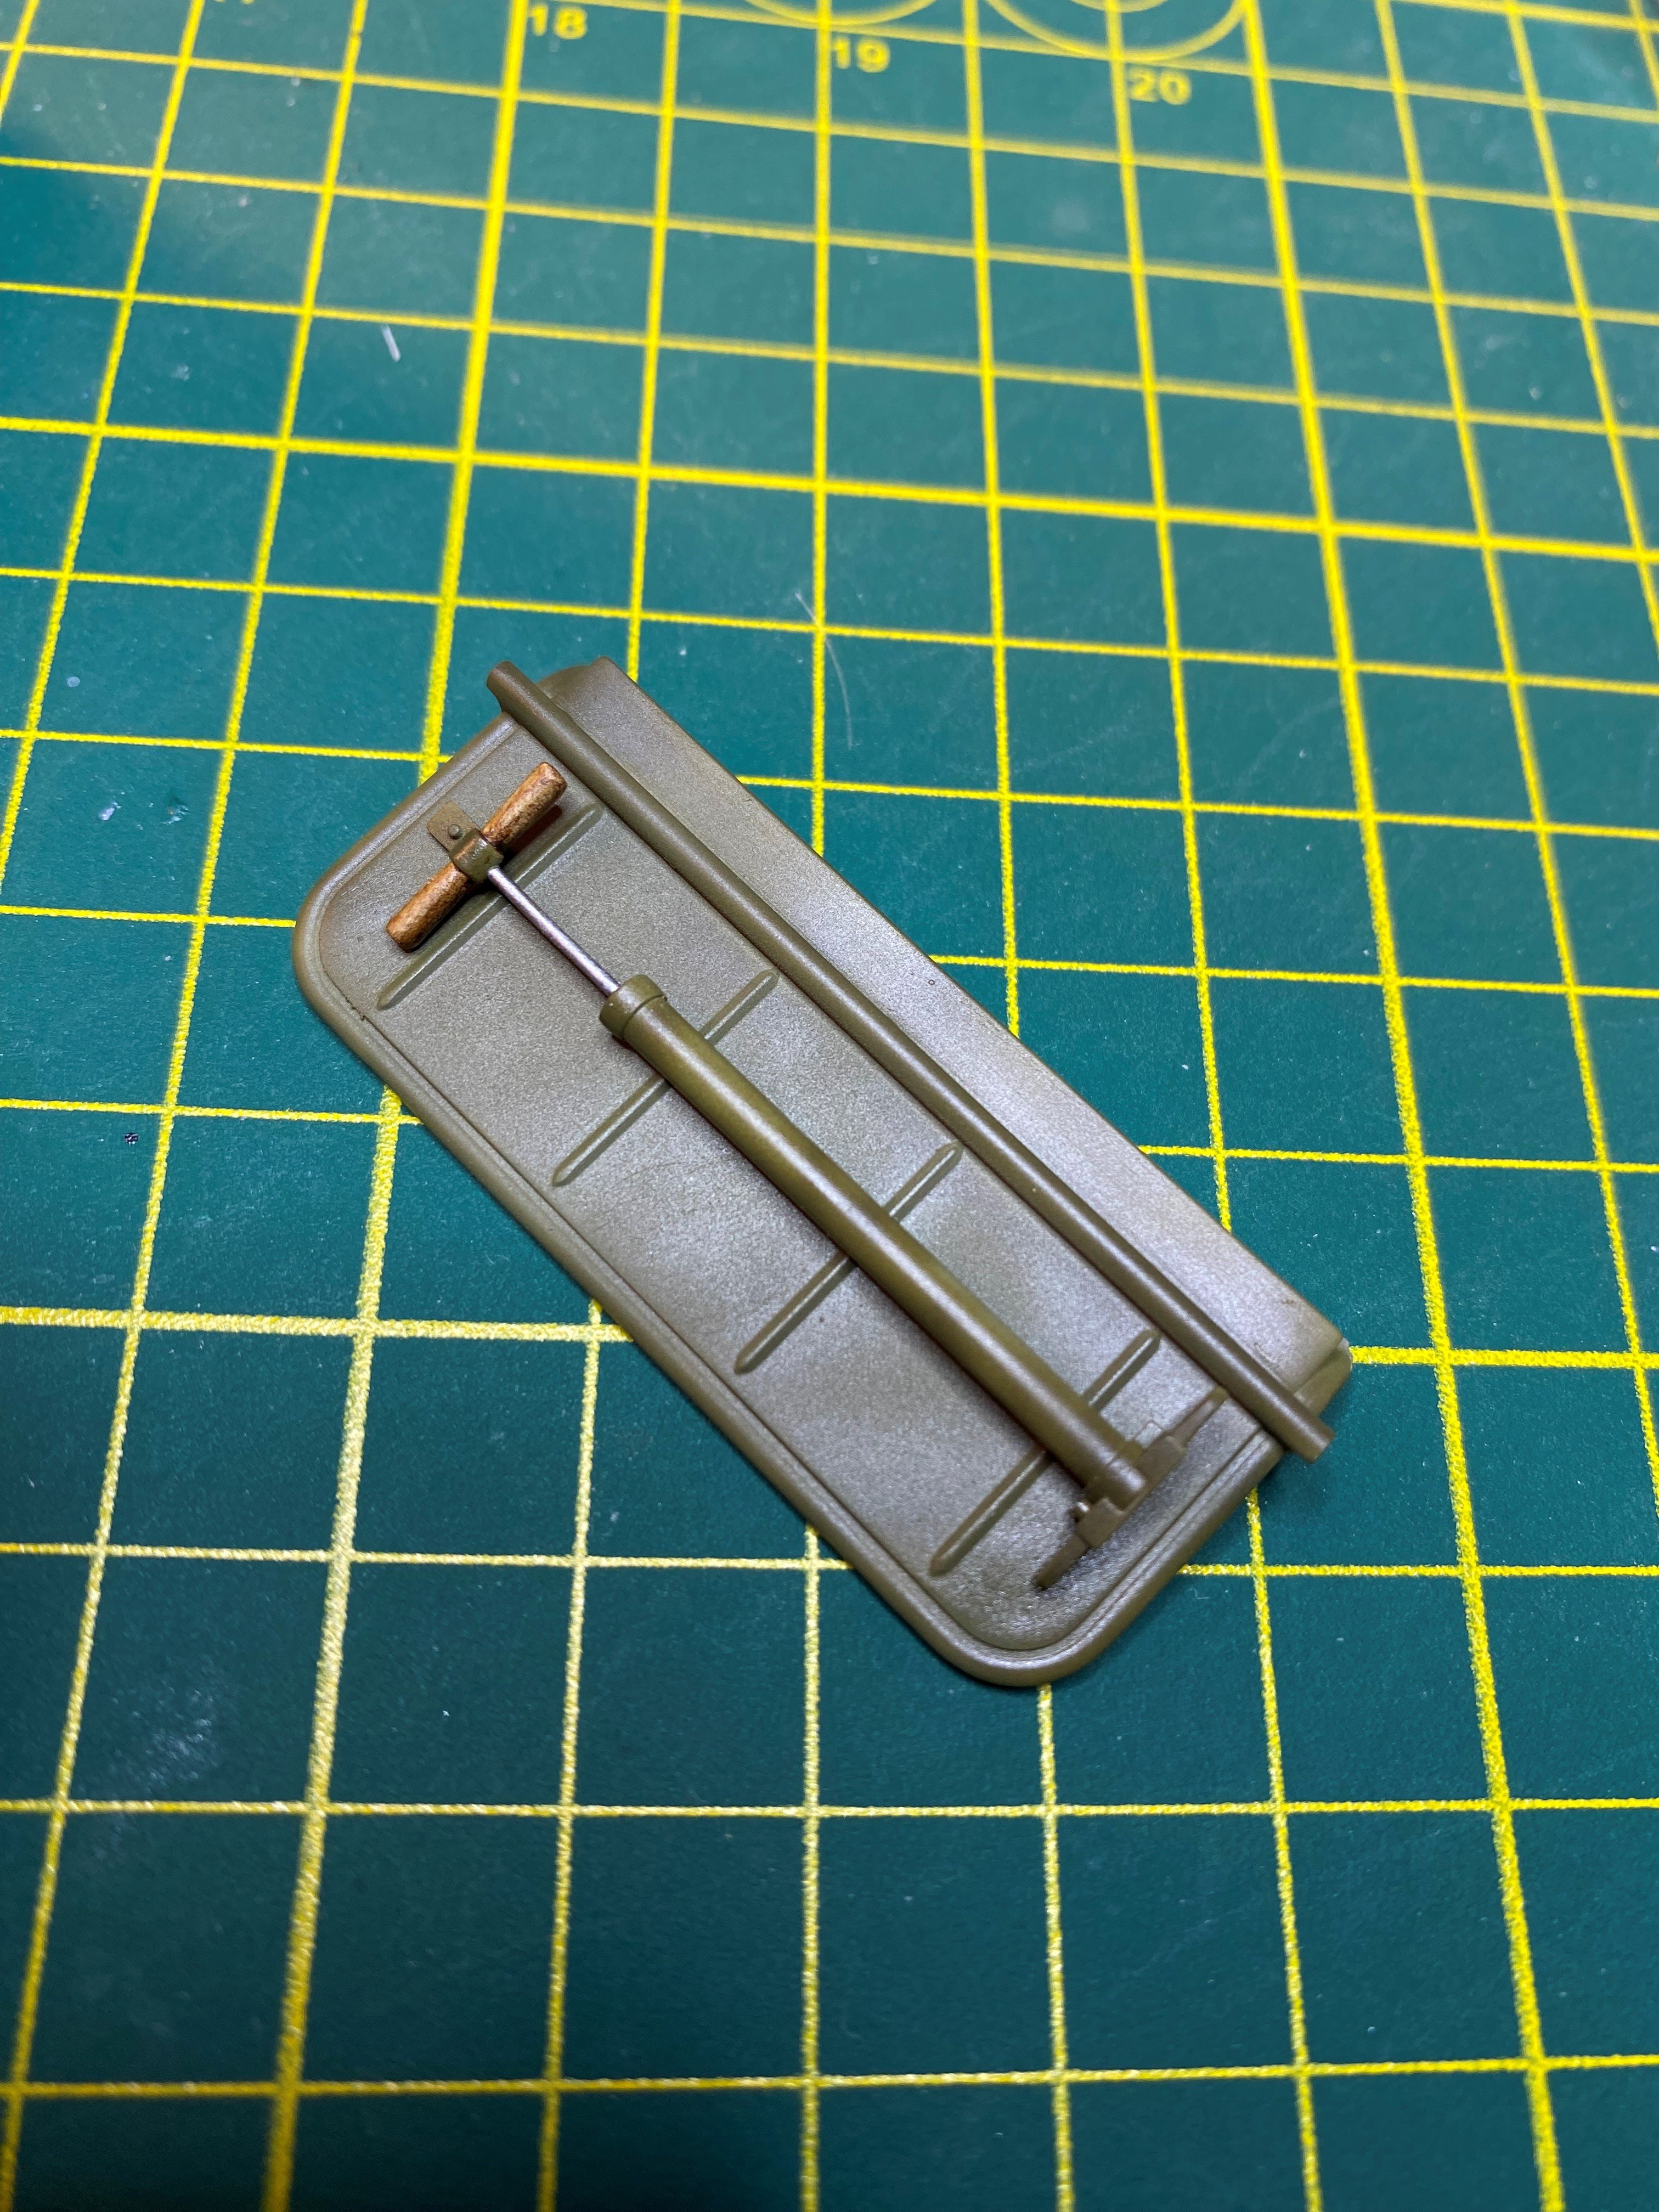
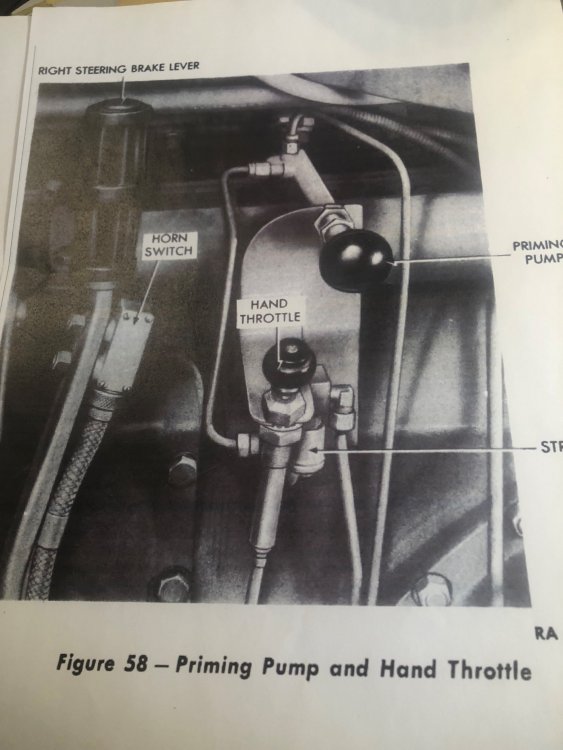
Added detail lines for the Priming pump and Hand Throttle. Replaced the hand throttle as the kit part went flying into the abyss. I think it looks better than the kit part did. Then spent two evenings cleaning up one set of tracks. Finally, parts cleaned and ready for painting and then primed. Hopefully I can get some white put down over the next week. I need to start painting so I can get this done by the end of March in time for the local IPMS contest. Tim

-
Tamiya 1/32 VLR P-51D "Fighting Lady" 475th FS
Axeman replied to Daywalker's topic in LSM 1/35 and Larger Work In Progress
Very nice silver painting. Tim -
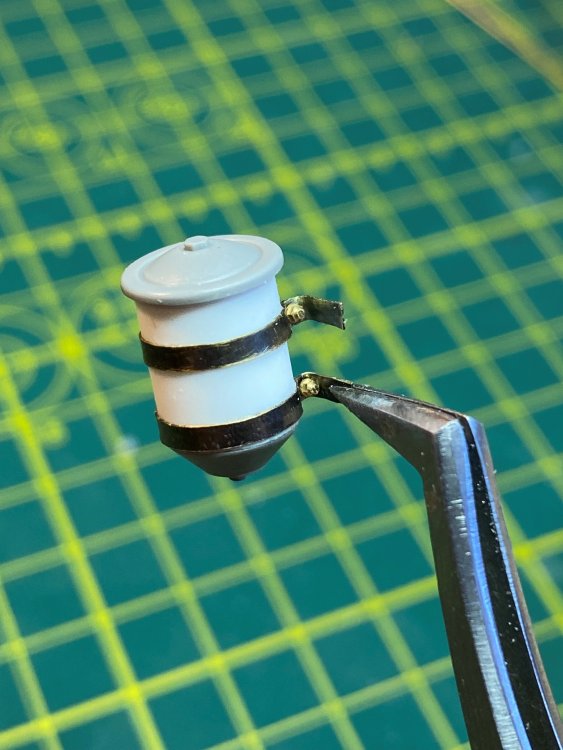
Back from my holiday vacation. Worked on replacing the belt in the engine area. I will see if I want to use it or not when I go to install it and see how visible it is. The reason I want to change it is that it has two bands but the kit part is only shows one. I am just not 100% feeling good about the scratch built part. Planning on starting to paint individual interior parts next weekend. Tim
-
Love the detail. Amazing work. Tim
-
RFM 1/35 Tiger 1 early Production "Full Interior"
Axeman replied to KevinM's topic in LSM 1/35 and Larger Work In Progress
The interior is looking fantastic. Cannot wait for the rest of the build. Tim -
Amazing scratch building. Great work … tim
-
RFM 1/35 Tiger 1 early Production "Full Interior"
Axeman replied to KevinM's topic in LSM 1/35 and Larger Work In Progress
Painting is looking good. -
Amazing work!!
-
RFM 1/35 Tiger 1 early Production "Full Interior"
Axeman replied to KevinM's topic in LSM 1/35 and Larger Work In Progress
Looking forward to this one. I like interior detail. Tim -
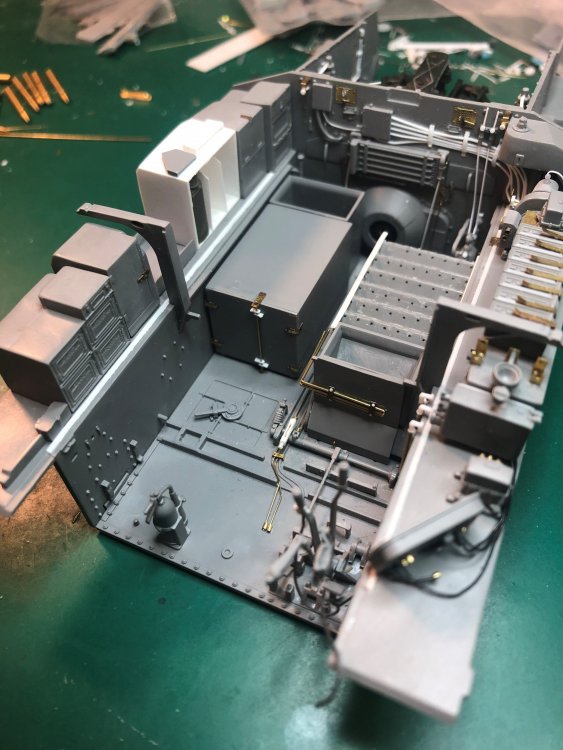
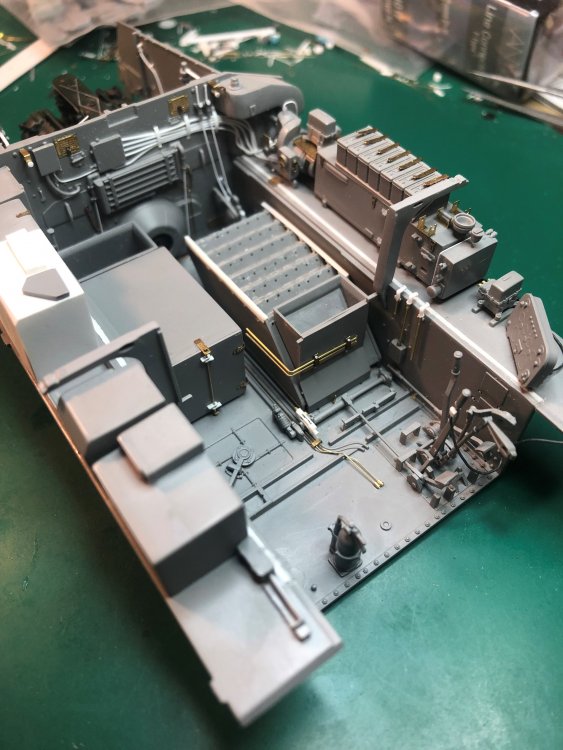
Did a test fit of the majority of the hull interior. Not shown but tested the support bar for the floor plating and needed to remove the fire suppression connection (will relocate it). Good thing I tested it before any painting. Just need to work on the generator around the transmission area and the drive shaft. After that I think I can start painting the individual items. Tim
-
My wife always asks, does it actually run…. 😆
-
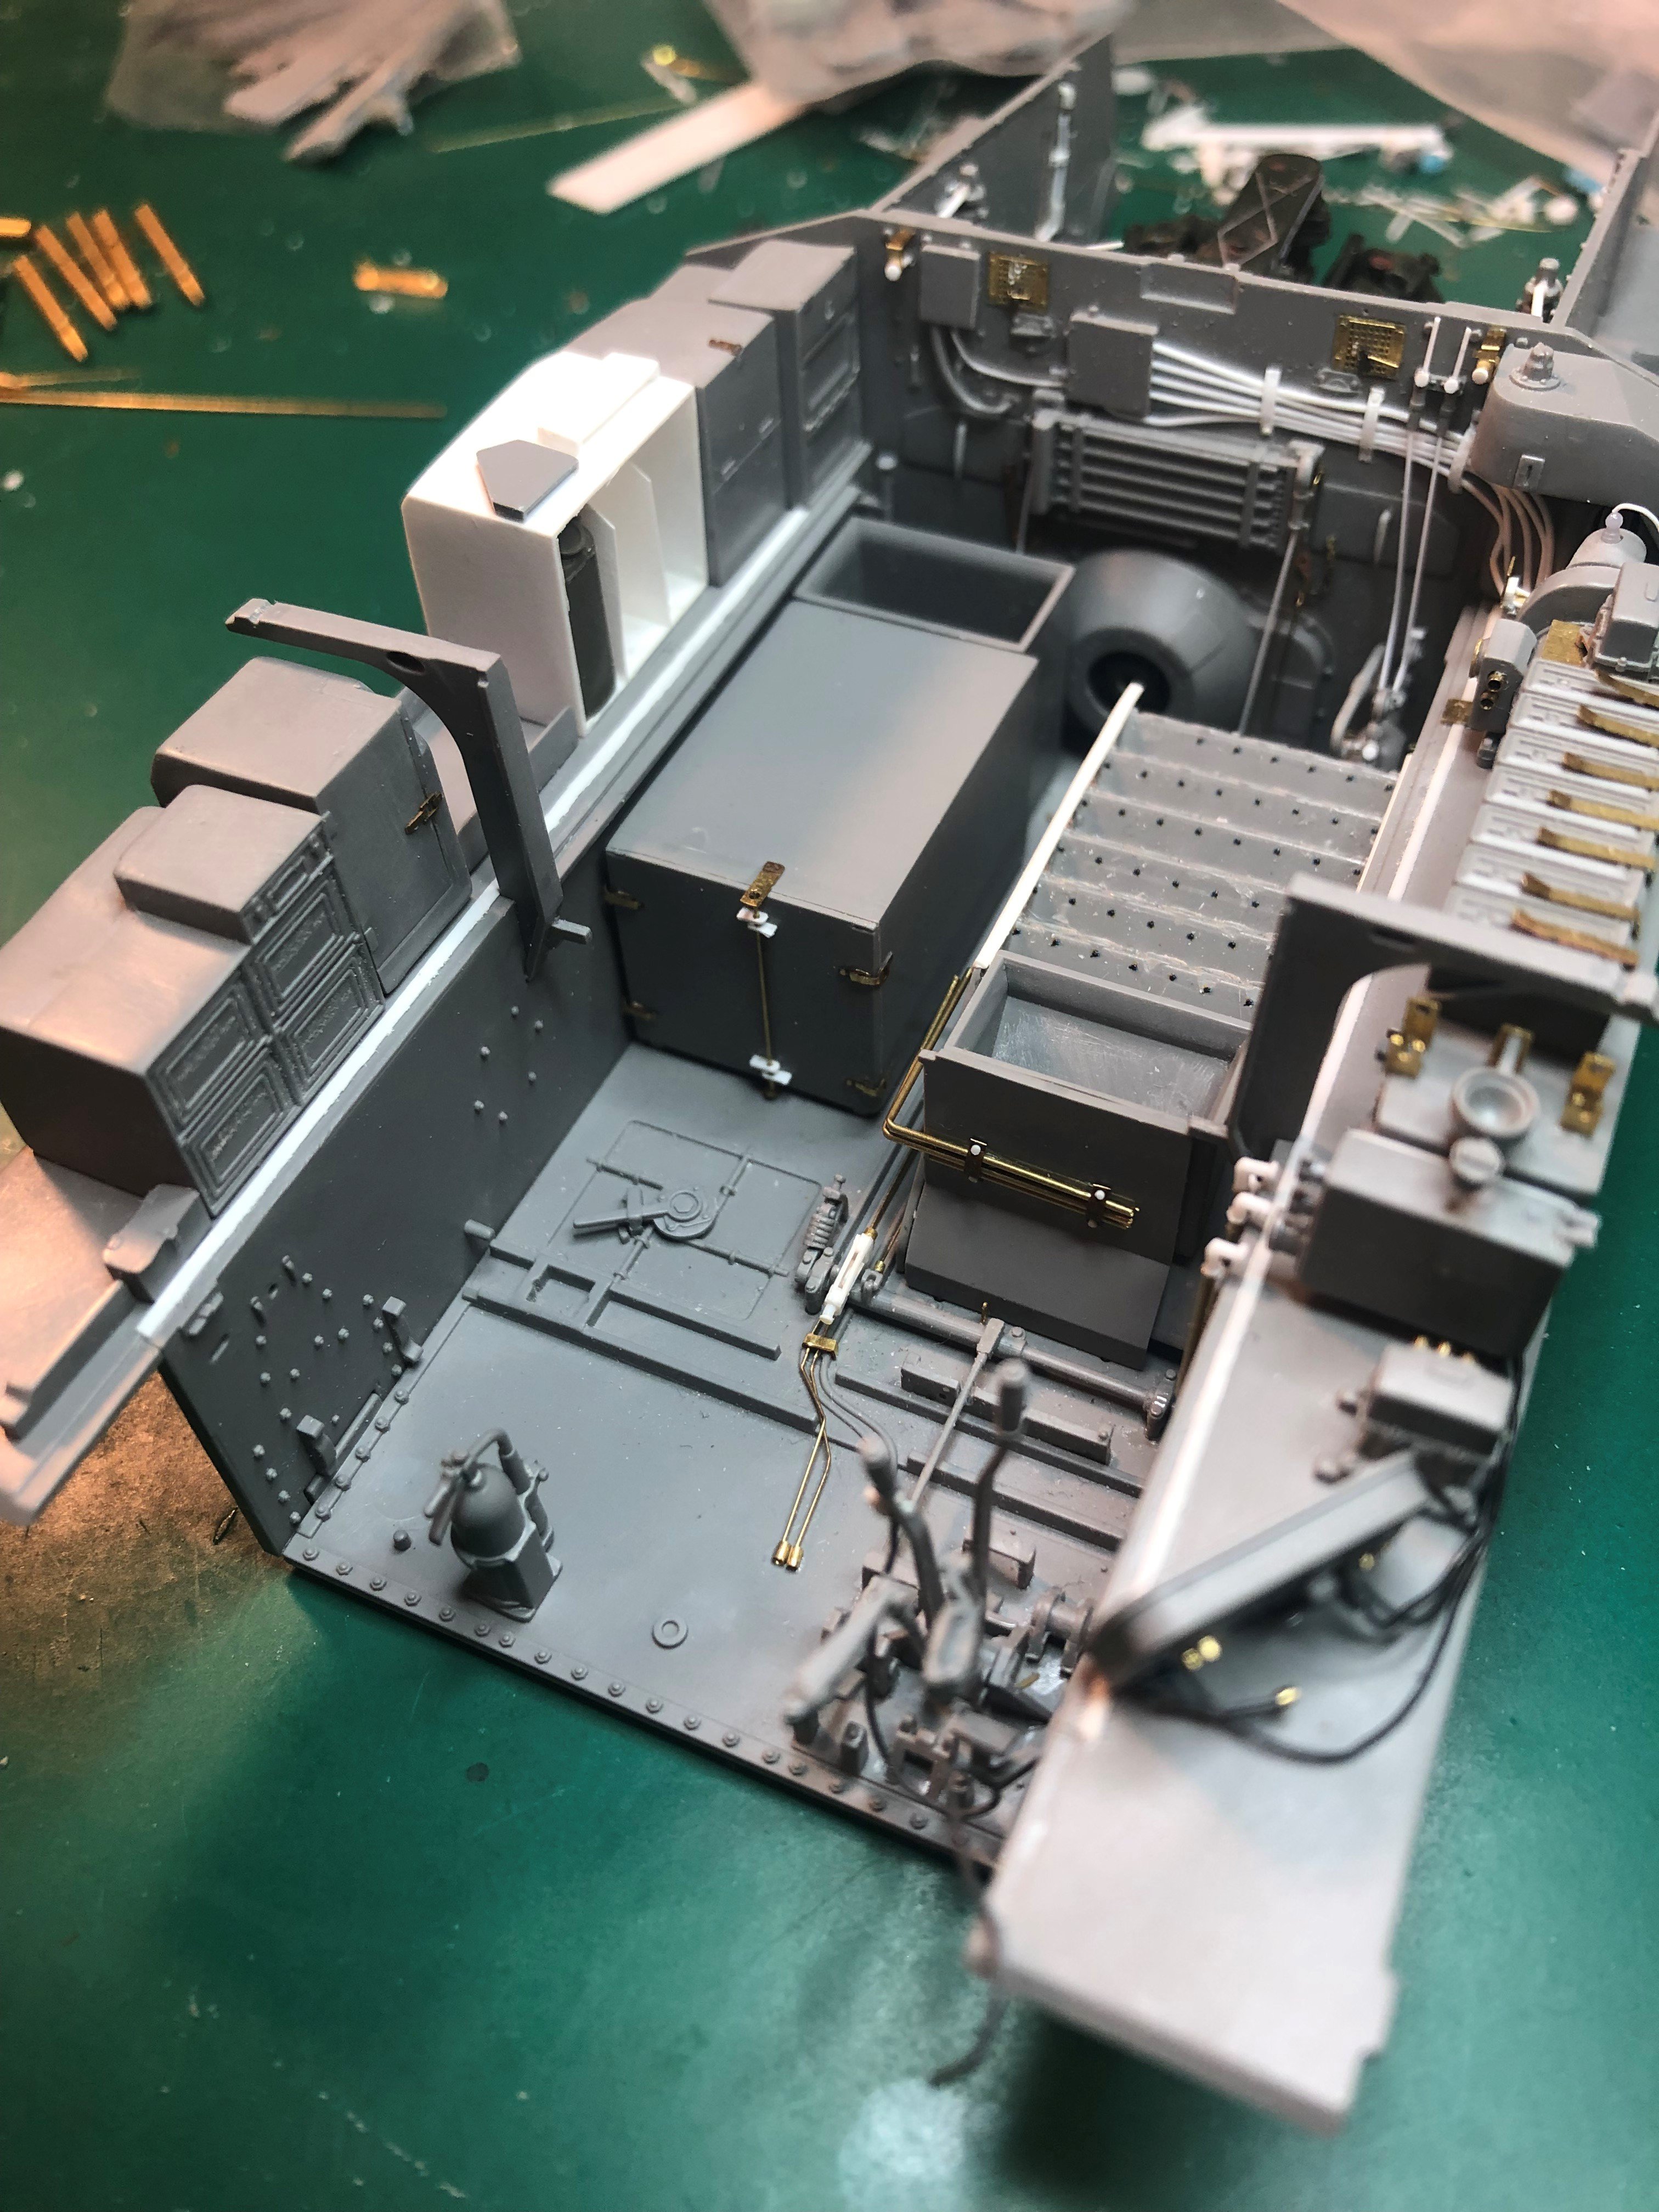
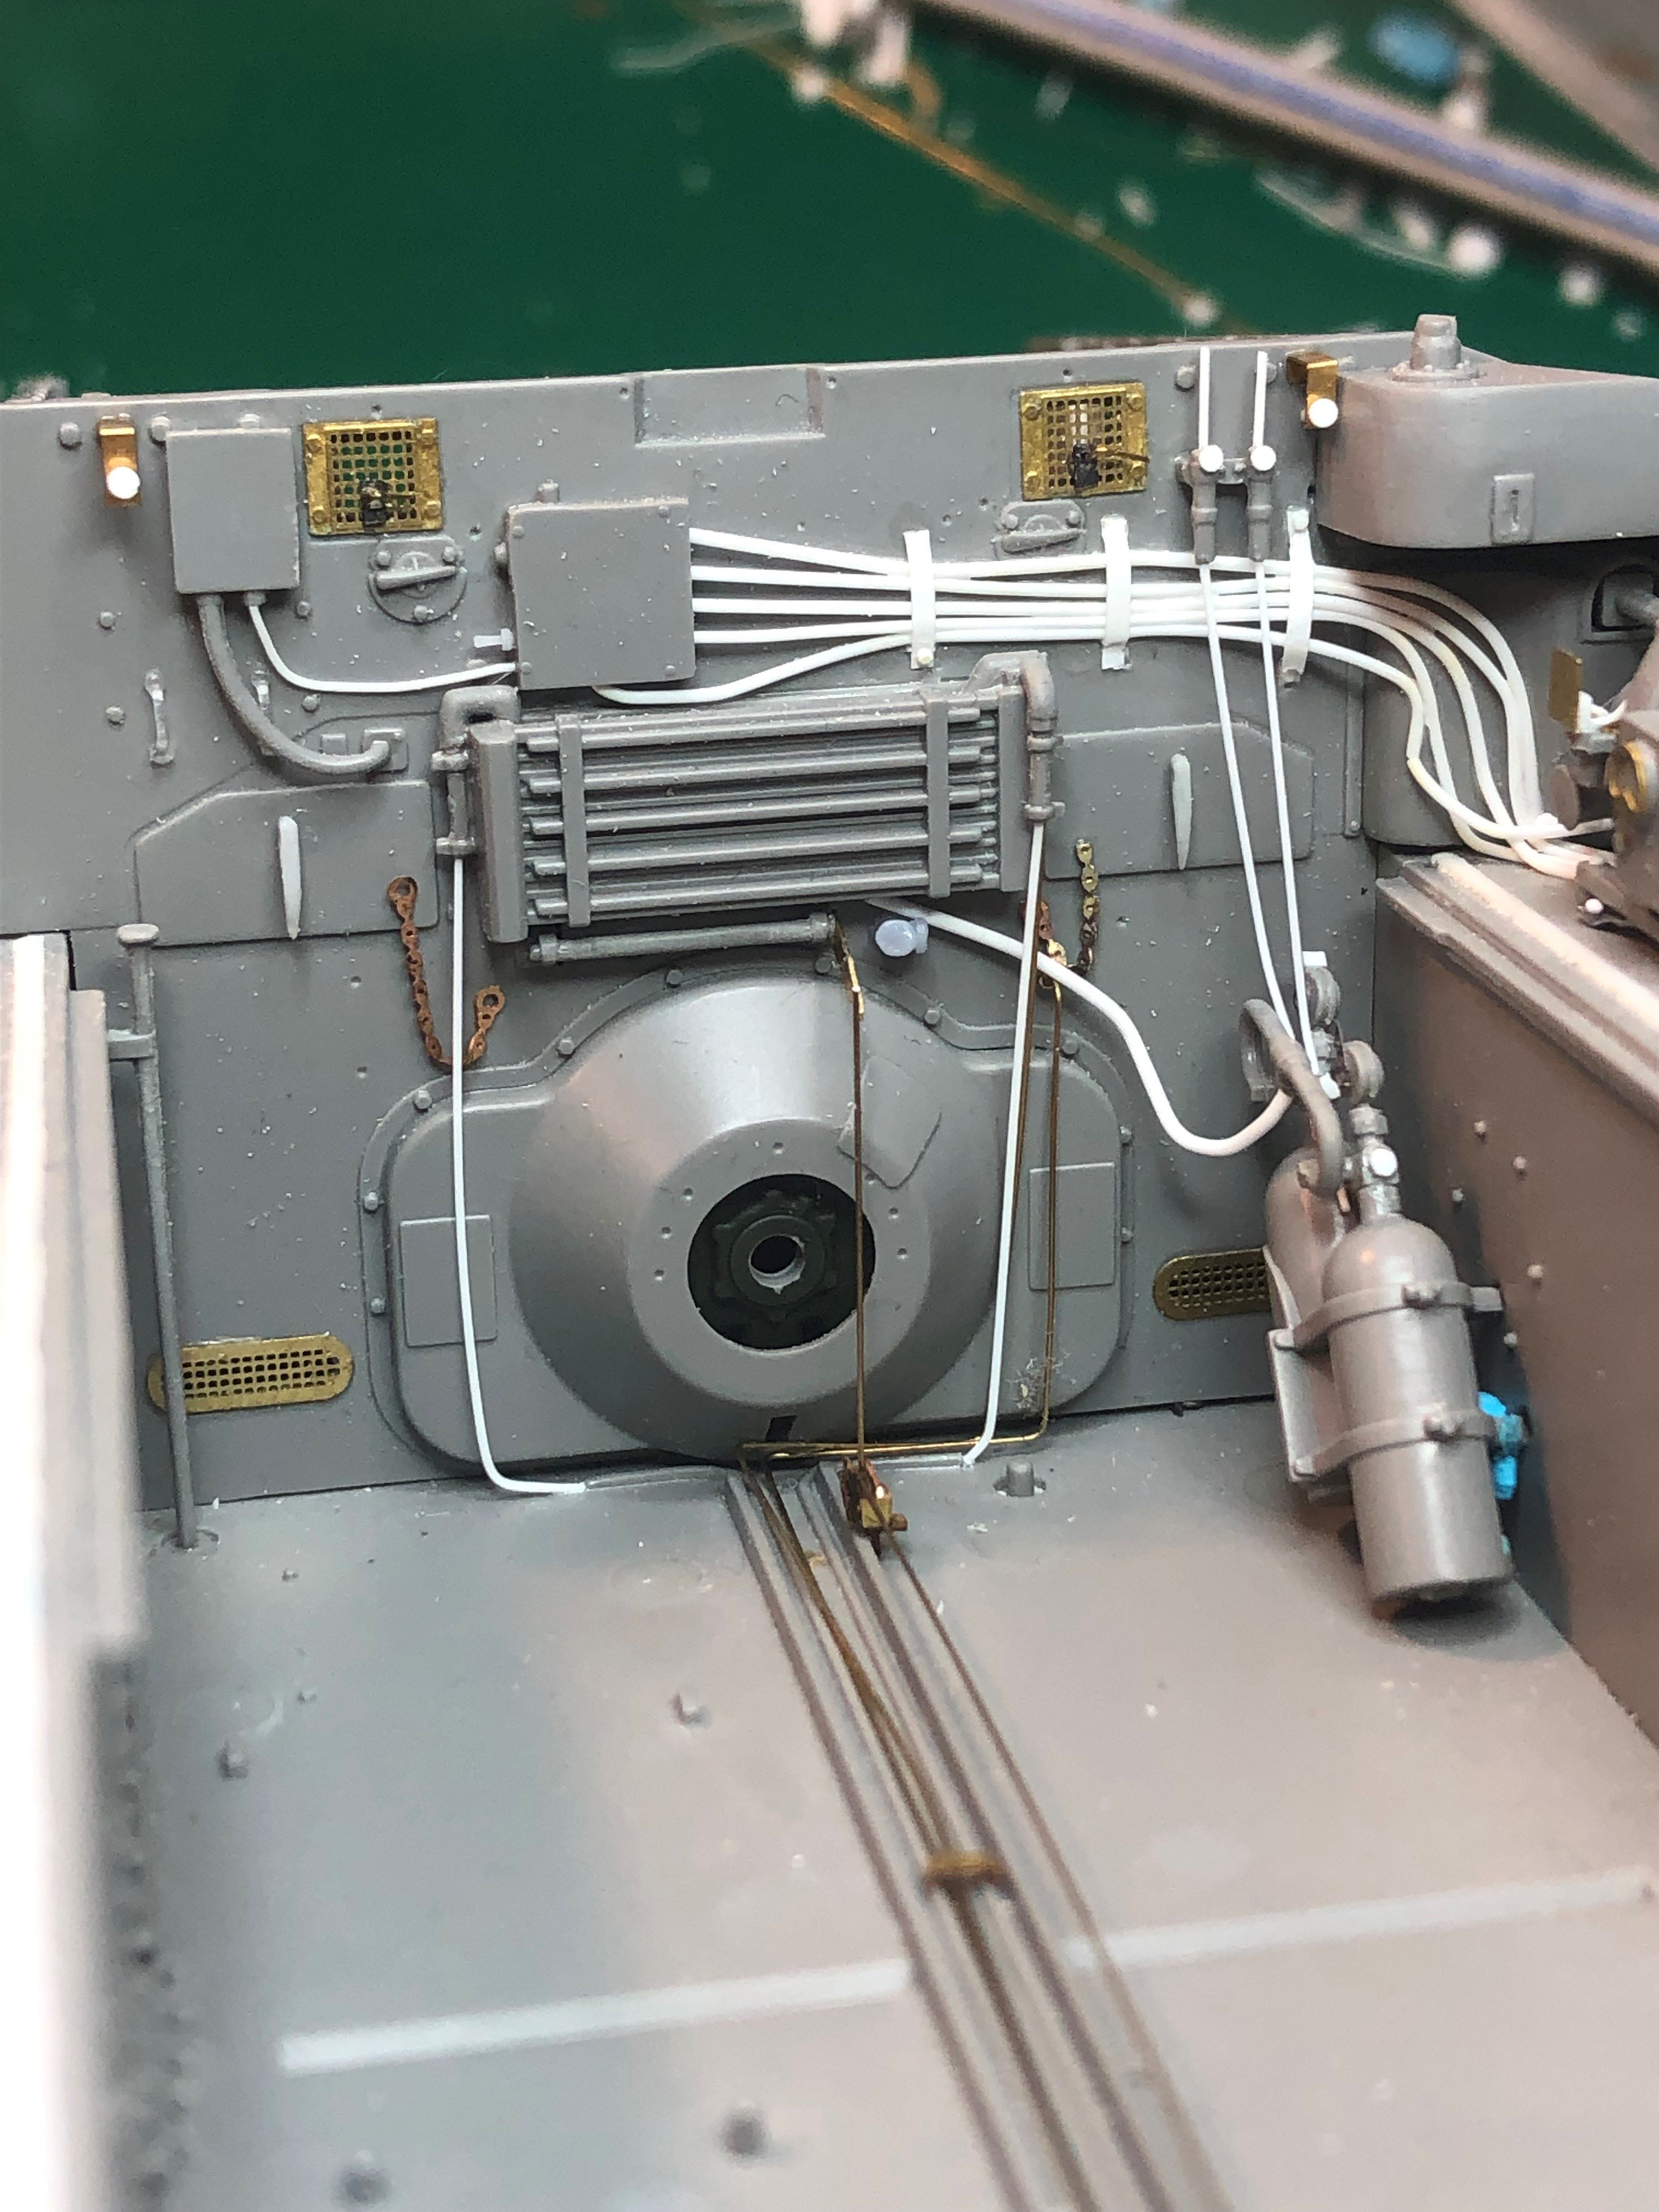
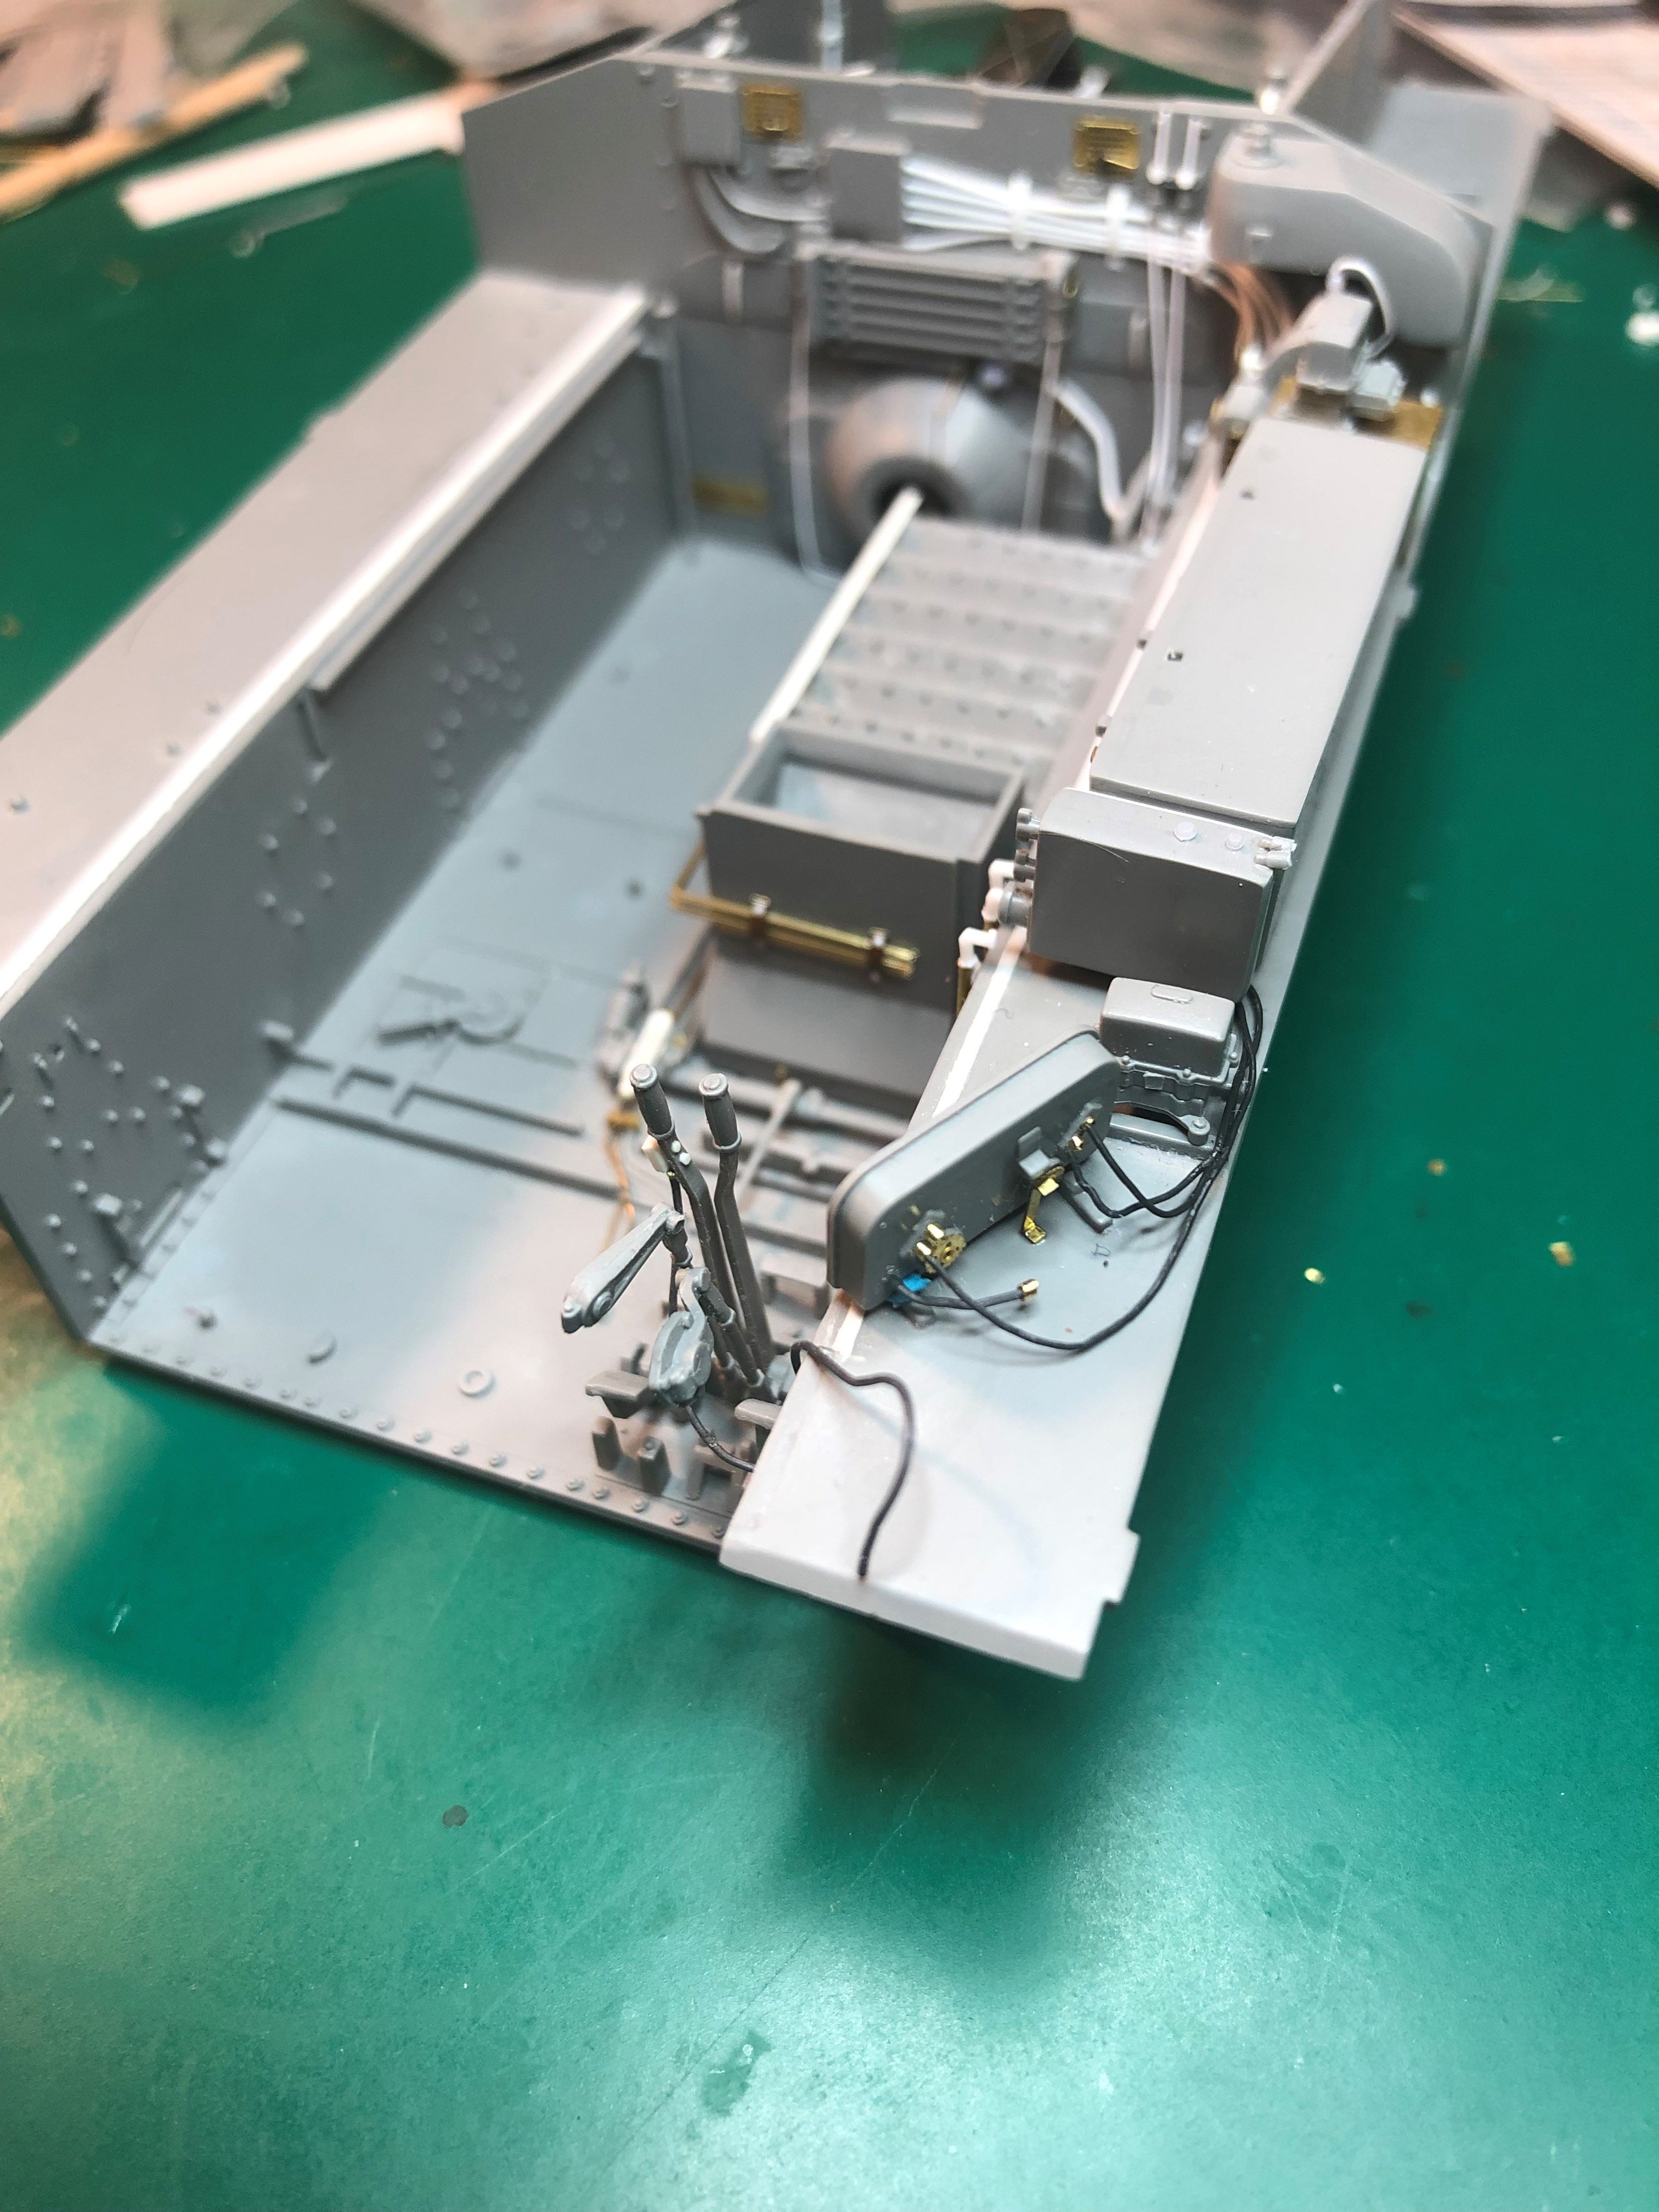
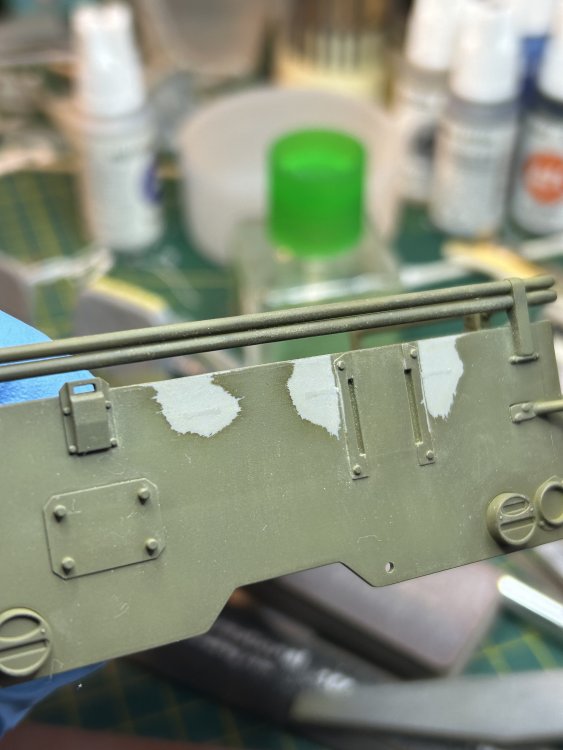
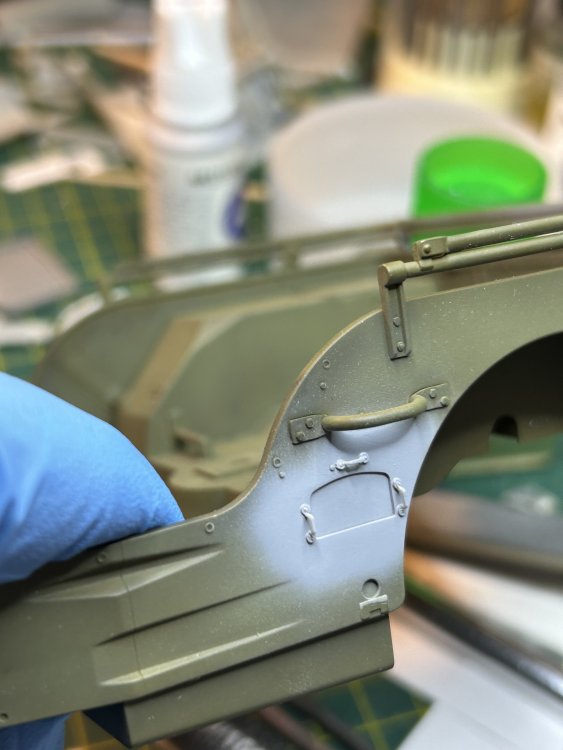
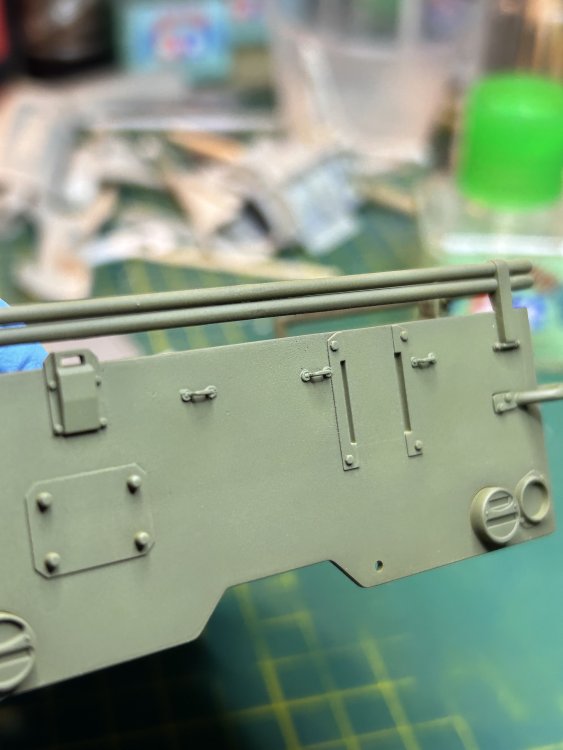
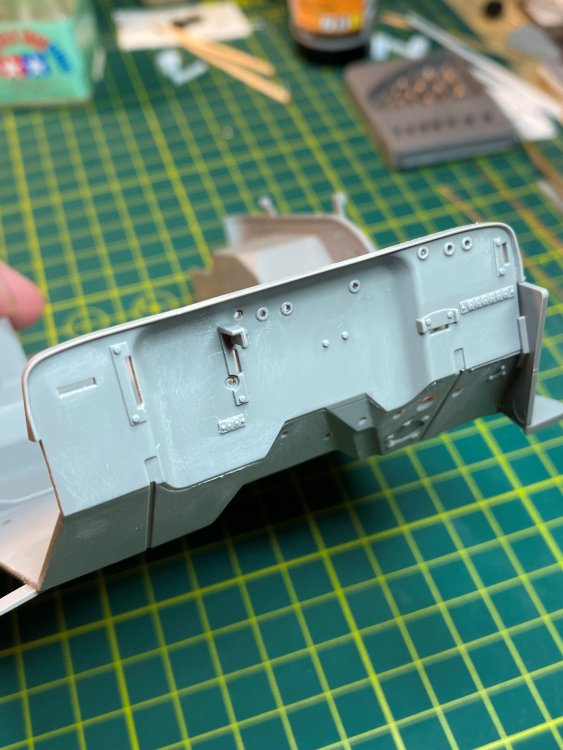
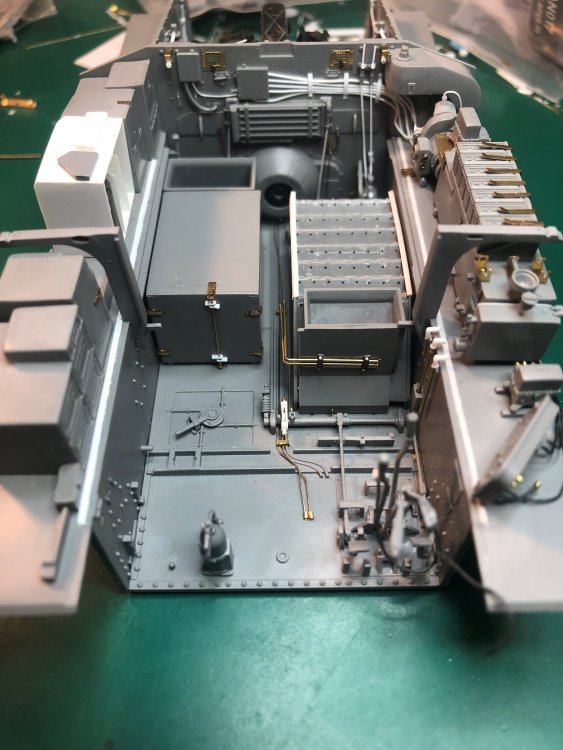
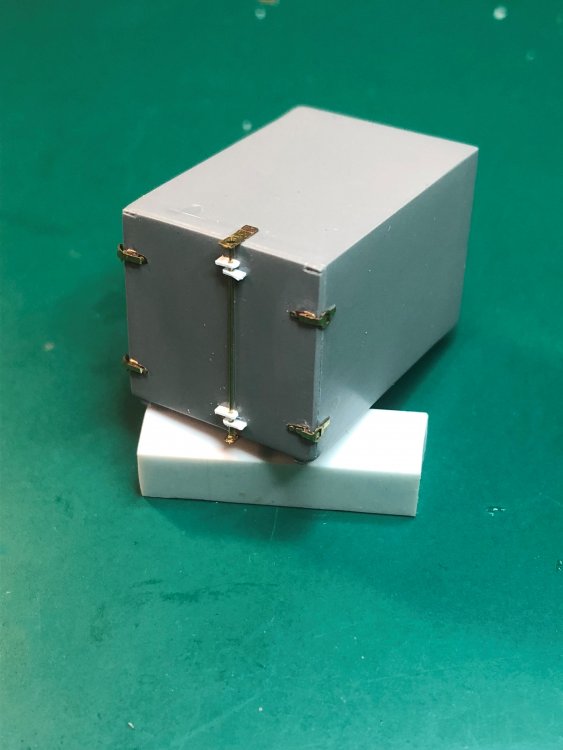
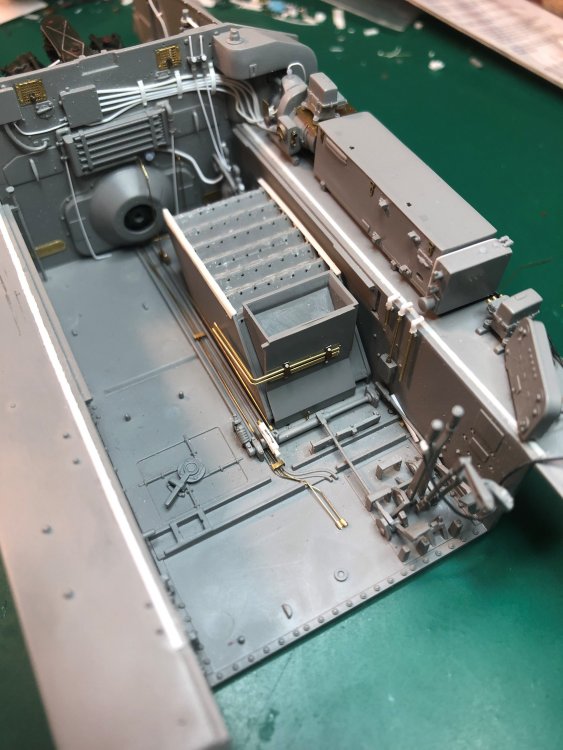
Added small details this week. On the firewall added air cleaner door chains, shutter controls (upper left corner and right corner). Once the engine compartment is done and painted, I can add "cabling" to the doors which I will display open. Hinge detail and latches to the ammo storage behind the asst. driver position and finally added the extra headlight storage on top of the battery box and the 30 cal ammo storage clasps. The ammo portion is removal at this point for easy painting. The photo etch over the 30 cal ammo boxes is security by only a little bit of super glue. I have knocked them off numerous times. A few more small details and I should be able to start to paint this area. that is it for now. Tim


-
I ordered a set for the Meng 1/48 F/A-18E from Hobby Nut and he said there was a delay receiving additional stock due to Quinta be closed temporarily due to. Covid out break for a couple of weeks but are back open but behind and trying to get caught up. Tim
-
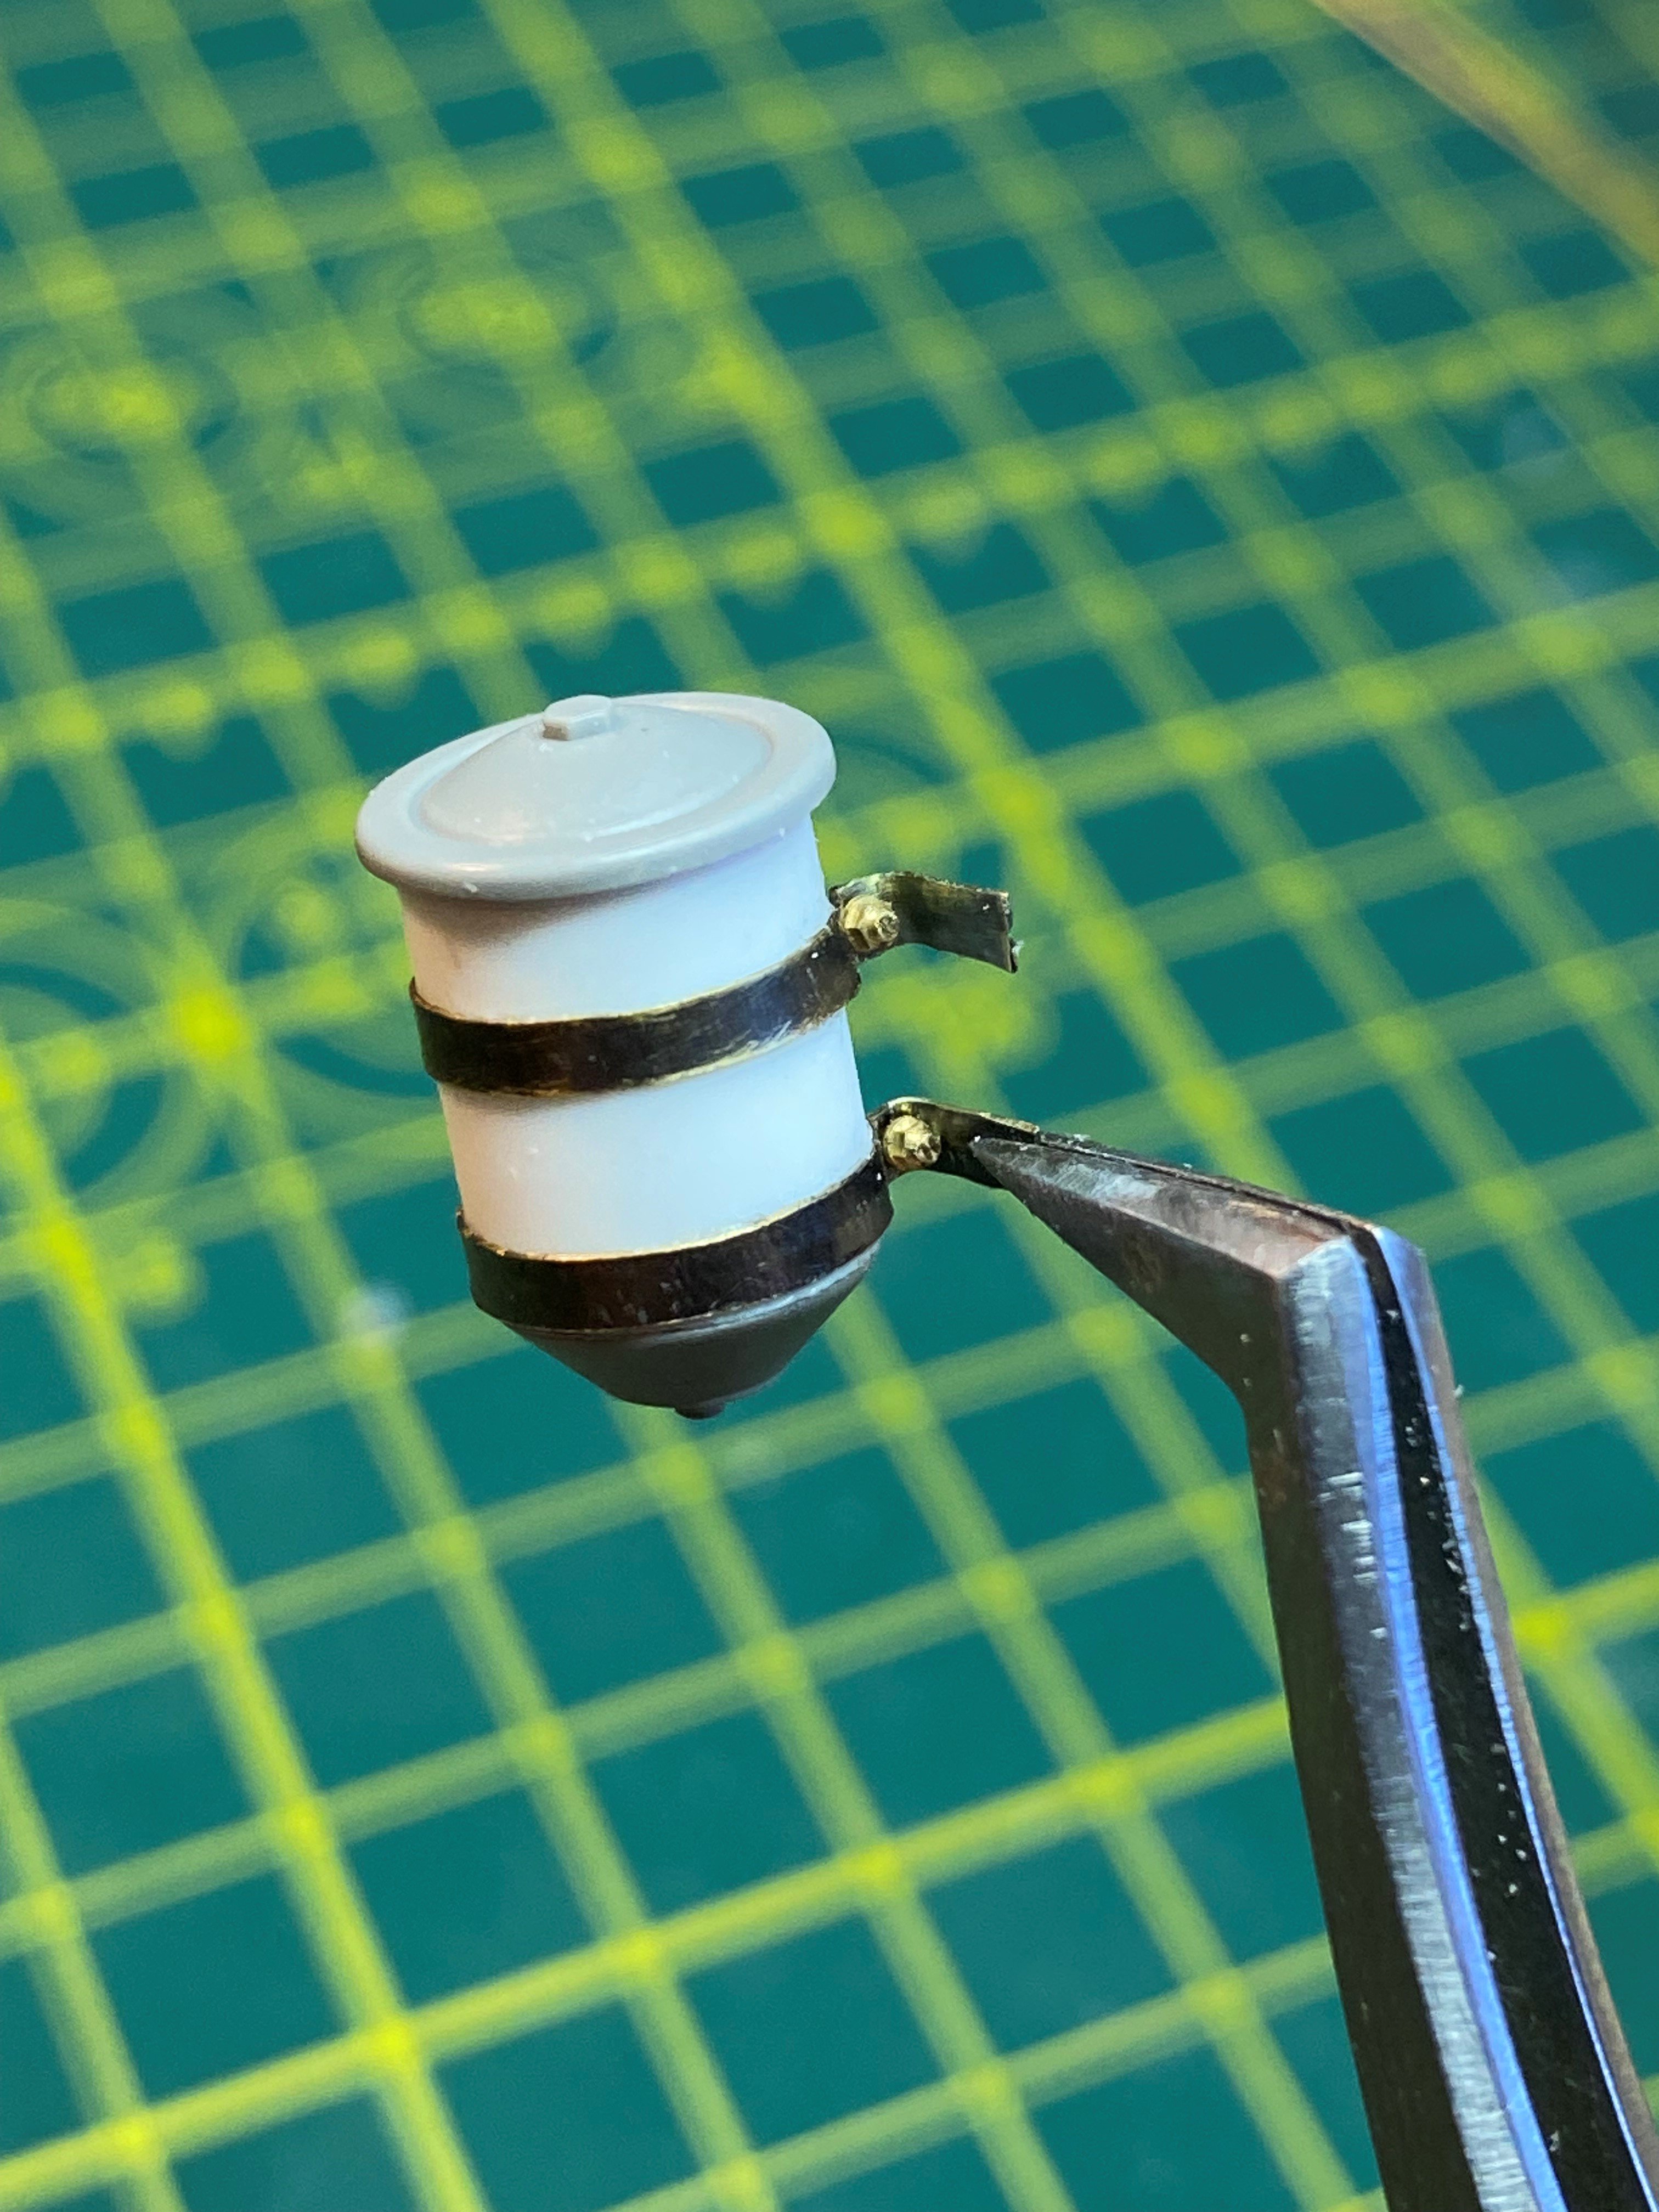
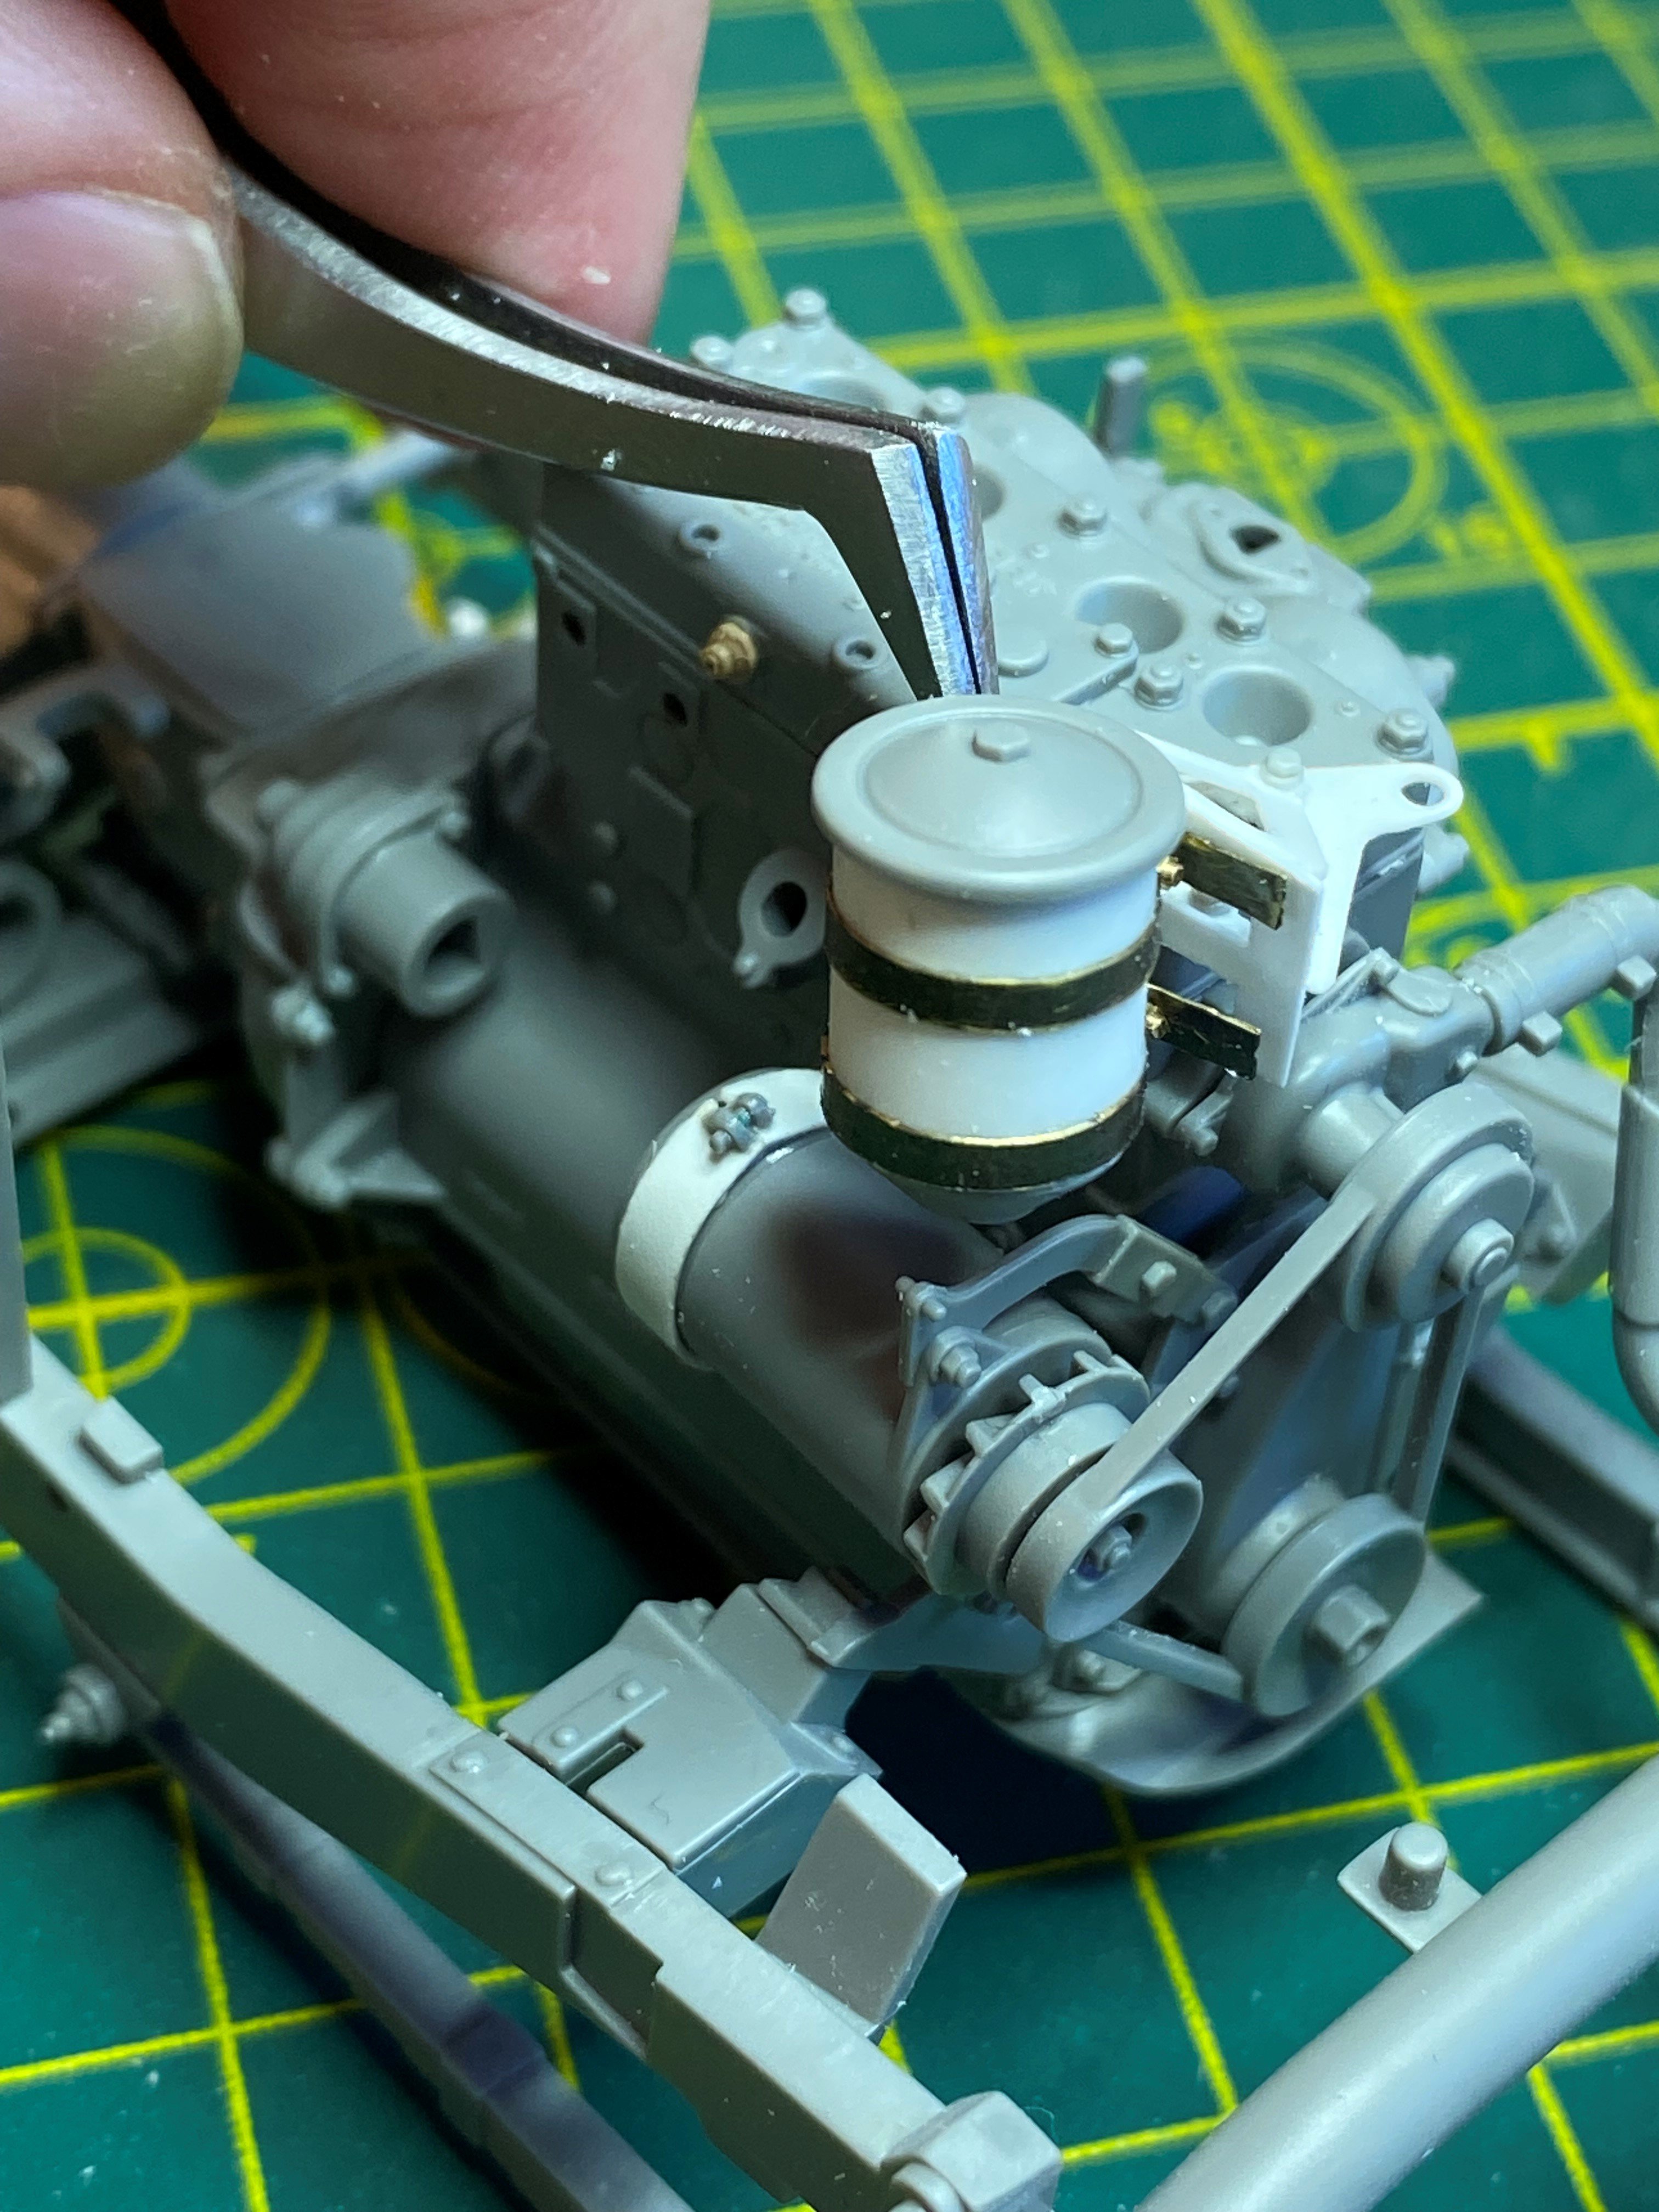
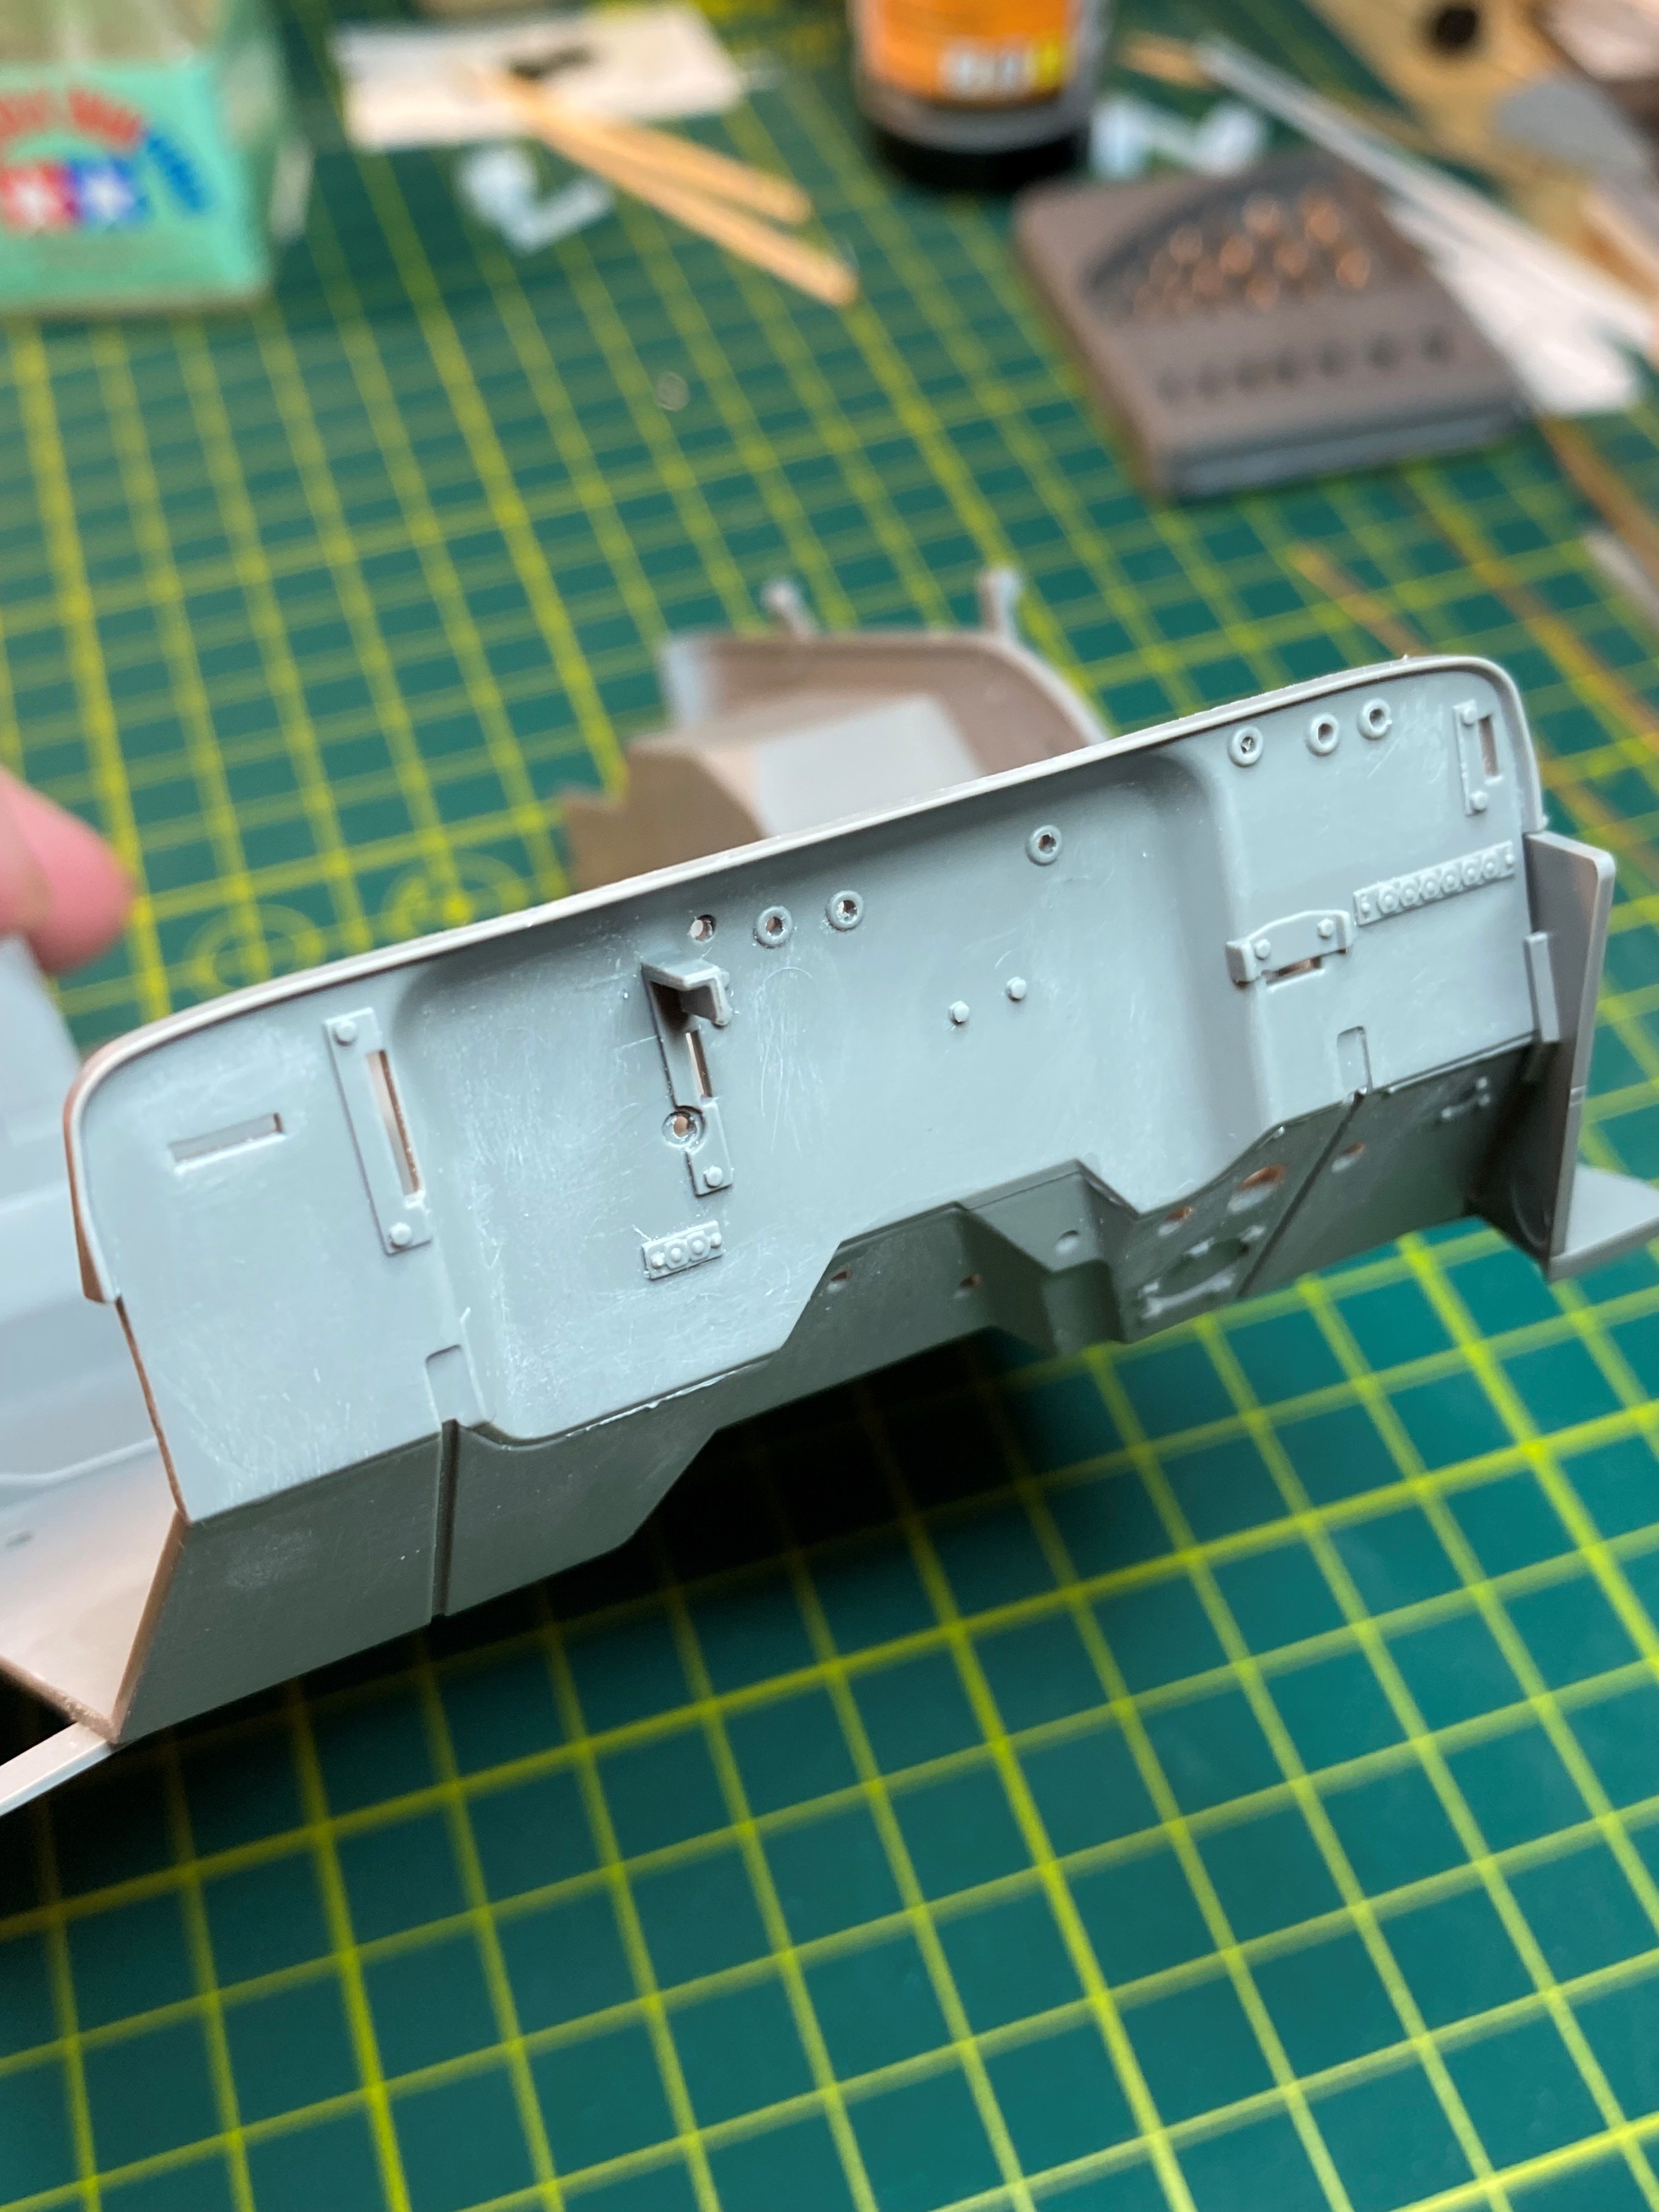
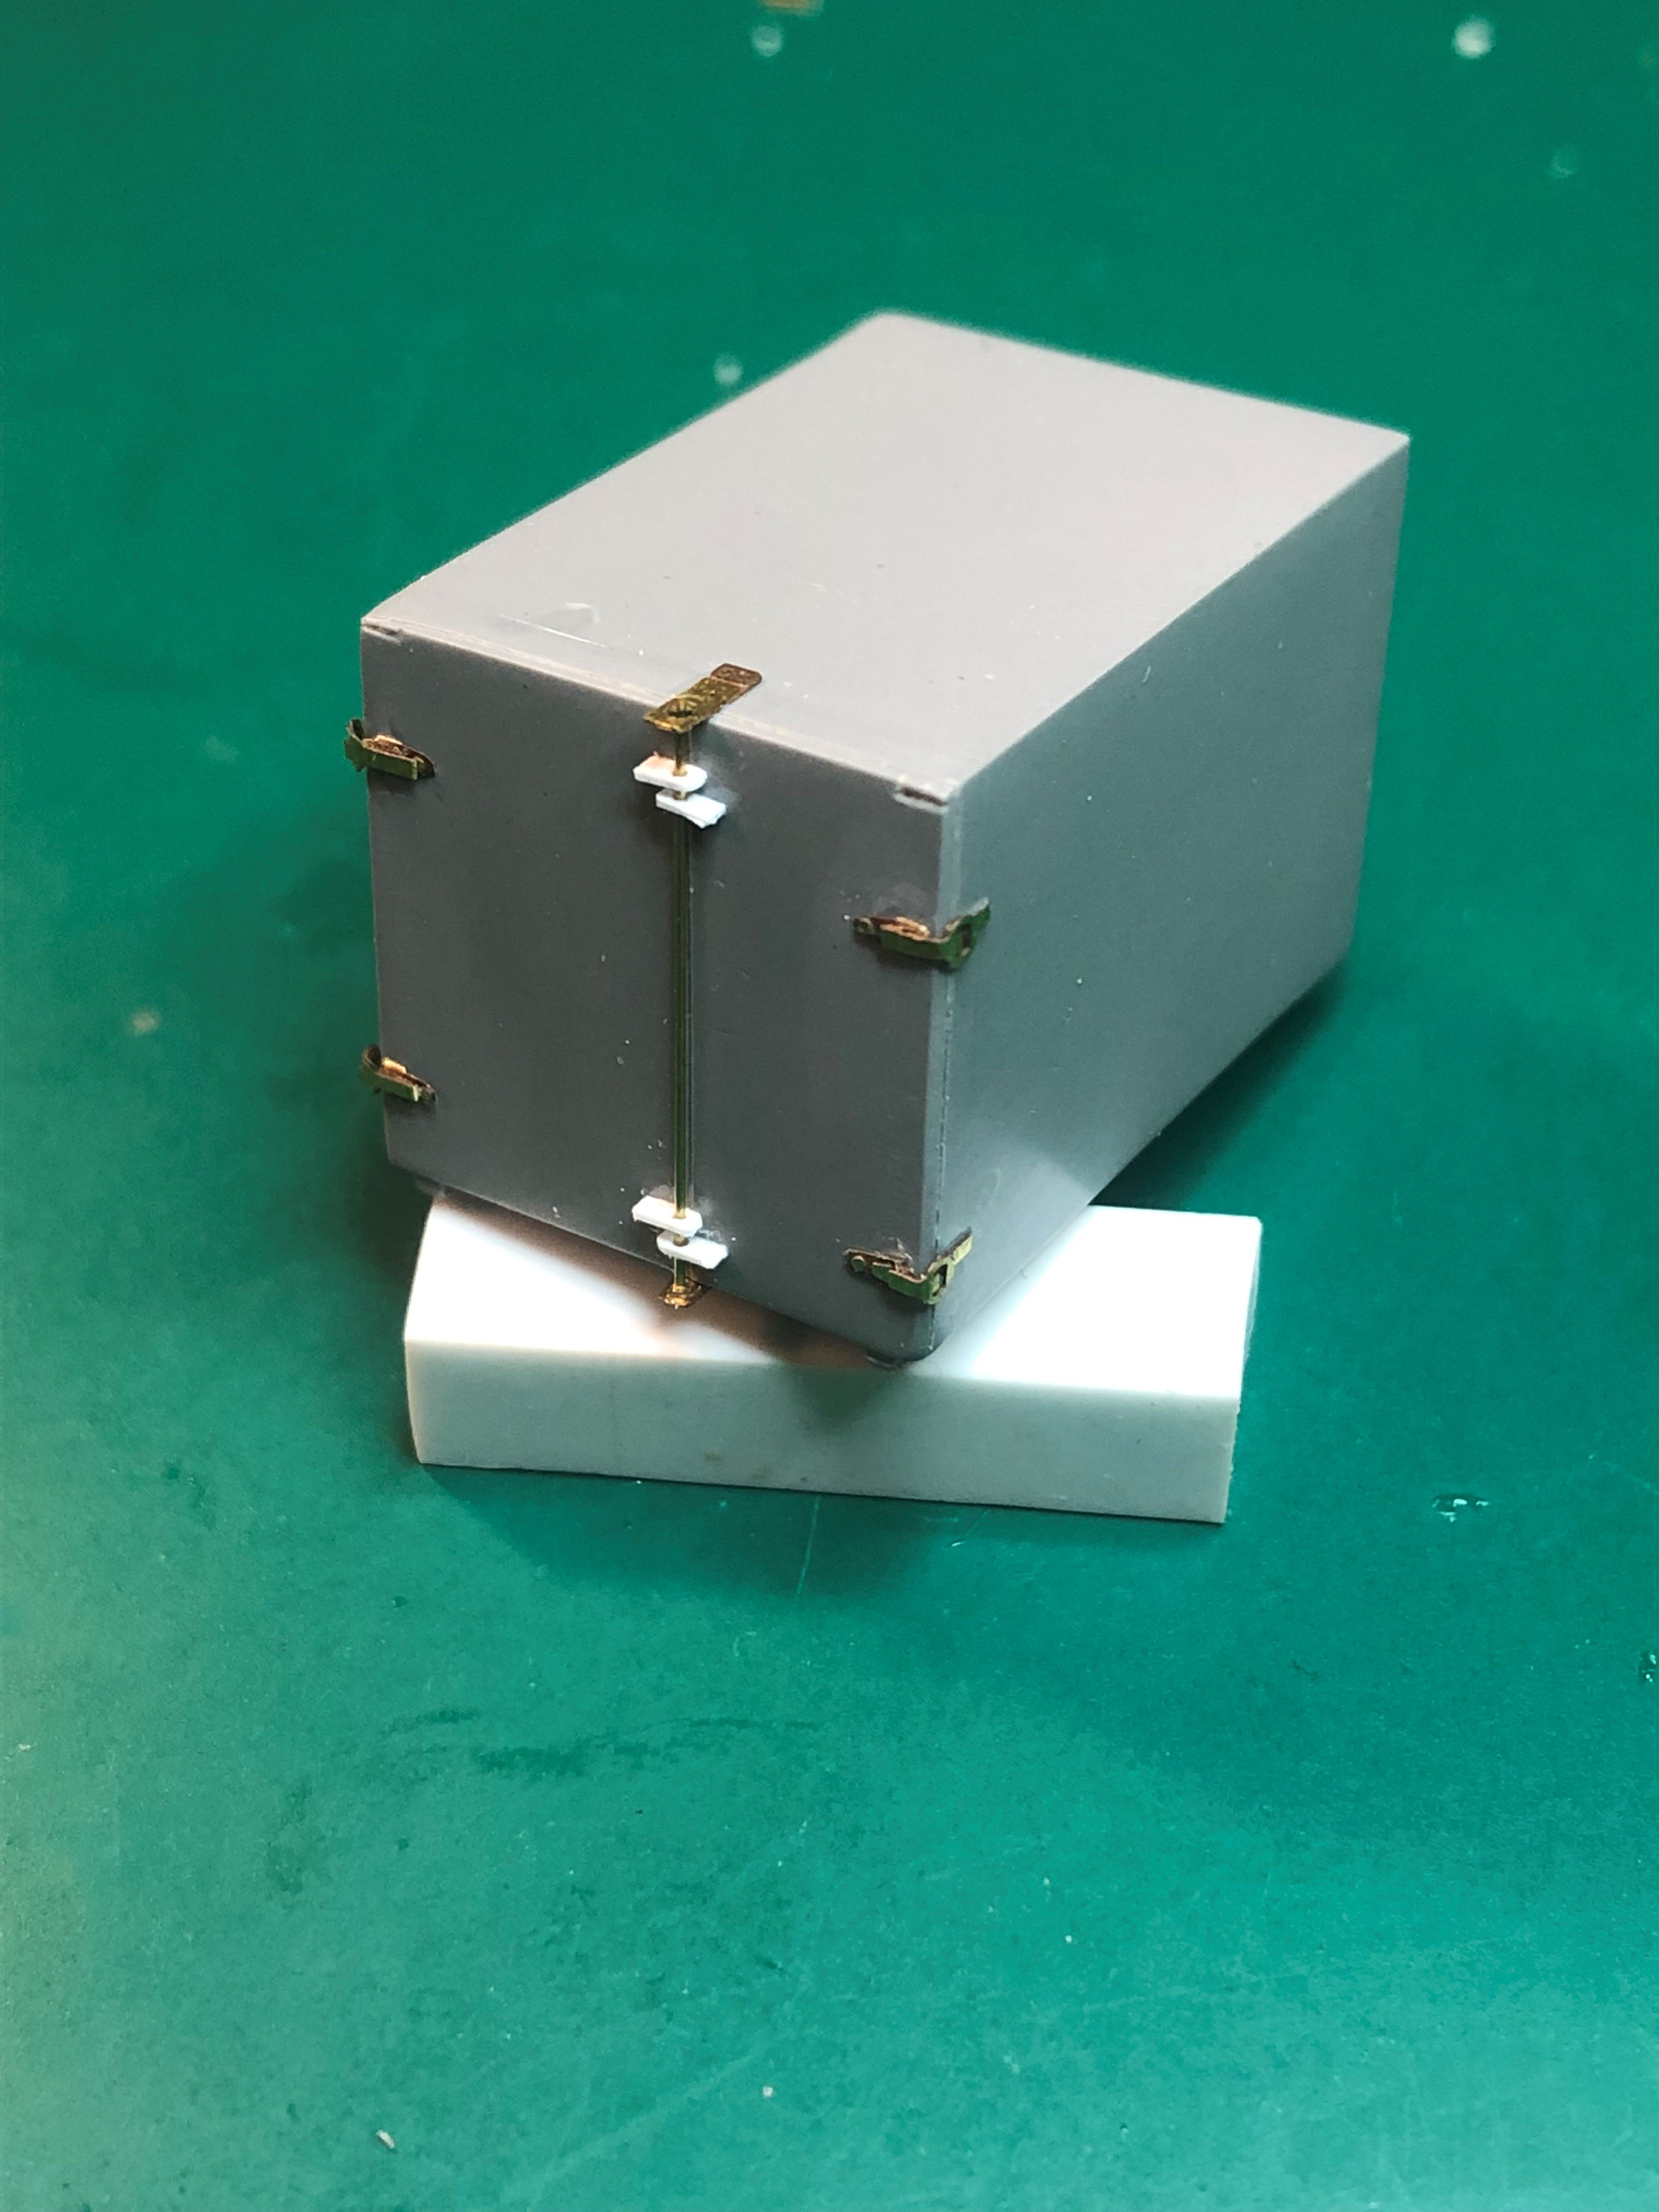
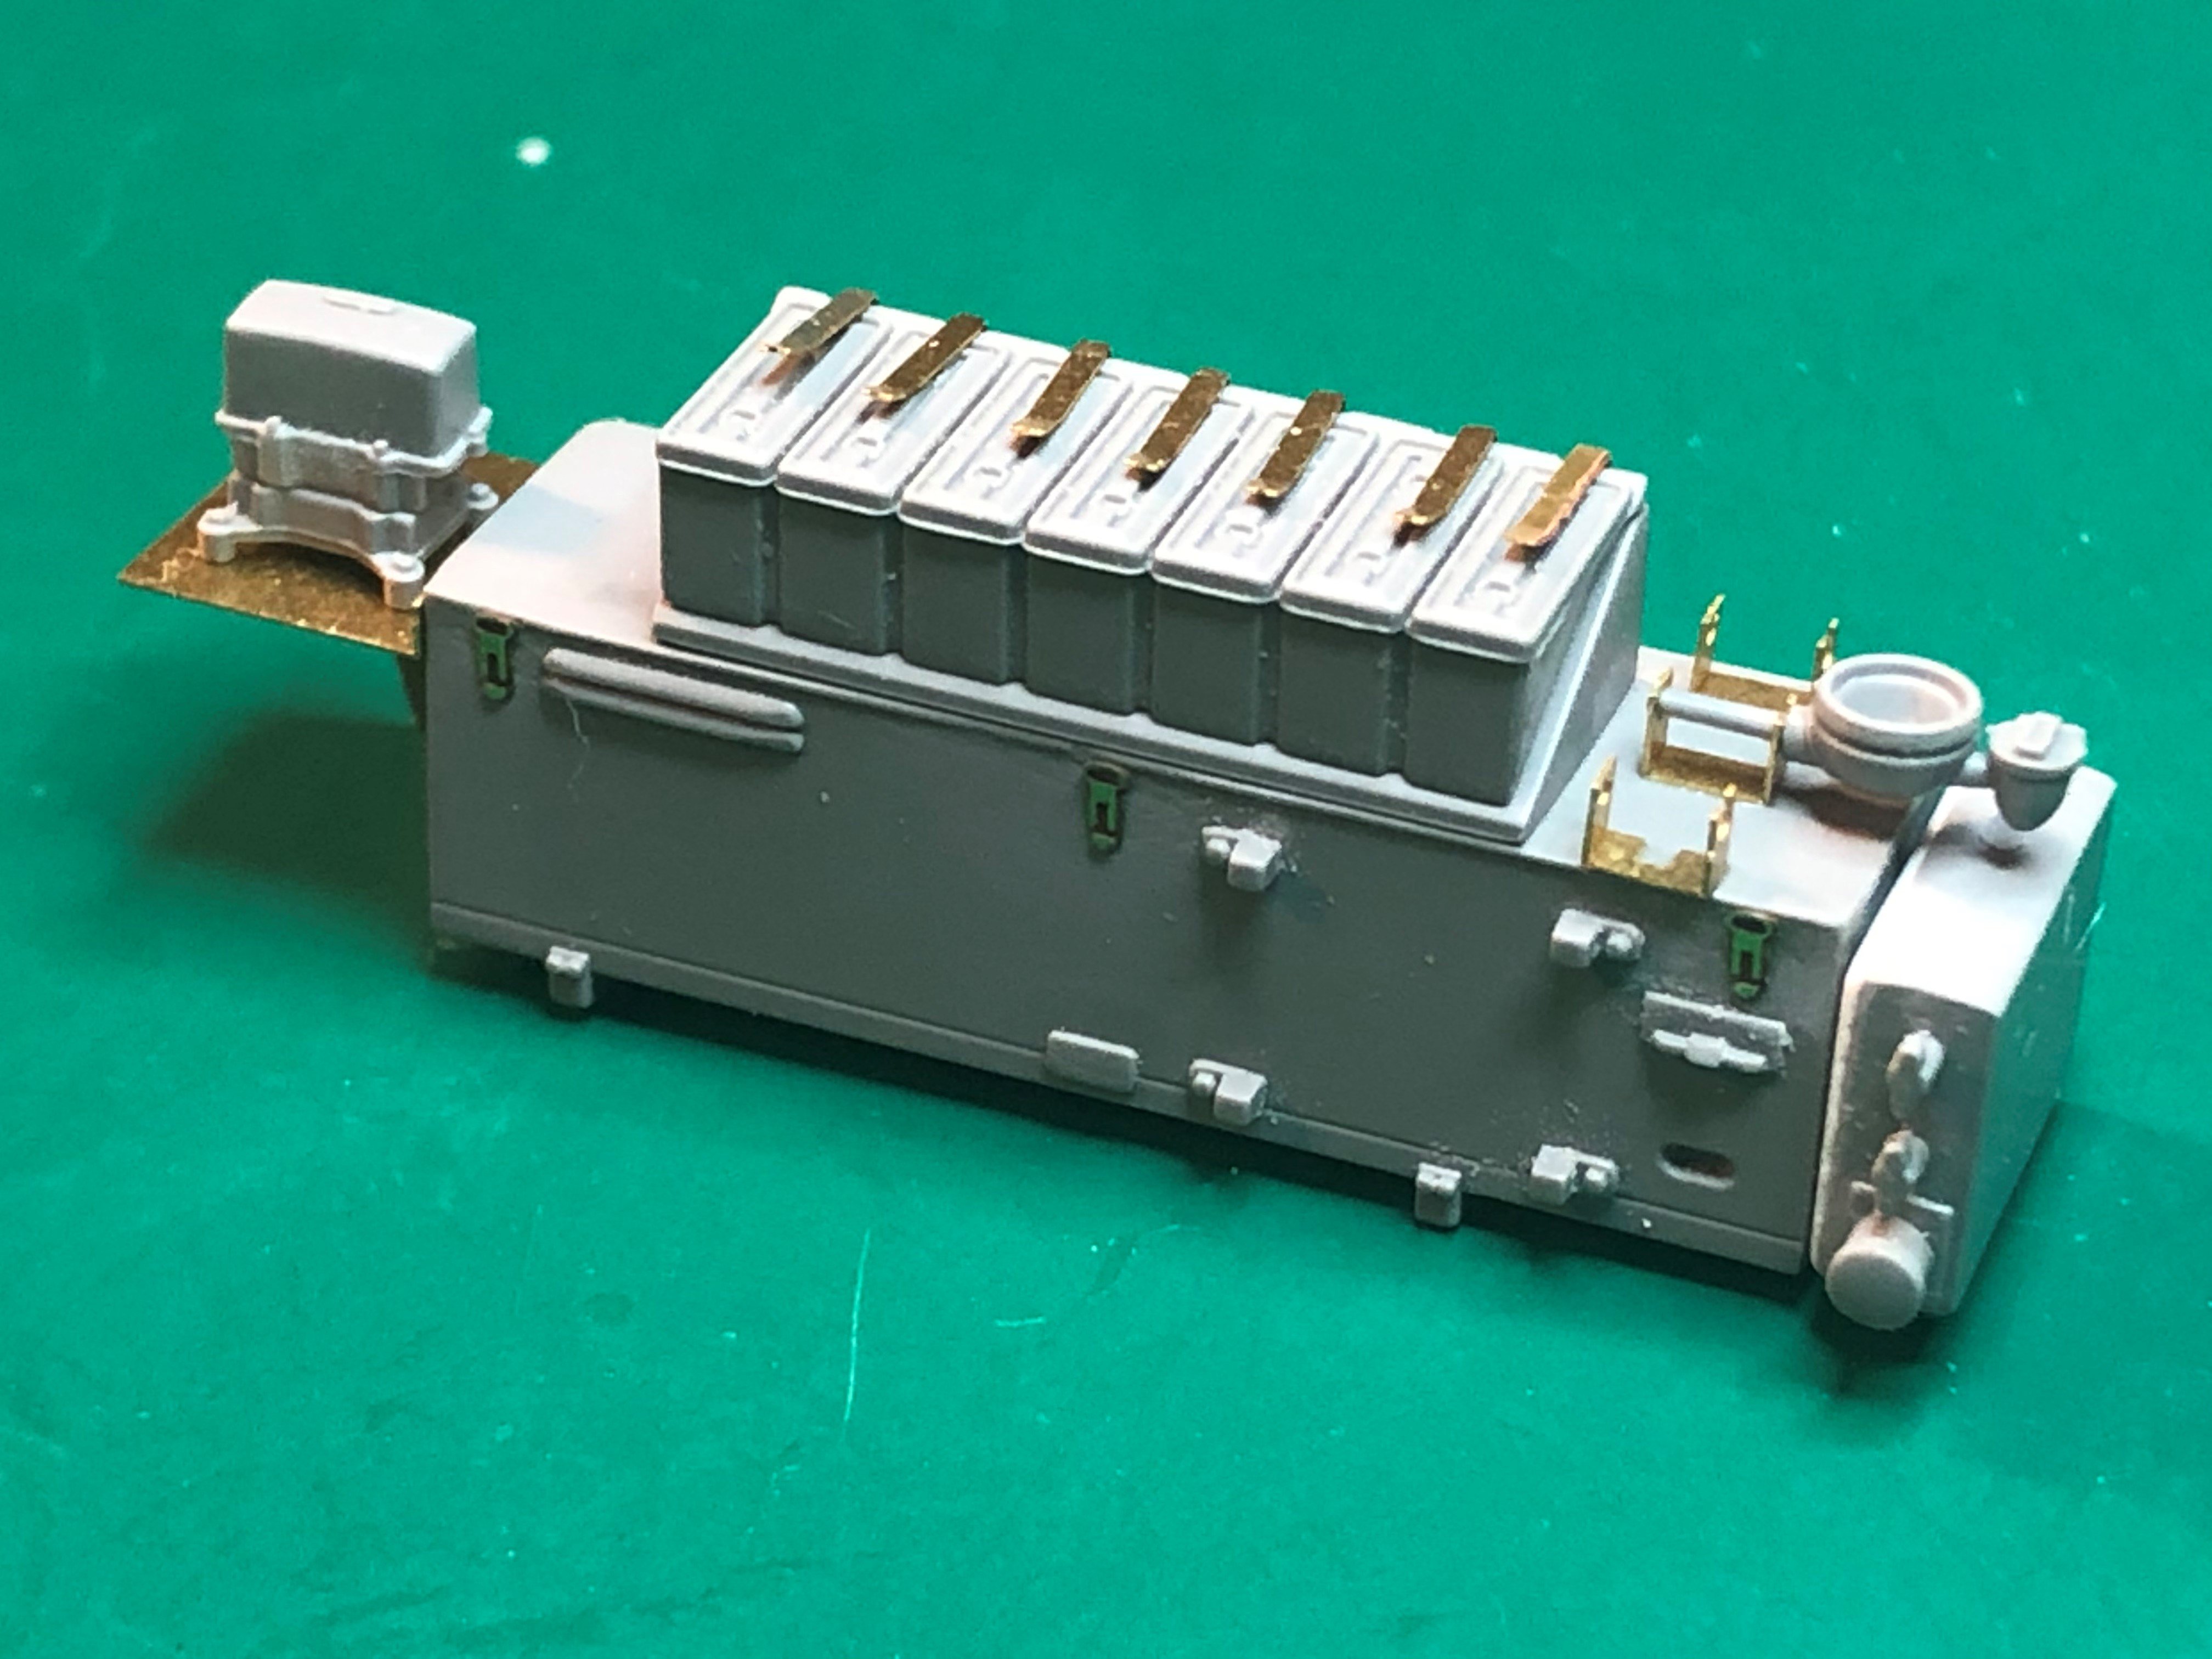
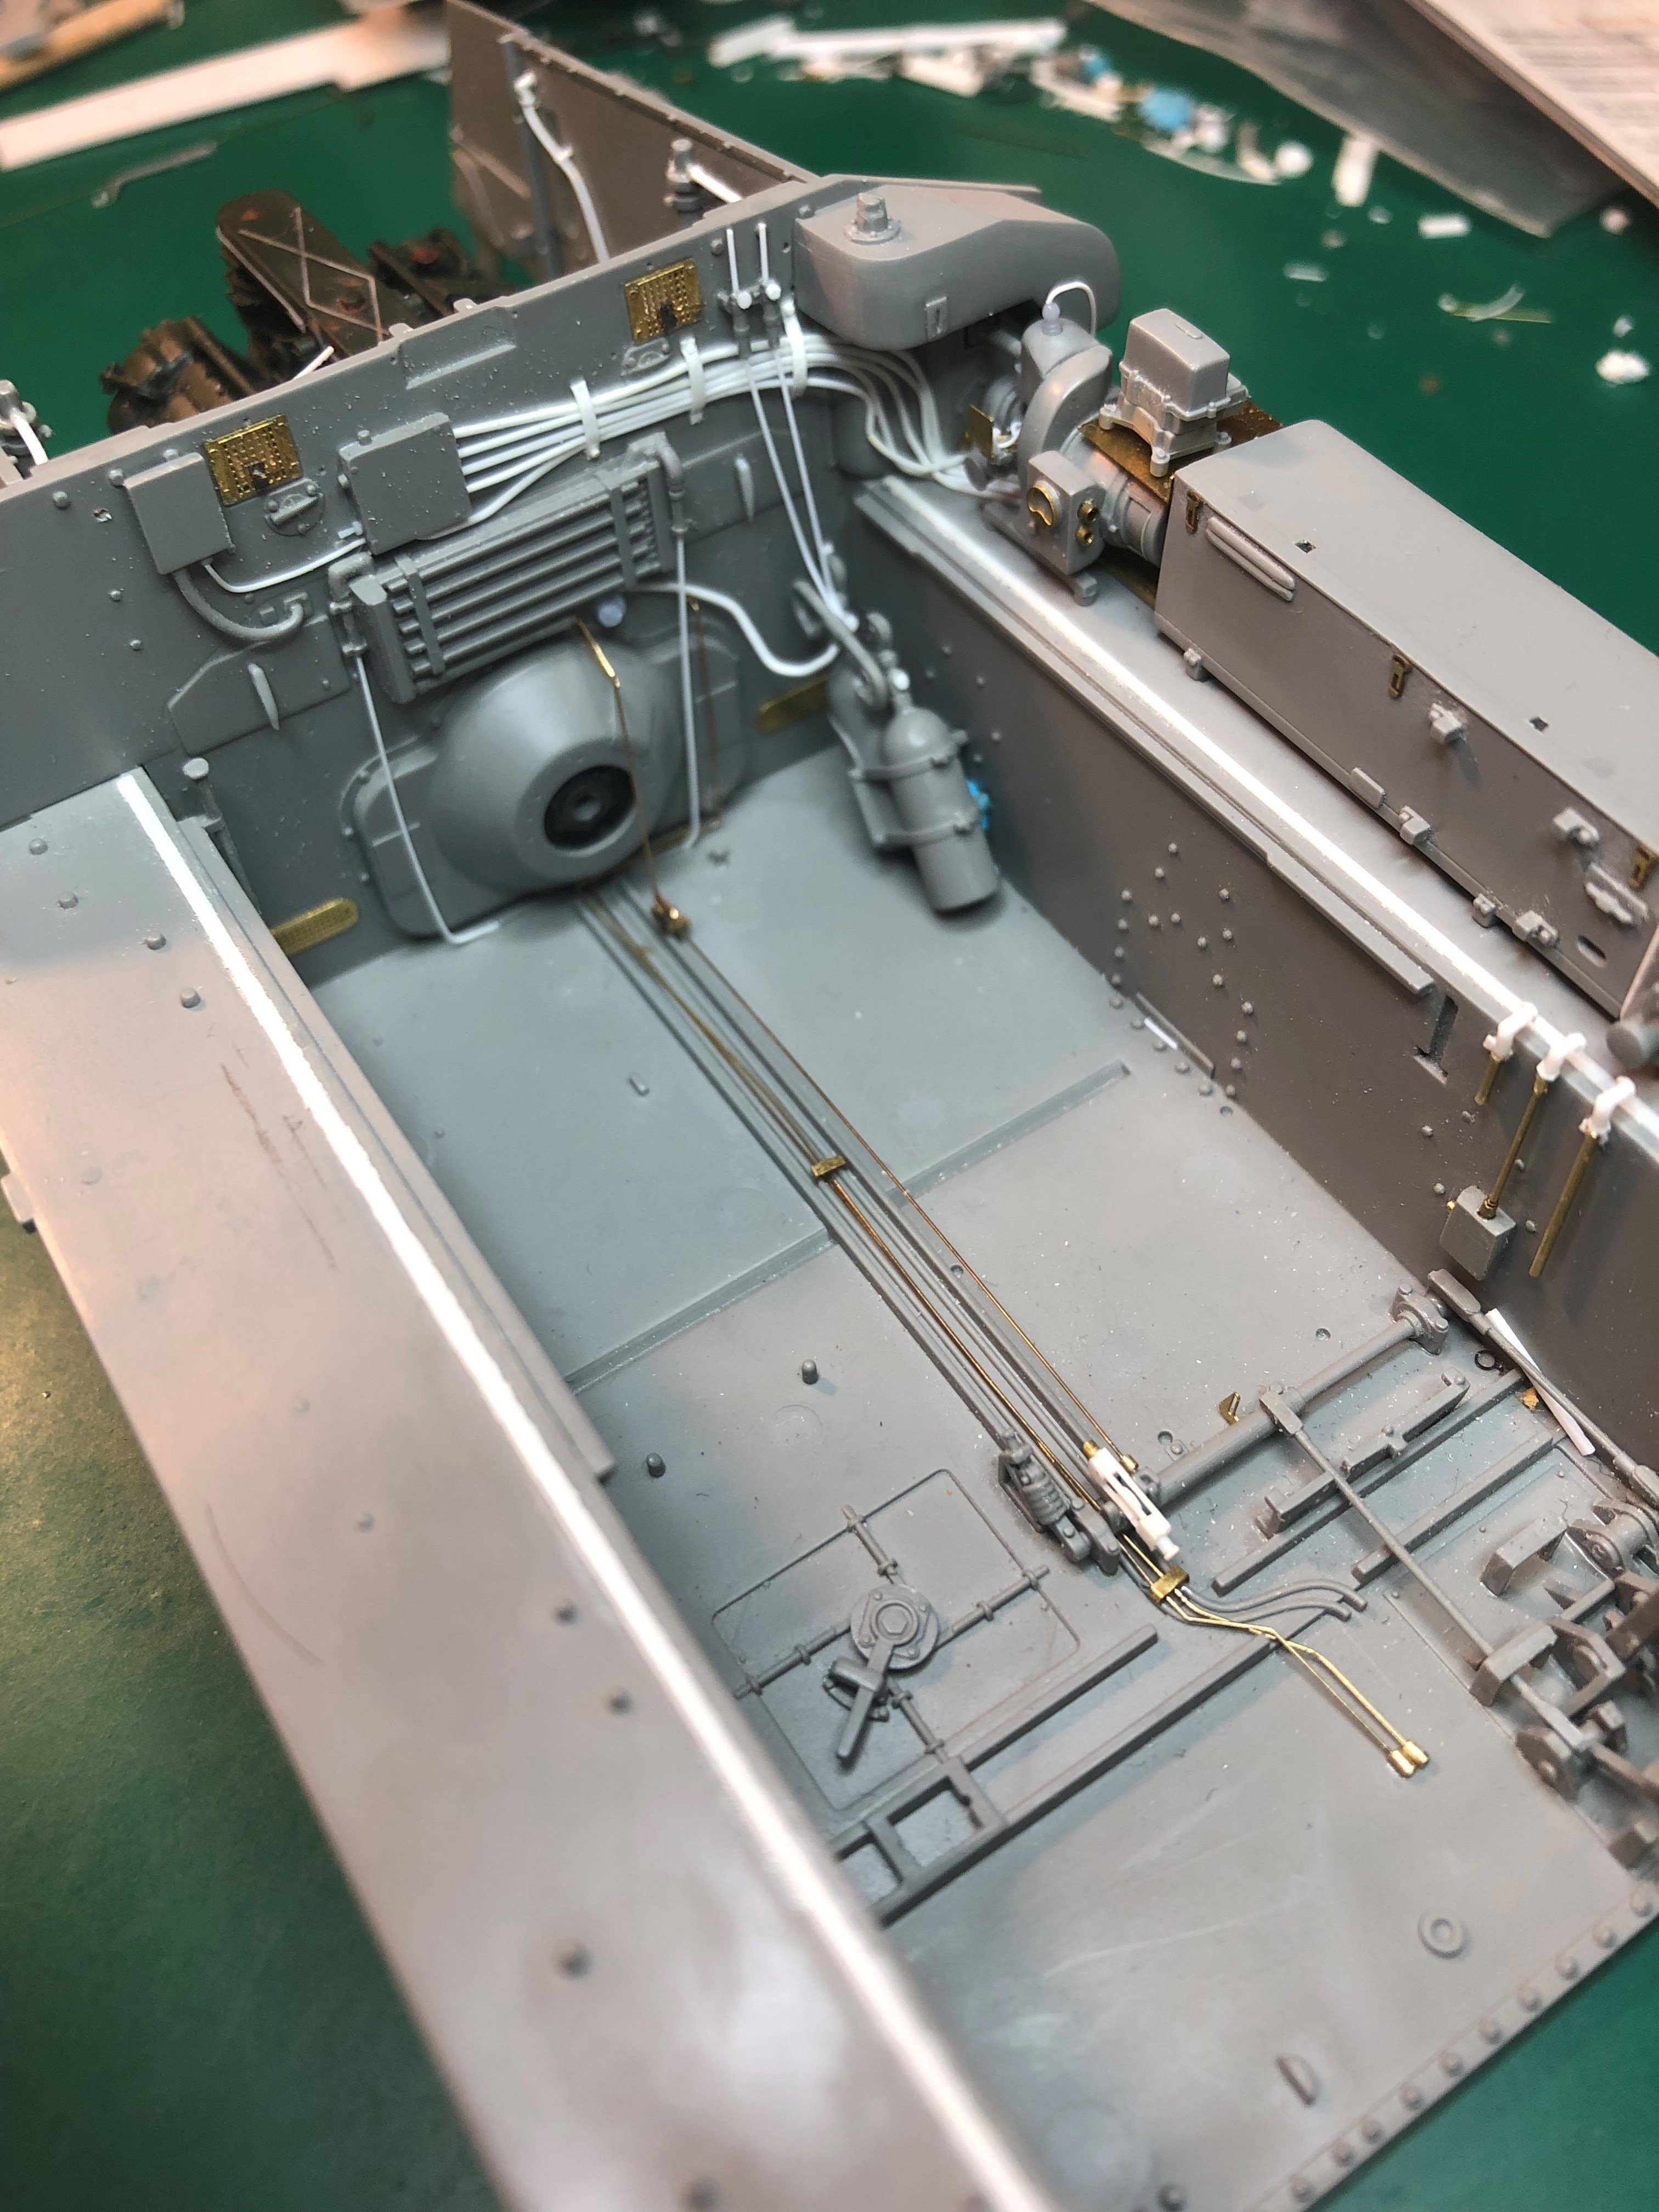
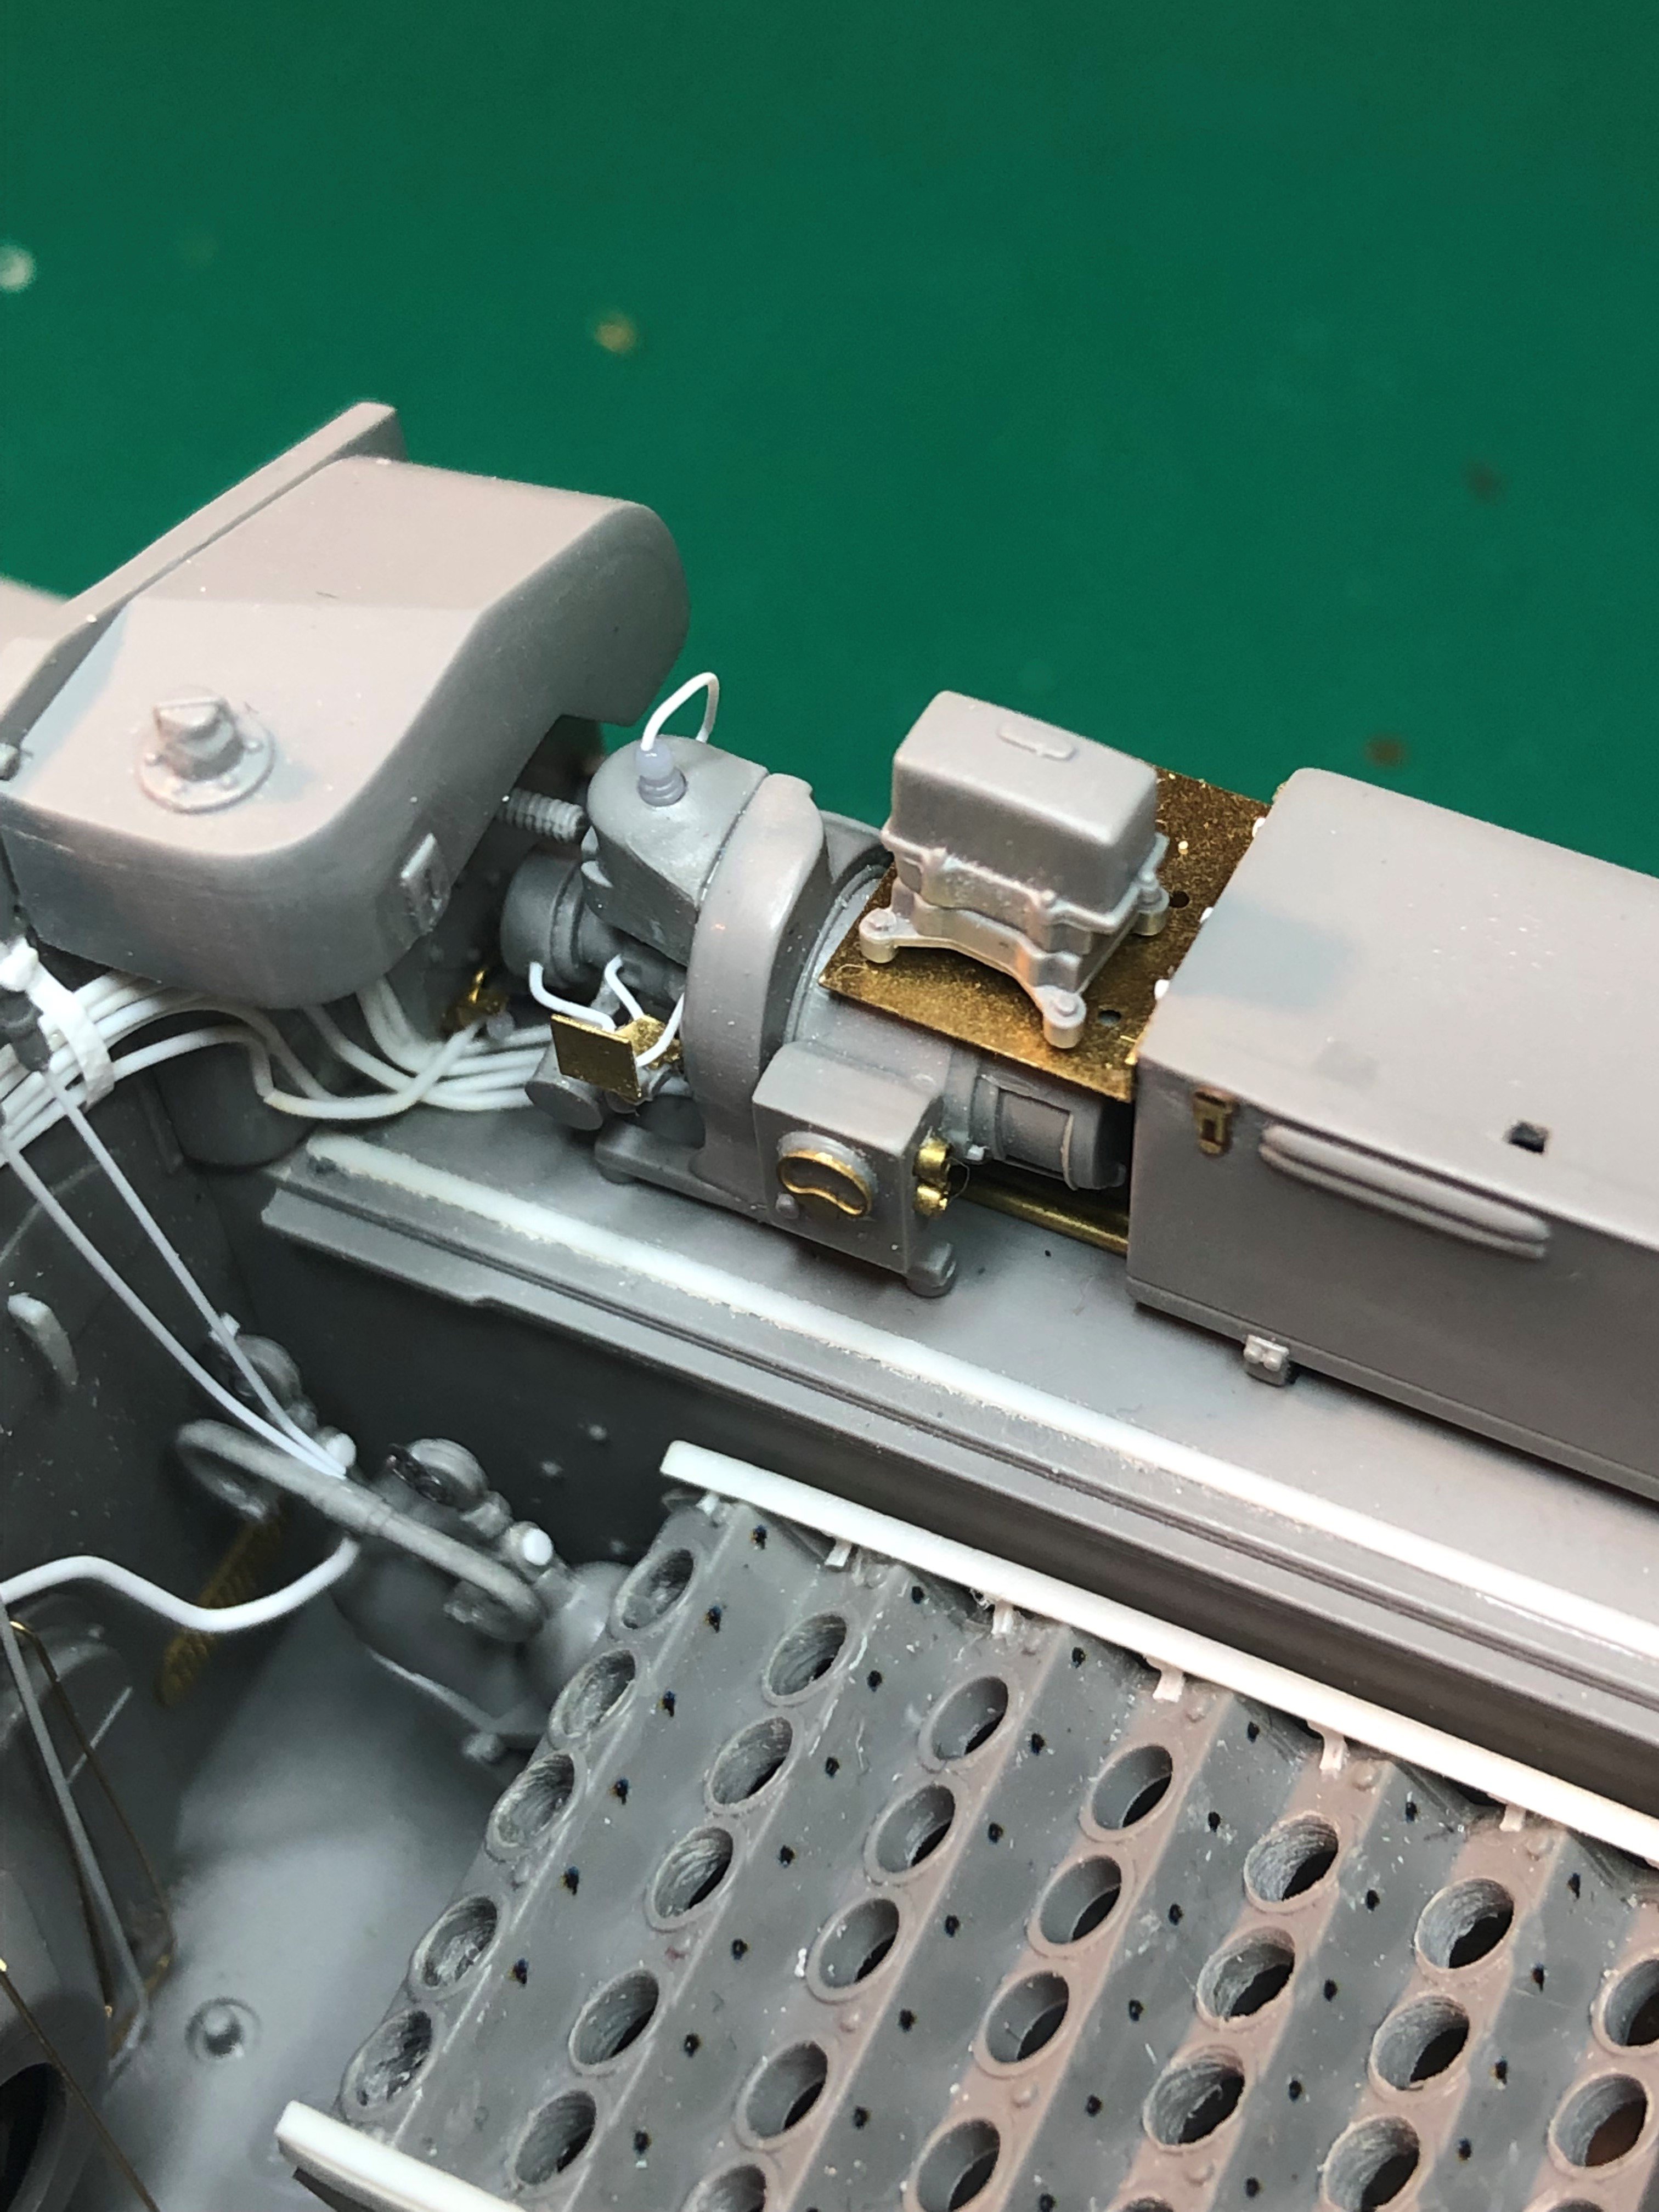
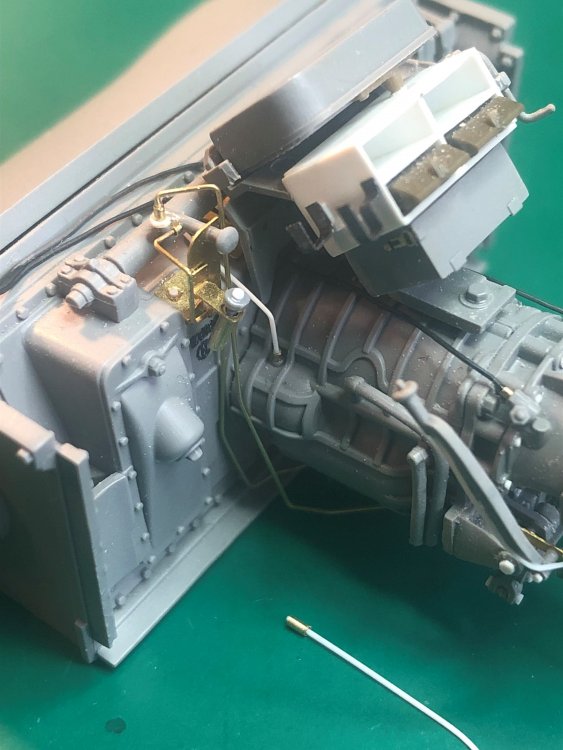
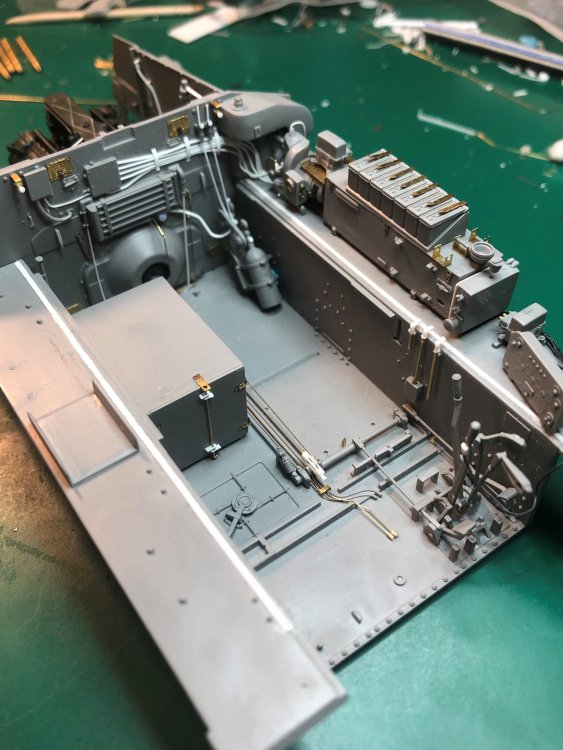
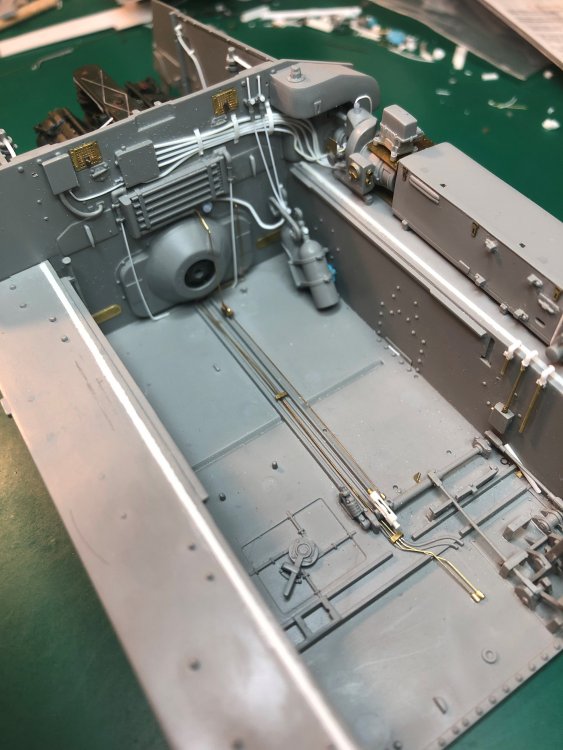
Good progress this week. Added plumbing and cabling for the fire suppression system. The extinguishers themselves are not glued in yet and will be painted before being glued. Added the plumbing for the fuel priming. That is the brass wiring that connects to the firewall. Left connections at the front of the drivers area to connect from the priming pump when the transmission housing is added. Did temporary wiring to the dashboard and did the back of the dashboard with connection points. Cabling to the collector ring which is secured to the storage area attached to the ammo storage. Still "flexible cabling" to be added connecting the collector ring. Finally, some wiring for the Auxiliary Generator. I feel I am moving faster on this section. The goal is to be painting the interior subassemblies by January. Tim


-
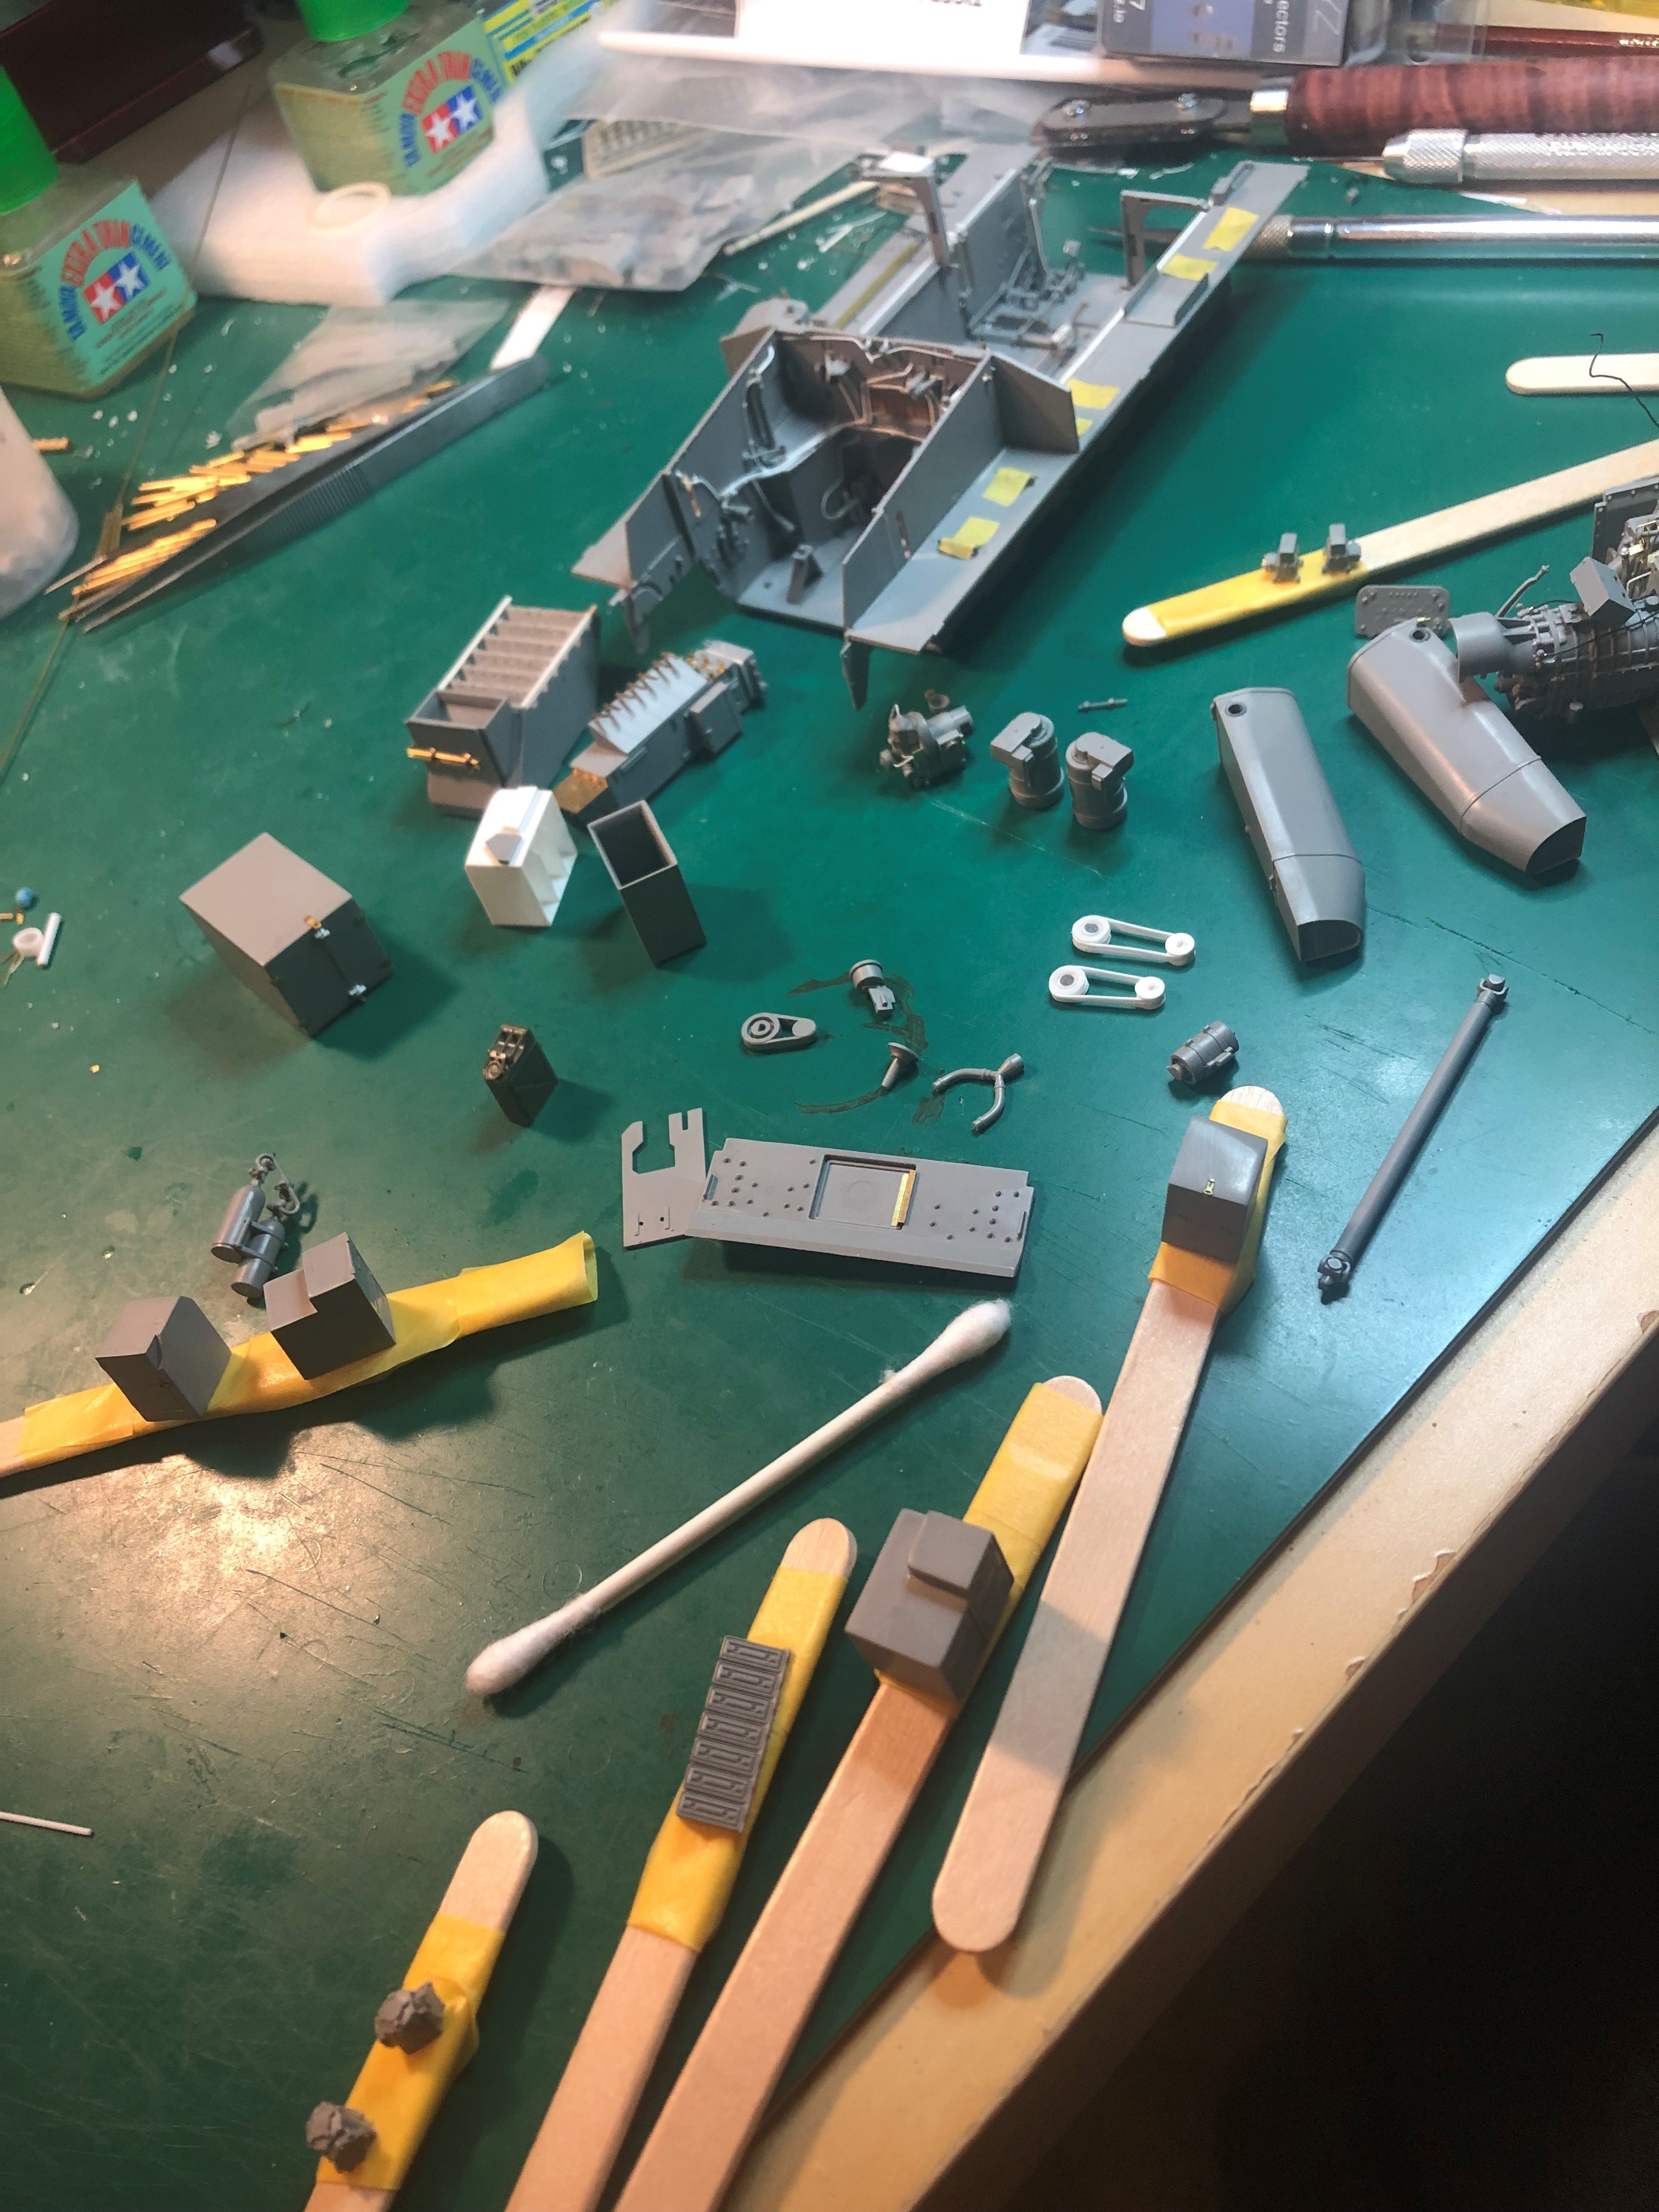
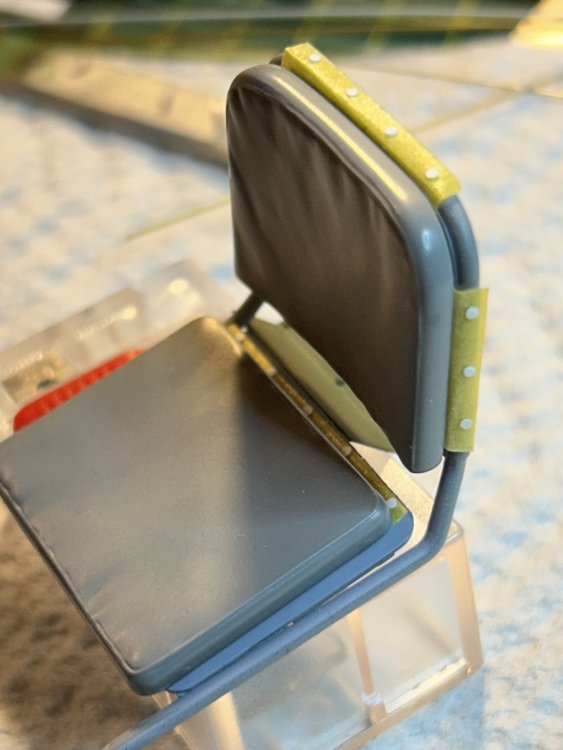
thanks guys I plan on displaying with the turret removed for any competition but can always put it on when not showing it I finally have decided on a plan of how to glue and connect the the wiring from most of the subassemblies. Also thought about cutting the fighting compartment flooring so there are three parts. The one in the middle would be glued to the from and the outer sides over the ammo storage would be able to be removed. Maybe held secure with magnets. Have not figures that out yet. But I feel it is coming along quicker now. I did paint the seats and did some weather on them. Just need to finish the backs of the seats. Tim