


Jeroenveen1
-
Posts
152 -
Joined
-
Last visited
Content Type
Profiles
Forums
Events
Gallery
Posts posted by Jeroenveen1
-
-
Thanks Martin! You provided me with the link that made me decide on this scheme, so it's all your fault ;-)
-
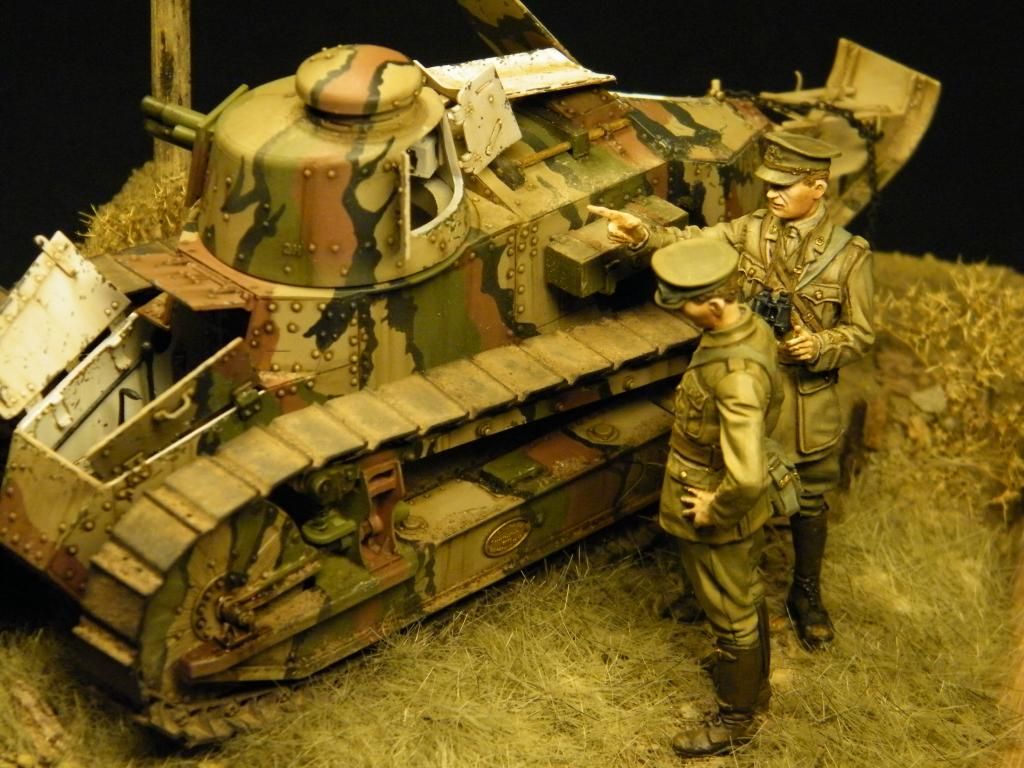
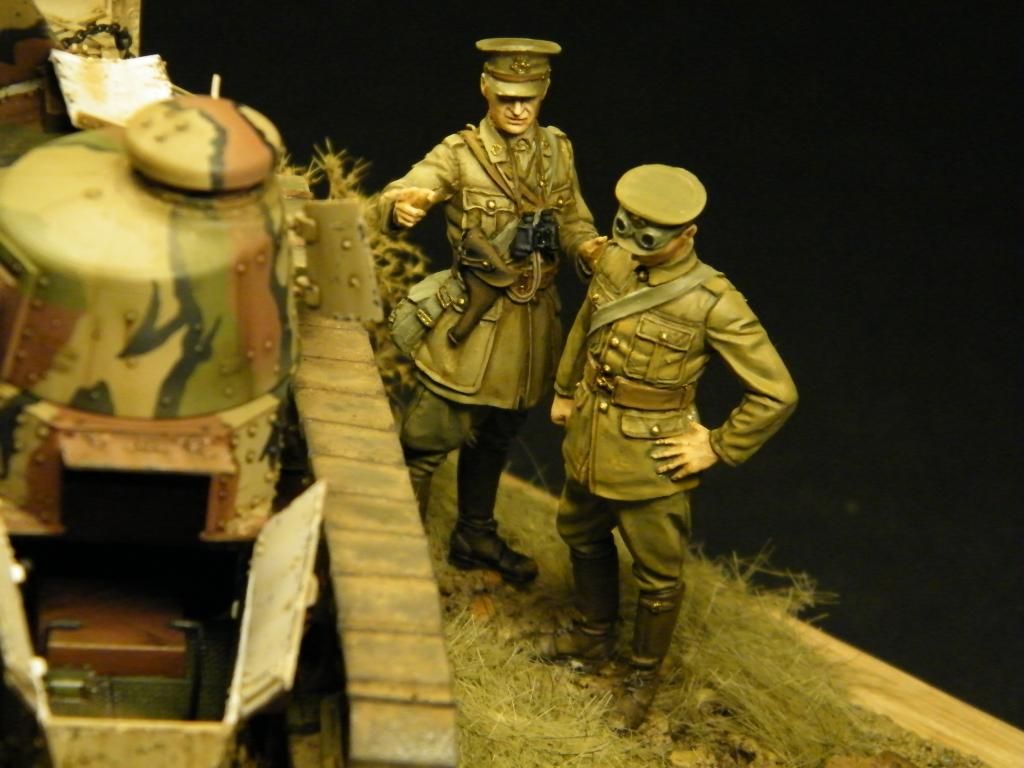
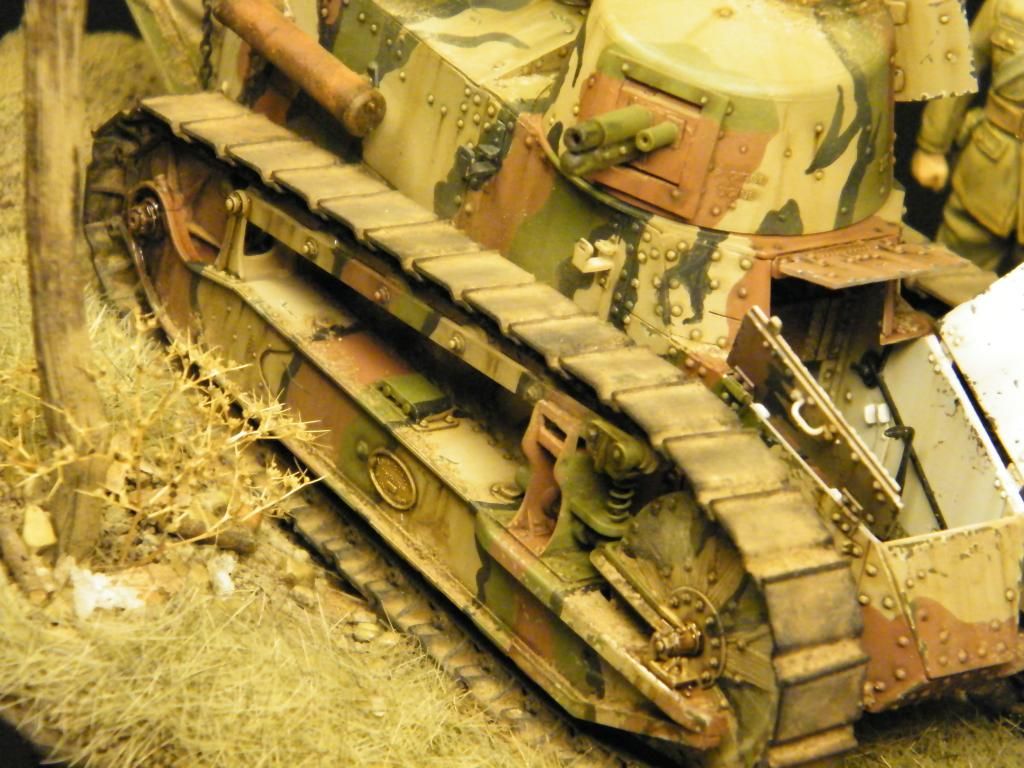
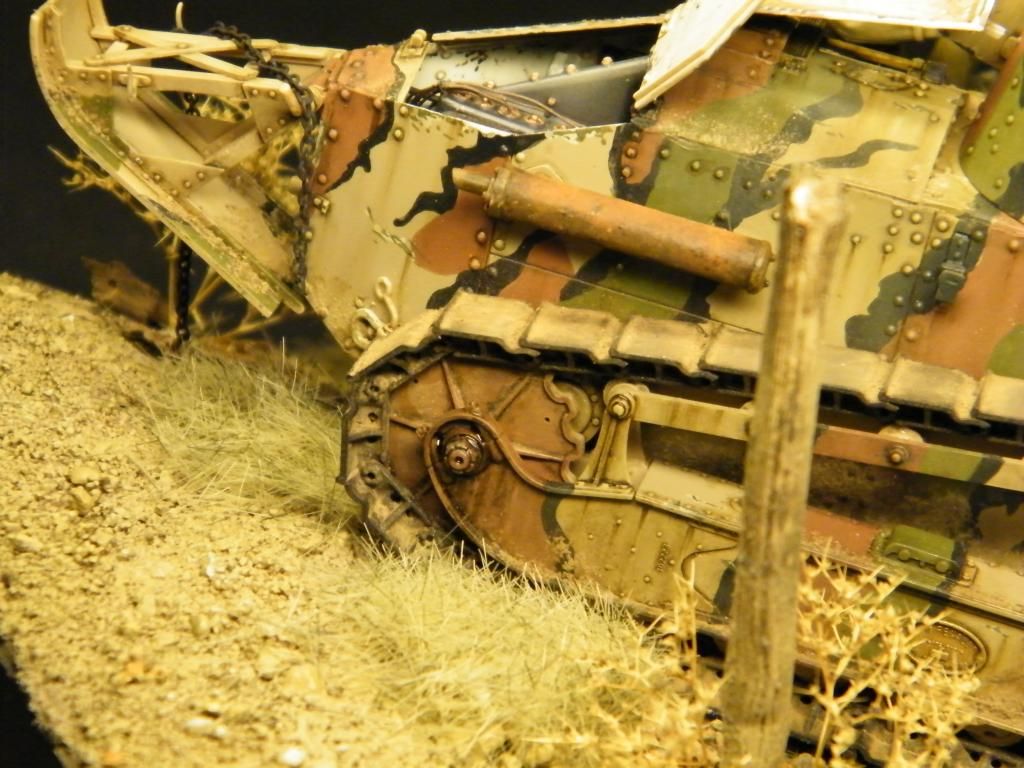
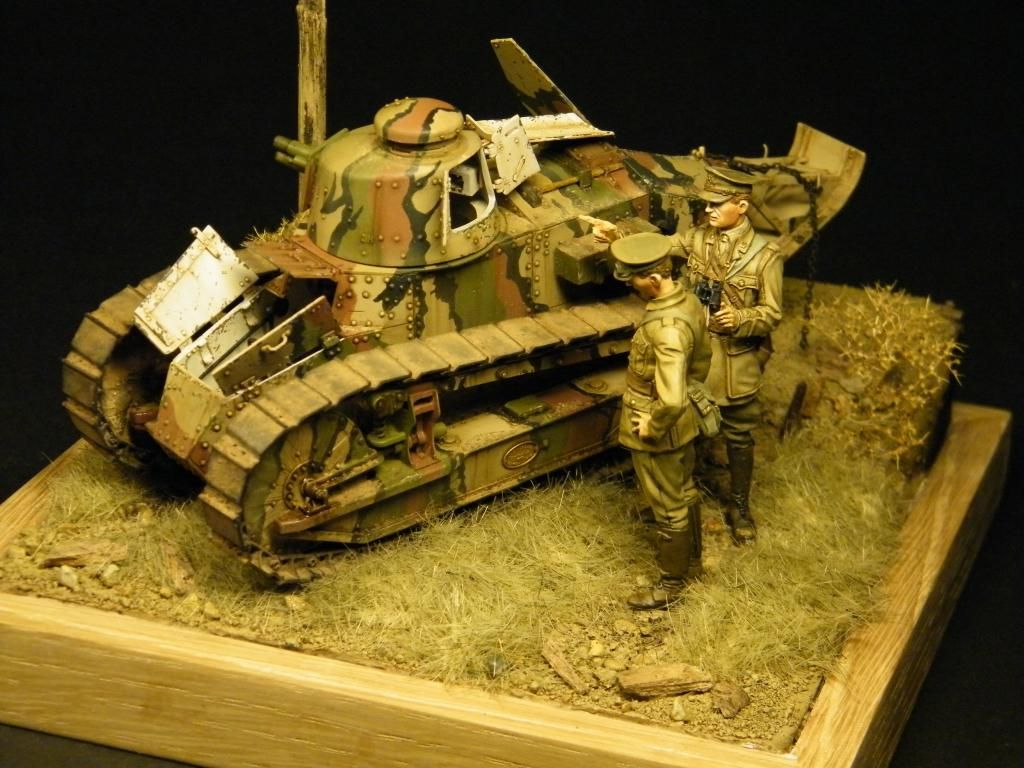
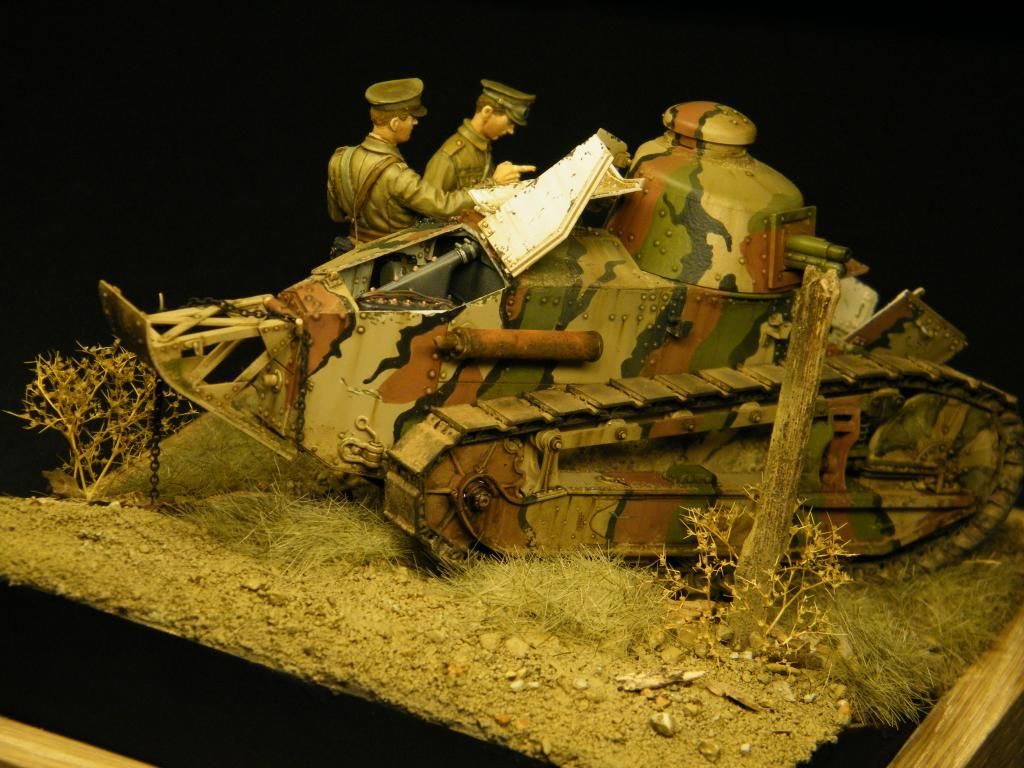
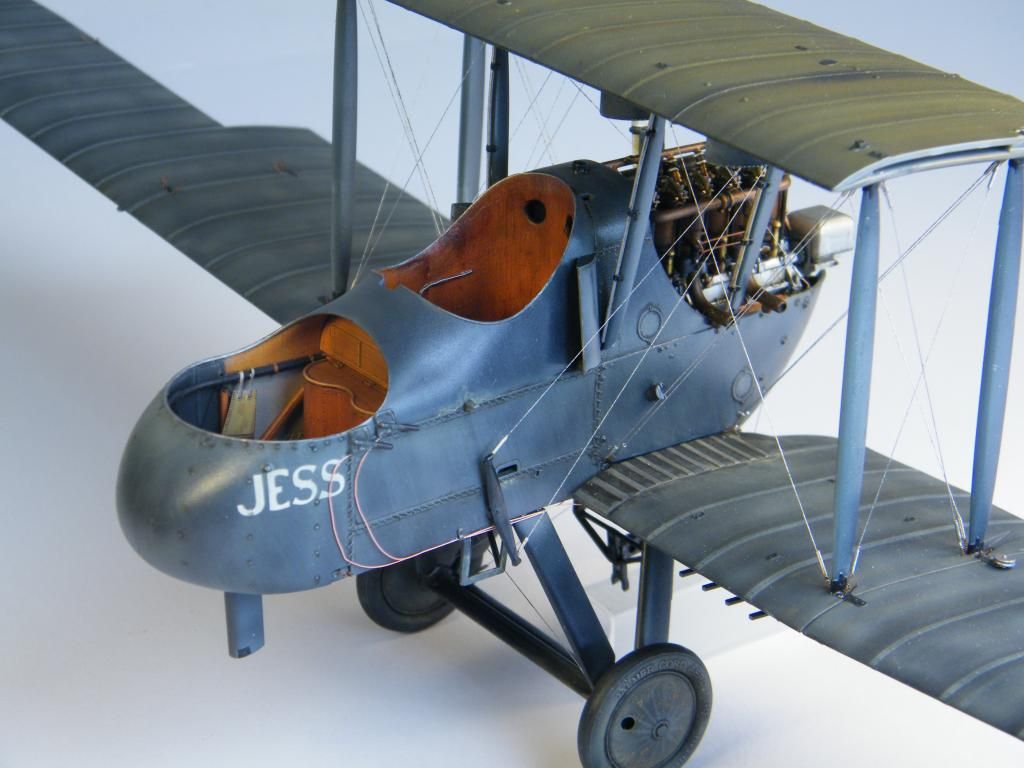
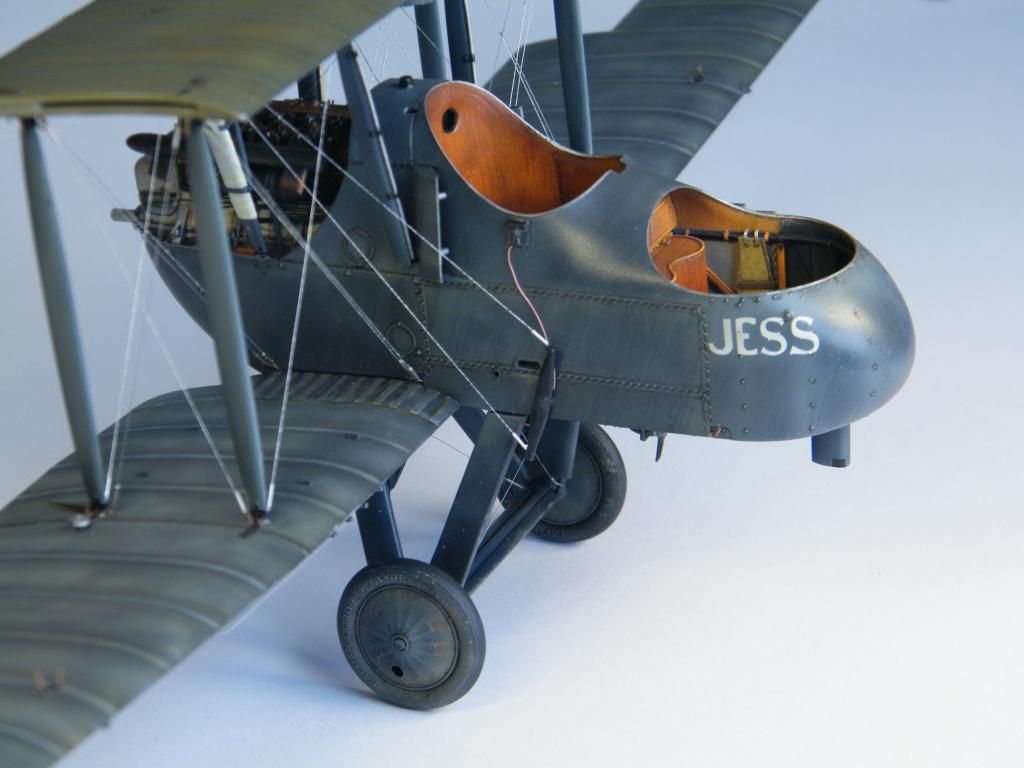
It's been quite some time since I posted on this site because some projects were for publications and couldn't be posted, but this weekend I finished my first little vignette in years. My last armor piece is from the days I dry brushed the heck out of my models Verlinden style, but so many things have changed since then. So this lovely little Meng kit was all about experimenting with hairspray techniques, pin washes, weathering pigments and so on. The two Tommys War figures are my first venture into figure painting with acrylics. The pics are mild on my work, but I'm happy with how everything turned out. Loads of lessons learned, and that is an important part of this hobby to me. So I hope you enjoy the pics as much as I did building this little vignette. All comments welcome as usual, happy modeling, Jeroen
-
 4
4
-
-
I tried them on a P47 and in all honesty… I gave up. I found these had no thickness at all and disappeared totally under a coat of paint. It's more like a dotted decal that something that looks like a rivet. Maybe it's me or I may have had a bad sheet, but I'm not going to use these again. Maybe the Archer ones are better...
-
-
Pure awsomeness!!!!
-
Still some things to do Paul but I'm getting there… I hope to have her done by the end of the year ;-). Thanks for the kind words!
-
No, still not done but I'm close to the finish and I just wanted to take some pics as a test for the final series. what is yet to come? Machinegun, front window, sales, skis, night lamps, flaps, rudder and some final rigging (thank god). I have to work on some finer details and get some little mishaps out of the way but I think it will be fine. This is where she stands now… I hope you like her. All comments welcome as usual, happy modeling, Jeroen

-
6
-
-
Landing gear and smaller details yet to finish, but she should be done this weekend….
-
2
-
-
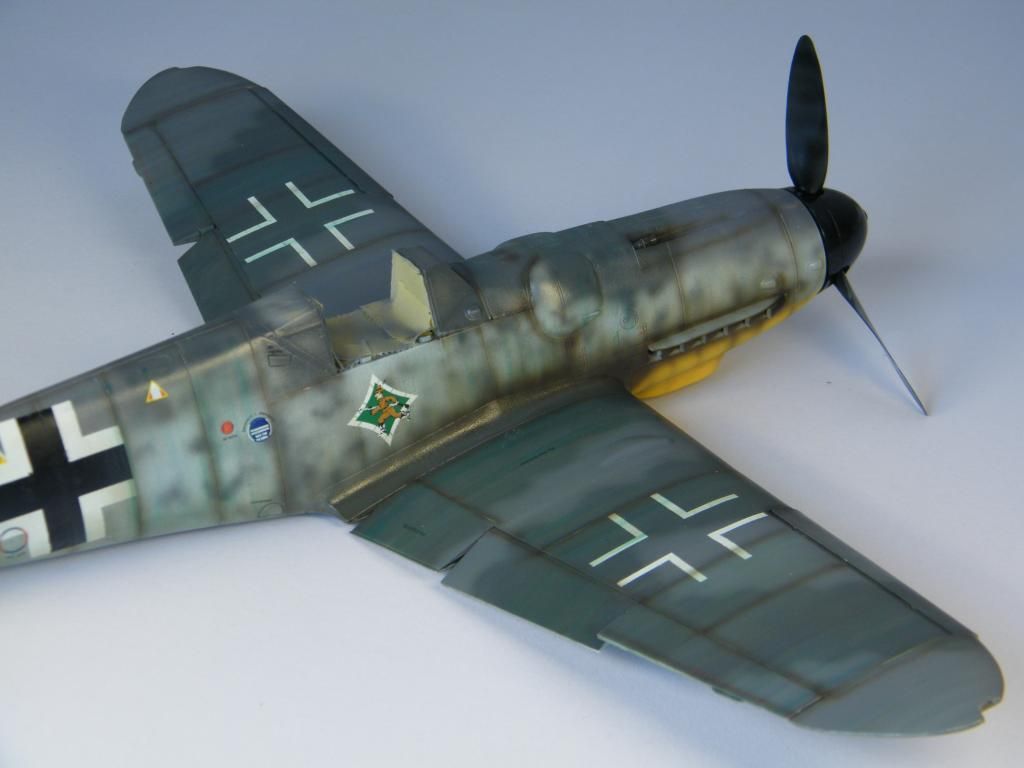
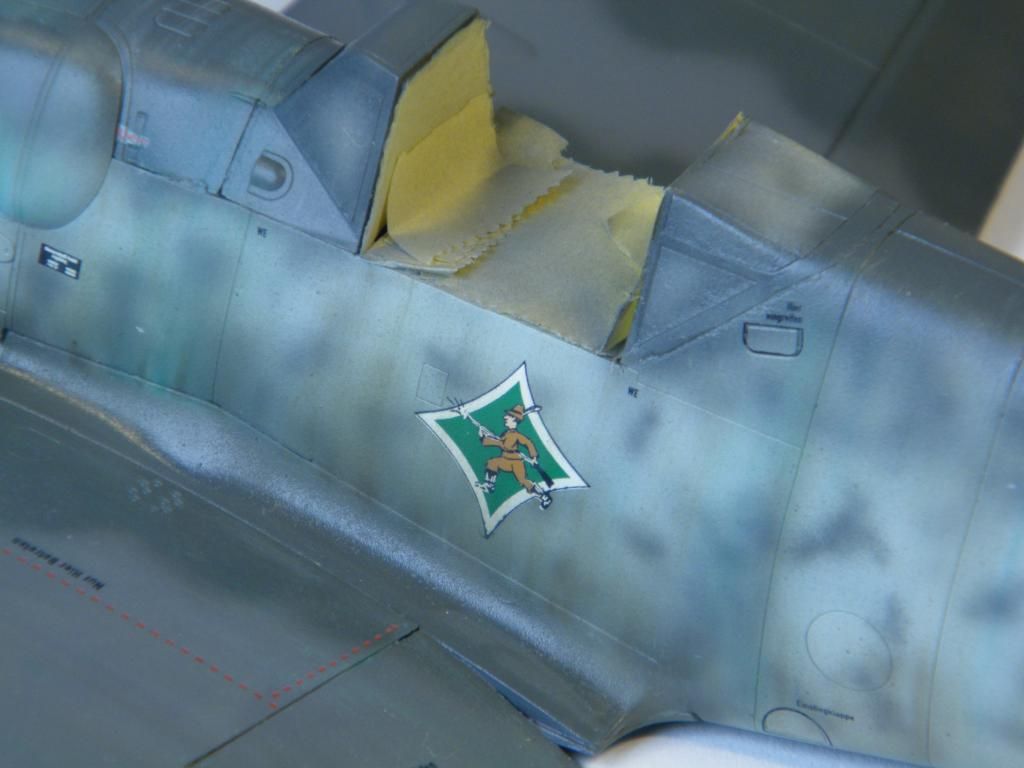
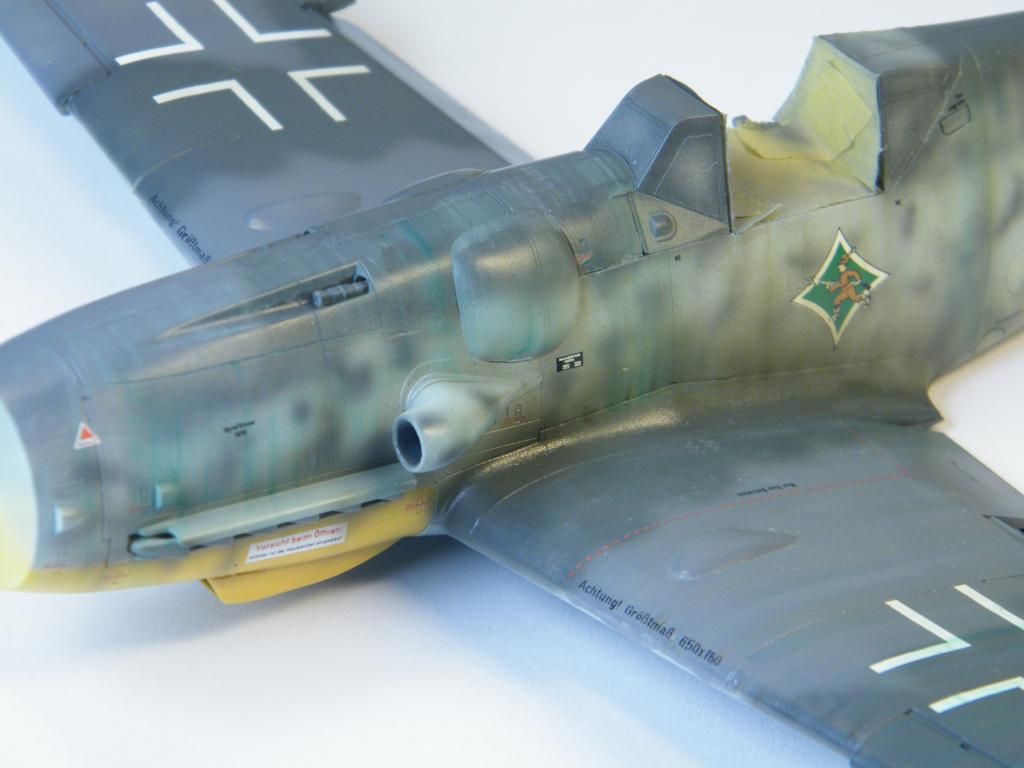
Ready for the last weathering stretch. Additional weathering has been done to break up the colors. Now it's time to tie it all together. Washes for the panel lines and raised detail, exhaust en gun grime, some scratches and a final coat of semi gloss varnish should do the job. Next week (the last week before the deadline) I should be able to finish the prop, landing gear, antenna's and other small details. Things are looking good if nothing unexpected happens. All comments are welcome as usual, happy modelling, Jeroen
-
That's correct Bevan! It looks a bit strange now but I hope that with the subsequent washes the contrasts will become a bit stronger and have some more depth. Of course the final coats of eggshell varnish will tie it all together, but that's the last phase. I'm very hopeful to meet TMMI's deadline but I need to keep up the pace!
-
1
-
-
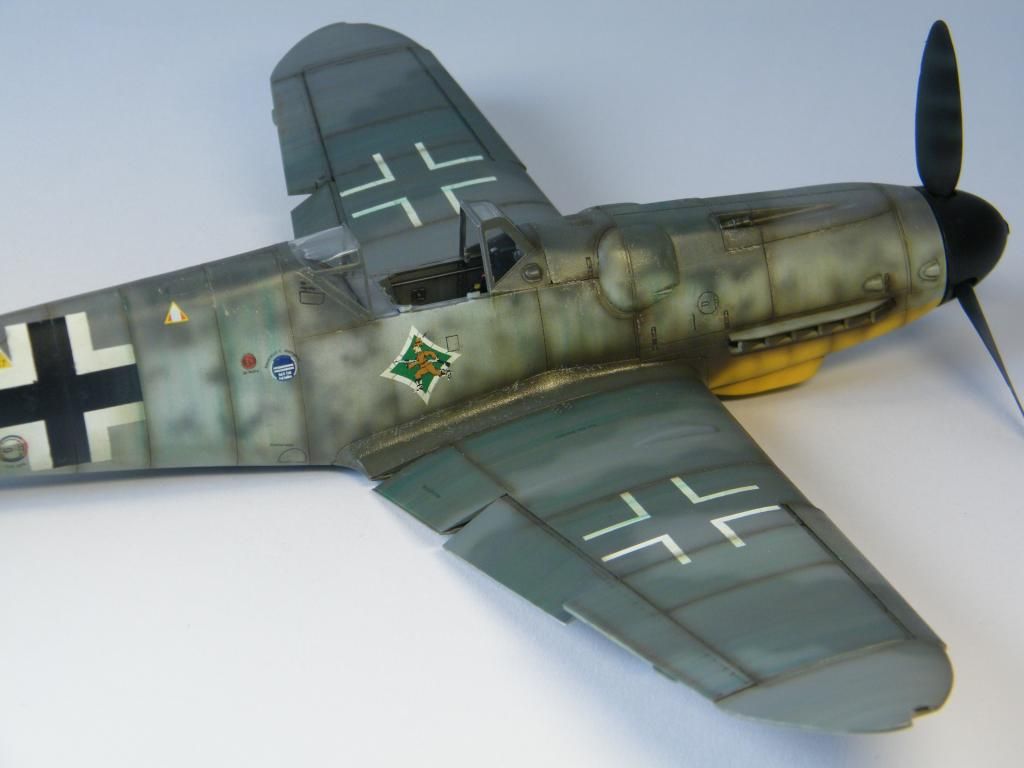
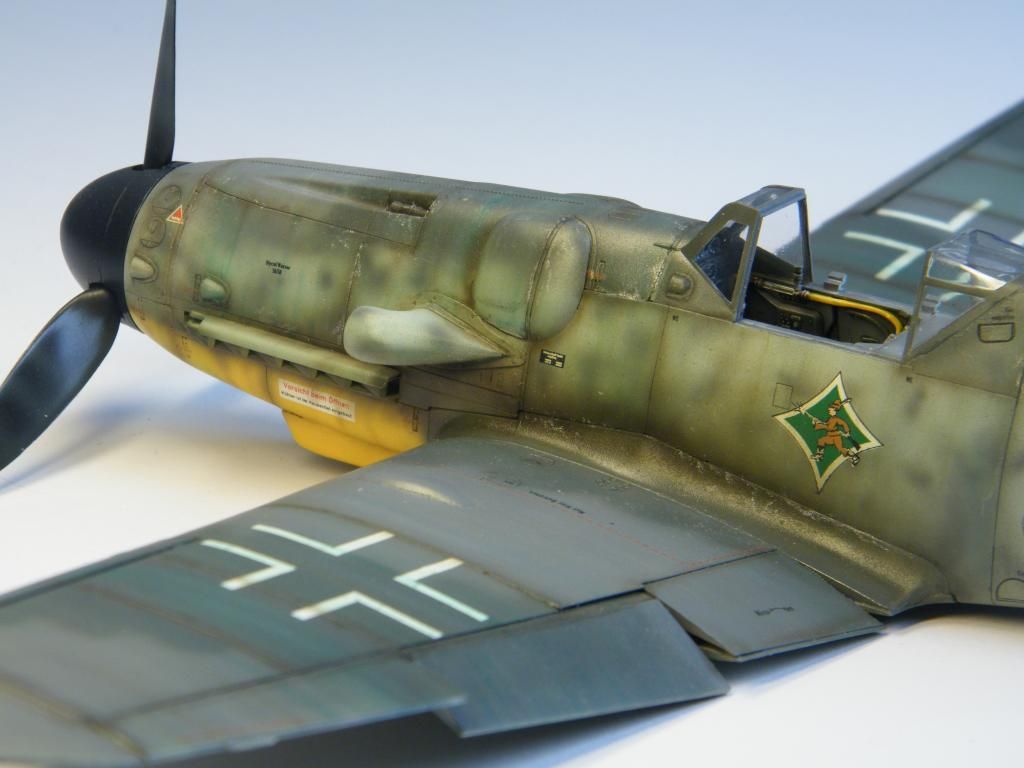
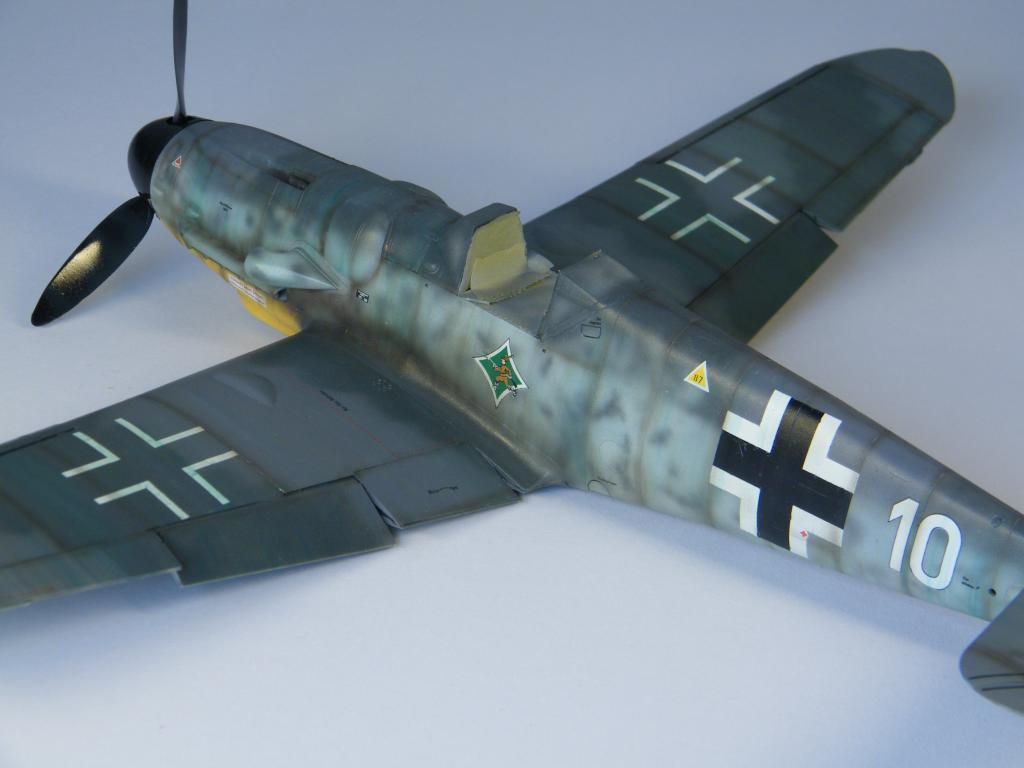
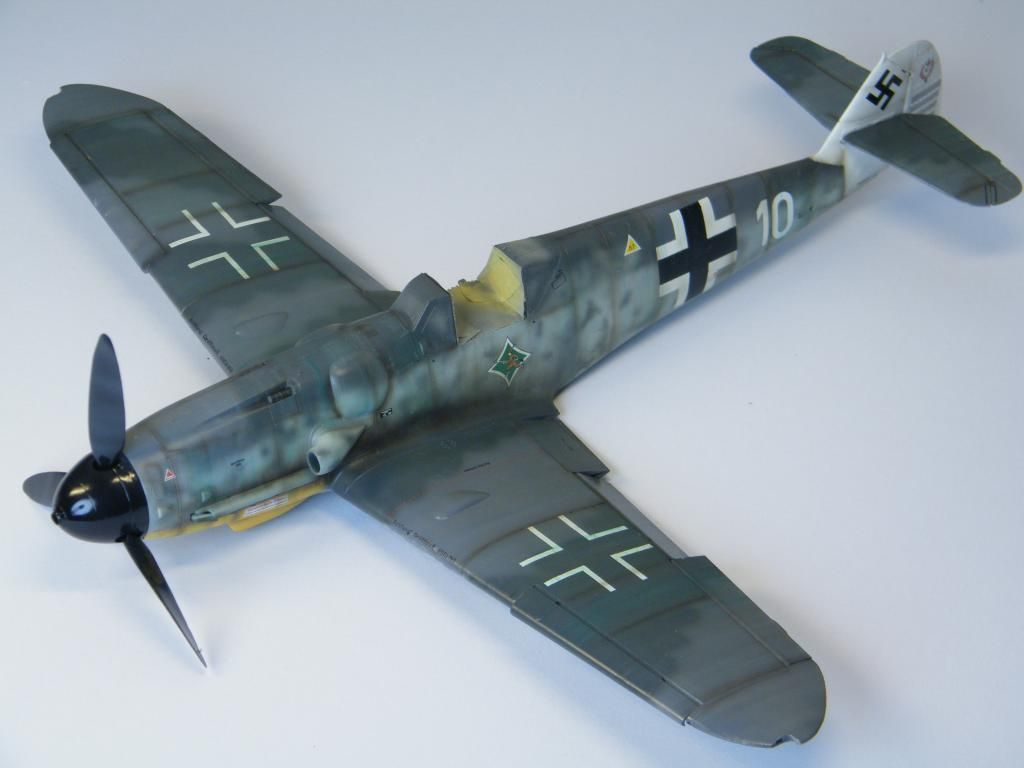
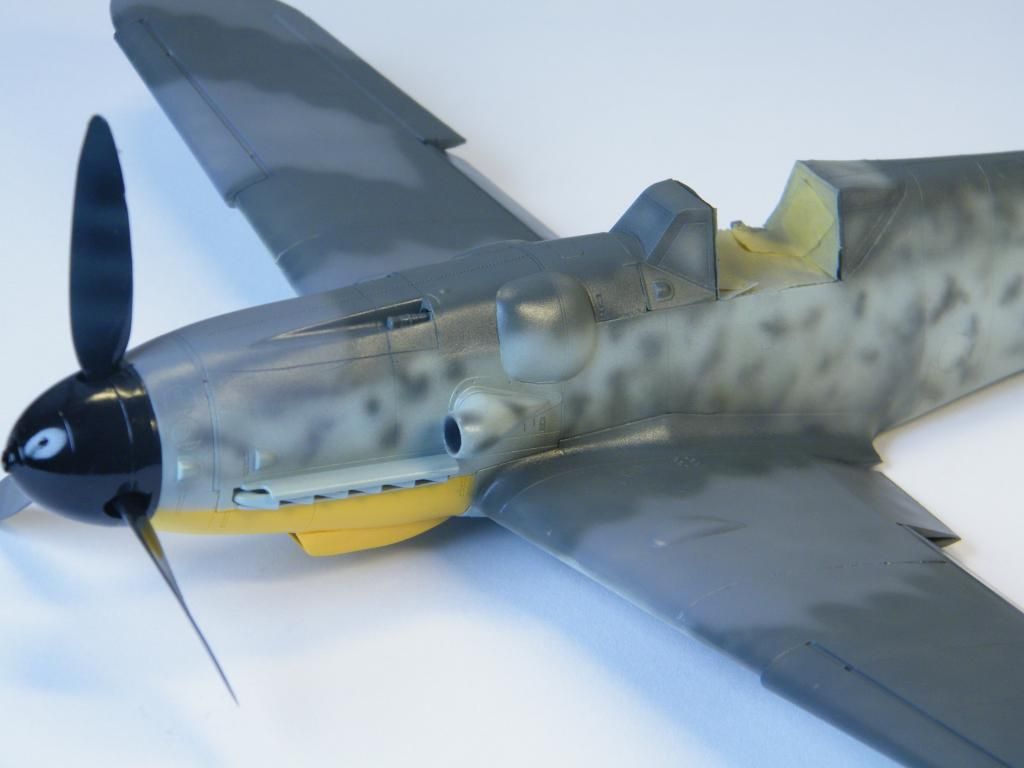
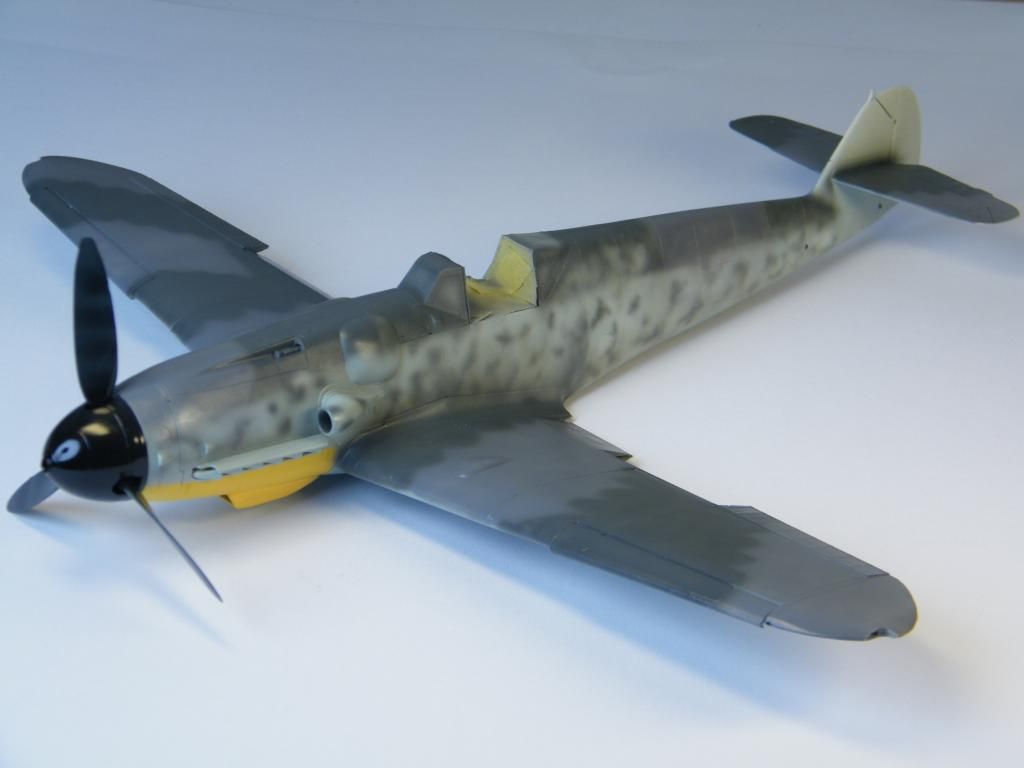
With two weeks left I'm in the middle of the weathering. All basic painting has been done and the mottling came out nicely I think. The decals worked very well, but I had some trouble with the crosses on the fuselage. The wrinkling didn't quite disappear so in the end I sanded them down, masked and sprayed some corrections on. After the protective varnishes had dried I started with brownish green to simulate grime, especially on the wing root. It seems a bit heavy now, but this also is the basis for the exhaust color which will be added in the final stages. I'm now in the middle of giving her a bit of a streaky appearance to break up the colors. The first pic is grime only, the second and third pic is the streaking. I hope you like the pics, all comments welcome as usual. Happy modelling, Jeroen

-
1
-
-
Thanks Gents, highly appreciated! This is a beaut of a kit... Just wished that rigging wouldn't be so timeconsuming!
-
1
-
-
A brief update. I'm working on a ME109 G6 at the moment but will pickup this project again mid december. Outer upper wings need to be fixed and rigged, but they are painted already, as is the tail boom. Things should go swift from here on. This is where she stands at the moment. Happy modeling, Jeroen
-
7
-
-
Pure awesomeness.... Damn Ralph, that looks beautiful!
-
Oh wow.... And even the toilet paper is included.... I'm in love!
-
1
-
-
Low pressure Cees, and the paint very much thinned... About 25 paint-75 thinner..
-
Well, I made some progress, with about four weeks to go from now… all bass painting is done except for the tail section. I'm about to start painting that, apply the decals and weather progressively. At least she starts to look like a G6 now, but I will need all the time I can find to finish this one like I would want….. hope you like the pics!
-
1
-
-
Oh yeah.... How conveniënt! Great stuff!
-
I'm using only one: a badger 100 SG. Never lets me down, smooth double action, can do almost all paintwork and paints and with the head and needle replaced to 'fine' is also capable of doing the finer work. Make sure you have a compressor with moist regulator and a pressure bin, so that you can spray under constant and even pressure. Just as important as the airbrush. The 100 SG really is.. my baby :P
-
I'm going to build it, super detail it and paint it and make sure it flies. Now I am looking for a dwarf to pilot the damned thing!
-
2
-
-
Amazing work Ralph! I'm working on the Revell version of the G6 and this sure is an inspiration… I will follow until the last post my friend. Fabulous! By the way… I have my Grey Nurse Masks!
-
I have read this is a good kit in fit and overall shape. Do you think it is as good as guys are saying in reviews?
There are certainly some issues with the kit. The moulded safety harness, the air intake with the thin lip, the spinner, some overdone detail on flaps, the undersized bulges on the nose are some examples. These can be corrected. So far she builds like a charm. I don't have the Hase kit so I cant compare. The best judgement would be price vs quality and I think it then rates as a very good kit and a great platform for detailing..
-
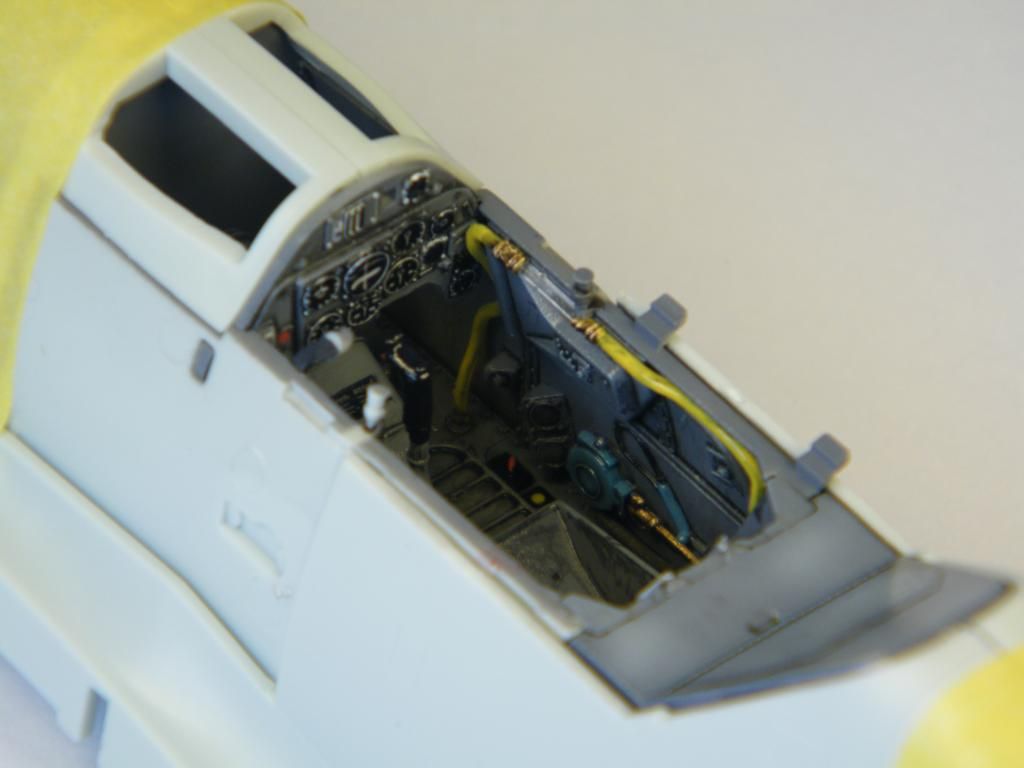
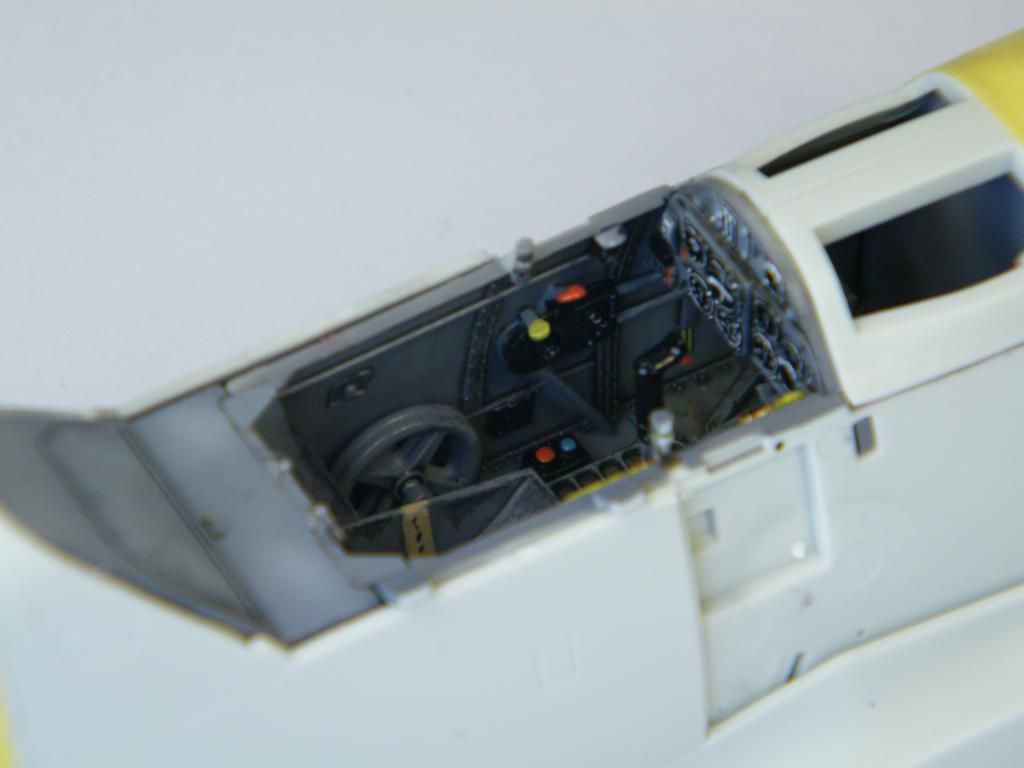
This arrived at my doorstep and should end up as an article in Tamiya Magazine. Basically I have 7 weeks to finish the ME109 G6, which should be possible, but will demand some dedication. I'm not the fastest of builders you know. But I managed to finish the pit in the first week and will now move on to assembly of the fuselage and painting of the wheel wells. I'm not going to comment on the kit, you will have to read that in the february issue of next year, but it has been fun so far...
-
3
-
-
That is coming along very nicely! Keep on posting, this looks very promising!


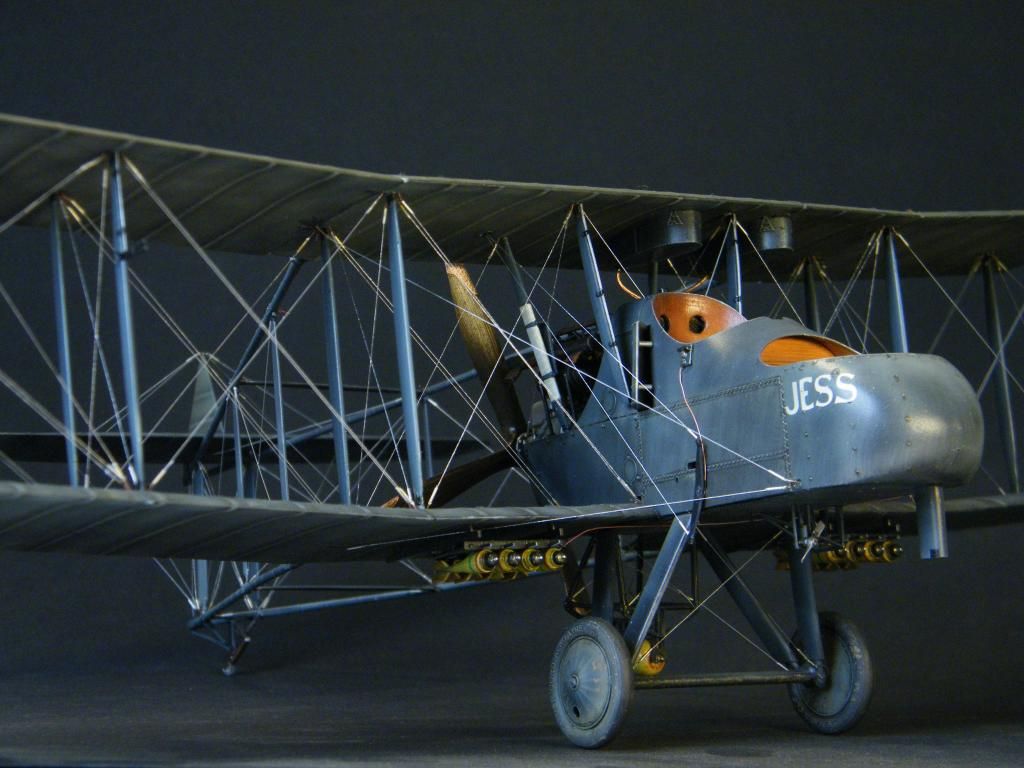
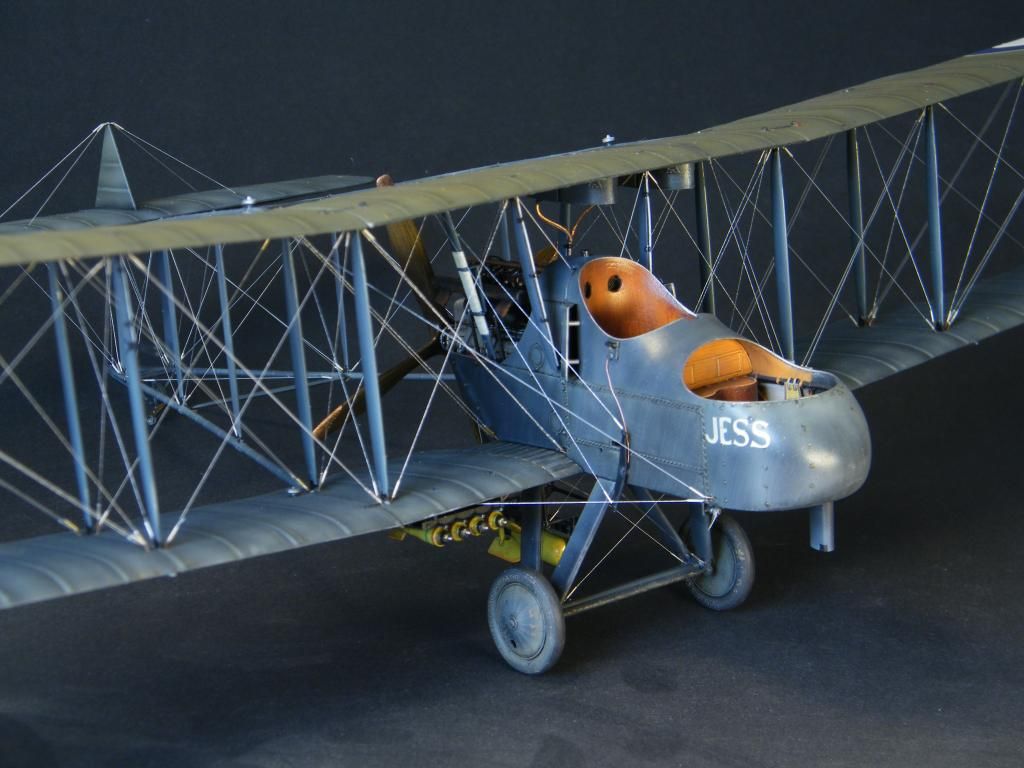
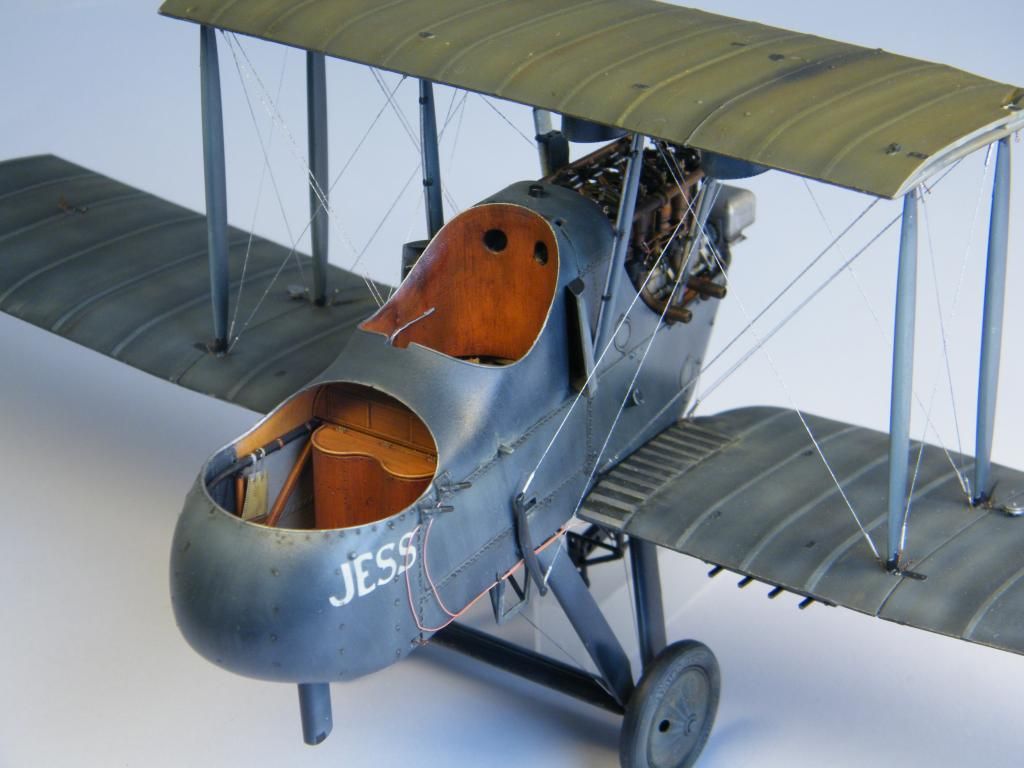
WnW FE.2B diorama
in LSM 1/35 and Larger Work In Progress
Posted
This may be a strange start because you might have expected some pictures of the FE2B, but this post will first show you the items that are going to be on the dio. I collected quite some nice stuff… a little cart from MK35, ammo drums, a mascot, chicken, dog, blankets, bottles, oil lamp, ladder, wheel chocks… and two nice pilot figures from Time Machine. This is the first one, almost completely done, and progress on the second one goes well. I'll be posting as I go along. I hope you enjoy the pics. Happy modeling, Jeroen