


Jeroenveen1
-
Posts
152 -
Joined
-
Last visited
Content Type
Profiles
Forums
Events
Gallery
Posts posted by Jeroenveen1
-
-
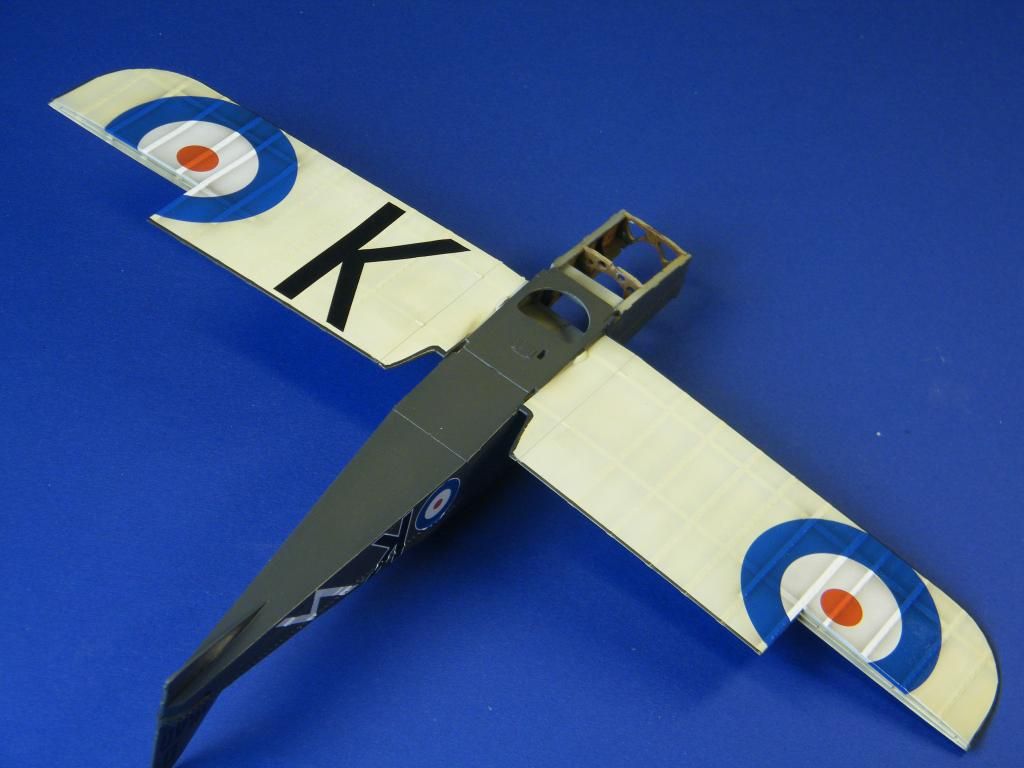
Thanks guys, for all the kind words and stimulating remarks. In the last week I painted the fuselage and wings in a homemade PC10 and focussed on weathering the undersides of the wings. This was a very intense procedure because I wanted to try and get some depth in the paintwork. I used many transparent color layers, some airbrushed, some brushed with oils. The effect is maybe a little heavy but I decided to leave it for what it is at this stage and start concentrating on weathering the PC10. In the end I will see how everything balances out and make adjustments then. This is where she stands at the moment...


-
 1
1
-
-
Ralph! Great to see you here my friend. Great Spitty as well! Keep on posting! Btw, Mal send me my Grey Nurse masks! Cheers, Jeroen
-
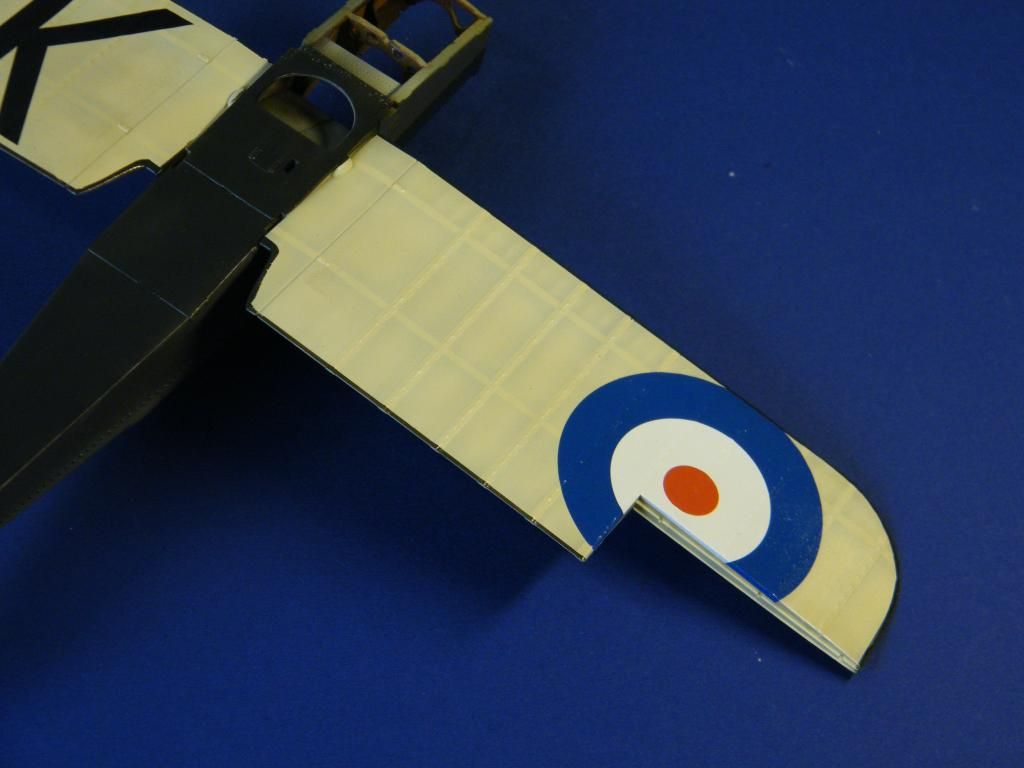
Without a doubt guys: D3540 'K', Captain G.H. Lewis
I painted the whole thing with my homemade PC10, will make some pictures tonight!
-
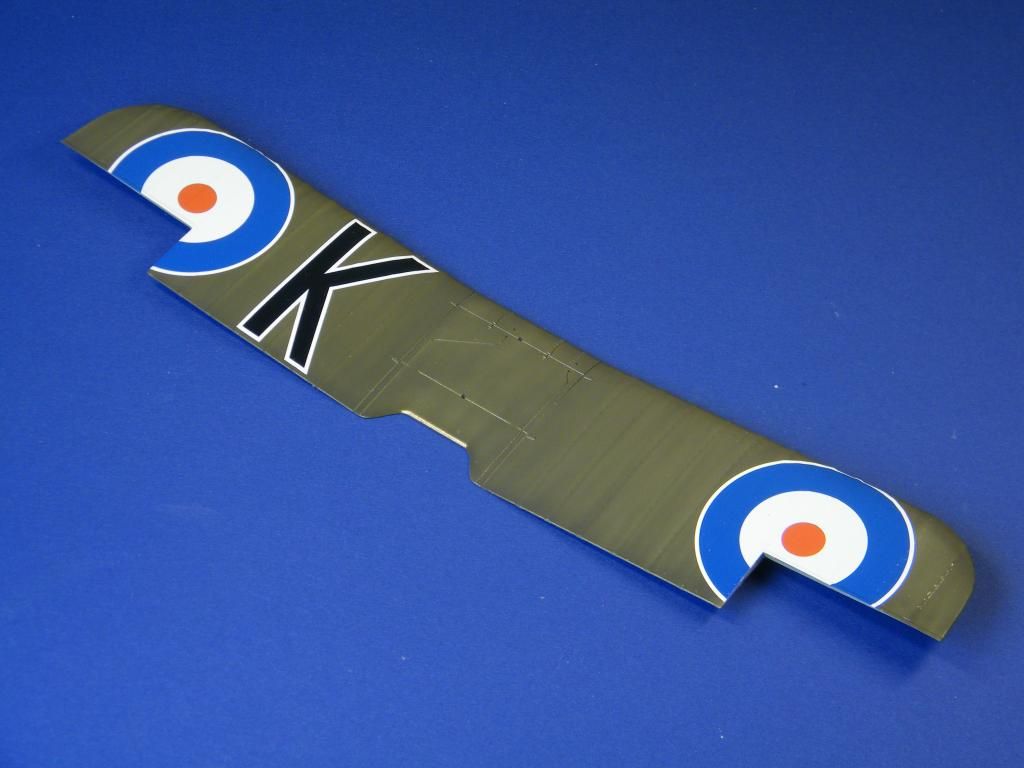
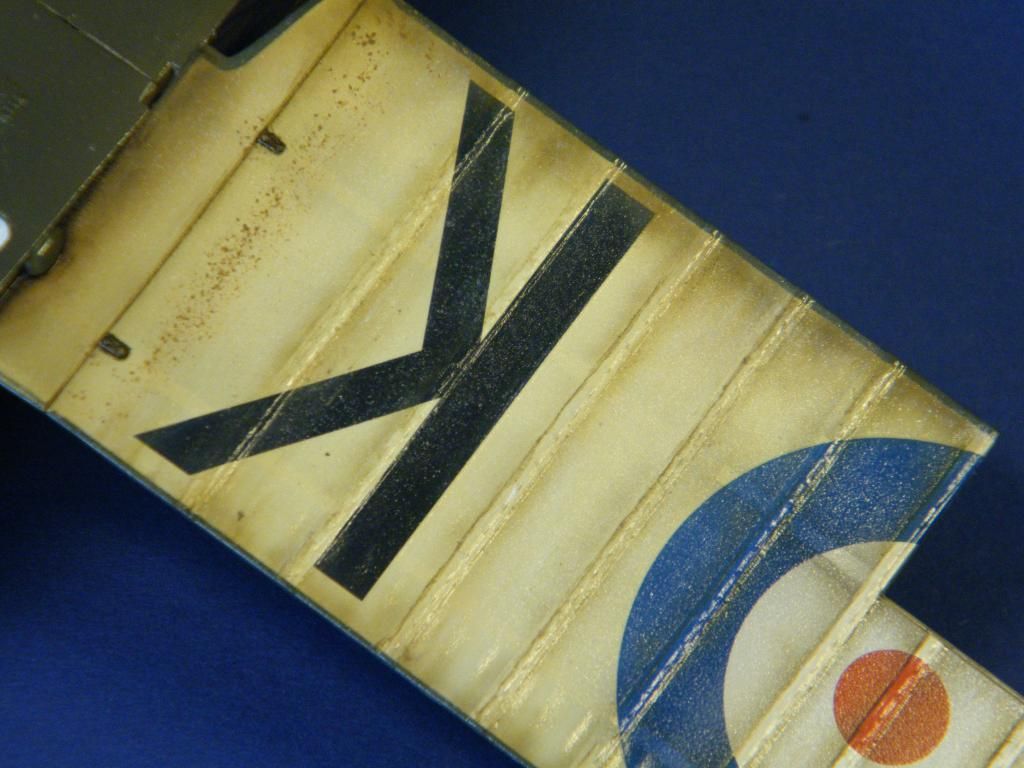
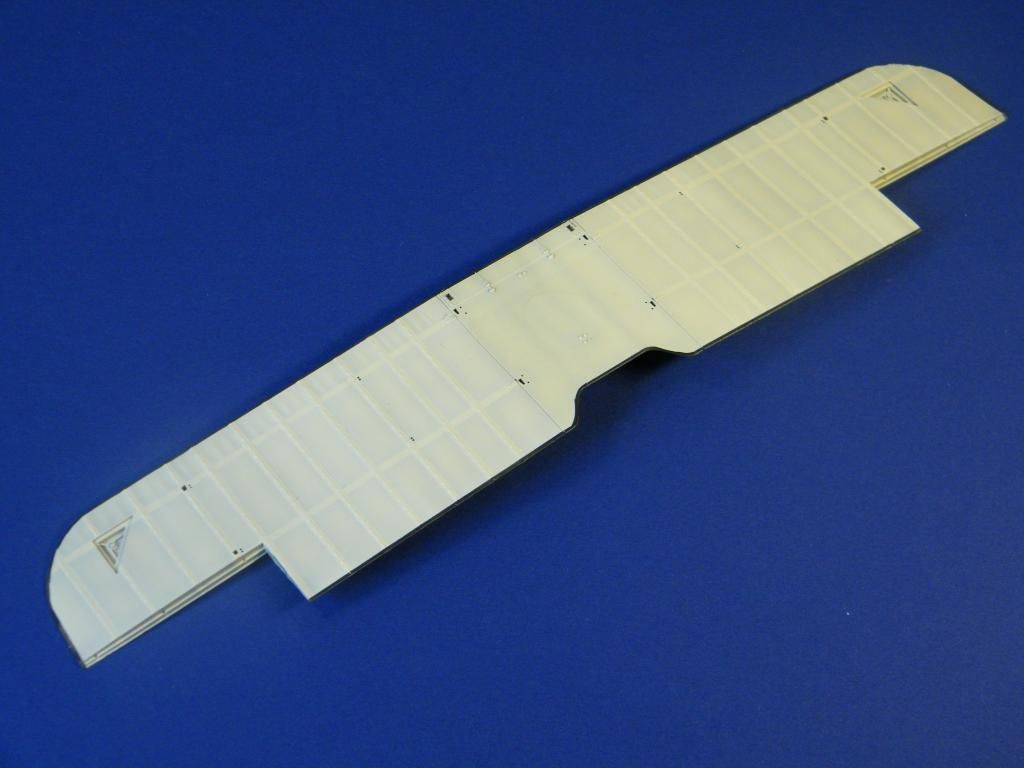
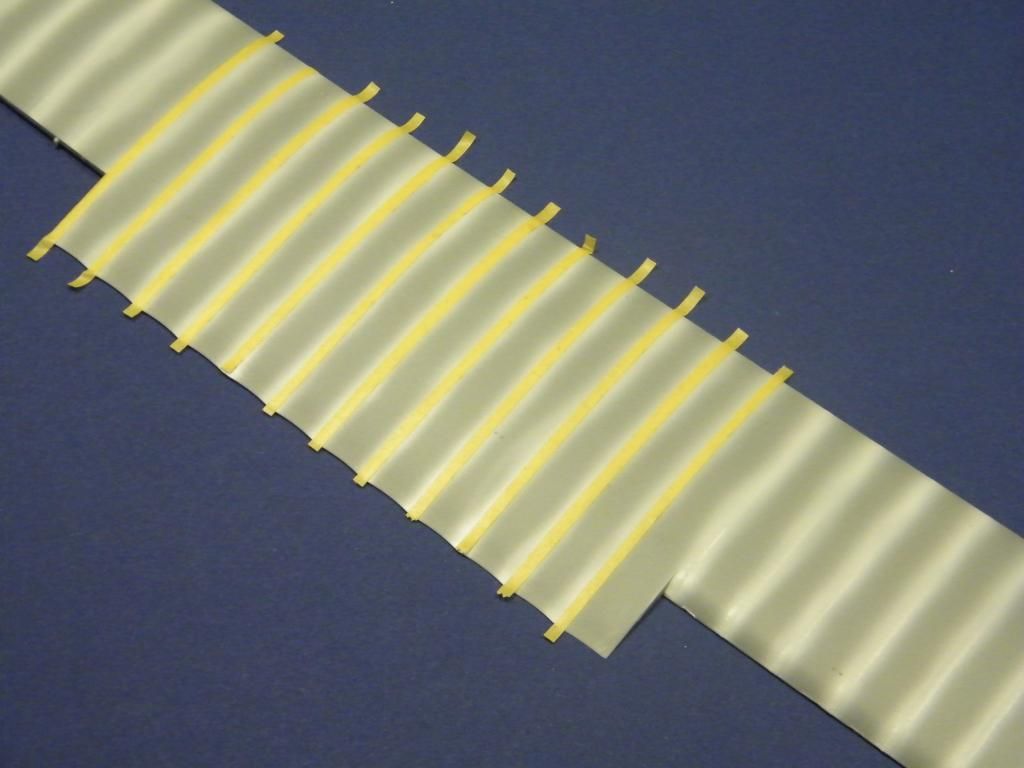
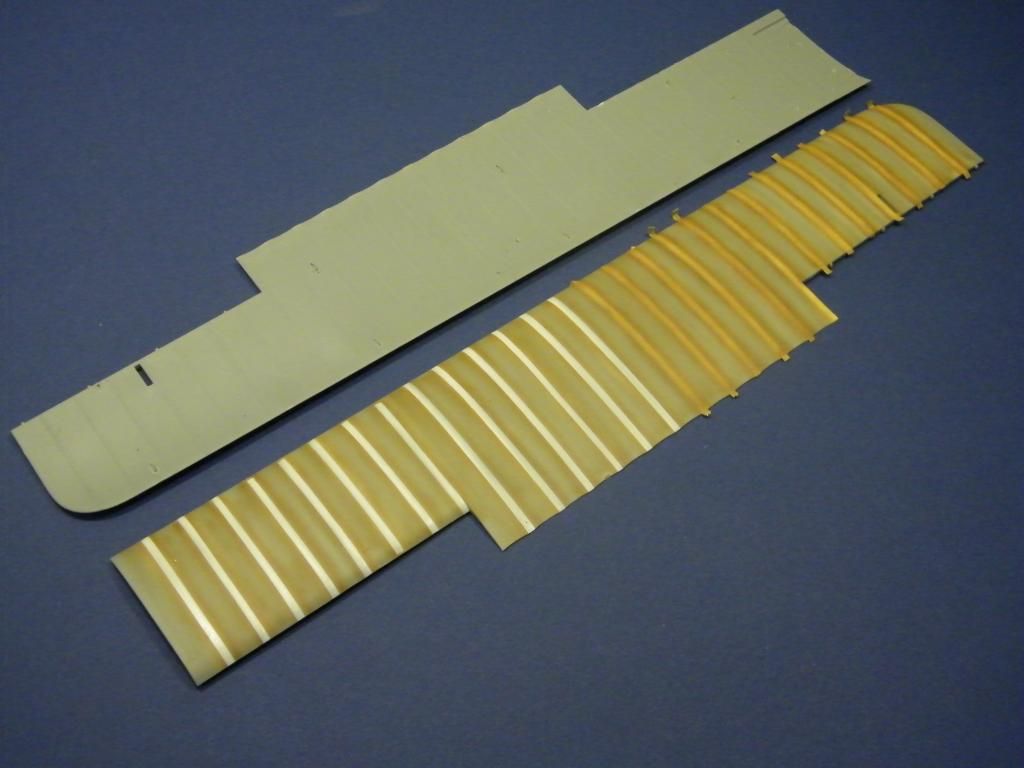
Undersides were painted with Humbrol linen colors. The ribs were masked as well as the beams and then dark brown was sprayed over the tape, leaving overspray on either side. After the tape was removed different shades of linen were airbrushed over this base. Paint was very very thin for control over color density and variation. The fuselage and wings received different shades of green. The homebrewn PC10 will be airbrushed over this in transparent layers so I can play with the light a little… Still need to think where I go from there because at the moment I have no clue :P

-
3
-
-
Oh boy.... Speechless! Superb!
-
That is mightily impressive Thomas. I followed this on HS but don't visit there as frequent as I used to, so it's good to see it appear here. The paint scheme you picked is very promising and I can't wait to see more progress. It might take you a lot of time but every second spend is well worth it. Phenomenal work!
-
Oh boy… that's freakin beautiful… I like everything about that. Great stuff!
-
Superb work! Keep those pics coming, that is just the right amount of inspiration. Great work!
-
1
-
-
Although this is not an official statement I would say yes… if 1:4 isn't large scale I don't know what is… and a bit of variety in subjects seems a good thing to me! Cheers, Jeroen
-
1
-
-
Cees! It was pleasure to meet you as well. We should have had more time, but hey, it's a start. Hope you got back home safely. Now this I'm going to foliow with great interest, Jeroen P showed me some of the pictures earlier but a first hand report is unbeatable! Great stuff so far. Get some rest and have a nice evening, speak to you soon! Cheers!
-
The camera has been mild guys, really, but thanks for your kind comments!
-
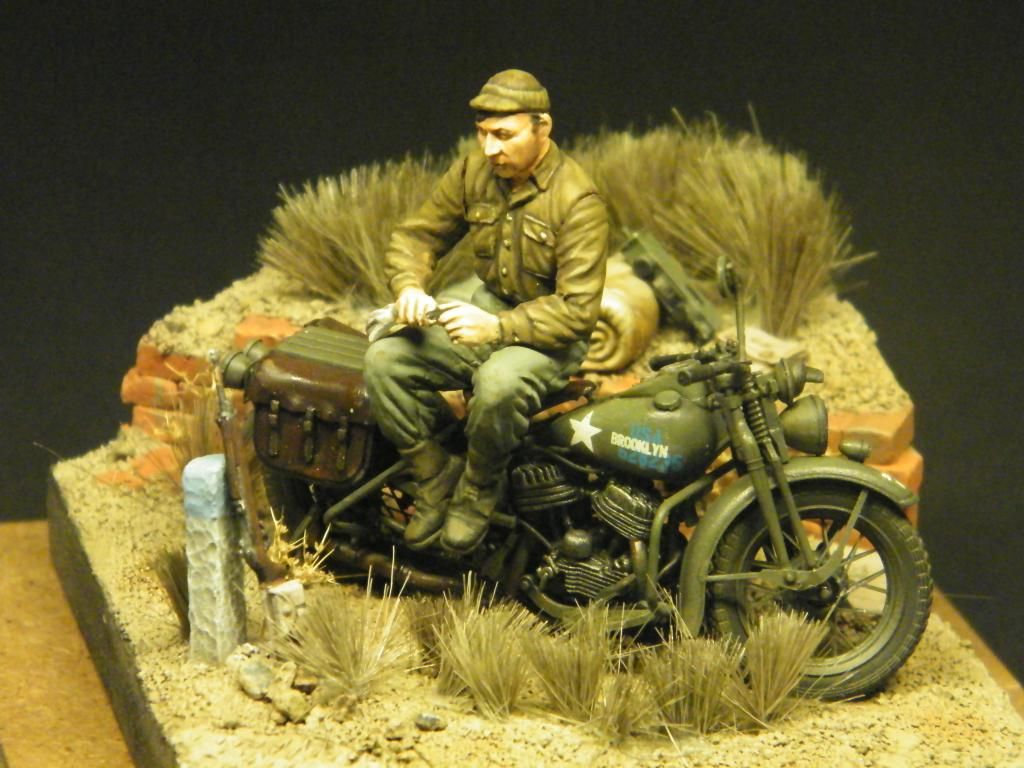
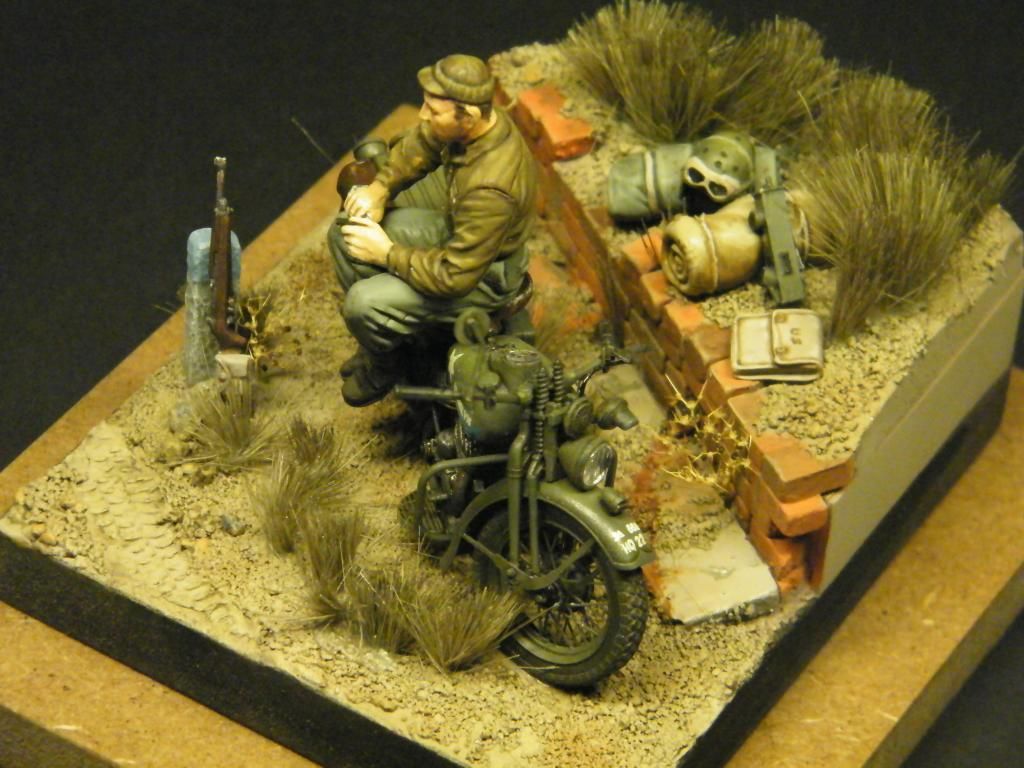
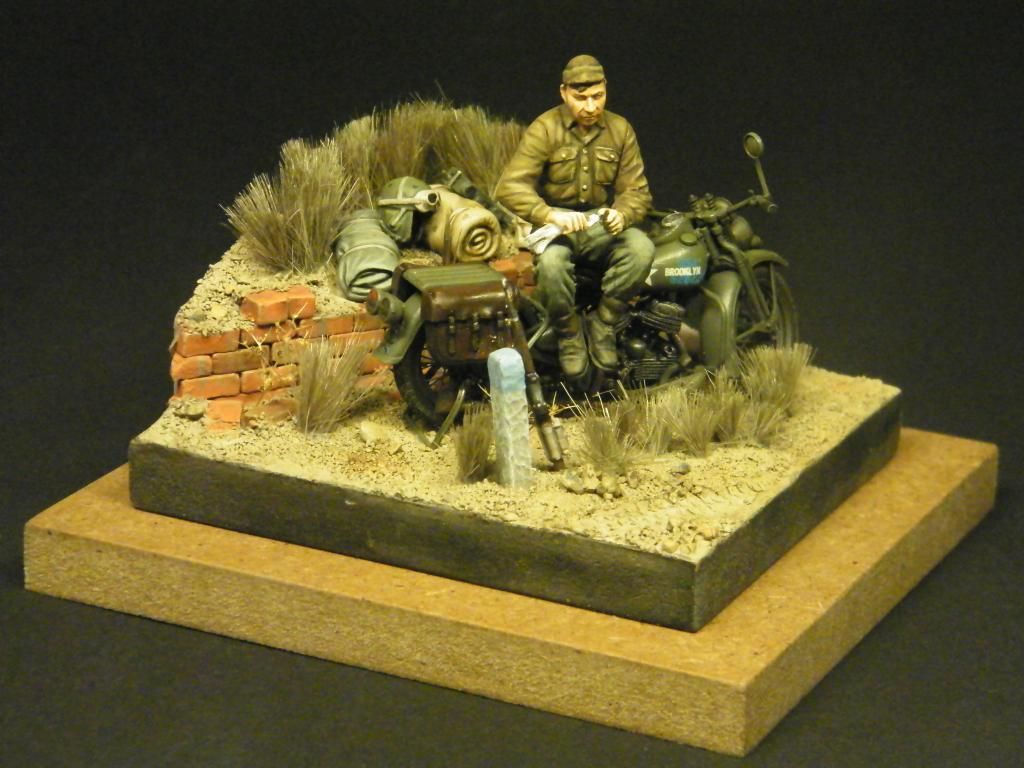
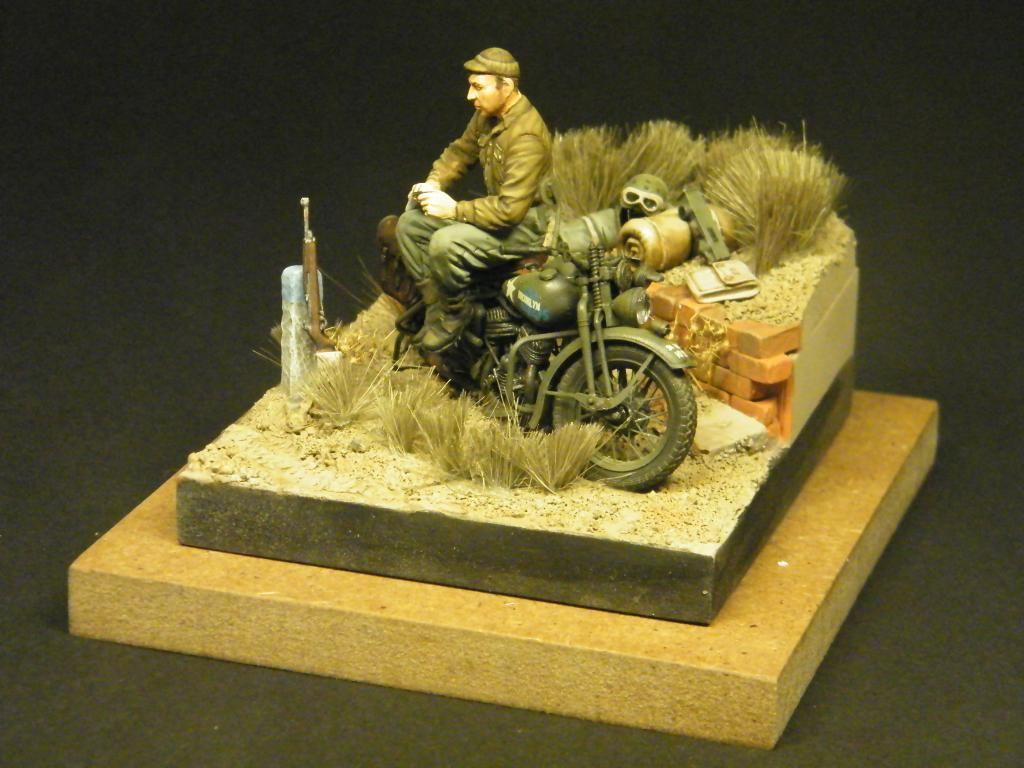
Oh well, it's back to the dark side I suppose and I can't paint figures to save my life, but at the beginning of this year I just wanted a little break and do something else. I had the Miniart 1:35 Harl;ey Davidson kit, along with some nice figures and settled for this little vignette. It was fun building it and just the right thing before I started on that Fokker. Not my greatest work but it gave me a good couple of modeling weeks… what more could I ask for? All comments welcome as usual, happy modeling, Jeroen
-
4
-
-
You see Jeroen, I might change my leather if I know how yours came about…. :-P…. these word games really have to stop lmao….
-
Question remains: how did you do it? Painting the leather I mean :-)
-
Well, thank you James, and please don't tell my wife, because she will take the money and the cards from my wallet knowing full well what is about to happen after this preview… now I want one!
-
2
-
-
Fabulous paintwork and the plastic doesn't look bad either! I'm pleasantly surprised with this kit I have to admit. Great to see it here and glad you're sharing your progress here! Will follow with interest! Cheers, Jeroen
-
Another option if you are in comparison mode… try Mal Mayfields Miracle Masks… used this on my Spitty, Mustang and B25 and that went pretty well. Mal's a great guy to work with, so he has my recommendation. Just thought it would help to give you some options! Cheers, Jeroen
-
The Ninak! High on my wish list and I may buy one soon but Jeroen, this I will watch first. That panel looks fantastic and it can only be the sign for more good things to come! I will follow with interest! Cheers Jeroen, Jeroen ~darn, that really is confusing ;-)
-
1
-
-
Thanks guys, for the kind response! I will do my best to update this post regularly!
-
Thanks Martin, James! At the moment I have a slight preference for D3540 'K', the bird Captain Lewis flew. I like 351-4 as well, with the red band, but that's a trainer and I prefer combat aircraft… The instructions didn't force me to make a final choice so I keep my options open for a little while ;-)
-
I used Sol and Set on my Fokker. Worked like a charm if you're not heavy-handed with that stuff! Great to see this approach, never knew that would work and I'm sure going to give it a try… Thanks for that tip! Cheers, Jeroen
-
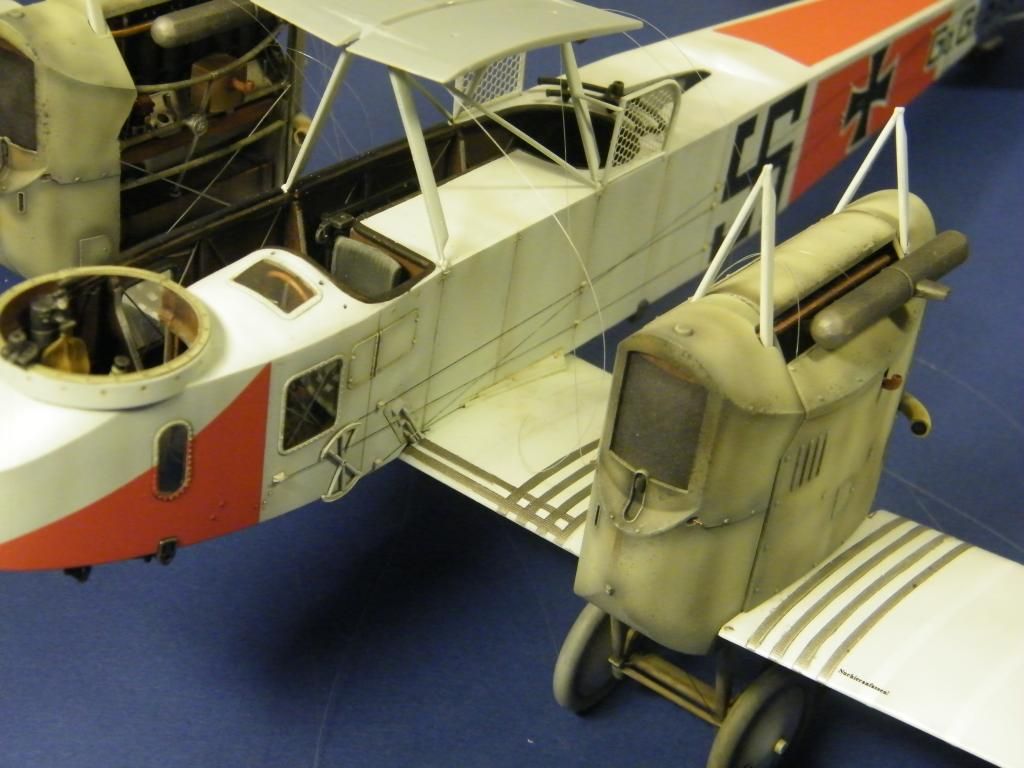
Last week I started building the Hisso. A beautiful kit, although at closer look you can see how much progress WnW has made when you compare it to the Fokkers that have been marketed lately. If there's any interest I will post progress here. The first steps refer to the lower part of the cockpit and the cockpit floor.
v]
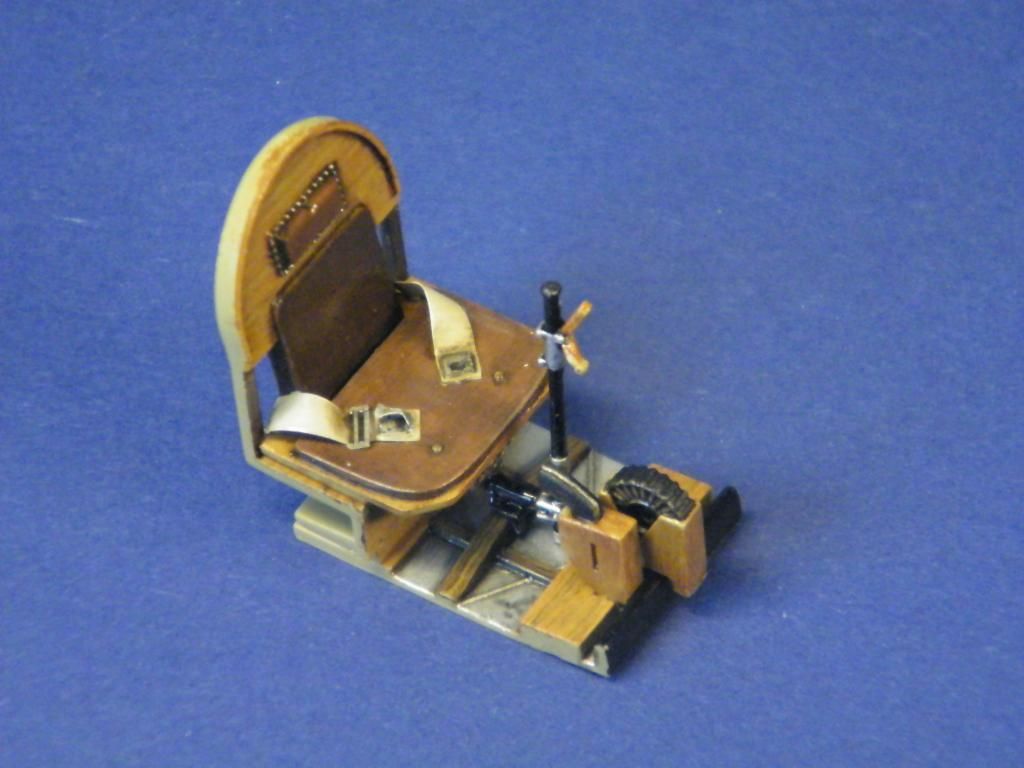
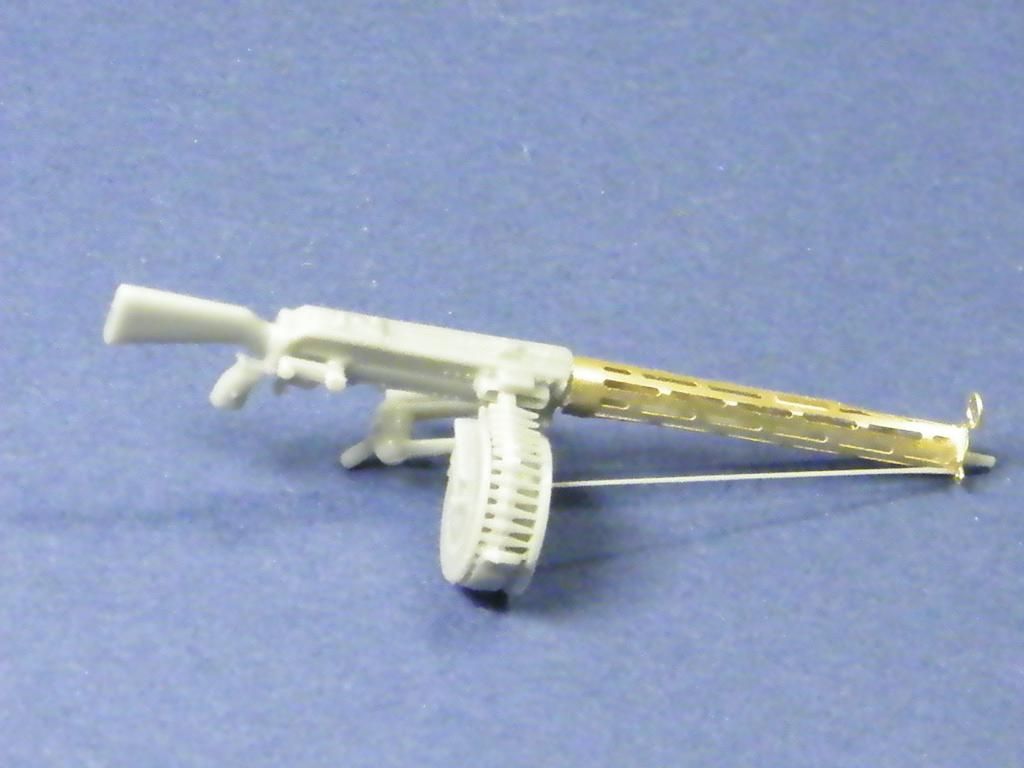
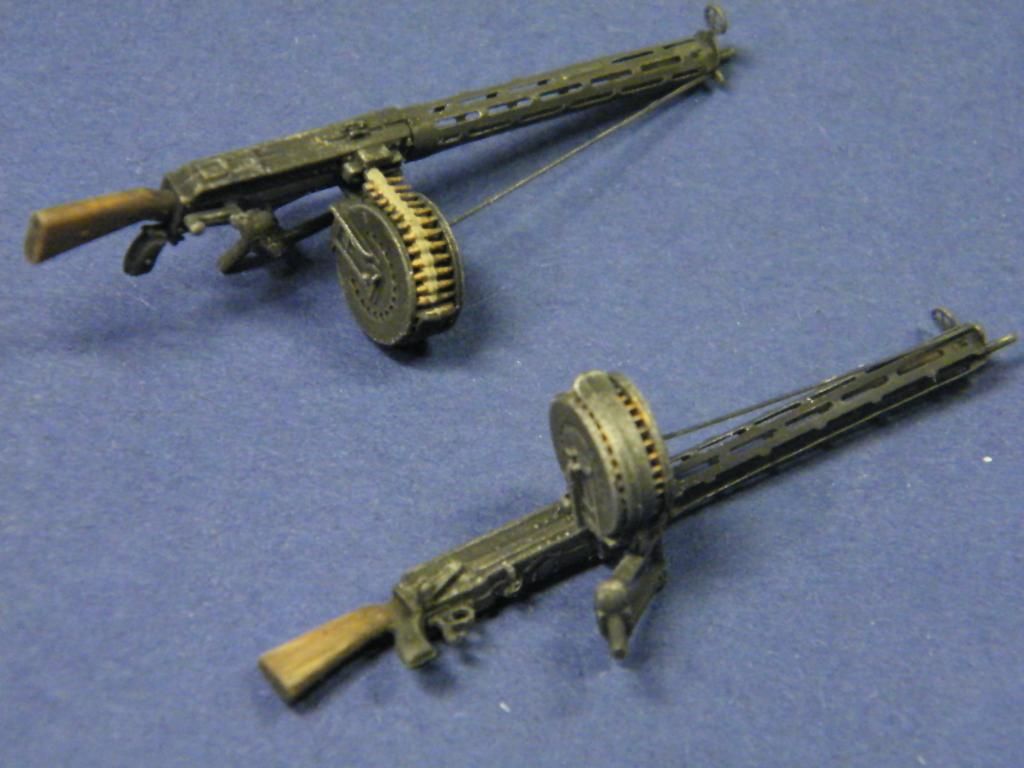
The wooden parts of the cockpit have been painted with Tamiya Desert Yellow and are protected with a coat of Tamiya Gloss Varnish. After this dried I used different brown shades of oil paint. These have been applied and left to dry for half an hour. Then I started dragging an old dry brush through the oil paint in the direction of the grain. Clean the brush regularly and slowly but surely the wood structure appears. When the oil paint is dry protect it again with a coat of gloss varnish. The seat was painted with a reddish brown and after that dried Raw Umber oil paint was drybrushed on the seat and back cushion. The safety harness is the etching that comes with the kit. I was painted in a tan color and some color modulation was done with whites for the higher parts and dark brown for the shadows. Everything was airbrushed with Tamiya Medium Gloss Varnish after which the safety harness, pistol and ammo magazine were painted with matt varnish.
The oil tank was painted with Humbrol metal. After this dried the tank received washes with Tamiya Smoke to bring out the detail. It was finished with Tamiya medium gloss.
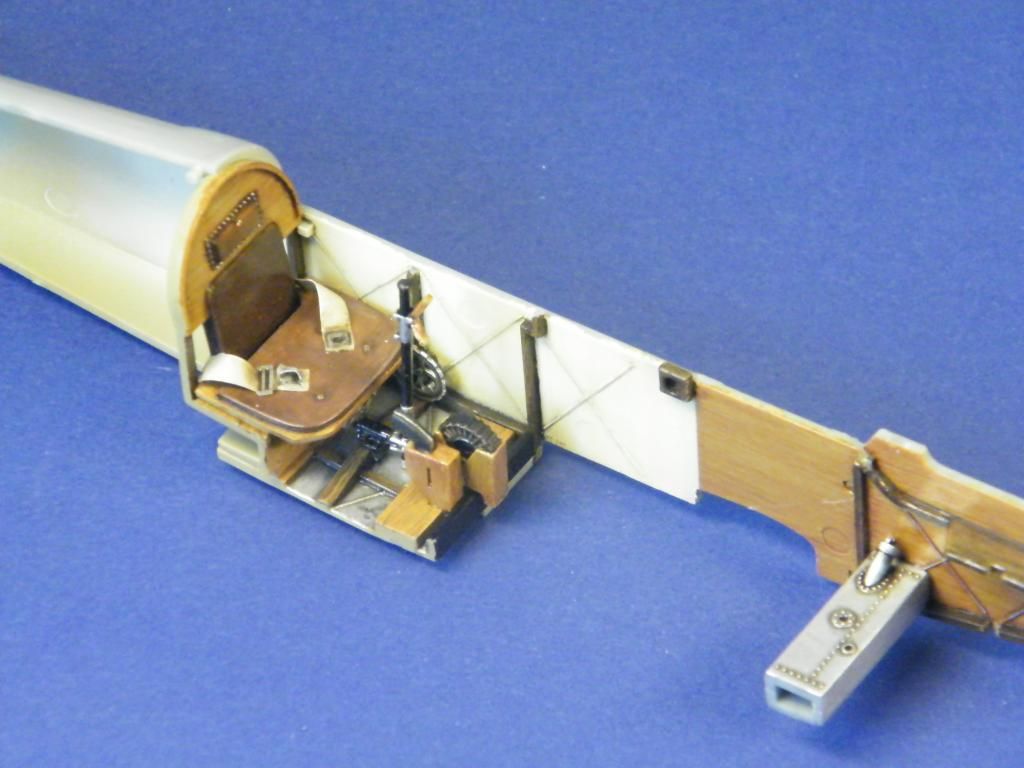
Cockpit floor and oil tank temporarily pressed in place. The sides of the cockpit are painted with various shades of Humbrol Linen and Tan and coated with matt varnish.

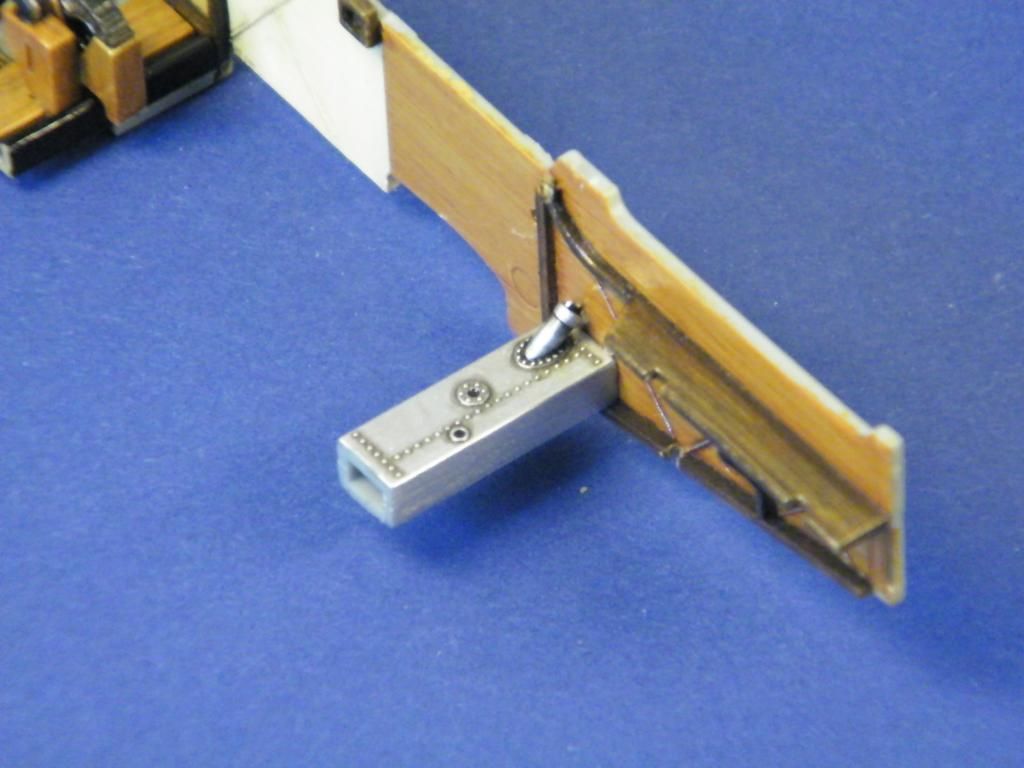
The center floor and the rudder pedals. The floor got the same wood treatment as described earlier, but now with a mix of sepia and raw umber oil paints. It is finished with Semi Gloss Varnish.
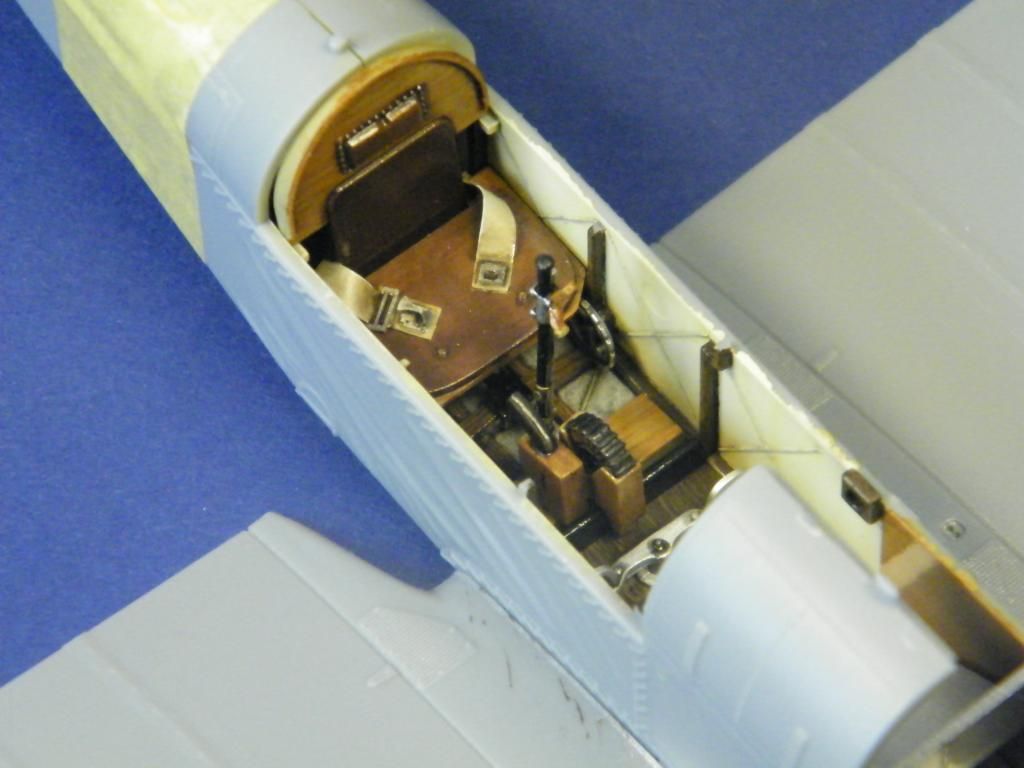
The cockpit temporarily pinned together. I will now start working on the cables, the upper cockpit deck and the instrument panel.
Hope you enjoy the pics so far, all comments welcome as usual. Happy modeling, Jeroen
-
3
-
-
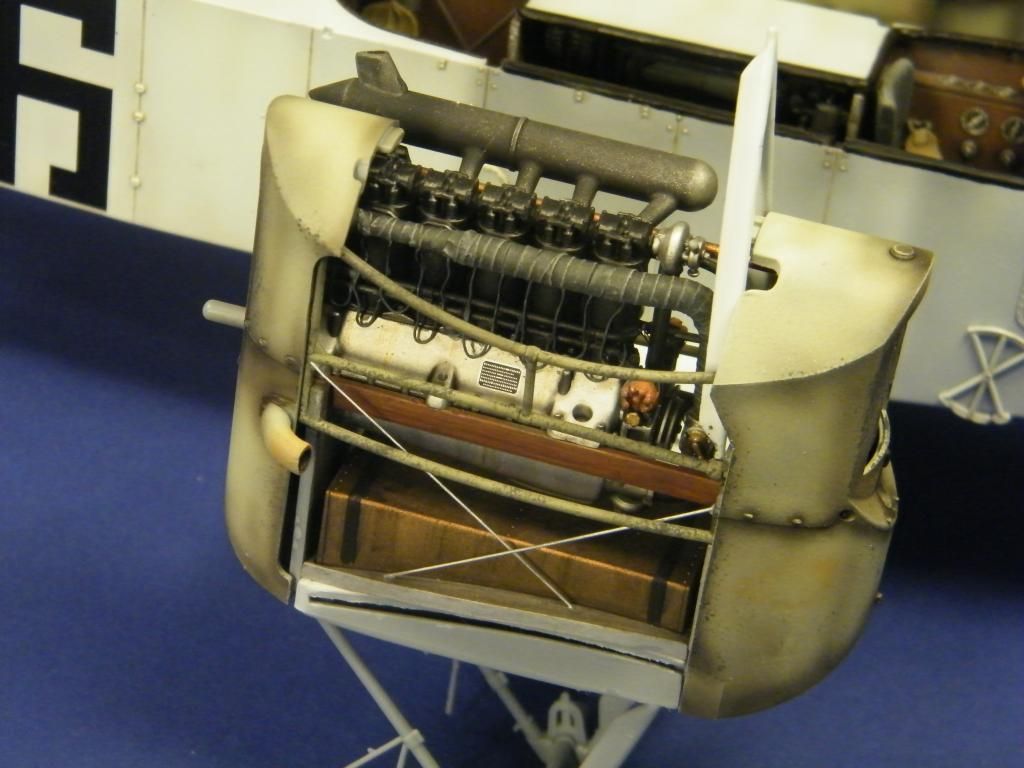
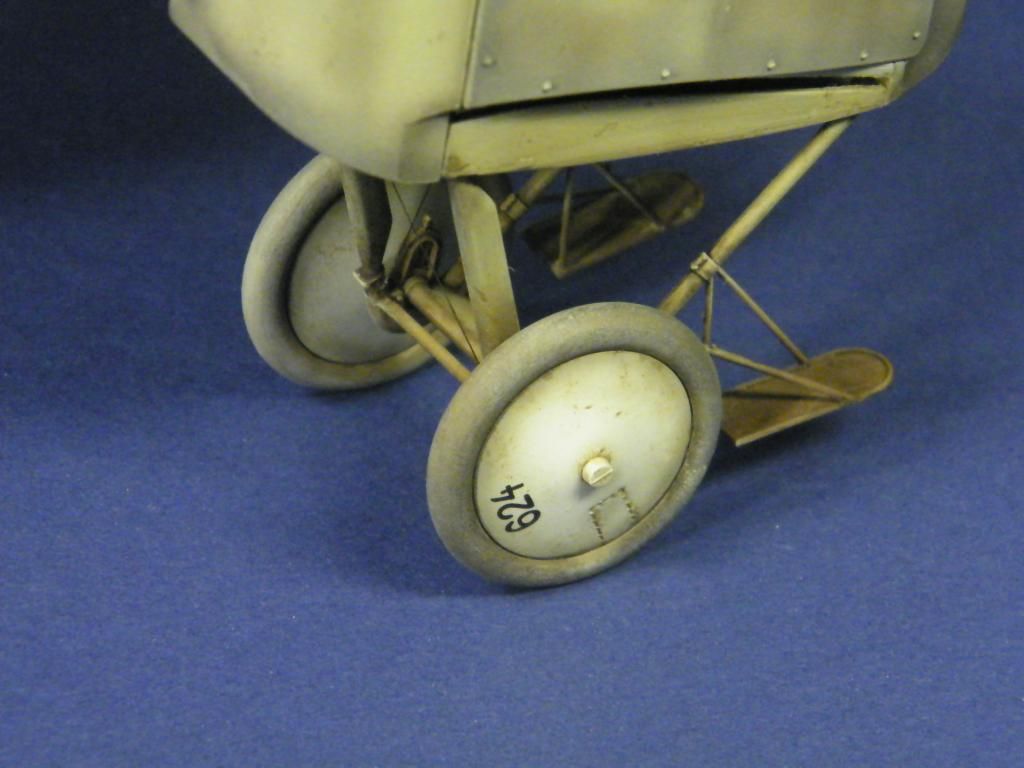
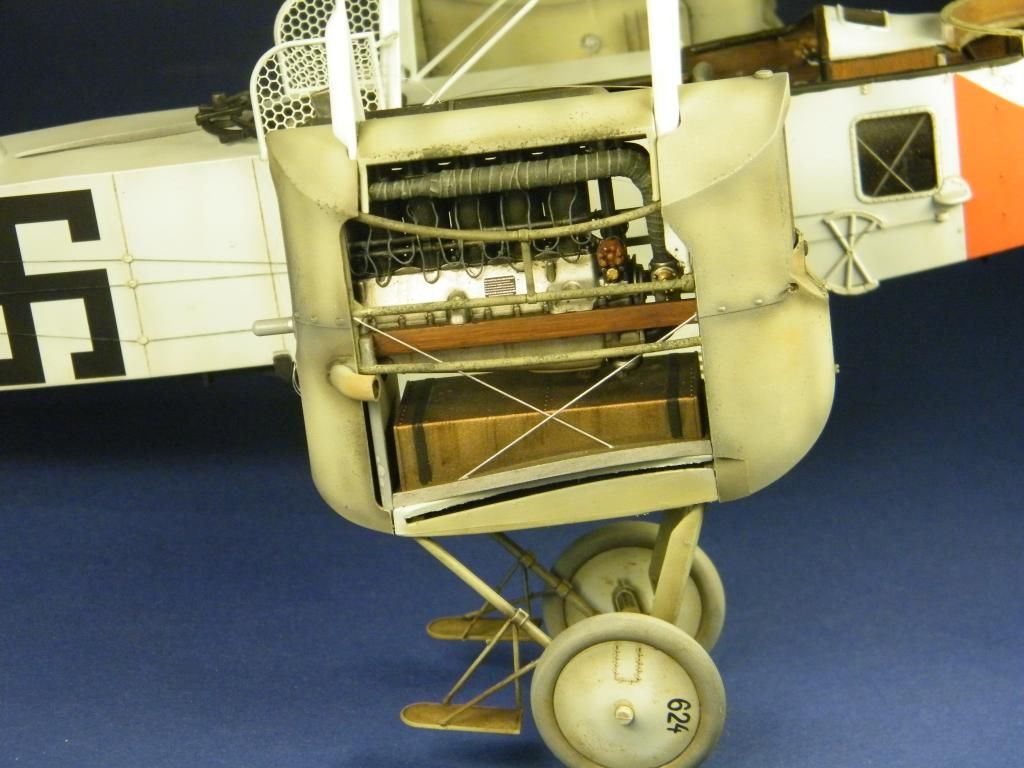
I cannot upload all I have in one go, but here's another update with more pics….


-
3
-
-
Thanks Wayne, yes, it was published some months after I had finished her… Erik, I think it just have been less than two years indeed. I started this mid 2011… time sure flies!


WnW DH9.a Ninak
in LSM 1/35 and Larger Work In Progress
Posted
Oh yes. Awesomeness!