


Jeroenveen1
-
Posts
152 -
Joined
-
Last visited
Content Type
Profiles
Forums
Events
Gallery
Posts posted by Jeroenveen1
-
-
…. with a little teaser pic: a model I am building for a future book on WnW, so I won't reveal anything further, but just to give you a starter for this page and perhaps some motivation… cheers guys, good luck with this little loverly corner of LSM! Happy modeling, Jeroen
PS - a request: please don't use this on FB in any way. It's not a secret strictly speaking, but I don't want to reveal to much of the book. Sorry guys, I hope you understand...
-
 5
5
-
-
Does anybody have experience with the HGW rivet decals? I'm curious about what you think about this, how easy they were to work with and so on! I have a set for the P47 bubbeltop from Tamiya and I want to come prepared ;-)! Thanks guys!
-
1
-
-
dougcraner@hotmail.co.uk - nothings seems to bounce on this adress. If you cannot get hold of him I can play middleman. Just let me know!
-
Steve, I used to order from Doug and I have his mailadress somewhere. I will send him a mail just to see if it bounces and let you know
-
And you said nothing. Nothing. Let me spell that out for you: n-o-t-h-i-n-g. This amazing kit is about to hit the market, you are building the first one and the motto is 'silence'? And now you expect us to say that it is beautiful? Damn you Dave. And shame on you as well. Because this really is beautiful. You know: b-e-a-u-t-i-f-u-l. Great job and (although I hate to say this) a secret well kept. I'm in love already with this kit and can't wait to get my hands on one. Thanks for sharing this!
-
3
-
-
Very nice! I especially like the work on the 'mouth' and that cockpit is very nice. Just as Martin I'm not a sucker for these modern planes because there's so little variety, but that does not mean I admire the work you are putting into this. And of course something Belgian is never a bad thing ;-)
-
Awesomeness. Great work Bevan! Glad to see it here and thanks for sharing, I will be on the lookout for more!
-
Damn…. I'm speechless
-
Respect dude! That is an awesome piece of work. Nevermind the time it took for whatever reason, that is pure eye candy! What's next Jeroen?
-
1
-
-
Beautiful Jeroen... That paintwork really is something to be proud of! Hats off to you!
-
Hi Martin, thanks my friend! I'm glad she's done now so I can start focussing on some other projects. David Parker of AFV modeler asked me to participate in a new WnW venture so I will build something for that ( I cannot say more at the moment I'm afraid). For the group build here I still intend to do the Harry Tate. But first and all I believe I will pick up a 1:48 kit, the Italeri Wessex, if it fits in the timetable ;-)!
-
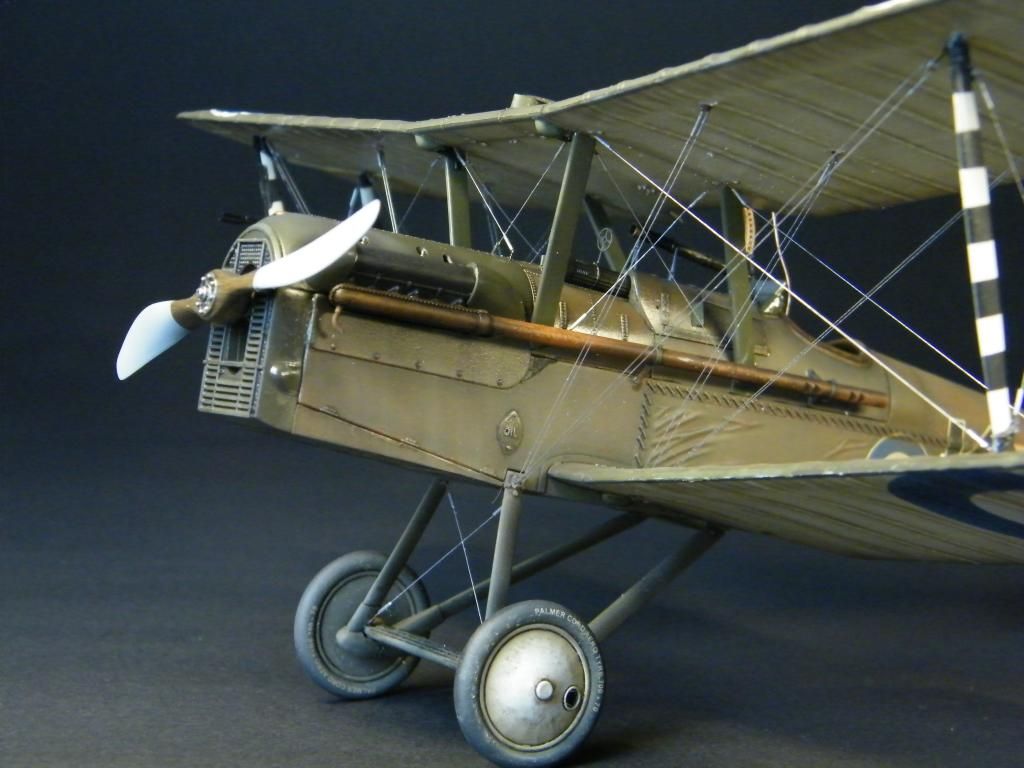
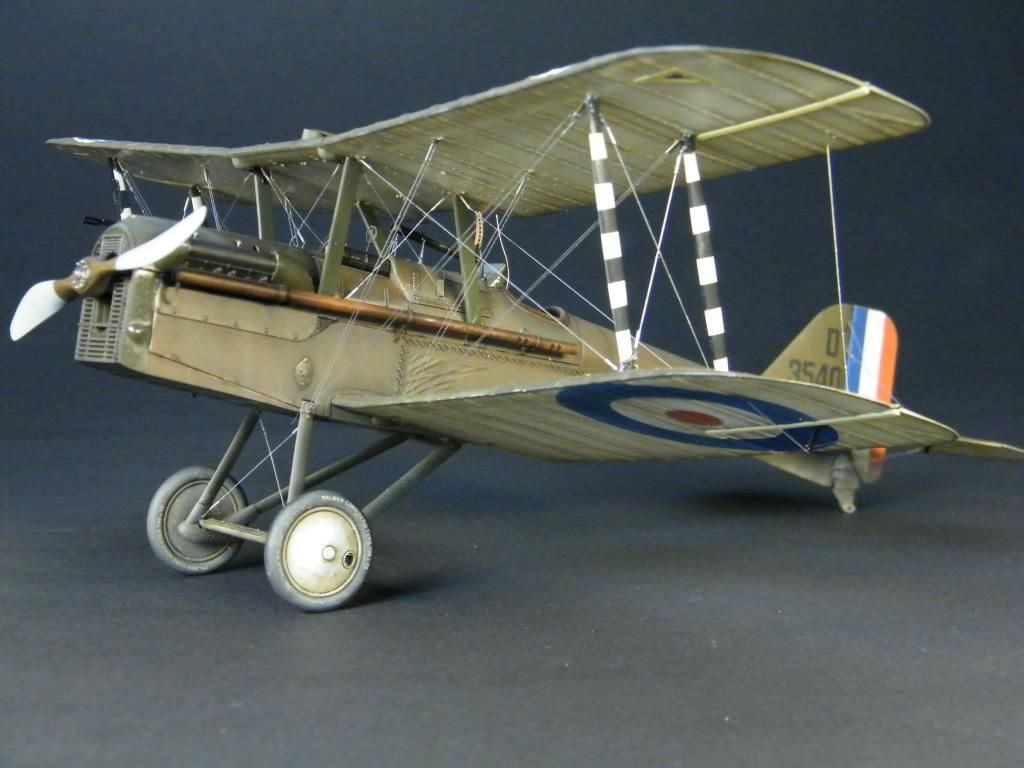
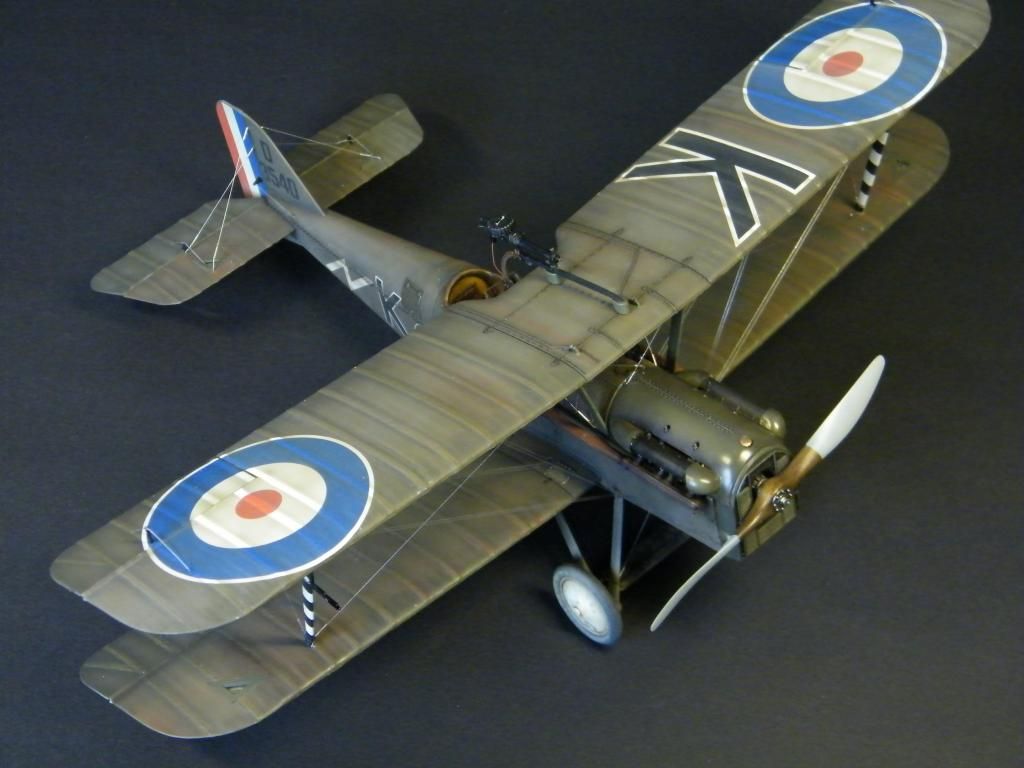
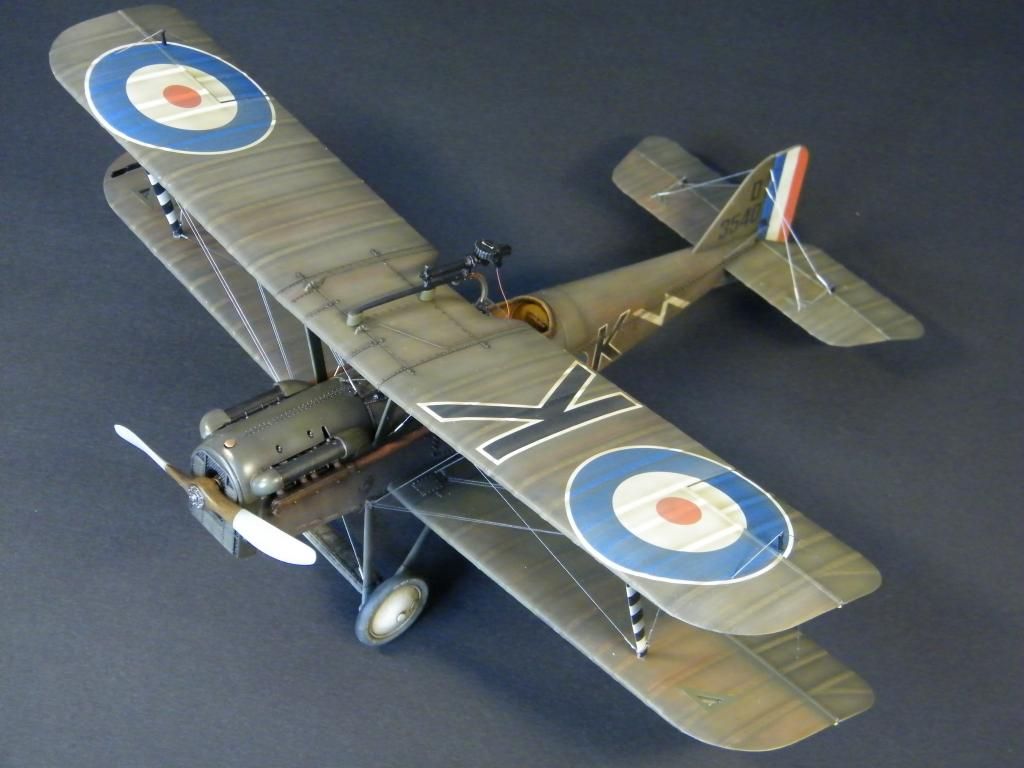
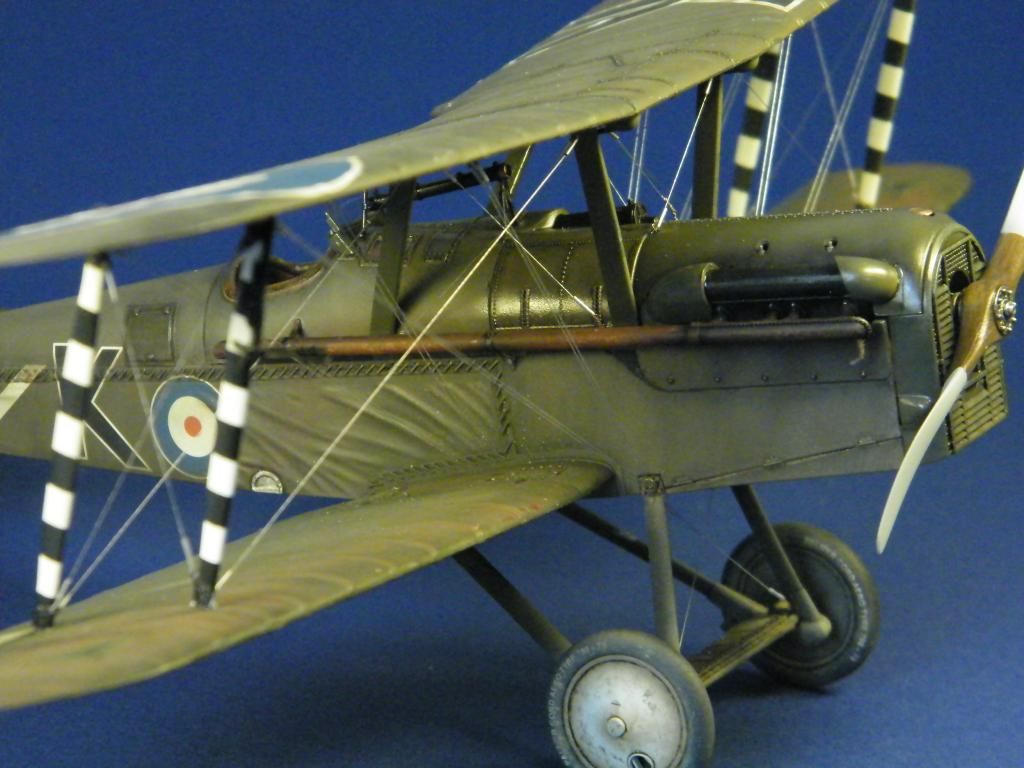
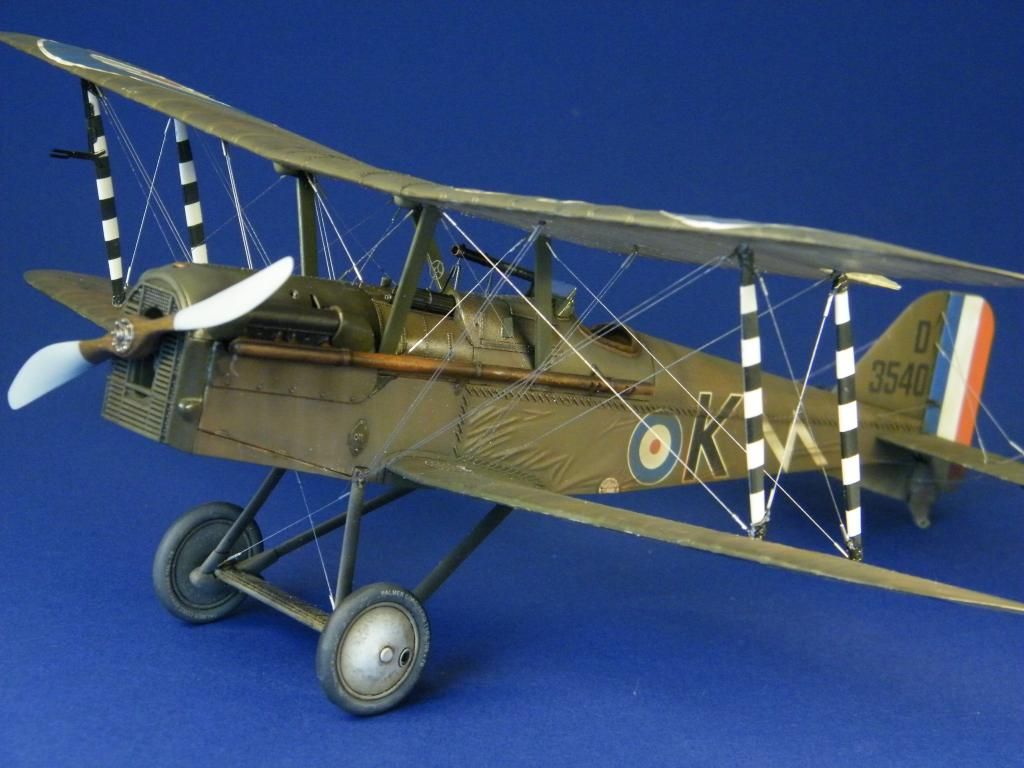
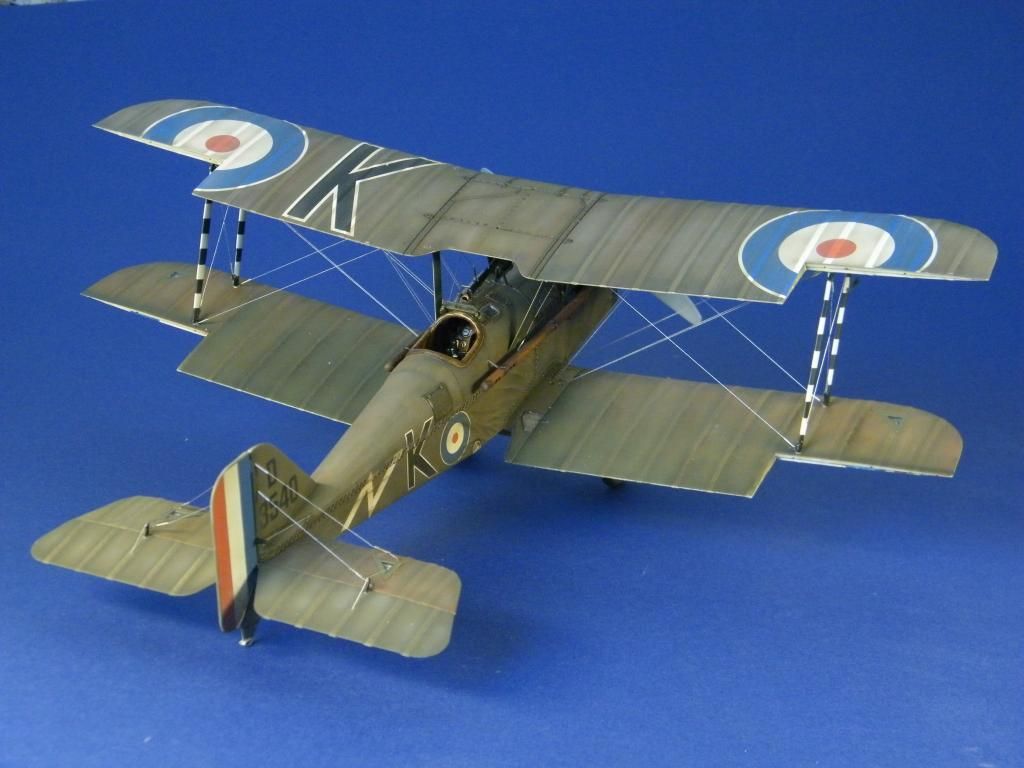
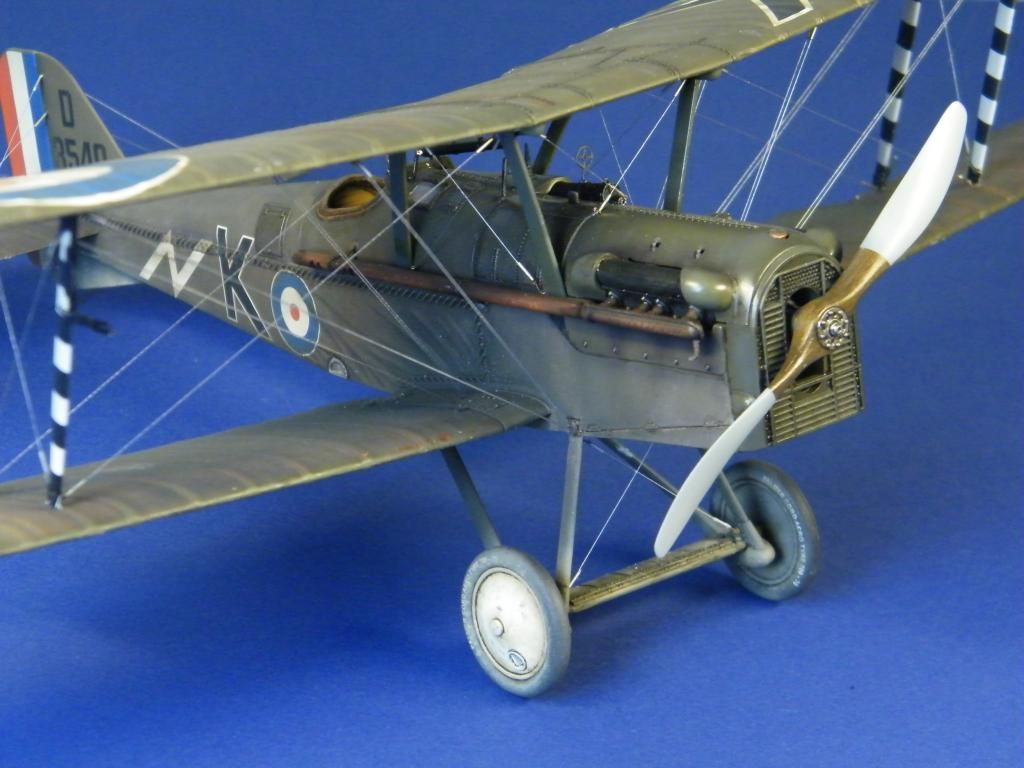
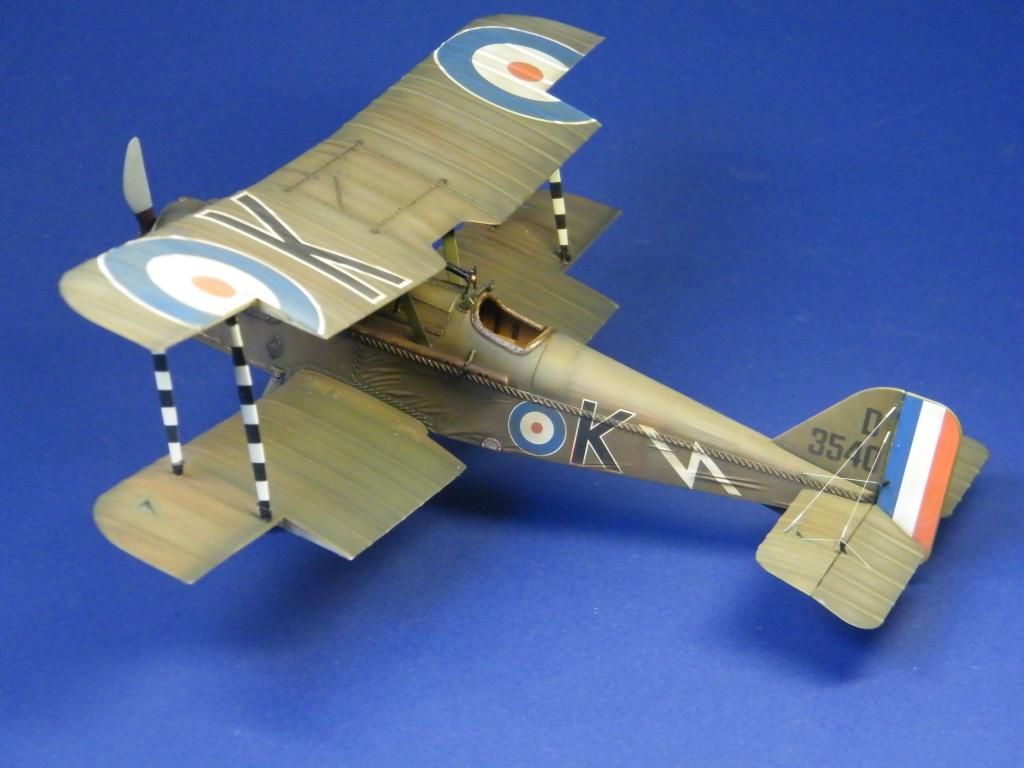
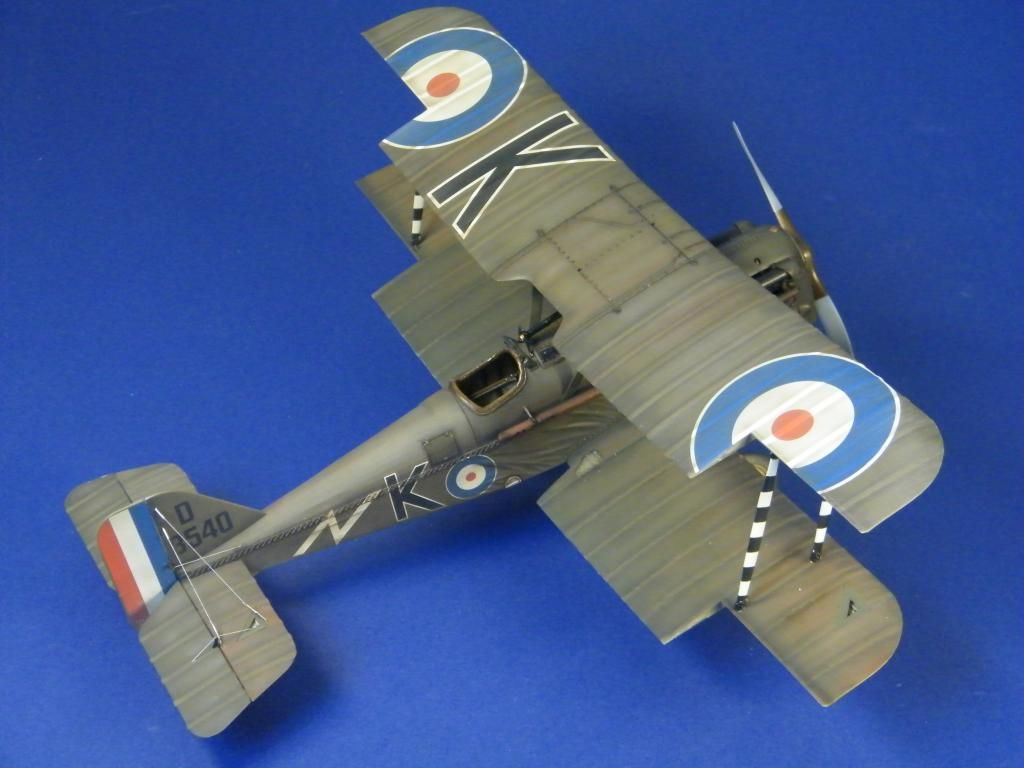
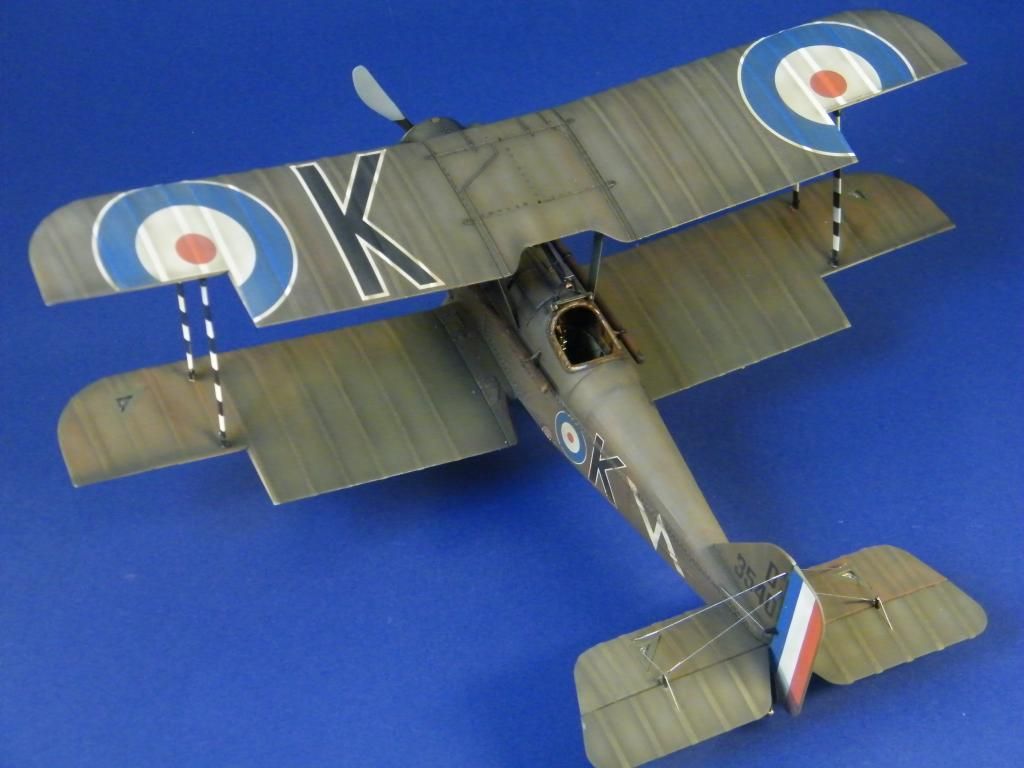
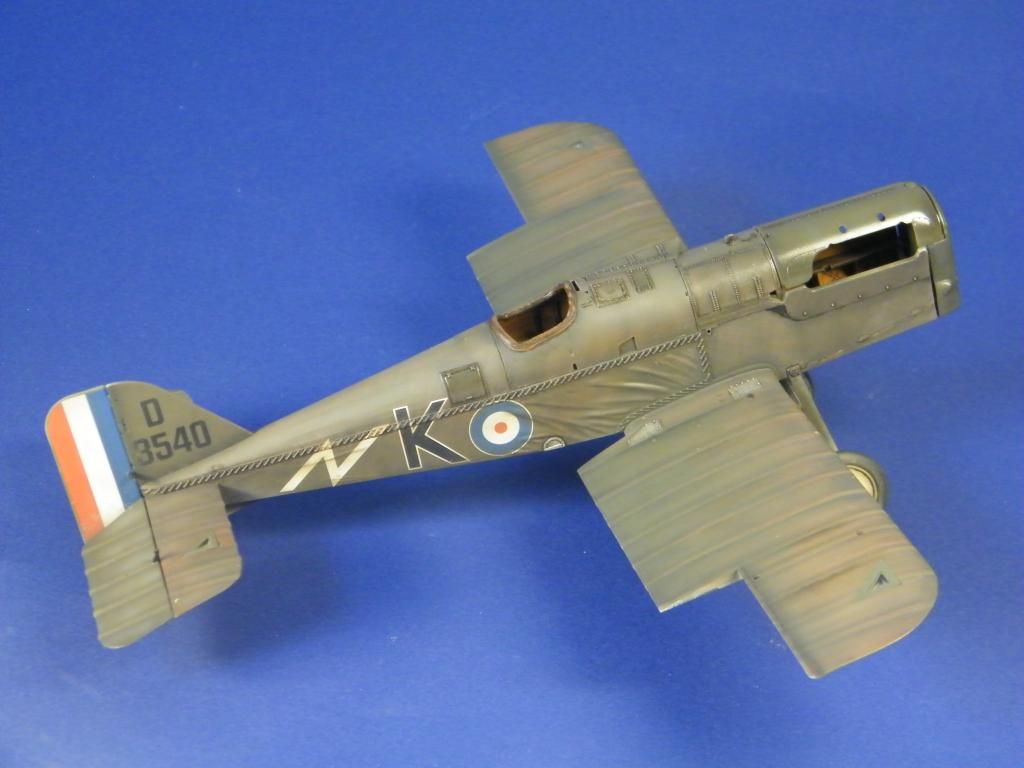
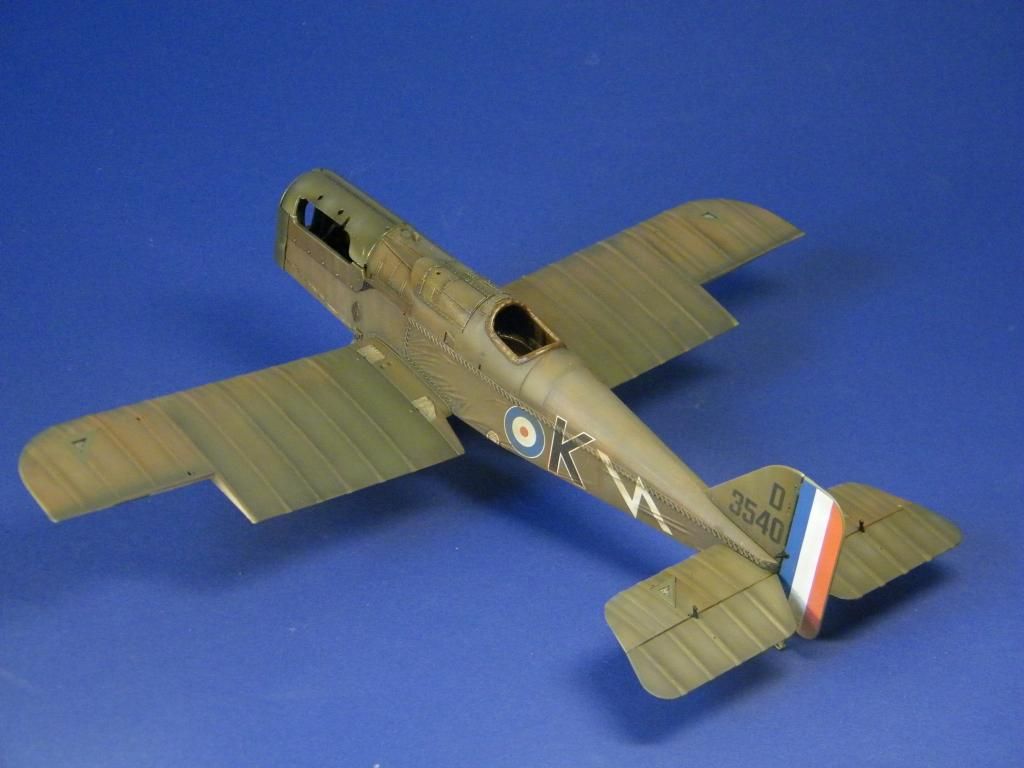
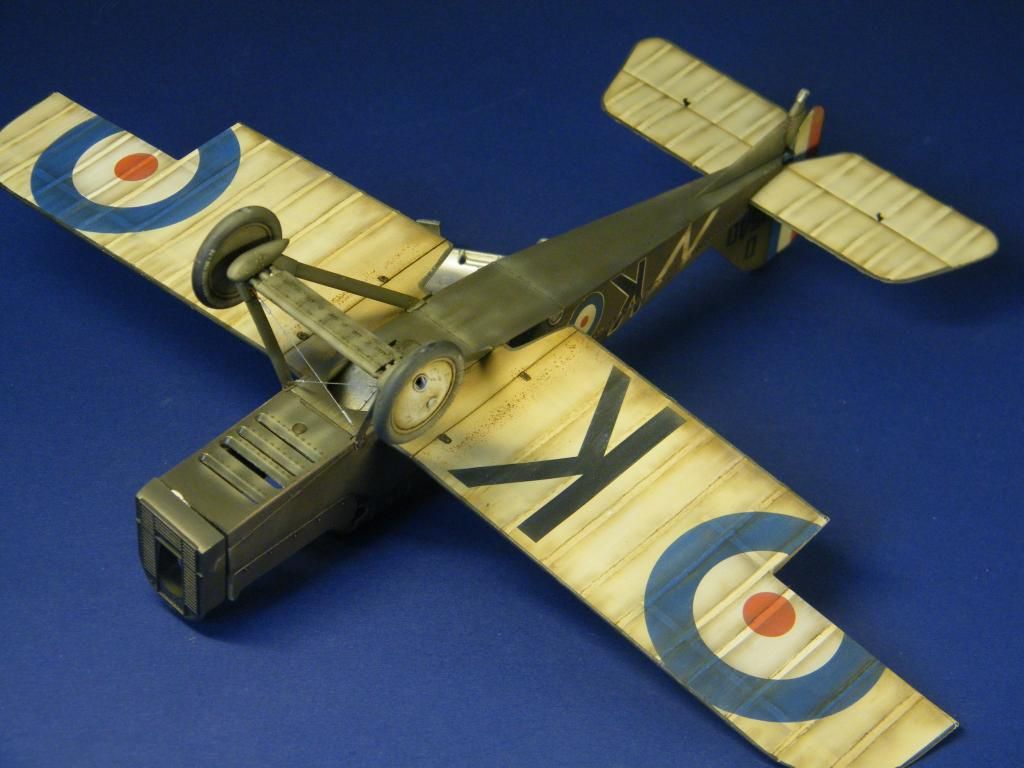
Well gents, she's done. She has been on my workbench far to long but in all honesty, I never had a clue where to go with this. All I knew is that I wanted to break the PC10 with some color variation and I think that worked out well. Although I see points I would improve upon a next time I'm pretty happy with the overall result. Here are some pice, hope you enjoy them. All comments welcome as usual, happy modeling, Jeroen


-
3
-
-
1/35 Pickup with ZU-23-2
MENG
Catalogue # Velociraptor series VS-004
Introduction
With its open cargo bay design, the Pickup is widely used in many conflicts around the globe today. Numerous models see activities not only as military supply carriers but also as light fire support vehicles. They are fitted with machine guns, recoiless guns, rocket launchers or as in this kit with light AA guns. The ZU-23-2 was developed in the 1950's by the Russians. Around 1960 mass production started and it became very popular due to its high firing rate, light weight and low costs. Large export orders were closed with Asia, Africa and Latin America. The ZU-23-2 saw combat in many conflicts and was extensively used in the Middle East, Iran, Iraq, Afghanistan and Libya.

The kit carries no reference to the car brand but it obviously is a Toyota.
First impressions
I was very keen to get my hands on a MENG-kit. I already saw so many good things from them already and I was curious how it would be to see one of these kits up close and personal. I can assure you that this kit won't dissapoint. The box is sturdy and dressed with some beautiful artwork. On the sides of the box two full color illustrations show you the main painting schemes (creme and blue) and you also get the most important specs of the vehicle and the ZU-23-2.


The firm box holds 202 plastic parts on 8 sprues. There are four creme colored plastic sprues that are needed for the Pickup body work, one black sprue for the Pickup chassis and two green colored plastic sprues that hold the ZU-23-2. There is a transparent sprue that holds the windows and lights. The truck tyres are vinyl, and although beautifully detailed I'm not to happy about this medium. The tyres of the ZU-23-2 are plastic. There is a small fret with etchings and an even smaller decal sheet with two decals for the dashboard. A beautiful and crystal clear instruction booklet with 35 building steps and some color illustrations for the painting schemes complete the package.


The plastic on all sprues looks very sharp en crisp and the detail is impressive. There are some pin marks but not in visible places.
The first five steps of the building instructions cover the chassis and axles and although there won't be much to see in the end this part of the build is nicely detailed.


Steps 6 to 11 cover the cab. The interior looks superb with some nice seats, a detailed instrument panel and seperate gear shift and parking brake. The cab roof has a rearview mirror and sun visors. The doors are seperate pieces and can be mounted closed or open. The only thing you might want to add are a couple of safety belts.
Steps 11 to 20 cover the cargo bay (which is a well detailed and crisp subassembly), steps, bumper and mudflaps on the underside of the car end the wheels. The vinyl tyres are combined with plastic rims and can be pressed on the axles.
There are many location points and I don't see any reason to believe that somehow parts may be misaligned or cannot be precisely placed. The instructions are very clear and helpfull!
The ZU-23-2


Steps 22 to 35 take you through the build of the ZU-23-2. This is a little jewel of a kit in its own right. The plastic is crisp and nicely detailed. The gun barrels are fitted with impressive flash guards and the kit offers the possibility to fit the barrels in three different positions: horizontal, around 40 degrees up and about 80 degrees up. These are fixed positions so you will have to make a decision here. The ammunition boxes are nicely detailed and the same goes for the seats.


The gun base can be attached to a frame of beams that goes on top of the cargo box, and these beams come with the kit. It's also possible to mount the base on road wheels. These are plastic moulds, which for me personally is a much better solution than the vinyl ones that come with the Pickup. In this configuration the ZU-23-2 could also be combined with the Pickup in a towed position.

Conclusion
Meng has delivered a very nice little kit that is crammed with detail. Straight from the box this is a well detailed Pickup with ZU-23-2 but it's also a great platform for superdetailing. Whatever you do, when it comes to painting this is a very nice canvas with endless possibilities. I'm not overly enthousiastic about the Pickup tyres and would have preferred injection moulded ones. Also the lack of Toyota markings is a bit of a letdown but understandable in the light of copyright costs. Perhaps these are areas in which the aftermarket guys can jump in. All-in all I would rate this kit an 8,5 out of 10. Of course building this kit would really define its quality. In a couple of weeks I will start on this one and do a full build report on the subject. Now that is something I look forward to very much!
Highly recommended
Jeroen Veen
Our sincere thanks to Meng for the review sample.

-
Euro 550 and a bit for the Catalina doesn't suit my wallet but boy, would I like to build one…. great job Jeroen, enjoying every bit of this! Cheers, Jeroen
-
1
-
-
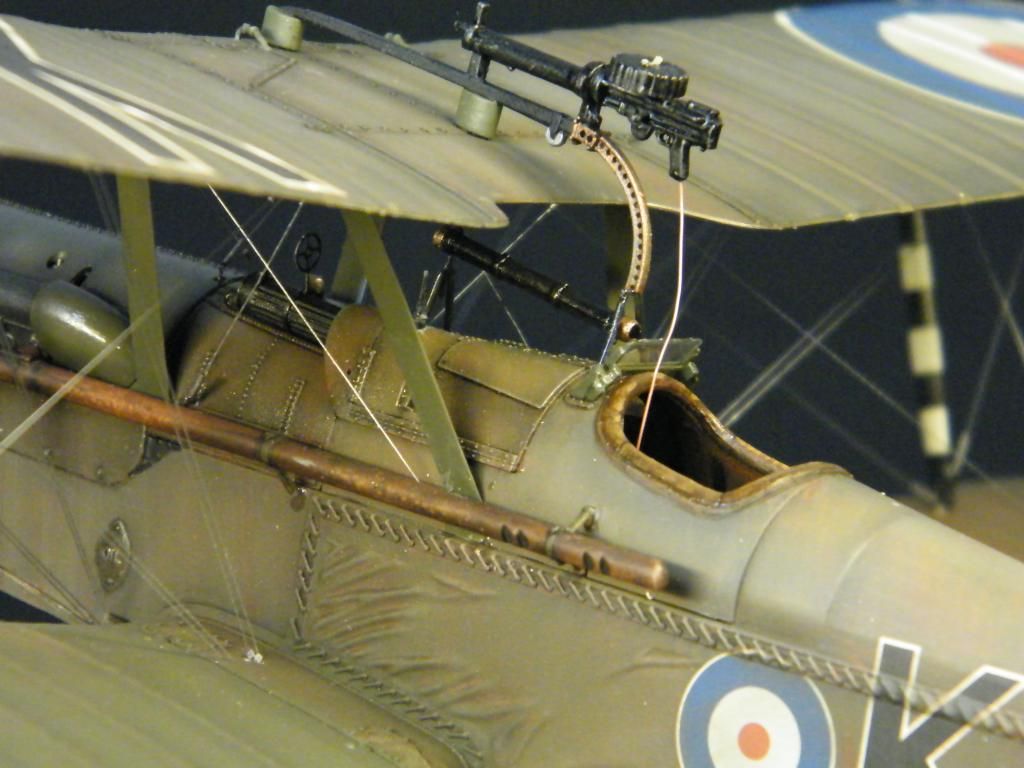
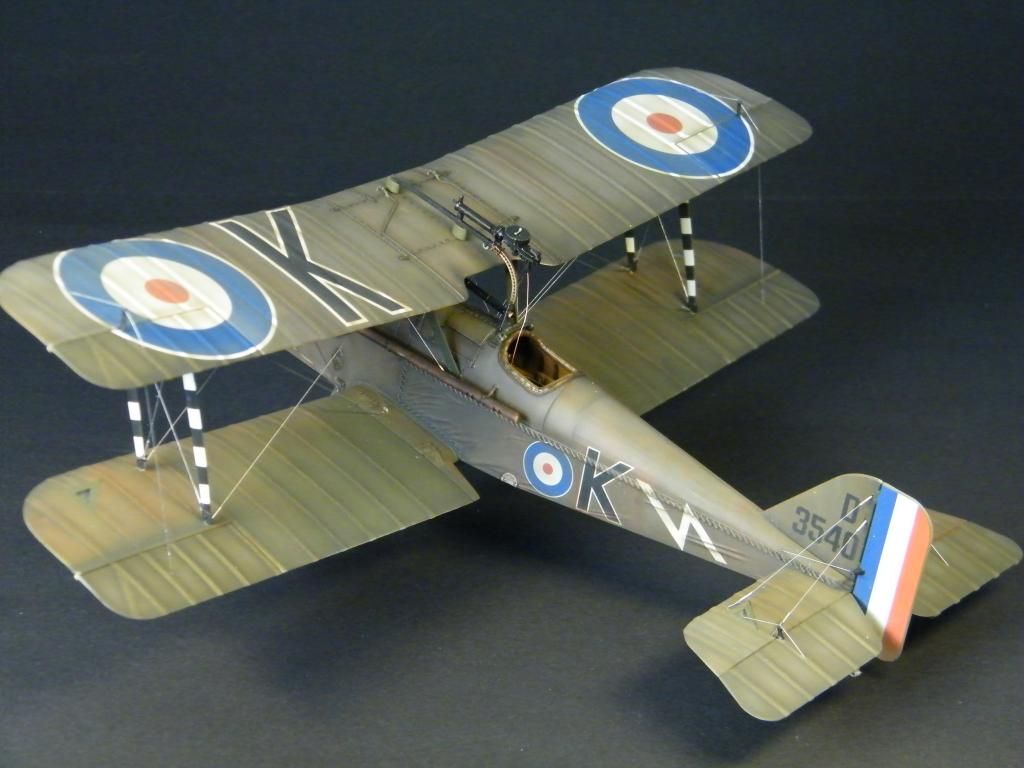
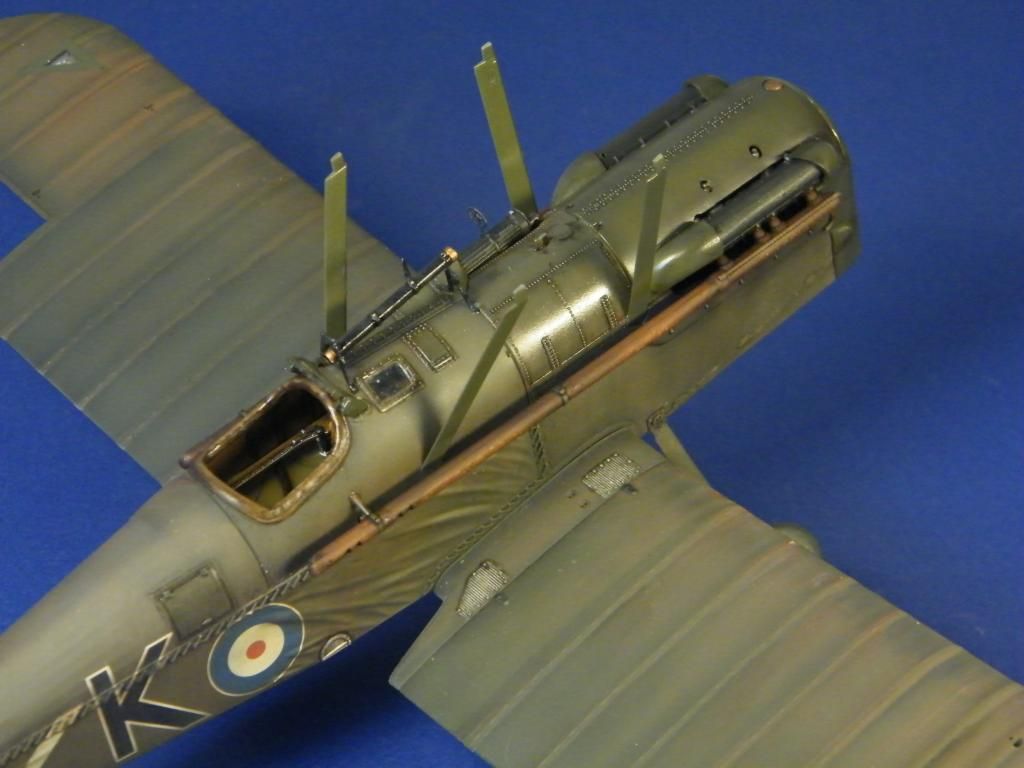
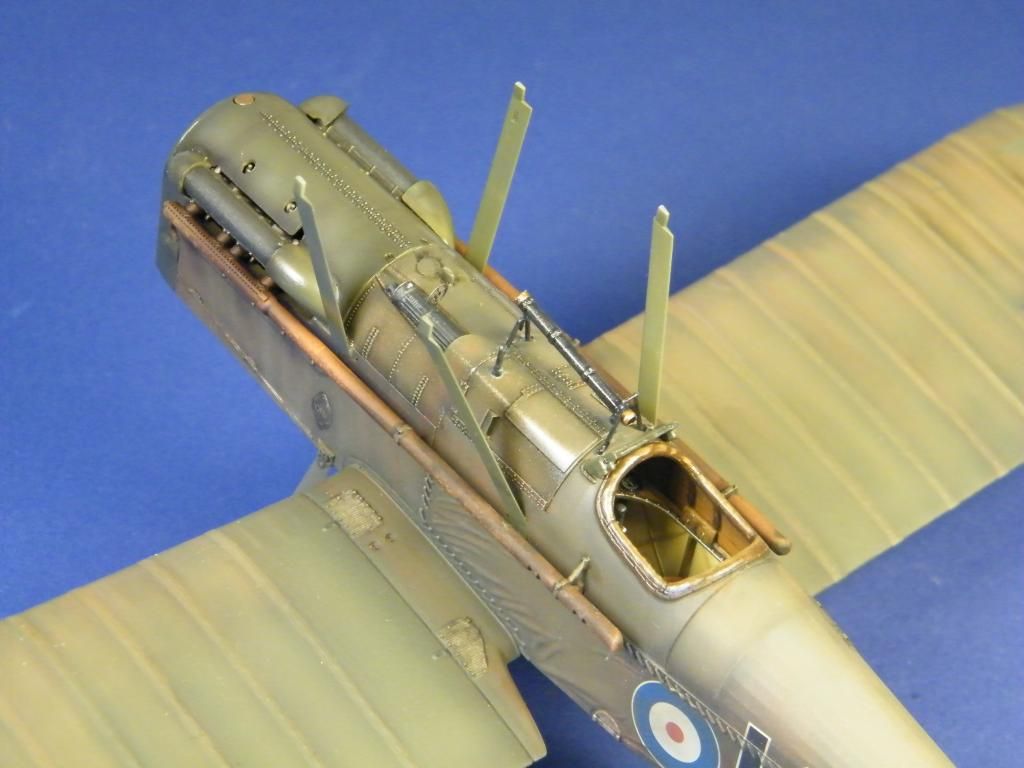
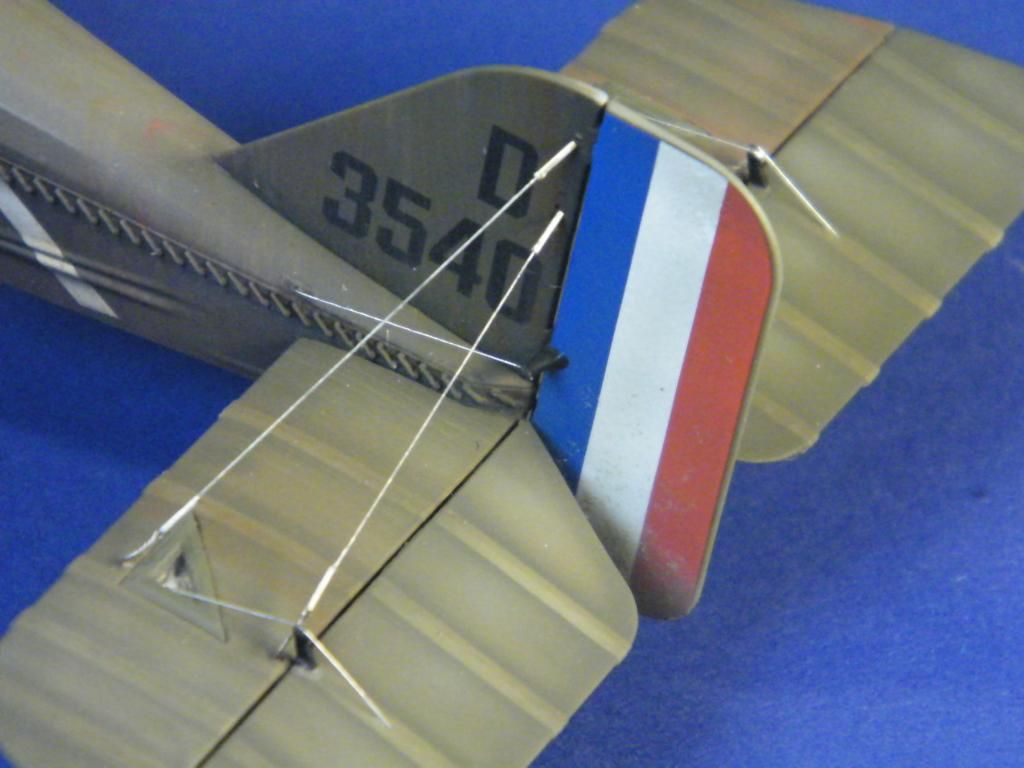
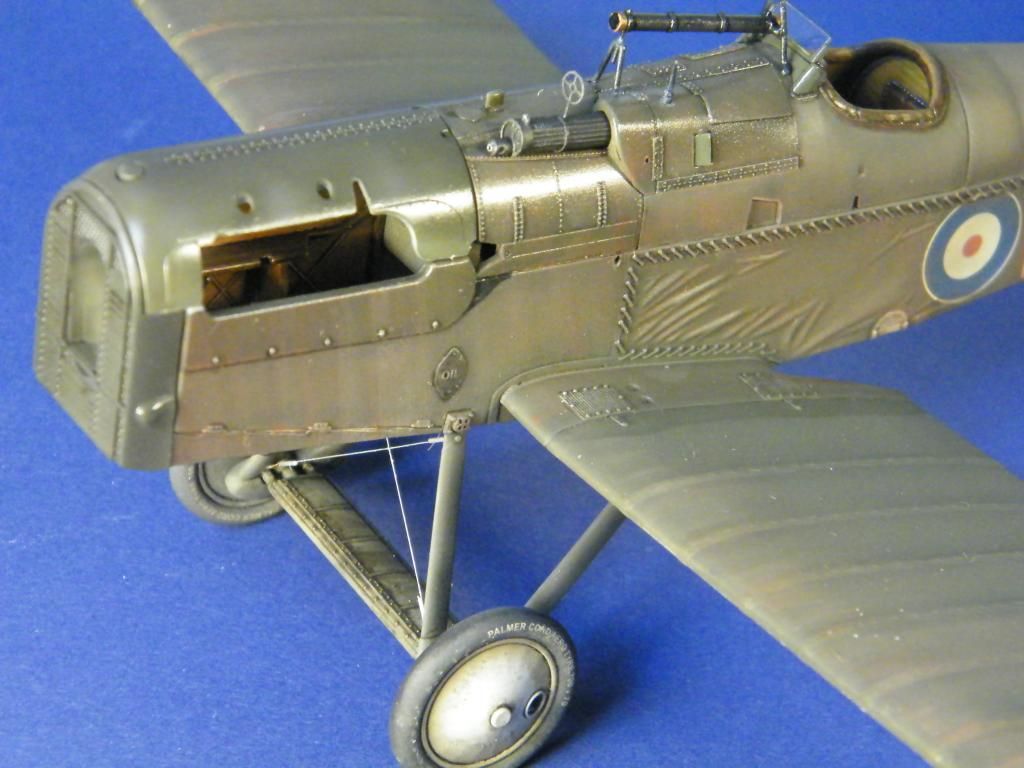
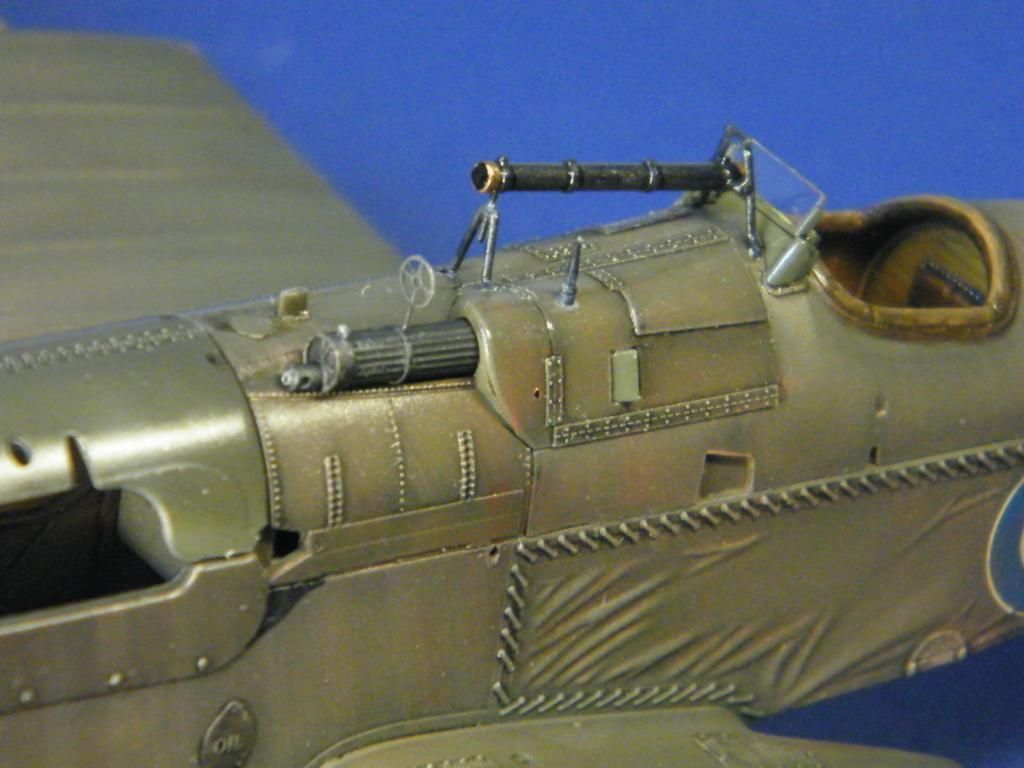
The home stretch… all the rigging is done. Flaps, top machine gun and some minor adjustments and she's done. I'm happy with the way she turned out, because somehow this build became more complicated than I had envisaged. Hope you enjoy the pics, all comments welcome as usual. Happy modeling, Jeroen
-
1
-
-
I'm not sure Dave... It might be the italeri wessex, a pilot figure to go along with this one... A new WnW challenge.... I haven't made up my mind. Suggestions are welcome!
-
Today I installed the upper wing. All rigging points have been prepared so I'm going to add wire over the coming days. After that I need to install the flaps and top machinegun. Then some minor adjustments.... and she's done. A week, a week and a half, and she should be finished!
-
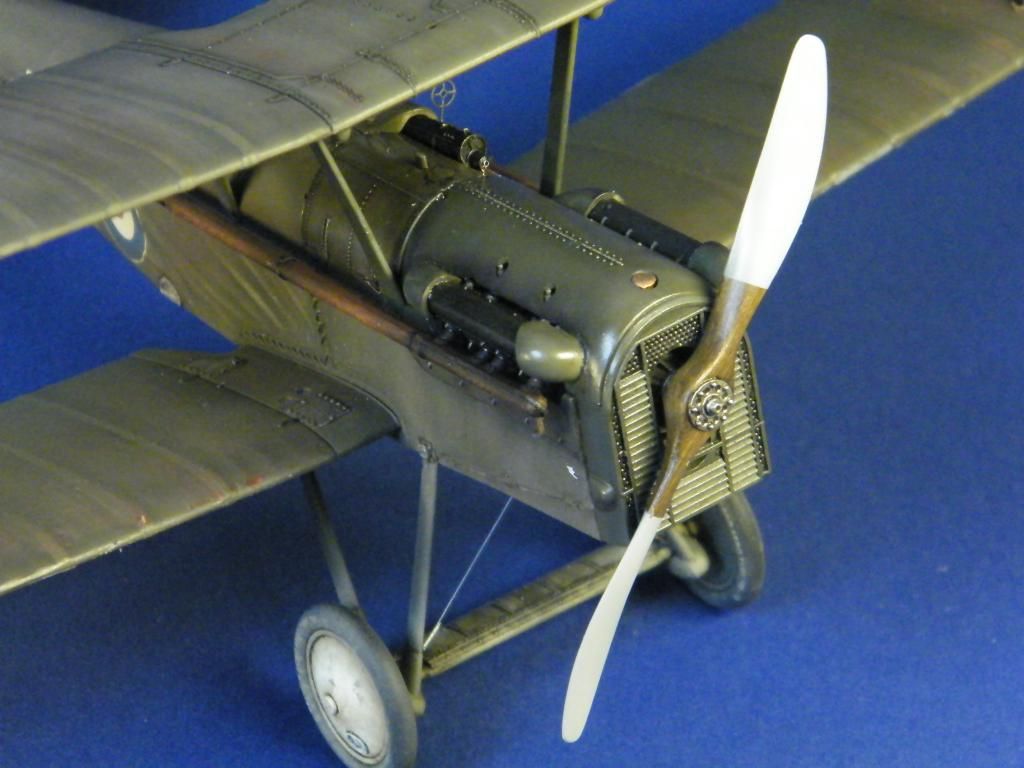
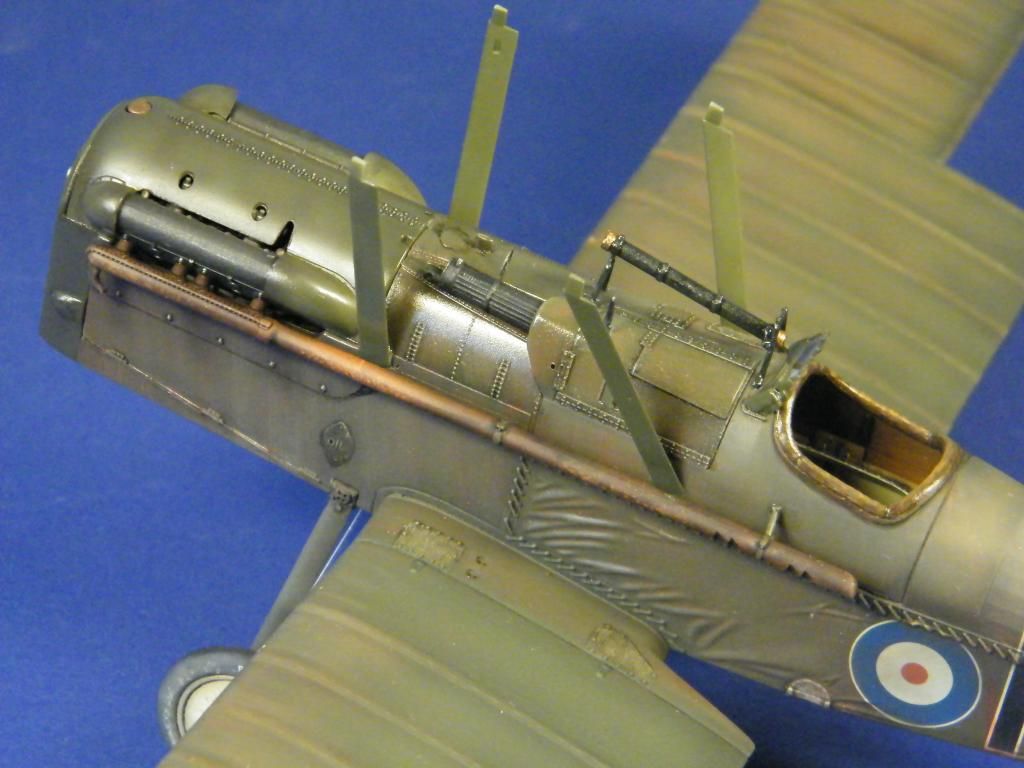
I managed to get quite some work done today. The engine, upper deck, inner wingstruts, radiator and exhausts have all been done. I'm still working on the prop and the outer struts, which will be in a black white striped pattern. The topwing is almost done as well so it won't be long before that is mounted and the rigging begins...
-
Marvelous Jeroen! I like that very much! Despite work you seem to make good progress. Are you going to weather her a bit more or will she stay like this? That color richness is truly beautiful!
-
The tail and upper deck are done. Focus now shifts to engine, inner struts, exhausts, radiator and prop….
-
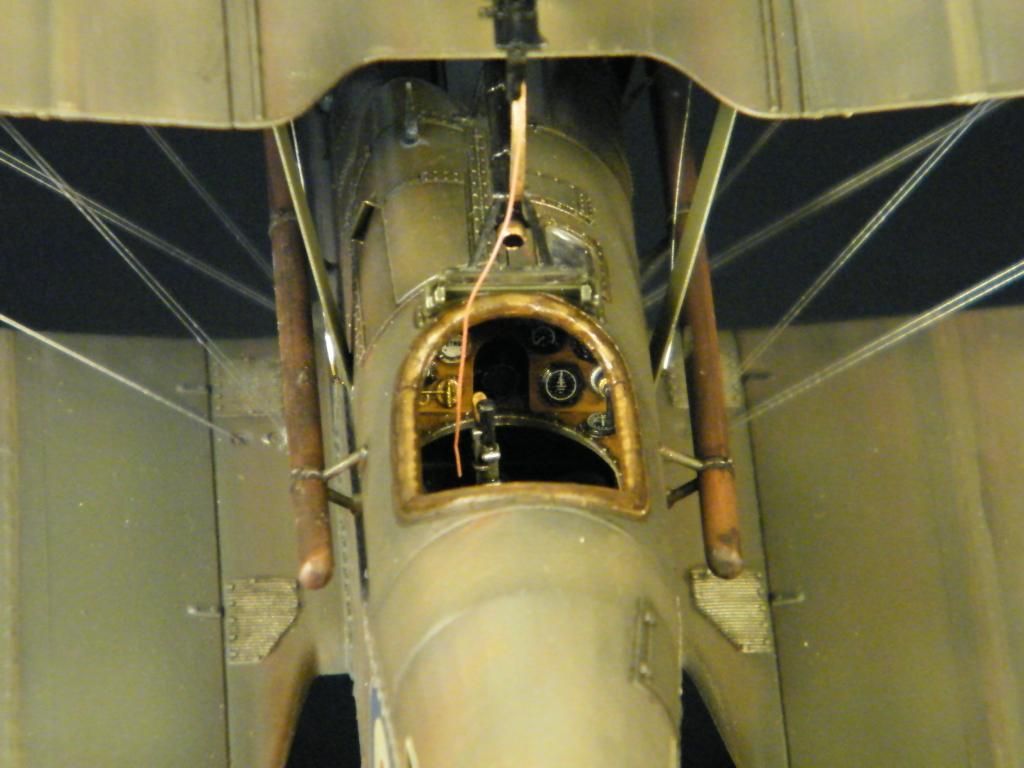
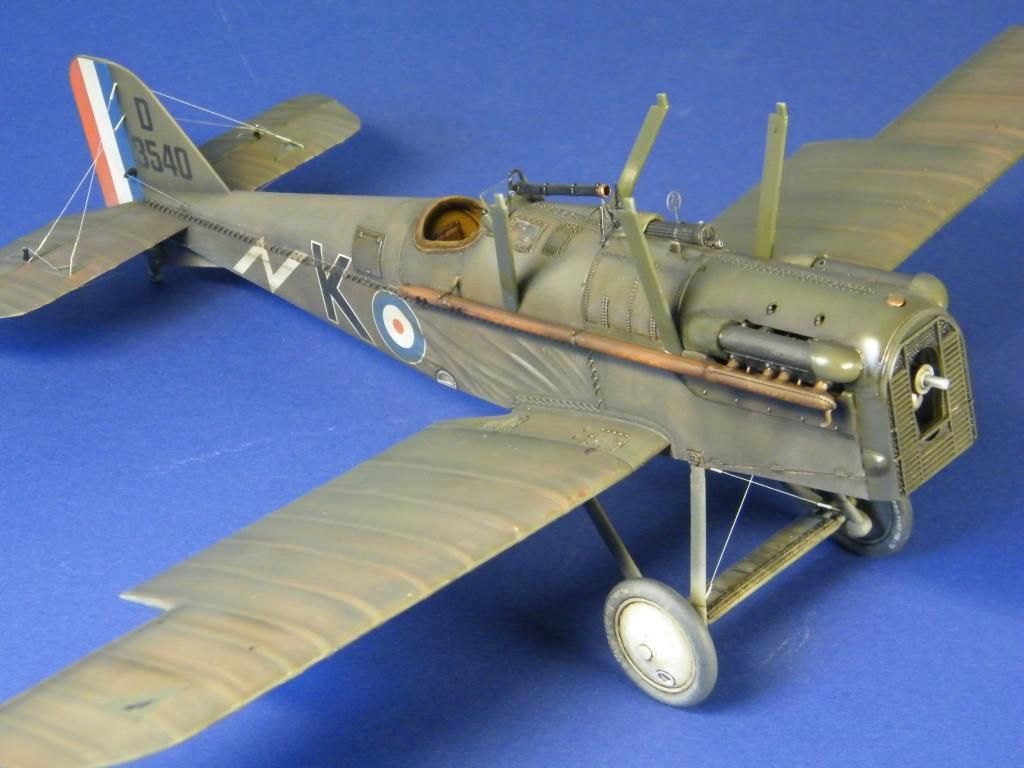
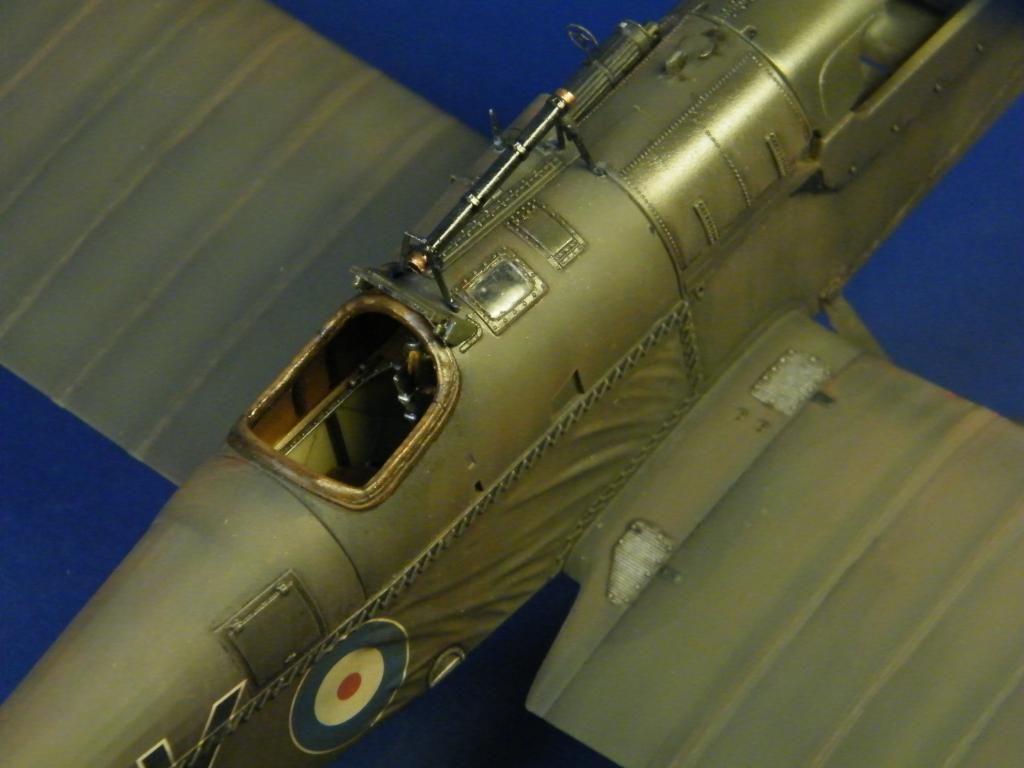
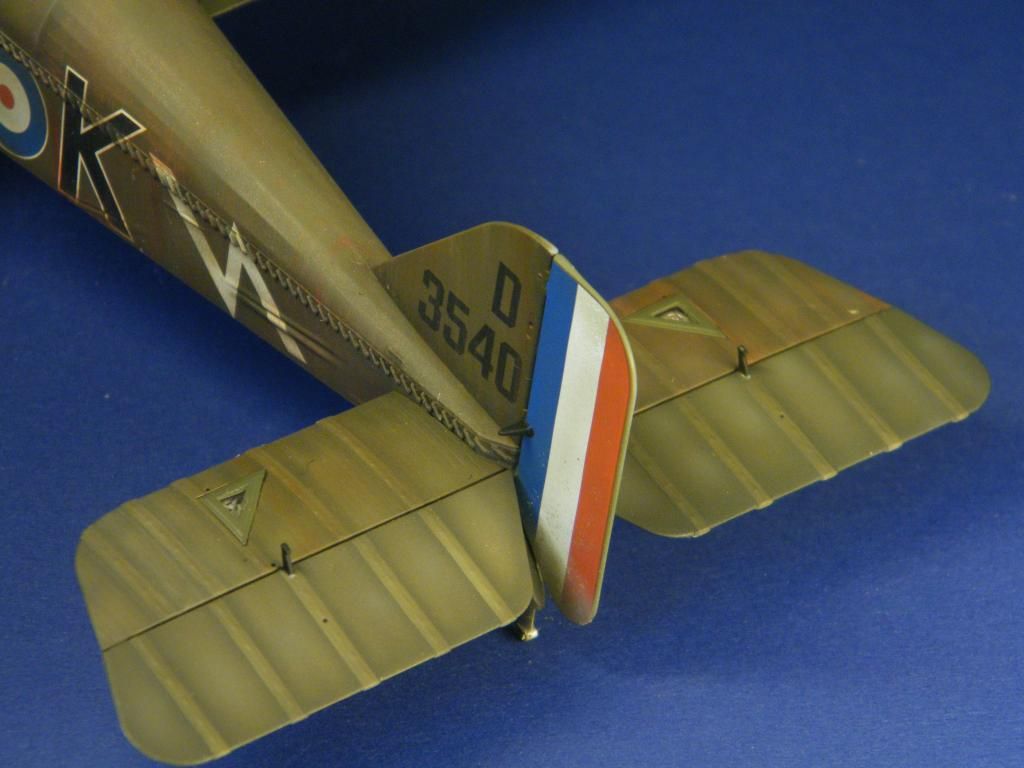
Time for a little update. I weathered the fuselage and wings, and differentiated with gloss, semi gloss an matt varnishes to get some variety in the color depth and feel for the different materials. Now it's time to rig that tail, add scopes, mg's, engine and the radiator. Then slowly but surely things will go to the upper wing and rigging. Finally, finally it seems this is going somewhere…. hope you enjoy the pics, all comments welcome as usual! Cheers, Jeroen
-
2
-
-
Superb work Jeroen! What grey color did you use on the prop?
-
Wow Jeroen... amazing progress and weathering. Again...
One question: how do you mask the undersides to obtain the green edge along the wing's edges?
Carefully :P … no, all kidding aside, it is just a matter of masking as carefully as you can. I made some paper templates of the curved part and cut the mask accordingly. Then it all boils down to precise placement of the tape which isn't difficult but just takes some patience….
-
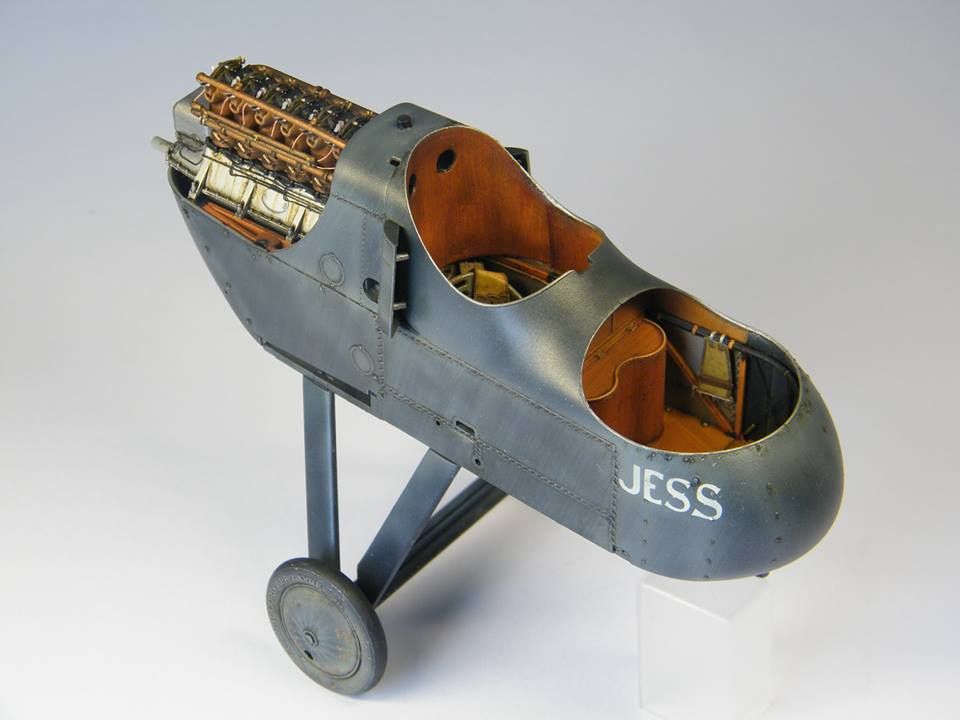
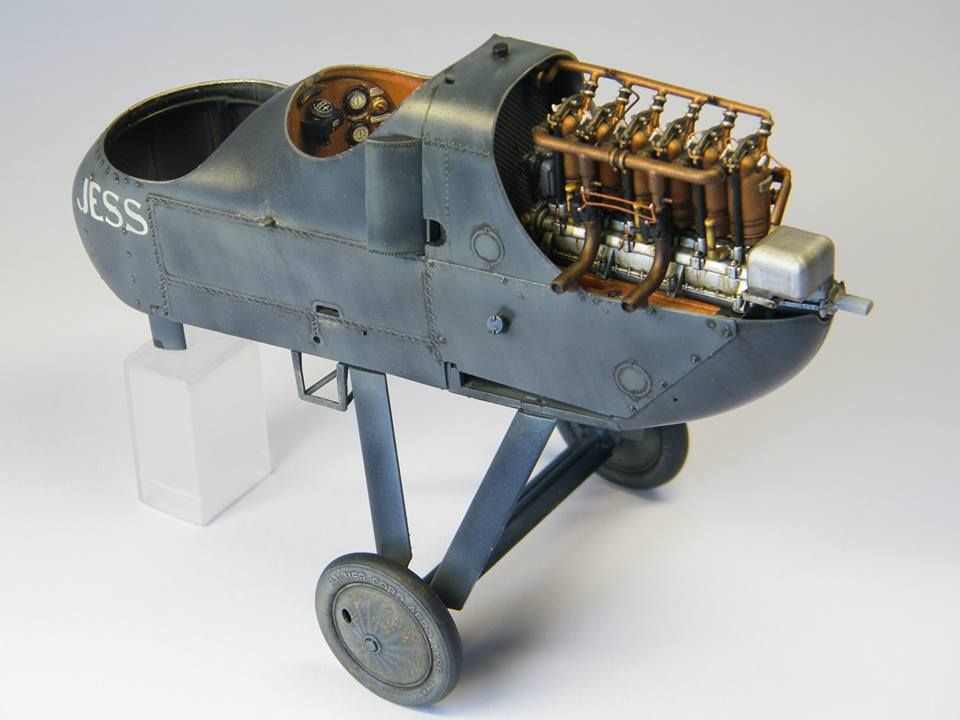
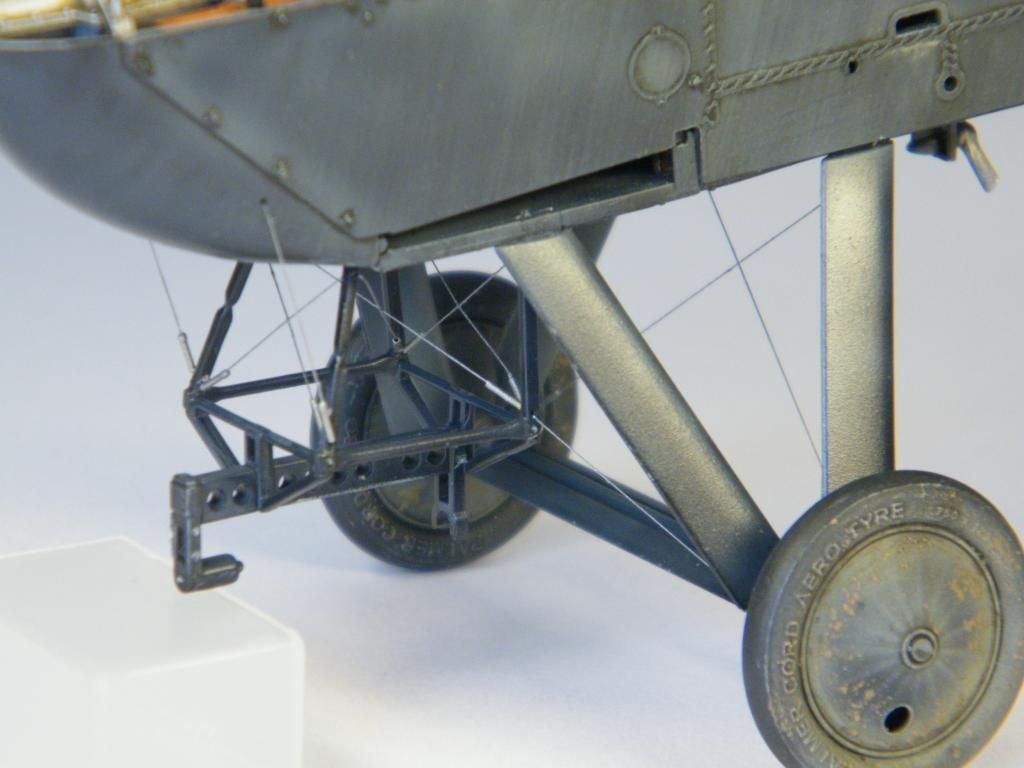
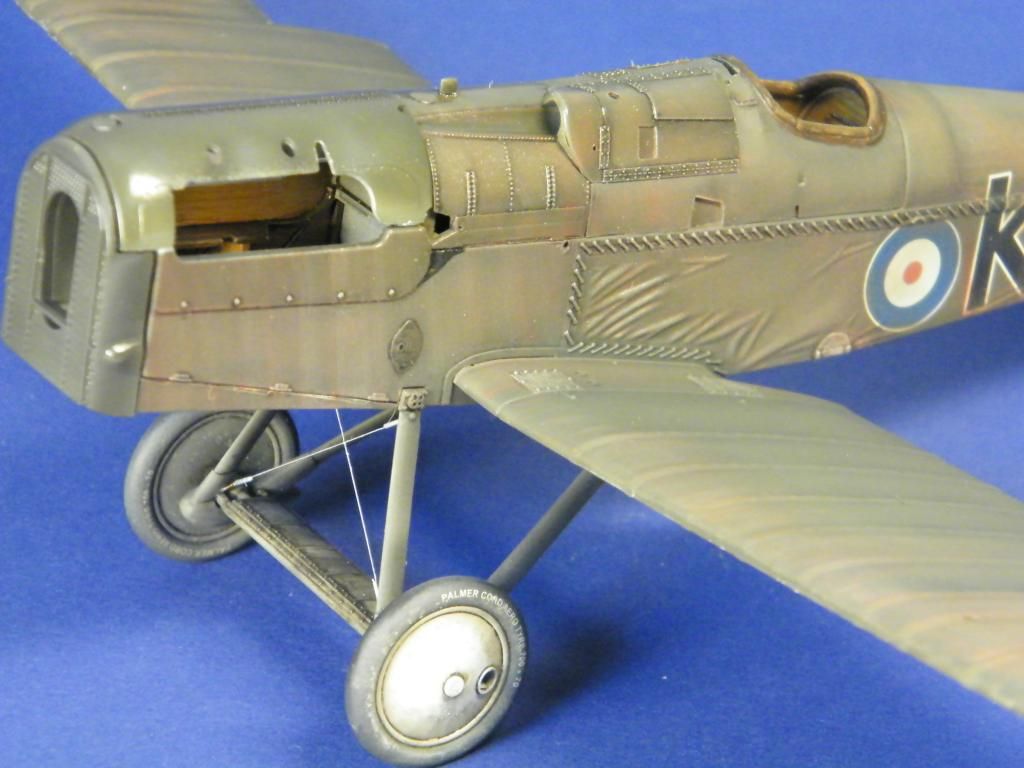
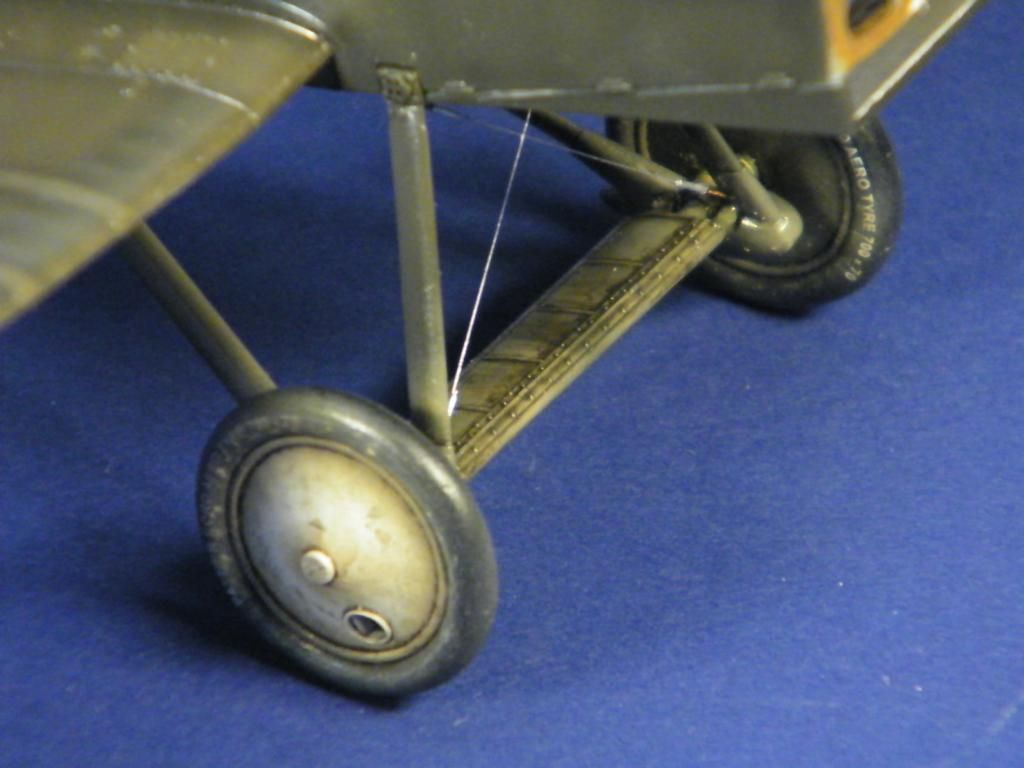
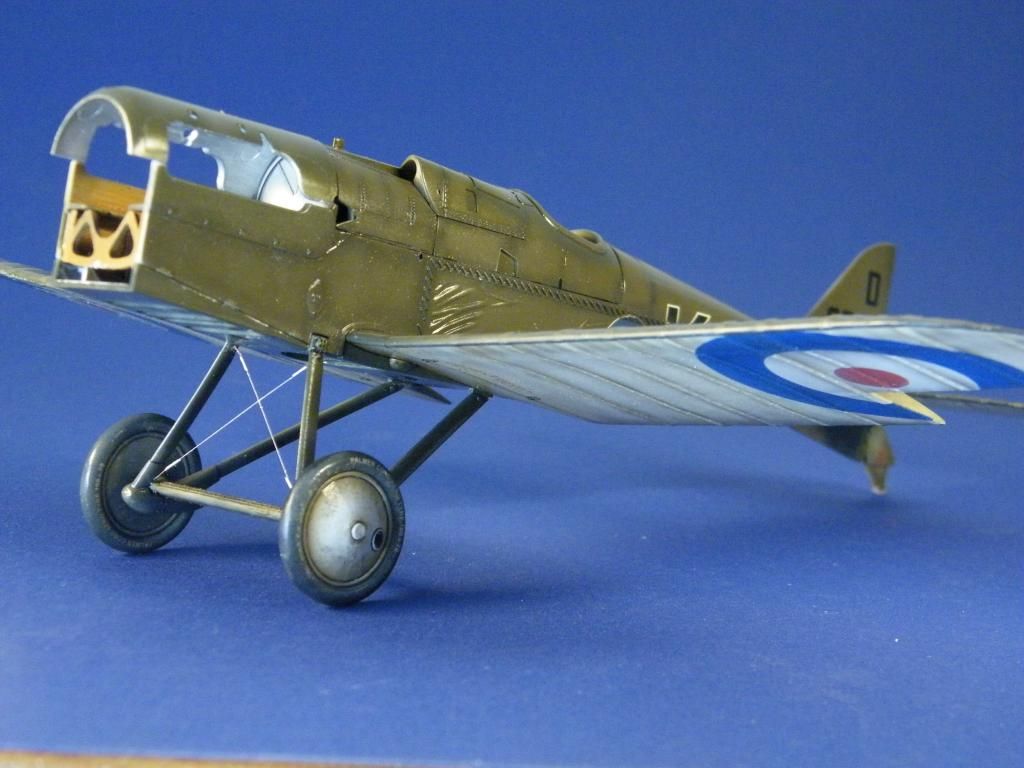
I just put her on her landing gear, that I tried to weather in harmony with the undersides of the wings. Mud splashes and dirt on the wheels and tyres, oil staying on the axel protection cover as well as some dirt, cross wires with tensioners… I'm fairly happy with how it looks. Now I will further weather the fuselage and lower wings, paint details there and start building the engine. This is where she stand now, all comments welcome as usual. Happy modeling, Jeroen


Ok… I'm on the home stretch with the FEEB… some test shots before shes done… (part 3)!
in LSM 1/35 and Larger Work In Progress
Posted
Thanks for the kind words guys. There's a lot of progress. The lower wing, bomb racks and releases have been installed and the centre upper wing part is in place as well. I'm about to start rigging… and that will take some serious time I guess!