
RalphSarc
-
Posts
2,023 -
Joined
-
Last visited
Content Type
Profiles
Forums
Events
Gallery
Everything posted by RalphSarc
-

Tamiya 1/35 Kit Tiger (Production)
RalphSarc replied to RalphSarc's topic in LSM 1/35 and Larger Work In Progress
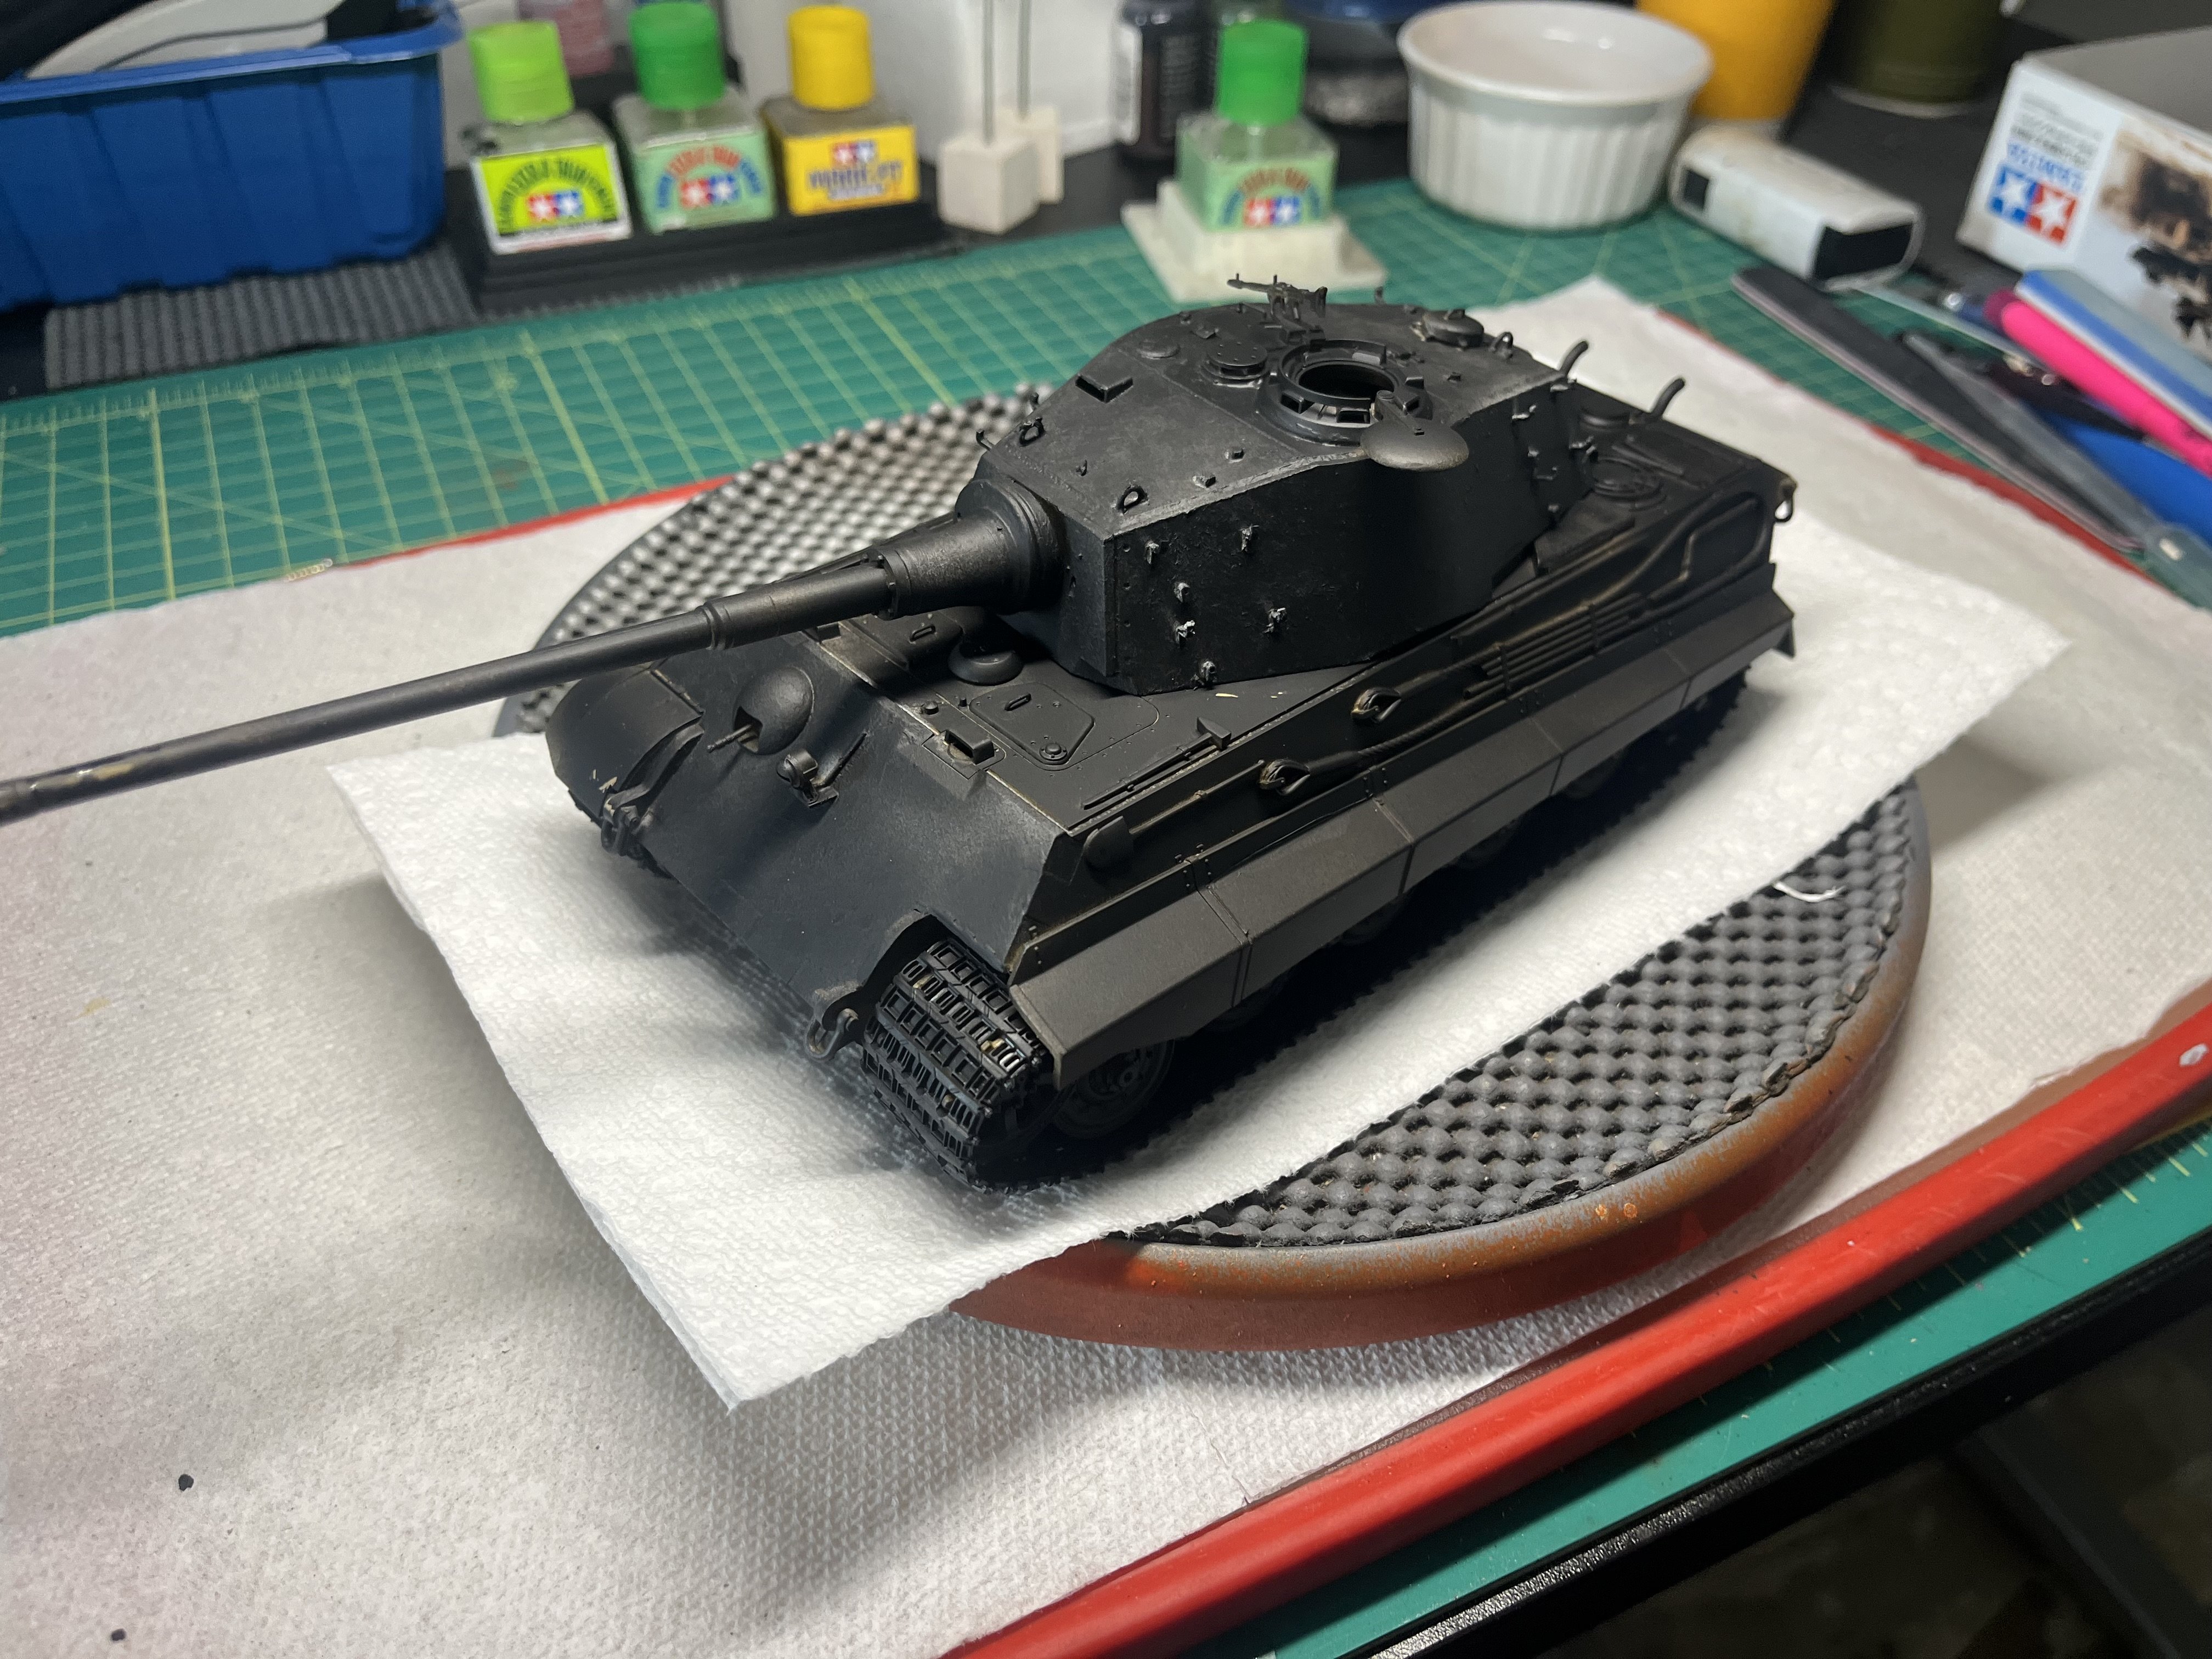
It’s a good morning when I can enjoy a quiet morning coffee while preparing my King Tiger scale model build for paint by applying a shadow coat of black primer.
-
Road wheels and tracks test fitting!! Looking good!!
-
Tamiya 1/35 Kit Tiger (Production)
RalphSarc replied to RalphSarc's topic in LSM 1/35 and Larger Work In Progress
Yeah but I like the smell, lol!!! -
Tamiya 1/35 Kit Tiger (Production)
RalphSarc replied to RalphSarc's topic in LSM 1/35 and Larger Work In Progress
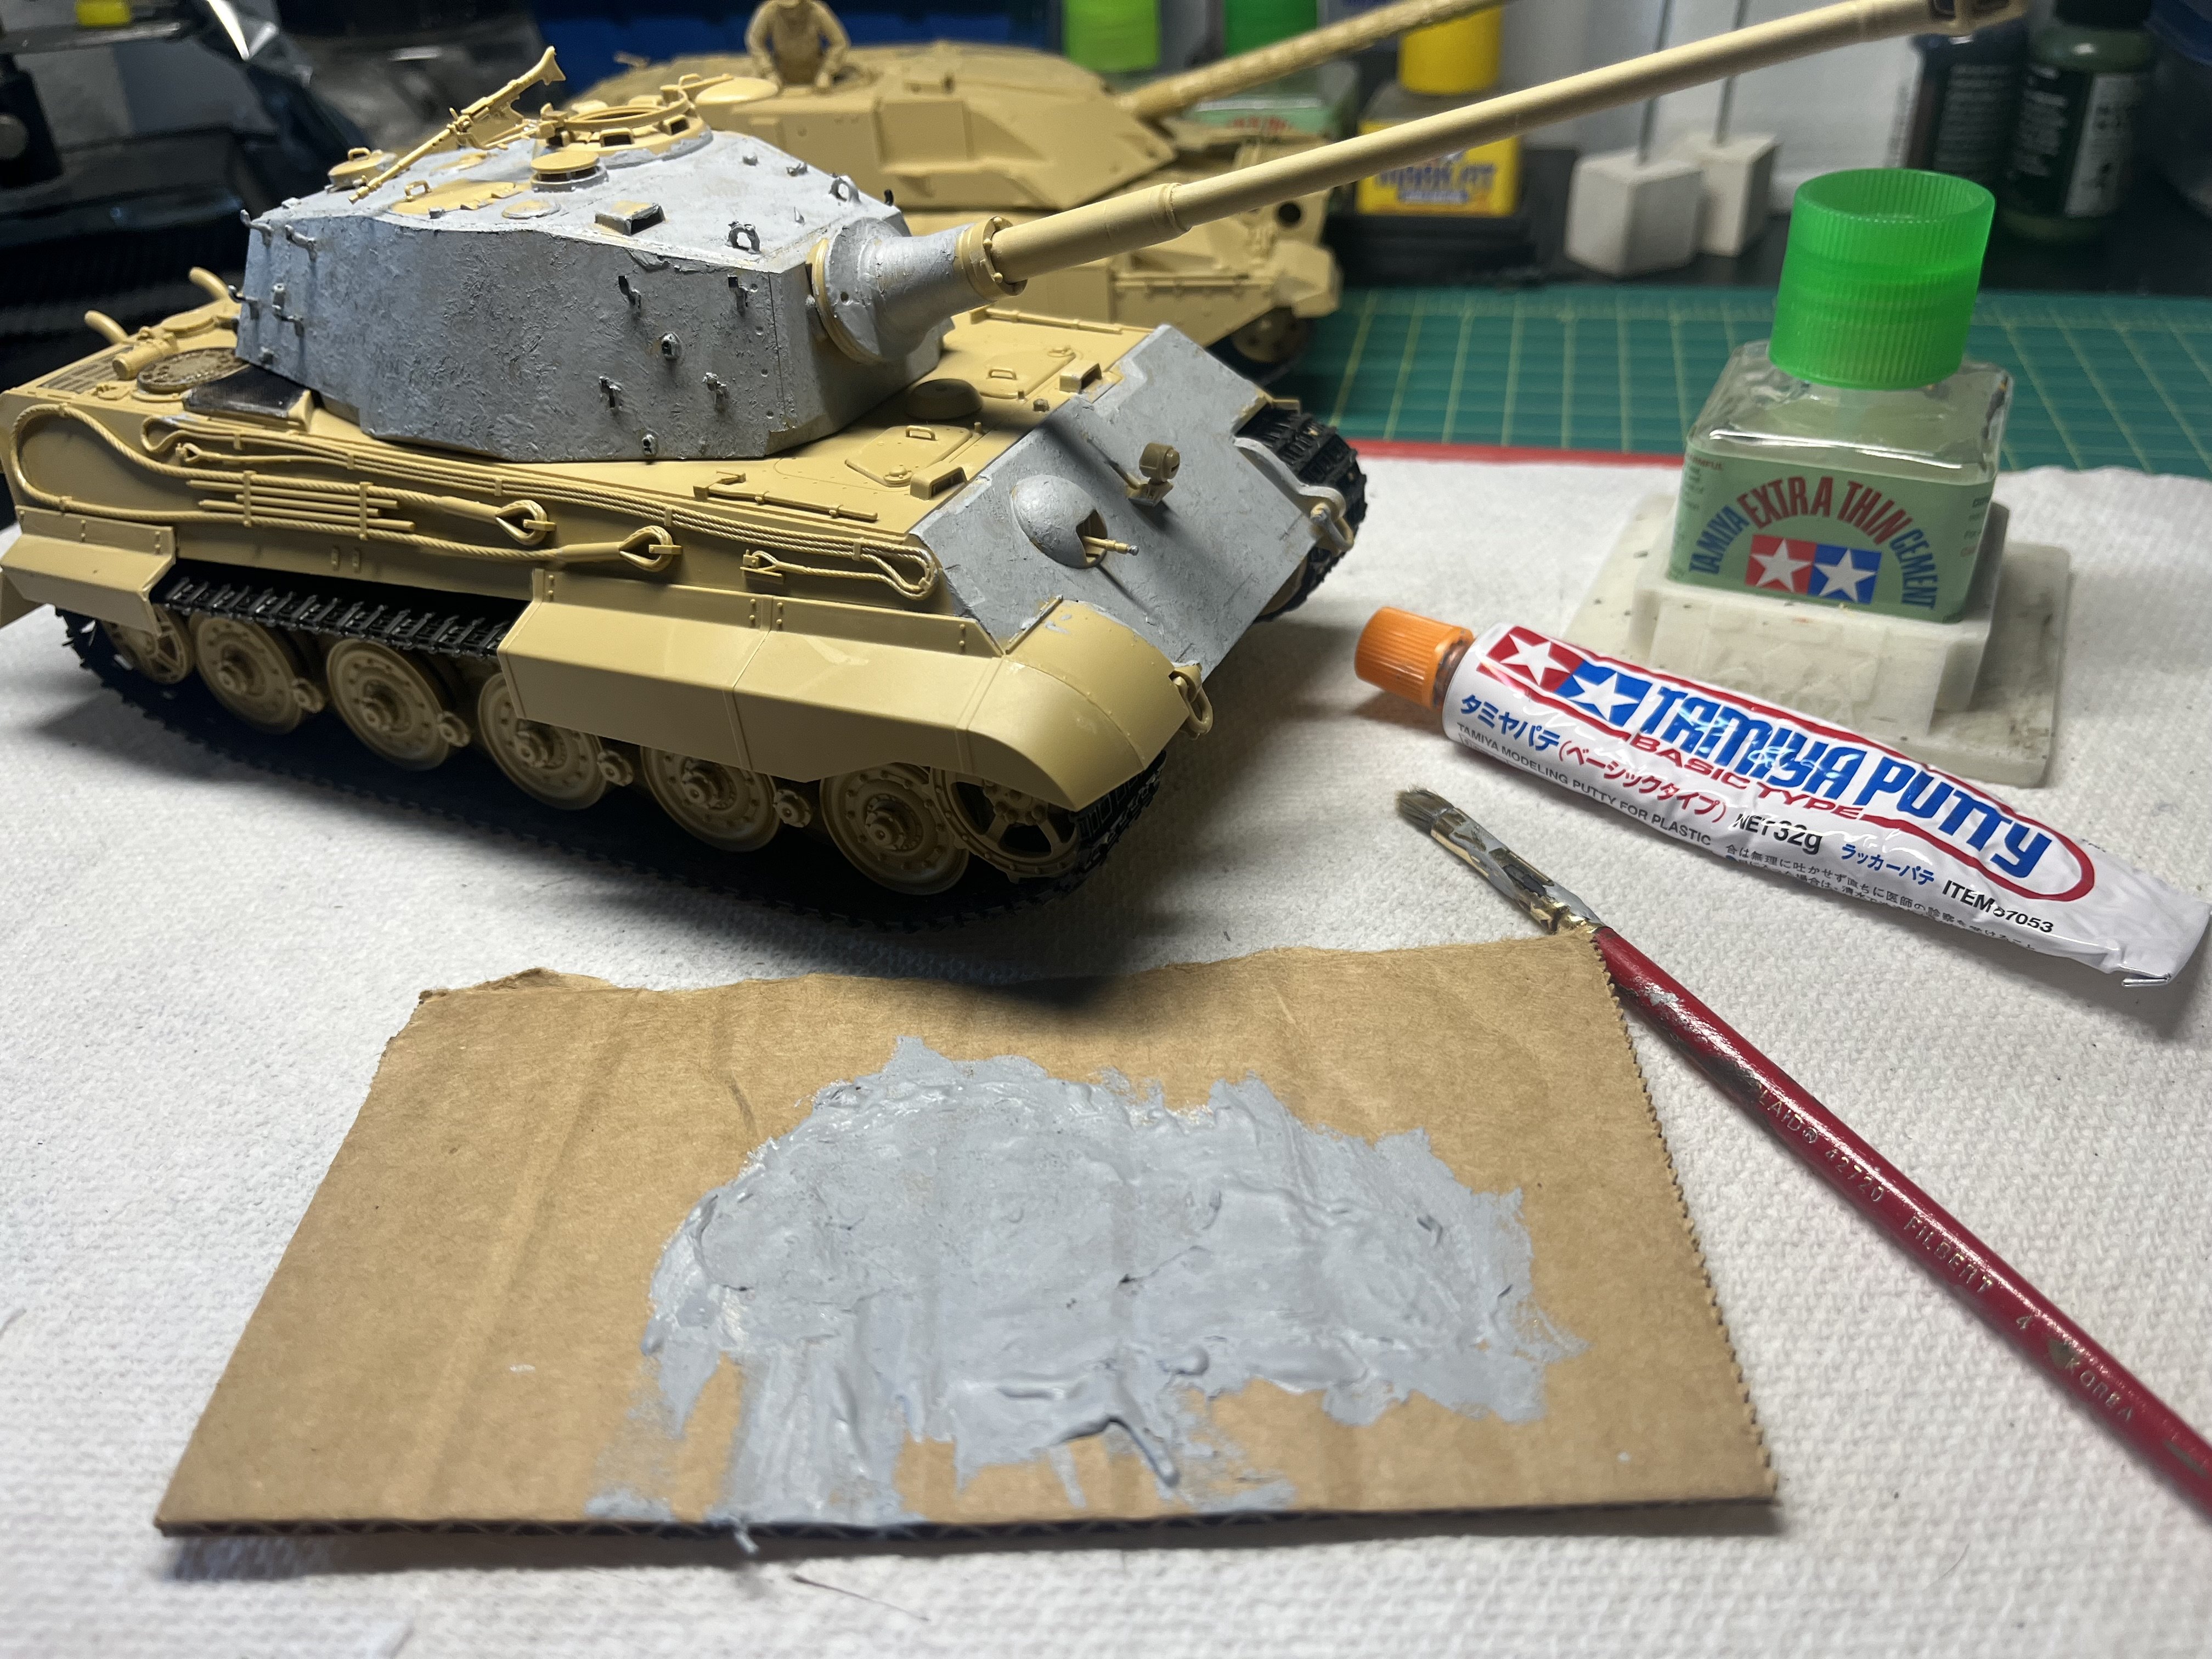
I’ve really enjoy the technique of using a mixture of Tamiya Putty and Tamiya Extra Thin to apply casting marks to my armor builds!! I think it adds an extra level of realism to my builds.
-
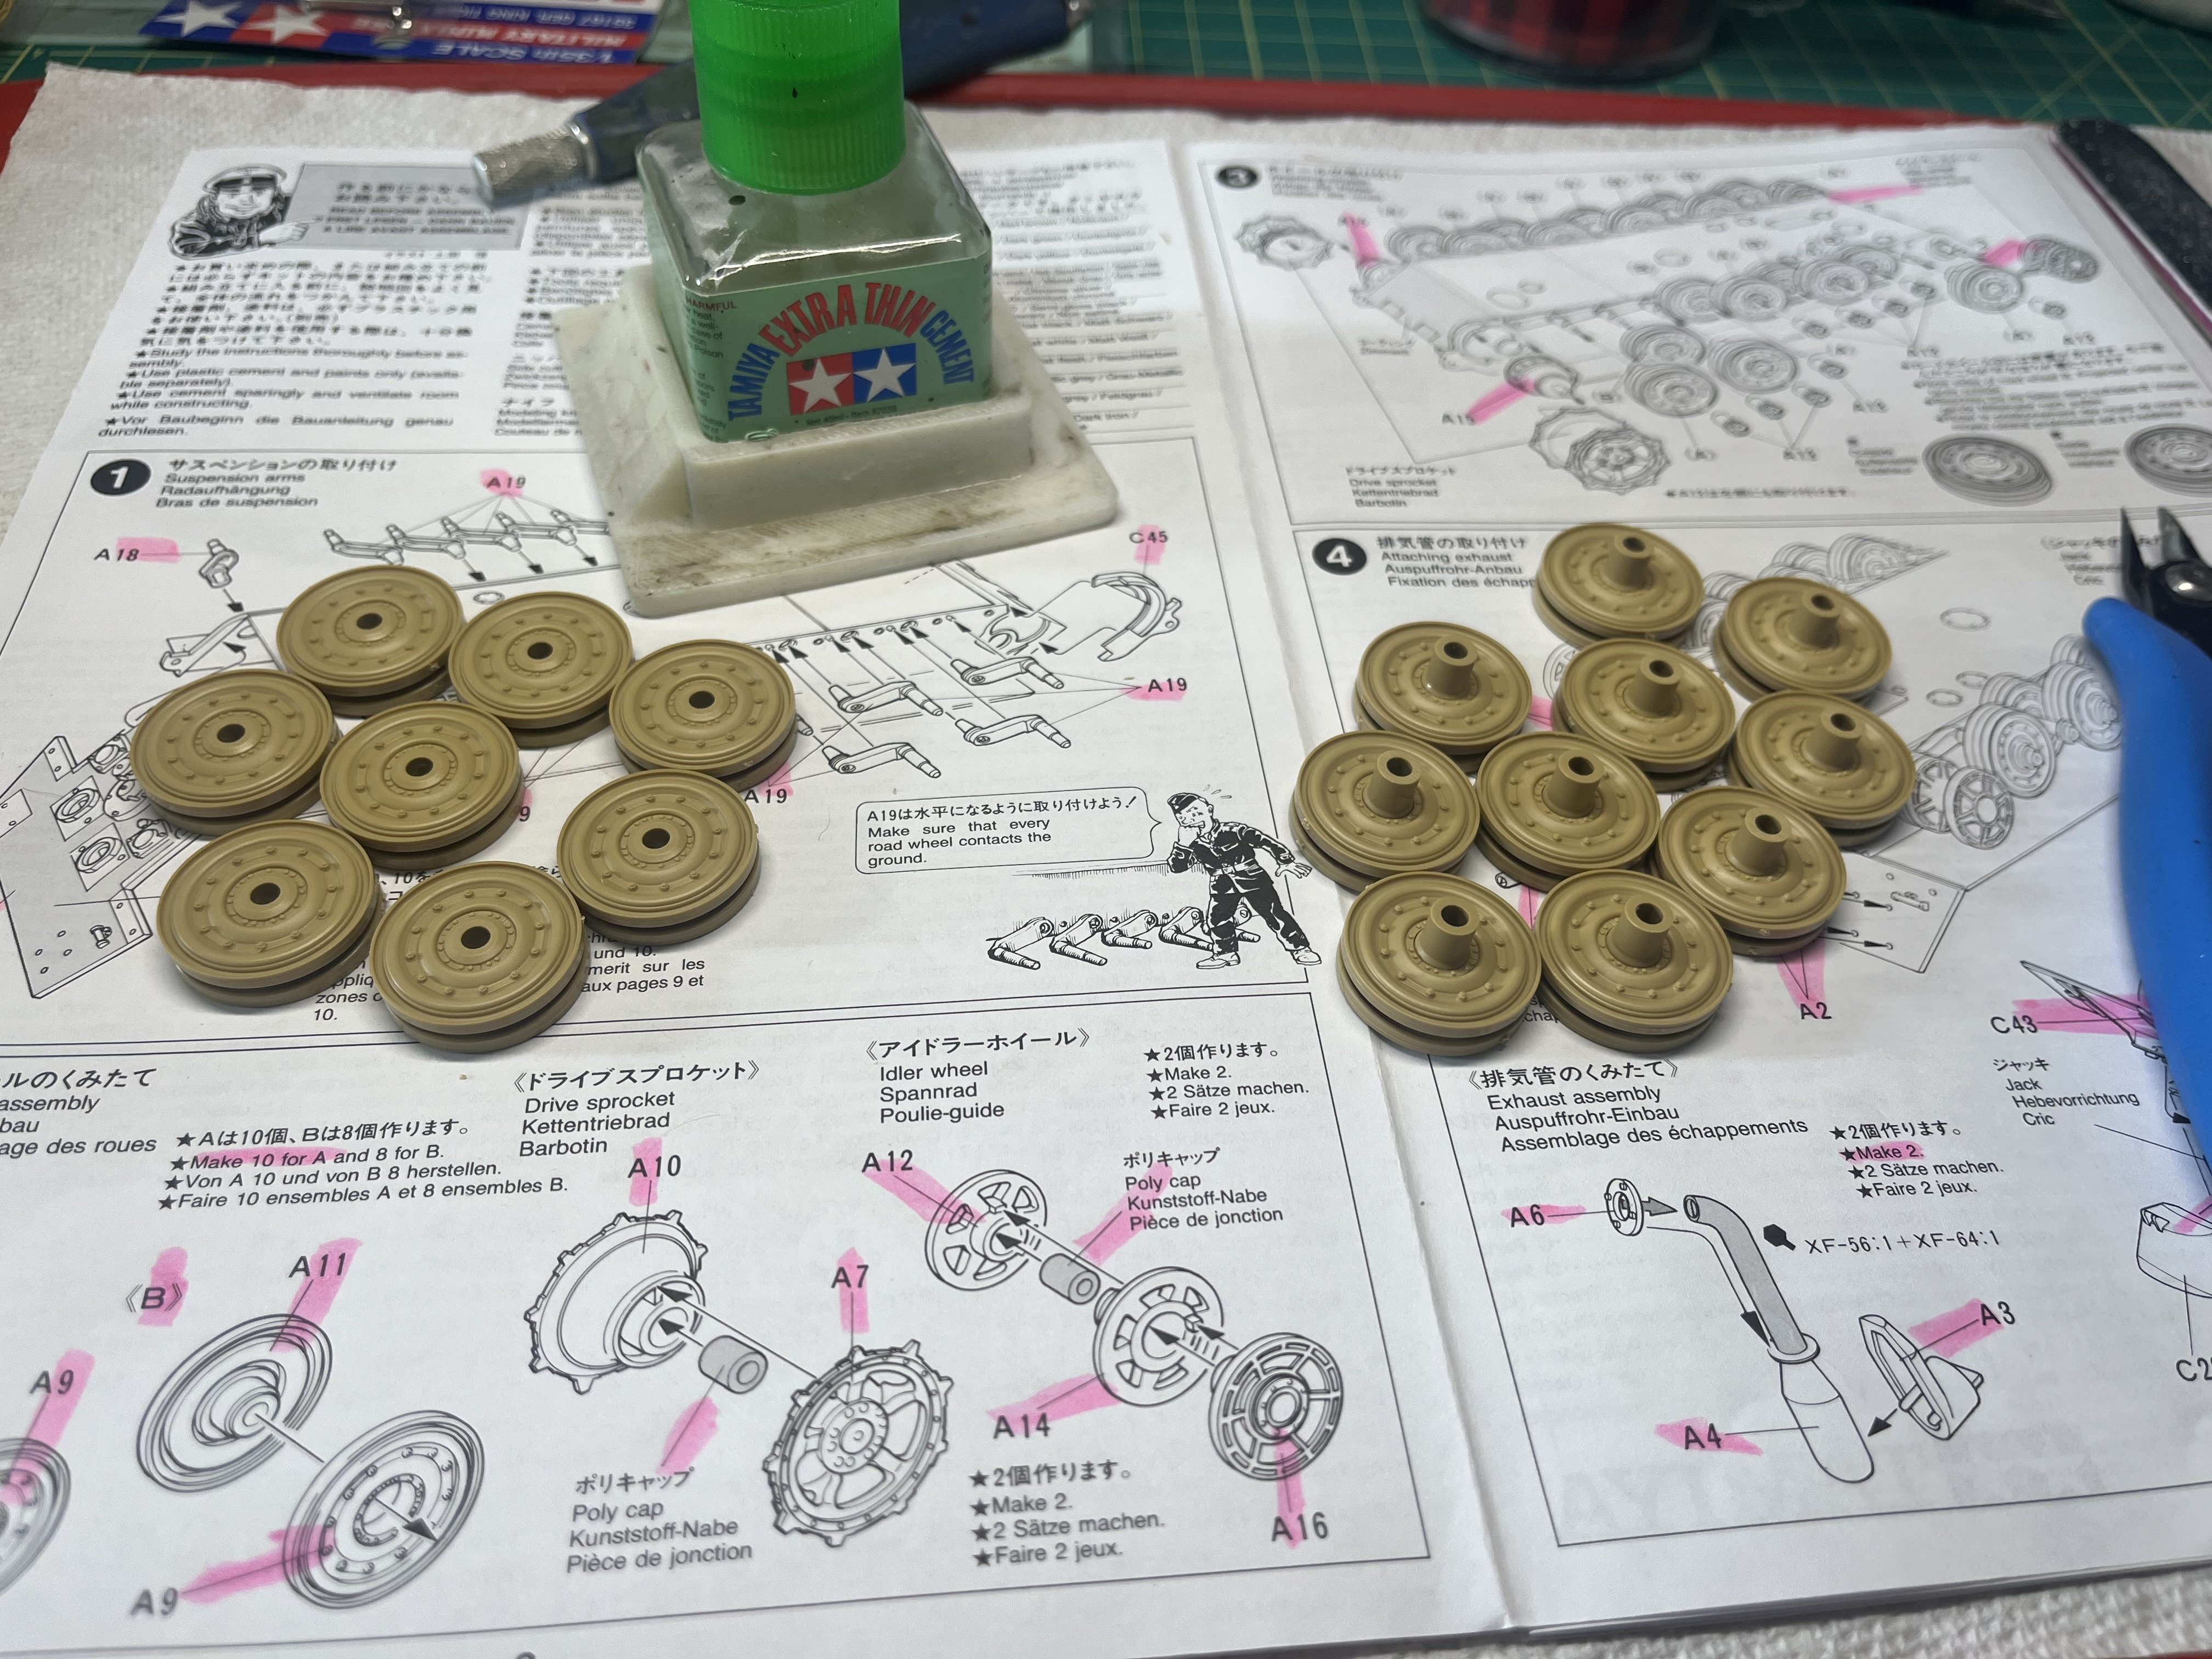
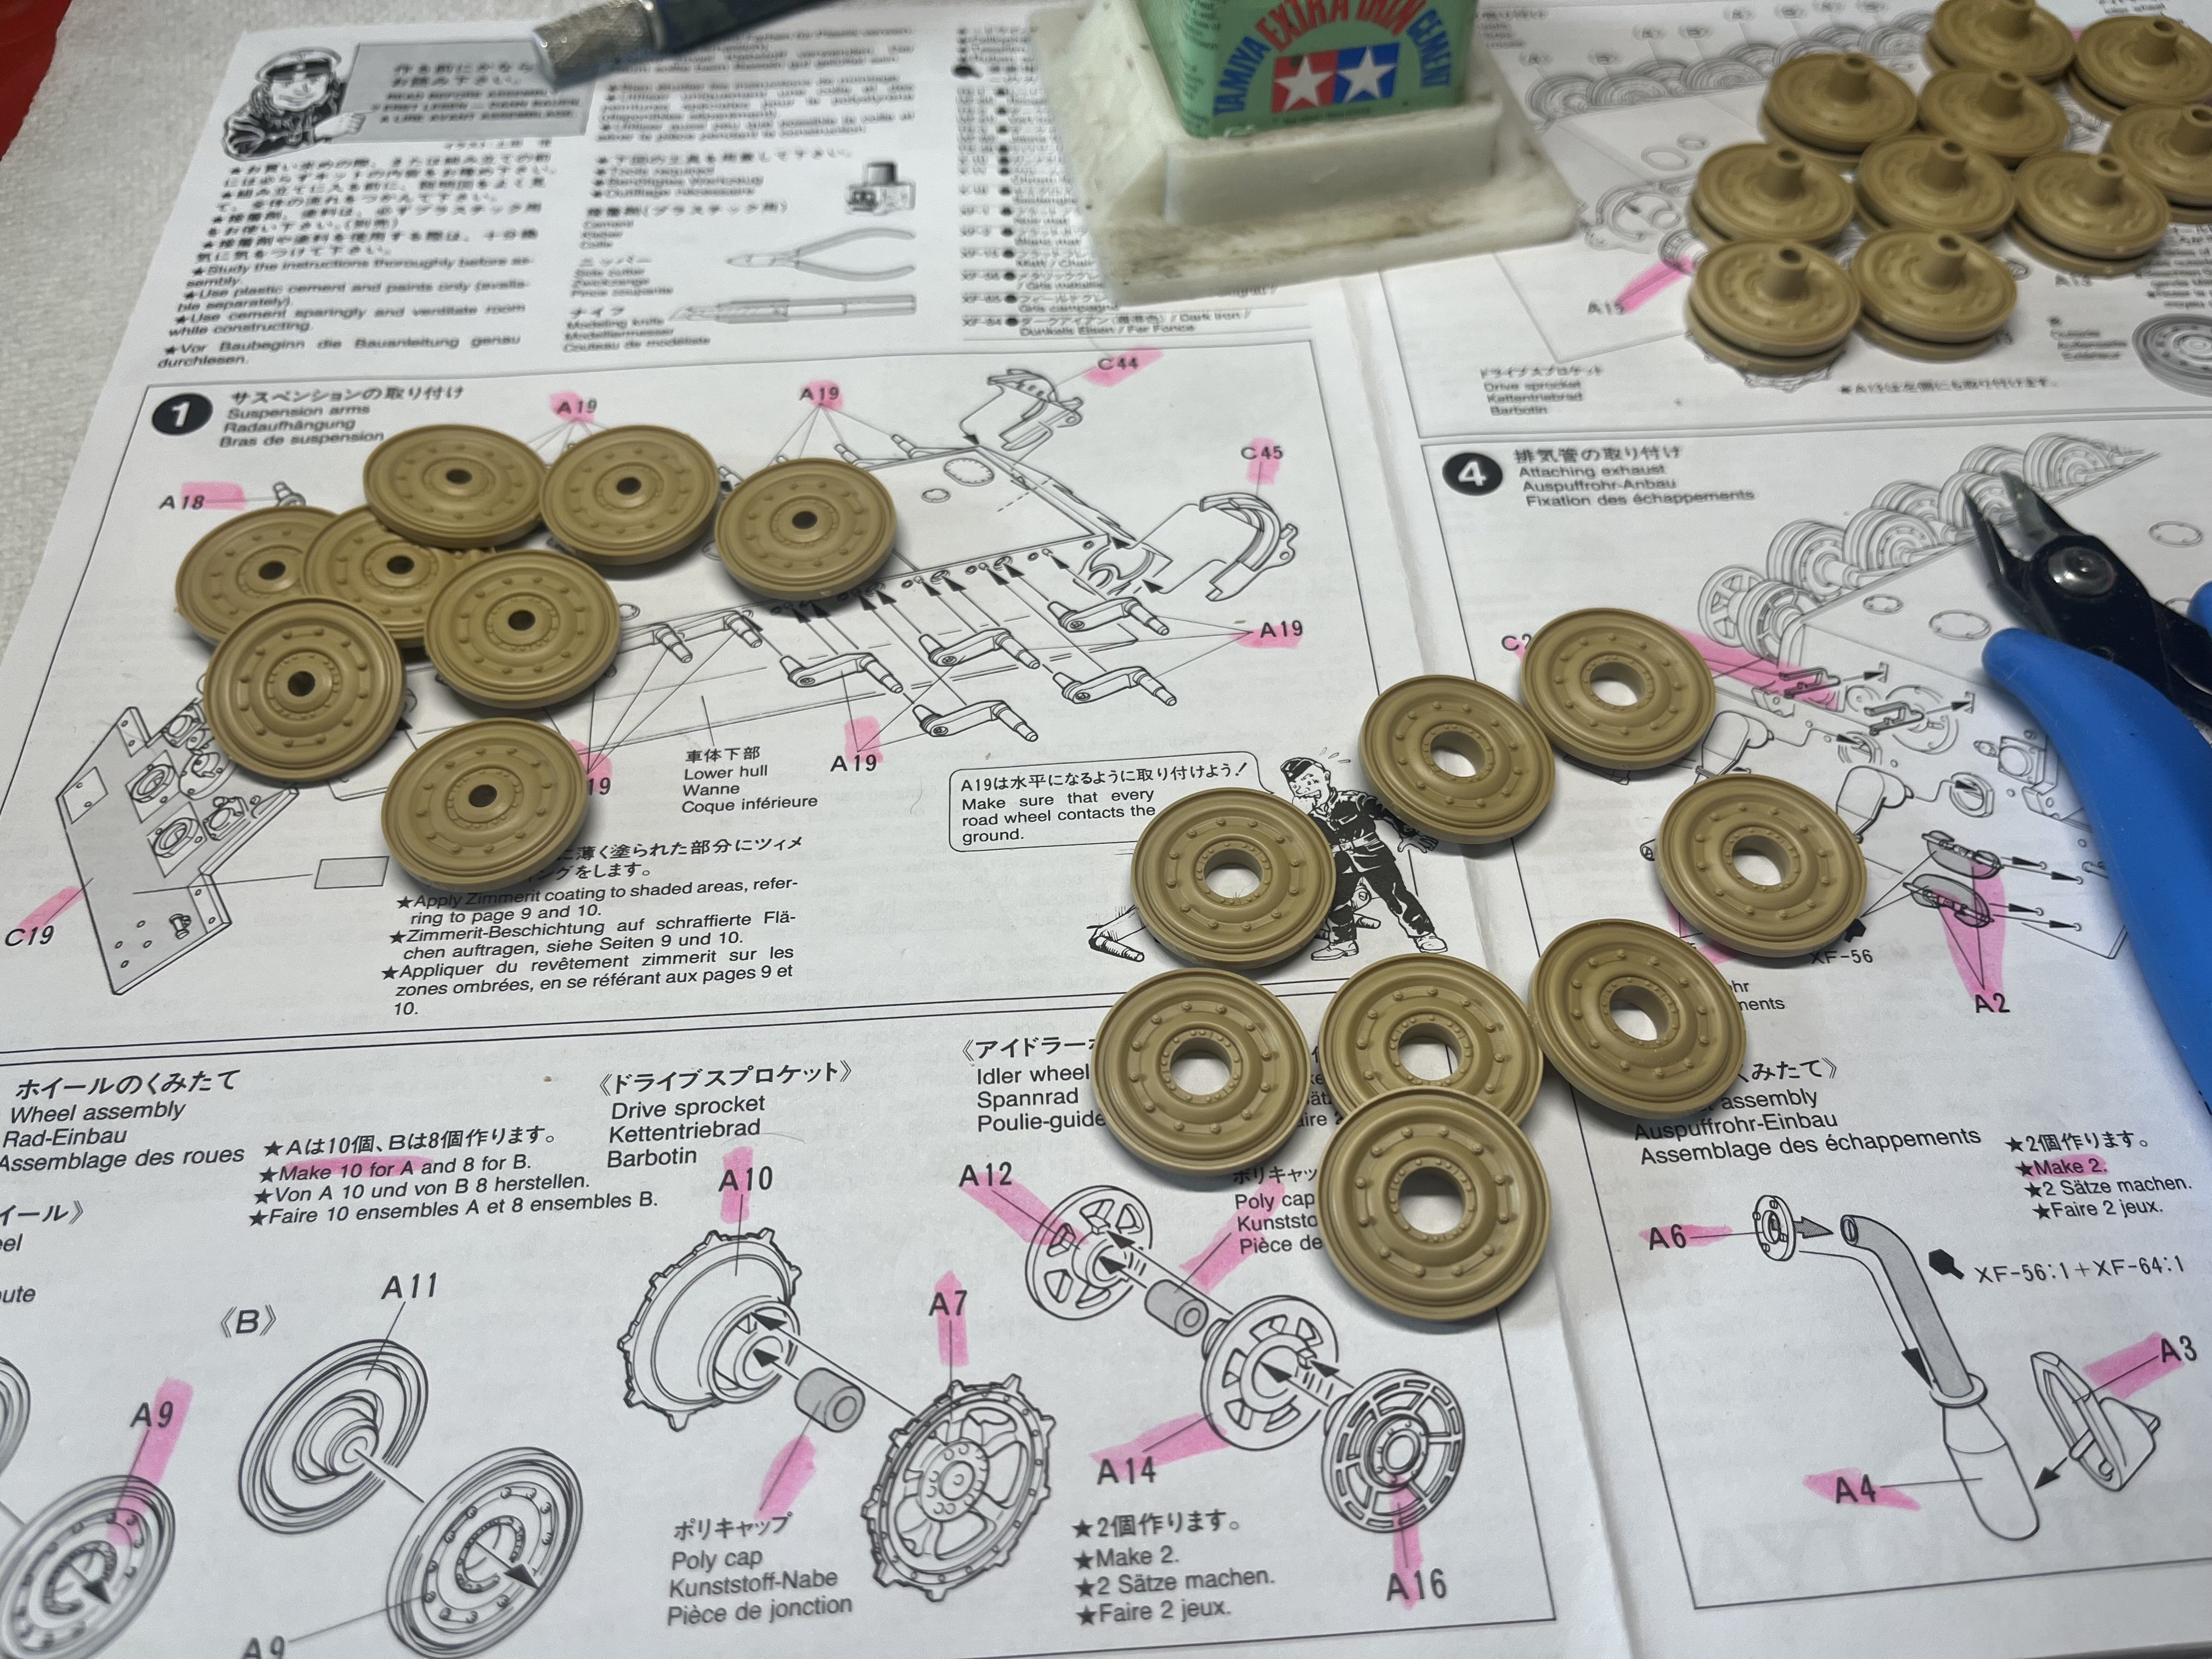
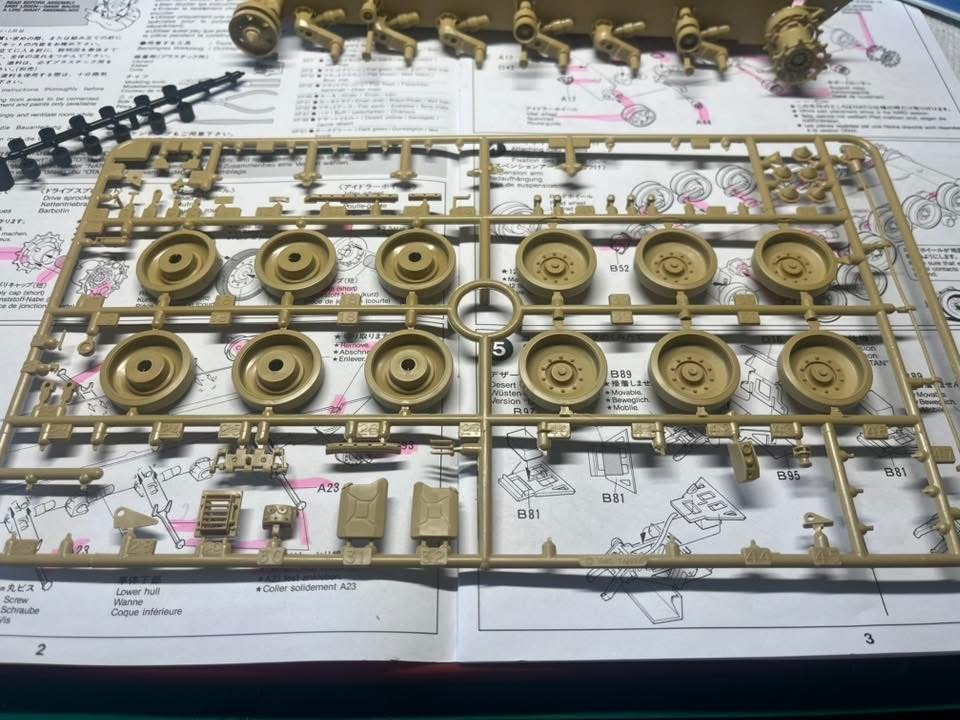
Let’s return to step 1 and build 12 road wheels!! Each wheel has four parts, a front and rear wheel a poly cap and hub covers!!
-
Tamiya 1/35 Kit Tiger (Production)
RalphSarc replied to RalphSarc's topic in LSM 1/35 and Larger Work In Progress
Ready for the paint shop crew!!
-
Tamiya 1/35 Kit Tiger (Production)
RalphSarc replied to RalphSarc's topic in LSM 1/35 and Larger Work In Progress
While waiting for the glue to dry on one side of the track brackets I assembled the tanks commander and positioned his arms to grasp the machine gun traveler bracket.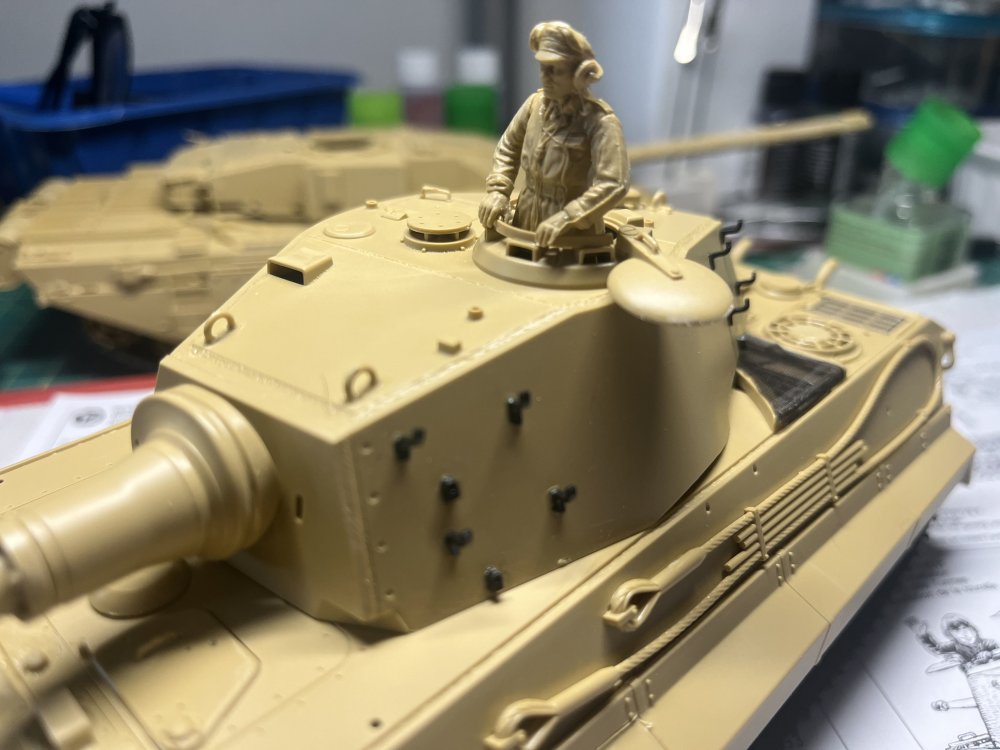
-
Tamiya 1/35 Kit Tiger (Production)
RalphSarc replied to RalphSarc's topic in LSM 1/35 and Larger Work In Progress
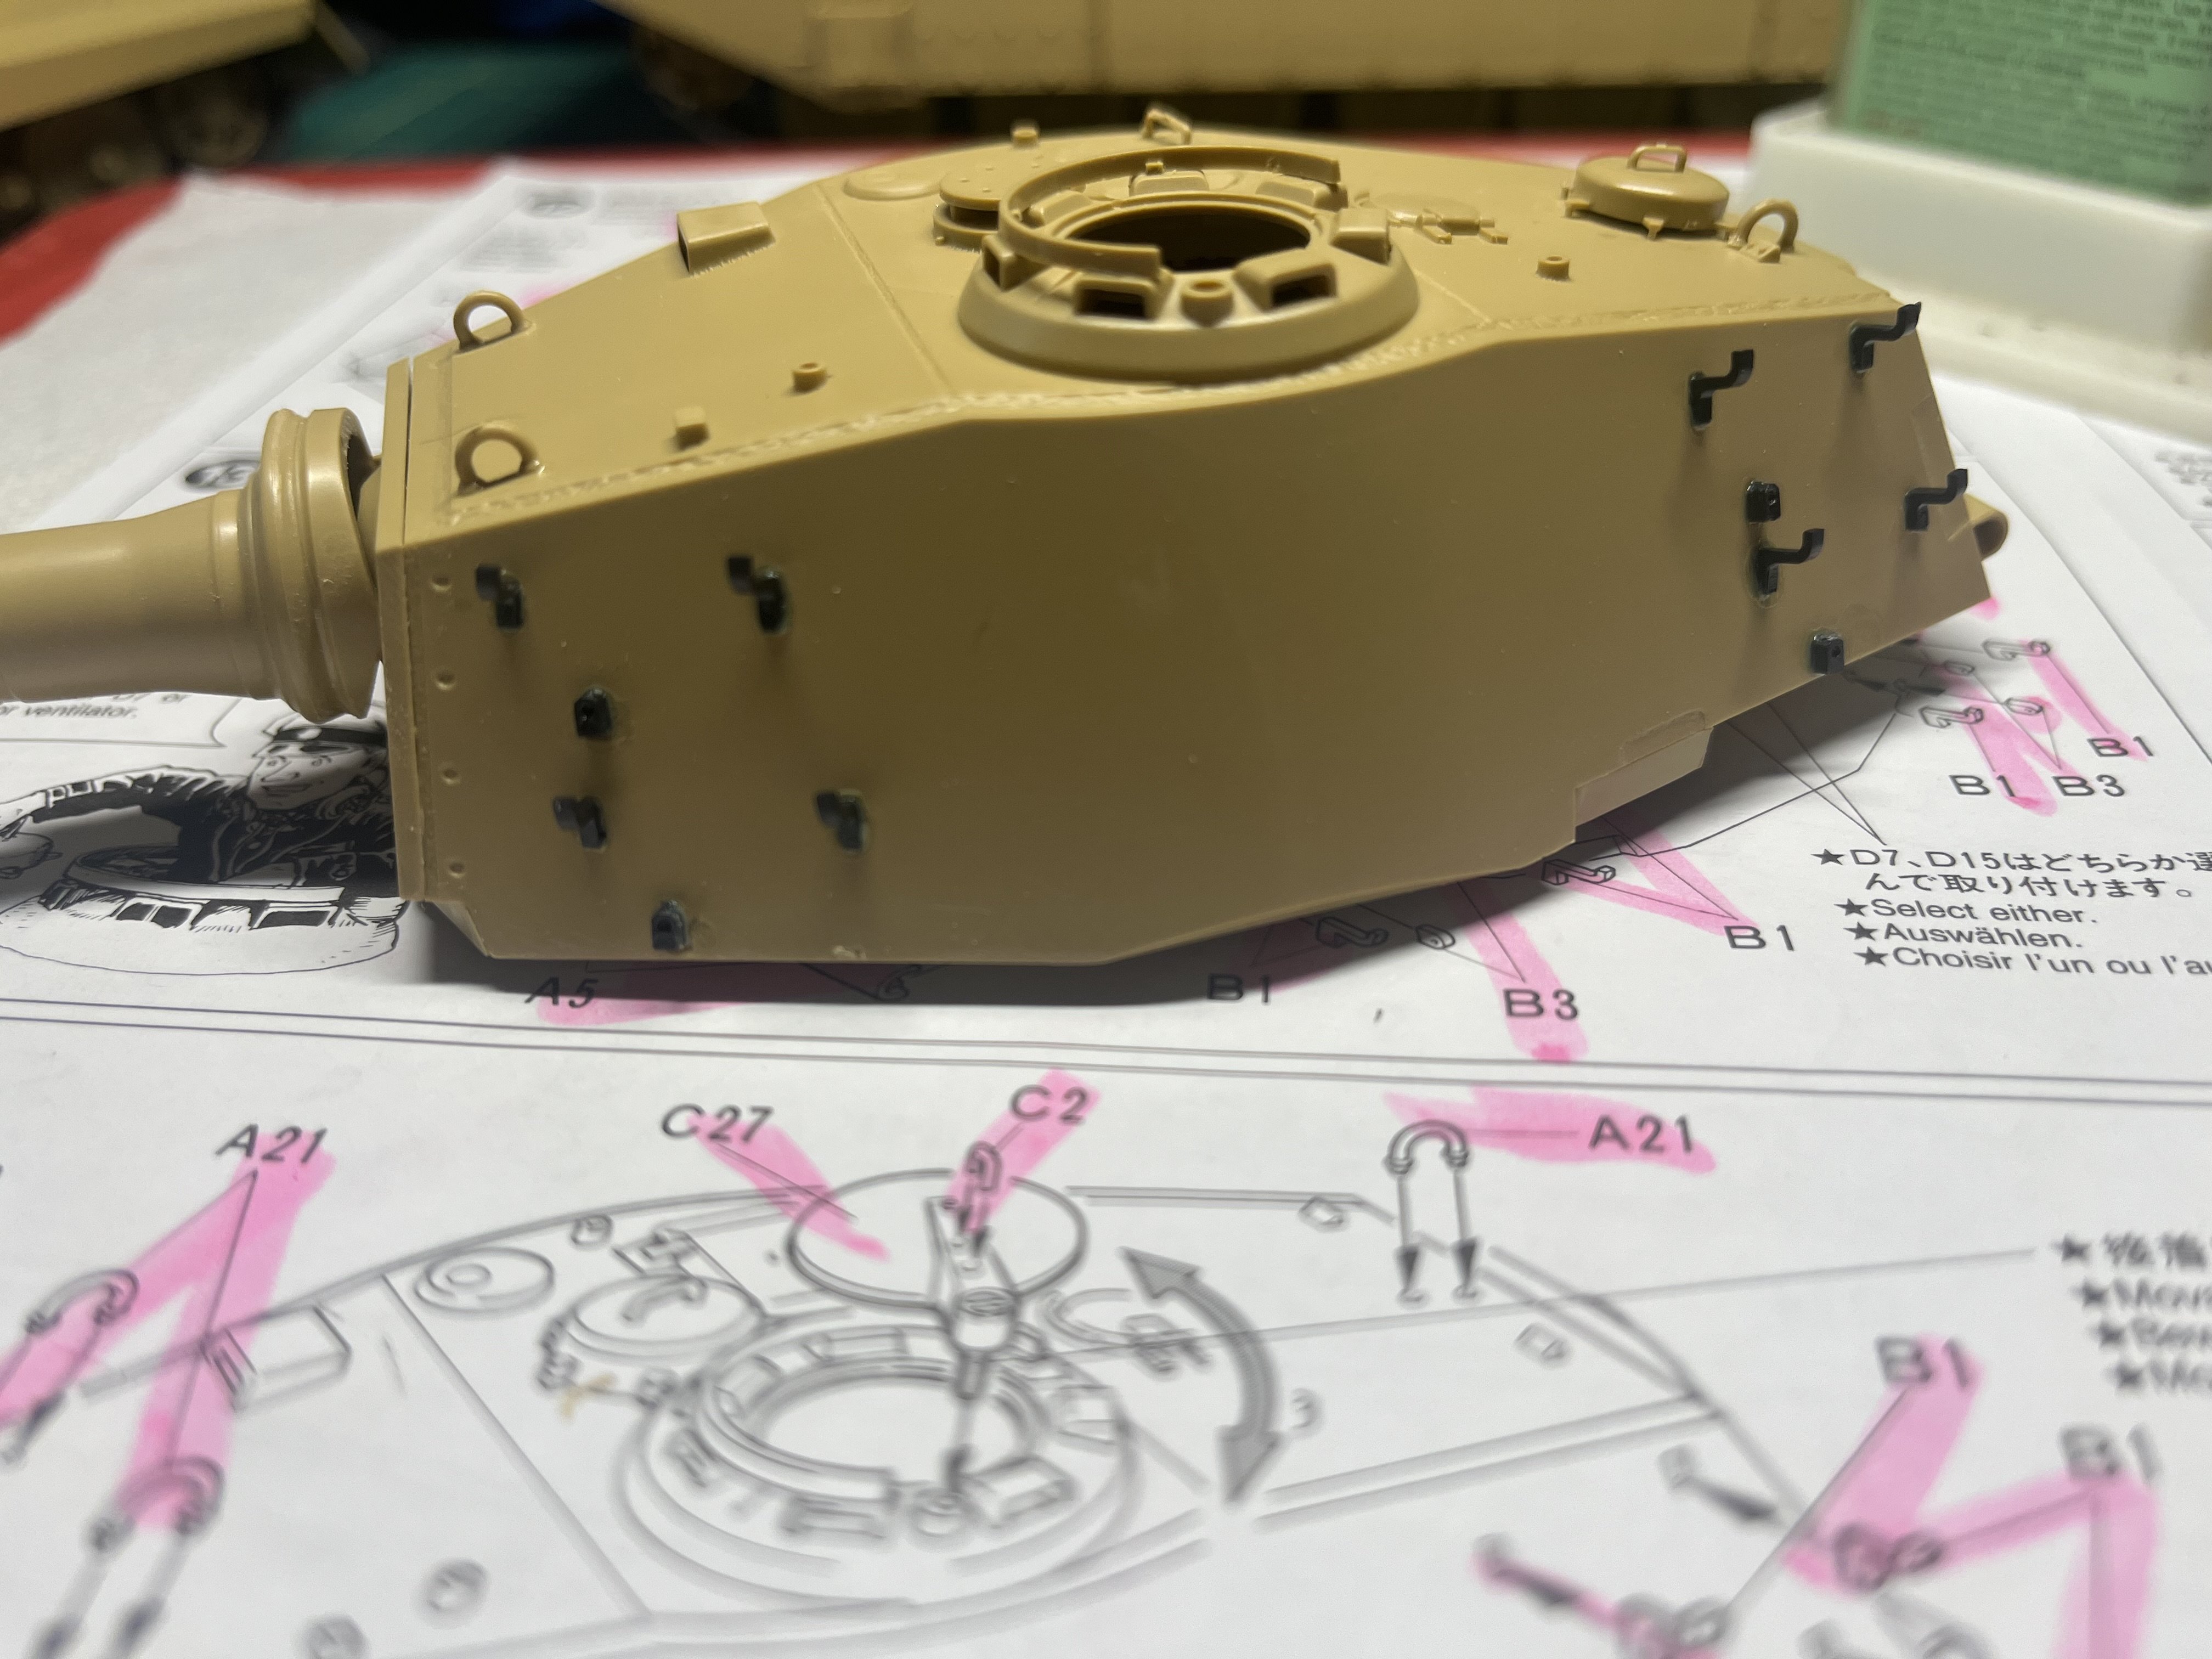
Fiddly fiddly fiddly steps 13 and 14 installing all the turret track brackets!!! Did I say they were fiddly??
-
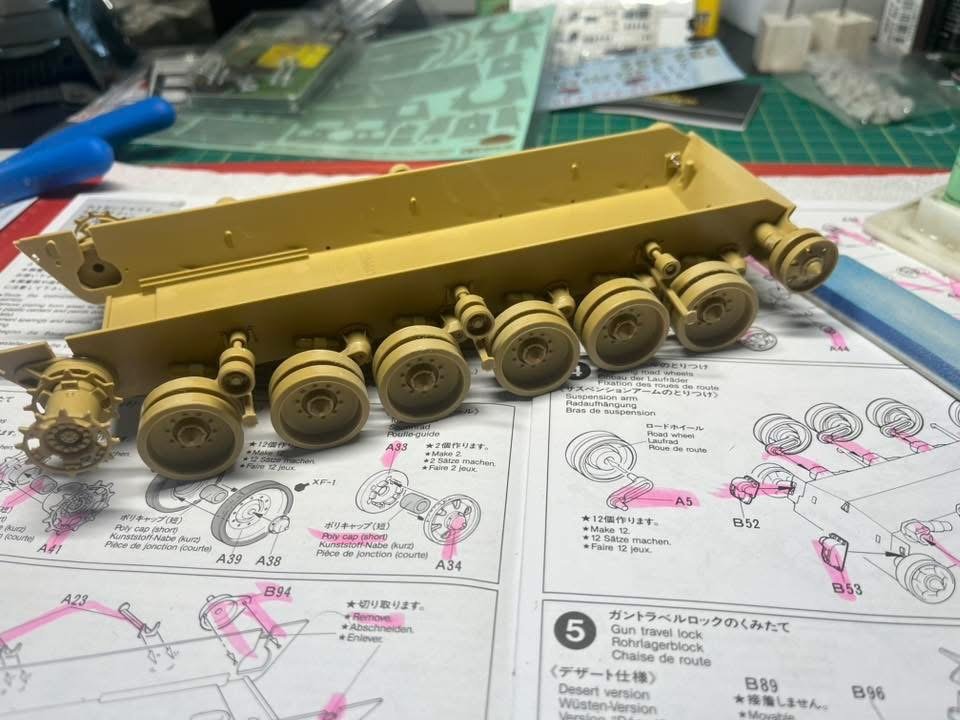
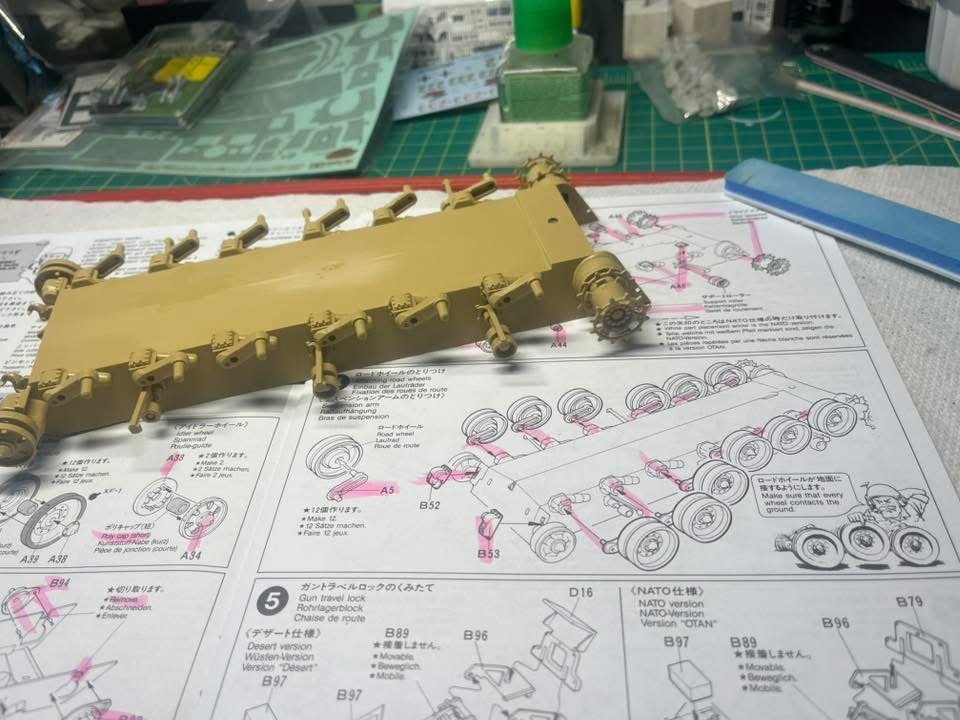
Since the road wheels are attached using poly caps I decided to attached the suspension arms separately using the keys making sure that every arm contacts the ground evenly as the little soldier guy said to do, lol!!! Other than the wheels I think that completes the lower hull suspension?
-
Tamiya 1/35 Kit Tiger (Production)
RalphSarc replied to RalphSarc's topic in LSM 1/35 and Larger Work In Progress
Just for fun…….two bad asses!!!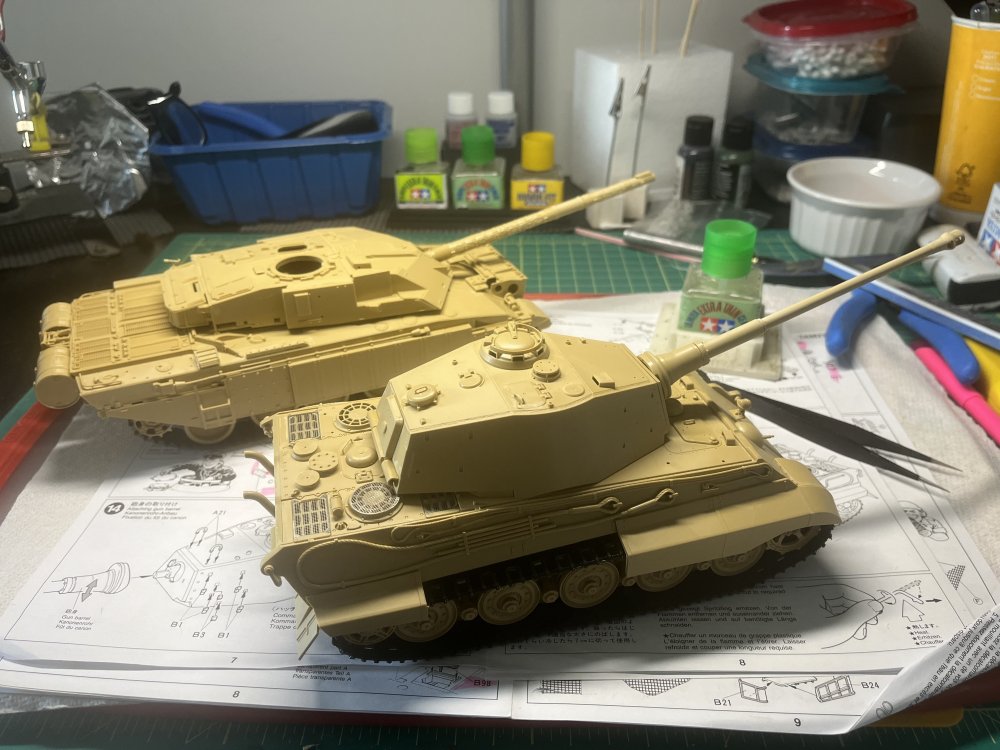
-
Tamiya 1/35 Kit Tiger (Production)
RalphSarc replied to RalphSarc's topic in LSM 1/35 and Larger Work In Progress
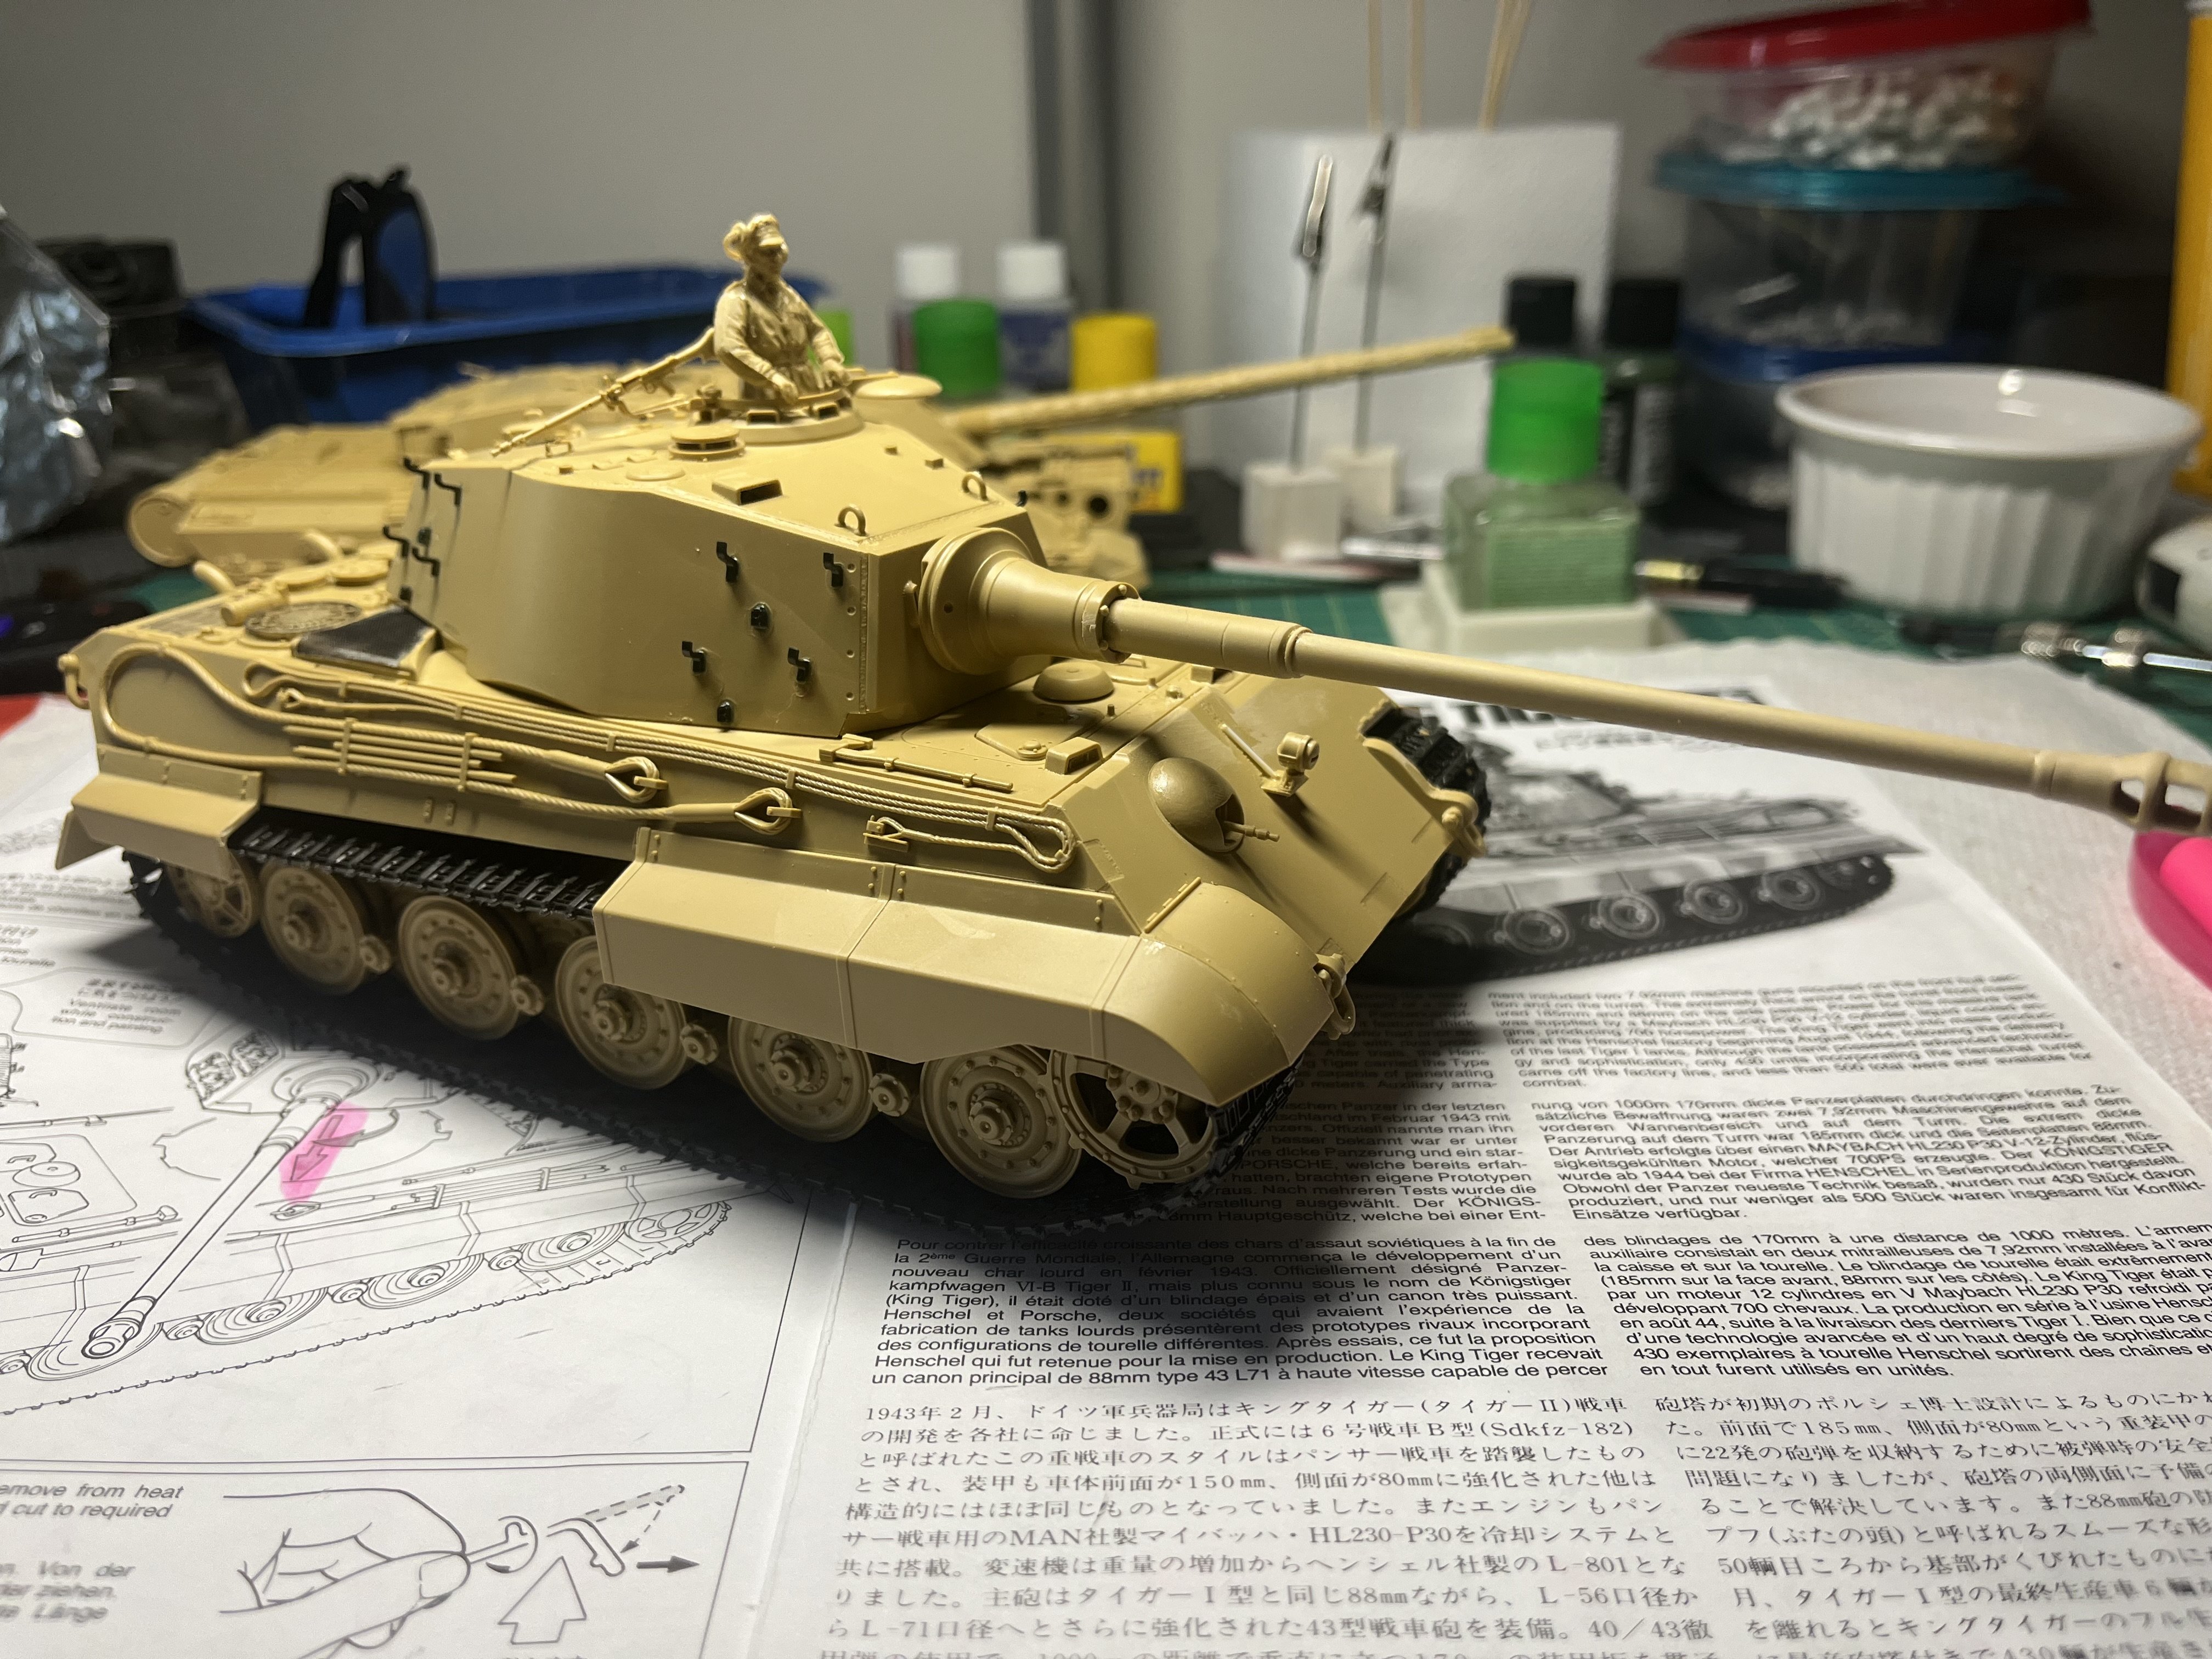
Continuing on with steps 12 and 13 building up the turret. An absolutely bad ass looking tank!!!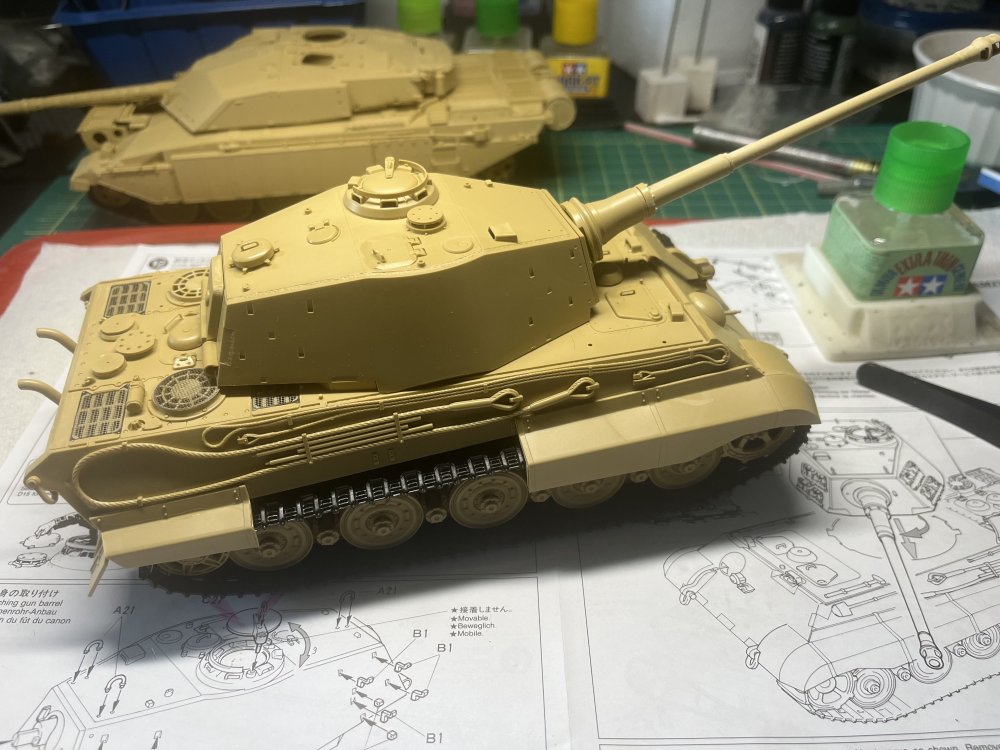
-
Tamiya 1/35 Kit Tiger (Production)
RalphSarc replied to RalphSarc's topic in LSM 1/35 and Larger Work In Progress
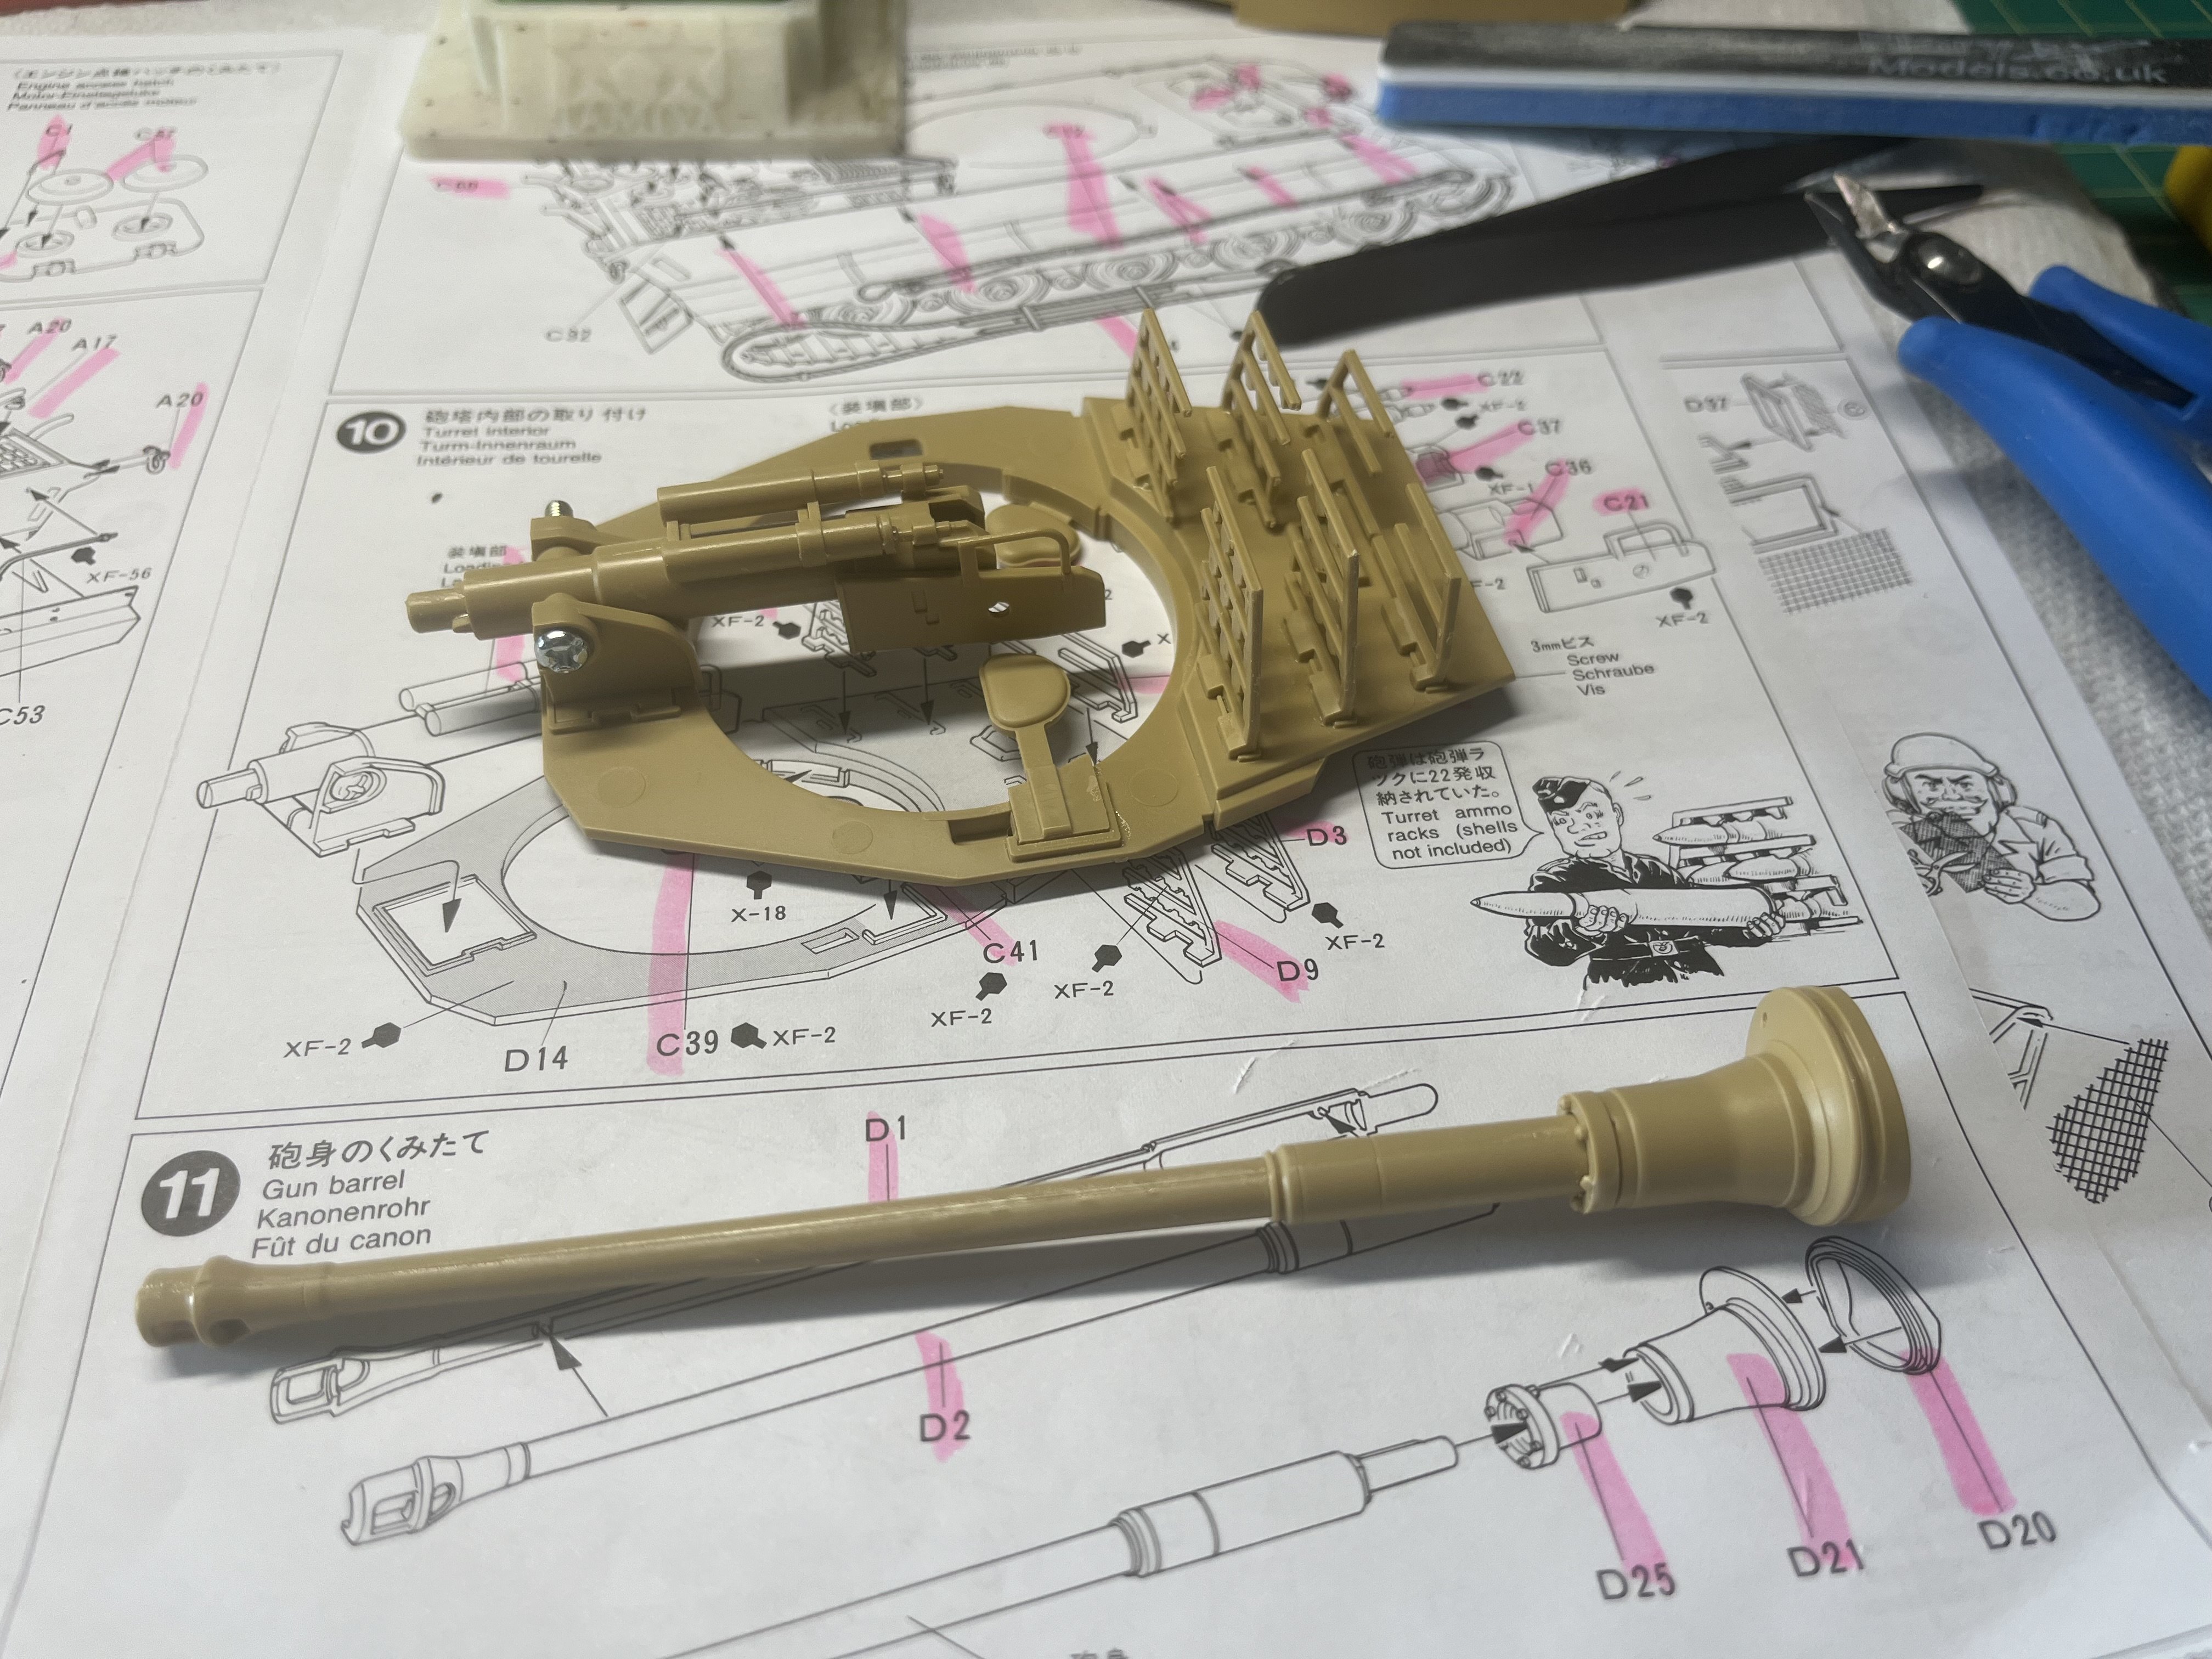
Completed steps 10 and 11 building up the turret floor, loading beech, ammunition racks, seats etc, plus the main gun barrel.
-
It’s a pretty fearsome looking tank for its age!! I certainly wouldn’t want to be in the gunners sights that for darn sure!!
-
Tamiya 1/35 Kit Tiger (Production)
RalphSarc replied to RalphSarc's topic in LSM 1/35 and Larger Work In Progress
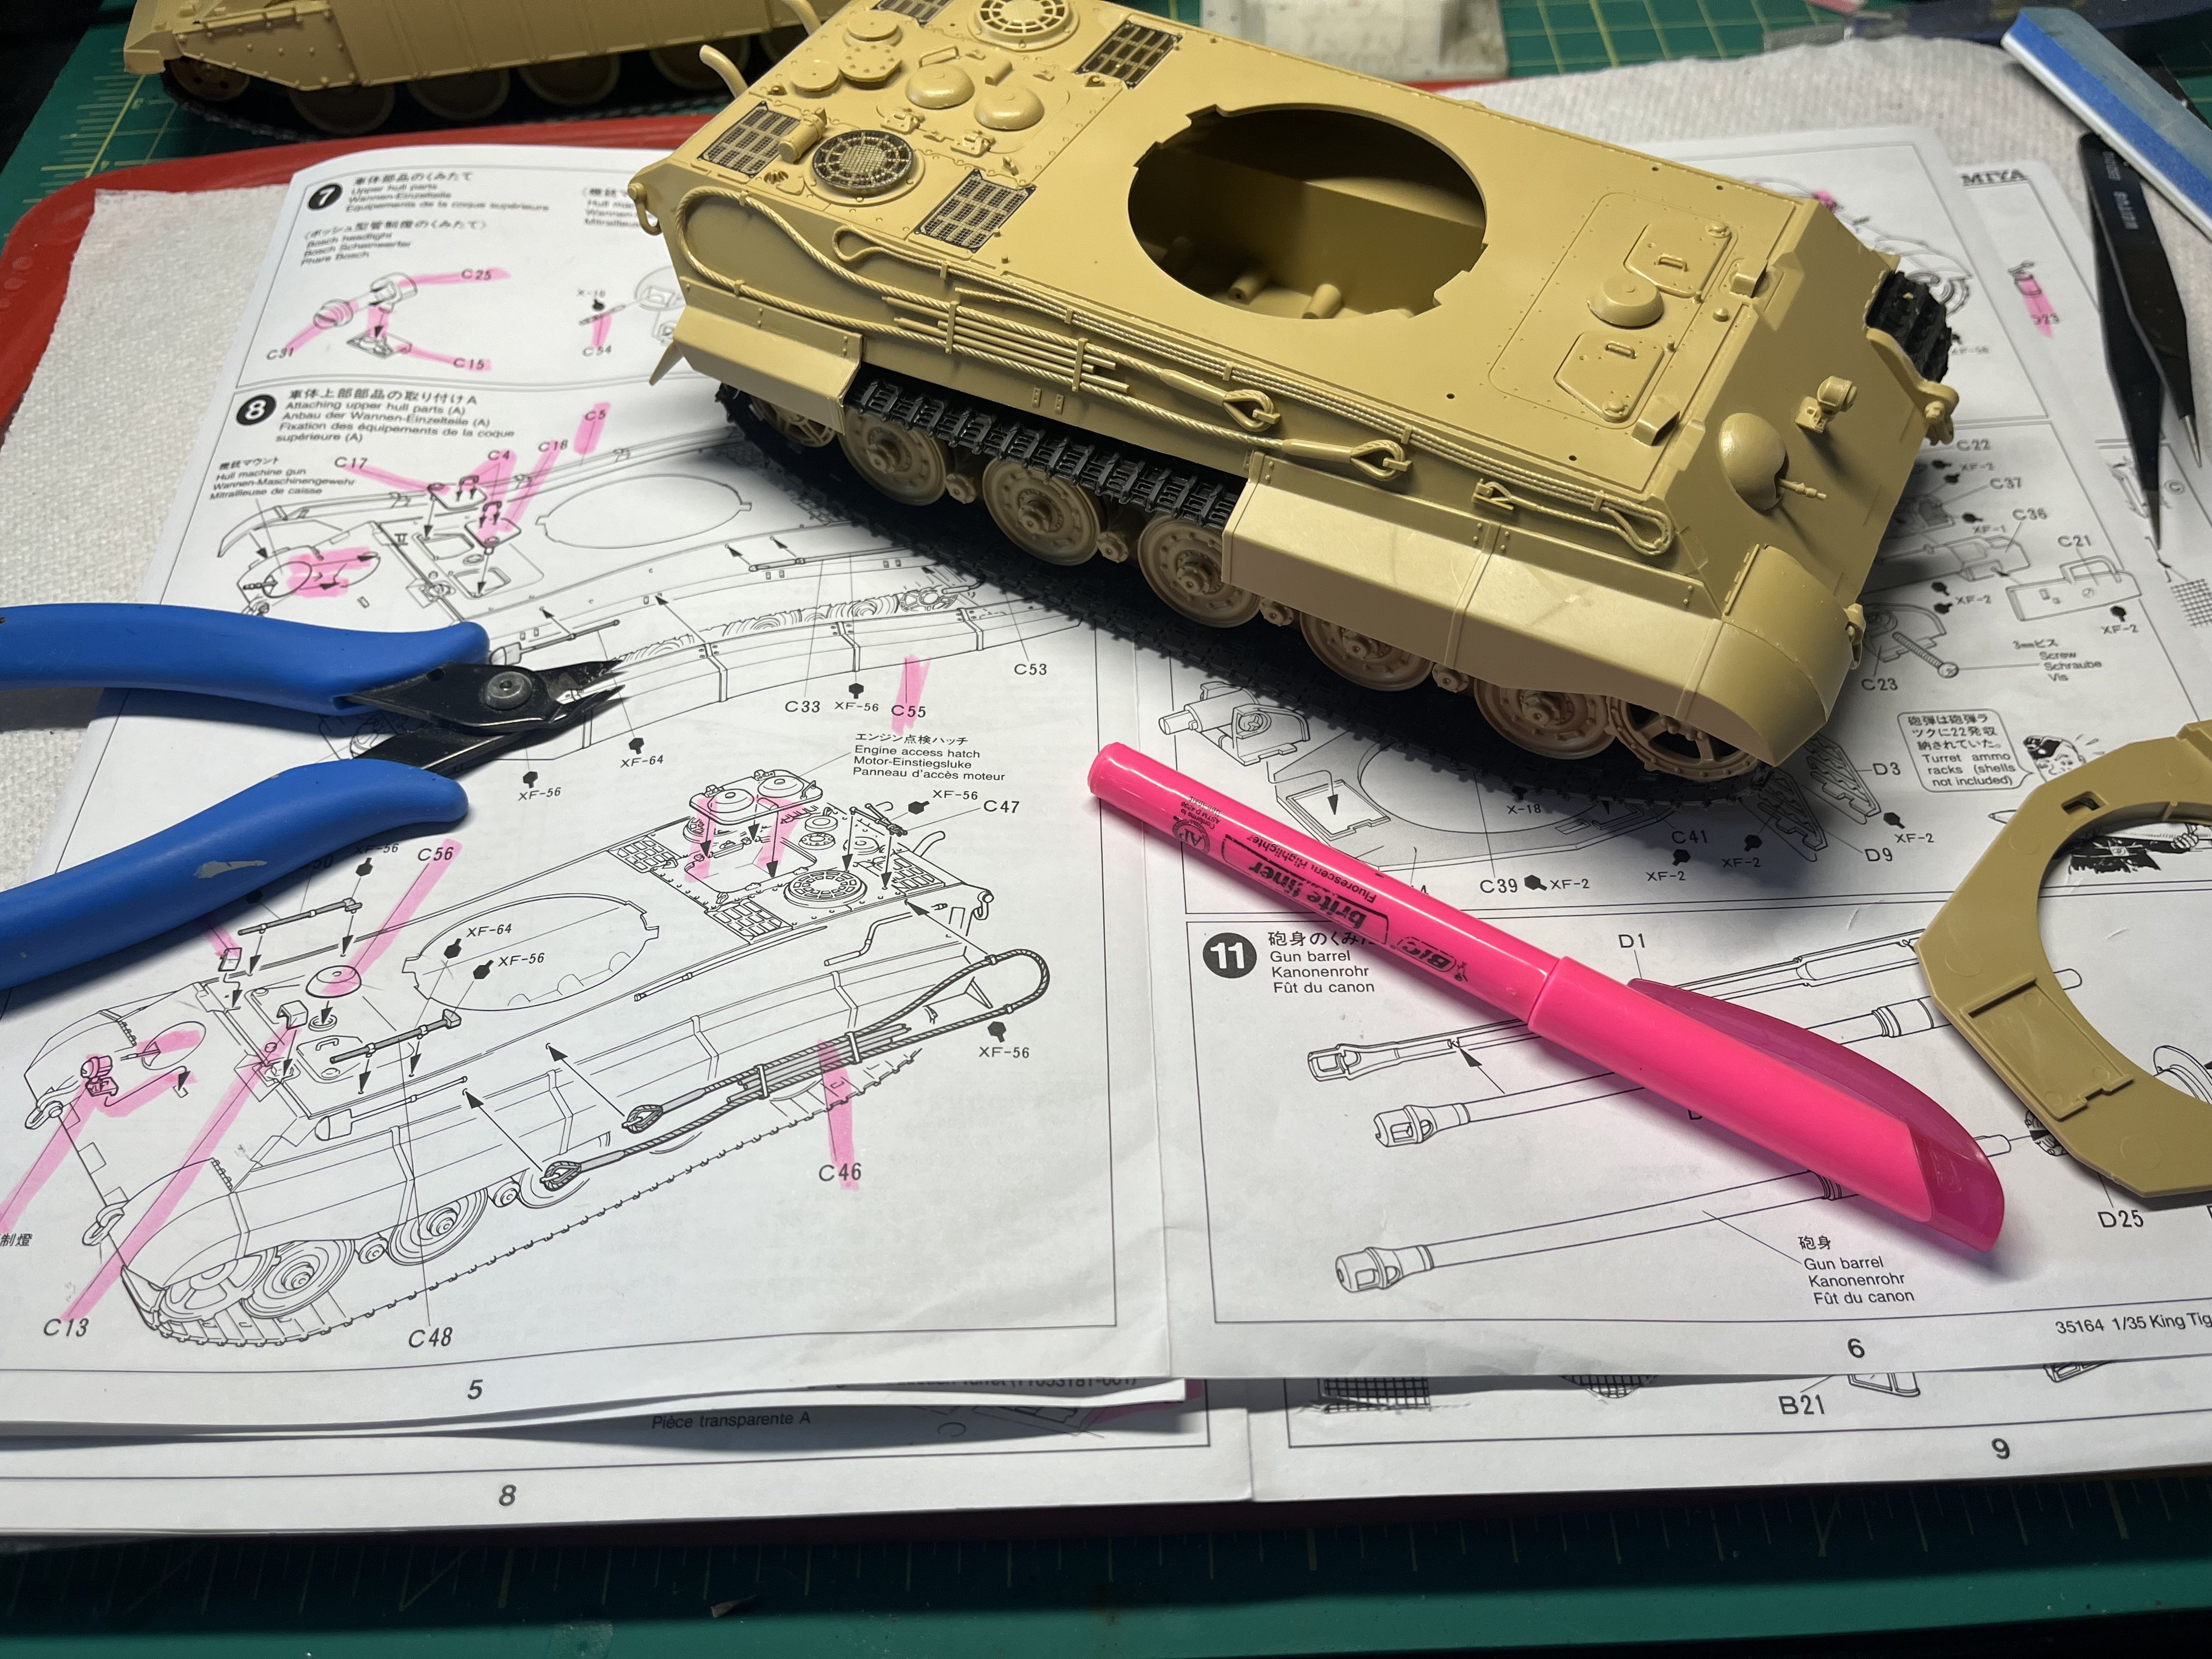
Completed most of the upper hull assembly in steps 7 and 8 adding the hatches, fire extinguisher, track cables, handholds, engine access hatch but leaving off the tool which I’ll paint separately. I still have more distressing of the fender/skirts to do but I love the look! On to the turret!
-
Tamiya 1/35 Kit Tiger (Production)
RalphSarc replied to RalphSarc's topic in LSM 1/35 and Larger Work In Progress
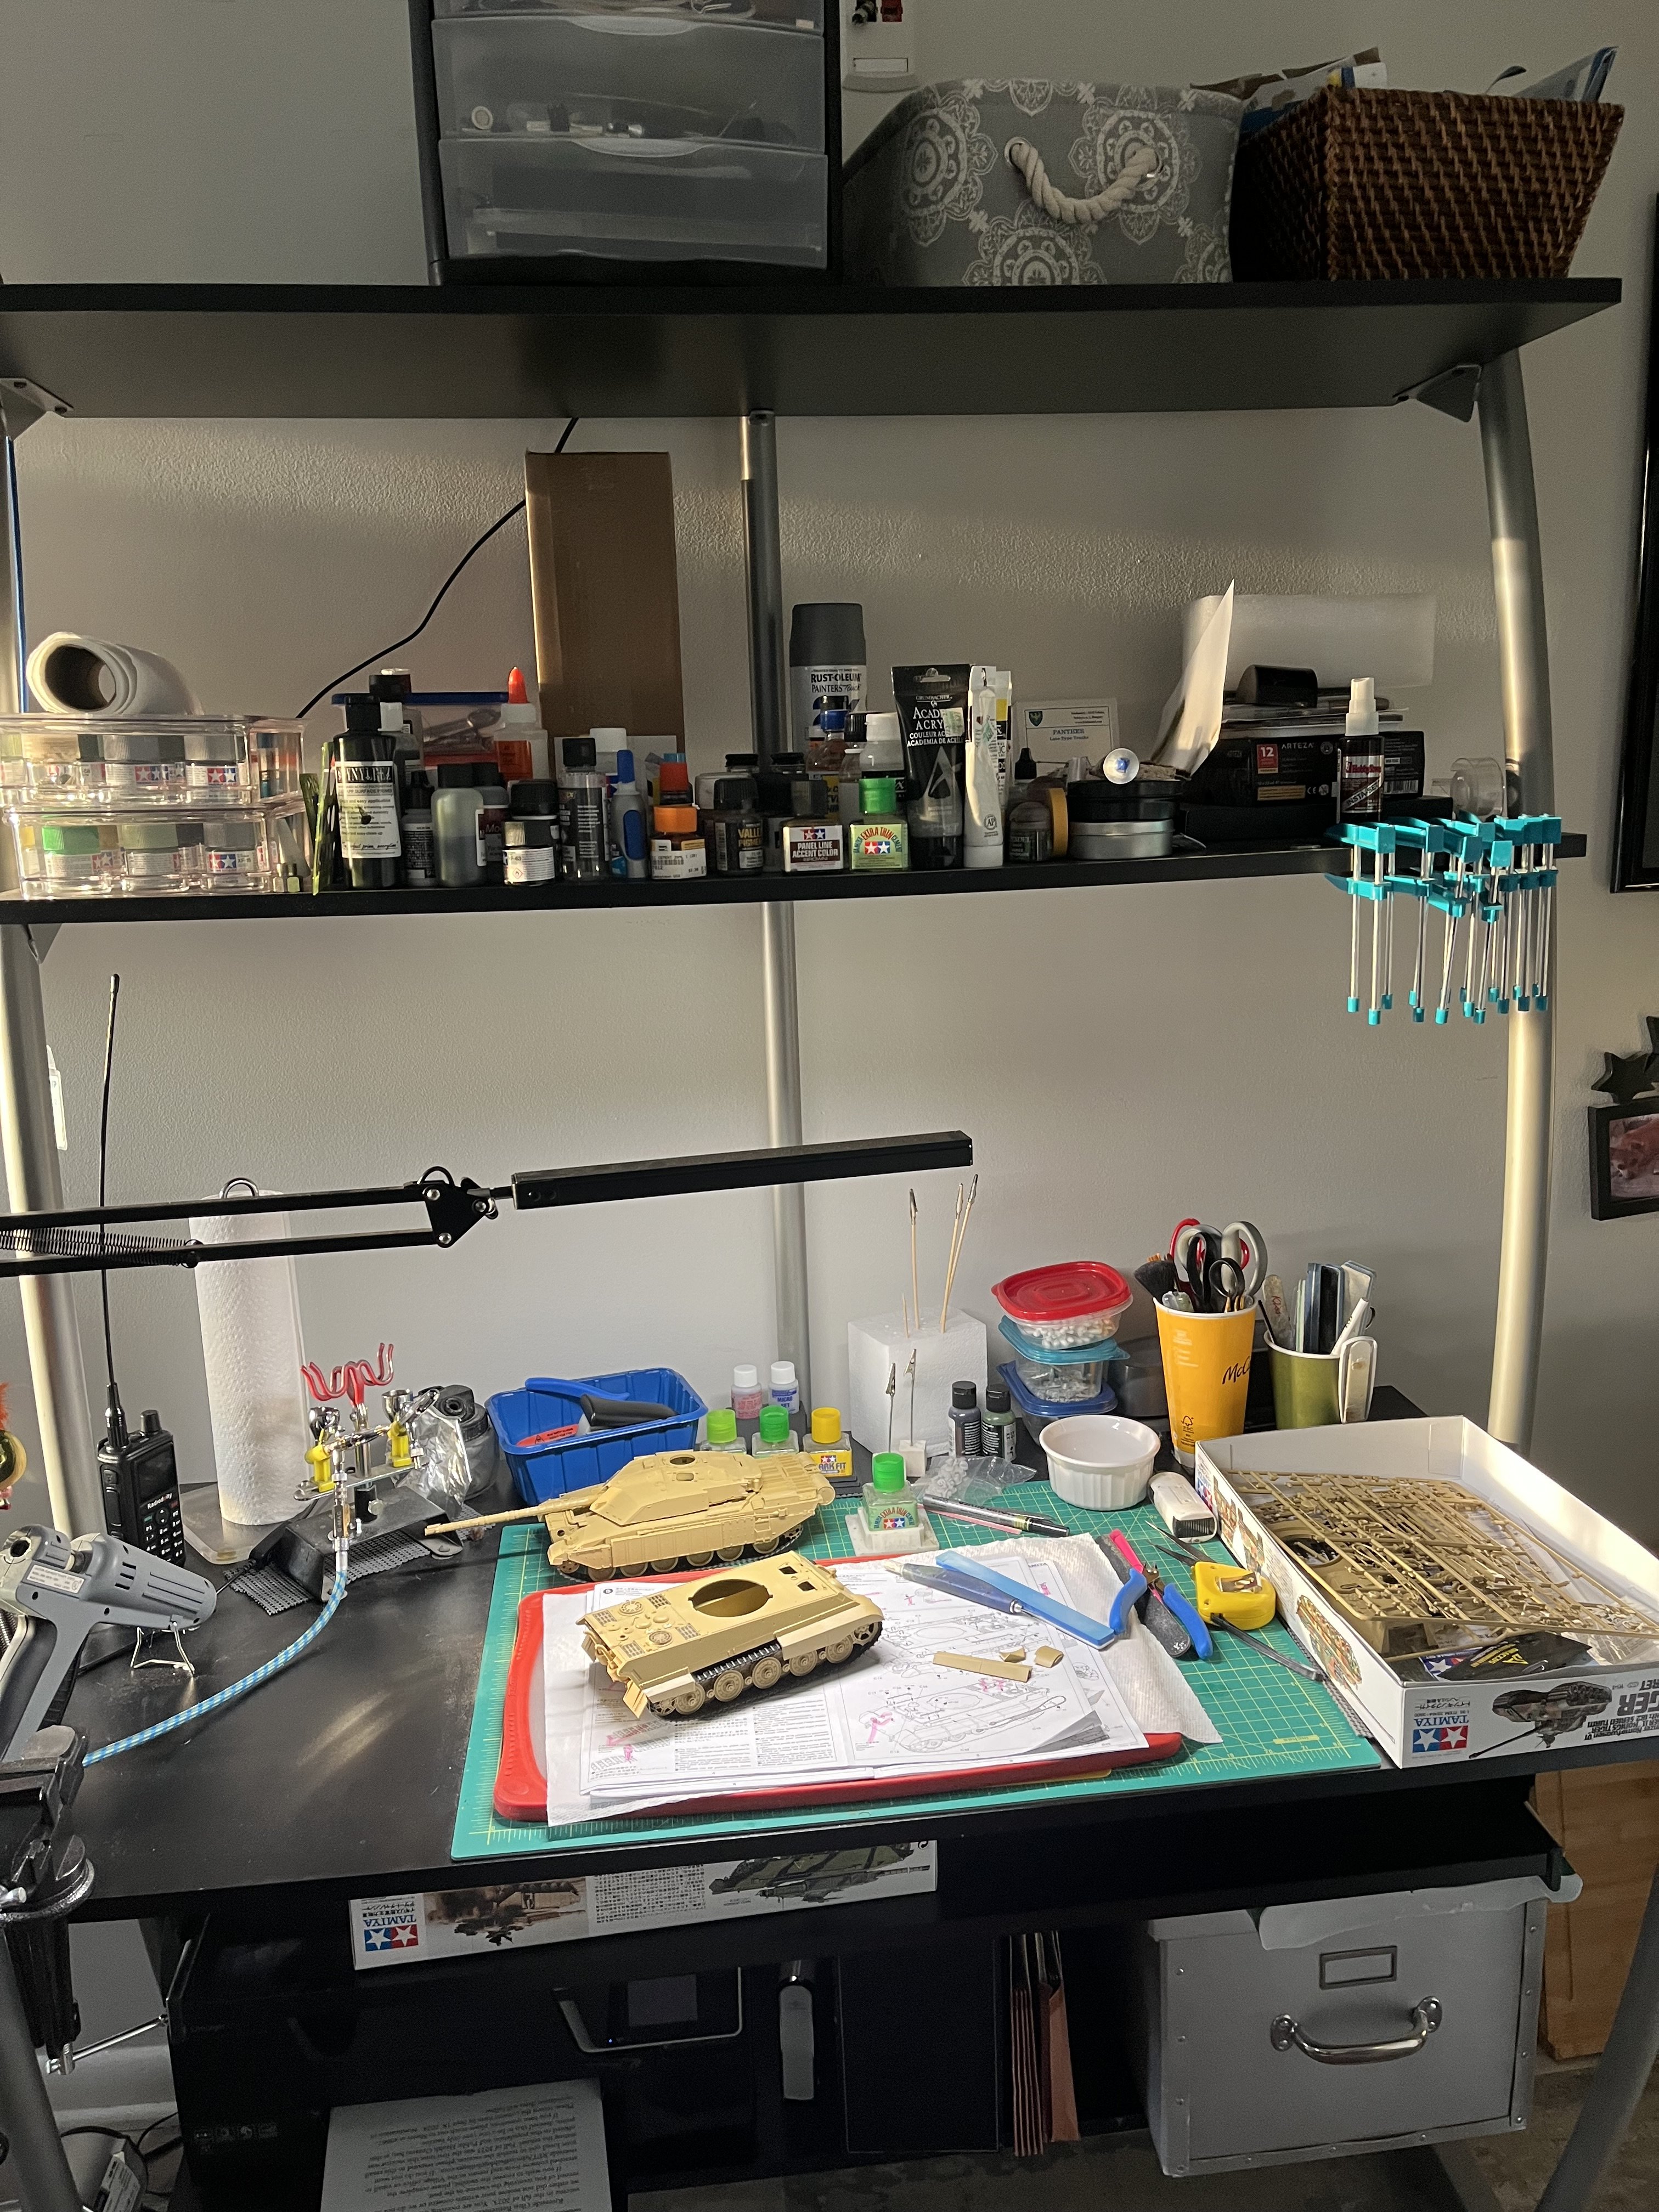
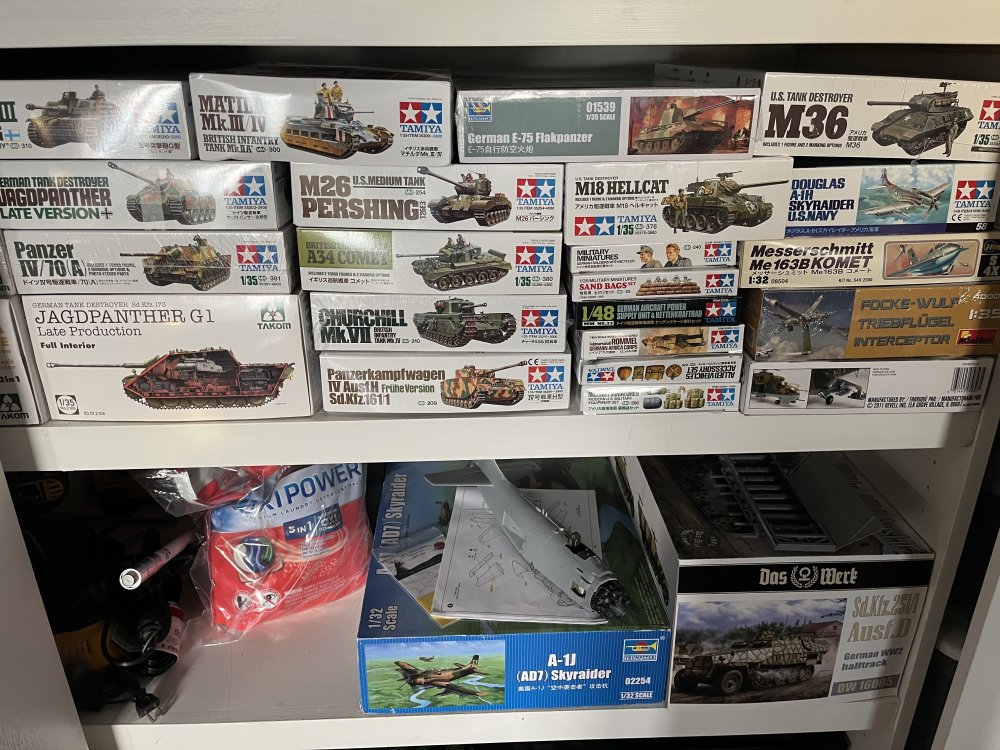
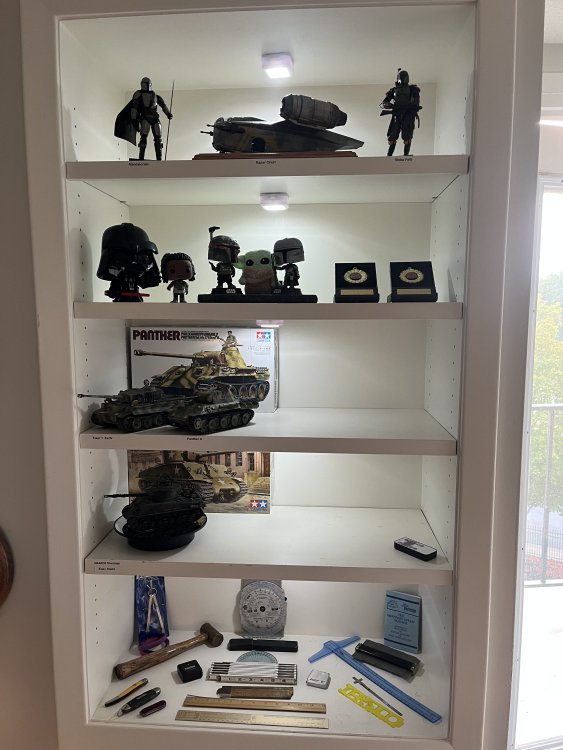
Sunday morning bench time! Plus my stash and new display shelves.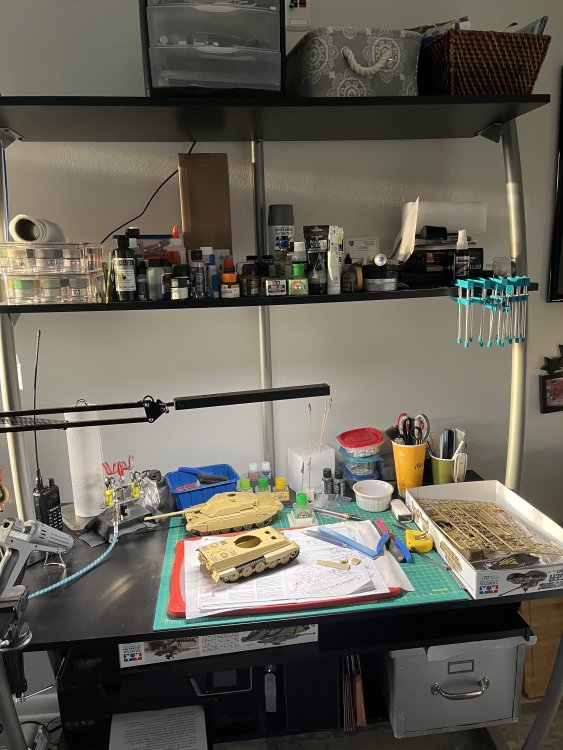
-
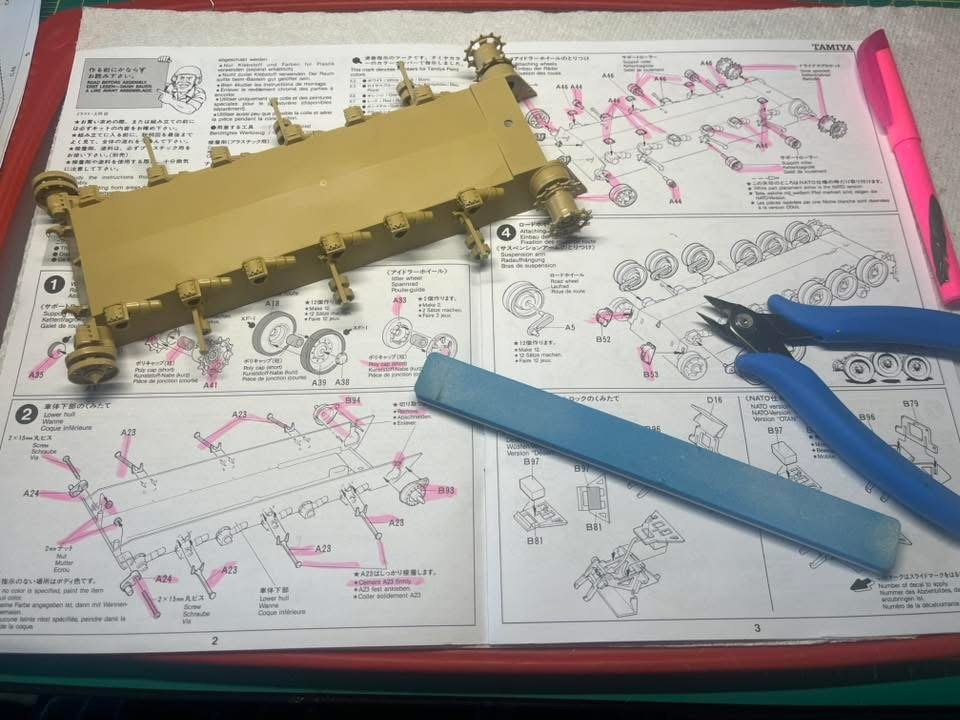
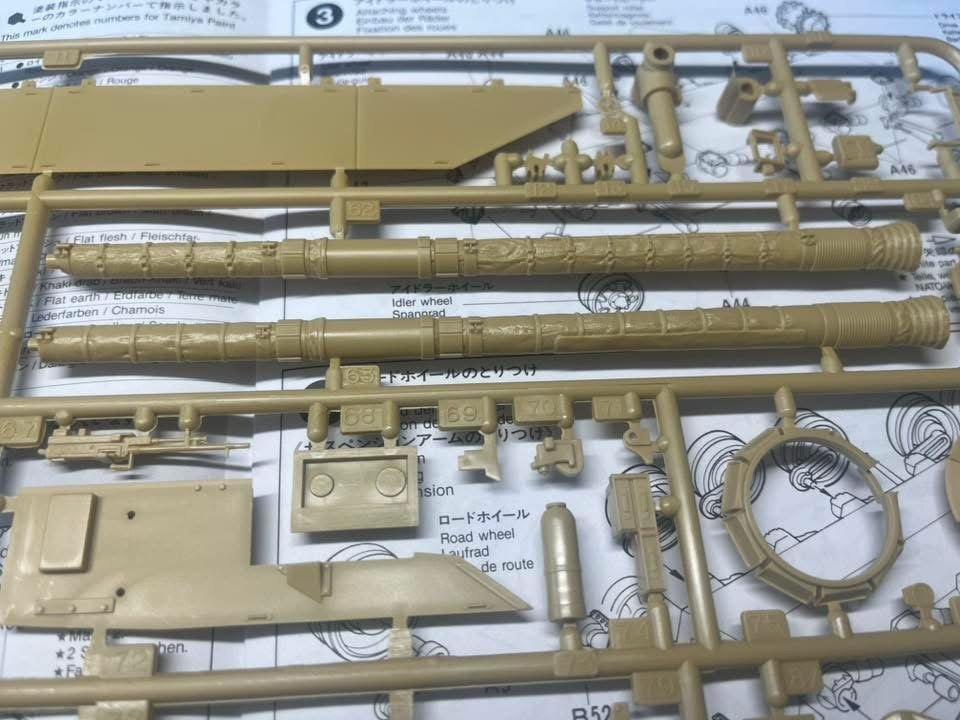
From step 1 I assembled 2each drive sprockets plus 2each Adler wheel and attached them into position in step 3. Also assembled 4each support rollers and attached them into position along with support roller A44’s in step 3. Installed 12each part 46 suspension access covers plus parts B52 and B53 which completed the lower hull build in step 3.
-
Completed step 2 by cementing 6 each part 23’s firmly as the instruction say to do, lol!!!

-
Love the wrapping detail on the 120mm gun barrel.
-
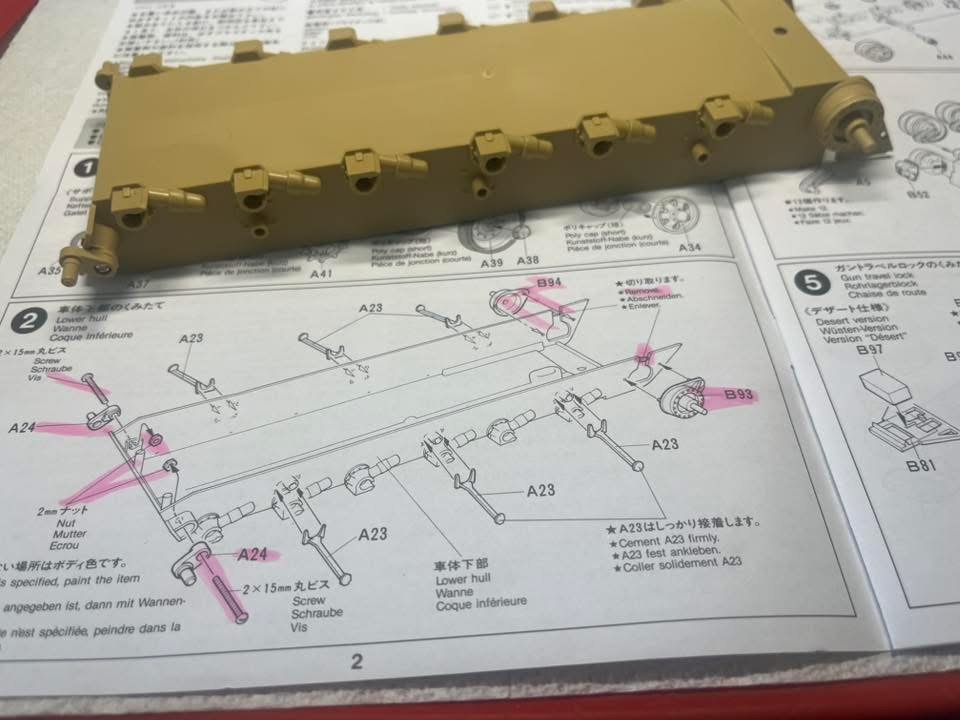
Okay let the Challenge build begin. Skipped over the road wheel assembly in step 1 fling myself instead into step 2 and two very fiddly screws attaching parts A24!!! Also attached parts B93 and B94 to the lower hull.
-
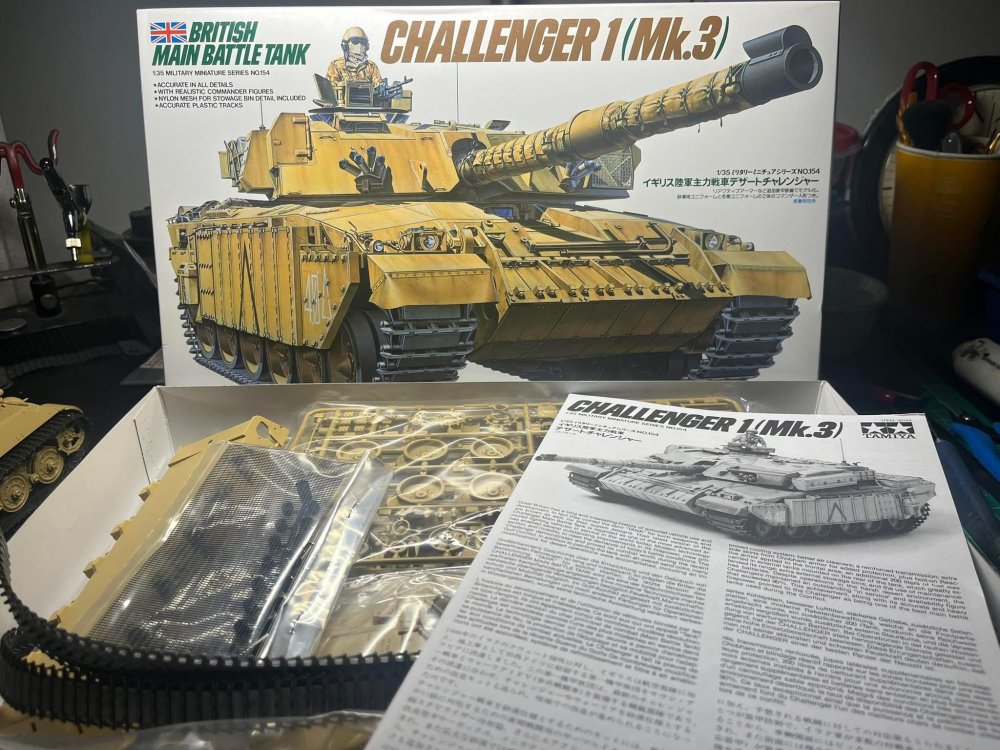
Tamiya 1/35 British Main Battle Tank Challenger 1 (Mk.3) Build Thread. The British Challenger 1 (Mk.3) was a version of the Challenger 1 Main Battle Tank (MBT) that featured modifications for desert warfare, including additional composite and reactive armor, external fuel drums, and smoke generators. It played a significant role in the 1991 Persian Gulf War, where its 120mm main gun proved effective against Iraqi T-72 tanks. The Mk.3 variant was specifically developed by modifying Challenger 1s in Saudi Arabia before the Gulf War.
-
Tamiya 1/35 Kit Tiger (Production)
RalphSarc replied to RalphSarc's topic in LSM 1/35 and Larger Work In Progress
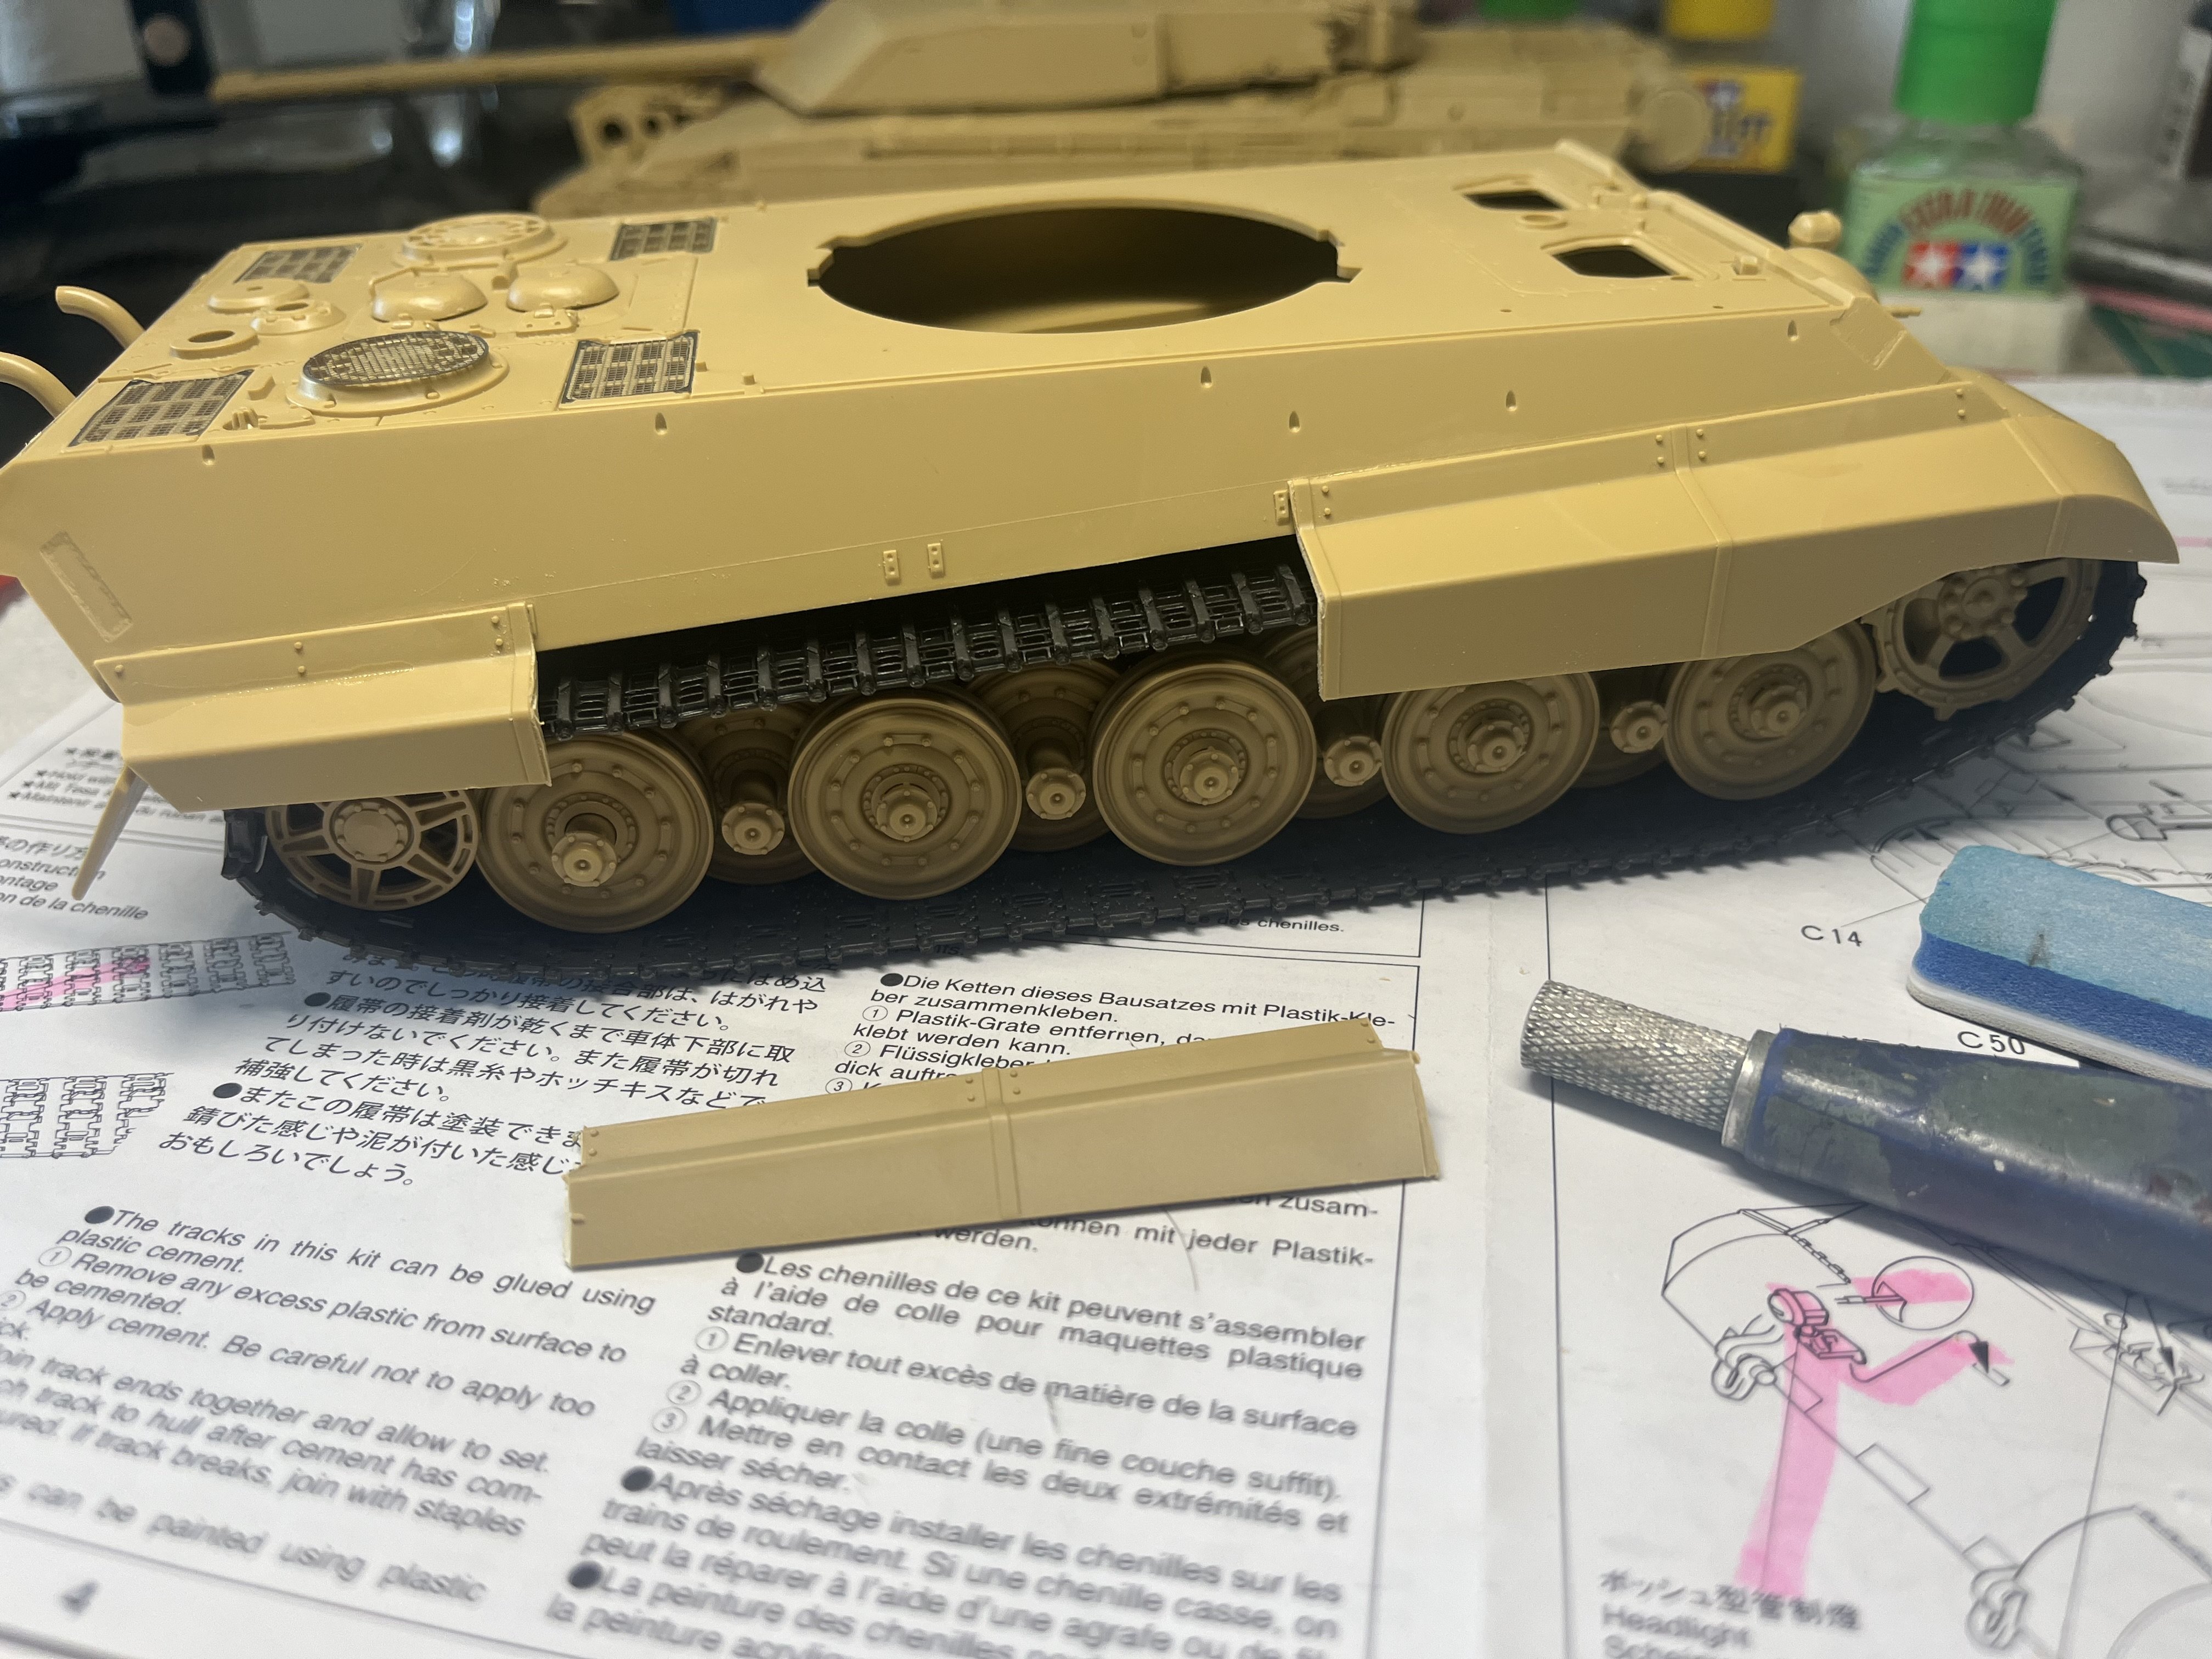
Spent a few quiet Saturday morning hours competing part of step 8 installing and distressing side fenders/skirts. Plan is to add lots of distressed paint, rust, mud and even some battle damage.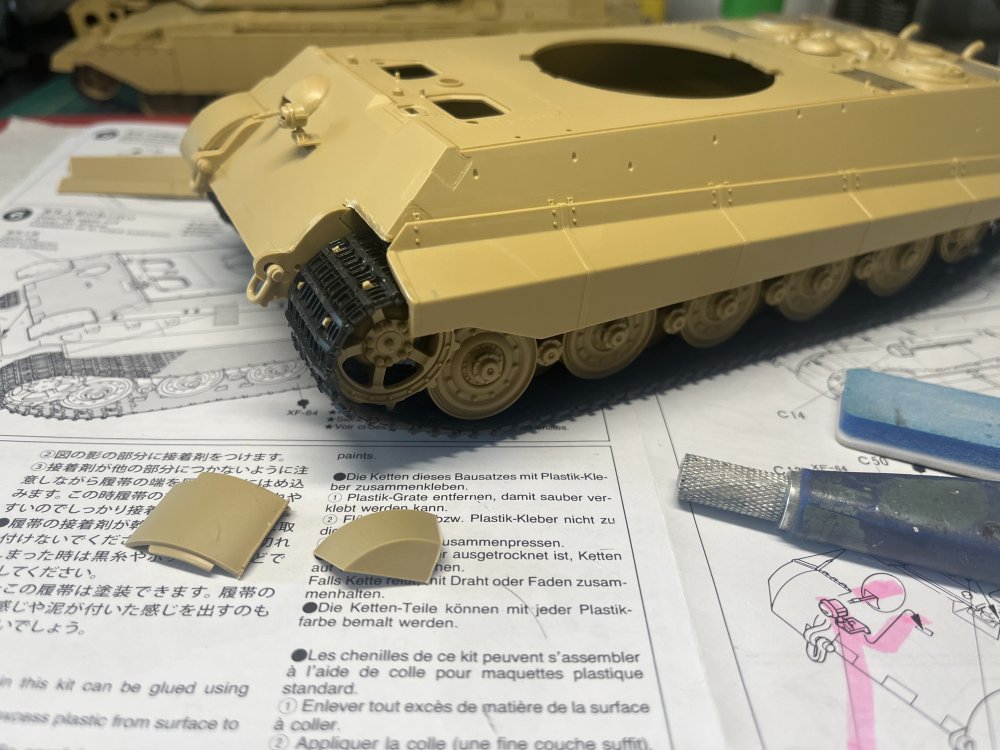

-
Tamiya 1/35 Kit Tiger (Production)
RalphSarc replied to RalphSarc's topic in LSM 1/35 and Larger Work In Progress
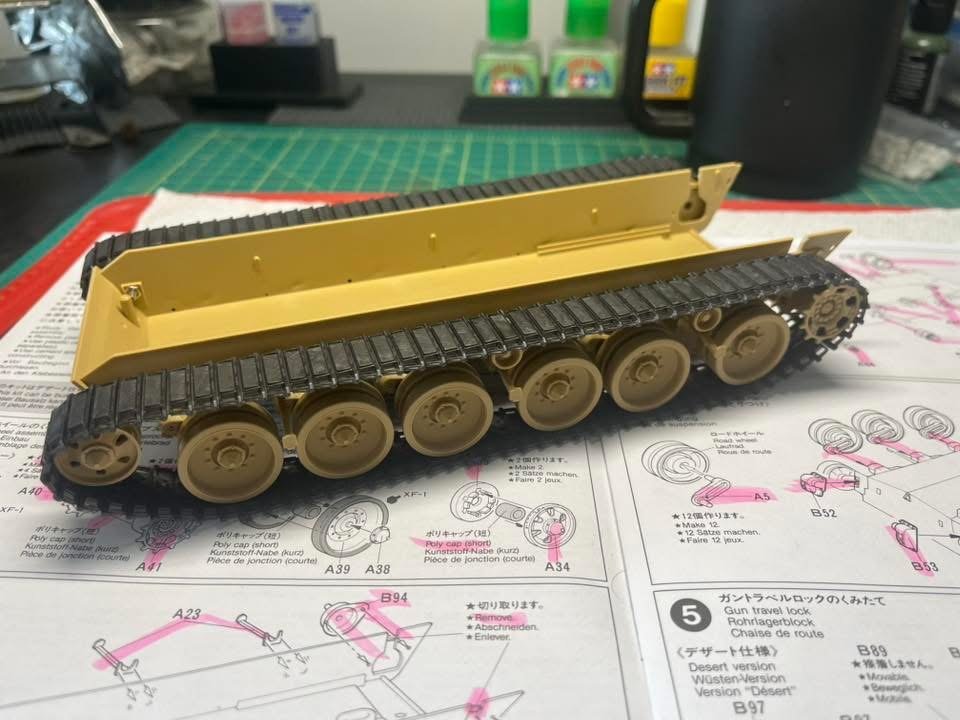
Hopped over to step 6 and installed the tracks and test fitted the upper hull!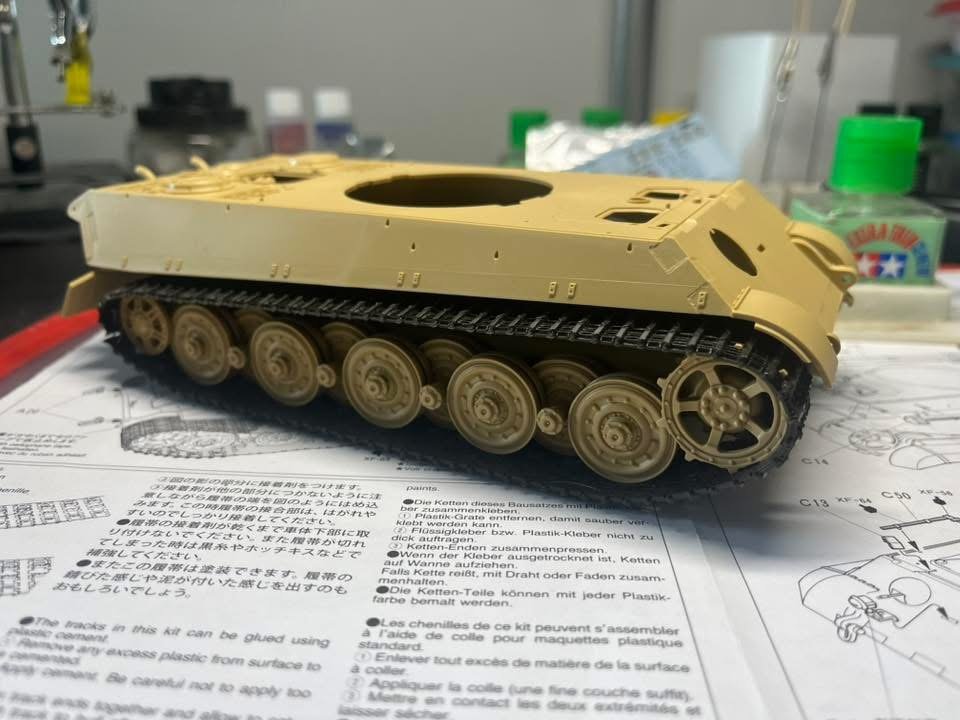
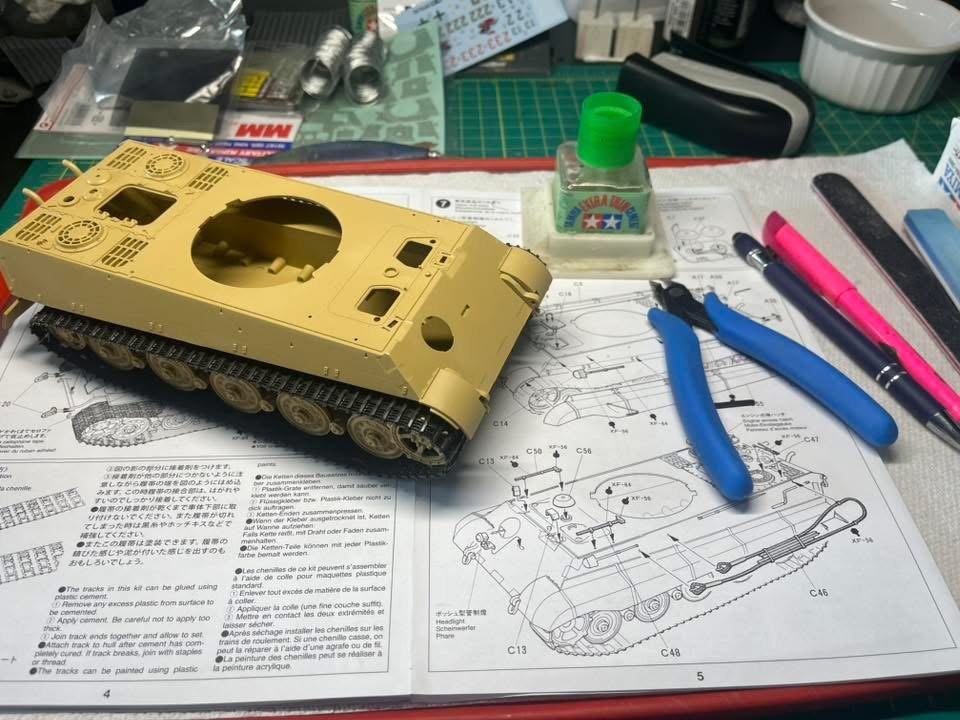
-
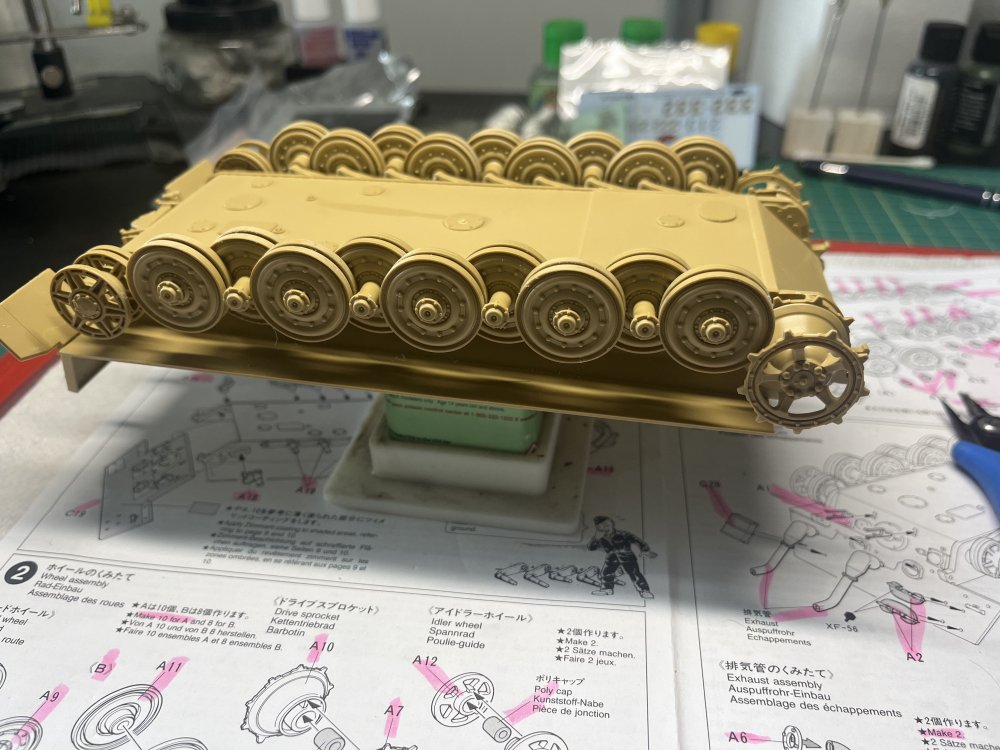
Tamiya 1/35 Kit Tiger (Production)
RalphSarc replied to RalphSarc's topic in LSM 1/35 and Larger Work In Progress
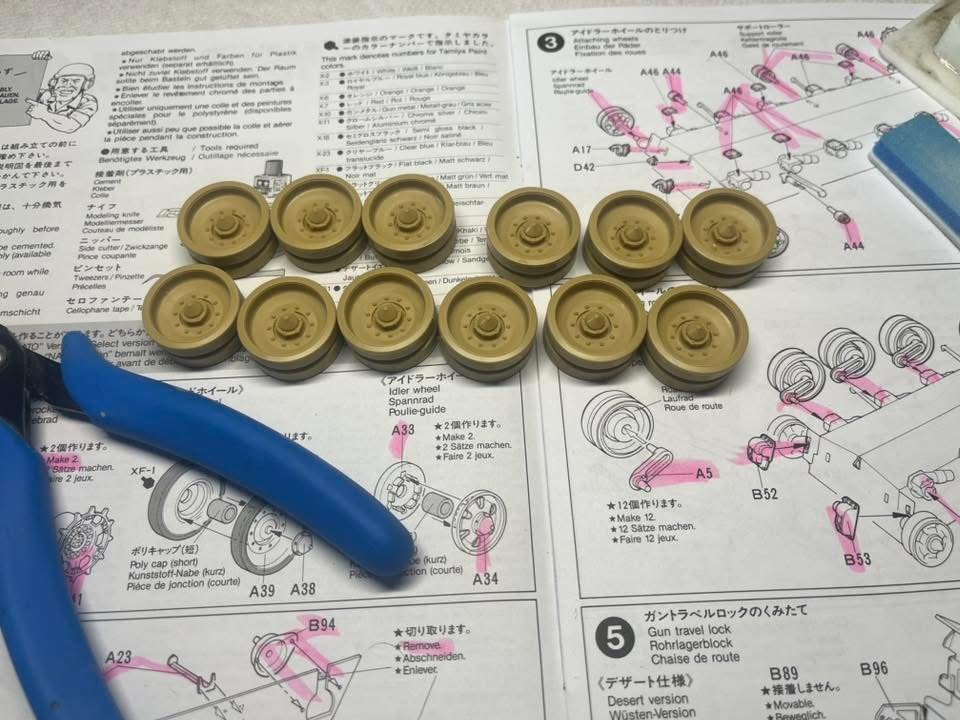
Completed step 3 installing the road wheels!!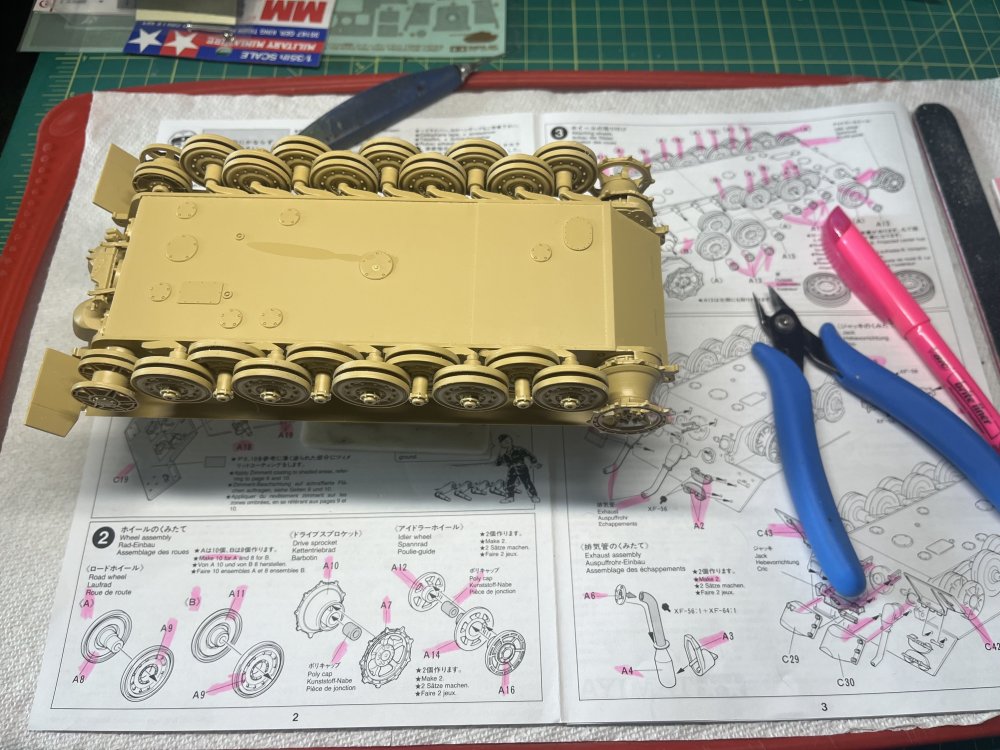
-
Tamiya 1/35 Kit Tiger (Production)
RalphSarc replied to RalphSarc's topic in LSM 1/35 and Larger Work In Progress
Road wheels assemble in record time, lol!!!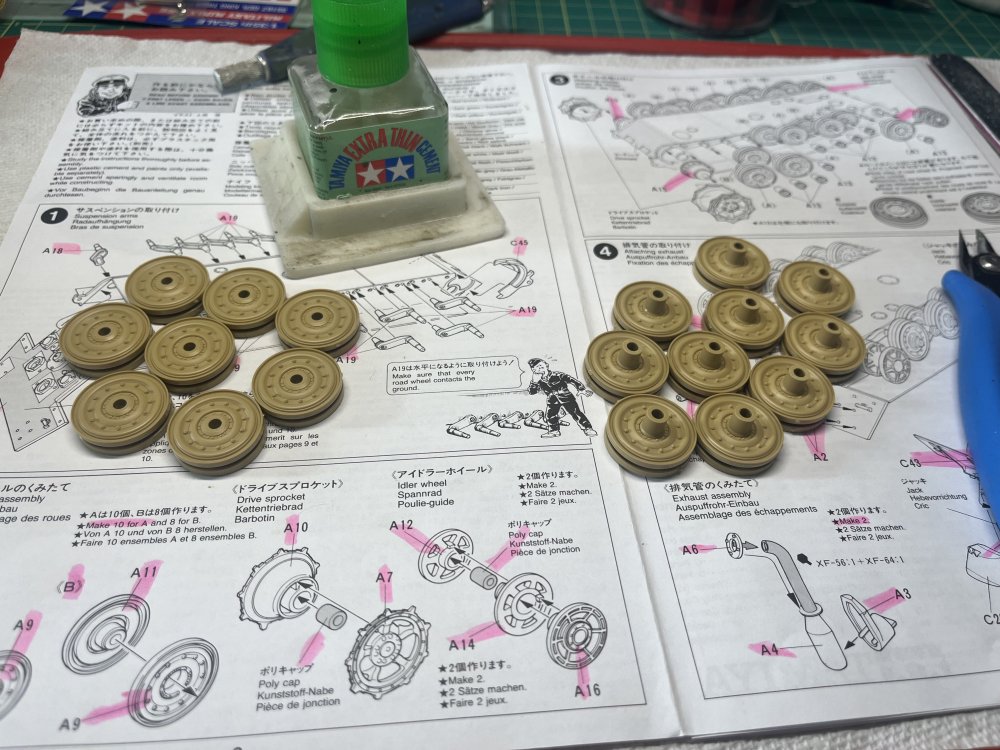
-
Tamiya 1/35 Kit Tiger (Production)
RalphSarc replied to RalphSarc's topic in LSM 1/35 and Larger Work In Progress
Road wheel assembly part 2 “B”=8