

PAnderson
-
Posts
285 -
Joined
-
Last visited
Content Type
Profiles
Forums
Events
Gallery
Posts posted by PAnderson
-
-
See what I started? LOL. Don't ever let me out of the house.
-
Thanks Guys, I knew I could count on you all for an answer. Can acrylics be thinned with lacquer thinner? What about an oil glaze? I think Uschi uses something like that to do the same thing.
Paul
-
Very nice. Please explain your wood grain technic on the propeller.
Thanks Paul, for your compliment. The wood grain is done by first spraying or brushing with a tan base color like deck tan or desert yellow depending on the type of wood you are after. Then, with oil paint that has sat on a paper towel for a few minutes to soak up some of the oil, I used a stiff brush to apply the paint. Keep brushing then wiping the brush on a paper towel to remove excess paint. The idea is to not glob on the oil paint but to leave a thin layer, letting the stiff brush leave behind the grain appearance. To be honest, it was easier than I thought it would be. And, not to take all the credit, I learned this technique from other members here and doing some other basic research. Easier than it looks.
Paul
-
I am placing the lozenge decals on my Fokker's wings today. What do you guys use to weather or tone down the lozenge decals when it comes time?
Paul
-
Interesting, i can only speak for WWII exhausts but I have never seen rusted exhaust pipes on service aircraft. Having been involved In aviation archaeology for many years the steel (inconel?) used is very rustproof. Sometimes I see heavily rusted exhausts on kits that look a bit overdone. They tend to get very hot and discolour heavily.
Cees
I understand and do agree Cees. The kit instructions called for "Rust" paint. WW! had not yet seen the advances in material technology. Stainless steel had just started being used in large quantities and I doubt if exhaust manifolds were stainless because welding technology had not caught up yet. That being said, I felt comfortable doing this to this aircraft since these were just welded steel tube, not even cast iron yet. Cast iron does rust but in a very even, smooth fashion, almost painted. I found that Hull Red mixed with some Tamiya Flat Base makes for a good cast rust finish.
Whoa ! Am going have to have a look at this stuff - Paul, can you send me some details of it ... Perhaps a web address or something, I can see this being used by people who excel in those fabulous dio's of abandoned and aged cars, tanks, trains etc.
Can you vary the degree to which it "rusts up" ? Or the depth of the rust??
Grant, I agree this stuff has potential for so many things. I initially saw this on another modellers work. Here is a web address for the company that makes it. I don't think they sell direct to the public. I got mine from Amazon. But they have a few other products you might be interested in. Yes the finish can be adjusted by multiple coats of the oxidizer. My example was 4 coats about an hour or so apart until the finish builds up.
Paul
-
 2
2
-
-
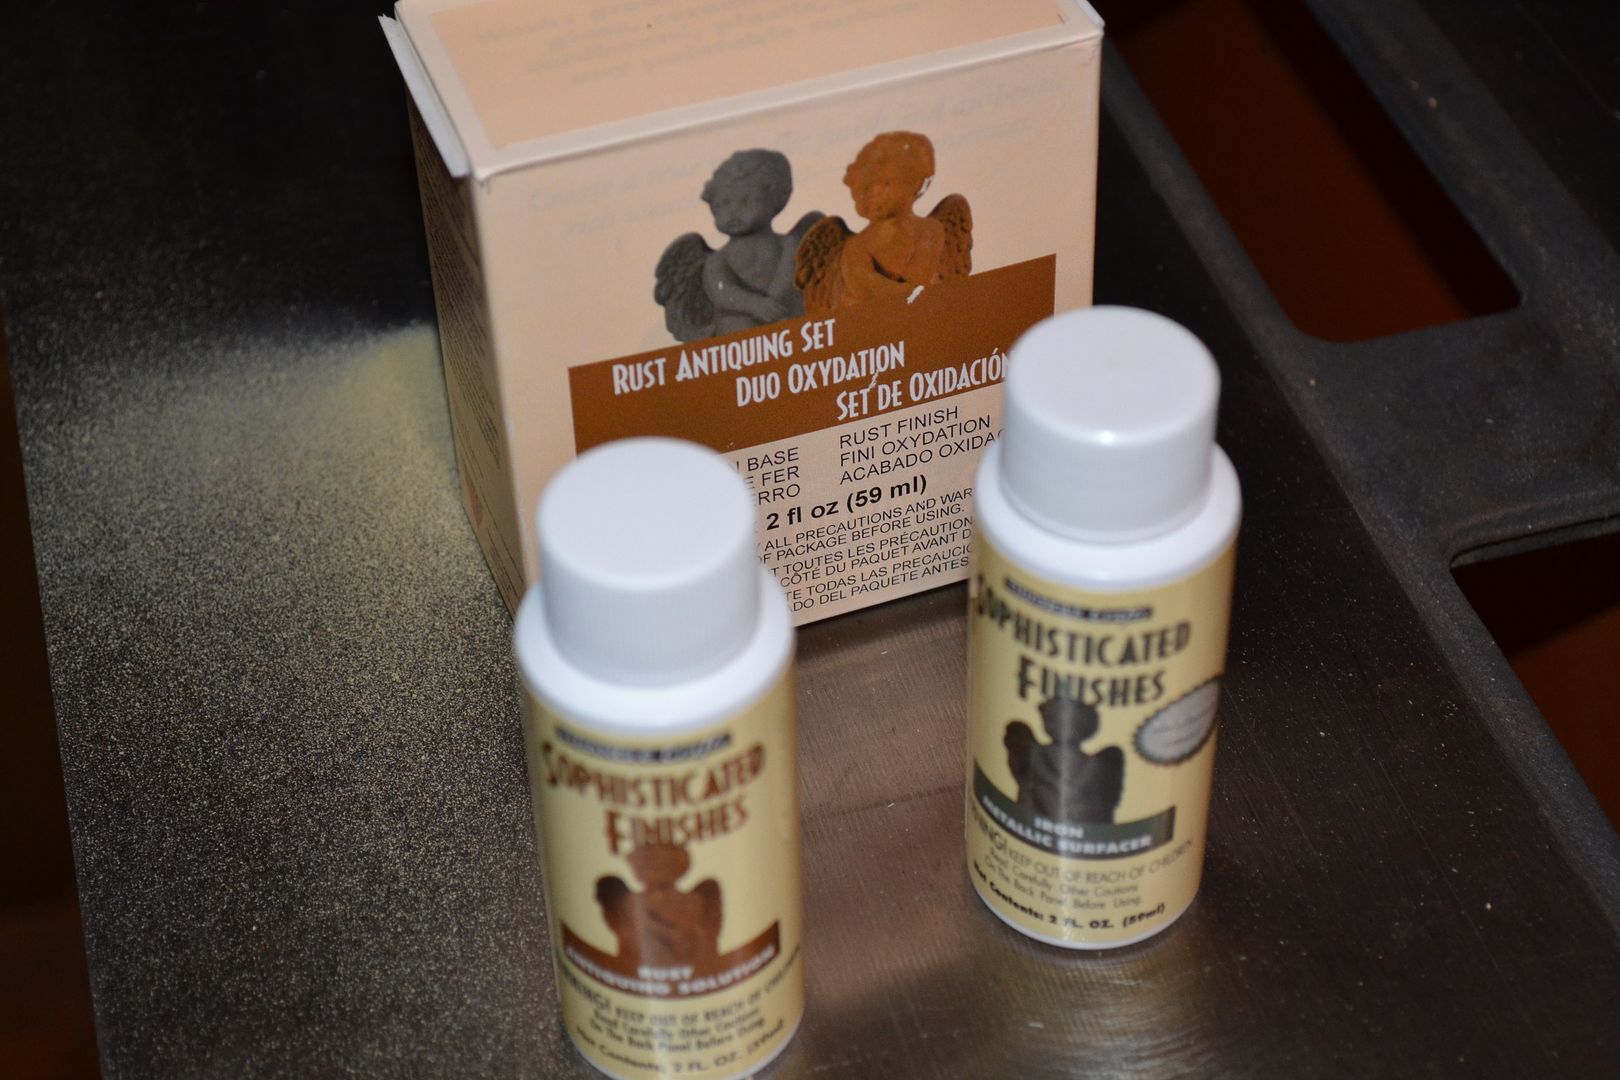
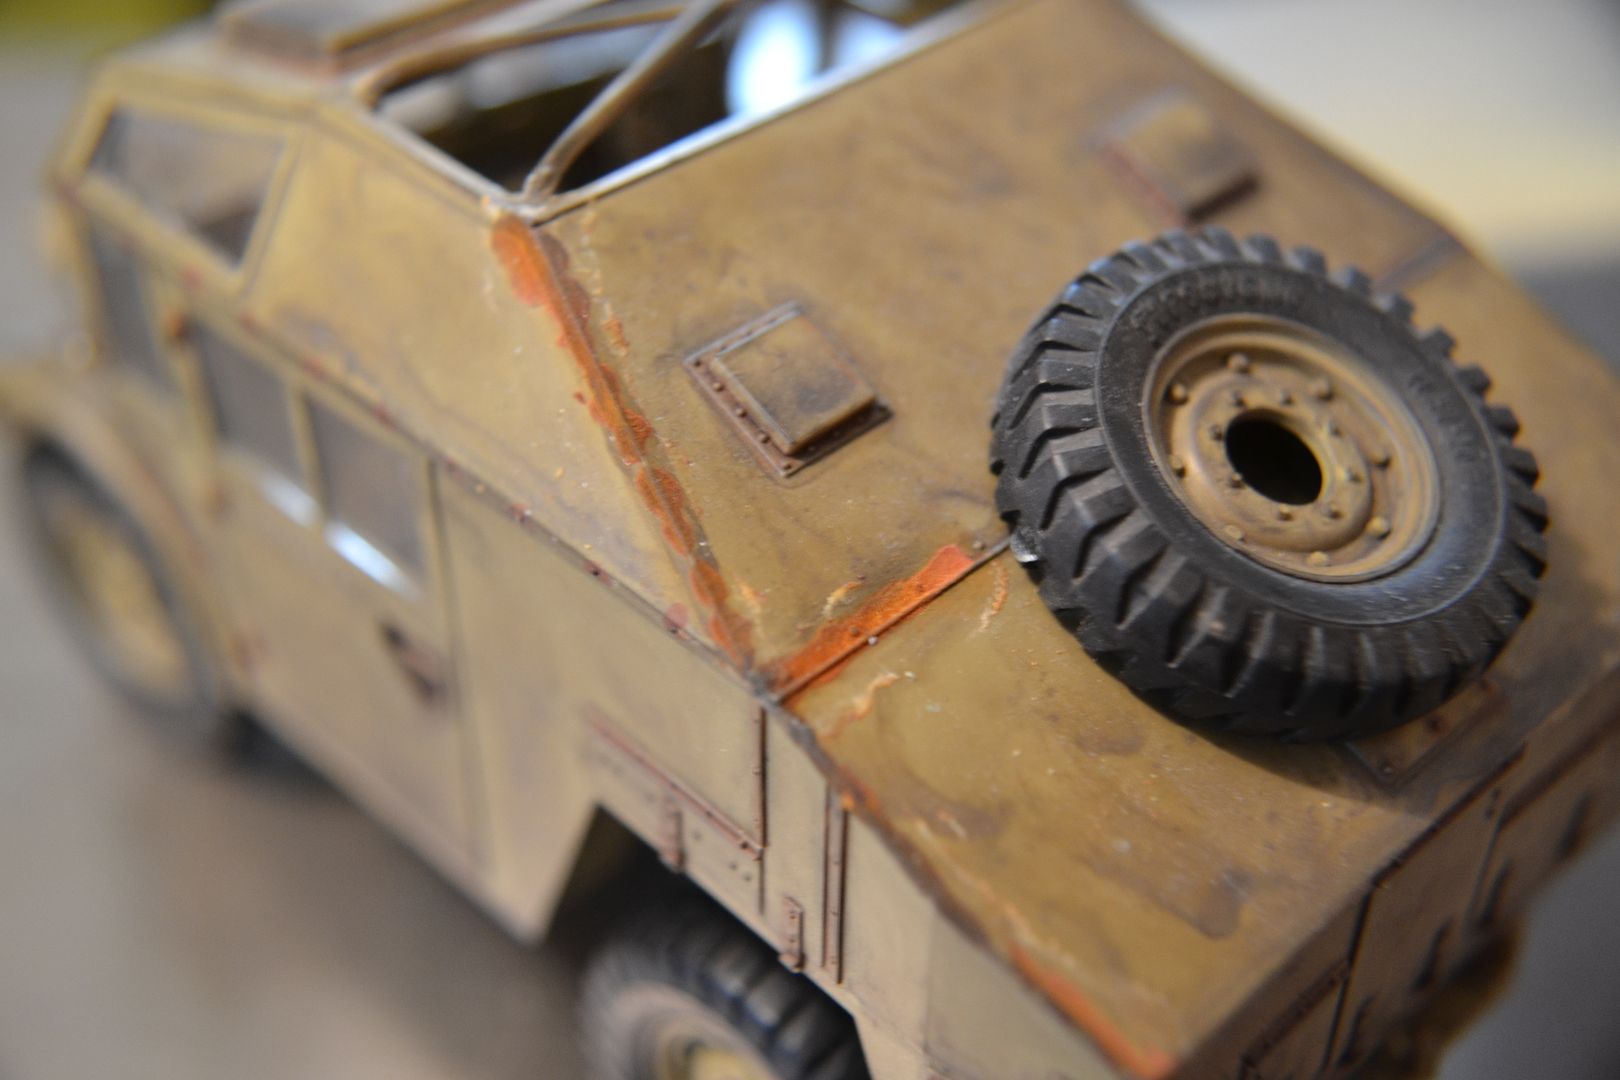
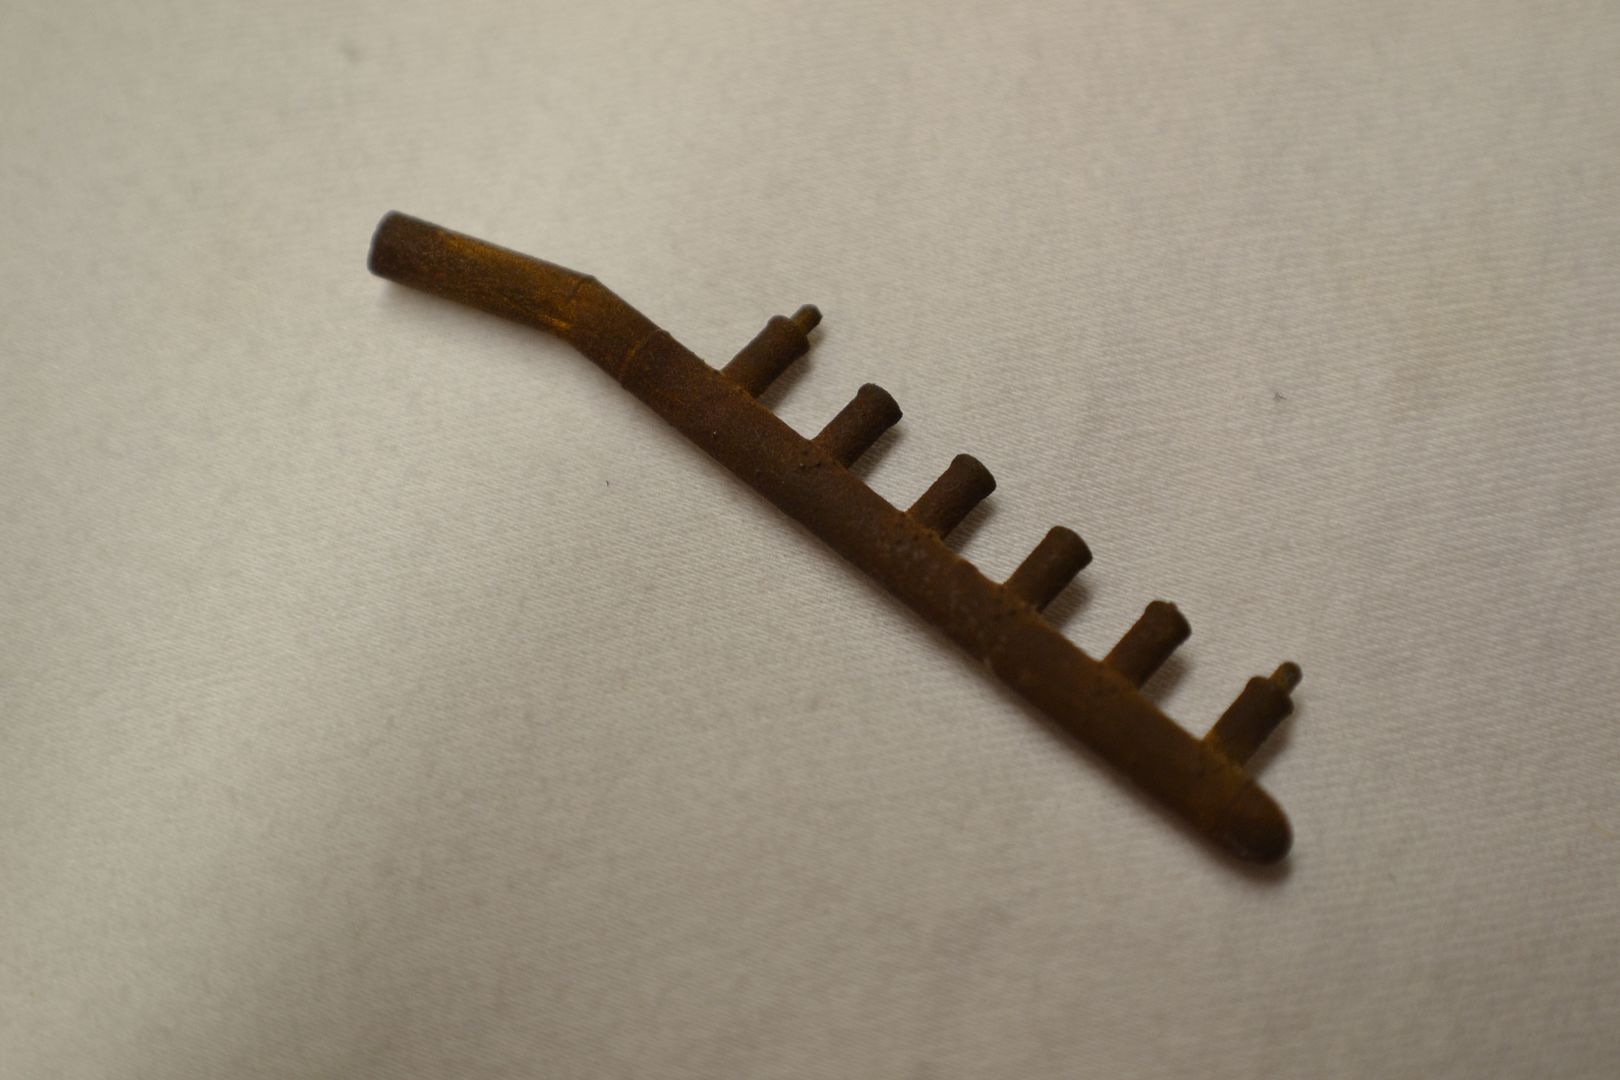
Here is a little experiment I did after finding this rust antiquing kit while checking out another modellers armor build. I plan on using this a lot now for certain things. This is a two part set. The first is a grey primer that has iron particles suspended in it. The second is an oxidizing solution that actually creates the rust texture. Some of you may know about this already. but I am not sure how popular it is. So, for your info, here are some pics.
The kit as taken from it's box.
This is a pic I tried out on an old model that needed some enhancement. I plan on doing the whole model at a later date to add some more realism.
Here is an old exhaust part from my DH9 that I wanted to experiment on. This will be used to do the exhaust on my Fokker DVII that I am currently building. This has also been sprayed with a clear flat varnish so I know it is safe to use.

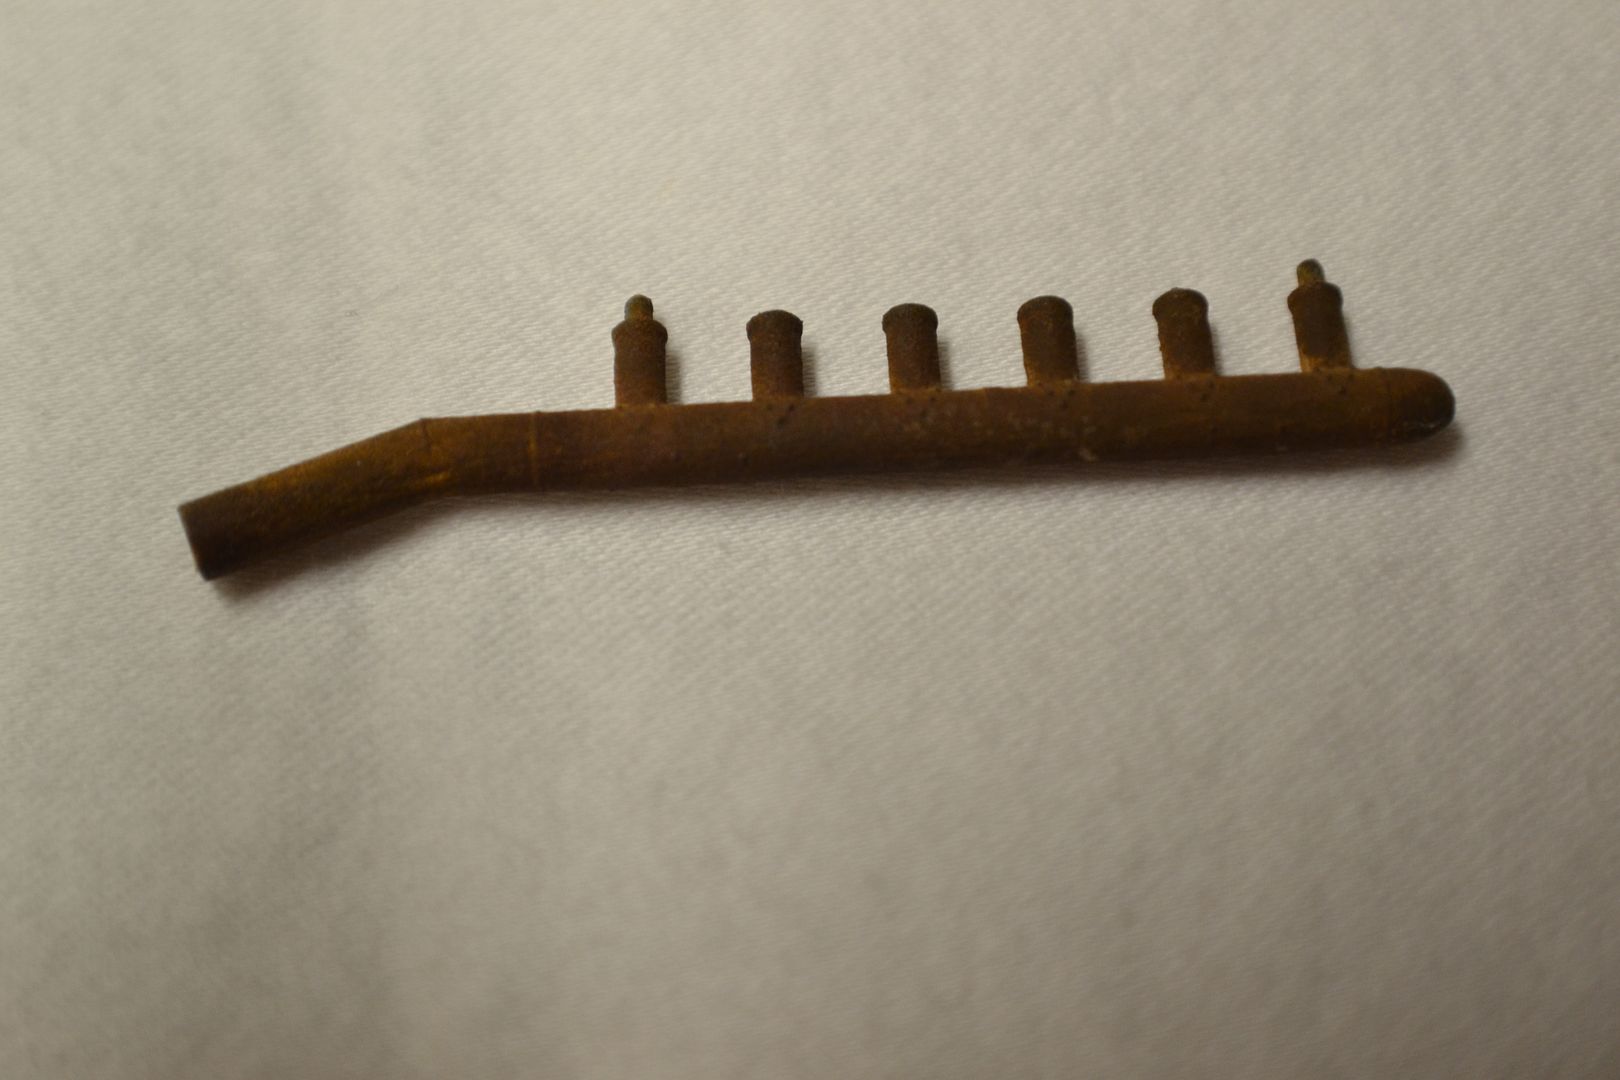
I hope some of you find a use for this.
Paul
-
OK, now for the good stuff. An update, since I had last week off, I had a lot of bench time. Here are some new pics.
First, a few of the finished engine.
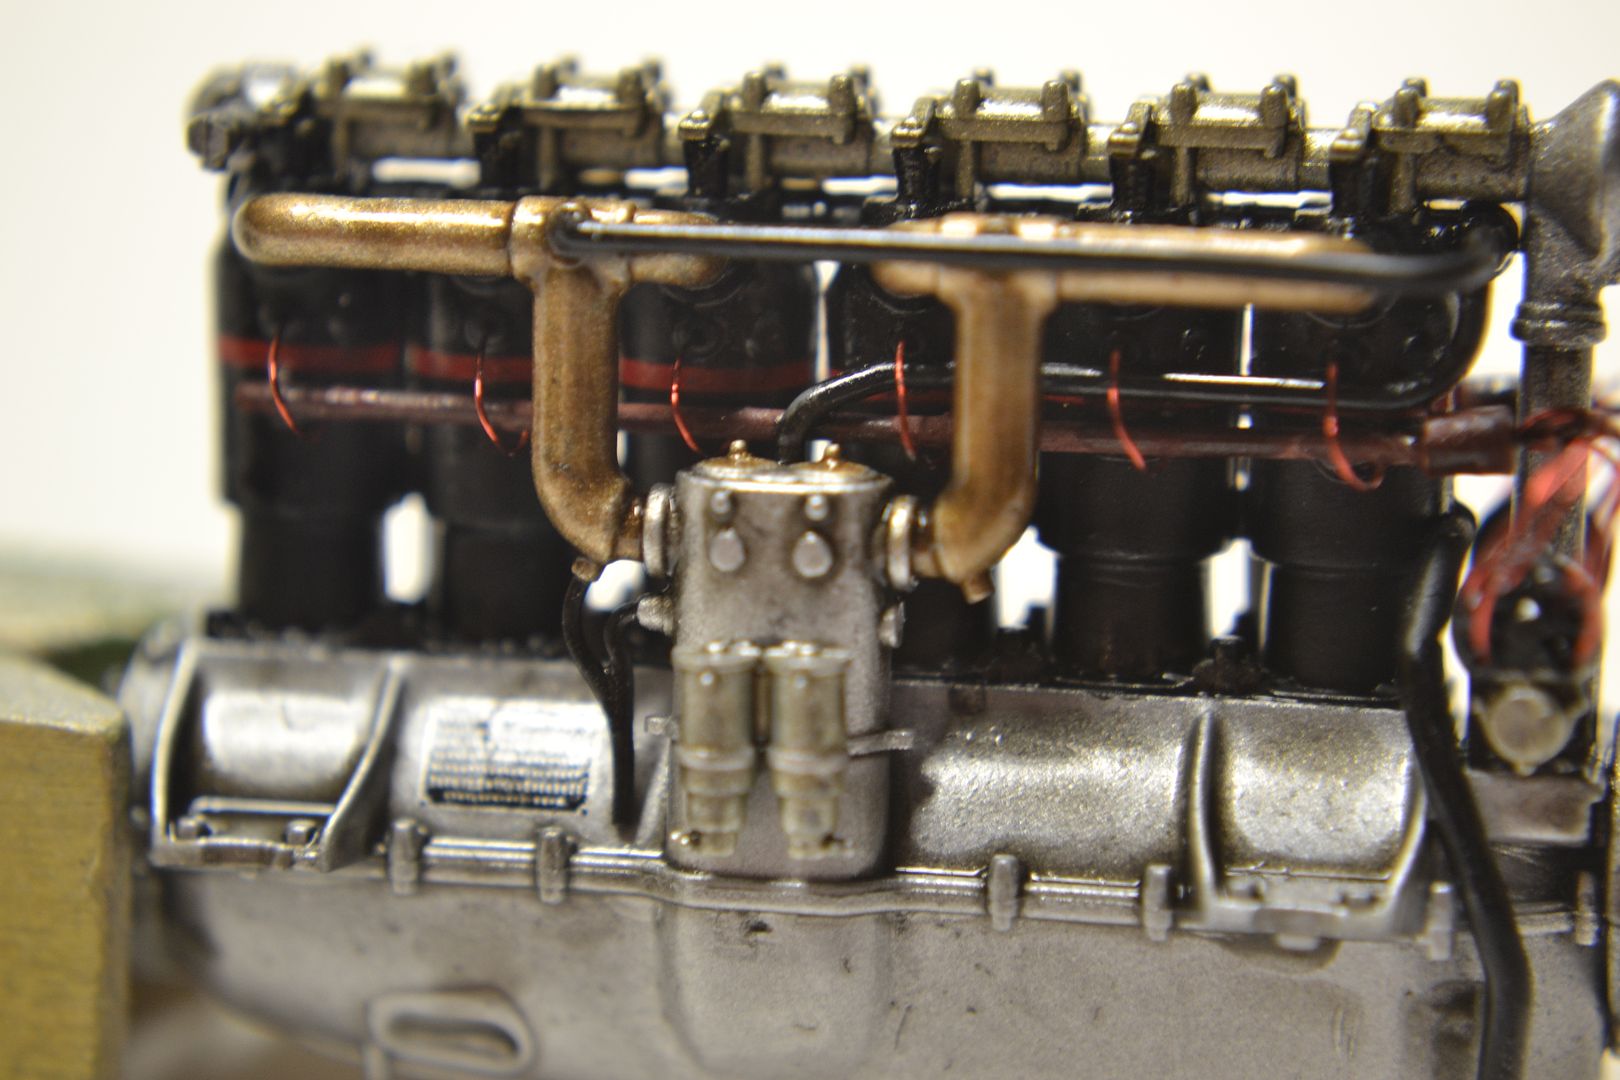
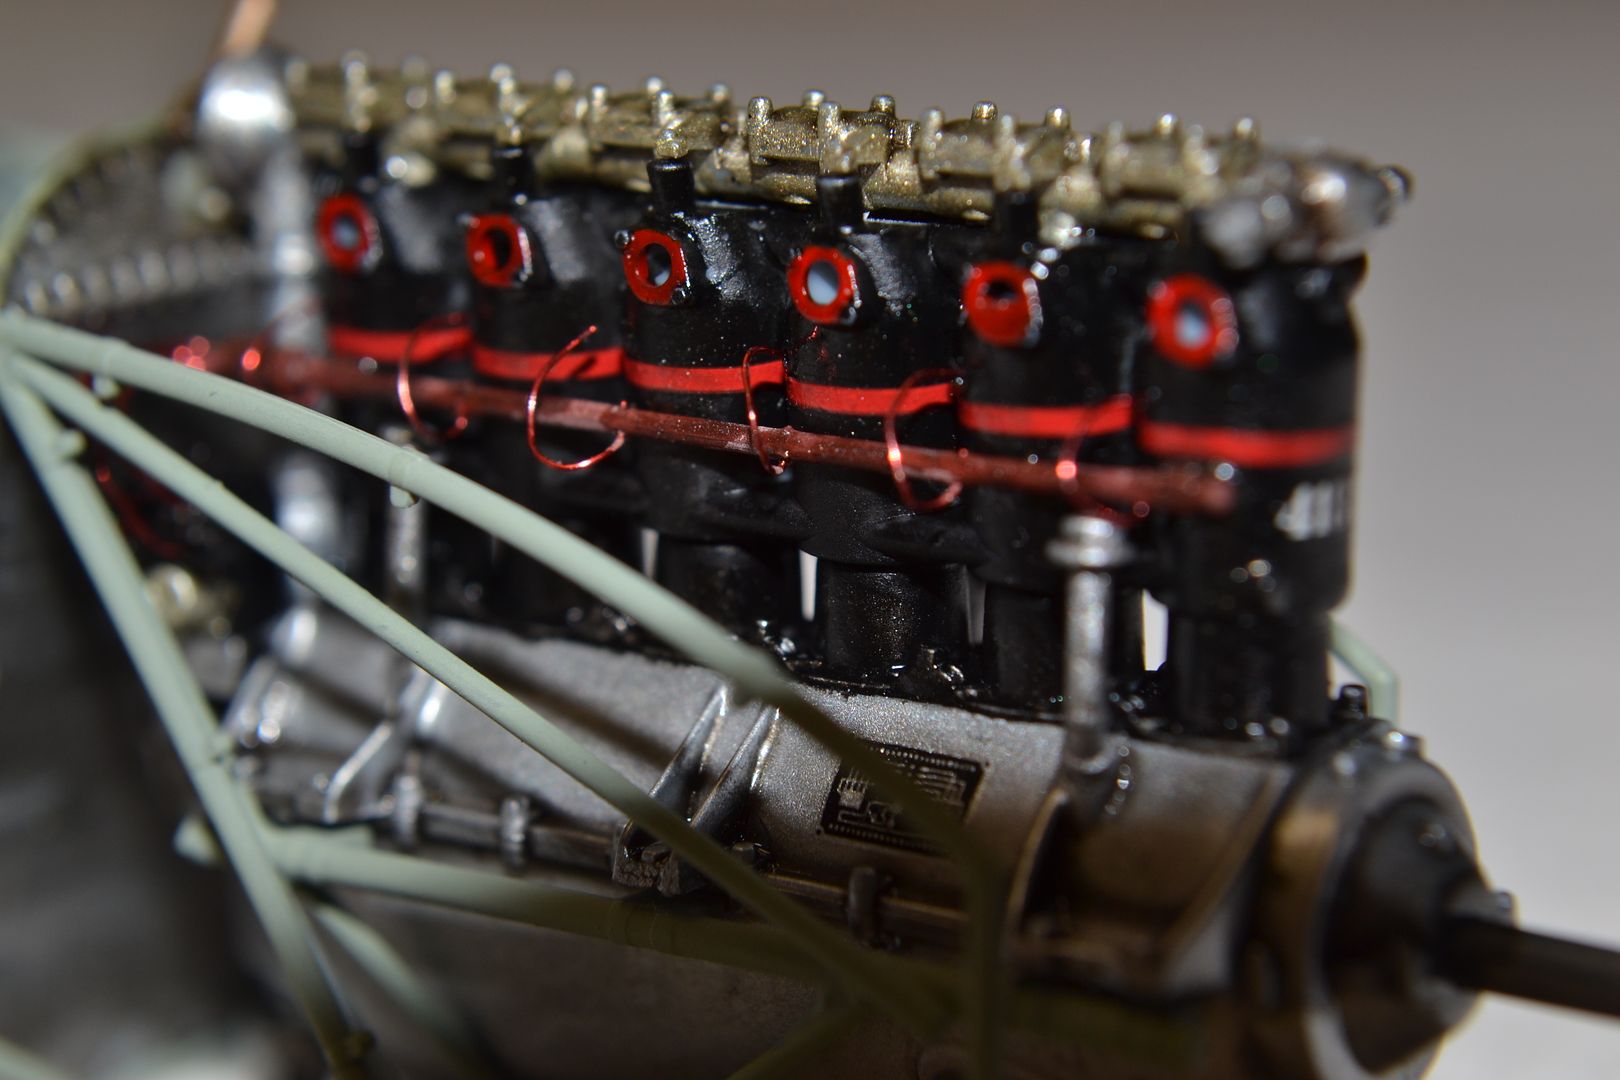
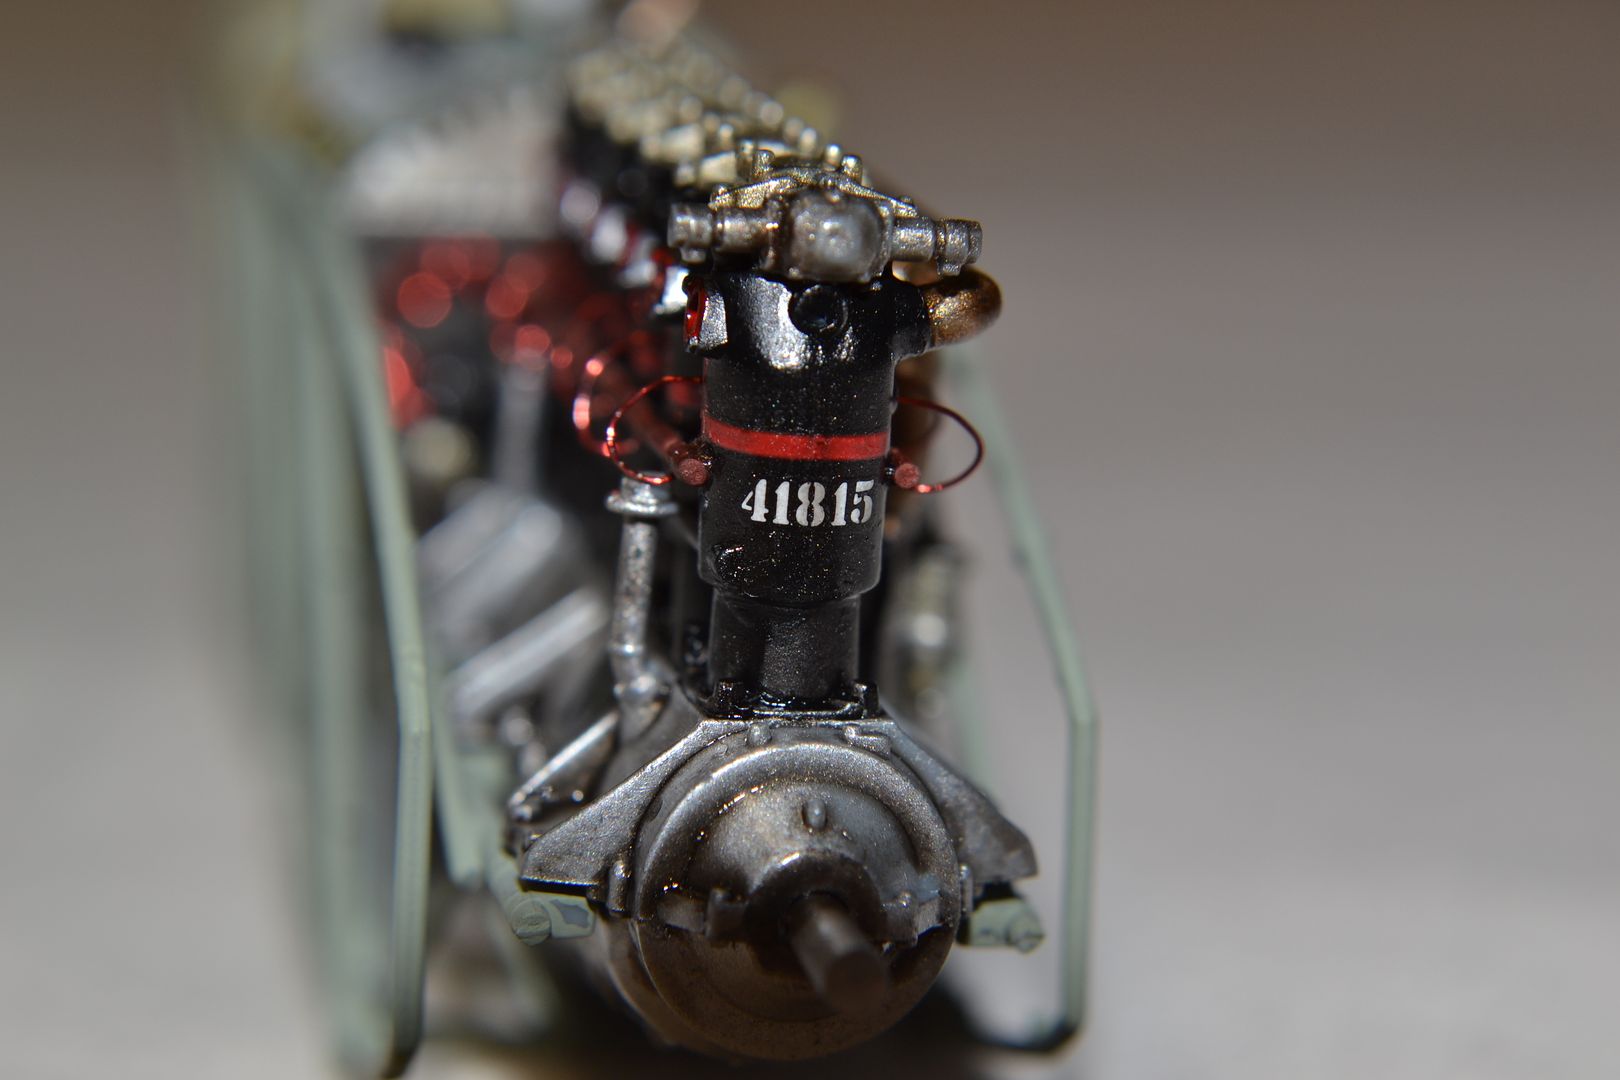
And then the semi finished cockpit.

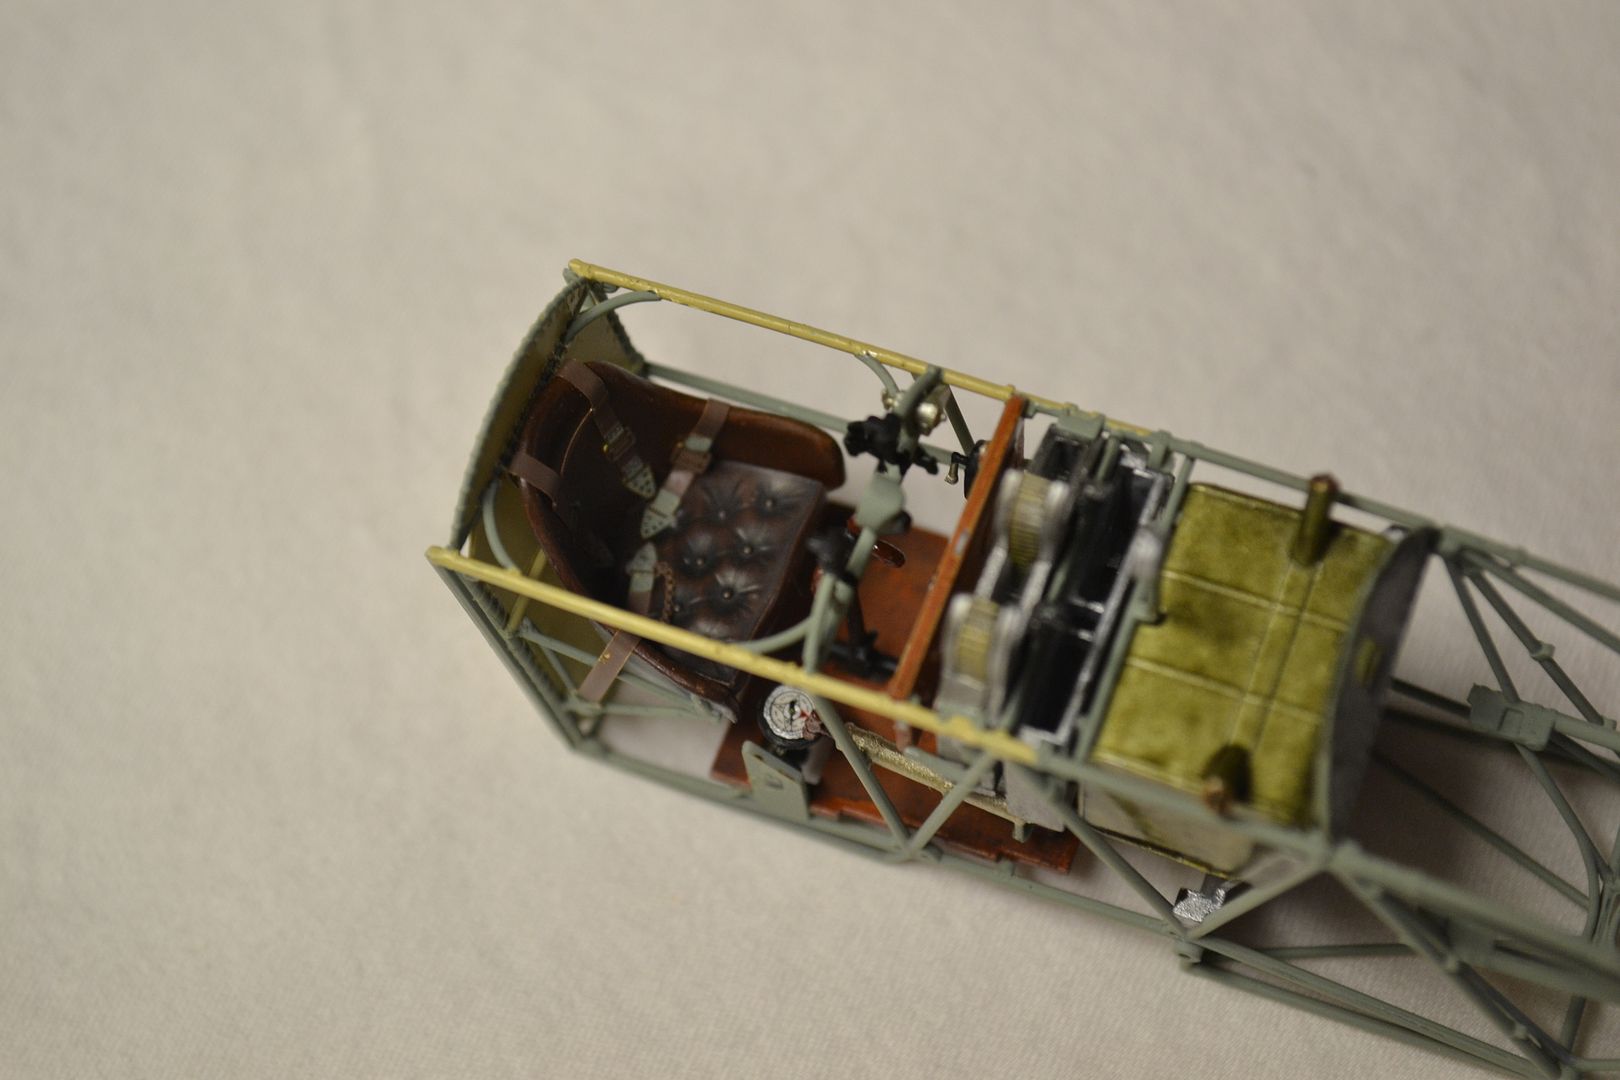
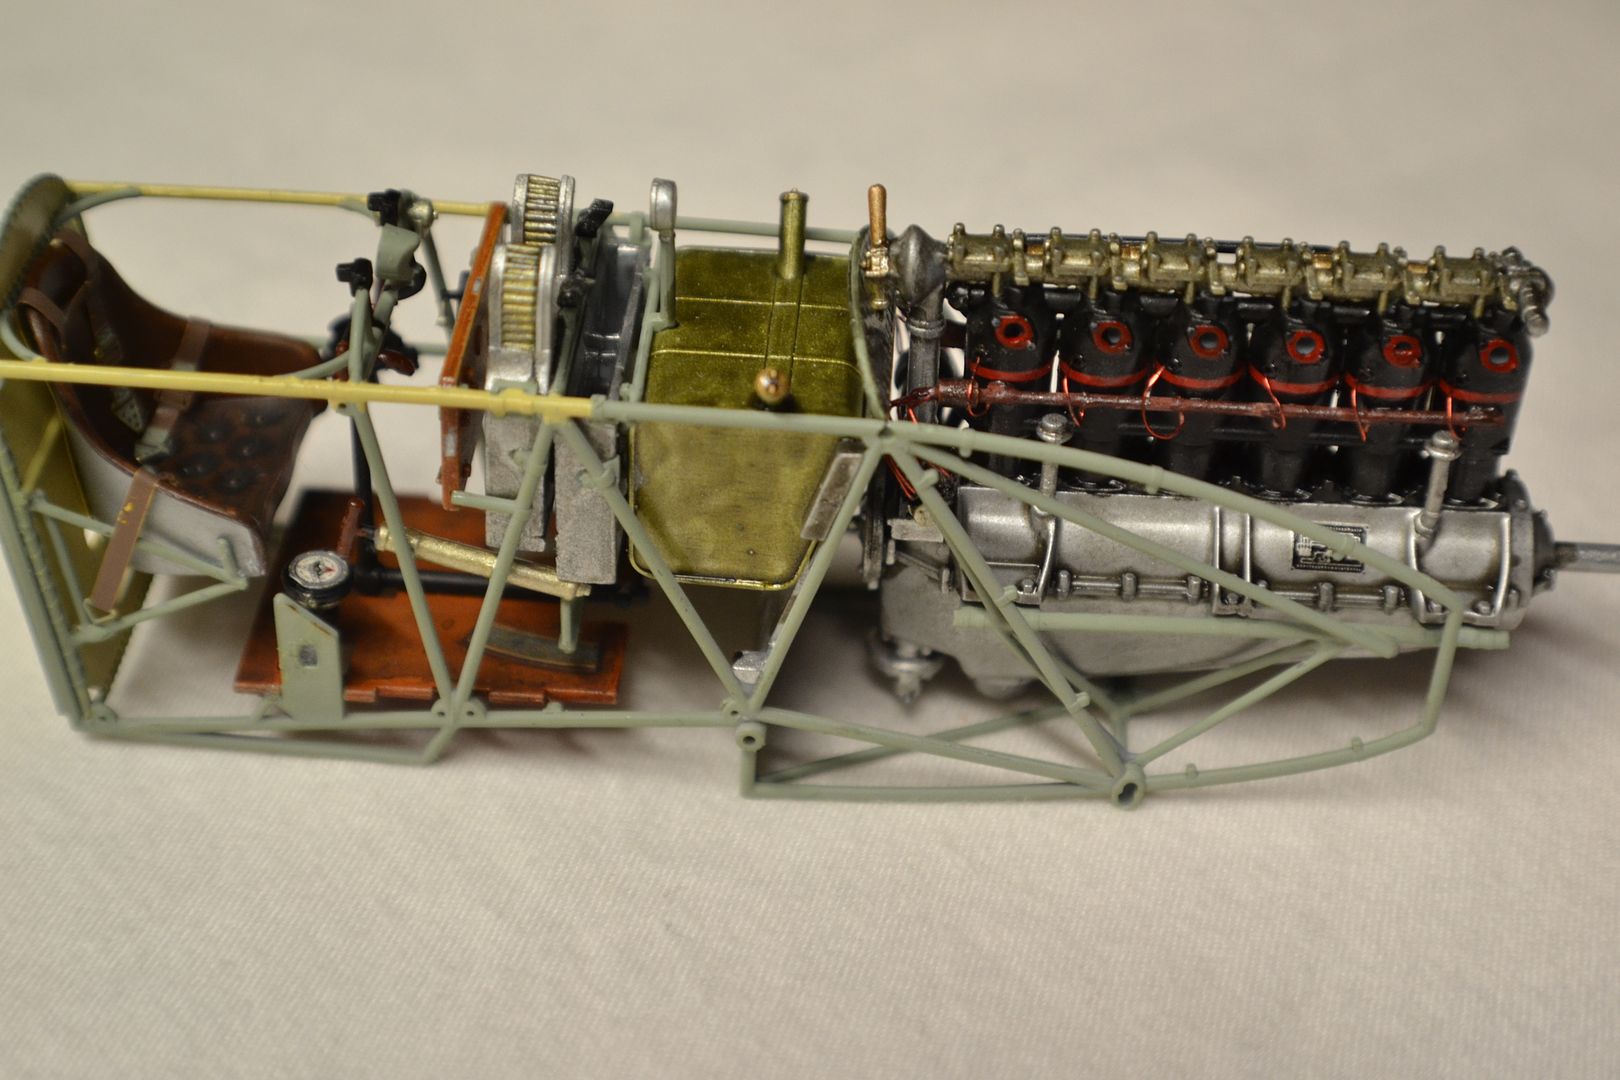
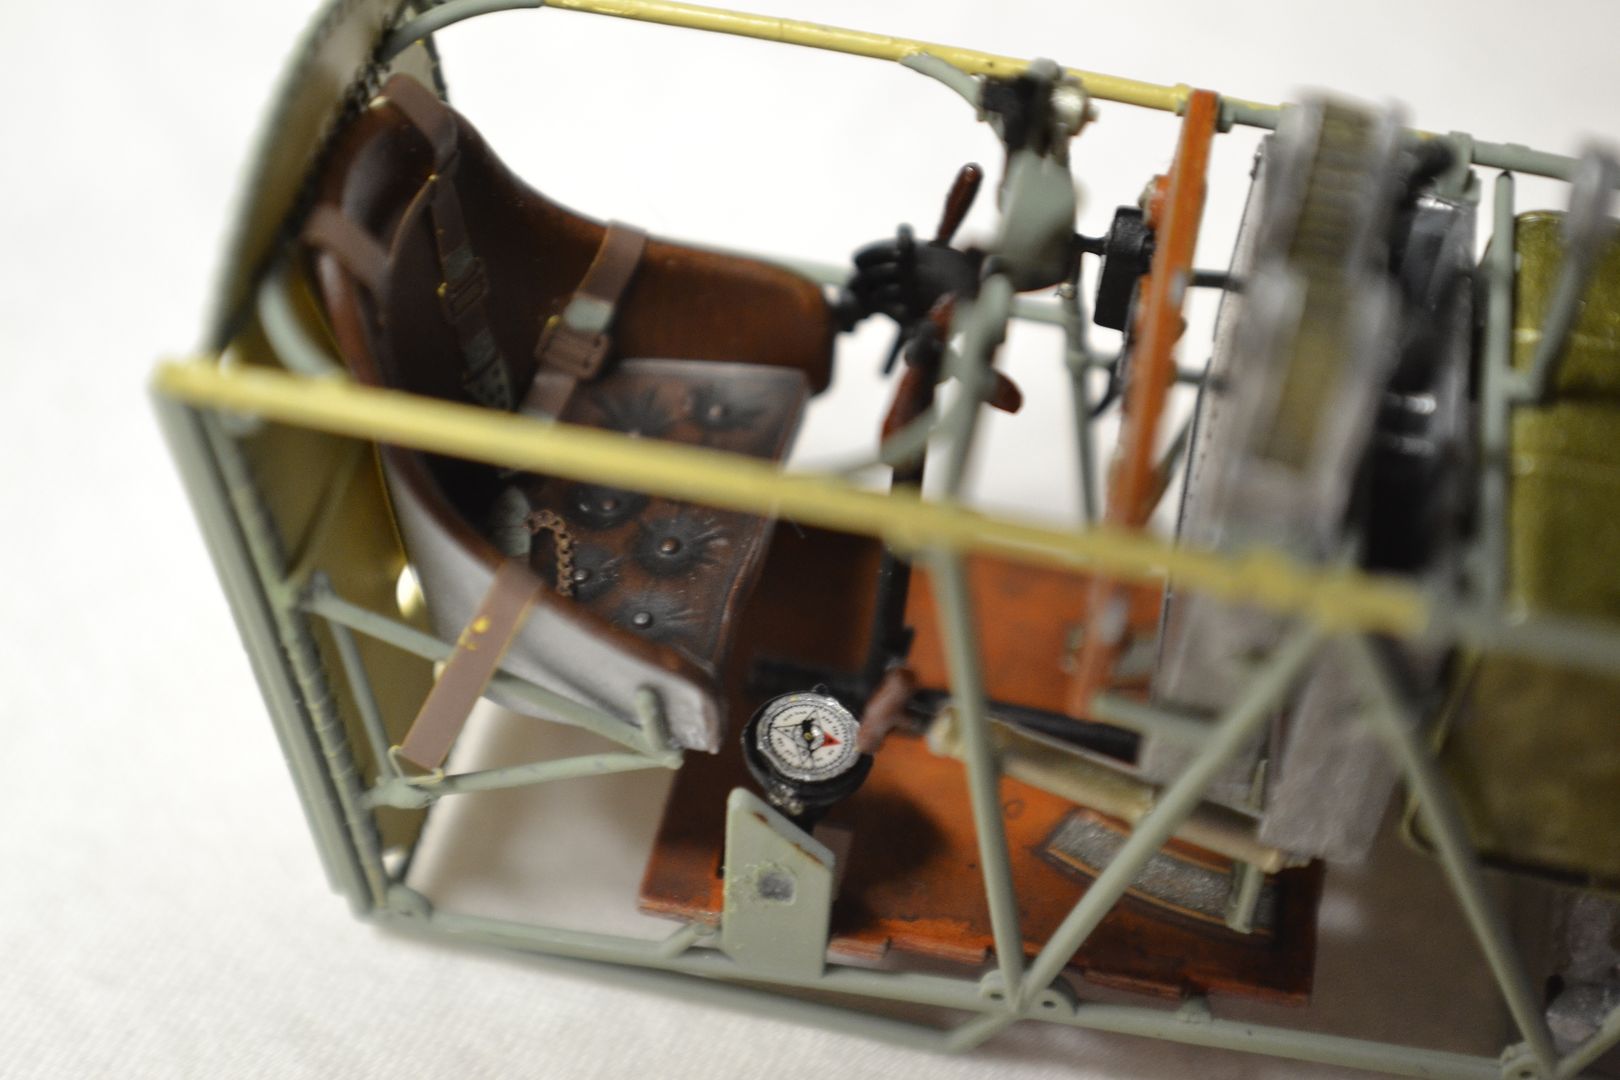
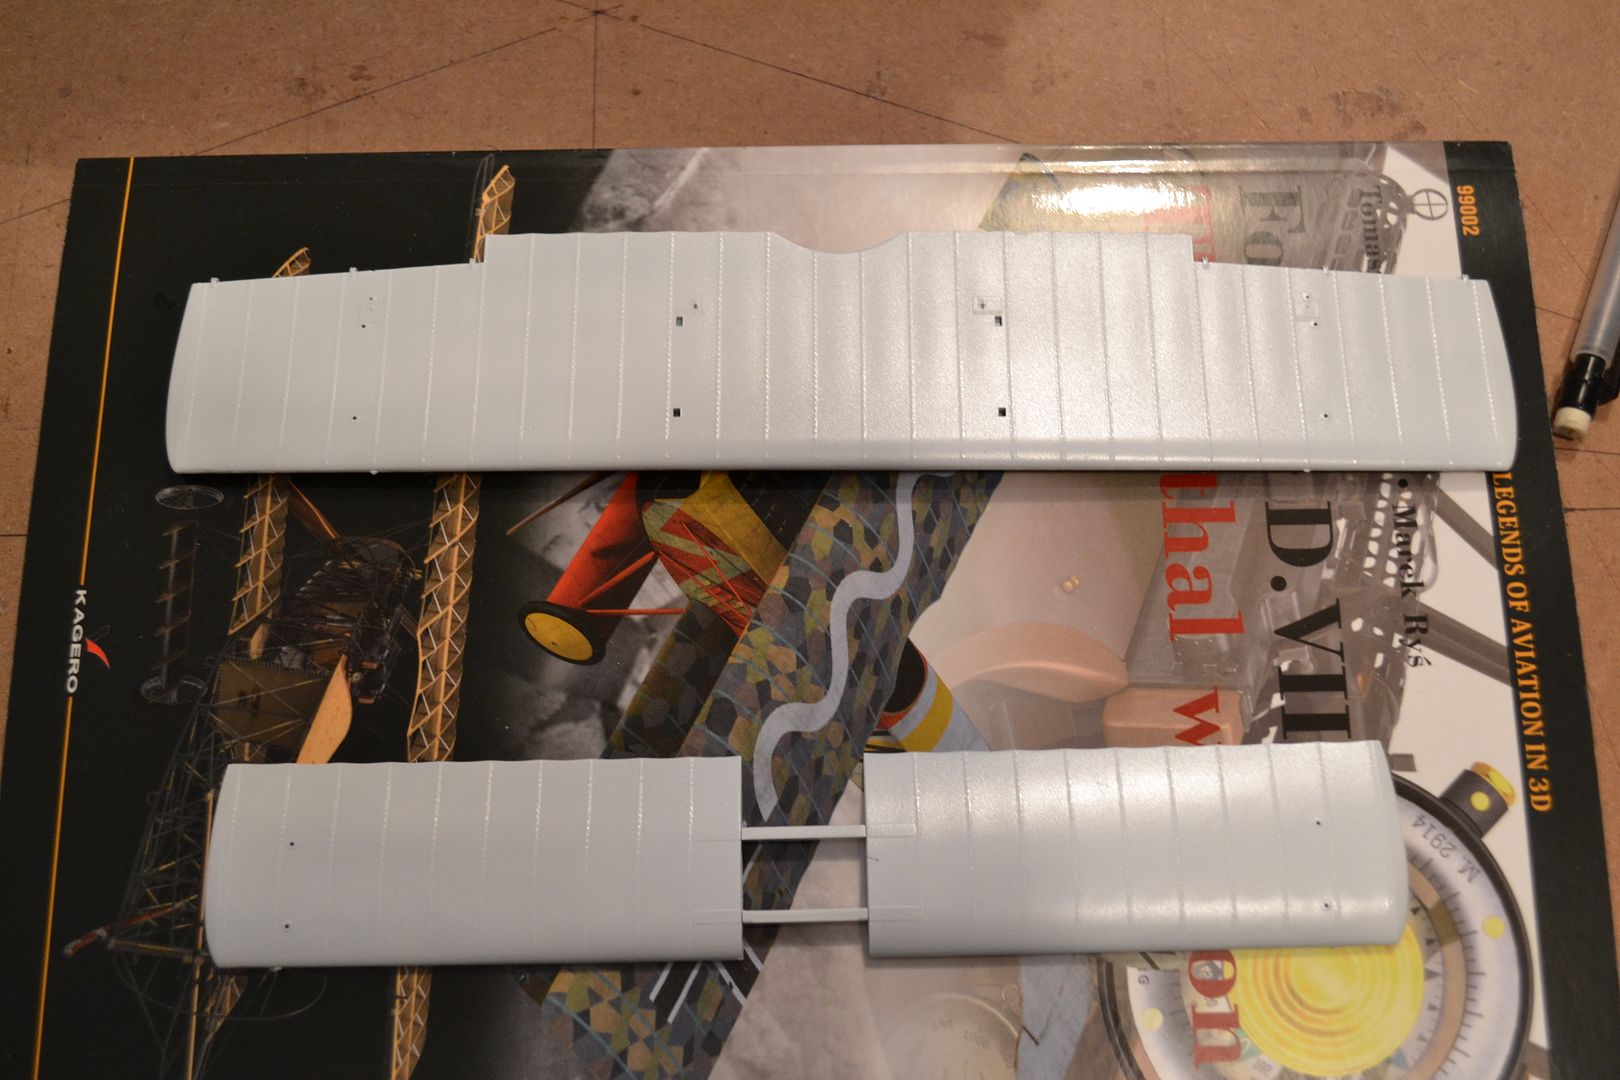
And finally, the wings, ready for the lozenge decals.
This has to be the sweetest kit I have ever done. I learned a lot from all you folks here, my undying thanks to every one that gave me inspiration.
-
3
-
-
I may be the oddball ............ I love the challenge of the rigging
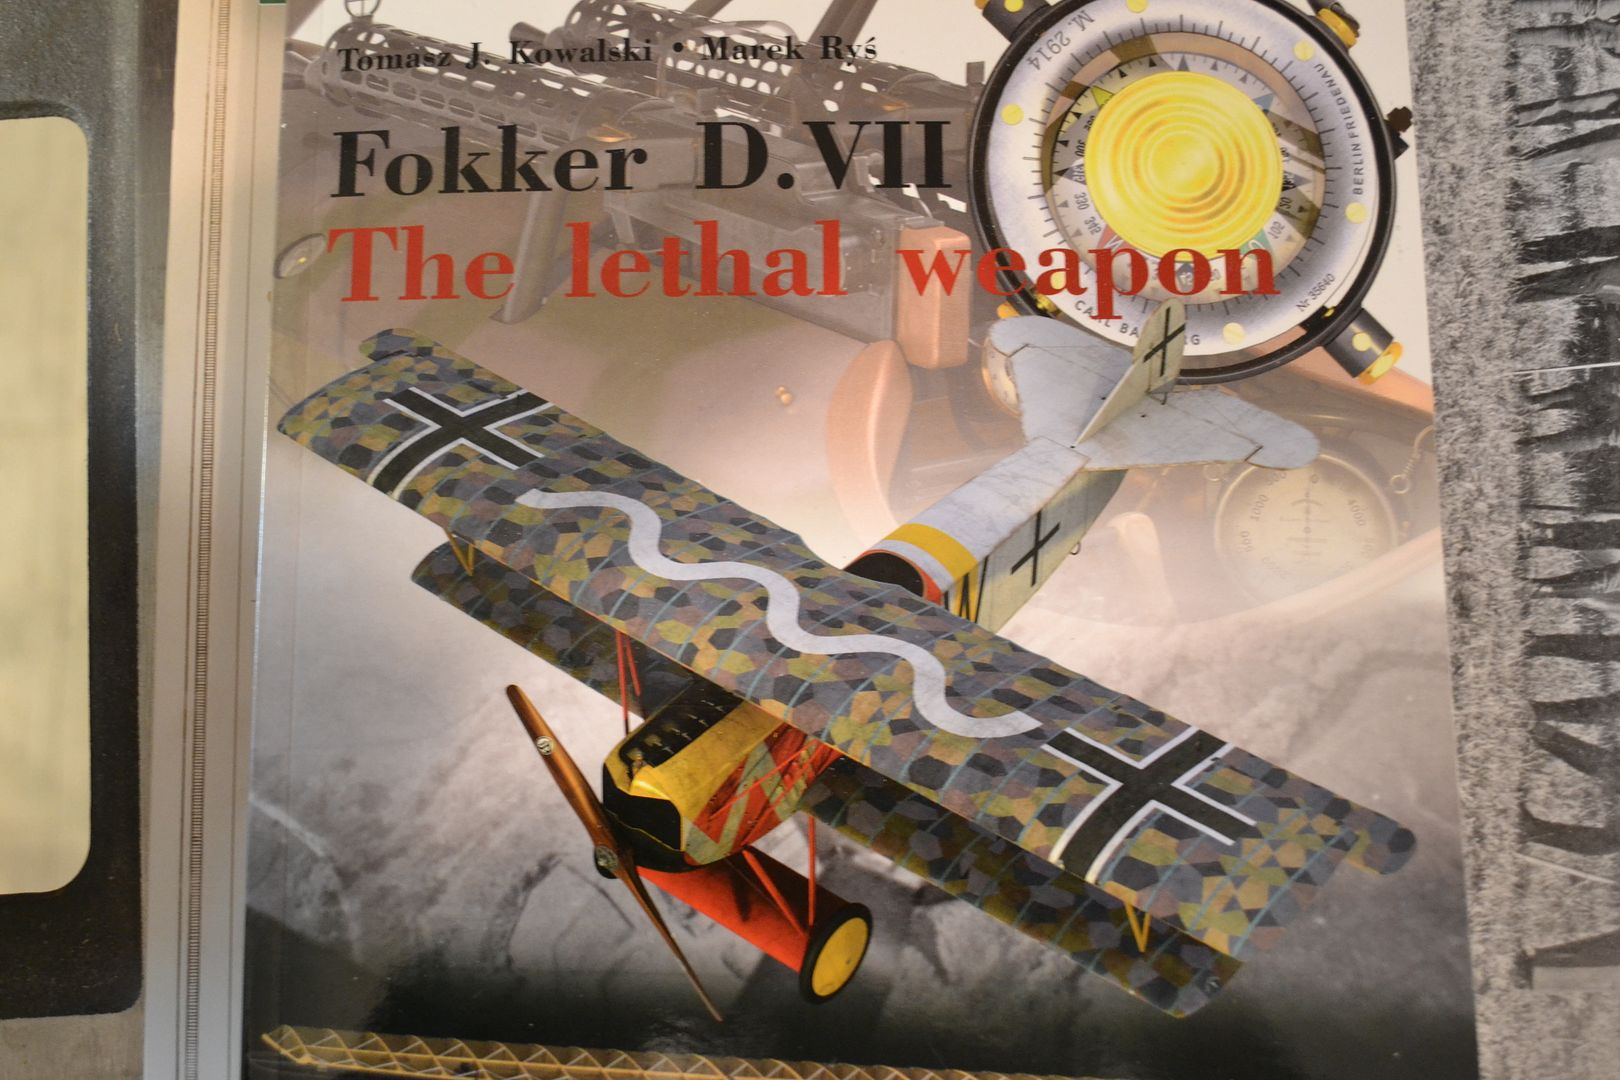
 ............... But I'd ALSO love to do this model too!! BTW, where is the best place to get that Kagero book?
Will
Sorry Will, I didn't mean to ignore your post. For some reason I did not see it. I believe I ordered that book from the link in the review on SP&R.
Paul
-
OMG! That is a seriously gorgeous wood finish. Awesome work.
Paul
-
1
-
-
Thanks all. Yes, they are WNW decals for my Fokker DII.
Paul,
Who's Lozenge Decals are you using? If its WNW, you will need to paint a glossly finish. Either using a Gloss paint or Matt Paint with a Gloss varnish over the top
Dave? Thanks. Any tips on what color? If the decals are opaque, does it matter? Future? Tamiya clear acrylic?
-
The kit says to place decals on a gloss finish. Does this mean the wings need to be painted? Or can I just spray them with a clear gloss coat. Do the wing colors show through the decals in any way?
Much obliged,
Paul
-
Wunderbar!!
-
That's amazing stuff. Not often you get to see the results of our follies like this. I have been to military museums but for the most part all of the items are in rather pristine condition. Kind of sad to see the stories of young men and the way they perished. The last war fought on US soil was the Civil War and those museums are sad in the very same way. Visit Gettysburg if you get a chance.
Paul
-
Hello All,
There was thread or two discussing how to do brass with paint. Someone, I forget who, had used clear yellow over aluminum and it looked awesome. So I tried an experiment and mixed up some Aluminum paint with some clear yellow and this is what I got.
1 part Tamiya Flat Aluminum
1 part Tamiya Clear Yellow
a couple of drops of Clear Orange to taste.
I'm calling out the brand only because I have no idea how other shades will work and this sis all I had.
This is the fuel and oil tank on my Fokker DVII I just started.
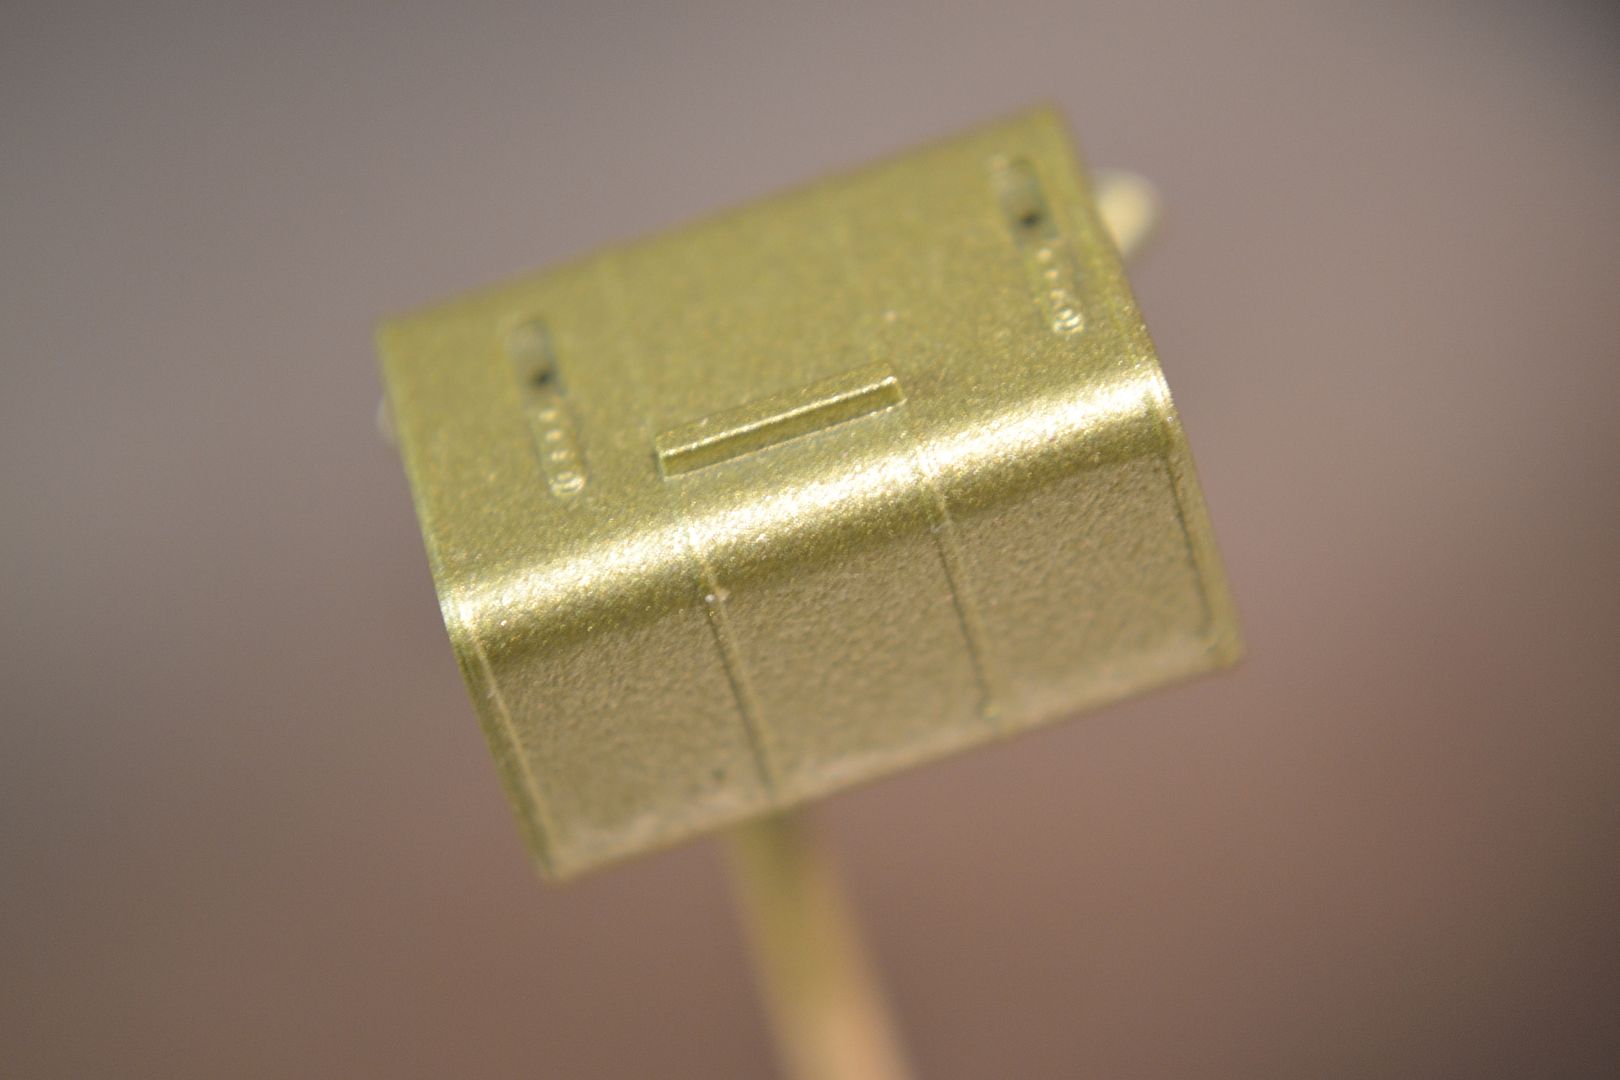
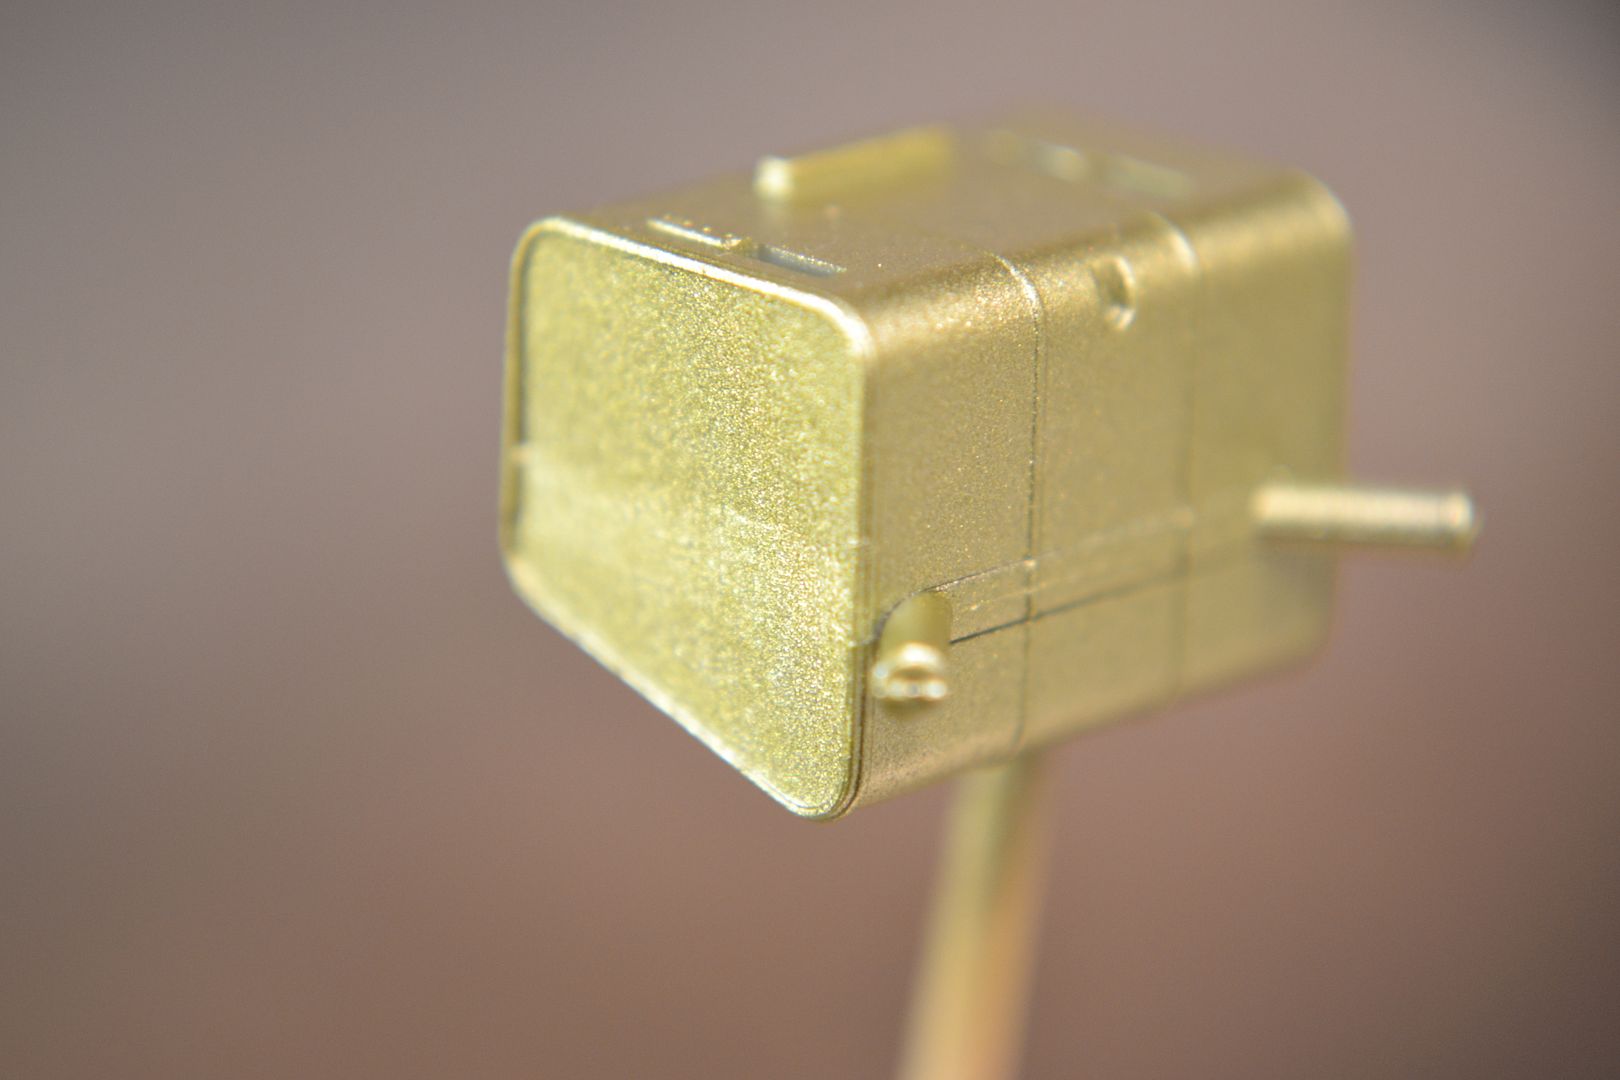
I suppose it could be a little darker but I made up a small bottle and will use it until I find a better one. I might try adding a little copper to see what happens.
Paul
-
1
-
-
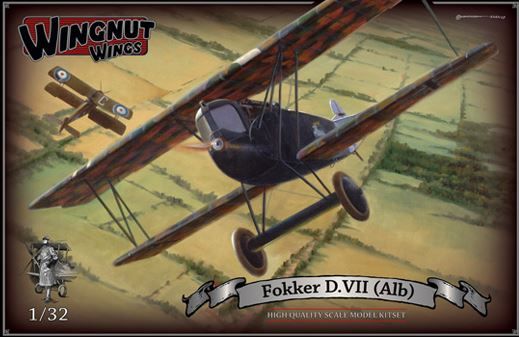
I now have on the bench for your viewing pleasure WNW's Fokker DVII(Alb). I will try my hardest to keep this WIP up to date because historically I tend to slack off posting as the build progresses. Bare with me here please, LOL.
Here is the kit I am doing.
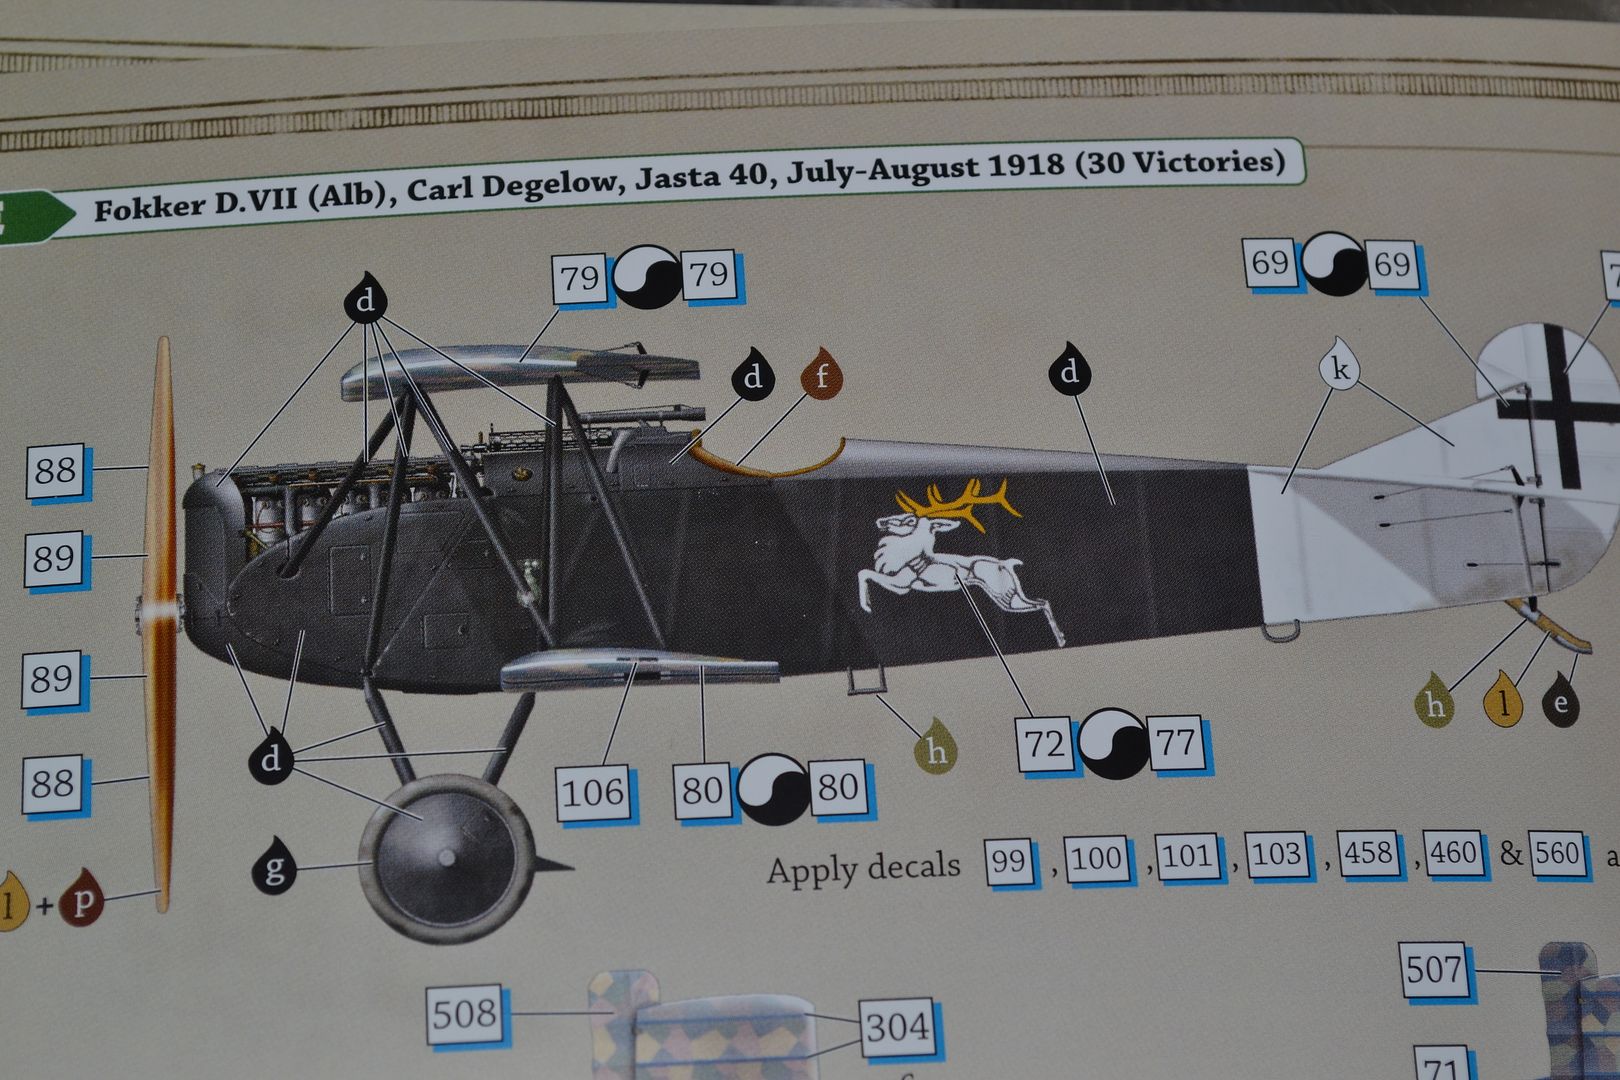
And this is the scheme I am doing This is the ride of Carl Degelow, Jasta 40, July-August, 1918 (30 victories)
And I will be using this as a reference.
I will keep you all posted.
Paul
-
1
-
-
I picked up these two kits at the 2013 Mosquito Con in New Jersey today.
Thia one will be used in the upcoming Great War GB. It has a full interior. This is an old kit I gather but looks pretty good. Pretty good for 25$ I guess.
This next kit will be used with the M1070 Heavy Transport from Hobby Boss I got last week. $10 US dollars.
-
Over 100 pics here, so I am posting just the link to my Photobucket page.
Enjoy
Paul
-
Glad to see you managed to get the MisterKit paints "locally" Paul. I'm sorry I wasn't able to help in that regard.
Grant
No problem Grant. I just hope this is not a hit or miss thing even coming from this source.
Paul
-
1
-
-
What i got since Christmas,
1/32 WNW Sopwith Pup
1/32 WNW Fokker DVII F
1/35 Emhar MK IV Male
1/35 Emhar MK IV Female
1/35 Hobby Boss M1070 Heavy transport vehicle
1/32 Trumpeter Bf-109 G6 (will be Franz Stiglers ride from "A Higher Call")
1/350 HMS Warspite Premium Edition
1/32 Revell He 219
1/32 Revell He 111 P
And last but not least:
22 bottles of Misterkit Acrylic Paints in various shades for my WNW collection
various aftermarket and decals for the above kits.
Paul
-
1
-
-
You betcha'
-
Is anyone from LSM going to this IPMS show this Sat.? This will be my first here in New Jersey.
Paul
-
Sweet, watching this one. The IP looks familiar.
-
I have my CC ready.
Edit: Done deal. It's aaaalllliiive.
-
1
-
-
WNW website says release is in late March. So................................................
Fokker E.III Immelmann
in LSM 1/32 and Larger Aircraft Ready for Inspection
Posted
That is a superb example of our hobby, or is it a profession in this instance? I love the weathering and the "oldness". Great job Jeroen!
Paul