

mywifehatesmodels
-
Posts
134 -
Joined
-
Last visited
Content Type
Profiles
Forums
Events
Gallery
Everything posted by mywifehatesmodels
-
 Thanks, Wouter! The Eduard Zoom set also has a few spare parts that are not specified in the instructions. They appear to be small data plates, similar to what's seen on this unit. I'll have to check and see if one of them fits! Thanks again! John
 -
I managed to get the other gear bay done this evening and primed them in aluminum, then followed with a coat of RLM 02. I'll let them dry overnight and get to the detail painting, tomorrow. However, I'm not sure what color the small canisters should be and I can't seem to find a solid reference on that, anywhere. Anyone know for sure? After the details are dry, I'll shoot a flat coat, then do some weathering on them. John
- 86 replies
-
- 1
-

-
- Luftwaffe
- Nachtjager
- (and 2 more)
-
Zoukei-mura 1:32 Focke-Wulf Ta 152H-0
mywifehatesmodels replied to JayDee's topic in Aircraft Reviews
Excellent, in-depth review, Jim! I have the H-1 in my stash, but am seriously considering getting the H-0 to build, instead. I'll probably only build one Ta-152, so.... Thanks for the review! John -
Last night and for a bit this morning, I continued working on the slats. I managed to put some inserts in the wings where I had cut them from. I also got the seams smoothed out and primed and started thinning the edges (the cut left a pretty thick appearance, which you can see in the slat on the left). From here, I'll probably leave the rest of the work in this area until the wings are put together. So, next up will be the wheel/gear bays. John
- 86 replies
-
- 4
-
-
- Luftwaffe
- Nachtjager
- (and 2 more)
-
Cut the bottom edge of the slats out and glued to the upper portions. Just need to fill the seams, smooth them out and prime. John
- 86 replies
-
- 2
-
-
- Luftwaffe
- Nachtjager
- (and 2 more)
-
Thanks, guys! That's what I was thinking, Bevan. However, I still don't know for sure. All I know is that I painted the part to try to match the photo, as closely as I could! Next up, I started working on the wing slats. Just have the upper portions cut out, for now. Still have to cut from the bottom halves, as well and clean everything up before adding the inserts, behind them. Cheers, John
-
Found the parts I had lost and we are good to go! John
- 86 replies
-
- 2
-
-
- Luftwaffe
- Nachtjager
- (and 2 more)
-
Thanks, Ralph. I'm already there, actually. I got the fuselage halves together with only a little bit of pushing and squeezing to align everything. The upper deck is nearly complete. However, I ran into a couple of issues/questions while working on it. First, I somehow managed to lose the small console that hangs off the bottom of the sill to the pilot's right side. I had attached and painted it and now it's gone! I also lost one of the four small handles (front left) somewhere along the way. So, I'm sure that by the time I scratchbuild and install new ones, they'll turn up. I also installed the small clear part on the right side of the sill. However, a couple photos I found online leave me wondering why this part is clear in the kit. Is there a part of it that's supposed to be, but I just can't see it and what exactly is it, to begin with? Last, but not least, I see that I still have to fill/sand the vent on the right side of the fuselage, as that wasn't implemented until the E variant, according to my references. Otherwise, all is going well and I'm really getting anxious to get this together. I hope you're right Ralph, in that it will "grow" quickly! Edit: The more I look at that gadget, the more it looks like a telegraph instrument???? Thanks again, John
- 86 replies
-
- 1
-
-
- Luftwaffe
- Nachtjager
- (and 2 more)
-
Thanks, George. Even though it would probably work (not even "probably", because yours turned out great!), I'm more of a traditionalist and would rather attach the wings before painting. Also, I've heard concerns about dihedral on this kit and want to be sure that I get it to look right. That could mean shimming the bottom wing to fuselage seam. But, I guess we'll see how it goes and I'll cross that bridge when I come to it. Thanks again, John
-
Thanks, guys! I think I'm about ready to button her up. John
- 86 replies
-
- 1
-
-
- Luftwaffe
- Nachtjager
- (and 2 more)
-
Mike, I would LOVE to see you do another 110! As for the G-4 "conversion", I'm still hoping that it comes from Dragon/CyberHobby, in the form of an entire kit. Thanks, John
-
Thanks, guys! Great pics, Jim. Really like that 109! I think I'm going to try the interior masks, at least on the most prominent parts (the ones that will be open and exposed), such as the pilots canopy/windscreen and the gunner's hatch, which also appear to be the easiest to mask. If that goes smoothly, I will try to take it further and see how it goes. My only experience with Montex canopy masks is on a recently completed Ju 188 in 1/48 scale. However, I didn't use the interior set. It turned out quite well, but it's a smaller model, a vac canopy and none of it was opened up. Thanks again, John
-
George, Since I have the pre-cut masks for the interior and exterior, I think I'm going to try them. If I do the exterior first, it should give me a better idea on alignment? If it looks to be too risky, I'll just pull them and only mask the exterior, painting the interior color, first. Thanks for commenting. Much appreciated! John
-
I snapped a few pics. A little better than the last, but I've been playing with the focus settings on my phone and haven't really settled on one that I like yet for really good close ups (in combination with how close I am to the subject when I take the shot). Anyway, here we are.... I coated the canopy parts in Future, this morning. Also working on the upper deck and sidewalls and figuring out exactly what combination of 02/66 I want them to be. Also, does anyone here have any experience/opinions on painting the INSIDE of a canopy? I've never done the inside of a greenhouse like this, but can see where it would really have it's advantages, in terms of effect. The Montex set has masks for the inside, as well, so I'm thinking about giving it a try, if it's not too much hassle. Thanks for checking in, John
- 86 replies
-
- 1
-
-
- Luftwaffe
- Nachtjager
- (and 2 more)
-
Simply amazing! John
-
Thanks, Jim. This is the first of Dragon's newer generation of kits that I've built. Back in the 90s and early 2000s, I built several of their 1/48 aircraft kits and at least a couple of their armor kits. I know that, back then, they were considered among the best available. From what I've read and can see in the box, this kit seems to fall into that category, even by today's standards. If they could only get their instruction issues sorted out.... In any case, this should be a fairly straightforward build, which I welcome. In the past several years, it seems like the vast majority of stuff that I've done has been limited run injection molded, or complete resin kits, as well as a lot of conversions. This should be a nice break from that (before I dive into another crazy resin kit/conversion!). Thanks again, John
-
Thanks, George. Actually, I think I had braced myself better when taking the pic of the IP, so it's not as blurry. I couldn't sleep last night, so I stayed up working on this some more. I managed to get the rest of the belts attached, the stick painted/installed and also shot my flat coat and put the IP and throttle quadrant in place. I also noticed, from looking at another build, that I had put the cross-member that attaches to the rear gunner's magazine racks, in the wrong position. It should be underneath the mags, not at the ends of the racks. So, I moved that and painted it, as well. Once I get the sidewalls ready, I'll take some more pics. Thanks again! John
-
Well, here's where I'm at for the moment. I only got the belts done for the pilot's seat and that took me nearly 2.5 hours. HGW belts are a major pain, but they do look great. I also added some air lines to the cannon tray's compressed air bottles and painted the radio rack. The interior is quite weathered. I figured that a plane that had been used for this long, both as a day and a night fighter, would probably show a pretty high level of wear. Sorry for the crappy focus in the pics. I'll try to do better on the next round. I'm hoping that I can get the rest of the belts installed, touch-ups done and then a flat coat shot, tomorrow (oh, and I need to paint/install the stick, too!). Then, I'll be moving on the to the sidewalls. Thanks for looking! John
-
Thanks, Mike. I was hoping to have an update today. The main portions of the cockpit are pretty much done. I still have the sidewalls and.....the reason I'm not done yet..... HGW seatbelts. John
-
Mirage Hobby 1/48 PZL-23 "Karas"
mywifehatesmodels replied to mywifehatesmodels's topic in Non LSM 'WIP
The kit is high on details, even with the PE set that comes in the box. I've seen the Part sets and I can only imagine how amazing that would be. Hope to see yours, soon! Thanks, John -
Thanks, George! I actually came across your build last night. Great job, by the way! With you, Mike, Ralph and a couple others who have gone before me, I feel better equipped to tackle this one and am fortunate to have that luxury. When I got to the spar and saw what the instructions were telling me to do, it was certainly a "what the..." moment. So far, however, the fit has been excellent, even if the part locations are wrong or just vague in some spots. I just came in from shooting an undercoat of sliver and painting the guns/magazines. Hoping to have most of the cockpit base colors on tonight. Thanks again, John
-
Okay, as a friend of mine likes to say, "Let's kick this pig!". I started by searching out a bunch of online discussions surrounding the instructions on this kit and making notes of the corrections and areas of caution. From there, I started cutting out and cleaning up parts for the cockpit, as well as taking notes on some other things I will likely change or enhance. Here are some of the things I plan on doing: 1. Adding a bit more wiring/plumbing to the cockpit. Probably not a ton, but just a bit to liven it up. 2. Adding the release cable for the dinghy in the tail, which was a feature of the D model, but not included in this C kit. 3. Adding tubing to the front of the prop hubs so that they look more like the originals, instead of just the dimples on the kit parts. 4. Cutting out the wings' leading edge slats and positioning them open, as they should be on the ground. 5. Whatever else I think I can add to it without getting too crazy. Items 1-4 are the most critical, in my mind. Not a ton of progress so far, but I am already getting close to priming and painting the main interior parts. Most of the smaller details will either be painted separately, or after the main portions are done. I also noted another issue in the instructions that I didn't see in any of the online builds (unless I missed it). Step one would have you attach the brace (spar? Part E22), on which the center seat is mounted, to the rear of the MG/FF weapons tray. This won't work, since the spar needs to sit on top of the floor and the tray is attached from beneath and level with the floor at the rear, where they tell you to put it. But, if you look at the floor, there are two slots for the tabs at either side of part E22, so it's fairly obvious....so long as you're looking at all the parts and not the instructions. Still plenty to add to the instrument panel, but I think it looks pretty good compared to a lot of the other Eduard colored sets I have used. The RLM66 is a touch on the light side, but at least it doesn't have that blue look to it they they (Eduard) are famous for. Also, I'll be representing a cockpit that is partially over-painted 02, with MM enamel 66, which is also a bit light. So, it should turn out fairly well, if all goes as planned. Not much of a start, yet, but progress is progress and at least I'm finally working on this! John
- 86 replies
-
- 1
-
-
- Luftwaffe
- Nachtjager
- (and 2 more)
-
Mirage Hobby 1/48 PZL-23 "Karas"
mywifehatesmodels replied to mywifehatesmodels's topic in Non LSM 'WIP
Thanks, guys! I don't know, Jeroen. I think the best bet would be from Silver Wings, given that they've just released the P.11, but you're probably right. It would be a super cool model if someone did it in "our" scale, though! Thanks again, John -
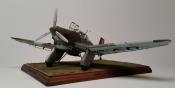
I hesitated to post this, since I wanted my first completed project on this forum to be something "large scale". But, this is what has been preventing me from getting to that build (I build smaller scales for other people, but most everything for my own collection is now 1/32). Now that it's complete I can get serious about my next "ME" project. This is Mirage Hobby's 1/48 PZL 23 "Karas". It was built pretty much OOB, except that I had to replace a broken gun barrel on one of the defensive MGs and I also made the leading edge slats from sheet styrene, as they were optional on the real thing and not included in the kit (but were on the particular aircraft that I was modeling). For a limited run kit, this is pretty nice and the cockpit, in particular is pretty complex, but fit better than many mainstream kits. Other parts of the build were a challenge, but I think it turned out pretty well. I used MM enamels for most of the paint work and weathered it with oils and pastels. I also tried a variation of the salt technique, similar to what Aaron did with his Ju 88C build. However, it was so subtle that the effect pretty much ended up being lost in the oil weathering, later on (I didn't want to go overboard and mess it up, especially since this was someone else's model!). I still learned from it and will continue to take it further on future builds. Markings are from the kit and depict an aircraft in Romanian service around Odessa in mid/late 1941. The kit decals were better than expected and I used them all except for the rudder stripes, which I painted on. Regards, John