


CrankyCrafstman
-
Posts
1,319 -
Joined
-
Last visited
Content Type
Profiles
Forums
Events
Gallery
Posts posted by CrankyCrafstman
-
-
10 hours ago, Jeff said:
I have this trailer in my stash as well. Did you build it with the camber ( hard to tell on my phone ) I’m trying to decide. Personally I might try BMF or chrome tape from an automotive store. Mulling it over ….
Jeff
Hey Jeff
Yes, I did the camberd one. Have you tried Green Stuff World chrome paint? It's a alcohol based ink/paint. It's the best chrome paint out there, as good or better than Alclad.
Ron G
-
 4
4
-
 1
1
-
-
Hey all
Small update on this build.
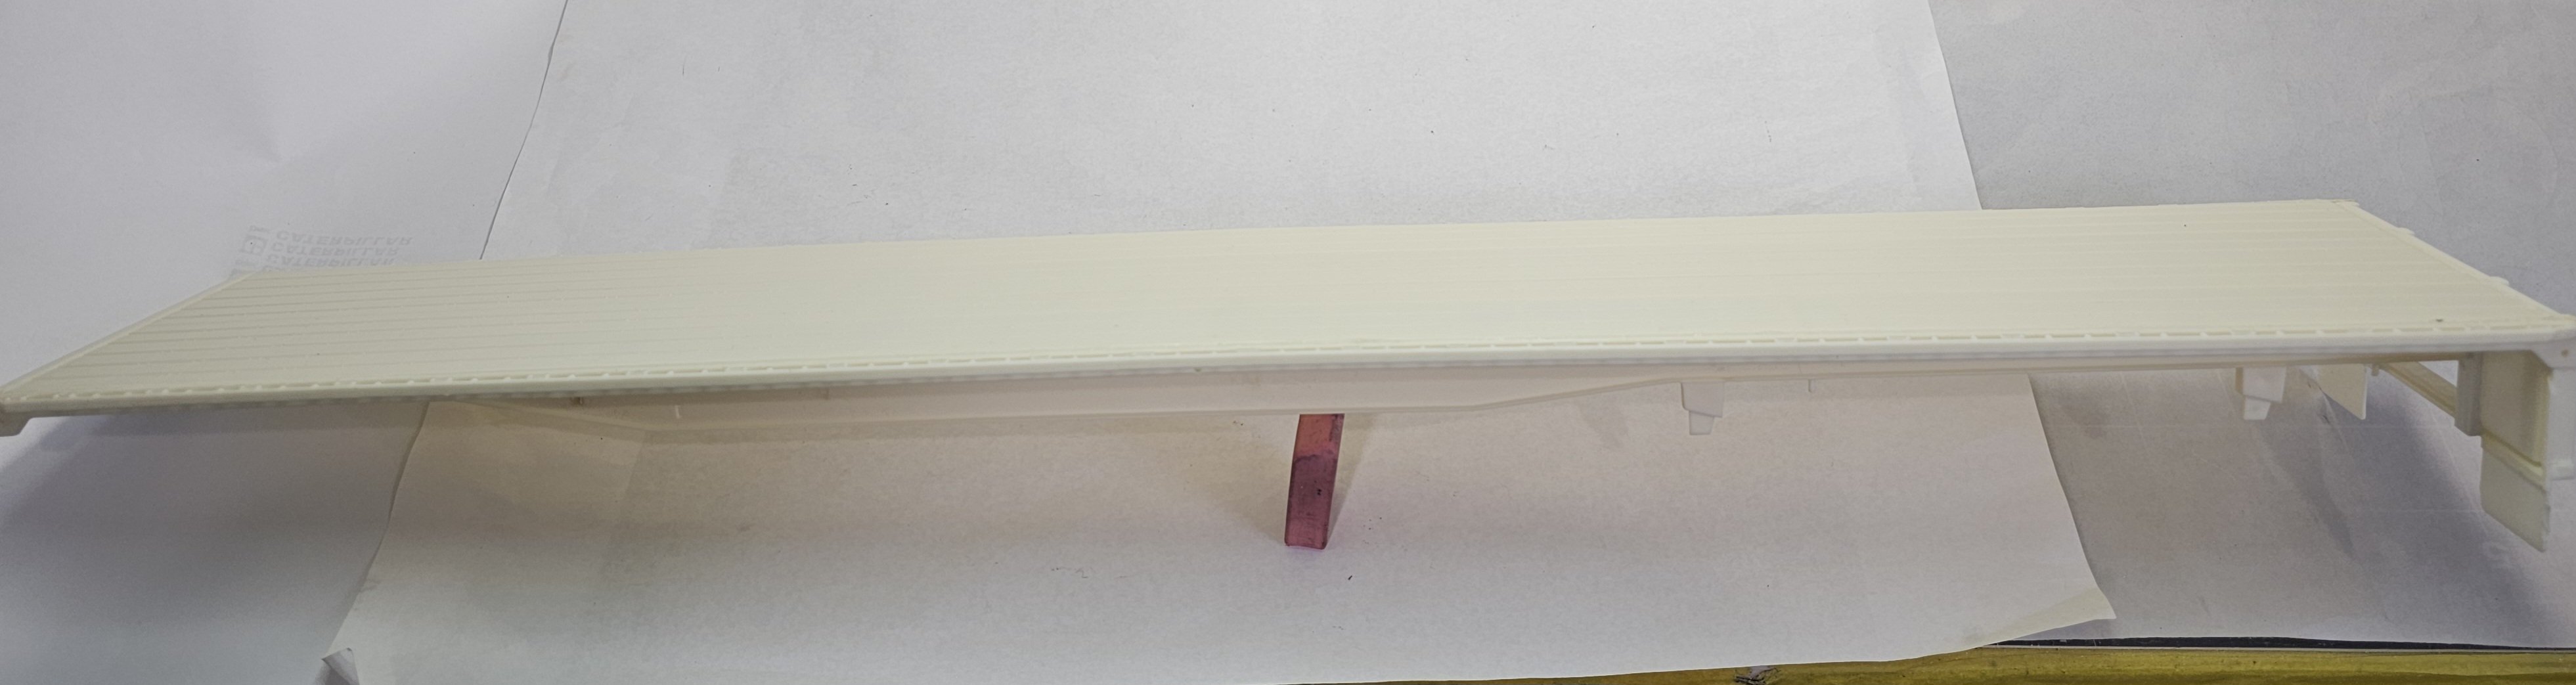
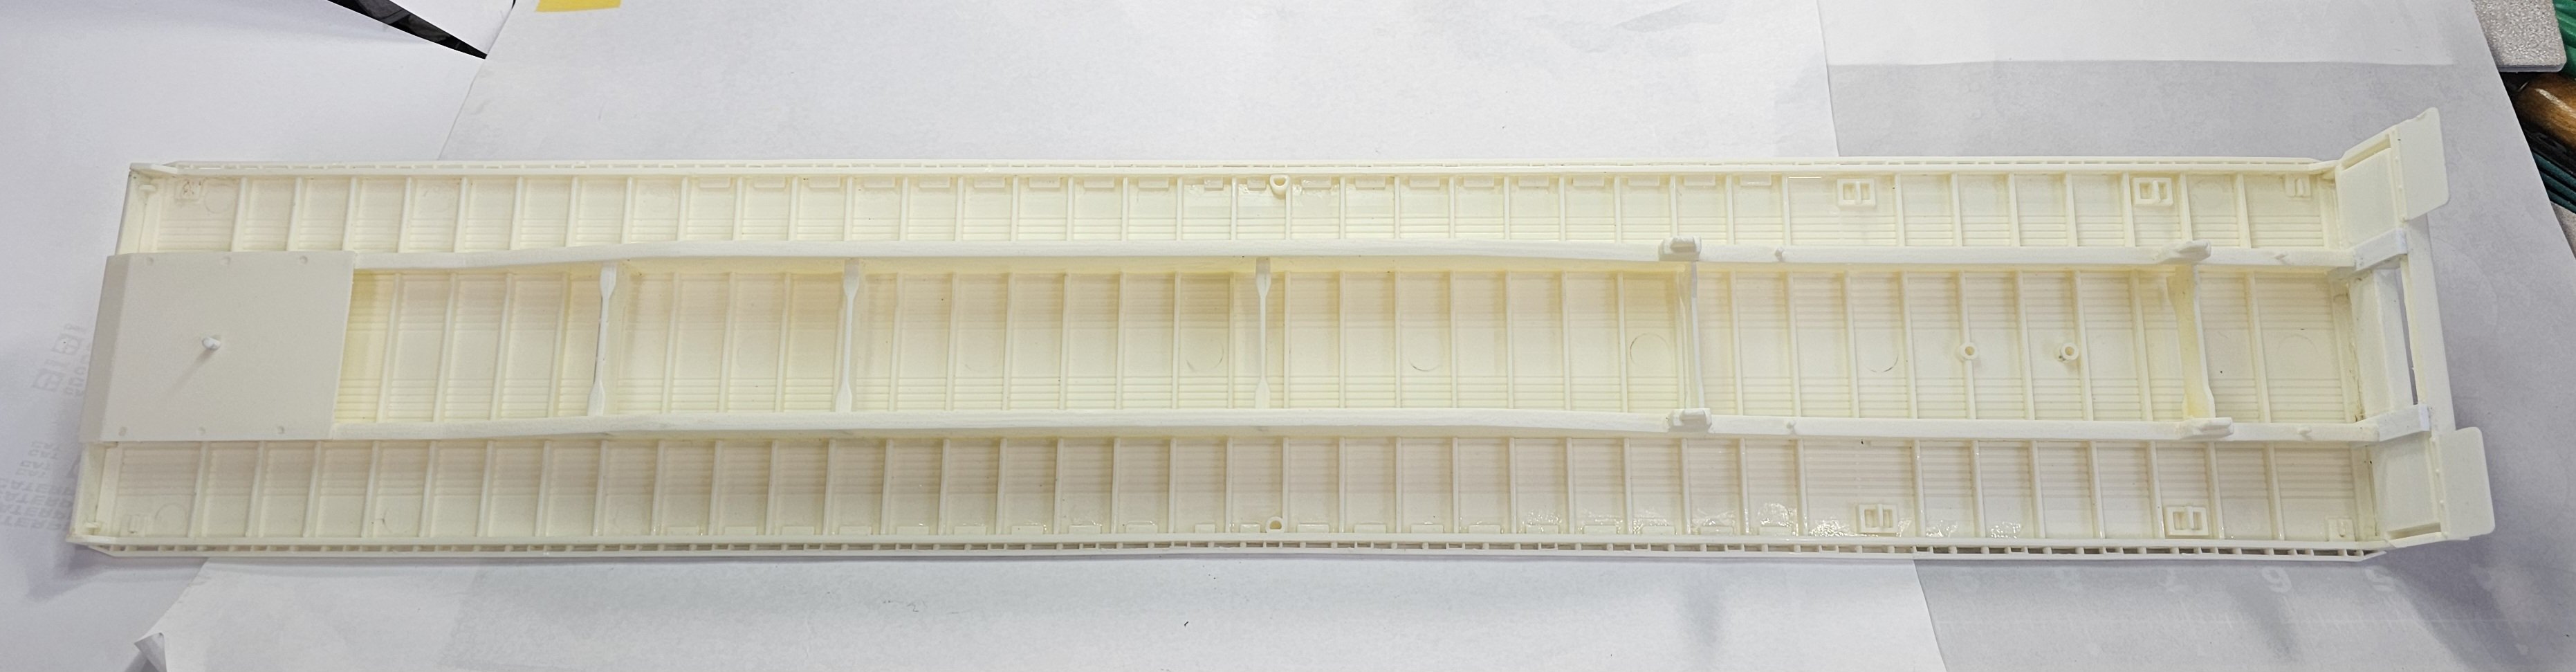
 This will be the trailer for this tractor.
 I have the main part of the frame and deck done.
 I'm planning on painting the frame the same orange as the K100 with an aluminum deck. I now have to figure out how to accomplish this.🤔
Ron G
-
9
-
-
Hey all
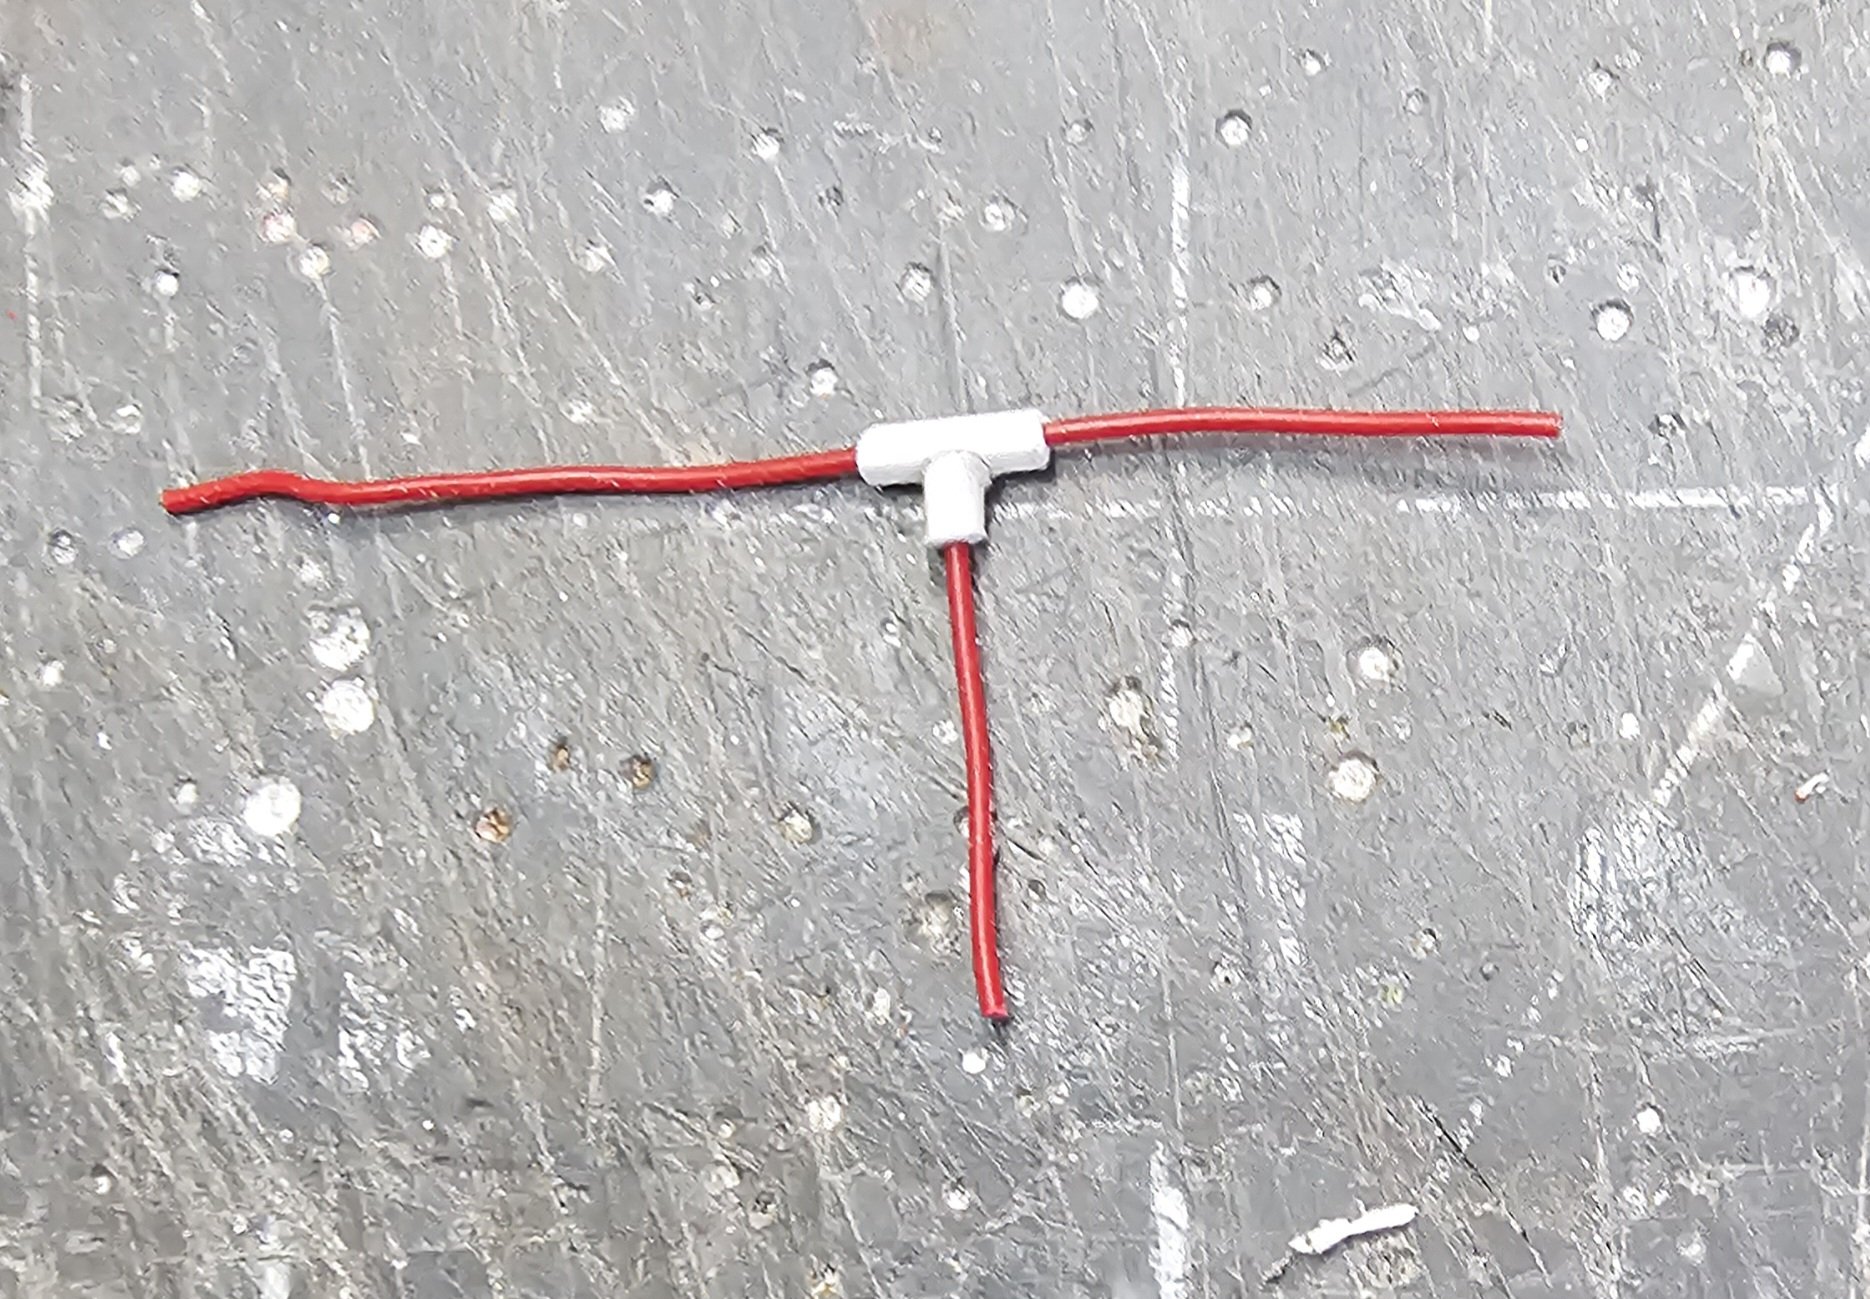
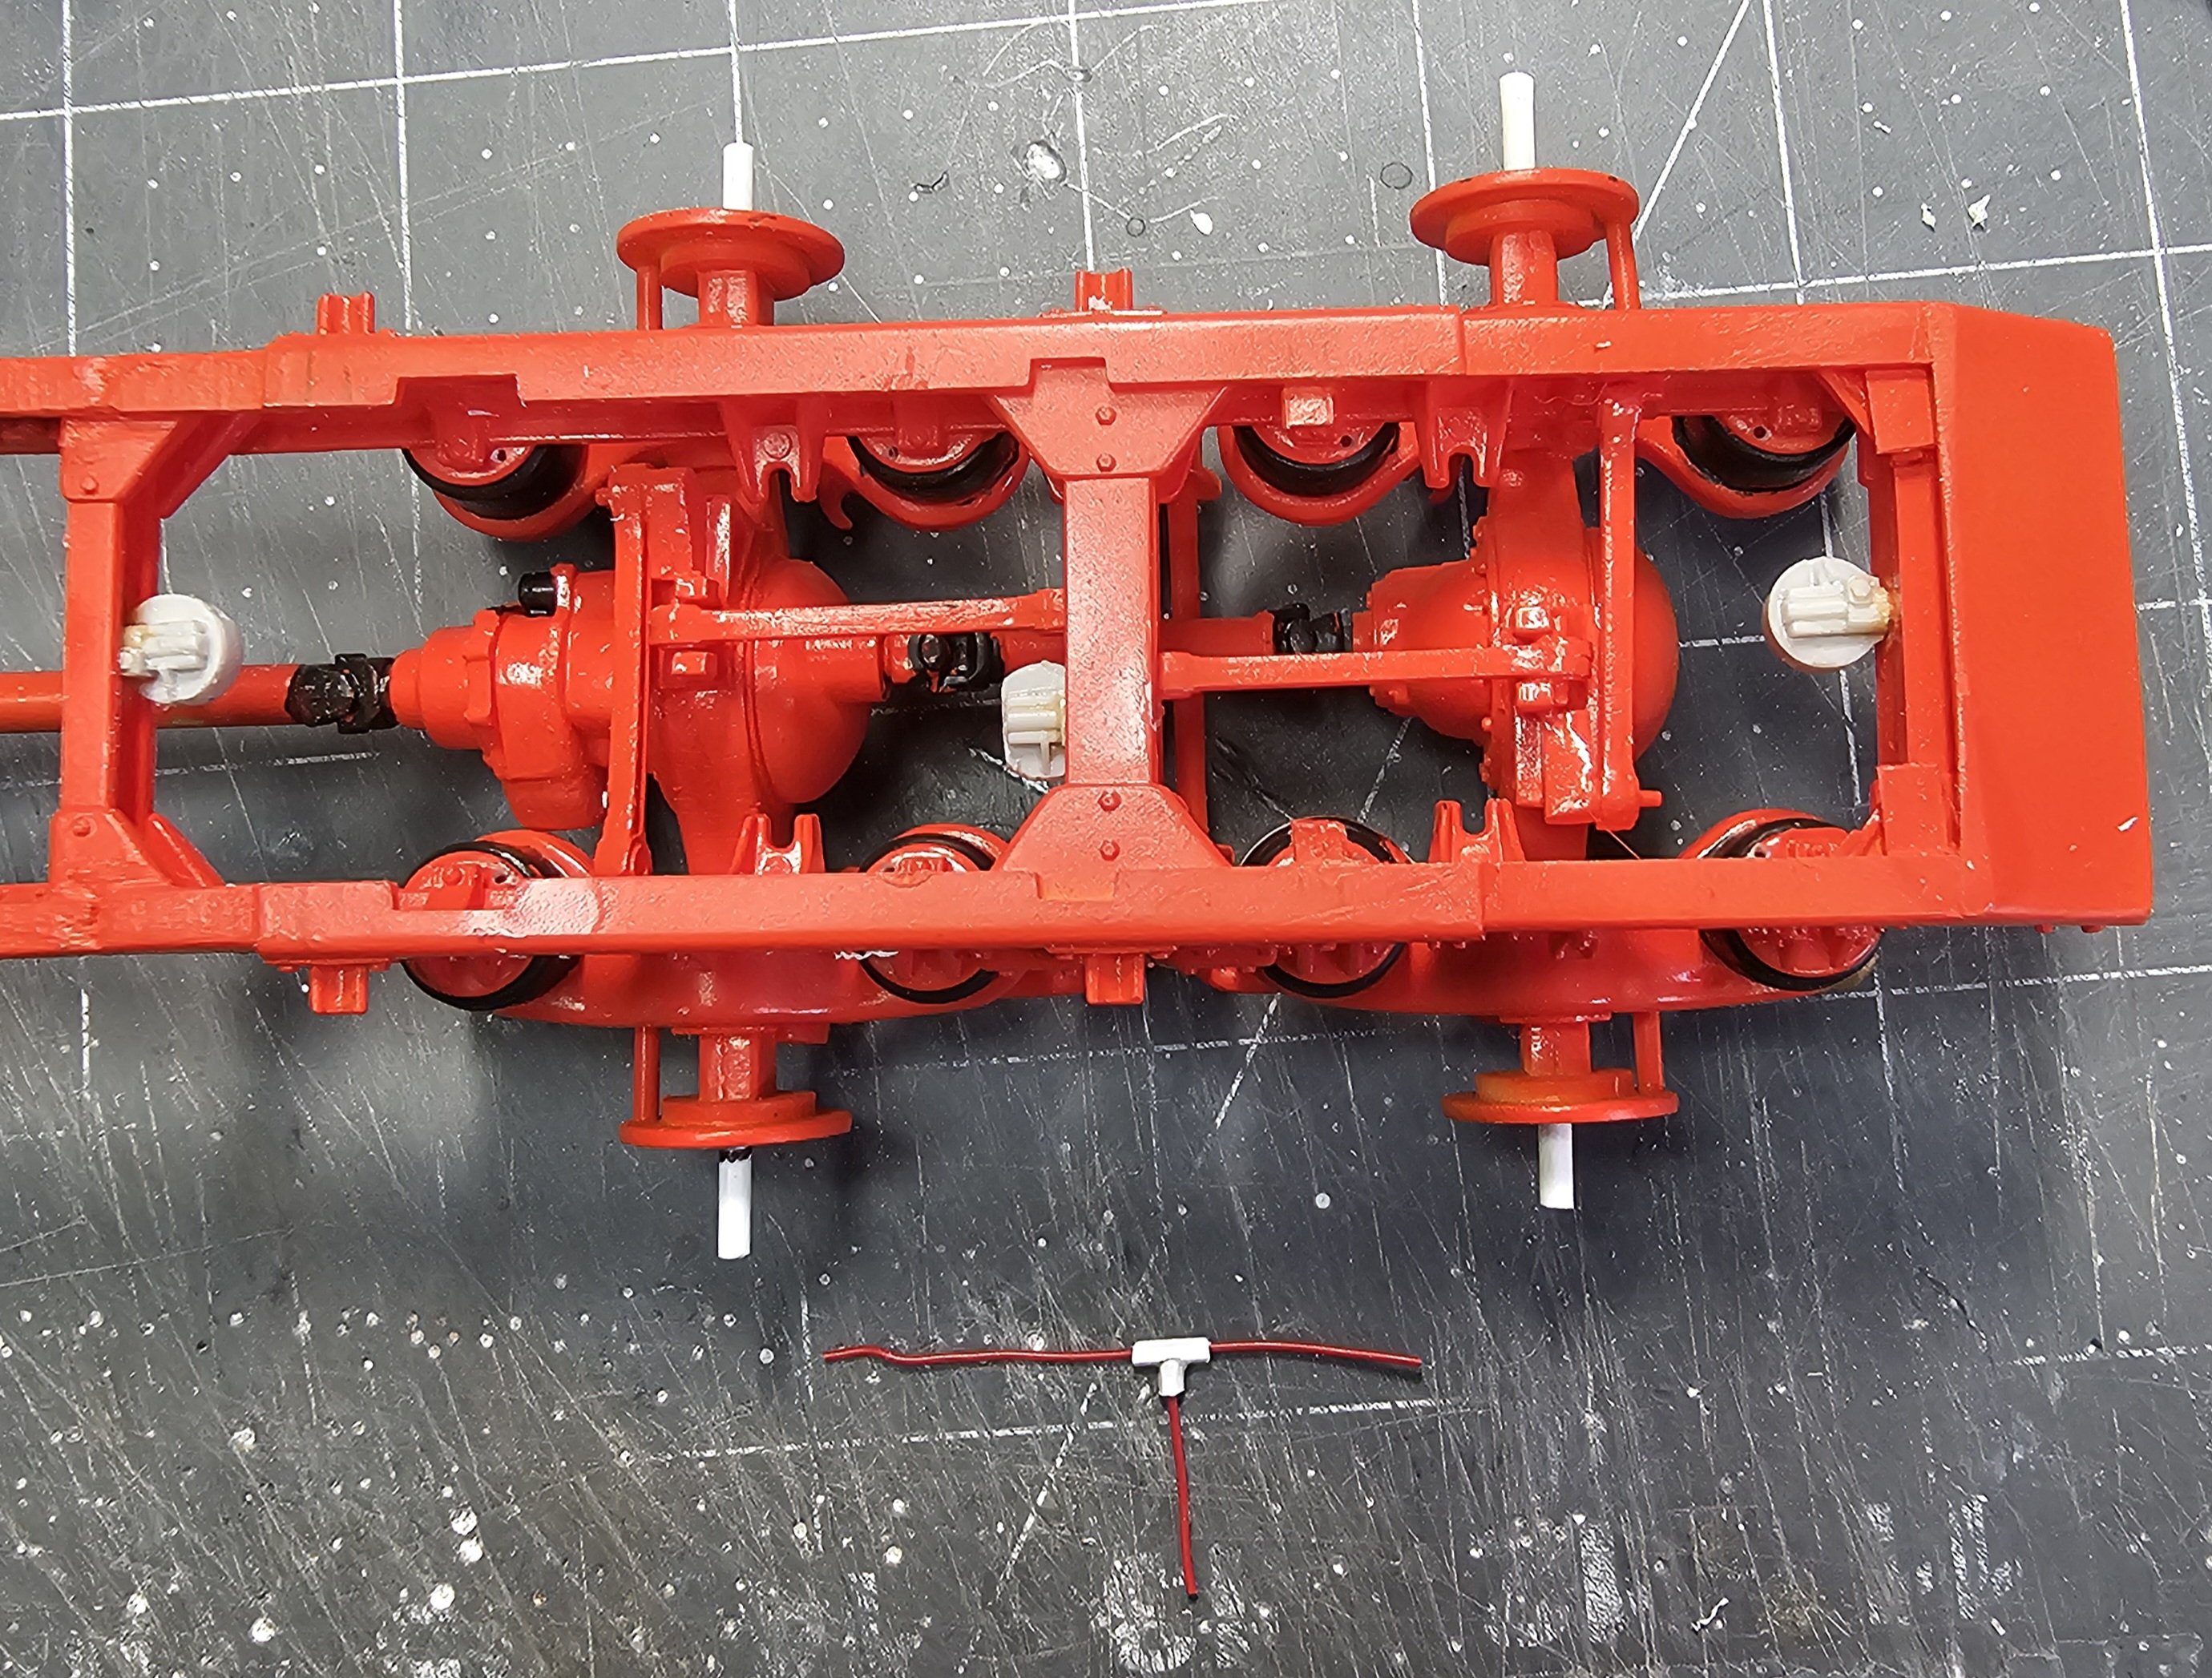
I've started to do all of the plumbing : air, fuel and electric.
 made a "T" fitting for the air bags, now I need to make 3 more.
 This view shows the 3 air valves that I scratch built and added.
 This view shows the valves painted blue. That's it for now be back soon with more updates.
Ron G
-
5
-
-
Hey all
Some more work done on this build.
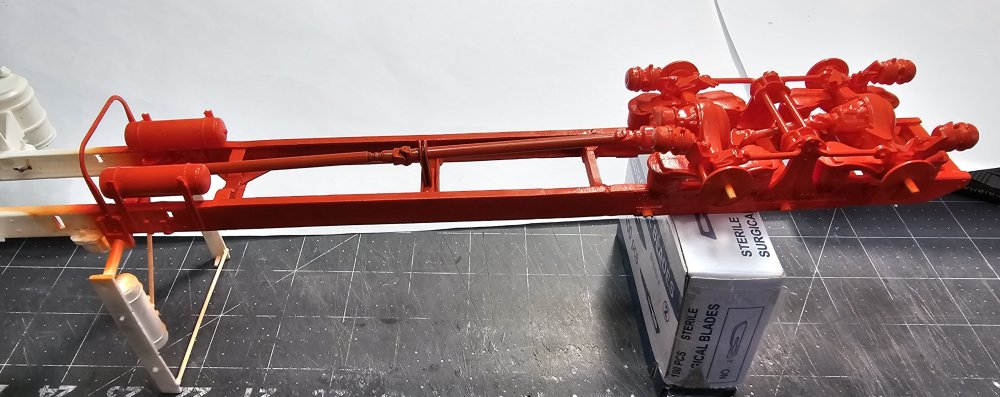
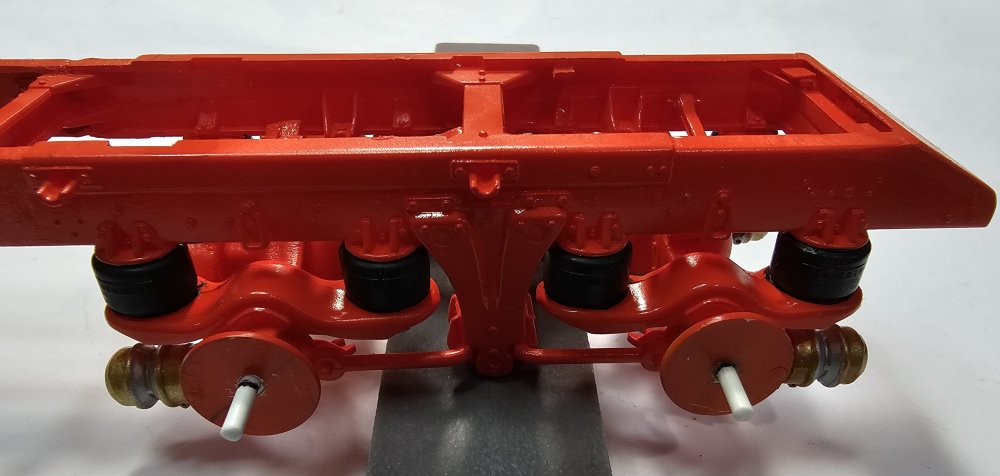 Drivers side view of the rear of the frame. I have painted the 8 air bags with Tamiya rubber black and the brake canisters gold and silver.
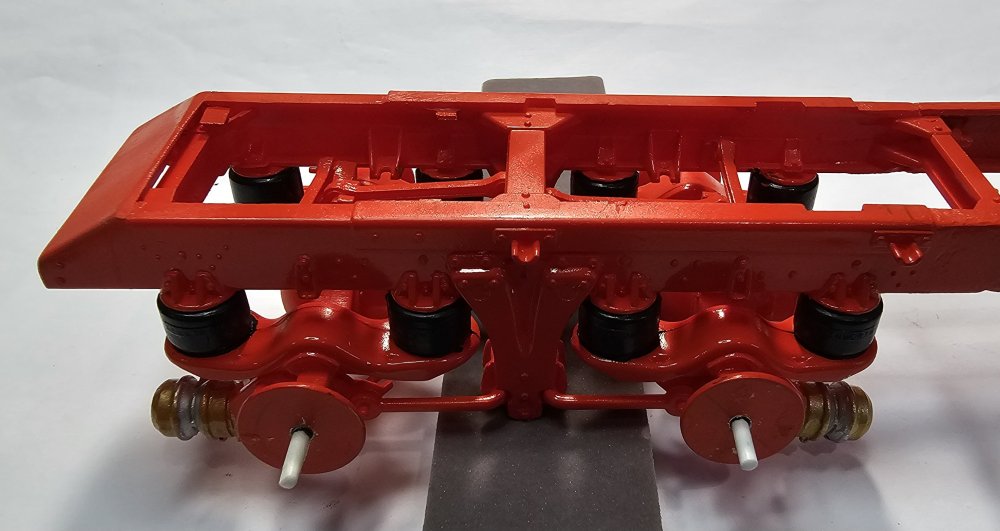 Passenger side view of the frame.
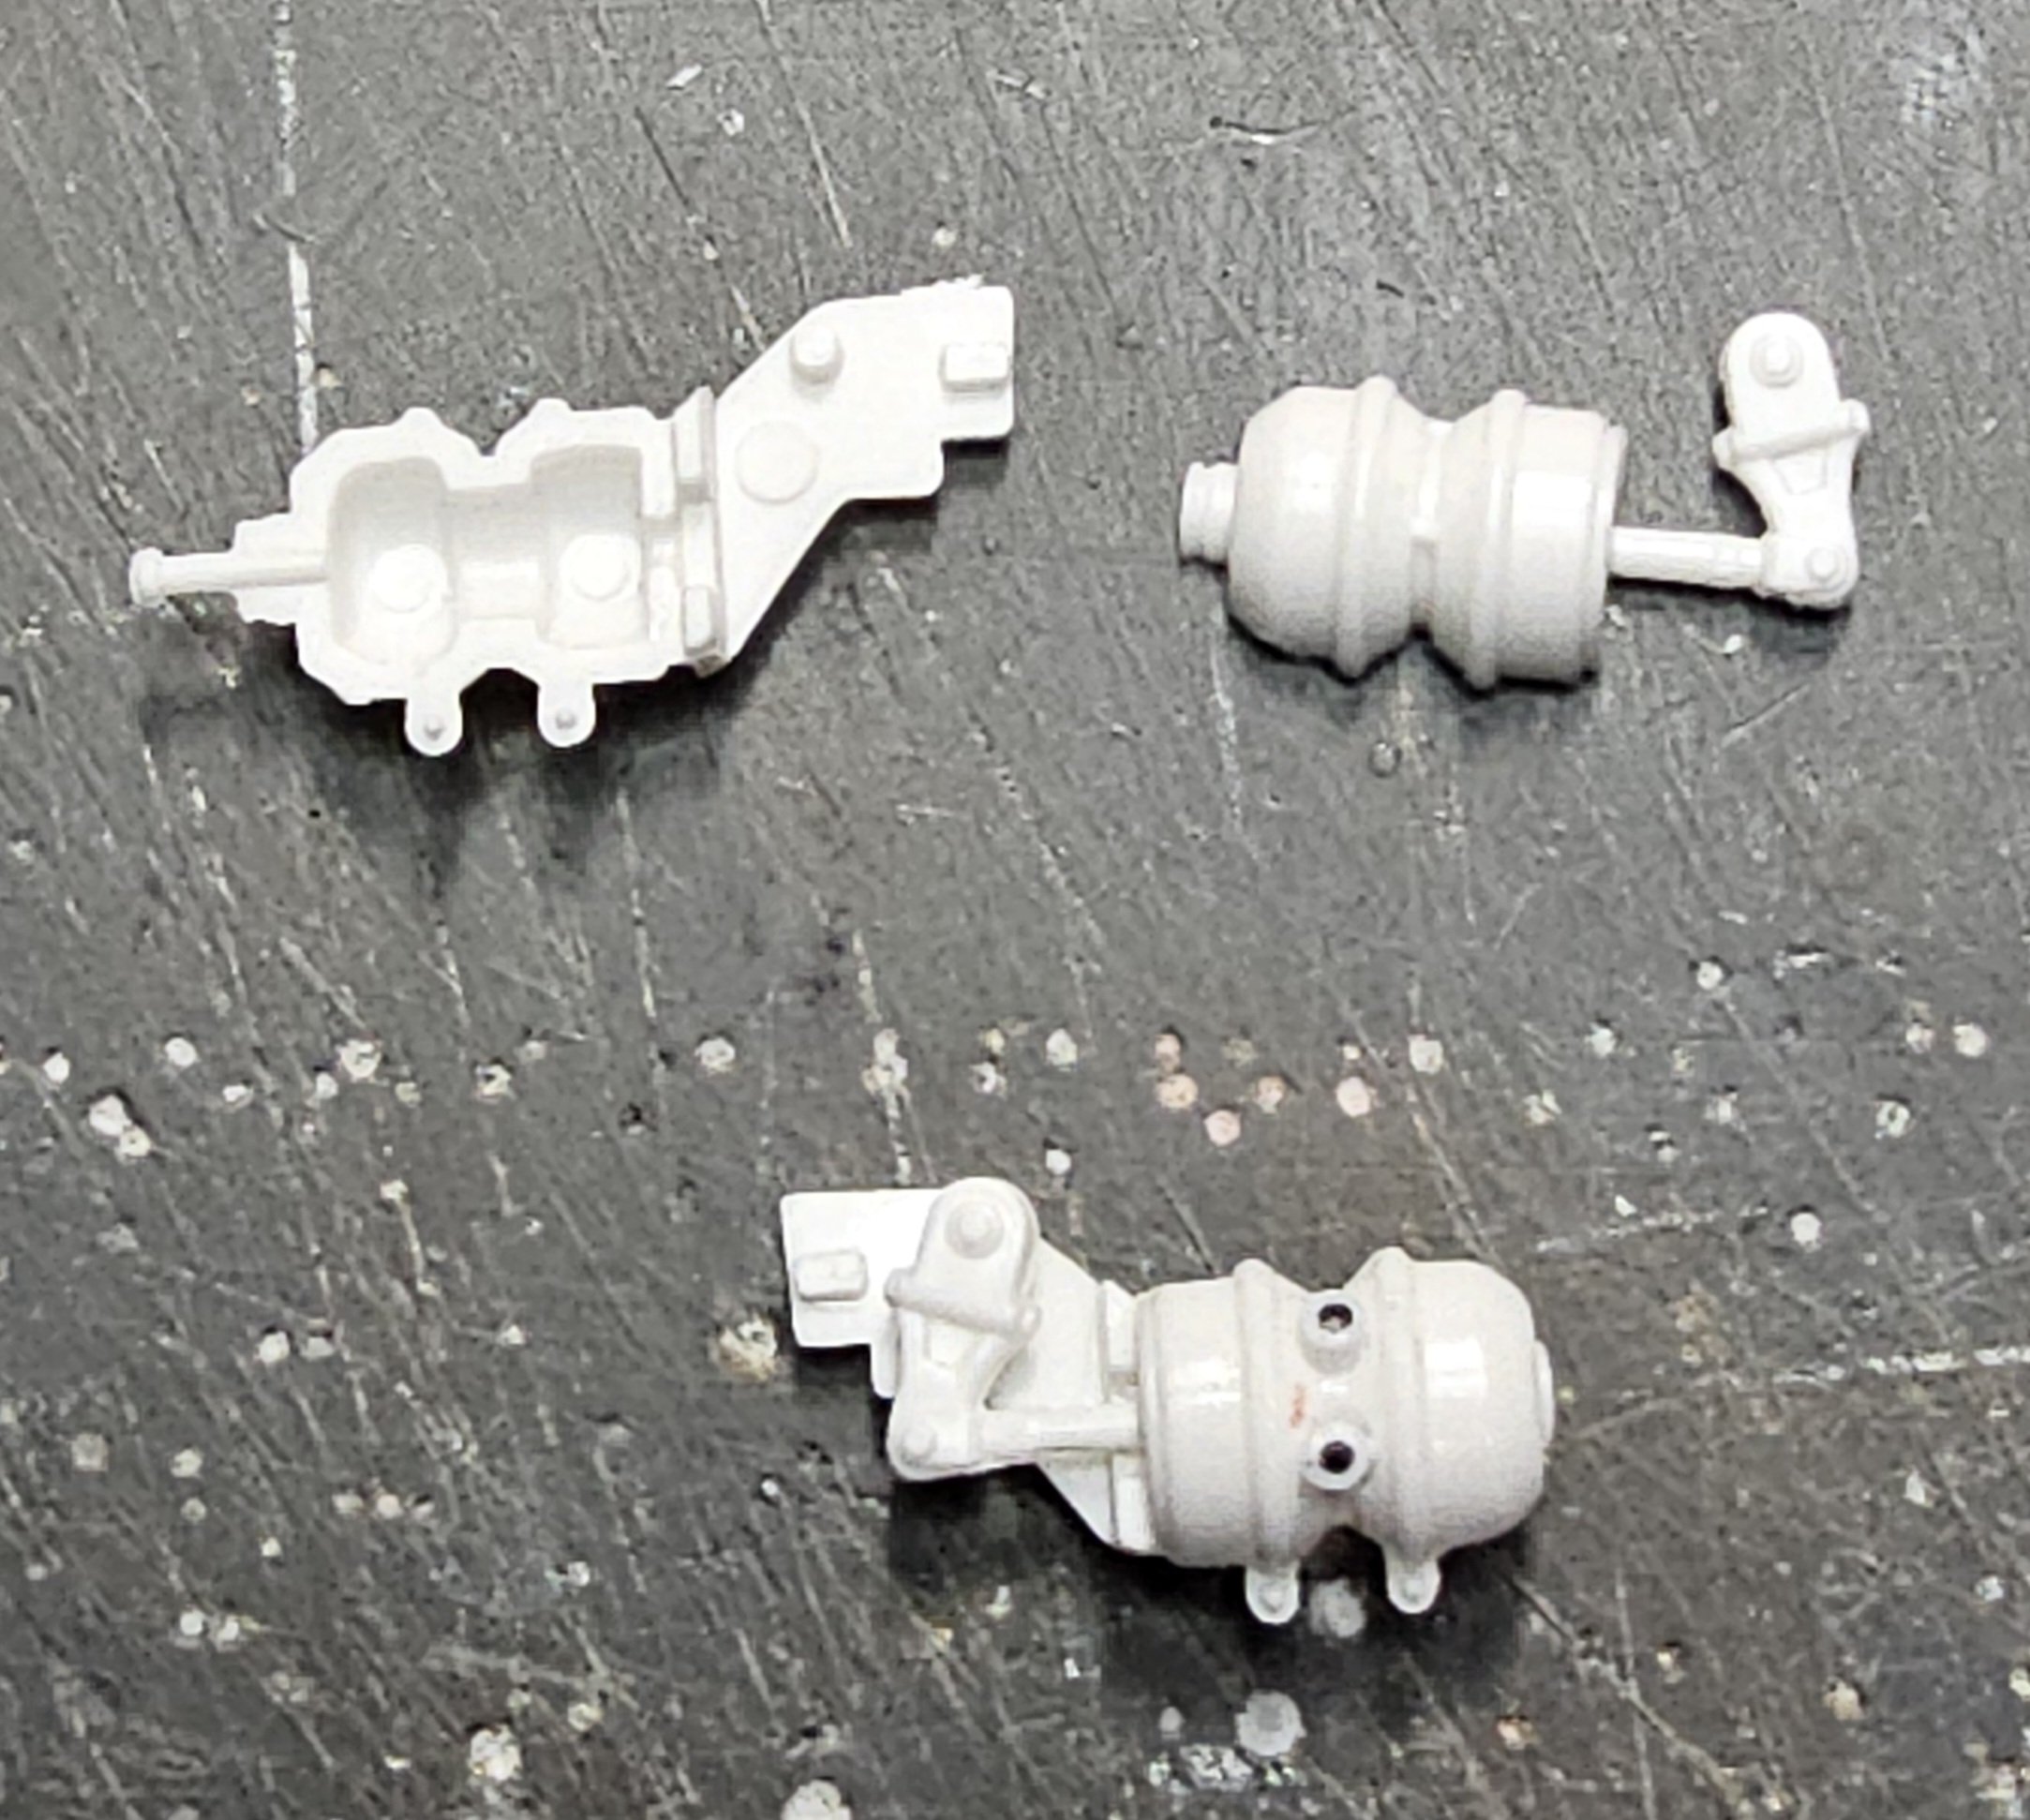
 This view shows the rear brake canisters.
 This view shows the front brake canisters.
 This view shows the detail I added to the exhaust pipe. I rapped some very small lead wire around the pipe to simulate the corrugated tubes that connect the exhaust to the stacks.
-
8
-
-
16 minutes ago, BlrwestSiR said:
Hi Ron, great to see the progress on this rig. The engine looks cool in a different colour. I did a Spitfire Merlin in red with chrome rocker covers once that thing popped.
In your last post, the pics aren't coming up for some reason.
Whoops! Sorry about that I reposted it.
Ron G
-
3
-
-
Hey all
Some more work done on this build.
 I painted the rubber around the lights with some Tamiya rubber black.
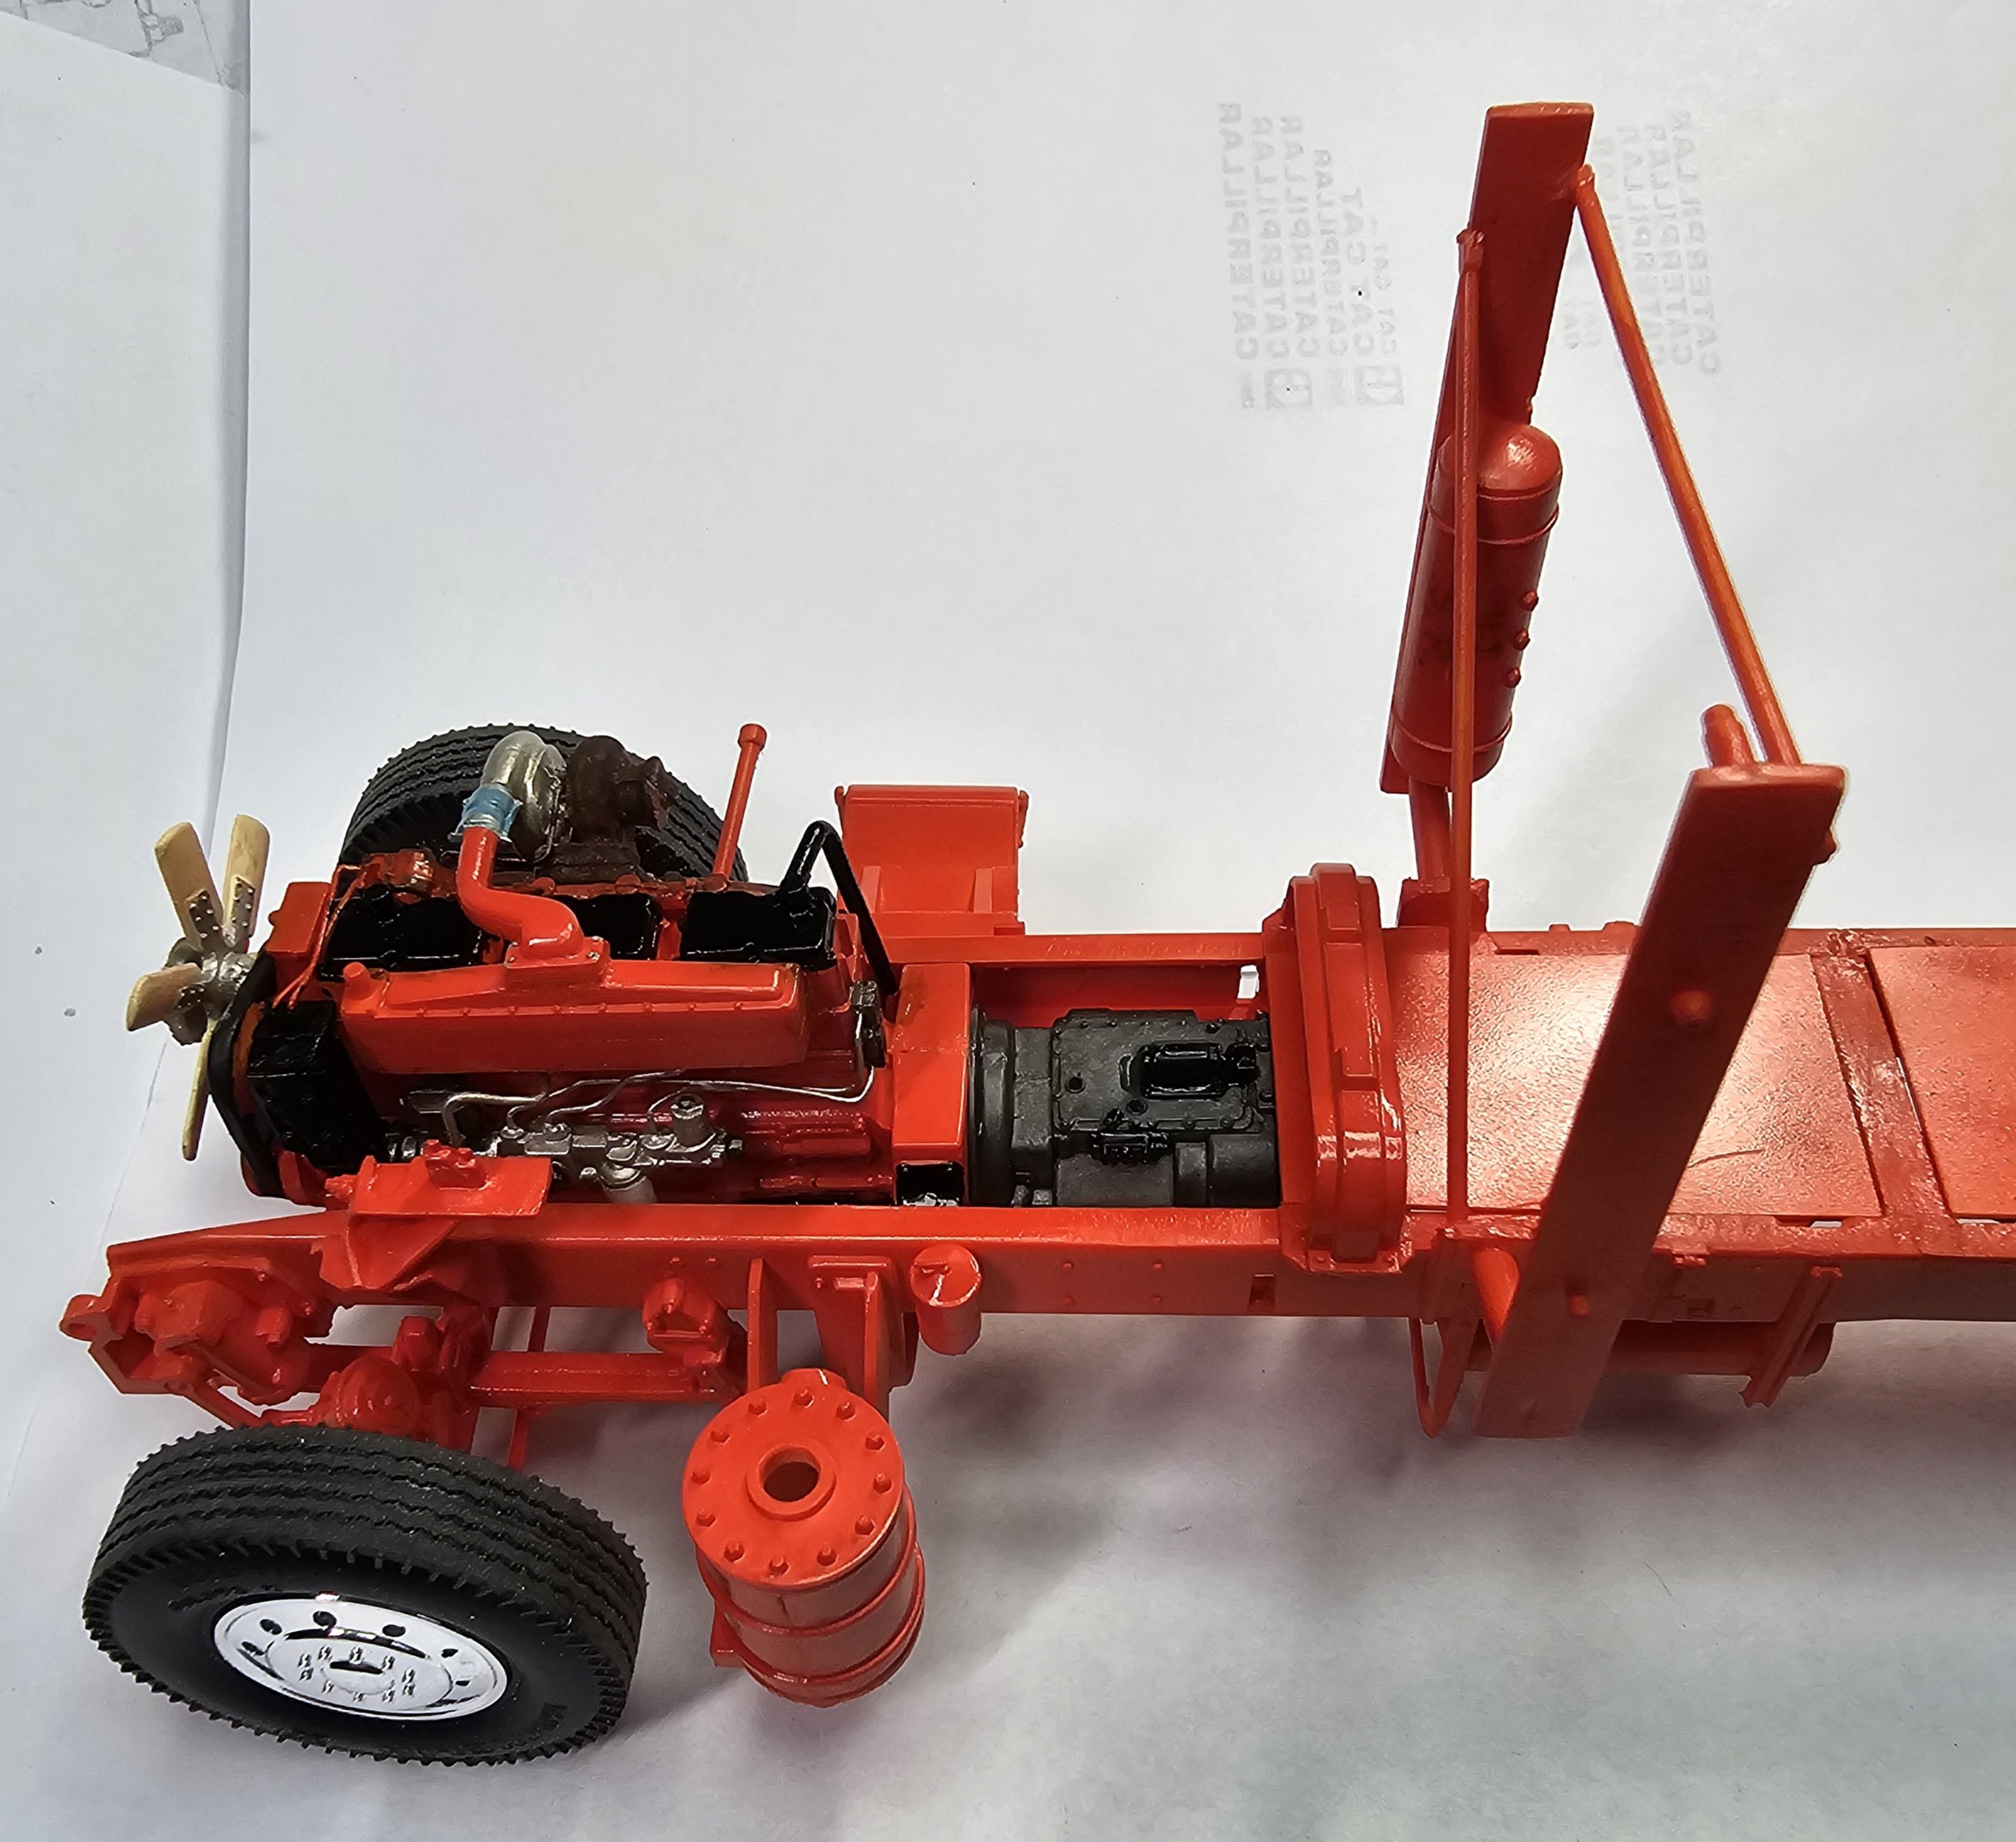
 This view shows some of the detail painting I have done on the engine.
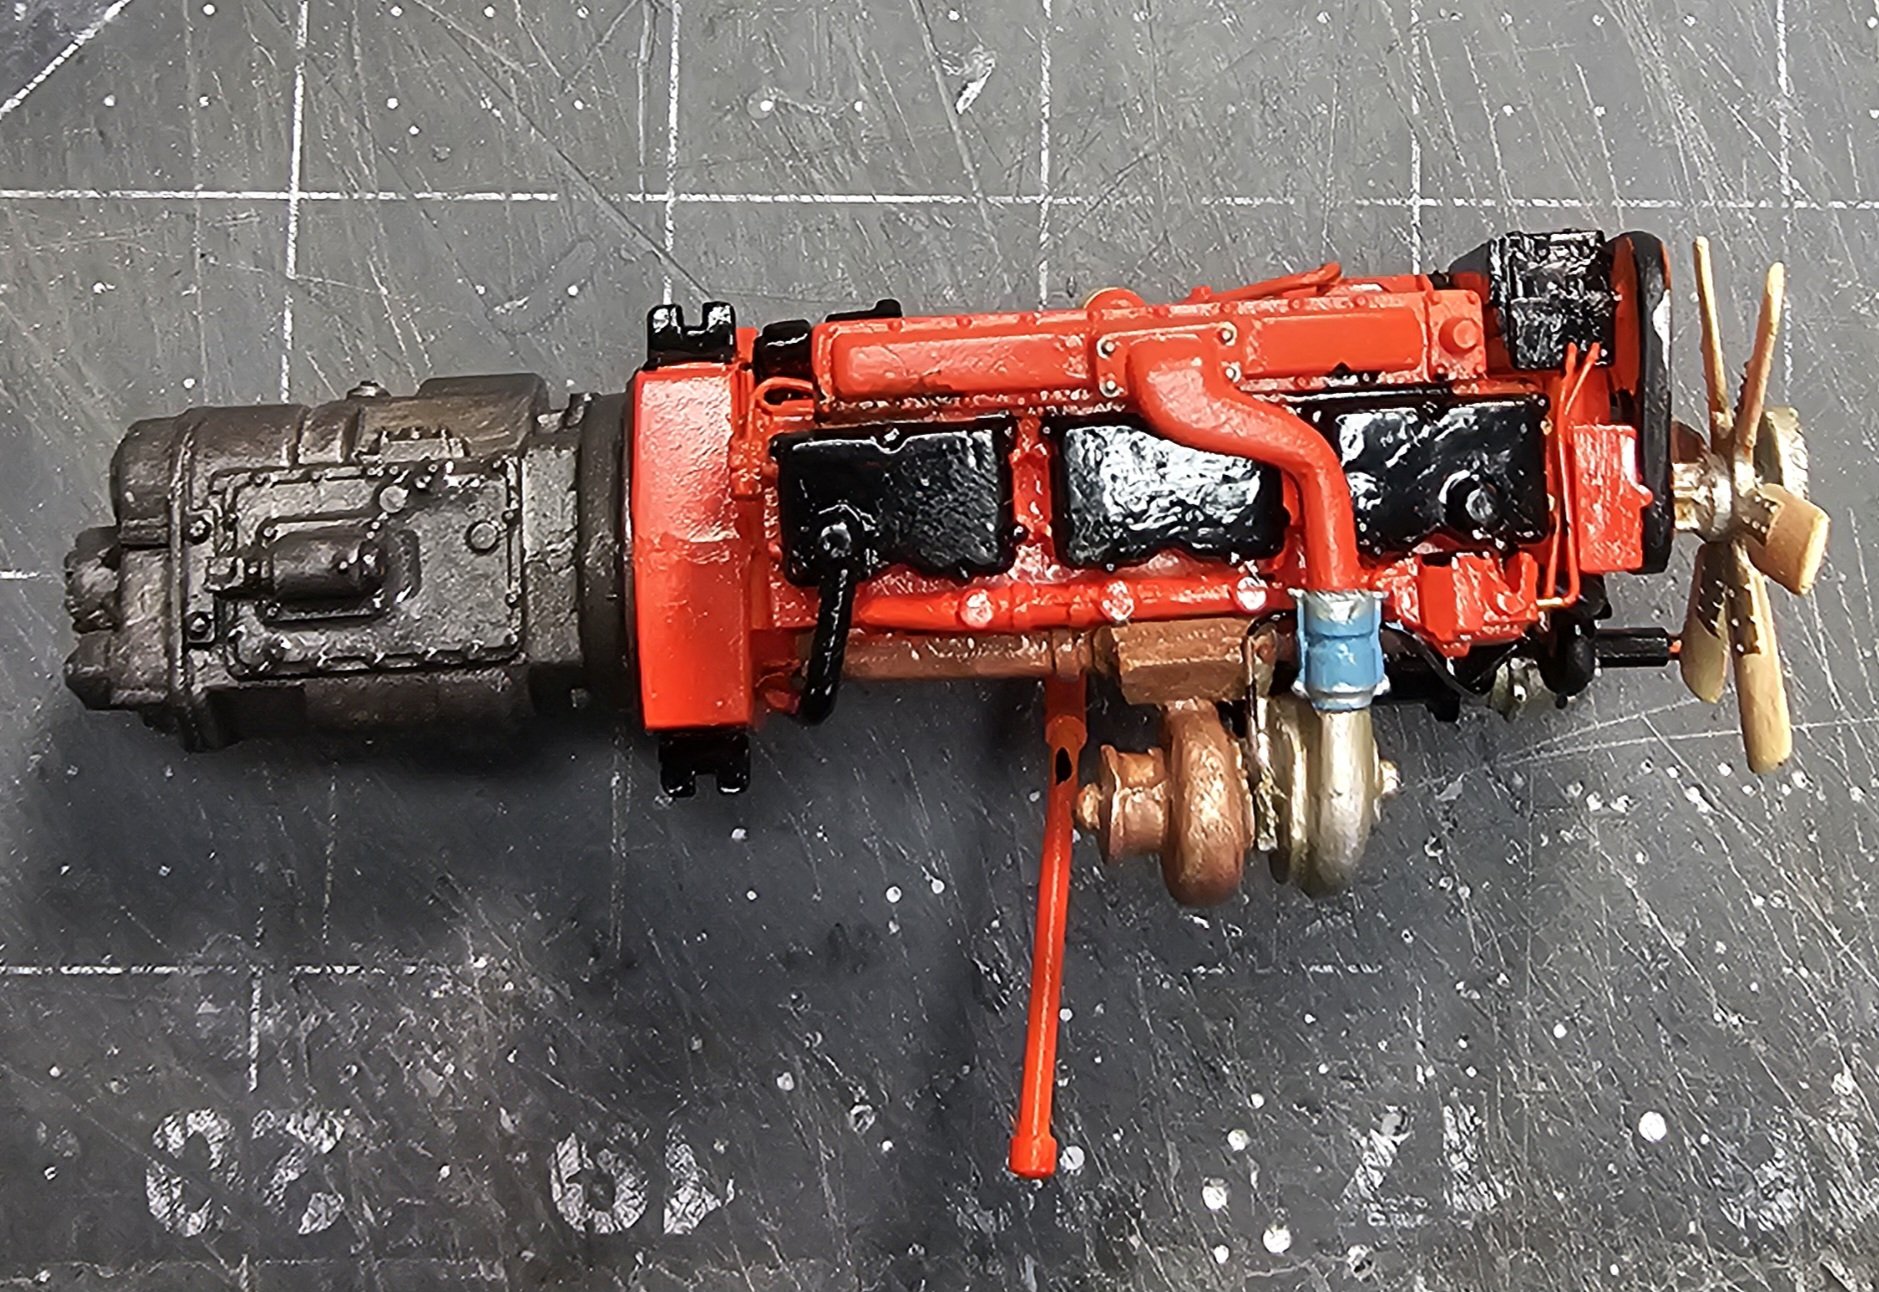
 The other side of the engine. I added some rust texture to the turbo and exhaust manifold.
 I painted the valve packs on the rear of the transmission black.
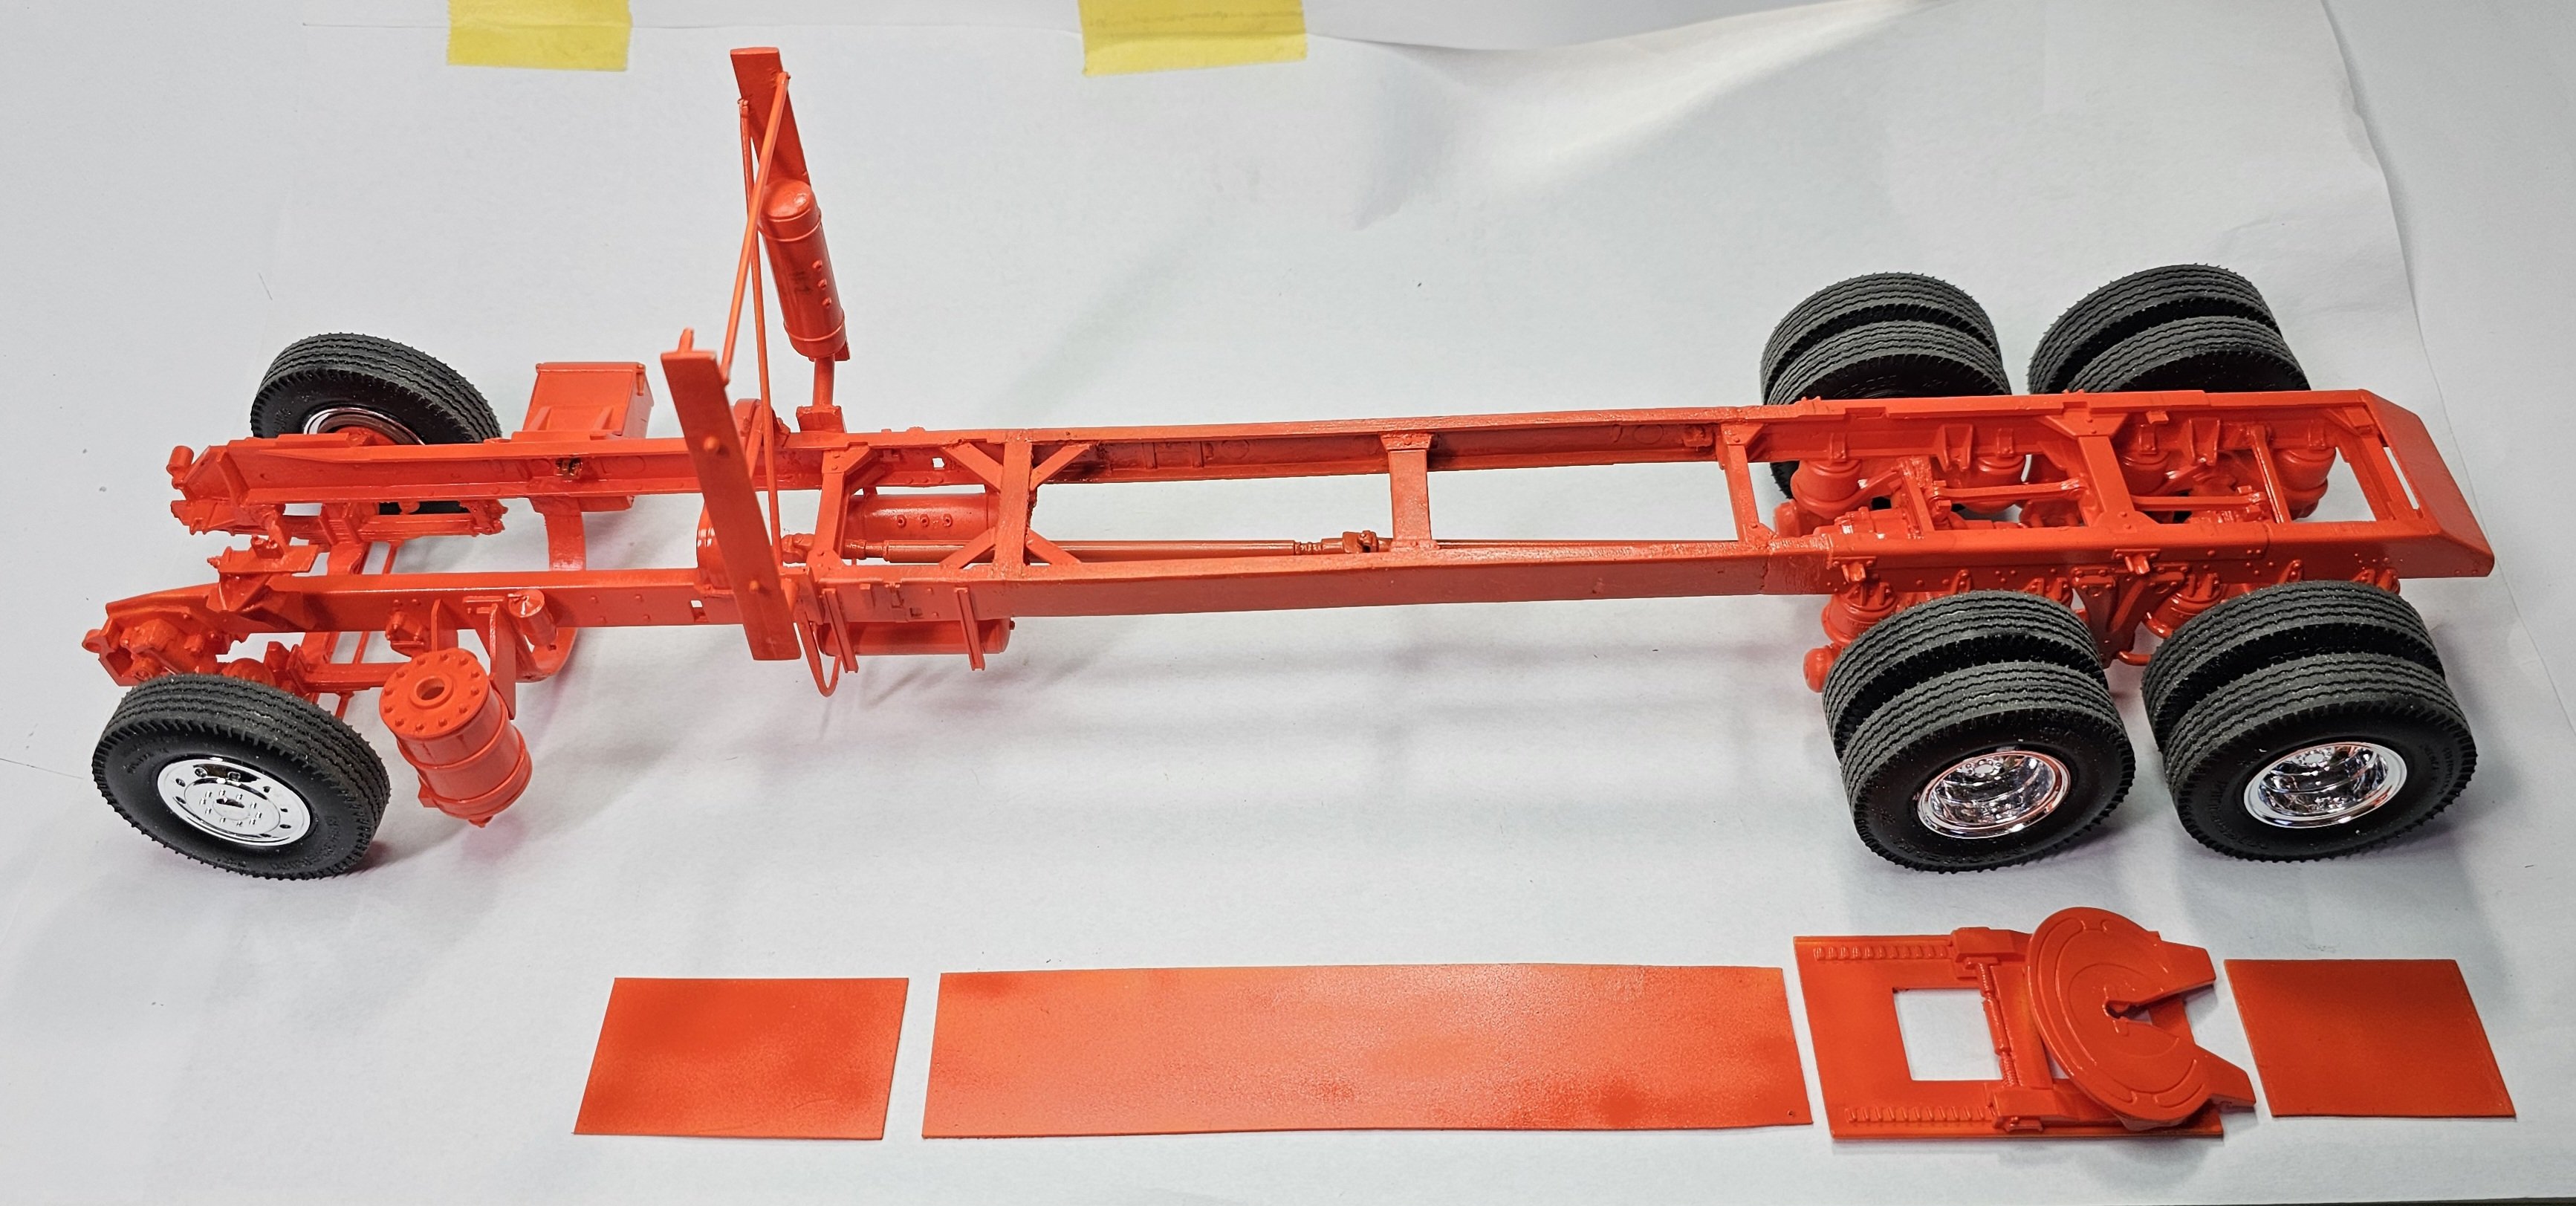
 This view shows the frame finished painted along with the three deck plates and the fifth wheel.
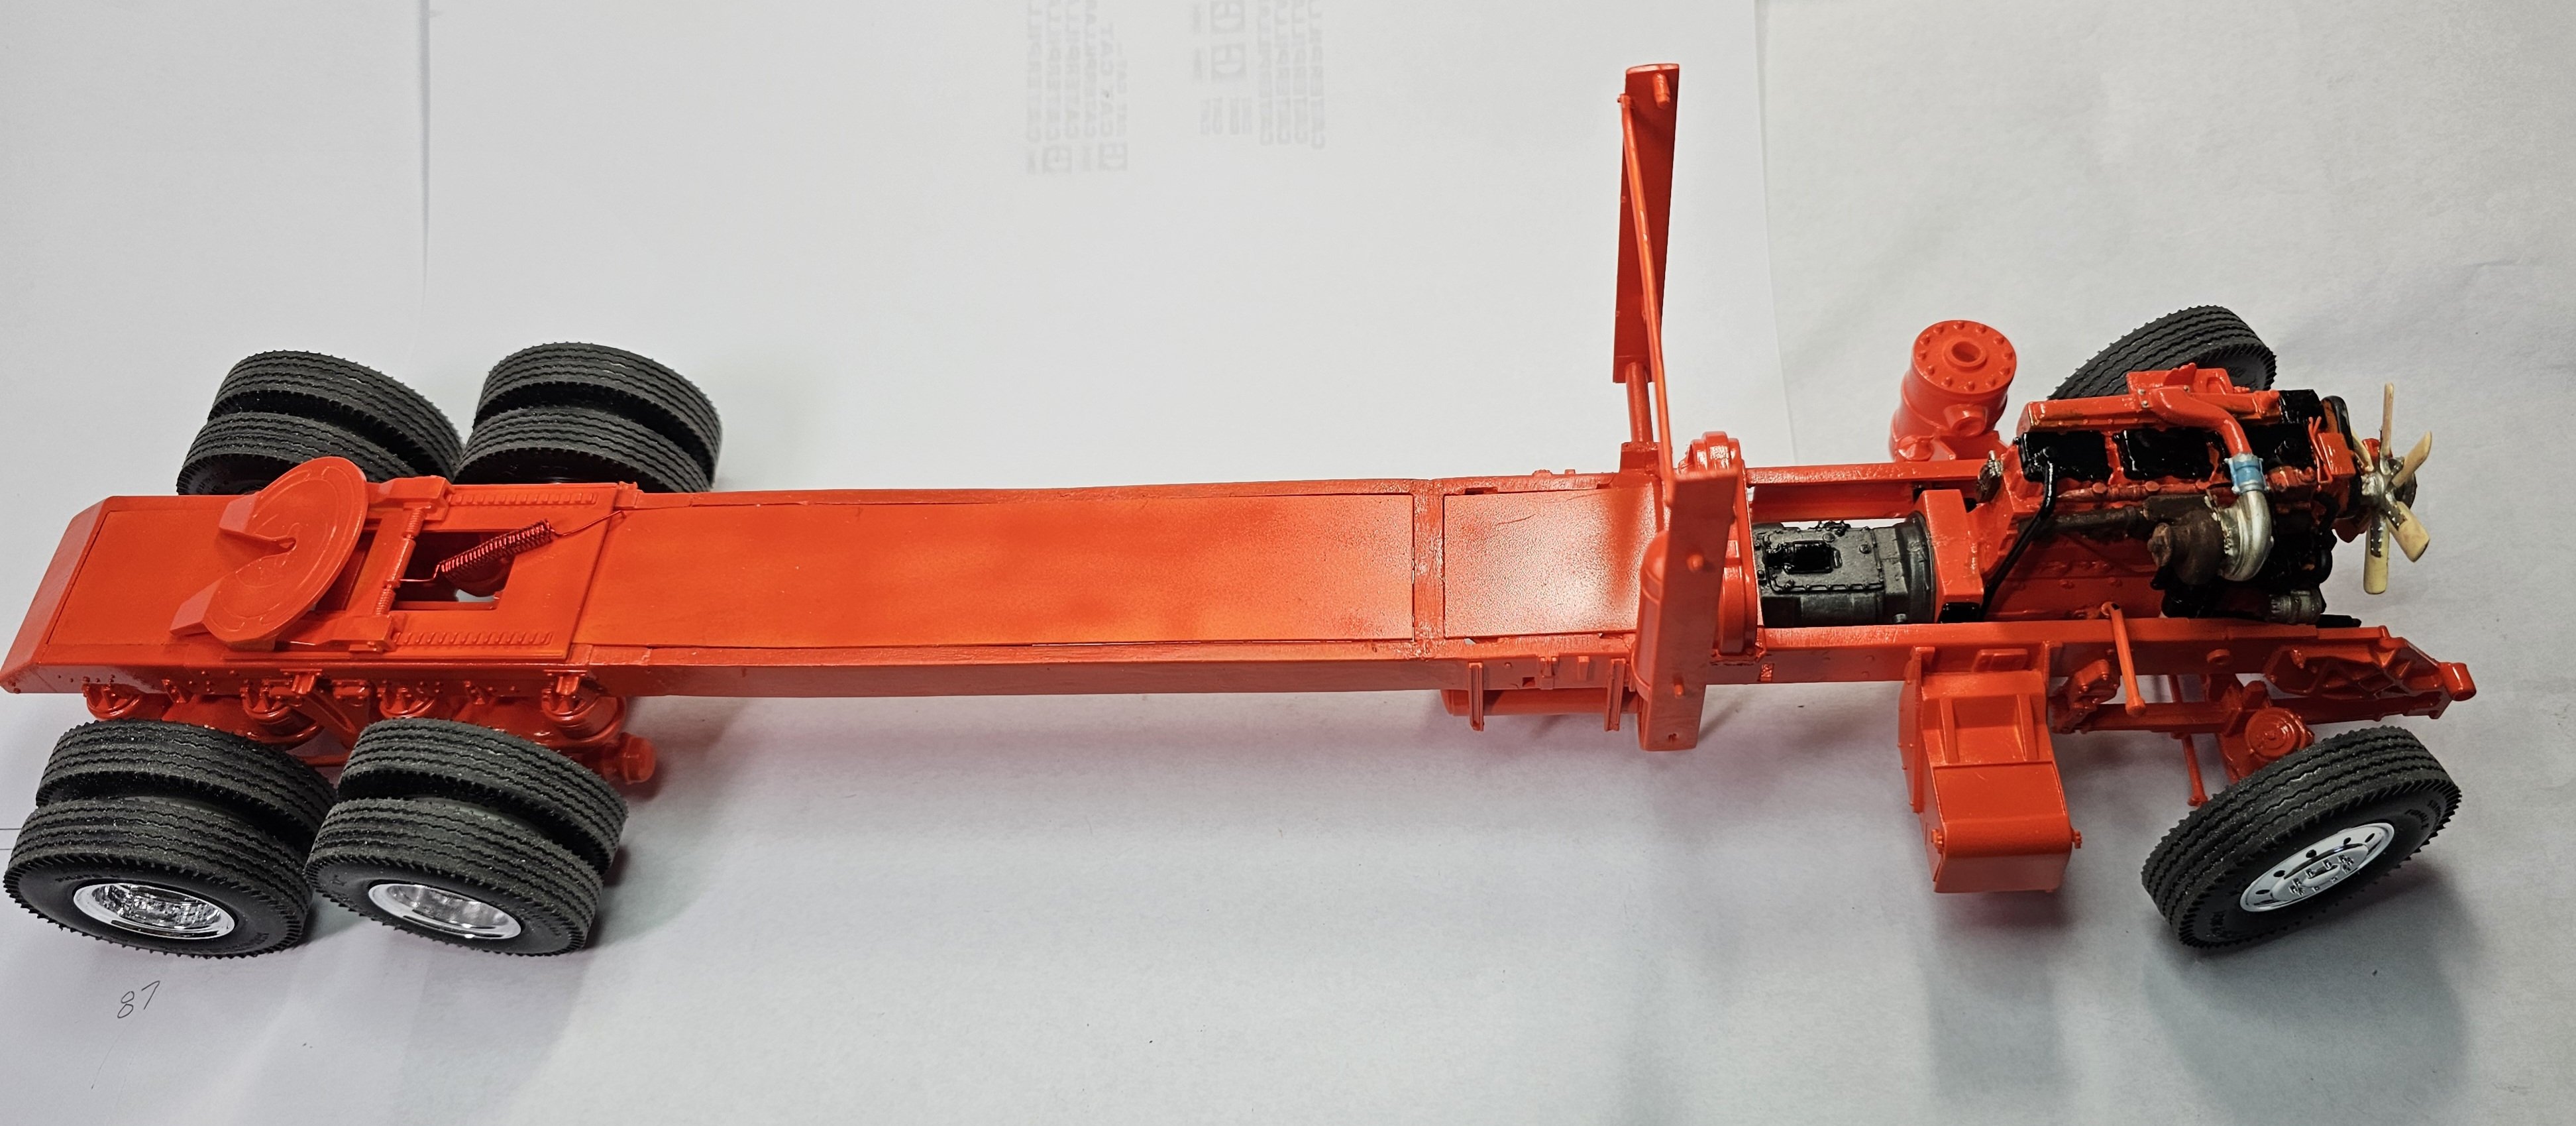
 This view shows the rolling chassis temporarily together.
 The other side of the rolling chassis.
 Closer view of the engine in the frame.
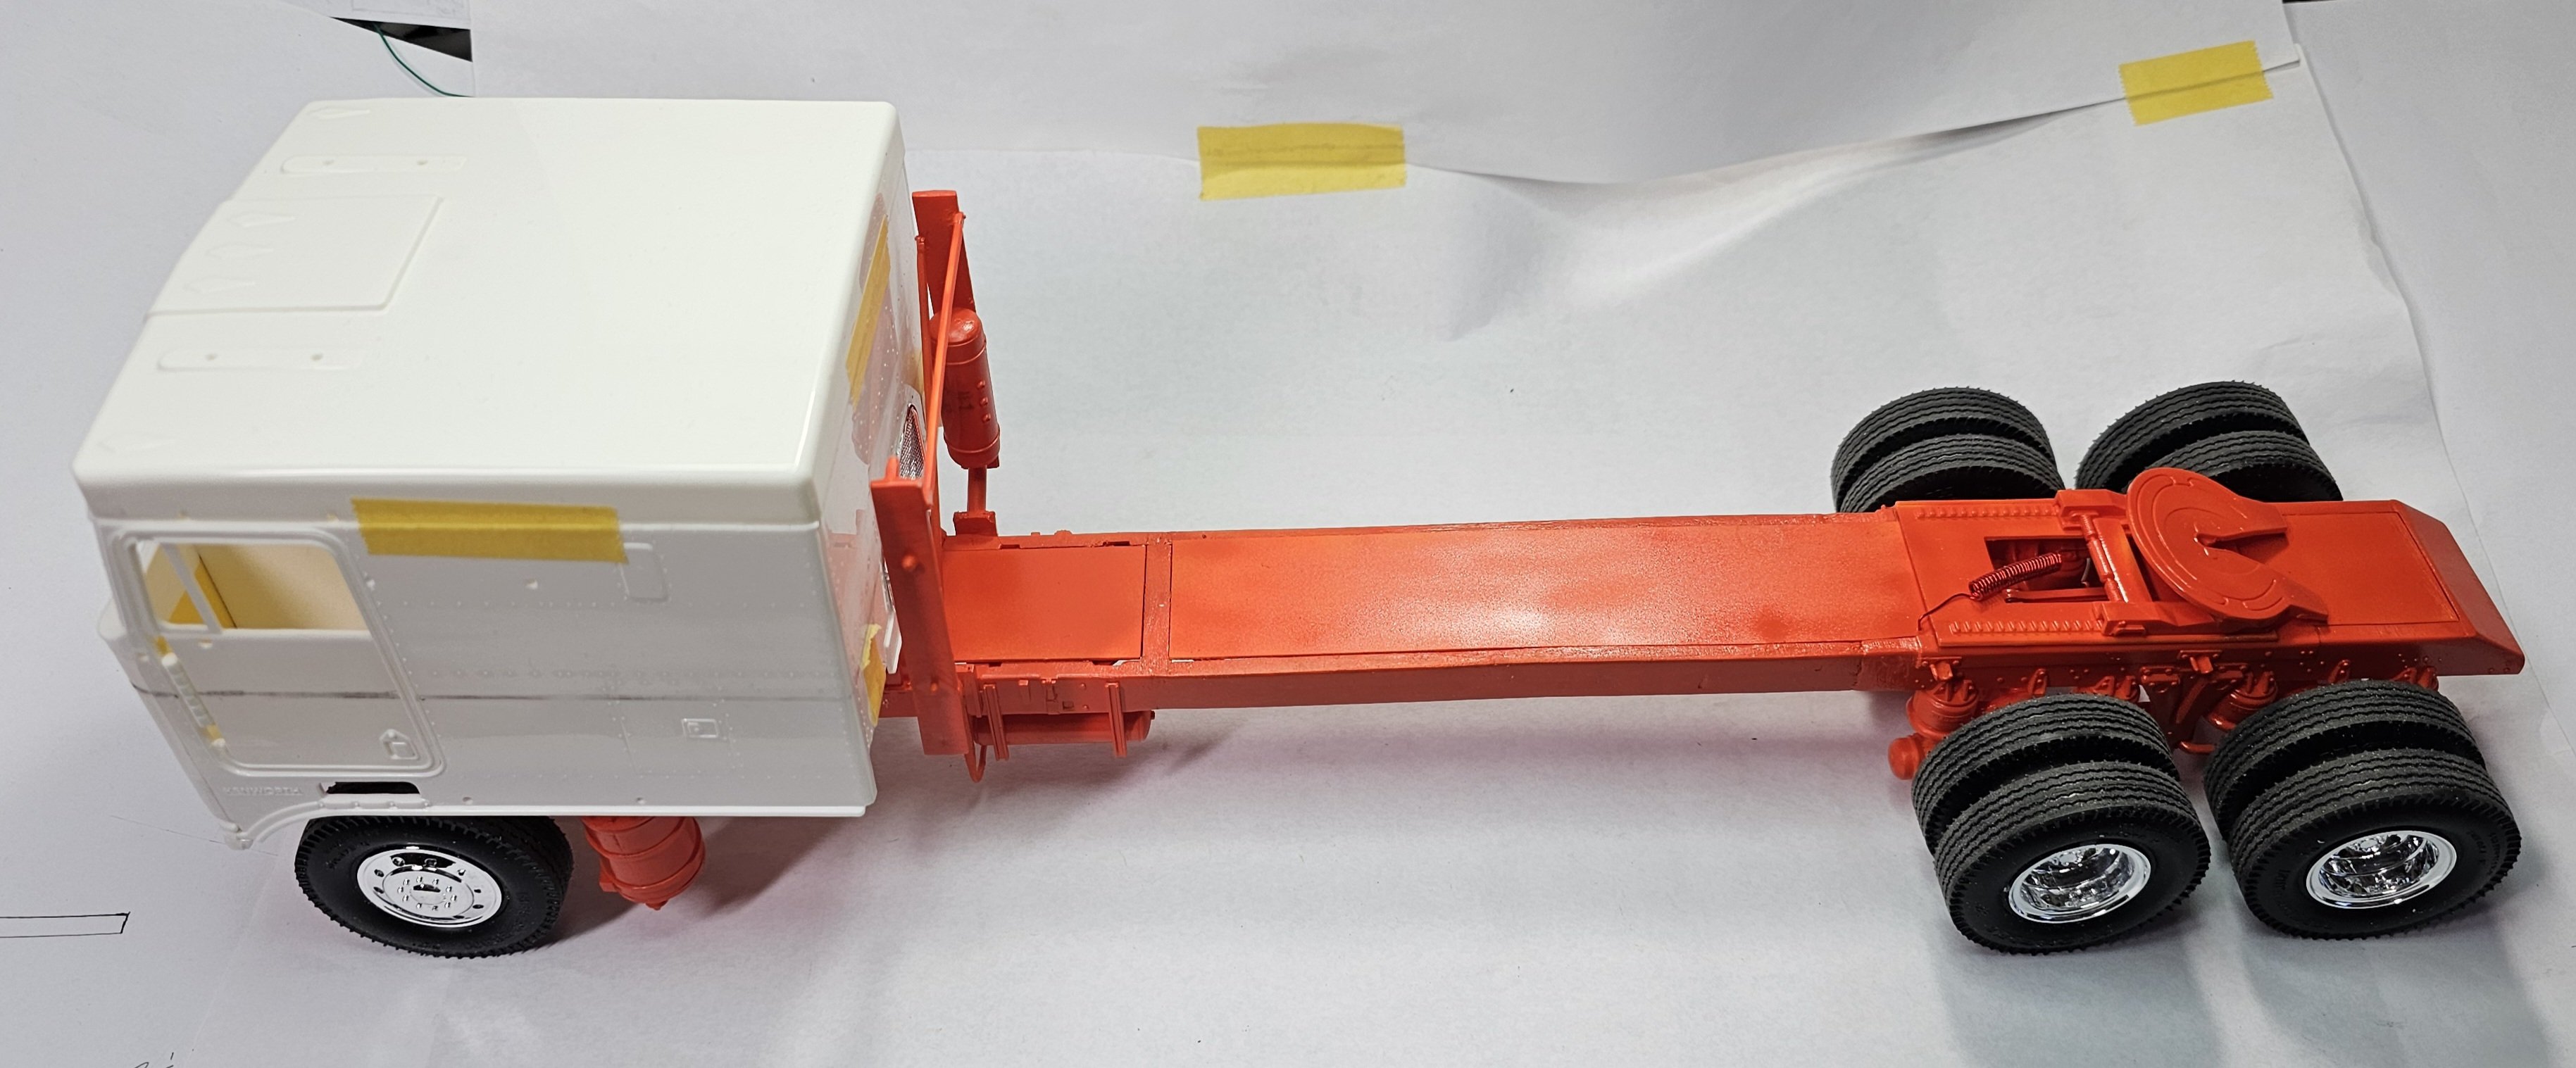
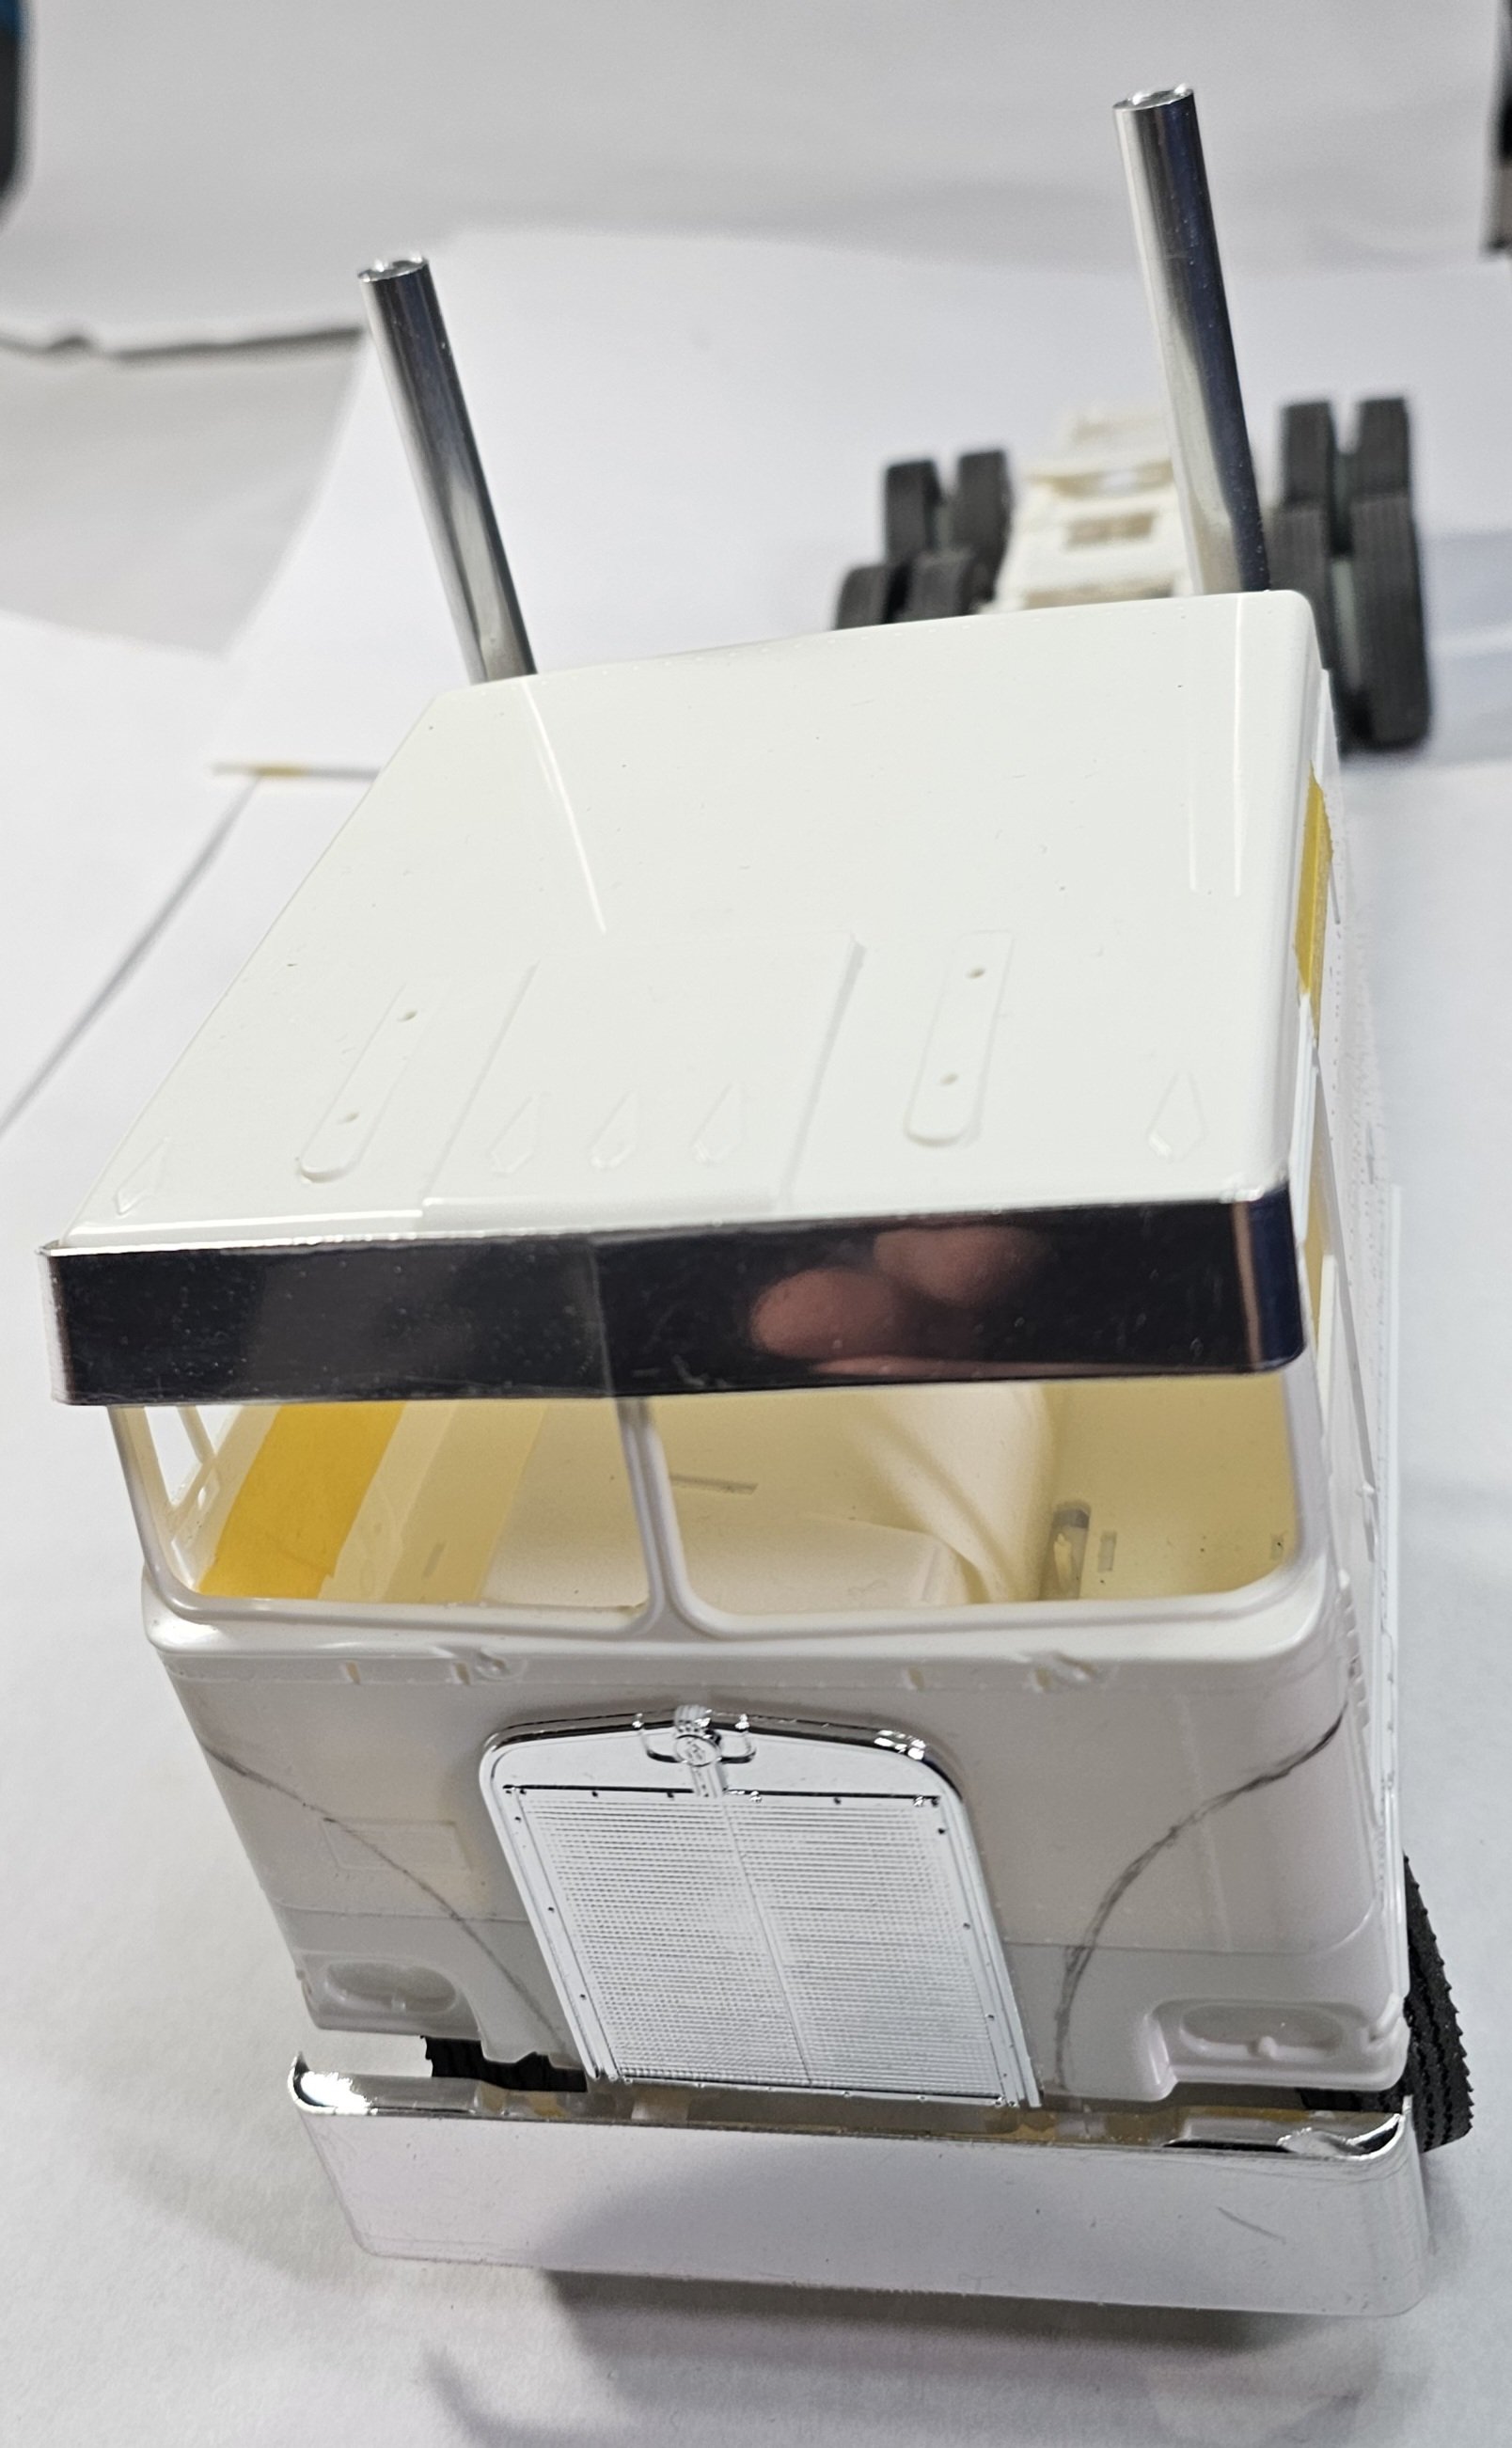
 This view shows the cab temporarily in place on the rolling chassis. Well that's it for now be back with more updates soon.
Ron G
-
7
-
-
19 minutes ago, Jeff said:
When you said you were painting the engine orange, I thought 🤔 hhhmmm not sure about that … BUT you NAILED it. That looks awesome ! I love it and the fan detail is perfect., I really like what you did there Ron, I usually paint my engines in as close to factory colors as I can, I can certainly see I have to step out of my mundane ways and do what you did here. This is cool !
Hey Jeff
I usually paint my stuff to as exact to factory colors as I can also, but this being a total custom show Queen...lol I thought it needed something special.
So, Jeff let me ask you a question. Should I leave the brake cans painted orange or should I paint them the goldish anodized and aluminum colors they come in? I'm leaning towards the goldish & aluminum color.
I'm packing up the dumper parts as we speak, I may not make to the post office today but I'll get it there Friday
Ron G
-
6
-
-
Hey all
Got some more work done on this build.
 This view shows the engine painted in orange & black. I still need to do some detail painting on it.
 The other side of the engine.
 Top view of the engine.
 rear of the fan blade.
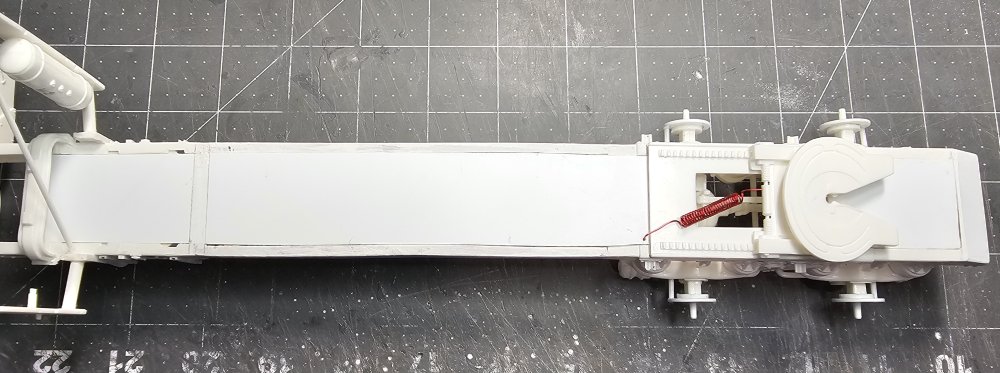
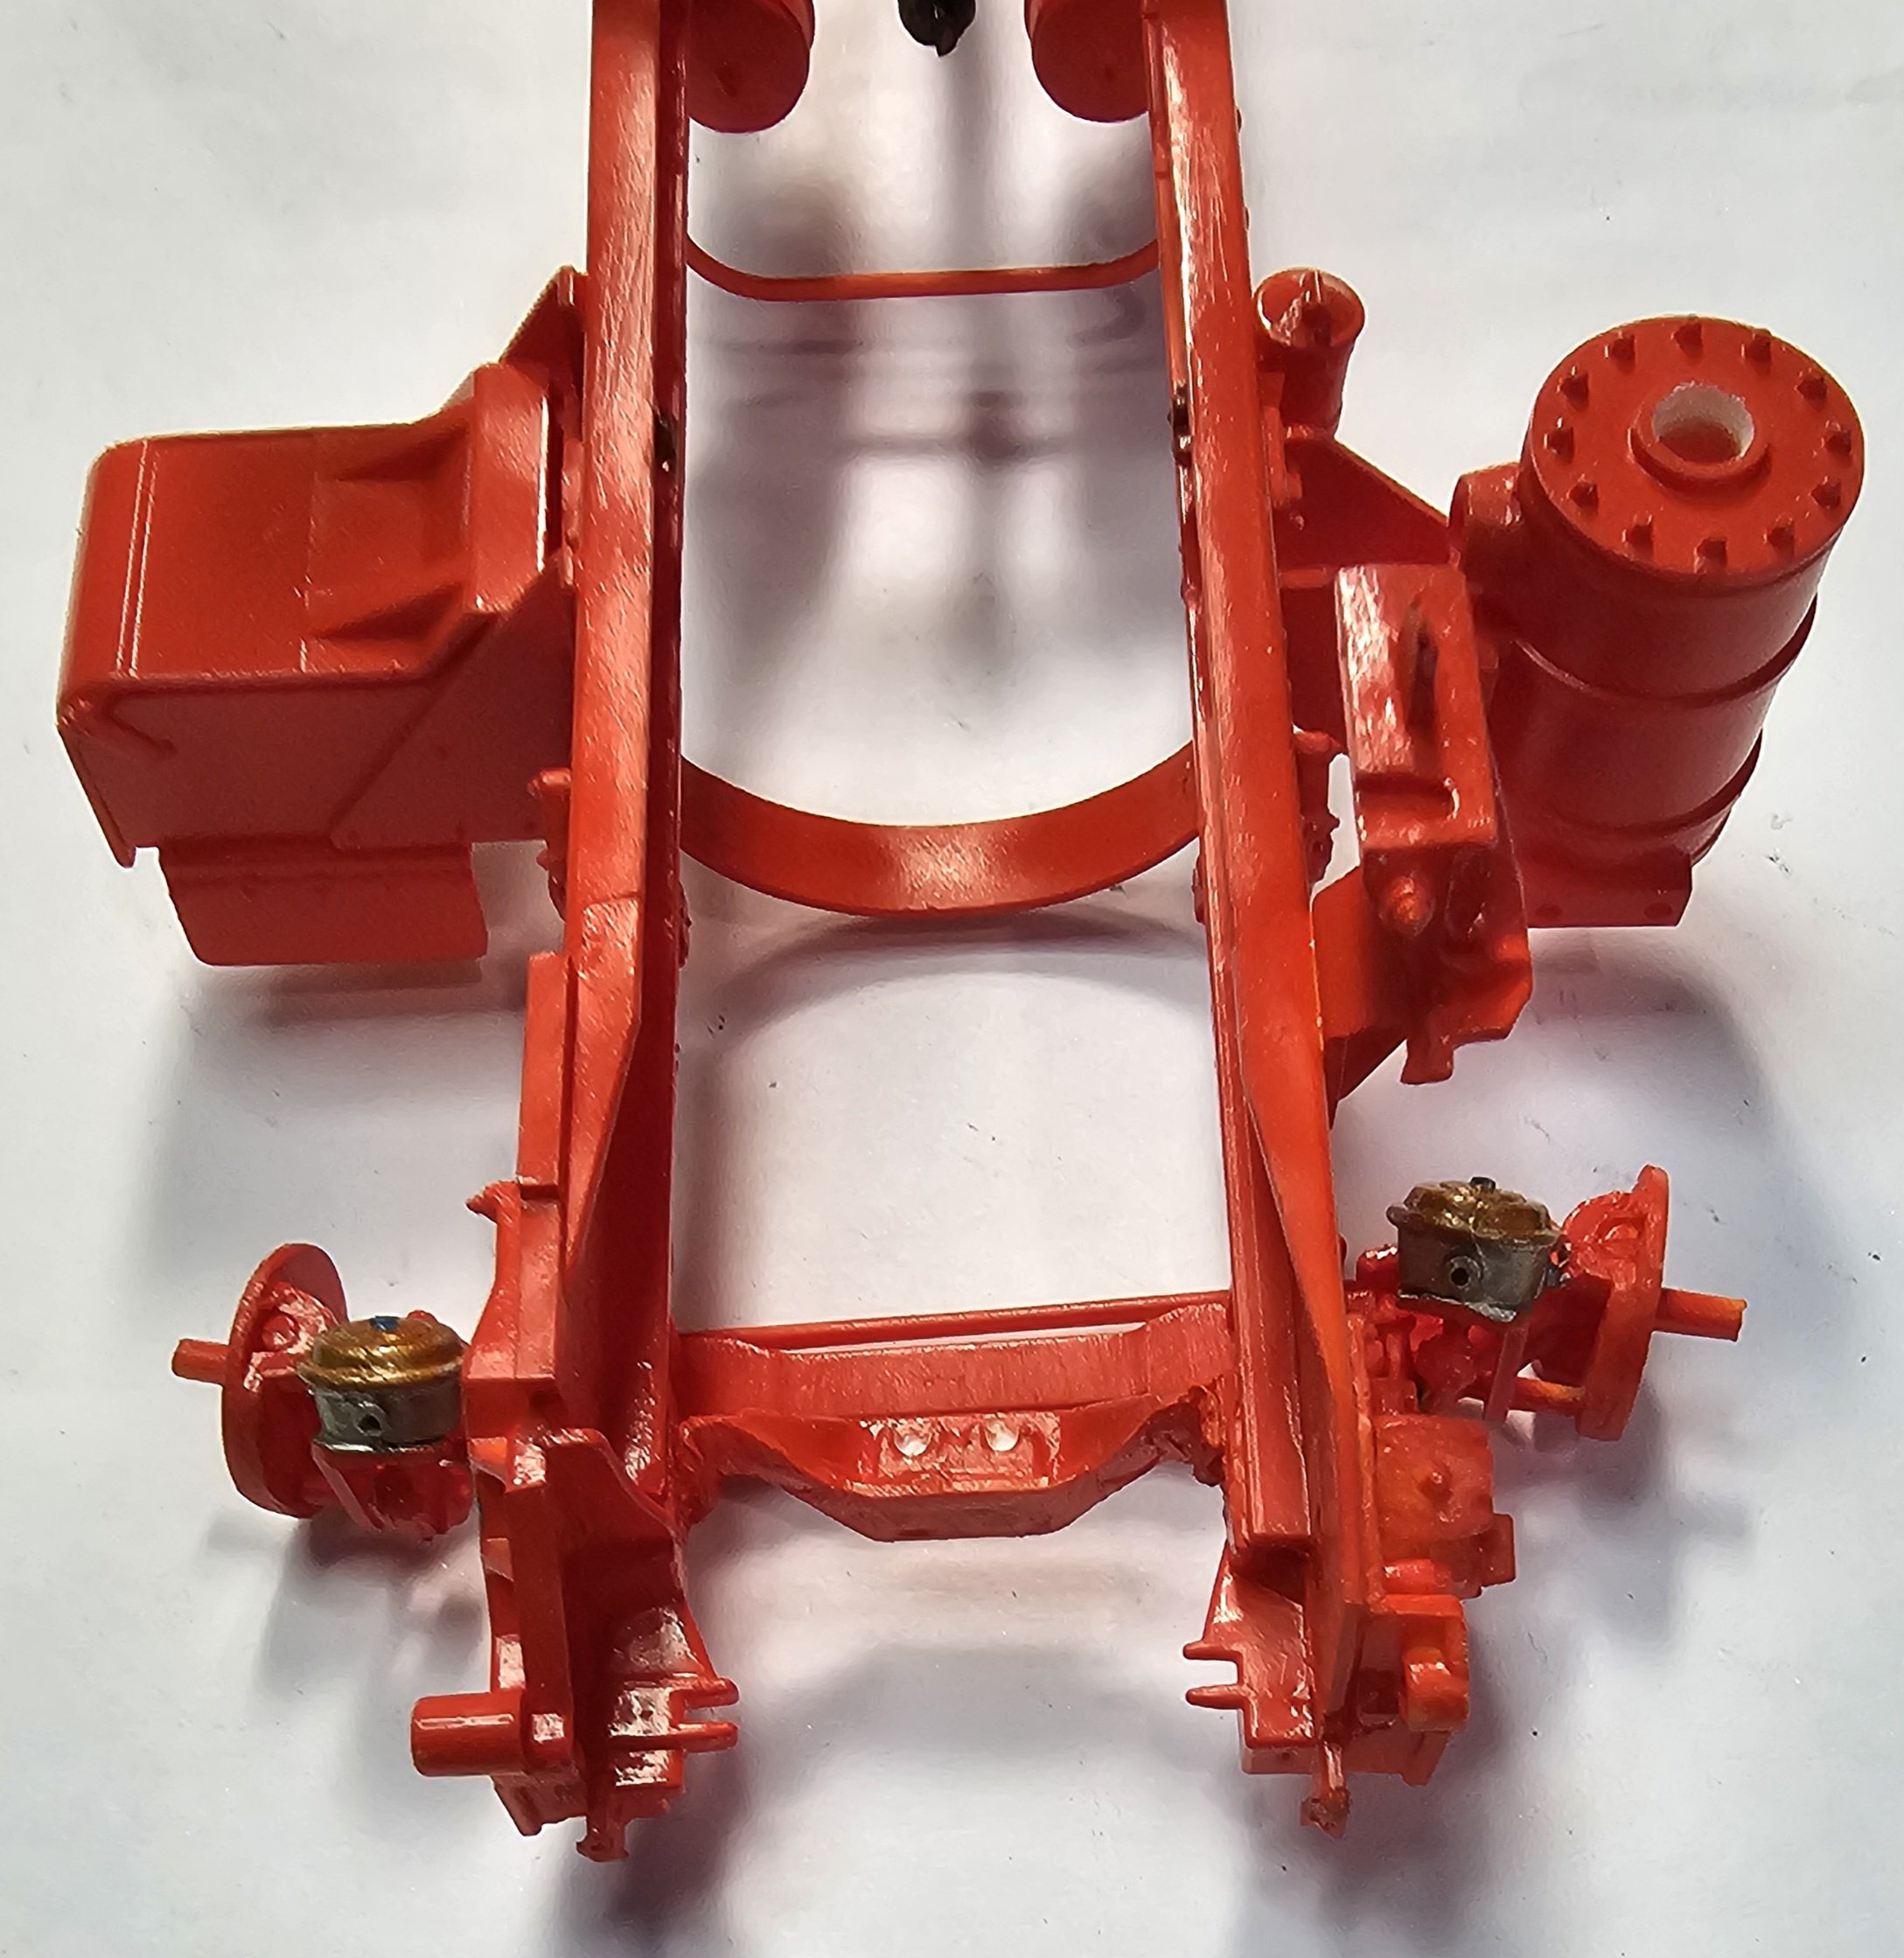
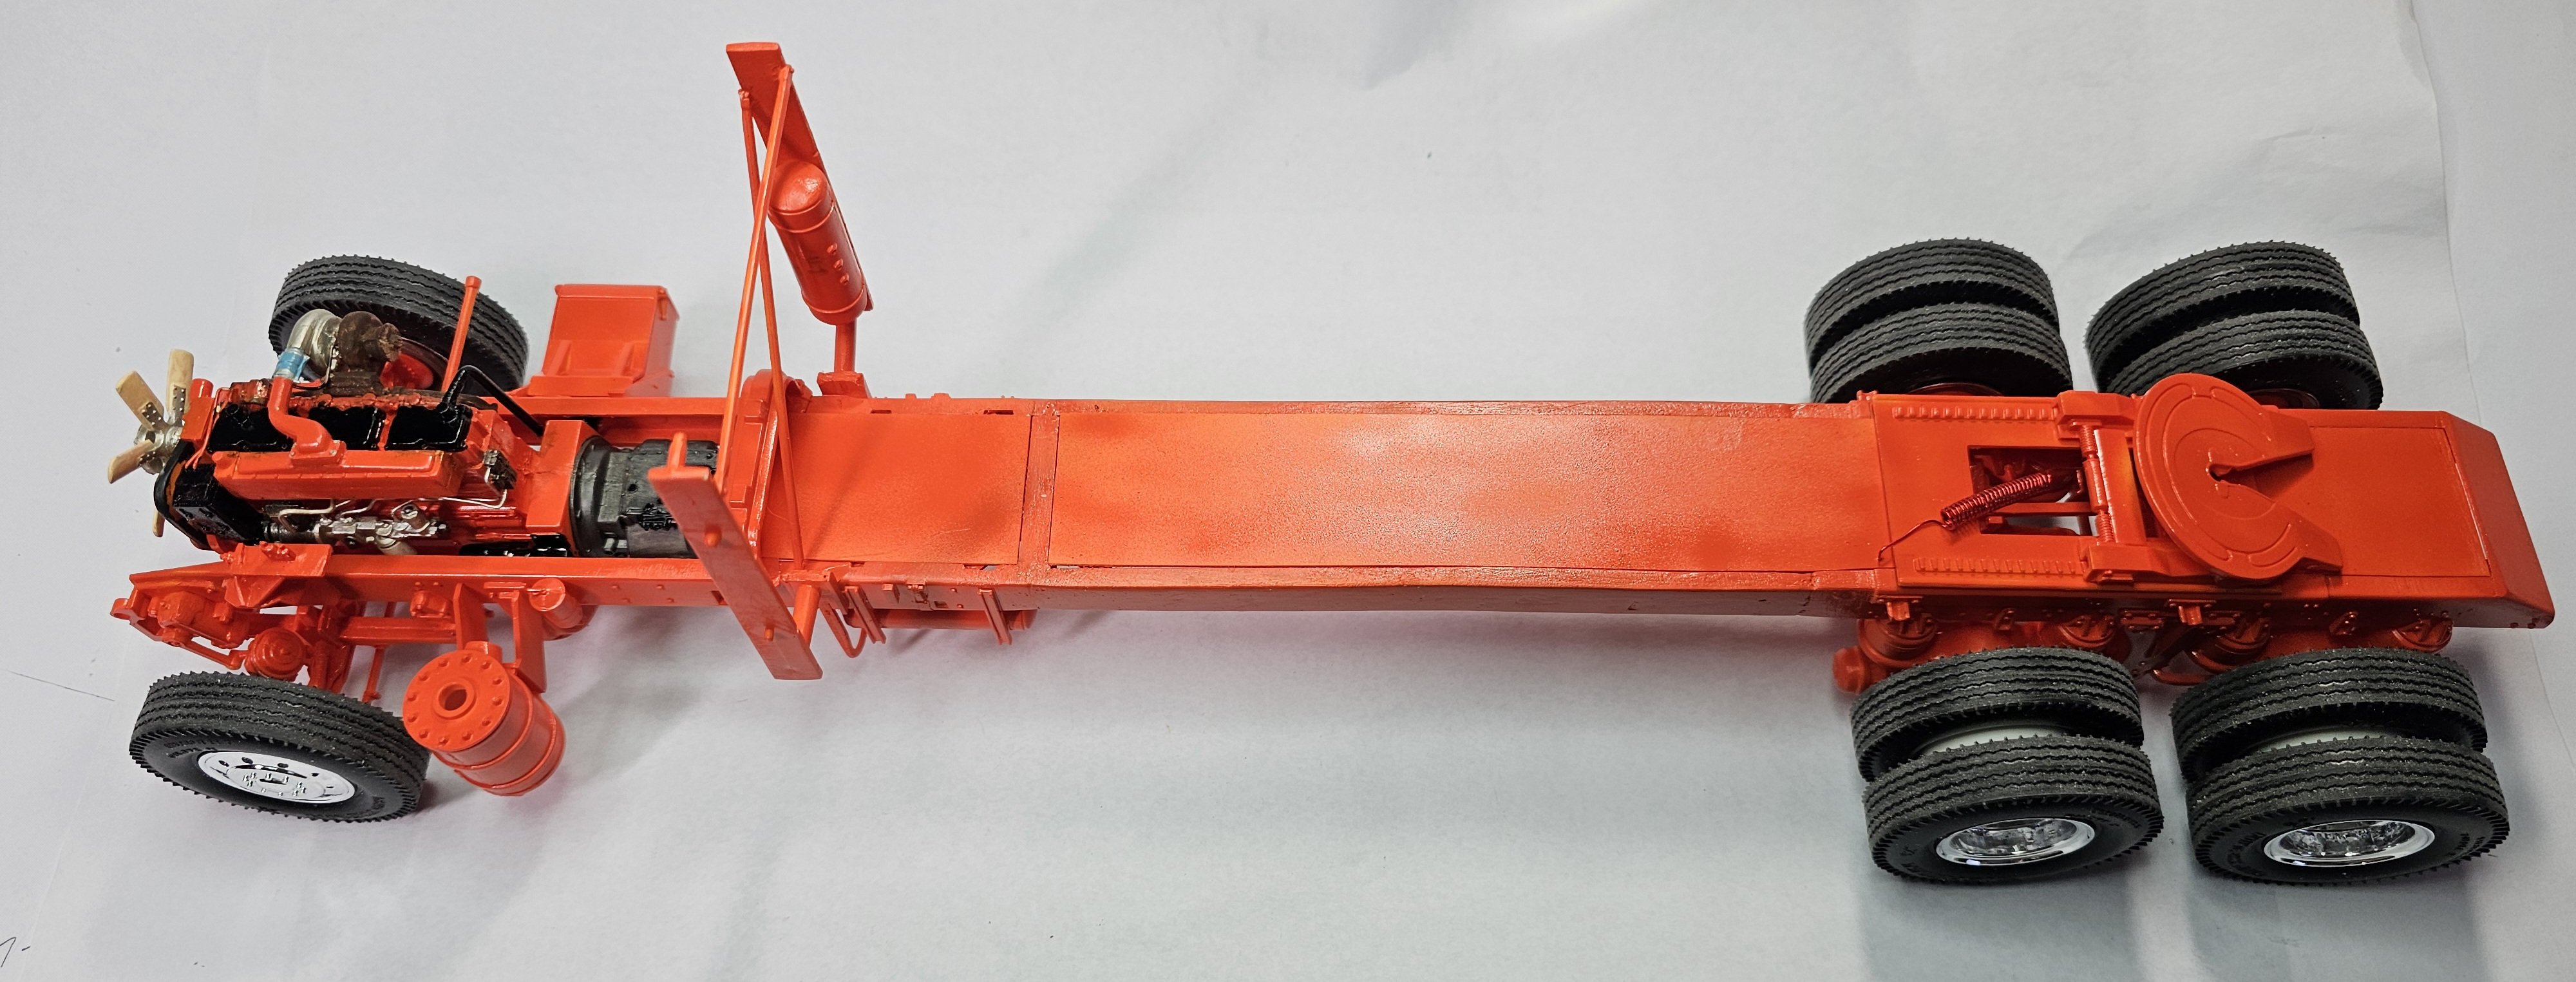
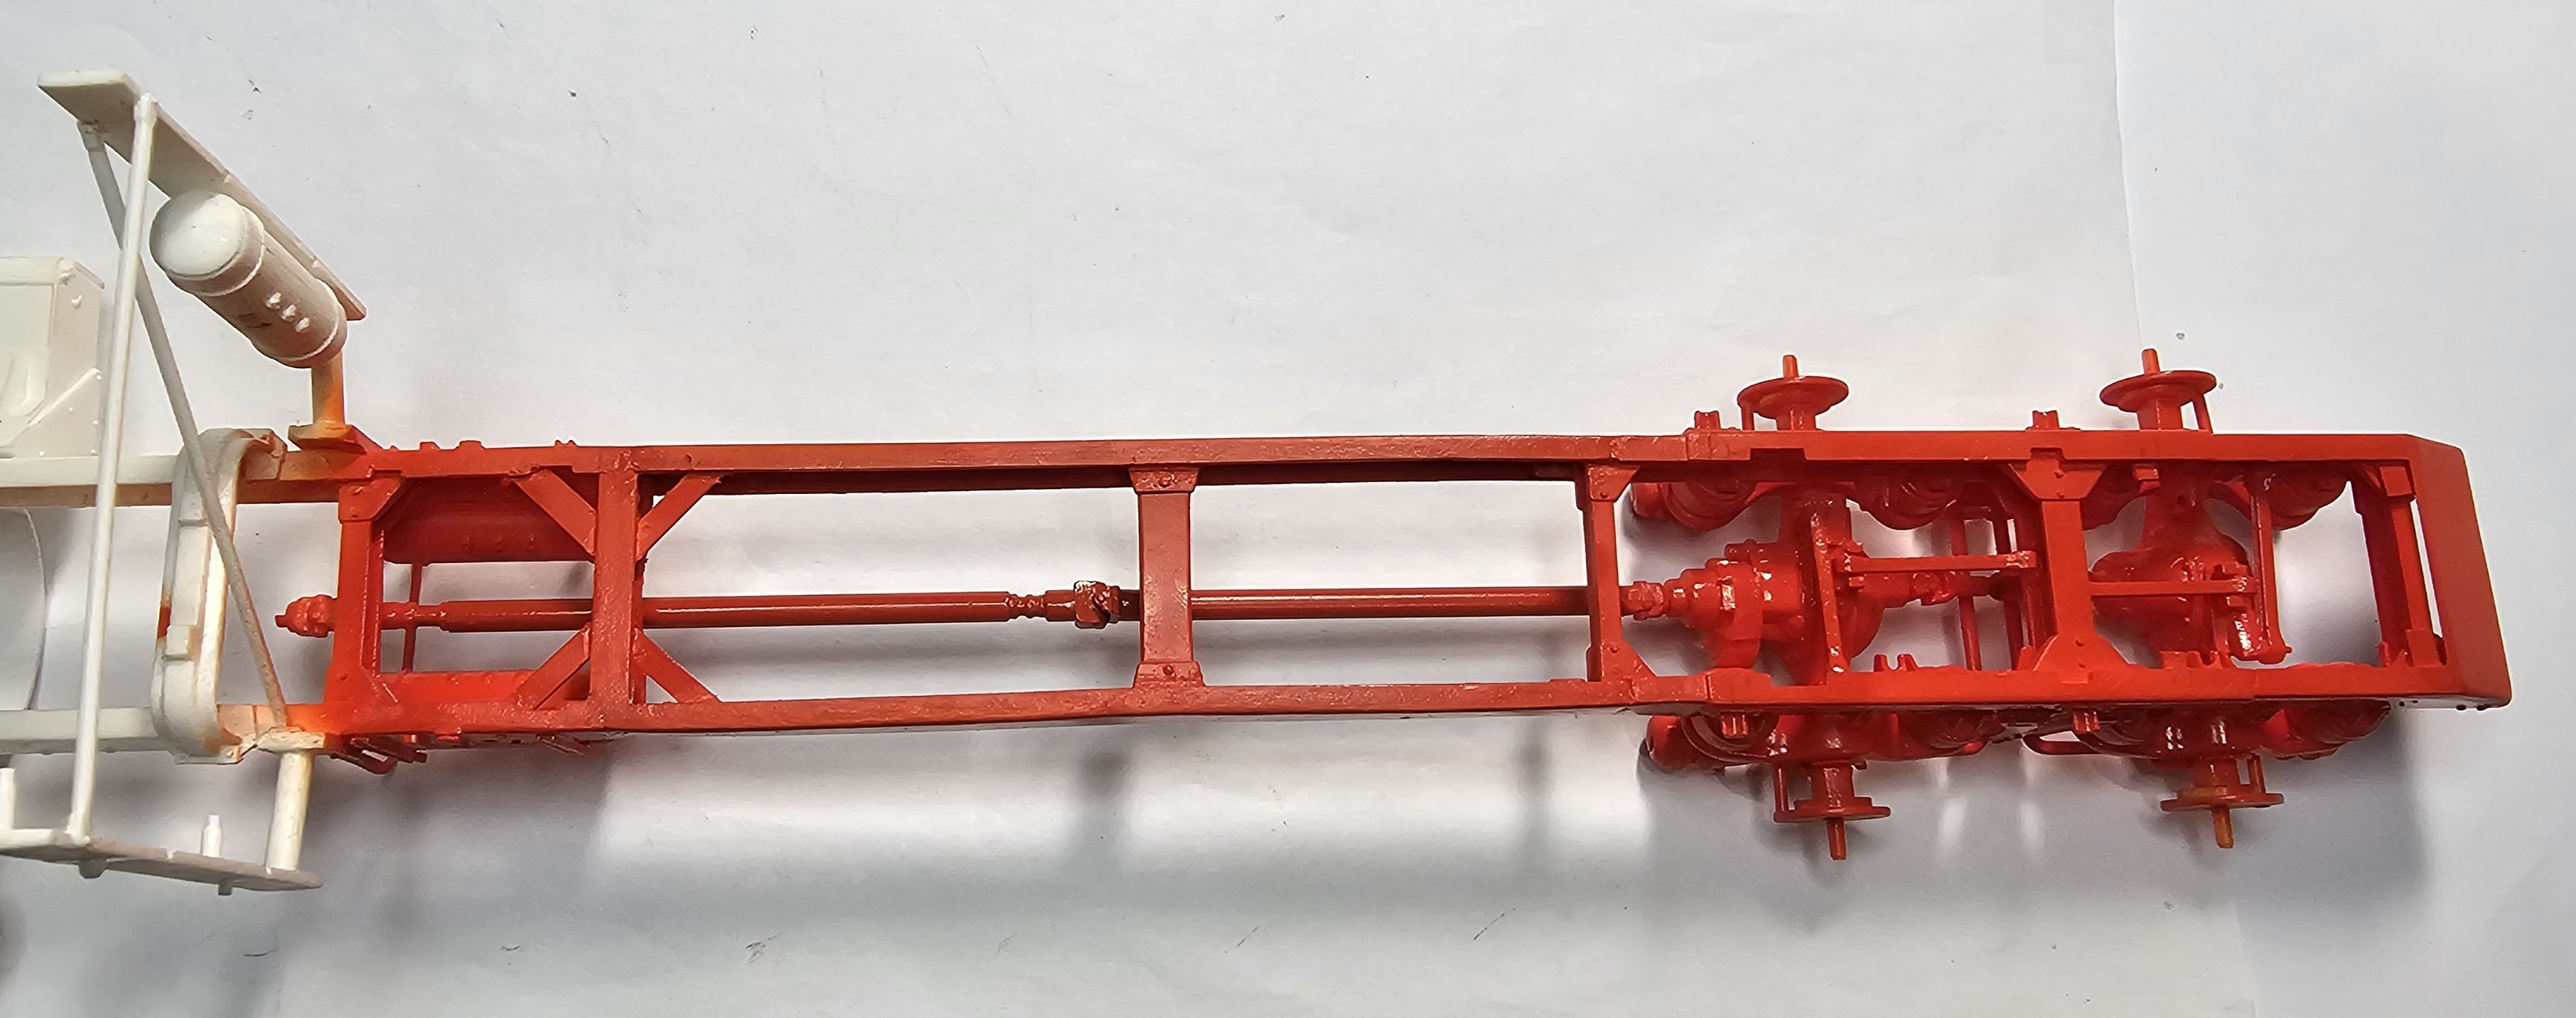
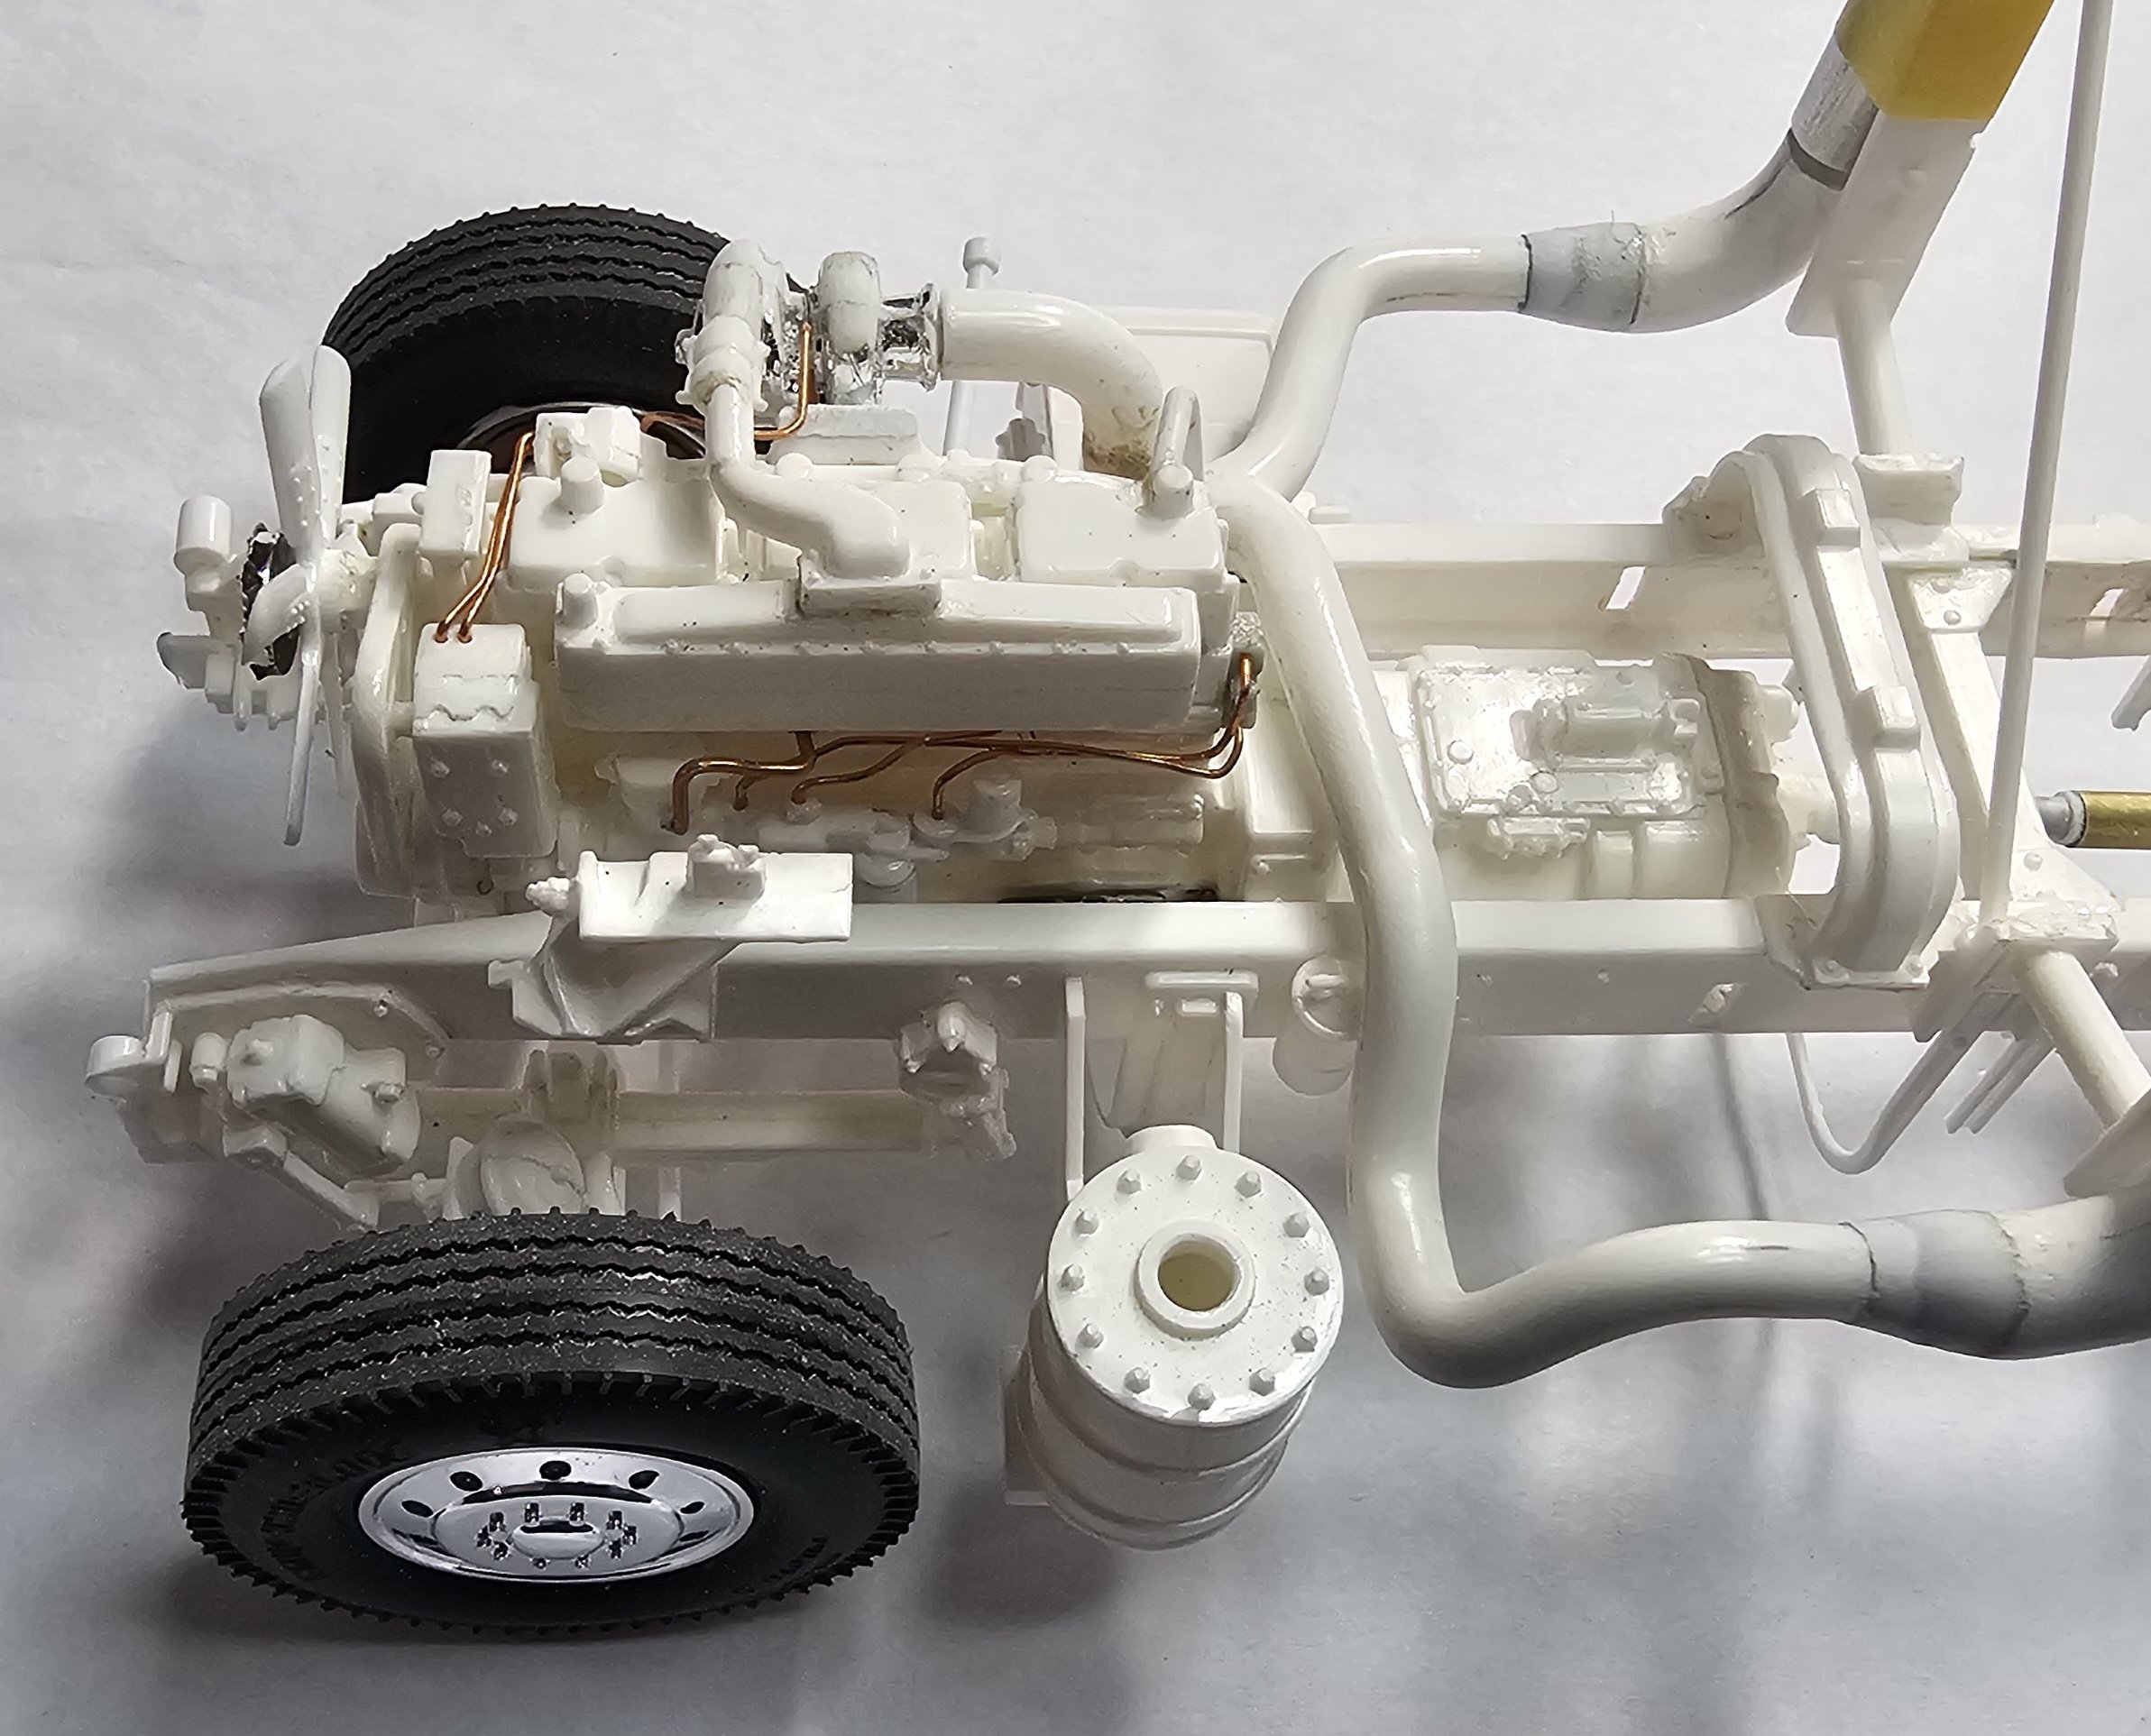
 This view shows the under side of the rear of the frame.
 Different view of the rear of the frame.
 Top view of the rear part of the frame. I'll paint the front of it tomorrow. That's it for now be back soon with more.
Ron G
-
6
-
-
I just got some stuff from hobbynut. I ordered some Green Stuff World chrome paint, airbrushable and hand brushable. I've never used there paint before so this will be a test, if it works I might just have found a way to chrome all the parts for all of my truck builds!
Ron G
-
3
-
-
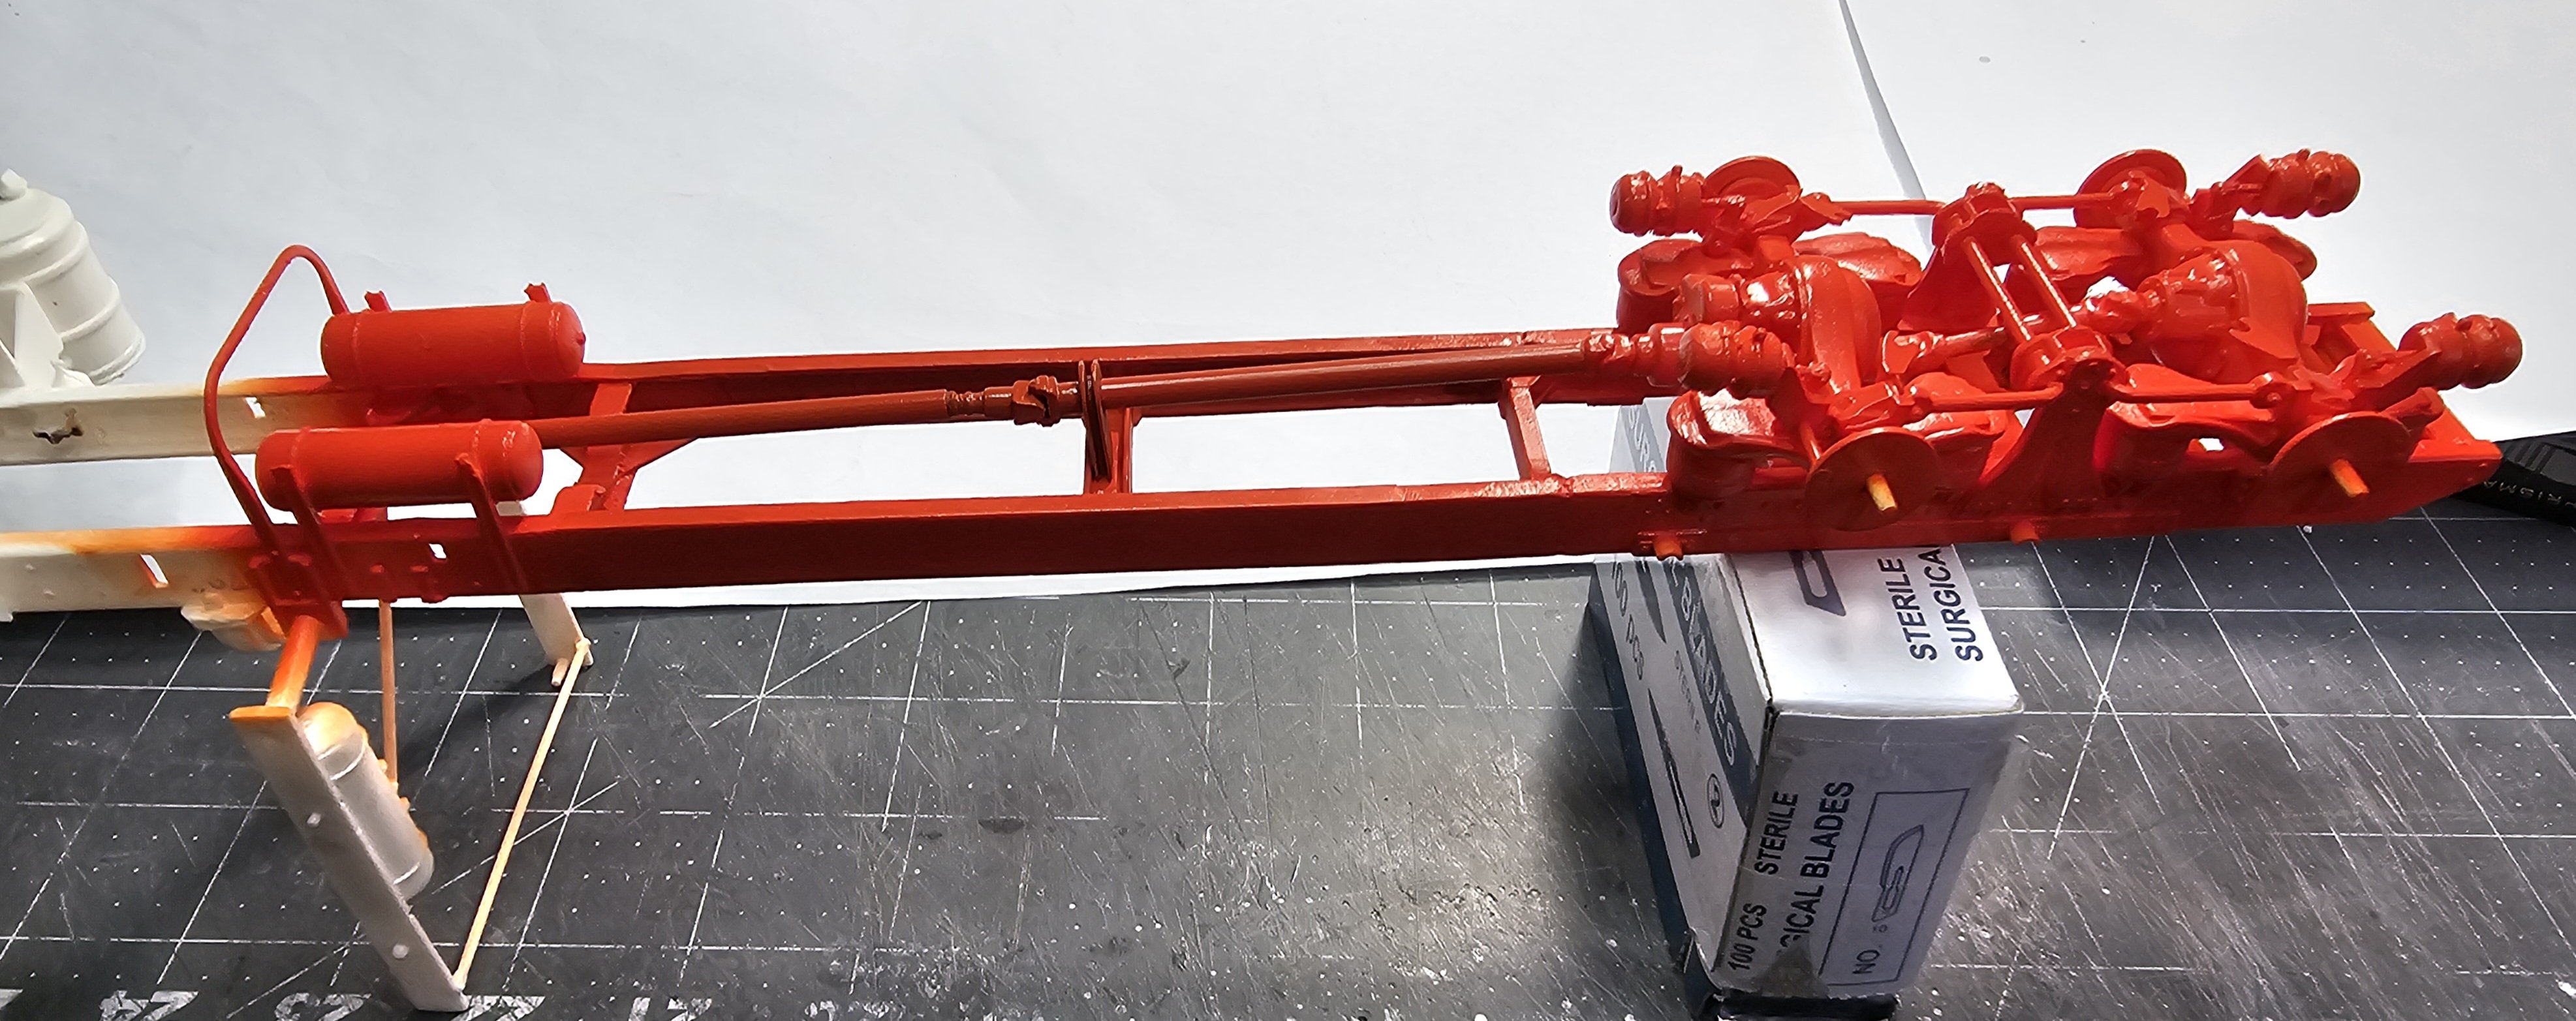
Hey all
Some more work done on this build. This is almost ready for some paint, just making sure I have everything mounted before I squirt on the orange!
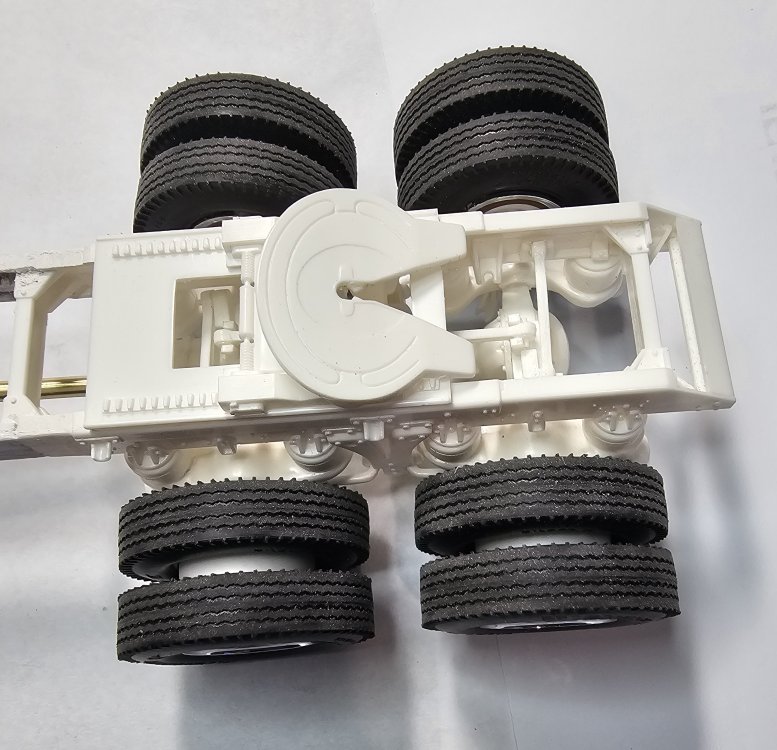
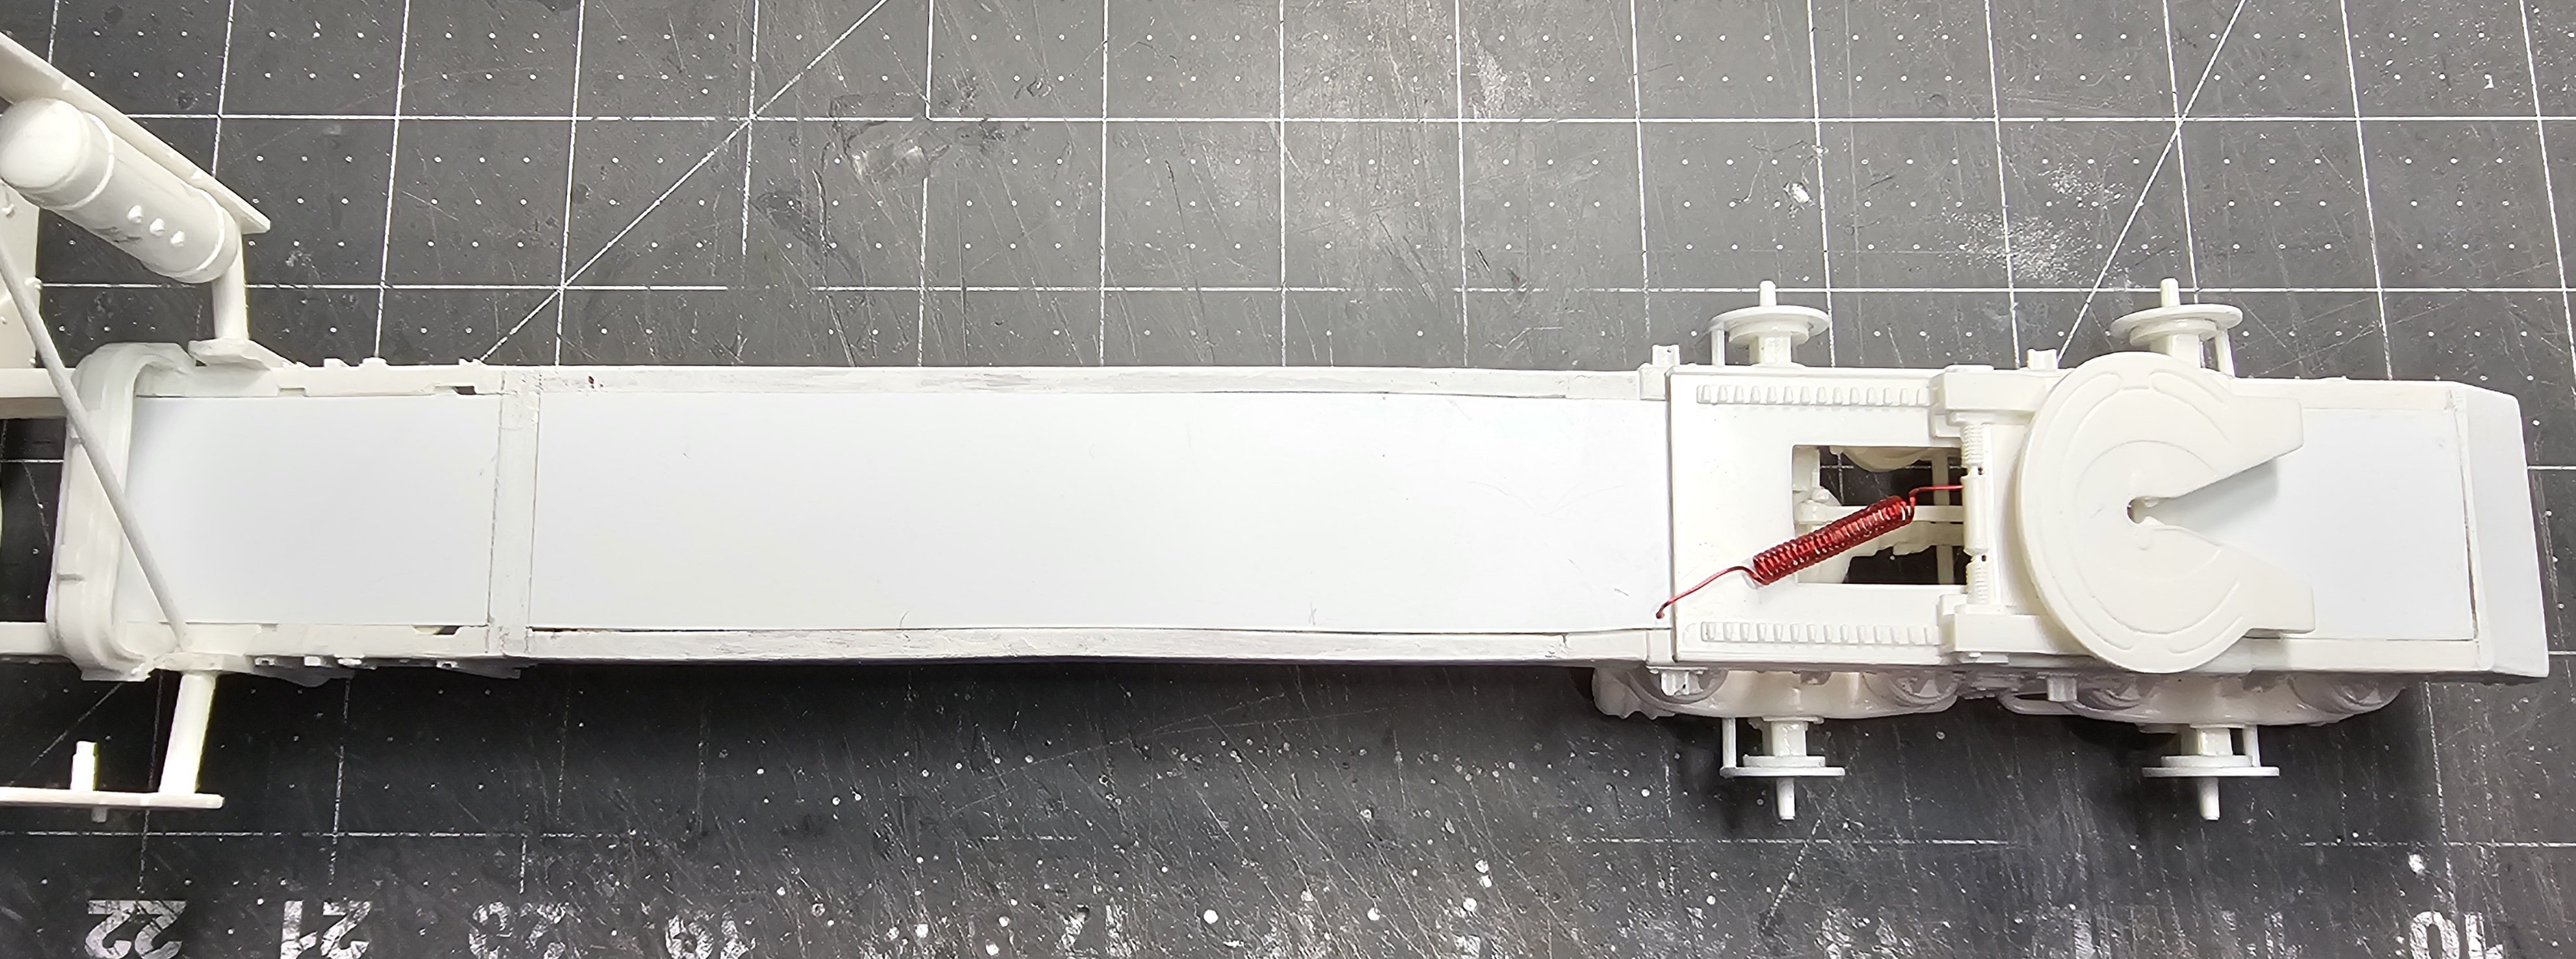
 This view shows the deck plates in place in the frame. Also I made the line for the fifth wheel slide out of some 0.017" diameter wire.
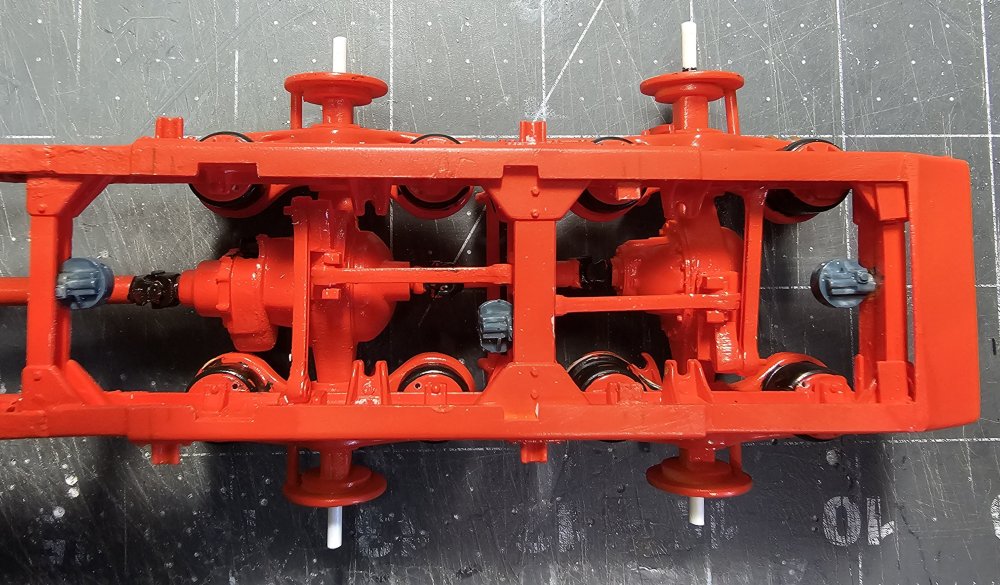
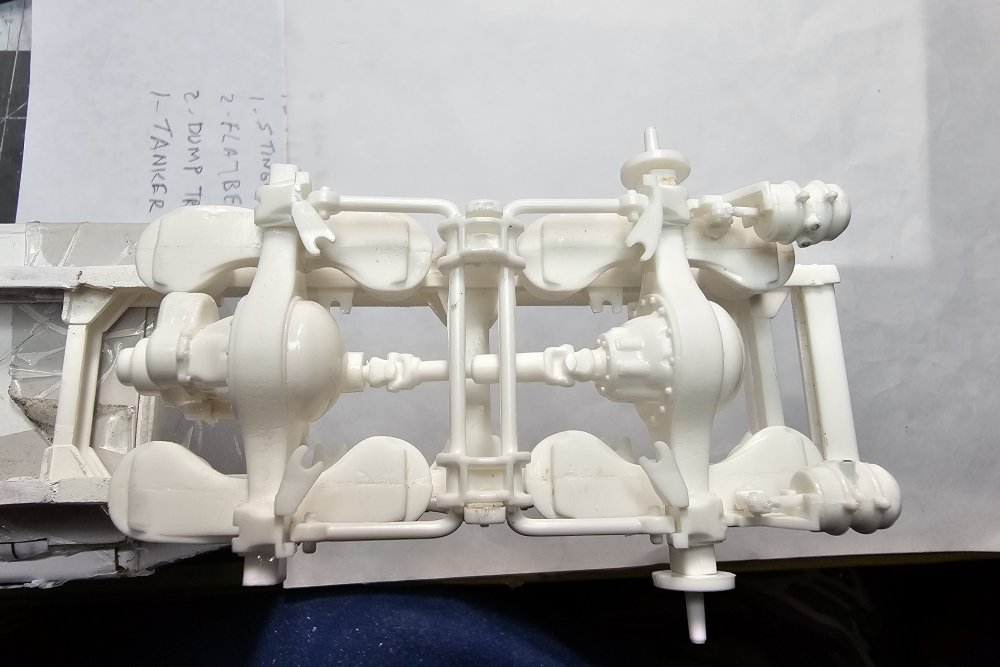
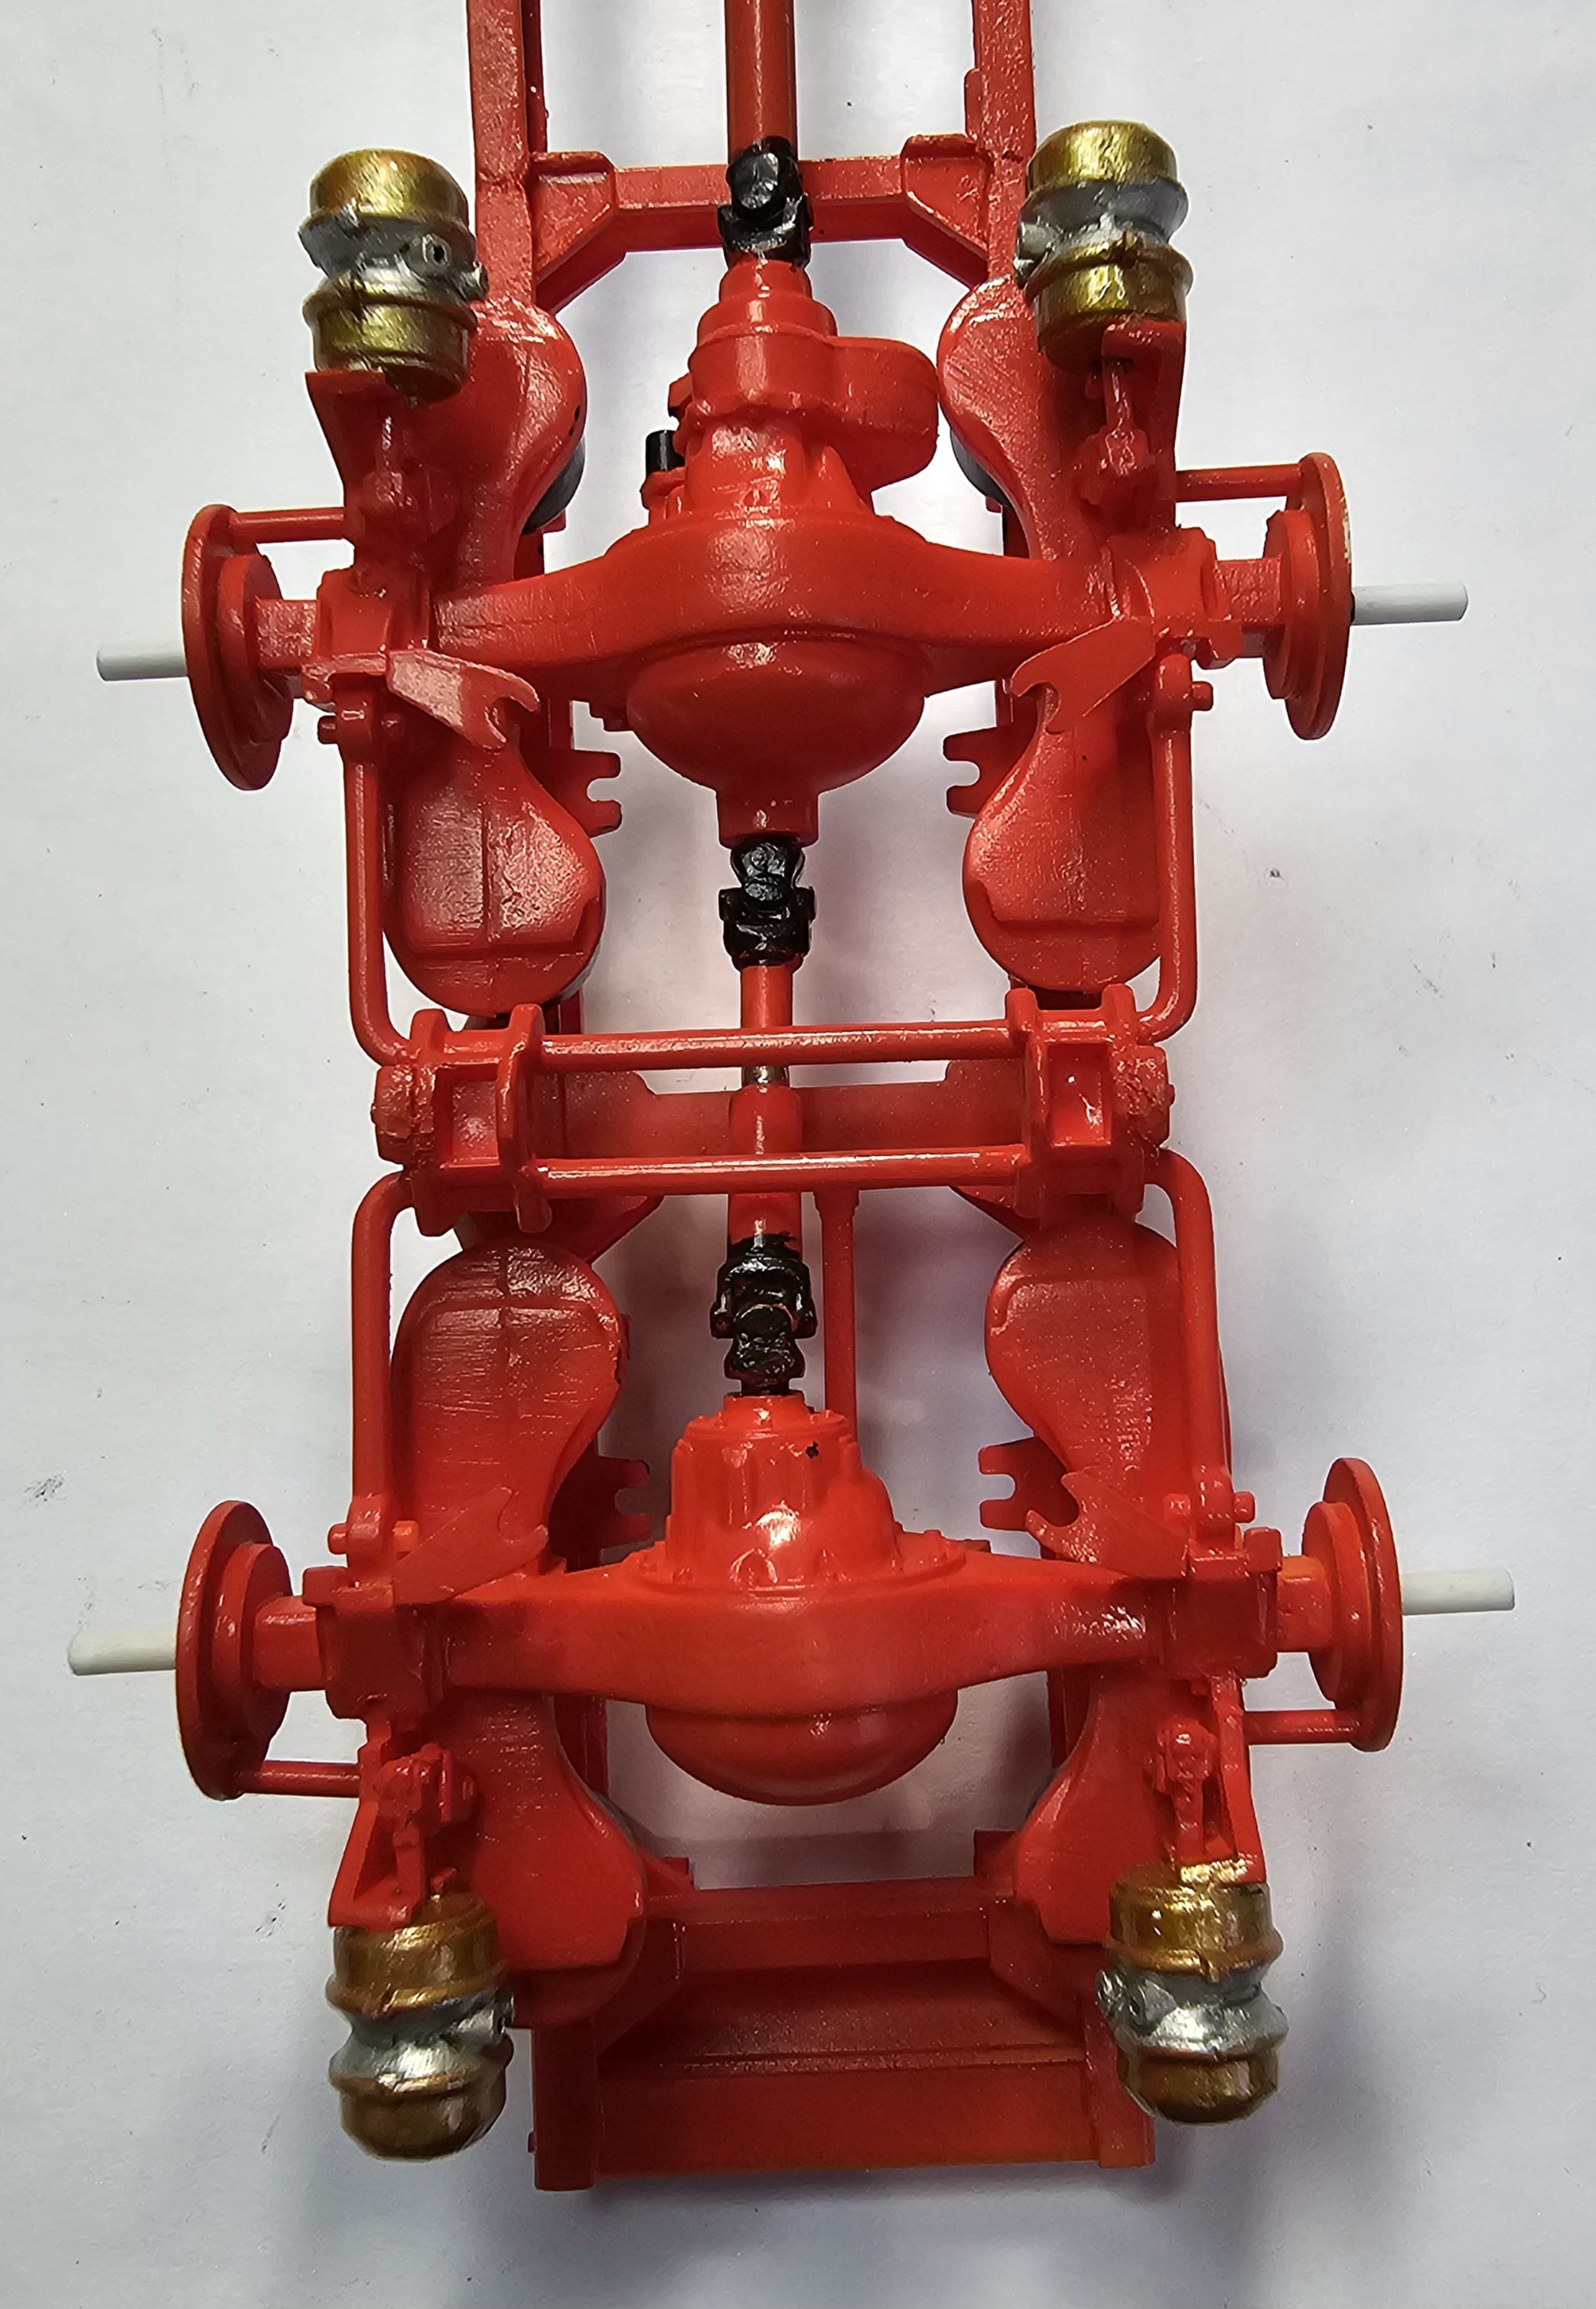
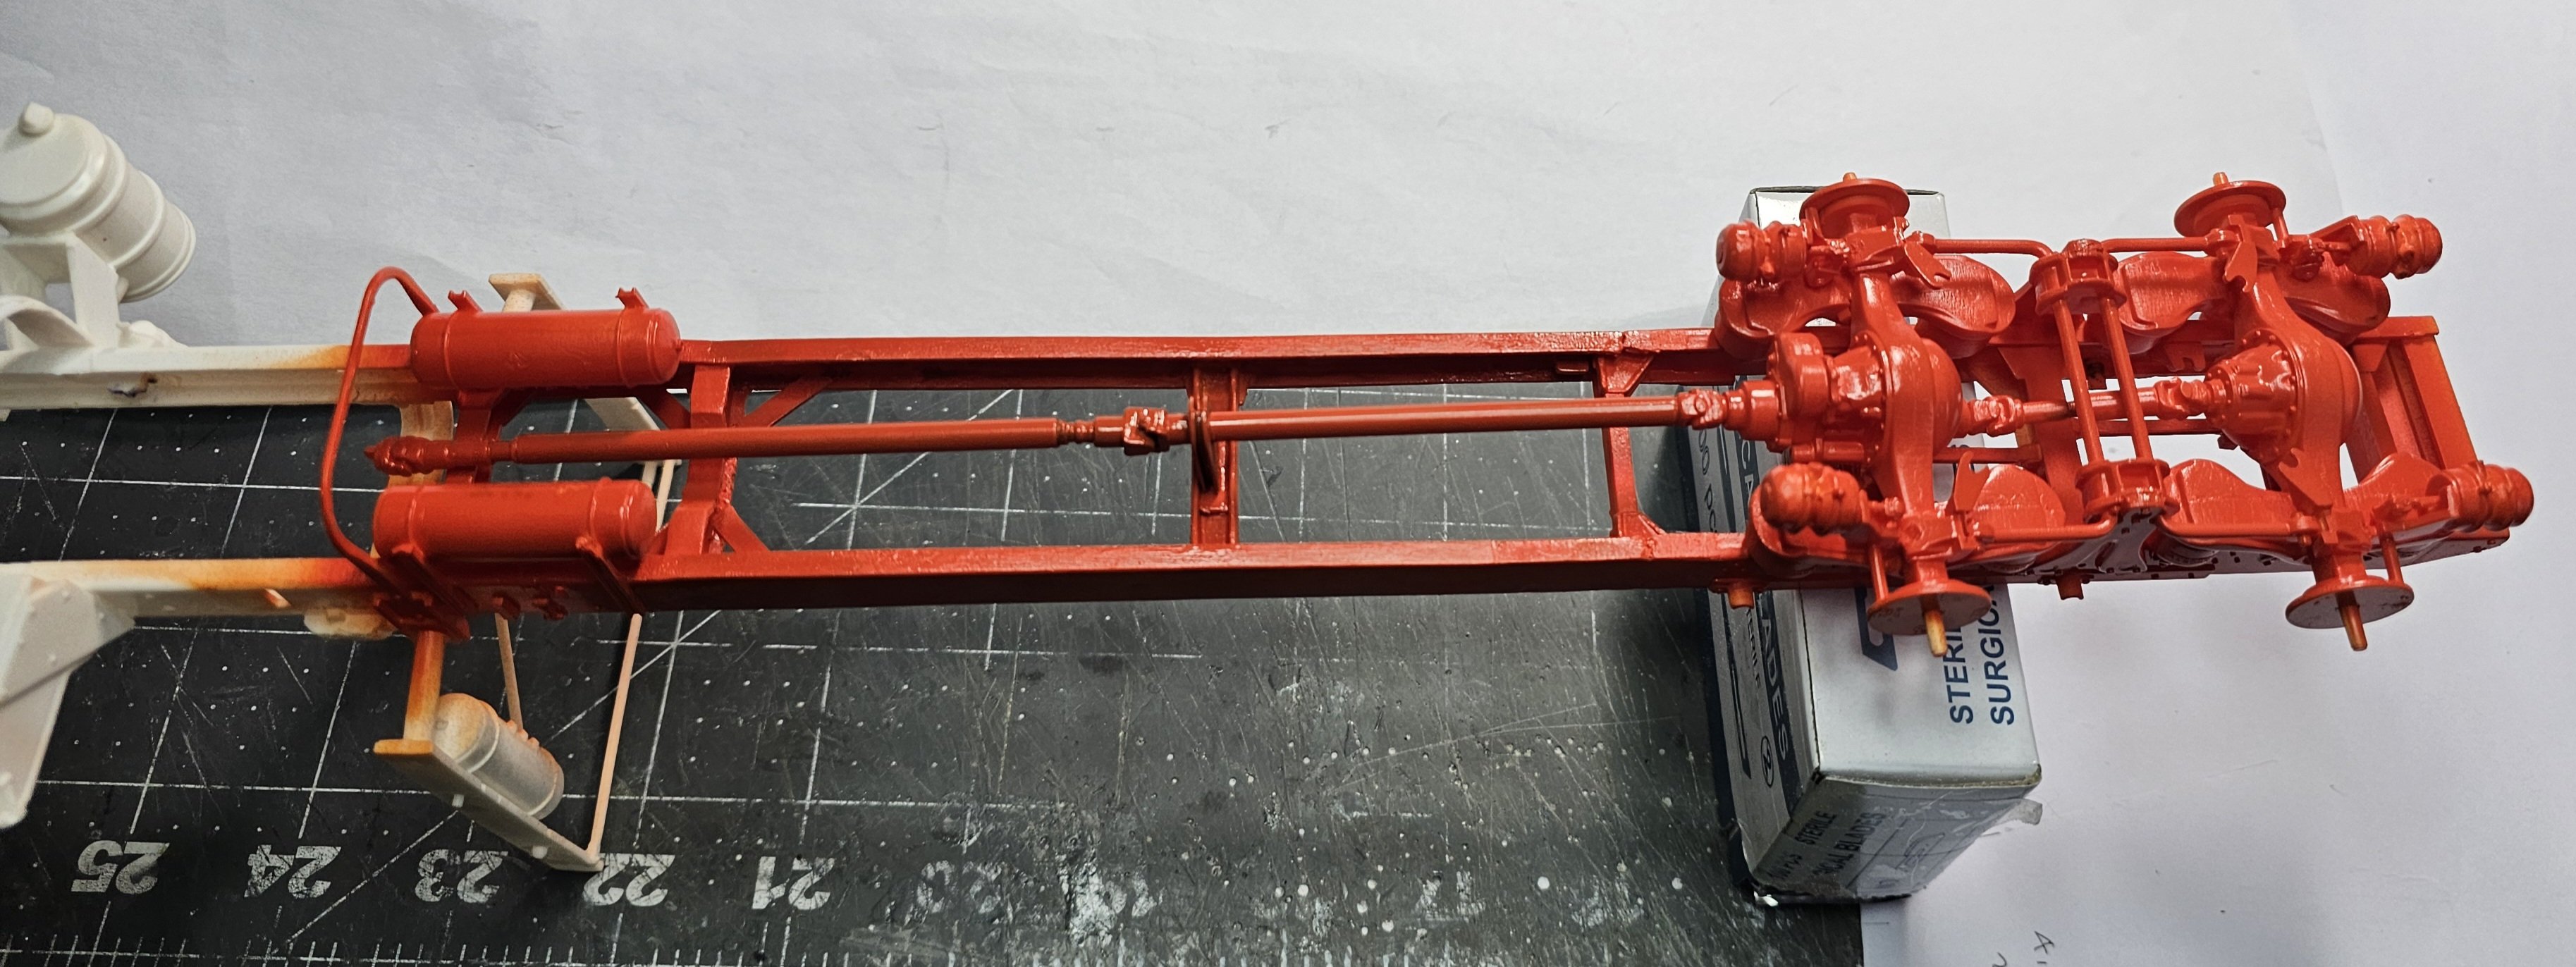
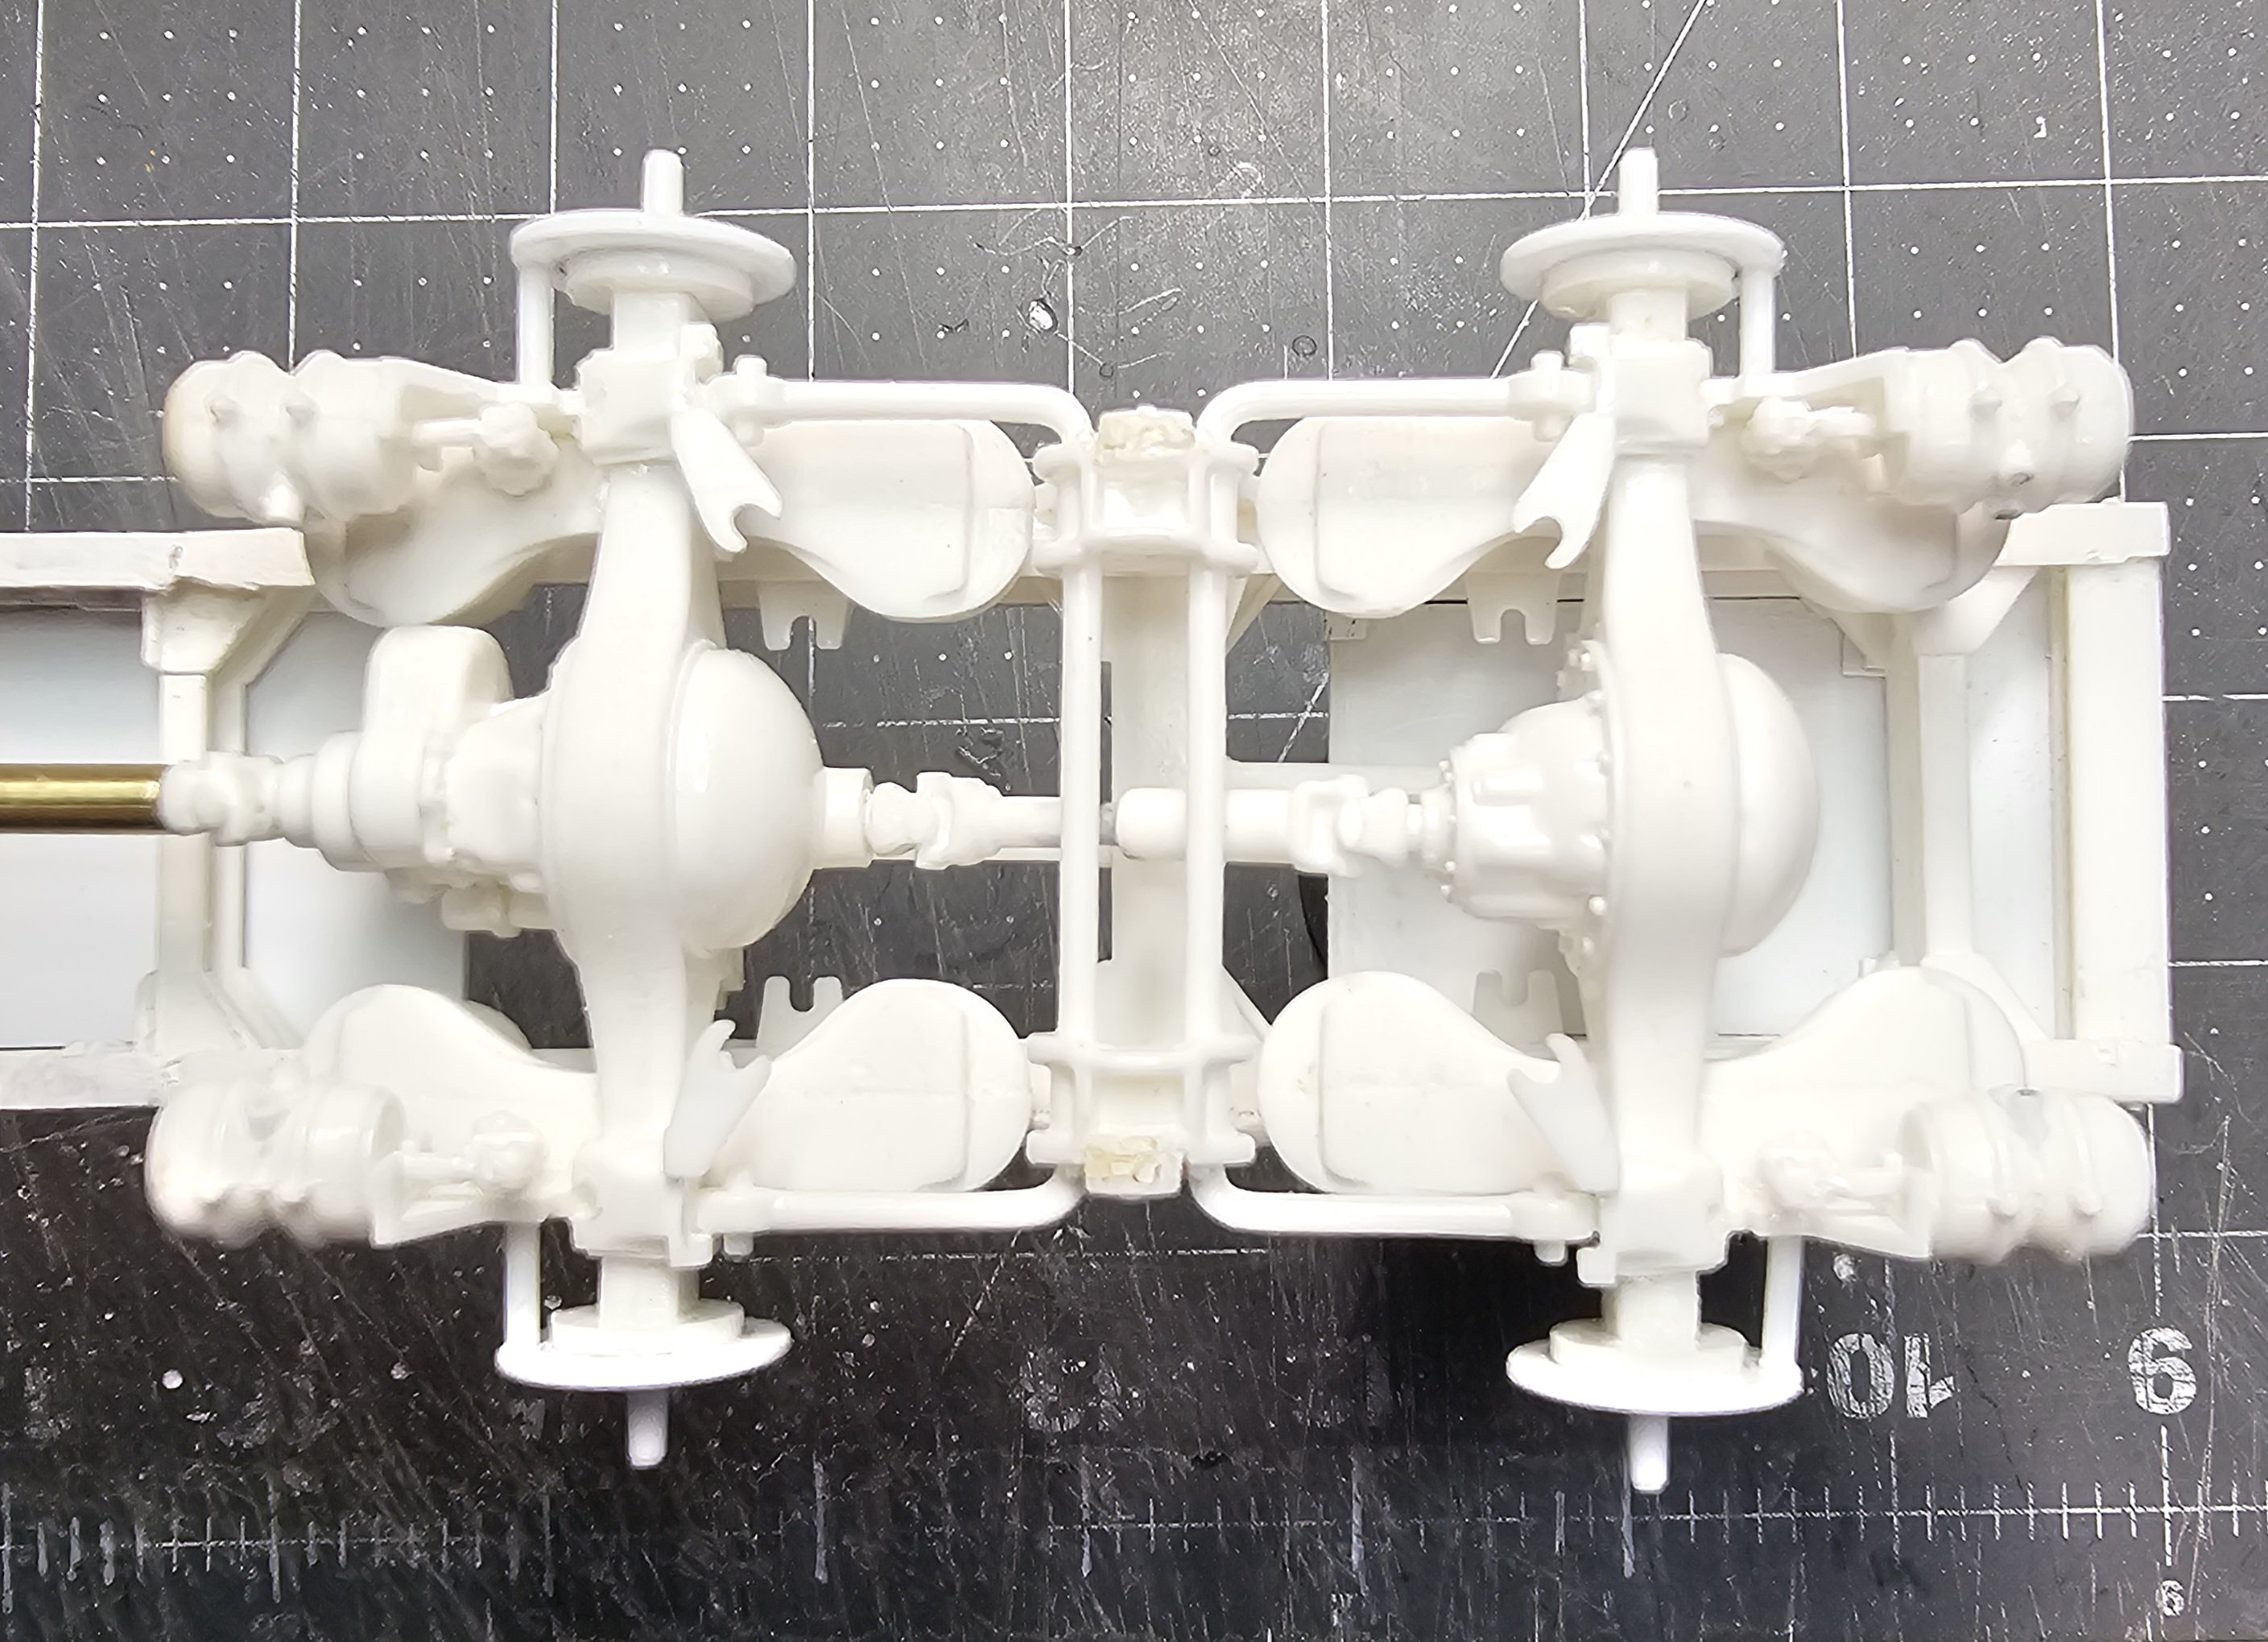
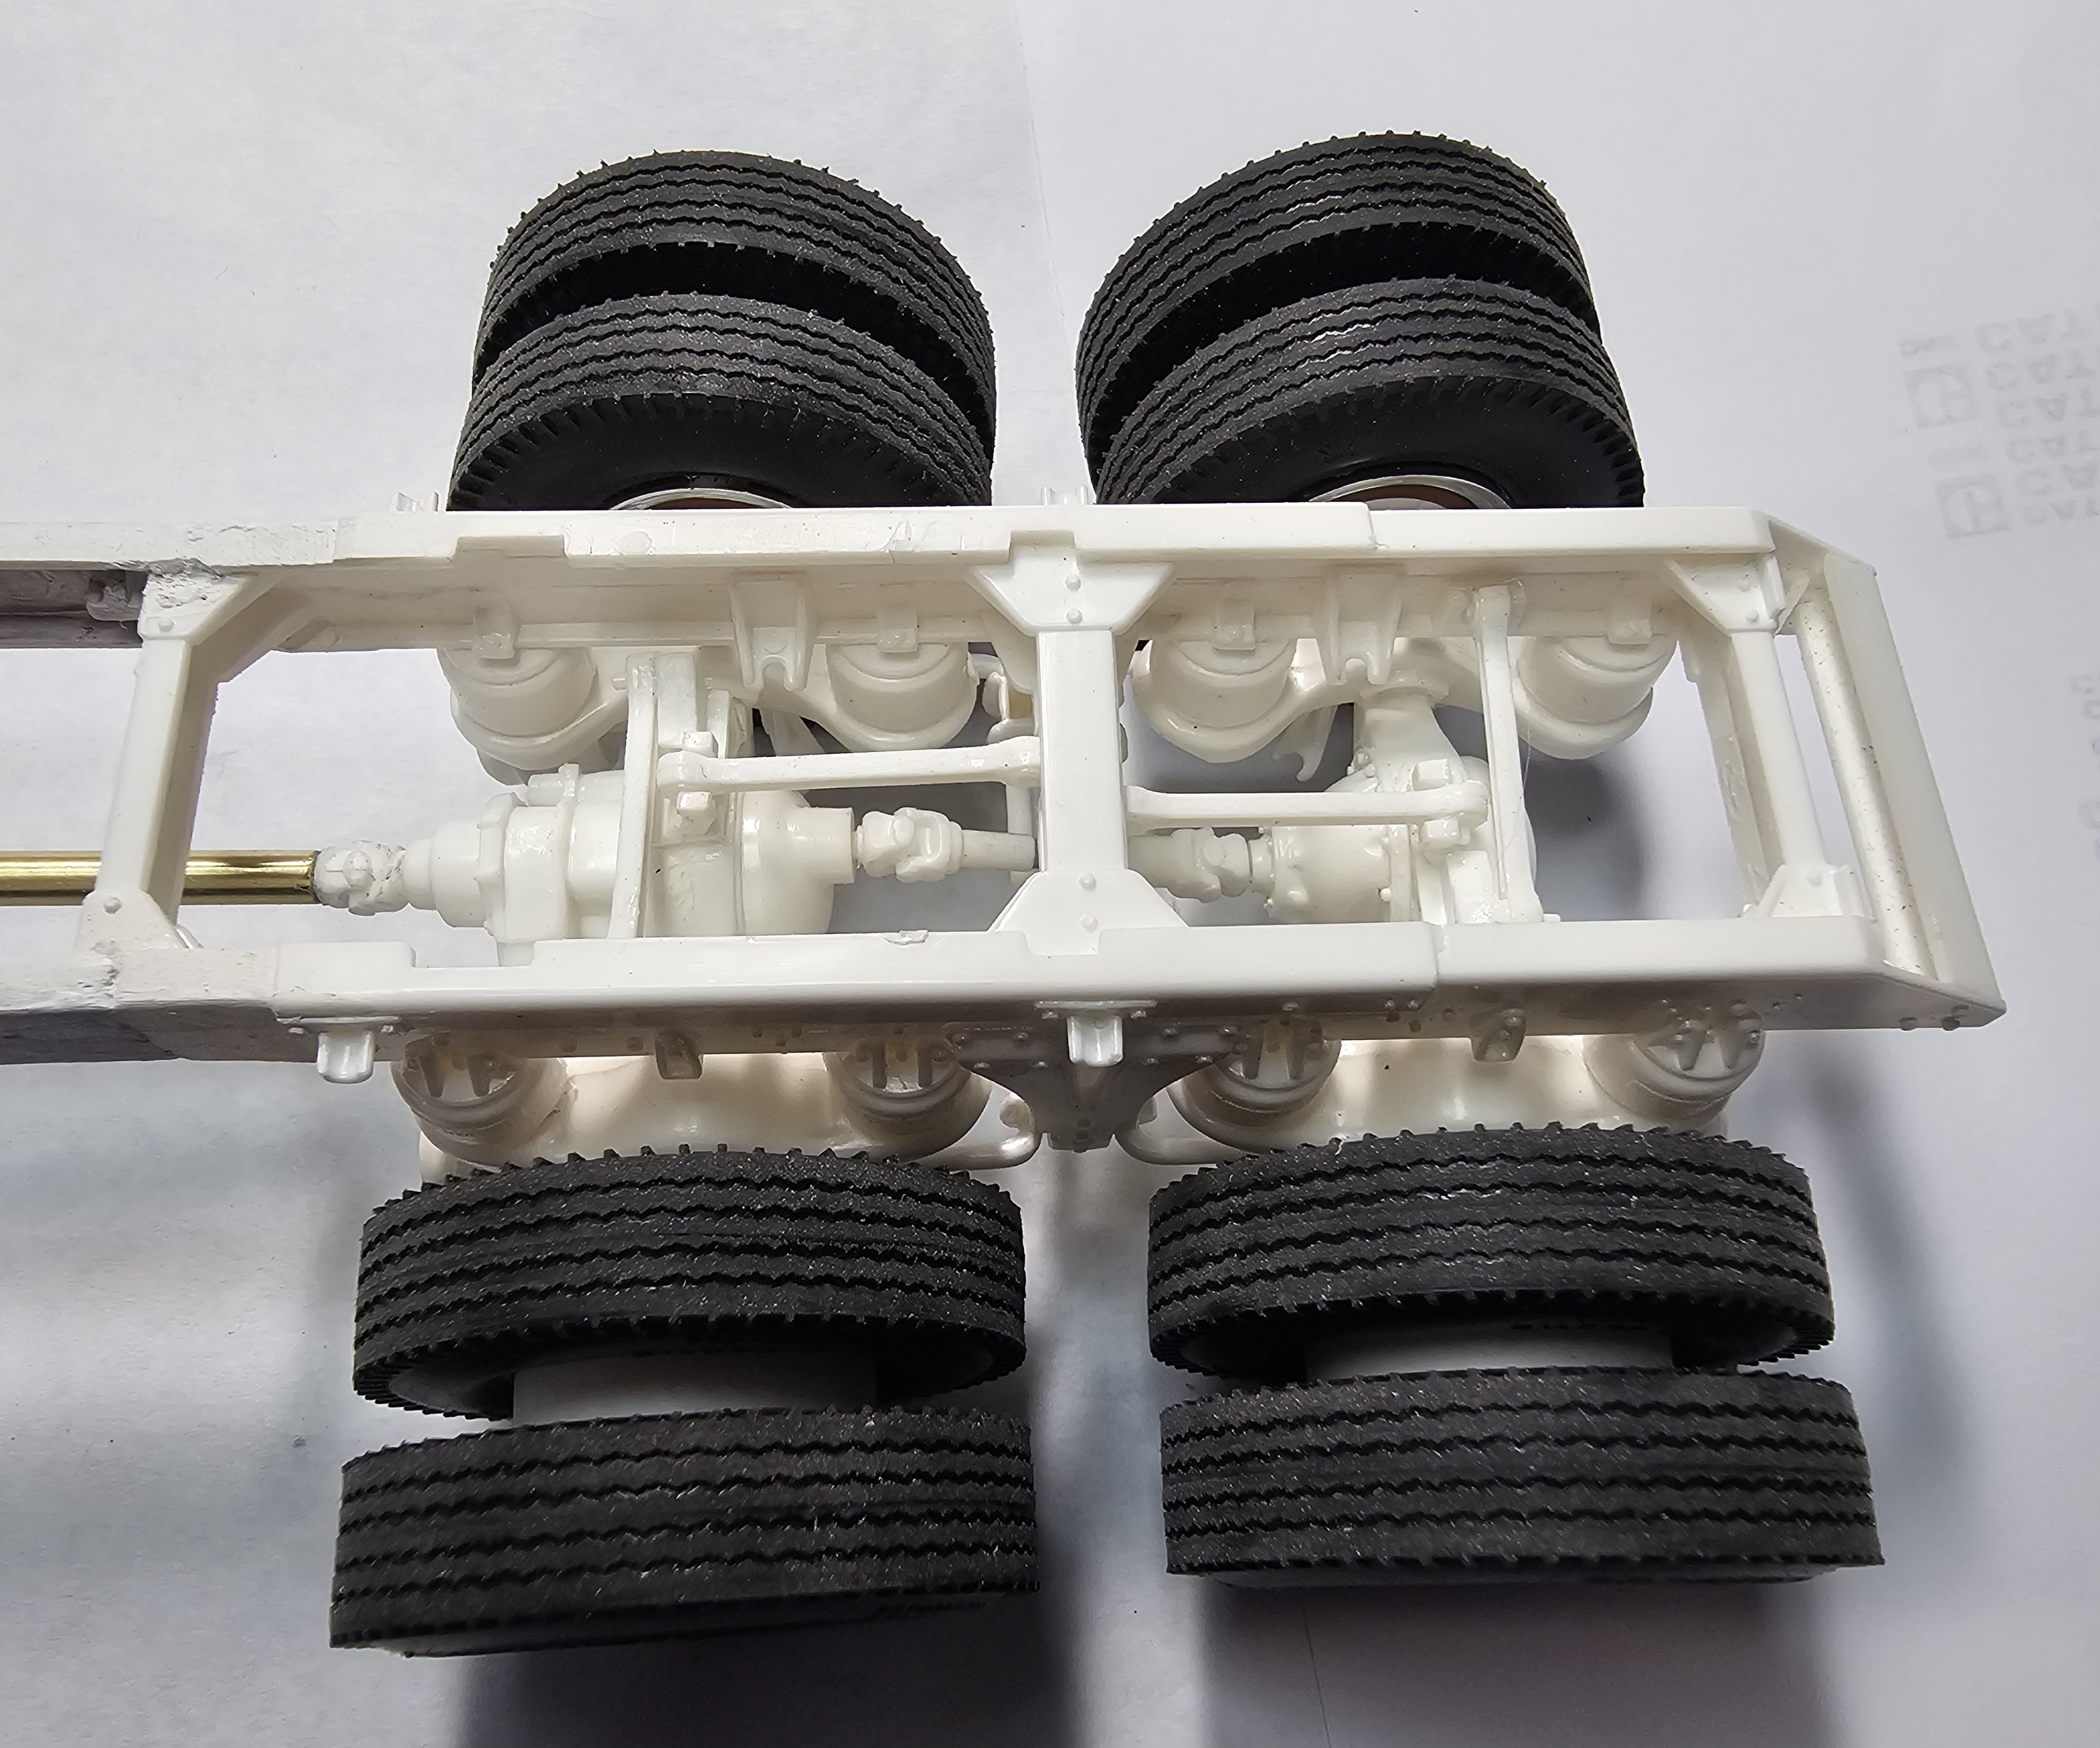
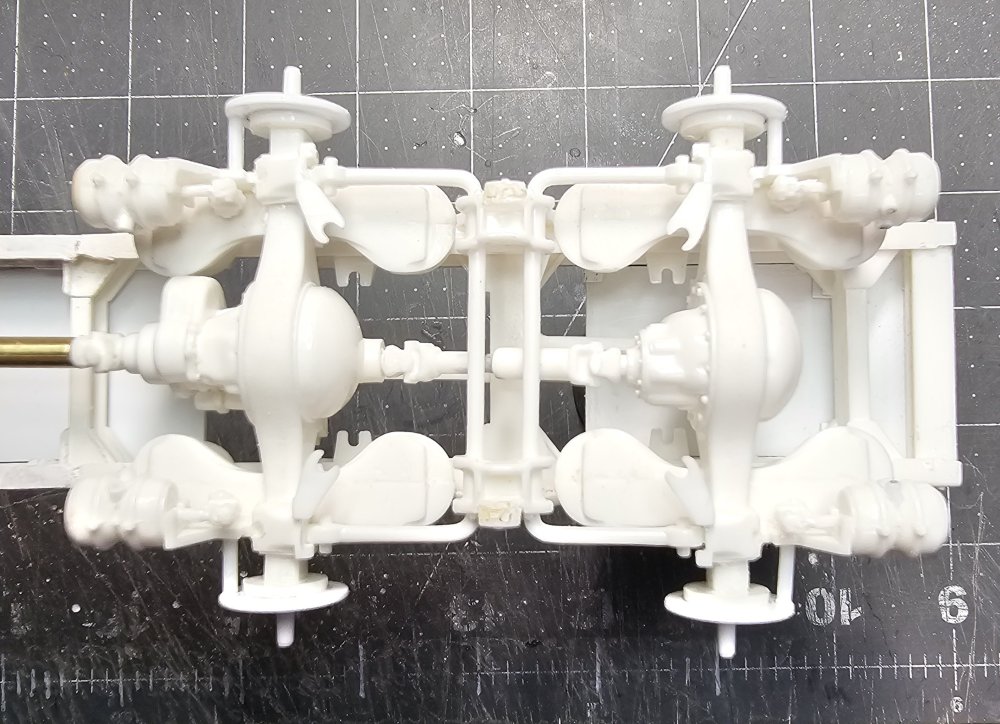 This view shows the under side of the suspension.
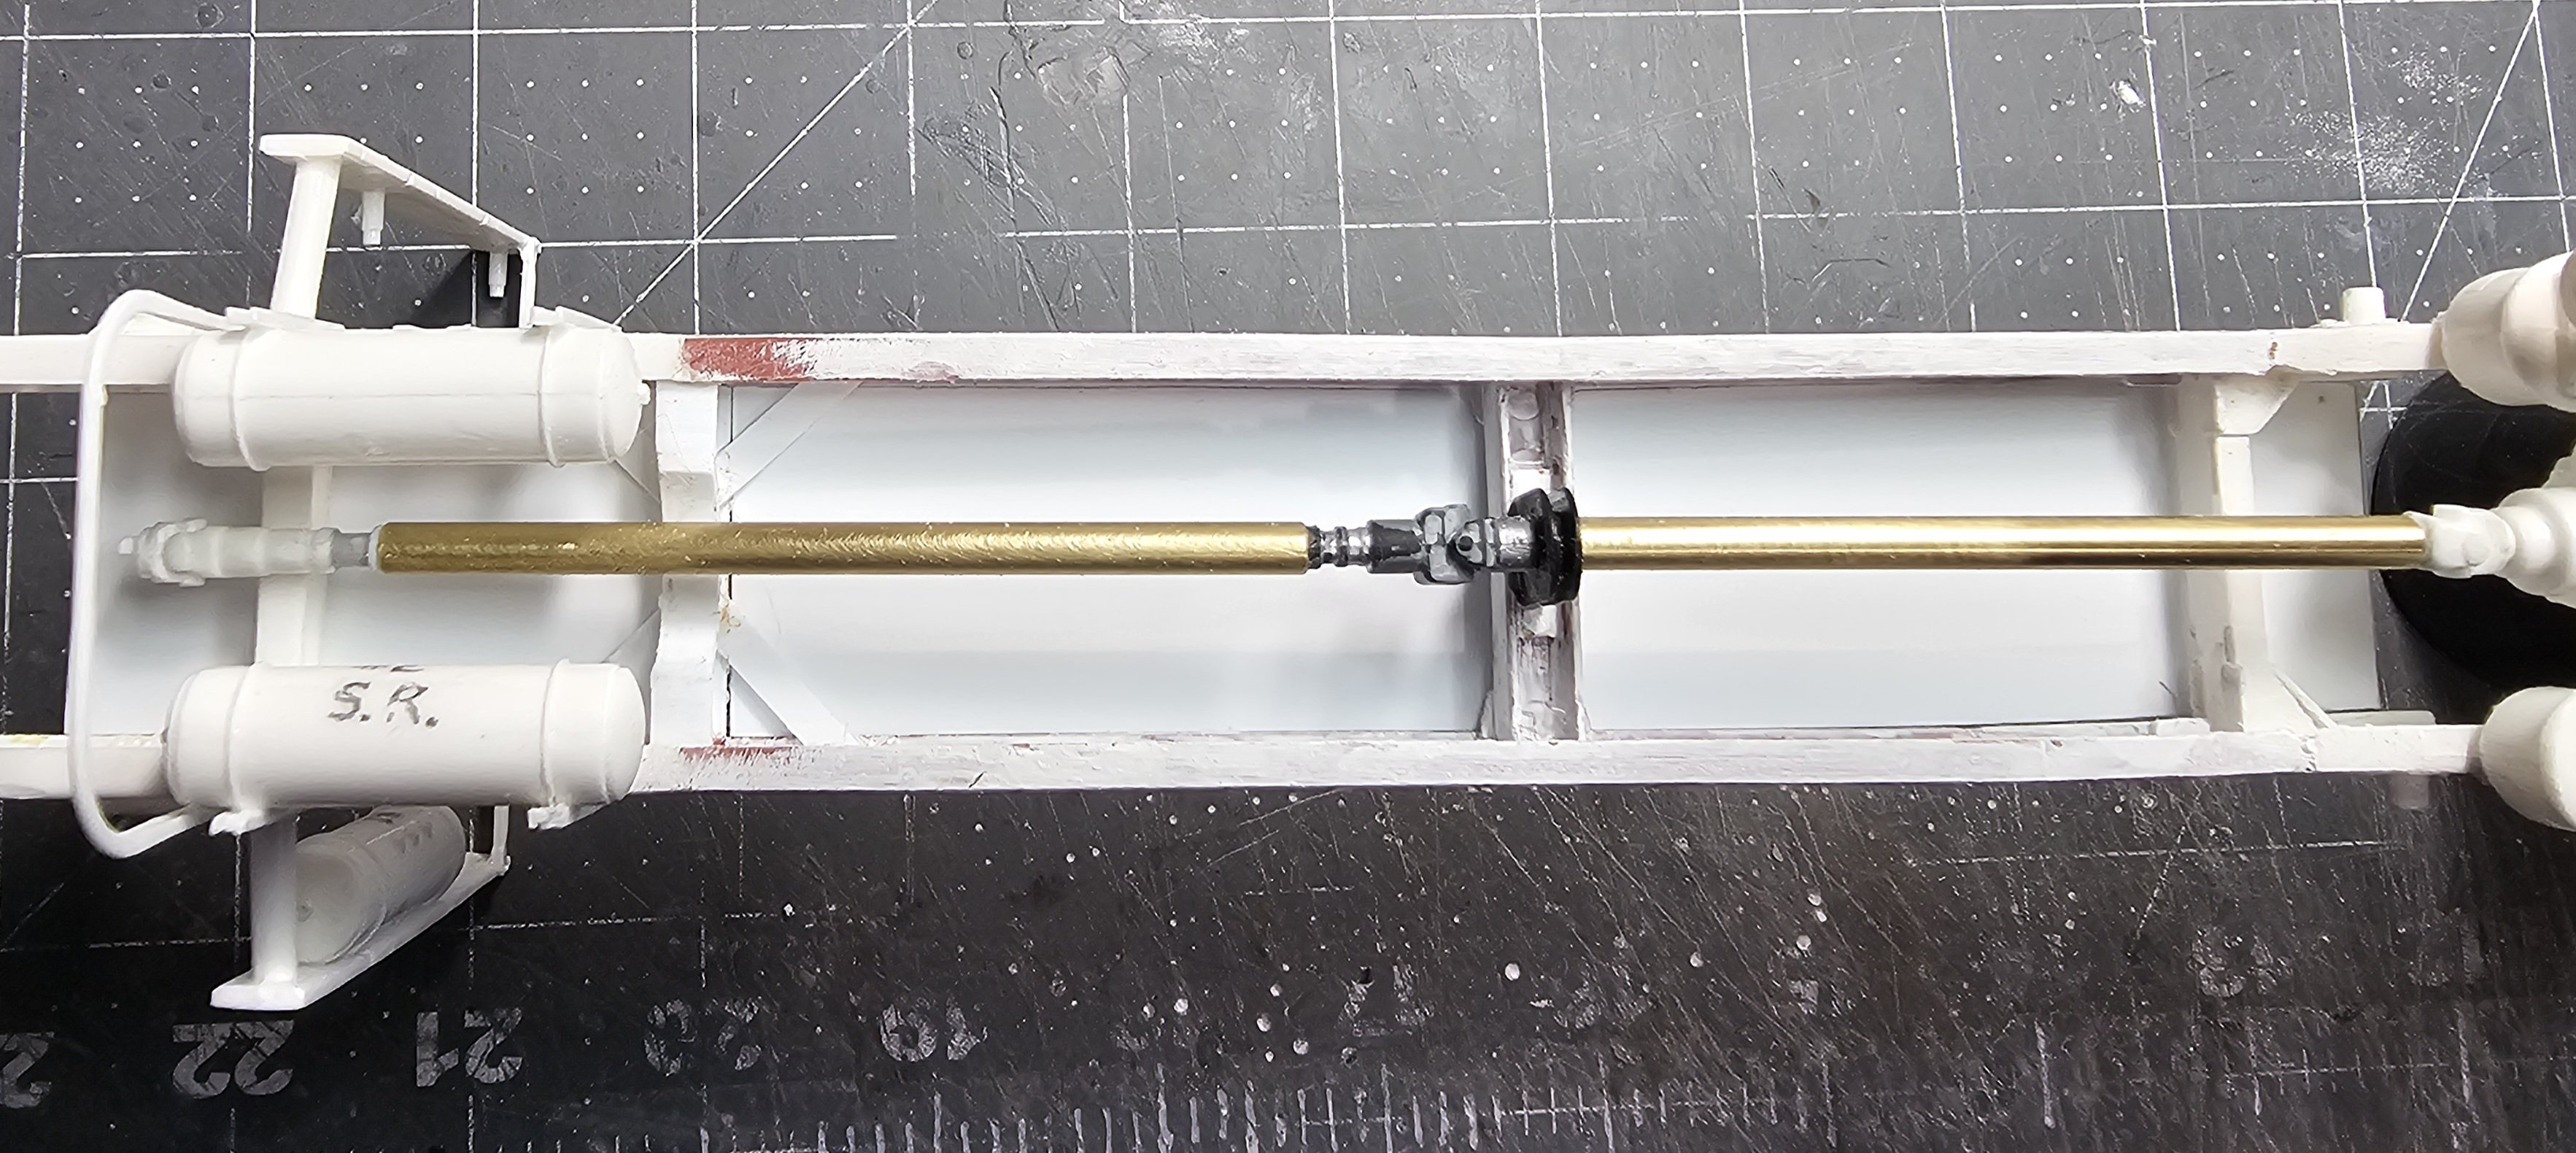
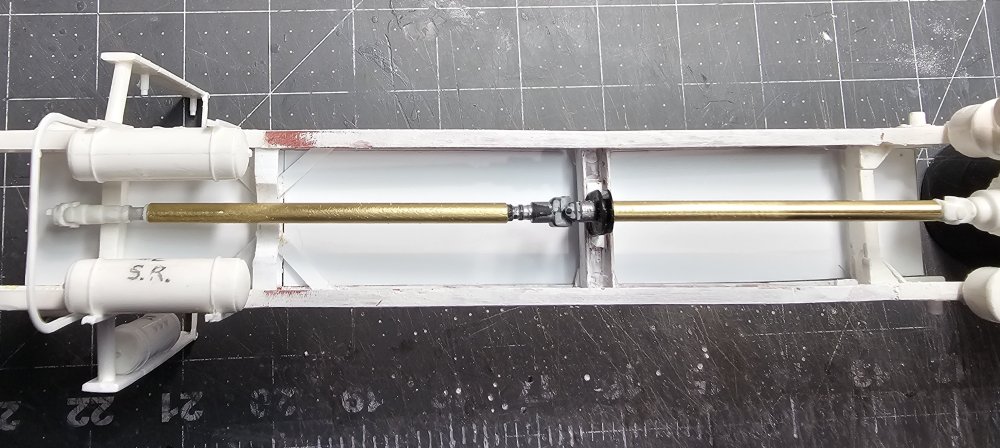 This view shows the drive shaft that I kit bashed out of some old Italeri parts and some brass tube. Also I have added the two lower air tanks.
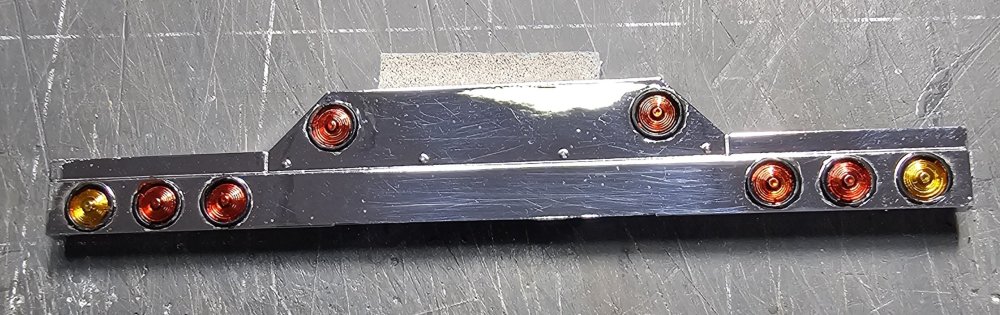
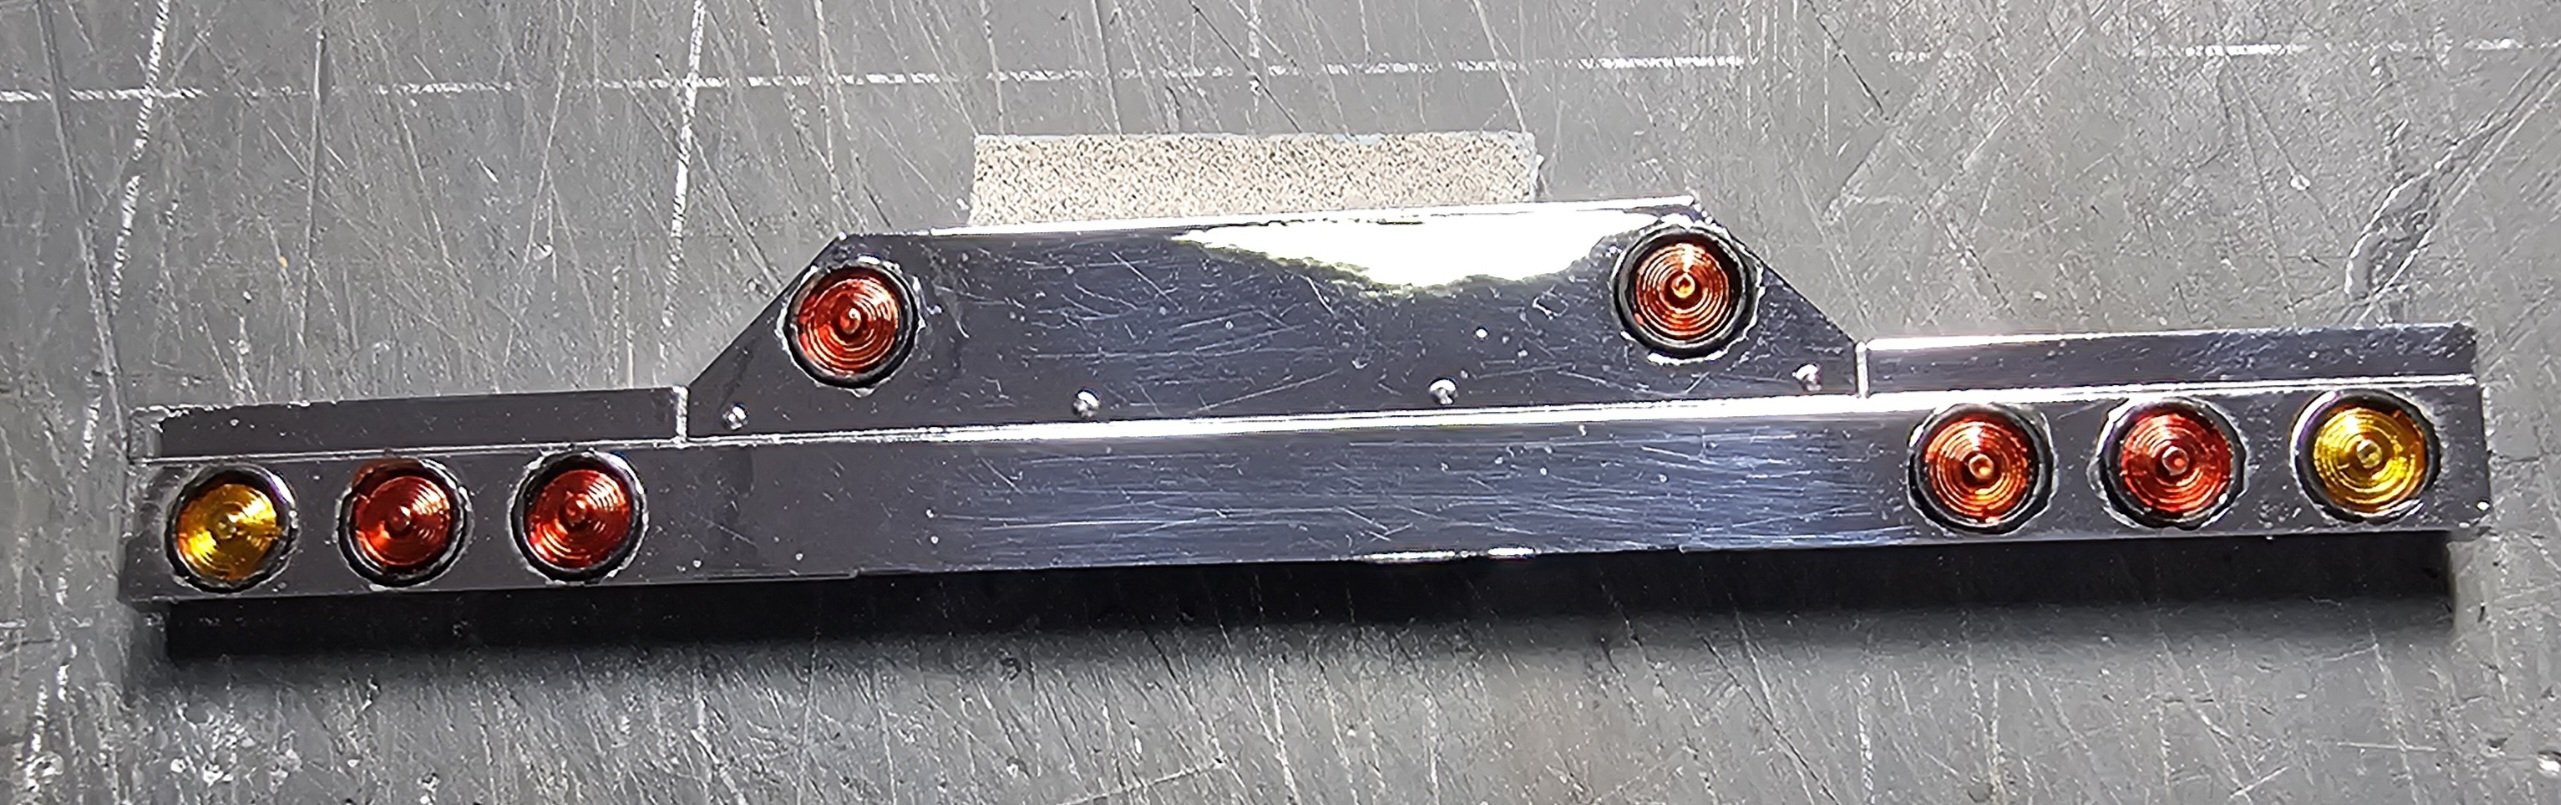
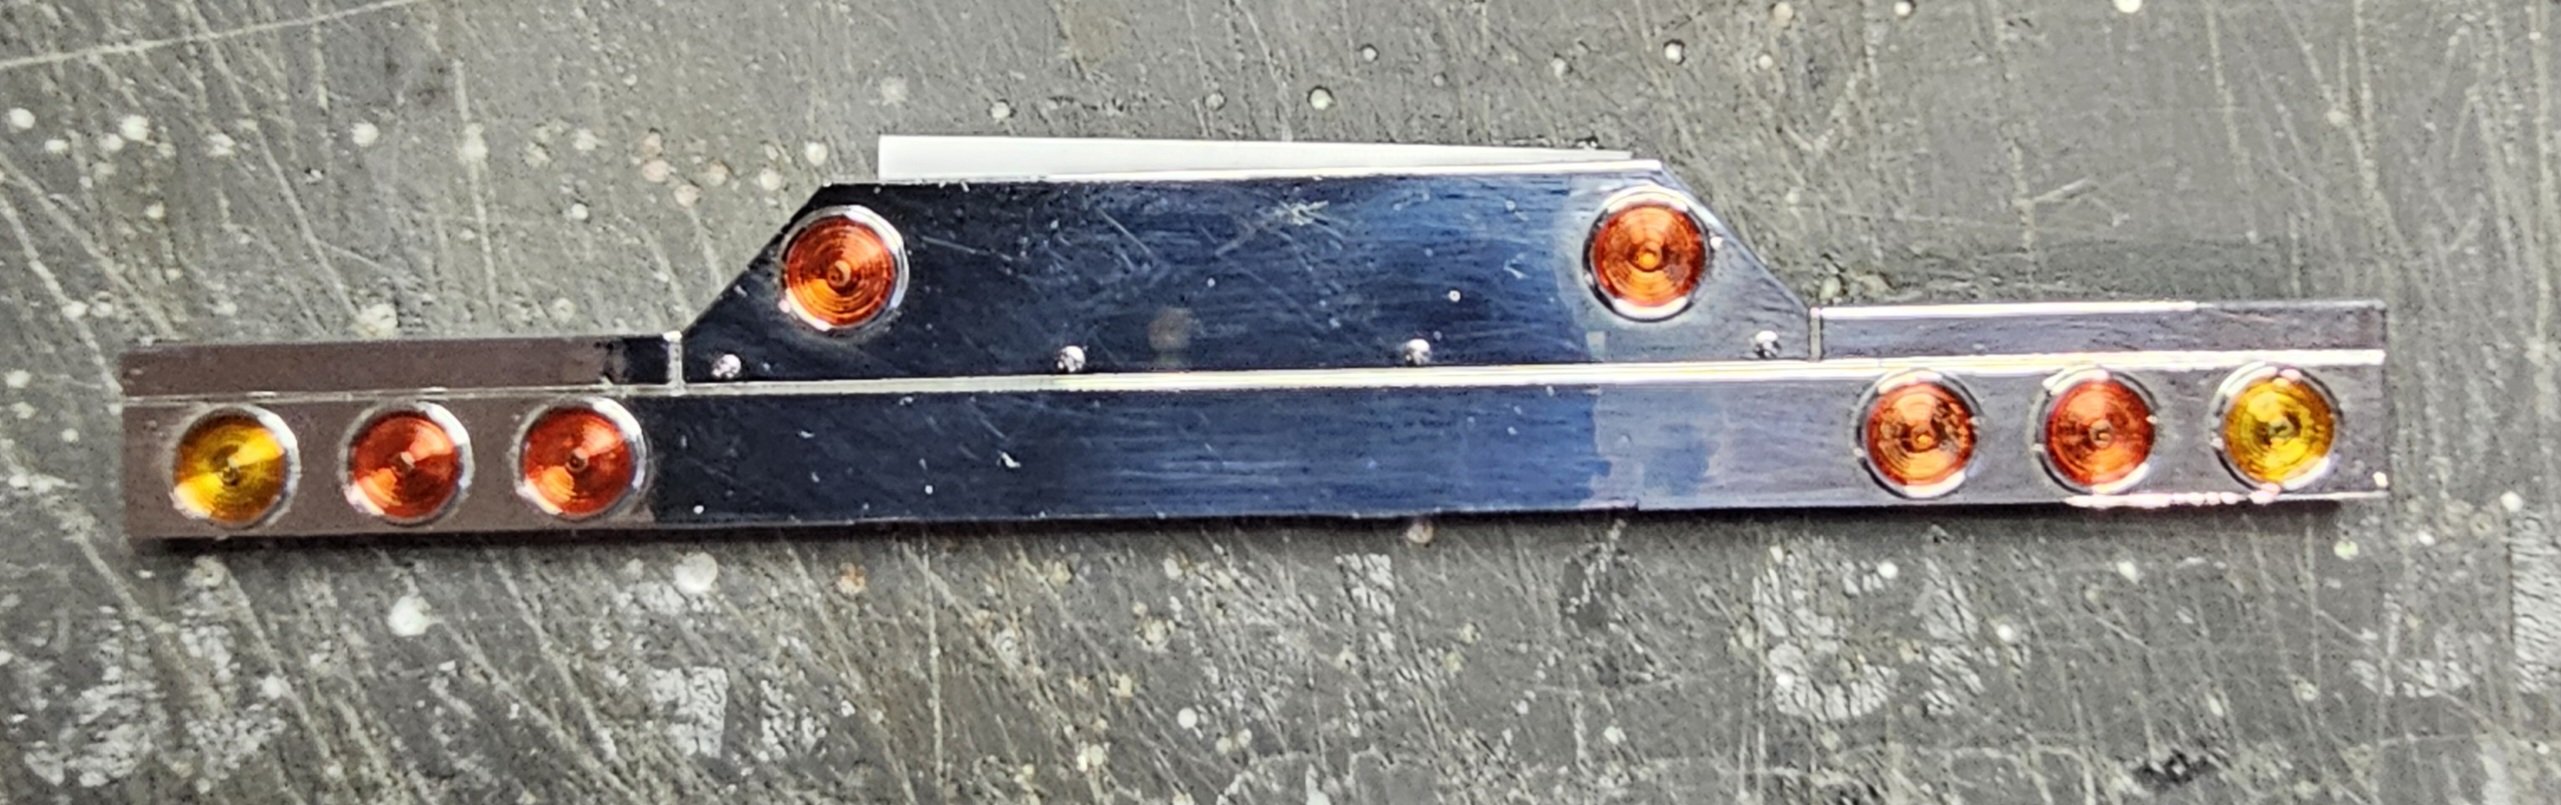
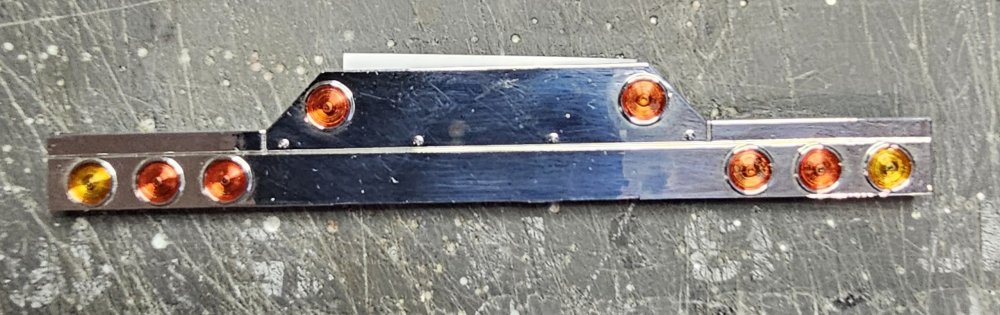 This is the kits rear bumper/light bar that I painted with some Tamiya clear red and amber.
 These fenders showed up in the mail today so I thought I would show them in place.
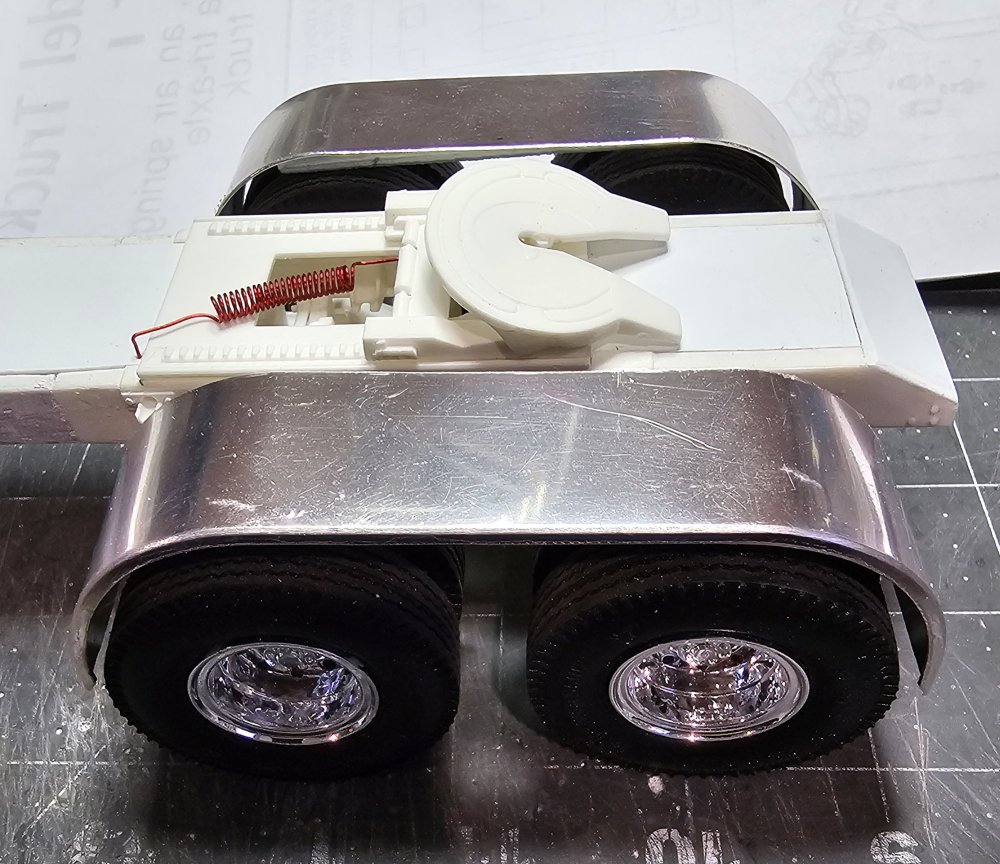 Another view of the rear fenders and fifth wheel. That's it for now be back with more soon.
Ron G
-
4
-
-
Thanks everyone
-
2
-
-
Hey all
A little update on this build.
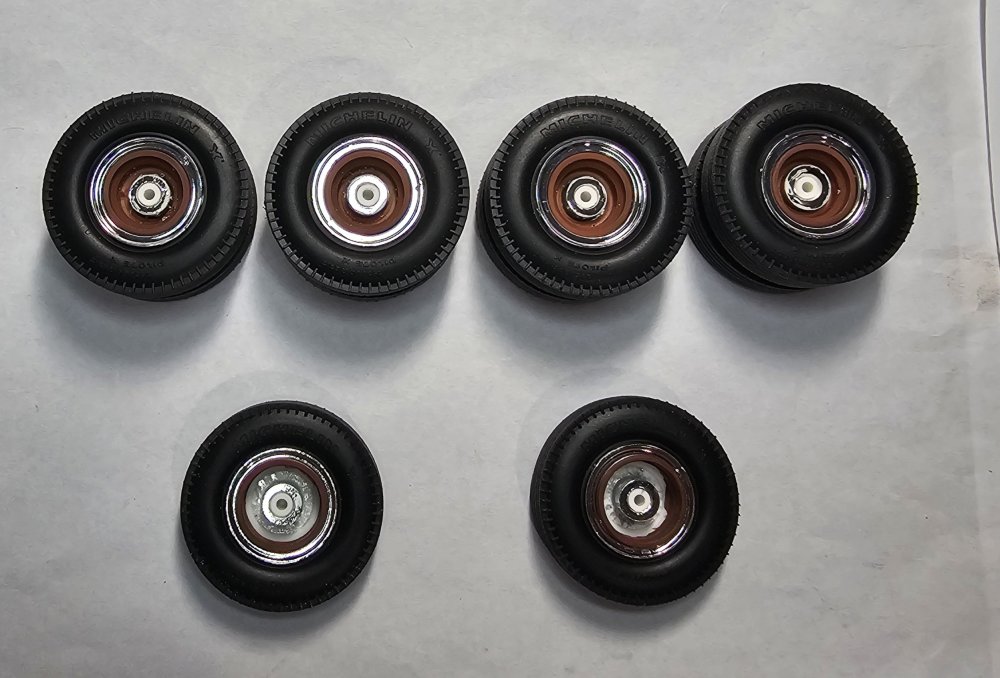 This view shows the brake drums that I added to the front and rear wheels/tires.
 This view shows the rolling chassis.
 This view shows the rear axles mounted in place.
 This view shows the engine in place.
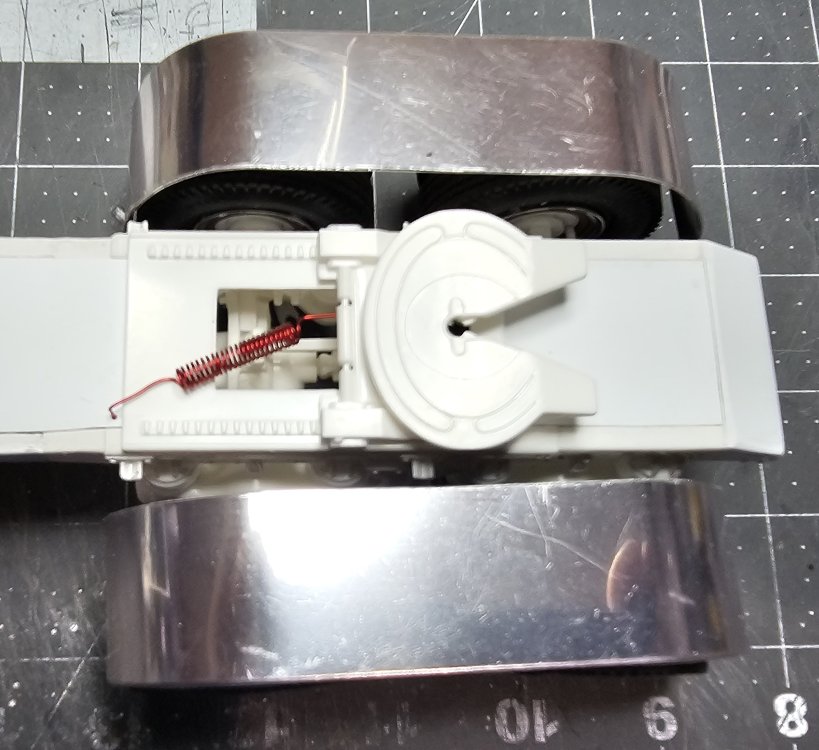
 This view shows the fifth wheel in place.
 This is an overall view of the truck.
 This is the front of the truck showing the drop visor and texas bumper. That's it for now be back with more soon.
Ron G
-
7
-
-
4 hours ago, HubertB said:
Interesting work, Ron.
I have a neophyte question : why would one want to lengthen the wheelbase on a truck aimed at hauling a trailer ? That must make the handling pretty tough on some bends and corners.
Hubert
Hey Hubert
It's done here in the states as a custom, kinda hot rod thing. These are mostly show trucks, kinda of like custom show cars. They don't realy do any work. I dont know how this trend started, but there are alot of them here in the states.
Ron G
-
6
-
-
Hey all
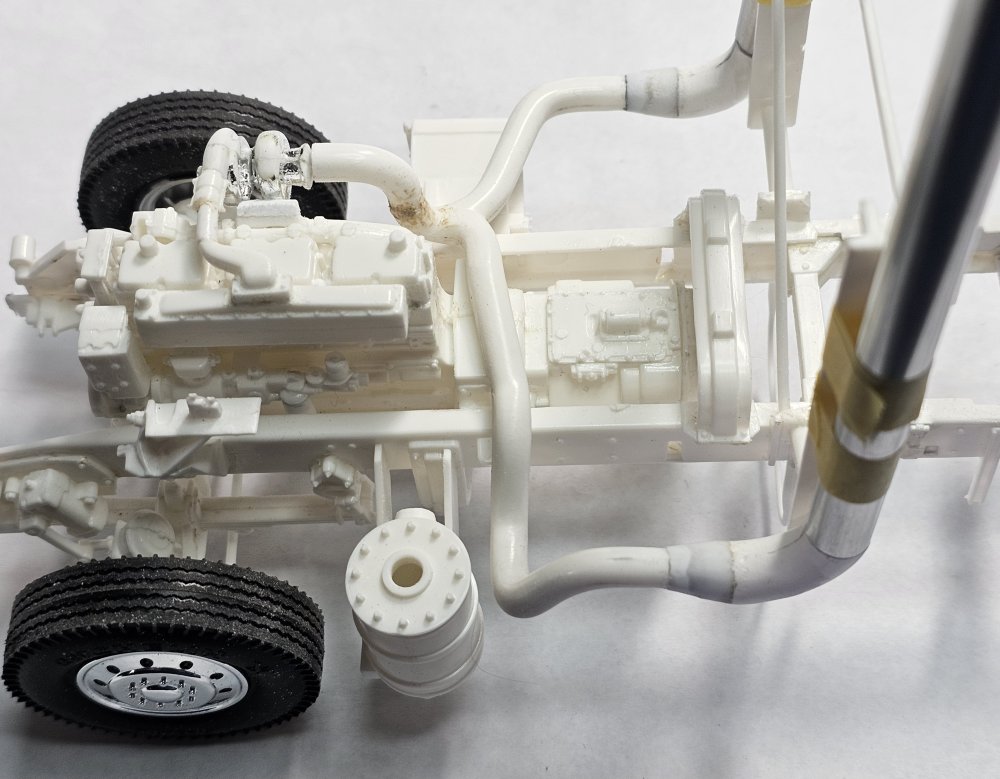
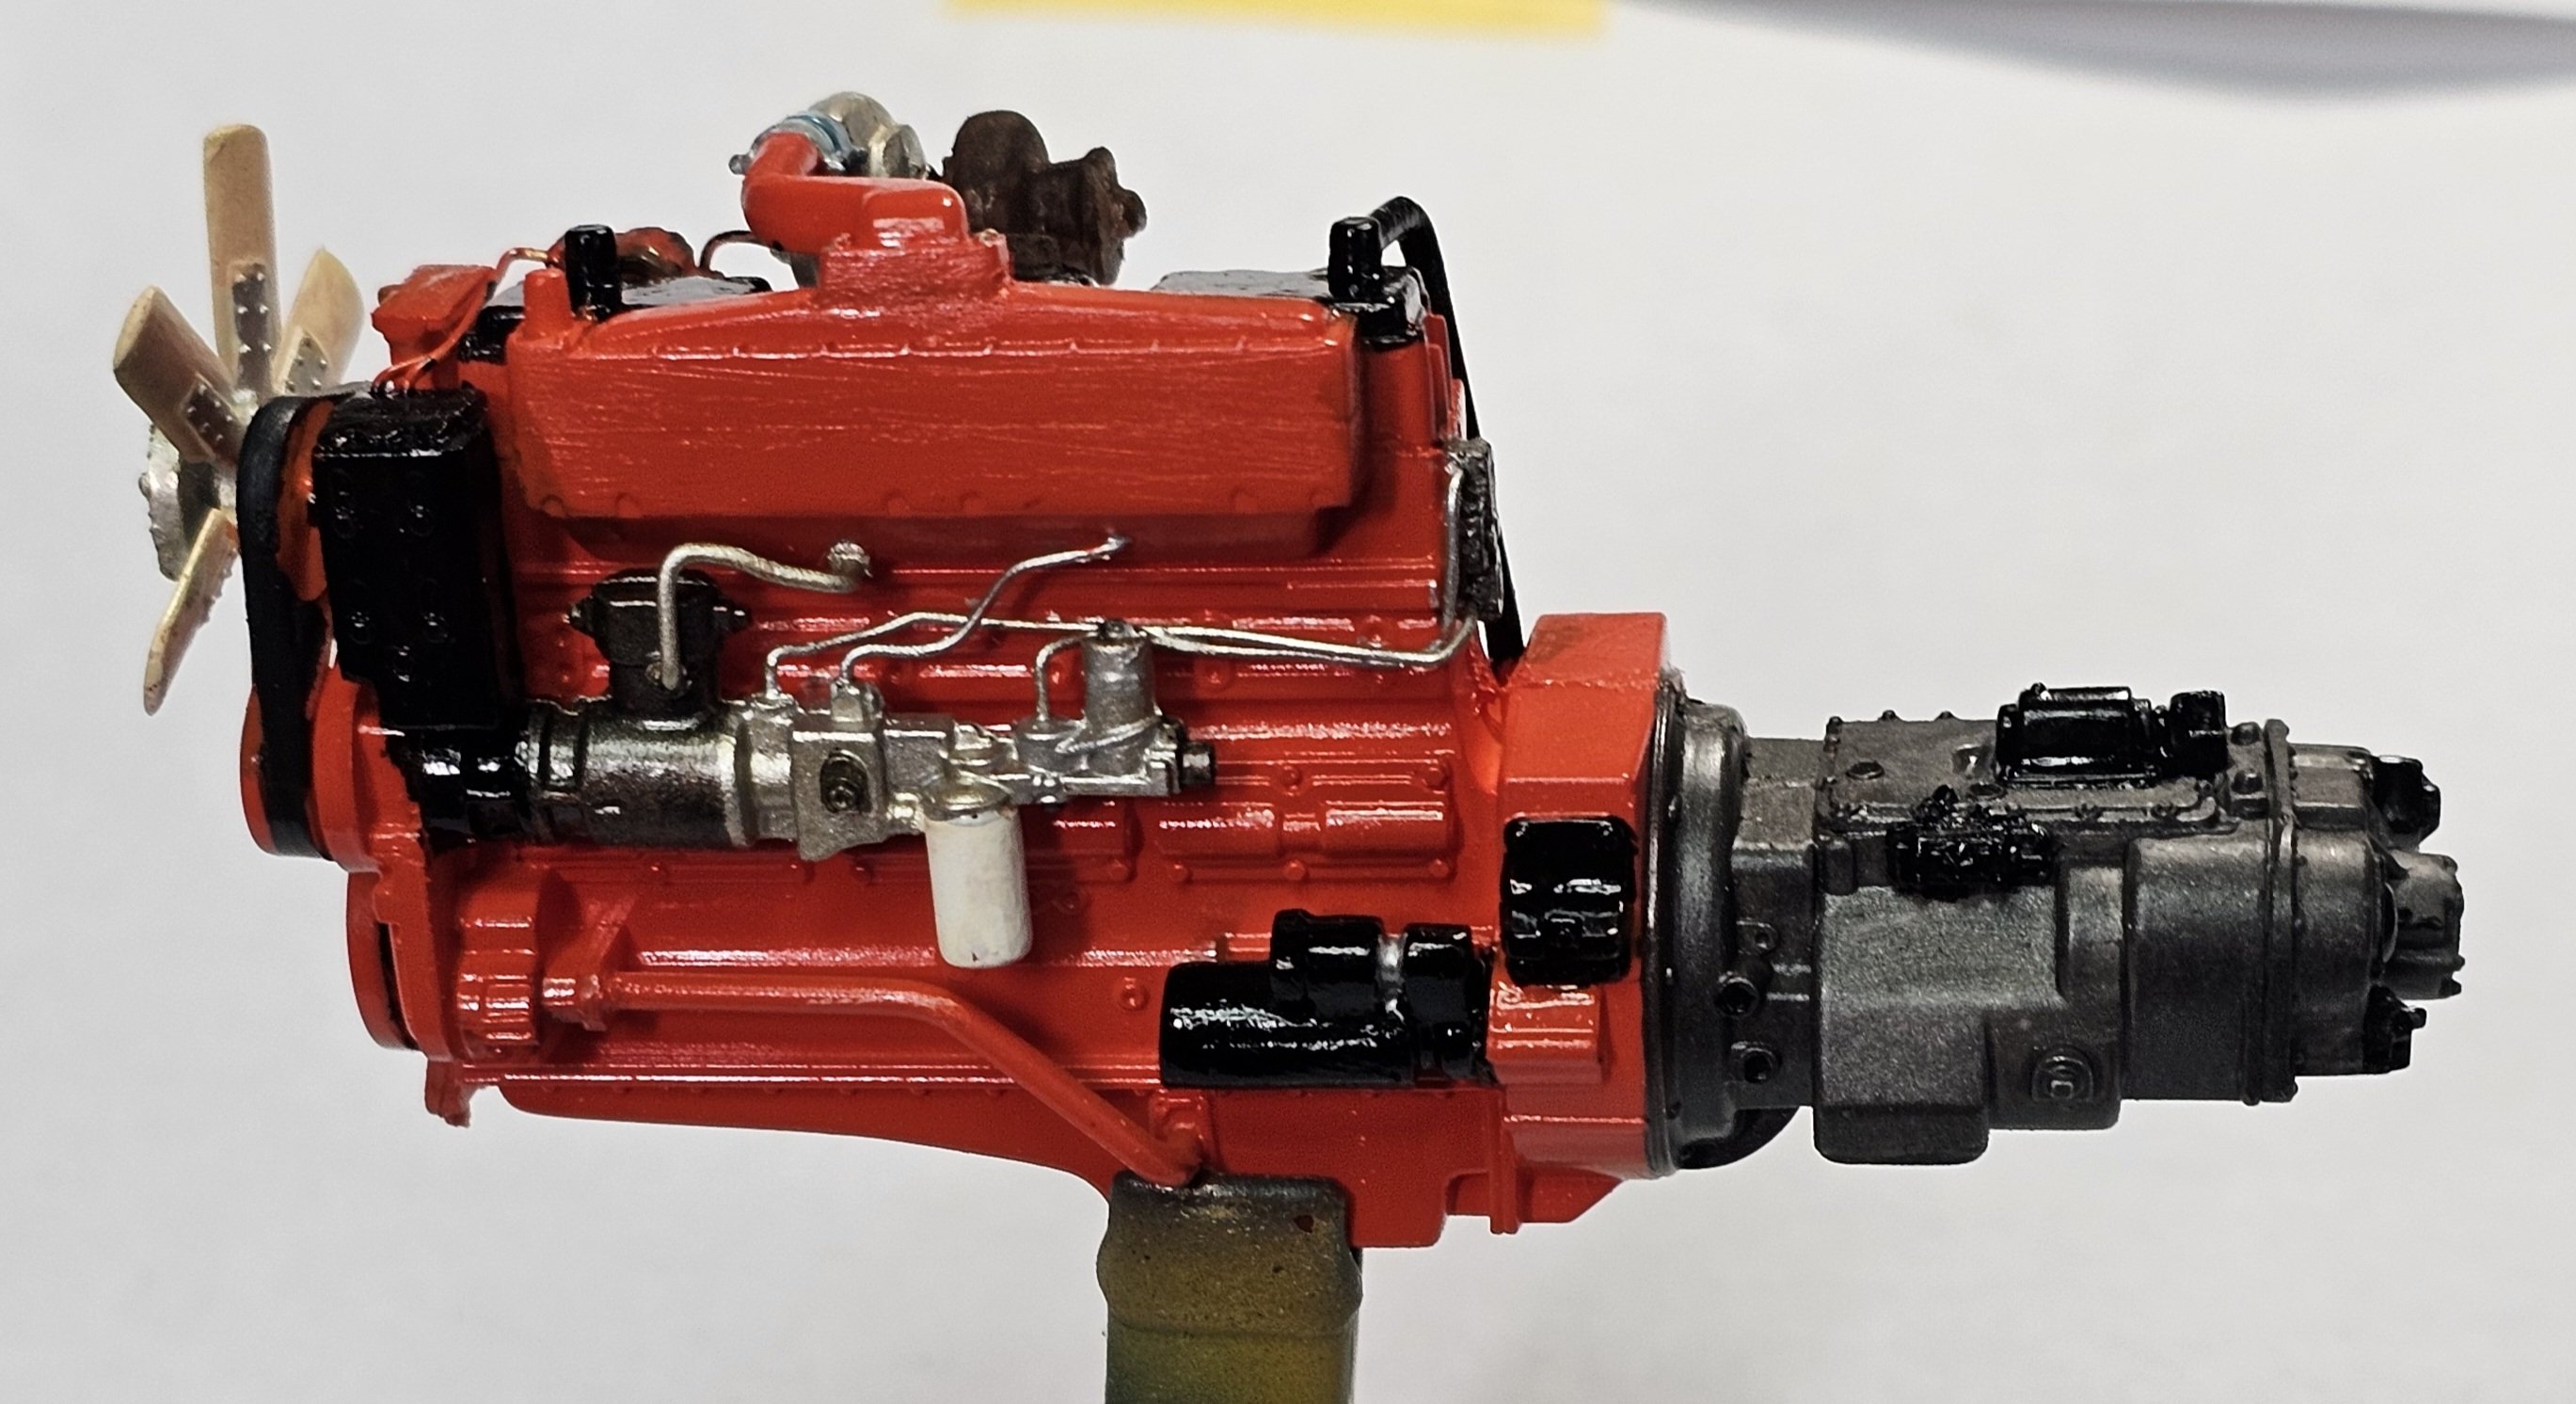
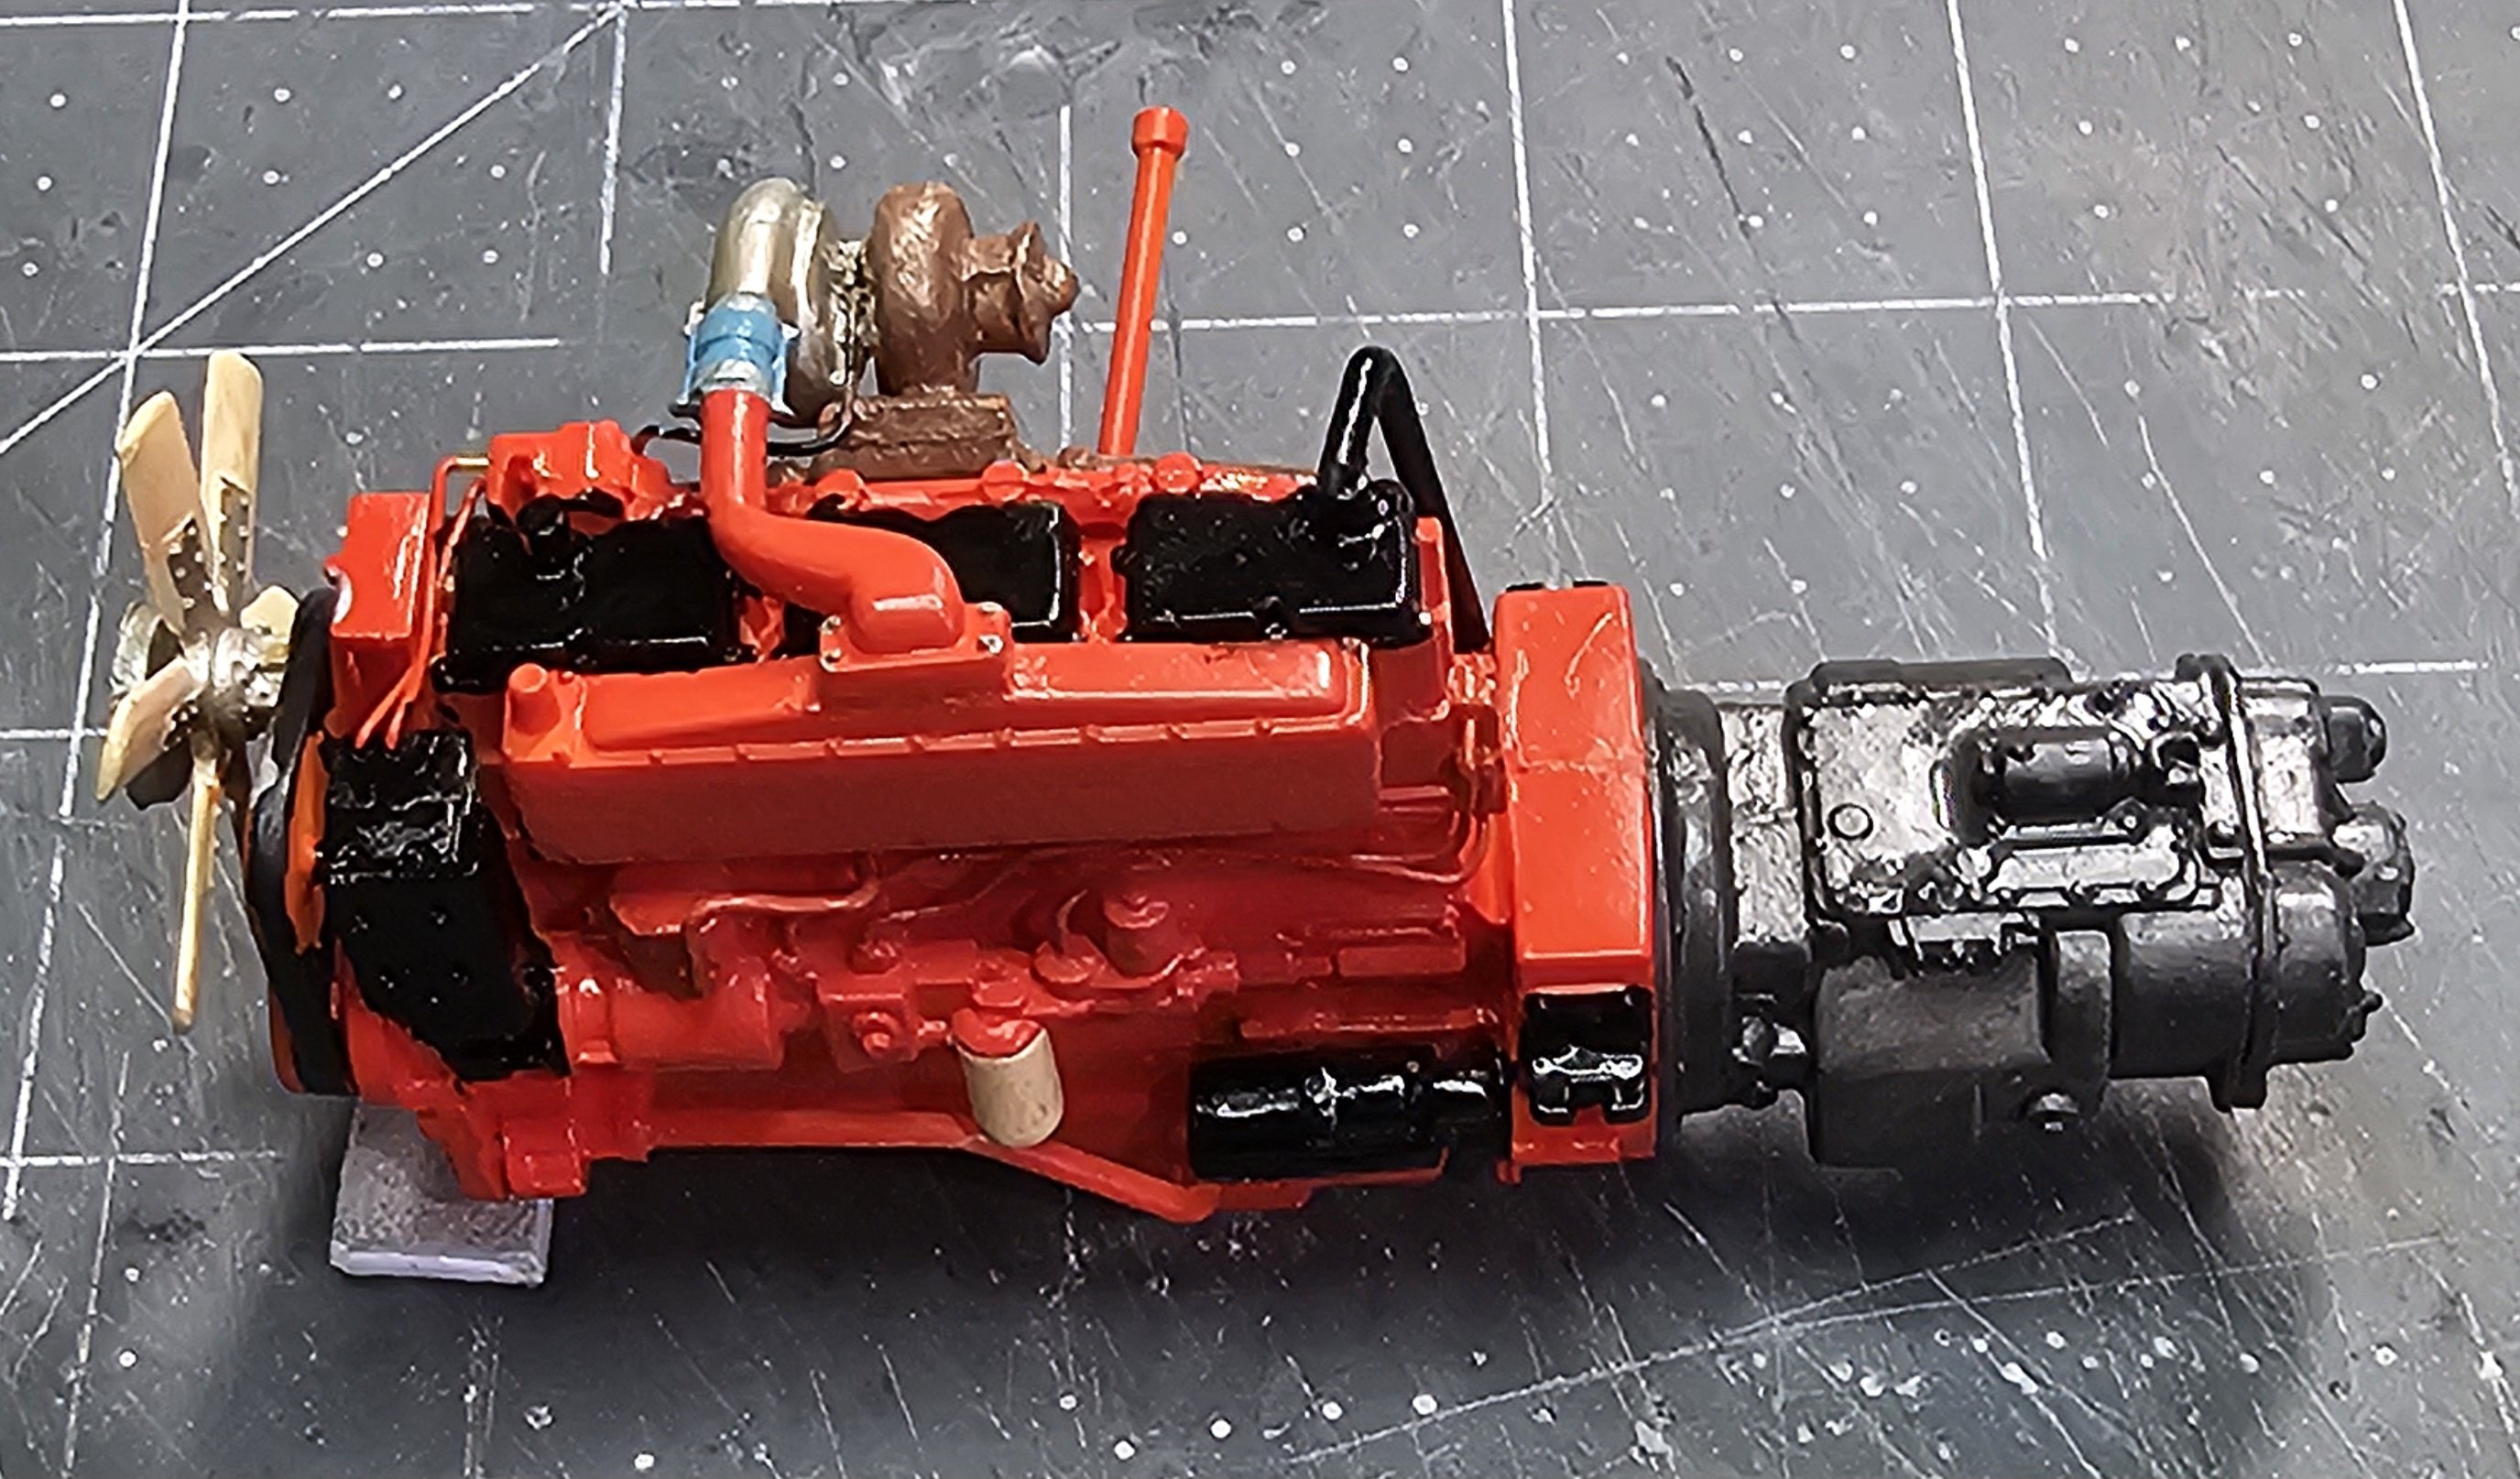
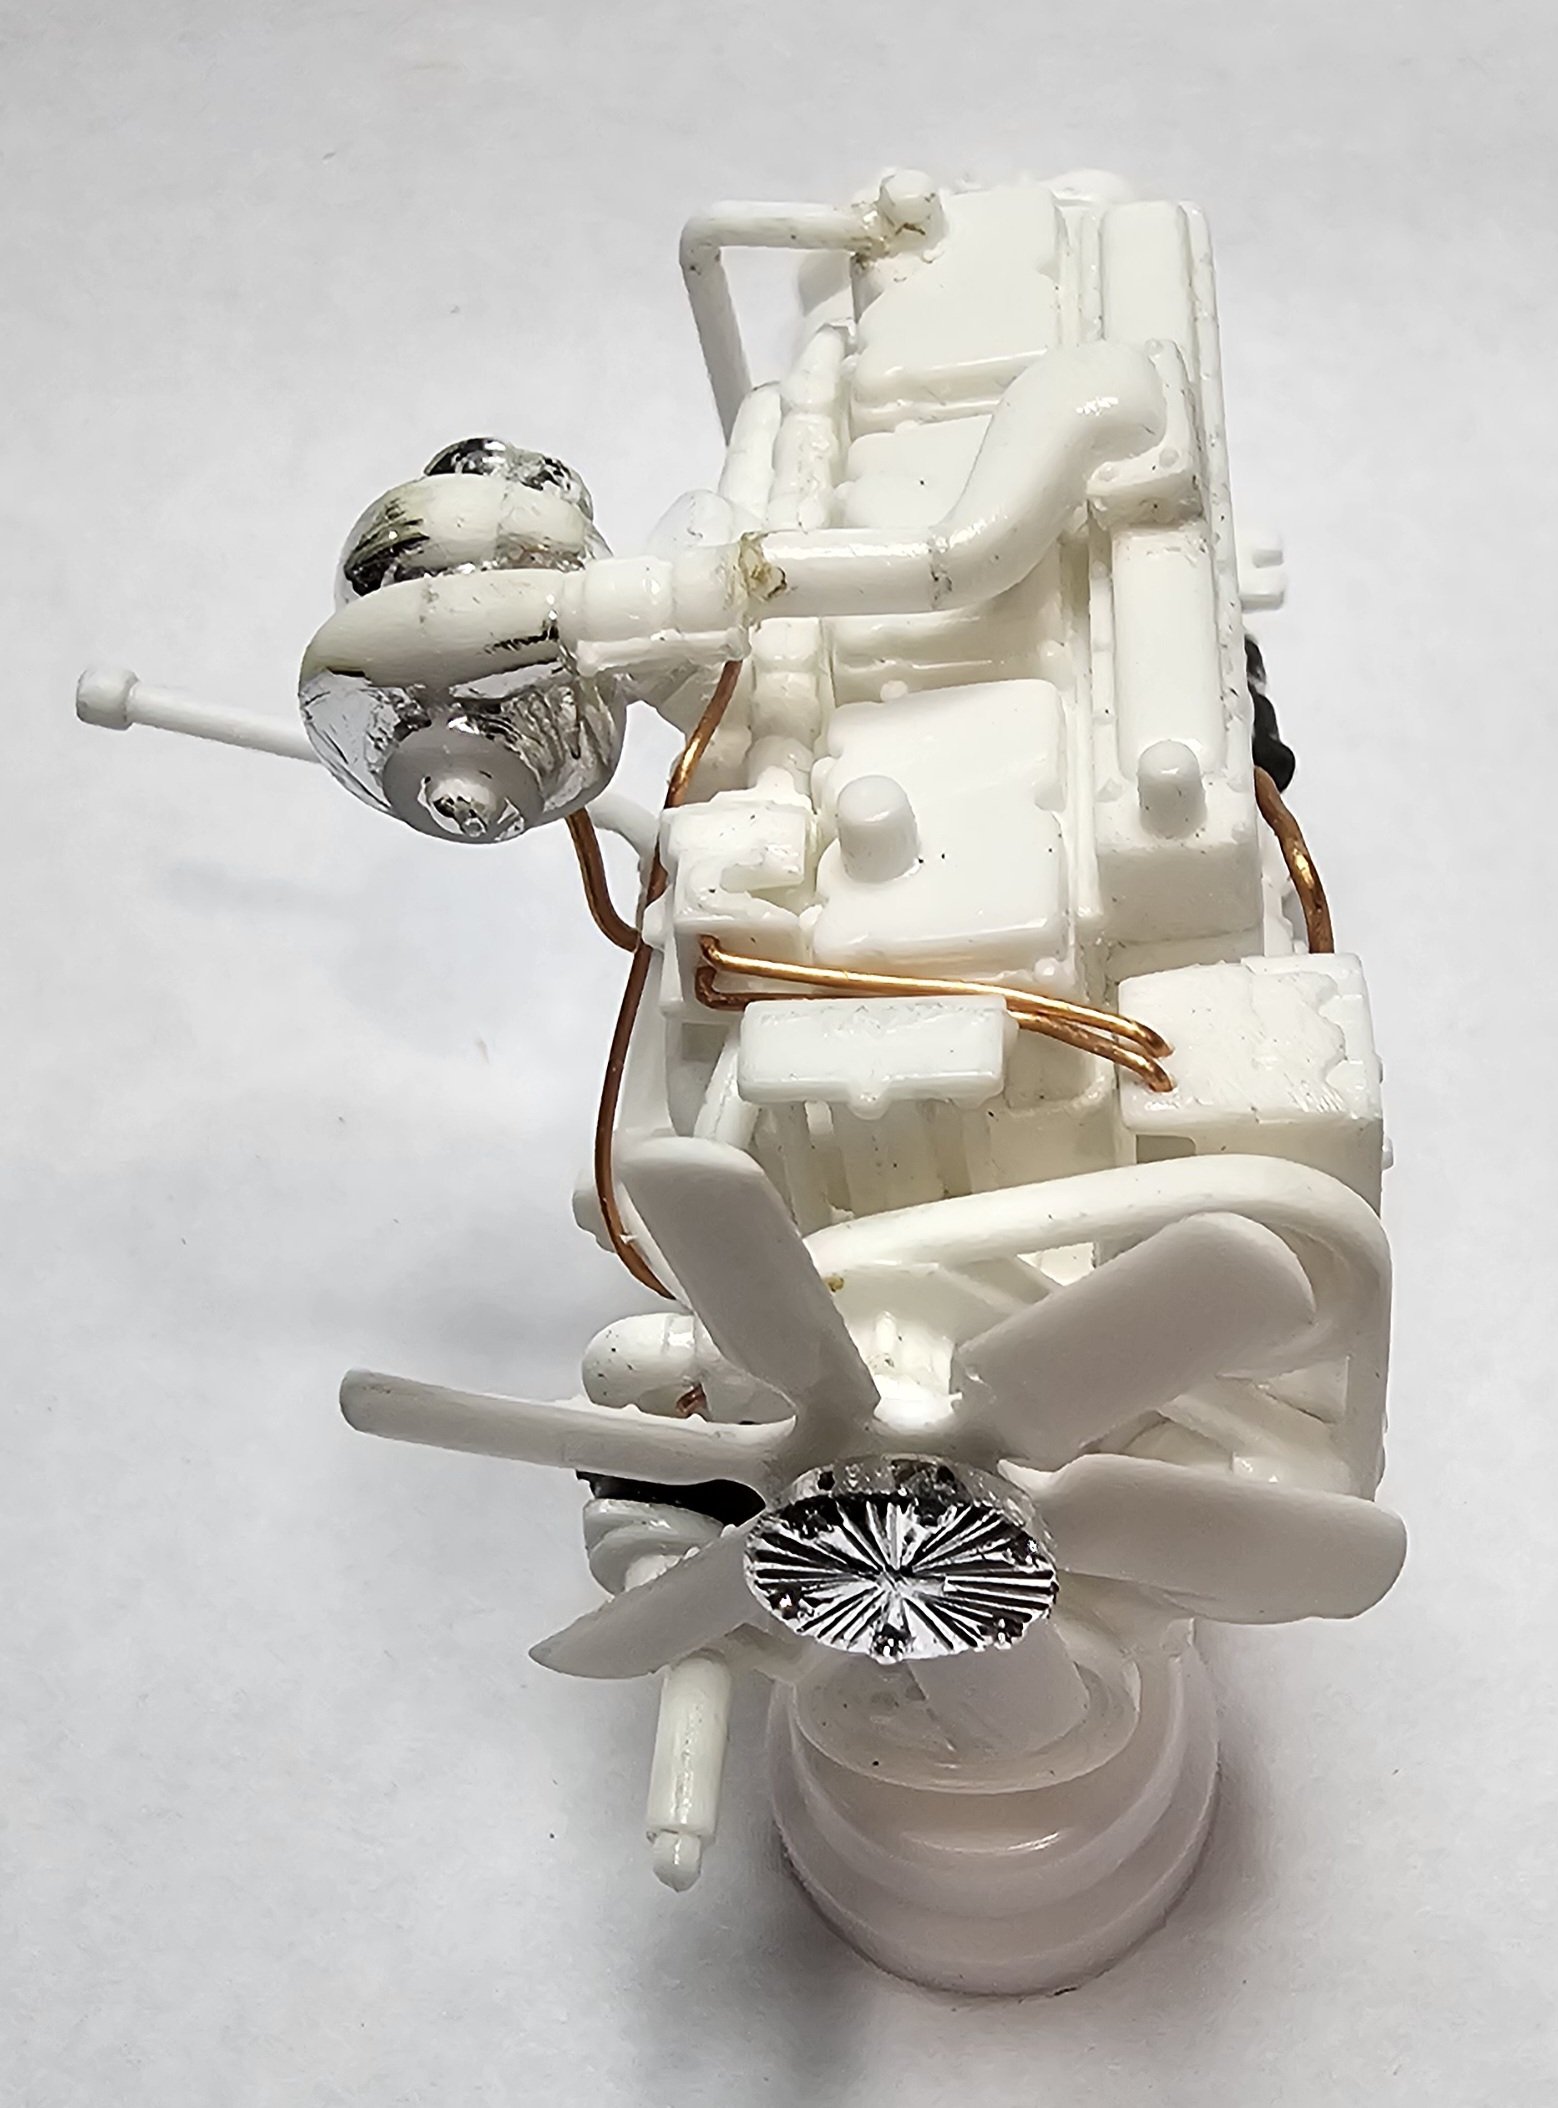
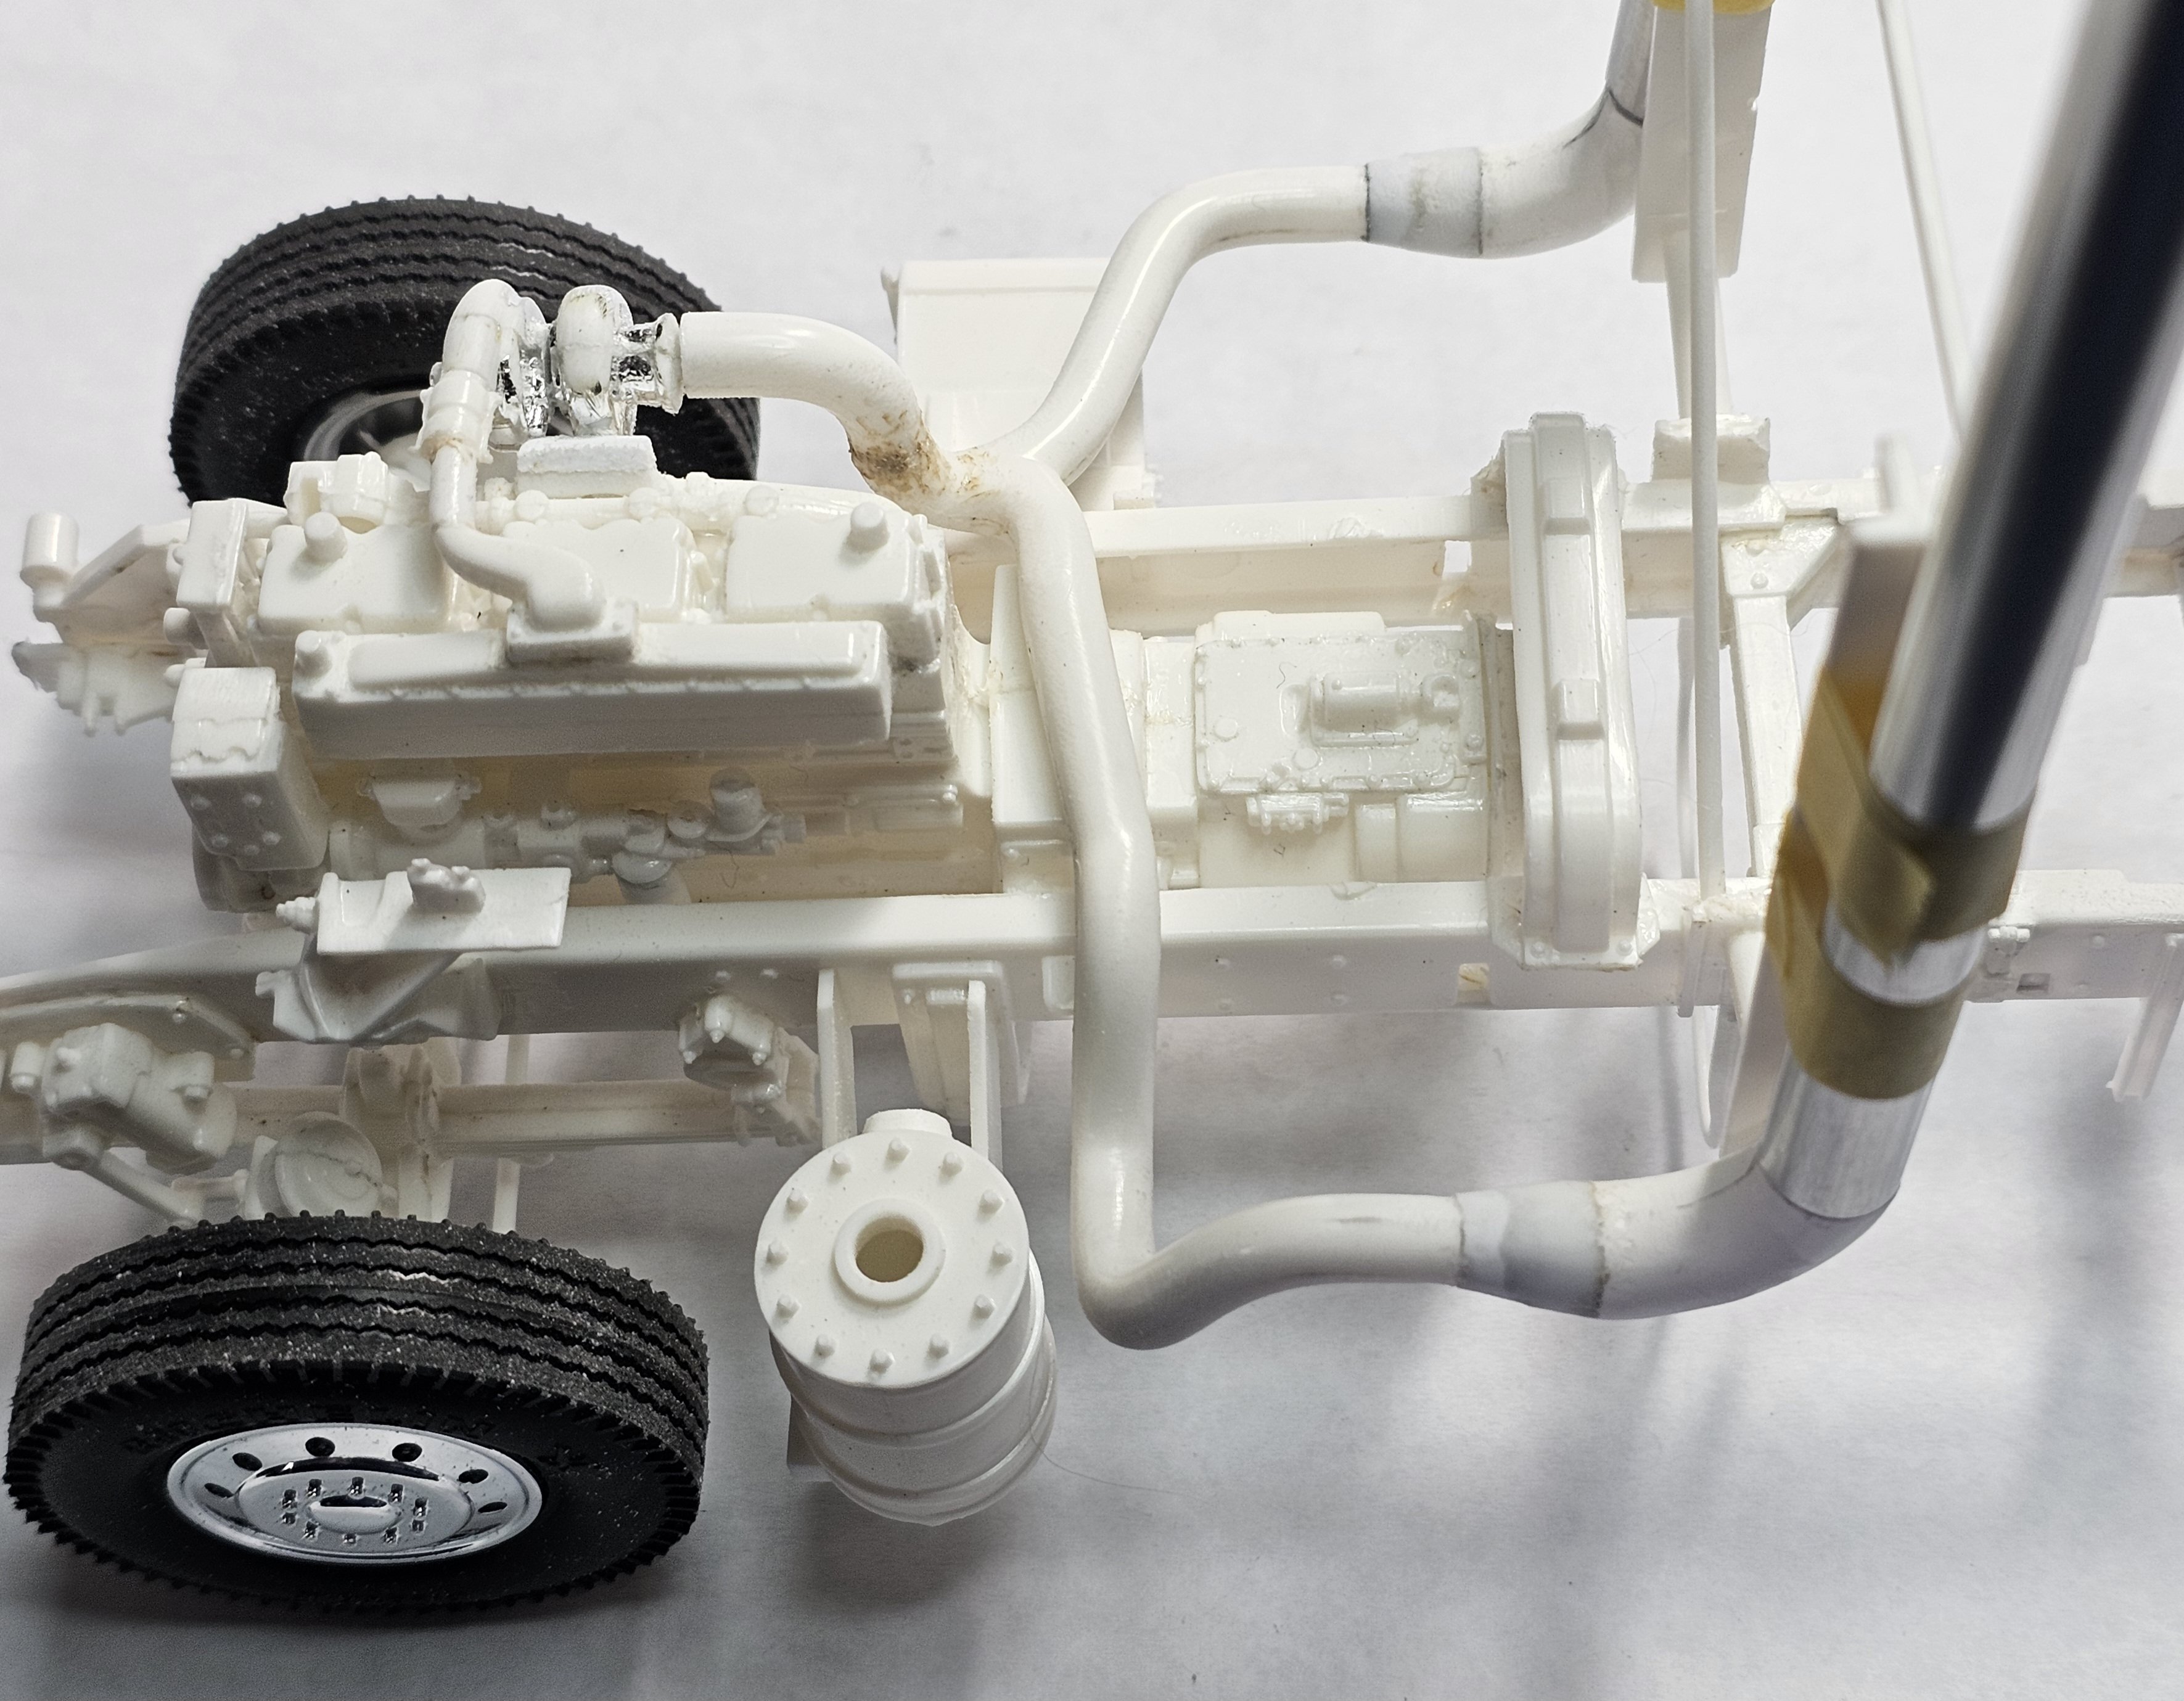
Got some detail work done on the big cam Cummins 475.
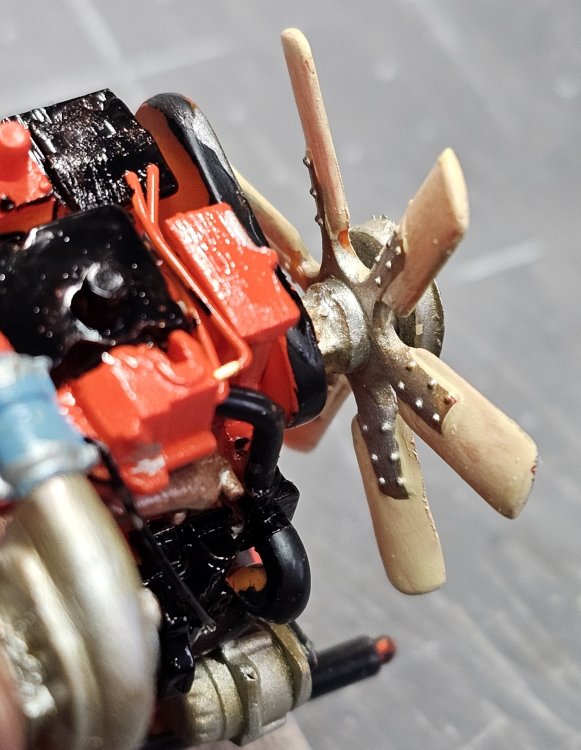
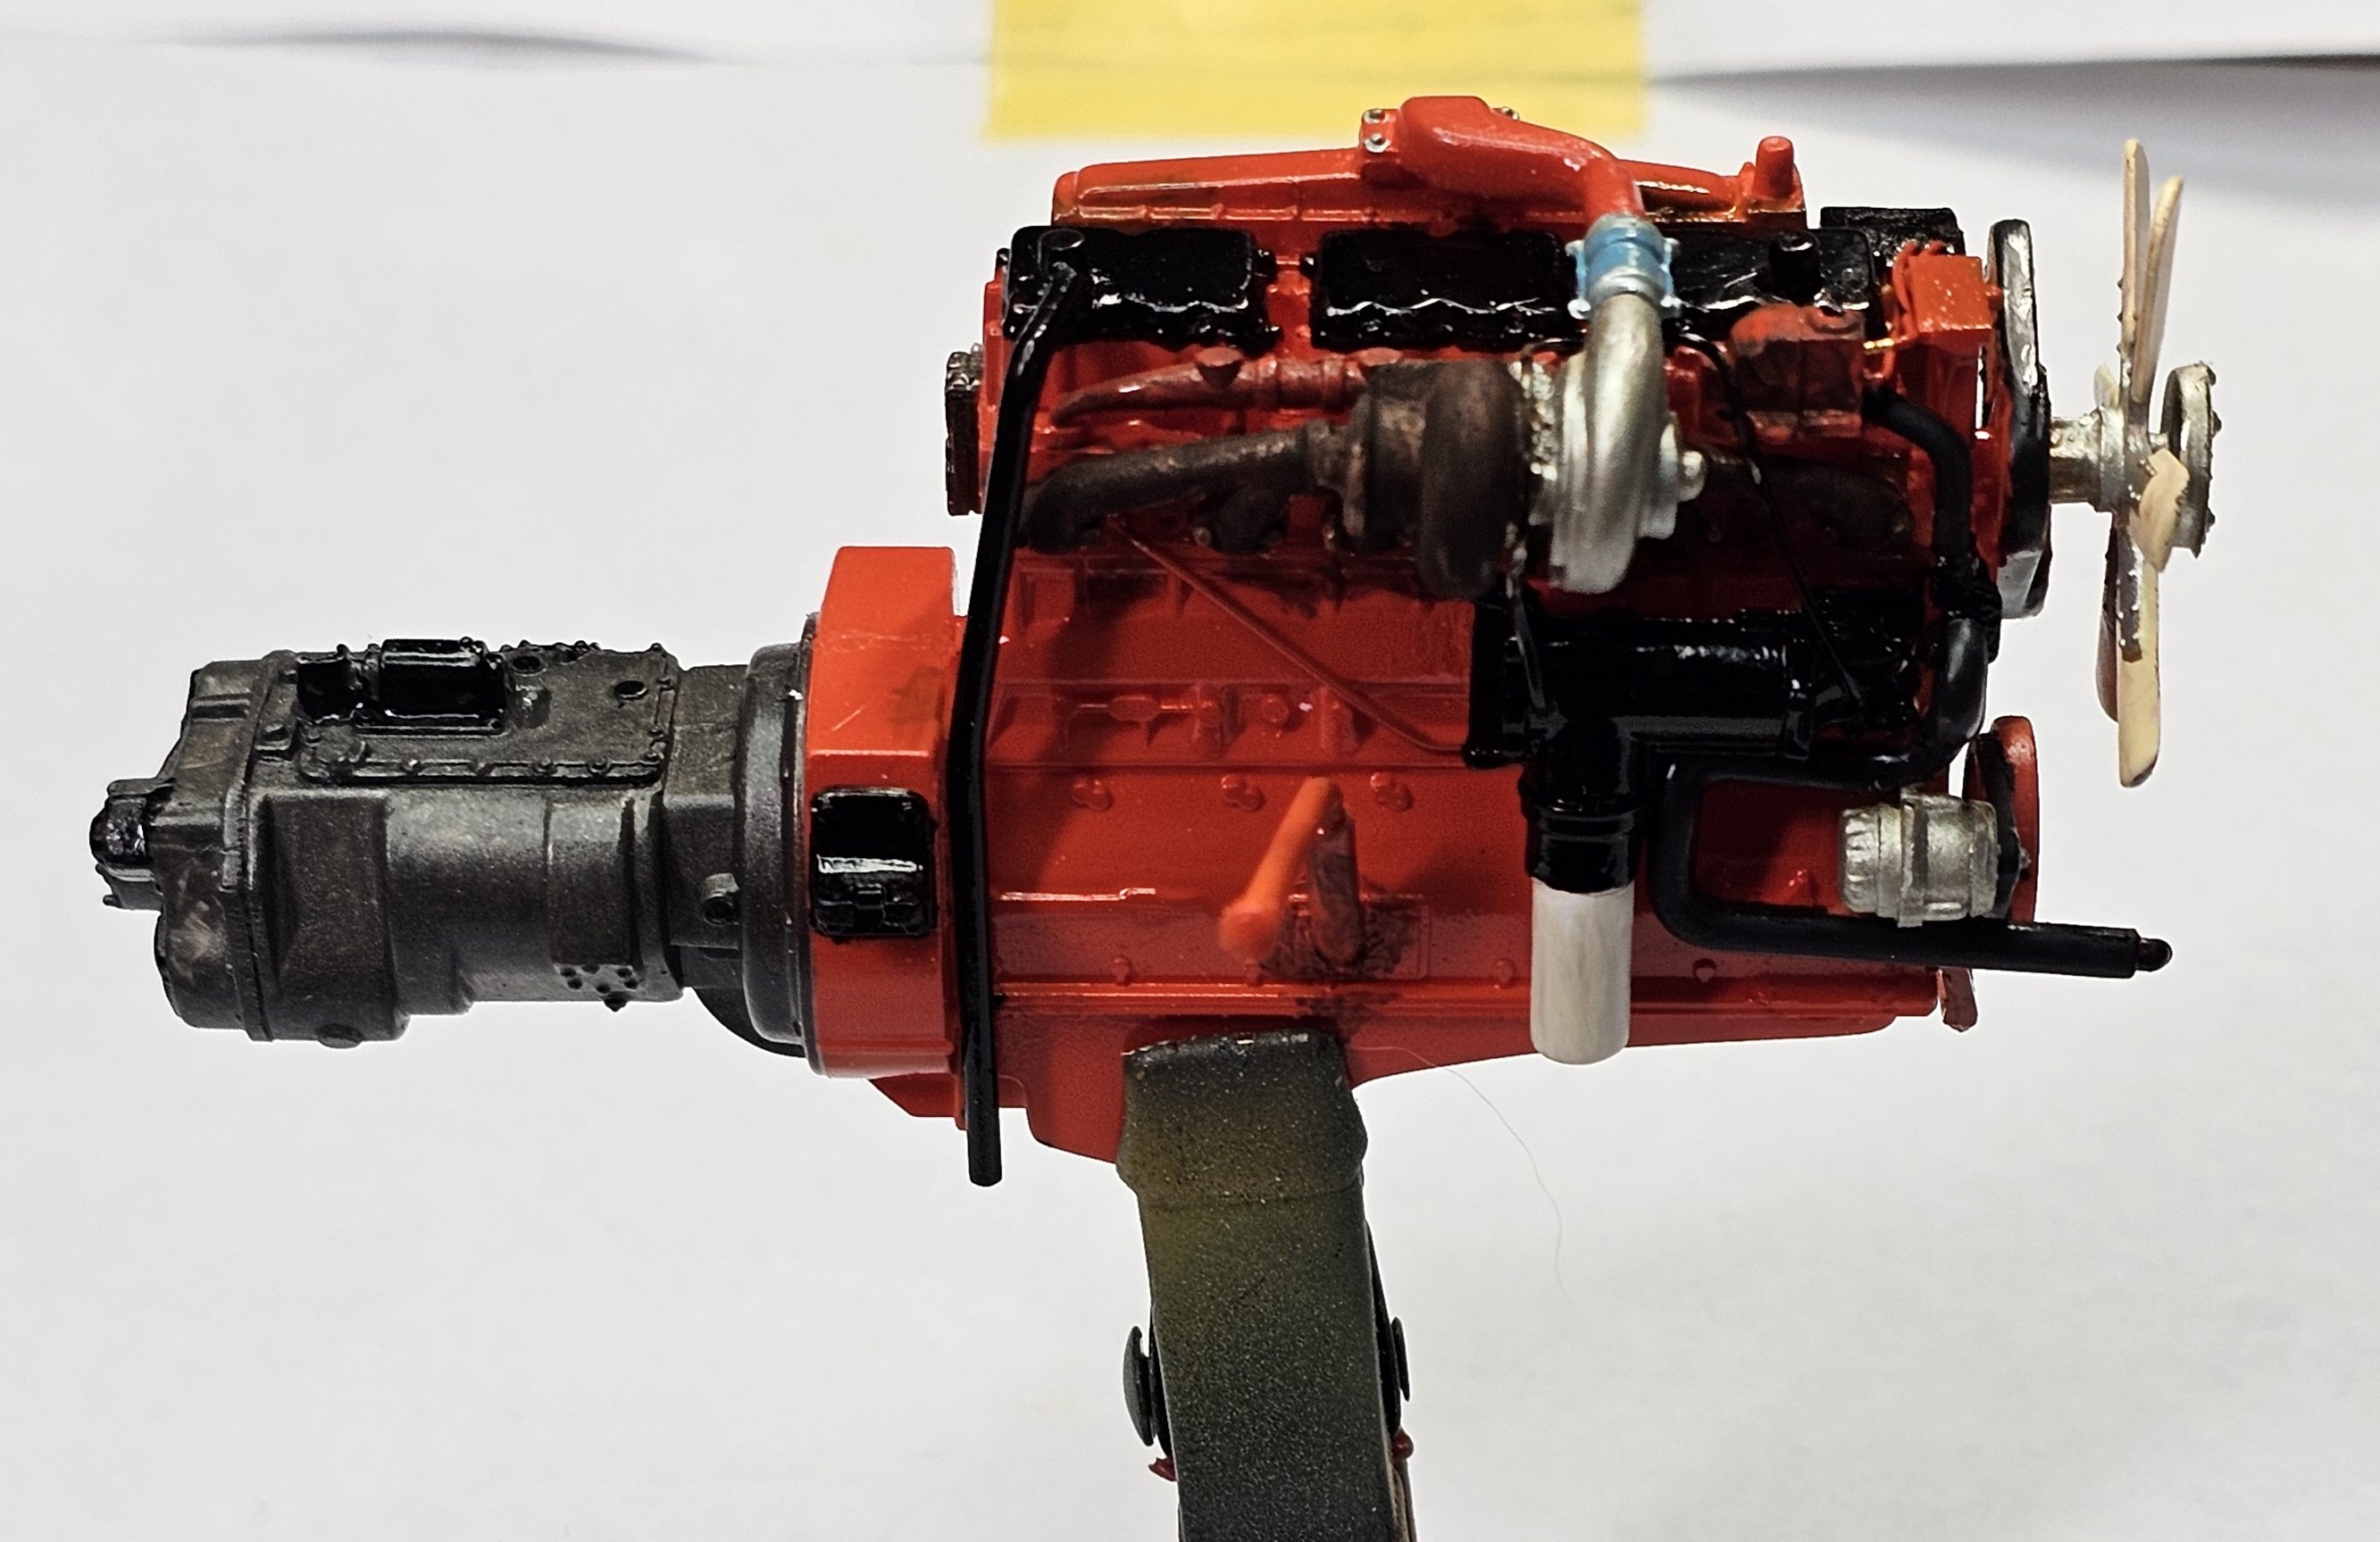
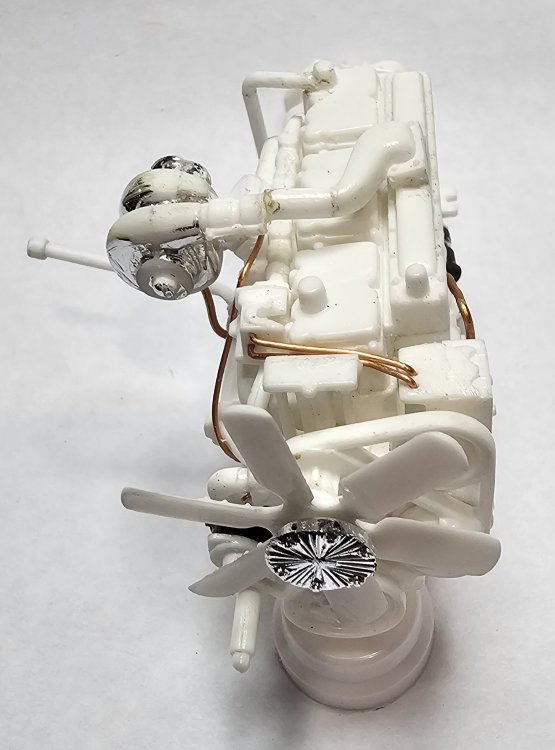 Front view of engine. I added a fan clutch to the fan. I added some plumbing also.
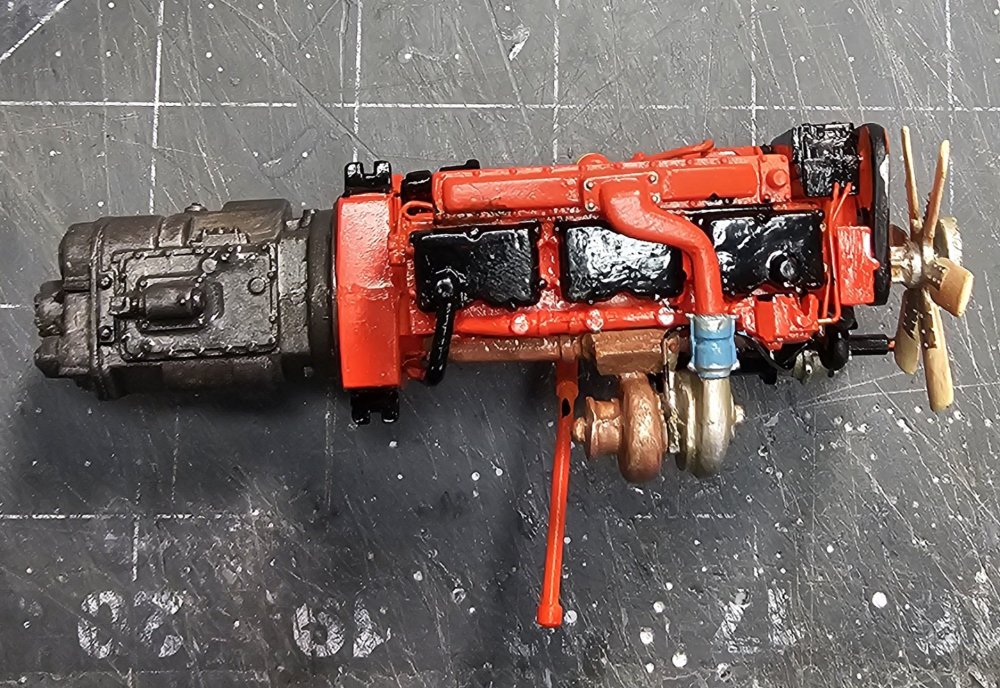
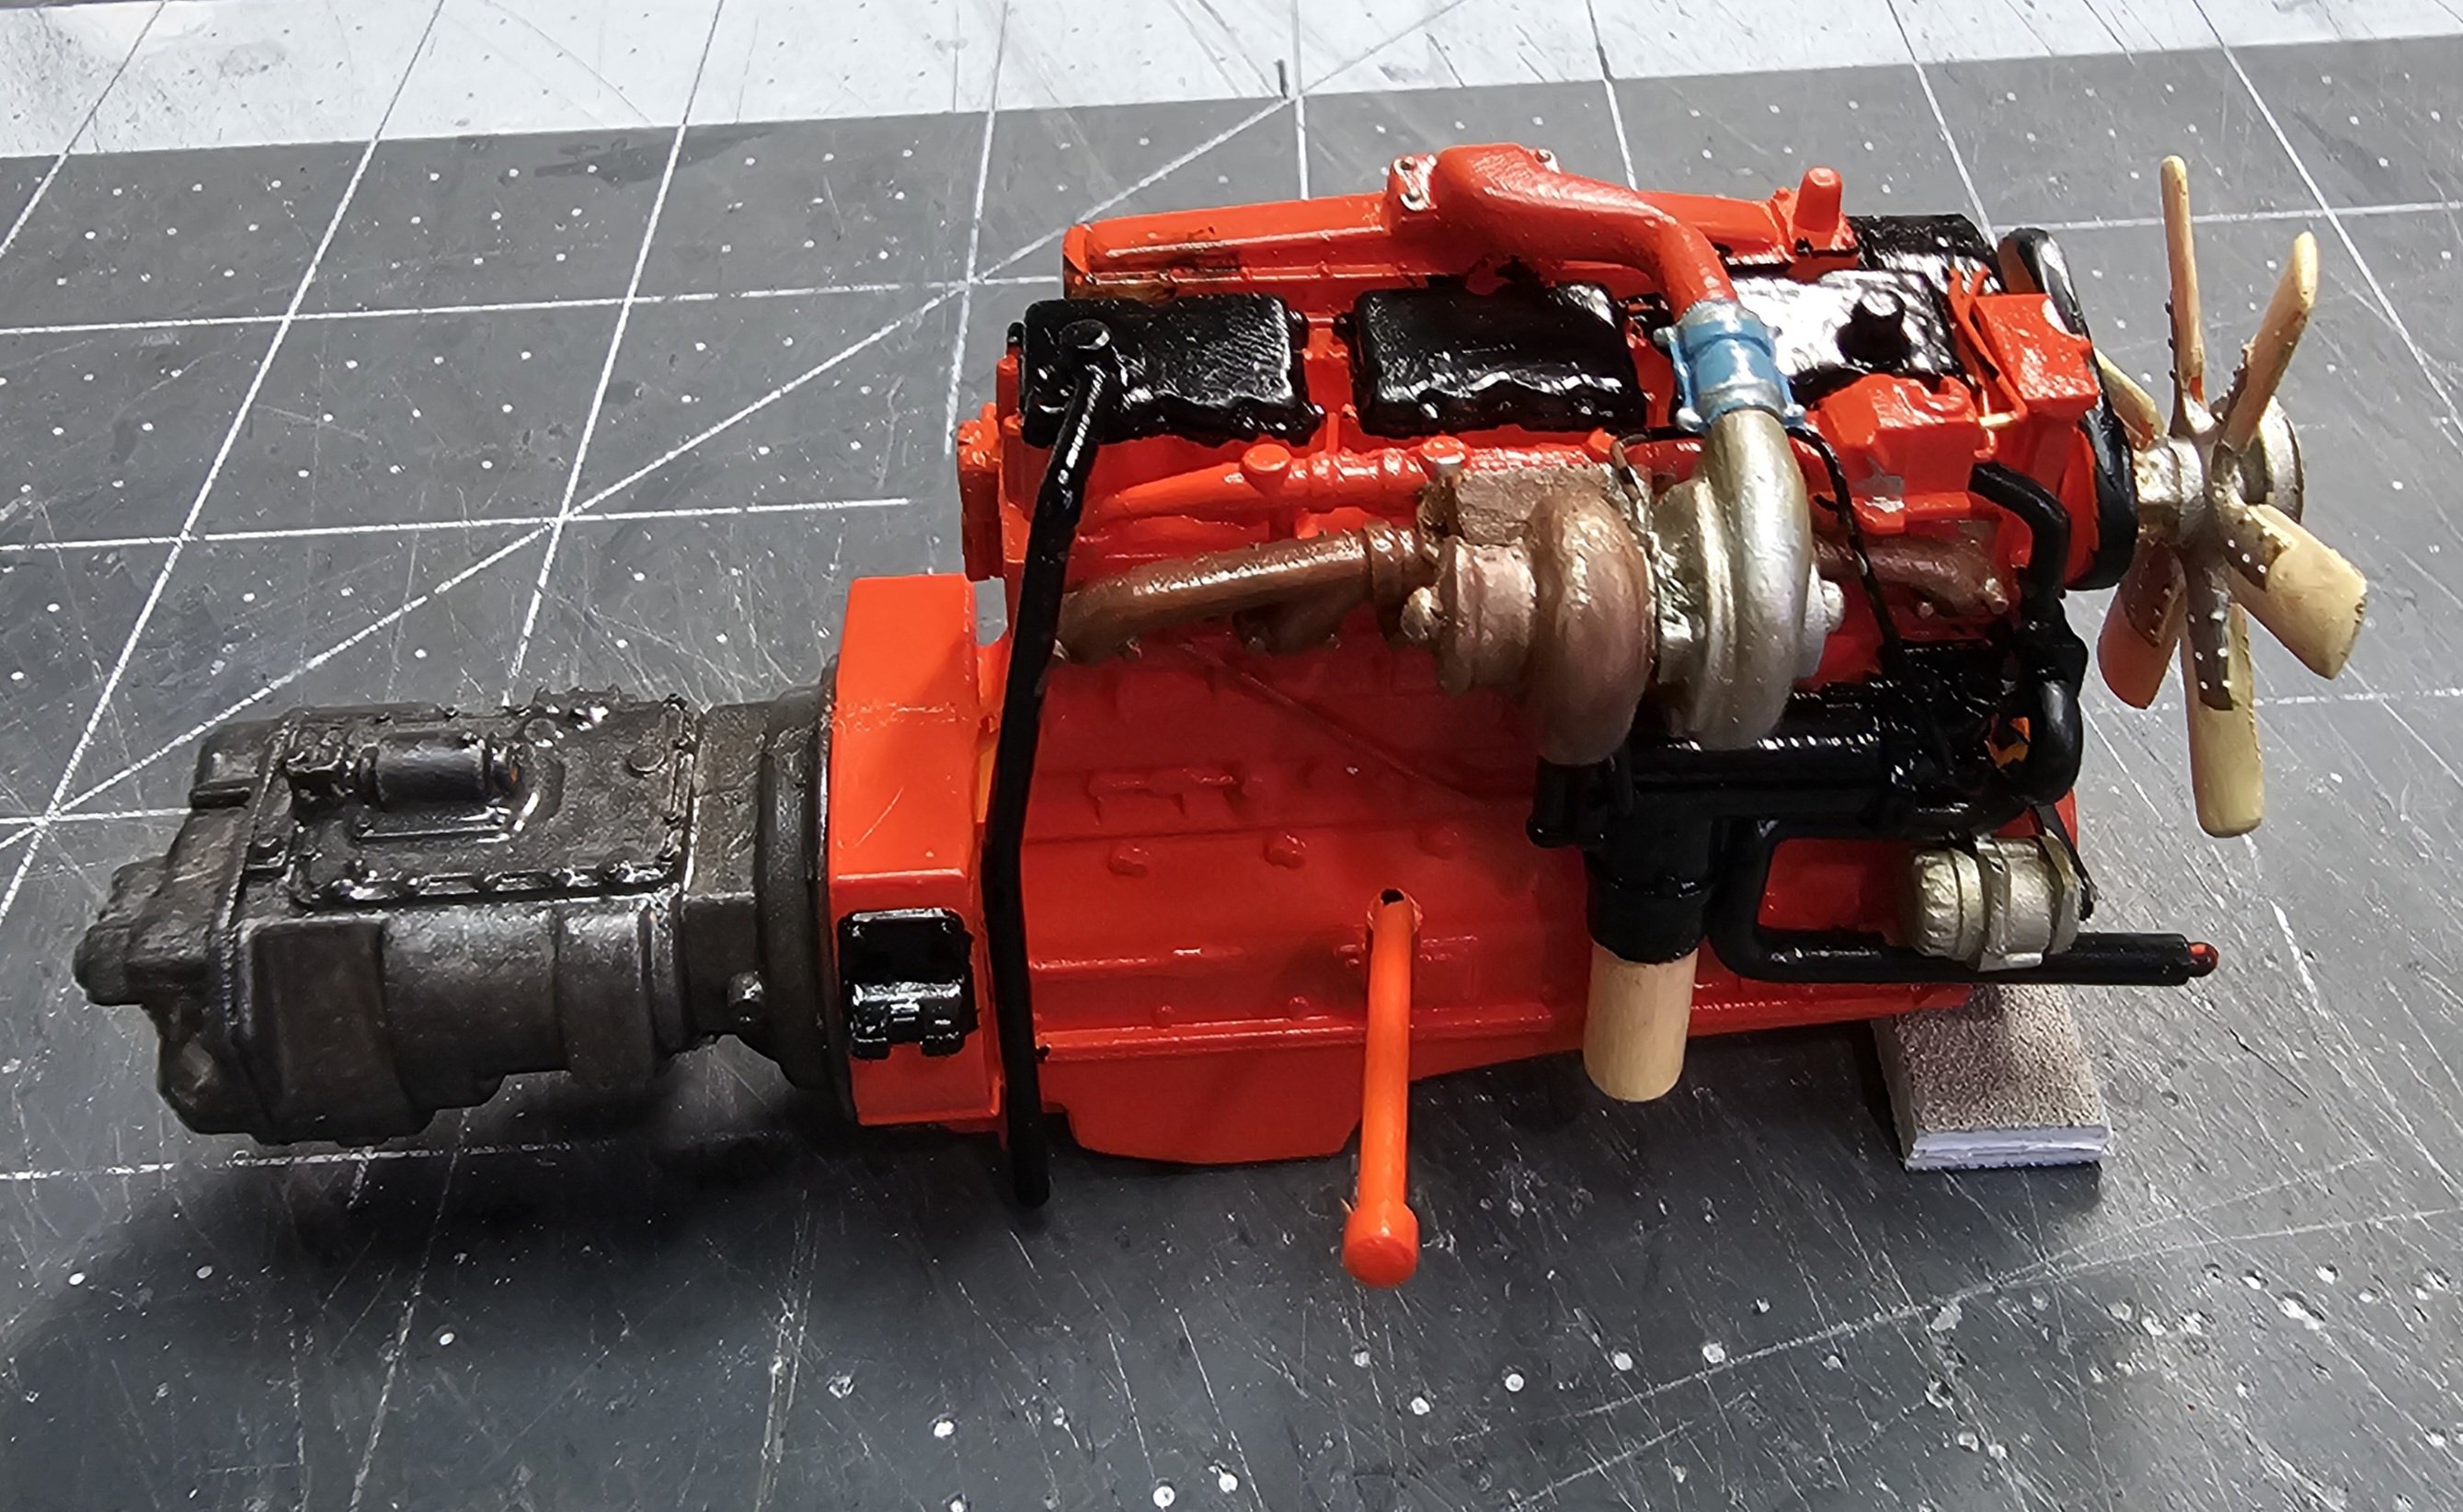
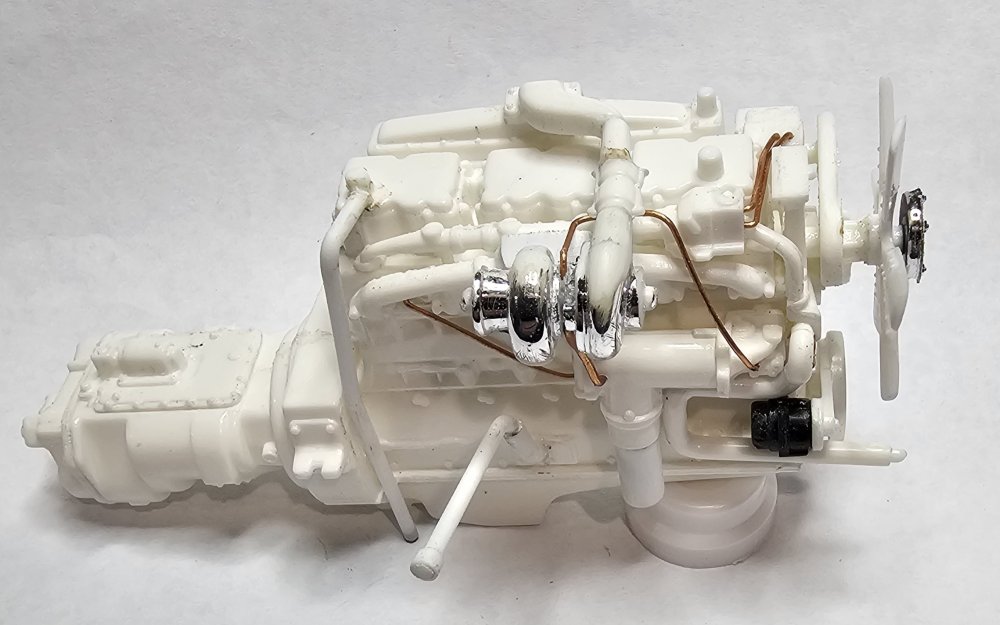 This side view shows the modified dipstick and blow bye pipe at the rear. Also some of the turbo plumbing.
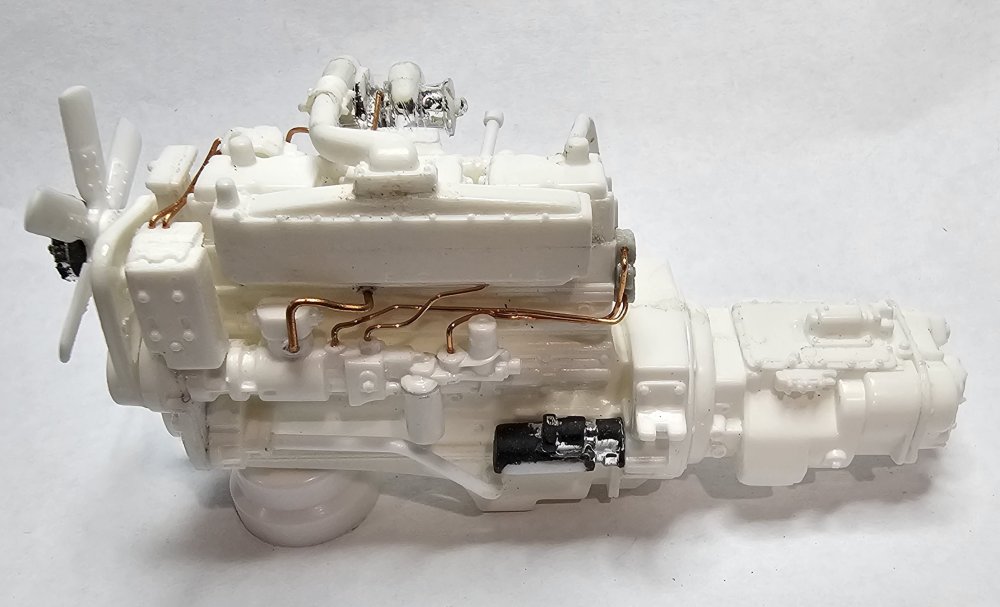 This side view shows the fuel lines and scratch built starter that I added. There will be a feed line from the fuel tanks up to the fuel pump.
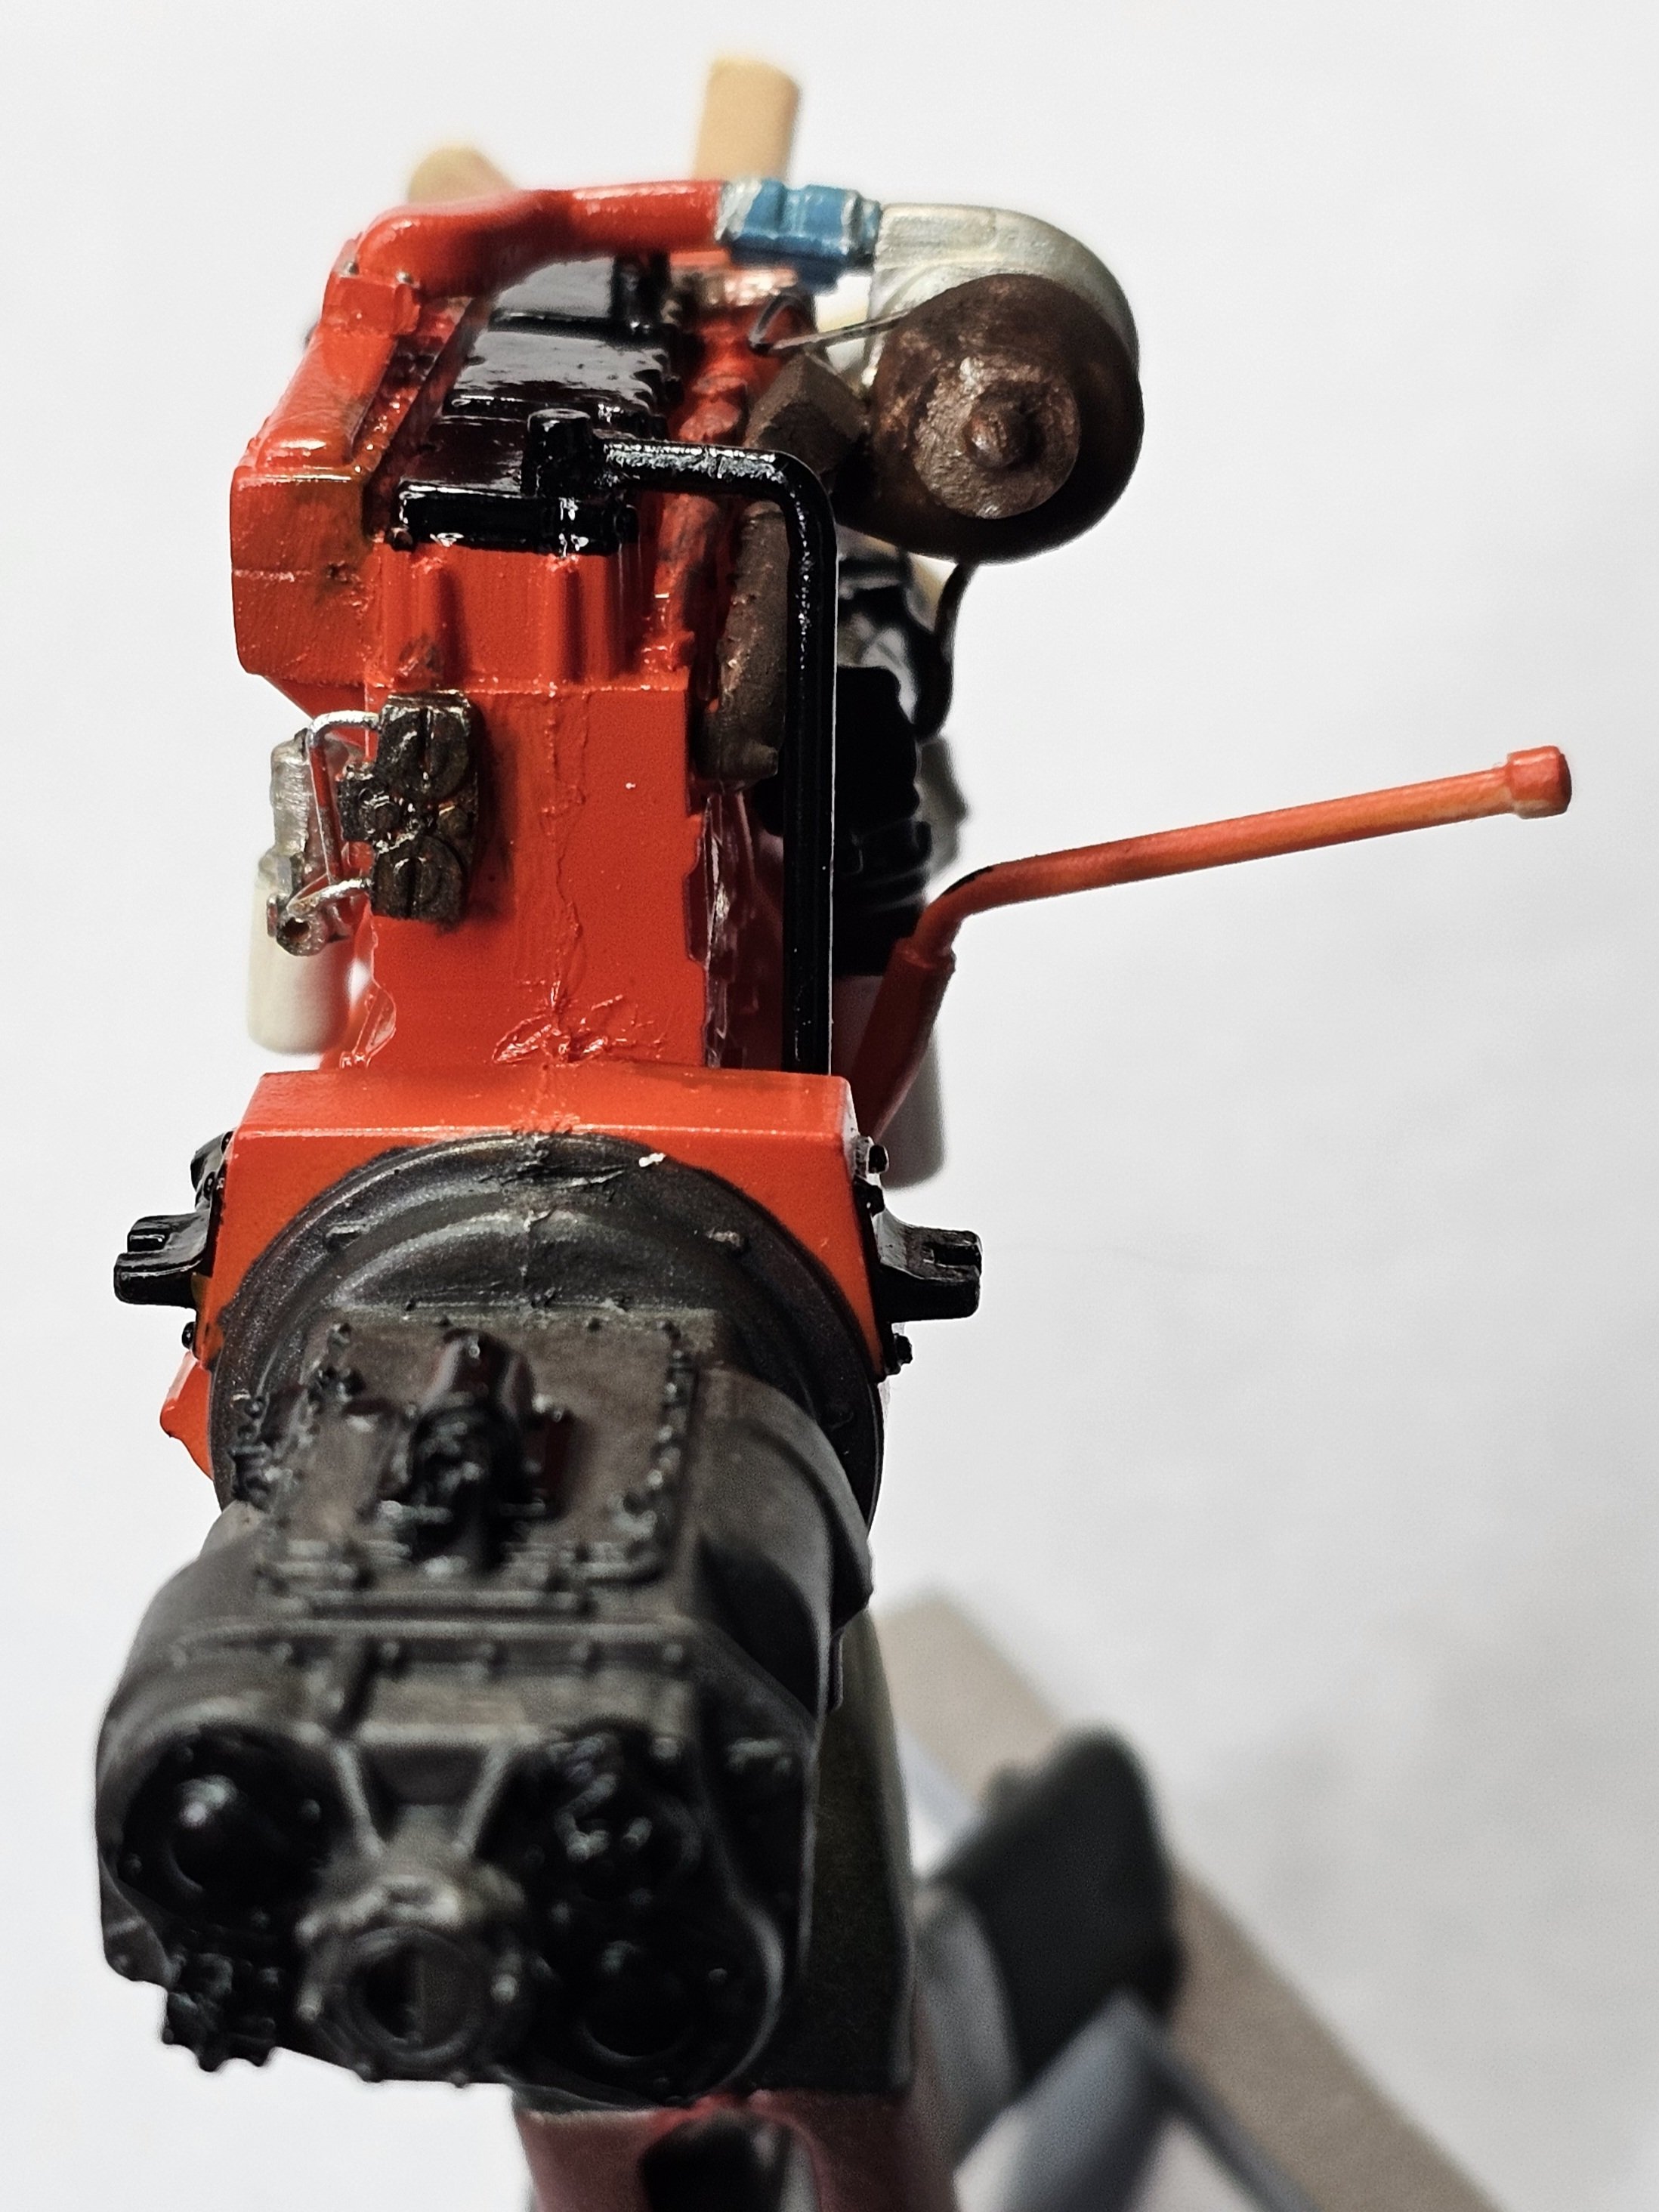
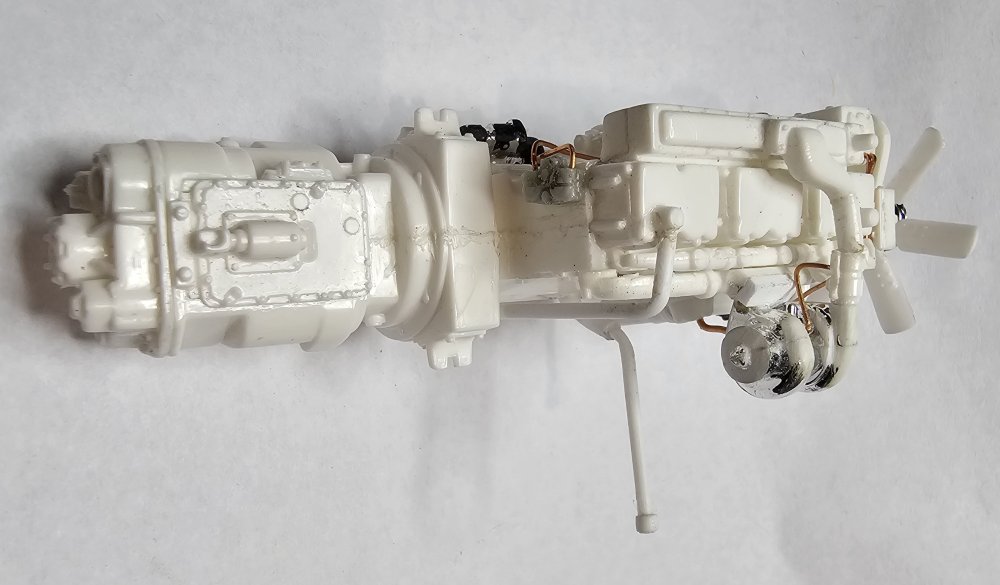 This view shows the fitting at the rear of the head.
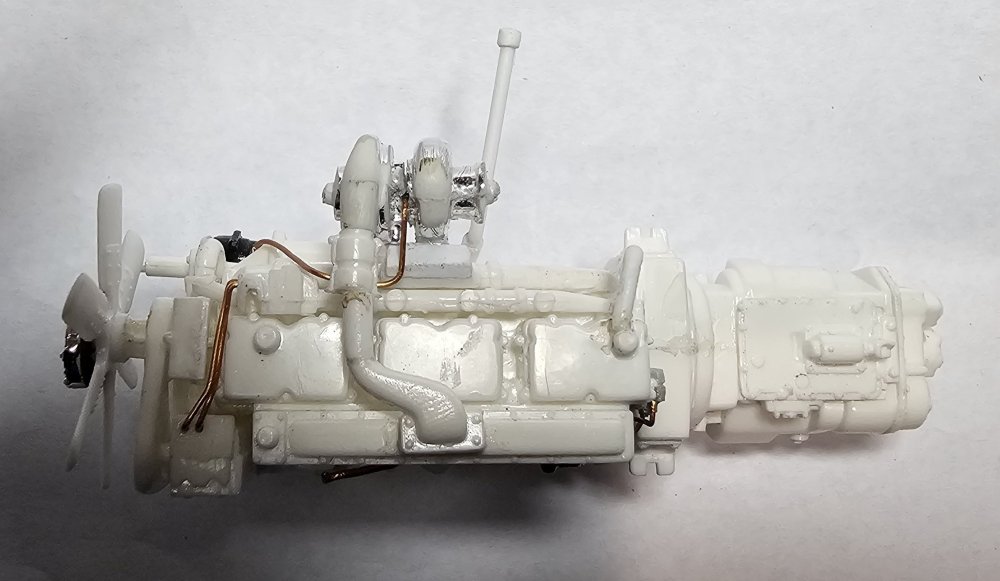 This plan view shows the single turbo set-up. Well that's it for now be back soon with more.
Ron G
-
5
-
1
-
-
Hey Jeff
Nope, I want to paint them on, no decals.
Ron G
-
2
-
-
3 hours ago, Jeff said:
That will be a real sweet look, and it will perfectly high light the black on the cab..... with the chrome rims, it will be a show stopper....
Yeah I think it's going to look pretty cool. I have to figure out how to paint the gold strip between the black and orange. I think I'm going to paint the gold first, then mask it with some 1/32" or 1/16" pin strip tape. Then I can mask up to it and do the orange then do the same thing for the black, it sounds logical to me.
Ron G
😵💫🫣
-
2
-
-
41 minutes ago, Jeff said:
I love the attention to the finest details. I love those photo etched dash panels. They make all the difference. And I am glad to see the aftermarket folks keeping up with us truck guys too. Have you decided on frame color?
JeffYupp, it's going to be orange. I think I'm going to do the engine orange too, with black and silver accents.
Ron G
-
2
-
-
10 hours ago, Jeff said:
Brake chambers look excellent. Not sure why Revell would have molded in the caging bolts , maybe some erroneous info. Our brake chambers had a blue rubber stopper where the caging bolts go to keep the crap out of the brake pot. It is no fun when they get full of mud and water and salt etc. On a pre trip I always checked for those stoppers. Made sure they were there. They do go astray sometimes. Nice job Ron. Love this.
JeffHe Jeff
Yeah, I know, that's why I left just a little stub so I could paint it blue.
Ron G
-
2
-
-
Hey all
Small update on this build.
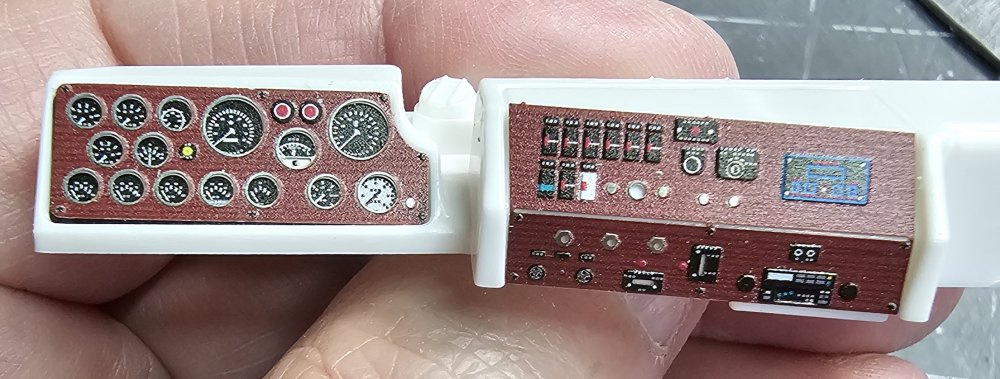 This view shows the photo-etch instrument panel I got from Jamie at Moluminum..there's alot more that comes on this photo etch piece for the interior.
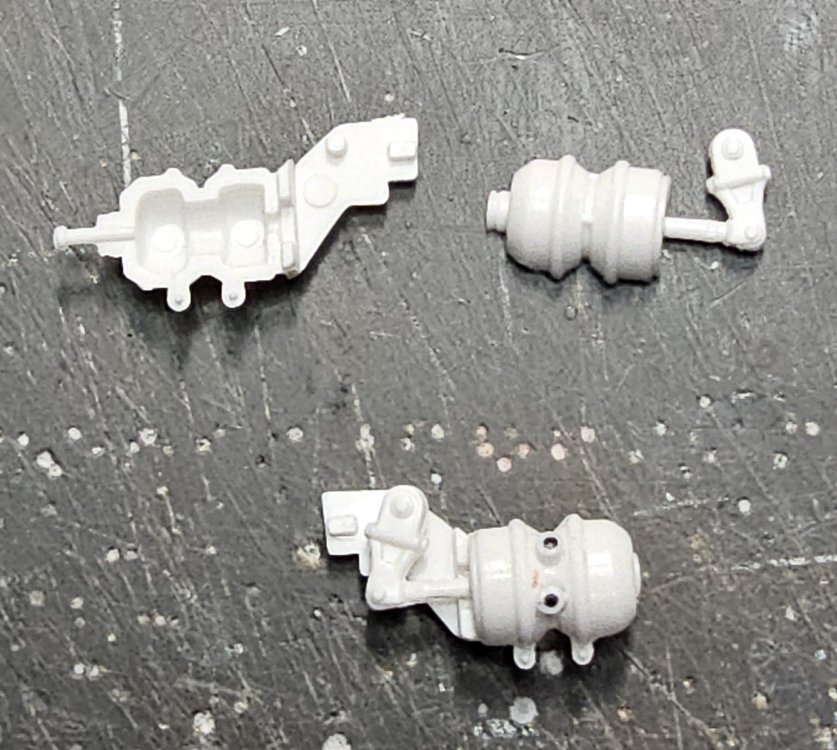 This view shows the rear brake chambers from this Revell kit. The bottom one I modified by adding the air line inlets and removing the caging bolts from the rear of the cans.
 This view shows both rear axles in place. The rear one has the brake chambers mounted in place. Well that's it for now be back soon.
Ron G
-
4
-
1
-
-
Hey all
Small update on this build.
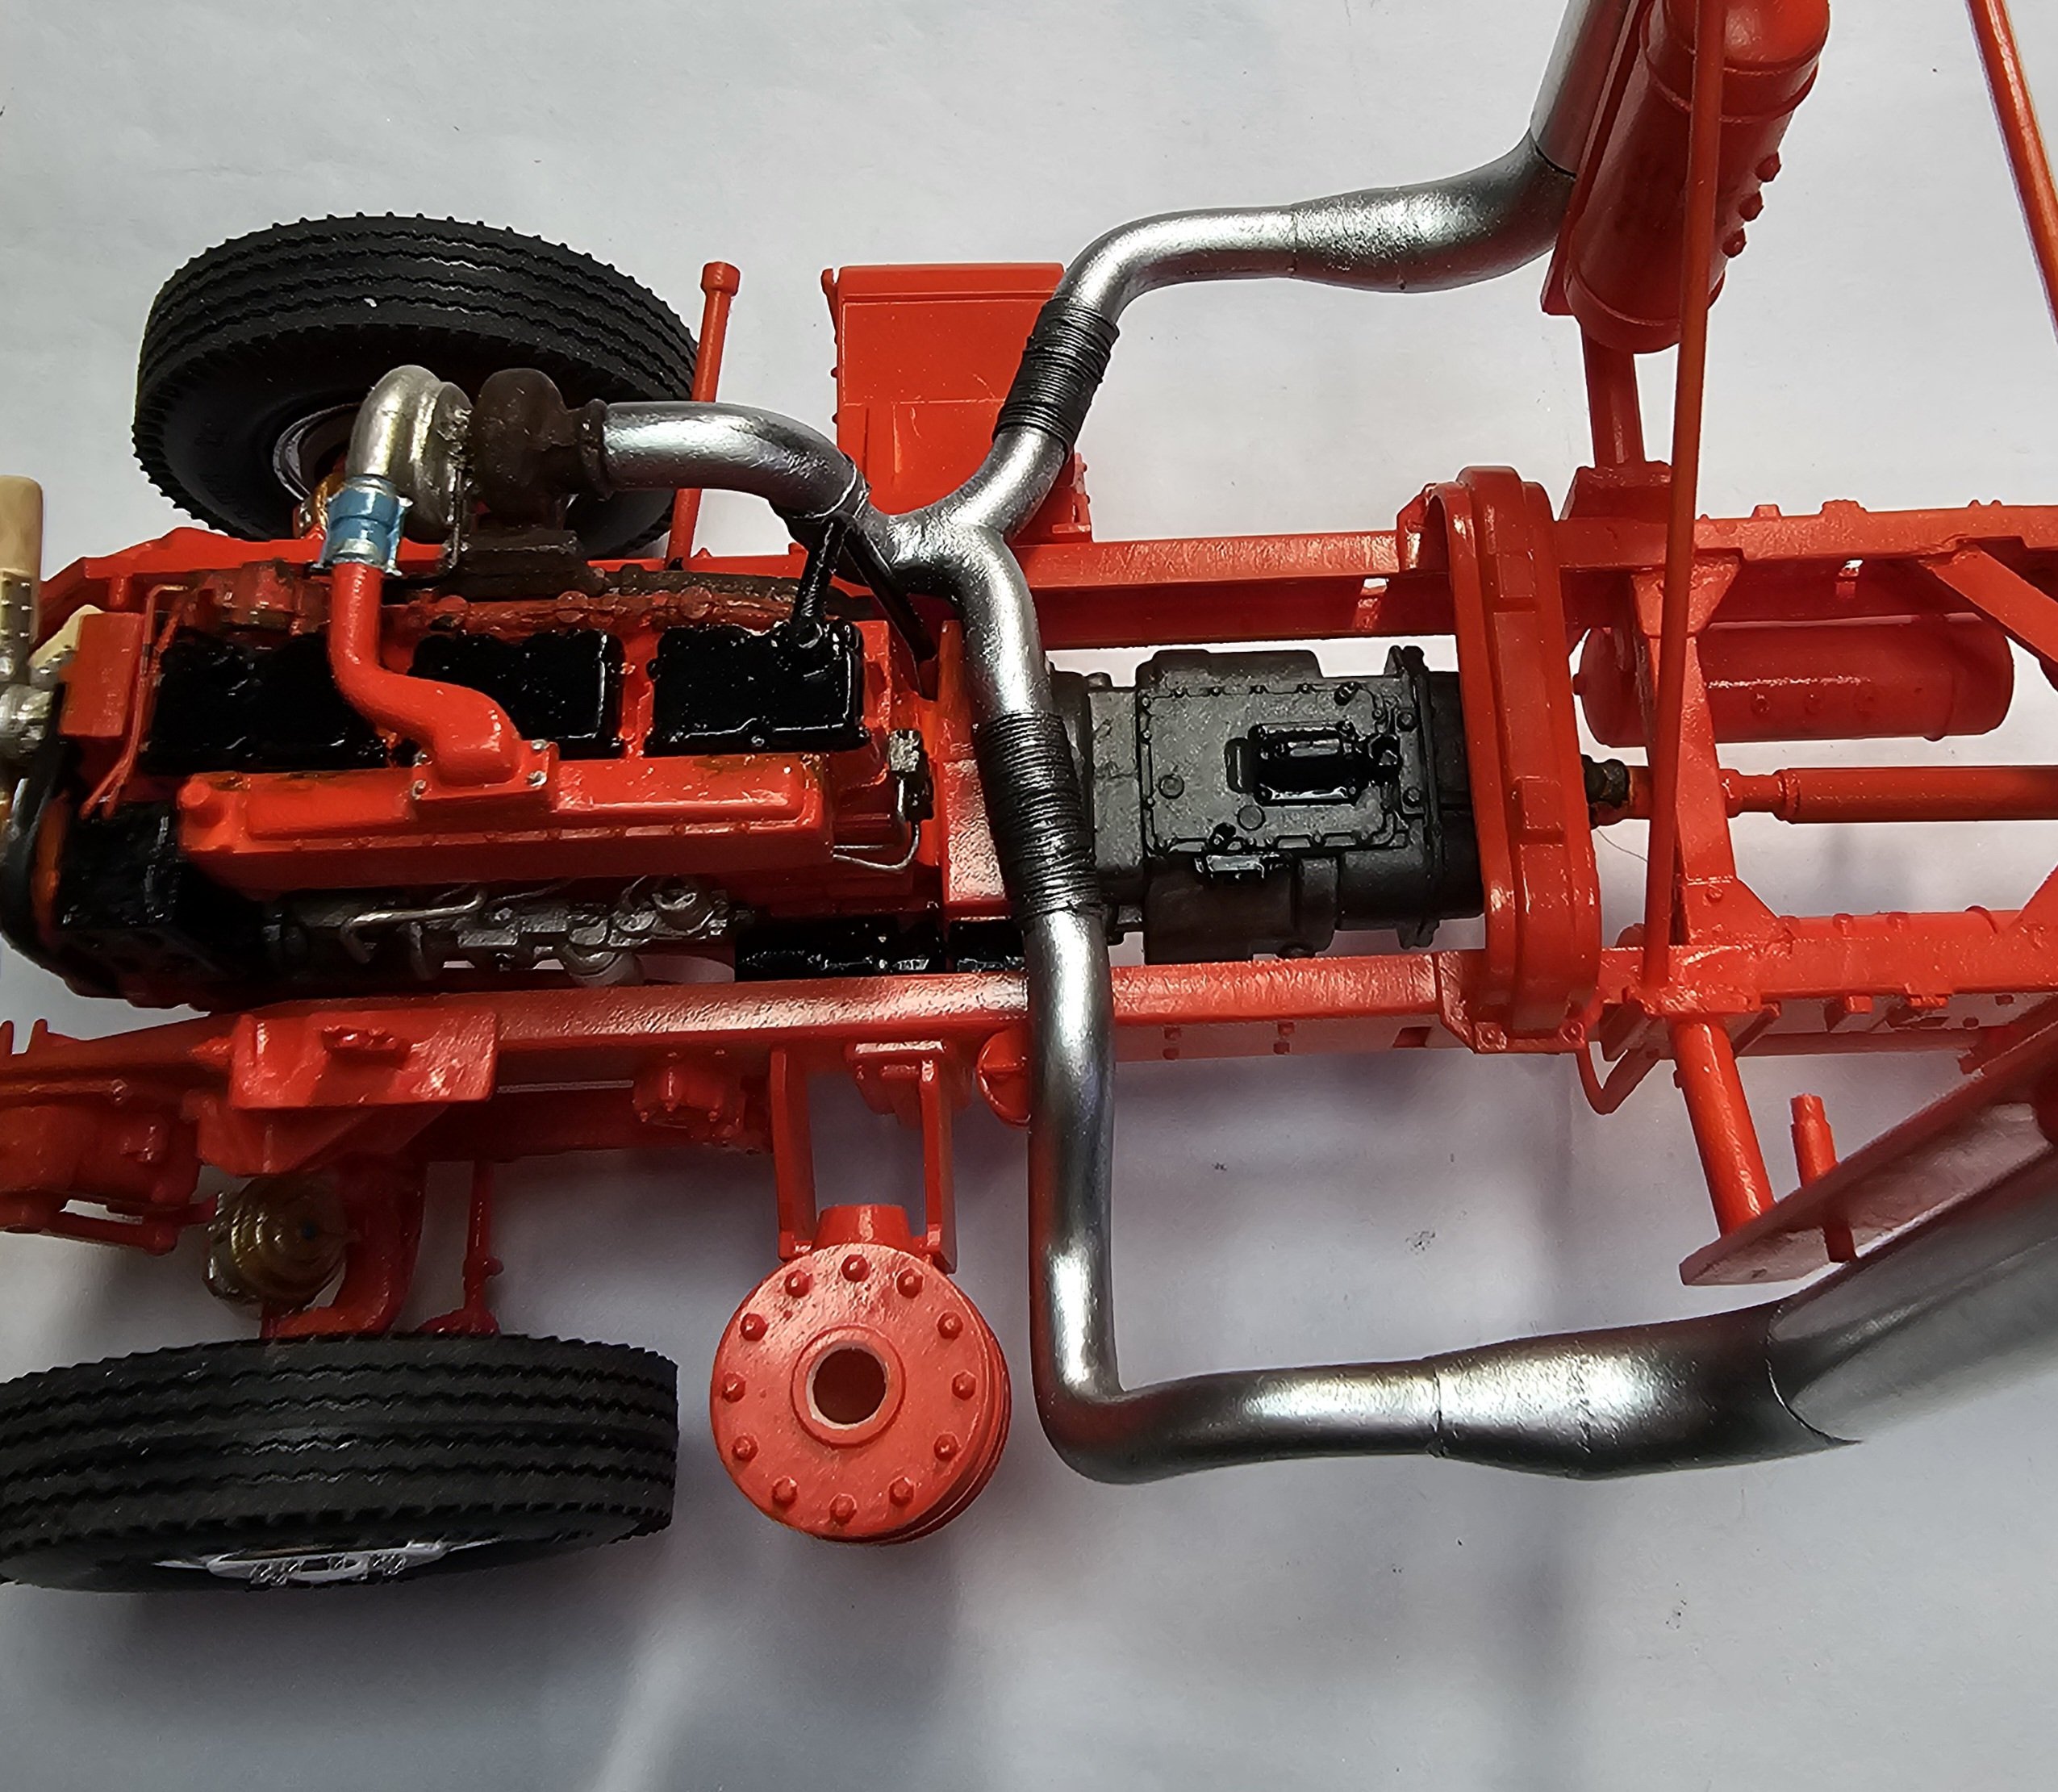
 This view shows the exhaust temporarily mounted.
 This view shows the exhaust from the turbo to the exhaust stacks. The elbows are Plastsruct 5/16" diameter. The adapters from 5" exhaust to the 8" stacks I scratch built. These will be painted with chrome/silver paint. I also converted the twin turbo Cummins to a single turbo. Well that's it for now be back soon with more updates.
Ron G
-
5
-
1
-
-
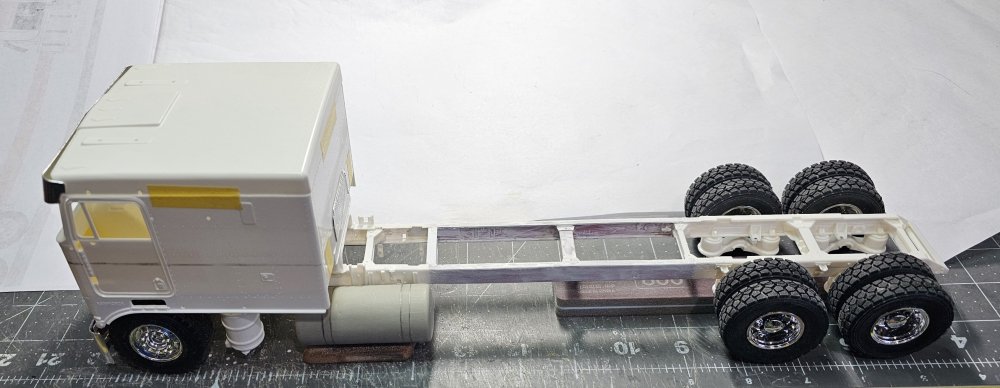
Hey all
Did some more work on the K100.
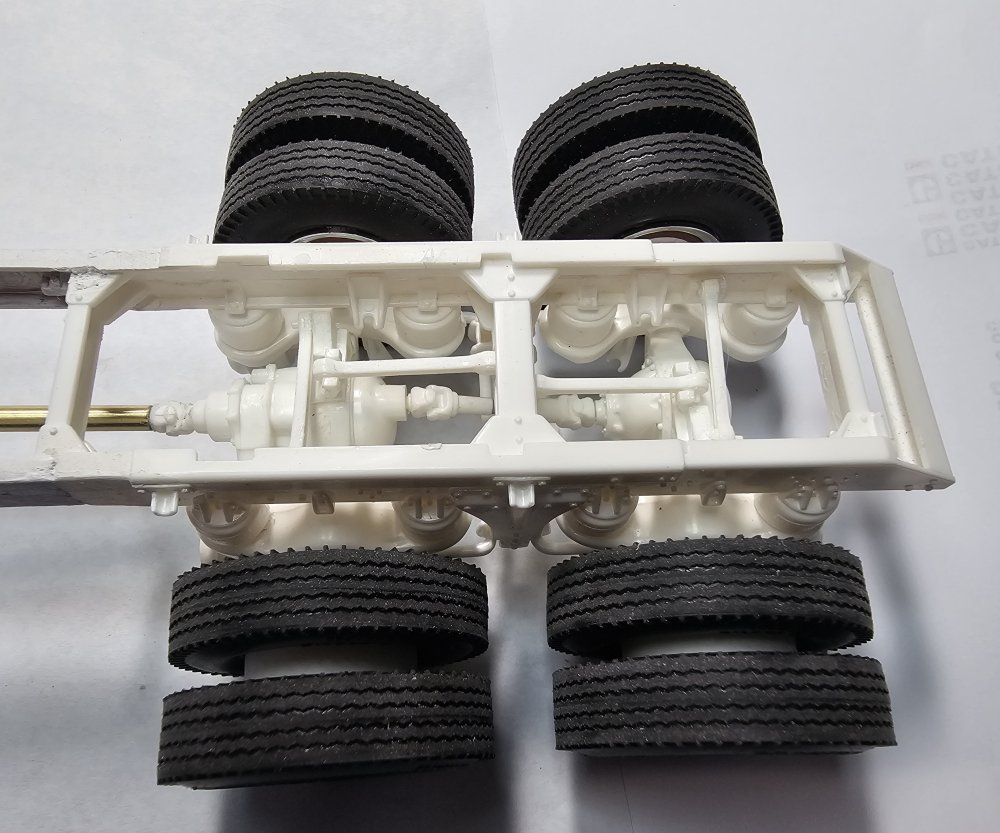
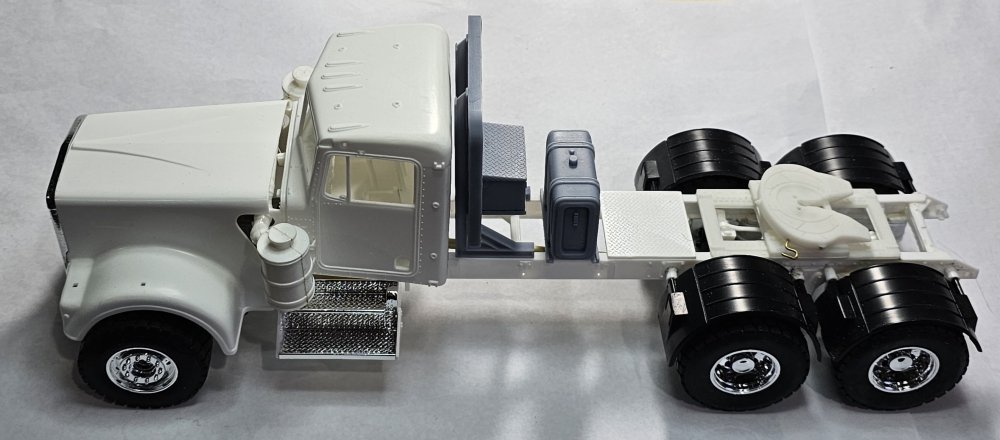
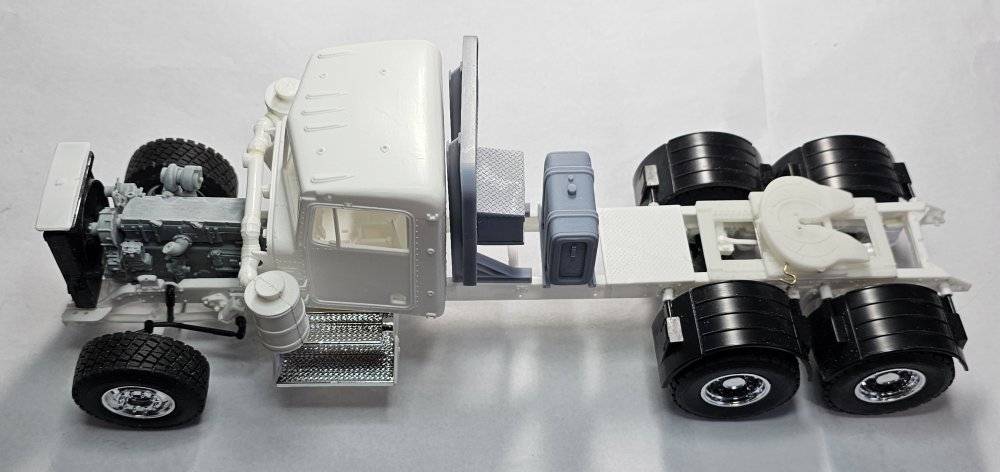
 I have all of the parts mounted on the frame, except for the rear suspension that need to be painted. And all of the wheels/tires assembled.
Ron G
-
2
-
-
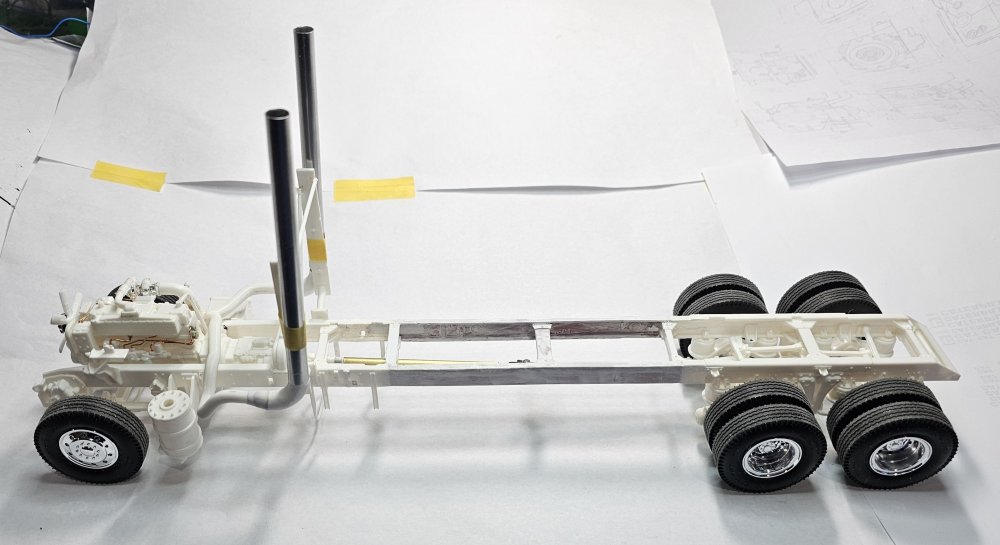
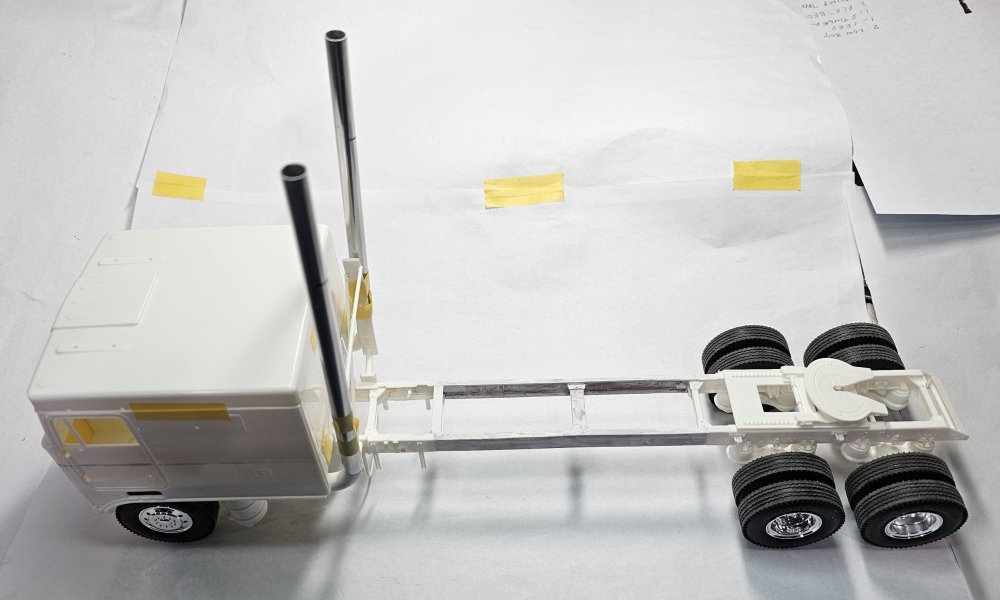
Hey all
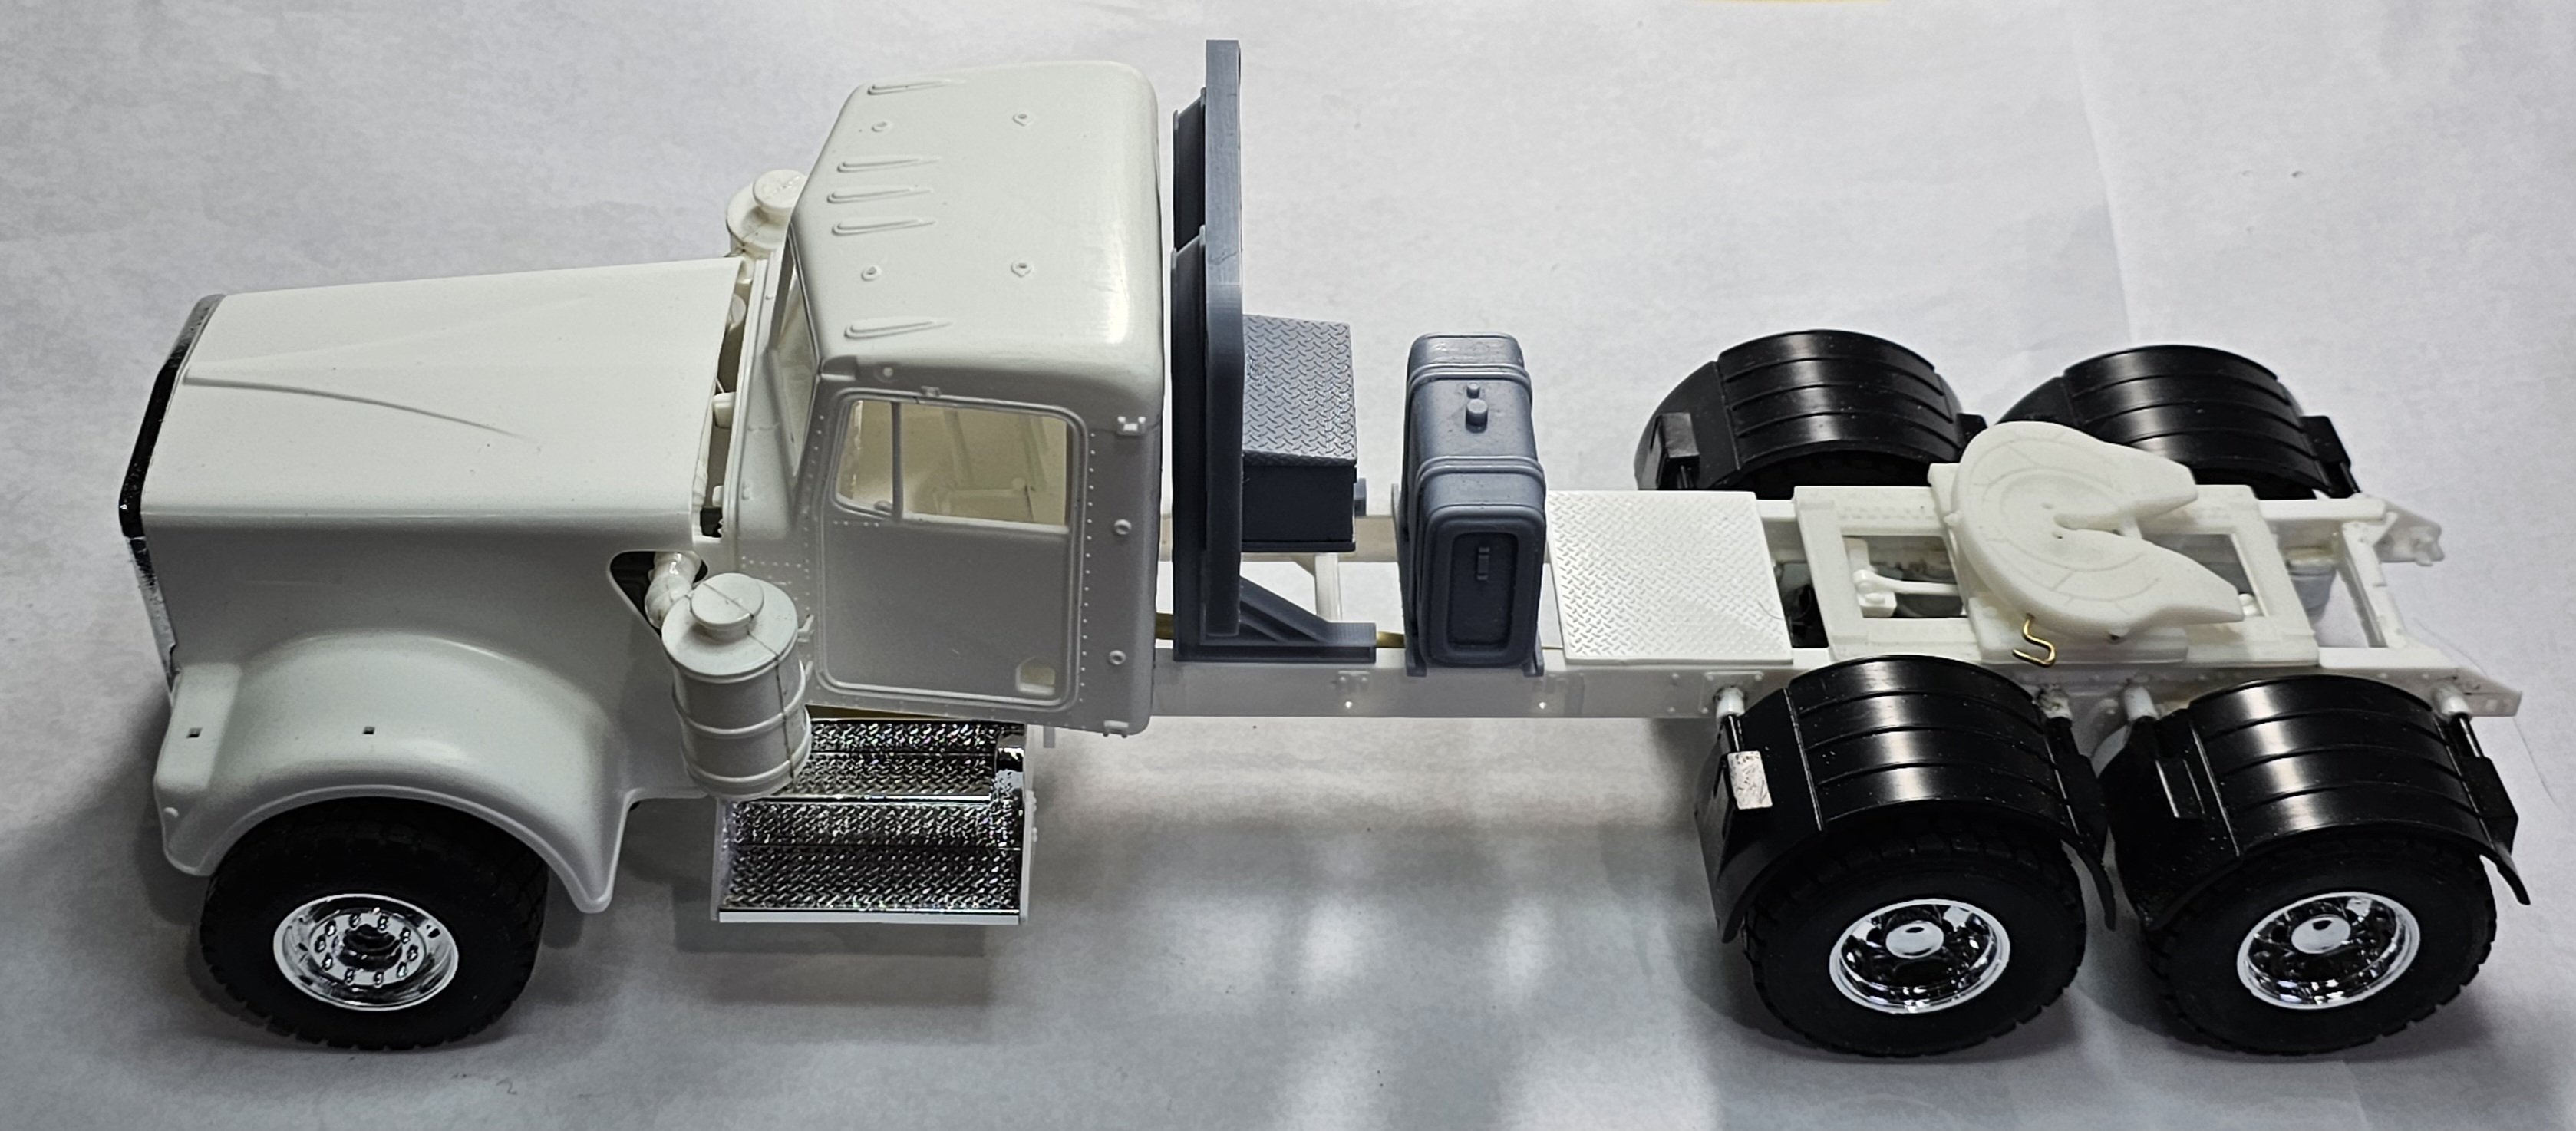
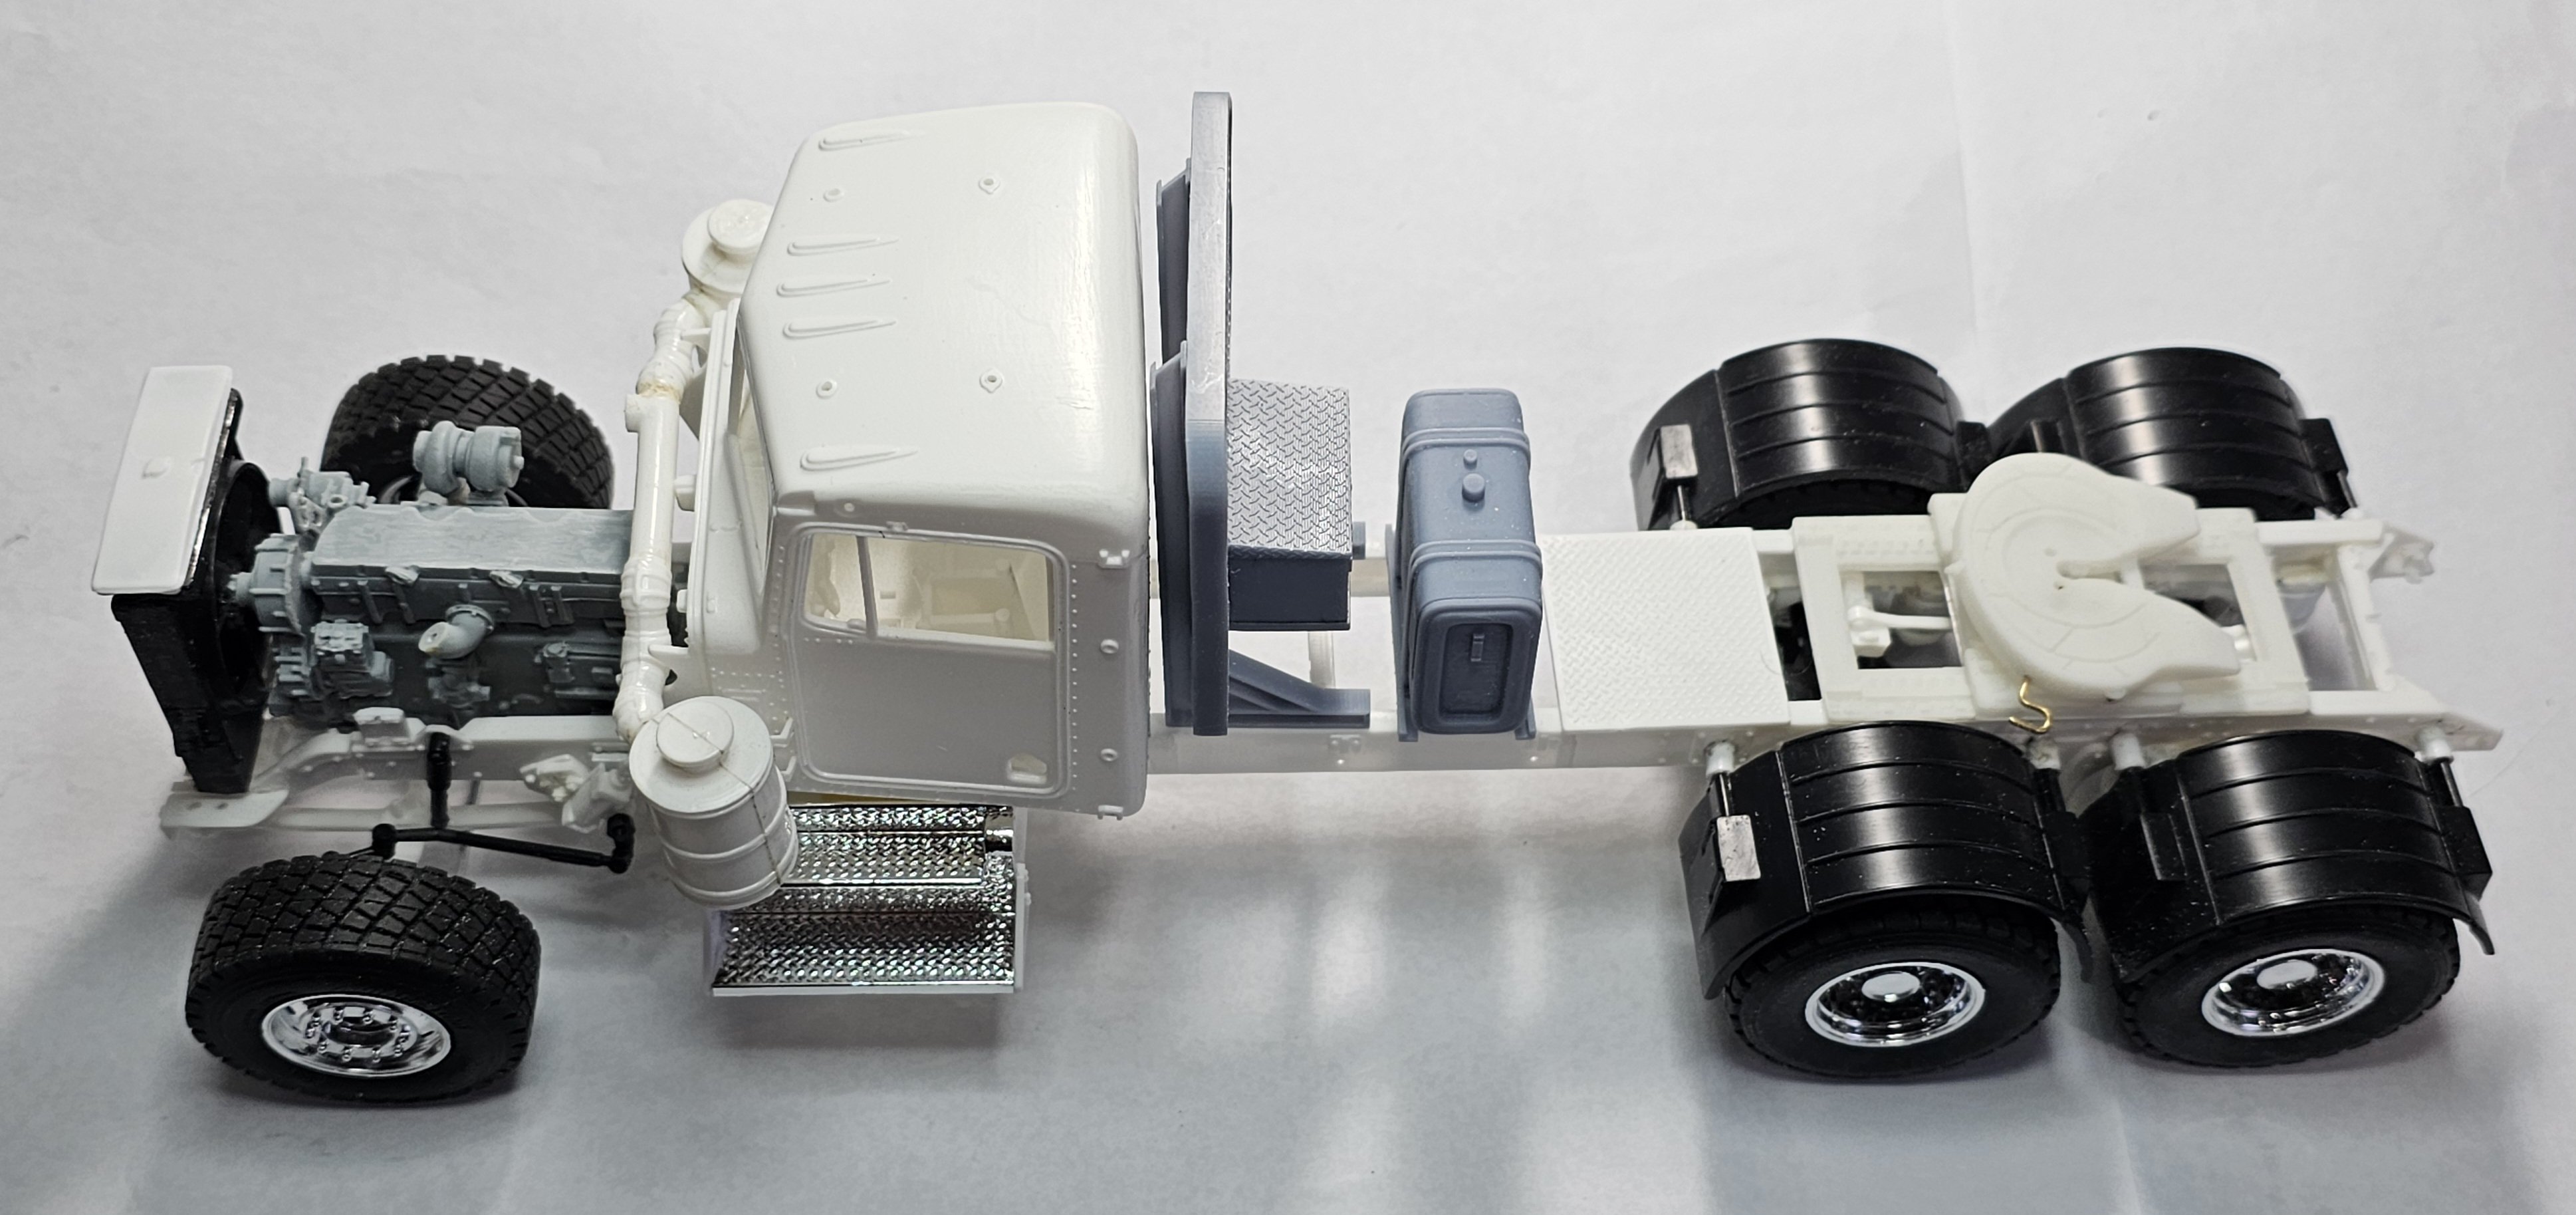
Yeah, I know, another build! Yupp, I figured it needs it's own build thread. So here are some mock-up pictures.
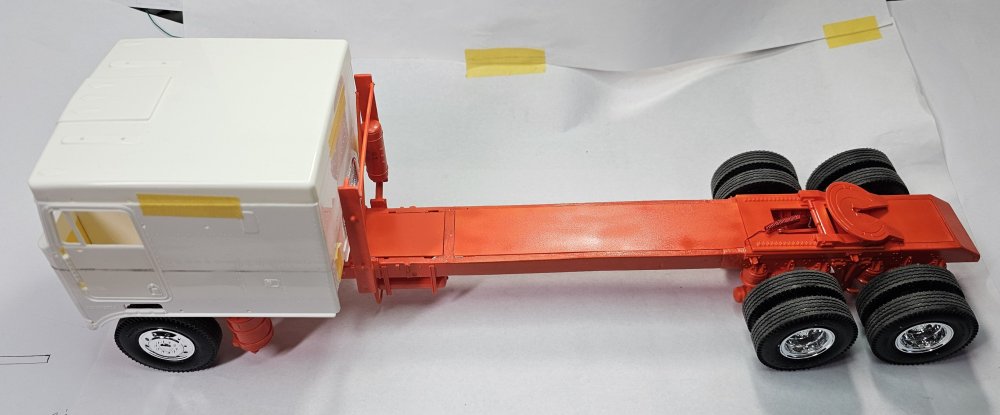
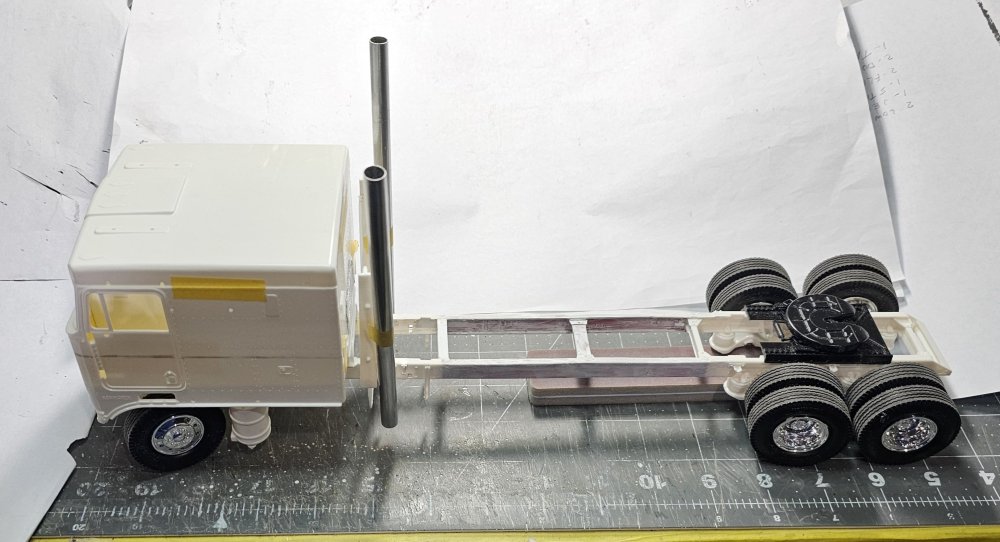
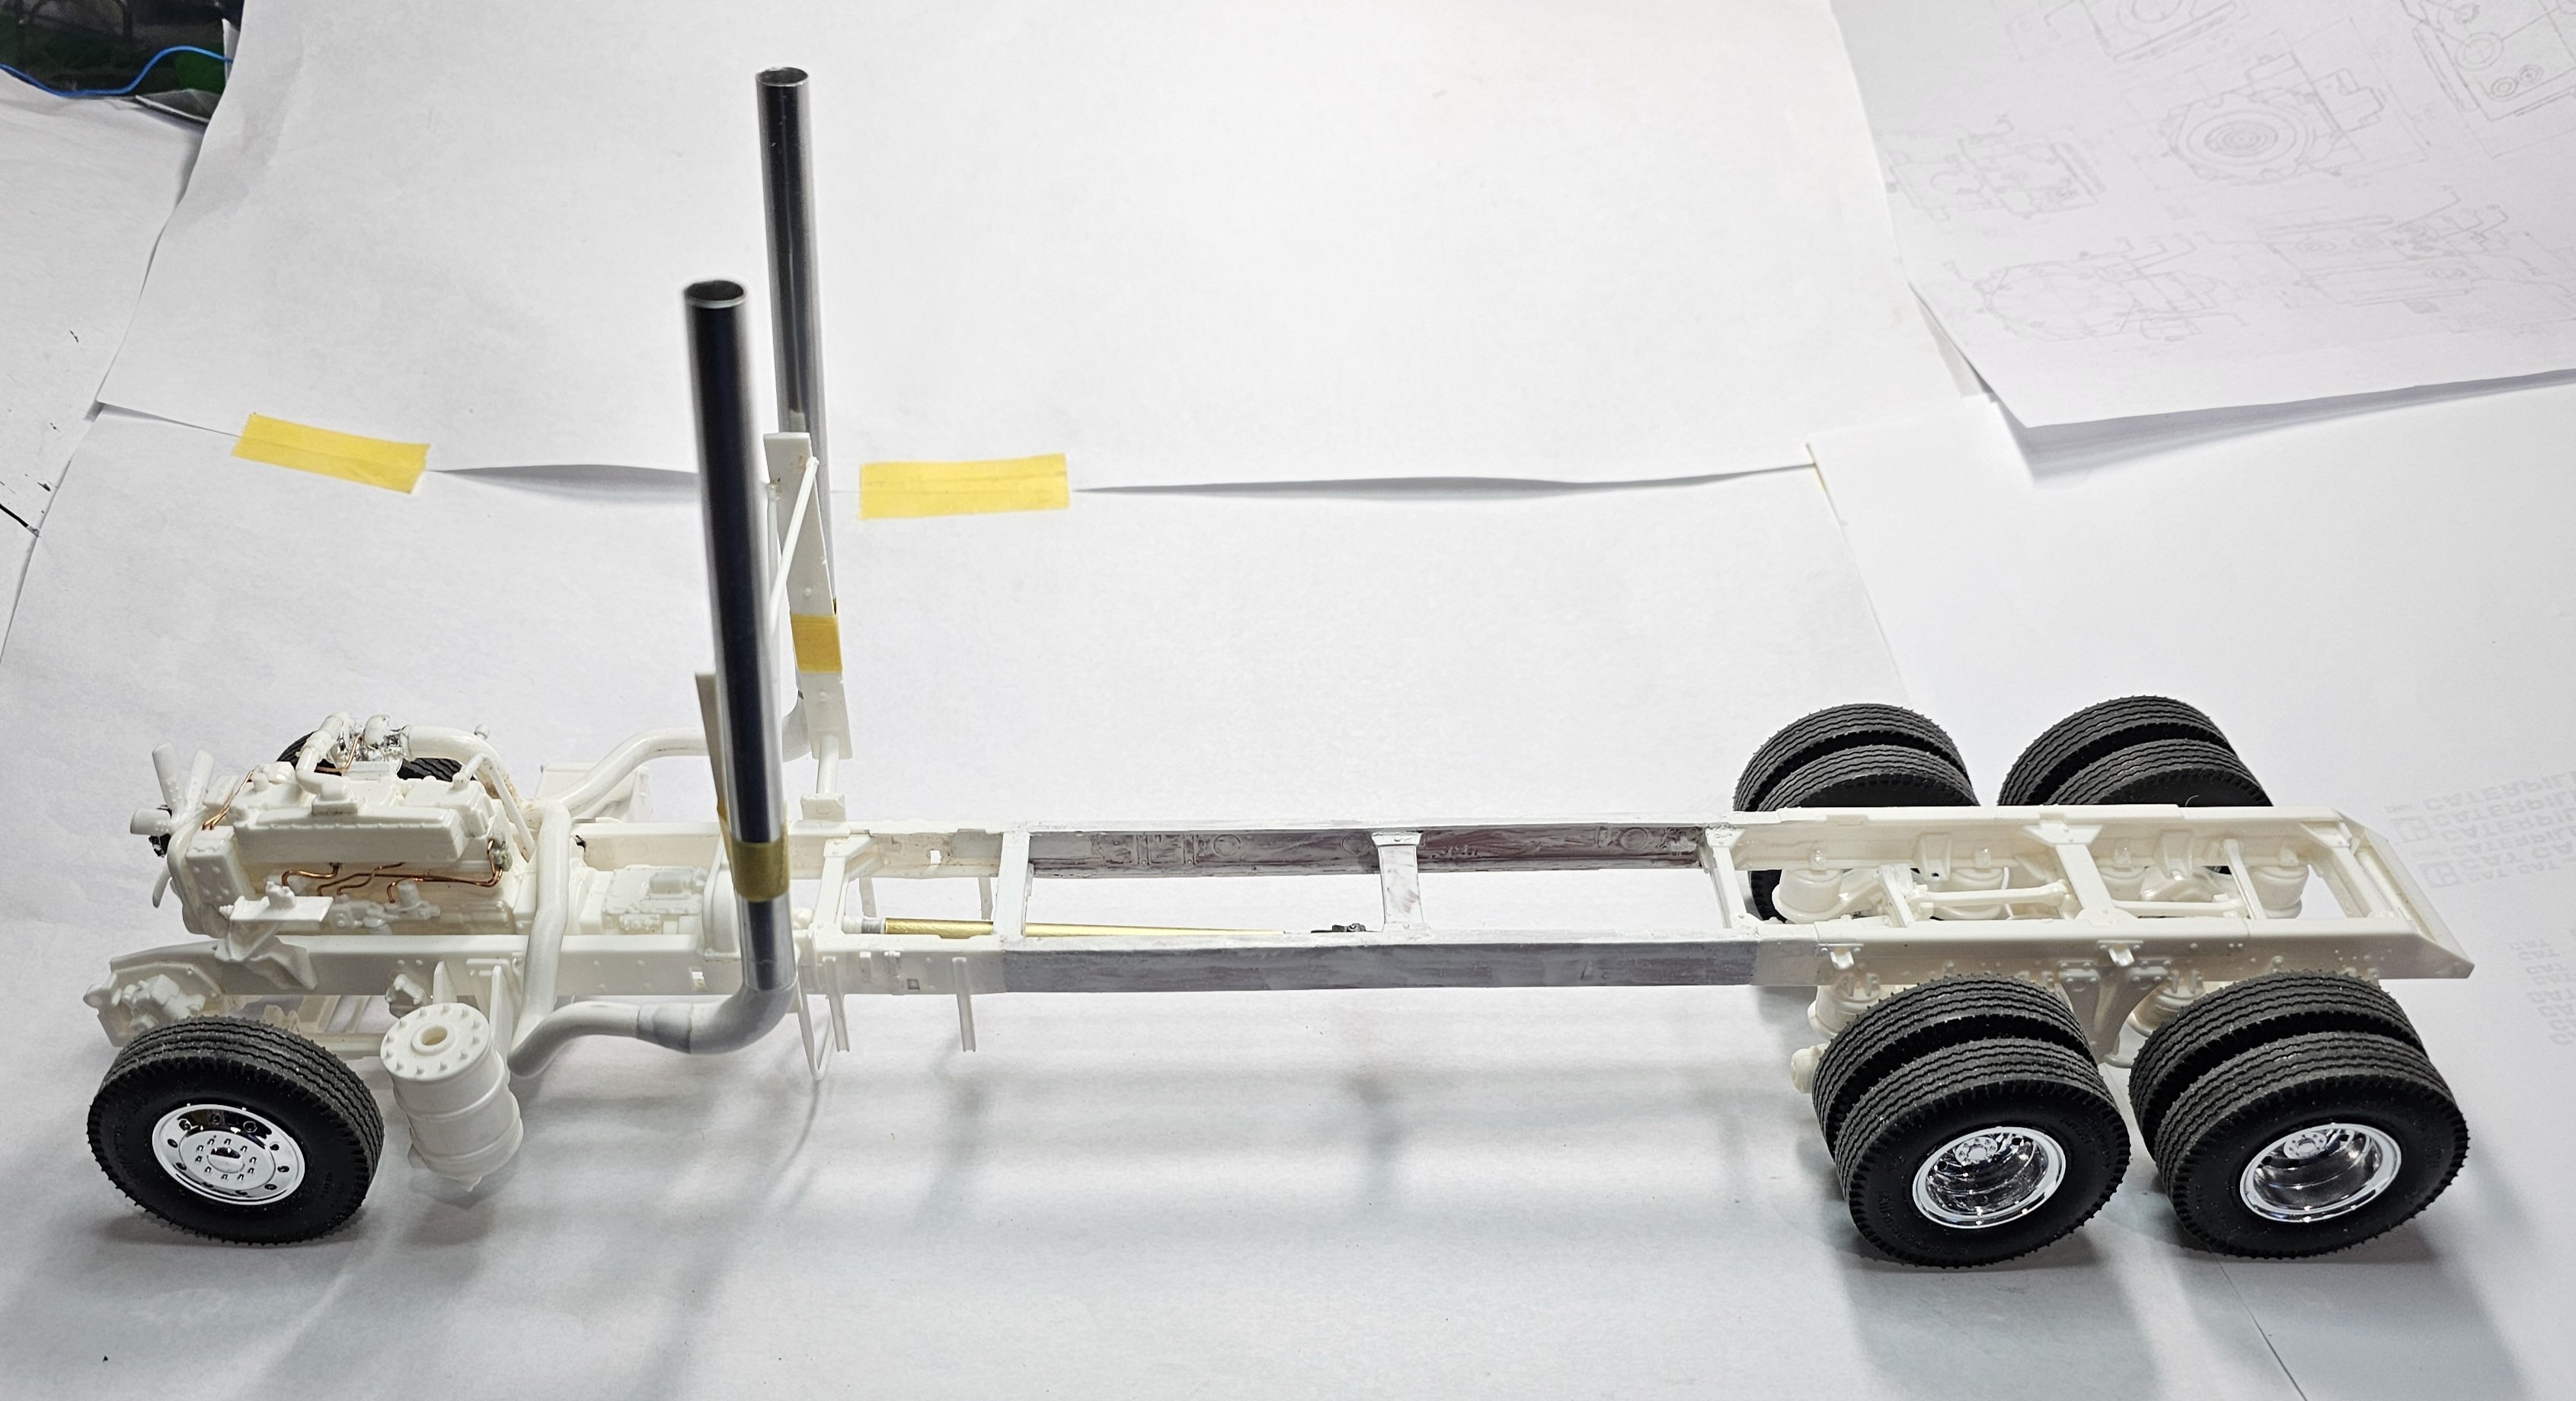
 This side view shows how long this is. Almost 16 inches!
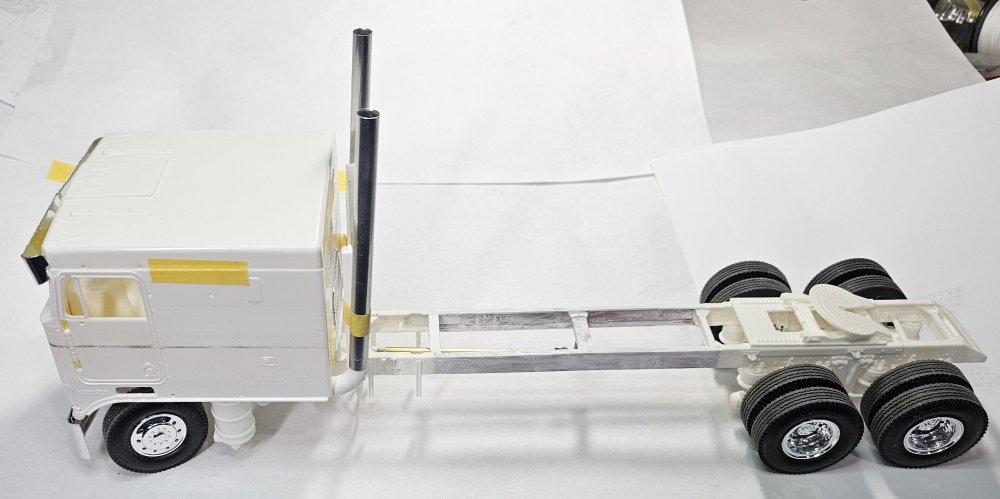
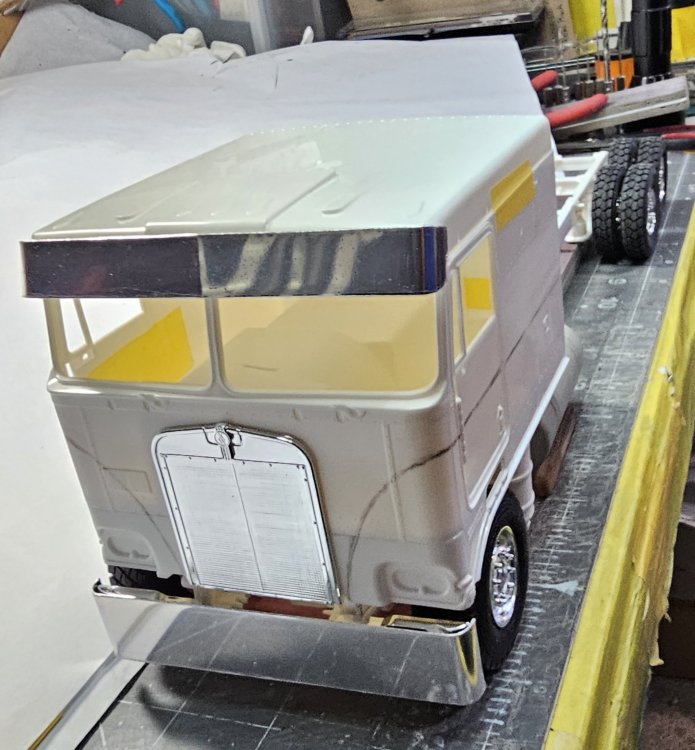 View looking rearward. In this view you can see the after market drop visor & Texas front bumper. I got these off of Ebay.
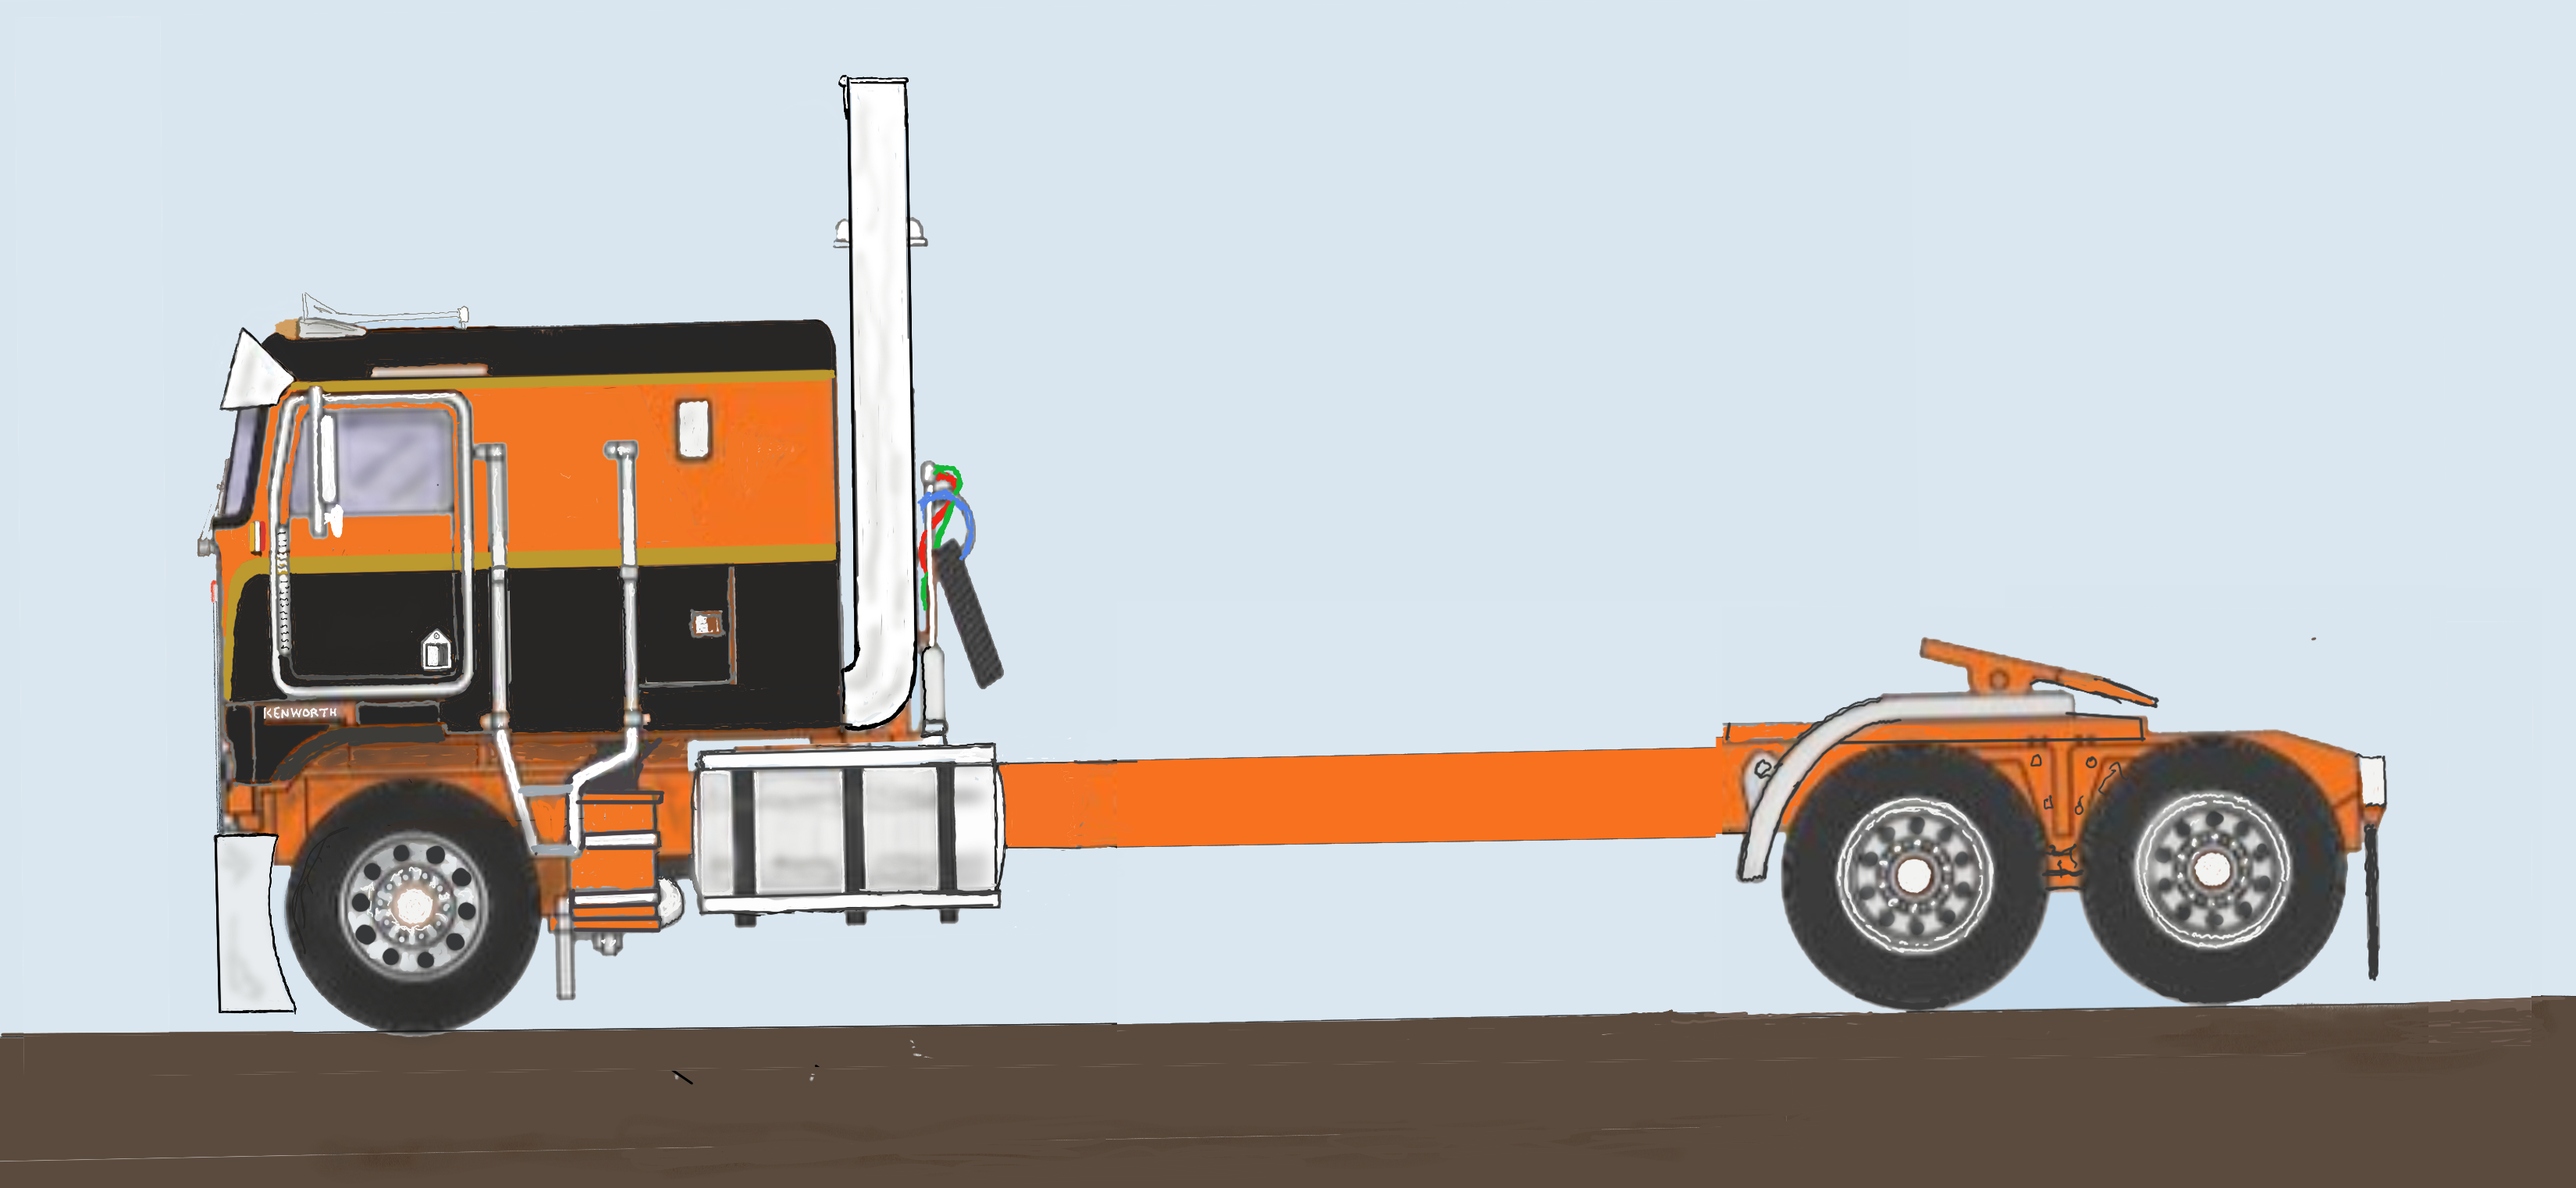
 This drawing shows what the finished truck will look like. That's it for now be back with more soon.
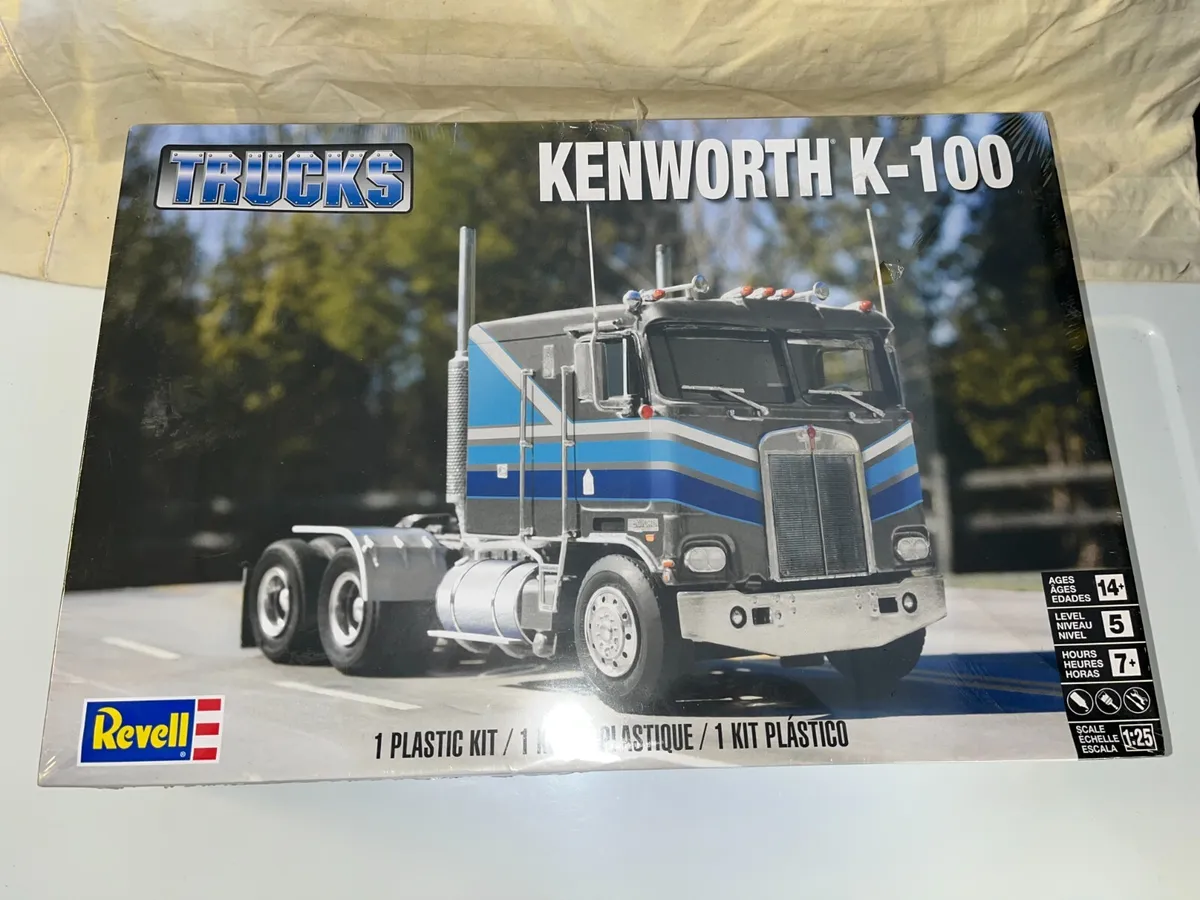
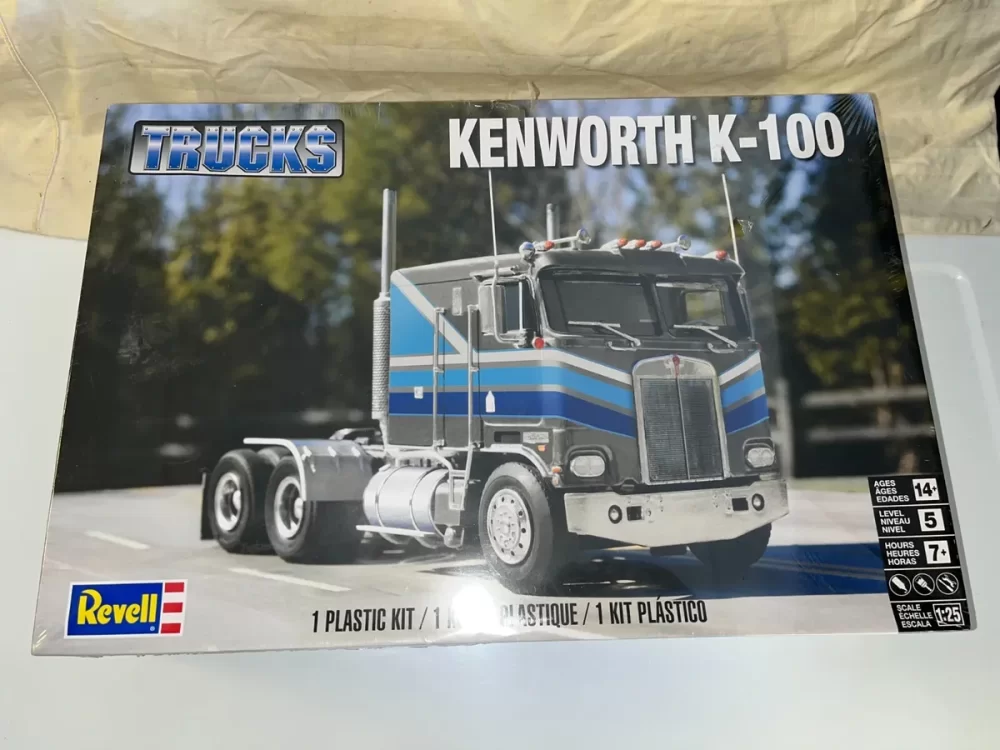 I almost forgot, this is the kit I'm using for this build.
Ron G
-
3
-
1
-
-
Hey all
Got a few things from ST Supply for this build.
 This view shows the headache rack, hydraulic tank and the fifth wheel assembly.
 Another view showing the engine. Still trying to figure out what color to paint it. That's it for now be back with more soon.
Ron G
-
3
-
-
Hey Jeff
This is ASSUME! You really hit the realism on the head. Great detail work. I used to drive, about 45 years ago! I drove a old Diamond T Reo with twin sticks (4 x 4). It would move along on the flat, but if I hit any kind of hill or rise, she would drop down to almost a stop...lol. I'm planning on doing all the bells and whistles on the Kenworth K100.
Ron G
-
2
-


1/25 Revell Kenworth K100 with 300" W.B.
in LSM 1/35 and Larger Work In Progress
Posted
Hey Carl
Nope, I'm planning on doing it all with paint. What I was wondering about is how NOT to get aluminum paint on the orange and vise a versa.
Ron G