


Landlubber Mike
-
Posts
865 -
Joined
-
Last visited
Content Type
Profiles
Forums
Events
Gallery
Posts posted by Landlubber Mike
-
-
Not sure how I missed this one. Great job!! The figures really bring life to the whole display.
-
 1
1
-
-
Looks fantastic Mike! Those wicker seats are really nice.
-
2
-
-
This is looking fantastic Sasha. I think you've convinced me to add rivets to models where the kit is lacking!
-
3
-
 1
1
-
-
Peter, meant to also say I'm glad to hear things have gotten better for you and that you are back to modeling. You've been a kind supporter for everyone else here these past few months, so we are all looking forward to supporting you on this build. Welcome back!
Forgive me for asking, but why do you need to fill all those windows? Are you using decals for them? What would the kit OOB have you do? Just leave them open or add a drop of window glazing to the opening?
-
3
-
-
Looking forward to this one. Don't see too many of this kind of subject!
-
3
-
-
Cool subject, nicely done!
-
2
-
-
Looks really great Martin, nice job! Wow!
-
2
-
-
Nice work Ernie. That camo scheme looks really sweet!
-
3
-
-
Nice choice! If it helps, you can see Eduard's paint scheme on page 17 of the PDF below (see camo scheme E):
https://www.scalemates.com/products/img/4/9/3/114493-50-instructions.pdf
Amazing work on the engine!
-
1
-
-
Looks fantastic, really nice job!
-
4
-
-
Looking really great Rob. The painting and decorations look fantastic!
One alternative to using paints on wooden ship models - aside from using colored woods - is to use stains and dyes. On my Pegasus I used black and blue stains from General Finishes. I like the stains approach in that they go on a little thinner than paints, and so you can still see a little of the definition of the wood underneath and it will have subtle variations in color tone reflecting the variations in color tone of the wood. Have to test any stain or dye out on scrap first, as they will look different depending on what wood you are applying them to. Just wanted to throw that out there in case you are thinking about a future wooden ship build.
-
3
-
1
-
-
I like the lines on this one - very cool subject! Looking forward to another masterpiece.
-
2
-
-
Thanks Rob, had no idea about that. Good to know, appreciate it!
-
2
-
-
If you don't mind me asking, why do the Aviattic and Phone decals require excessive pre-cutting? I've been thinking about getting their decals for some of the WW kits I have in the stash.
-
2
-
-
That looks really sharp! Nice job! Stay safe!
-
4
-
-
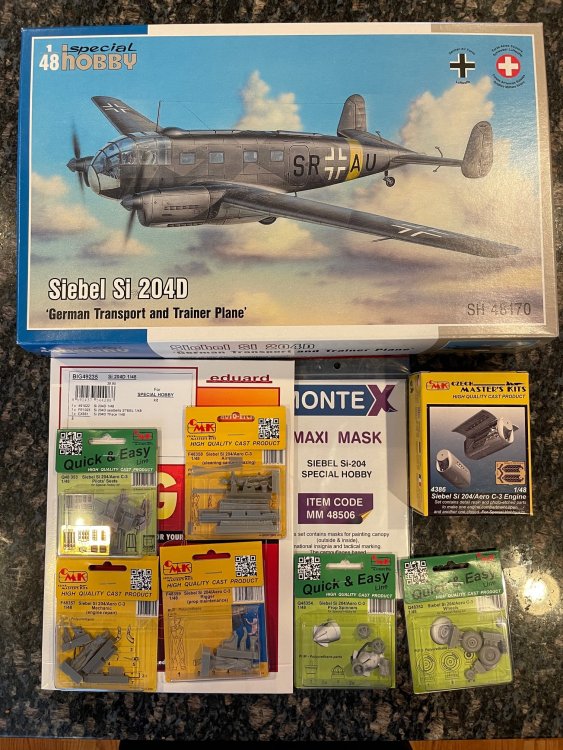
I don't usually post what comes in the mail as you all might think I have some kind of mental condition, but pretty excited about this - Special Hobby's Siebel Si 204D. I tend to like the work horse subjects when it comes to planes (like the Ju52) and ships (like the auxiliary ships). Got the full aftermarket including Eduard's BigEd set and a bunch of CMK aftermarket improvements and figures. The CMK engine set looks especially cool. Should be a fun build when I ever get to it.
-
5
-
3
-
-
Planking around the lower corners of the stern counter can be tricky - you executed it perfectly! Well done!
-
2
-
1
-
-
Rob, your planking looks fantastic! Nice job!! Looking really great! The wood is beautiful. Completely different color than the pear I have used. The pear I use is "swiss pear" which I think gets its name and pink color from a steaming process. Funny thing is I end up staining it to get it closer to the hue yours is.
I think you'll like the Wipe-On Poly. It's really easy to apply and brings wood to life. Glad you were able to finally get some!
If you ever do another wooden ship, I've found that working with shorter planks makes things easier, especially when you are having to taper planks. The shorter length makes it much easier to lay a plank flat and avoid the tendency of bending a longer plank laterally against its width. It is a little trickier working with smaller planks to make the ends butt against each other and you are naturally dealing with a lot more planks than single plank strakes, but overall, I like the shorter plank approach as I find myself prone to forcing wood in position instead of letting it lay naturally.
-
3
-
1
-
-
Hey Rob,
Second planking is certainly trickier in some aspects, but I would say easier in others. The nice thing about it is you have many many more points to secure the plank to the hull, whereas with the first planking, you only can secure it to the bulkheads or filler blocks if you used them.
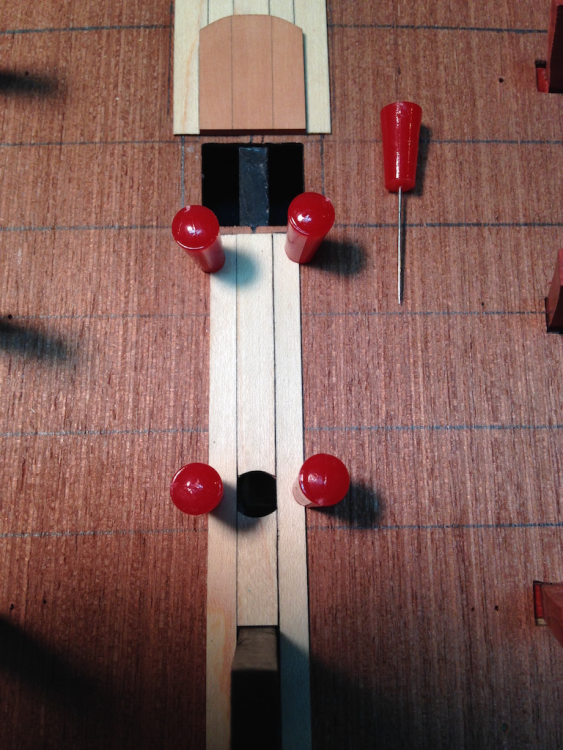
What works for me is to use those red-capped pins I posted earlier in your log. I place the plank against the plank above/below it, run the pin just under the plank all the way through the first planking to secure it tightly against the already fixed plank, and between the pin and the shoulder of the pin cap, the plank usually stays in place. Sometimes it's a little tricky as you can't push them into bulkheads but usually you have many more pinning points. Here is an example:
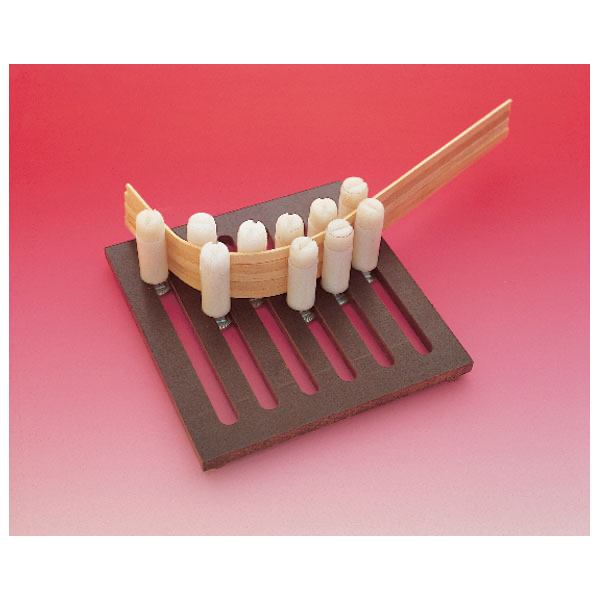
Where there is a big curve, I will usually pre-soak the plank, and sometimes will even put it in one of those plank bender devices (like the one pictured below) to pre-start the curve. This method takes a while, but it gives me the best results. For what it's worth, pear (at least the swiss pear I've used) bends nicely when soaked. In the picture above, the pinned pear plank is 1mm thick. The strakes above are the wale are 2mm thick pear - and you can see how much of a bend around the bow and at the stern was needed. Certainly, you might need to use C- or bar clamps to help keep the plank in place while the glue is setting. It's a good idea to put a scrap piece of wood, cloth, etc. between the clamp and the plank so that you don't mark up the wood. Learned that lesson the hard way!
I tried CA glue on my first build, and hated it. Frankly, it was the first time I used CA in a modeling situation so I didn't know what I was doing. But, I found it really messy, and it either set too quickly due to moisture in the wood, or didn't set at all. I'm a little more facile with CA now from plastic modeling, but I don't know if I would still use it. I could see using CA to set a plank in the rabbet along the stem, and then bending it around and using PVA for the rest of the length of the plank. PVA is just easier to clean up, and if you are looking for a natural wood finish, getting a CA spot could spoil the model as it will block the finish.
Of course there are people that use CA for everything and have no problems. These are the same people that can build a museum-quality wooden model using only an X-acto and sandpaper, when the rest of us mere mortals resort to power tools and other gadgets to hope to arrive at a lesser result 🤐
-
5
-
-
Nice job Rob! Starting to look like a ship. A little sanding and filling and you'll have a great foundation for the second planking.
By the way, a small palm sander can make really quick work of sanding the hull down. I used to do it by hand with sanding blocks, etc., but it's so much quicker and easier with a palm sander. You'll still likely have to do some manual sanding in some of the curved areas like near the stem, but otherwise, you can knock most of the hull out using the palm sander.
-
3
-
-
3 hours ago, biggtim said:
Rob,
Could use your opinion - I'm interested in building the USS Constitution, and there are many to choose from. I see for sale on the ebay a few of the 1:96 scale kit from Mantua, and some 1:96 kits from Bluejacket. Are either of them good kits? I see plenty of the 1:76 Model Shipways kits out there as well, but they are a tad too big for my space, and if their ship kits are as rough as their aircraft kits, then I'm not sure I want that one anyway. Thanks,
Tim
The MS Constitution looks like it builds up into a nice model. In terms of their kits being "rough as their aircraft kits," remember that wooden ship kits are mostly wood strips and dowels. The bulkheads, keels, and the deck items generally are laser cut. It's less that the ship kits are rough and more that you are mostly working with raw materials to build the hull, masts, etc. For what it's worth, I'm building the MS Charles Morgan whaler as my first MS kit and it's a nice kit - great plans, the laser cutting looks great, no warping, etc. The framing is basswood if I remember correctly, and I tend to prefer MDF for rigidity, but it worked out nicely for my hull.
At 1:76, I believe it's a pretty big model. I think the Bluejacket one builds into a nice model too, but take a look at the fittings of both kits, not just the size.
The one caution I would give you is that the Constitution is not the easiest kits to start with if this is going to be your first model. I don't believe that it has all the helpful items more modern kits have such as pre-formed bulwark planking strips, very detailed instruction manuals, etc. that you see in more modern kits like the DoK. In my Morgan build, you have to build up the framing above the deck level and was a bit tricky even with two other hulls under my belt. You're also mostly working off the plans as the instruction manual isn't anywhere near as informative compared to the DoK manual. That being said, if you take your time, read other logs, etc., I'm sure you'd be fine. There's also a practicum out there from Lauck Street Shipywards which people say is really good. The one I got for the Pegasus was terrible, but the Conny one gets good reviews from what I've seen.
If you are going to buy the MS kit, make sure you sign up for emails from Model Expo. Their kits go on deep discounts all the time. Definitely do not pay the full price for the kit!
One thing to also note is that there is a lot of controversy about the stern of Constitution - number of windows, etc. Depending on the particular period you want to model, the kits may be different. Taking a quick look, the MS stern (which seems to be based on what the ship looked like in 1998) looks different from the BJ stern (which is supposed to be for the period 1812-1815). Even then, I think people fight over whether there were five or six stern windows if I remember correctly.
-
3
-
-
11 minutes ago, DocRob said:
Somewhere I have seen somebody using plastic headed thumbtacks for second planking, using the pin to push the plank up and the head to get a good bond on the first planking.I use these pins - I forget where I found them, but they have a longer and thinner needle and a narrower shoulder. For me at least, the thinner needle made less of a mess of the first planking underlayer and were easier to insert than the typical thumbtack. The narrower shoulder made it easier to use in more situations.
EDIT - just looked at my Pegasus log and I said i bought them from Hobbylinc. Might be these pins:
https://www.hobbylinc.com/htm/mid/mid587.htm
-
4
-
1
-
-
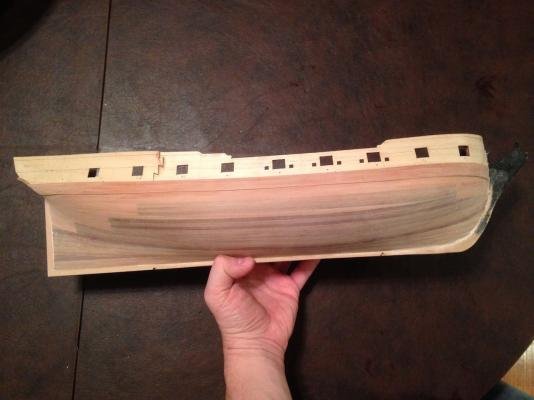
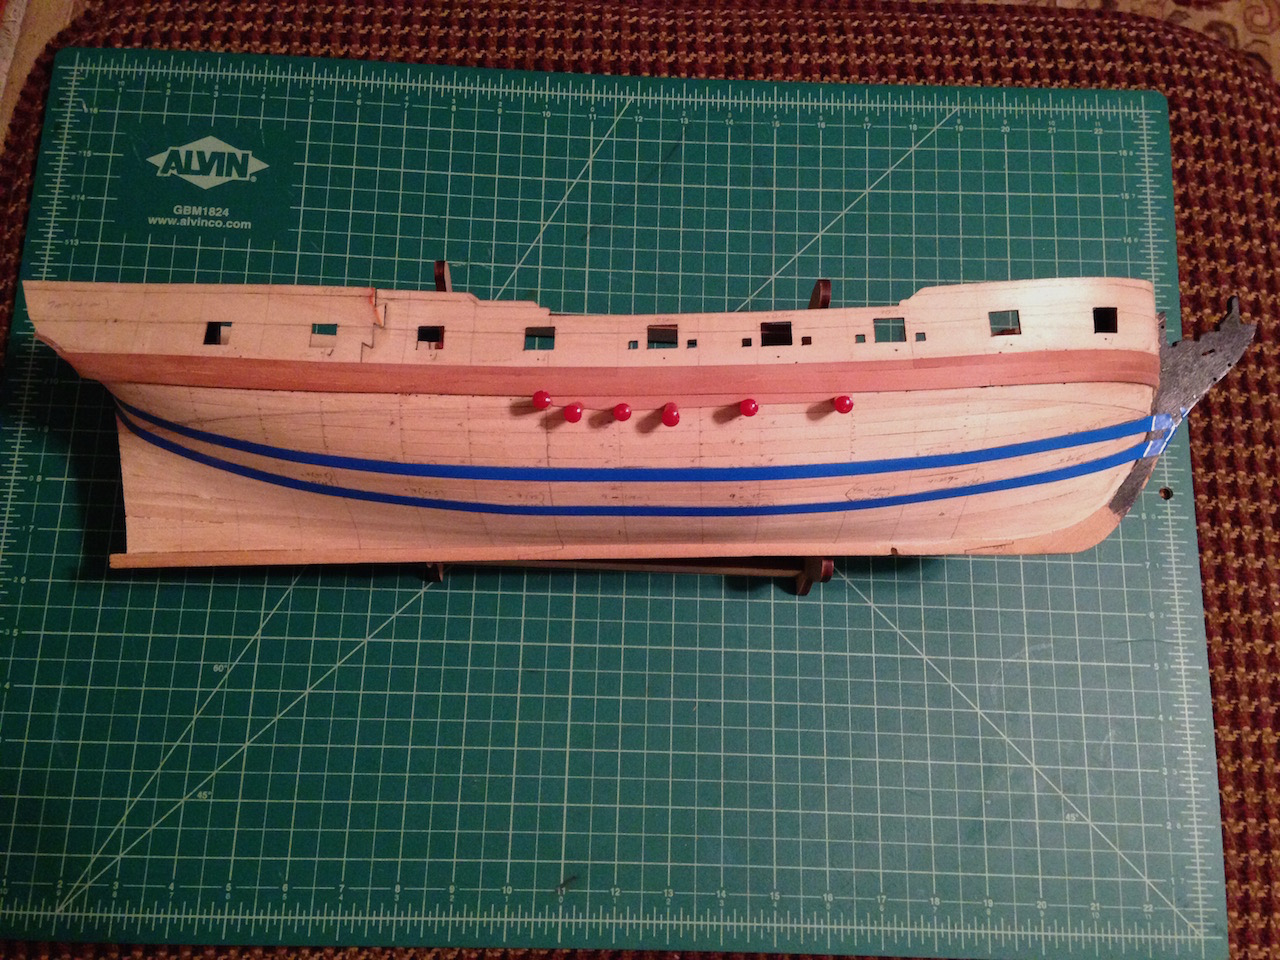
Painting the lower hull white will make the second planking a lot less stressful. From the pictures, the white stuff comes up very close to the wales so you only have to worry about a few planks being visible. The great thing is that these planks should be relatively straight runs with little need to taper the planks or add stealers.
For the planking under the white stuff, there are two ways to approach it. You could plank it and try to make it as perfect as possible to get the experience for when you might want to tackle a hull without white stuff or copper plating. Or, you could focus on the visible planks, and then not care as much about how the planking looks under the white stuff.
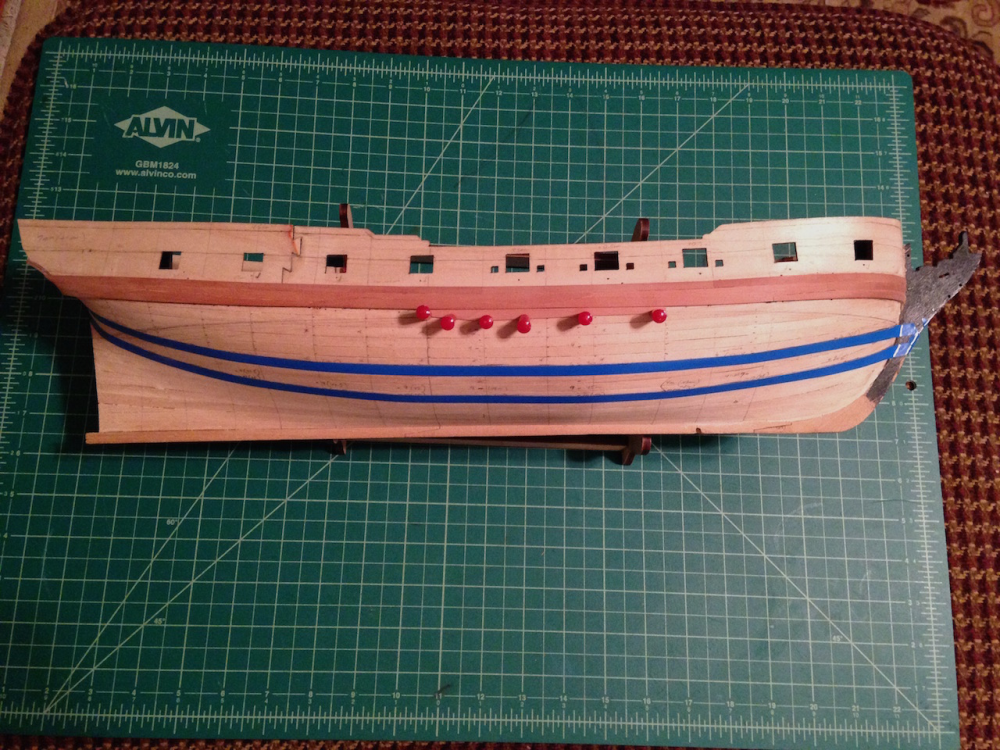
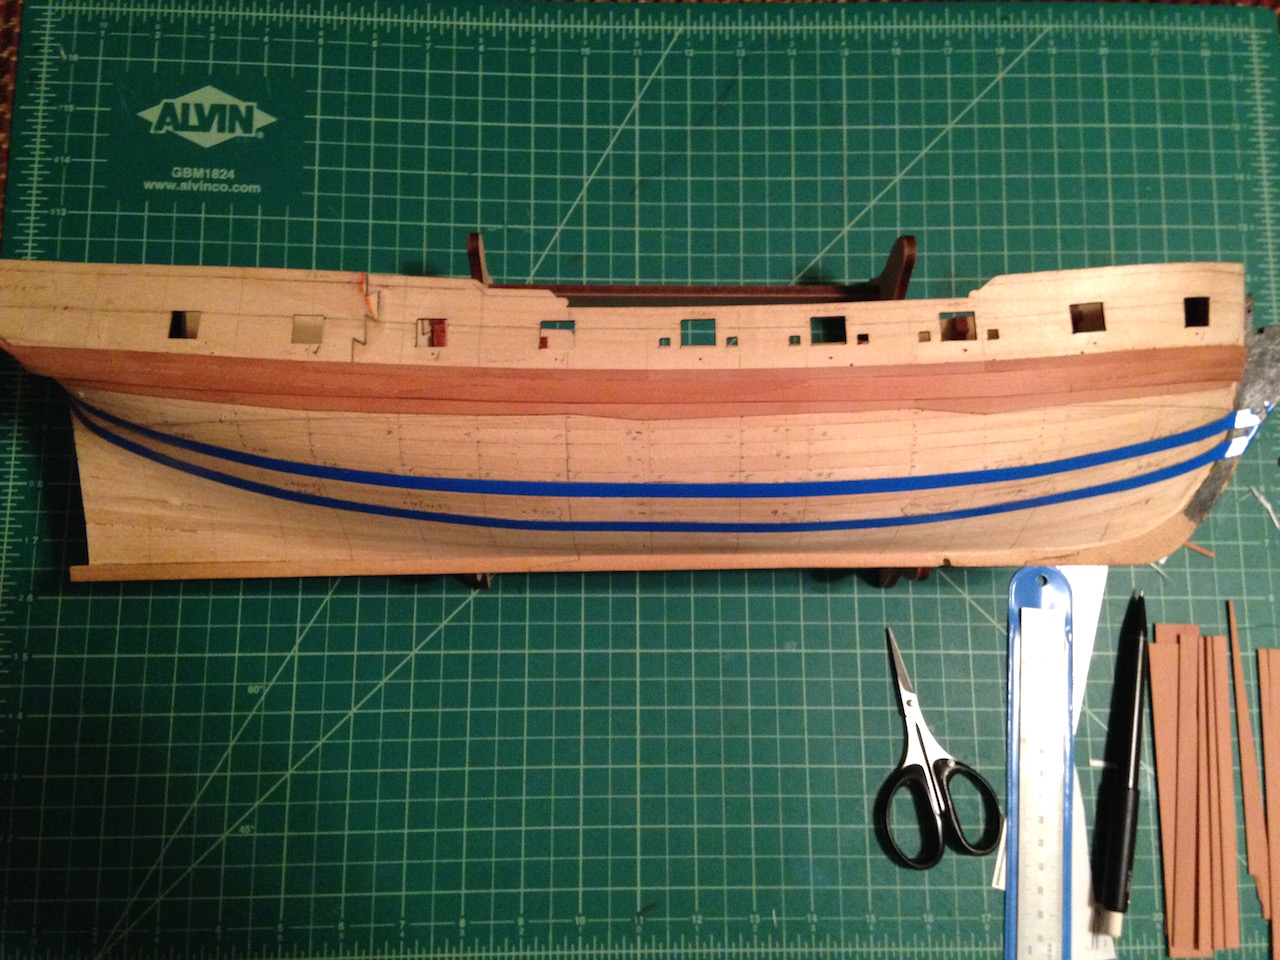
As an example, here is my Pegasus hull after finishing the second planking. The lighter color planks are pear wood, which I ended up staining. The darker planks, which are under the copper line, are the kit walnut planks. I'm planning on copper plating the lower hull, and didn't want to spend the money on using pear that would just be covered up so I drew the line for the copper line, and then used pear above it. At the belly of the hull, there aren't many strakes, but you can see how at the bow and especially the stern there are a lot more.
I show this in case you might think working with shorter planks at the stern will be easier, rather than try and bend a full plank around the hull and potentially get gaps or other issues. Alternatively, you could use full planks and focus on a tight fit at the stern, and then care less about perfection further forward in the hull whether the planking can be filled, stealers added, etc. In either case you just fill in the rest of the hull the way you wish without worry about how the lines look. It was really quick for me to plank the remainder here, where I just laid planks flat and used stealers where necessary.
One other tip I forgot to pass along is that in planking, sometimes it's worth putting in a slight bevel to the planks so they fit tighter together. This is especially true where the hull curves or you can get a visible gap between the planks. I forgot if you were already doing this, but just thought I'd pass this along.
Oh, and sorting the kit wood by color is a great idea. Sometimes there is way too much variation, especially with woods like walnut. In large part that is why I've moved to mostly replacing kit wood with other woods that are more uniform in color like pear, boxwood, ebony, redheart, yellowheart, etc.
I'm enjoying watching your build, you're doing a great job! You're making me want to get back to my wood ship builds. I just have to clear out the too many plastic projects I have going on.
-
6
-
1
-
-
I should have mentioned that some people edge bend wet planks that they dry to shape with a hair dryer. Not sure exactly how all that works, but it might be worth looking into for the second planking. You can also look for planks in your kit that have a slight curve to them laterally, and use that to your advantage when planking.
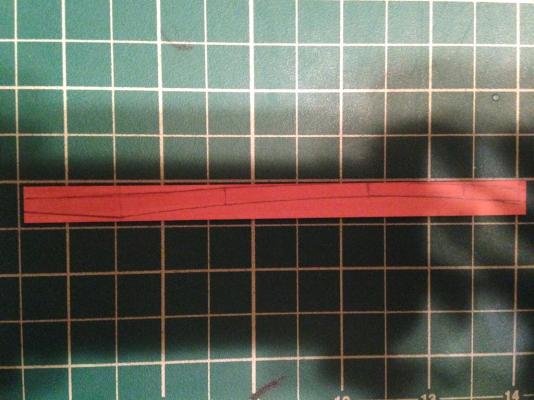
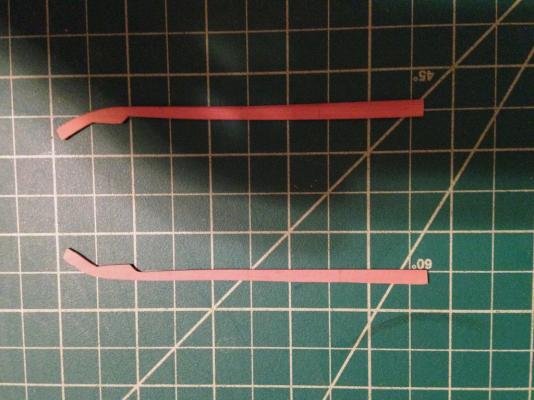
If you really want to torture yourself, you can always try spiling your planks. It works really well to avoid gaps, clinks, etc., but is (1) incredibly time consuming, and (2) you need to use wider planking materials to be able to cut the planks to start with. I was just looking through my Pegasus log and found these extreme examples of what spiling can entail - worth it in the end as you end up with nicer looking plank runs. Most of the planks weren't this bad though.
Here is one at the bow (in third picture, I believe it's the foremost plank under the wale):
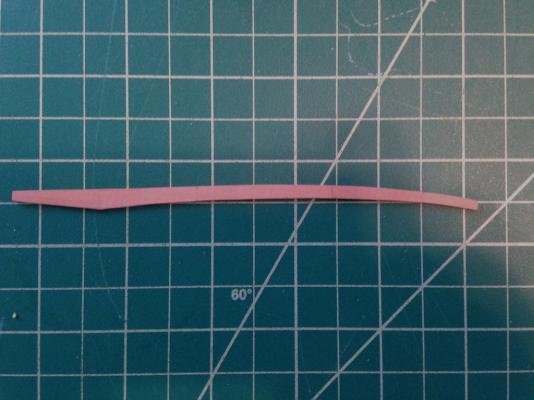
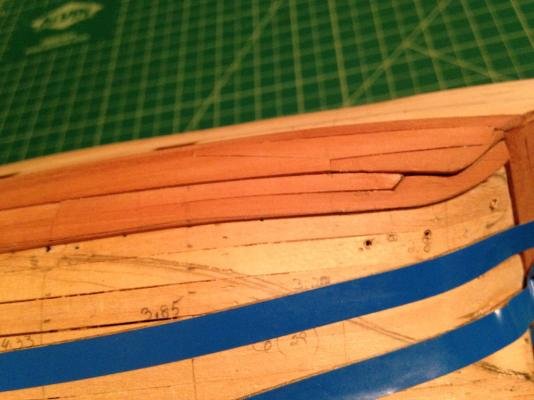
Here was one crazy one at the stern that had to not only go around the drop plank above it, but carry upwards to the stern counter:
-
5
-
2
-


TAMIYA 1/48 A-10 THUNDERBOLT II
in Non LSM 'WIP
Posted
Very nice! One of my favorite "modern" aircraft! I have the Trumpy kit in the stash that I will get to one of these days.