


Landlubber Mike
-
Posts
861 -
Joined
-
Last visited
Content Type
Profiles
Forums
Events
Gallery
Posts posted by Landlubber Mike
-
-
I have this kit in the stash with the various goodies. Looking forward to your build! I need to get a lot more experience before tackling it.
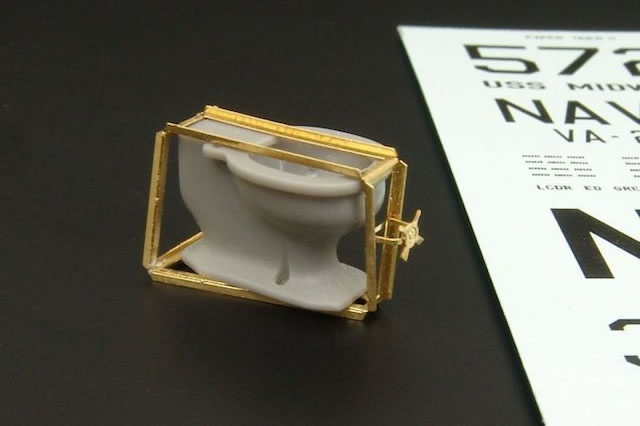
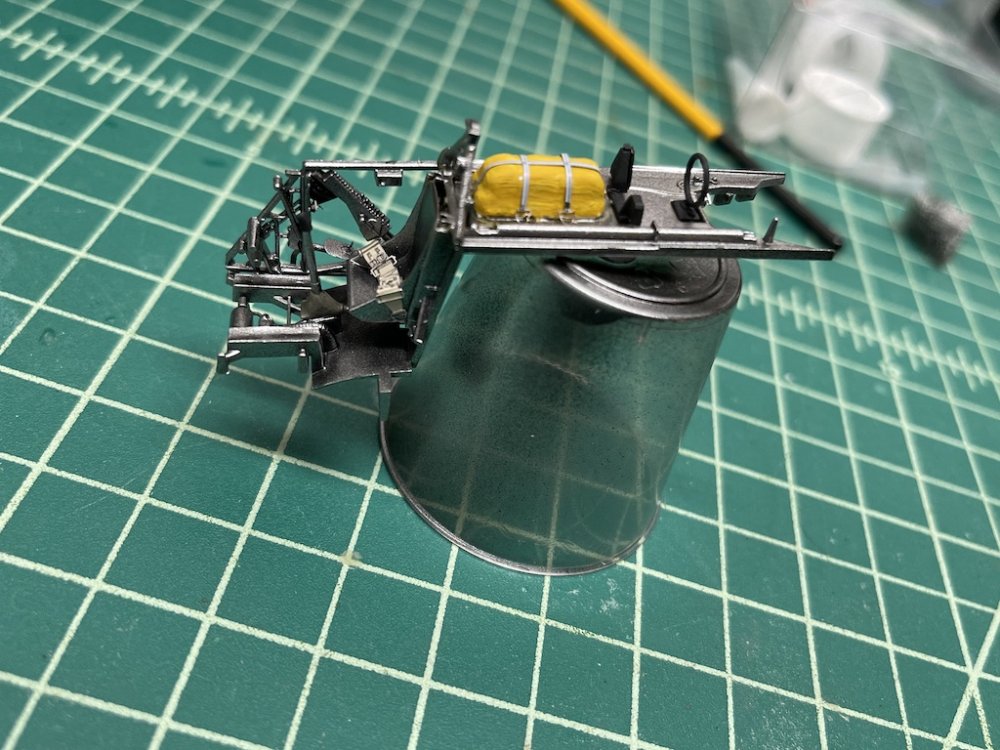
I'm thinking of building the one with the toilet bomb:

If interested, Brengun makes a resin duplicate with the appropriate decals: BRL32012
-
 7
7
-
 1
1
-
-
That's really sharp looking Peter, really nice job! Looking forward to watching this one come together in your skilled hands.
-
2
-
-
A lot of goodies there!
-
5
-
-
Great work Rob! I have the Royal Class box set which doesn't have the cat mouth decals, but recently found the HGW decals that did. When I saw it, I knew I had to build this particular Hellcat! Good to know that the HGW transfers are very fragile - I'll keep that in mind.
-
1
-
 1
1
-
-
I still have a decade or so to go, but I'm planning to take early retirement when I get there. I think the big considerations are (1) do you have adequate health insurance coverage to cover you until you go onto Medicare, and (2) do you have enough cash in reserves that you don't have to draw down tax-advantaged retirement accounts, take a haircut on any pension, etc. during the bridge period before you take social security, etc.
To help those bridge years, I keep telling my wife that since she is three years younger than me, she needs to work three extra years. As I'm sure you can expect, I haven't been very successful at convincing her...
Good luck with the home sale!
-
7
-
-
That wing fold looks nice!
-
4
-
-
On 7/4/2021 at 10:36 PM, Martinnfb said:
O lala!
")
Not to be suggestive, but ...

You know, You want to....

What is that? A cicada? I can't make it out.
-
1
-
2
-
-
Wow those look tasty. Need to get cracking on the ones I have to make for shelf space!
-
2
-
-
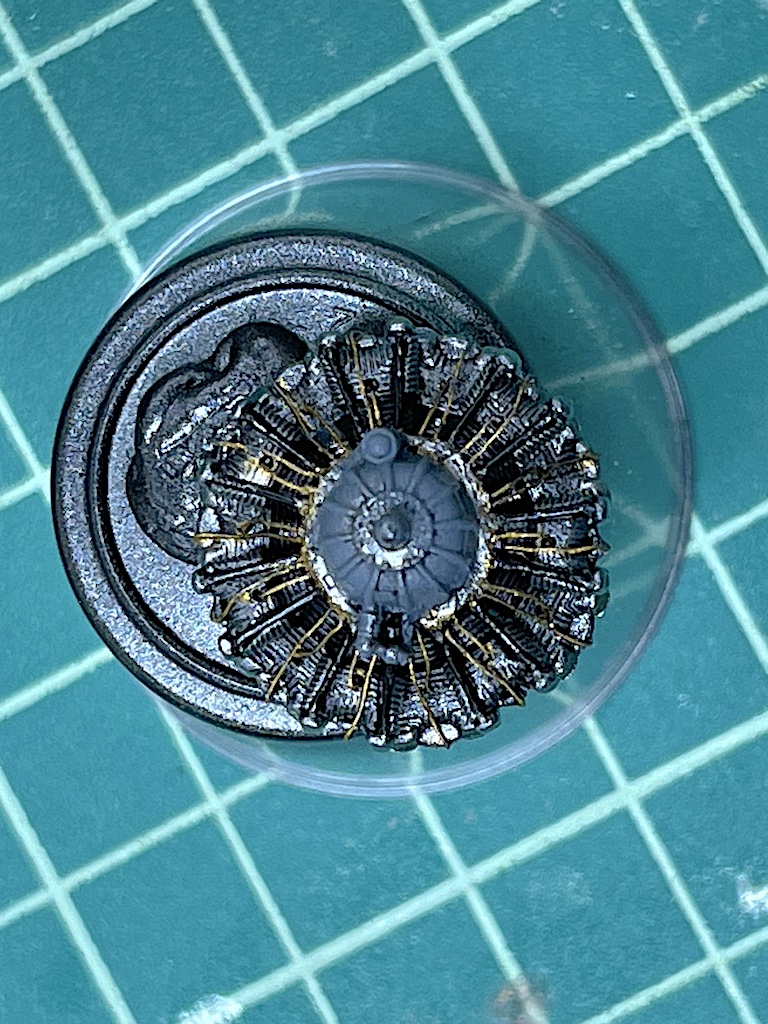
Kitlinx is a terrible company. They took an order from me for a few Taurus engine kits -- not cheap -- and never included them with my order. I sent them about a half dozen polite emails asking about the situation and they all went ignored. I wouldn't do business with them.
-
1
-
-
Gorgeous Peter!

-
4
-
-
Looking really sharp Peter! The Eduard set looks fantastic.
-
4
-
-
Thank you Peter, really appreciate the kind words. Maybe I'll start a separate log for the Vindicator. It's not a highly decorated plane for its war service, and there aren't too many kits available for it, but I think it's a pretty interesting subject. I'm actually planning on building it with partially folded wings, which should be a little different from the few models out there.
-
3
-
-
Just now, Kaireckstadt said:
I didn’t realize that someone else already mentioned that method.
You can test if it works for you and then maybe give it a try on your beautiful Wildcat.Sorry, I meant someone from another website (modelshipworld.com). And thank you very much again! Good to know that the sponge technique can work!
-
4
-
-
14 hours ago, Kaireckstadt said:
Mike,
you can achieve a blurred transition between the 2 colors when you use a piece of a fine sponge fixed between tweezers.
When you dip it in the color and then on a piece of paper you can control the color which remains in the sponge.
With this it should be possible to create a blurred line. I used this technique for years until I finally got an airbrush.
Maybe you can give it a try.
And: Awesome builds of the 2 planes so far!
Thanks for the kind words! You know, someone else had mentioned the fine sponge, I'll have to try that. Not sure why I went with the brush as I think a sponge might be easier. Thank you!
-
4
-
-
14 hours ago, Old Dog said:
Kitlinx has it up for preorder and in their latest news letter they said they were expecting the shipment soon. I order mine from a dealer in the Czech republic and paid a stupid amount for shipping but in the end it was about the same amount as Kitlinx is charging once you add shipping.
I won't ever buy from Kitlinx again. I ordered a few Taurus resin engine kits from them last winter along with some other items, and the kits were not in the box. I sent probably a half dozen polite emails to Loic and never even got a response. So, I would caution doing business with them when there are plenty of other great suppliers out there like Sprue Brothers and others.
-
2
-
 1
1
-
-
Thanks Phil. Yeah, I have tried the technique on some plastic sheet and it seemed to work. Will just need to pour myself a stiff drink and go for it
I'll try to post a log on the Vindicator. Along with the Eduard PE set (which is really nice for this kit), I'm planning to partially fold the wings and include that tension rod that is used to anchor the folded wing against the fuselage. Should be interesting, just trying to push myself on these builds to make them a little more challenging and interesting, rather than cookie cutter.
-
6
-
-
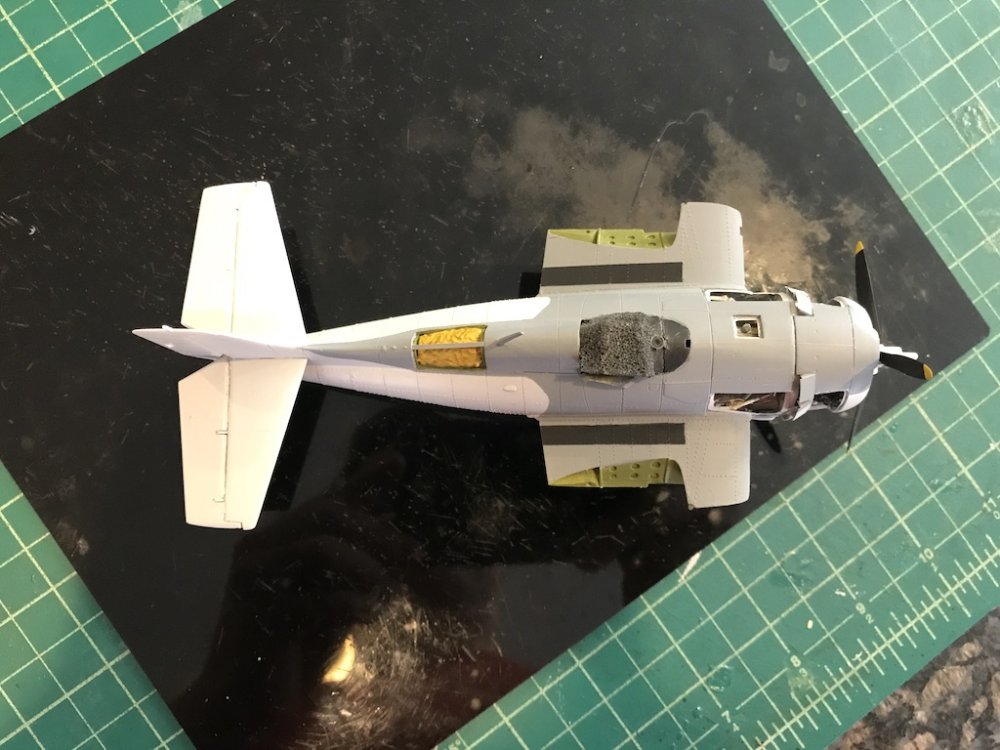
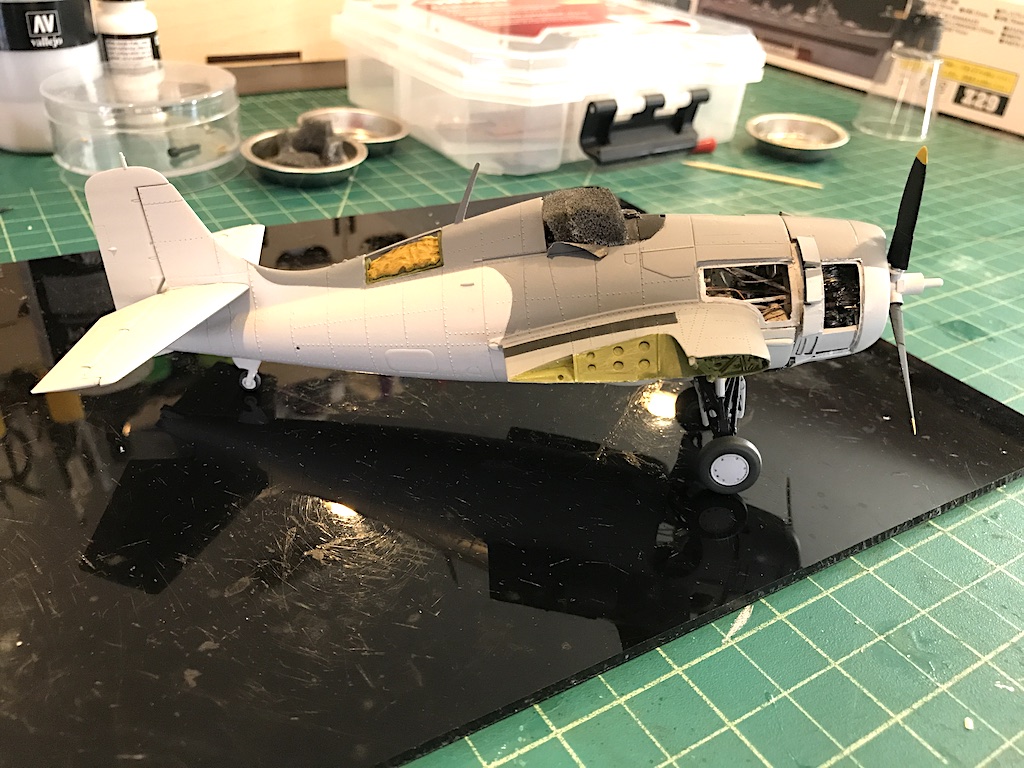
Hey Phil, thanks for checking in. I'm still at about the same point but have the landing gear on and worked on the cockpit windshields. I am not too happy with the stark line between the gull gray and insignia white - it should be a bit of a blurred transition between colors. Not exactly sure how I want to go about doing the transition. I tested a method of using very thinned gray with a little bit on the brush almost like dry brushing, but instead of standard painting strokes like dry brushing, I would dab the end of the brush along the intended line. That seems to be ok, so I'll probably go with that method. Unless of course you guys have any better suggestions - I'm all ears because this has me stuck on the build!

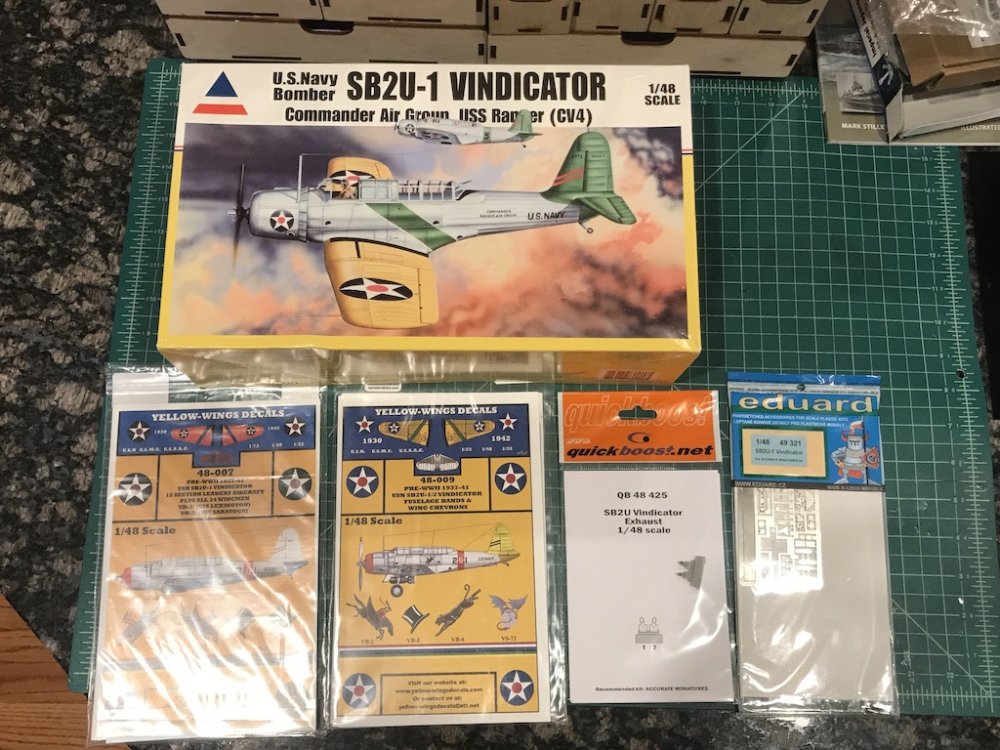
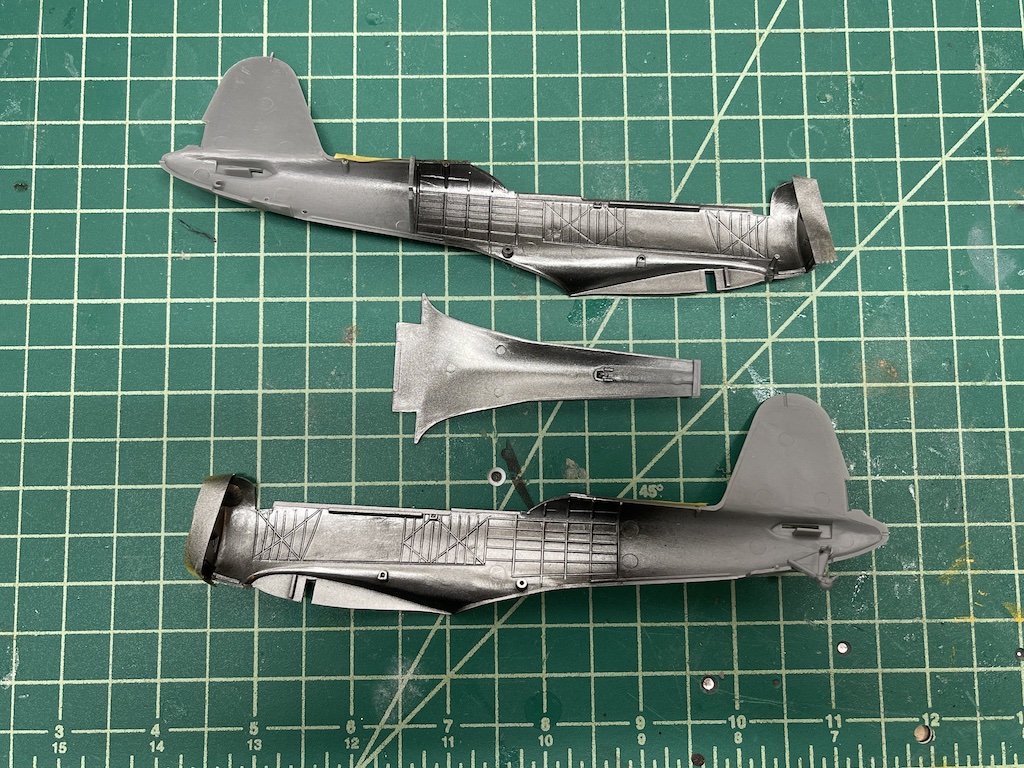
In the meantime, I started the Accurate Miniatures 1/48 SB2U-1 Vindicator. Unlike their F3F kits which I thought were fantastic, this one is a bit of a letdown as the front and rear cockpits need a lot of modifications to get the fuselage halves to fit together. I've probably put in 5 hours or more trying to make it all fit, it's been incredibly frustrating. But, I'm just about there.


-
6
-
1
-
-
Those do look amazing. I'm still a while before I try to tackle a WNW kit or similar WWI era kit, but I thought about making my own props given I have plenty of woodworking equipment from my wooden model side. That being said, I agree with you that these look like a good time saver and clear perfection! Also agree about supporting suppliers from countries that support and follow property rights.
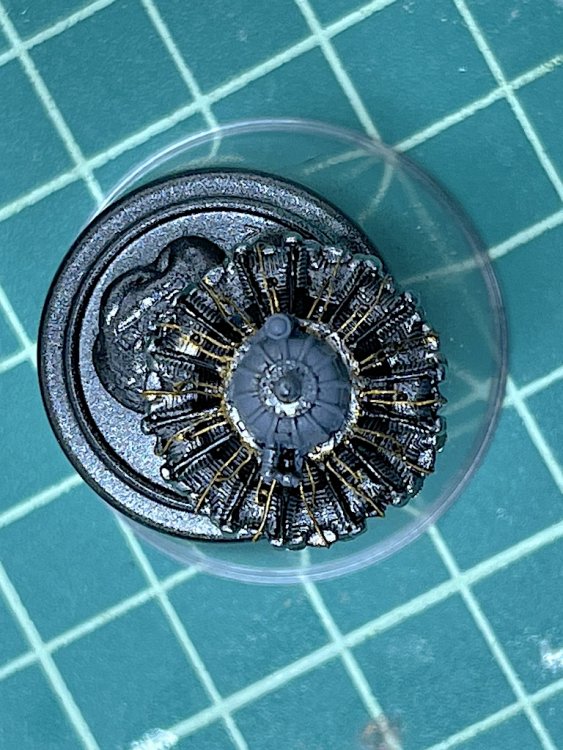
Ernie, are they also putting together exhausts similar to the Rexx and Moskit products? I saw what looks like an exhaust in your first picture. If so, looks great!
-
3
-
-
Wow, that's really nice! Well done!
-
3
-
-
Holy cow, this is really cool. Nice job!
-
2
-
1
-
-
Hey Rob, thanks for the reply. Sorry, I didn't necessarily mean to give you a tutorial on lathes since you obviously have much more experience than I ever will. Was mostly giving info to others who might not know much about lathes, so my apologies!
I think the Proxxon would be perfect for your intended use. I really enjoyed mine. In retrospect, I probably could have just kept it and added the Sherline since the Sherline takes more effort to get set up, but space starts becoming an issue when you begin adding tools. If I remember correctly, the DB250 didn't require a transformer unlike a bunch of other tools in the Proxxon range - another plus!
Some people have added the extended bed for the DB250. That increases the footprint quite a bit, and I wonder how steady things will be since I don't think the DB250 allows for things like a steady rest. It seemed that the hole through the headstock would accommodate longer pieces, you'd just have to turn half and then flip around and turn the other half.
-
3
-
-
7 hours ago, HubertB said:
And, btw, conversely, do not expect to turn wood on a metal lathe. Plastic, yes, perspex yes, soft metals or steel yes, on these cheap-end metal lathes, but not wood... Ask me how I know
")
So that means two lathes if you want to turn wood and machine metal (the semantic difference is actually meaningful)
Hubert, the Sherline is designed to handle both wood and metal. They have wood tool rests you can purchase for wood turning tools. I've turned wooden (and acrylic) pens and other wooden items on my lathe no problems.
-
2
-
-
Rob - I had that Proxxon lathe a while back and used it for my Badger. It's only built for wood though, not metal, as others have said. I found it really helpful for tapering the masts and spars. Put the dowel in, turned it on, used calipers, sandpaper and steel wool to finish, and completed in no time. I'm not sure why some pooh-pooh the use of lathes to construct masts and spars. They have to build a jig, cut it into square or hexagon stock, and then use planes to shave bits off. Took no time at all for me in the lathe.
One warning if you are new to lathes - be very careful getting anything near the headstock. My first time I got the steel wool too close and it yanked it from my fingers, thankfully my fingers weren't pulled into the machine. Scared the bejesus out fo me, and I was like, oh, that's what the warning in the instructions was meant to cover!
 I would also make sure you have eye protection just in case.
I thought it was a really great little machine, but ended up selling it to buy a Sherline lathe, in part to be able to turn metal parts. I first started with a used one I bought off eBay with an 8" bed, but ended up selling that one and buying a new one with a 14" bed and a digital read out (the DRO is really helpful) when I started turning other things like pens and needed the longer bed. The 8" is good for most small needs, but once you start adding centers, chucks, etc., the bed size decreases quickly. They also make a reverse live center to help with masts and spars, but I haven't used it yet.
In case anyone is interested, here is a link to how ship modelers use Sherline products. I couldn't recommend their lathe and mill highly enough. They are built like tanks, and have a ton of accessories for every conceivable construction process. They are a bit on the pricey side though, especially when you throw in the accessories. That being said, I don't know how much they would help with plastic modeling. But, if you like tools, I'm sure one could find a use for them.
https://www.sherline.com/ship-modelers/
-
6
-
-
Damn Ernie, you're forcing me to admit I have a serious man crush on you. Such sweet rides! I'm stuck drive a Pilot and a mini-van

-
1
-
2
-


He-219A-0 UHU
in LSM 1/35 and Larger Work In Progress
Posted
I heard you can find the book in a van down by the river...