

Folkwulfe
-
Posts
118 -
Joined
-
Last visited
Content Type
Profiles
Forums
Events
Gallery
Everything posted by Folkwulfe
-

Mono-Chrome 1/16th Scale Stug III ausf G
Folkwulfe replied to Folkwulfe's topic in LSM 1/35 and Larger Work In Progress
Thanks guys....here's a little side skirt armor test fit action for you. -
Mono-Chrome 1/16th Scale Stug III ausf G
Folkwulfe replied to Folkwulfe's topic in LSM 1/35 and Larger Work In Progress
Just a small update...working on finishing the tracks and the armored skirt hangers. -
Mono-Chrome 1/16th Scale Stug III ausf G
Folkwulfe replied to Folkwulfe's topic in LSM 1/35 and Larger Work In Progress
I guess I agree with Peter too...I was sorta leaning that way but I digress. I am going to add some detail since the aft fighting compartment is visible through the open hatches. But I promise not to get too crazy with it. I start with coating the interior off white...more to come. I also have added more of the smaller details to the upper hull such as blackout headlight, smoke grenade tubes, and drivers visor armored hood. The spare track rack on the aft deck has also been added. The main upper and lower hull halves are permanently joined and there's a couple of small joints to address here, but nothing major. The second track is about 30% but the running gear is ready to go on now. That's it for now... -
Mono-Chrome 1/16th Scale Stug III ausf G
Folkwulfe replied to Folkwulfe's topic in LSM 1/35 and Larger Work In Progress
Okay folks...I need some help with a decision that I have been 50/50 about for the last week or so. The armored top of the fighting compartment fits very tightly and won't require glue to hold in place. By not gluing it in place, it can be removed to show interior detail....which will have to be all scratch built. That's going to take a while since practically nothing is available in this scale. If, however I glue the top in place, very little of the interior is visible as you can see... This is what's visible without the top plate... So which direction do I go? A small amount of interior and top mounted permanently or a large amount of interior and leave the top removable? What would you do? -
Mono-Chrome 1/16th Scale Stug III ausf G
Folkwulfe replied to Folkwulfe's topic in LSM 1/35 and Larger Work In Progress
Well...I can't really say for sure. There is no definitive parts count listed anywhere on the box or instructions. There are 23 major parts trees including PE Brass, clear parts, and individual parts (metal barrel and woven brass tow cable)...and that's not including the trees for all the track link parts. I know there are a few parts extra because of duplicate trees, but not that many. There are no crewmen included, but there are two crewman plastic kits (TC and loader) available separately for about $20 each. I plan to get them and include them. Decals are provided, but there are few needed. My version will be a Stug assigned to northern France in the fall of 1944 immediately following Dday. -
Mono-Chrome 1/16th Scale Stug III ausf G
Folkwulfe replied to Folkwulfe's topic in LSM 1/35 and Larger Work In Progress
Another update courtesy of the weekend....I was able to get some painting time it. Since most of the running gear was ready, and the track for one side was assembled, I decided to shoot some primary colors on and start the weathering process.....at least on one side. I can't go much farther on the interior because of a supply shortage awaiting delivery of more "stuff" I need to carry on farther. That's a fancy way of saying "I have stalled long enough...let's roll!" So I start here with a little pre-shading over the general hull.... ...after a few light coats of the base color (some of it still wet when I took that shot)... ....a second dusting of color and let dry thoroughly.... ....attach the road, idler, and take-up bogies and then thread the track on.... ...and then paint to match.... ....and start adding in some weathering. Remember, most of this will be covered by the side-skirt armor plates, but I'm ADD about these kind of things. Even if it can't be seen, I know it's there so it matters. Now I have to get the OTHER side along the way so they match. BOY! I'm really gonna hate sitting there for hours assembling another 93 track links!!!! -
Mono-Chrome 1/16th Scale Stug III ausf G
Folkwulfe replied to Folkwulfe's topic in LSM 1/35 and Larger Work In Progress
Just a little update...I primed all the PE and metal parts as well as the gun breech. This weekend I plan to counter shade and start on the lower hull primary colors. That way I can start getting the road gear and tracks finished and on....- 113 replies
-
- 10
-

-

-
Mono-Chrome 1/16th Scale Stug III ausf G
Folkwulfe replied to Folkwulfe's topic in LSM 1/35 and Larger Work In Progress
I saw an advert yesterday I had to check out. A group from Australia (I think) called Hearn's Workshop is developing 3D printed parts for the Das Works Stug III G. Since these Stugs are essentially the same, the parts should be interchangeable. The few parts they have showcased so far include more accurate large rivet heads and three different muzzle brakes for later versions of the 75mm main gun tube and they mentioned working on ammo bins. My hope is that they will produce a line of interior parts including the gun breech guard, crew station seats, and radio gear. -
Mono-Chrome 1/16th Scale Stug III ausf G
Folkwulfe replied to Folkwulfe's topic in LSM 1/35 and Larger Work In Progress
Sorry Bomber, but there is no parts count listed in either the instructions or on the box. I can tell you there are about 25 trees and many have duplicates such as the idler bogies and road wheels. Lets just say there's ALOT! A plastic main barrel as well as a metal one, a woven brass tow cable, separate PE sheet and a small decal sheet are also included. What's not included is any crew members, however there are two plastic figure kits available for a tank commander and a sitting loader for about $20 each. As mentioned above, the interior detail is next to nill, but scratch building shouldn't be too difficult. Between the loaders hatch and the commander's hatch, there just too much of the interior observable to leave alone. I understand the Das Works kit adds some of the detail in the kit already. -
Mono-Chrome 1/16th Scale Stug III ausf G
Folkwulfe replied to Folkwulfe's topic in LSM 1/35 and Larger Work In Progress
The tracks are made of individual links. The instructions say 93 links per side. I think that's too many. Each link is three separate pieces combined. Crap!!! I still have the whole other side to do....!?!?!?- 113 replies
-
- 10
-
-
-

-
Mono-Chrome 1/16th Scale Stug III ausf G
Folkwulfe replied to Folkwulfe's topic in LSM 1/35 and Larger Work In Progress
This will be my main reference except for the color plaques in the instructions. I am going to add some interior details just for grins and giggles. I hate that you can look right through to the torsion bars in the lower hull. From the few modest pictures in my reference, I think it shouldn't be too hard. The main hull is all one piece and very well detailed. I have already attached the main shock struts at the number 1 and 6 idler bogies. These shocks are not flexible, but rigidly mounted to the hull. As I add the 2 through 5 idlers, the torsion bars actually do give and rebound like the real suspension. The drive cog is going to be fun. If you paint it prior to installation, it will be easier. However, the drive "hump" also needs to be painted prior to install. As you can see, I discovered that too late.... The upper hull and rear take-up cog are not permanent. The main gun is well detailed at the breach end and the kit includes your choice of a metal or plastic barrel. Again, the upper hull and upper deck are not attached. I took this just to give you an idea between the 1/35th scale Hummer and the 1/16th scale Stug.....told you it was big. -
Well...I had to shelve the Huey for awhile. Not too long I hope. In the meantime I got hooked on doing armor again and have finished a couple and still working on others. THEN....this thing came out. I was lucky enough to snag one of the initial releases. Now essentially this is almost identical to the Das Works version coming out soon. The main difference is in the armored side skirts available here, but not on the Das Works kit, but their kit does include more interior items. I can also tell you this thing is BIG....the largest armor kit I have ever built.
-
...well maybe not so OOB. The tracks are individual link replacements, the antenna is scratch built, and the extra equipment came from Tamiya #35141 Modern US Accessories lit.
-
Bomber...the kit is Tamiya #35350....M-10 Mid-Production...the build above is OOB except for the added equipment....and the base of coarse.
-
Sorry guys...I got diverted for a while due to a consignment promise I had to keep. A friend found a WW2 advertisement for war bonds taken from a magazine and fell in love with an emblem on it... The emblem is from Camp Hood (now Fort Hood) and the first tank destroyer school for the M-10. So I had to build an M-10 to display with it. This is the final result... So now, hopefully, I can get back to the Dustoff bird and some real progress.
- 19 replies
-
- 10
-
-
I am using interior Army green as a base (dark) with lighter chromatic green for highlights. Light gull grey for the engine casing and some of the other parts.
-
A little time away from the engine compartment...I started cutting and sanding away alot of the grossly over-thick cockpit details. So far I have been able to erase the IP details and center console areas...fitted a bulkhead forward the IP and started to measure areas around the floor where the walls and floor don't meet. The overhead window frames have been thinned and a lot or rivet exterior detail has been remove...
-
Still working on the engine compartment. This is NOT a true representation of the T53-9L turbine, but you only get a hint of it behind the vent screens....and this is not finished yet either.
-
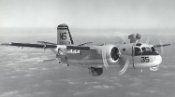
SBD-3 clear Edition Trumpeter OOB
Folkwulfe replied to Martinnfb's topic in LSM 1/35 and Larger Work In Progress
Semtex??? I wouldn't stick around if she farts!!! -
SBD-3 clear Edition Trumpeter OOB
Folkwulfe replied to Martinnfb's topic in LSM 1/35 and Larger Work In Progress
I hope it's not terminal! Your work is superb and a credit to your workmanship. I too had the builders bug for the SBD, but I went in a slightly different direction. I opted for the Merit 1/18 scale and backed it to -2 appearance. I built "2106" which has a long story attached. She was on Midway with a Marine unit and participated in the June 4th attacks on the Japanese fleet. These are the finished pics: I hope this helps refill that mojo container so you can continue your fantastic progress. I will be patiently watching for more from your bench. -
Start another even before the last is complete! So here is the "next" project on the bench. I have always loved the Huey for its distinctive sound you hear and feel long before the helo is over your head. The classic lines and the no-BS design also make it look every bit the part of a utility helicopter doing its best. So here is the kit by Hobby Boss, which is identical to Merits release and another smaller companies version. The model is designed to be the attack Huey, but I thought a more appropriate subject would be the battlefield ambulance version know as "Dustoff". The first look inside the box reveals a very large proportioned helicopter with some rather disappointing features (or missing features in some cases) that will require alot of scratch building and modification to make it more passable. The main body is broken fore and aft into two parts. There is the main/forward cabin area, and a separate second area consisting of the tail boom. The plastic is alot thicker than I expected including the clear window parts. Most all of the glass parts are so thick that they appear milky or clouded. The main body contains instrument panel, center console, pilot and co-pilot seats, and a bench seat for the cargo area. Both pilot/co-pilots doors are hinged and openable. Both rear cargo sliding doors are also openable. Other than the spinning main rotor mast and tail anti-torque rotor, the is no other functional features. The instrument panel and center console surface detail is a joke. The overhead panel is missing and will need to be fabricated. The pilot/co-pilot seats look straight out of toyland and will definitely require replacement. I don't even was to go there about the rear cargo seat. There is a passable cyclic and collective for both pilots, and they did include some pretty accurate decals for the gages on the IP and center console. On the exterior we have some very overdone rivet detail that needs to be knocked down alot, and surface detail that will need to be redone. The seam line where the two shell halves of the body meet is going to be a headache to obliterate. And the gap where the tail boom attaches is HUGE! Add to this that the model is designed to be assembled using the included screws and have large holes for them that have to be filled and removed. Don't even get me started on the rotor head. I started out by test fitting as much as I could together... One of the first "I can't live with this" items were the cooling vents on either side of the turbine dog-house. The mess screen was molded in and ugly. I used my trusty Dremel on them and replaced it with real copper screens after thinning the plastic edges a bit... Now another problem....with the screens opened up, you can see clean through to the other side because there is no engine detail in the kit. The best bet was to build a reasonable appearance of a turbine engine...This is the engine core without any detail yet. And this is how the engine core fits inside... That's pretty much it for right now. I had to stop and shelve this one for a couple of weeks to finish the 1/72nd scale submarine. I think this one will be interesting...!!!
- 19 replies
-
- 12
-
-
With all the encouraging comments, how could I resist? Besides, I'm a glutton for punishment.
-
It's from Hobby Boss sir...
-
The build was started by a good friends dad who died shortly after in 2011. My friend traded the model to me for some other project I did last year. I couldn't think of a better home for this project than the son of the dreamer who started it all some 10 years ago. As for what is next? How about a 1/18th scale UH-1B Huey Dustoff....?
-
Sorry for the small print...it reads: U-995 German Type VII C/41 U-boat circa Late 1944, Endlich fast zu Hause...Almost home at last. Build started (2011) by Robert W. Clark Sr...Build finished (2021) by Ralph E. Jeffries.