nmayhew
-
Posts
1,154 -
Joined
-
Last visited
Content Type
Profiles
Forums
Events
Gallery
Everything posted by nmayhew
-
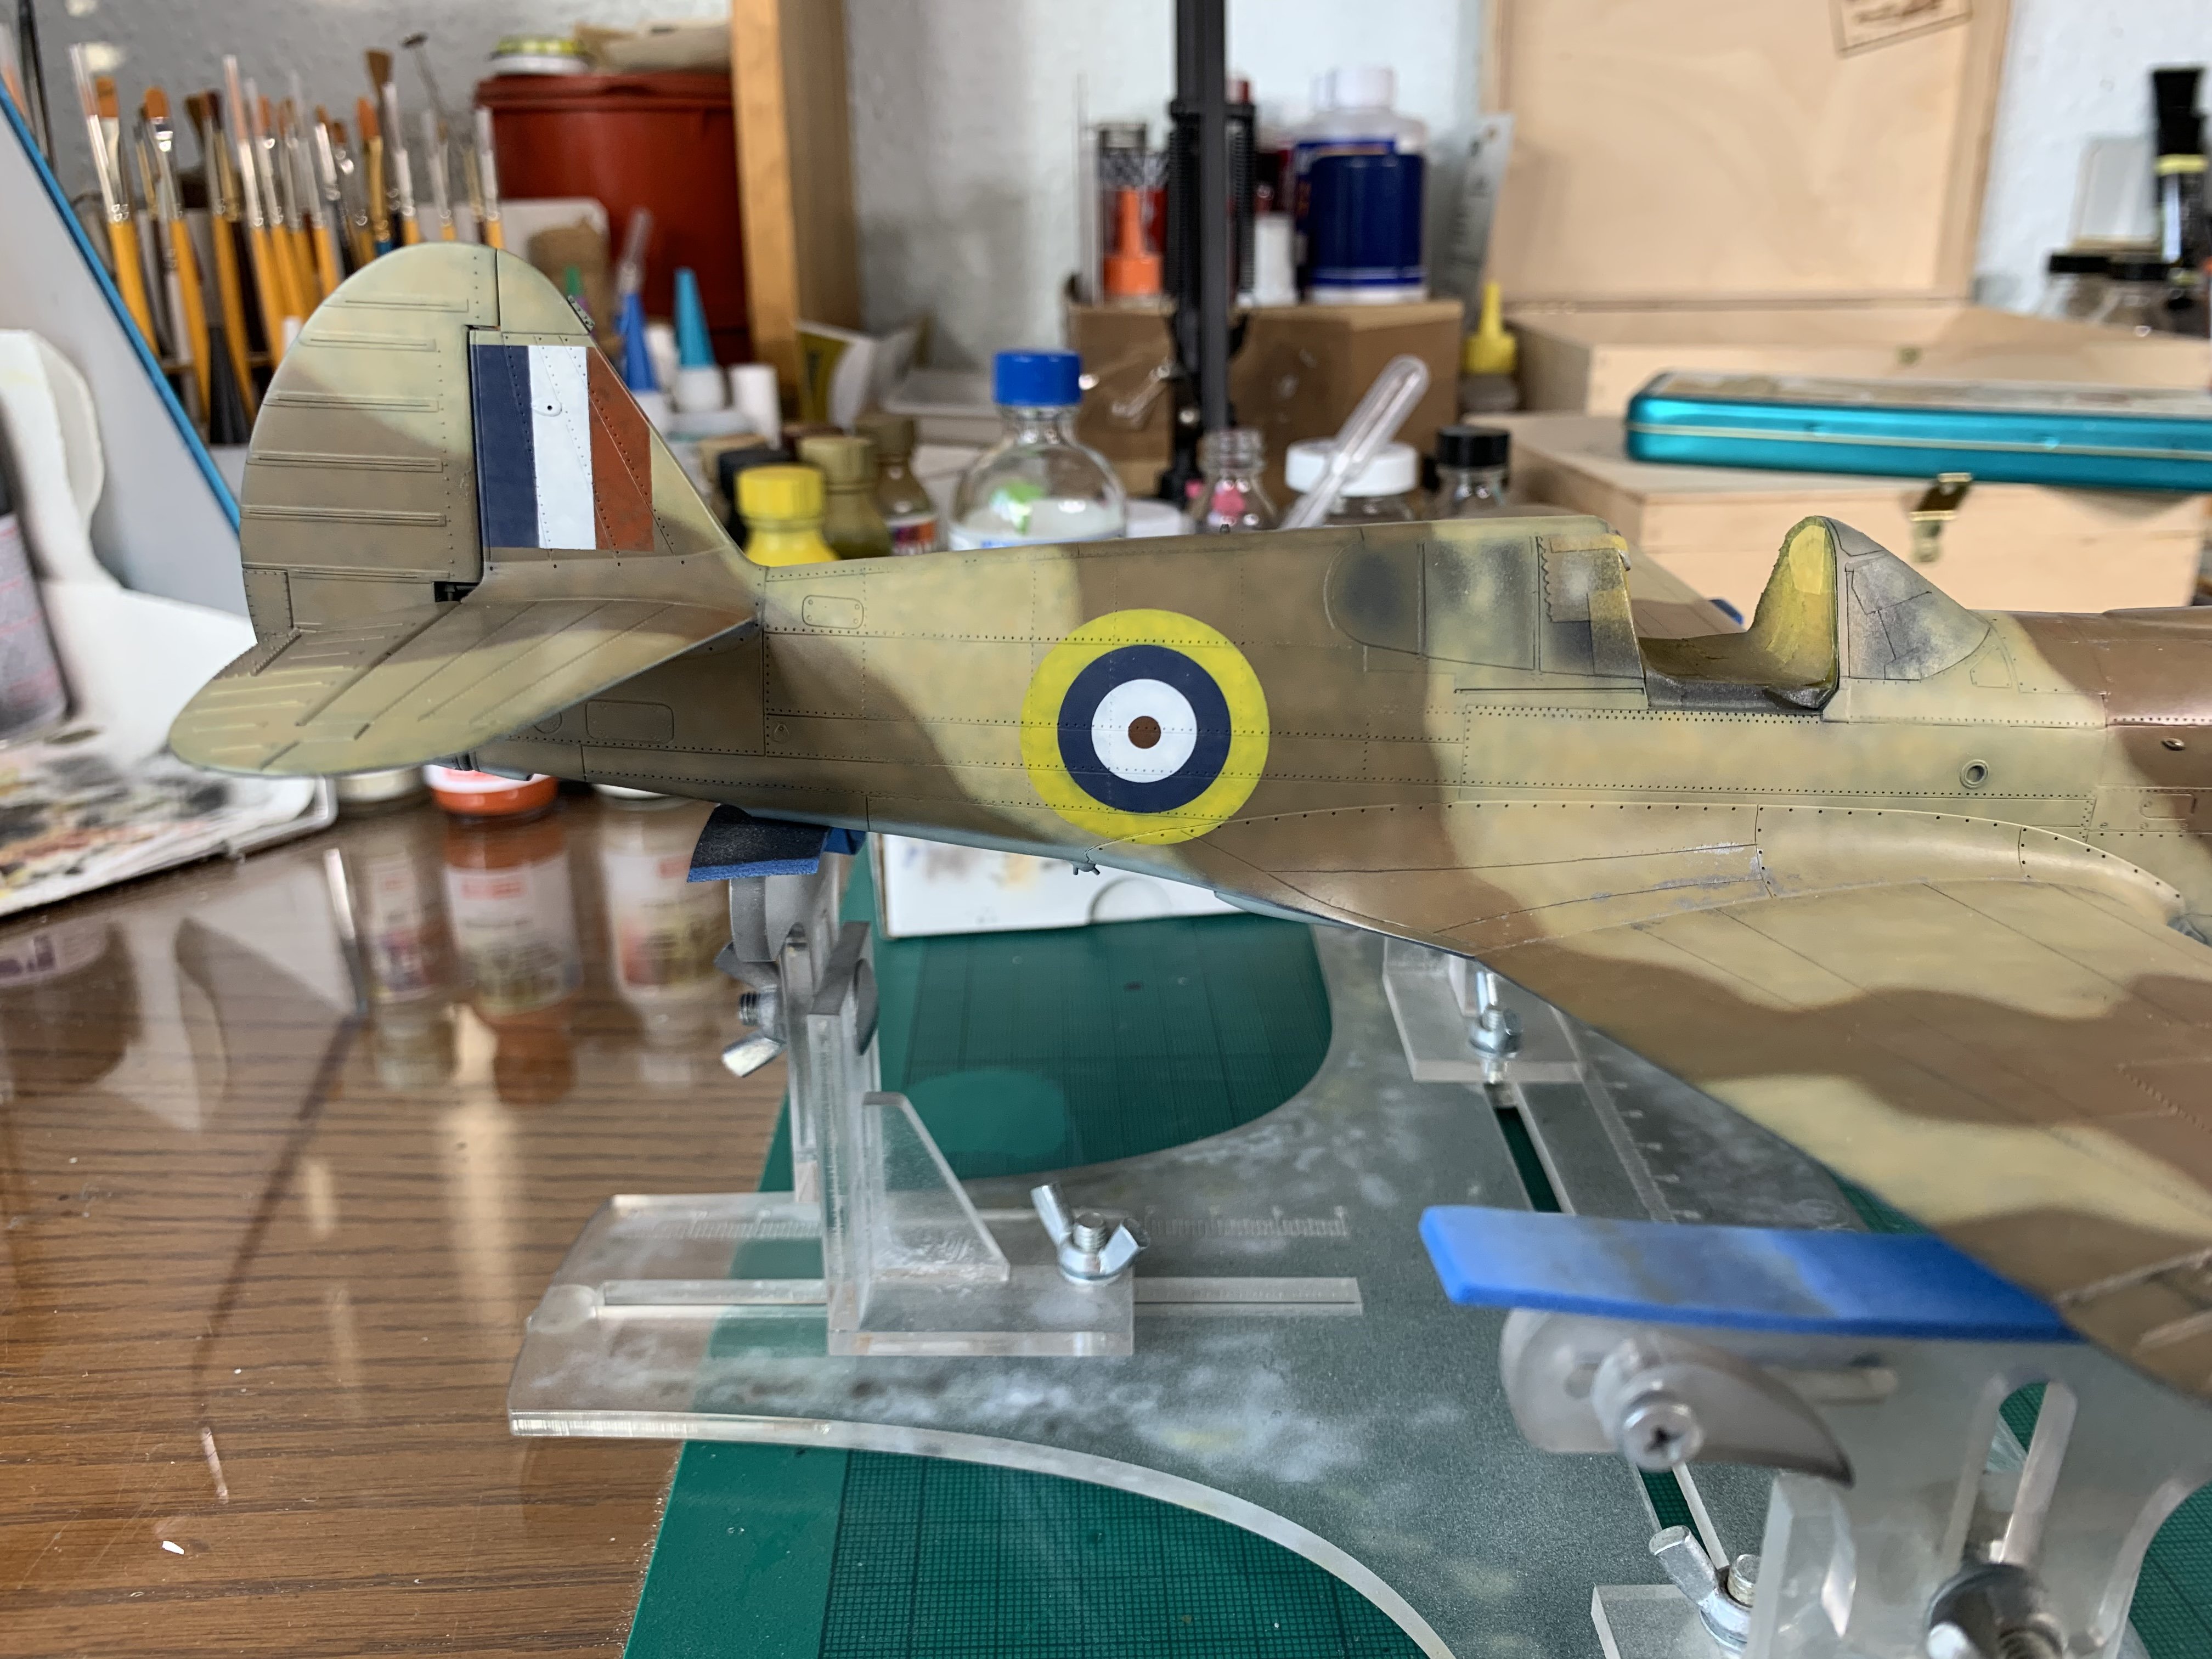
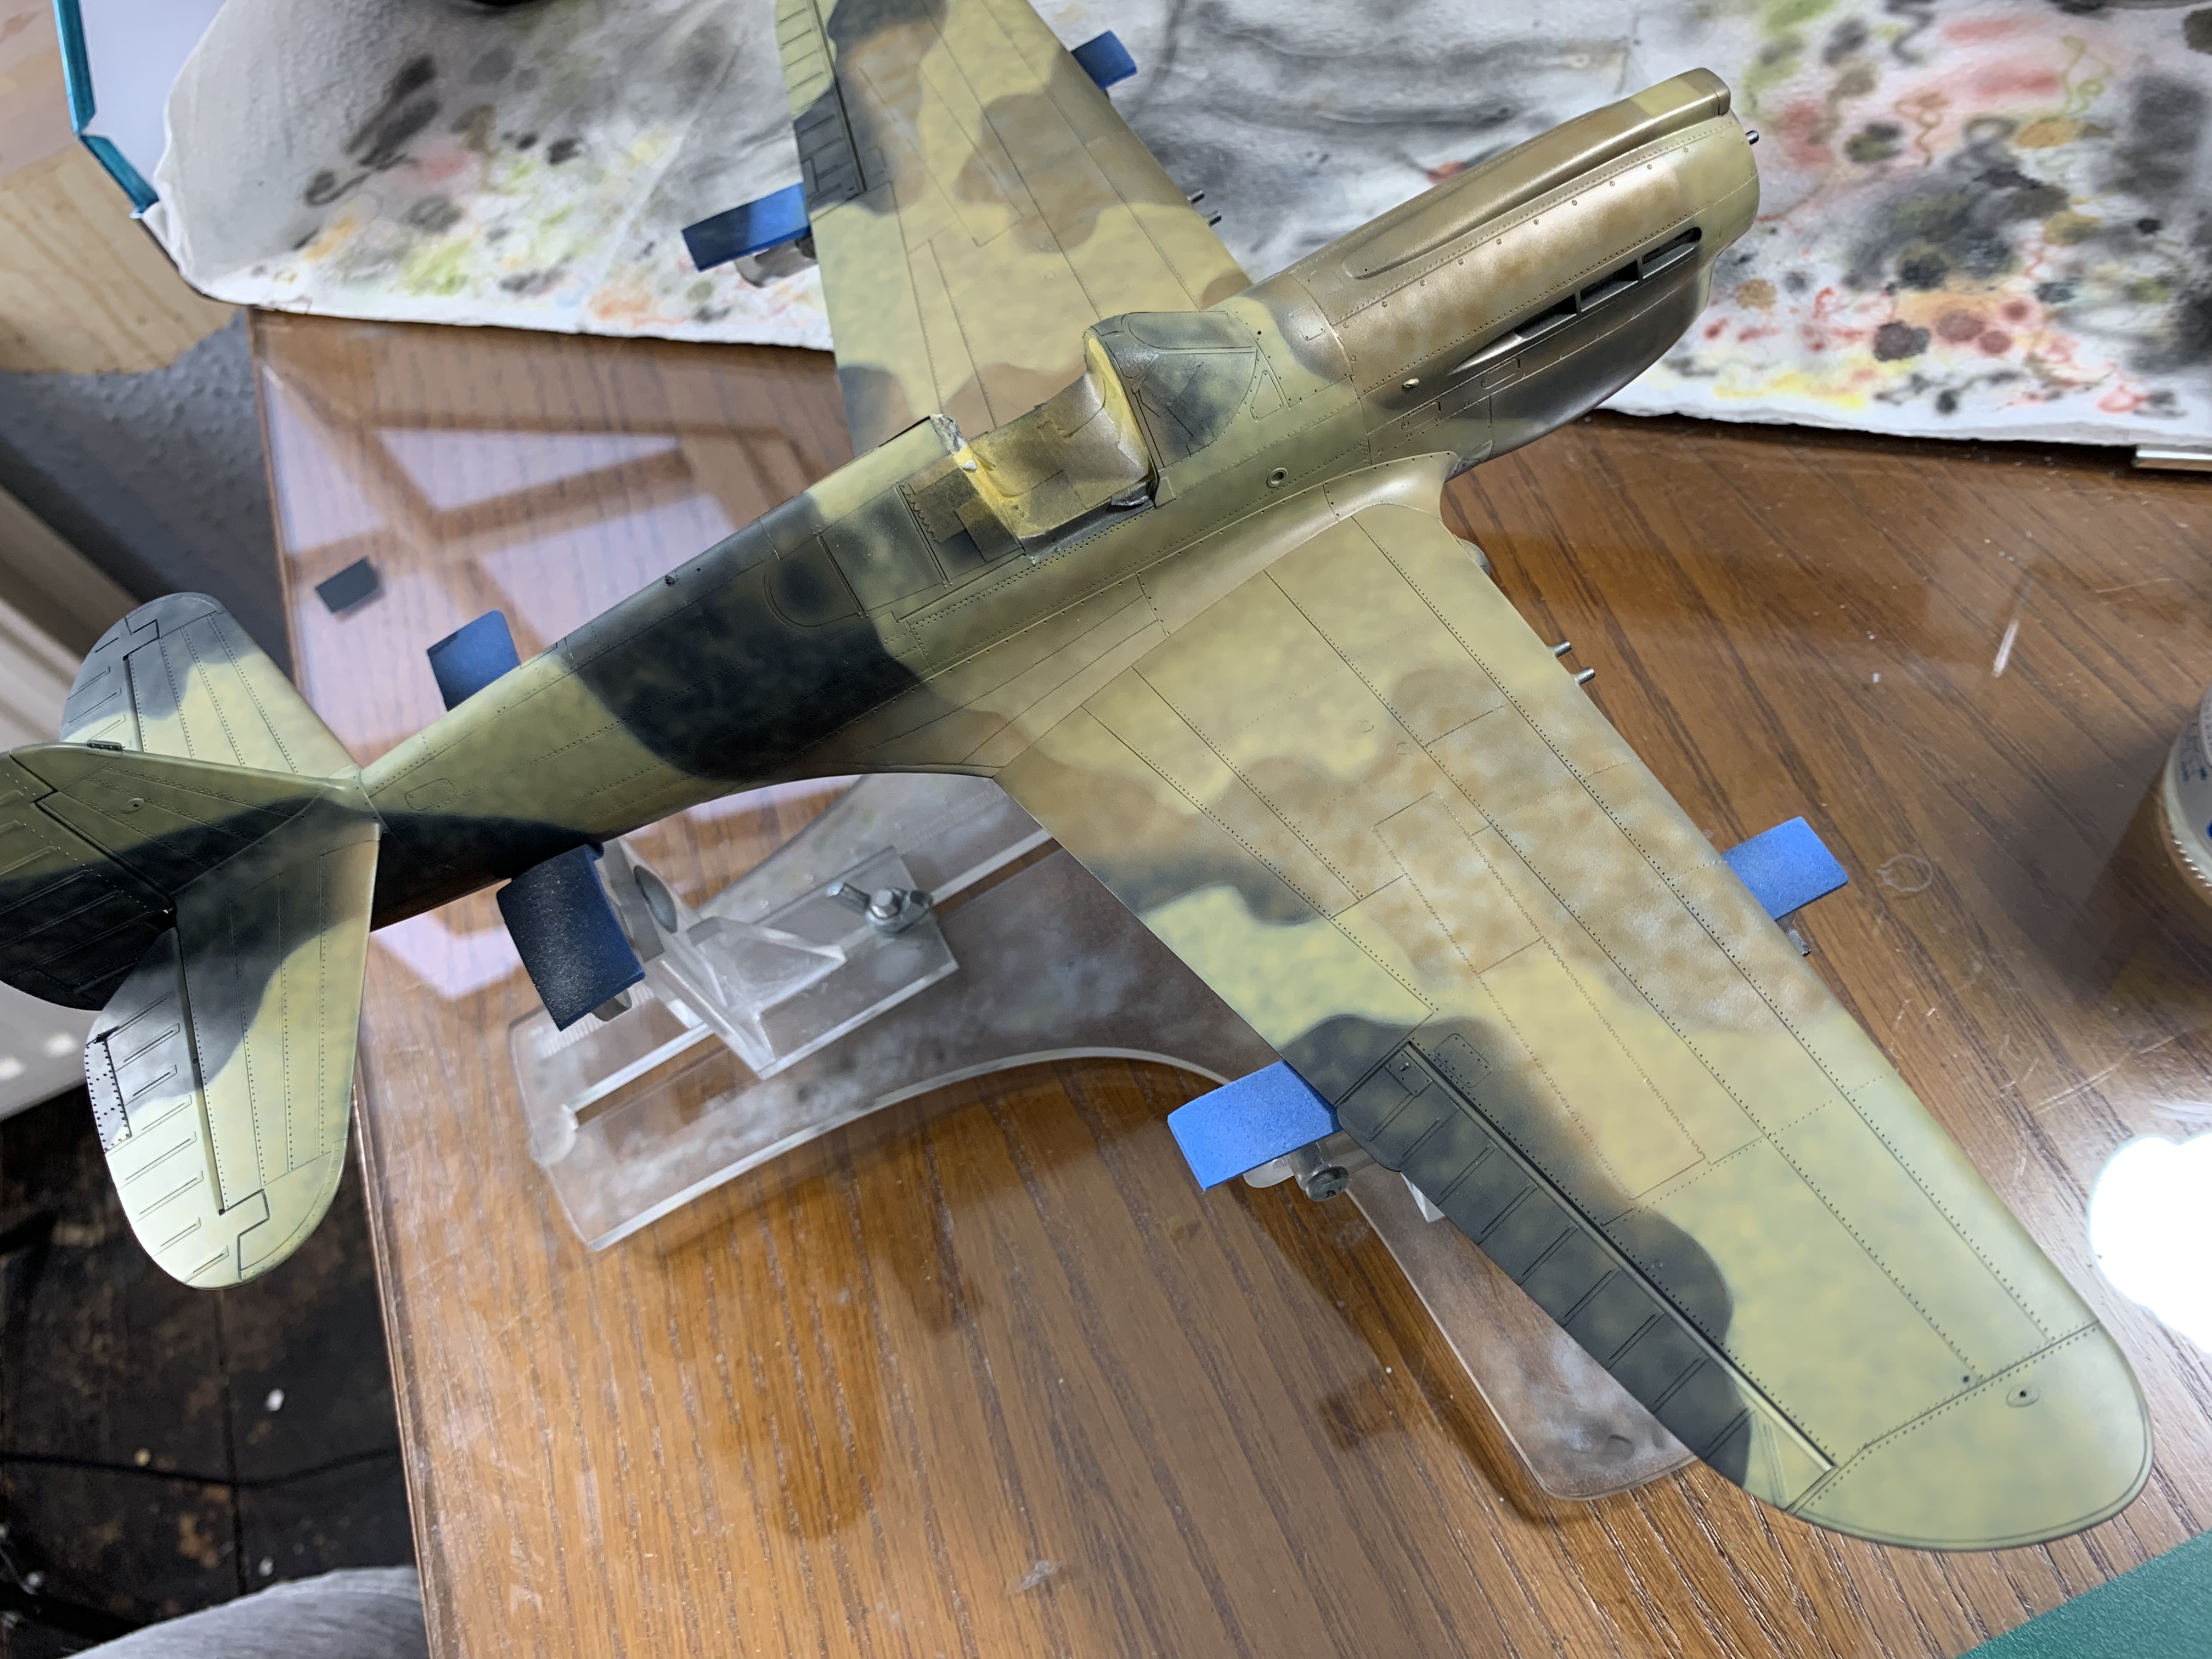
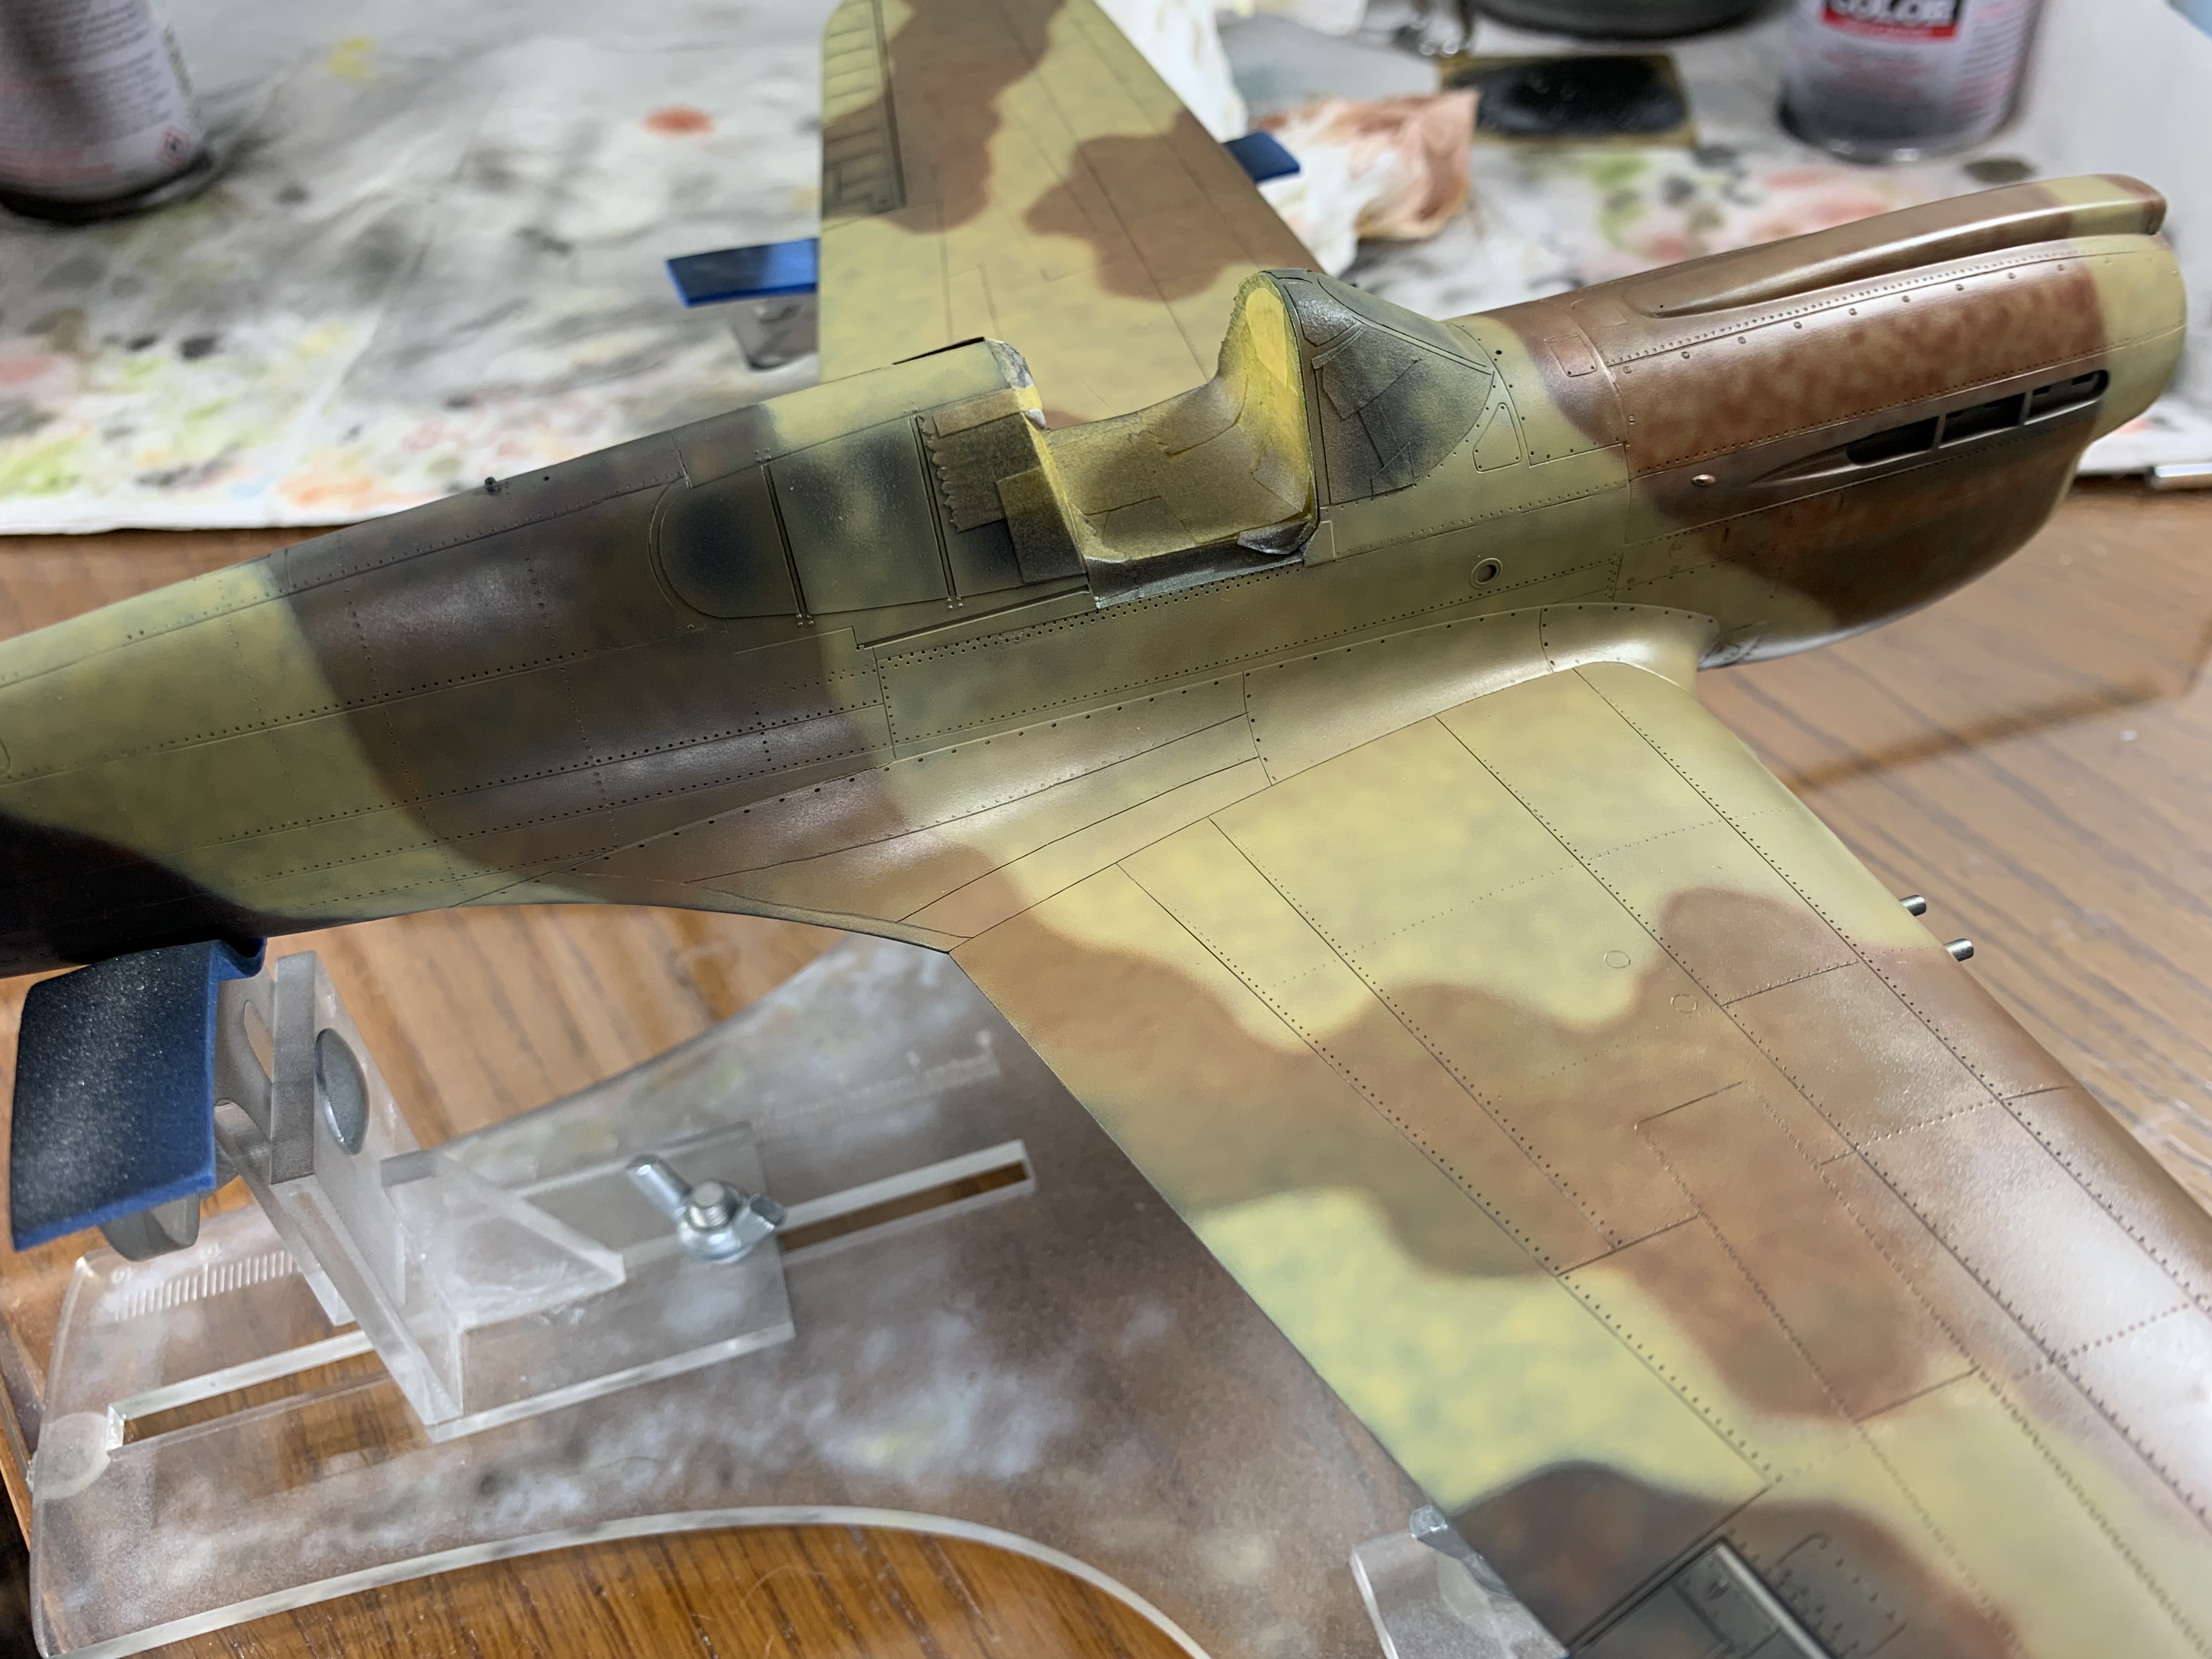
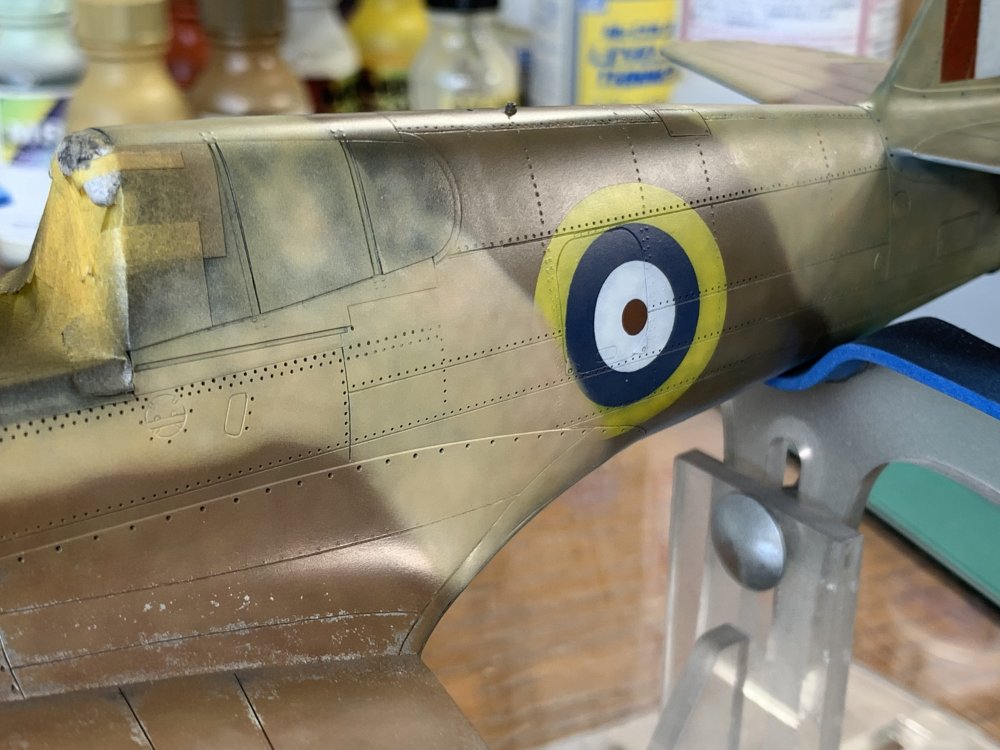
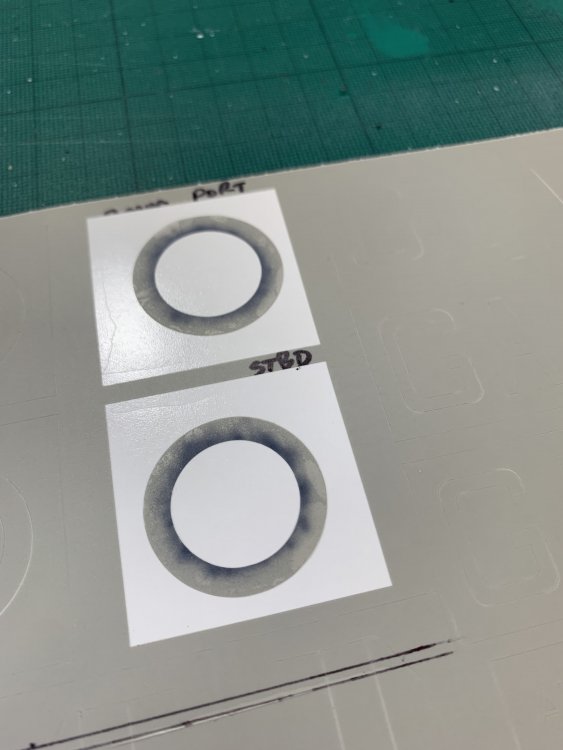
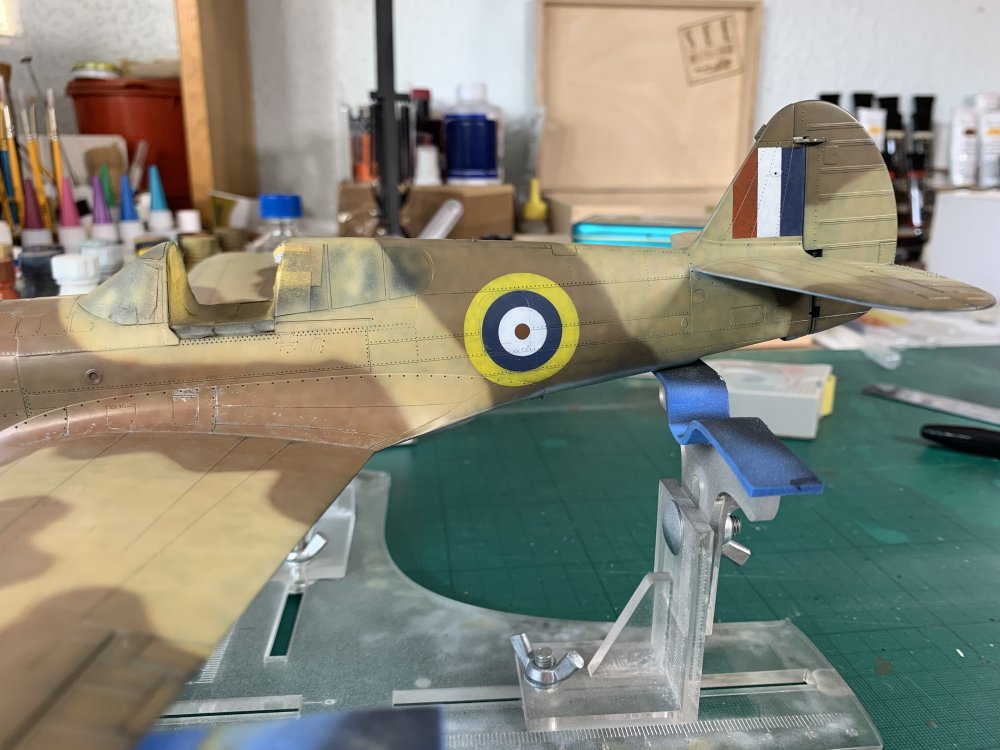
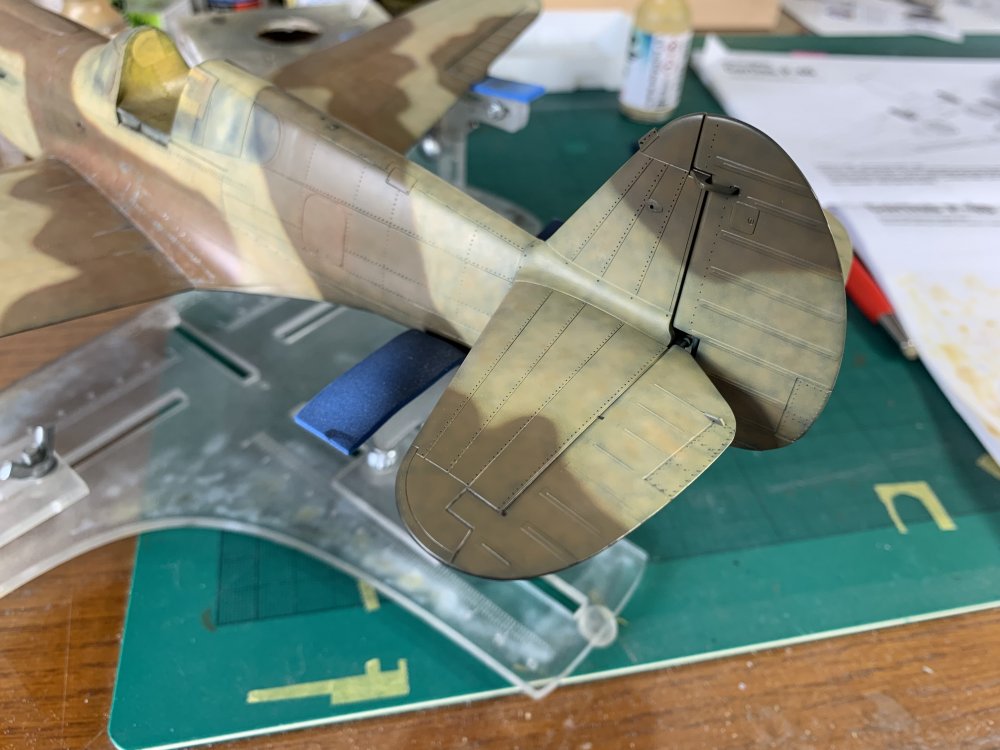
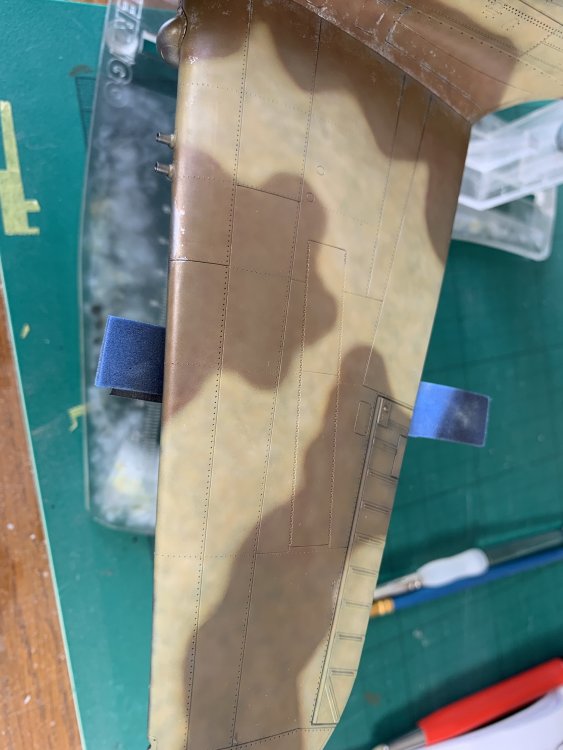
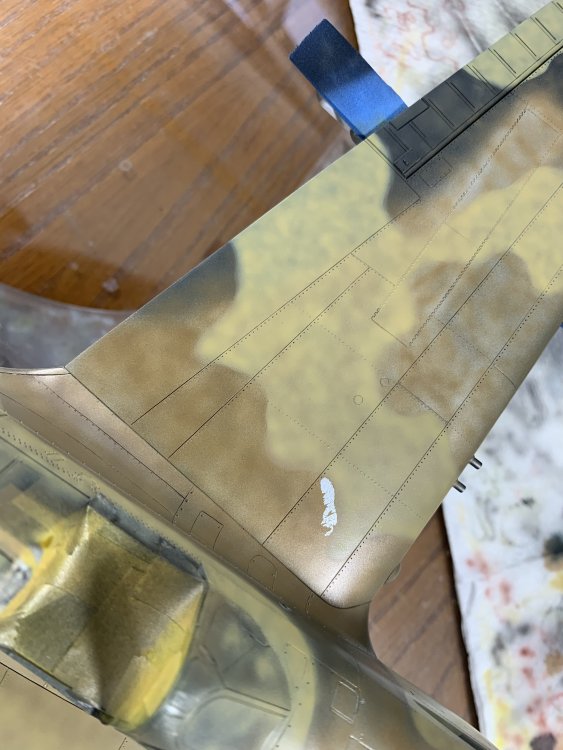
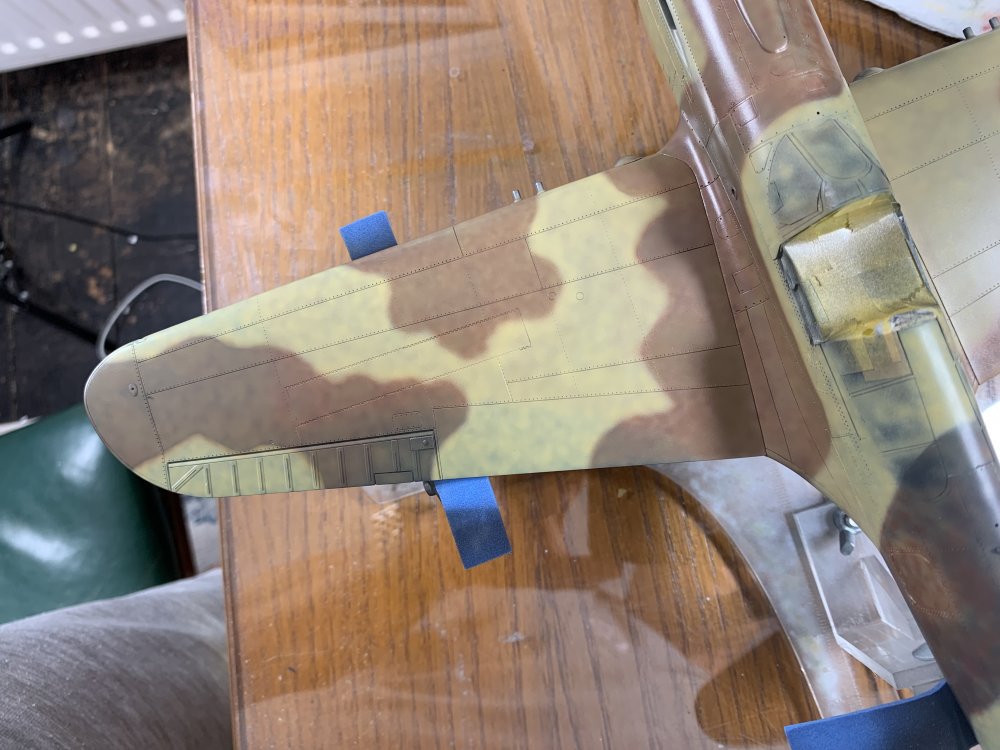
On holiday at moment so not modelling but i do have a few updates on what i did just before i left… In summary, it was make some changes, and then finding out about 2 seconds later that i had done it wrong! firstly, i did the middlestone overspray which i had thought was clearly visible on the port side, and i also did some educated guesswork for the starboard side Hopefully the pics are fairly self explanatory at this stage i was quite pleased with how it looked


-
thank you - my pleasure i did the step by step thing also to show people how easy it is with decent masks and decent paint, there is no reason why anyone couldn't do this (or better) to emphasize, it's done one colour after the other with no breaks at all - i'm only pausing to change colours in the airbrush - that gives you more than enough time for the MRP to dry N
-
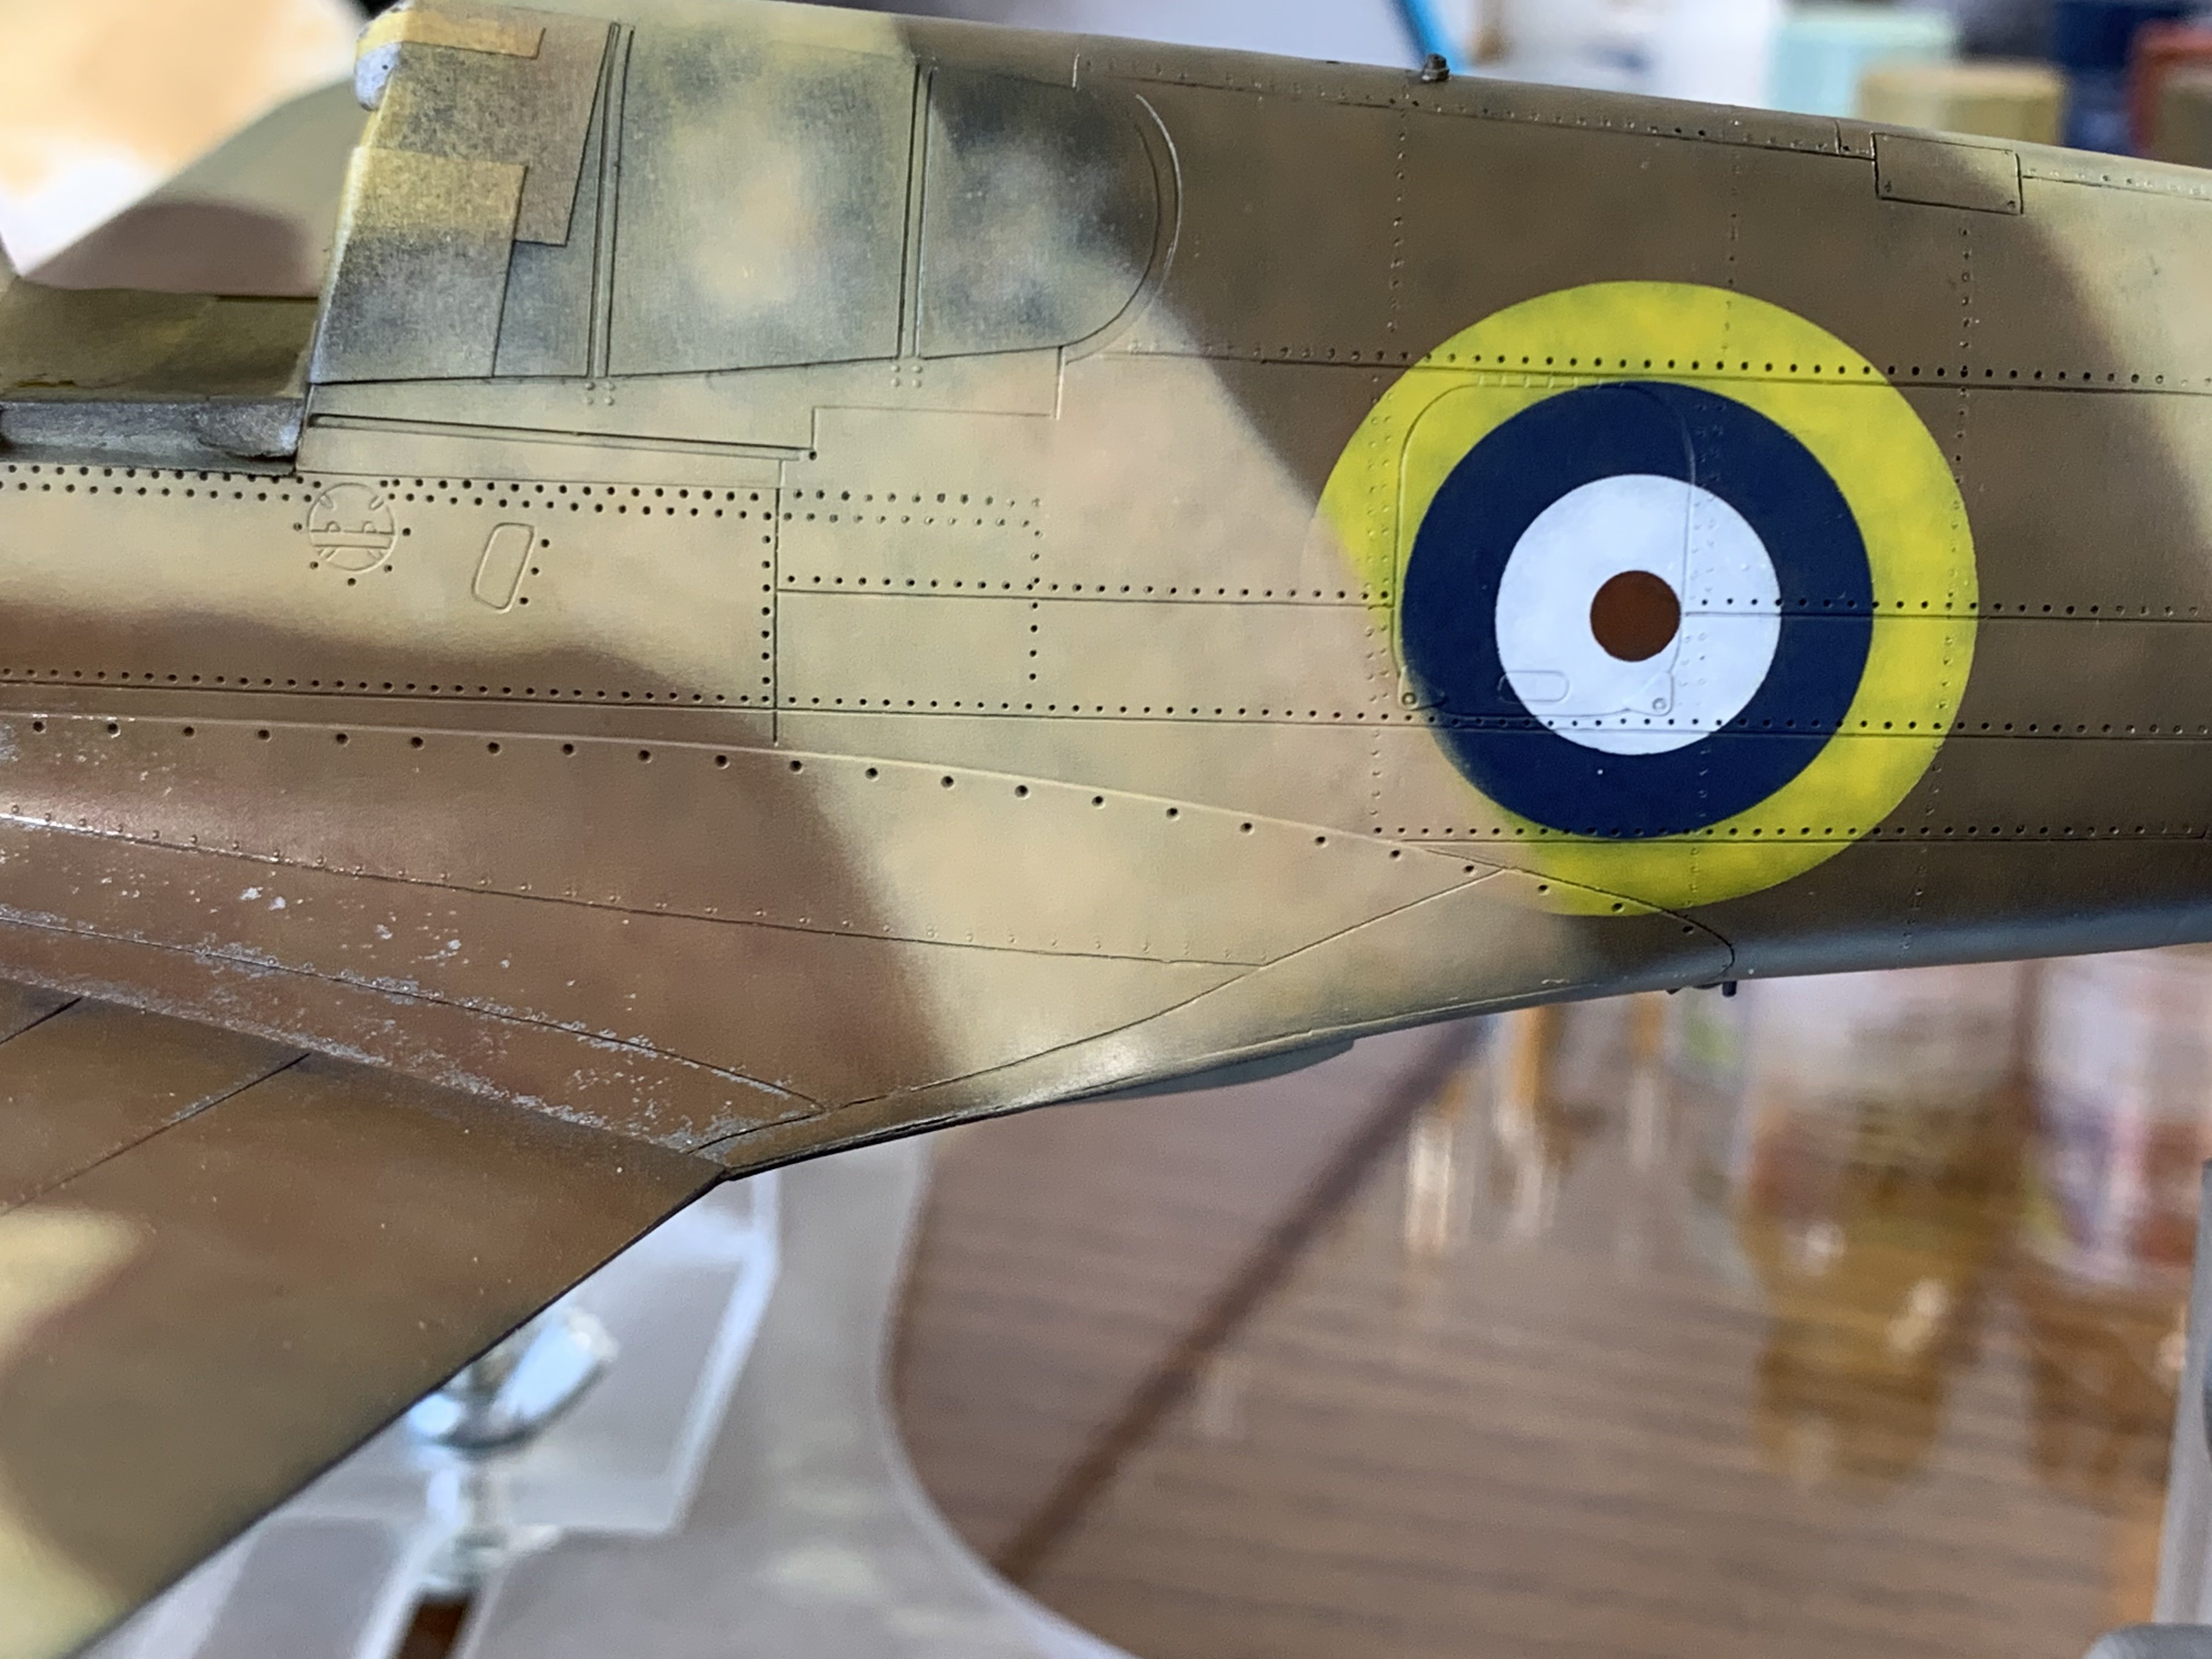
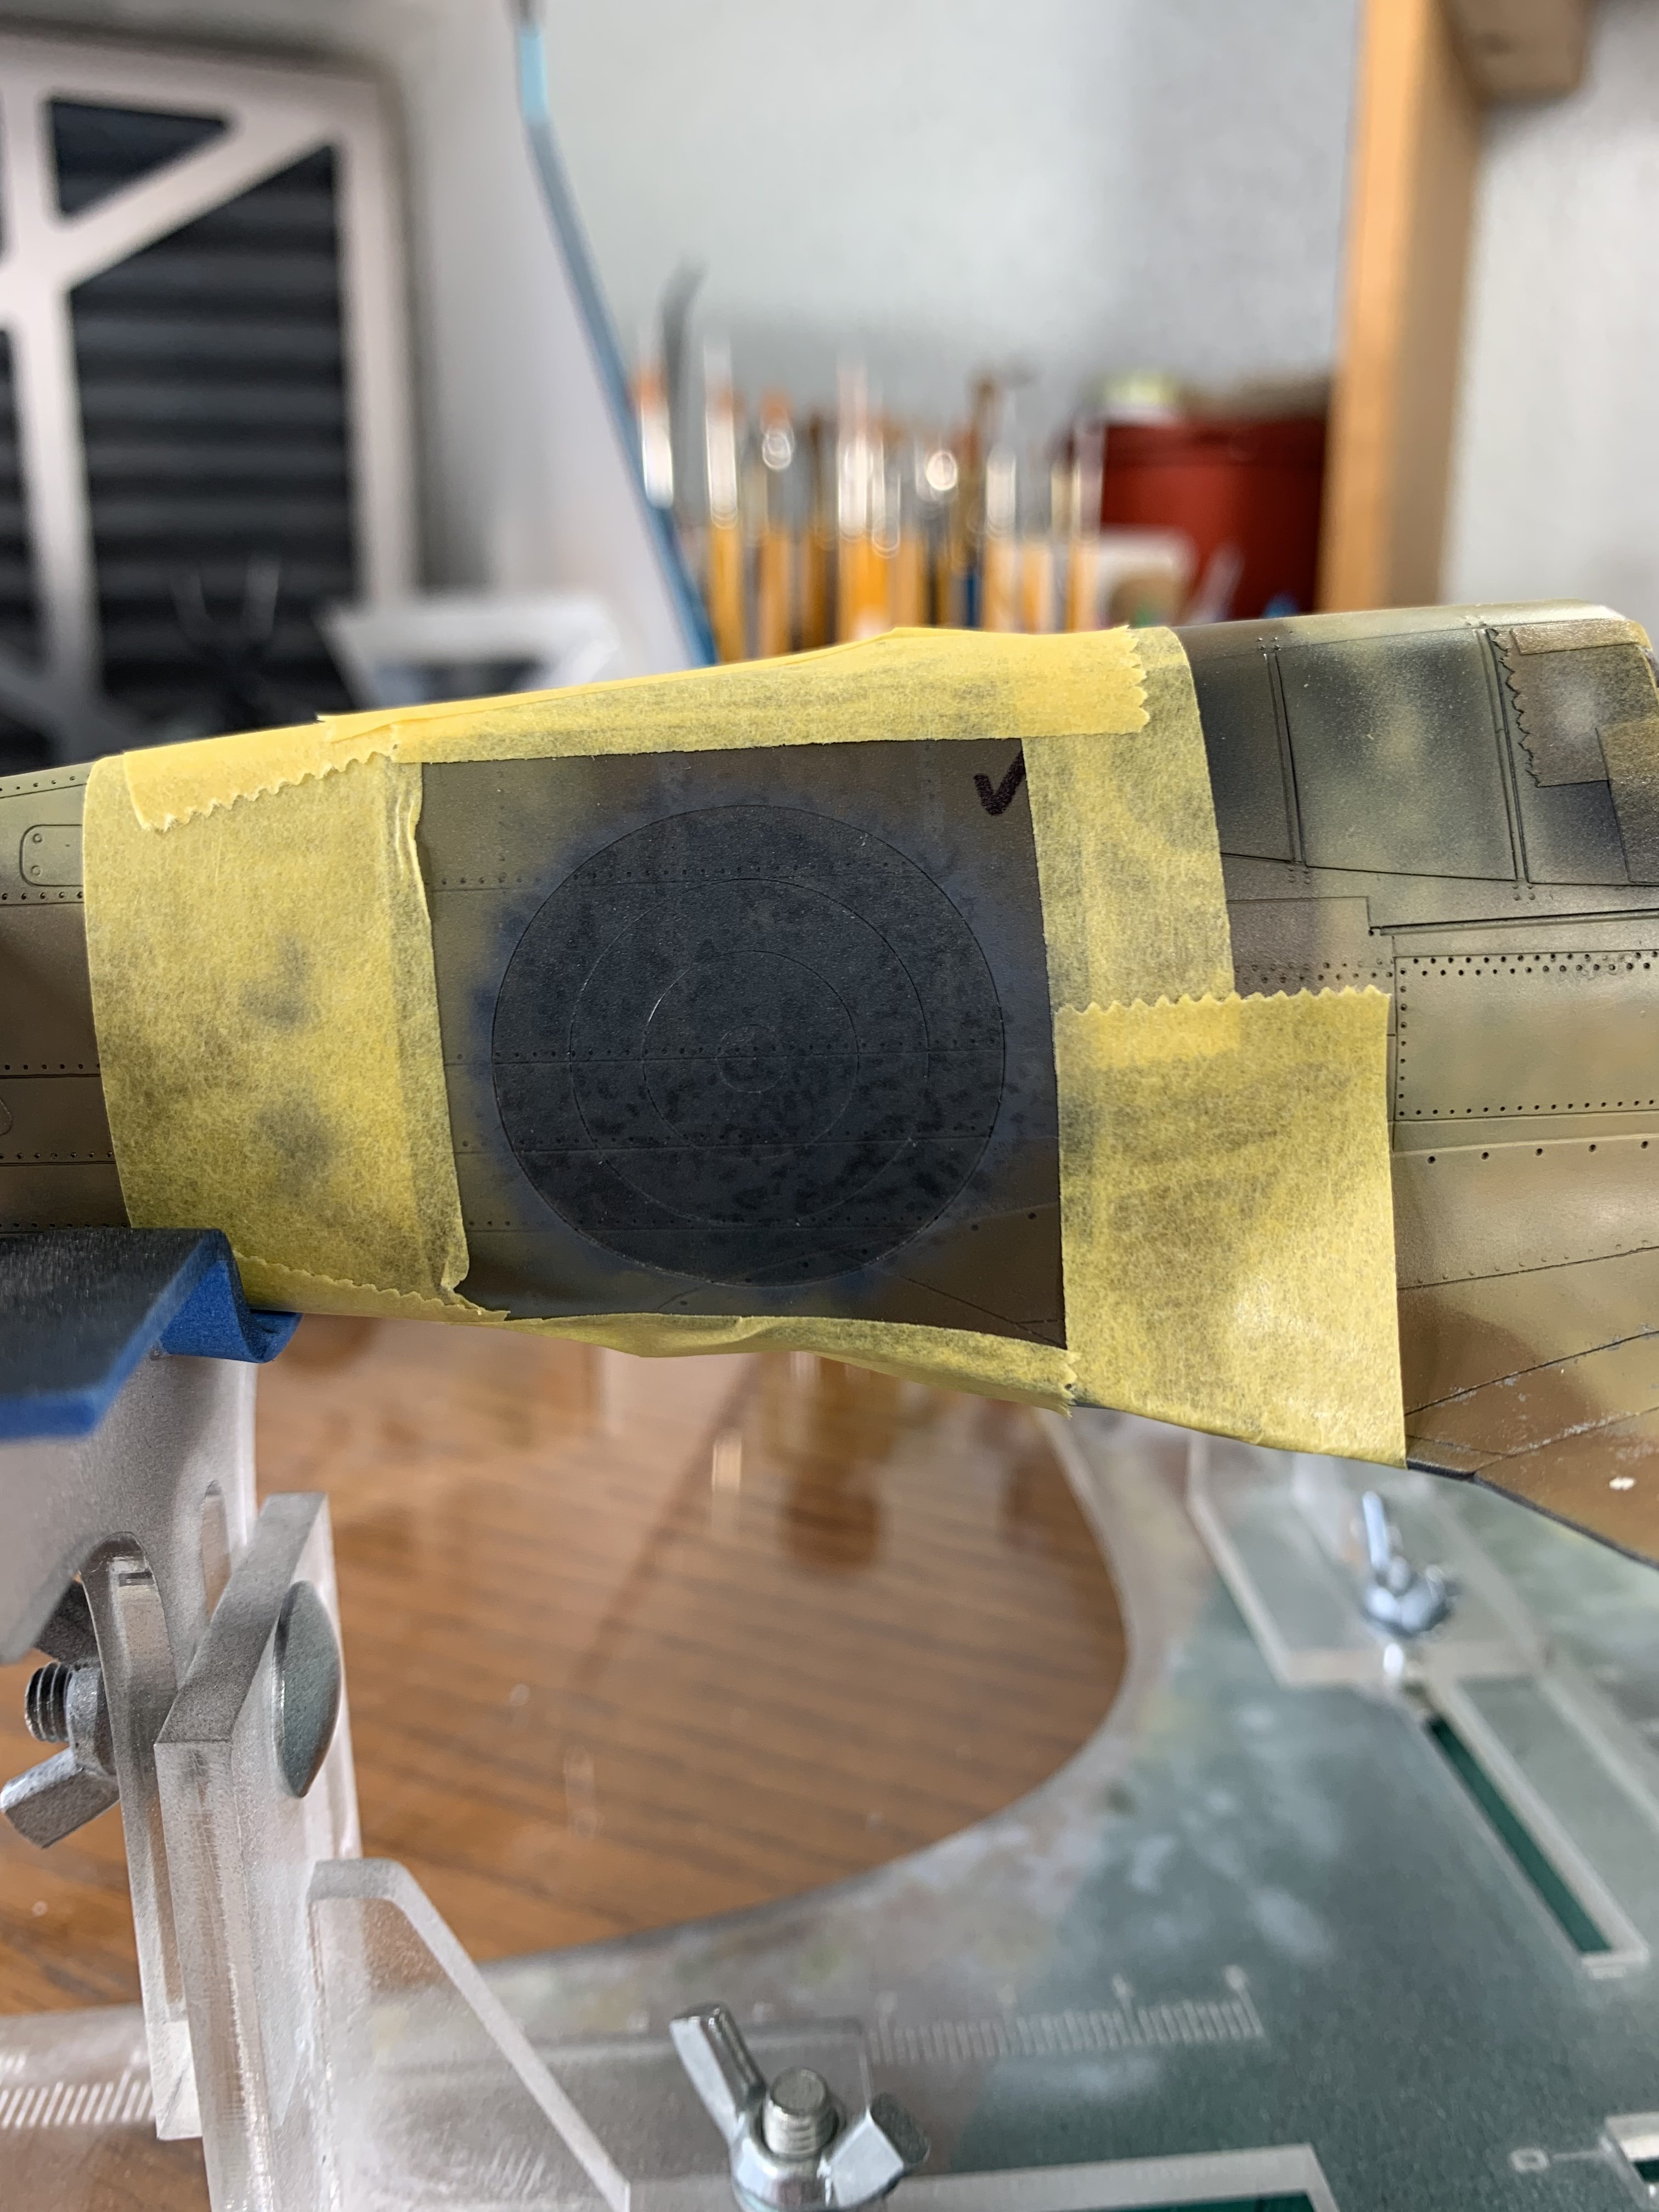
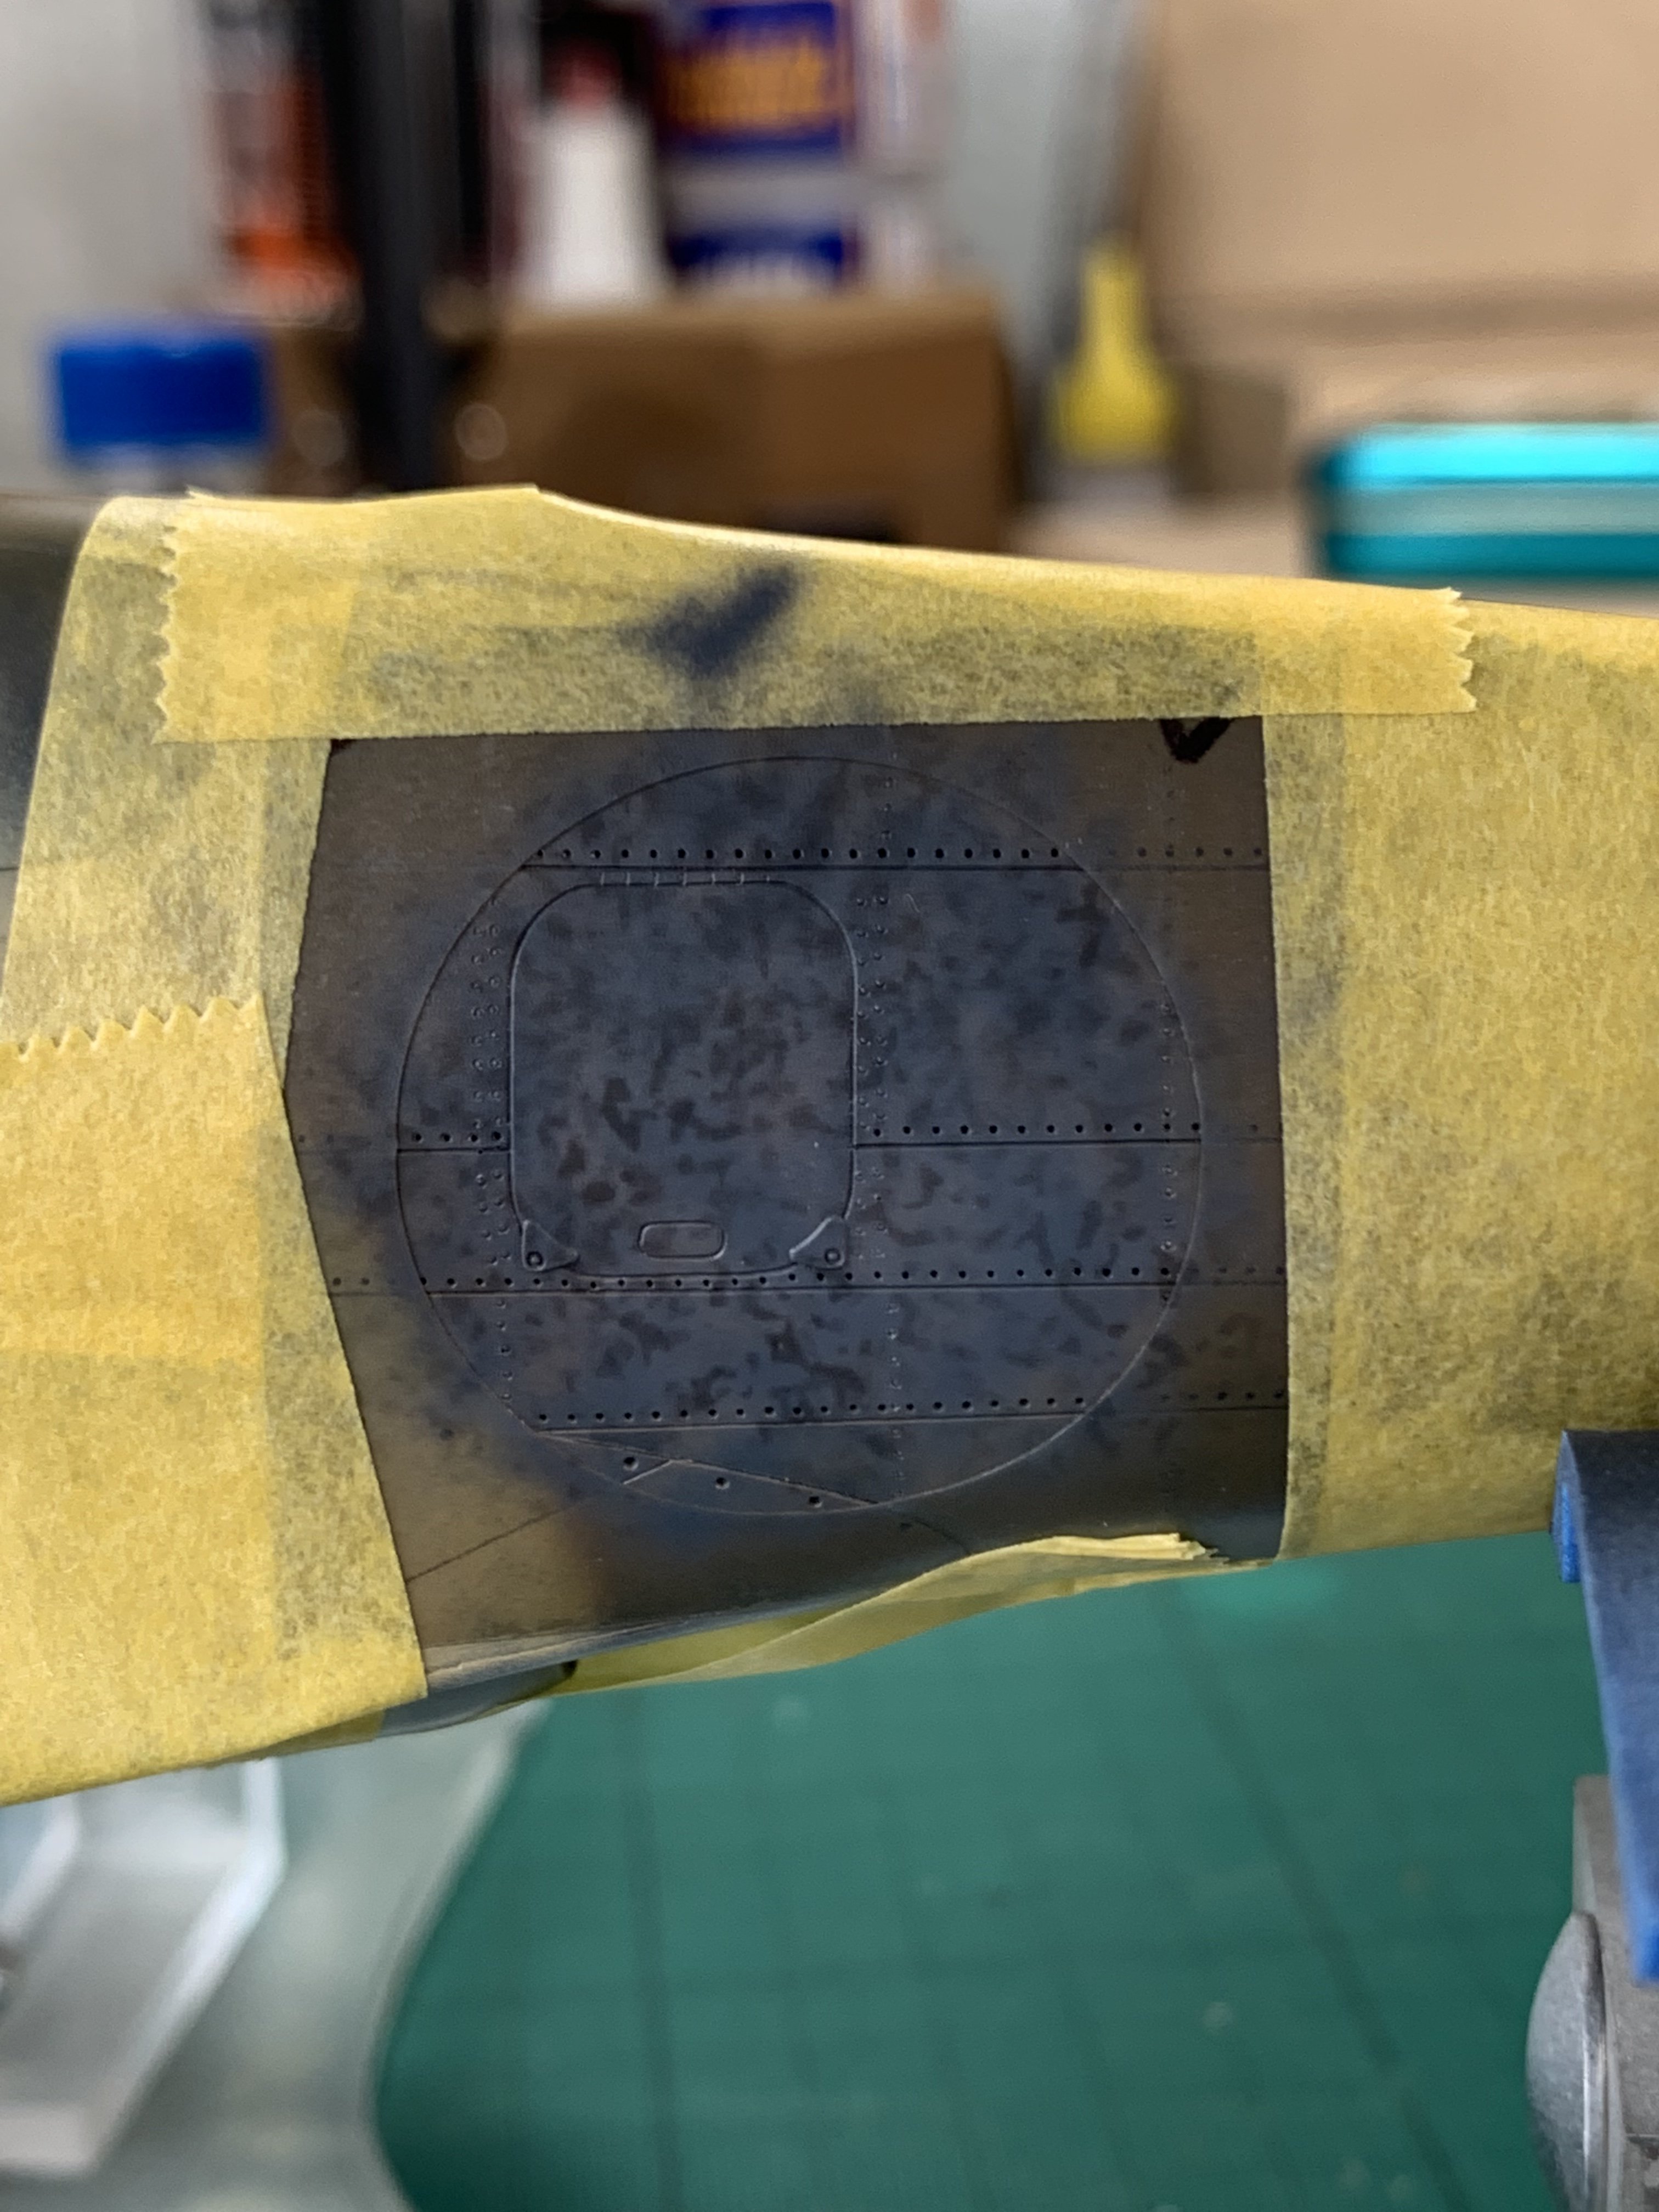
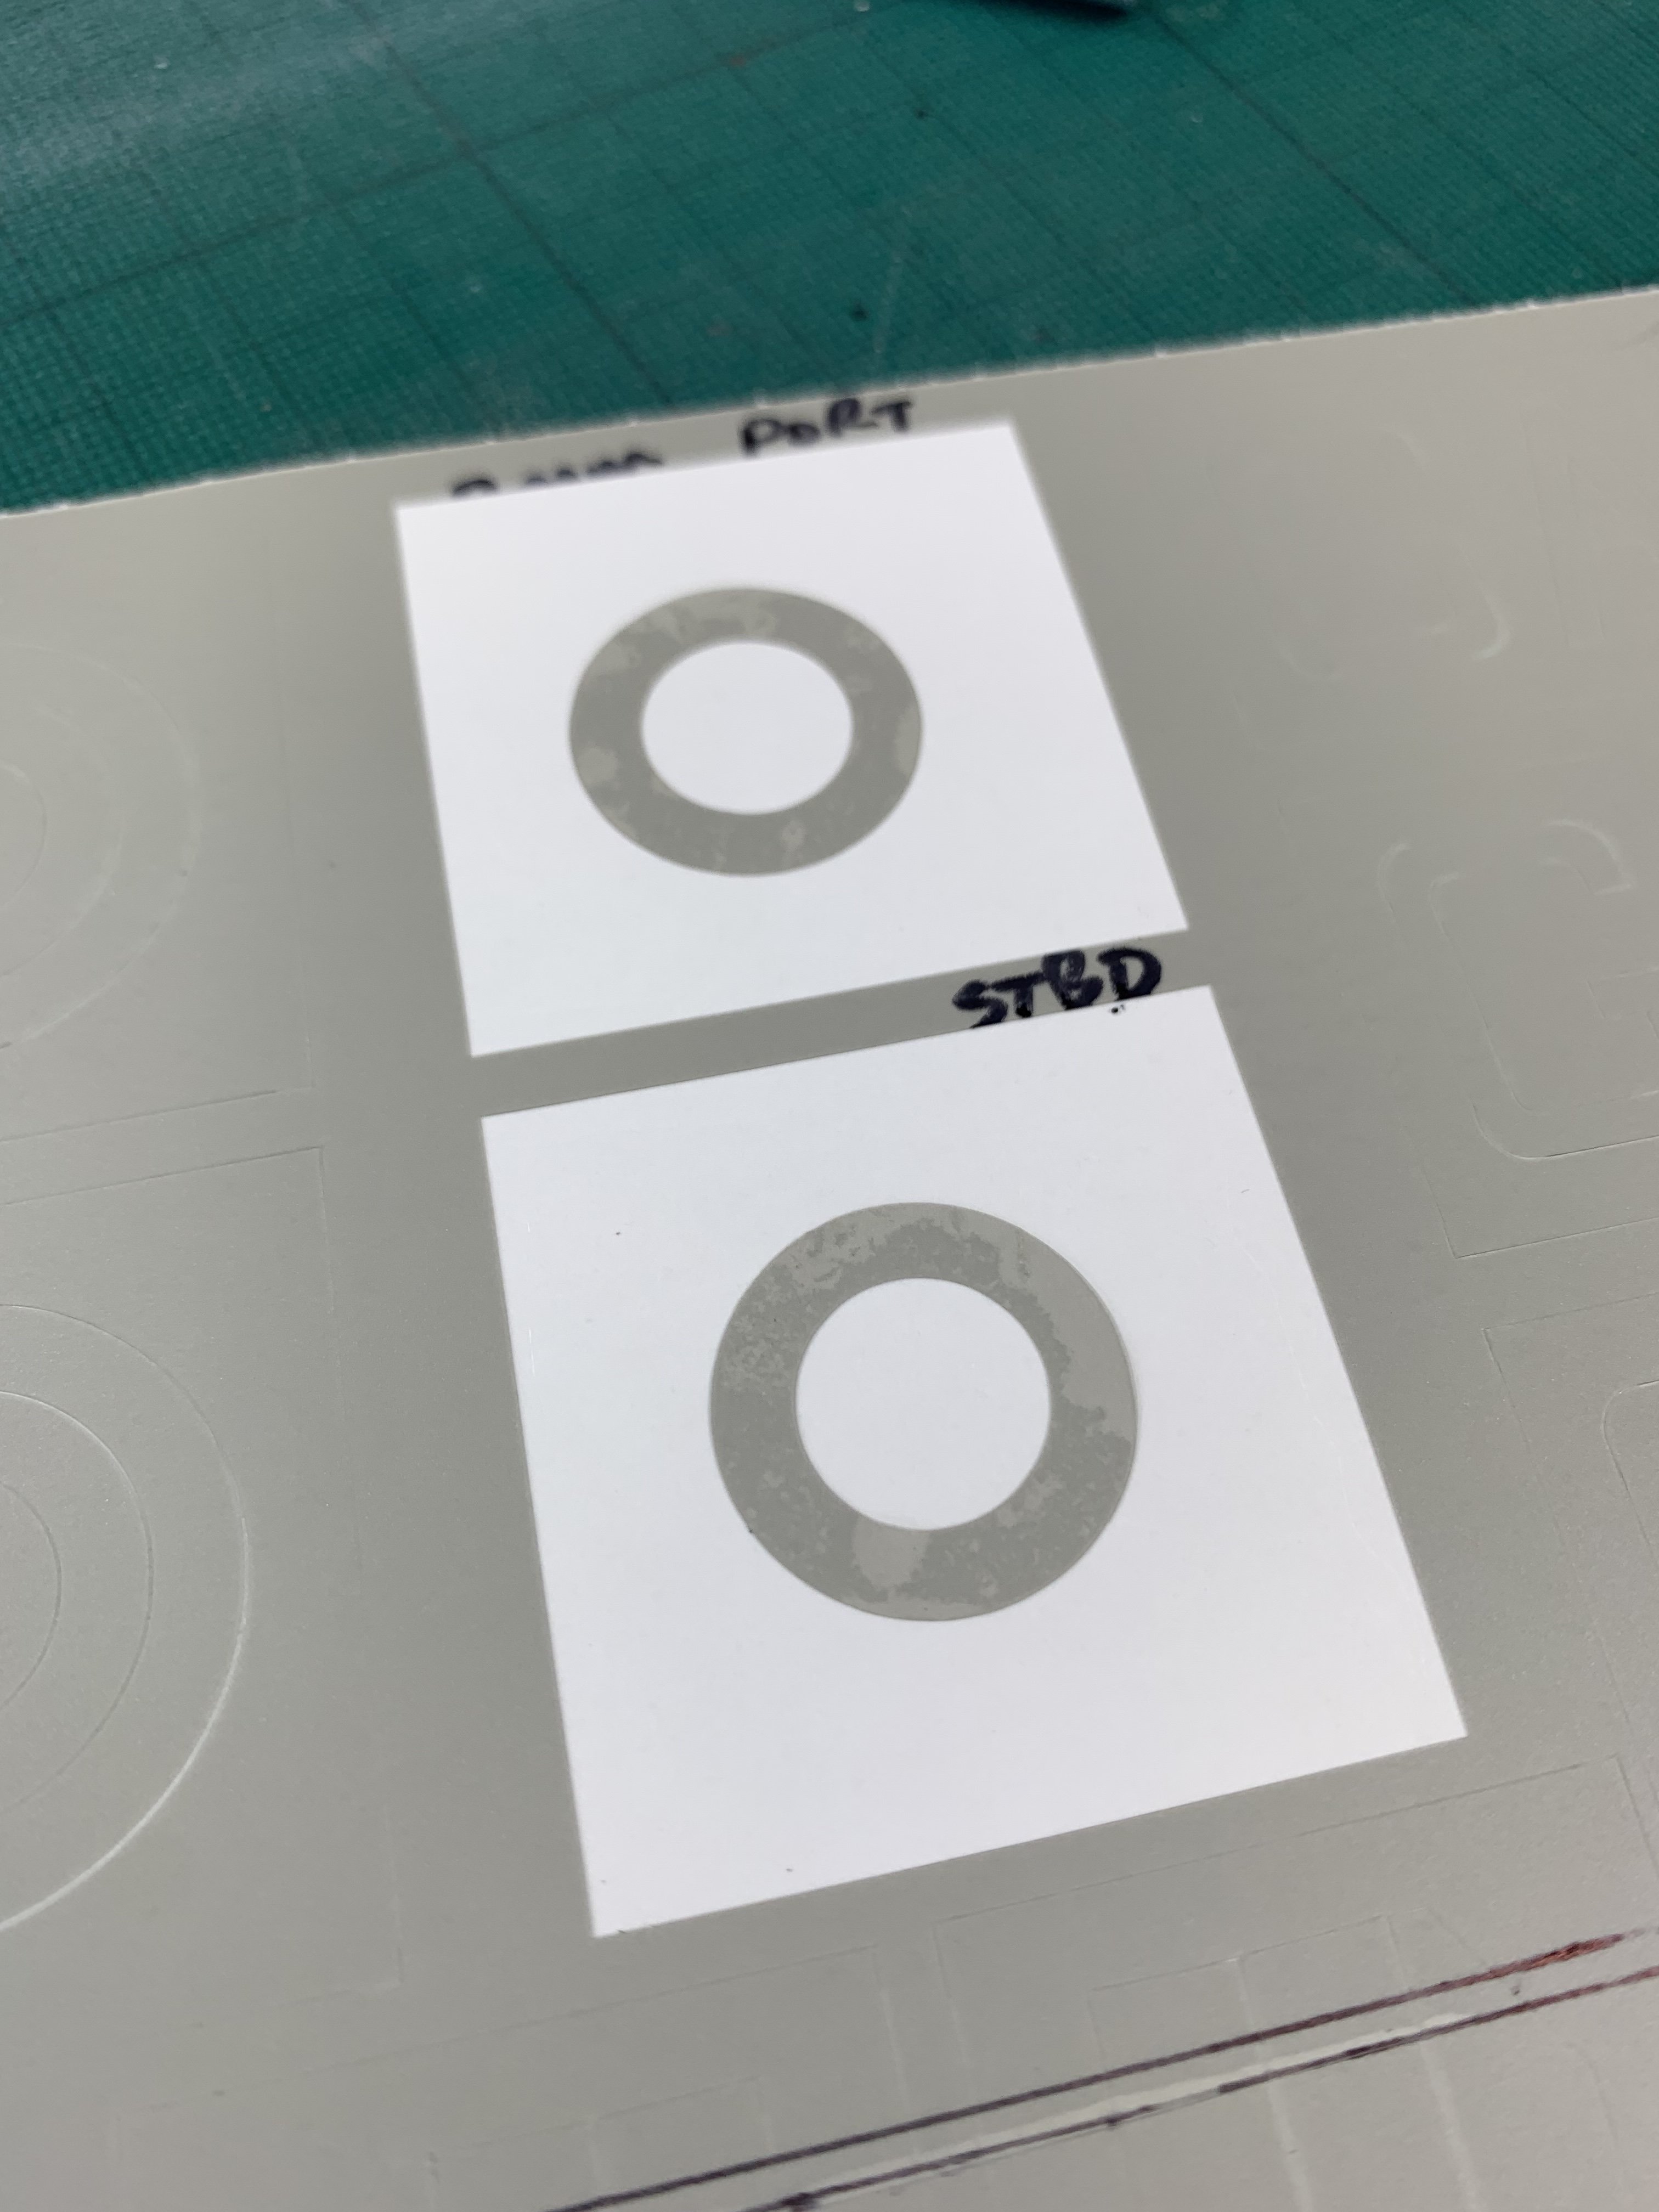
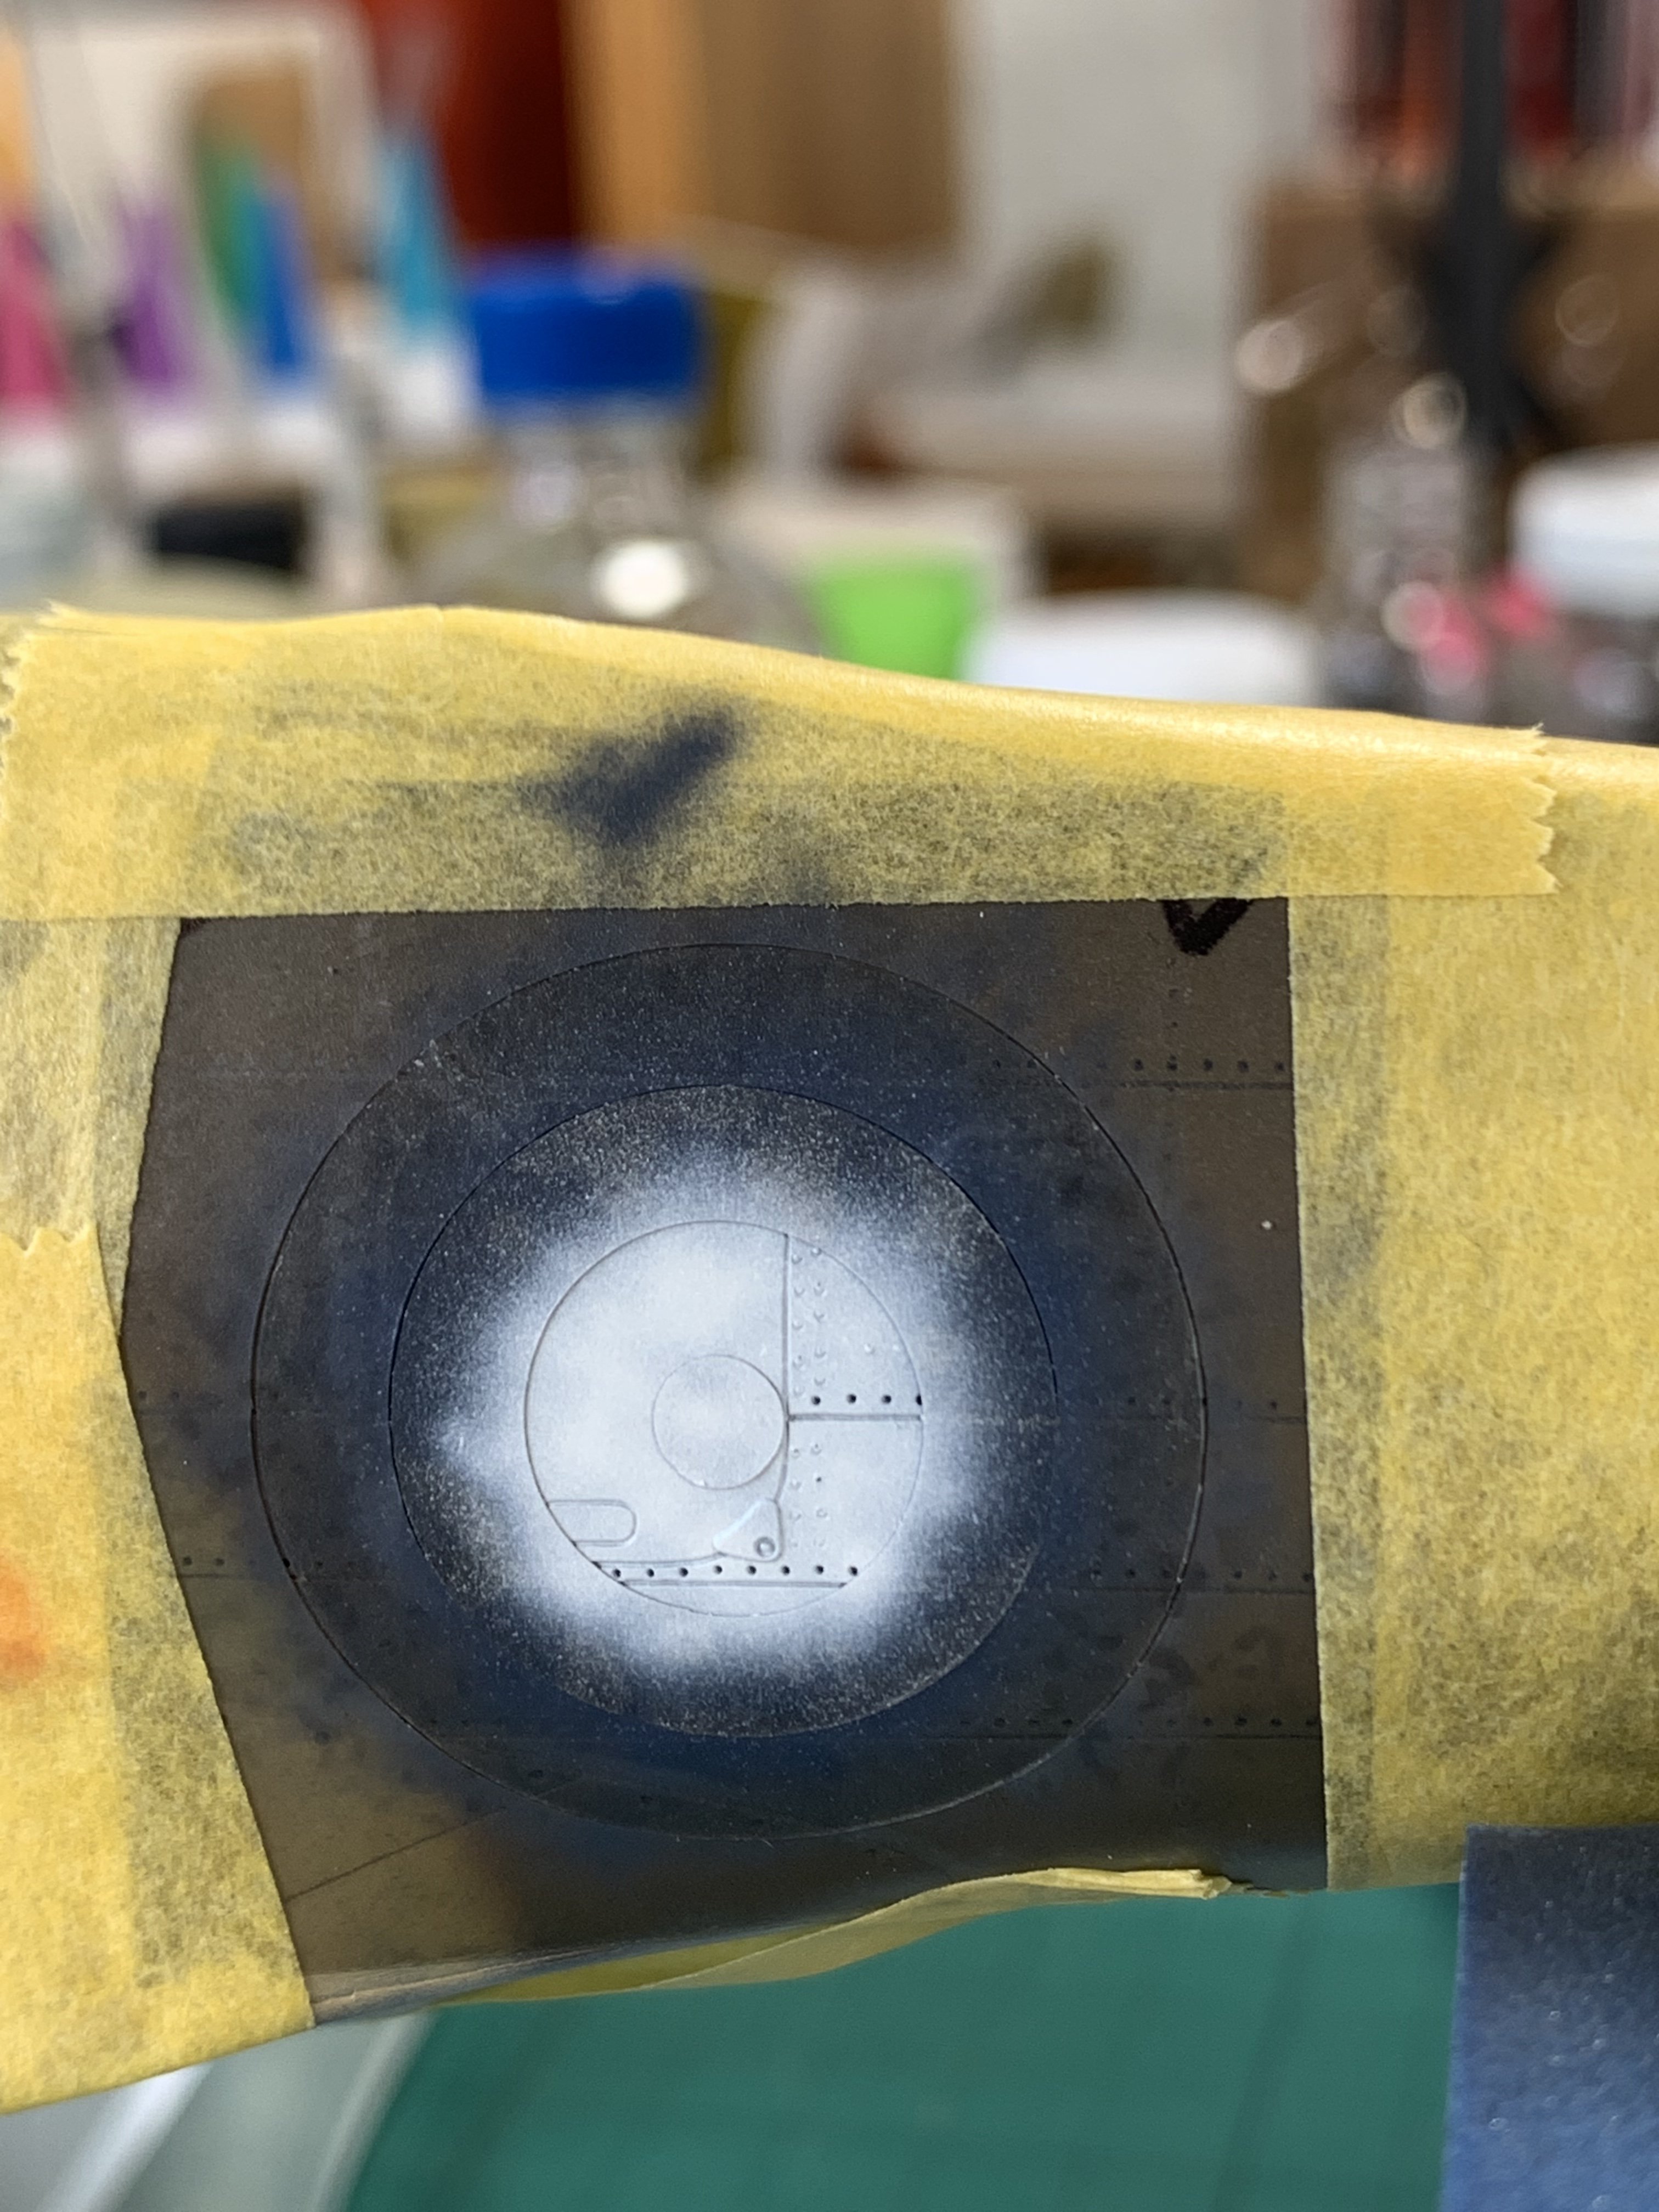
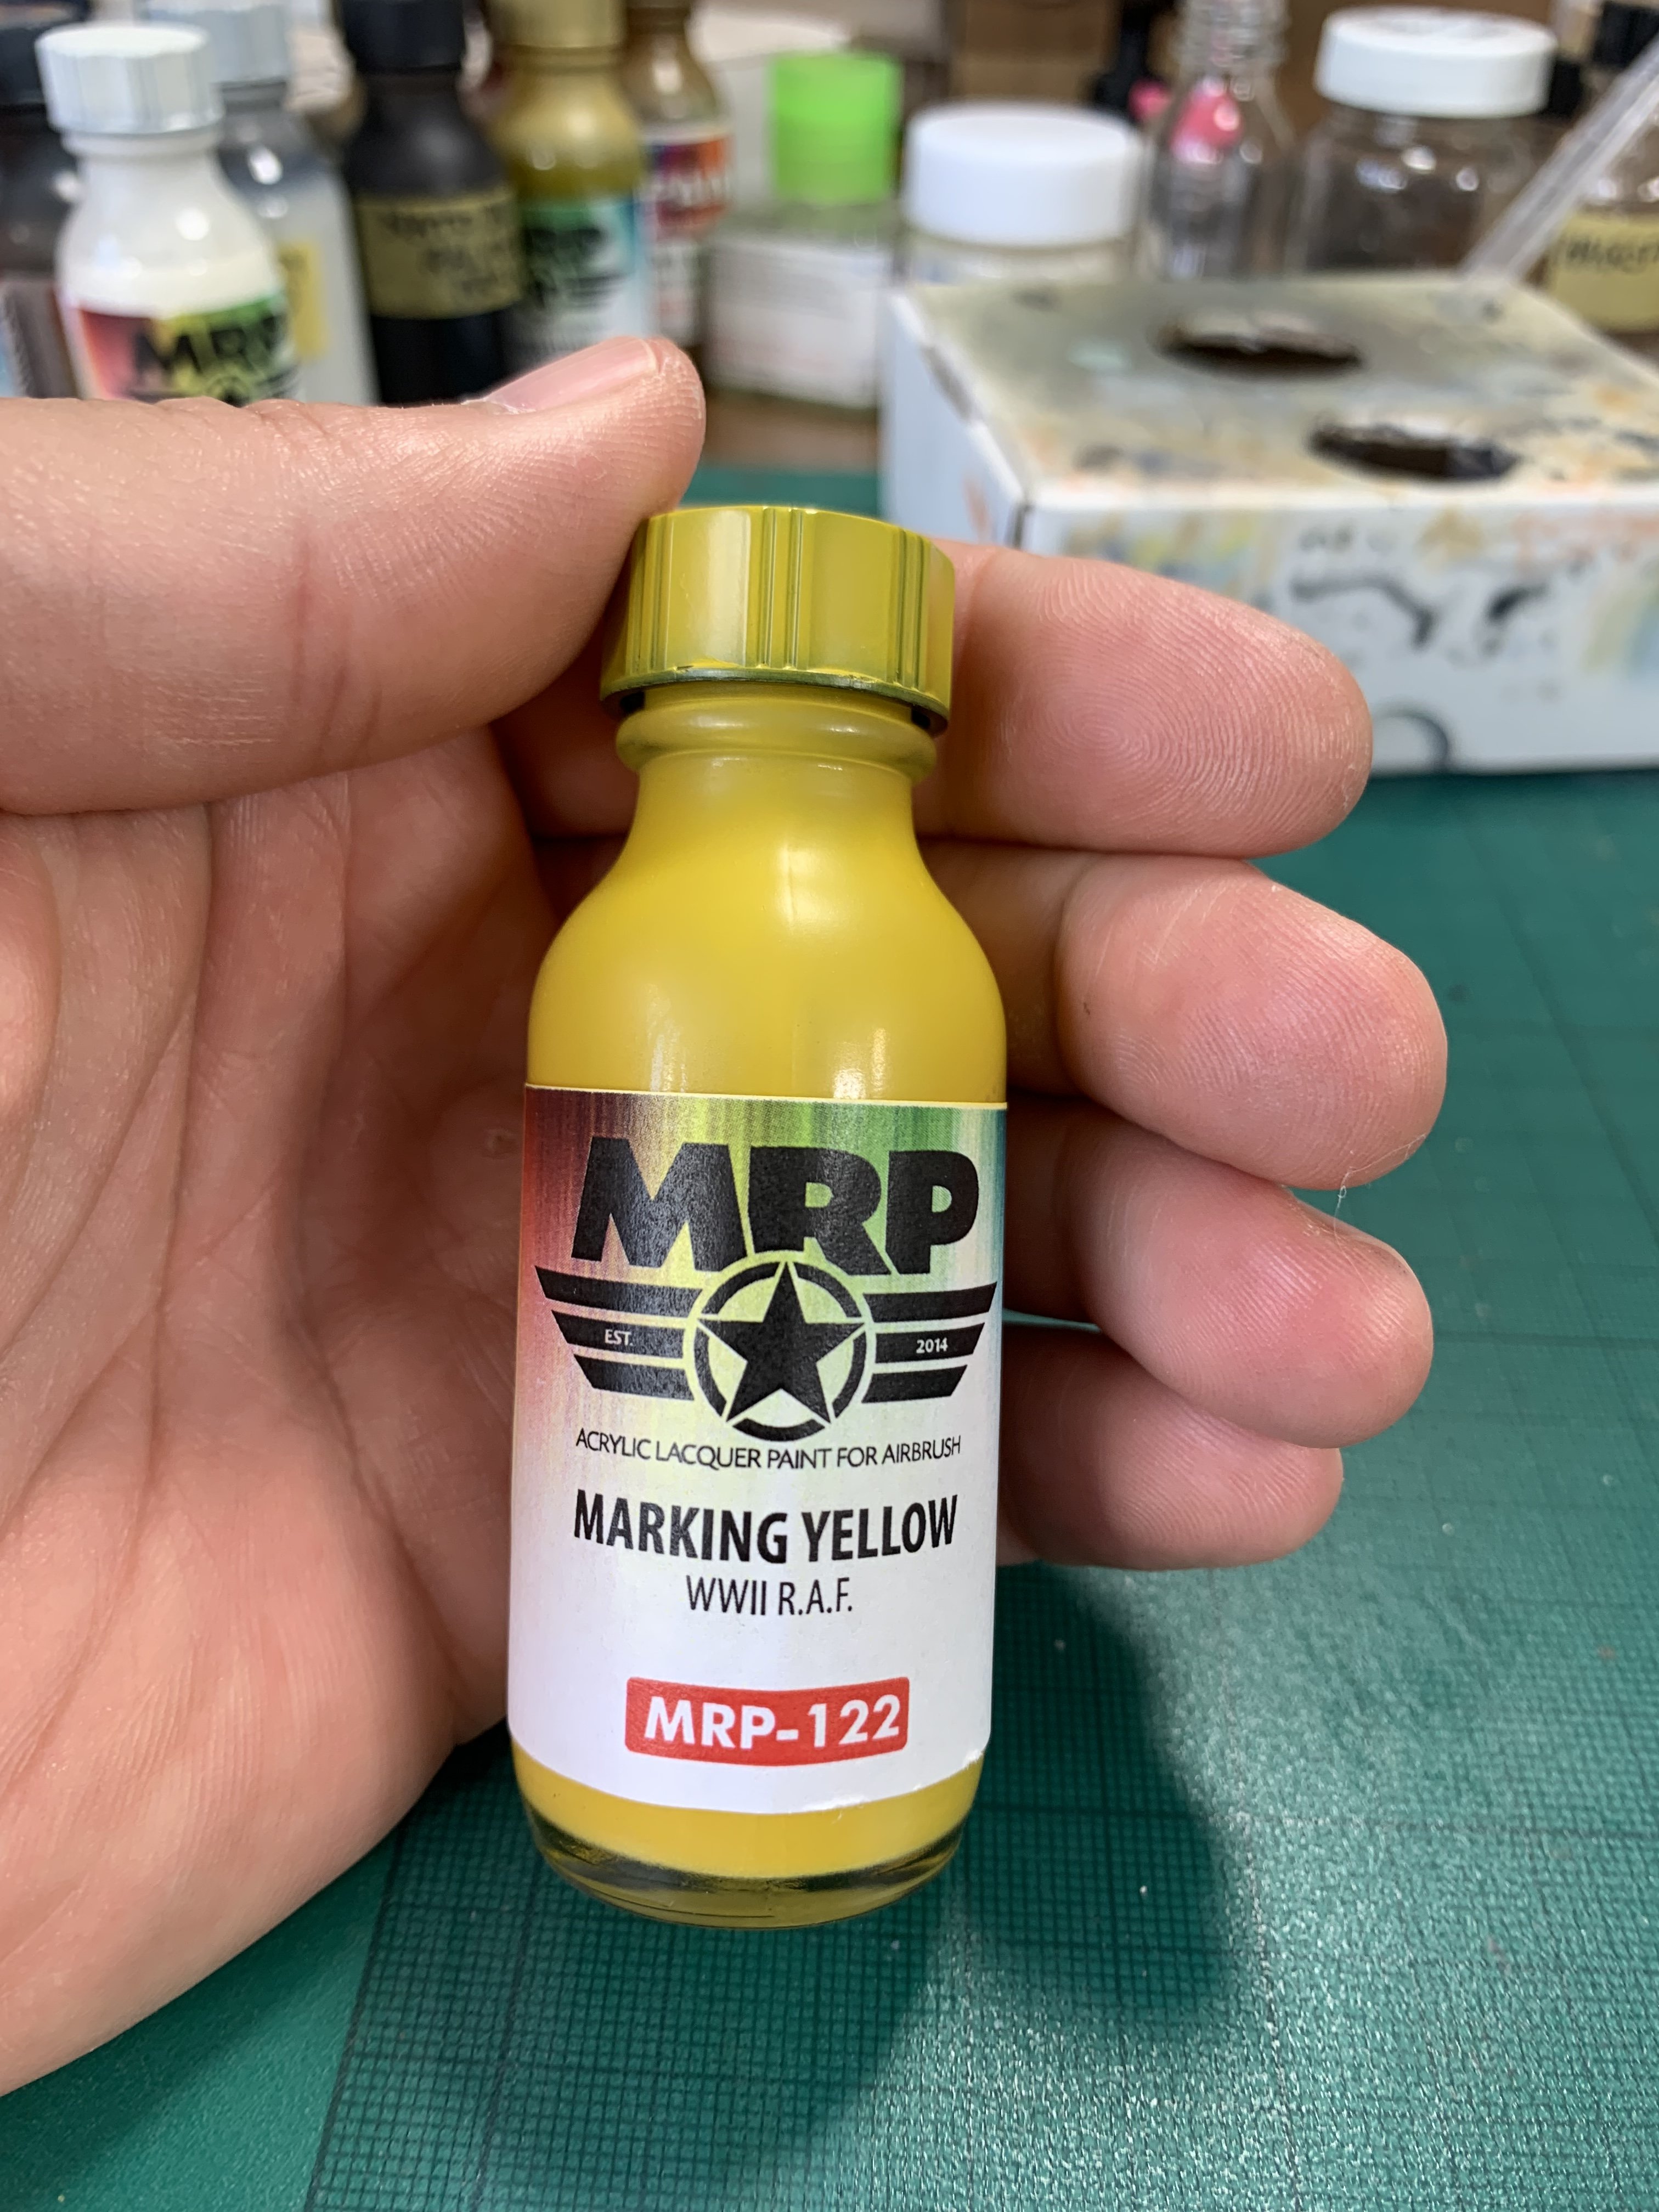
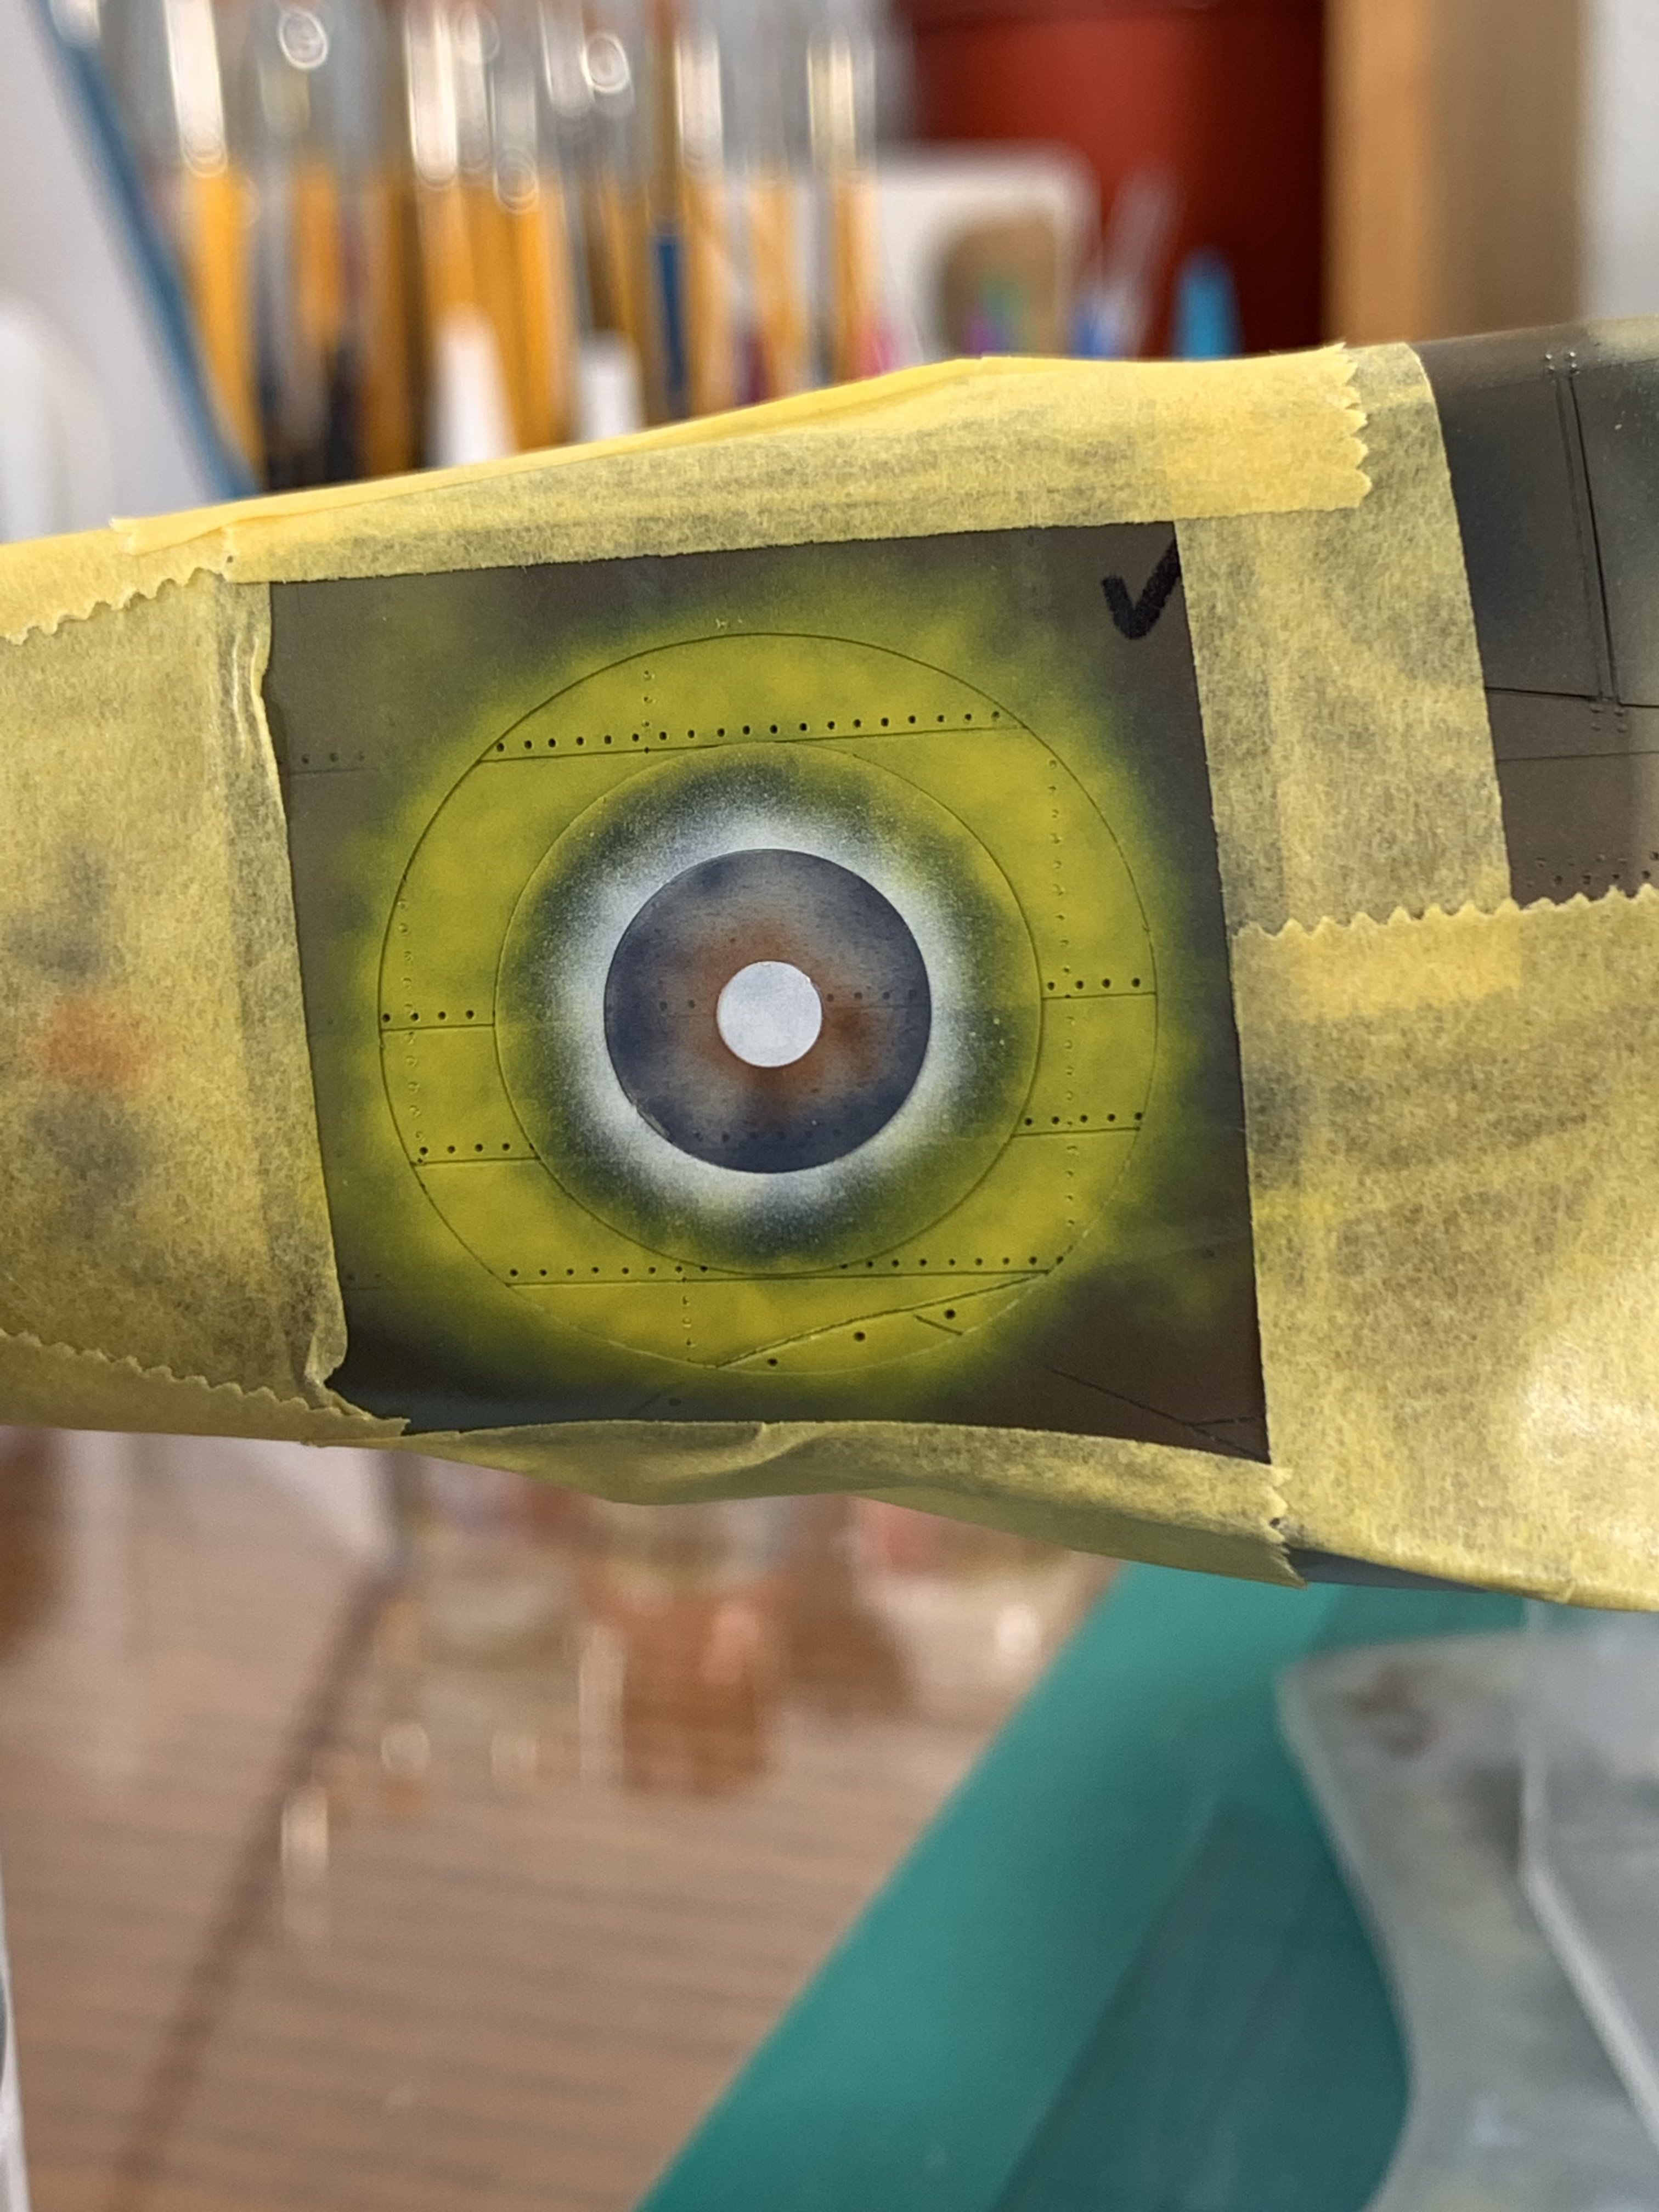
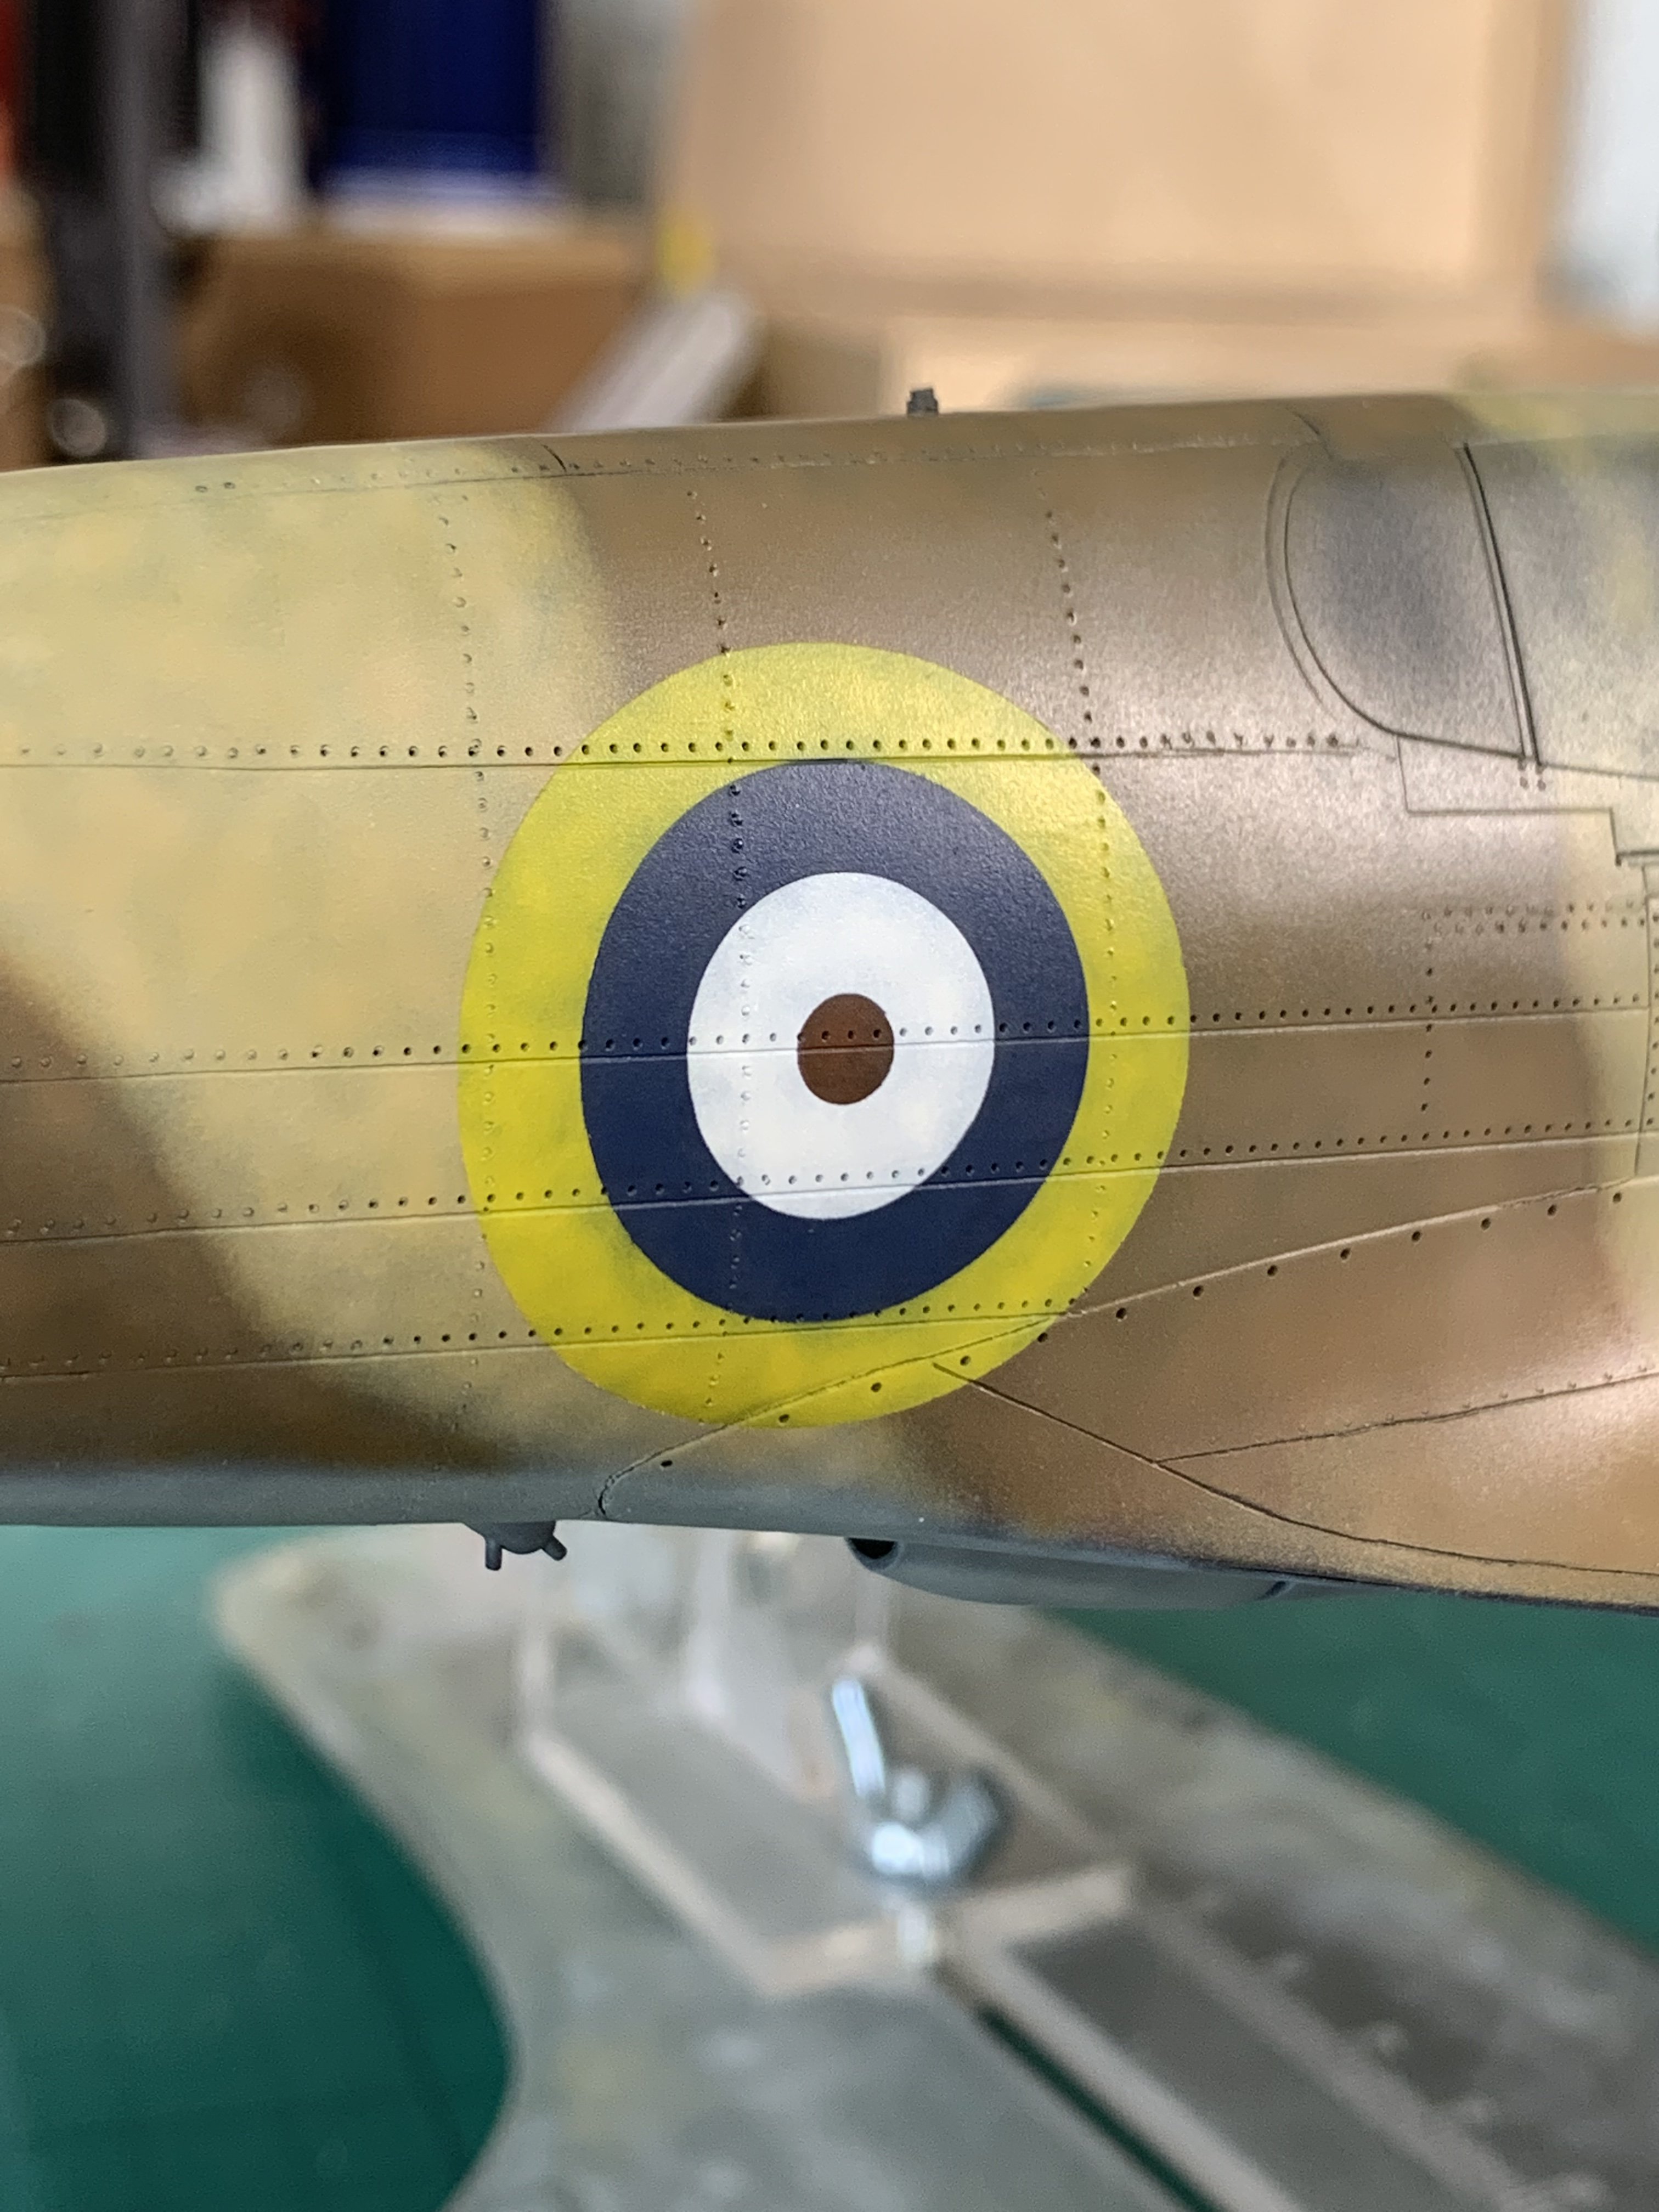
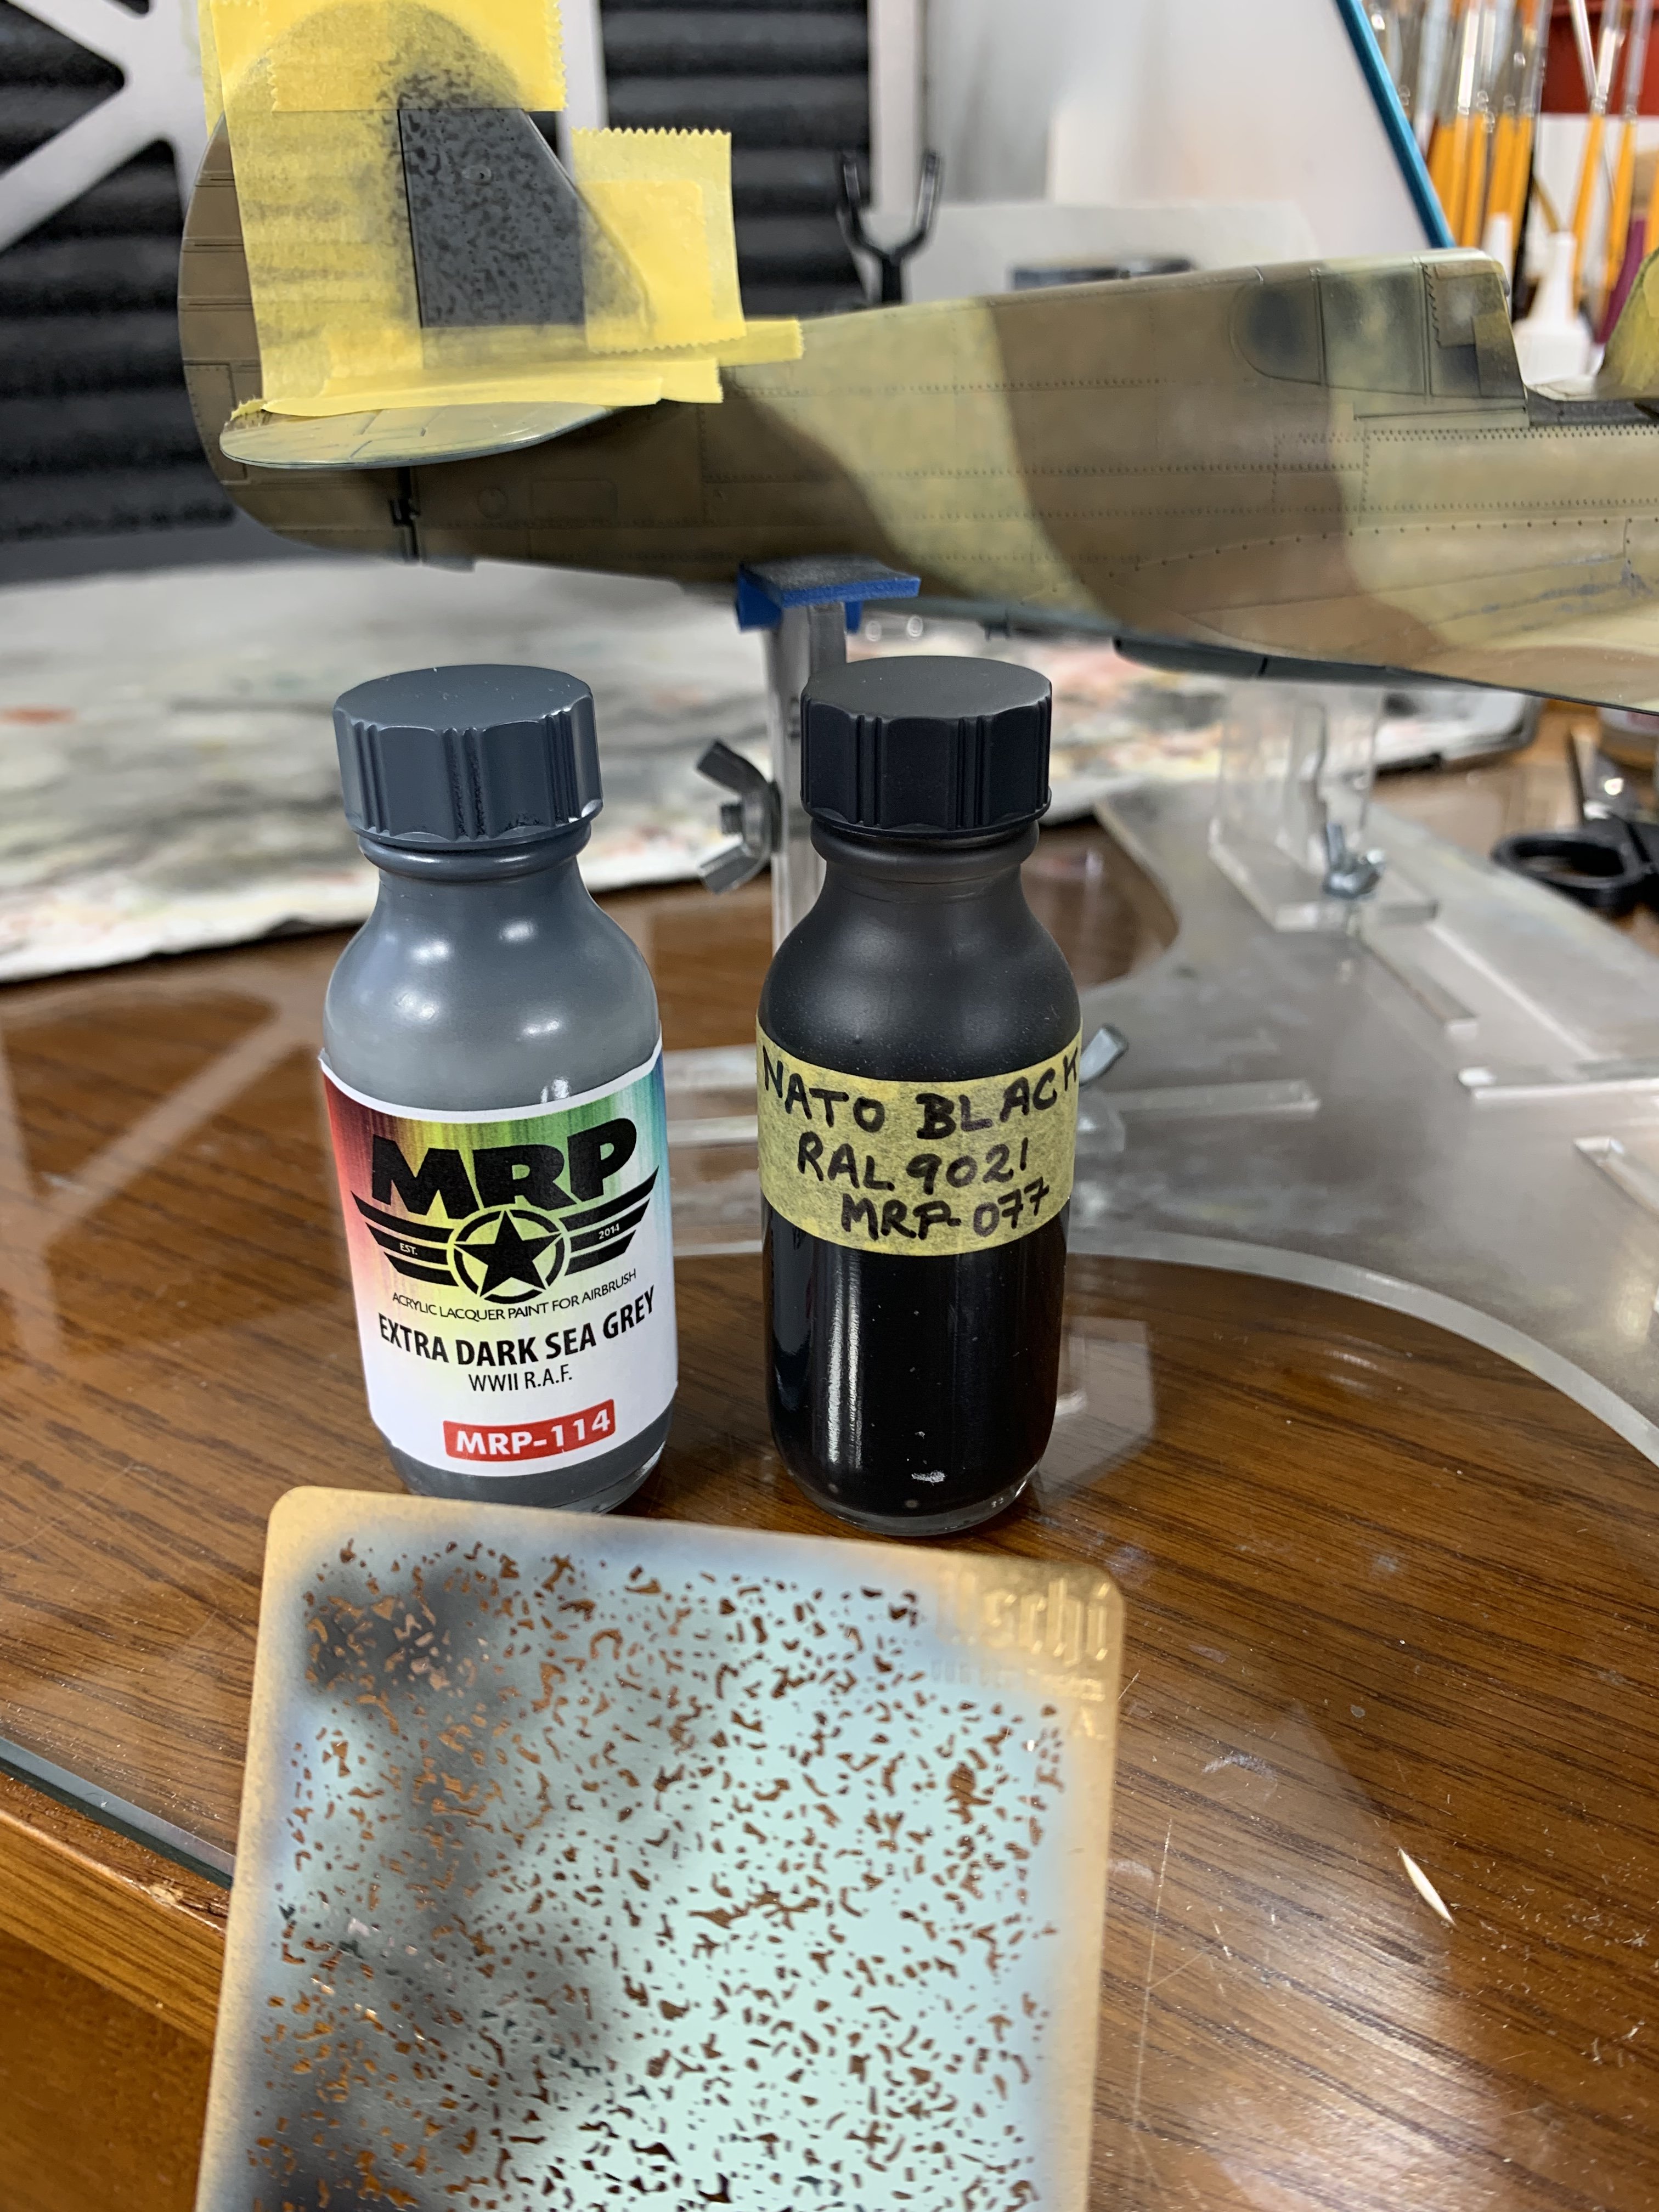
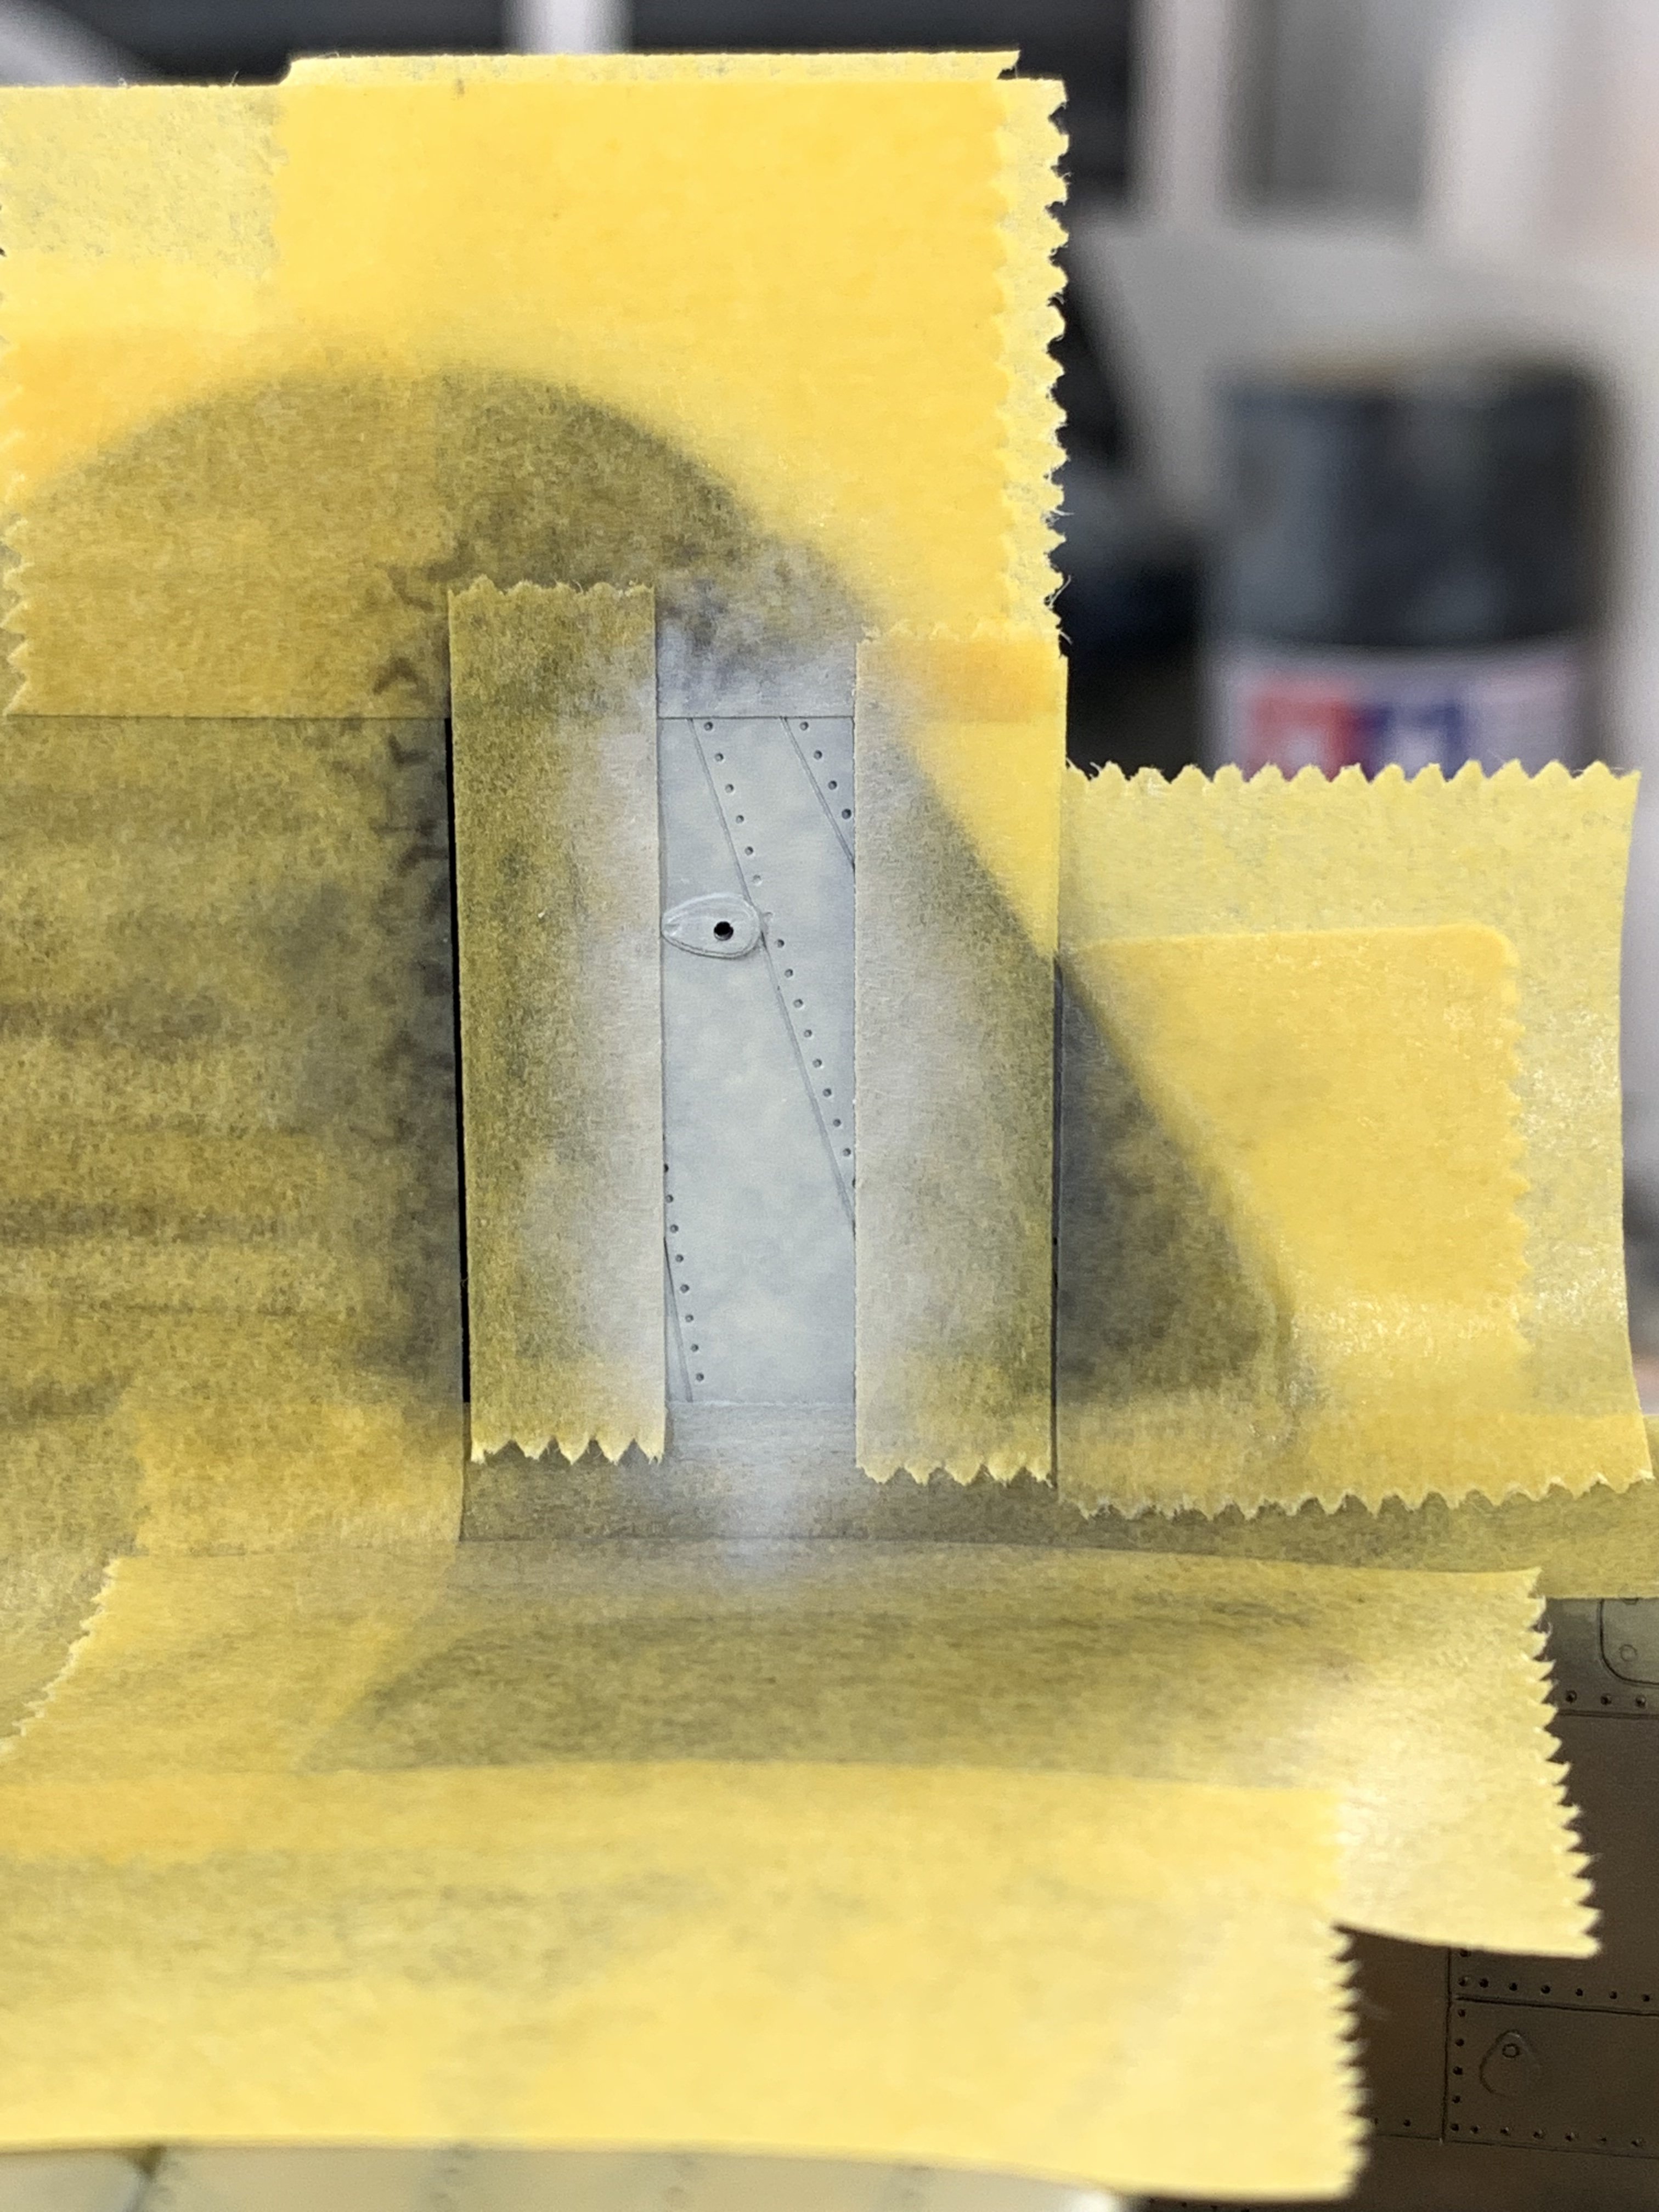
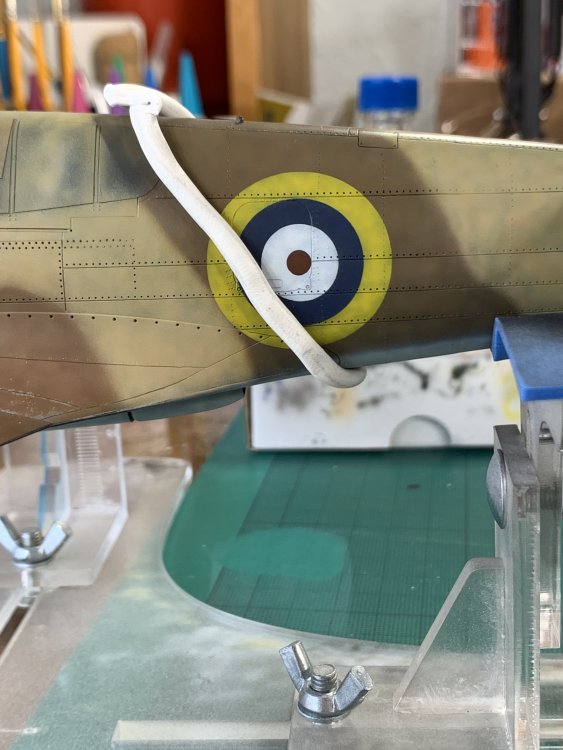
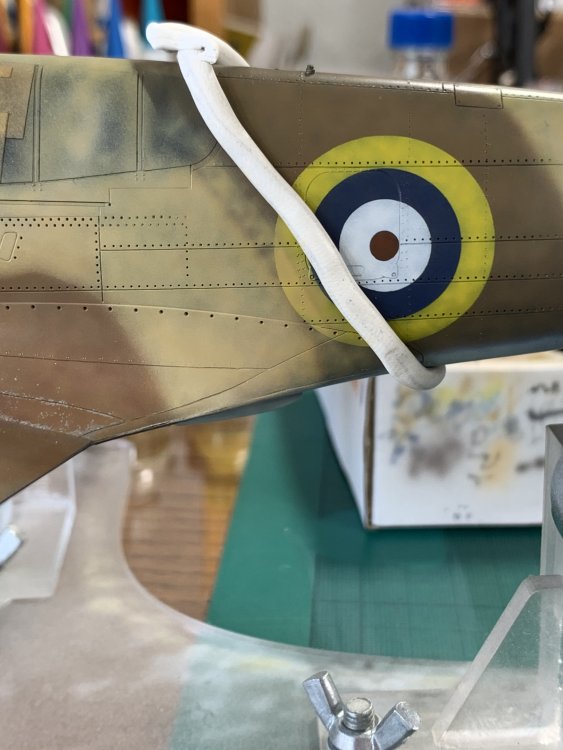
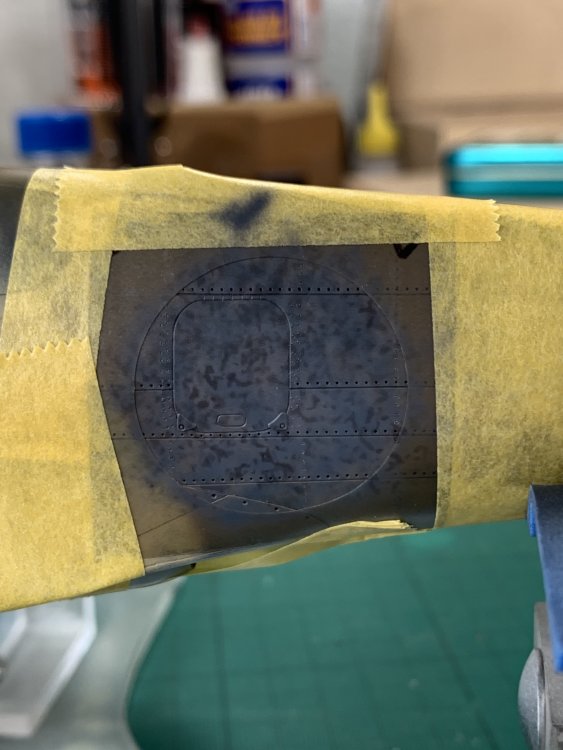
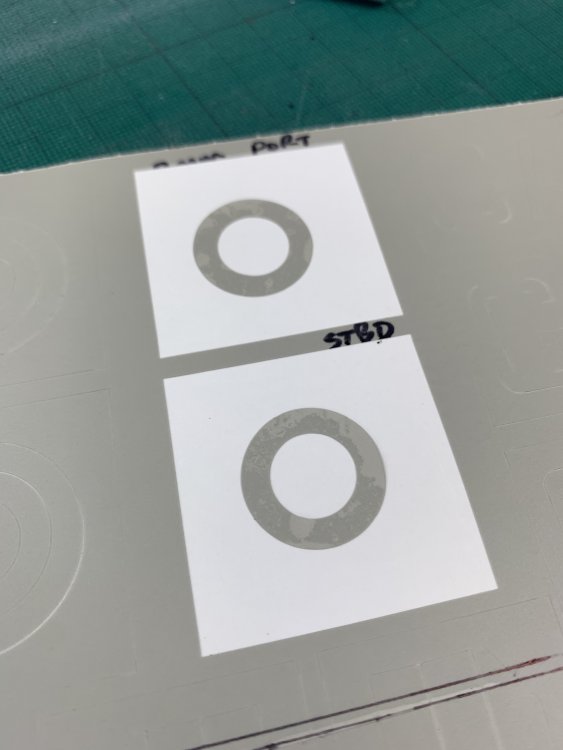
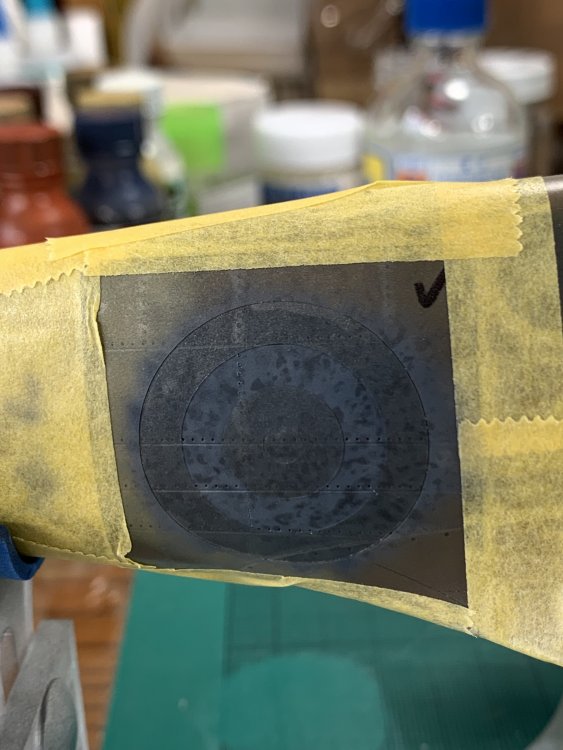
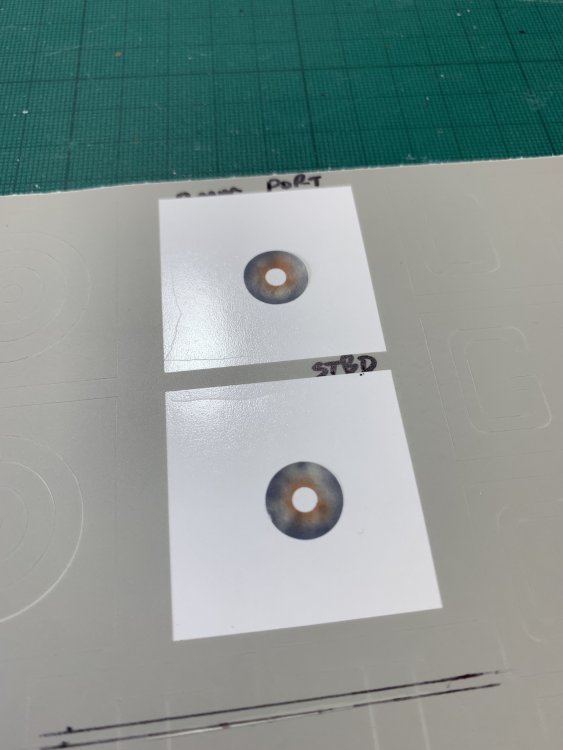
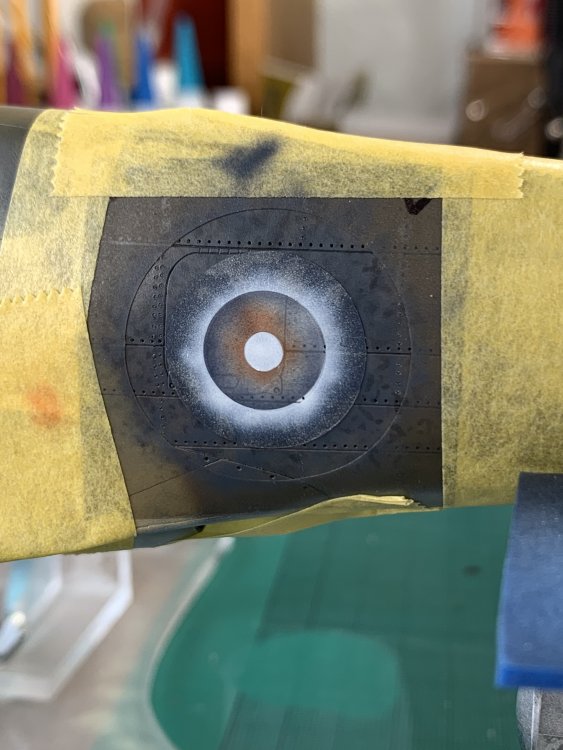
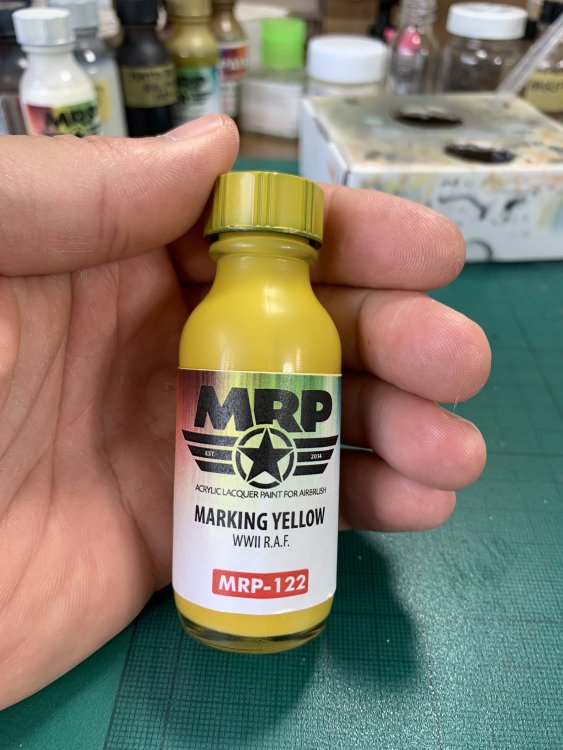
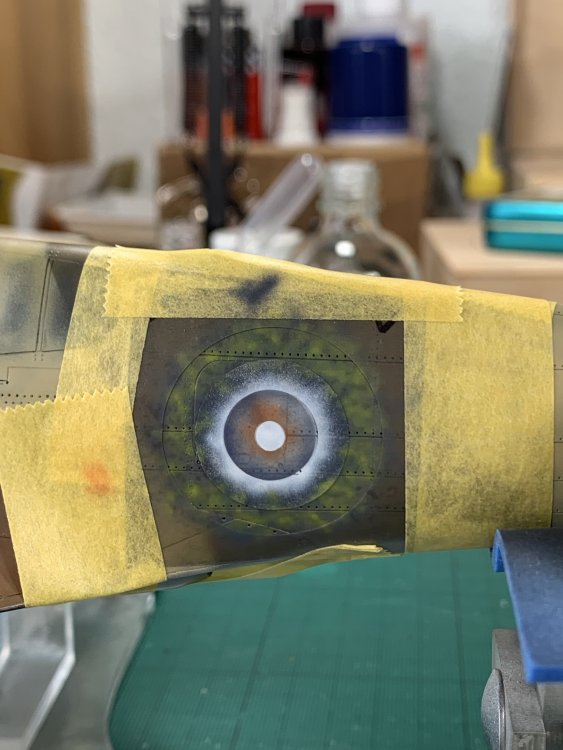
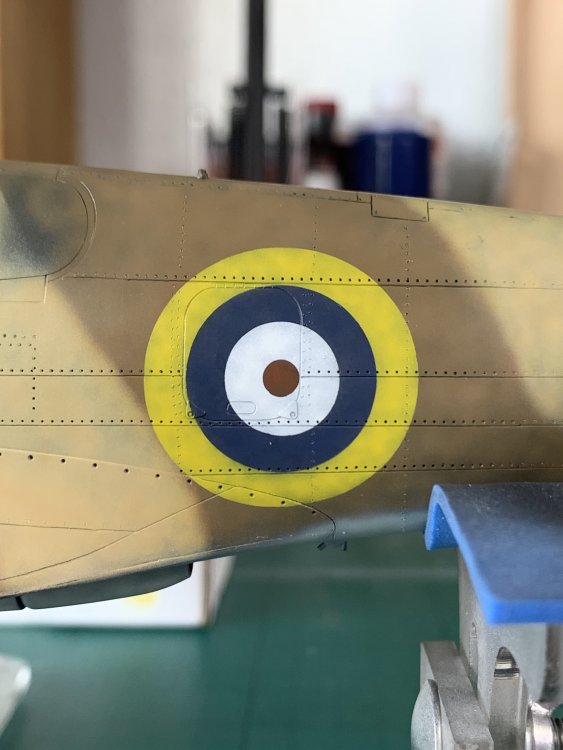
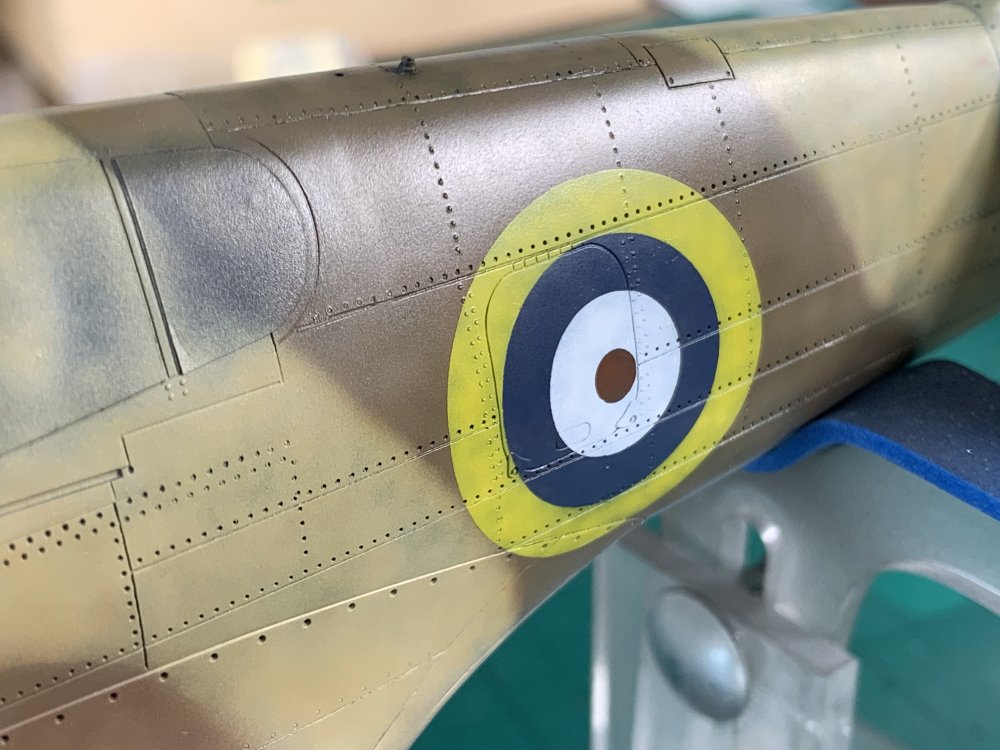
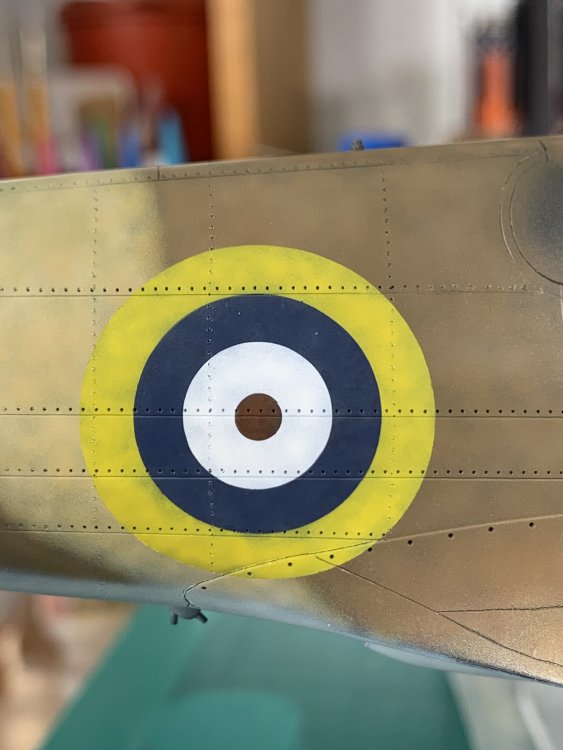
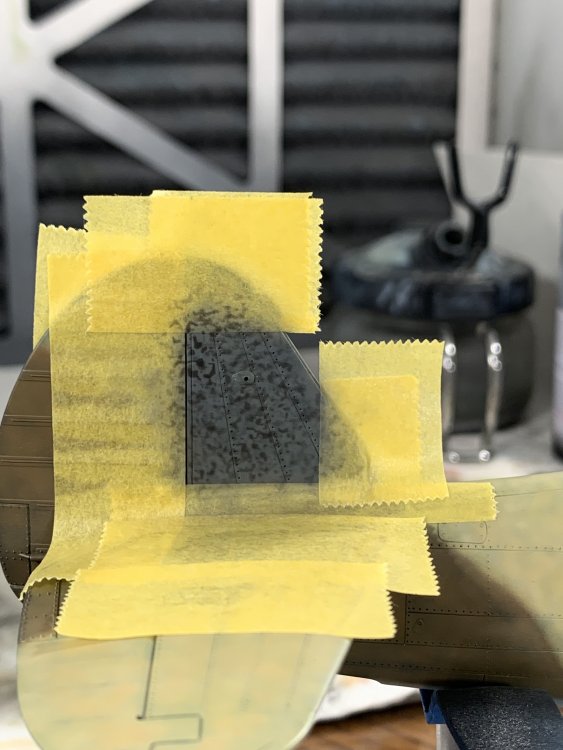
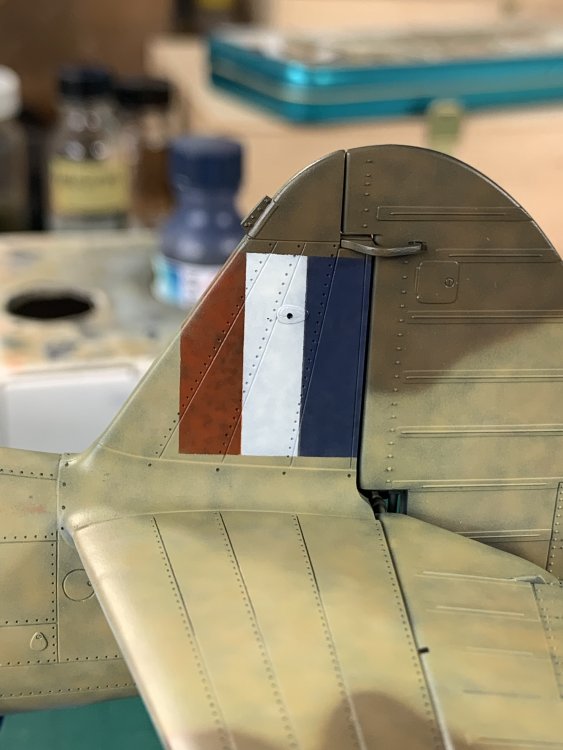
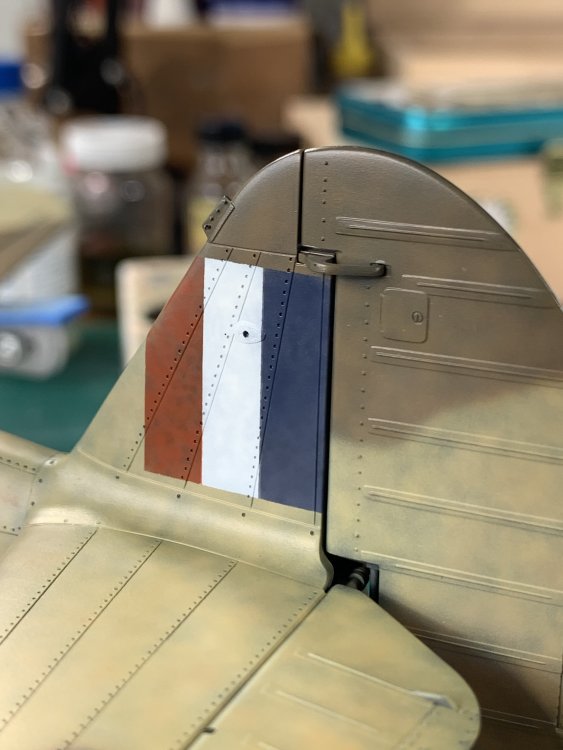
So here is how I did the fuselage roundels… First up (and sorry no pic of this) I use a couple of strips to criss cross the roundel and overlap on to the masking surround - this enables you to lift the surround and the roundel *in one go* and place on to the model. This is probably the most tricky bit - it can be fiddly to get it all to come up together, but with a little patience and practice you will come to master it very quickly I think. Placing the mask and surround on the model can also be tricky - and this is why vinyl based masks are better (for this) than Tamika tape type masks where you just can’t see through enough to know where it’s going with any accuracy Once the mask and surround is down, mask around the area as you see fit to avoid overspray, then using your criss-cross bits of tape remove the entire mask from the surround and place on its original backing i then put down a mid grey base - in this case RAF Extra Dark Sea Grey - and then airbrush template with some NATO Black; a sort of half way house black base if you will, and one that’s useful if painting a marking which overlaps camo demarcations Then i put the entire mask back on the kit…the reason for this is that when it comes to removing and putting back various sections, if the whole mask is on the kit you have a natural way to line everything up; if you try to eyeball putting sections in and taking them off one by one it will be a nightmare First up was the blue ring - this was removed and placed on the backing… then RAF Marking Blue mottled in for a gradual build up of colour; the pic below is just before i started spraying the blue (i forgot to take one immediately after)… Then put the blue ring back on, and remove the white one… i wanted to make sure the white looked uneven / had some variation to it… if you lay down too much paint you lose that white ring goes back on so it looked like this… then it was the red centre dot which if did it again i might do first just to get it out of the way - at this point i was itching to finish! and finally i removed the yellow ring and laid down some MRP Marking Yellow i took some in progress shots of this because I wanted to show you how i am specifically *not* trying to get even coverage / even colour outcomes… After first mottling passes… Then some more… And the finished article… Next up will be to replicate the Middlestone overspray - that will be tomorrow i think


-
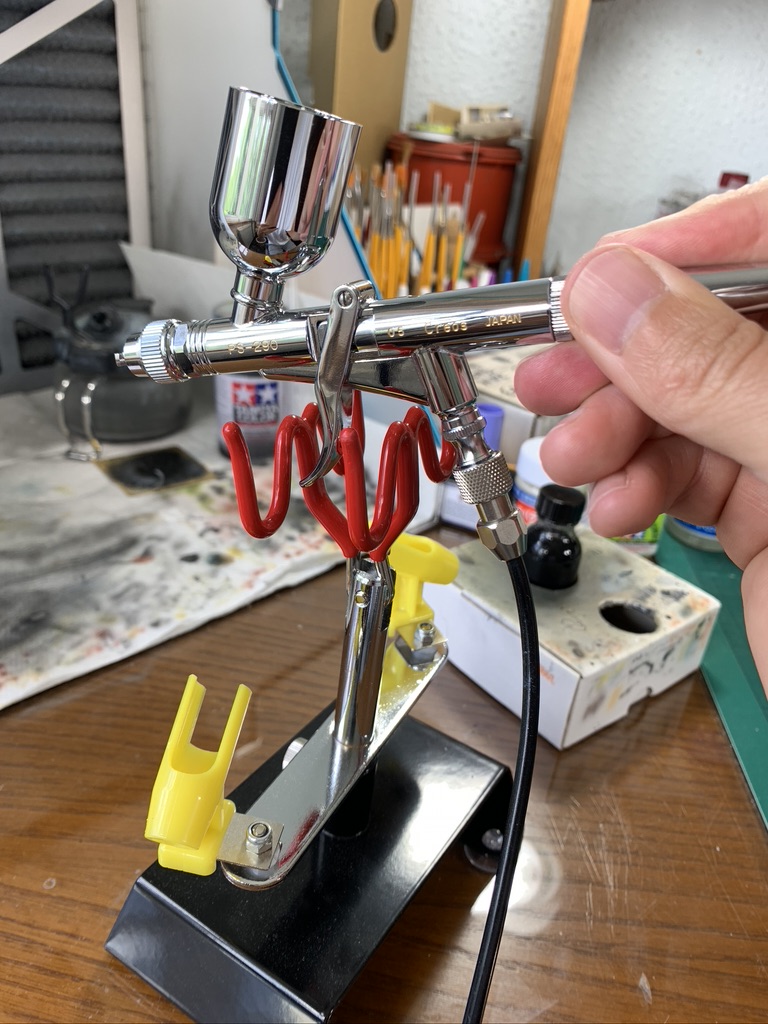
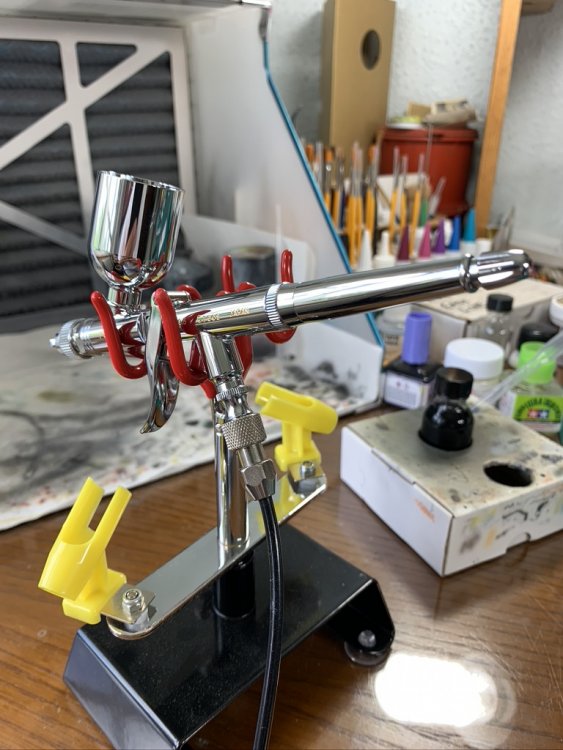
hi Kevin, it depends what i am doing... for priming I use MS1500 (for all other airbrushing i use MRP exclusively), i try to make long strokes that finish off the model - rather than do a 180 on the edge where that part essentially ends up getting more paint for large priming areas i use my PS-290 trigger action with 0.5mm needle - it's a f*cking beast! for quick jobs where i am priming add-on parts, cockpit etc, i will use my H&S Evolution with 0.2mm needle (it's a good decent all round brush); primer is usually thinned 1 primer to 3(ish) Mr Levelling Thinner ('MLT') and sprayed at about 18psi - i don't have a digital read out and just eyeball the gauge. i am spraying from no more than 2 inches away - i see videos where stuff is being hosed on from the next village away and cringe! for initial marble coat, i am not too 'careful', and although this stage might be tedious it can also be used as 'free practice' for mottling and the like - if you goof and put too much paint down and get a spider, it's no biggie etc when using the airbrush template again it's just point and shoot basic blend coat / coverage i often thin the paint even more (it comes ready to paint) with some MLT, but this is in no way a prerequisite; pressure is usually a bit lower - say 15 psi; spraying closer now - maybe an inch or so? for mottling or fine detail work, i will usually thin; Mr Rapid Thinner ('MRT') can be helpful here, but i have also used MLT; pressure is somewhere towards 10-12psi maybe, and i am VERY close to the surface for all my blend and mottling i use the PS-771 with 0.18mm needle - it is head and shoulders the best brush i have used, and as a benchmark, is a significant upgrade on my Evolution, which previously i thought was very very good hope this helps Nick
-
And just quickly before I go ‘up the wooden hill to Bedfordshire’, here’s the first markings masked… all sooo simple with MRP! I tried something new here by providing a dark but not black base of grey with some NATO black through an airbrush template also I find it more interesting to use an off white (or even light grey) instead of a pure white… All this done back to back to back with only the time it takes to clear the airbrush and change paints between colours… I’ll show how I did the roundels tomorrow, as I know some people think the full 4 colour roundel can be a bit daunting.


-
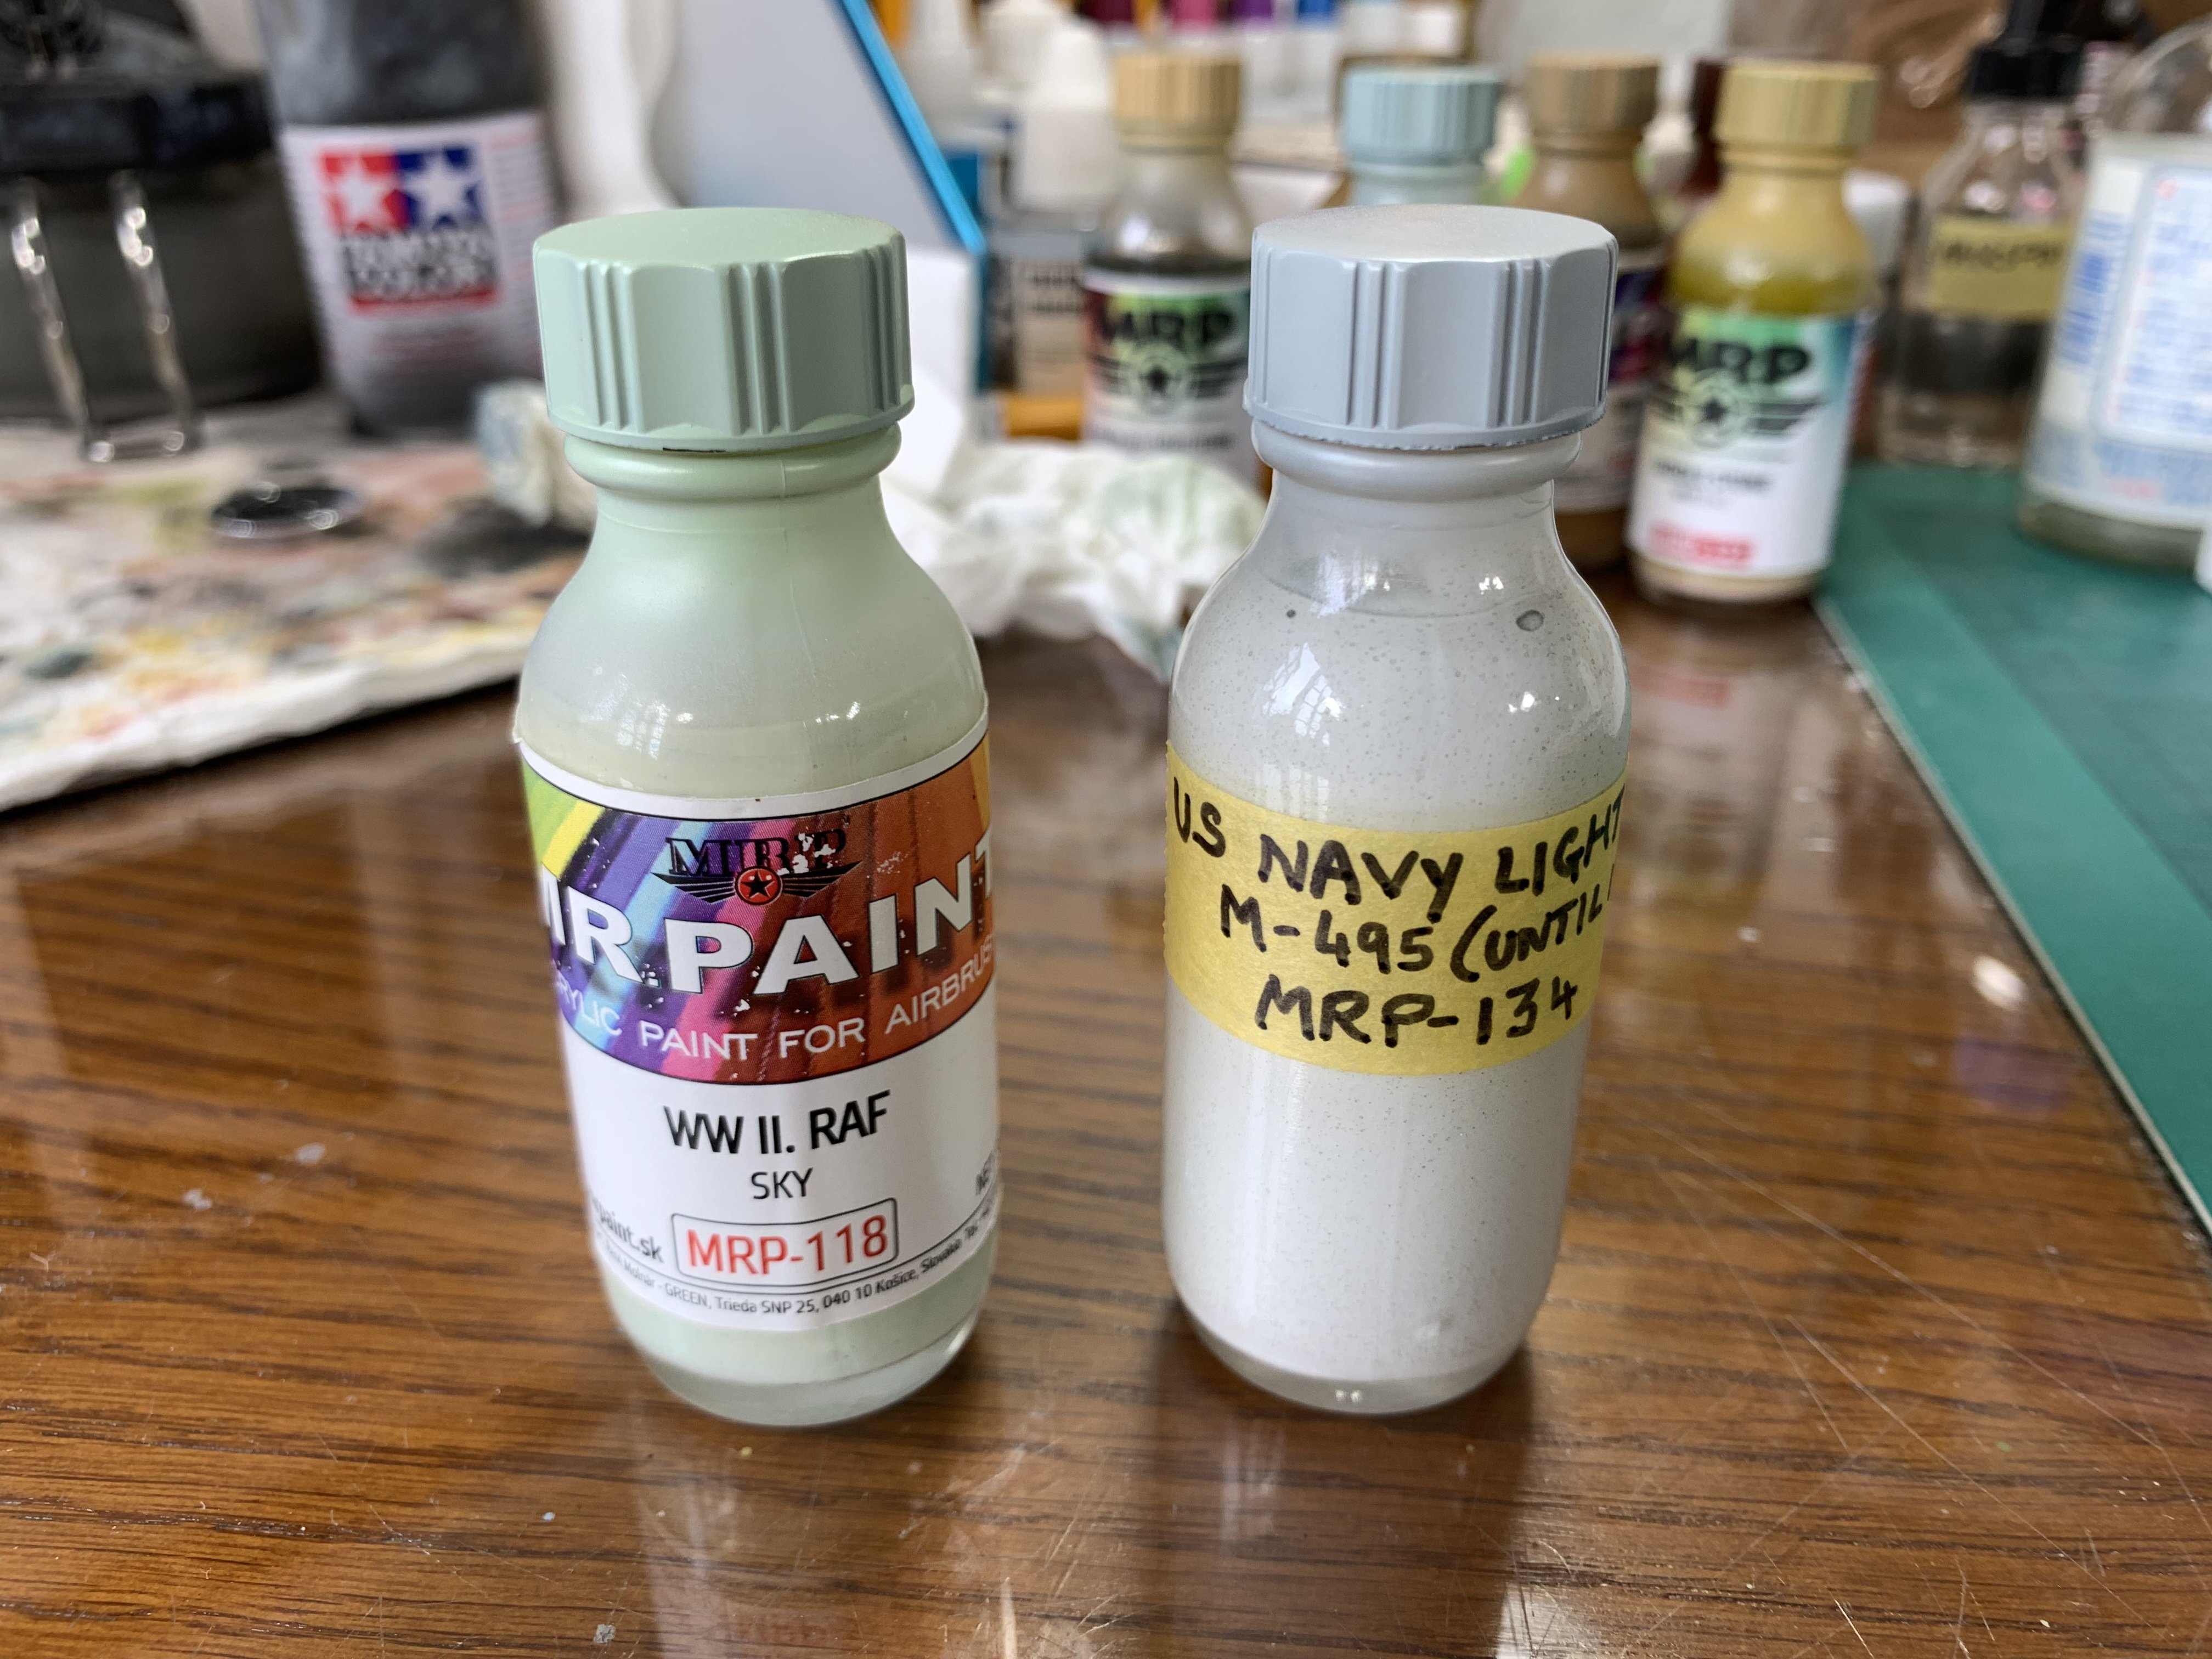
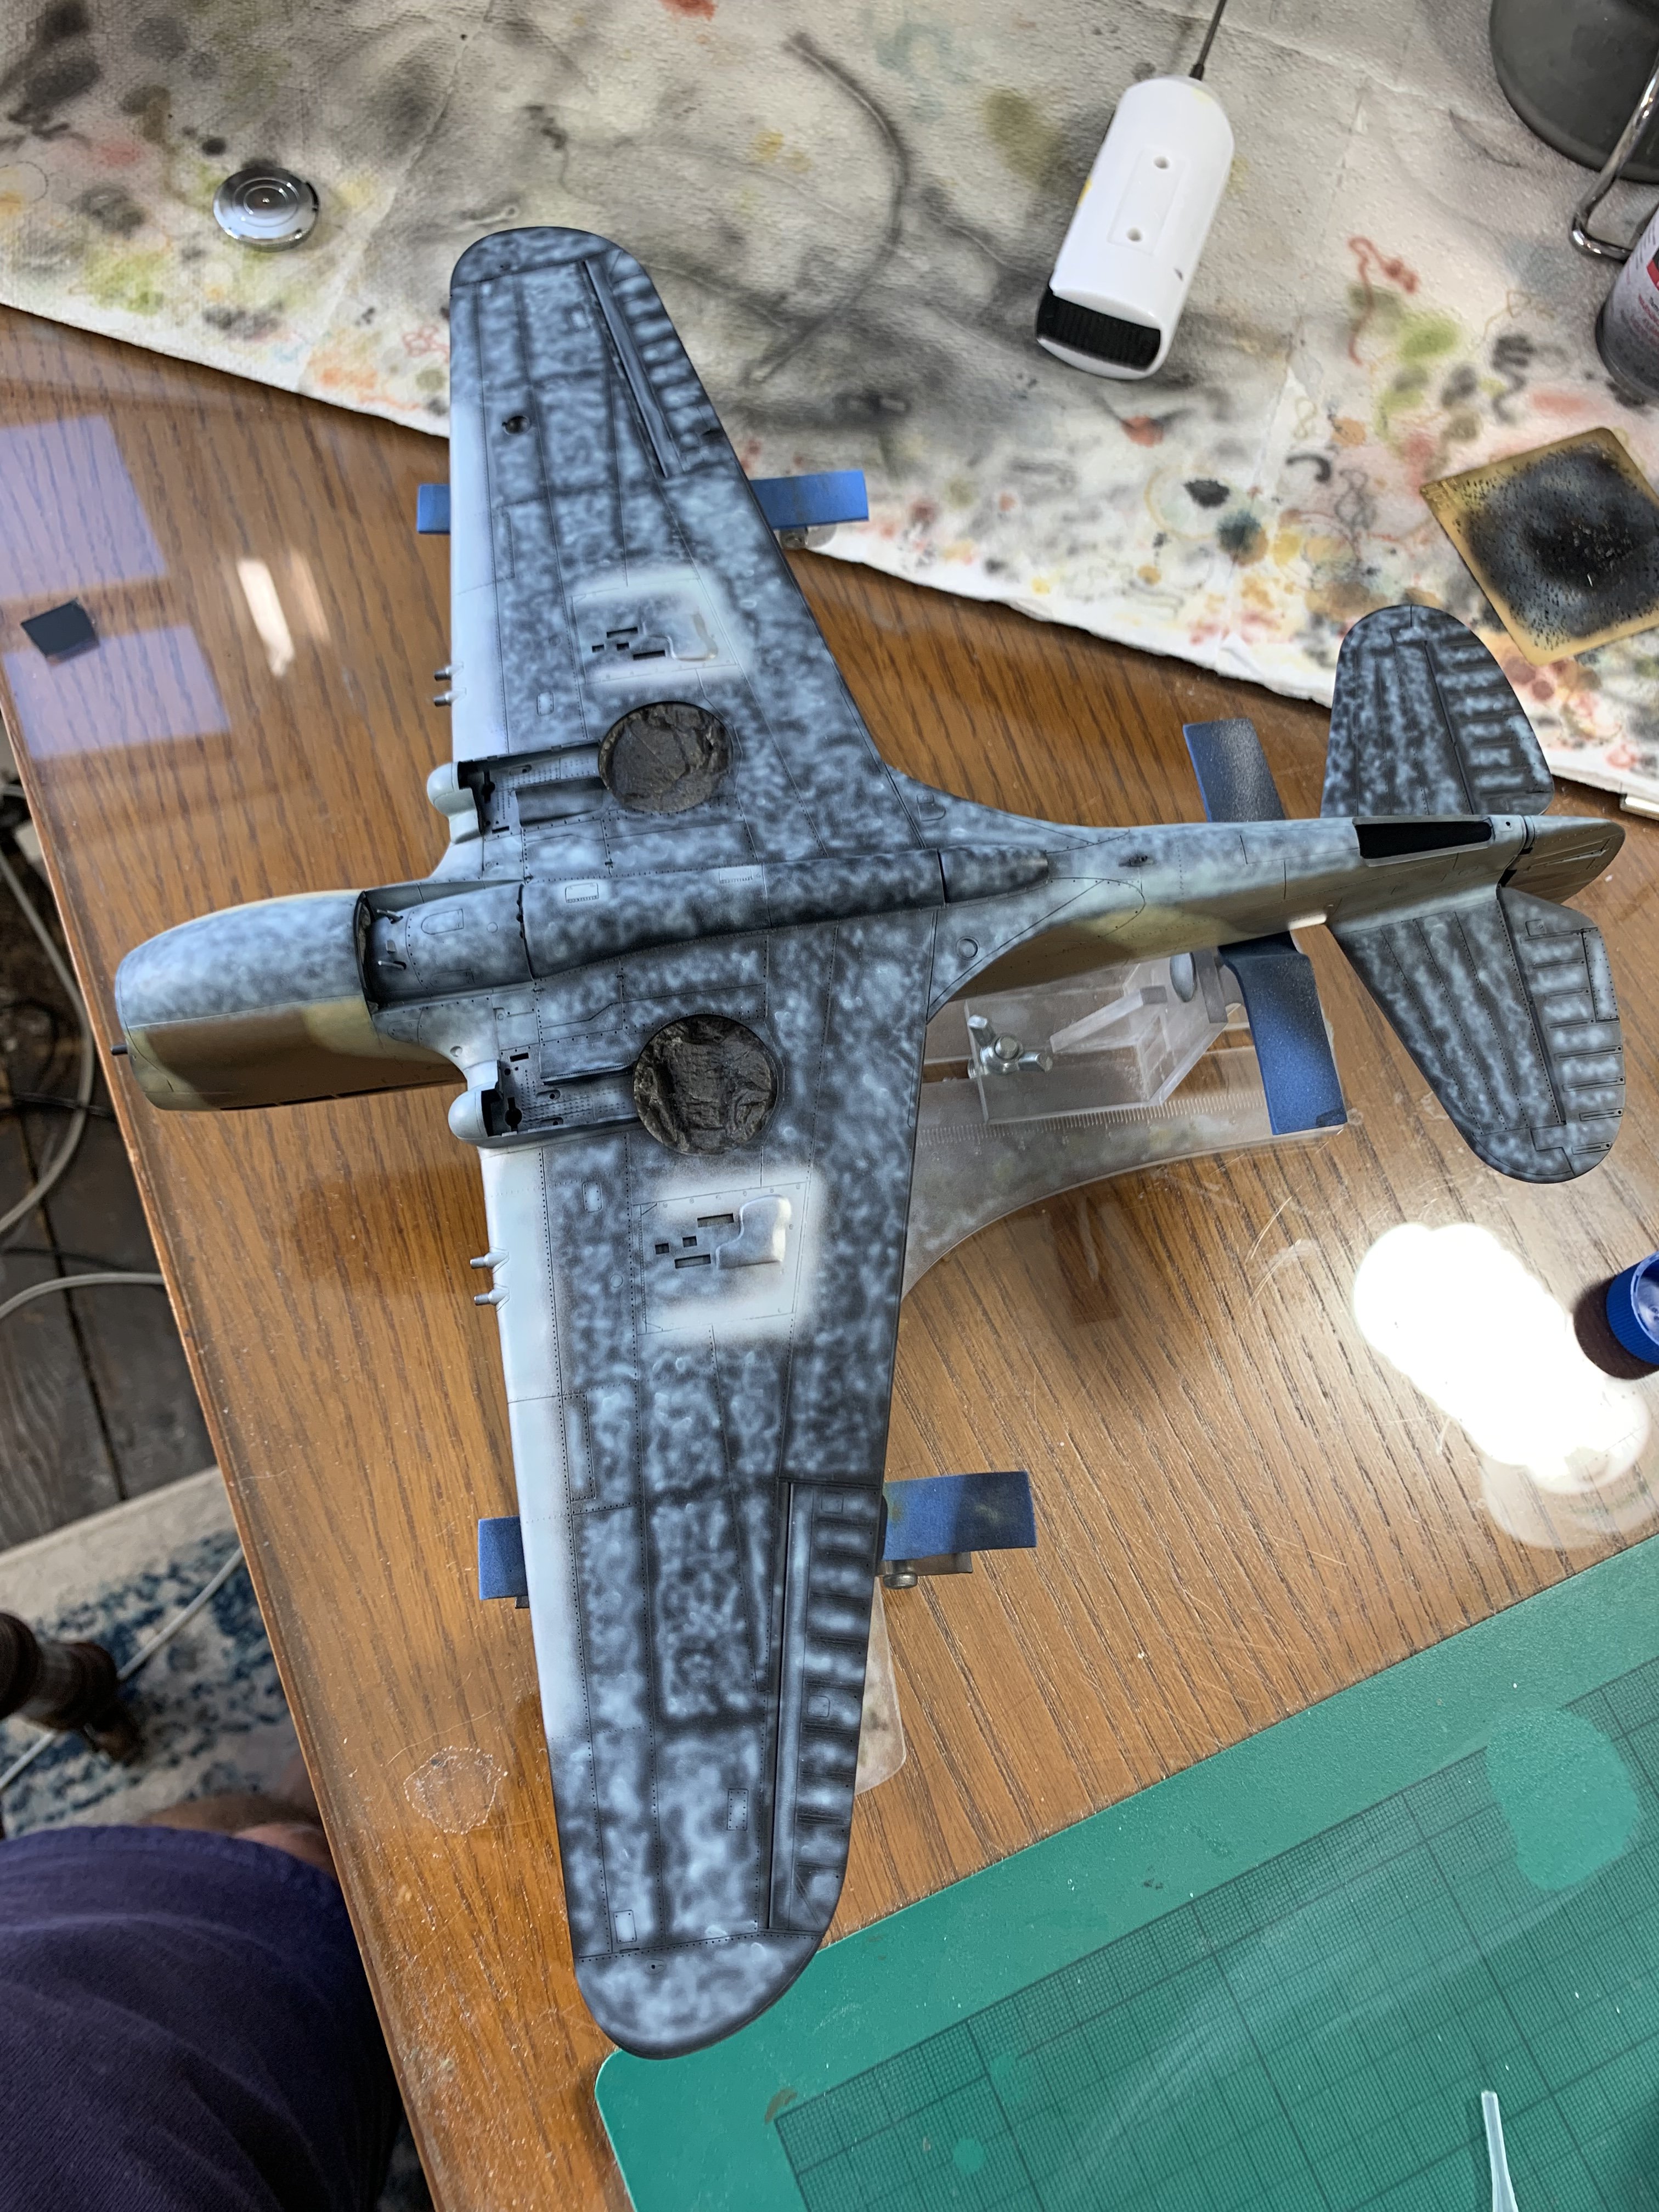
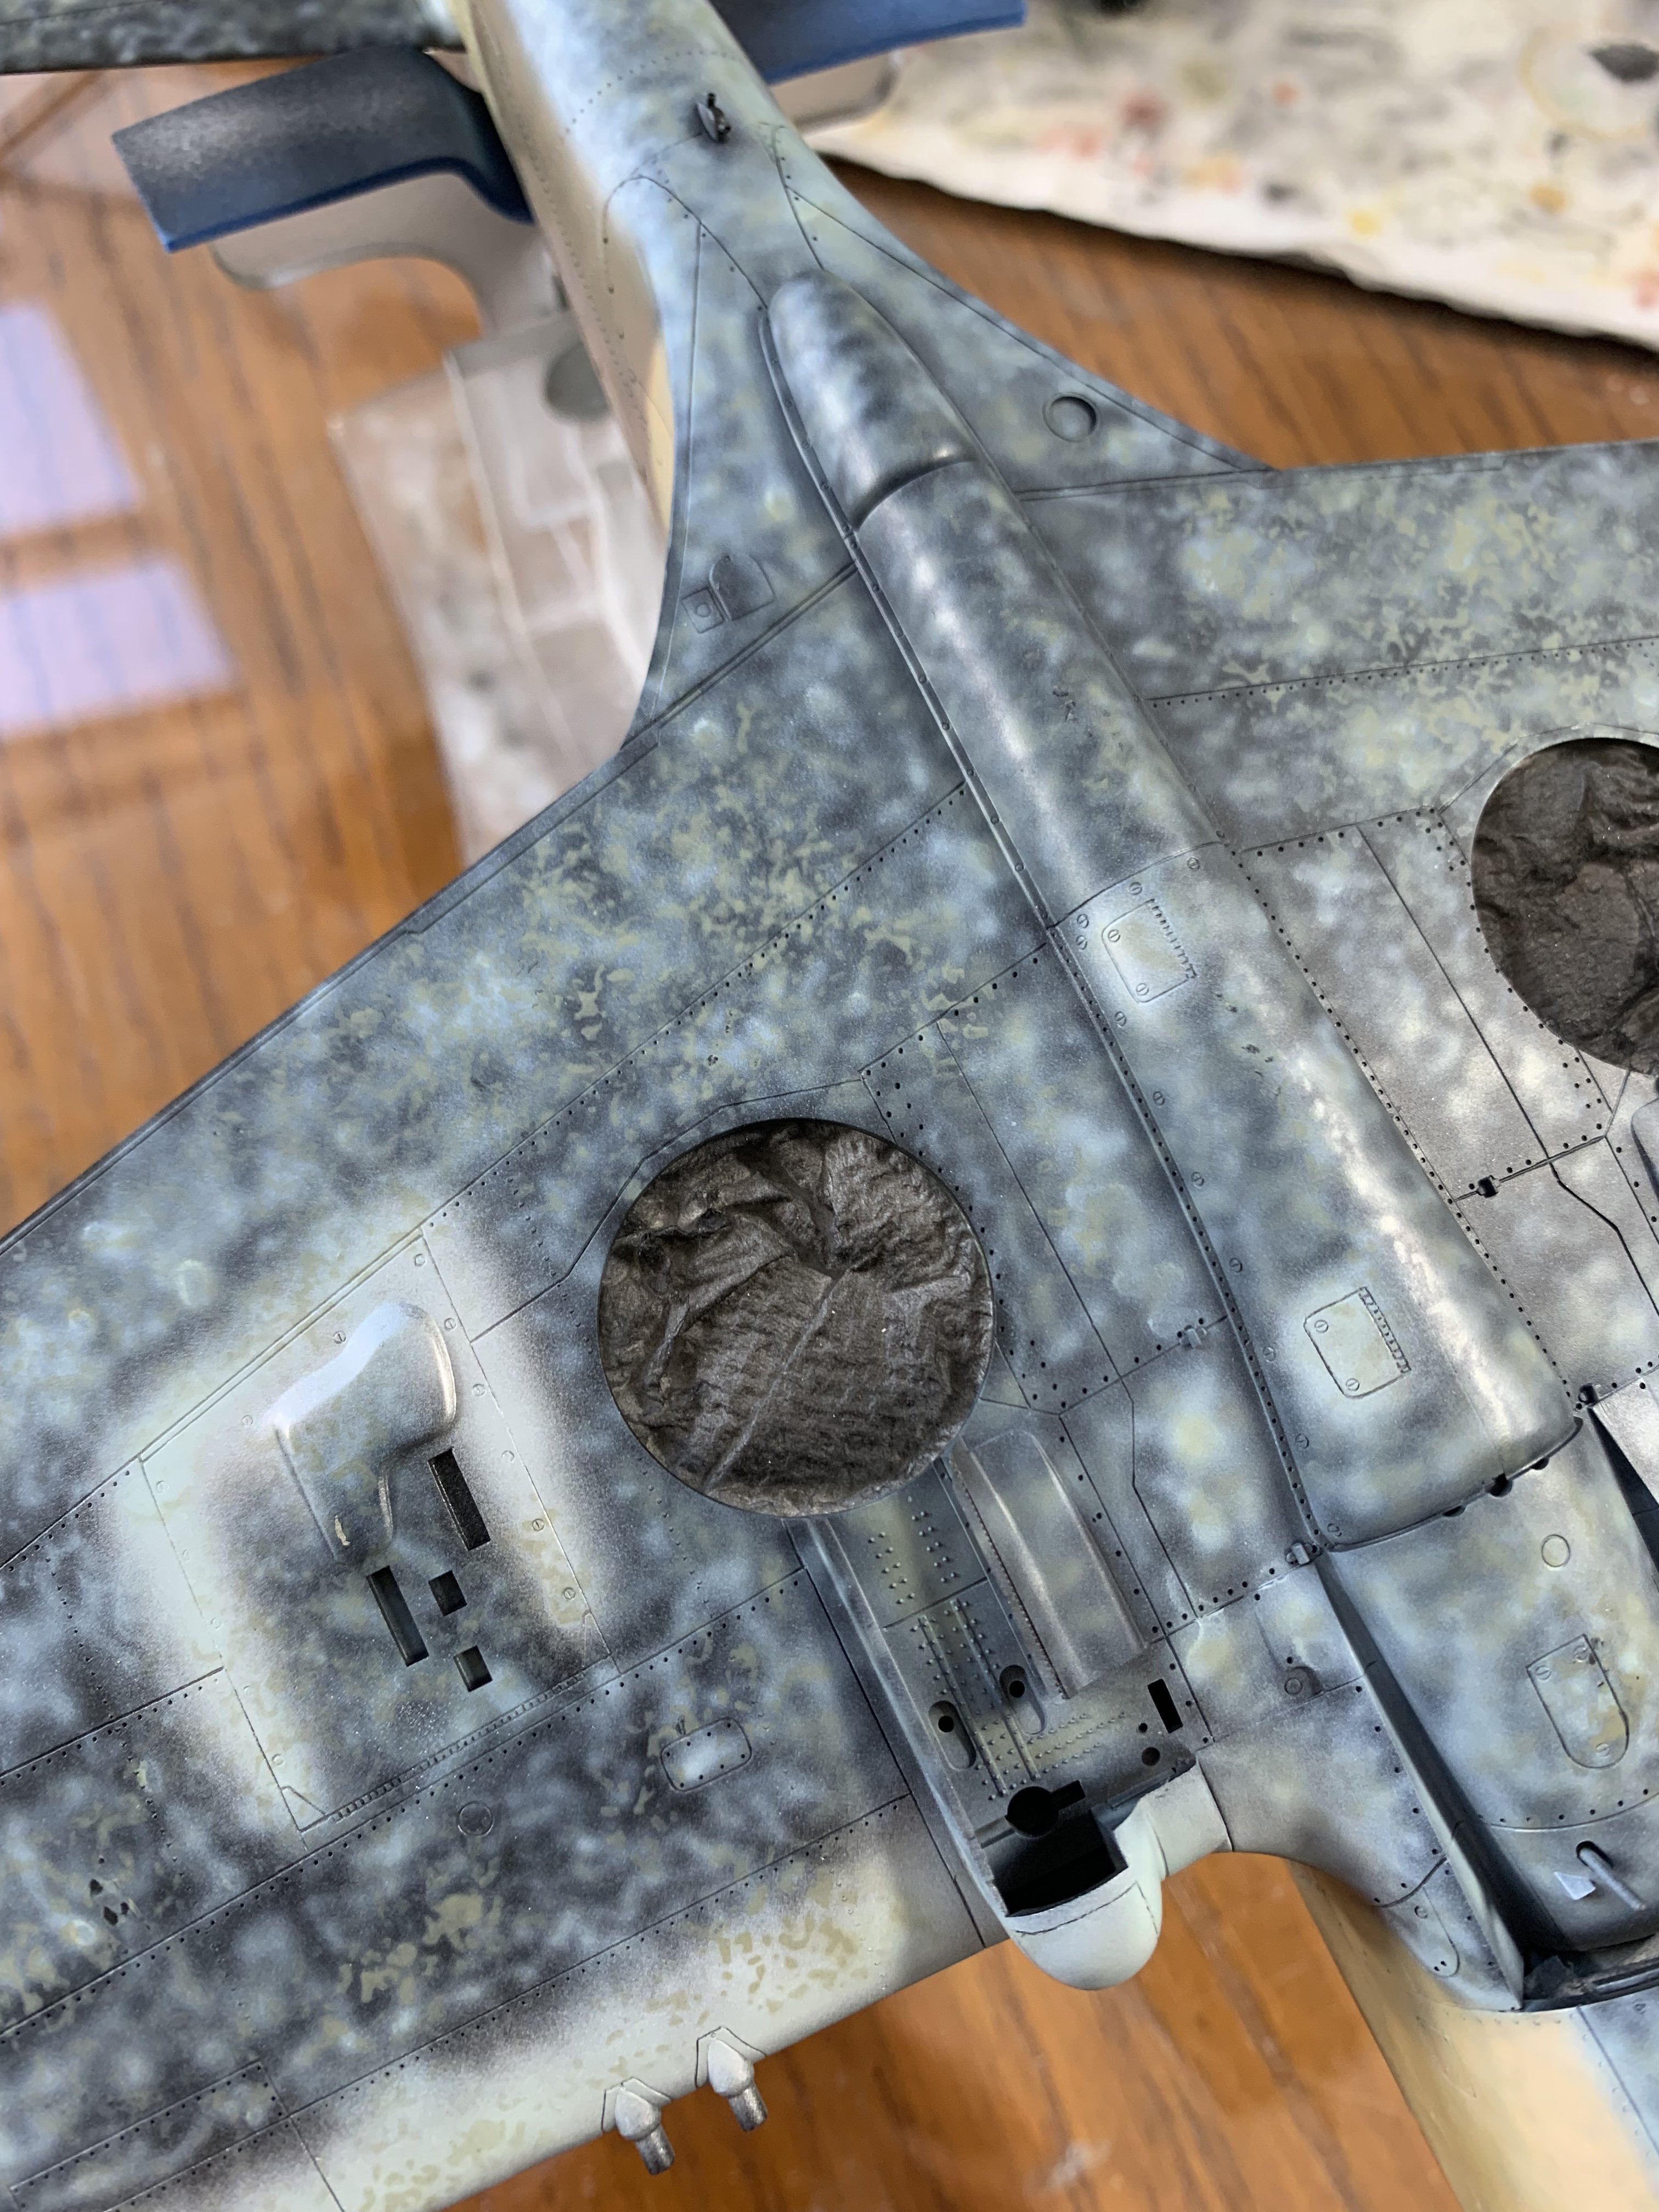
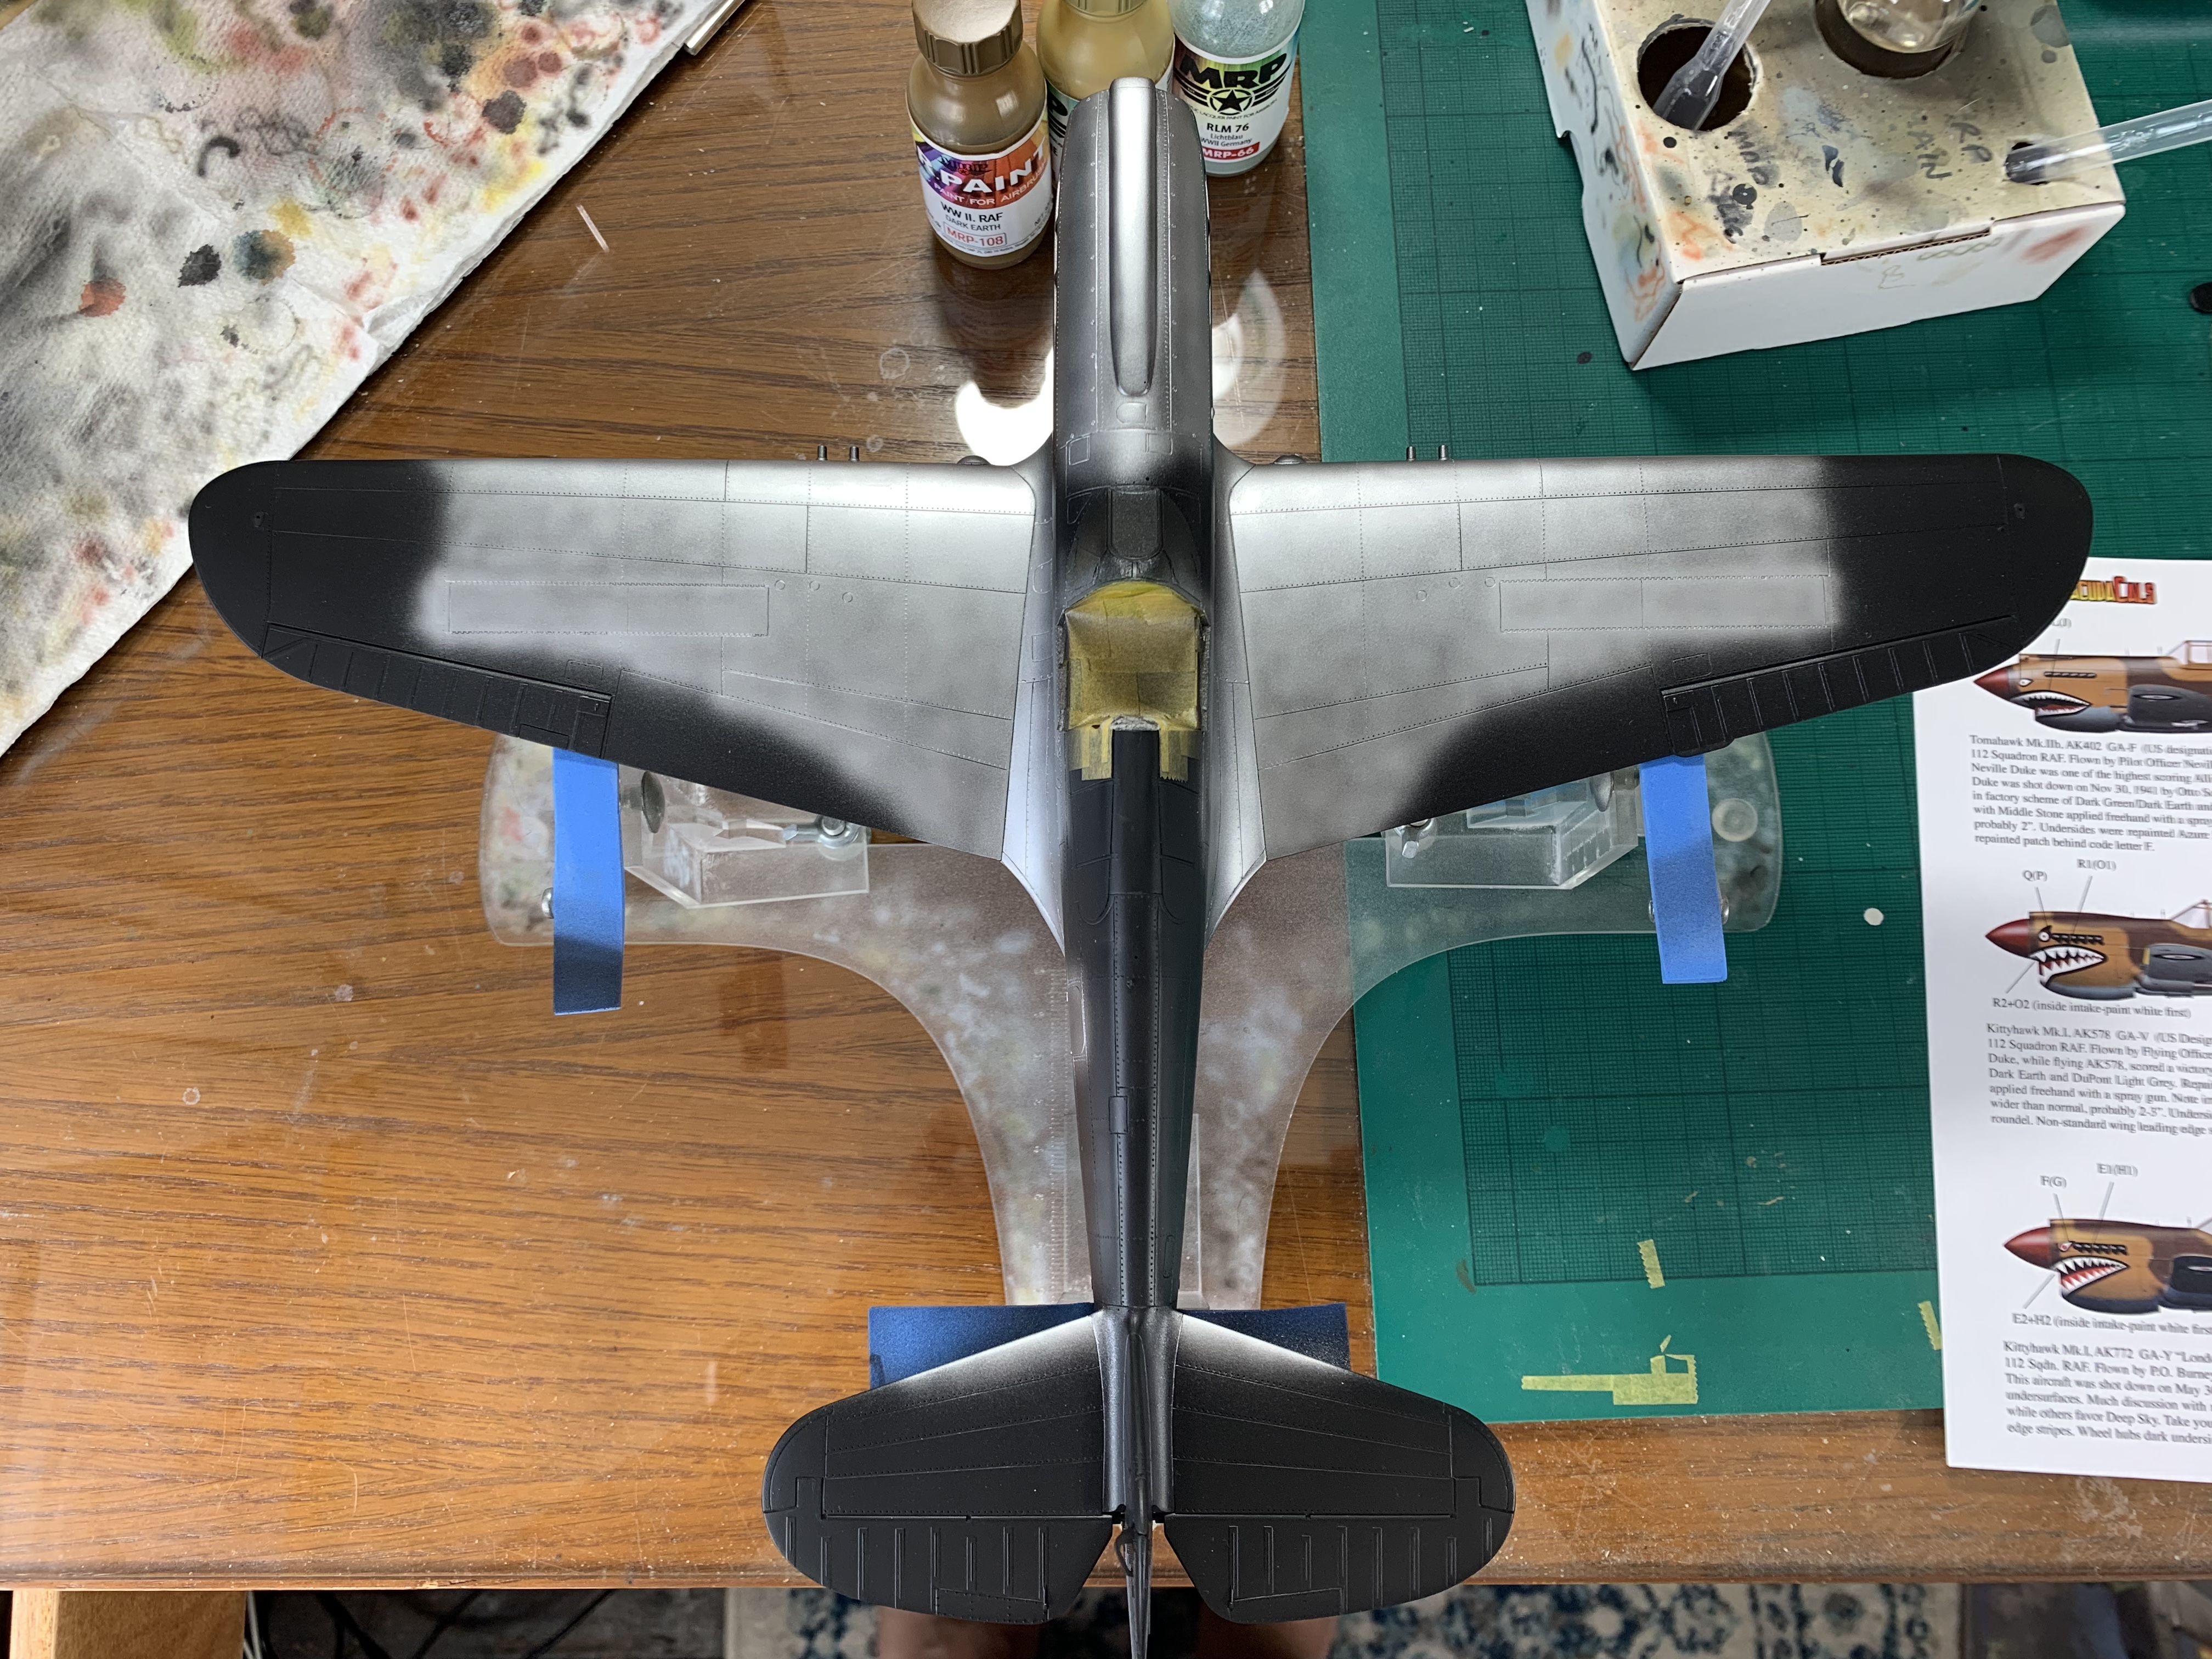
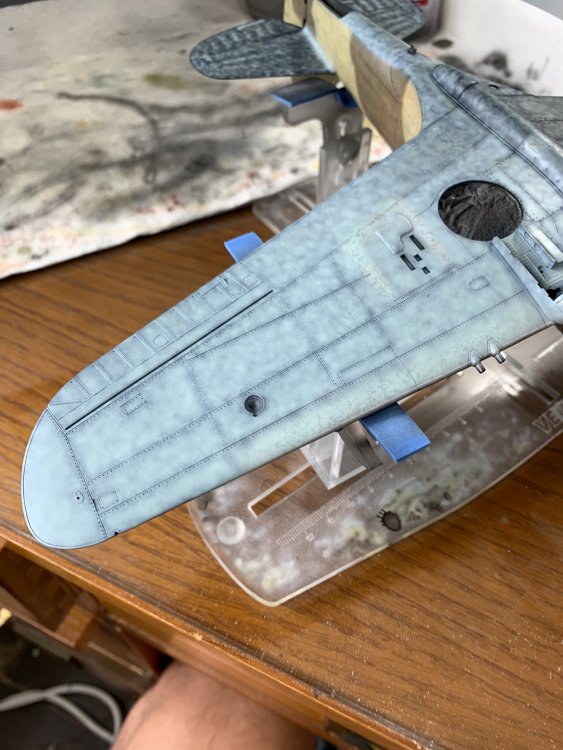
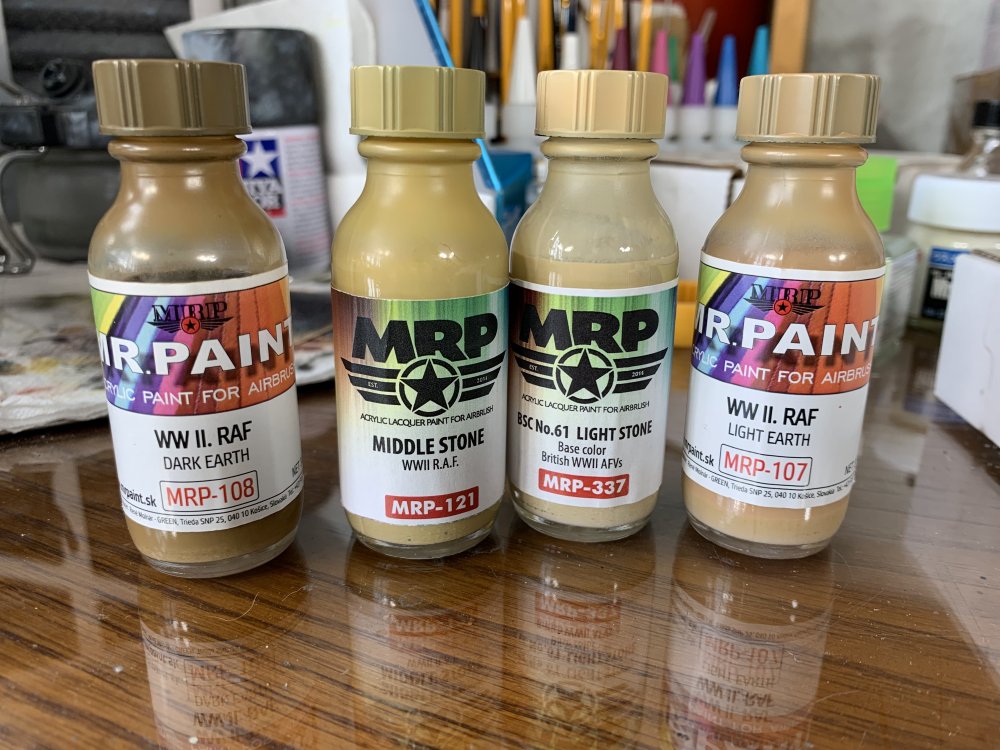
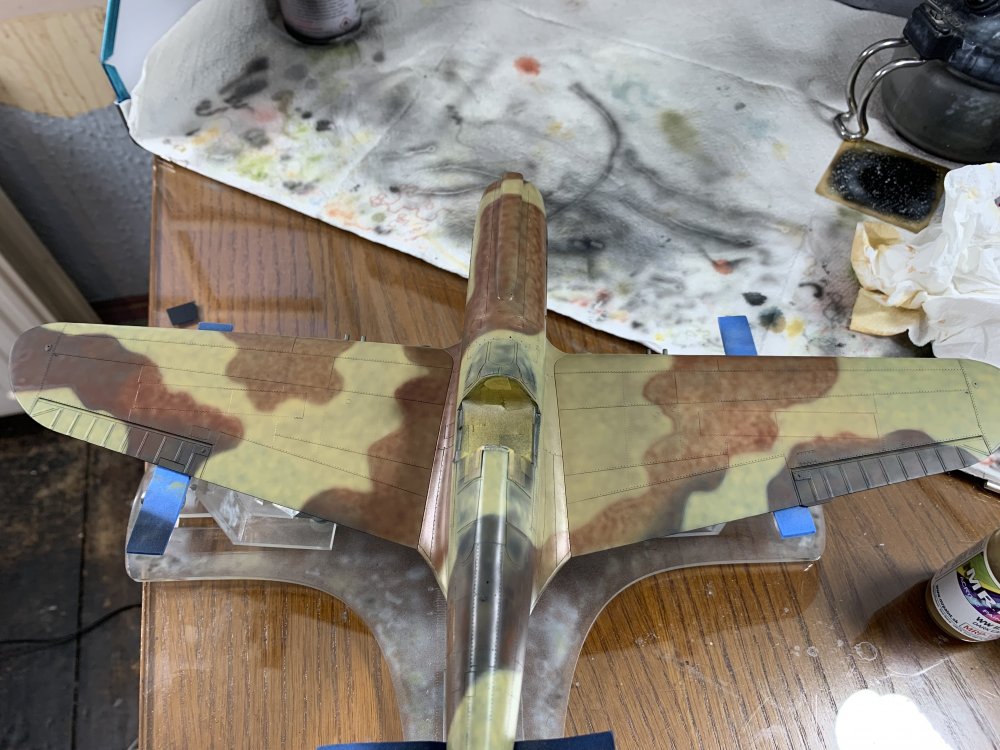
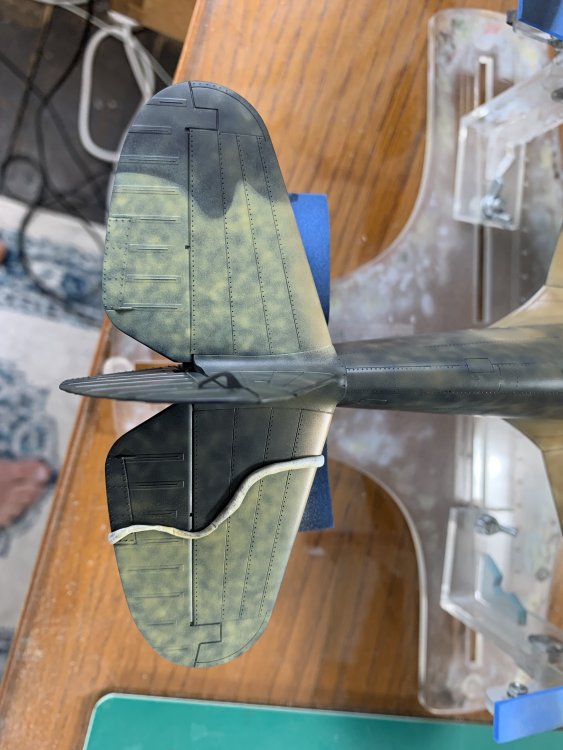
So the underside is pretty much done - at least pre weathering! - and it was achieved by successive mottling with these 2 colours: It looks a bit too marbled for some people’s tastes, but I quite like it, and it provides enough interest that further weathering with oils is not imperative if one is looking for a less complicated finish.


-
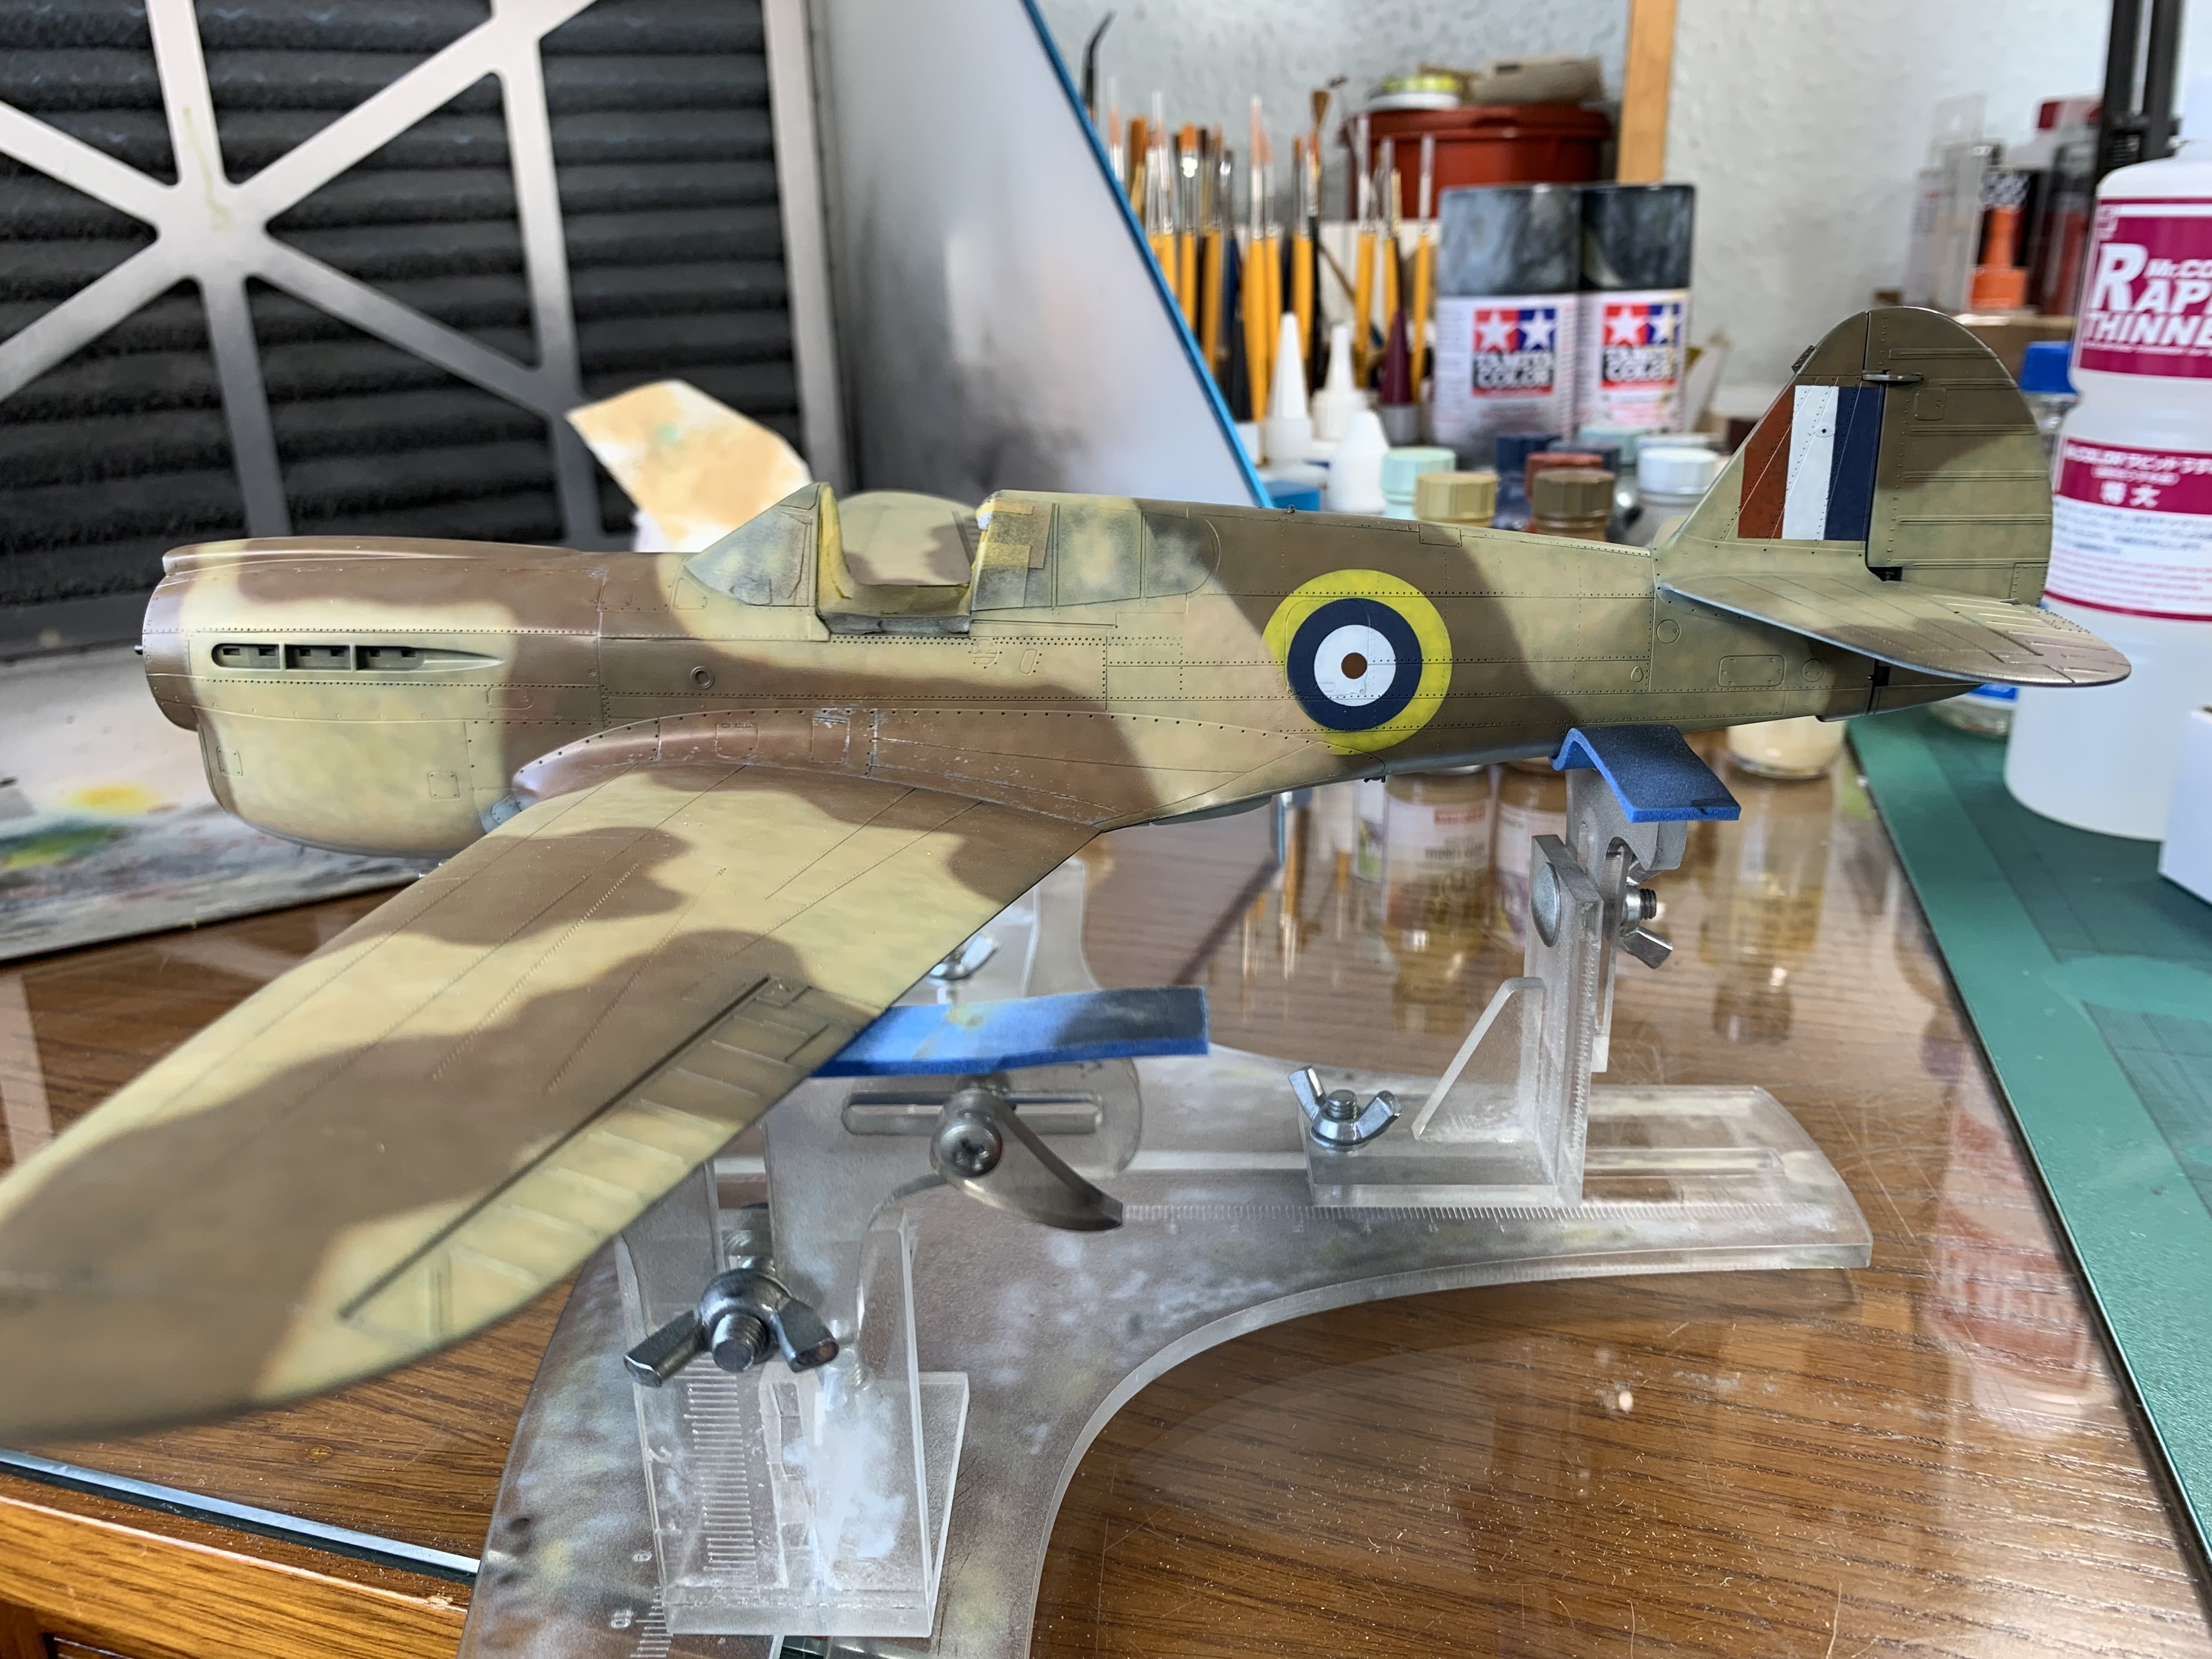
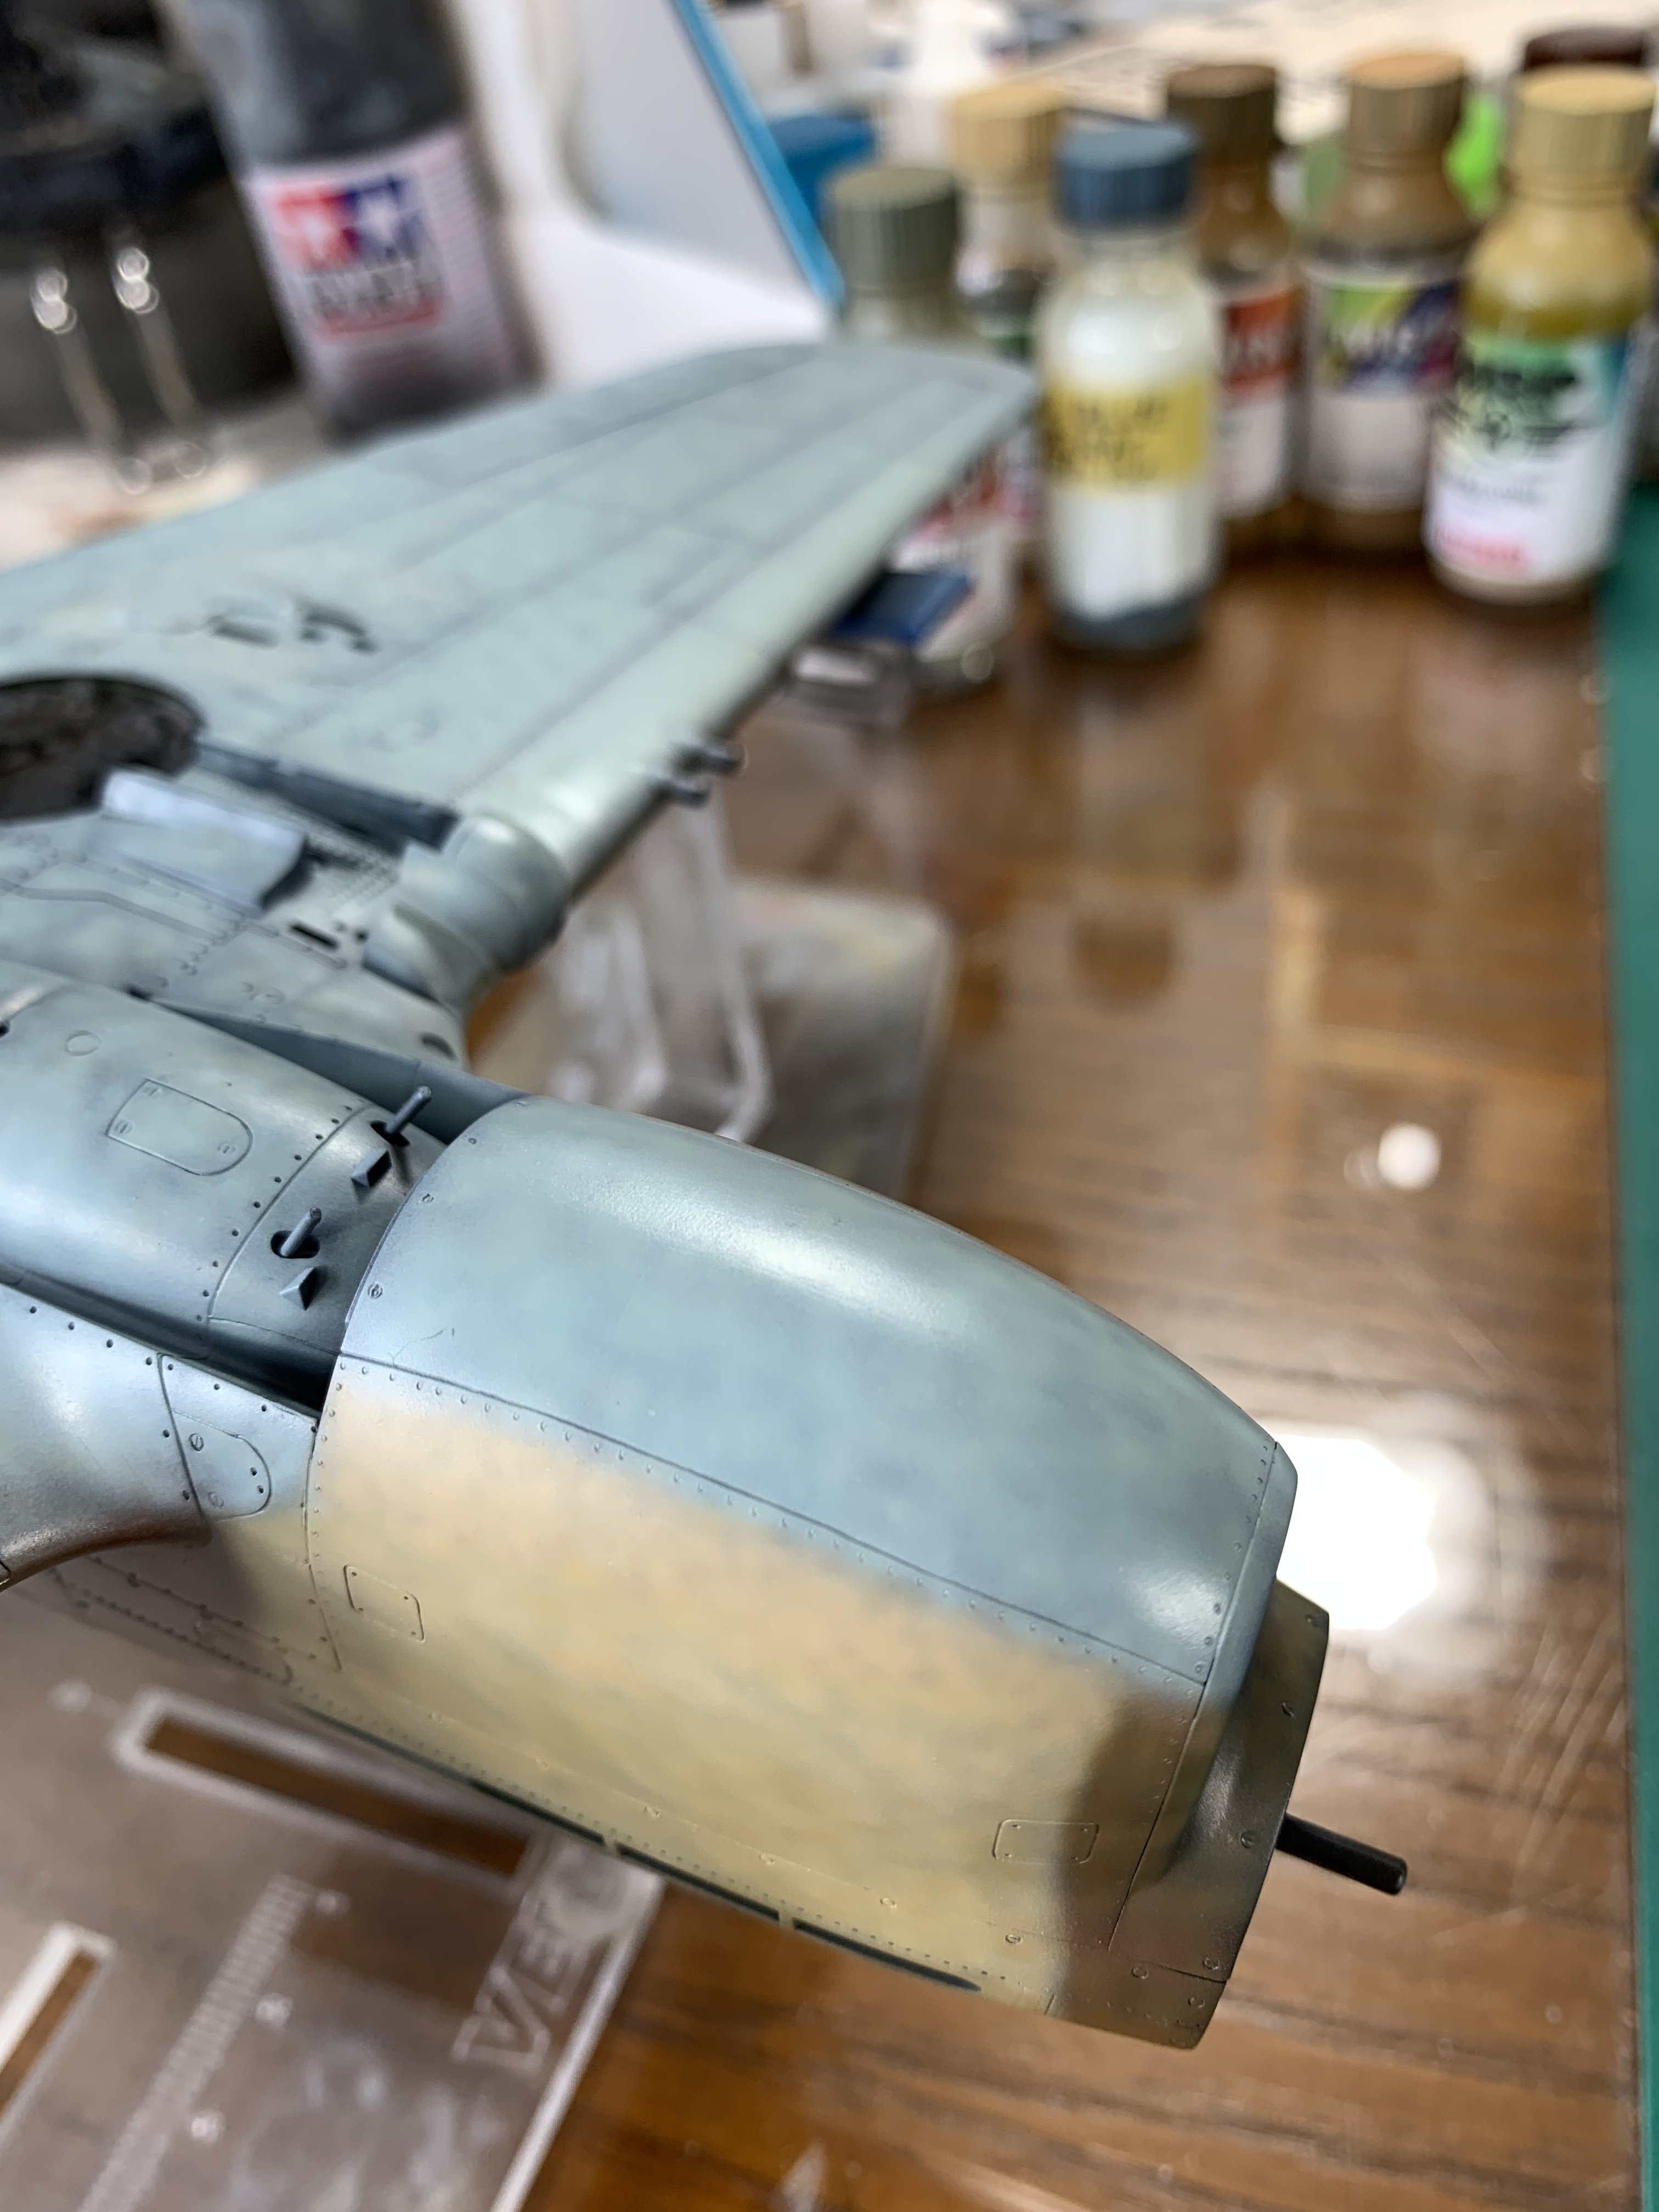
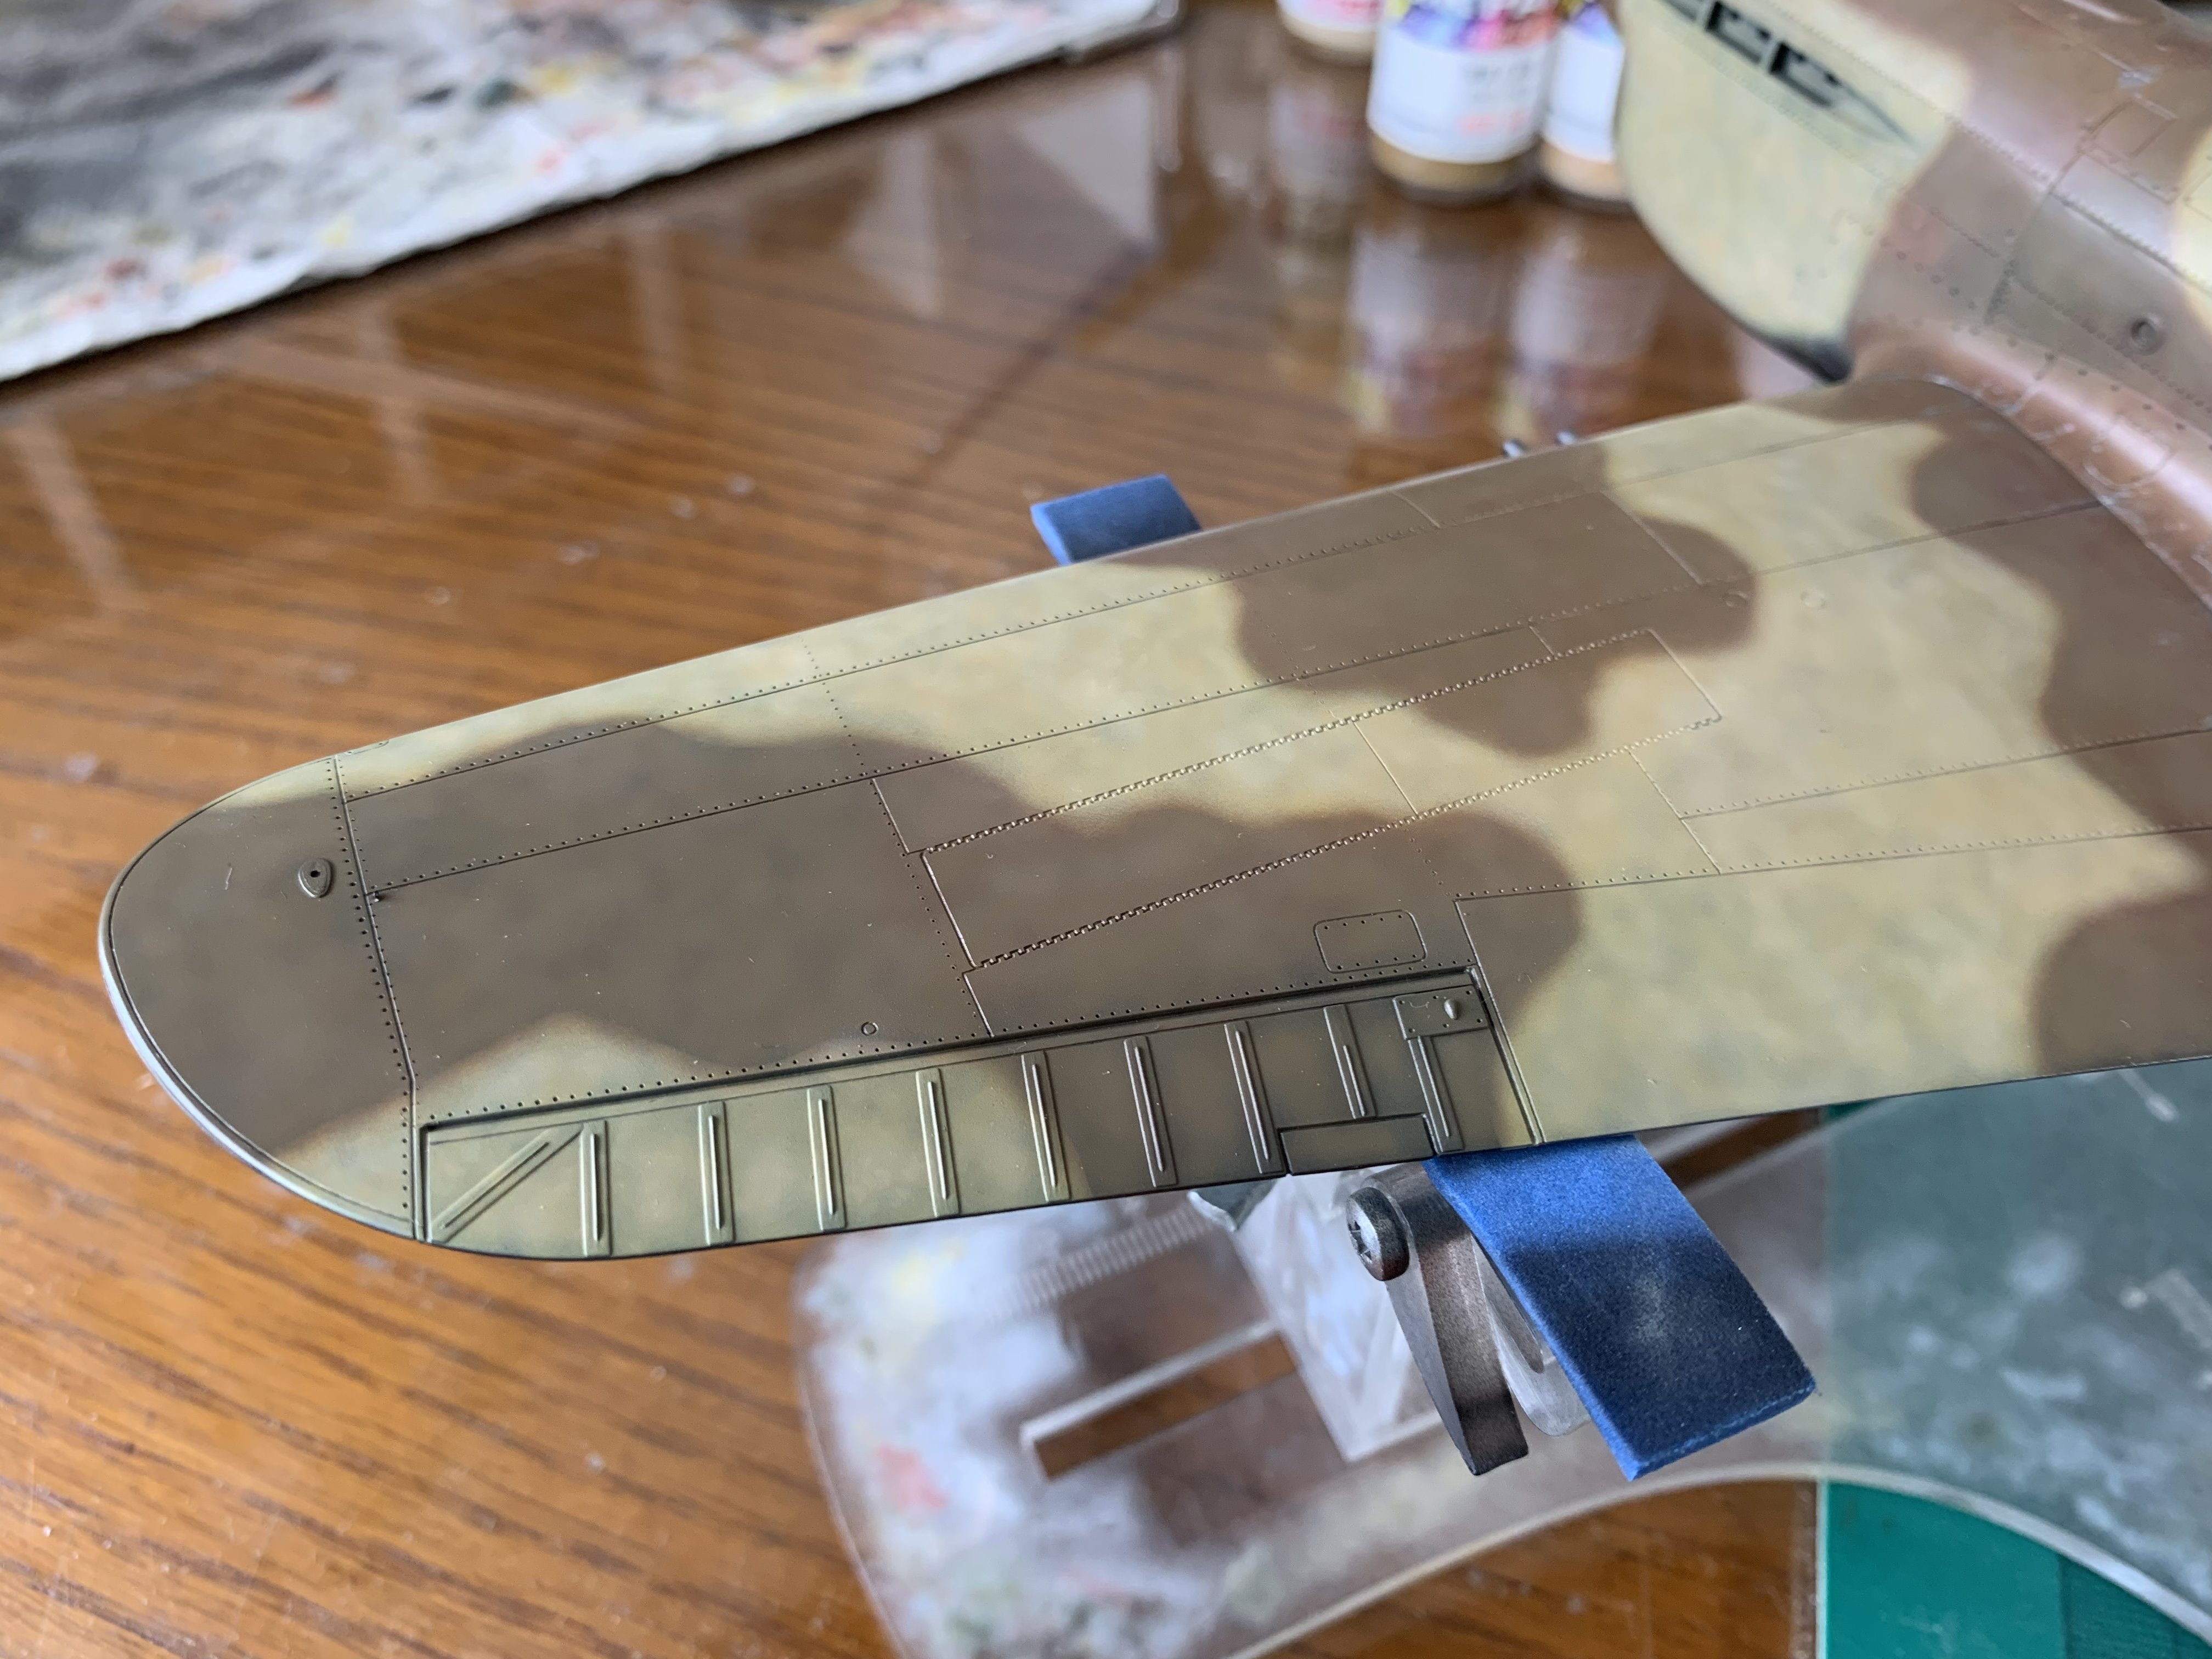
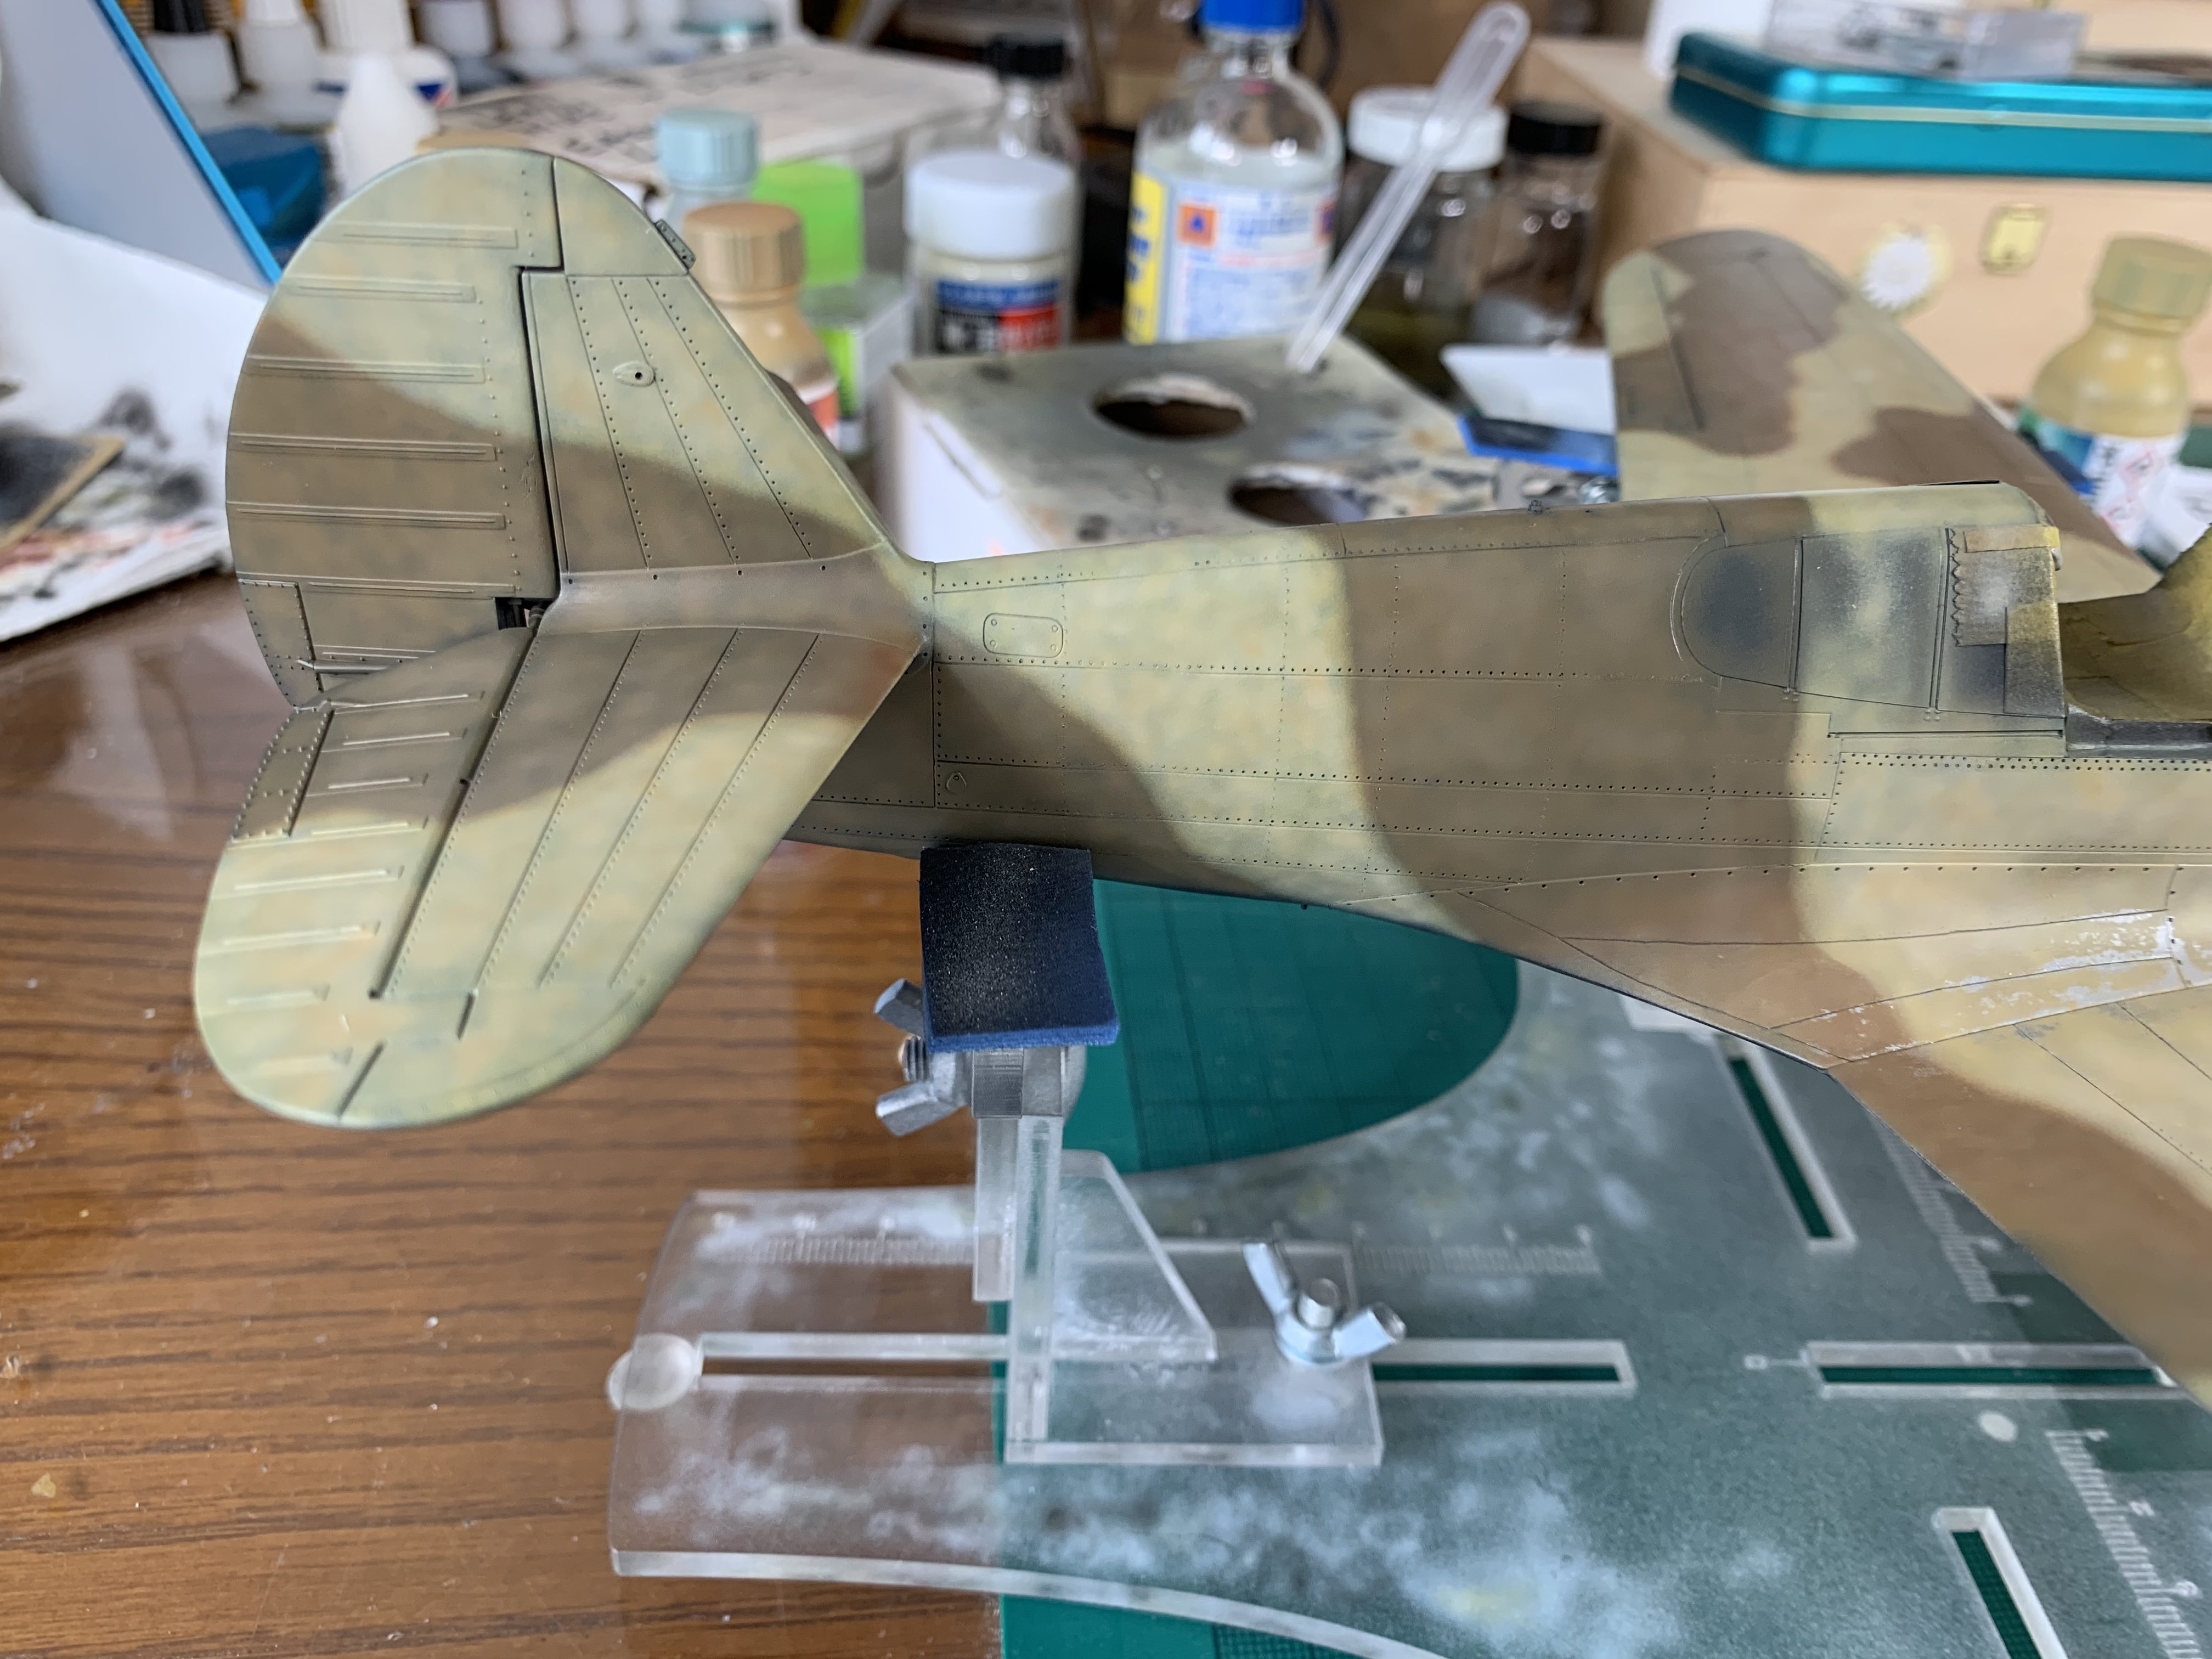
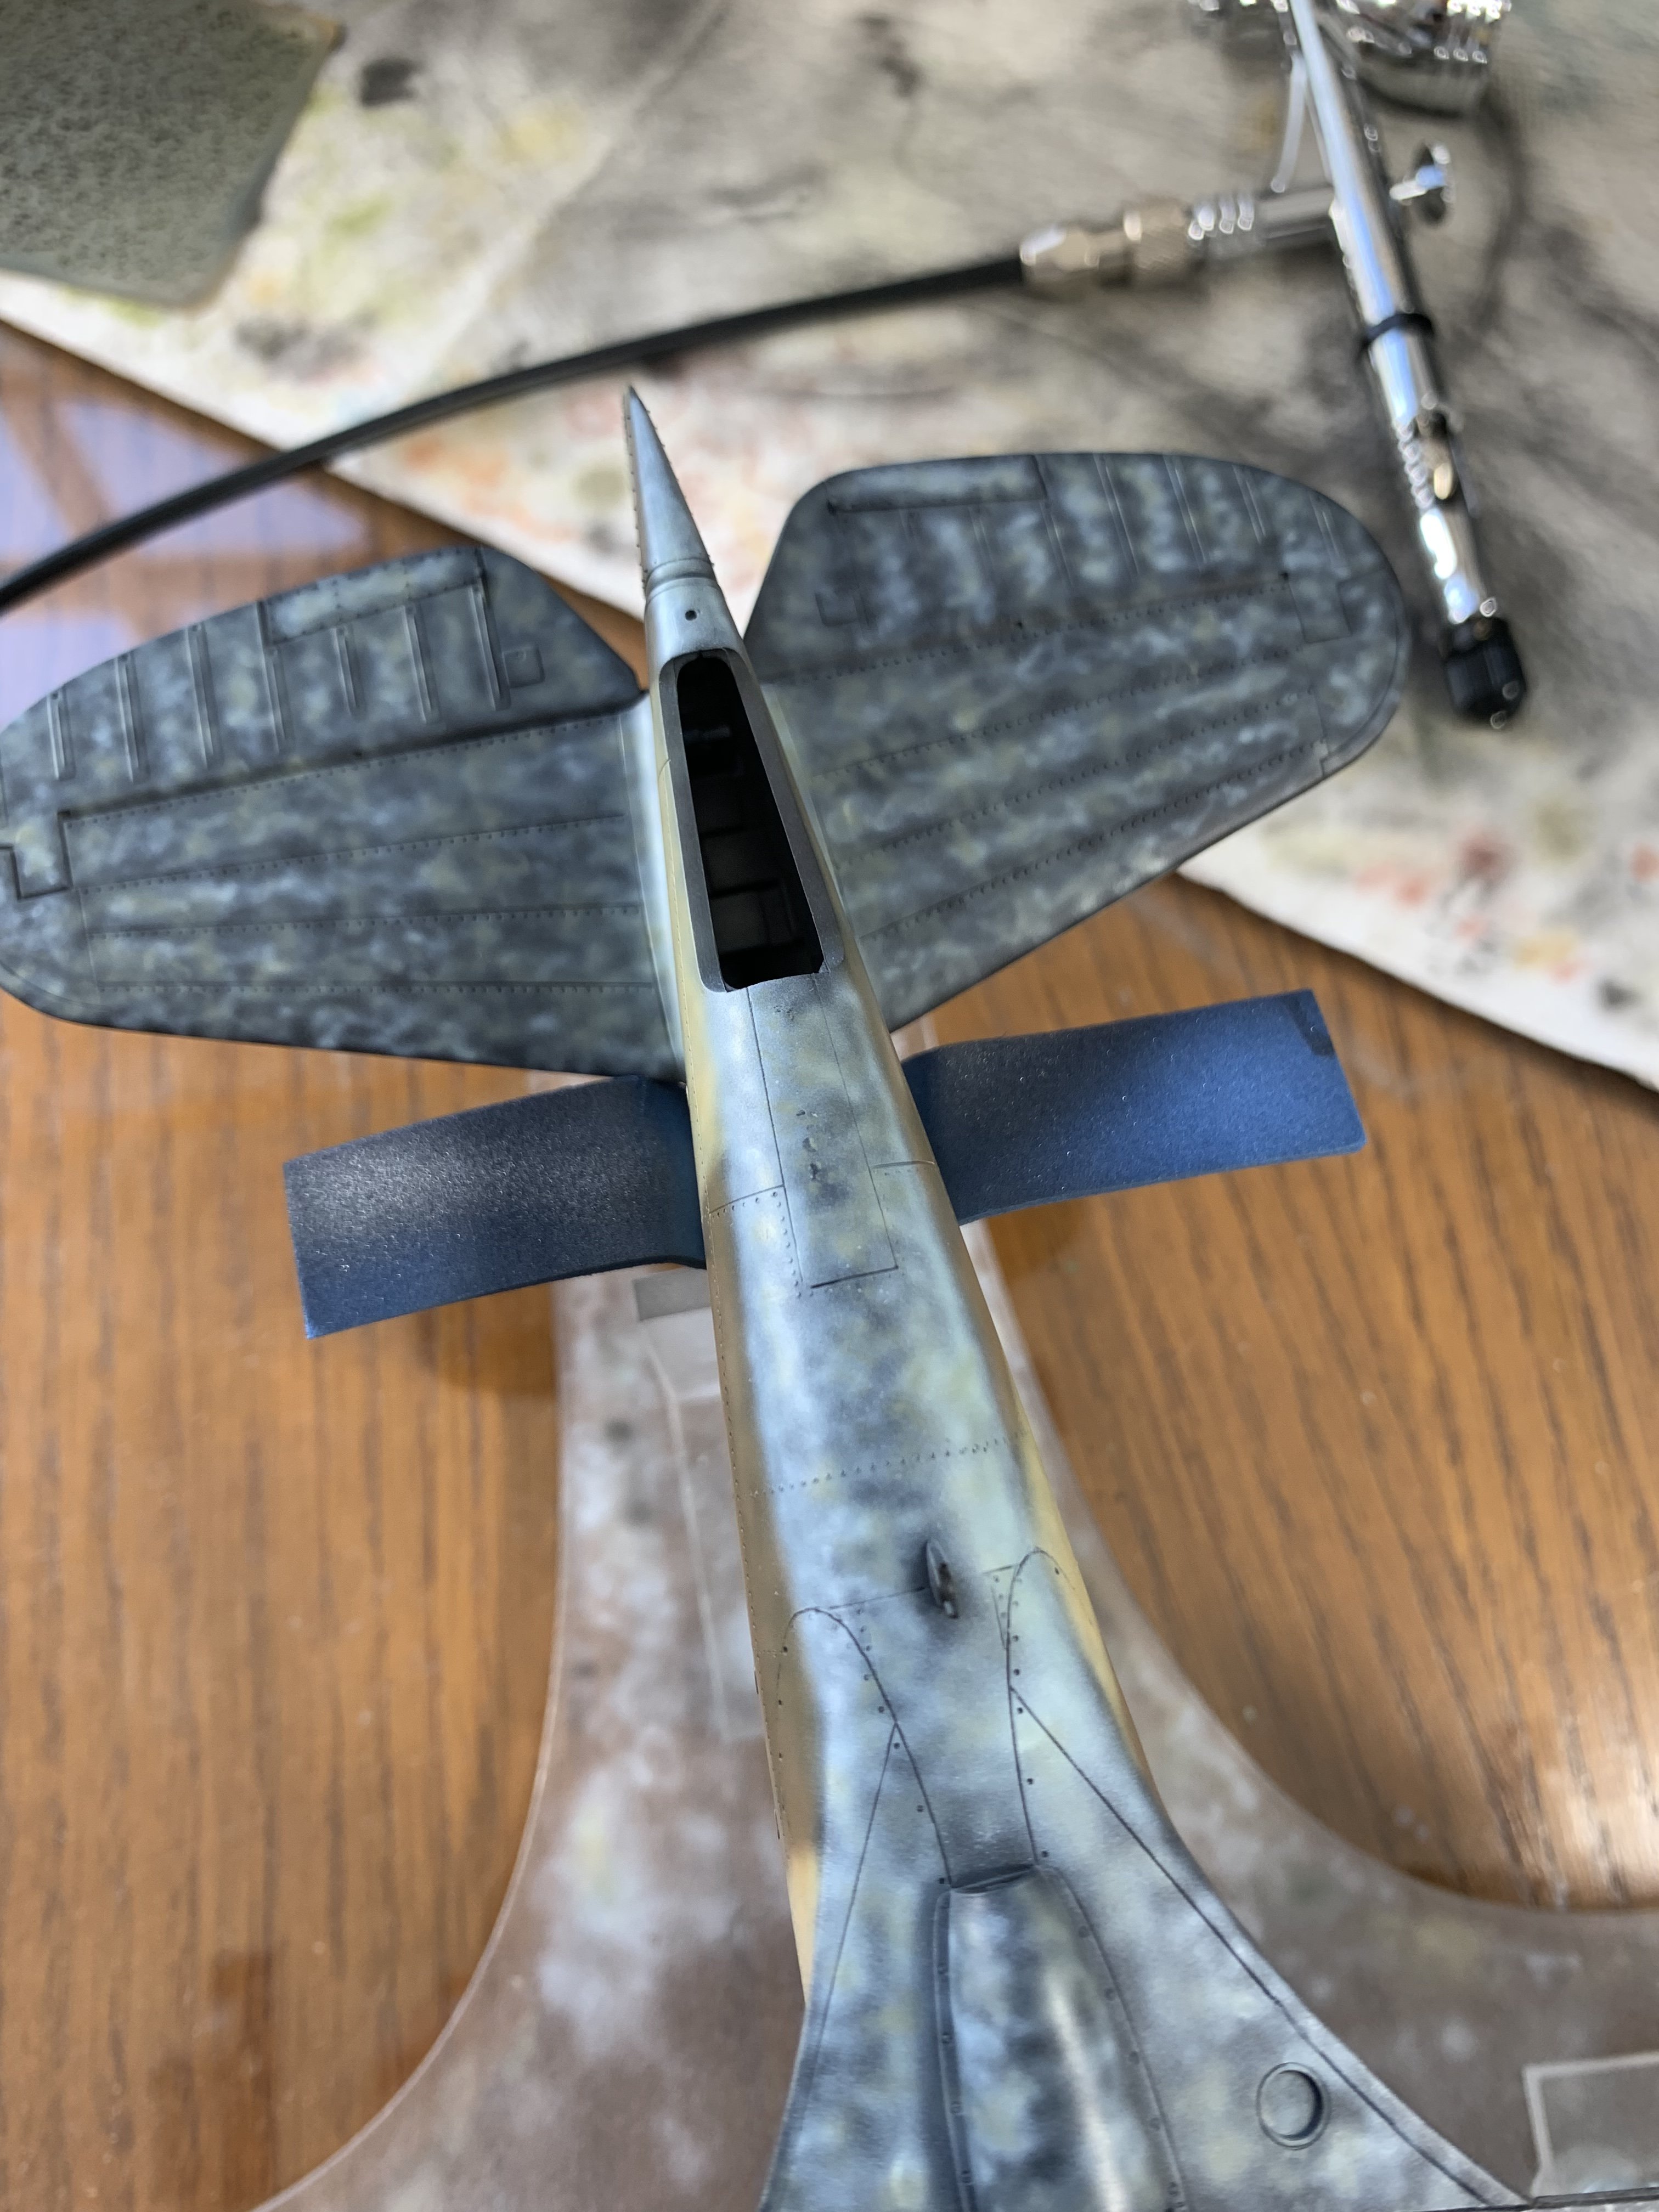
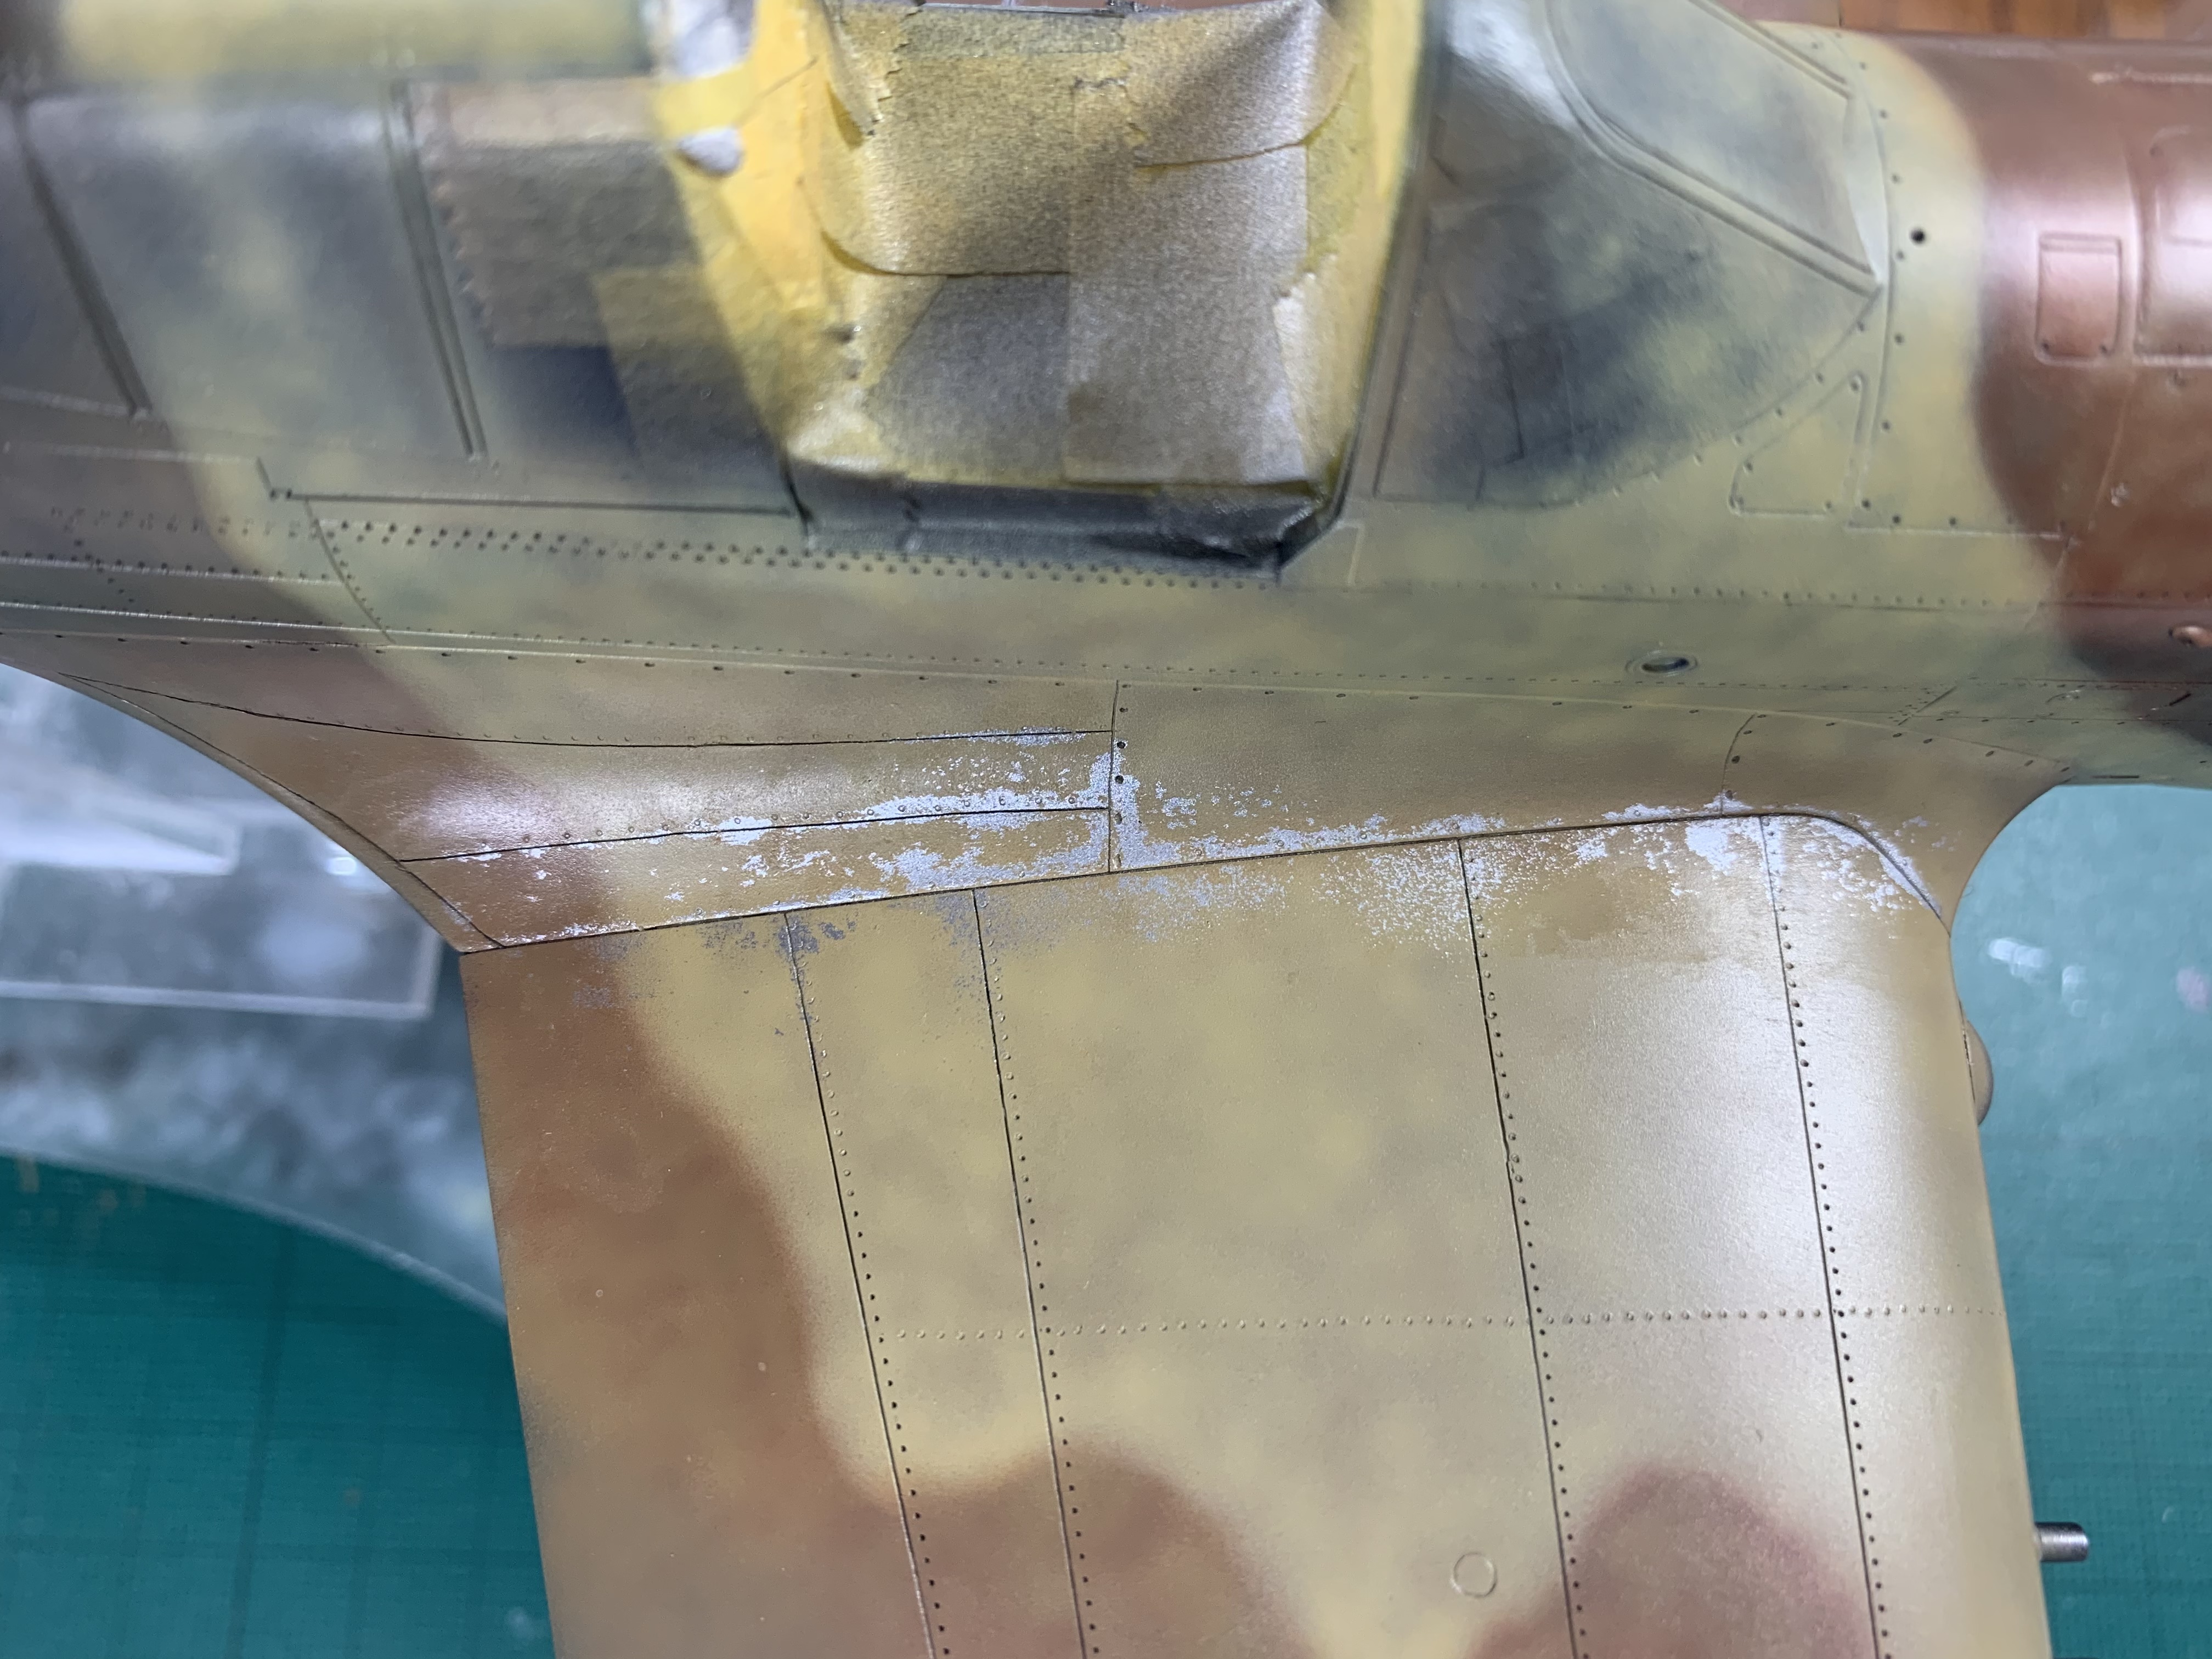
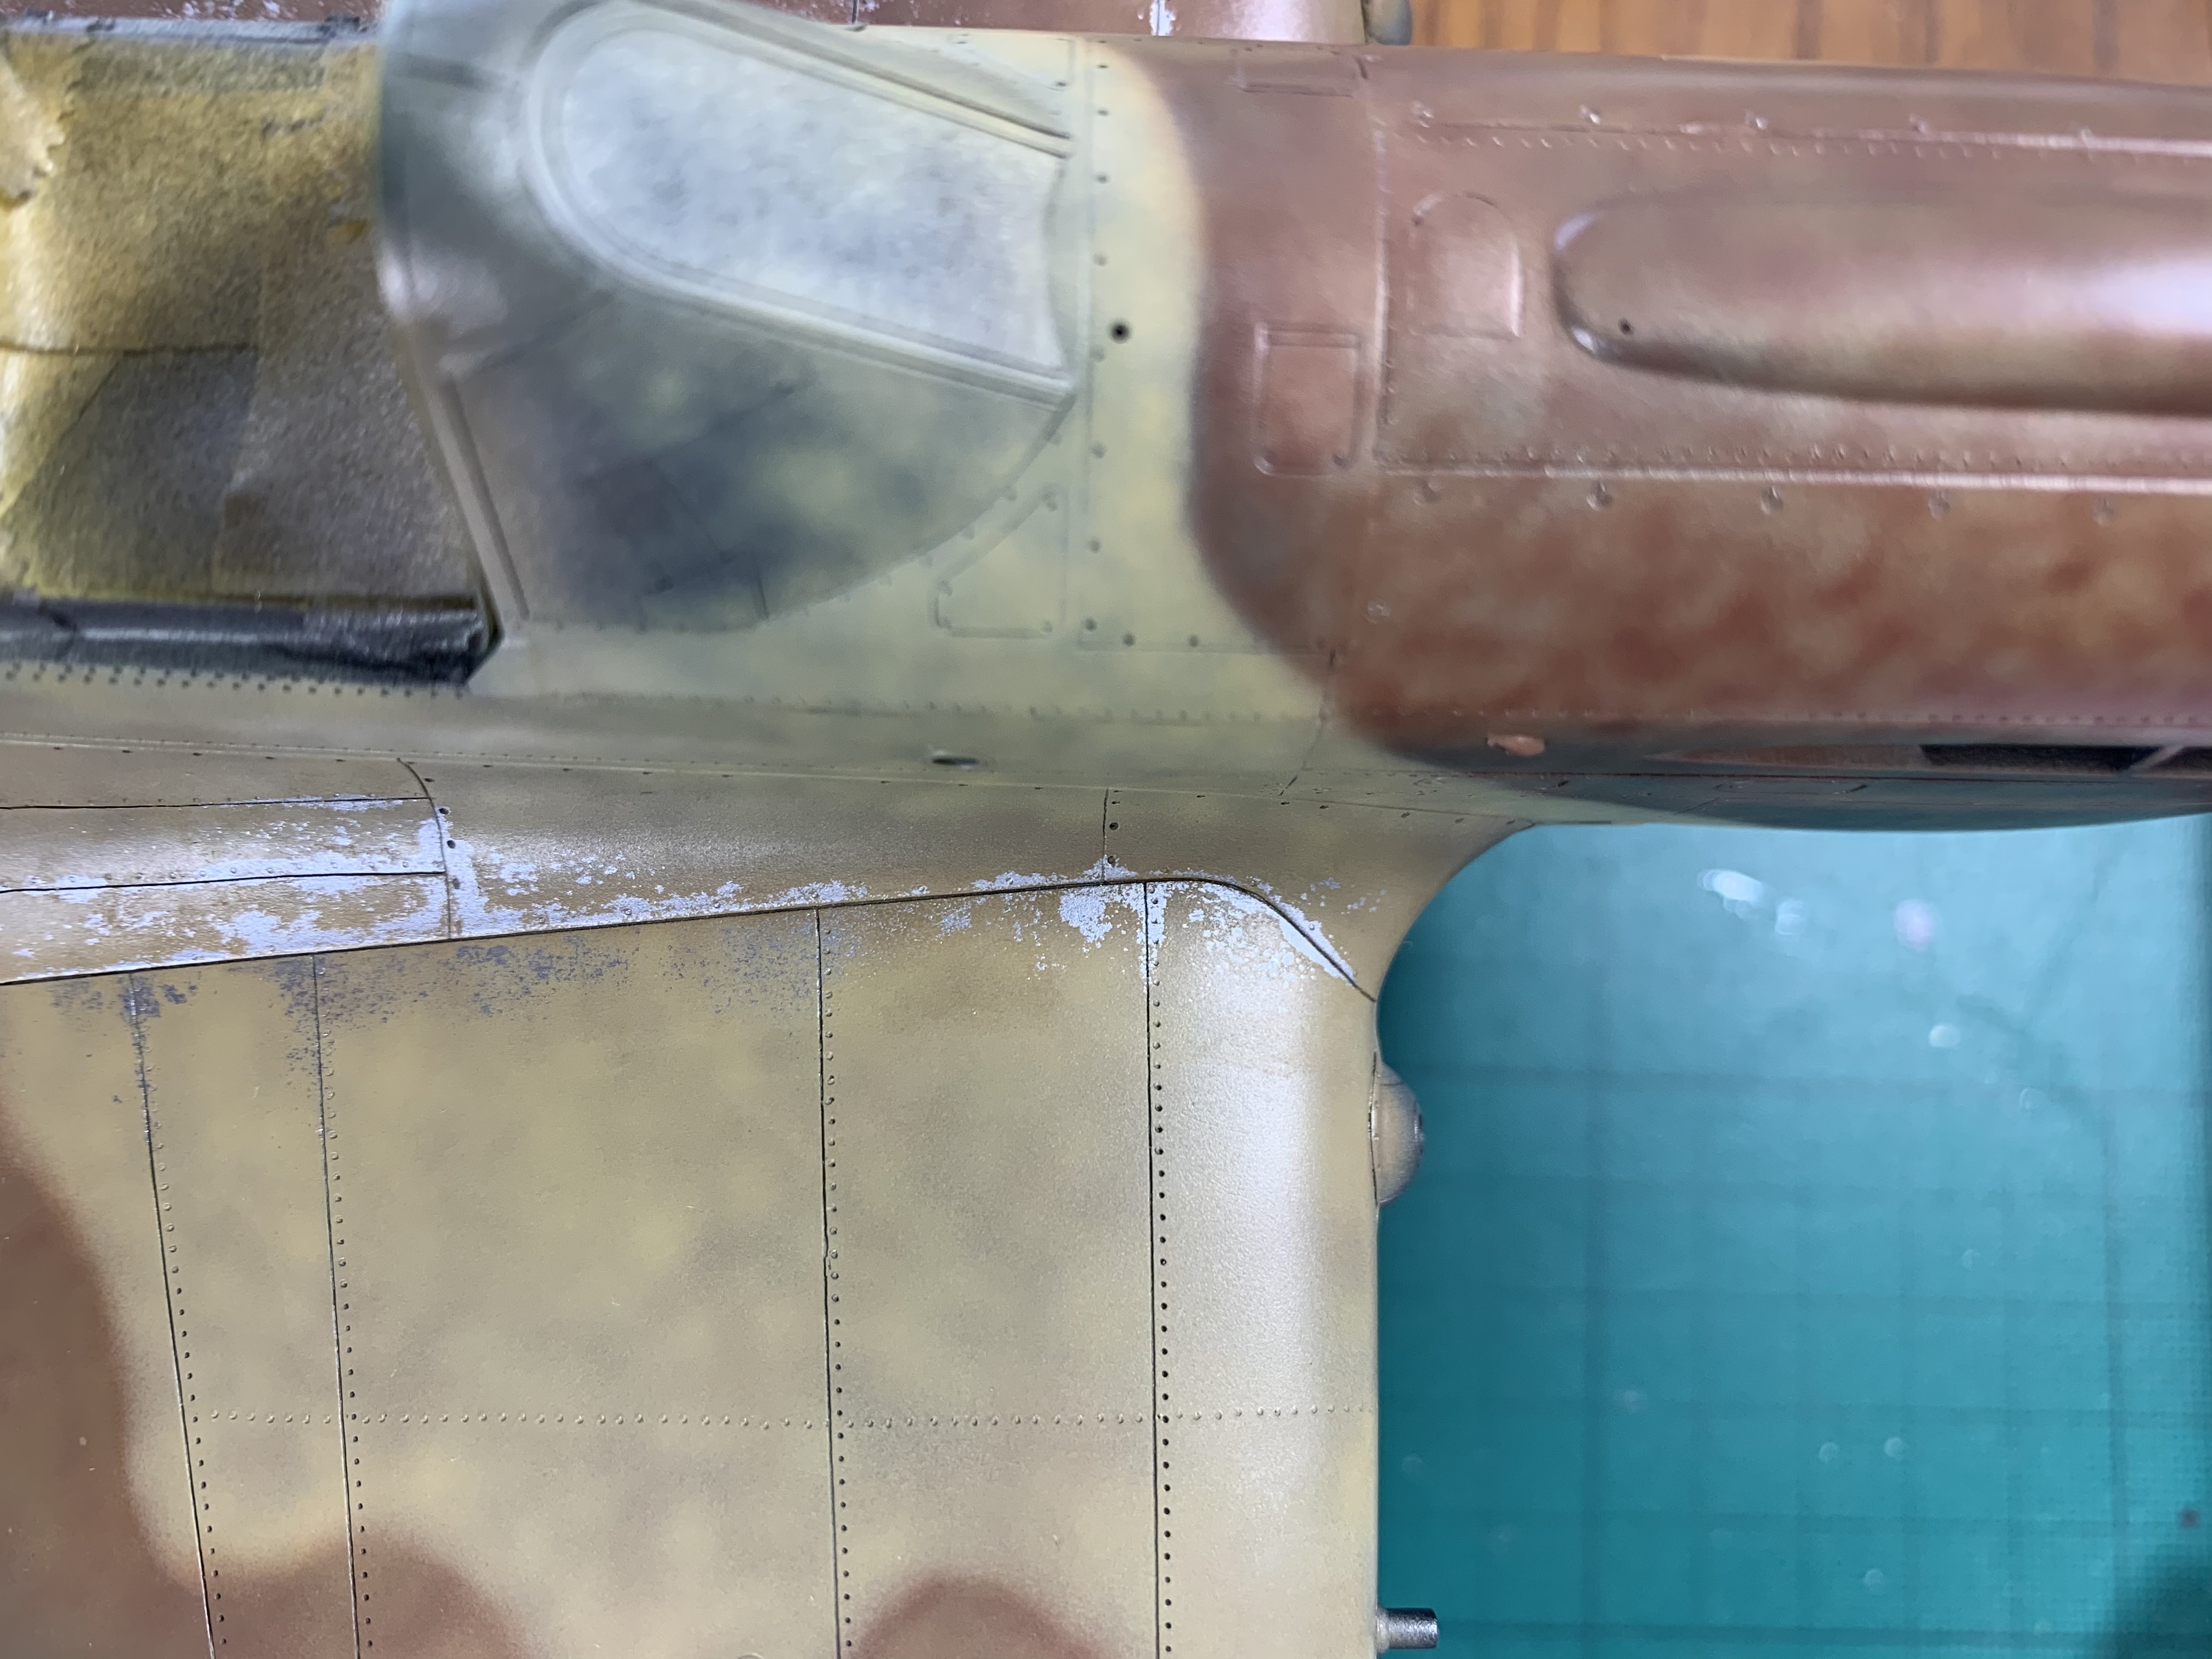
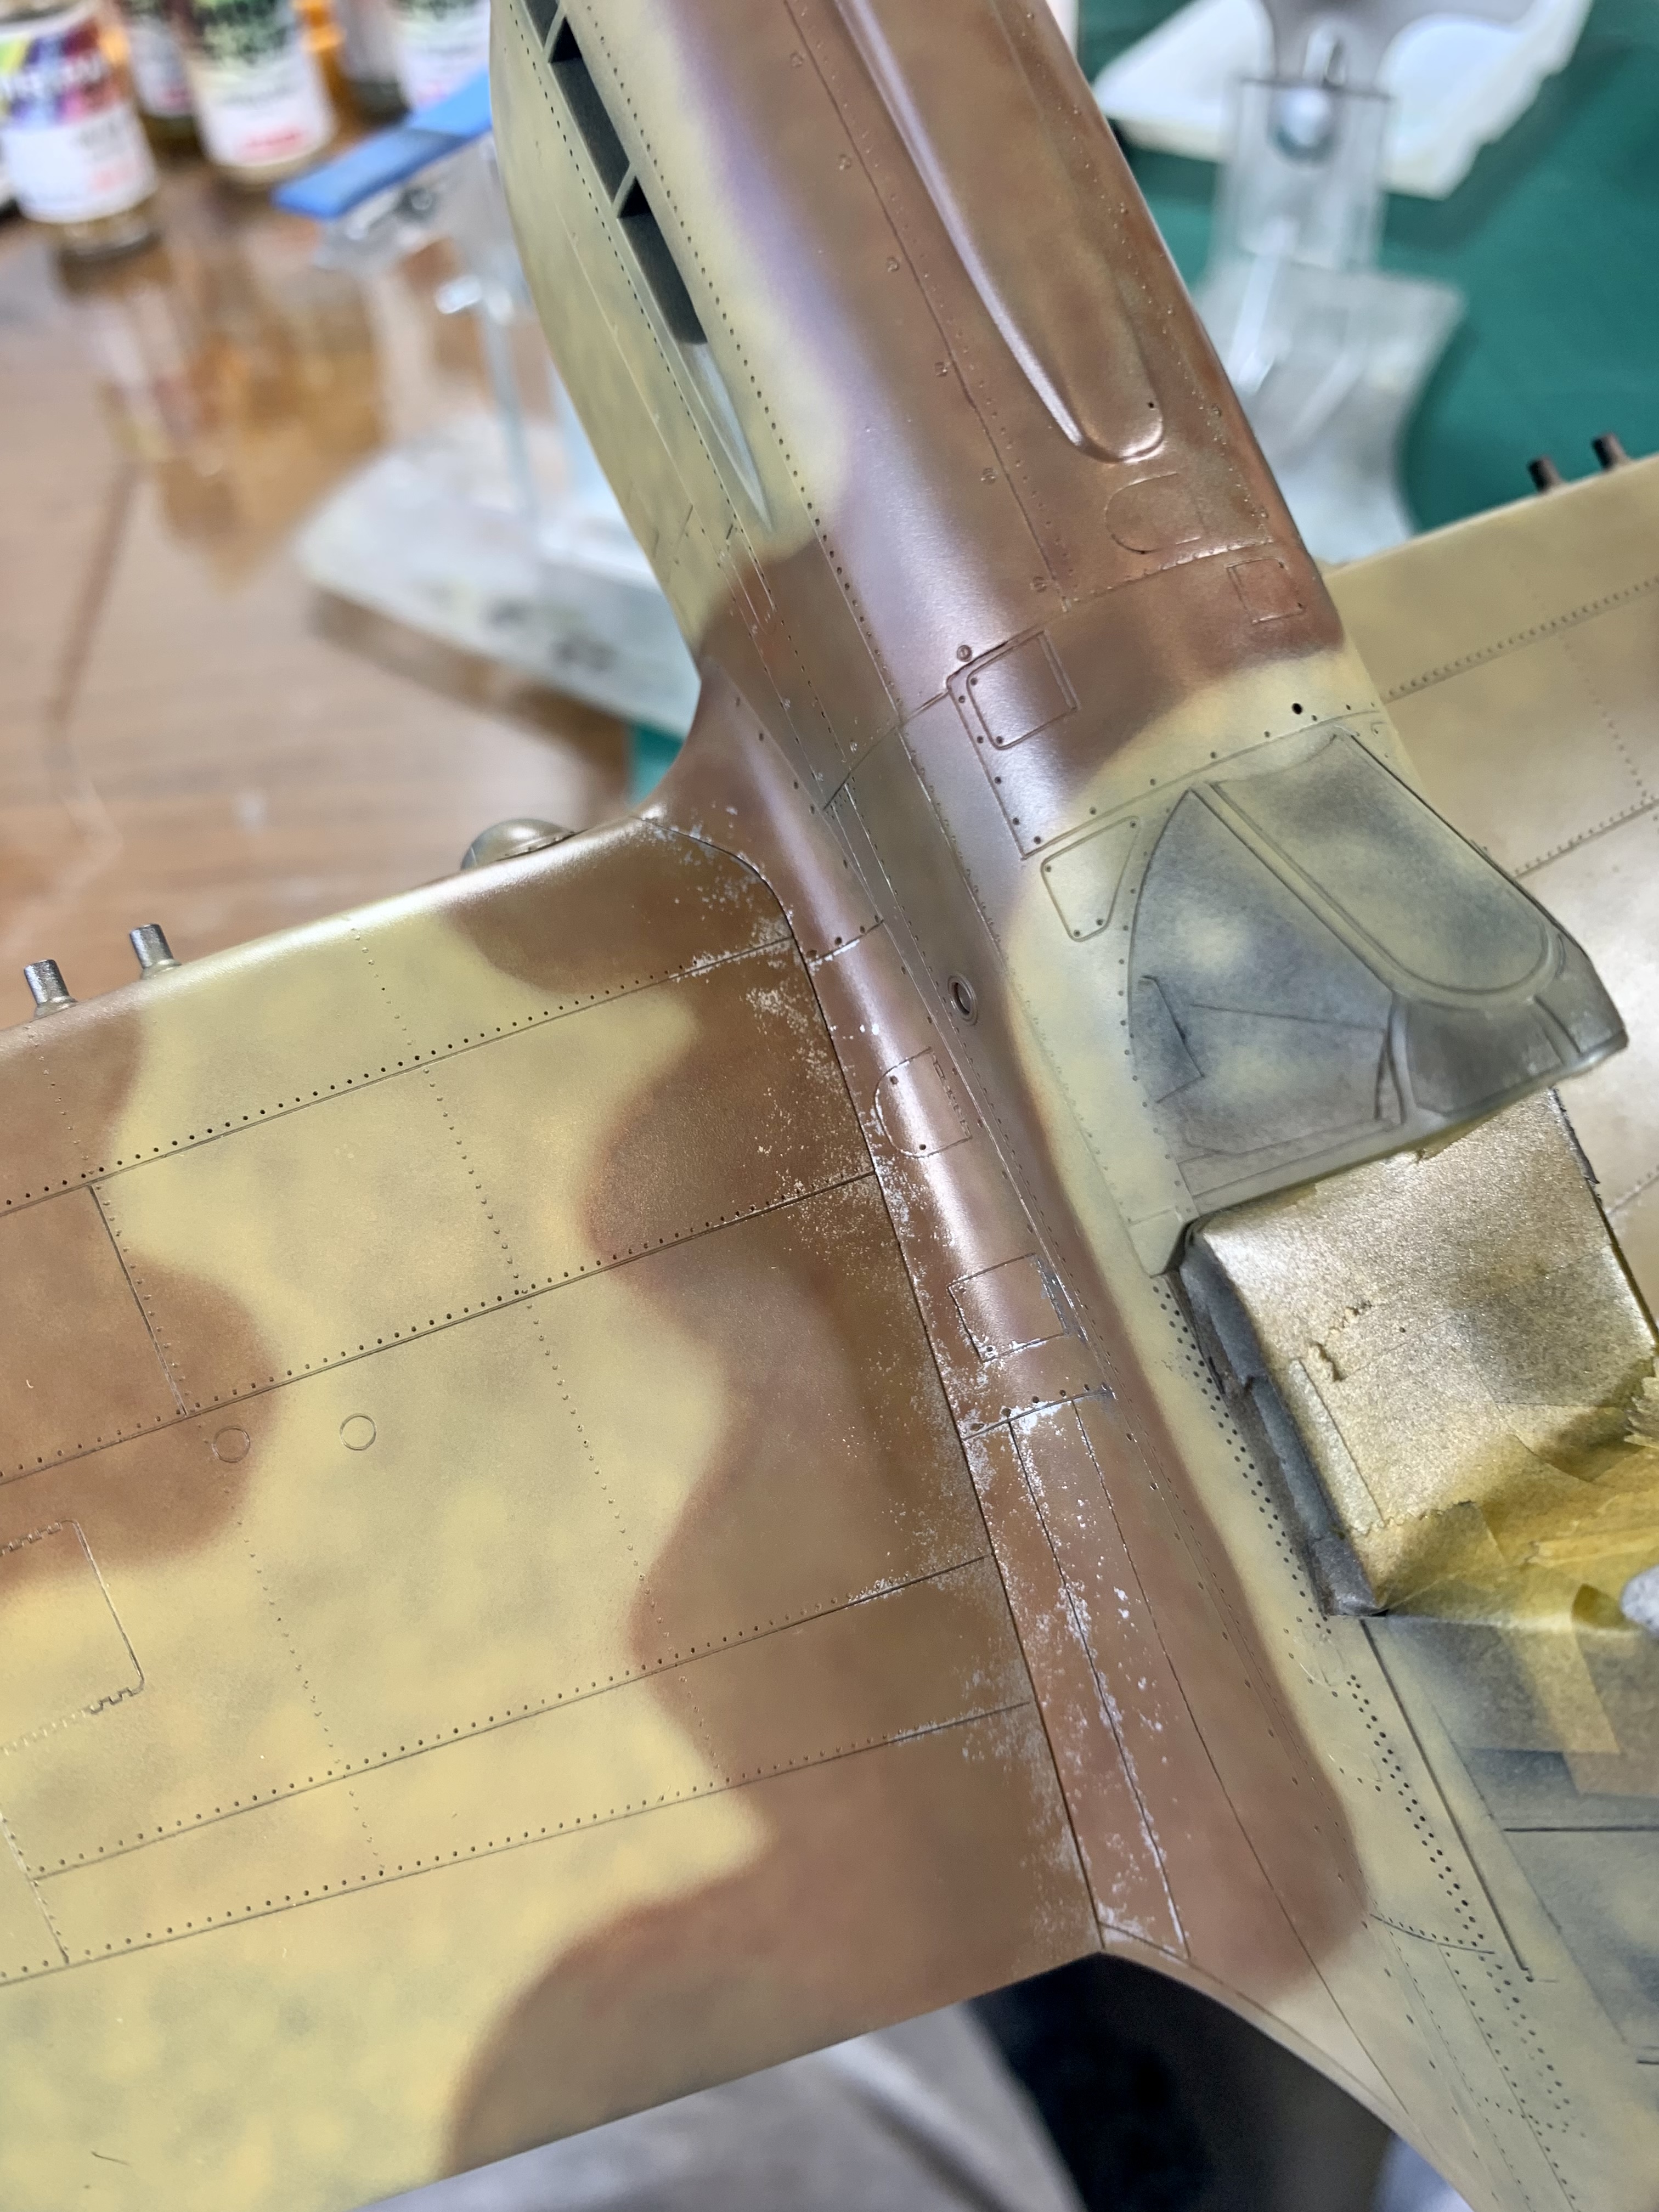
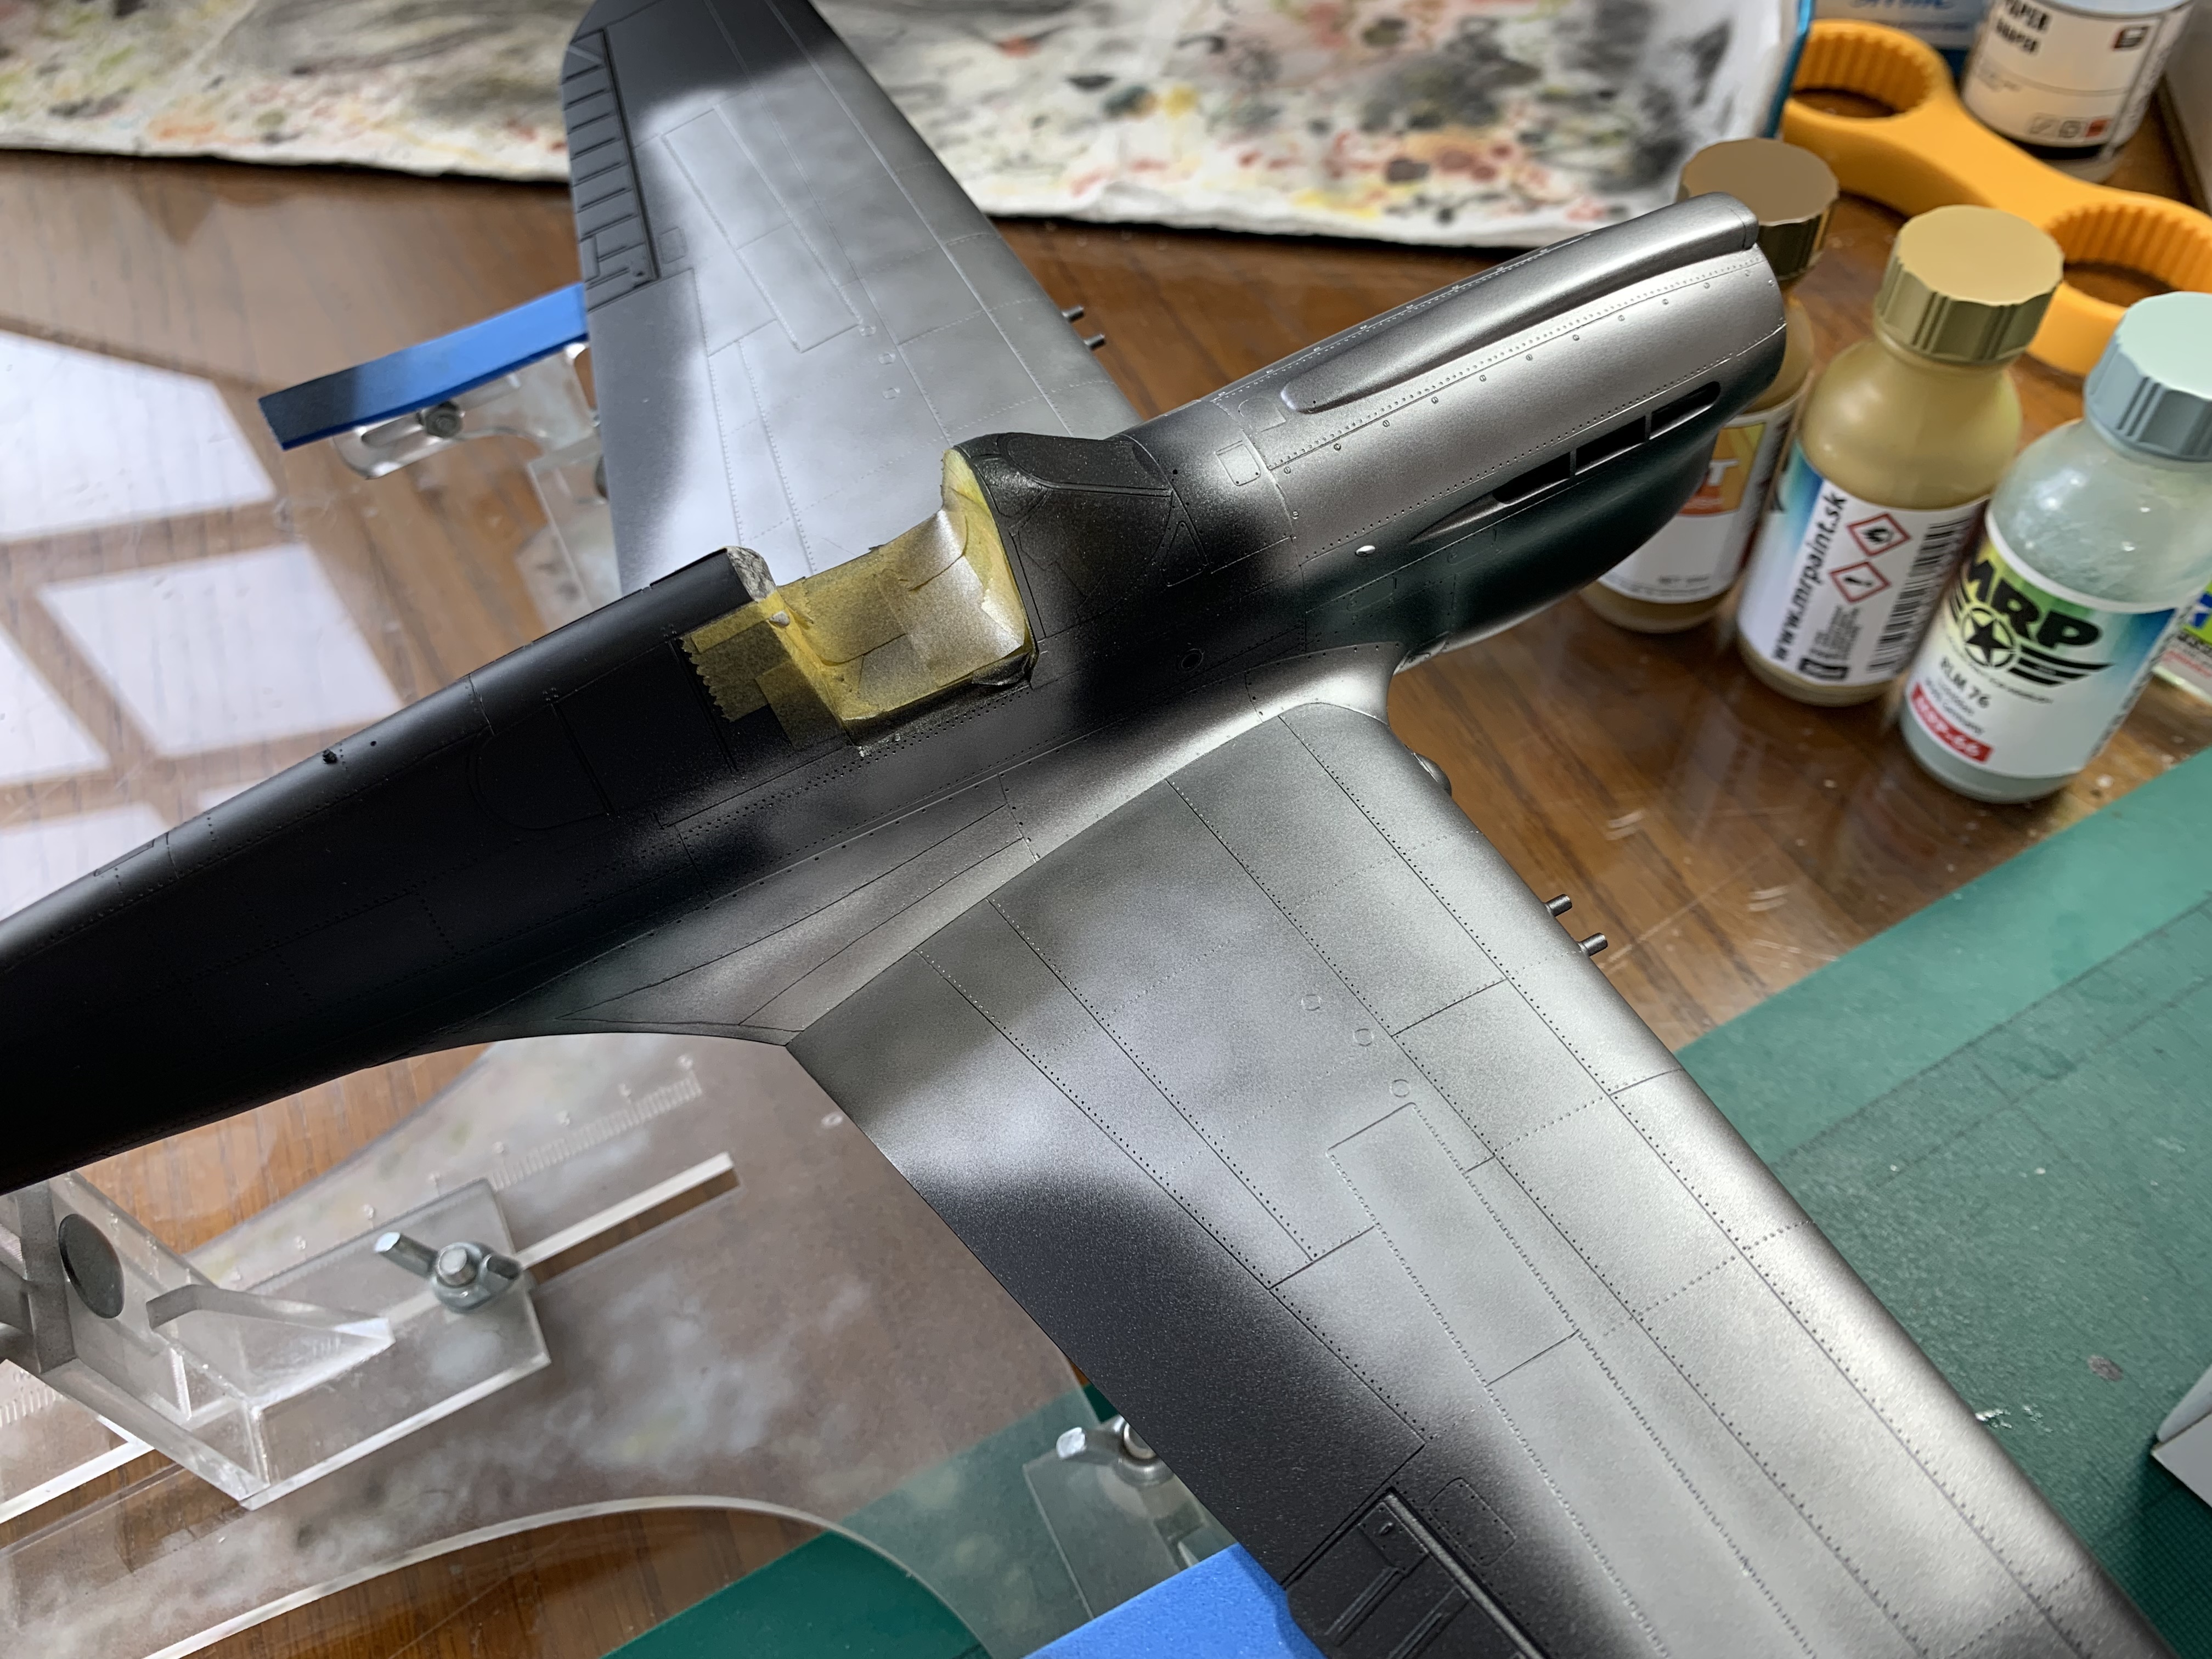
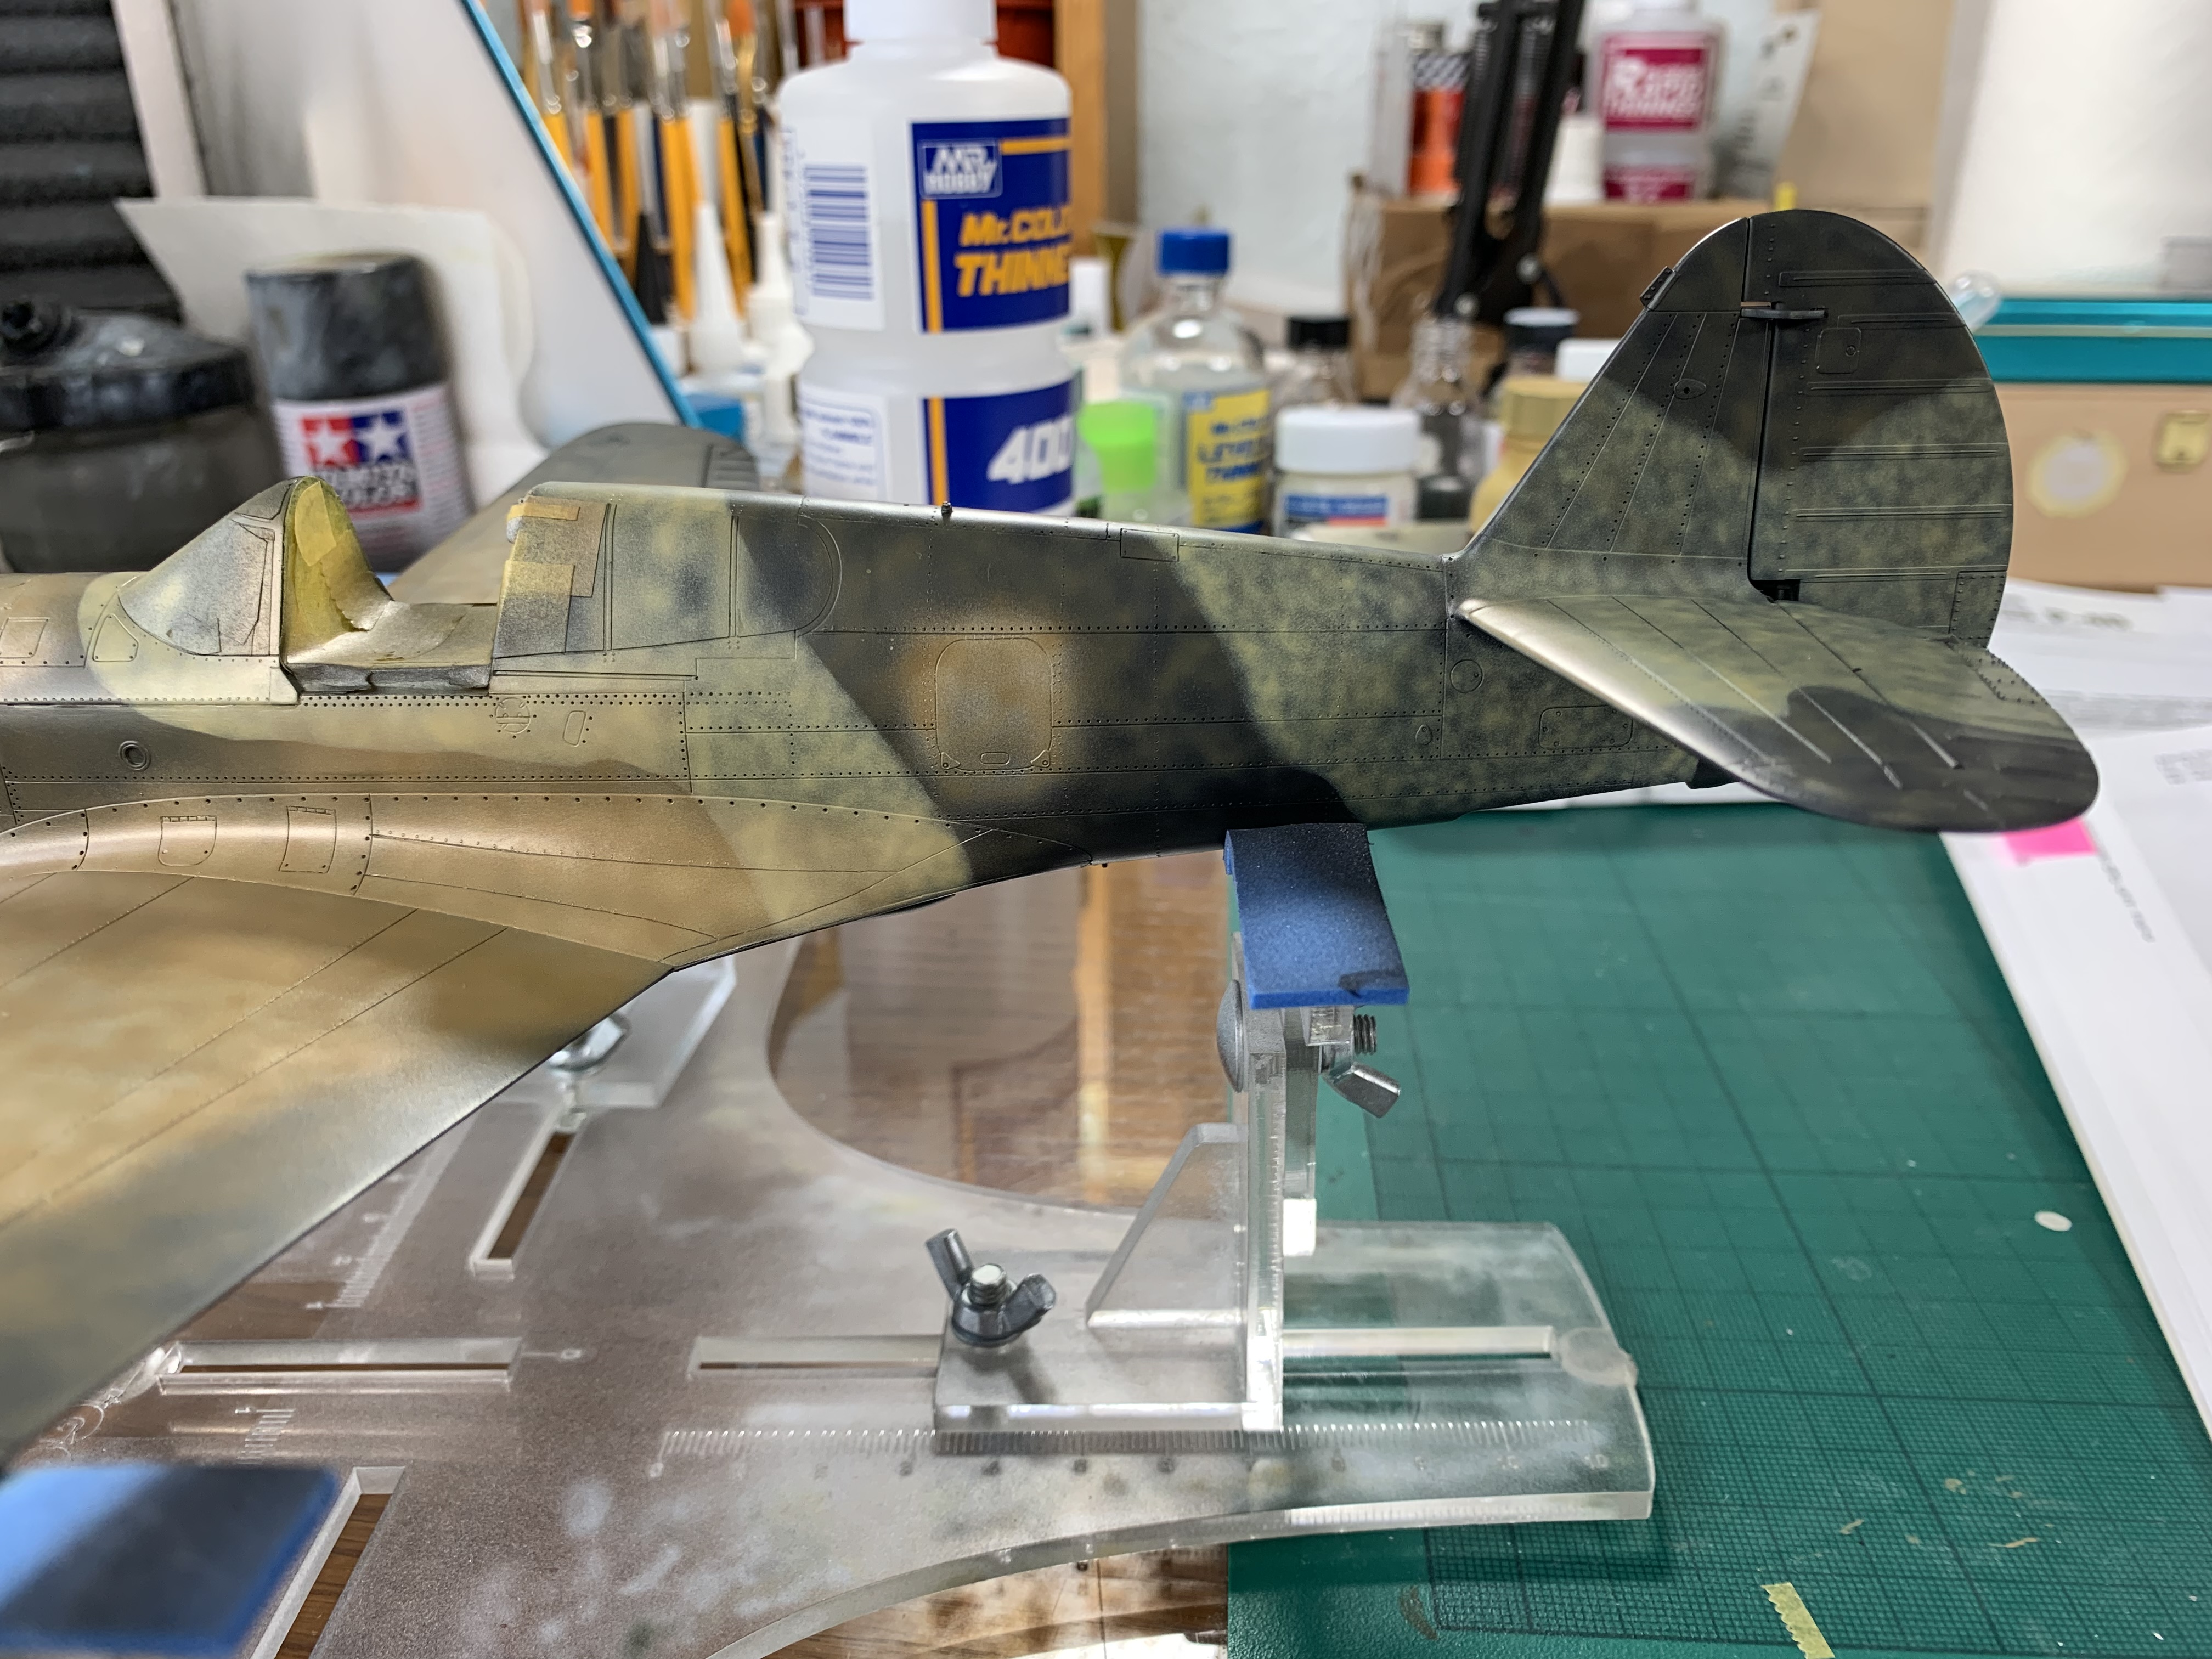
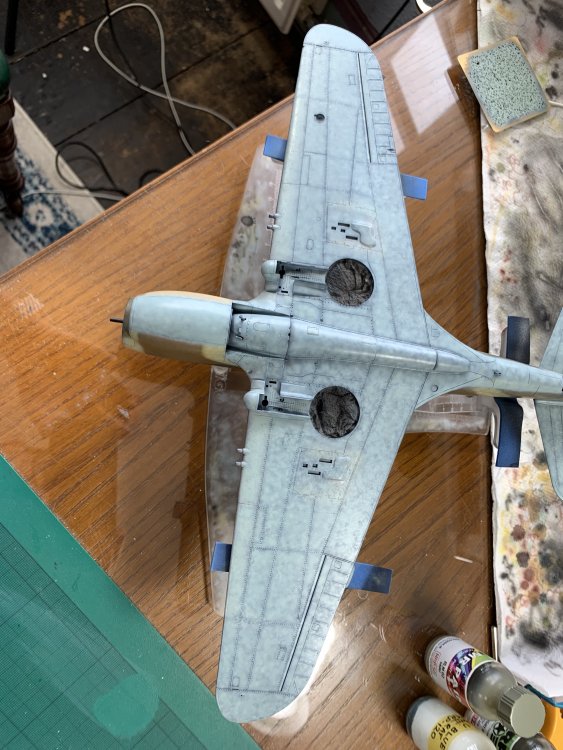
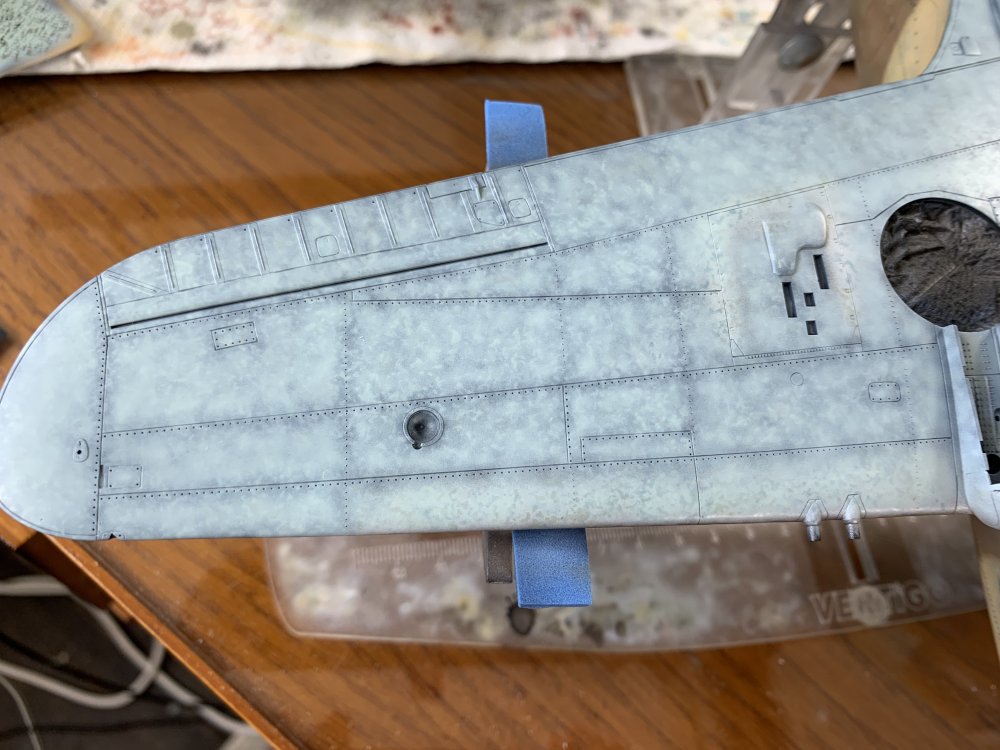
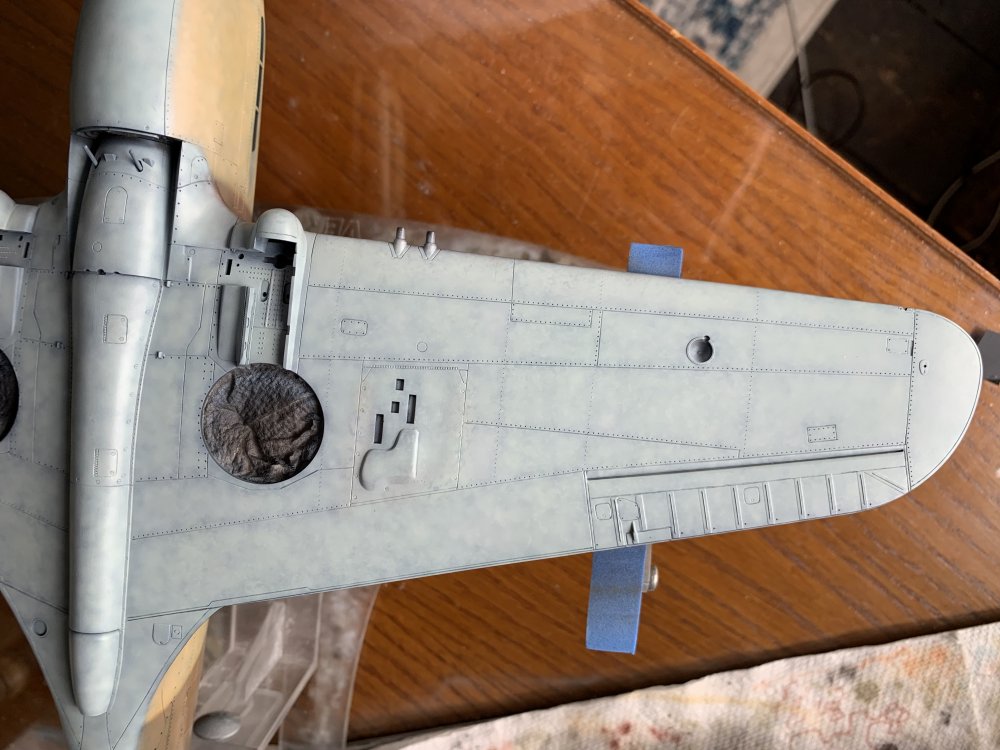
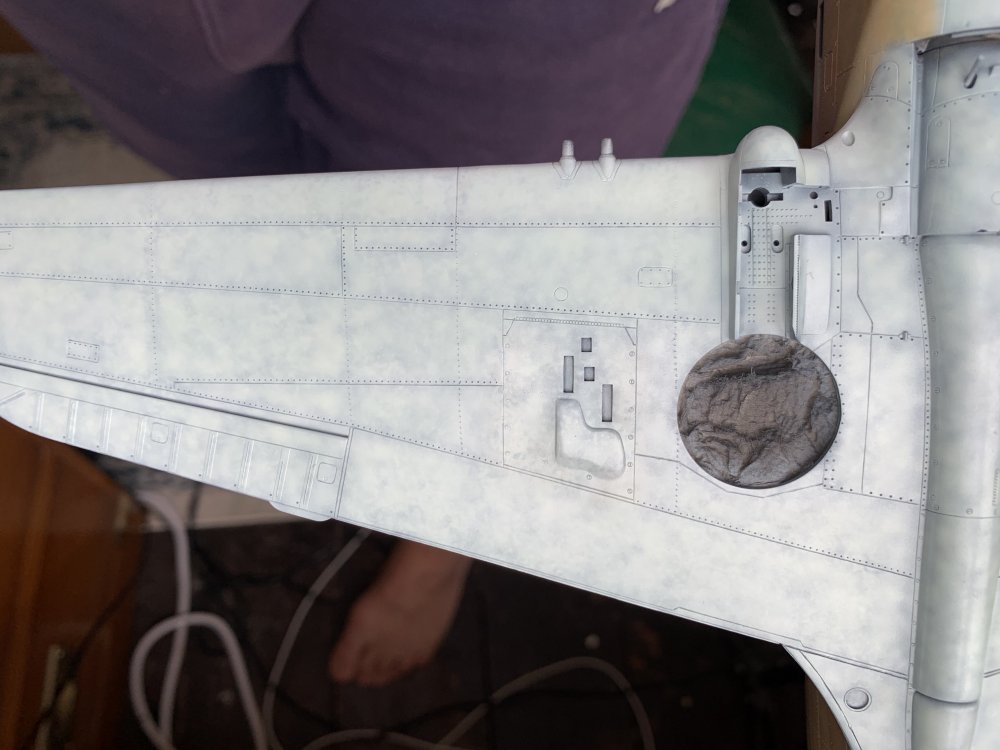
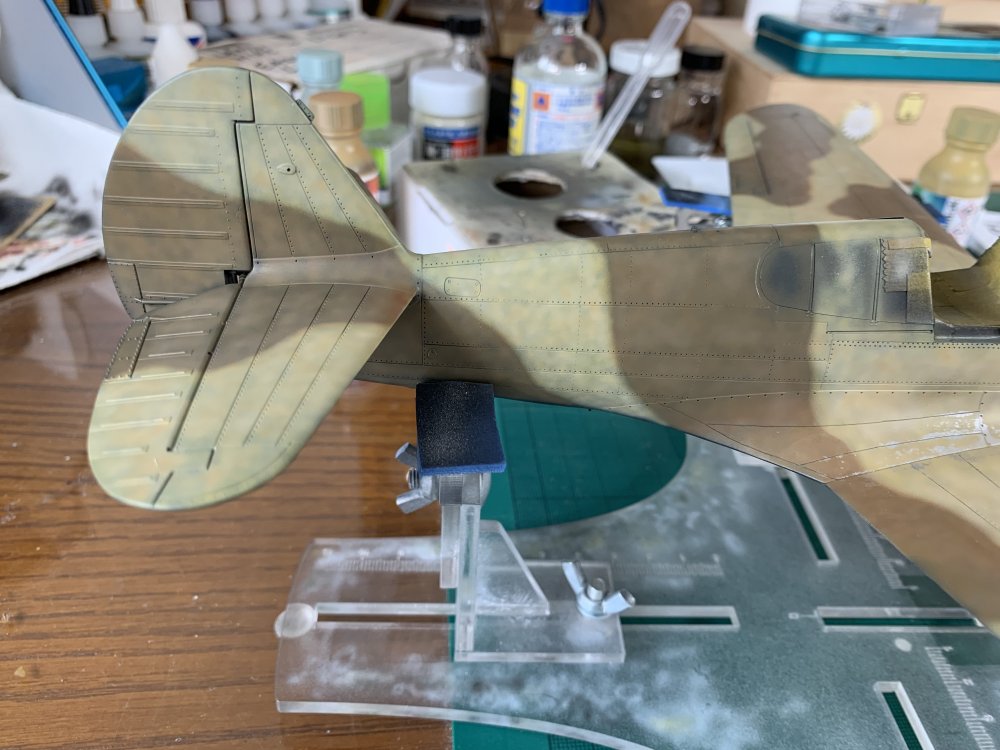
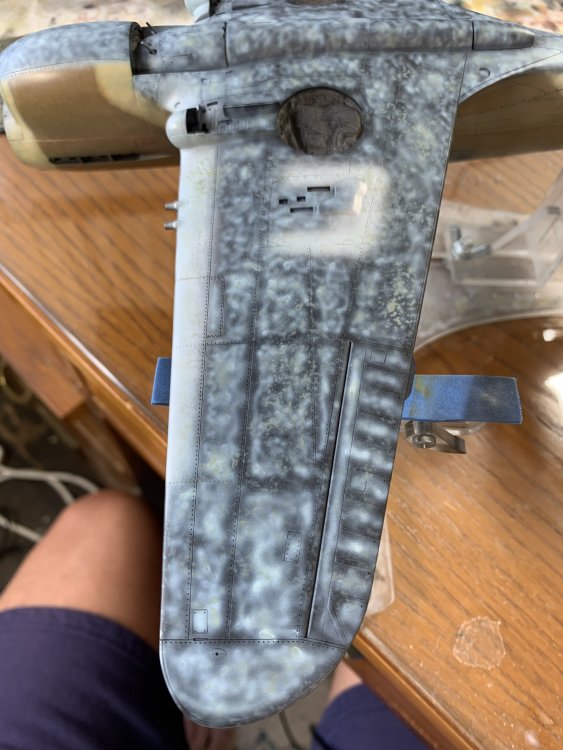
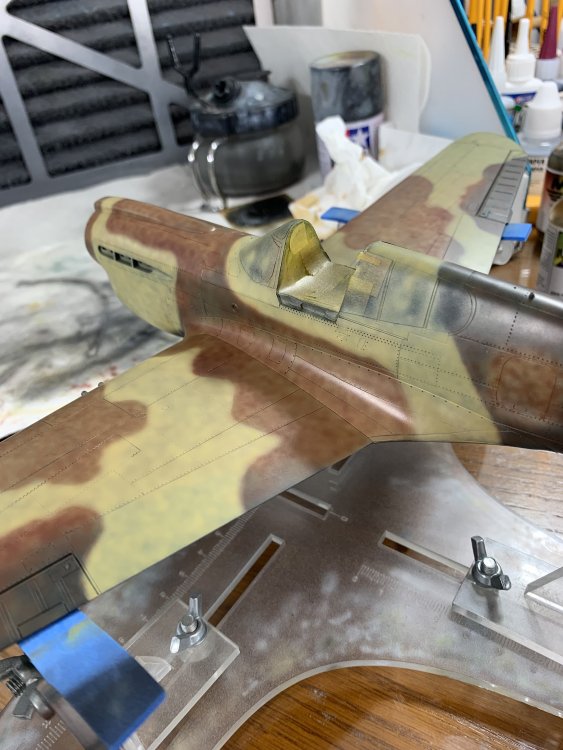
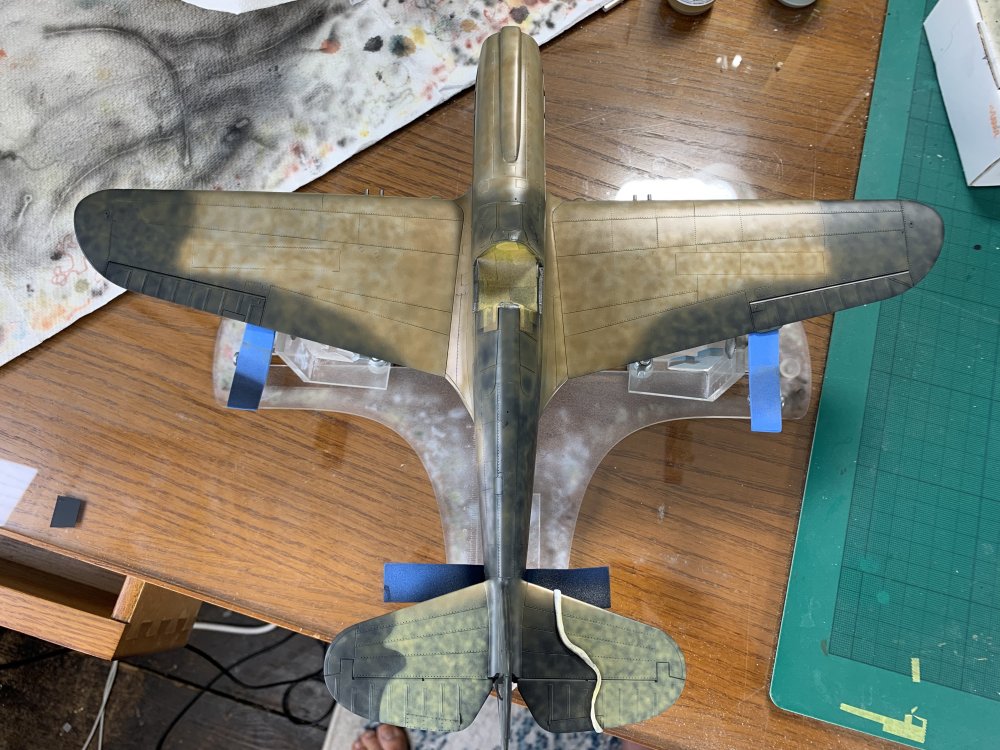
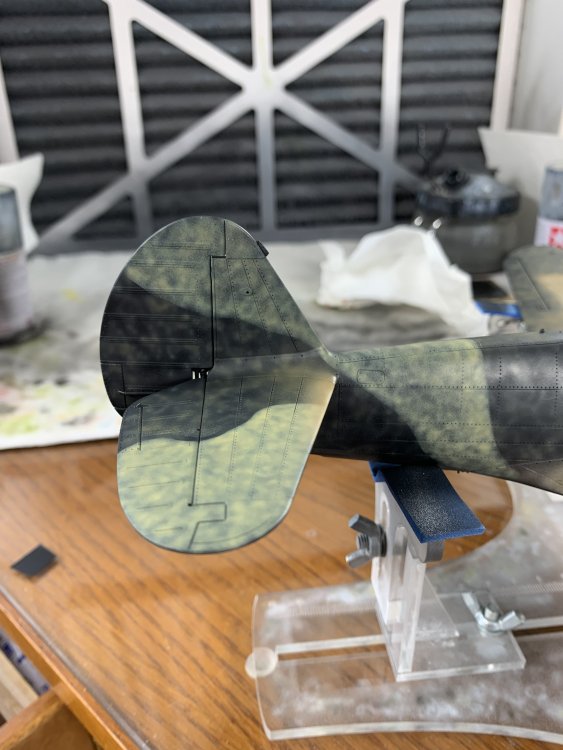
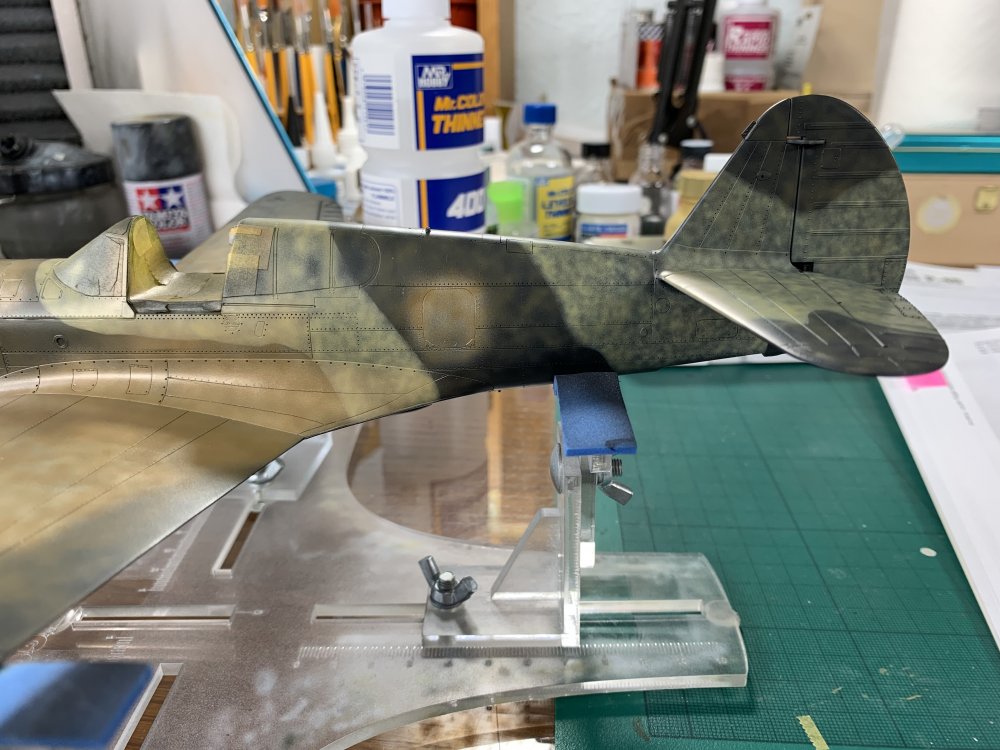
Progress has been slow recently but here is where we are at the moment… To recap these are the main colours used topside, where I did some extra blending so it looks like this - I must learn to take pics with my iPad because the phone ones make the colours look a bit funky / erratic… And then did some work on the undersides which, if you recall were not Azure but painted in the US as their version of Sky RLM76 *very* rough marbling first, and then some template work with RLM02… the areas of more solid blue / grey on wing leading edges and around the gun bay doors (which hinged and dropped down on the real thing) were given a quick shot of hairspray and to give me the option of doing some chipping later (not sure if I will). that’s all for now. cheers, Nick


-
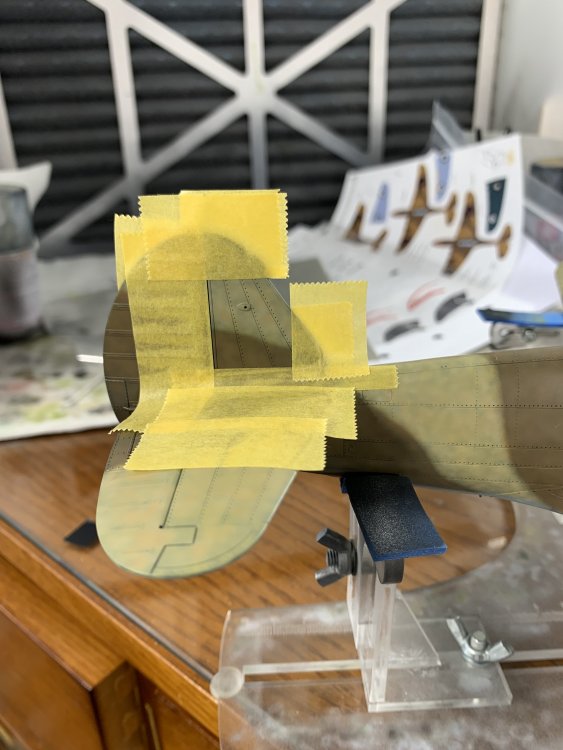
Not sure how well these pics show it as the iPhone struggles with the extreme brightness of my lamps but I revisited the port side chipping with the aim of increasing coverage and size of chips I also did some leading edge chipping - outboard of the guns I purposely chipped a very large (unrealistic) section as this will go under the yellow strip ie be chipped again.


-
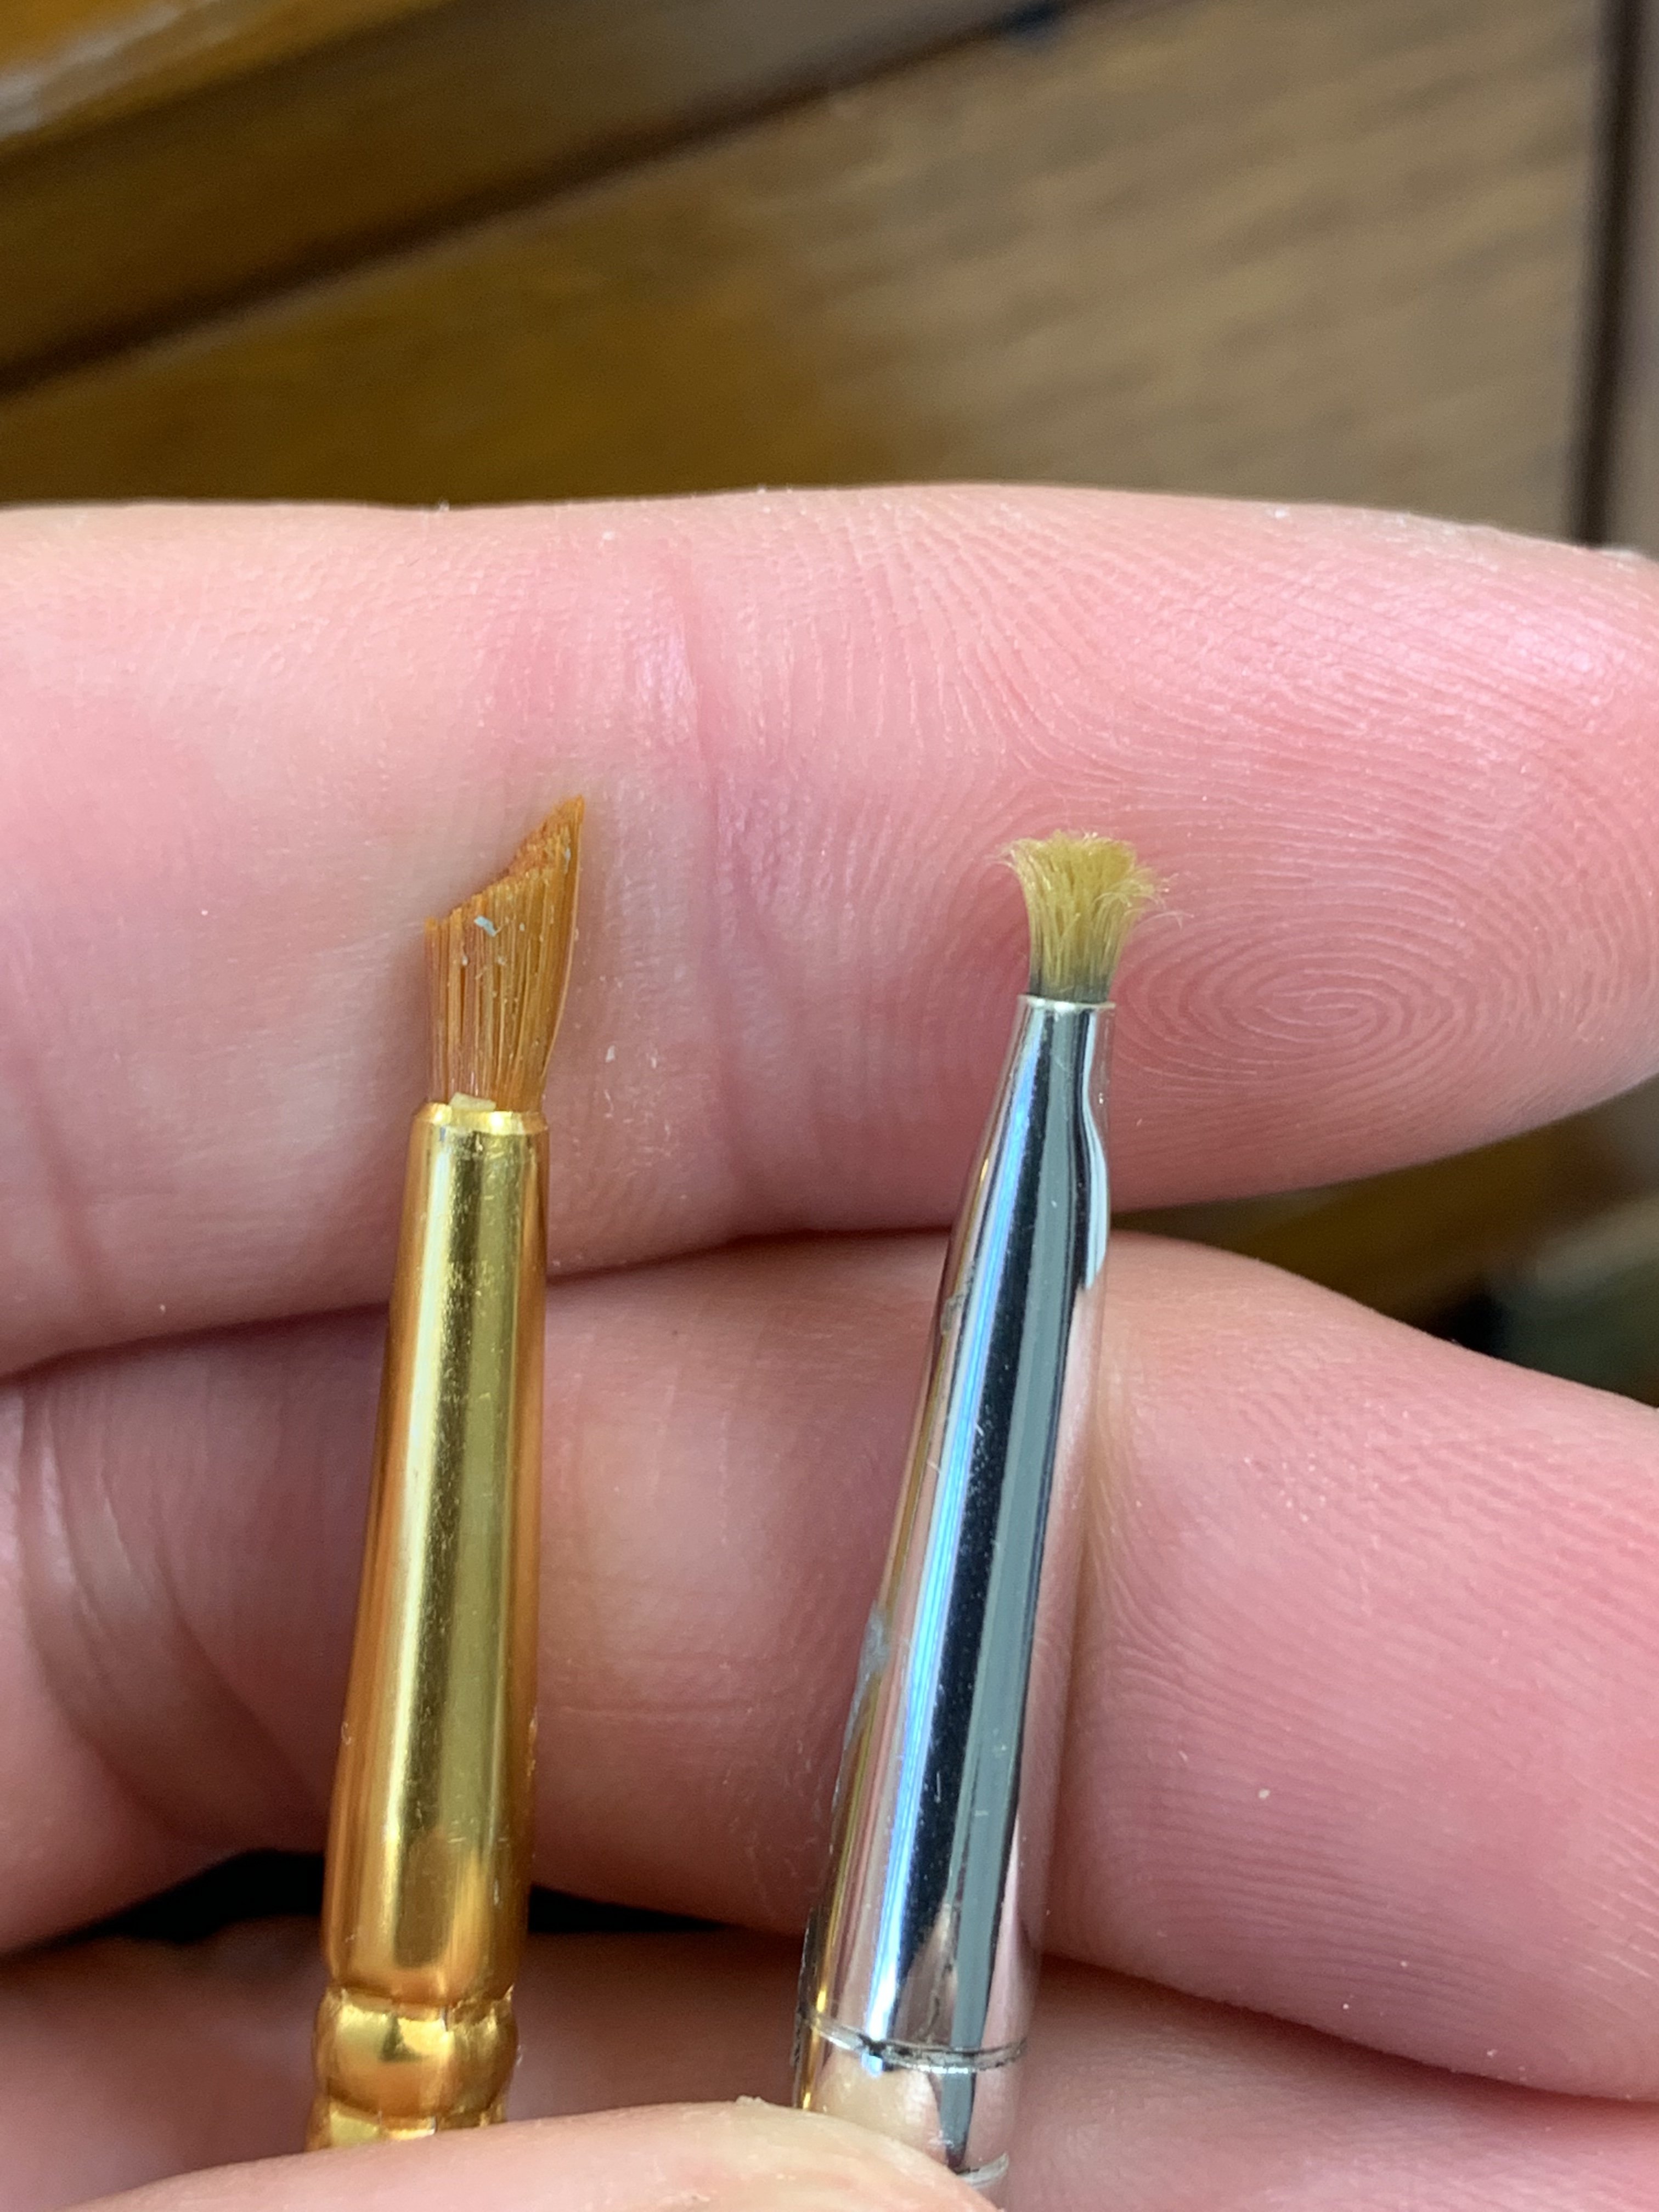
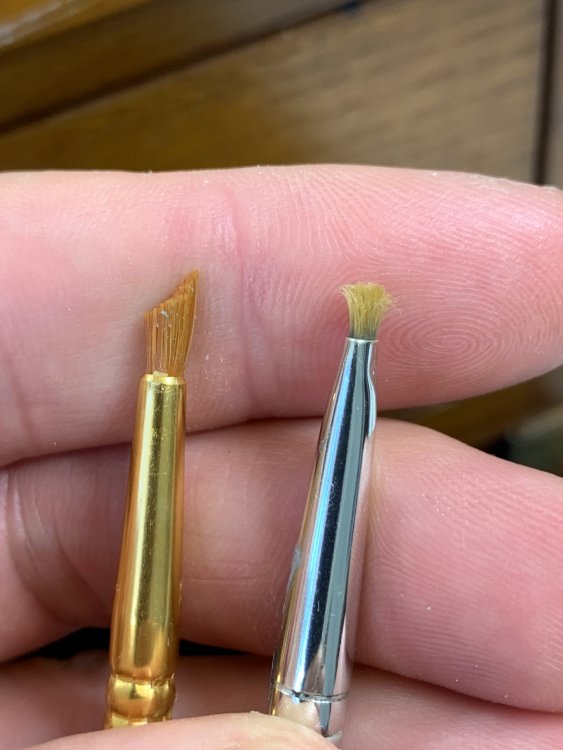
Chipping! so hairspray and everything above was done Sunday, and chipping done Monday afternoon. I have found that when I left it 24hrs or so I got better control - you can of course chip pretty much straight after the MRP goes down but the delay helps (I have found) go from micro chips up, rather than having the odd larger one suddenly appear. MRP **will** chip many weeks after btw the brushes I use are just snipped off knackered old ones; I have also used a fibre pen thingy but find they can be too abrasive so be careful key is patience and good light, and keep turning you head / the model to check what is happening because even under magnification you mag find you have actually started chipping - sometimes even larger ones - without them catching the light anyway the pictures are presented in order to show some progression I suggest doing some one side, step back and see what you think , and then do the other side, and if you want more then return to the first etc, but of course there’s no ‘right’ way to do this


-
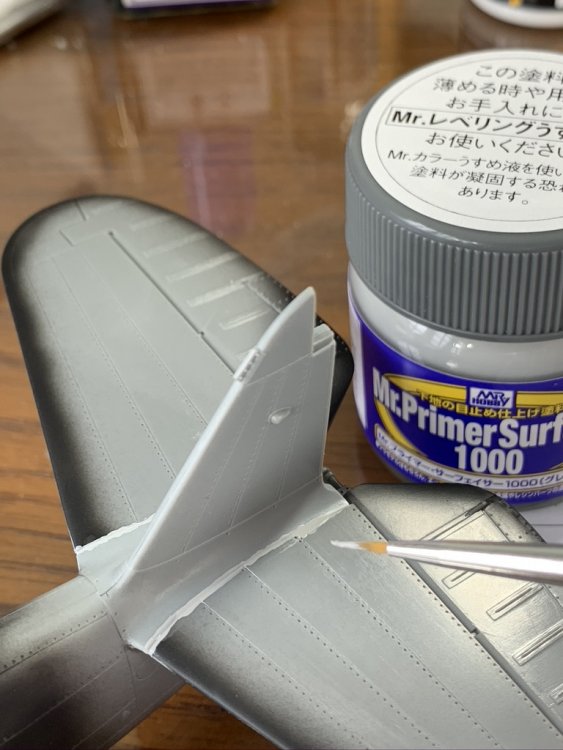
process: primer - MS1500 thinned with MLT then some light sanding with Infini 4000 if any rough areas (there shouldn't be, but it's easier sanding primer than paint!) MRP silver (and i realise i went TOTALLY overboard in where i put it) hairspray MRP colours the colour was laid down using PS-771 which is just awesome i got mine for £175 from ebay direct from Japan, and escaped the customs charge etc even if i had got nailed, it was still materially cheaper than anywhere in Europe / UK, and arrived in less than a week it is one of those brushes which you have to try to believe spending £100 less on another brush for your detail work is in my view a false economy (should your funds permit of course) i have never heard of pebbling with MS1500 and MRP paints - other stuff who knows note I am not laying down 'gloss black' per se, it's just primer on a well-prepared (in theory!) surface the result should be super smooth when you run your finger over it if it's not, you either had some gruff areas from construction, or you were not laying the paint down properly I like MS1500 and MRP because they are super durable, dry in seconds, and spray like nothing else out there hope this helps
-
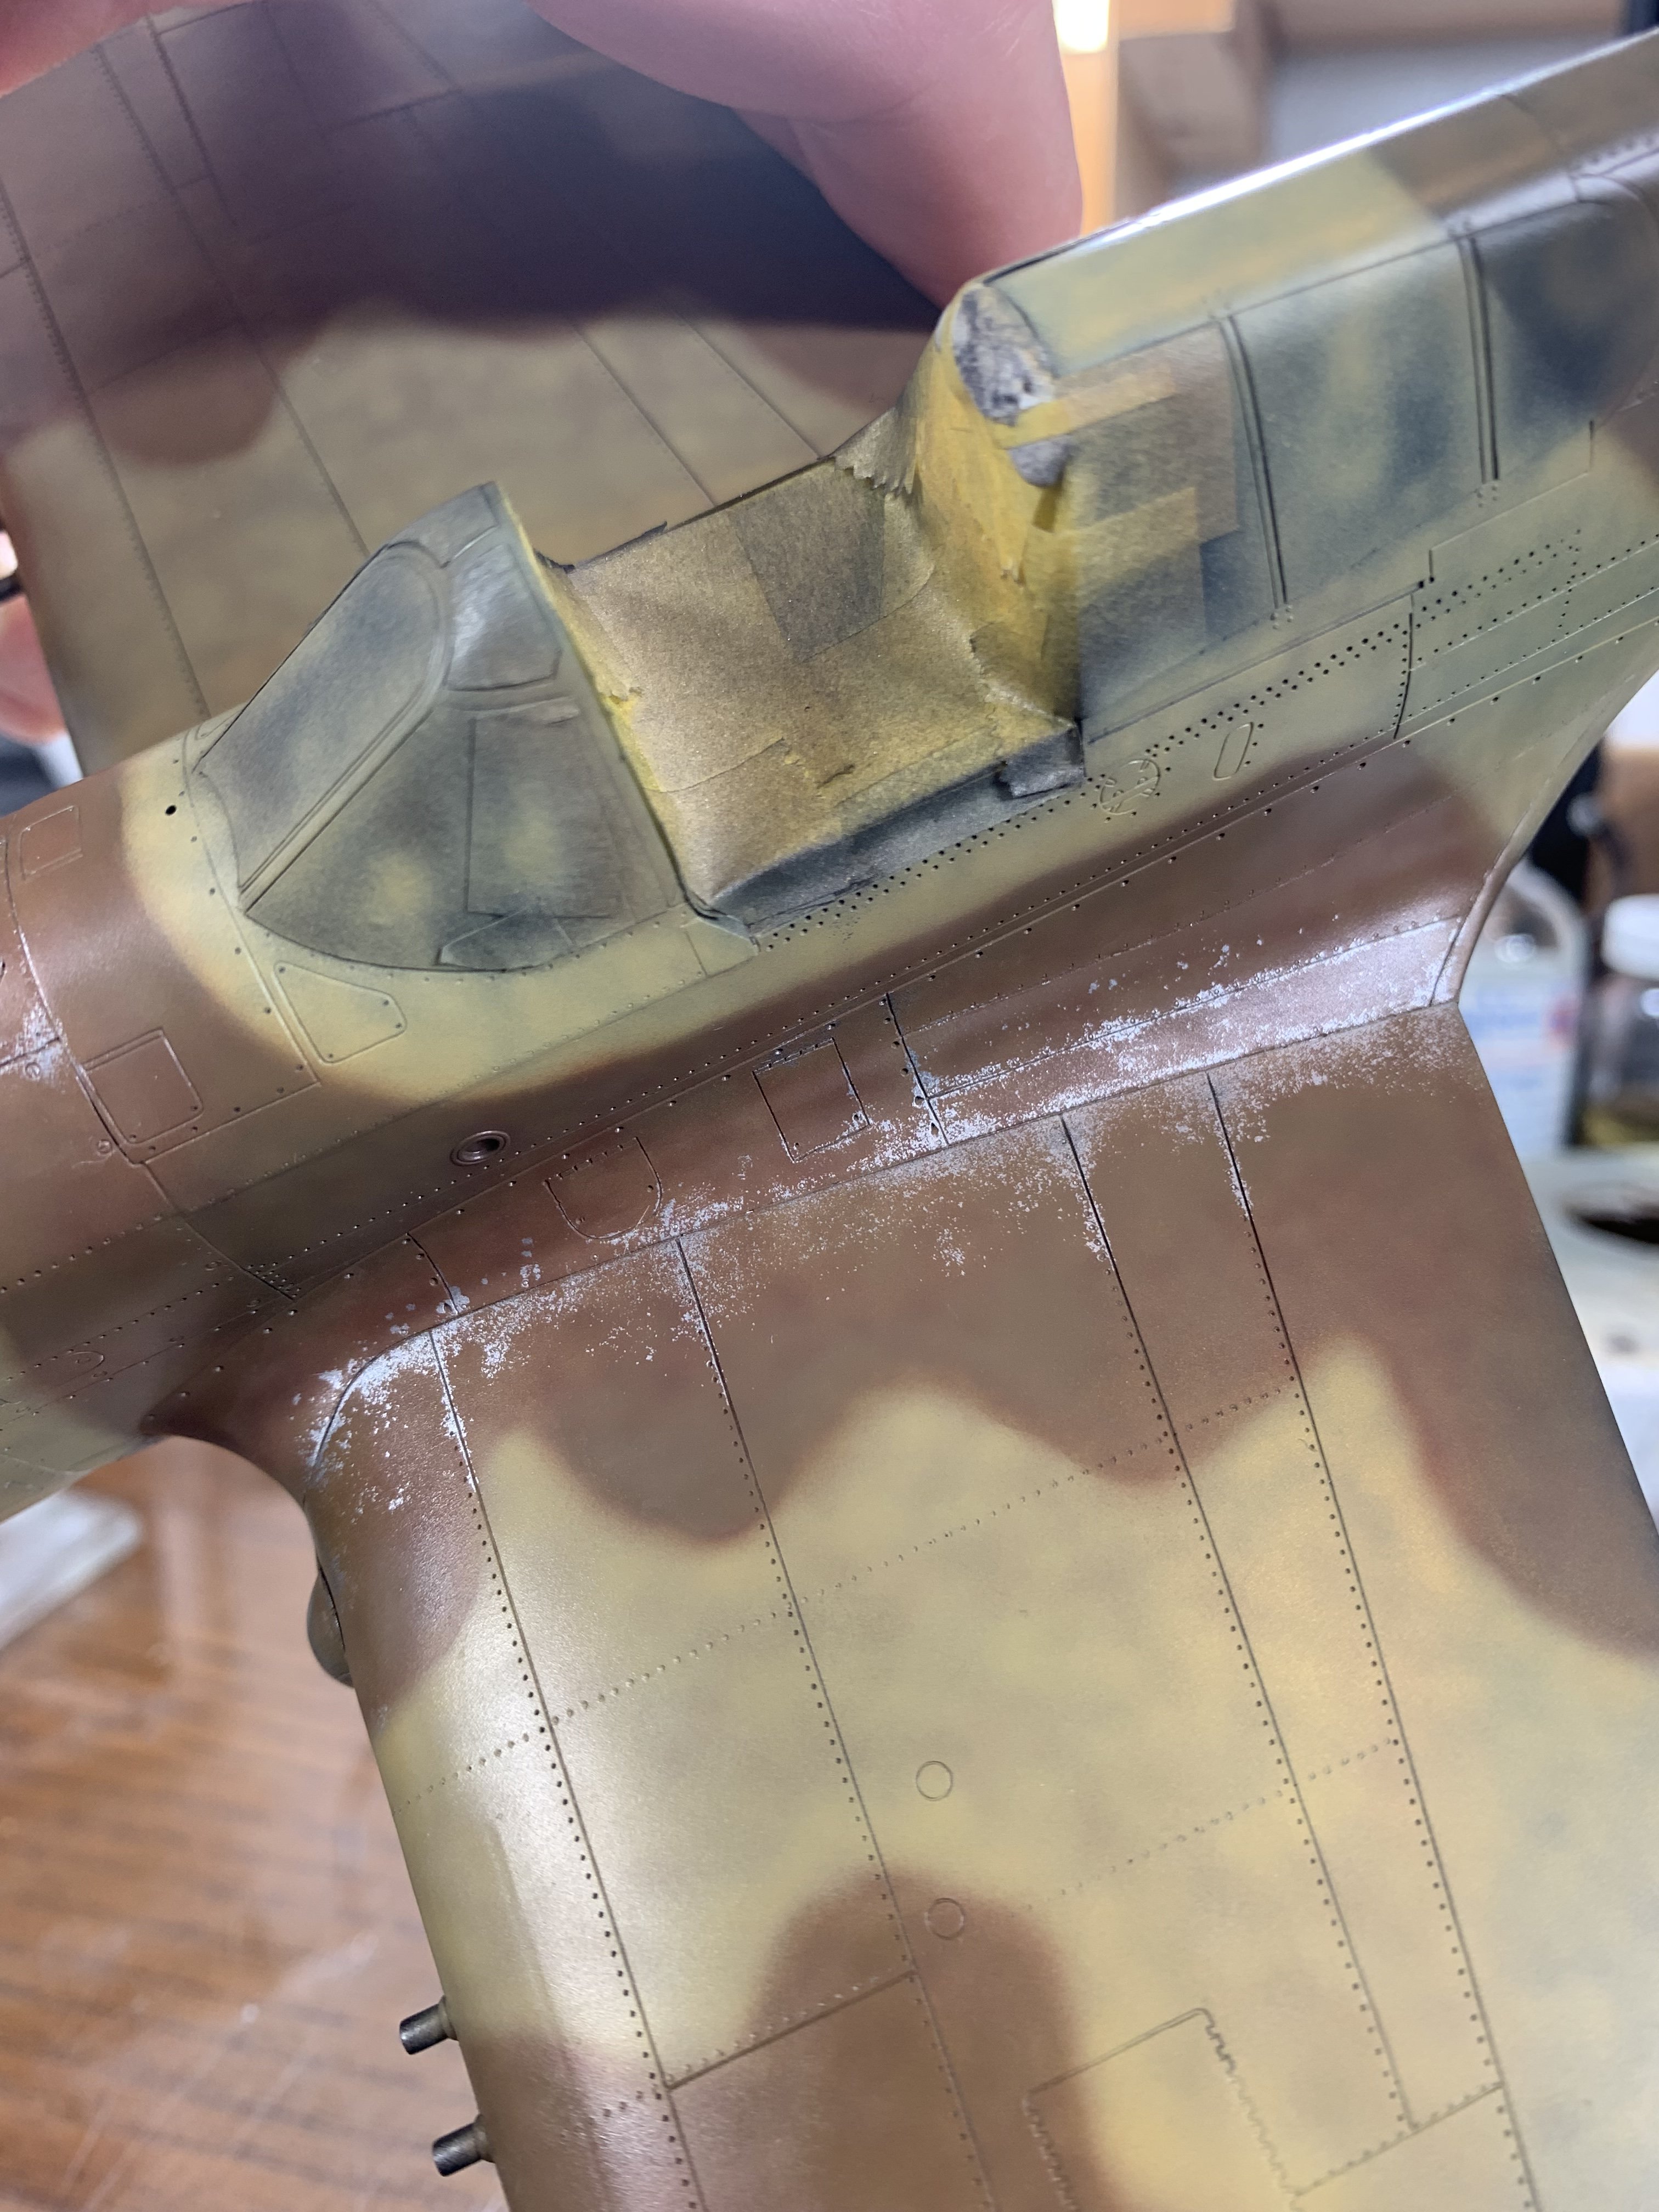
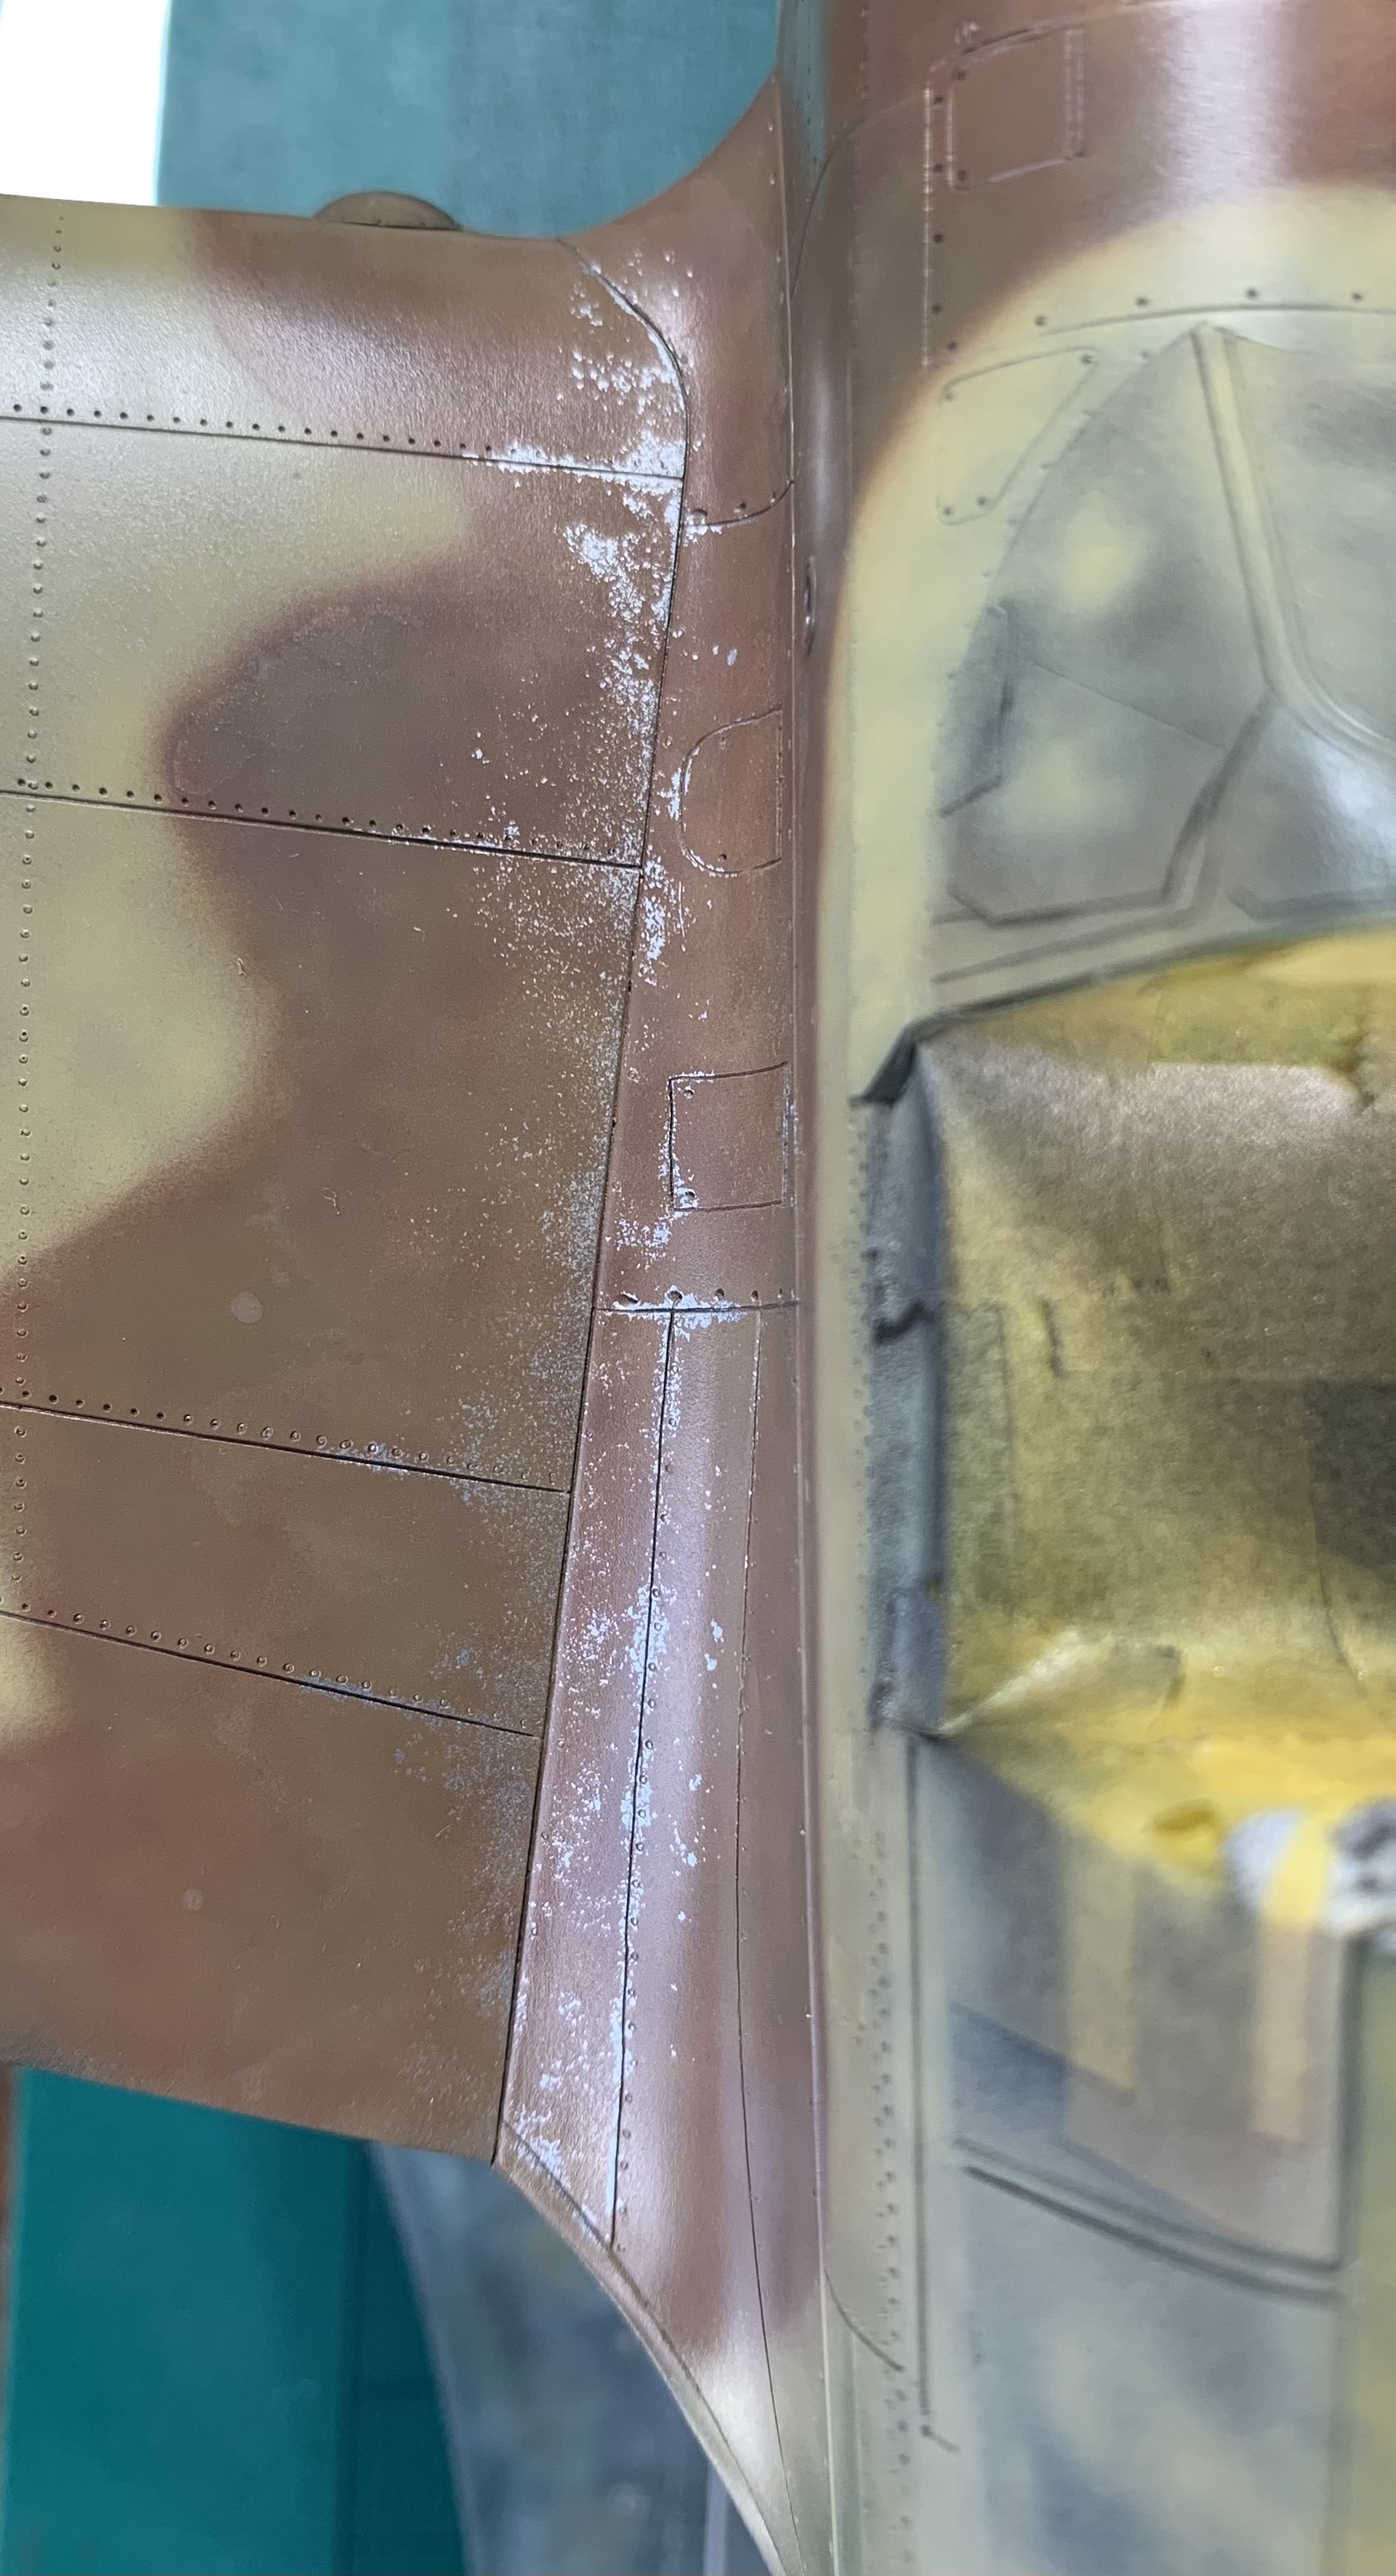
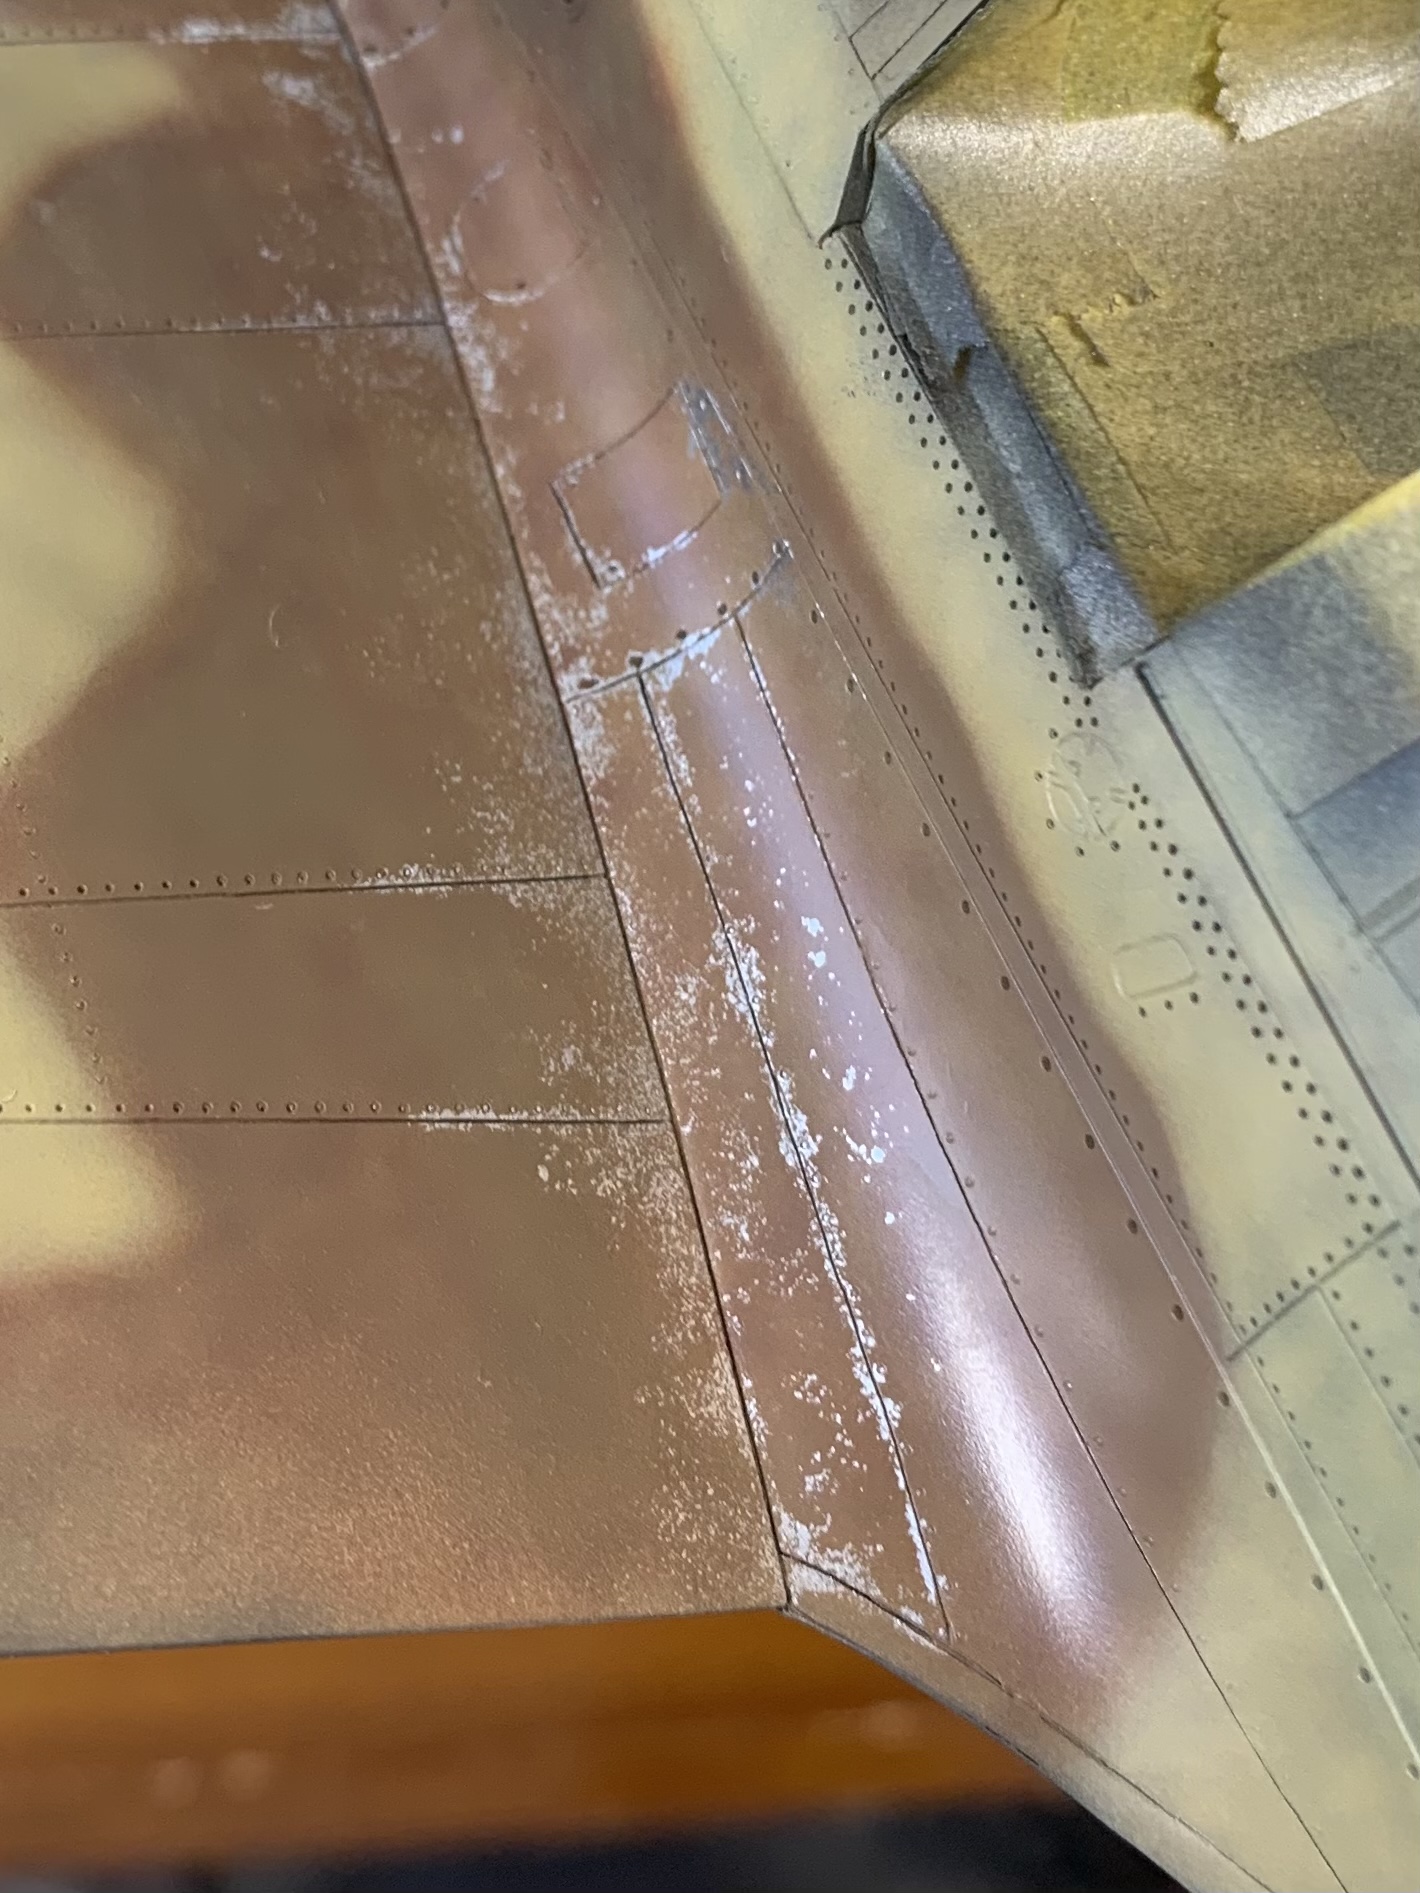
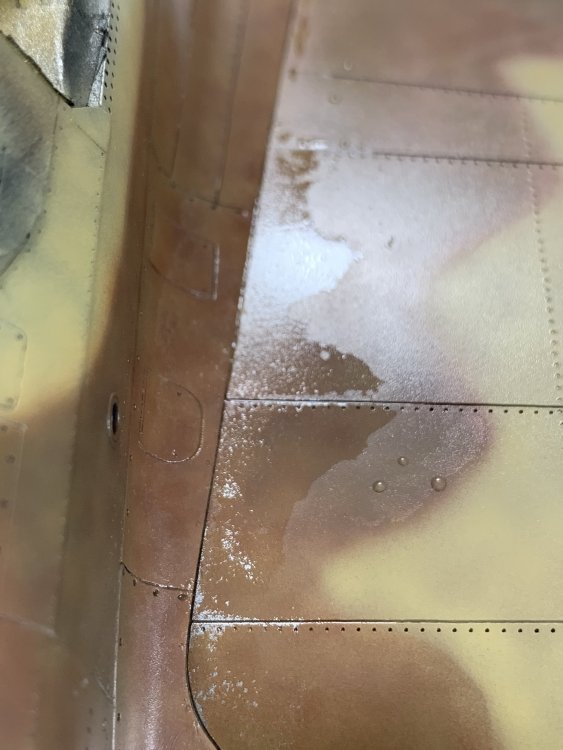
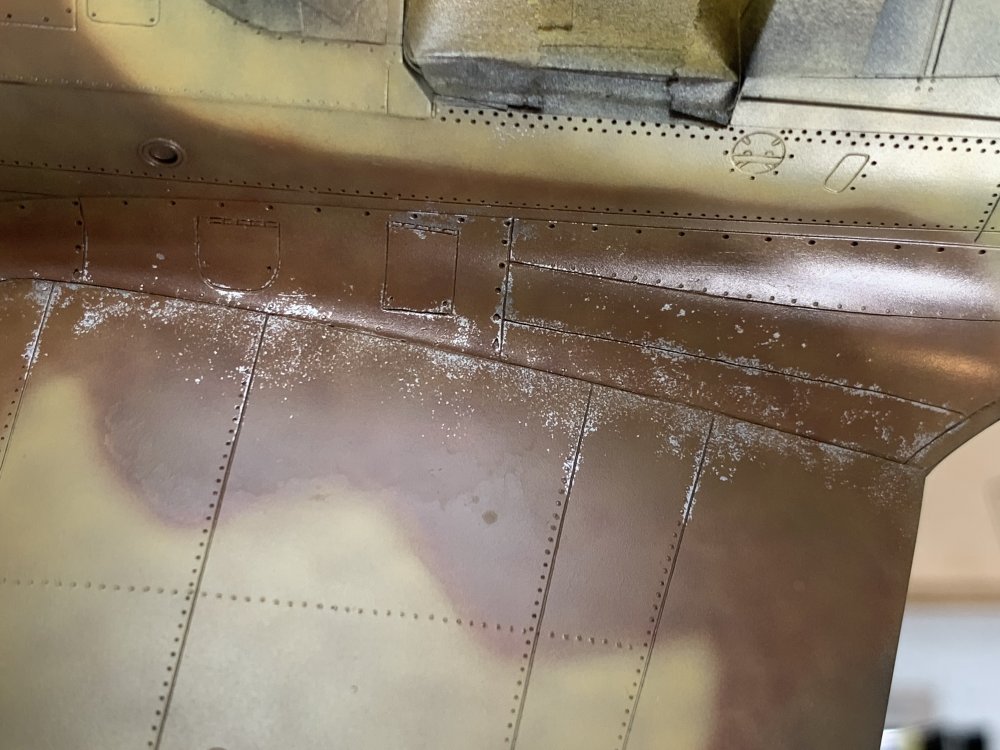
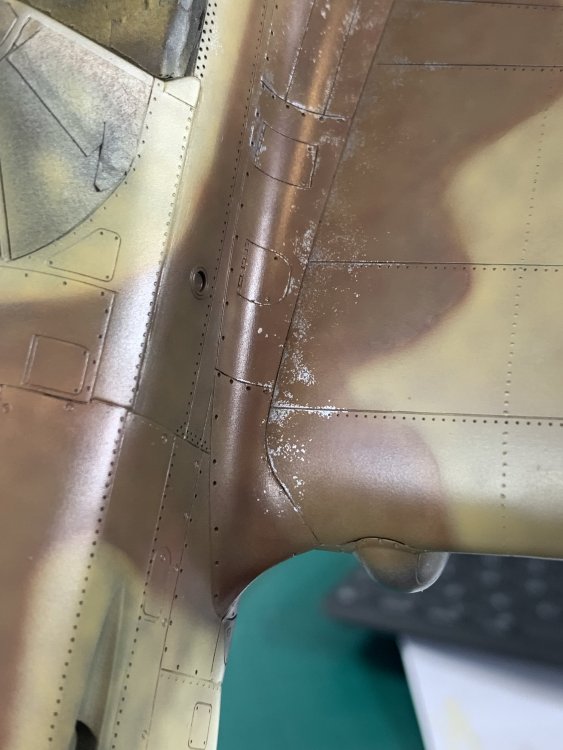
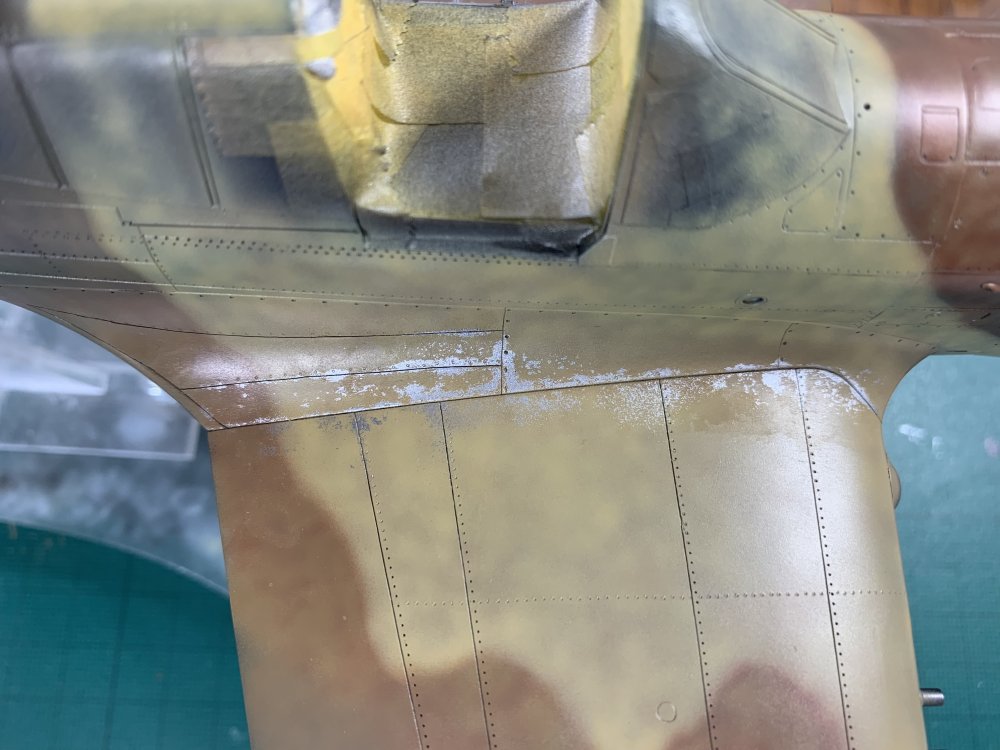
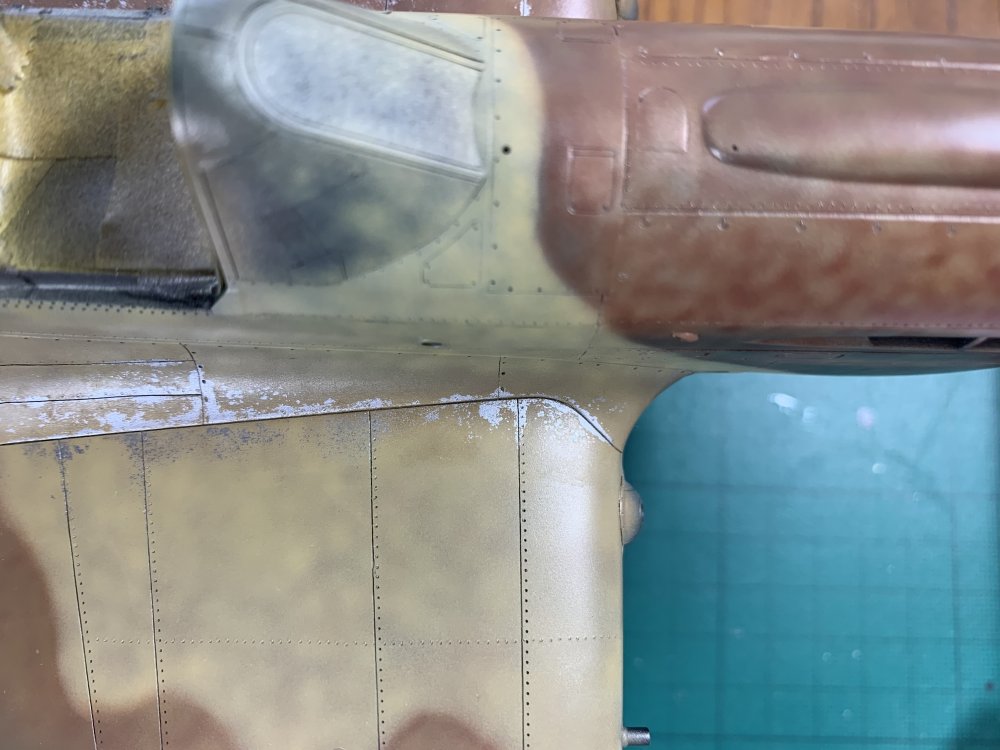
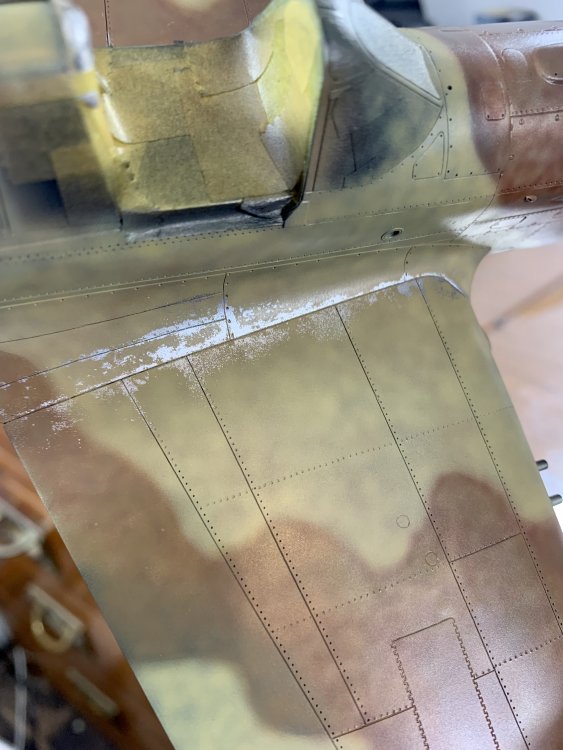
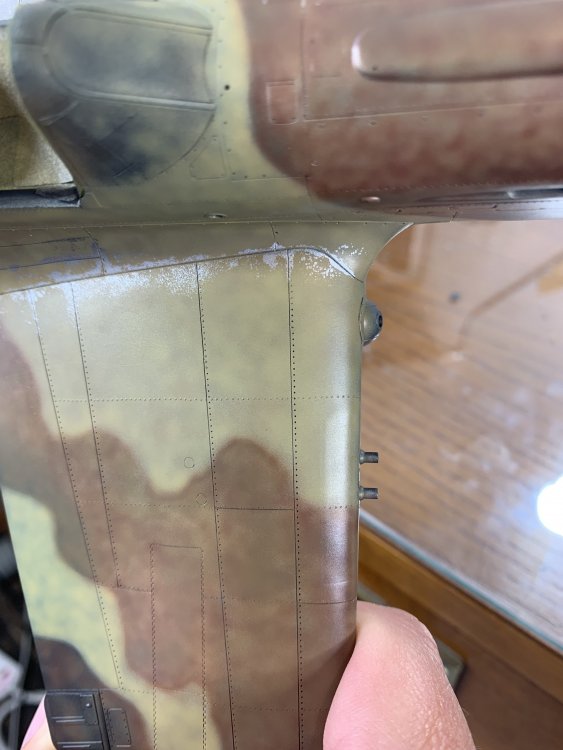
One of the worms lifted up some paint - MRP’s super powers of adhesion are rendered somewhat impotent over hairspray, but let’s see how it looks after weathering etc I will do the chipping tomorrow. whilst most of the middlestone is done, I haven’t yet done all the dark earth - I toyed with adding some German Rotbraun in places - but I have done the areas that will be chipped These last 2 pics show where I left it for the day…


-
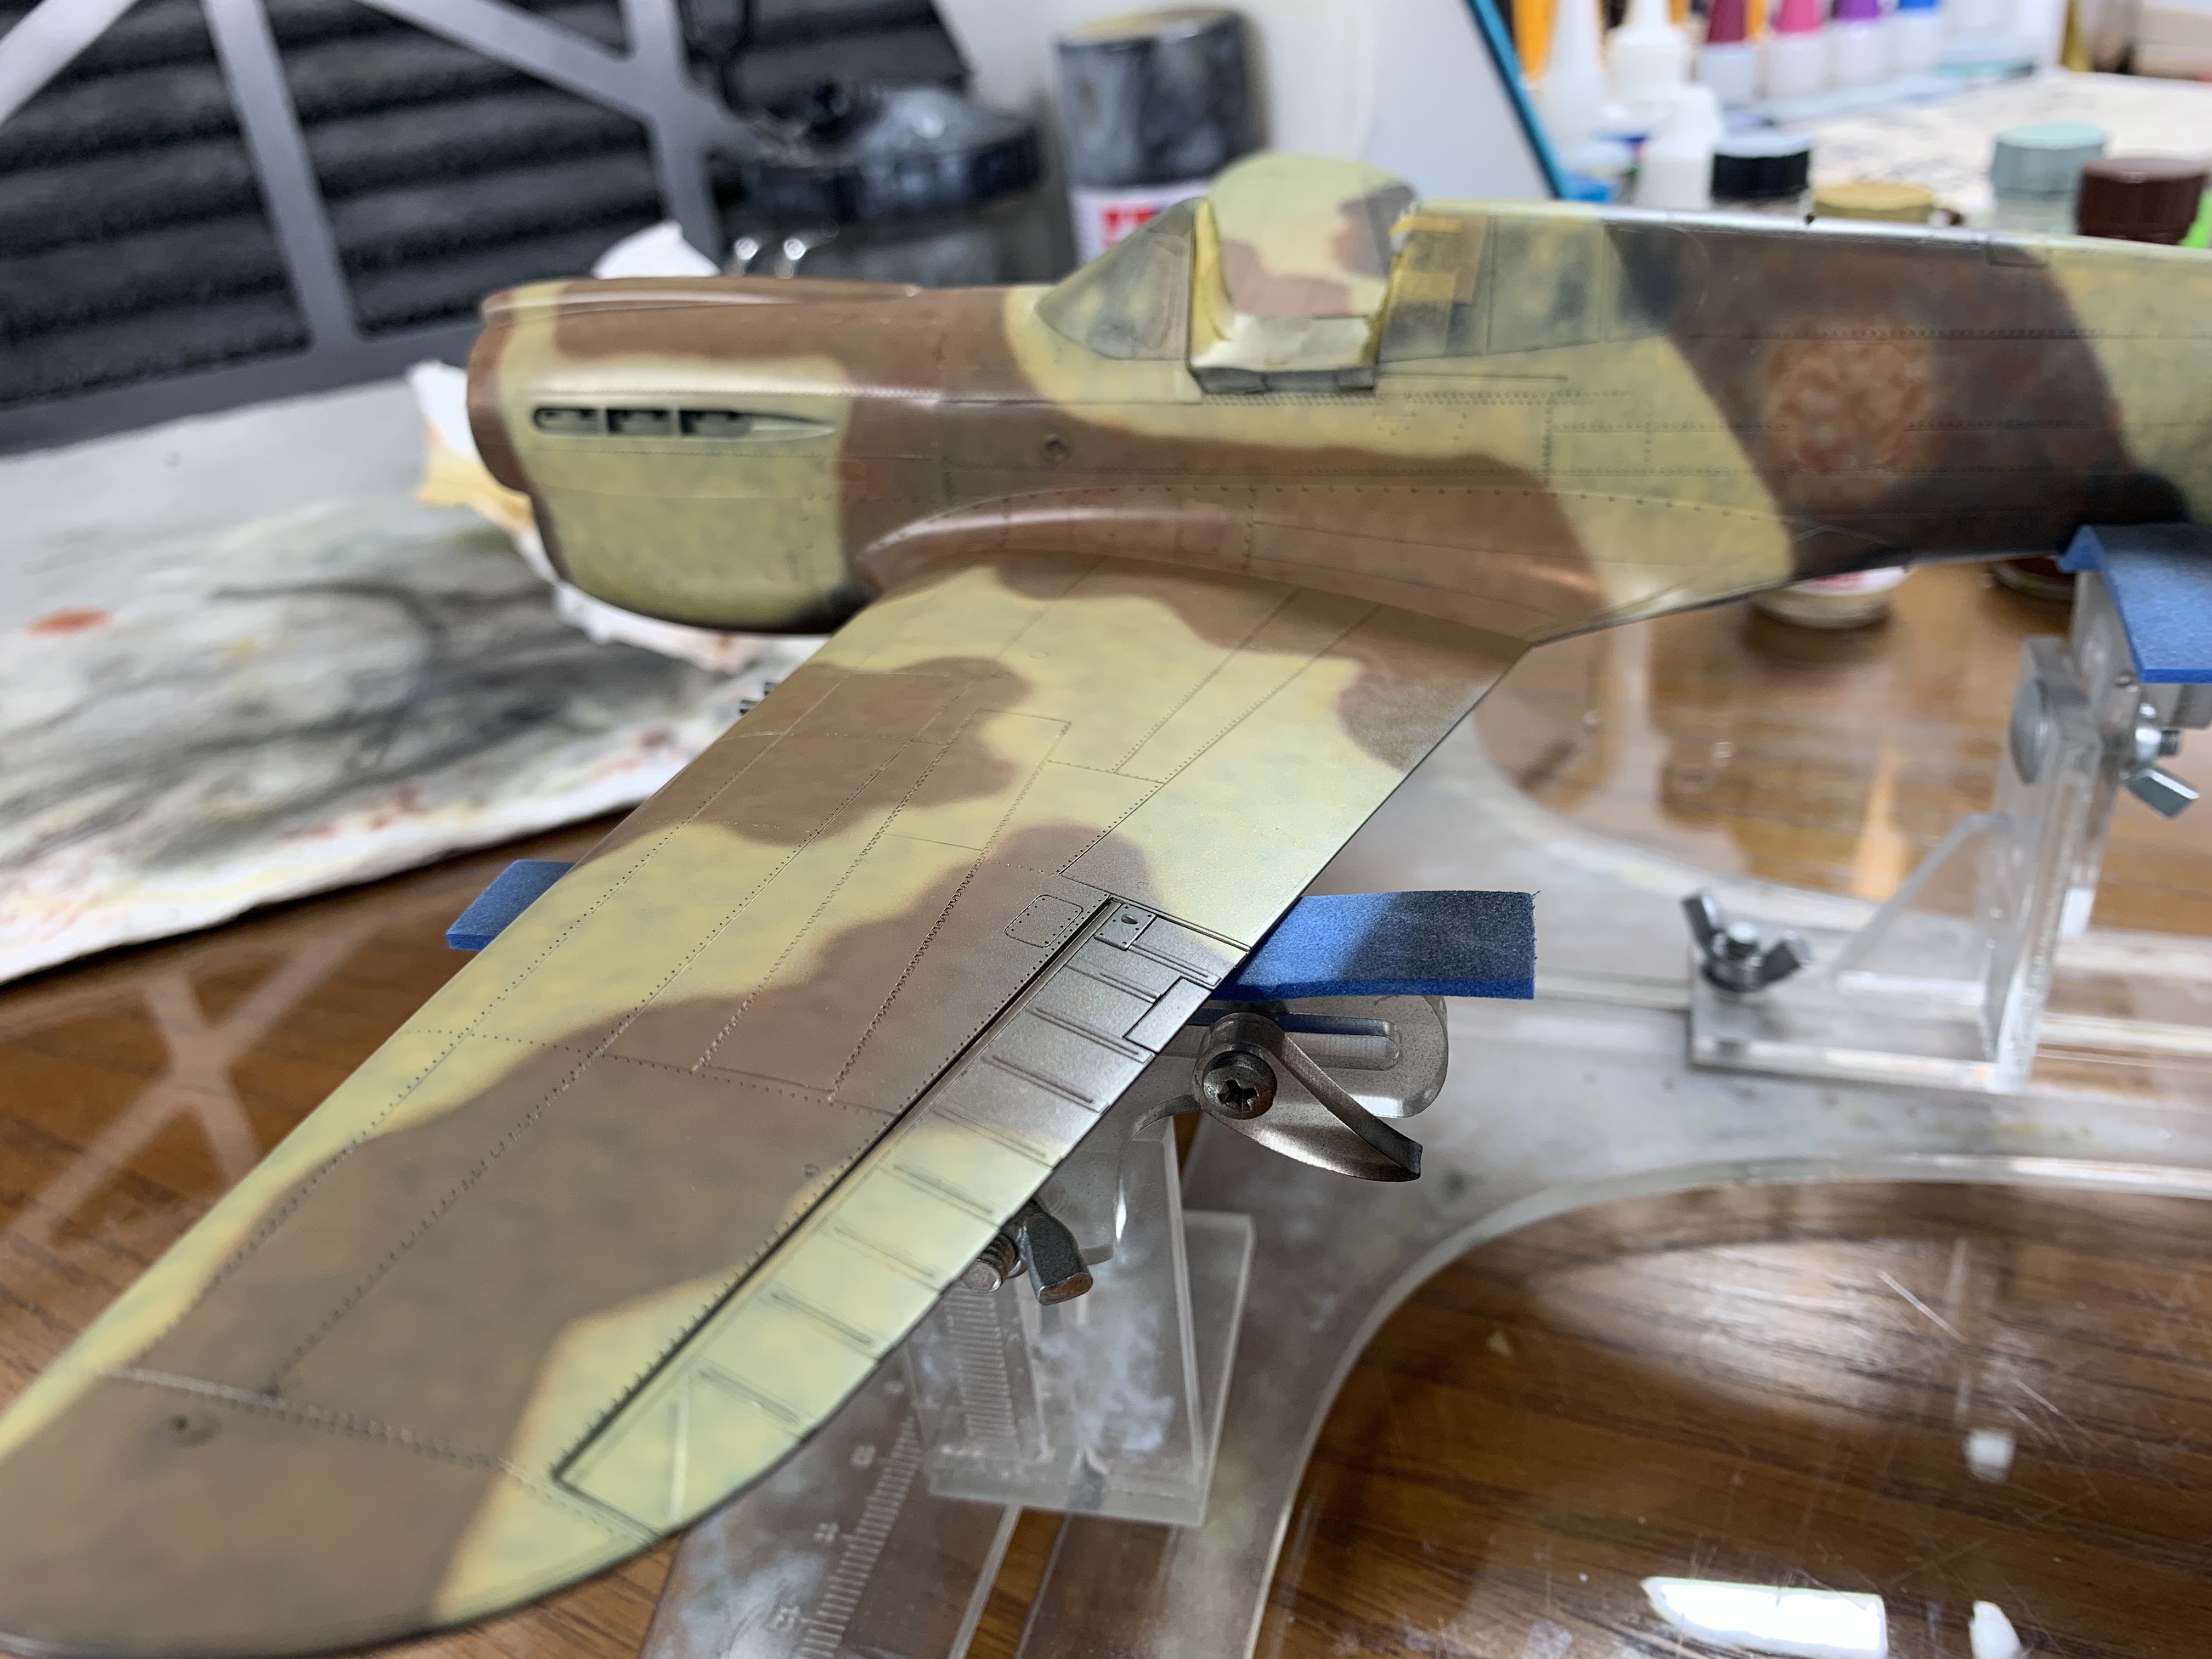
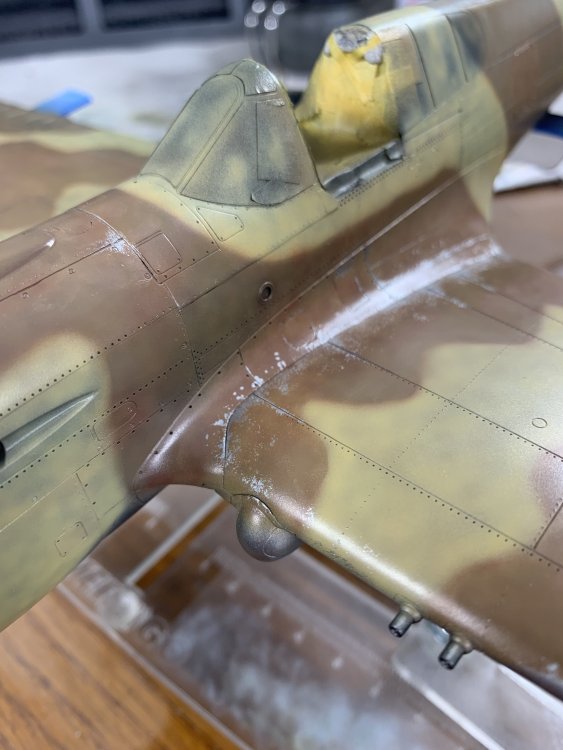
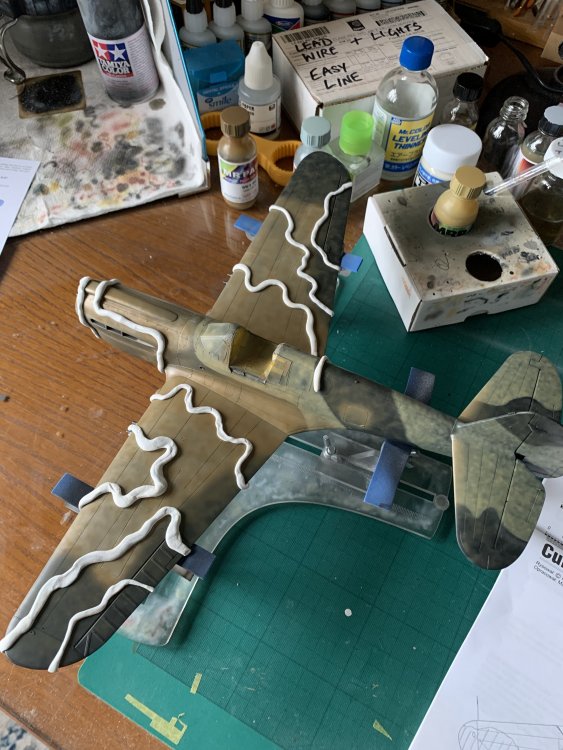
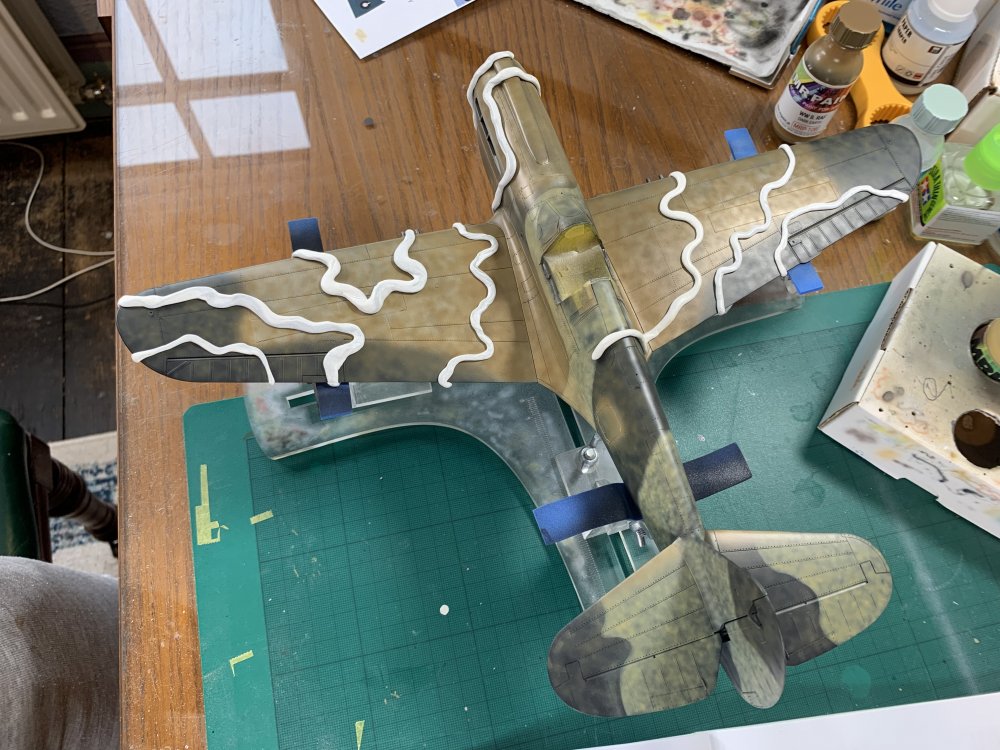
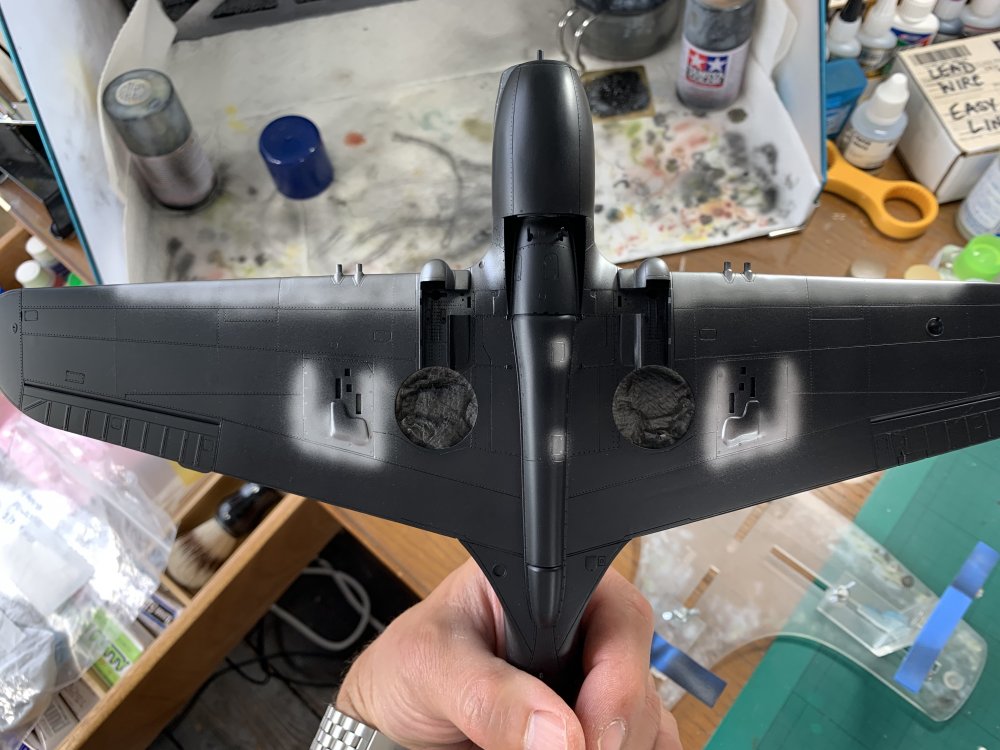
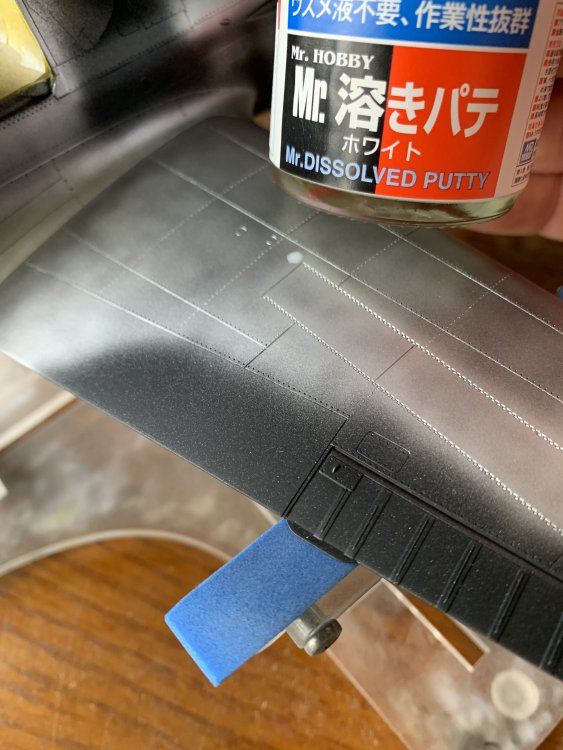
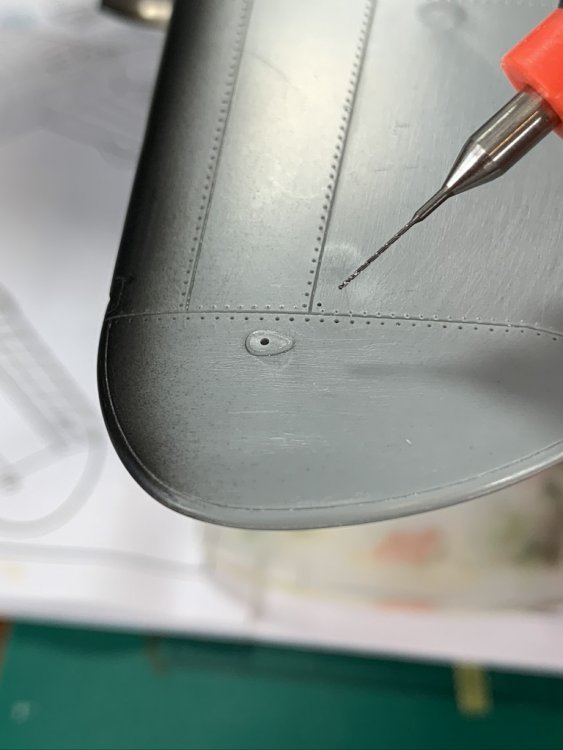
Because I want to do chipping on wing roots - and maybe a few other spots - I then sprayed MRP Super Silver in these areas. I was just about to start with the whole hairspray then camo when I realised one of the three little circle thingies on the wings needed to be filled - i thought they were fuel filler caps but that was idiotic - the are gun related, though still no idea what they are a few dabs of Mr Dissolved Putty did the trick one of the problems of chipping and black basing is they don’t necessarily go that well together i was not clear in what I wanted to achieve and just started putting down dark earth…and also realised that whilst my airbrush control is reasonable, ability to replicate a camo pattern freehand is utterly feeble! Feeling somewhat frustrated, but knowing this bird had a very feathered demarcation, I thought I would try blu tack (white tack actually) worms! with a few worms in place, I started putted down some Middlestone...


-
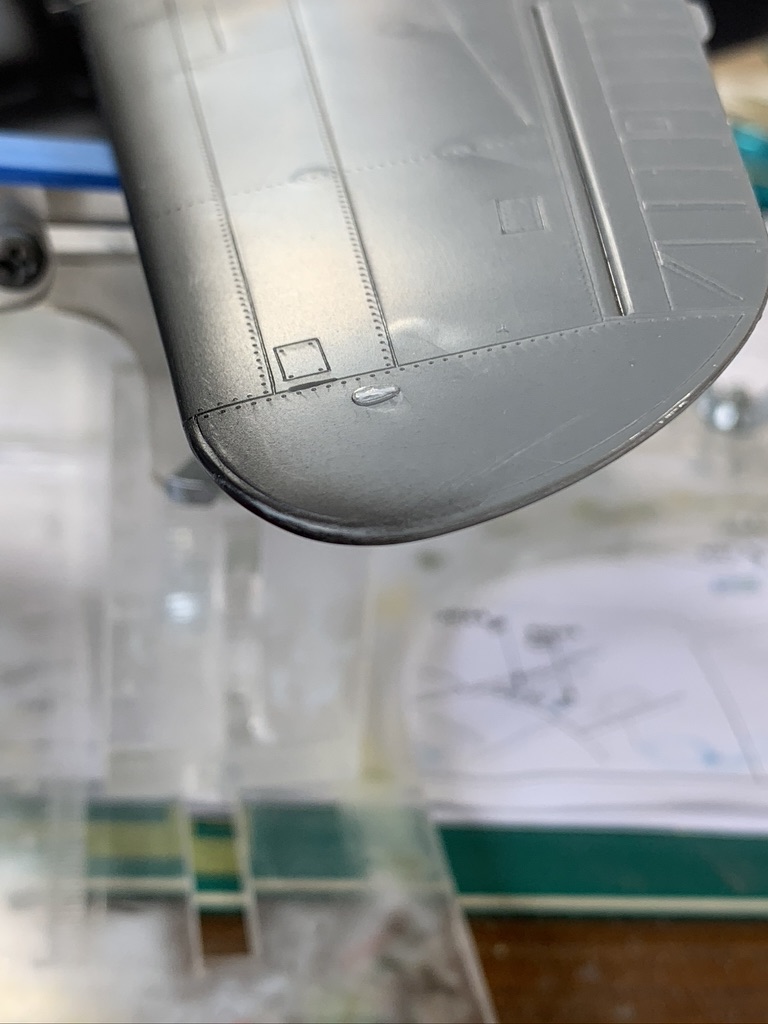
yeah the flaps work out to Tiger armour plate thickness lol but i will always avoid PE wherever possible for genuine structure - for me that would be a recipe for disaster! the udder thingy is hydraulic drain - someone on SMCG posted a diagram - so at least i know they are actually tubes btw PS-290 - f&ck me it's a beast! if you don't have one, GET ONE!!! the stand is useless for this brush - I need to get something that can actually man up! once filled with paint it nearly fell out! anyway, the fan tip on this thing is the absolute nuts, and boy can it put out some paint! finally feel like i am getting somewhere!

-
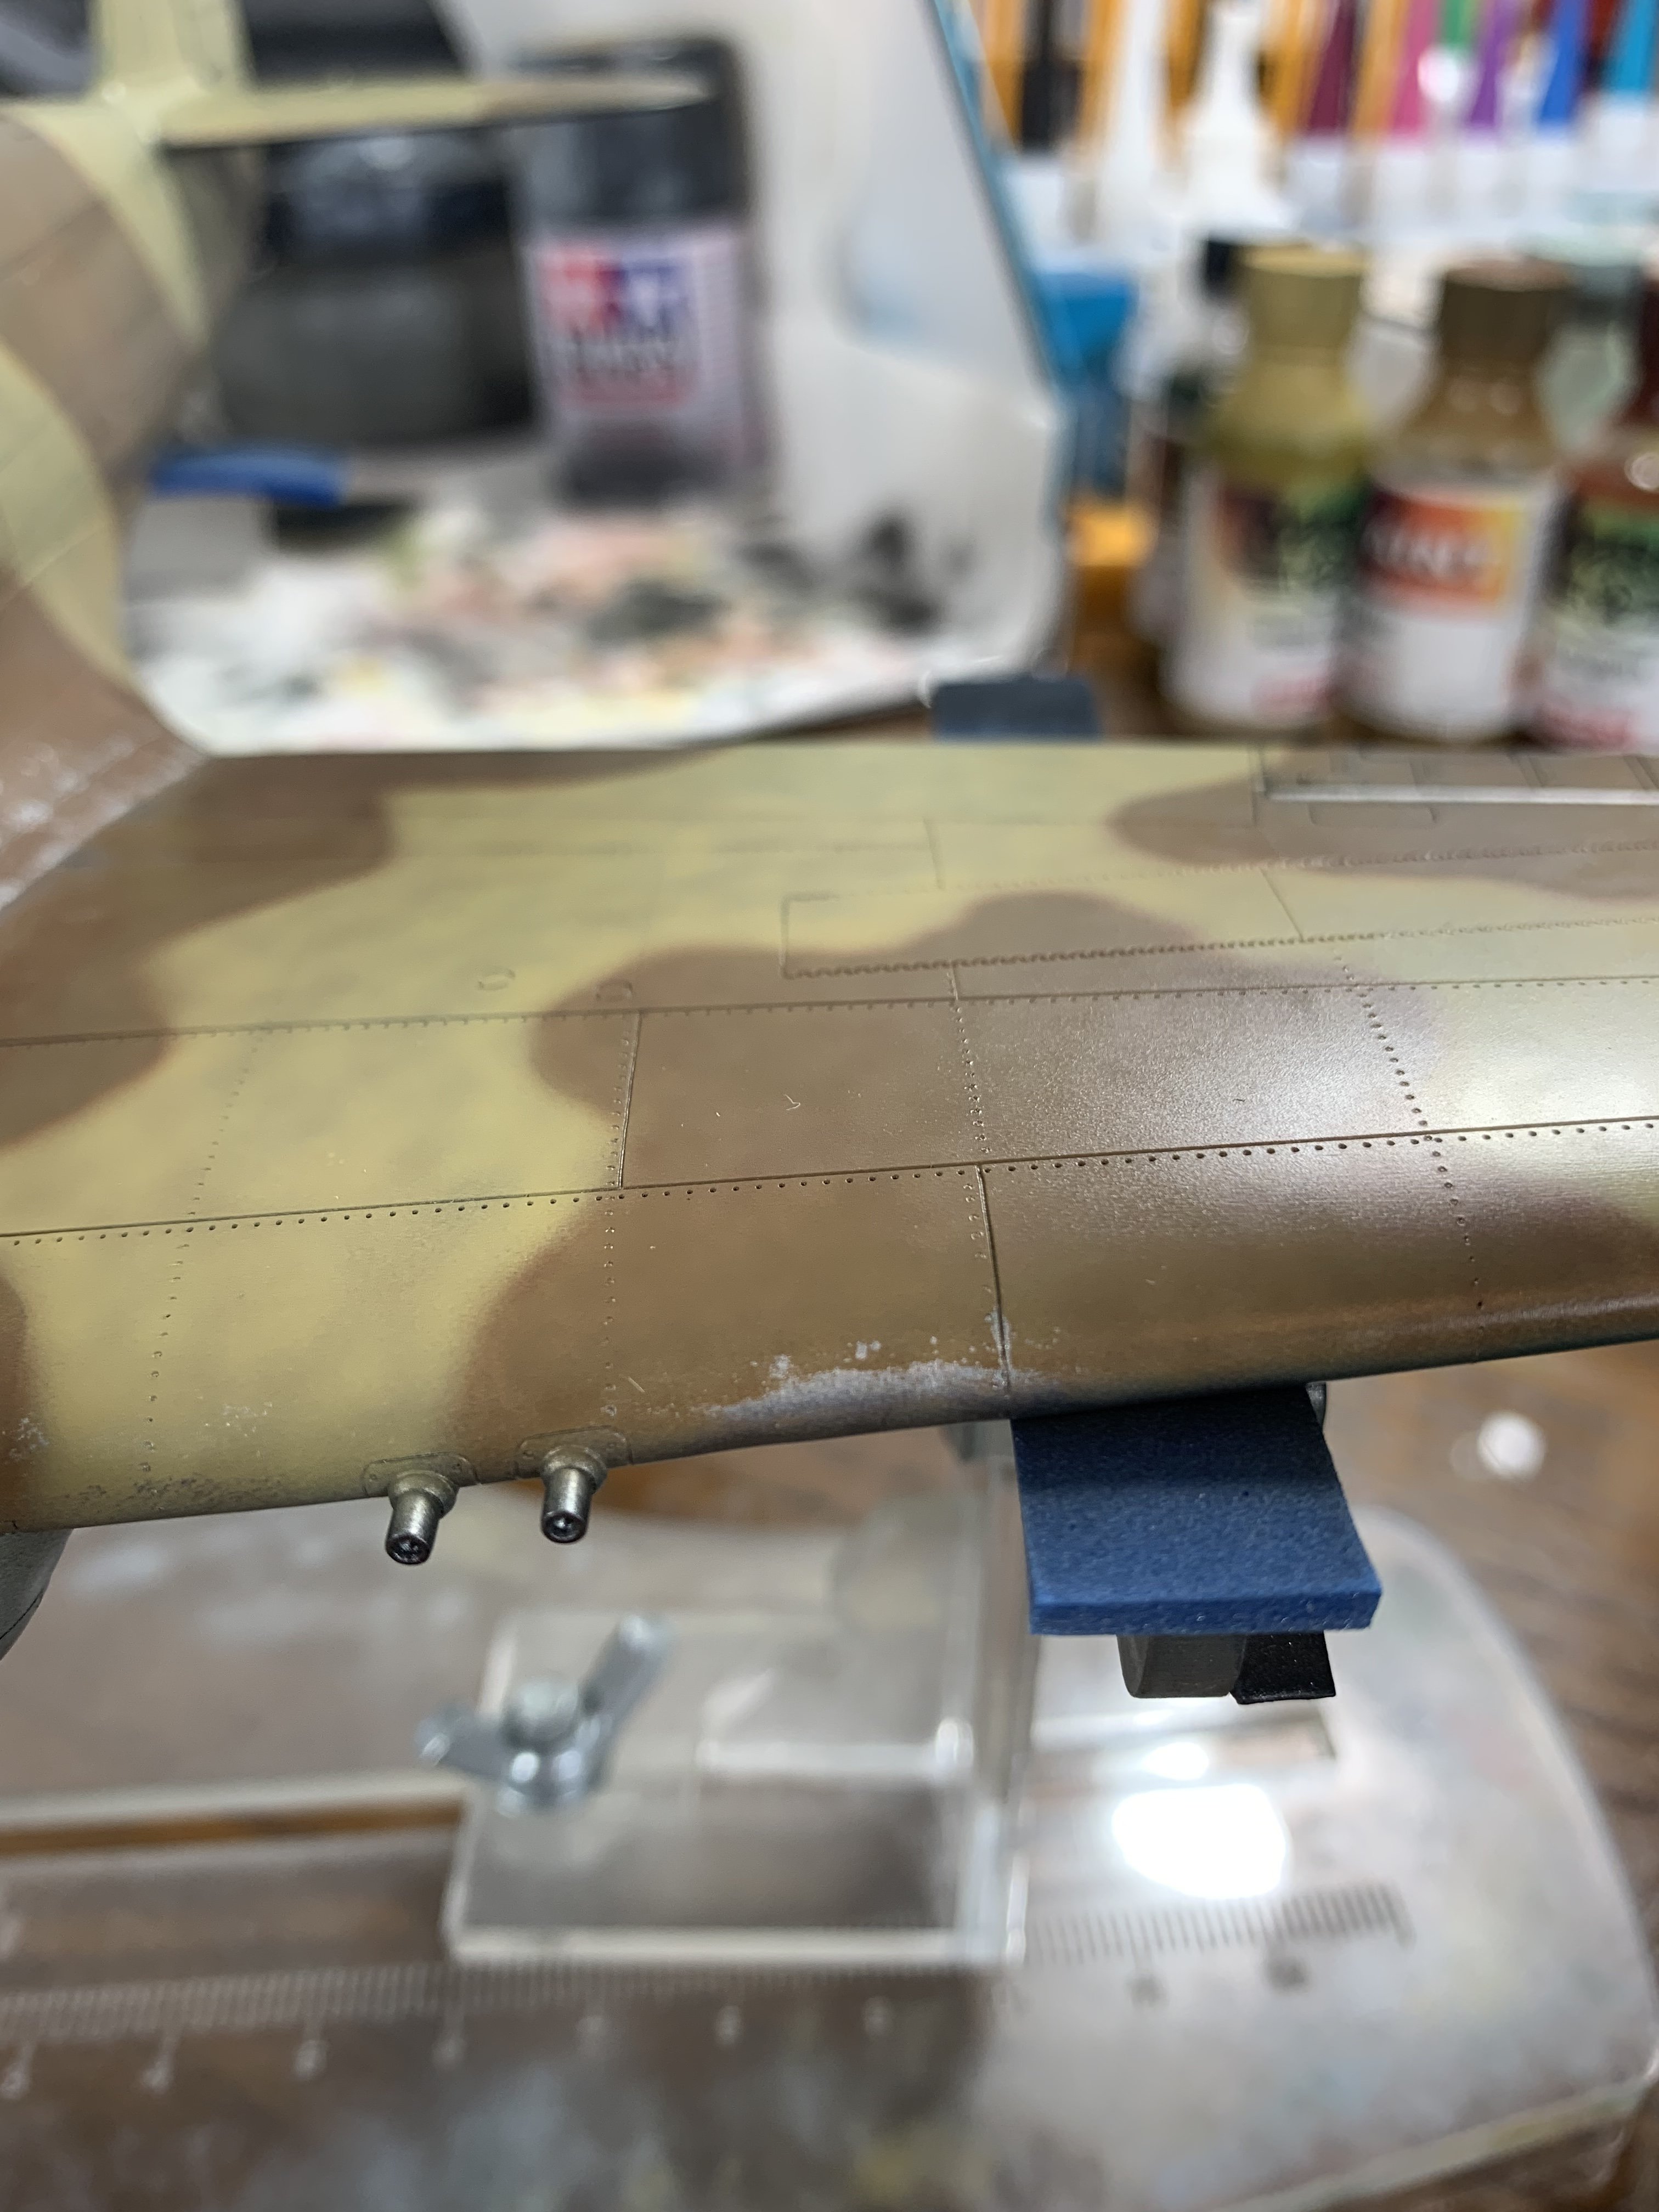
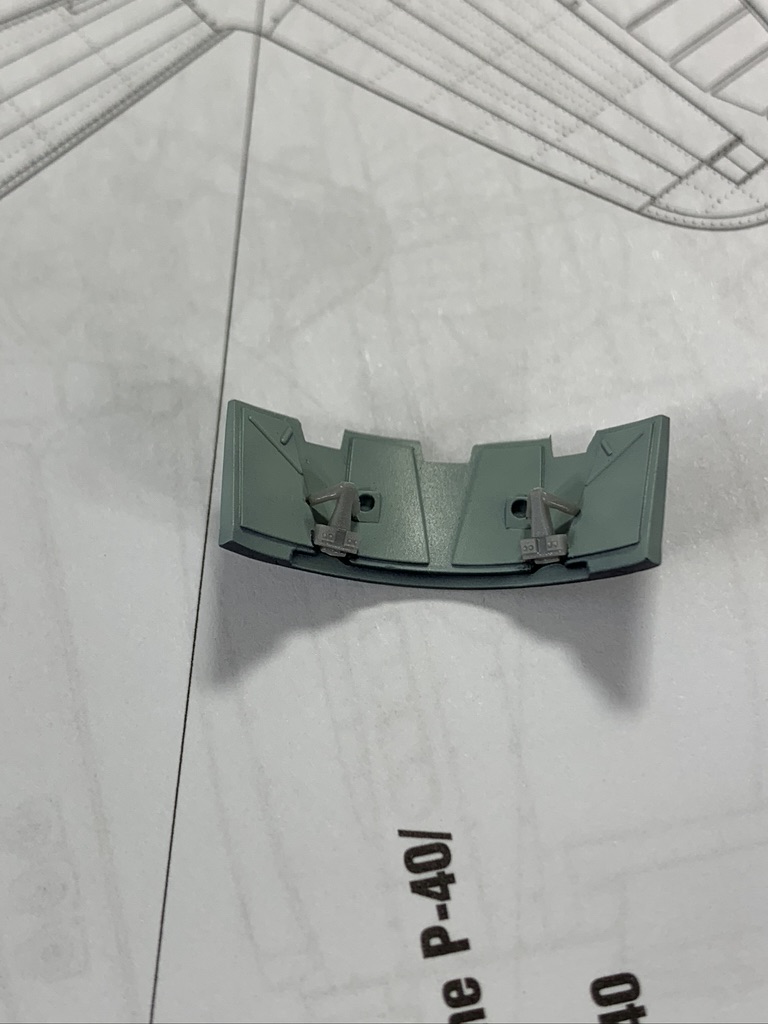
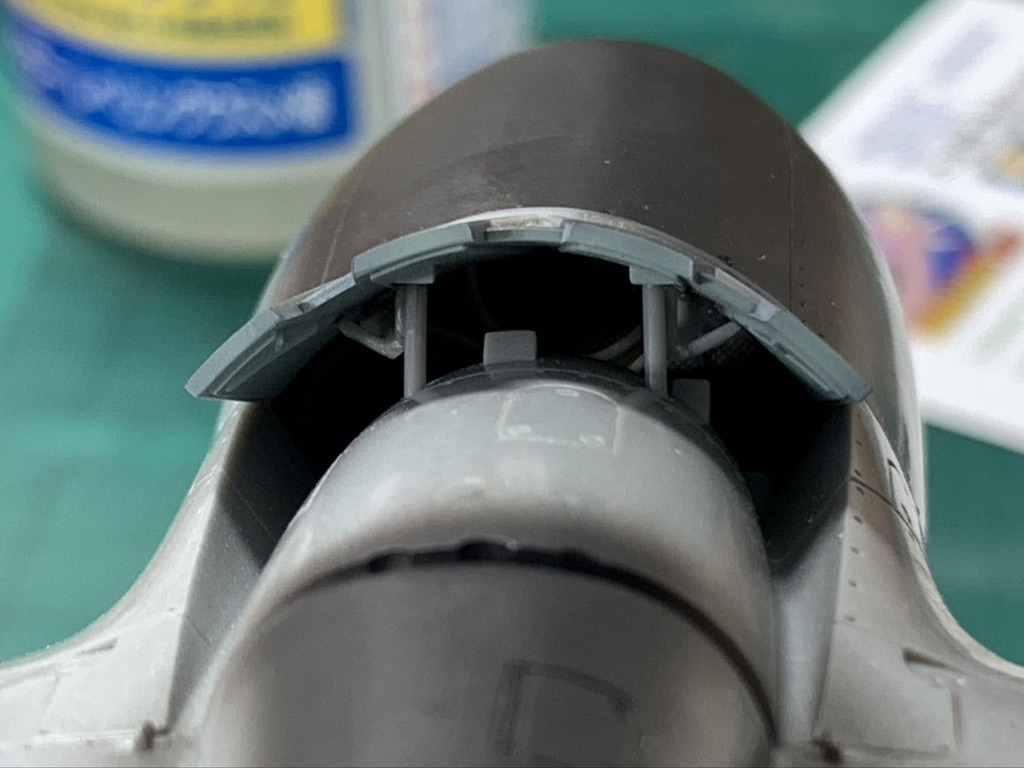
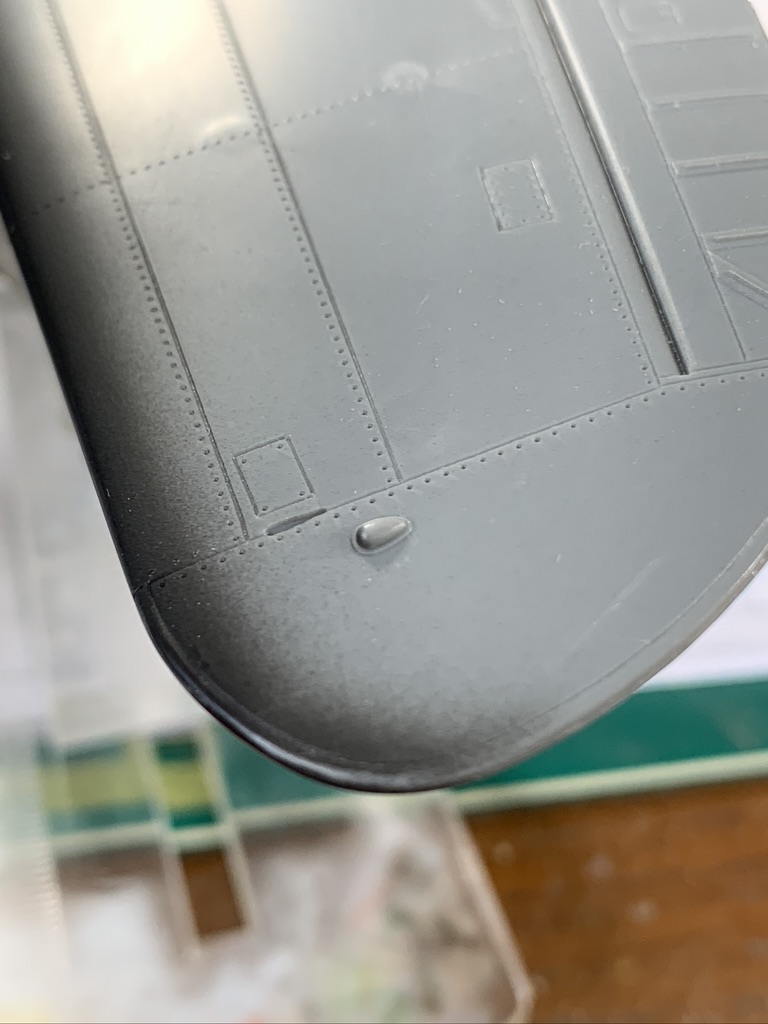
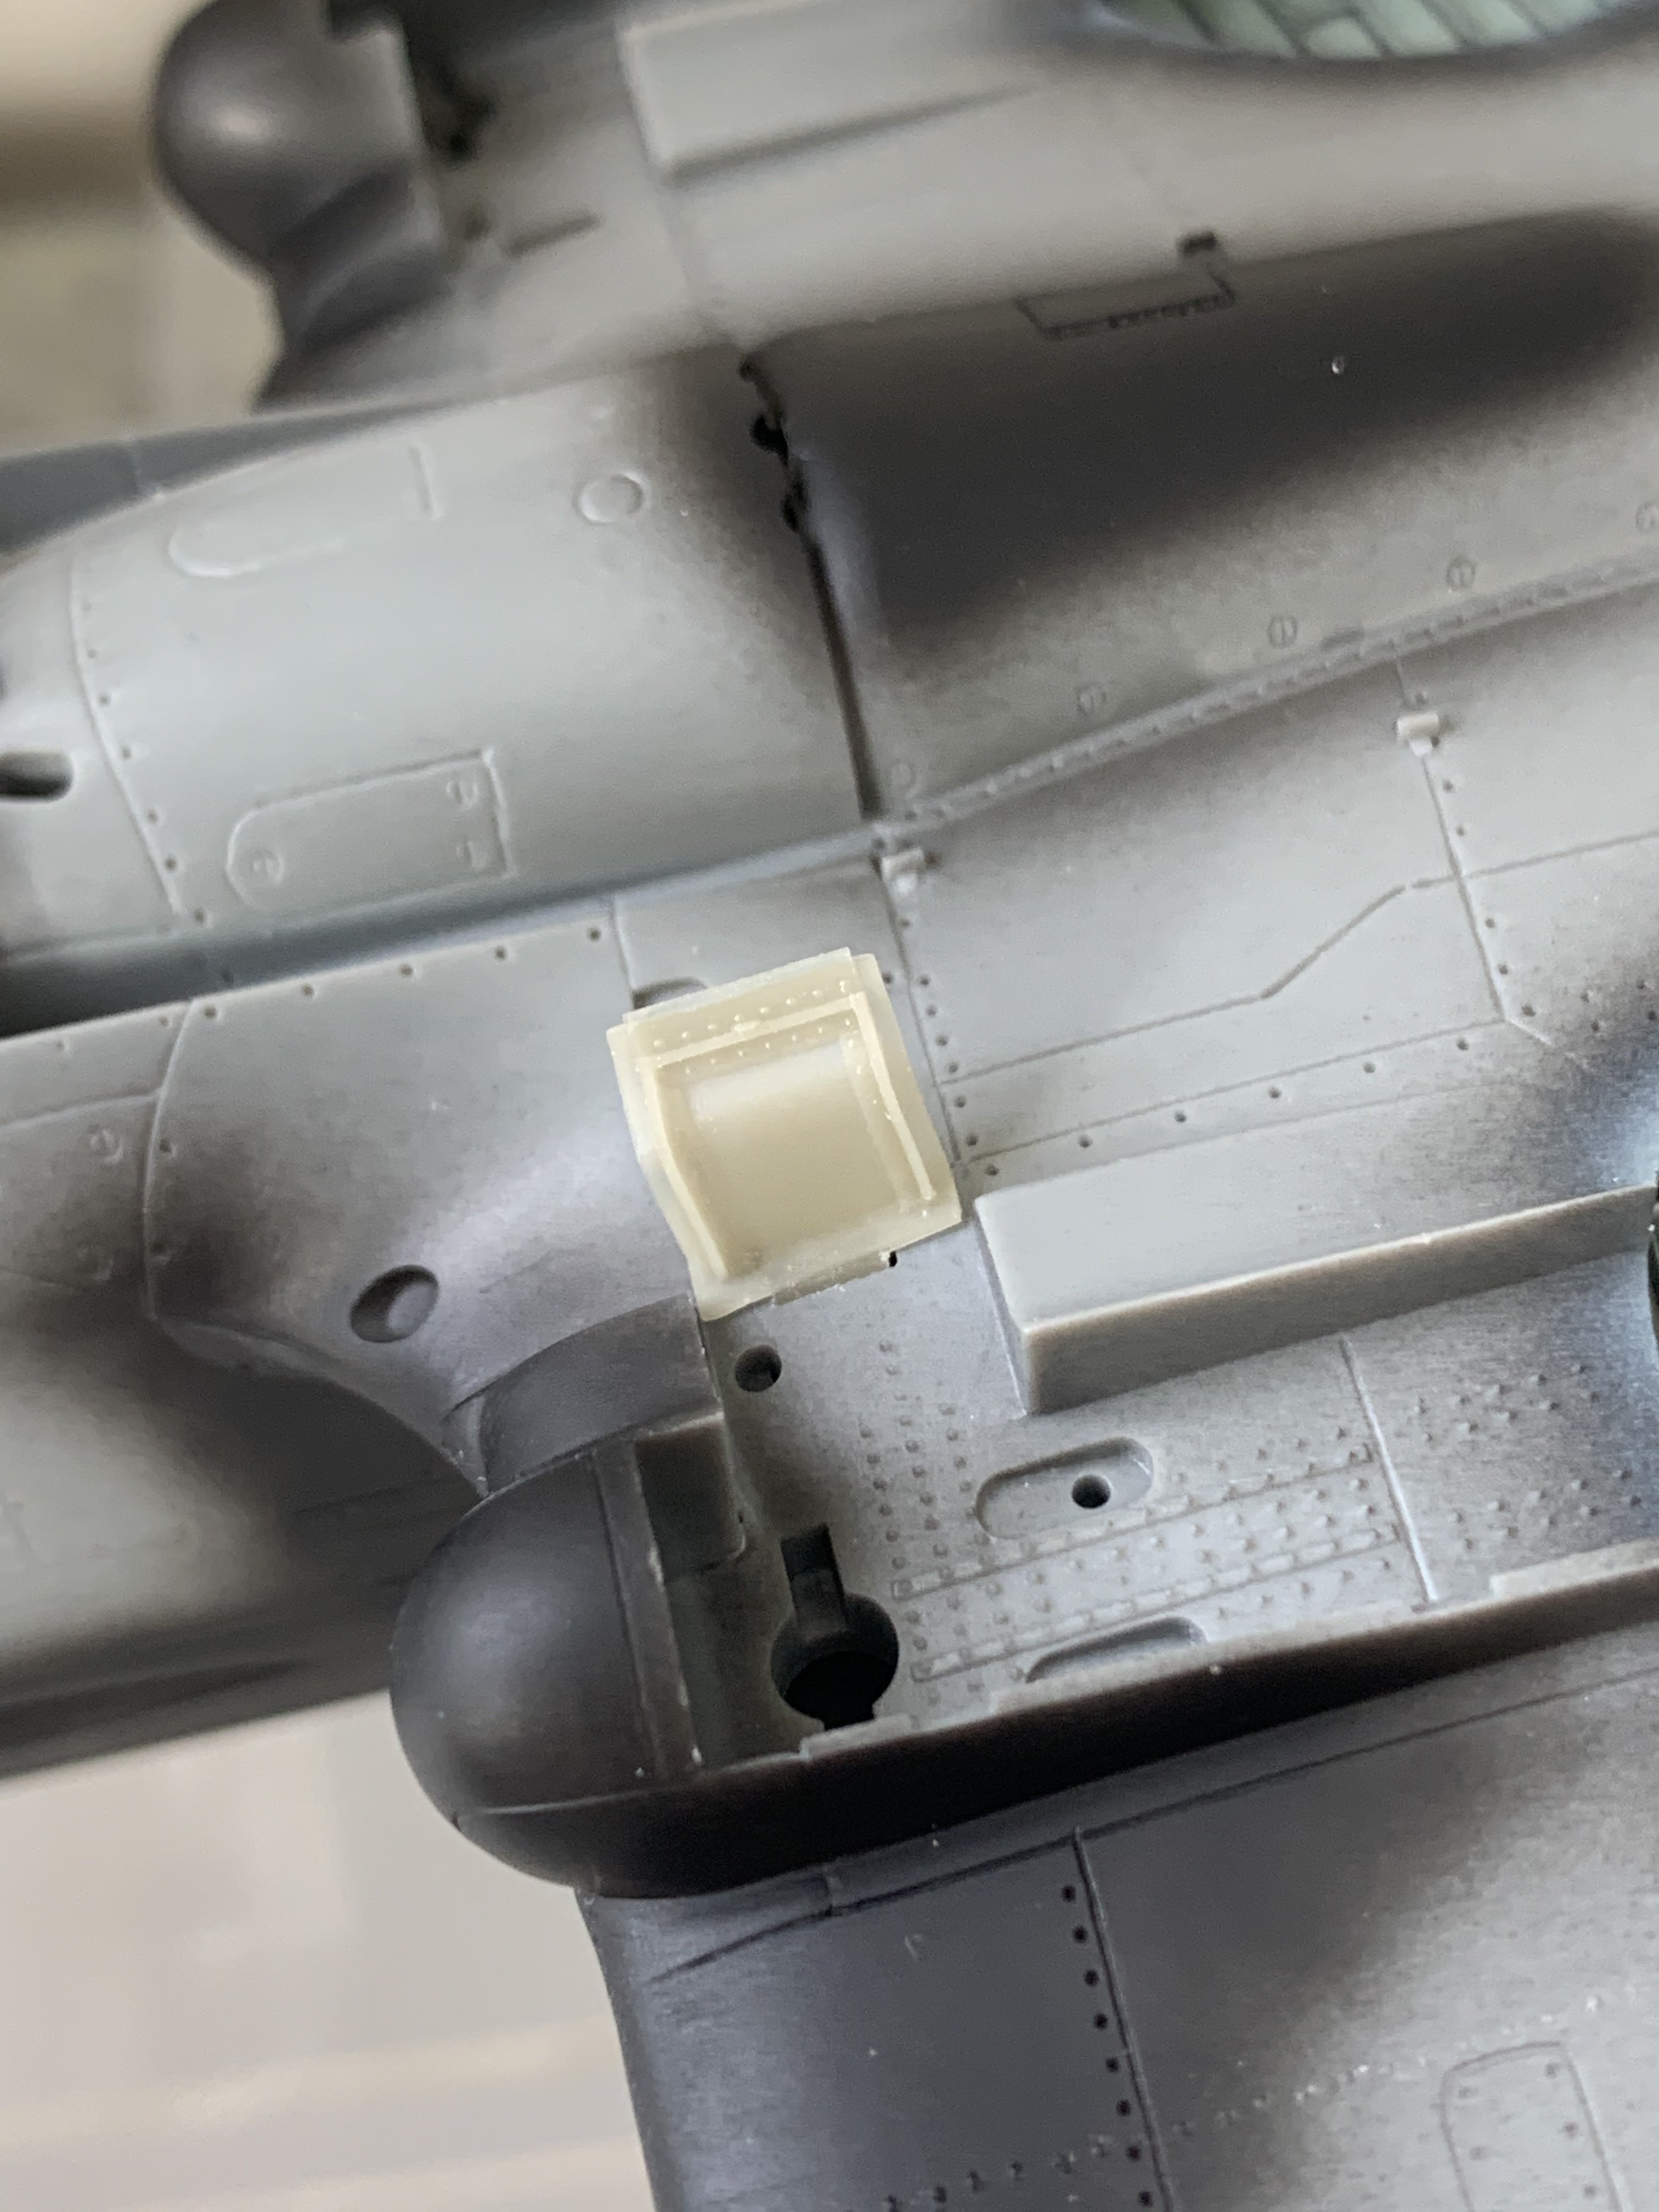
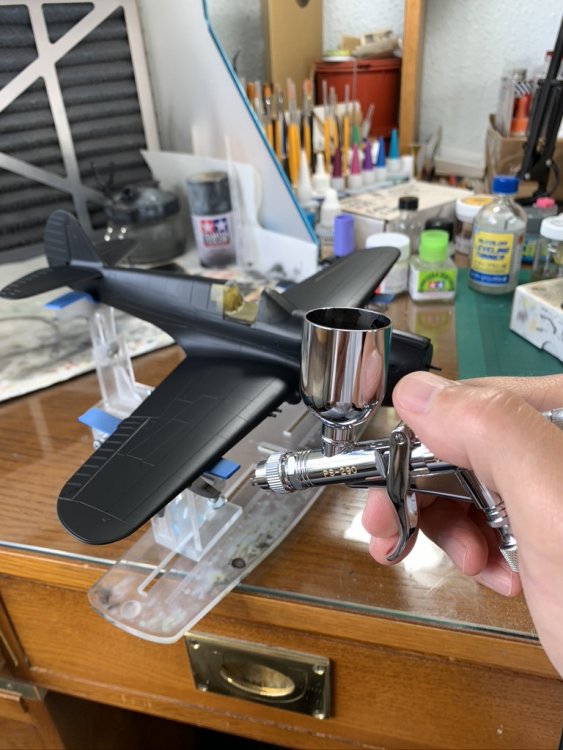
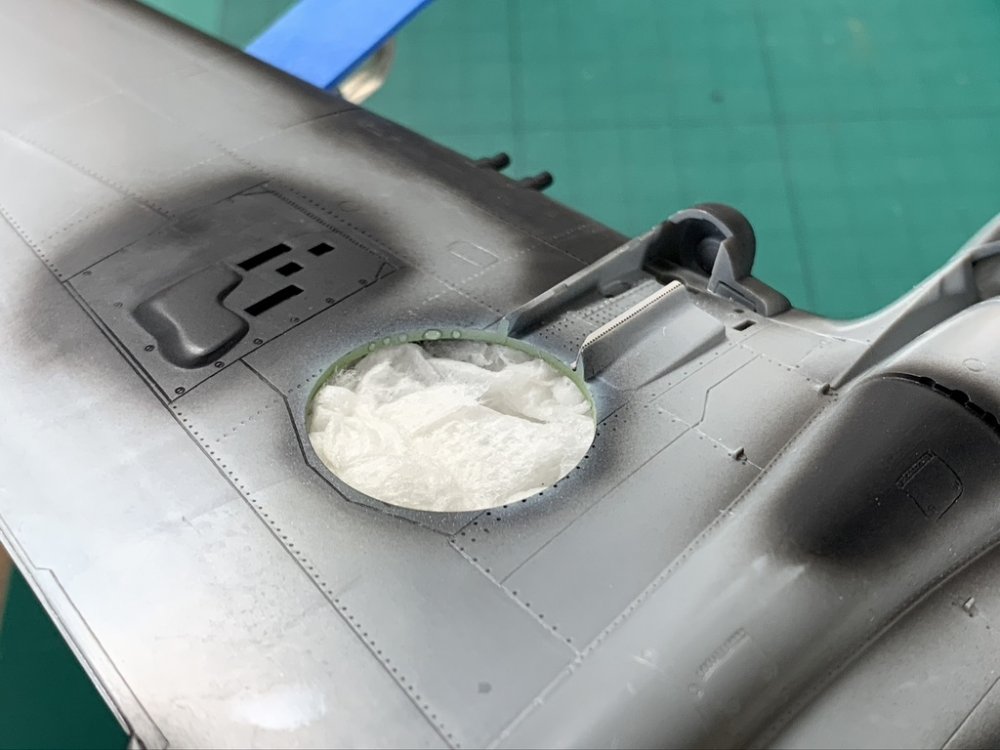
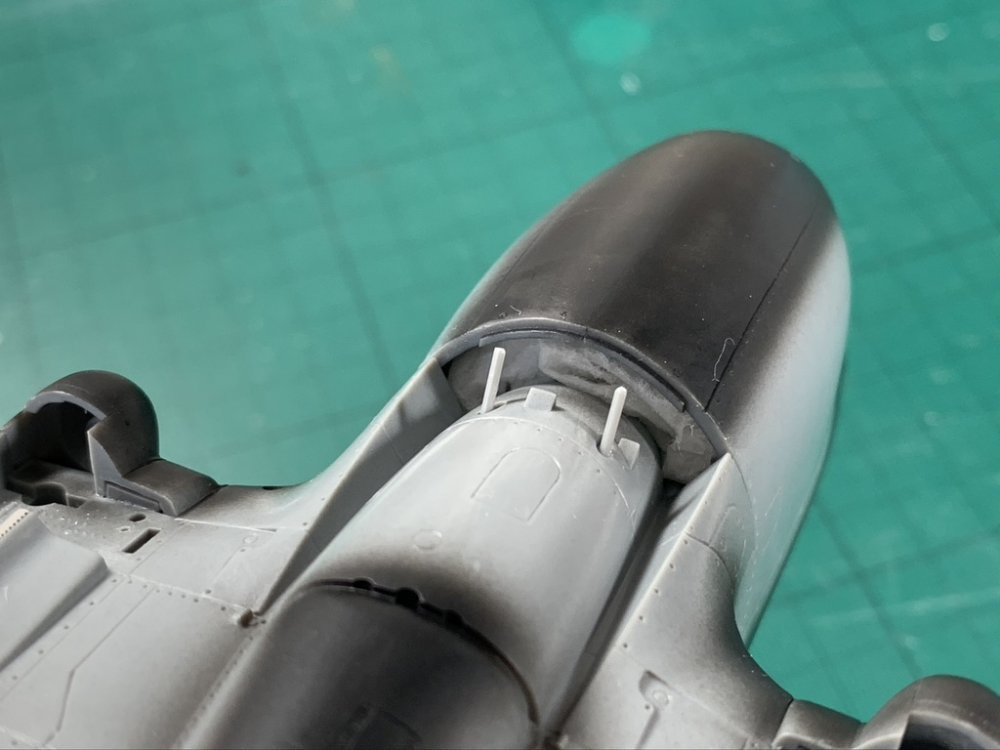
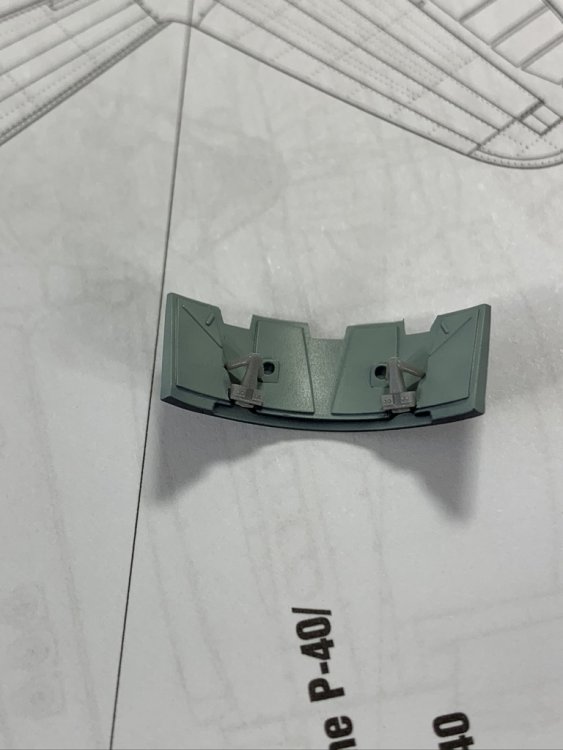
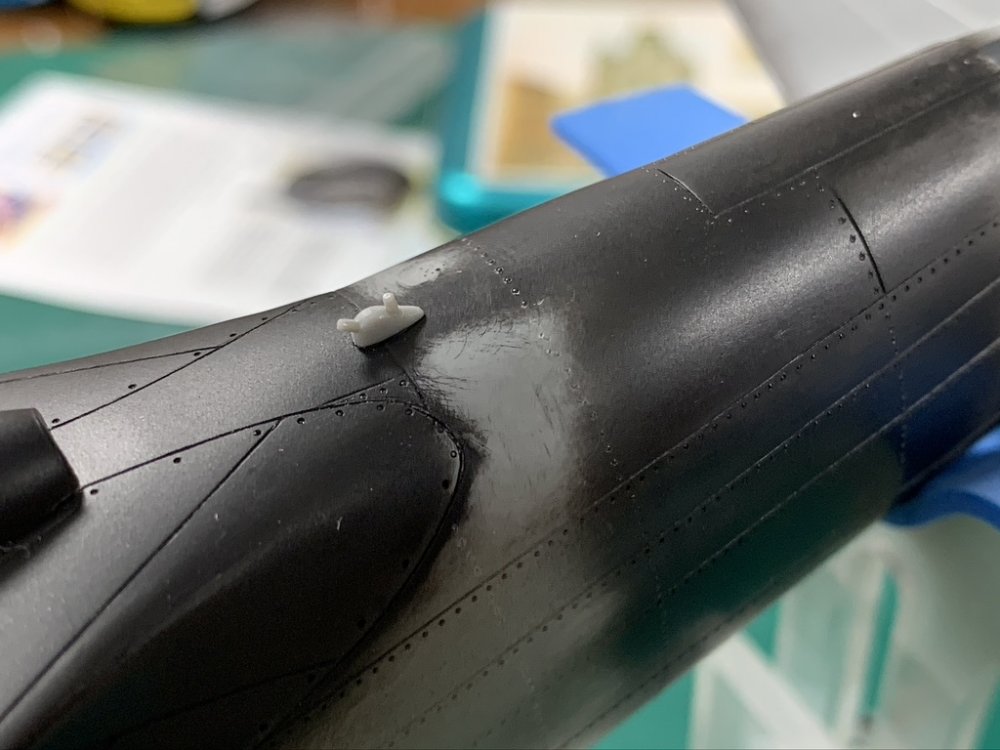
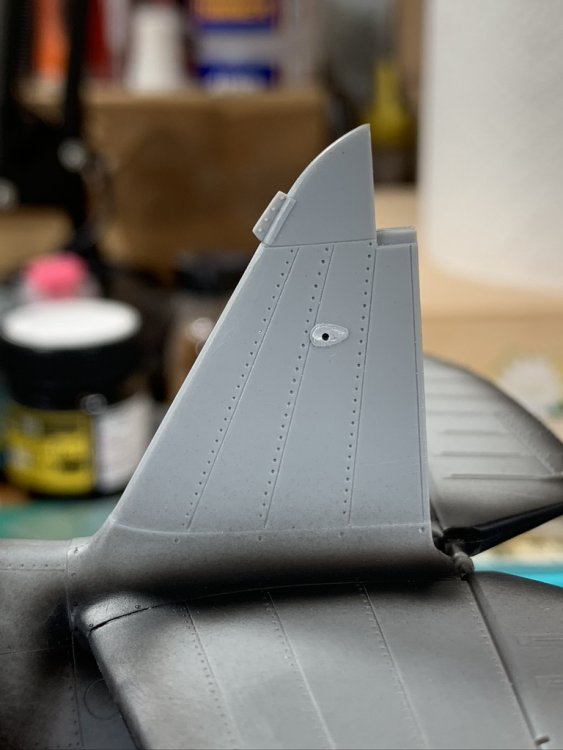
getting close to primer! going with interior green wheel wells but the rest will be Dupont's sky grey whatever the hell it was called (don't tell anyone but i'm using RLM76), so kitchen towel sprayed with water to make it stay in the wells only really need to keep the primer out, as the wells themselves will get overspray round the edges maybe same procedure for the radiator cowl area the radiator flap part has two little tripod brace things which i found lacked any sense of positive fit, so careful here; i'll re-prime and paint this again later i guess i got lucky because after some fiddling and a little pressure it just clicked into place (I was able to remove it the same way) finally, what is this little thing on the underside? fuel dump? need to know if i should drill the little tube things out / replace with brass tube etc cheers Nick

-
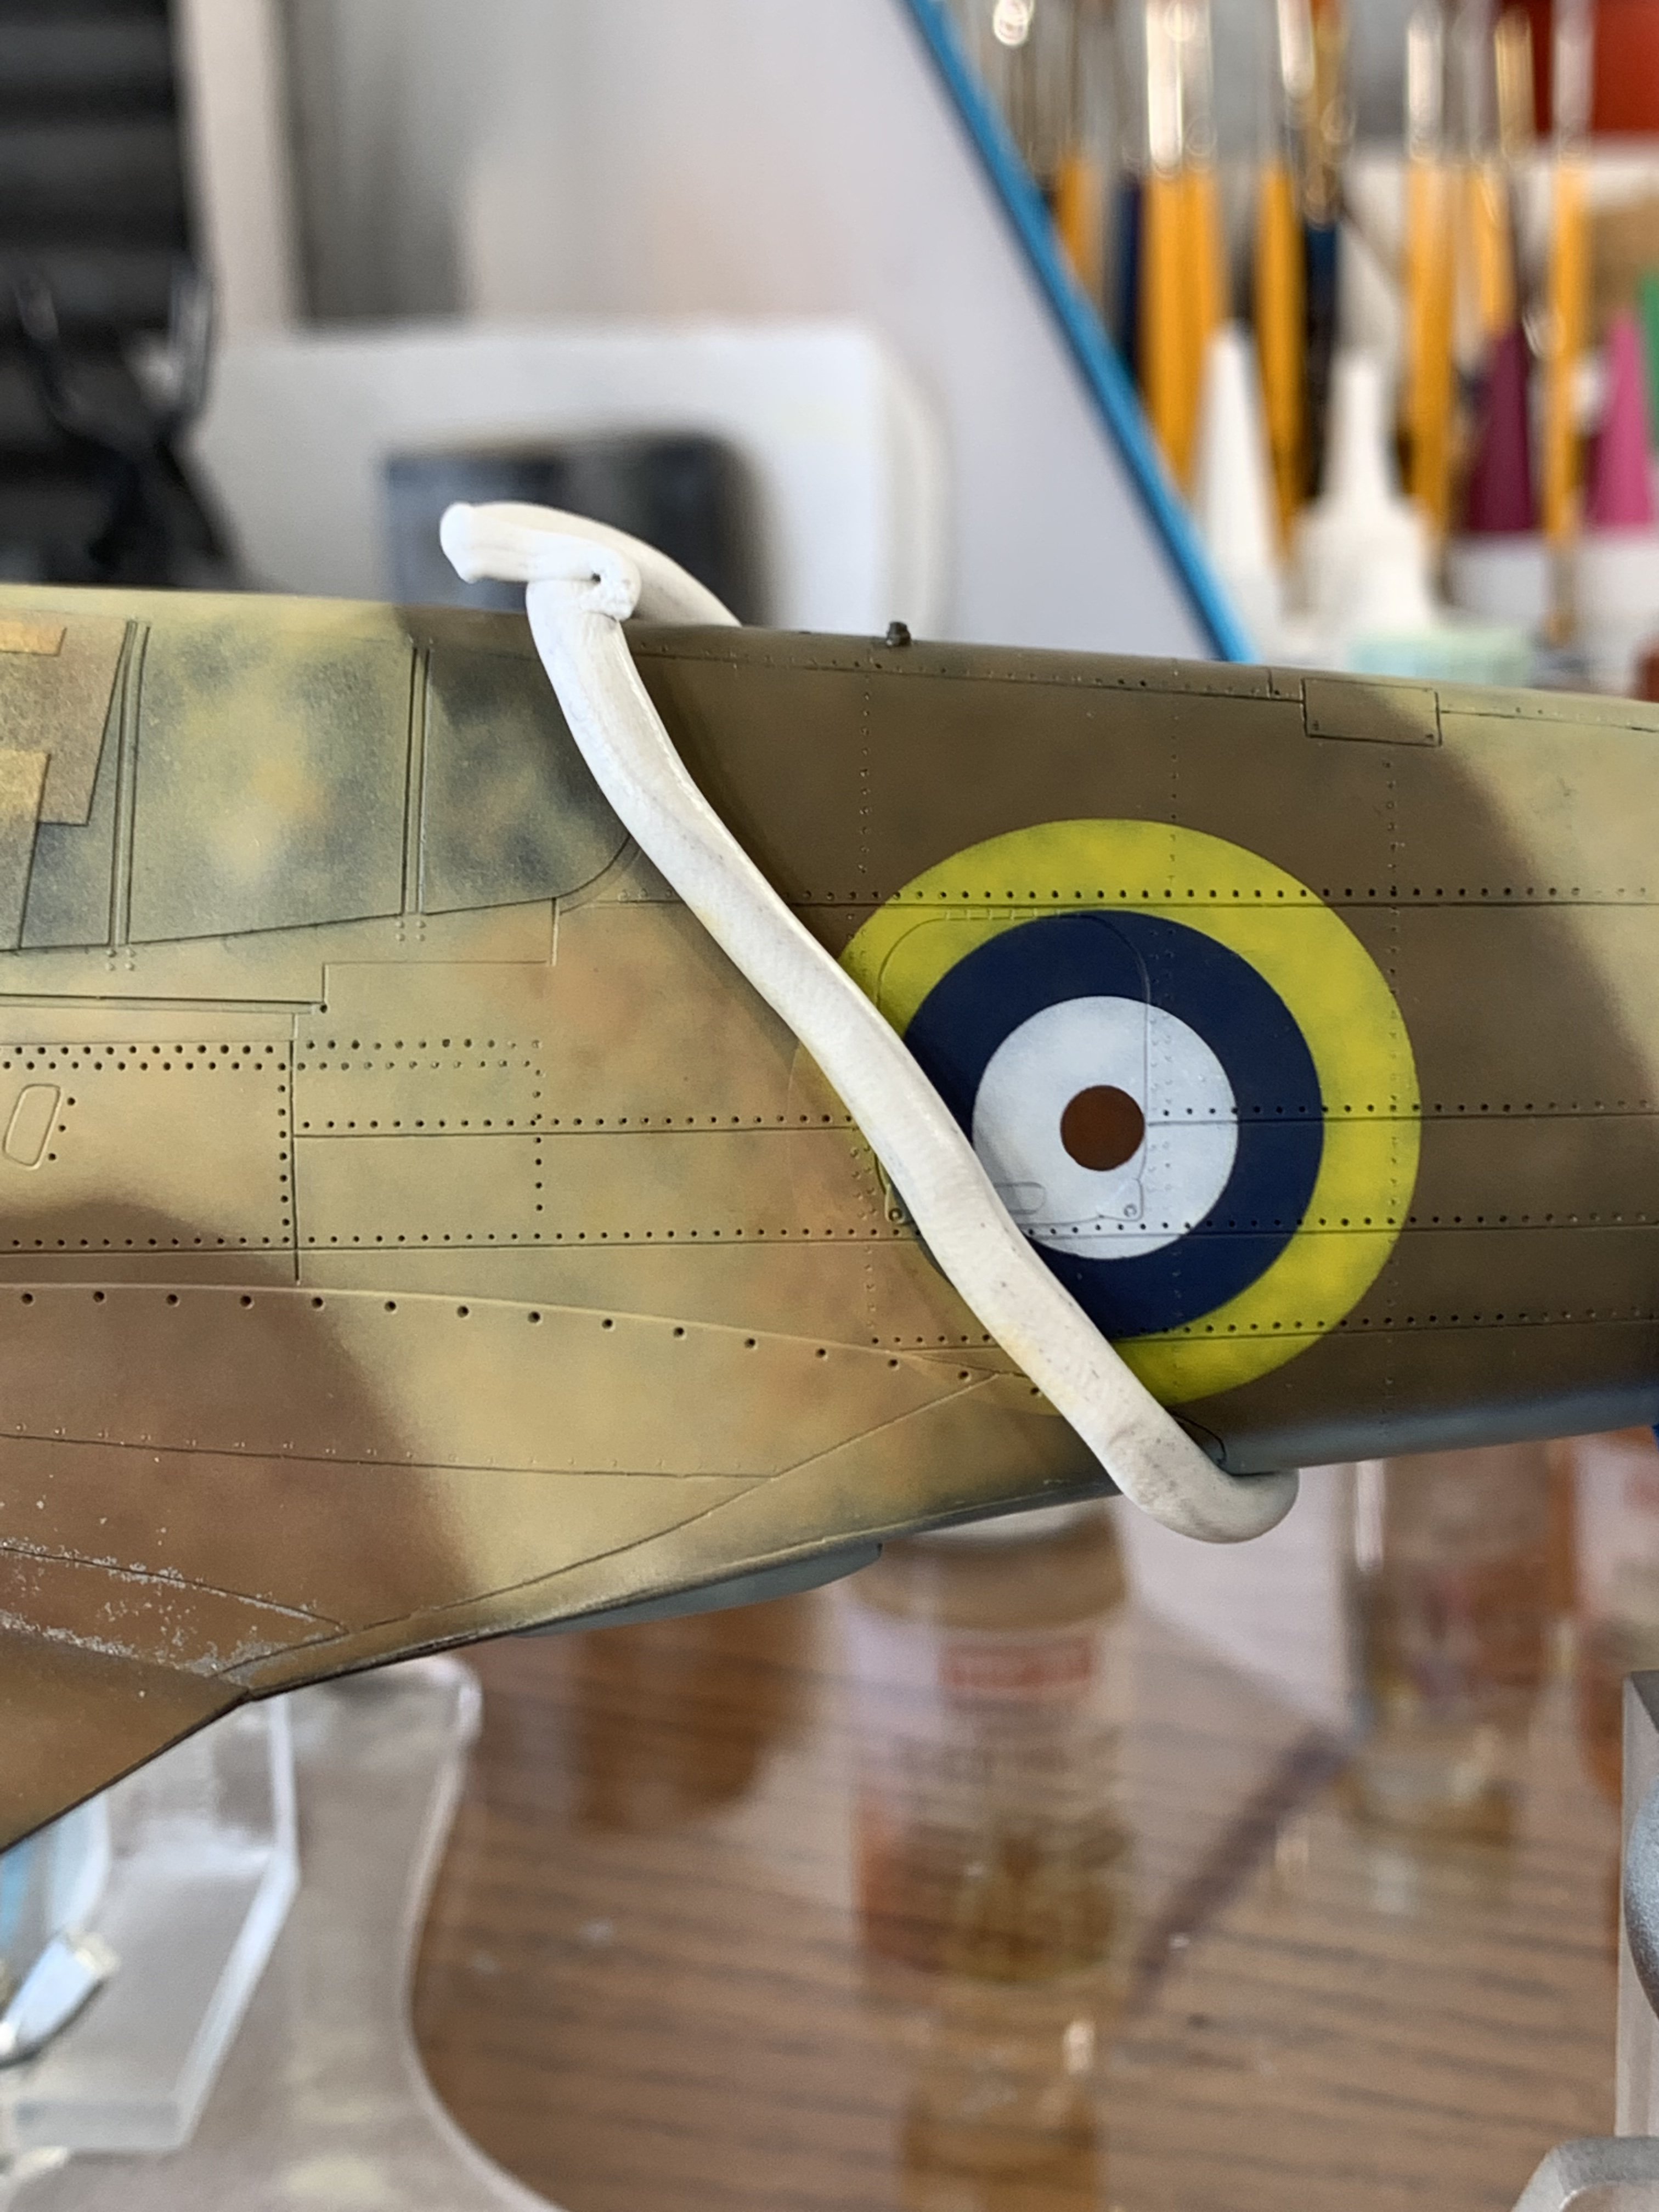
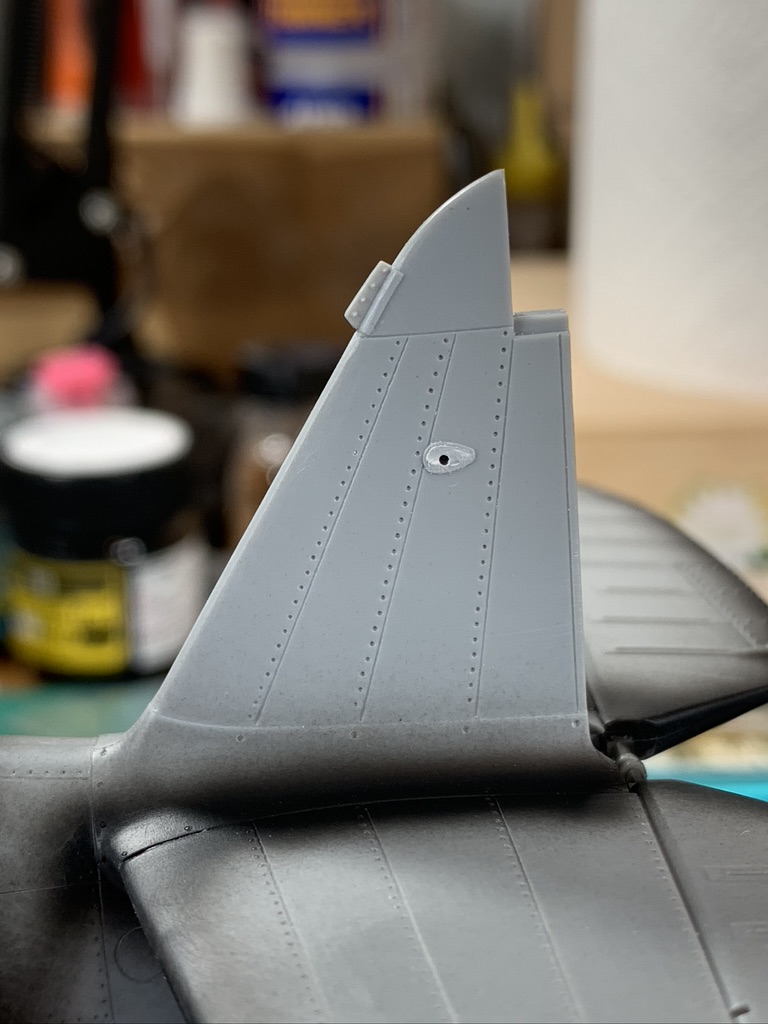
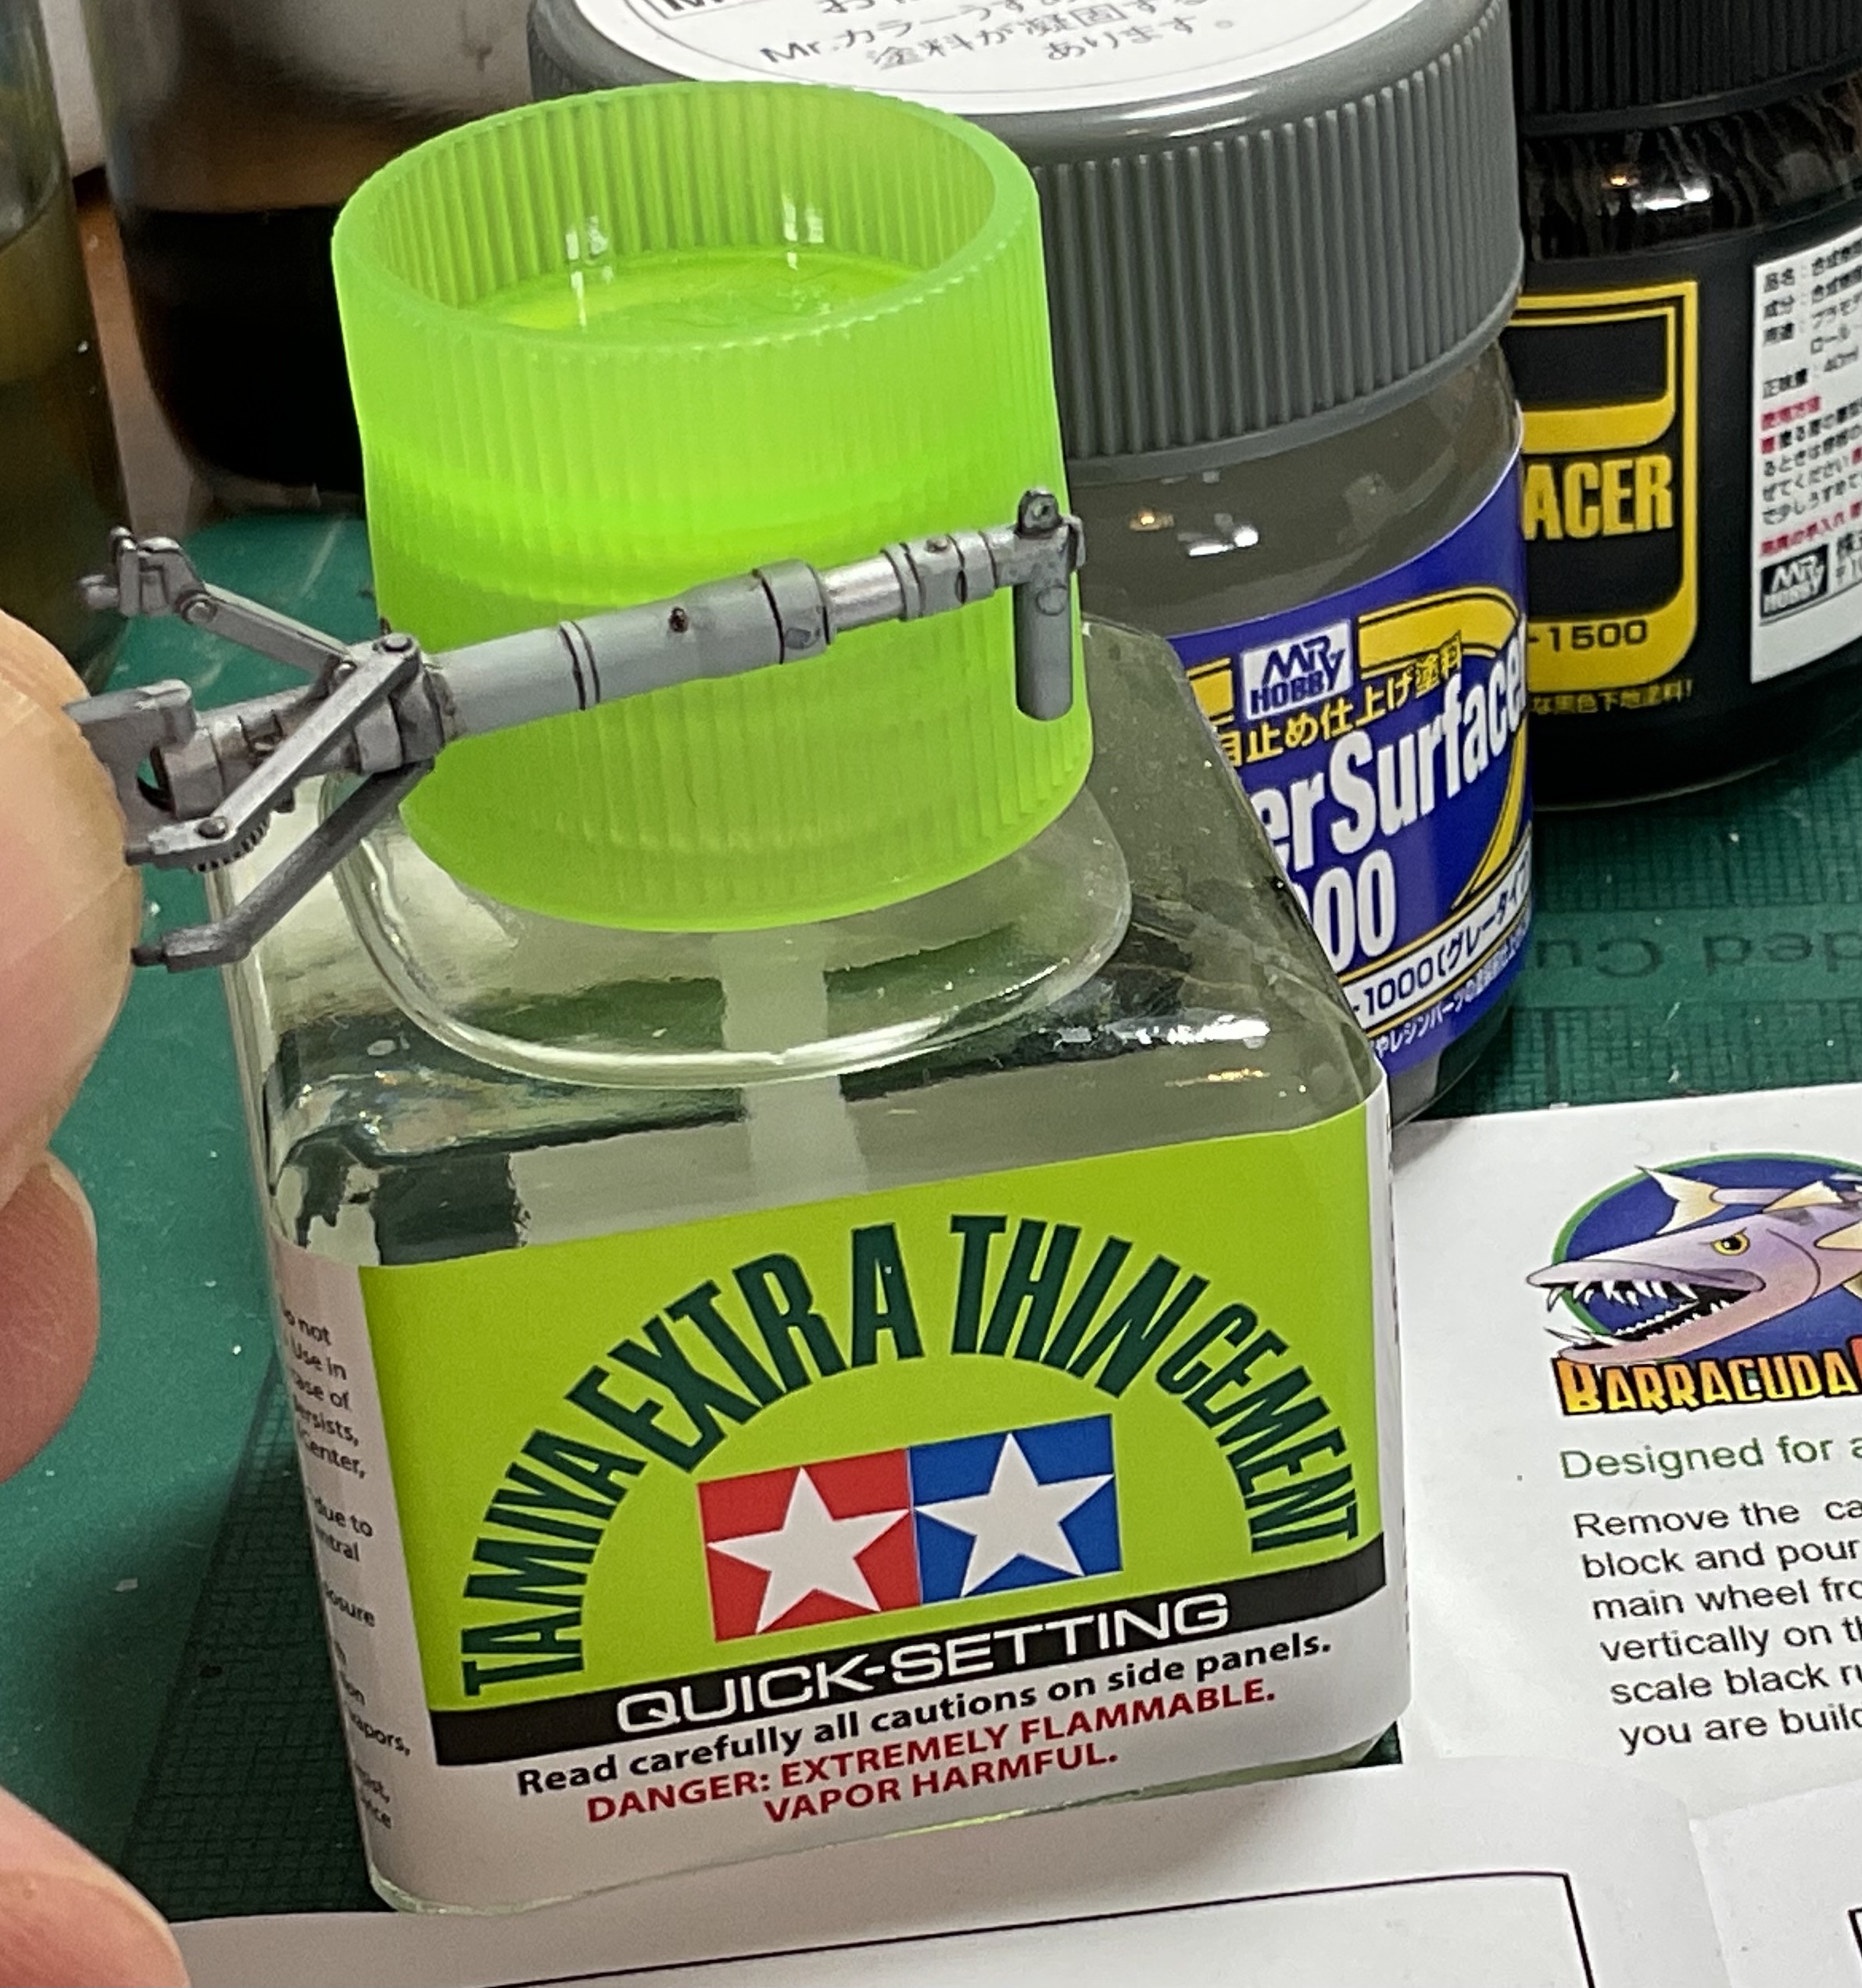
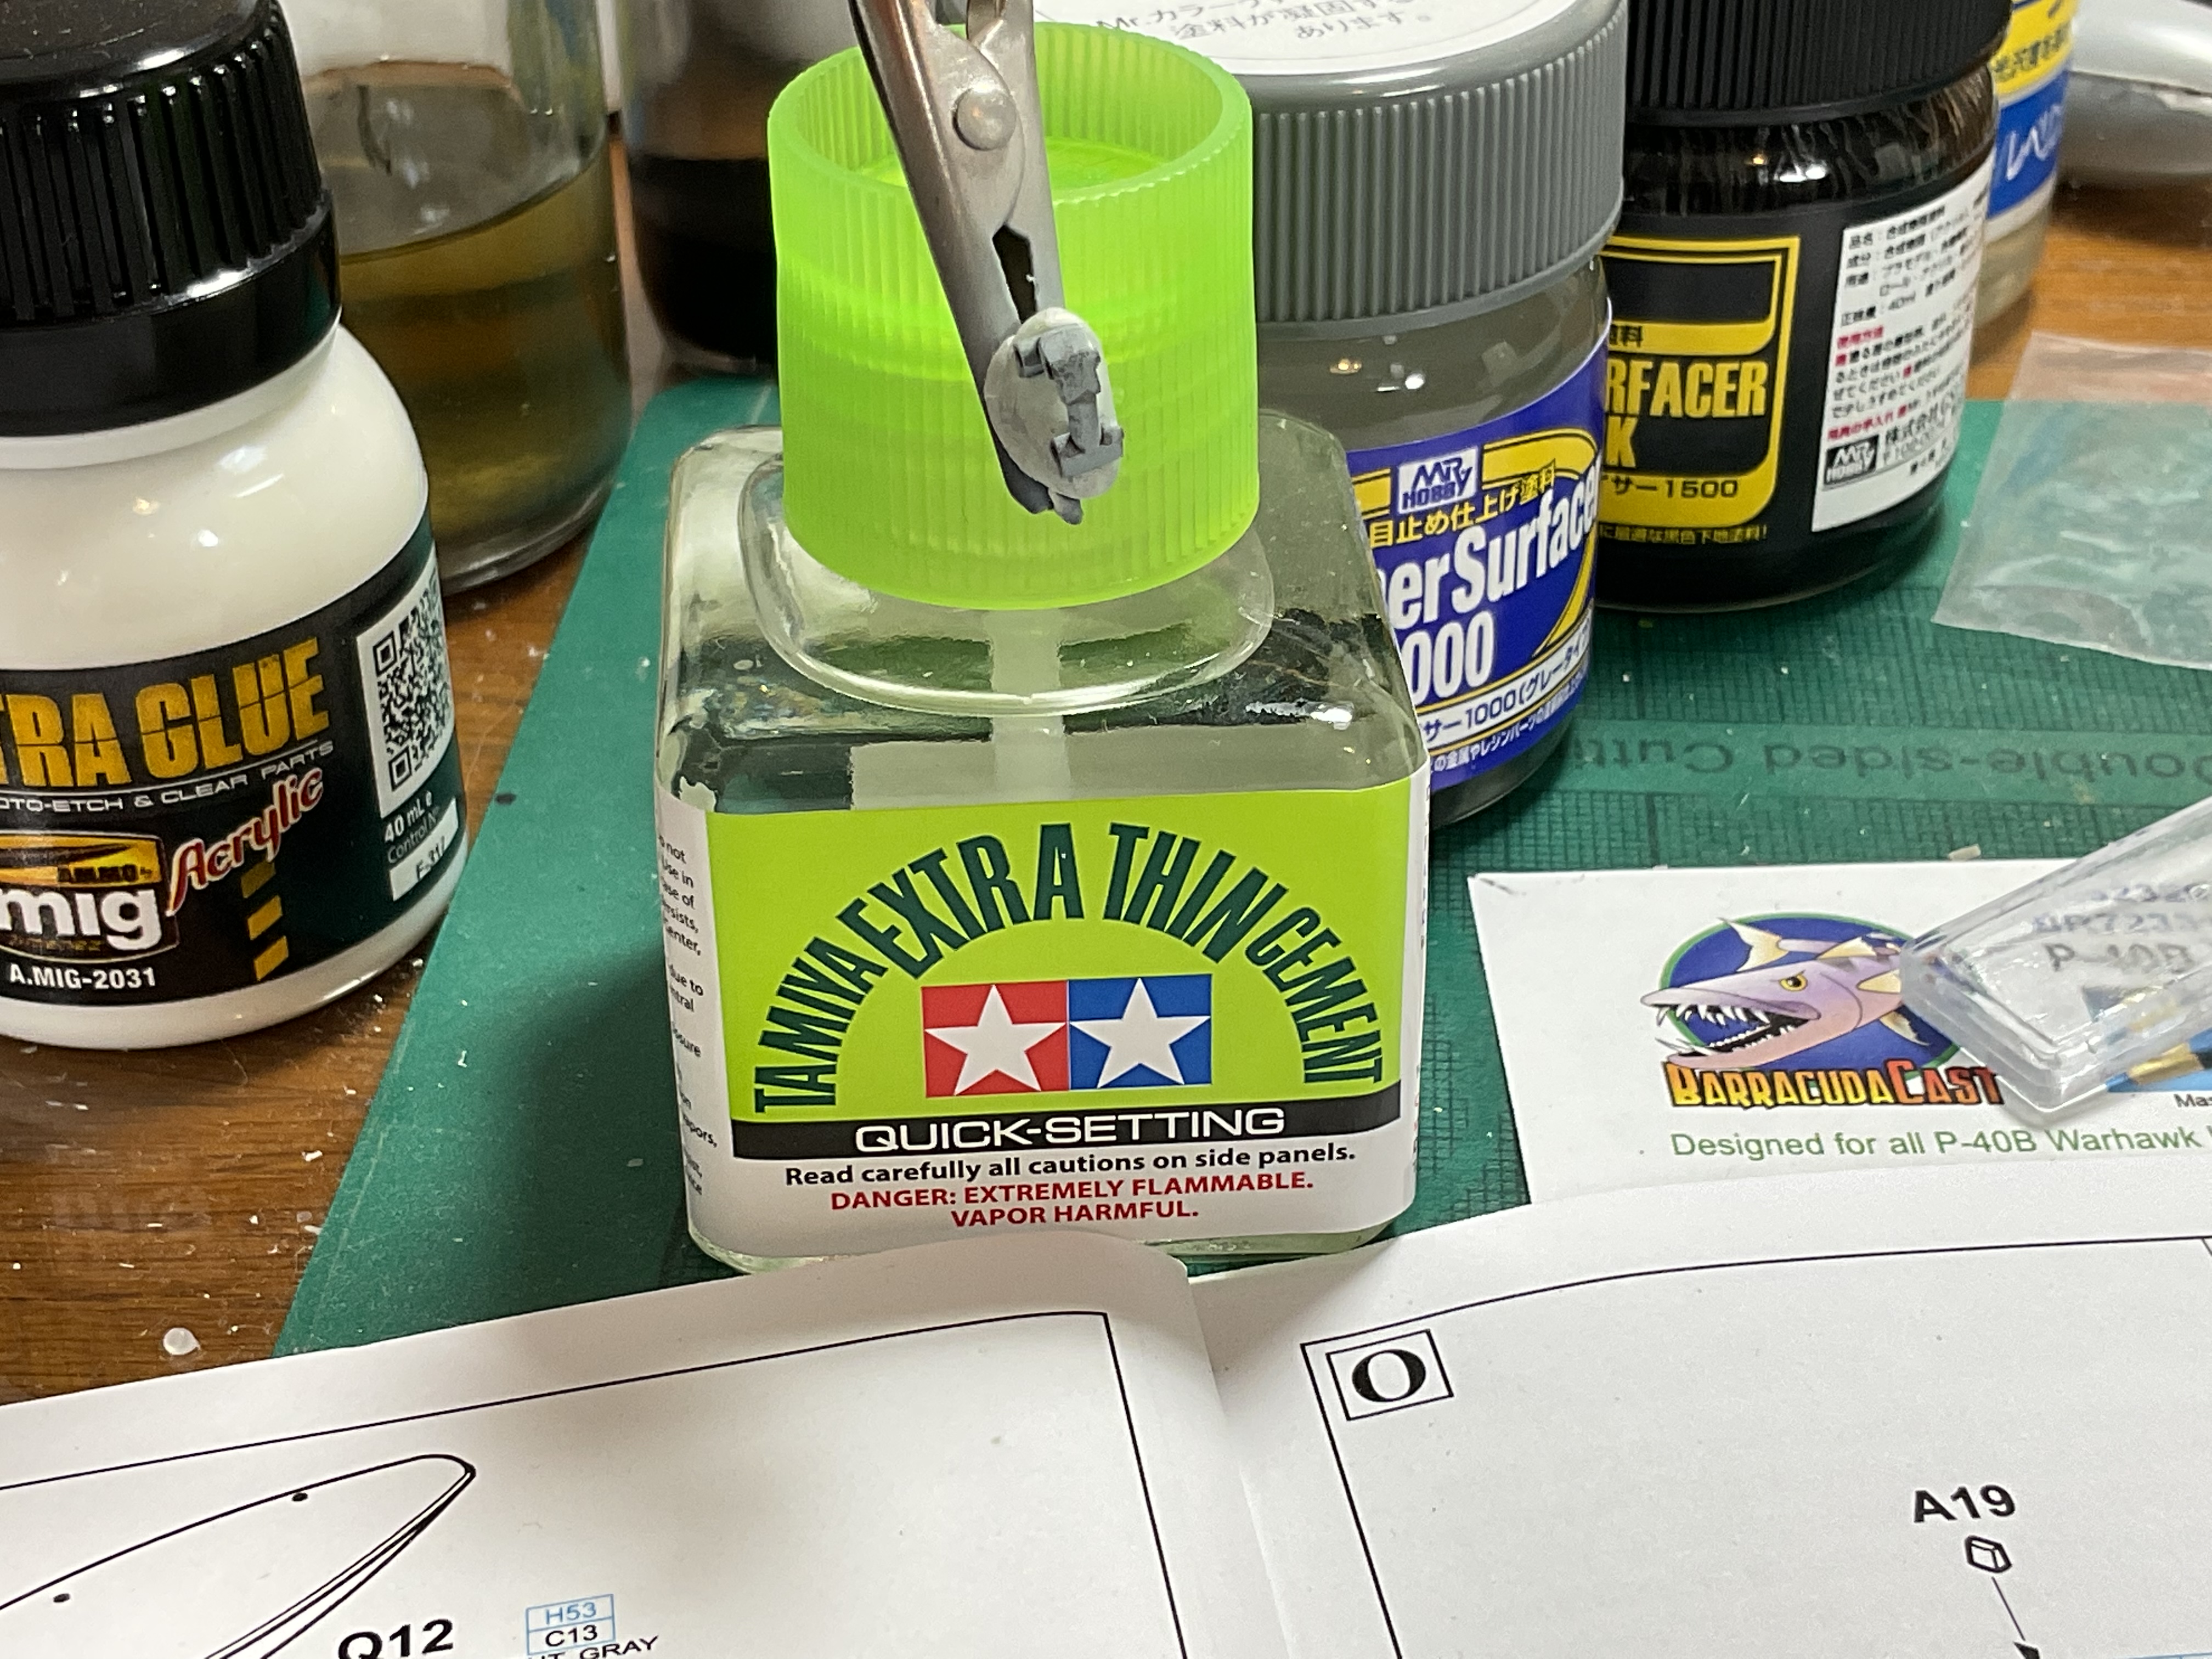
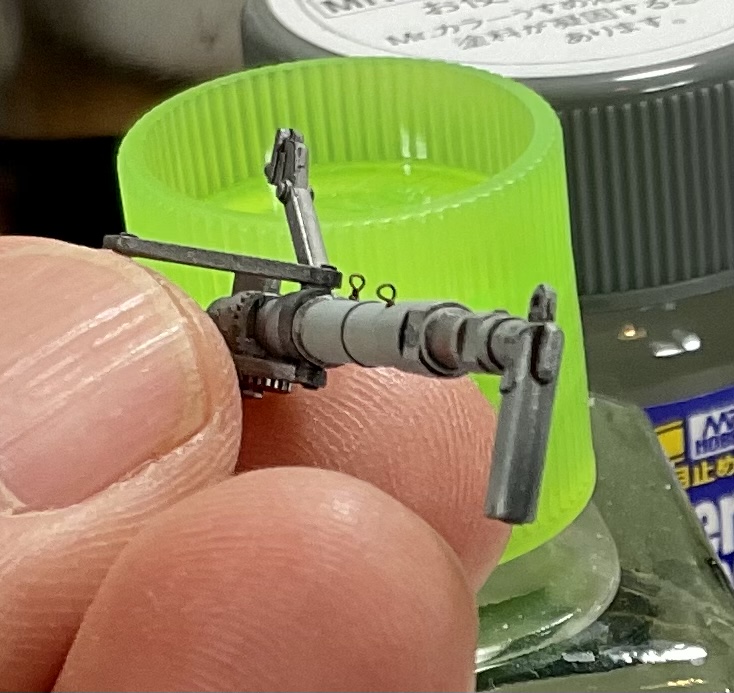
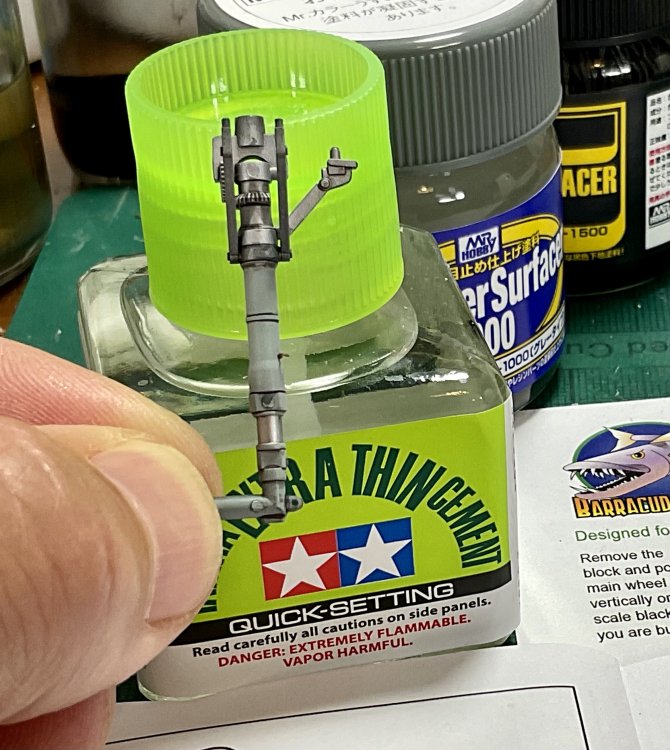
i was toying with leaving the moulded on lumps - which are actually nice and crisp - but decided to clip them off and drill a small hole (per instructions - I have the Eduard kit) so that replacement clear parts can be added after painting starting point... snipped! small drill bit in pin vice after a little sanding for next time i recommend doing this before you put anything together - it will be a bit less fiddly this is the part i plan to use at the tail and attach the elastic line (I'll be using Uschi, which is round - EZ Line is fine but it is square in profile and you will see it if it's twisted even at tiny sizes) not entirely sure how accurate this is, but it will look a little better than just running the wire to the plastic tab part of the tail it bugs me that no aftermarket provider makes designated parts for these insulators and springs and stuff! the below was sourced from Hiroboy in UK btw and this is sort of what i think it will look like - note i drilled the hole too far back towards the tail so (test-)fitting the spring thingy was a bit more difficult that it should have been that's all for now cheers Nick


-
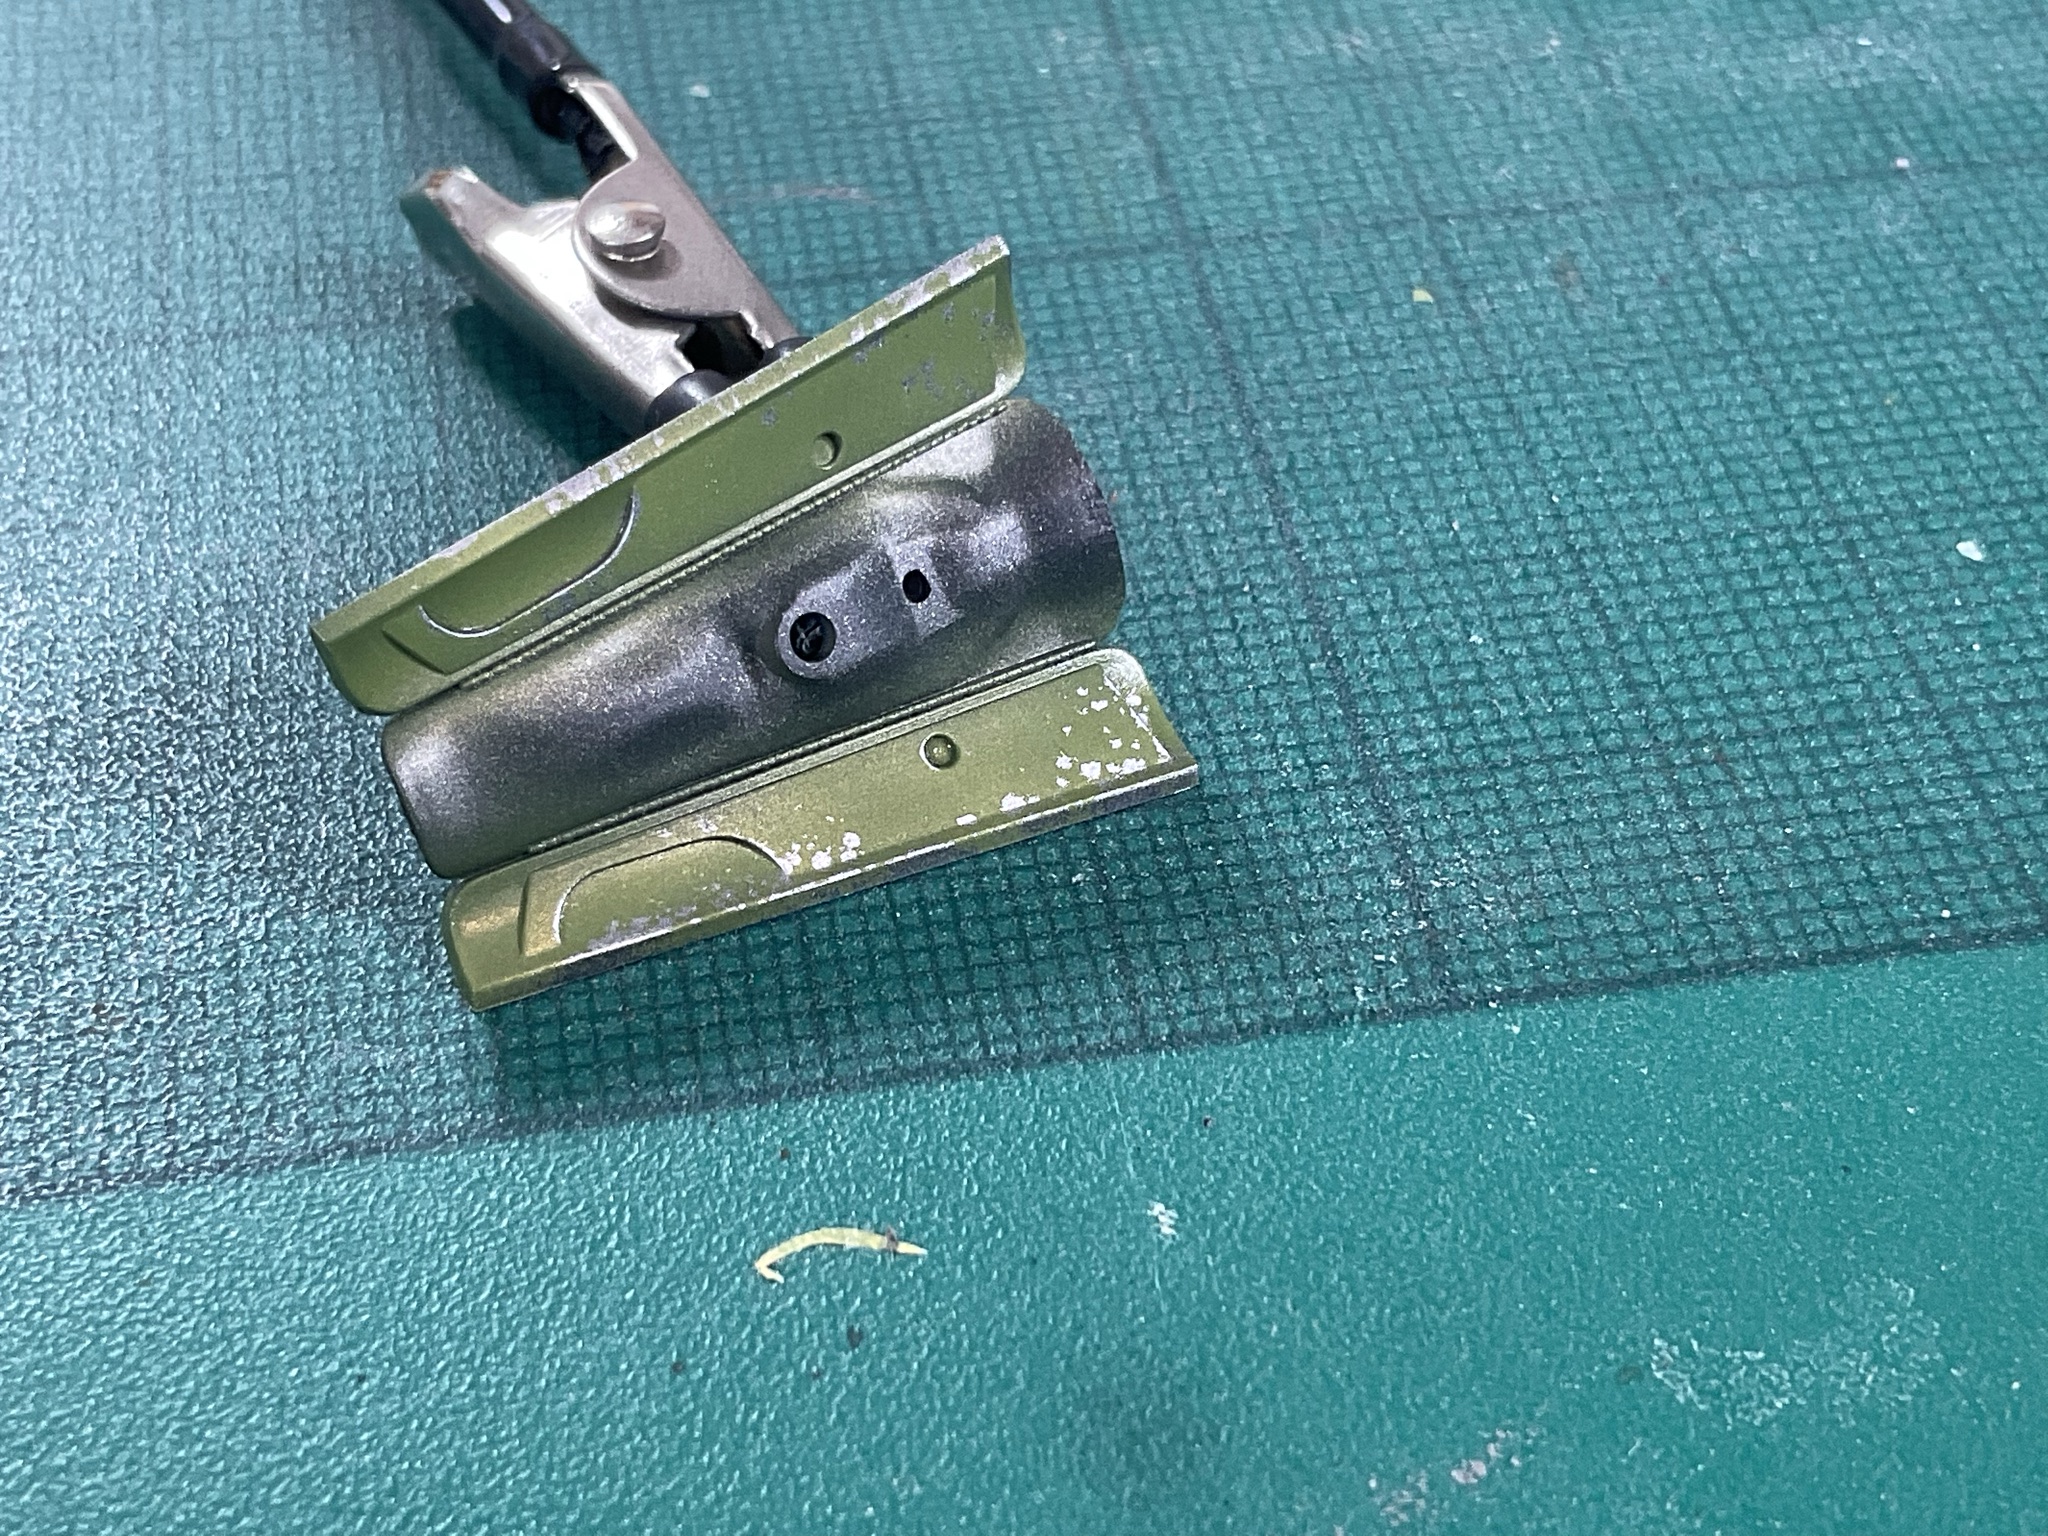
thank you the oloe is just MRP super silver which i sprayed the whole oleo with pre-chipping it was then masked and everything else done it was only masked after matt coat and i was pleasantly surprised with the contrast and general look next time - and perhaps on something larger - i might try to use MRP chrome and yes i will also use these loops for the antenna tie-downs on the wings (haven't tried this before but i reckon easier than trying to just make the wire disappear into a tiny hole! cheers Nick
-
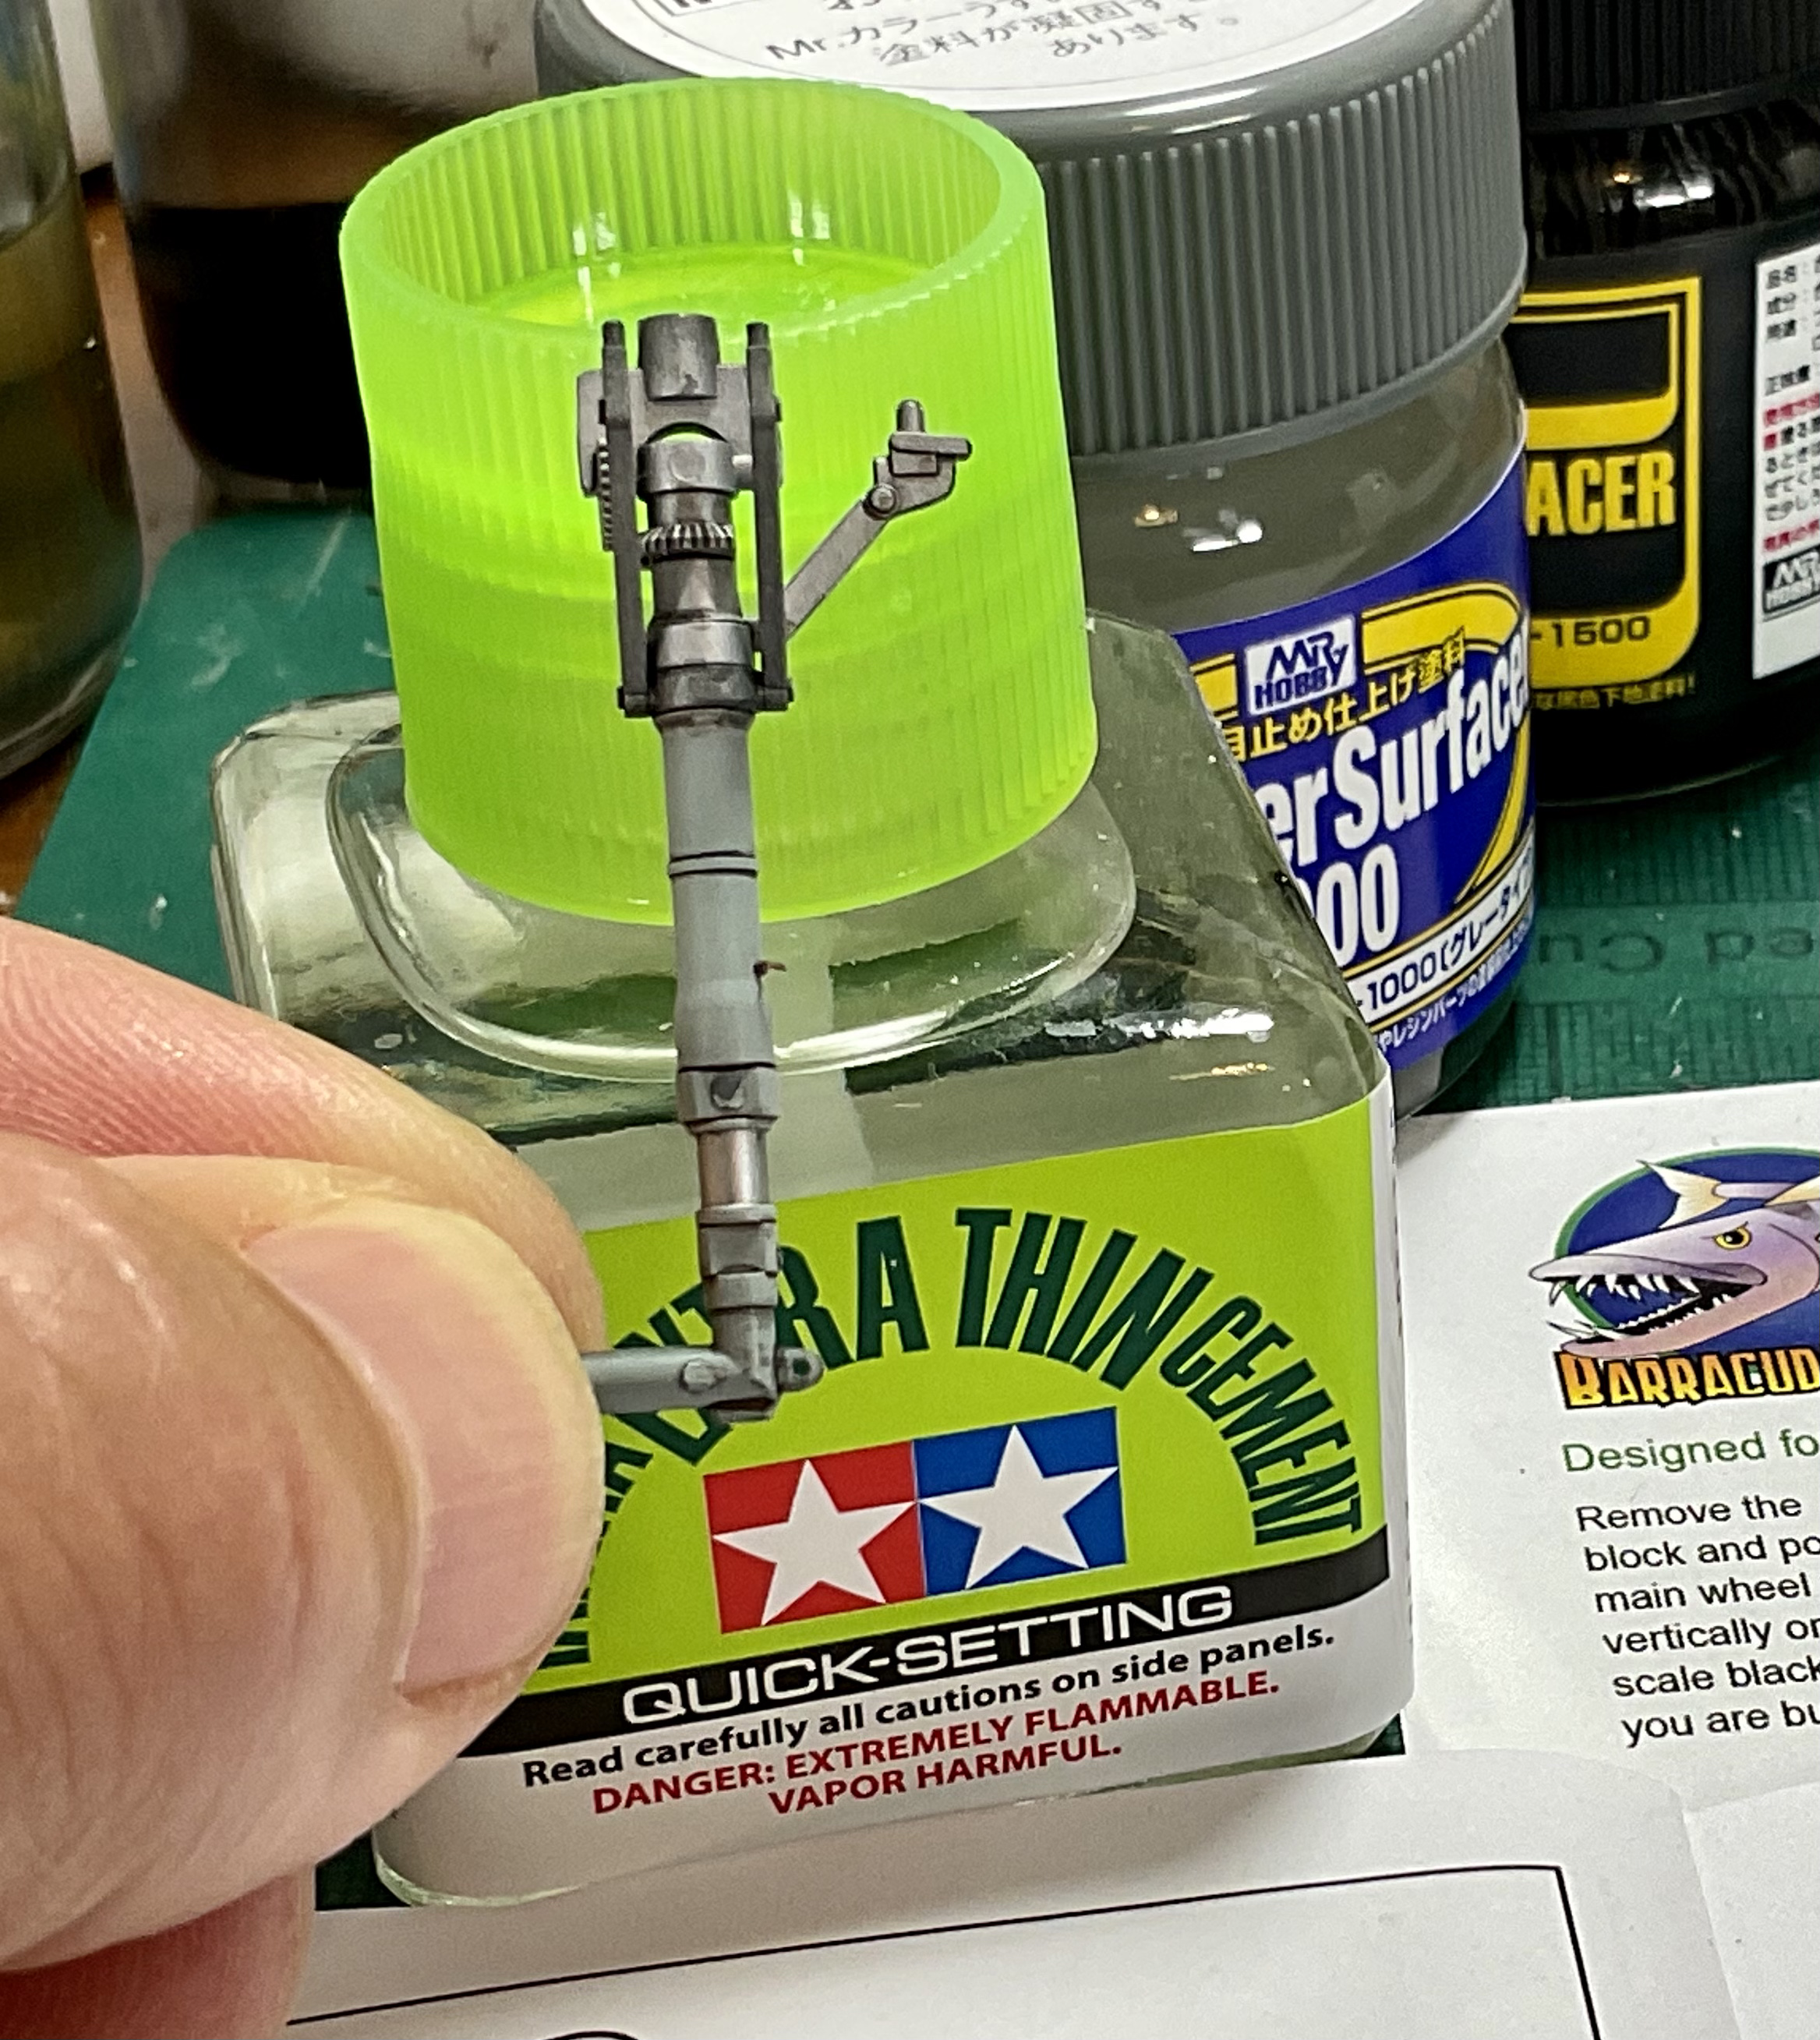
Also, some pics of the landing gear which are close to complete Bob’s Buckles were used for the small loops that the brake line will be passed through they were gloss coated (MRP) then Tamiya panel line wash dark brown, then sealed with matt coat MRP


-
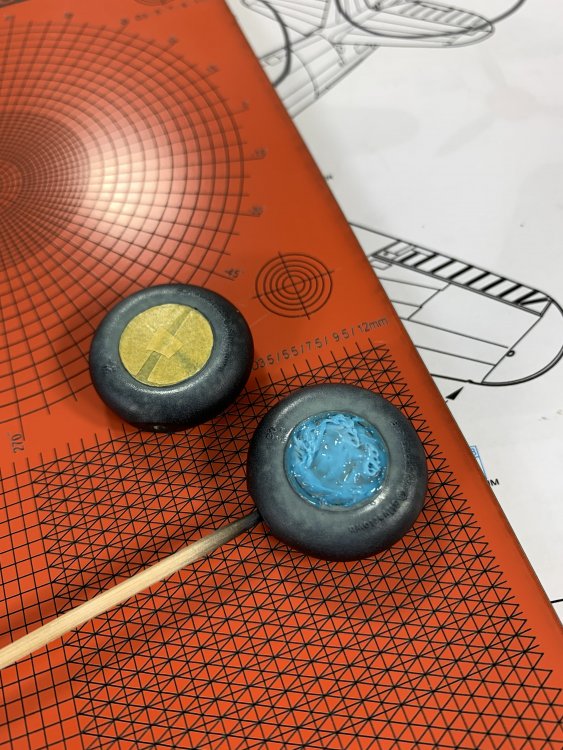
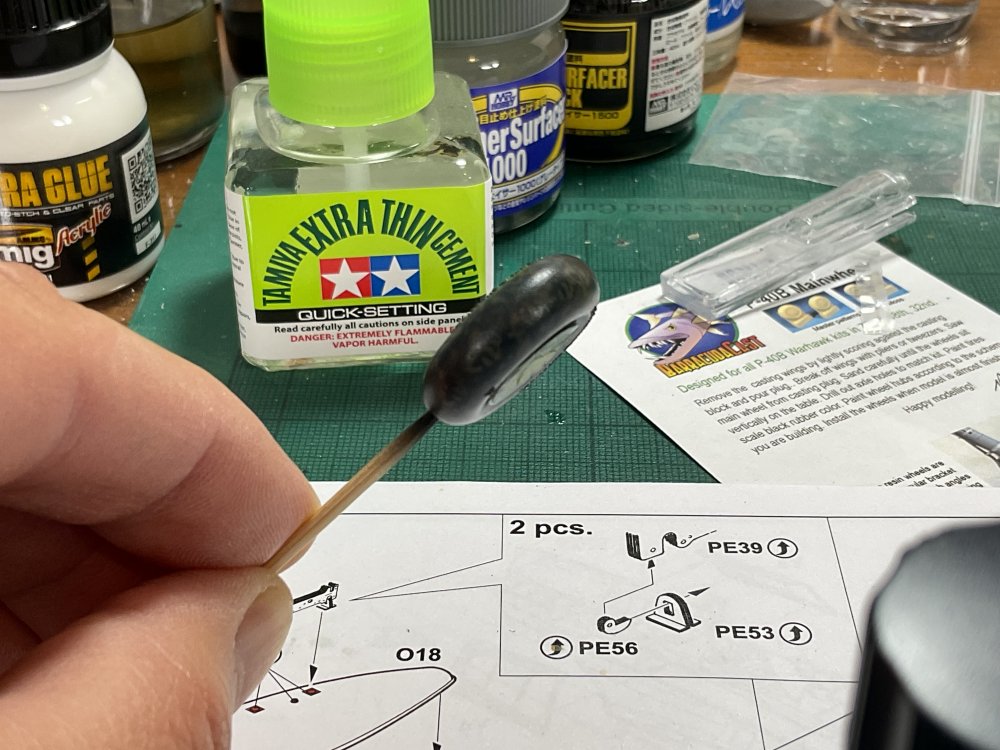
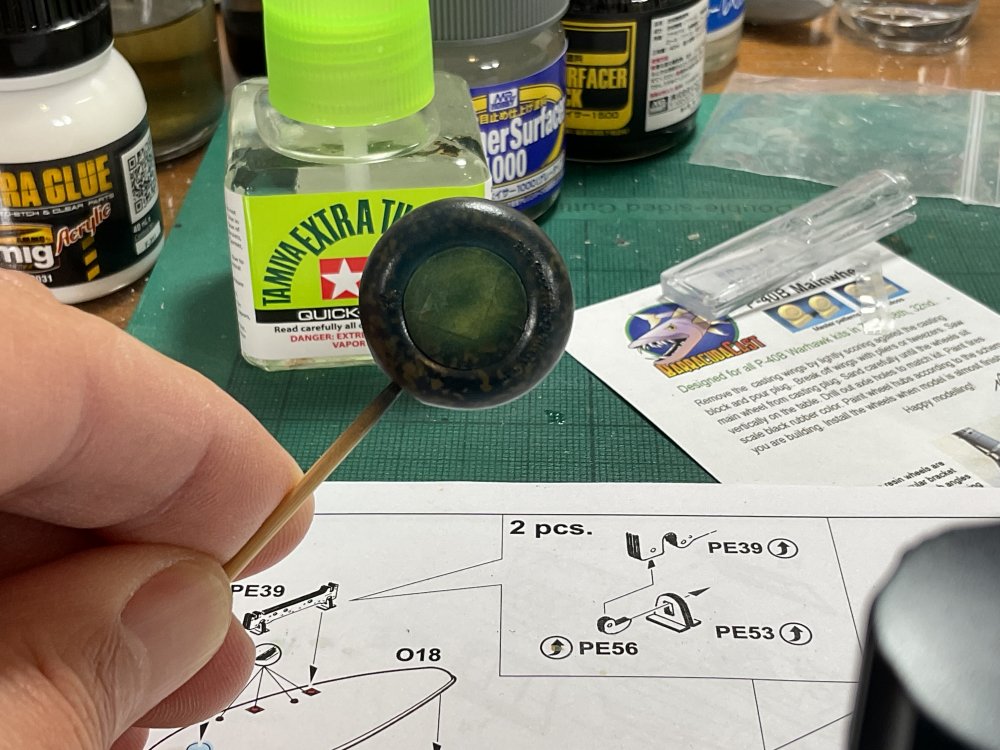
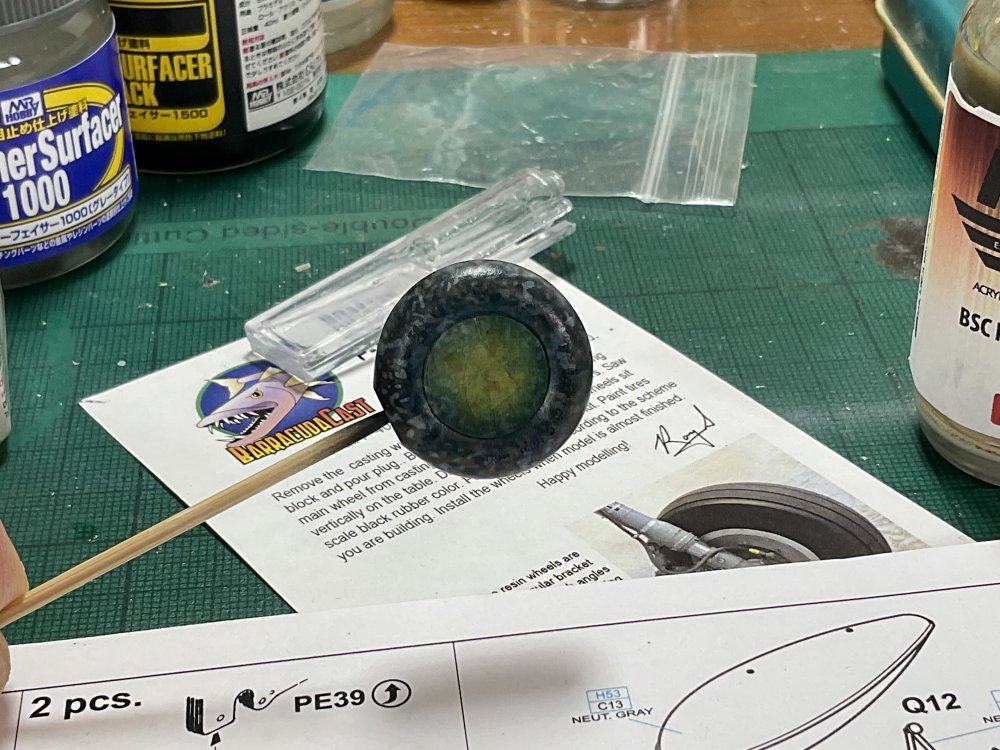
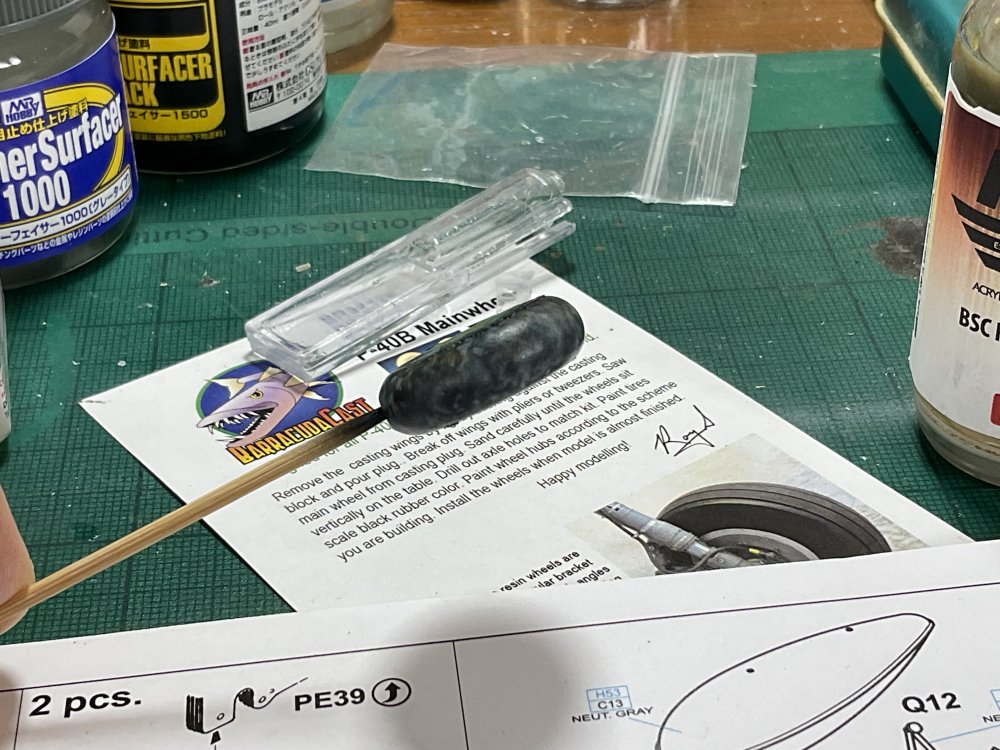
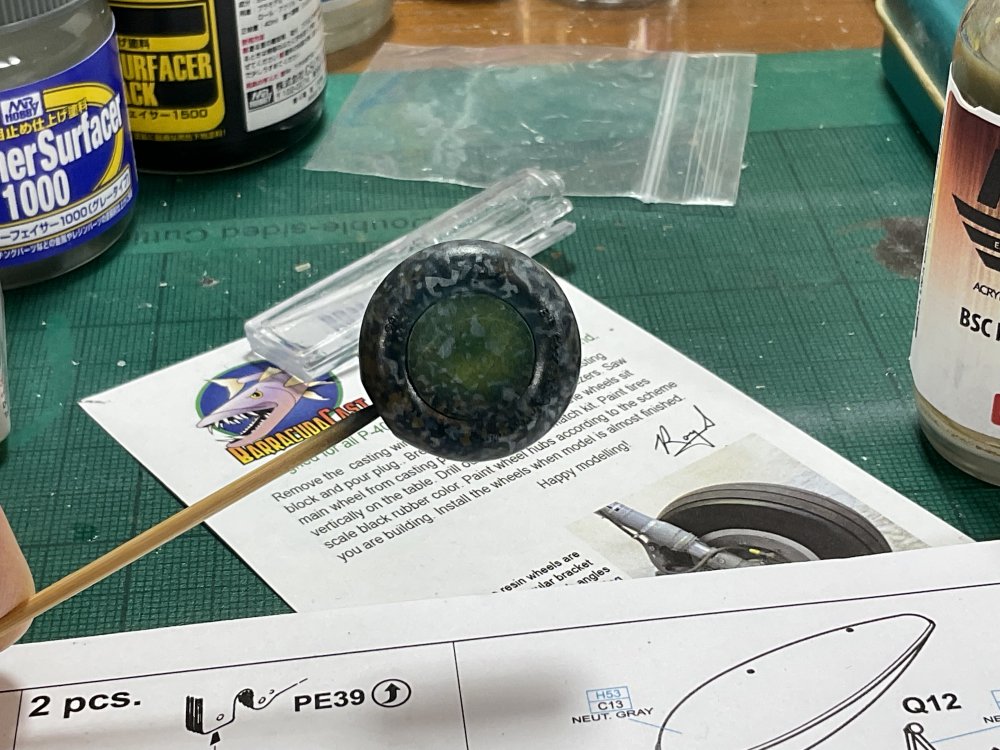
Some work on the wheels annoyingly there are no masks out there for these tried using some masking fluid but wasn’t happy with the finish so cut mask circles myself but of course the infini mat I have has every f*cking size apart from the ~13mm that I reckon I needed Nothing looks crapper than a wheel which is just flat black so here are the colours I plan to use I started by giving them an overall dark blue coat just to draw it all together then with paint stencil - someone please make these things in floppy plastic so can be used more effectively on compound curves - added some dark earth, and then some of the lighter colours… I will blend them all with some tyre black later but this is a decent start

-
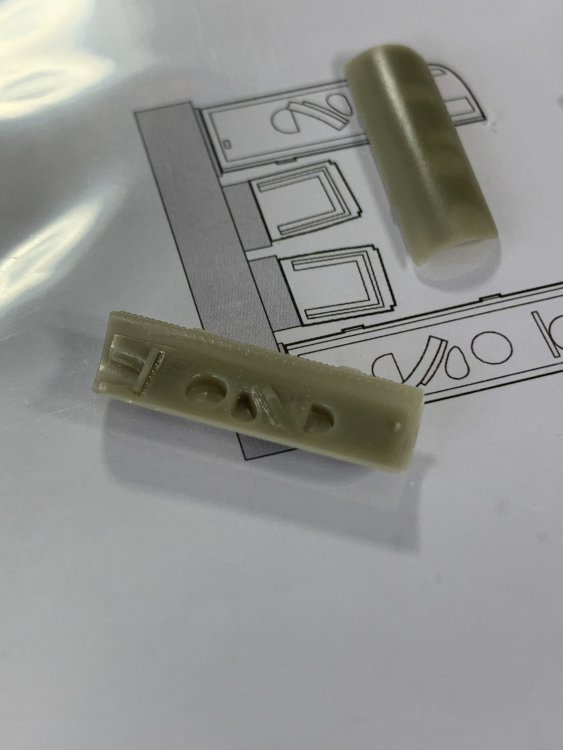
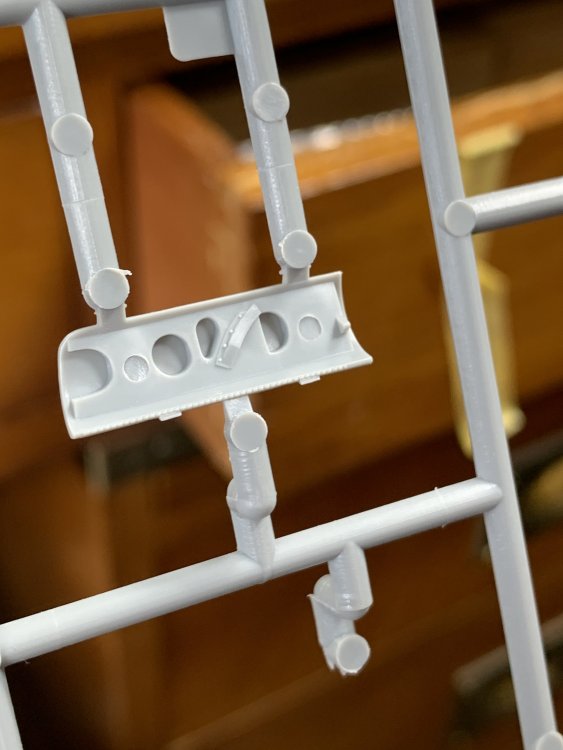
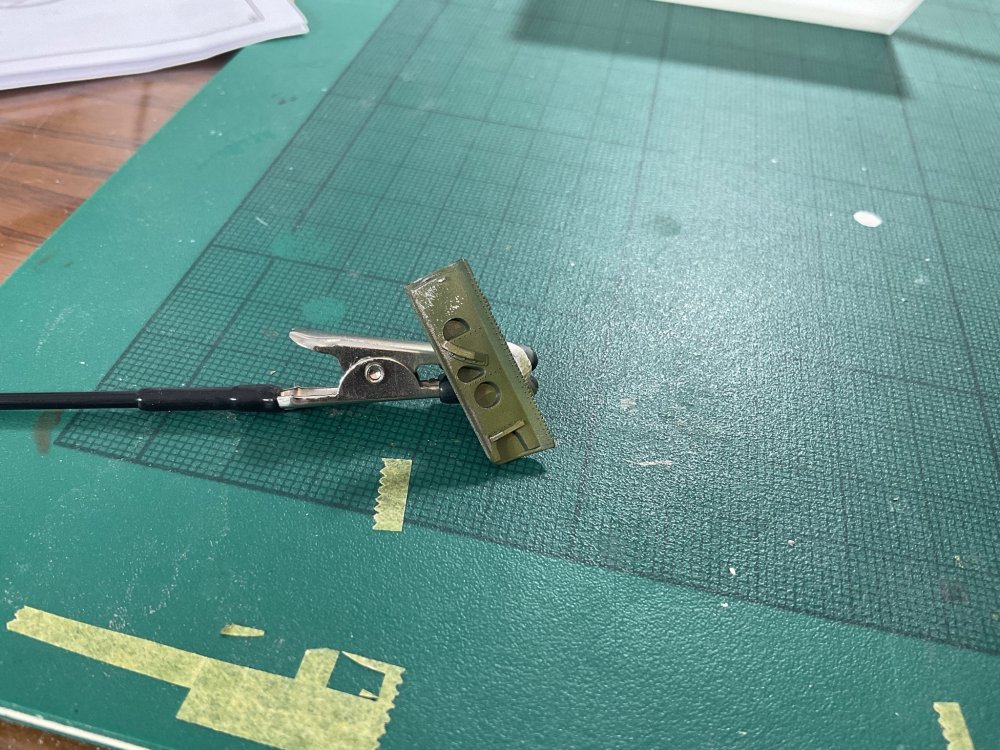
Not too much progress recently I’ll go with the Quickboost landing gear doors primarily because they don’t have the shitty ejector pin marks (the kit parts are actually very sharp). The small door will fit very nicely, but the larger door will be fiddly to attach - neither upgrade nor kit part has a large mating surface and I don’t think the engineering is very good here. these doors will be us sky grey eventually - as will the main parts of the oleos - but I thought I would do some hs chipping first the tail wheel doors will stay interior green


-
he he no worries yes of course you are right and I am a numpty lol it should look reasonable enough once the prop hub is on in other news I have received a better copy of one of the two known photos of this airframe and I have now been ‘converted’ to believe that the spinner is red, and not black as I had previously believed so I guess I have some respraying to do cheers Nick
-
Hey DocRob sorry to hear of your issues with the wet transfers i would not be afraid to contact HGW directly and explain what happened - maybe it was a dodgy batch etc? HGW concede that they have not yet mastered the process for multi coloured decals which are very involved eg some intricate nose art i recommend them only because they do seem to have taken the fear / unpredictability from the stencilling / small decals best Nick
-
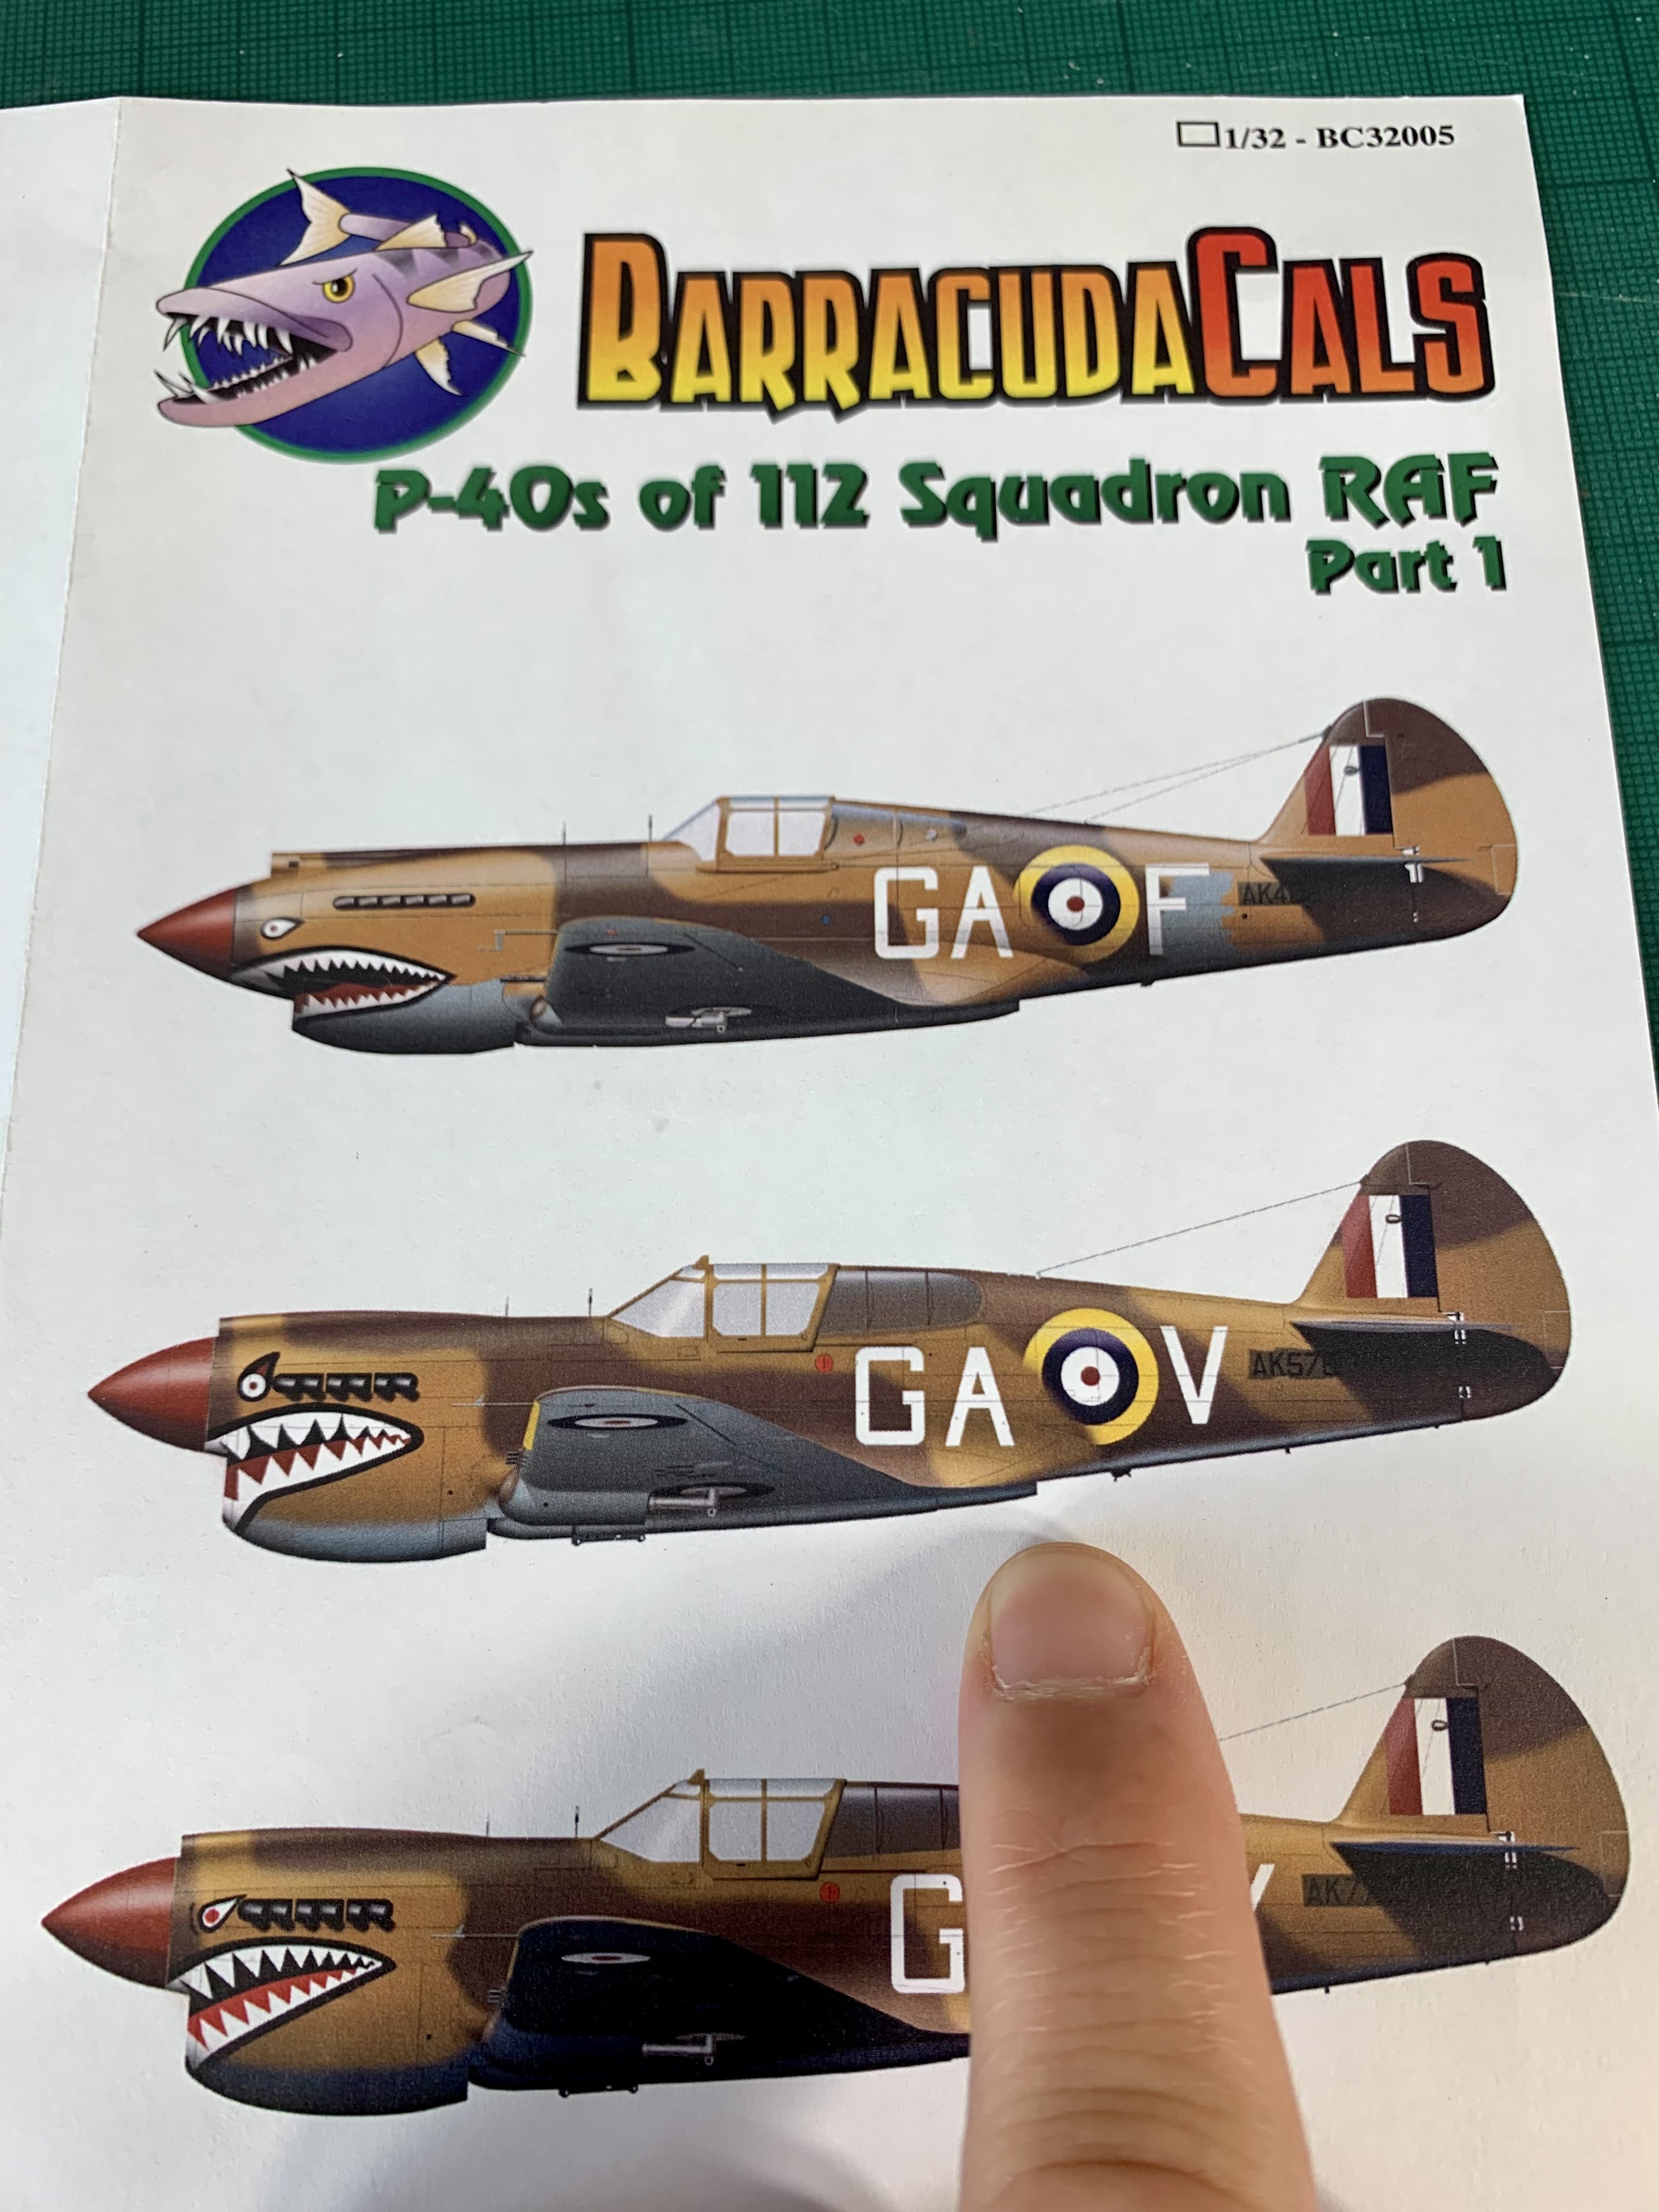
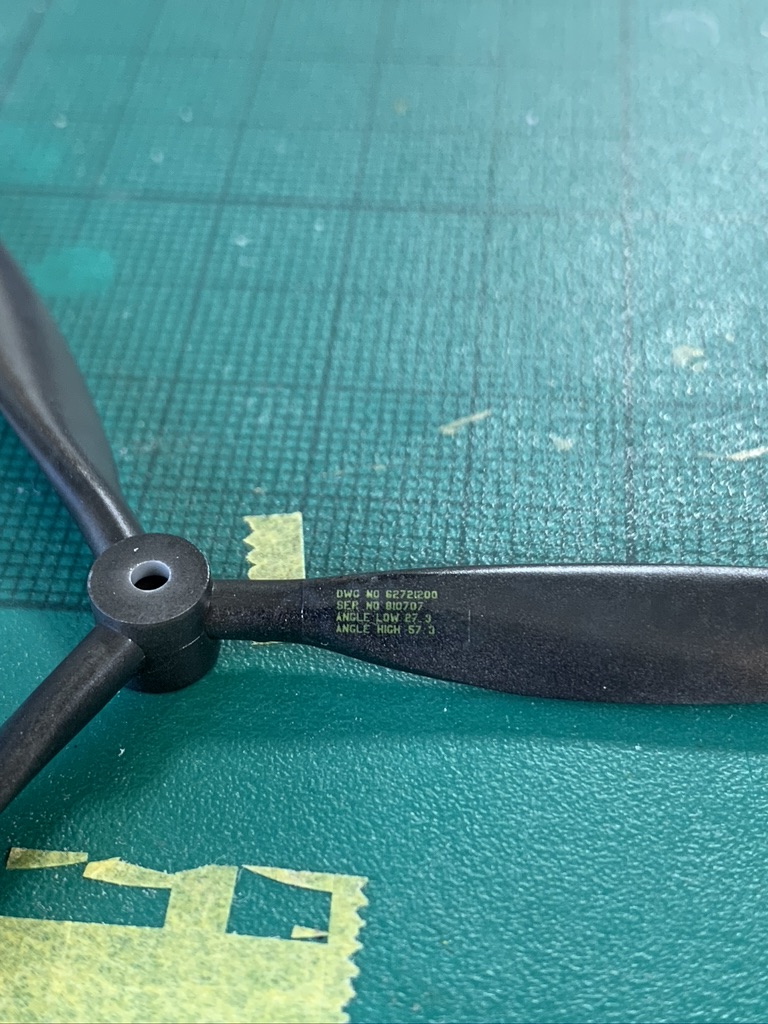
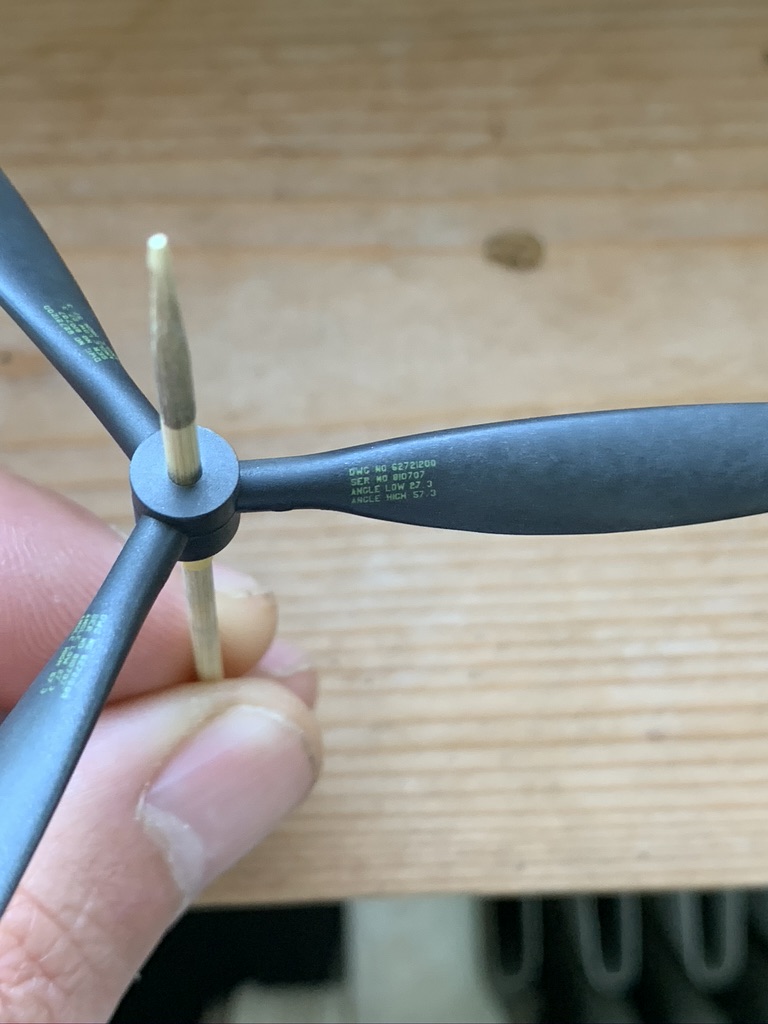
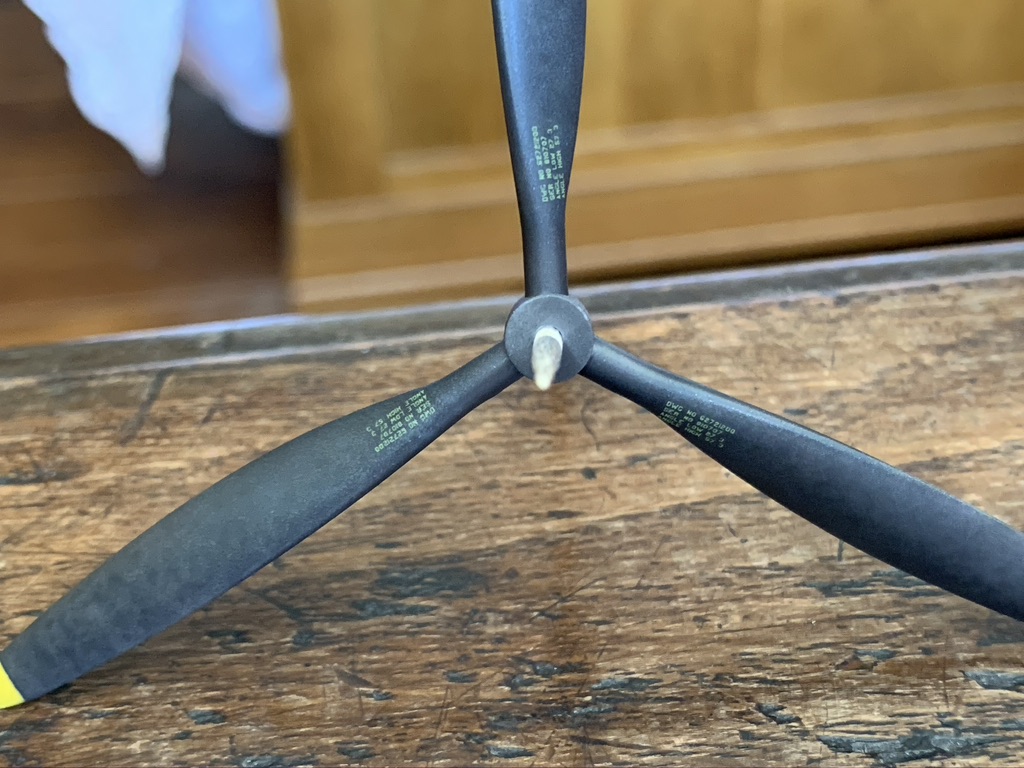
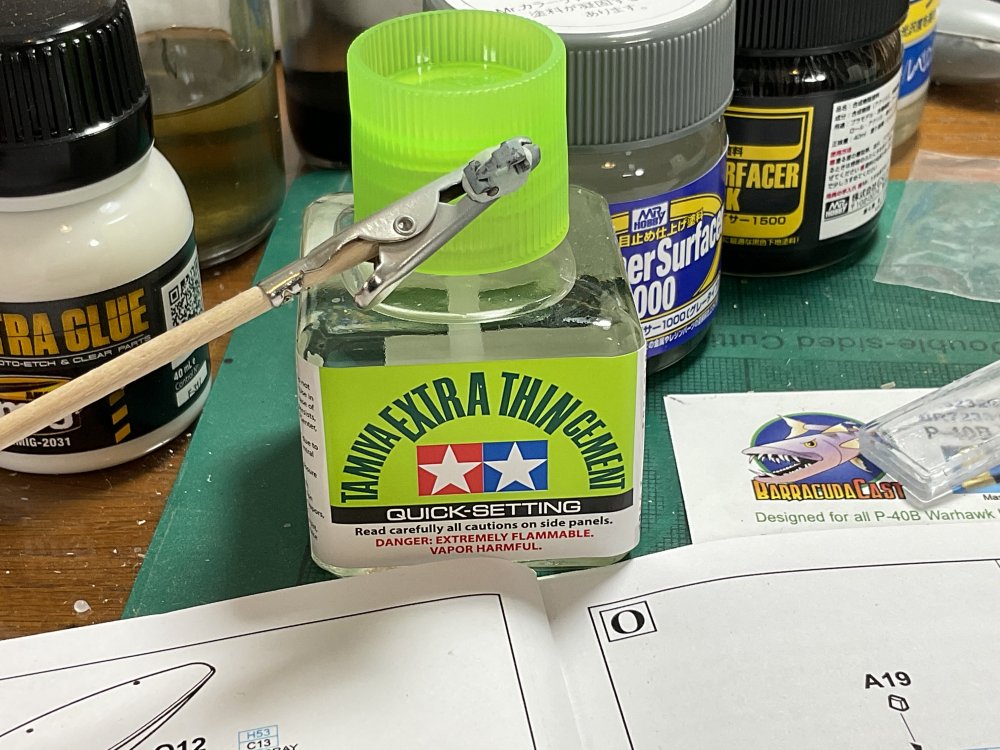
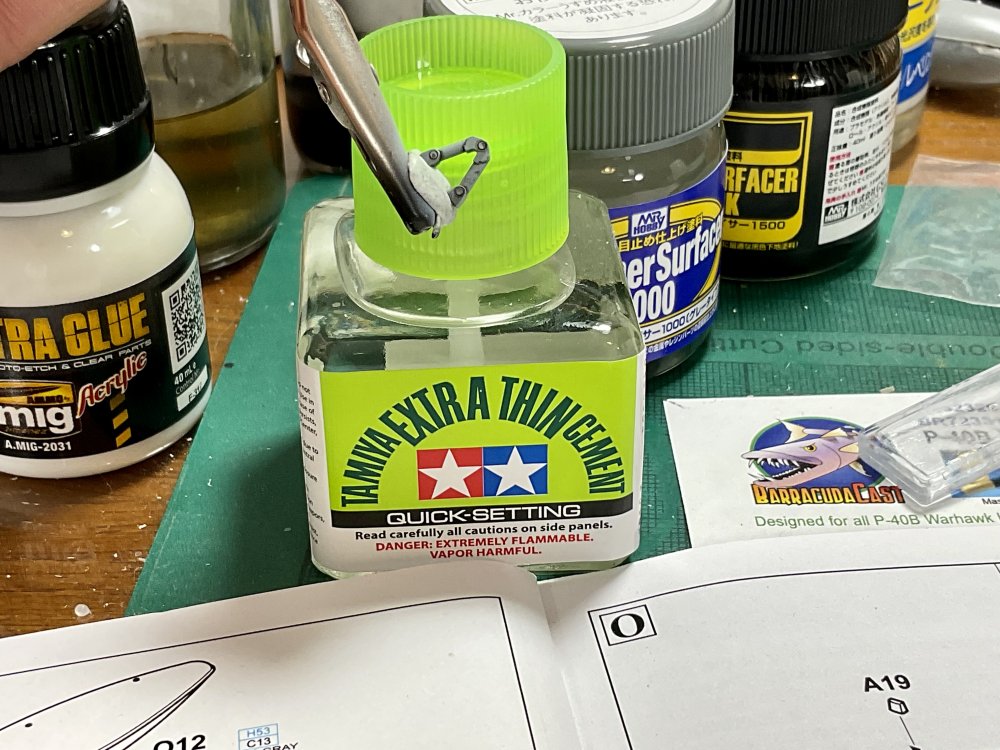
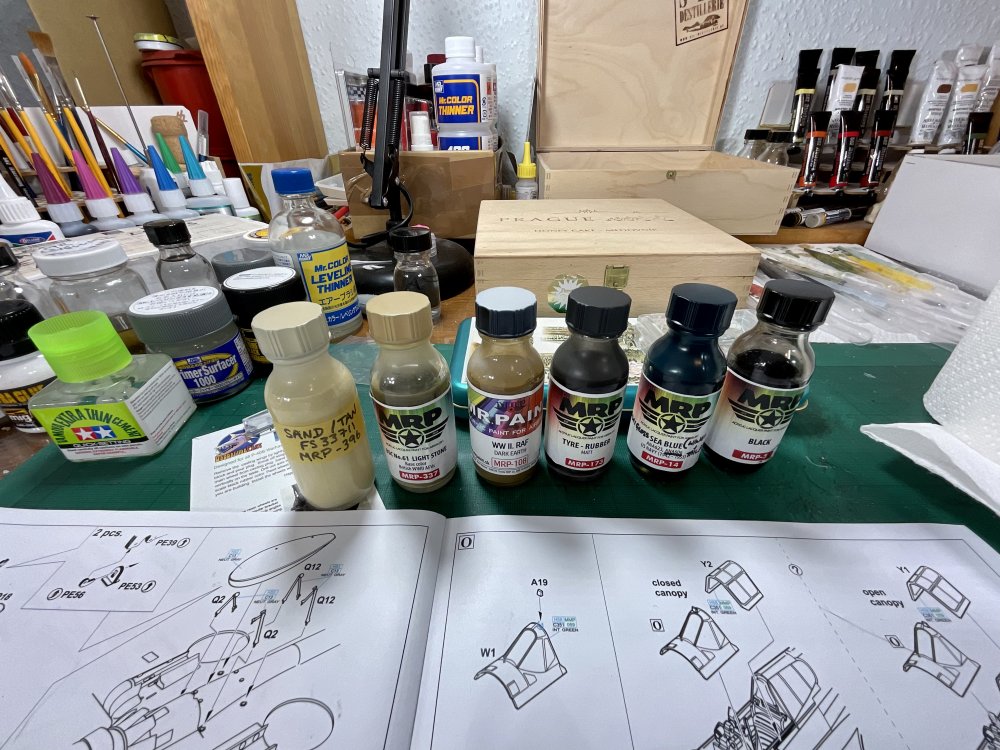
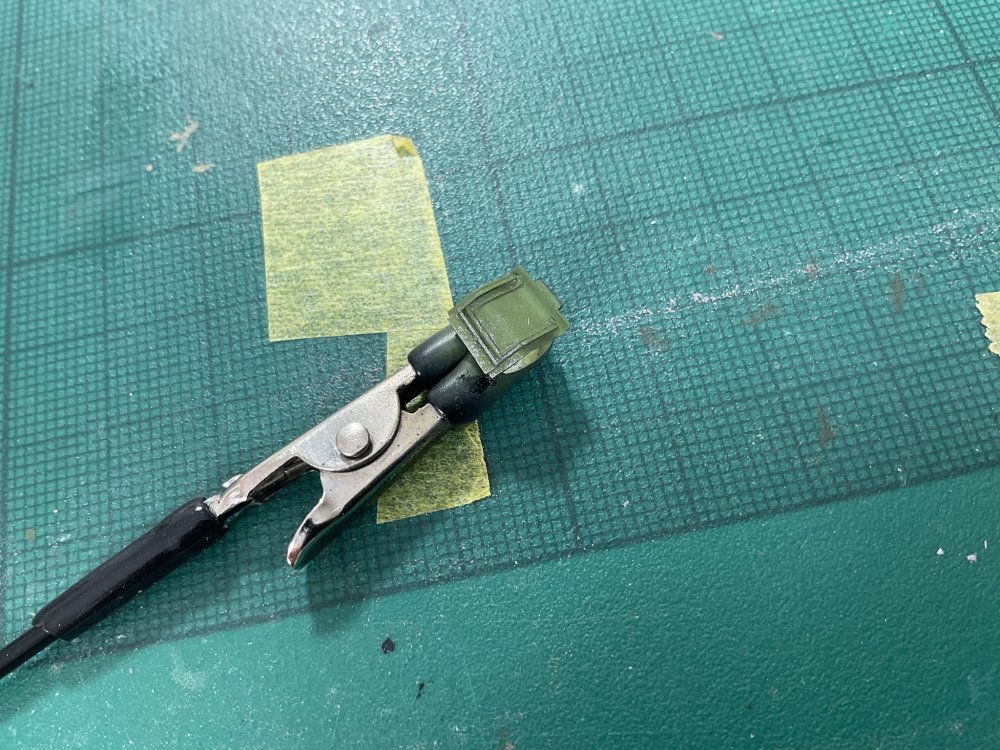
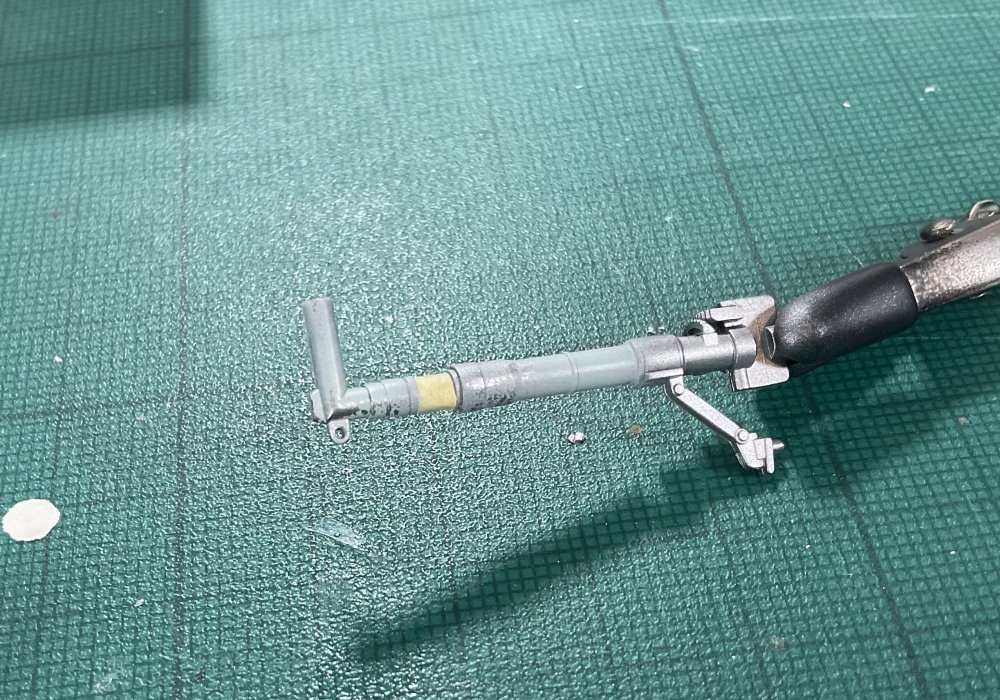
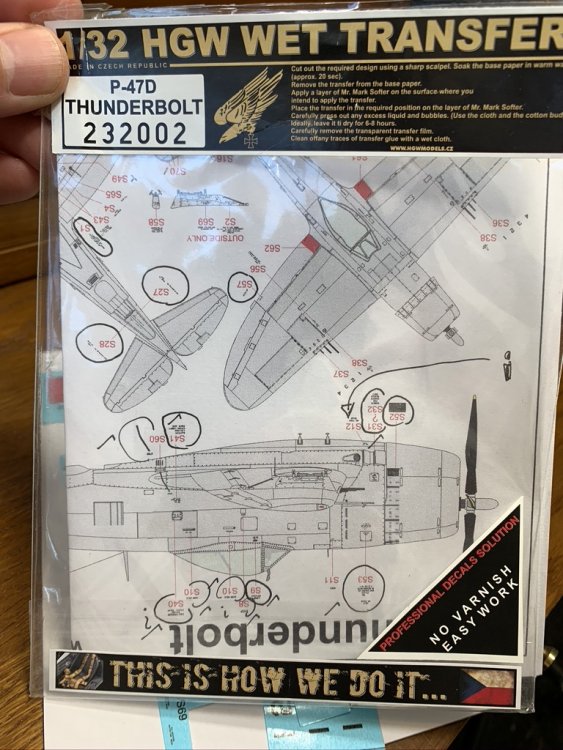
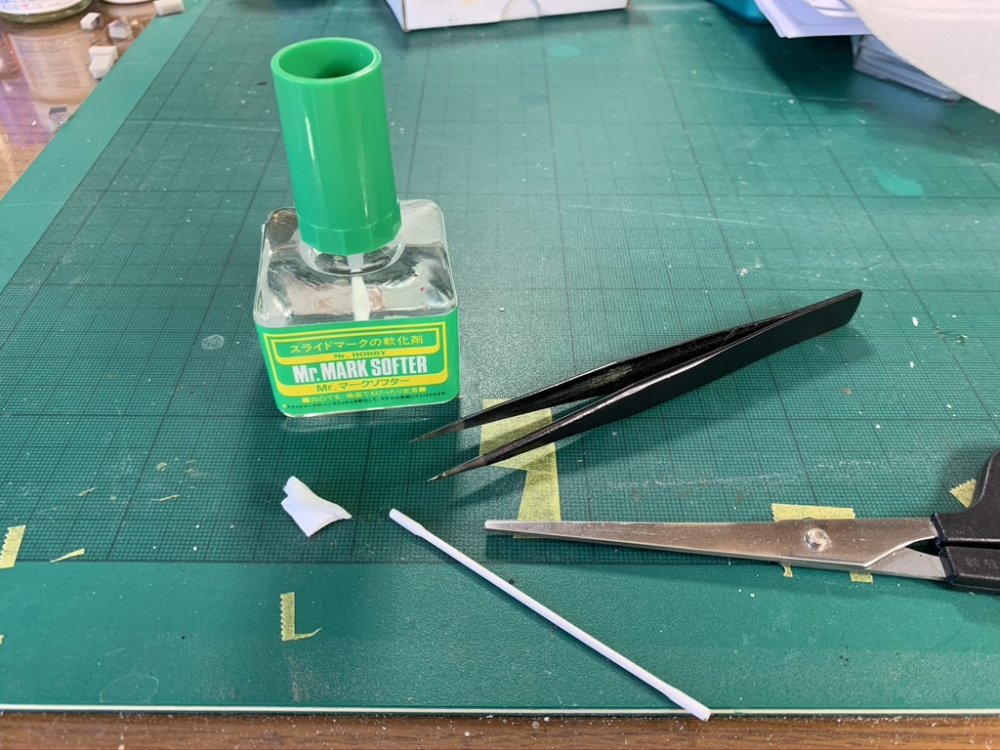
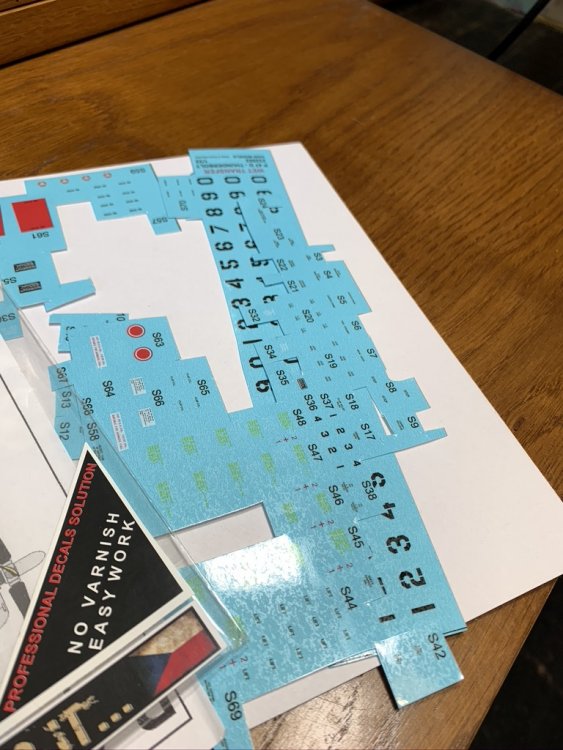
finishing (I think) the prop blades I have the Barracuda decals but i only ever use decals when there is no alternative luckily there is - HGW wet transfers from my P-47! no idea if the text is correct for a P-40 - probably not - but 1) at least it is for a Hamilton prop and 2) even in 1/32 you cannot read the text unless under magnification tools used shown below, plus a small bowl of water for those who haven't used these things before, fear not - it's dead simple... fyi paint surface is smooth, not because of gloss coat or 'the F word' but because I sanded the surfaces of the primer coat, and MRP goes on super smooth. dip in water just like a decal, then slide the transfer off the backing paper and put in place on top of either some Mr Mark Softer, Micro Sol or similar. use cotton bud / paper towel to press down and push out all the fluid from underneath ensuring a good 'connection'. below shows transfer in place still on the carrier film. i usually wait 6-8 hrs or overnight (hey it's like I'm using enamel paints lol) then use a toothpick to scuff an edge and remove the film depending upon the strength of setting solution, you may get a faint 'ghost' where the film was, but i found this disappears either by wiping the area with a damp paper towel / cotton bud, and if not then certainly by the time you apply final finish - MRP matt varnish in this case. the finished article is literally as if a tiny person painted the data on - there is no ridge or film - none of the dreaded silvering bs you roll the dice with decals etc etc. the finish is pretty bullet proof so you can apply oils, enamel washes etc over the top i have also seen guys sand bits away to simulate wear, but have not done this myself yet i used HGW wet transfers on my P-47 as well - there is no hiding place on a NMF for decal carrier film - and they performed flawlessly anyway, hope the tutorial helps a few people 'break their wet transfer cherry' cheers Nick


-
HK Models 1/32 Lancaster Hints, Tweaks and Tips,
nmayhew replied to NigelR32's topic in Modelling Discussion
Did it have the full value displayed on the box? I am a bit out of touch as to what the rules and regs are... -
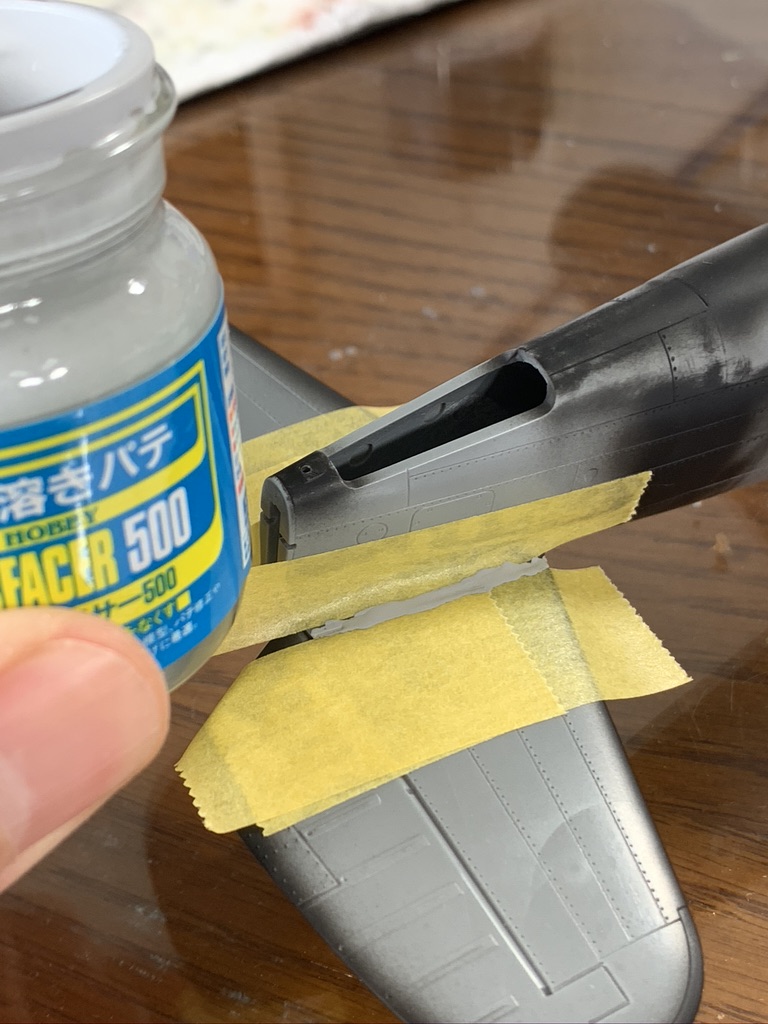
final update for today i think the horizontal stabs went in and were VERY tight i found that putting both wings in about half way and then pushing them together worked - with a bit of grunt they snapped in very nicely but putting in one wing first and then trying the other and i found that no amount of force would make the second go in just a small amount of Mr Surfacer 500 for underneath where the gap was slightly larger...and then some light sanding and all good 500 not needed on top - i probably could have got away with just sanding tbh catch you all later time for some gardening!

-
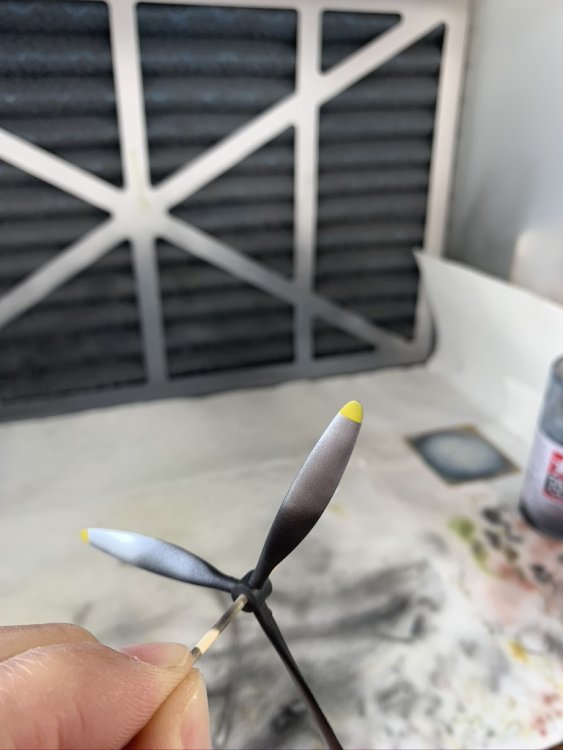
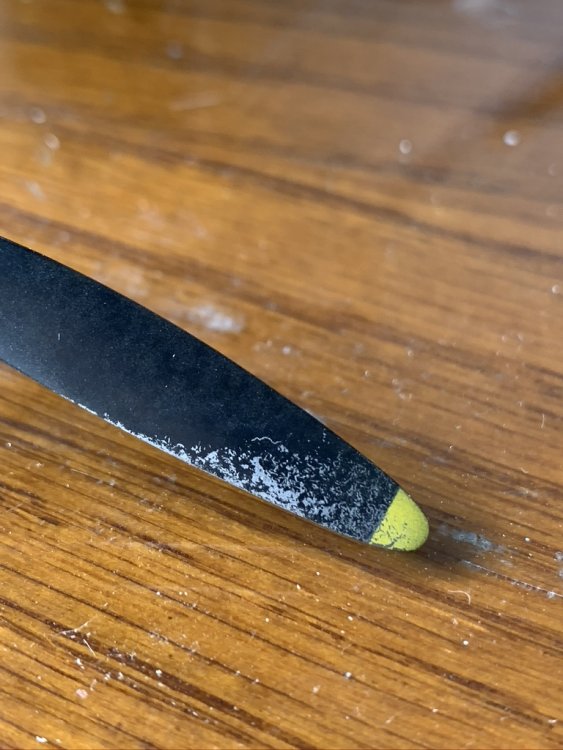
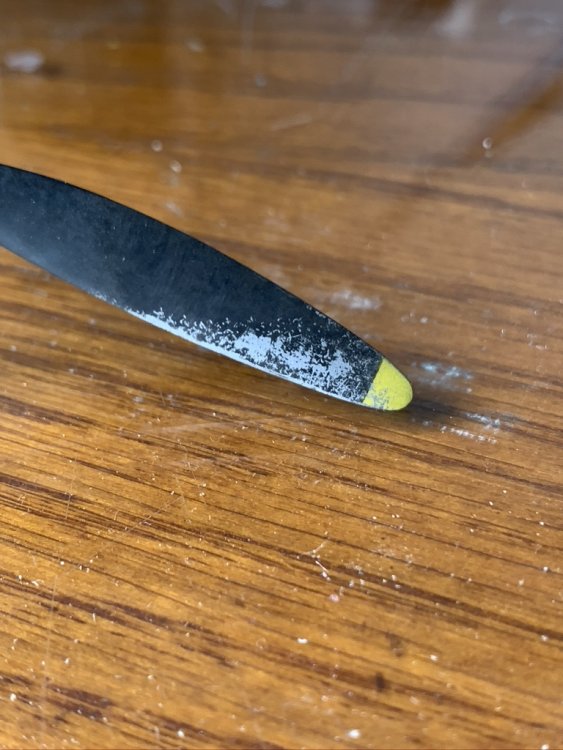
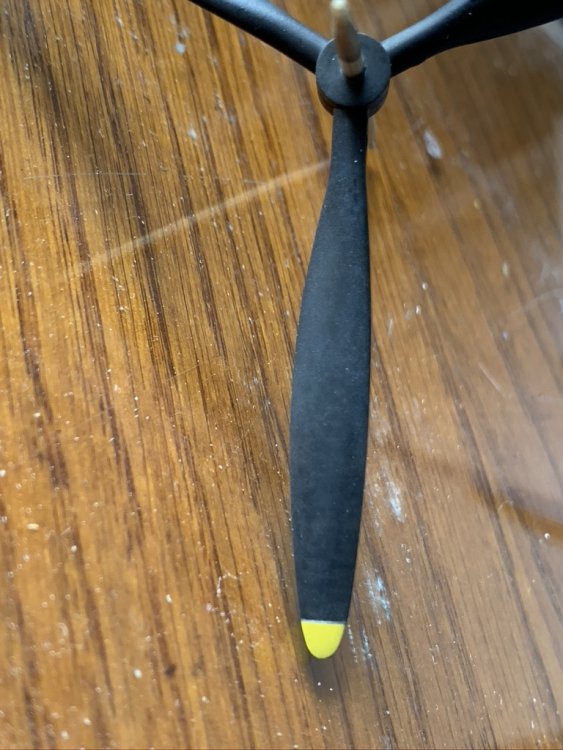
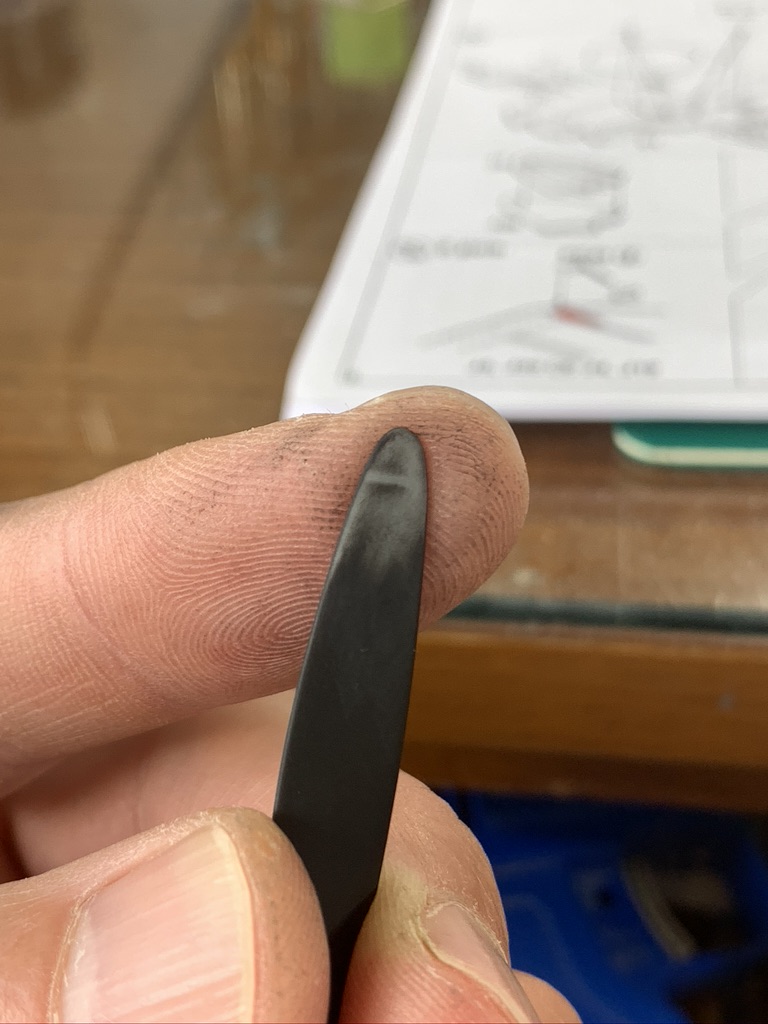
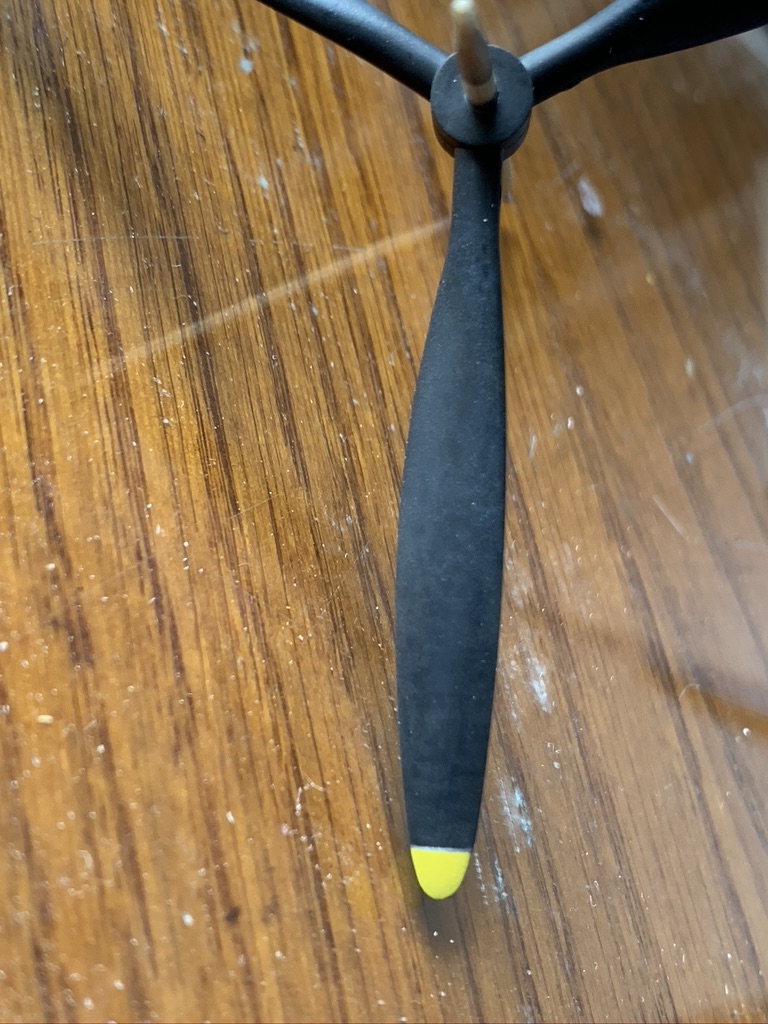
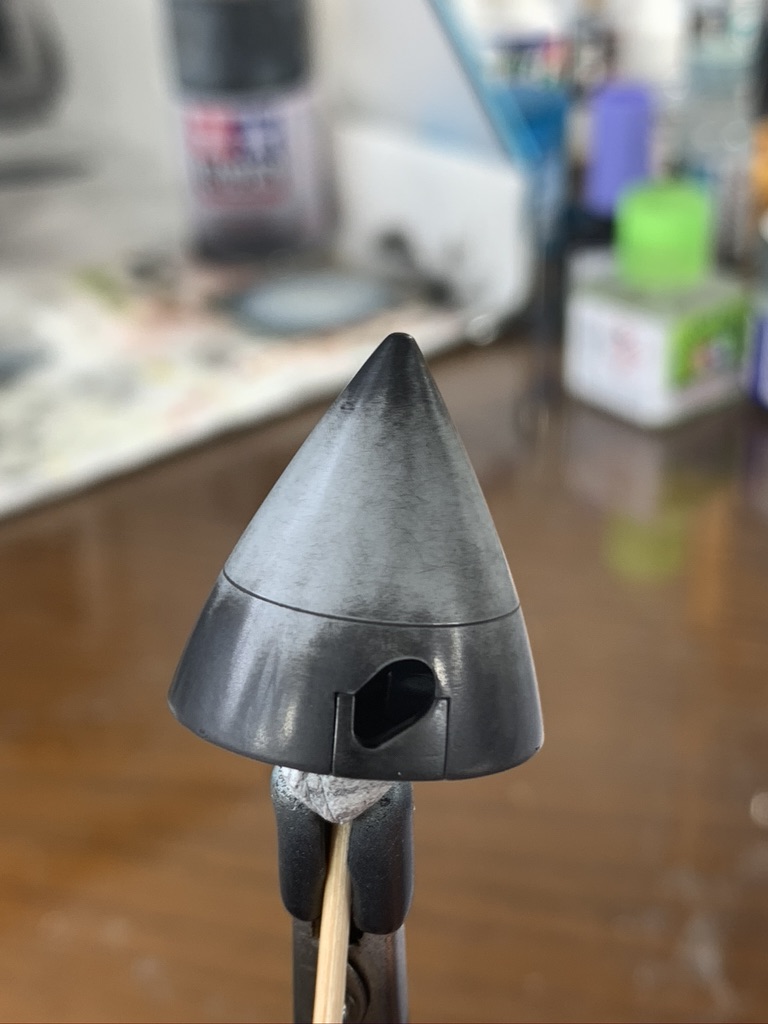
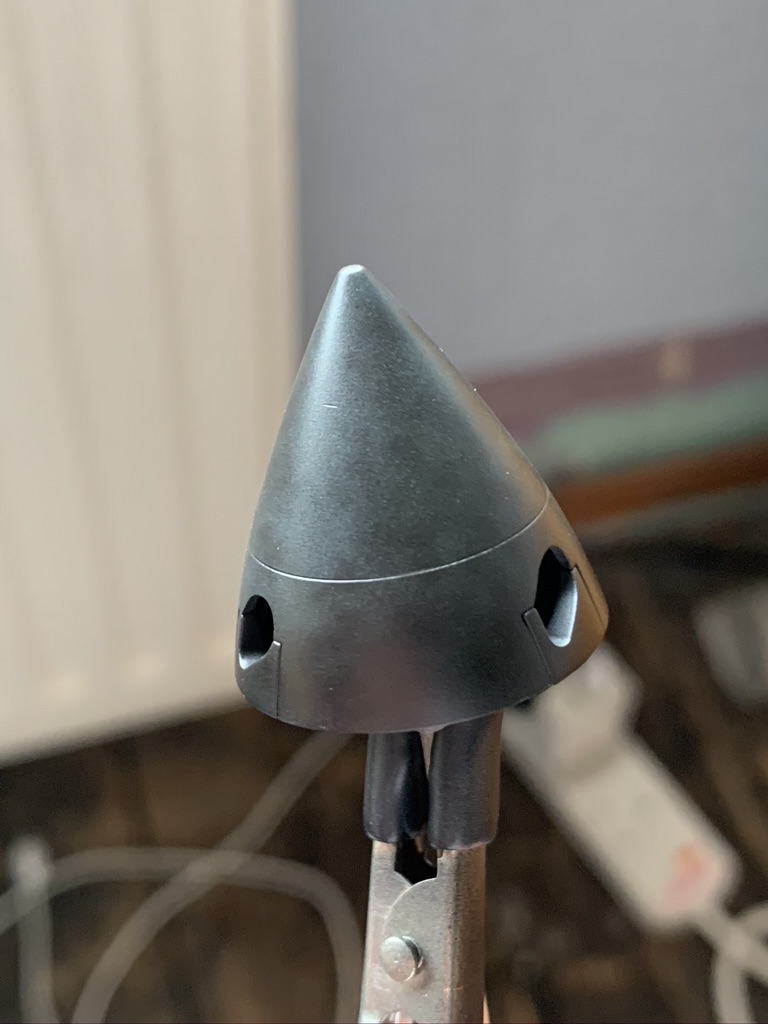
propeller blades hassy have some really f*cking annoying raised lines to signal where the yellow tips should be silver sprayed on rear edge for chipping quick bit of masking then yellow goes on - none of this 'must lay done a grey blah blah' (it's MRP - you can spray anything over anything!) hairspray then goes on, then various colours all mottled on (not on the yellow) to give the blades some depth one of the things i try to do now is not just have 'slabs of colour' - so literally any old colours to hand can work, it doesn't need 'over thinking' then water and stubby brush for some chipping results were so so because i sprayed direct from can and think the hs went on a bit thick but still reasonably pleasing the chipping through the yellow is hard to pick at anything other than close up but as you can see from above is indeed there the front side - here you can see what i mean about depth and variation...the bigger the scale, the more you need this approach in my view or you just end up with that 'big toy' look same sort of approach for the spinner i don't think the panel line around the prop hole is correct but i have no interest in investigating further on this one! some sanding and polishing as my part was scratched to sh*t in the box (my bad on that) half way through the various mottles... looks a bit dodgy here but to naked eye finished article looks similar to prop blades, just slightly different all pics are iphone btw and for some reason when i drag and drop to LSM on my Mac it says they are exported in low quality etc so sorry about that