nmayhew
-
Posts
1,154 -
Joined
-
Last visited
Content Type
Profiles
Forums
Events
Gallery
Everything posted by nmayhew
-
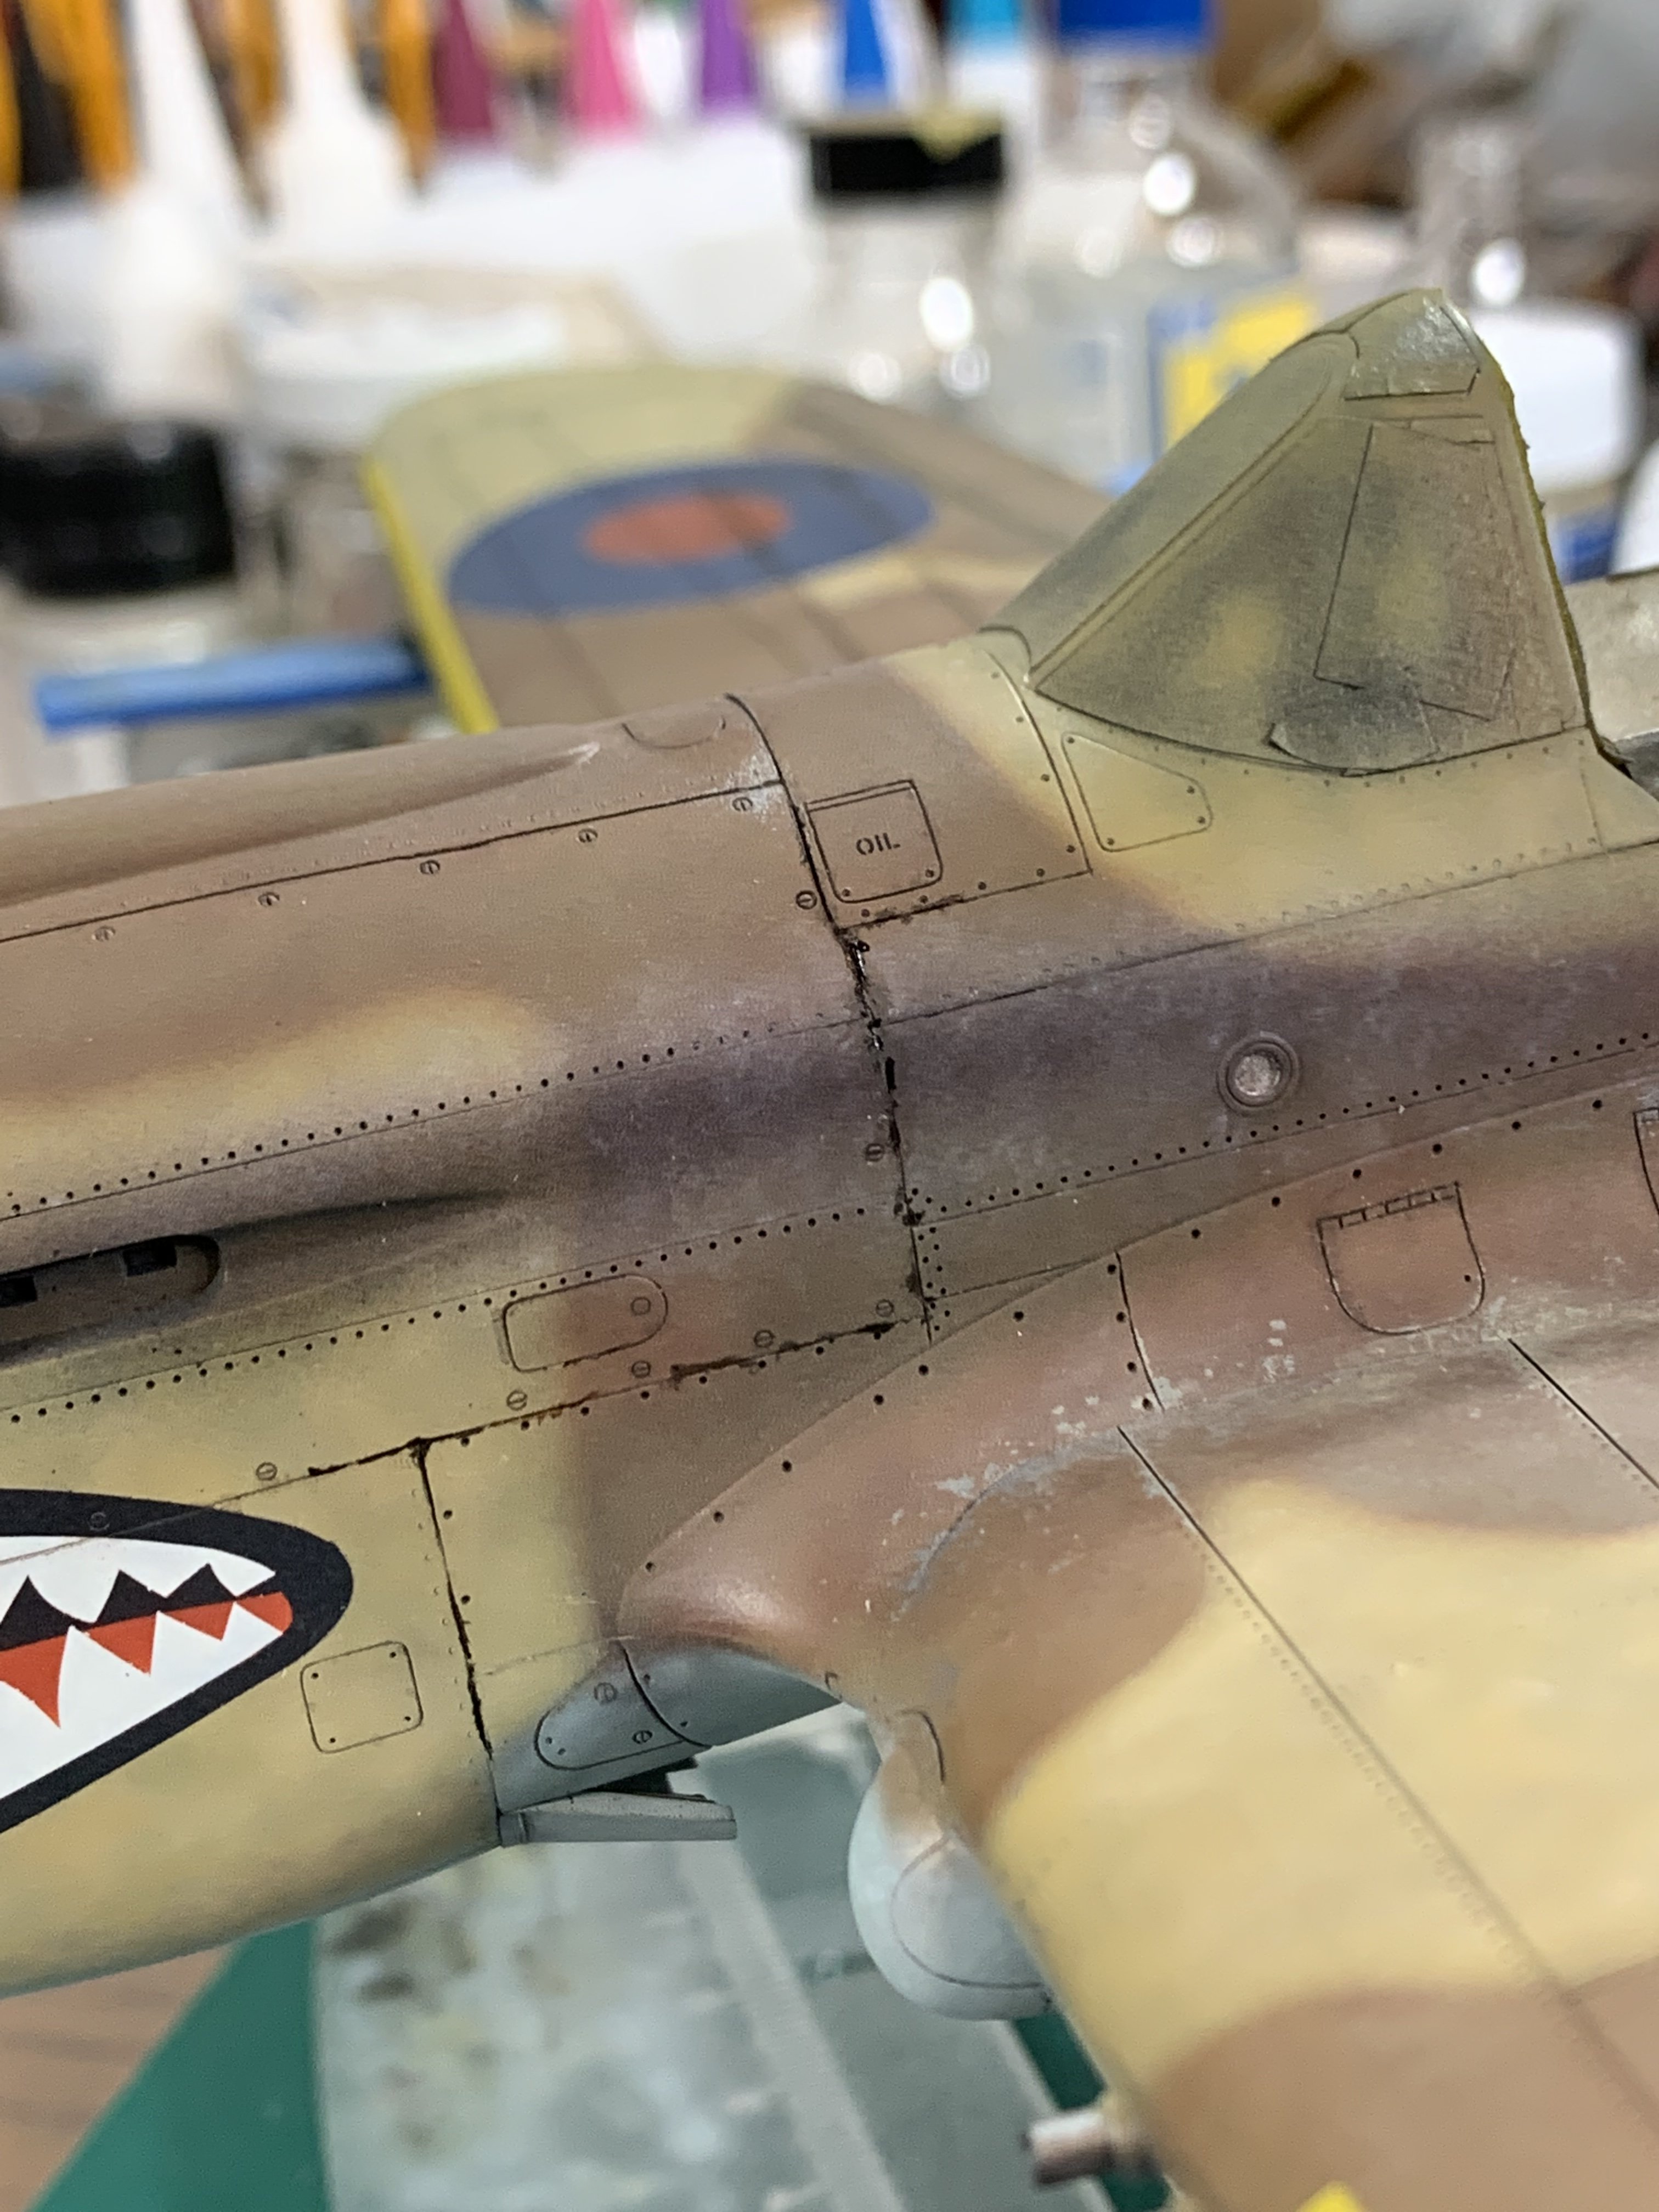
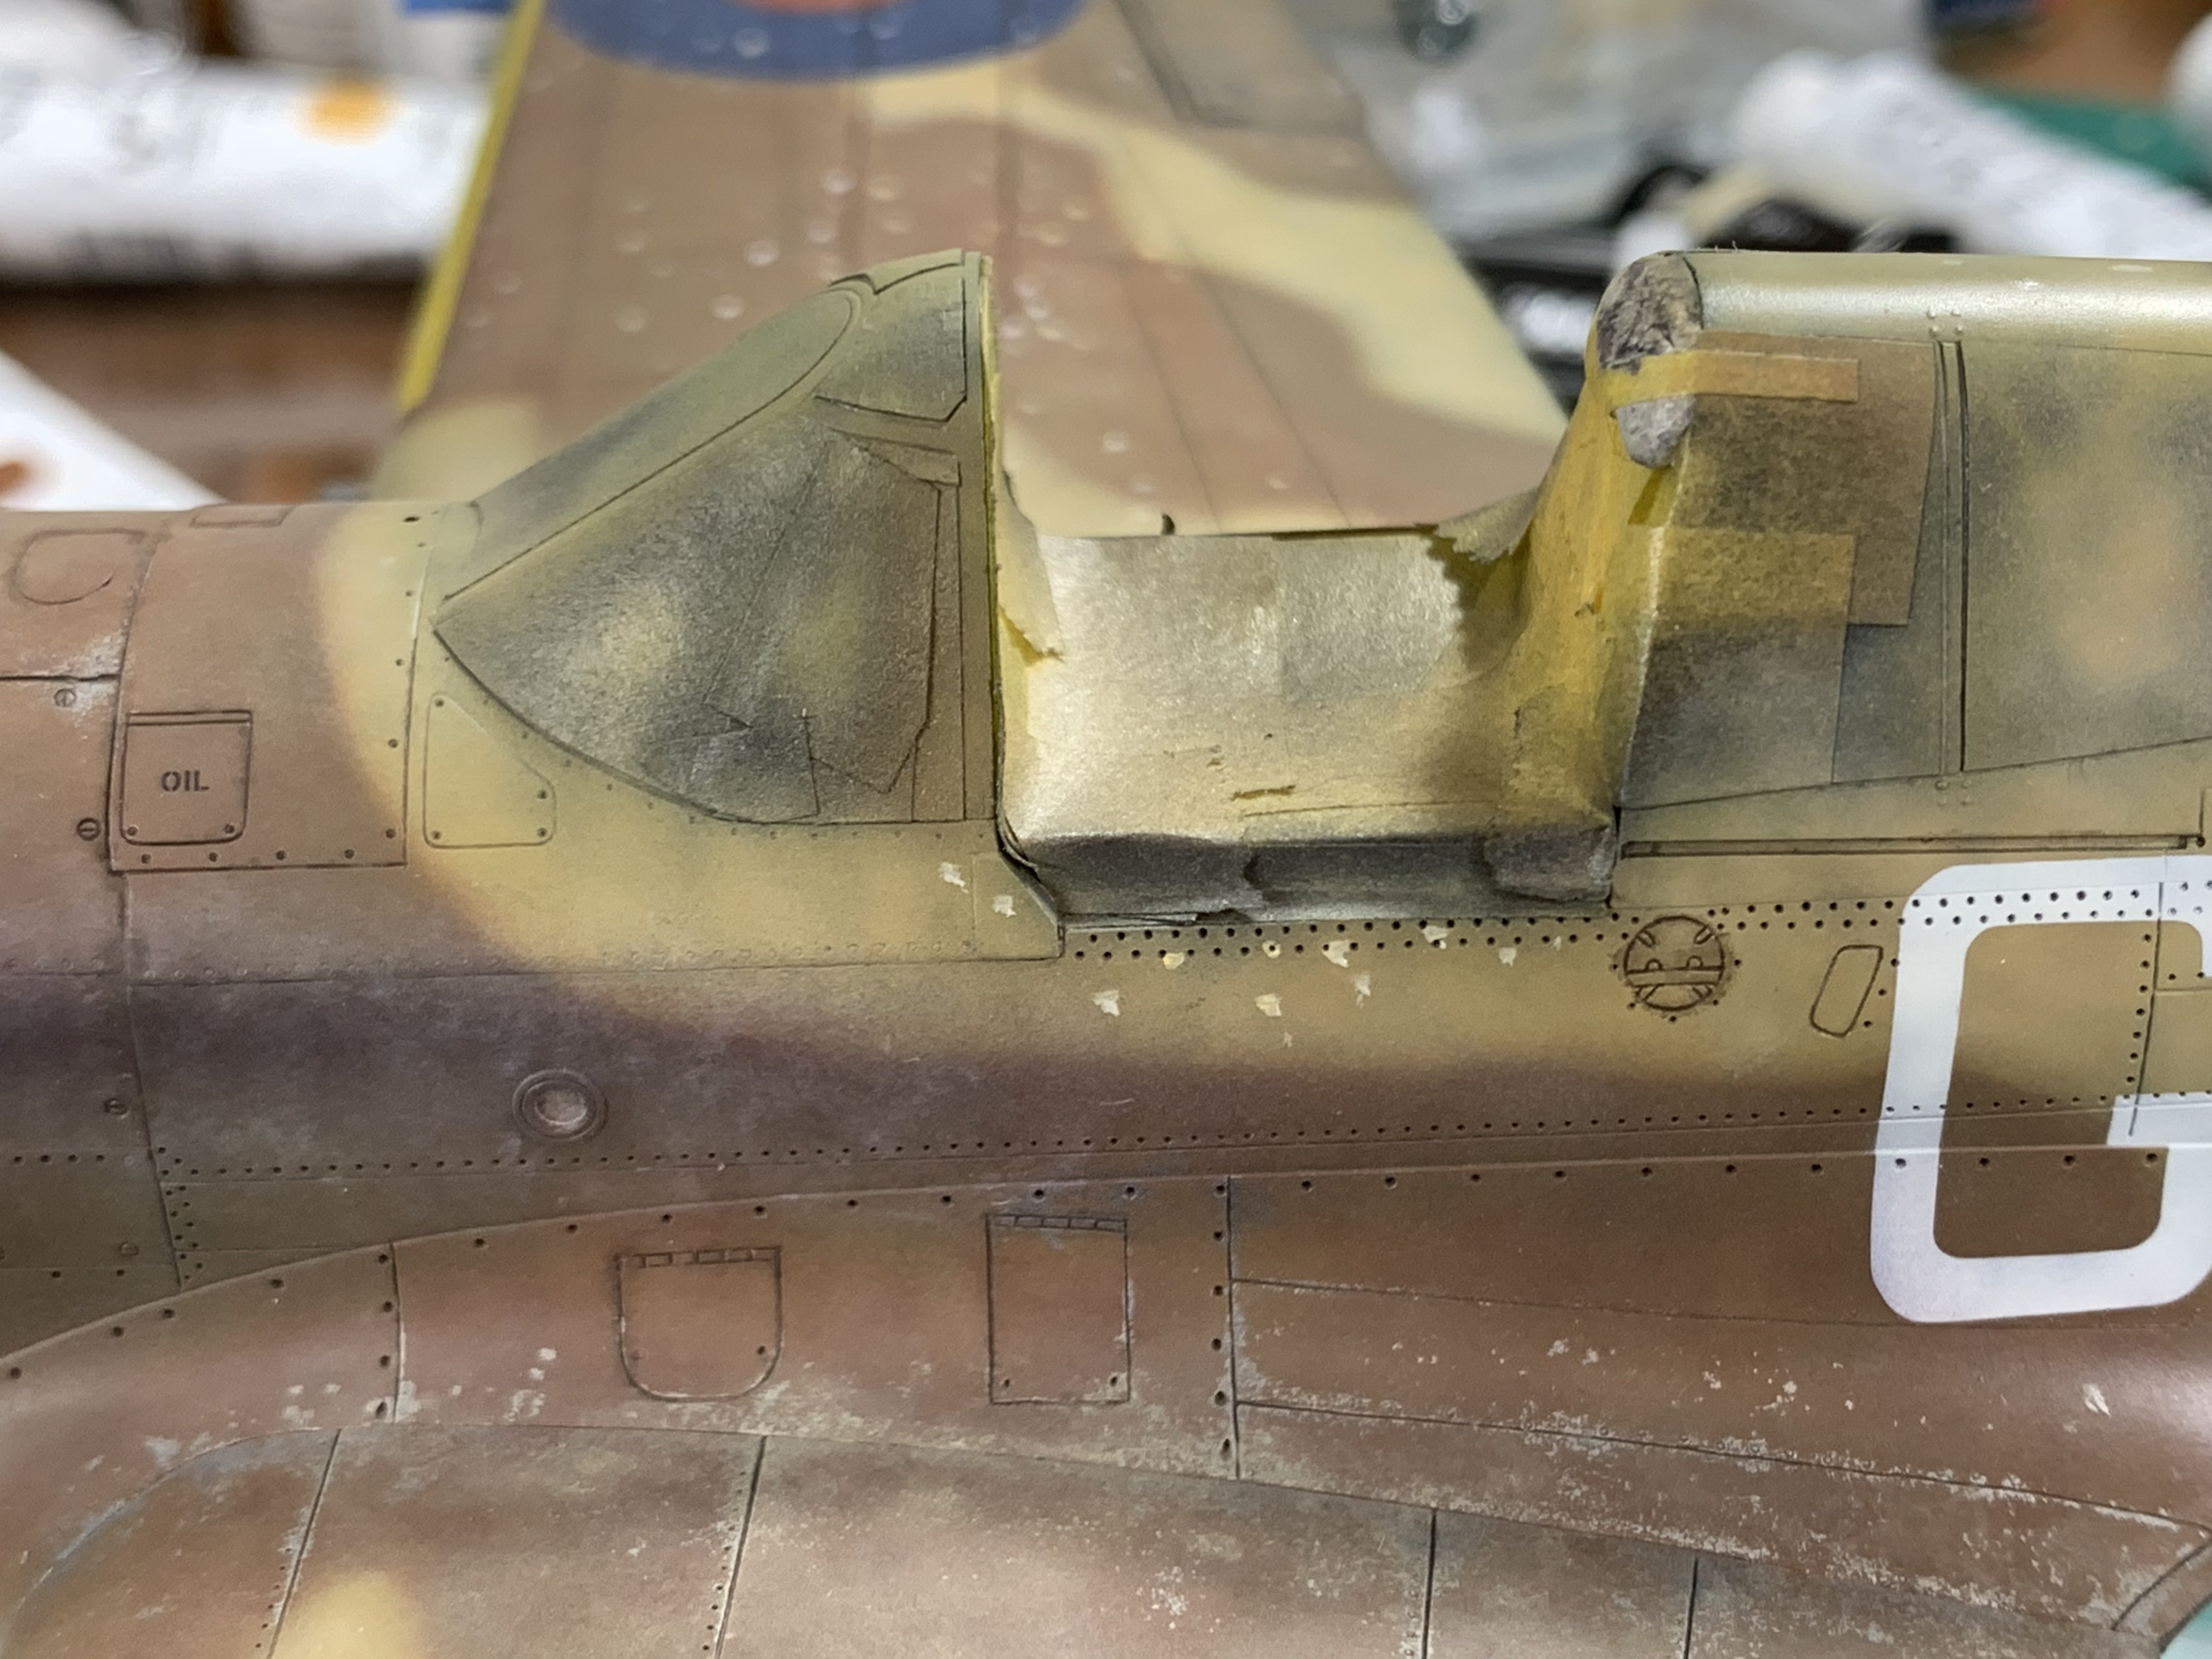
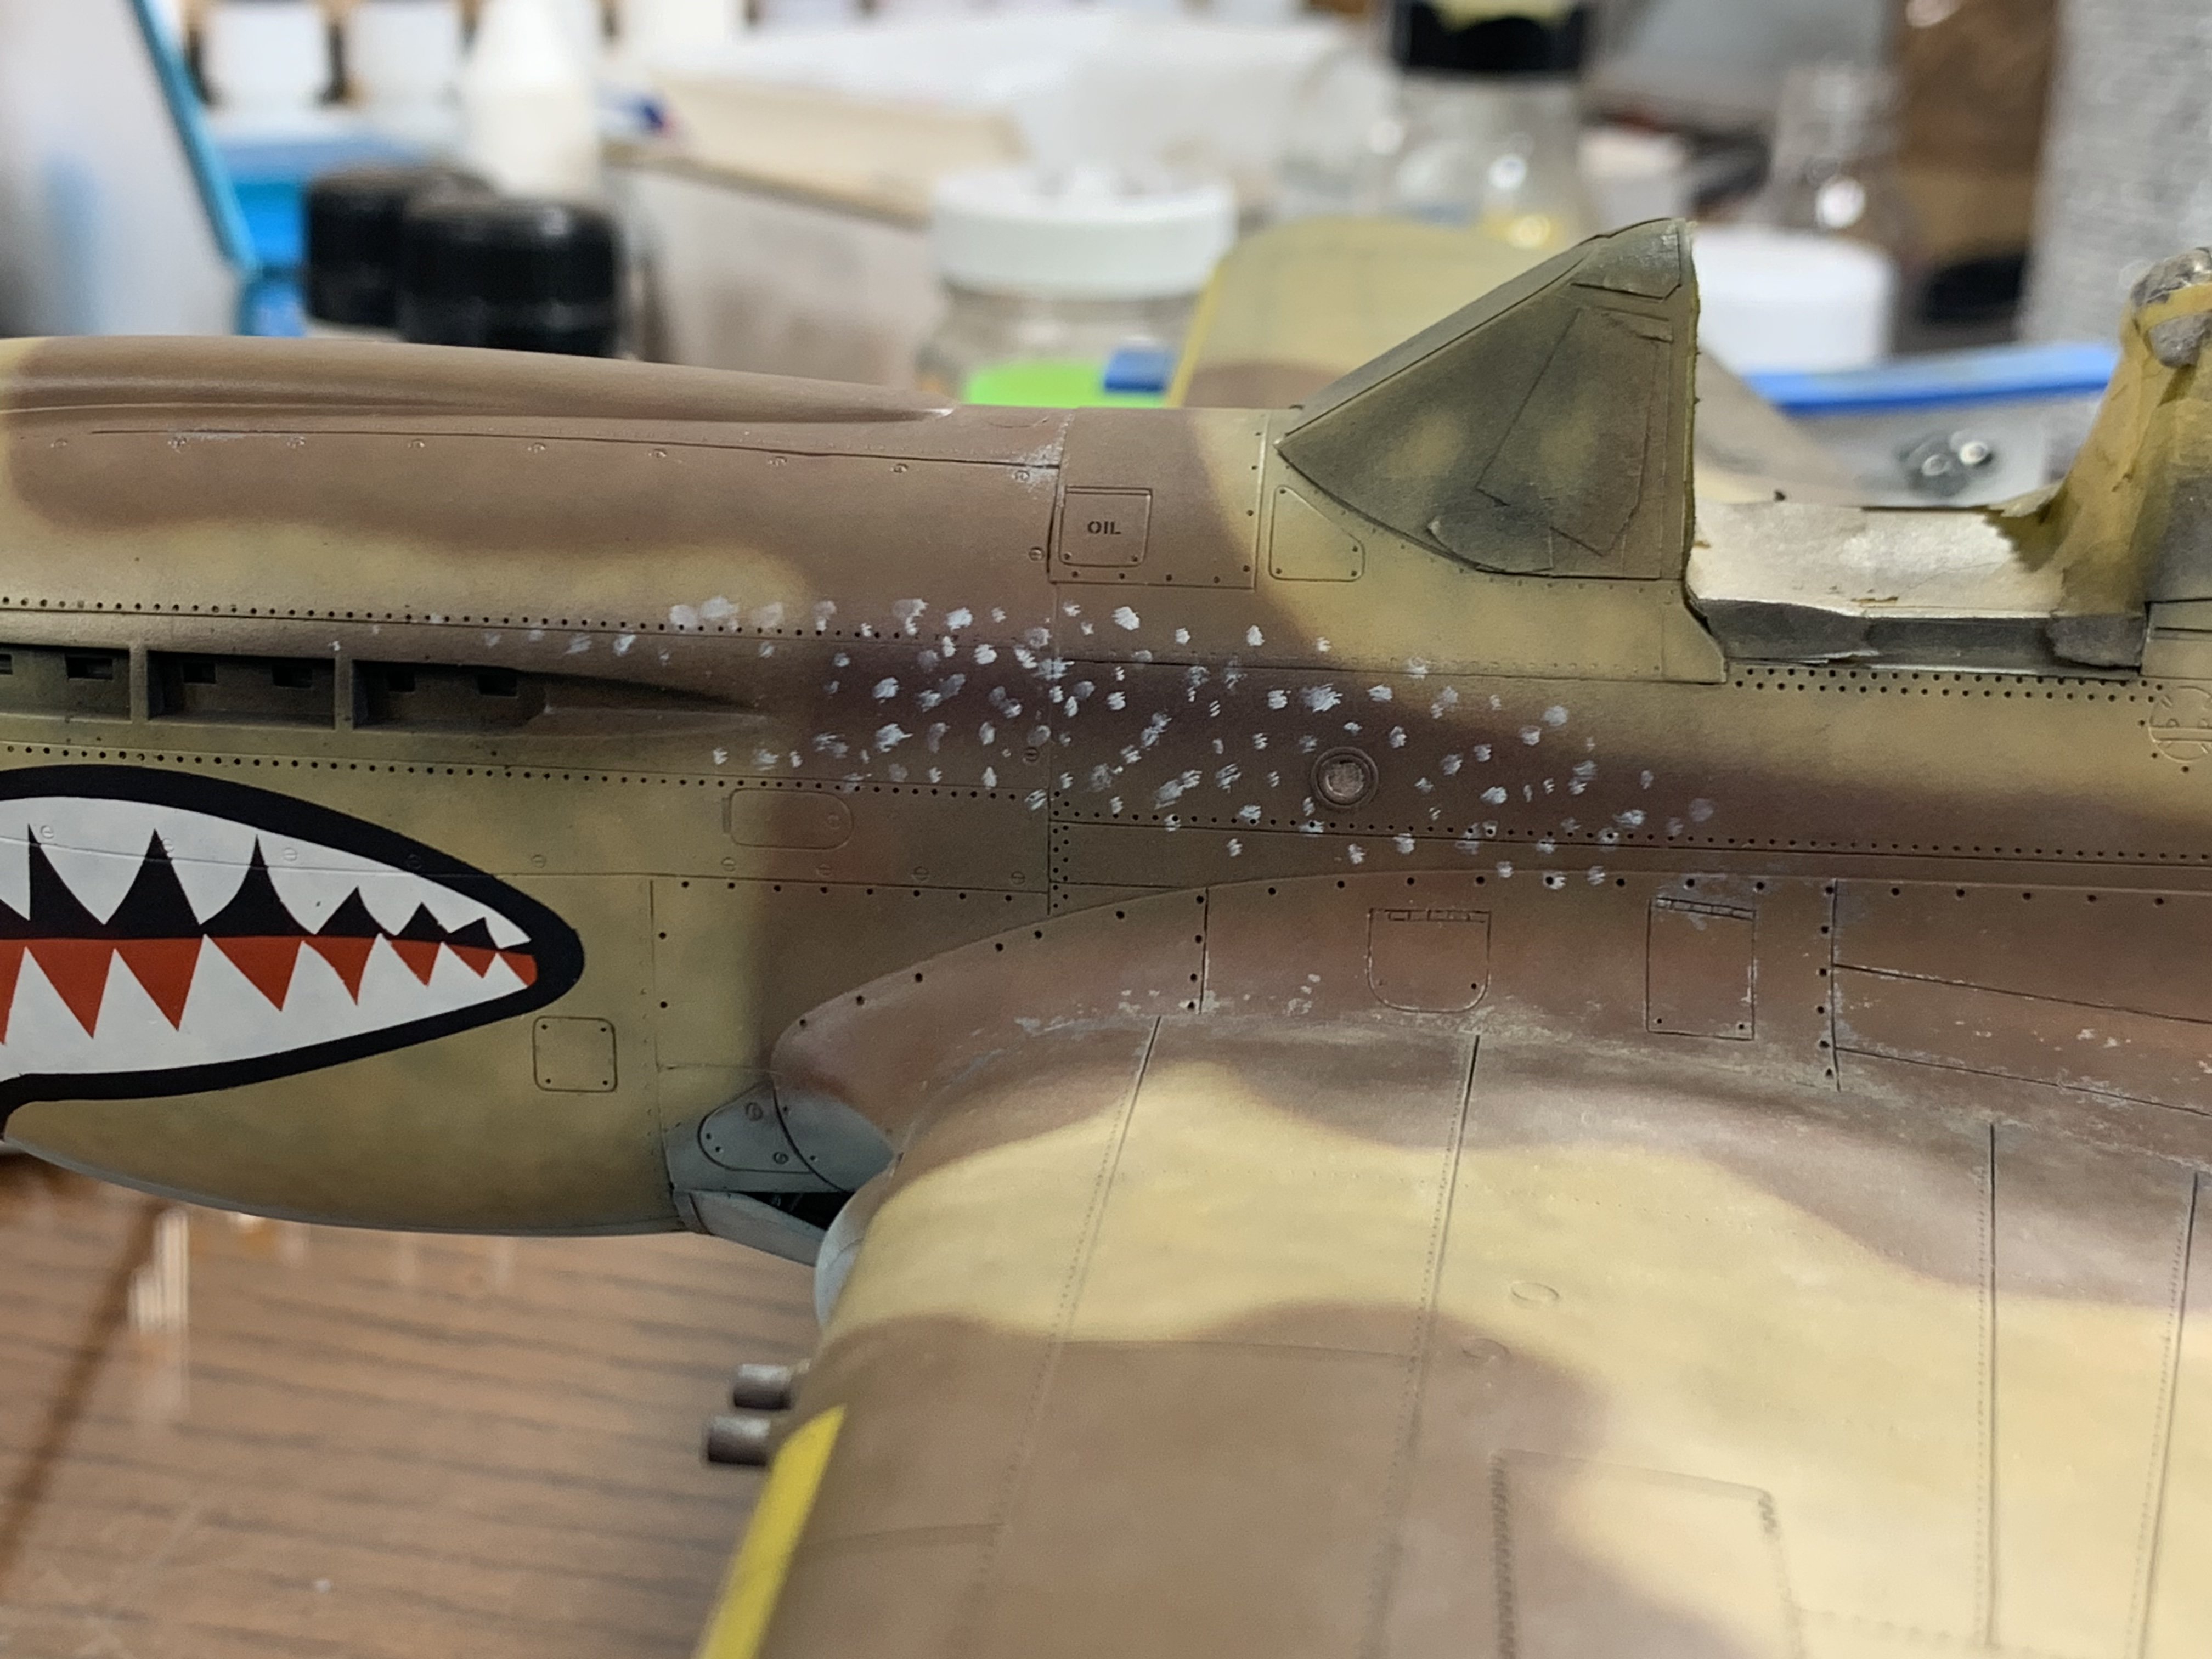
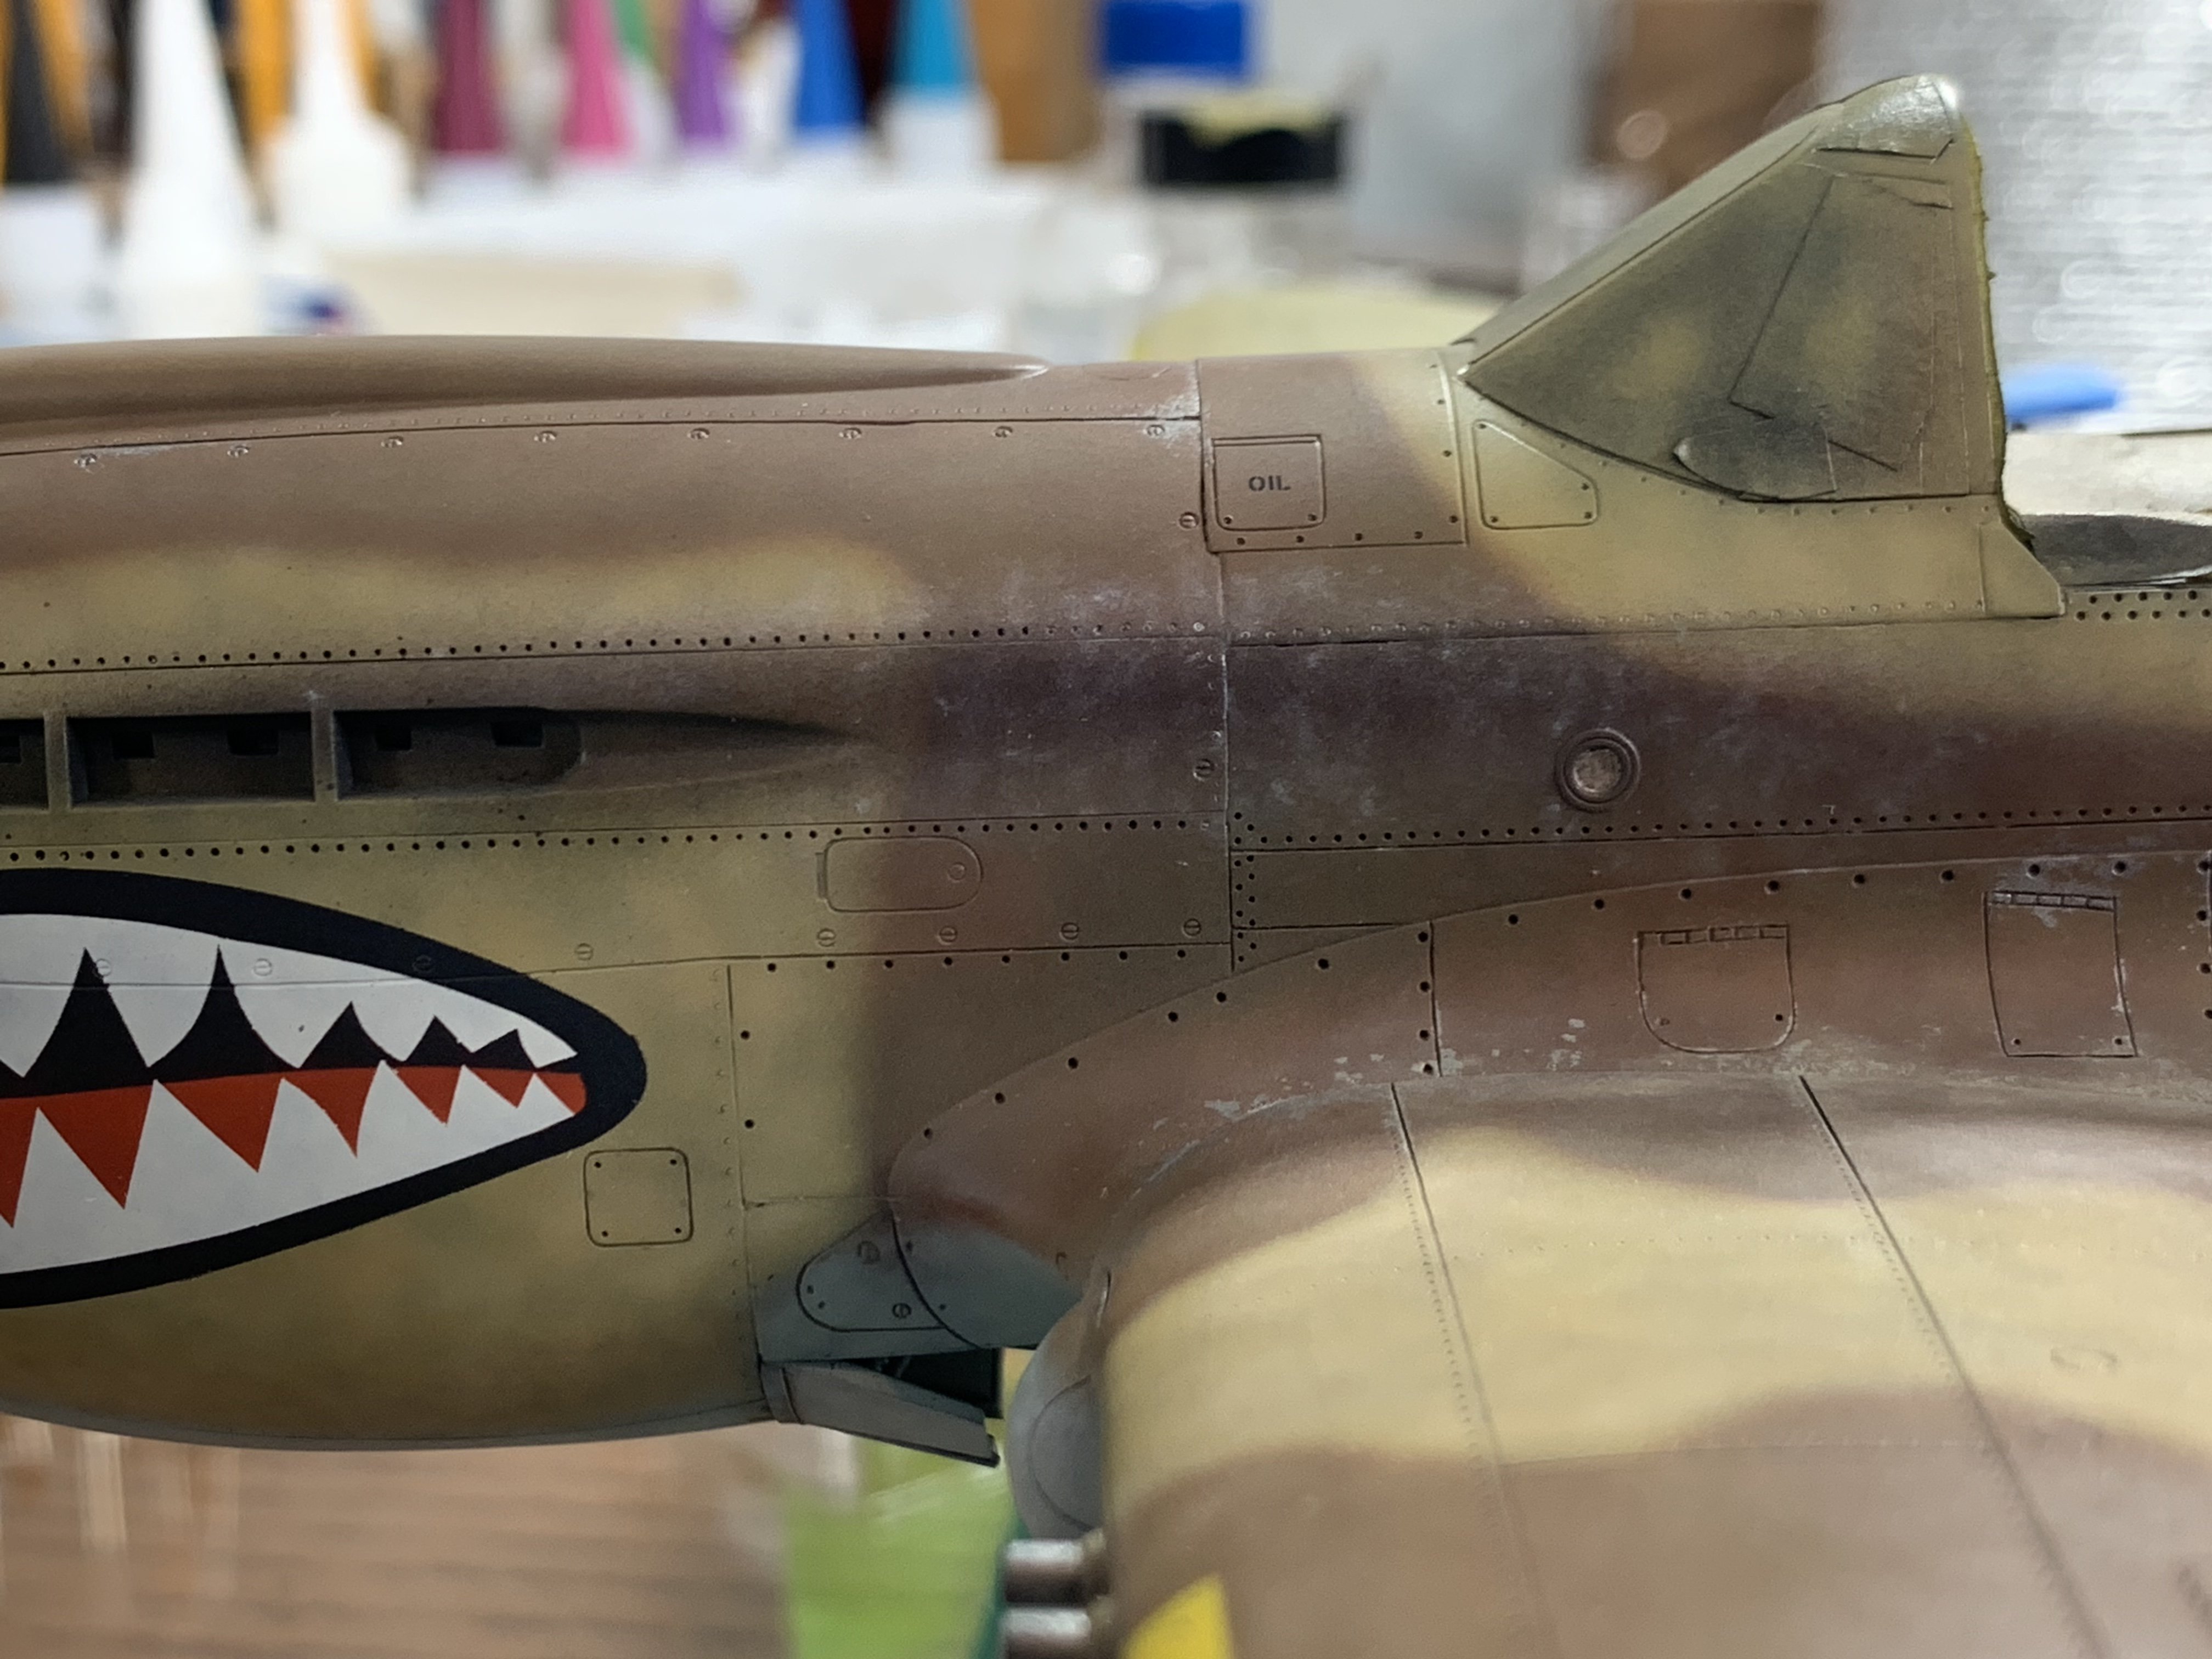
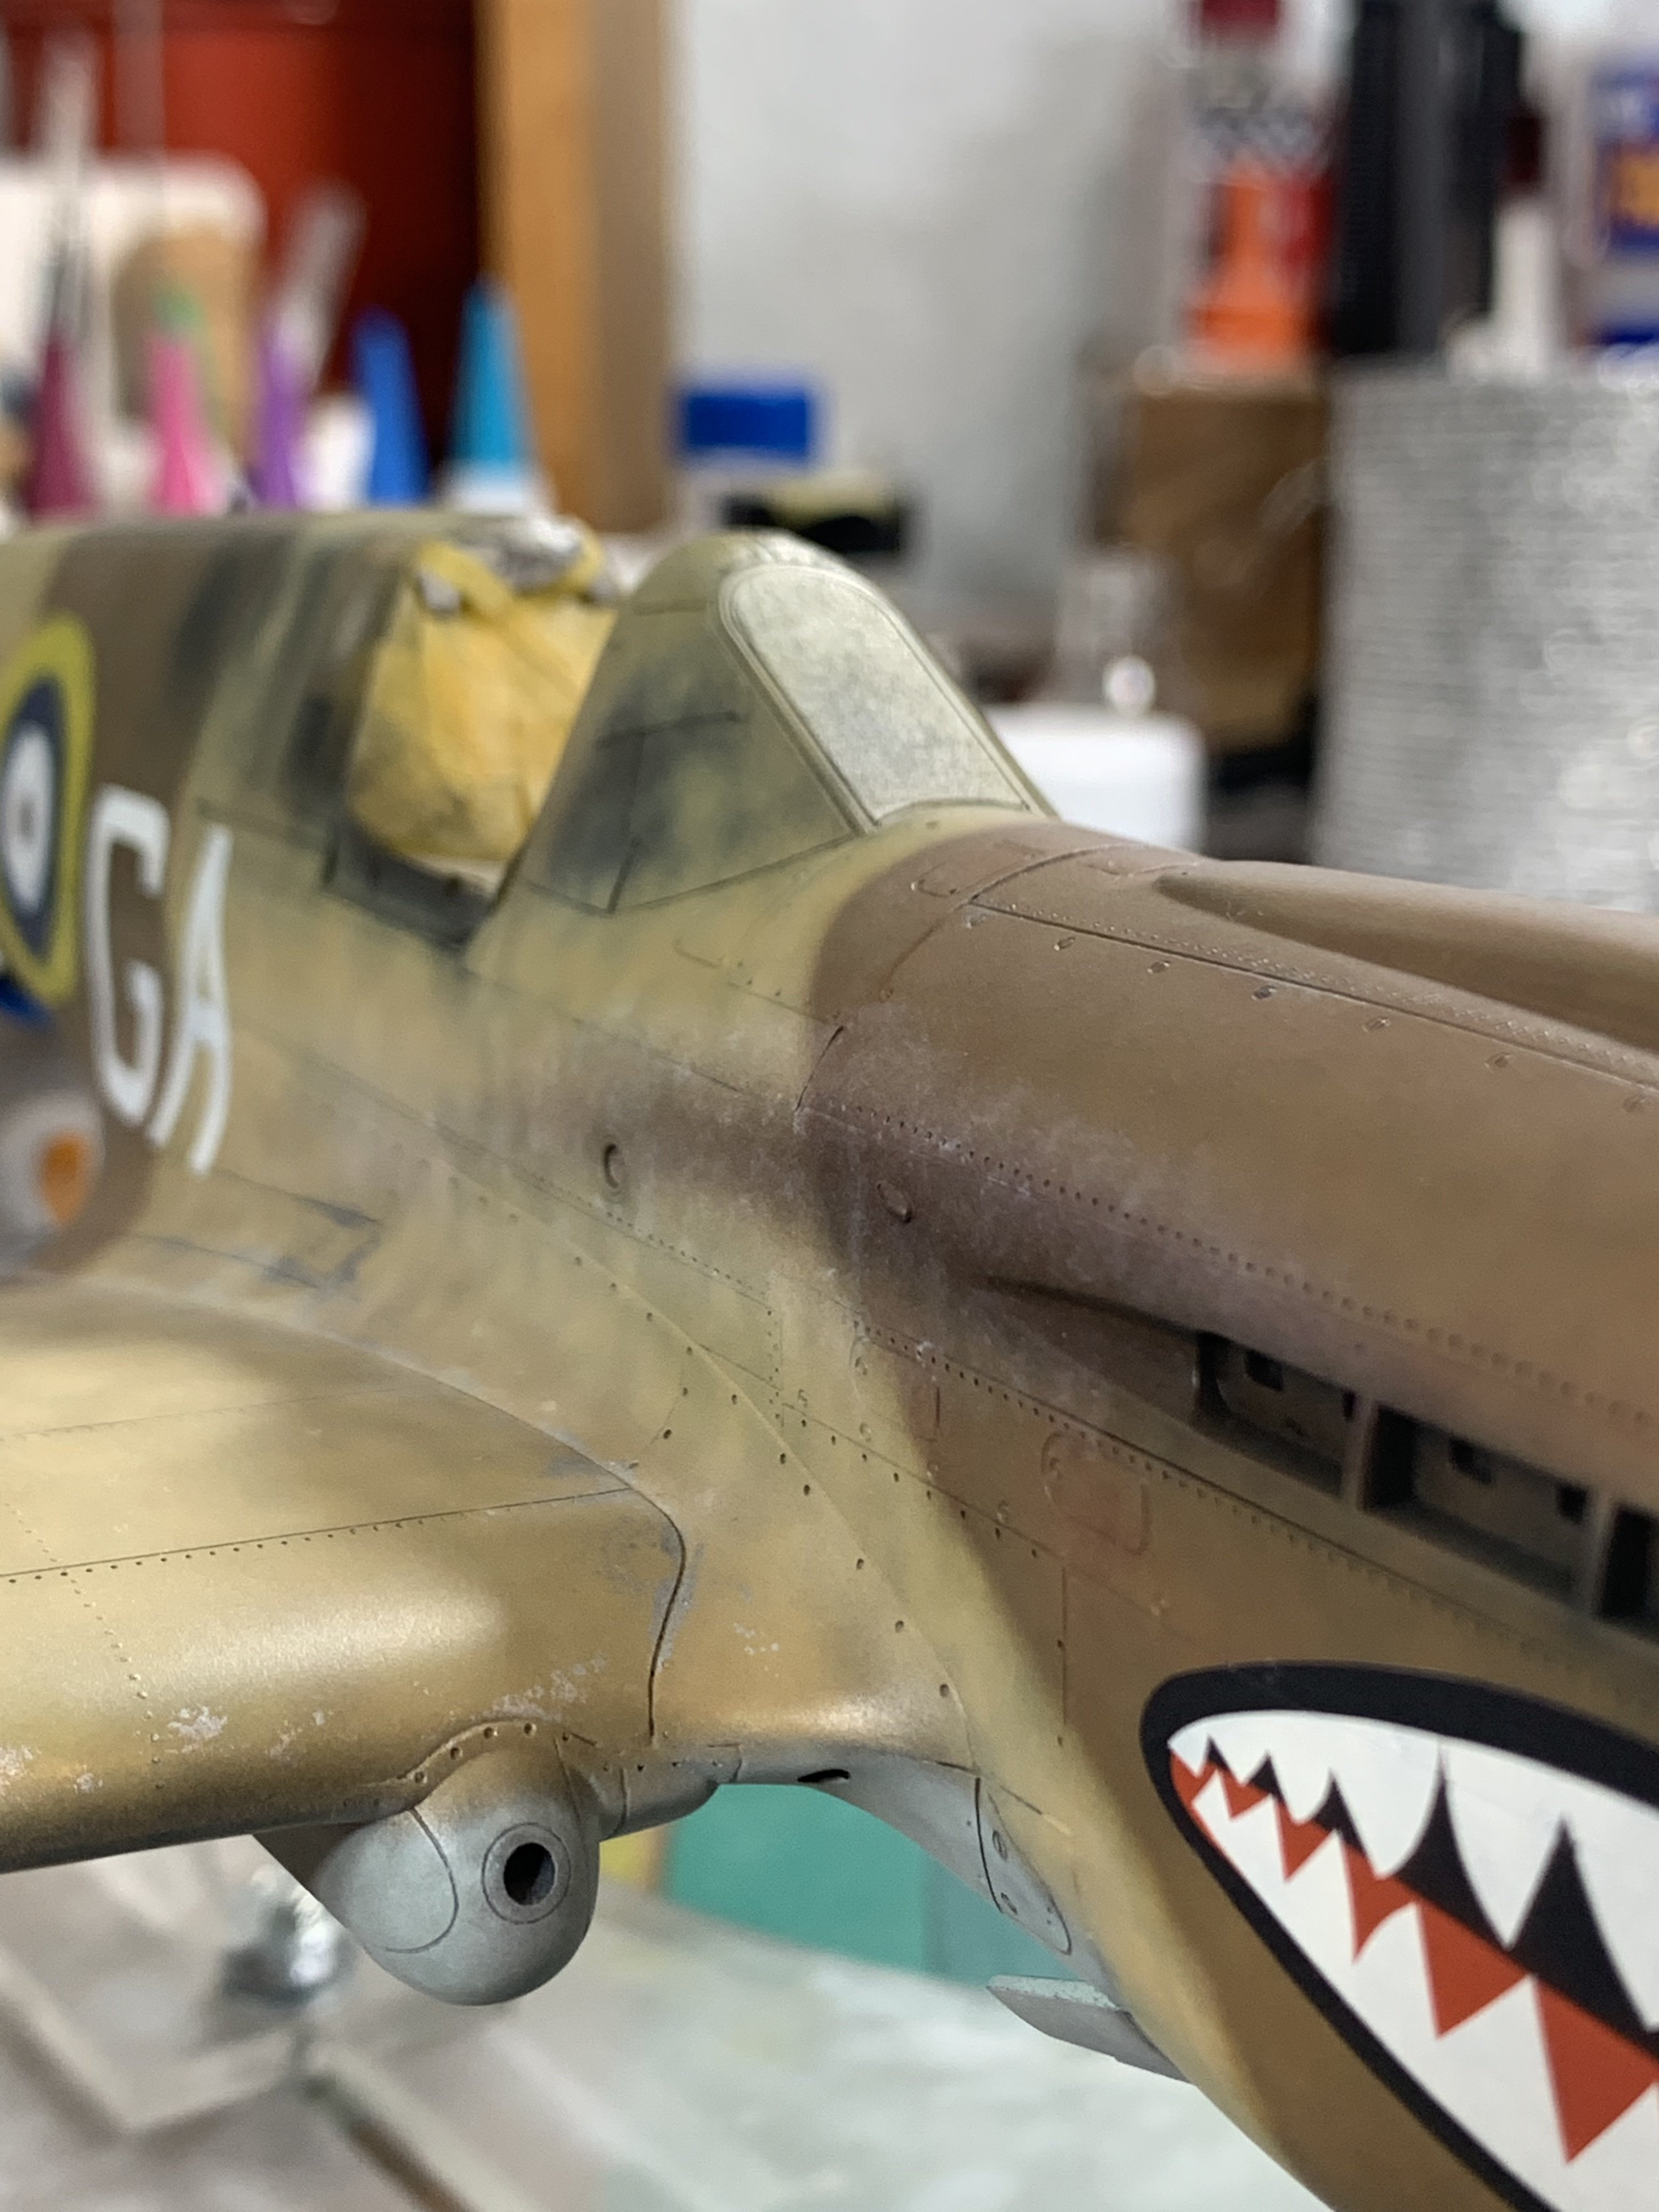
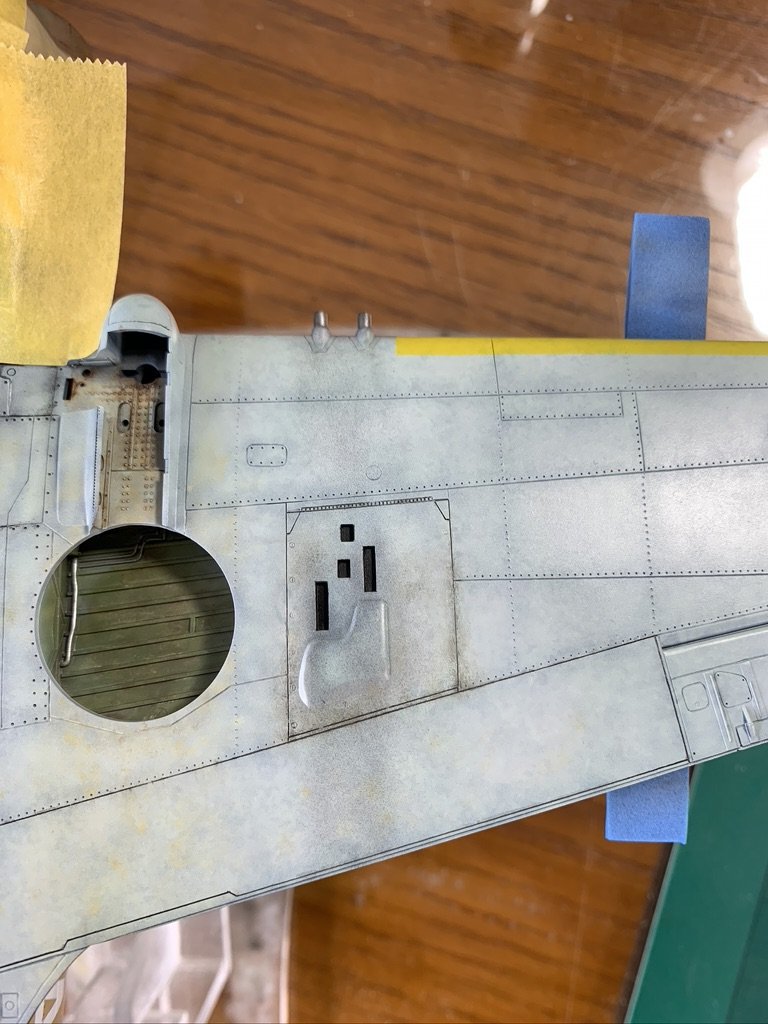
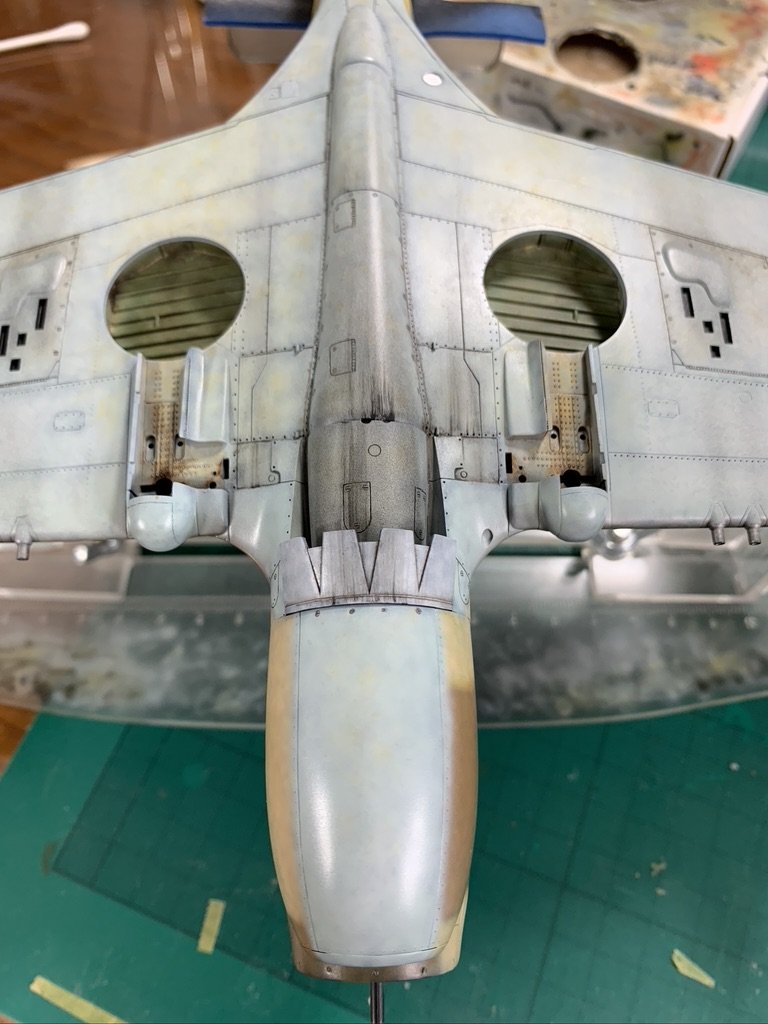
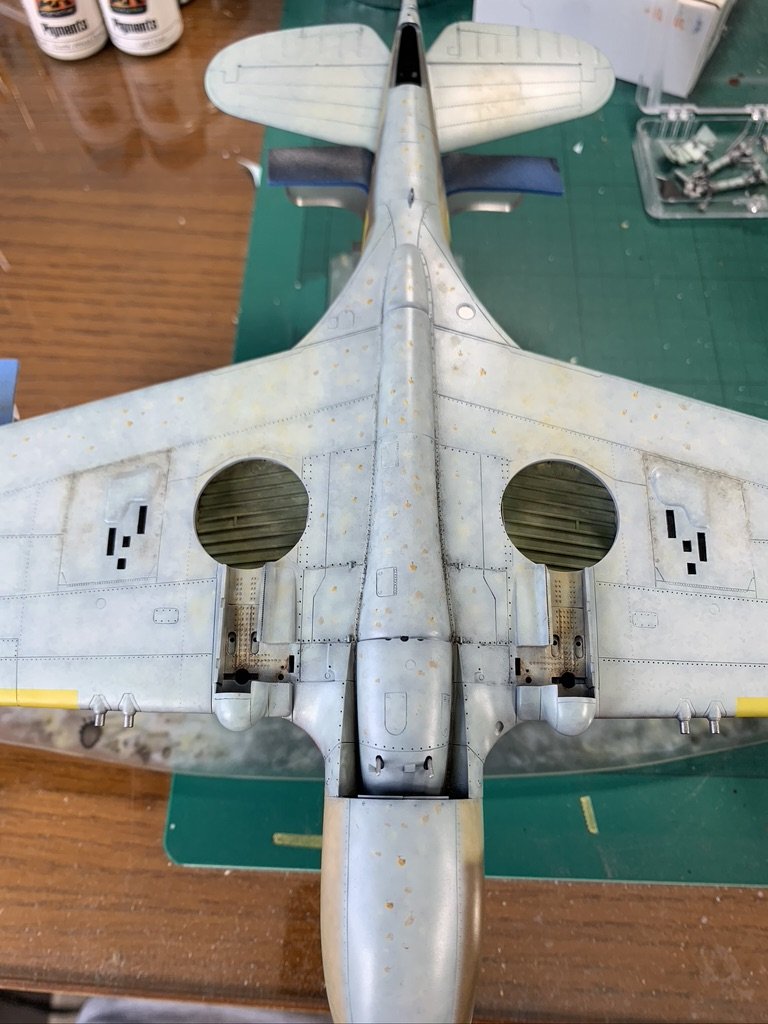
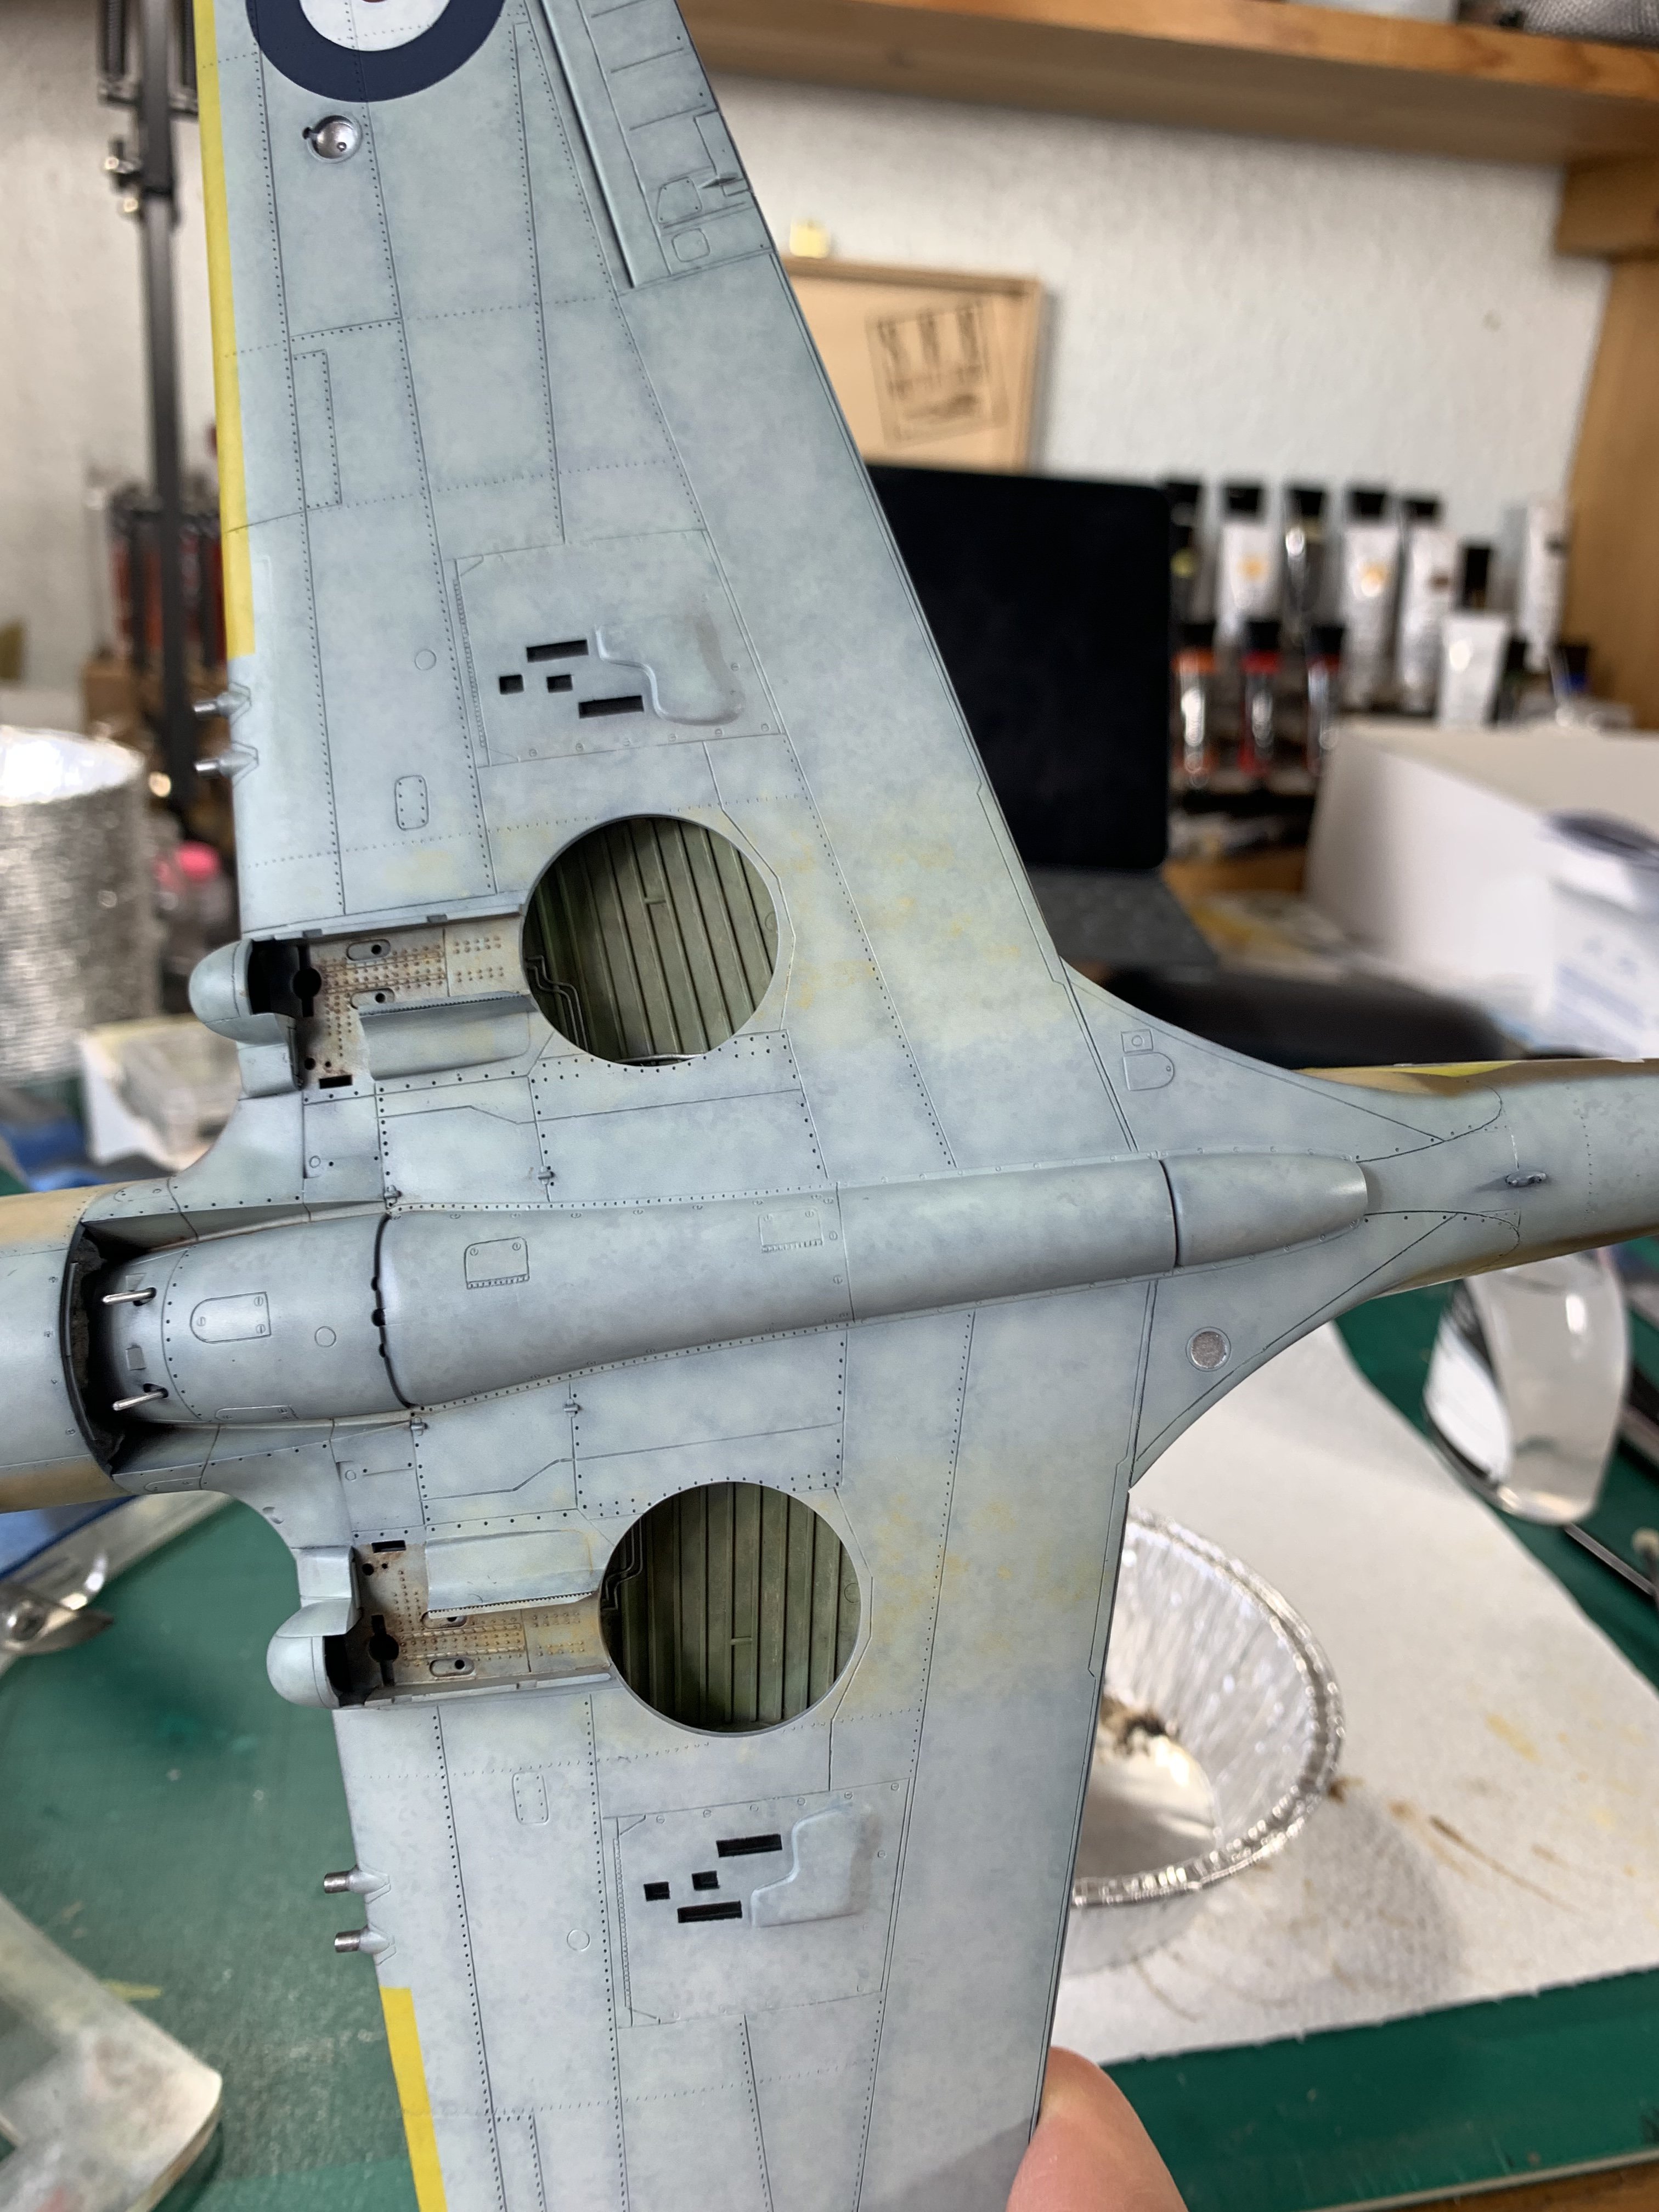
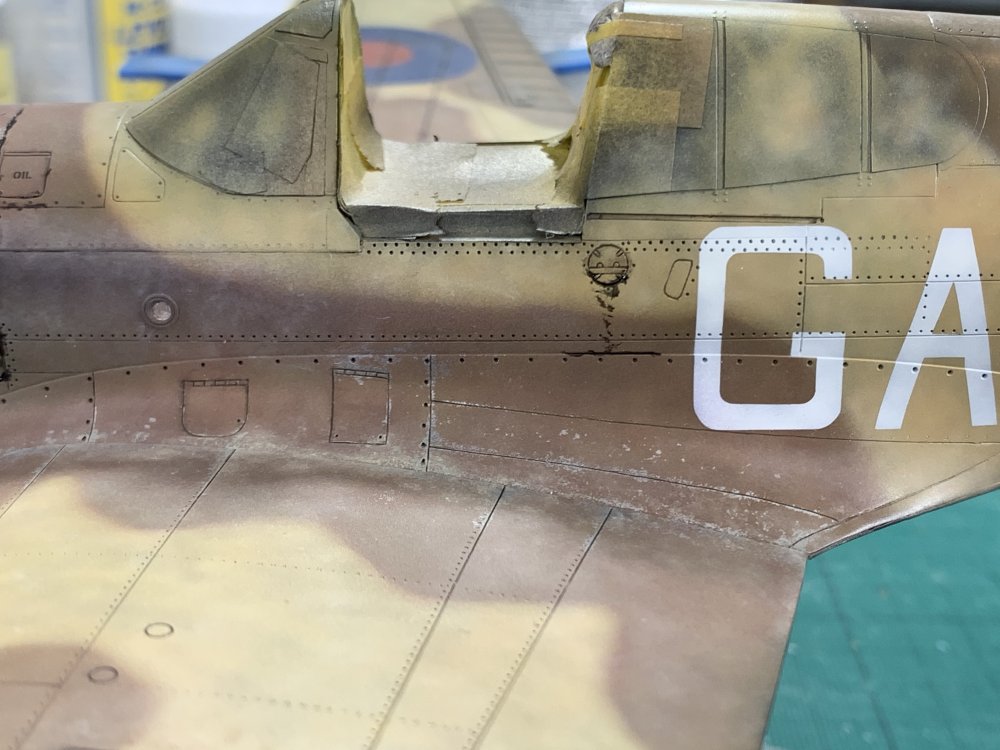
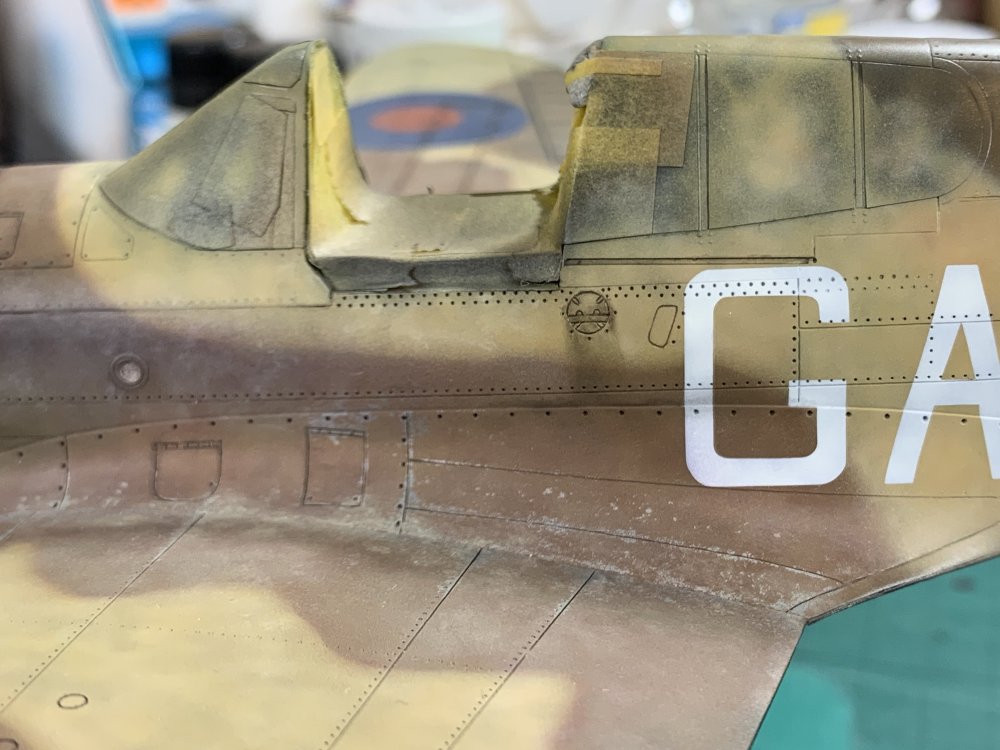
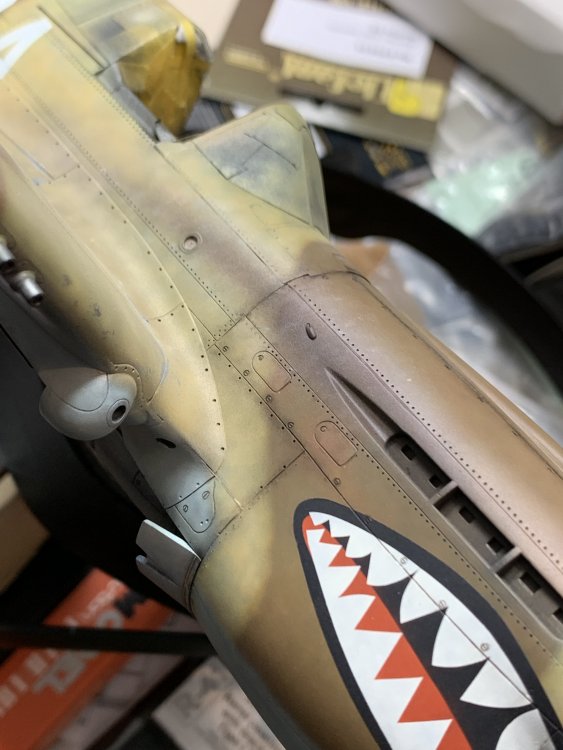
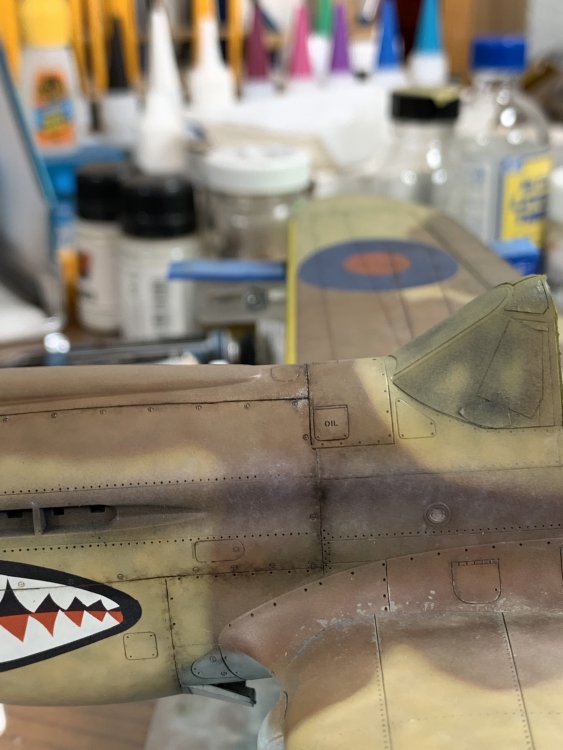
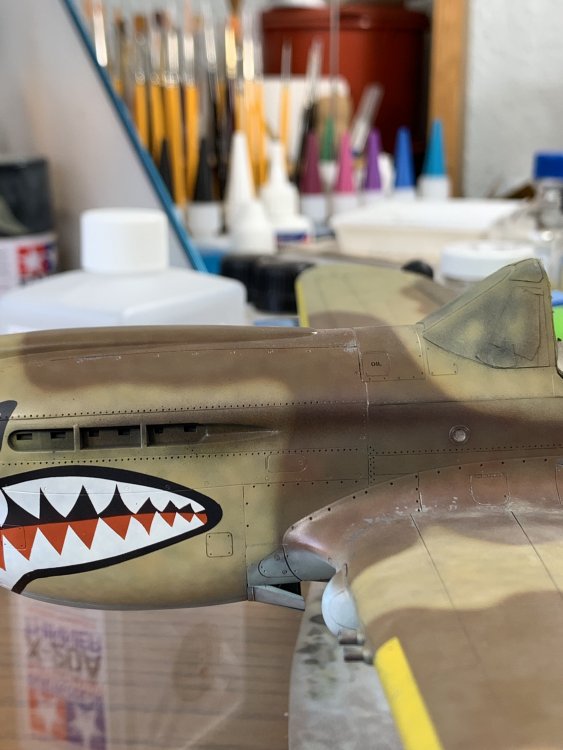
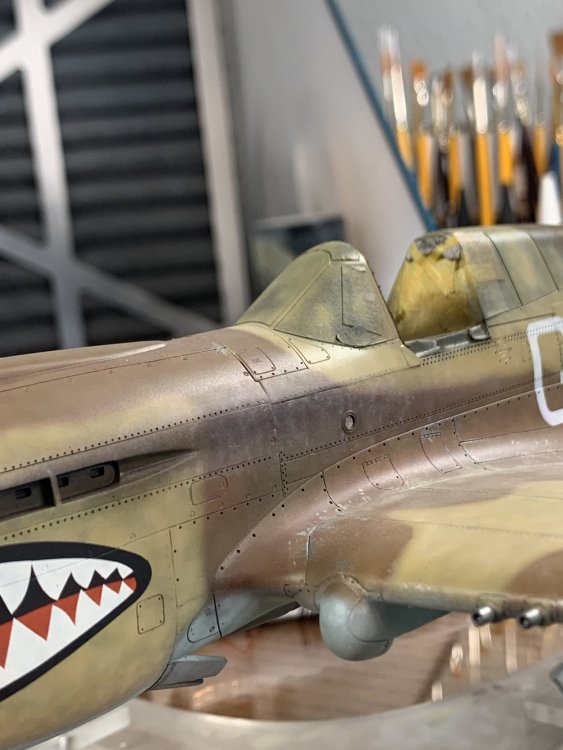
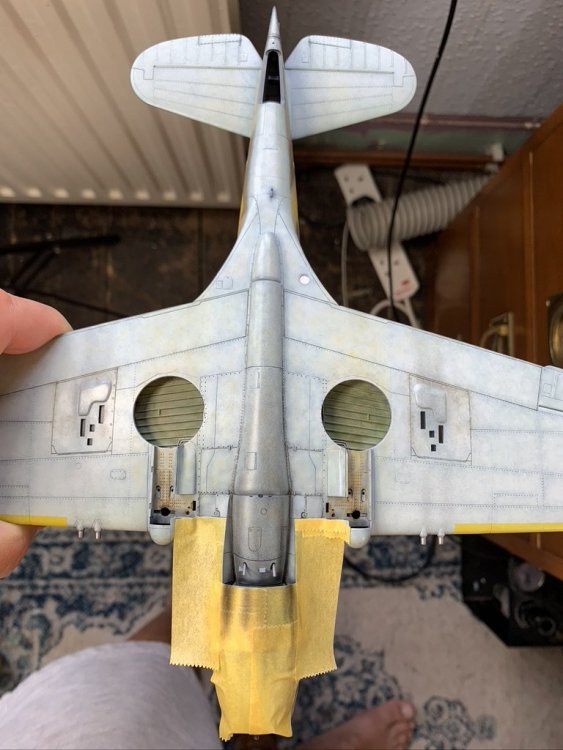
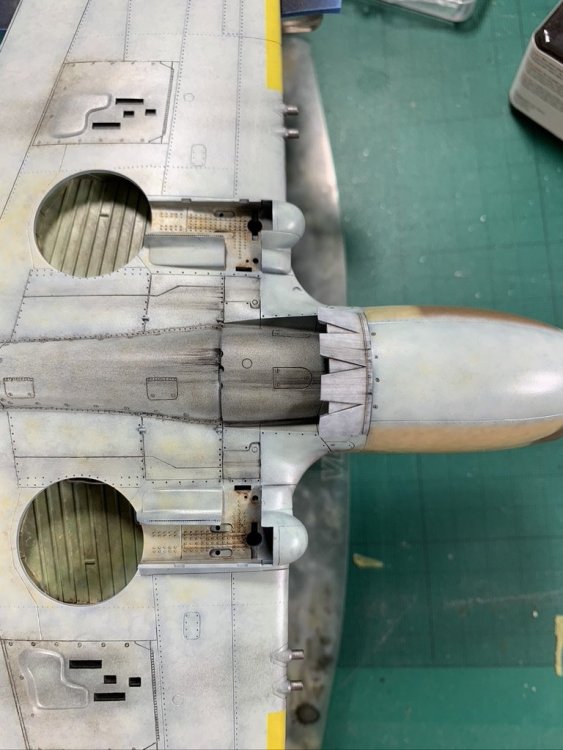
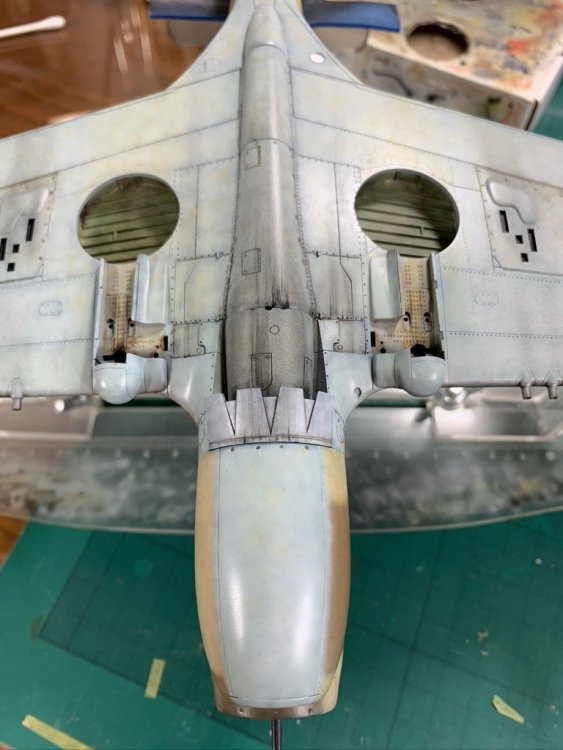
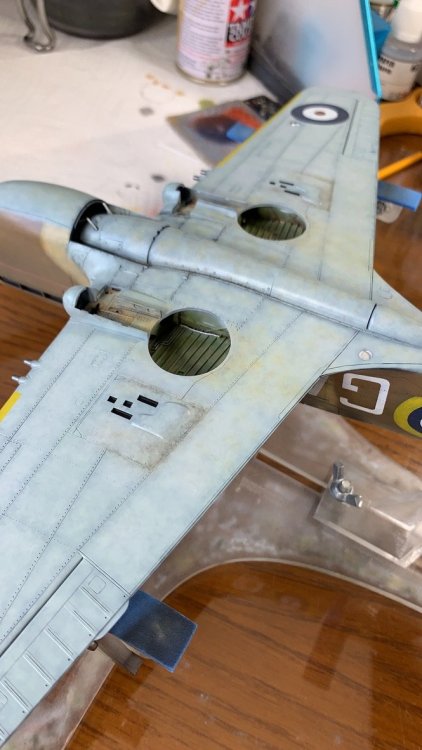
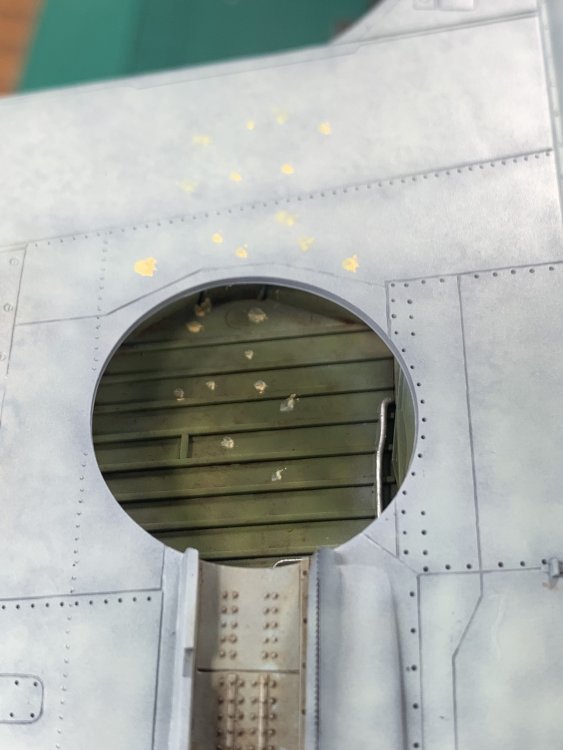
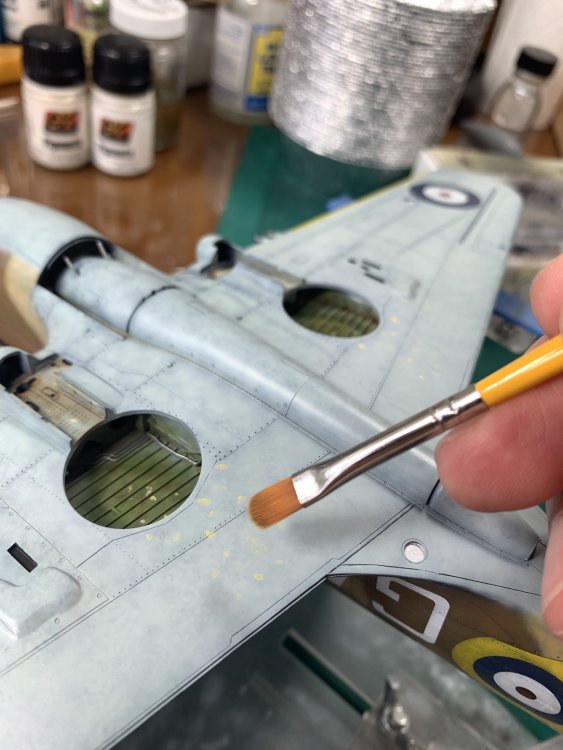
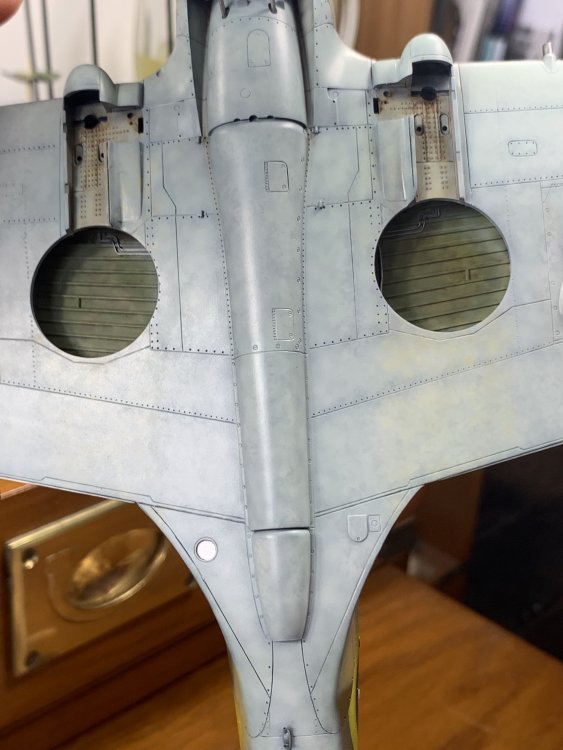
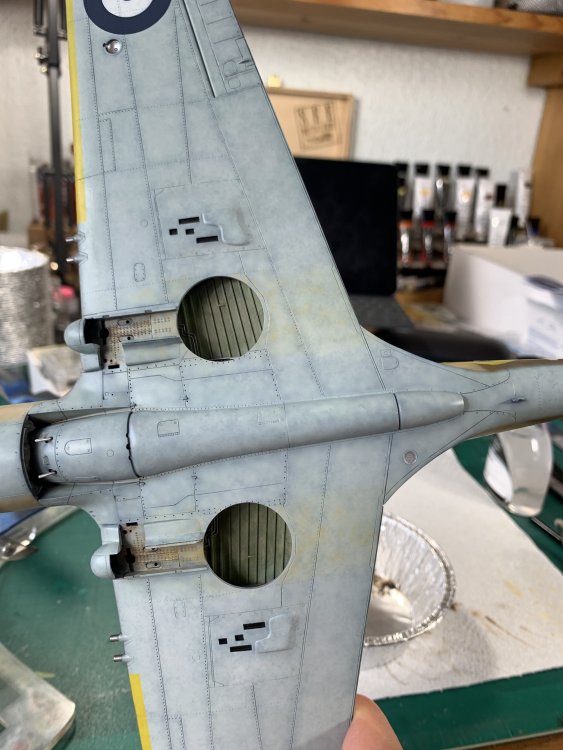
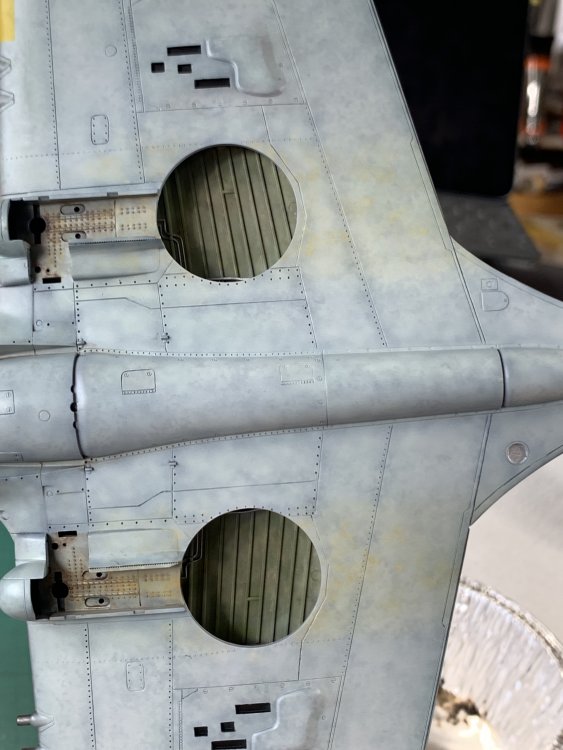
Darker tones added to simulate the extra dirt and wear that accumulates around the ammunition bay covers, and also grime around the engine panels here is the selection I used First dabs around ammunition bays then added some more - a reminder that with oils you can always just remove all of this without affecting the paint job underneath: mineral spirit over MRP is fine not sure the staining around the fuel filler cap is 100% correct but I’ll add some for visual effect and see what it looks like after and here are the engine panels that I have seen look a bit grubby in some of the pictures… more dark oily colours here rather than just ‘dirt’… and after some blending… Decided to do a bit less this side as the oil filler cap / hatch is port side Wing bays after some blending… fuel cap - not convinced but I’ll probably leave it and overhead view; for some reason I missed adding the dust tones here earlier so I will come back and do that


-
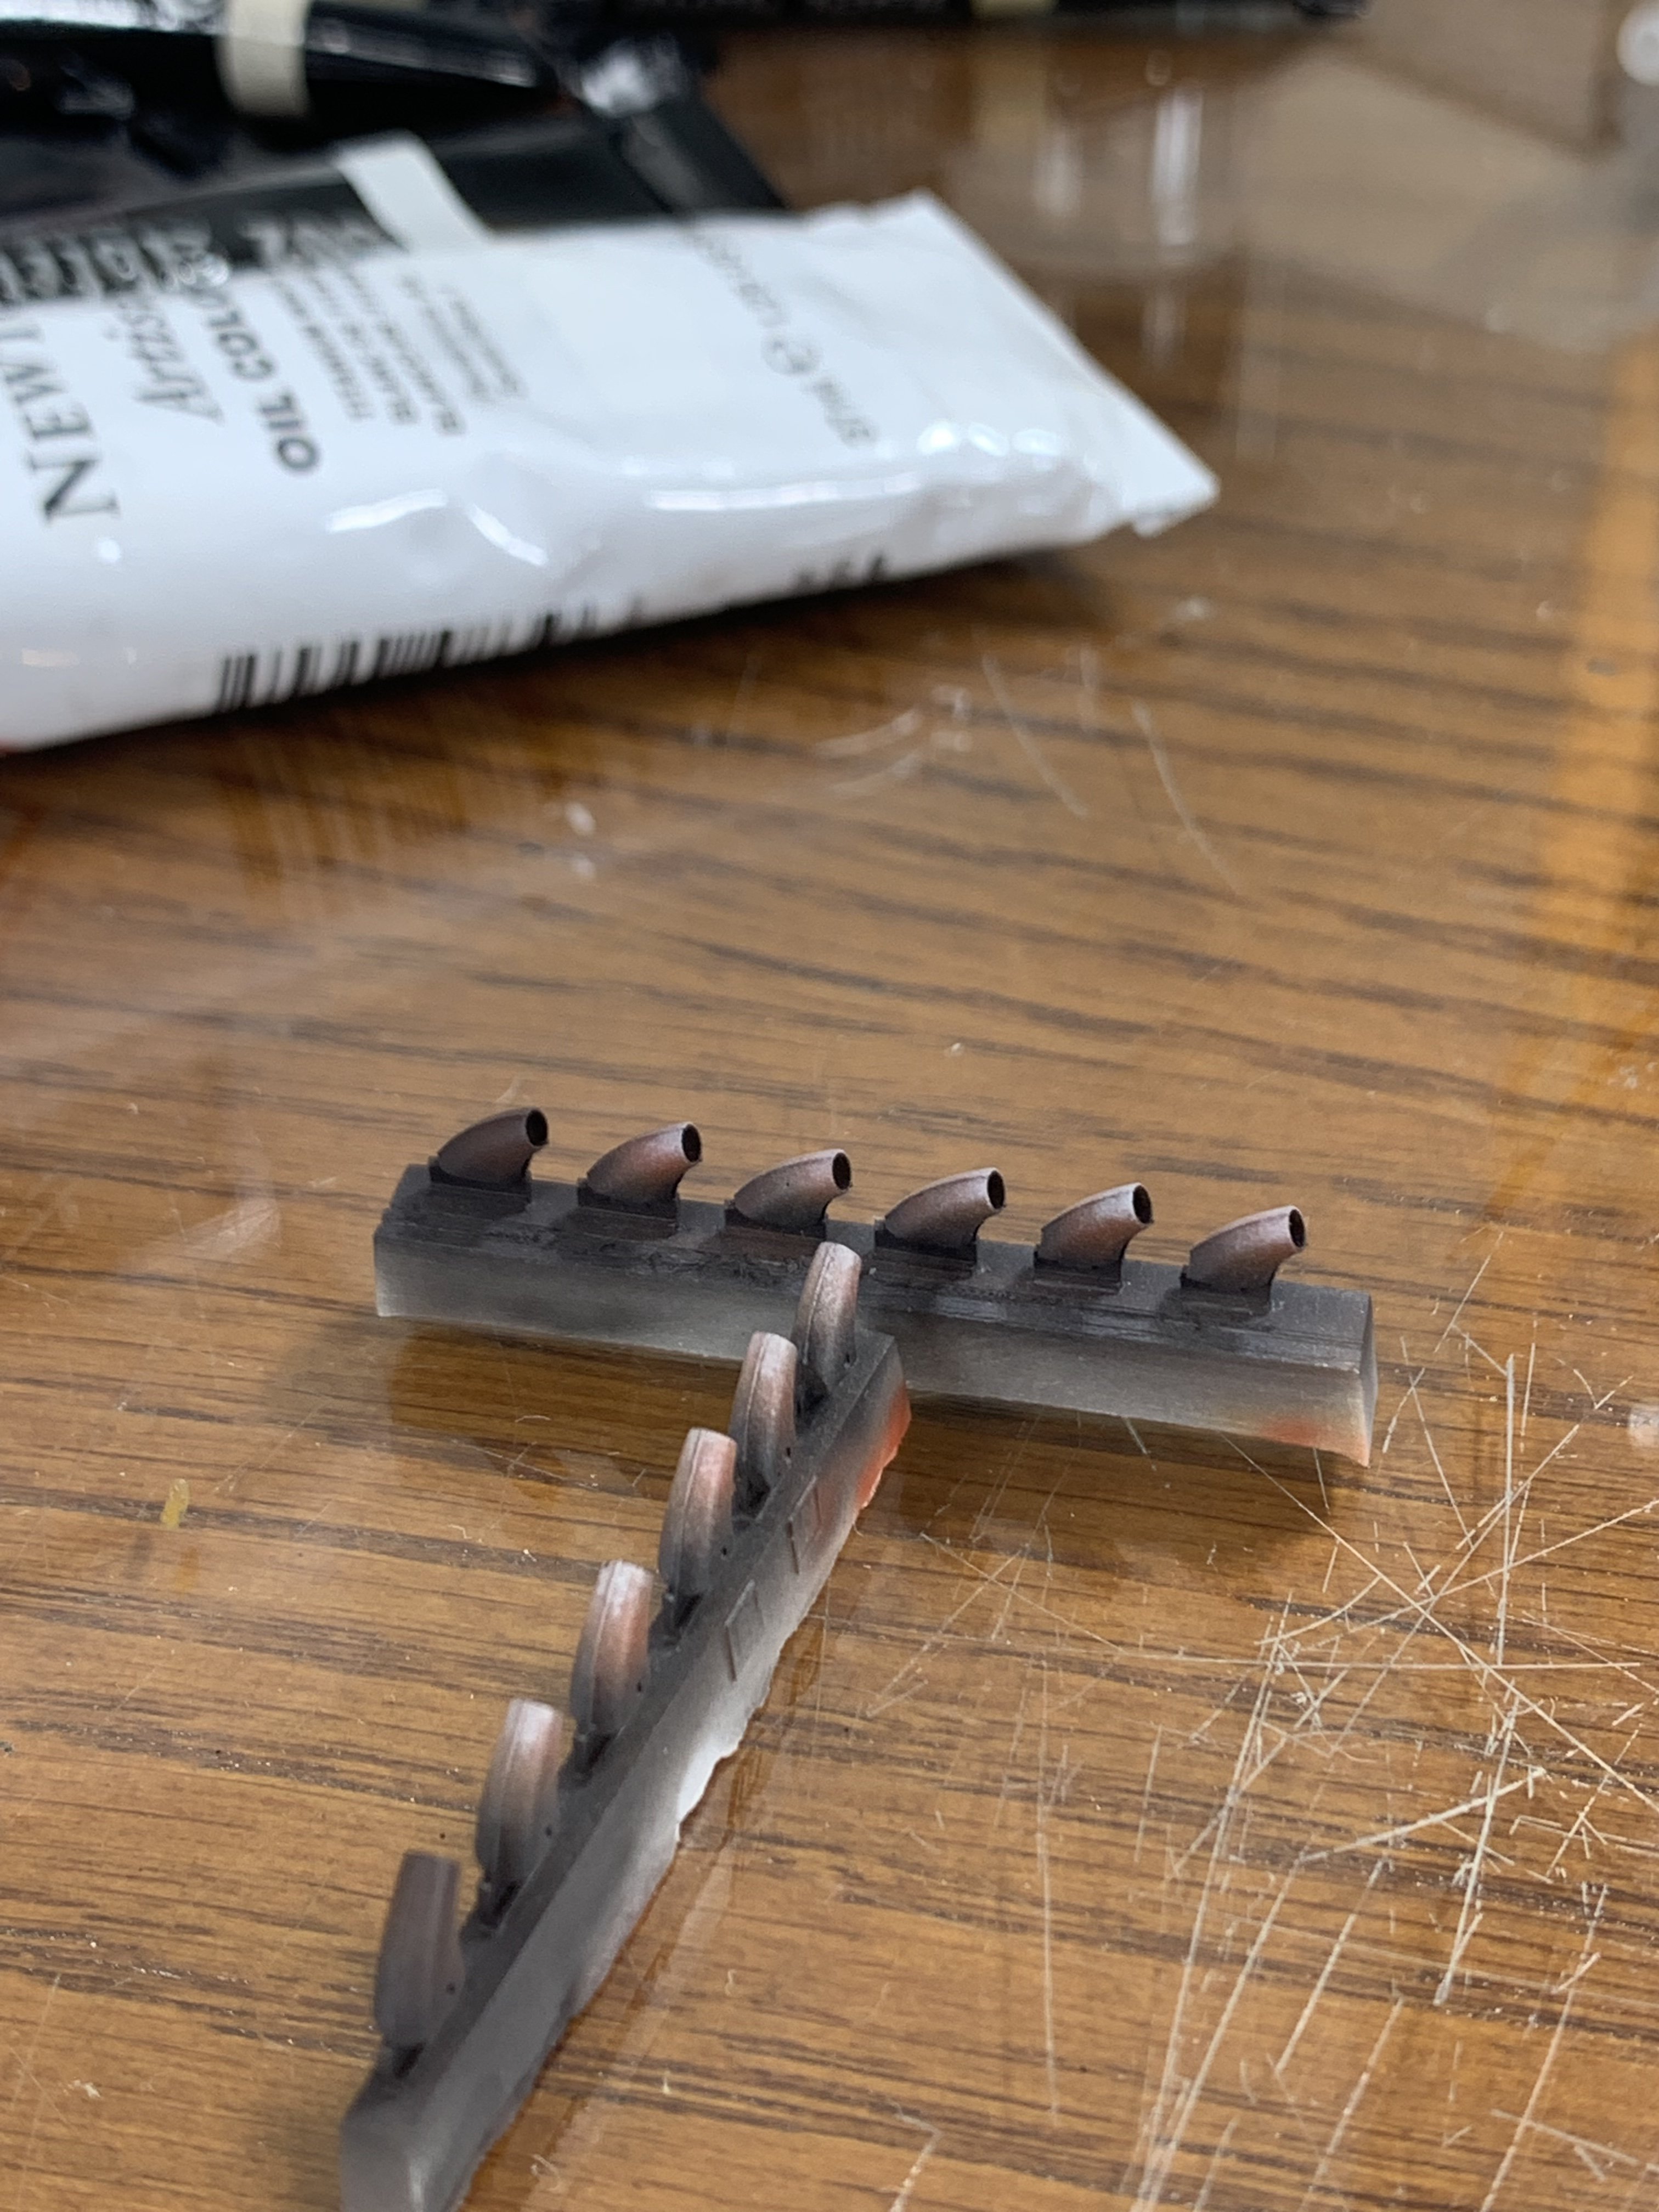
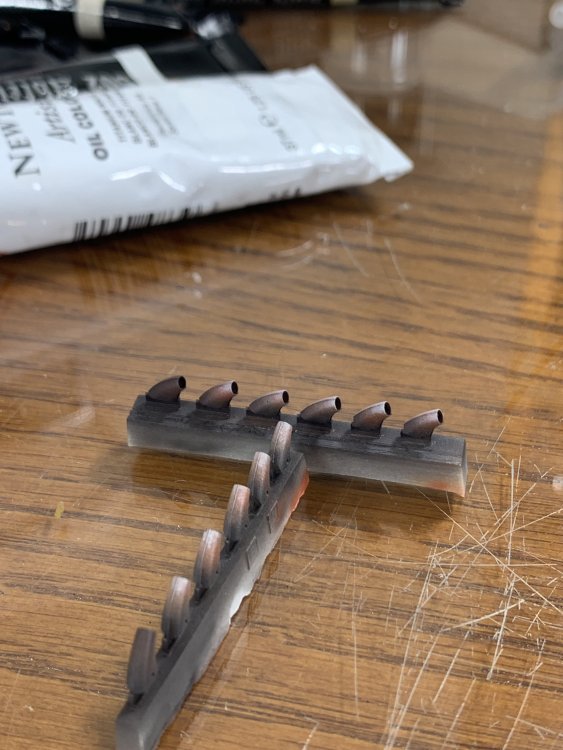
Thanks all. I am glad it’s enjoyable and of use. In the previous post some of the pics seem to have gone in out of order, even after editing, but suffice to say that after spraying the semi Matt clear, everything gets toned down. [edit: I have gone back and re-arranged some of the pictures so hopefully it makes a bit more sense, and the pics with the clear coat are now shown at the end; sorry about that] back to the approach, i can only say that if I can do this and get these results - which I think look pleasing but are nothing ‘out of this world’ - then anyone can! The biggest thing for me was opening my mind to some new techniques, watching quite a few YouTube videos, and just ‘having a go’. one of the things I picked up from the SMCG Facebook page was being willing to make mistakes because I knew I was happy to try to fix them, rather than the previous fear of screwing up and when I did thinking ‘that was the end’. And fwiw this afternoon I spent a very frustrating time trying to fix the exhaust stubs - it feels like six months since I have actually had to glue anything lol - and duly failed! Will try to post some pics once I have another go Cheers Nick
-
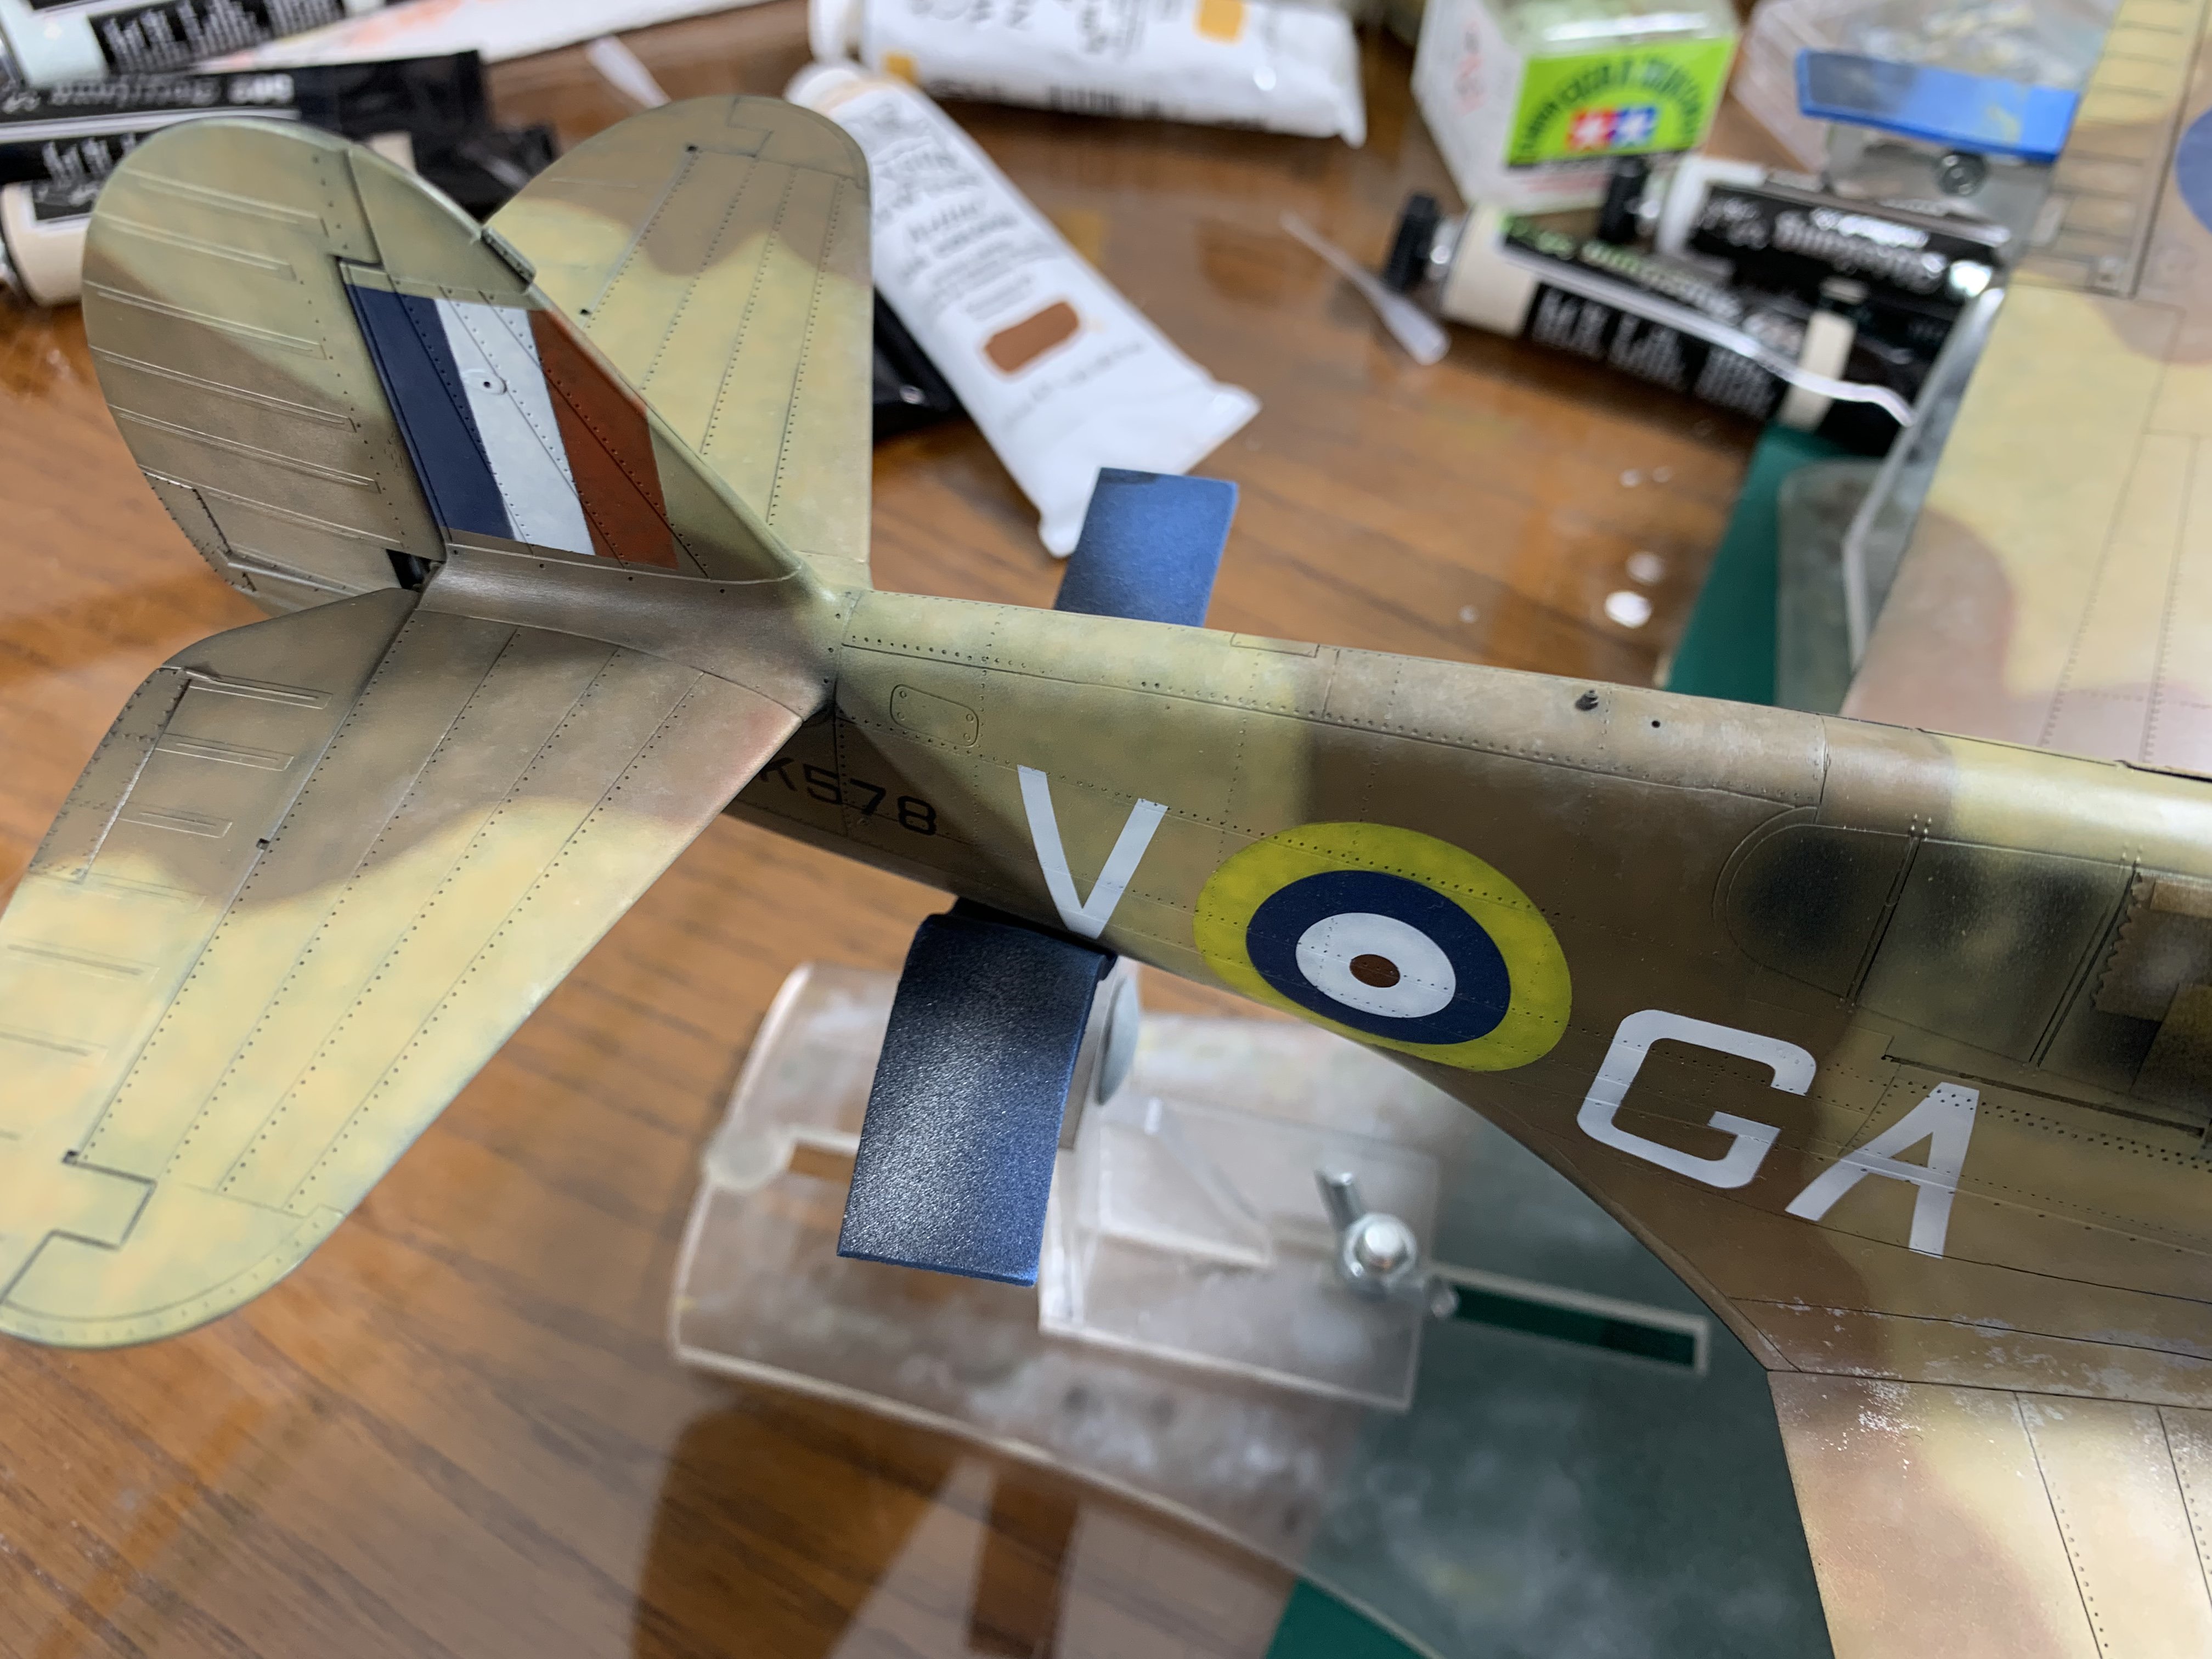
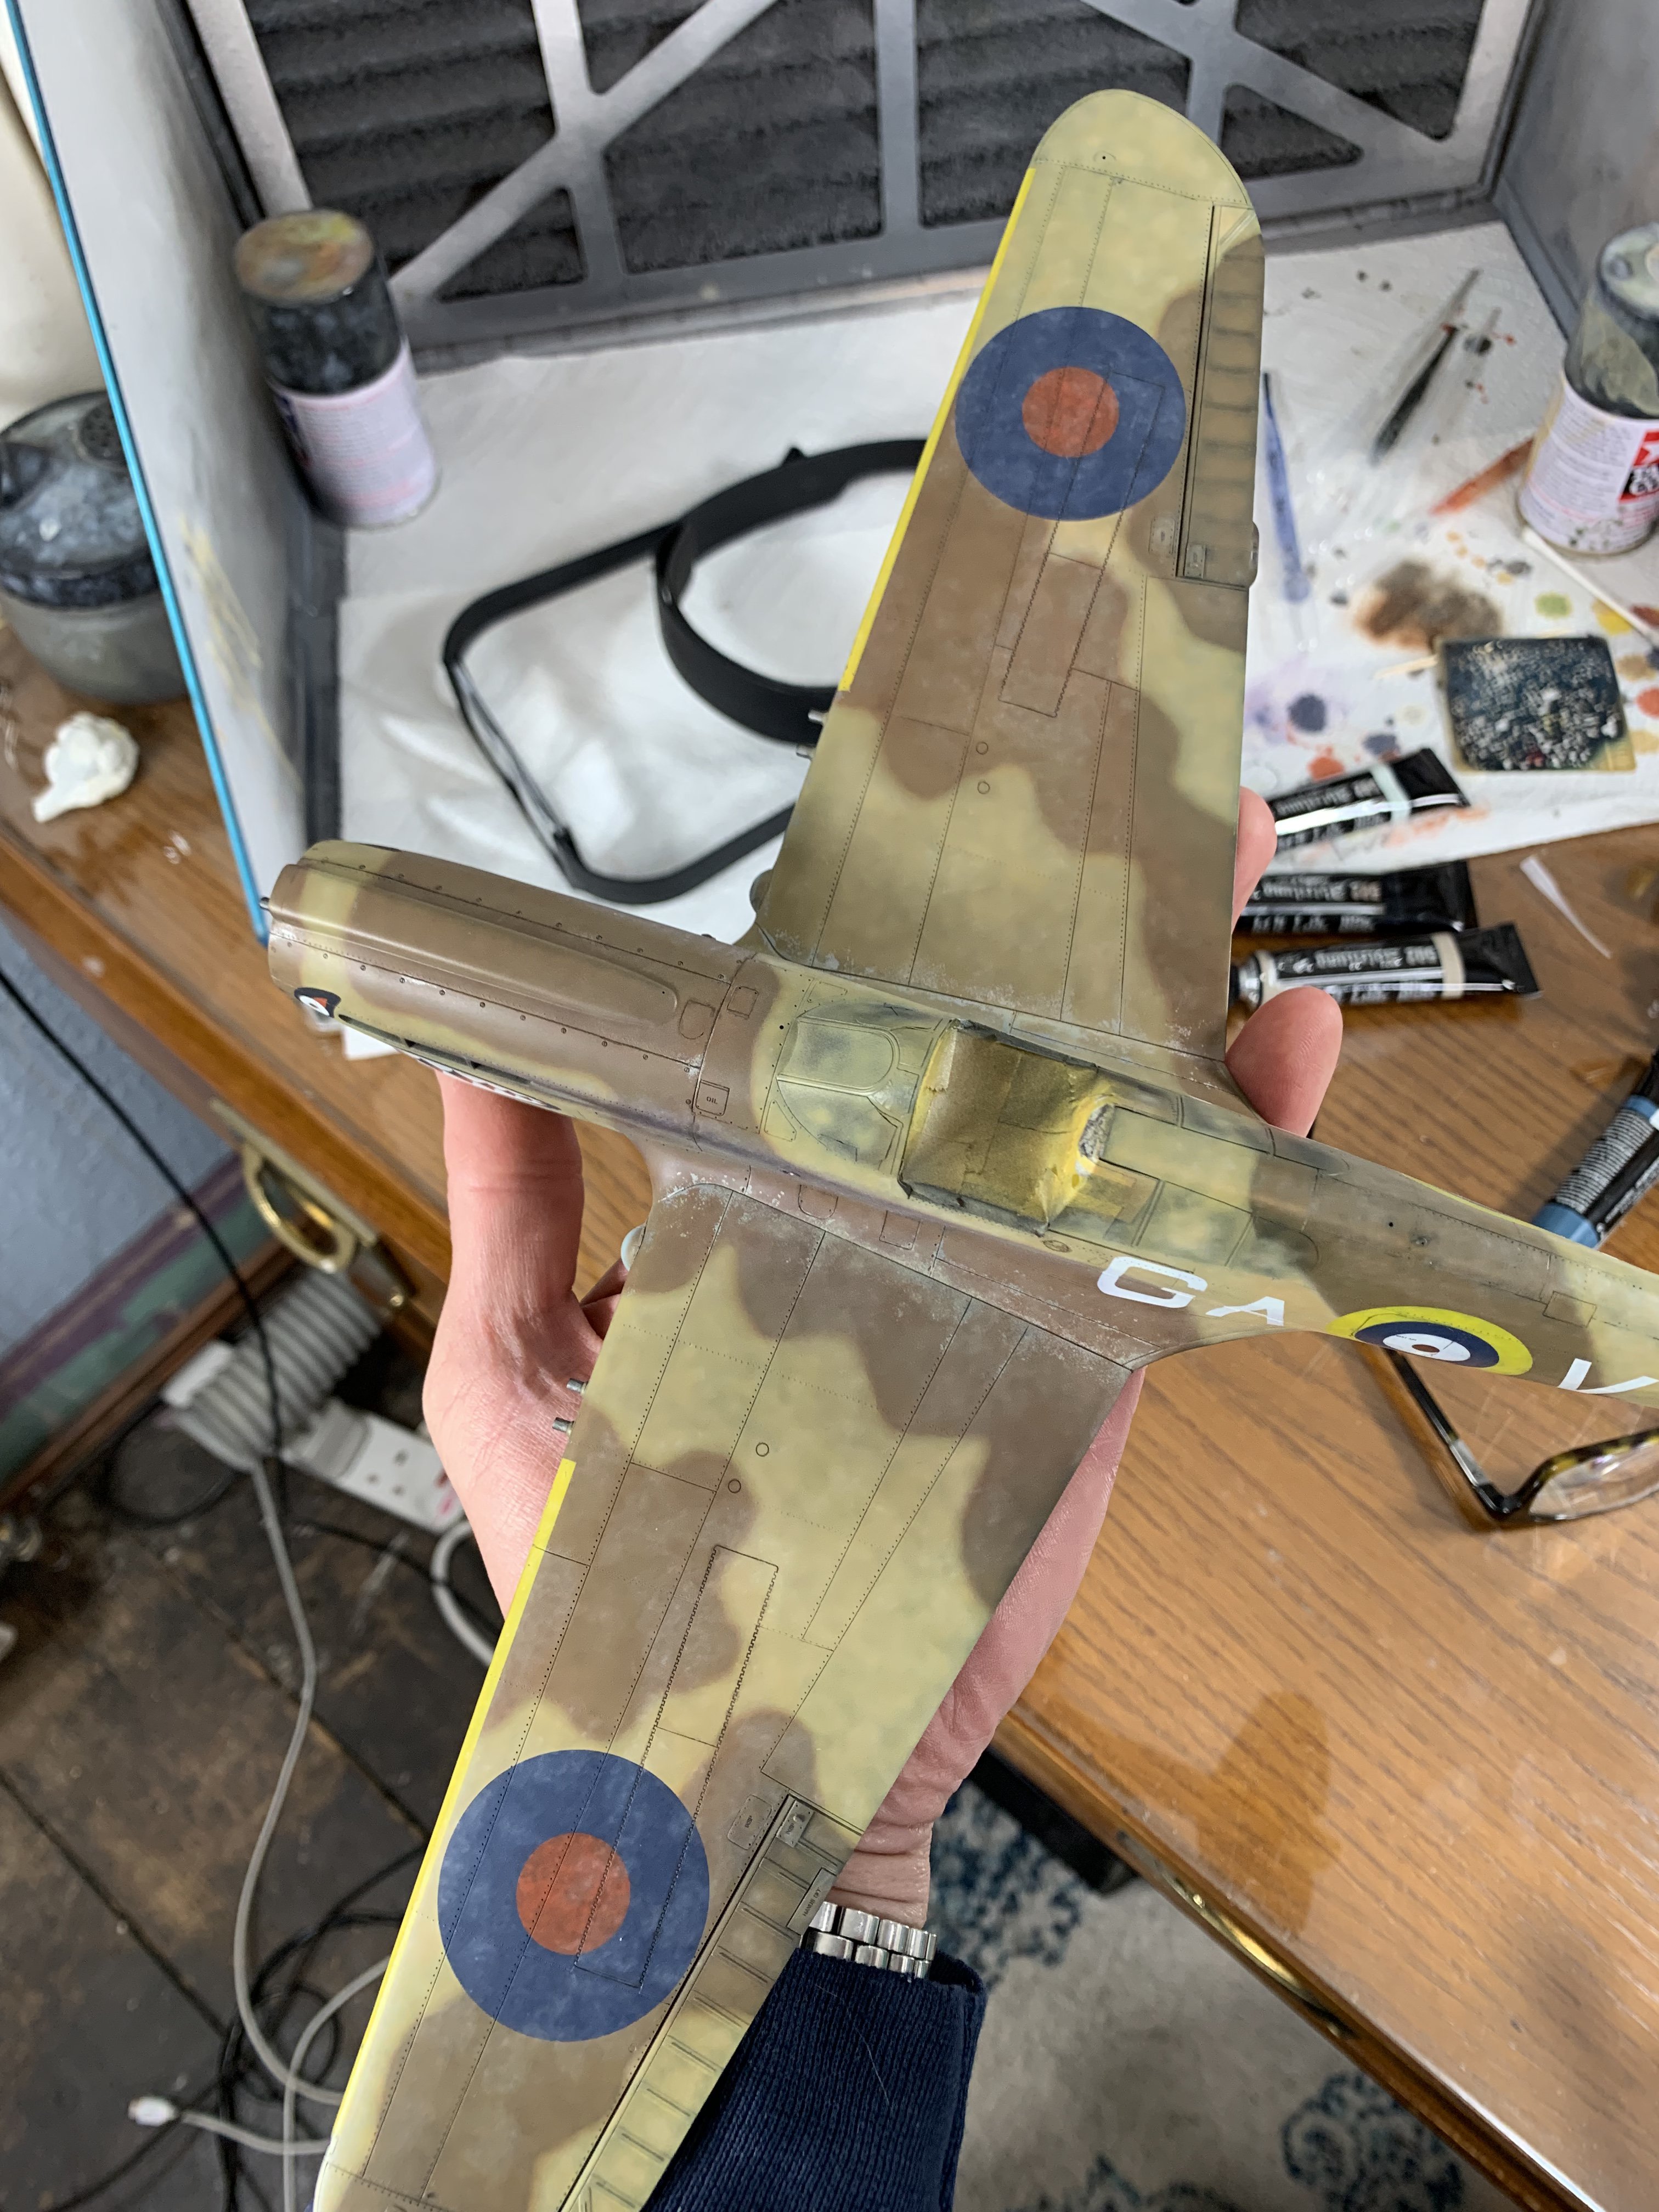
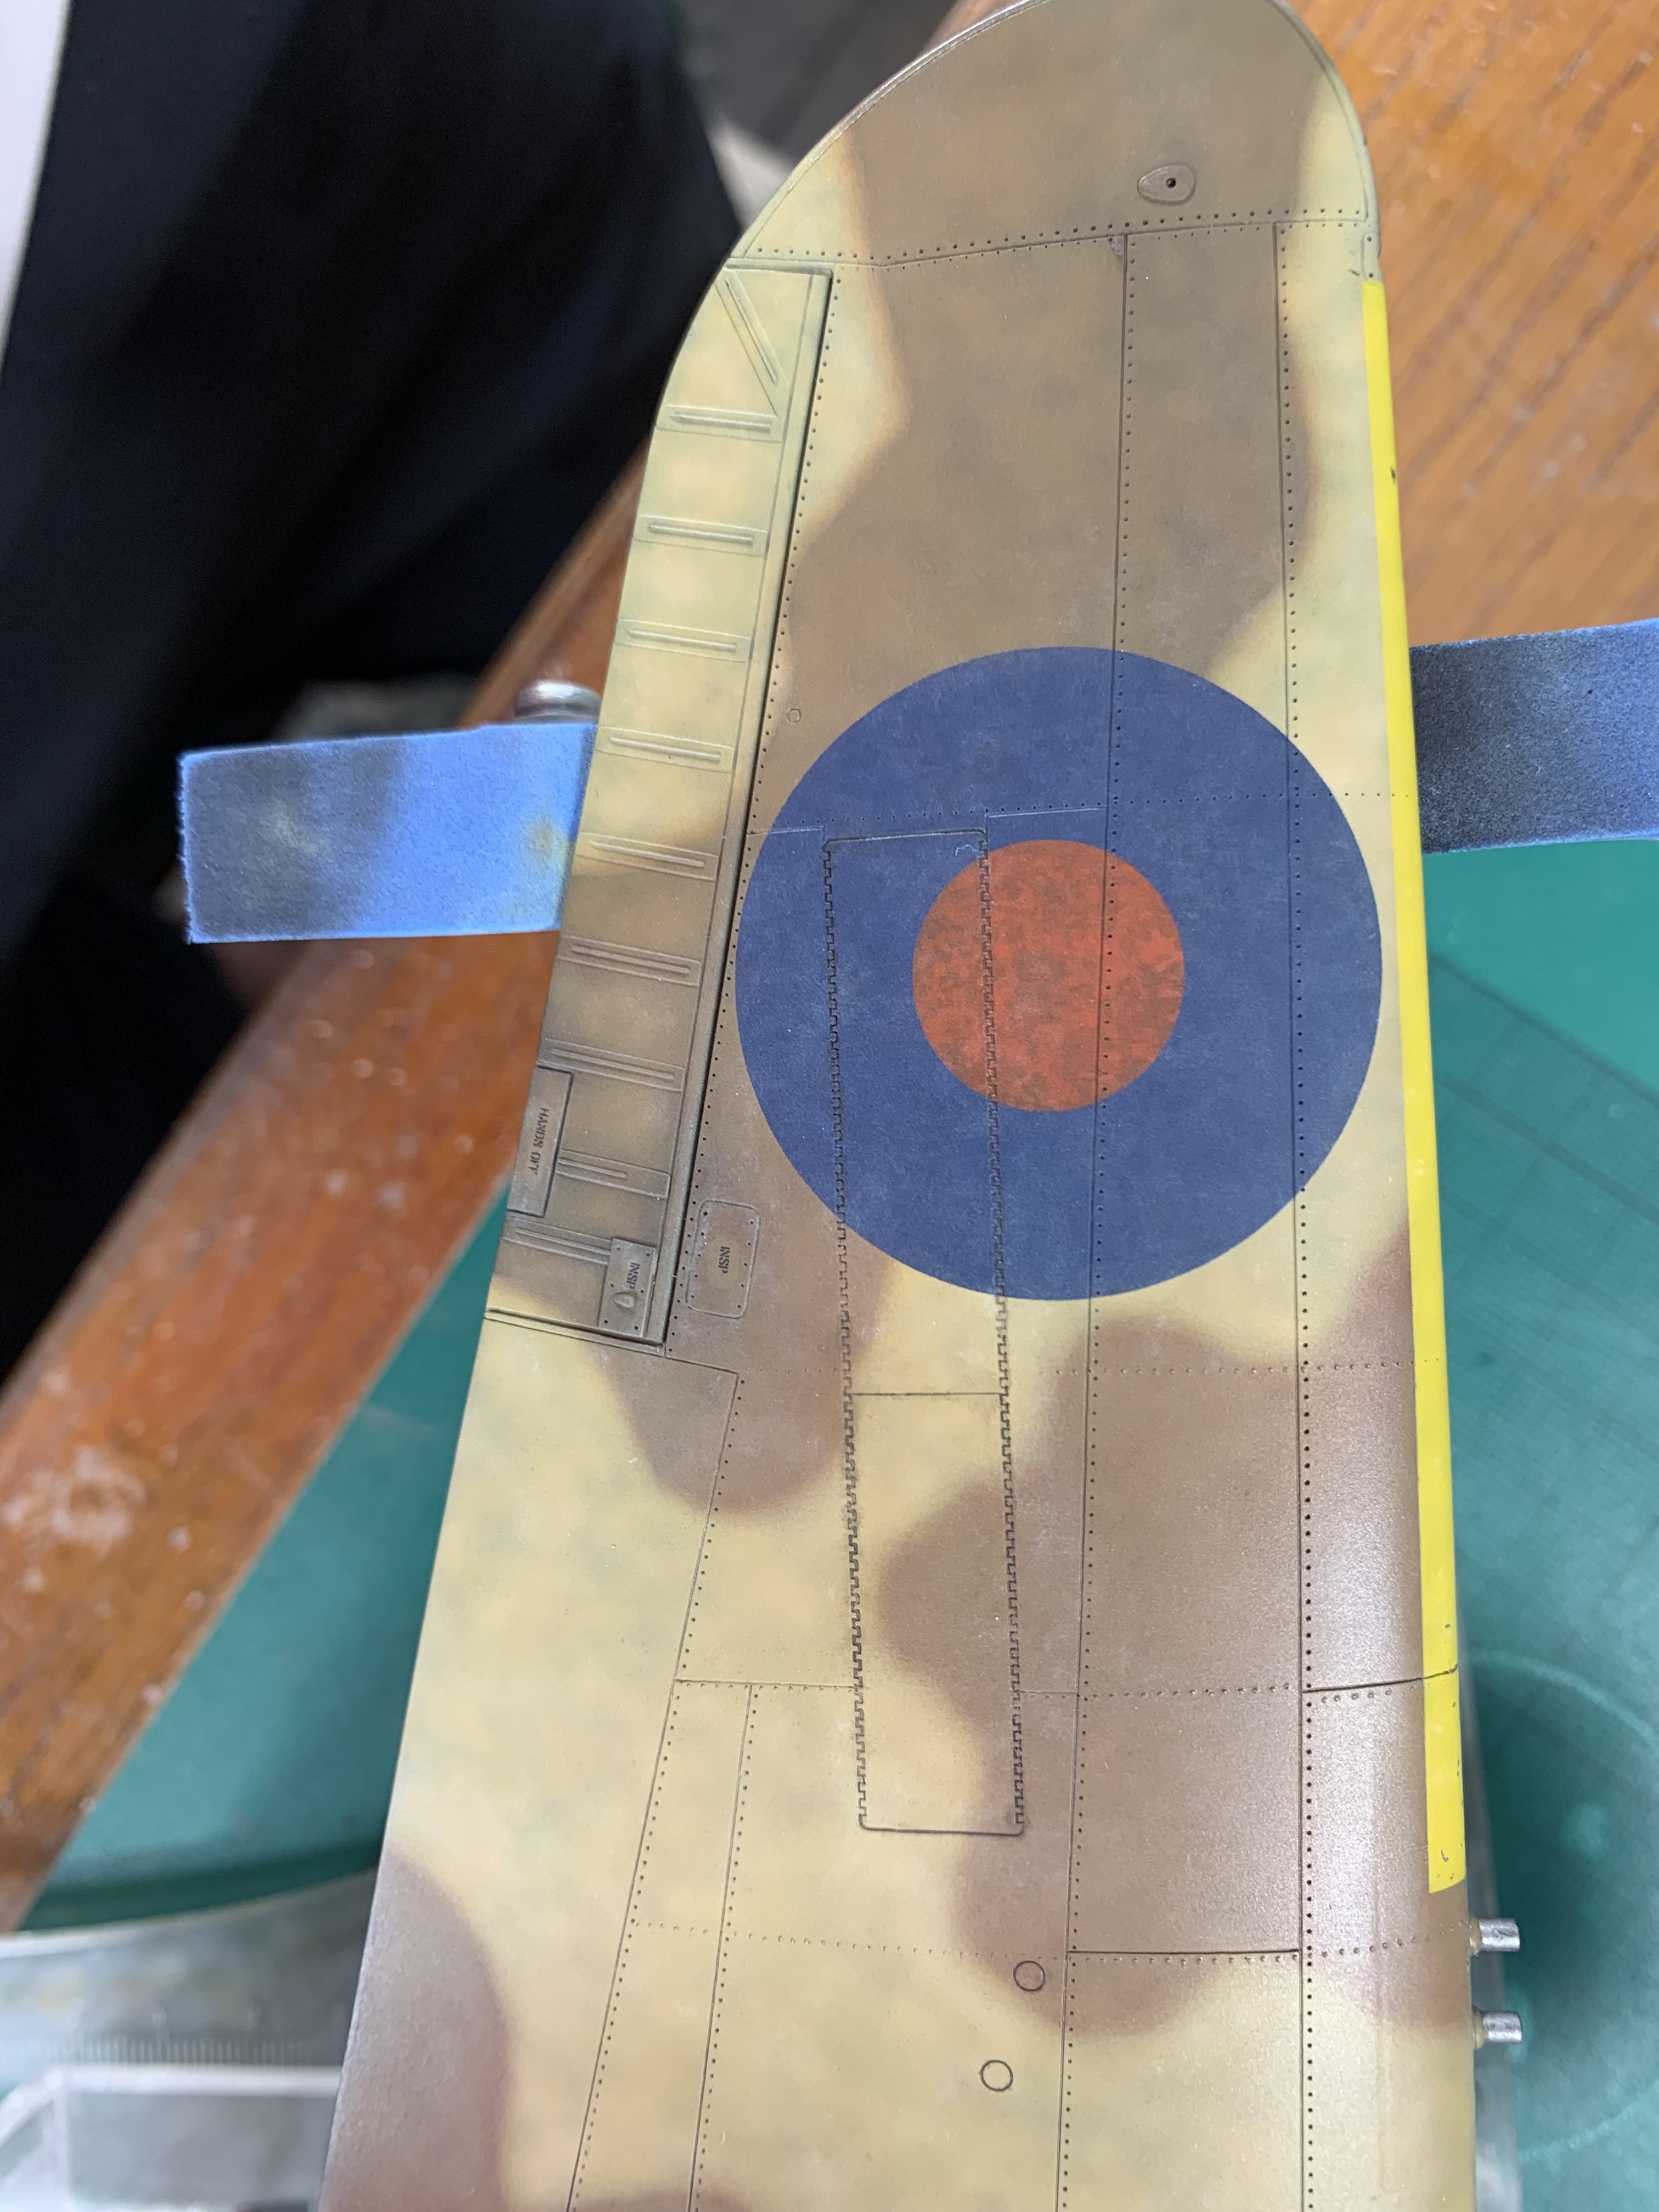
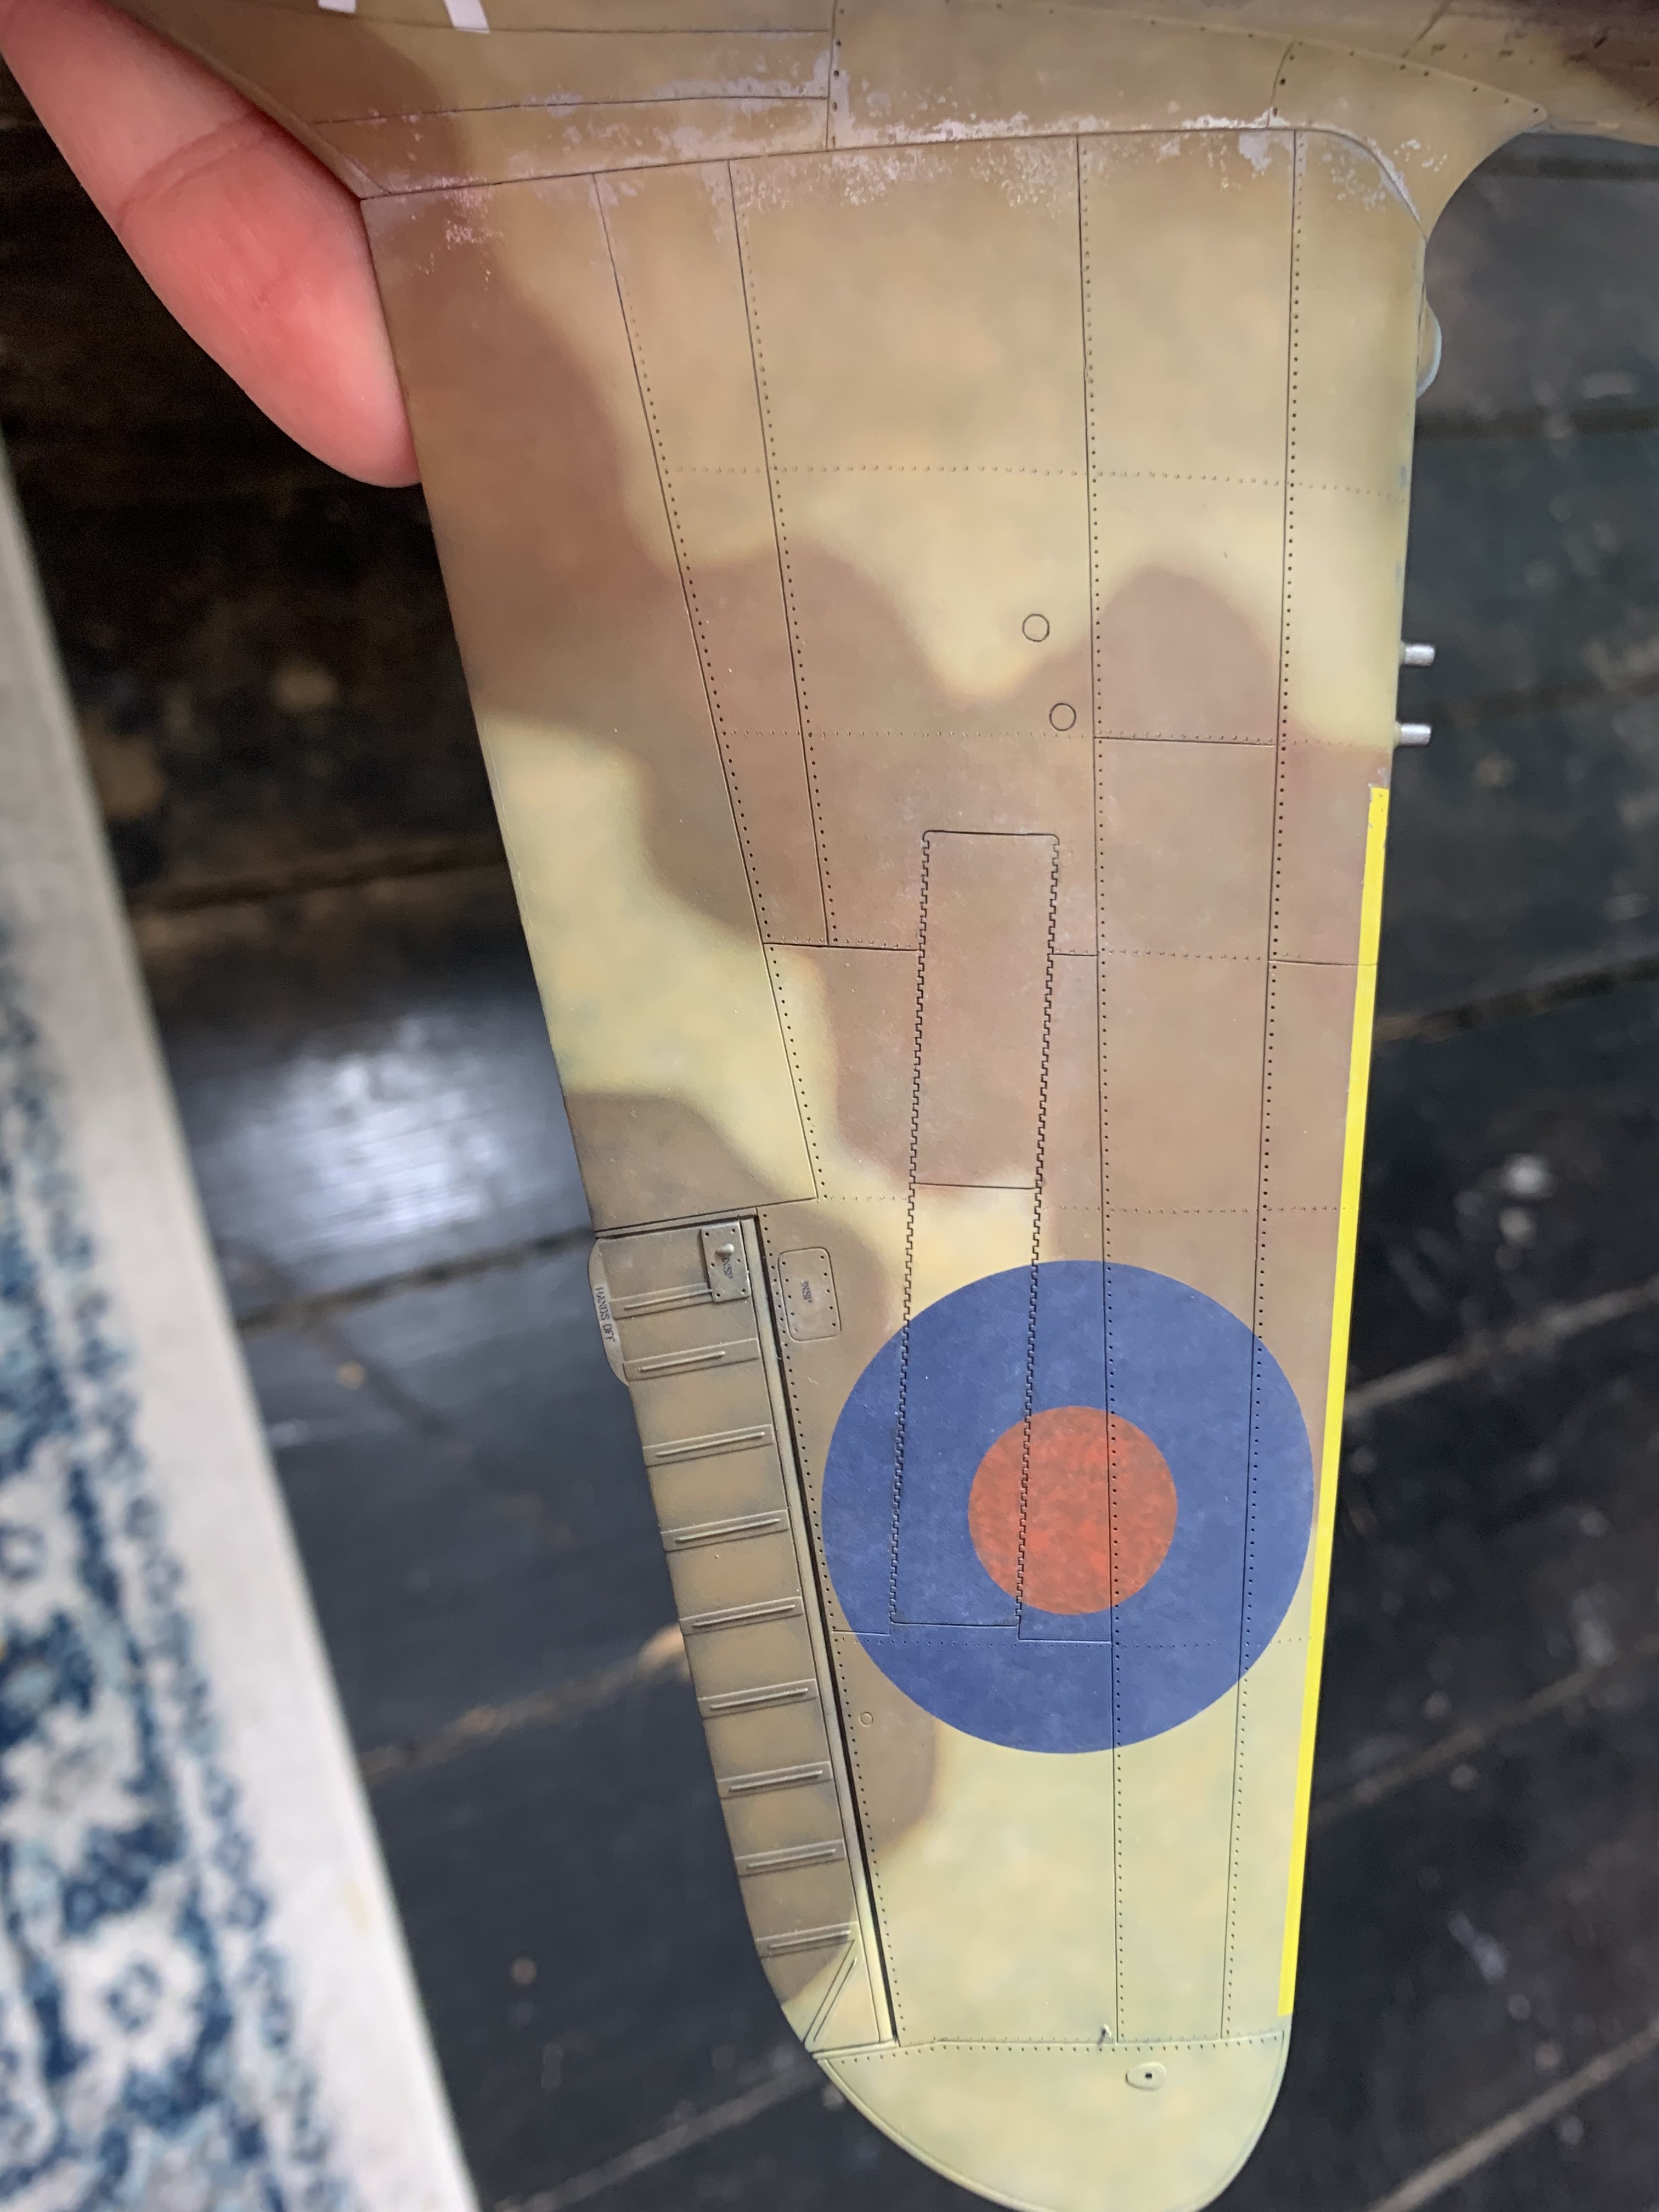
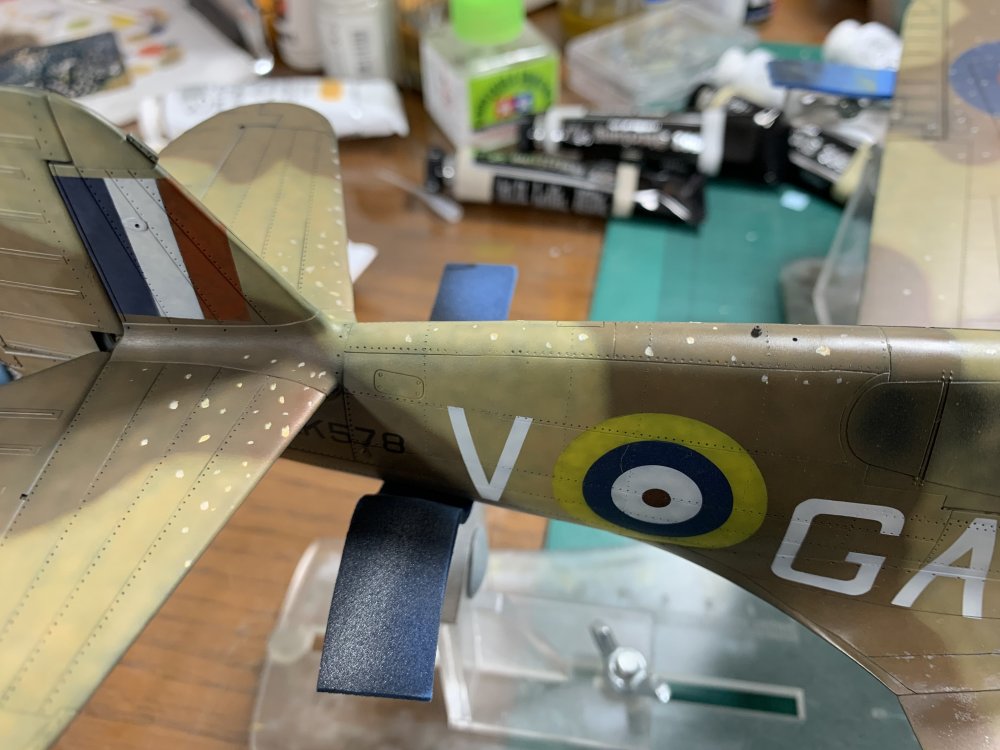
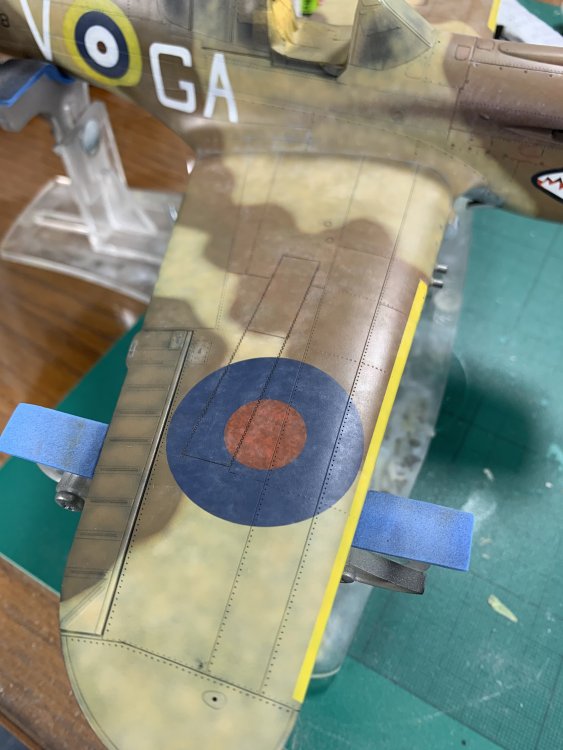
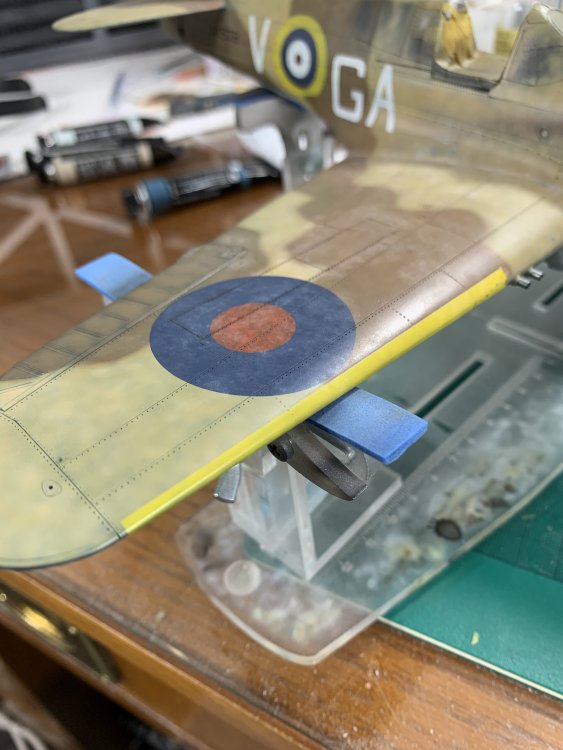
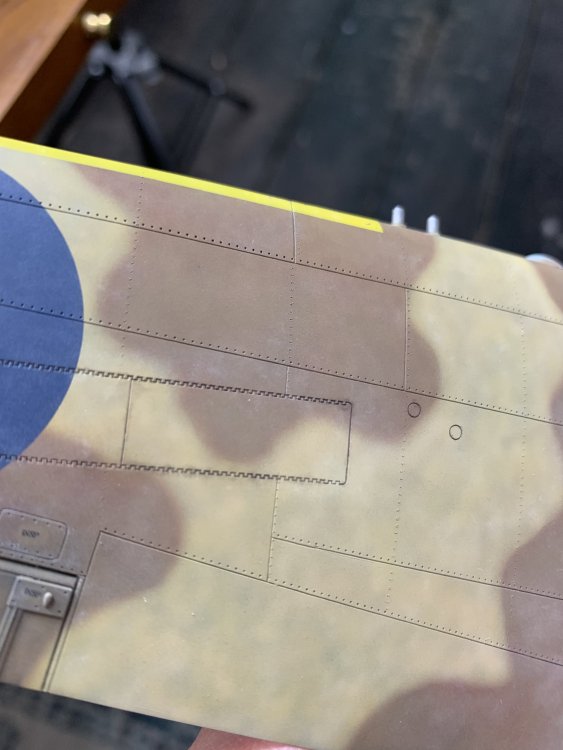
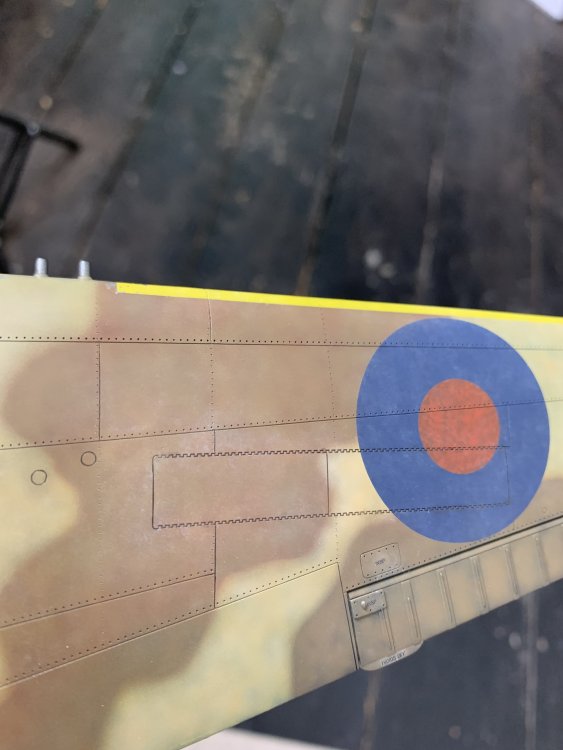
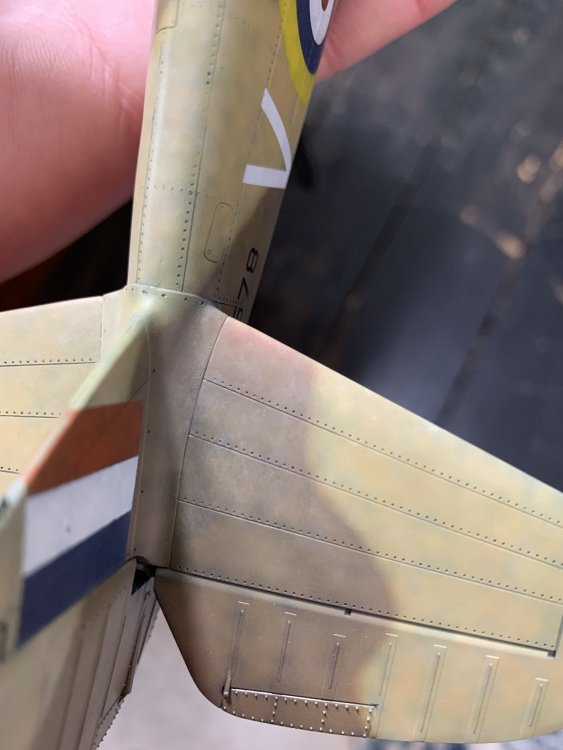
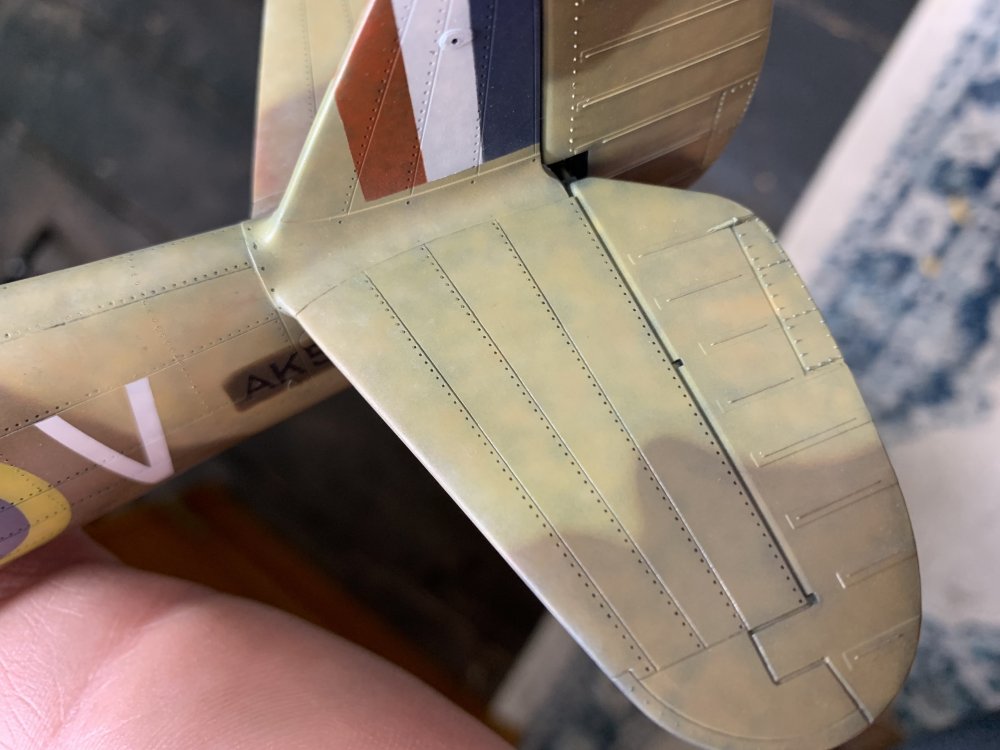
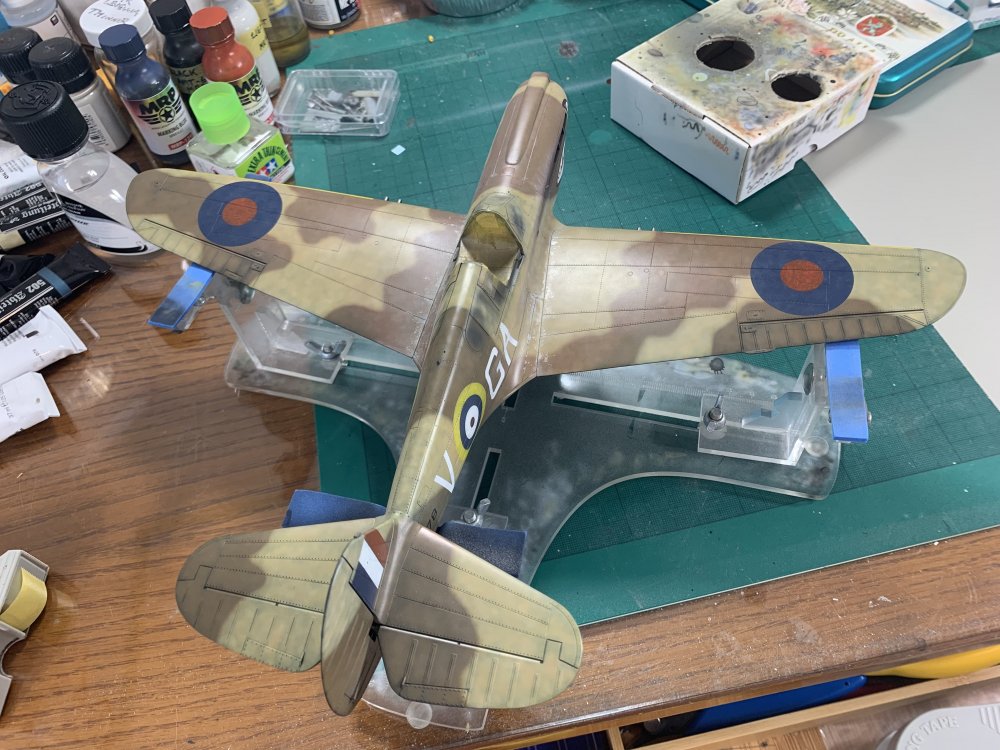
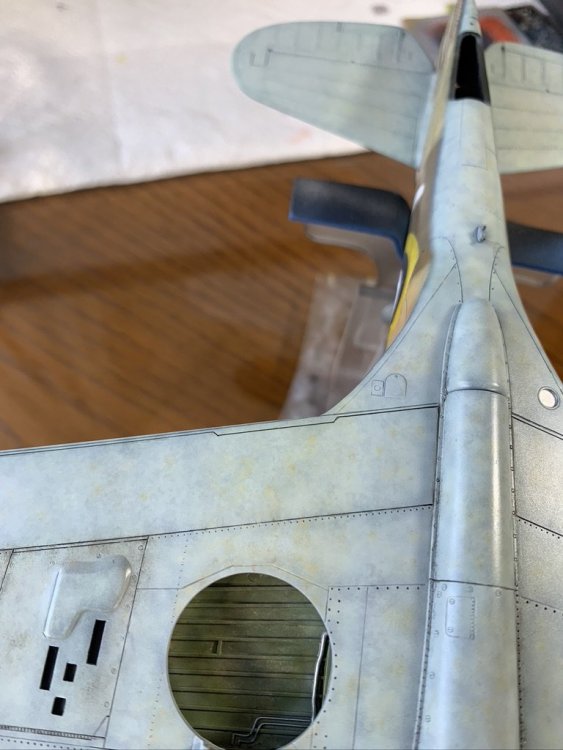
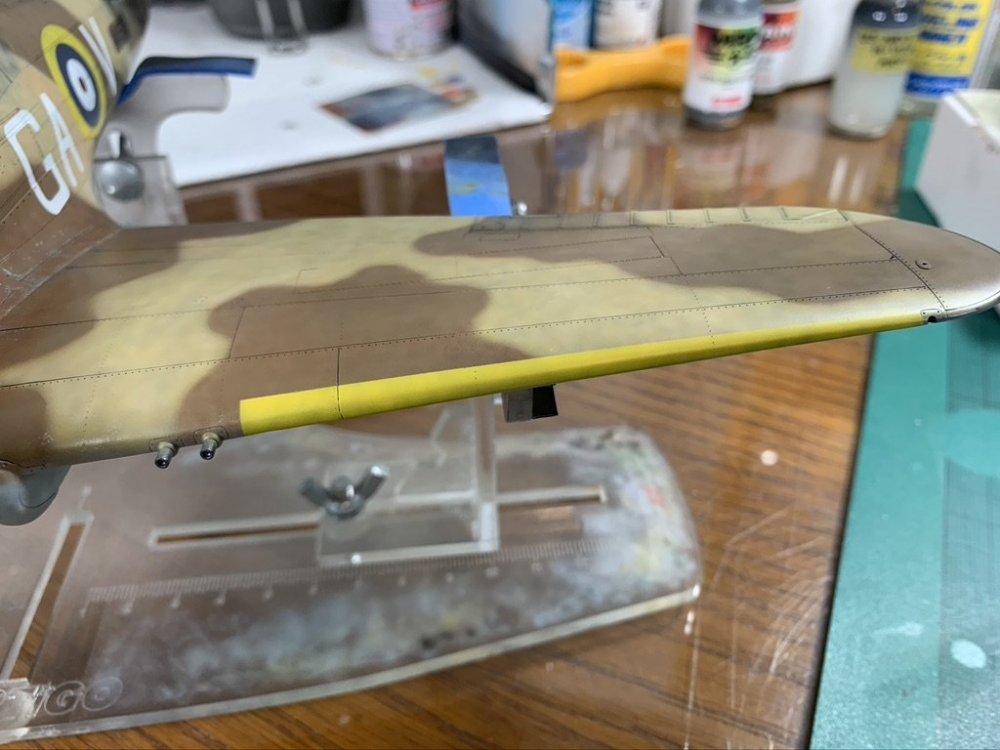
So with the roundels finally done, i could finally add some of the lighter / dust weathering over the wings, spine of the fuselage and also the tail plane (where ‘stuff’ was often left when on the ground) done with oils in the same manner as the wing root weathering what seems like - and actually was! - months ago… dots of oils dabbed on.. Then worked in with a dry brush at this stage And you quickly get to something like this after some additional work with a *tiny* amount of thinner on this brush… so it looks a bit crazy here but once you do a sealant coat with some MRP semi matt, it all seems to get dialled down and look a bit less over the top Next up is adding some darker dirt / stains around the gun bay panels and engine panels, which I’ll try to post tomorrow cheers Nick


-
RCAF Liberator GR Mk VI
nmayhew replied to BlrwestSiR's topic in LSM 1/35 and Larger Work In Progress
I am away at moment but from quick google it looks like the turret would be a regular one - it was the earlier GR IV and V that had the British 4 gun turrets i don’t know much about these but wondering whether the Border Models Lanc - which has 2 types of rear turret - may help for those looking for this? Also noticed that Profi now make both the Leigh light, nose radar, AND the mini wings and rockets - so it is possible to make one the earlier Libs once you solve the turret issue sorry to distract this thread no back to this Lib - can’t wait to see more! -
RCAF Liberator GR Mk VI
nmayhew replied to BlrwestSiR's topic in LSM 1/35 and Larger Work In Progress
Do we have confirmation of what the rear turret is on your Lib? just wondering if it’s a FN one or something else non ‘regular B-24’? -
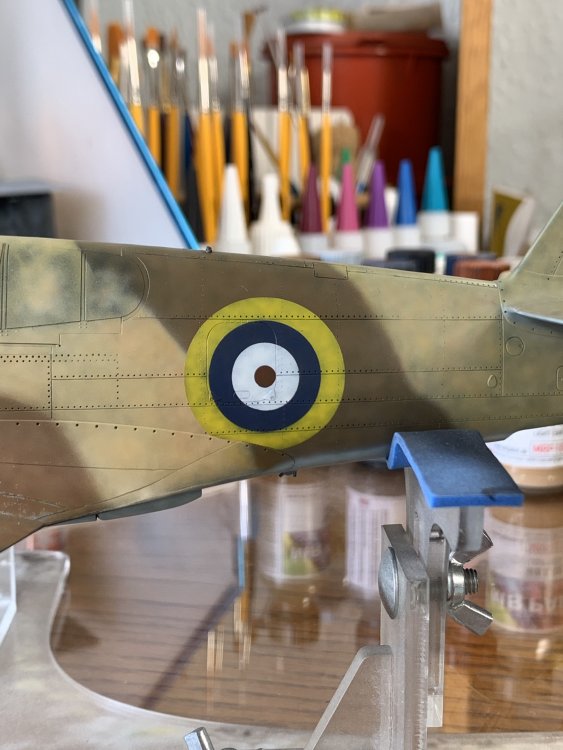
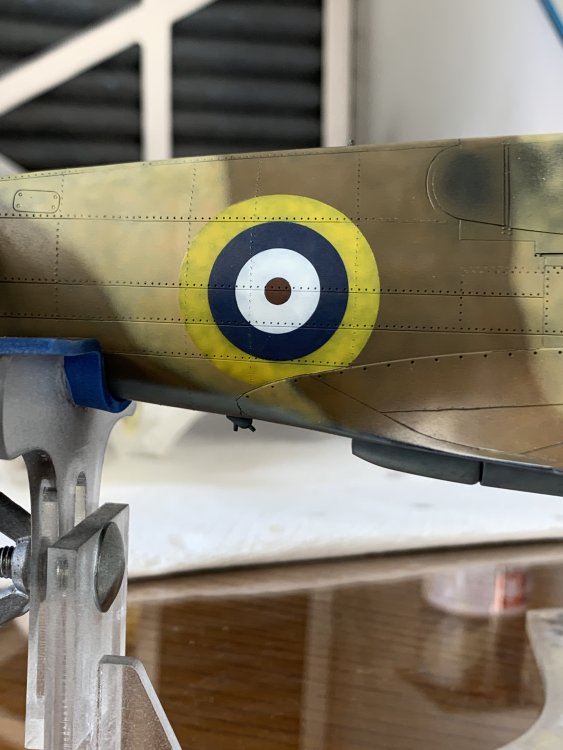
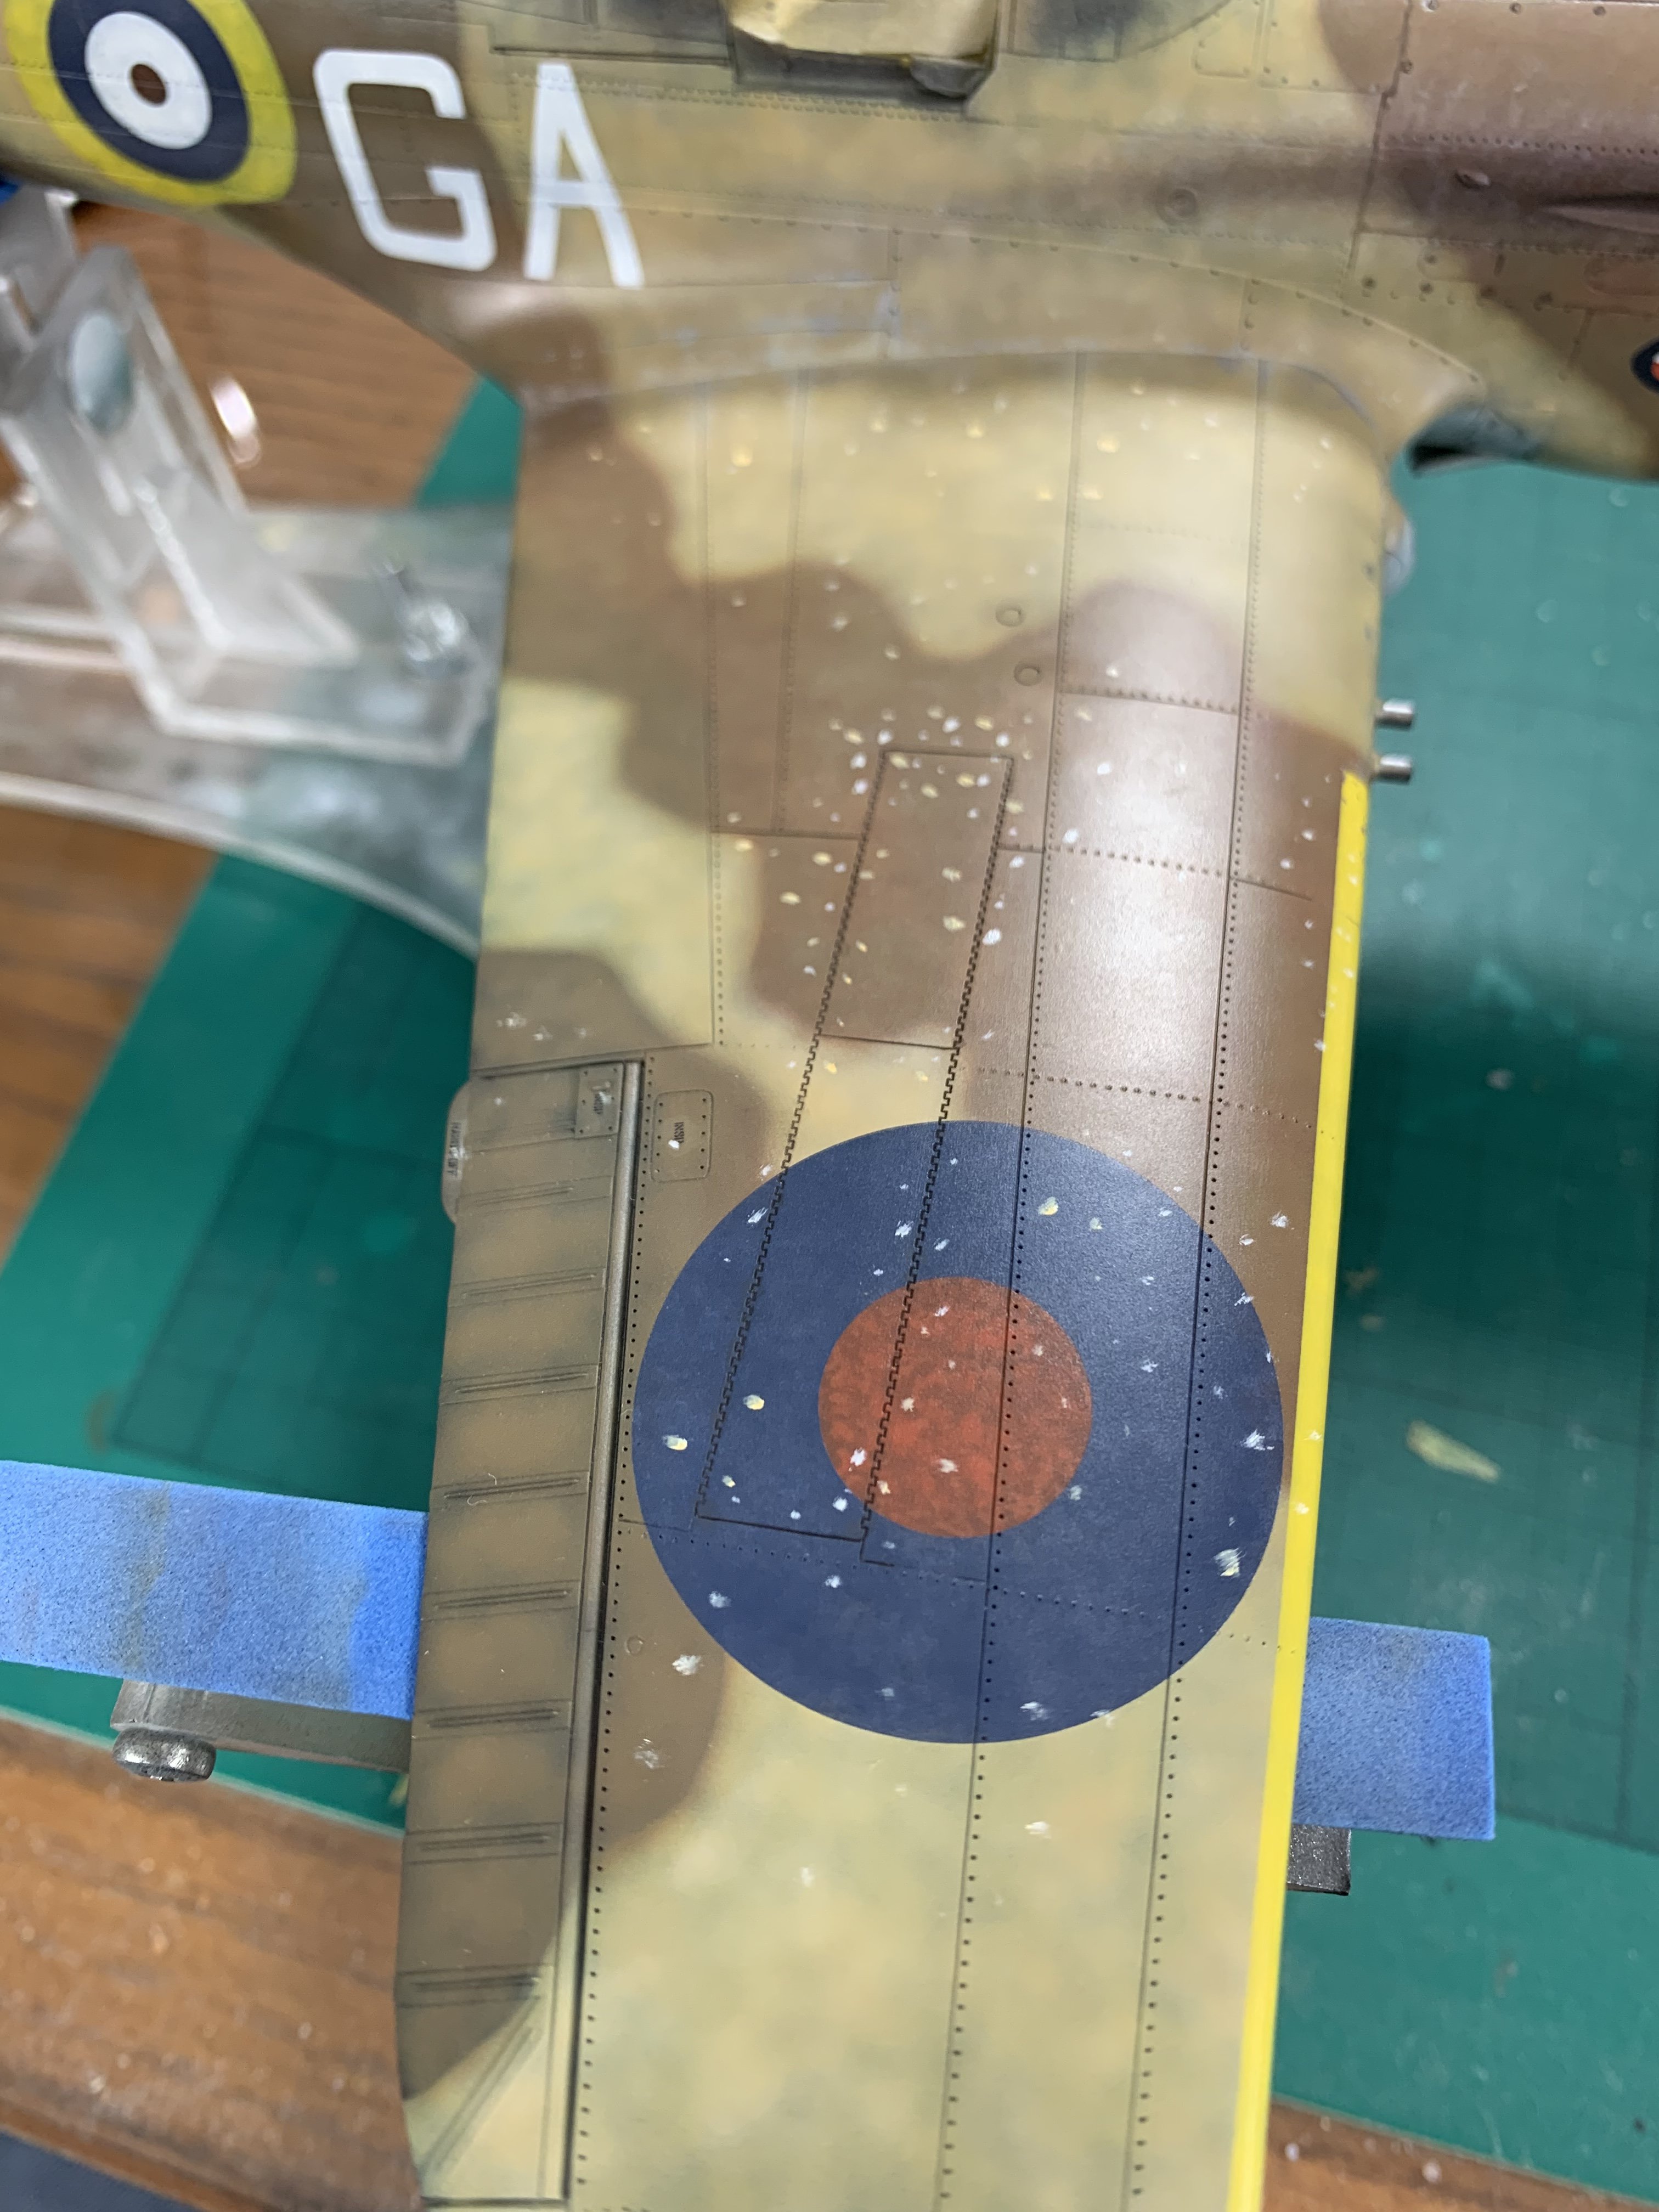
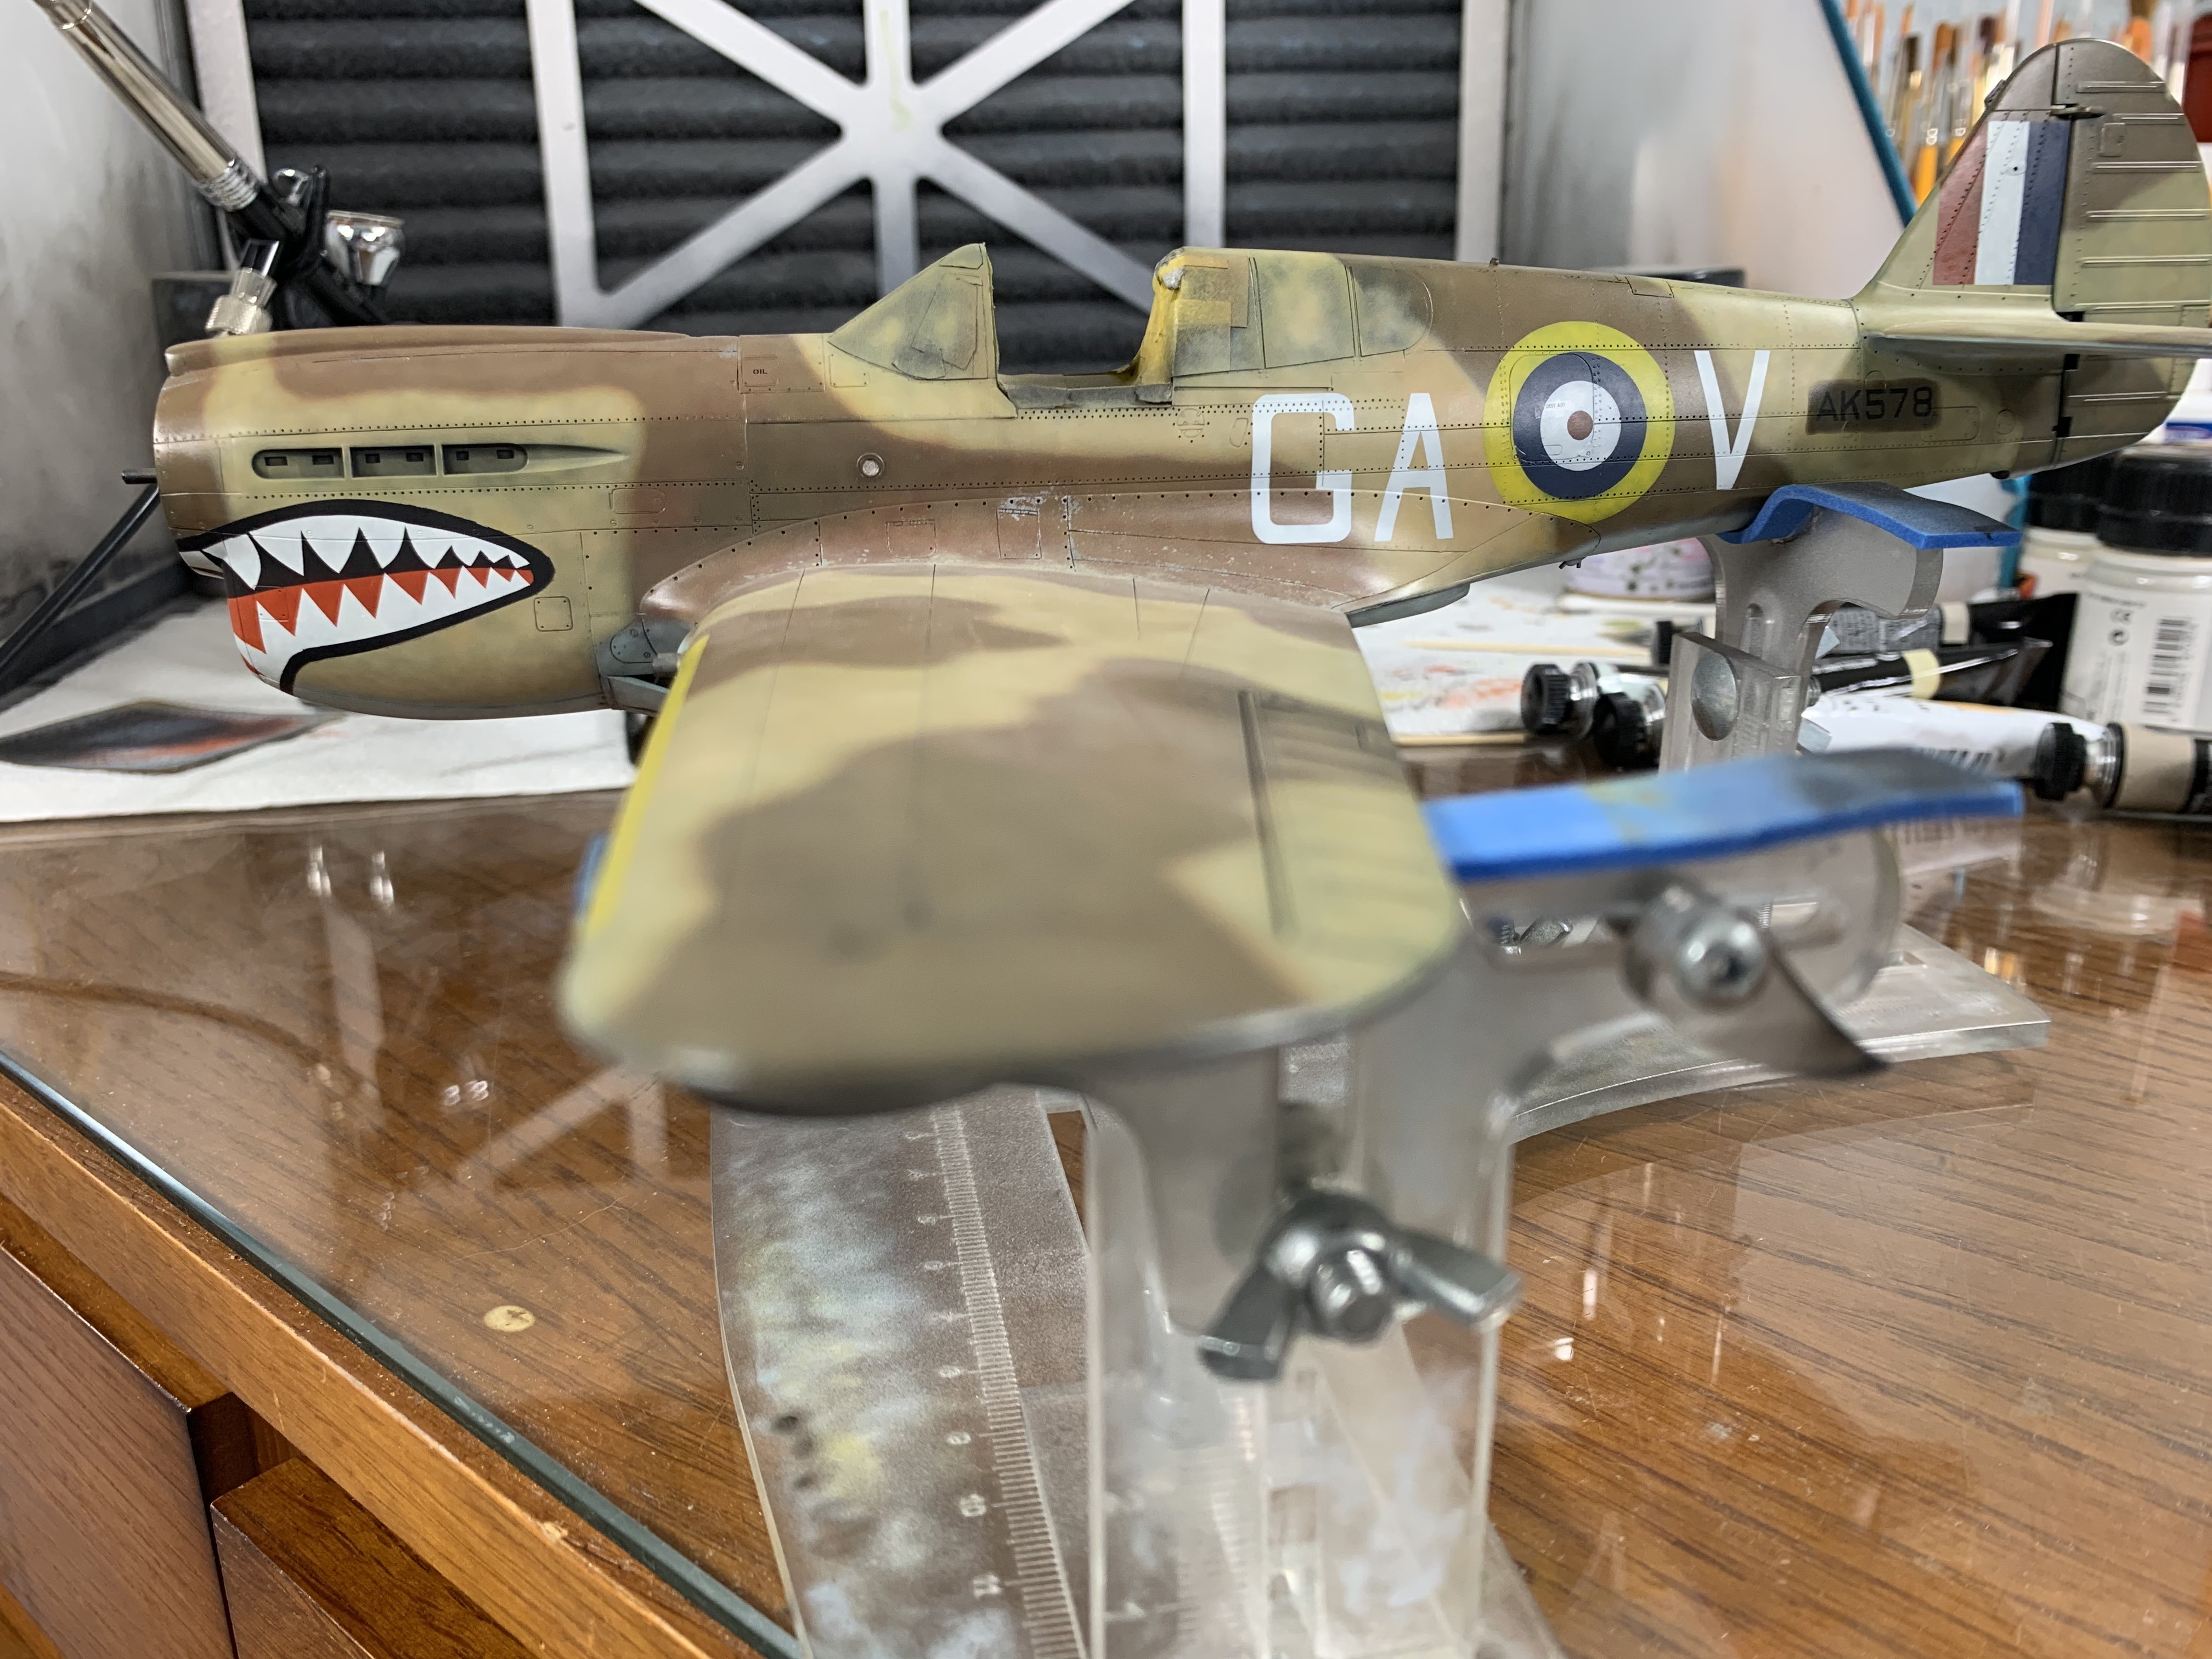
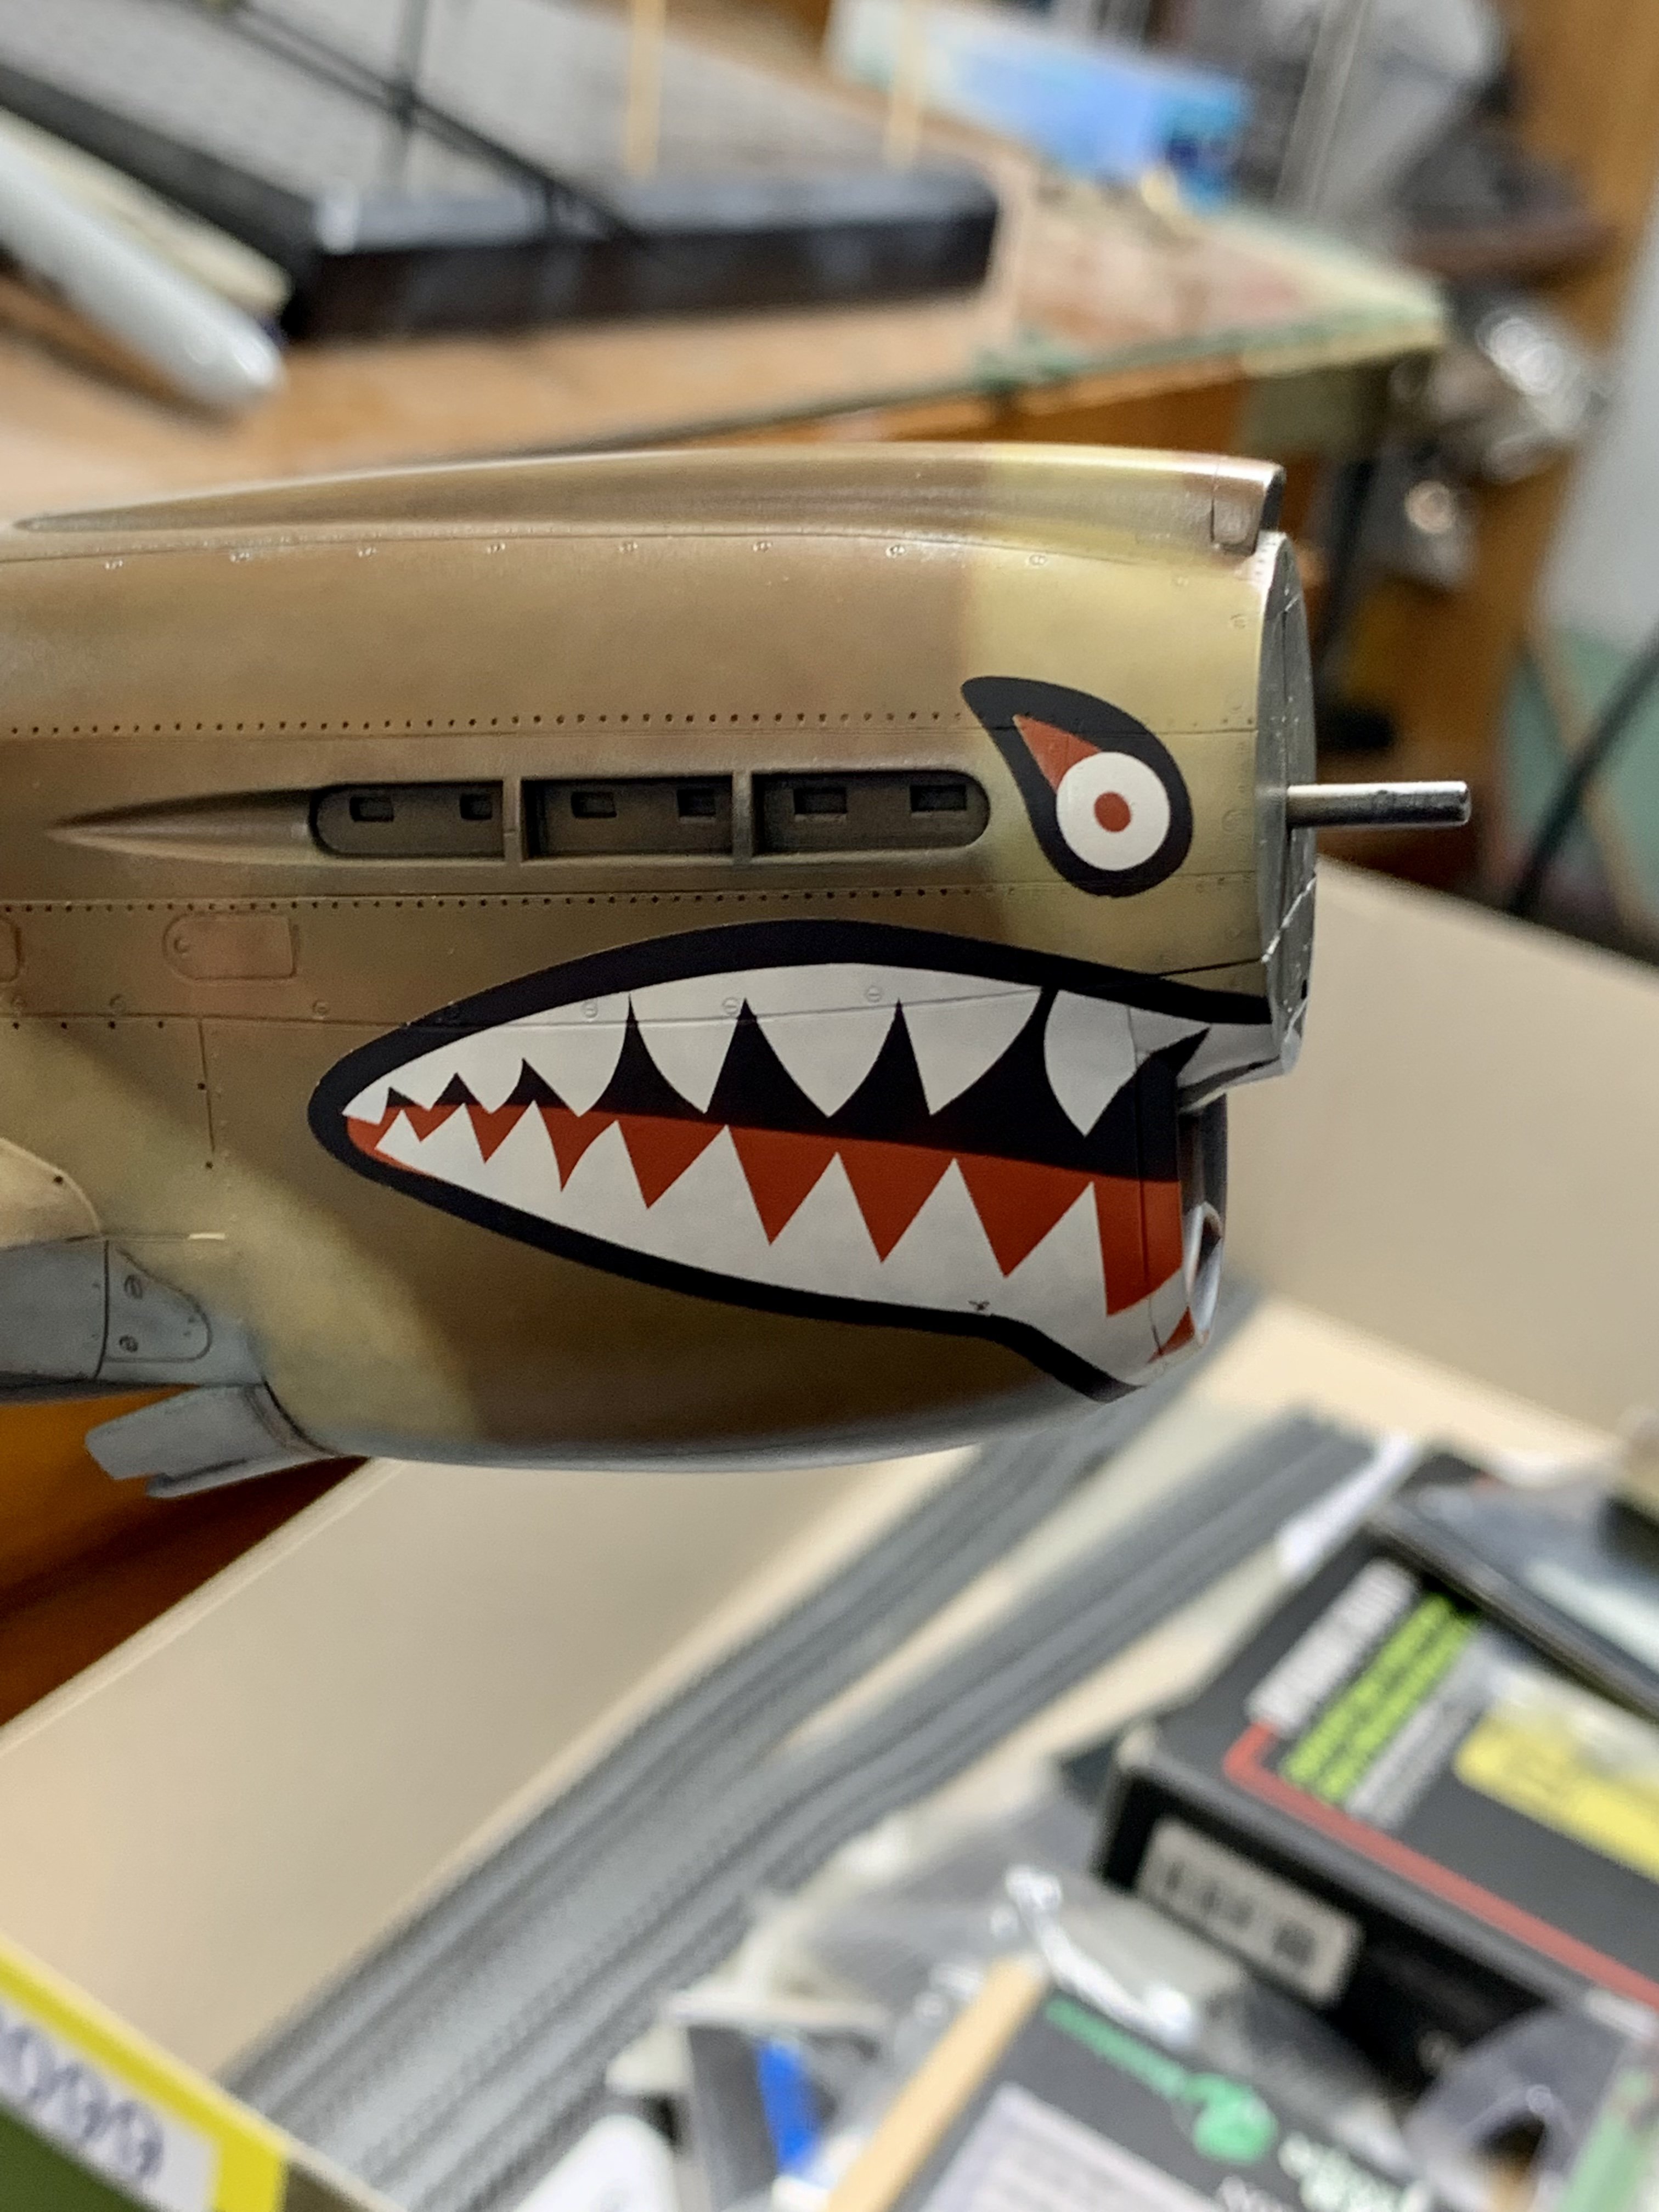
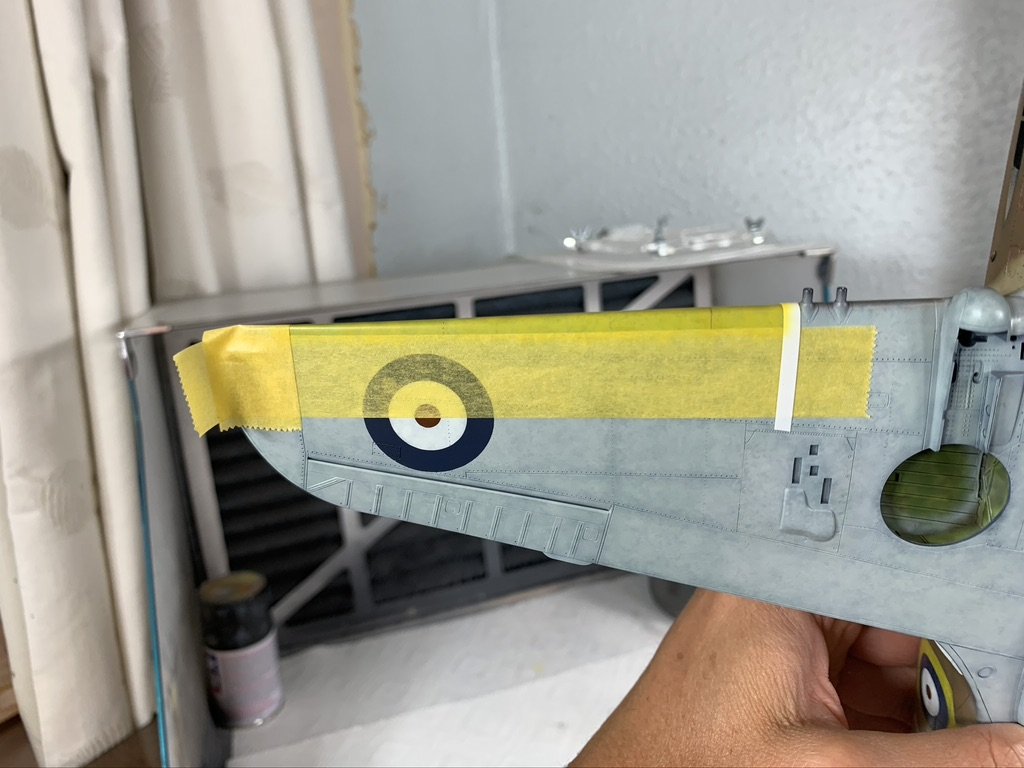
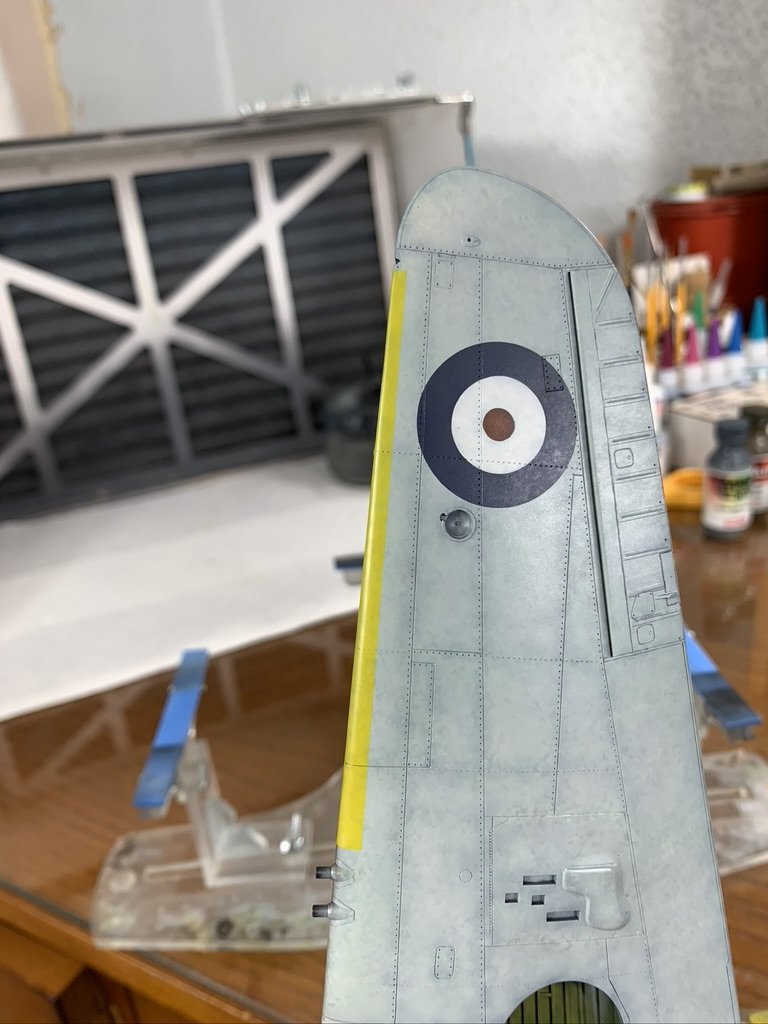
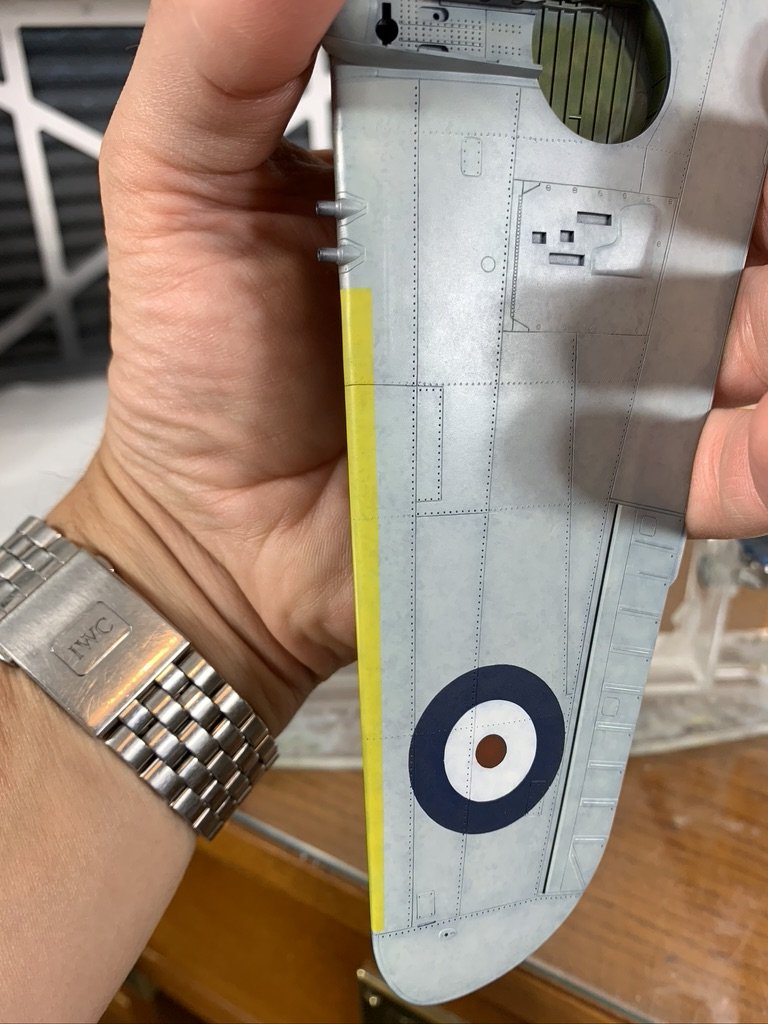
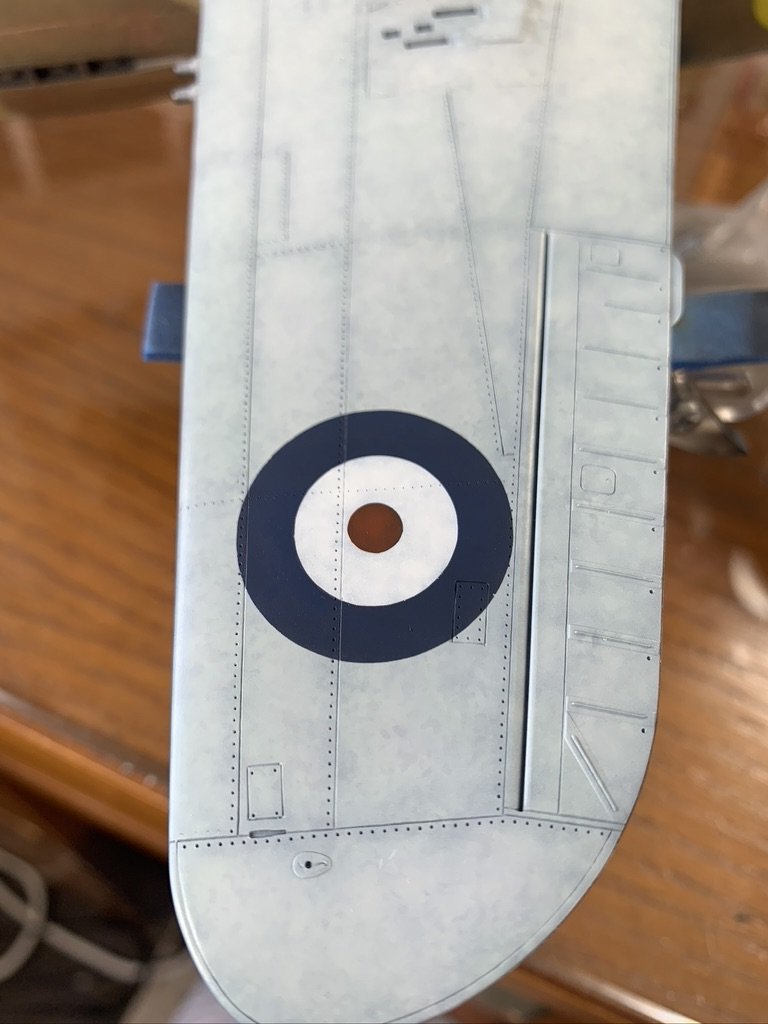
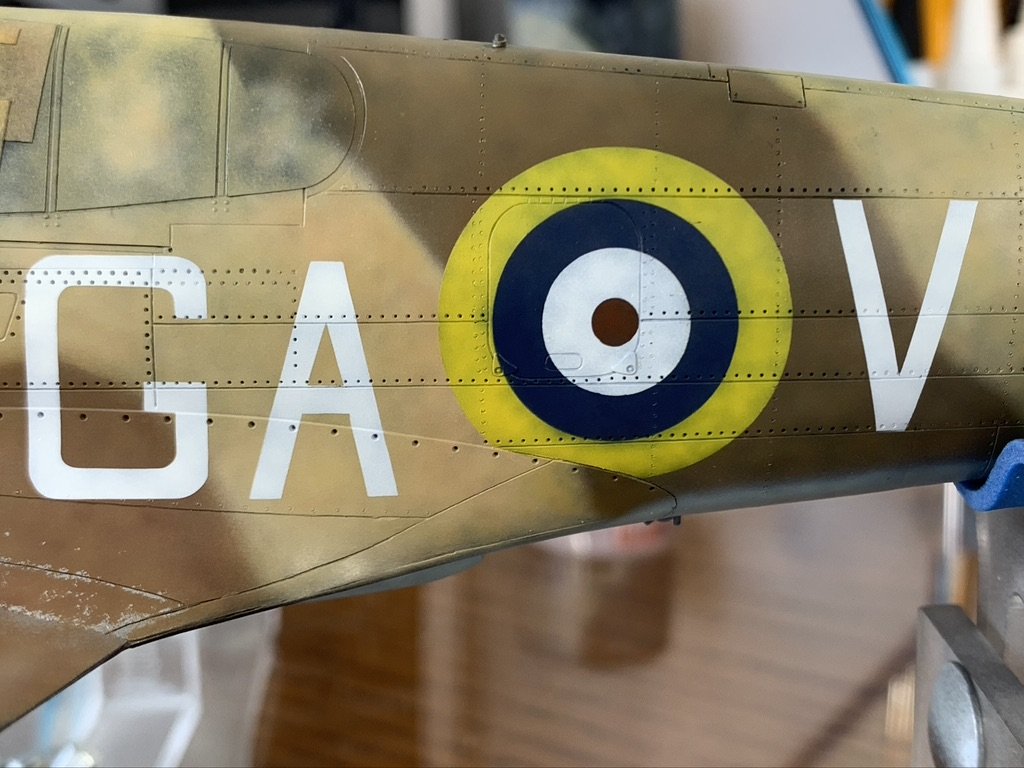
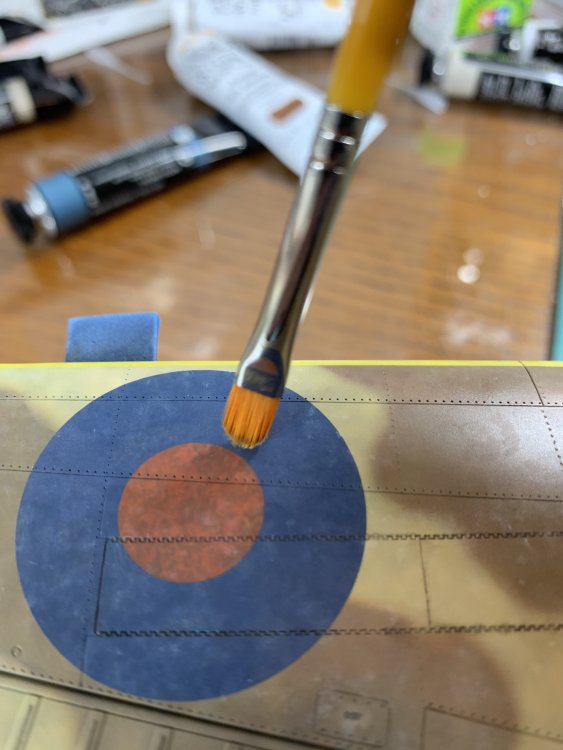
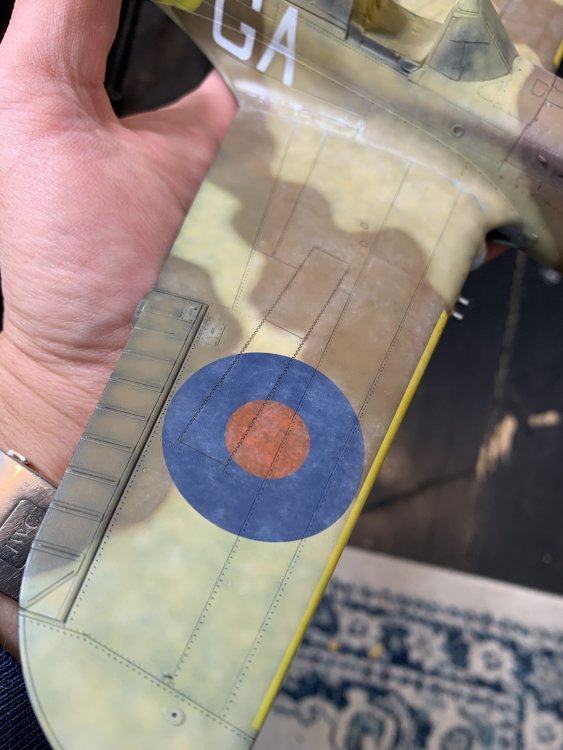
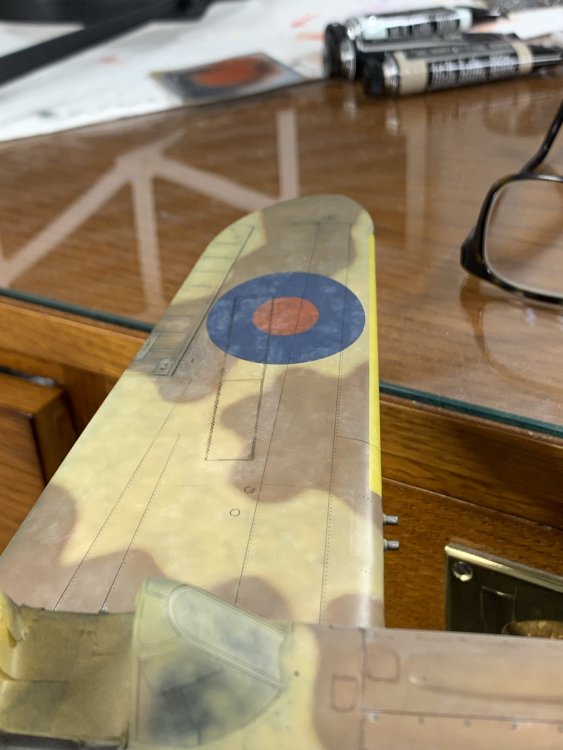
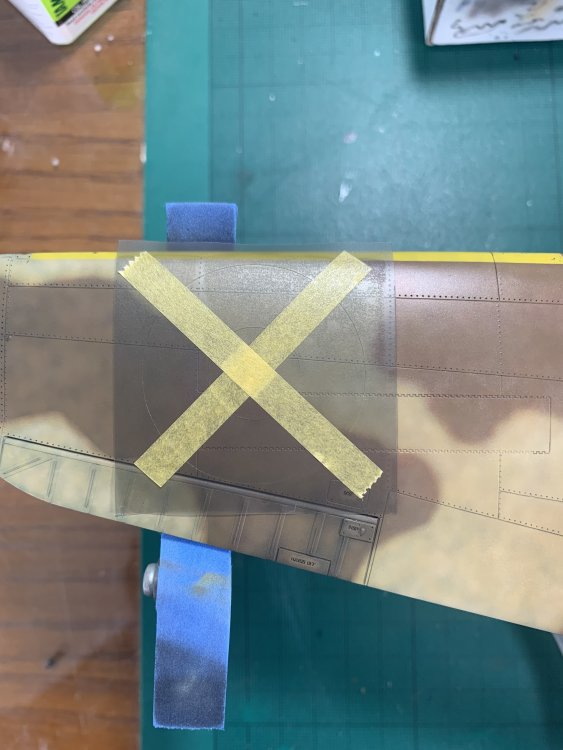
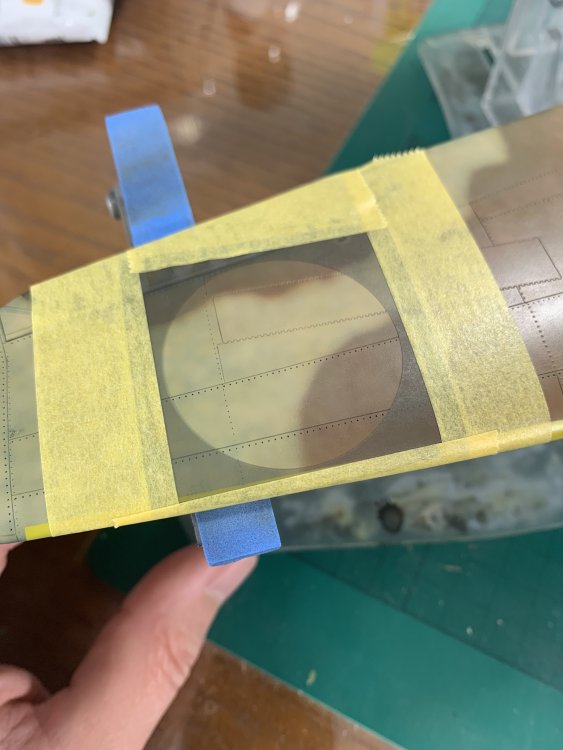
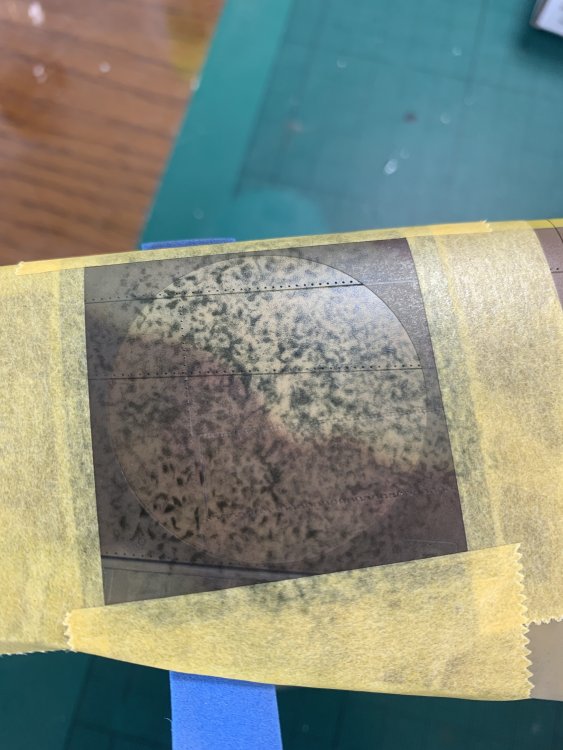
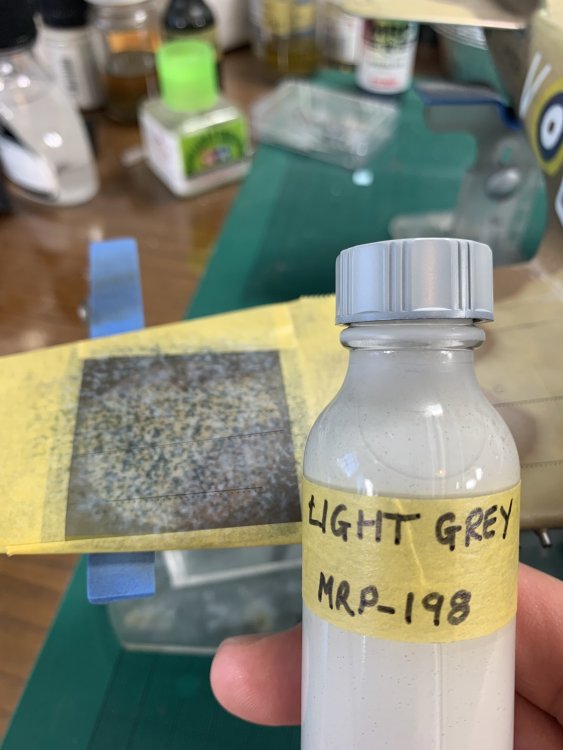
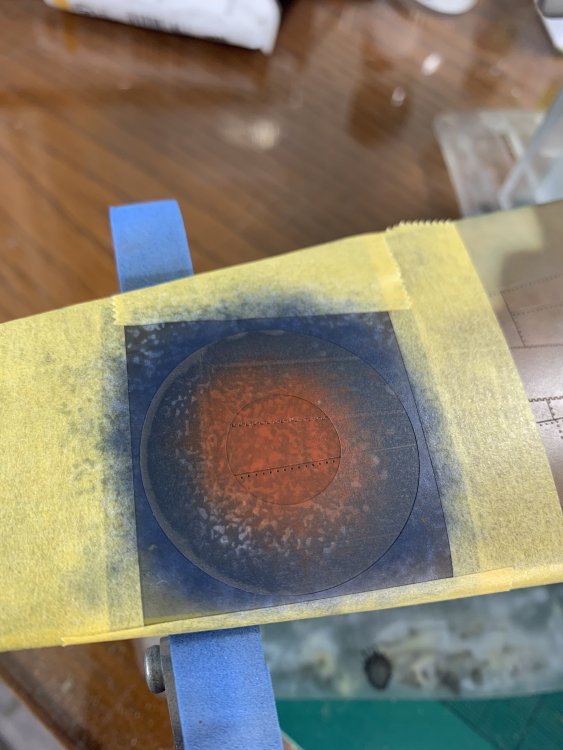
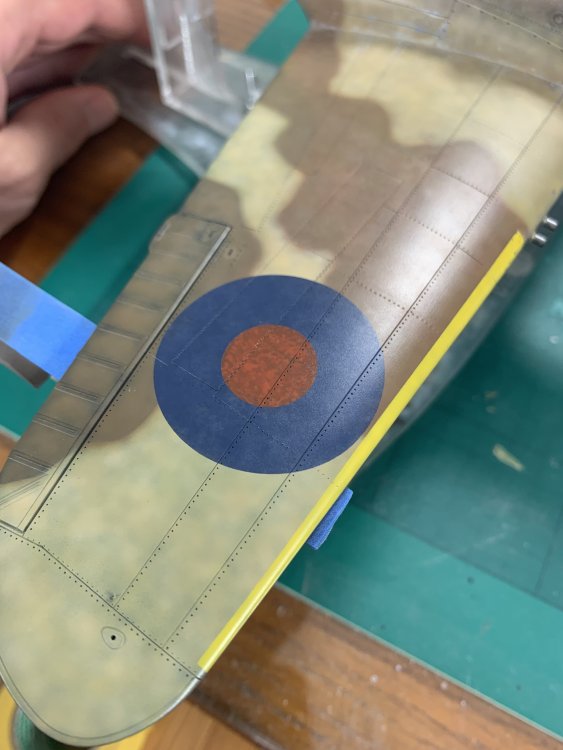
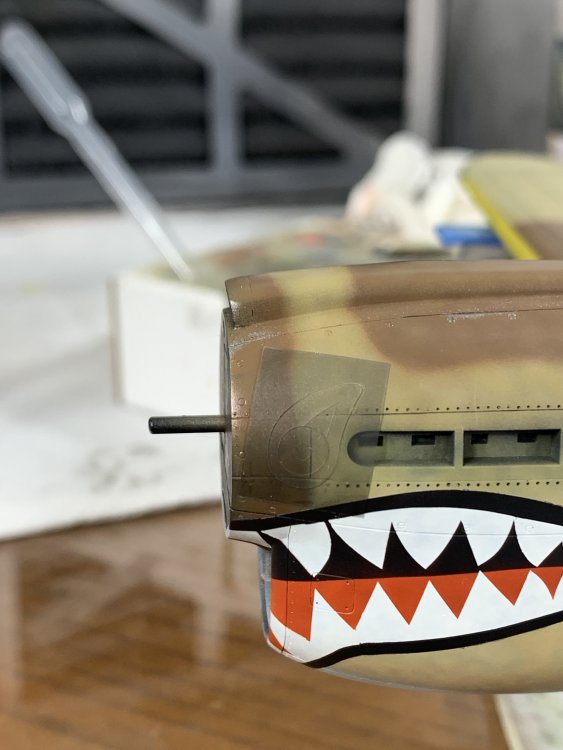
We have roundels! usual process… the black and light grey are not essential obviously but I would rather get depth through painting and then see what needs to be added with oils etc afterwards this was all done back to back to back - God bless MRP! I’ll semi- flat coat it once back at the bench which is likely early next week but I finally feel the end is in sight nick


-
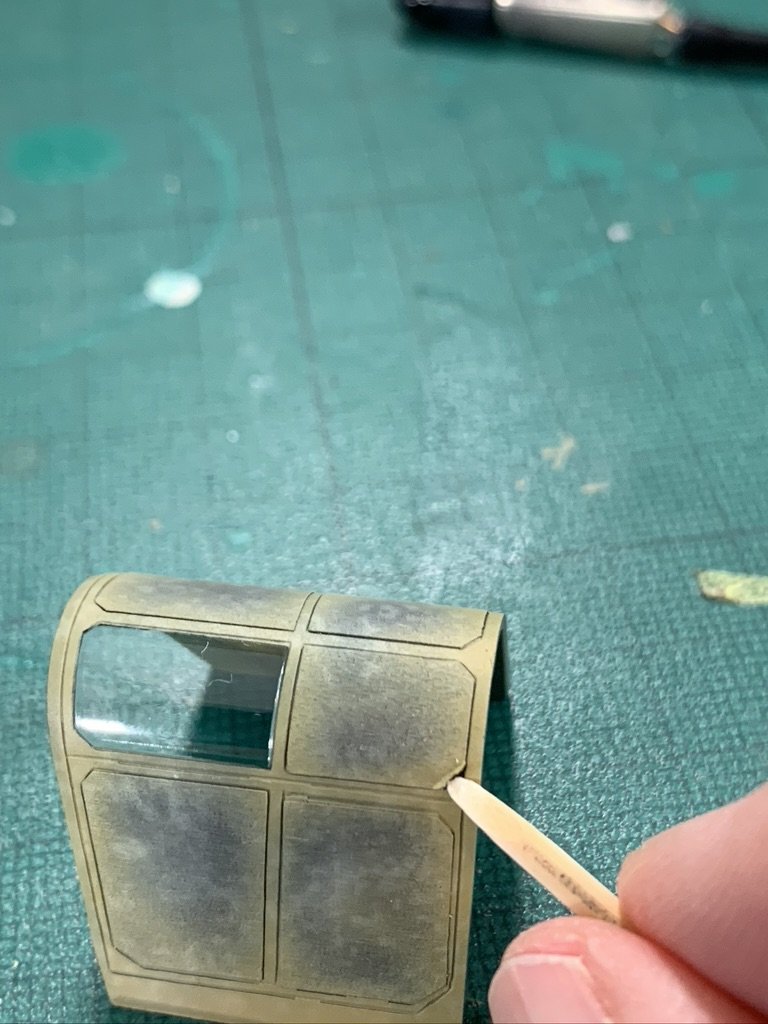
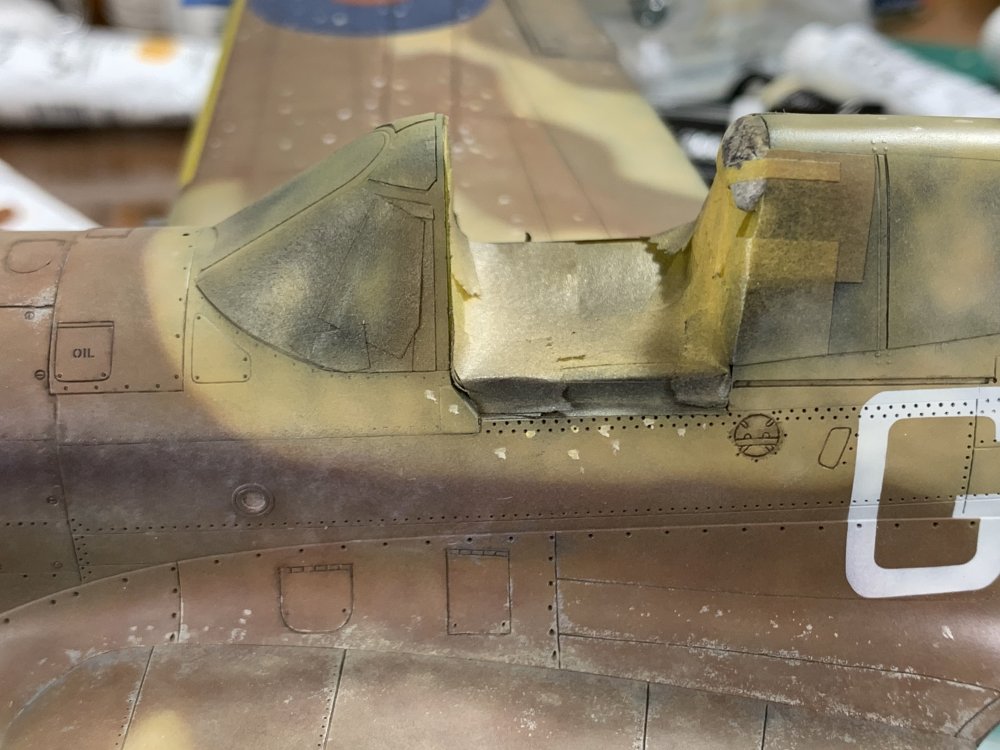
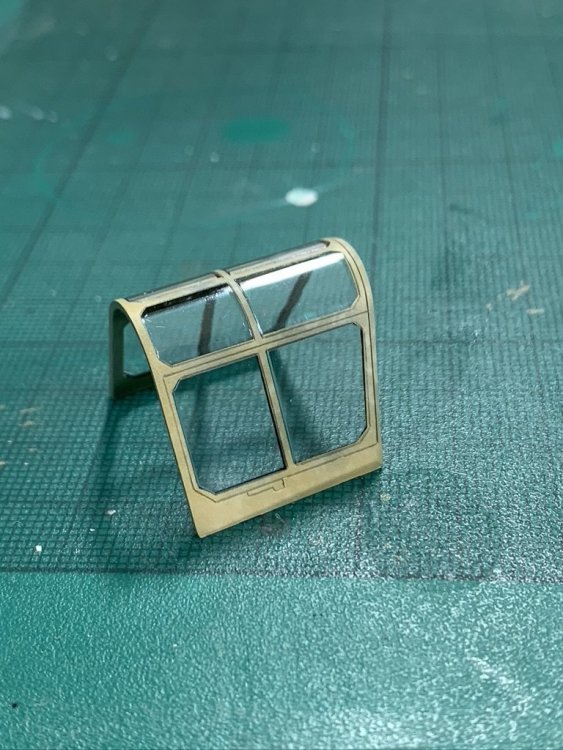
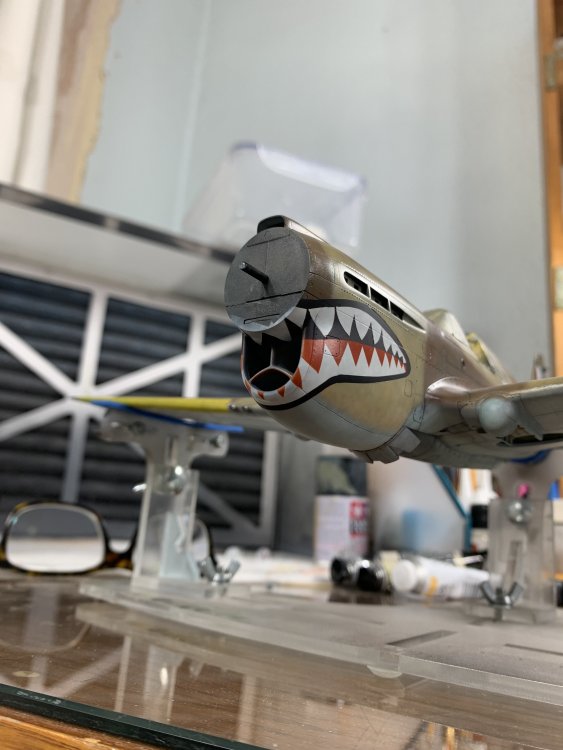
yes this was something i picked up in Will Pattison's series of YouTube vids on his P-40 both his and the above are the later fish tail exhausts rather than the round ones i have but i thought the same sorts of principles would apply the exhaust stain arc is a little different from what i have seen between Allison round exhausts, Allison fish tail and Merlin (fish tail) i am still not decided on what i will do with mine yet - probably add more light grey to tone down the dark brown, i'm not sure i did a little extra blending / fading of the lighter colours so this is where we are now - not a whole lot different when i compare before / after pics tbh i also sprayed final matt (MRP) over the main canopy frame and removed the Montex masks which had been on there for probably 3 months or so - i have no idea! masking inside is a pain and it still bugs me that many of Eduard's (and others') masks are not inside and out - if you get it right it does make a difference to the look a good tool to use when picking the masks off clear parts - or any paint work actually - is a tooth pick shaved to wedge with a scalpel blade quite pleased with the results note no Future on clear parts - just polished that's it for the time being hope to do the roundels later but am off for the weekend to Bath so may not update until after the weekend, we'll see cheers Nick

-
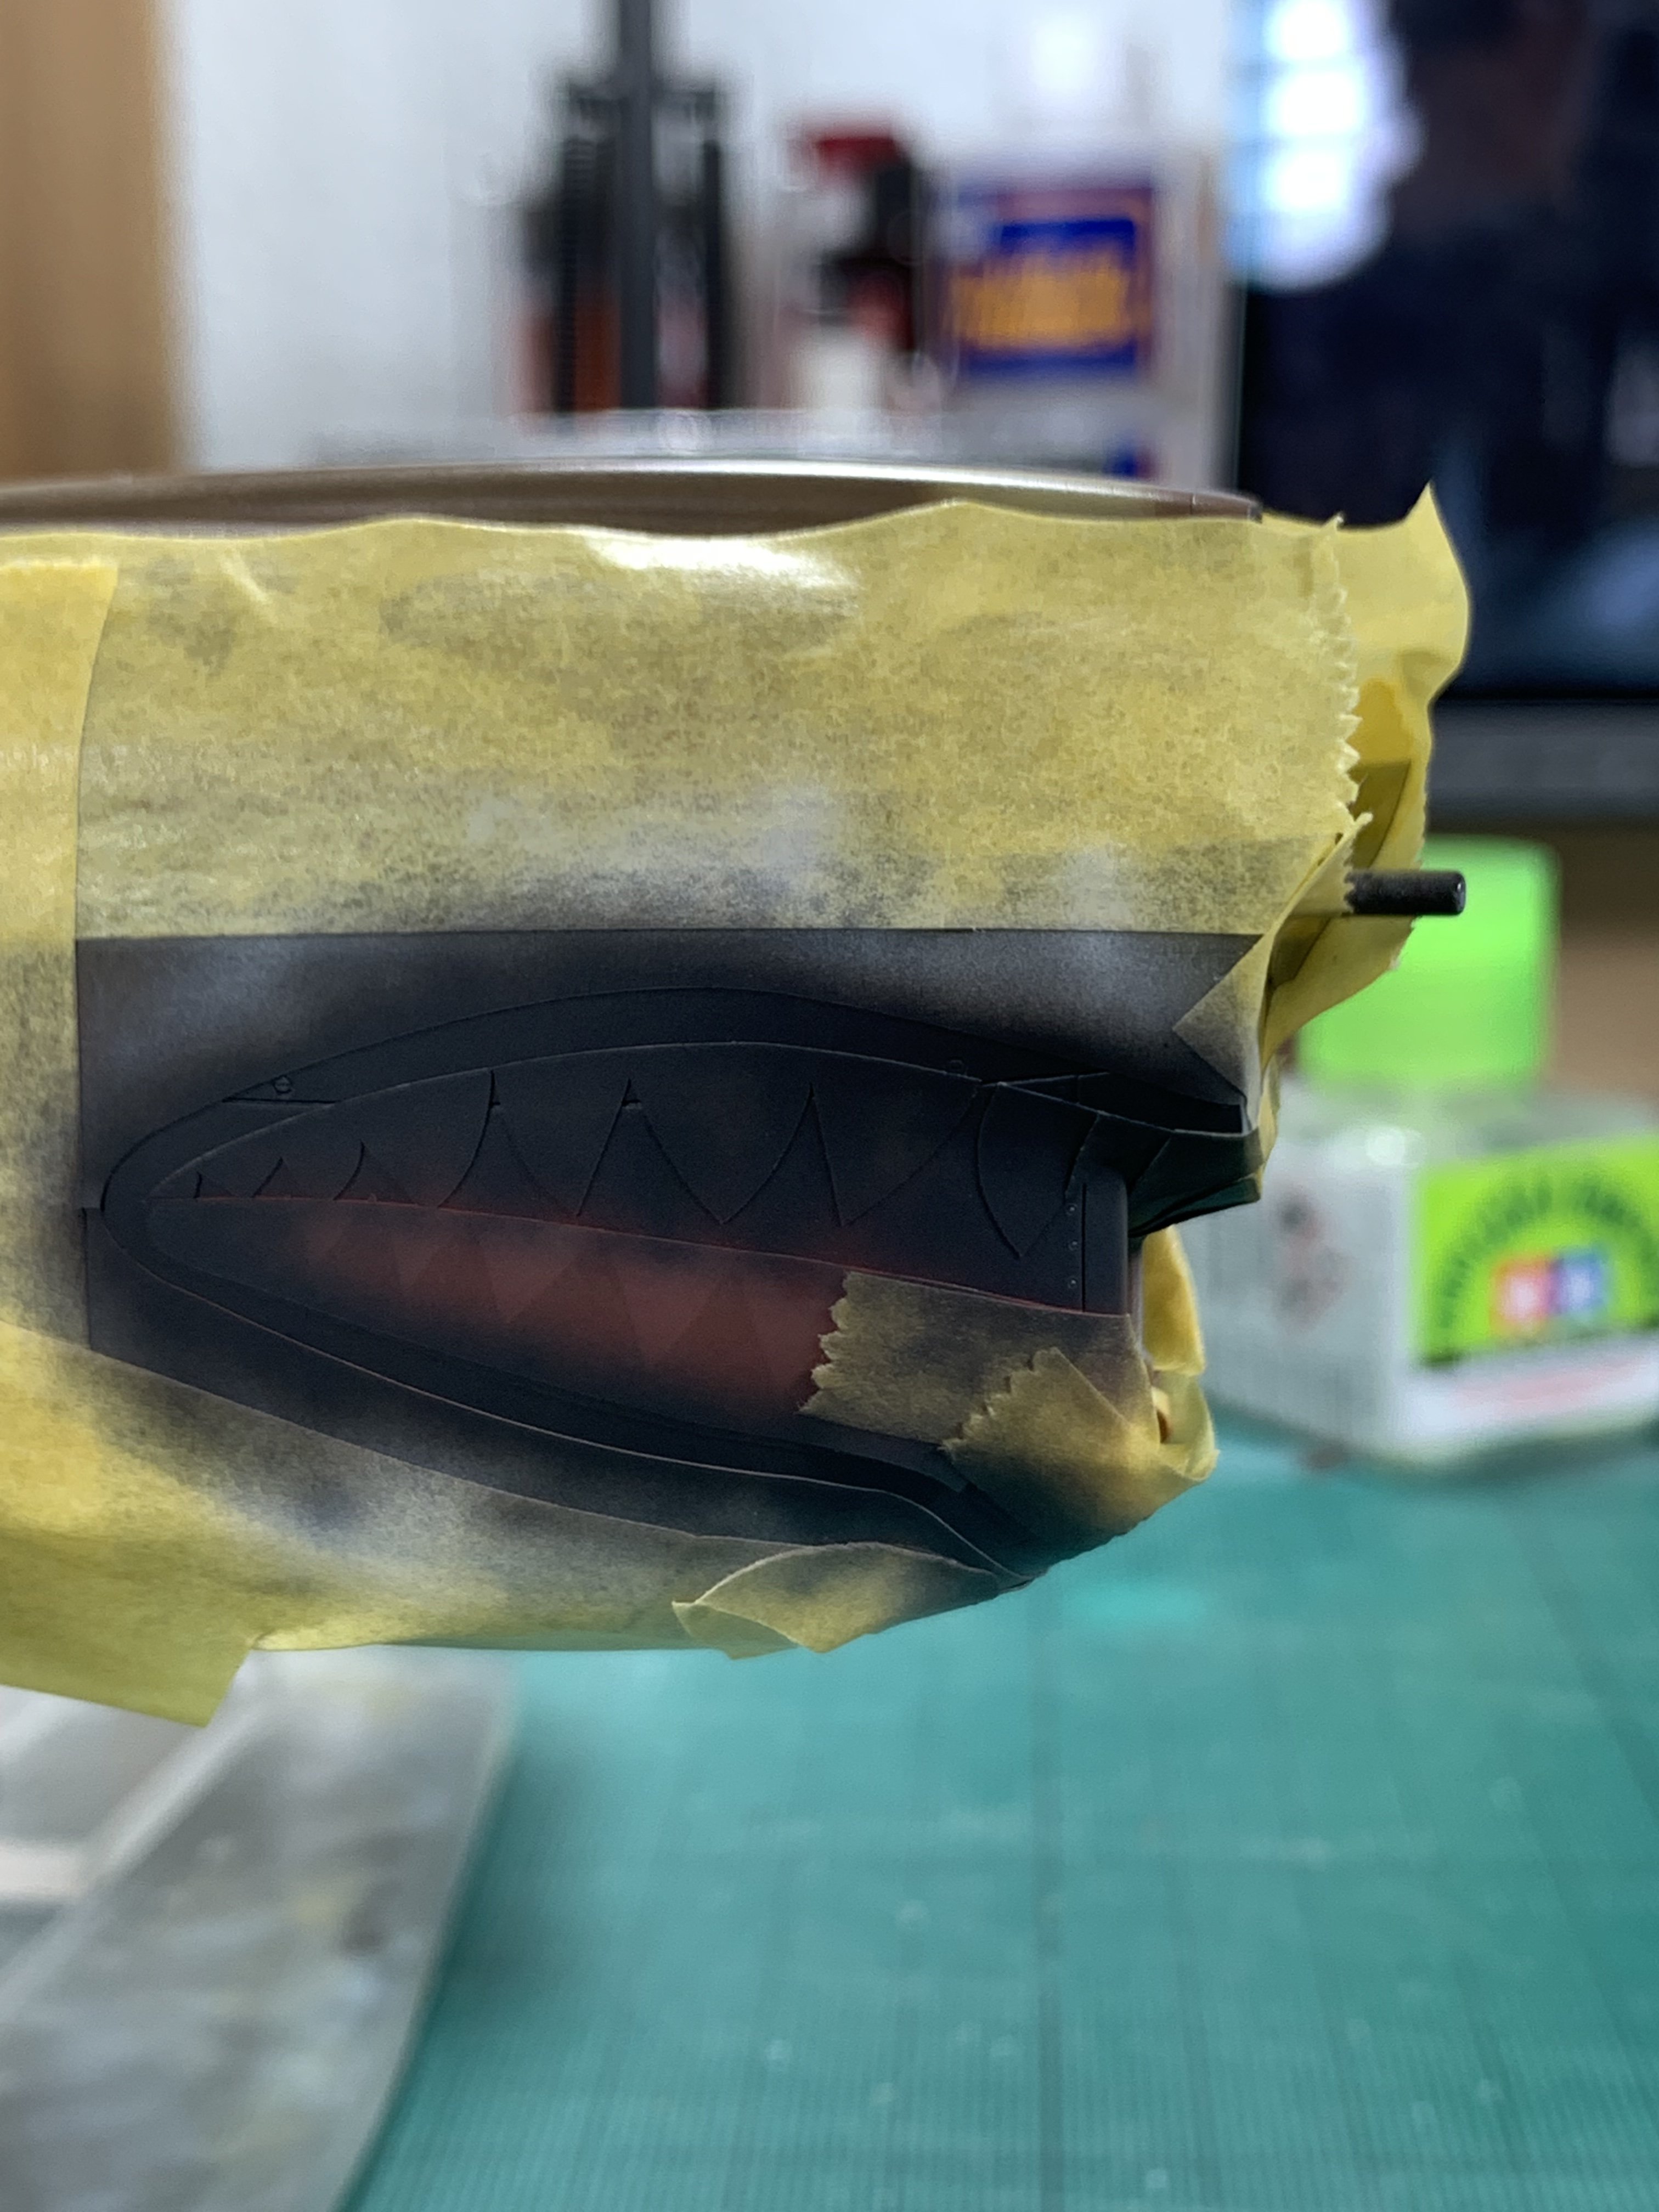
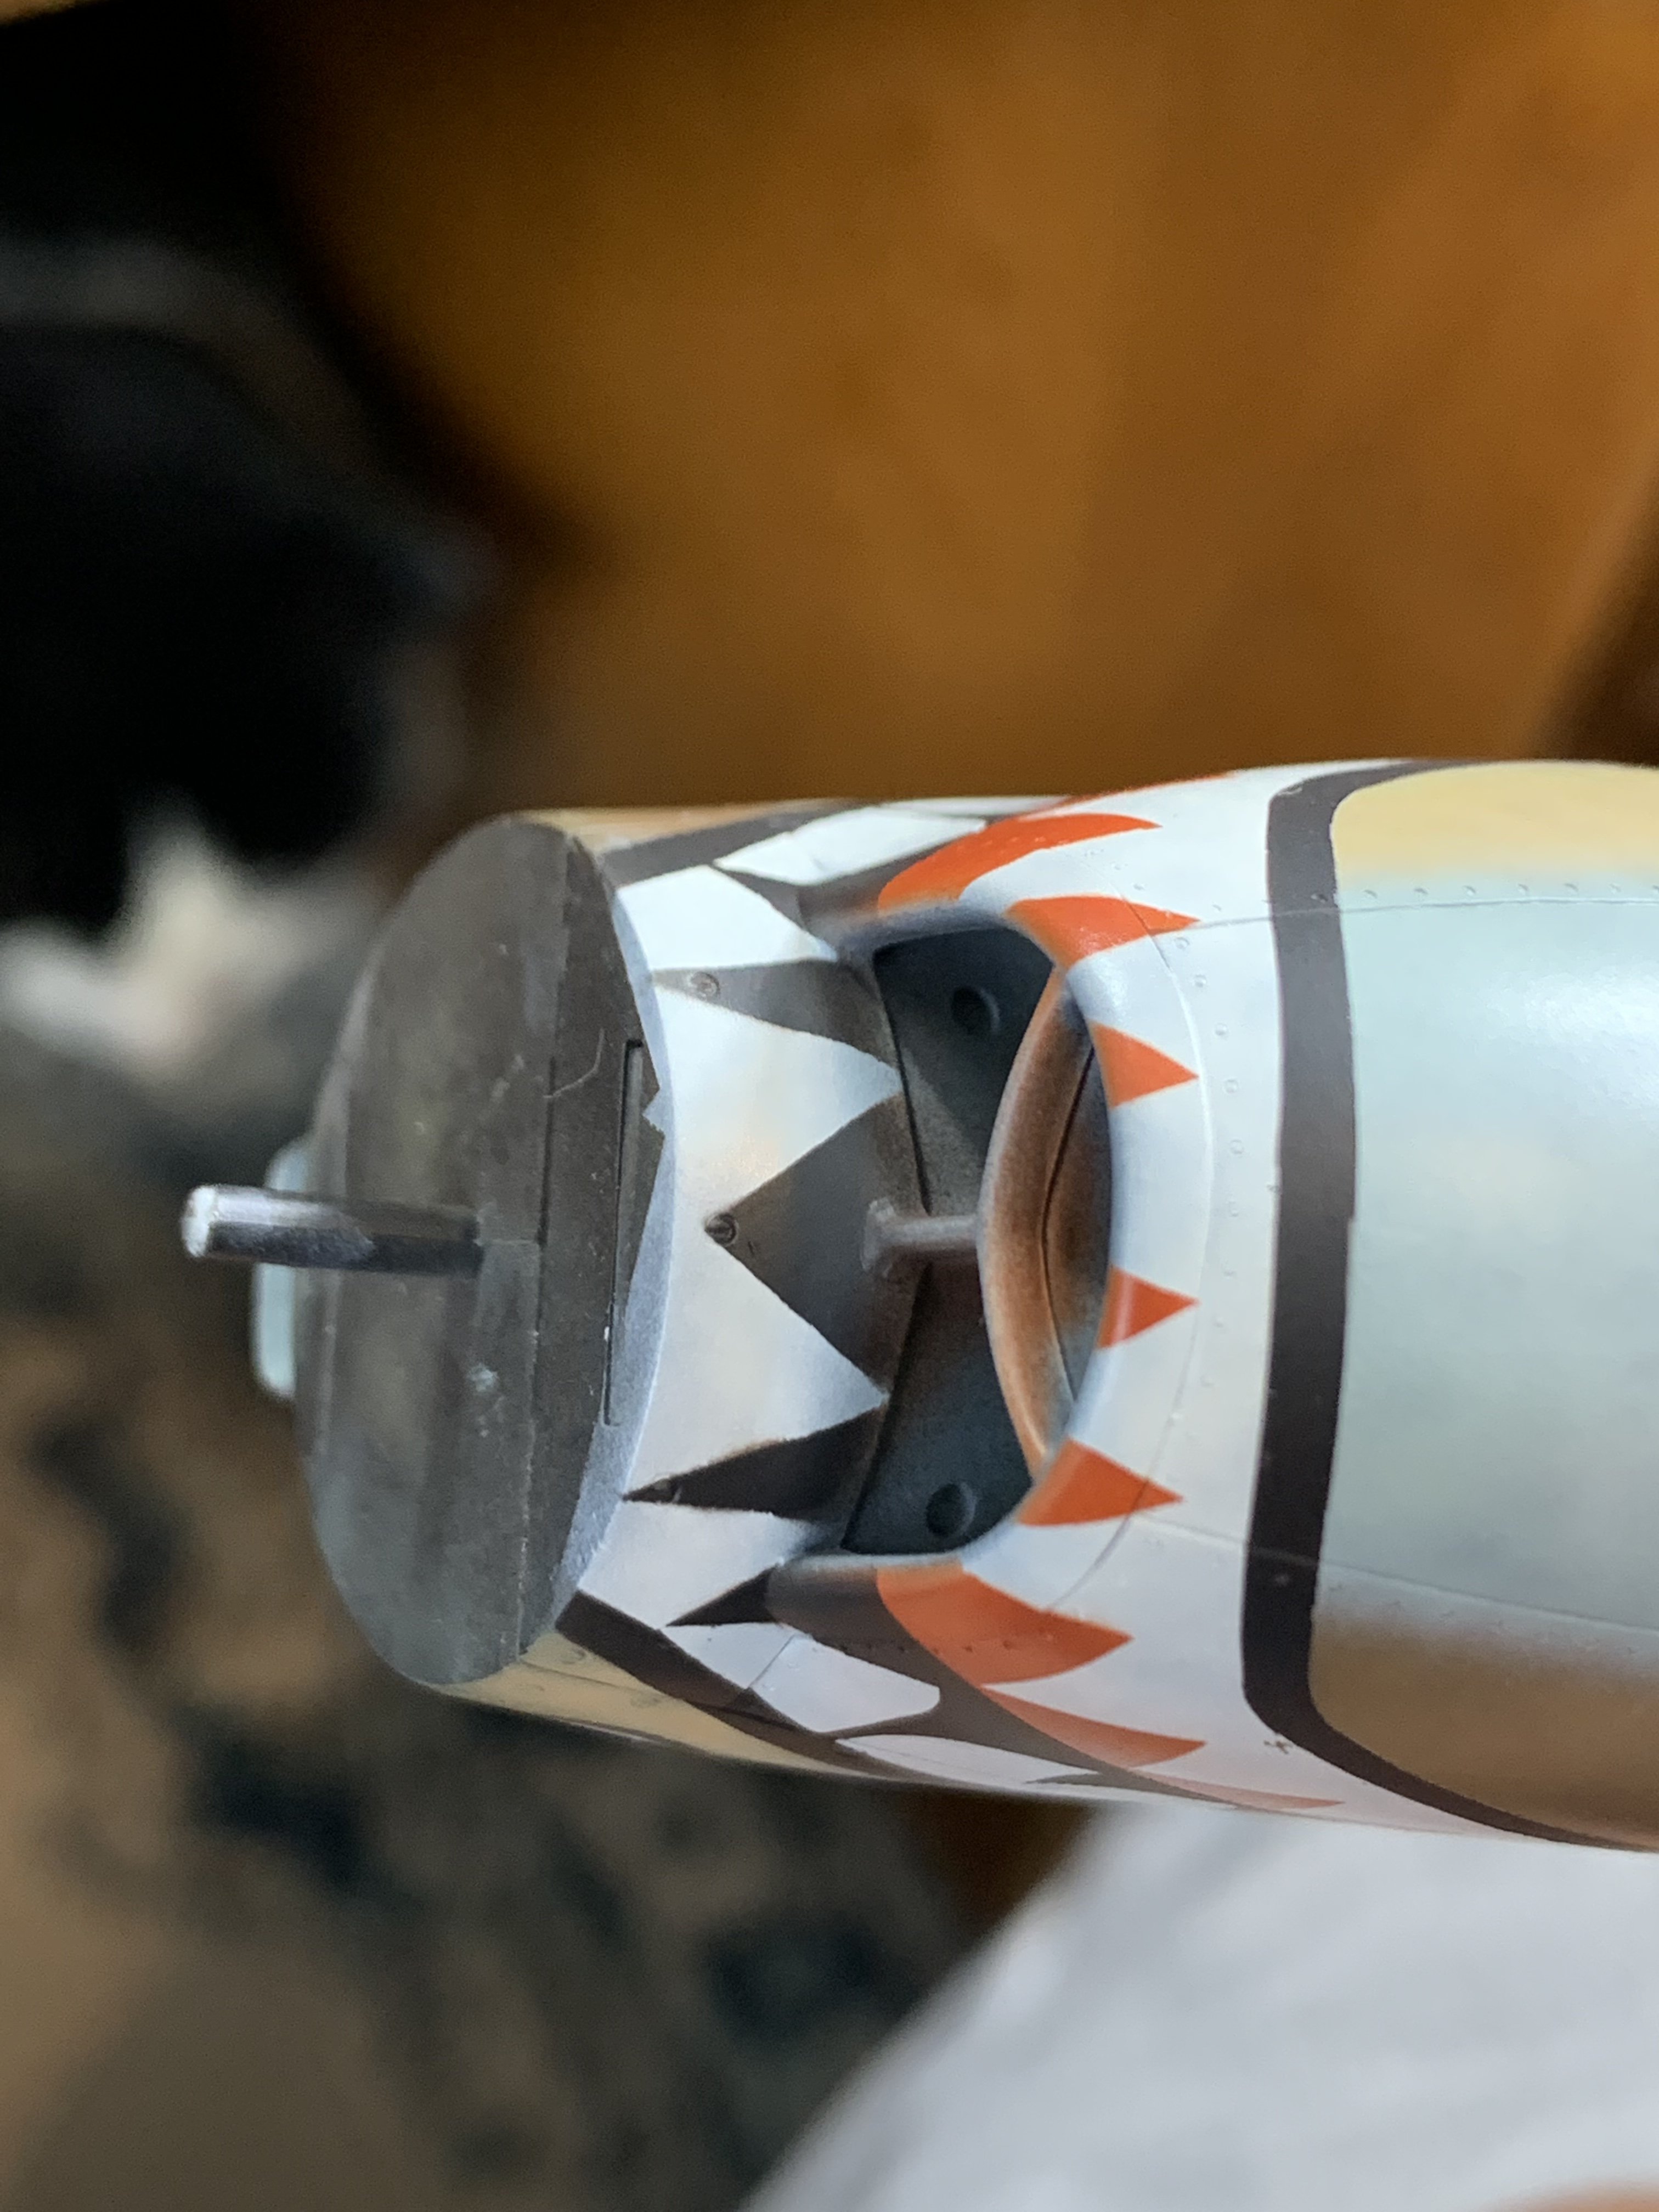
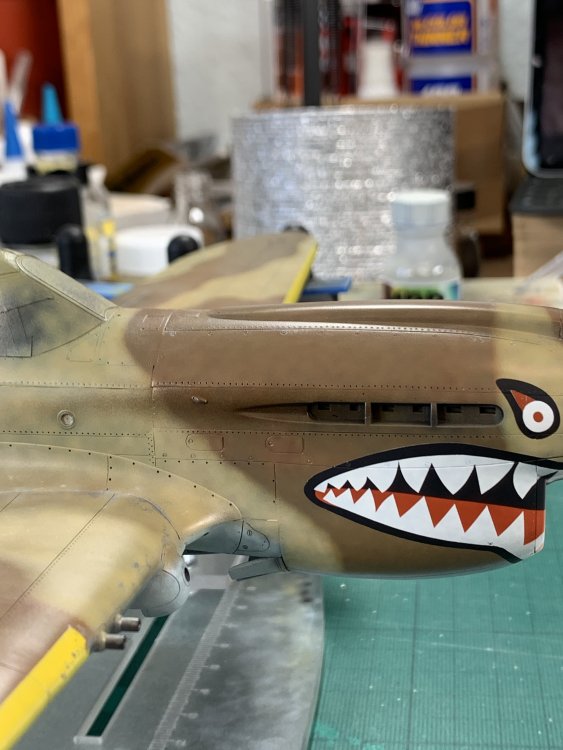
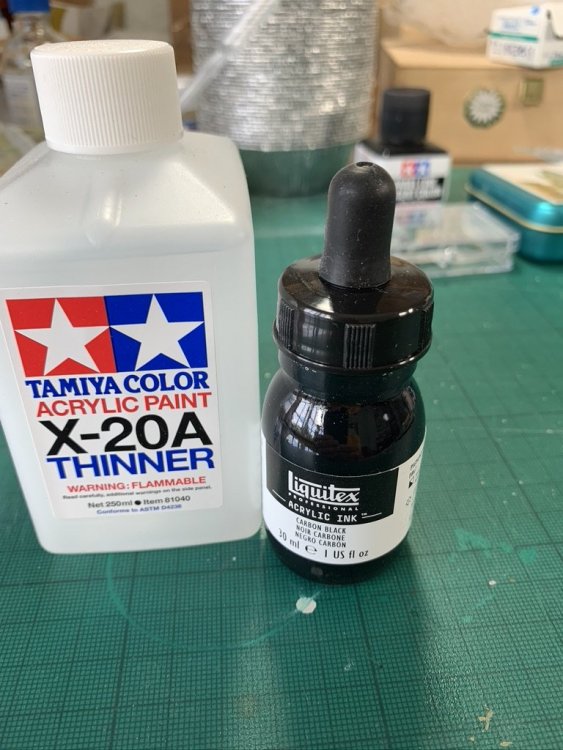
Exhaust stains today… I have in the PST used MRP smoke and exhaust but thought I would give the inks another whirl after only so-so results on the underside sprayed liquitex inks thinned heavily with x-20a these 2 pics show a mixture of carbon black and burnt umber Then some lighter grey but it just didn’t feel that good so left it for a couple of hours to have a think i sealed the inks with MRP semi matt then worked Abt 502 Faded White and Light Grey around the edges dabbed on almost ‘neat’ then worked in with a flat brush which is dipped in Winsor & Newton Sans Odor but then dabbed almost 100% dry quite pleased with this but I will sleep on it and see what it looks like in the morning it looks a little rough in these pics, but to the naked eye it seems to be a bit more natural / blended anyway, nothing is sealed so the beauty of oils is i can add more, fade some out etc if i am not happy when reviewing tomorrow i also think that the main weathering of the cowling, fuselage sides and finishing the wing root weathering will also help bring everything together at least that is the plan! also added some of these oils to the ends of the exhausts


-
RCAF Liberator GR Mk VI
nmayhew replied to BlrwestSiR's topic in LSM 1/35 and Larger Work In Progress
Interesting project. Wow the quality of that profi aftermarket part is really sh*t! what replacement turrets are those? any pictures of the aircraft you are making? cheers nick -
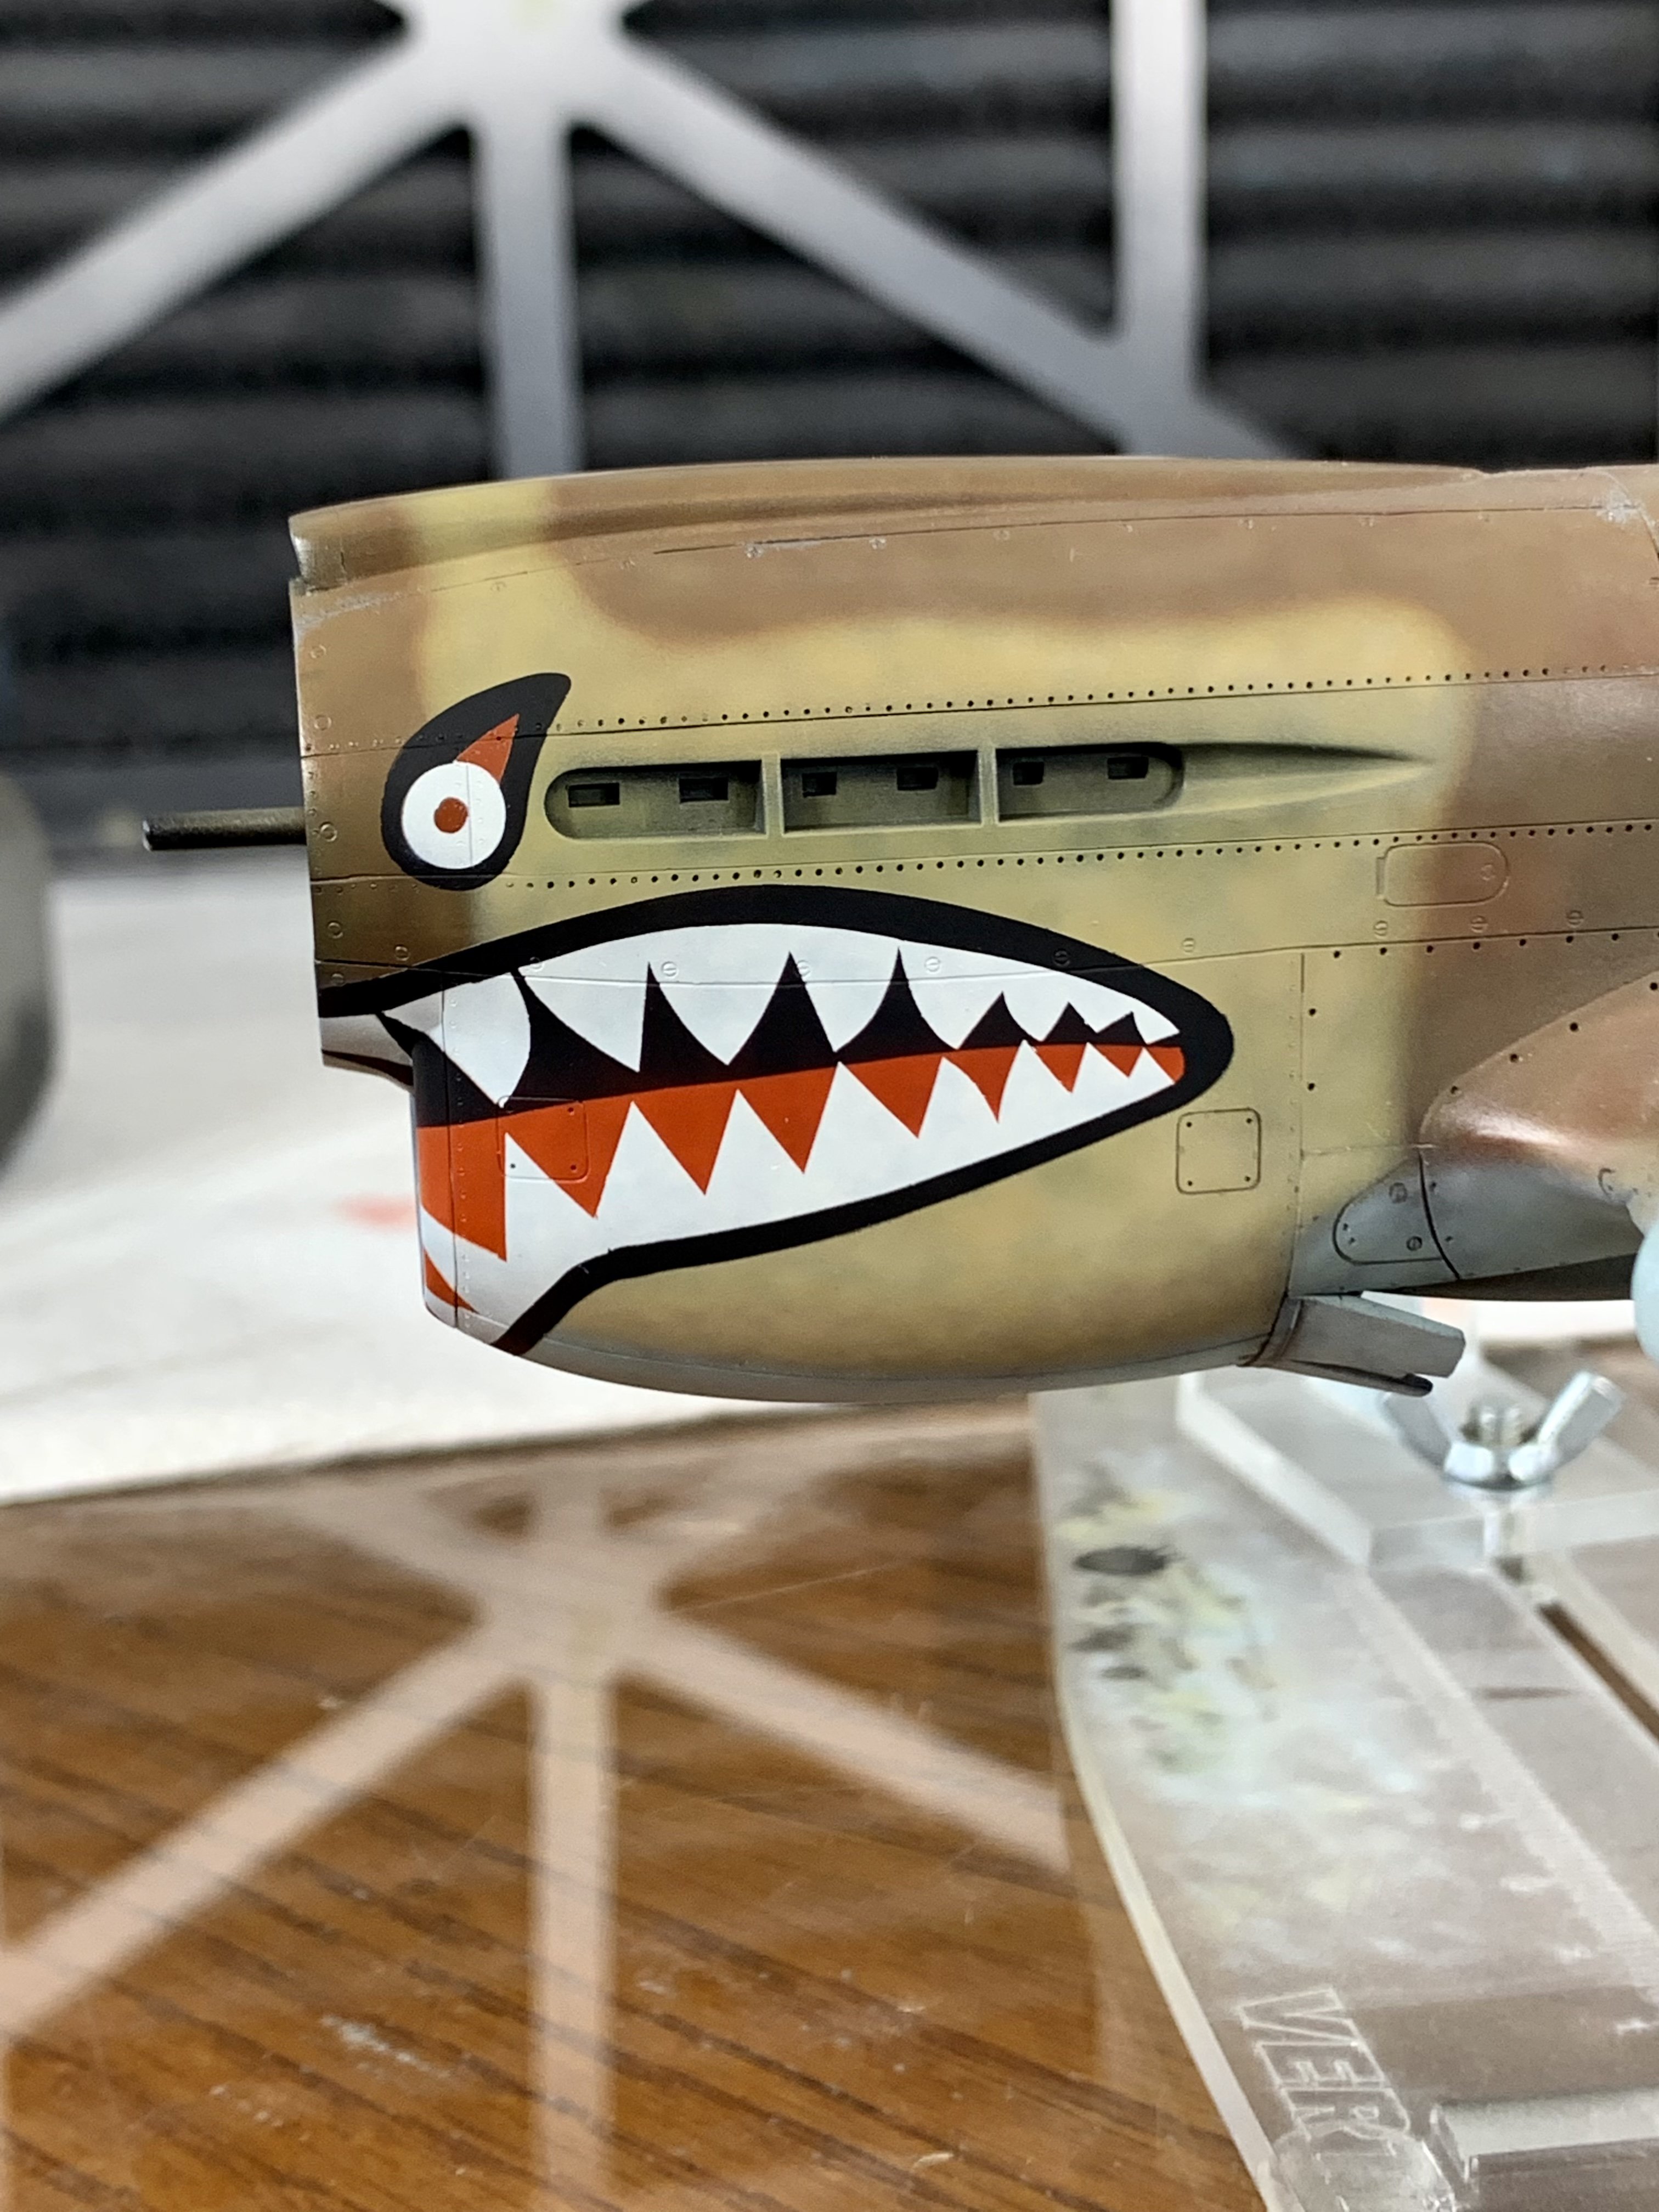
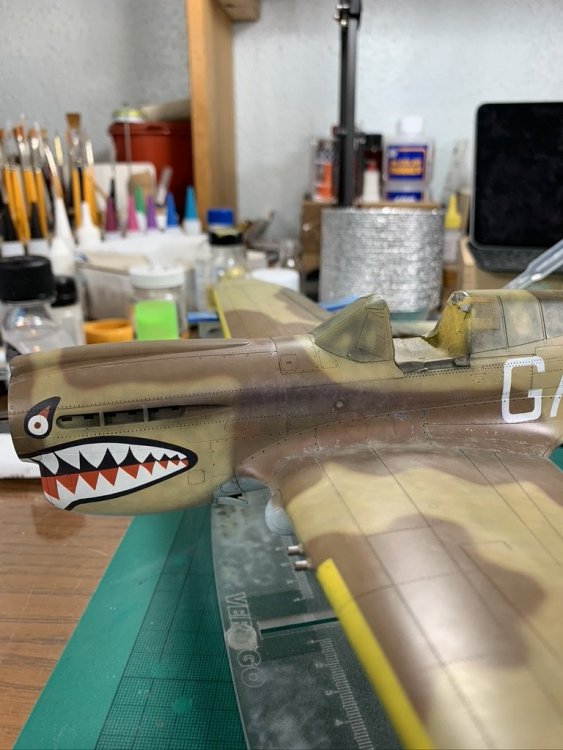
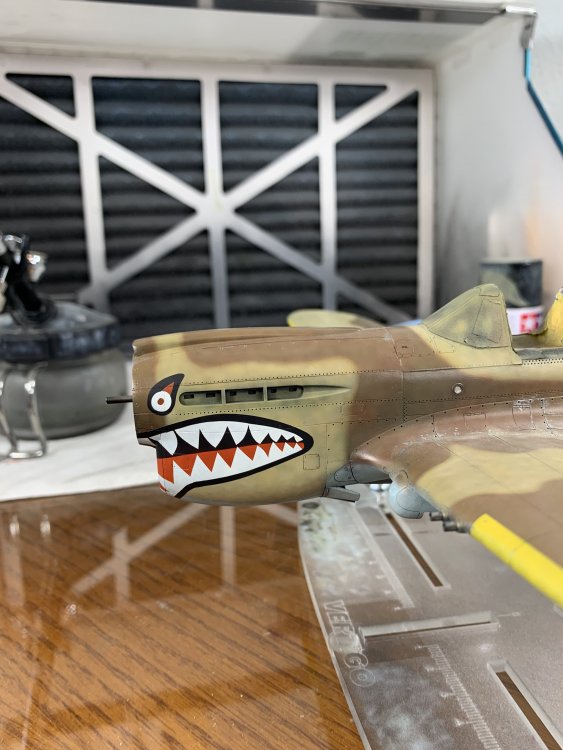
and then the eyes…whole mask transferred this time, then black surround sprayed and replaced, red bits sprayed and replaced, and finally the whites and there we are - finally!!


-
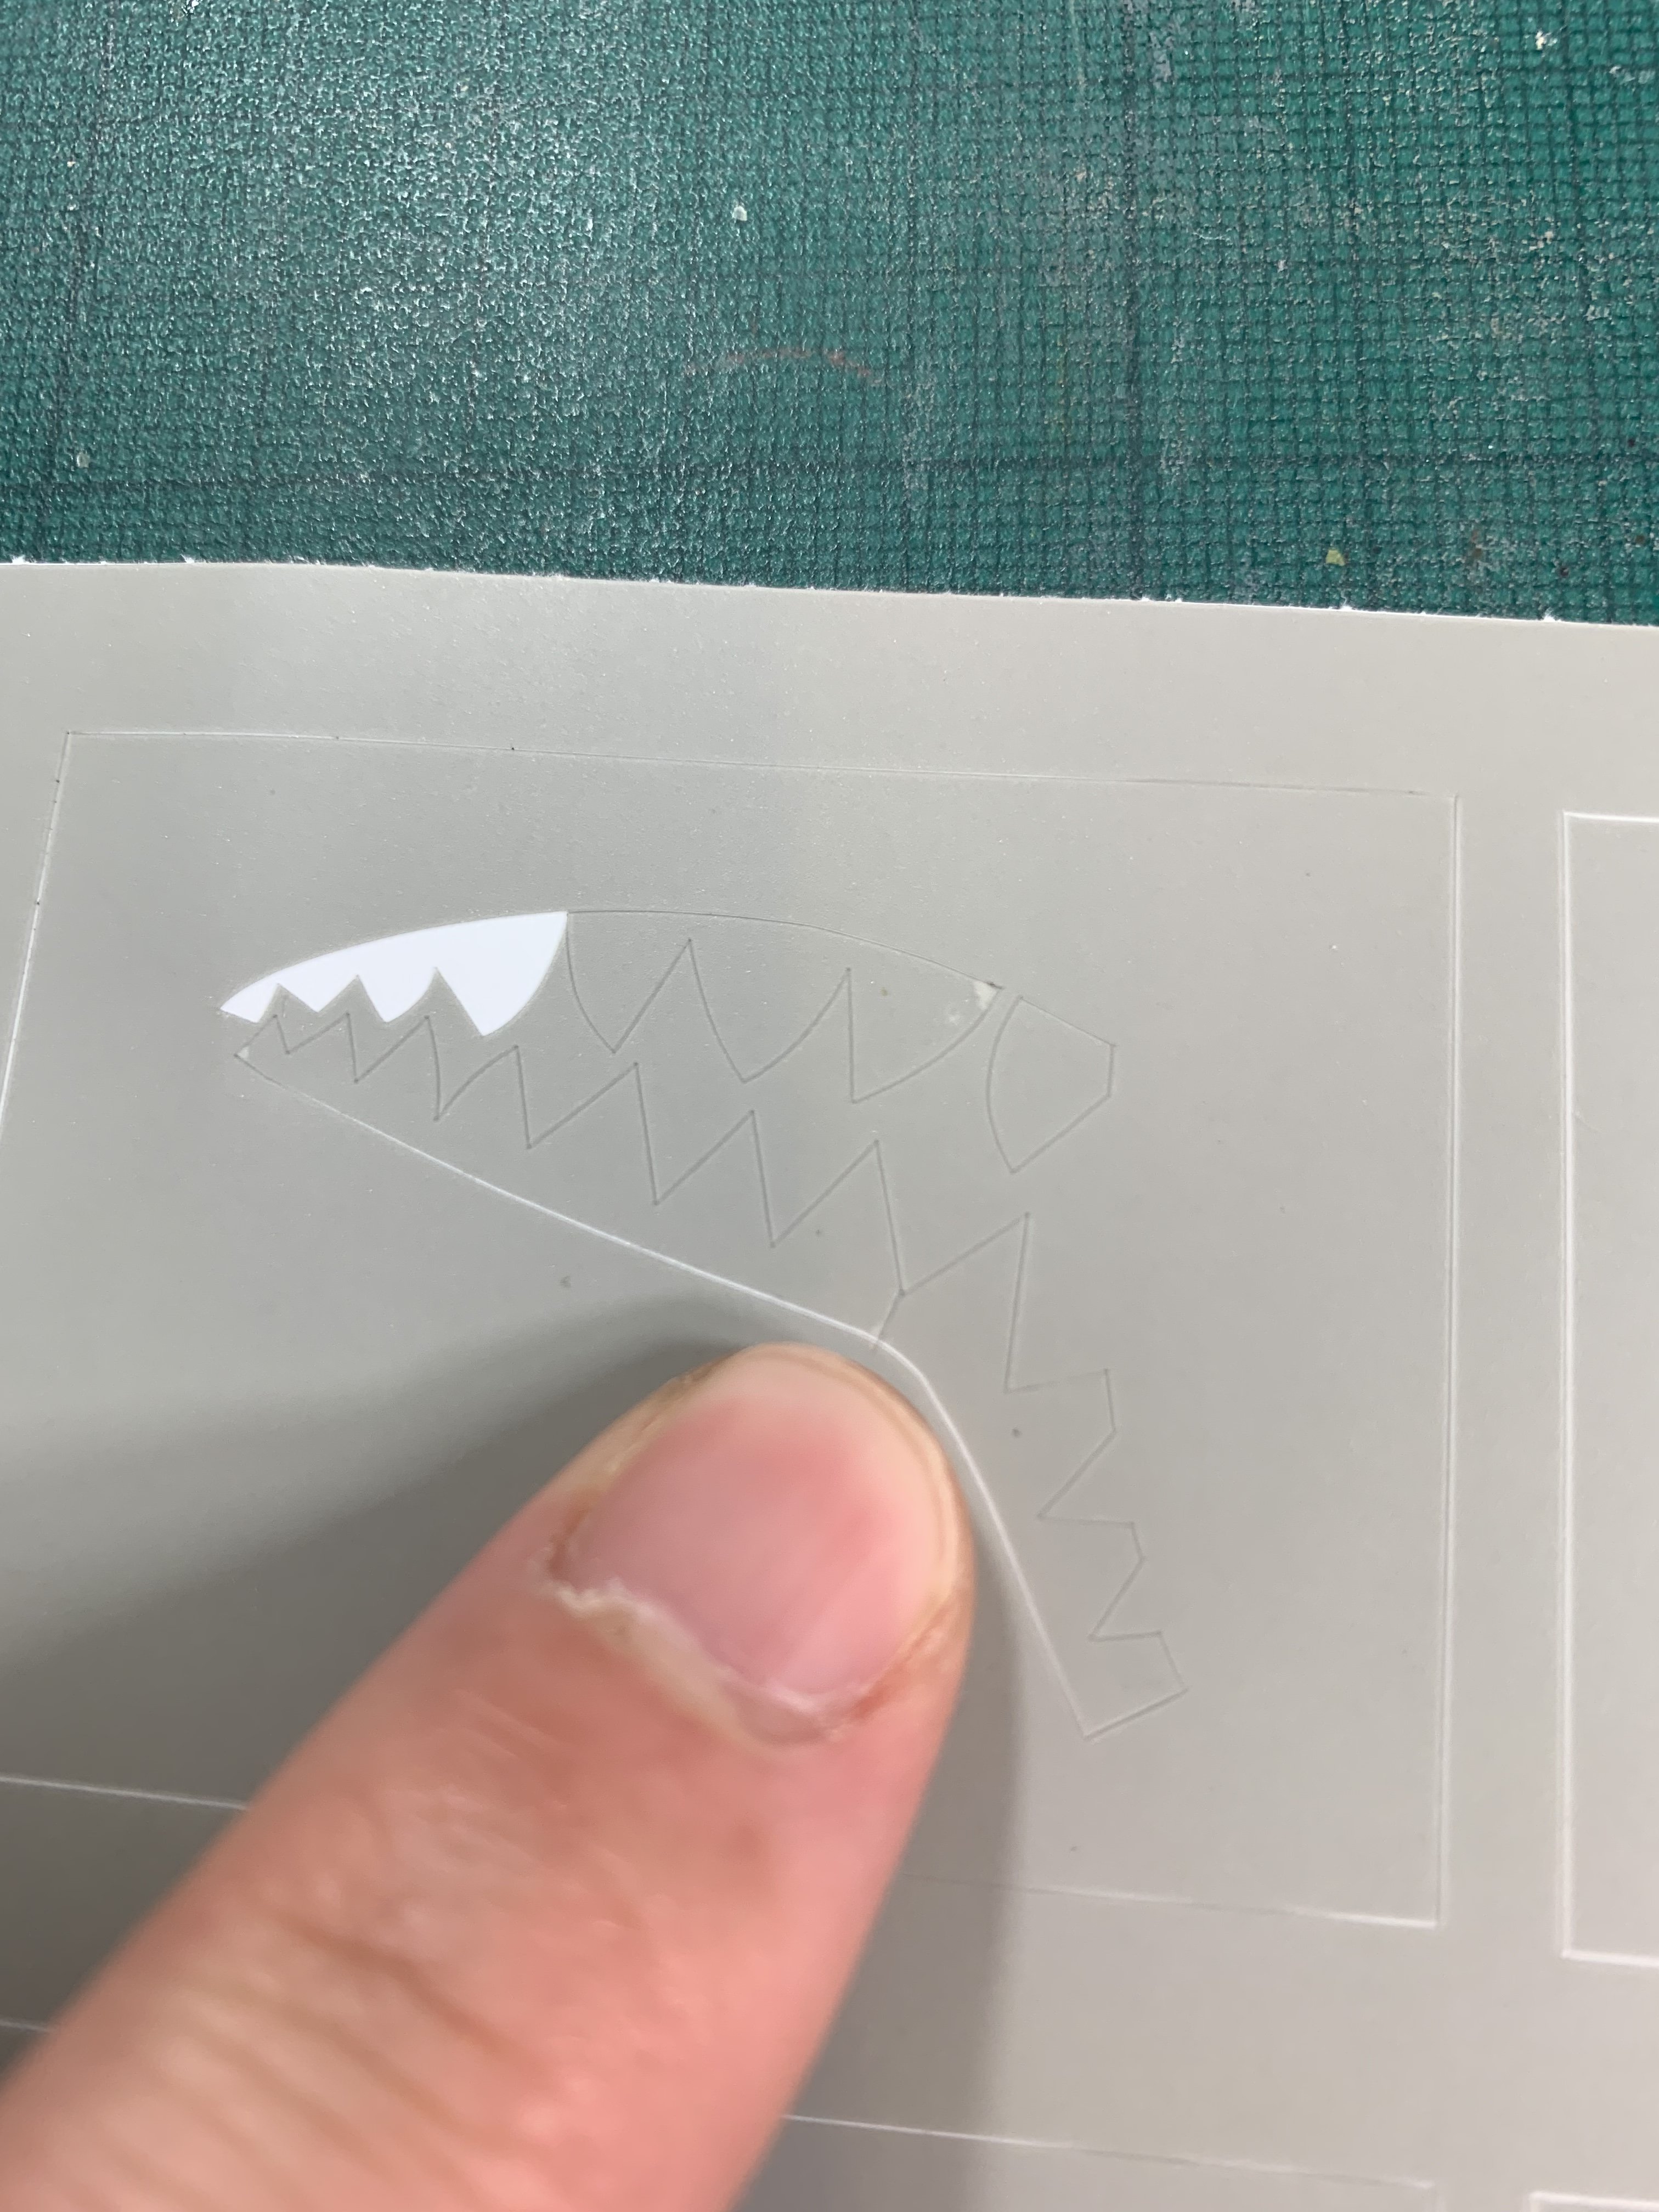
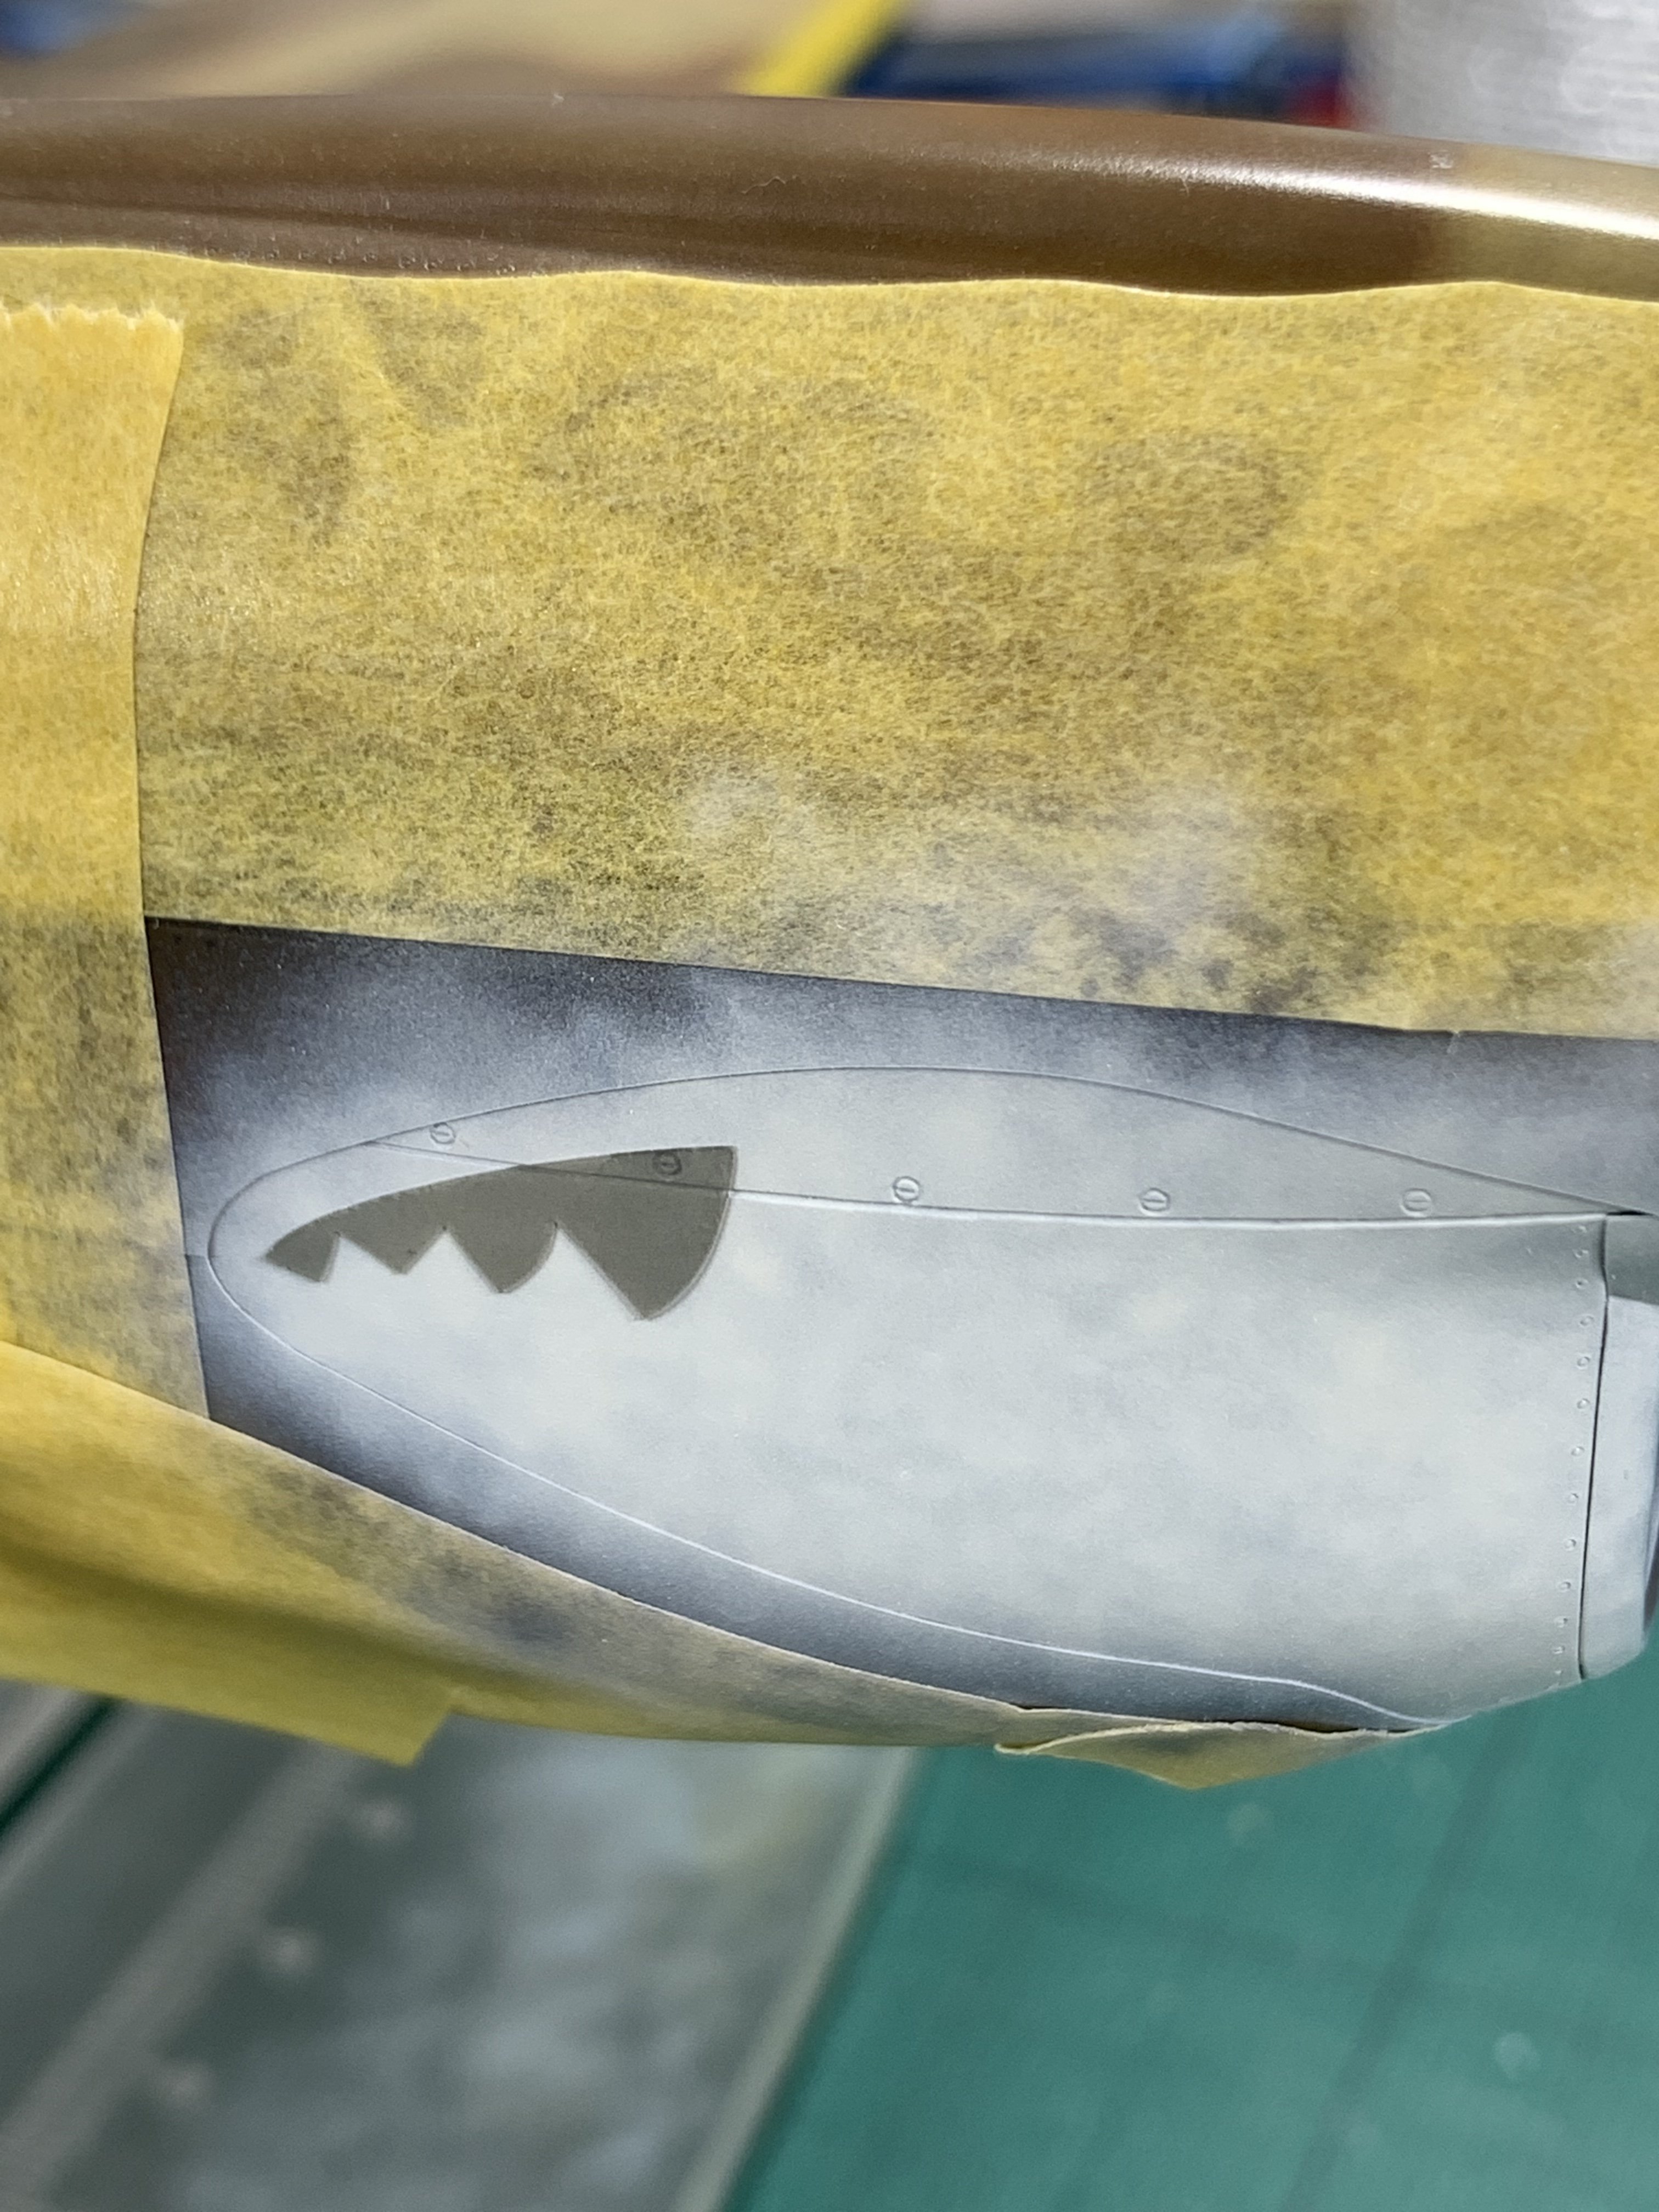
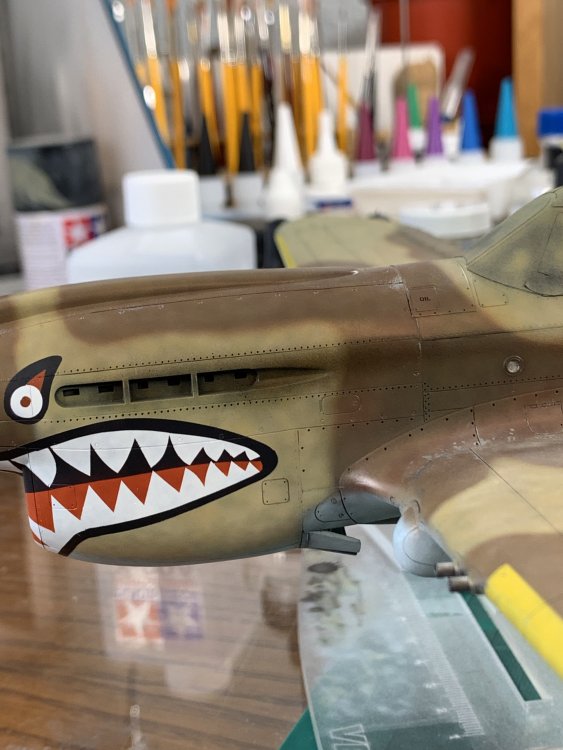
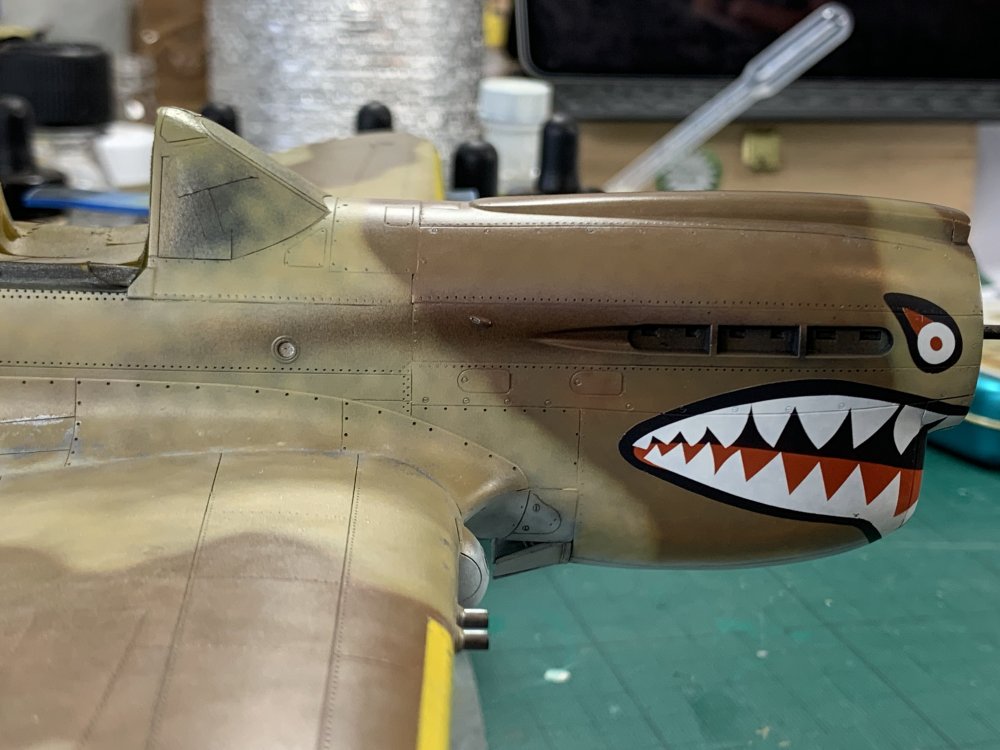
cheers guys, and Peter I wish you all the best i opened up the masks - which themselves were about the third iteration - last night thinking i would bash out the wing roundels whilst the Wife was at her fitness class only to find they were 'egg shape' (38mm one way - which was what i had asked for - but 42mm the other) now normally there would have been much swearing and cursing, but then i thought to myself this time last week, I was convinced i had less than a year to live, so having to do the sharkmouth first instead of wing roundels really wasn't that great a hardship! 😃 now back to our silly models ... hope to have some progress later today fingers crossed
-
hey guys sorry for the lack of updates on this project first of all had to wait a while for corrected masks and then had a bit of health scare which put this - and everything else! - on hold for over a month luckily it was nothing but when you have to contemplate funeral arrangements - and what will happen to your stash when you are gone - it does concentrate the mind somewhat anyway, i now just want to get this done so hopefully wing roundels and shark mouth will go on this week and then final weathering before landing gear and antenna go on cheers Nick
-
i am soooo excited about this!!
-
Share how COVID-19 Quarantine has affected you.
nmayhew replied to 1to1scale's topic in General Discussion
Out of interest (and don’t say the company) but what are they about to do that you think is a no-no? I am fortunate in that I am able to work from home at present and can socialise / be a hermit as I choose. -
what's happening with the rear left deck to hull join at the corner? it should not be sitting up at an angle like that
-
from Der Tigermeister himself... and instructions from Scalemates
-
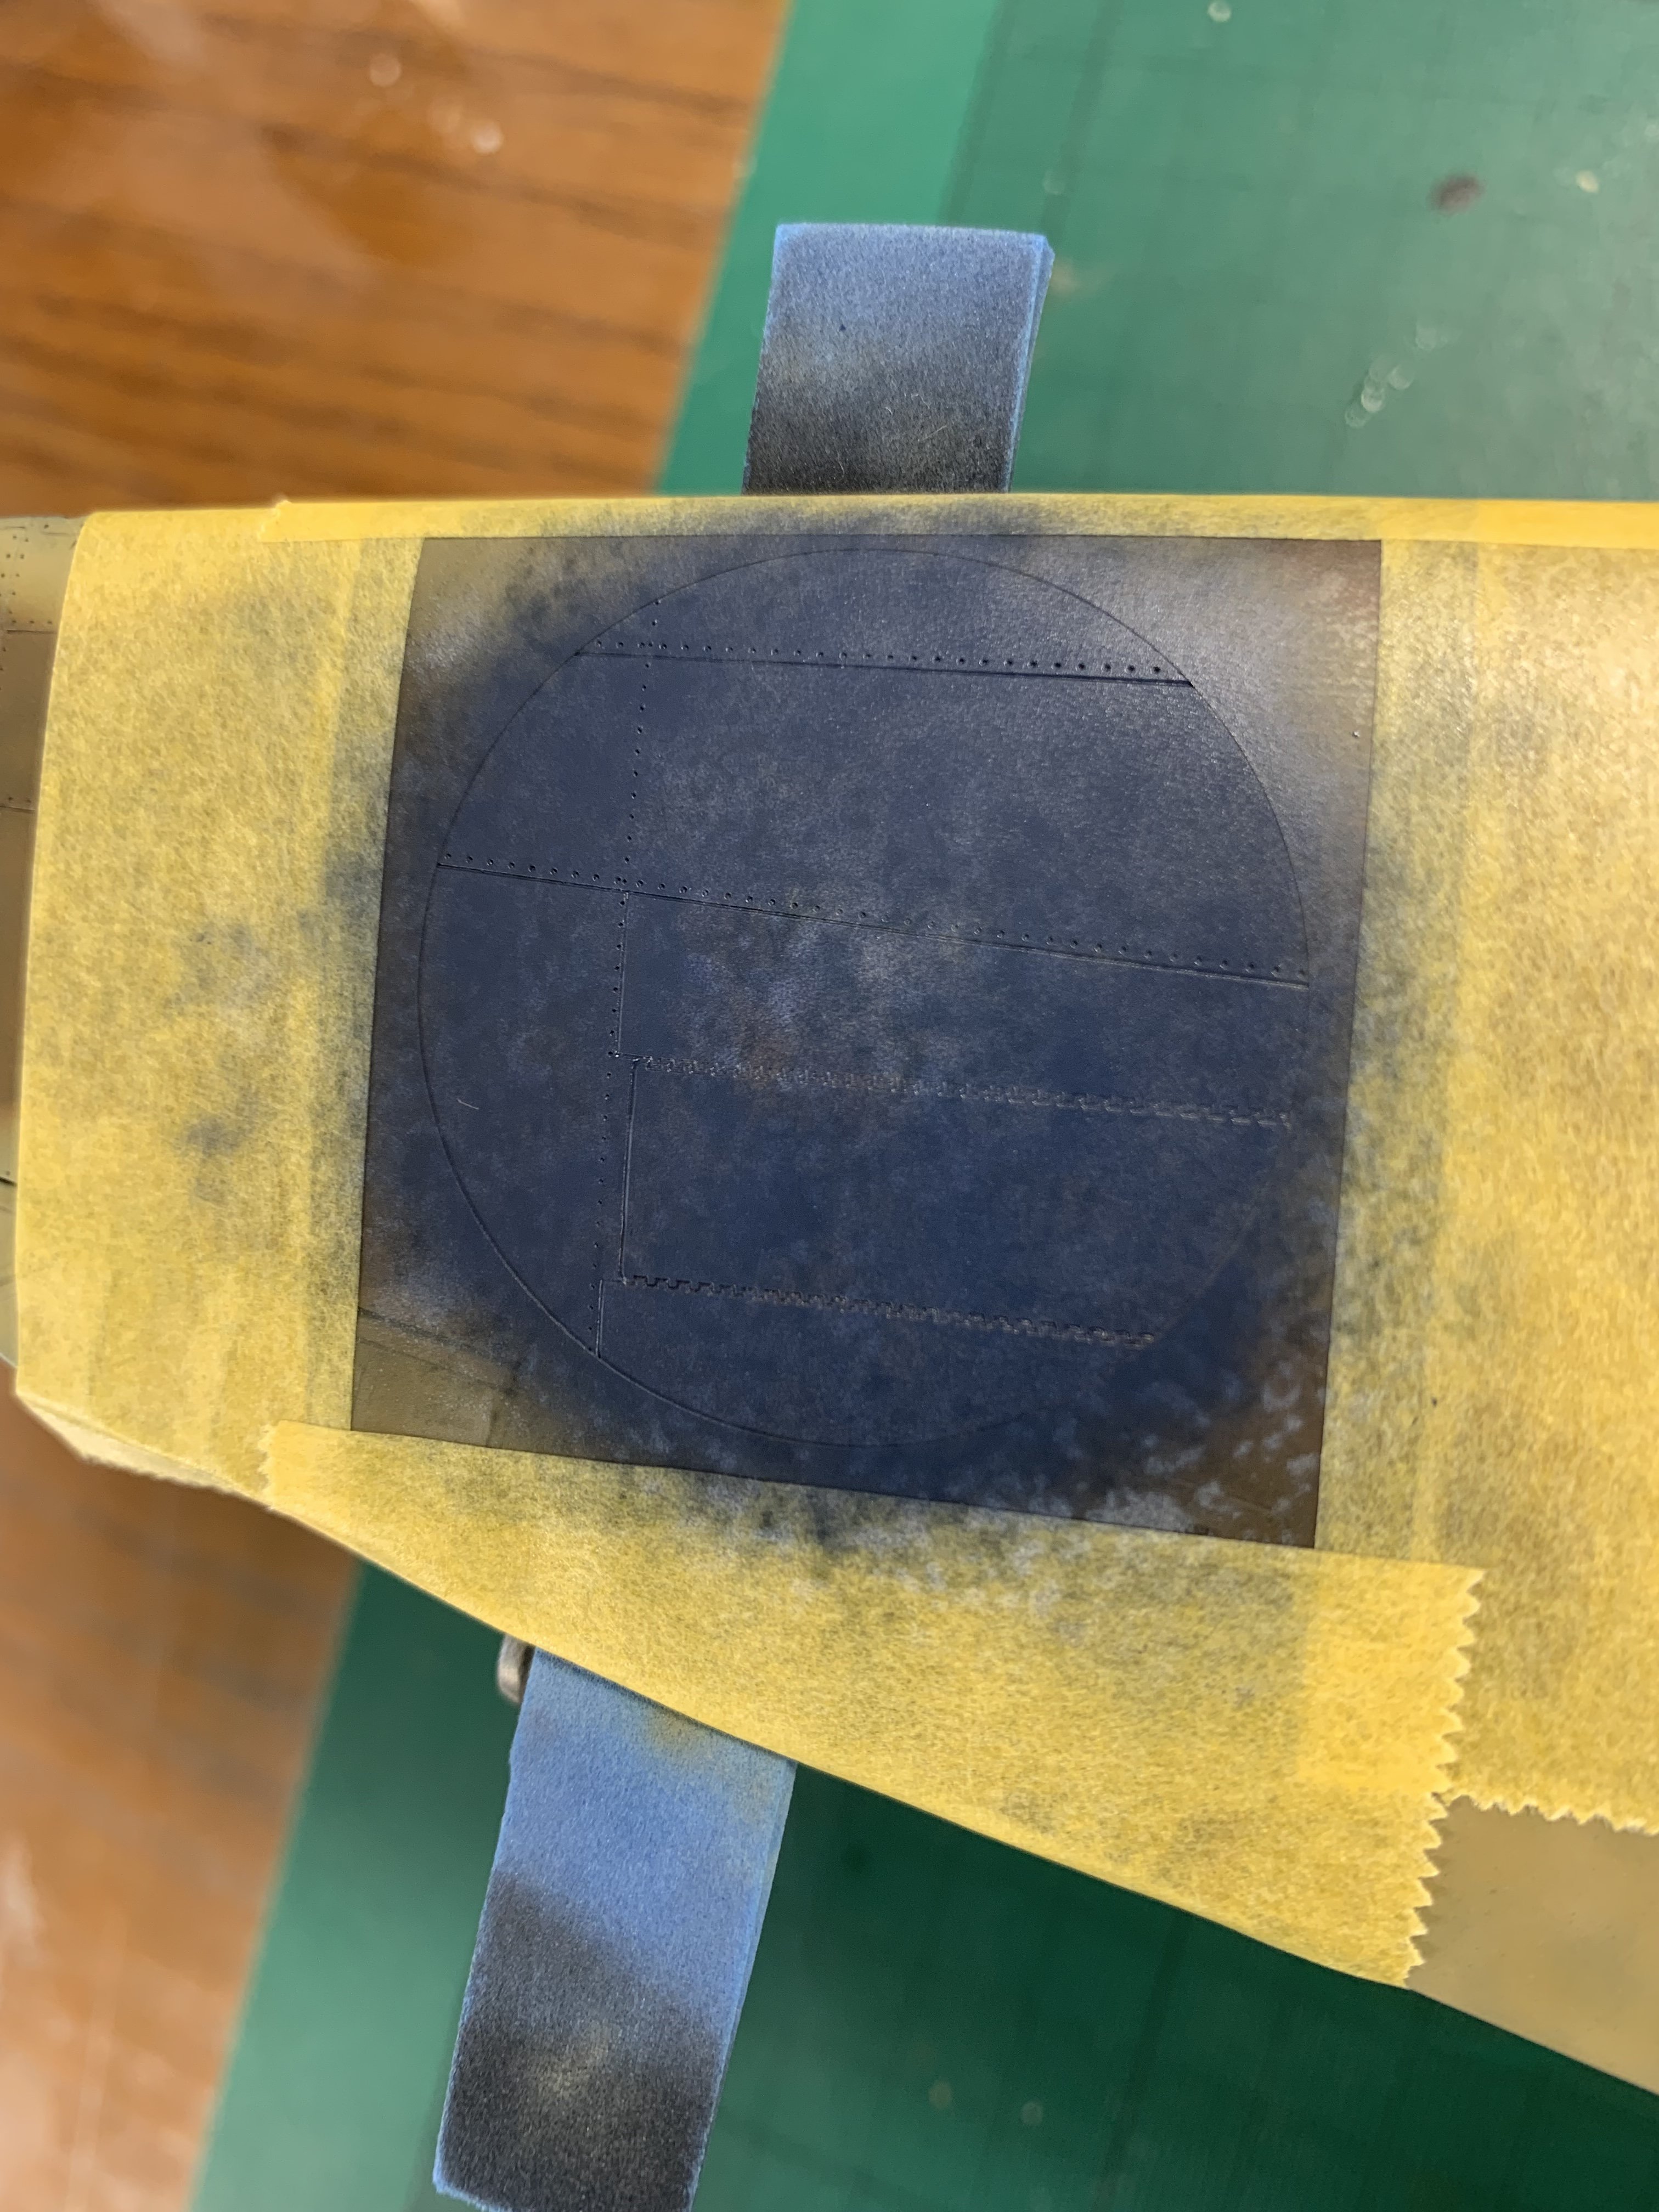
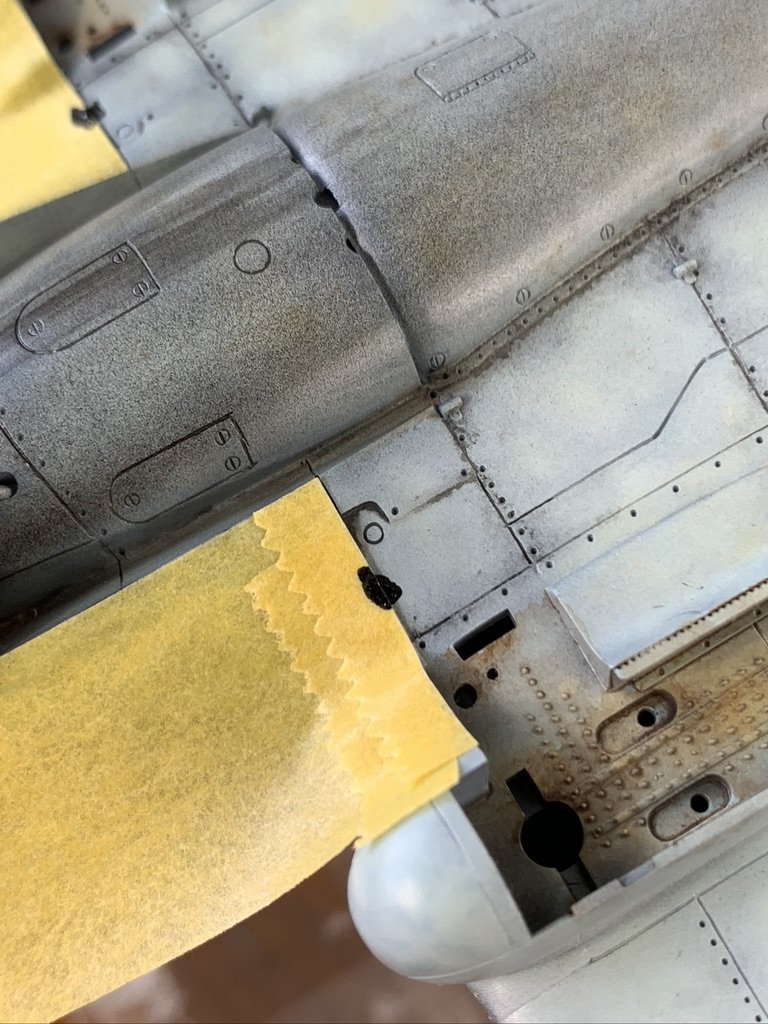
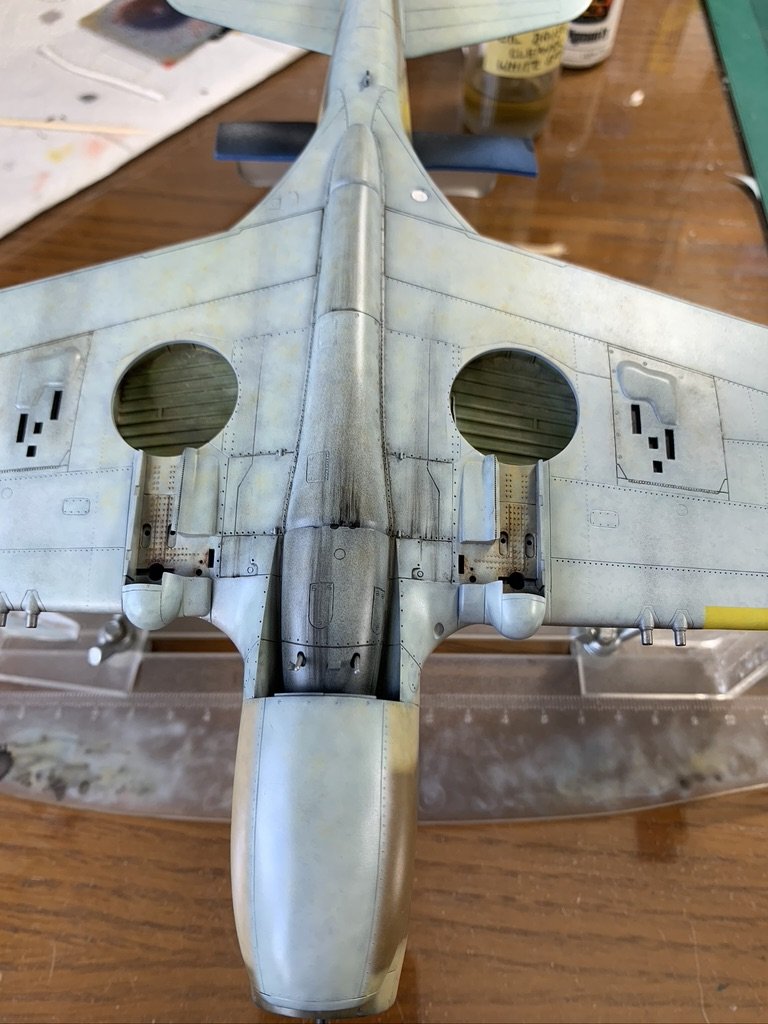
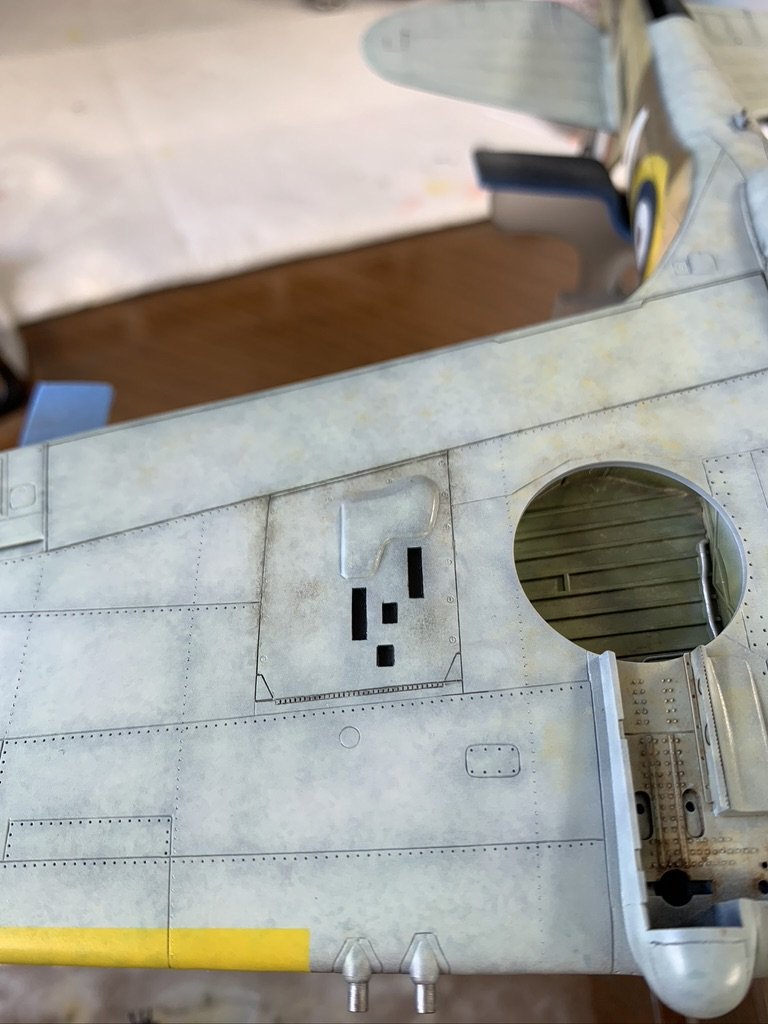
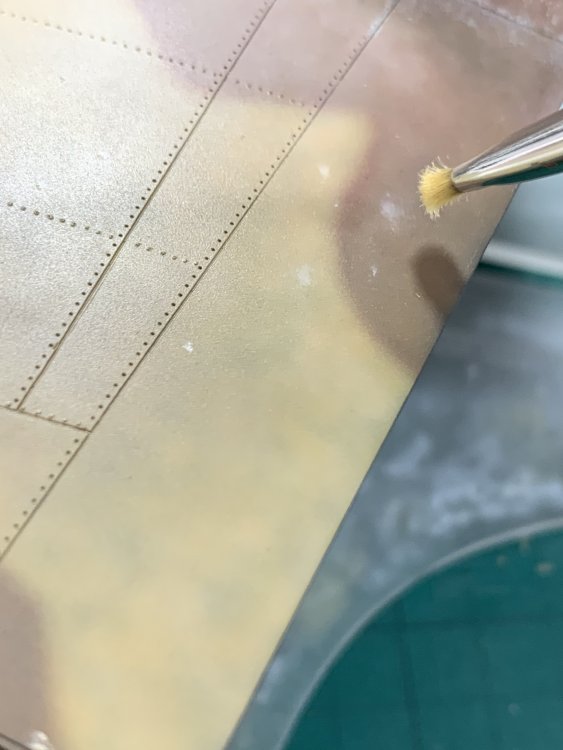
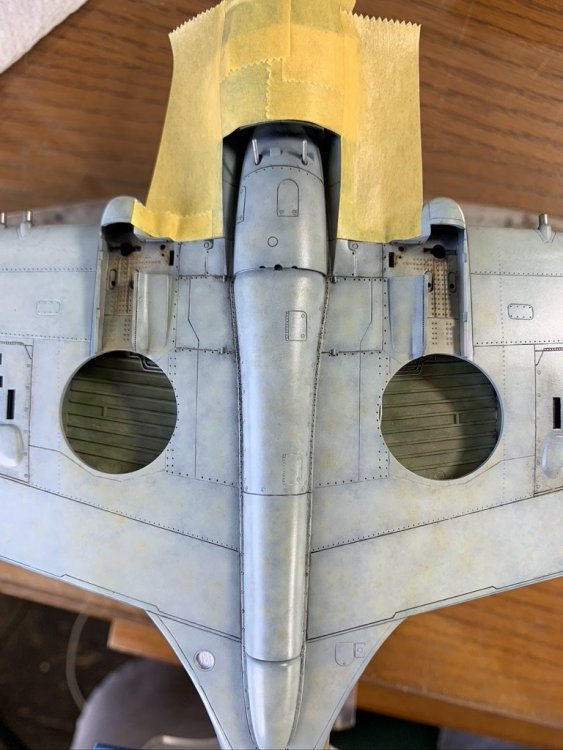
first up bit of masking haven't tried this before... ink is super thinned and results look a bit 'pigment-like' but ended up ok in the end i will revert once i get more info on the inks - the good thing is like oils you can just wipe them off and start again (x-20a can do this; US folk use some cleaner stuff called '409') some staining around gun barrels, ammo ejection ports, and the radiator / spine of the aircraft... here is a close up of that pigment effect - not what i was looking for but decided to roll with it! and some oil streaks - i put a wet blob and then drag the brush streaks nearly always need to be straight, and can't magically appear half way down, so you need to keep a steady hand i forgot to use a ruler / similar rest for hand when doing it - a tip I had seen in one of Will's videos just a few streaks in place - the two fuselage ones were done separately ie long one first, hair drier, quick MRP clear... then do the second one that way if you f*ck up a later one and have to remove it, you don't lose everything with hair drier and MRP clear this is all done in minutes btw a little weathering on the inside of the radiator flaps - impossible to do once attached, which is why i have kept the off until the last minute and outside... finally, i blended the underside by spraying some MRP Smoke which 'pulled everything together' (sorry sounds v pretentious lol) so here is where we are now... the flaps are just resting there (not glued yet) thanks for looking


-
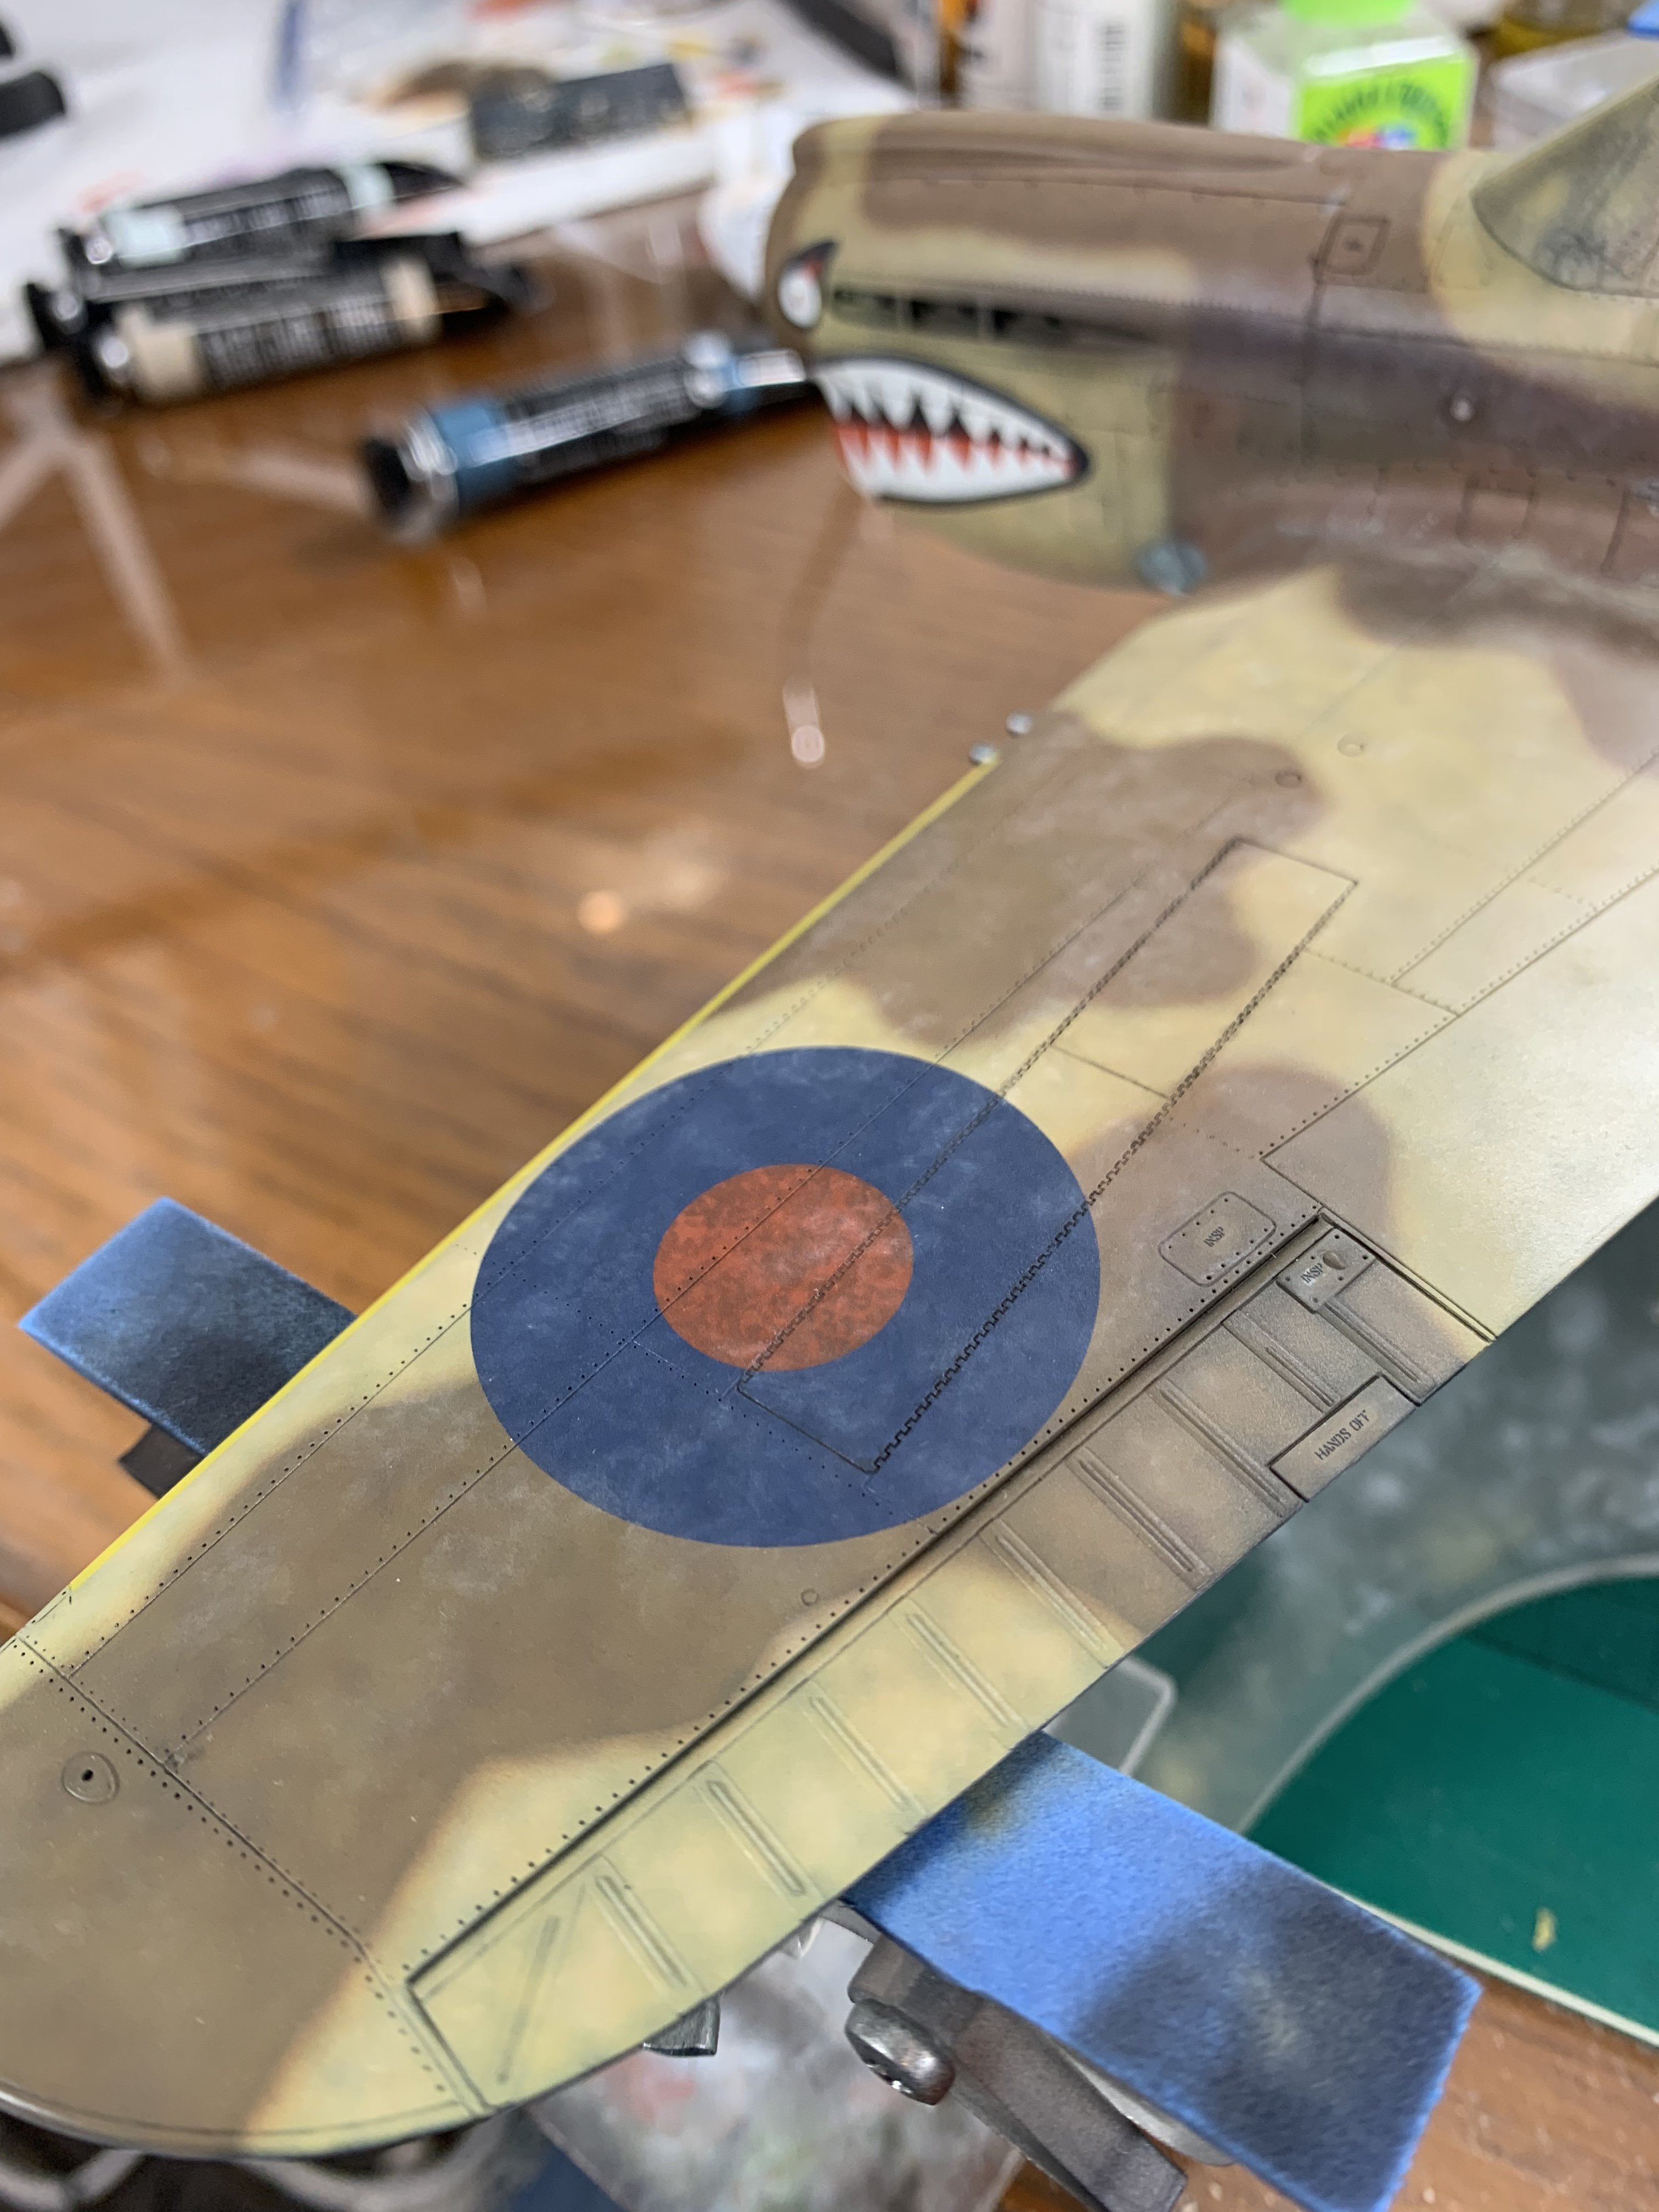
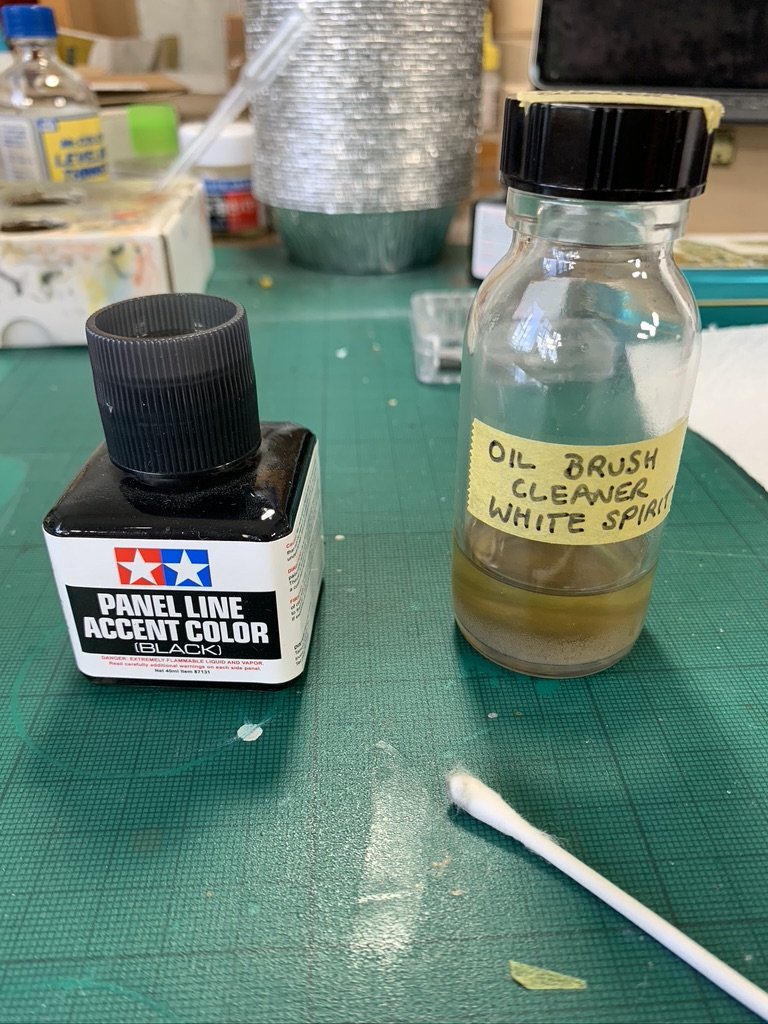
for the underside especially on this model i tried to mix black basing / marbling with old school panel line pre-shading in the end i don't think i got it quite right - i left too much of the pre-shading show through, being reluctant to add more blend coat and end up losing it all, but as always it's a learning process i am not a fan of stark panel lines - they tend to make a model look like 1/48 or 1/72 to me - so given the above i will leave most of them alone; plus the fact that the overall paint job is not a 'block', there is enough variation etc etc but, i will add some panel lines around the flaps, and maybe a few panels closer to the centre of the fuselage / radiator where there would be lots of oil and sh*t accumulating anyway, i usually use Tamiya panel line jars, and the excess can be wiped off with some white spirit here the forward most line has been wiped, the one near the trailing edge (avoid looking at the sh*tty construction please lol) has not) i also advise using better cotton buds than i am using here, but i was being lazy anyway, it's very simple and results are pleasing same process with the gun bay doors and hinge... and an overall look at where we are at the moment... streaks will be next, something i find quite challenging update may be after the weekend thanks for looking Nick

-
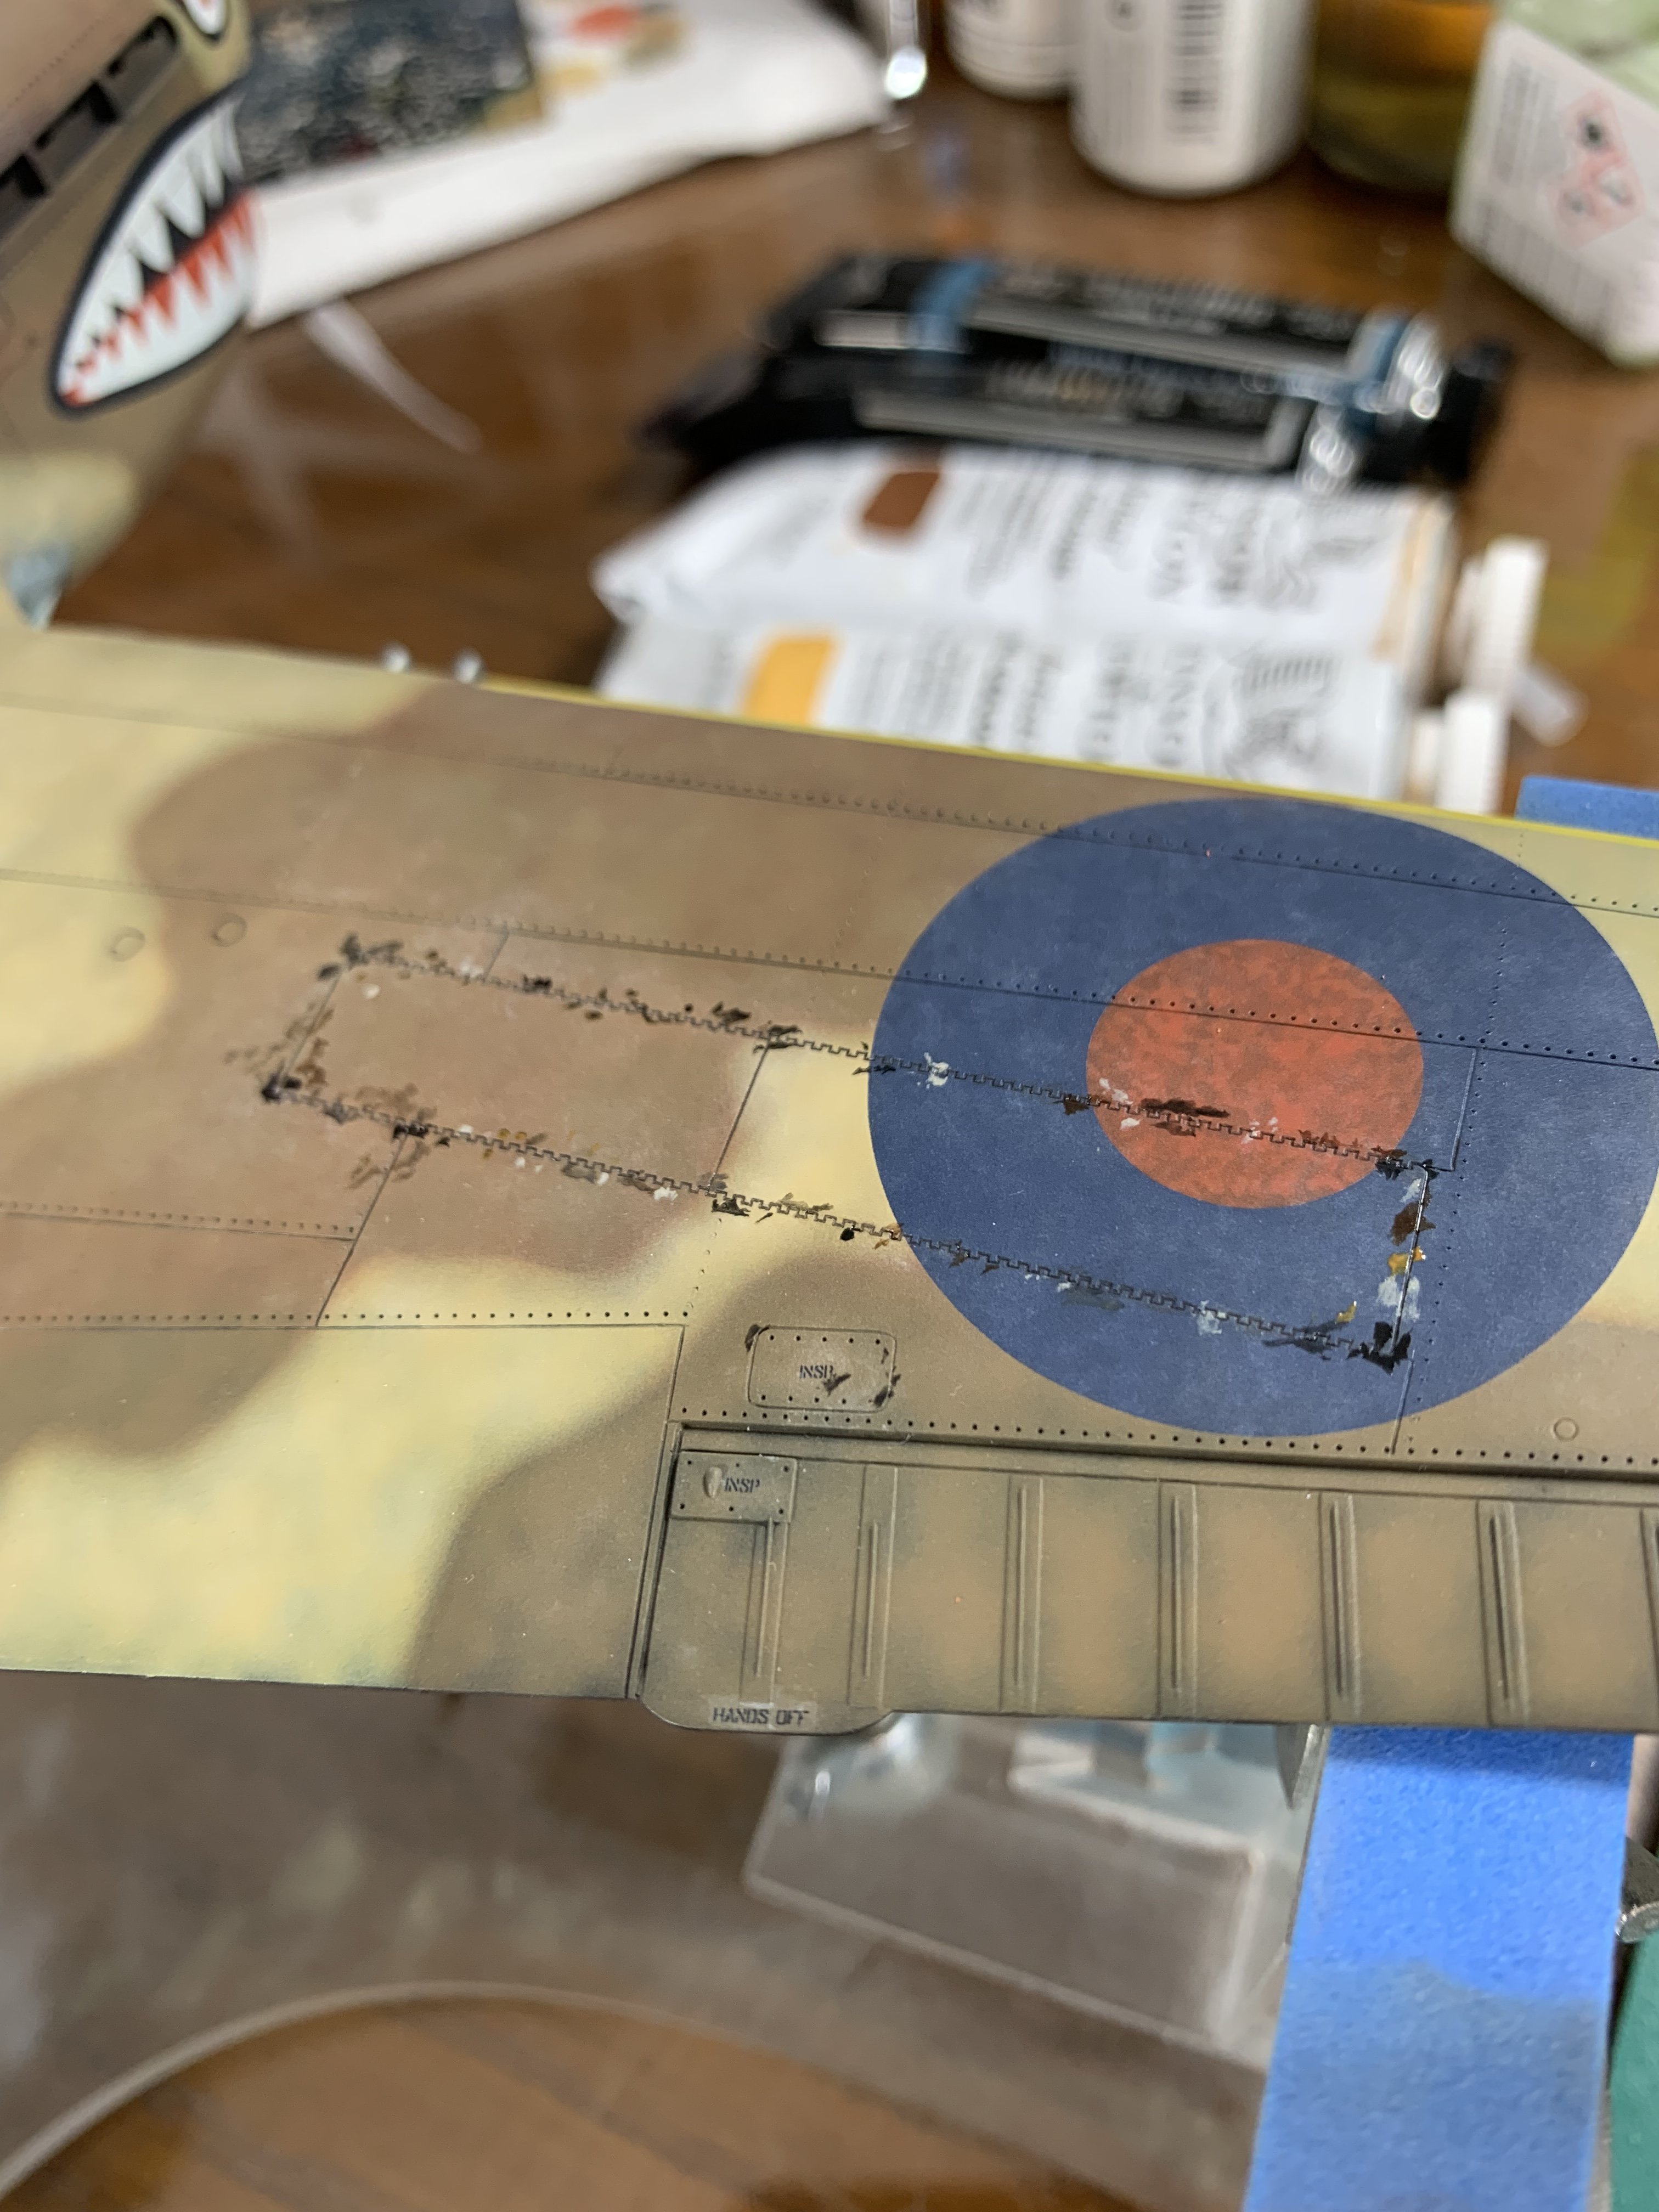
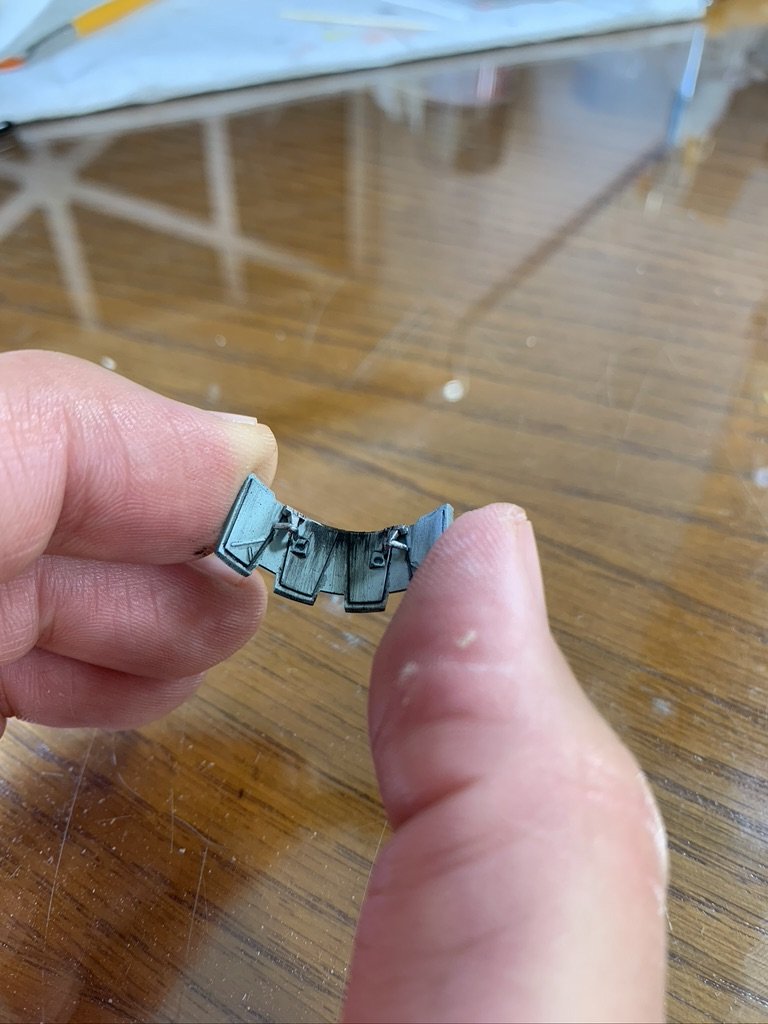
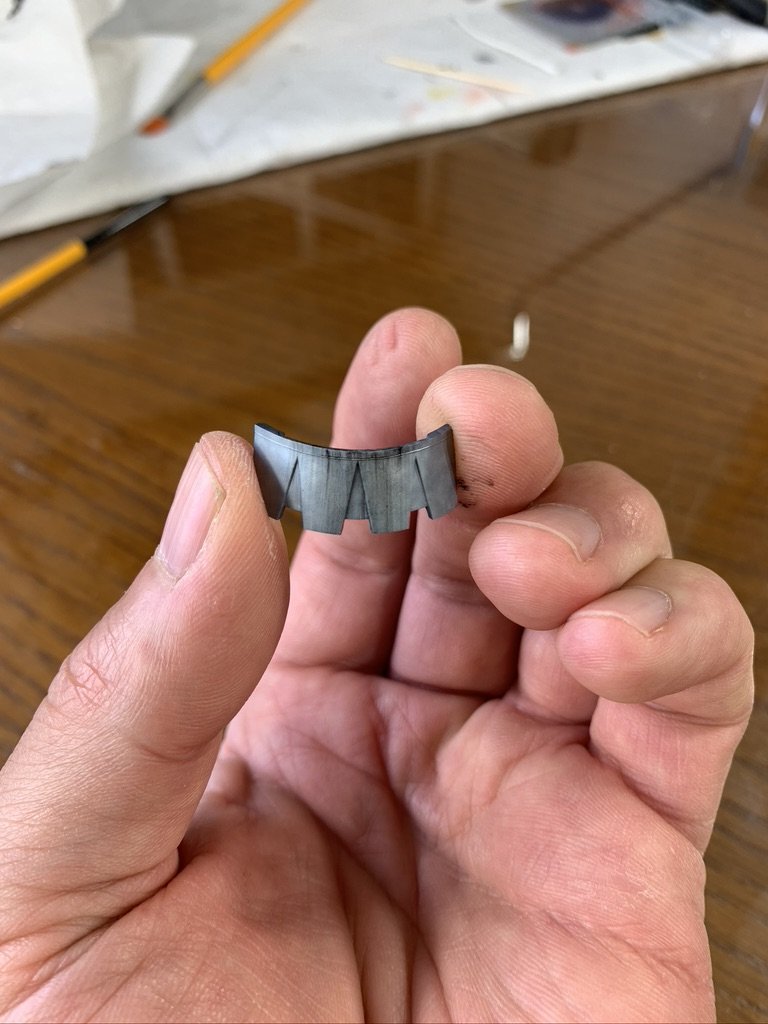
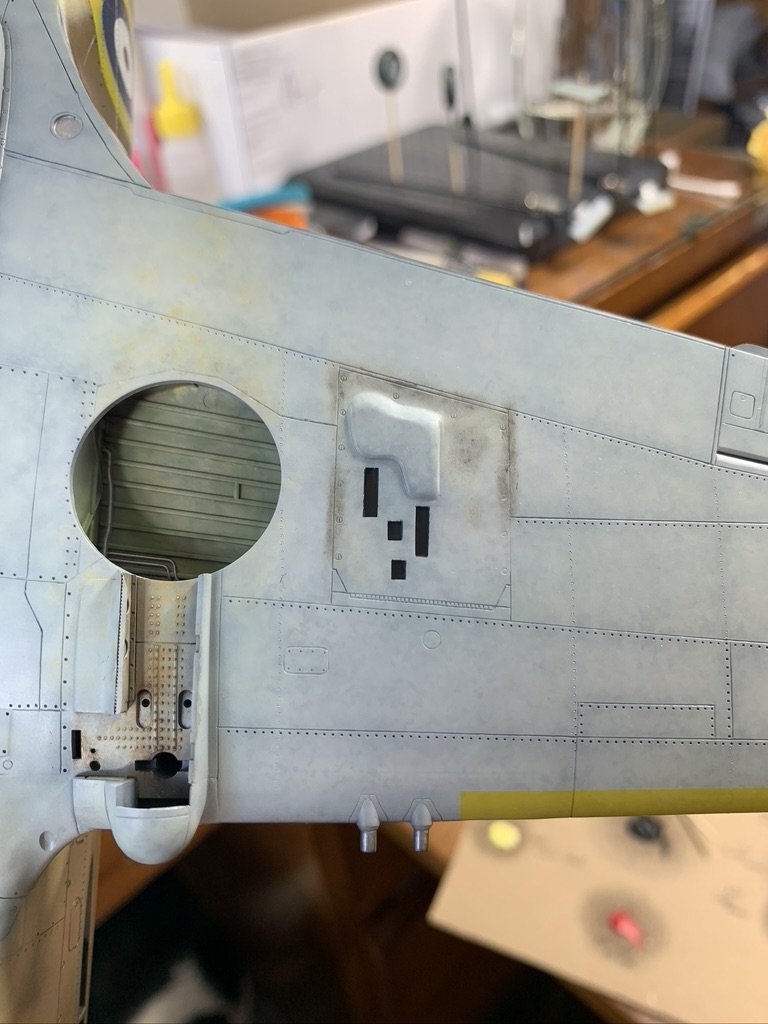
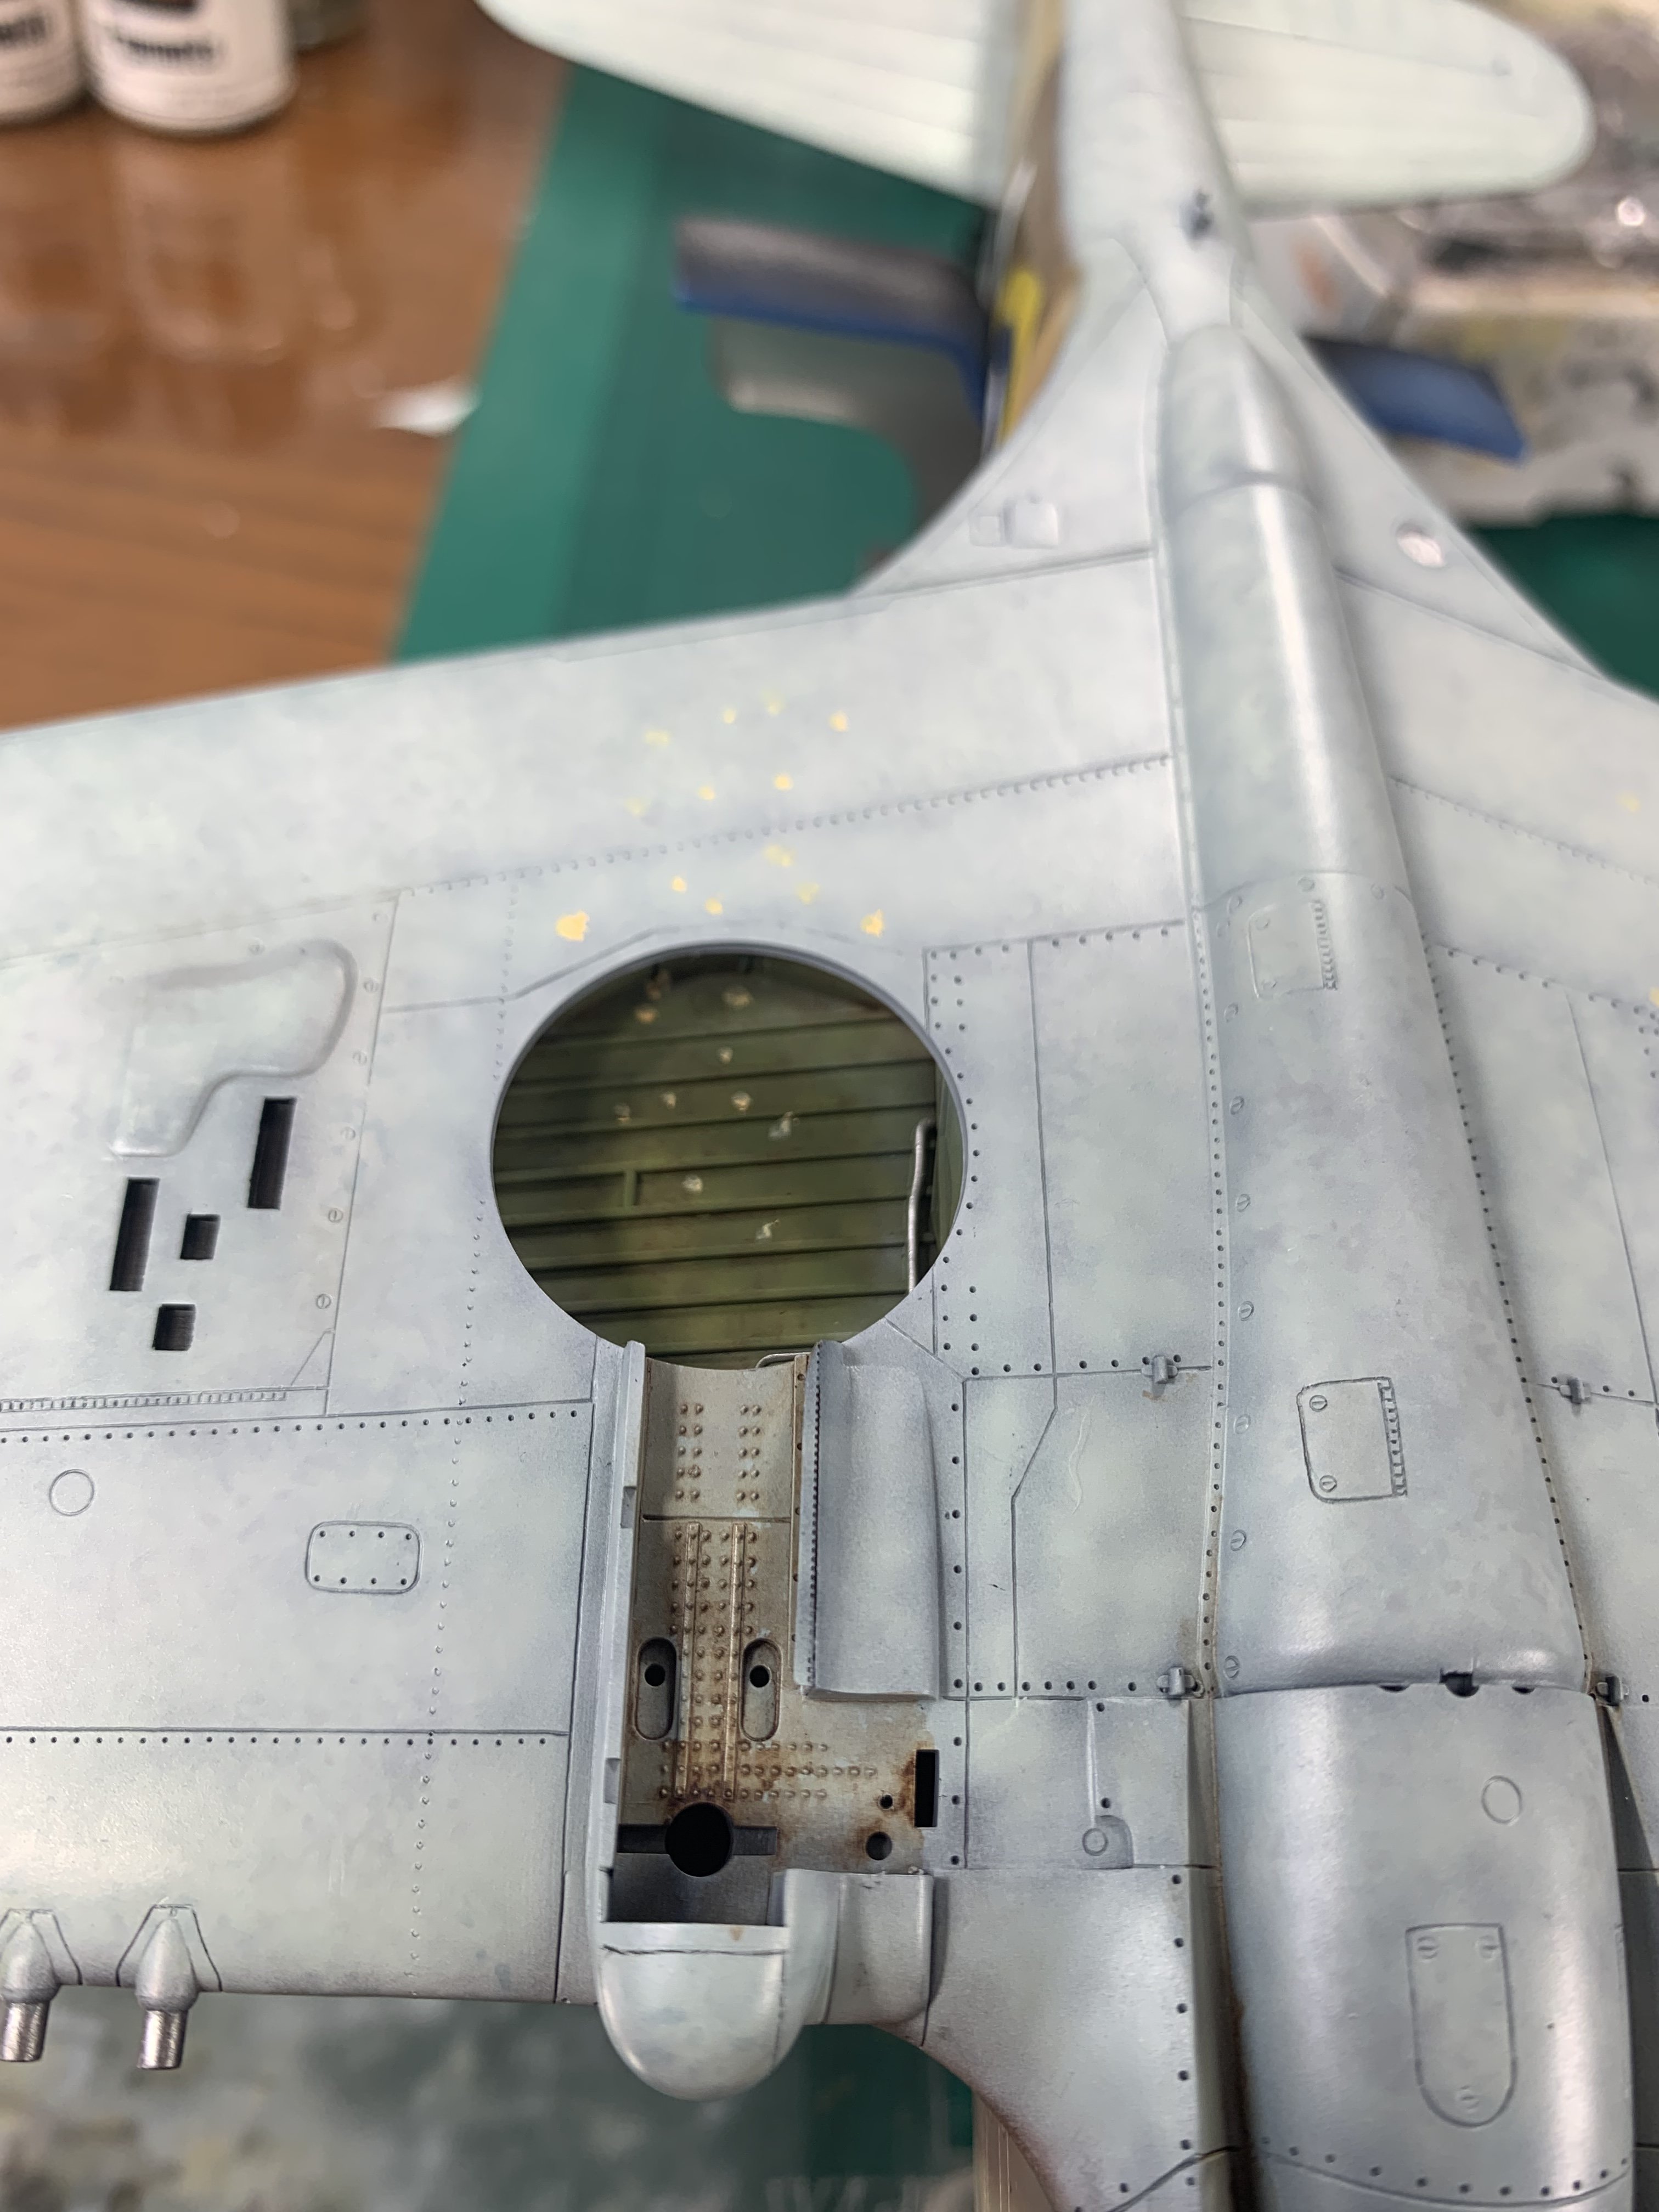
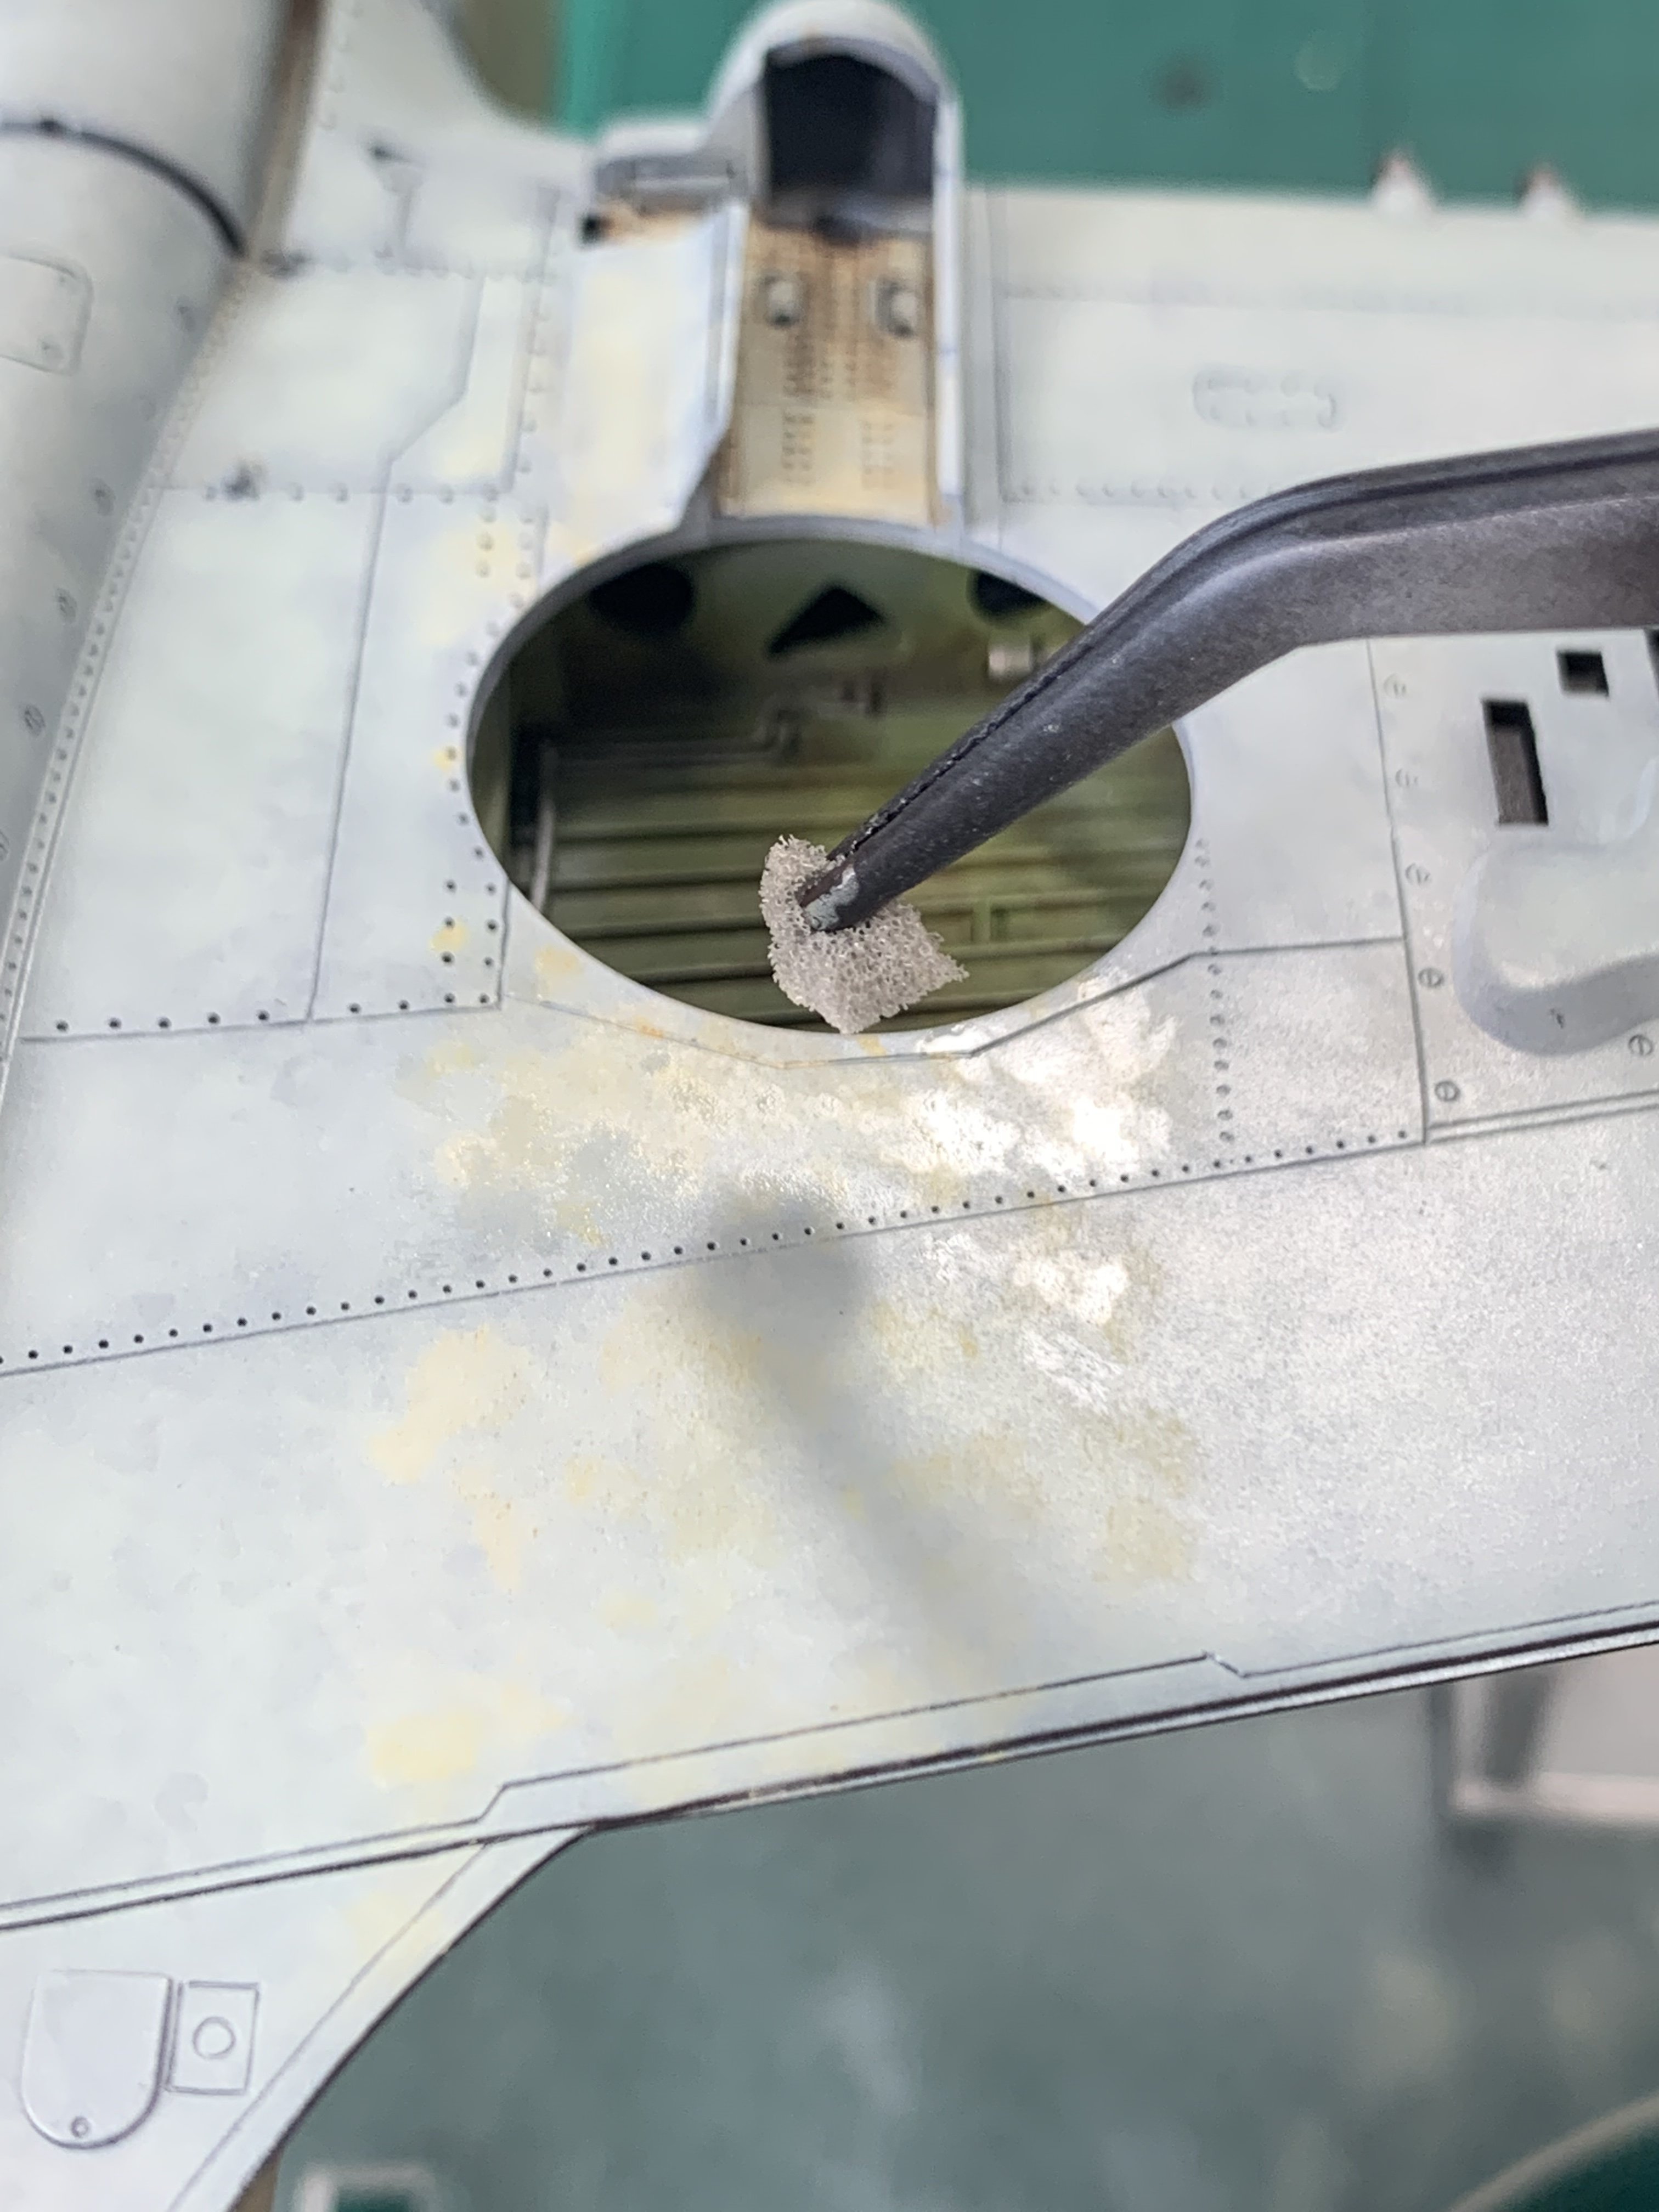
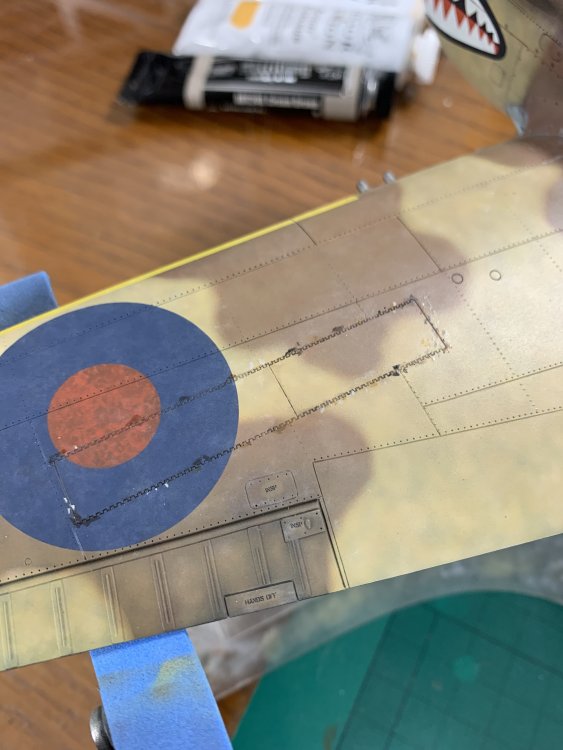
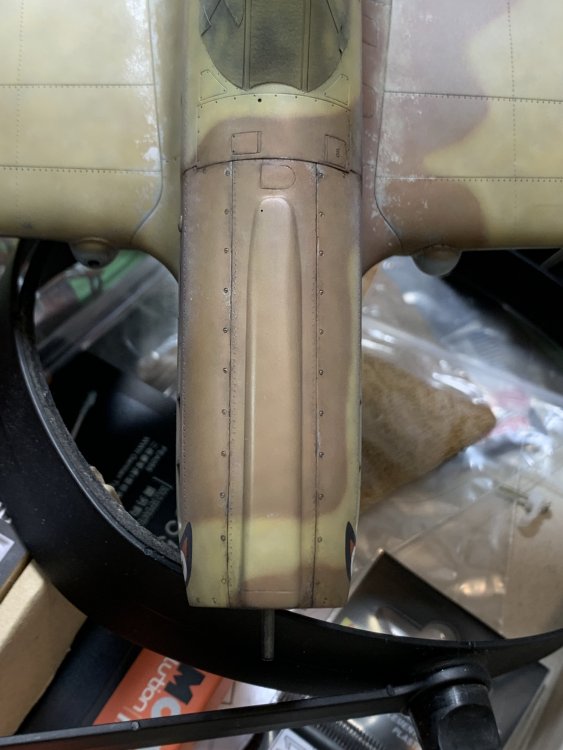
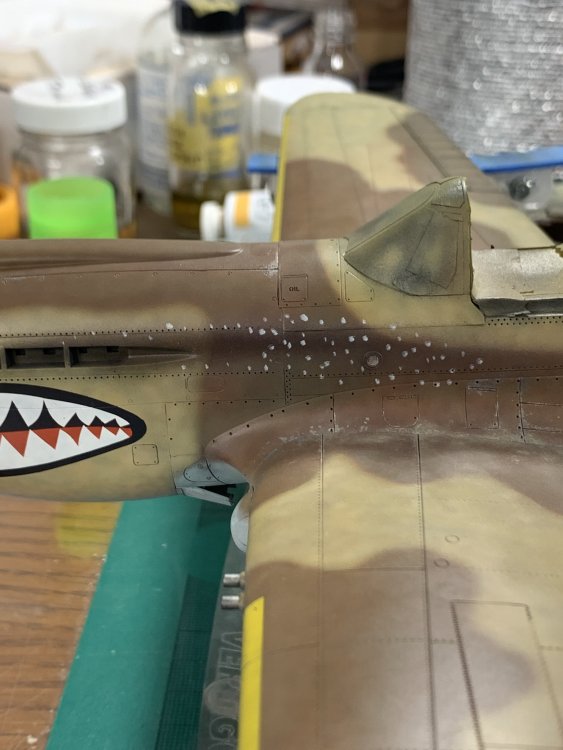
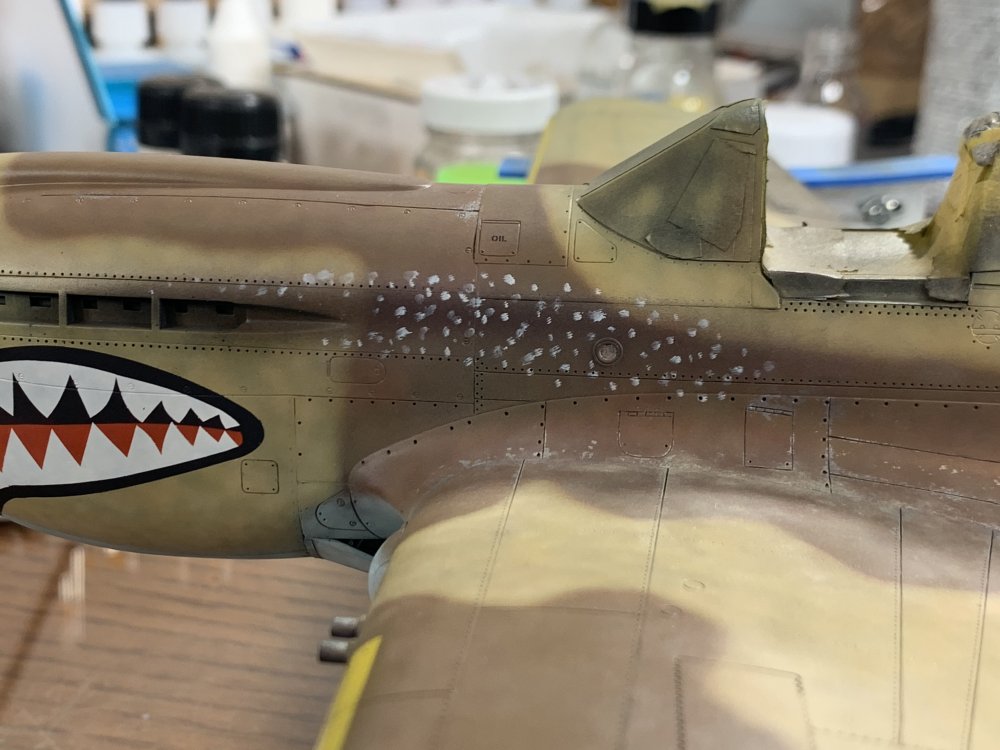
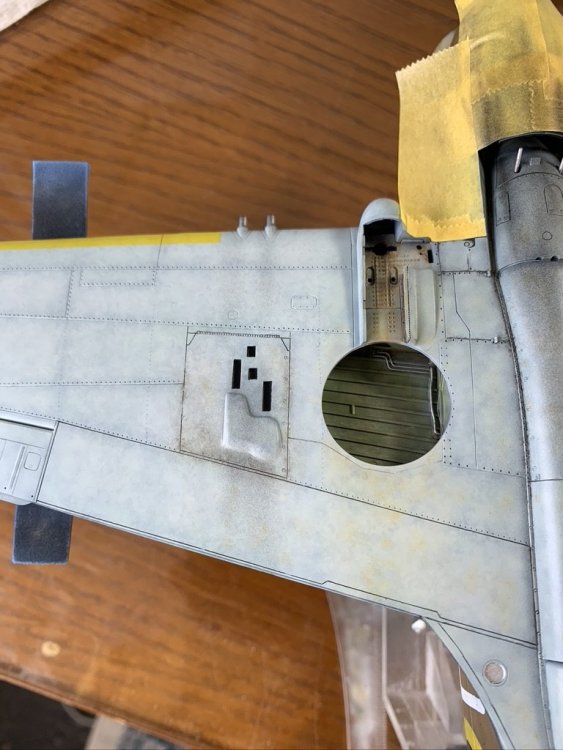
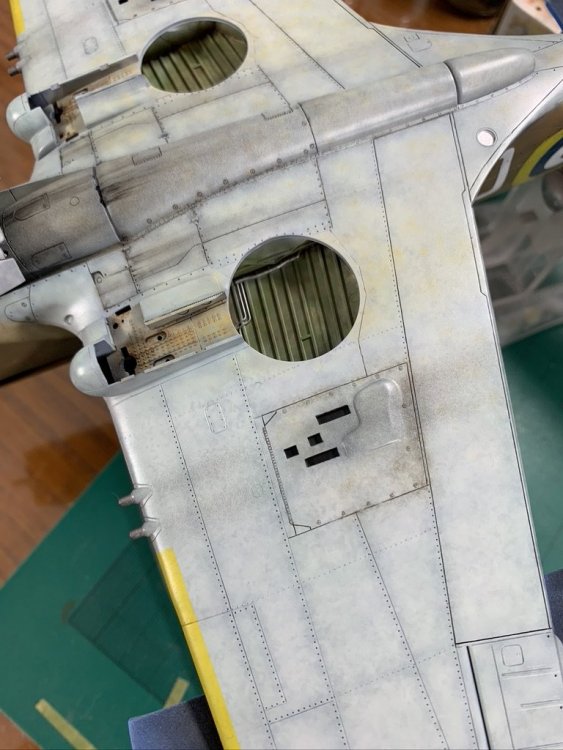
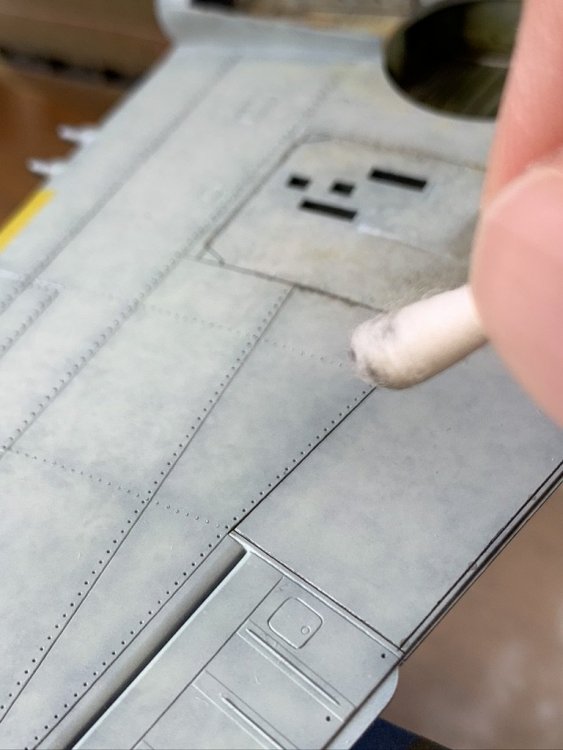
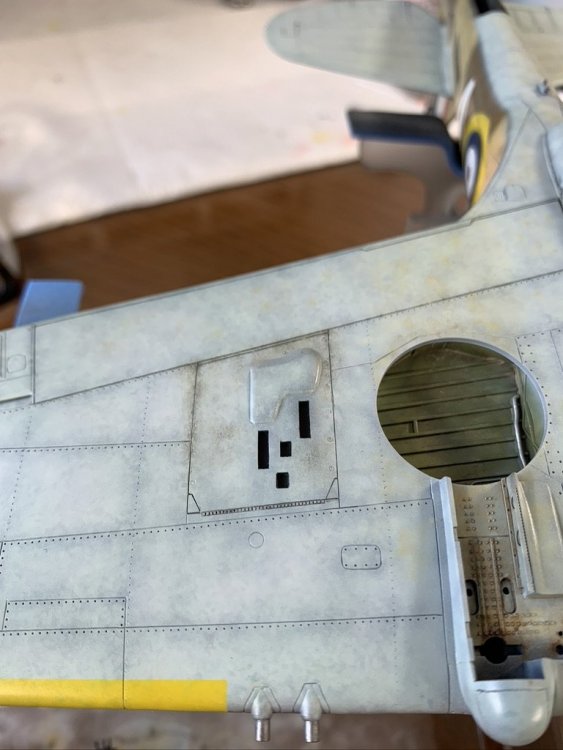
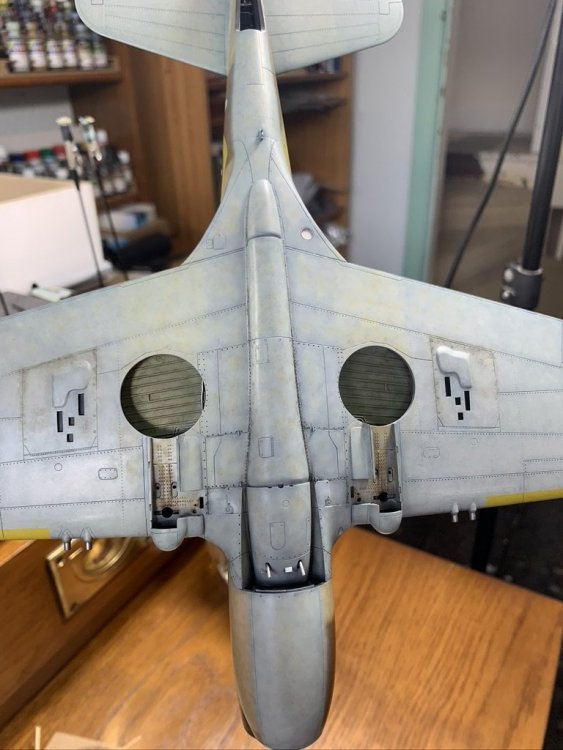
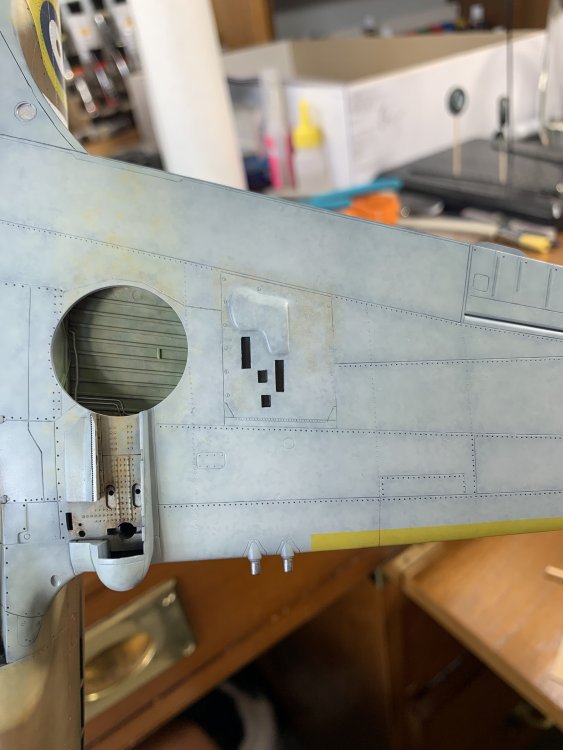
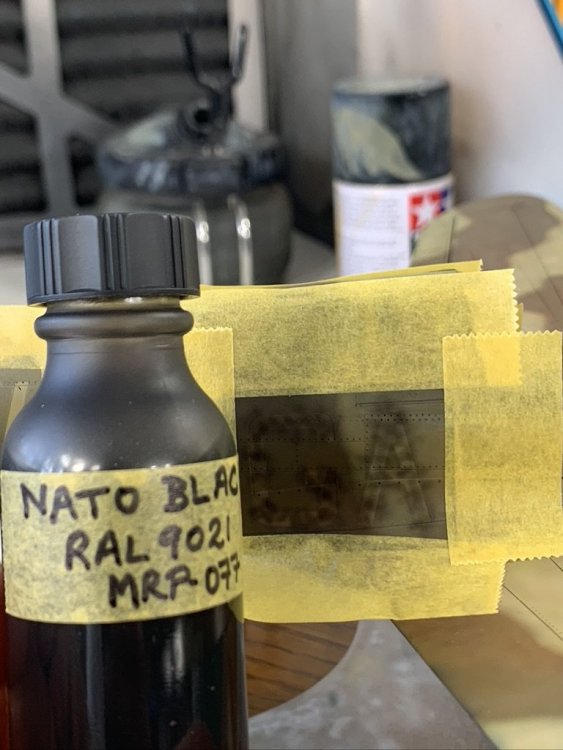
next i added some darker tones (black / near black) around the edges of the gun bay doors they don't look that great when first applied, but you need to keep the faith in the ability of blending to get where you want to be, with the 'emotional crutch' of knowing if you really don't like it you can just wipe it all off and start again and after some blending .. still a bit clunky...but after the stippling with the just slightly damp with mineral spirits sponge and we are getting there... gun bay dark tones have had their final blending in this shot below and although i may add some leaks, i am reasonably happy with the 'dirt' part the next shot also shows mid range dust / dirt being on wings and fuselage from gun bays inwards (just dotted, before any blending) and after some blending...


-
you can apply oils in varying degrees of 'wetness' depending upon what you want them to do my main aim here is to dirt / desert sand 'stuff' to the undersides - the paint job itself has enough variation for me, but of course if you just spray large blocks of a single colour with no mottling / black basing etc etc then oils can be used to make the finish more interesting / less 'toy like'. in this session most of the oils were applied pretty dry - a small dab with a no.1 sized brush I then use a larger brush to blend the oil into the surface - here is where you have problems if you have a glossy surface! Don’t be scared at this stage if it still looks way too stark i then use a sponge dipped in sans odour but with most of it wicked away on a paper towel and then start gently dabbing away to diffuse the paint even more, and also get some random effects So now we can see it starting to look more like dust thrown up from the wheels… If you are happy, a quick blurt with a hair drier will help you can then either seal with a lacquer / acrylic coat to protect what’s underneath, or in this case, just carry on… In the pic below i have dabbed the lighter colour (working from light to dark is often a good way to go), and just put some mid dirt oil down which has been worked with the dry brush In this one i think i have sponged the second colour And here i have added some of those mid dirt tones to the gun bay doors Hopefully you are getting the idea by now? I’ll try to post more pics of this process tomorrow - the rowing machine is now calling me I’m afraid! Cheers Nick


-
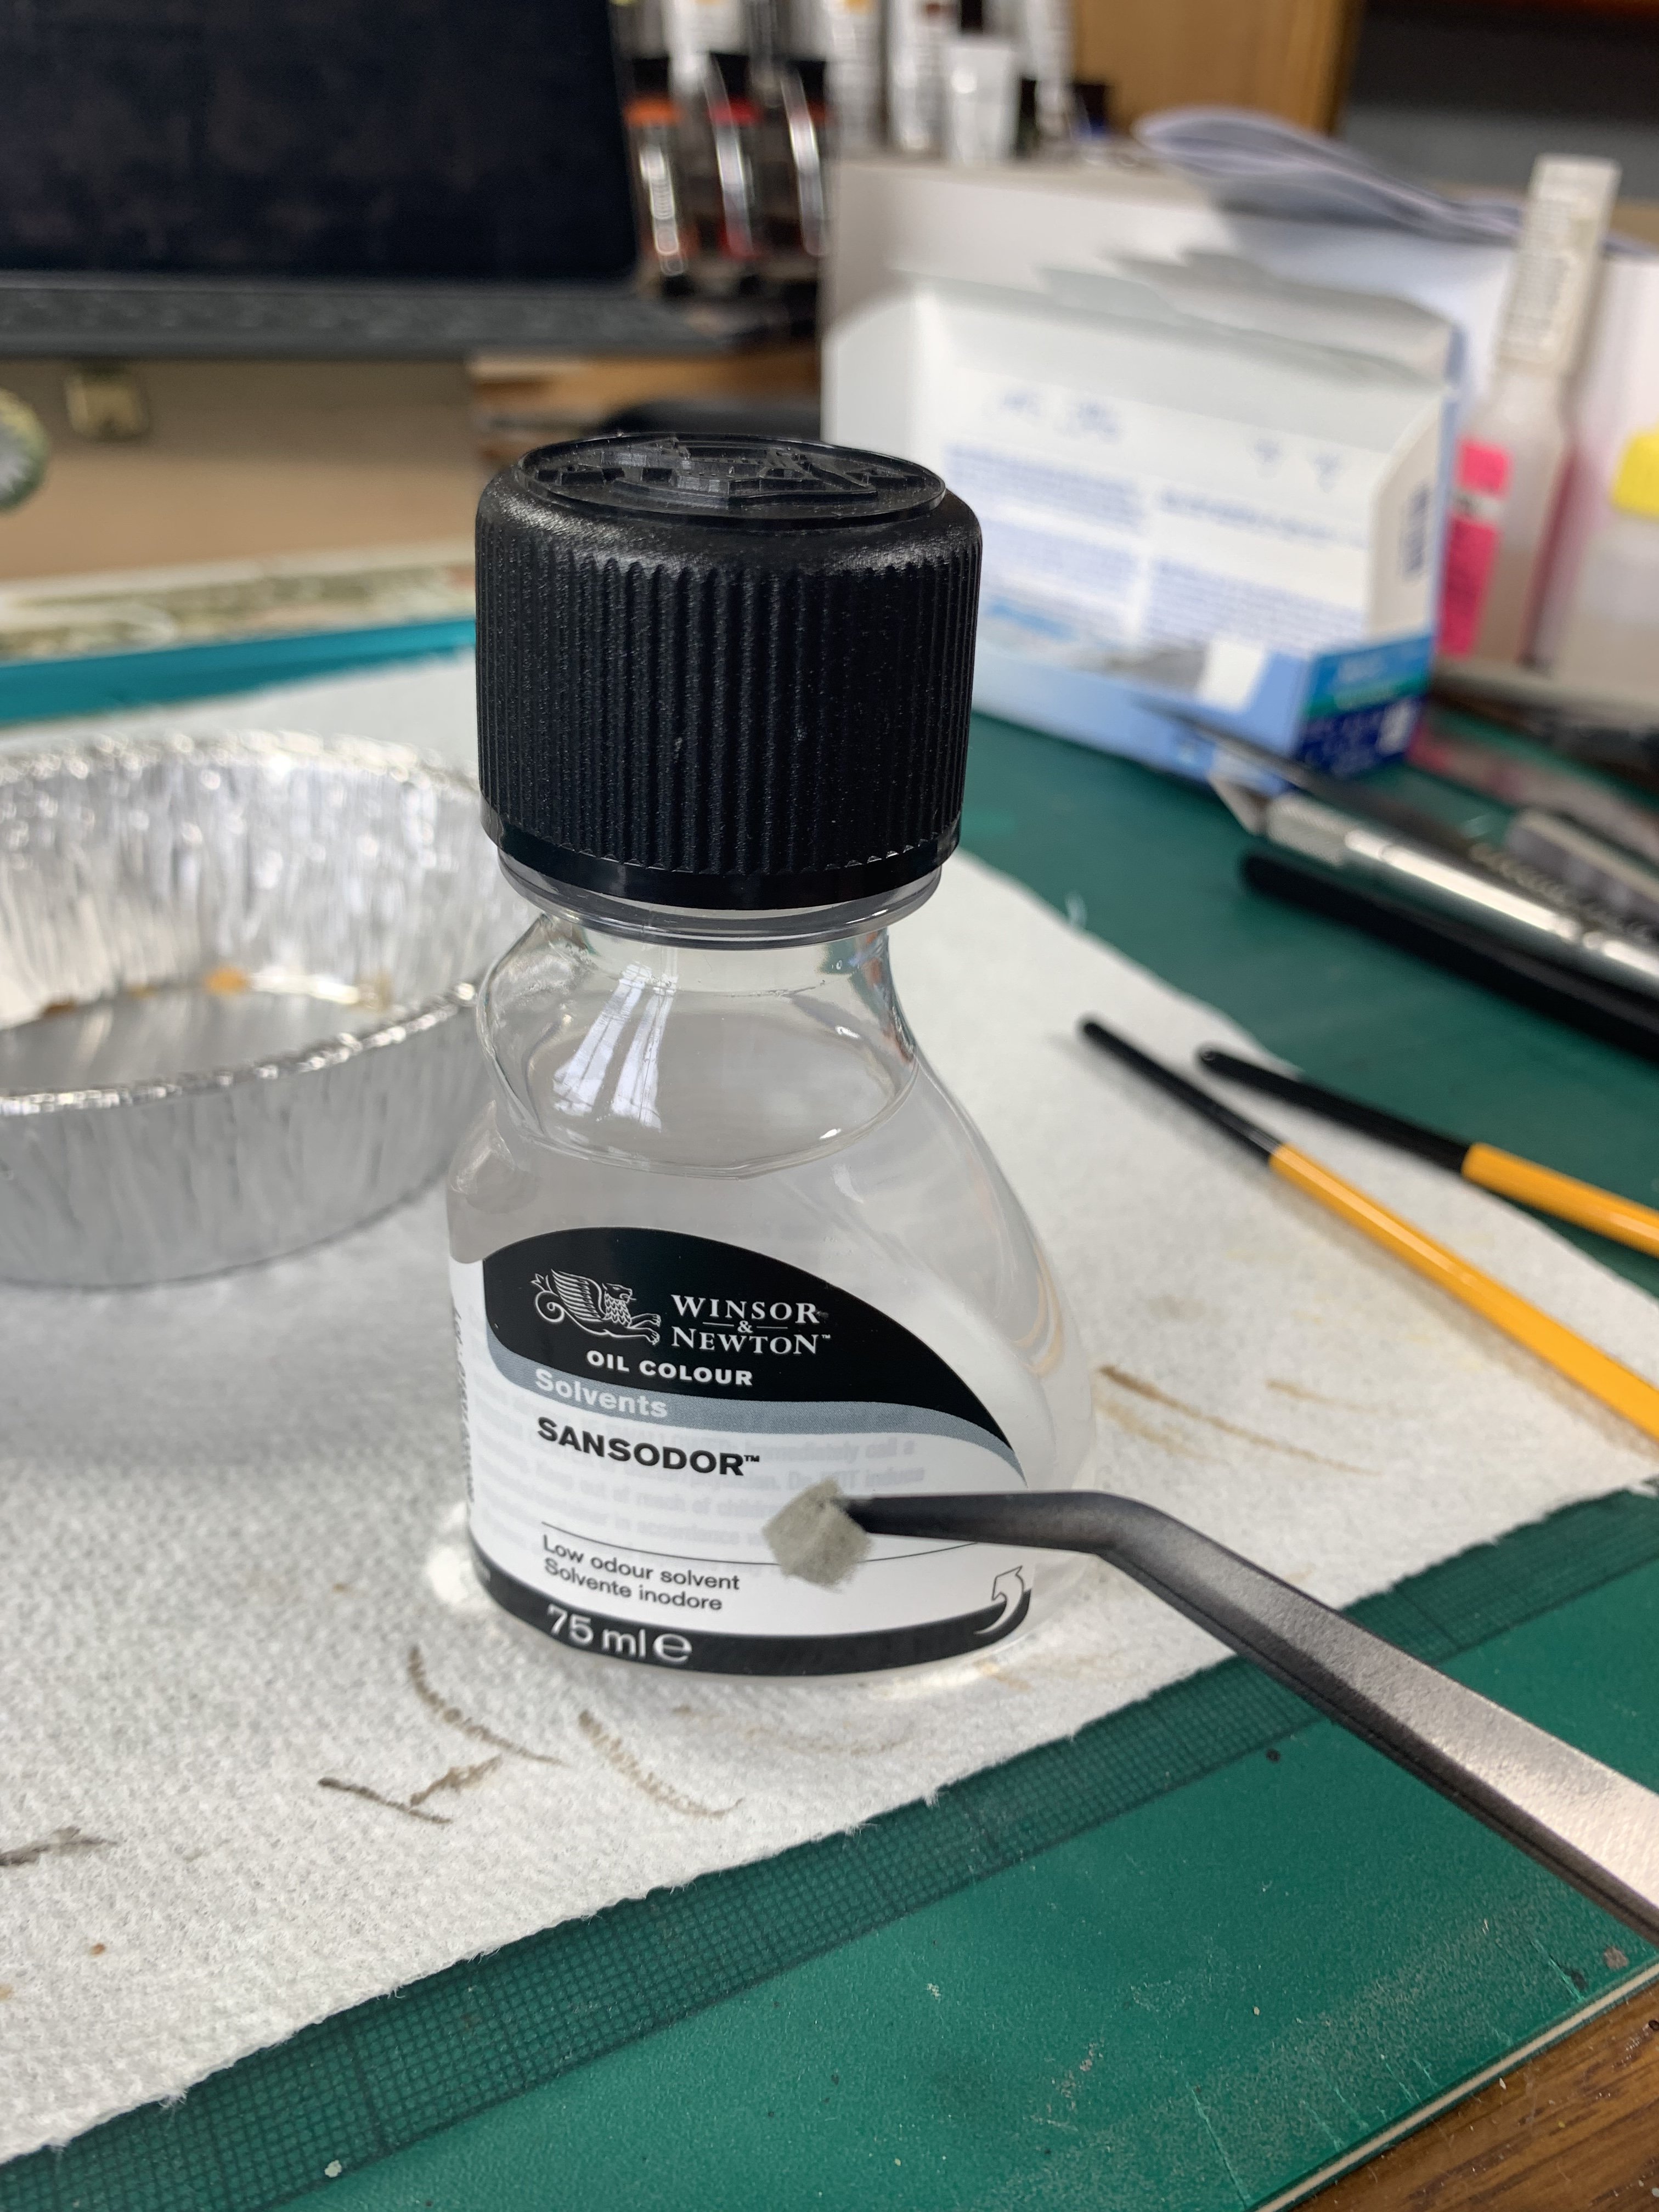
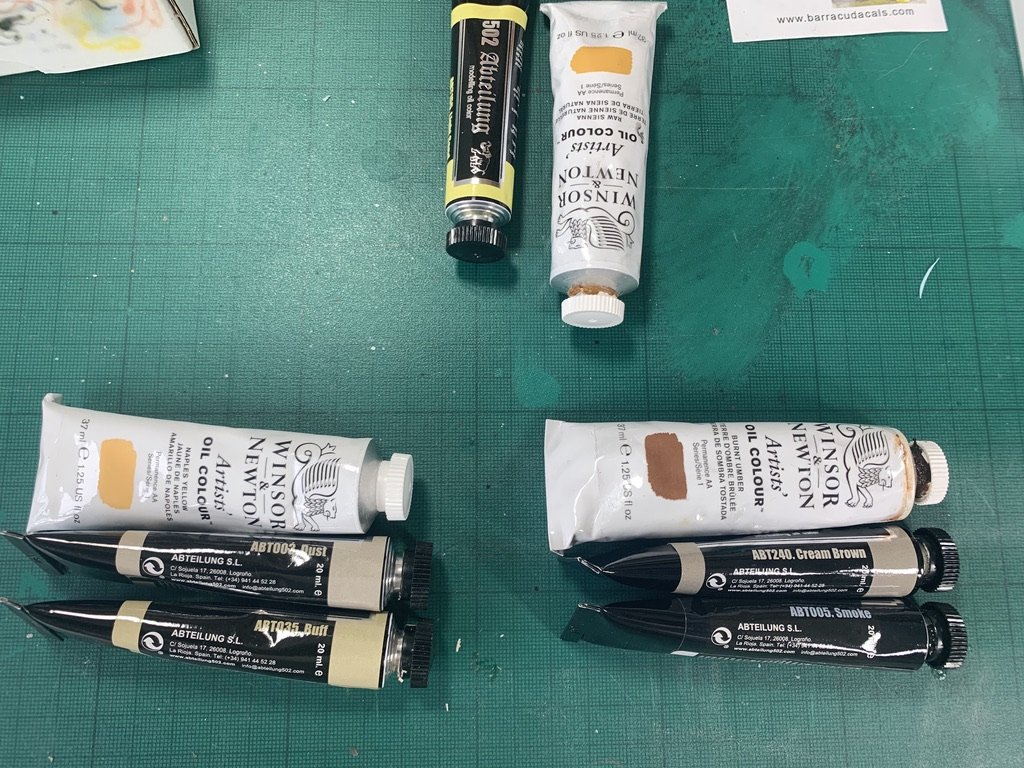
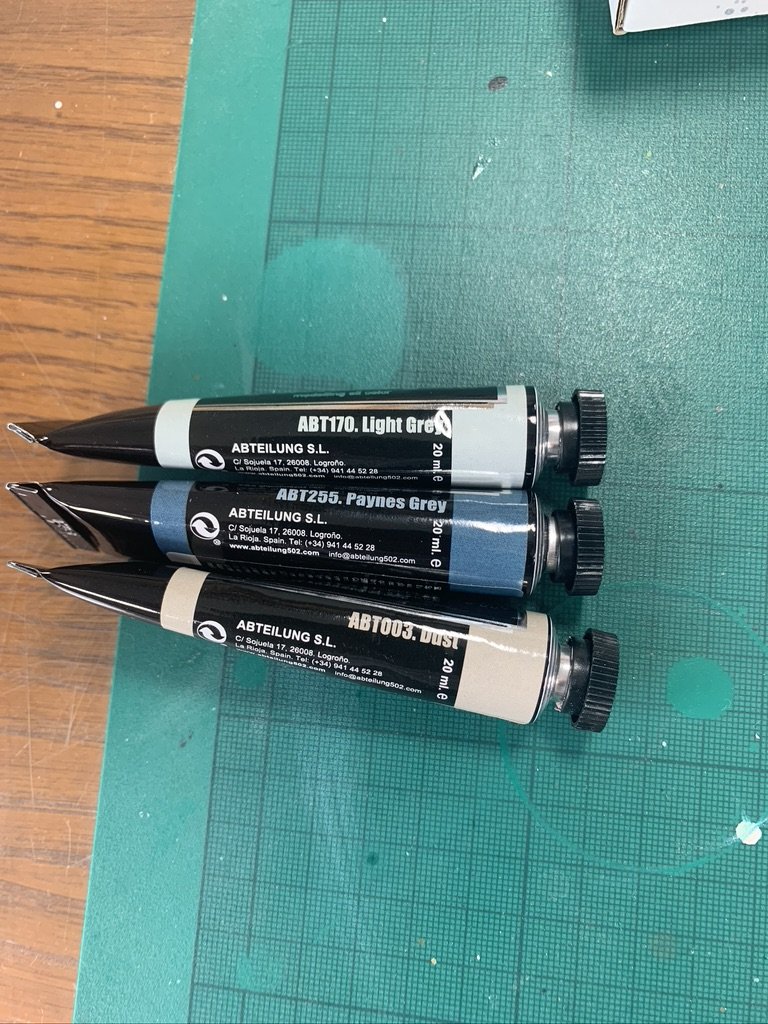
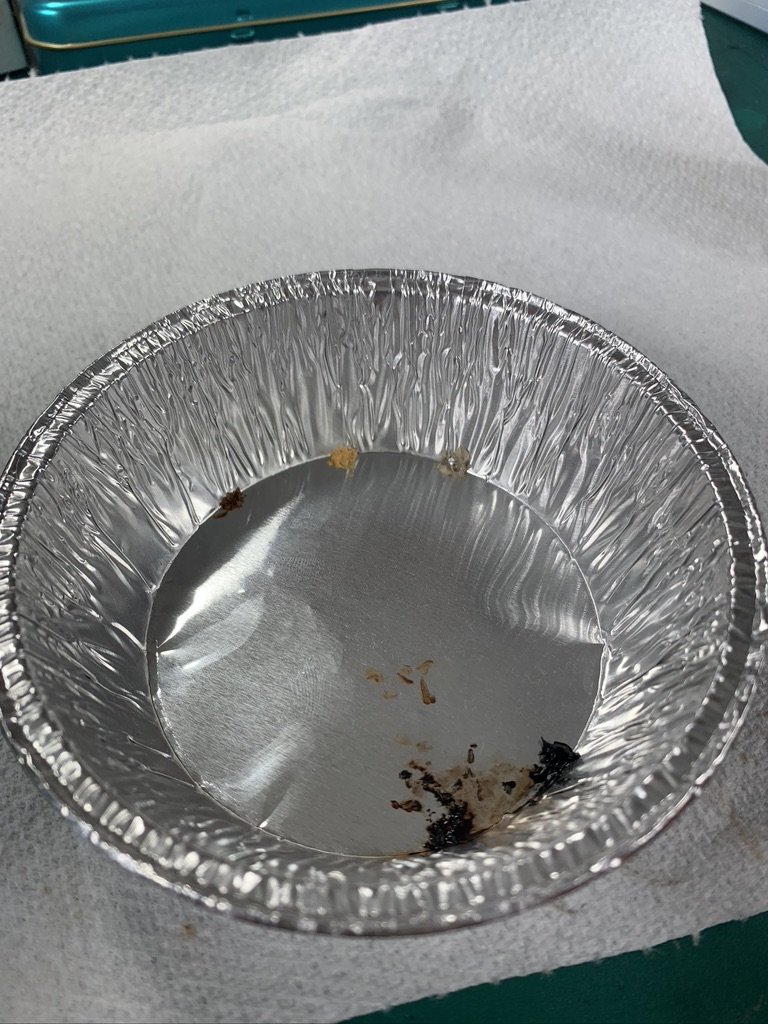
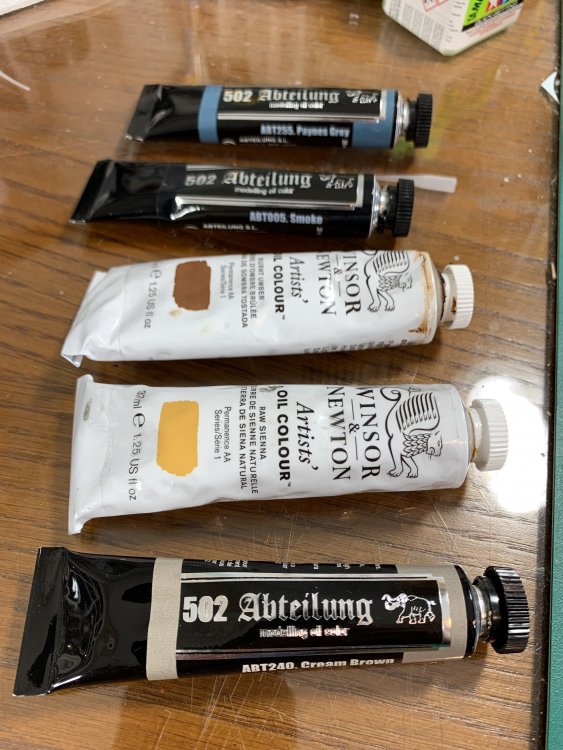
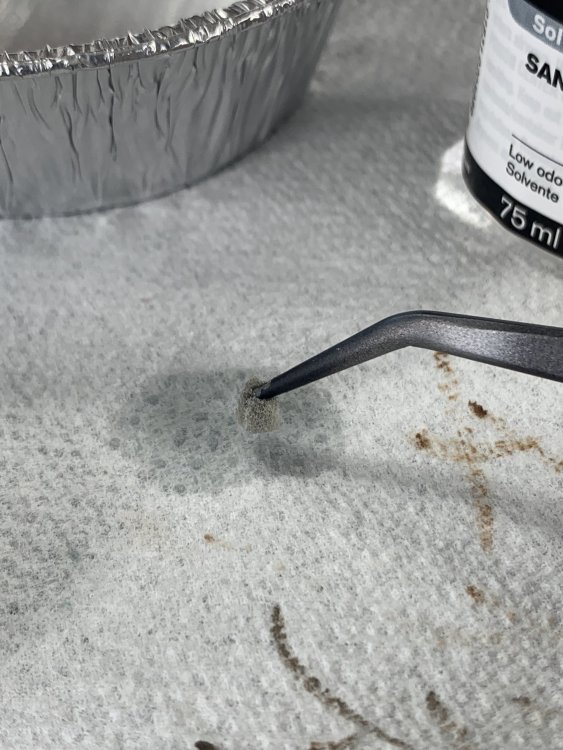
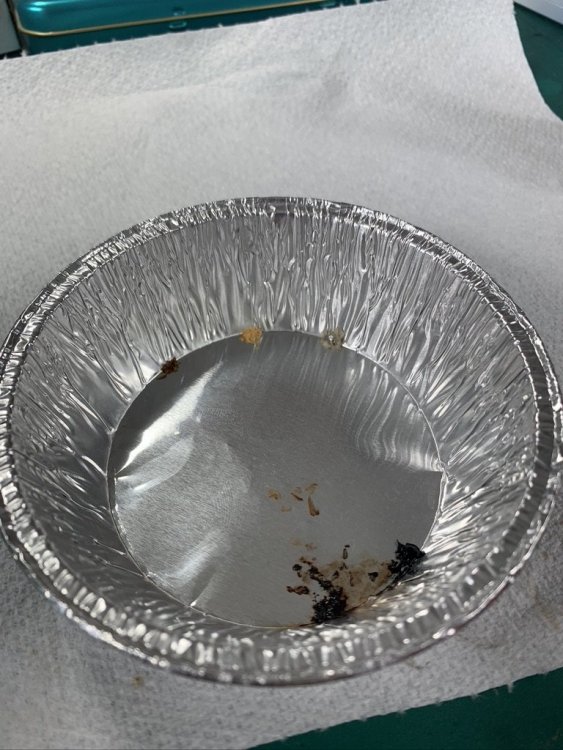
oils... there have recently been some very good technique videos on the use of 'OPR' (oil paint rendering) on youtube - check out Mike Rinaldi's new series and also Will Pattison's series of 7 videos on OPR for aircraft obviously there are many ways to use oils, and no way is 'wrong' per se, but there are some things that just don't make much sense! For instance, unless you are thinning them down to virtually nothing and using them as a wash, applying them to a gloss surface means you will likely just push them round your model without achieving much. The more matt your surface, the more 'bite' you will get. I spray MRP, and hopefully don't butcher it as i am doing so, thus the surfaces of my models are (should be!) smooth satin to the touch - I tend to find that this is just about right, but your mileage may vary. The other thing i will mention is the whole 'oil dot filtering' thing - putting lots of random dots of random colours all over your paint job. If that works for you then fine, but I try to ask myself what am i trying to change, why am i trying, and what do i want to achieve? For me 'ODF' doesn't figure in the answer to any of those questions. THE most important thing with oils though, is that it's almost impossible to f*ck up, or f*ck up your model! If you don't like what you did / are doing, then mineral spirits will just wipe it off and leave your paint job intact if you are using lacquers (I don't know about / have zero interest in other paint types, sorry). Anyway, before diving in, i like to group my oil colours together to help me visualise which ones will be used for which area / effect etc, so here's what mine looked like... and... i dab some out on cardboard to leach some of the oil out, but this is not absolutely necessary, and not everyone does it; next time i might not do this, and put it on hard copy paper instead to reduce the leaching effect labelling them can help as well if i want to mix colours i usually do it in a foil cup / cake mould, where i can also add some thinner, which for me is always W&N Sans Odour (Mineral Spirit that has had the smell taken out)... next up, application...


-
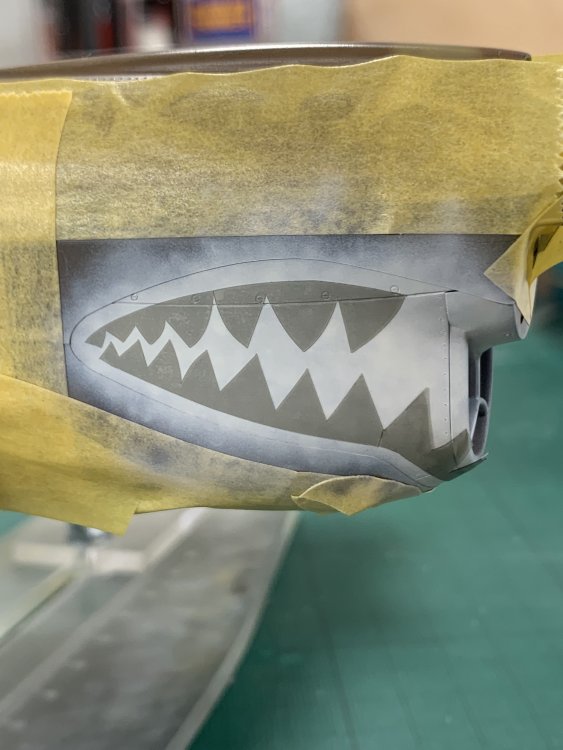
TopNotch will make to custom order, and i have used them for three previous projects for this one, they goofed the sharkmouth (only did one side, and that wasn't a close representation of the real thing either) and upper wing roundels too small, which they are working to correct; I should point out that the masks remained unopened by me for 7 months, and only then did i see their errors - I won't make that mistake again! my strong advice is get yourself a silhouette cutter thingy - it's what i've just done. Jennings (from LSP) is the only guy i have ever found to cry 'cant make them work' - I just haven't tried yet lol...i have zero patience to learn stuff, and just want to know how to 'do' i think this Youtube vid may be the solution: https://youtu.be/d2z45-4b7k8 Hope this helps Nick
-
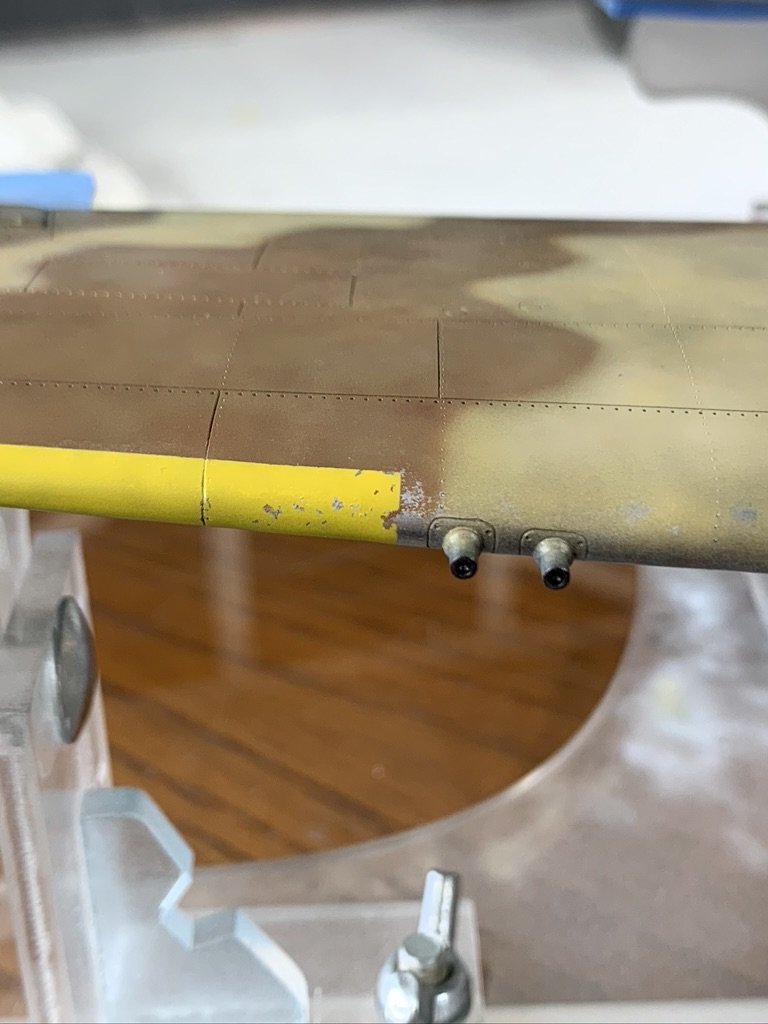
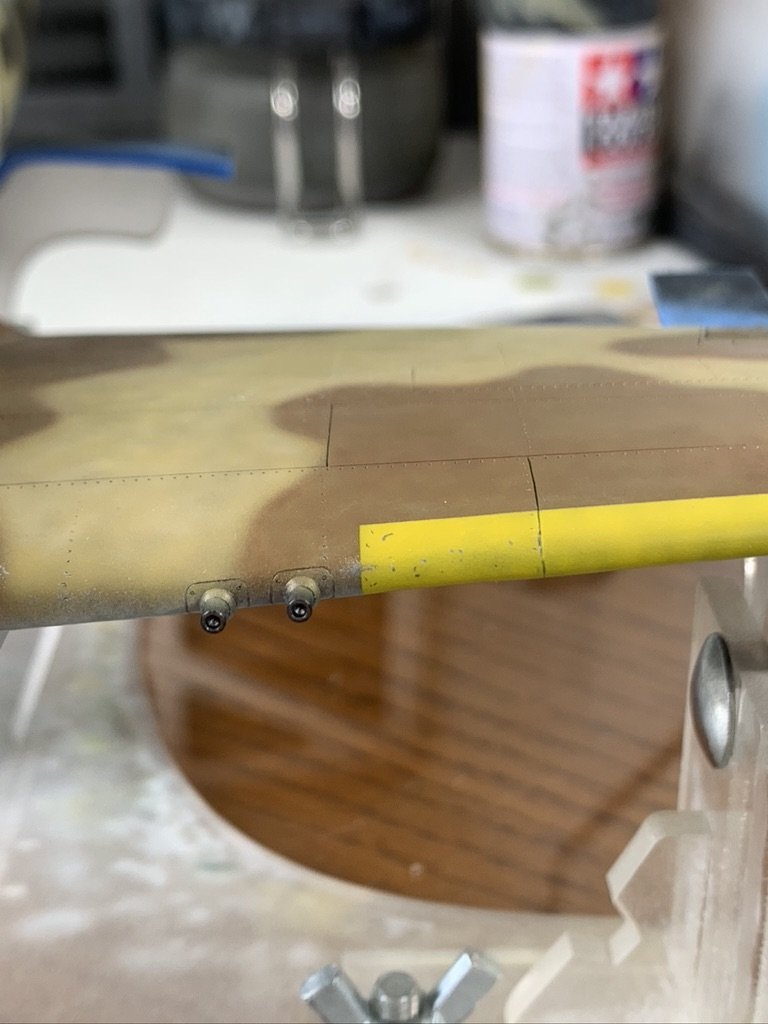
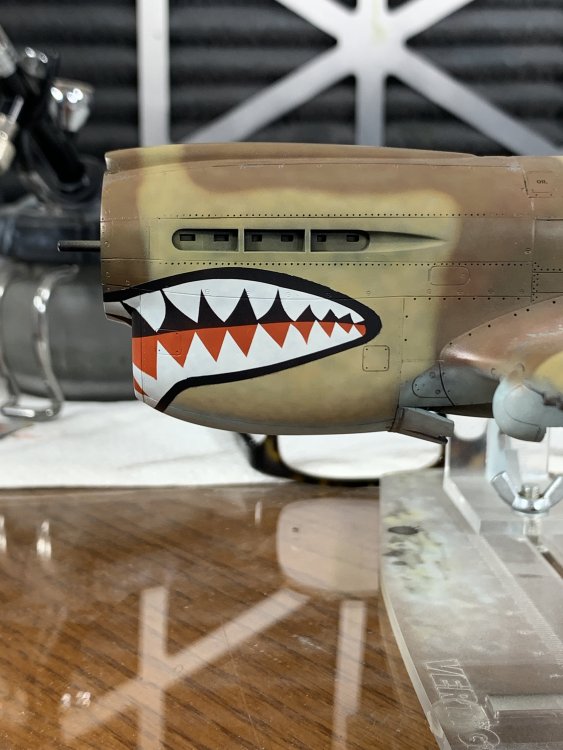
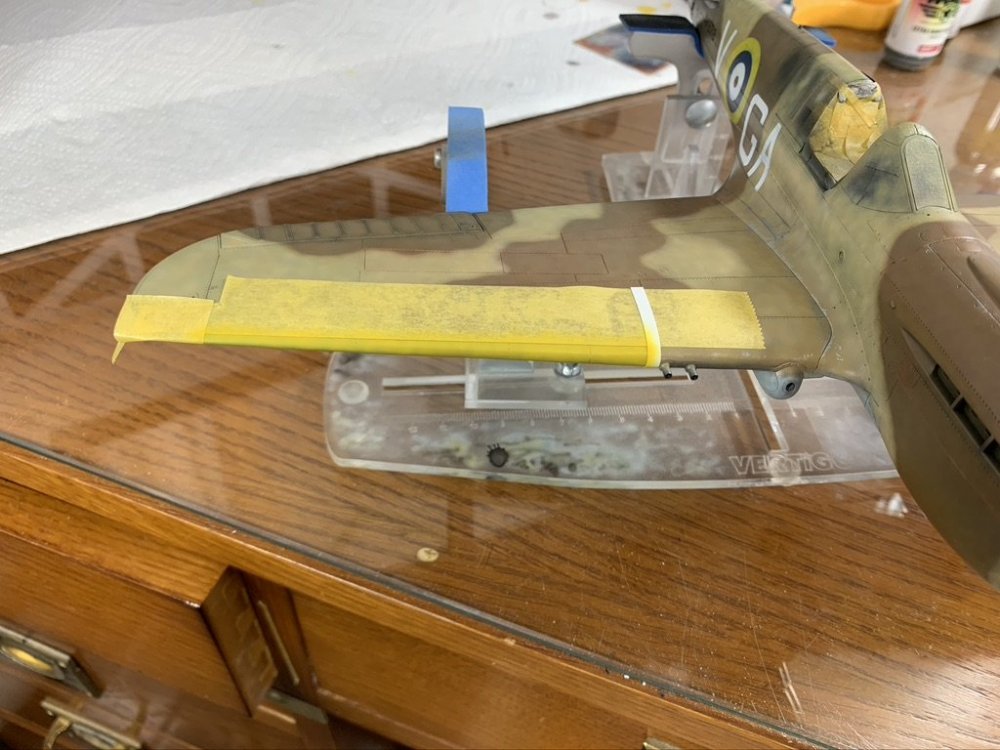
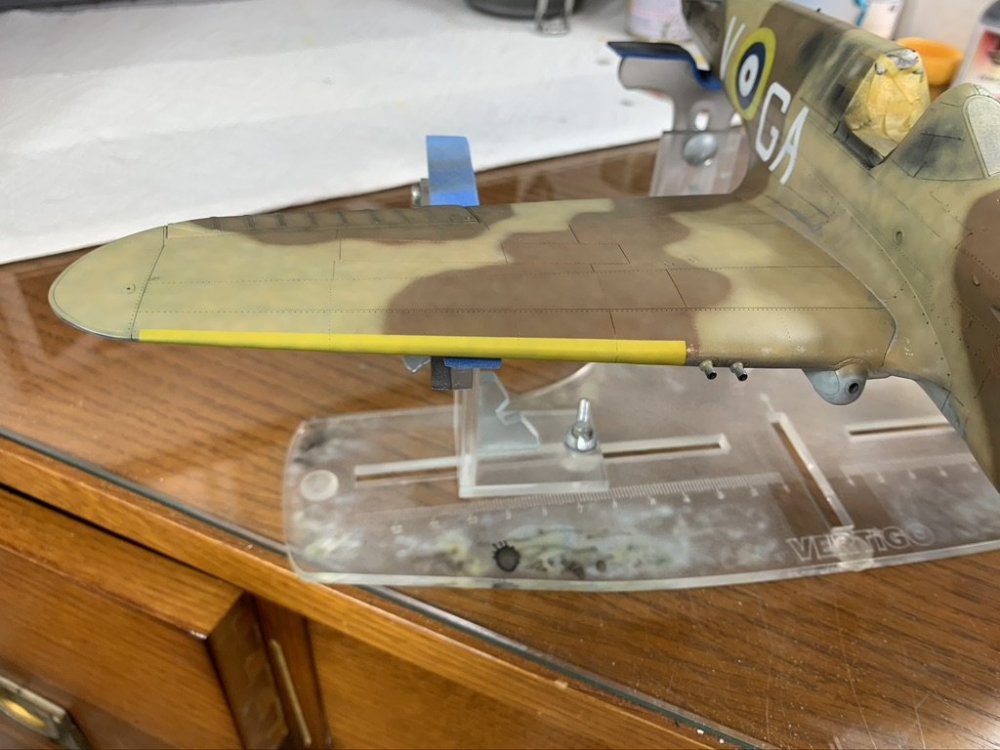
hey guys thank you for the comments just a quickie today - the leading edge yellow which makes this P-40 a little more interesting / exotic I think? I was in a bit of a rush so just quickly eye-balled the size of the 'stripes' and used Tamiya curved tape for the wing leading edge parts, then a quick pass with some hairspray on the inner most parts MRP yellow followed a few minutes later, building it up in layers / trying to get some randomness / depth in there hopefully the pic below shows it's not just a 'slab' of yellow... then some chipping - done the day after spraying the paint - takes a while to get it going but i only wanted one or two chips it's not my best, but it is sufficient to bring the stripe and the rest of the camo job 'together' next up will be some oil weathering of the underside i am still waiting on TopNotch to re-do the shark mouth and upper wing roundels, so no topside work until I get those - very frustrating! thanks for looking Nick


-
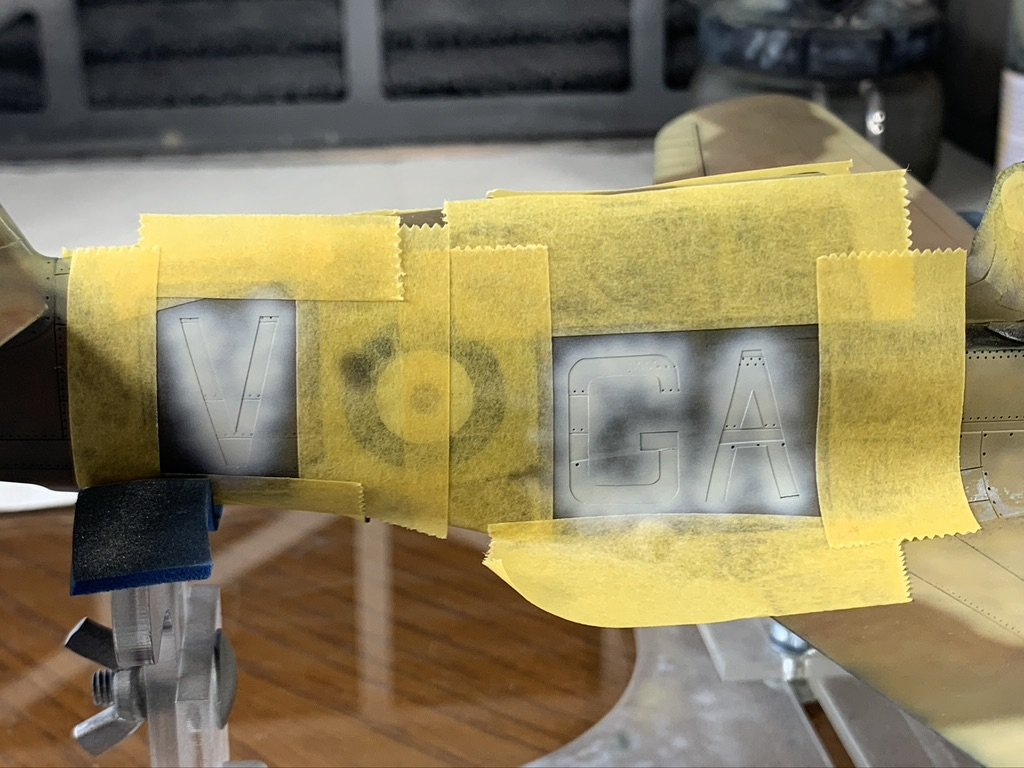
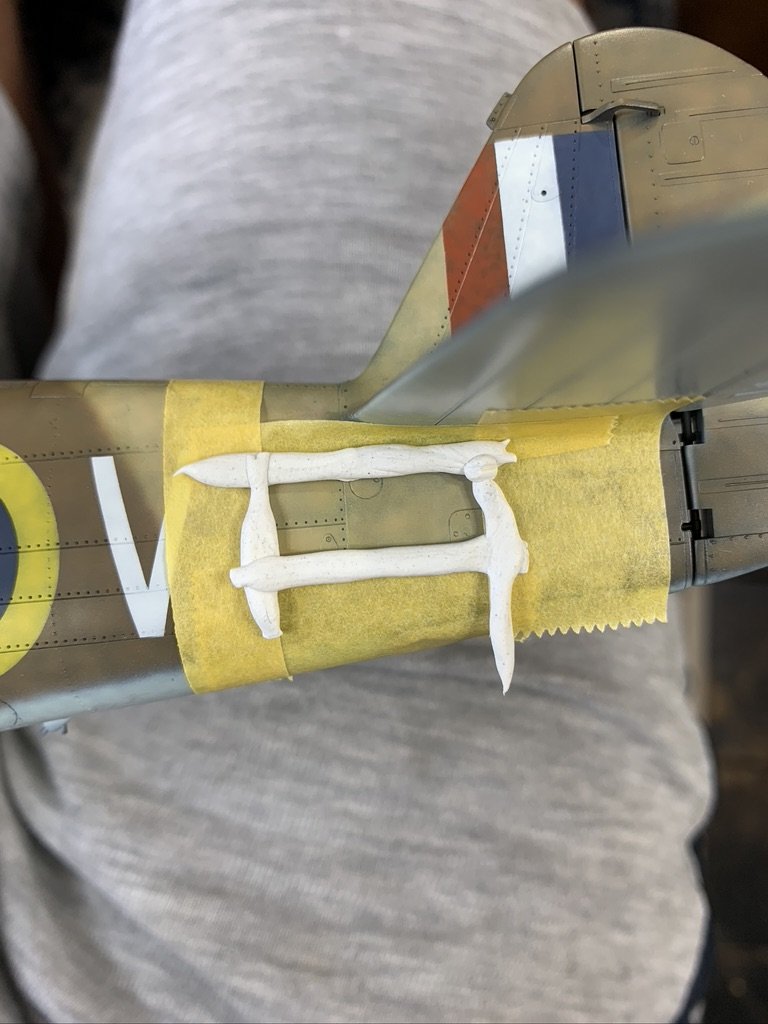
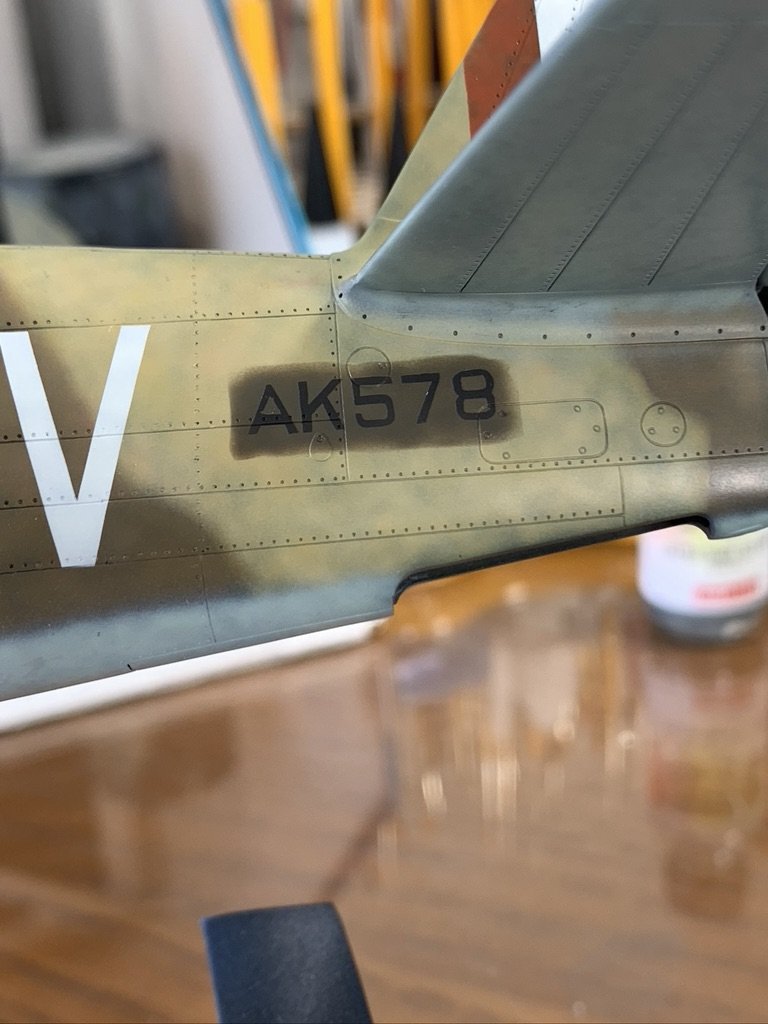
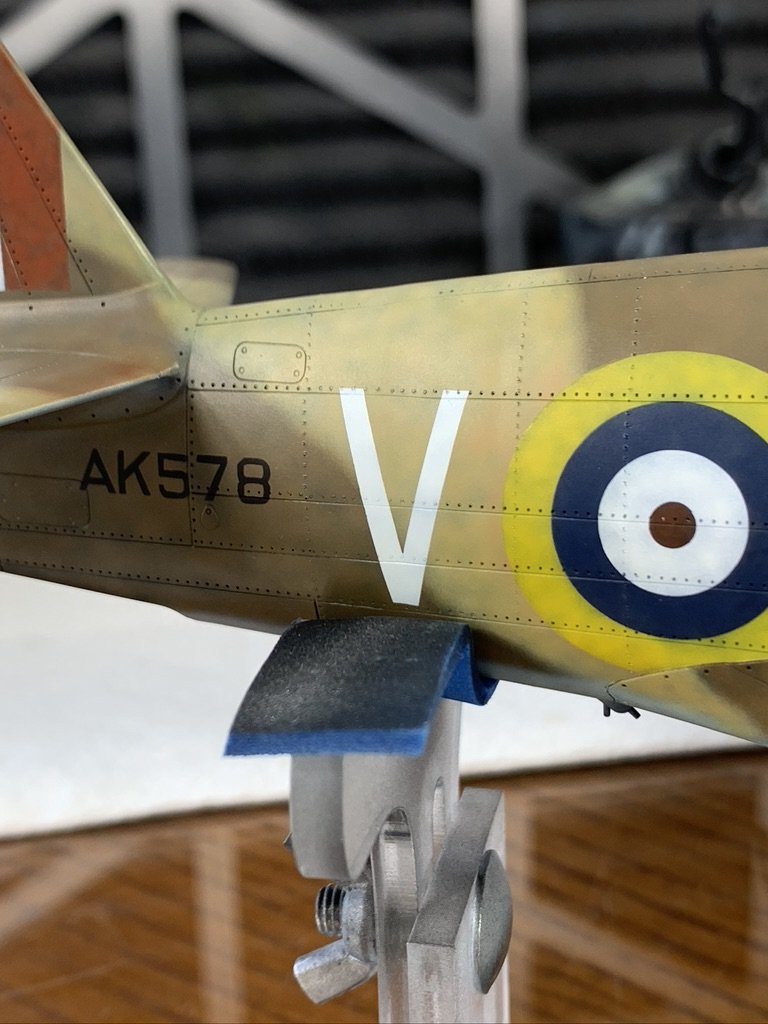
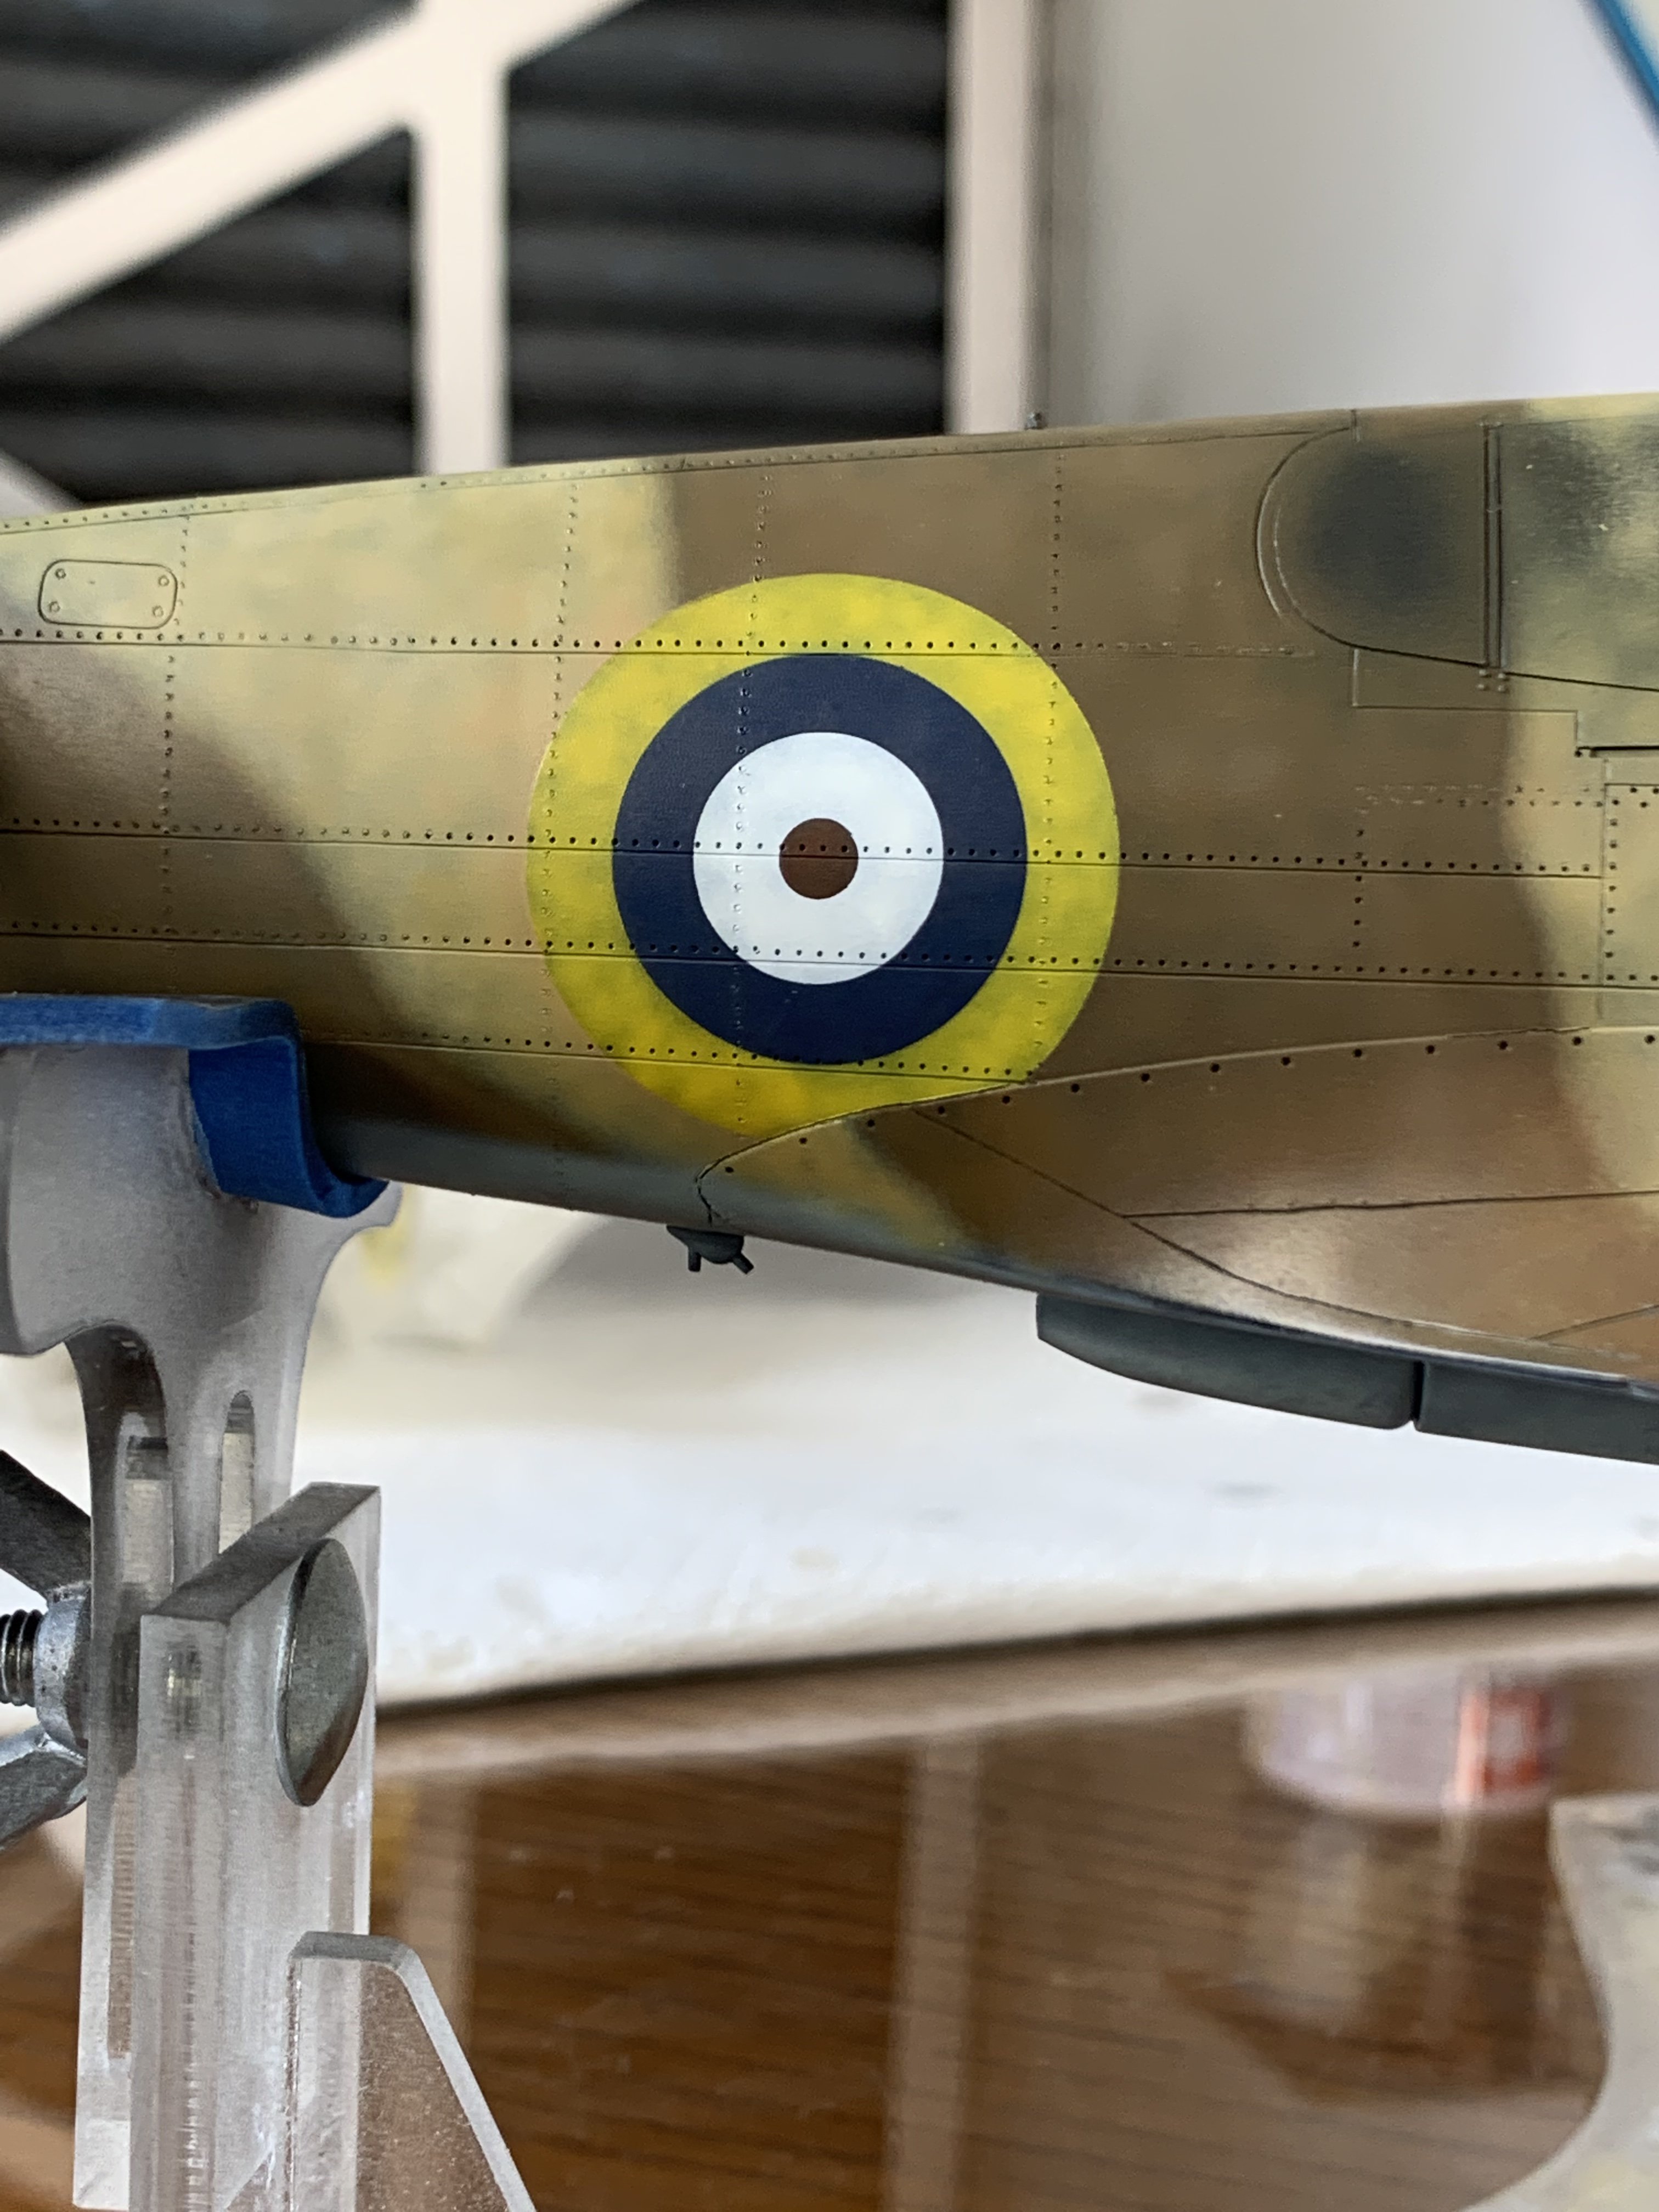
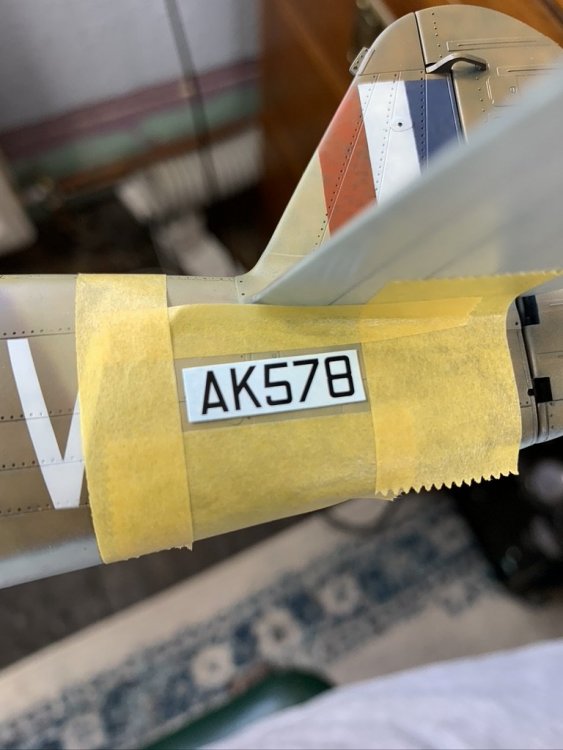
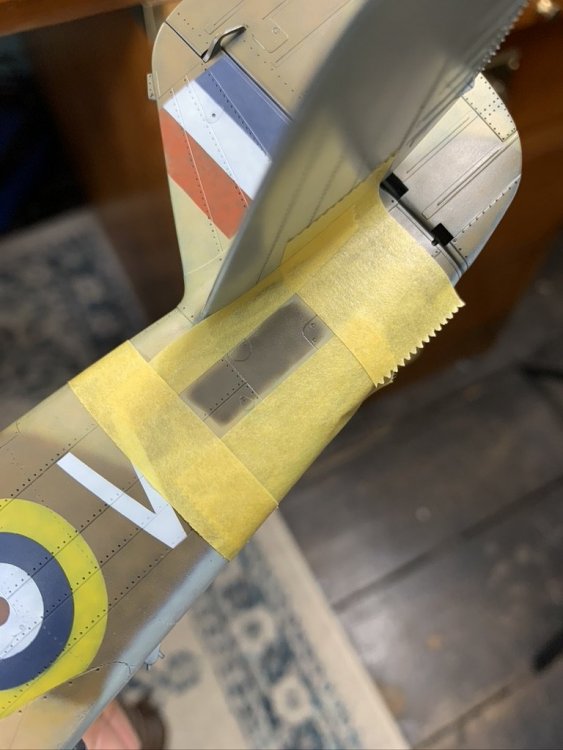
sorry for the lack of updates over the last week or so - been away on hols and also waiting for some masks to be re-cut for the shark mouth and upper wing roundels anyway, there has been some progress... underwing roundels now on - I haven't done a step by step simply because there's nothing inherently new from the fuselage roundel process and then fuselage codes - these are in white which i think offers a nice contrast on desert schemes once again dark colour applied first to help get some depth and variation... and then using MRP Clear Doped Linen - it's a subtle creamy off white so after a few passes and some squiggling, here is what we have and as you may have noticed in the above i also retouched the yellow in the roundels (same done on both sides) - i wasn't happy that i had enough coverage on the part the i resprayed whether this is correcting the correction to the correction to the correction, I will let Peter confirm once the fuselage codes were done, it was time to add the serial which on the port side was left on the original dark green, so this needed to be added first i used the decal to get a feel for how much i would need to mask off - it's just resting there in the pic below then used blu tack worms for the surround... and sprayed some dark green in the box... i goofed up the A a bit - my fault in not taking care of the transfer of the mask in the same way that i normally would with roundels - very sloppy! and here is the other side which is over the dark earth so no repaint needed next update will be the yellow wing leading edges which will have some very light chipping - I'll do that later / tomorrow hopefully thanks for looking Nick


-
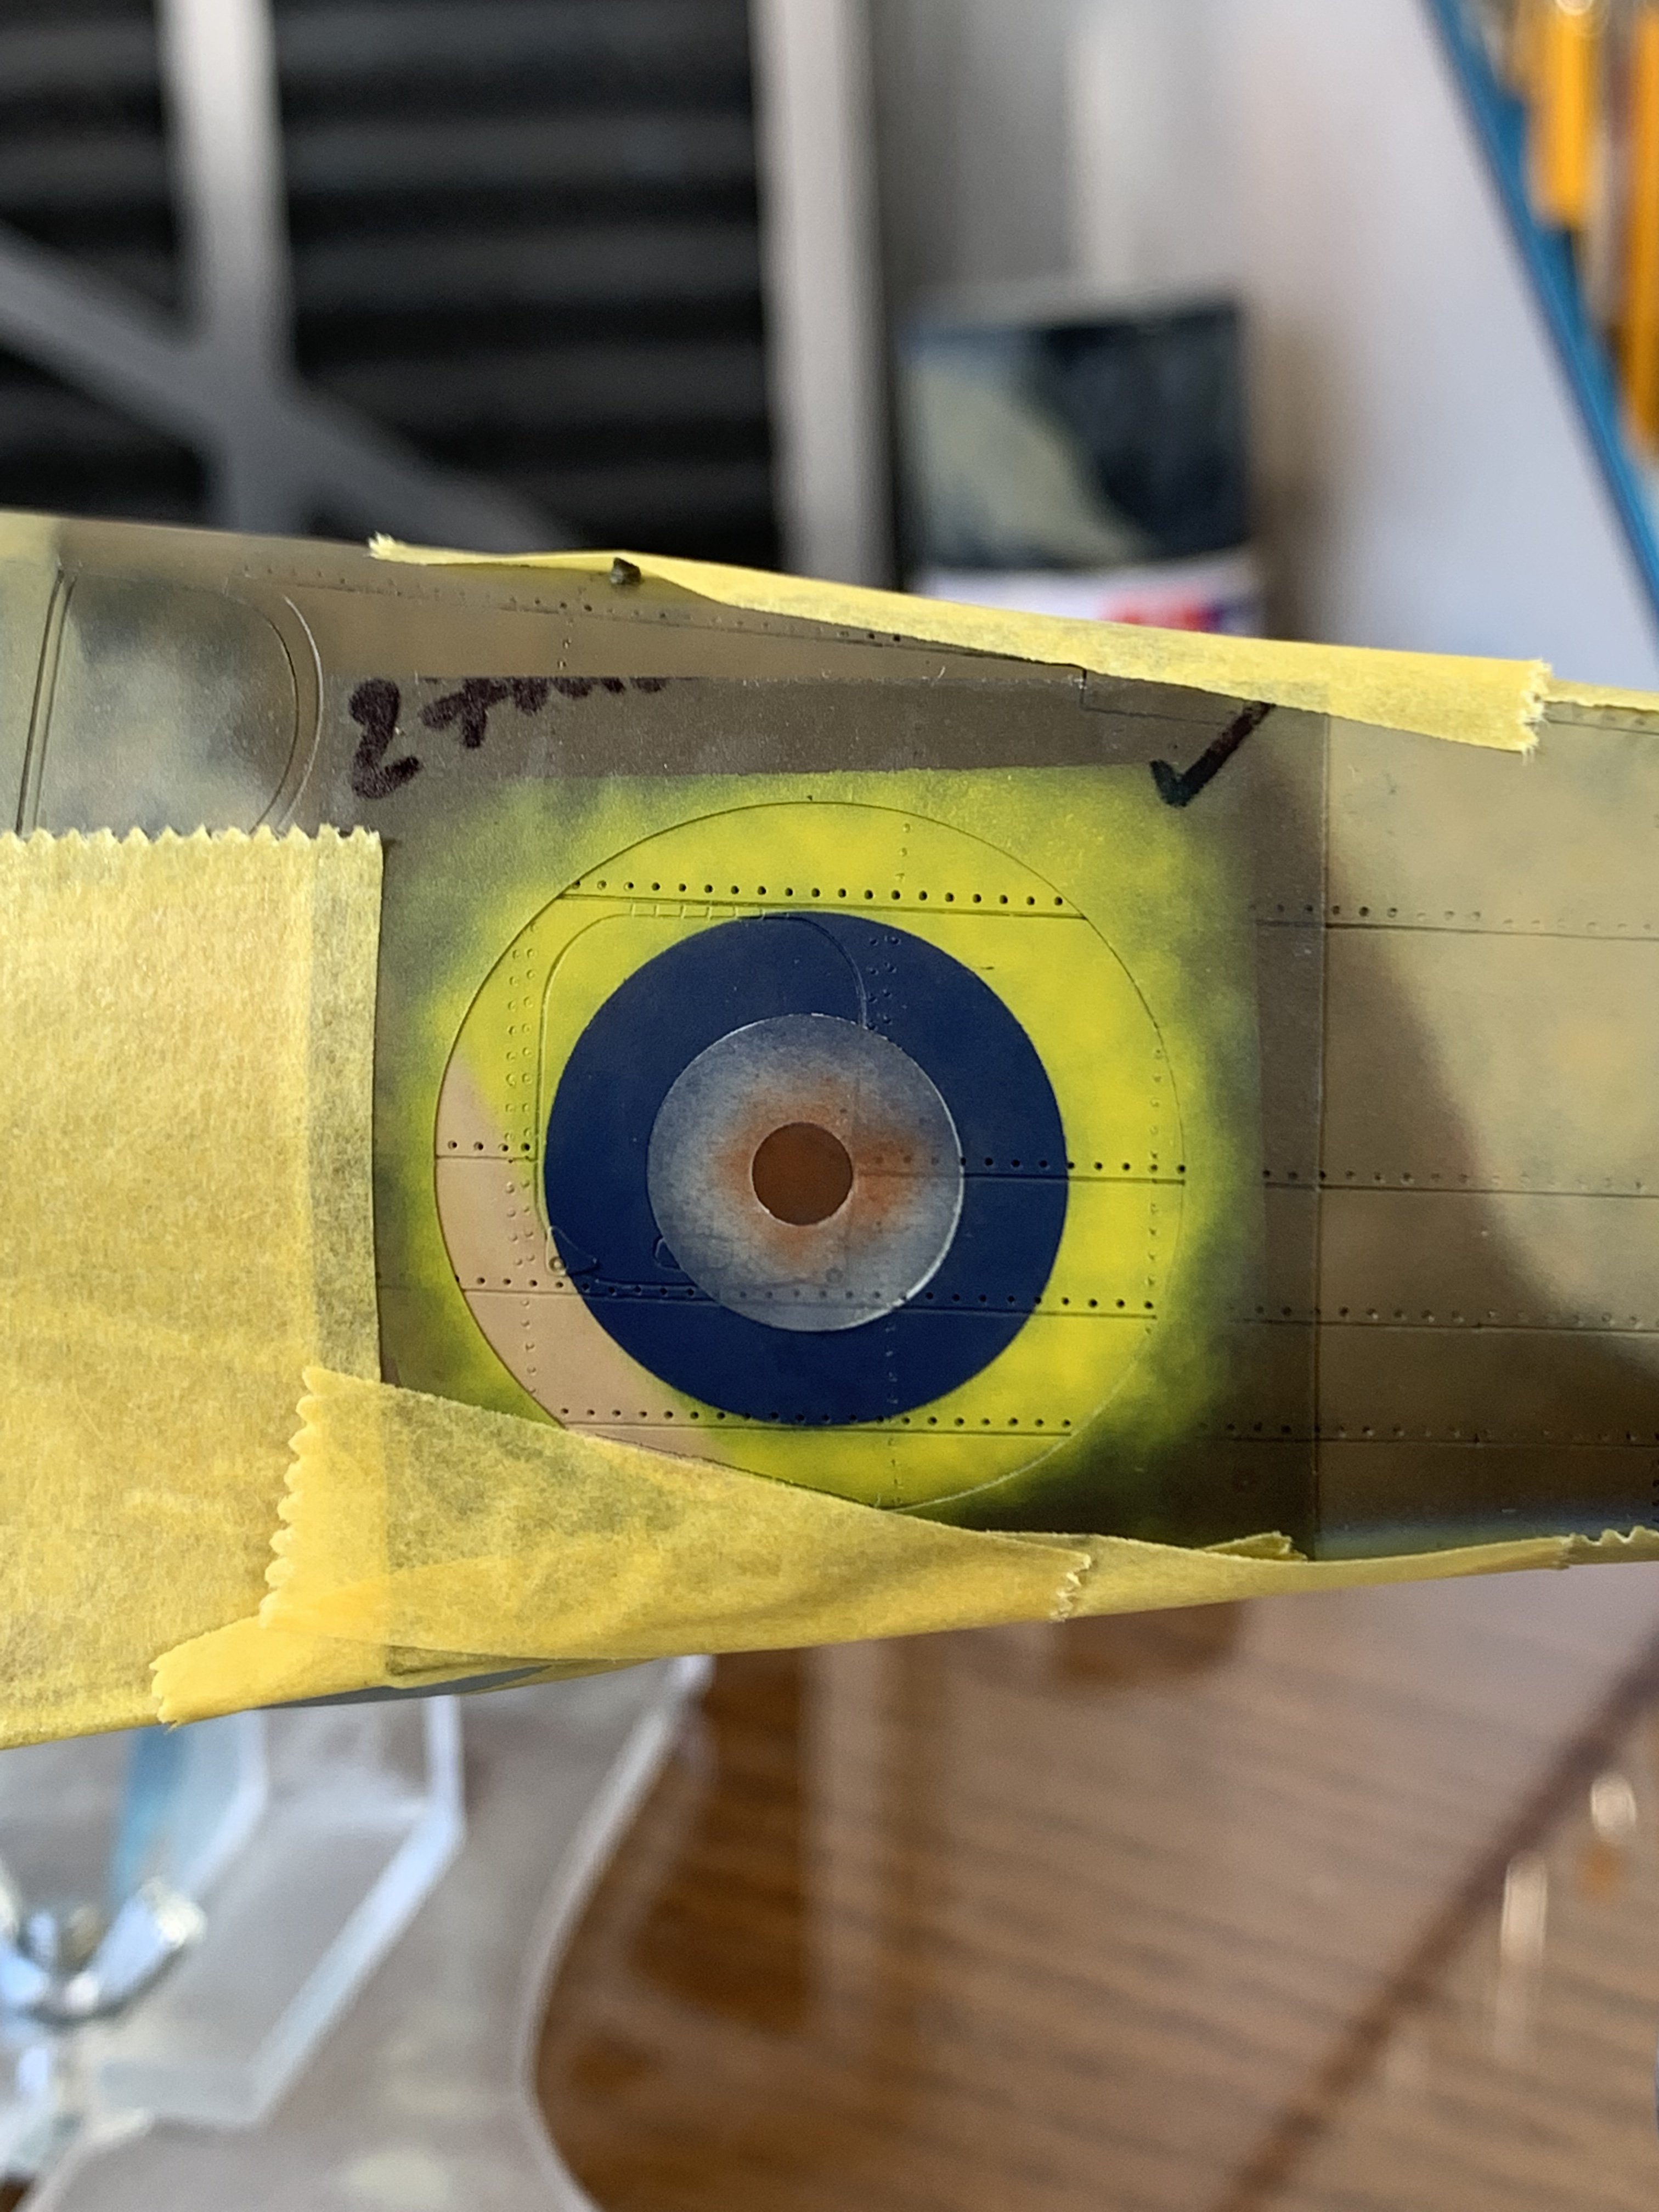
So pretty much as soon as I had finished spraying the middlestone, i received an email from a researcher and expert and desert P-40s who confirmed that the Barracuda analysis / take on things was actually incorrect - isn’t that always the way?! after analysing better copies of the existing photos and with some modern picture editing wizardry, i was able to clearly see that there was in fact no overspray but there was a different portion of the roundel (on both sides) which was painted when the aircraft was still in pieces that was covered up by the wing fillet after re-assembly. so…luckily i kept the masks and their surrounds so a little re-touching was required Without seeing the surrounding colours sometimes it is difficult to get a proper feel for how much paint you have laid down and unfortunately i think i will have to do another pass when i get back from hols here is where we are at the moment