
Daniel_Roxy
-
Posts
214 -
Joined
-
Last visited
Content Type
Profiles
Forums
Events
Gallery
Everything posted by Daniel_Roxy
-

1/16 Panther Conversion
Daniel_Roxy replied to Daniel_Roxy's topic in LSM 1/35 and Larger Work In Progress
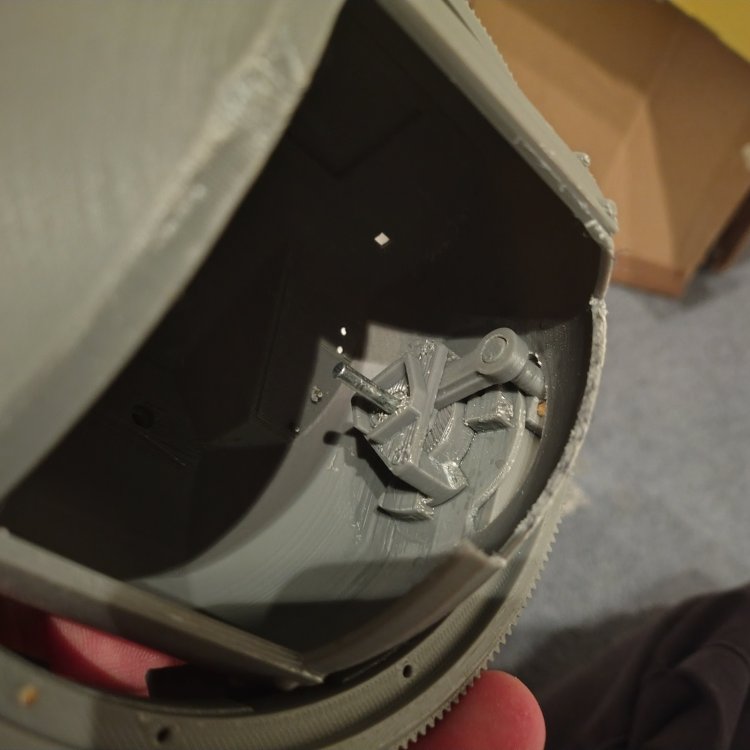
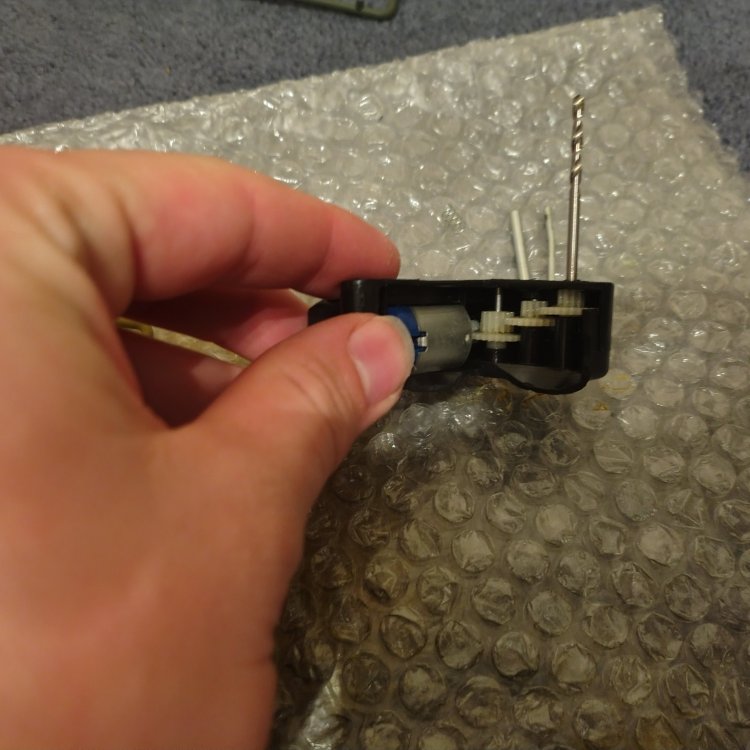
A small but exciting update. I have worked out how to make the old gun elevation gearbox work for the ball turret. The motor mount sits in those 3 twist locks and also holds the bar that connects the motor to the pin that the turret pivots about Used model glue and drilled a hole through the old gearbox and new motor mount. Aswell as drilled out the gear and made openings for a 3MM shaft to go from the last gear to the turrets elevation mechanism And here's the work in progress. Video!! VID_20251227_192507286.mp4 The grinding sound is just the slip gear. Can be seen in the 3rd photo the thicker gear with the spring.


-
1/16 Panther Conversion
Daniel_Roxy replied to Daniel_Roxy's topic in LSM 1/35 and Larger Work In Progress
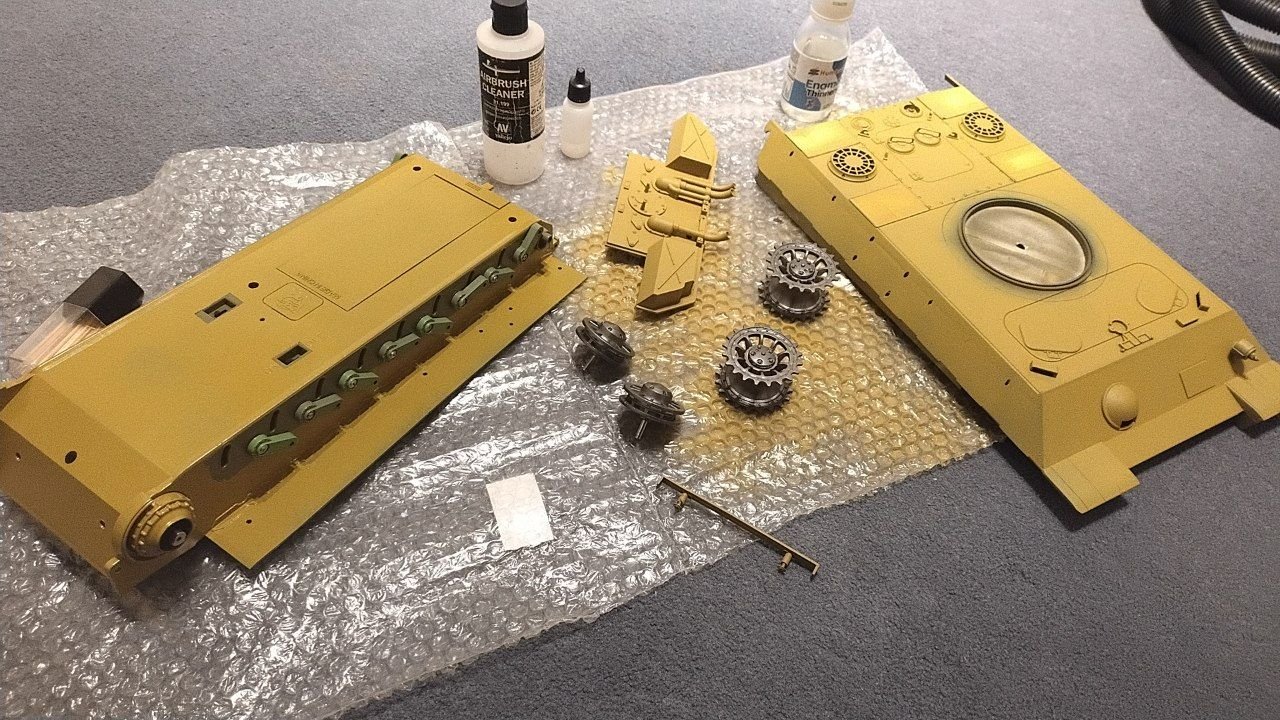
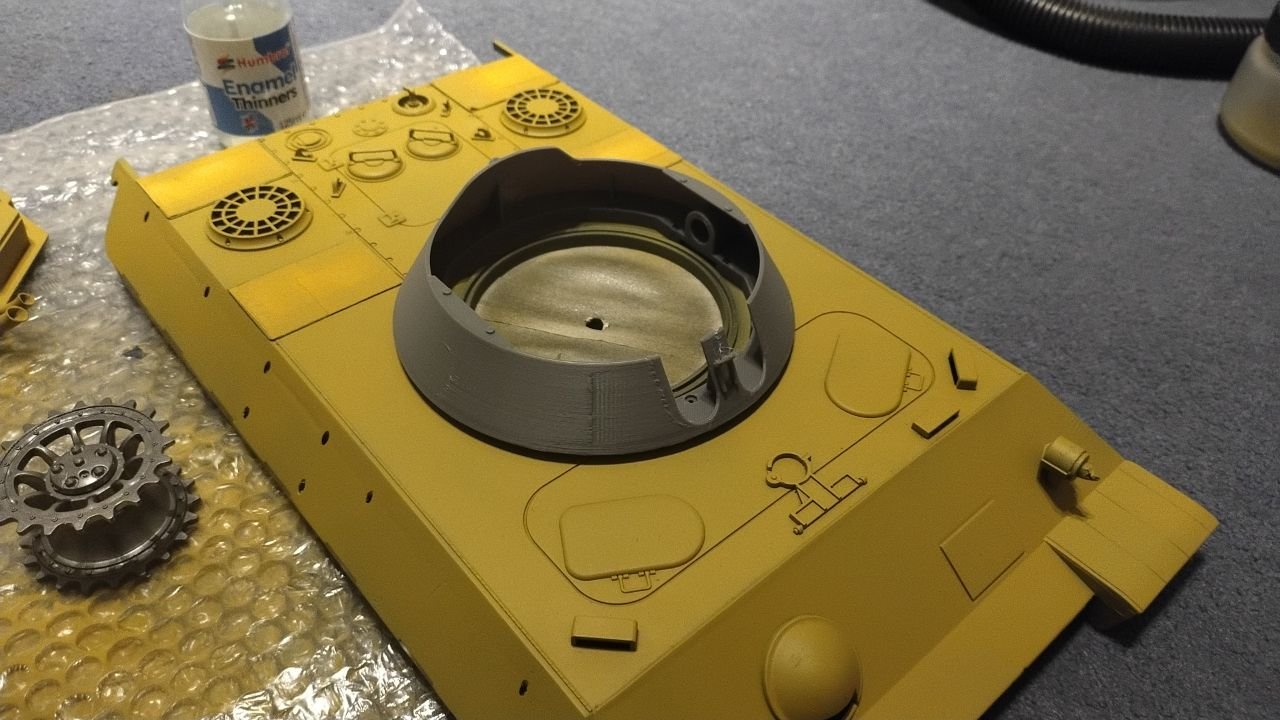
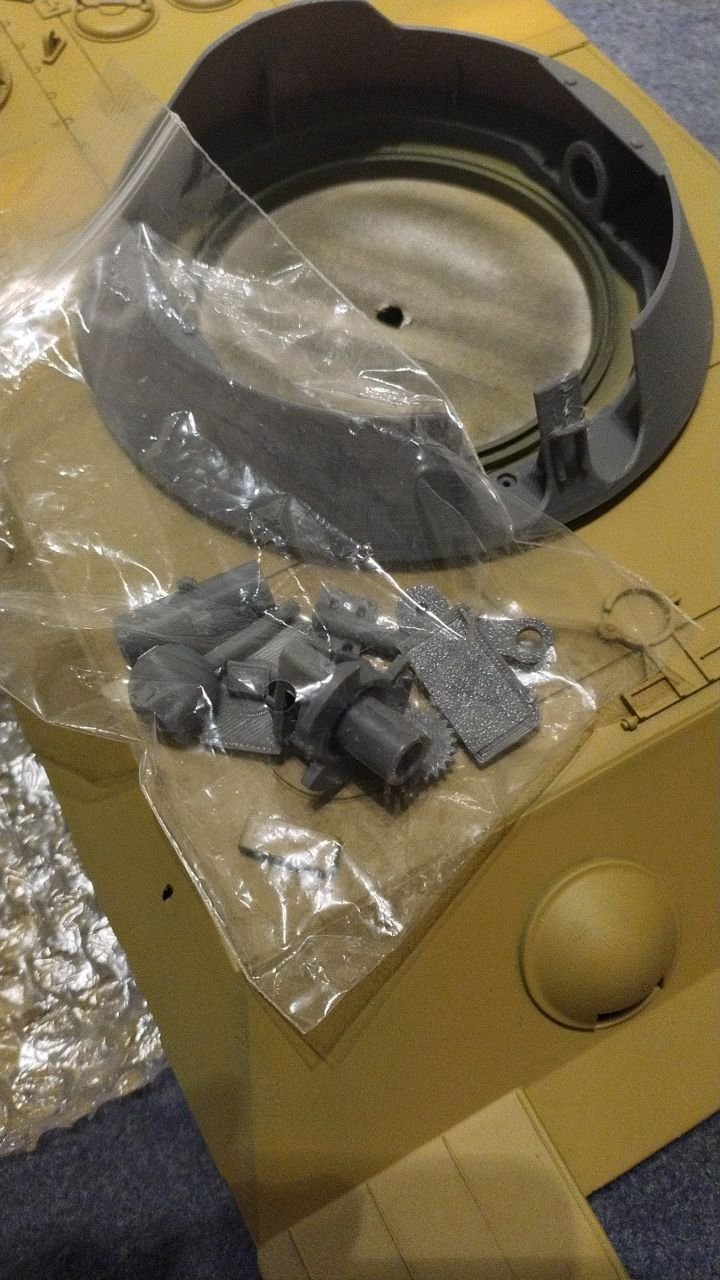
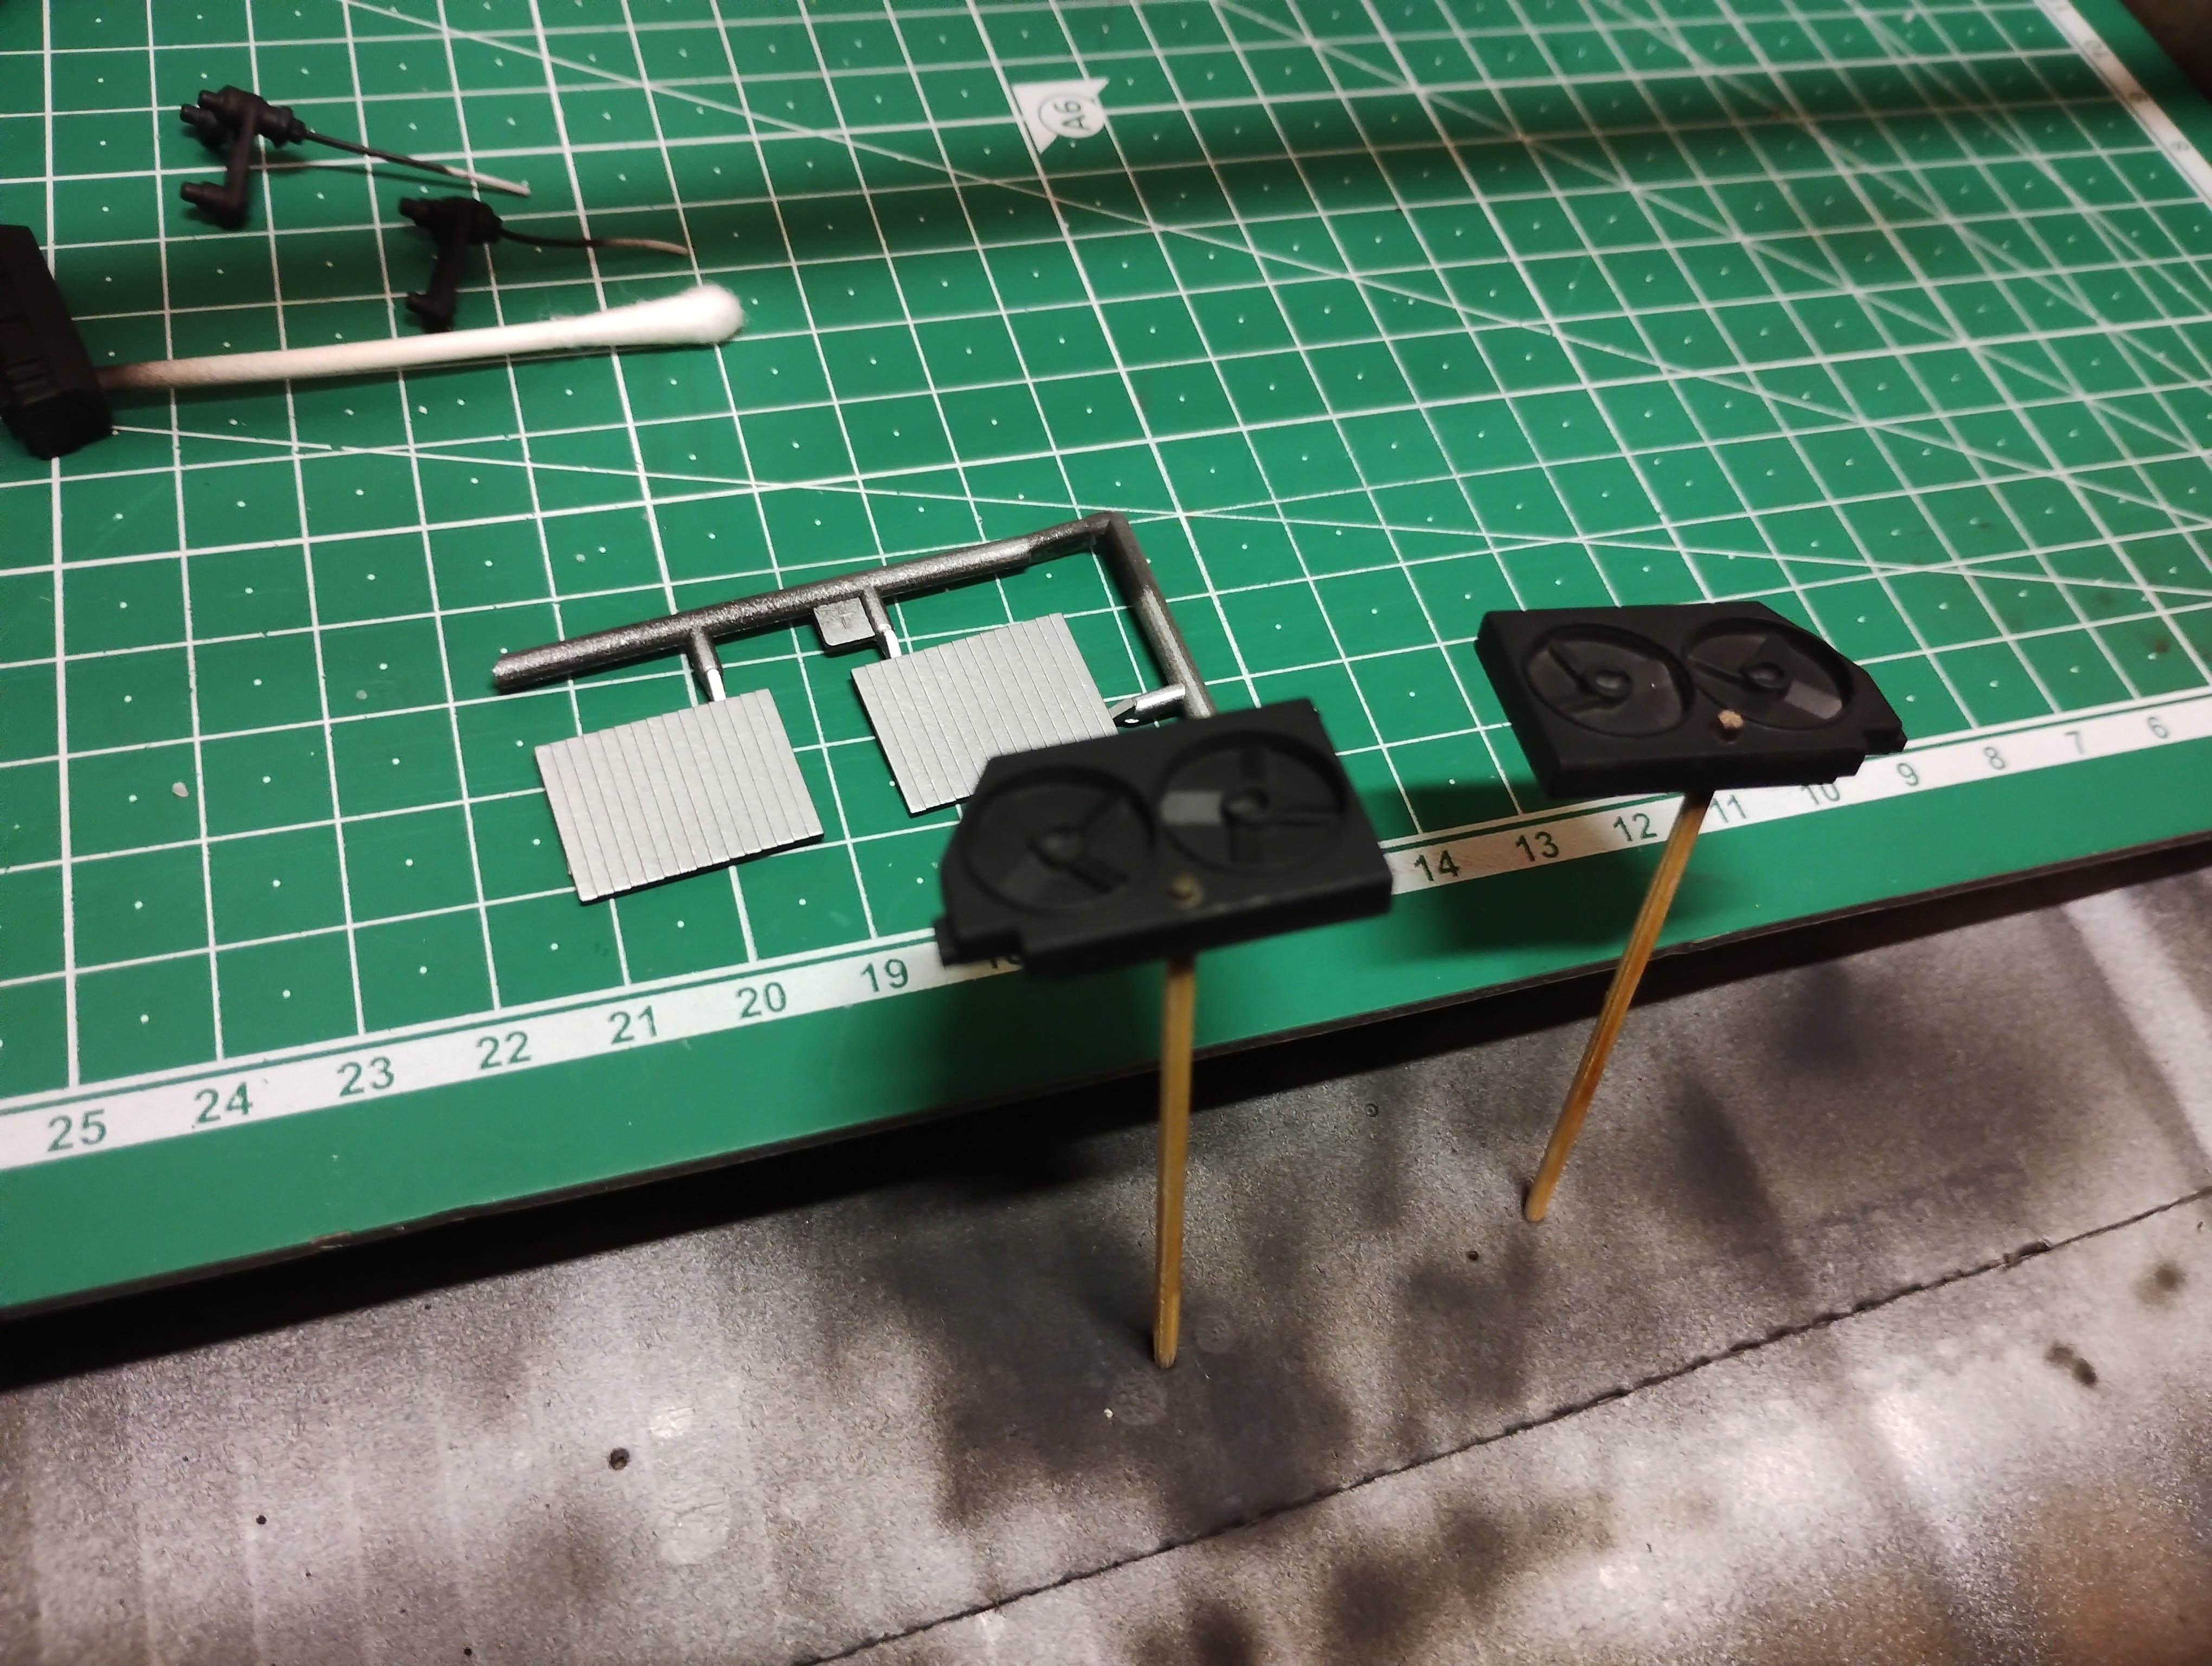
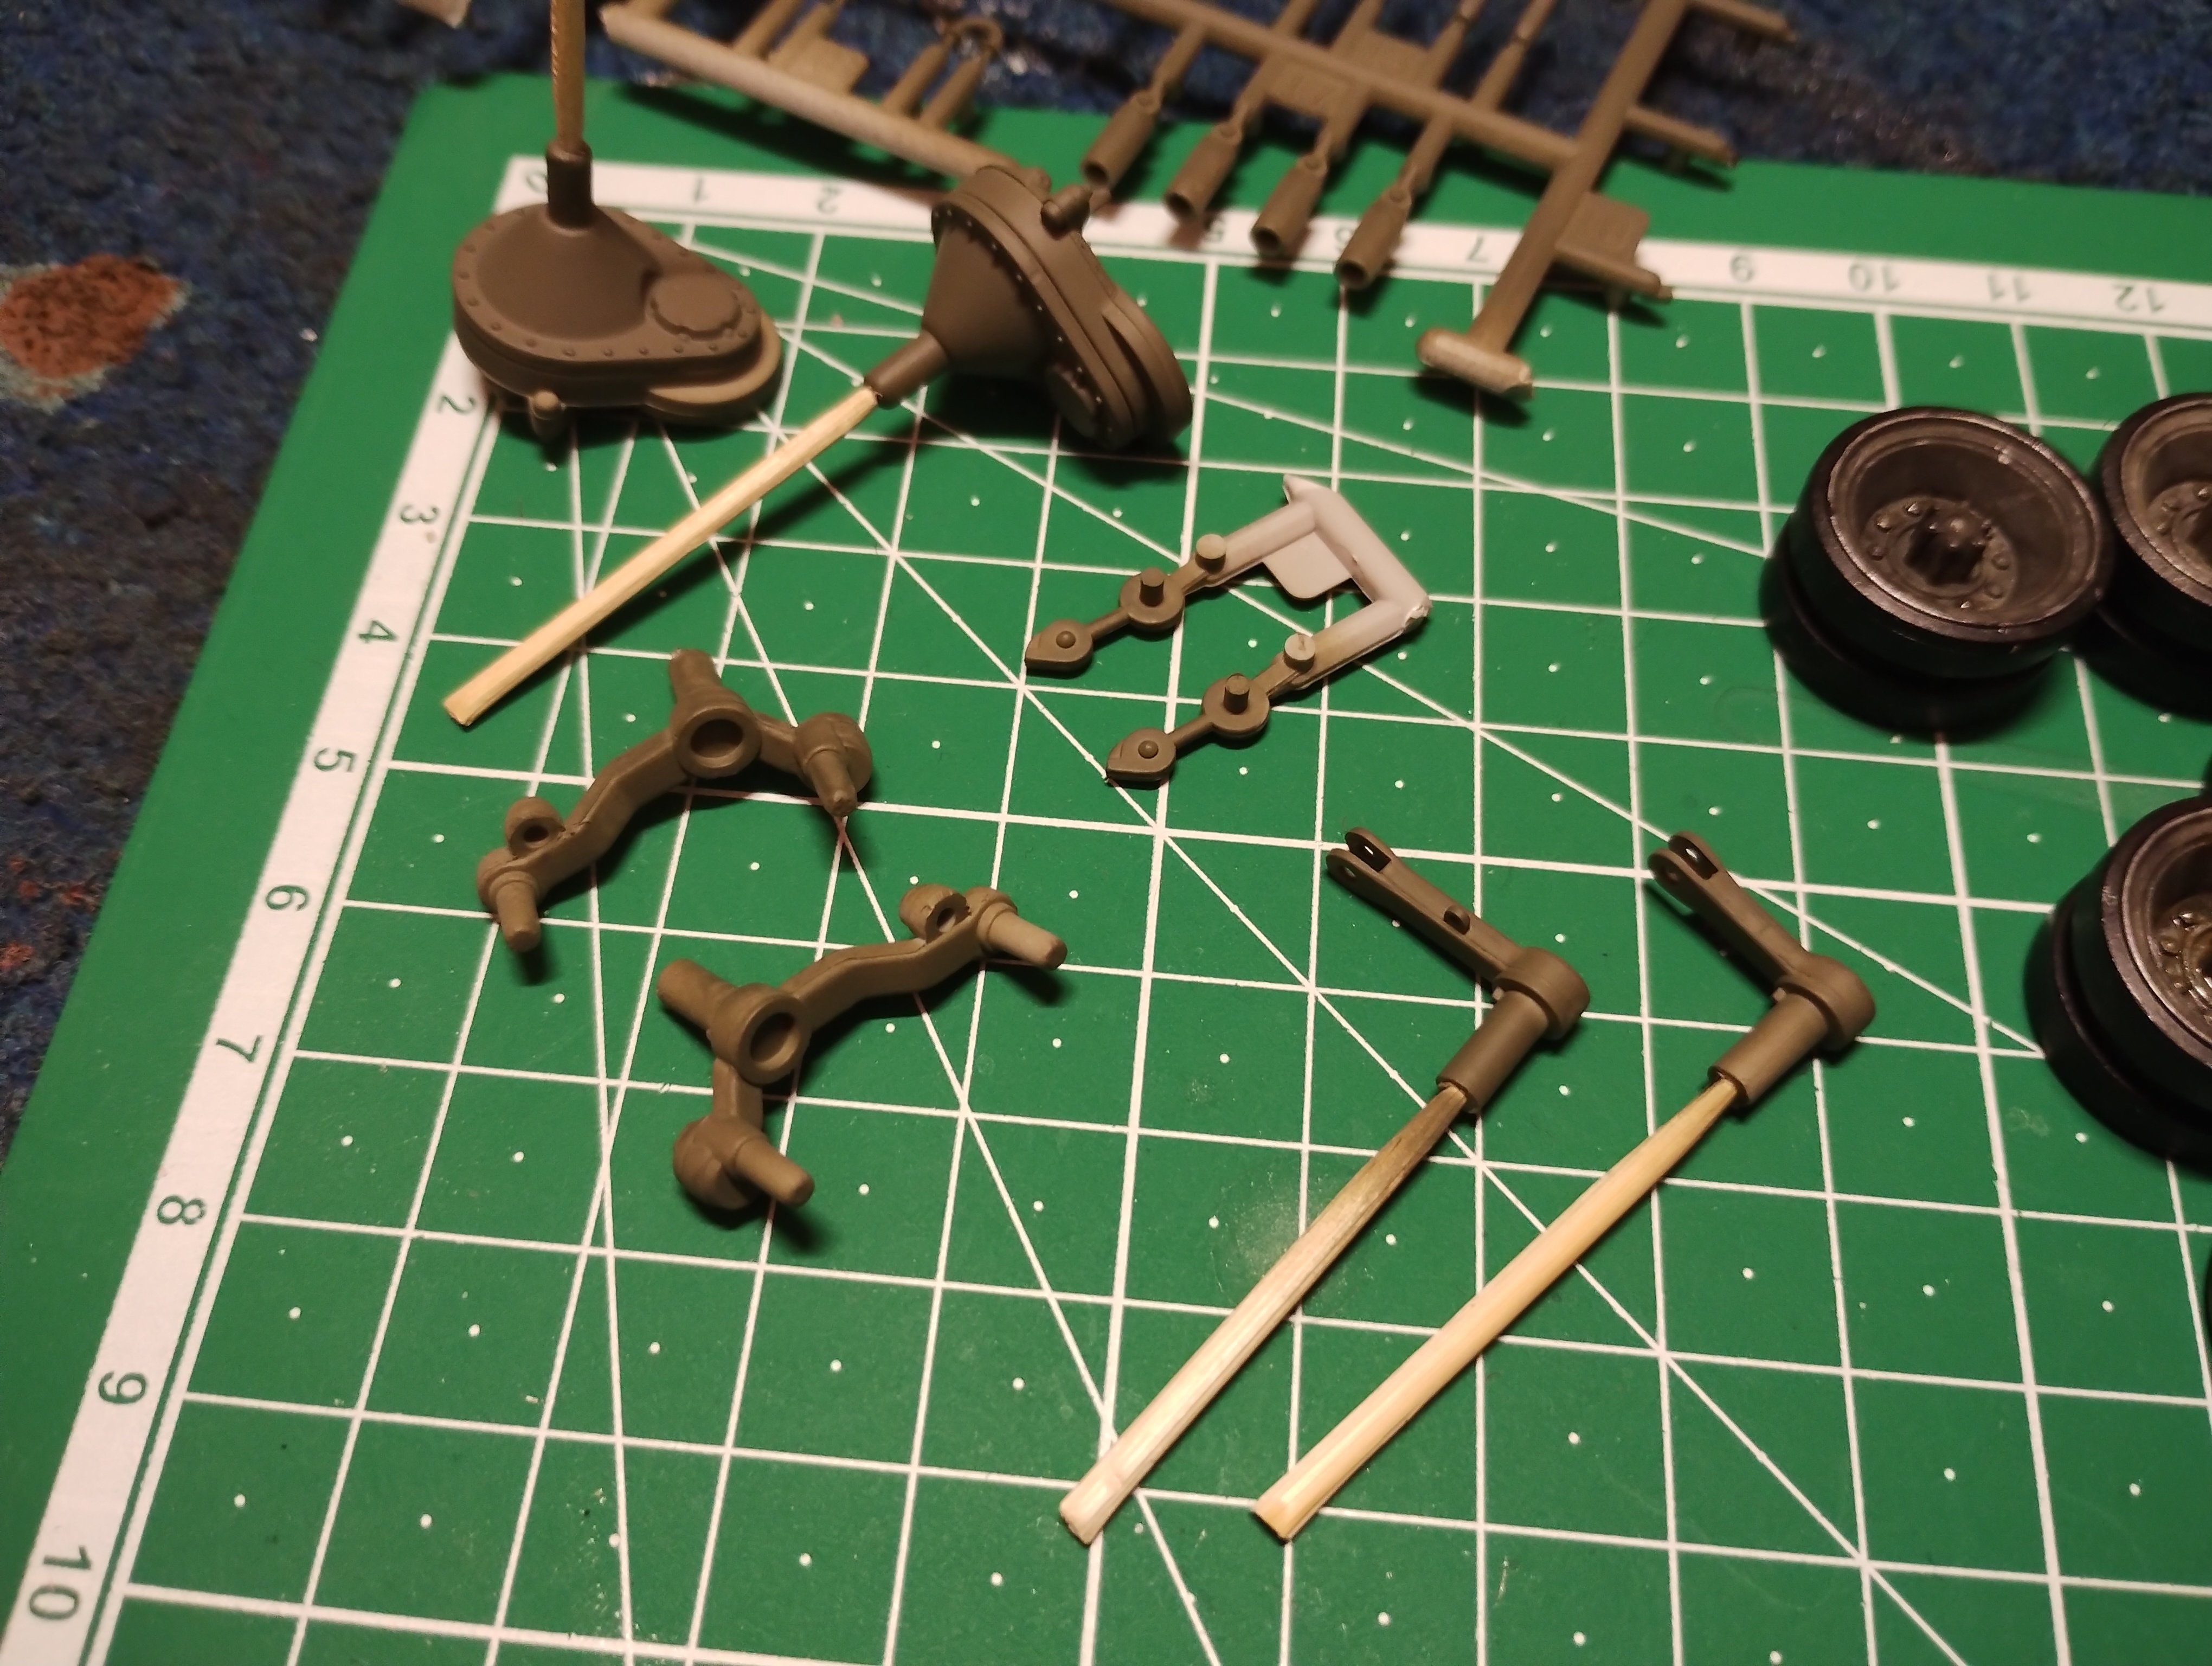
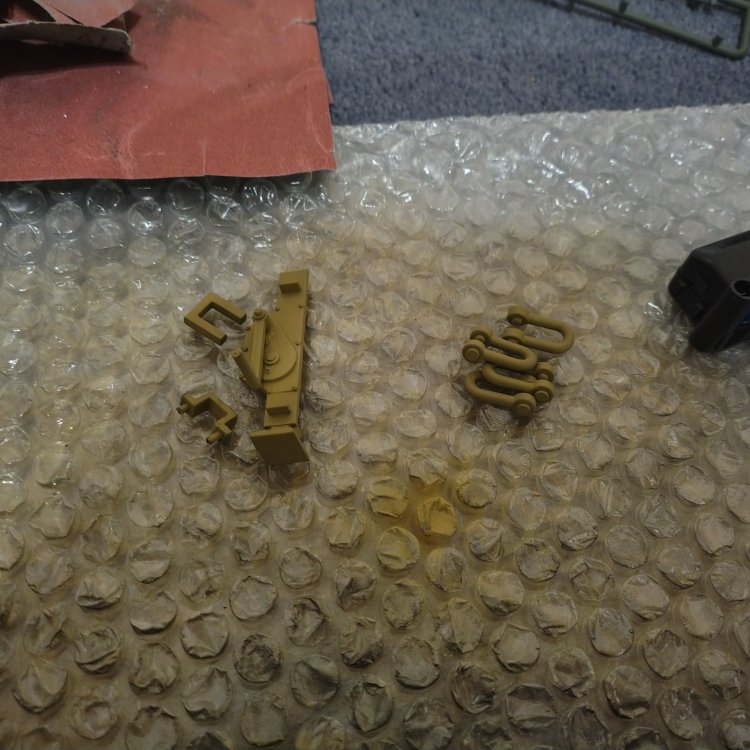
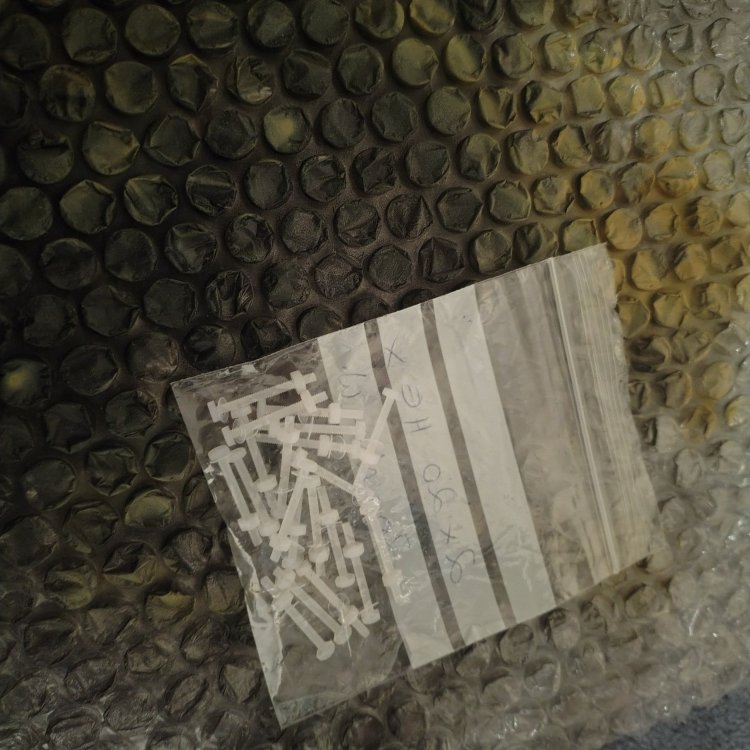
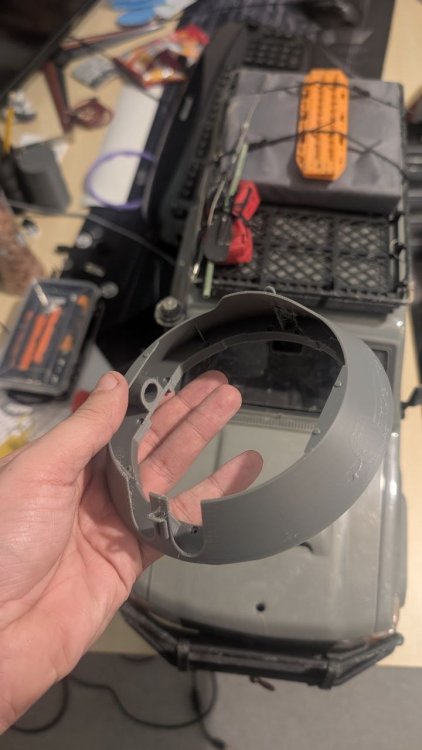
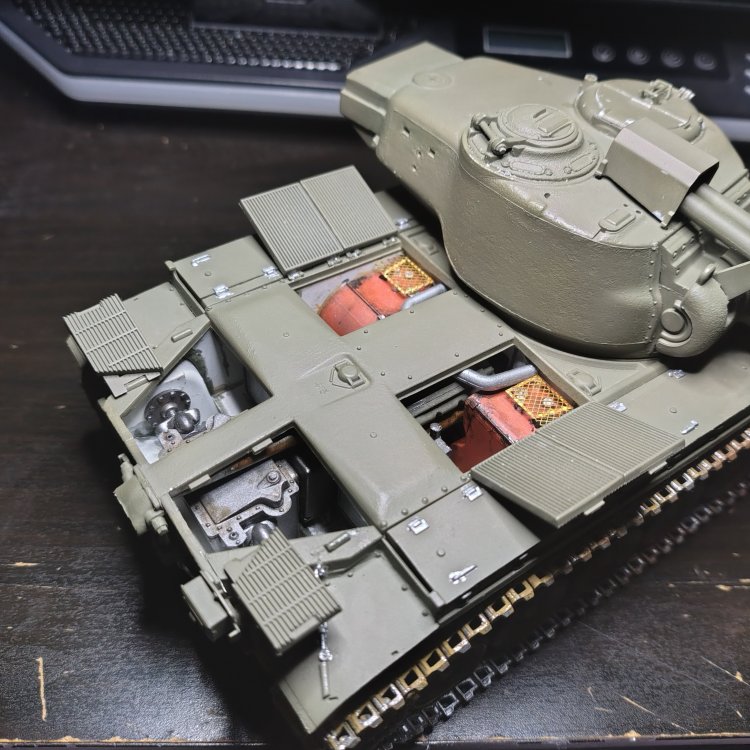
After a busy week I got some time to work on this monstrosity. I have worked out how to modify the existing elevation and depression gearbox to work with the new turret. Still got some bits to do on it but getting there now. The mechanism is deceptively simple. The pin sticks through the side of the turret and connects to the metal bar going through the support that locks into the side of the turret. As with the other side these 2 parts that lock in also provide the pivot point for the central part of the turret. As for the gearbox that's now going to have the metal bar fixed into were the drill bit is on this image and also be assured inside the turret onto the shiny metal shaft you can see in the image above.When all this is in place what should happen is when the motor receives the signal to move one way or another it doesn't actually turn anything instead it moves around the central axis (drill bit in the image and shiny metal bar in the first image) rotating whatever is attached to it. (Hopefully). Also got some added details that have arrived. And now been painted along with some nice little bolts. And lastly. Here's the upper hull shows with the turret sat ontop of it. This won't be how it sits when finished as the rotation gear is also attached under it were as when finished it will be inside the hull.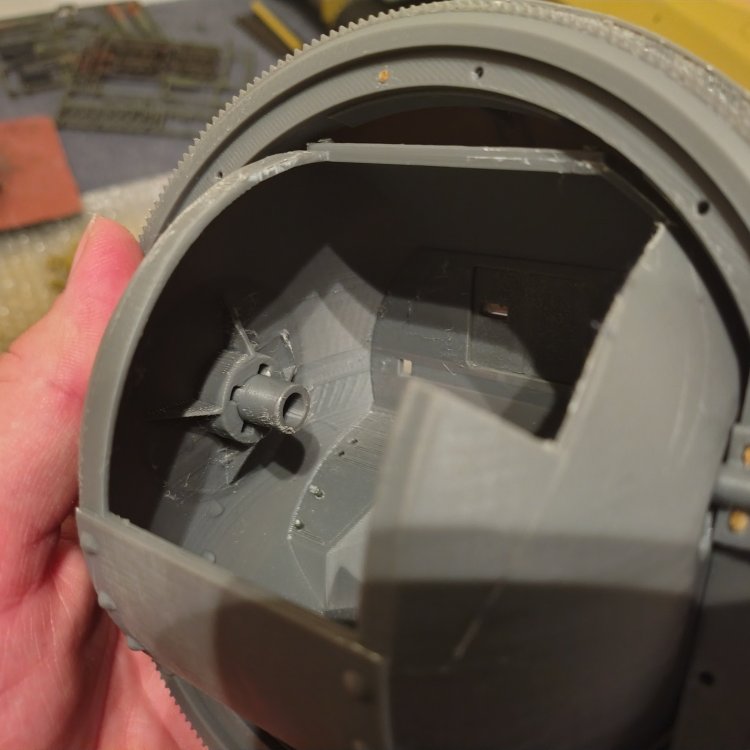
-
So sorry to hear this. That's a hell of a hard blow. Best of luck to you for the coming year. Hope you can get back to how life was before all the trouble.
-
1/16 Panther Conversion
Daniel_Roxy replied to Daniel_Roxy's topic in LSM 1/35 and Larger Work In Progress
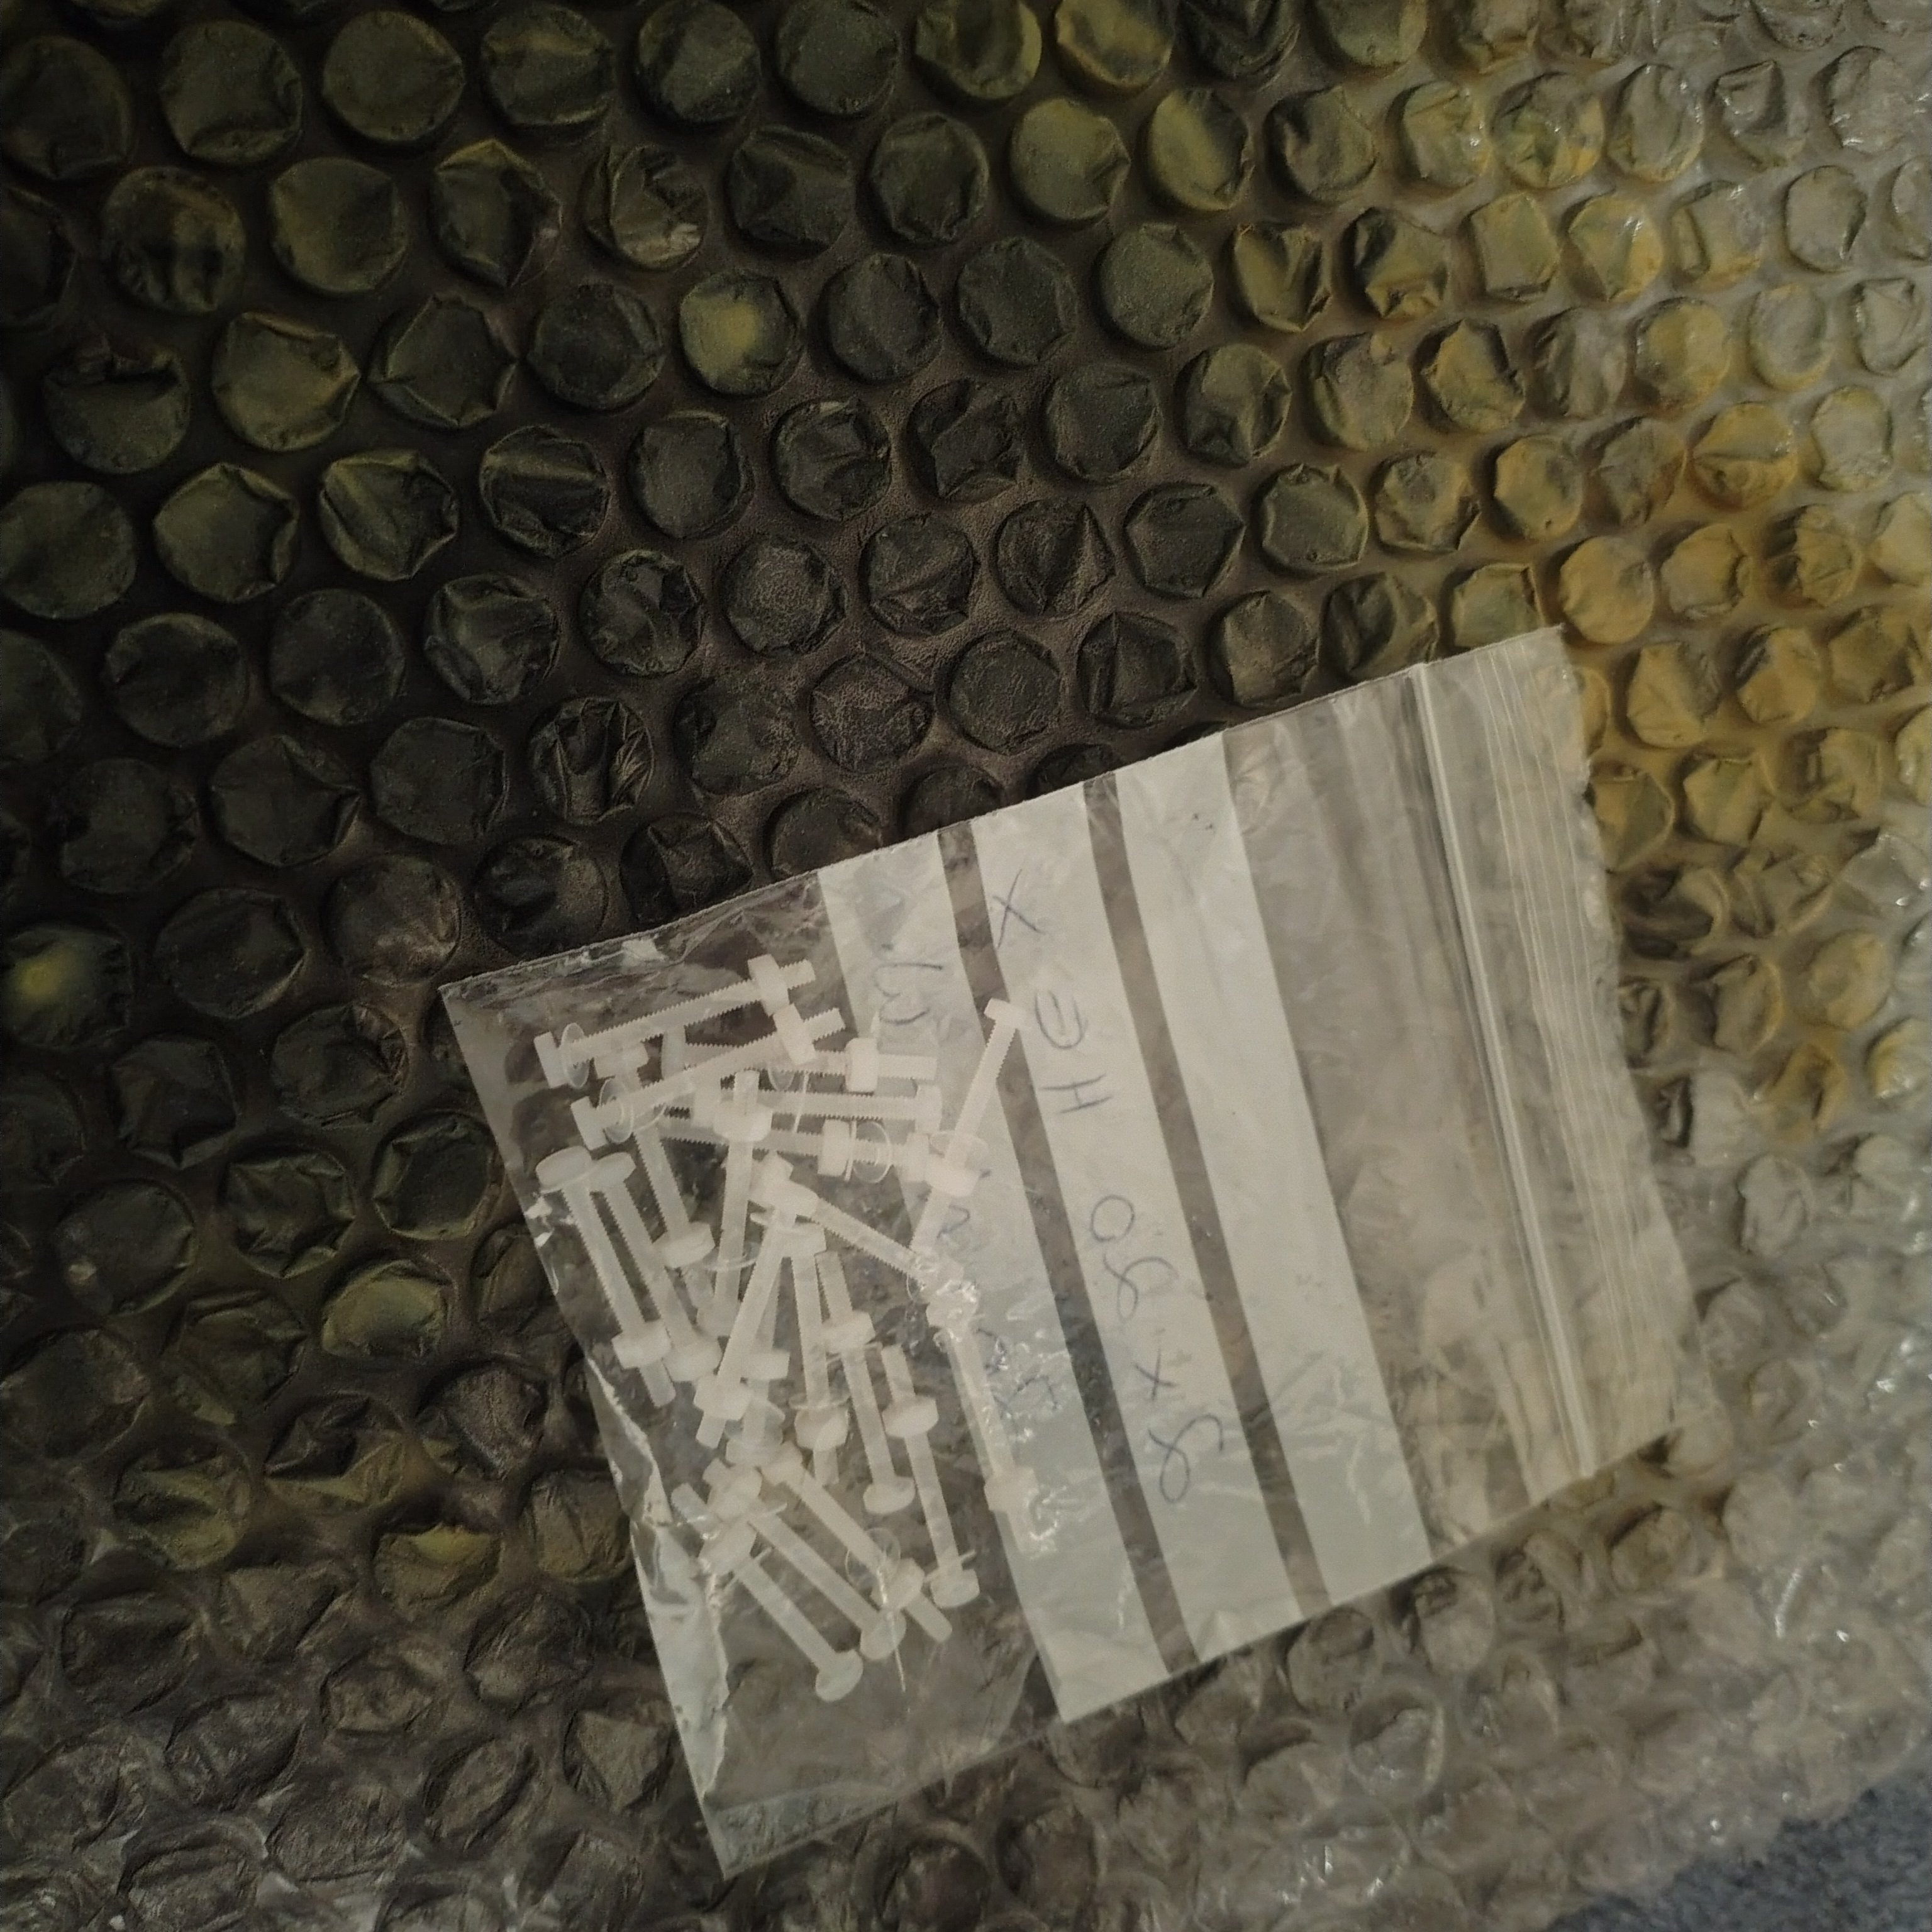
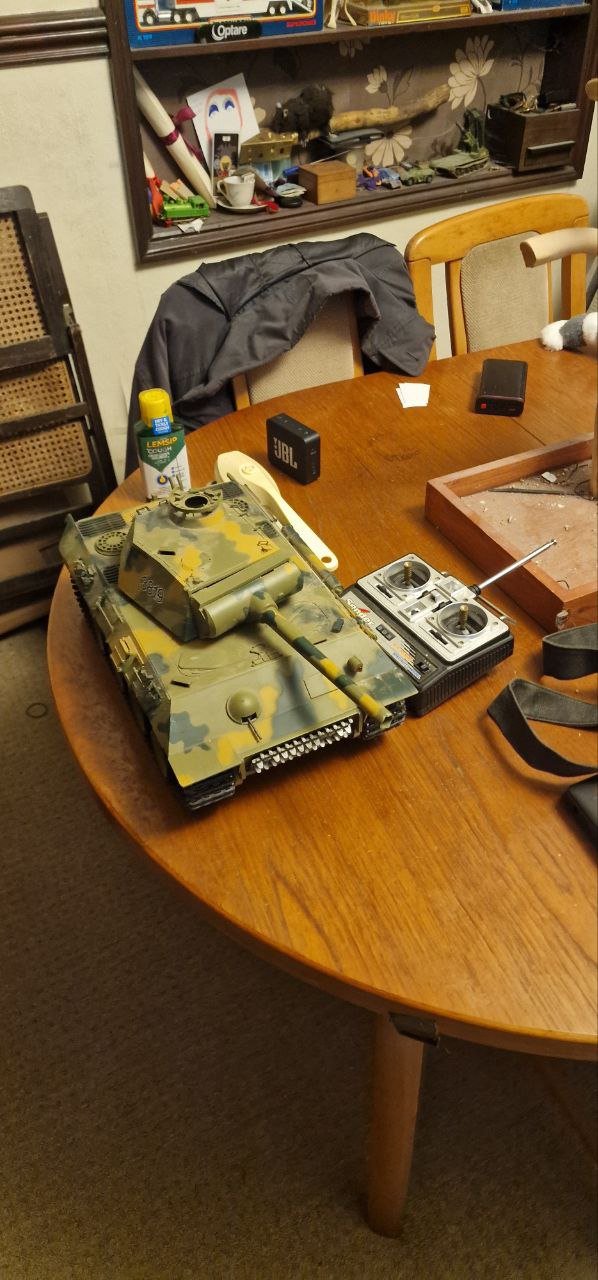
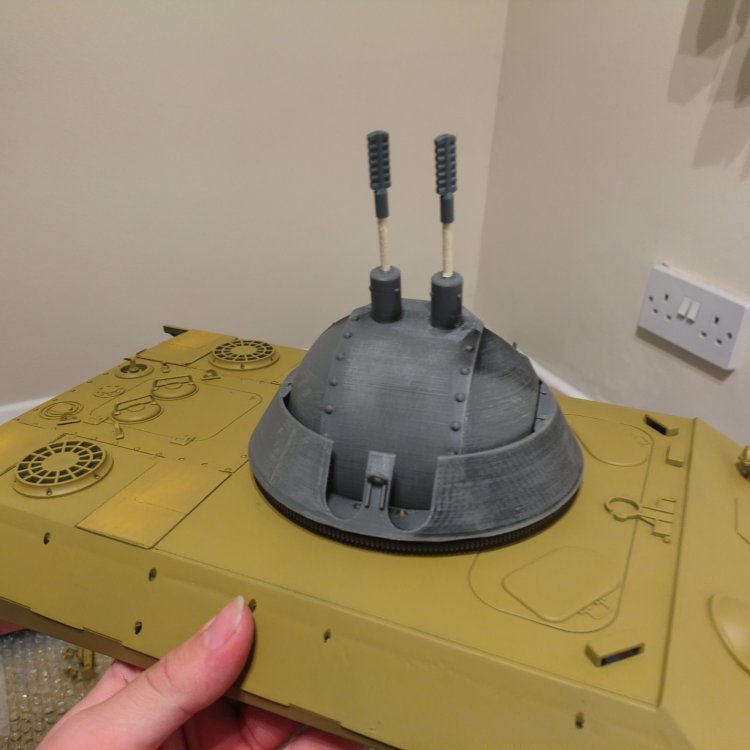
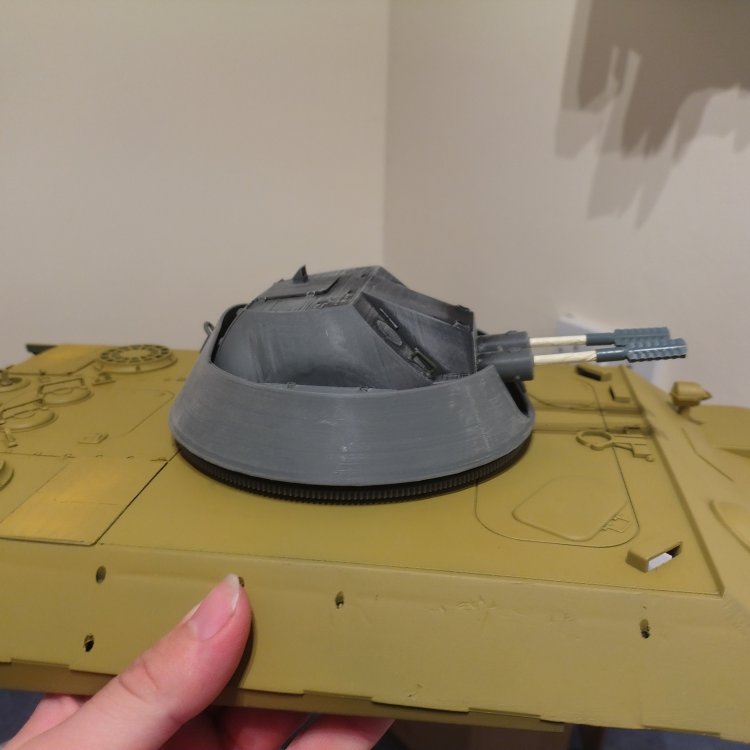
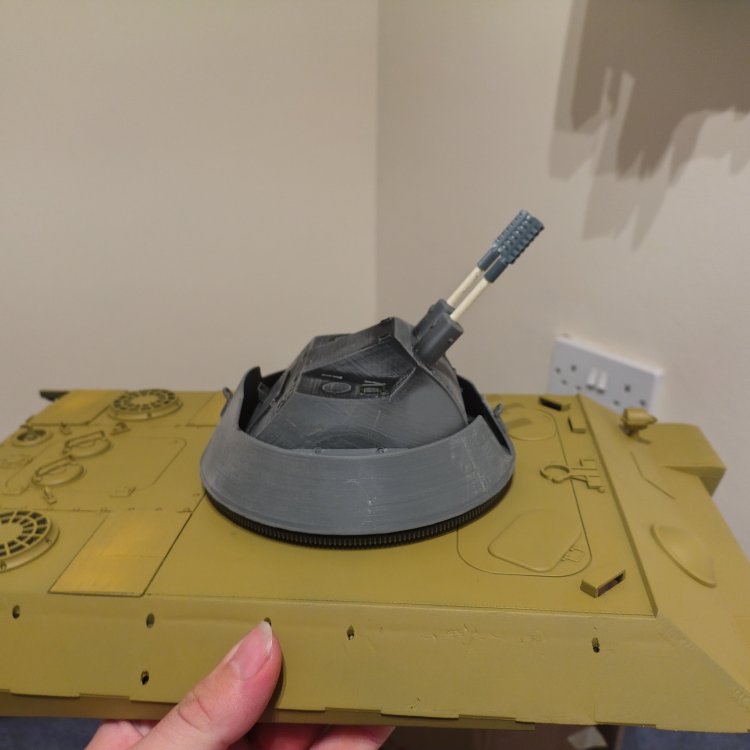
And just like that the turret parts have arrived.even a little bag of fun bits. Can also see how the hull has been repainted.And is ready for the tracks to go back on.


-
T26E4 Super Pershing
Daniel_Roxy replied to Daniel_Roxy's topic in LSM 1/35 and Larger Work In Progress
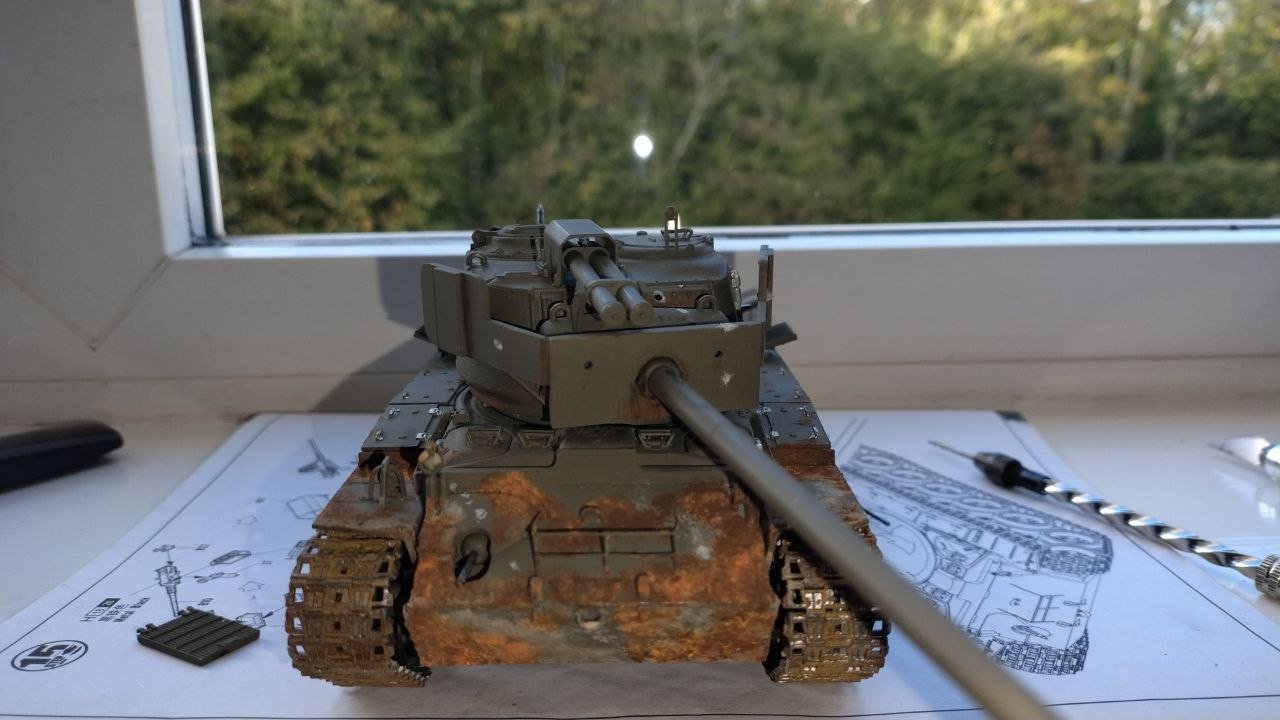
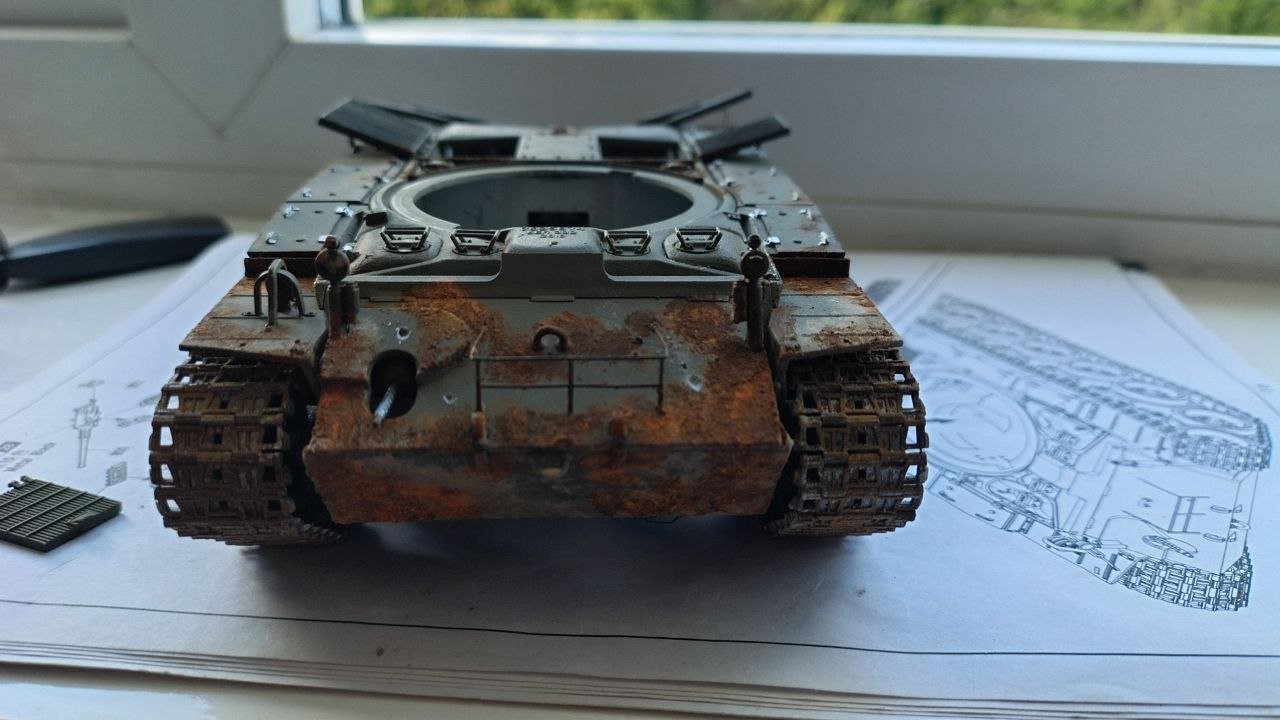
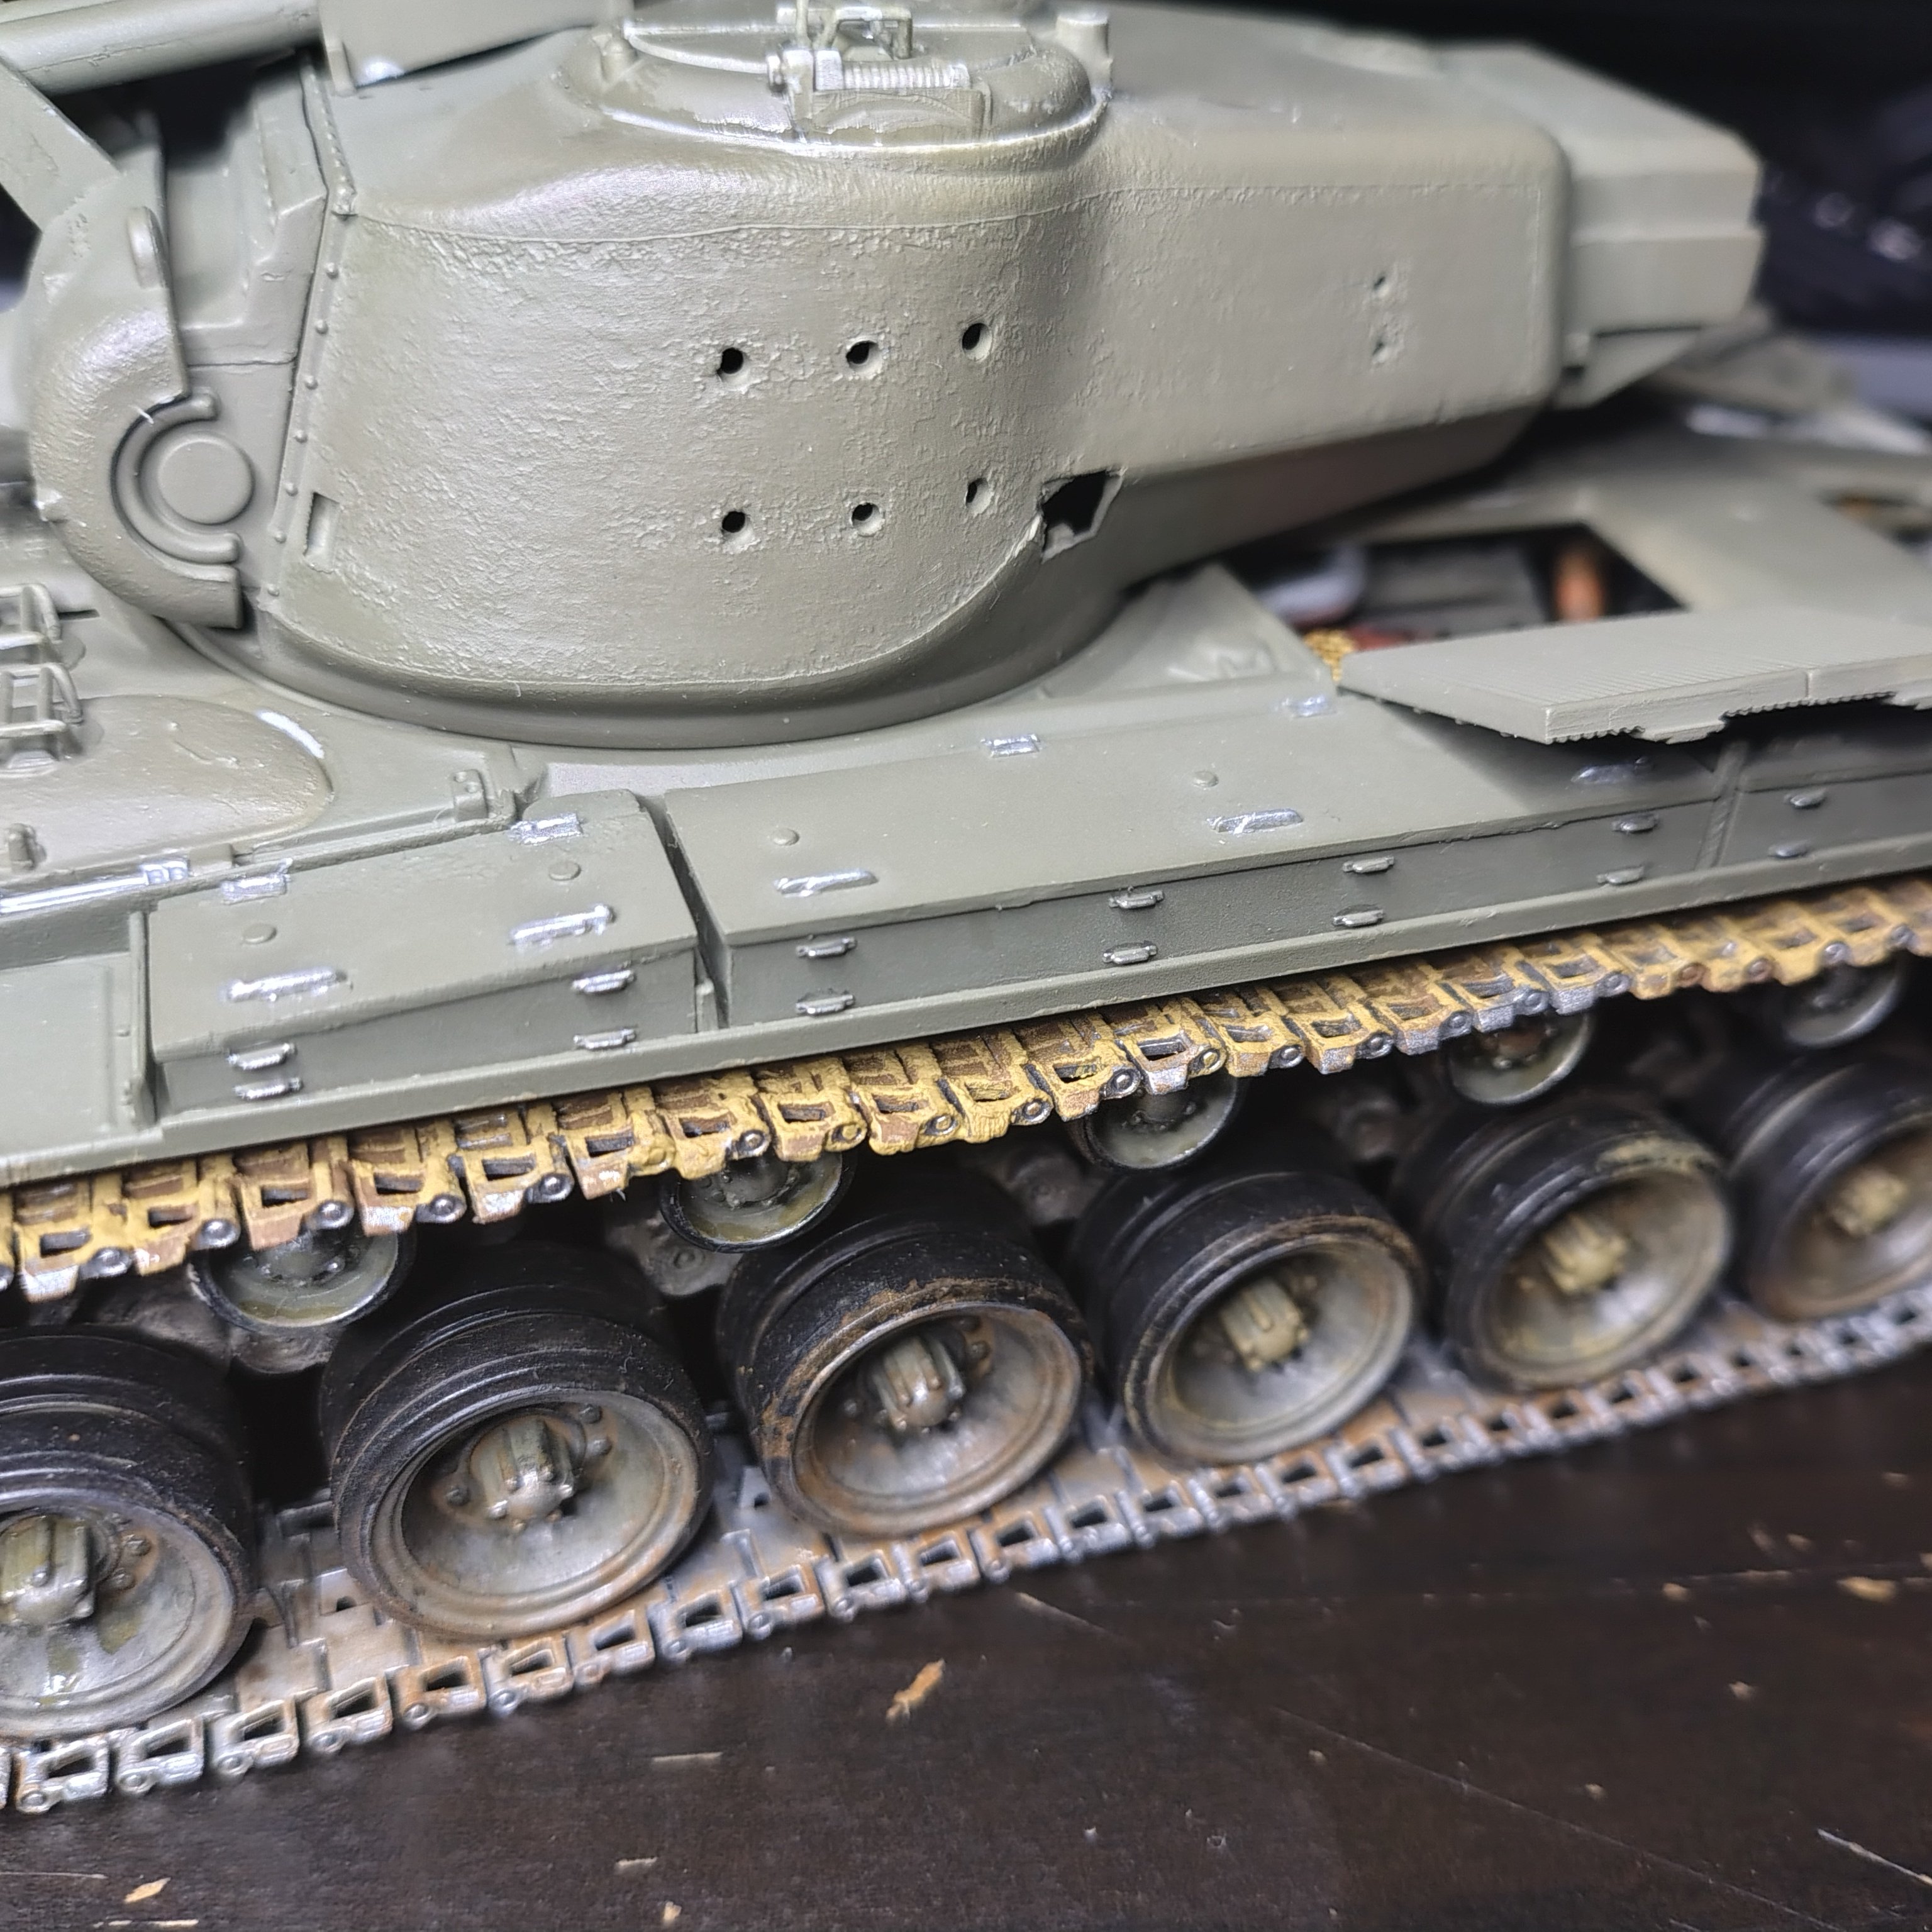
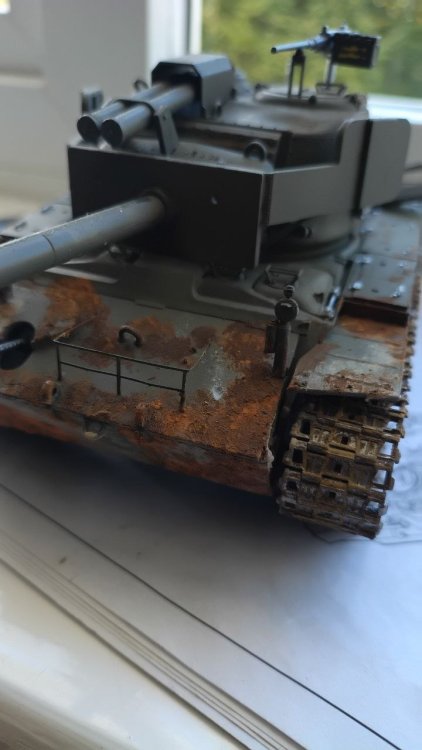
I thought I had updated this model more recently. Will have to try get some more photos of it. Calling it finished now with the weathering and even tried making some shell hits and damage. Unfortunately the weathering looks more like rust than mud with this lighting but still looks pretty interesting.

-
1/16 Panther Conversion
Daniel_Roxy replied to Daniel_Roxy's topic in LSM 1/35 and Larger Work In Progress
And my last post for this is a 1/35 scale model of the tank. I picked this up at Tank Fest at bovington tank museum a year or two ago. This is the same version that I hope to convert the panther to And with the wonders of 3D printing and a handy free to use model kit I found online for a panzer 4 verient of this tank. I was able to get the parts for the turret printed by a friend.

-
1/16 Panther Conversion
Daniel_Roxy replied to Daniel_Roxy's topic in LSM 1/35 and Larger Work In Progress
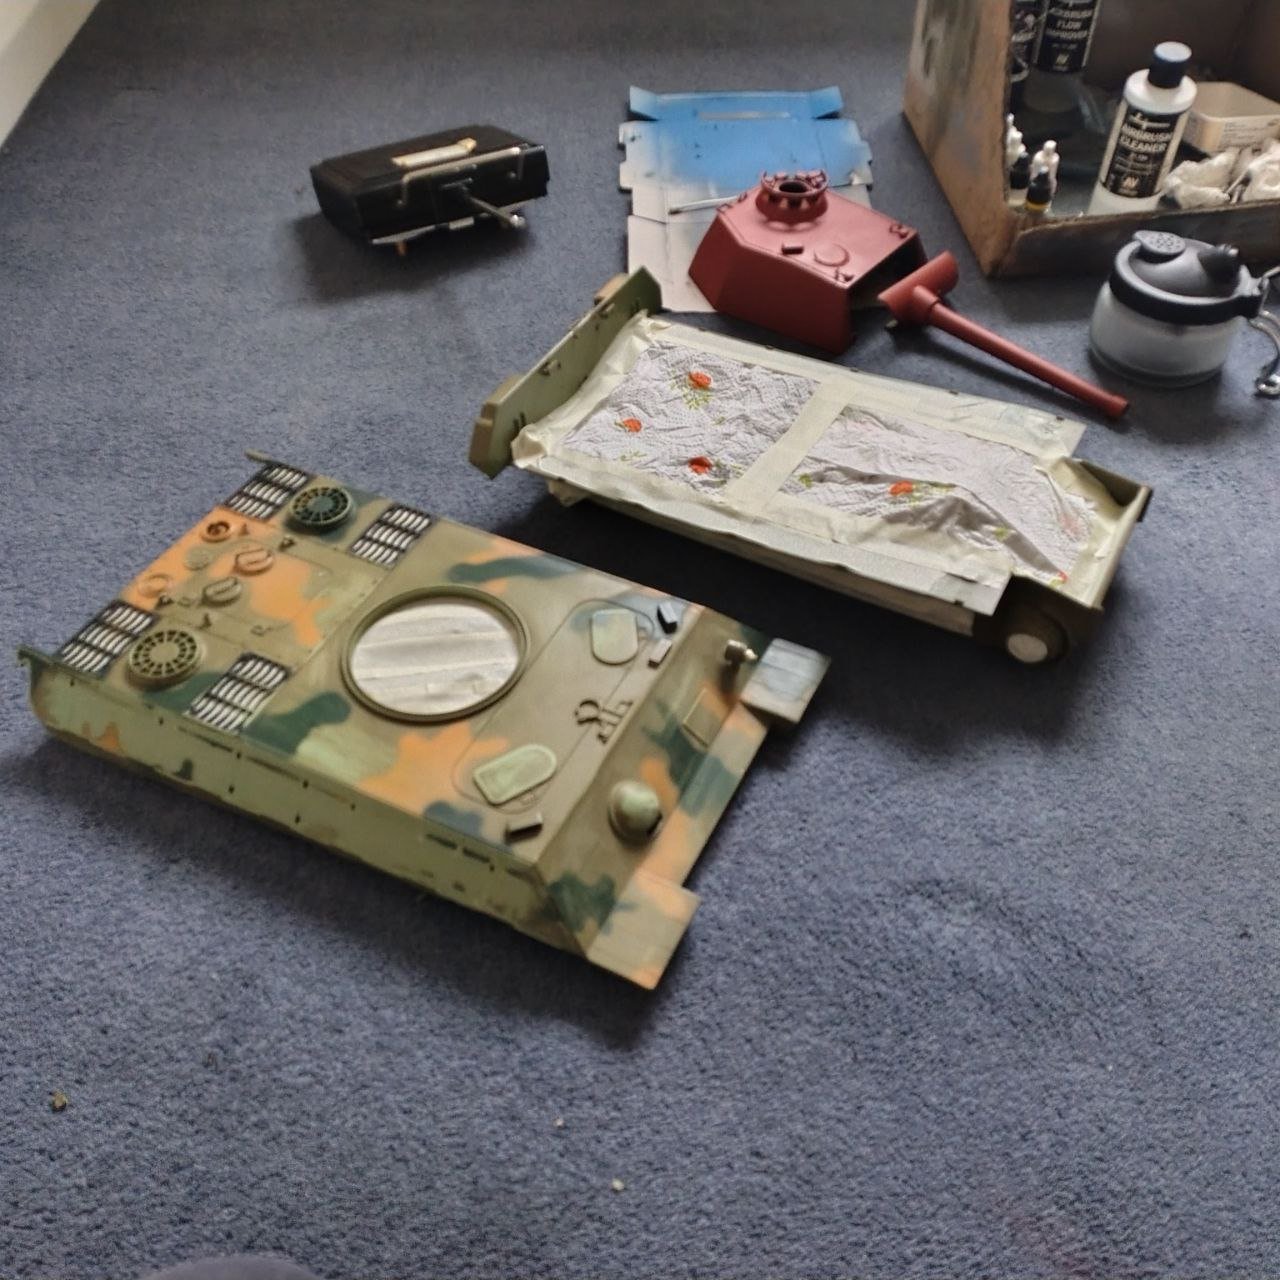
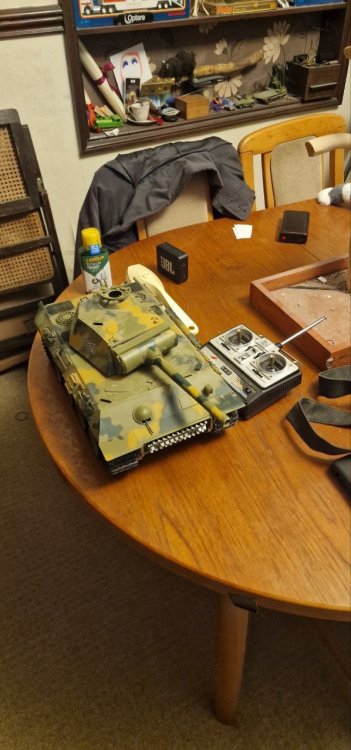
This last set shows how it was after masking off anything needing it and covering the electrics and motors. Ready for some painting.
-
1/16 Panther Conversion
Daniel_Roxy replied to Daniel_Roxy's topic in LSM 1/35 and Larger Work In Progress
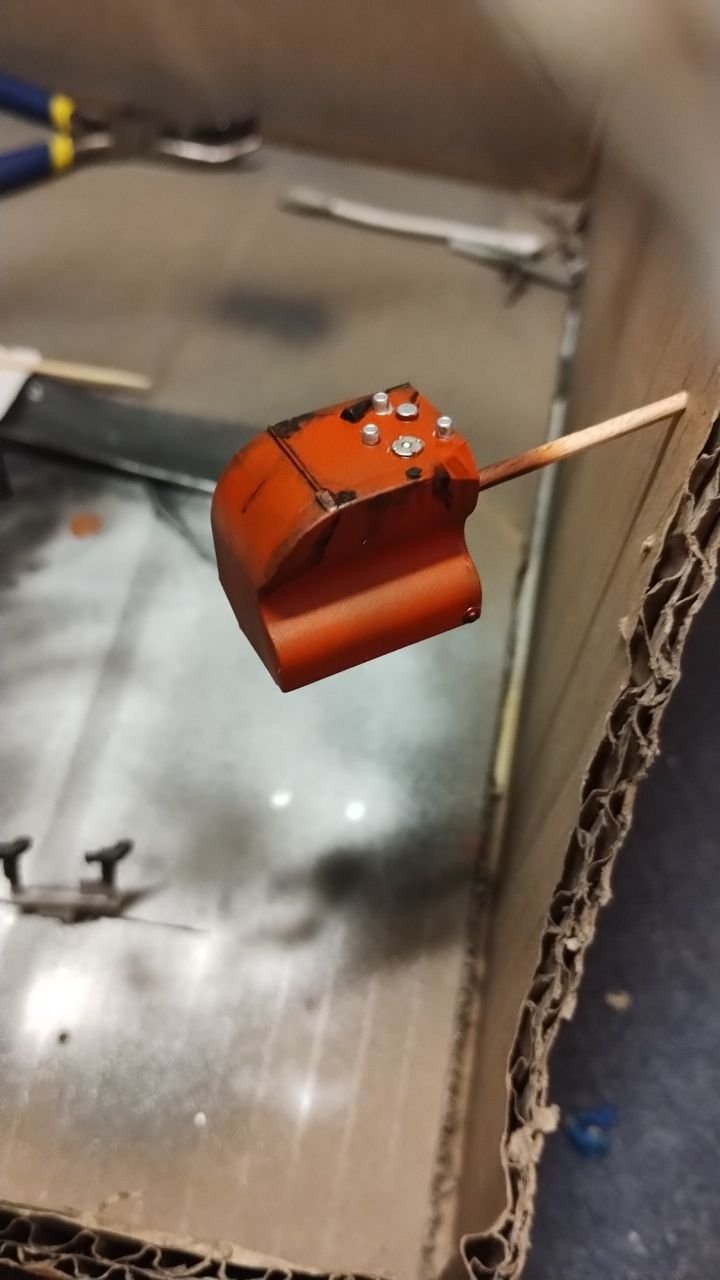
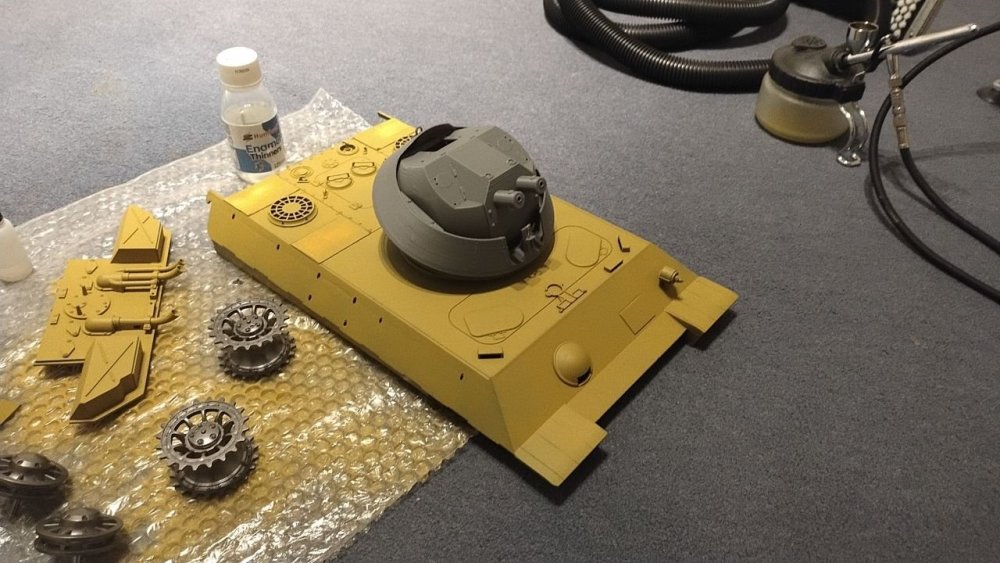
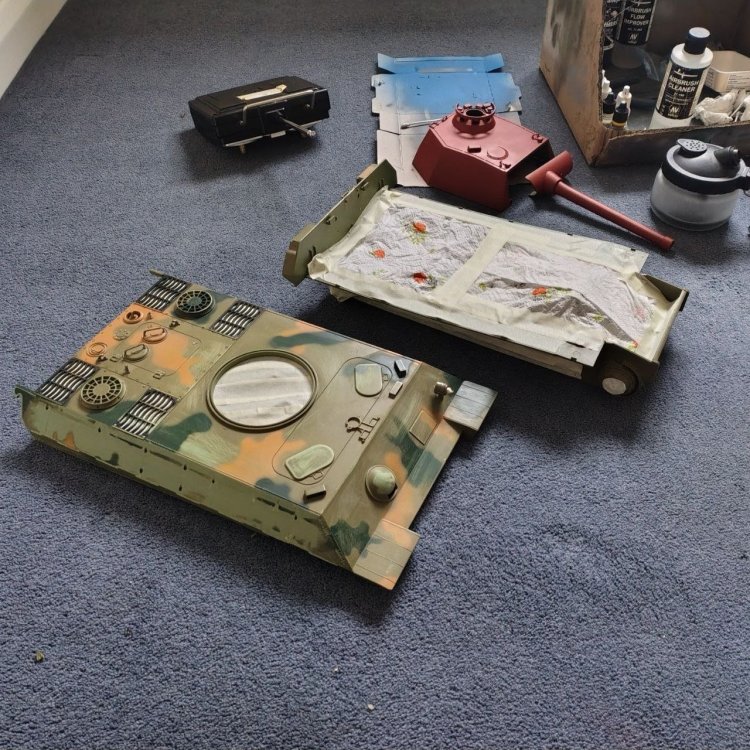
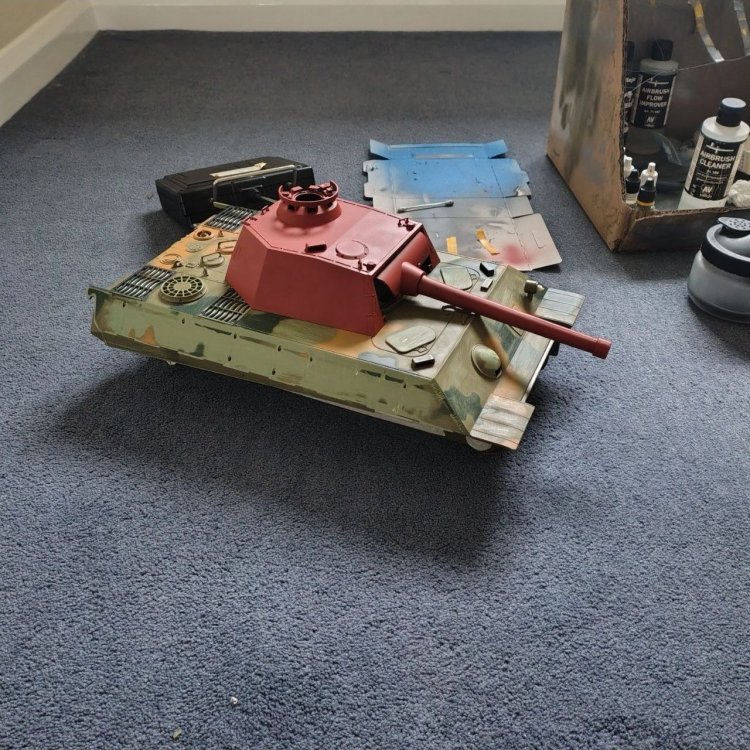
These were taken after I had stripped the turret of any useful parts and painted it red to see how the paint takes to the models plastic and how it would look. Can also see most of the side details have been removed for painting too. Oh and the running gear/tracks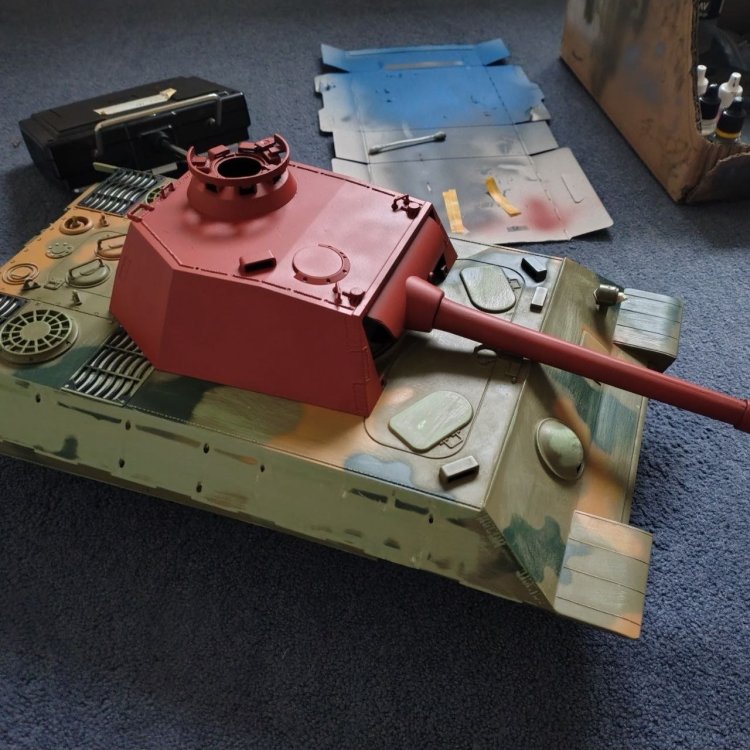
-
1/16 Panther Conversion
Daniel_Roxy replied to Daniel_Roxy's topic in LSM 1/35 and Larger Work In Progress
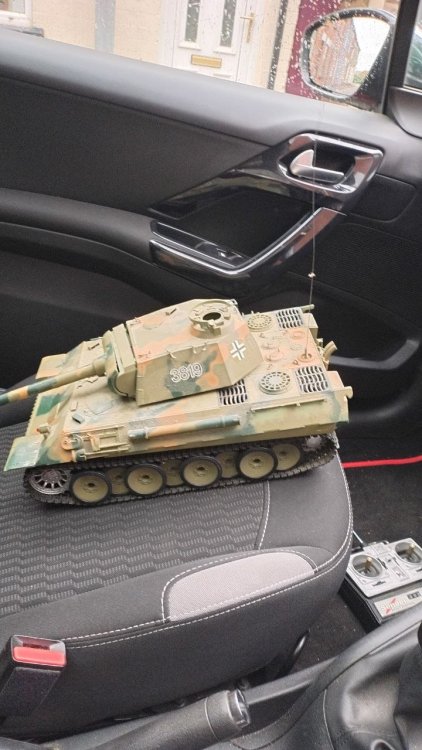
I wasn't planning on documenting the progress of this tank so I don't have many photos. But what I do have here is a handful showing the condition it was in after taking a dive off a washing machine 😂. And when I picked it up.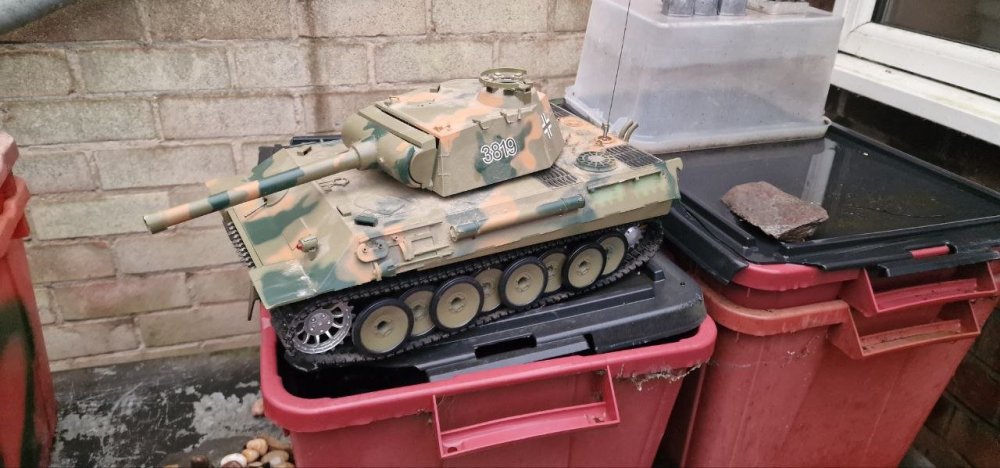
-
Got an interesting one here. I got a old Heng Long Panther tank with a busted turret about a month ago. Gun mechanism jammed and broken,mantlet cracked and split and afew other issues. My plans are to repaint and mount a custom turret to it resembling a theoretical but never actually built panther variant.
-
T26E4 Super Pershing
Daniel_Roxy replied to Daniel_Roxy's topic in LSM 1/35 and Larger Work In Progress
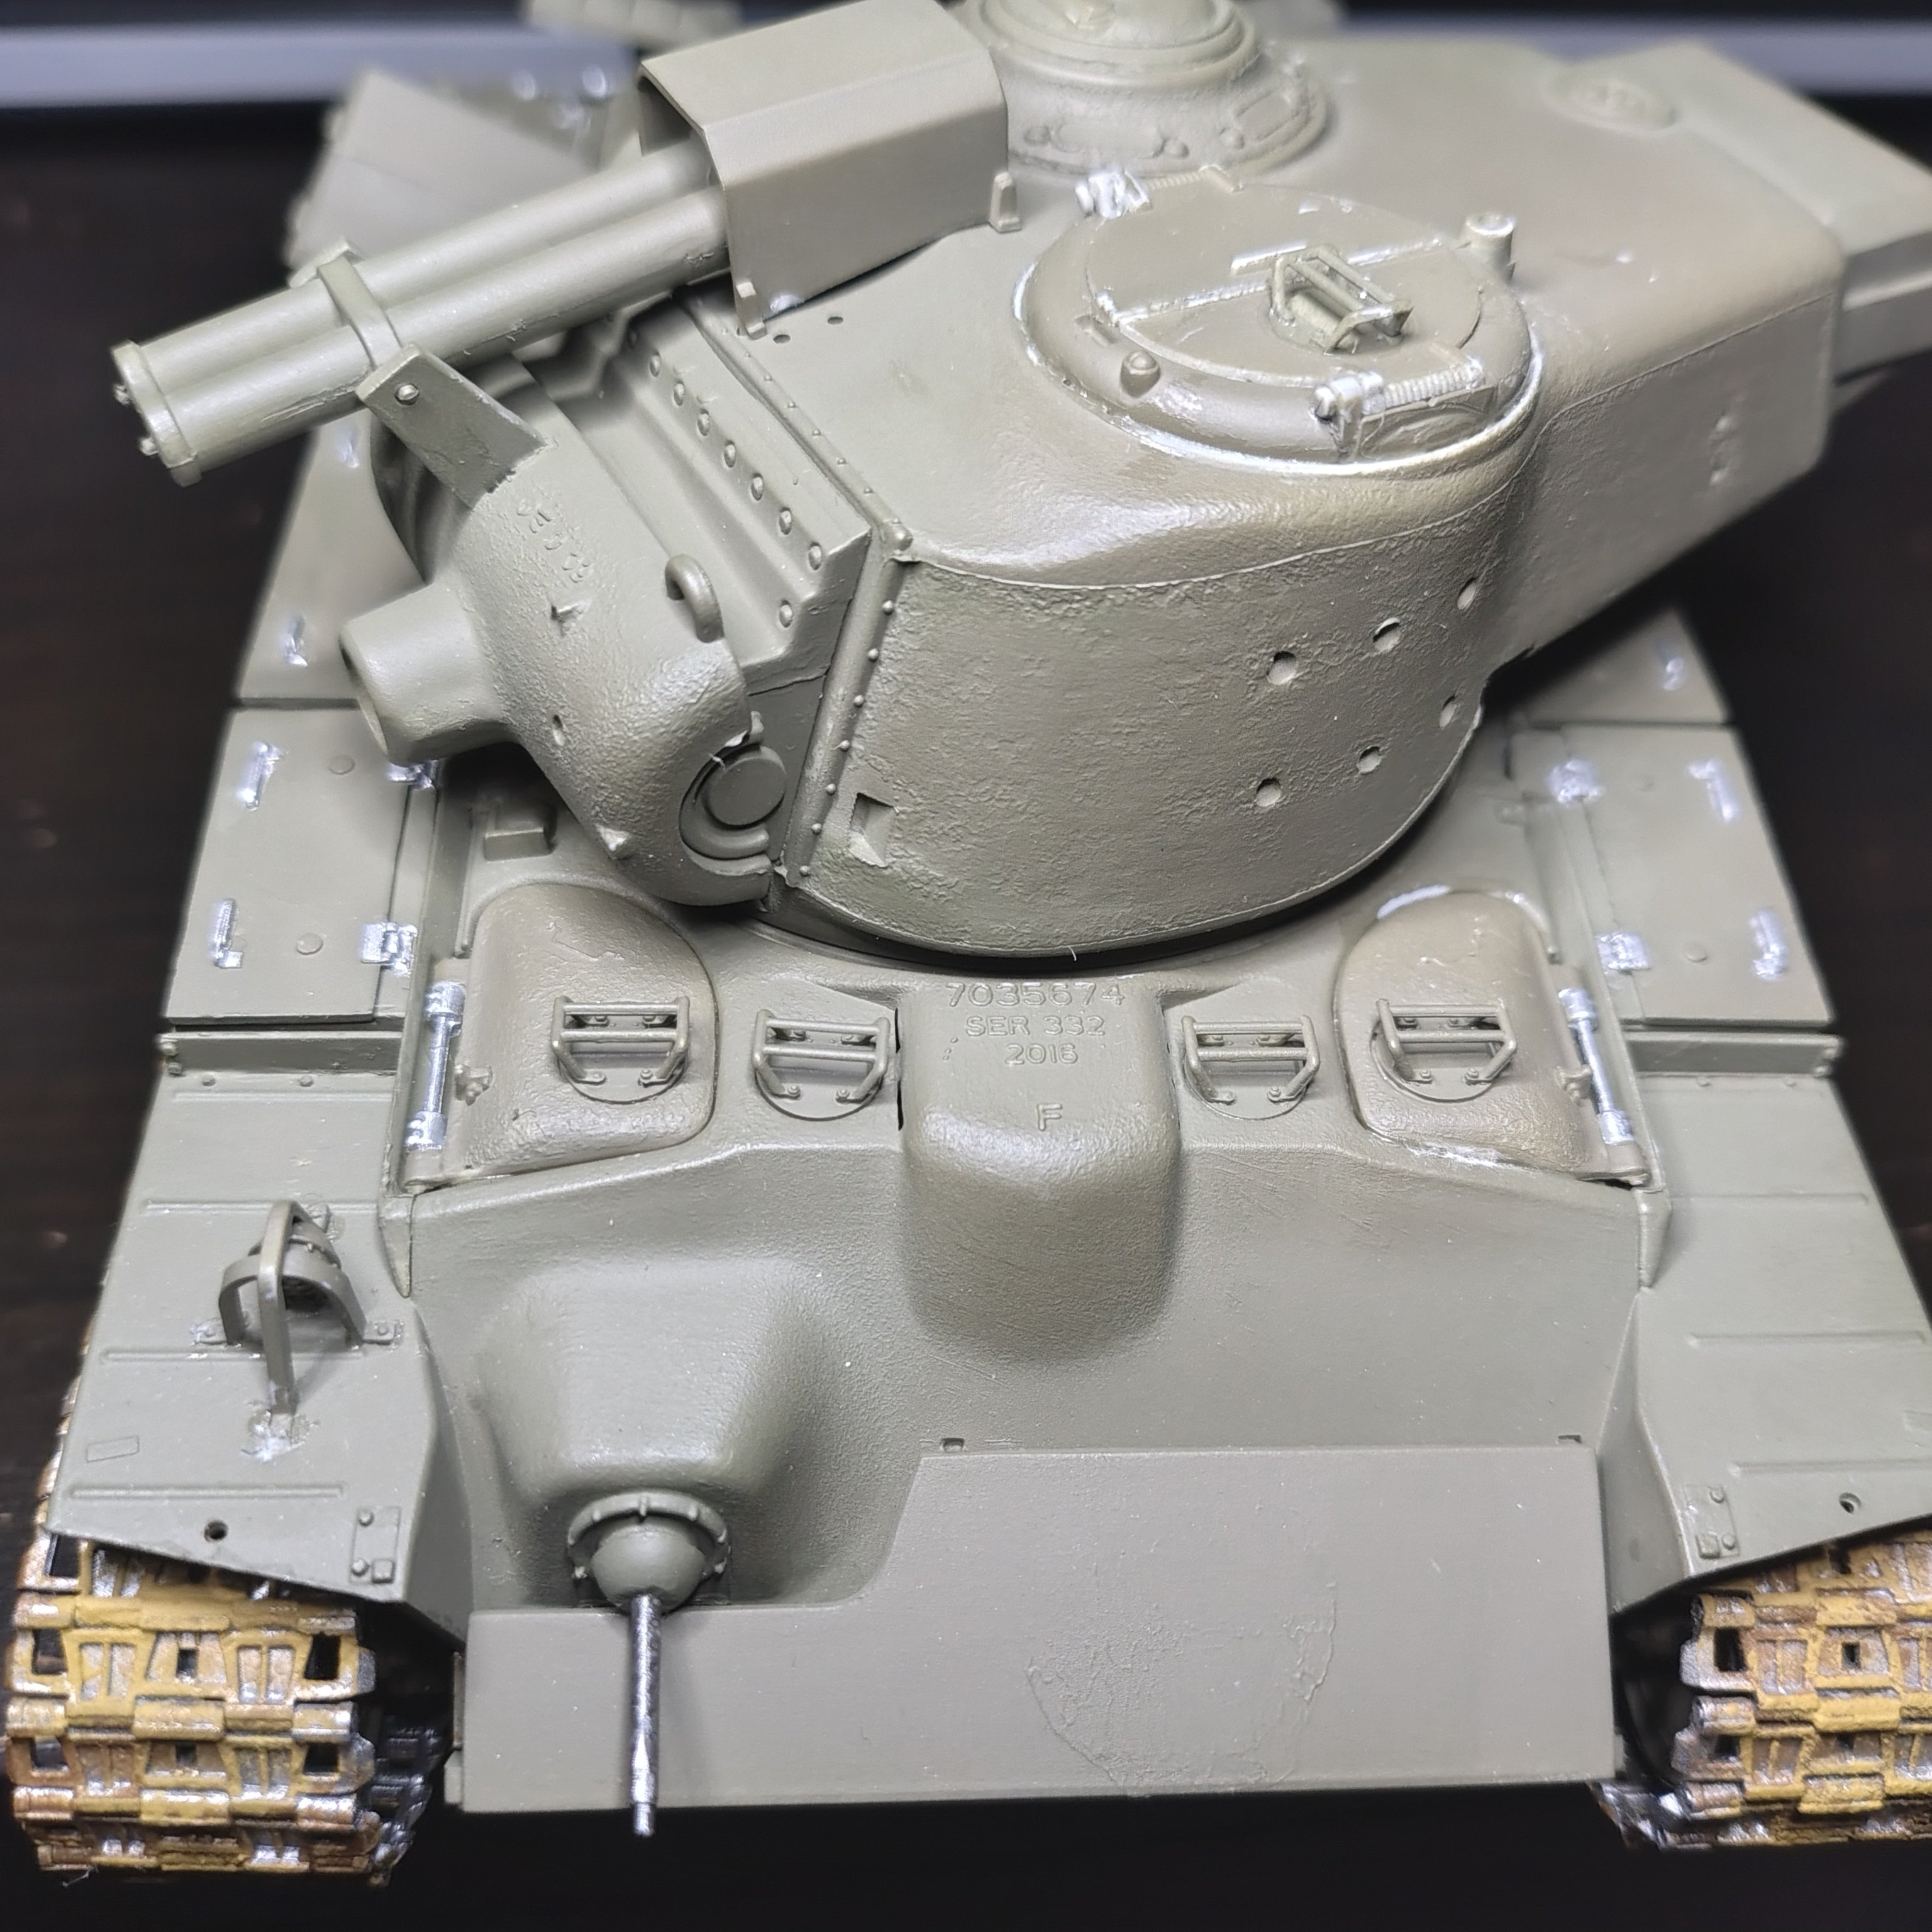
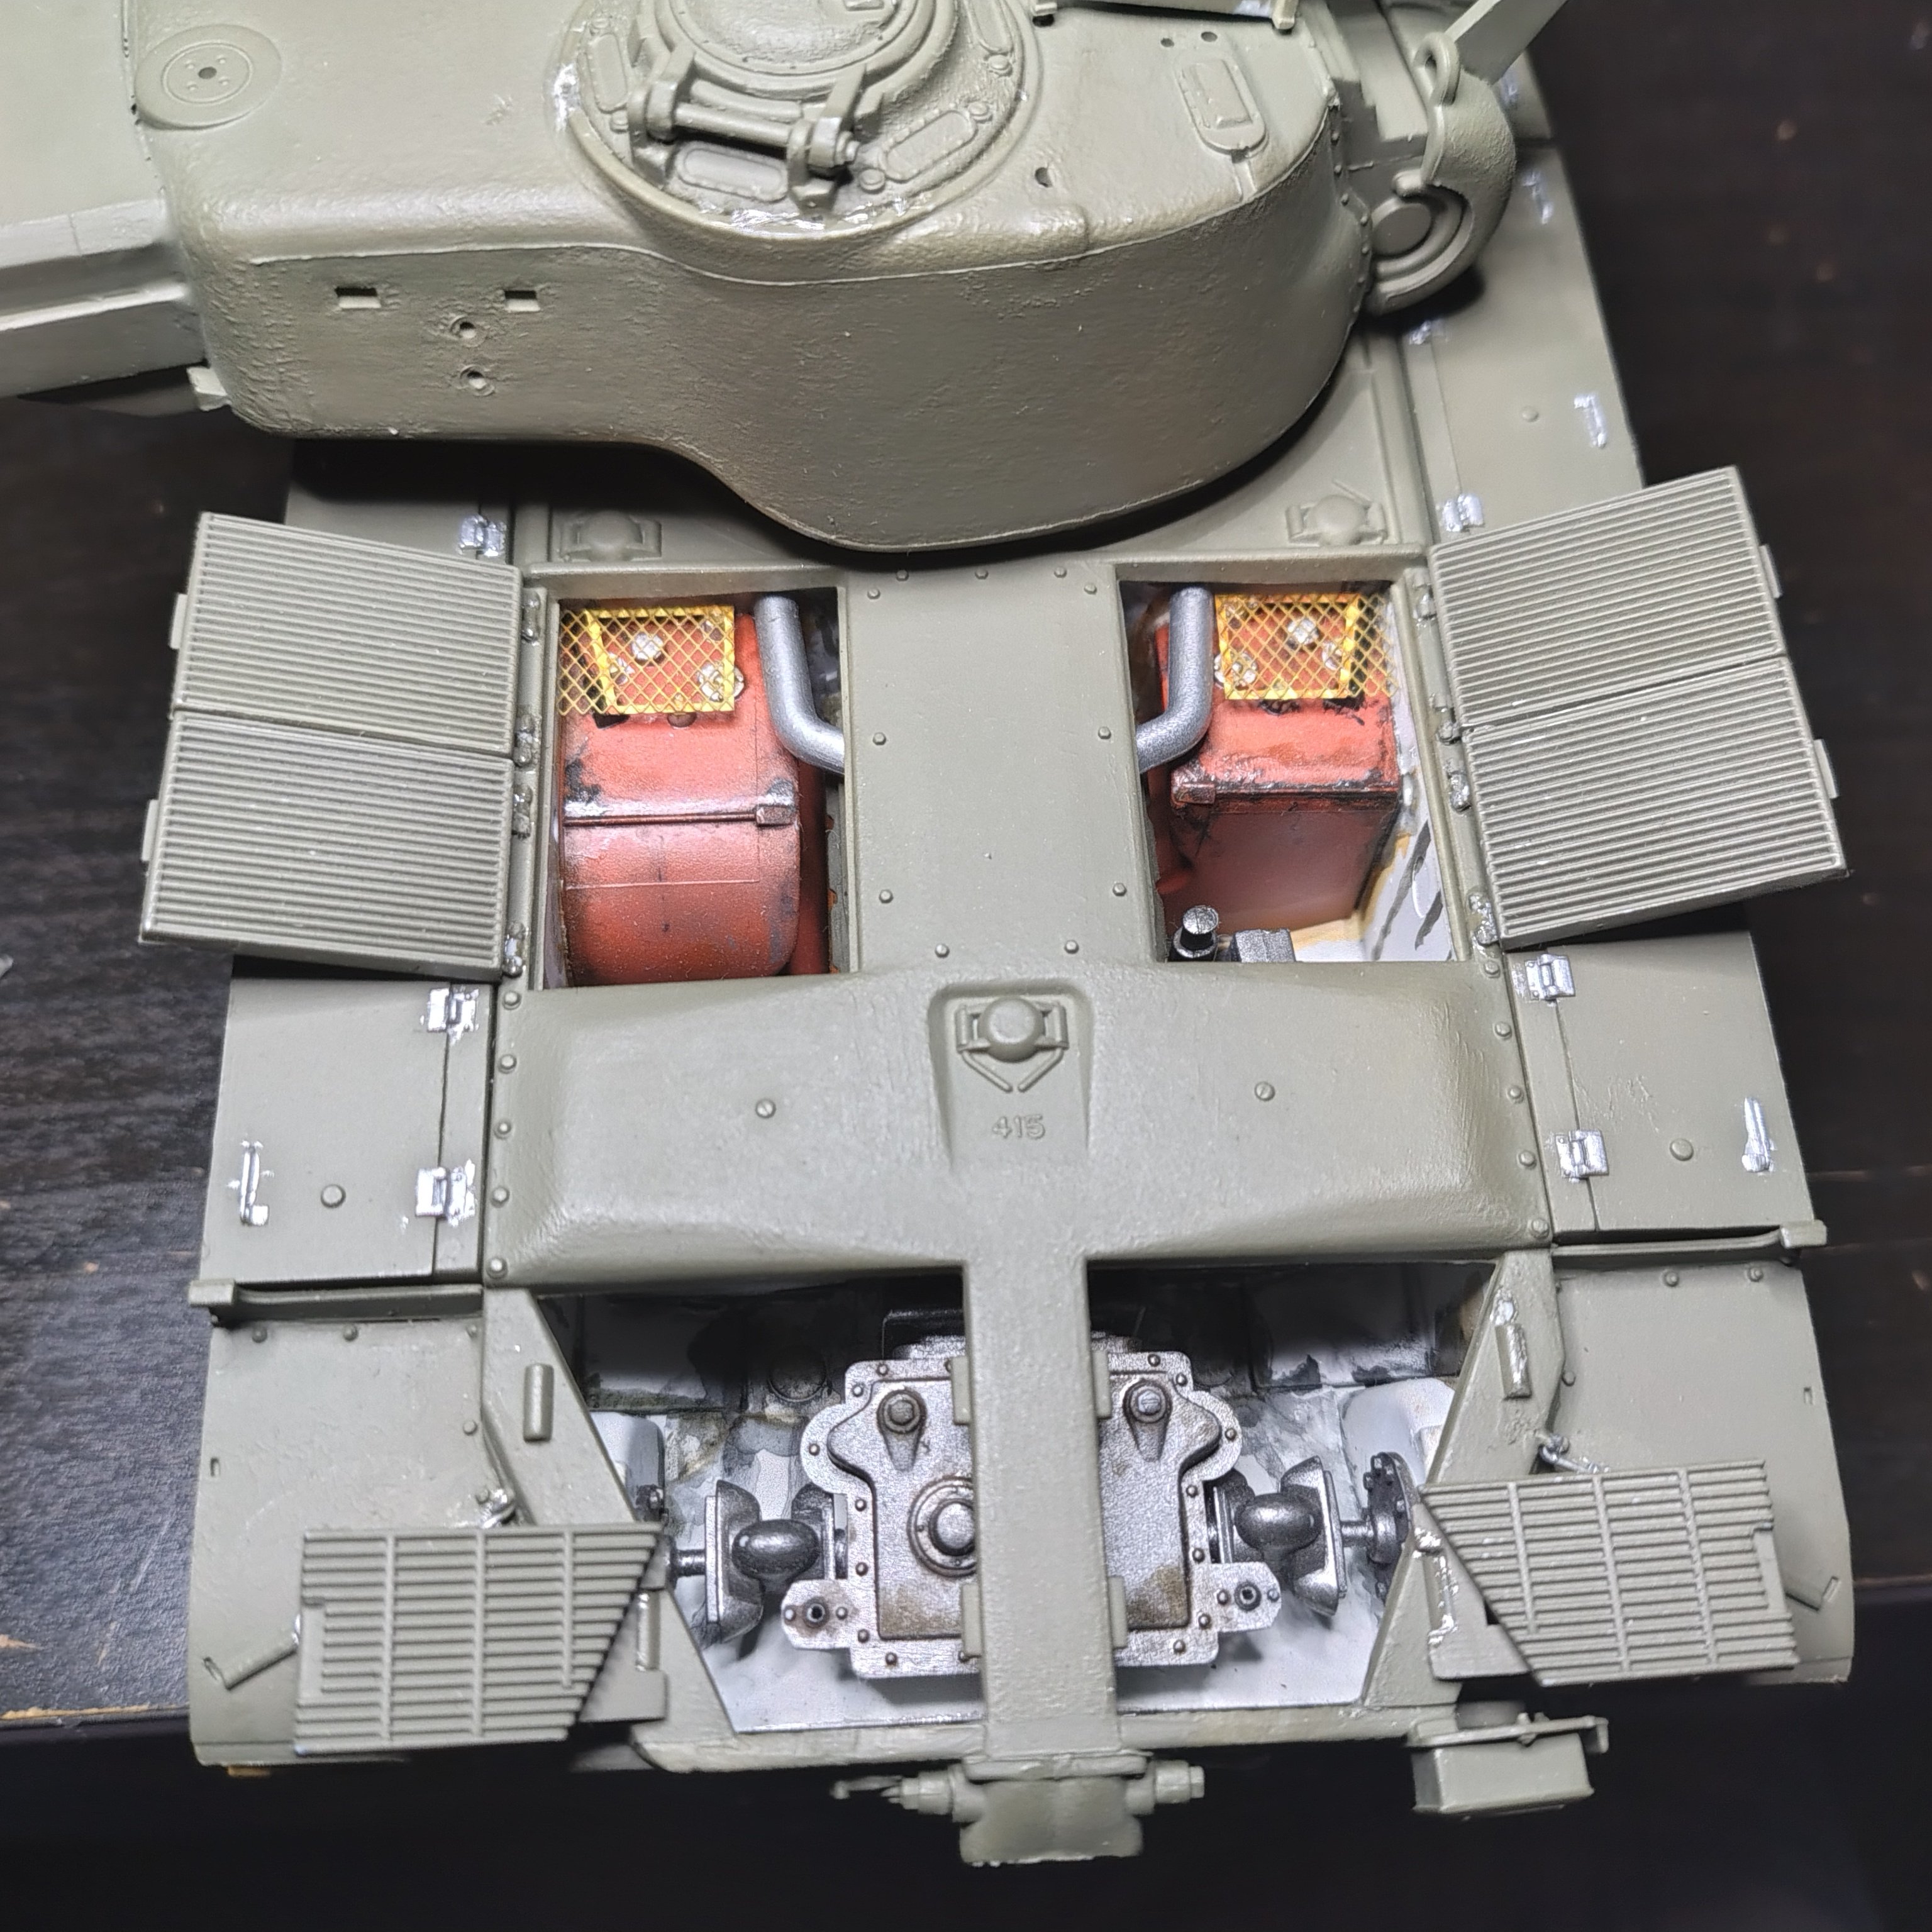
It's been a while since I updated this. I have been to Bovington tank museum afew times since then as well both for Tiger Day and Tank Fest. Both great shows and a great chance for a good look around at armour and get plenty references for weathering and such. Here's a update on the model tho. Added some small details with painting the clips and fixings on the stowage boxes. Back has all been painted and glued together. Upper and lower hull have been glued together as well. 6 of 8 engine hatches have been glued on in the open position. The turret can just clear the ones on the left side so glad I can make that work. And some other small details here and there


-
T26E4 Super Pershing
Daniel_Roxy replied to Daniel_Roxy's topic in LSM 1/35 and Larger Work In Progress
Little update. Been to Tank Fest a little bit ago. Was a good time plenty of running and static armour to look at. Got some cool photos for referencing weathering too. Will have to find a place to drop all those for other to use as well. But here's my bit of progress. Most of the turrets major components painted and staring on the back of the hull.
-
HobbyBoss T-34/85 | No. 82602 | 1:16
Daniel_Roxy replied to FullArmor's topic in LSM 1/35 and Larger Work In Progress
Would love to see some in progress photos of that weathering. I never understand how it looks so real 😅 amazing work. -
T26E4 Super Pershing
Daniel_Roxy replied to Daniel_Roxy's topic in LSM 1/35 and Larger Work In Progress
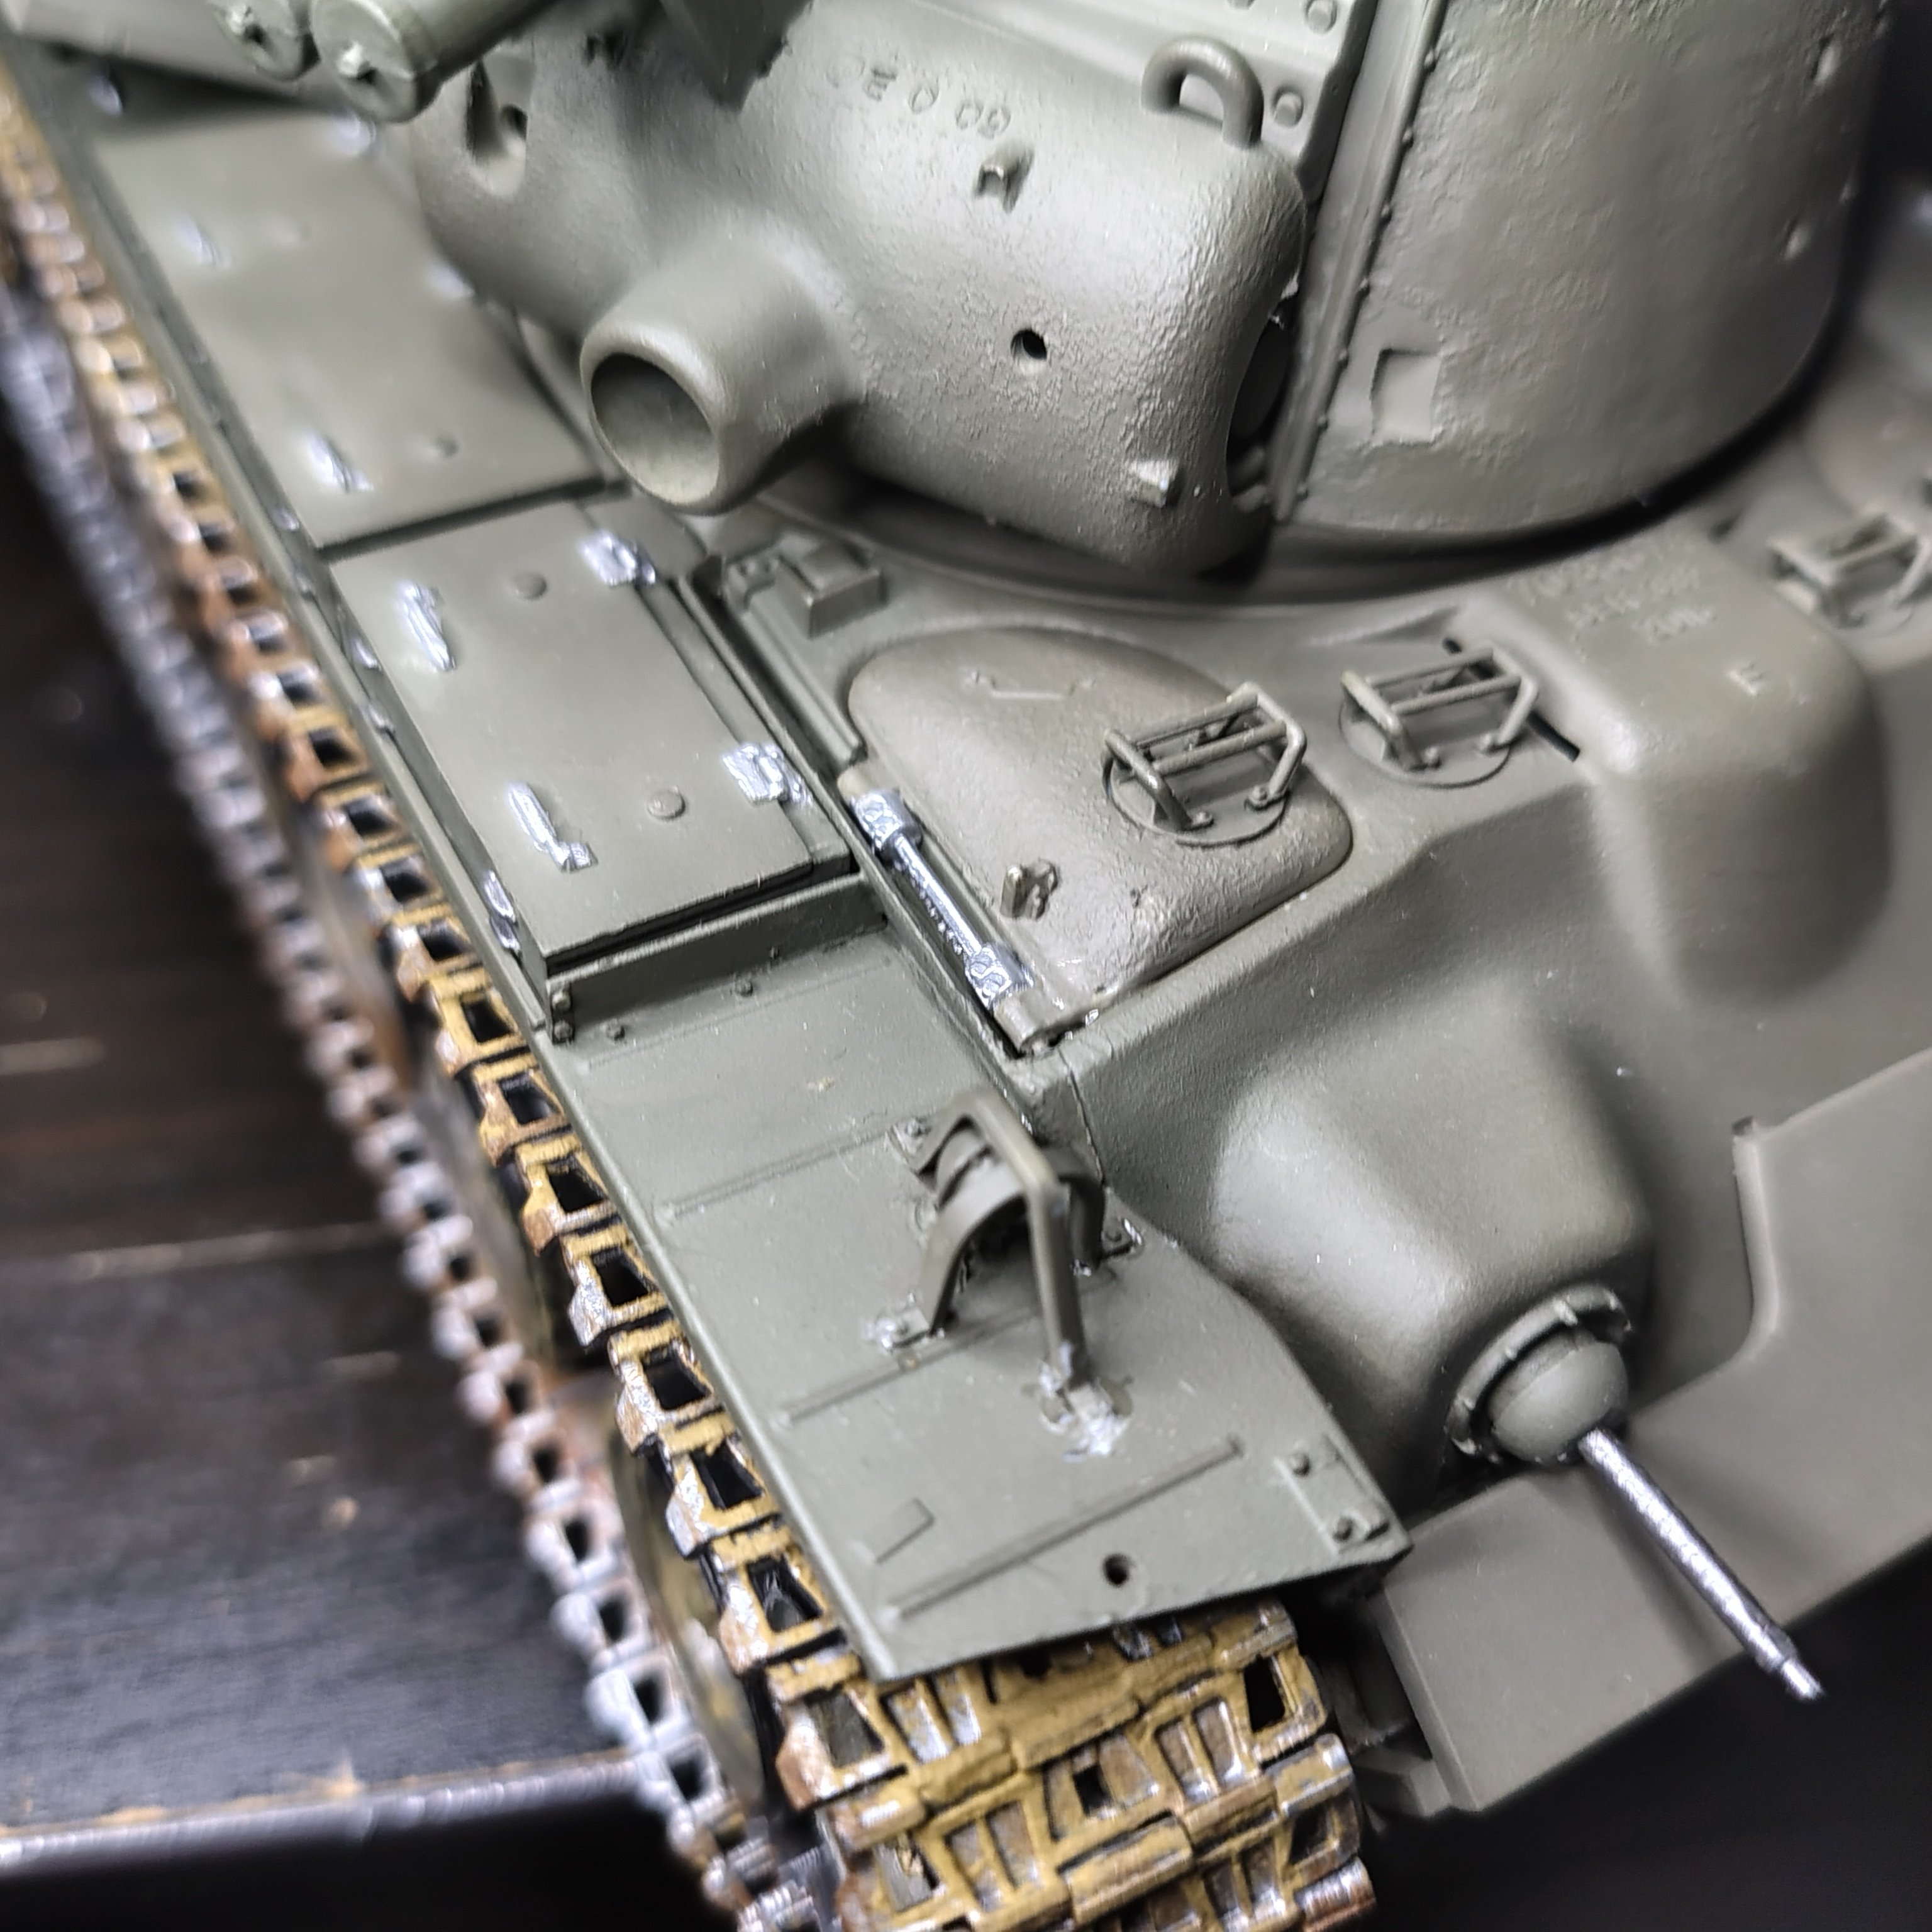
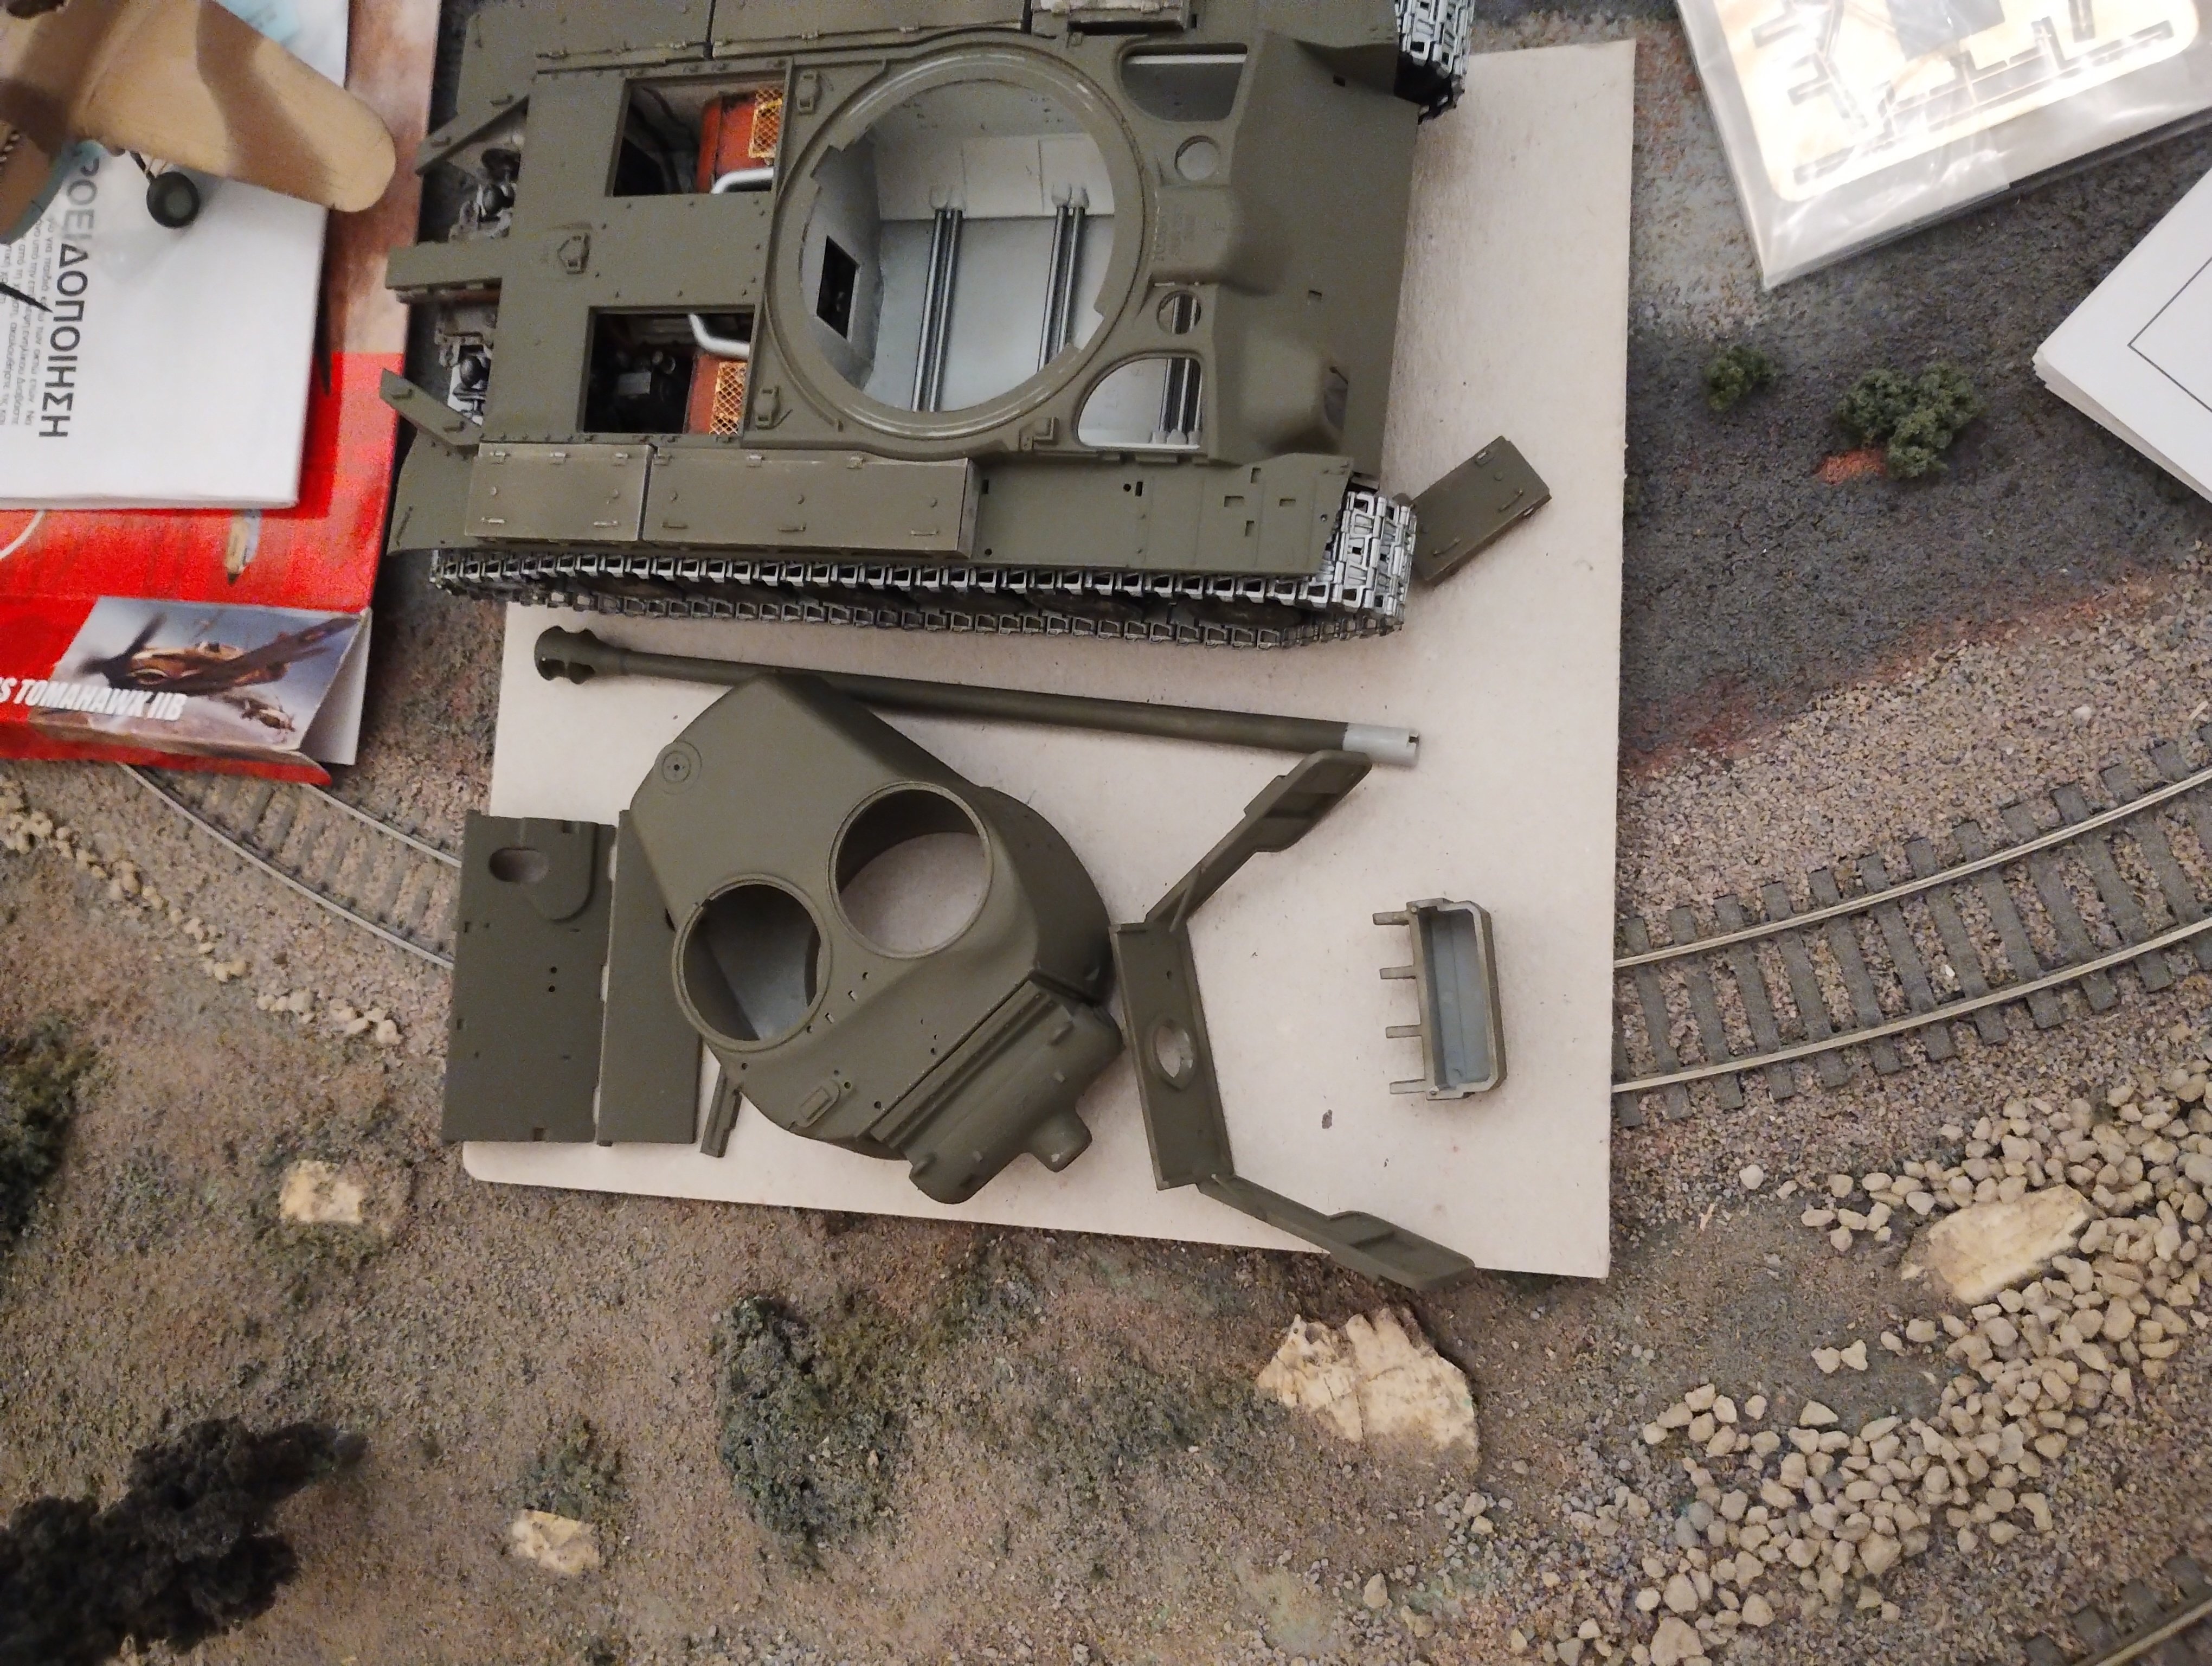
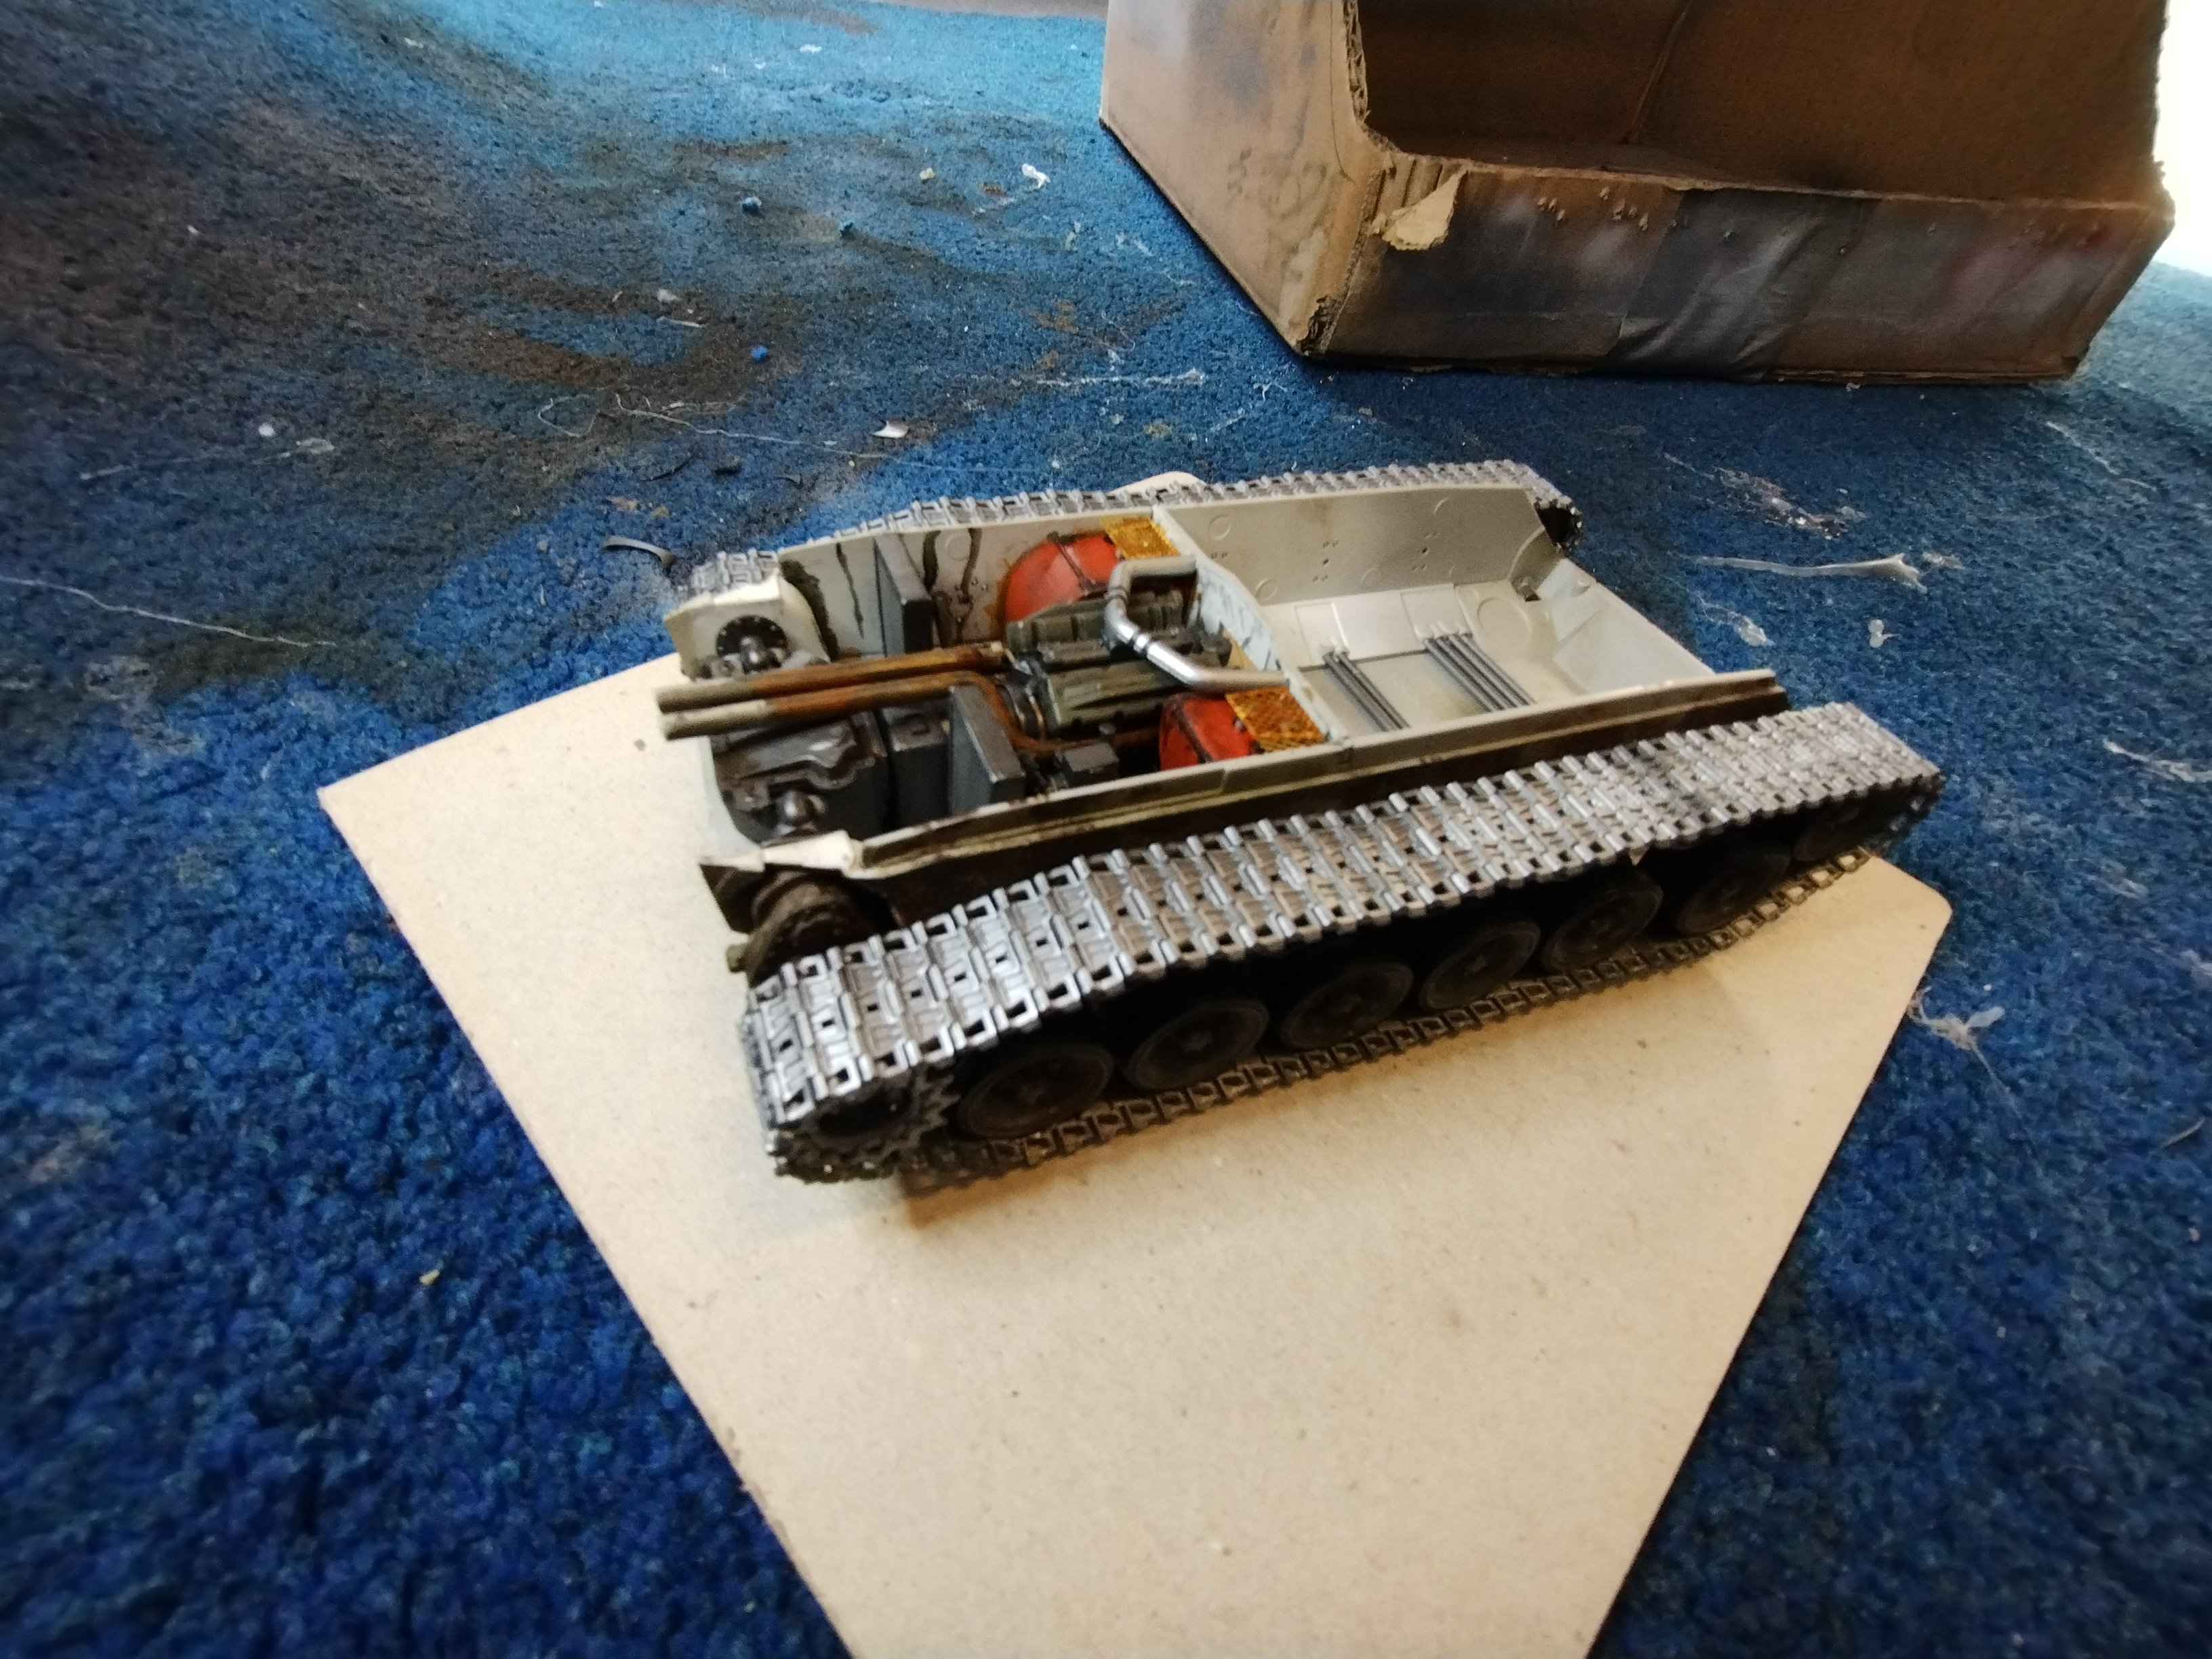
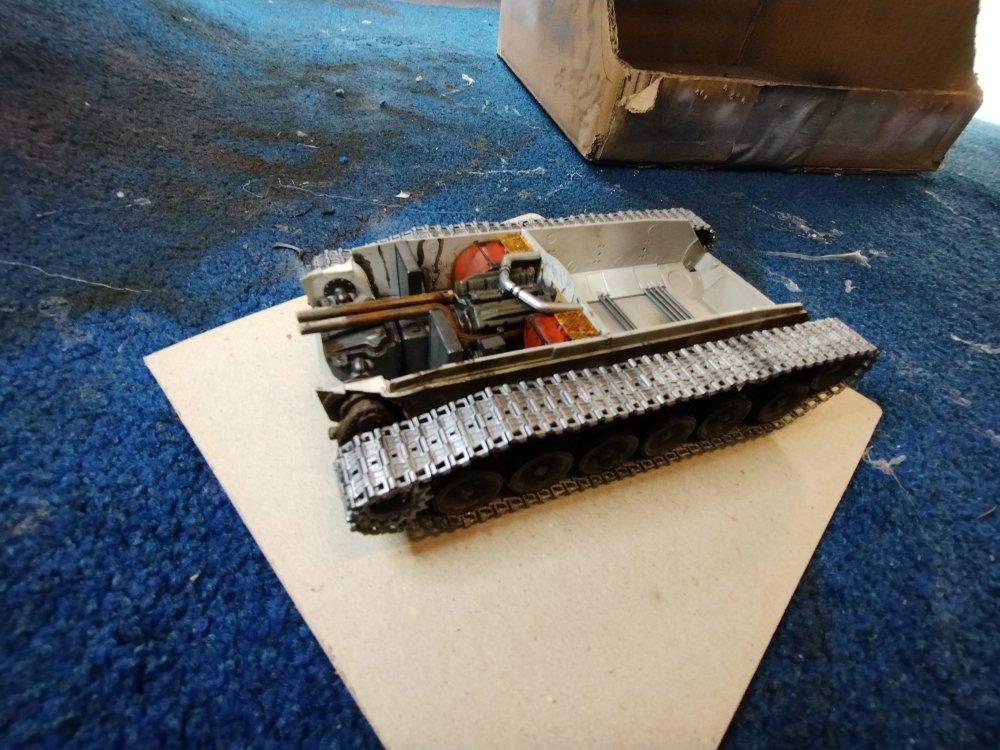
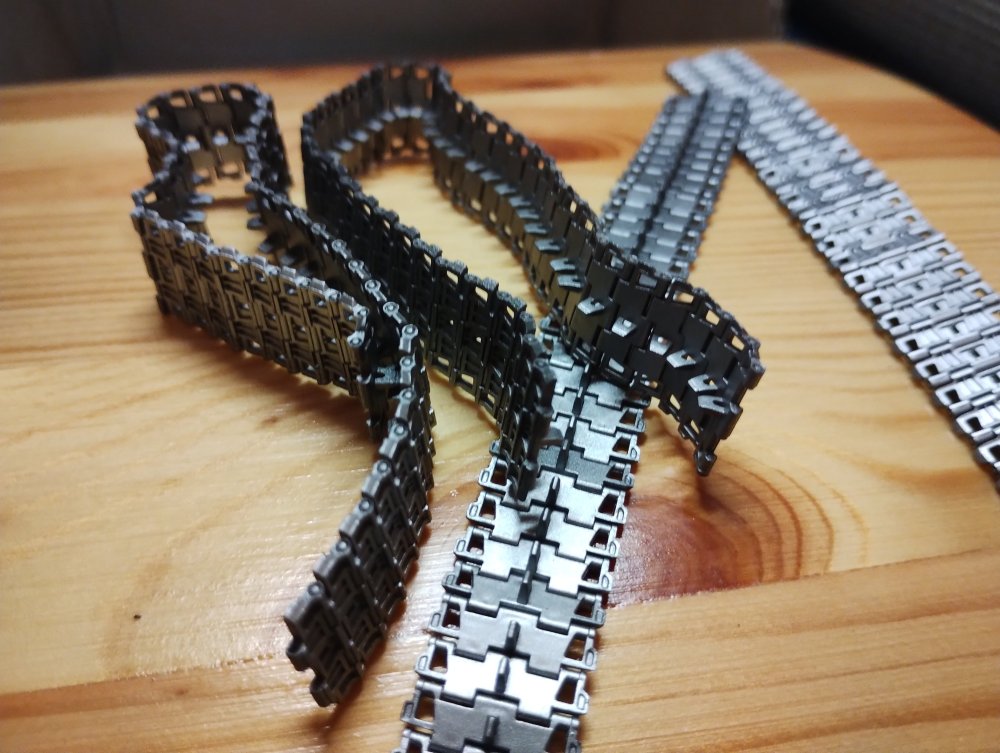
It has been a while since I put an update out. Both sets of tracks are now on and all glued in place. I found the lugs for the sprocket wheels to be a bit to small and short so had to bend them out a bit at the ends to stop the wheels from falling off while the glue was drying. Weathering is all on now for the tracks and lower hull. Looks good I think 😅 The tracks themselves need some dirtying up but I'll get round to that sooner or later. also started painting the parts for the addon armour and turret


-
T26E4 Super Pershing
Daniel_Roxy replied to Daniel_Roxy's topic in LSM 1/35 and Larger Work In Progress
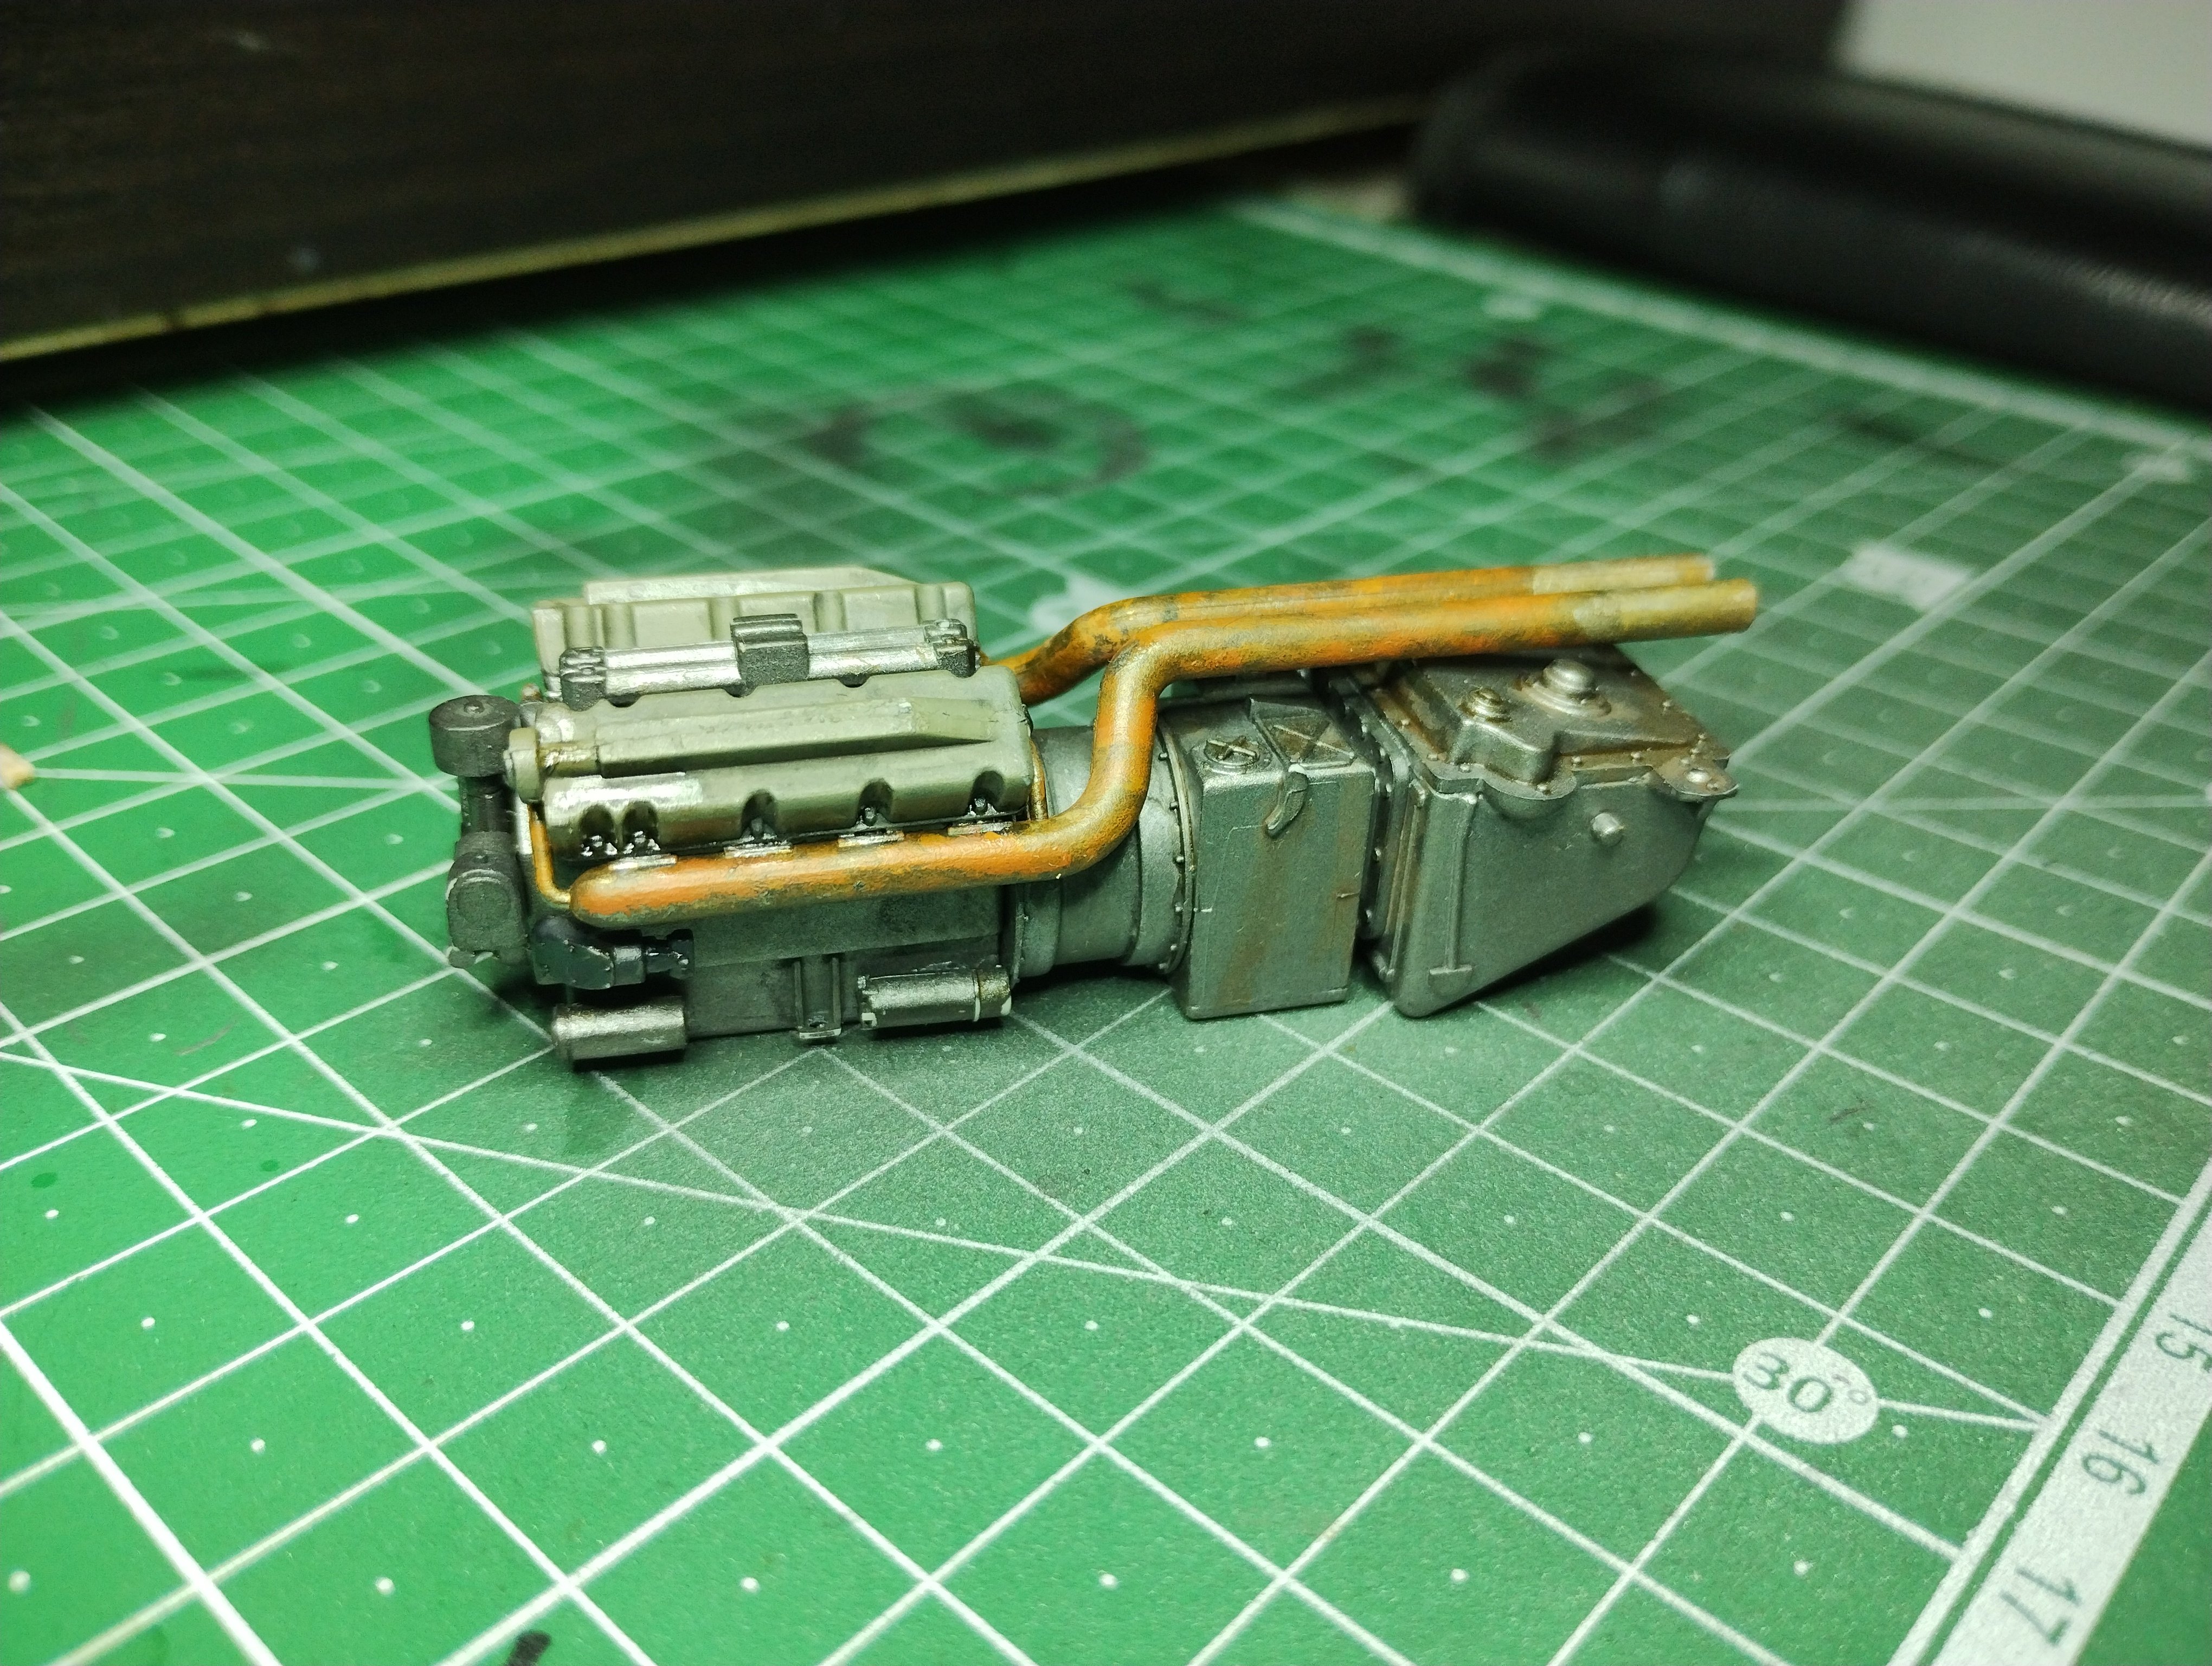
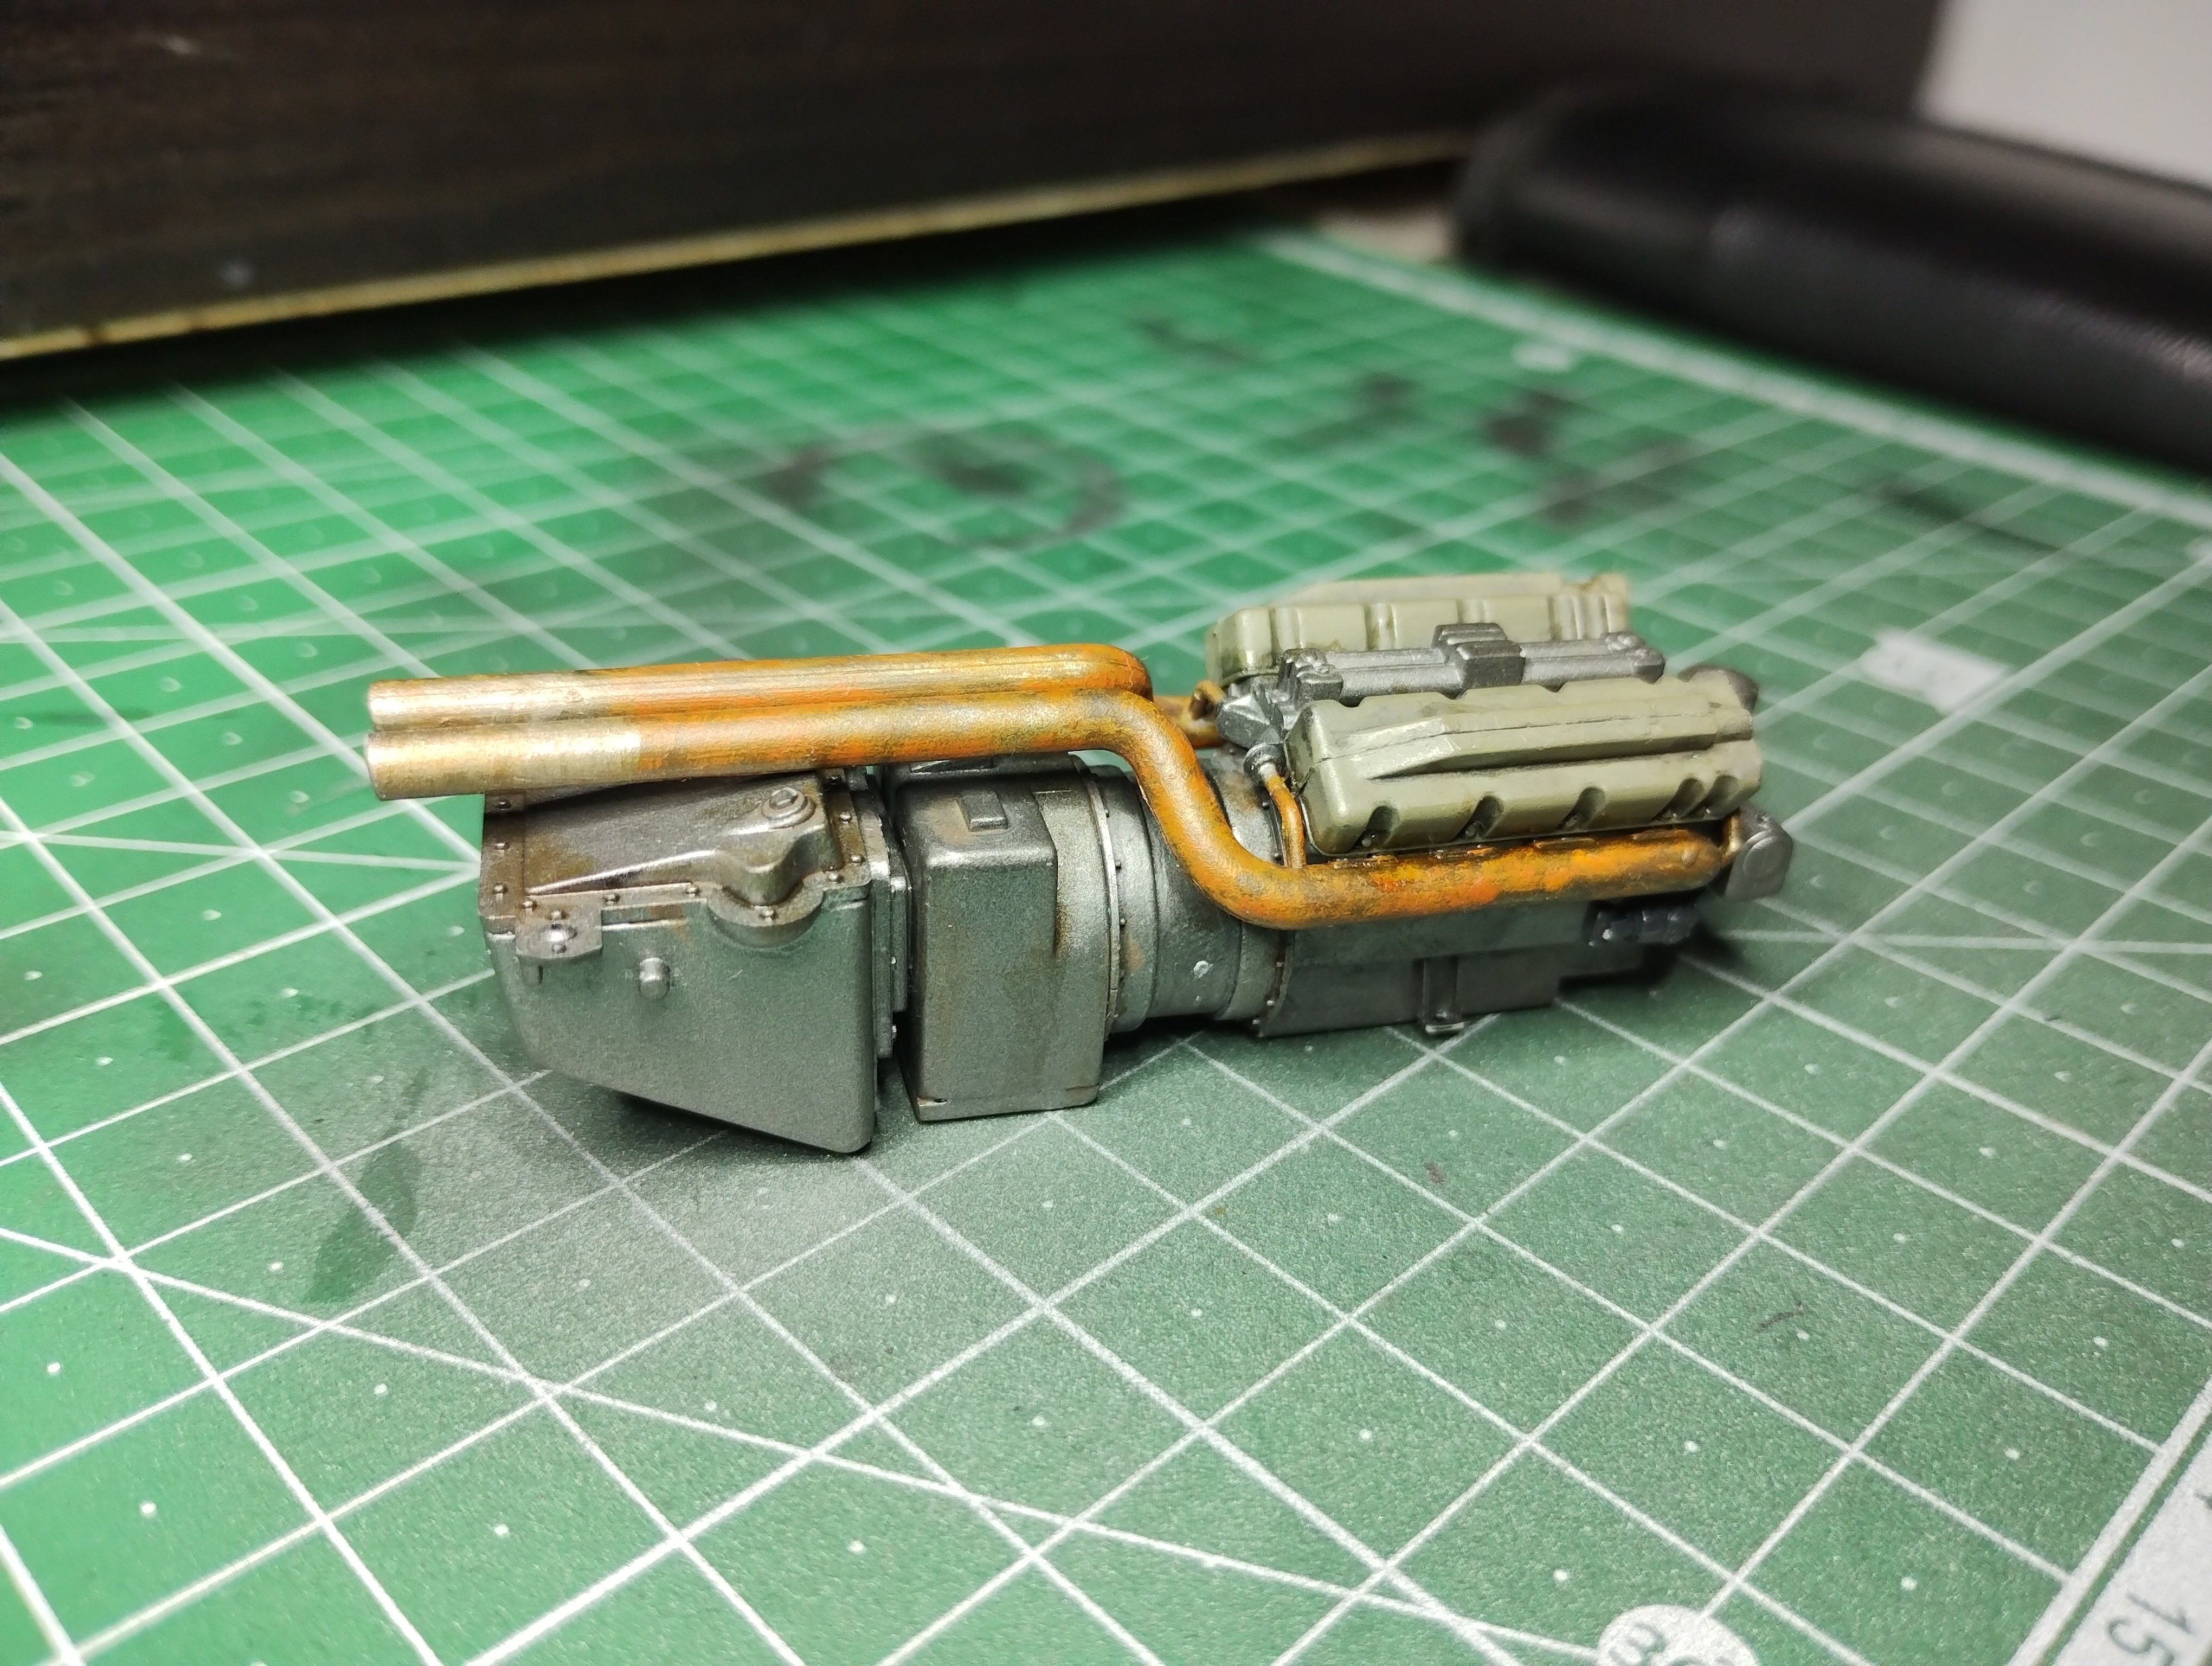
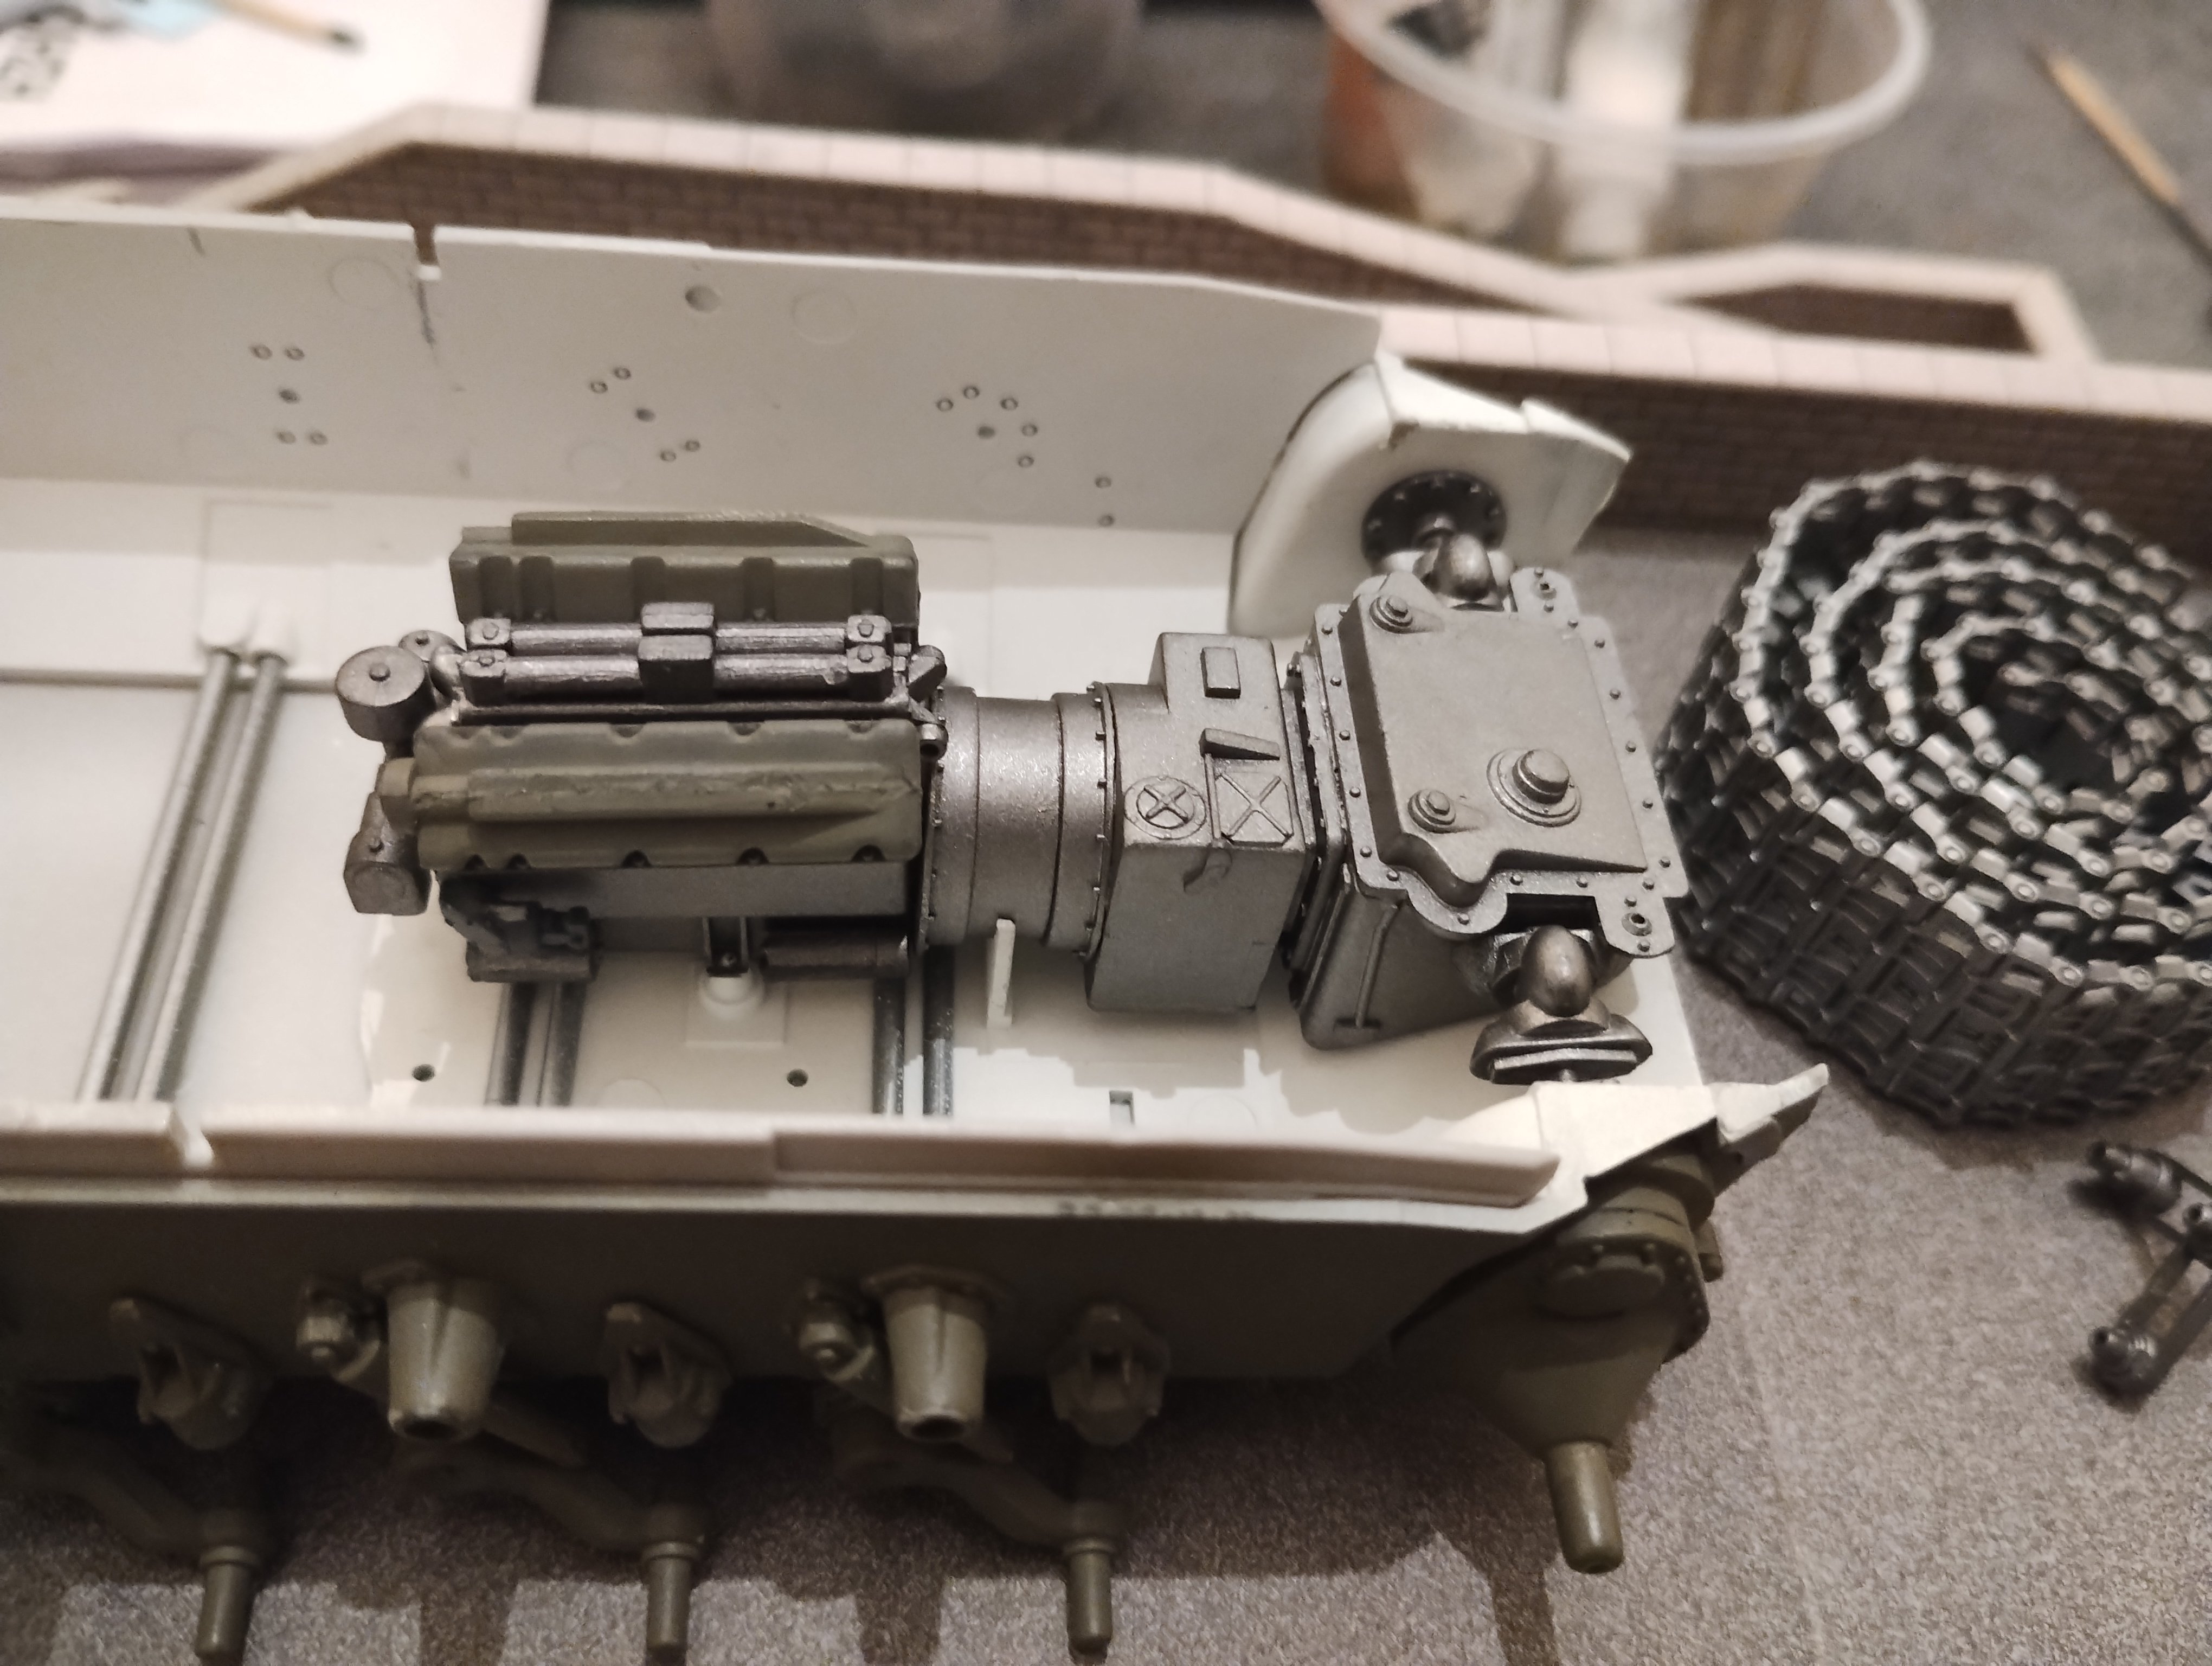
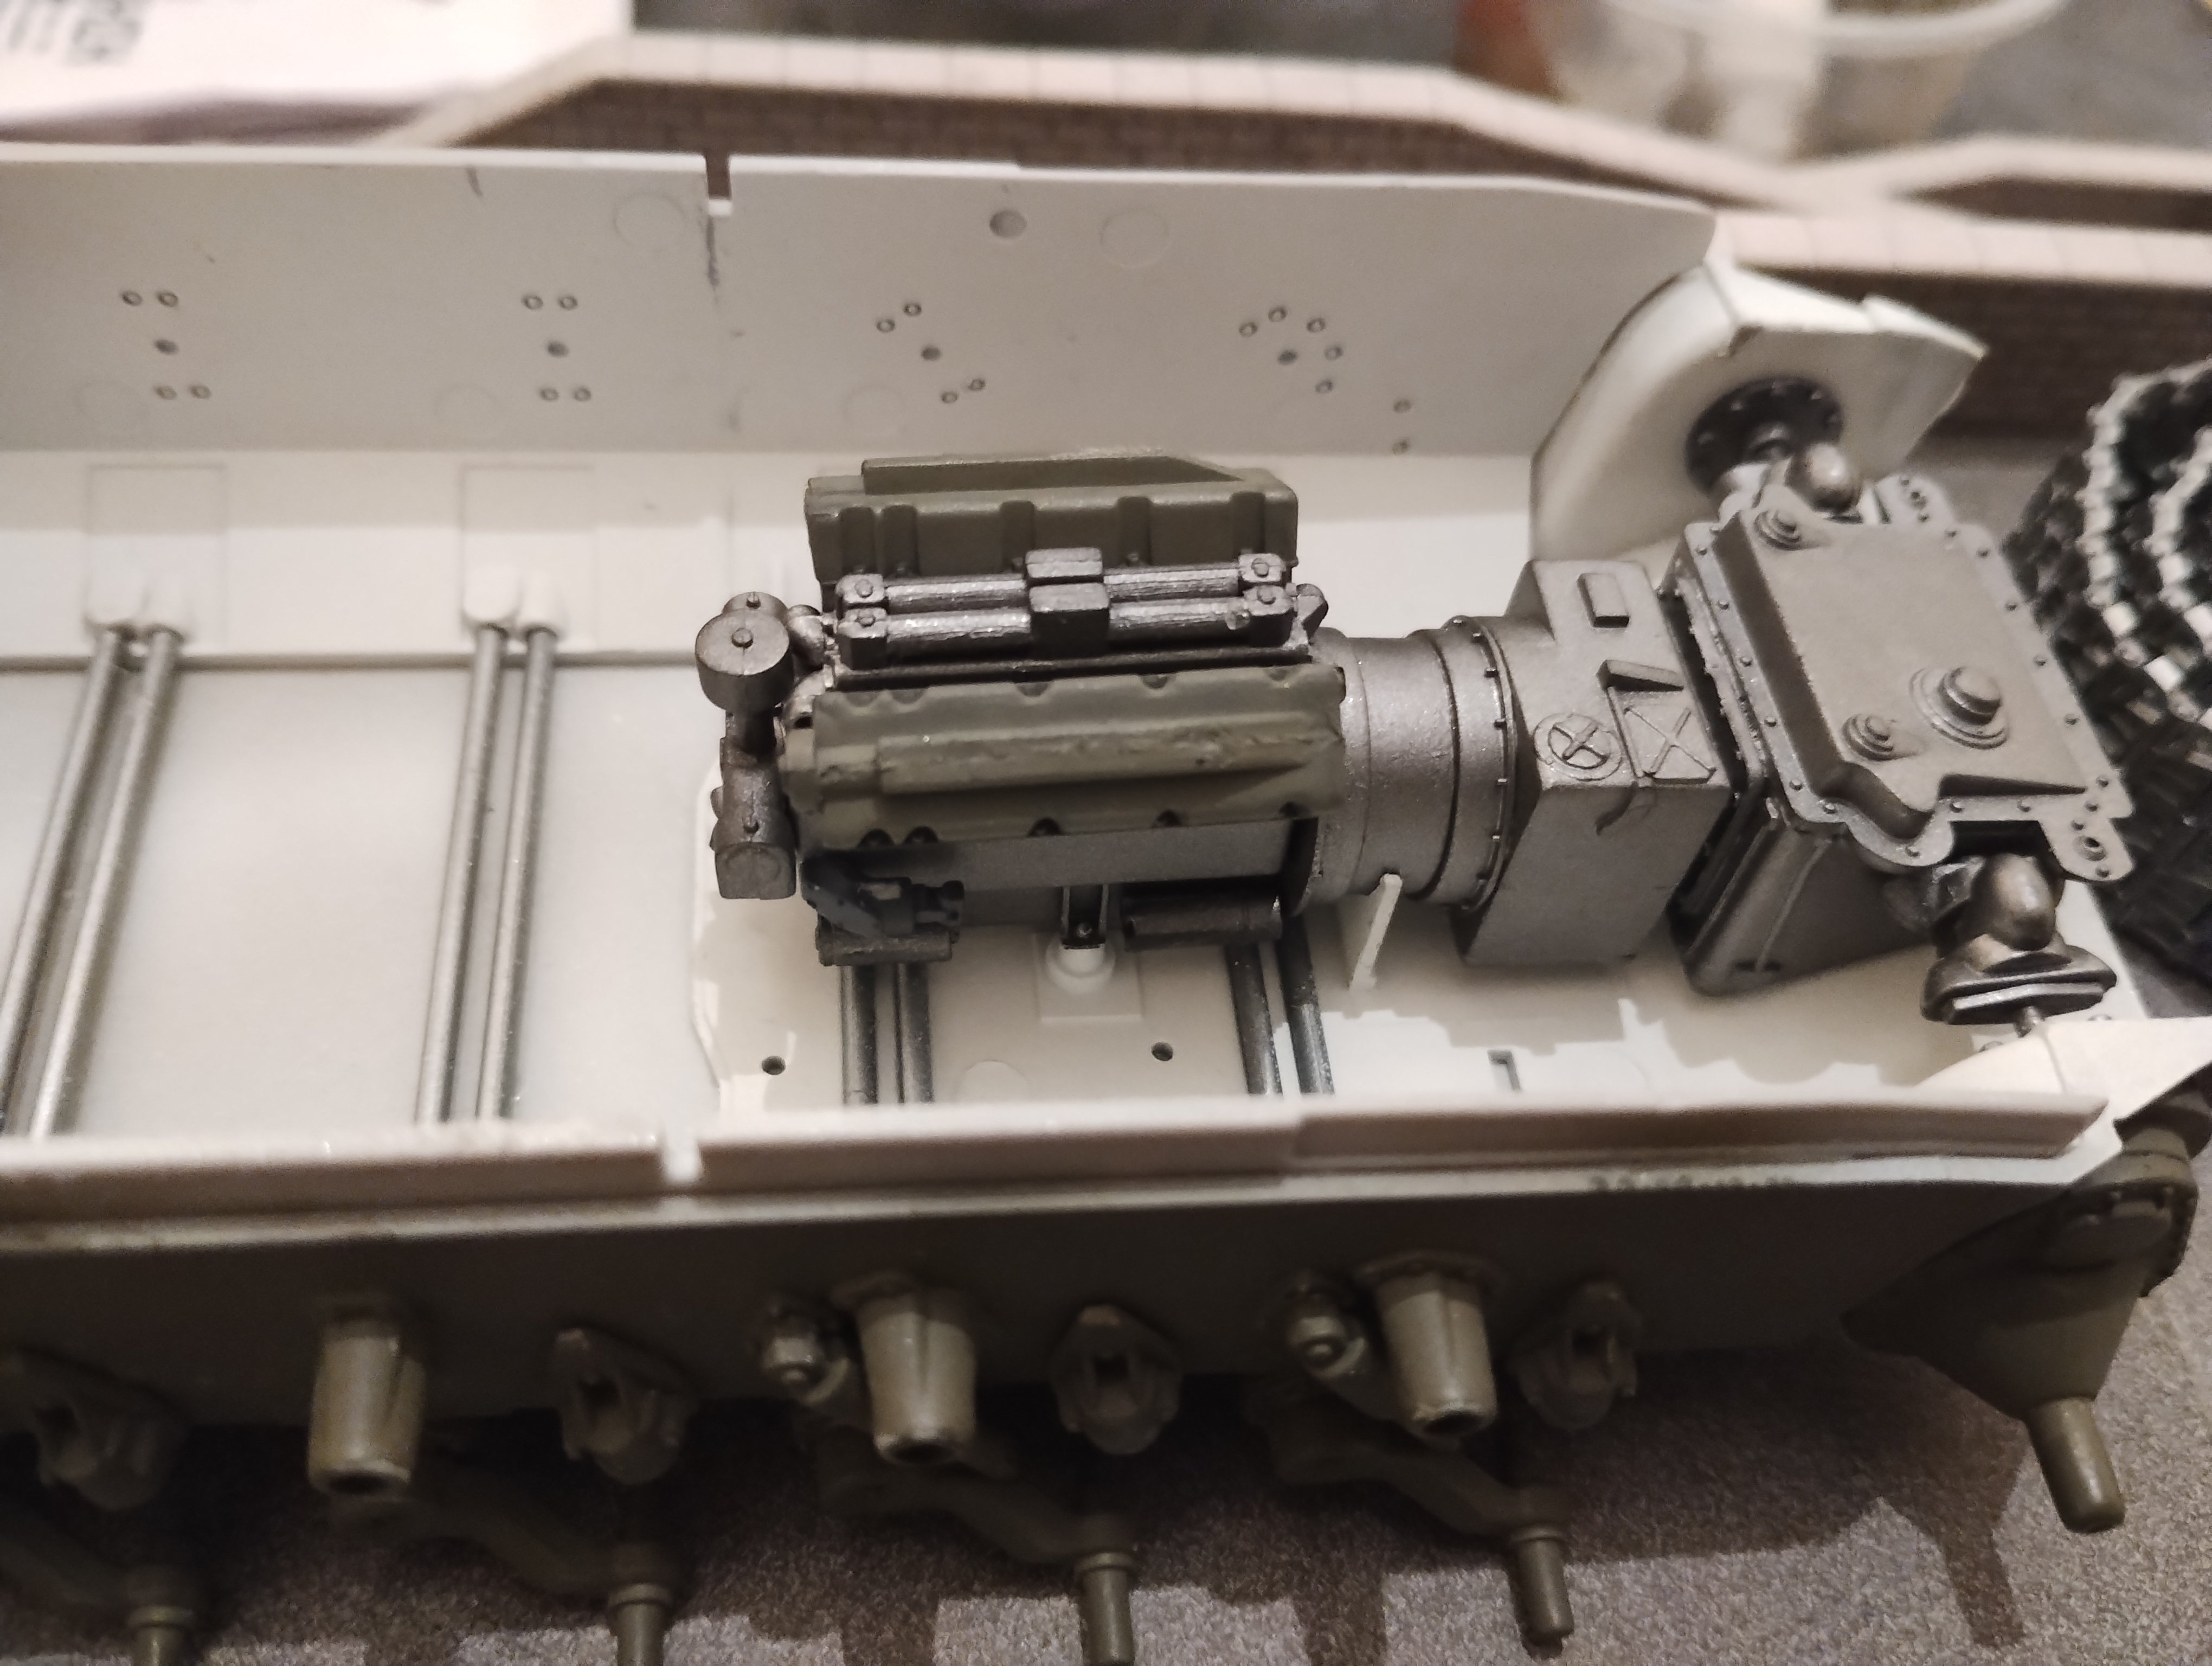
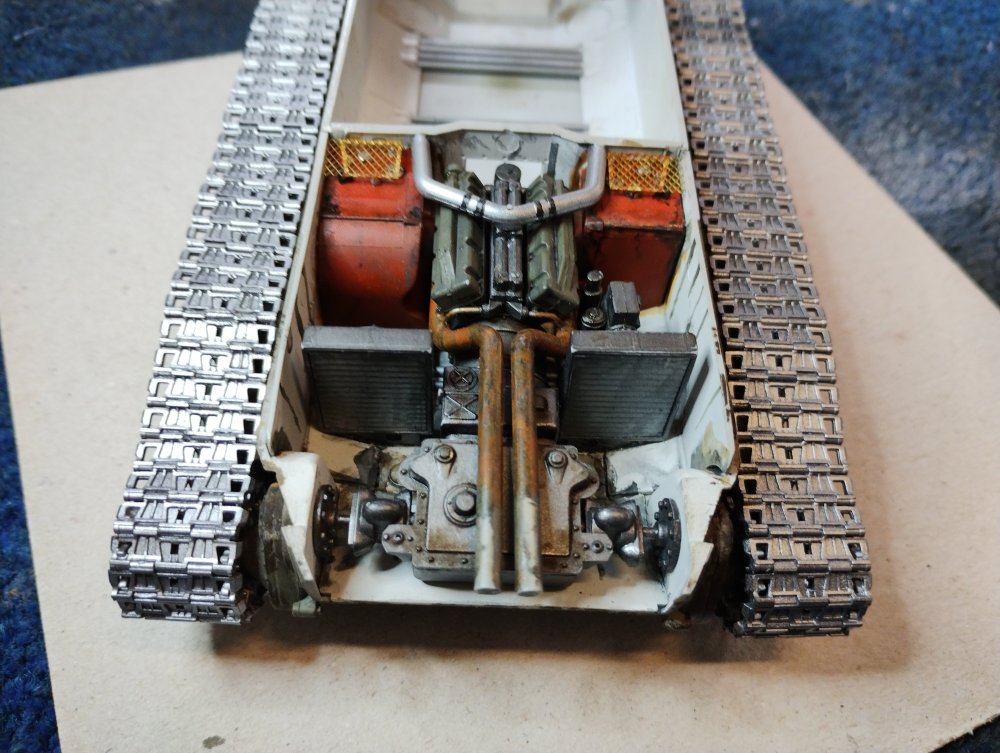
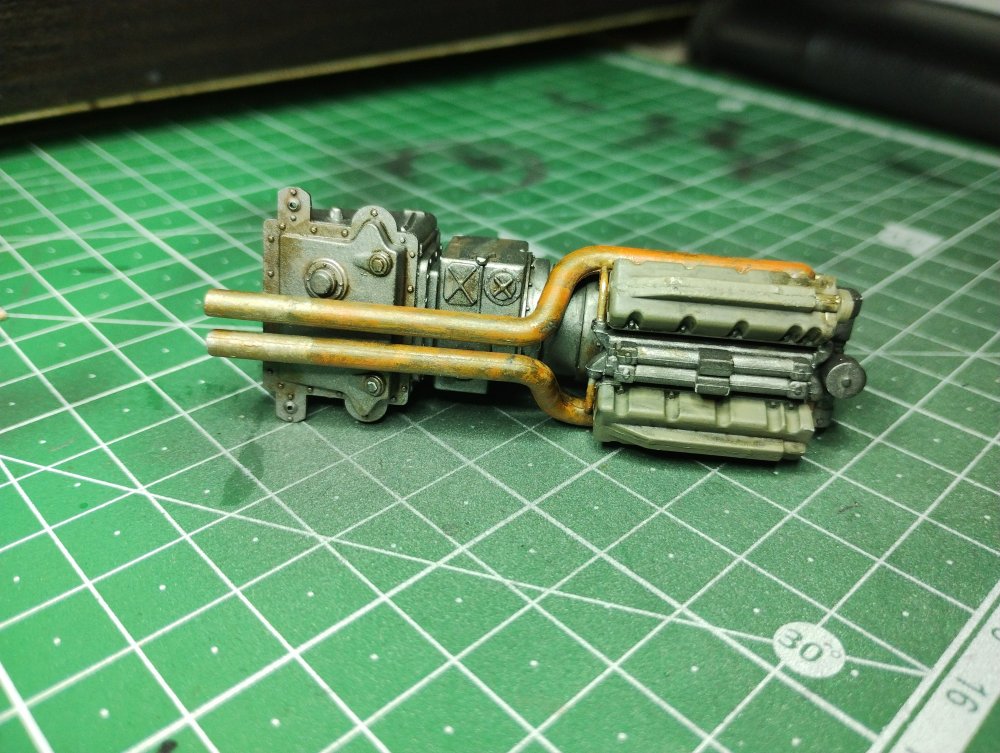
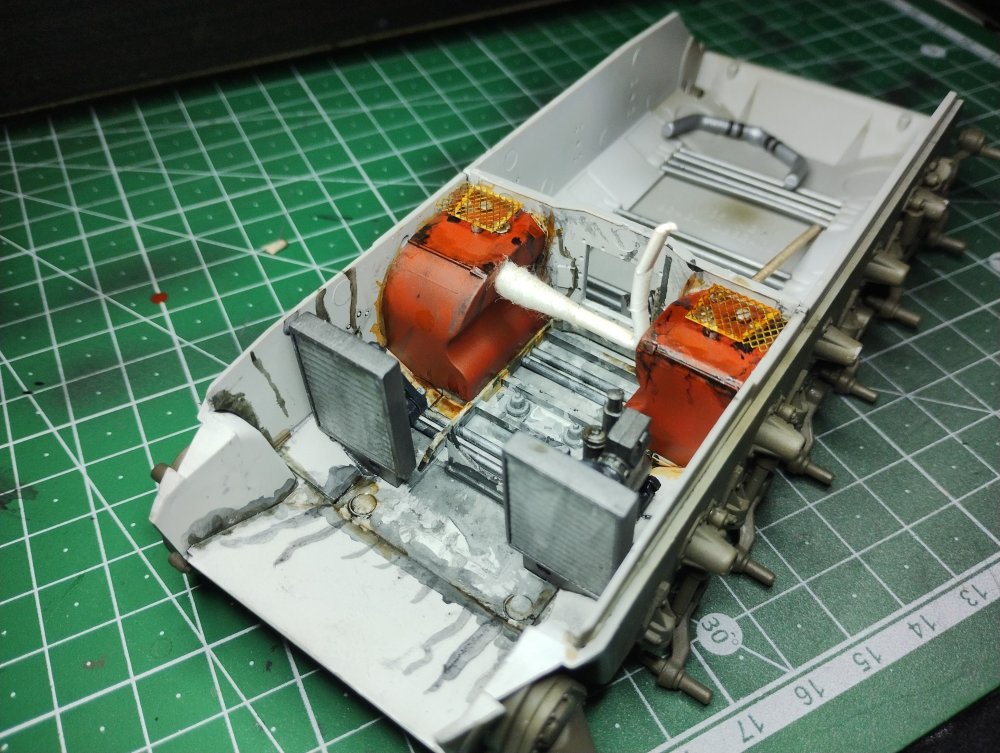
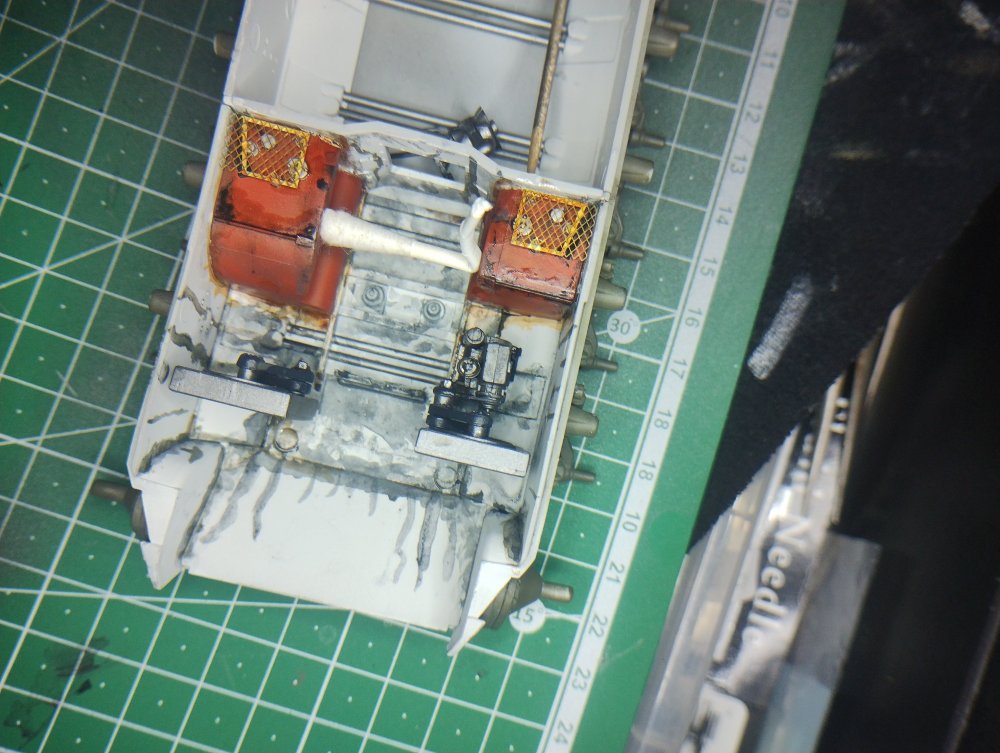
Not too good at blending. But it's definitely looking pretty good. Loving the detail on the engine. Painted the rocker covers with a more olive drab look. Think it really makes the engine just look that extra bit


-
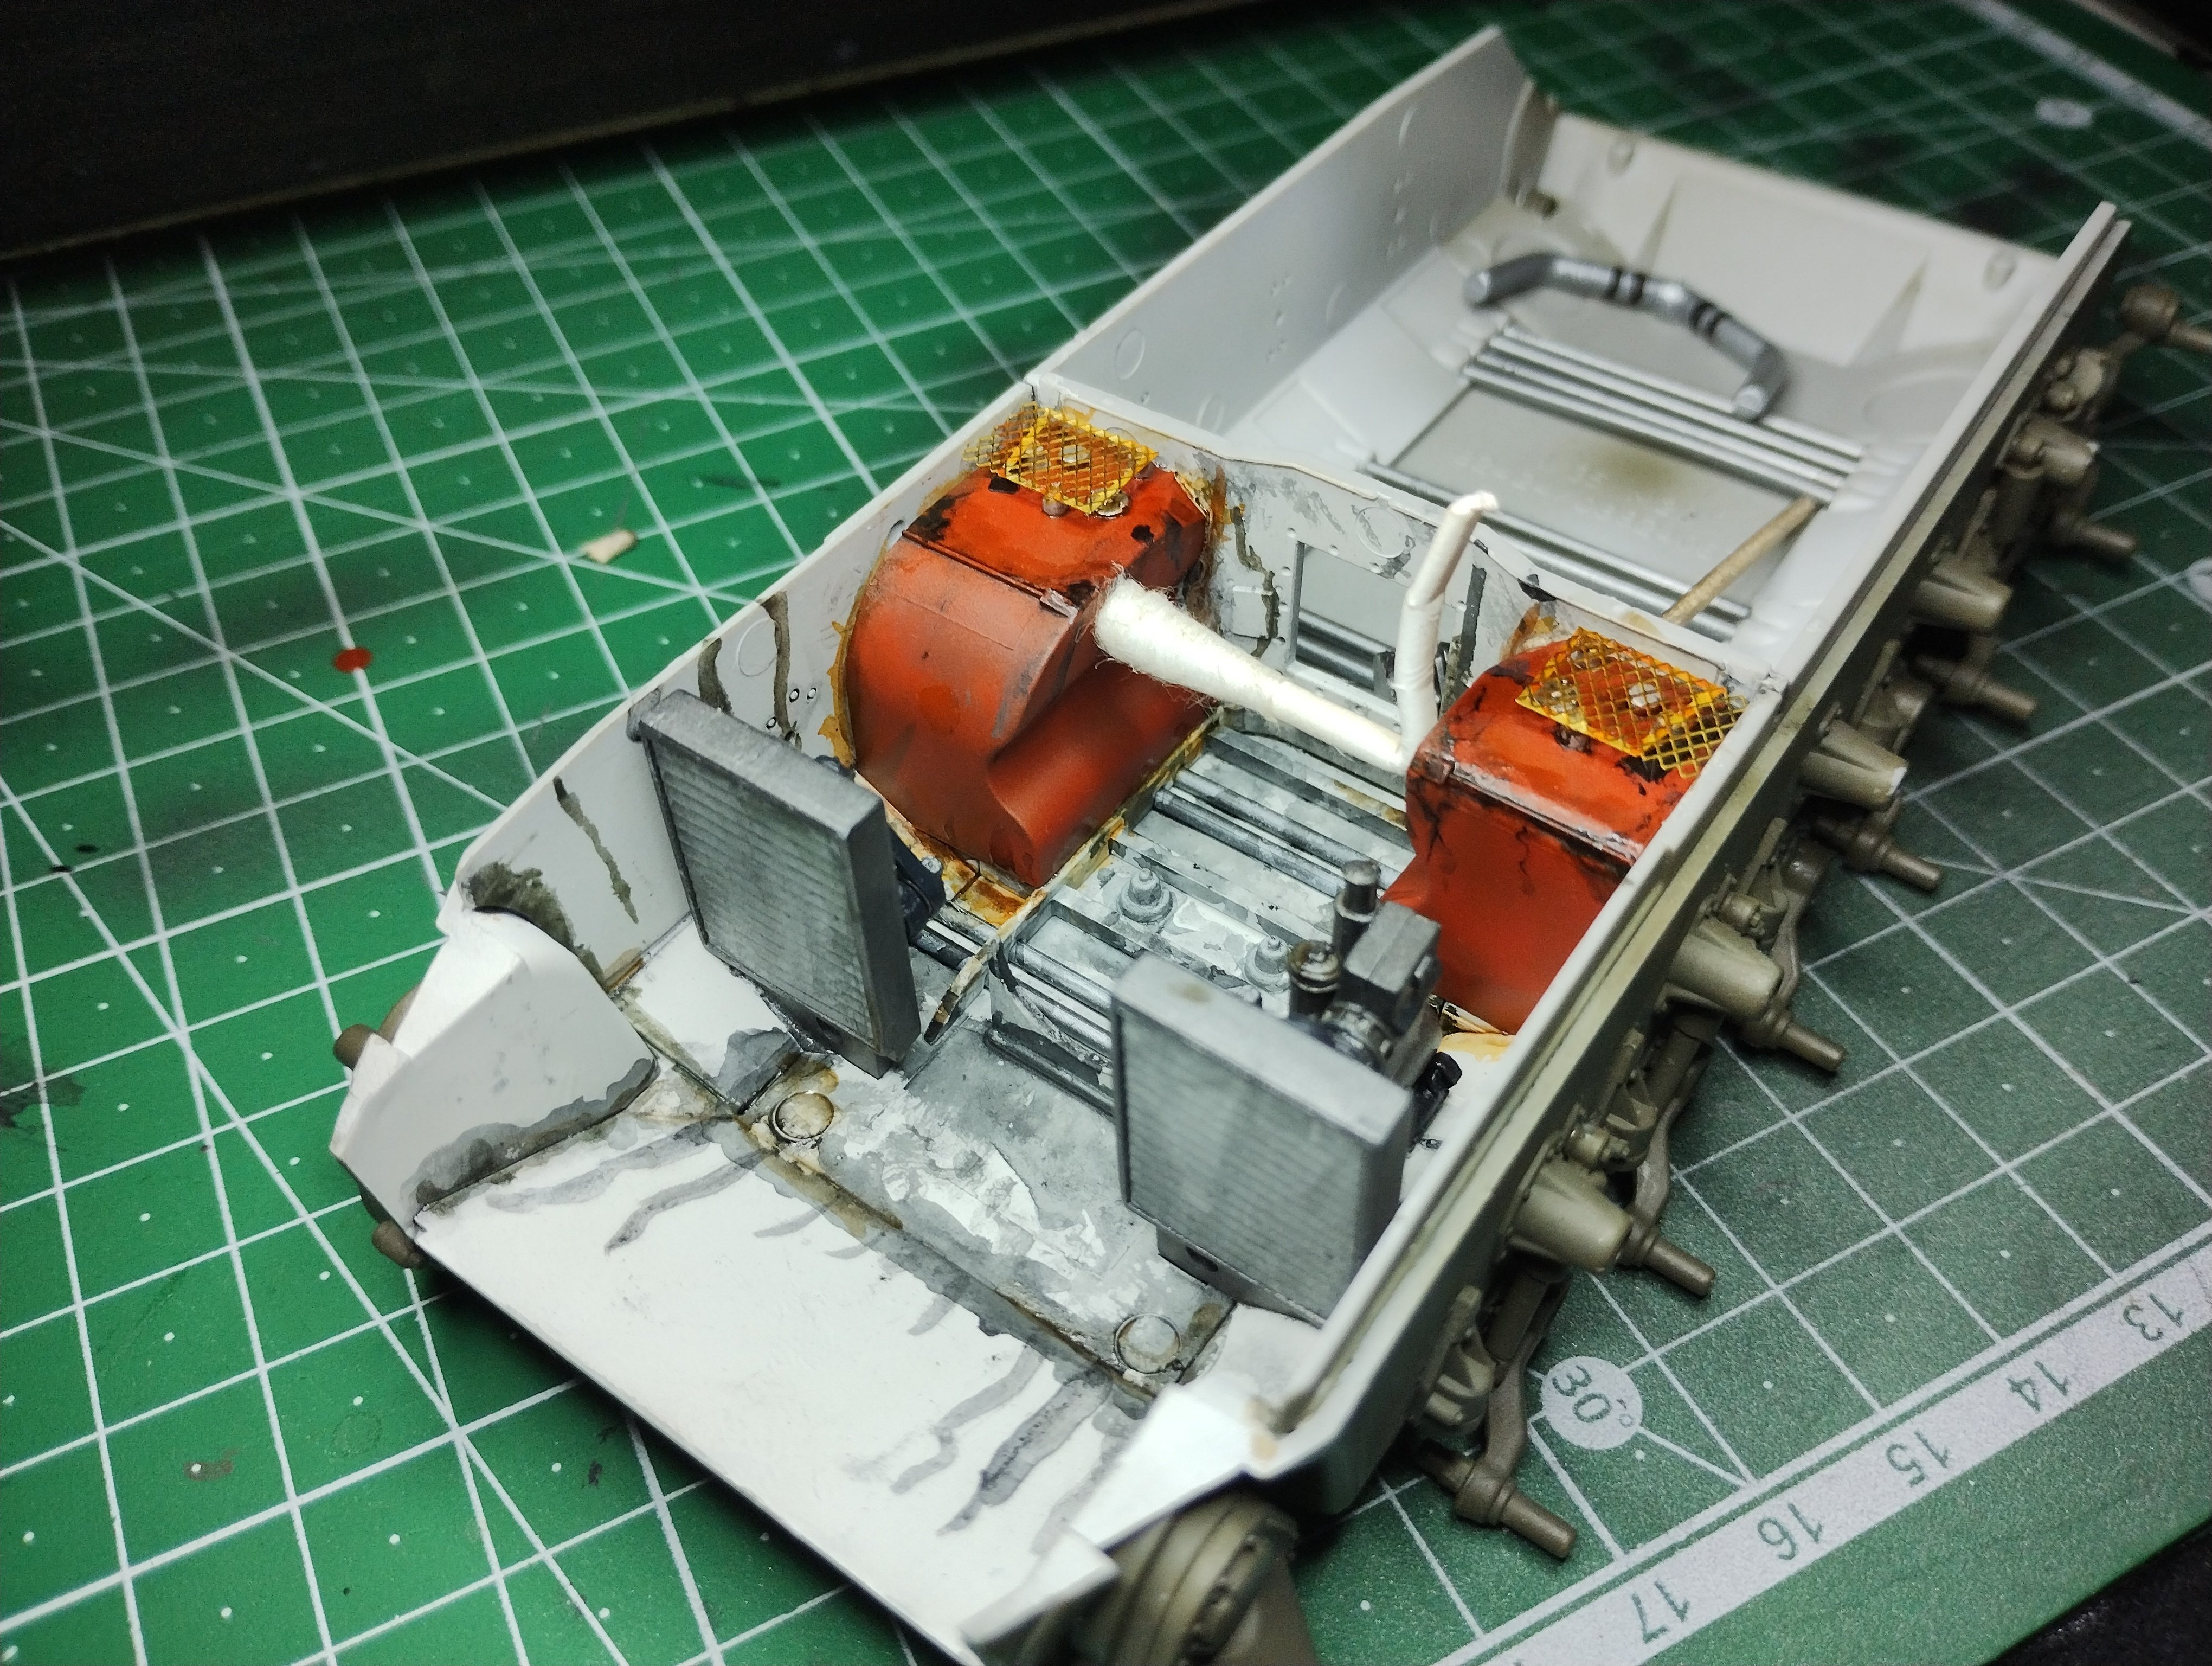
T26E4 Super Pershing
Daniel_Roxy replied to Daniel_Roxy's topic in LSM 1/35 and Larger Work In Progress
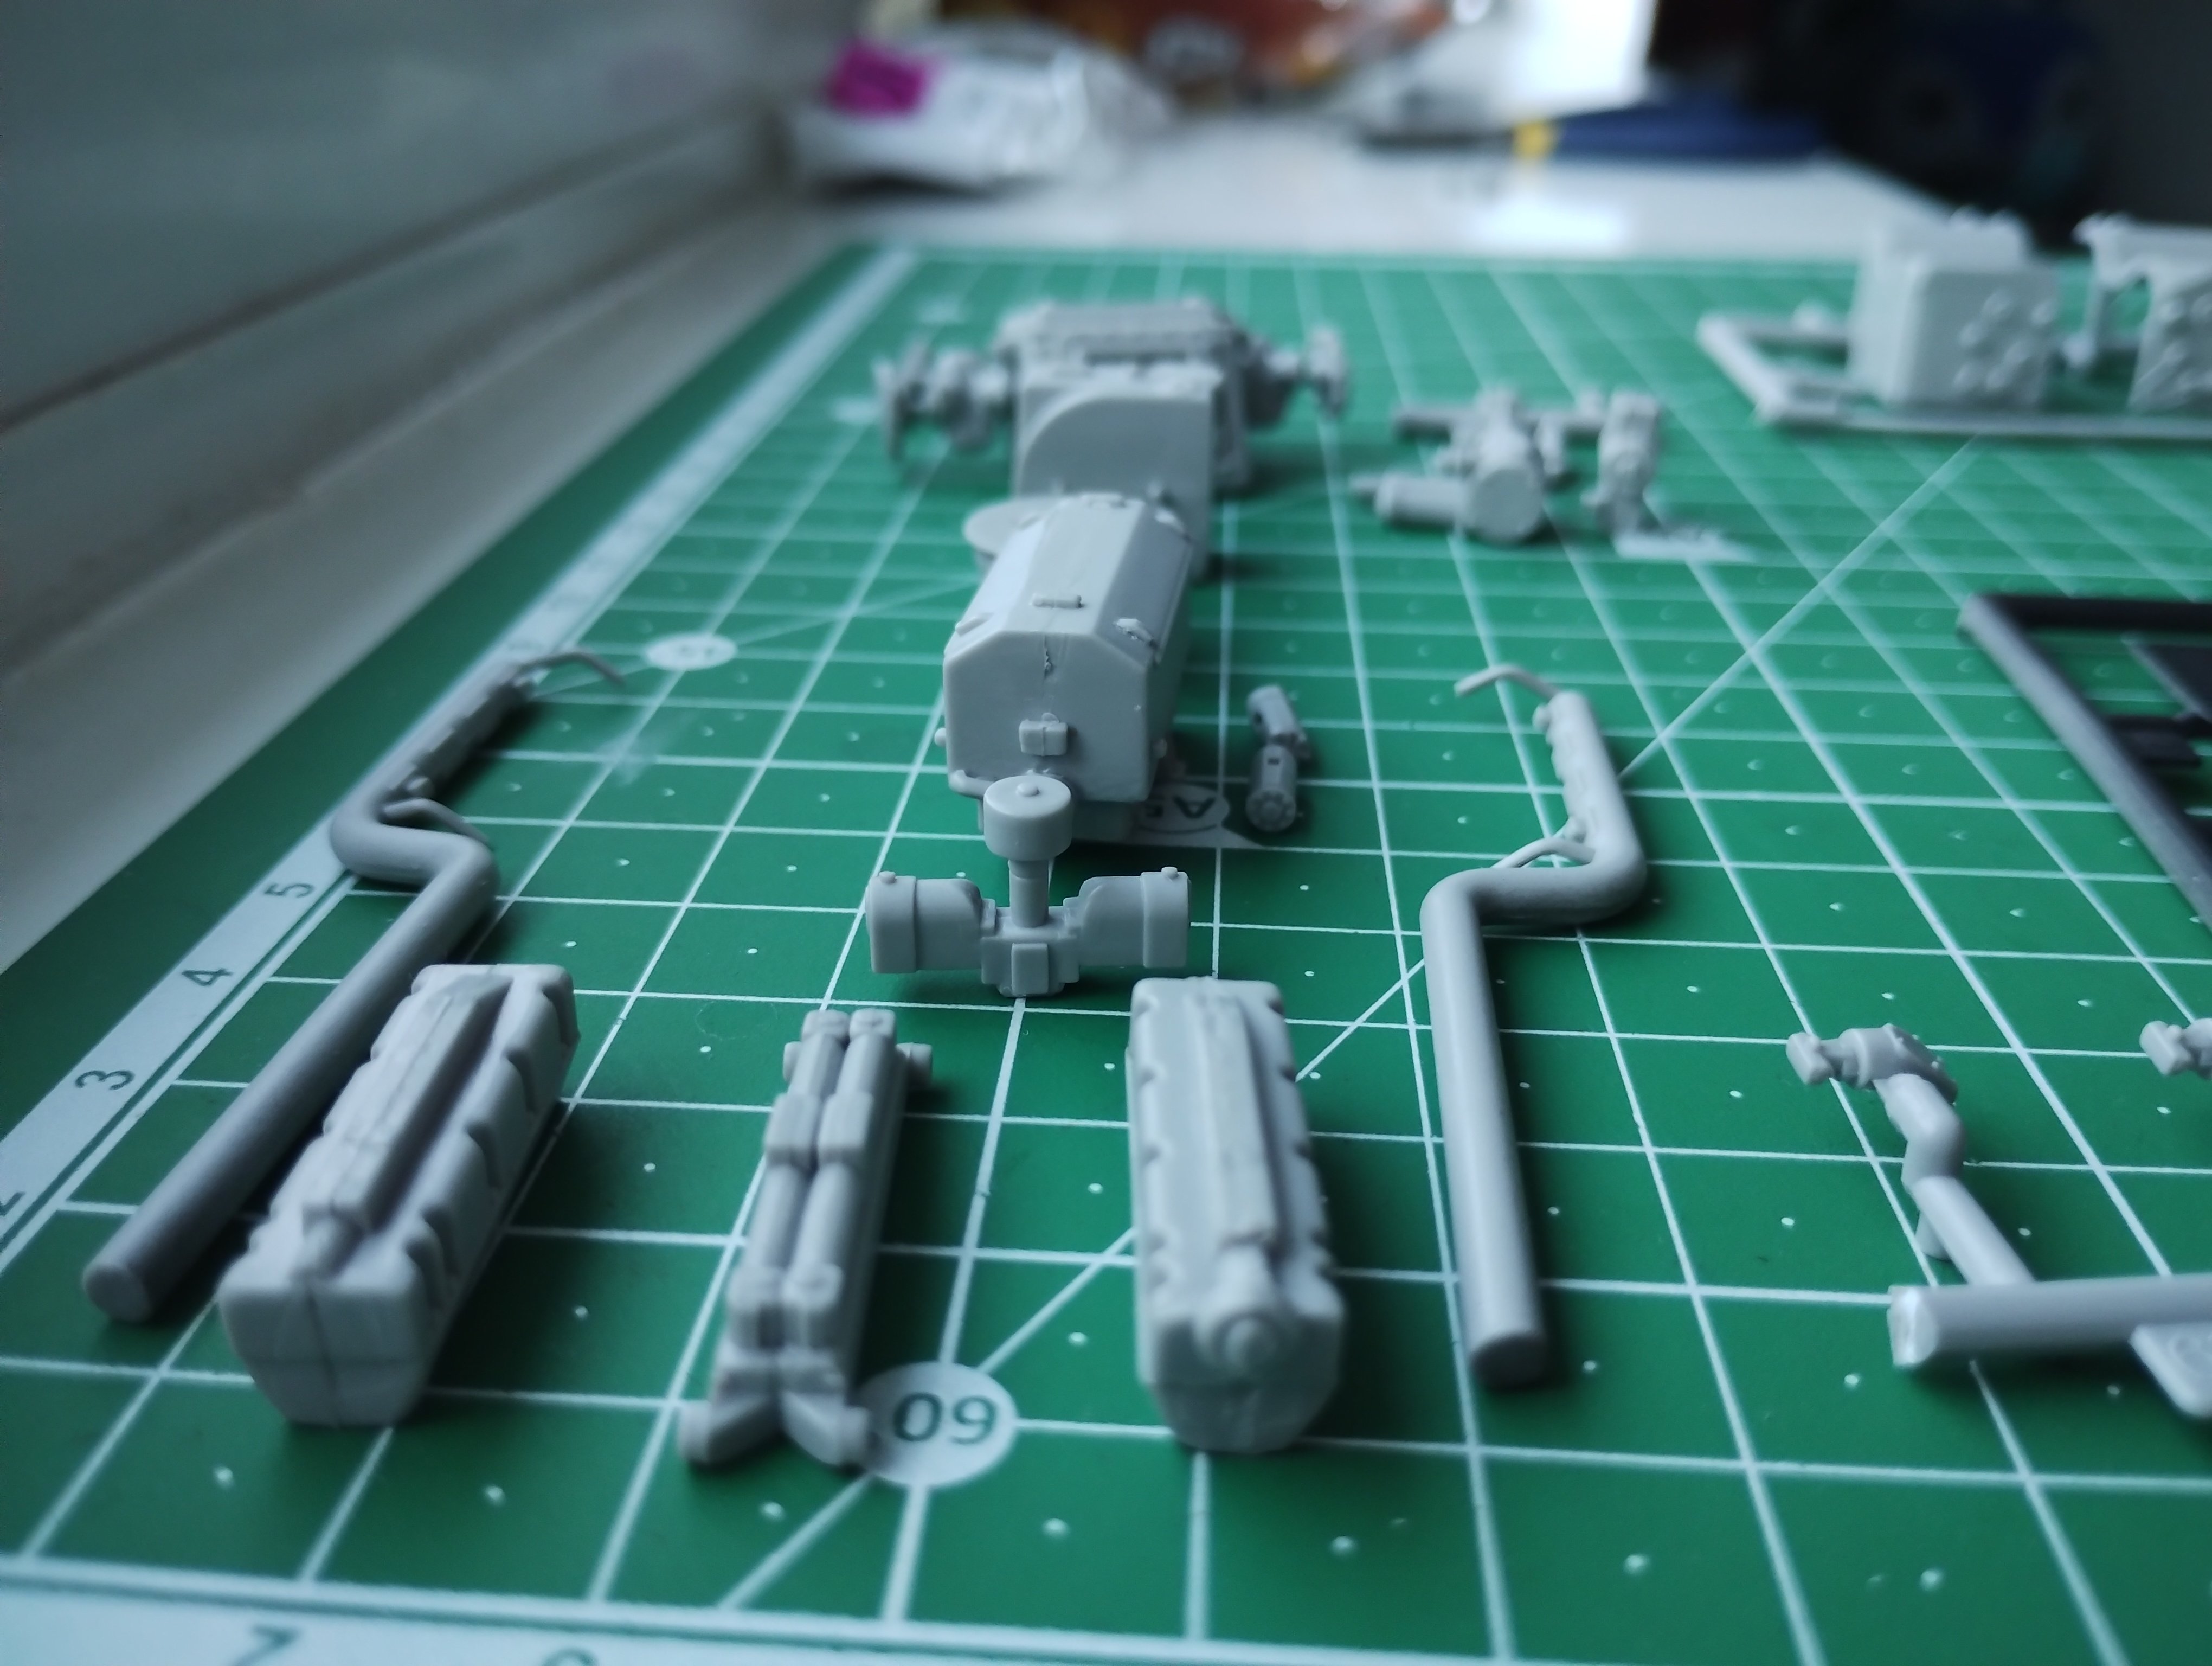
Abit more work. Got some nice things for weathering. And put the engine together. Still got the exhausts air intake pipe. And some other bits to put on. But it's coming together. Just had a little go dry fitting the engine and transmission and it's starting to look pretty good.


-
T26E4 Super Pershing
Daniel_Roxy replied to Daniel_Roxy's topic in LSM 1/35 and Larger Work In Progress
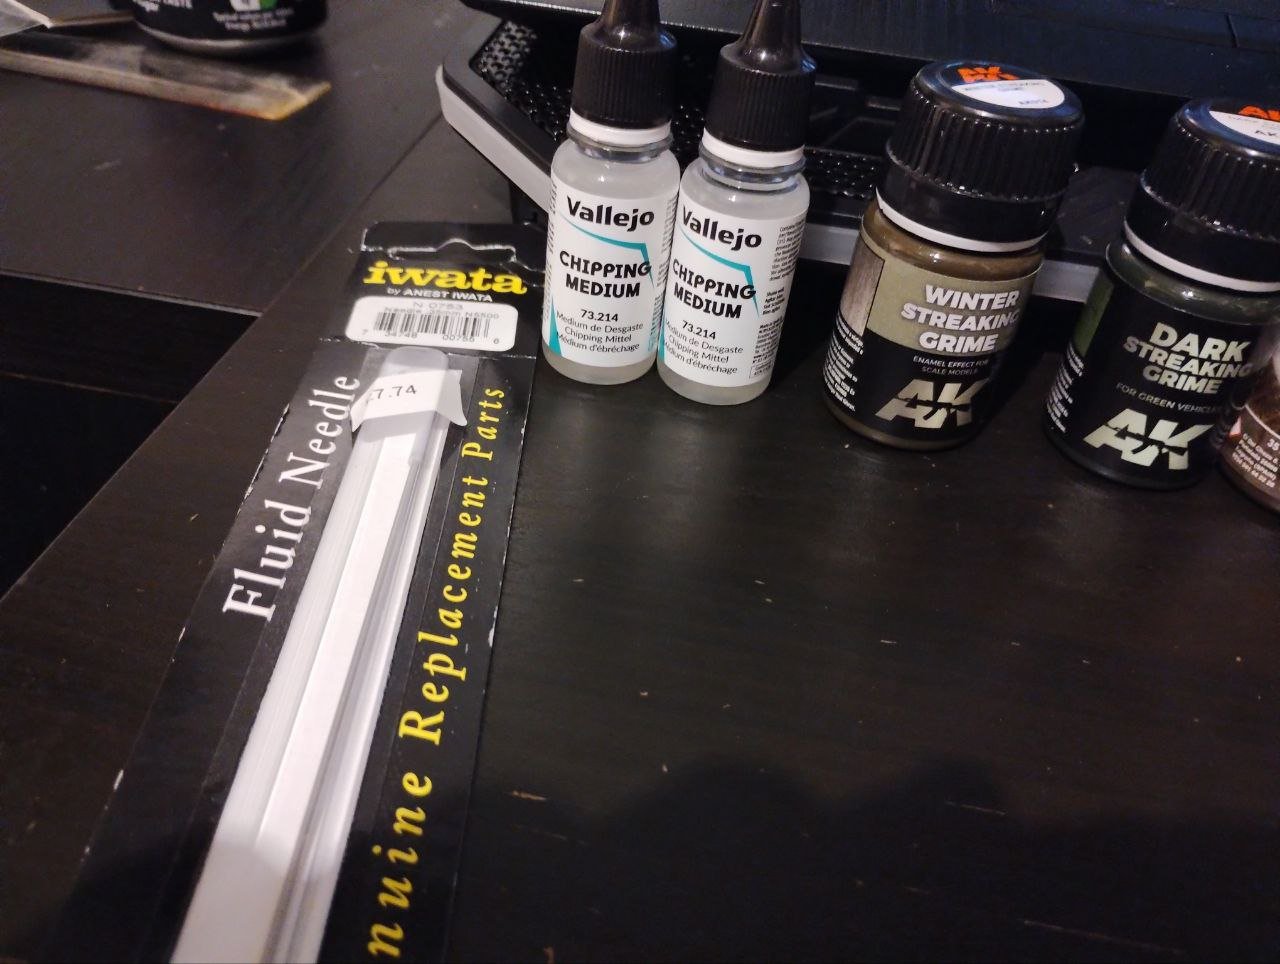
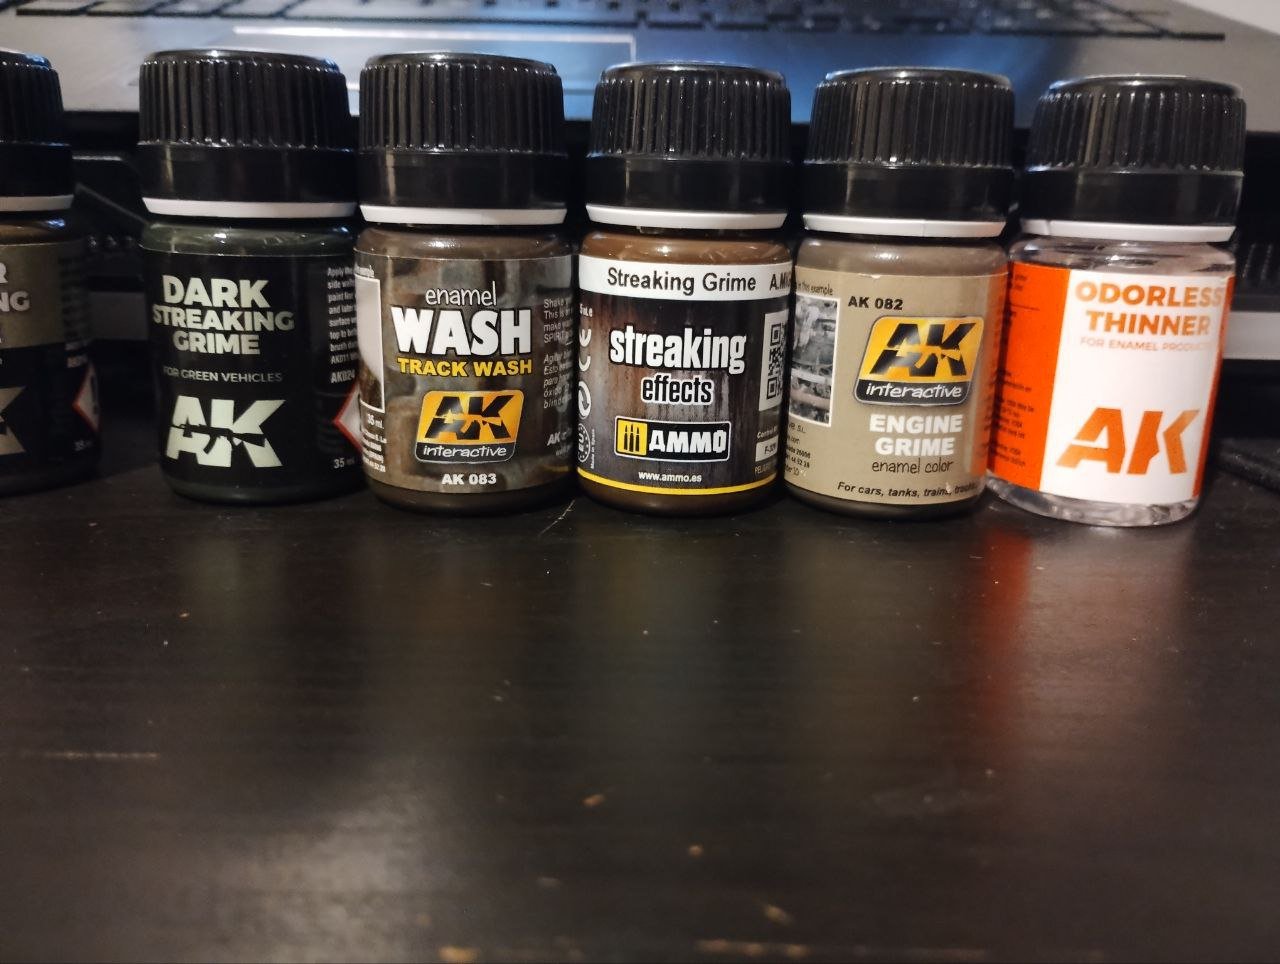
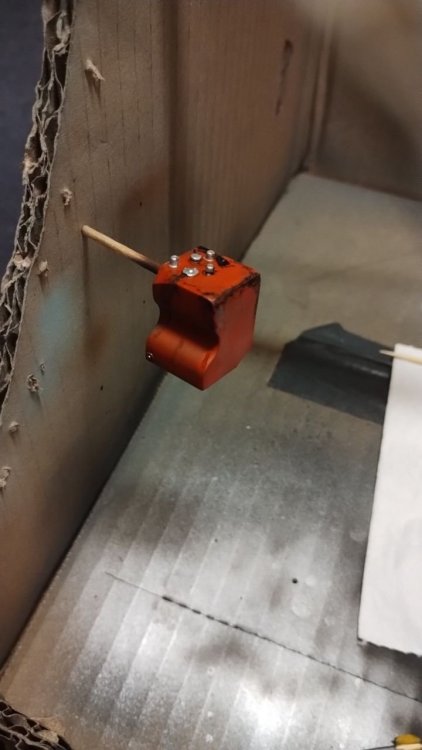
Been working on little bits over the week. Got most of the engine parts painted in a dase colour. Will post photos later But I have painted the fuel tanks in a patchy sort of way and then detailed and weathered them with some washes. Definitely getting better with that sort of thing
-
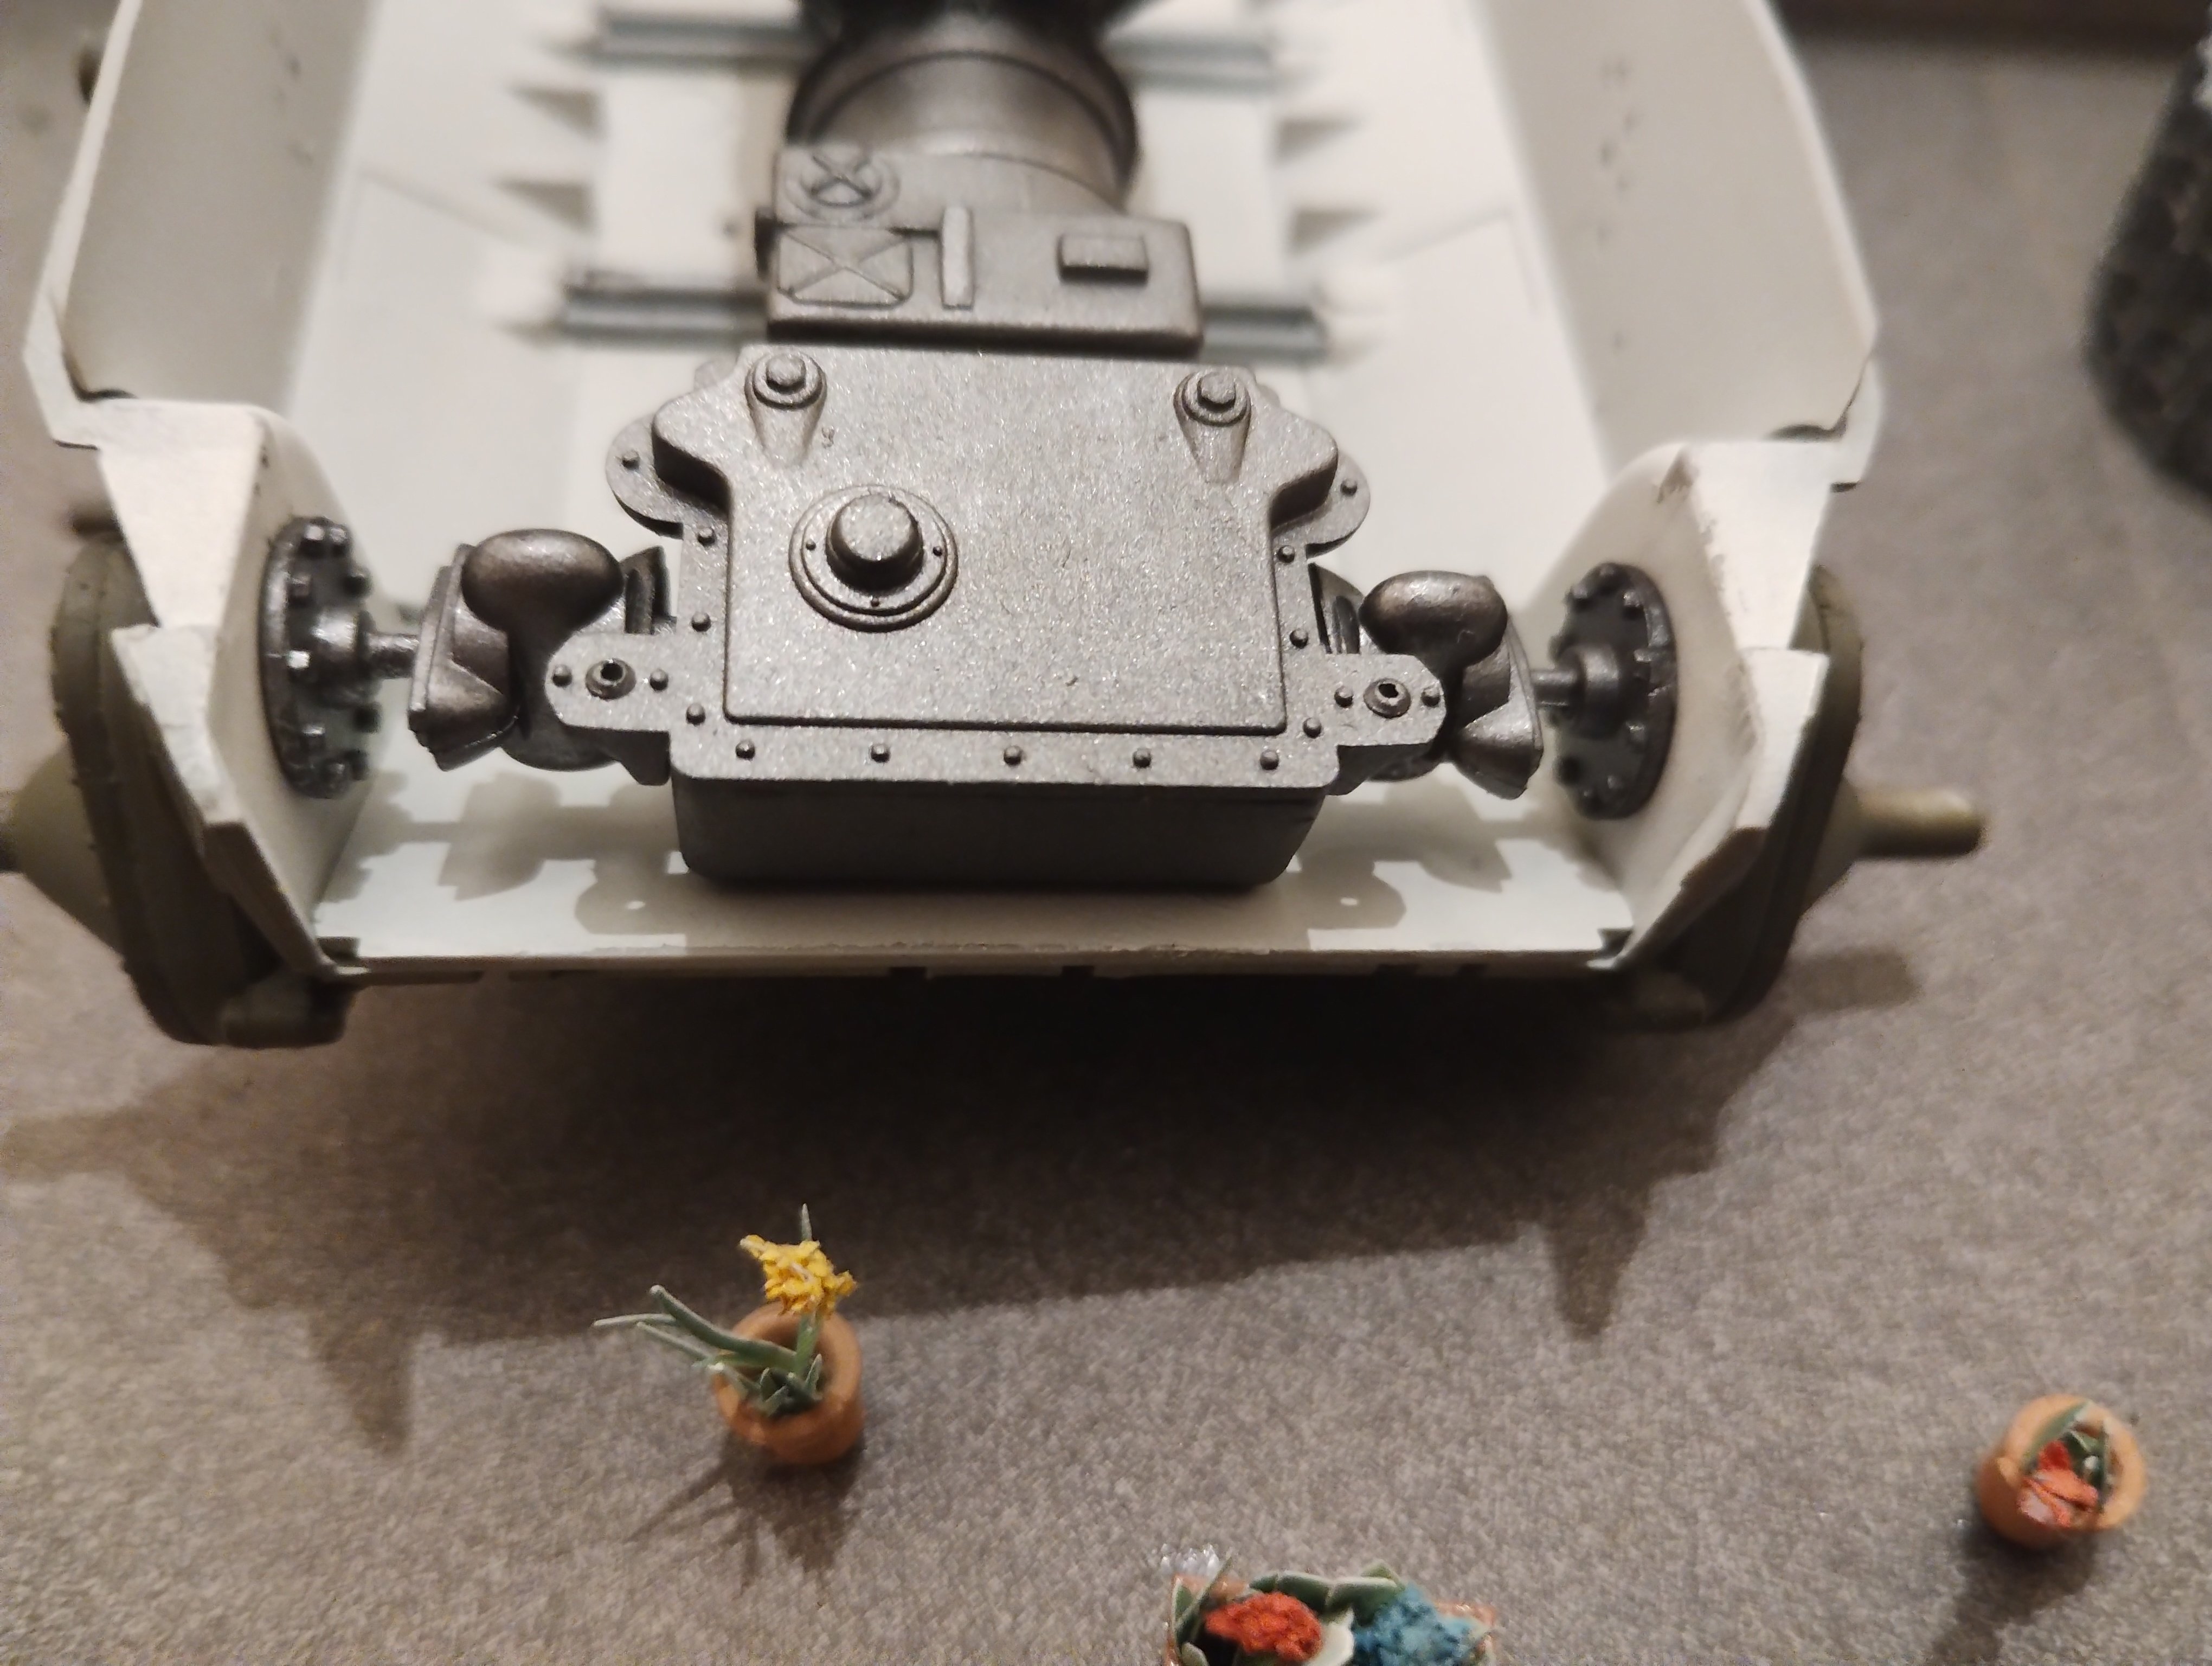
T26E4 Super Pershing
Daniel_Roxy replied to Daniel_Roxy's topic in LSM 1/35 and Larger Work In Progress
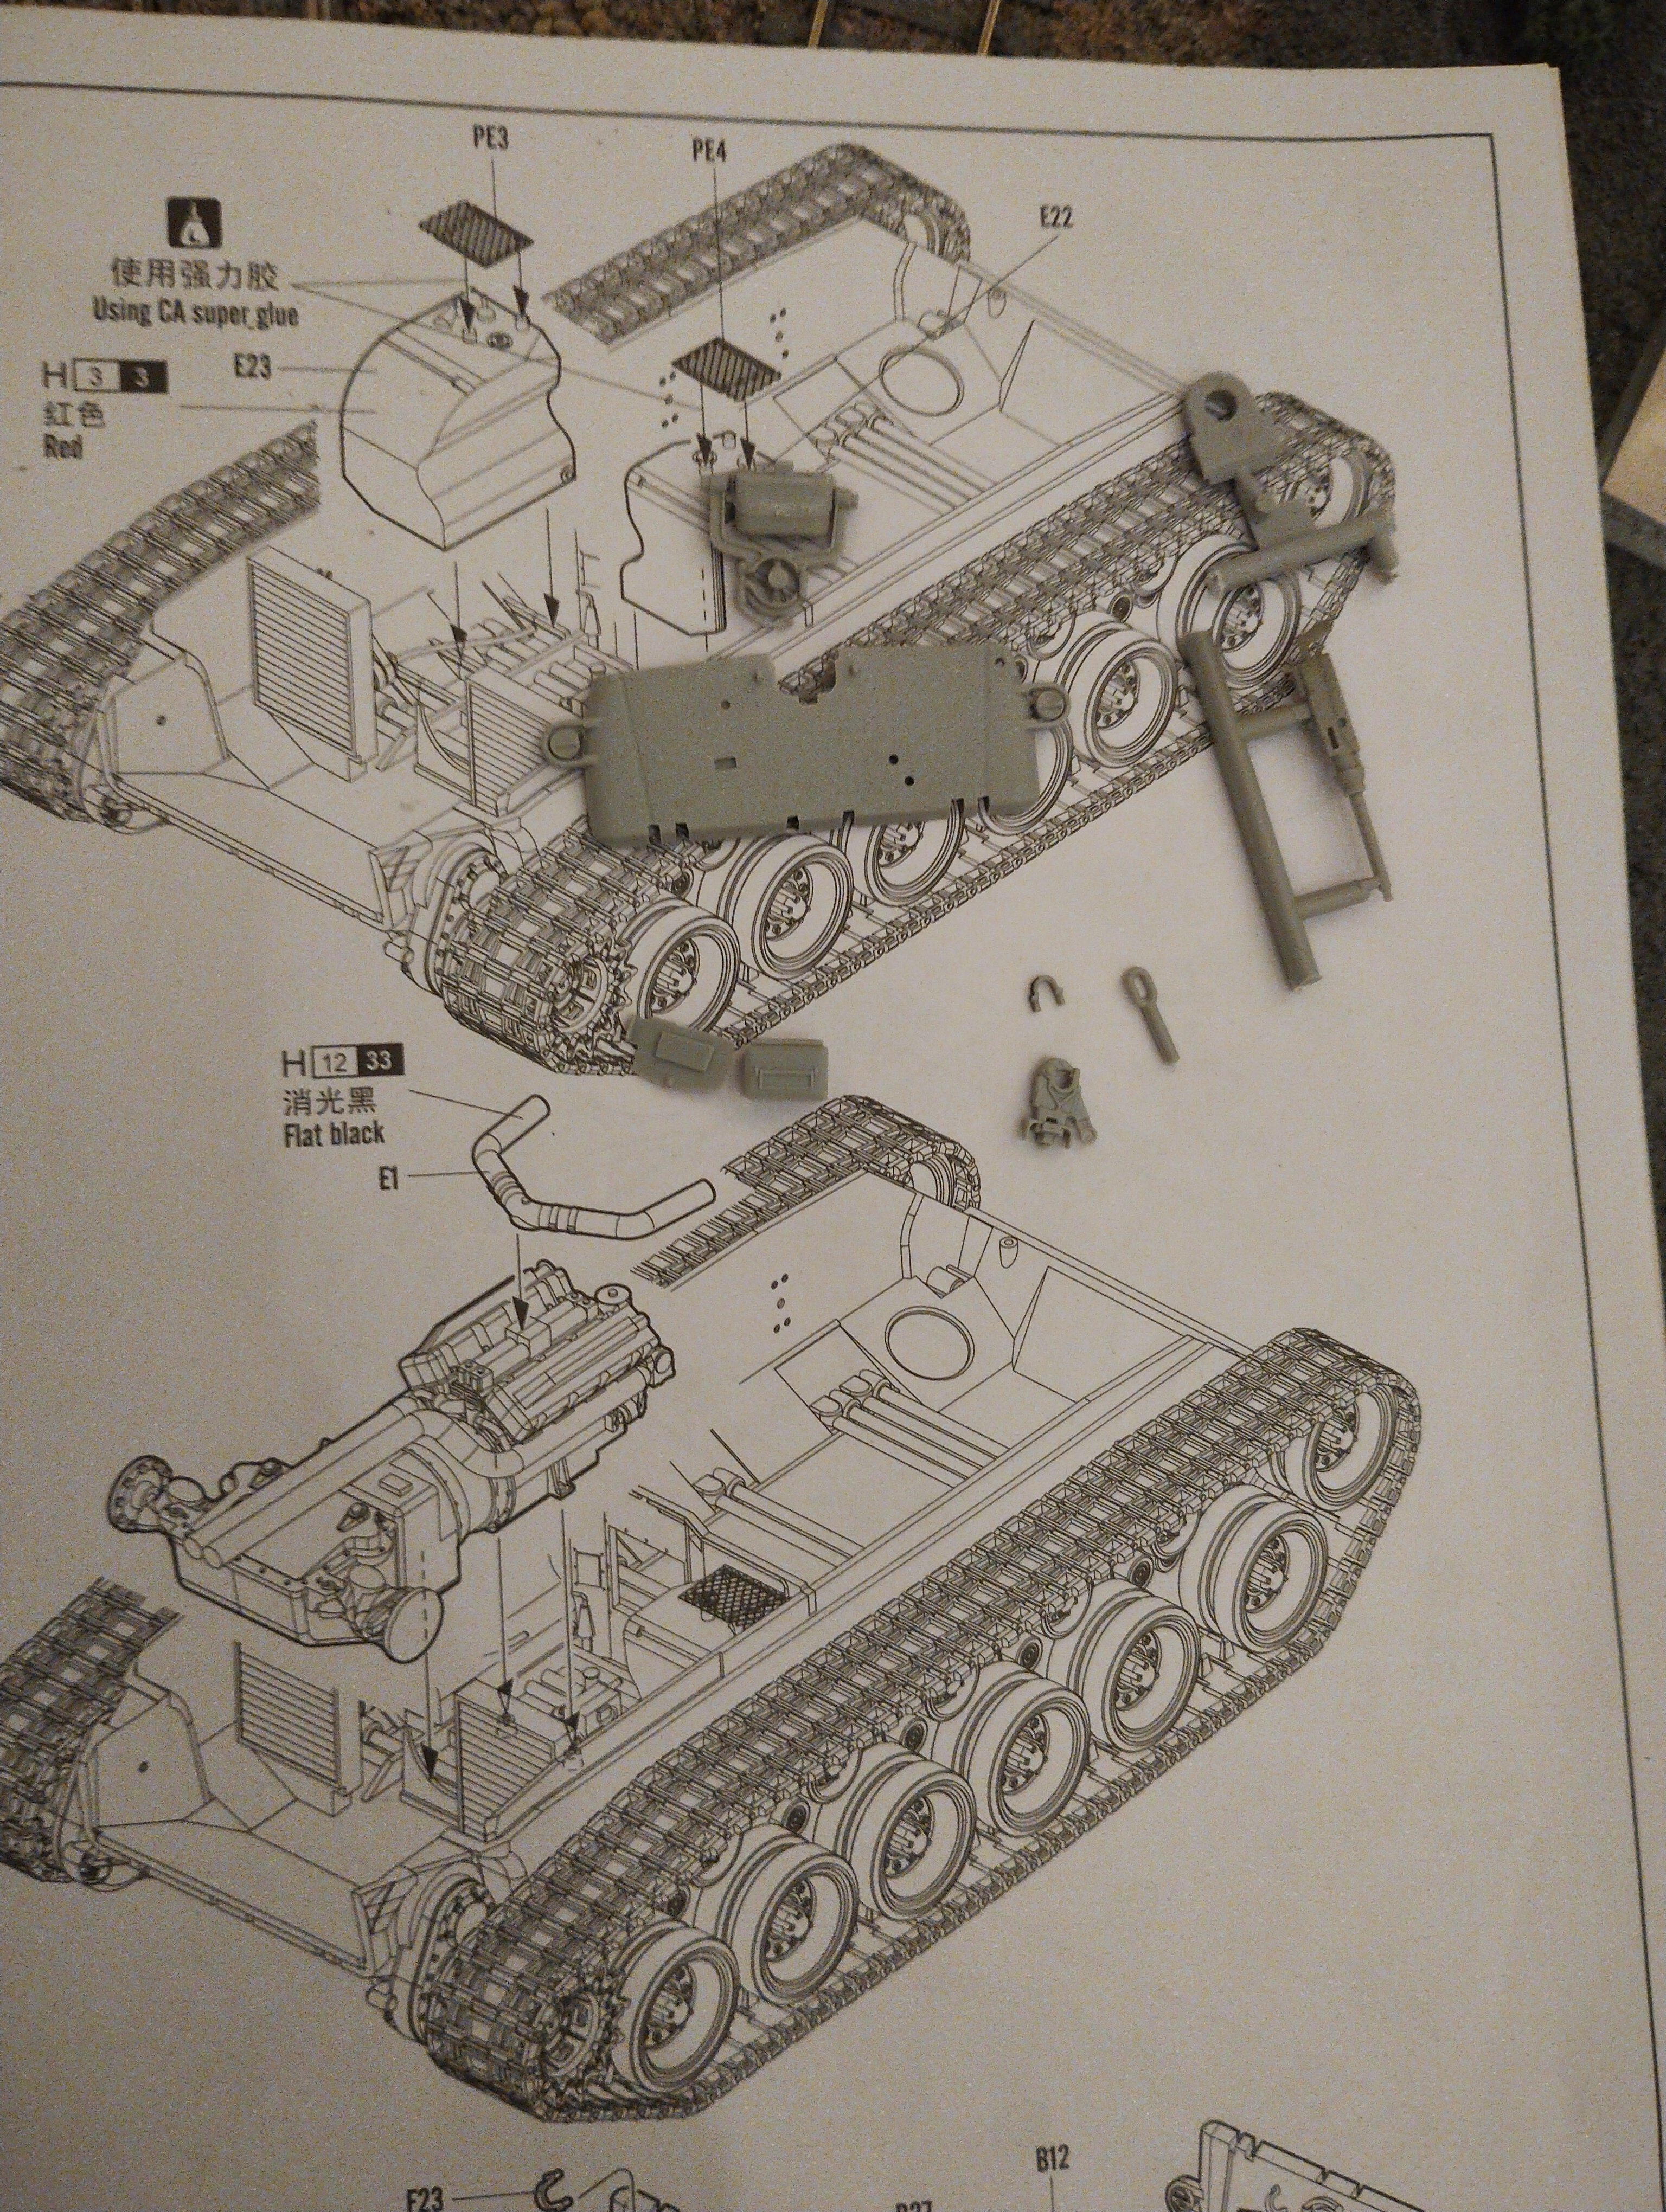
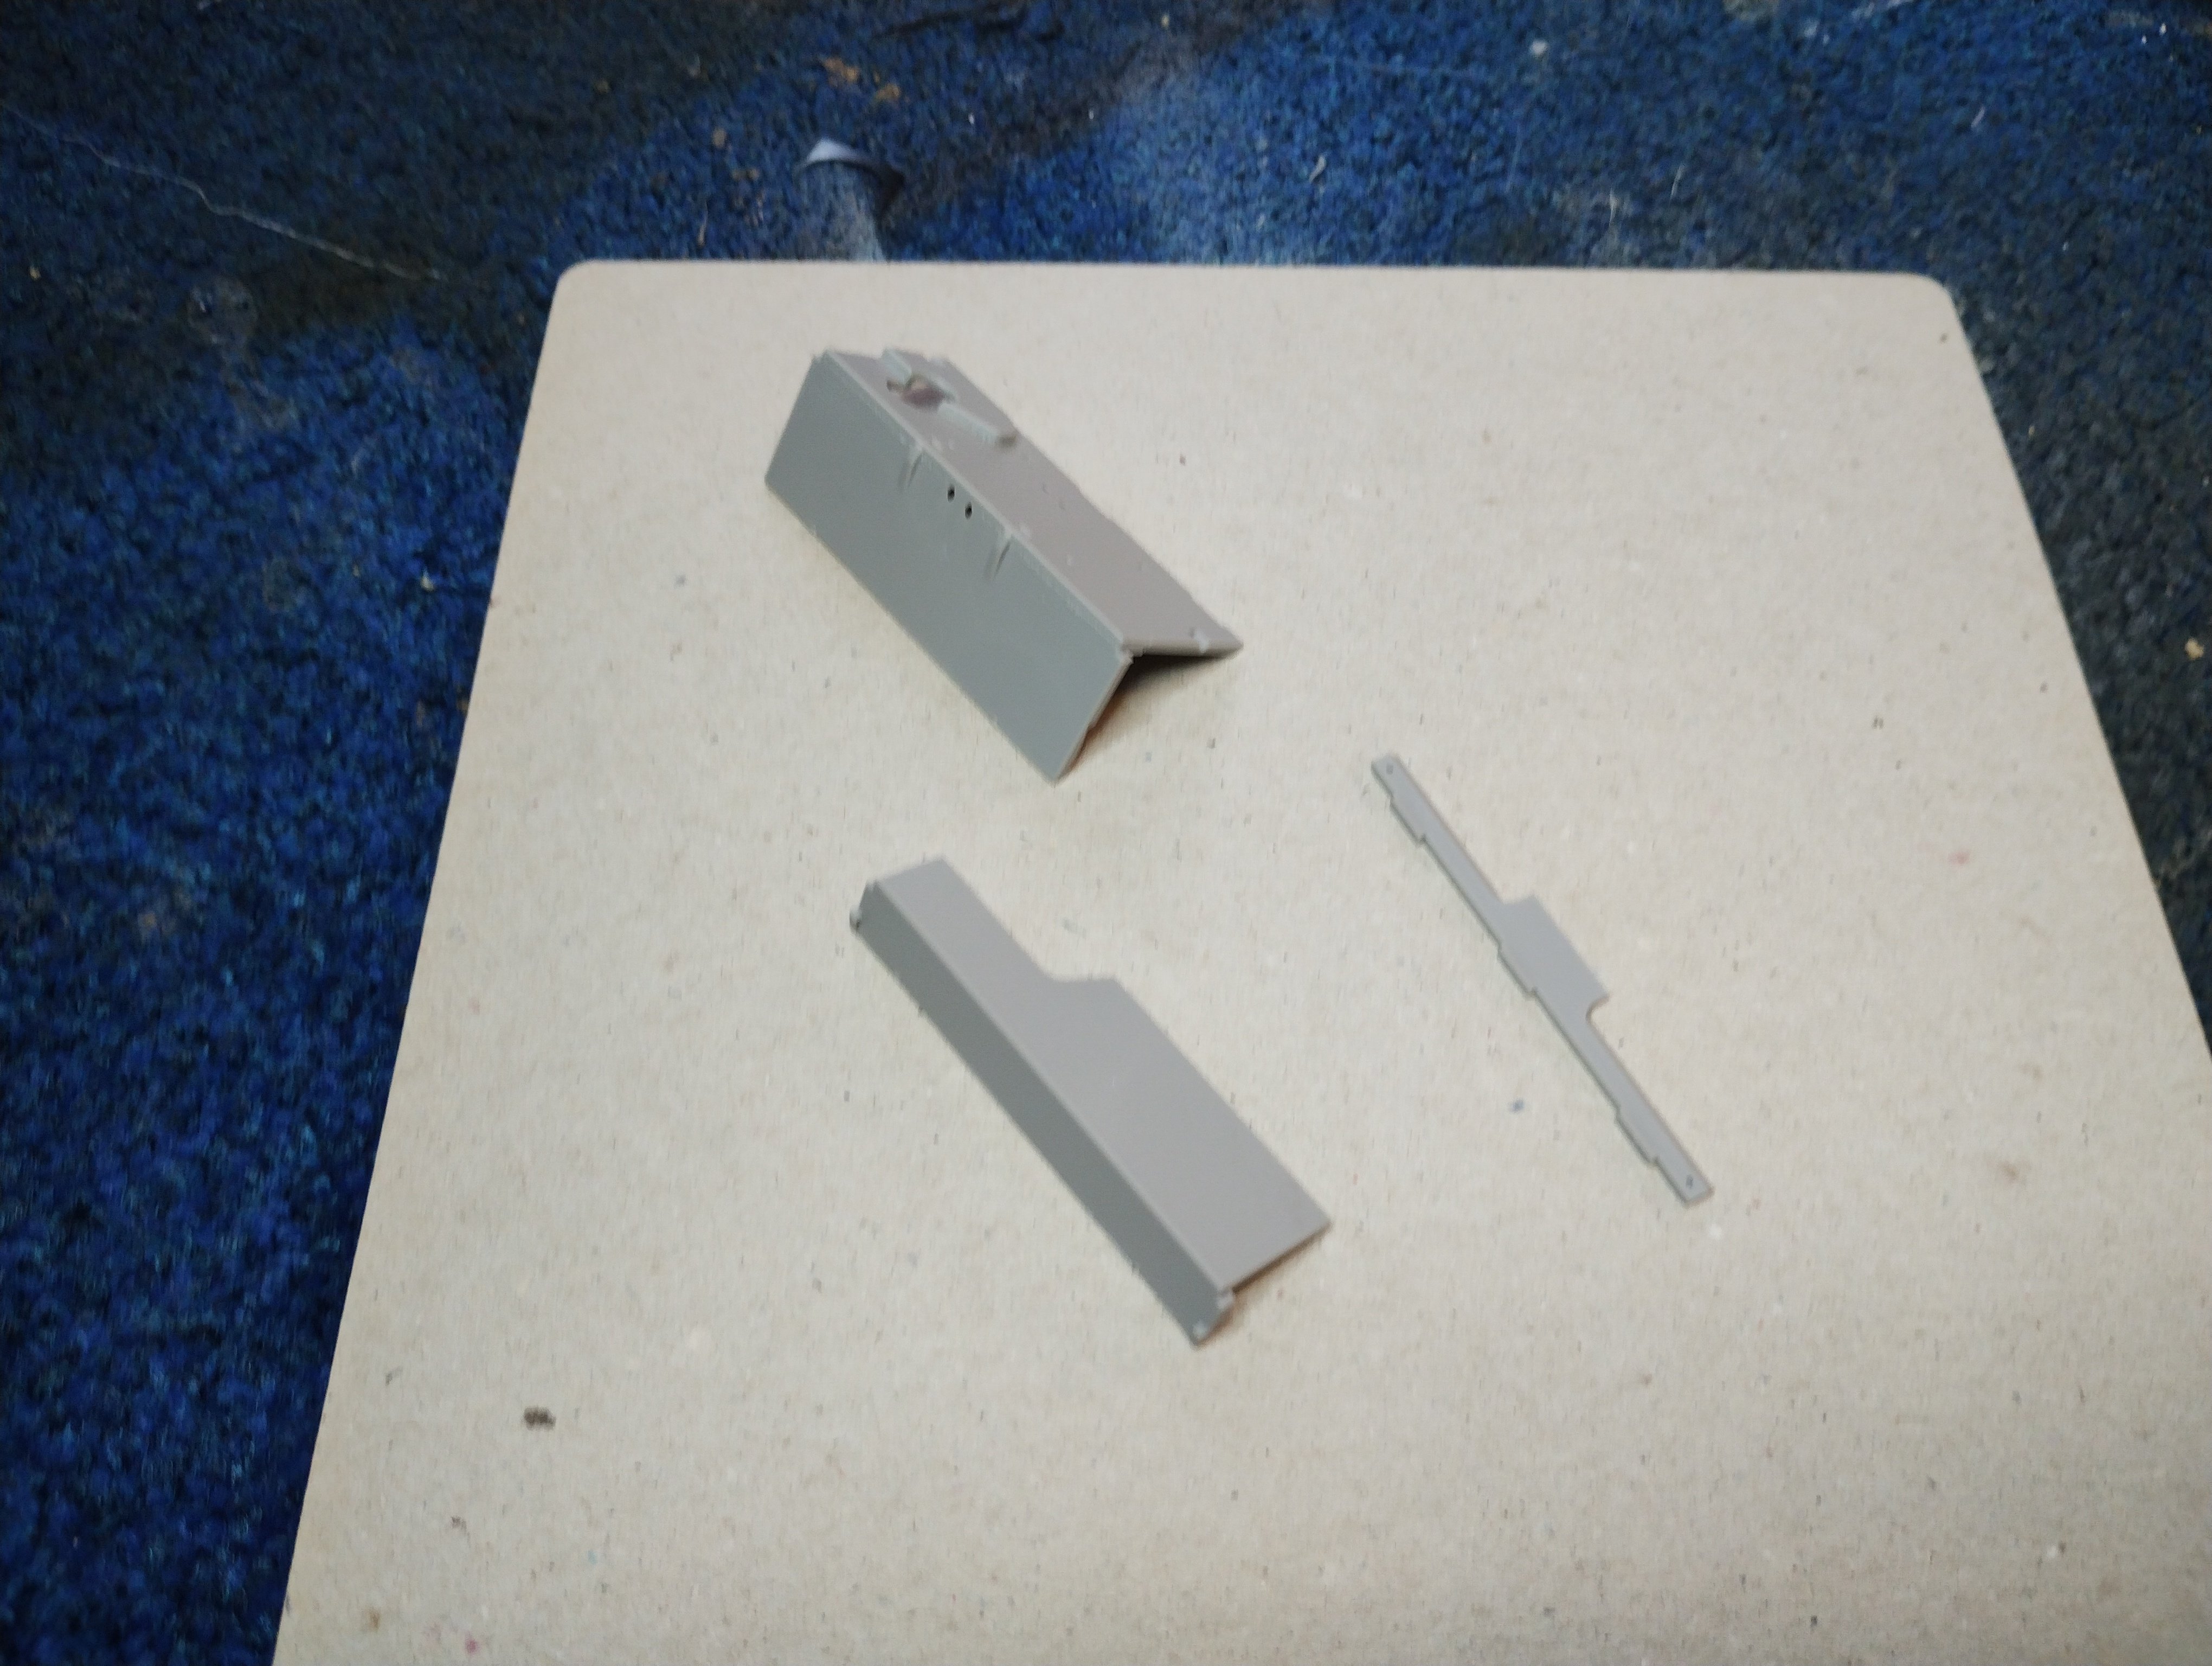
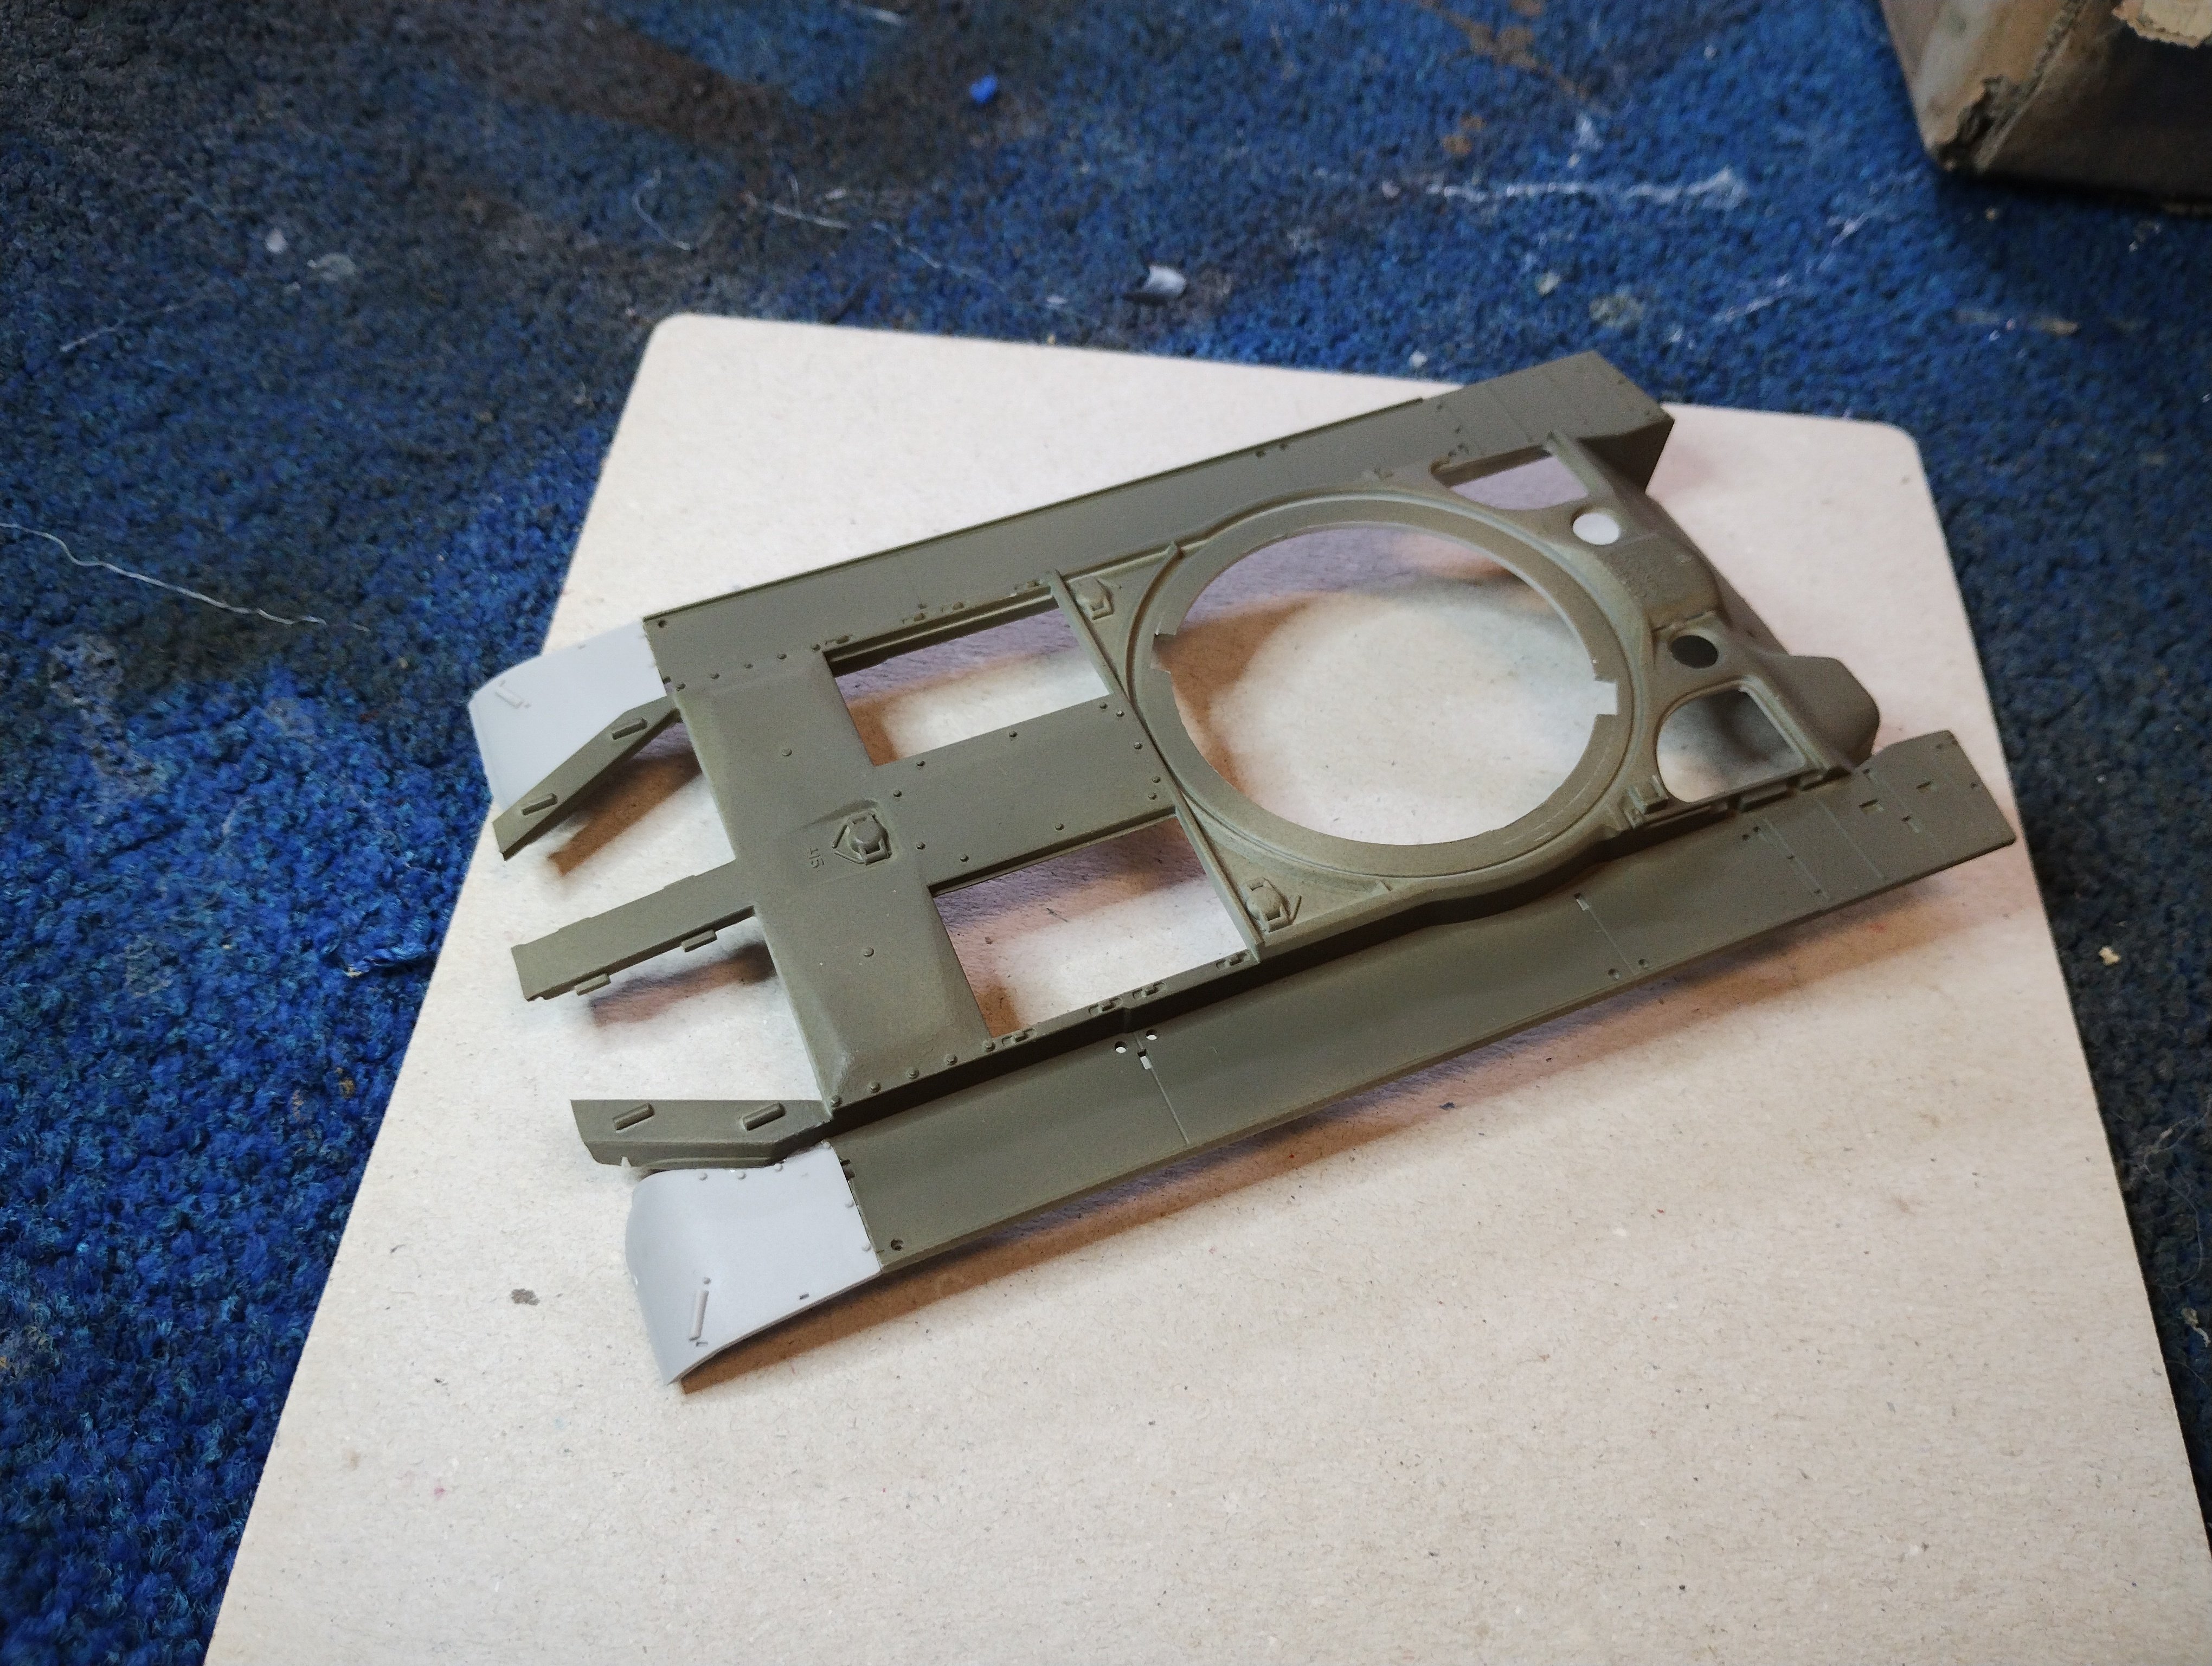
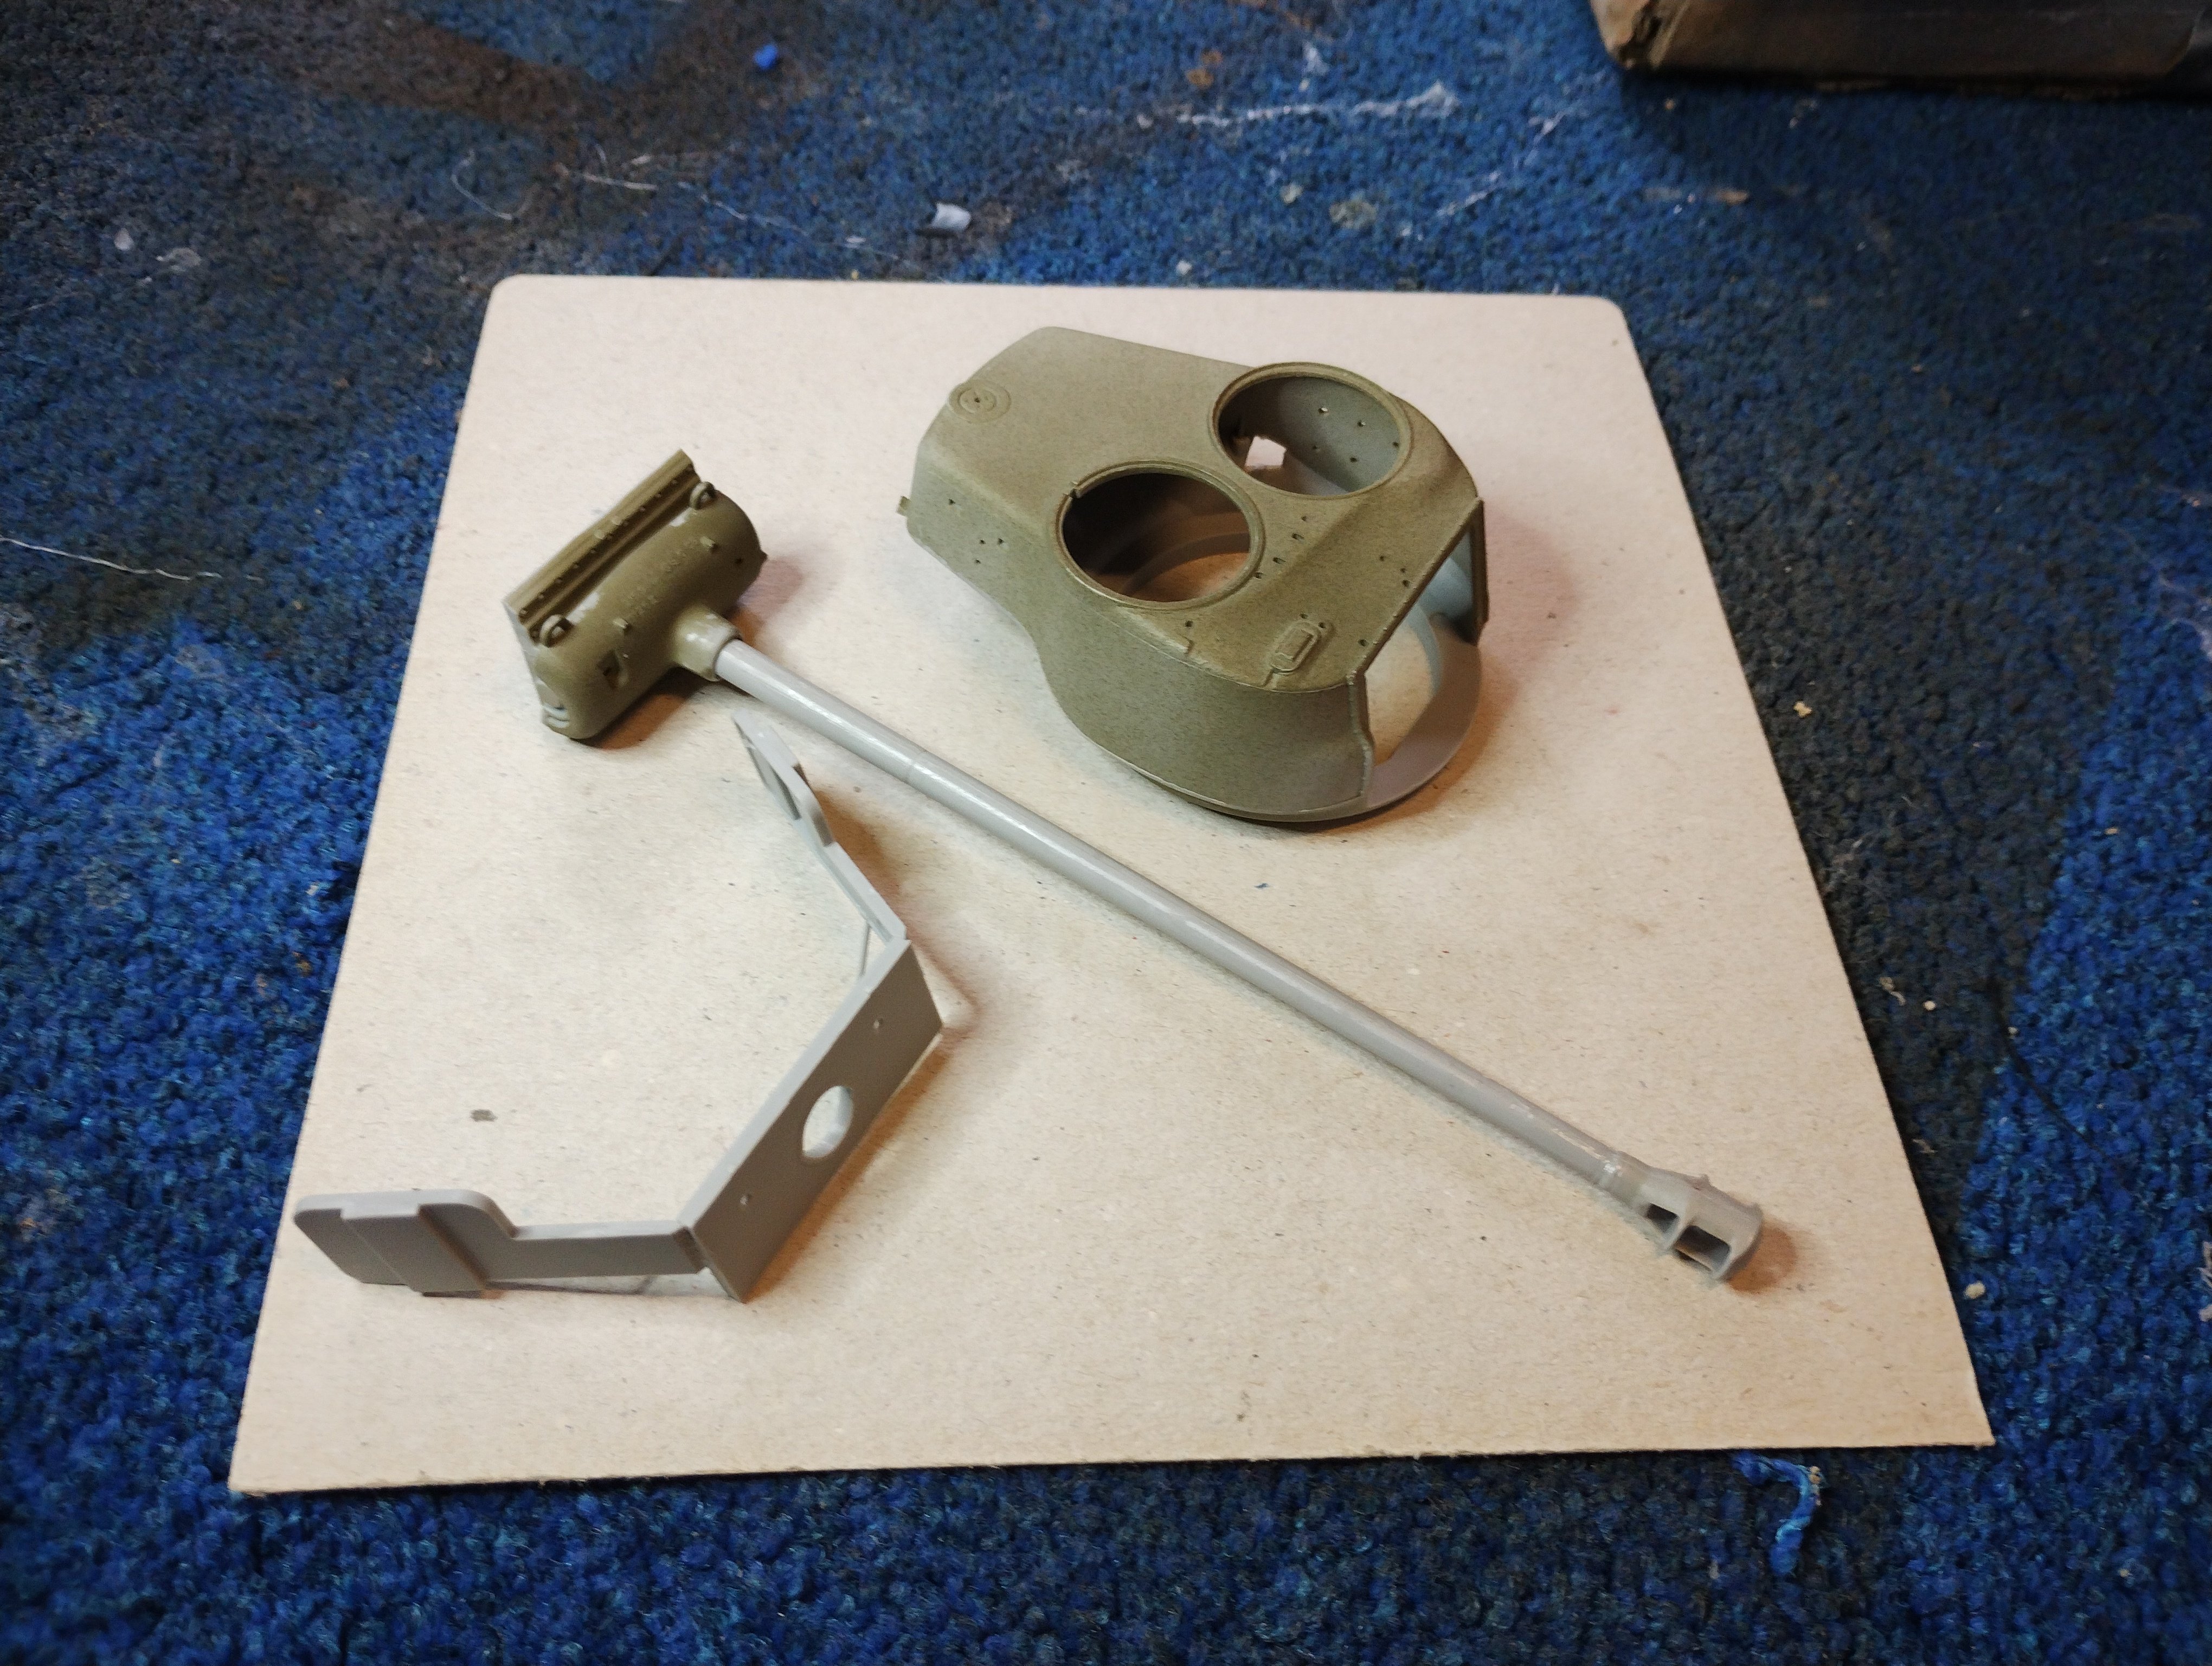
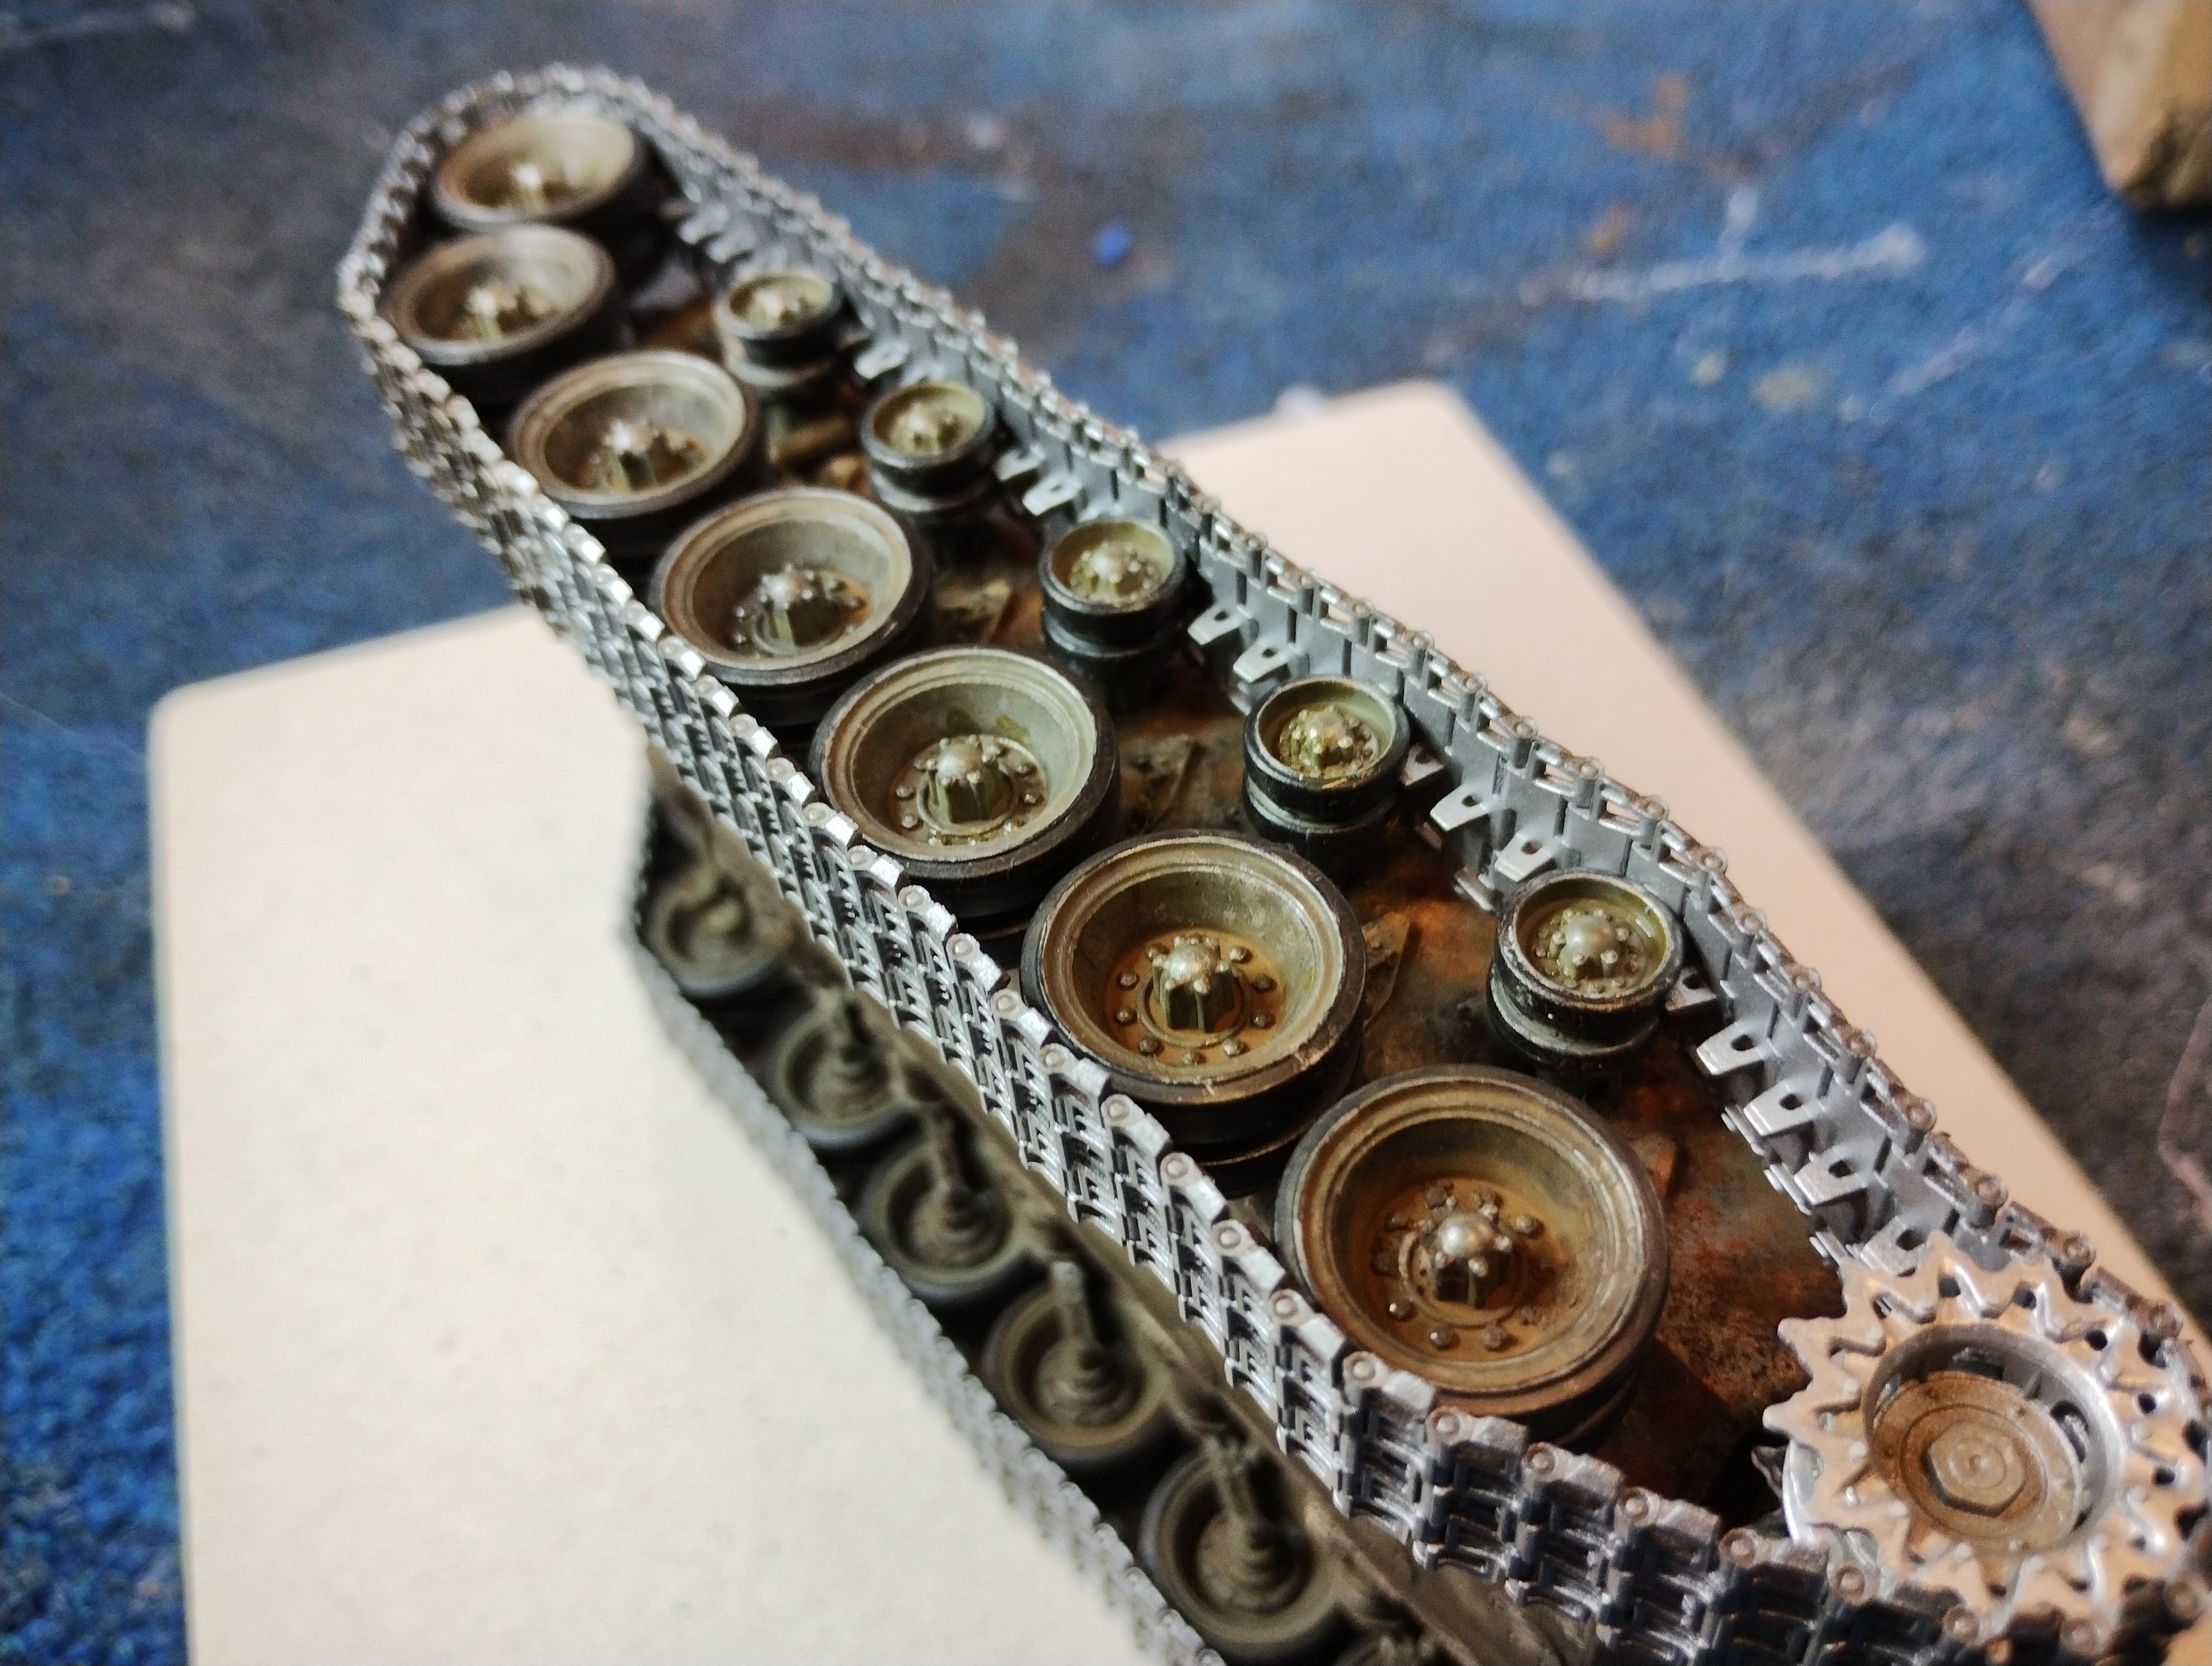
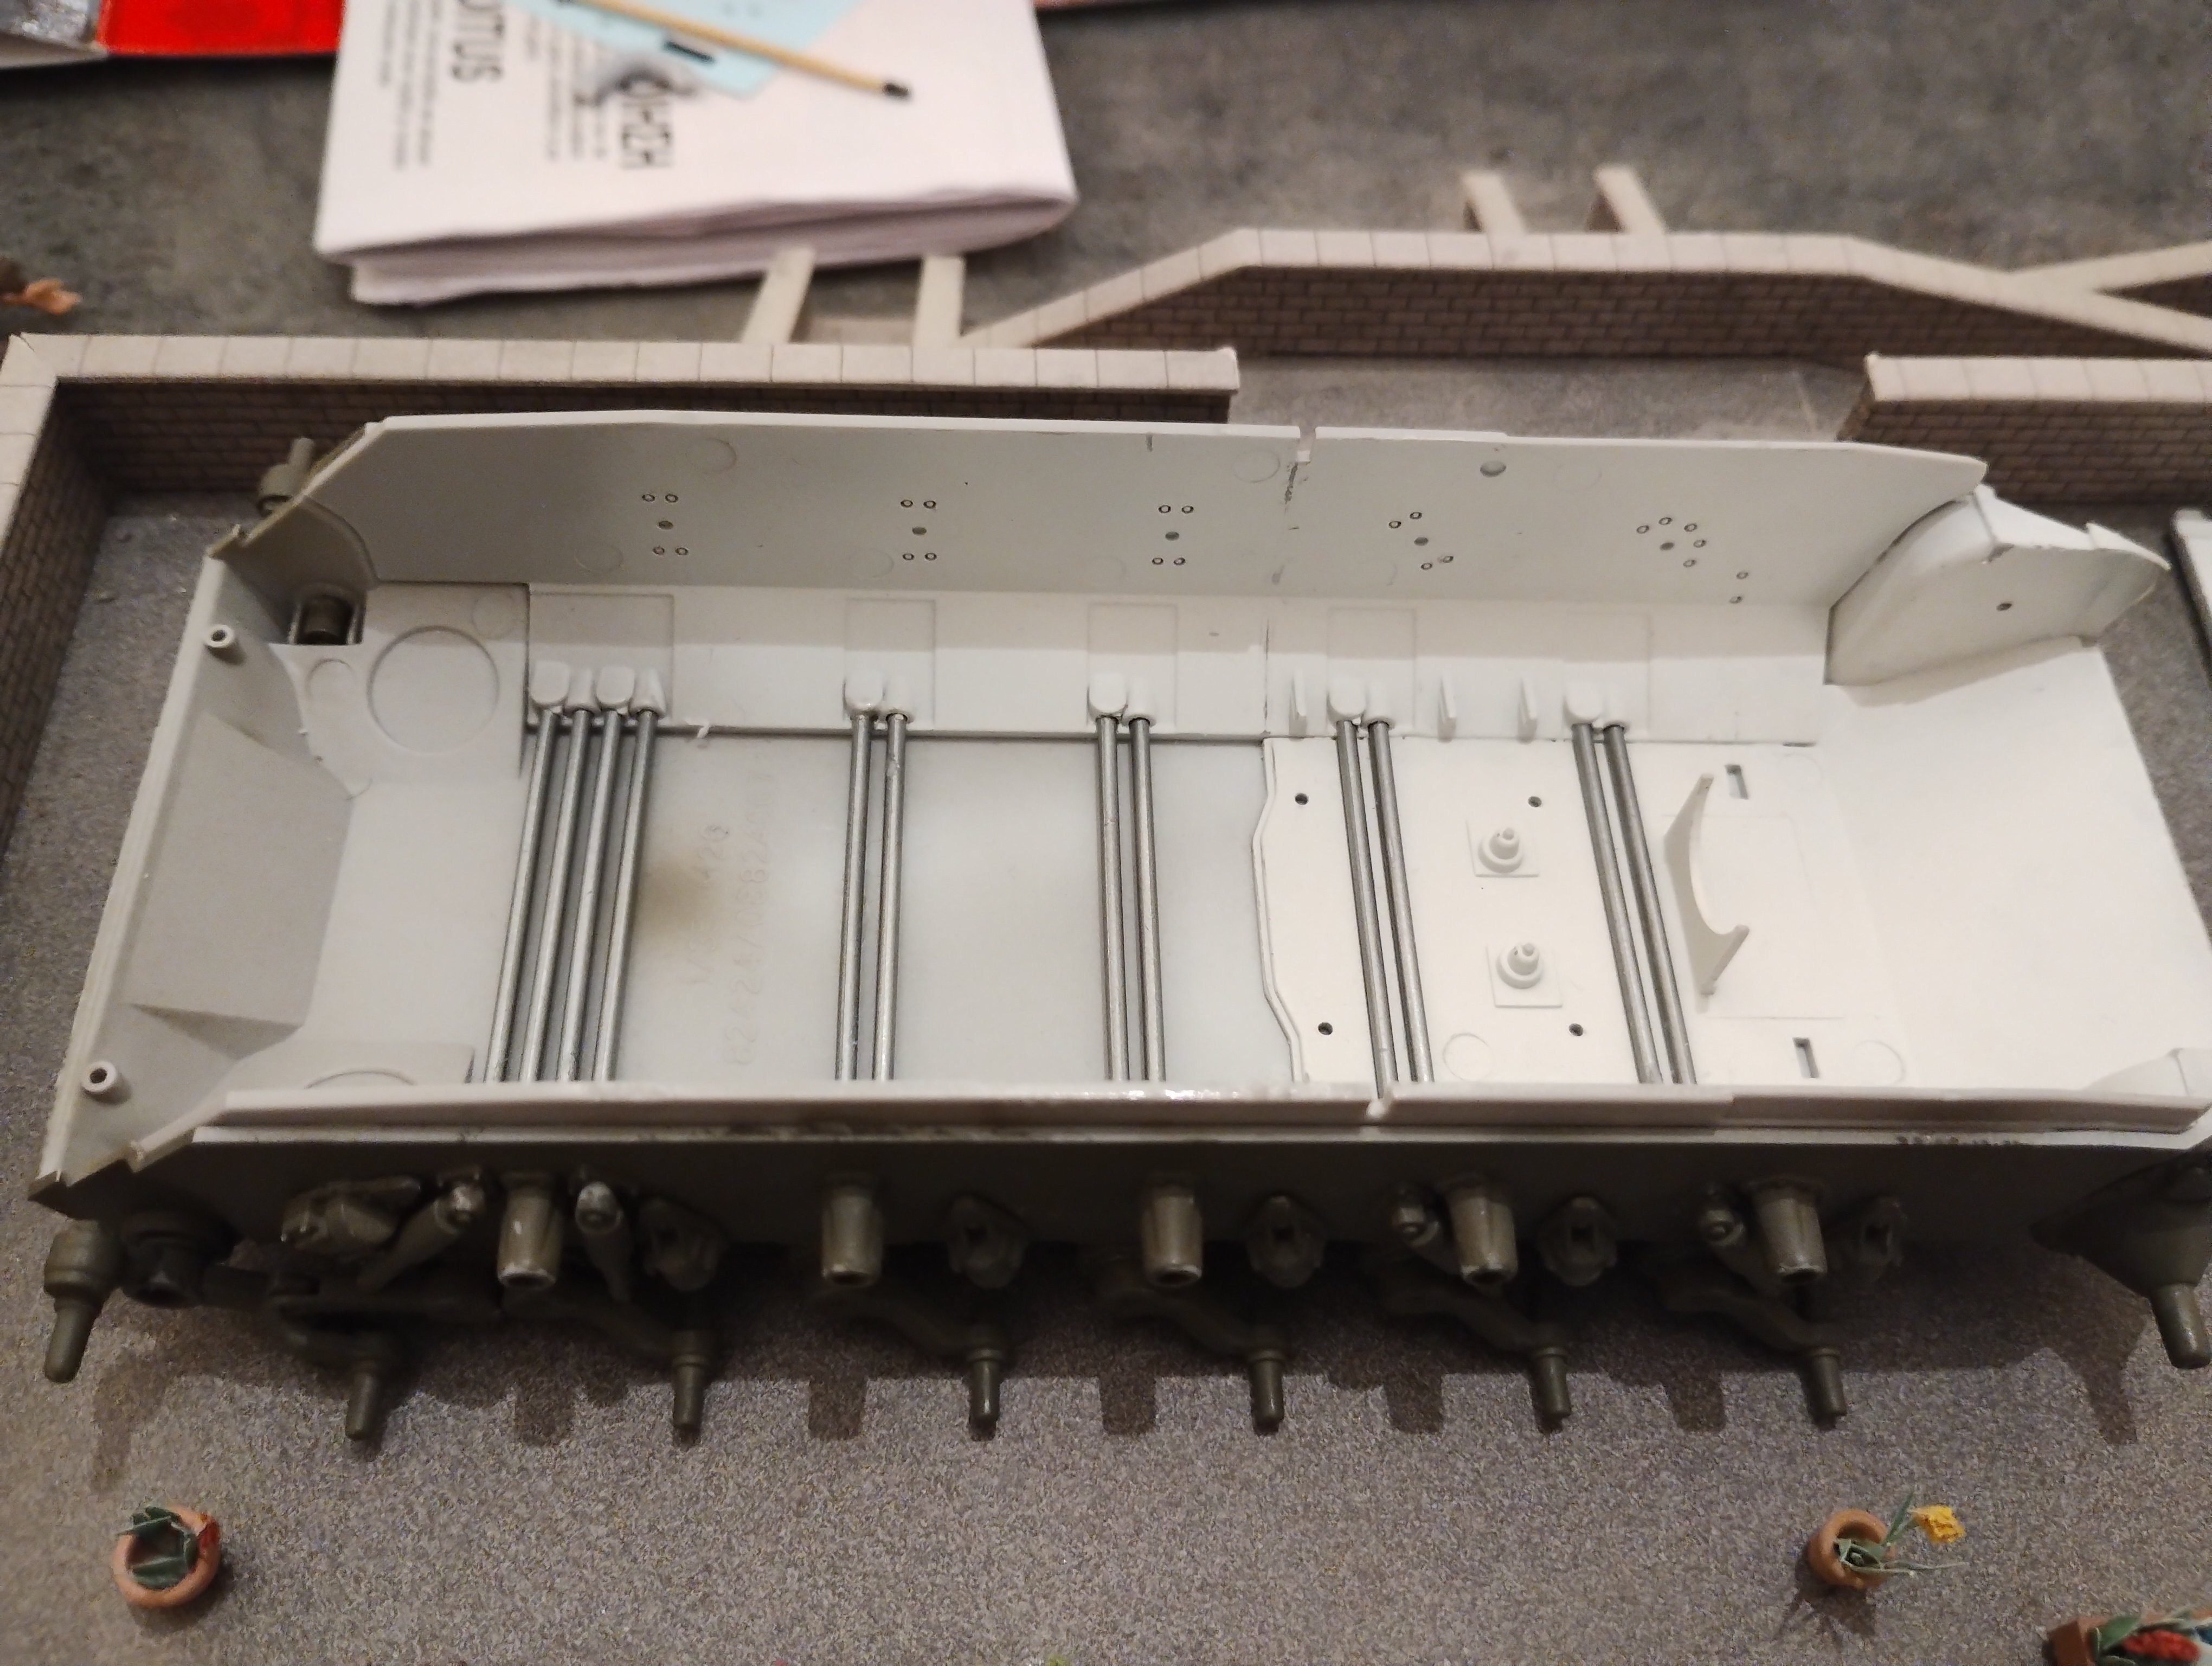
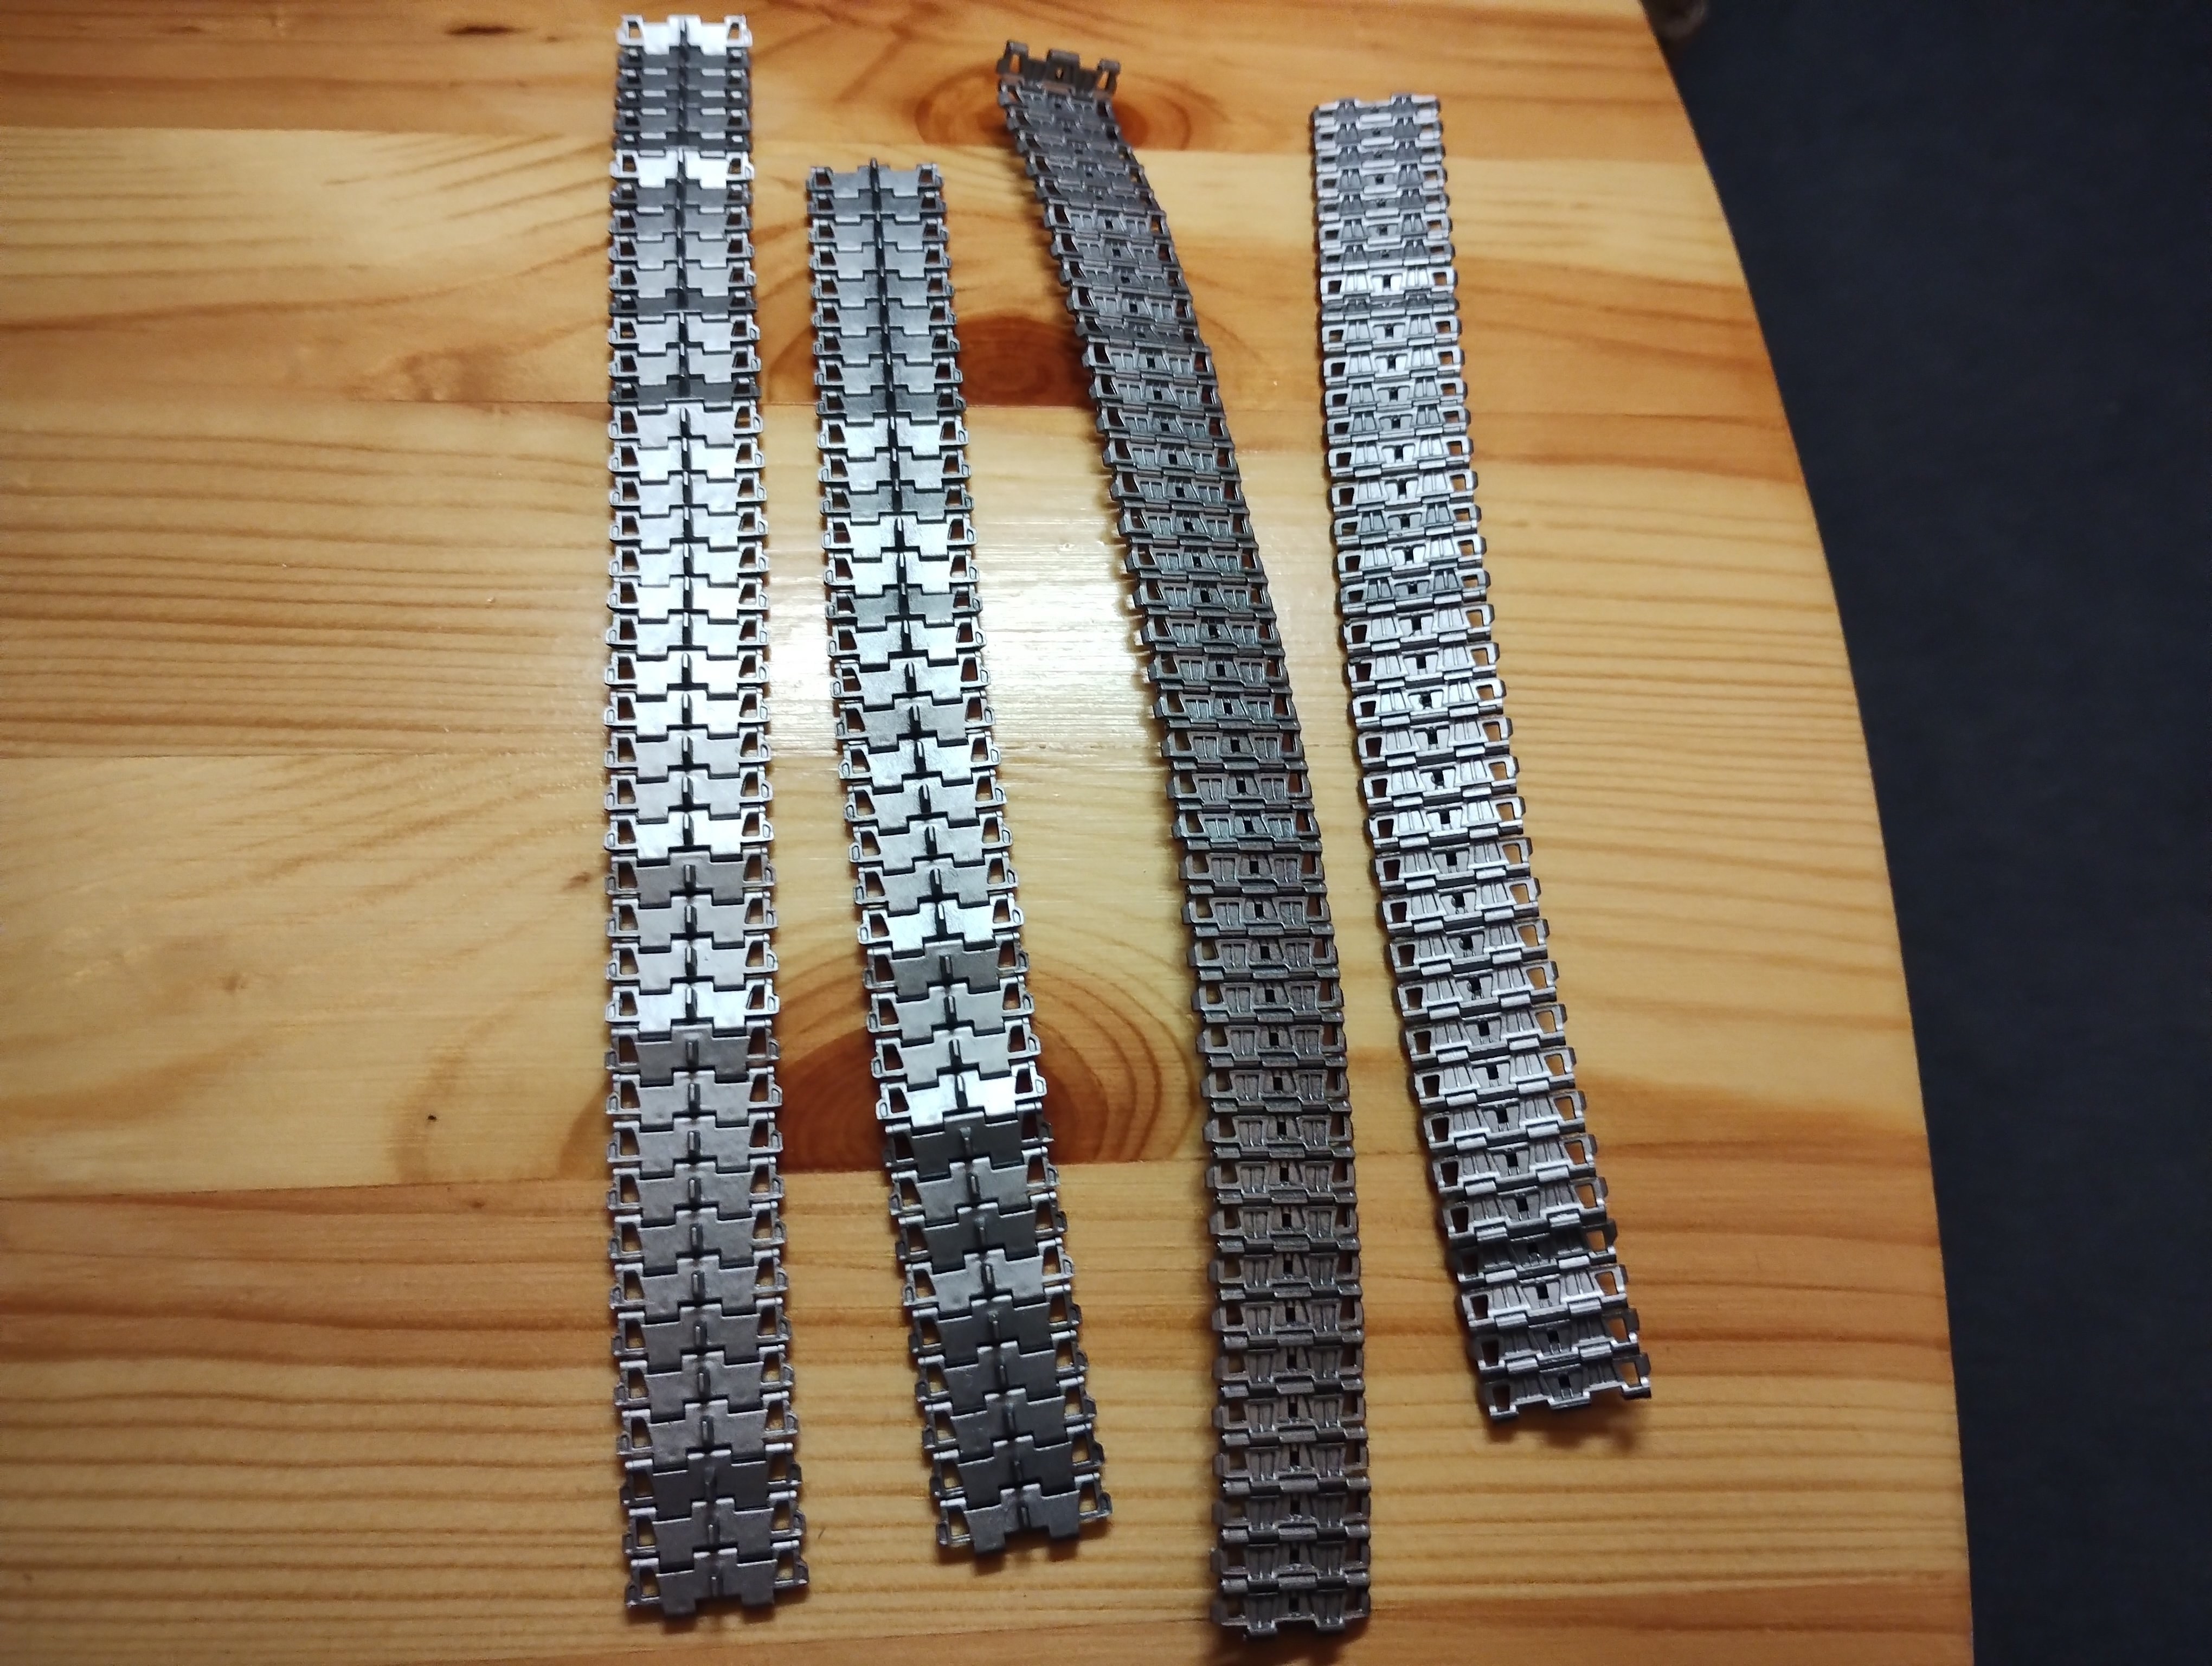
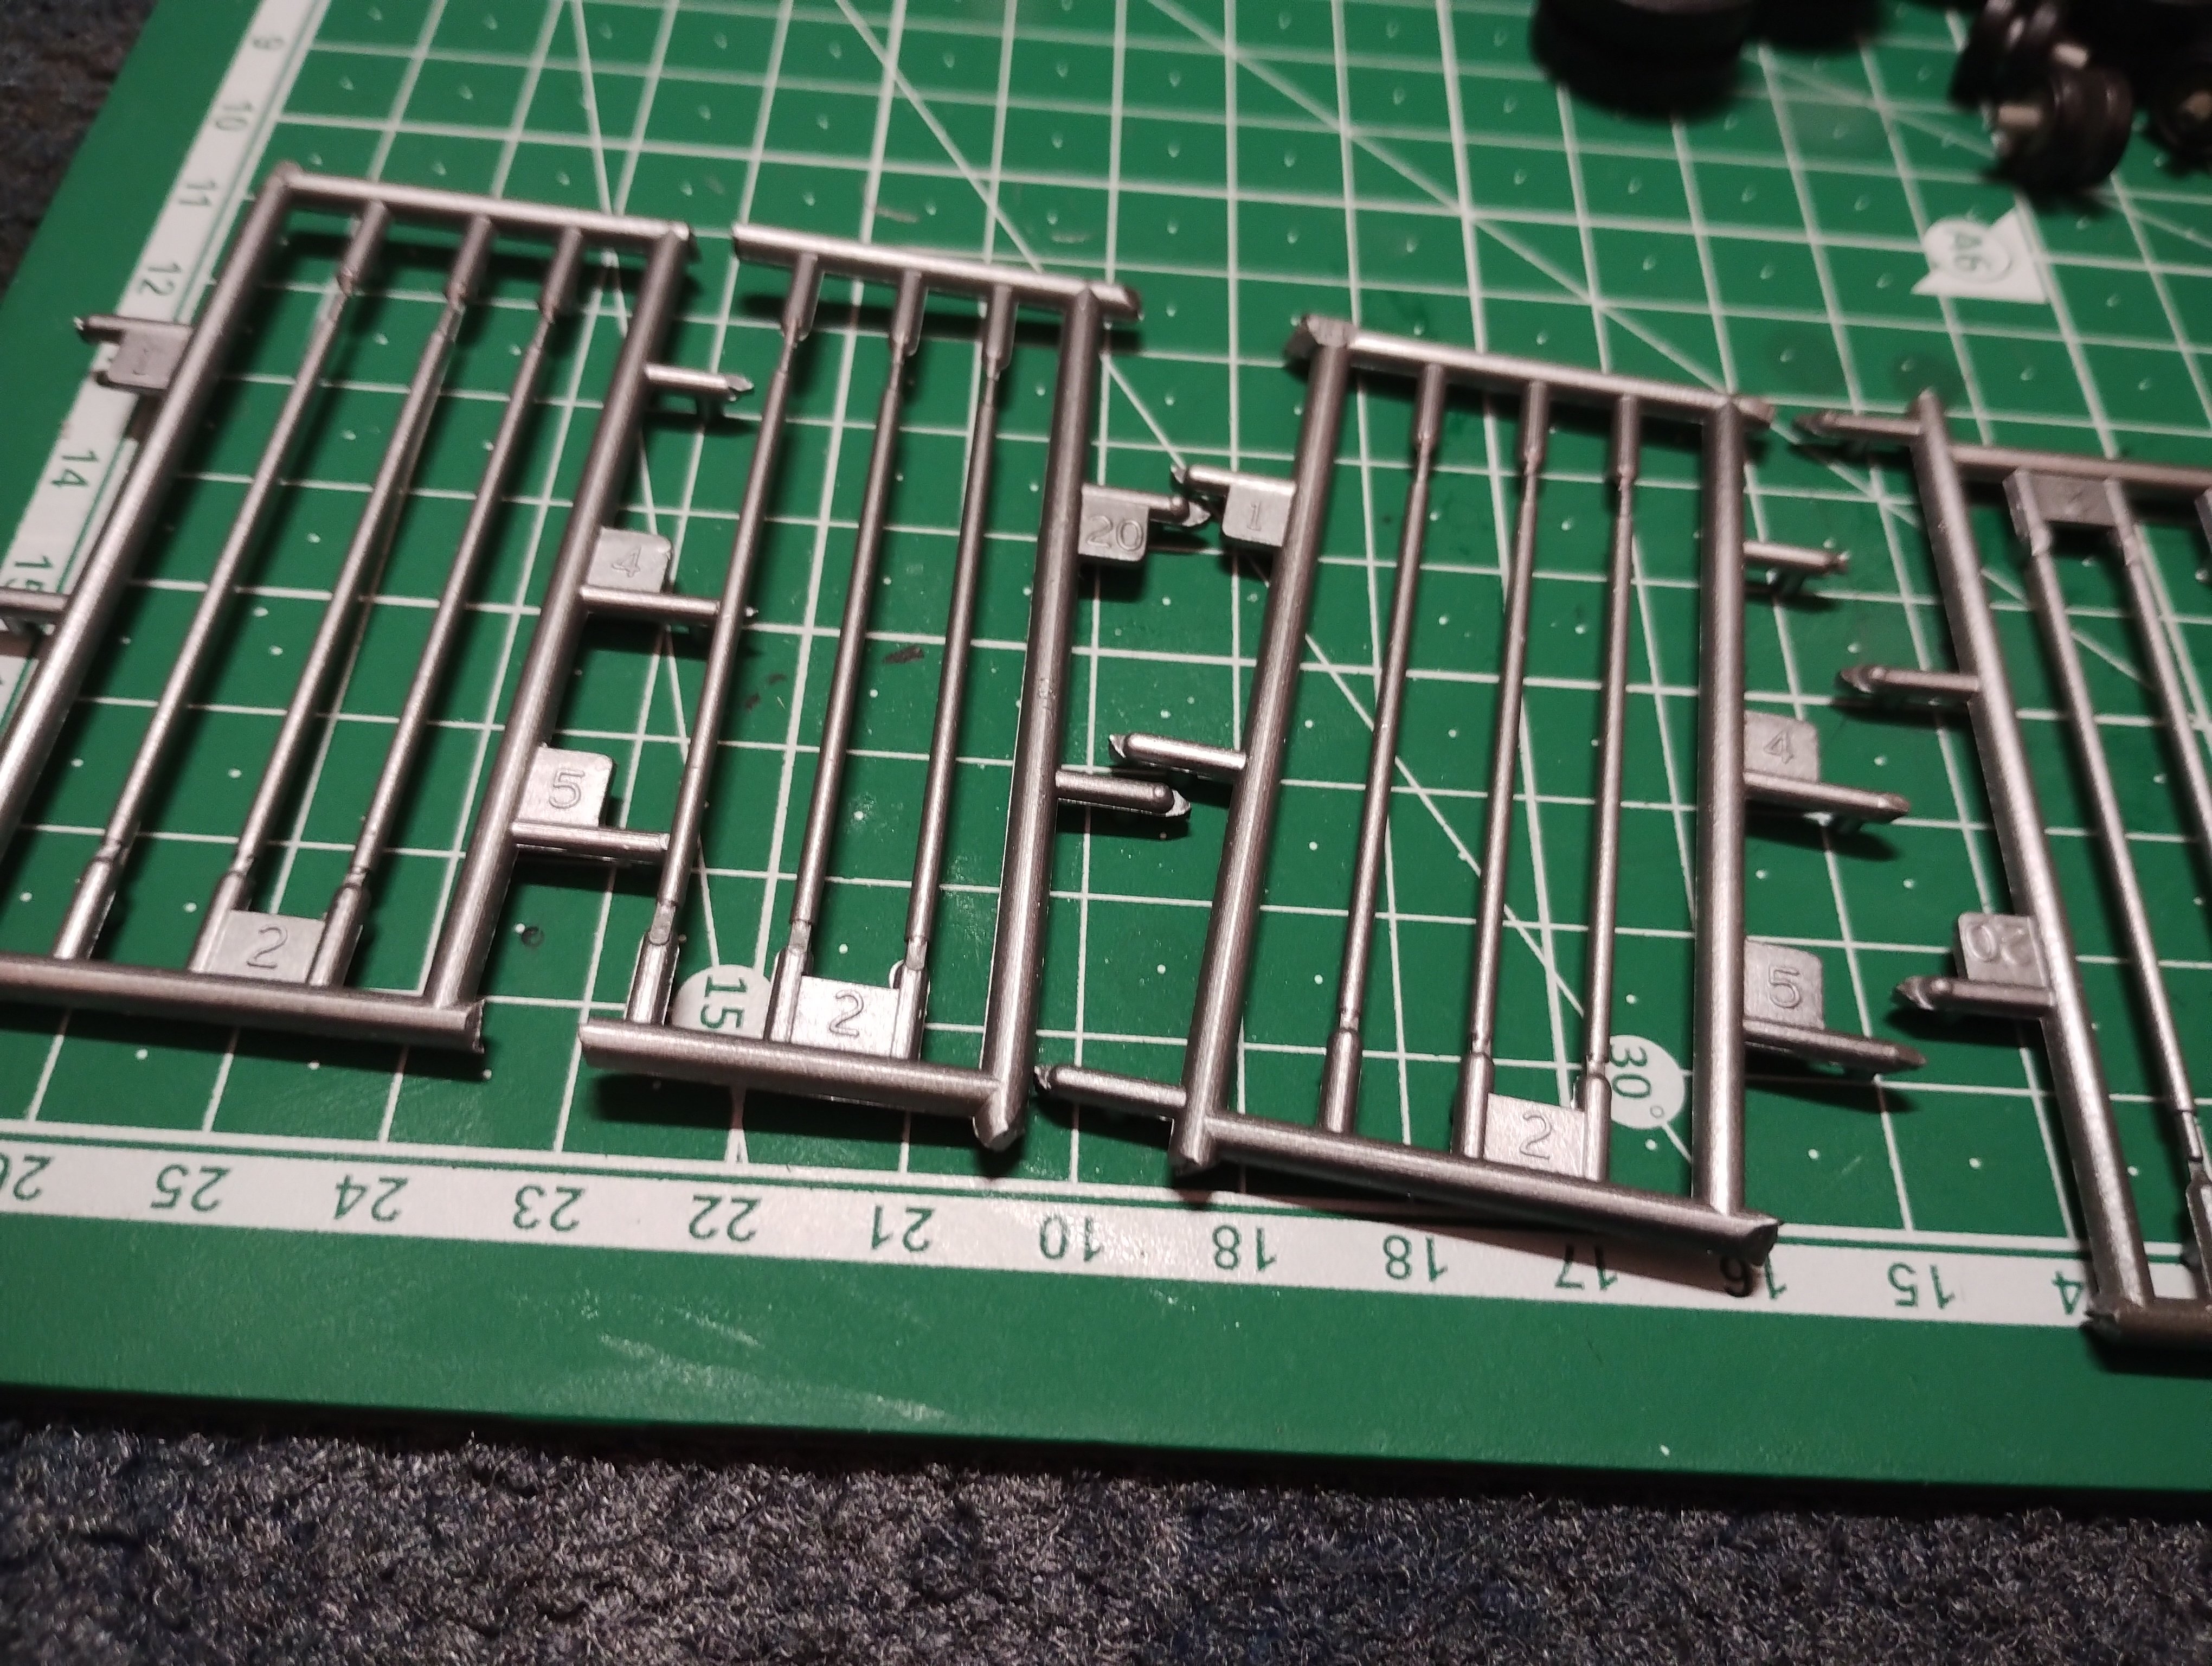
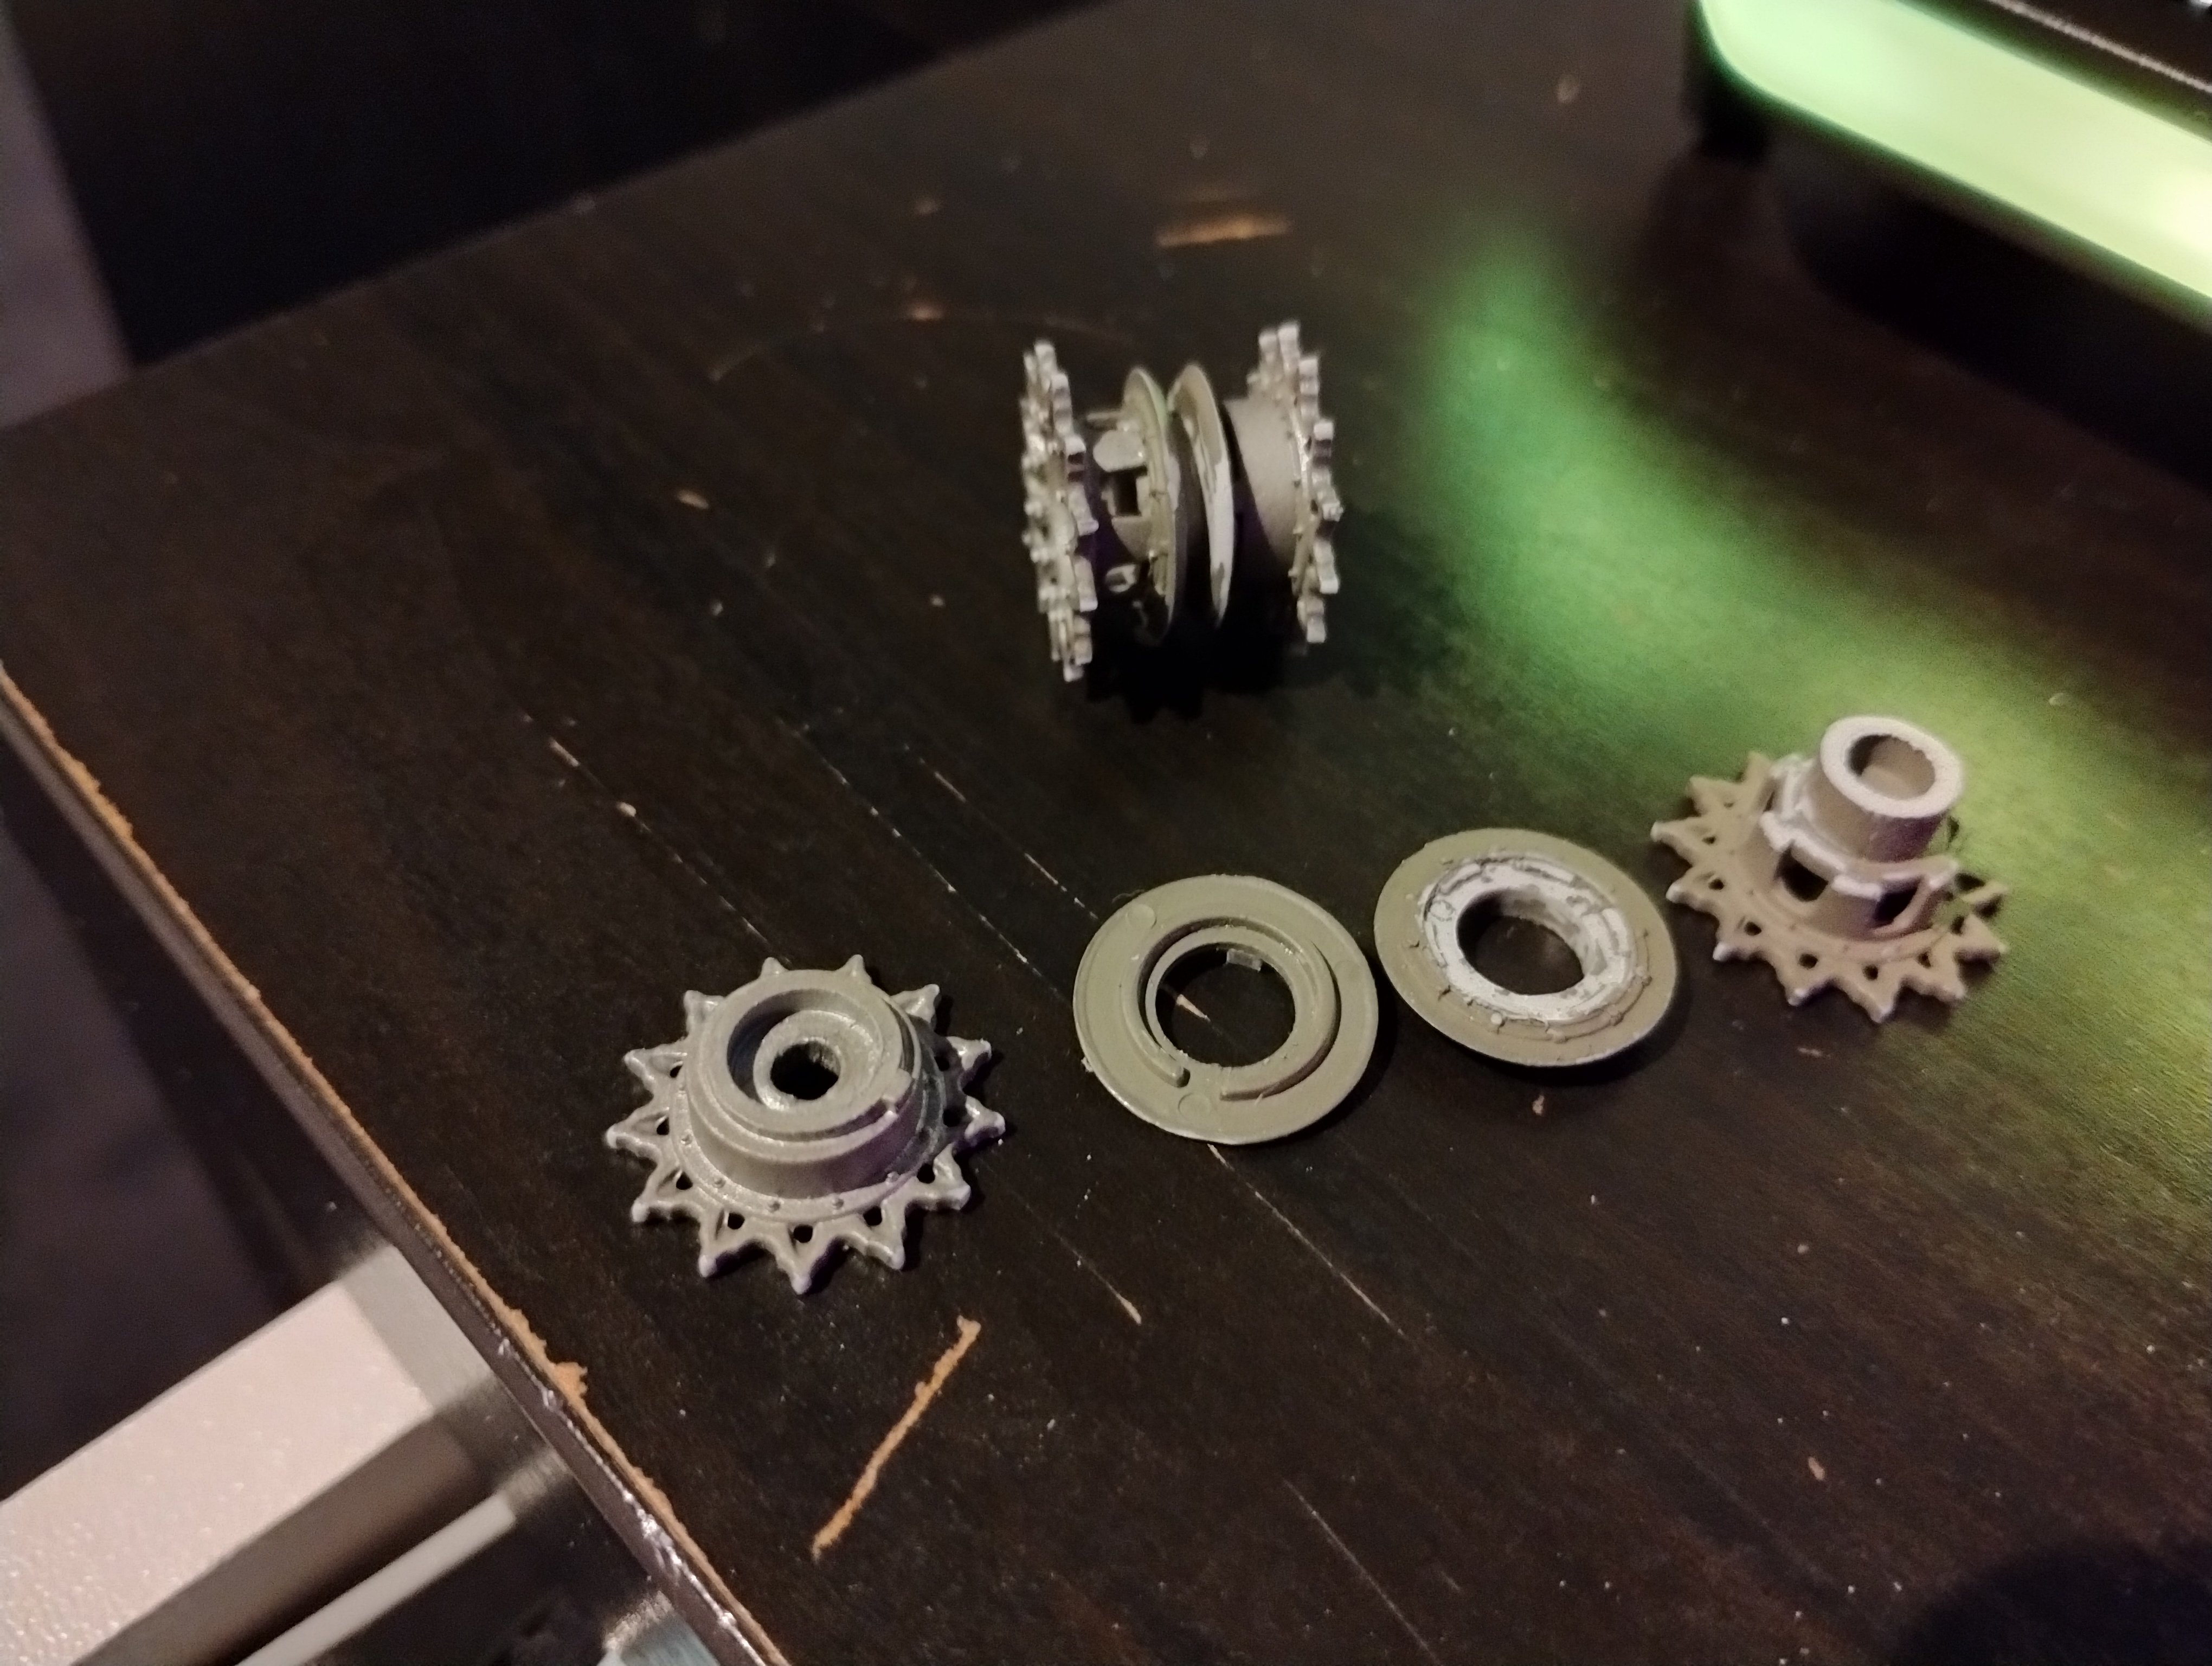
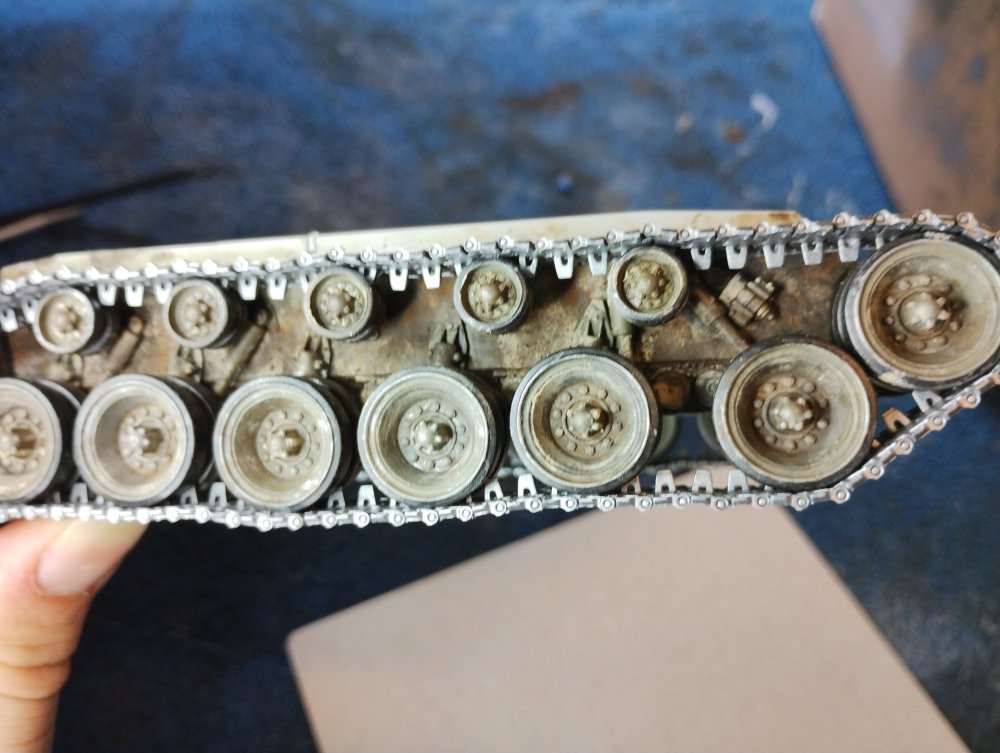
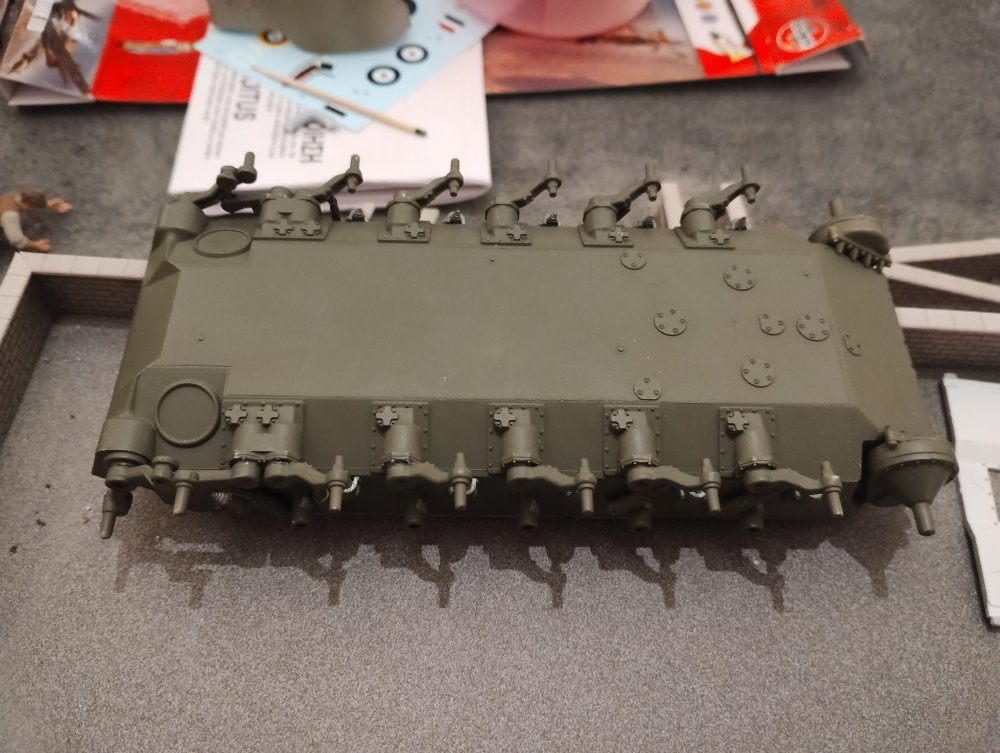
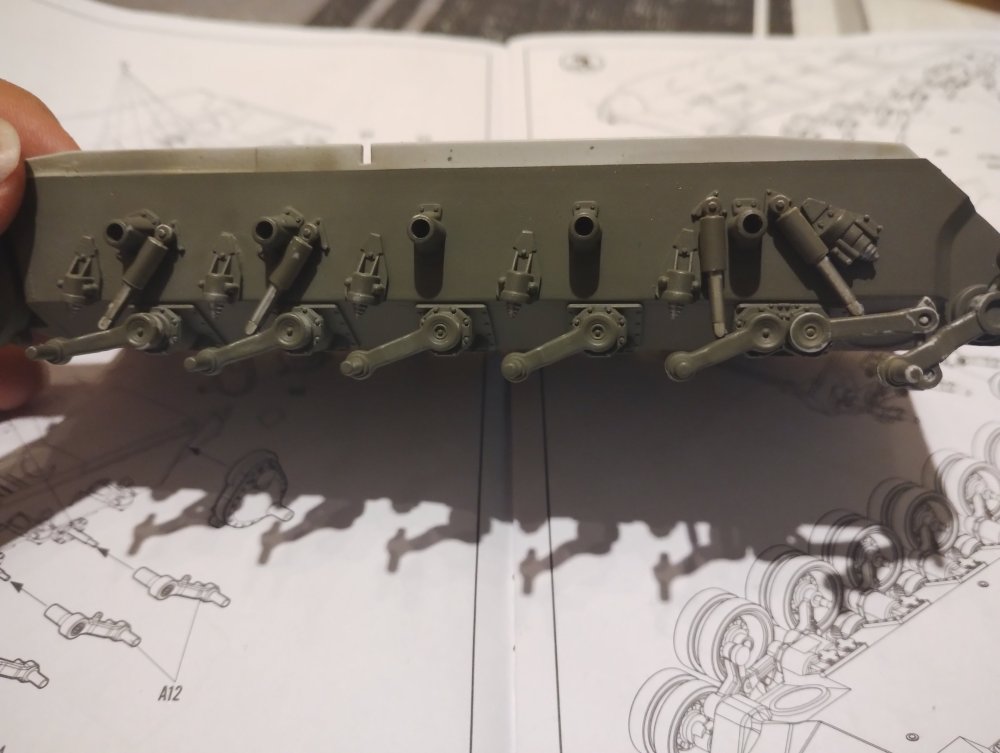
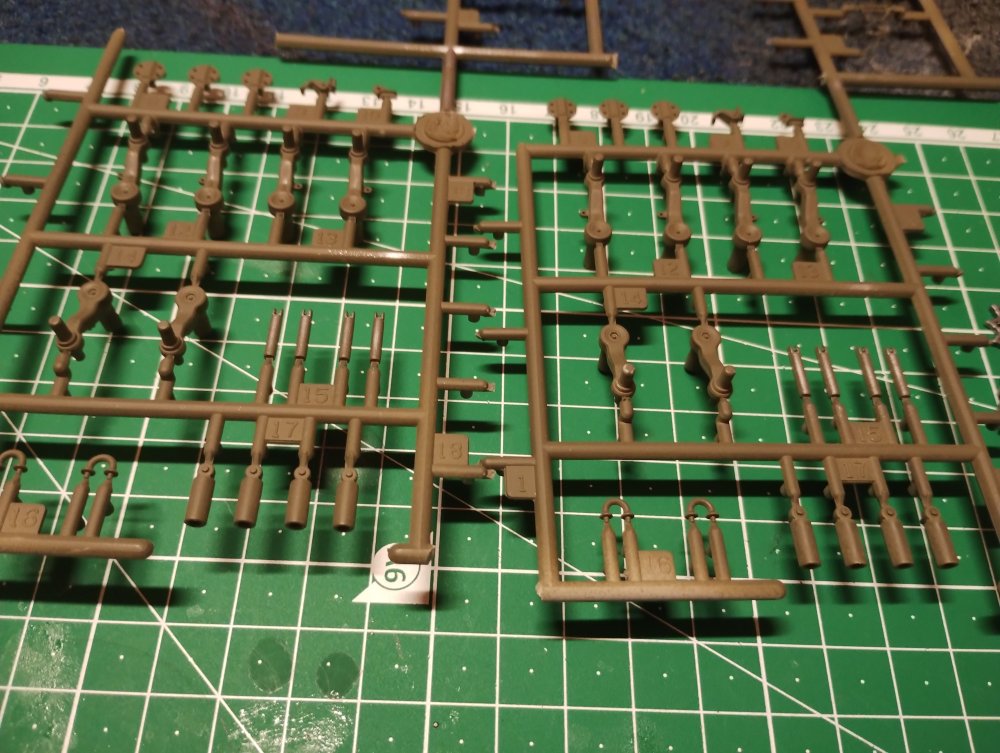
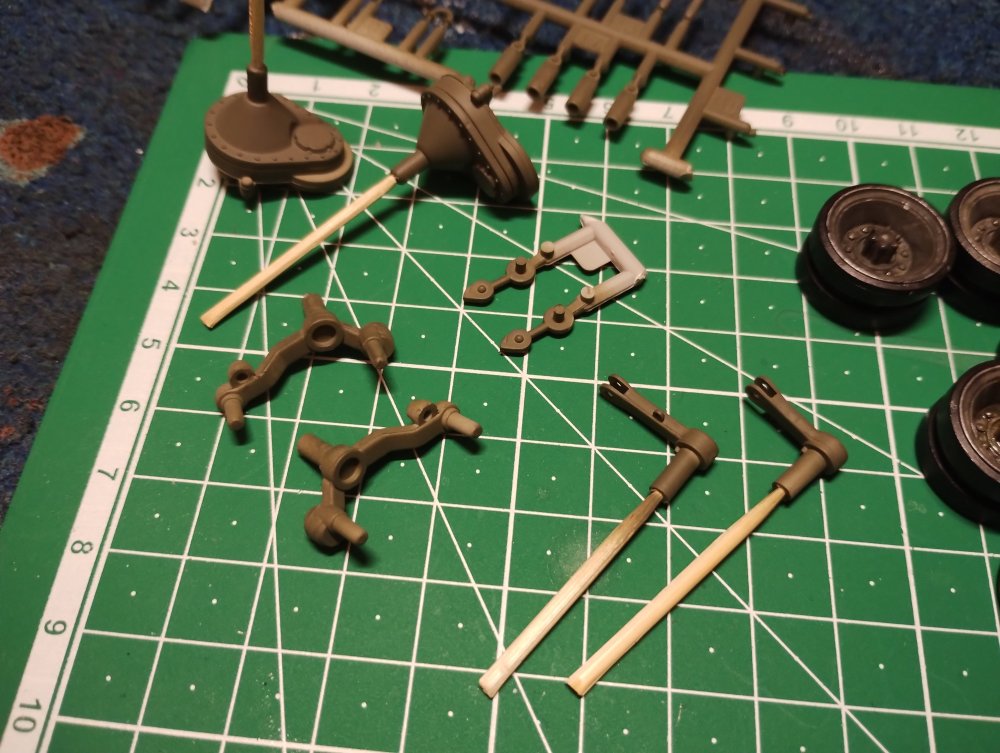
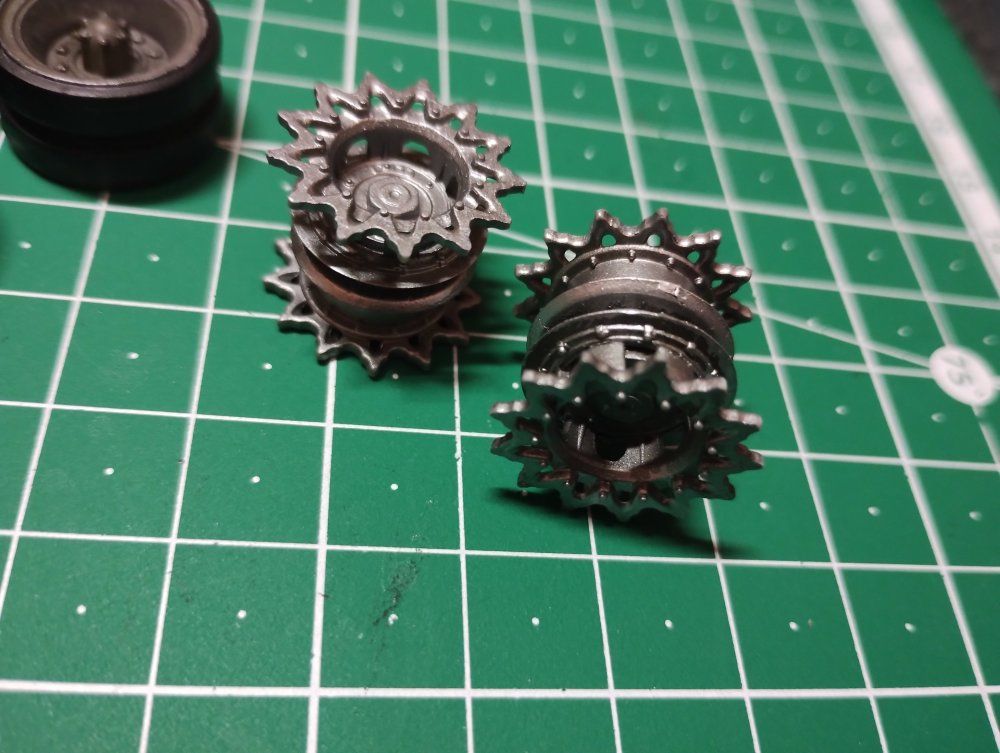
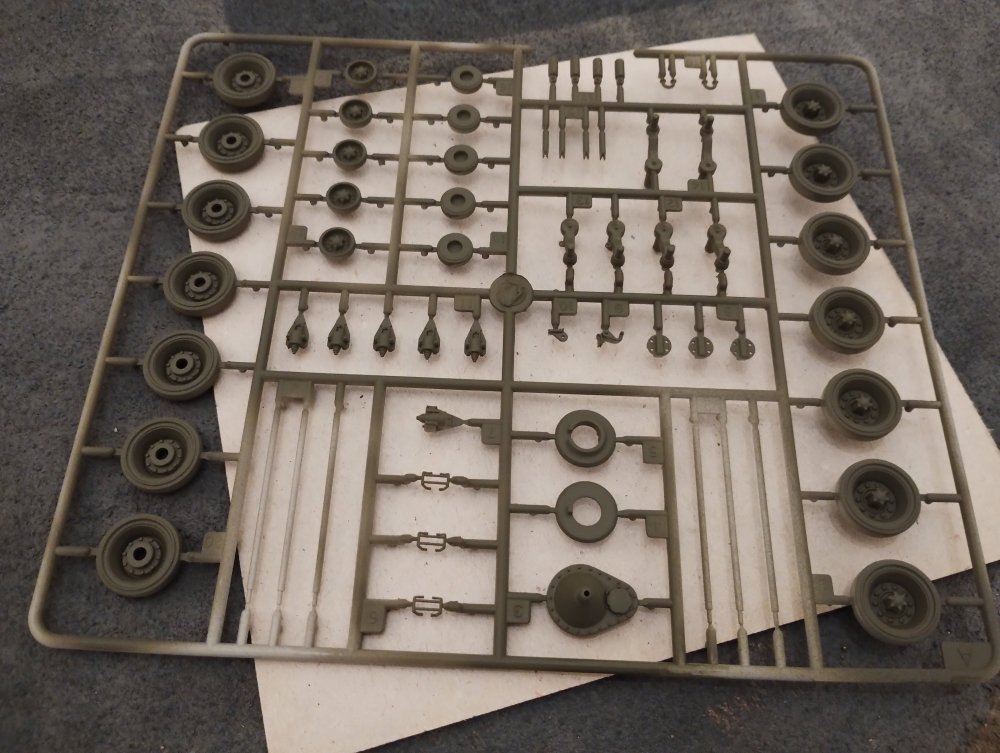
All of the suspension arms have now been fixed in, Road, Sprocket and return rollers painted and some weathering added, tracks have also been cut from sprues,cleaned up and primed + painted. It took some time to get most of the simpler parts stuck together. And then everything has now been primed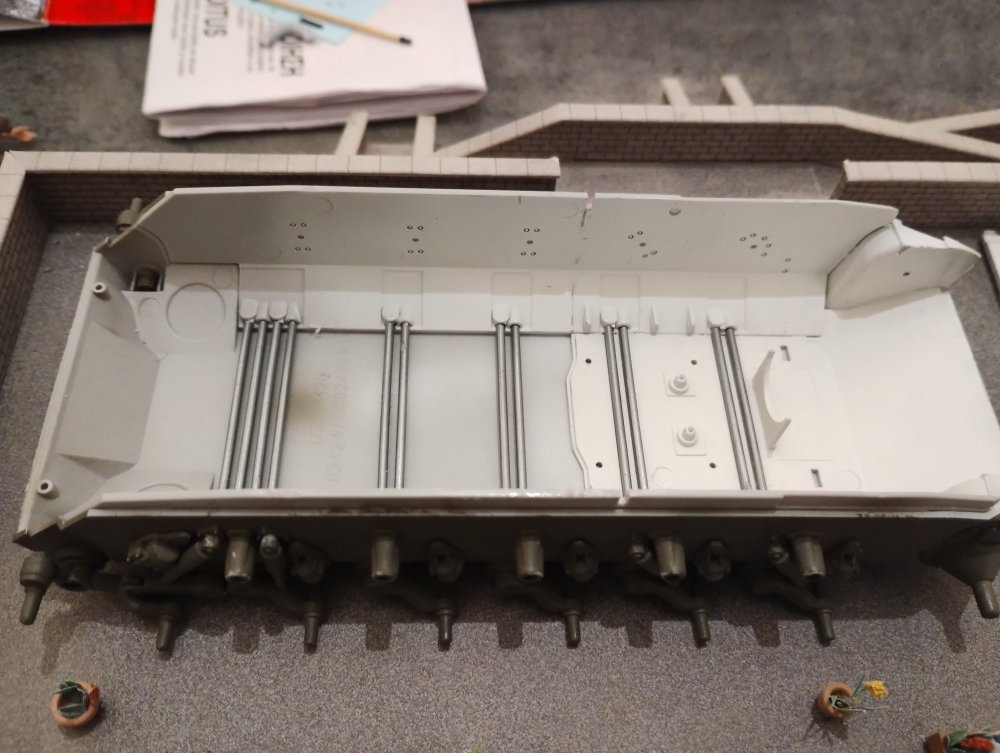


-
HobbyBoss T-34/85 | No. 82602 | 1:16
Daniel_Roxy replied to FullArmor's topic in LSM 1/35 and Larger Work In Progress
Looks really good. Personally being also an avid game player I use WarThunder for images and ideas of things like how stuff should look. The tanks are modeled really well and you can preview anything in any nation so gives a good 3D model you can look at. Might be helpful might not. -
T26E4 Super Pershing
Daniel_Roxy replied to Daniel_Roxy's topic in LSM 1/35 and Larger Work In Progress
The level of detail is pretty damn good. Love the fact that there is actually torsion bars modeled in and fitted together properly. Unfortunately it's gonna all be glued in place as the plastic doesn't have enough strength to actually work. And the shock absorbers can't pivot or move angle wise. But it all fits and looks great together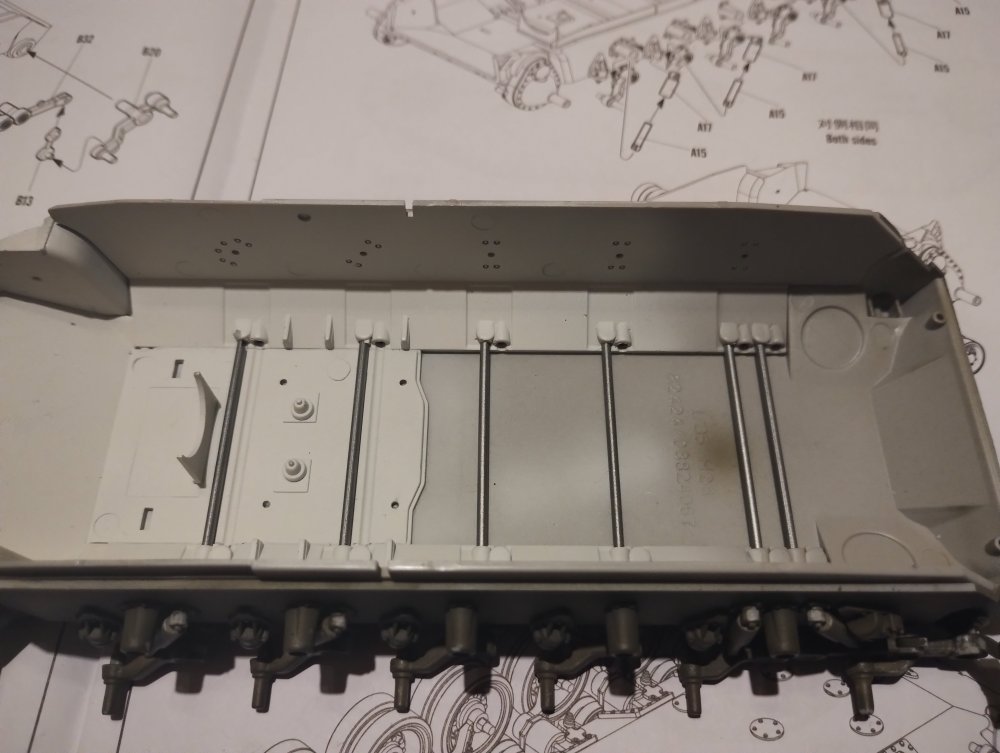
-
T26E4 Super Pershing
Daniel_Roxy replied to Daniel_Roxy's topic in LSM 1/35 and Larger Work In Progress
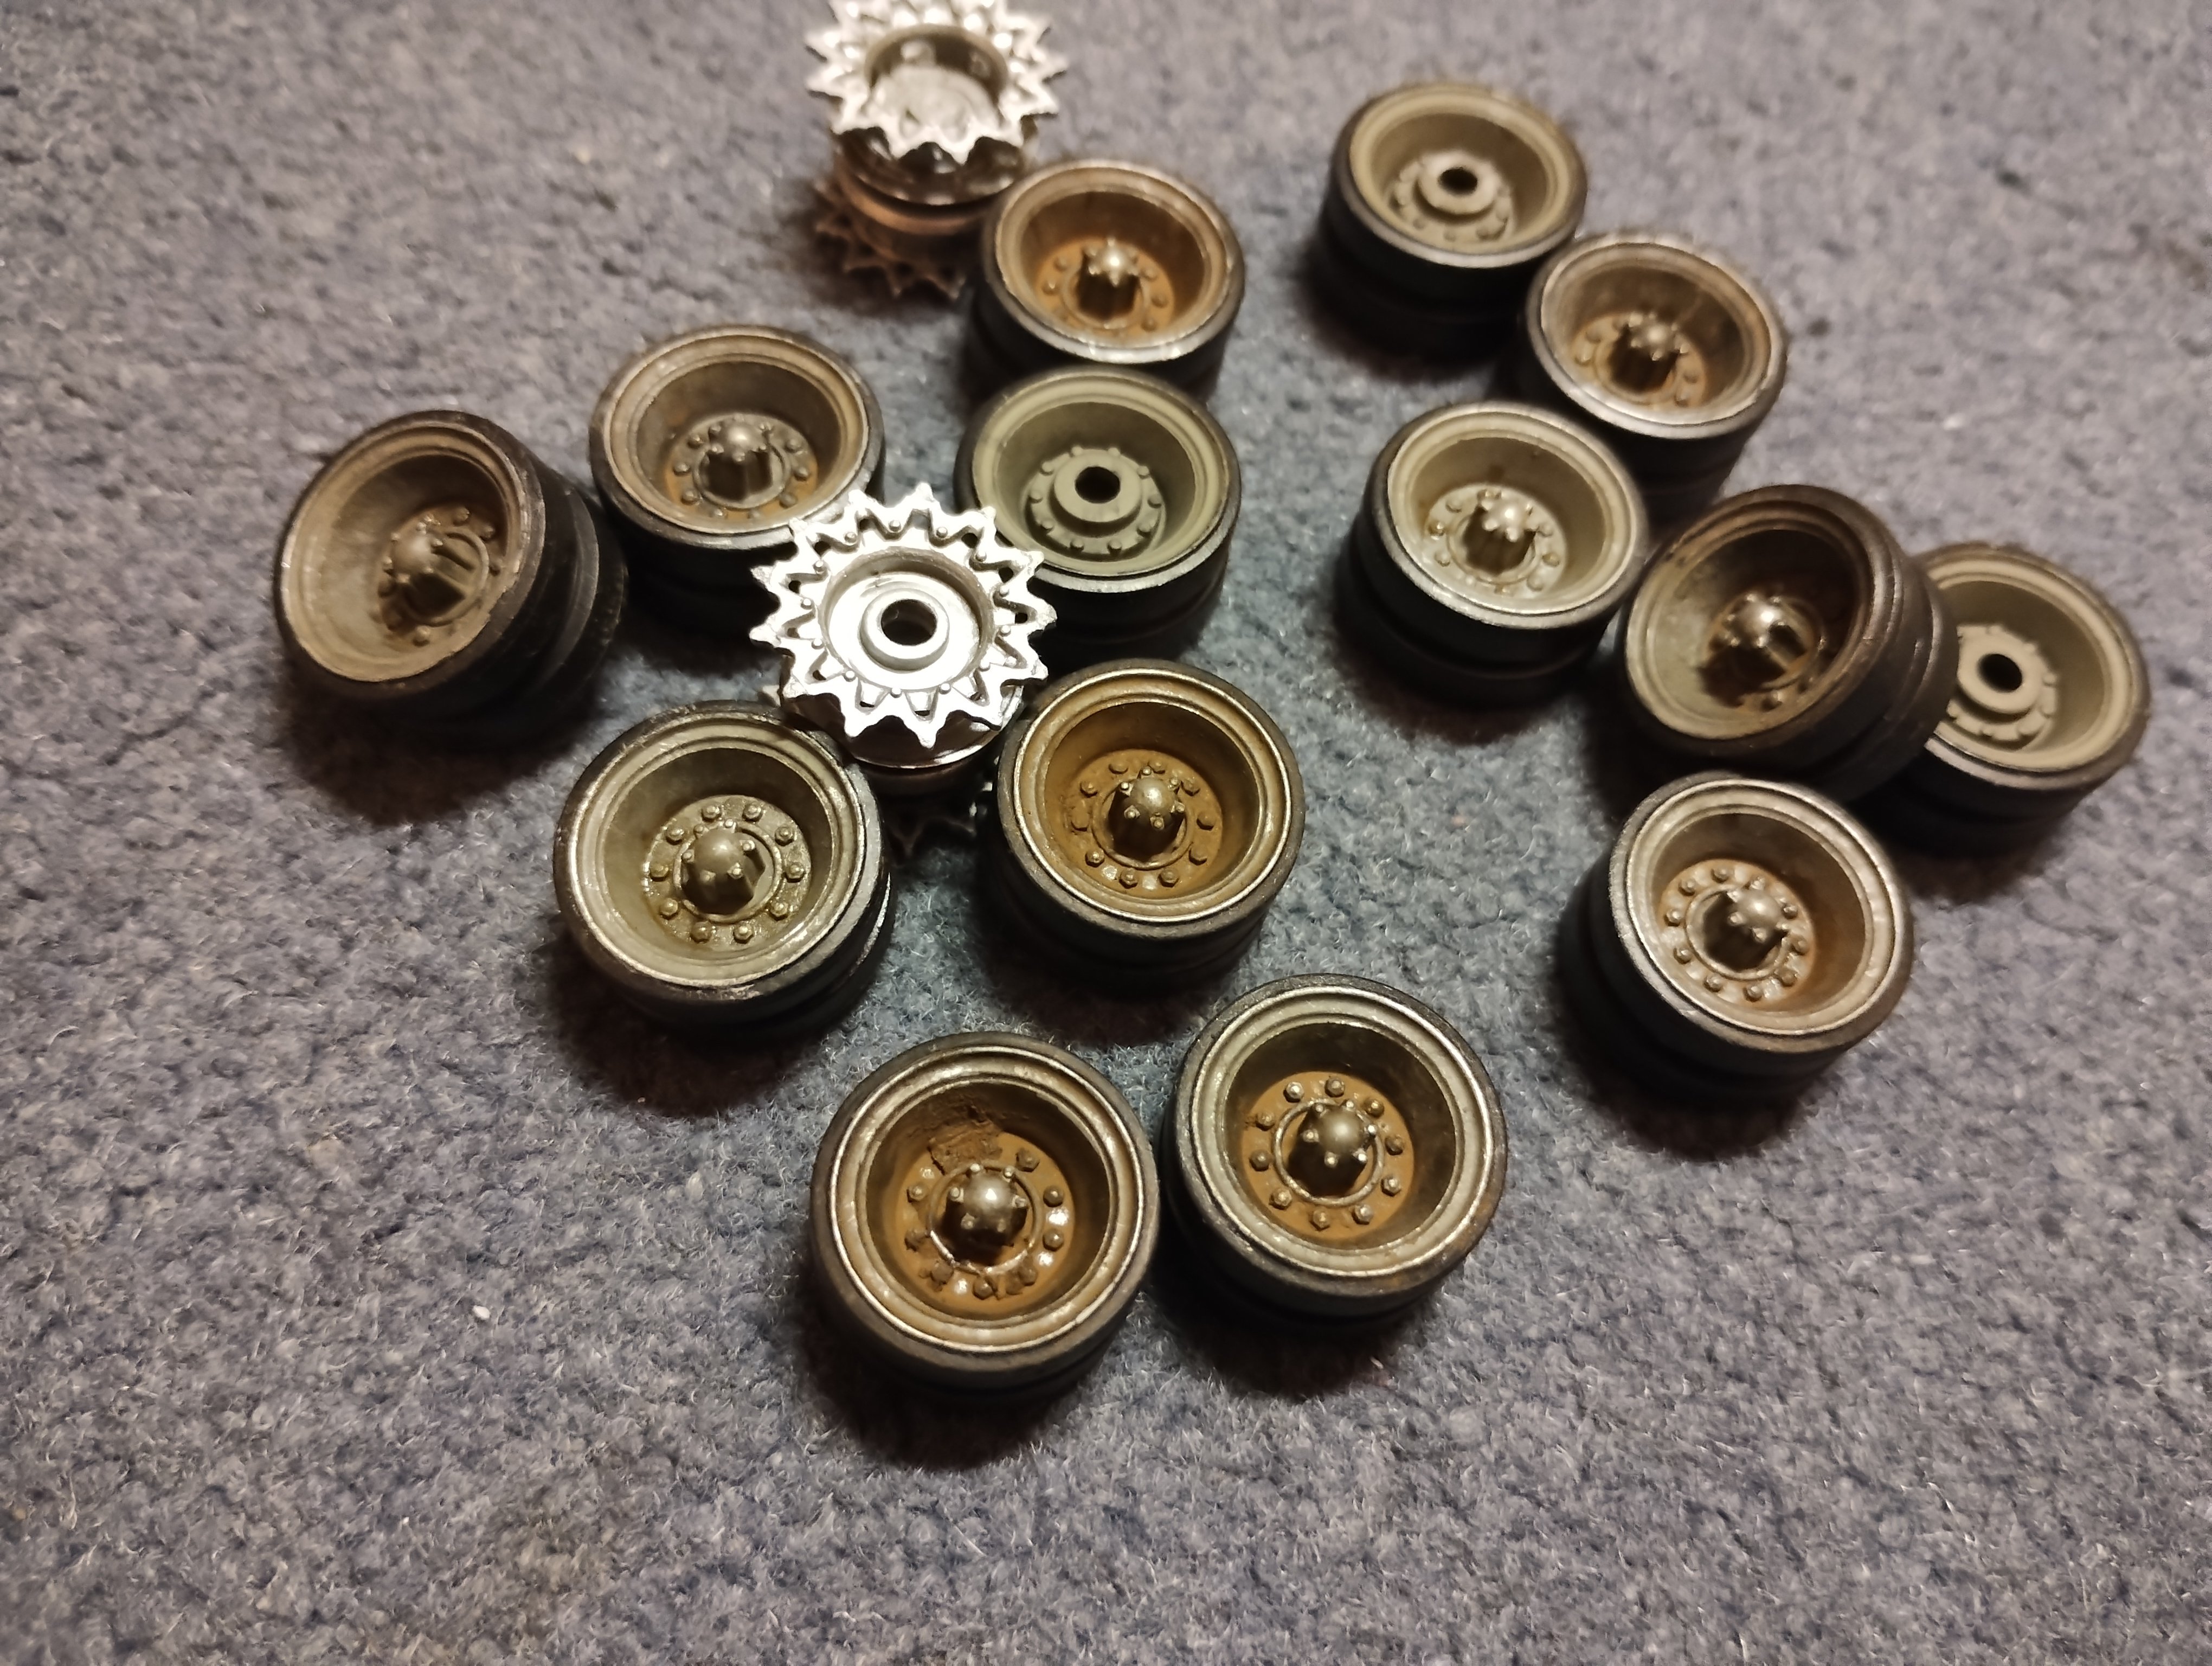
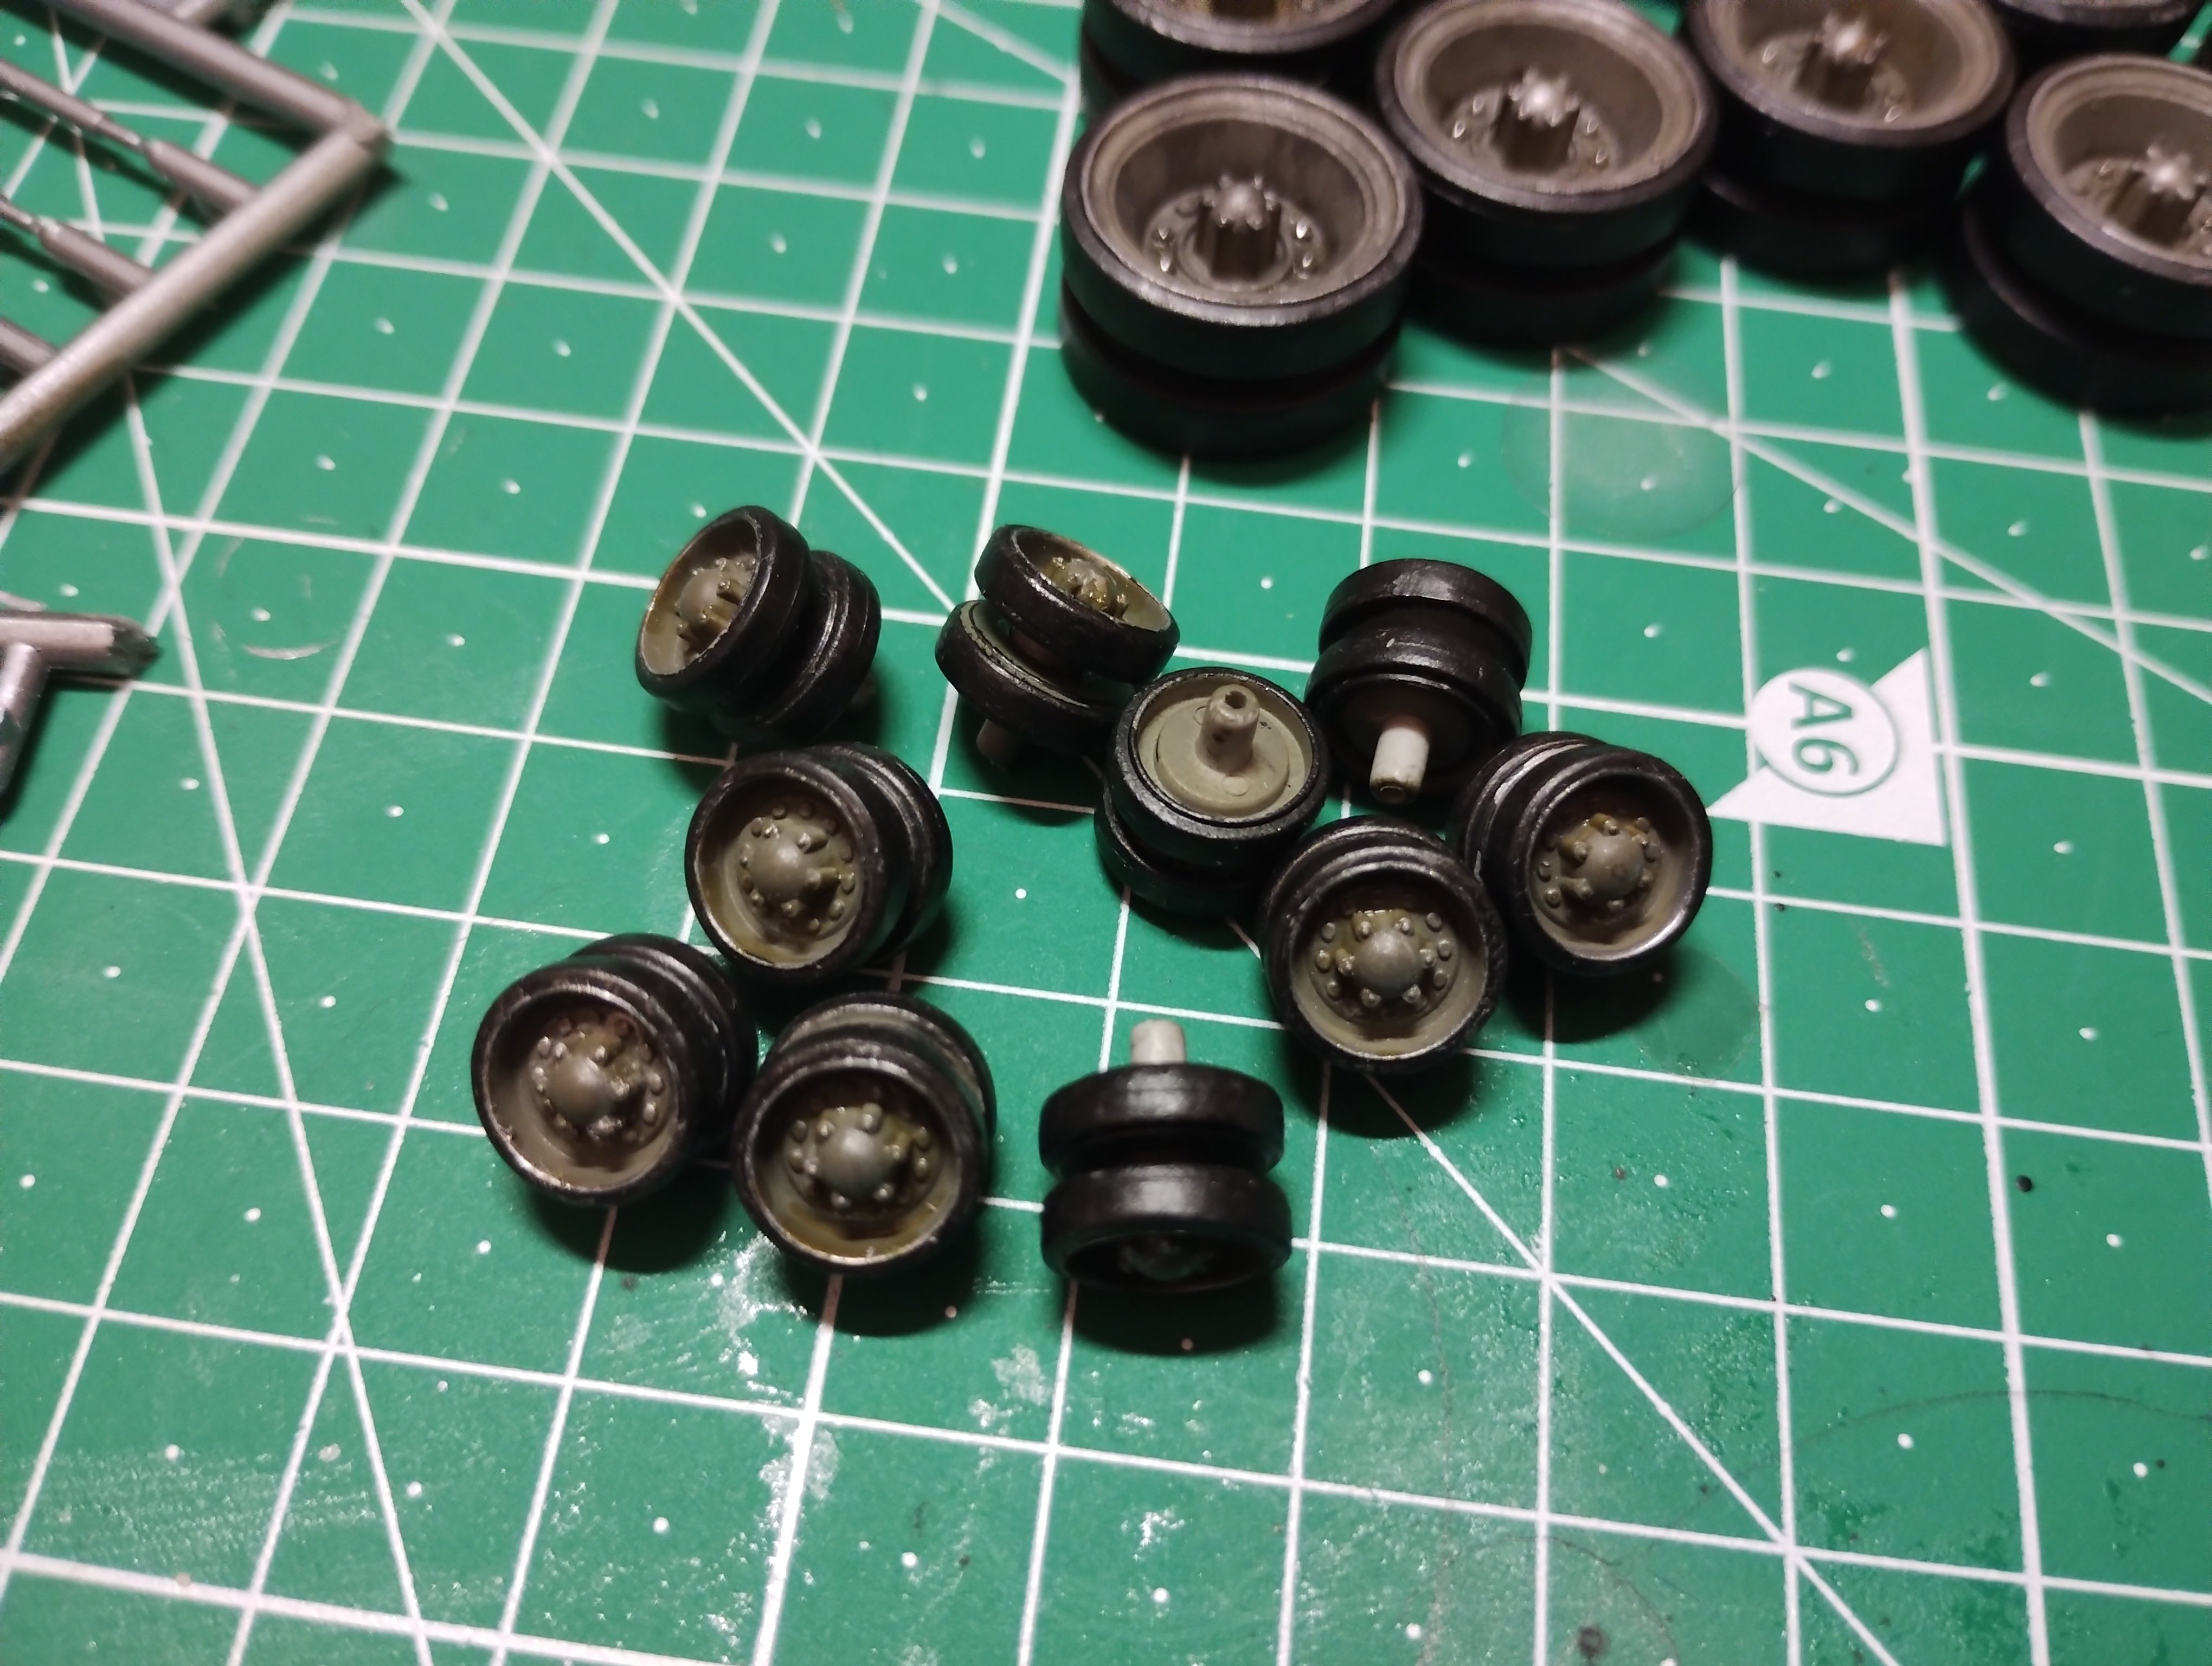
There. That's better. Got the wheels all done. Added some black wash and oil/grease to them as well. Got all the suspension and running gear parts done and ready to be put on.


-
T26E4 Super Pershing
Daniel_Roxy replied to Daniel_Roxy's topic in LSM 1/35 and Larger Work In Progress
Quite helpful thanks. Been using videos from the chieftain for info. Not quite sure why I decided the rollers were metal honestly 😅 -
T26E4 Super Pershing
Daniel_Roxy replied to Daniel_Roxy's topic in LSM 1/35 and Larger Work In Progress
I don't find it to bad. Tho it is annoying getting the colours to not cross sometimes. Although making any kind of Churchill tank is an exception. Or German for that matter. So so many road wheels ha ha -
T26E4 Super Pershing
Daniel_Roxy replied to Daniel_Roxy's topic in LSM 1/35 and Larger Work In Progress
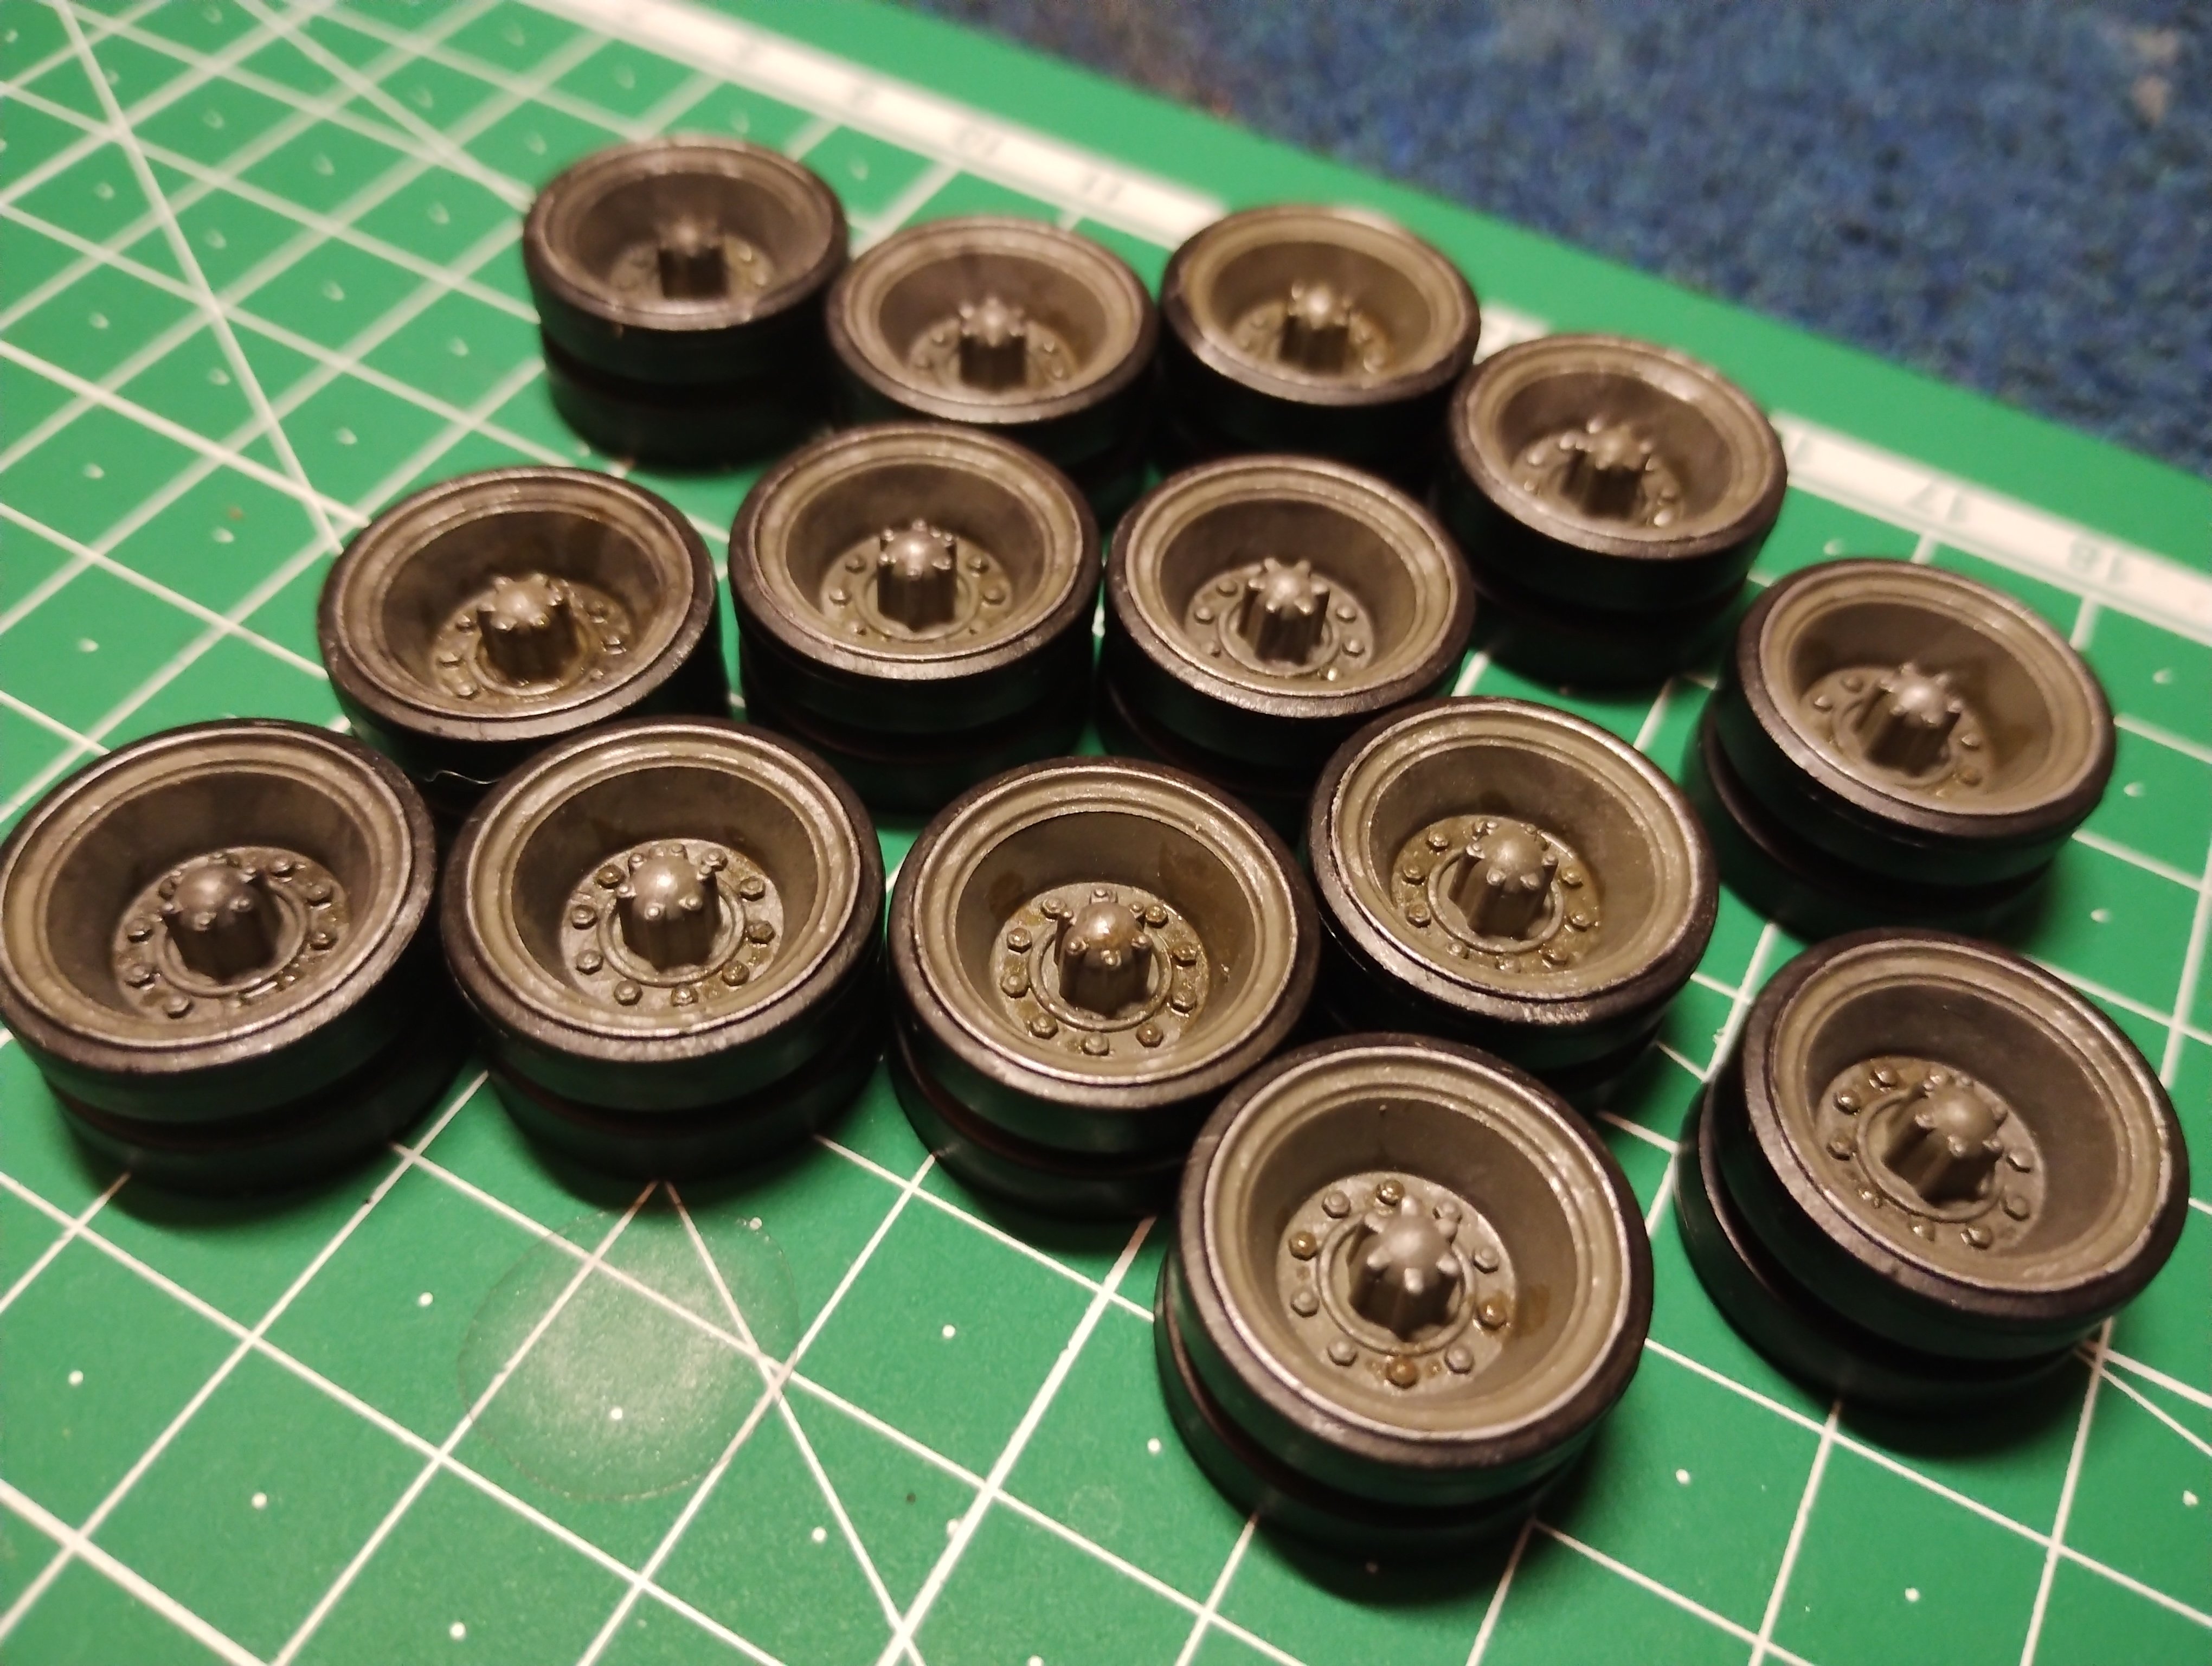
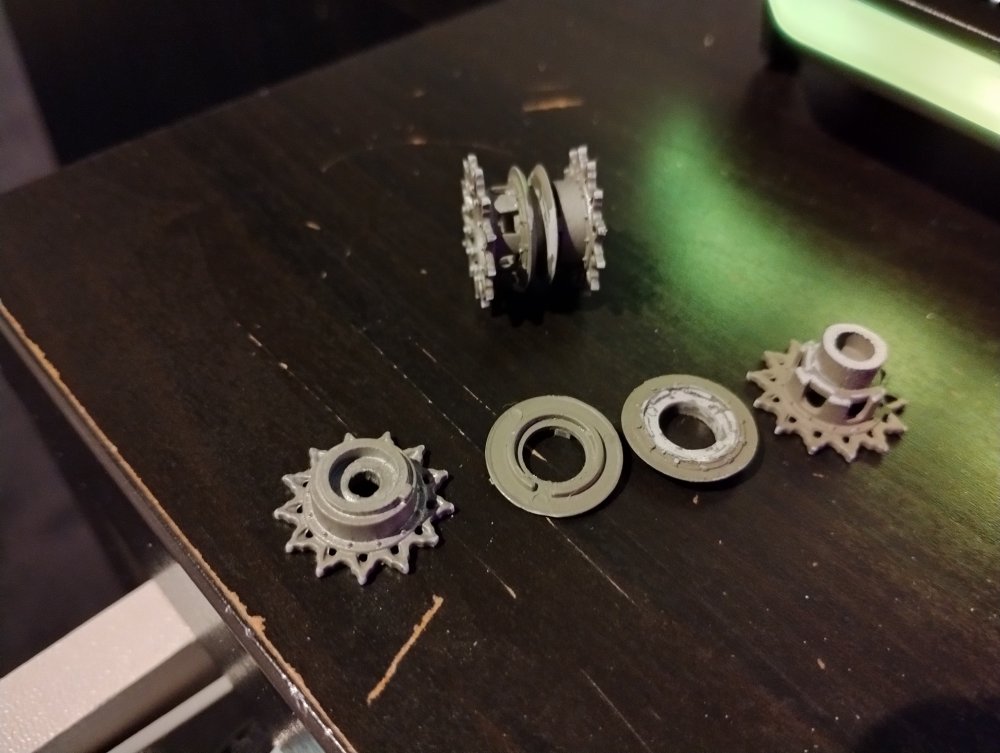
Here some work. Been doing the road wheels and return rollers. Started with adding the weathering to them as well.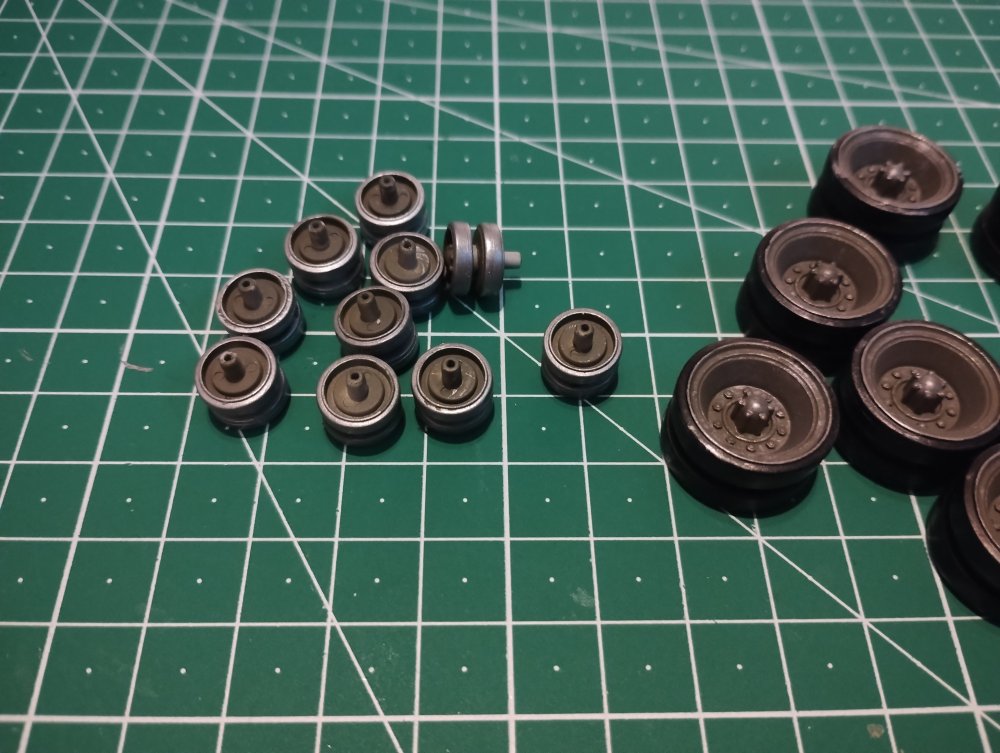

-
HobbyBoss T-34/85 | No. 82602 | 1:16
Daniel_Roxy replied to FullArmor's topic in LSM 1/35 and Larger Work In Progress
Looking awesome so far. Love the headlights and all the smaller details. Will be following along for this one.