

Flip
-
Posts
24 -
Joined
-
Last visited
Content Type
Profiles
Forums
Events
Gallery
Everything posted by Flip
-

HPH Reichenberg Re 4a 'Piloted V-1'
Flip replied to JeroenPeters's topic in LSM 1/35 and Larger Work In Progress
Looking great, Jeroen. Especially love the train wagon!! Grtz Flip -
Hi guys, After a short break from WW1 aircraft, I've decided to give this one a go :-) As per instructions, I started work on the cockpit. For this one I wanted to give the Uschi Van Der Rosten wood decals a try. They are extremely thin and careful handeling is necessary in order not to break them during application. I started out by airbrushing the different wood panels separately, each time using a different shade of beige. Since the decals are transparent, the background colour will show through and will provide for some color variation in the woodwork. After applications of the decals, I've sealed everything with tamiya clear varnish. Next, the fuel tank was airbrushed in shades of grey and the electricity conduits where painted with acrylics (life color and vallejo) Pin washes & shading were done with Van Dyck Brown oil paint. As I wanted to replicate a worn black leather look on the seat, I studied many pictures before setting out to work. Using life color acrylics I tried to paint the light and shadow effects that you usually see on a seat like that. The colours used are: Burnt black, Light skin tone, sand, matt black and red. Now I hope I can repeat this effect on the seat in the back as well :-) Grtz Flip
-
Hi Guys, Here are some pictures of the MENG FT17 i'm working on. Will be built out of the box. Very nice kit and highly recommended d grtz Flip
-
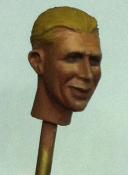
Hi Guys, This bird is done now and the full article will appear in Art Of Modelling magazine in the near future. Pilot and dog are from Kellerkind. Grtz Flip
-
HPH Reichenberg Re 4a 'Piloted V-1'
Flip replied to JeroenPeters's topic in LSM 1/35 and Larger Work In Progress
Very nice work Jeroen! Love the setting with the railroad car. Grtz Flip -
beautiful and inspiring work Danny :-) Grtz Flip
-
Great work Johan! The cockpit looks splendid. Looking fwd to your progress on this bird :-)
-
1/32nd scale Halifax: *project complete*
Flip replied to ThomasProbert's topic in LSM 1/35 and Larger Work In Progress
oh wow, that's just fantastic work. That's 'real' modelling! Have some vac form kits in my stack as well, but never dared to tackle them. You make it look easy indeed (but I bet it's not :-)) Grtz Flip -
thanks guys! :-) Here's a picture of the engine. Originally, I wanted to leave the cowling off, but ham fisted as I sometimes can be, I dropped the engine one day, damaging it to the point that I couldn't repair it without masking the damage completely. At least I still have the picture :-)
-
thanks guys! really enjoying this build. Although it's nog WNW quality, for a resin kit: this is the best one I've ever seen. Finished the seat belts for the back seat this morning and have installed the seat itself. Fuselage now ready to close up. Grtz Flip
-
Trumpeter F14-D Tomcat and Zacto intakes
Flip replied to pfuf's topic in LSM 1/35 and Larger Work In Progress
Looks very very realistic. Top notch paint job indeed! Grtz Flip -
fantastic build! Can't get enough of this topic :-)
-
little update. interior nearly ready. Just have to add the bomber/gunner's seat. (lost one of the lap straps and have to make another one) Was quite hard to line up the frame (but that had probably more to do with my work method :-) I couldn't get it completely straight, but once closed up, it's not visible anymore. grtz Flip
-
HK Models Meteor F 4 RNethAF
Flip replied to Wingco57's topic in LSM 1/32 and Larger Aircraft Ready for Inspection
Great looking model Cees! Thanks for sharing the pictures. Can't wait to pick this kit up as well :-) Cheers Flip -
WIP 1:32 A6M2-N Rufe (Tamiya/MDC Conversion)
Flip replied to rkranias's topic in LSM 1/35 and Larger Work In Progress
Very nice build indeed! Very interesting subject too. Grtz Flip -
Hi, This is the 'other' project on my table. The WNW SE5a. A full article will appear in 'Art of Modelling' magazine, so I can only show you a few pictures. In the mean time, I finished up the weathering and the top wing is on as well. Now I'm about to start the rigging proces. Grtz Flip
-
Hi Cees, No, the original color of the frame was either grey or aluminium. All pictures I found confirmed this. Grtz Flip
-
Thanks Guys! Really enjoying this build. I've never been a fan of resin kits, but this one is a very enjoyable build. @Benjamin: Will be doing 11 squadron version with the yellow wheel hubs as depicted on the box. @Erik: unfortunately, I won't be able to make it to the Willebroek show this year. :-( Here are some more pictures. All the cockpit components are painted and ready for final assembly. I've added some cables and have reworked the throttle a little bit. grtz Flip
-
Hi Cees, thanks for sharing this. Been waiting for this kit for a while. Will be keeping an eye on this topic :-) All the best Flip
-
Hi Guys, I've recently purchased one of Silver Wings's splendid Hawker Hart kits and although I promised myself not to start this kit before I had finished the 2 kits that I currently have on the table, as usual, I couldn't help myself :-) This kit is a full resin kit with some PE parts. Although this kit is very detailed, I've decided to spice the cockpit up a bit by adding the odd cables, etc. Some of the details is a bit on the soft side (the radio's for instance, which made them a bit harder to paint, but I'm quite pleased with the result in the end. I'm 60% into the painting process regarding the cockpit, and I hope to finish it up later on this week. More pictures to follow soon :-) Grtz Flip